Frog or Frog King

AdventurerKatzi
Rating5.04.2 thousand times & (1) DifficultyIntermediate

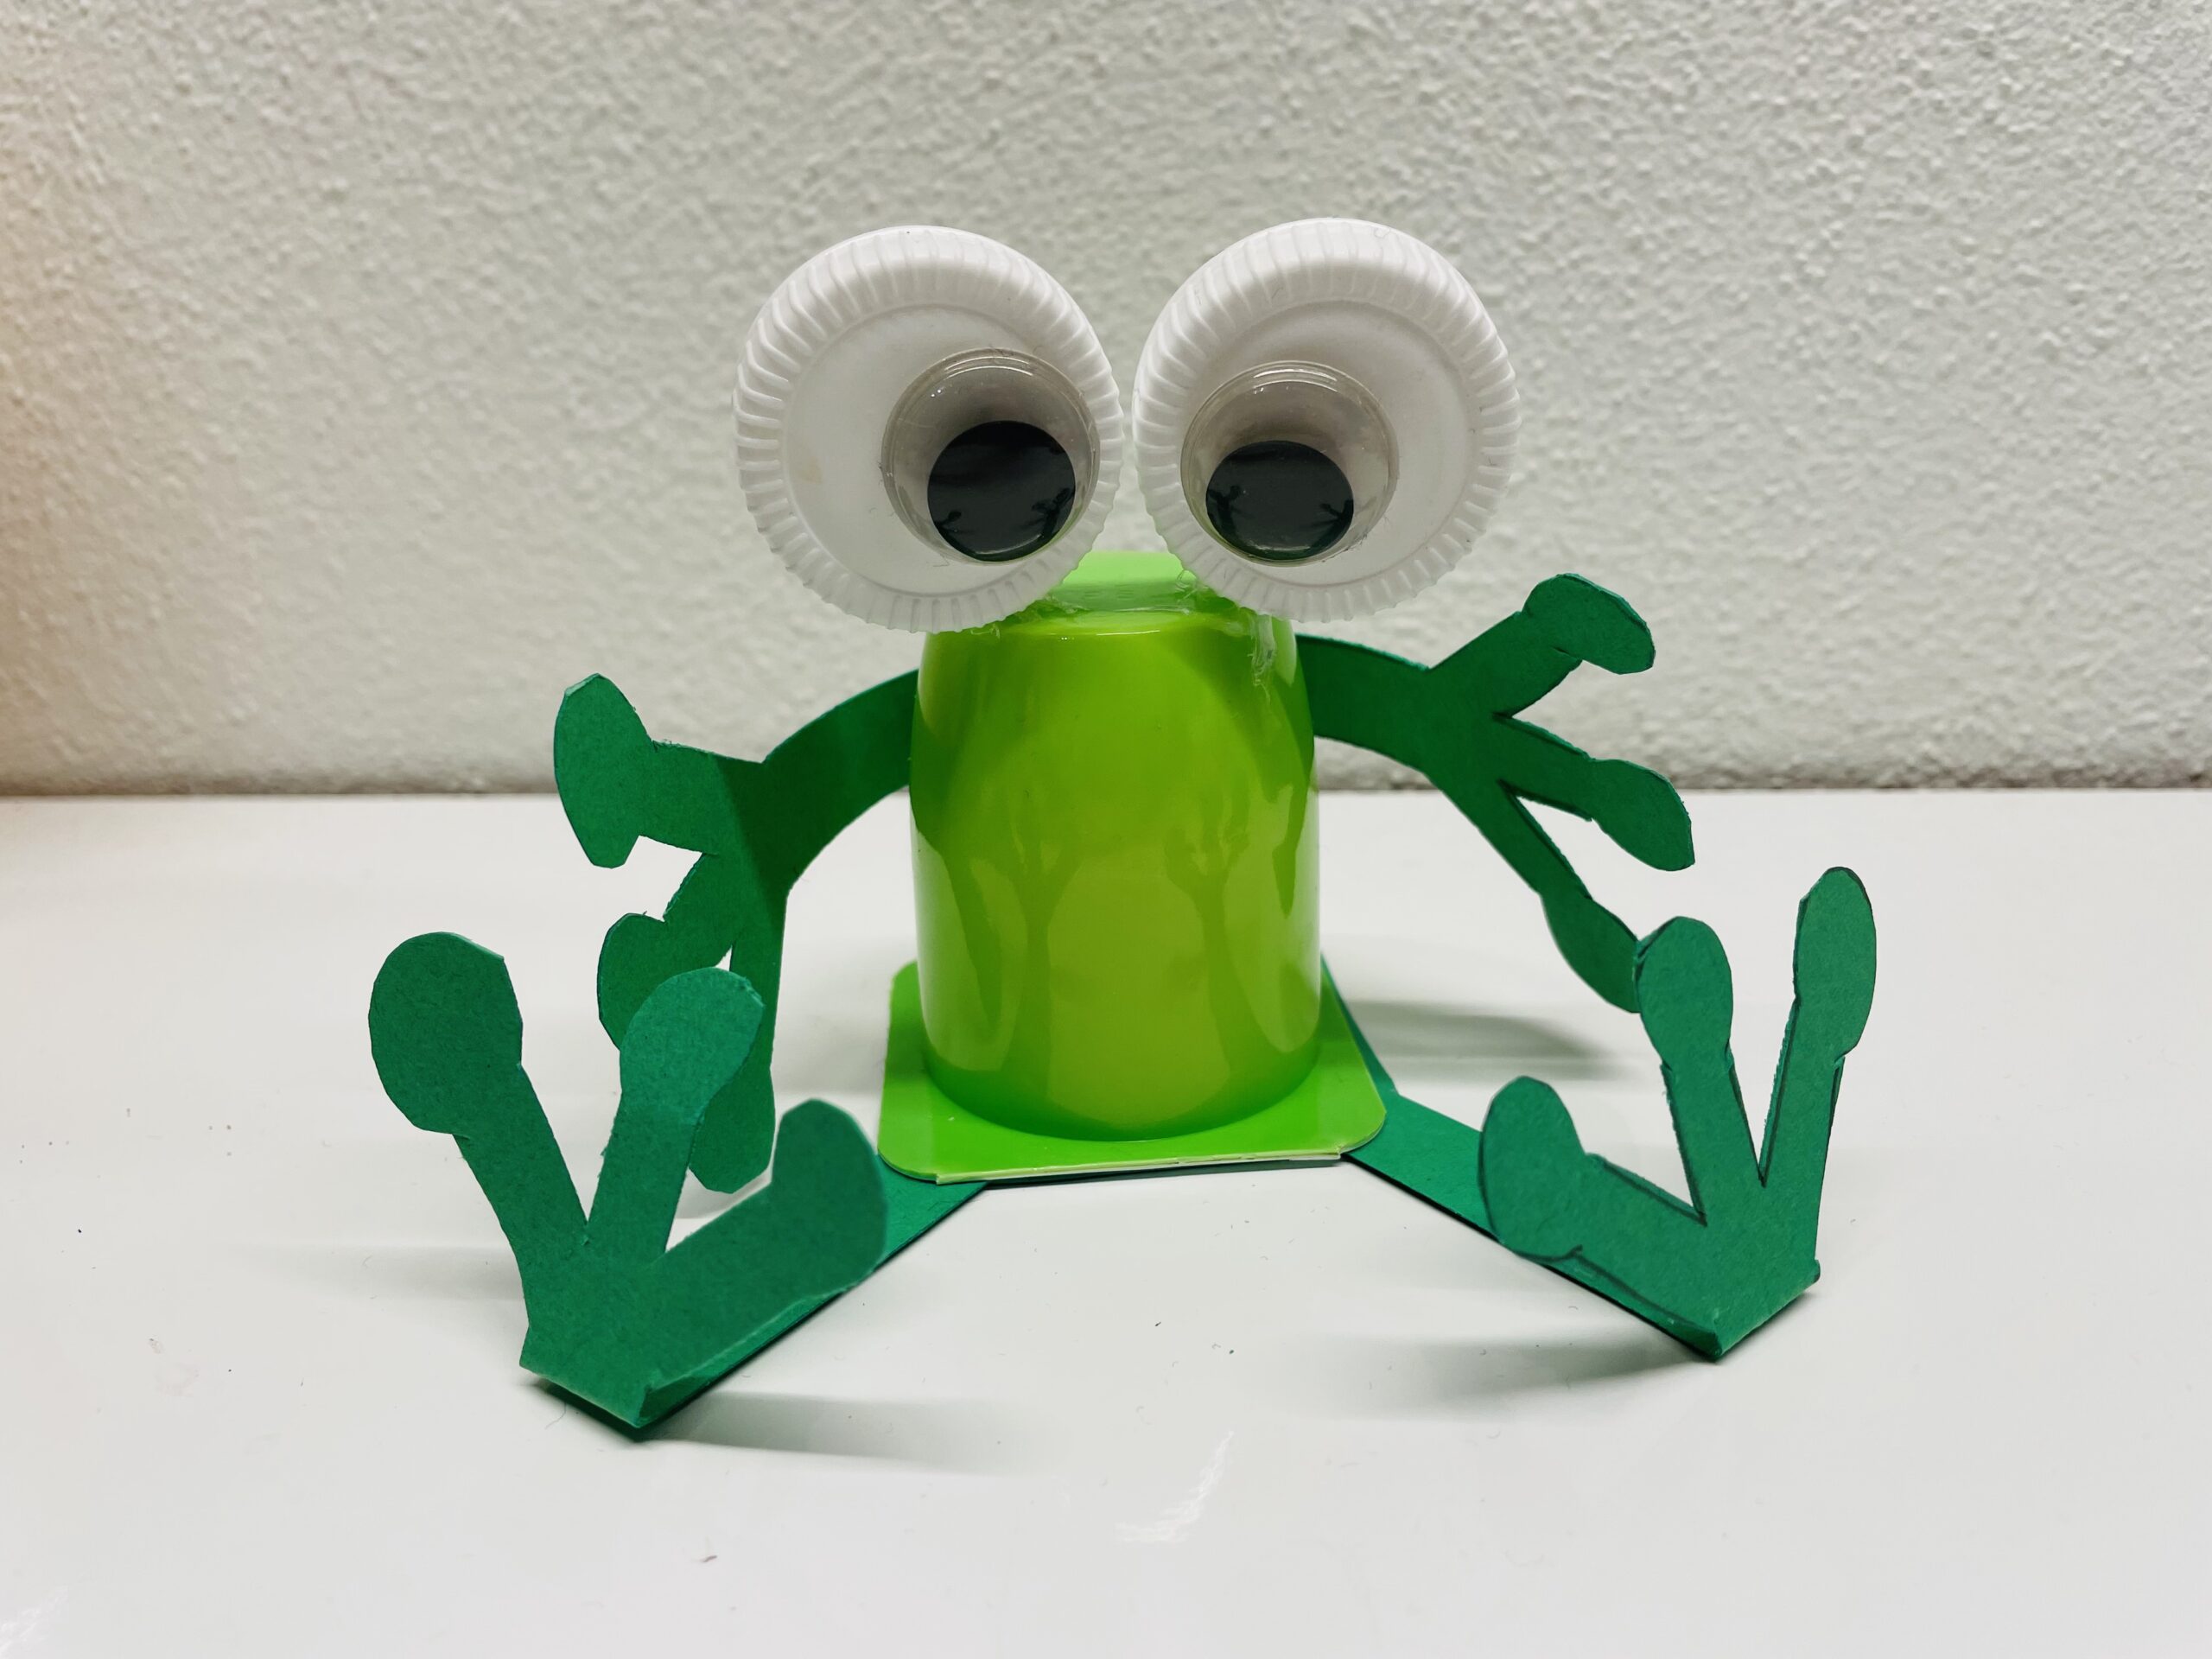
This little green frog conjures a laugh in the face. With a small green yoghurt cup the frog is very easy to make. You can print the template for the frog legs and use as a template, or you paint your legs yourself. In addition, you need two wobble eyes on two screw caps. This craft is ideal for upcycling.
Use it for decorating or as a funny gift. For carnival you can also make colorful frogs or conjure up a frog king from it. Stay creative and have fun doing crafts!

Media Education for Kindergarten and Hort

Kind bastelt eine Rassel mit dem Navi
The Adventure Navi, the app for DIY projects, enables media education for the youngest.

Relief in everyday life, targeted promotion of individual children, independent learning and - without any pre-knowledge already usable by the youngest!
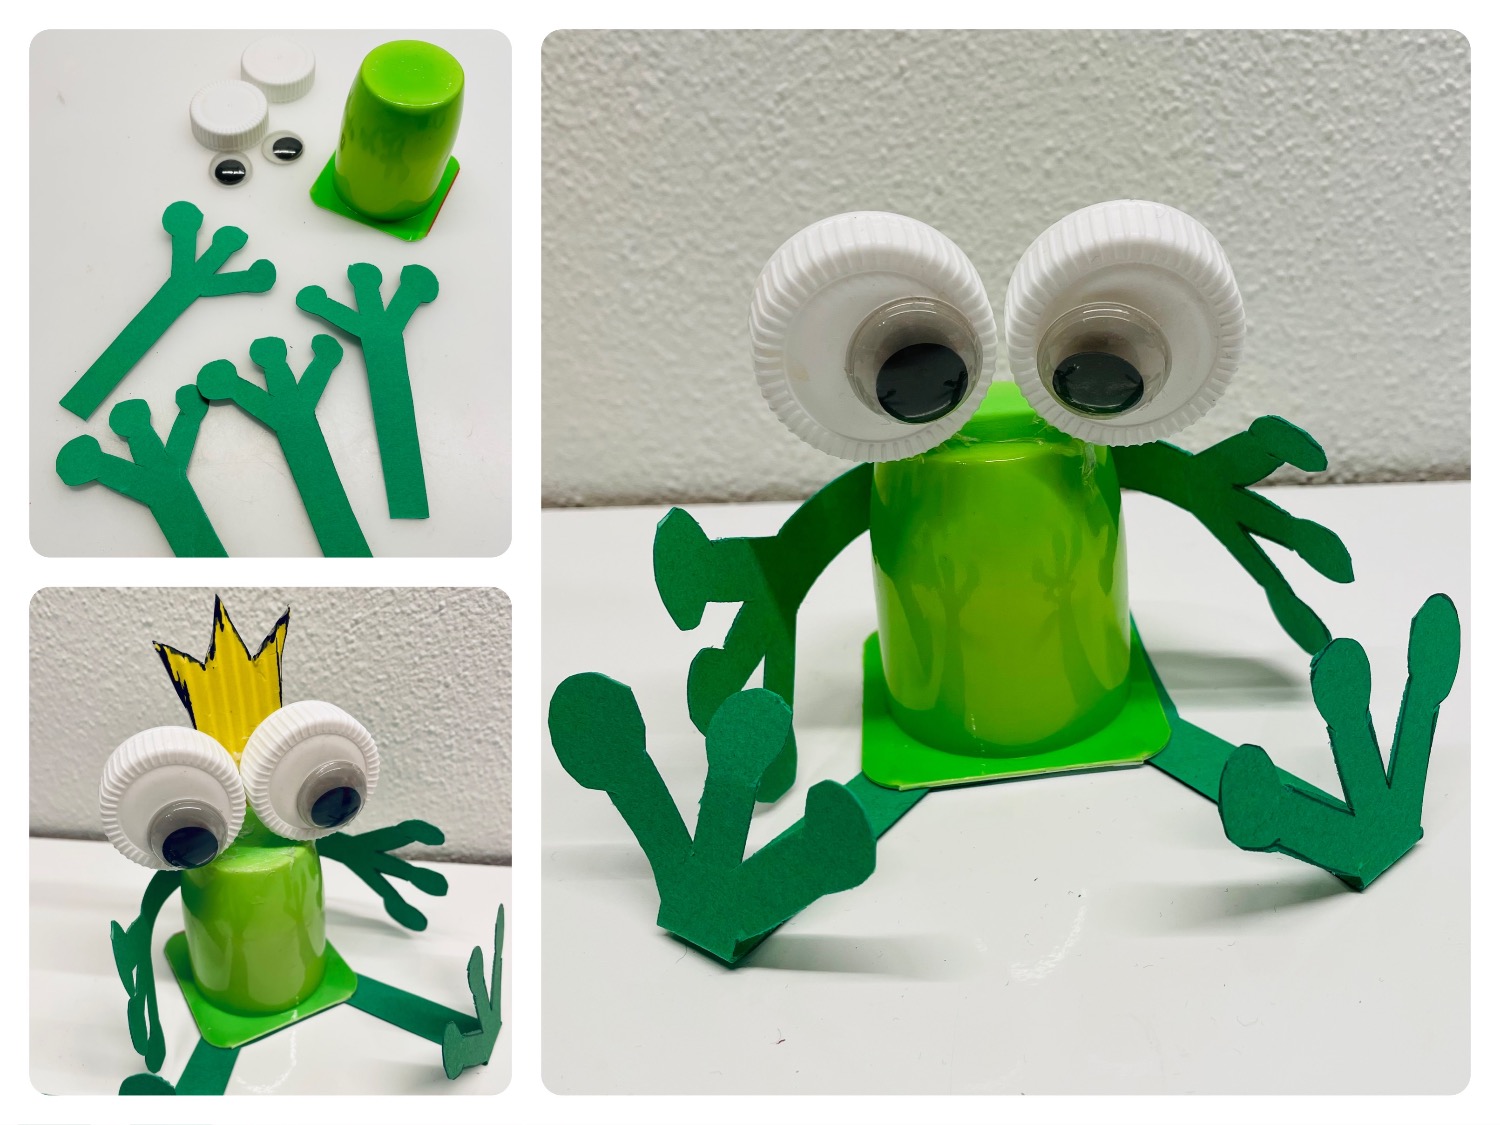


Titelbild zur Bastel- und DIY-Idee für Kinder '(957) Frosch oder Froschkönig'
Material for1 Child
Prep Time5 min.Adv. Time20 min.Total Time25 min.
 1 Yogurt cup greenSmall yoghurt
 2 Screw capsapprox. 2cm diameter
 2 Wax eyes
 Clay paper green
 1 Pen
 Possibly hot glue gun
 1 Builder's pad
For the Frog King
 1 Photo box yellowpossible corrugated board
All links marked with a shopping cart lead to Amazon - here we have selected products that we would order ourselves and in part also ordered. In a qualified purchase via the advertising link, we as Amazon partner receive a commission, for you there are no costs. You thus support our cost- and advertising banner-free, educational offer.
1

You need a clean yoghurt cup and a green paper for the front and back legs of the frog.

2

First transfer the template to green clay paper four times and then cut out the legs.
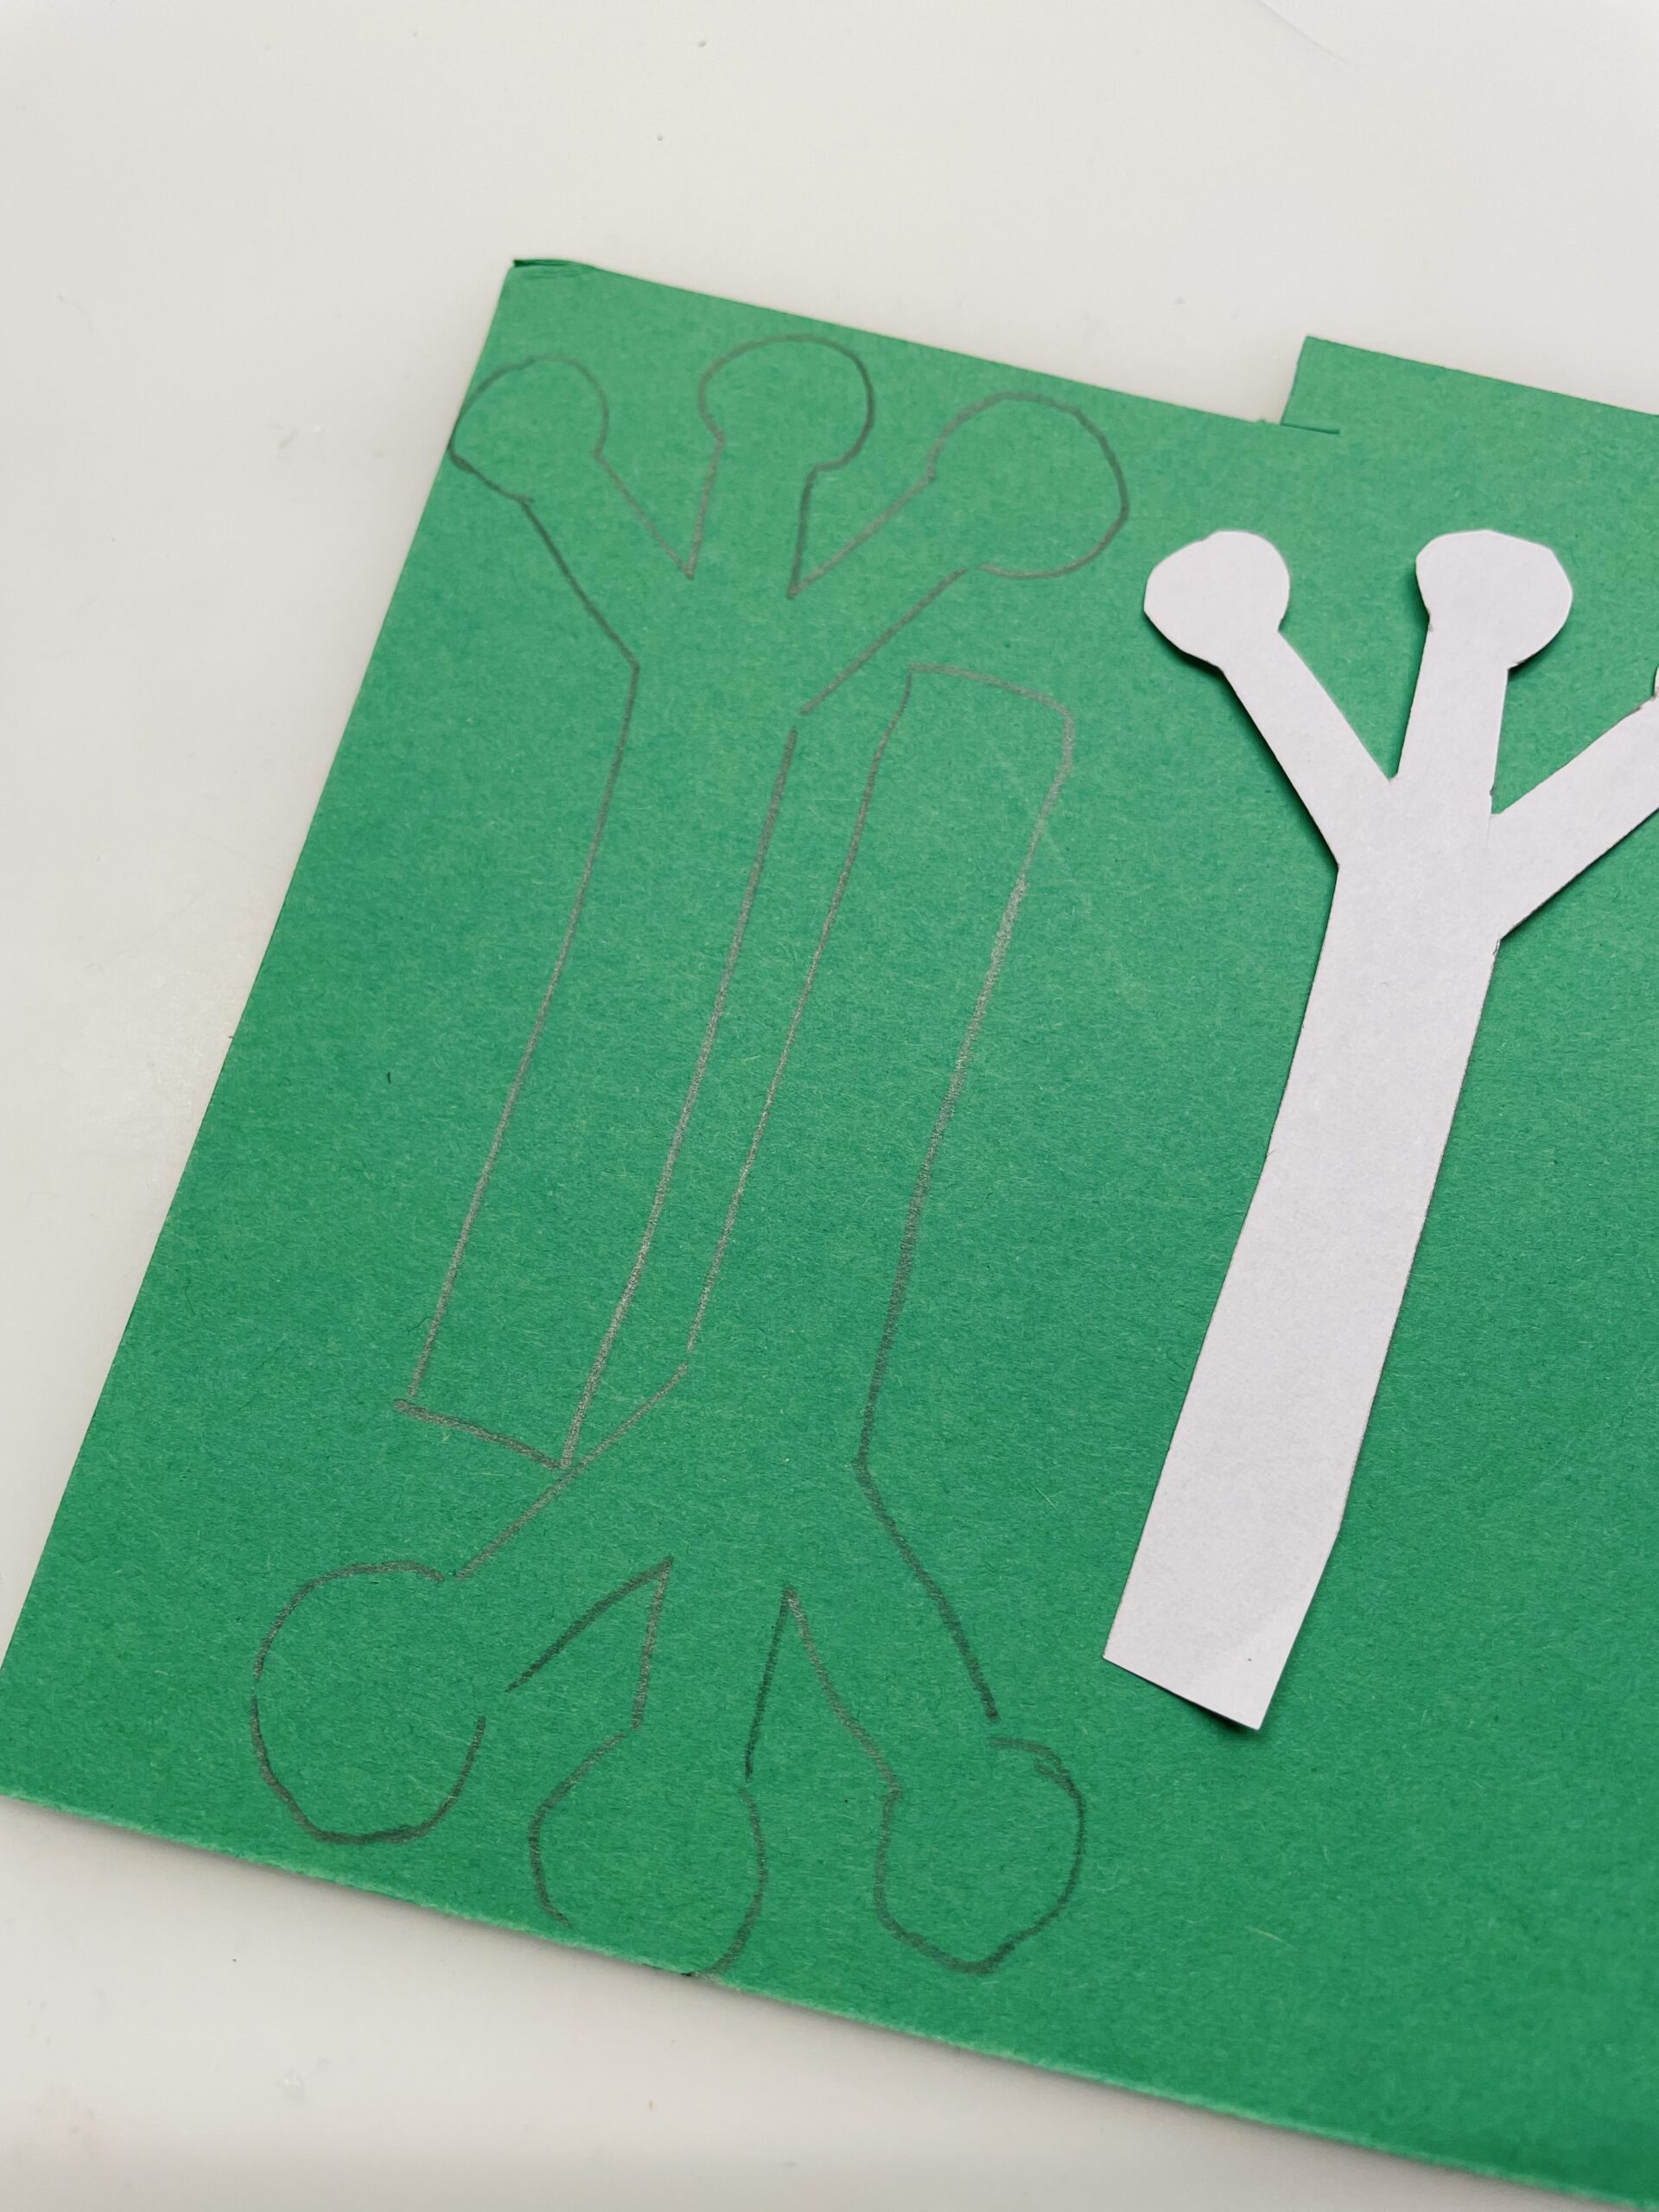
Bild zum Schritt 2 für das Bastel- und DIY-Abenteuer für Kinder: 'Übertragt zuerst die Vorlage viermal auf grünes Tonpapier und schneidet...'

3

Now you set up the other materials.

Tip: Cut out two large circles of photo box and design the eyes yourself, if you don't have any wobble eyes.
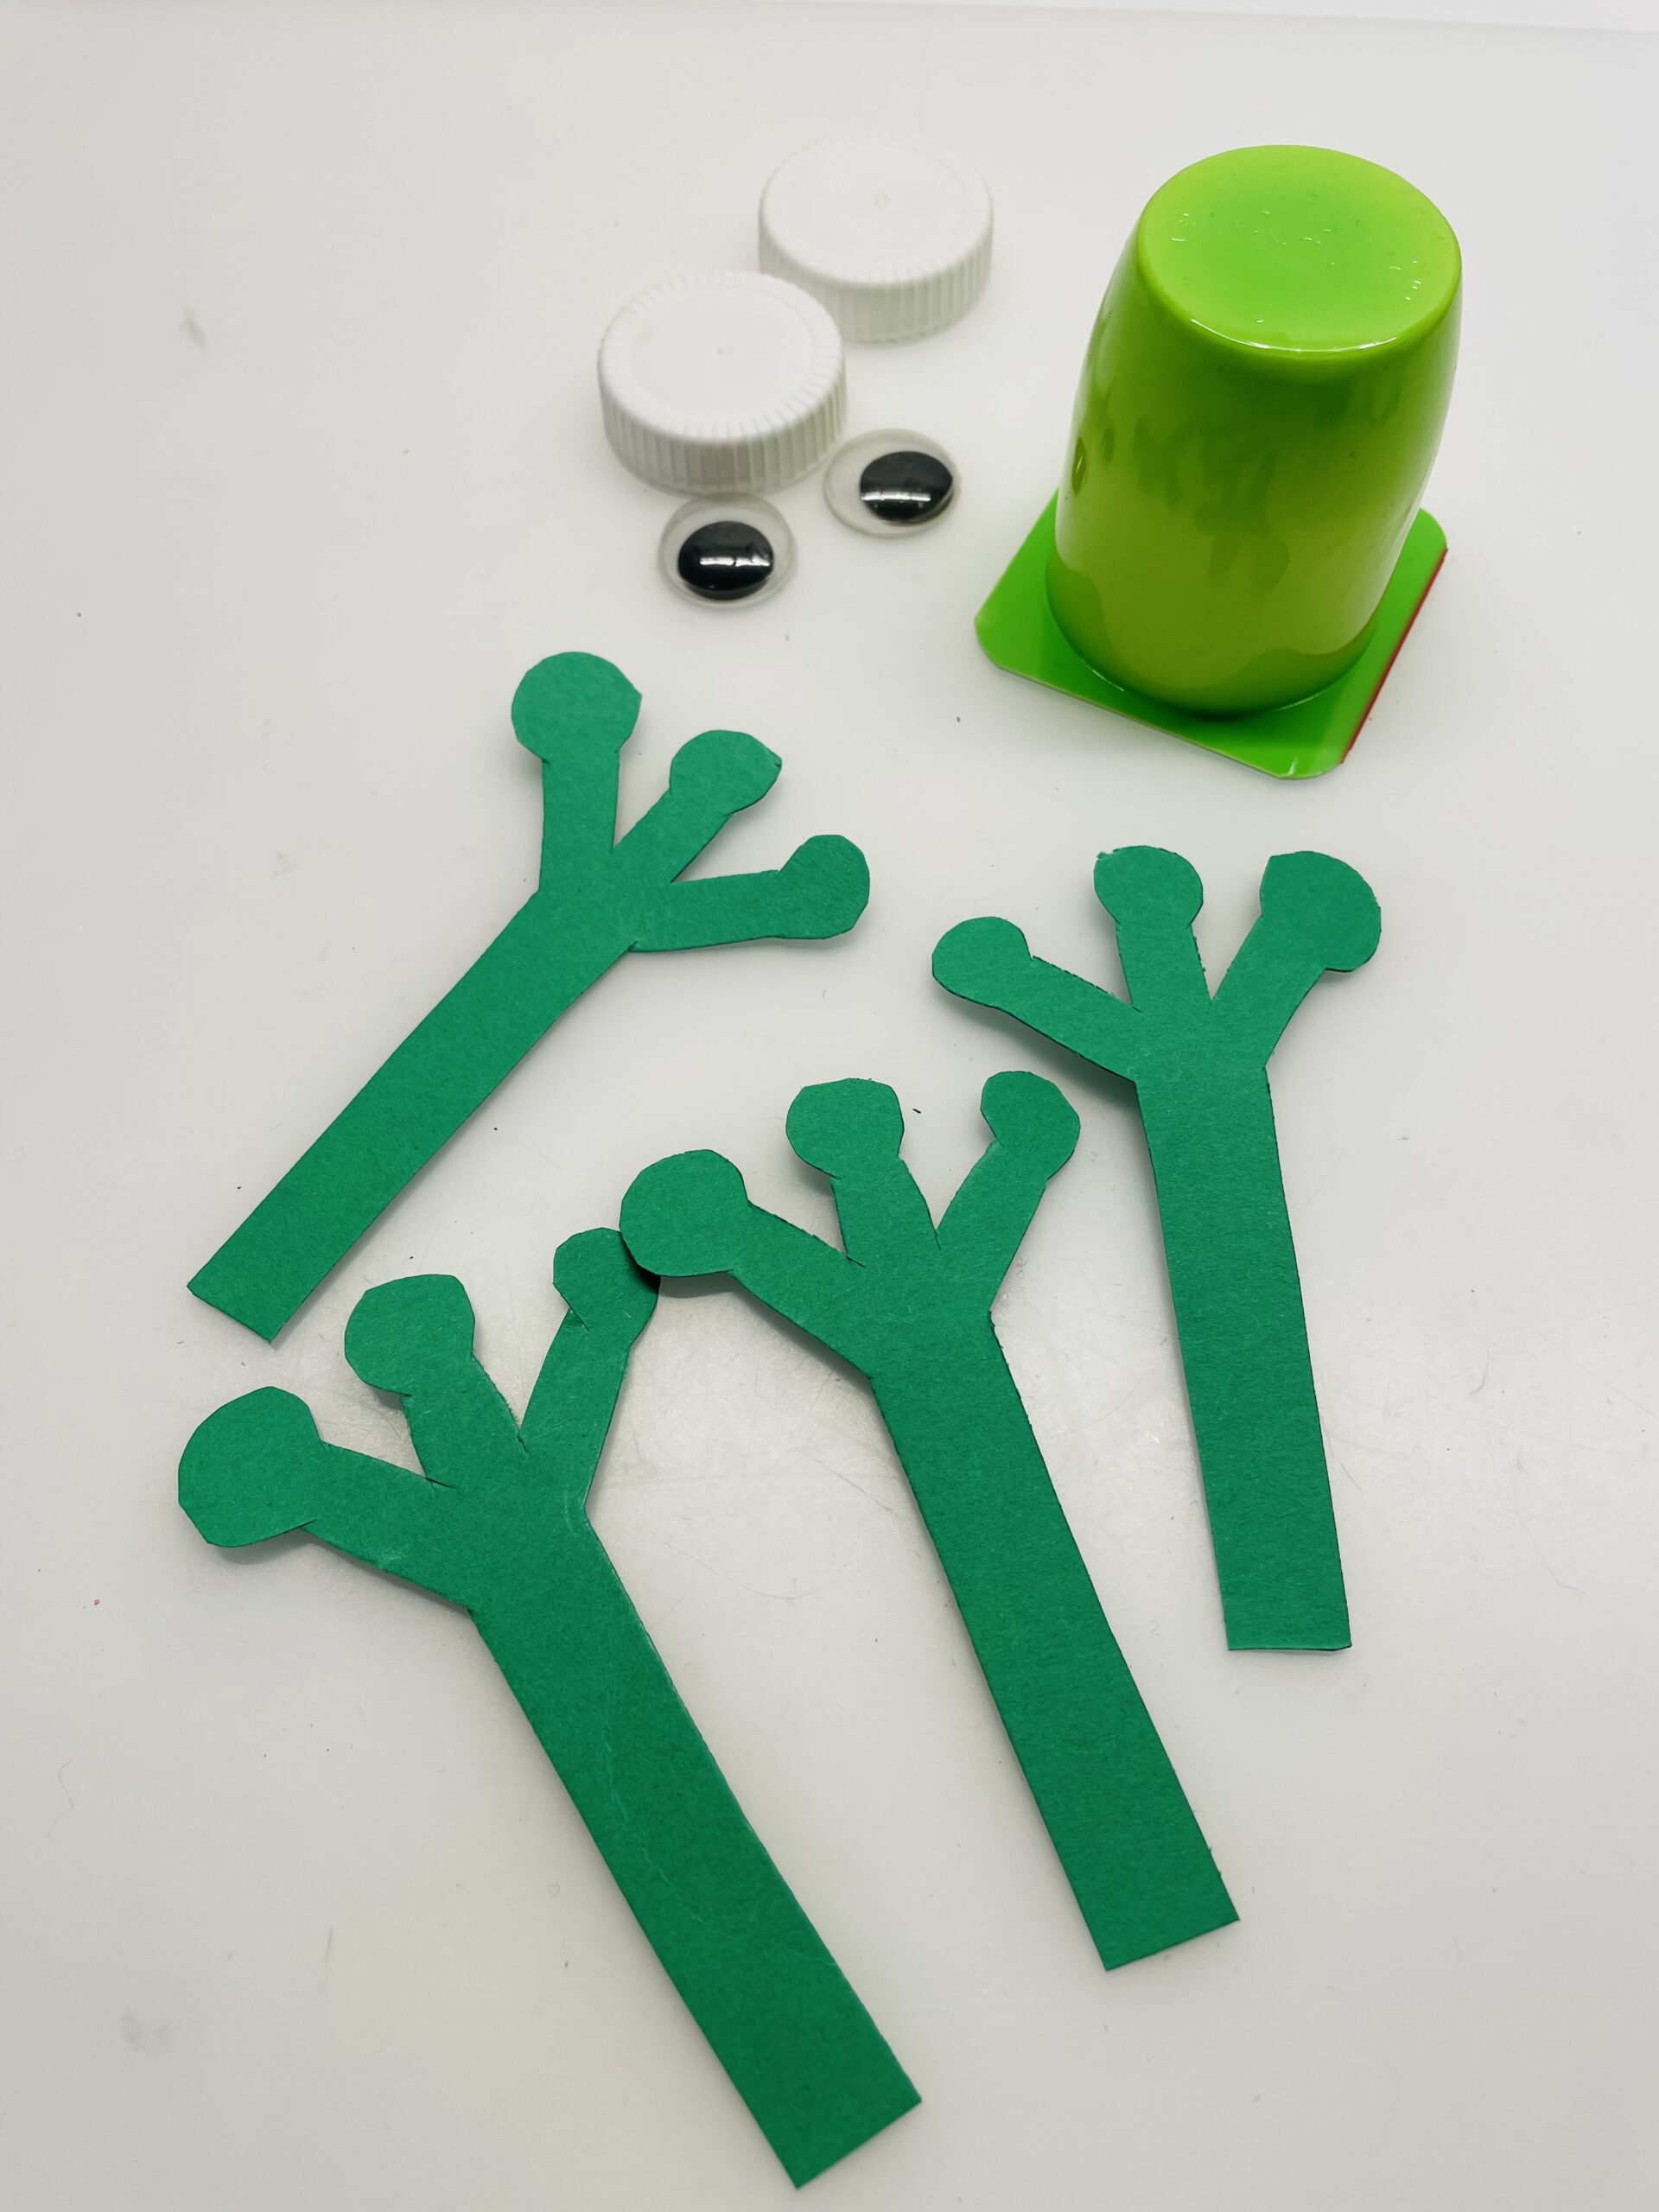
Bild zum Schritt 3 für das Bastel- und DIY-Abenteuer für Kinder: 'Jetzt legt ihr euch die anderen Materialien zurecht.  ...'

4

Now place the yoghurt cup with the opening down on the green paper and paint with a pen the outline of the cup. Then cut the clay paper and glue the underside of the yoghurt cup.

Bild zum Schritt 4 für das Bastel- und DIY-Abenteuer für Kinder: 'Stellt jetzt den Joghurtbecher mit der Öffnung nach unten auf...'

5

Afterwards, two of her legs stick to the green clay paper under the yoghurt cup.
For this you fold your feet and then fold your feet up again. So they remain bent upwards.

Bild zum Schritt 5 für das Bastel- und DIY-Abenteuer für Kinder: 'Anschließend klebt ihr zwei der Beine an das grüne Tonpapier...'

6

The front legs now pull her over a pen with pressure. So the paper bends slightly. After that, the two front legs stick to each other a bit overlapping.

Bild zum Schritt 6 für das Bastel- und DIY-Abenteuer für Kinder: 'Die Vorderbeine zieht ihr jetzt mit Druck über ein Stift....'

7

Now press the glue with your fingers.

Bild zum Schritt 7 für das Bastel- und DIY-Abenteuer für Kinder: 'Presst jetzt die Klebestelle mit den Fingern zusammen.'

8

Then stick the front legs to the back of the yoghurt cup.

Bild zum Schritt 8 für das Bastel- und DIY-Abenteuer für Kinder: 'Anschließend klebt ihr die Vorderbeine an die Rückseite des Joghurtbechers.'

9

By bending the paper, the forelegs lay around the cup.

Bild zum Schritt 9 für das Bastel- und DIY-Abenteuer für Kinder: 'Durch die Biegung des Papiers legen sich die Vorderbeine um...'

10

Now glue the two wobble eyes on each screw cap. Then glue the eyes up on the cup. Use a large stick of the glue stick or a hot glue. Attention when handling the hot glue - danger of injury!

Bild zum Schritt 10 für das Bastel- und DIY-Abenteuer für Kinder: 'Klebt nun die zwei Wackelaugen auf je einen Schraubdeckel. Danach...'

11

The little frog is ready.

Bild zum Schritt 11 für das Bastel- und DIY-Abenteuer für Kinder: 'Fertig ist der kleine Frosch.'

Template
12

Uses the template as a template or paints the frog legs themselves.

Bild zum Schritt 13 für das Bastel- und DIY-Abenteuer für Kinder: 'Verwendet die Vorlage als Schablone oder malt die Froschbeine selbst...'

Frog King
13

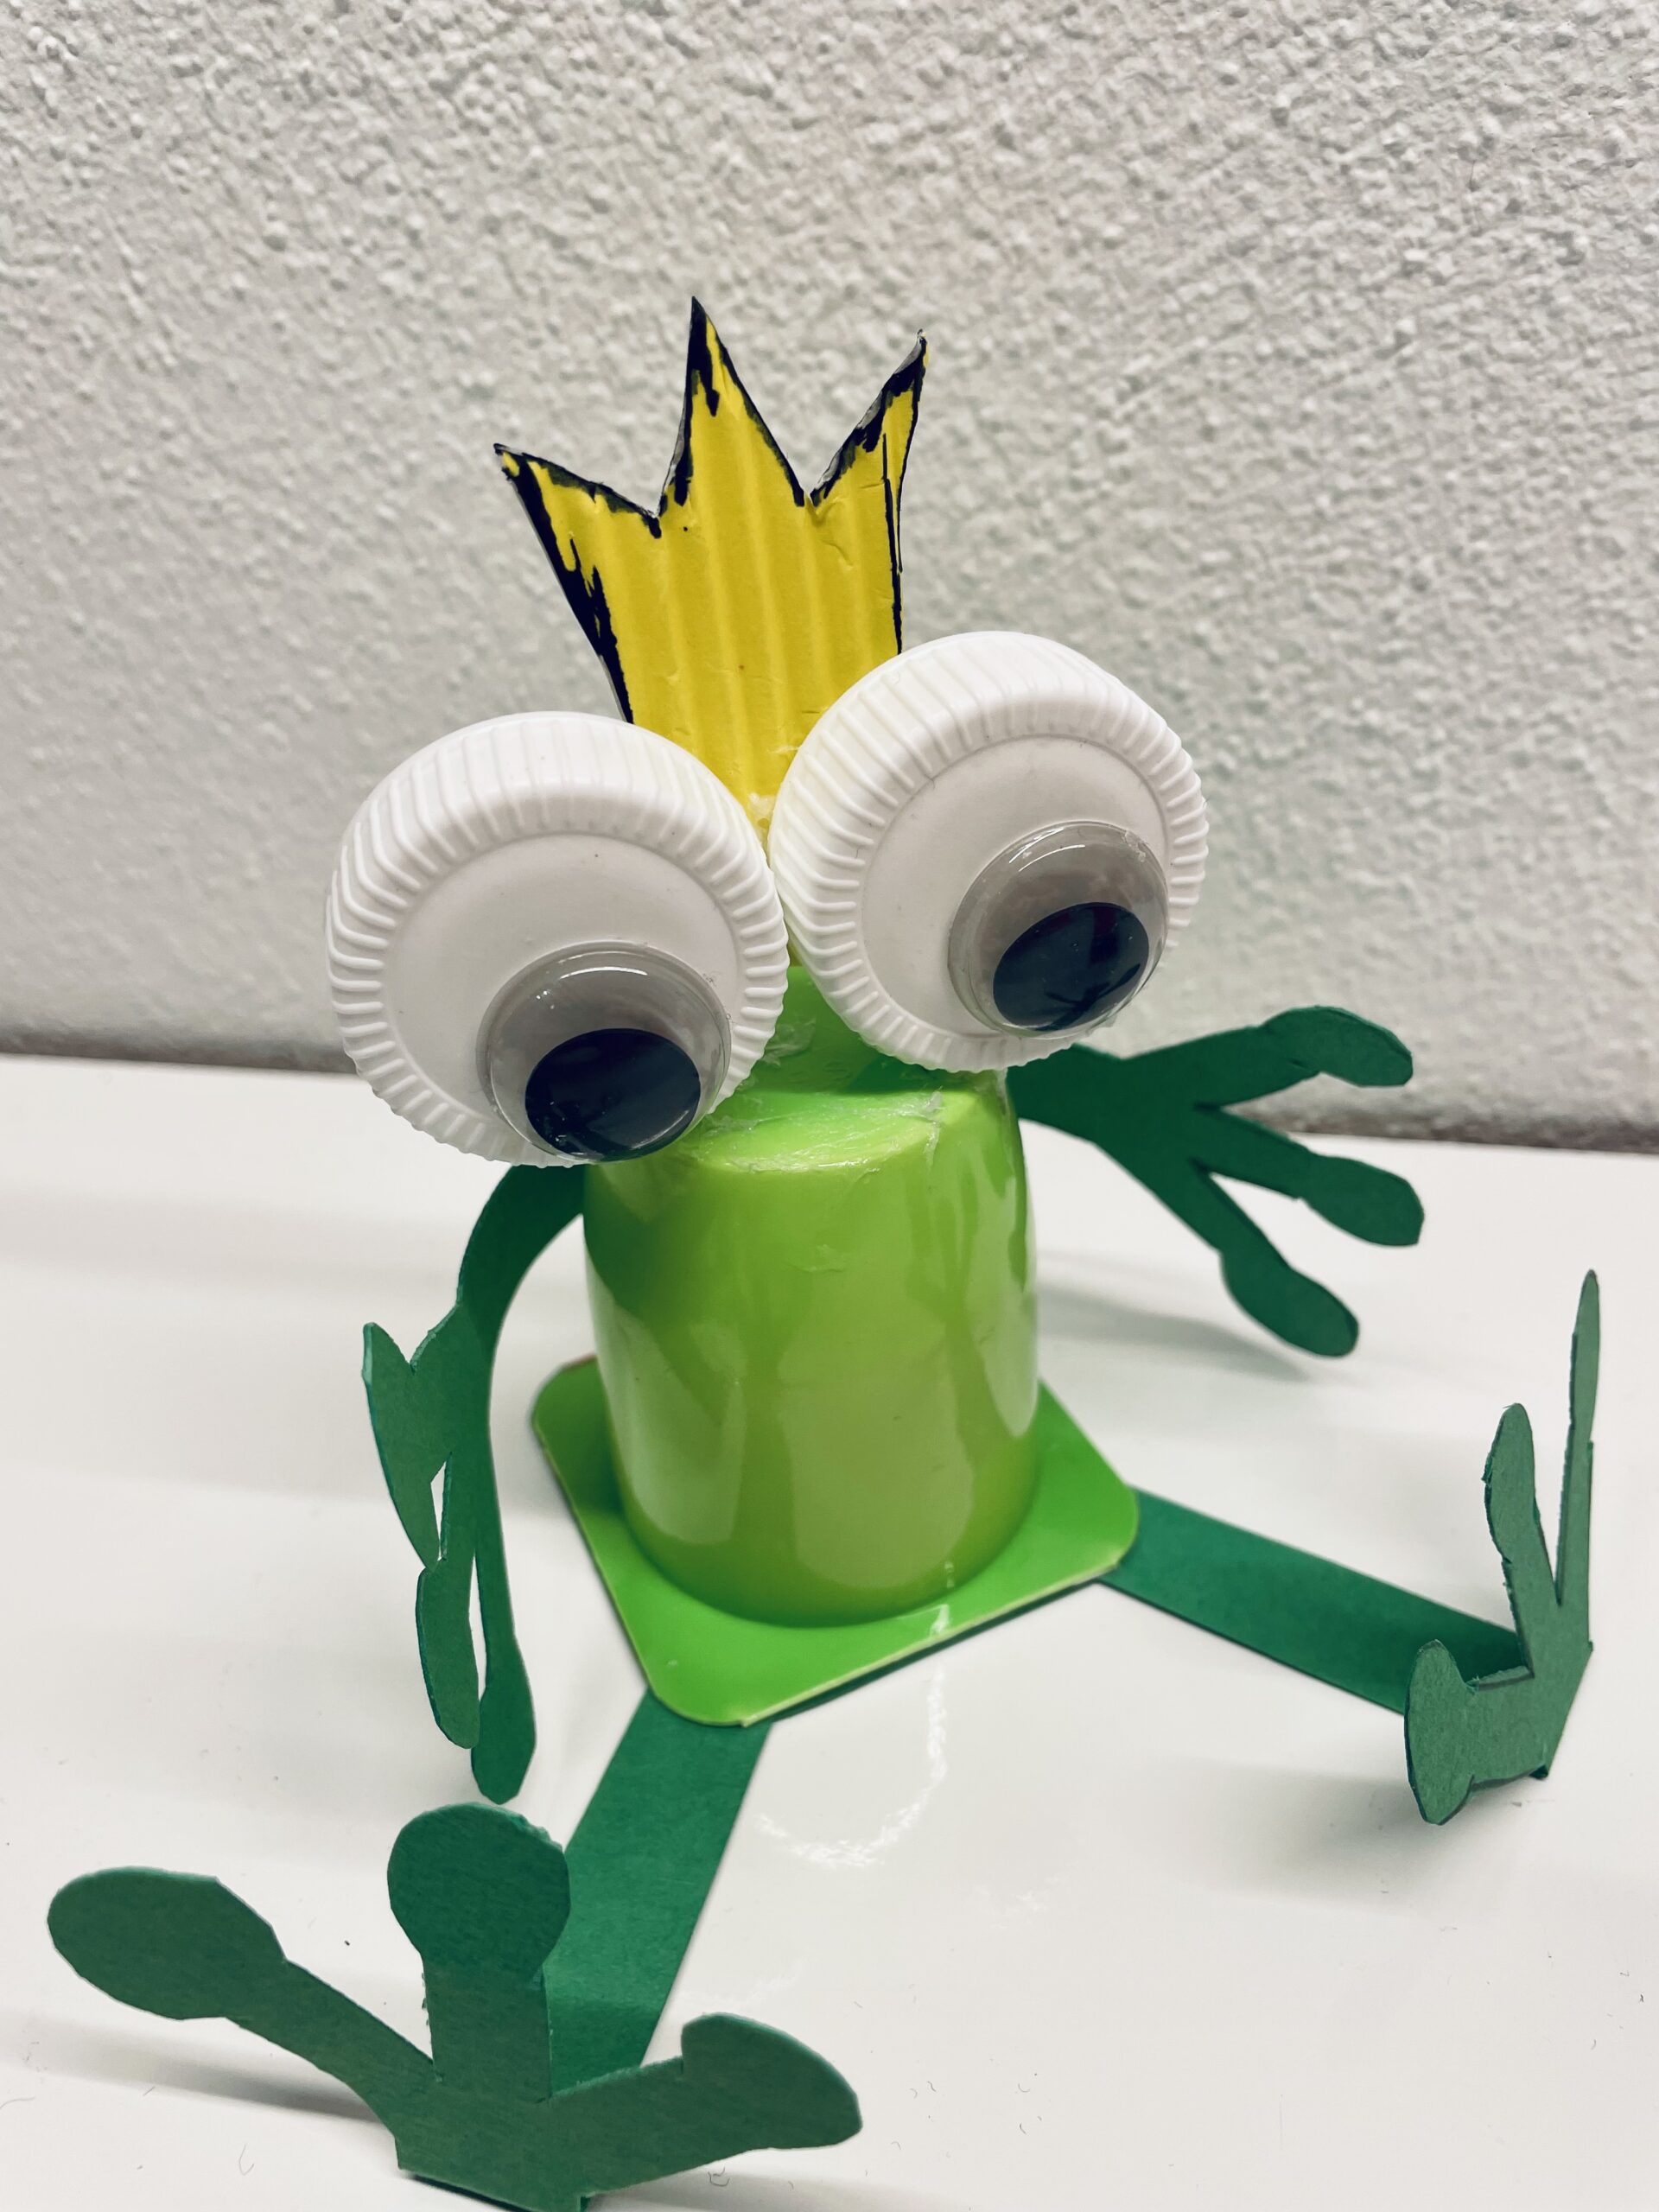
In order to conjure up a frog king from the frog, you now make a small crown. For this you paint a crown on yellow paper. Leave the lower part of the crown a little longer and then cut it out. Now fold the lower part a half centimetre. Place the half centimetre of the crown with glue and place the crown behind the eyes of the frog.

Bild zum Schritt 15 für das Bastel- und DIY-Abenteuer für Kinder: 'Um aus dem Frosch einen Froschkönig zu zaubern, bastelt ihr...'

14

Your frog king is ready.

Bild zum Schritt 16 für das Bastel- und DIY-Abenteuer für Kinder: 'Fertig ist euer Froschkönig.'

15

Have fun doing crafts and giving gifts!

Materials

 1 Yogurt cup greenSmall yoghurt
 2 Screw capsapprox. 2cm diameter
 2 Wax eyes
 Clay paper green
 1 Pen
 Possibly hot glue gun
 1 Builder's pad
For the Frog King
 1 Photo box yellowpossible corrugated board
All links marked with a shopping cart lead to Amazon - here we have selected products that we would order ourselves and in part also ordered. In a qualified purchase via the advertising link, we as Amazon partner receive a commission, for you there are no costs. You thus support our cost- and advertising banner-free, educational offer.

Directions

1

You need a clean yoghurt cup and a green paper for the front and back legs of the frog.

2

First transfer the template to green clay paper four times and then cut out the legs.

Bild zum Schritt 2 für das Bastel- und DIY-Abenteuer für Kinder: 'Übertragt zuerst die Vorlage viermal auf grünes Tonpapier und schneidet...'

3

Now you set up the other materials.

Tip: Cut out two large circles of photo box and design the eyes yourself, if you don't have any wobble eyes.

Bild zum Schritt 3 für das Bastel- und DIY-Abenteuer für Kinder: 'Jetzt legt ihr euch die anderen Materialien zurecht.  ...'

4

Now place the yoghurt cup with the opening down on the green paper and paint with a pen the outline of the cup. Then cut the clay paper and glue the underside of the yoghurt cup.
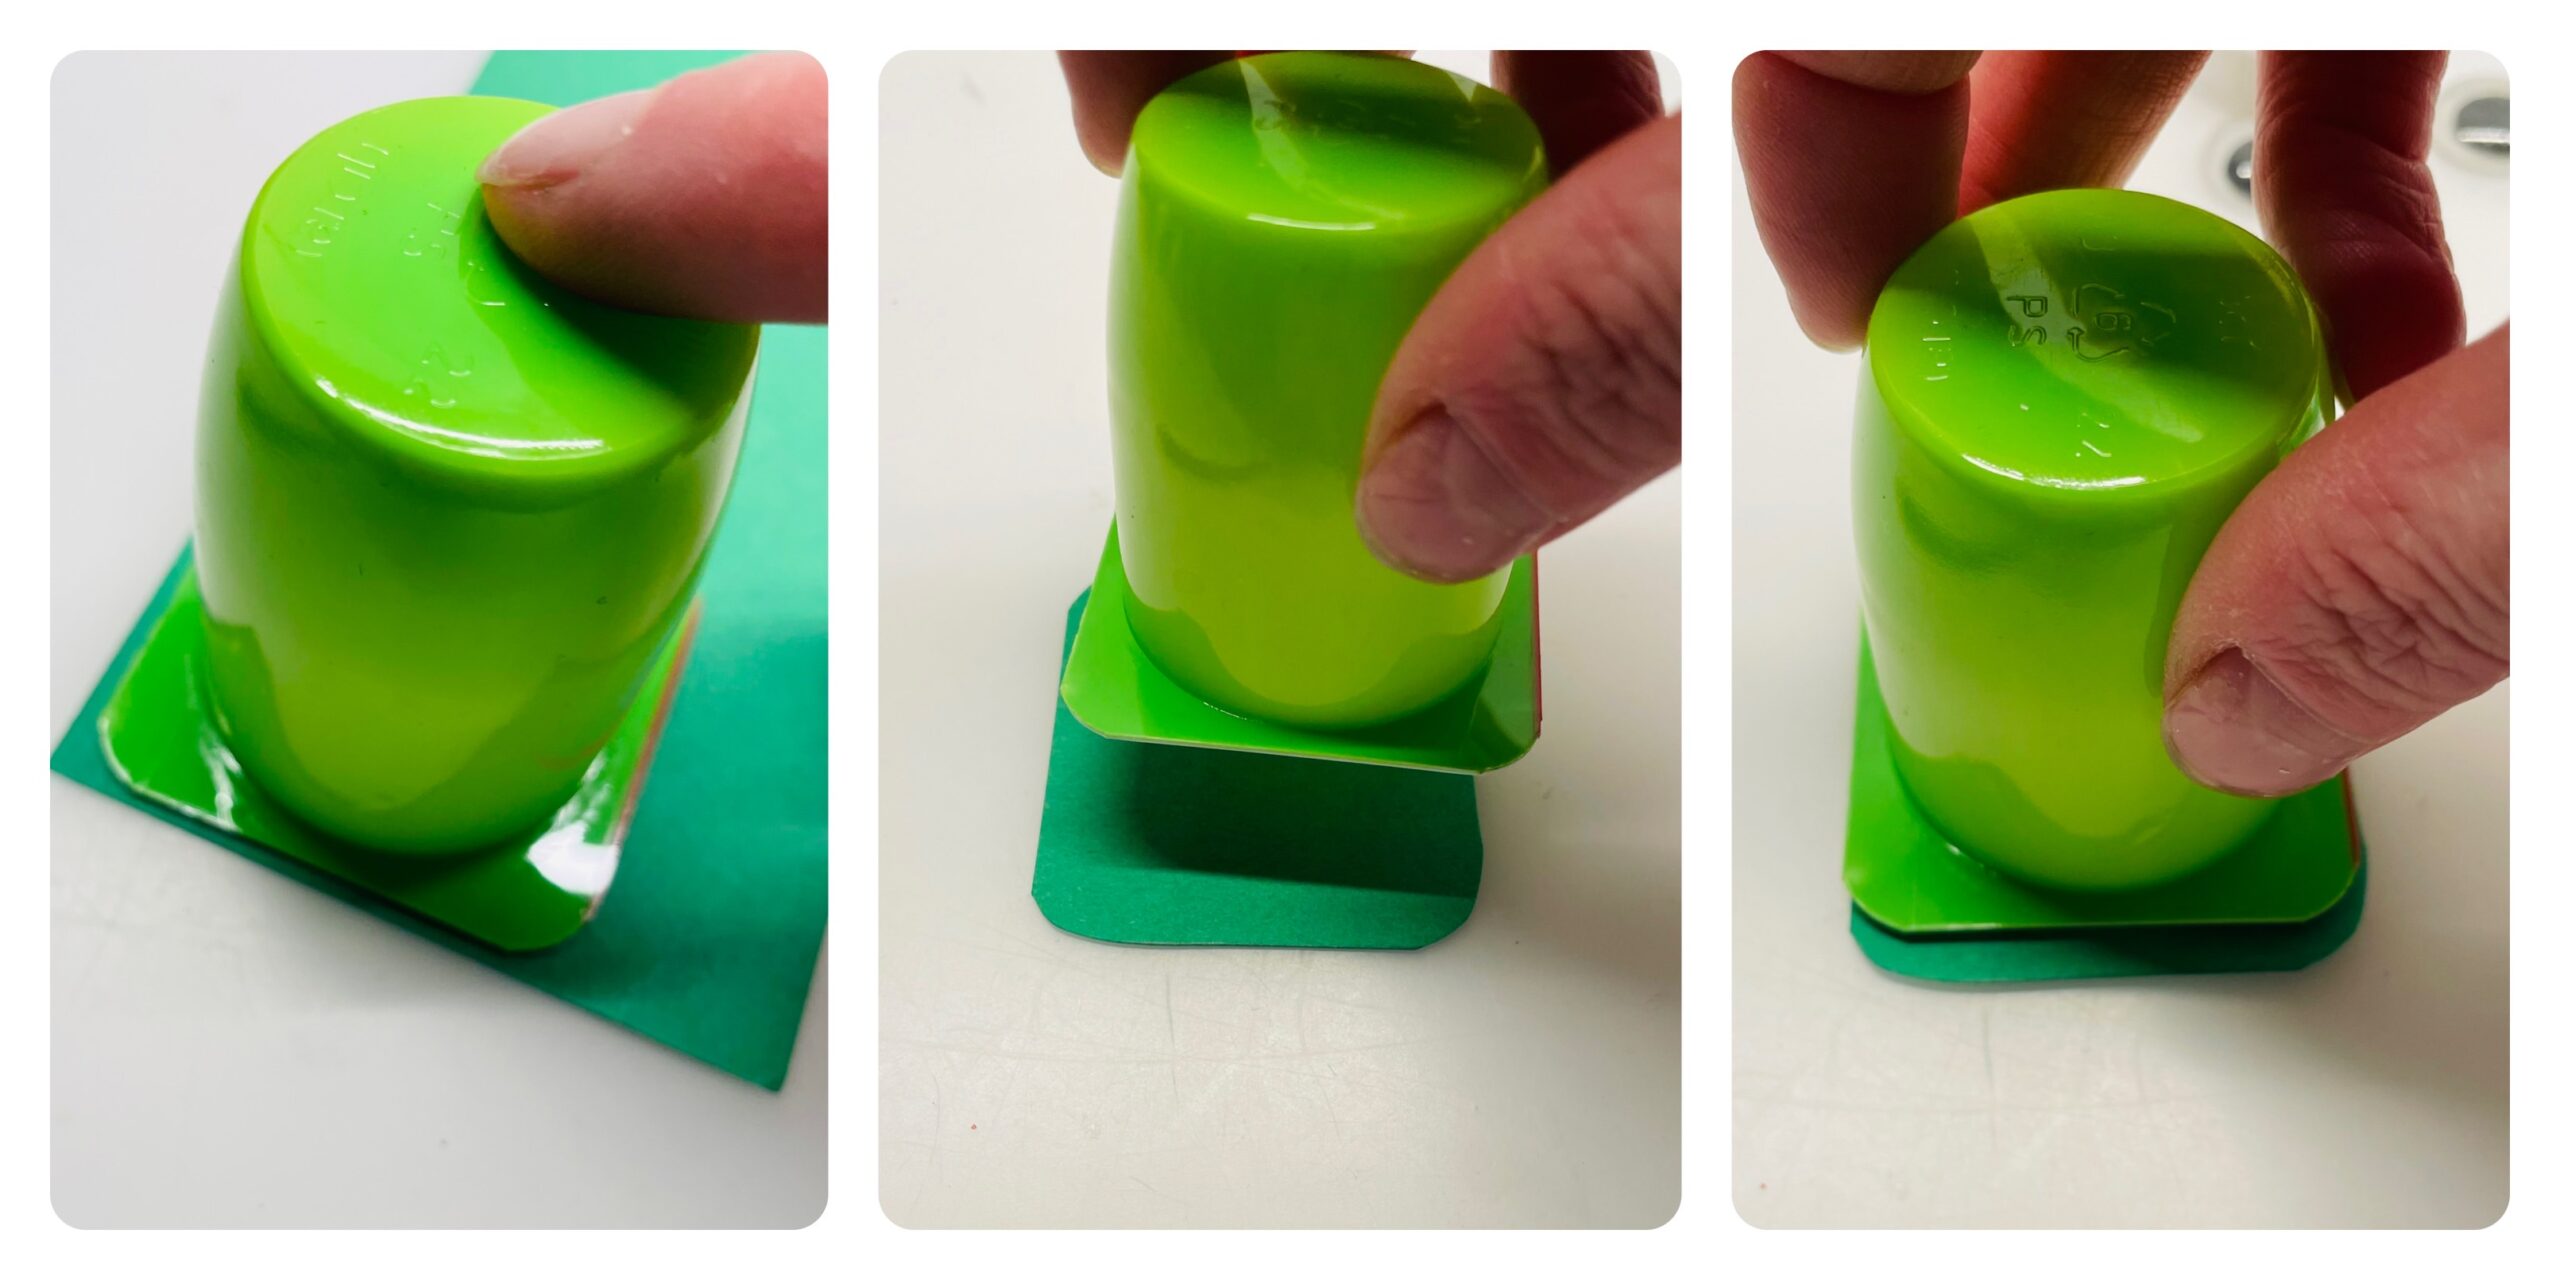
Bild zum Schritt 4 für das Bastel- und DIY-Abenteuer für Kinder: 'Stellt jetzt den Joghurtbecher mit der Öffnung nach unten auf...'

5

Afterwards, two of her legs stick to the green clay paper under the yoghurt cup.
For this you fold your feet and then fold your feet up again. So they remain bent upwards.
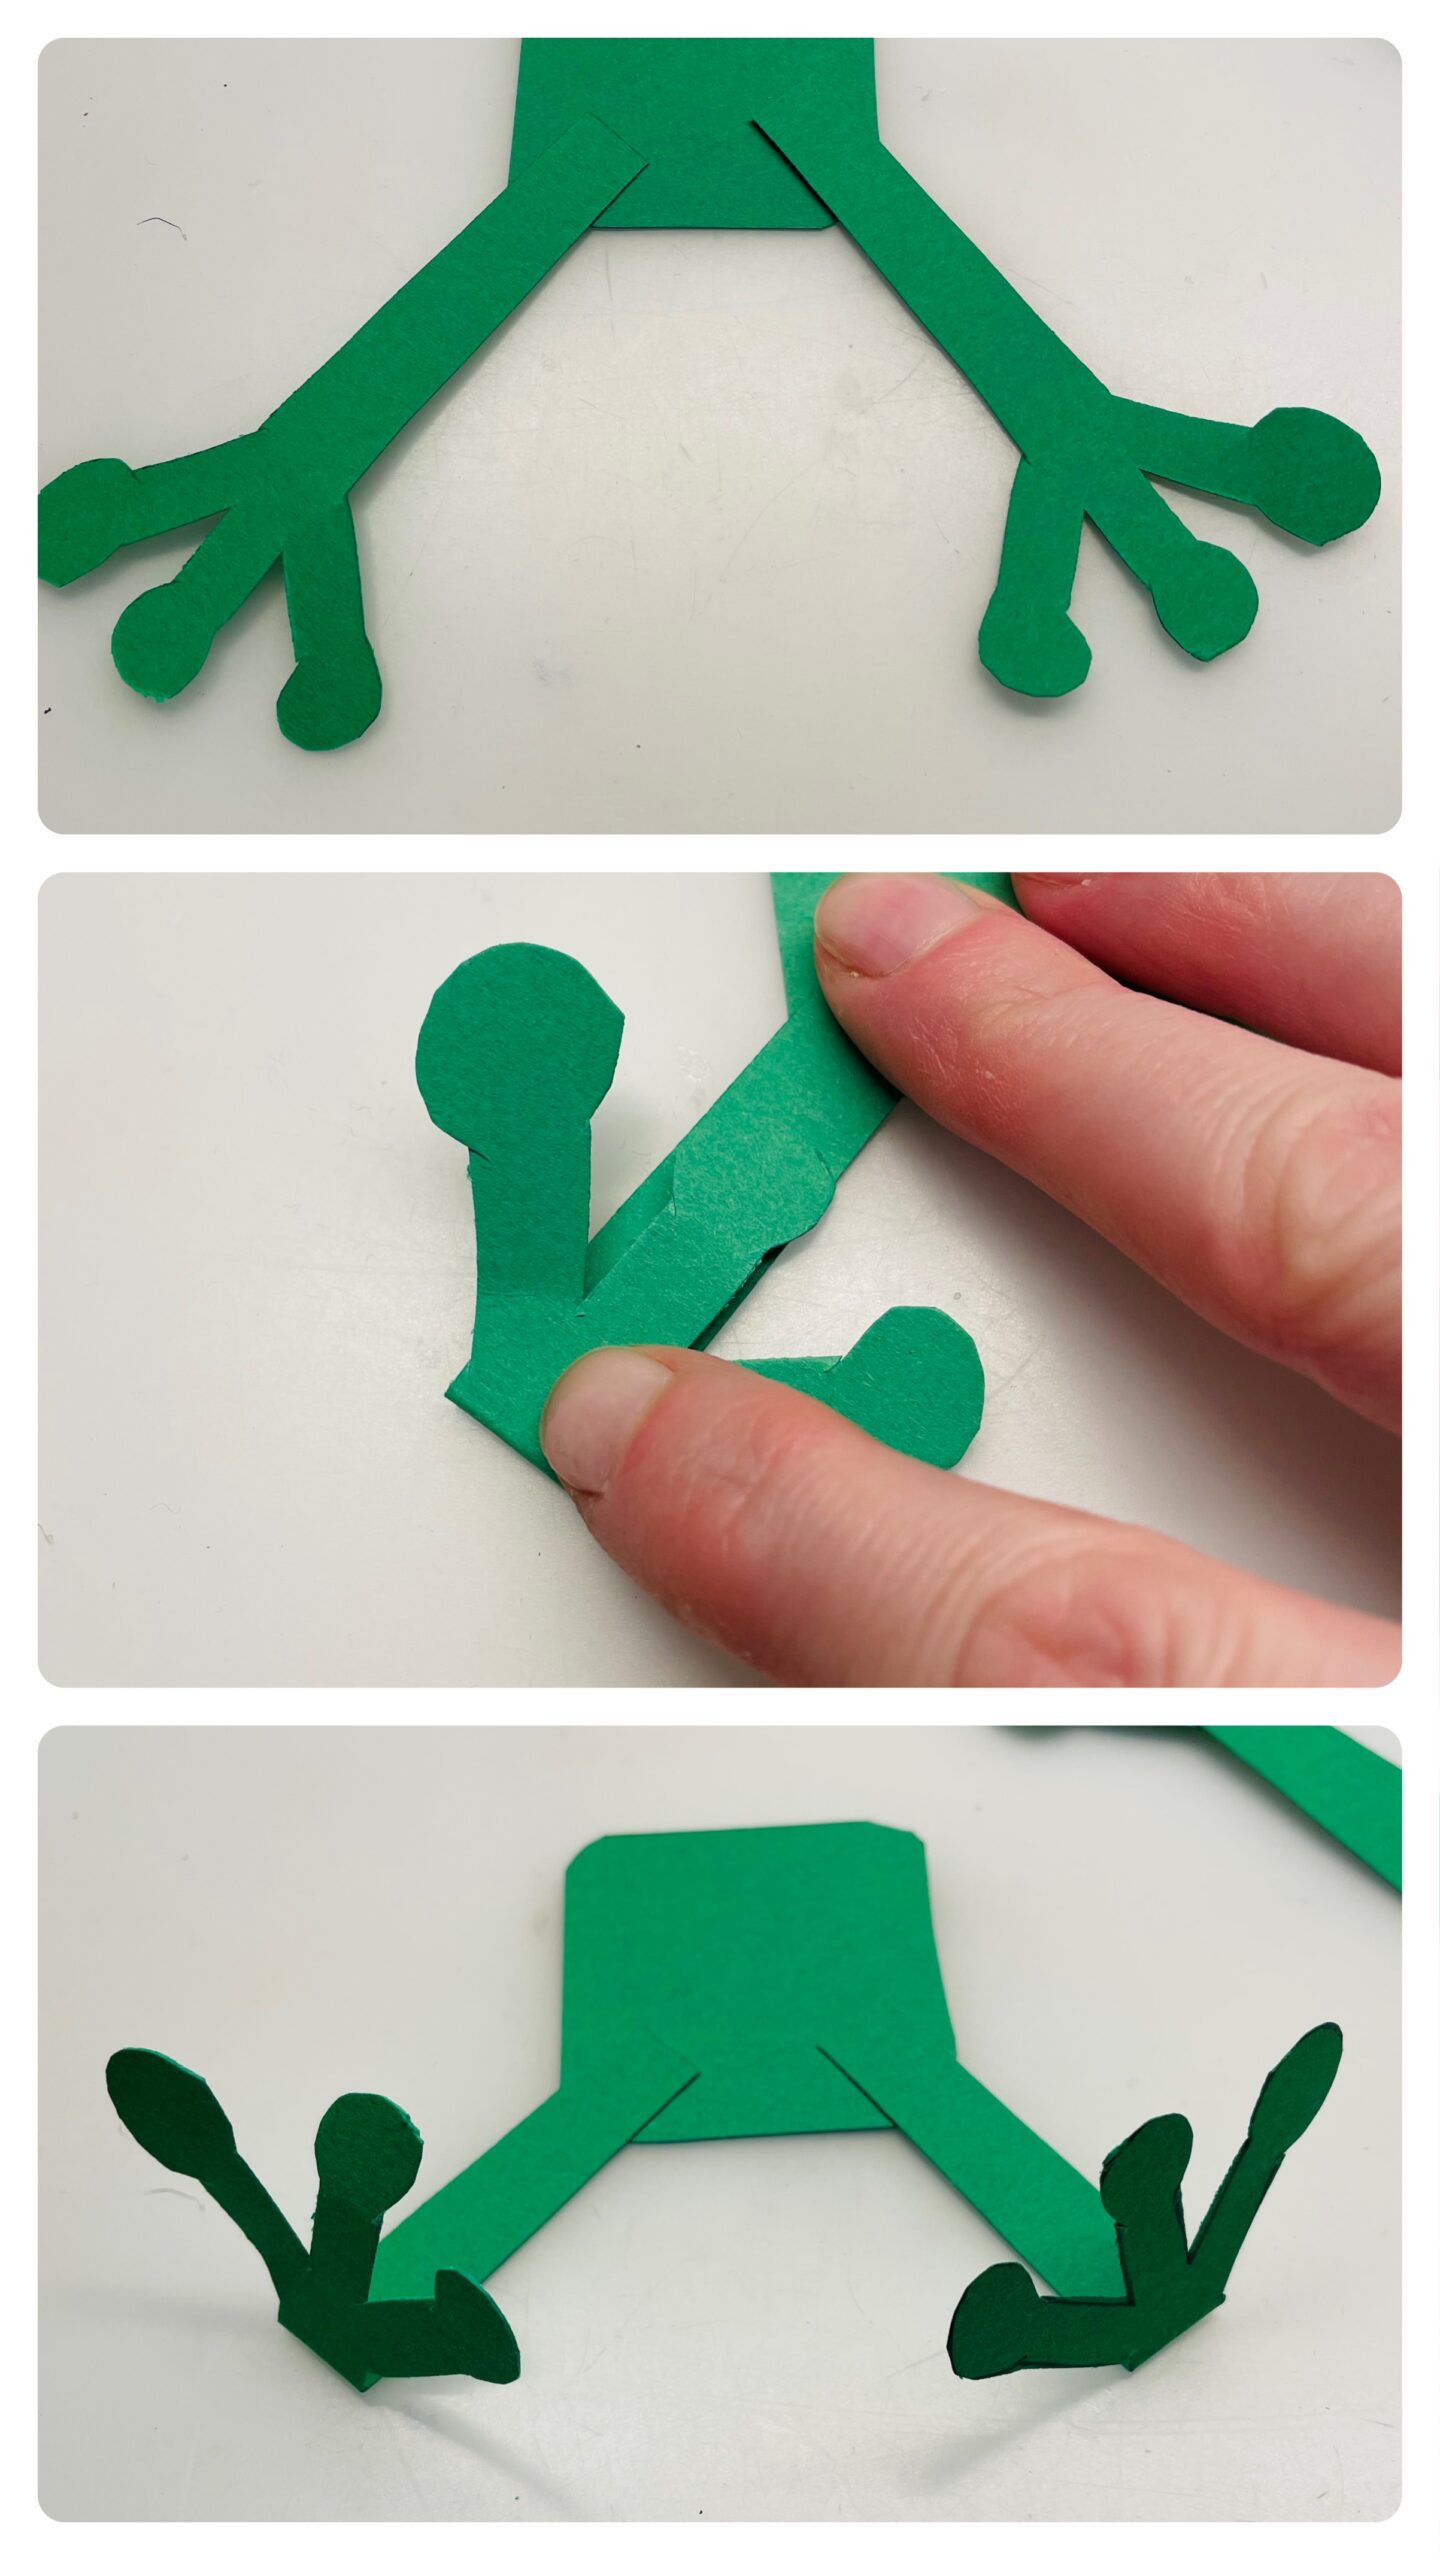
Bild zum Schritt 5 für das Bastel- und DIY-Abenteuer für Kinder: 'Anschließend klebt ihr zwei der Beine an das grüne Tonpapier...'

6

The front legs now pull her over a pen with pressure. So the paper bends slightly. After that, the two front legs stick to each other a bit overlapping.
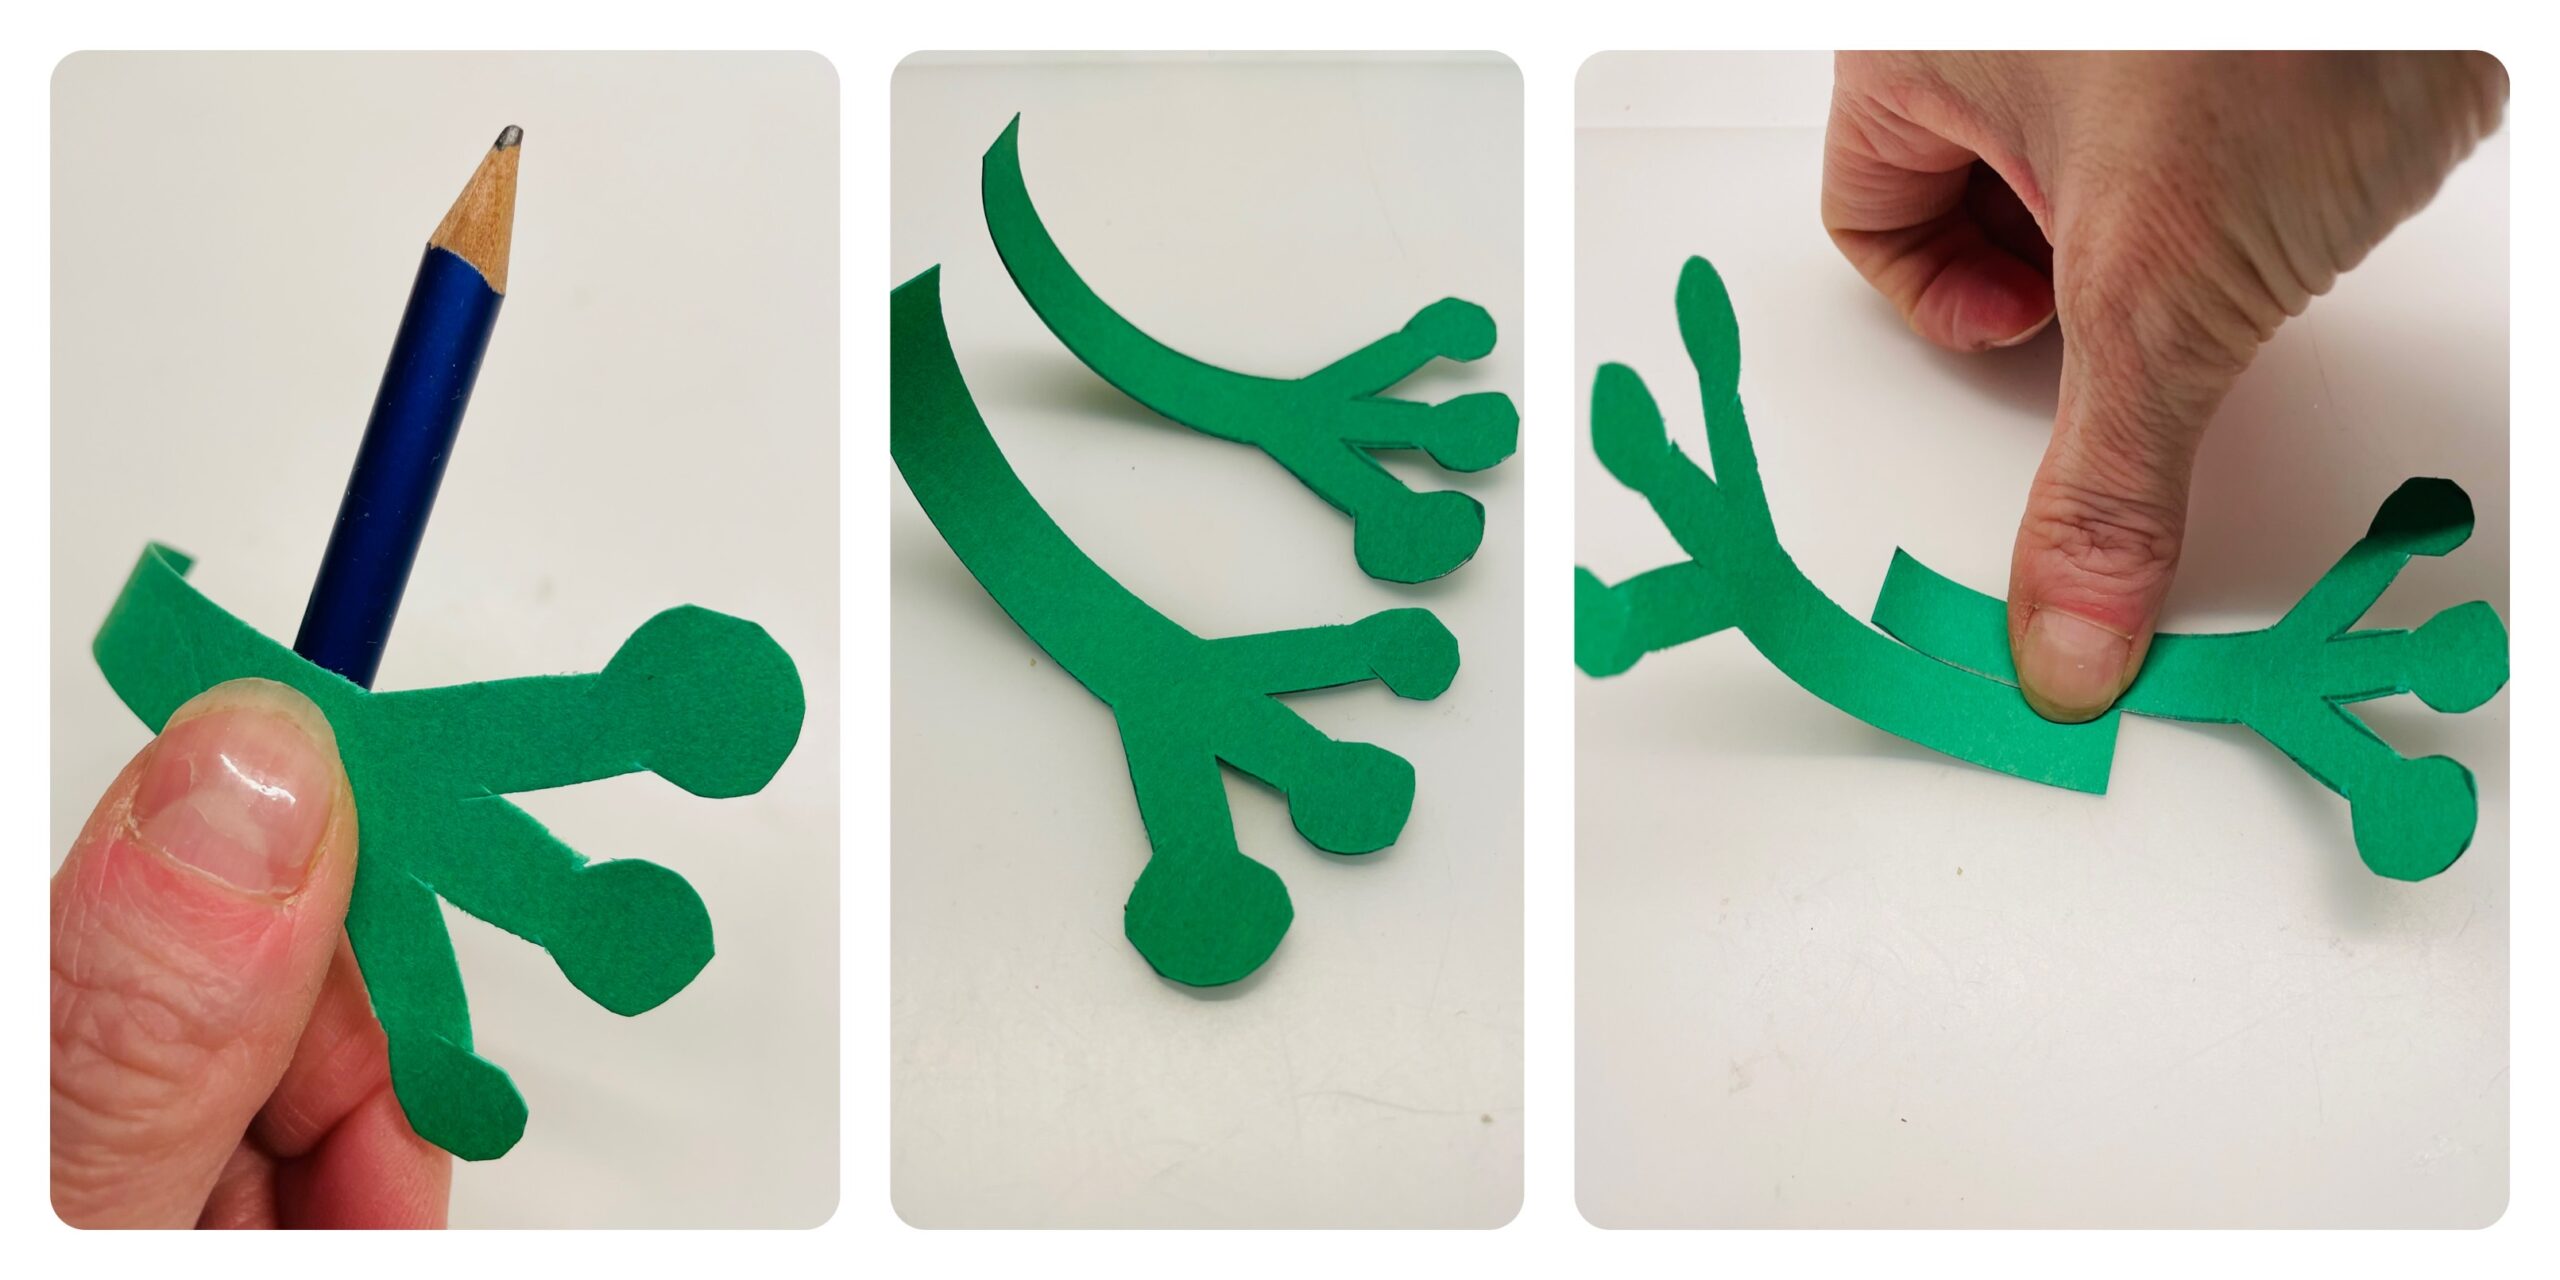
Bild zum Schritt 6 für das Bastel- und DIY-Abenteuer für Kinder: 'Die Vorderbeine zieht ihr jetzt mit Druck über ein Stift....'

7

Now press the glue with your fingers.
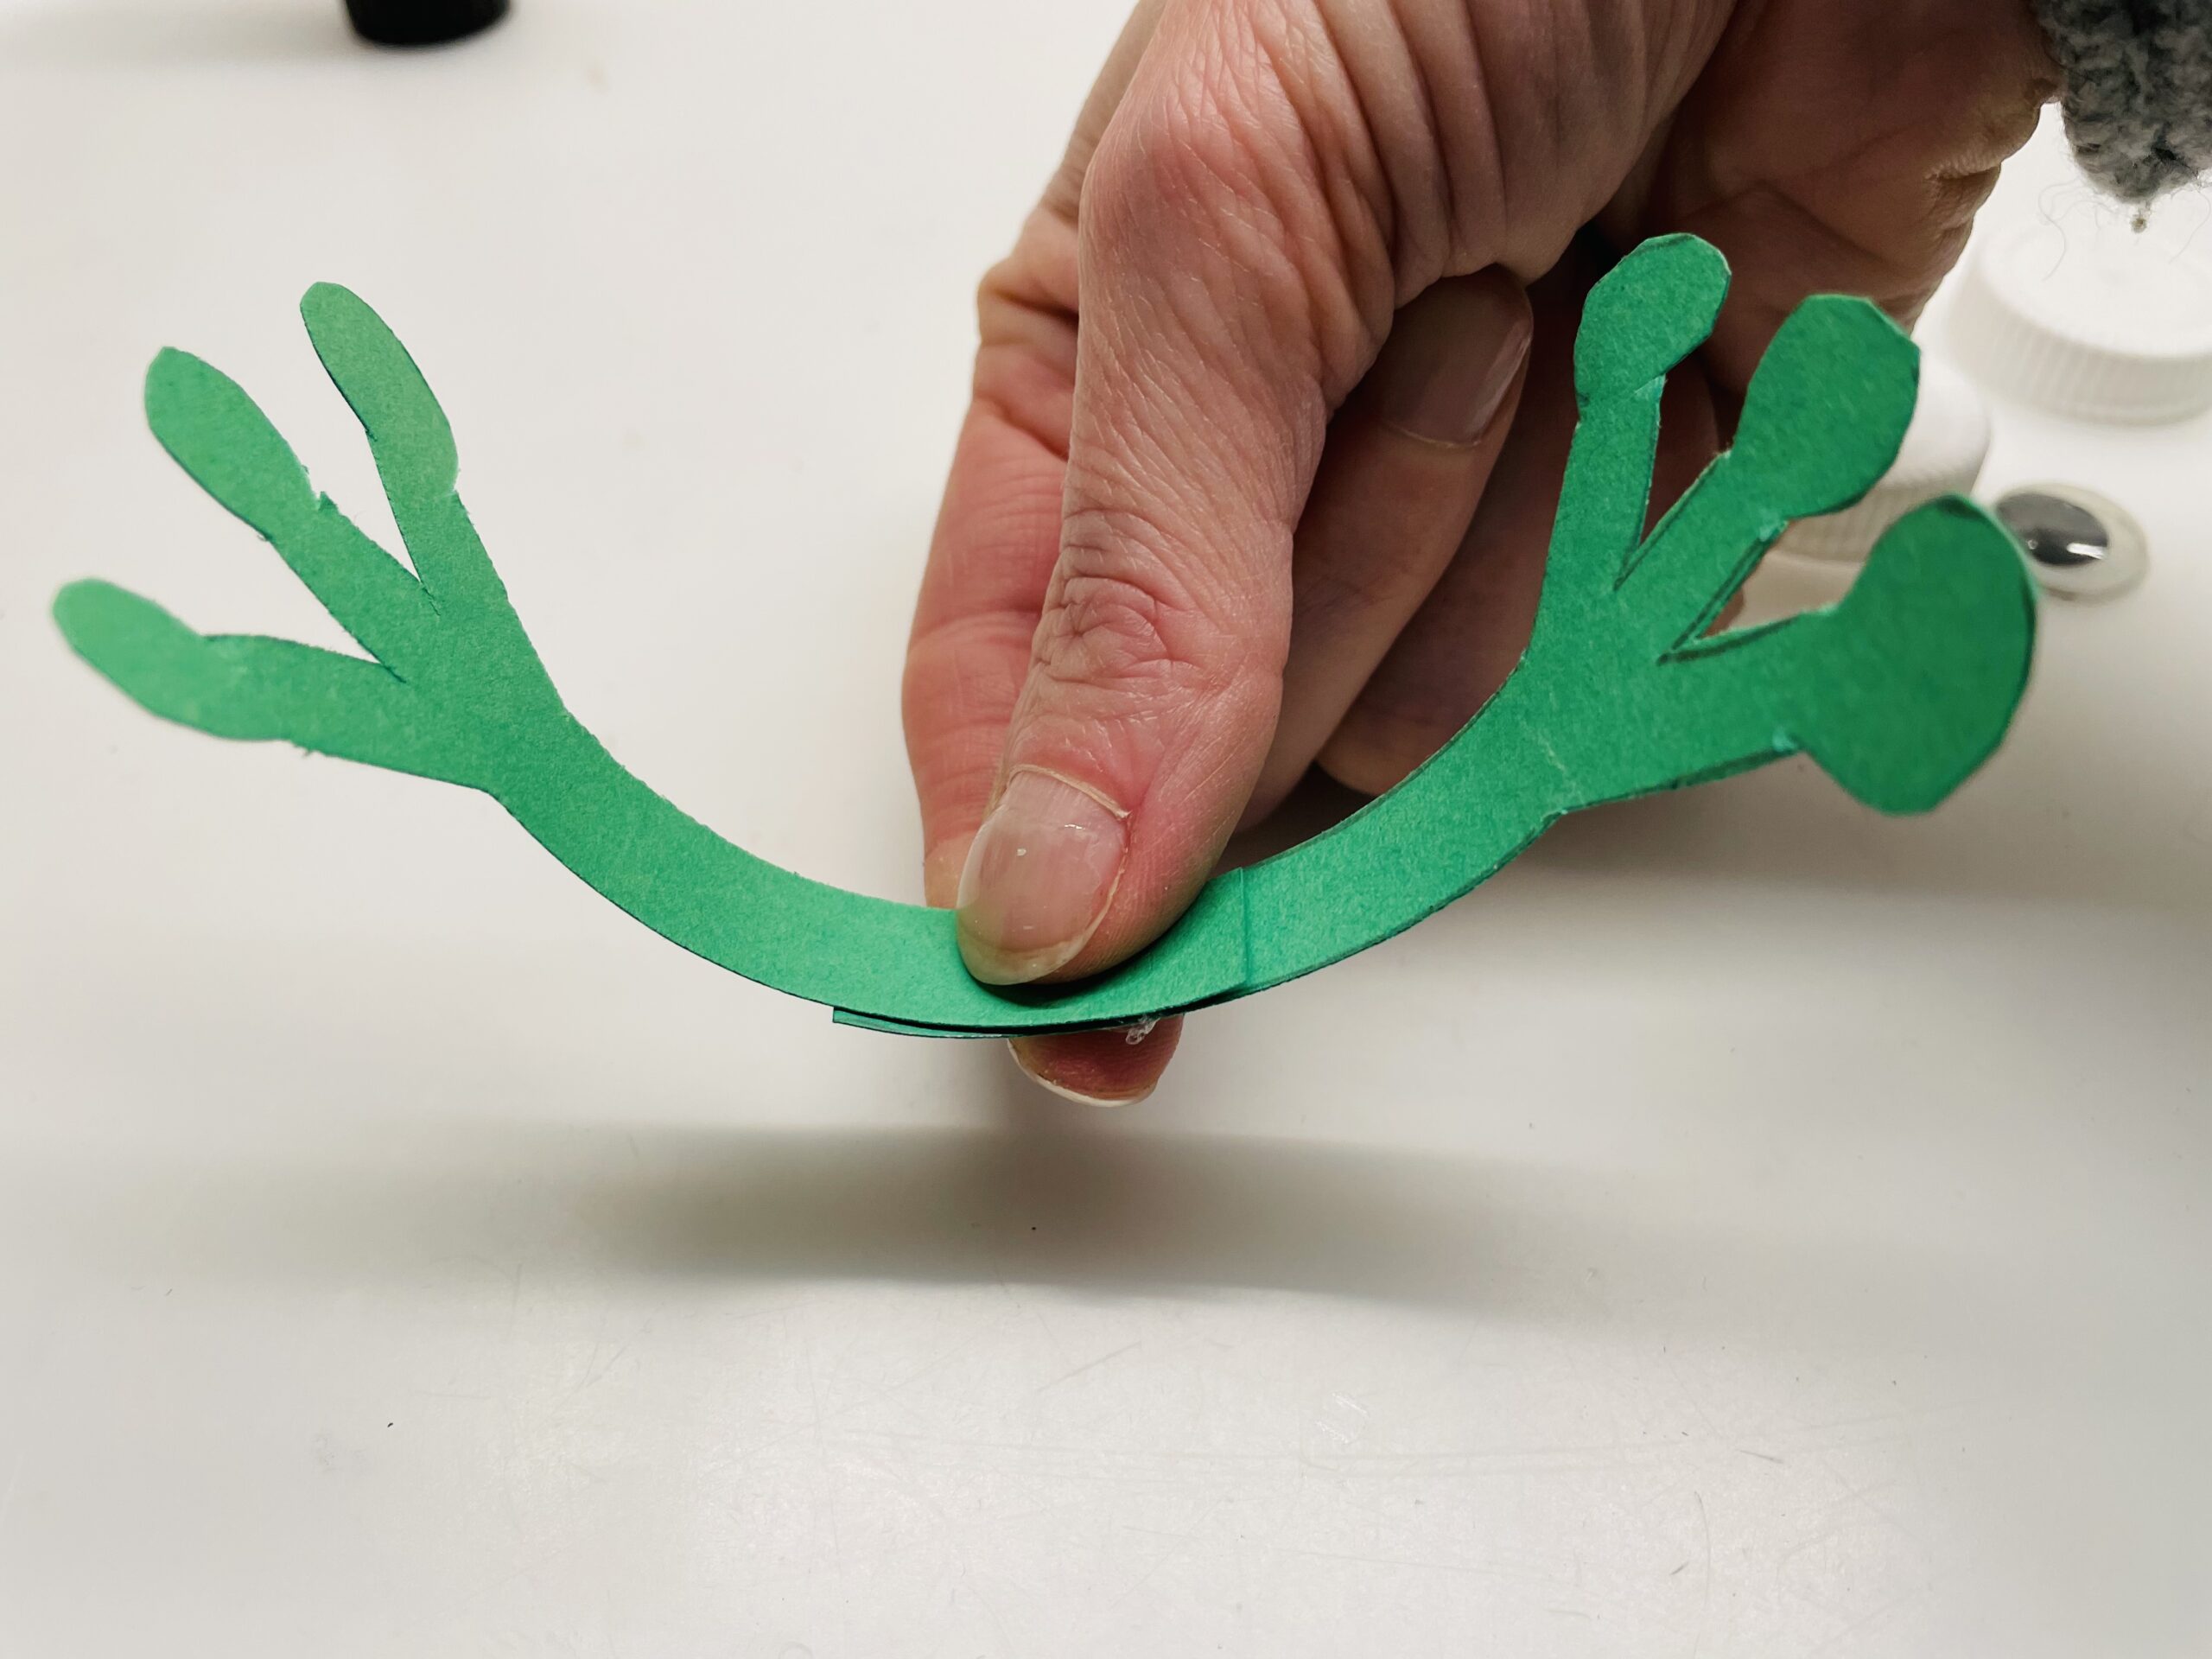
Bild zum Schritt 7 für das Bastel- und DIY-Abenteuer für Kinder: 'Presst jetzt die Klebestelle mit den Fingern zusammen.'

8

Then stick the front legs to the back of the yoghurt cup.
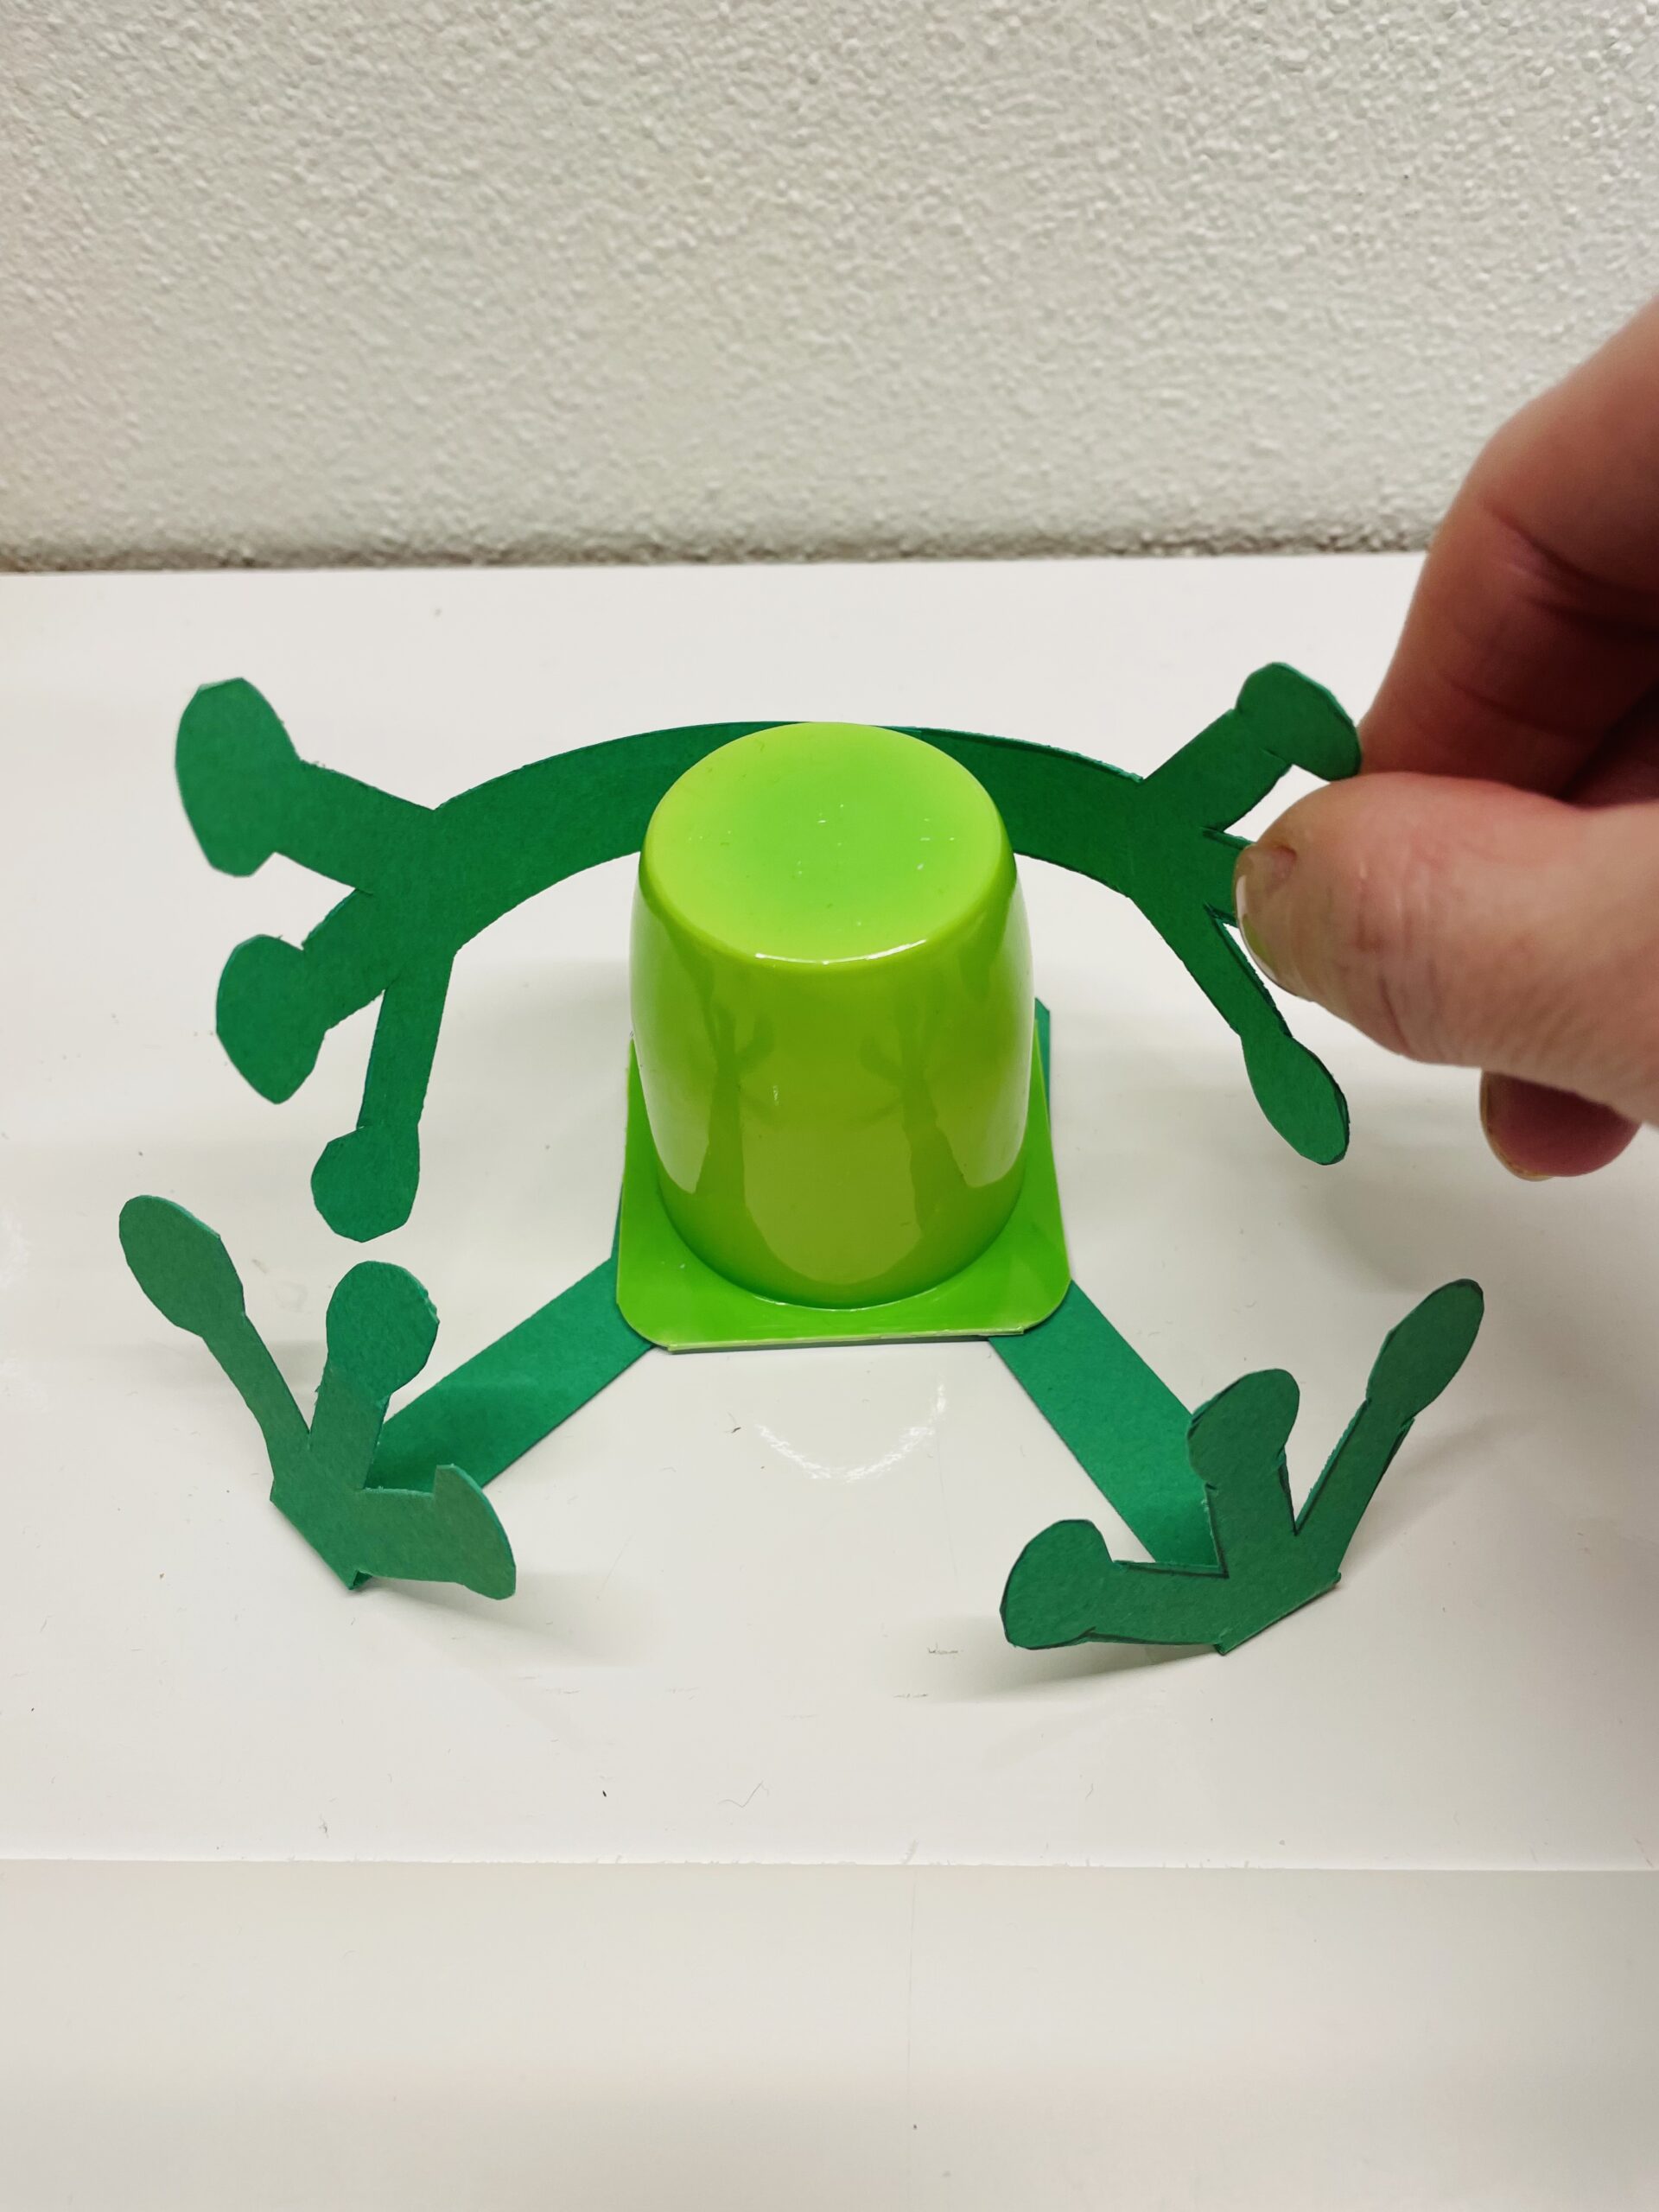
Bild zum Schritt 8 für das Bastel- und DIY-Abenteuer für Kinder: 'Anschließend klebt ihr die Vorderbeine an die Rückseite des Joghurtbechers.'

9

By bending the paper, the forelegs lay around the cup.
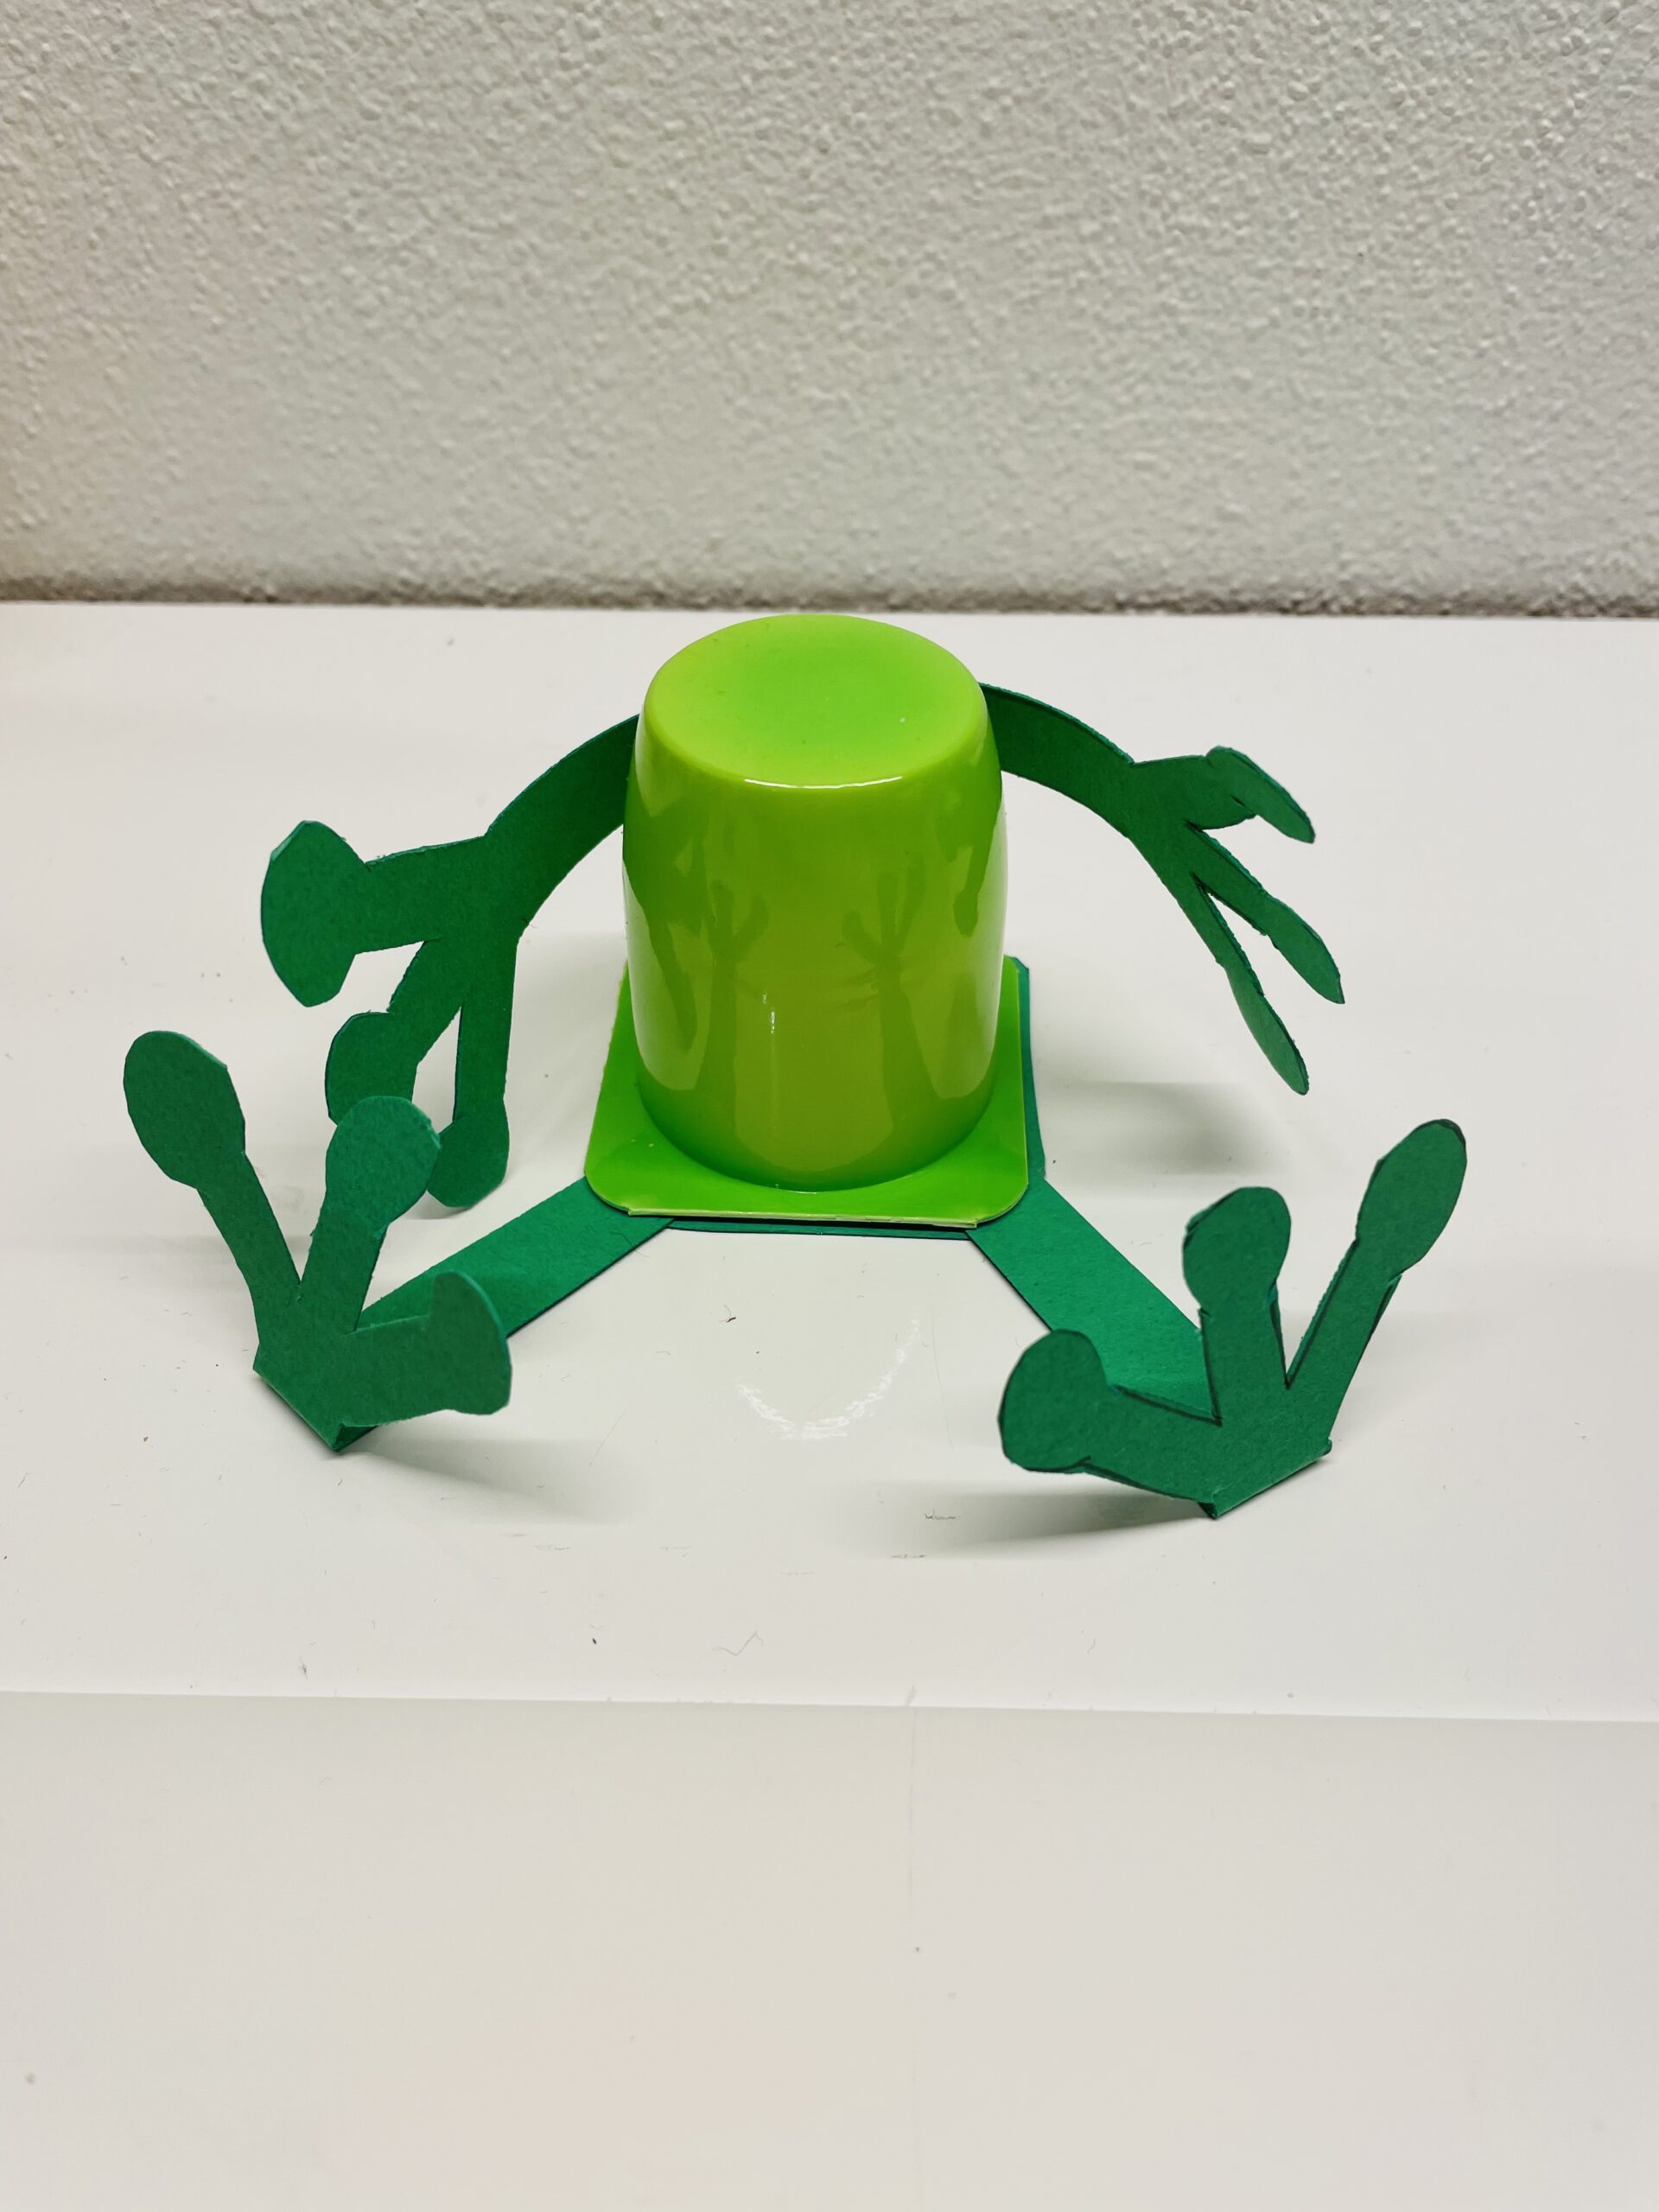
Bild zum Schritt 9 für das Bastel- und DIY-Abenteuer für Kinder: 'Durch die Biegung des Papiers legen sich die Vorderbeine um...'

10

Now glue the two wobble eyes on each screw cap. Then glue the eyes up on the cup. Use a large stick of the glue stick or a hot glue. Attention when handling the hot glue - danger of injury!

Bild zum Schritt 10 für das Bastel- und DIY-Abenteuer für Kinder: 'Klebt nun die zwei Wackelaugen auf je einen Schraubdeckel. Danach...'

11

The little frog is ready.

Bild zum Schritt 11 für das Bastel- und DIY-Abenteuer für Kinder: 'Fertig ist der kleine Frosch.'

Template
12

Uses the template as a template or paints the frog legs themselves.
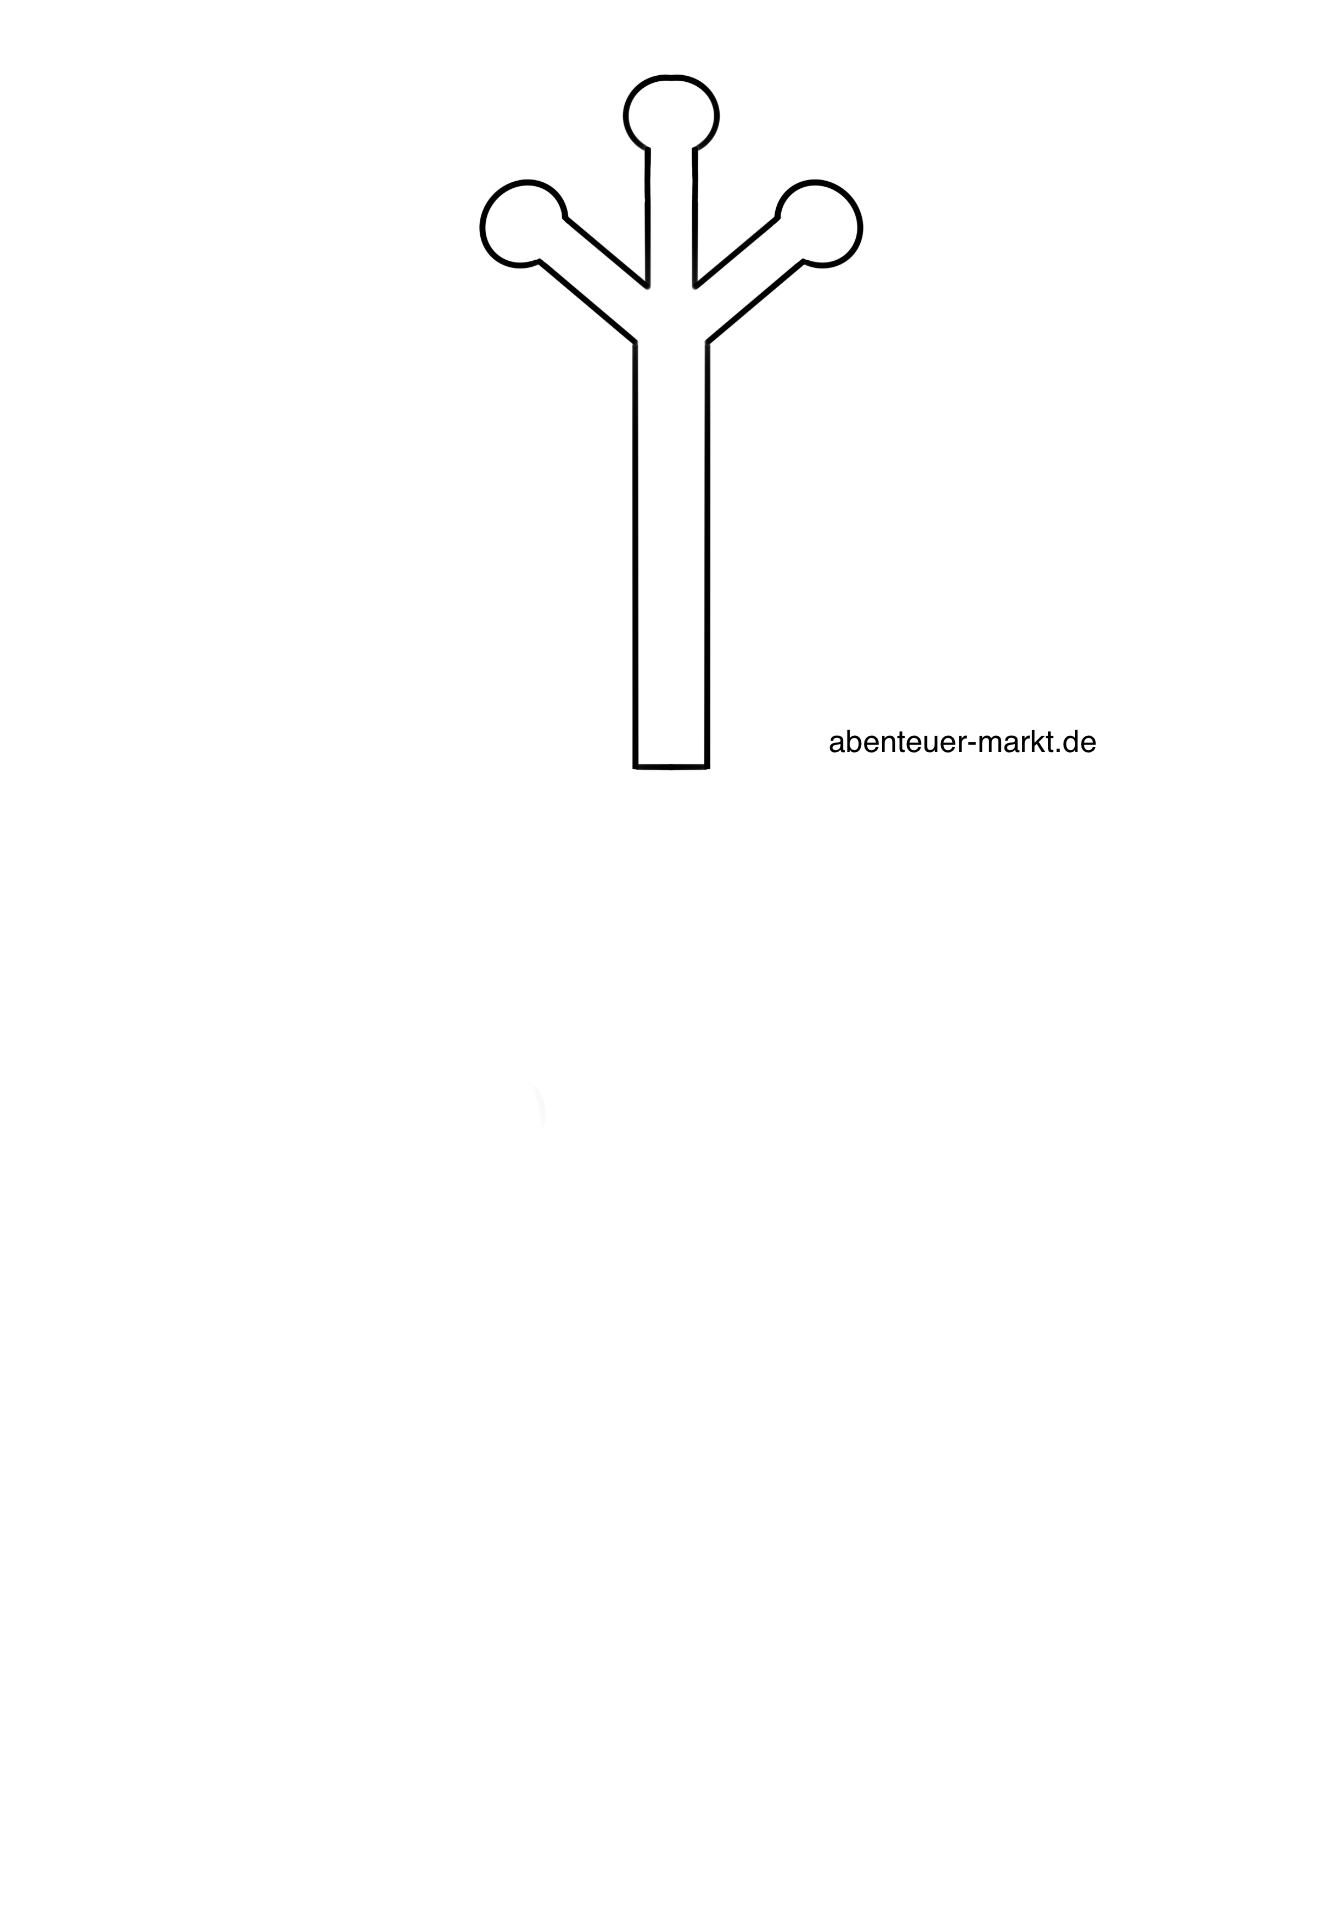
Bild zum Schritt 13 für das Bastel- und DIY-Abenteuer für Kinder: 'Verwendet die Vorlage als Schablone oder malt die Froschbeine selbst...'

Frog King
13

In order to conjure up a frog king from the frog, you now make a small crown. For this you paint a crown on yellow paper. Leave the lower part of the crown a little longer and then cut it out. Now fold the lower part a half centimetre. Place the half centimetre of the crown with glue and place the crown behind the eyes of the frog.
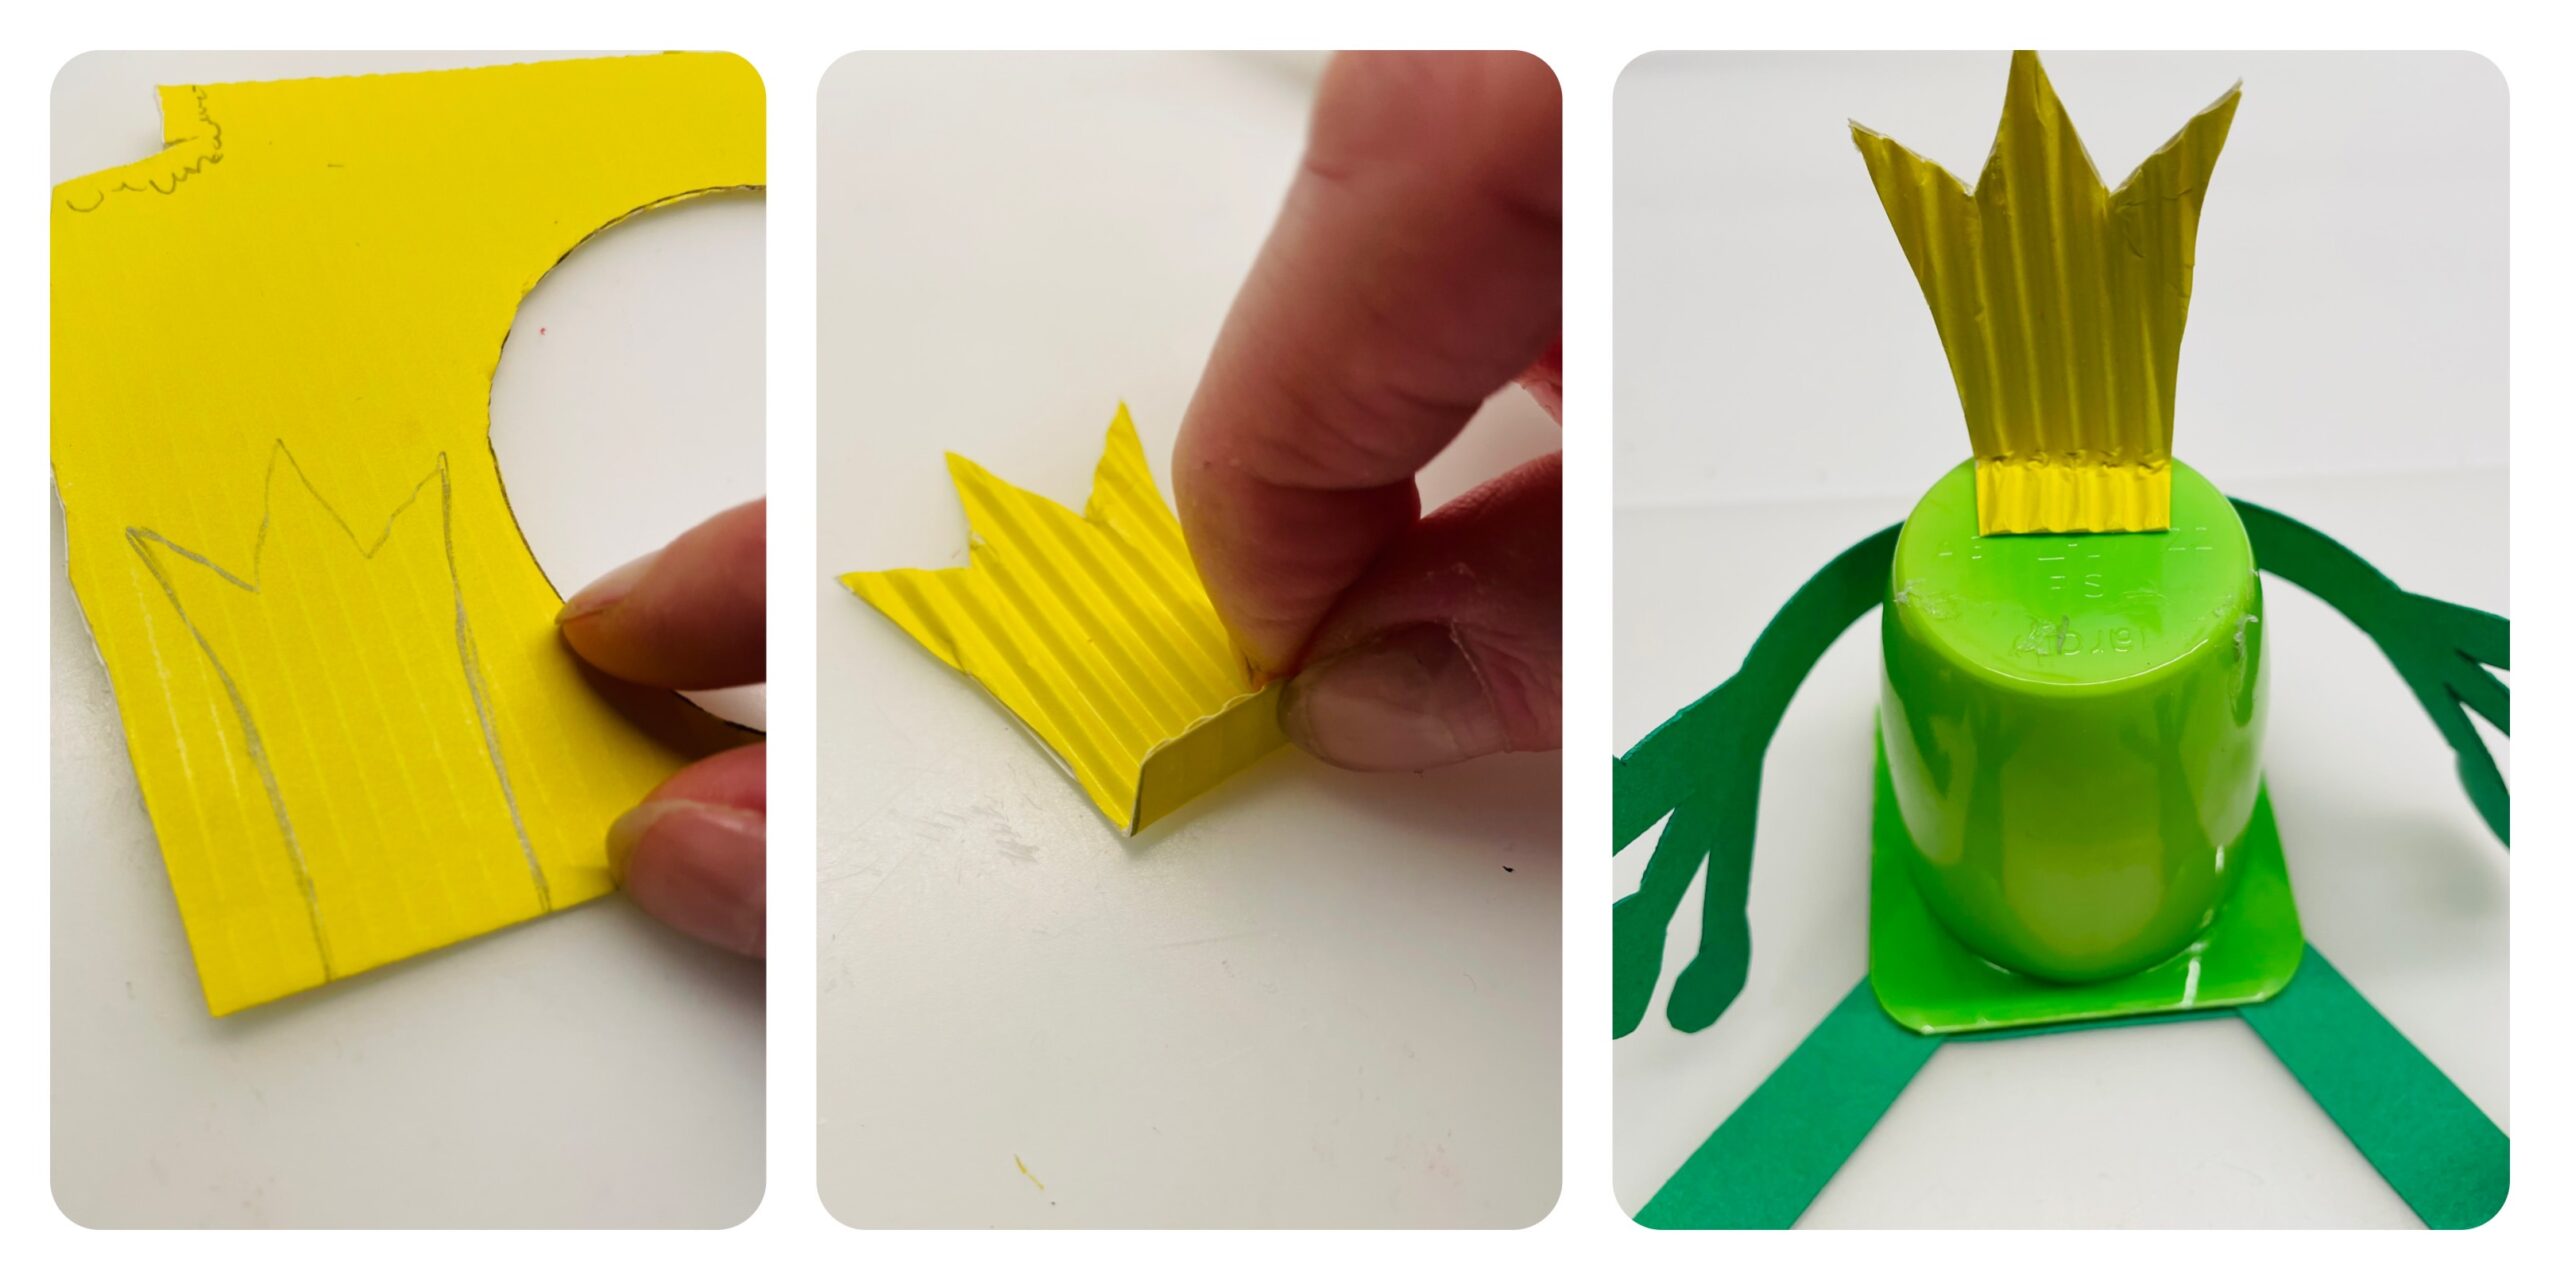
Bild zum Schritt 15 für das Bastel- und DIY-Abenteuer für Kinder: 'Um aus dem Frosch einen Froschkönig zu zaubern, bastelt ihr...'

14

Your frog king is ready.

Bild zum Schritt 16 für das Bastel- und DIY-Abenteuer für Kinder: 'Fertig ist euer Froschkönig.'

15

Have fun doing crafts and giving gifts!

Frog or Frog King

Follow us on Facebook , Instagram and Pinterest
Don't miss any more adventures: Our bottle mail

Leave a Reply

Your email address will not be published.

The maximum upload file size: 5 MB. You can upload: image, document. Drop file here