Make a handkerchief box with a puffing instrument. This looks very simple, but you'd rather let an adult help you punch the holes. The punching, the pulling in of the rubber threads is described here, as well as every further step.
Have fun building your own instrument and playing music.
Media Education for Kindergarten and Hort

Relief in everyday life, targeted promotion of individual children, independent learning and - without any pre-knowledge already usable by the youngest!

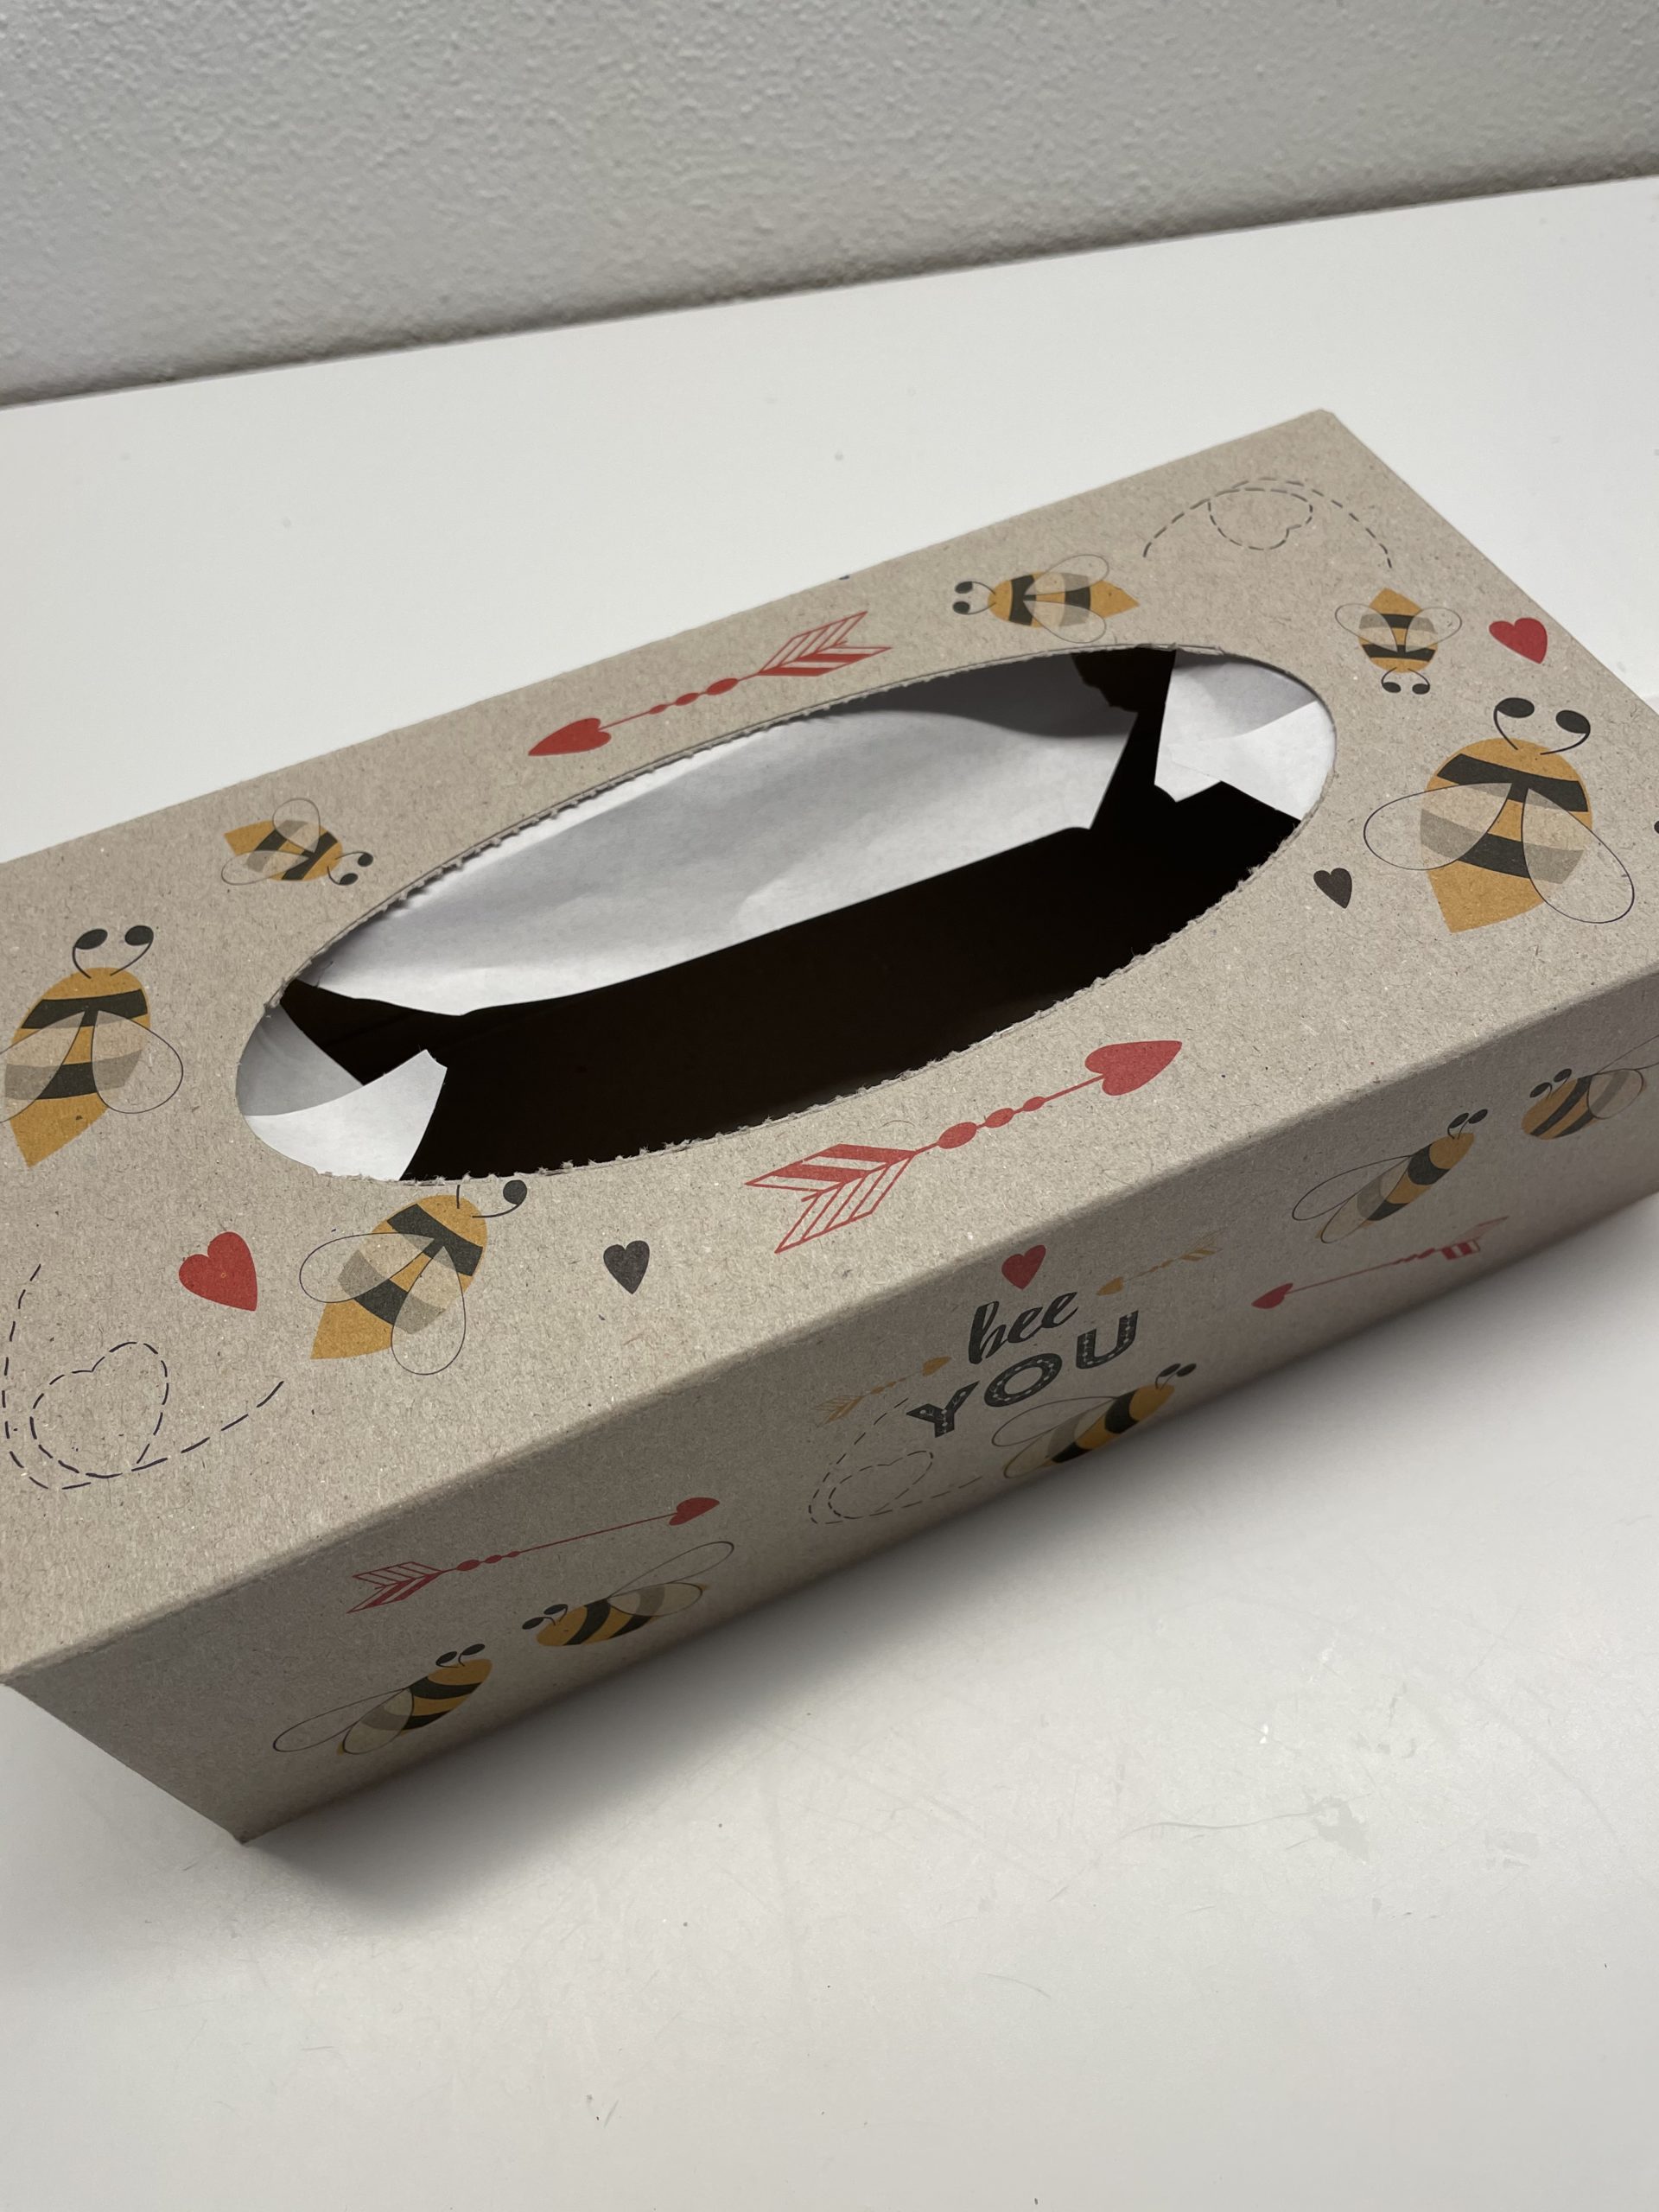
First, remove the paper or foil from the opening of the empty handkerchief box.
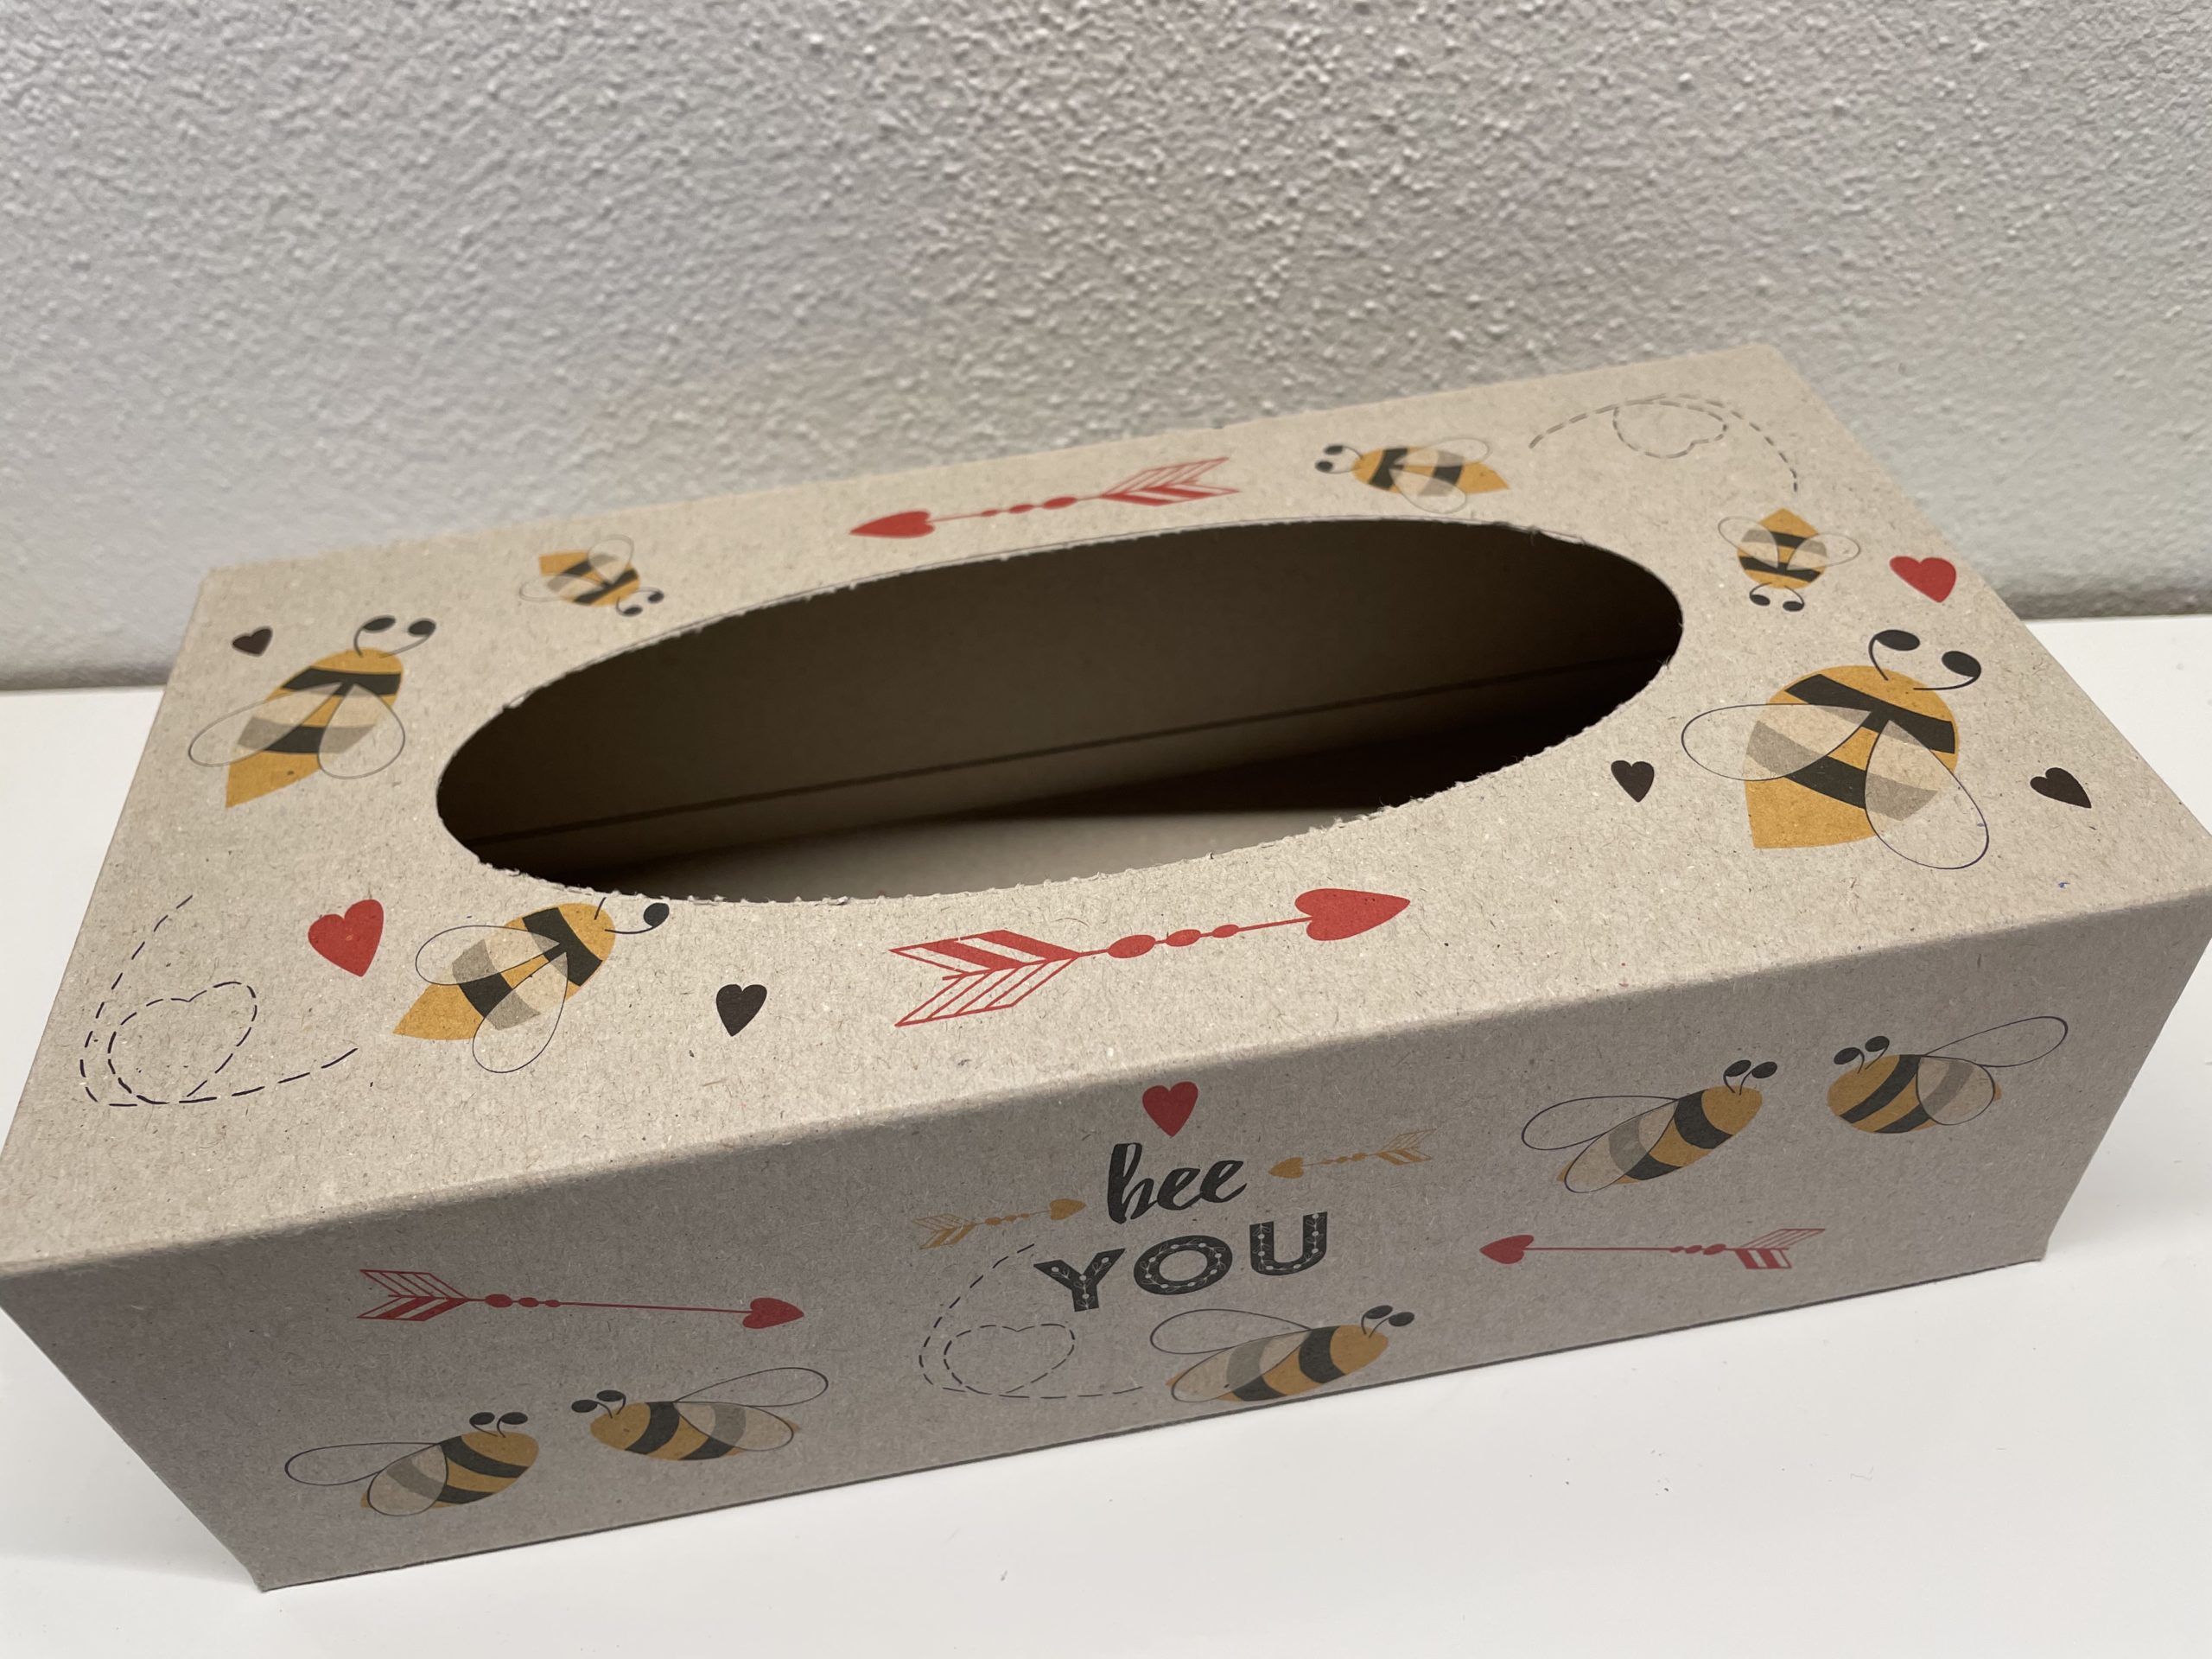
Then you embellish and design the box as you like it. You can paint or glue the box. I used the box as it was because I like it so much.
The box must be dry and clean for further processing.
Now you only punch the two long sides of the hole with about 9 holes per side. First mark the position of the holes with pencil. Then you punch with the punch plier and with the help of an adult, because the cardboard box is very tight.
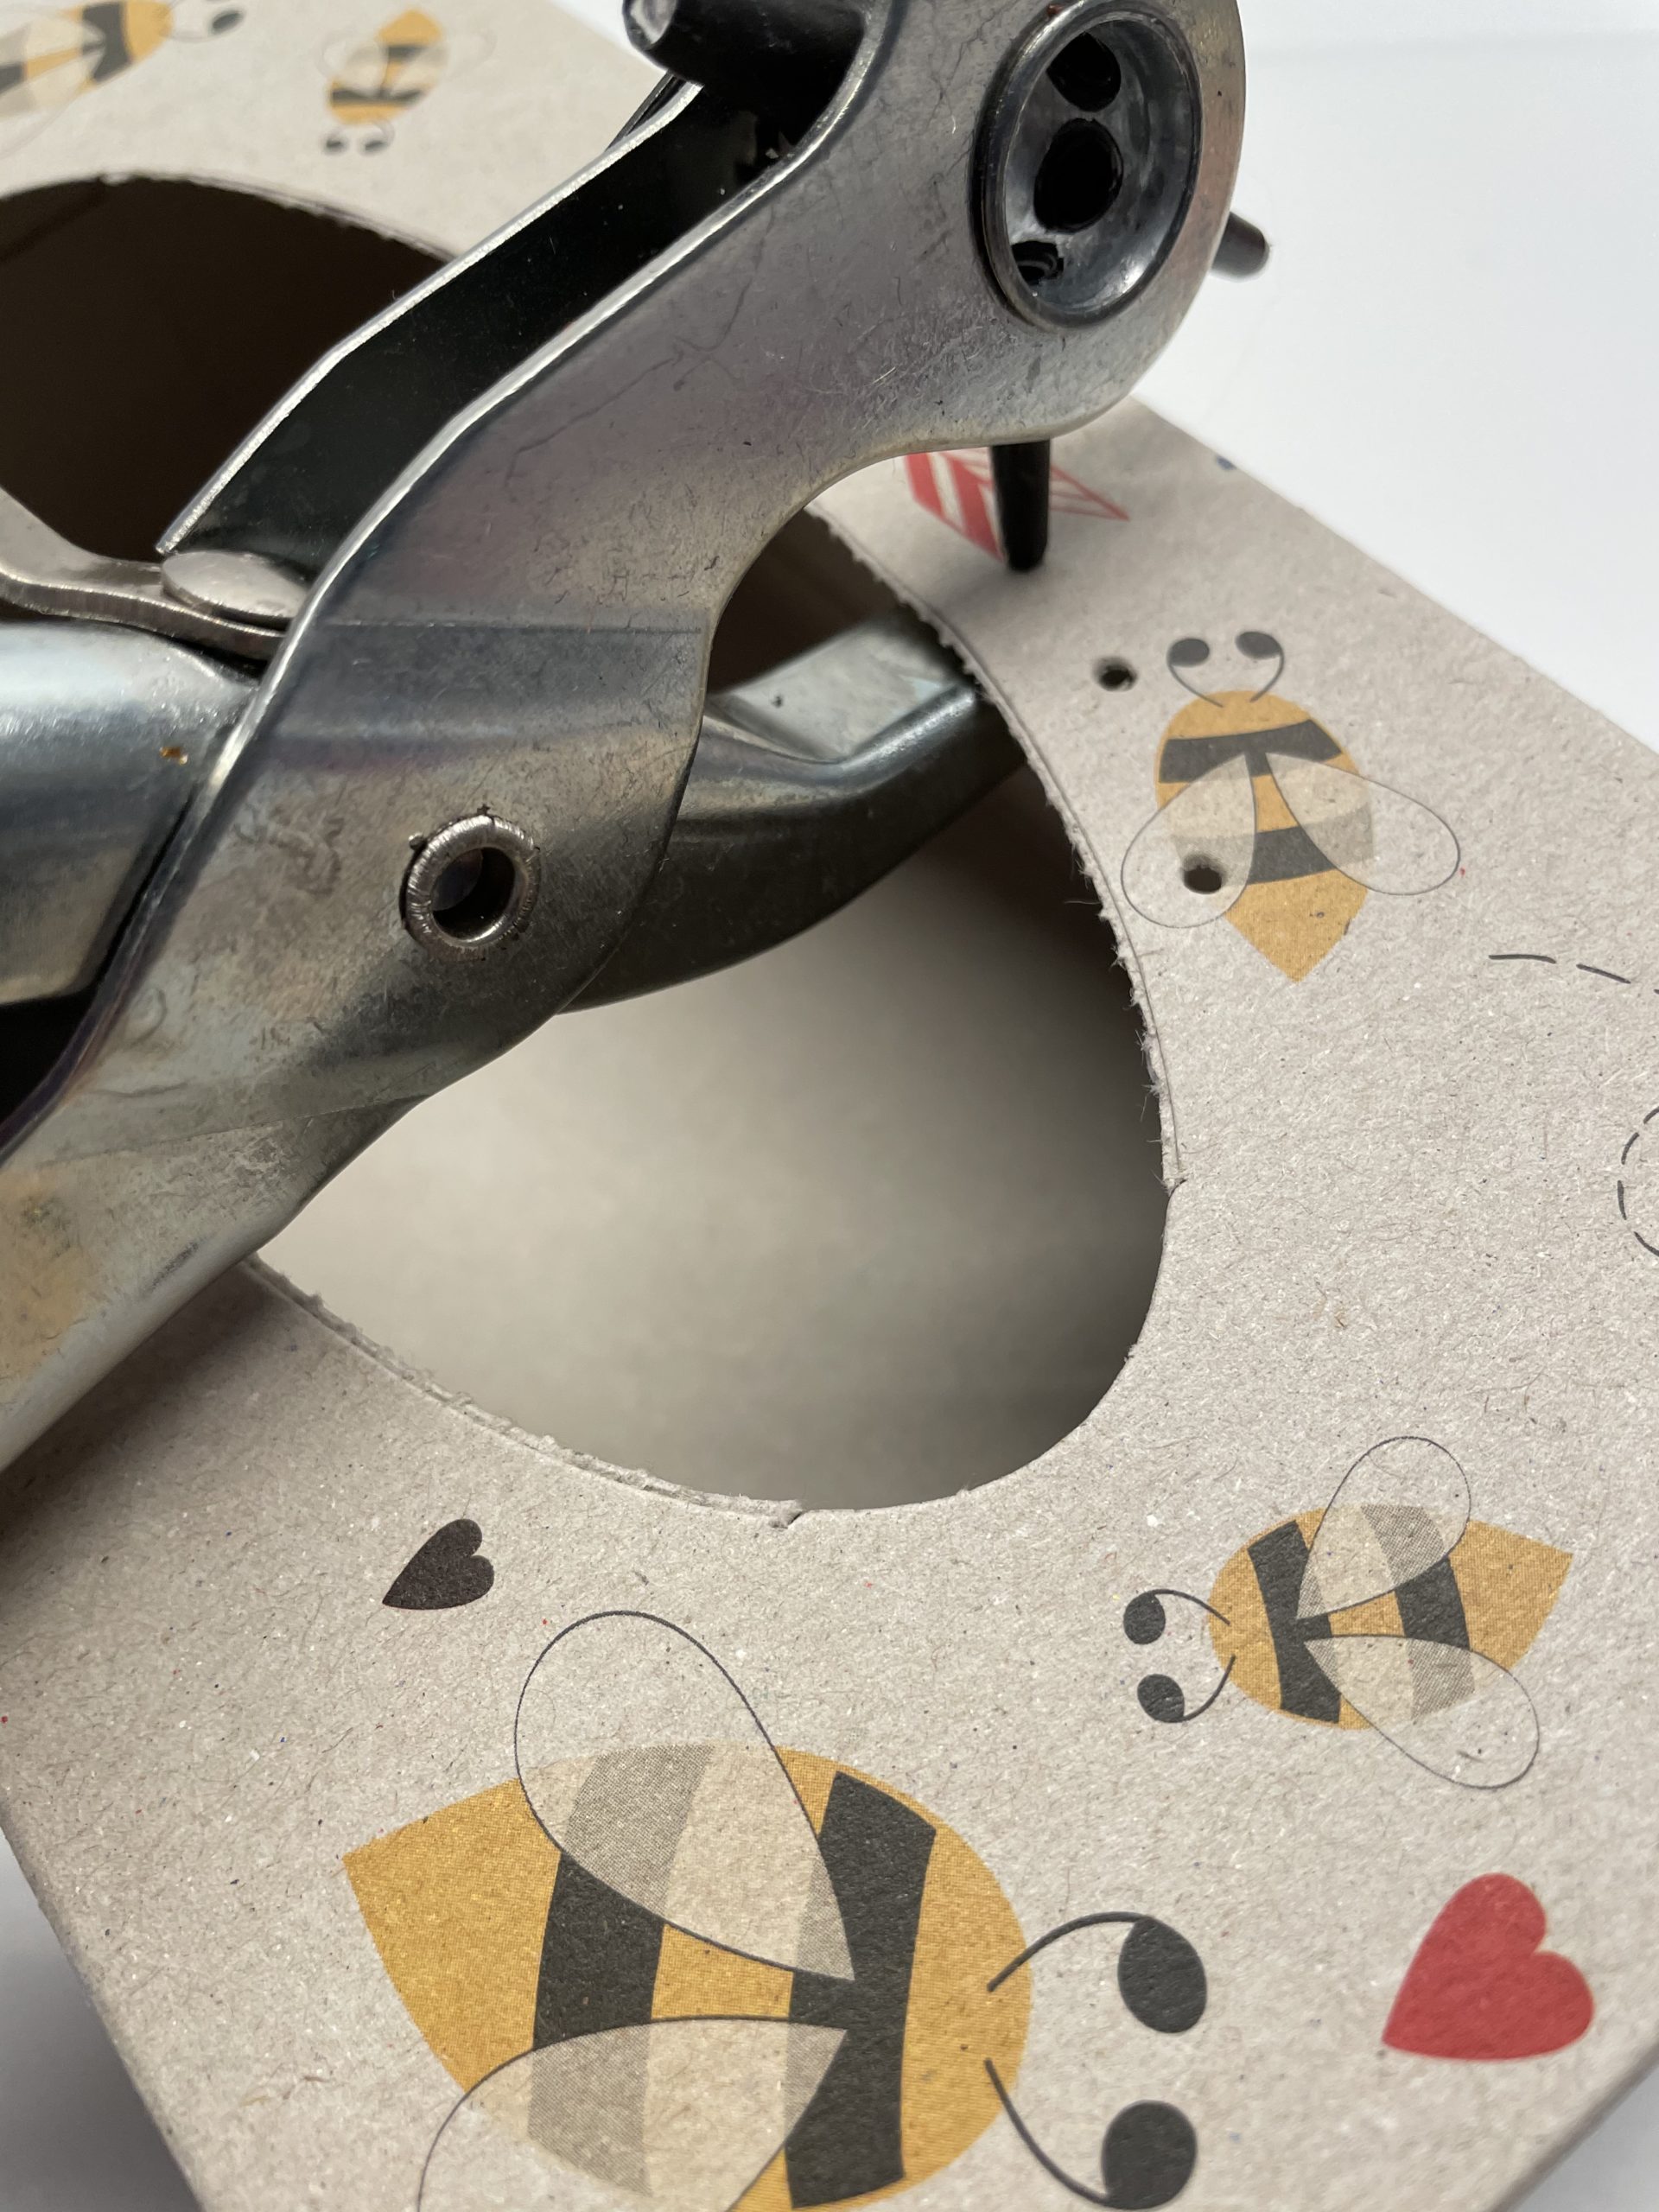
Here you can see the holes on one side. The short rounding is not perforated (see picture)!
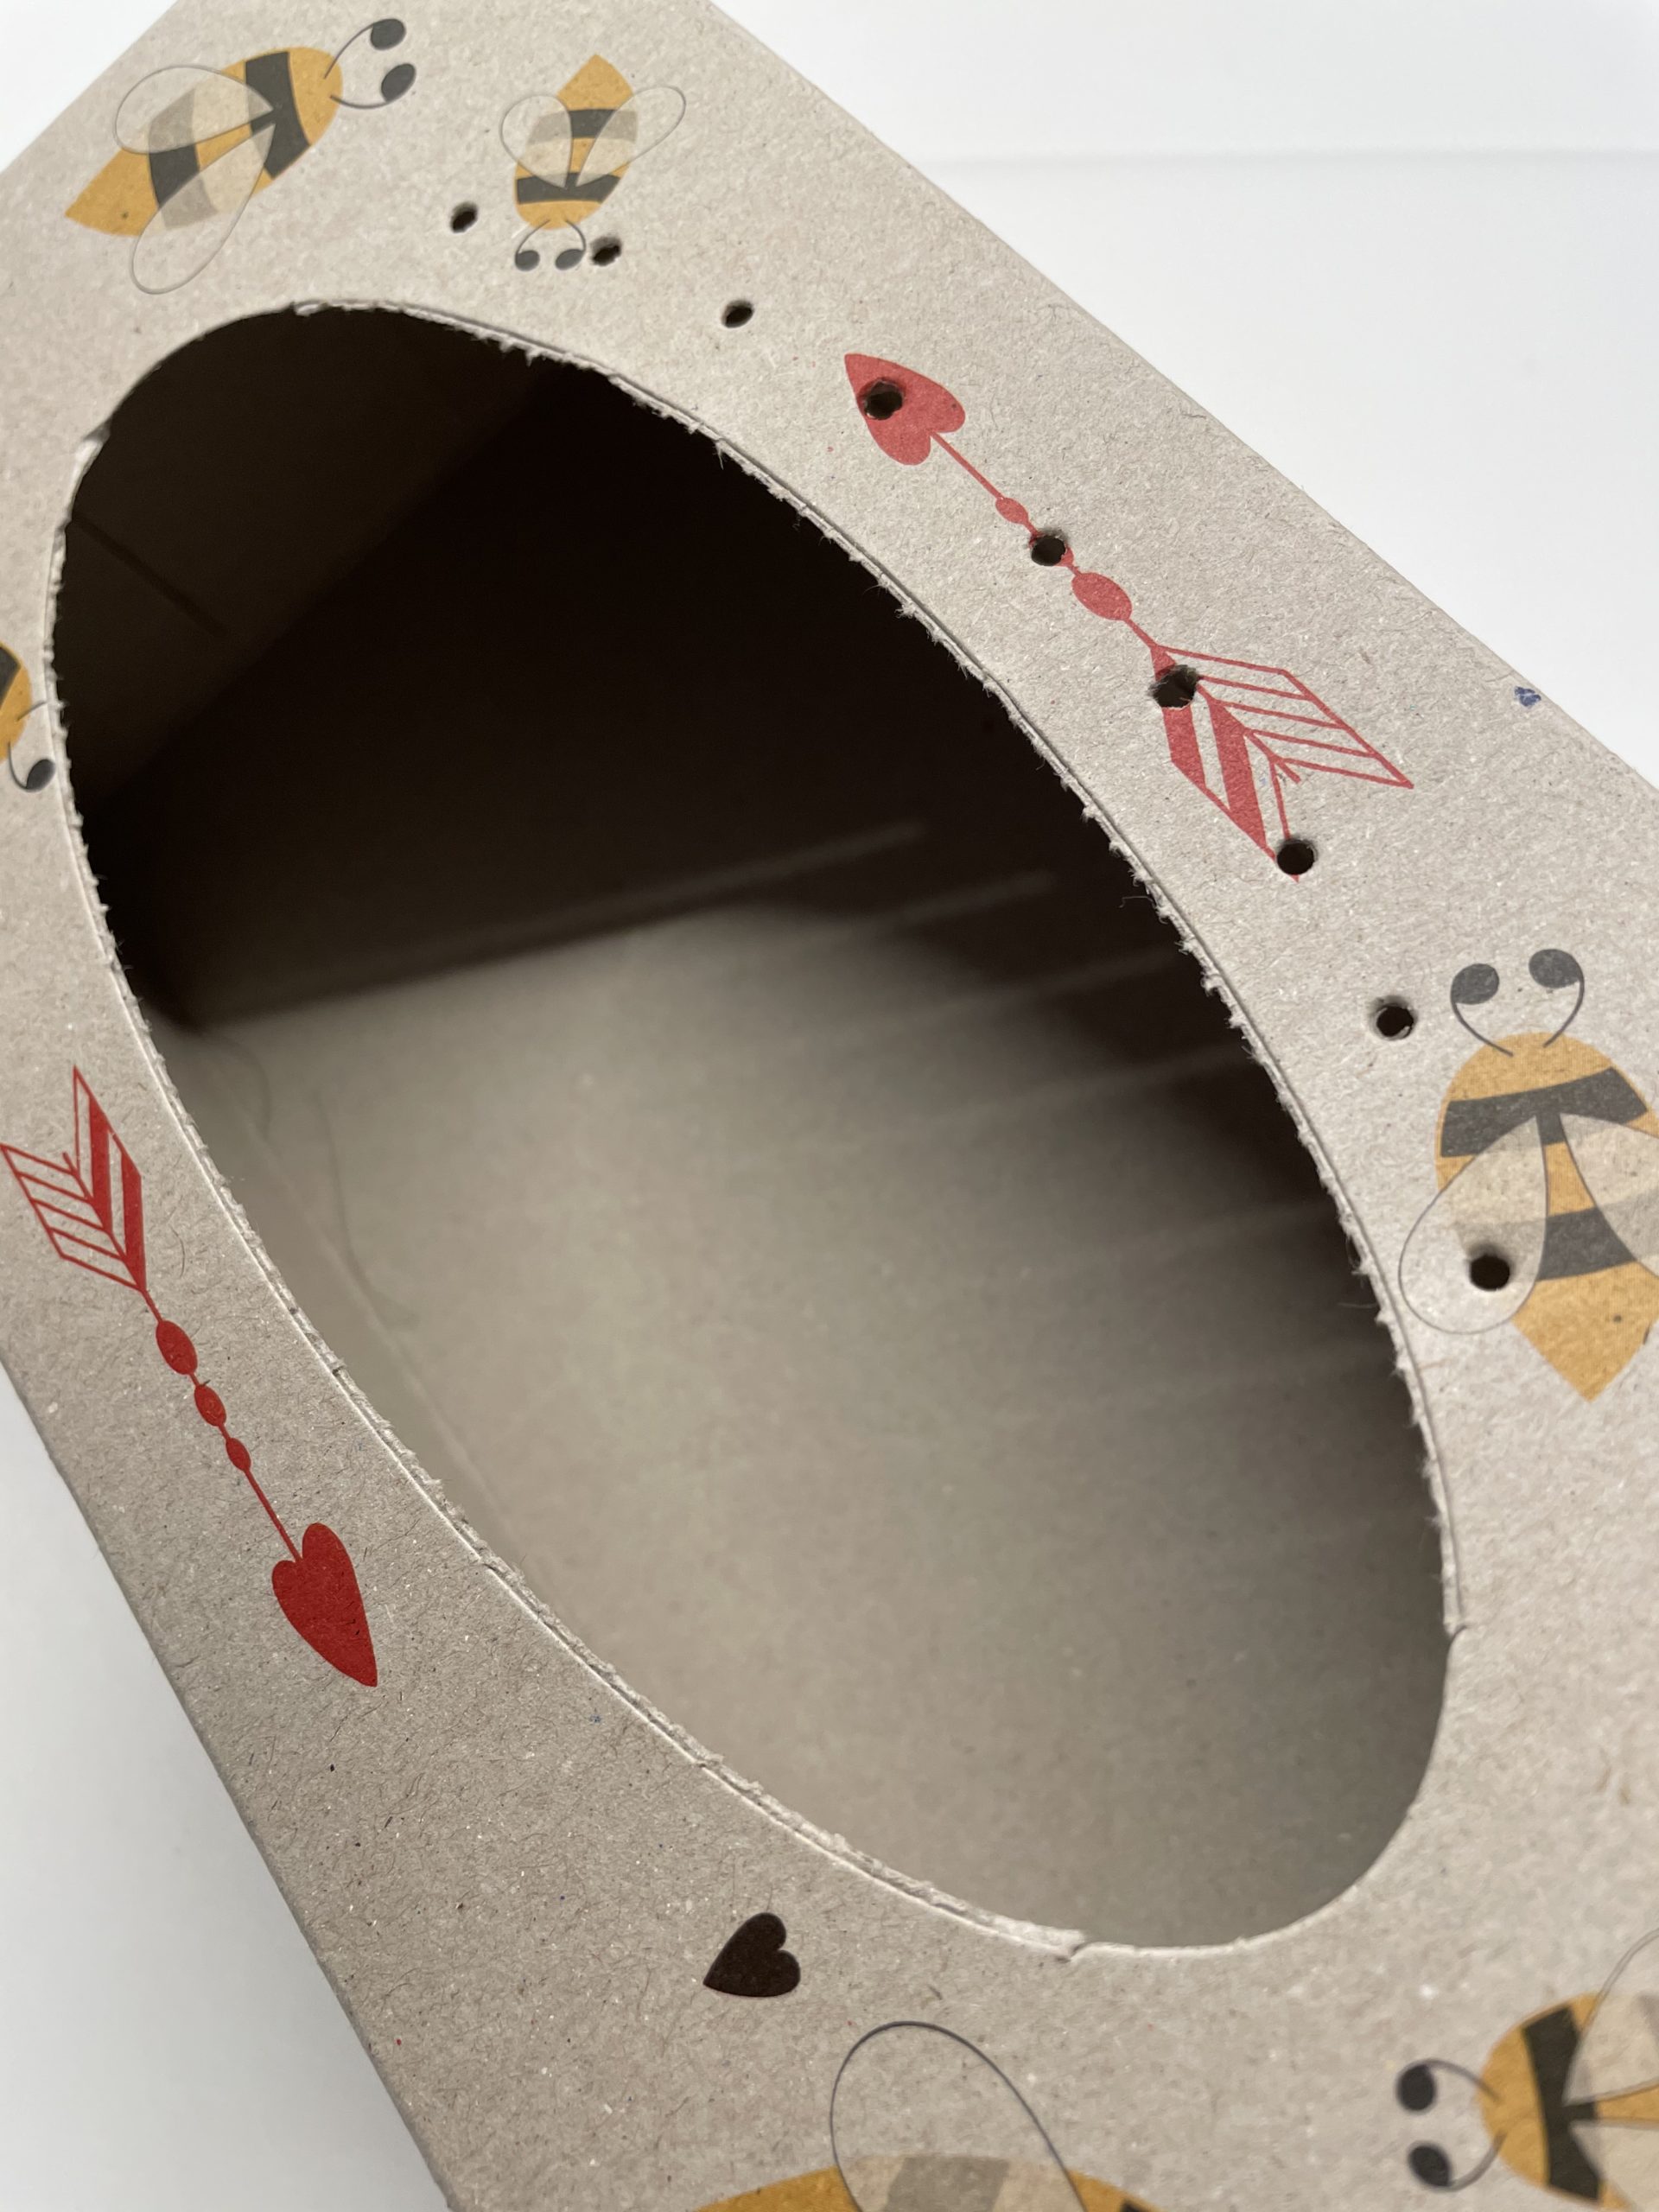
Now you're punching the other long side.

Then pull the hat rubber through the first hole on any side. Do not cut the rubber off, but leave it on the coil. Then thread it from top to bottom through the first hole.
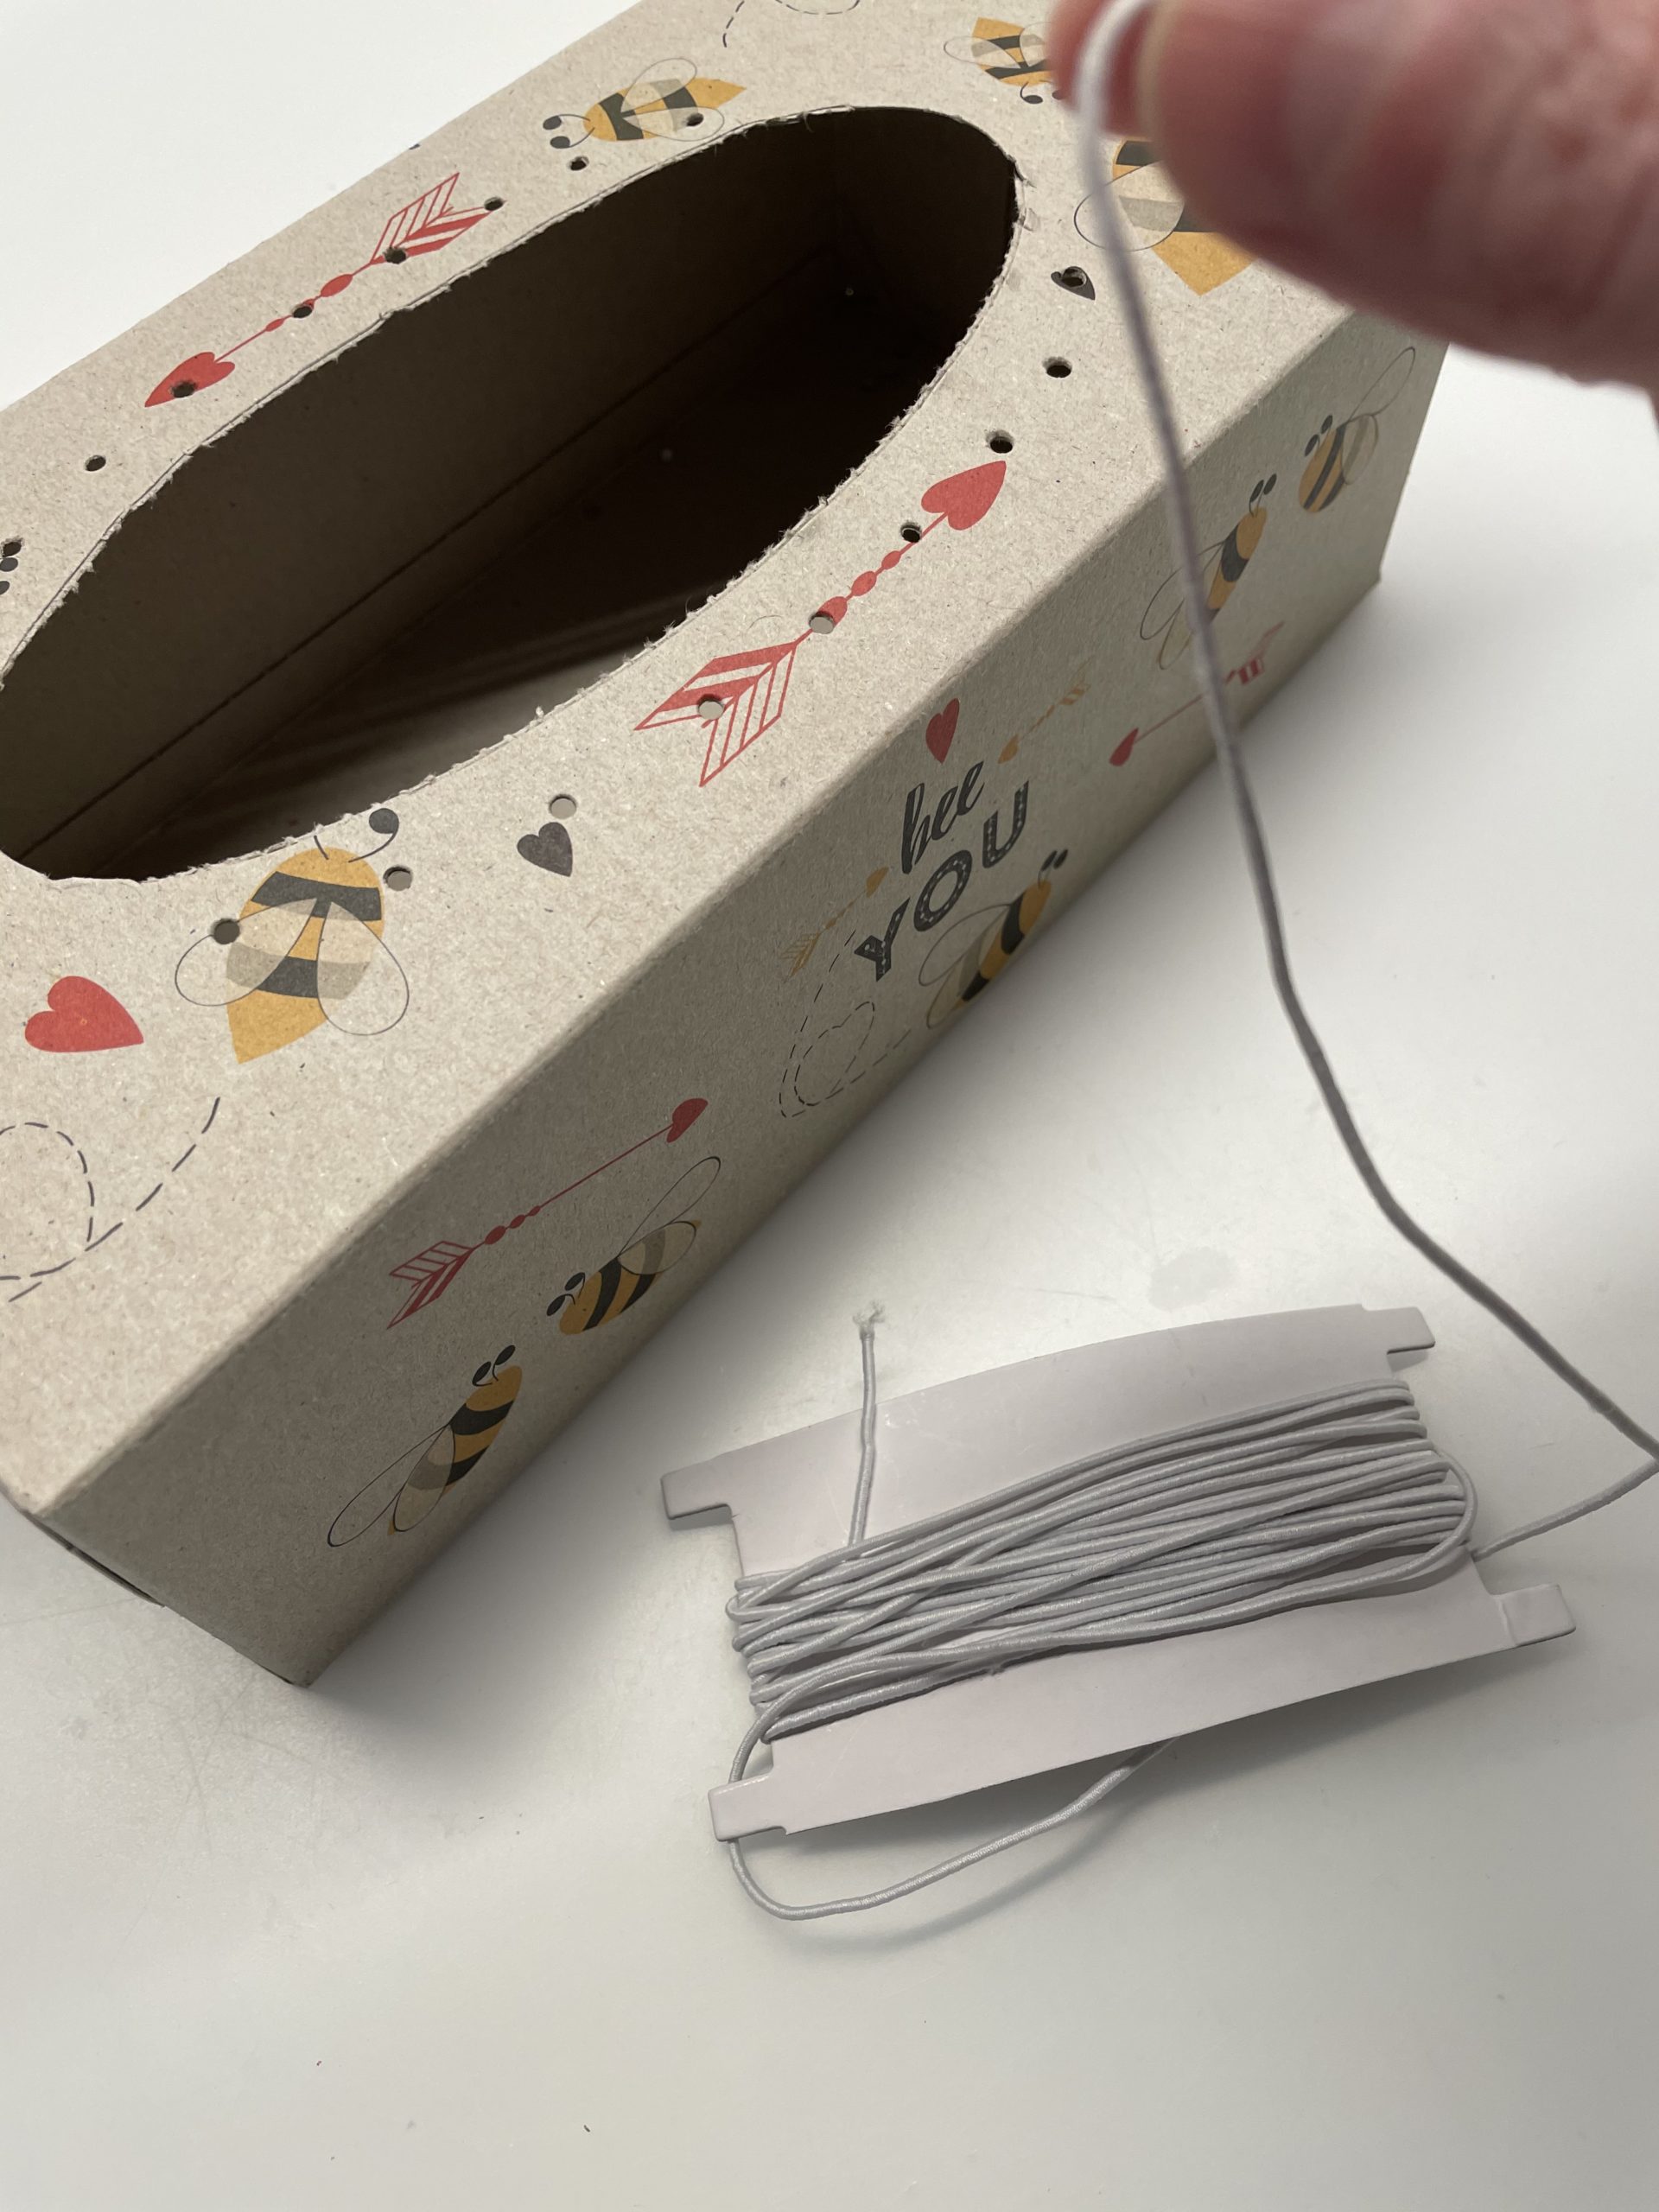
Pull the beginning of the thread about 10cm through the opening.
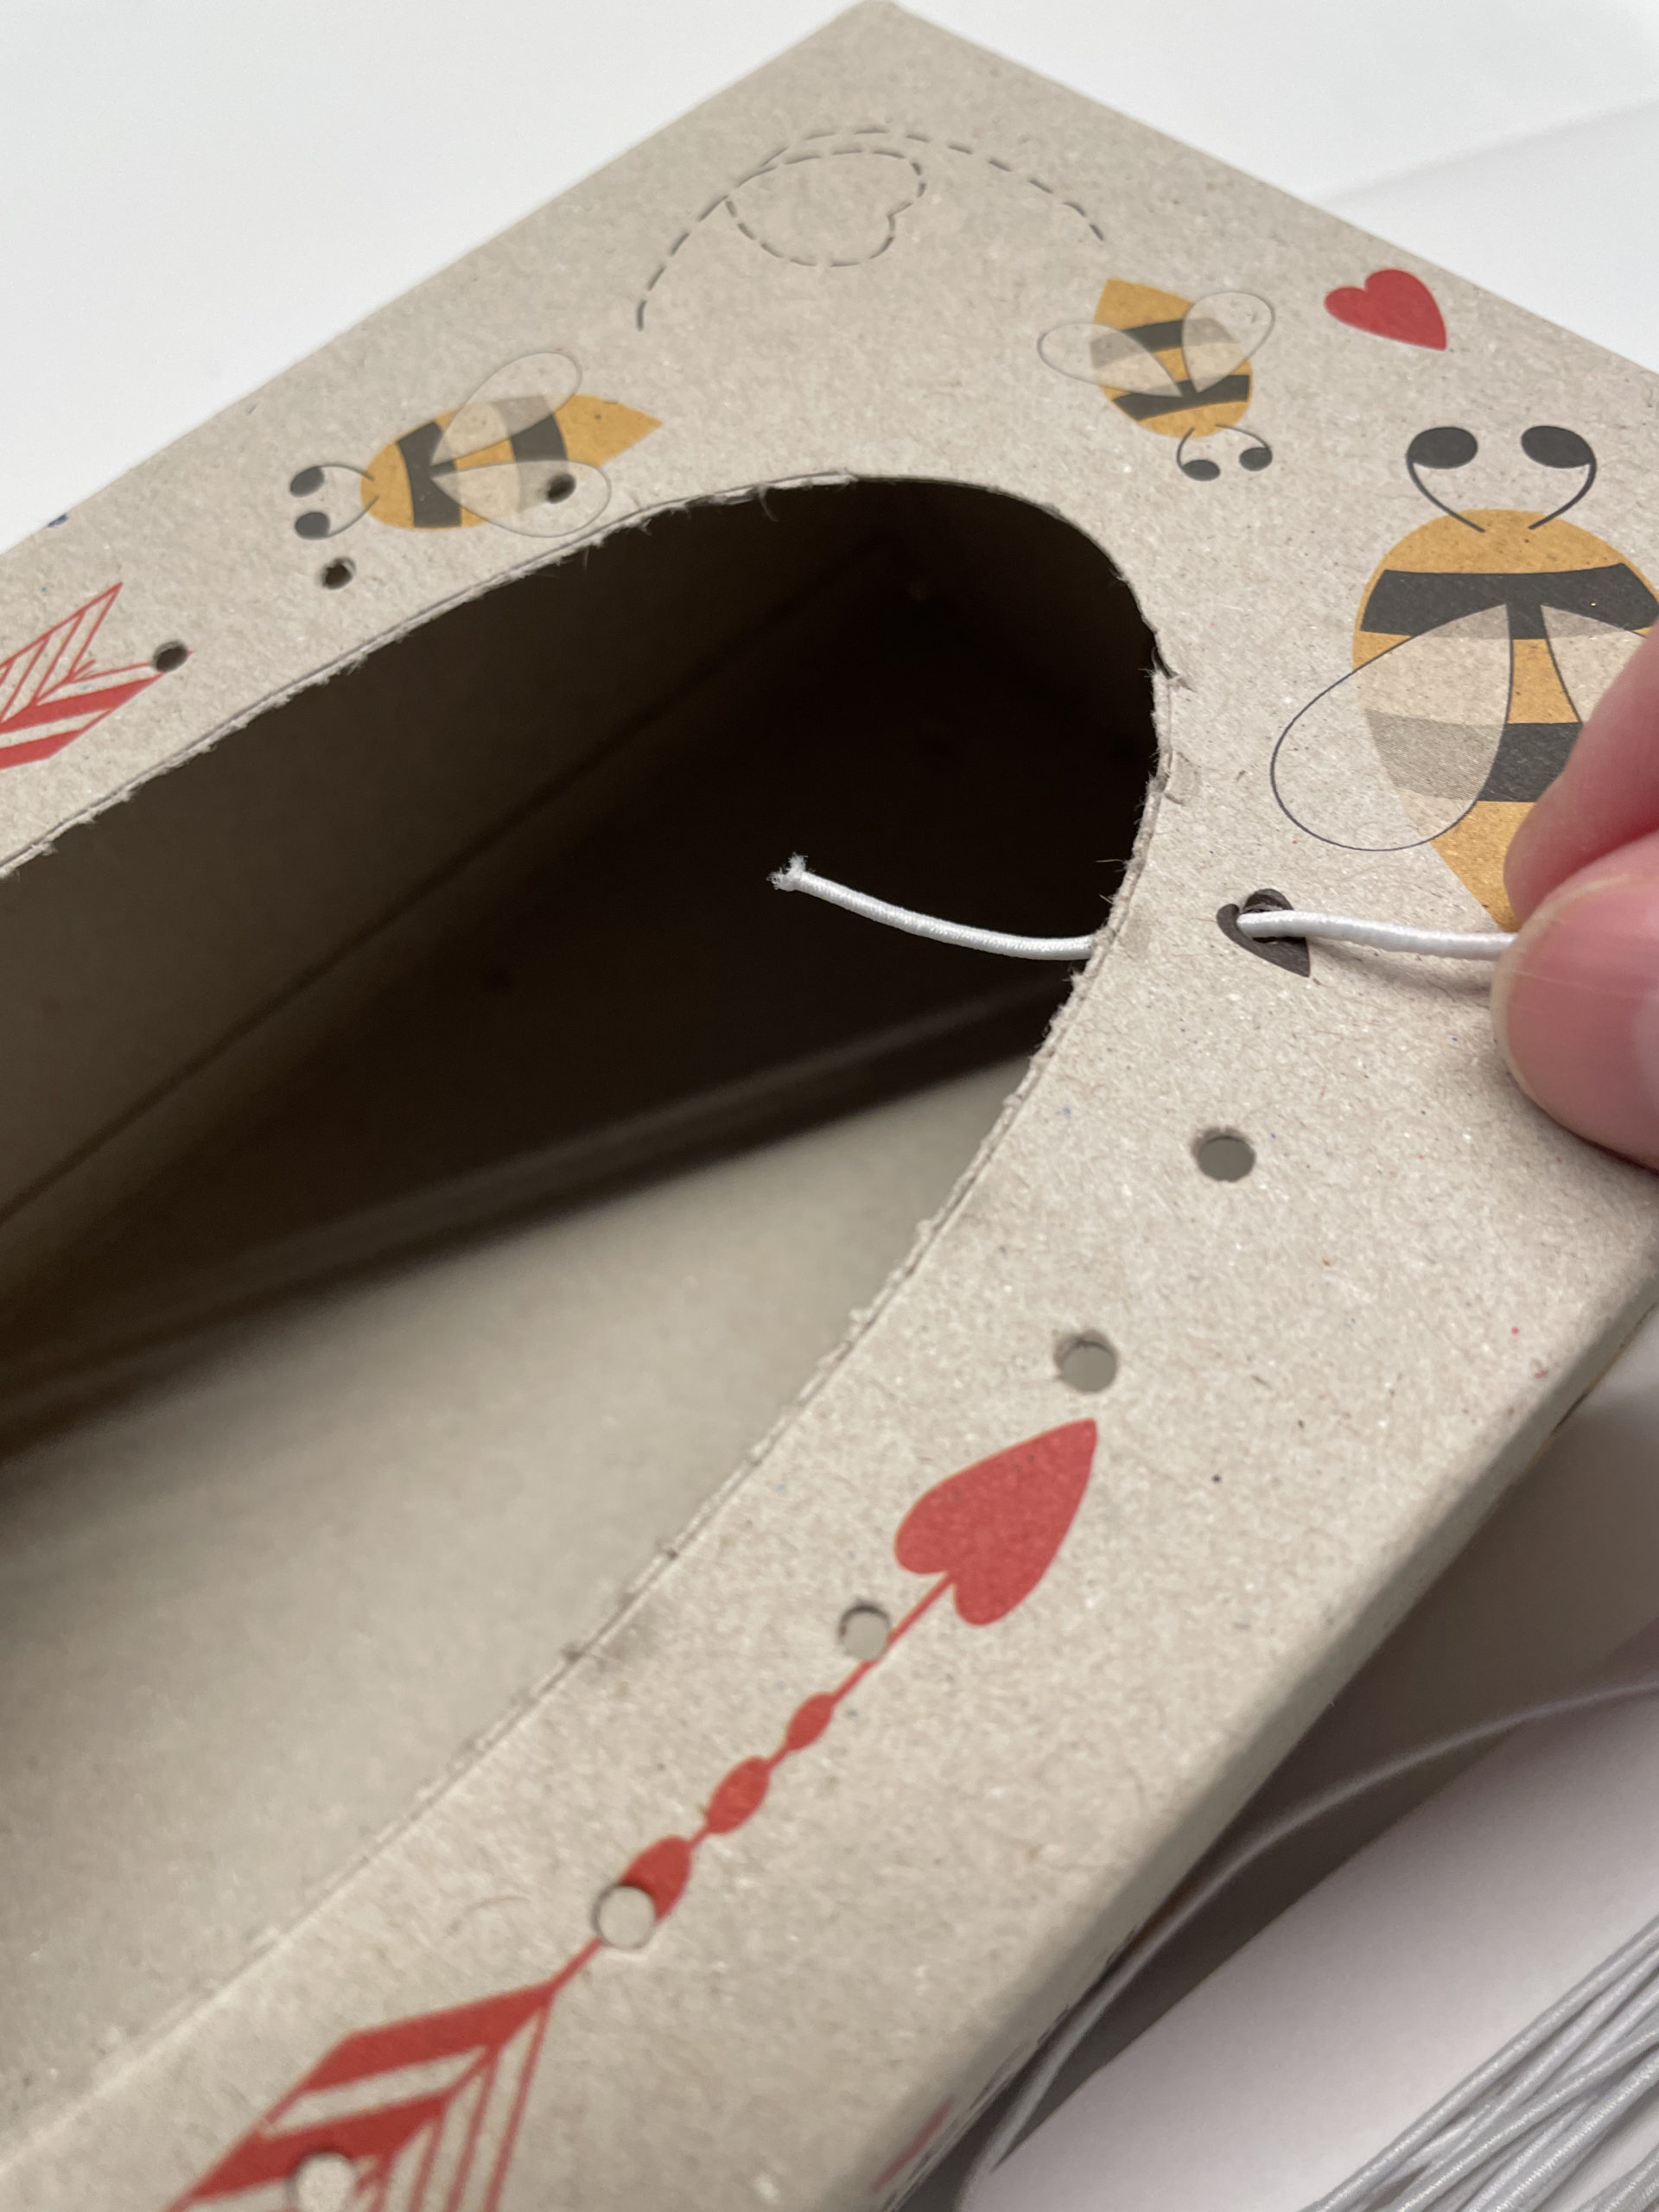
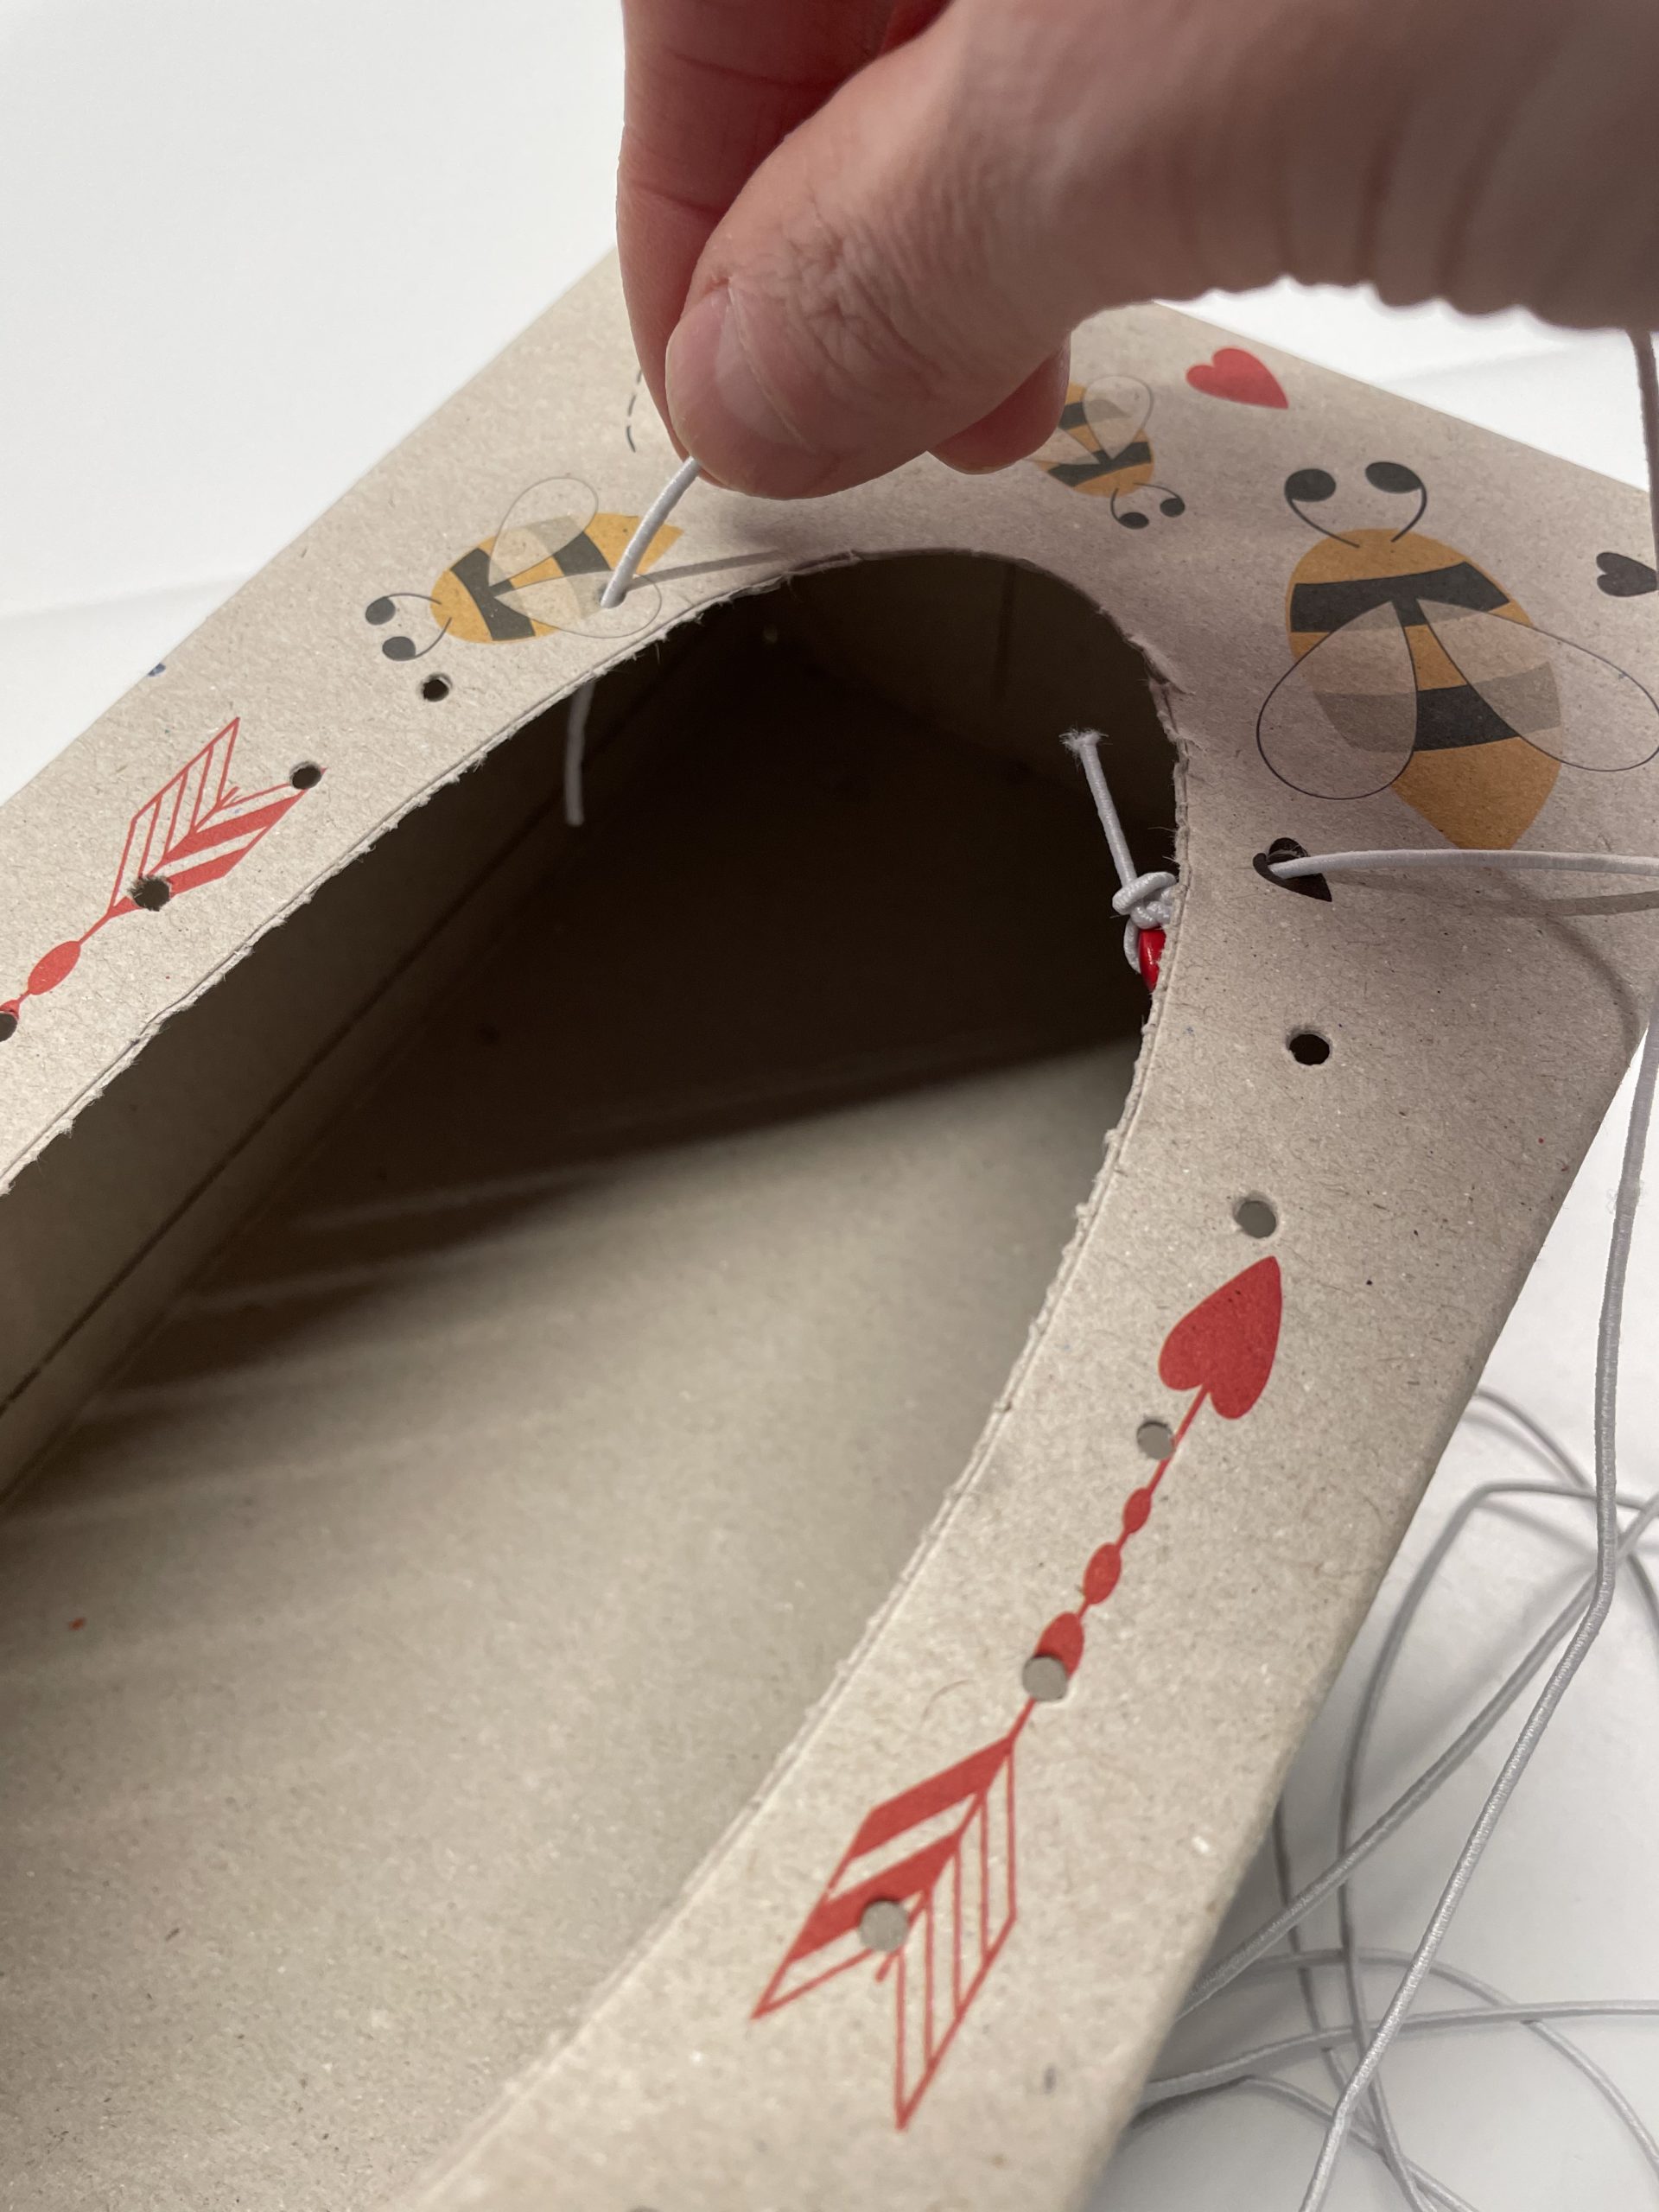
Then you thread a pearl on the beginning of the thread.

Then knot the pearl several times with the hat rubber.
Now pull the beginning of the thread back through the hole until the pearl lies on the inside of the box.

Unwrap the rubber from the coil and thread with the other end of the rubber.
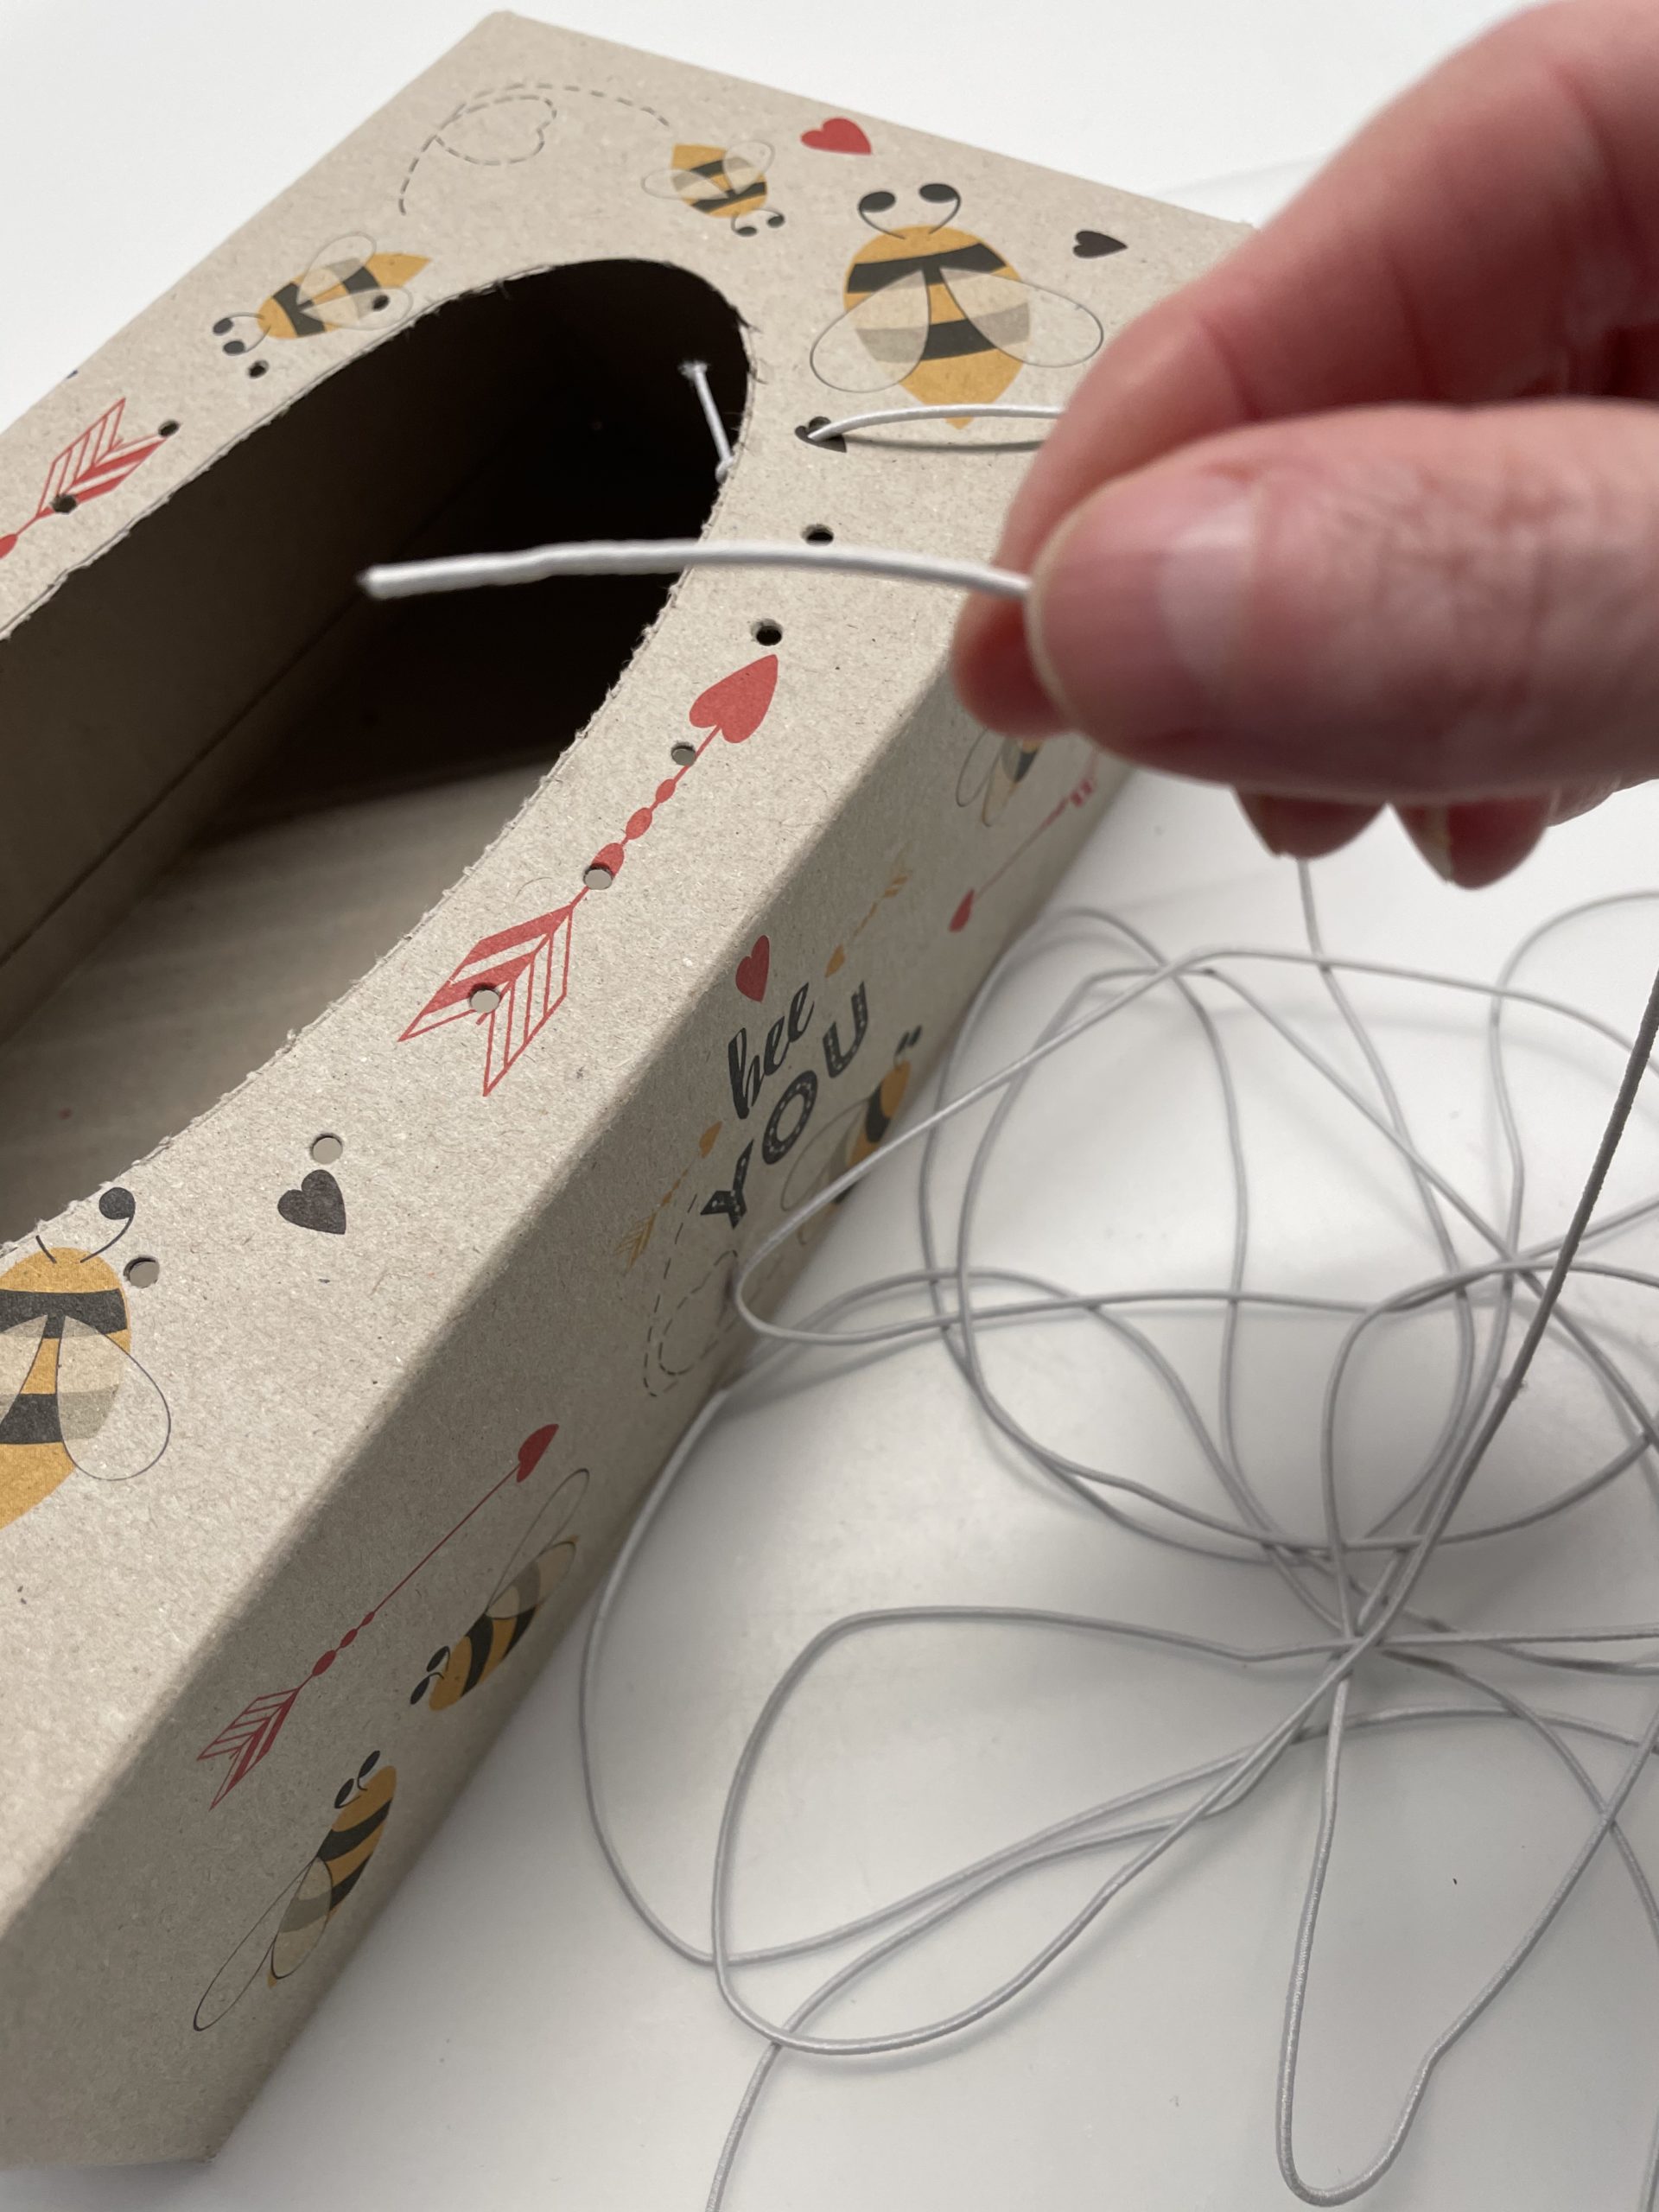
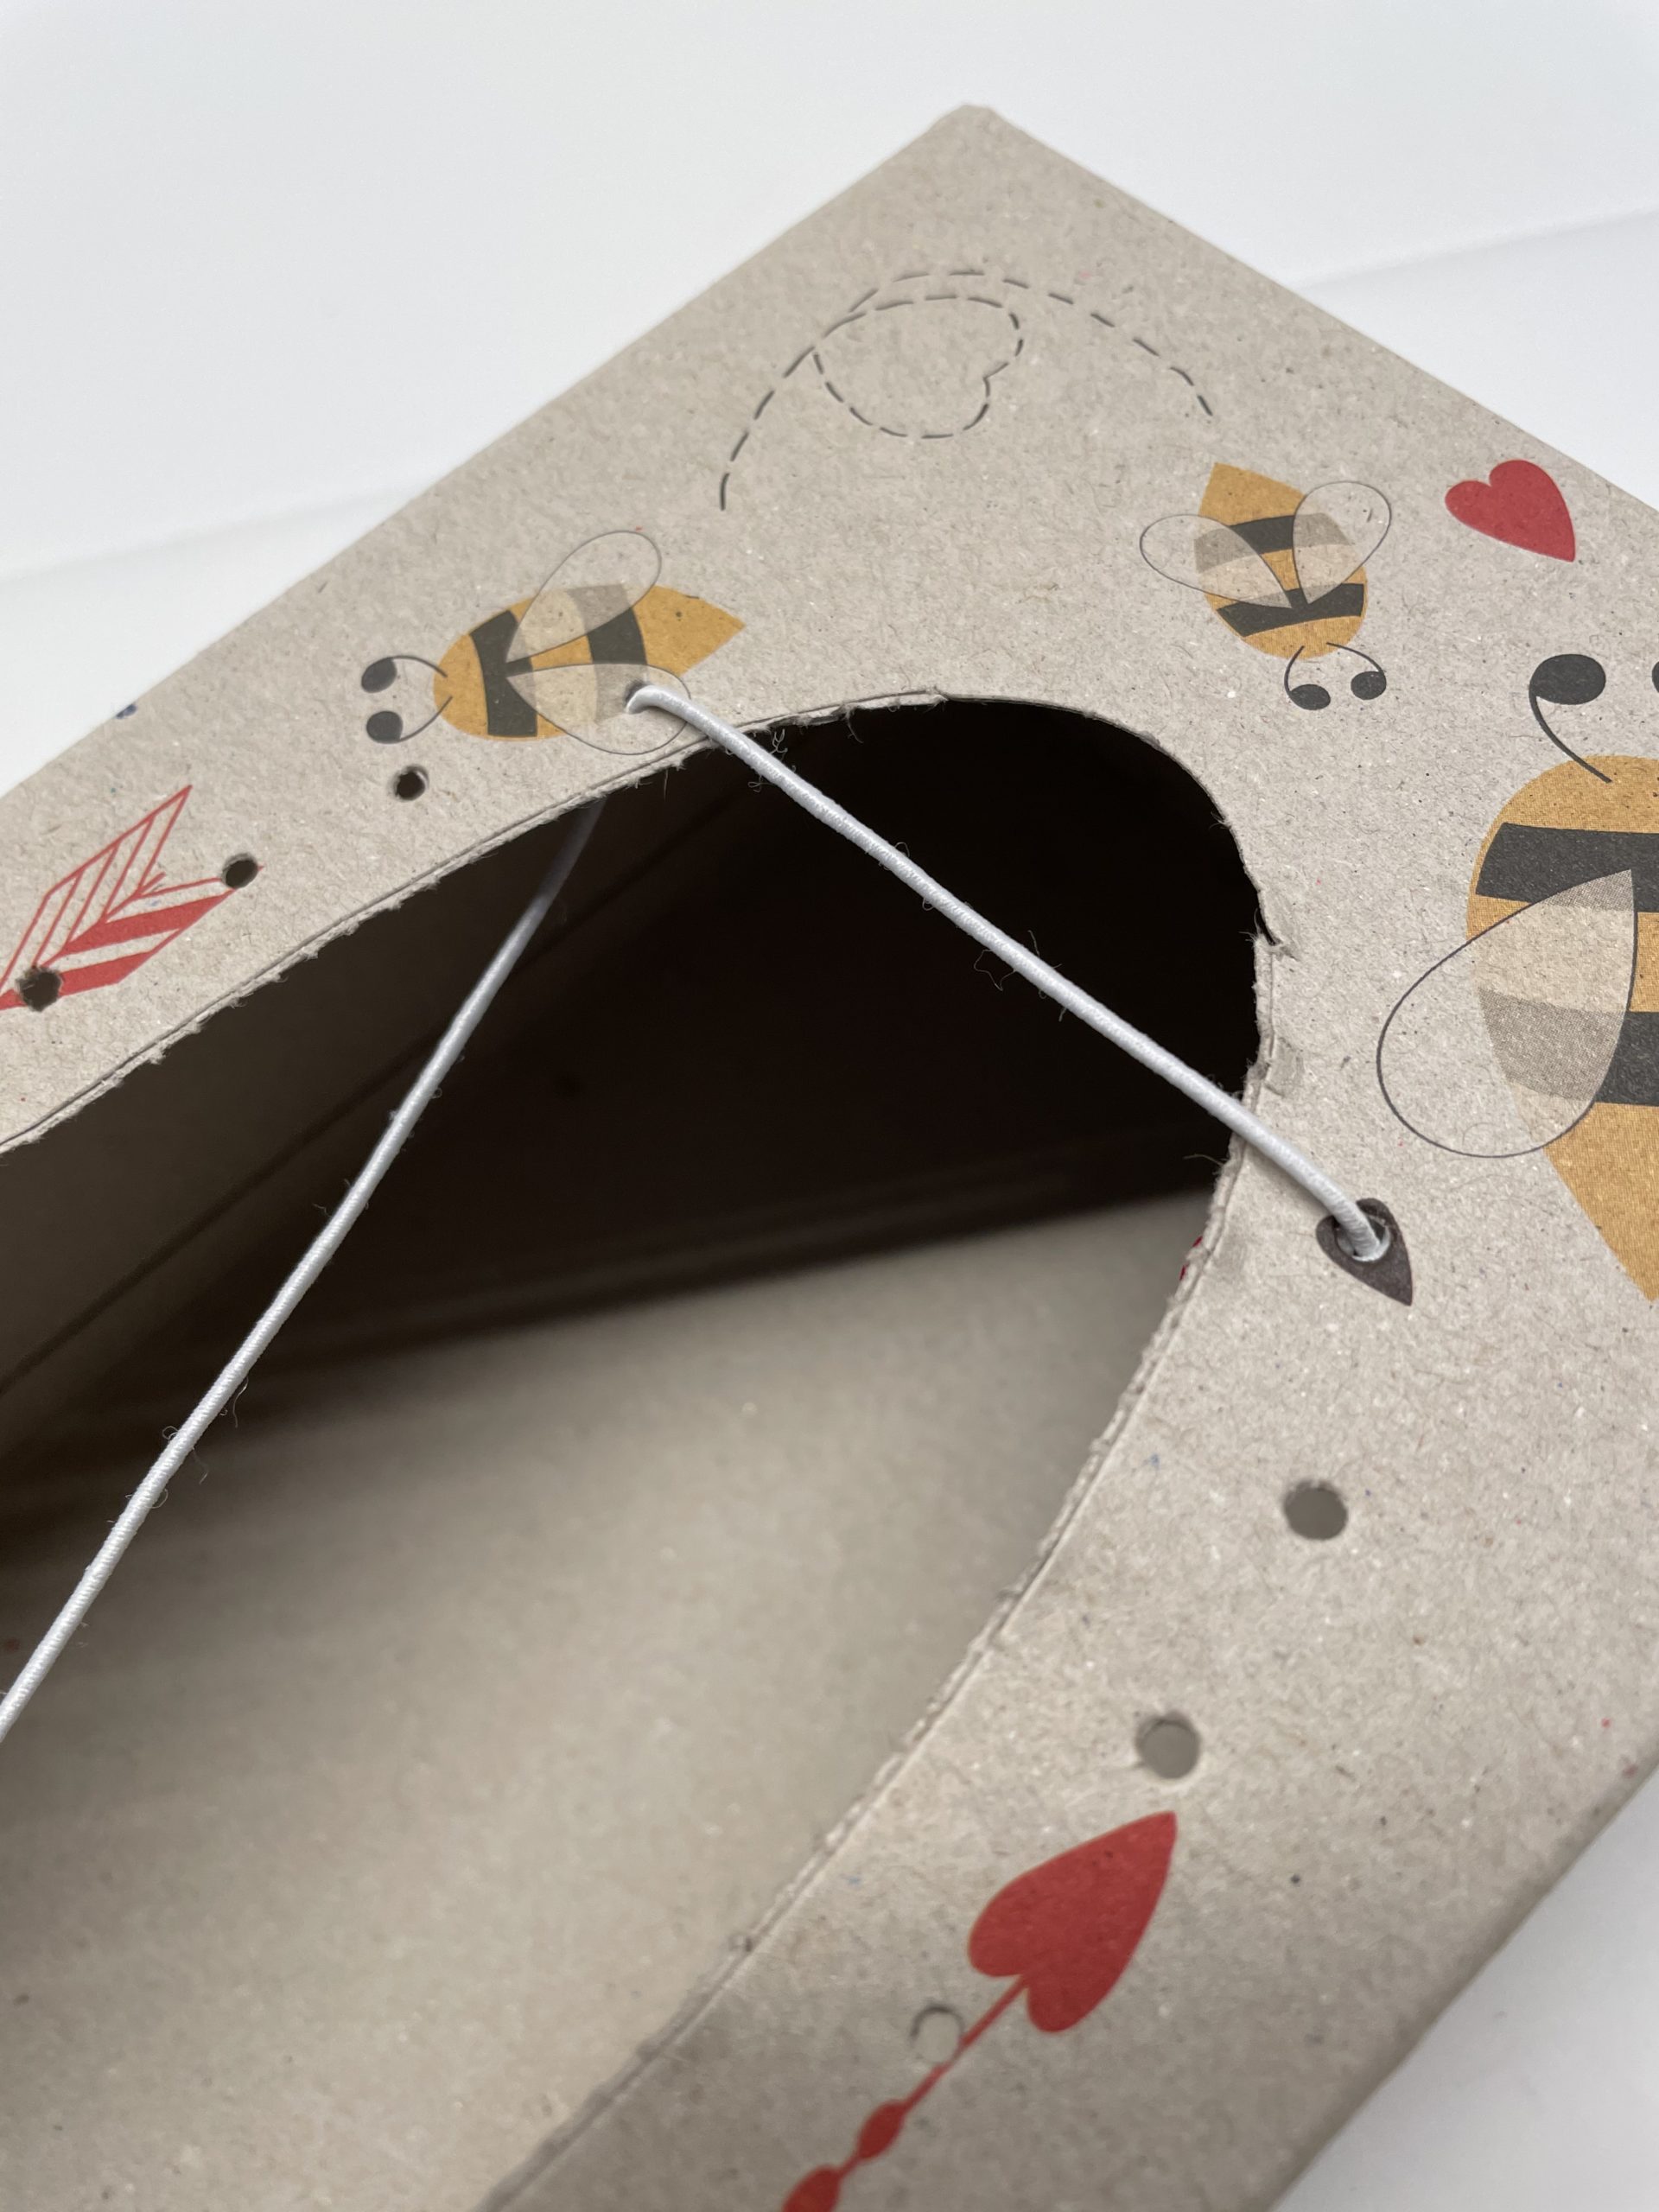
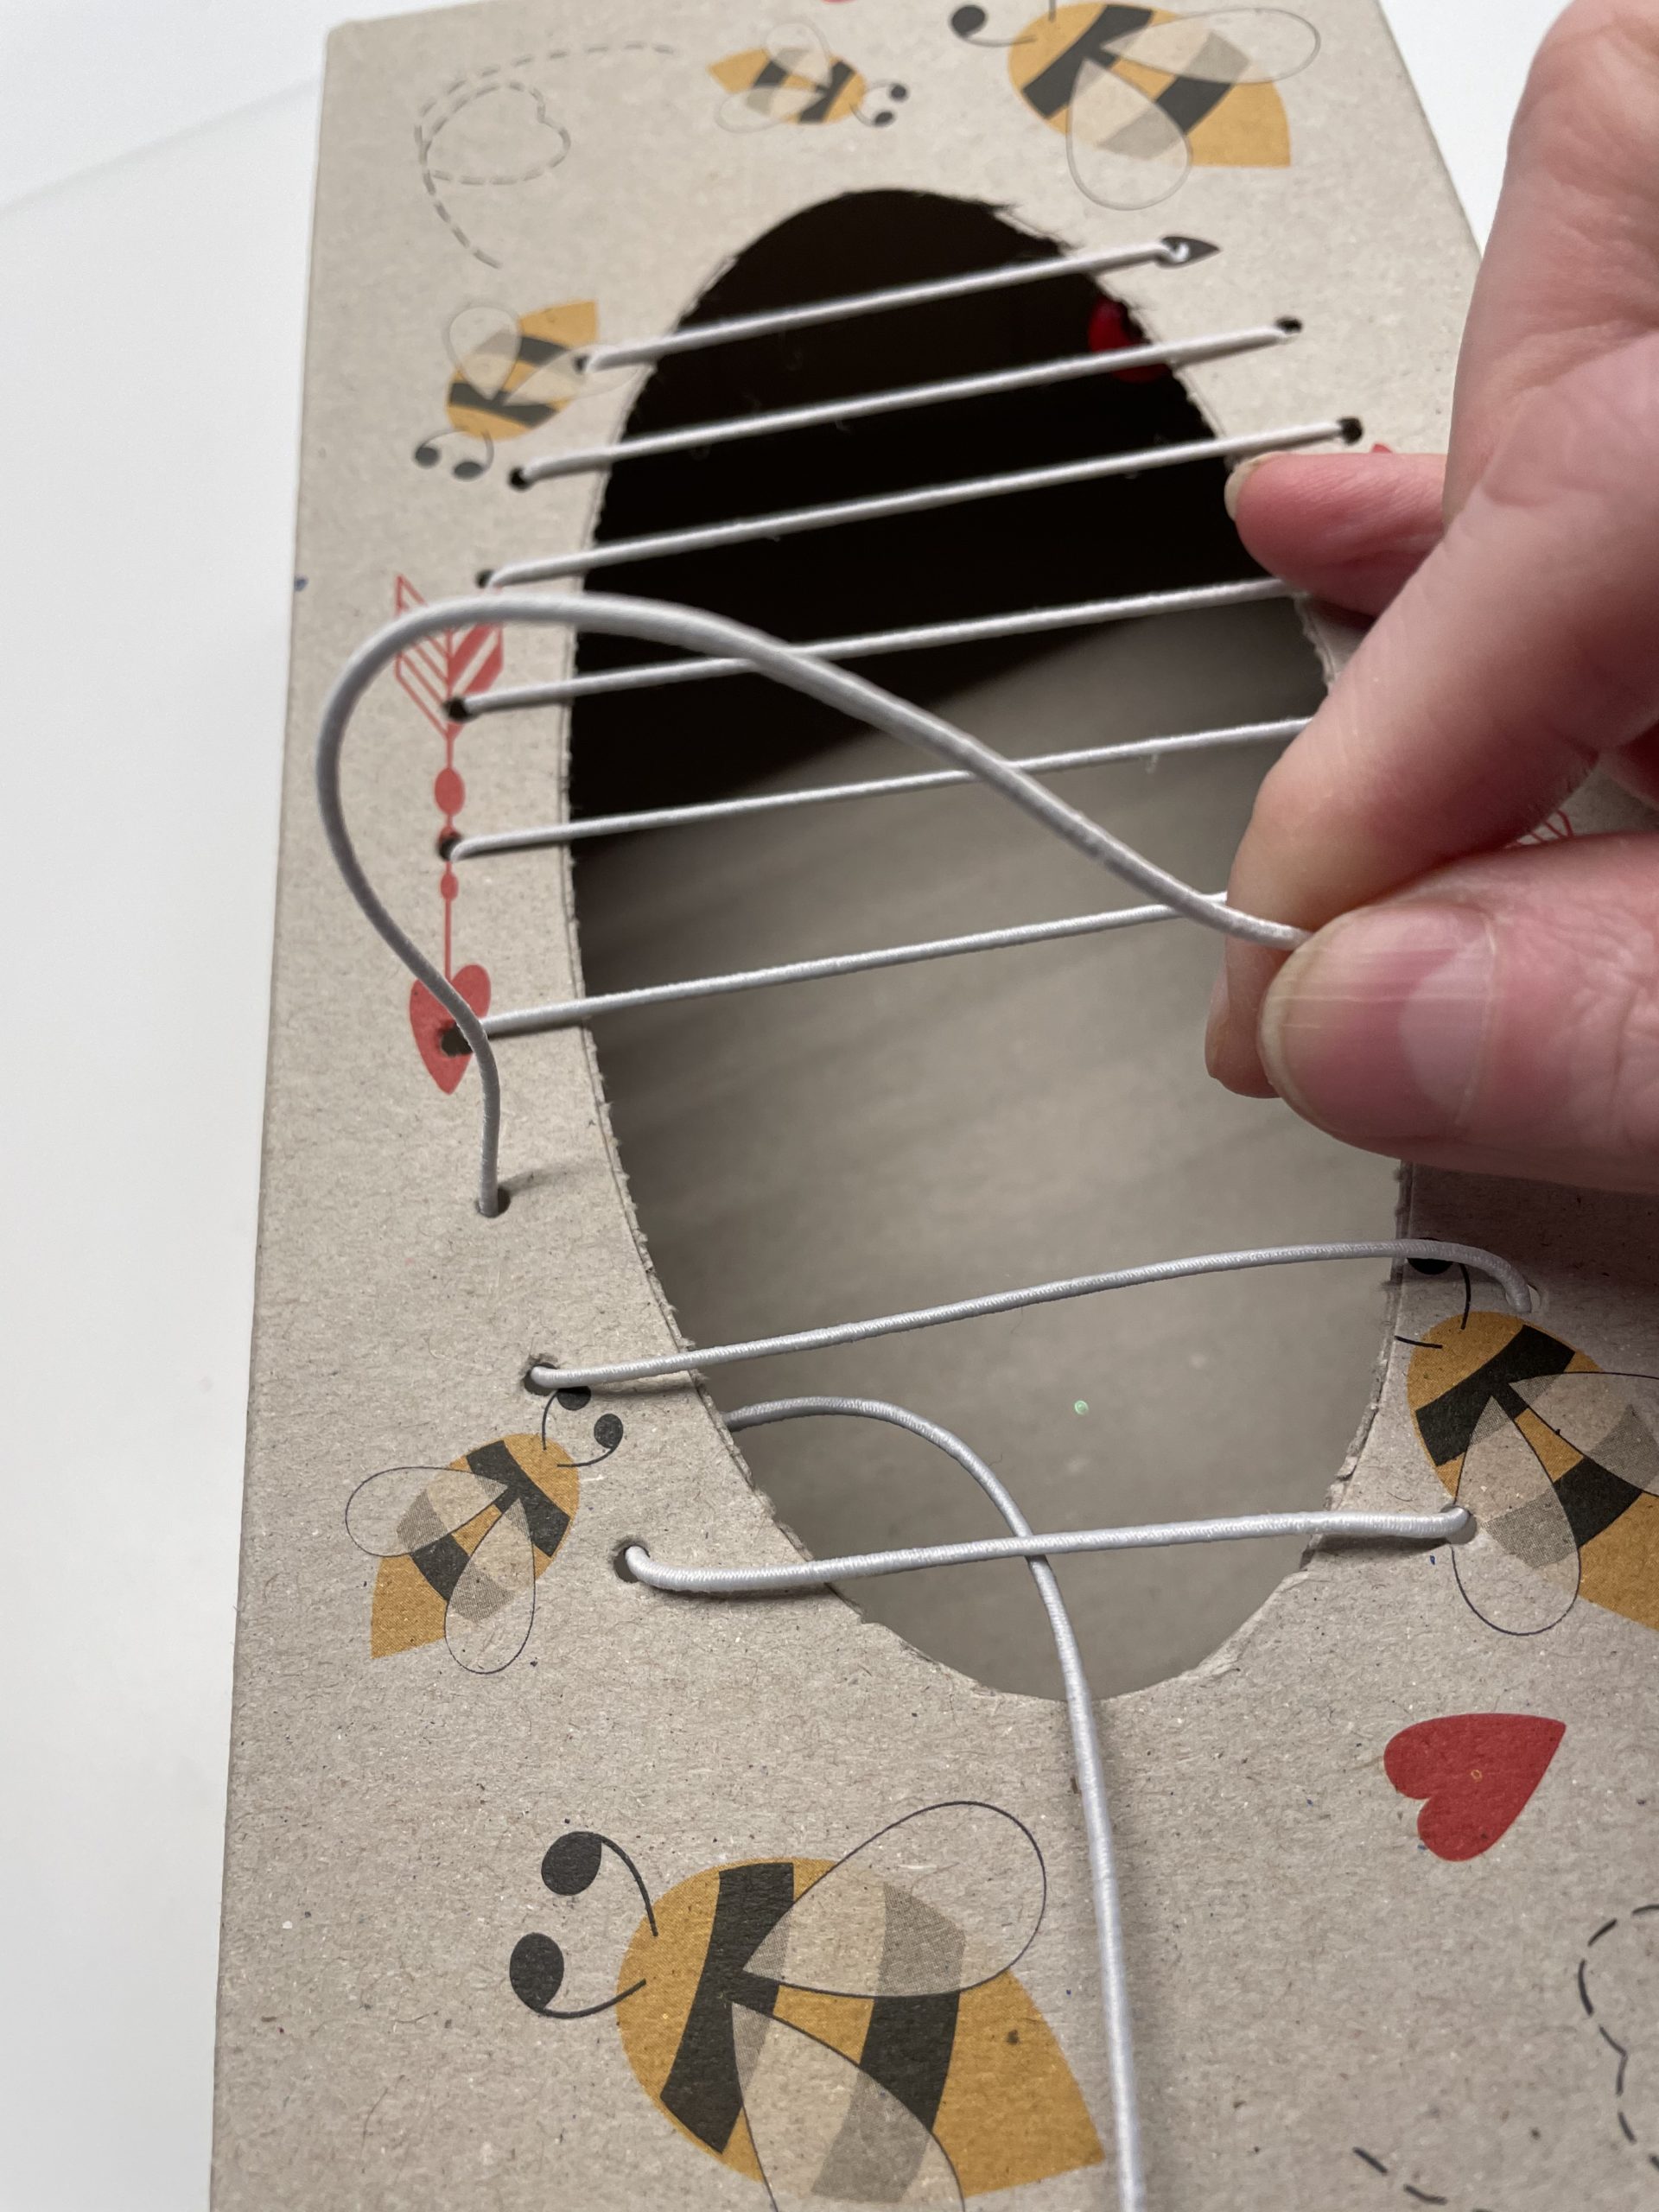
Now thread the end of the hat rubber from top to bottom into the opposite hole.
Pull the rubber through until it covers the opening smoothly and loosely.
Now thread the thread directly through the adjacent hole from bottom to top. Pull the rubber back completely.
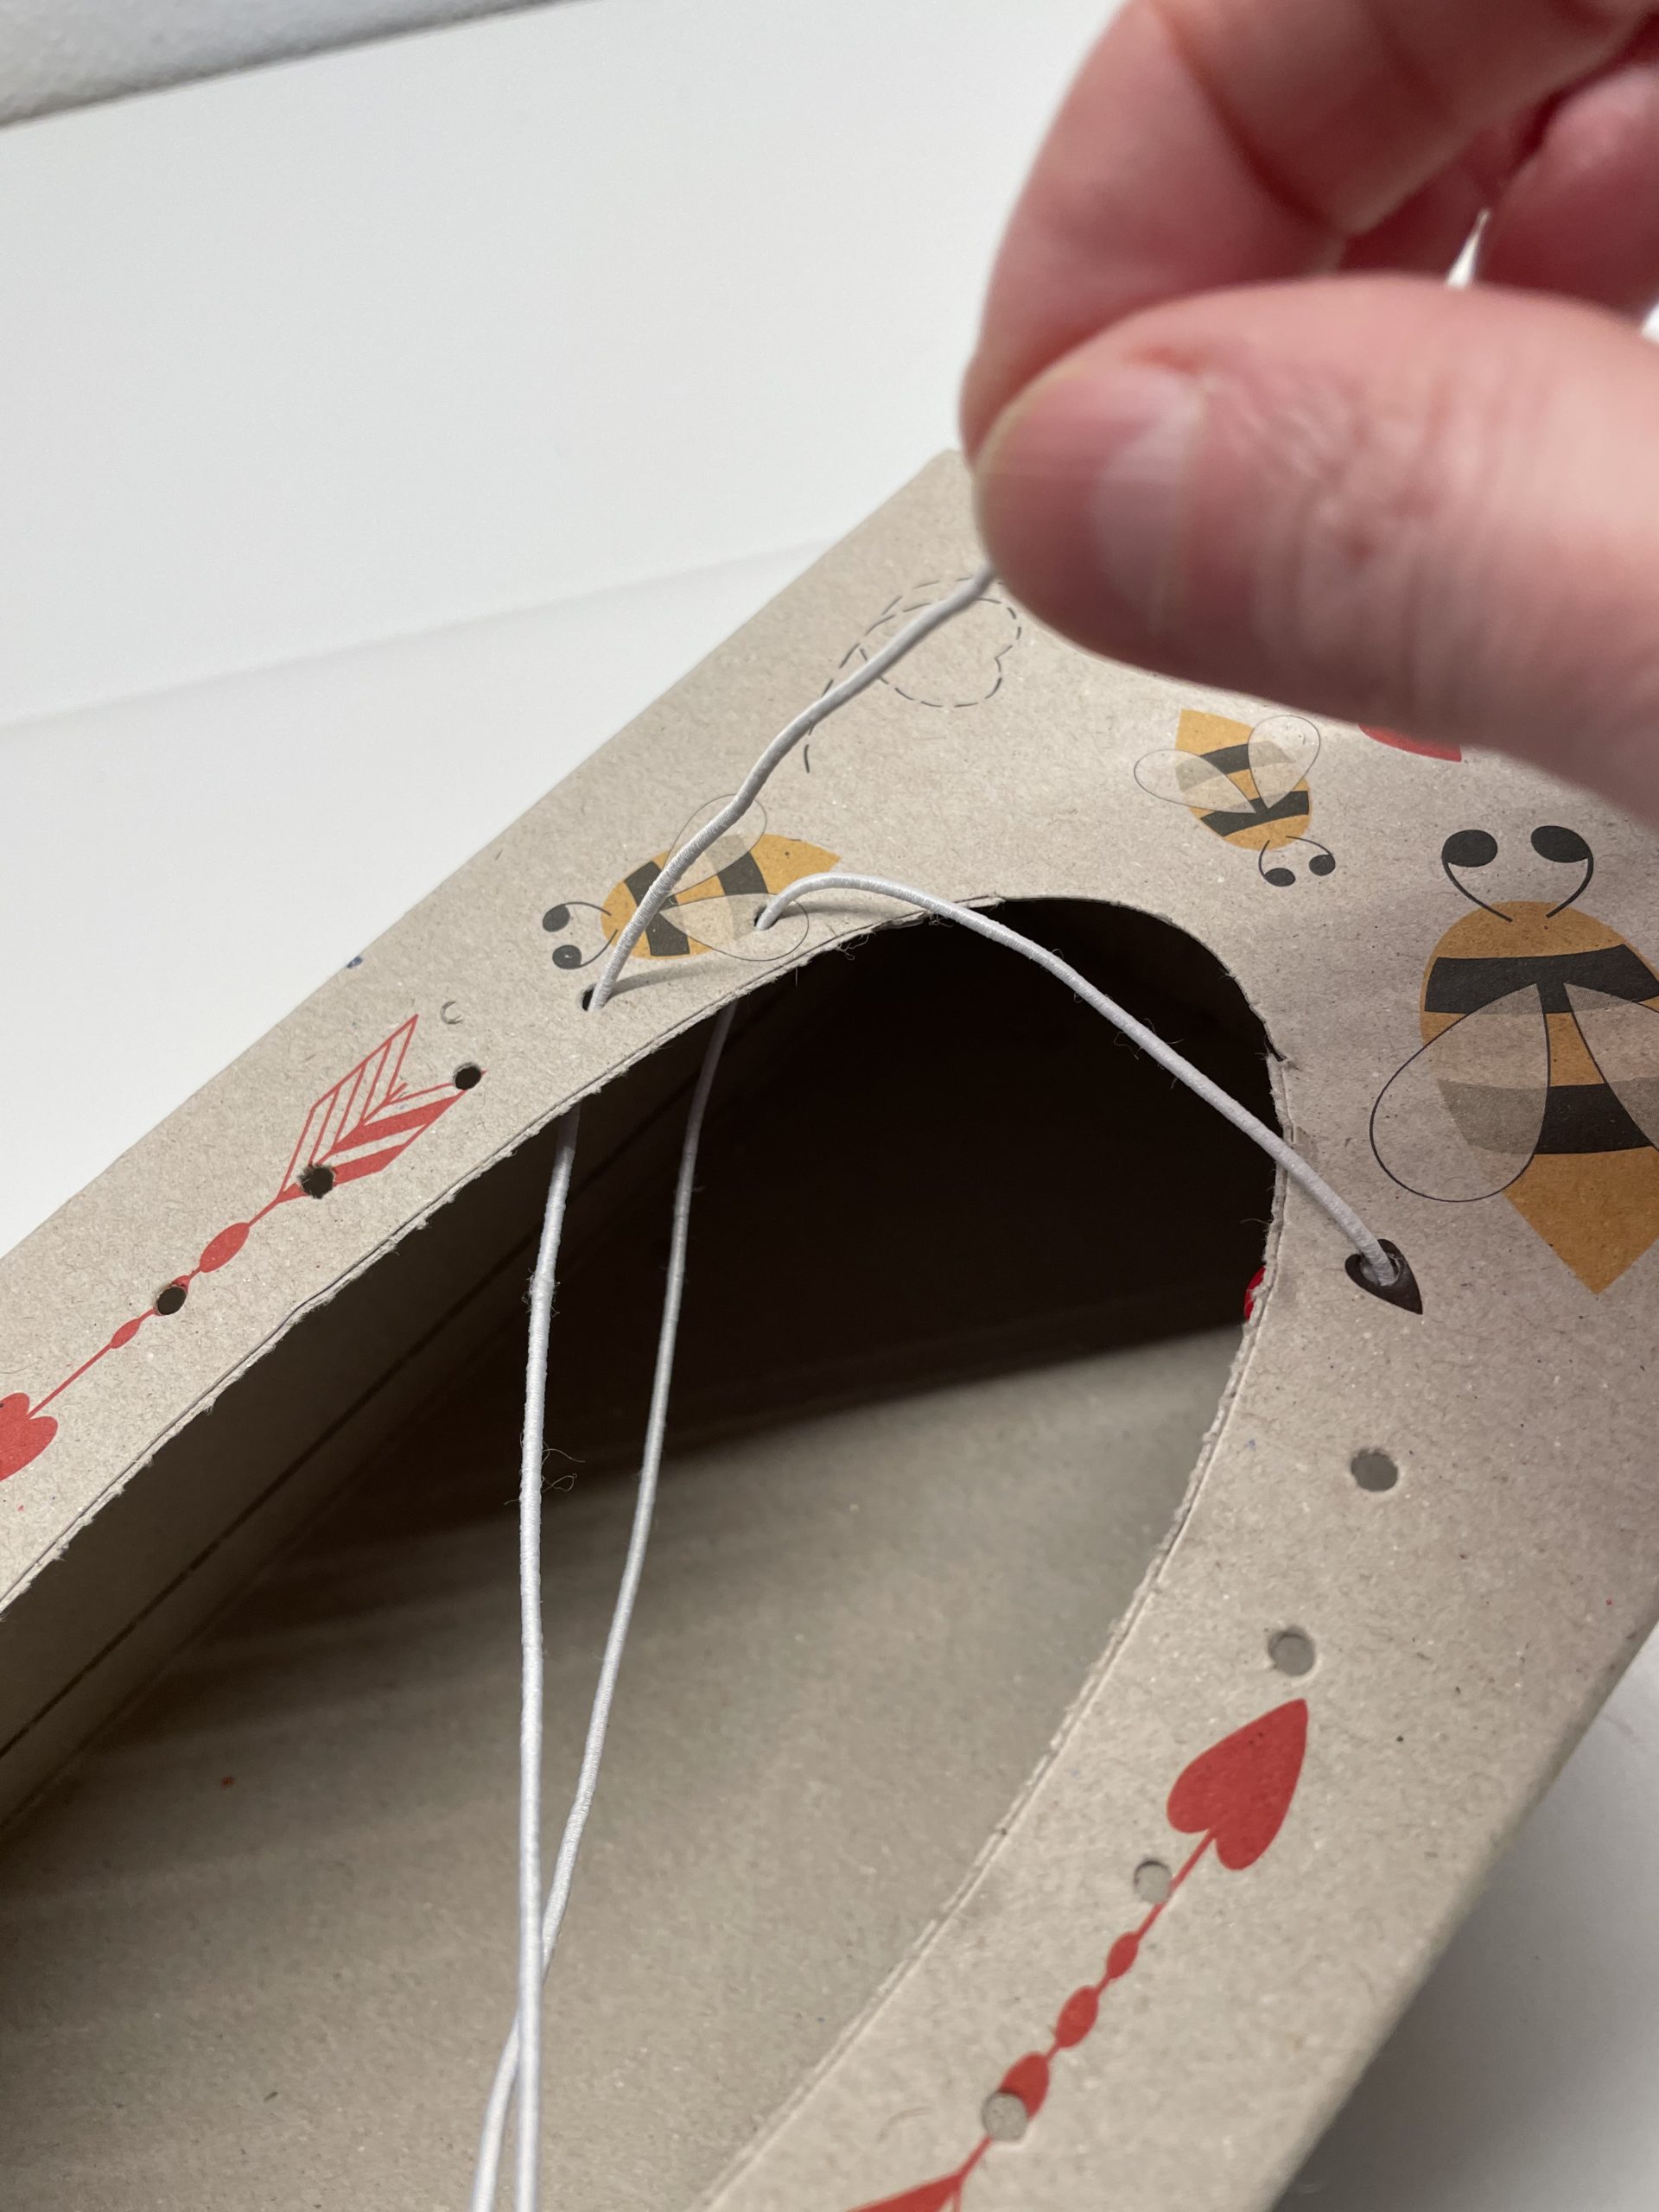
On the opposite side it is threaded again from top to bottom through the hole. Pulls the rubber to lie two parallel rubber cords loosely above the opening.

Again thread the thread from bottom to top through the adjacent hole and then from top to bottom into the opposite hole.
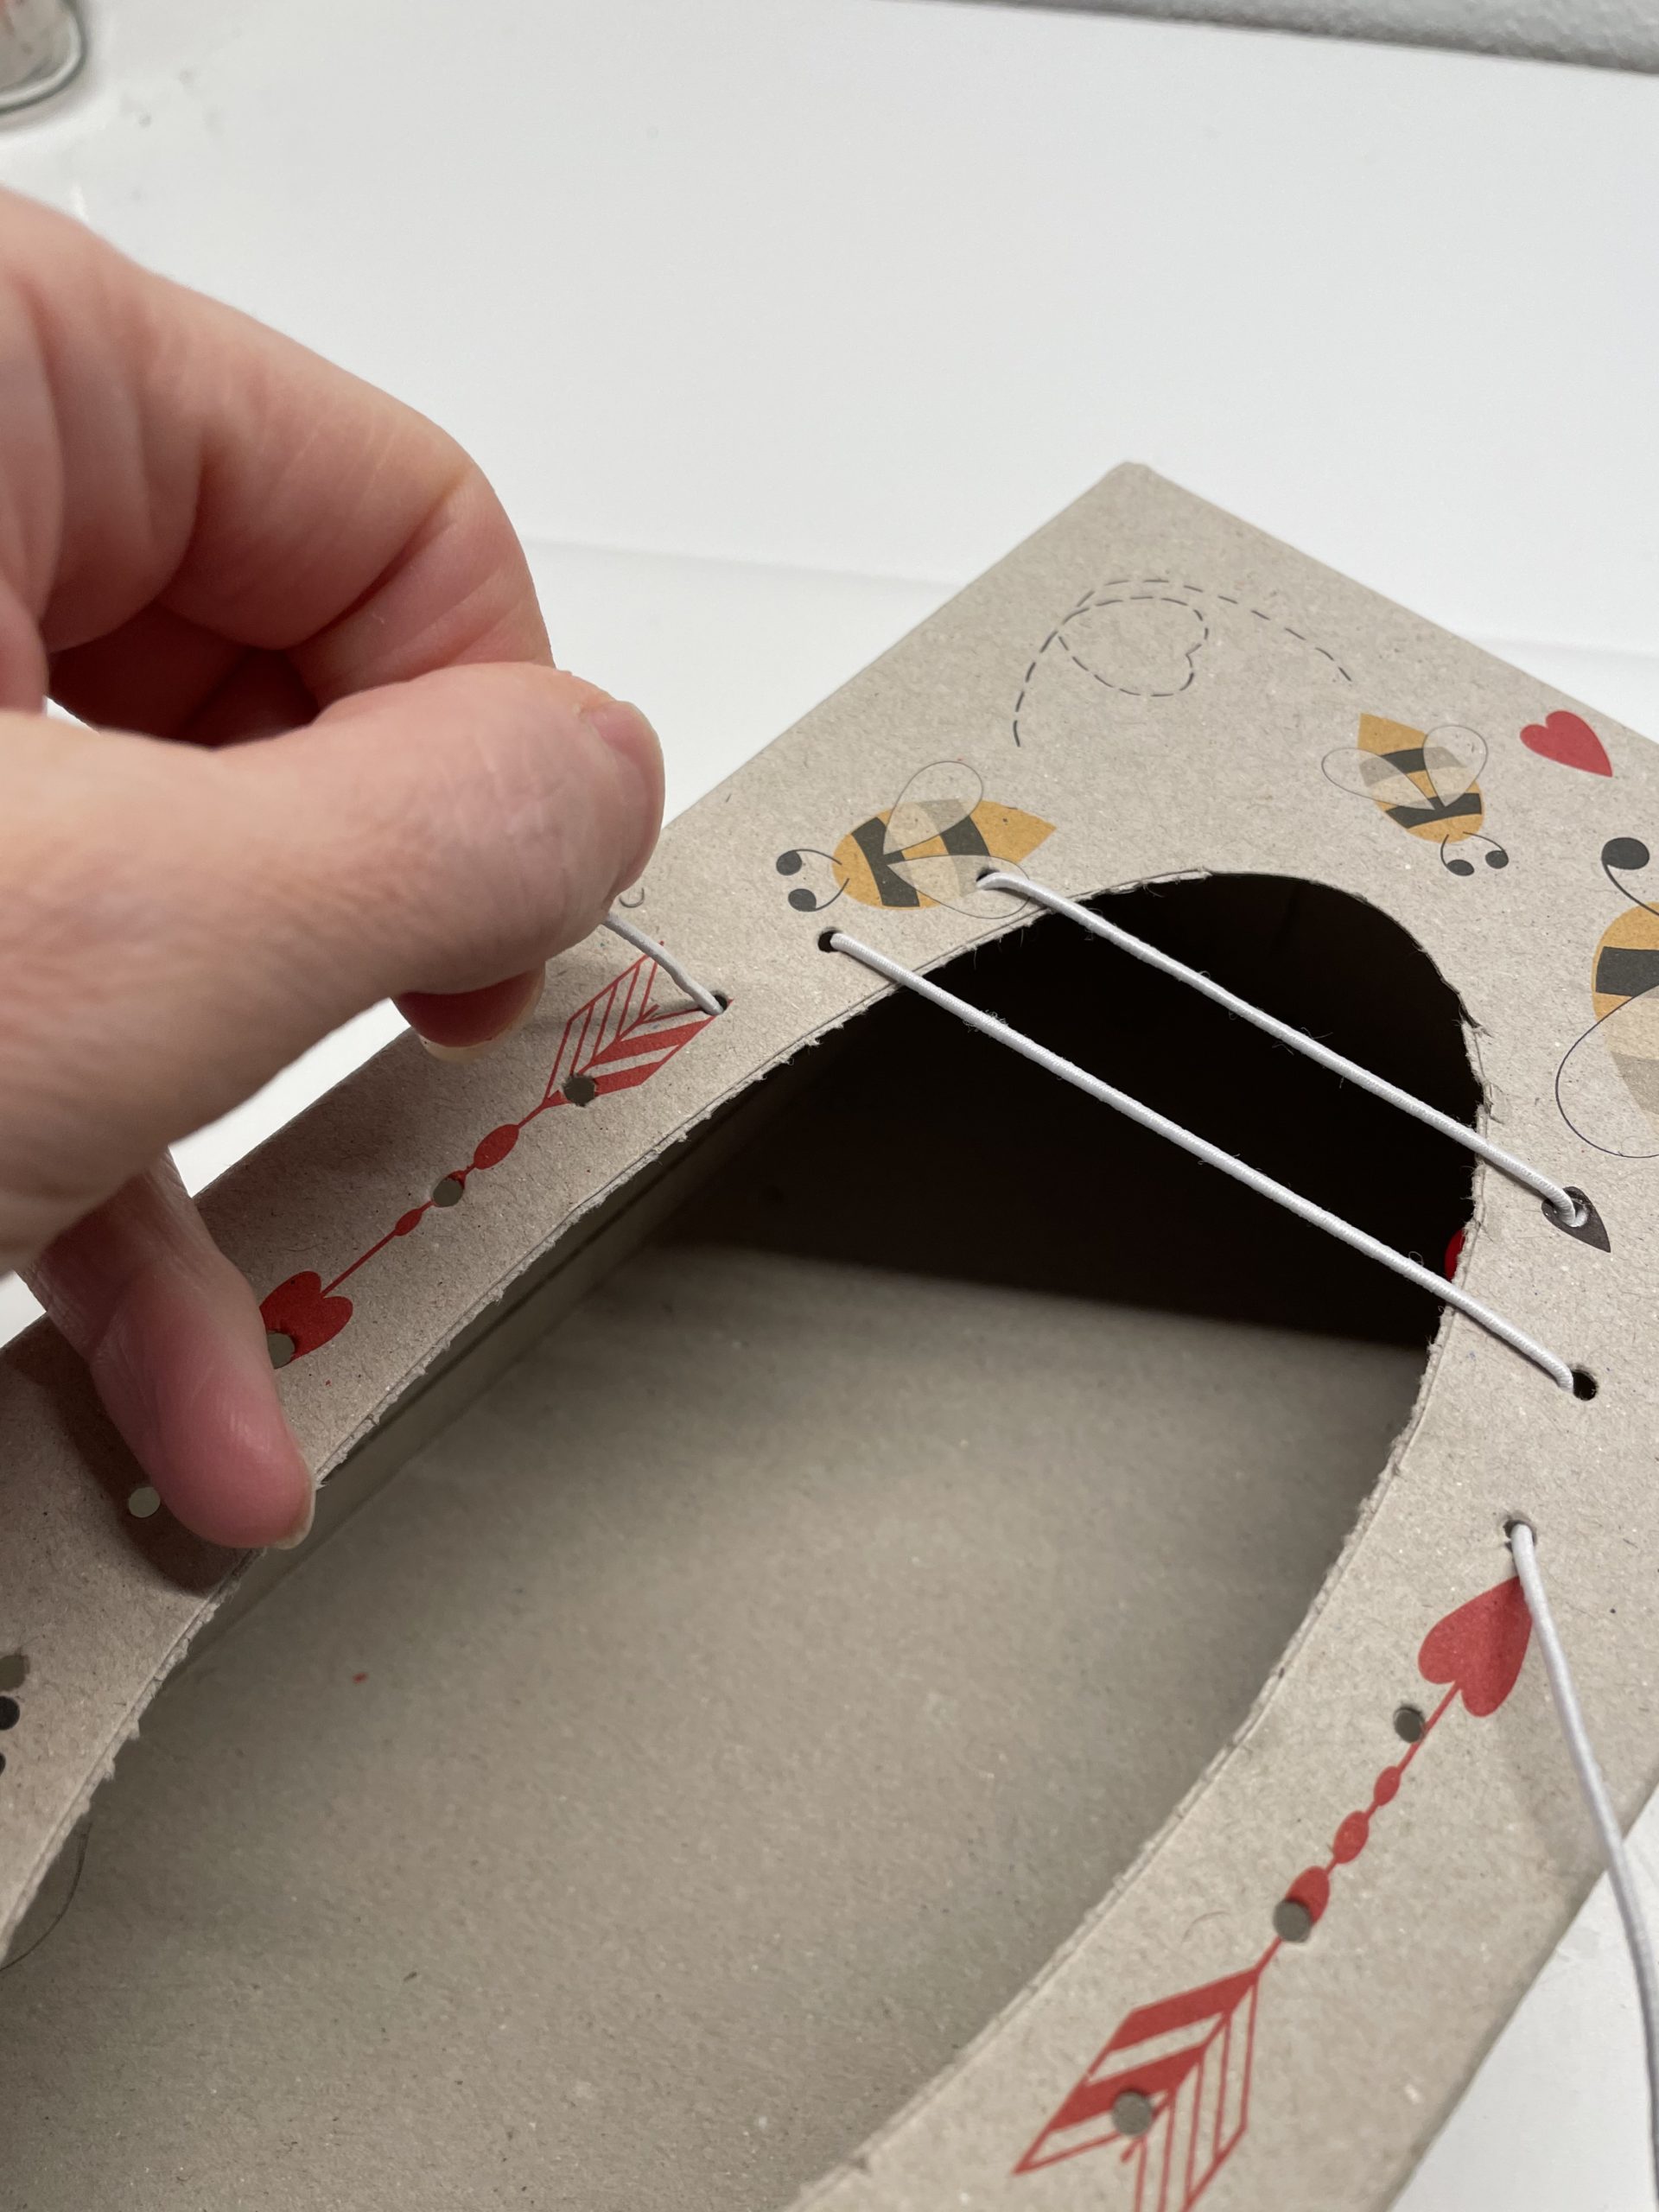
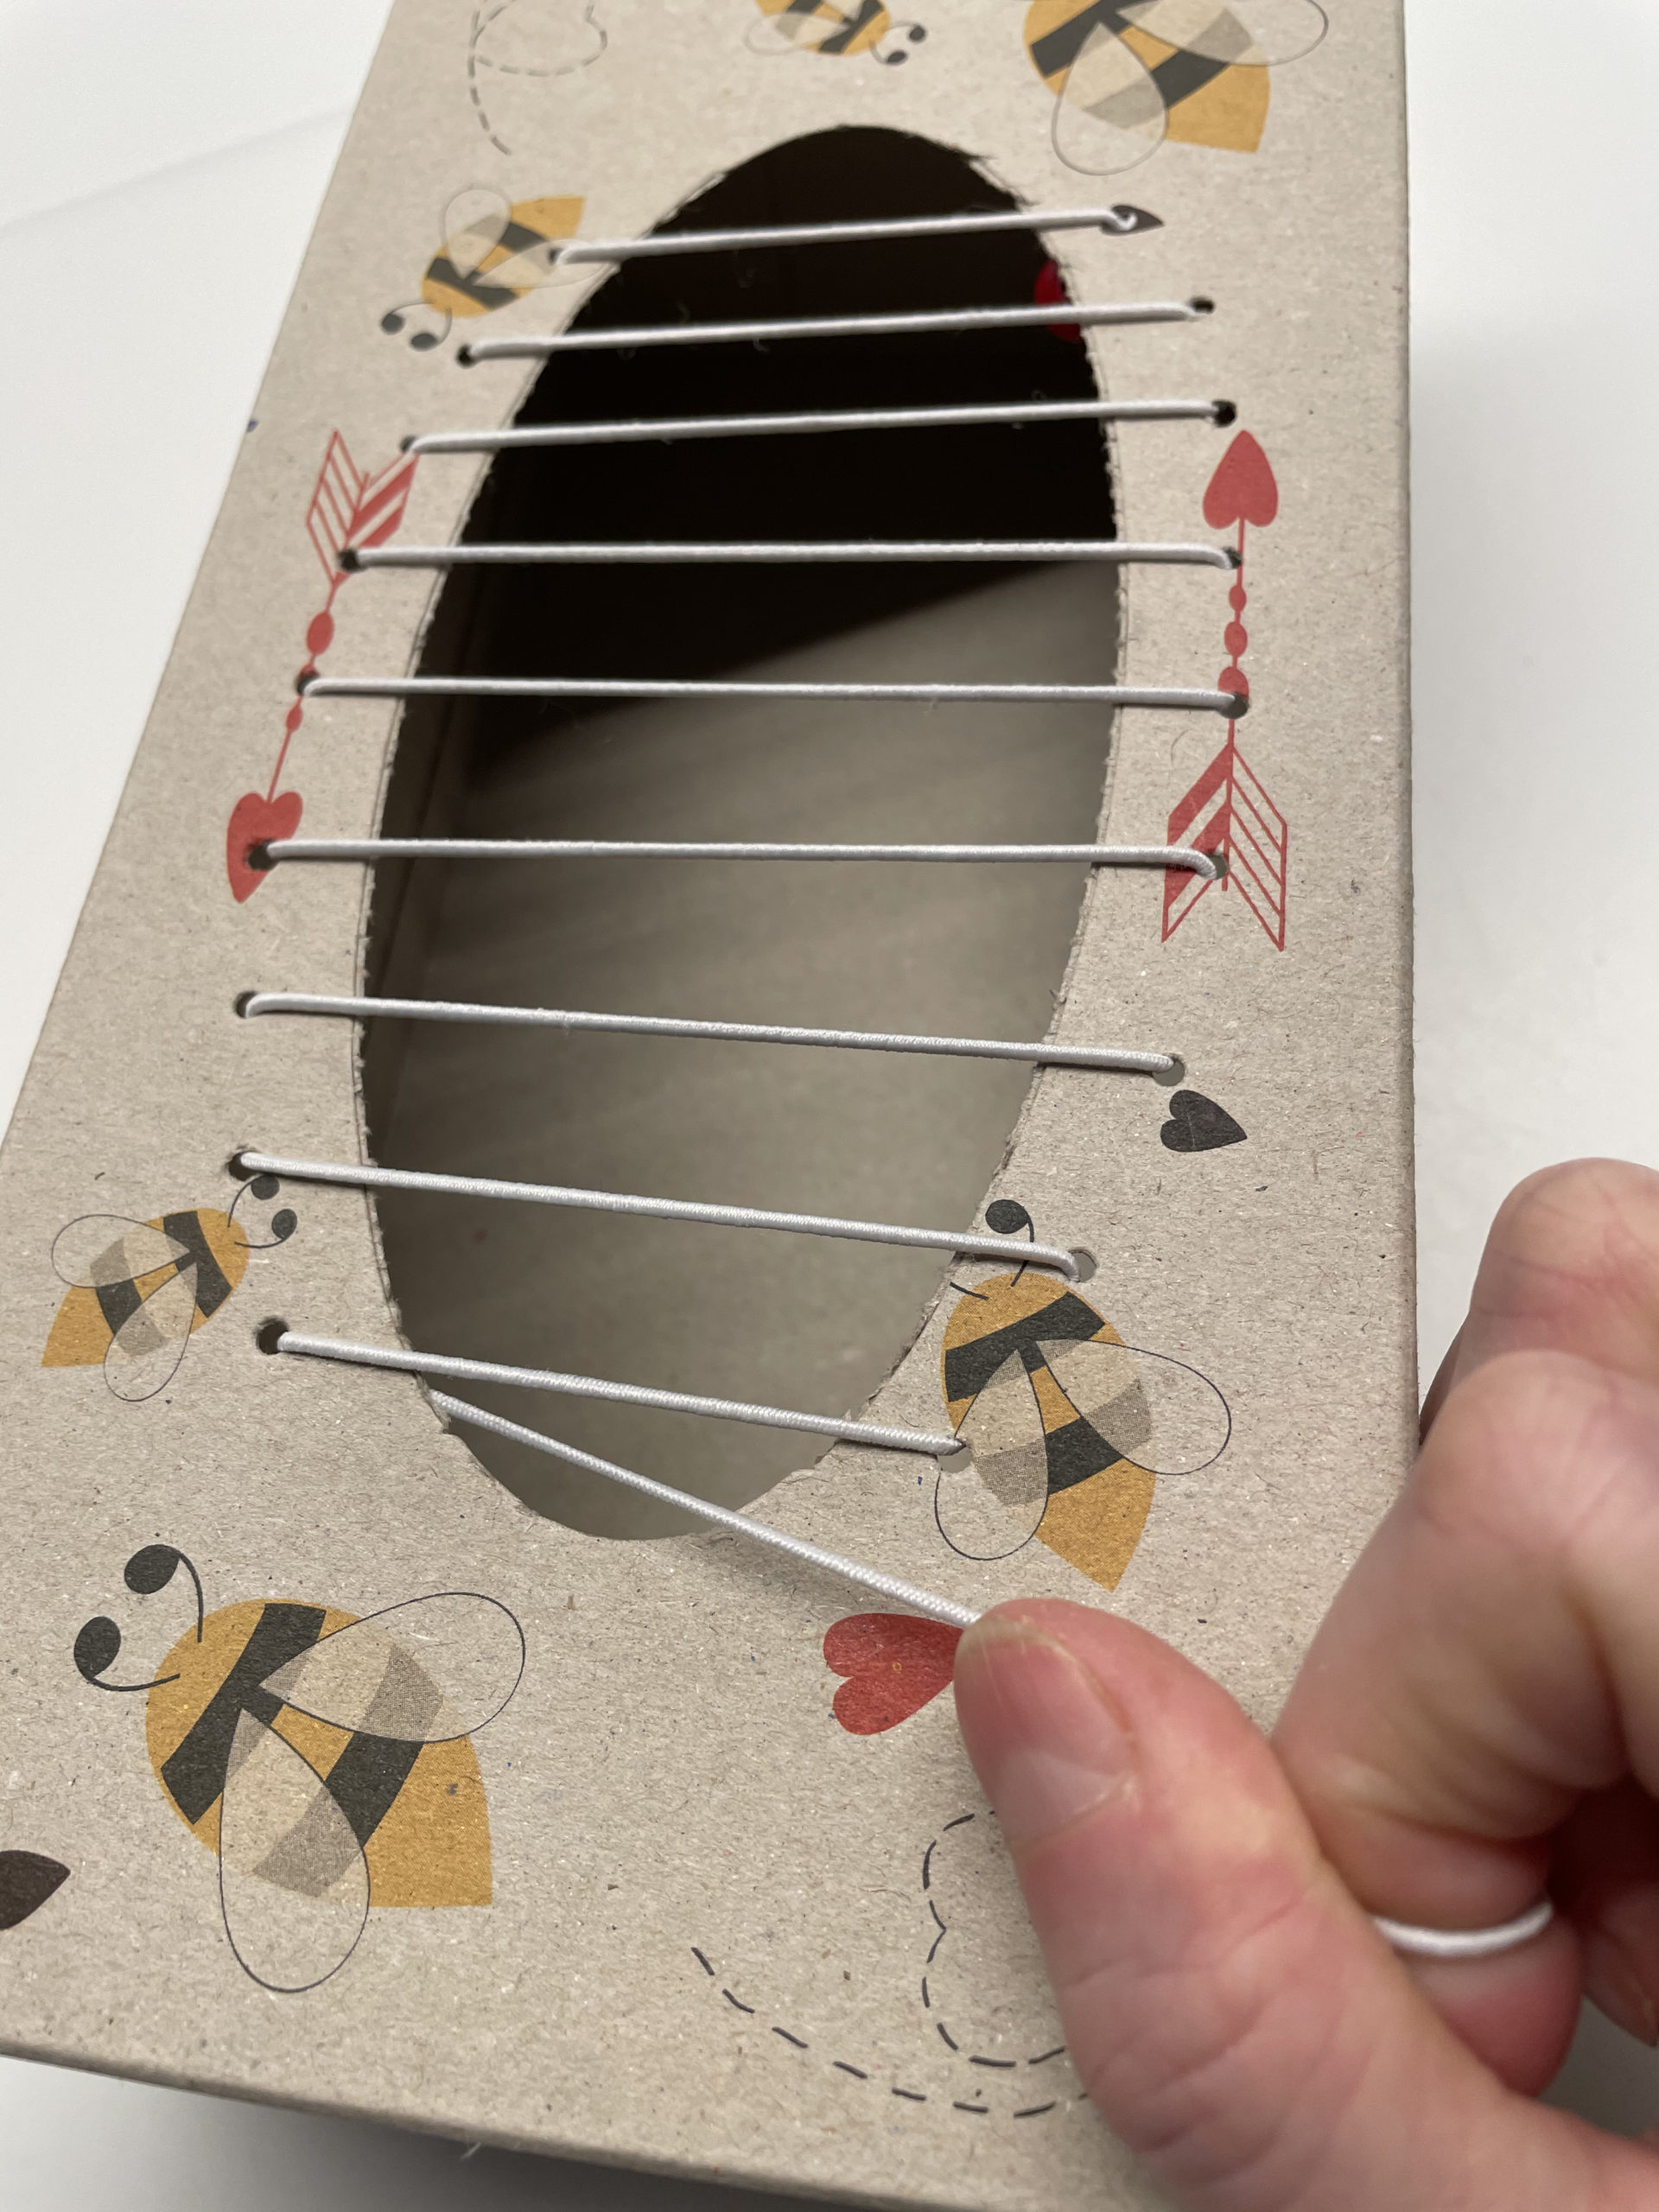
Repeat the process until you reach the last hole.
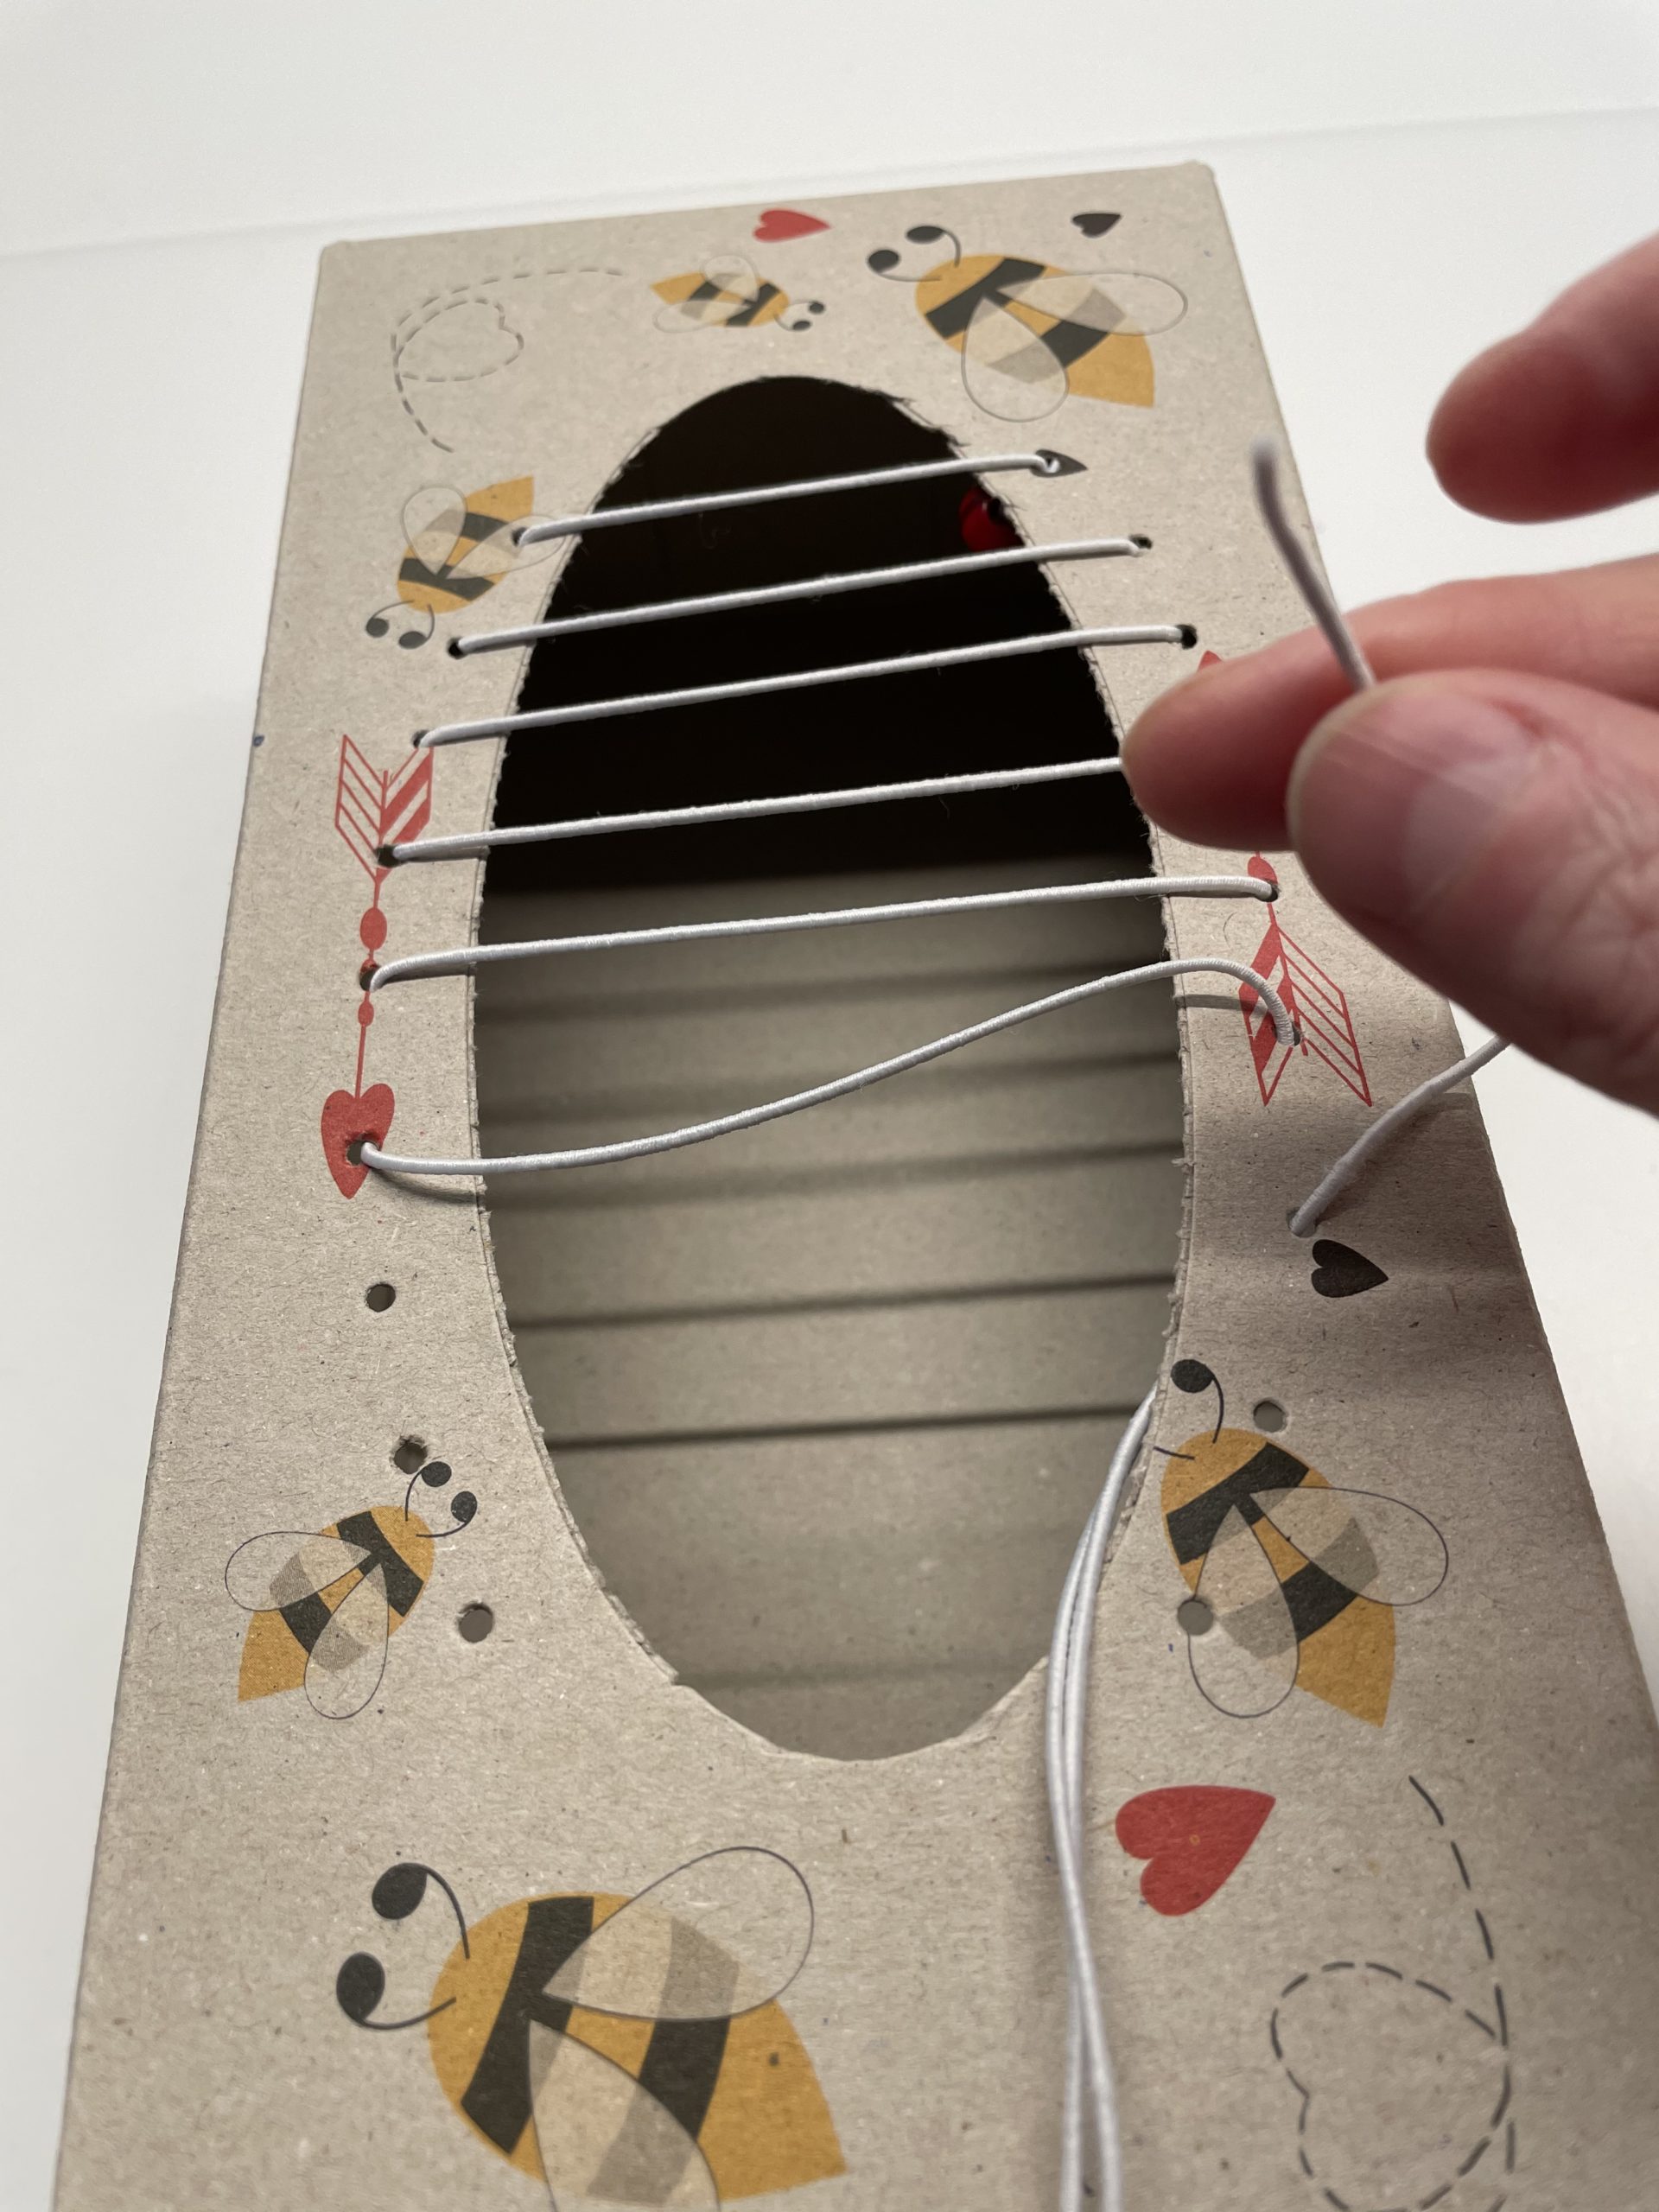
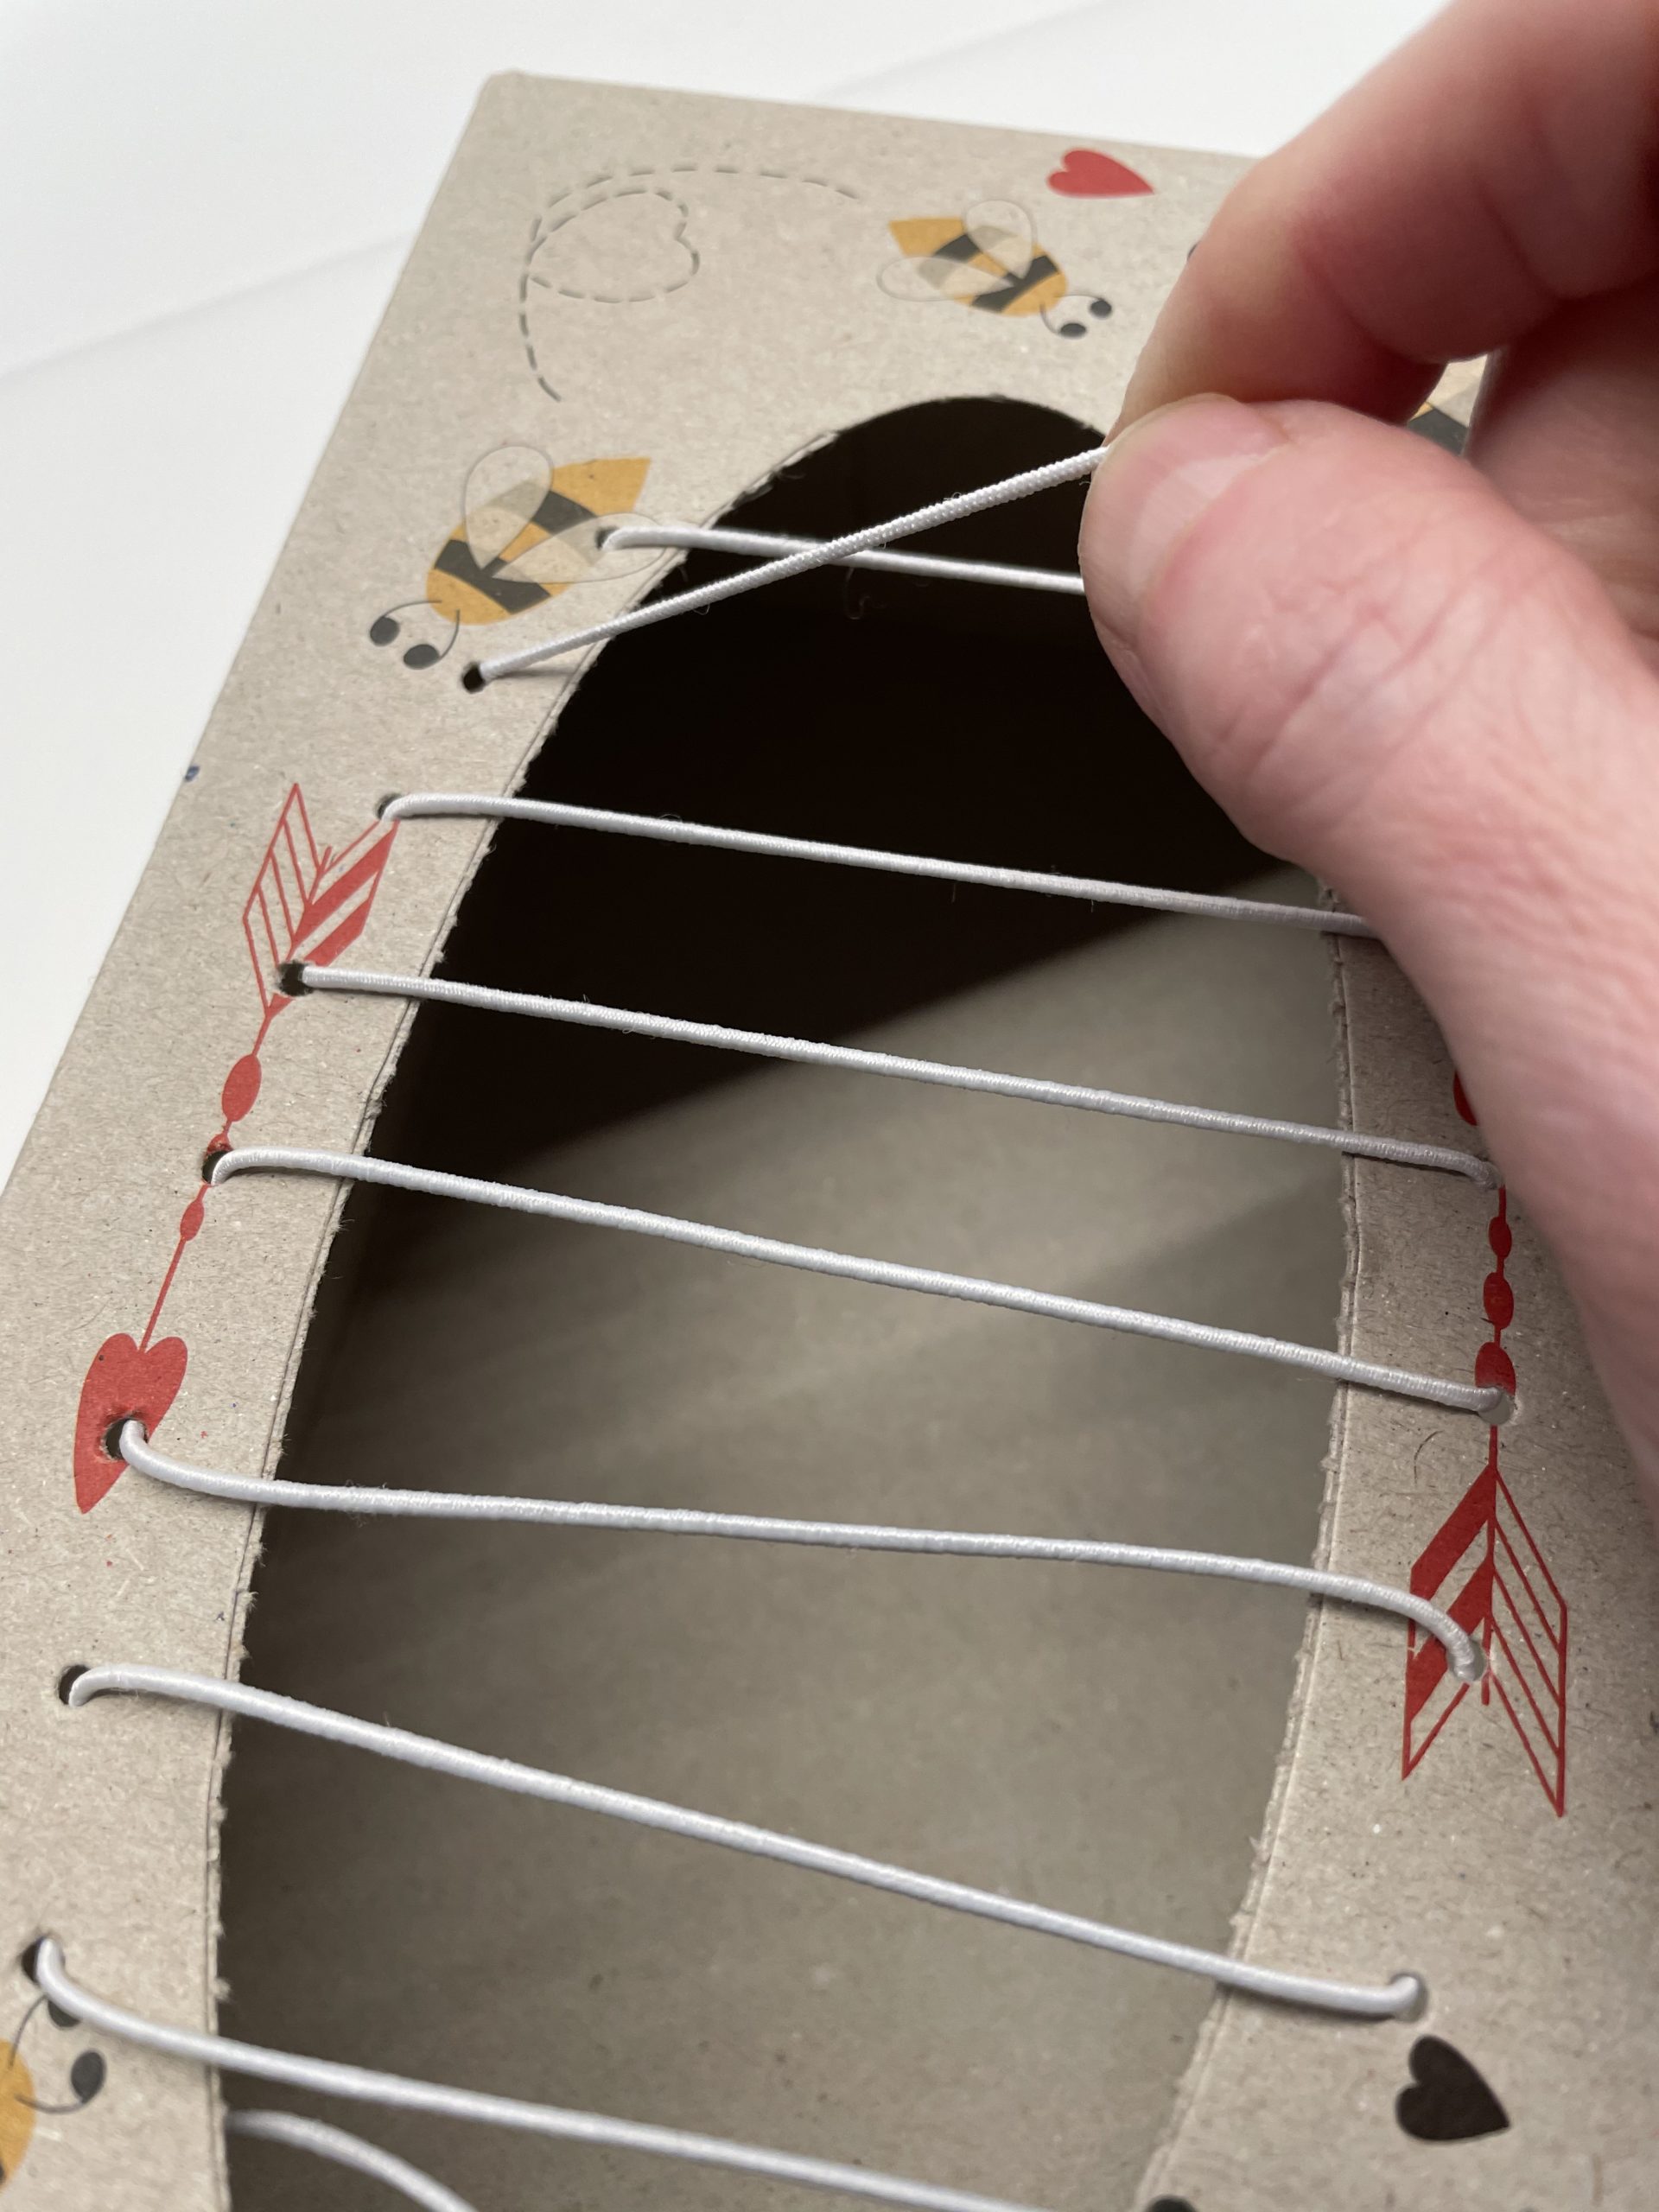
Make sure that all rubber threads lie loosely above the opening without tension.
The rubber cord ends inside. Leave the thread still long!
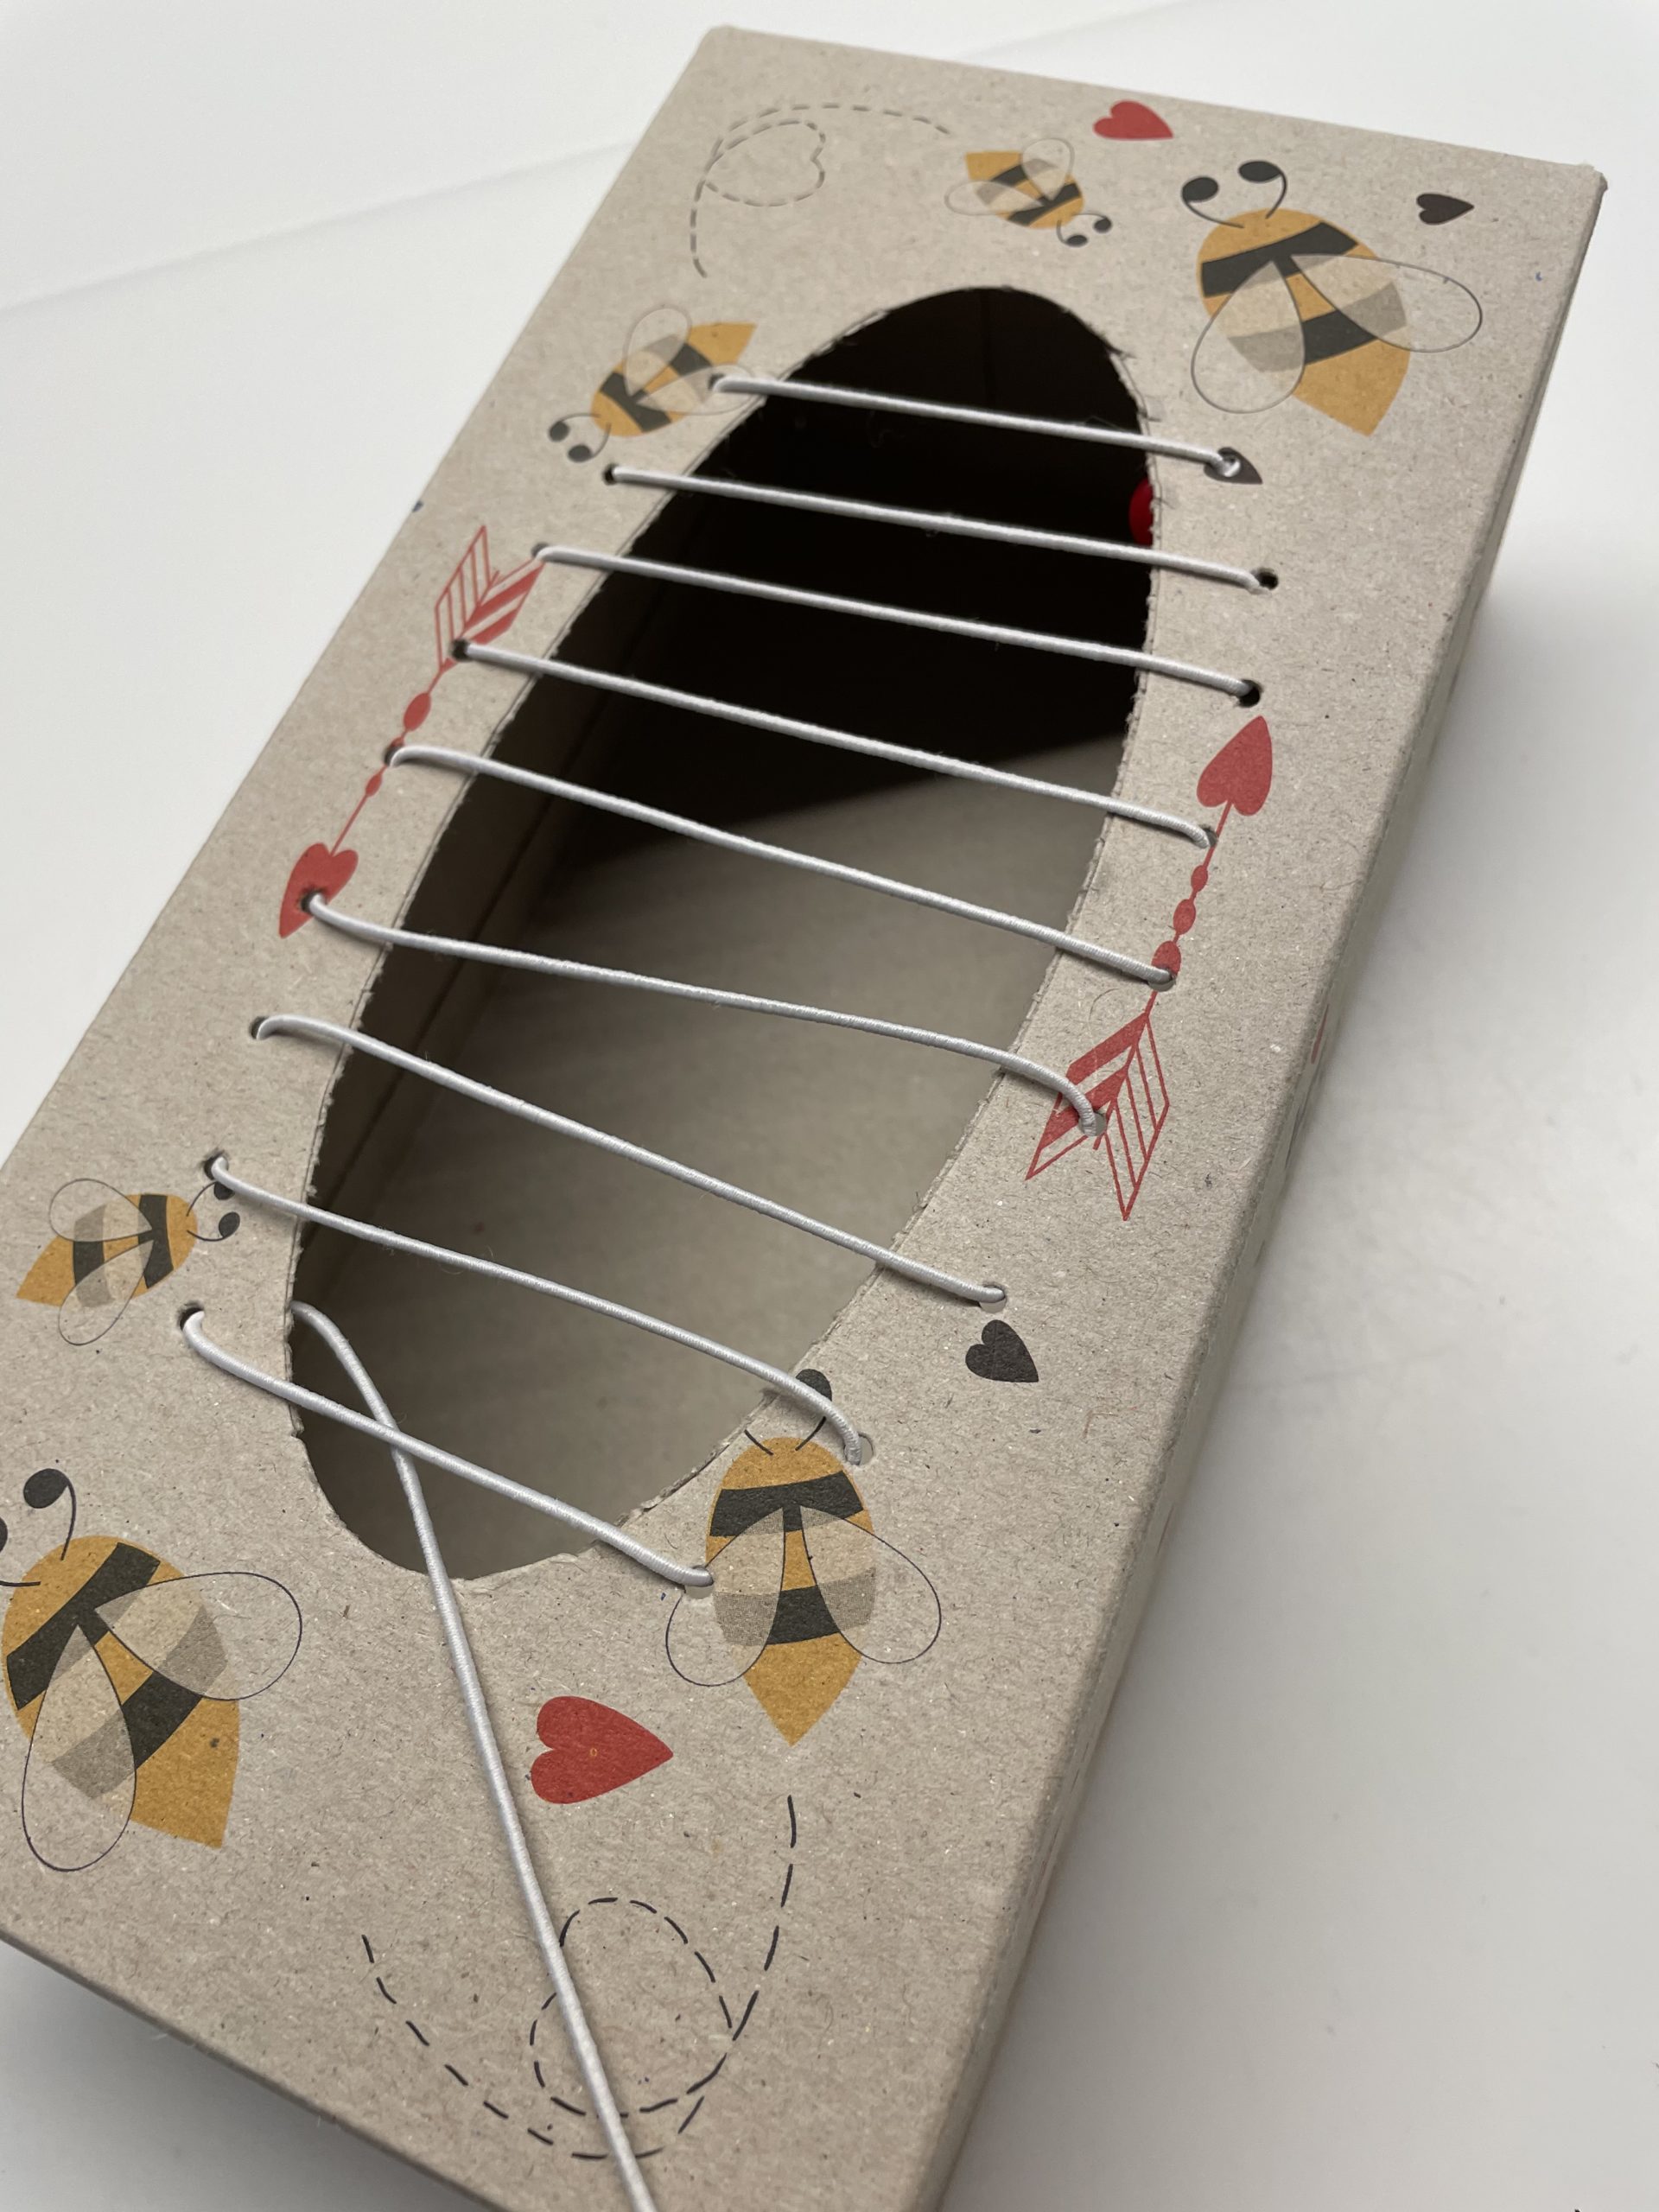
Now the gunmi is strained. Begins at the first hole.
For this, tighten the rubber piece by piece. Hold the pulled hat rubber well and work your way forward.
Pull the thread again and again!
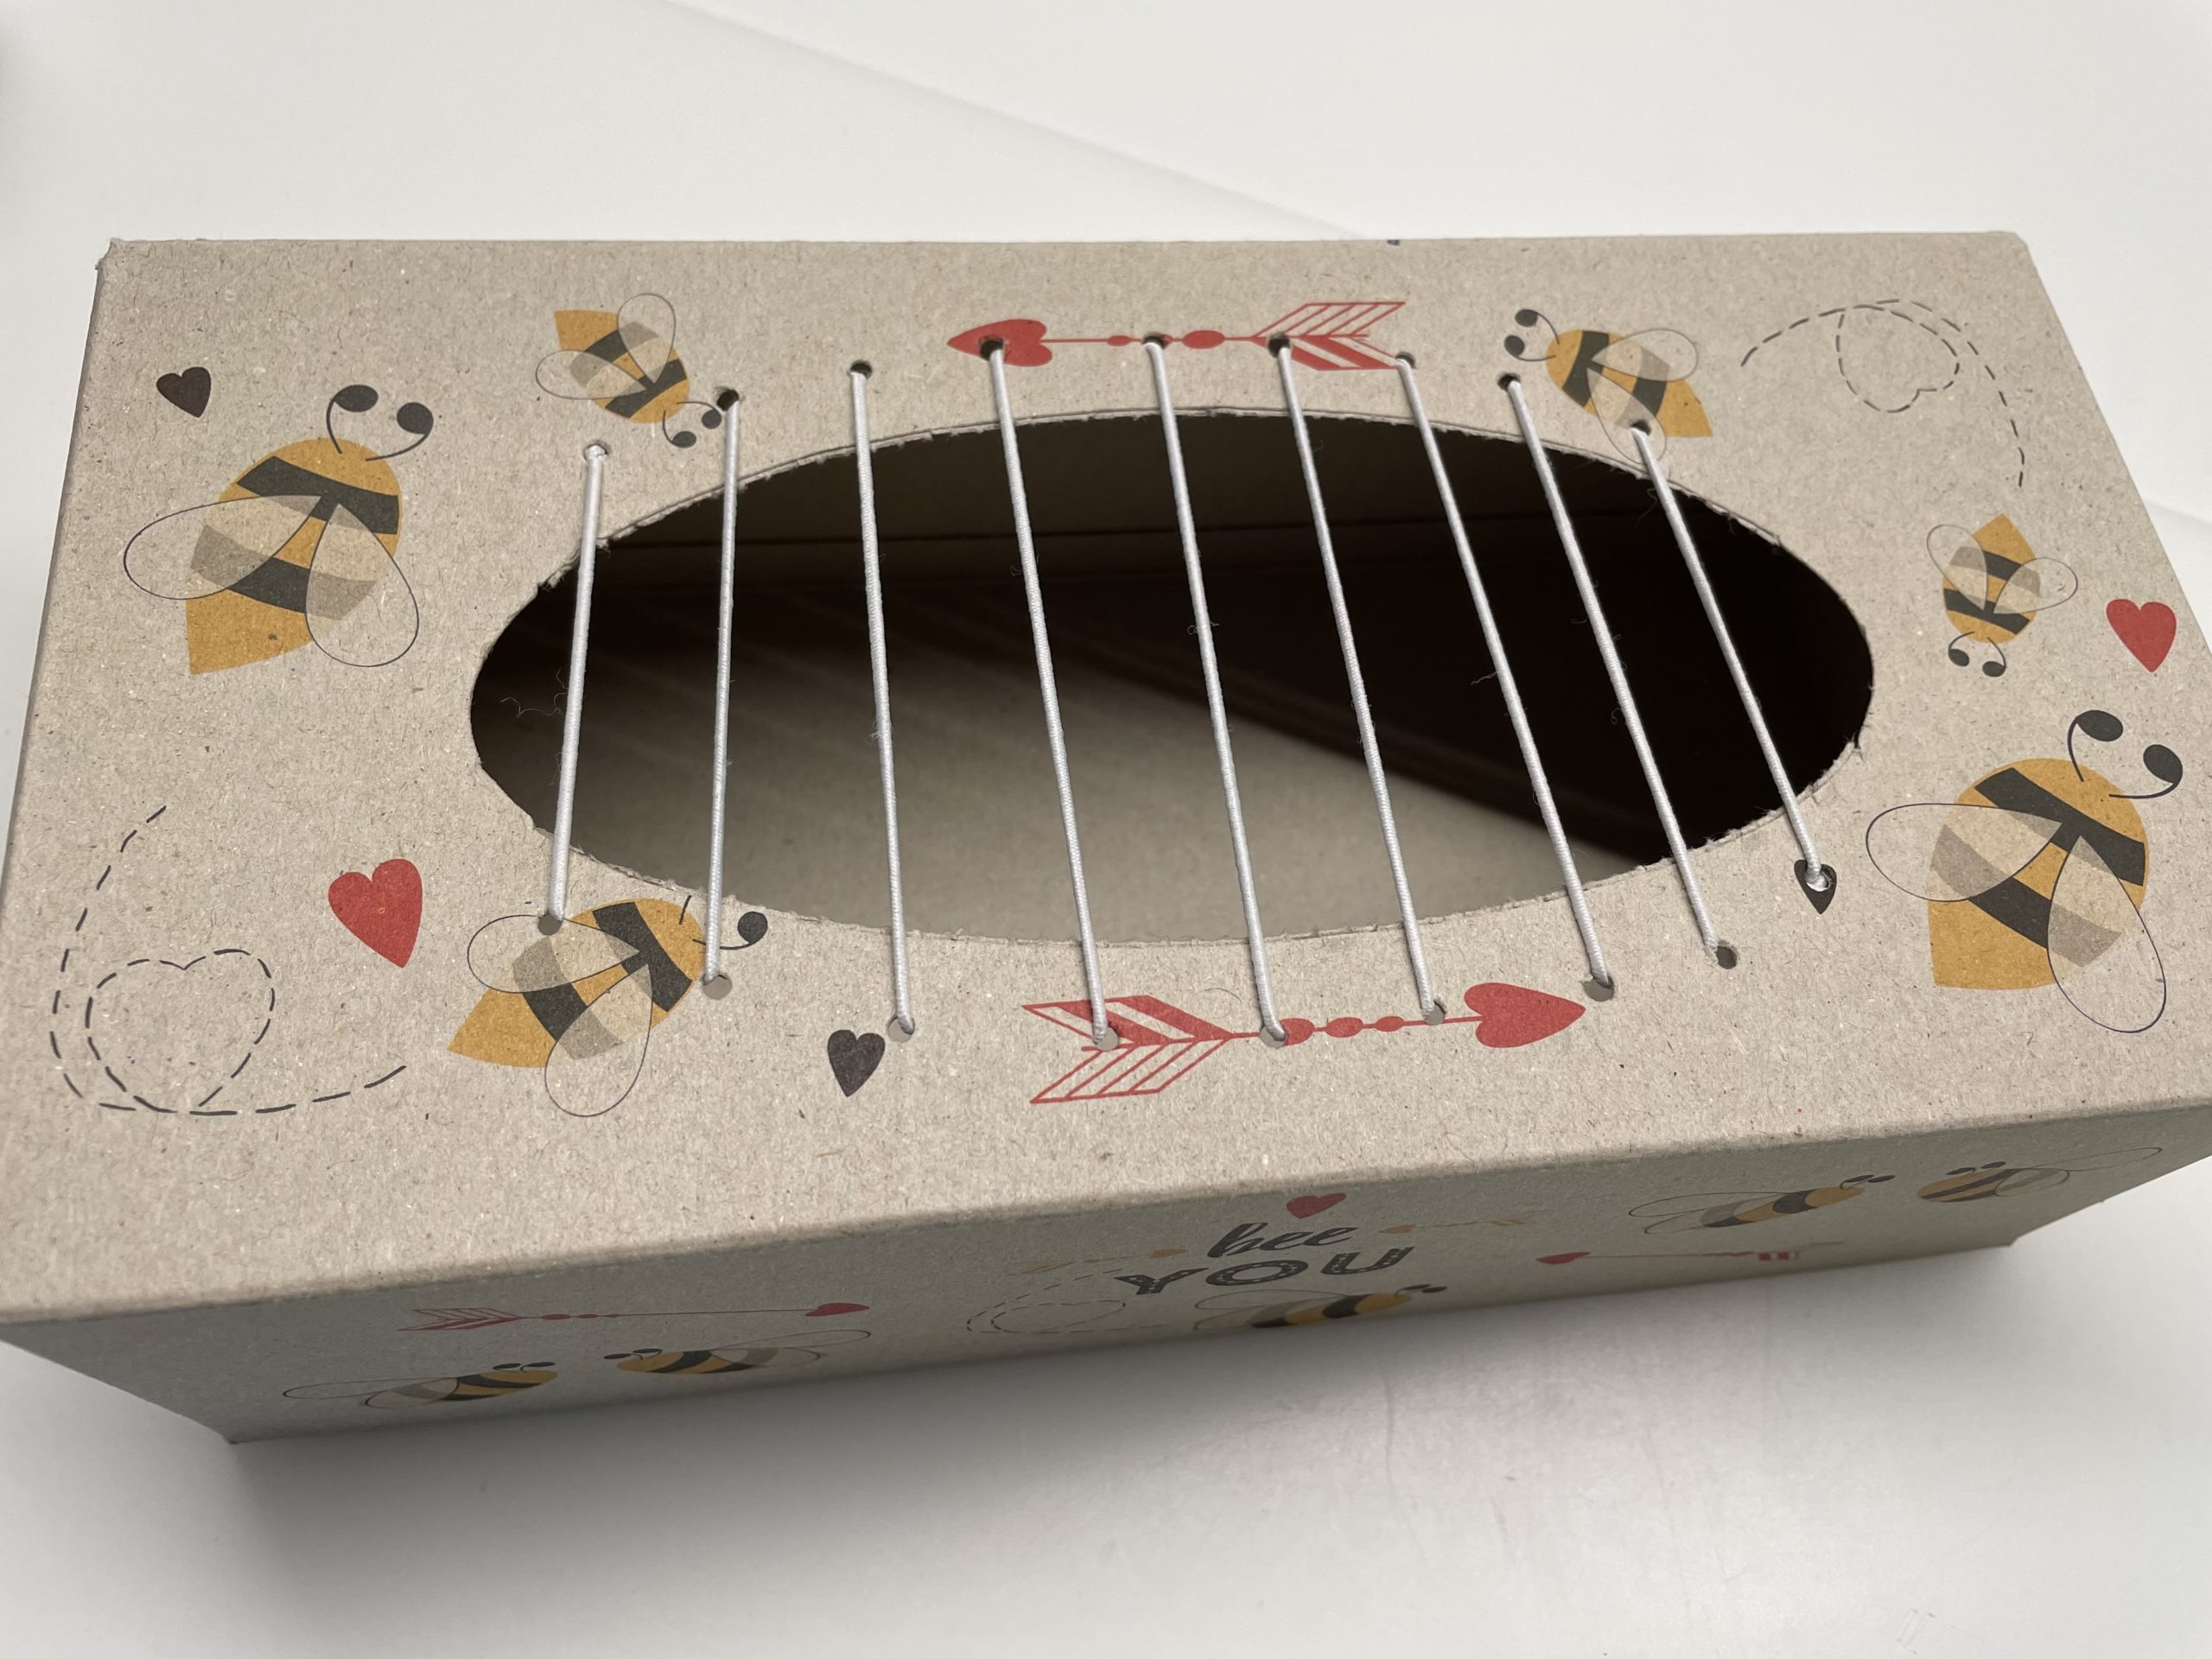
The complete strings of your supply box are now firmly tensed.
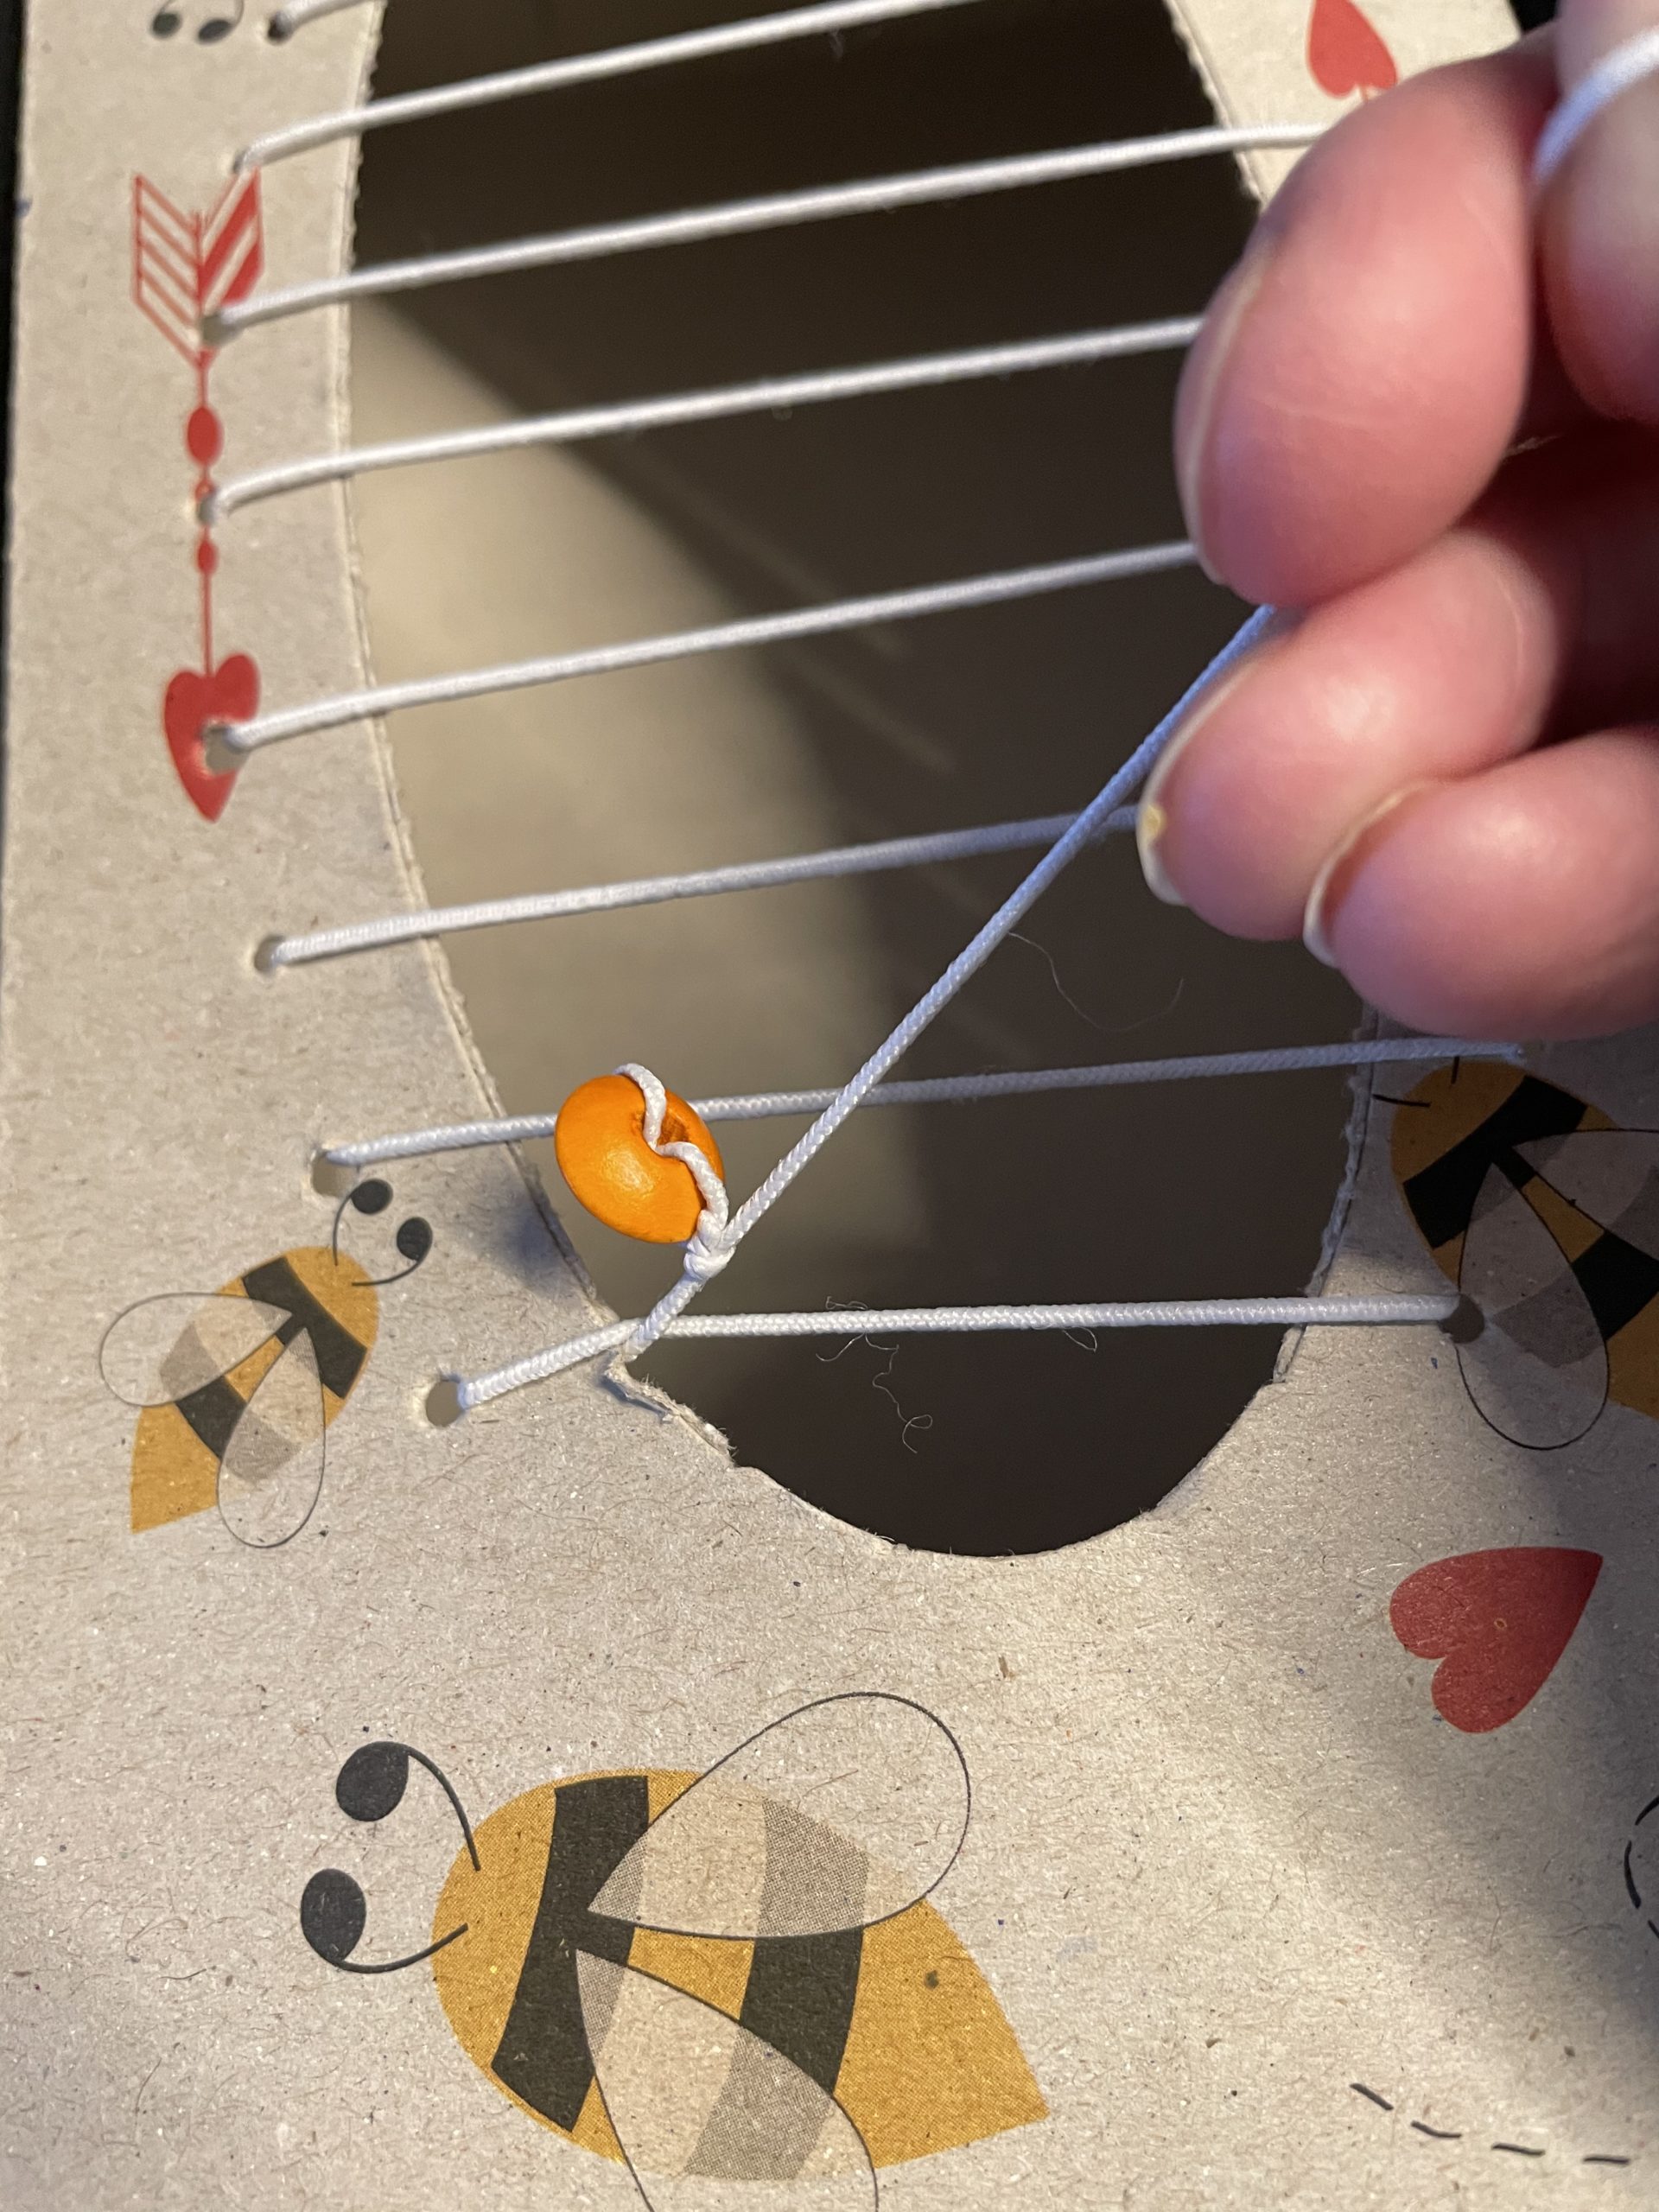
Holds the end well and shortens the overhanging rubber to a length of about 10-15cm.
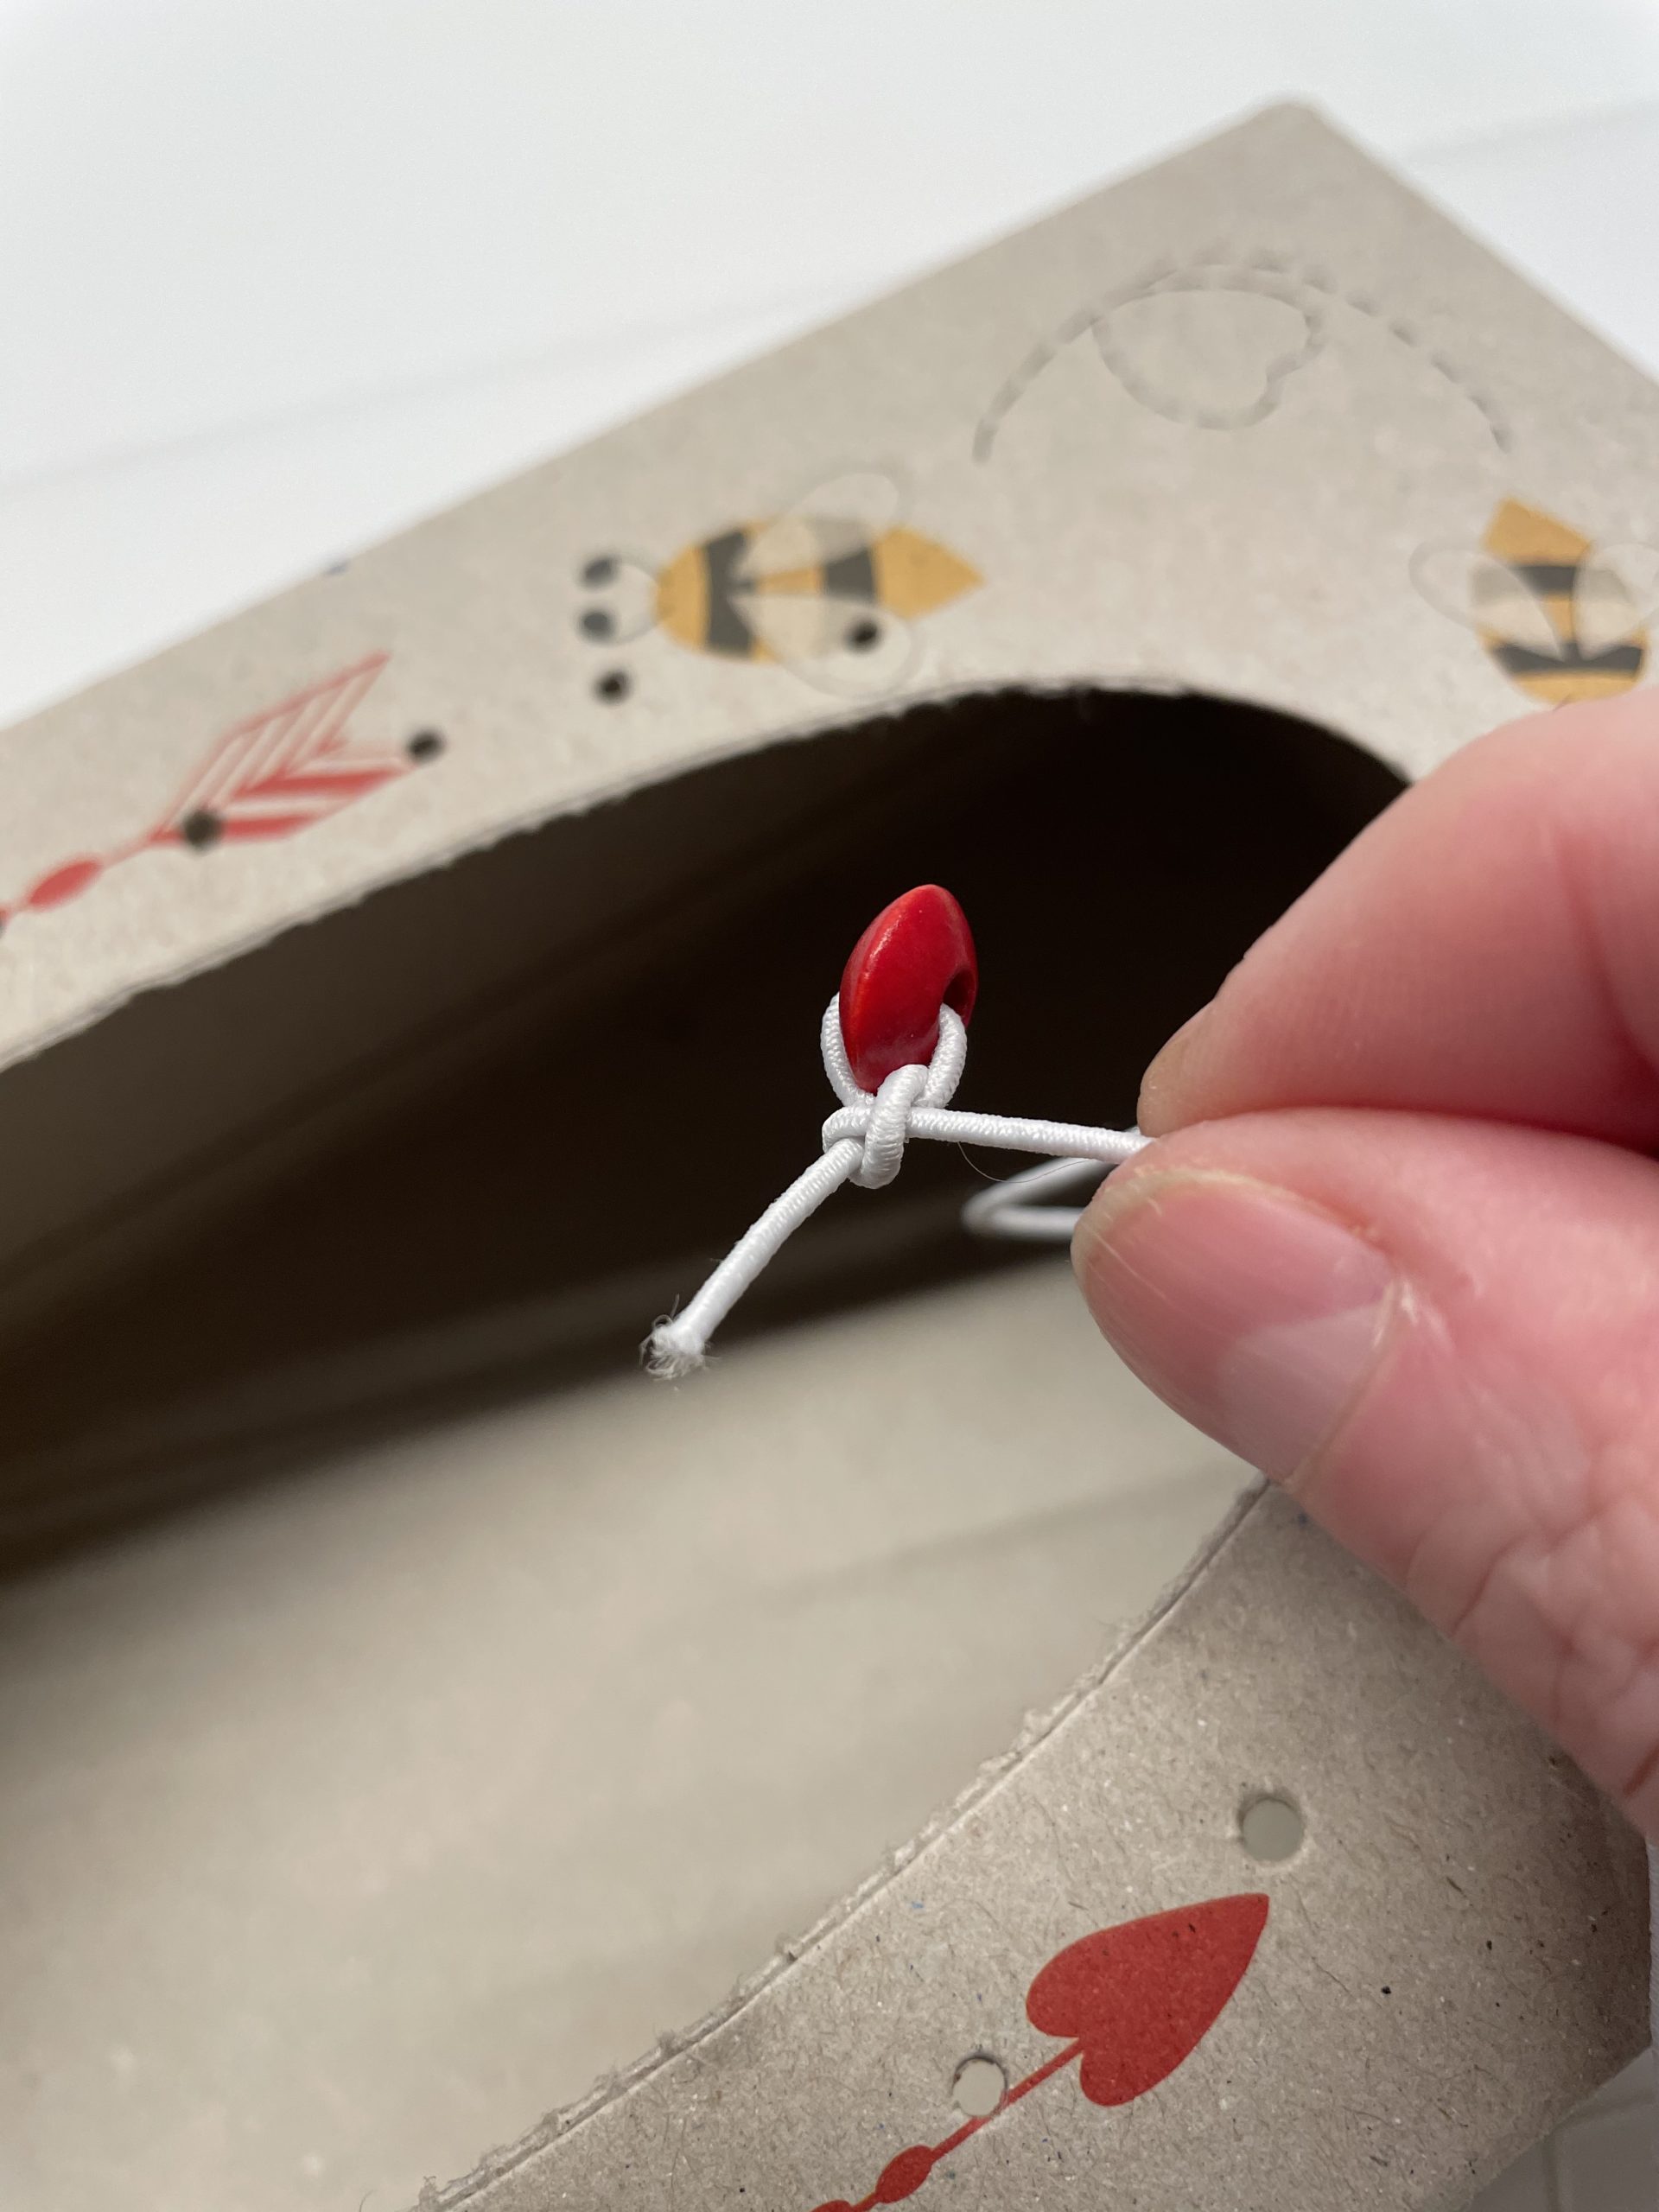
Now you're threading a pearl on the end of the thread.

Then you tie this pearl several times as close as possible to the last hole.
Remember that the pearl is on the inside of the last hole!
Keep the thread still in your hand. Check whether the rubber hat is tight enough before you release it. Only when all the strings are strongly tightened and the pearl is well knotted can you cut off the overhanging rubber thread about 1cm after the knot.
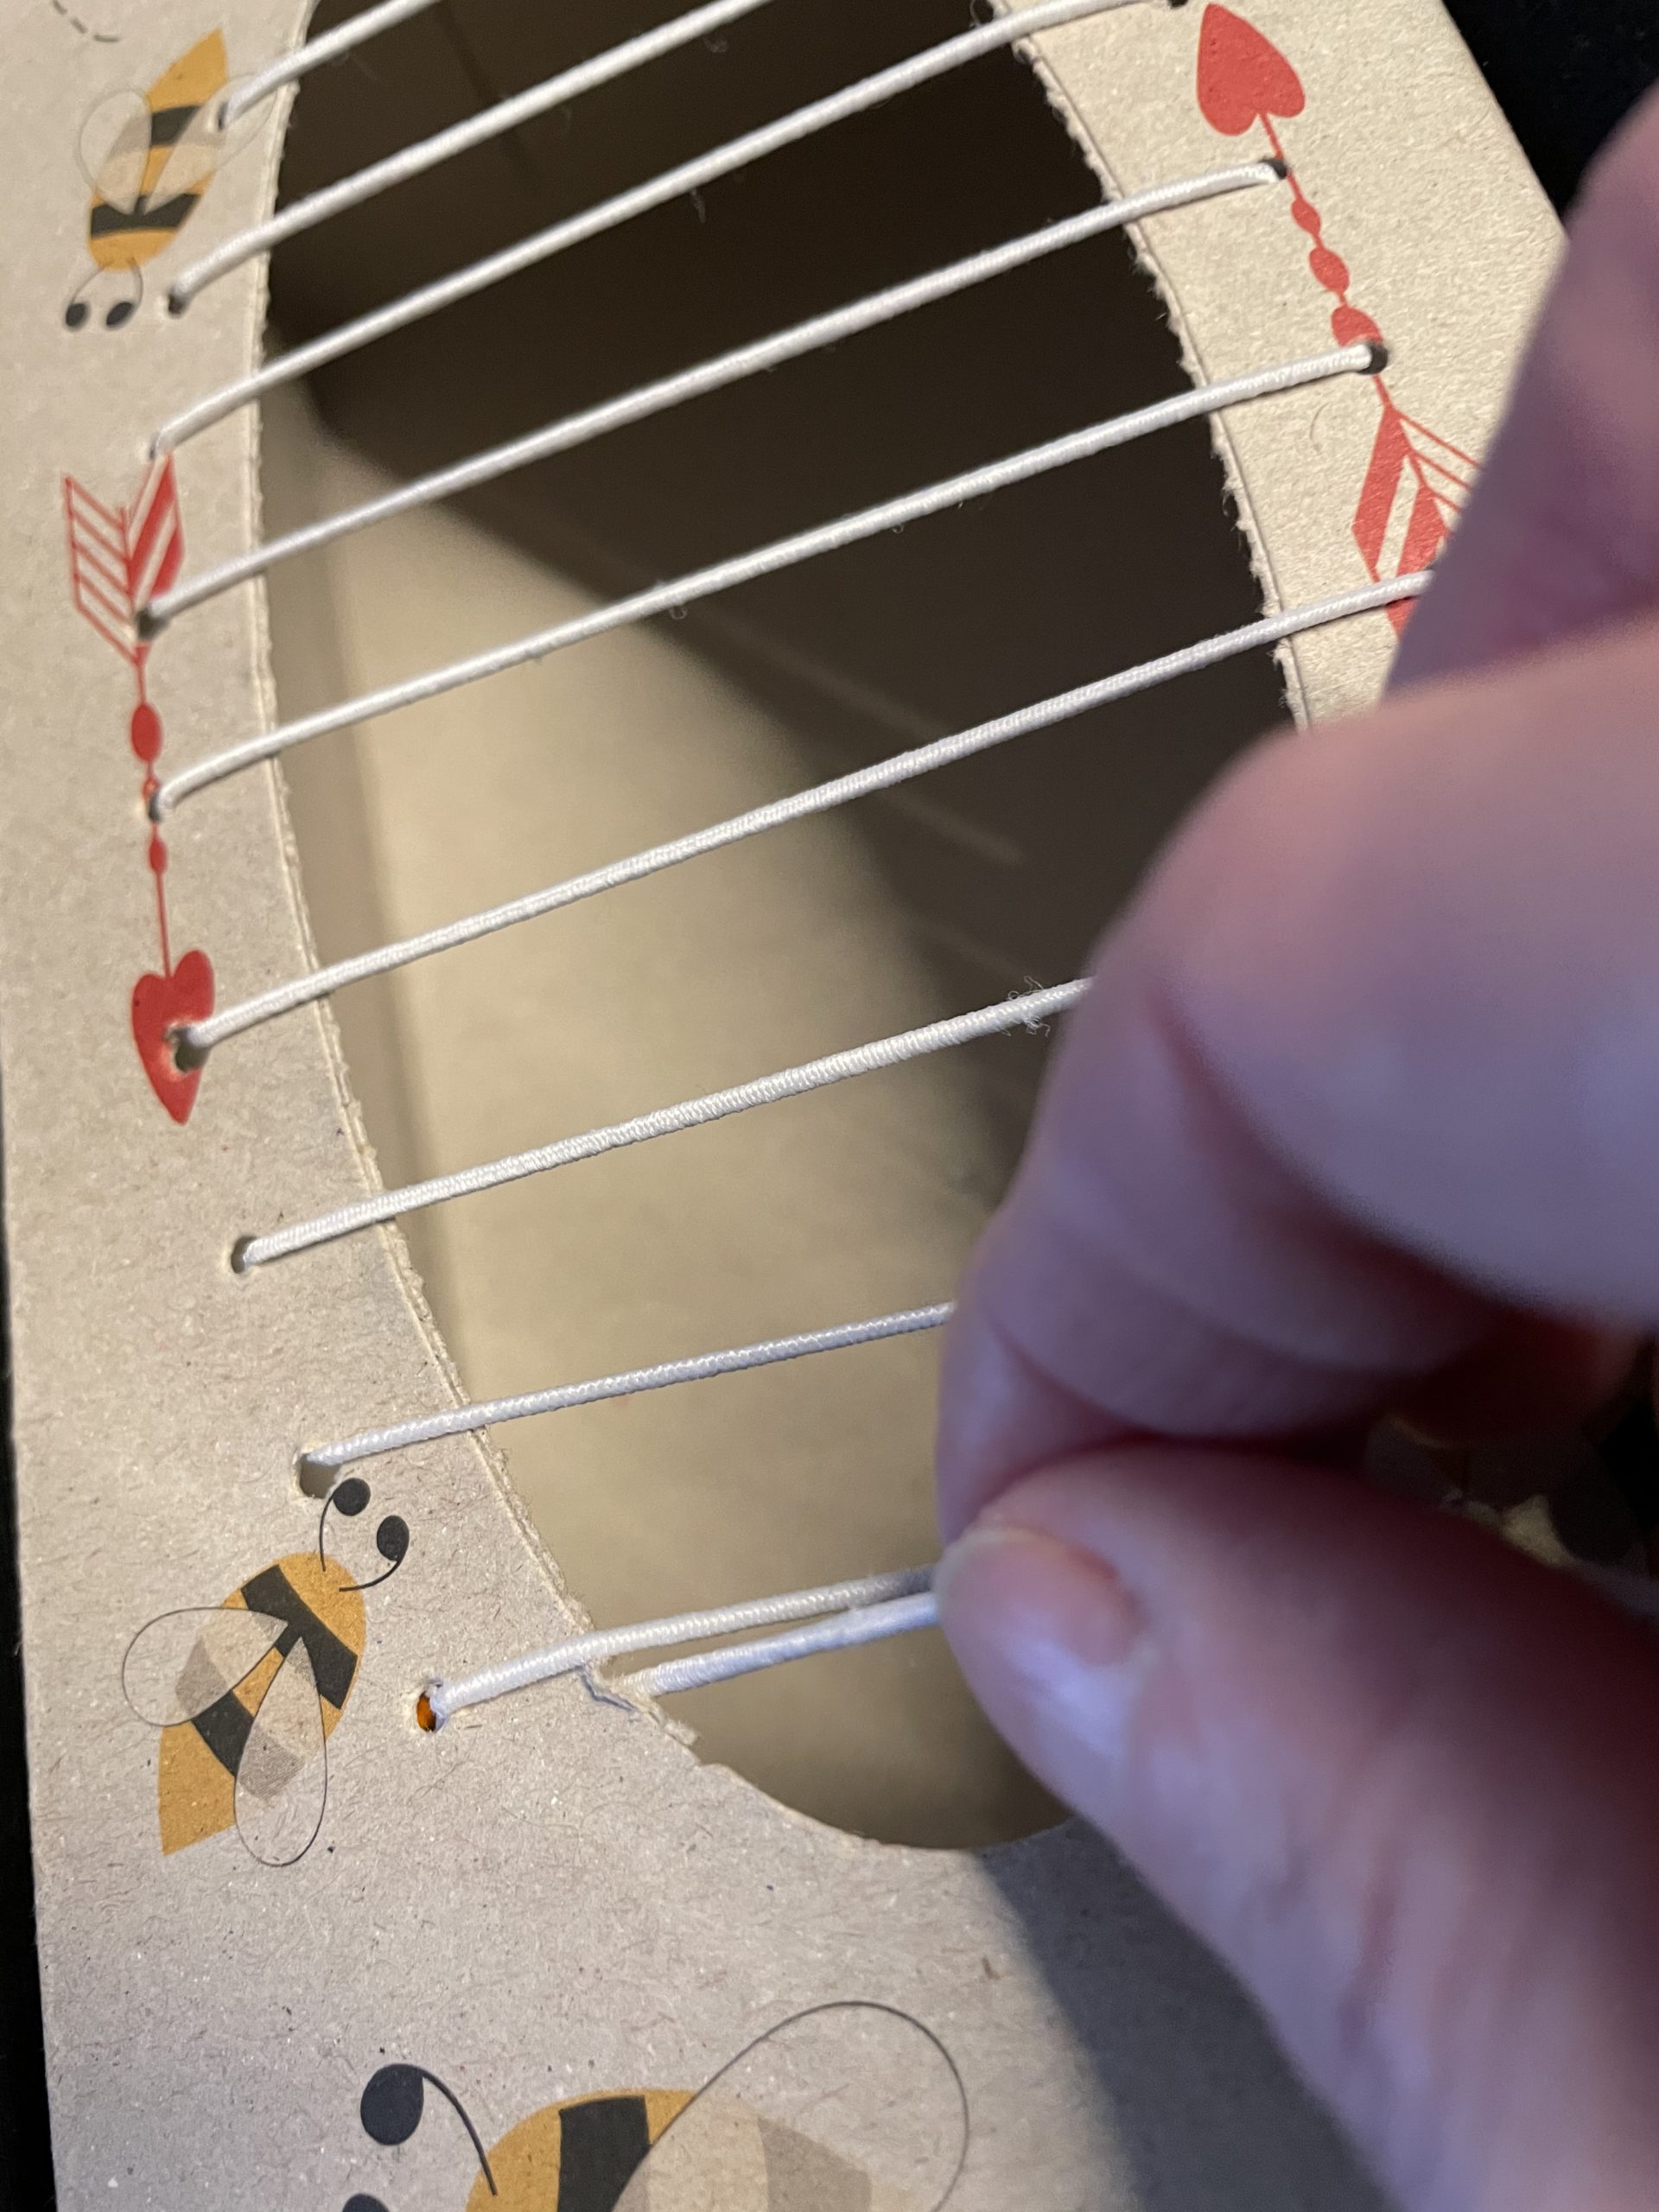
Your can is ready.
Try to raise the threads with two fingers and let them buckle. The rubber threads become strings and the plucking of the rubber threads creates tones.

Or you can move your finger over the strings of your instrument. Small children's hands can also move over the strings with the flat hand. The vibration of the strings under their hands fascinates children.
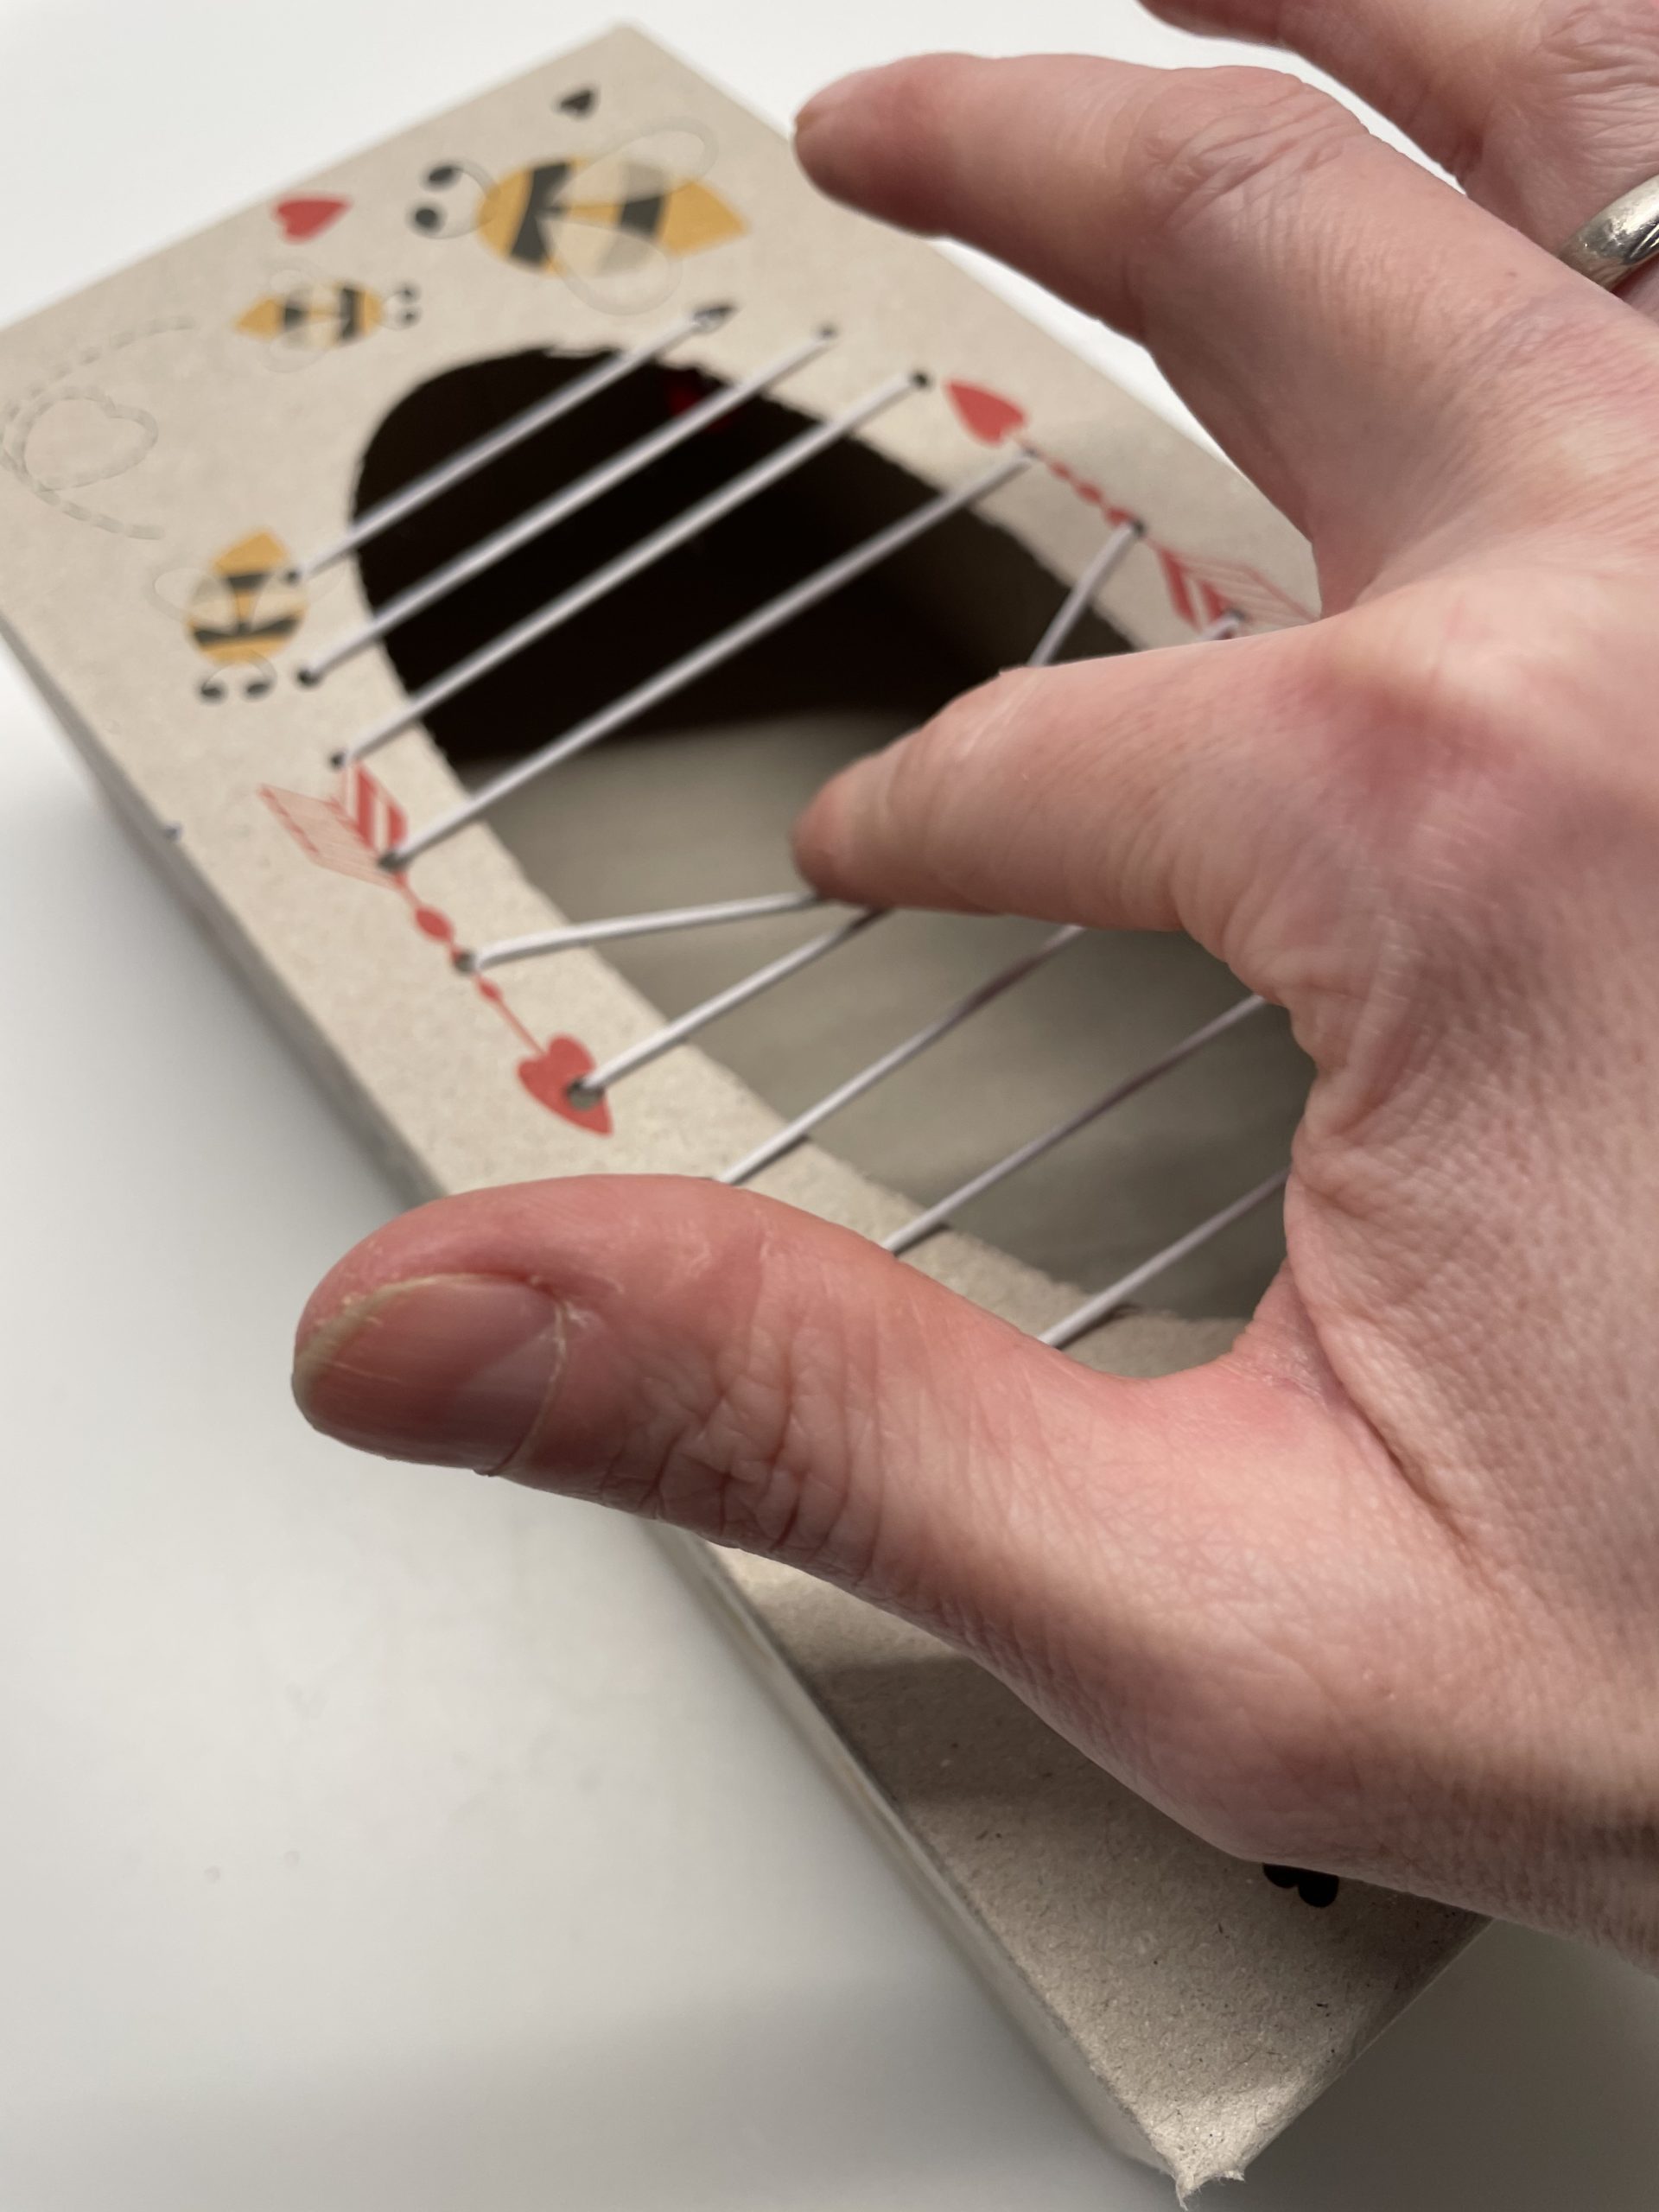
Accompany songs with the Zupf box. Experiment with the sounds and make your own music!
Have fun playing music!
Materials
Directions
First, remove the paper or foil from the opening of the empty handkerchief box.
Then you embellish and design the box as you like it. You can paint or glue the box. I used the box as it was because I like it so much.
The box must be dry and clean for further processing.
Now you only punch the two long sides of the hole with about 9 holes per side. First mark the position of the holes with pencil. Then you punch with the punch plier and with the help of an adult, because the cardboard box is very tight.
Here you can see the holes on one side. The short rounding is not perforated (see picture)!
Now you're punching the other long side.
Then pull the hat rubber through the first hole on any side. Do not cut the rubber off, but leave it on the coil. Then thread it from top to bottom through the first hole.
Pull the beginning of the thread about 10cm through the opening.
Then you thread a pearl on the beginning of the thread.
Then knot the pearl several times with the hat rubber.
Now pull the beginning of the thread back through the hole until the pearl lies on the inside of the box.
Unwrap the rubber from the coil and thread with the other end of the rubber.
Now thread the end of the hat rubber from top to bottom into the opposite hole.
Pull the rubber through until it covers the opening smoothly and loosely.
Now thread the thread directly through the adjacent hole from bottom to top. Pull the rubber back completely.
On the opposite side it is threaded again from top to bottom through the hole. Pulls the rubber to lie two parallel rubber cords loosely above the opening.
Again thread the thread from bottom to top through the adjacent hole and then from top to bottom into the opposite hole.
Repeat the process until you reach the last hole.
Make sure that all rubber threads lie loosely above the opening without tension.
The rubber cord ends inside. Leave the thread still long!
Now the gunmi is strained. Begins at the first hole.
For this, tighten the rubber piece by piece. Hold the pulled hat rubber well and work your way forward.
Pull the thread again and again!
The complete strings of your supply box are now firmly tensed.
Holds the end well and shortens the overhanging rubber to a length of about 10-15cm.
Now you're threading a pearl on the end of the thread.
Then you tie this pearl several times as close as possible to the last hole.
Remember that the pearl is on the inside of the last hole!
Keep the thread still in your hand. Check whether the rubber hat is tight enough before you release it. Only when all the strings are strongly tightened and the pearl is well knotted can you cut off the overhanging rubber thread about 1cm after the knot.
Your can is ready.
Try to raise the threads with two fingers and let them buckle. The rubber threads become strings and the plucking of the rubber threads creates tones.
Or you can move your finger over the strings of your instrument. Small children's hands can also move over the strings with the flat hand. The vibration of the strings under their hands fascinates children.
Accompany songs with the Zupf box. Experiment with the sounds and make your own music!
Have fun playing music!
Follow us on Facebook , Instagram and Pinterest
Don't miss any more adventures: Our bottle mail