Dragon card (upcycle)

AdventurerKatzi
Rating0.0235 times & (0) DifficultyAdvanced

From newspaper or from old book pages you can make a great card for an autumn festival or an invitation card to the "dragon rise". You can see how it works here. Enjoy trying it out.

Media Education for Kindergarten and Hort

Kind bastelt eine Rassel mit dem Navi
The Adventure Navi, the app for DIY projects, enables media education for the youngest.

Relief in everyday life, targeted promotion of individual children, independent learning and - without any pre-knowledge already usable by the youngest!
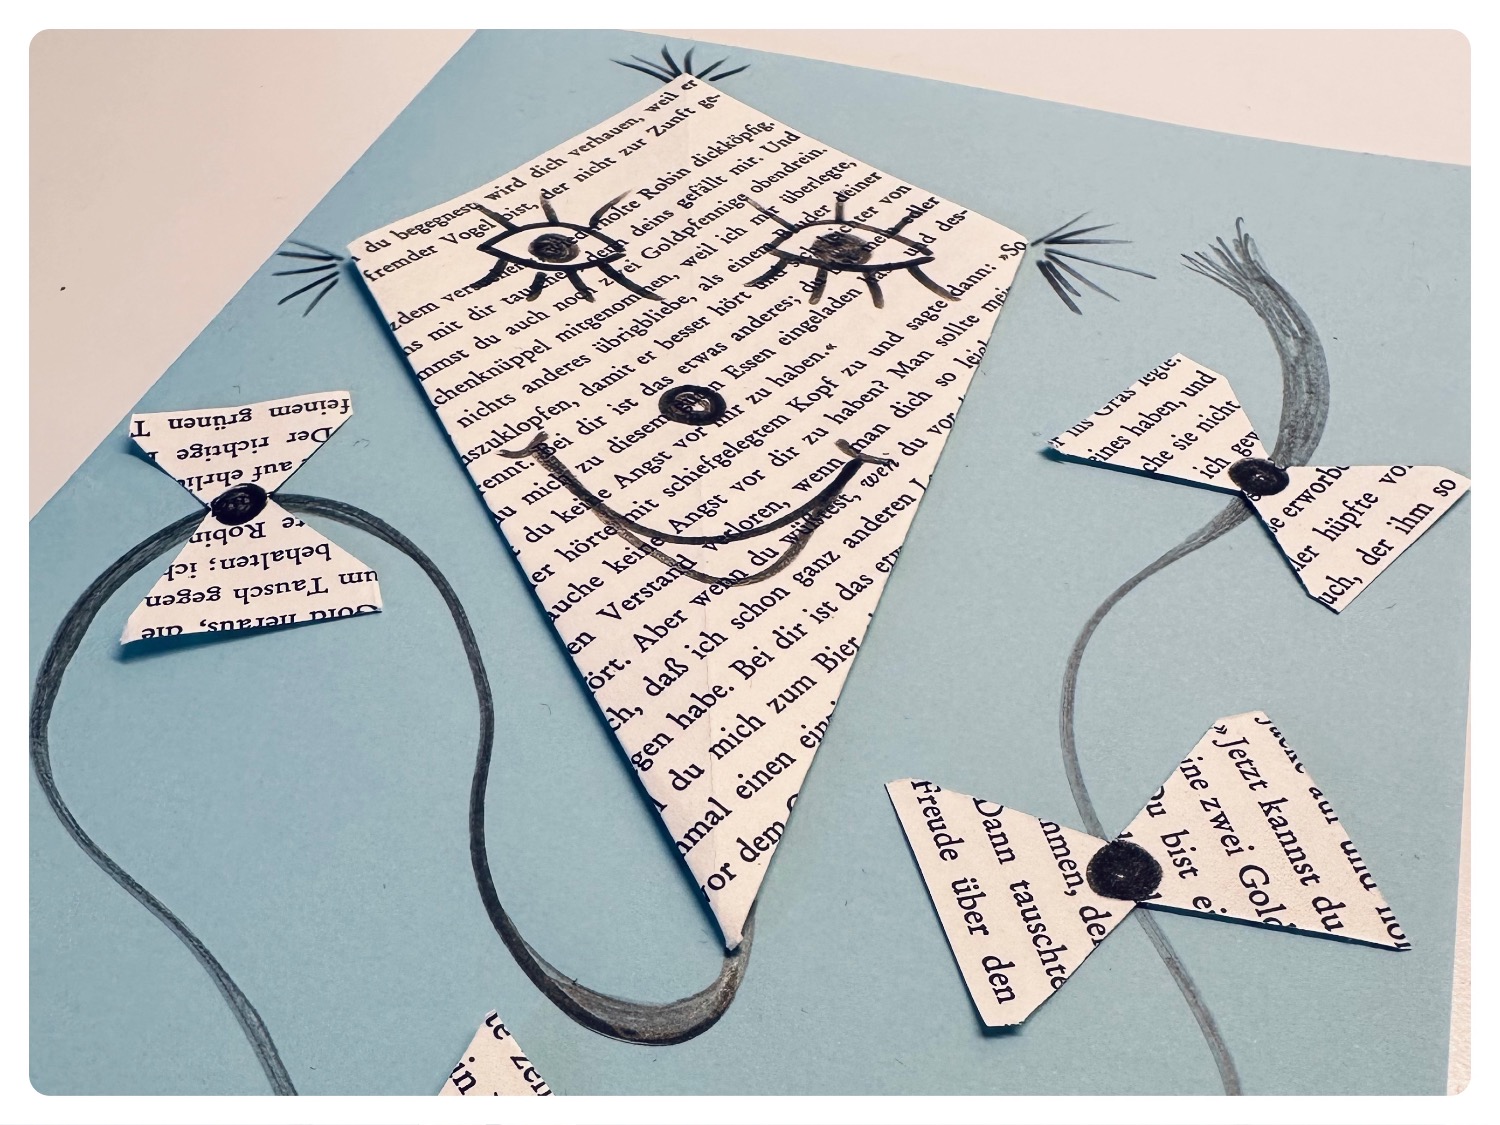


Titelbild zur Bastel- und DIY-Idee für Kinder '(1124) Drachen Karte (upcyceln)'
Material for1 Child
Prep Time5 min.Adv. Time25 min.Total Time30 min.
 1 Book page; orNewsprint
 1 Sound paper DIN A4= DIN A5 folding card
 1 Ruler
 1 Pencil
 1 Felt pen black
 1 Glue
 1 Builder's pad
All links marked with a shopping cart lead to Amazon - here we have selected products that we would order ourselves and in part also ordered. In a qualified purchase via the advertising link, we as Amazon partner receive a commission, for you there are no costs. You thus support our cost- and advertising banner-free, educational offer.
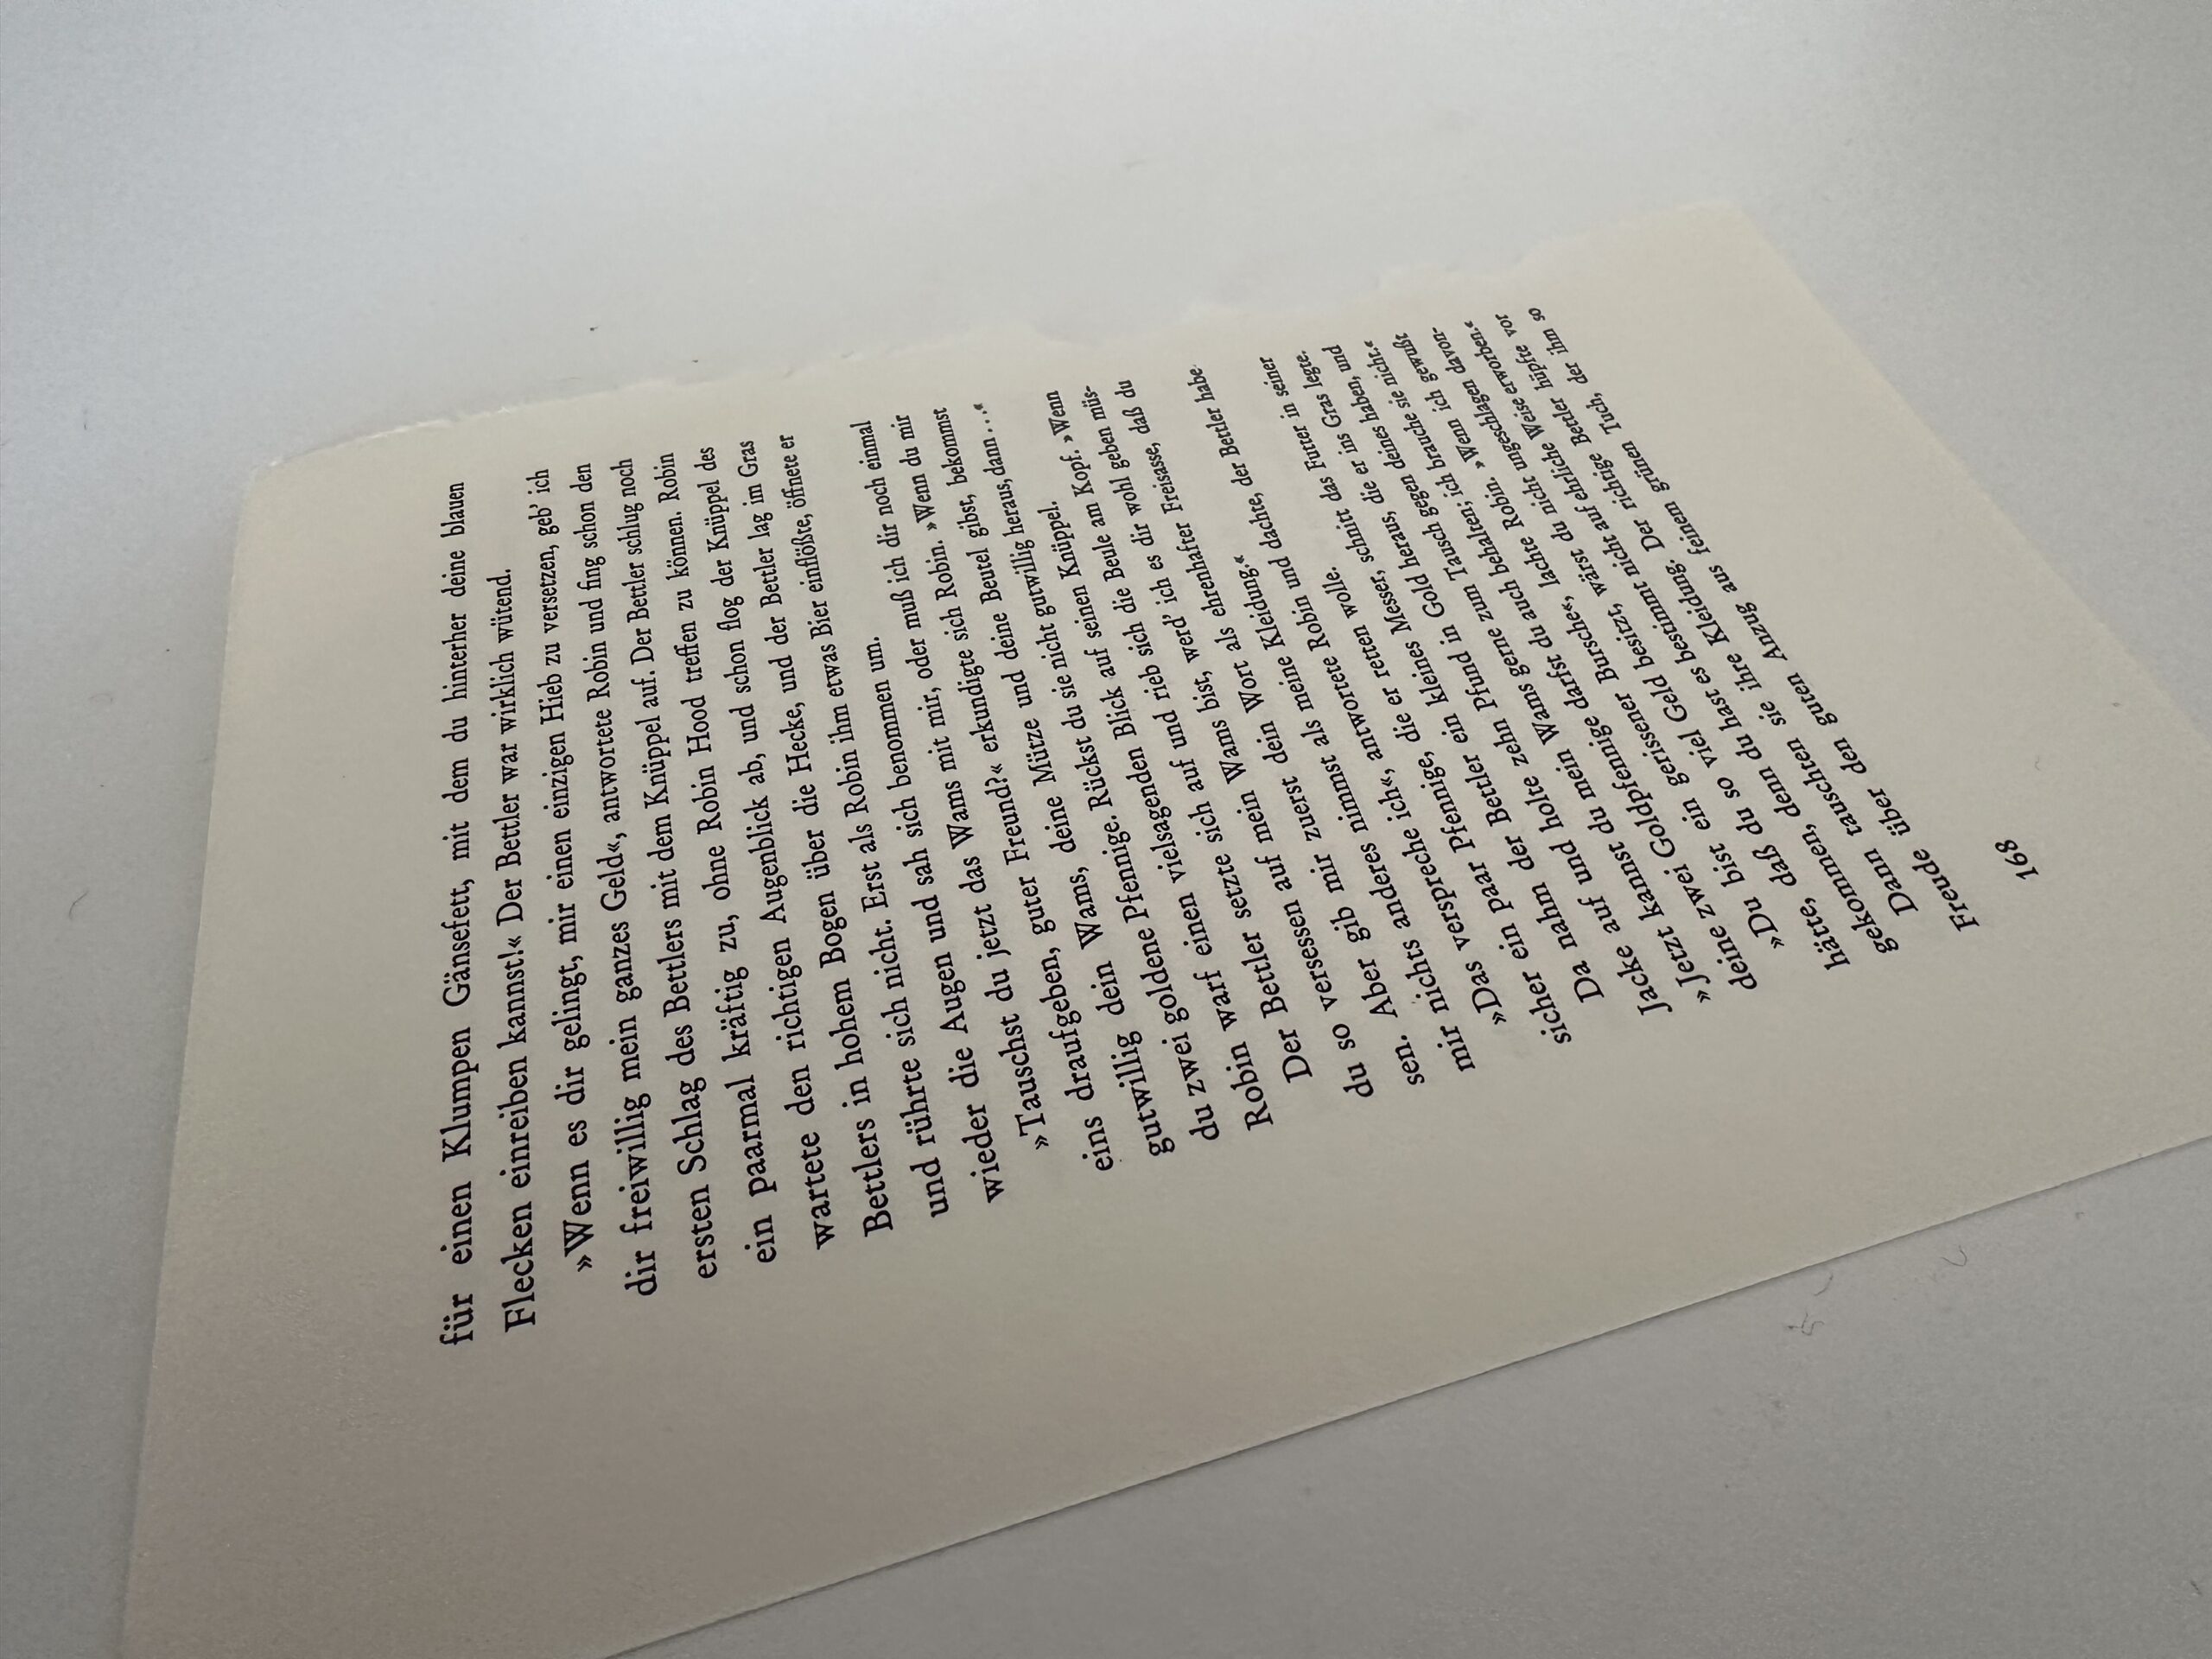
1

You need a labeled book page.

Bild zum Schritt 1 für das Bastel- und DIY-Abenteuer für Kinder: 'Du brauchst eine beschriftete Buchseite.'

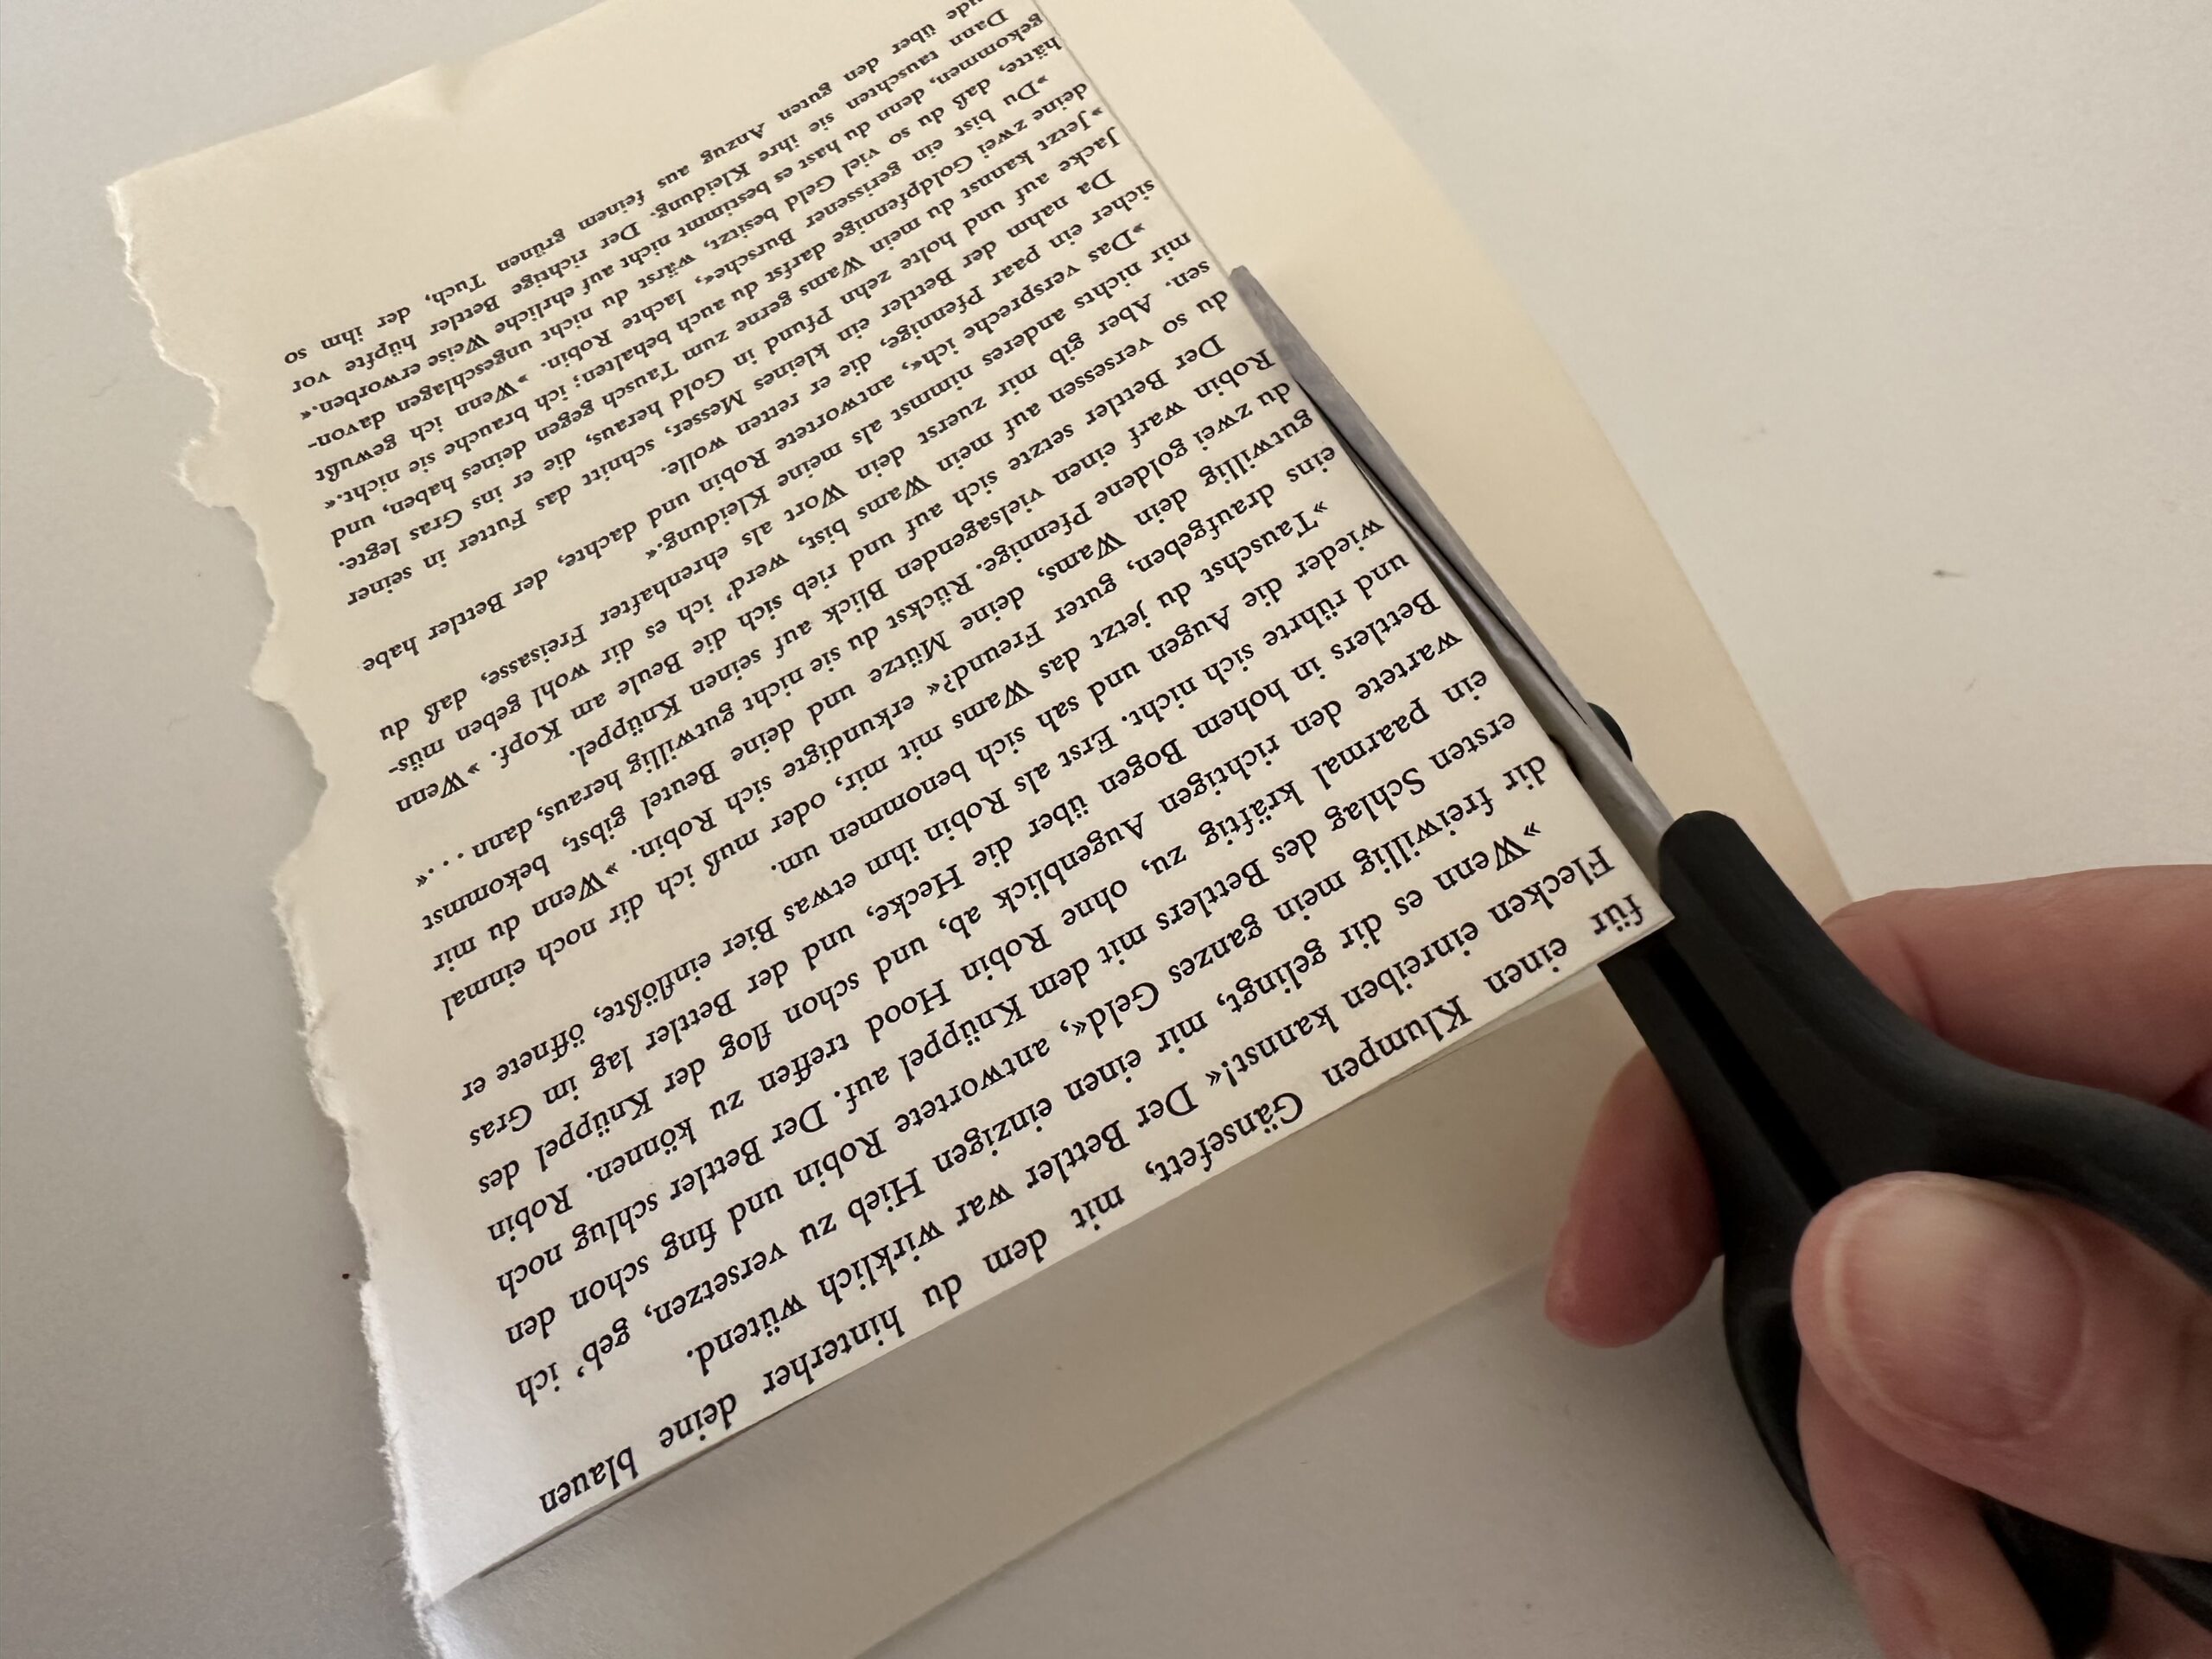
2

The required sheet should be completely filled with letters. Cut off the unwritten edge. To get a straight edge, use a ruler.
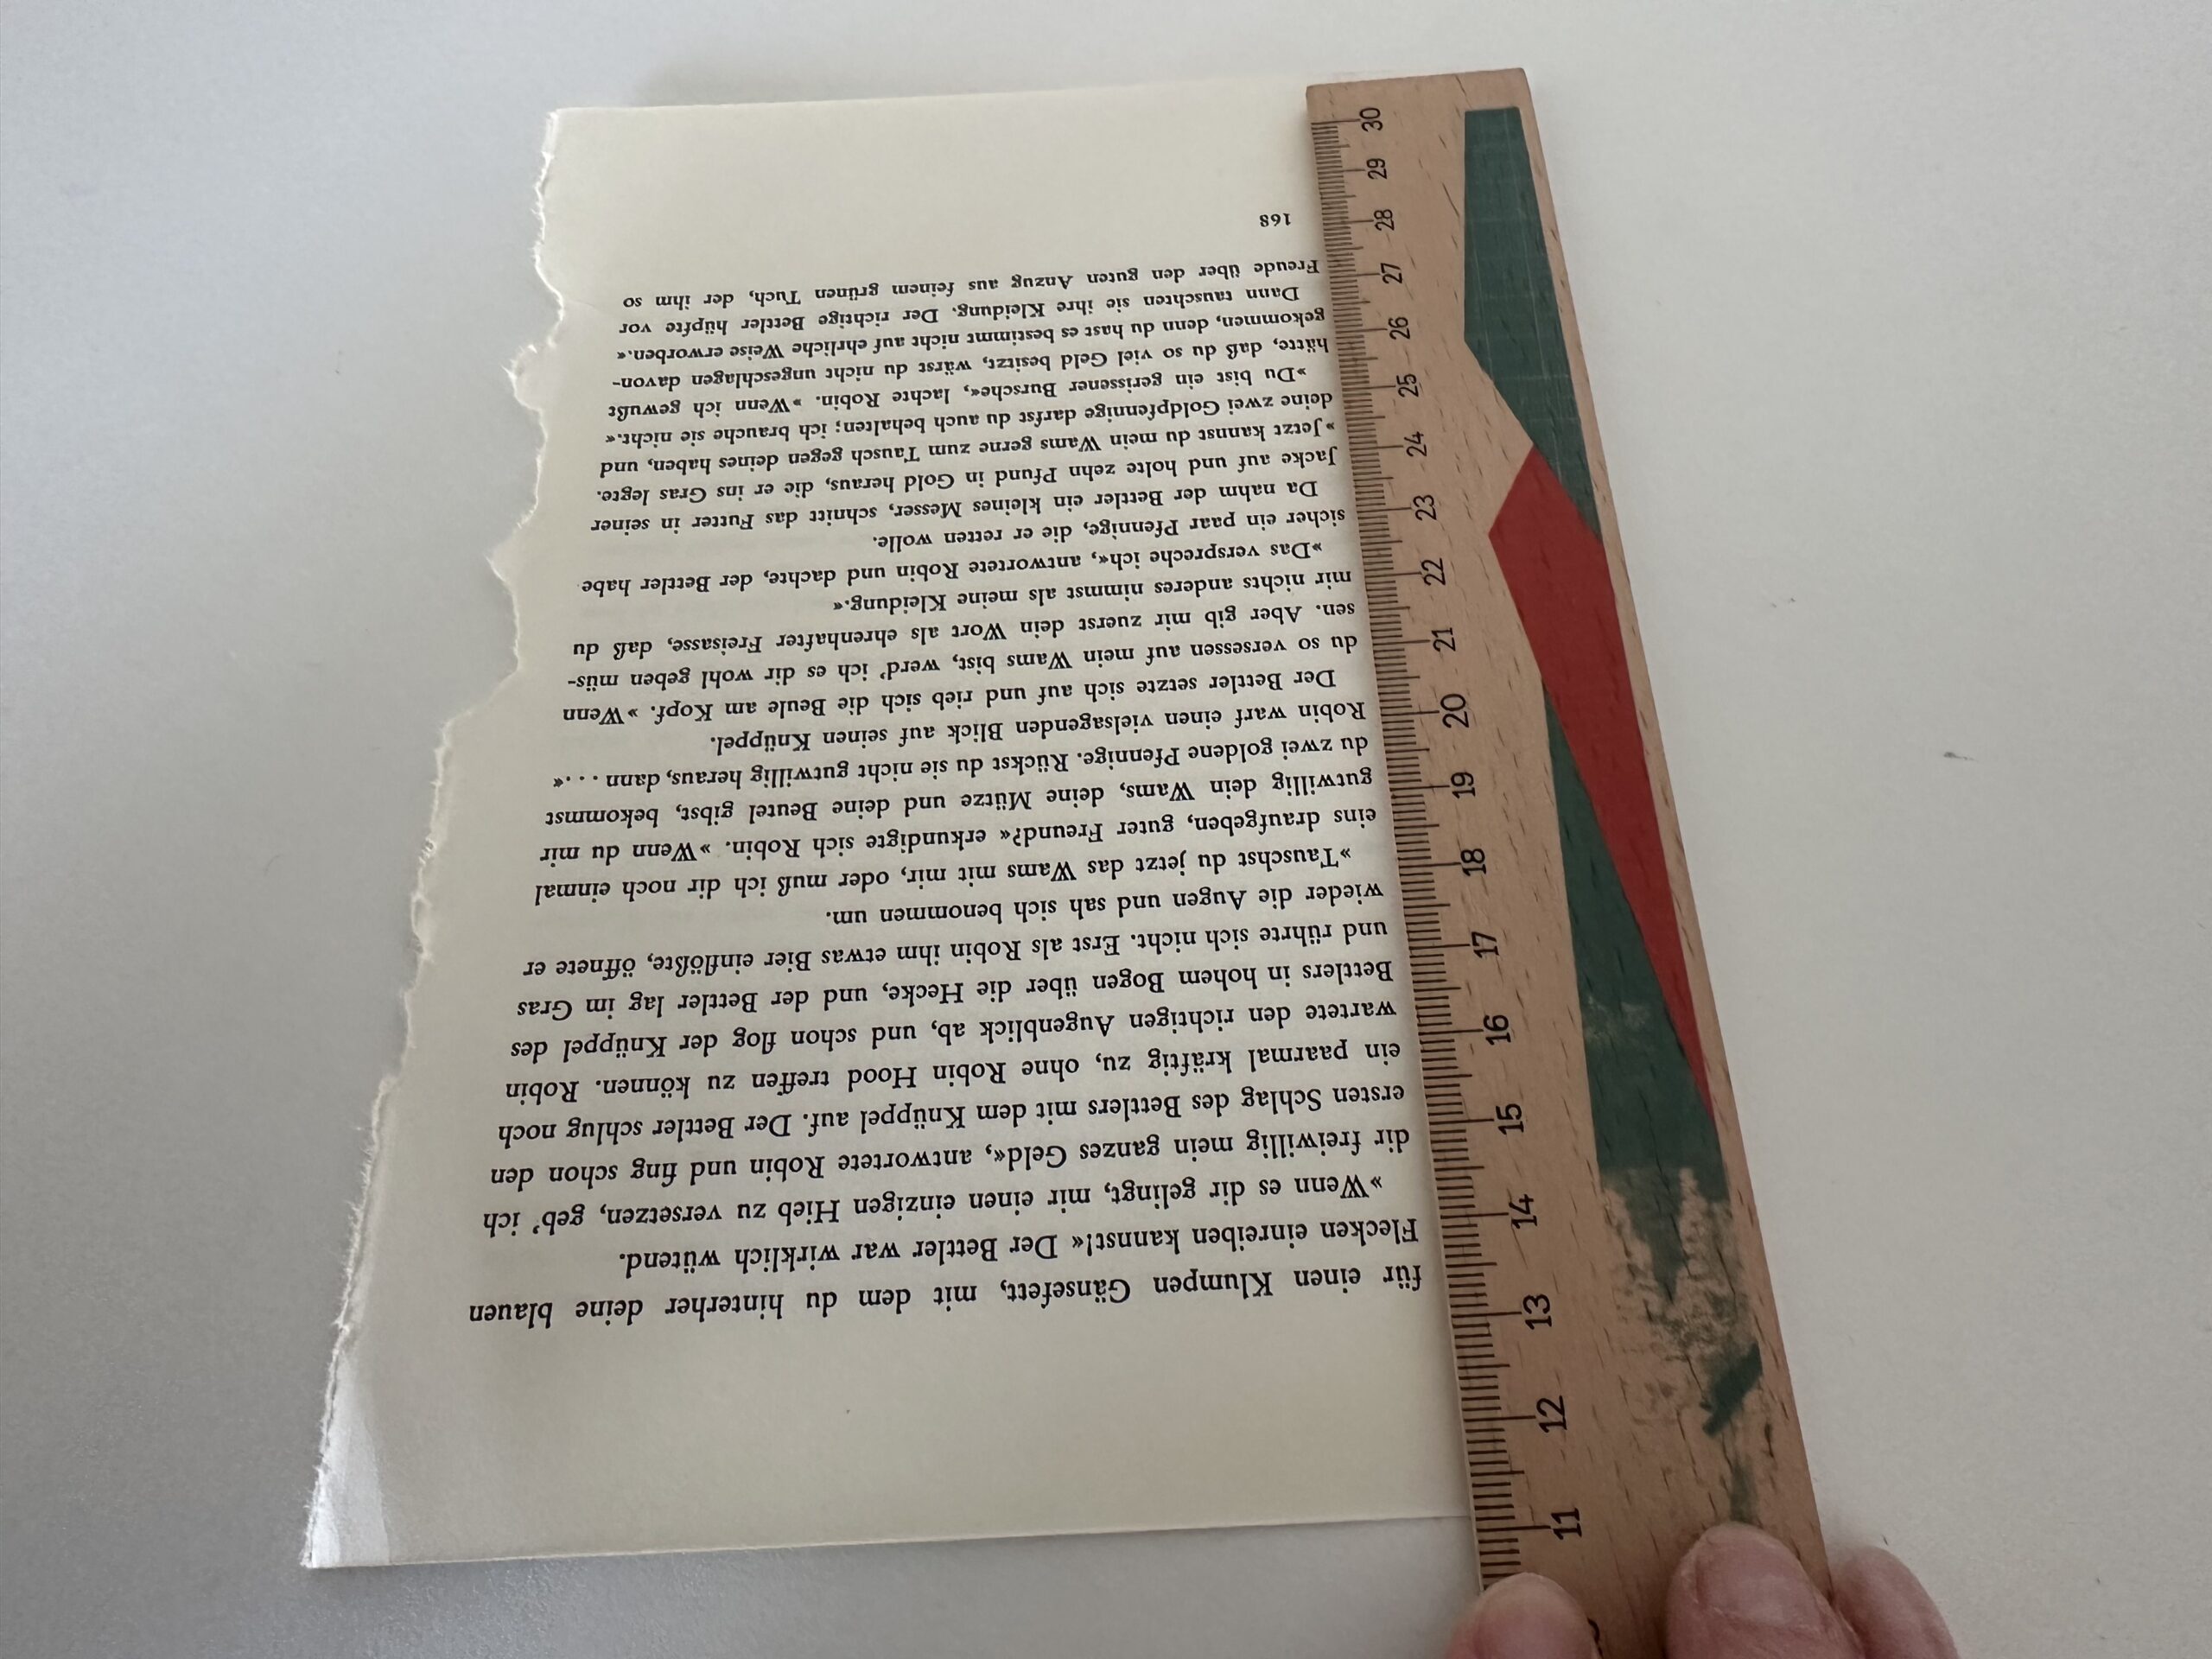
Bild zum Schritt 2 für das Bastel- und DIY-Abenteuer für Kinder: 'Das benötigte Blatt sollte komplett mit Buchstaben gefüllt sein. Schneide...'

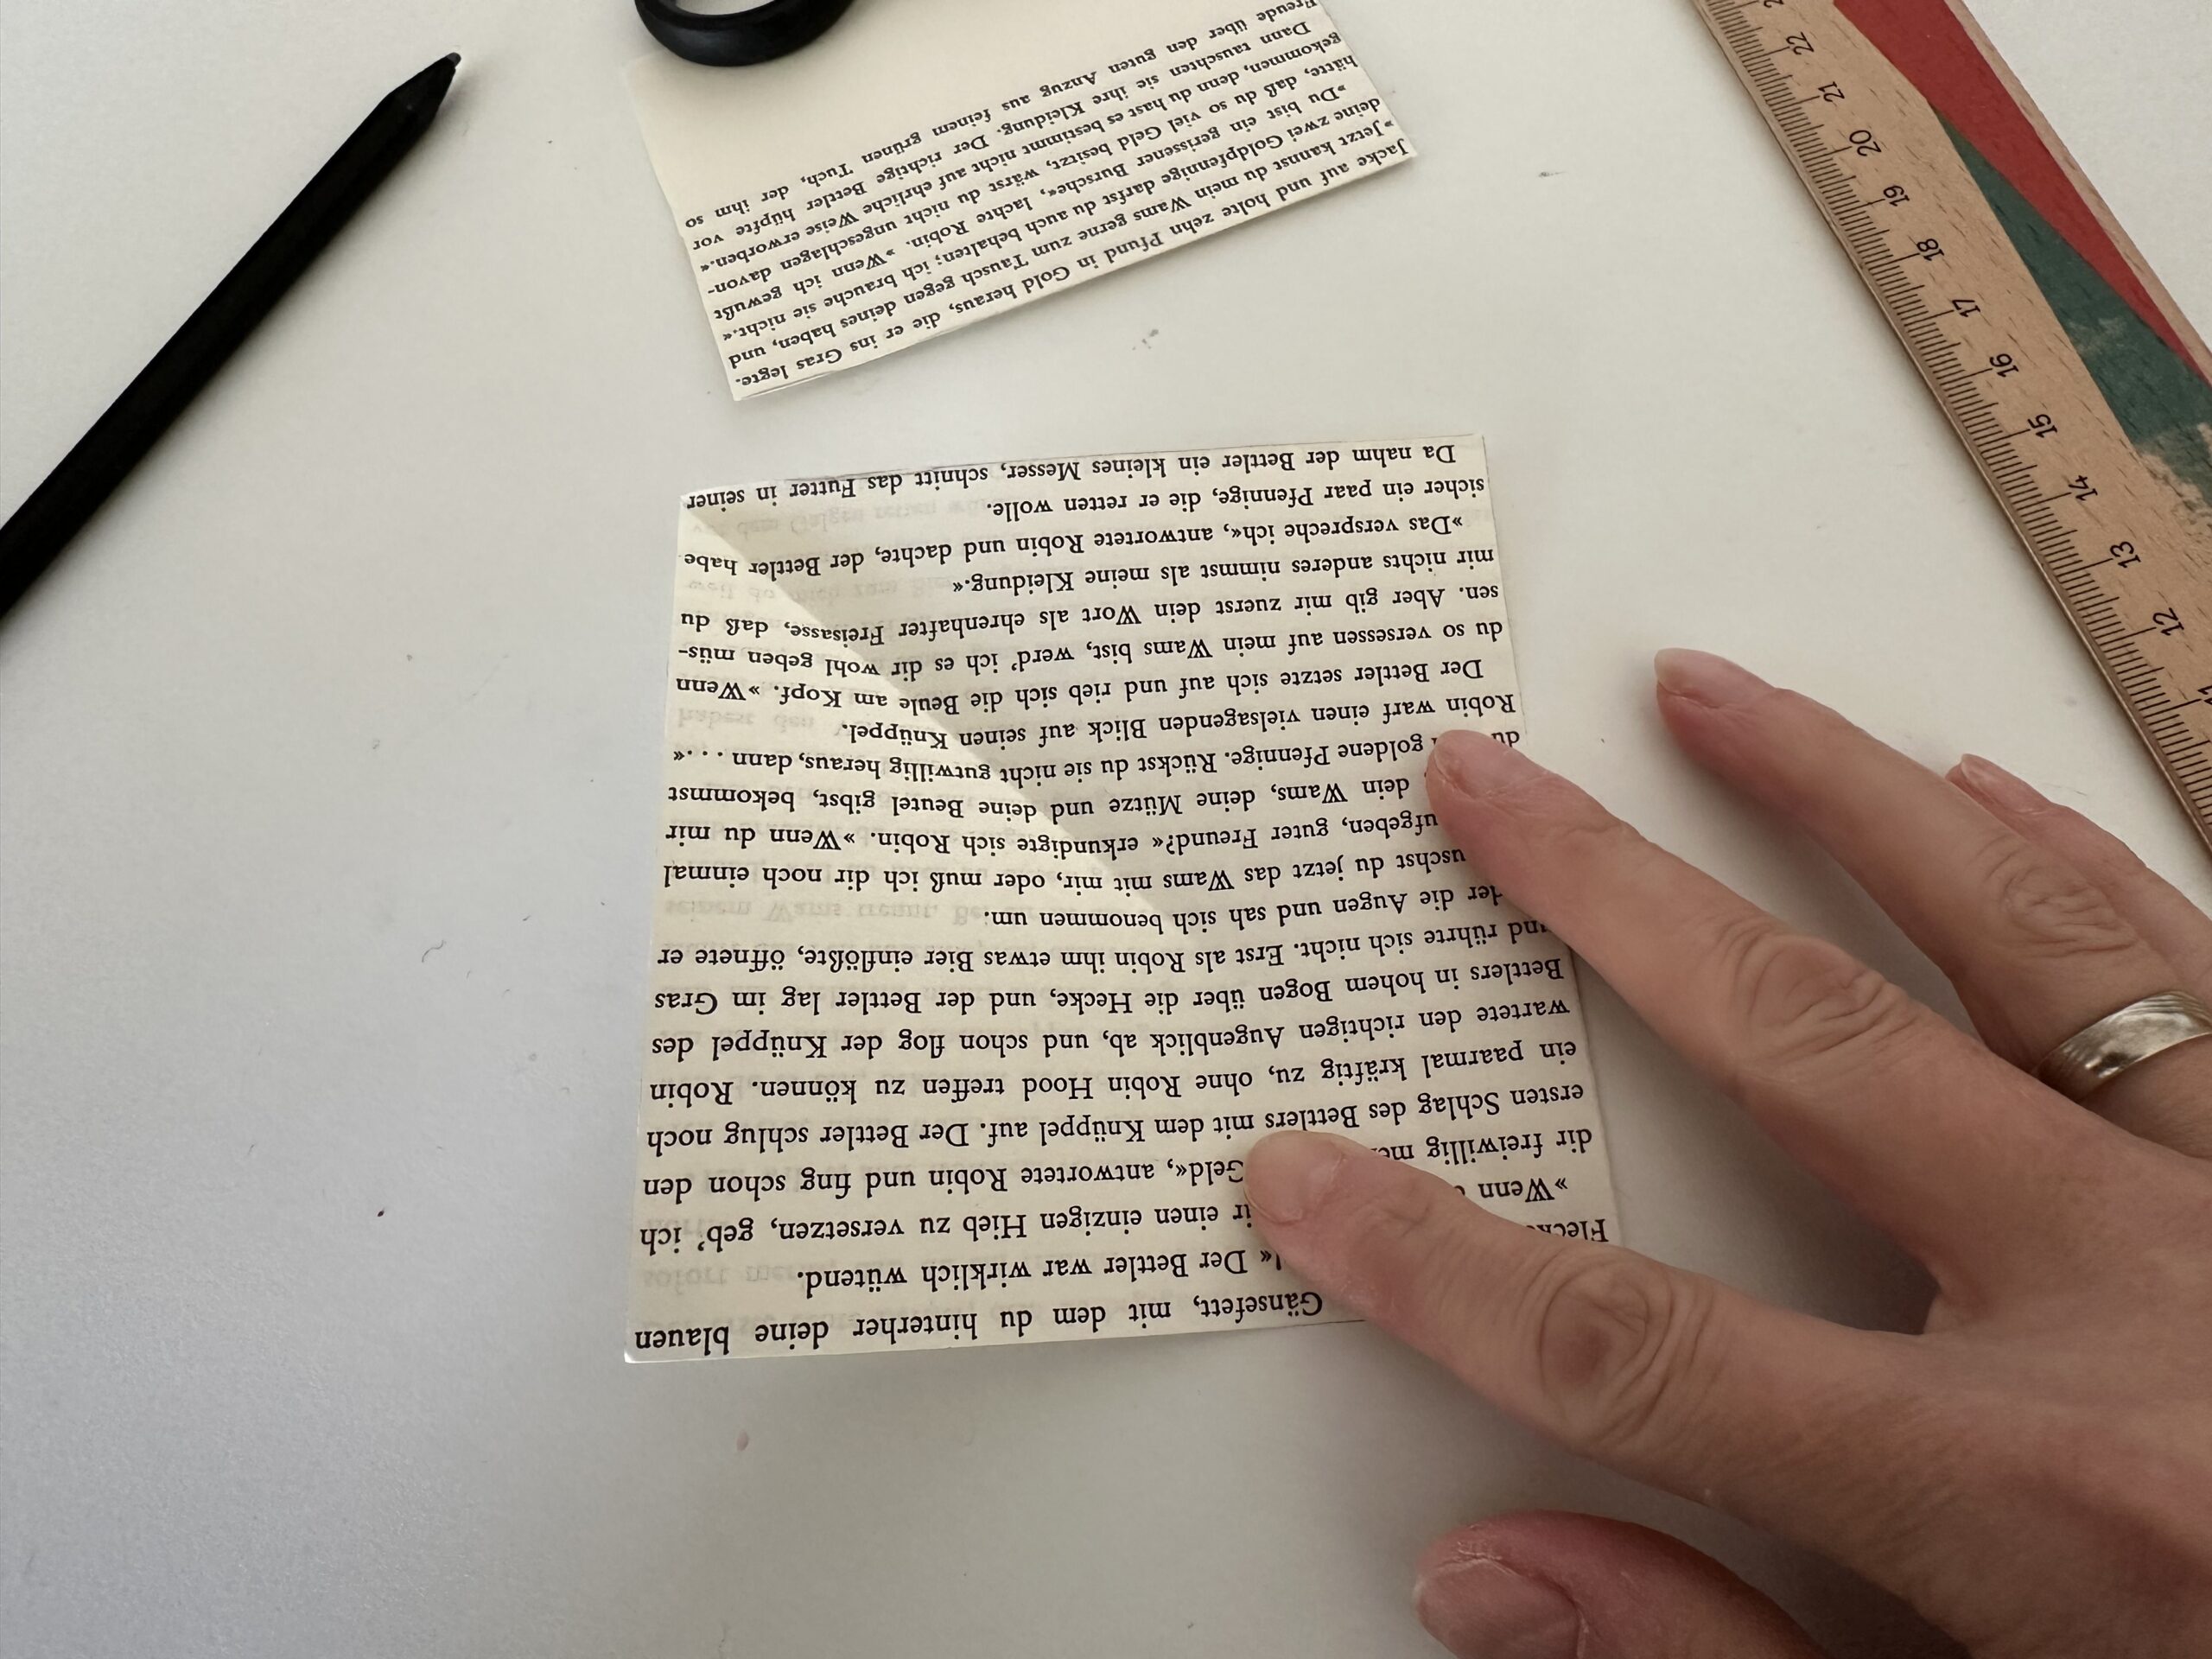
3

Cut your marks along the paper.

Bild zum Schritt 3 für das Bastel- und DIY-Abenteuer für Kinder: 'Schneide deinen Markierungen entlang das Papier zu.'

4

A square is now needed from the paper.
You'll see how you do it.

Bild zum Schritt 4 für das Bastel- und DIY-Abenteuer für Kinder: 'Aus dem Papier wird nun ein Quadrat benötigt.  ...'

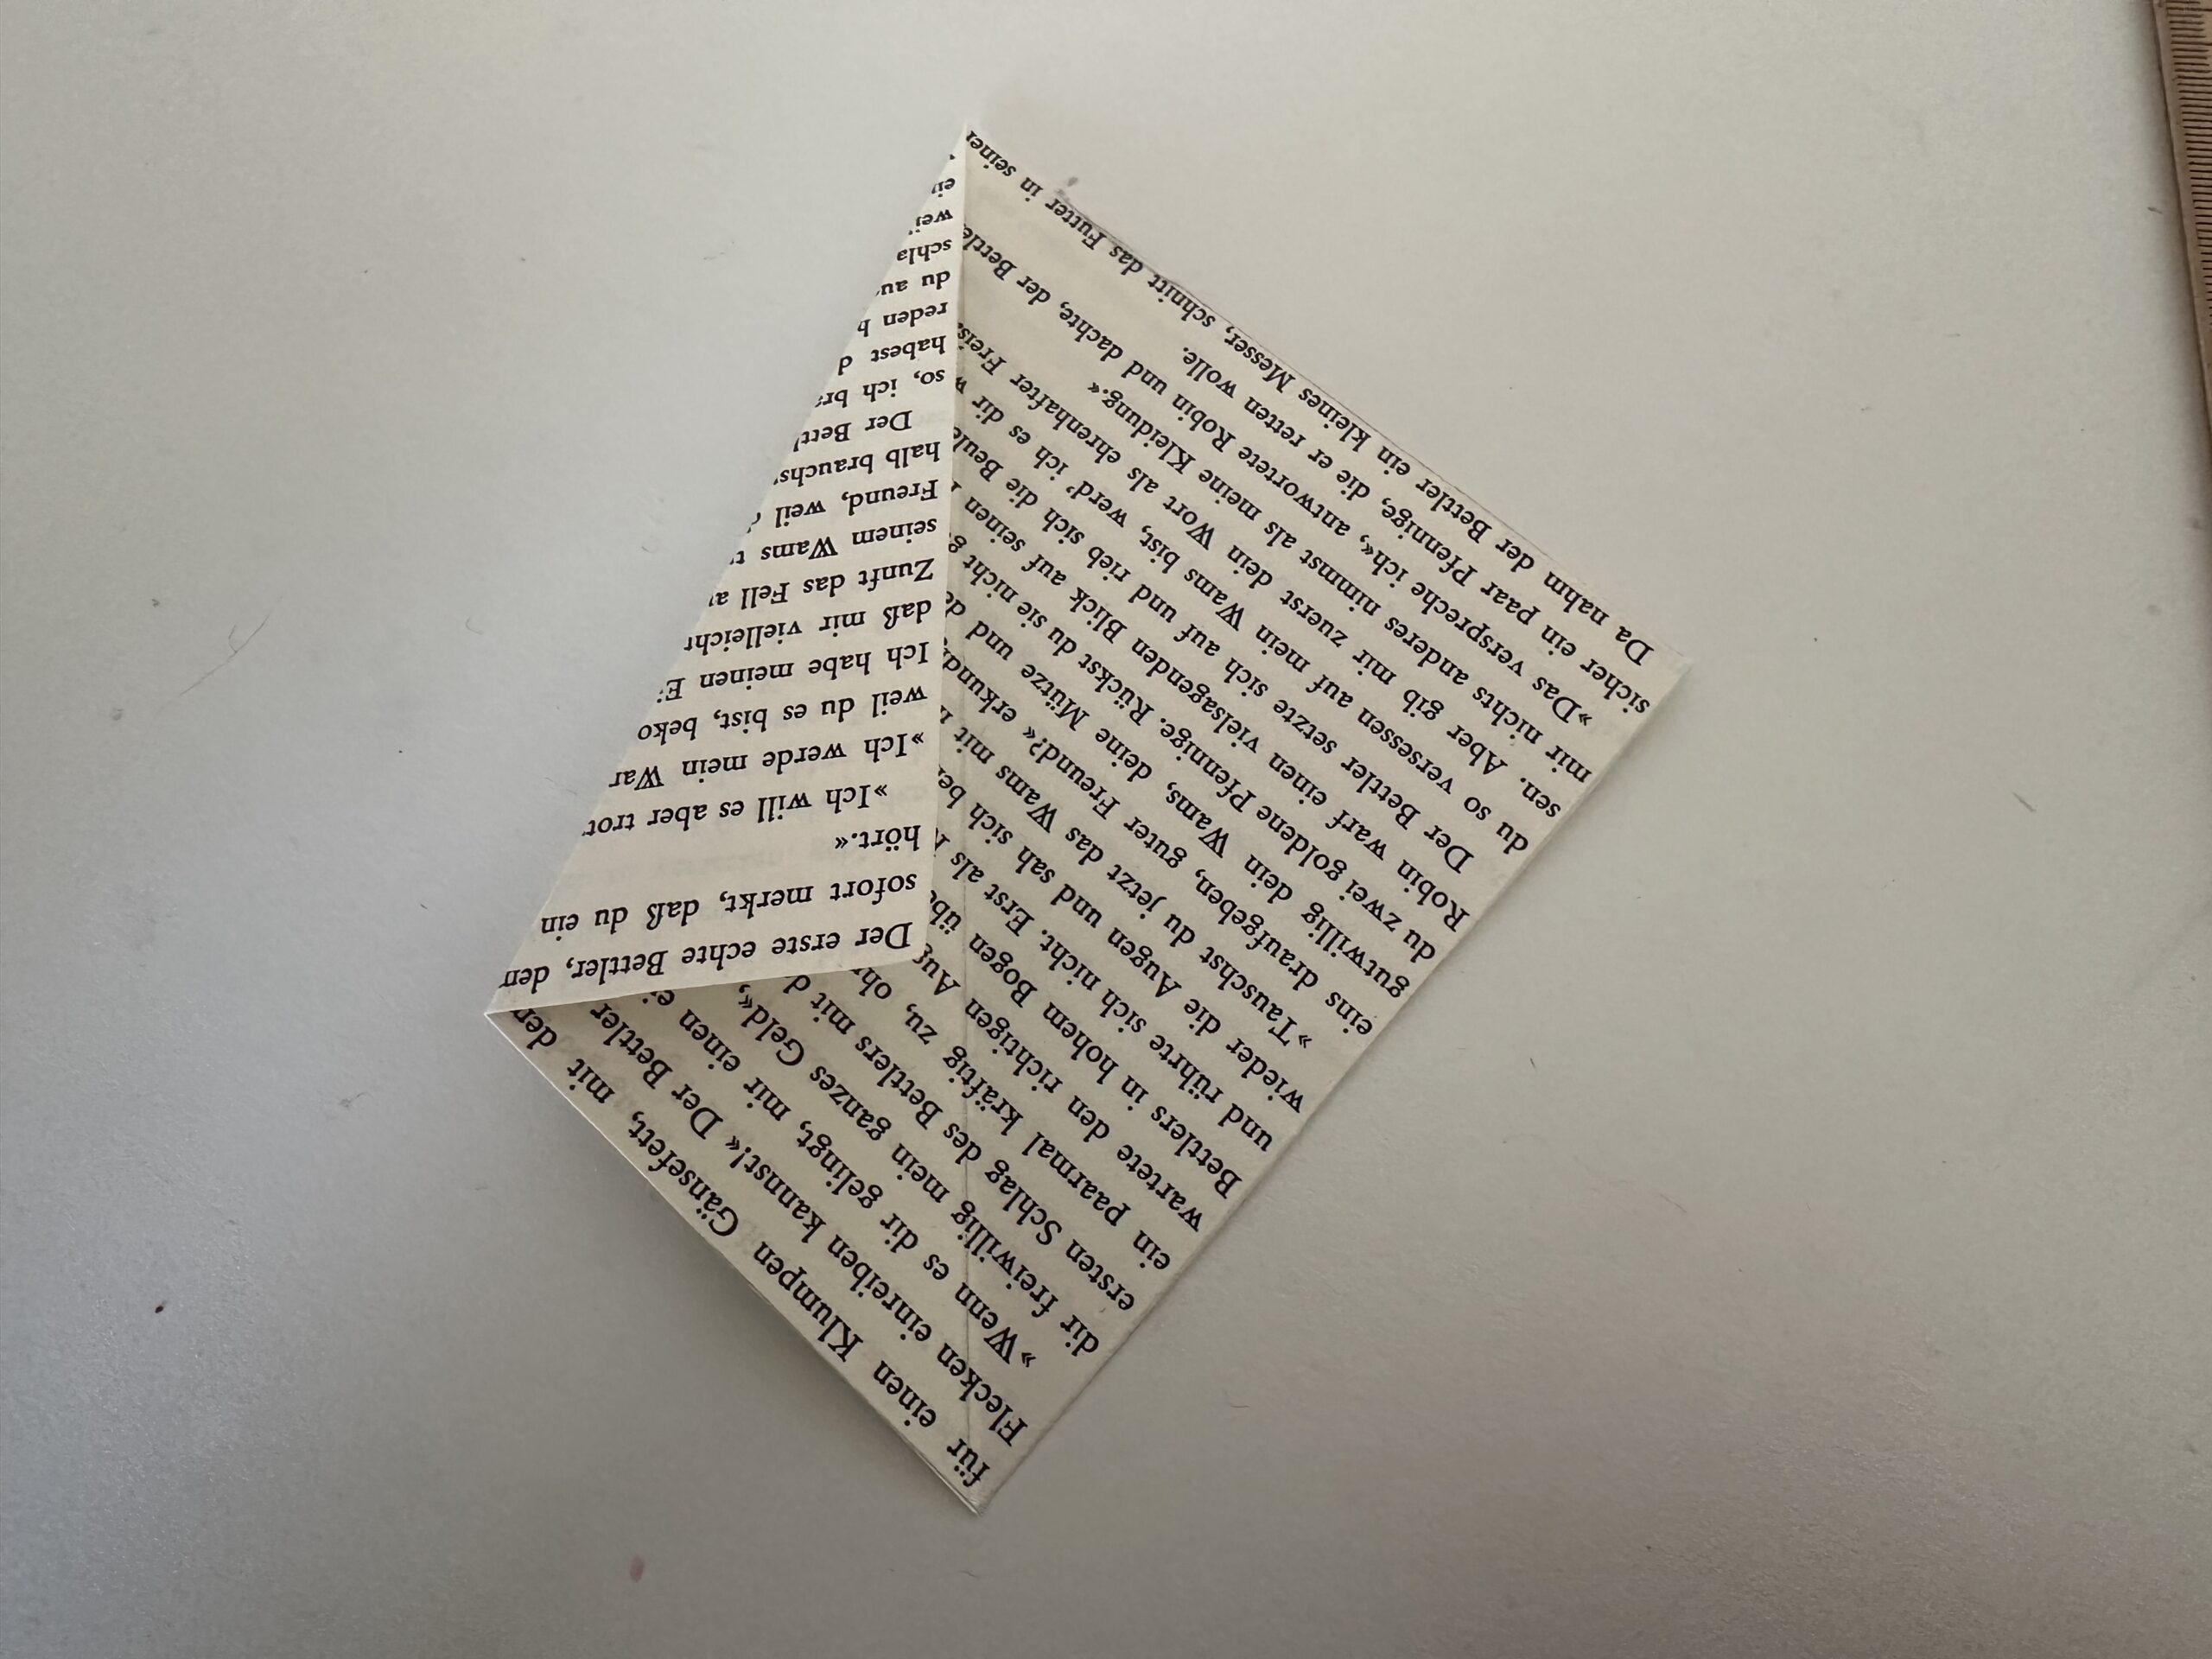
5

Take the lower left corner and fold it to the opposite side. Here, the lower edge of the paper is completely placed on the right outer edge.

Bild zum Schritt 5 für das Bastel- und DIY-Abenteuer für Kinder: 'Nimm die untere linke Ecke und falte sie zur gegenüberliegenden...'

6

A triangle emerges.
The corners lie on top of each other.

Bild zum Schritt 6 für das Bastel- und DIY-Abenteuer für Kinder: 'Es entsteht ein Dreieck.   Die Ecken liegen als...'

7

Press the paper flatten and strip the fracture smoothly.

Bild zum Schritt 7 für das Bastel- und DIY-Abenteuer für Kinder: 'Drücke das Papier platt und streife den Bruch glatt.'

8

All you need is the triangle you created.
The overhanging paper is now cut off. To do this, mark the top as in the next pictures.

Bild zum Schritt 8 für das Bastel- und DIY-Abenteuer für Kinder: 'Du brauchst nur das entstandene Dreieck.   Das überstehende...'

9

Make a line with a pencil so you can cut off a straight line.

Bild zum Schritt 9 für das Bastel- und DIY-Abenteuer für Kinder: 'Mache einen Strich mit einem Bleistift damit du eine gerade...'

10

Cut off the paper strip with the scissors.

Bild zum Schritt 10 für das Bastel- und DIY-Abenteuer für Kinder: 'Schneide den Papierstreifen mit der Schere ab.'

11

The double-lined triangle is ready.

Bild zum Schritt 11 für das Bastel- und DIY-Abenteuer für Kinder: 'Das doppelt liegende Dreieck ist fertig.'

12

Shut the triangle apart.

Bild zum Schritt 12 für das Bastel- und DIY-Abenteuer für Kinder: 'Klappe das Dreieck auseinander.'

13

Turn the square so that the center line points to you.

Bild zum Schritt 13 für das Bastel- und DIY-Abenteuer für Kinder: 'Drehe das Quadrat so, dass die Mittellinie auf dich zeigt.'

14

Fold the upper left edge to the centre line.

Bild zum Schritt 14 für das Bastel- und DIY-Abenteuer für Kinder: 'Falte die linke obere Kante an die Mittellinie.'

15

Gently strike the fracture.

Bild zum Schritt 15 für das Bastel- und DIY-Abenteuer für Kinder: 'Streiche den Bruch glatt.'

16

Fold the upper right edge to the middle line as well. Also strike this fracture smoothly.

Bild zum Schritt 16 für das Bastel- und DIY-Abenteuer für Kinder: 'Falte die rechte obere Kante ebenfalls an die Mittellinie. Streiche...'

17

Finished is the dragon. Turn the folded leaf. Place the dragon in front of you so that the long tip points downwards.

Bild zum Schritt 17 für das Bastel- und DIY-Abenteuer für Kinder: 'Fertig ist der Drache. Wende das Gefaltete Blatt. Lege den...'

18

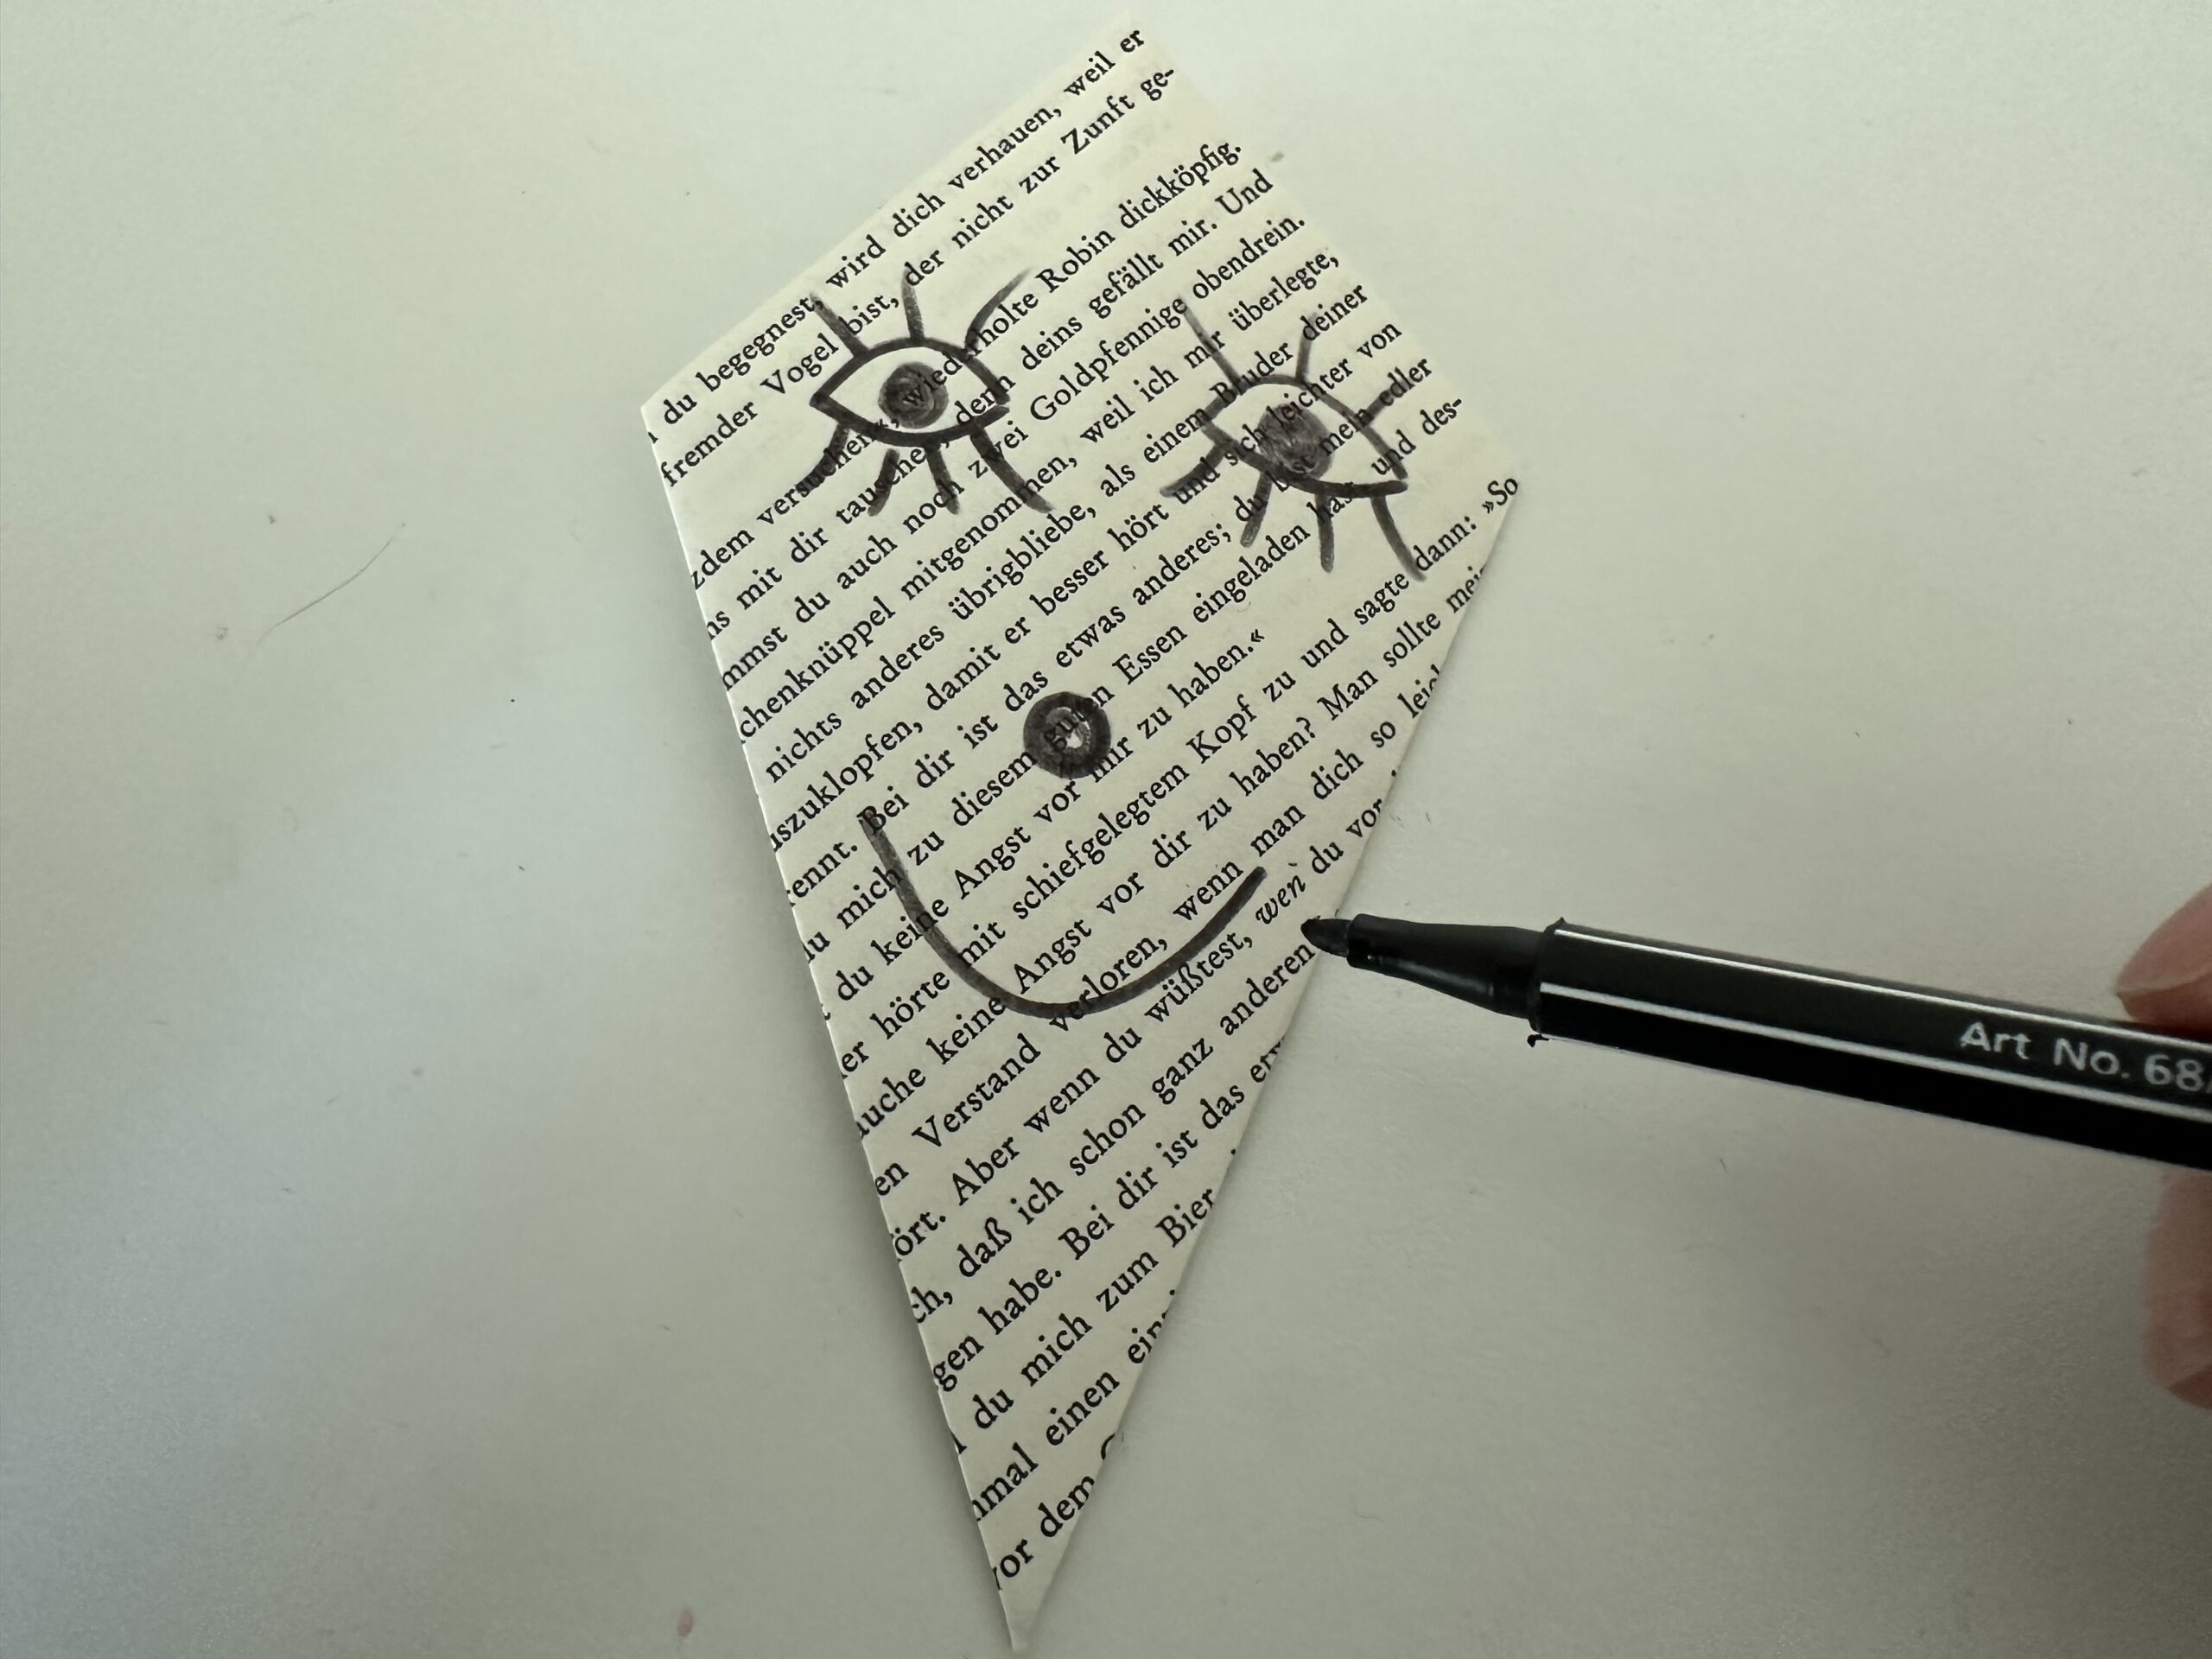
Put a face on the dragon.

Bild zum Schritt 18 für das Bastel- und DIY-Abenteuer für Kinder: 'Male ein Gesicht auf den Drachen.'

19

From a narrow strip of paper you can now cut loops. As you can see in the following steps.

Bild zum Schritt 19 für das Bastel- und DIY-Abenteuer für Kinder: 'Aus einem schmalen Streifen Papier kannst du nun noch Schleifen...'

20

Fold the paper strip as a "hedge staircase".
Fold the paper strip about 2 centimeters wide and then turn the whole around.

Bild zum Schritt 20 für das Bastel- und DIY-Abenteuer für Kinder: 'Falte den Papierstreifen als „Heckentreppe“.   Falte den Papierstreifen...'

21

Fold the paper in the opposite direction again 2 centimeters. This creates a zigzag strip.

Bild zum Schritt 21 für das Bastel- und DIY-Abenteuer für Kinder: 'Falte das Papier in die entgegengesetzte Richtung wieder 2 Zentimeter....'

22

Put a bow on the top of the leaf.

Bild zum Schritt 22 für das Bastel- und DIY-Abenteuer für Kinder: 'Male auf das oberste Blatt eine Schleife.'

23

Cut out the jigs from the outside inwards.

Bild zum Schritt 23 für das Bastel- und DIY-Abenteuer für Kinder: 'Schneide von außen nach innen die Zacken heraus.'

24

Fold the paper strip. You recognize the individual loops.

Bild zum Schritt 24 für das Bastel- und DIY-Abenteuer für Kinder: 'Falte den Papierstreifen auf. Du erkennst die einzelnen Schleifen.'

25

Cut them apart with the scissors if they are still related.

Bild zum Schritt 25 für das Bastel- und DIY-Abenteuer für Kinder: 'Schneide sie mit der Schere auseinander, wenn sie noch zusammenhängen.'

26

You're getting all the little loops.

Bild zum Schritt 26 für das Bastel- und DIY-Abenteuer für Kinder: 'Du erhältst lauter kleine Schleifen.'

27

Take a leaf and fold it half way. So you get a folding card.

Bild zum Schritt 27 für das Bastel- und DIY-Abenteuer für Kinder: 'Nimm ein Blatt und falte es zur Hälfte. So erhältst...'

28

Place the folded dragon slightly obliquely in the upper part of the map. So the kite line also has enough space.

Bild zum Schritt 28 für das Bastel- und DIY-Abenteuer für Kinder: 'Lege den gefalteten Drachen etwas schräg in den oberen Teil...'

29

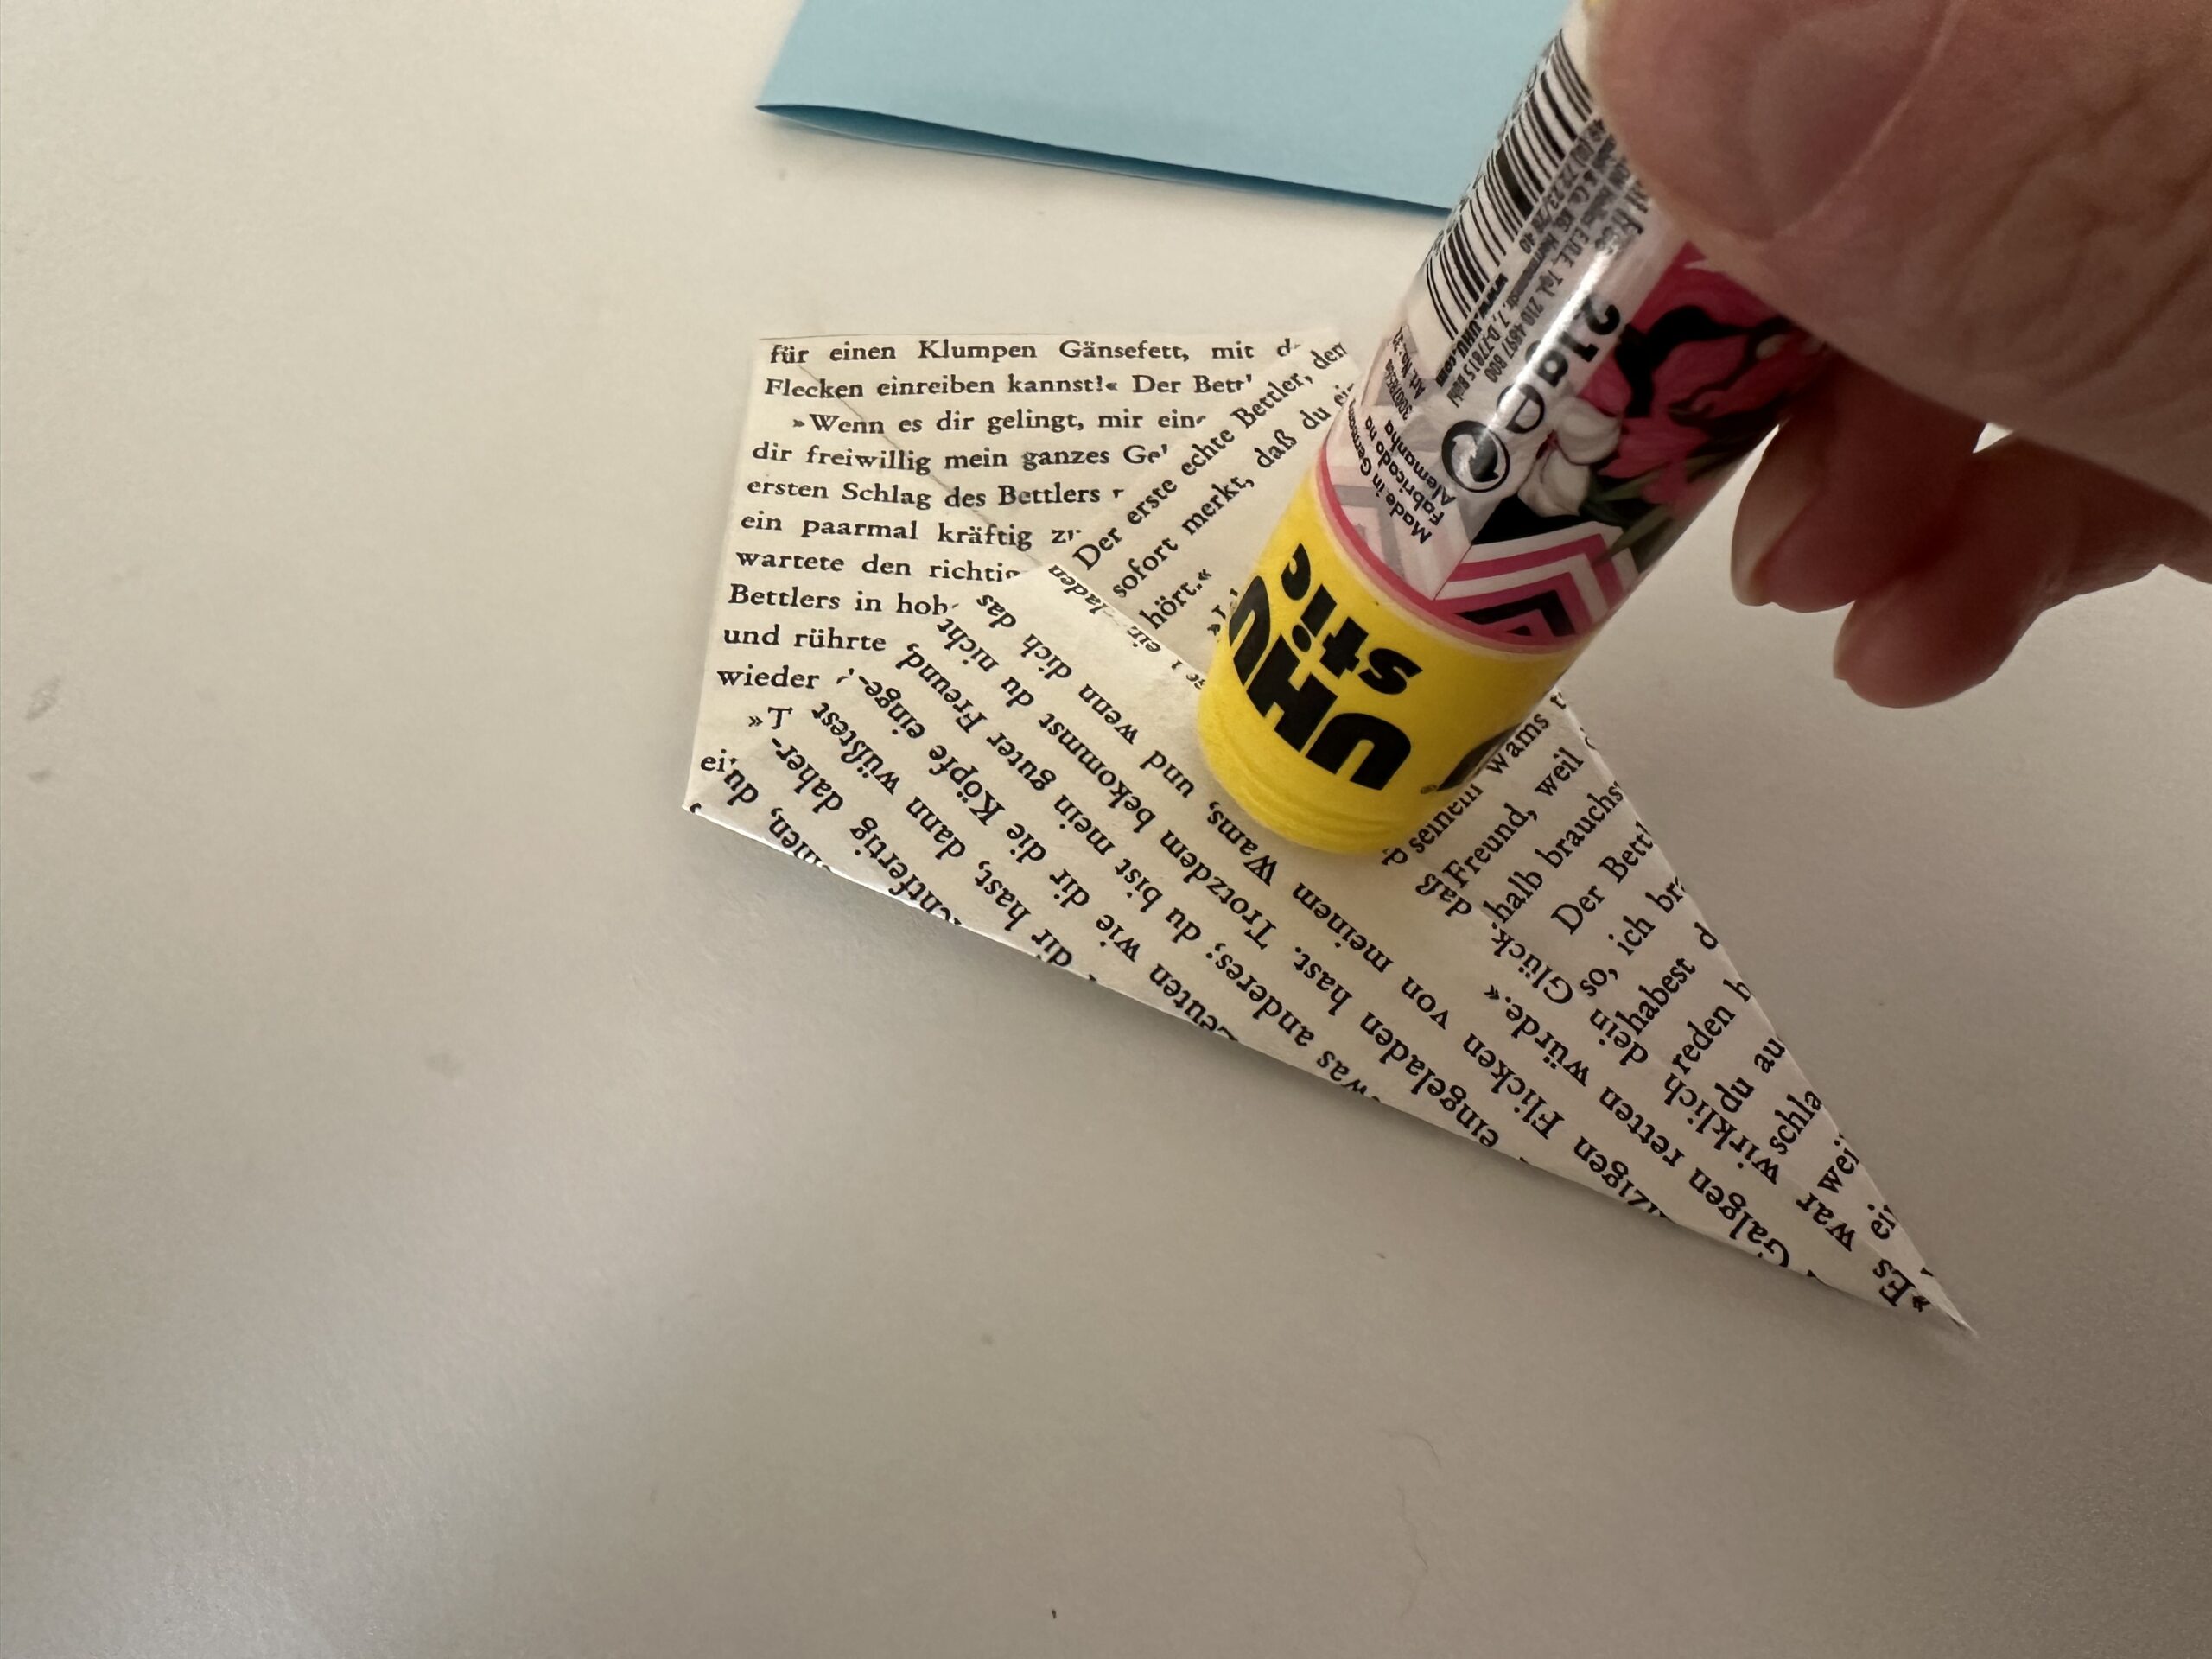
Stick the dragon on the map.

Bild zum Schritt 29 für das Bastel- und DIY-Abenteuer für Kinder: 'Klebe den Drachen auf die Karte.'

30

Now all you need is the dragon line.

Bild zum Schritt 30 für das Bastel- und DIY-Abenteuer für Kinder: 'Drücke ihn gut fest. Jetzt fehlt nur noch die Drachenschnur.'

31

Paint the kite line with a pen. Start at the bottom of the kite. (See picture)

Bild zum Schritt 31 für das Bastel- und DIY-Abenteuer für Kinder: 'Male mit einem Stift die Drachenschnur. Beginne an der unteren...'

32

Male large curved arches and let the dragon "dance" so.

Bild zum Schritt 32 für das Bastel- und DIY-Abenteuer für Kinder: 'Male große geschwungene Bögen und lasse den Drachen so „tanzen“.'

33

You can now distribute the prepared loops as desired on your kite line (the painted line). Glue them firmly if the arrangement pleases.

Bild zum Schritt 33 für das Bastel- und DIY-Abenteuer für Kinder: 'Die vorbereiteten Schleifen kannst du nun beliebig auf deiner Drachenschnur...'

34

Paint fringes on the sides of the kite. Start at the edge of the paper and remove the pen from the outside. Thus, the painted line becomes thinner outwards.

Bild zum Schritt 34 für das Bastel- und DIY-Abenteuer für Kinder: 'Male dem Drachen noch Fransen an die Seiten. Beginne am...'

35

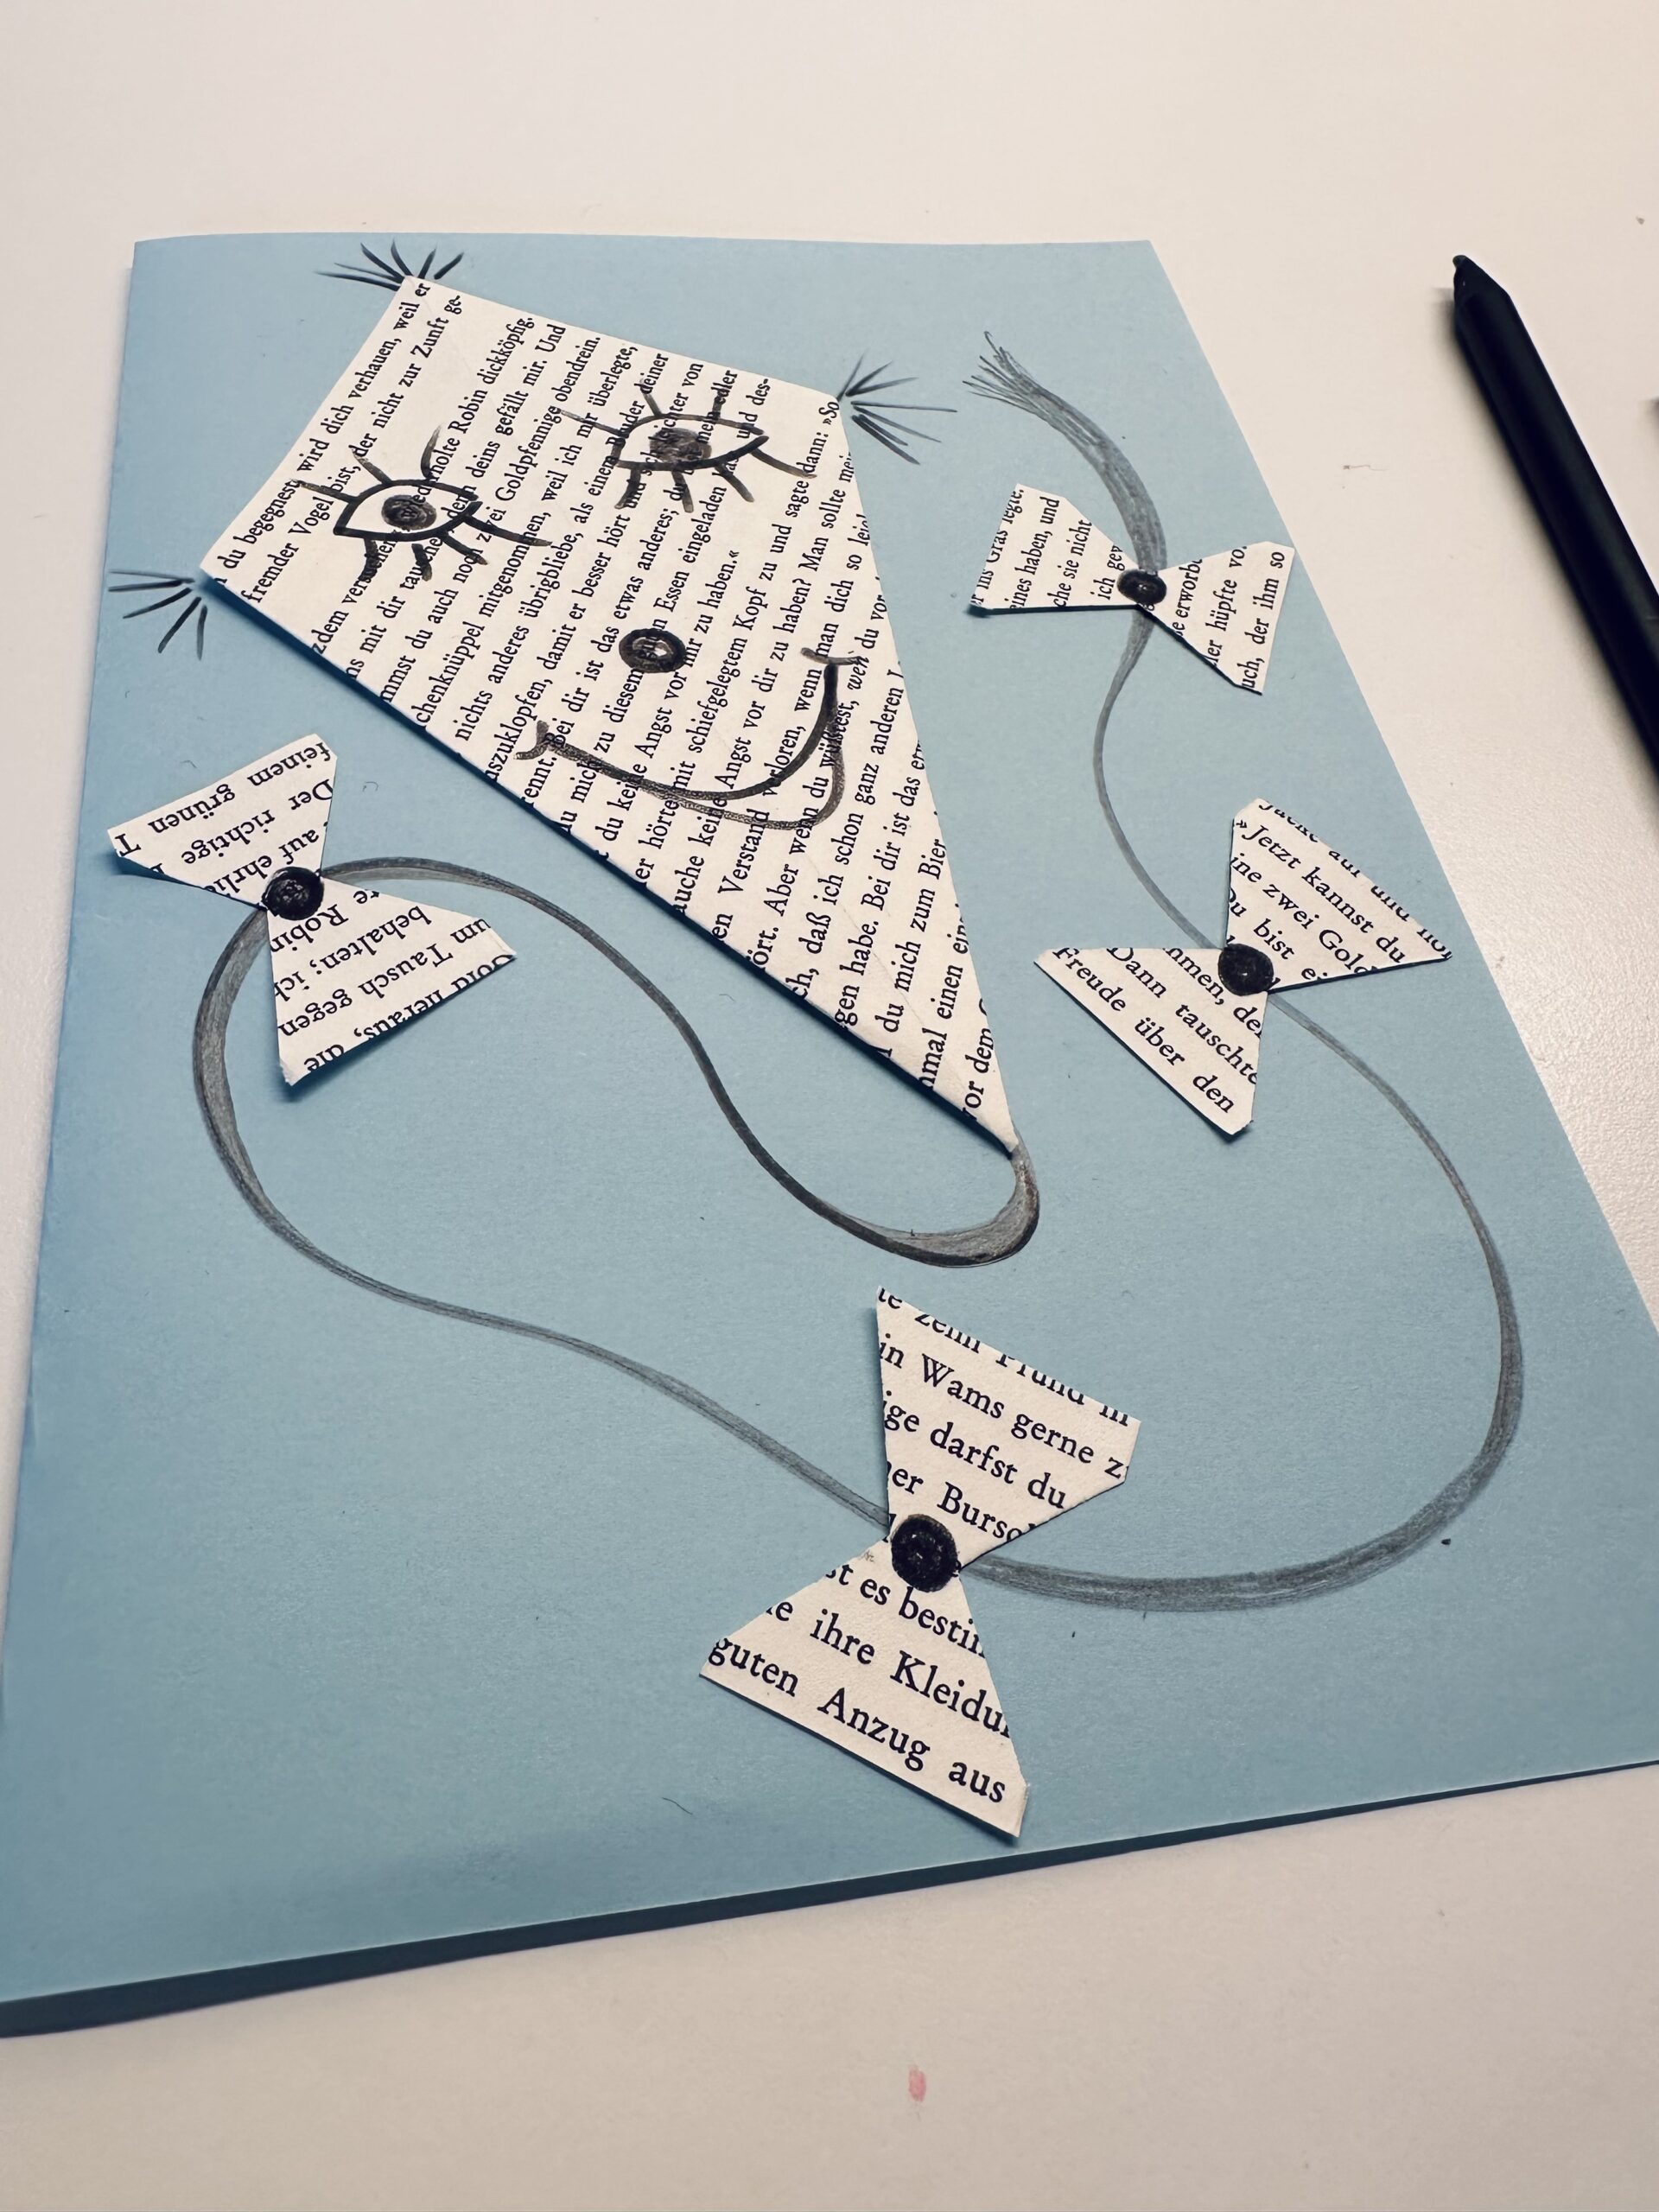
That's what that might look like.

Bild zum Schritt 35 für das Bastel- und DIY-Abenteuer für Kinder: 'So könnte das dass aussehen.'

36

Make your kite line even more beautiful. You can also paint circles in the middle of your loops, they look like if you have tied the loops.

Bild zum Schritt 36 für das Bastel- und DIY-Abenteuer für Kinder: 'Verschönere evtl. noch deine Drachenschnur. Du kannst auch noch Kreise...'

37

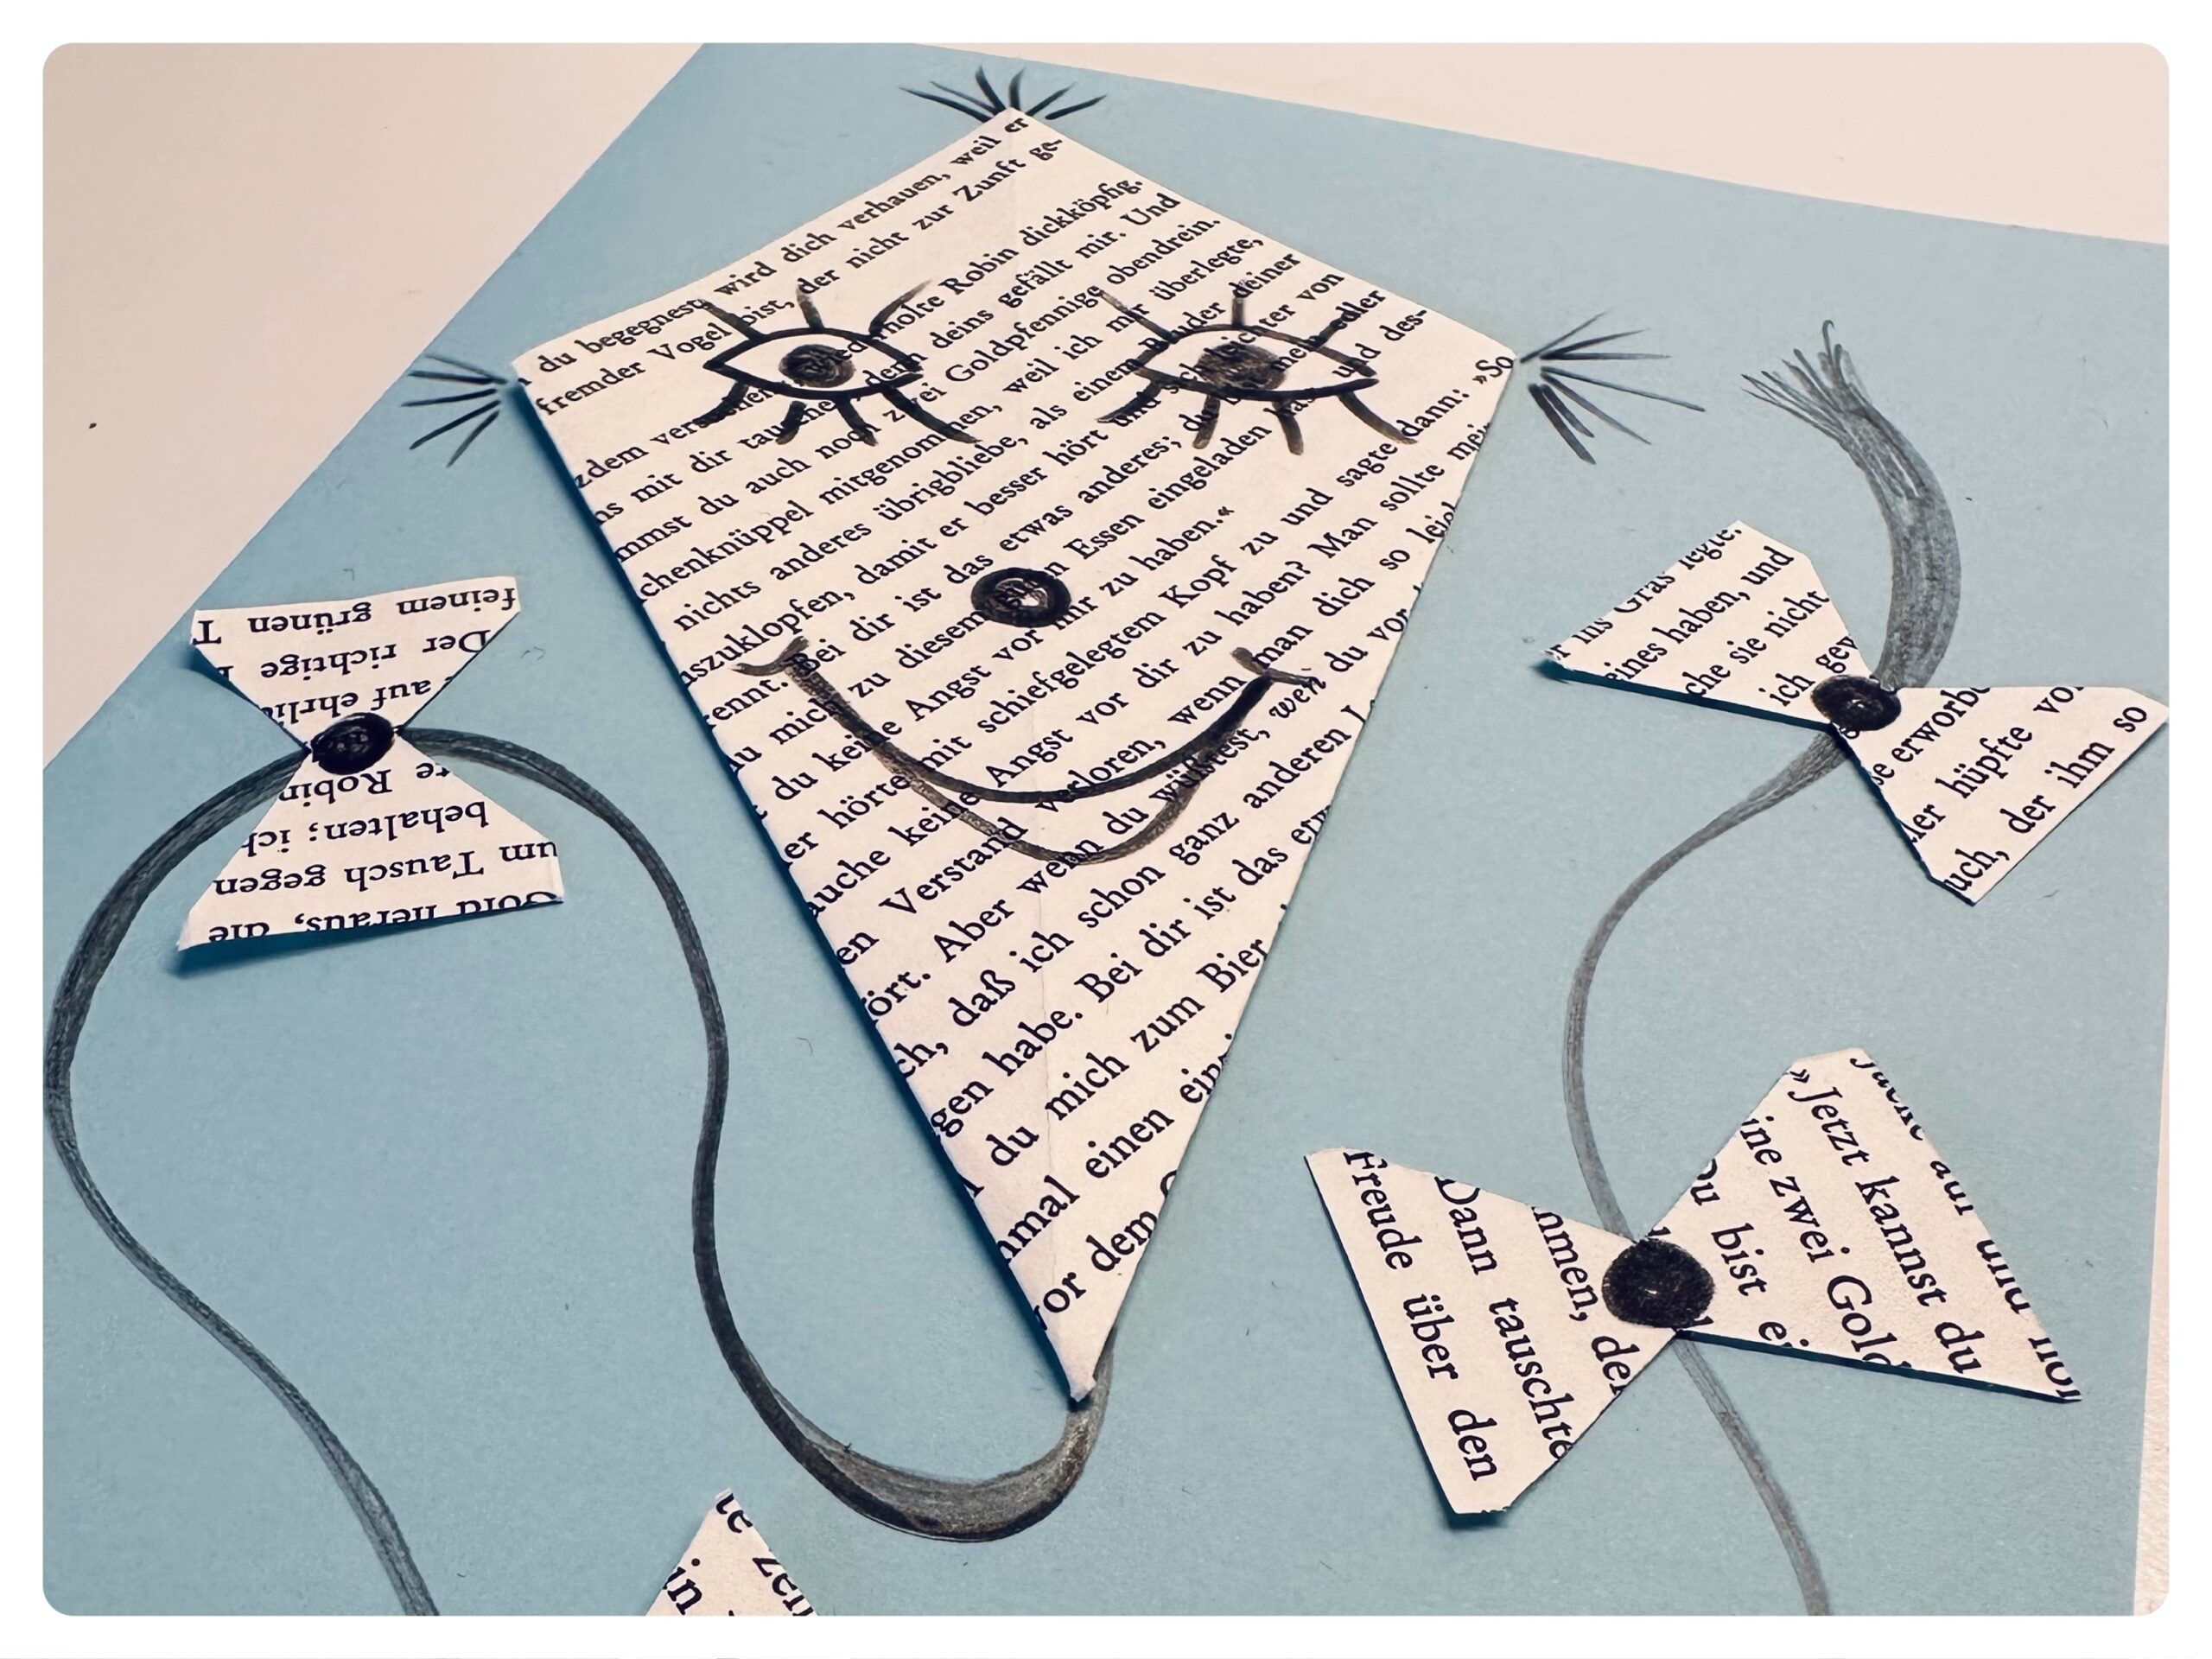
Your card's ready.

Bild zum Schritt 37 für das Bastel- und DIY-Abenteuer für Kinder: 'Fertig ist deine Karte.'

38

Have fun making it up.

Bild zum Schritt 38 für das Bastel- und DIY-Abenteuer für Kinder: 'Viel Spaß beim Nachbasteln.'

Materials

 1 Book page; orNewsprint
 1 Sound paper DIN A4= DIN A5 folding card
 1 Ruler
 1 Pencil
 1 Felt pen black
 1 Glue
 1 Builder's pad
All links marked with a shopping cart lead to Amazon - here we have selected products that we would order ourselves and in part also ordered. In a qualified purchase via the advertising link, we as Amazon partner receive a commission, for you there are no costs. You thus support our cost- and advertising banner-free, educational offer.

Directions

1

You need a labeled book page.

Bild zum Schritt 1 für das Bastel- und DIY-Abenteuer für Kinder: 'Du brauchst eine beschriftete Buchseite.'

2

The required sheet should be completely filled with letters. Cut off the unwritten edge. To get a straight edge, use a ruler.

Bild zum Schritt 2 für das Bastel- und DIY-Abenteuer für Kinder: 'Das benötigte Blatt sollte komplett mit Buchstaben gefüllt sein. Schneide...'

3

Cut your marks along the paper.

Bild zum Schritt 3 für das Bastel- und DIY-Abenteuer für Kinder: 'Schneide deinen Markierungen entlang das Papier zu.'

4

A square is now needed from the paper.
You'll see how you do it.
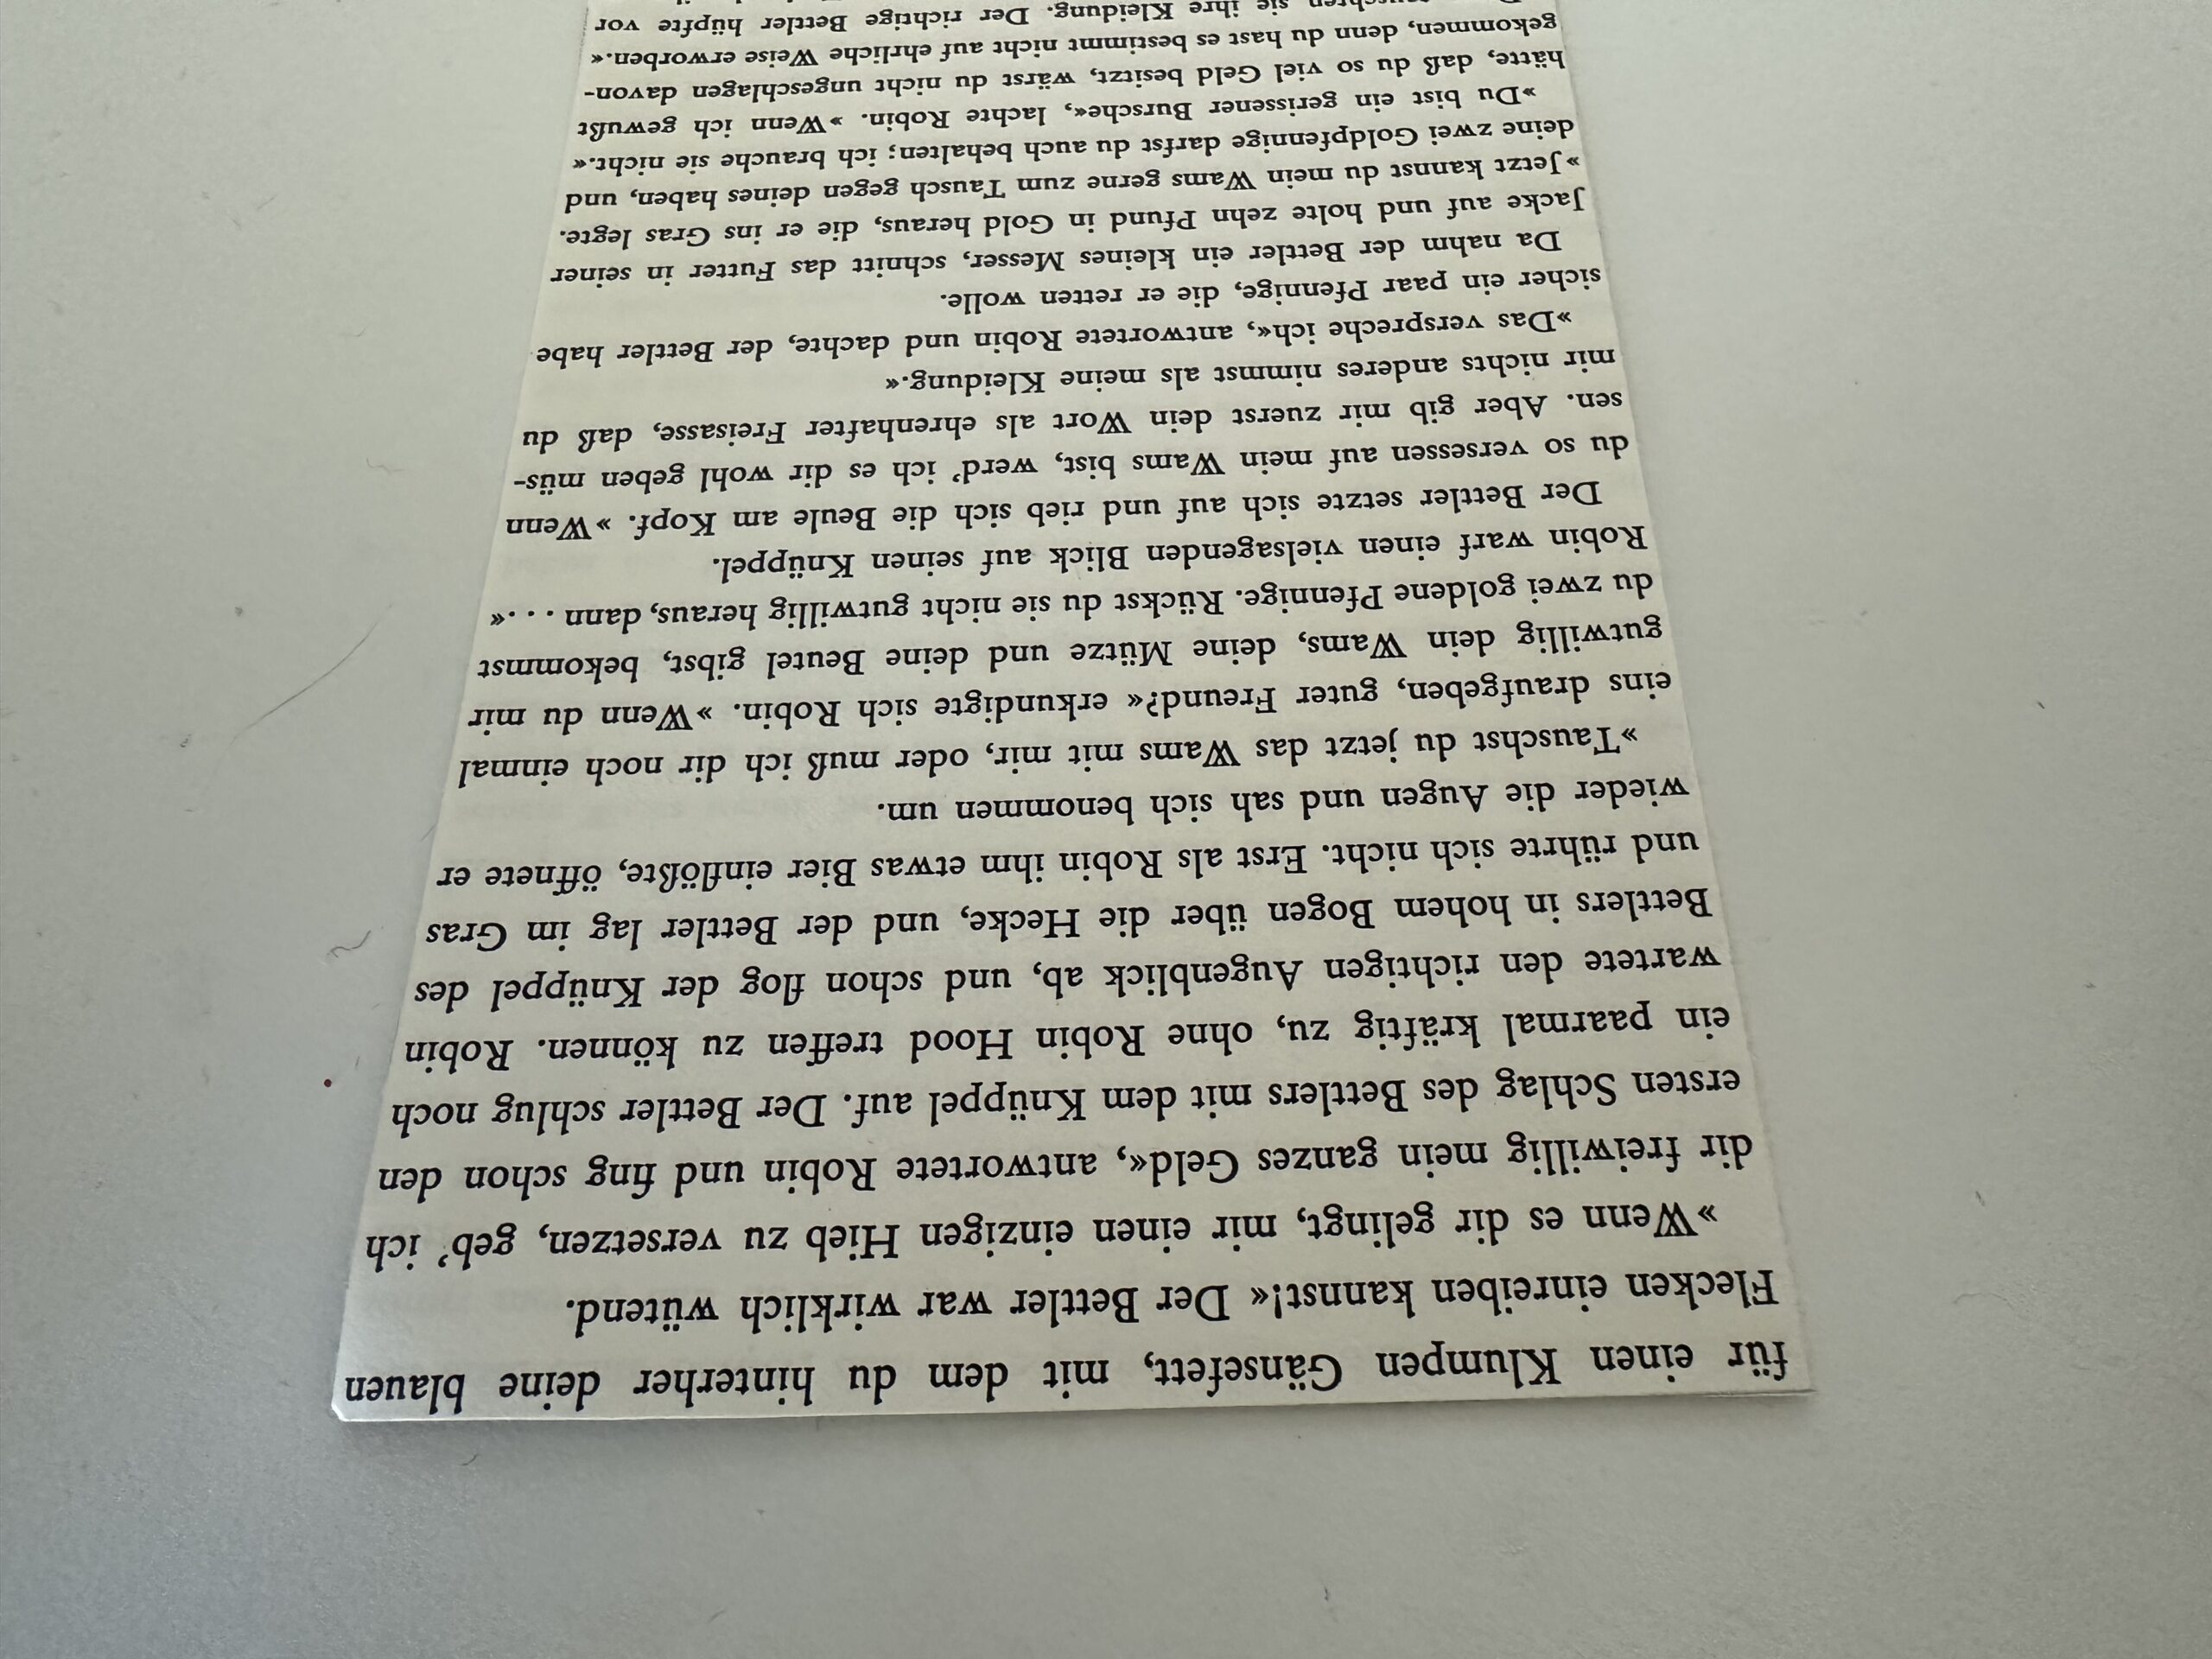
Bild zum Schritt 4 für das Bastel- und DIY-Abenteuer für Kinder: 'Aus dem Papier wird nun ein Quadrat benötigt.  ...'

5

Take the lower left corner and fold it to the opposite side. Here, the lower edge of the paper is completely placed on the right outer edge.
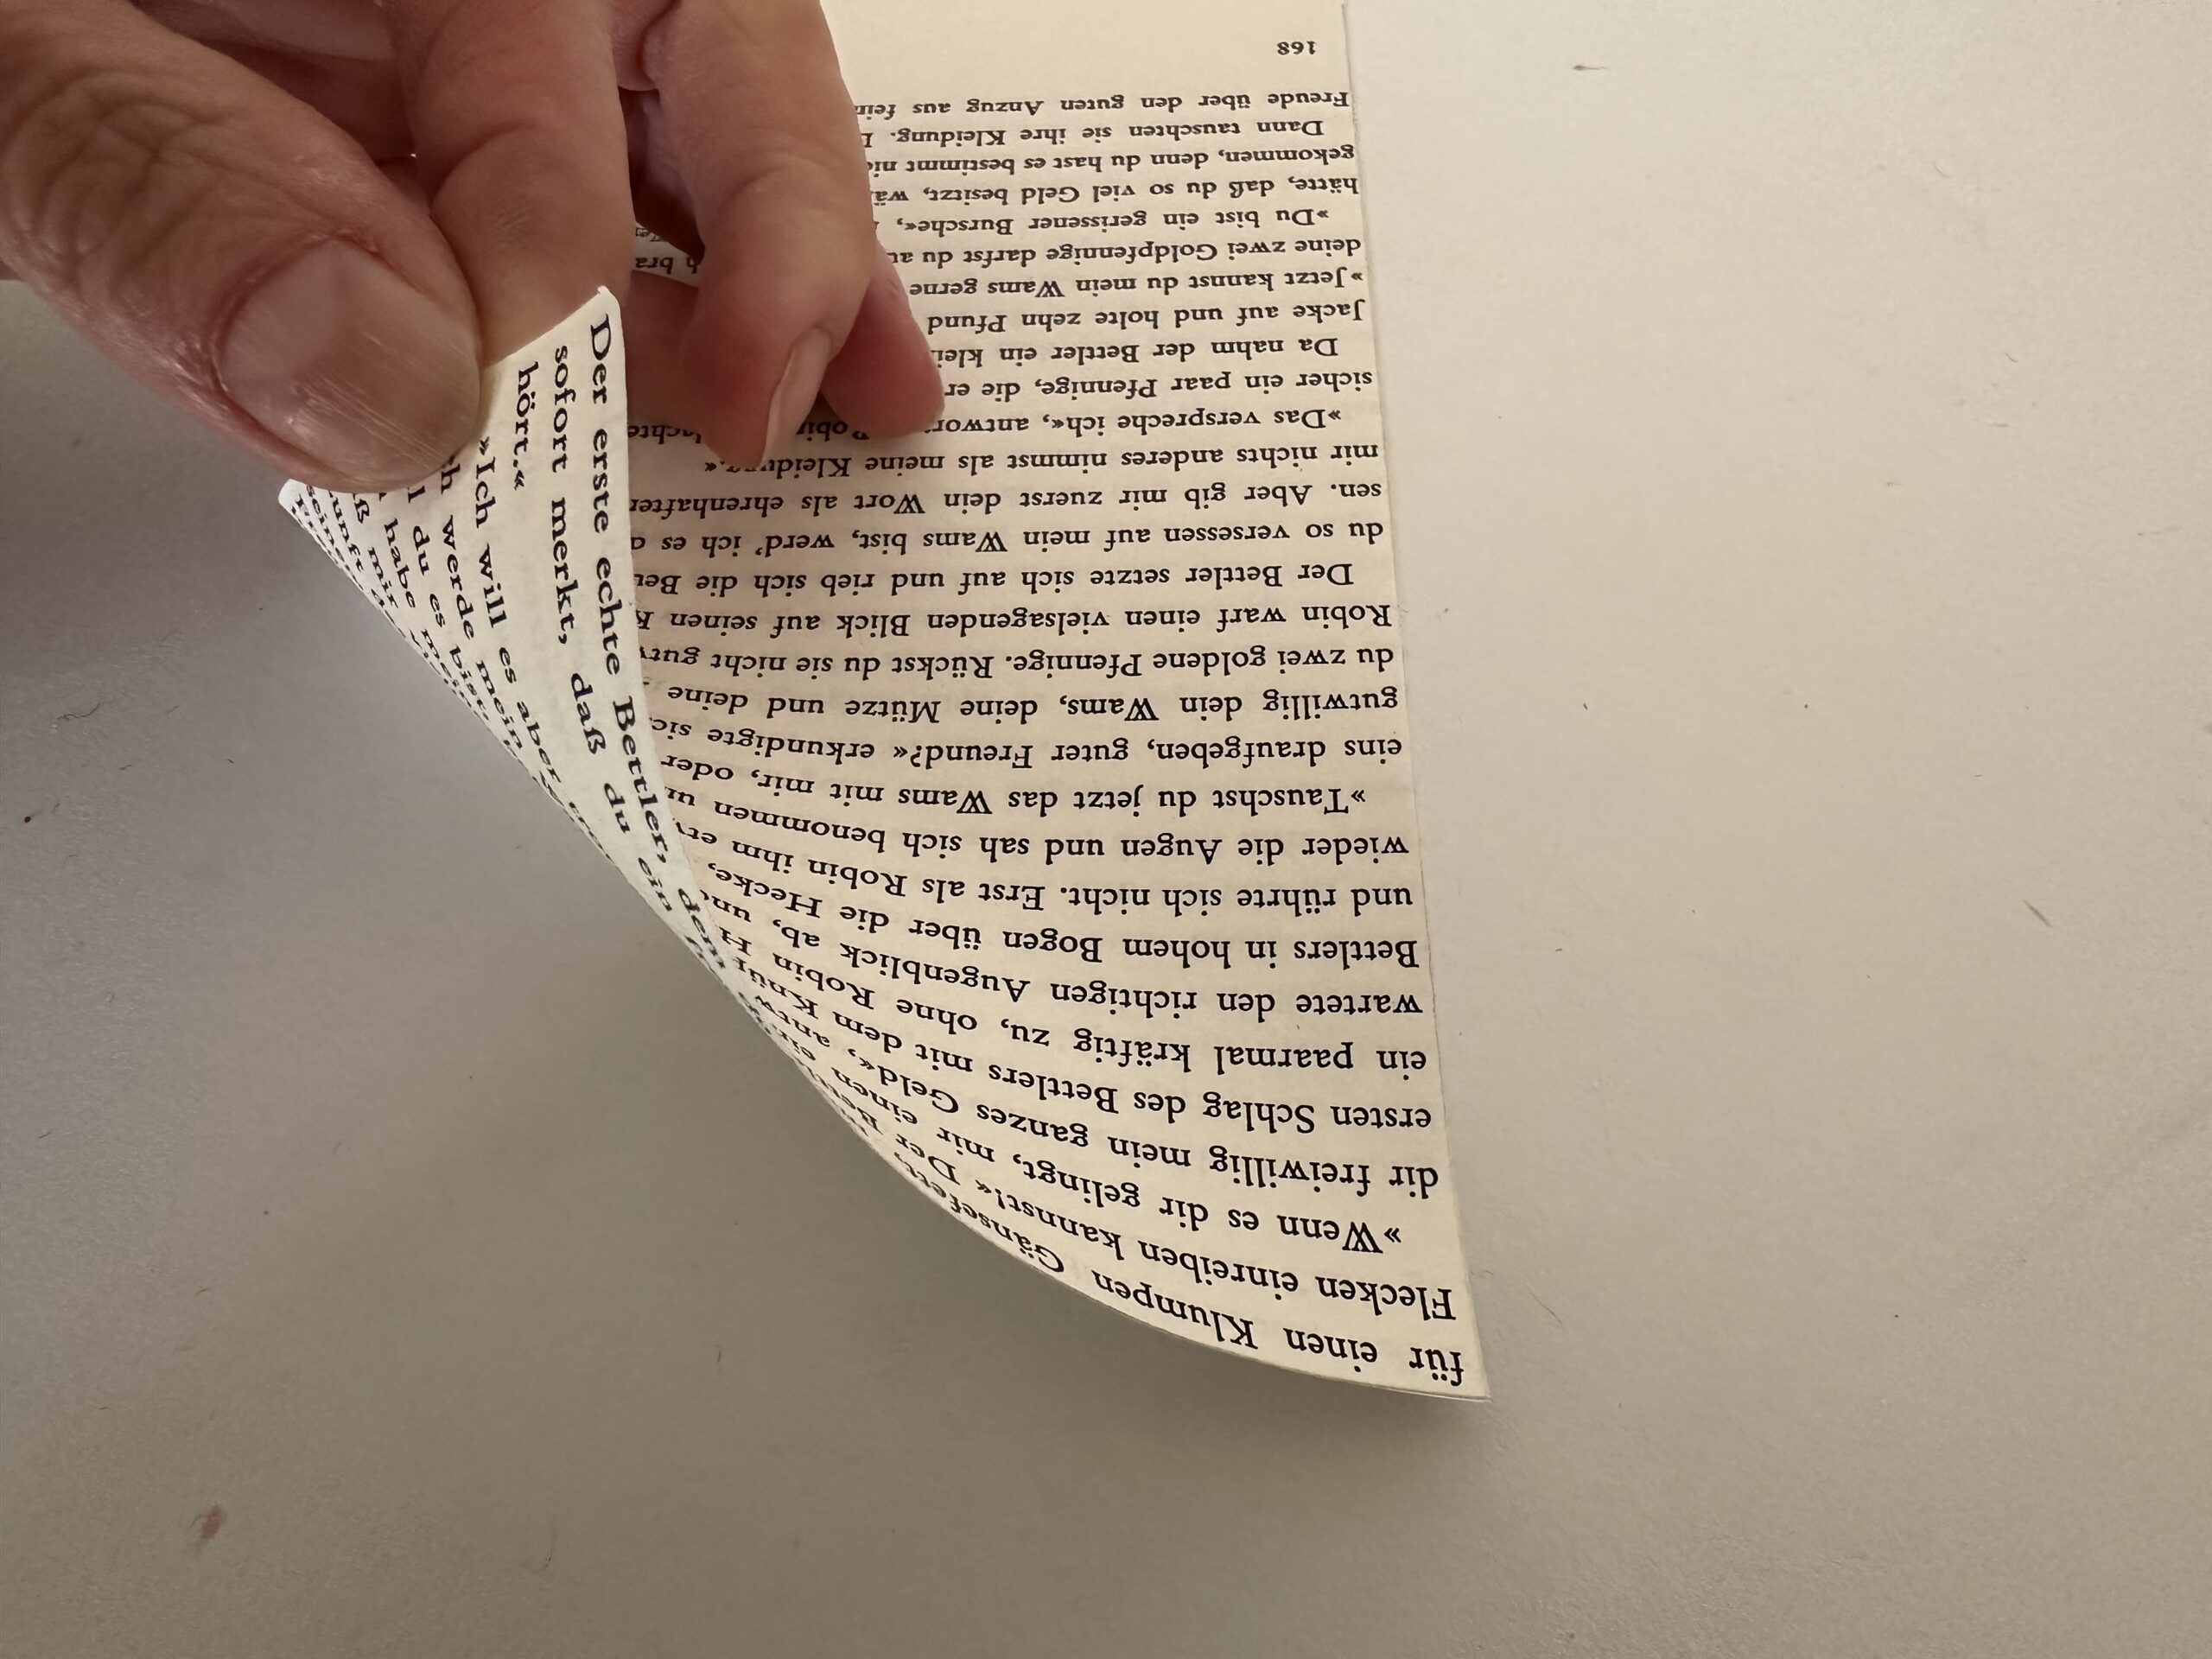
Bild zum Schritt 5 für das Bastel- und DIY-Abenteuer für Kinder: 'Nimm die untere linke Ecke und falte sie zur gegenüberliegenden...'

6

A triangle emerges.
The corners lie on top of each other.
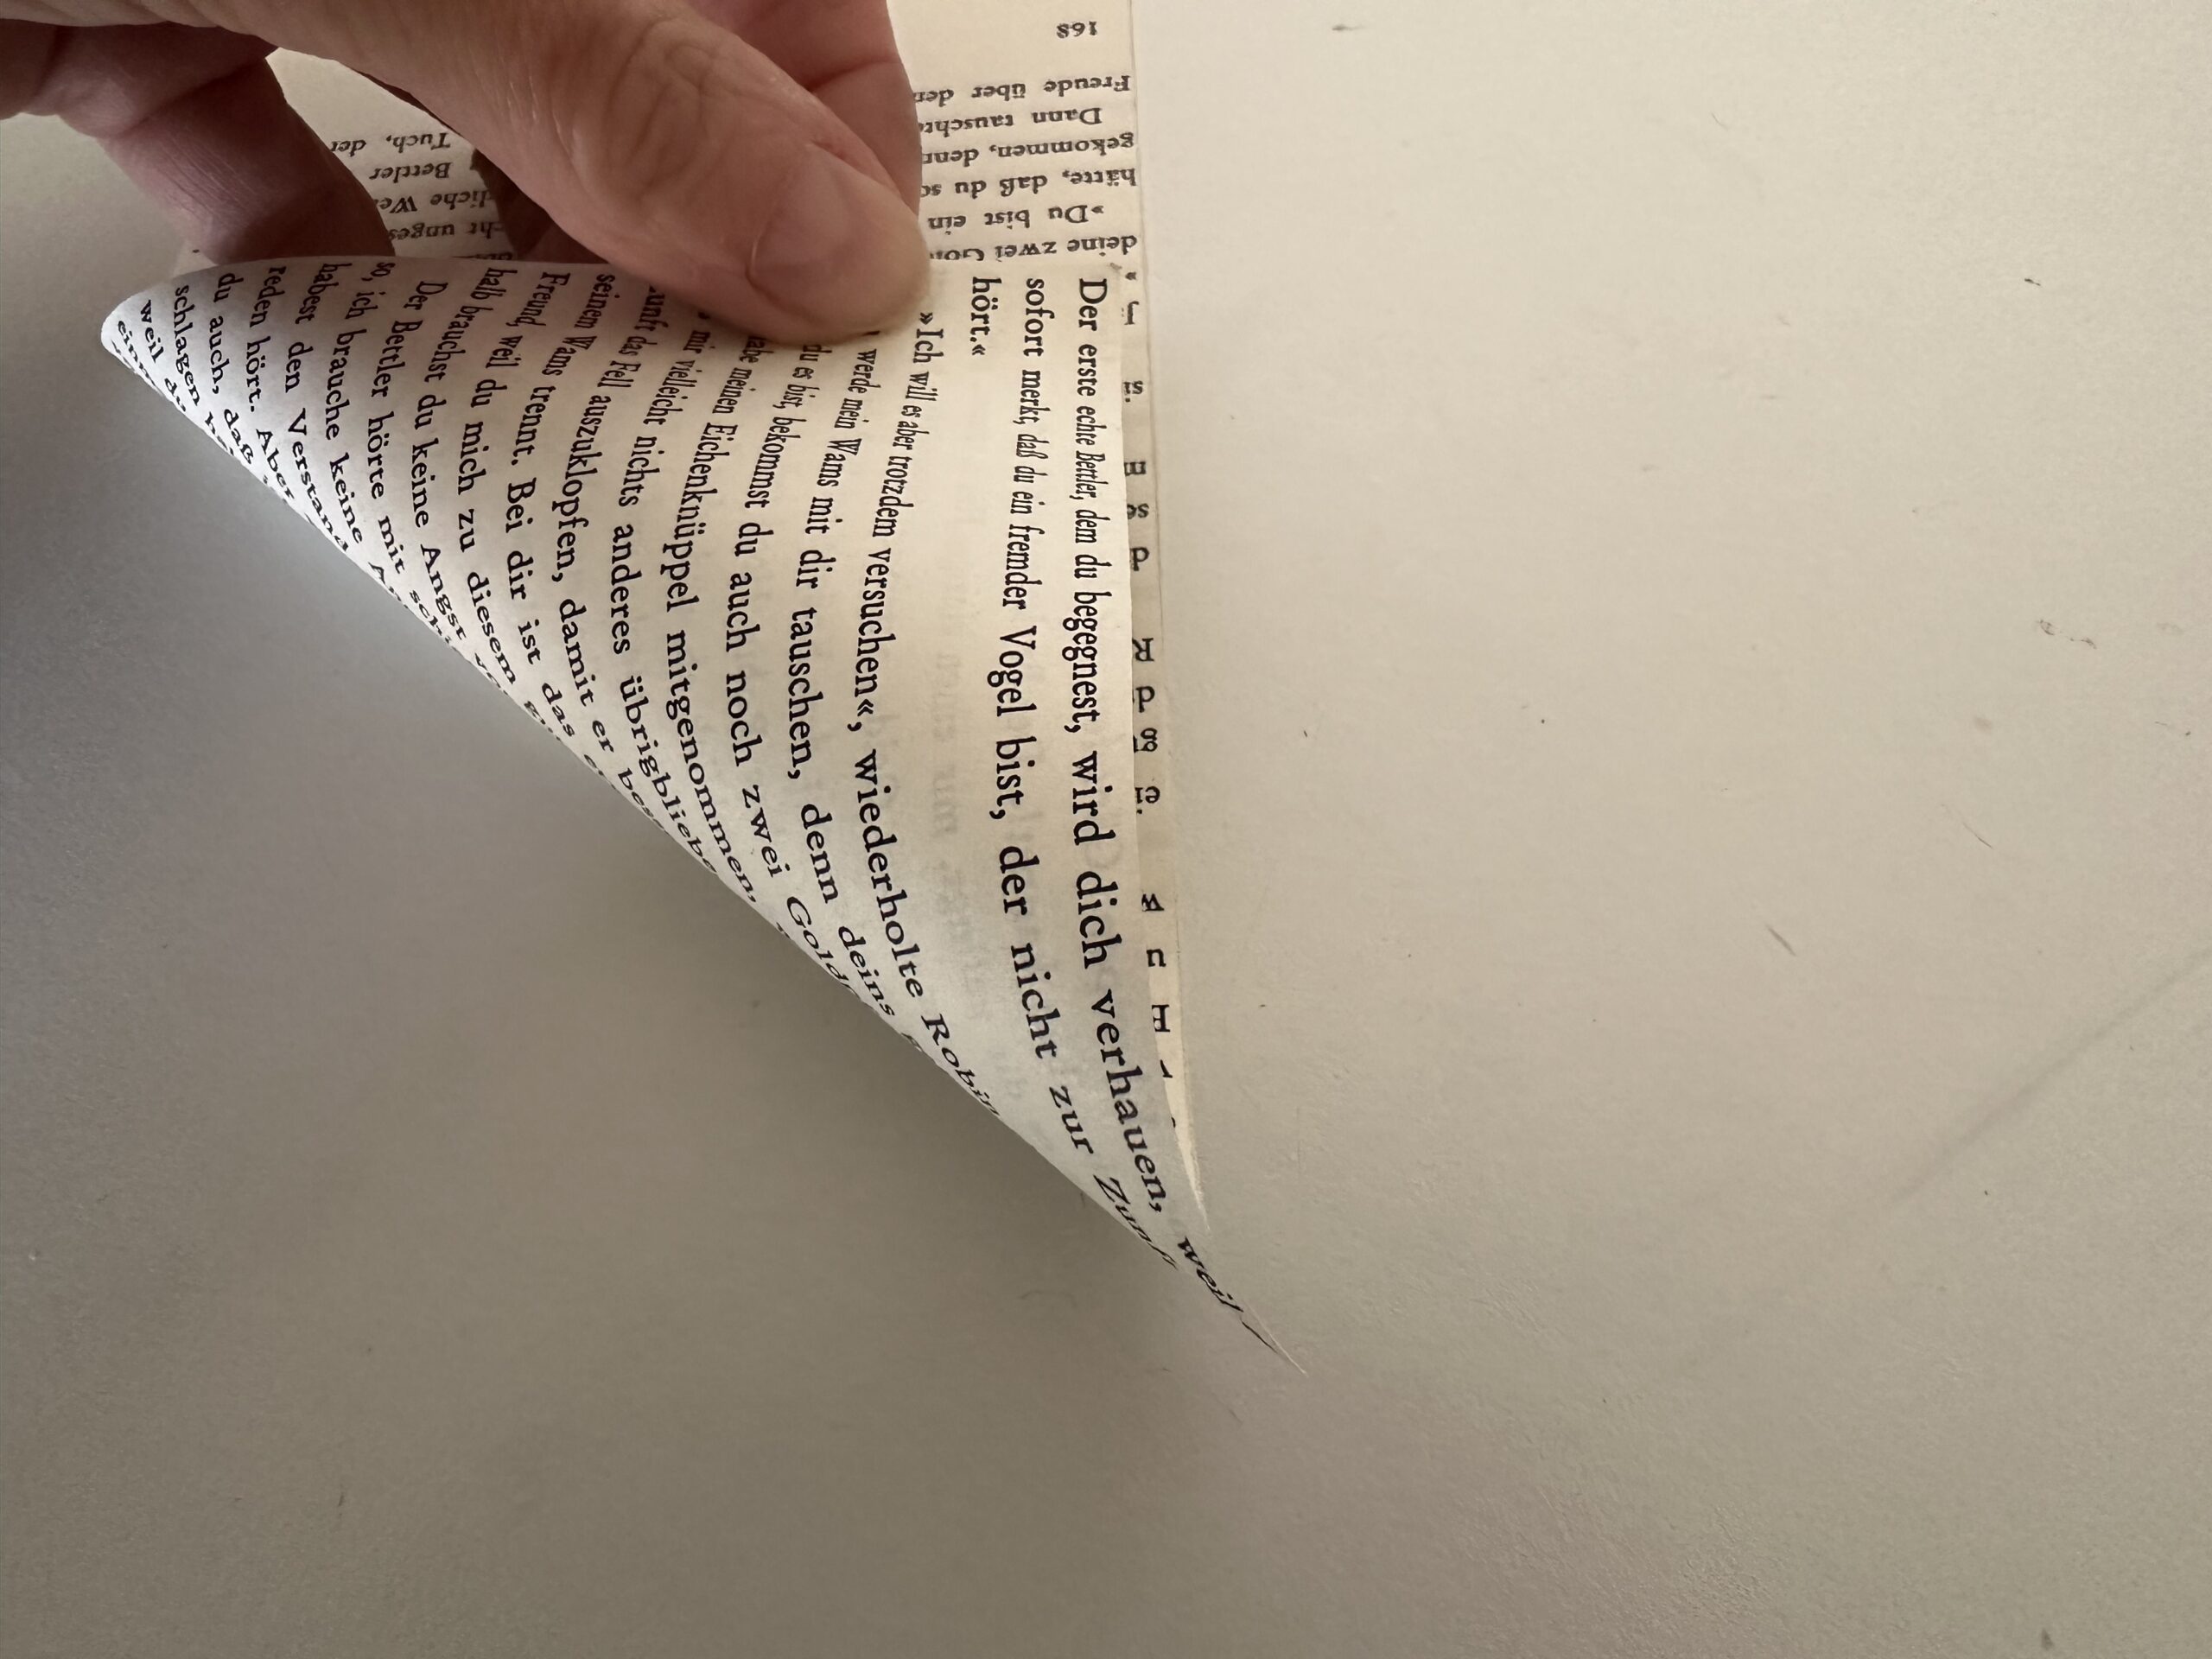
Bild zum Schritt 6 für das Bastel- und DIY-Abenteuer für Kinder: 'Es entsteht ein Dreieck.   Die Ecken liegen als...'

7

Press the paper flatten and strip the fracture smoothly.
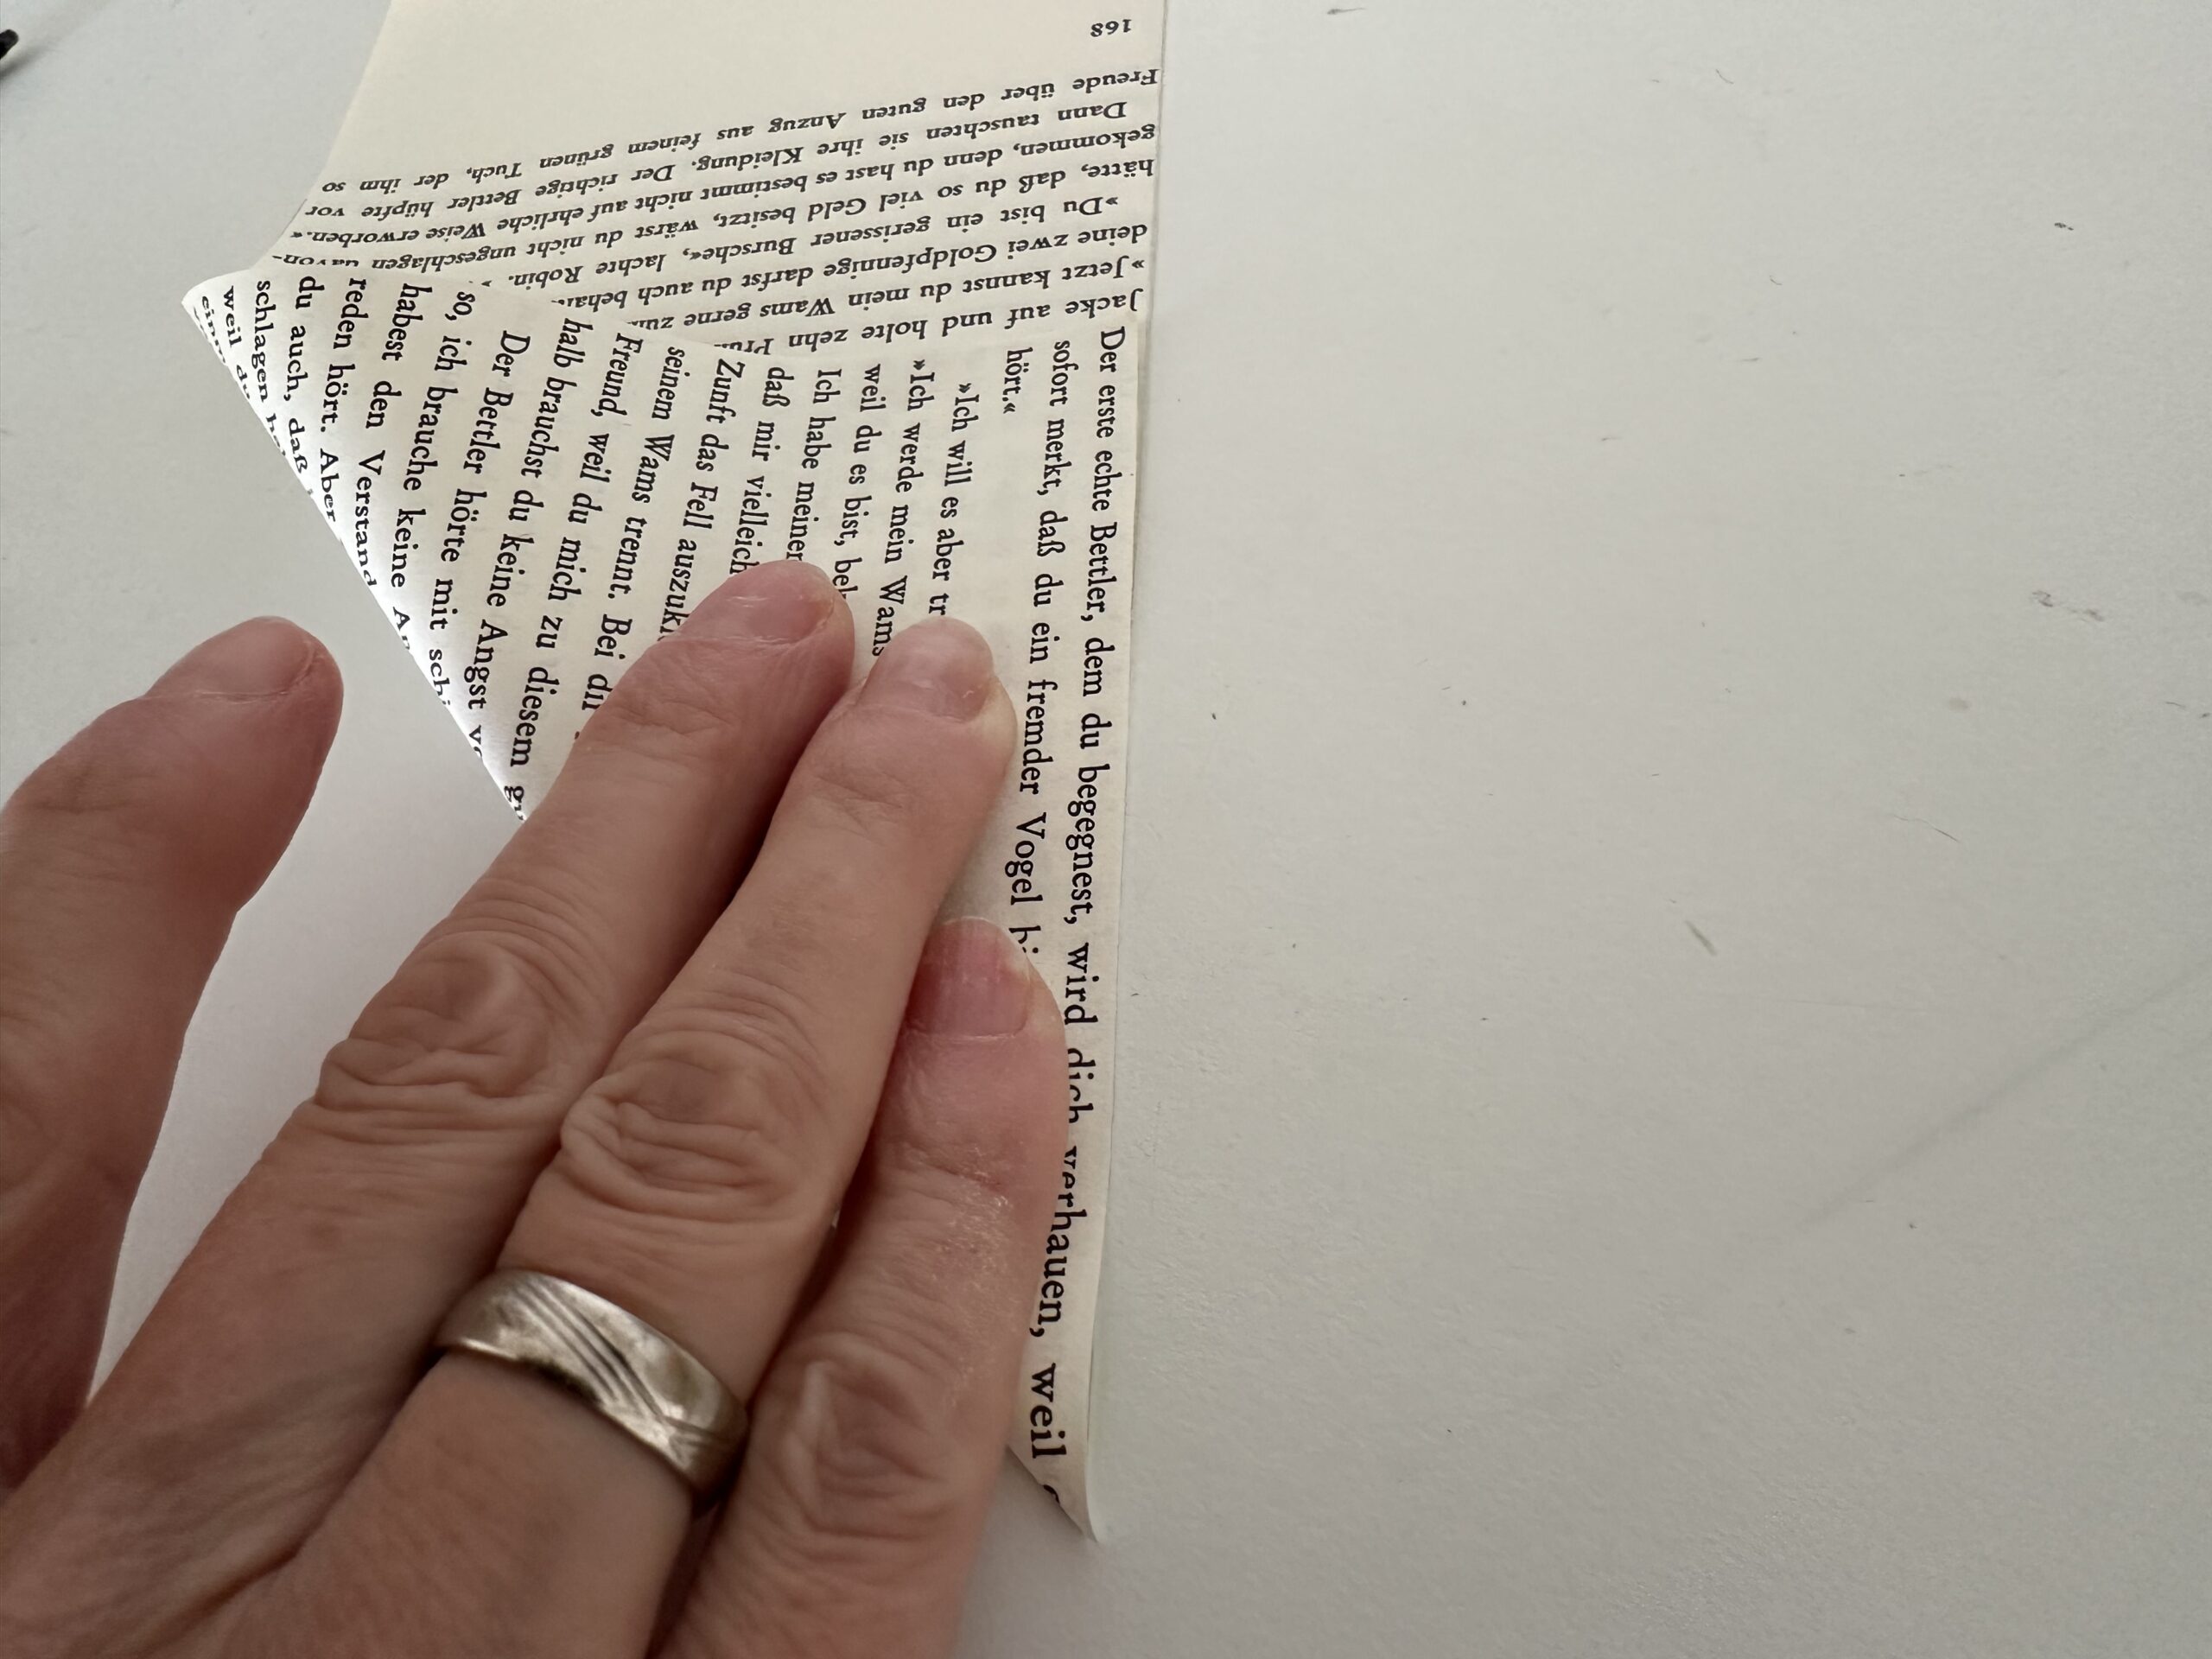
Bild zum Schritt 7 für das Bastel- und DIY-Abenteuer für Kinder: 'Drücke das Papier platt und streife den Bruch glatt.'

8

All you need is the triangle you created.
The overhanging paper is now cut off. To do this, mark the top as in the next pictures.
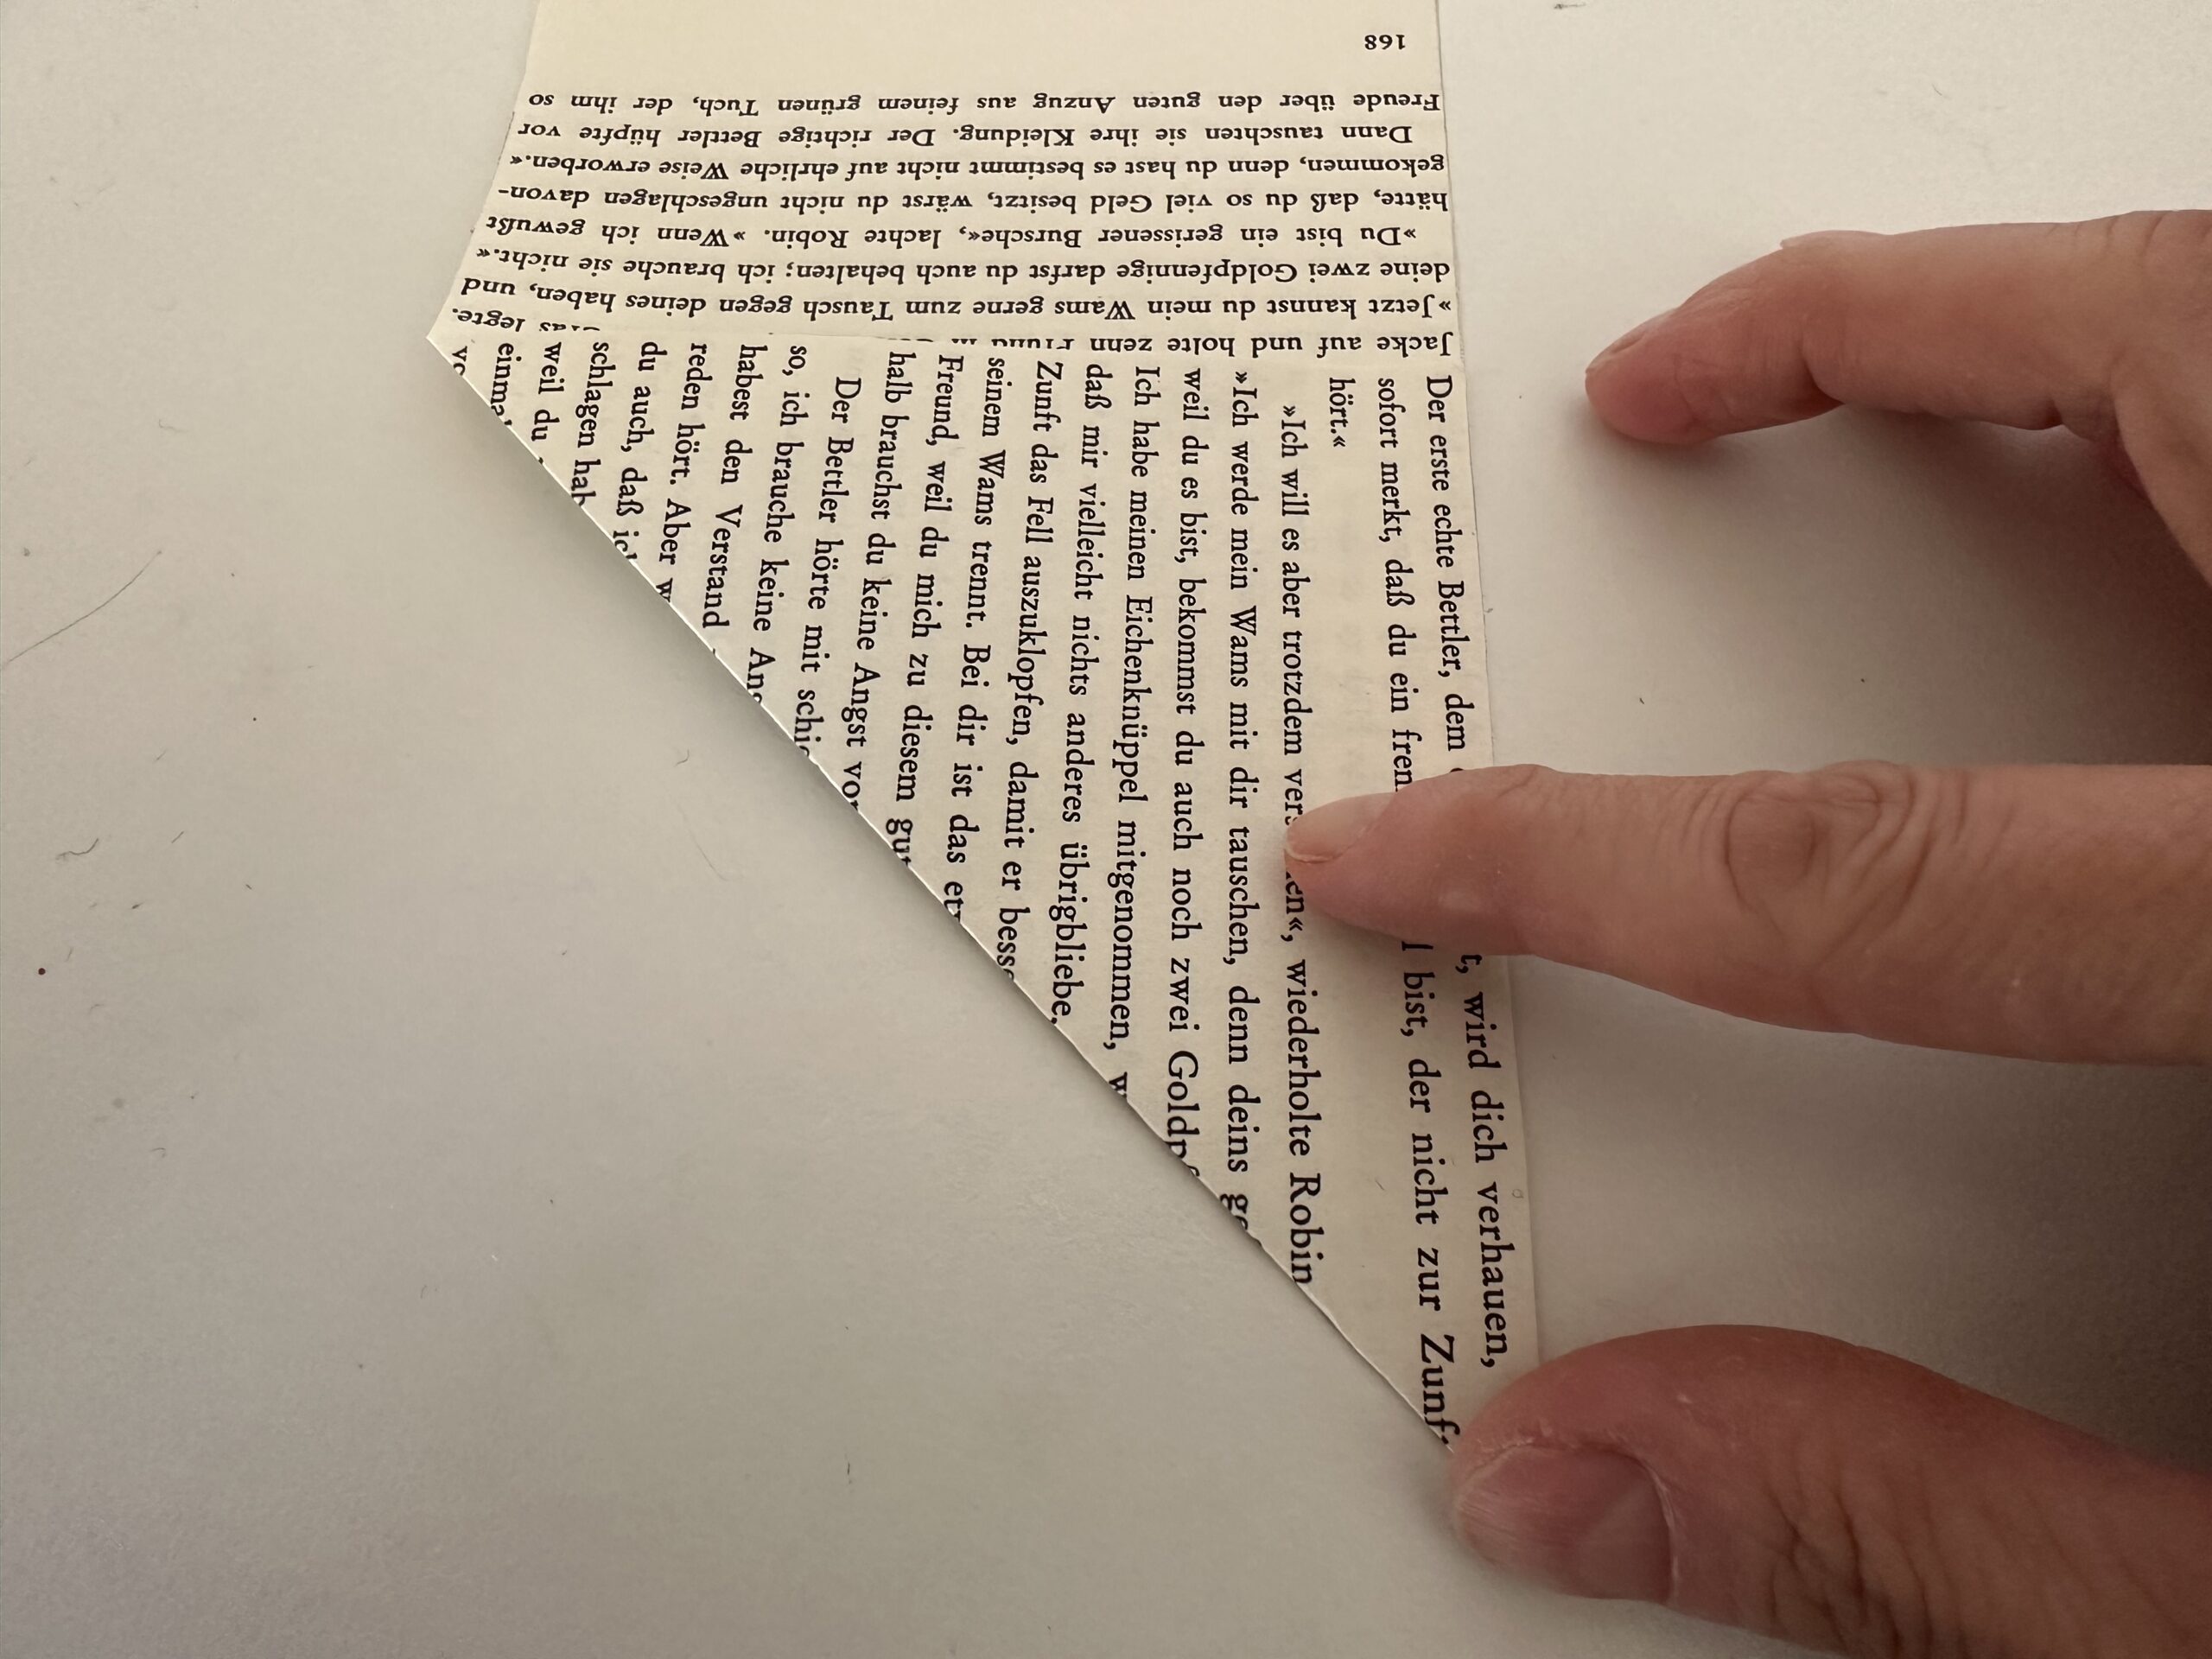
Bild zum Schritt 8 für das Bastel- und DIY-Abenteuer für Kinder: 'Du brauchst nur das entstandene Dreieck.   Das überstehende...'

9

Make a line with a pencil so you can cut off a straight line.
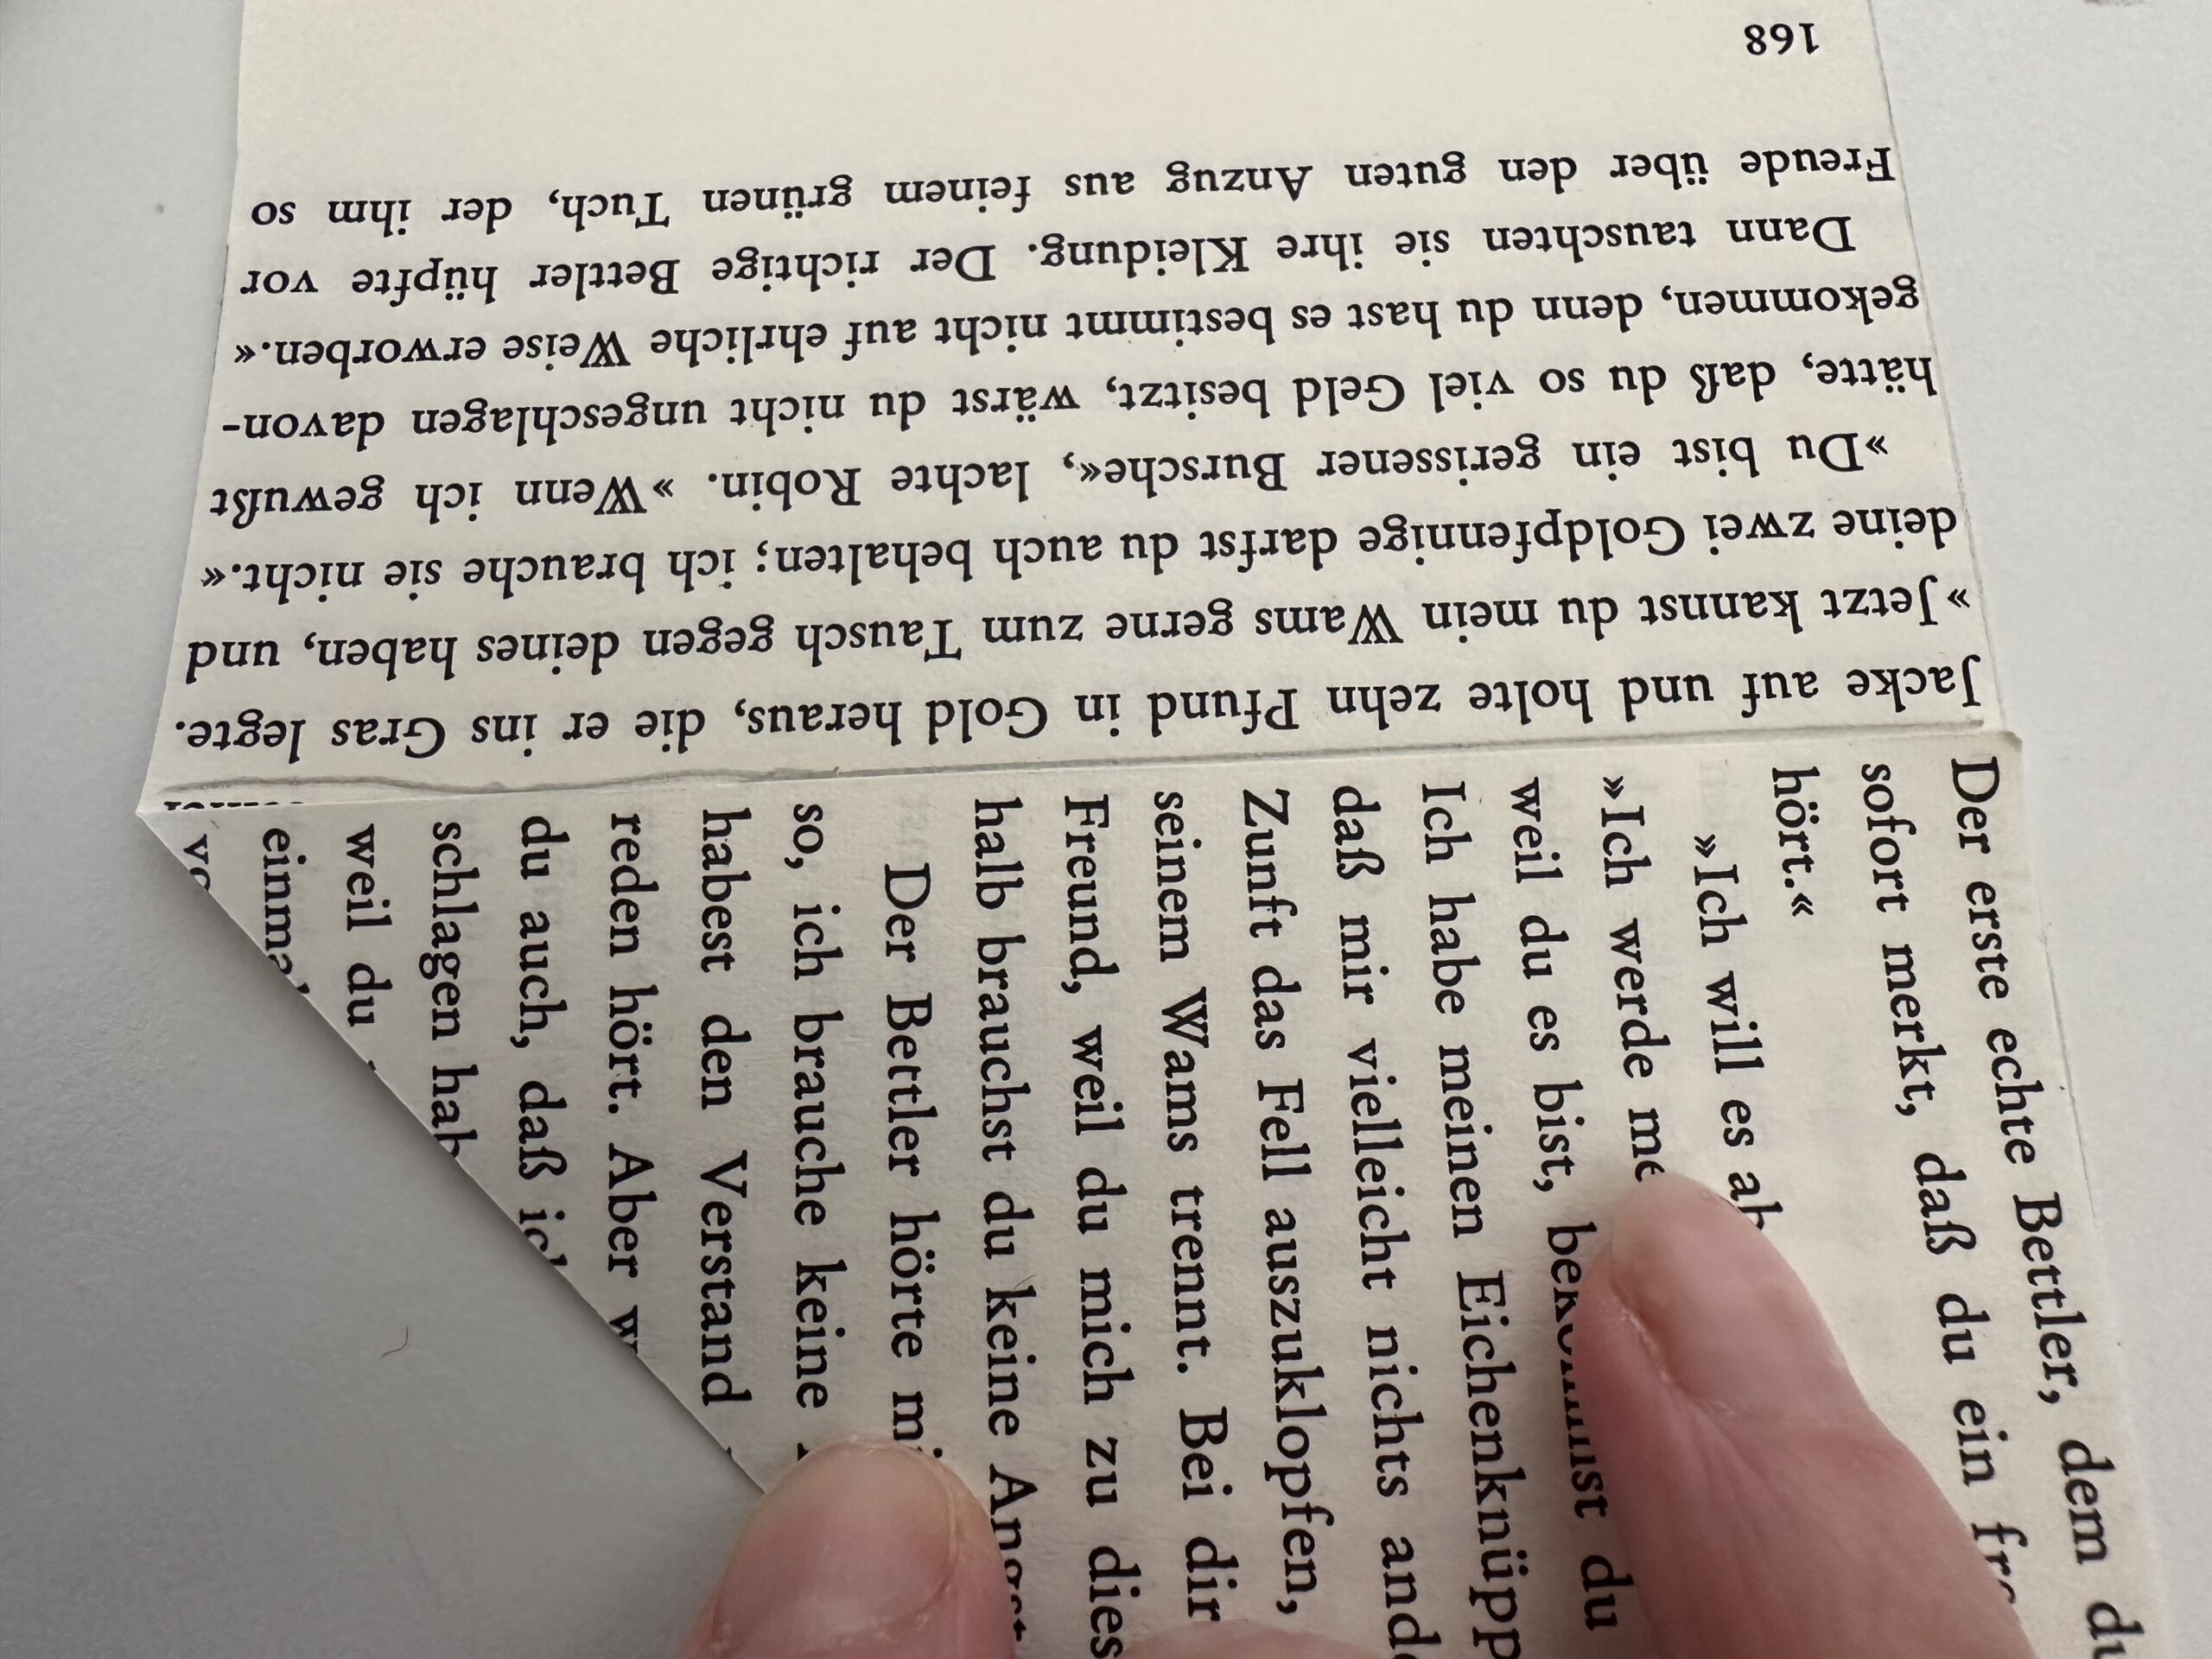
Bild zum Schritt 9 für das Bastel- und DIY-Abenteuer für Kinder: 'Mache einen Strich mit einem Bleistift damit du eine gerade...'

10

Cut off the paper strip with the scissors.
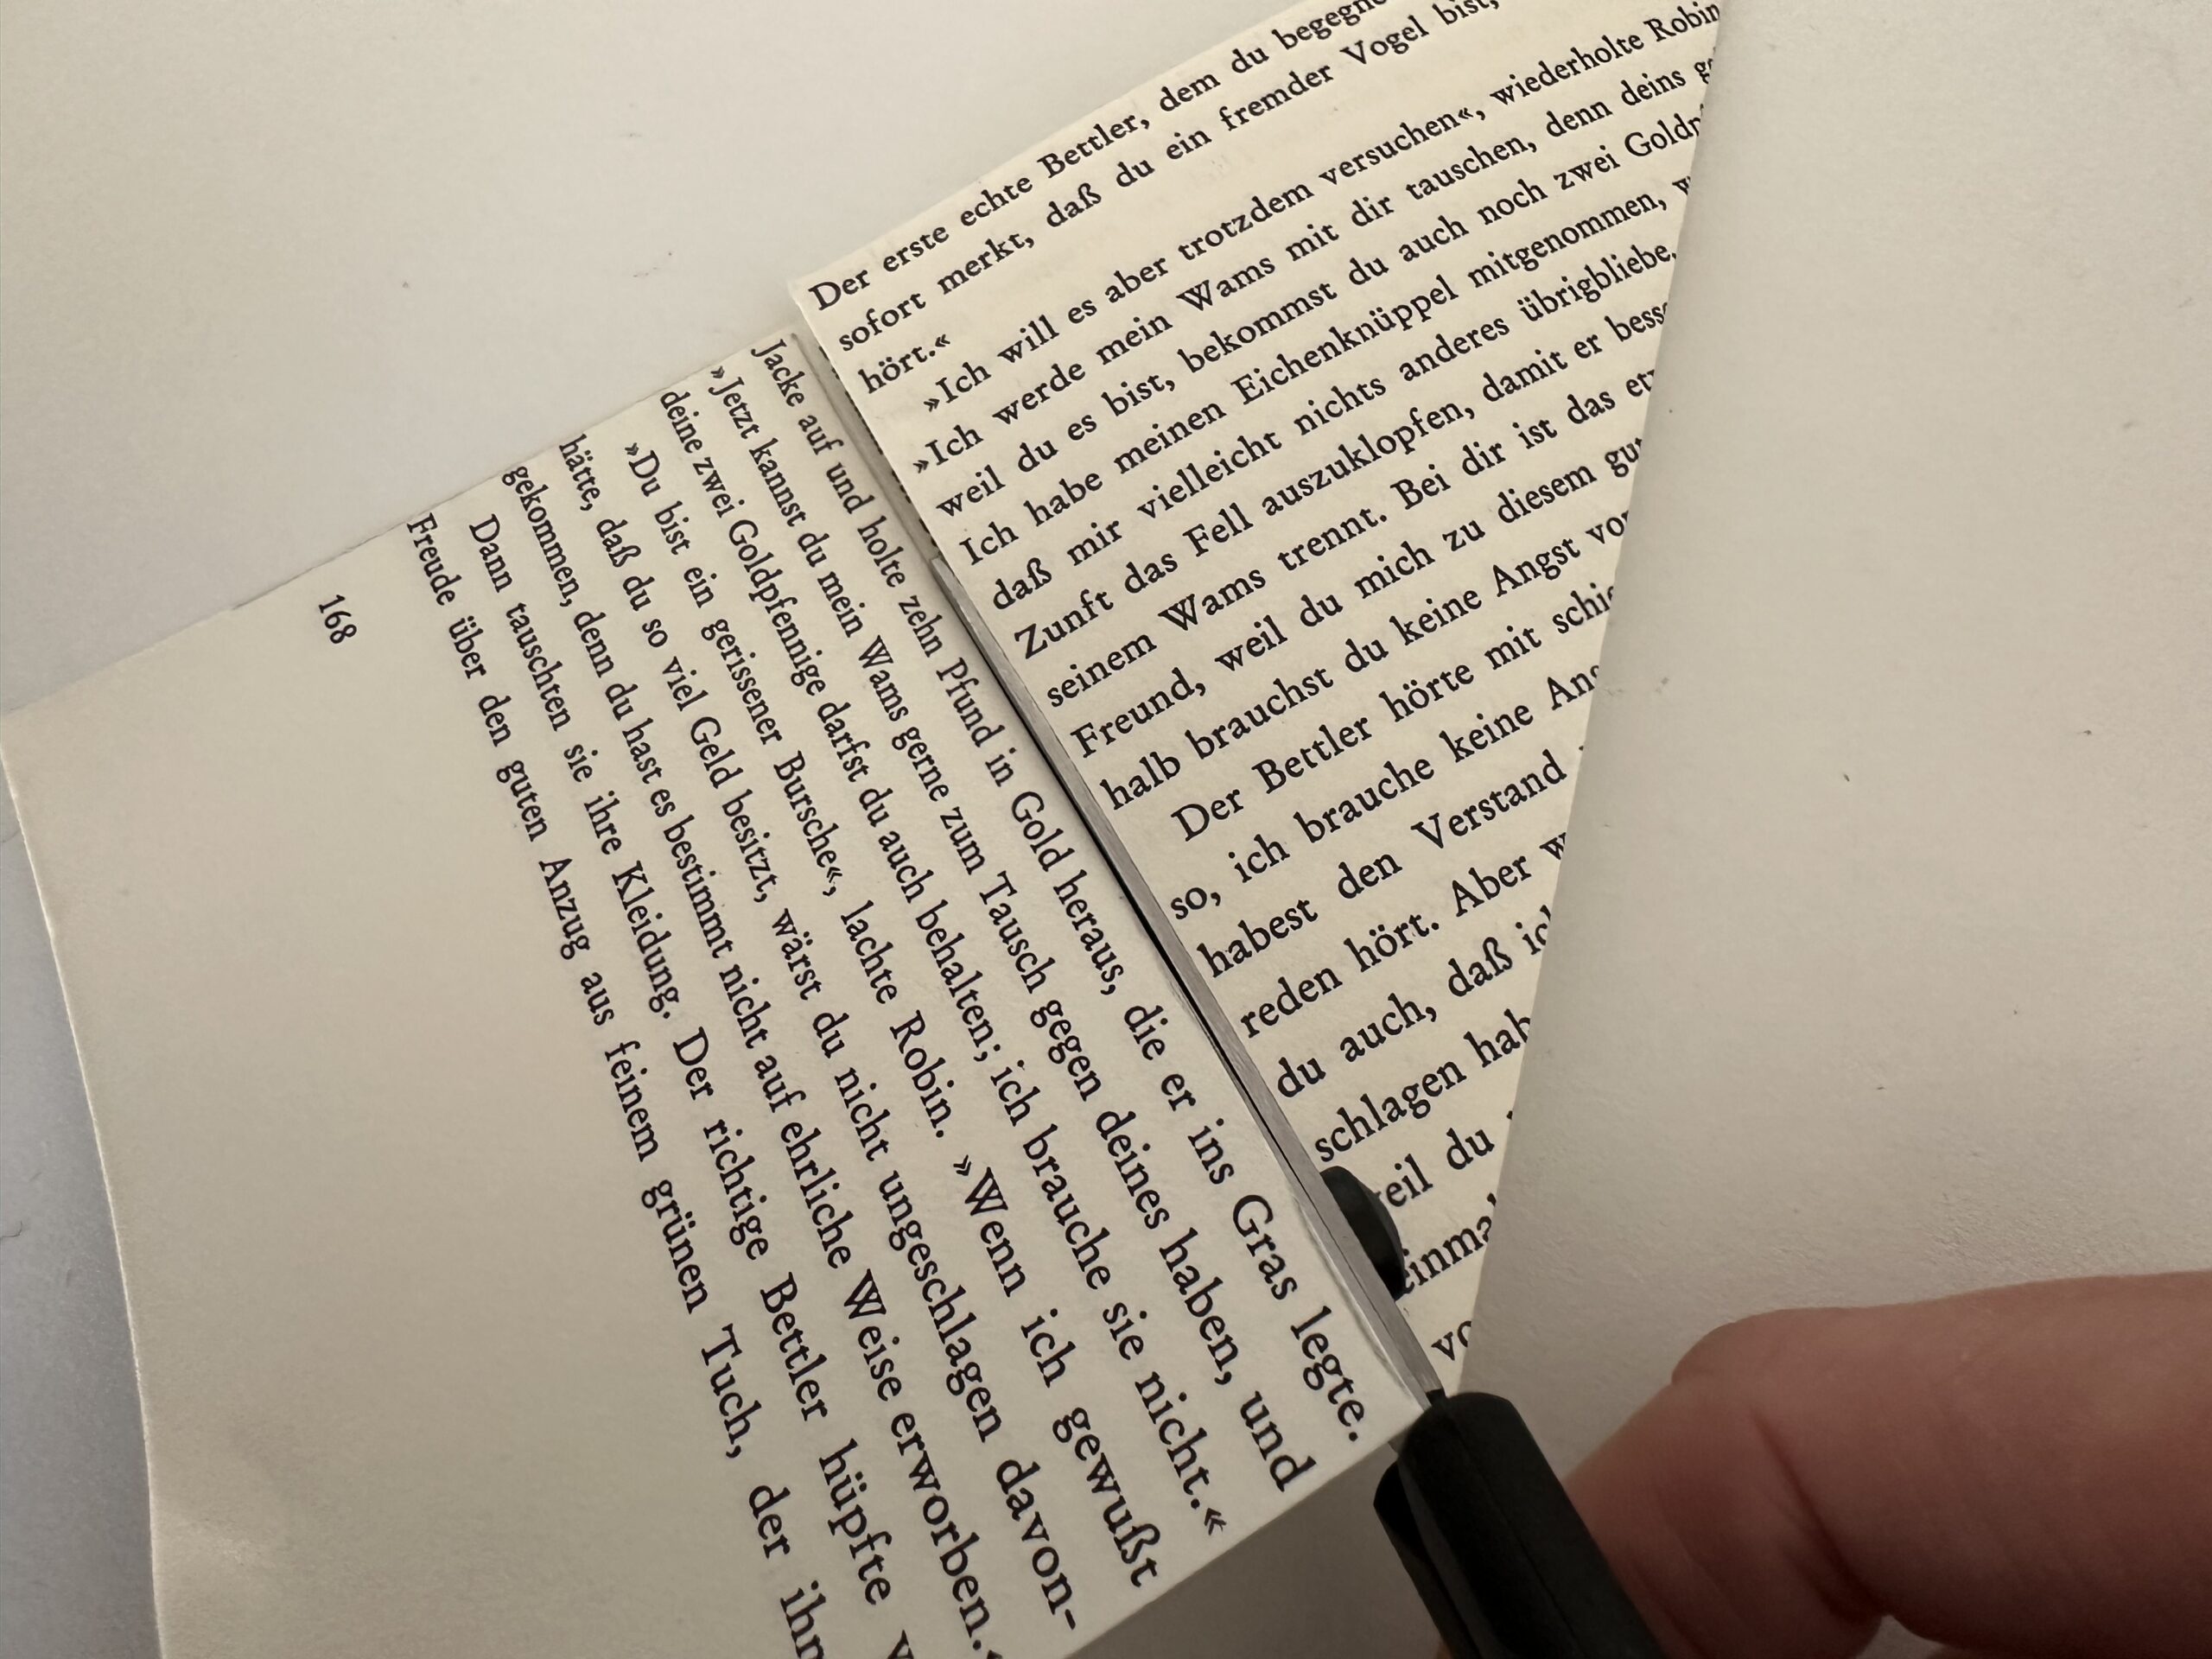
Bild zum Schritt 10 für das Bastel- und DIY-Abenteuer für Kinder: 'Schneide den Papierstreifen mit der Schere ab.'

11

The double-lined triangle is ready.
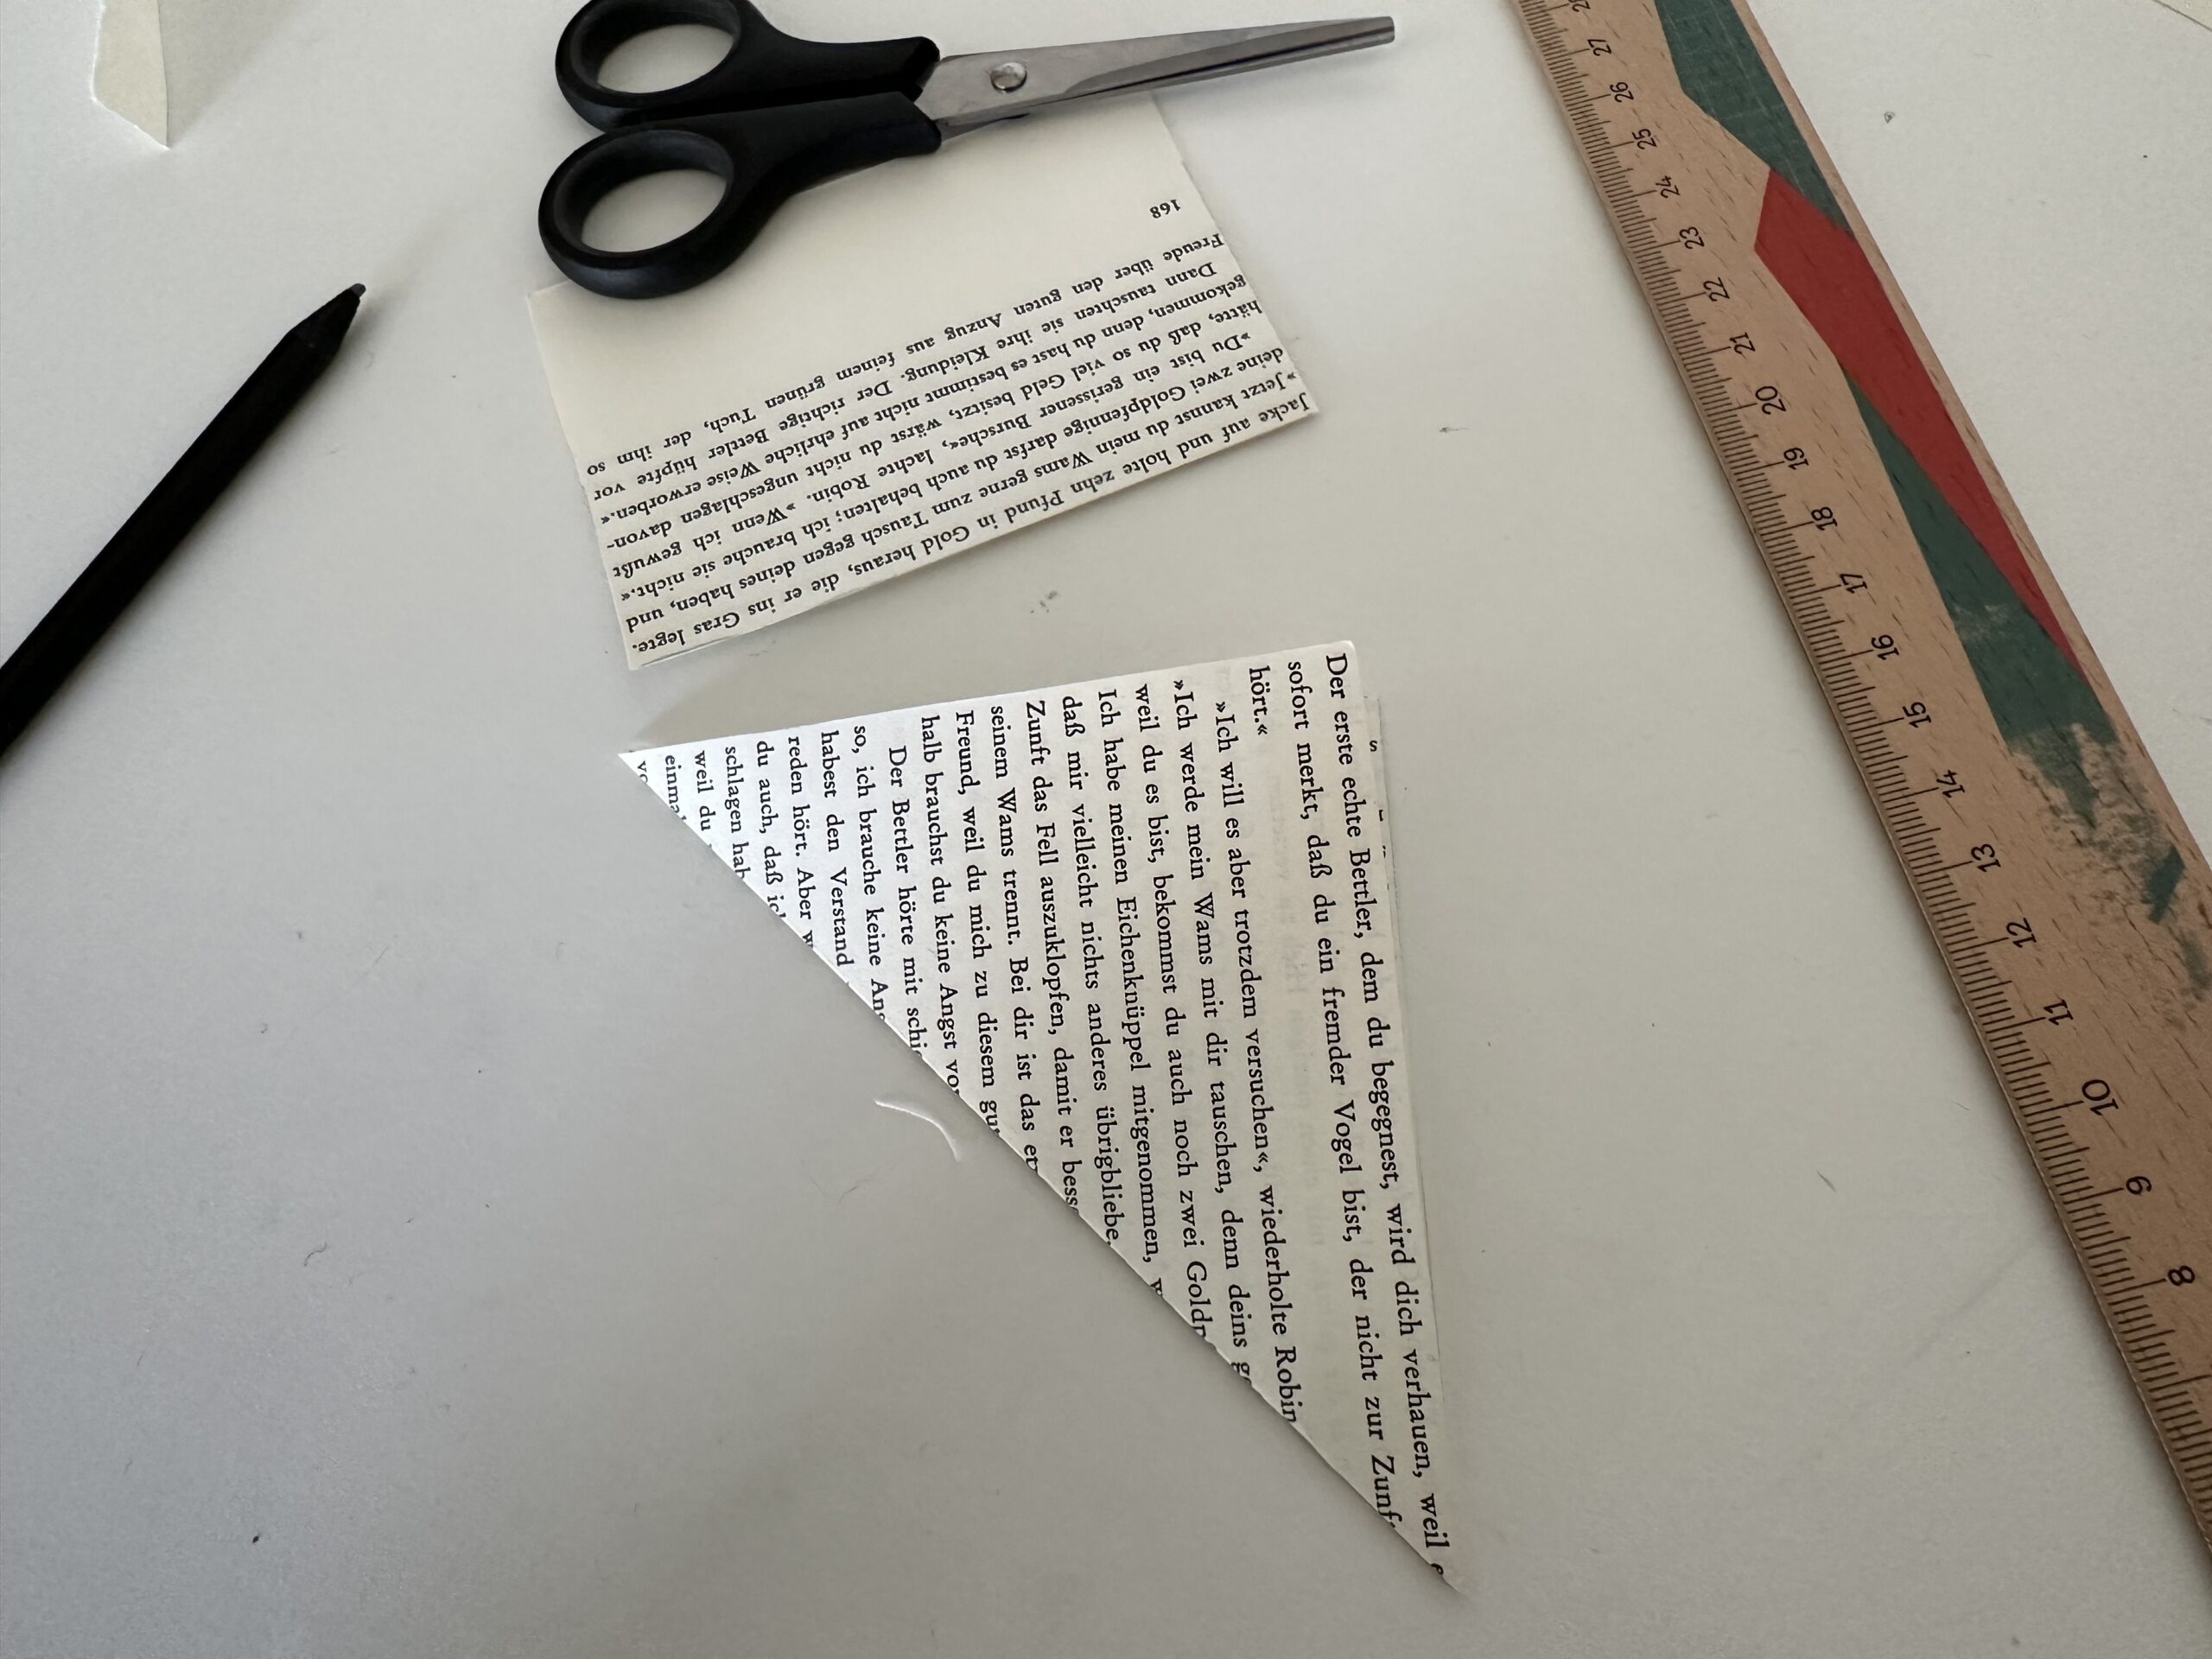
Bild zum Schritt 11 für das Bastel- und DIY-Abenteuer für Kinder: 'Das doppelt liegende Dreieck ist fertig.'

12

Shut the triangle apart.

Bild zum Schritt 12 für das Bastel- und DIY-Abenteuer für Kinder: 'Klappe das Dreieck auseinander.'

13

Turn the square so that the center line points to you.
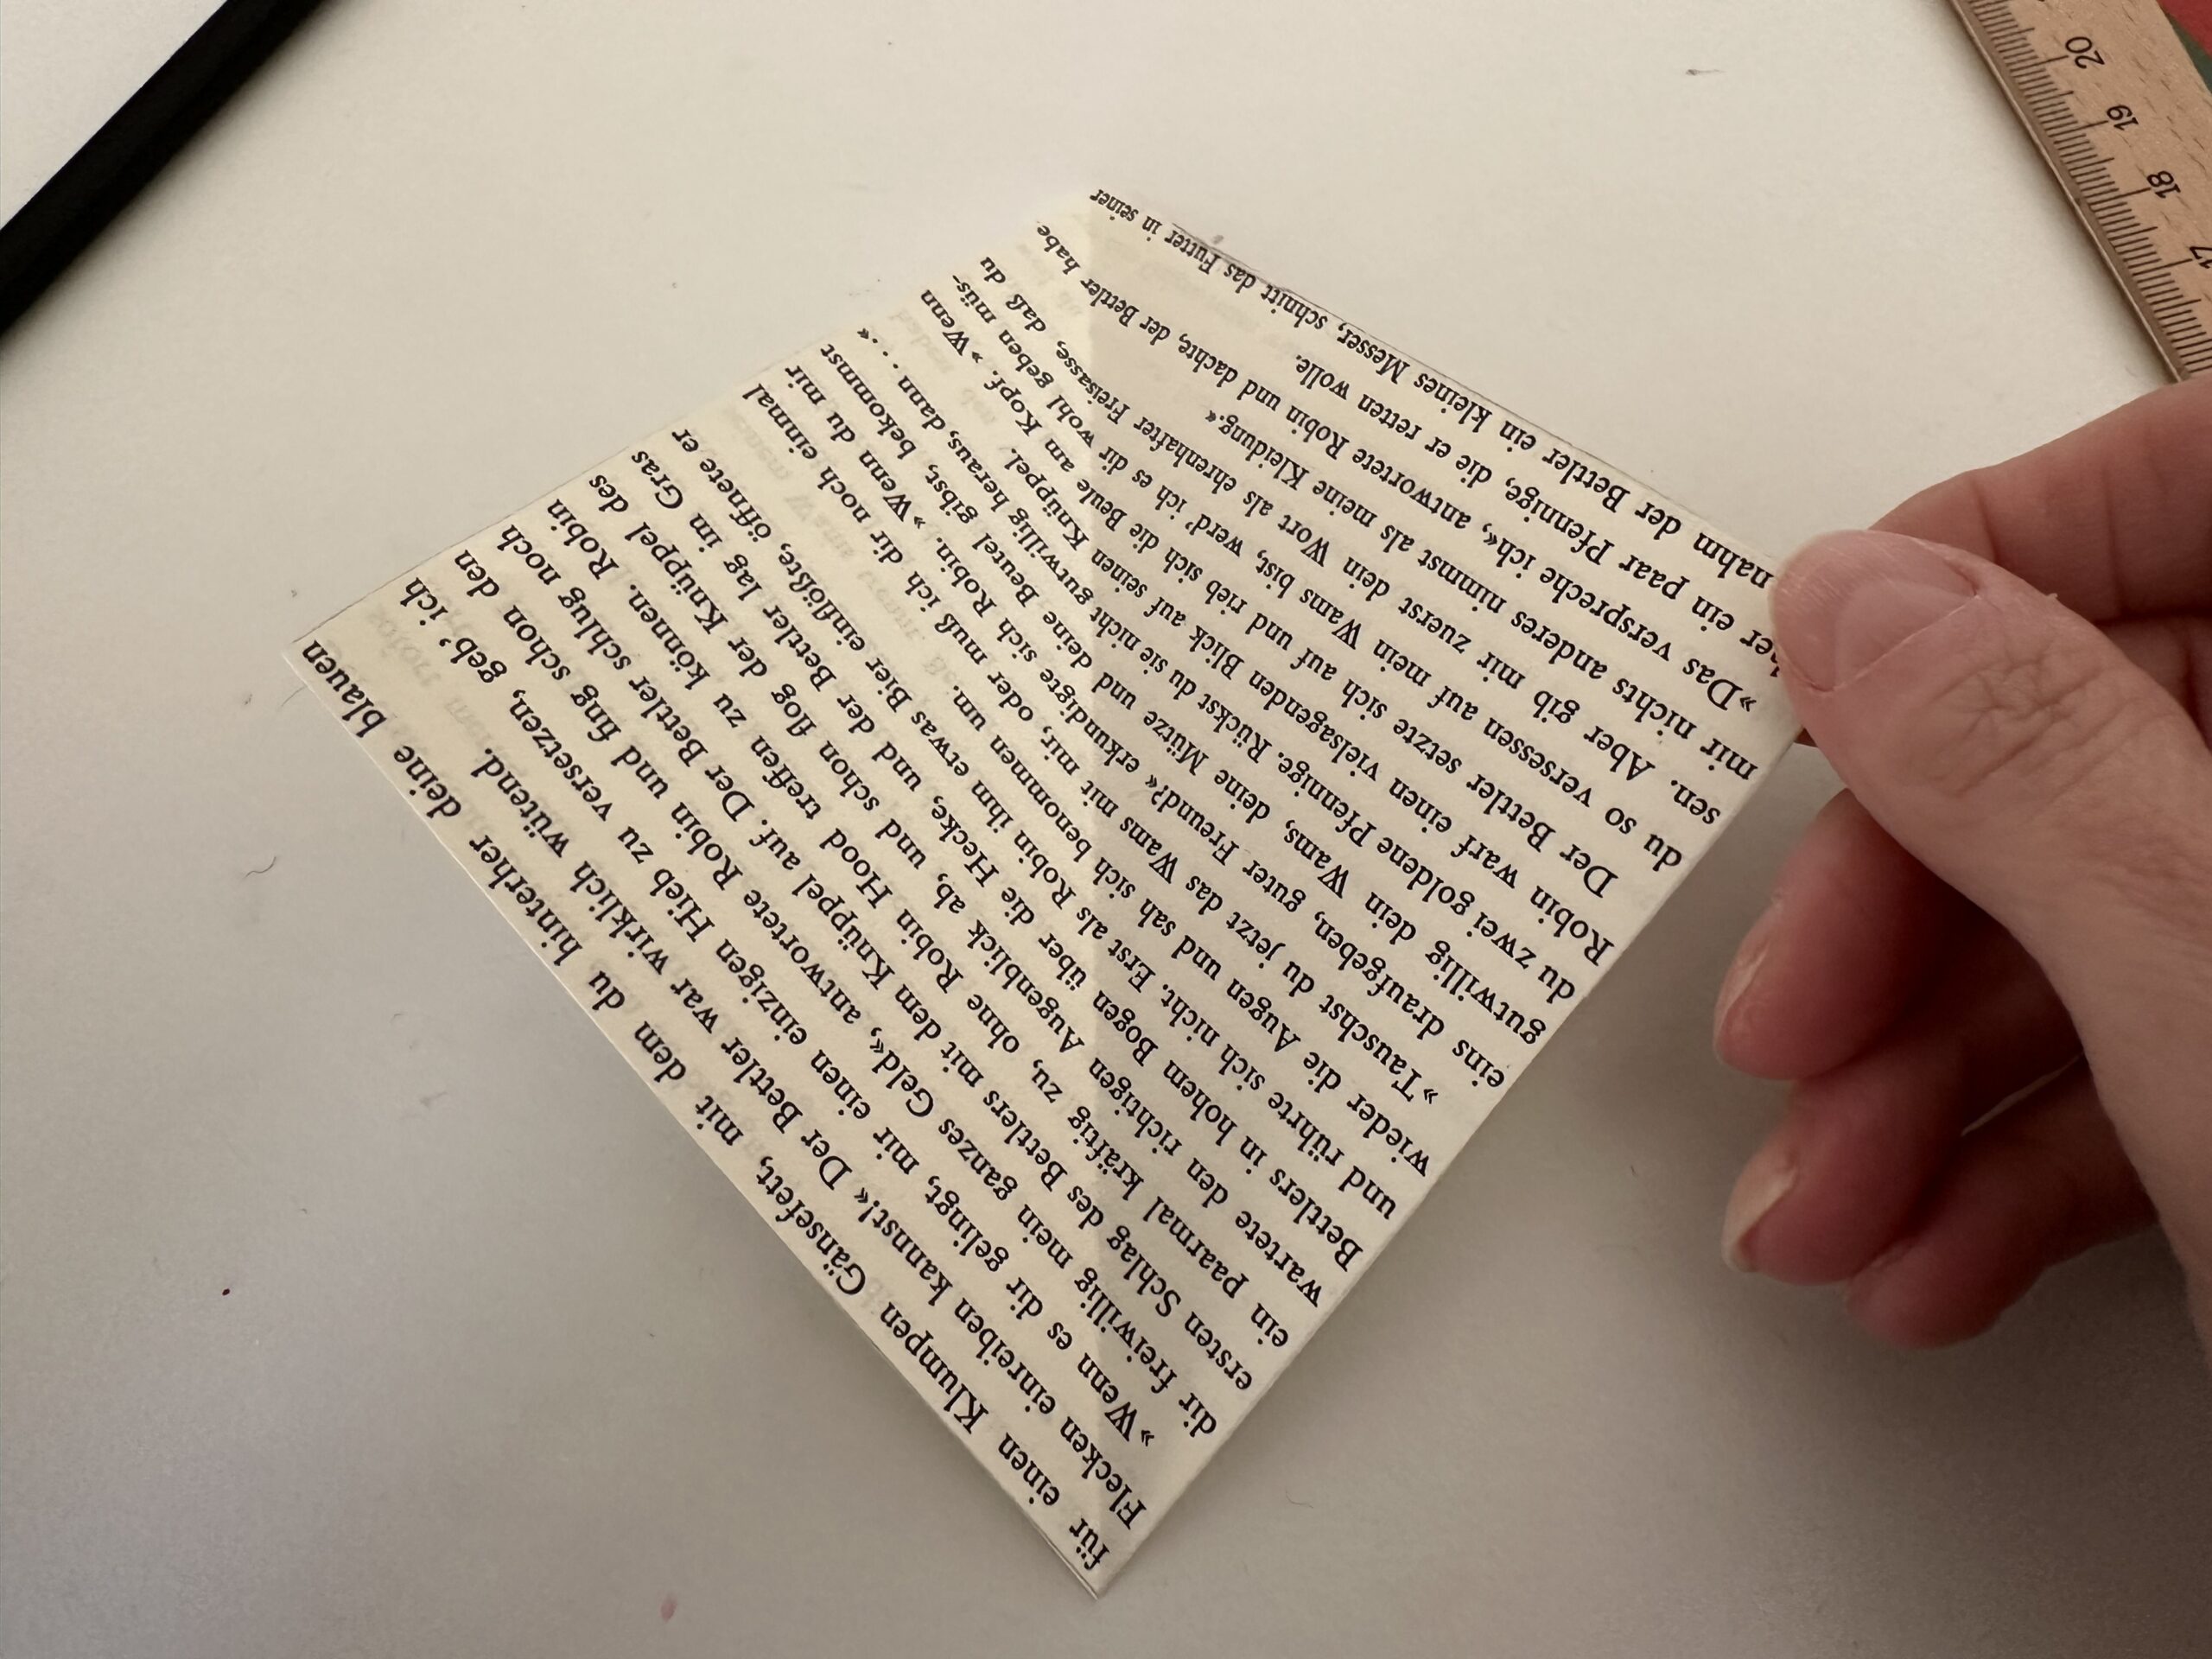
Bild zum Schritt 13 für das Bastel- und DIY-Abenteuer für Kinder: 'Drehe das Quadrat so, dass die Mittellinie auf dich zeigt.'

14

Fold the upper left edge to the centre line.
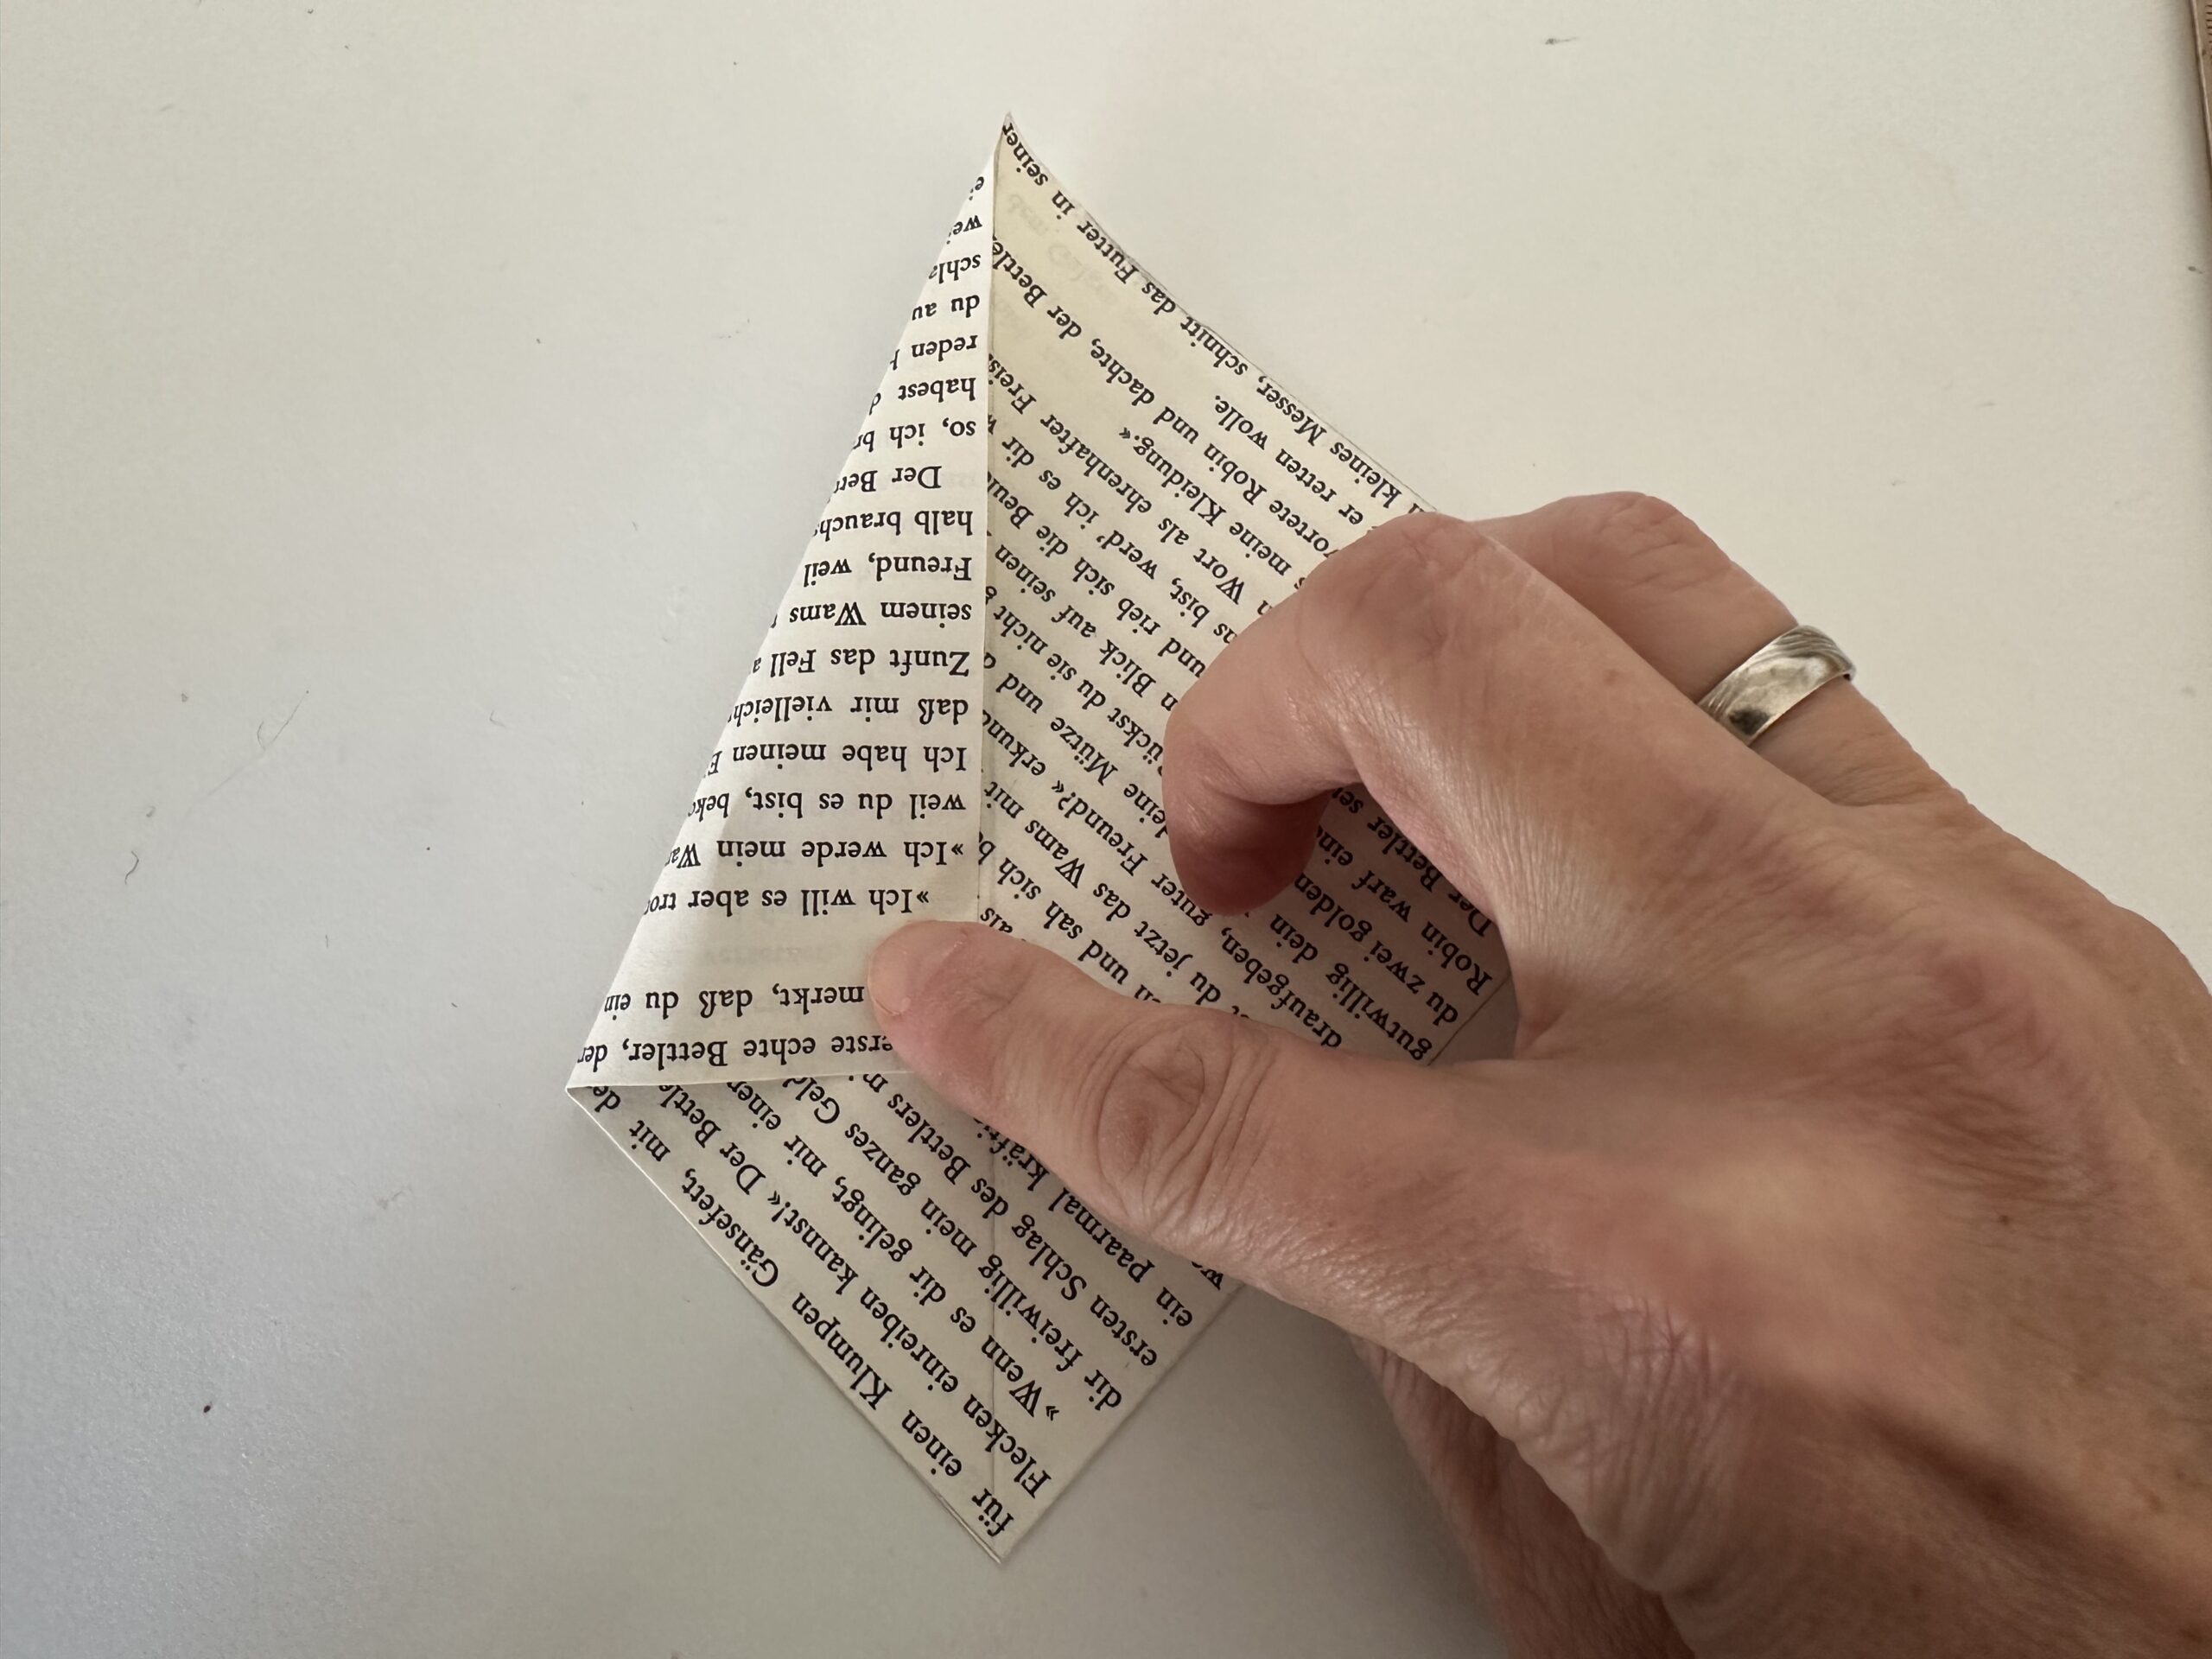
Bild zum Schritt 14 für das Bastel- und DIY-Abenteuer für Kinder: 'Falte die linke obere Kante an die Mittellinie.'

15

Gently strike the fracture.

Bild zum Schritt 15 für das Bastel- und DIY-Abenteuer für Kinder: 'Streiche den Bruch glatt.'

16

Fold the upper right edge to the middle line as well. Also strike this fracture smoothly.
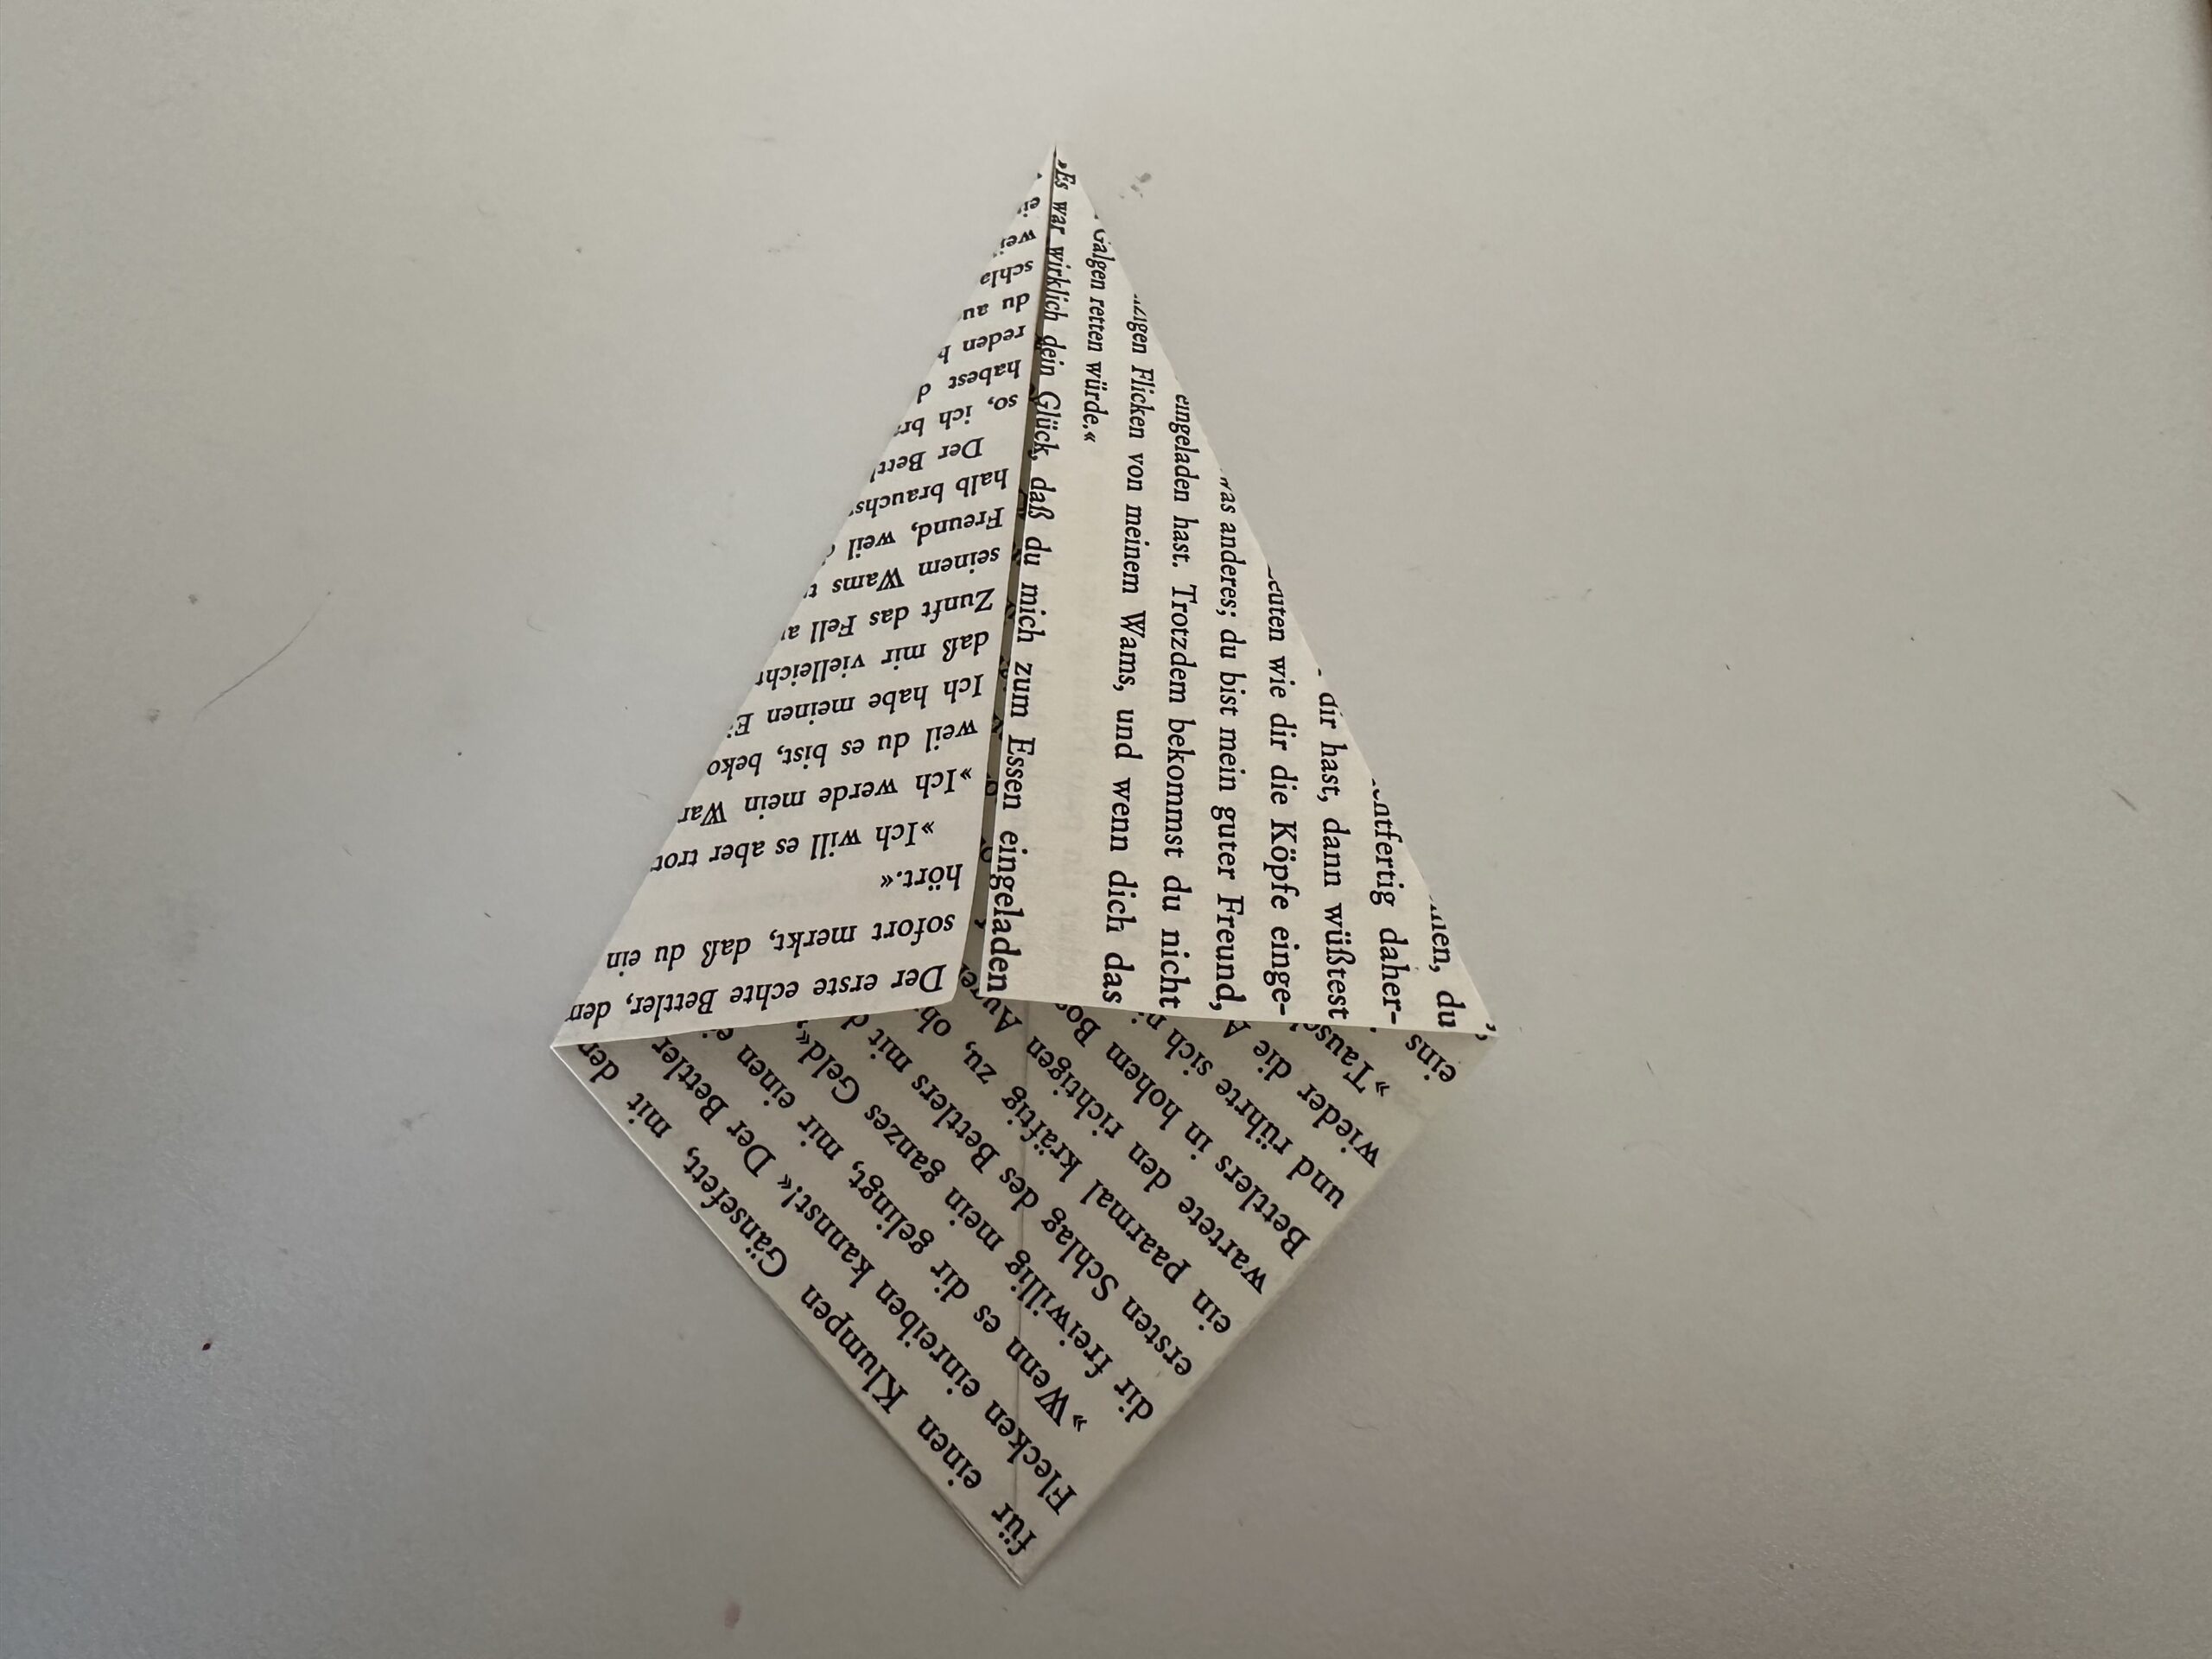
Bild zum Schritt 16 für das Bastel- und DIY-Abenteuer für Kinder: 'Falte die rechte obere Kante ebenfalls an die Mittellinie. Streiche...'

17

Finished is the dragon. Turn the folded leaf. Place the dragon in front of you so that the long tip points downwards.
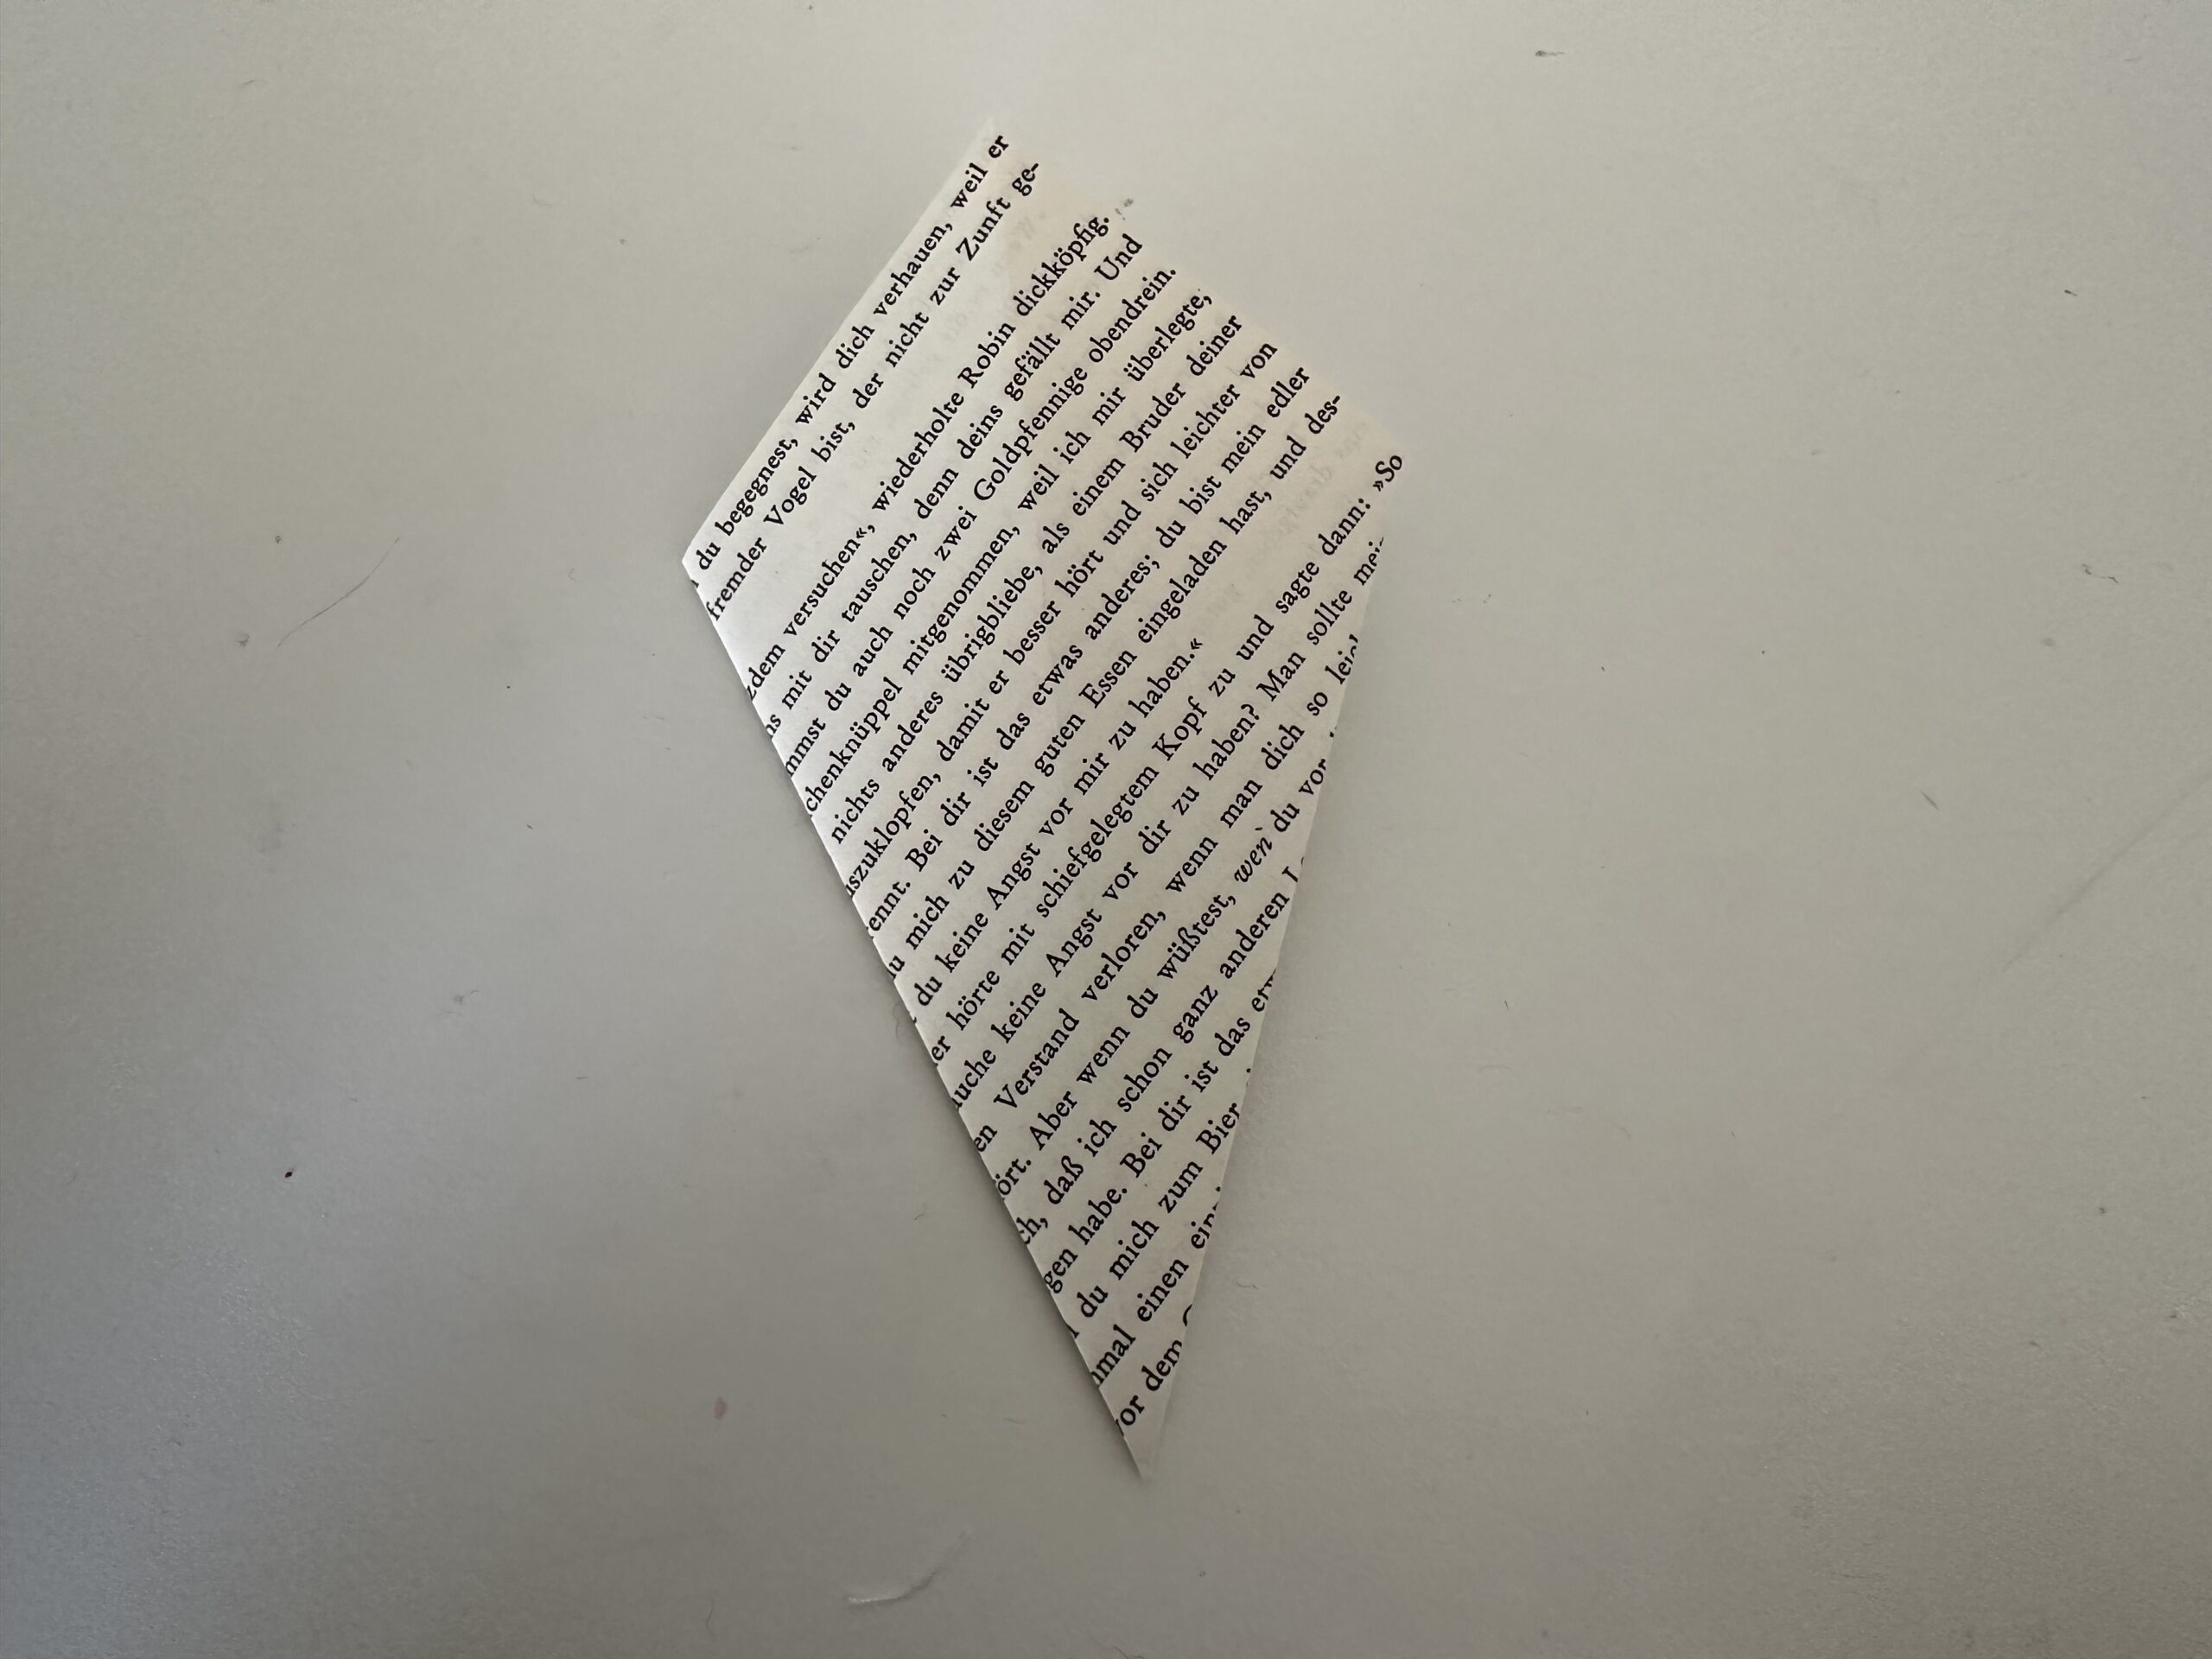
Bild zum Schritt 17 für das Bastel- und DIY-Abenteuer für Kinder: 'Fertig ist der Drache. Wende das Gefaltete Blatt. Lege den...'

18

Put a face on the dragon.

Bild zum Schritt 18 für das Bastel- und DIY-Abenteuer für Kinder: 'Male ein Gesicht auf den Drachen.'

19

From a narrow strip of paper you can now cut loops. As you can see in the following steps.
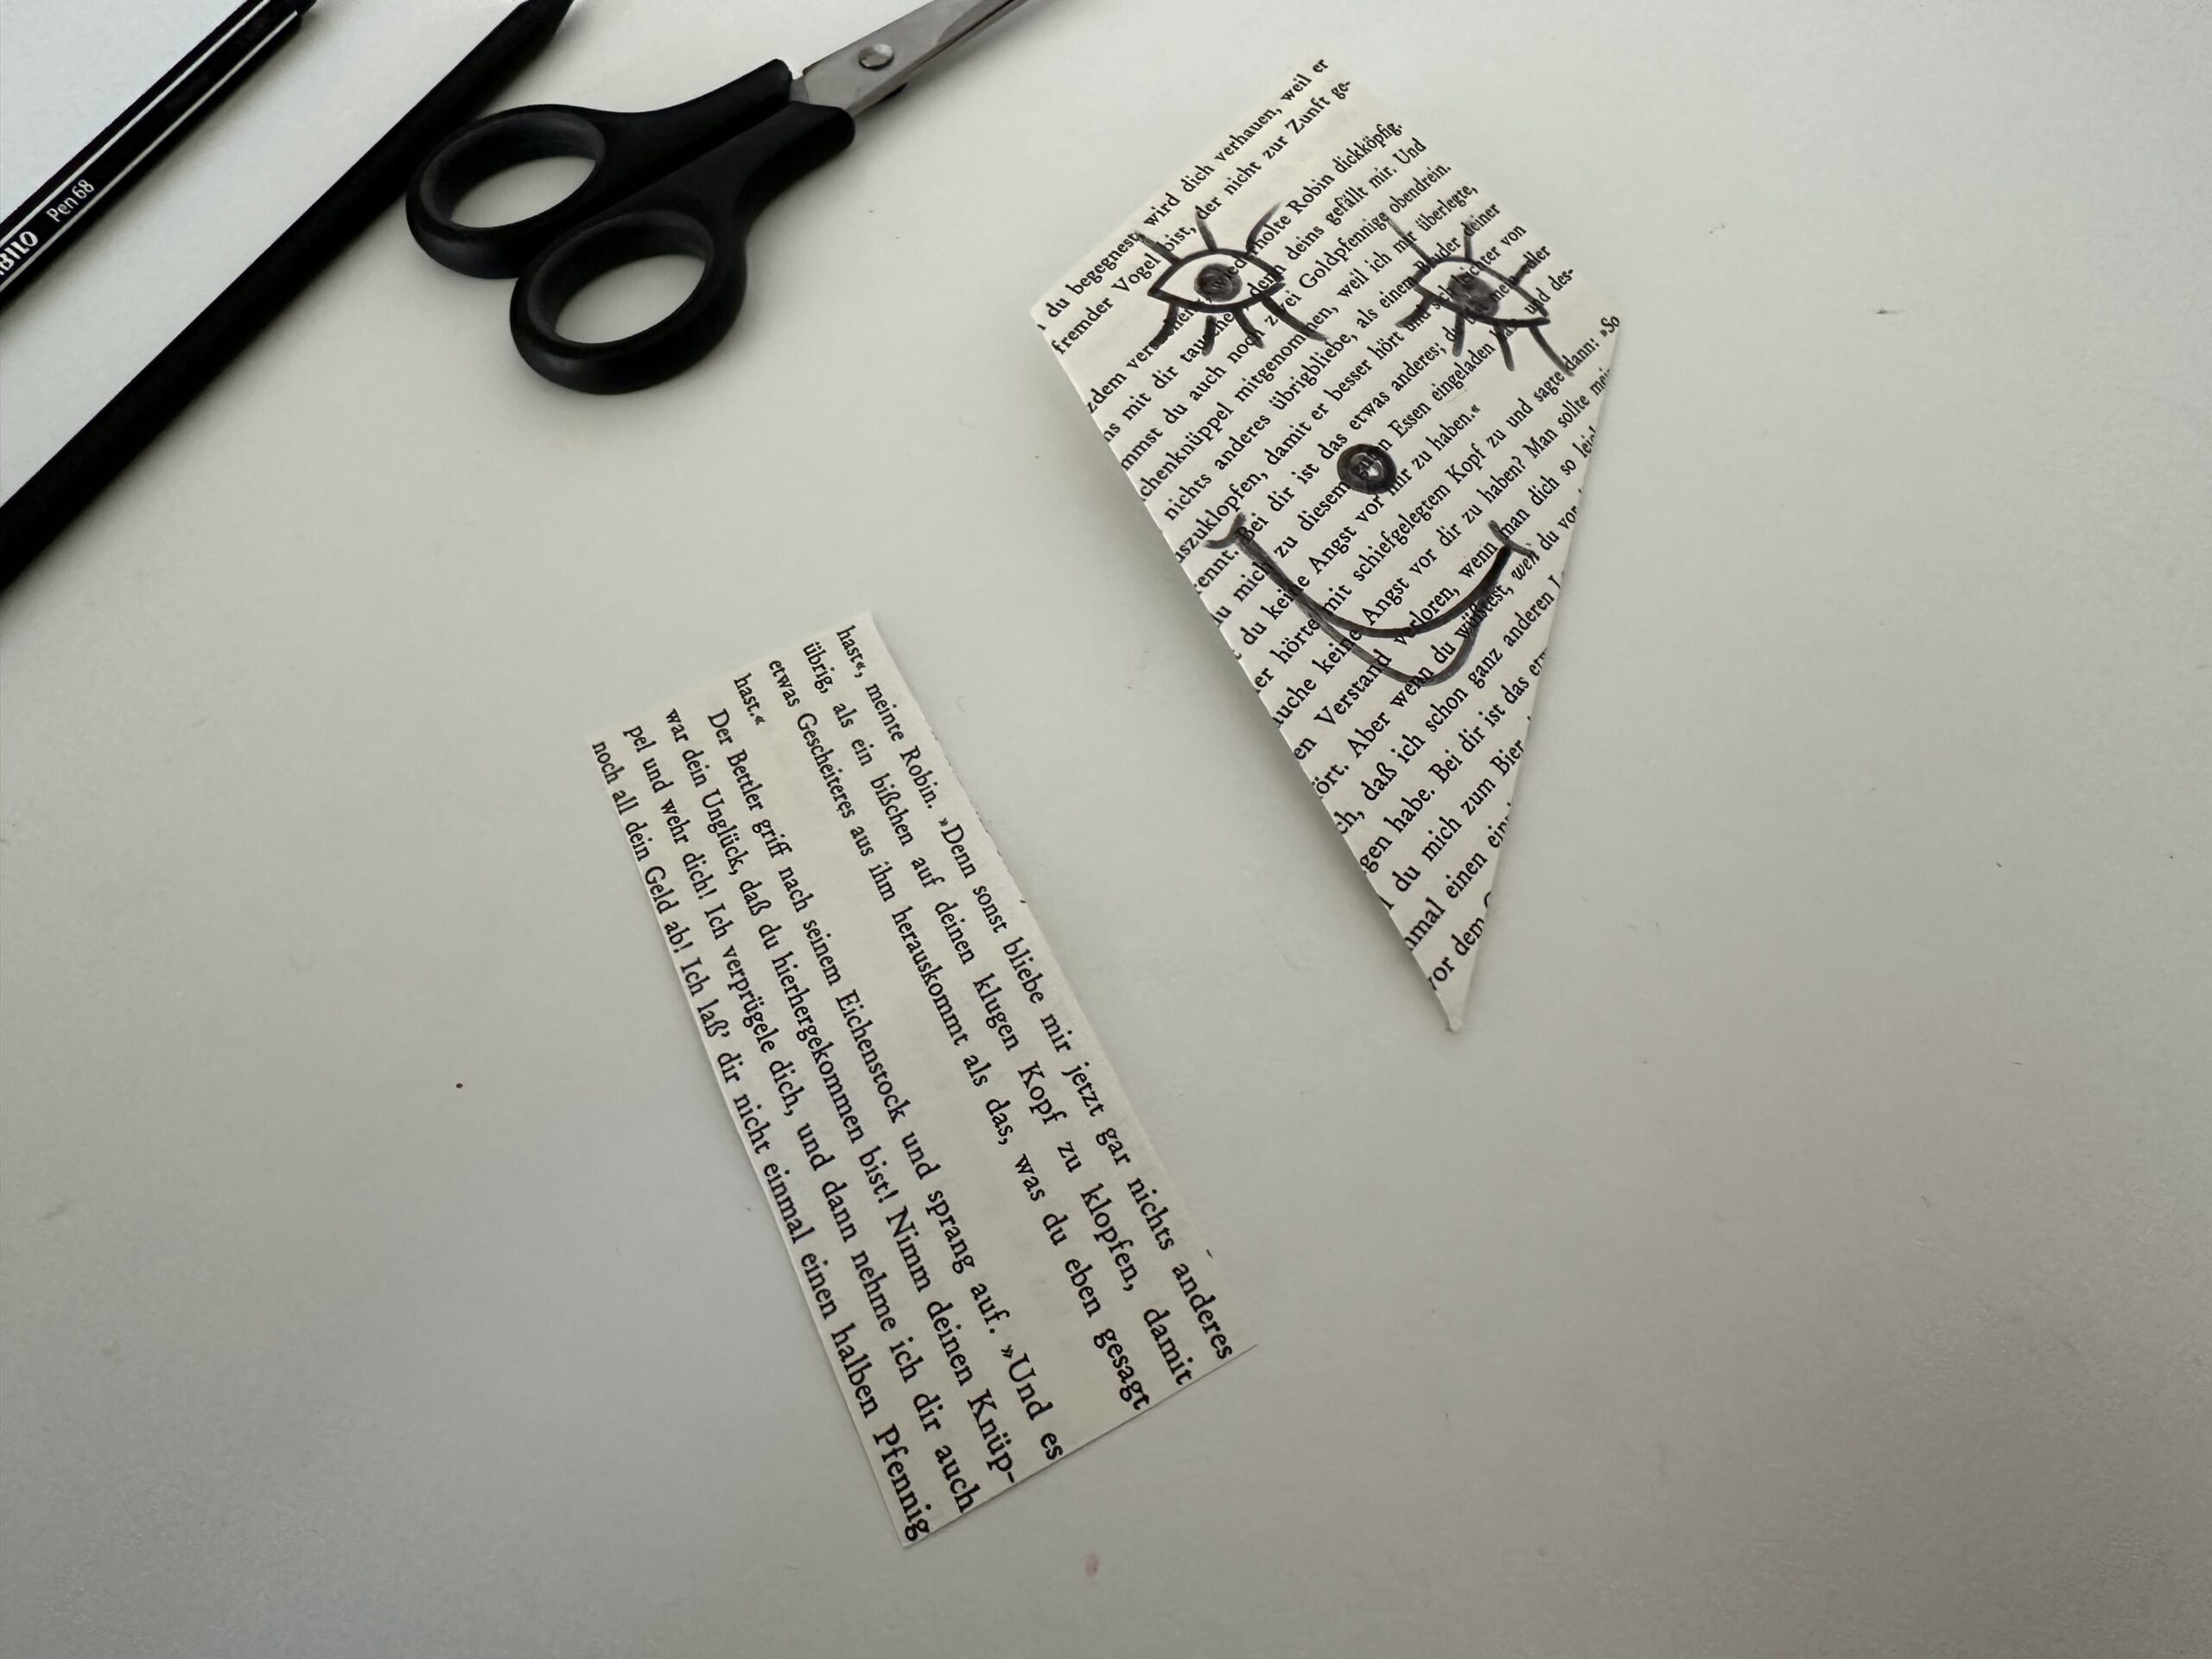
Bild zum Schritt 19 für das Bastel- und DIY-Abenteuer für Kinder: 'Aus einem schmalen Streifen Papier kannst du nun noch Schleifen...'

20

Fold the paper strip as a "hedge staircase".
Fold the paper strip about 2 centimeters wide and then turn the whole around.
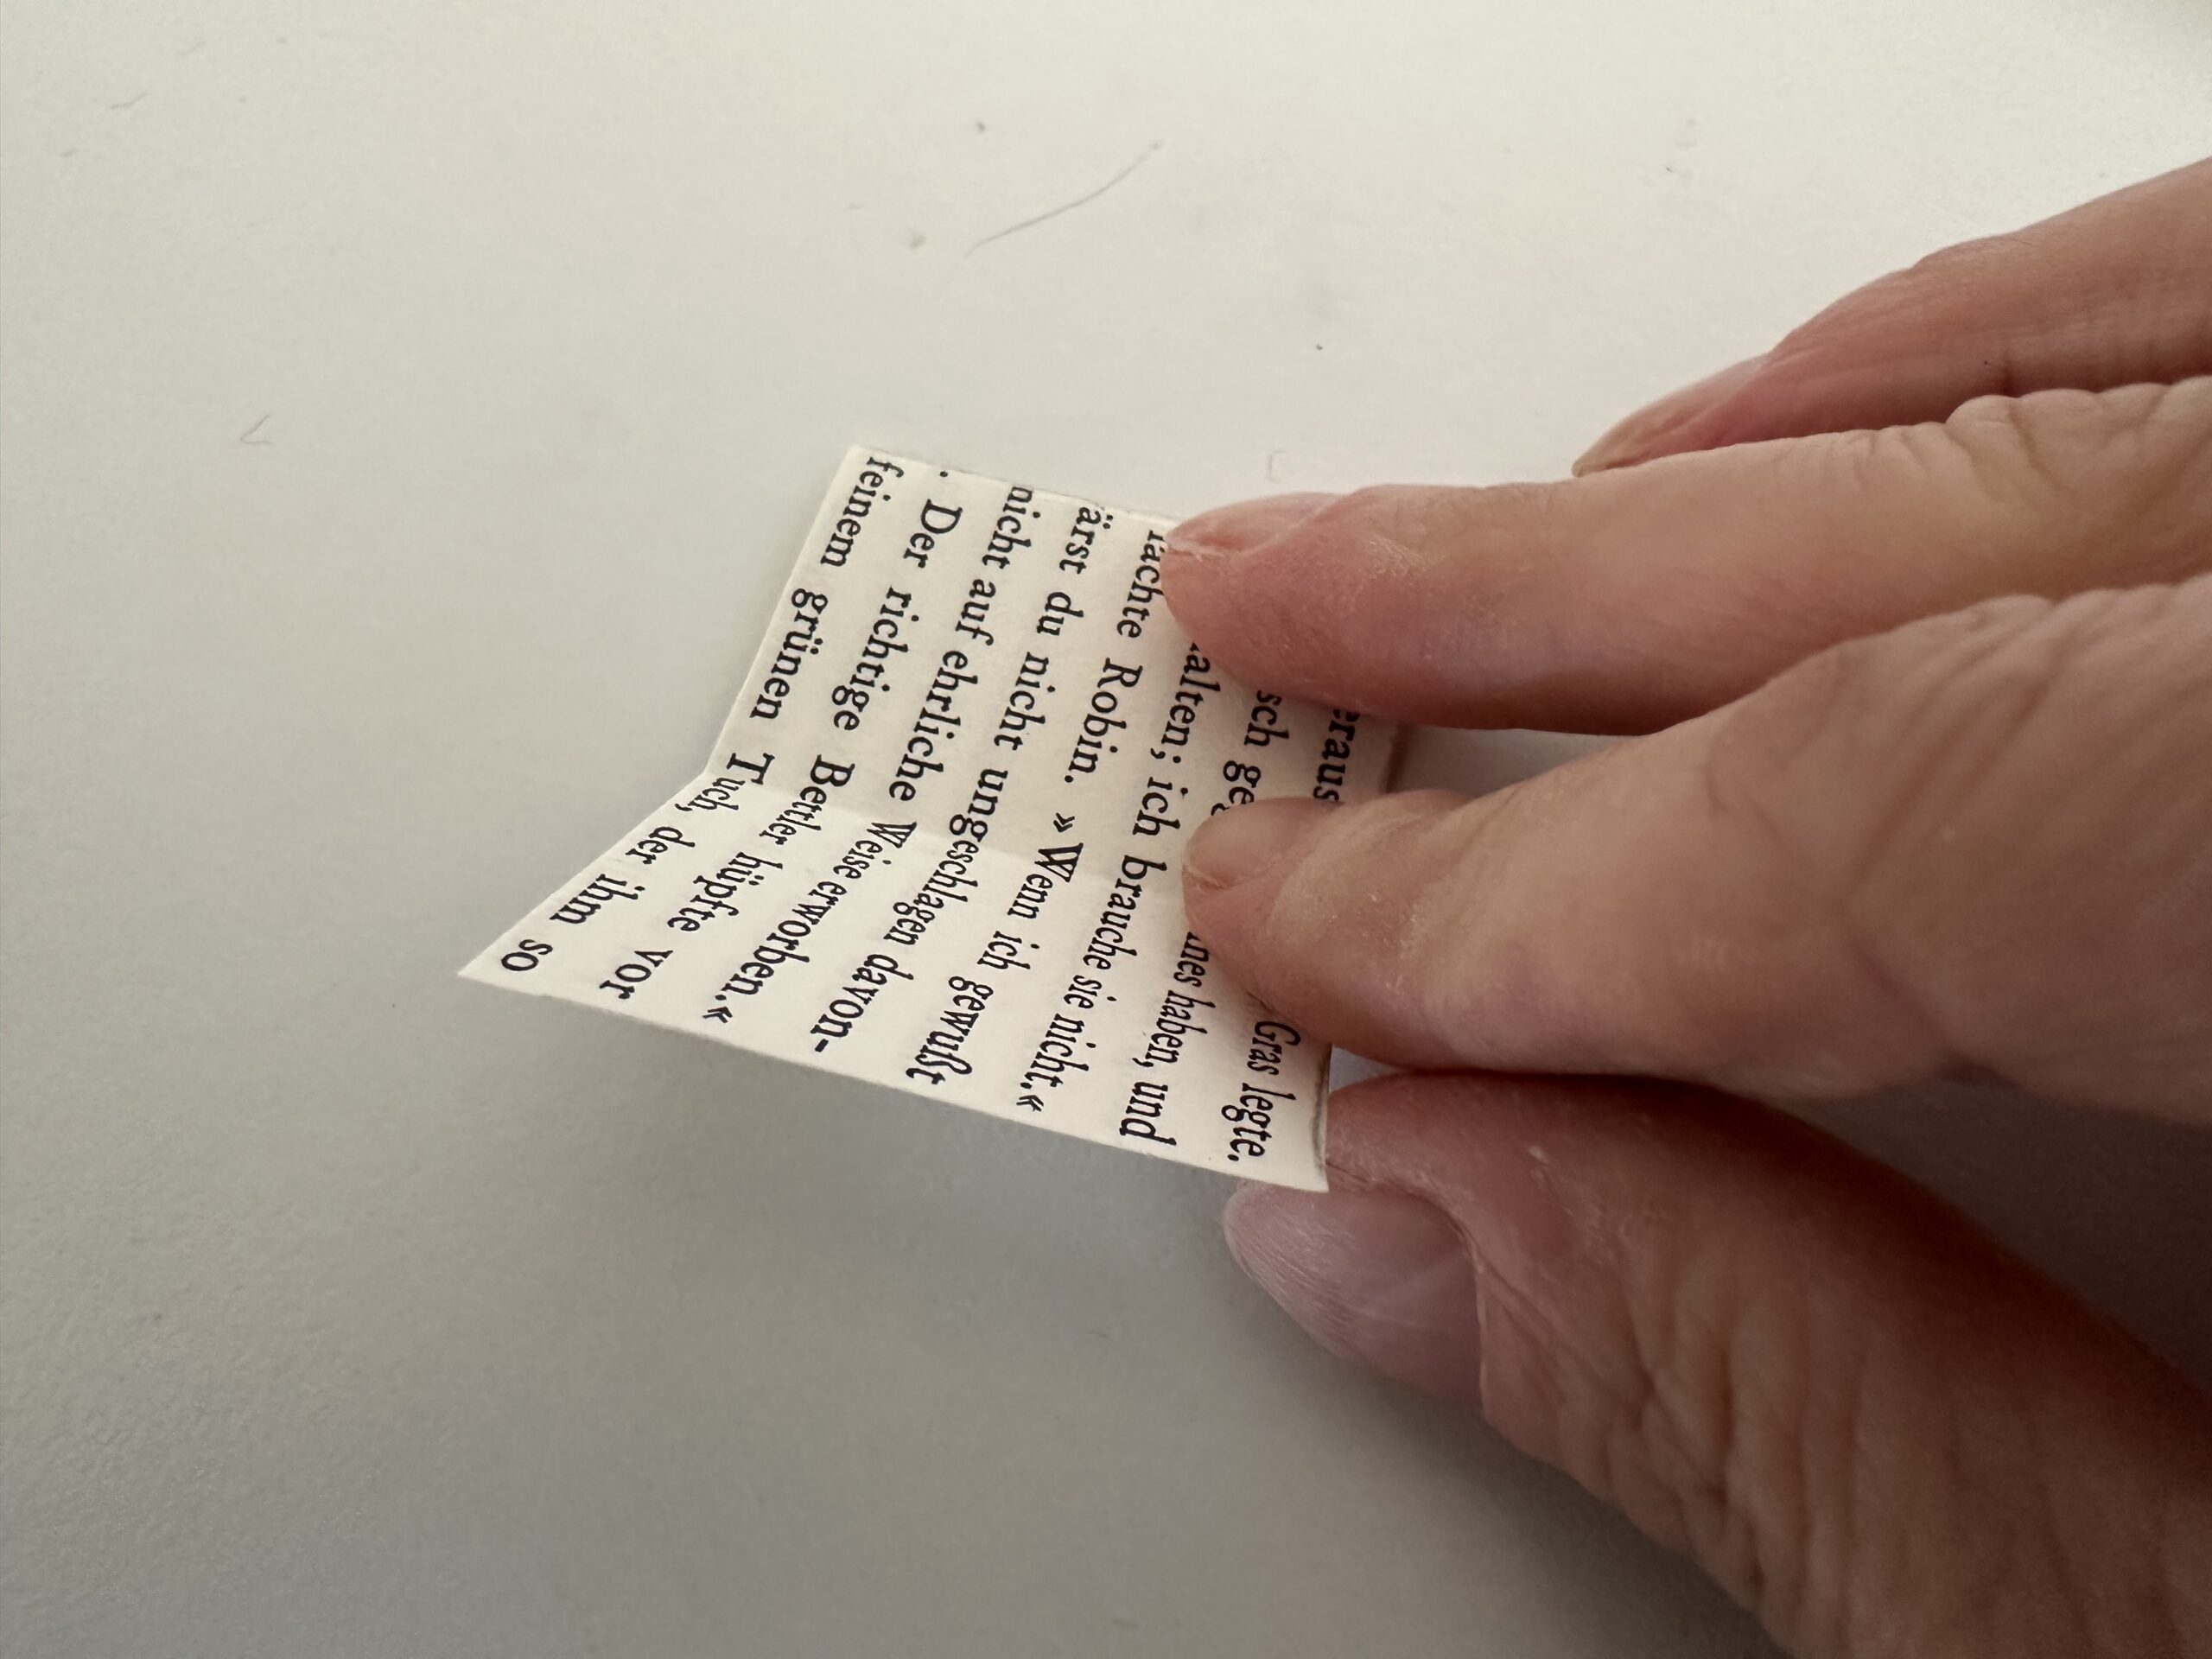
Bild zum Schritt 20 für das Bastel- und DIY-Abenteuer für Kinder: 'Falte den Papierstreifen als „Heckentreppe“.   Falte den Papierstreifen...'

21

Fold the paper in the opposite direction again 2 centimeters. This creates a zigzag strip.
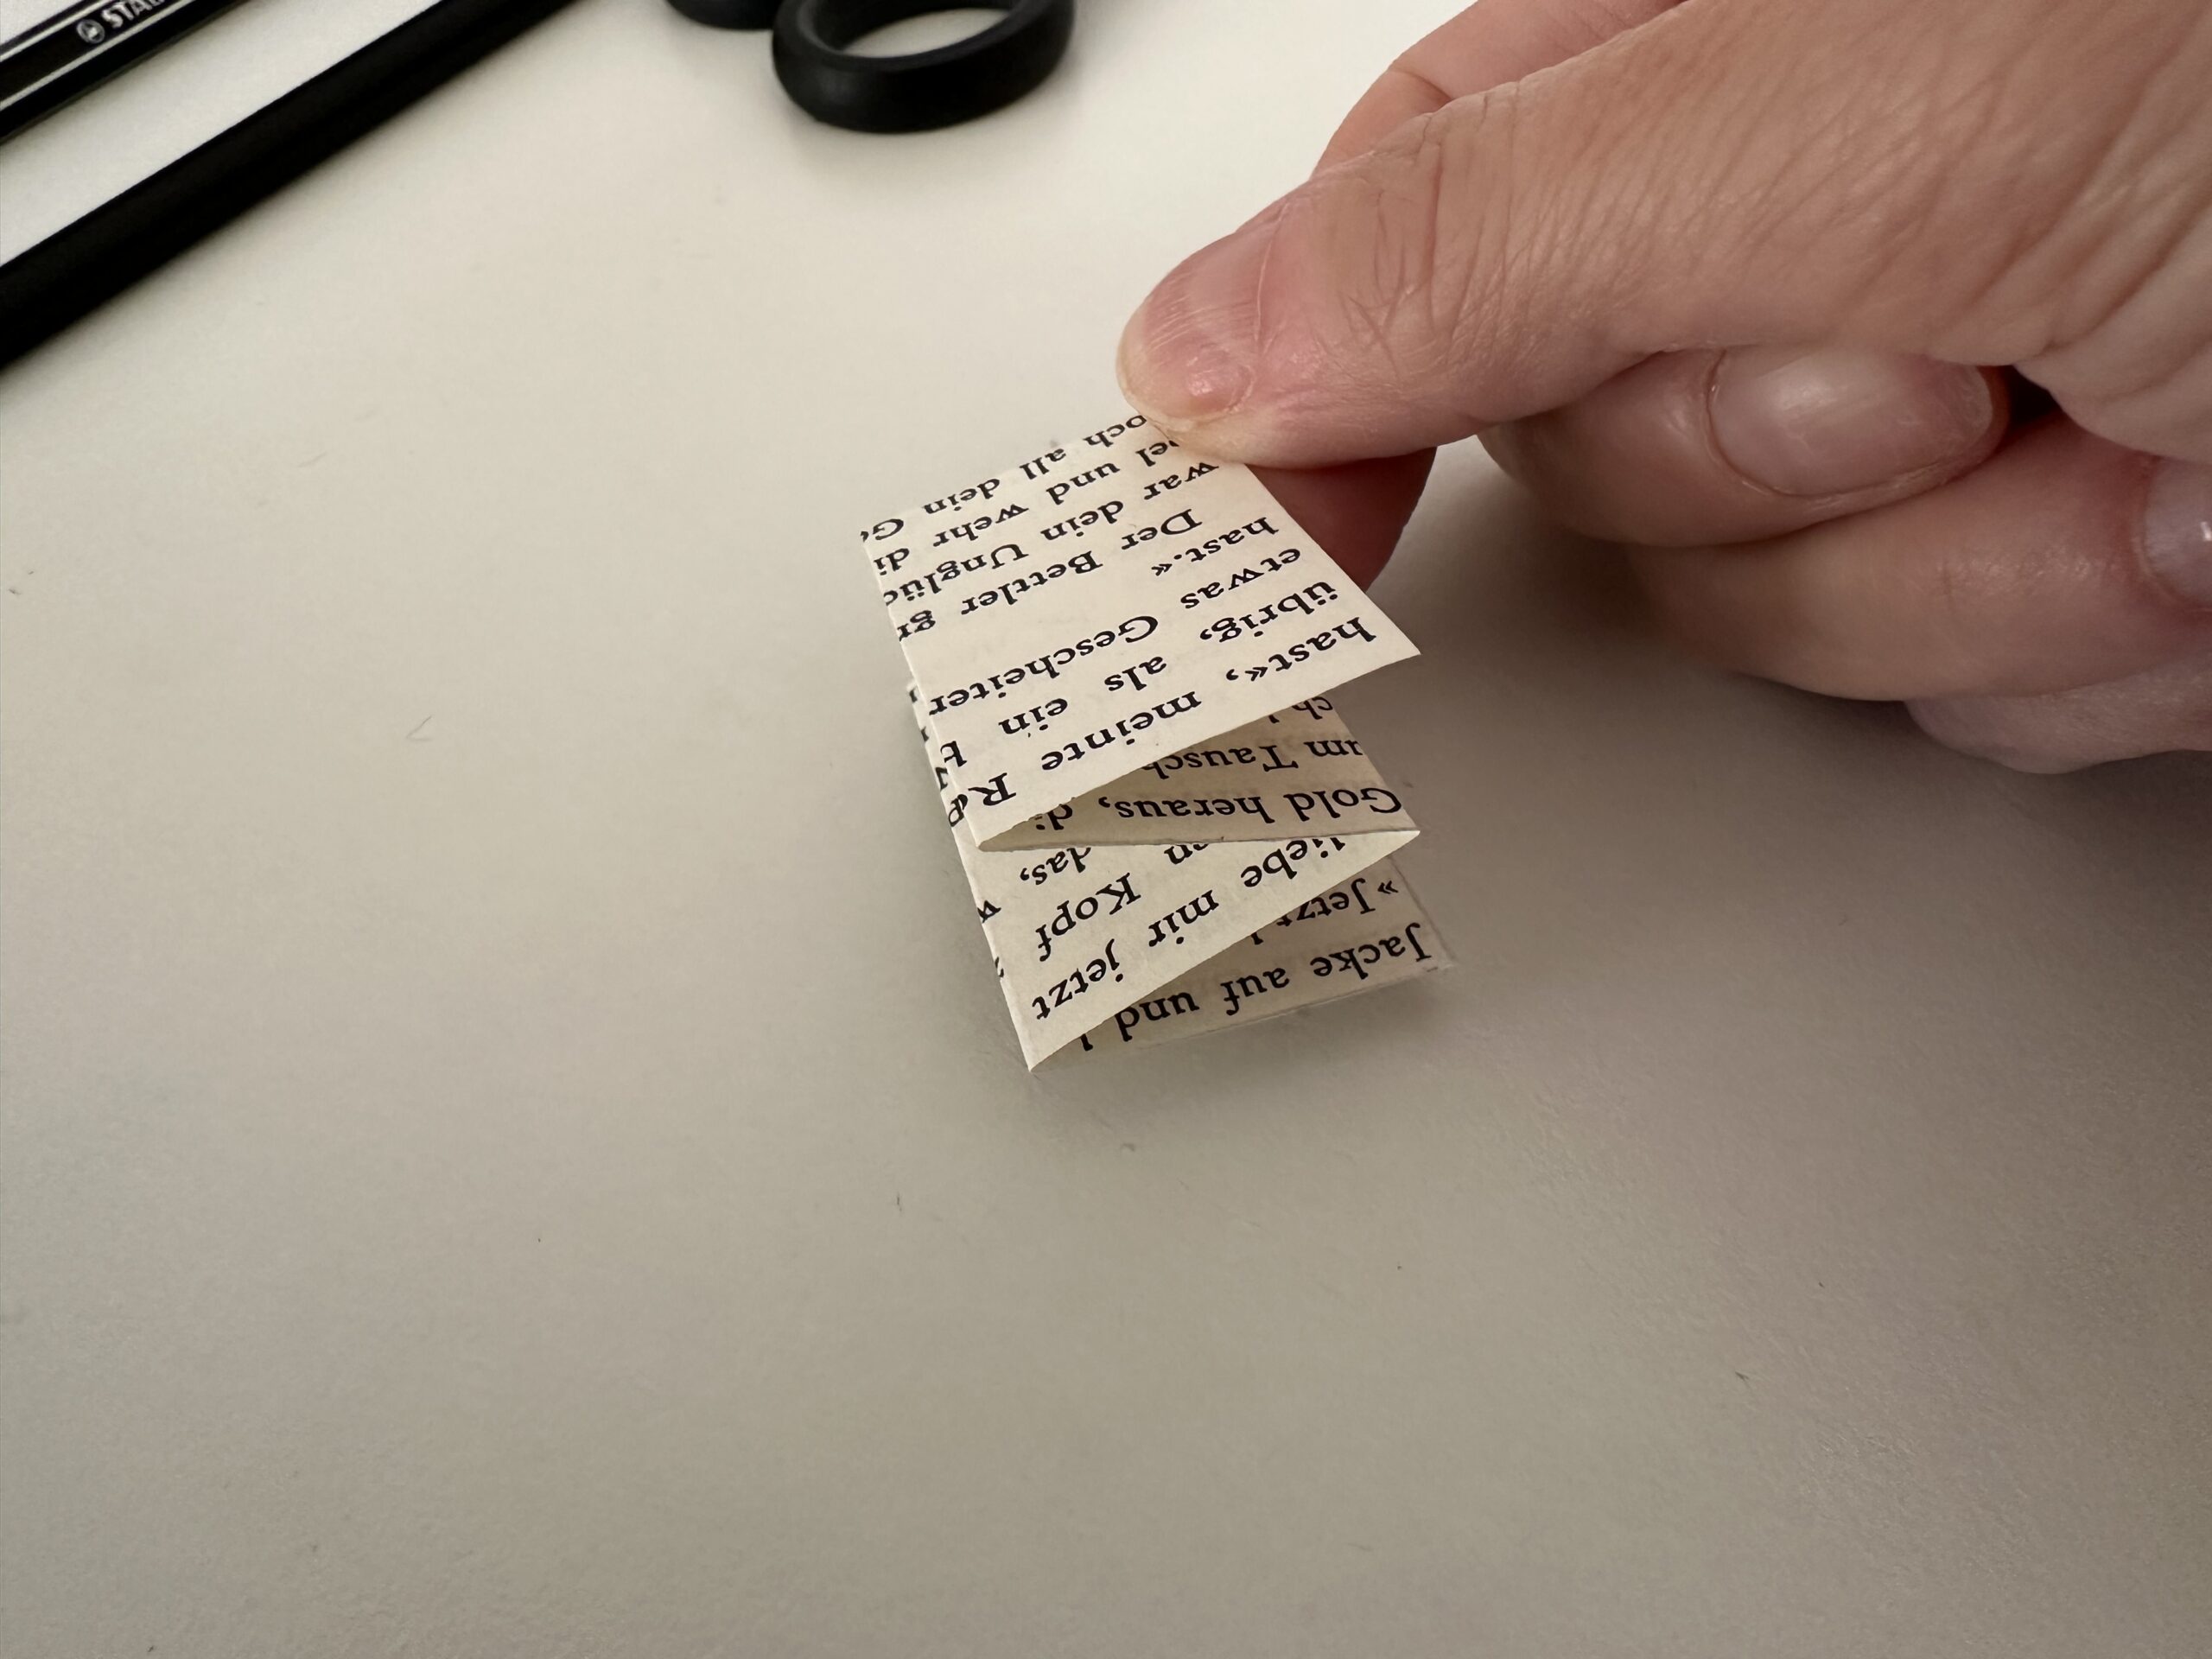
Bild zum Schritt 21 für das Bastel- und DIY-Abenteuer für Kinder: 'Falte das Papier in die entgegengesetzte Richtung wieder 2 Zentimeter....'

22

Put a bow on the top of the leaf.
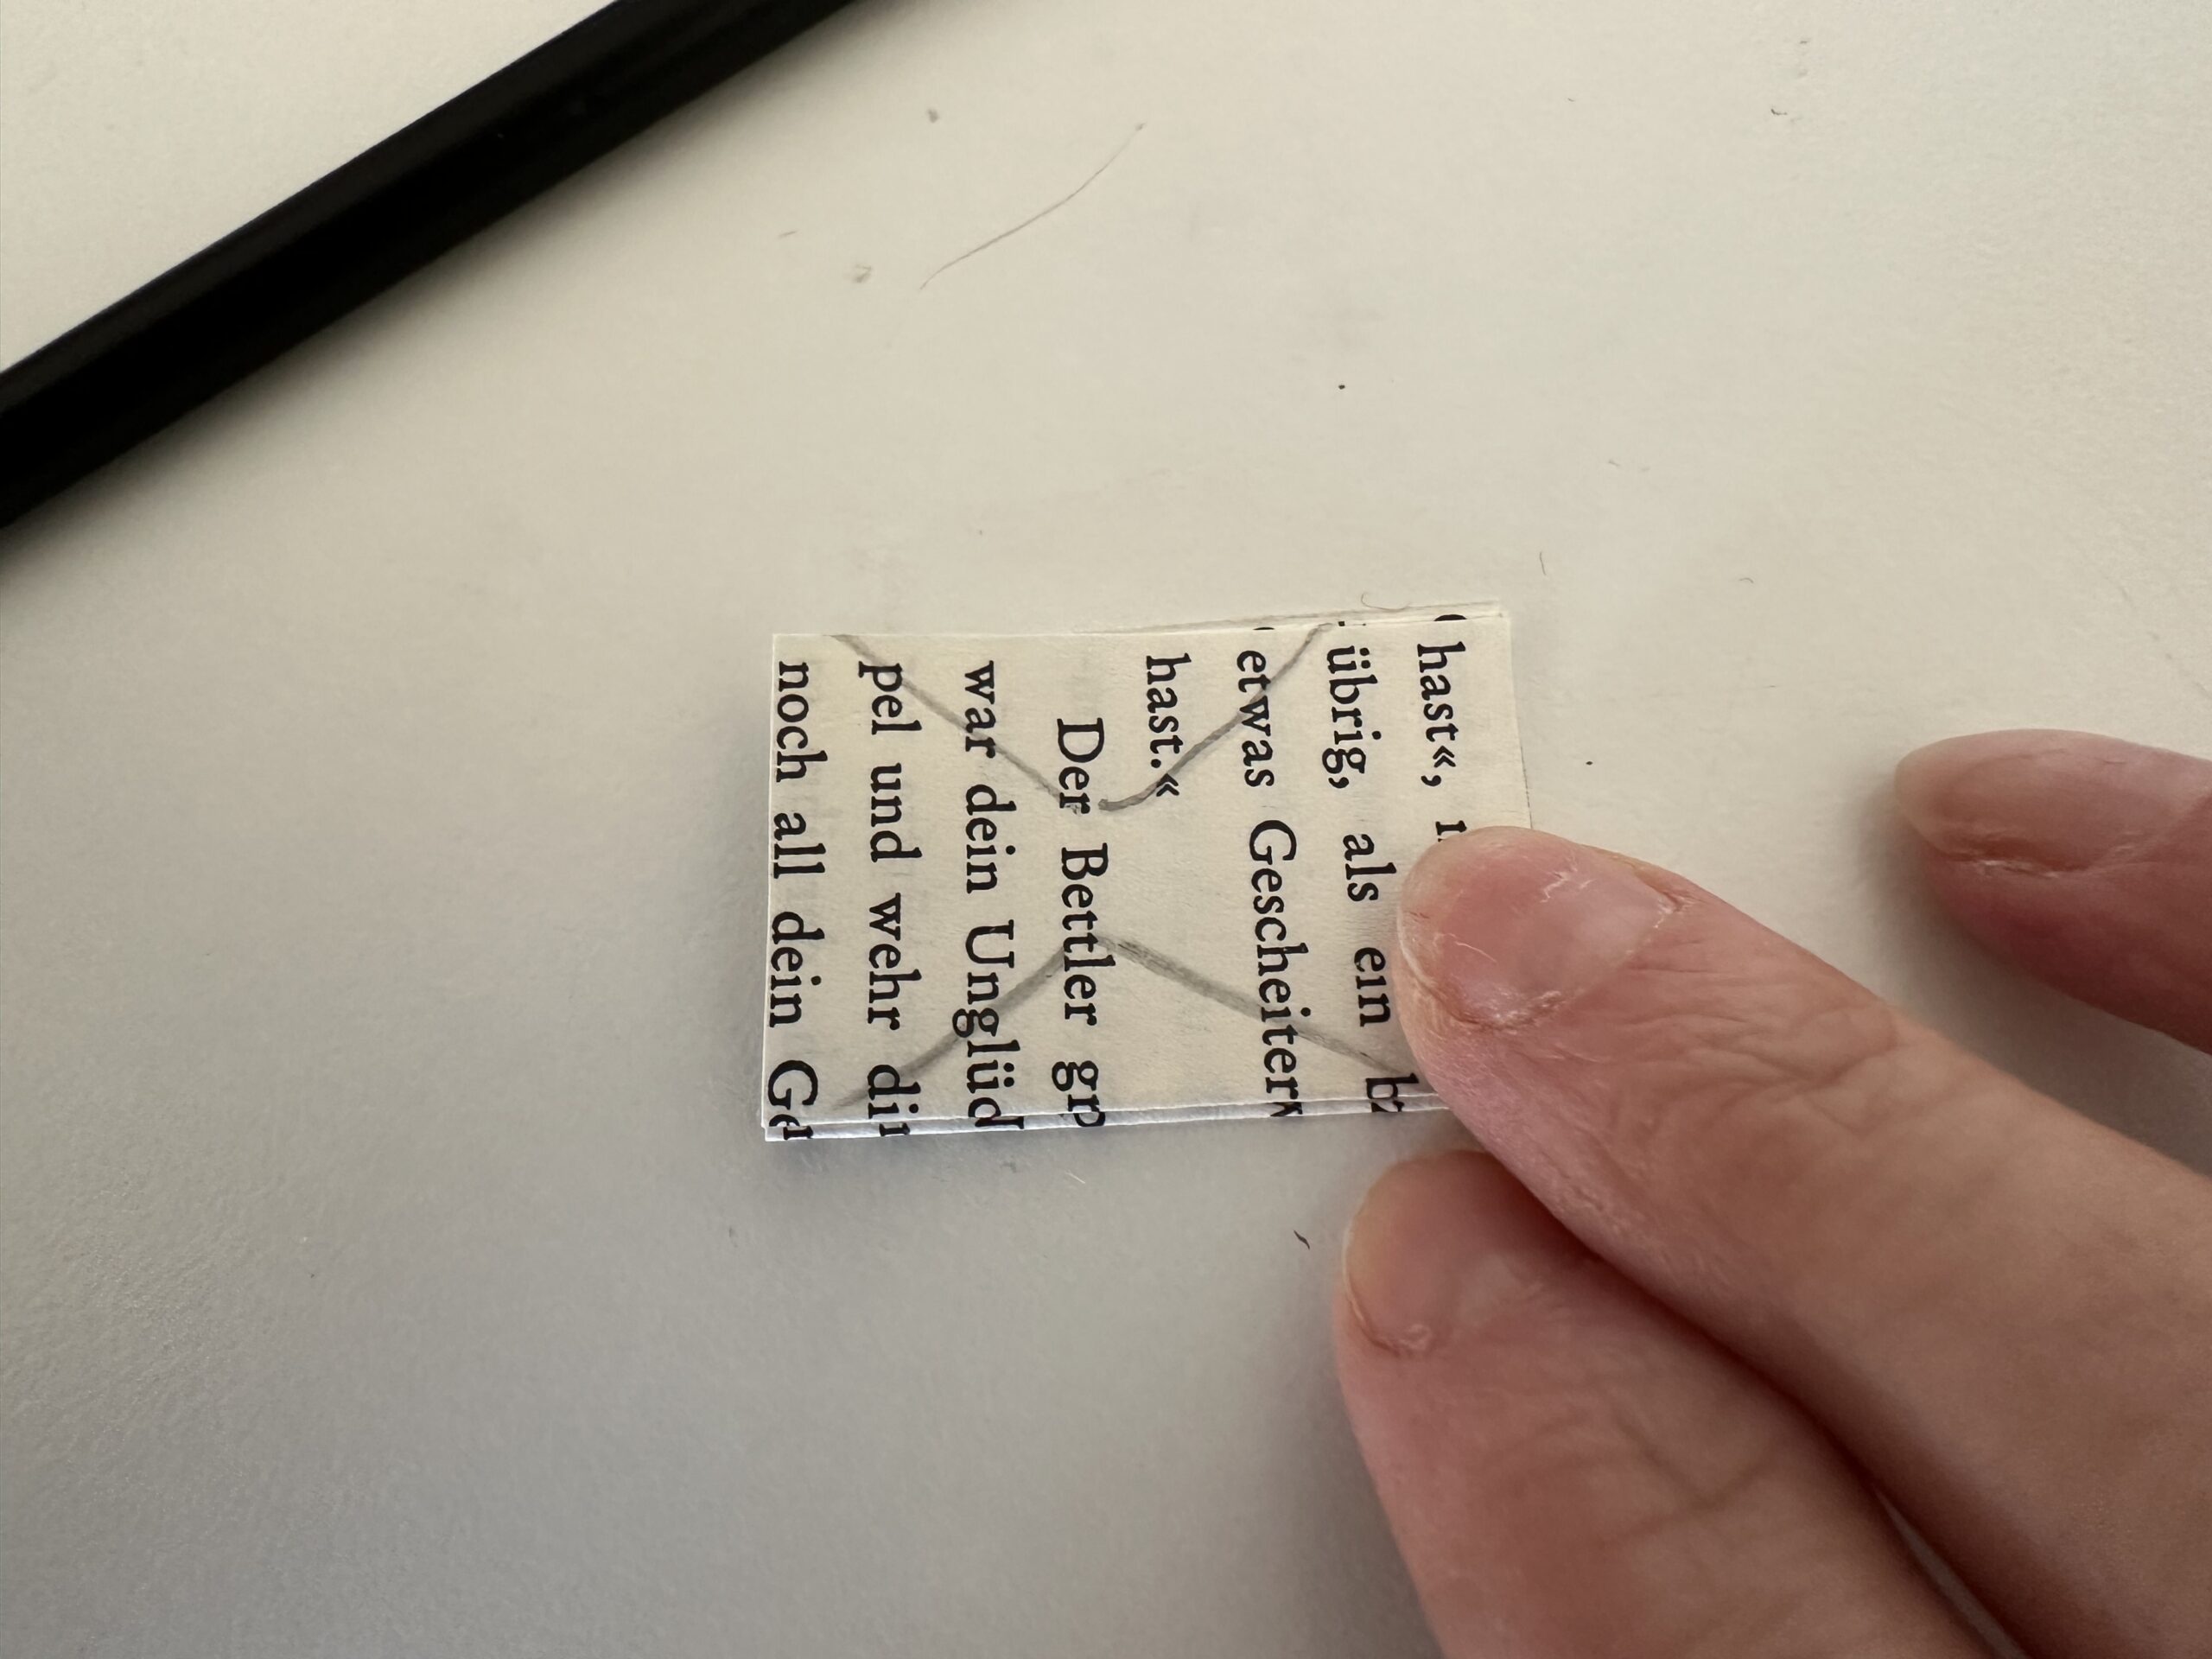
Bild zum Schritt 22 für das Bastel- und DIY-Abenteuer für Kinder: 'Male auf das oberste Blatt eine Schleife.'

23

Cut out the jigs from the outside inwards.
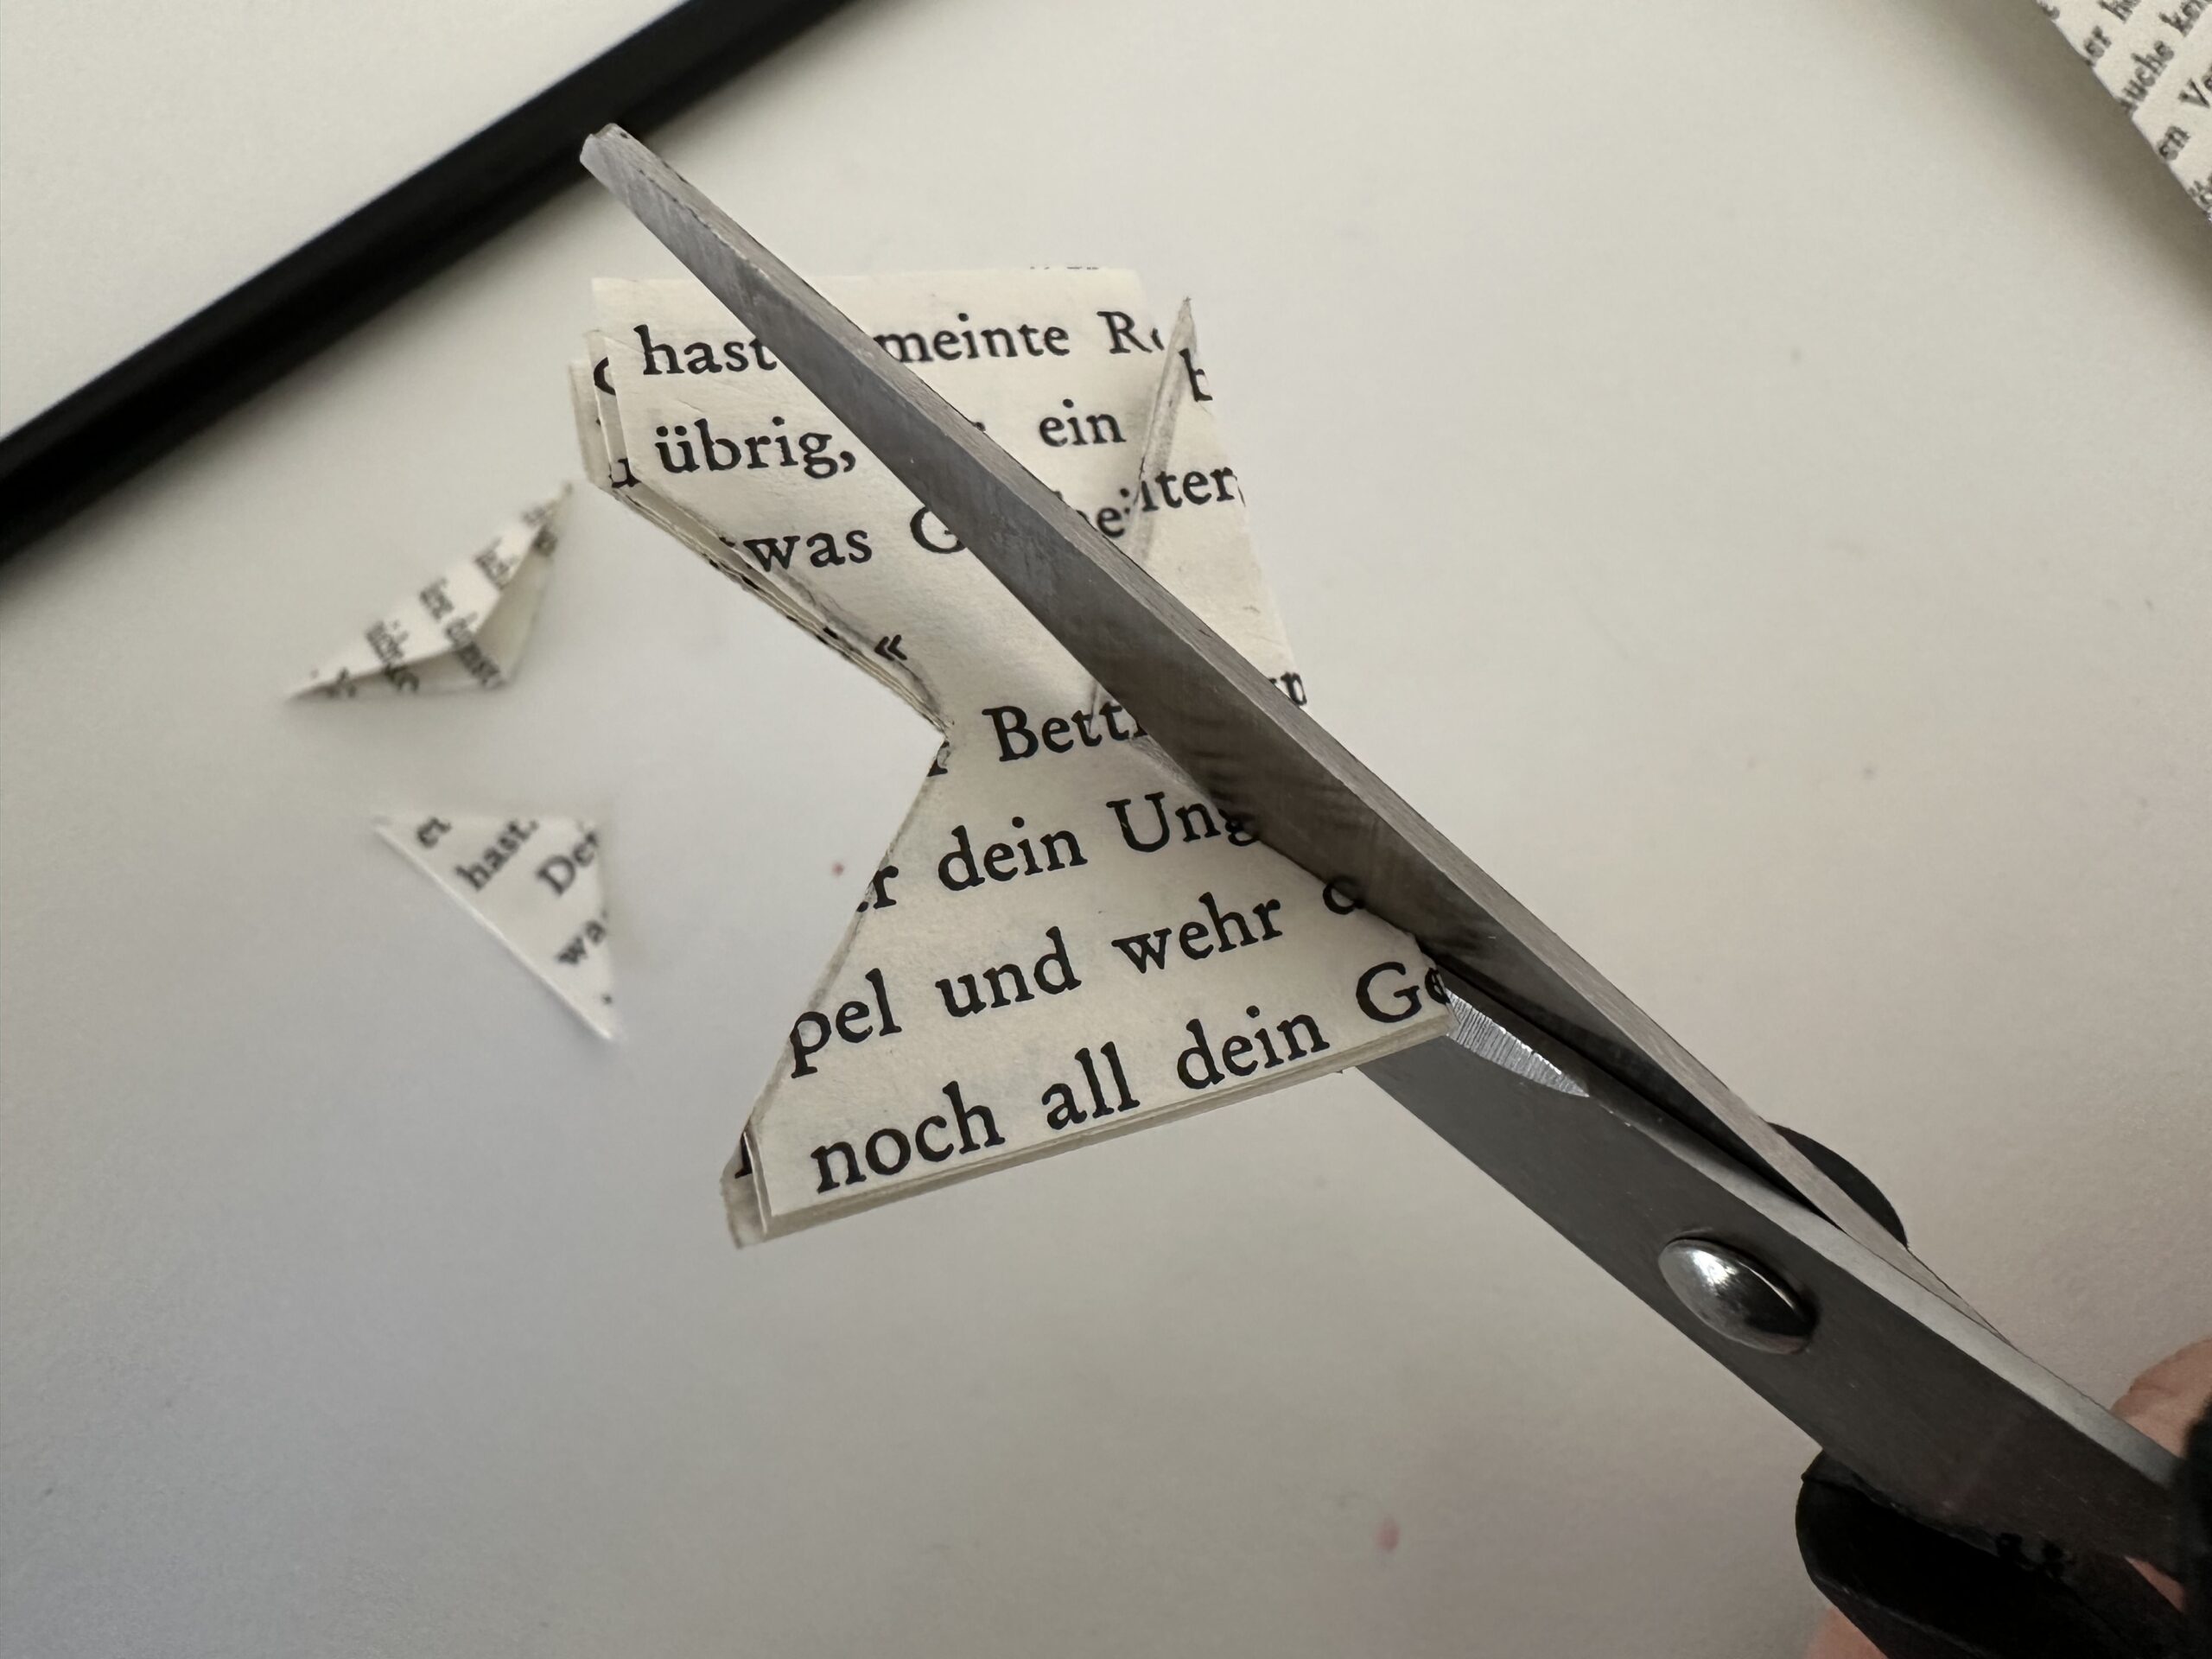
Bild zum Schritt 23 für das Bastel- und DIY-Abenteuer für Kinder: 'Schneide von außen nach innen die Zacken heraus.'

24

Fold the paper strip. You recognize the individual loops.
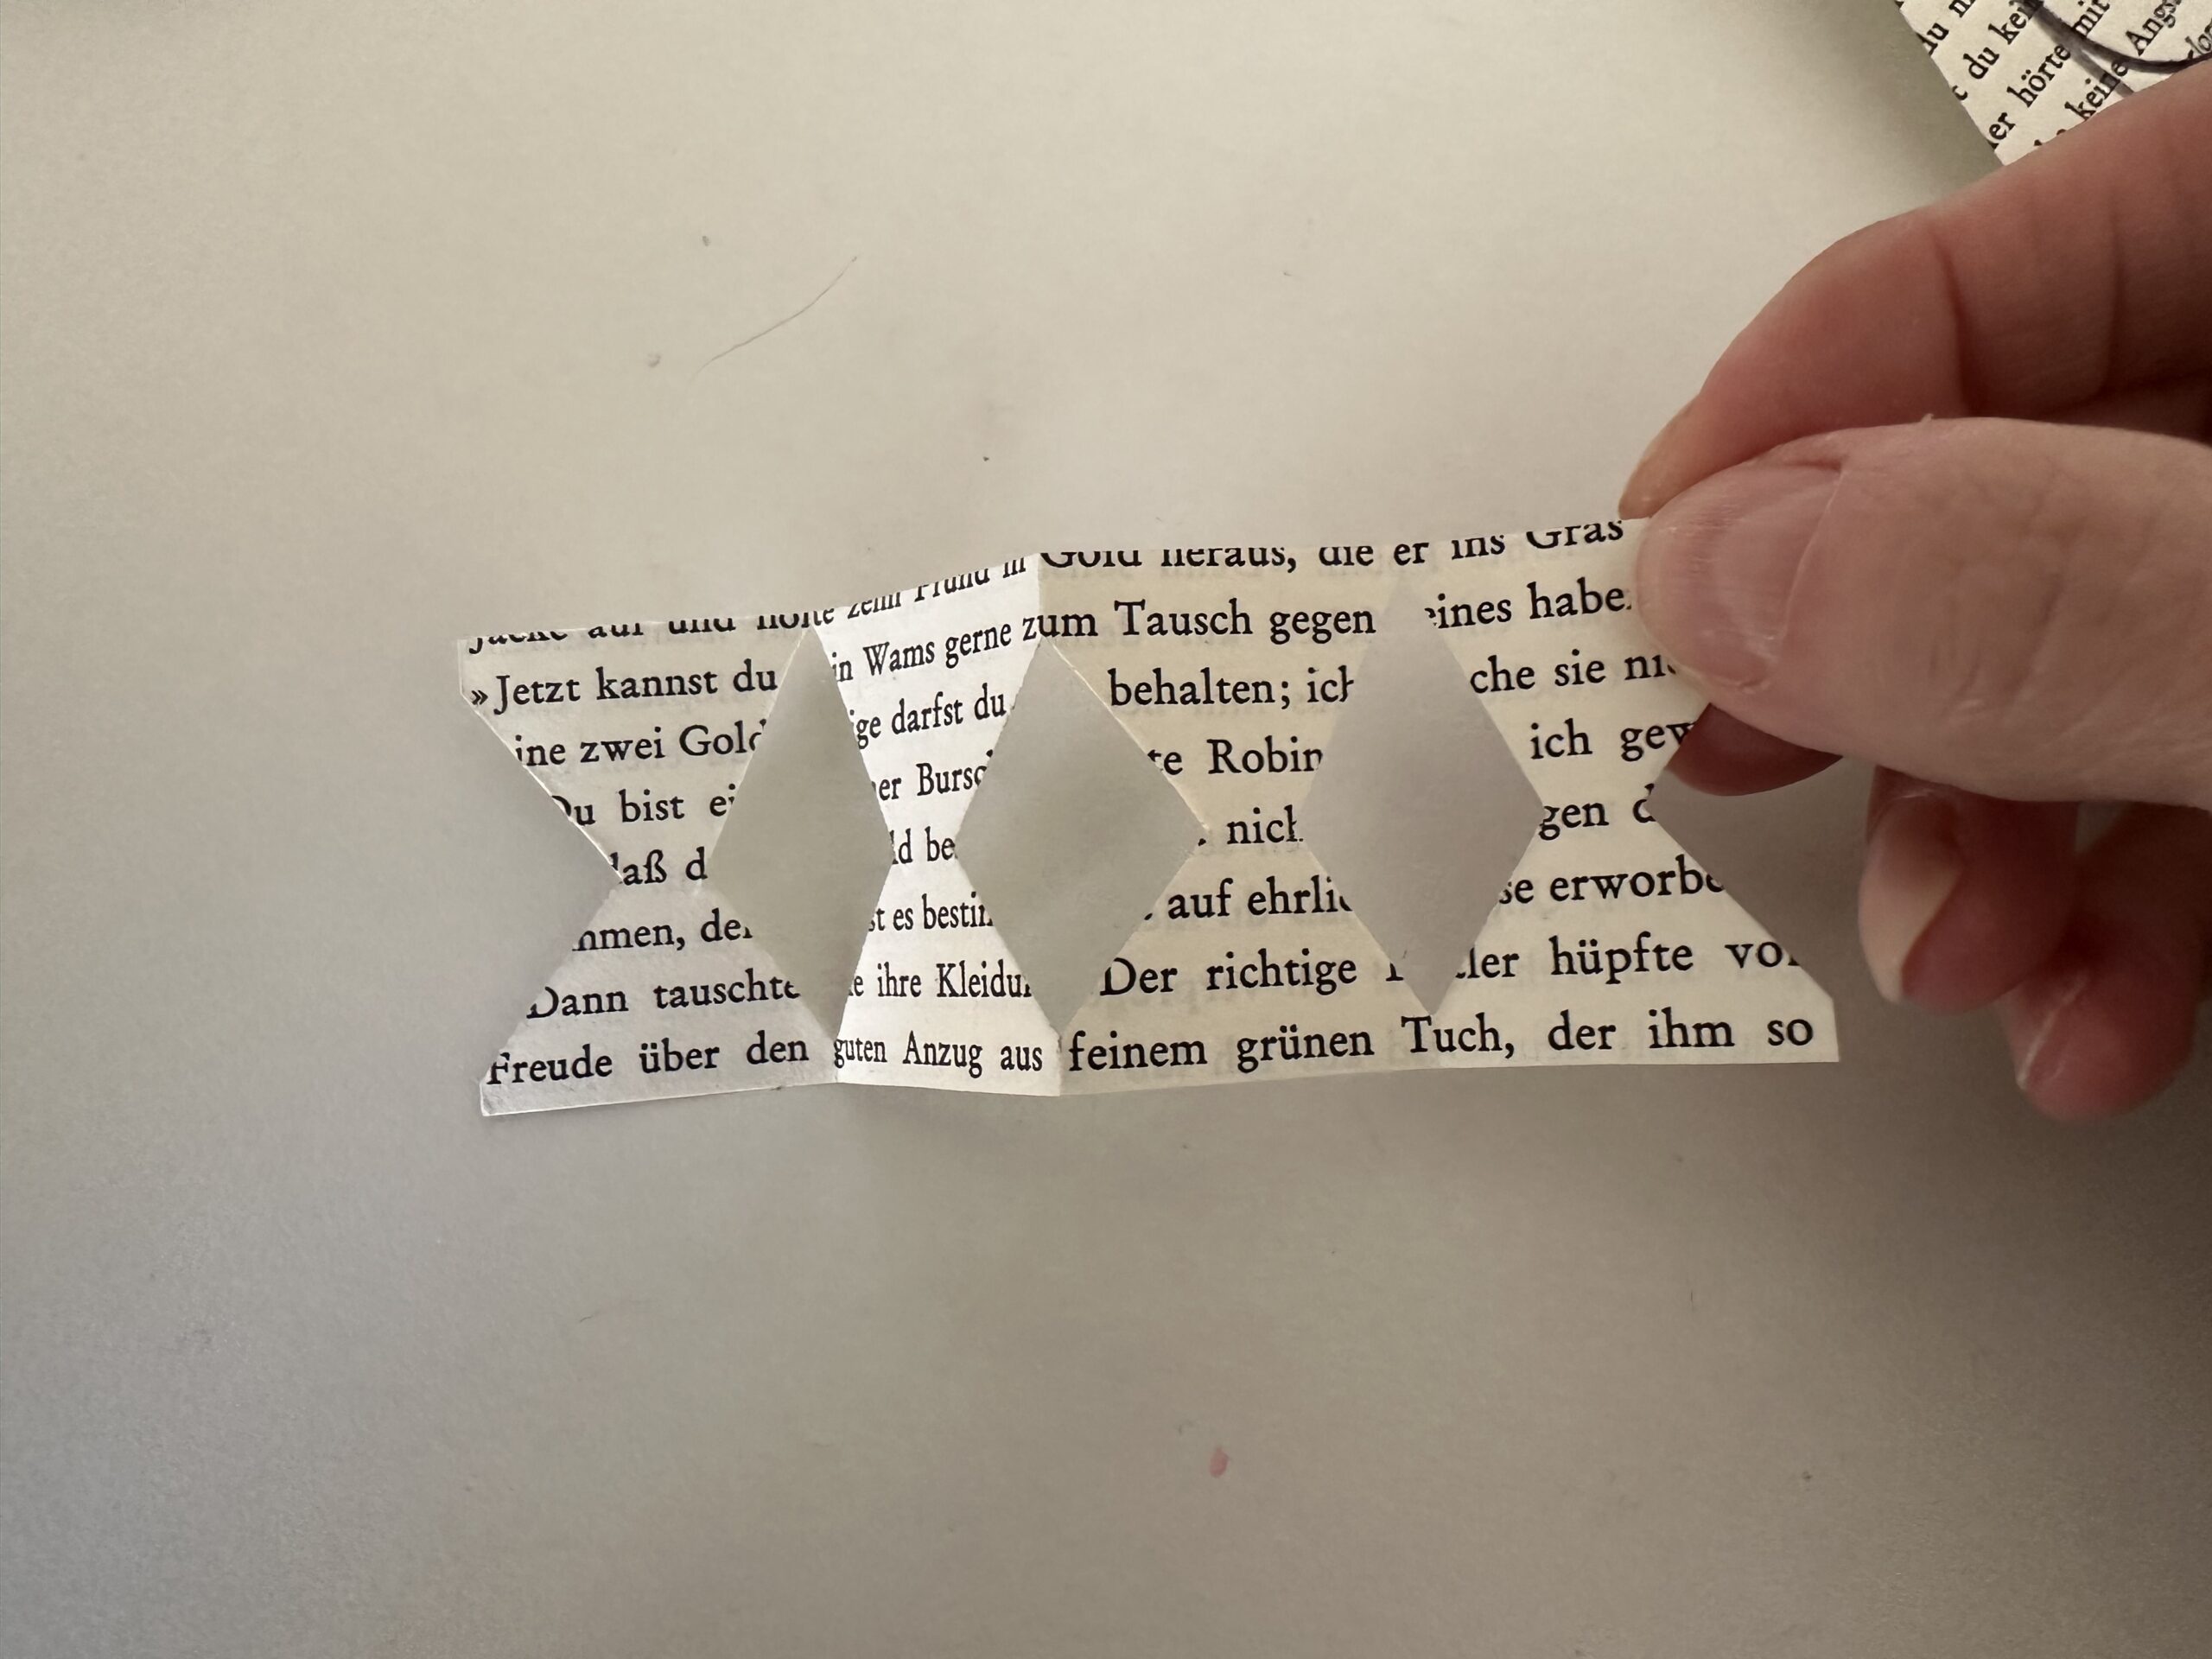
Bild zum Schritt 24 für das Bastel- und DIY-Abenteuer für Kinder: 'Falte den Papierstreifen auf. Du erkennst die einzelnen Schleifen.'

25

Cut them apart with the scissors if they are still related.
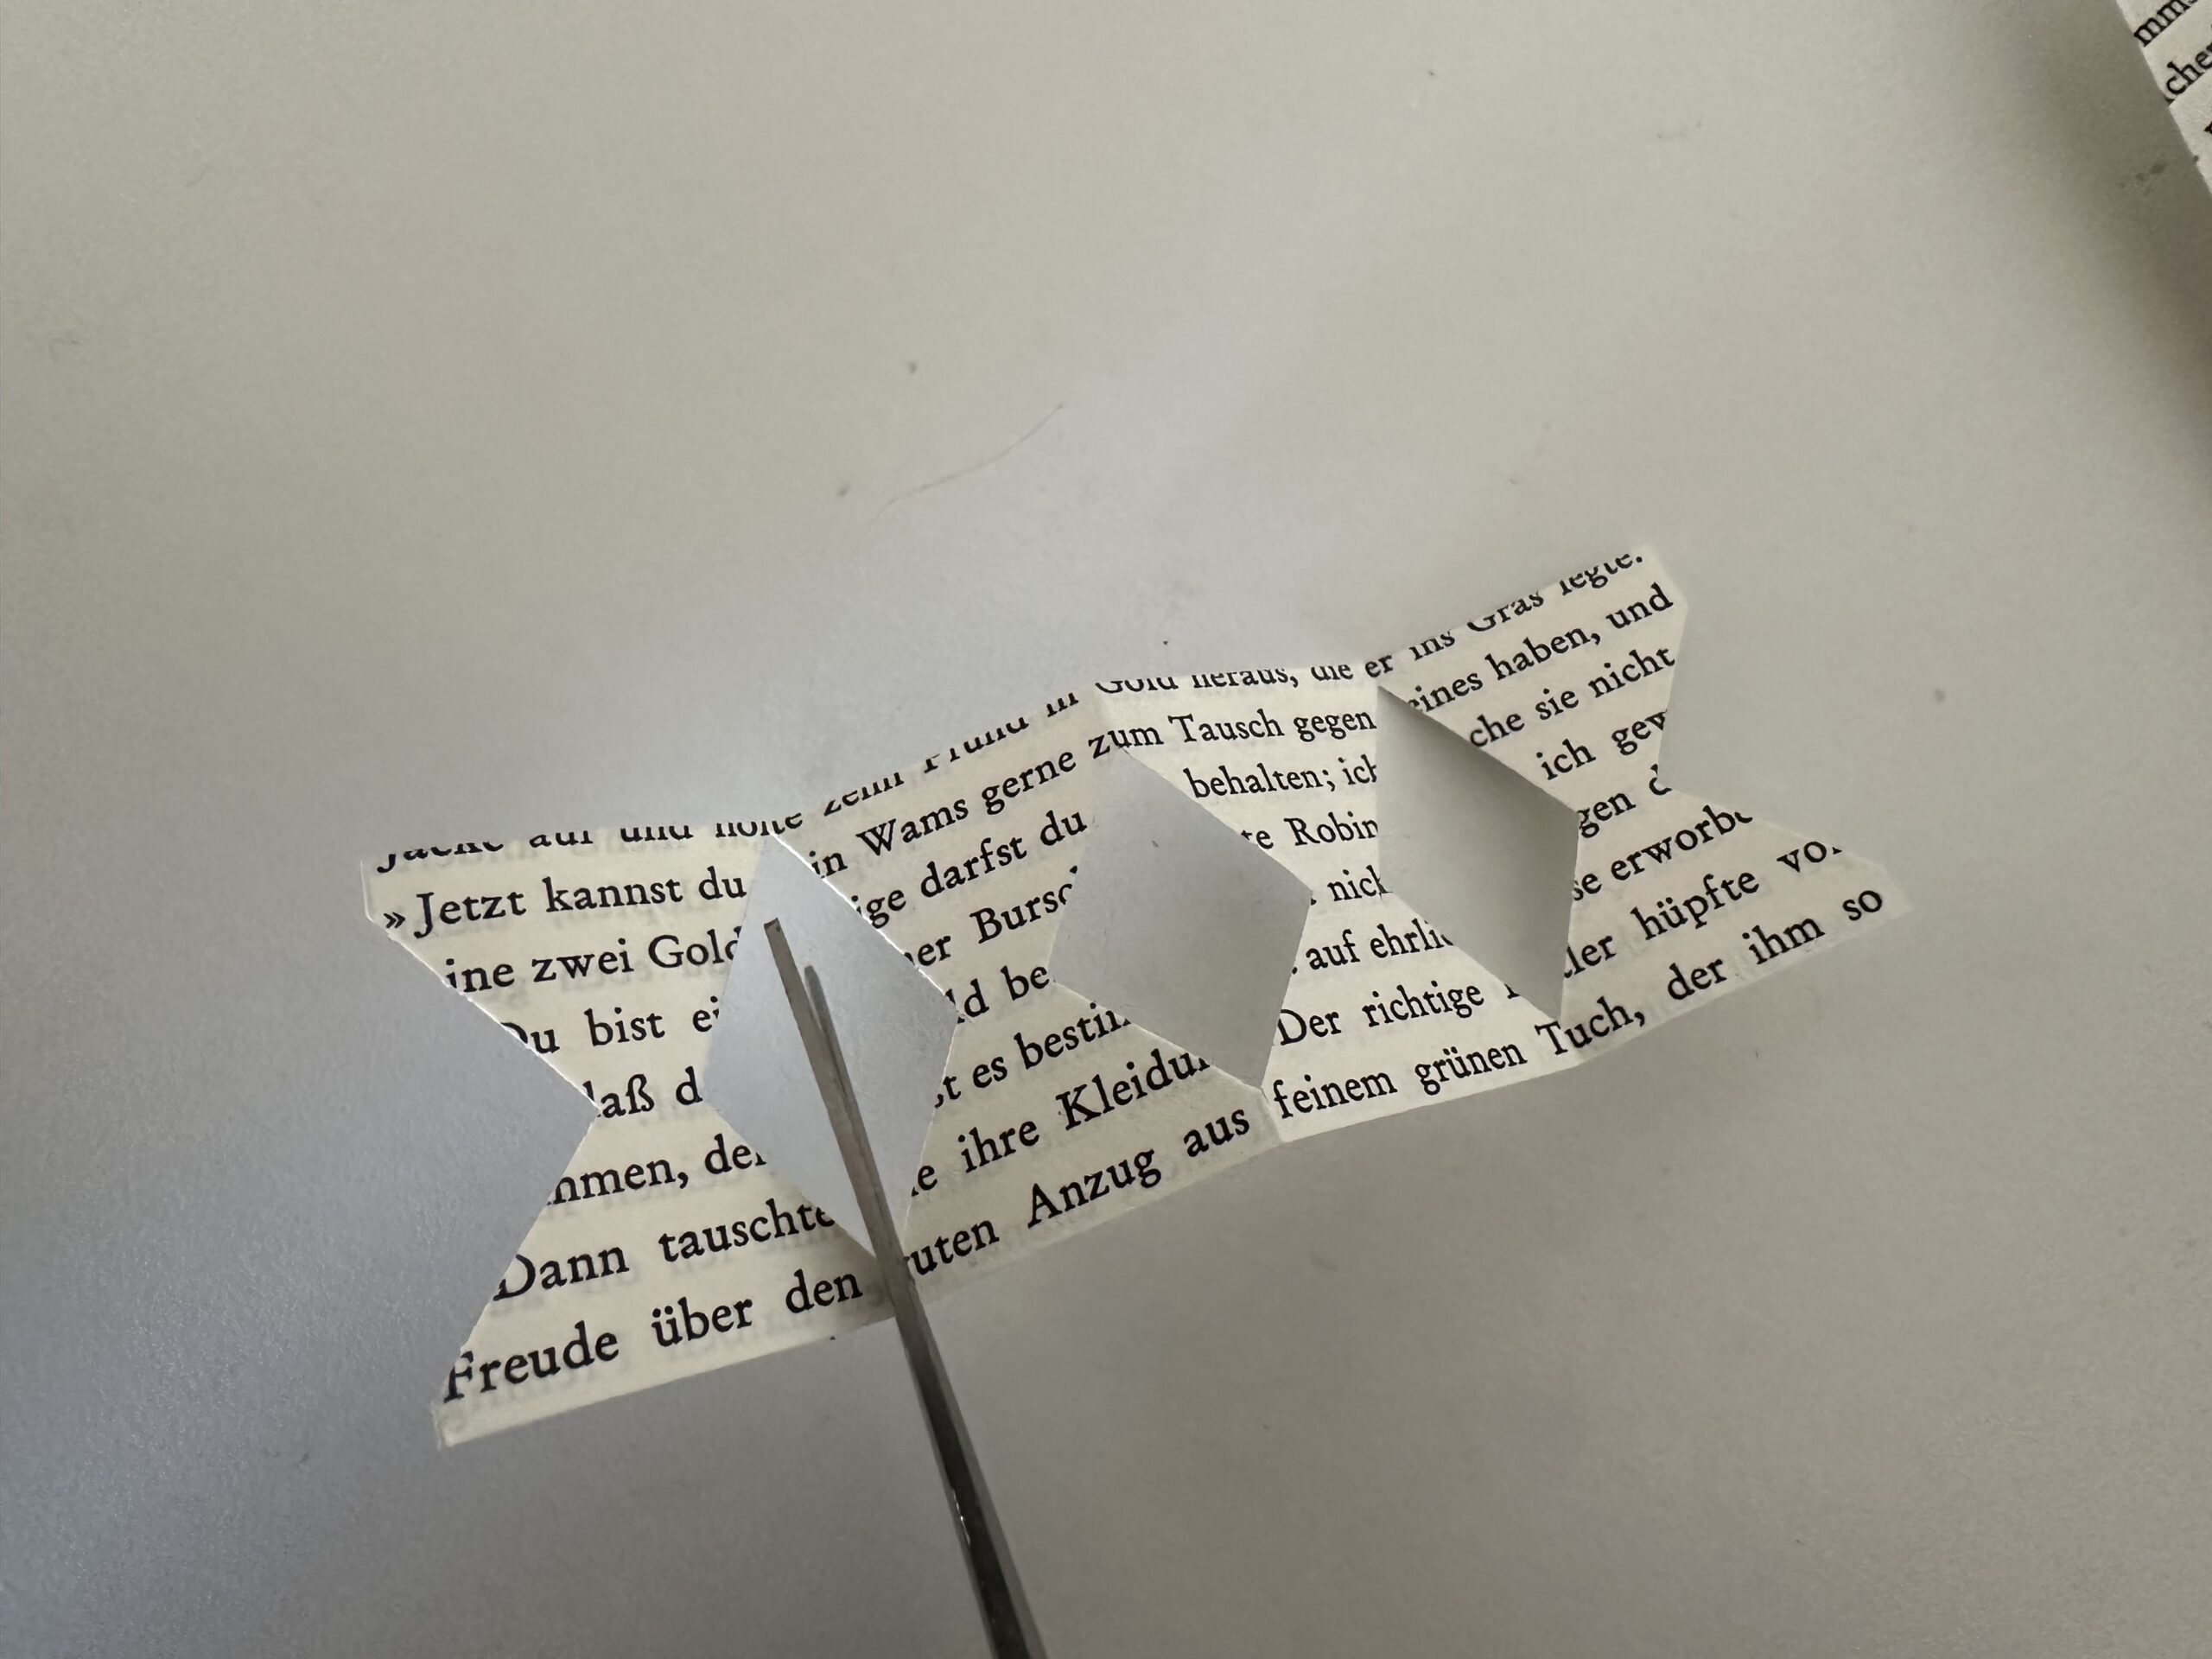
Bild zum Schritt 25 für das Bastel- und DIY-Abenteuer für Kinder: 'Schneide sie mit der Schere auseinander, wenn sie noch zusammenhängen.'

26

You're getting all the little loops.
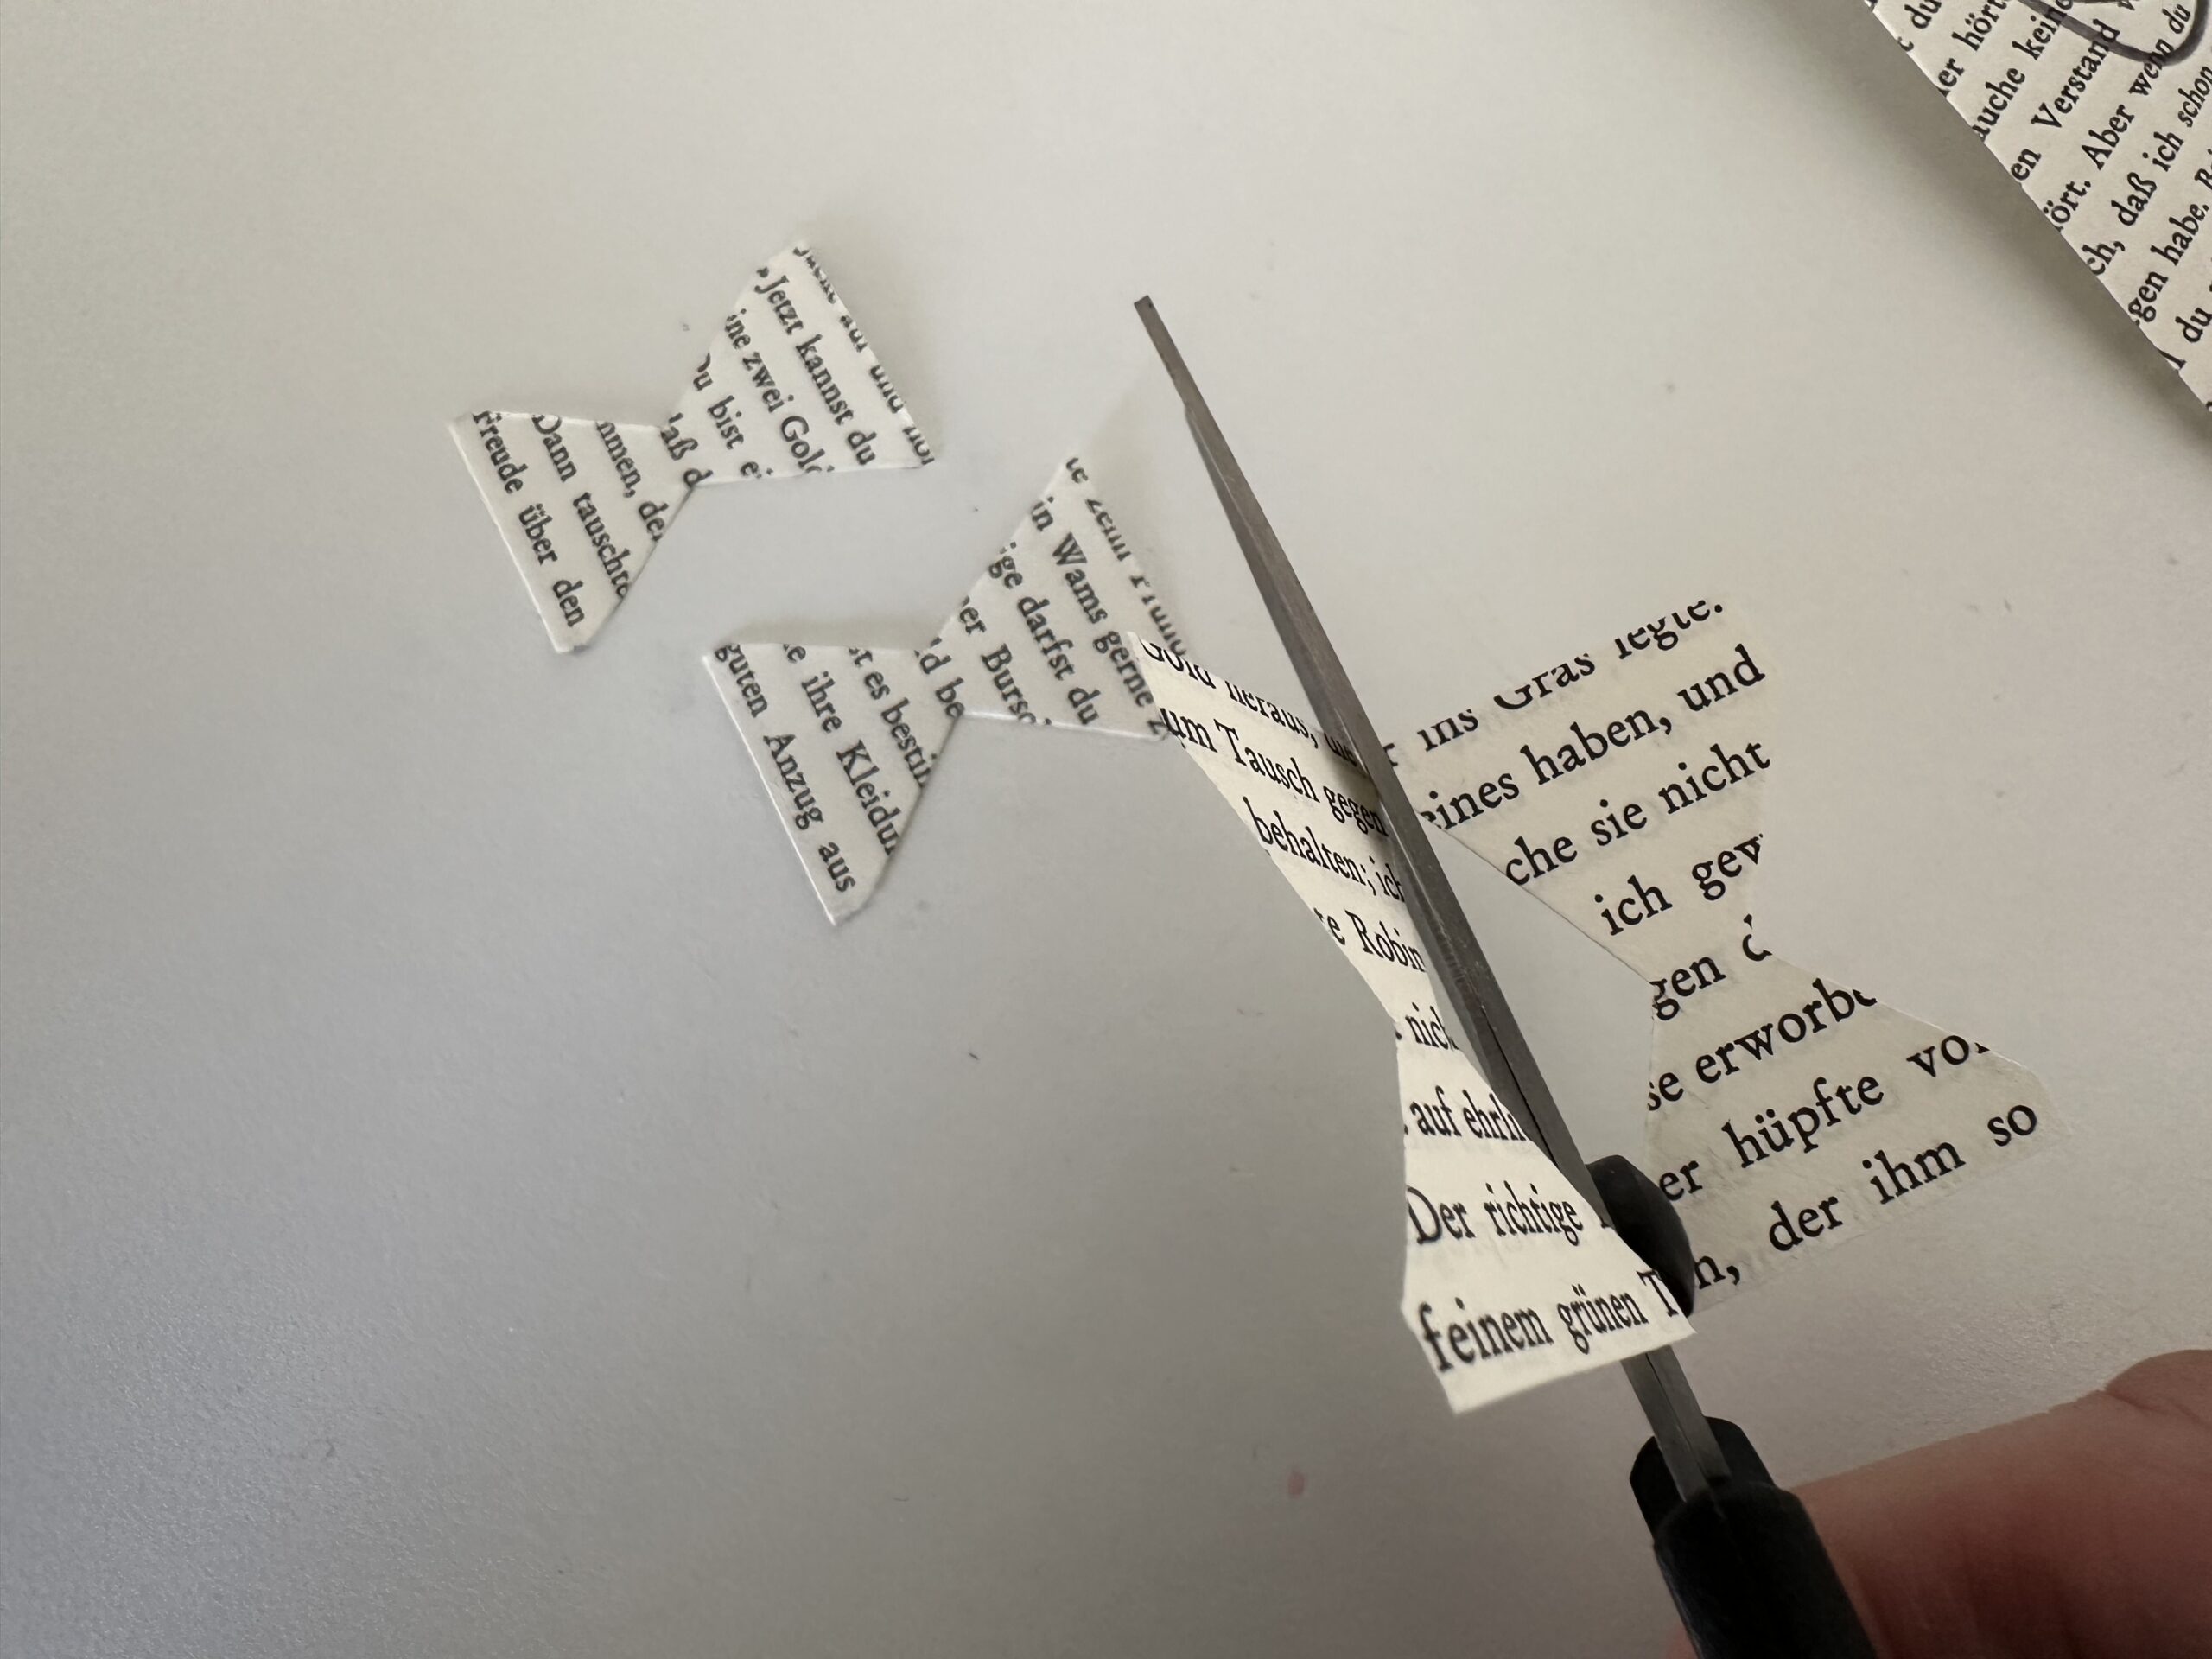
Bild zum Schritt 26 für das Bastel- und DIY-Abenteuer für Kinder: 'Du erhältst lauter kleine Schleifen.'

27

Take a leaf and fold it half way. So you get a folding card.
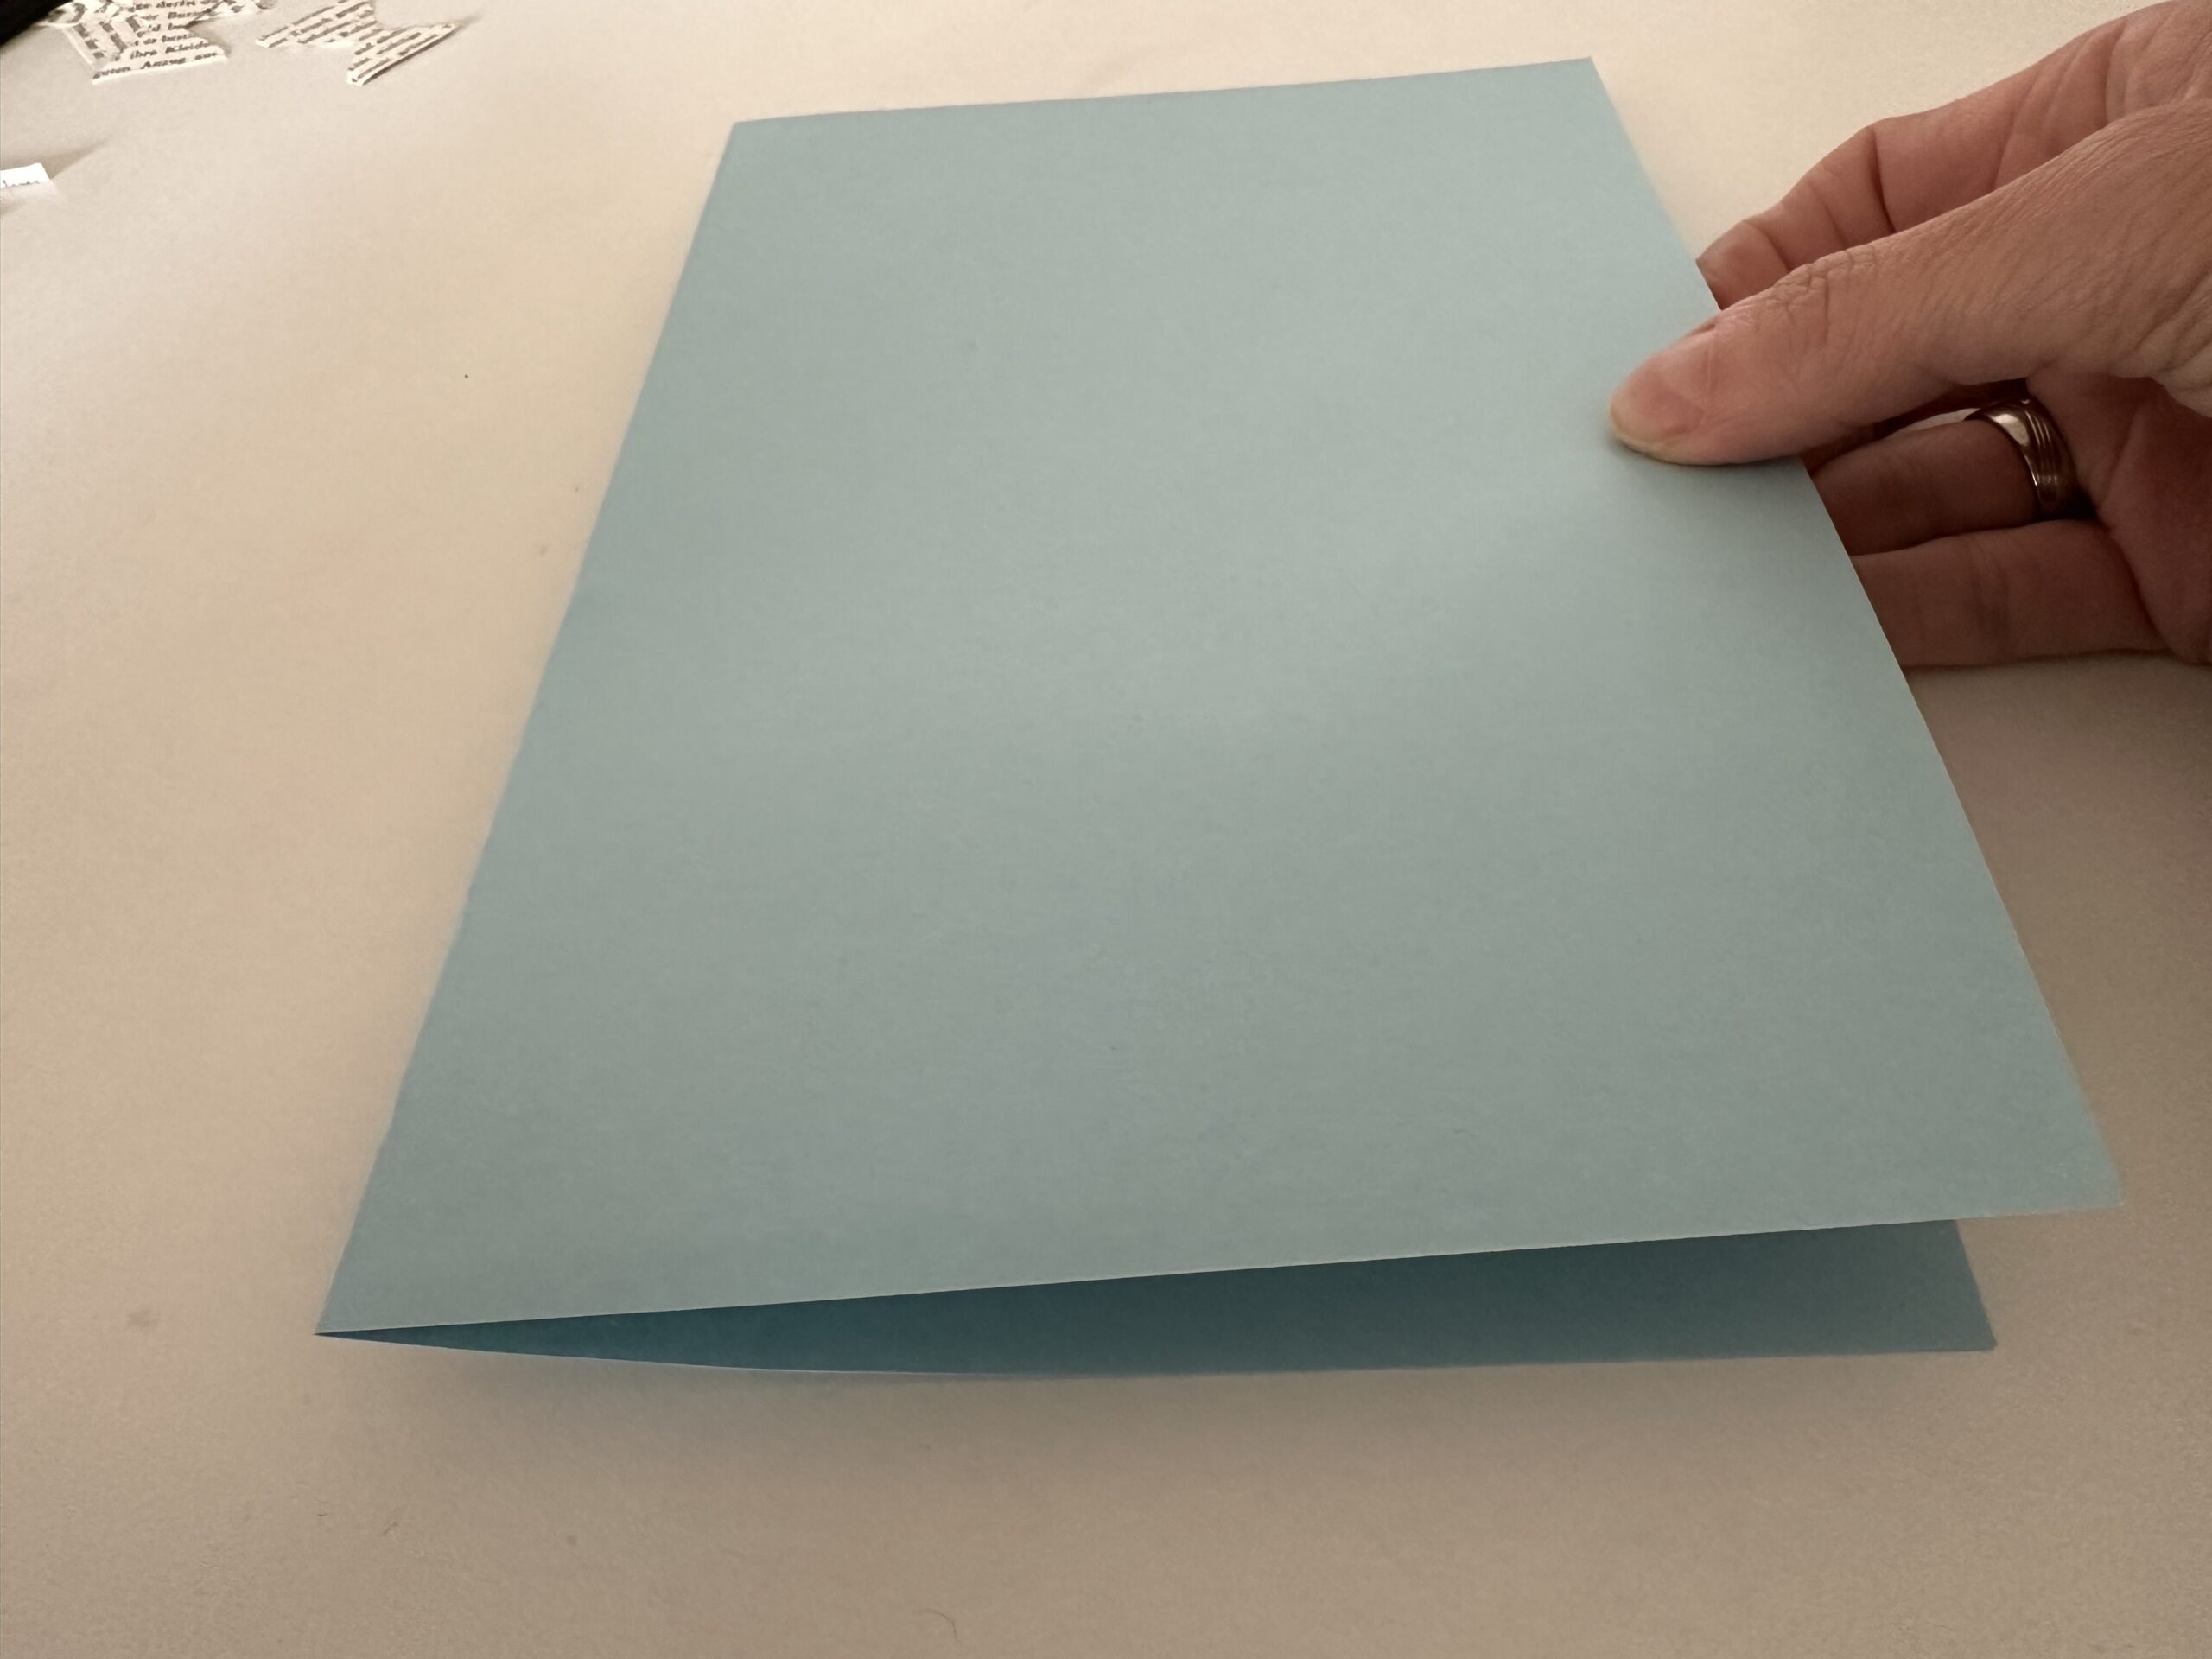
Bild zum Schritt 27 für das Bastel- und DIY-Abenteuer für Kinder: 'Nimm ein Blatt und falte es zur Hälfte. So erhältst...'

28

Place the folded dragon slightly obliquely in the upper part of the map. So the kite line also has enough space.
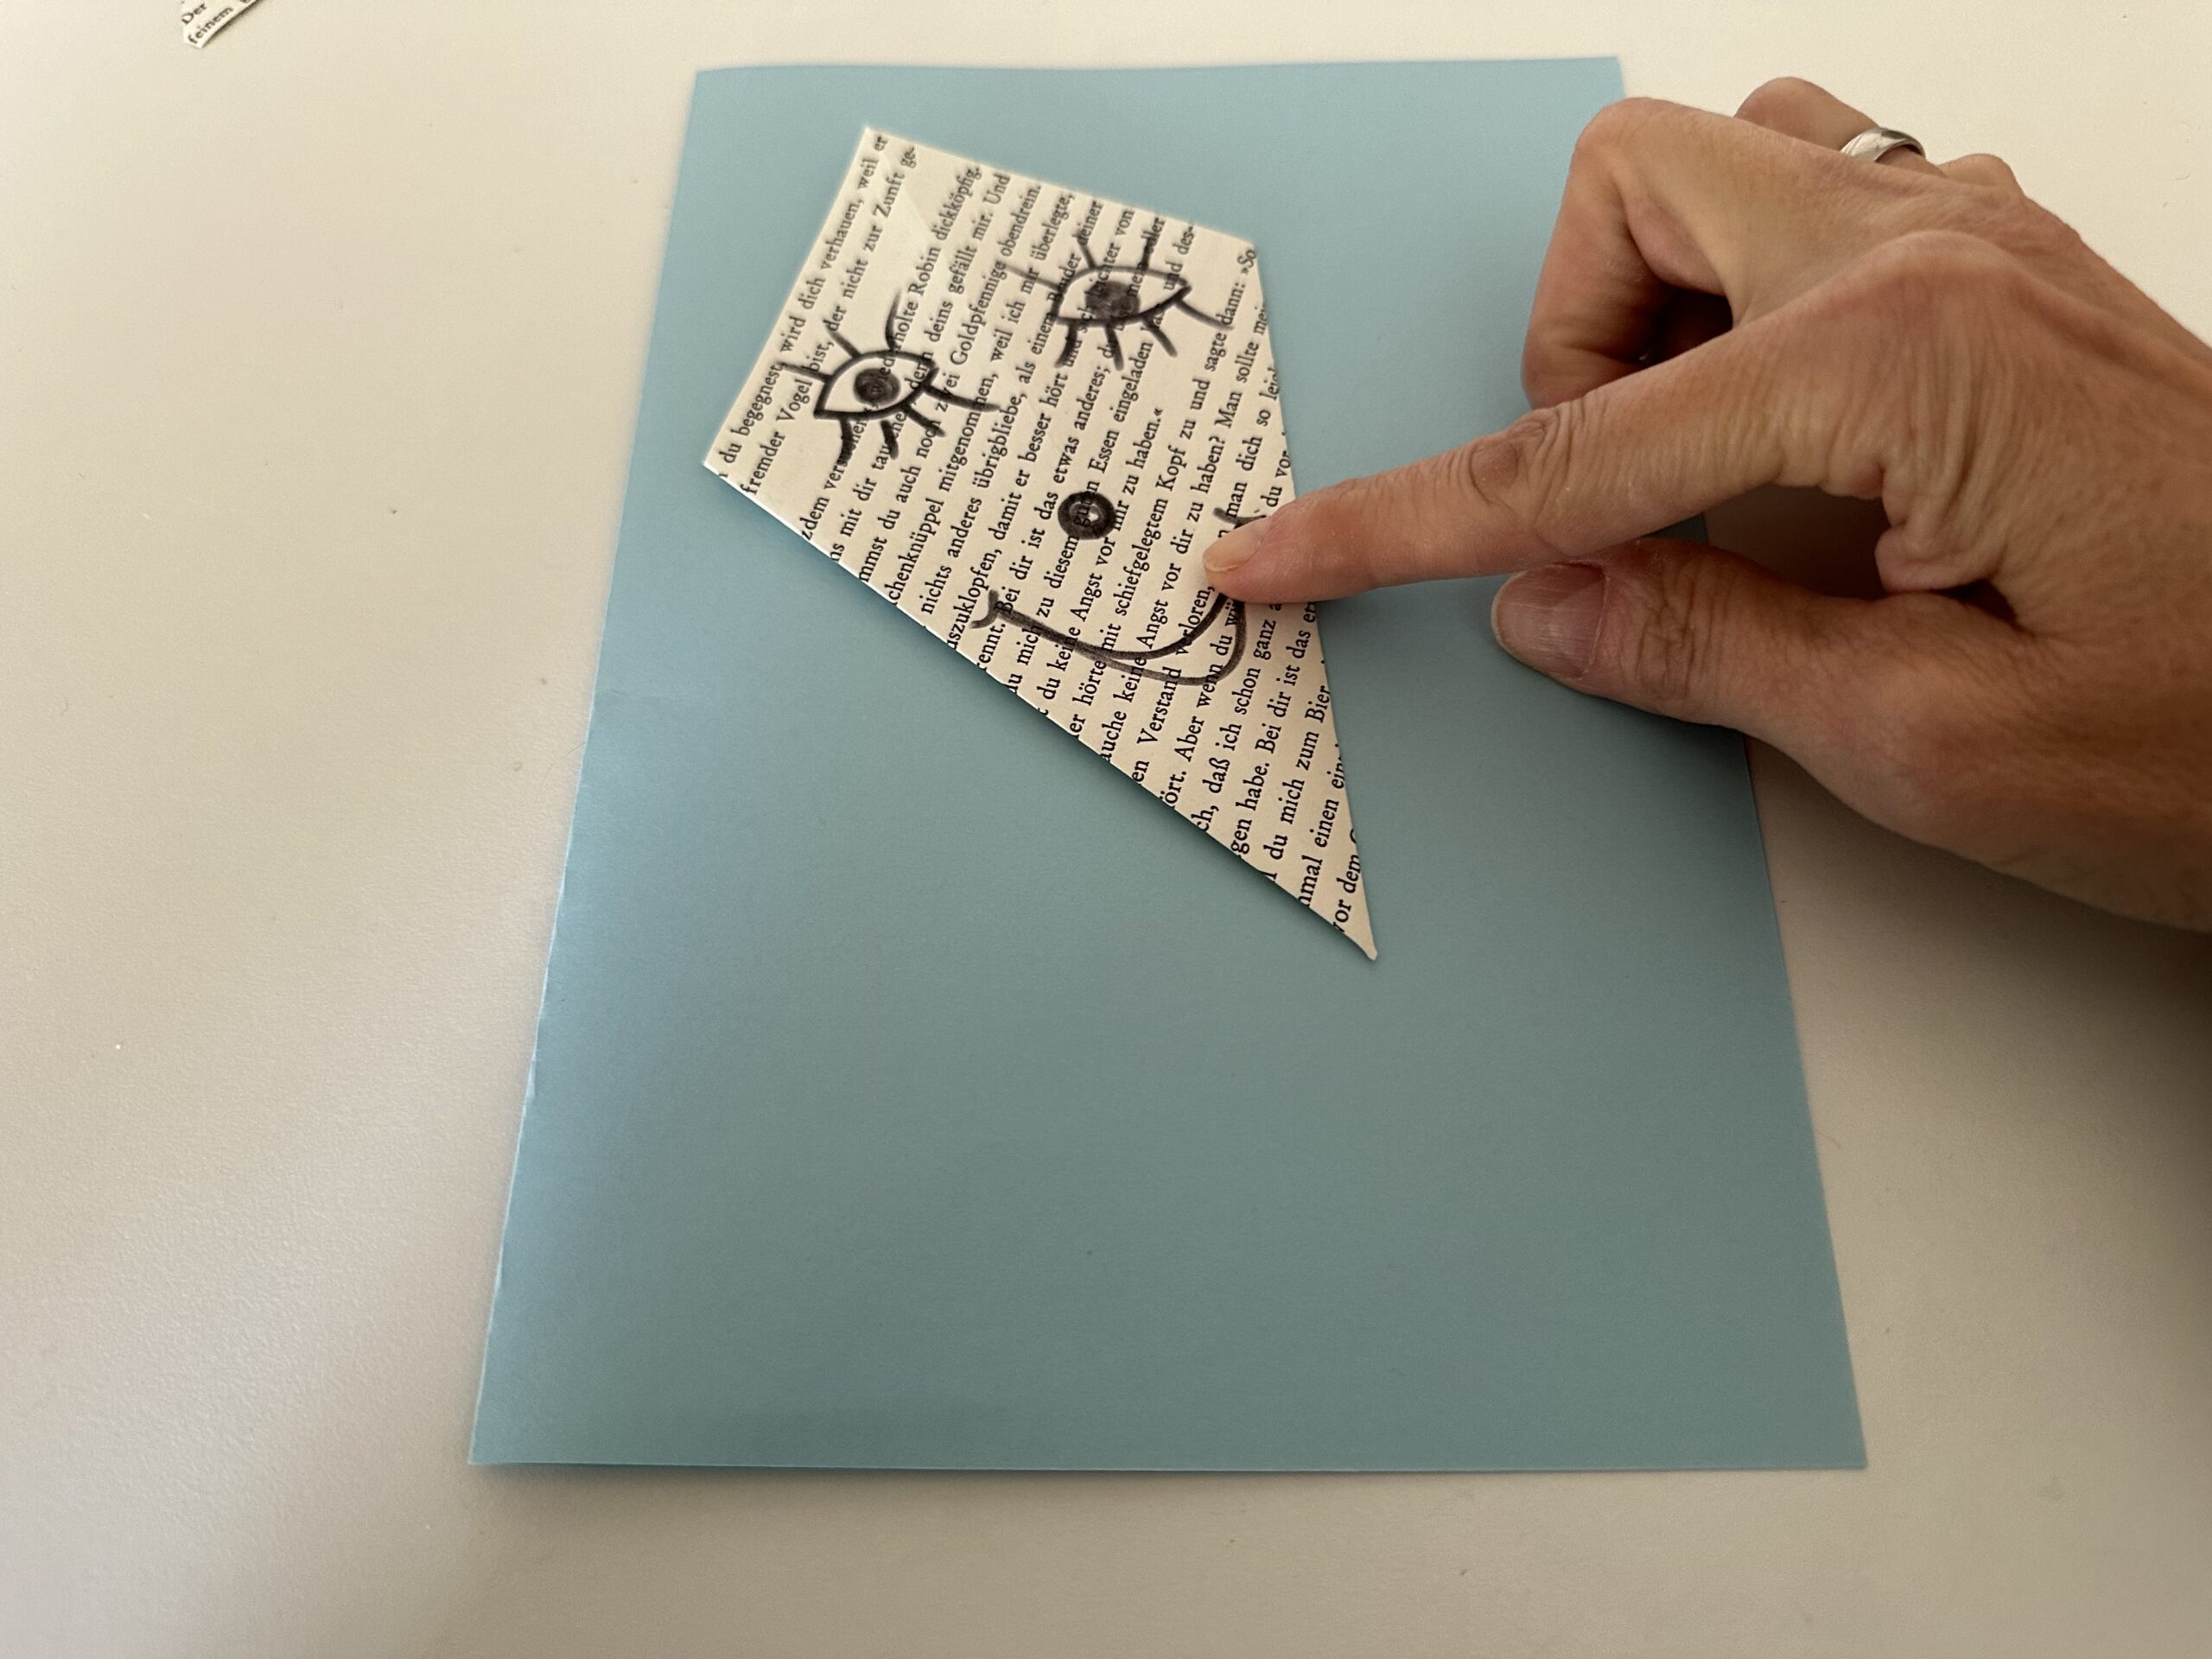
Bild zum Schritt 28 für das Bastel- und DIY-Abenteuer für Kinder: 'Lege den gefalteten Drachen etwas schräg in den oberen Teil...'

29

Stick the dragon on the map.

Bild zum Schritt 29 für das Bastel- und DIY-Abenteuer für Kinder: 'Klebe den Drachen auf die Karte.'

30

Now all you need is the dragon line.
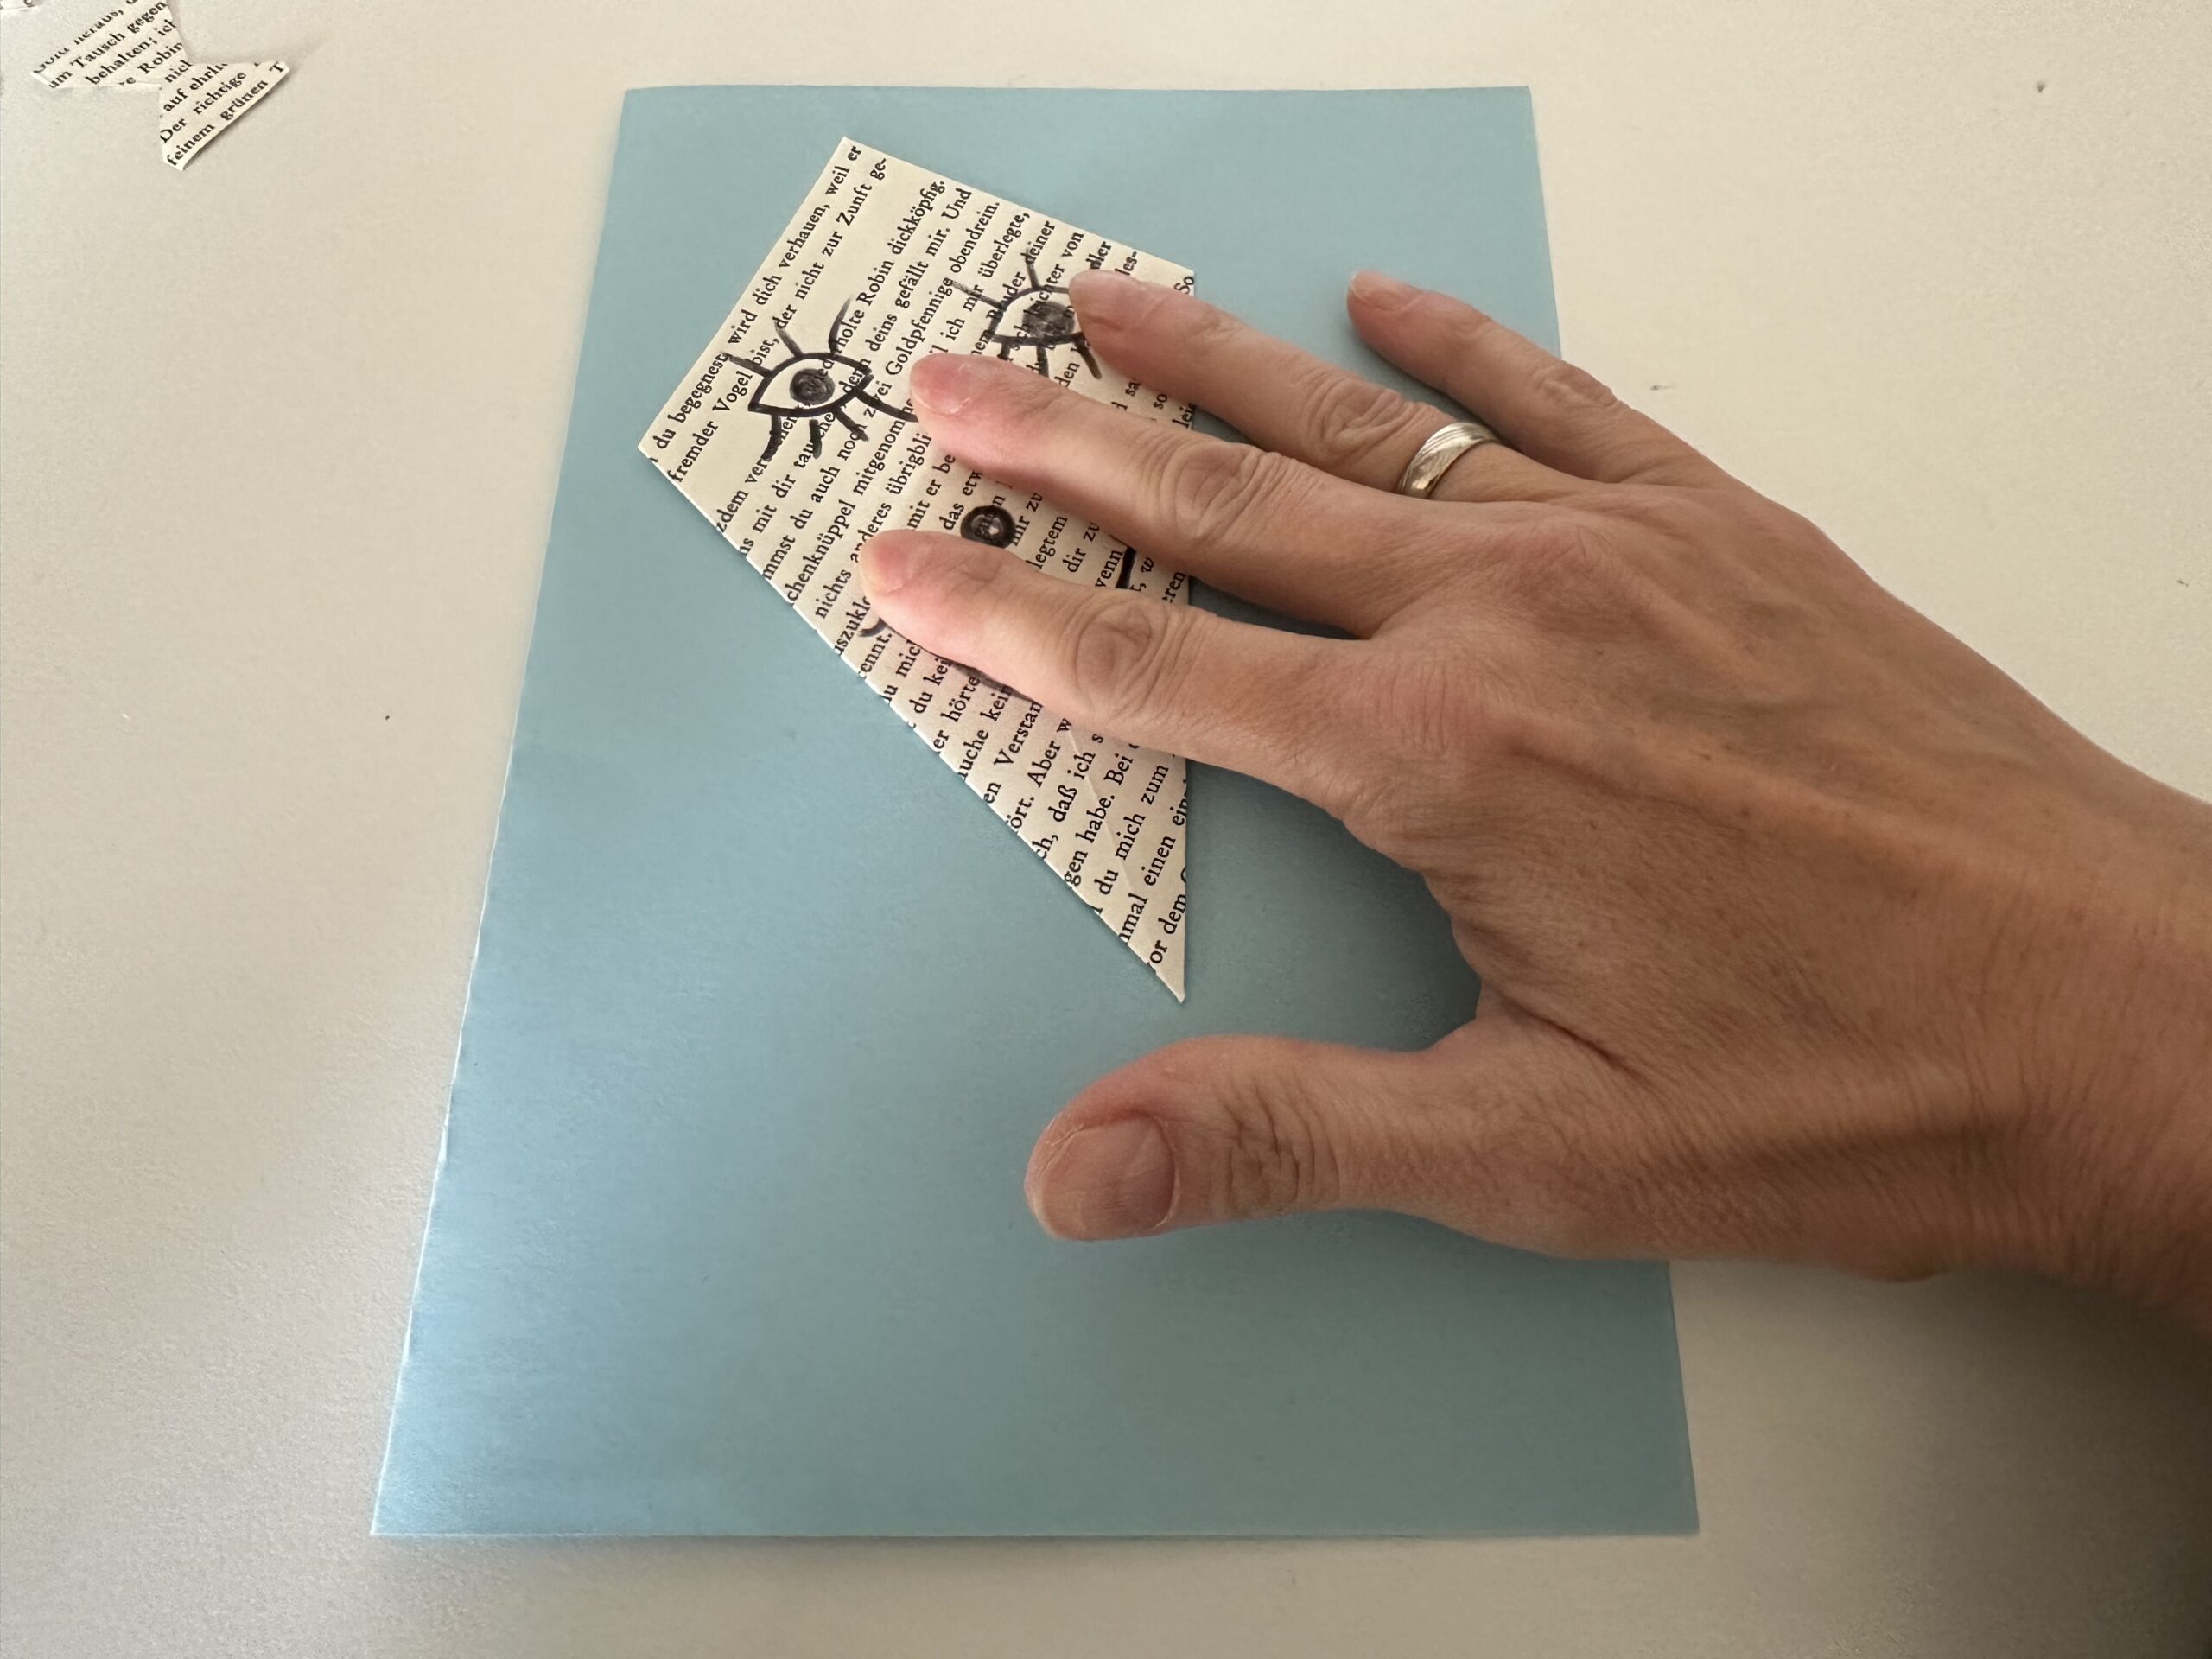
Bild zum Schritt 30 für das Bastel- und DIY-Abenteuer für Kinder: 'Drücke ihn gut fest. Jetzt fehlt nur noch die Drachenschnur.'

31

Paint the kite line with a pen. Start at the bottom of the kite. (See picture)
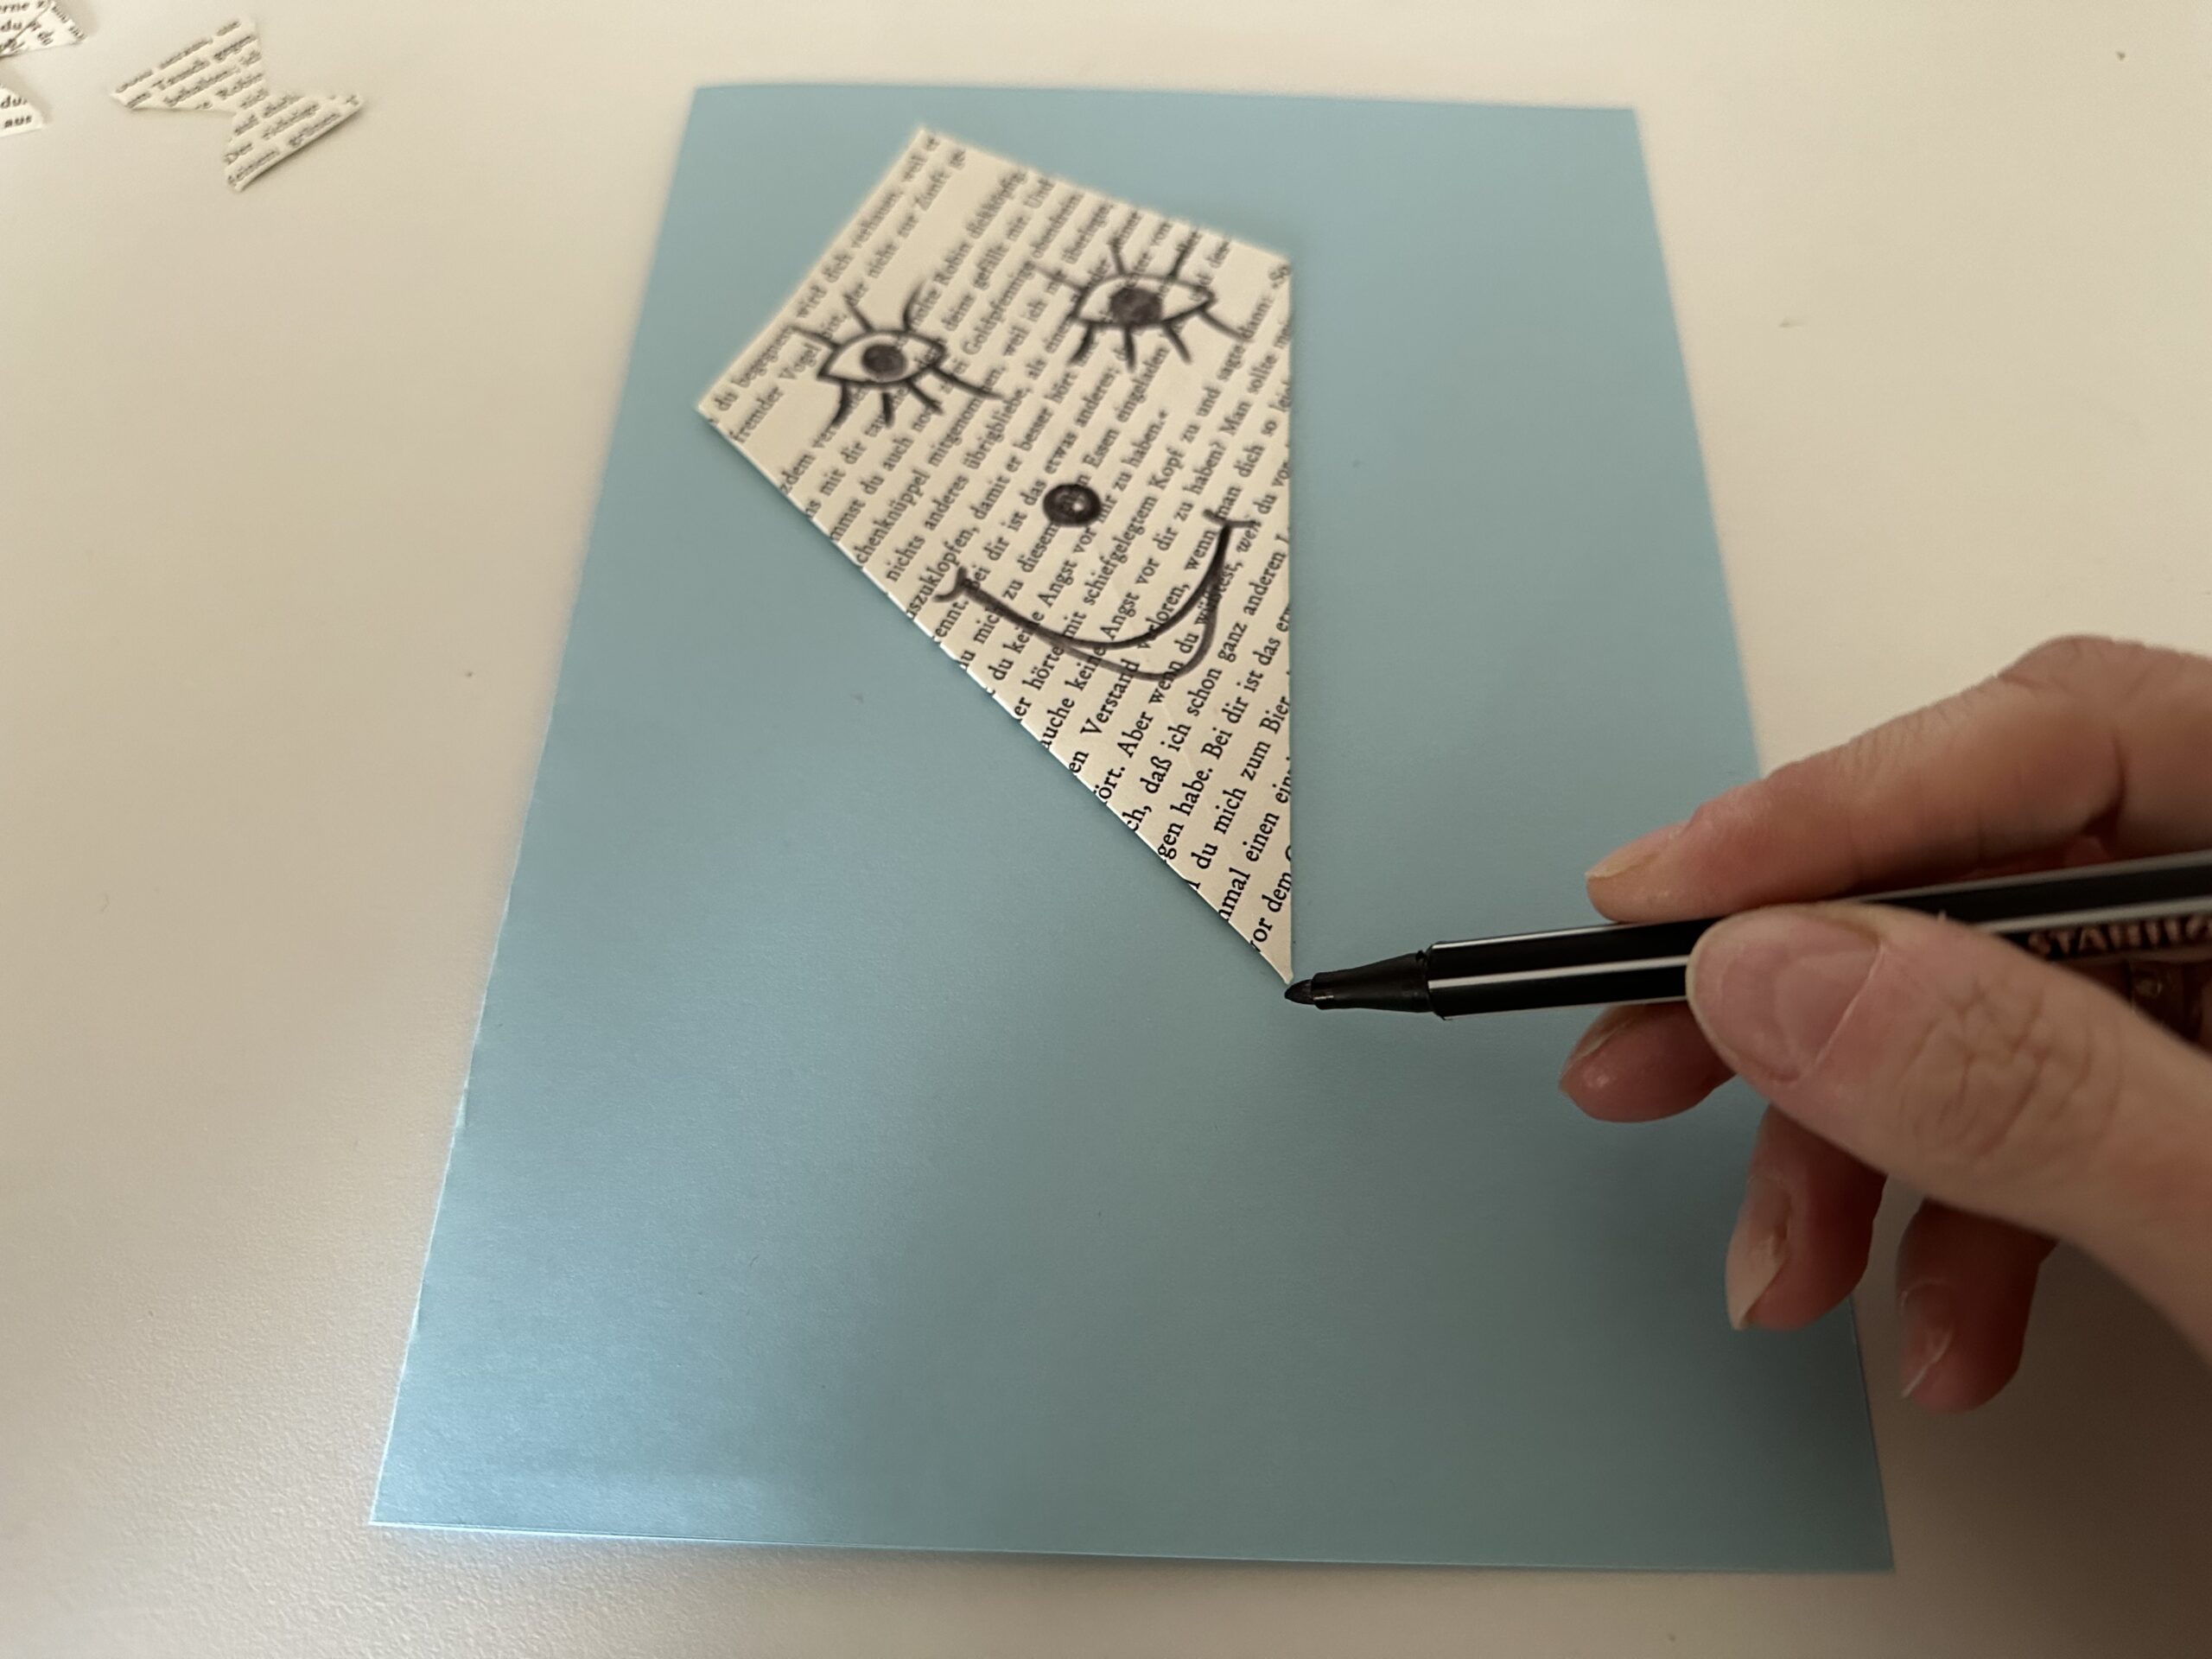
Bild zum Schritt 31 für das Bastel- und DIY-Abenteuer für Kinder: 'Male mit einem Stift die Drachenschnur. Beginne an der unteren...'

32

Male large curved arches and let the dragon "dance" so.
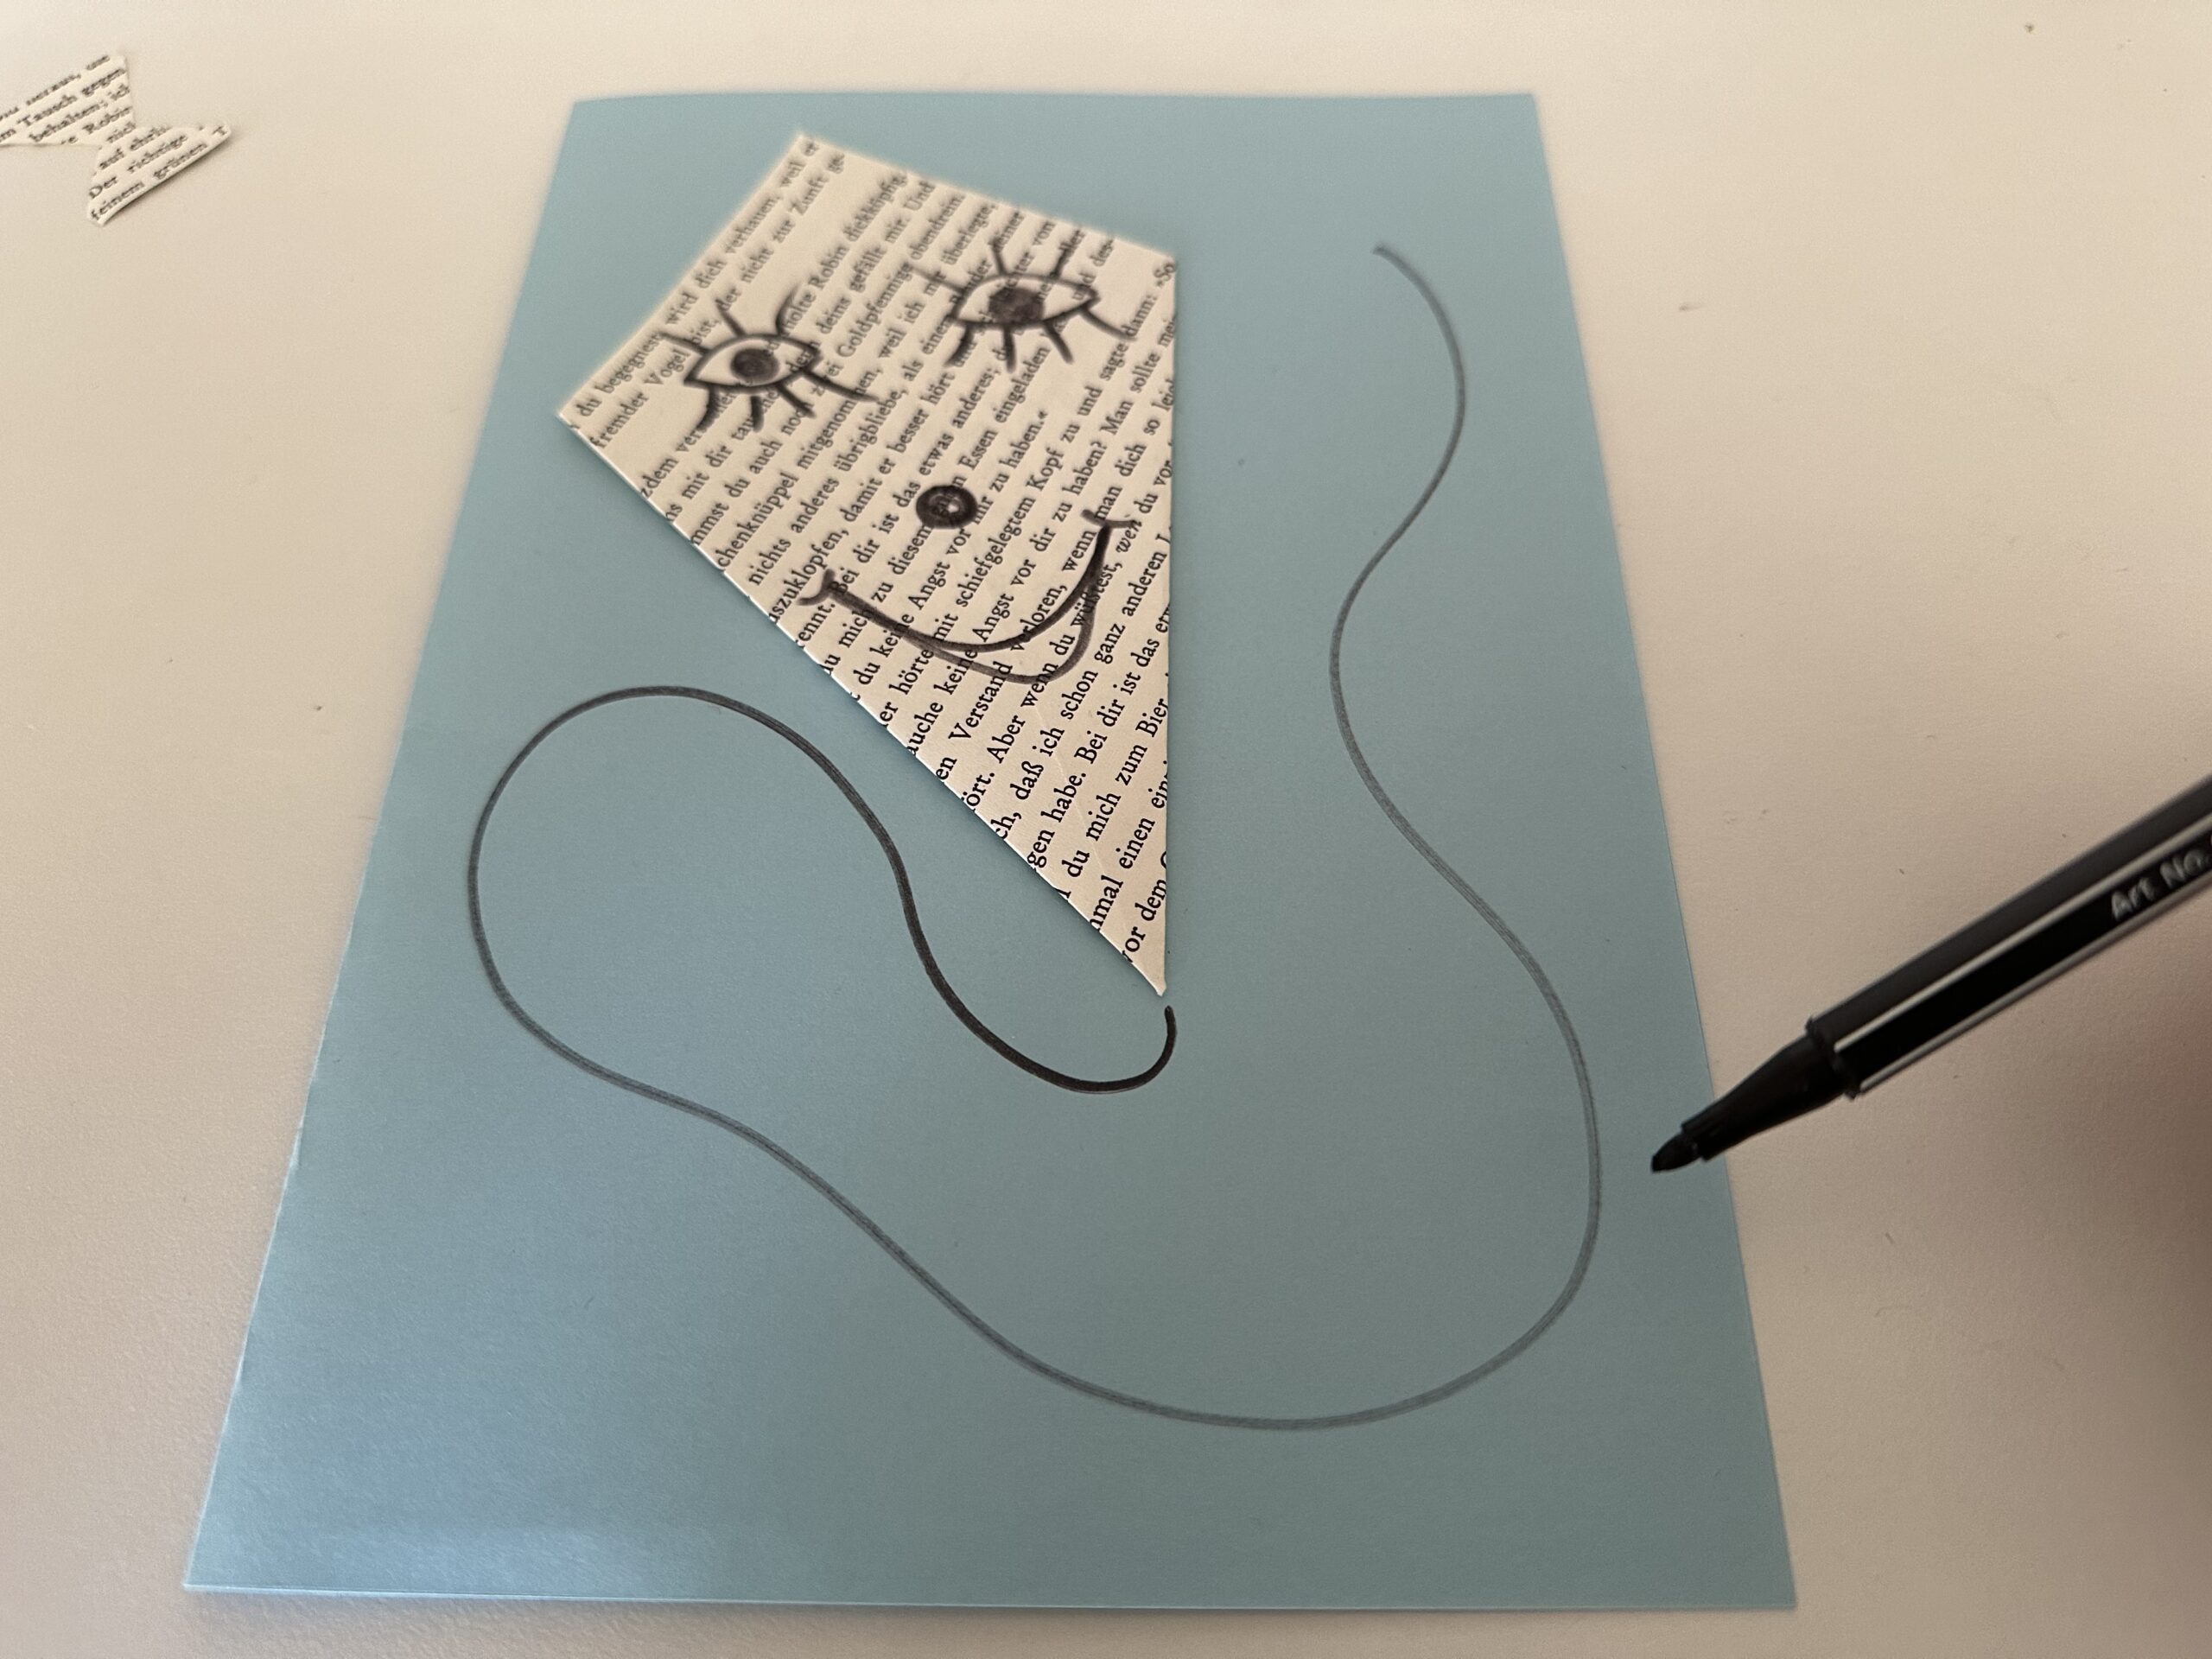
Bild zum Schritt 32 für das Bastel- und DIY-Abenteuer für Kinder: 'Male große geschwungene Bögen und lasse den Drachen so „tanzen“.'

33

You can now distribute the prepared loops as desired on your kite line (the painted line). Glue them firmly if the arrangement pleases.
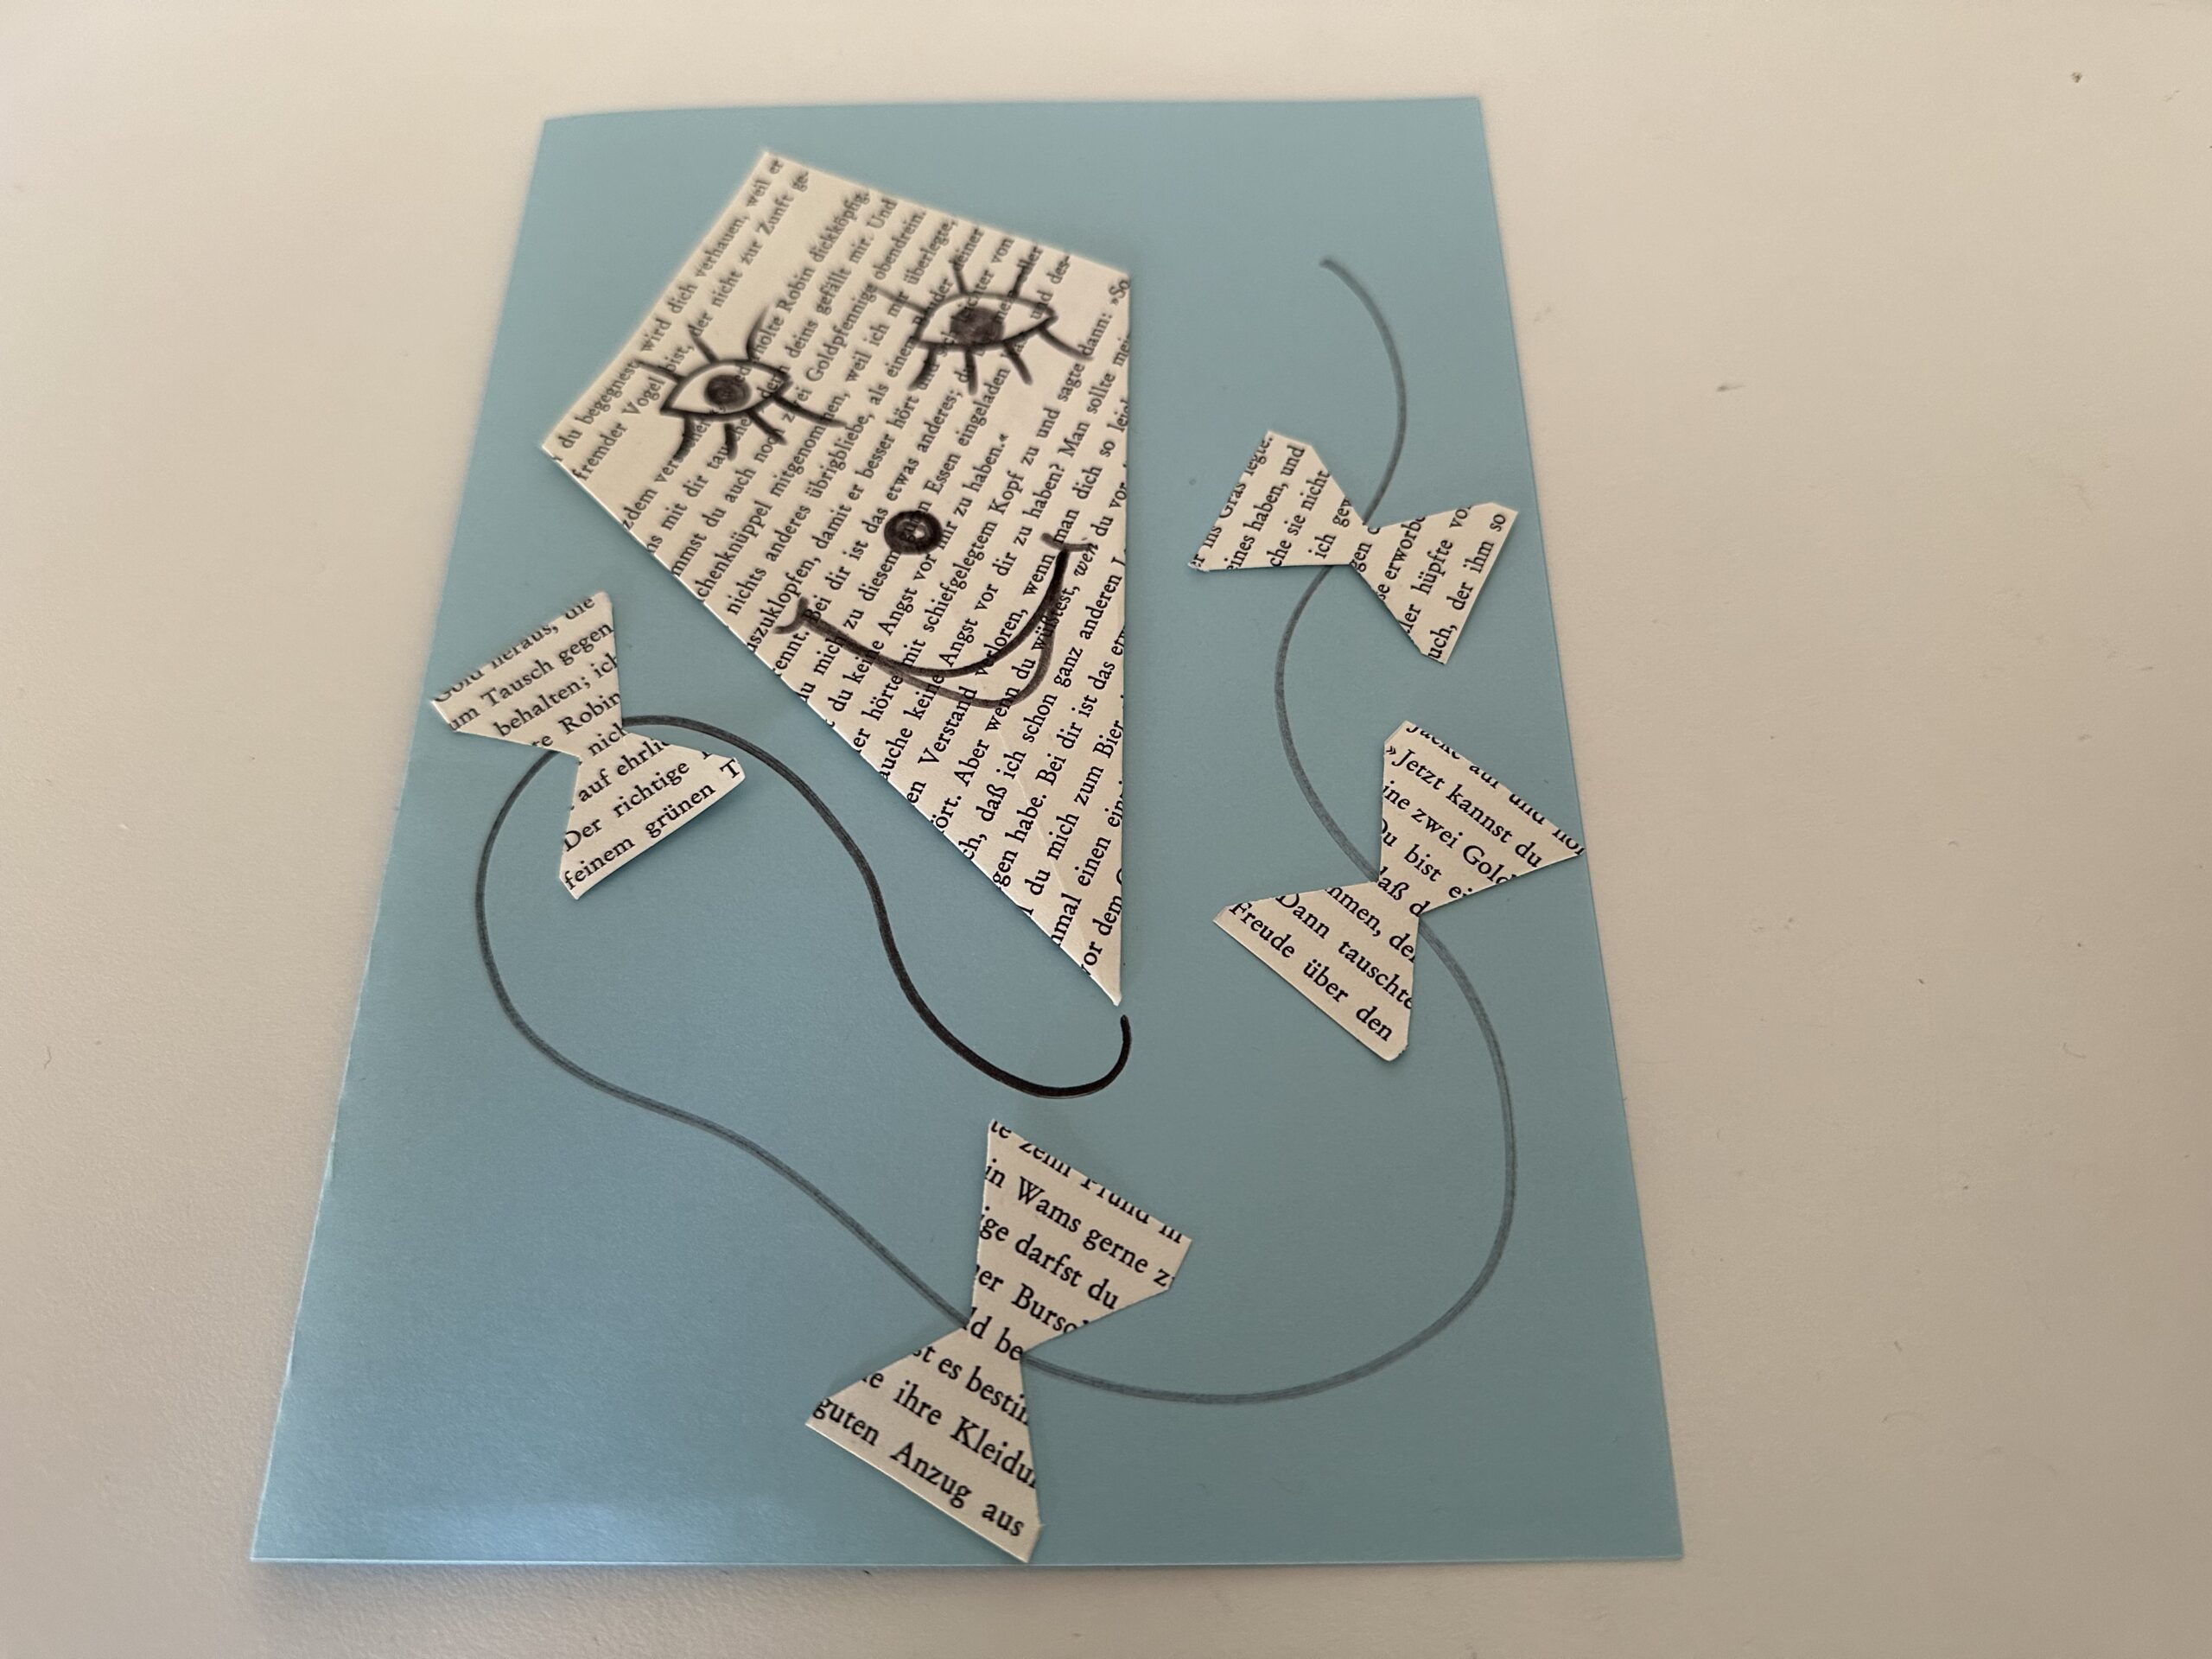
Bild zum Schritt 33 für das Bastel- und DIY-Abenteuer für Kinder: 'Die vorbereiteten Schleifen kannst du nun beliebig auf deiner Drachenschnur...'

34

Paint fringes on the sides of the kite. Start at the edge of the paper and remove the pen from the outside. Thus, the painted line becomes thinner outwards.
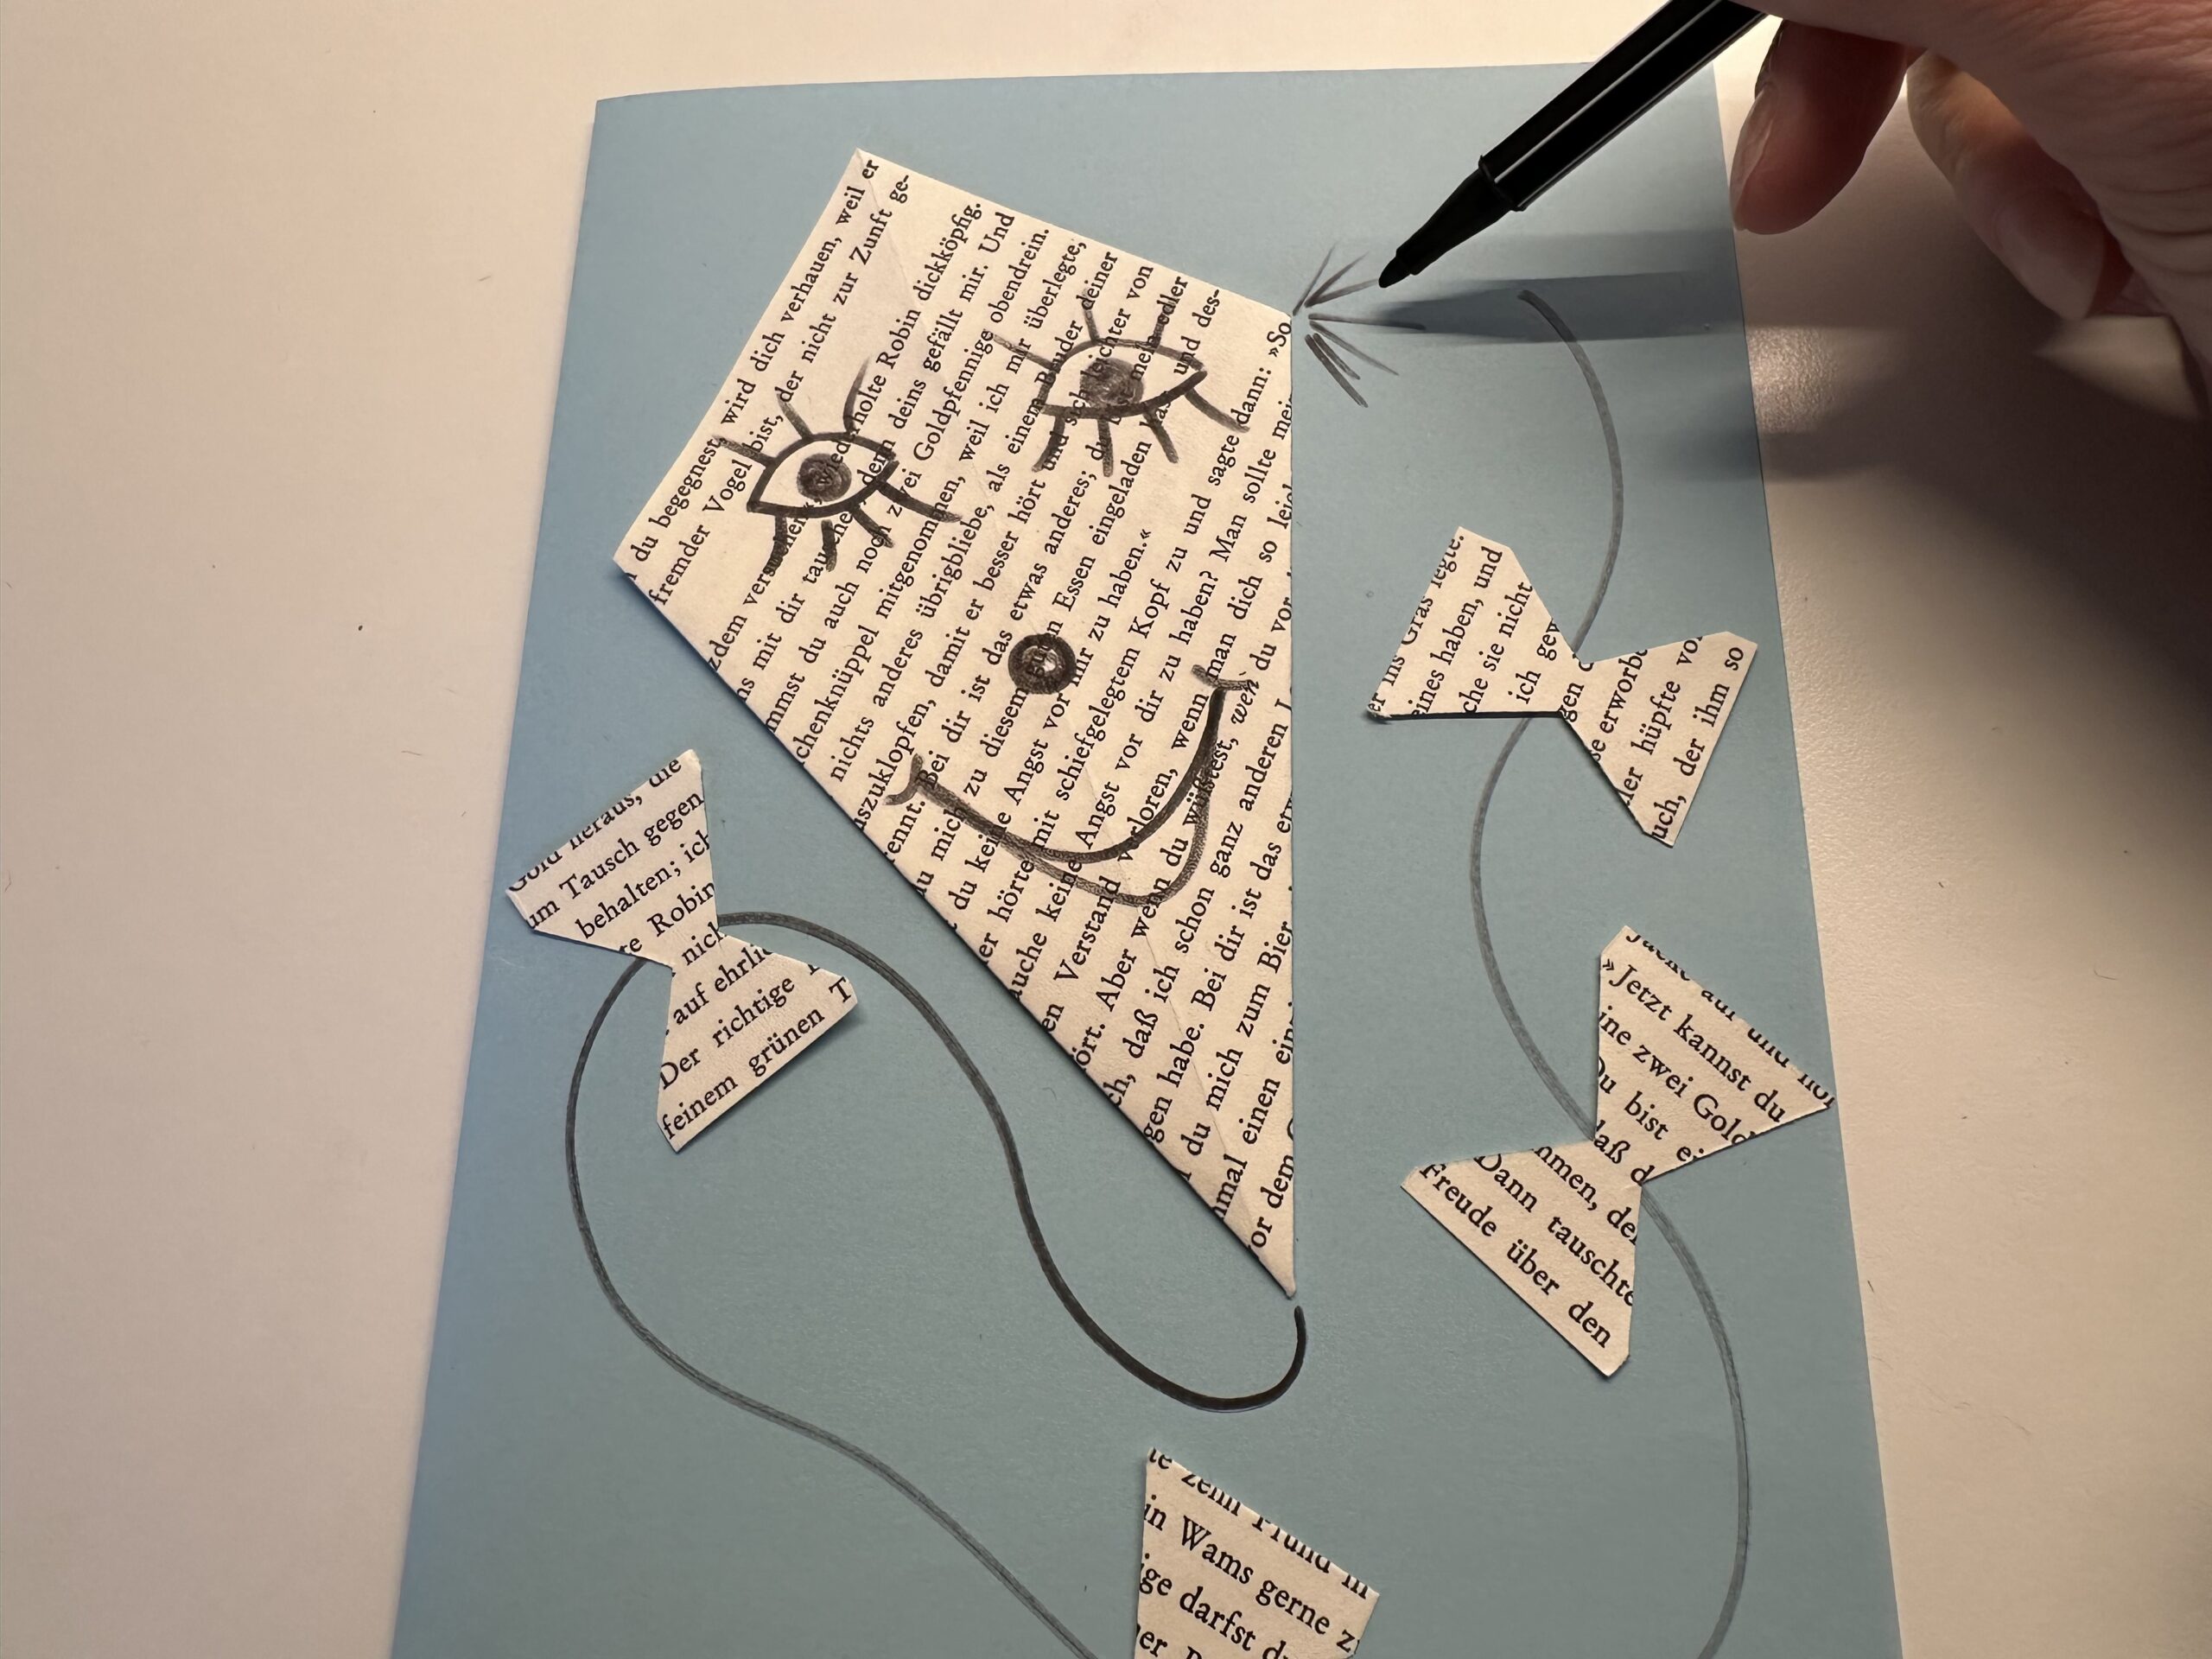
Bild zum Schritt 34 für das Bastel- und DIY-Abenteuer für Kinder: 'Male dem Drachen noch Fransen an die Seiten. Beginne am...'

35

That's what that might look like.
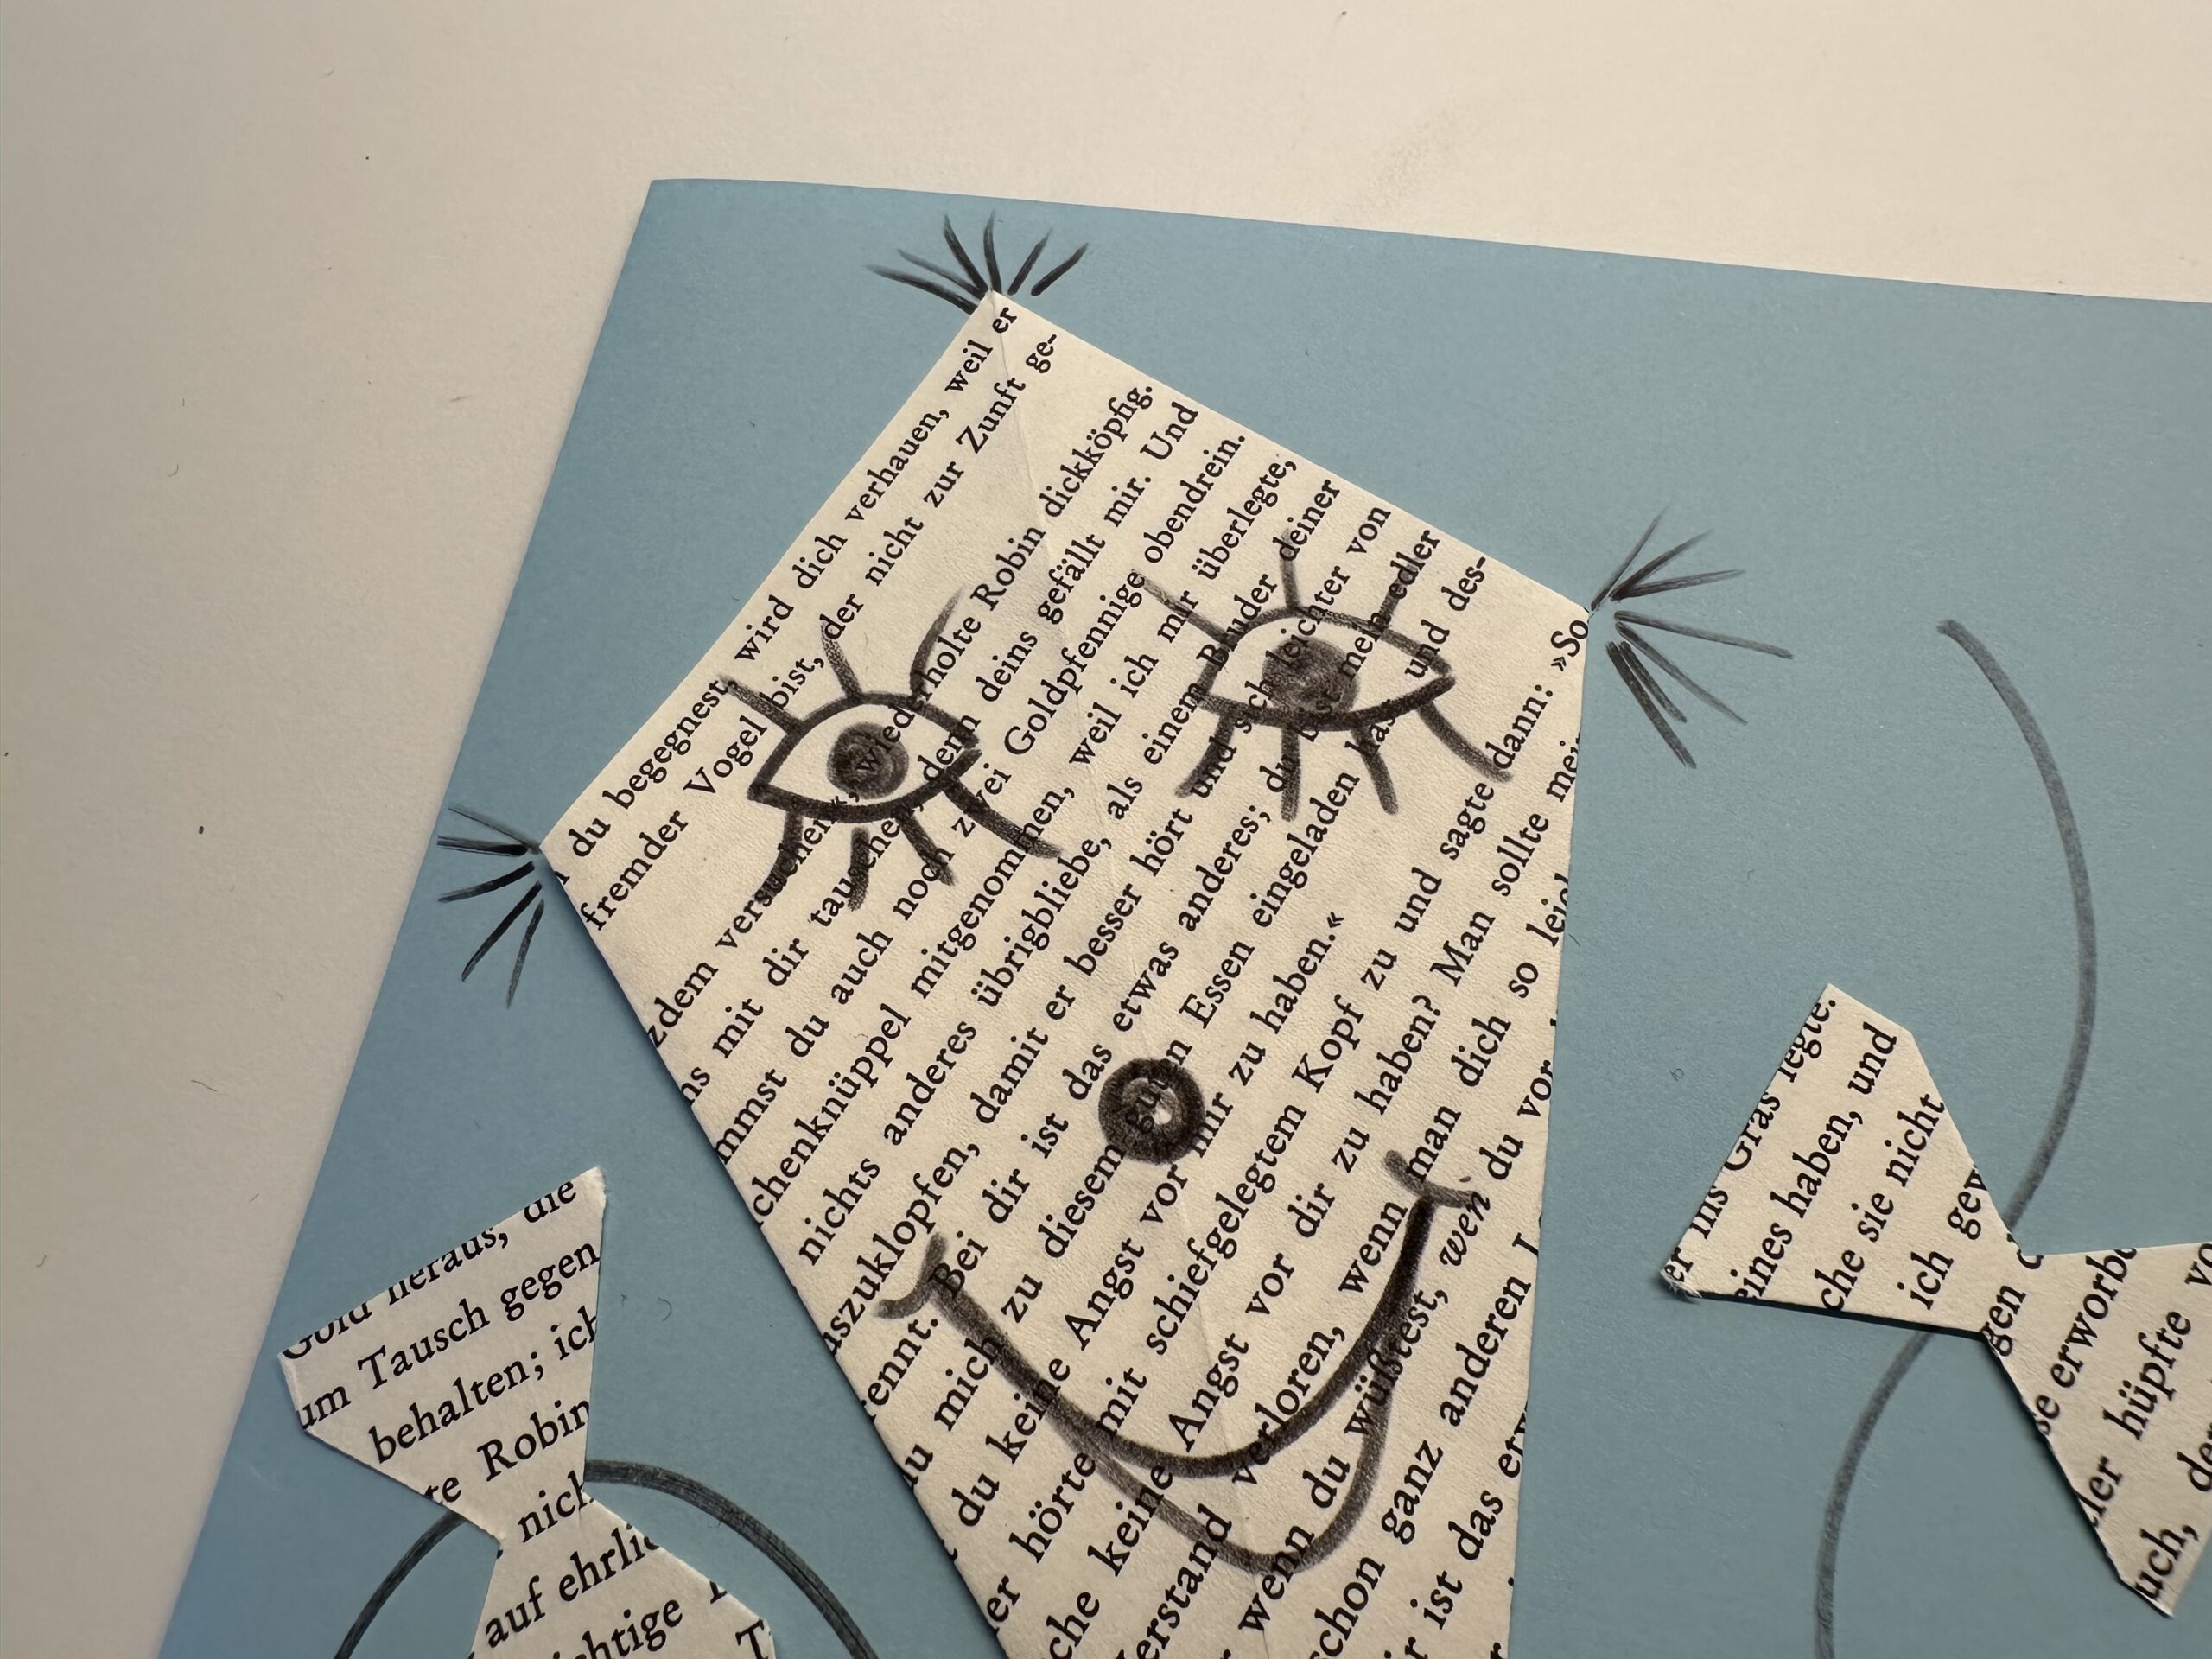
Bild zum Schritt 35 für das Bastel- und DIY-Abenteuer für Kinder: 'So könnte das dass aussehen.'

36

Make your kite line even more beautiful. You can also paint circles in the middle of your loops, they look like if you have tied the loops.
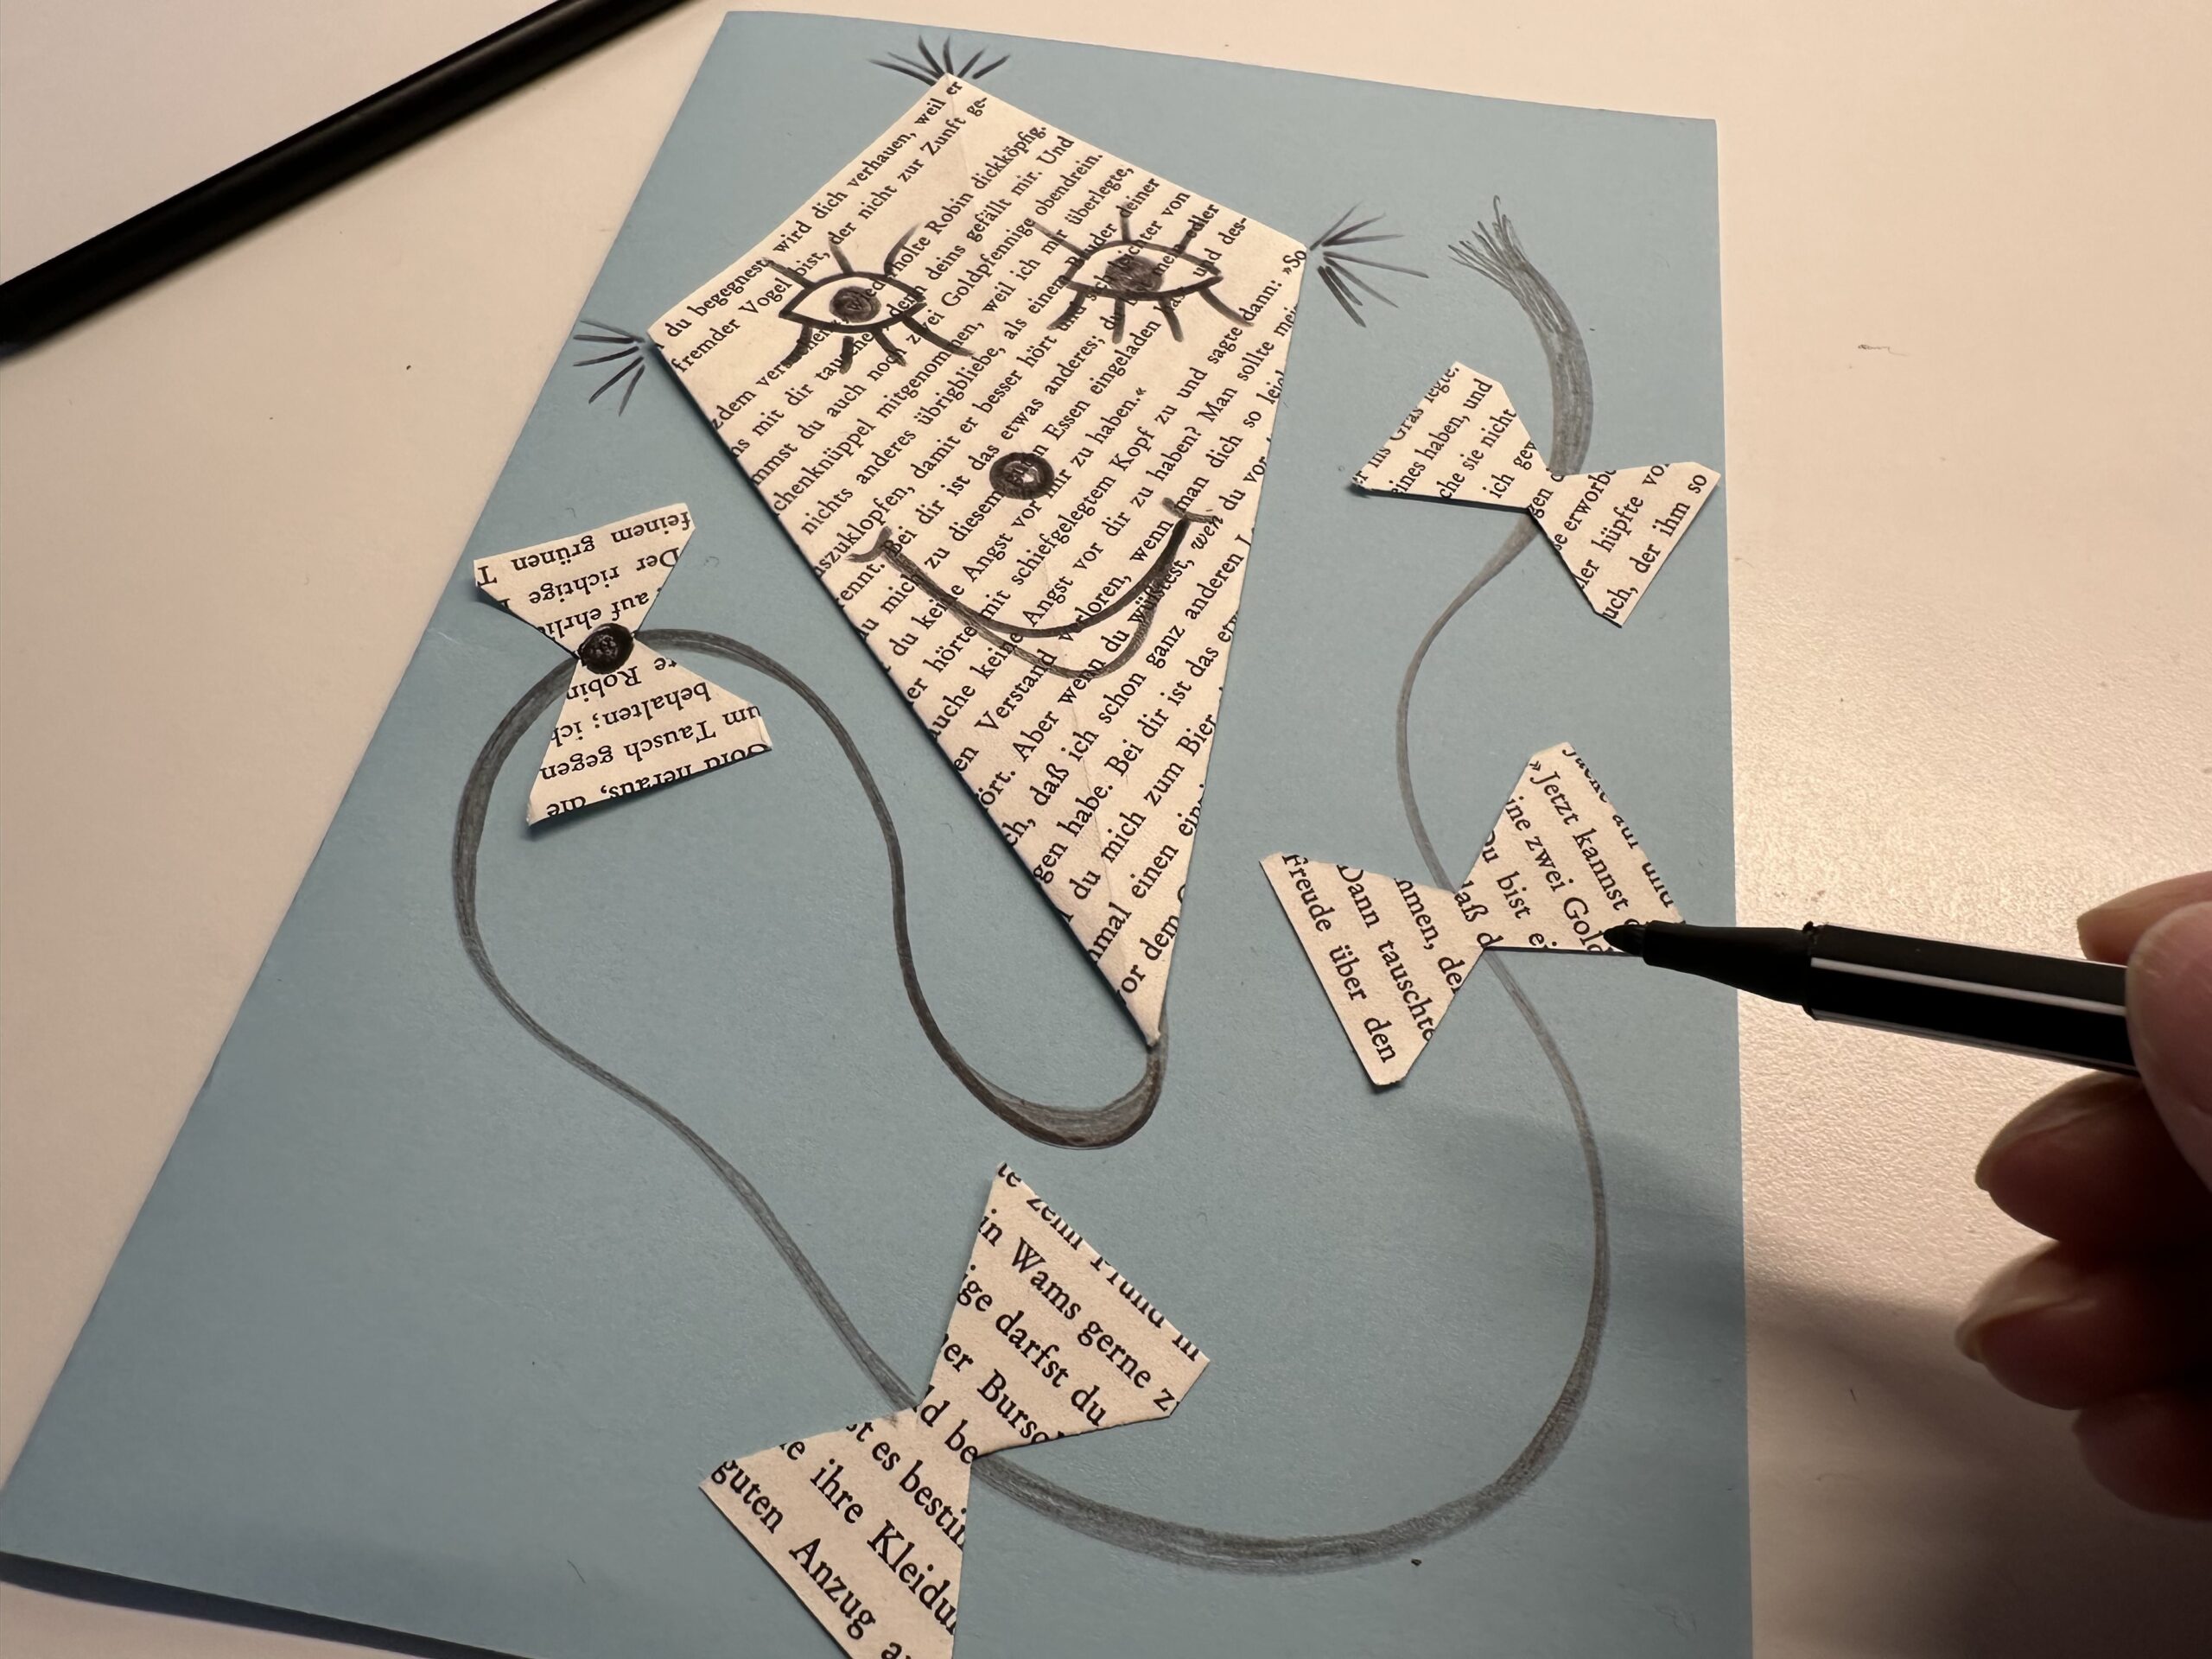
Bild zum Schritt 36 für das Bastel- und DIY-Abenteuer für Kinder: 'Verschönere evtl. noch deine Drachenschnur. Du kannst auch noch Kreise...'

37

Your card's ready.

Bild zum Schritt 37 für das Bastel- und DIY-Abenteuer für Kinder: 'Fertig ist deine Karte.'

38

Have fun making it up.

Bild zum Schritt 38 für das Bastel- und DIY-Abenteuer für Kinder: 'Viel Spaß beim Nachbasteln.'

Dragon card (upcycle)

Follow us on Facebook , Instagram and Pinterest
Don't miss any more adventures: Our bottle mail

Leave a Reply

Your email address will not be published.

The maximum upload file size: 5 MB. You can upload: image, document. Drop file here