An empty Tetrapack offers an ideal ressonance body for this self-made plucking instrument. A cutout is covered with rubber bands and by plucking these sounds emerge.
Let your children be creative in the design of the Tetrapack and have fun playing music.
Look inside. The crafting of a string instrument for the first plucking and playing does not have to be complicated. Here there is an illustrated step by step instruction.
Media Education for Kindergarten and Hort

Relief in everyday life, targeted promotion of individual children, independent learning and - without any pre-knowledge already usable by the youngest!
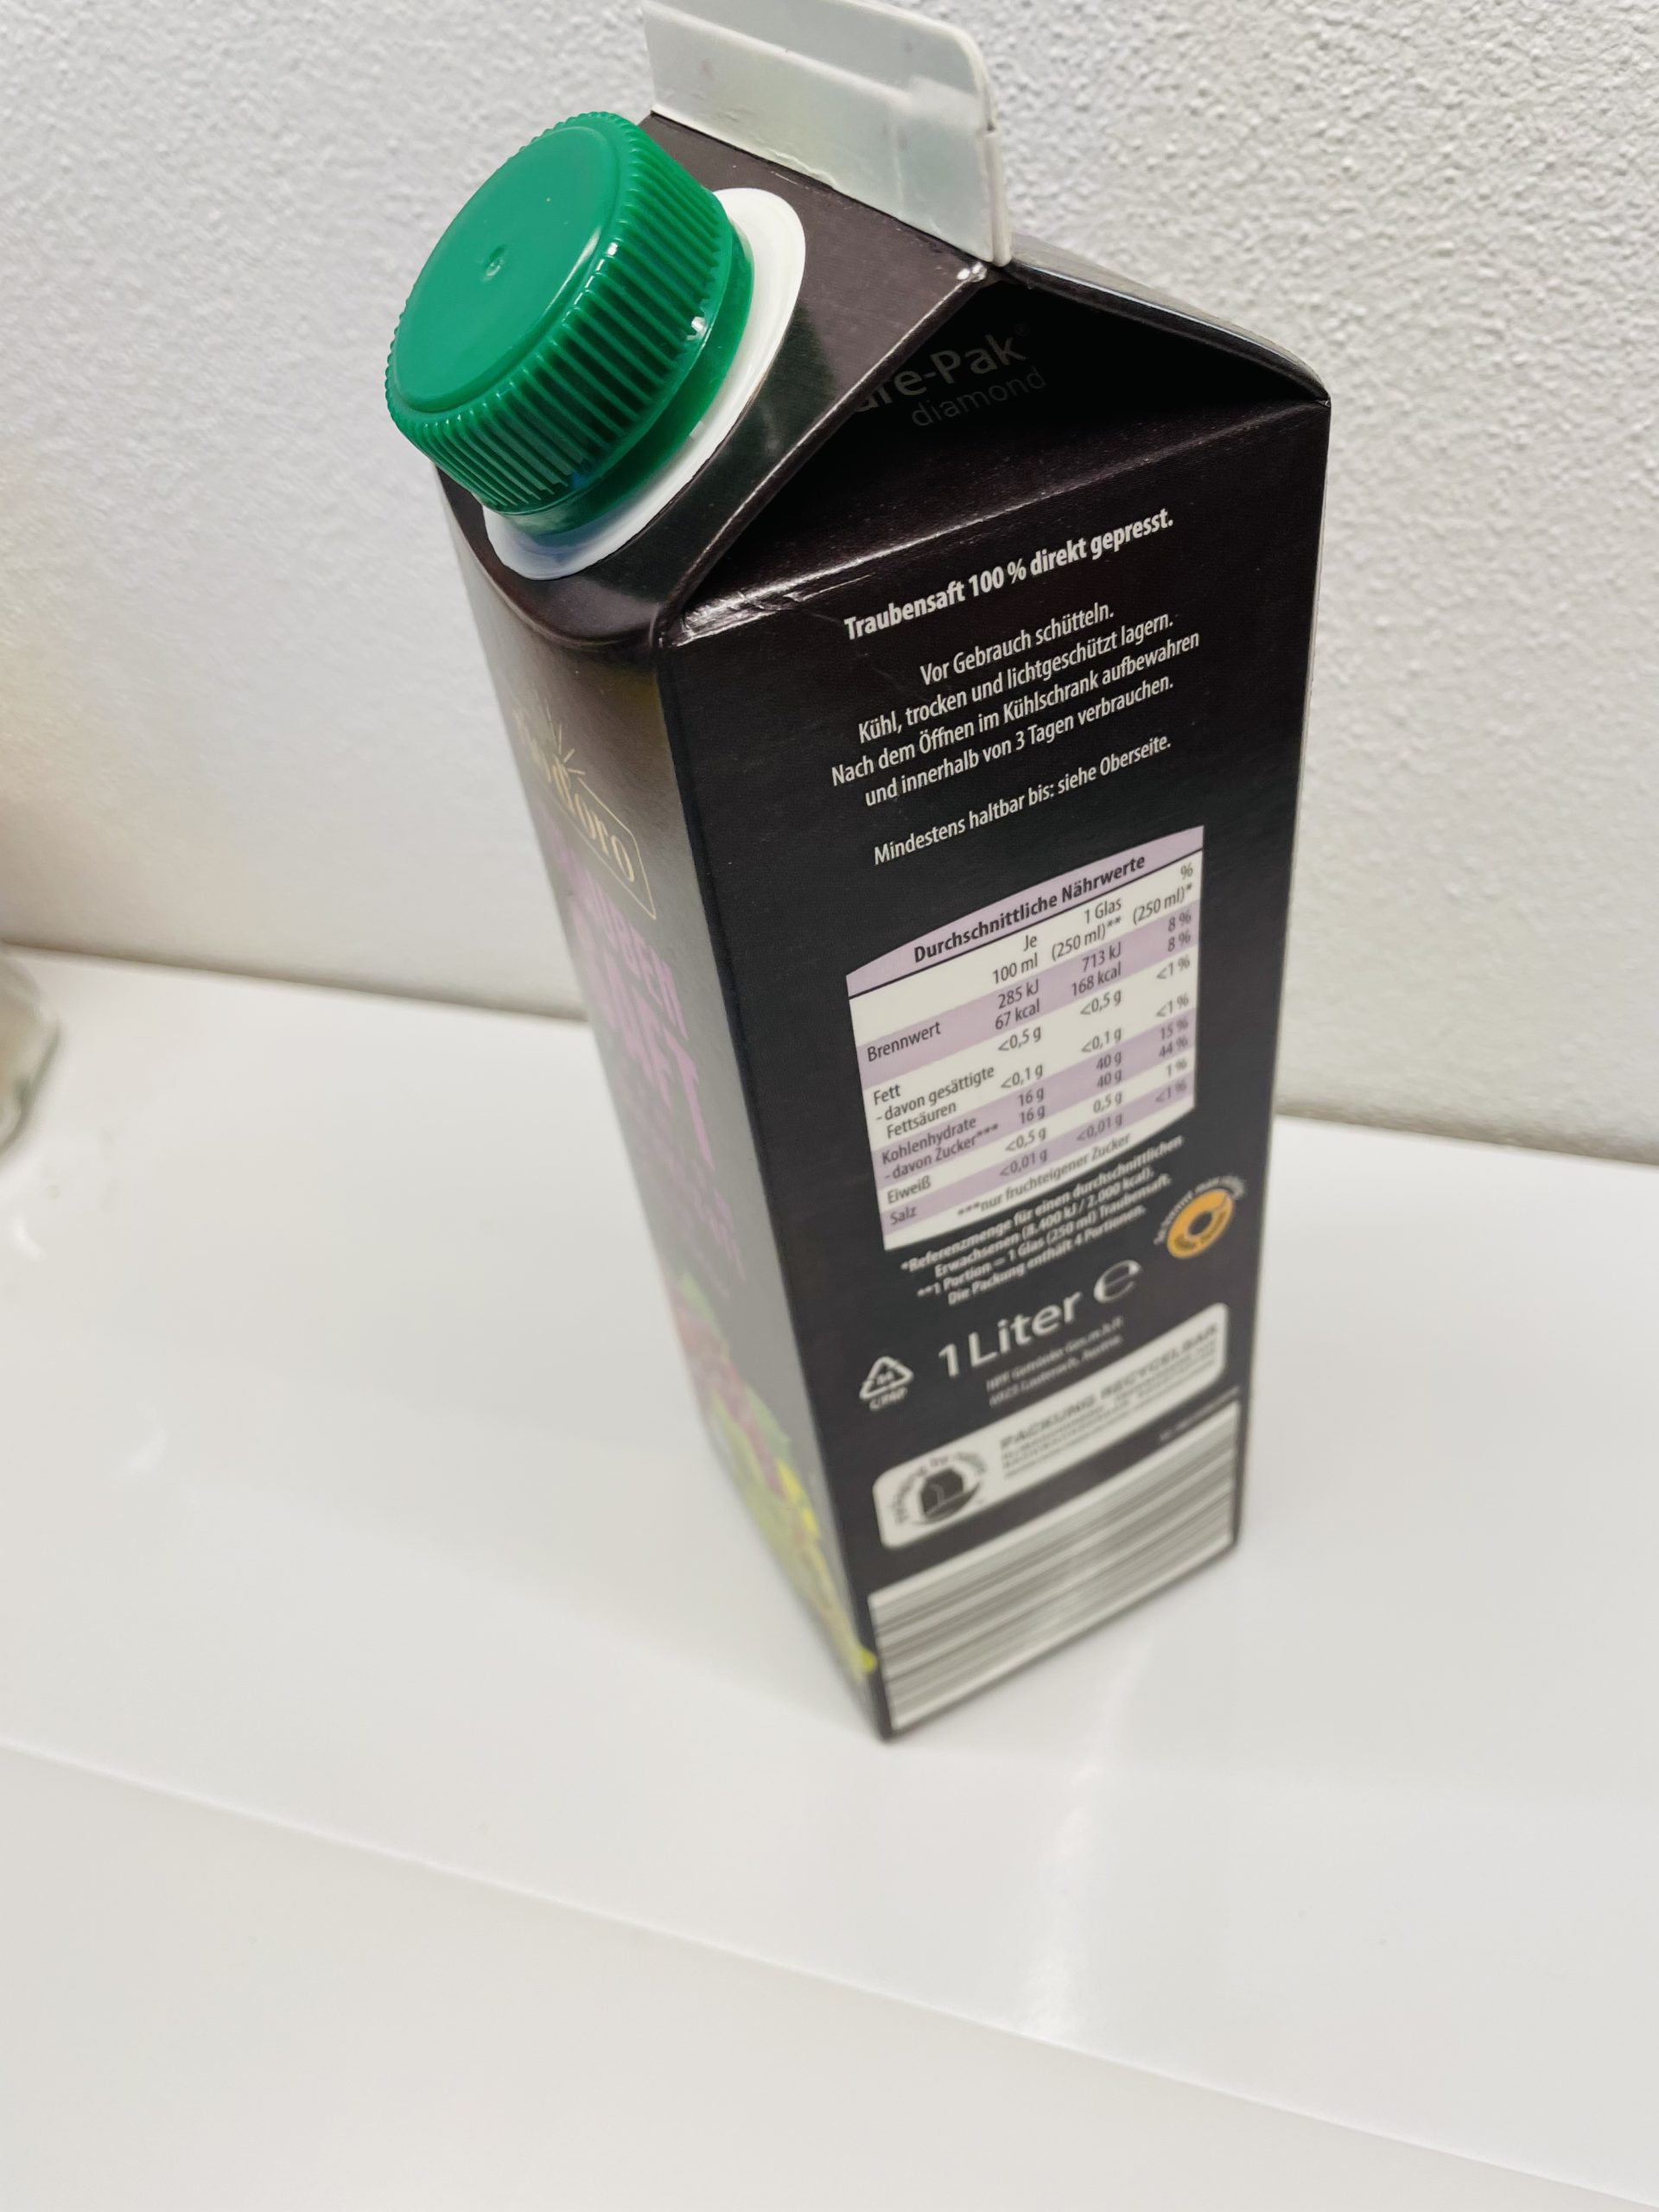
First, prepare your materials and put out the craft file. Use an empty, clean Tetrapack.
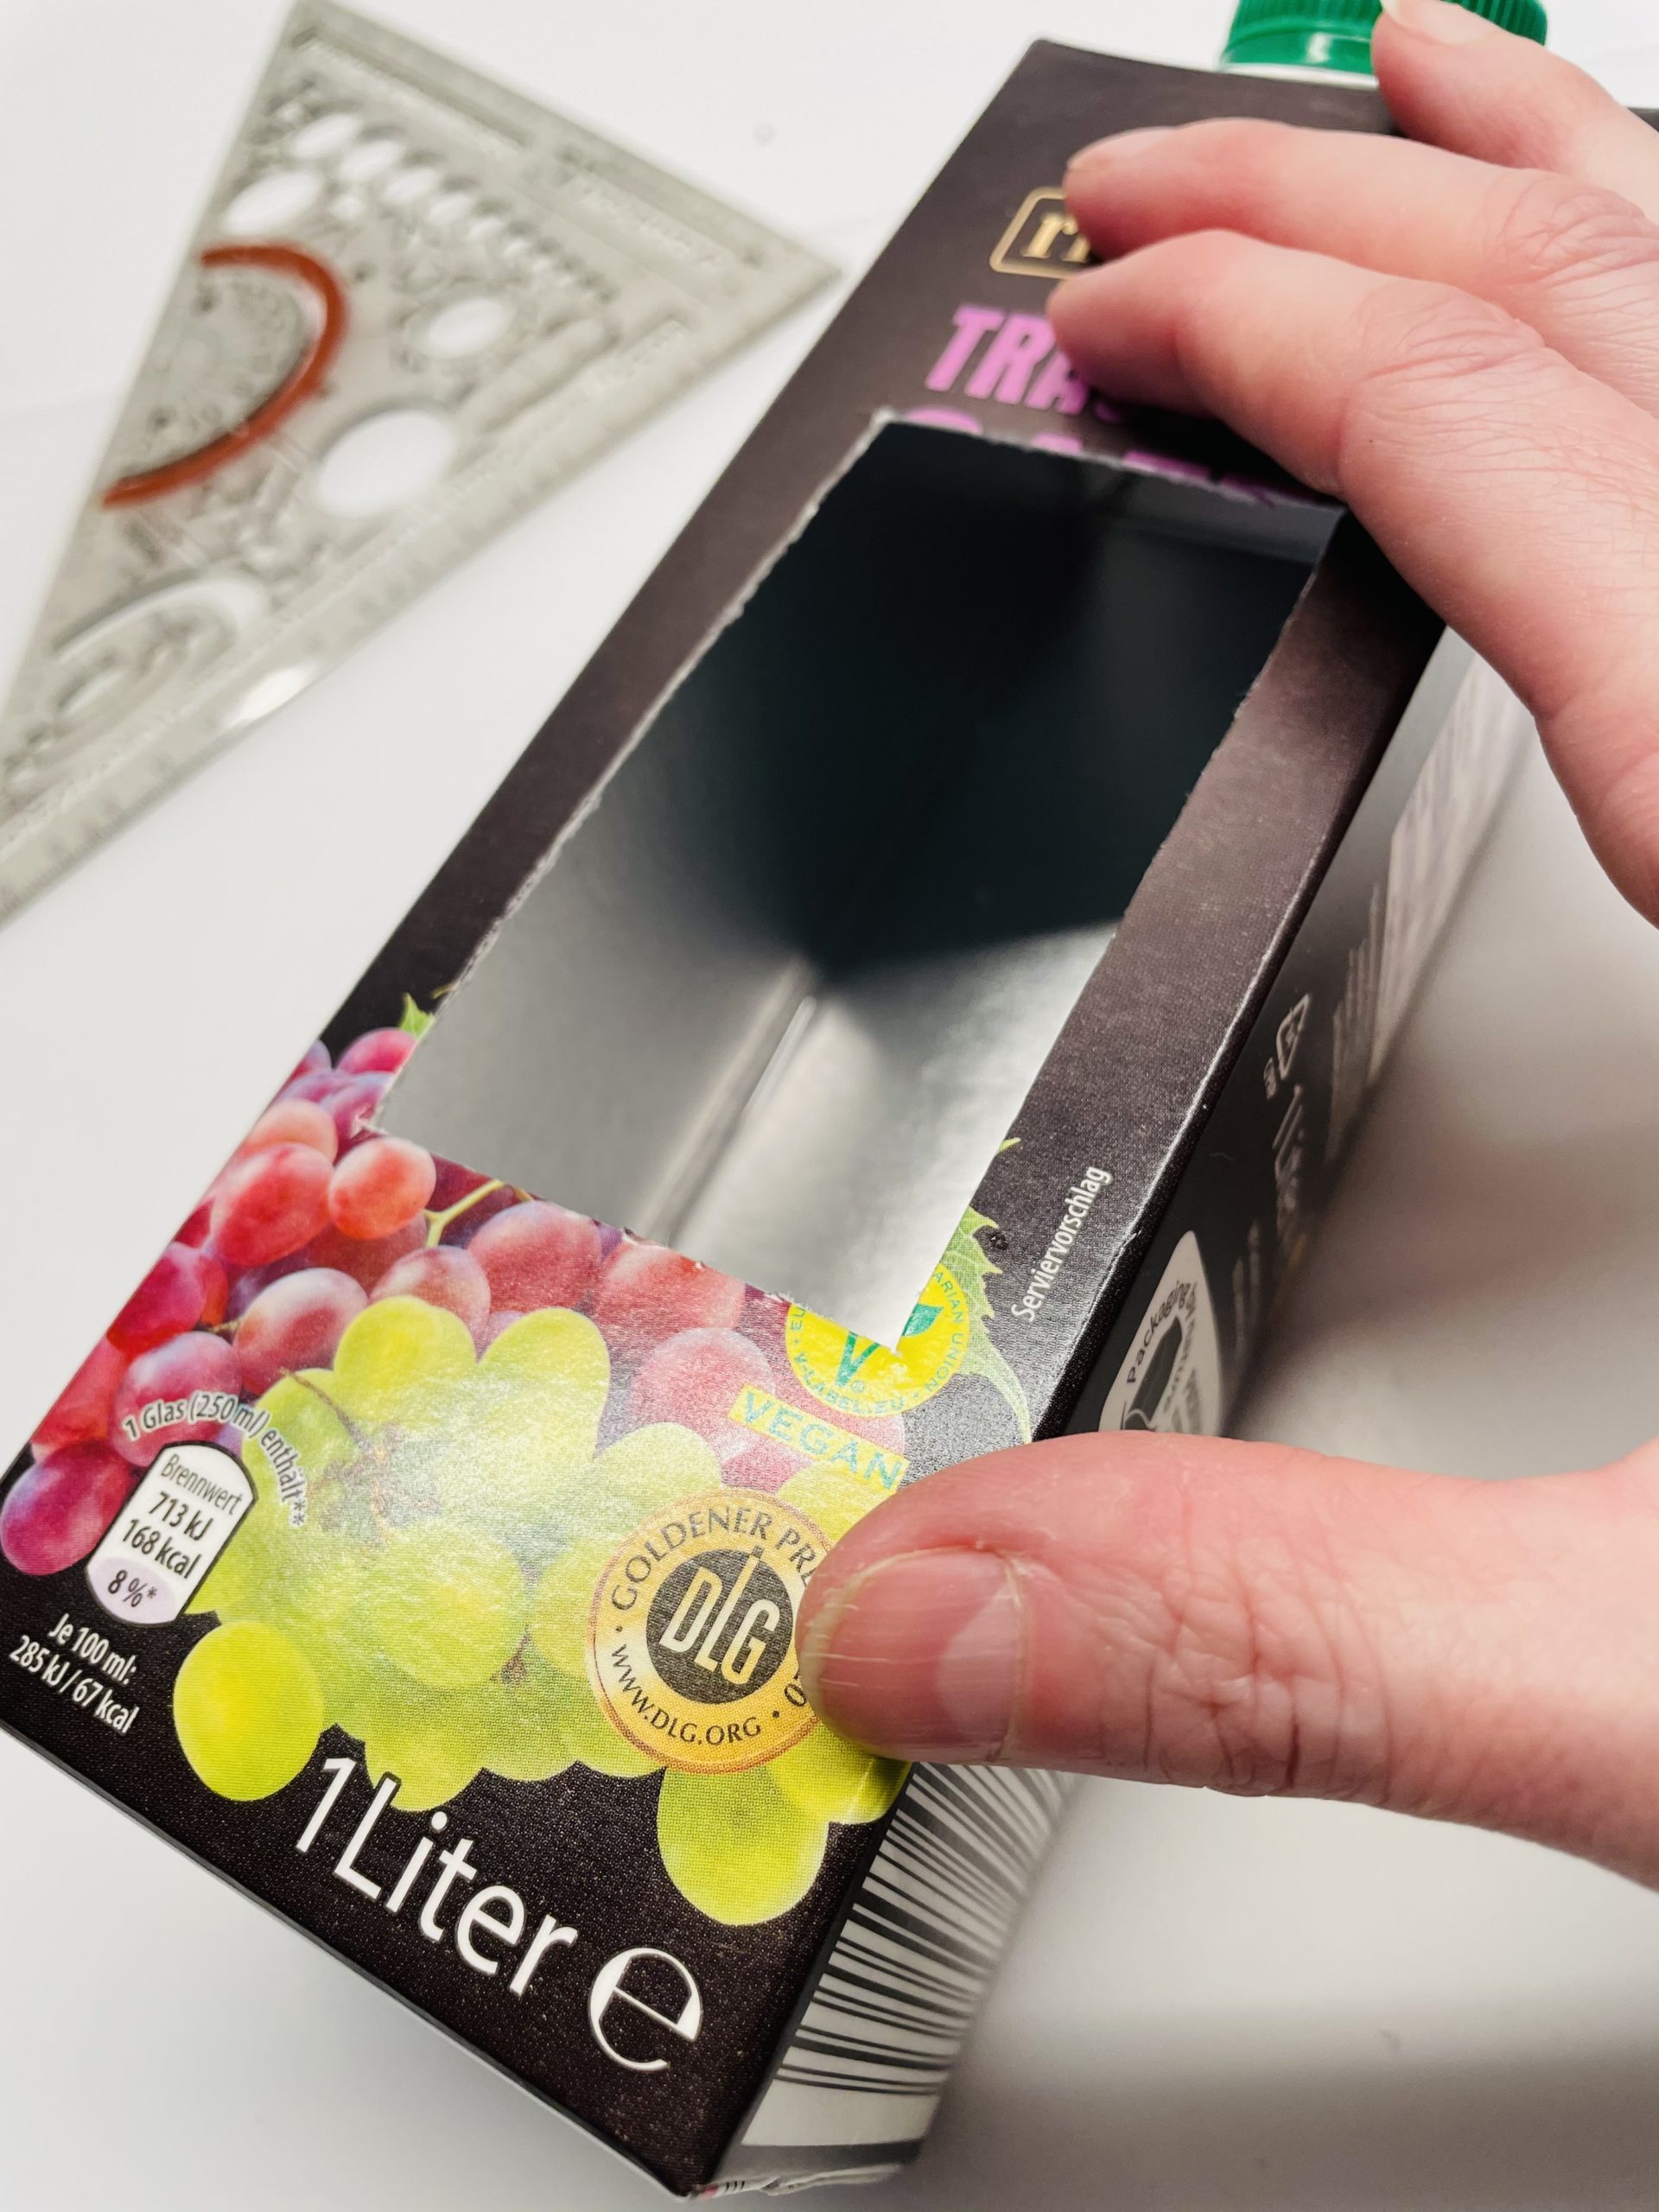
Put it on a long side. Draw on your neckline. Make sure that there is still a cardboard border around the neckline!

Get help with cutting with the cutter knife - risk of injury!
Now you design the Tetrapak. Sticks around the neckline colored adhesive tapes, designs your box with colored paper or paints the cardboard in color.

Then you punch two opposite sides of the cut-out. Use a punched plier and set it to a small hole size. (Only the rubber has to fit through!) Then you punch about 4 -5 holes per side.

You'll need a lot of holes on both sides.

That's what the box looks like now!

Now you need the rubber hat. Thread it from top to bottom through the first hole. Then you thread a pearl. Make sure that the pearl is so large that it does not slip through the hole. Then you tie the pearl to one end.
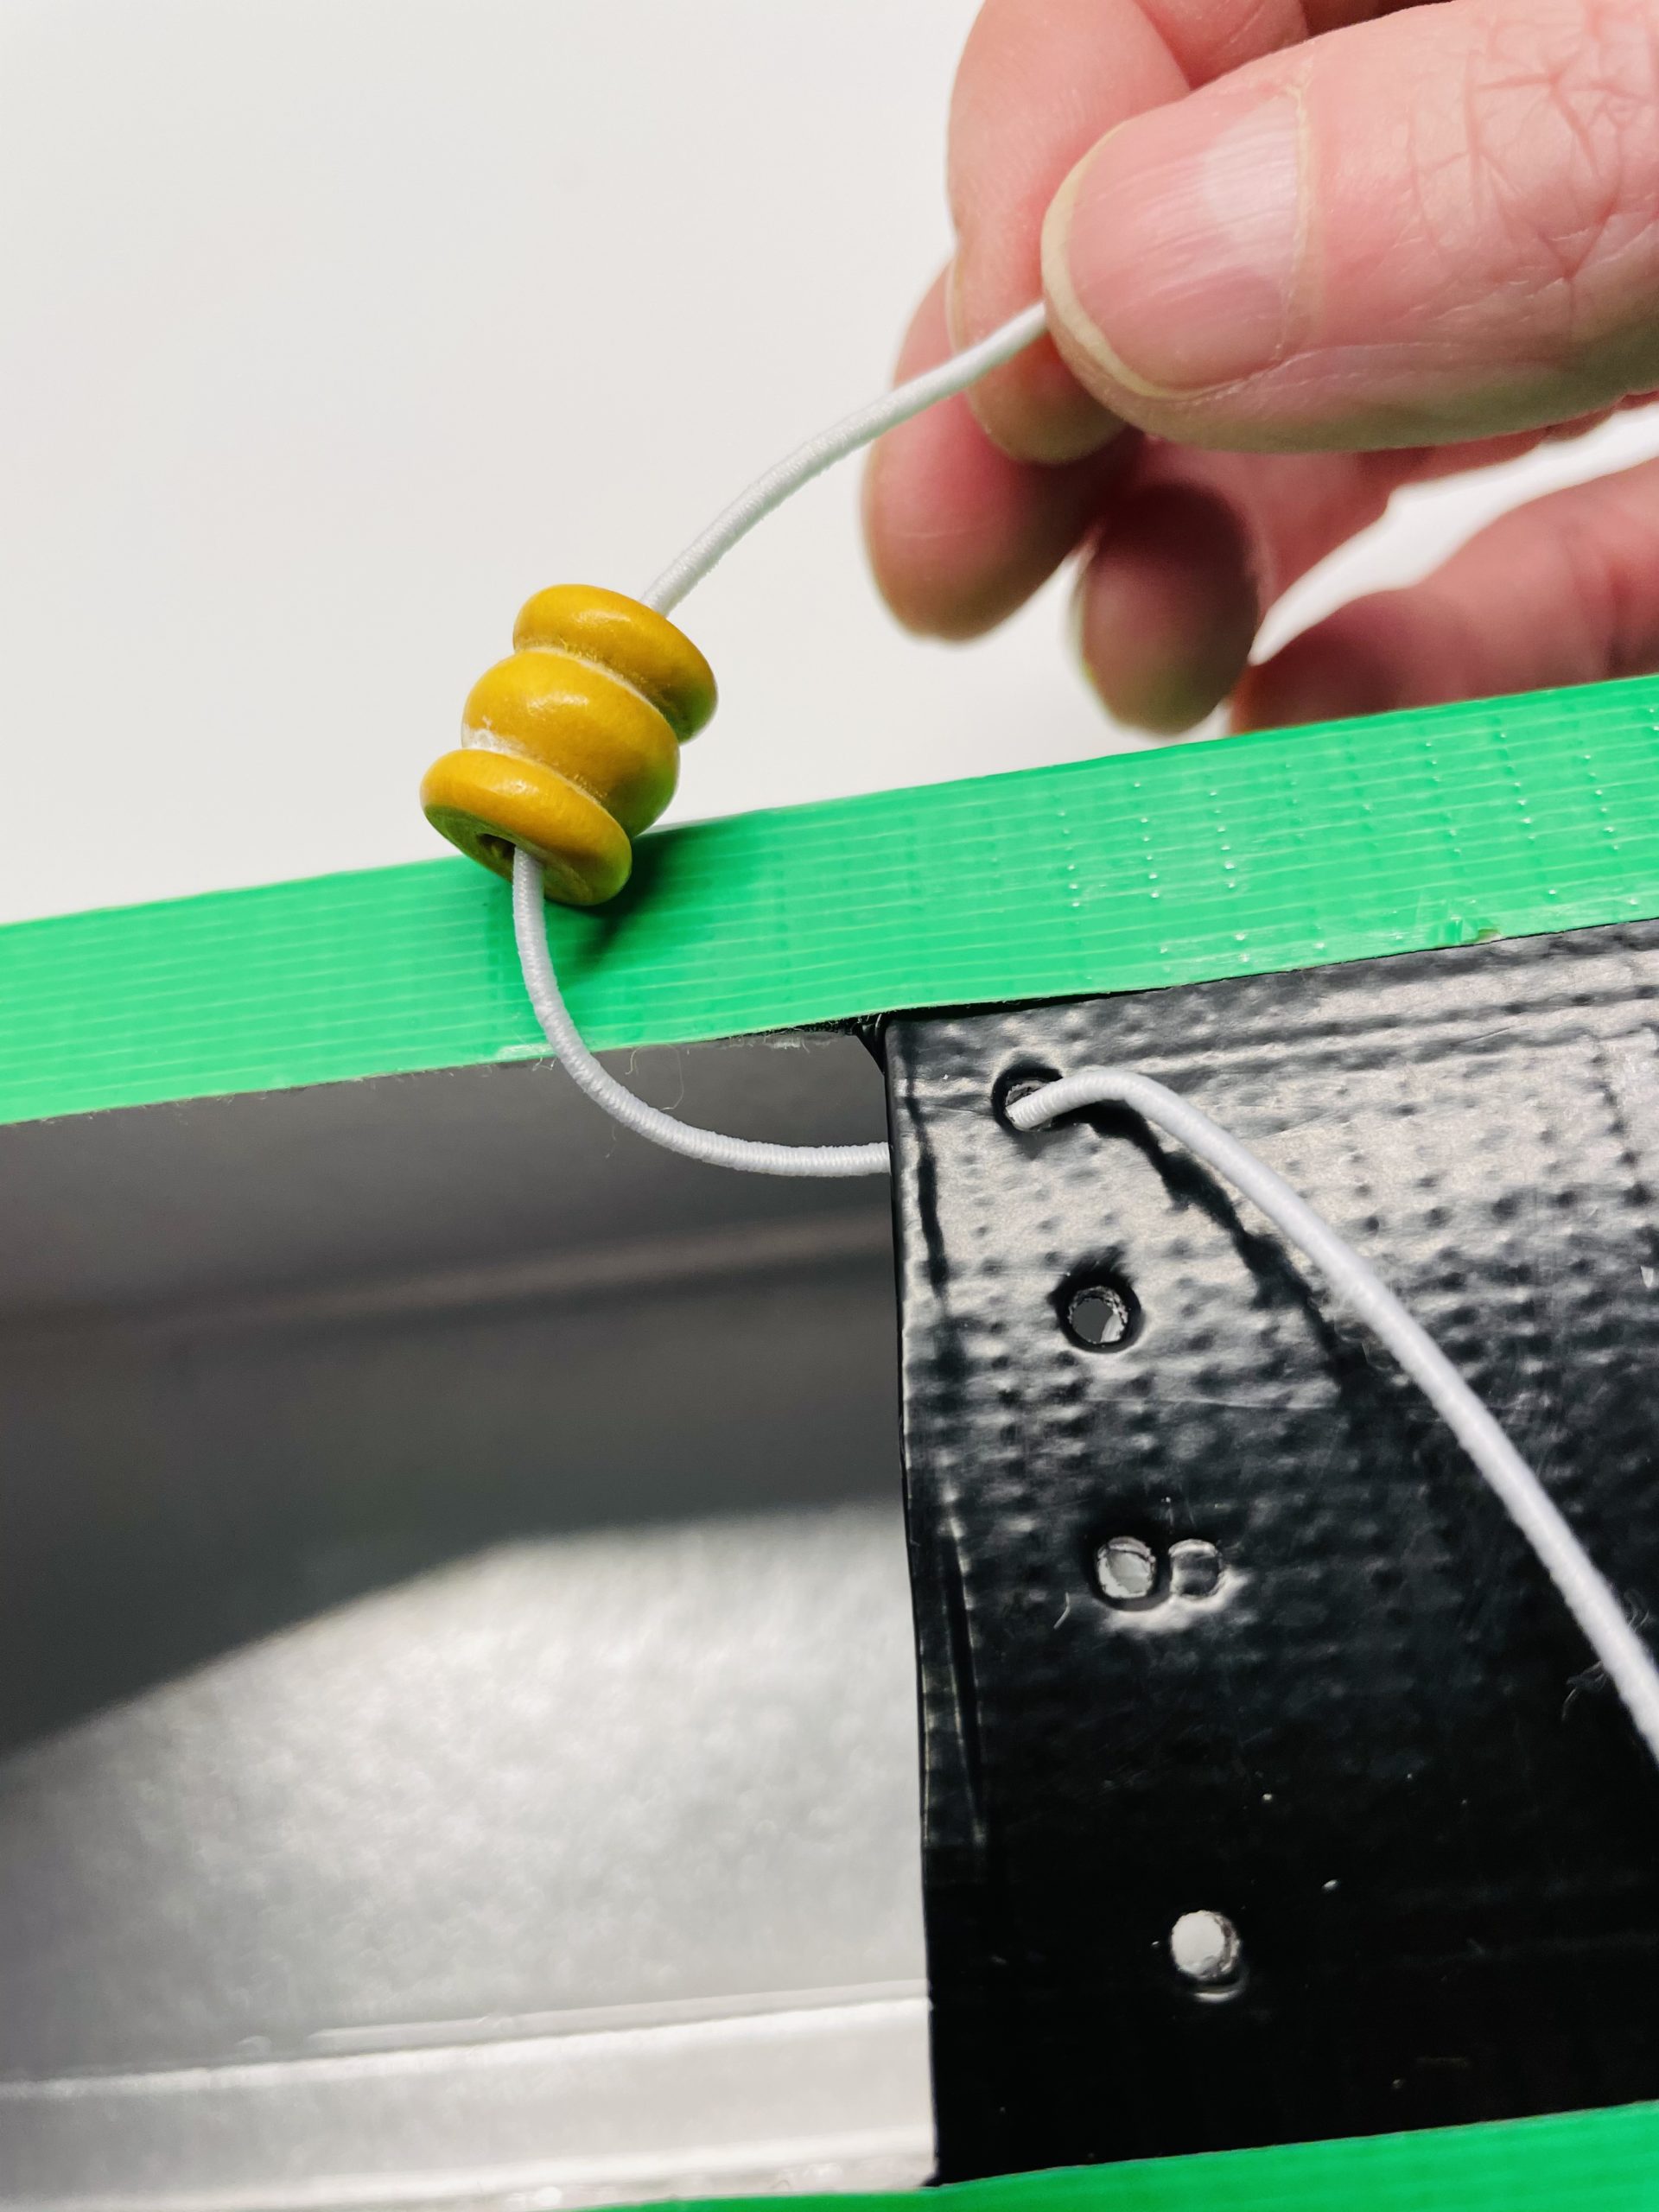
Pull the bead right behind the first hole. It prevents the rubber band from being pulled out by clamping.
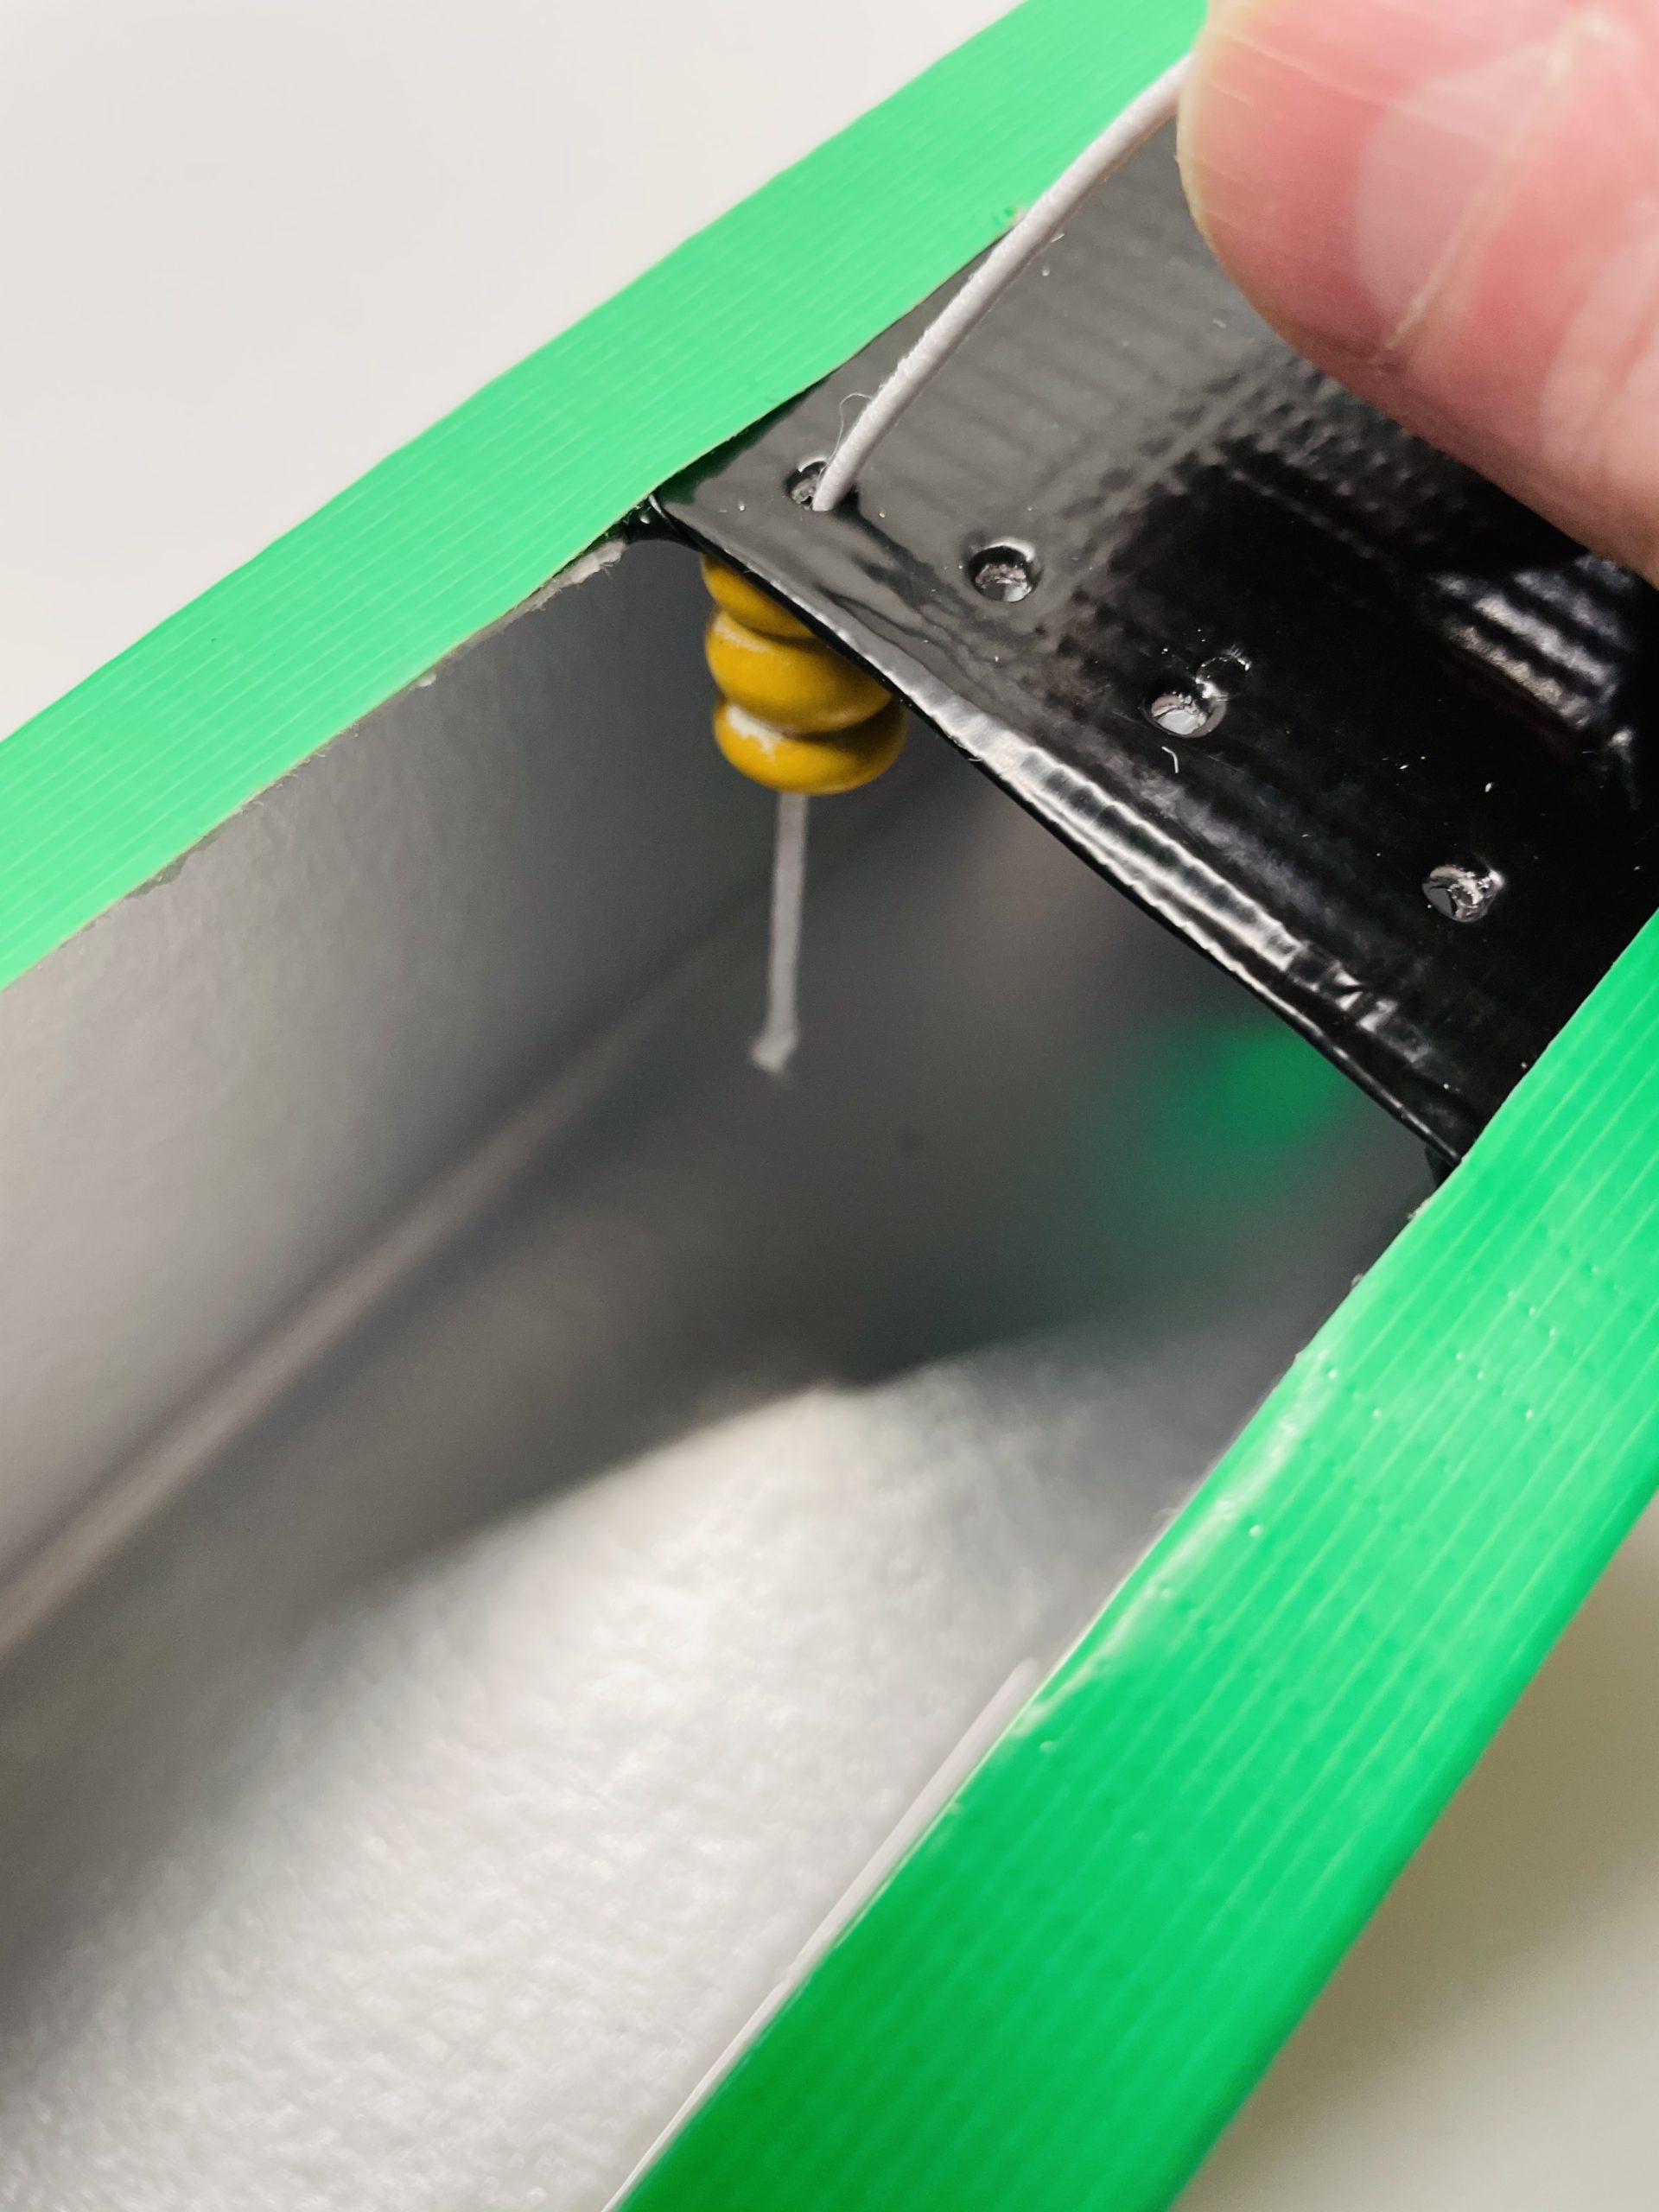
Now you tighten the threads. For this you put the rubber from above into the opposite hole. Then you pull the rubber through the hole and put it from below into the hole right next to it.
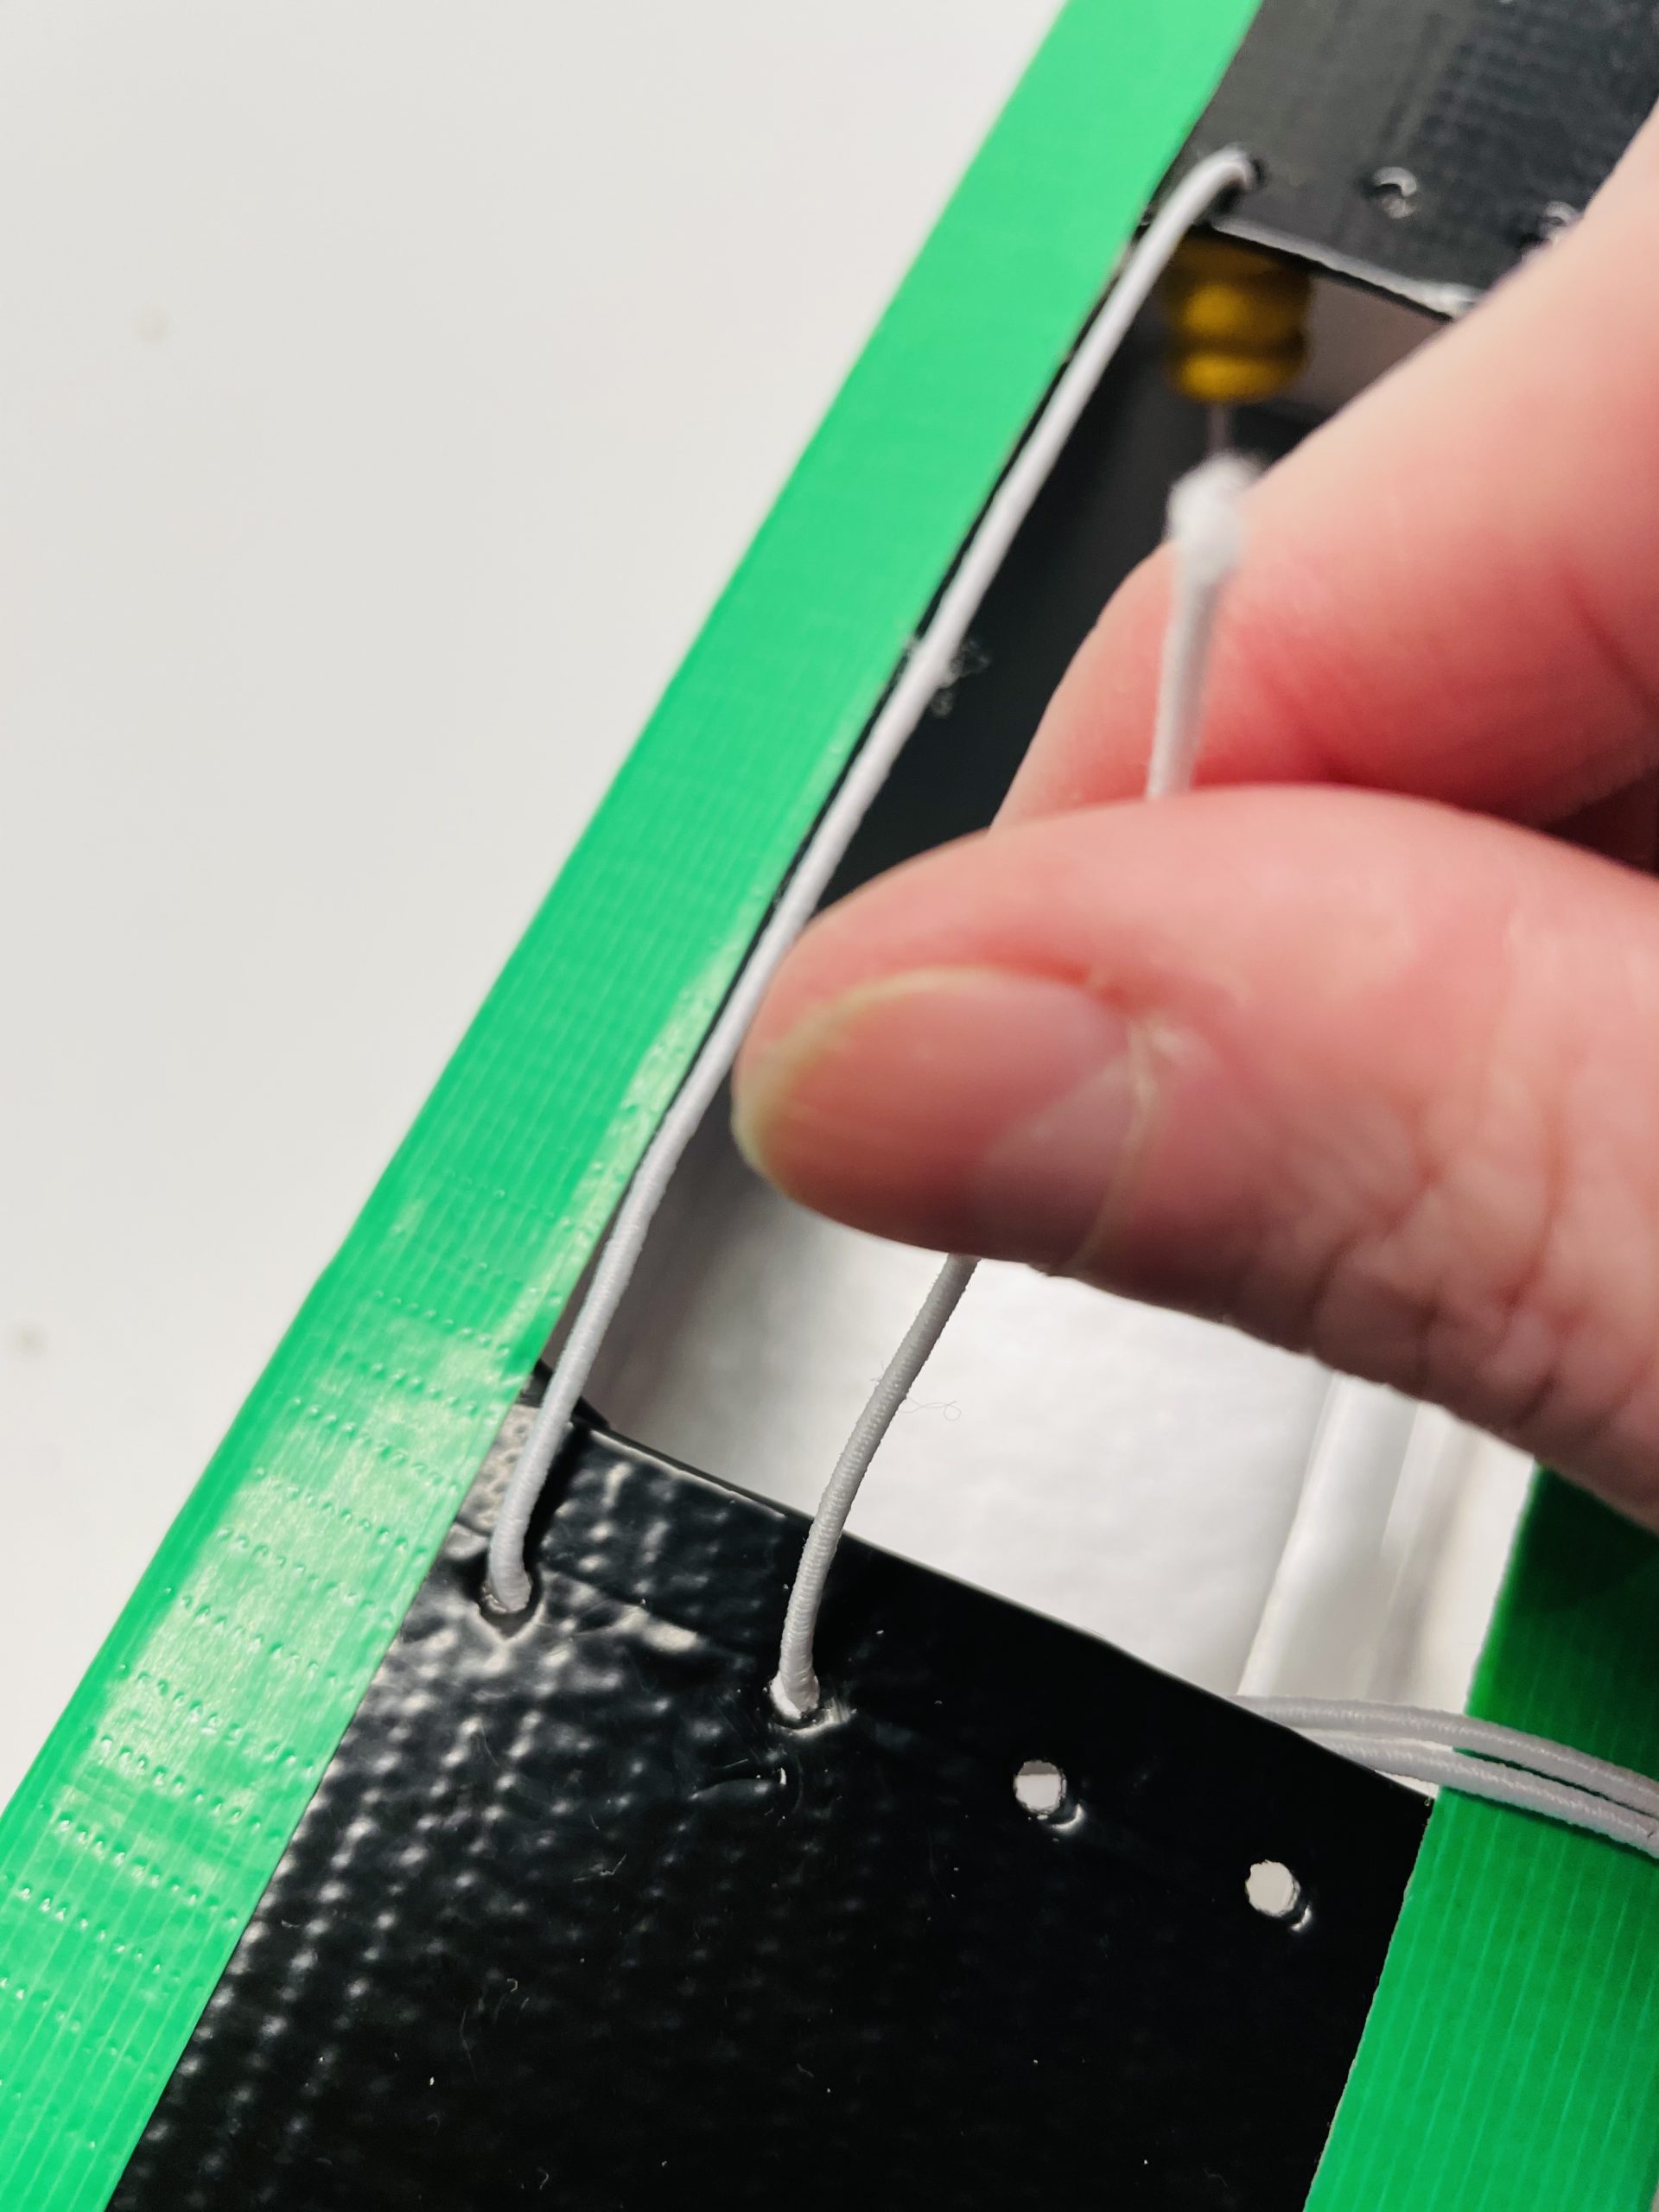
Then go back to the opposite side and put the rubber back from top to bottom through the hole. Pull in the rubber cord in this way.
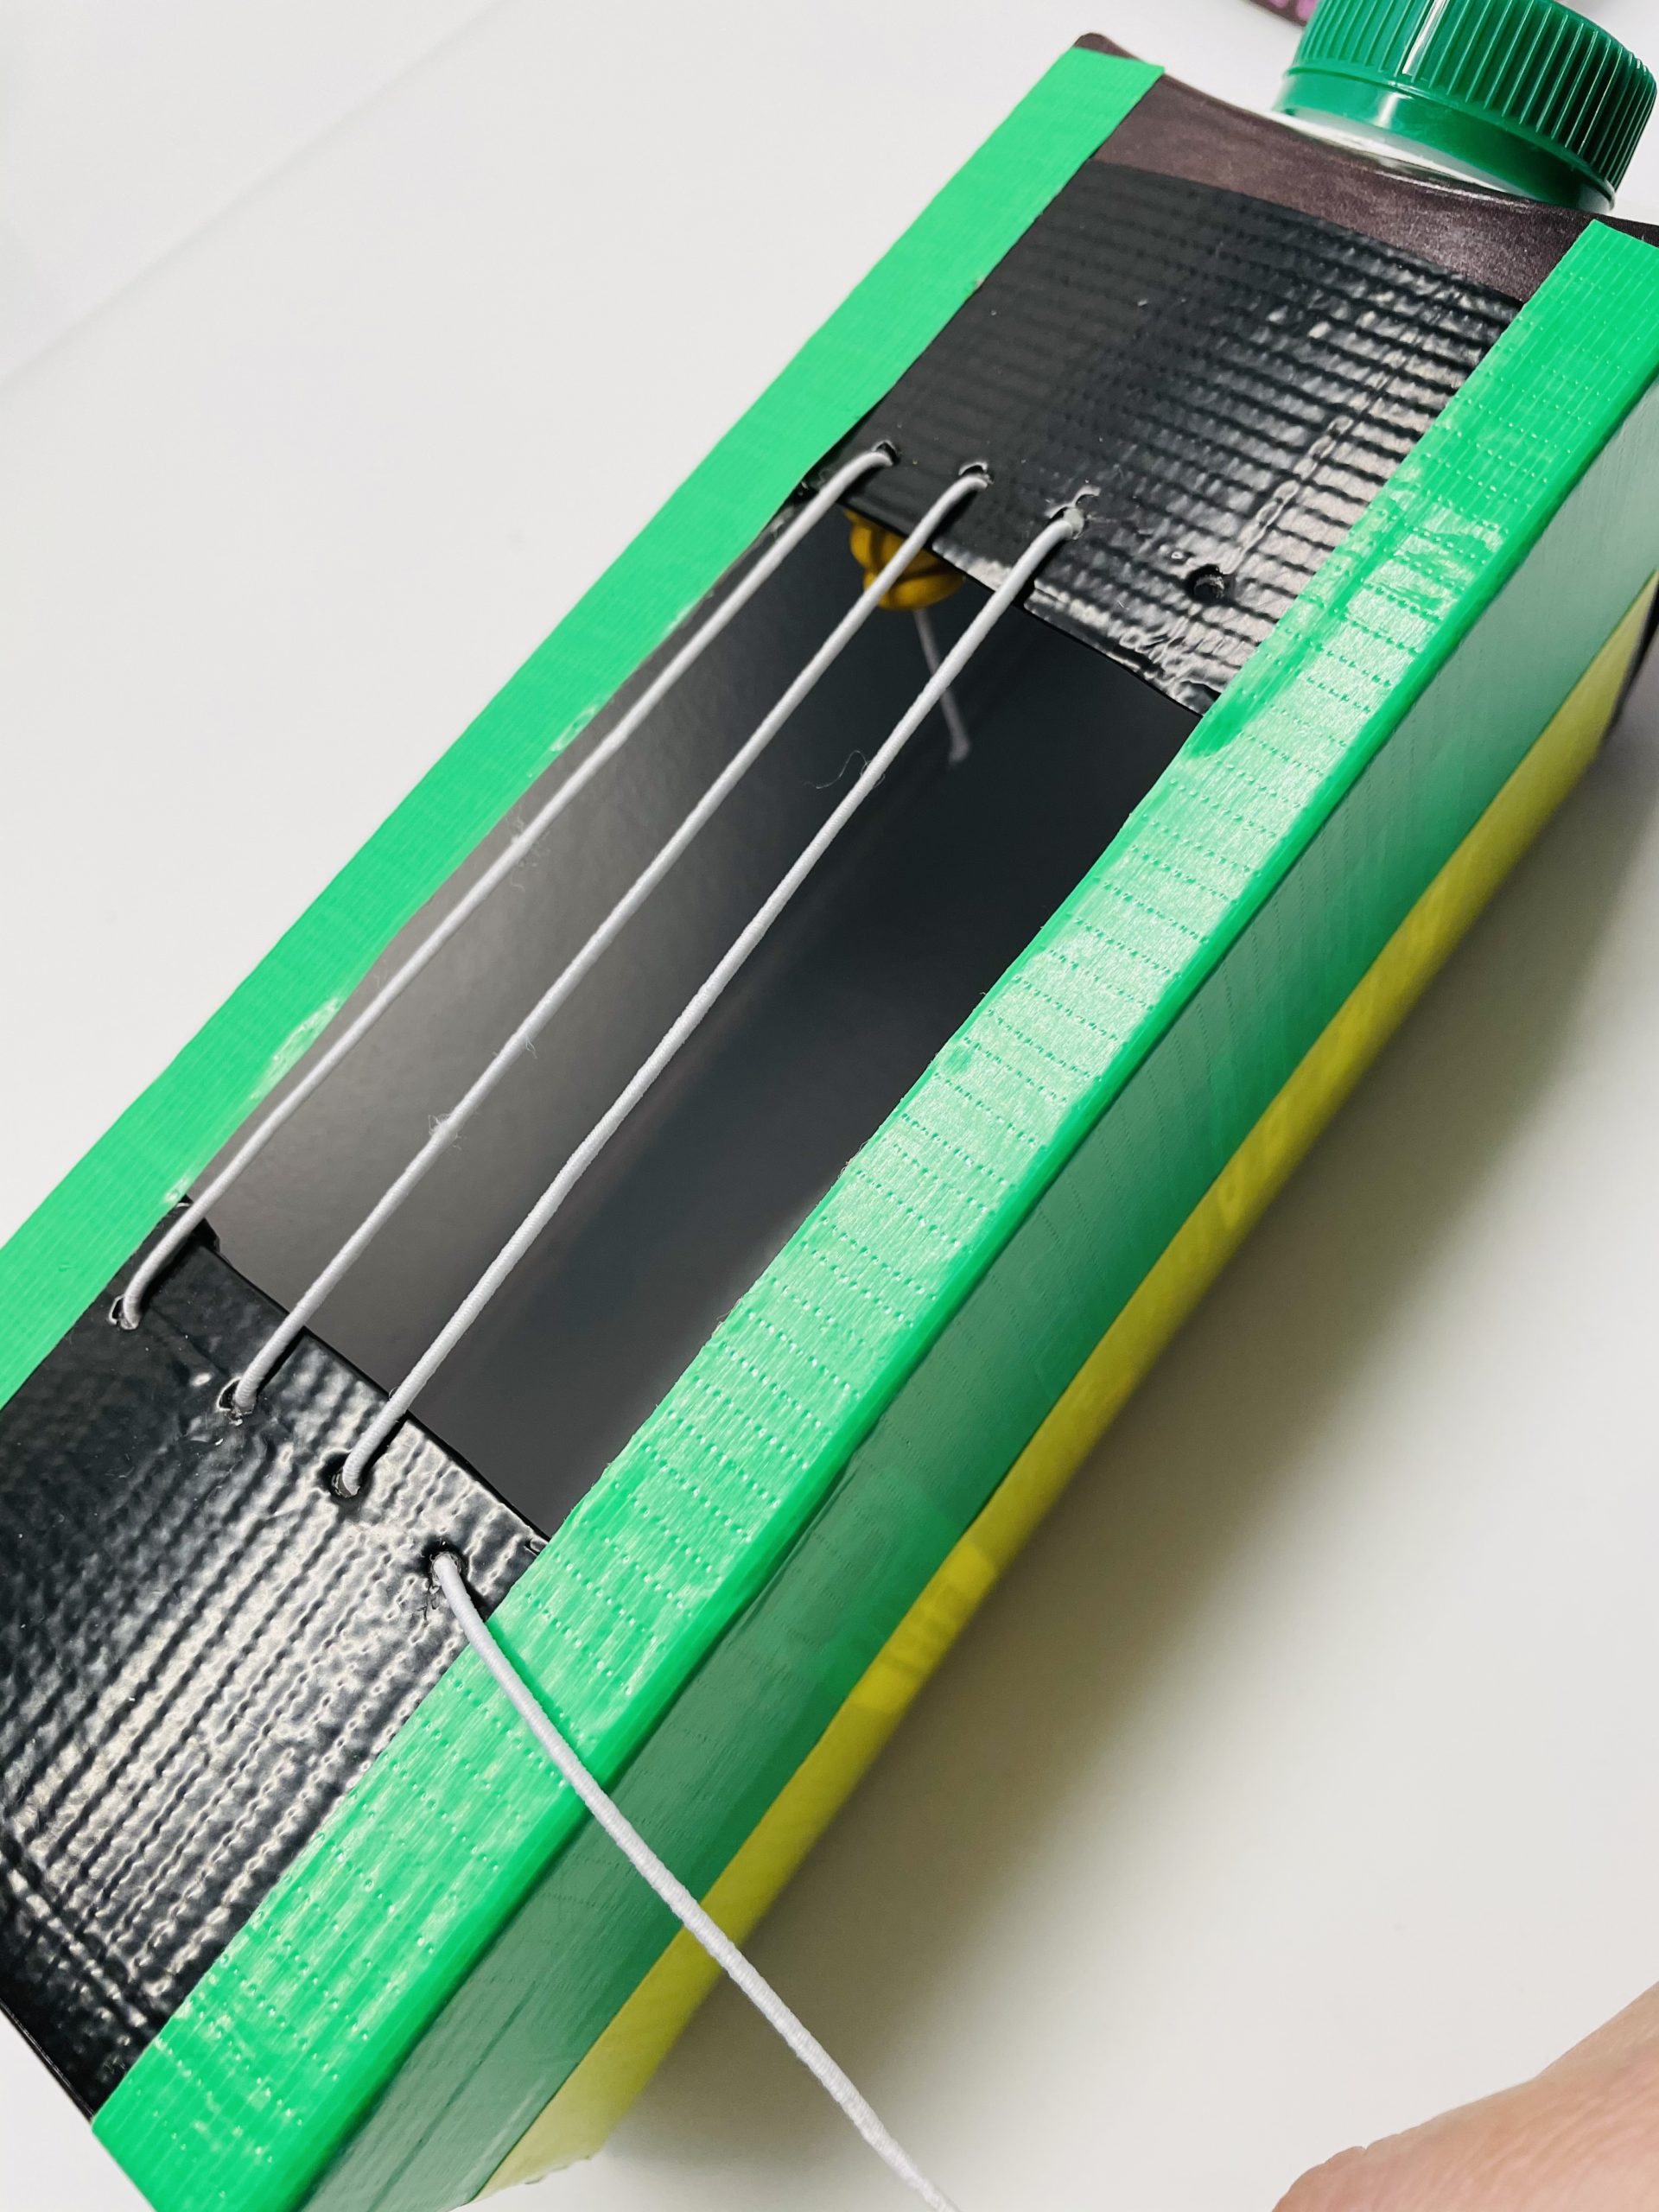
As soon as you arrive at the last hole, tighten the rubber bands. Start with the first hole!

DO NOT cut off the thread yet!
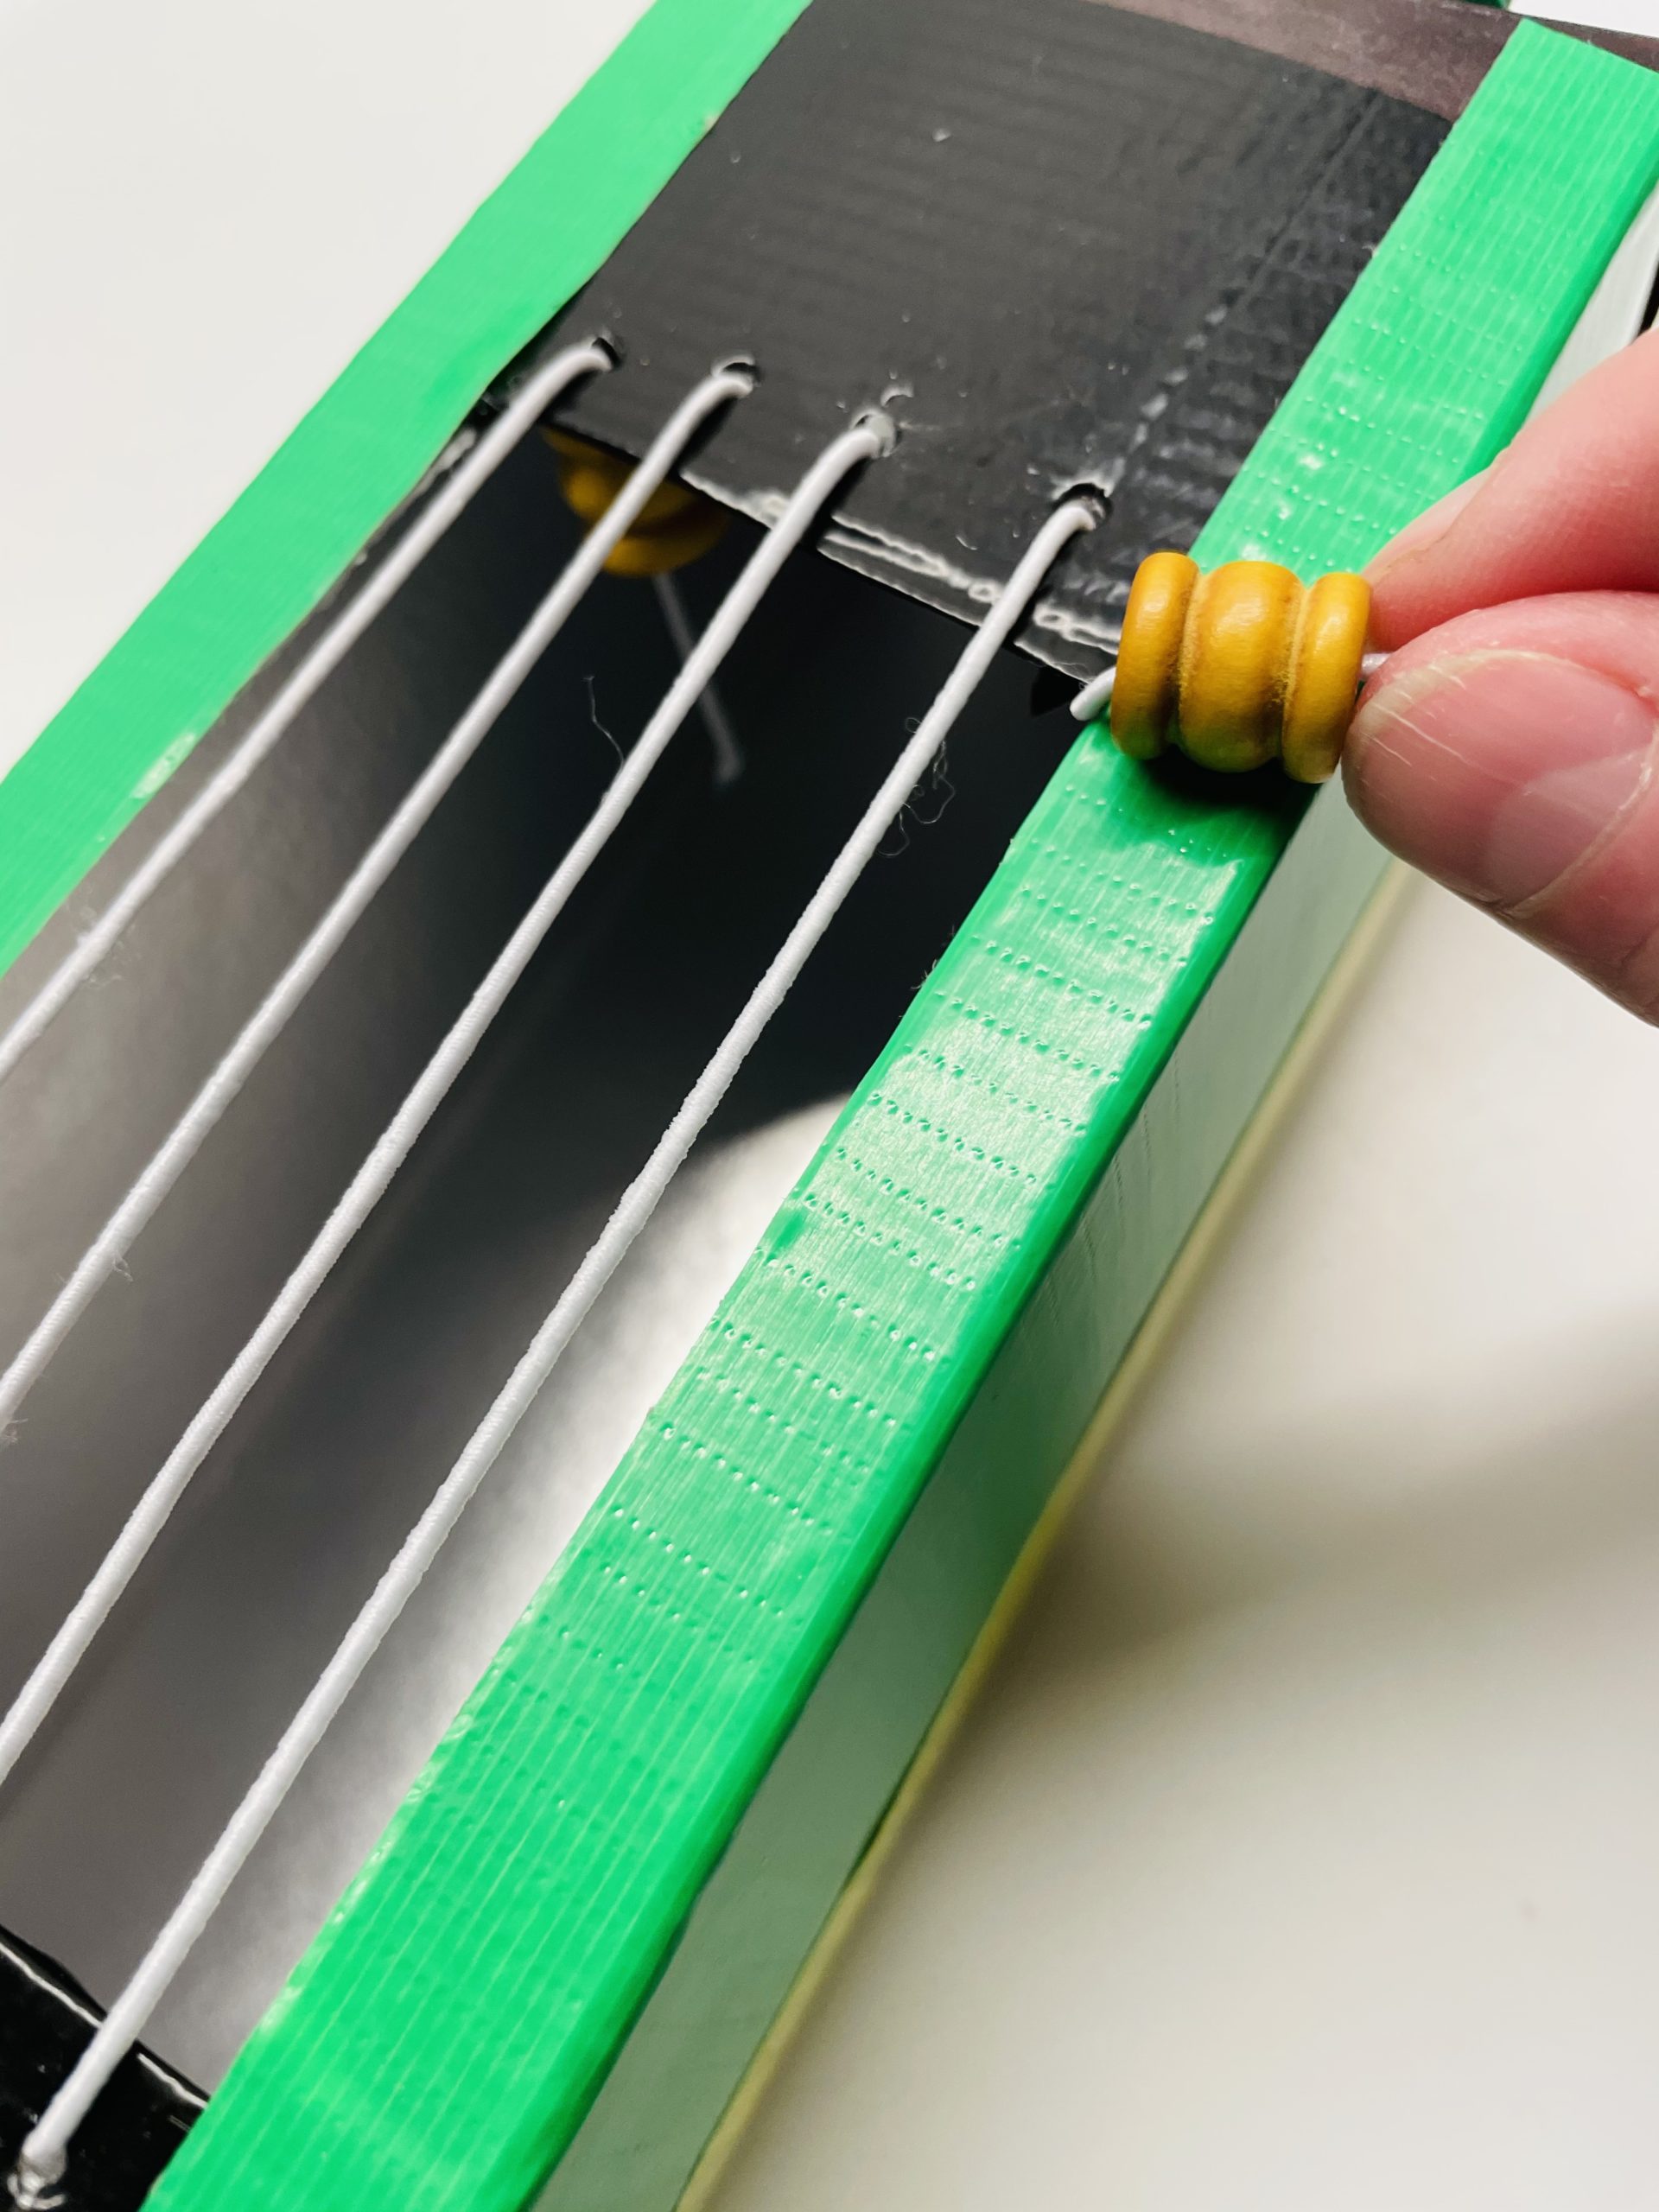
Now you thread another pearl onto the tail piece. Keep the hat cord tensed.
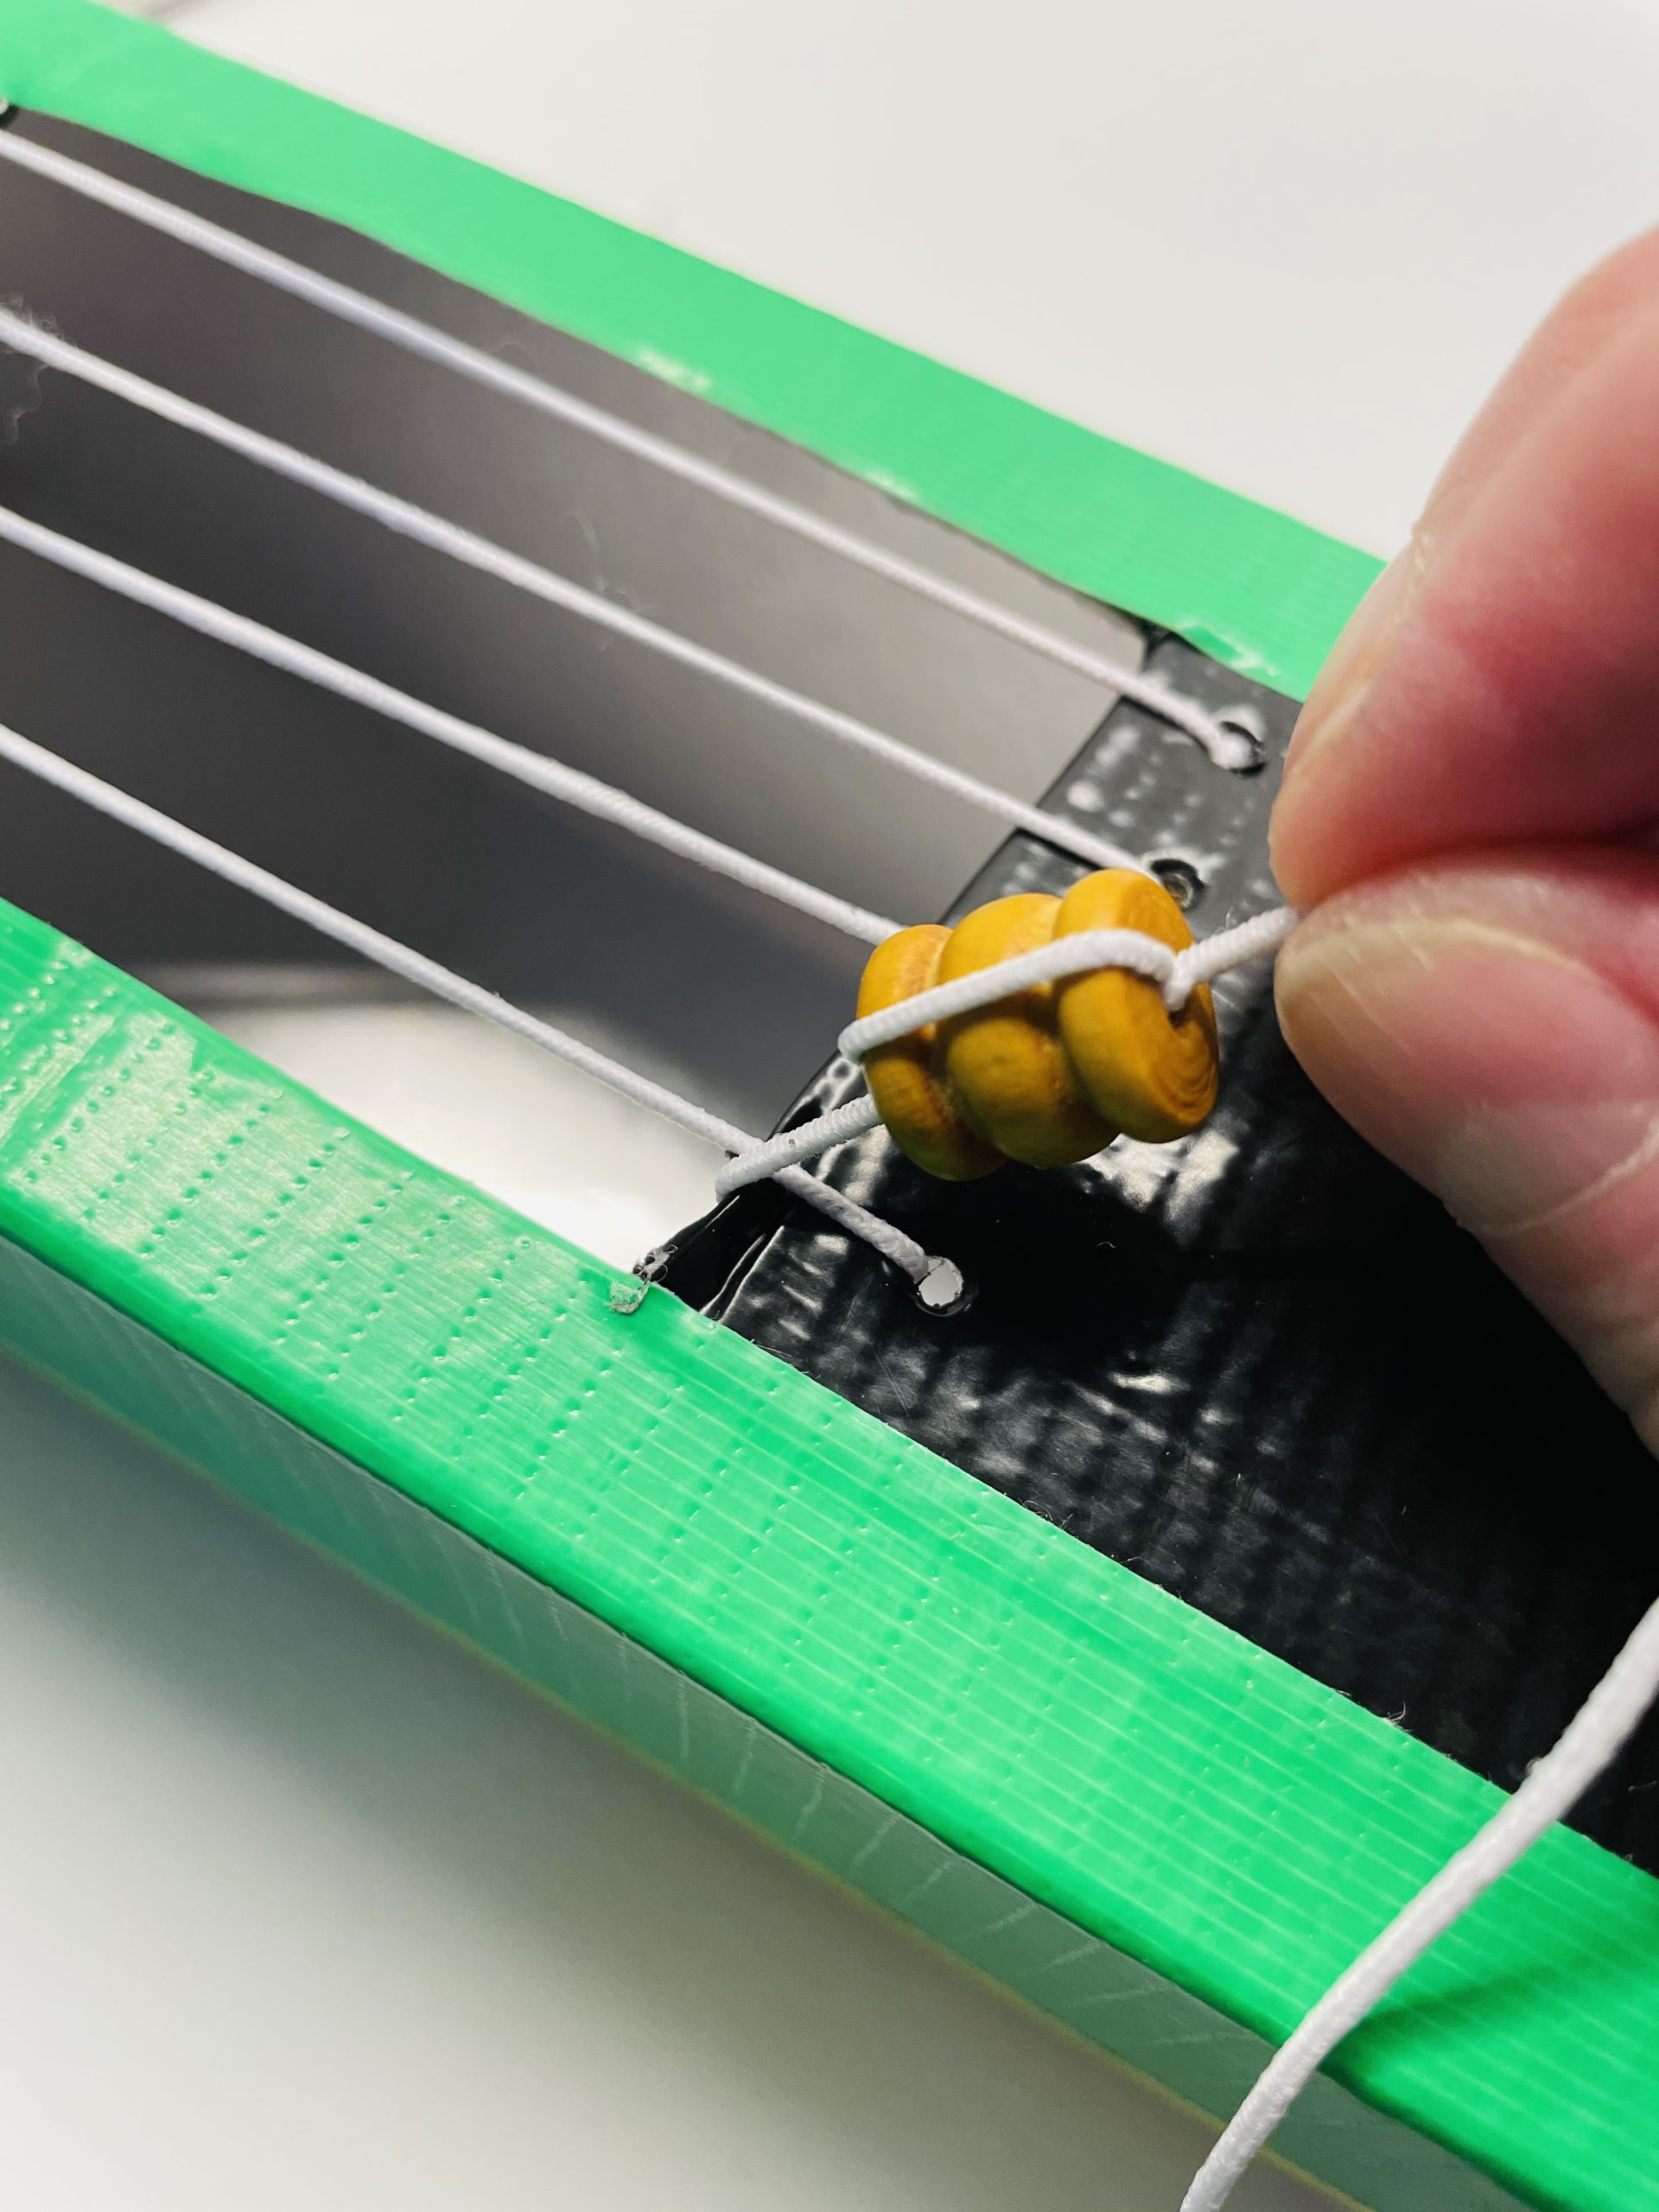
Insert the thread twice through the pearl. Because that's how it holds better. Then you knot the rubber thread. Pull all threads tight again and push the pearl as close as possible to the last hole.
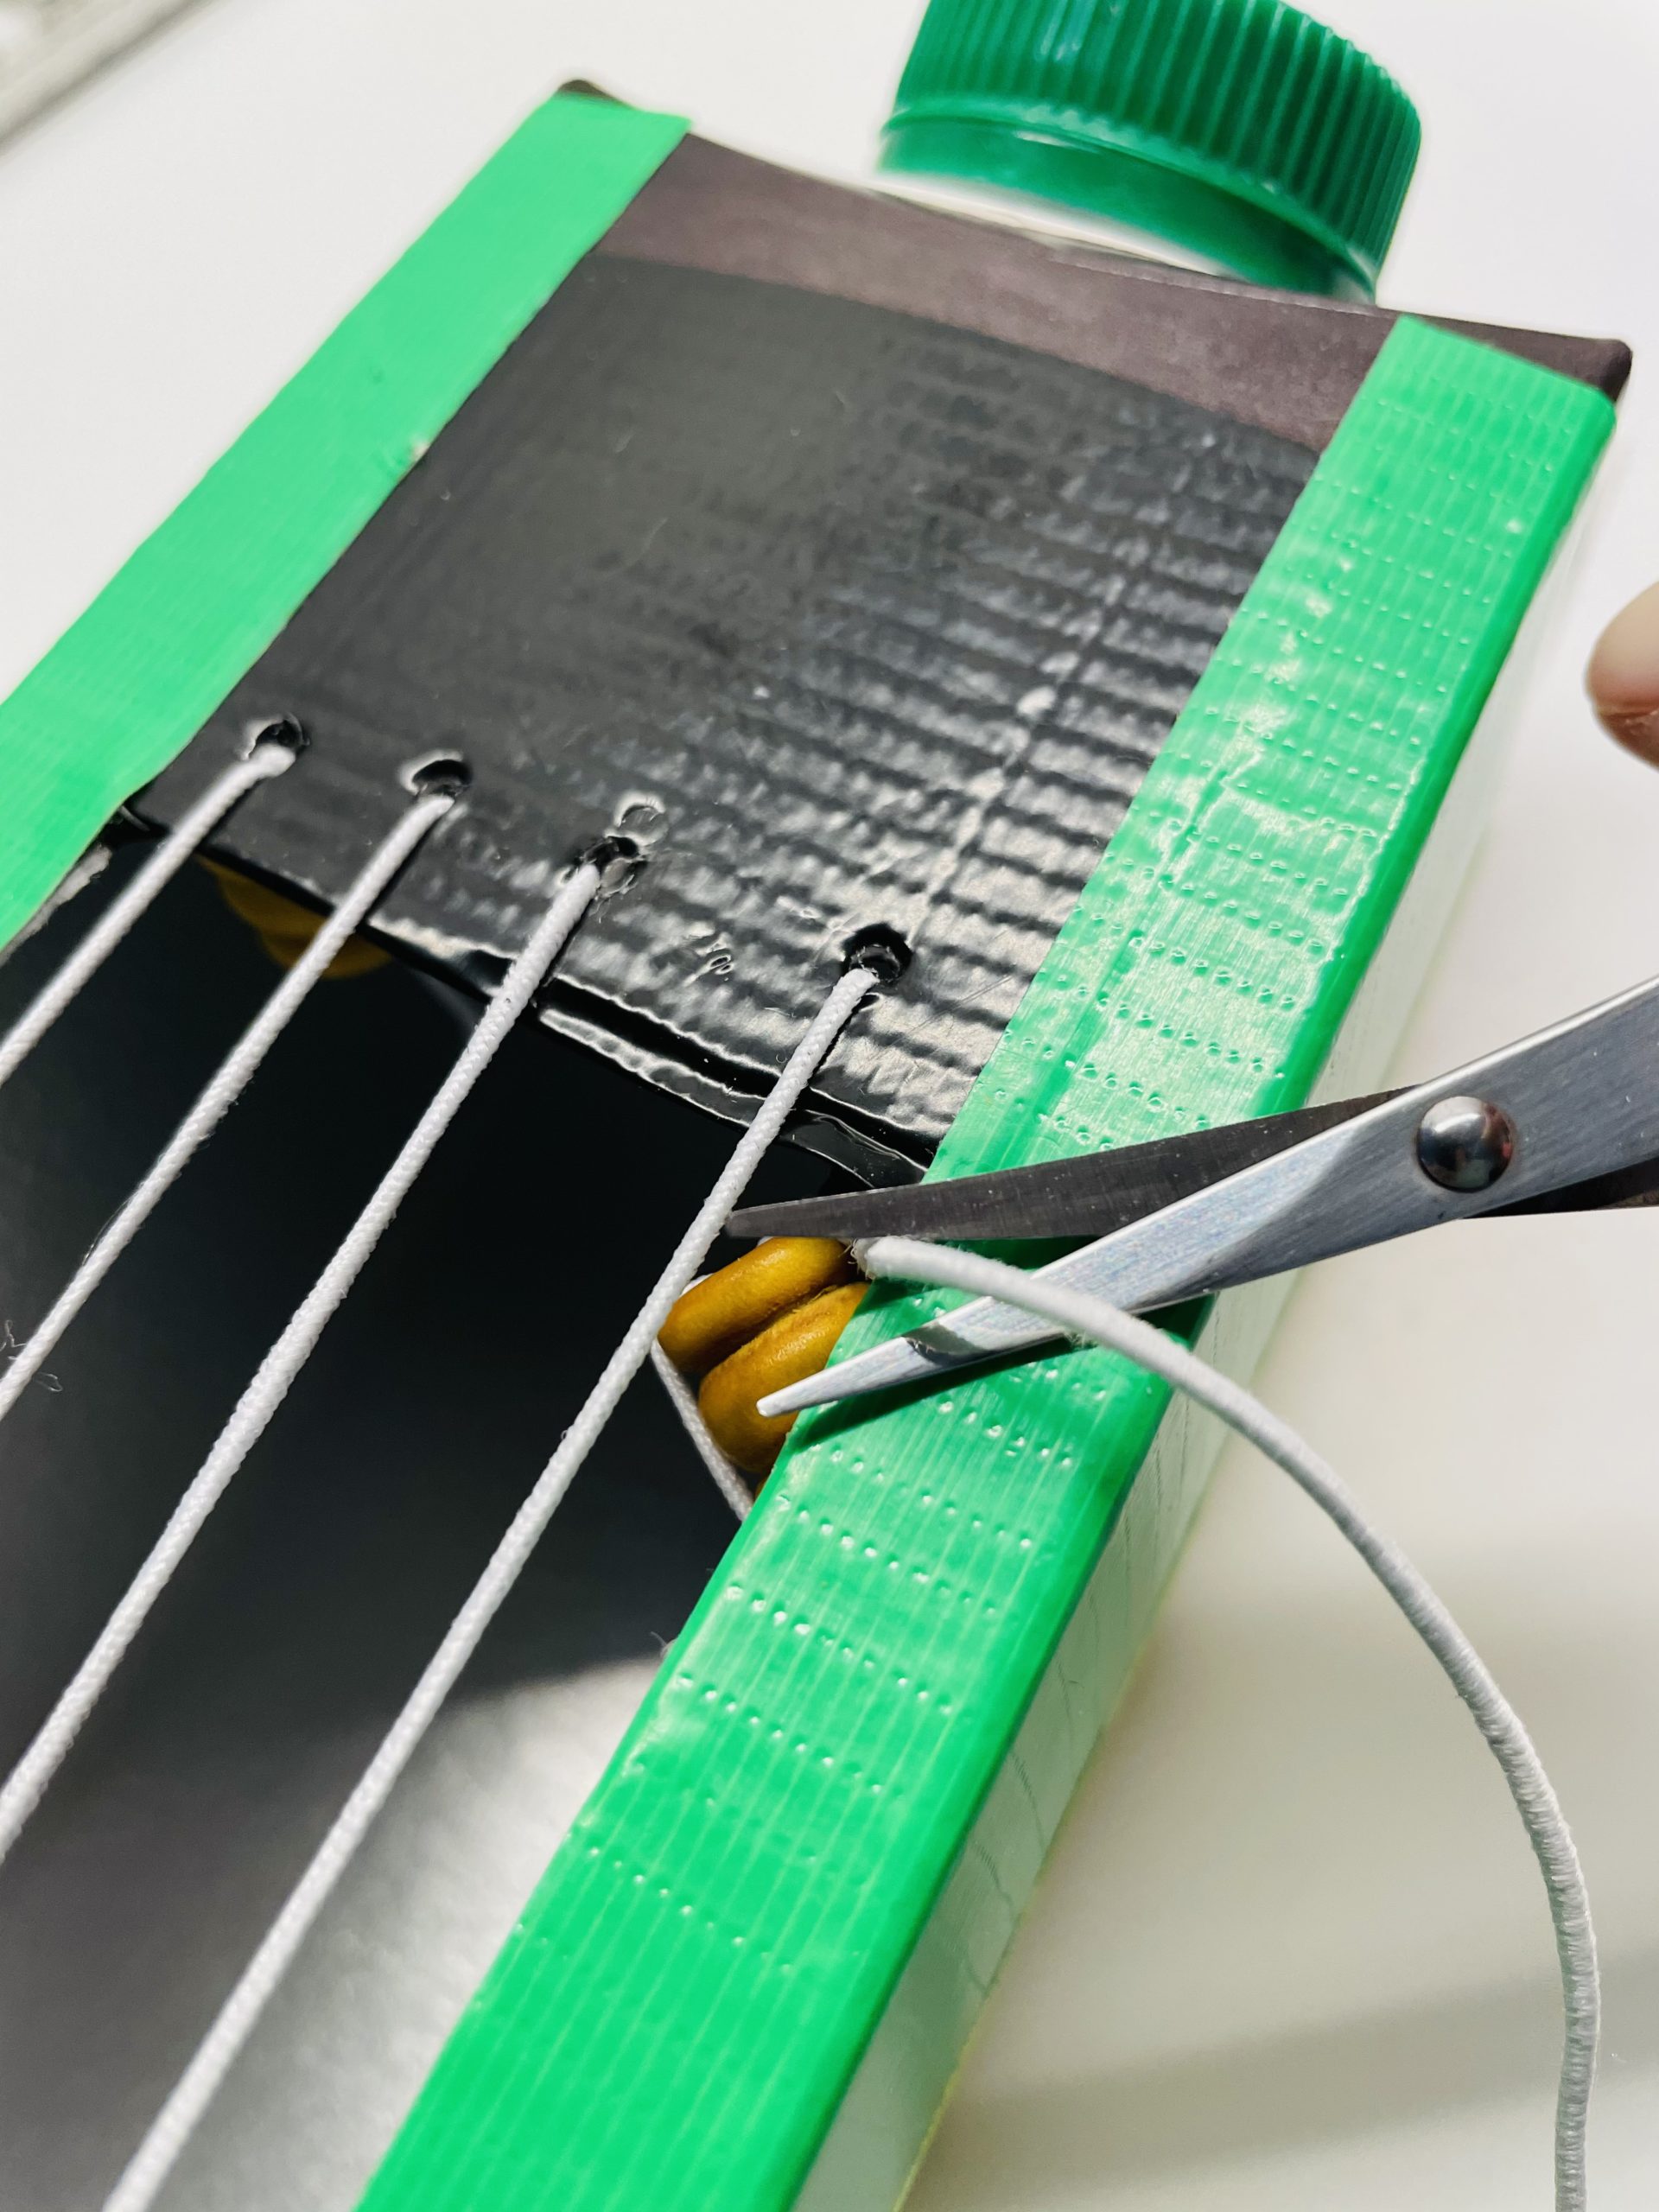
Now you can cut off the remaining piece of rubber.
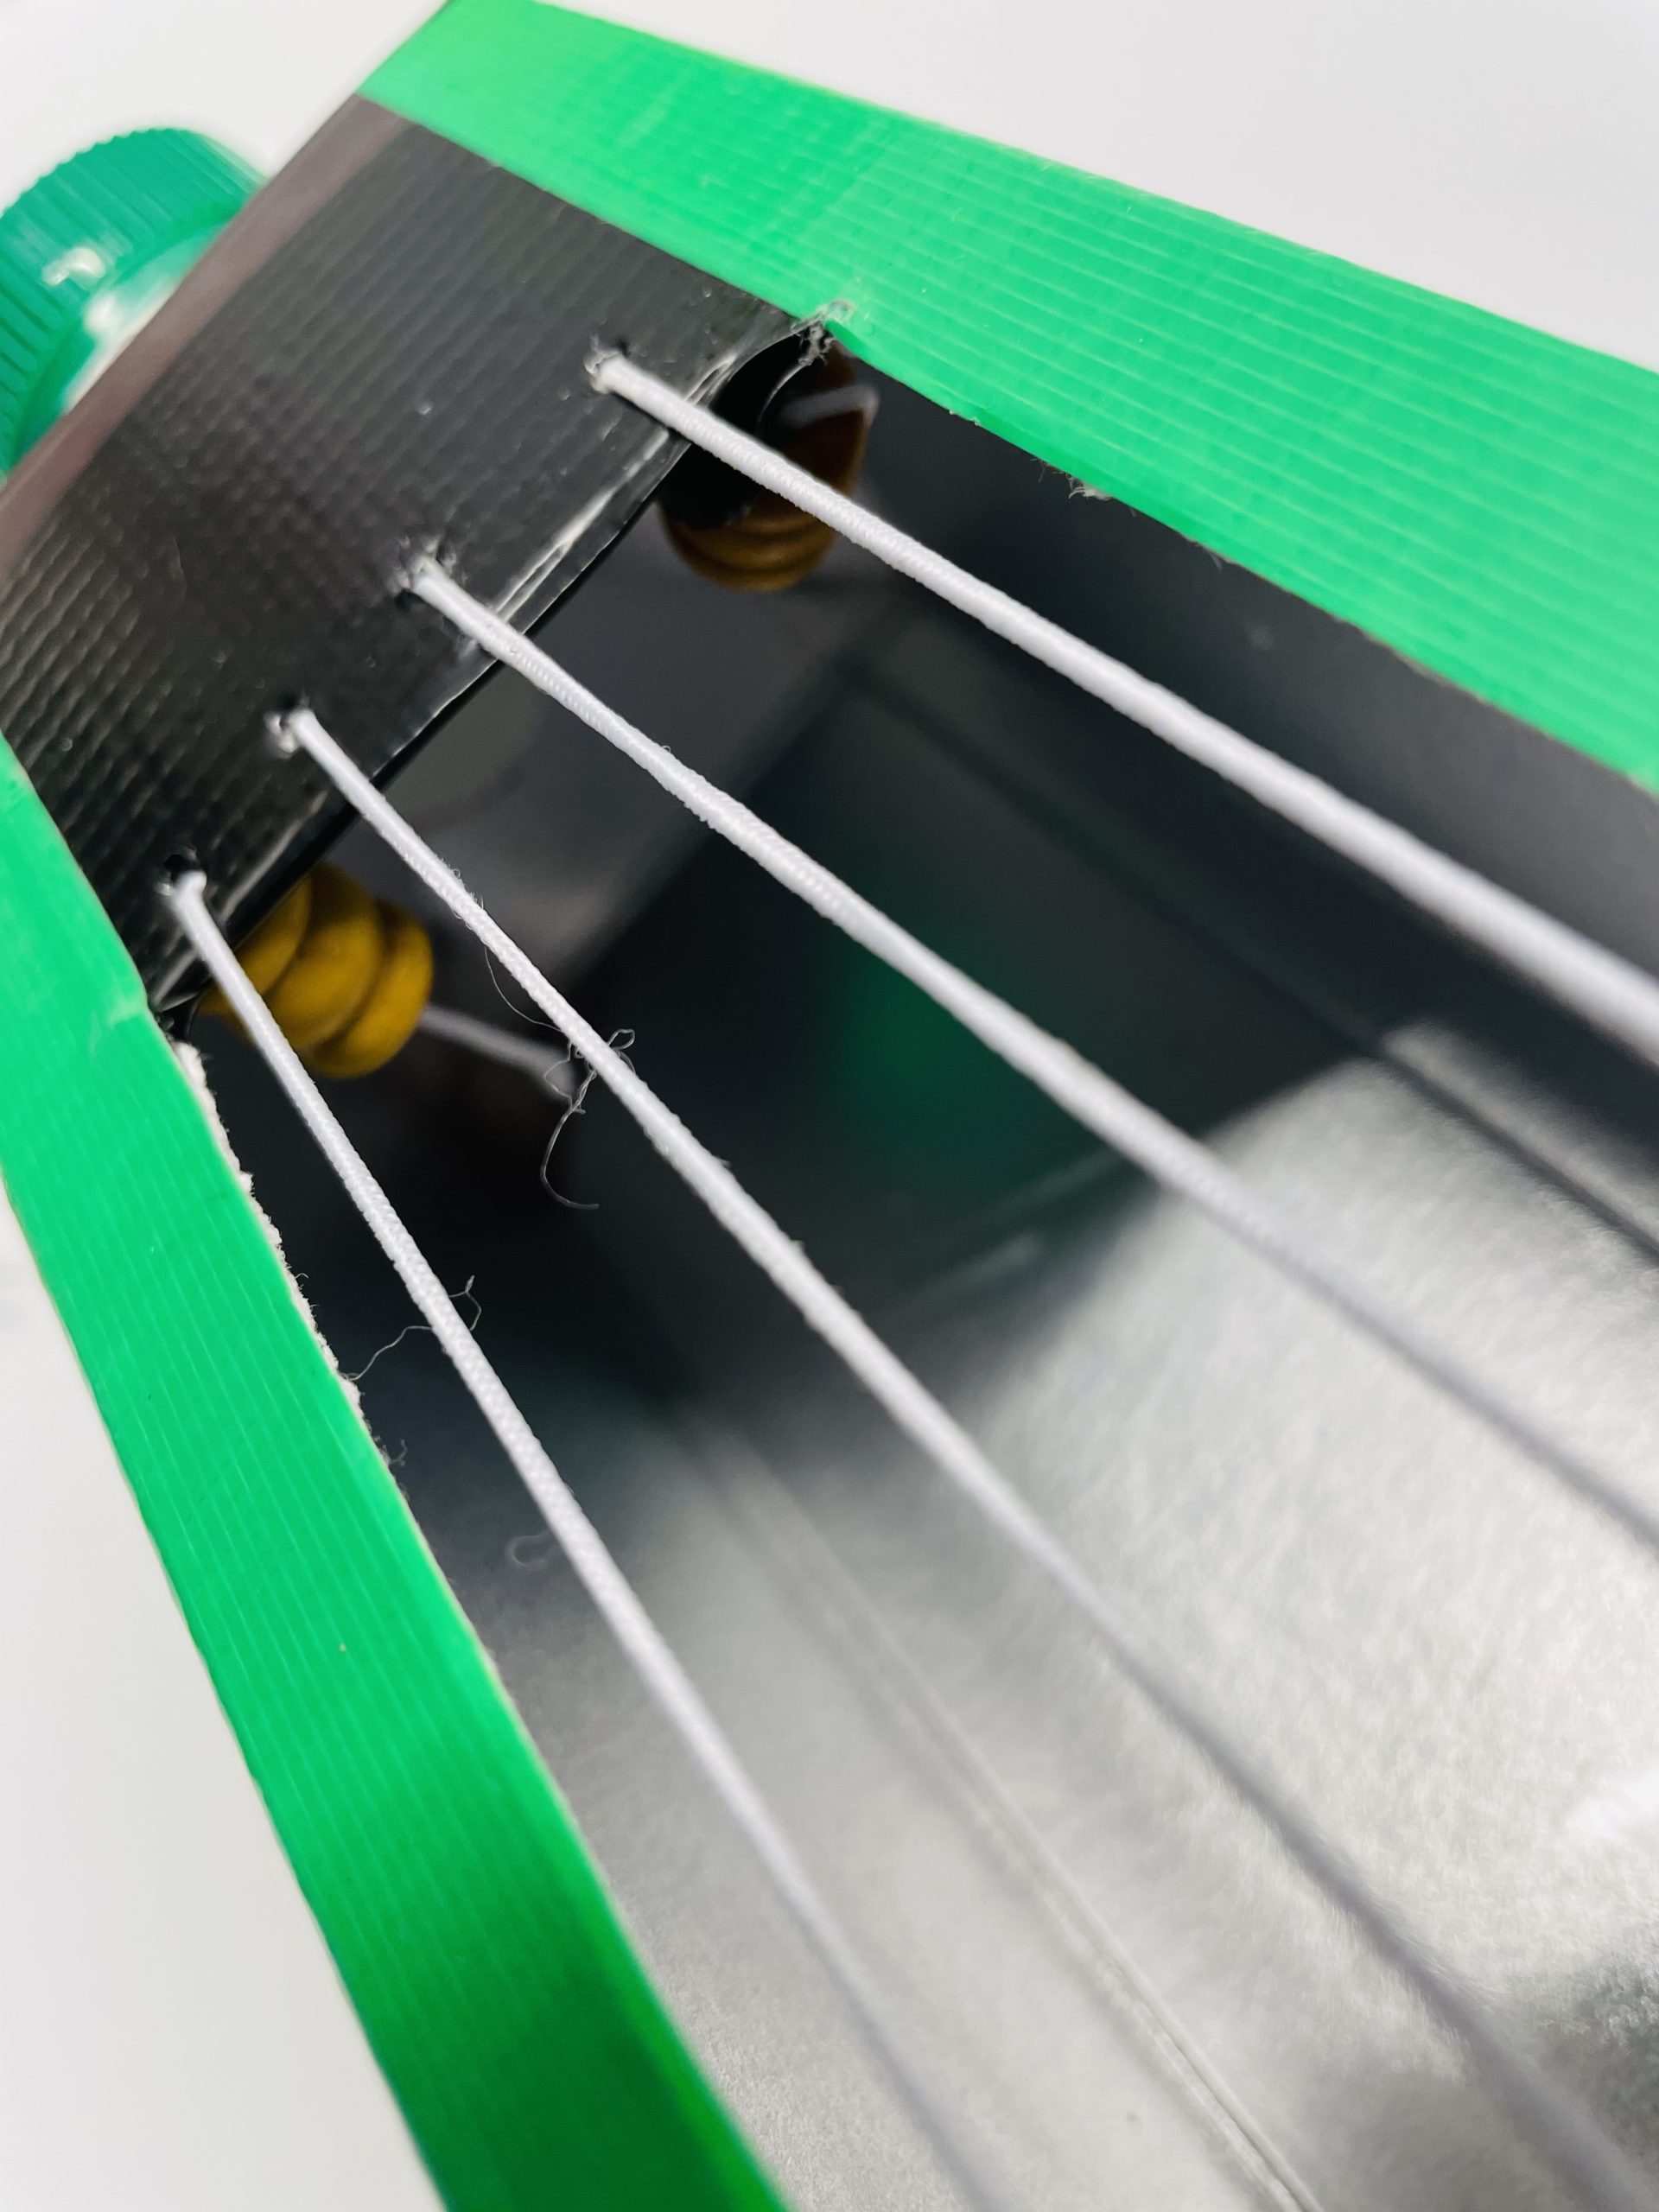
The bead now slides inside and lies under the last hole. Thus, it keeps the rubber thread on tension.
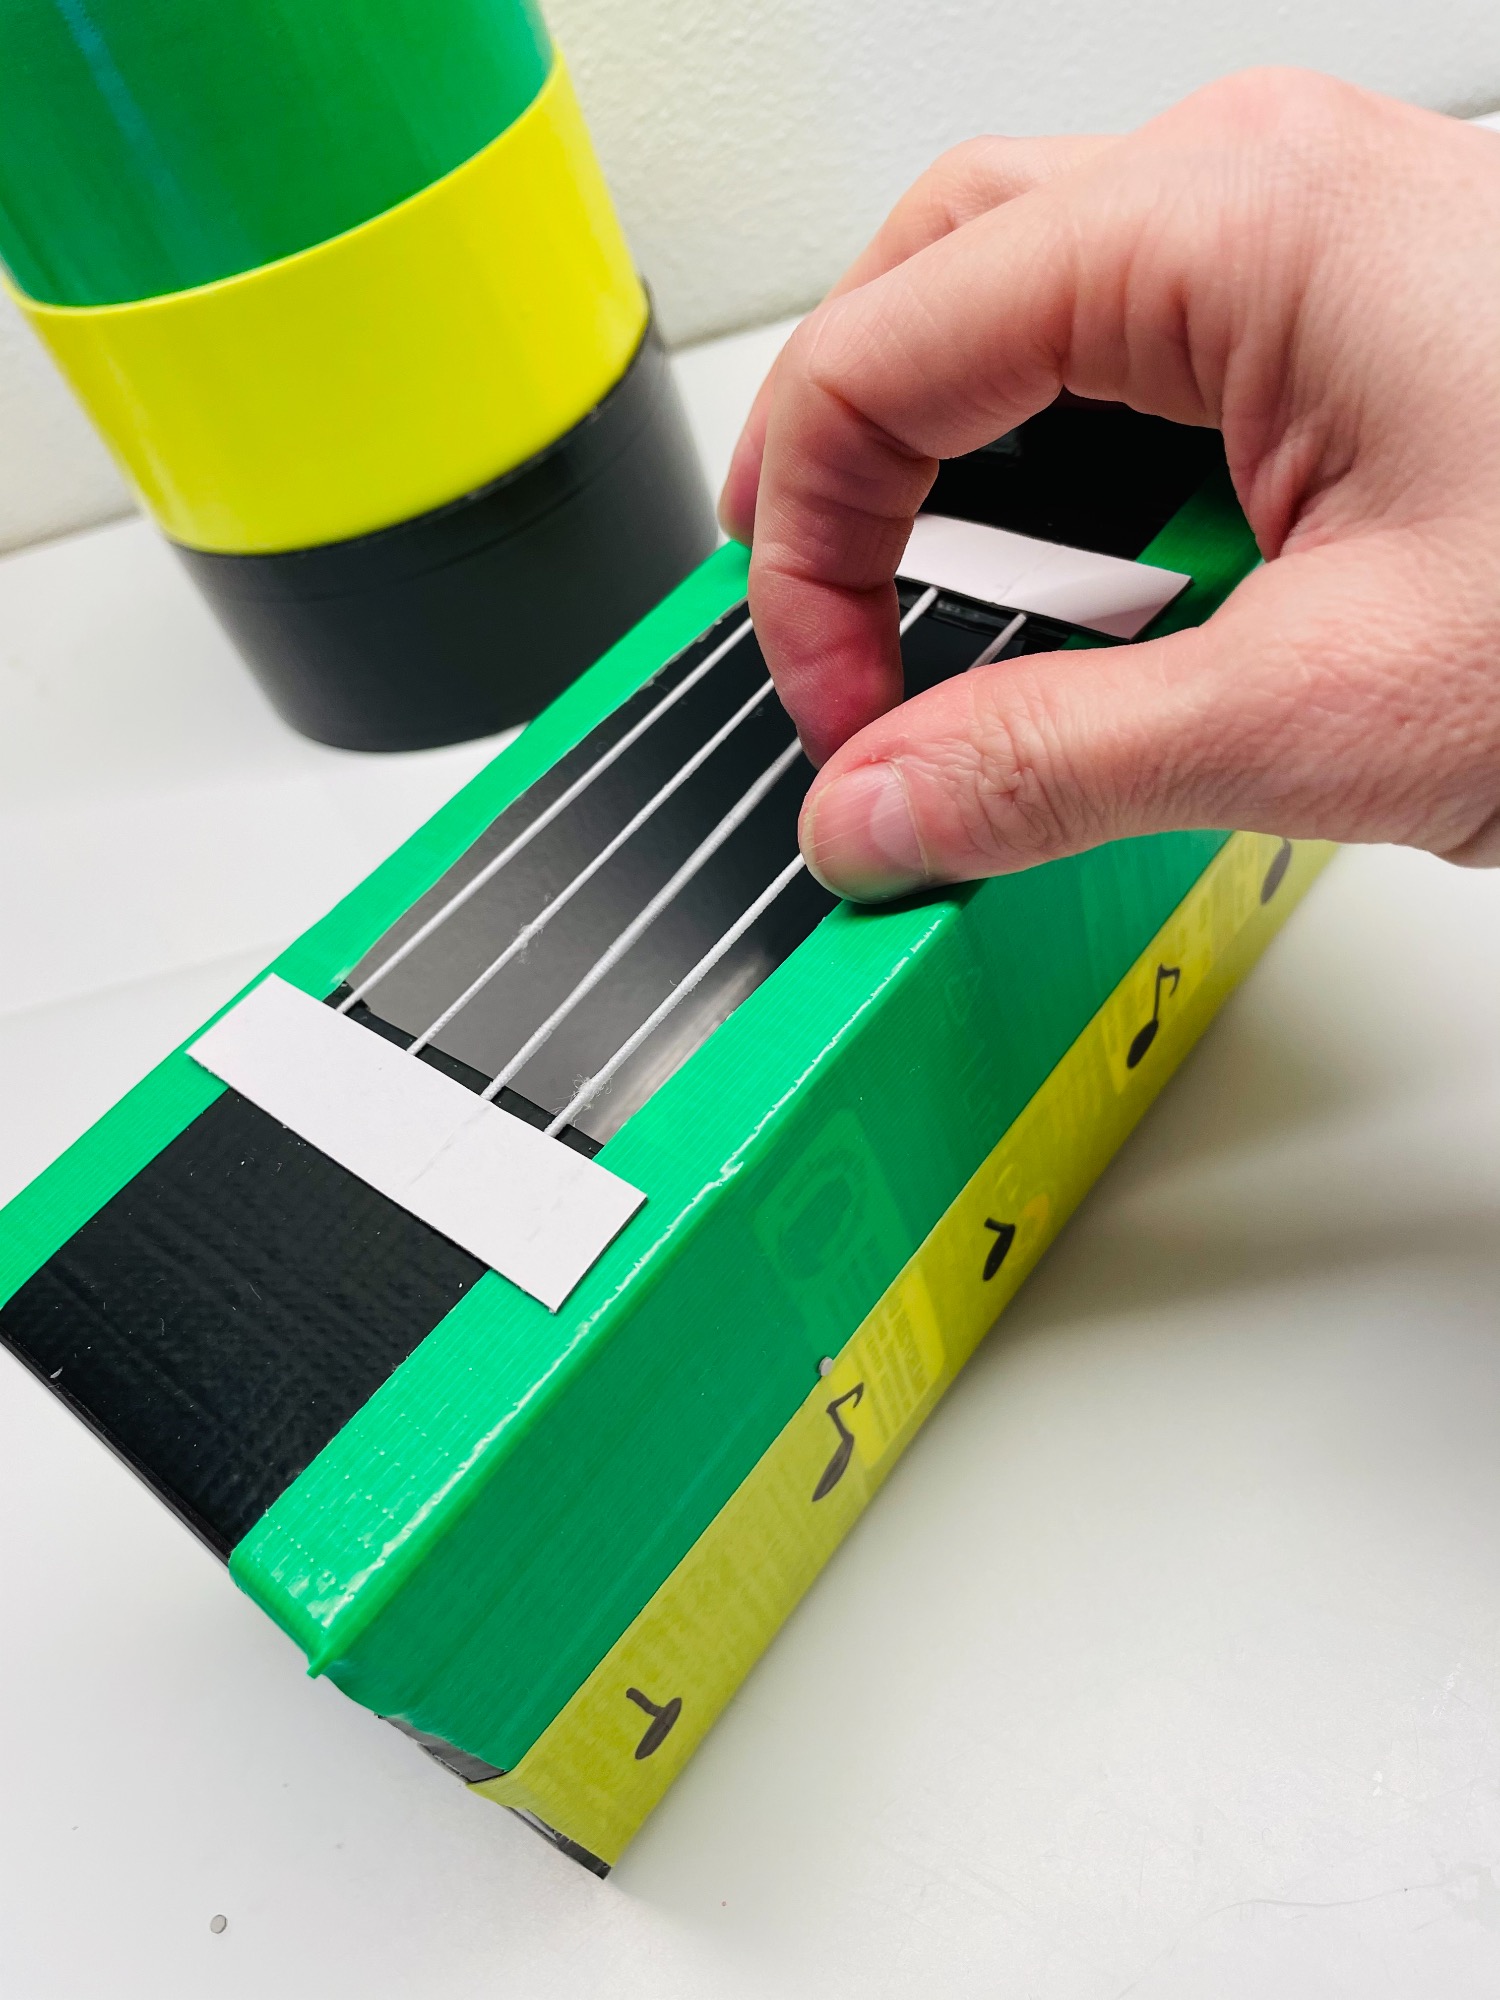
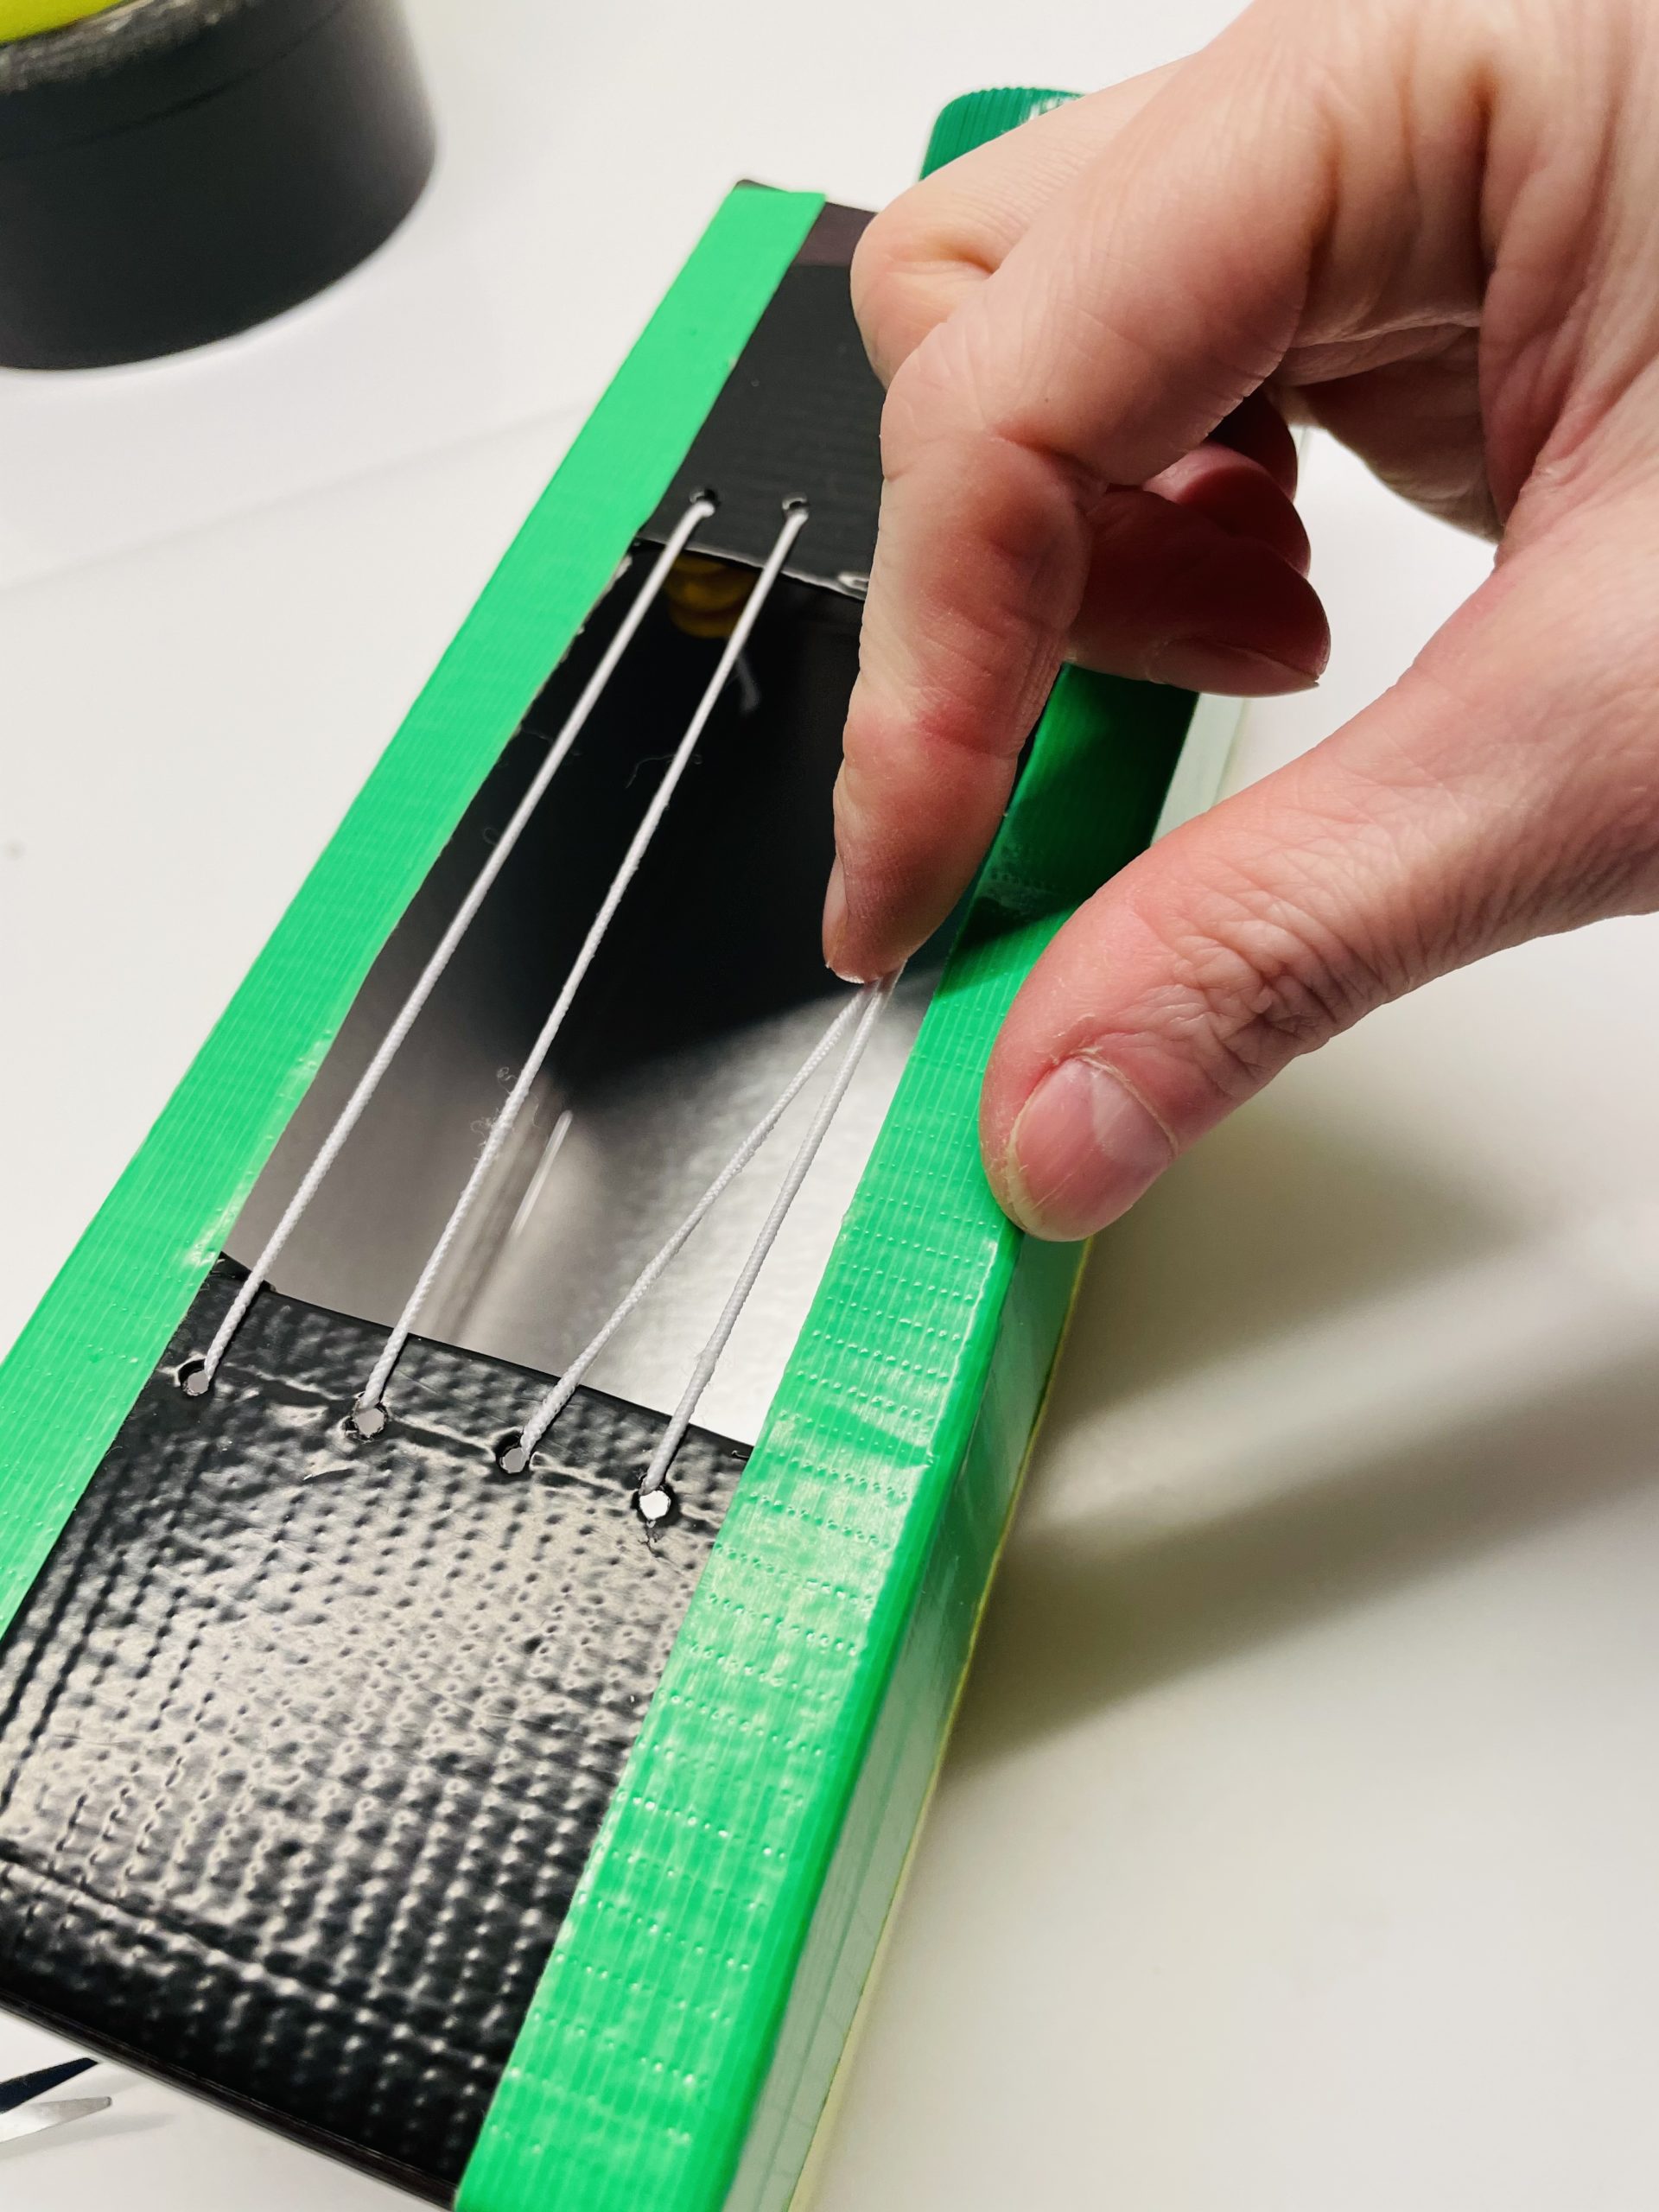
Your instrument is now ready.
Try out how the individual strings sound, pluck them and brush them over.
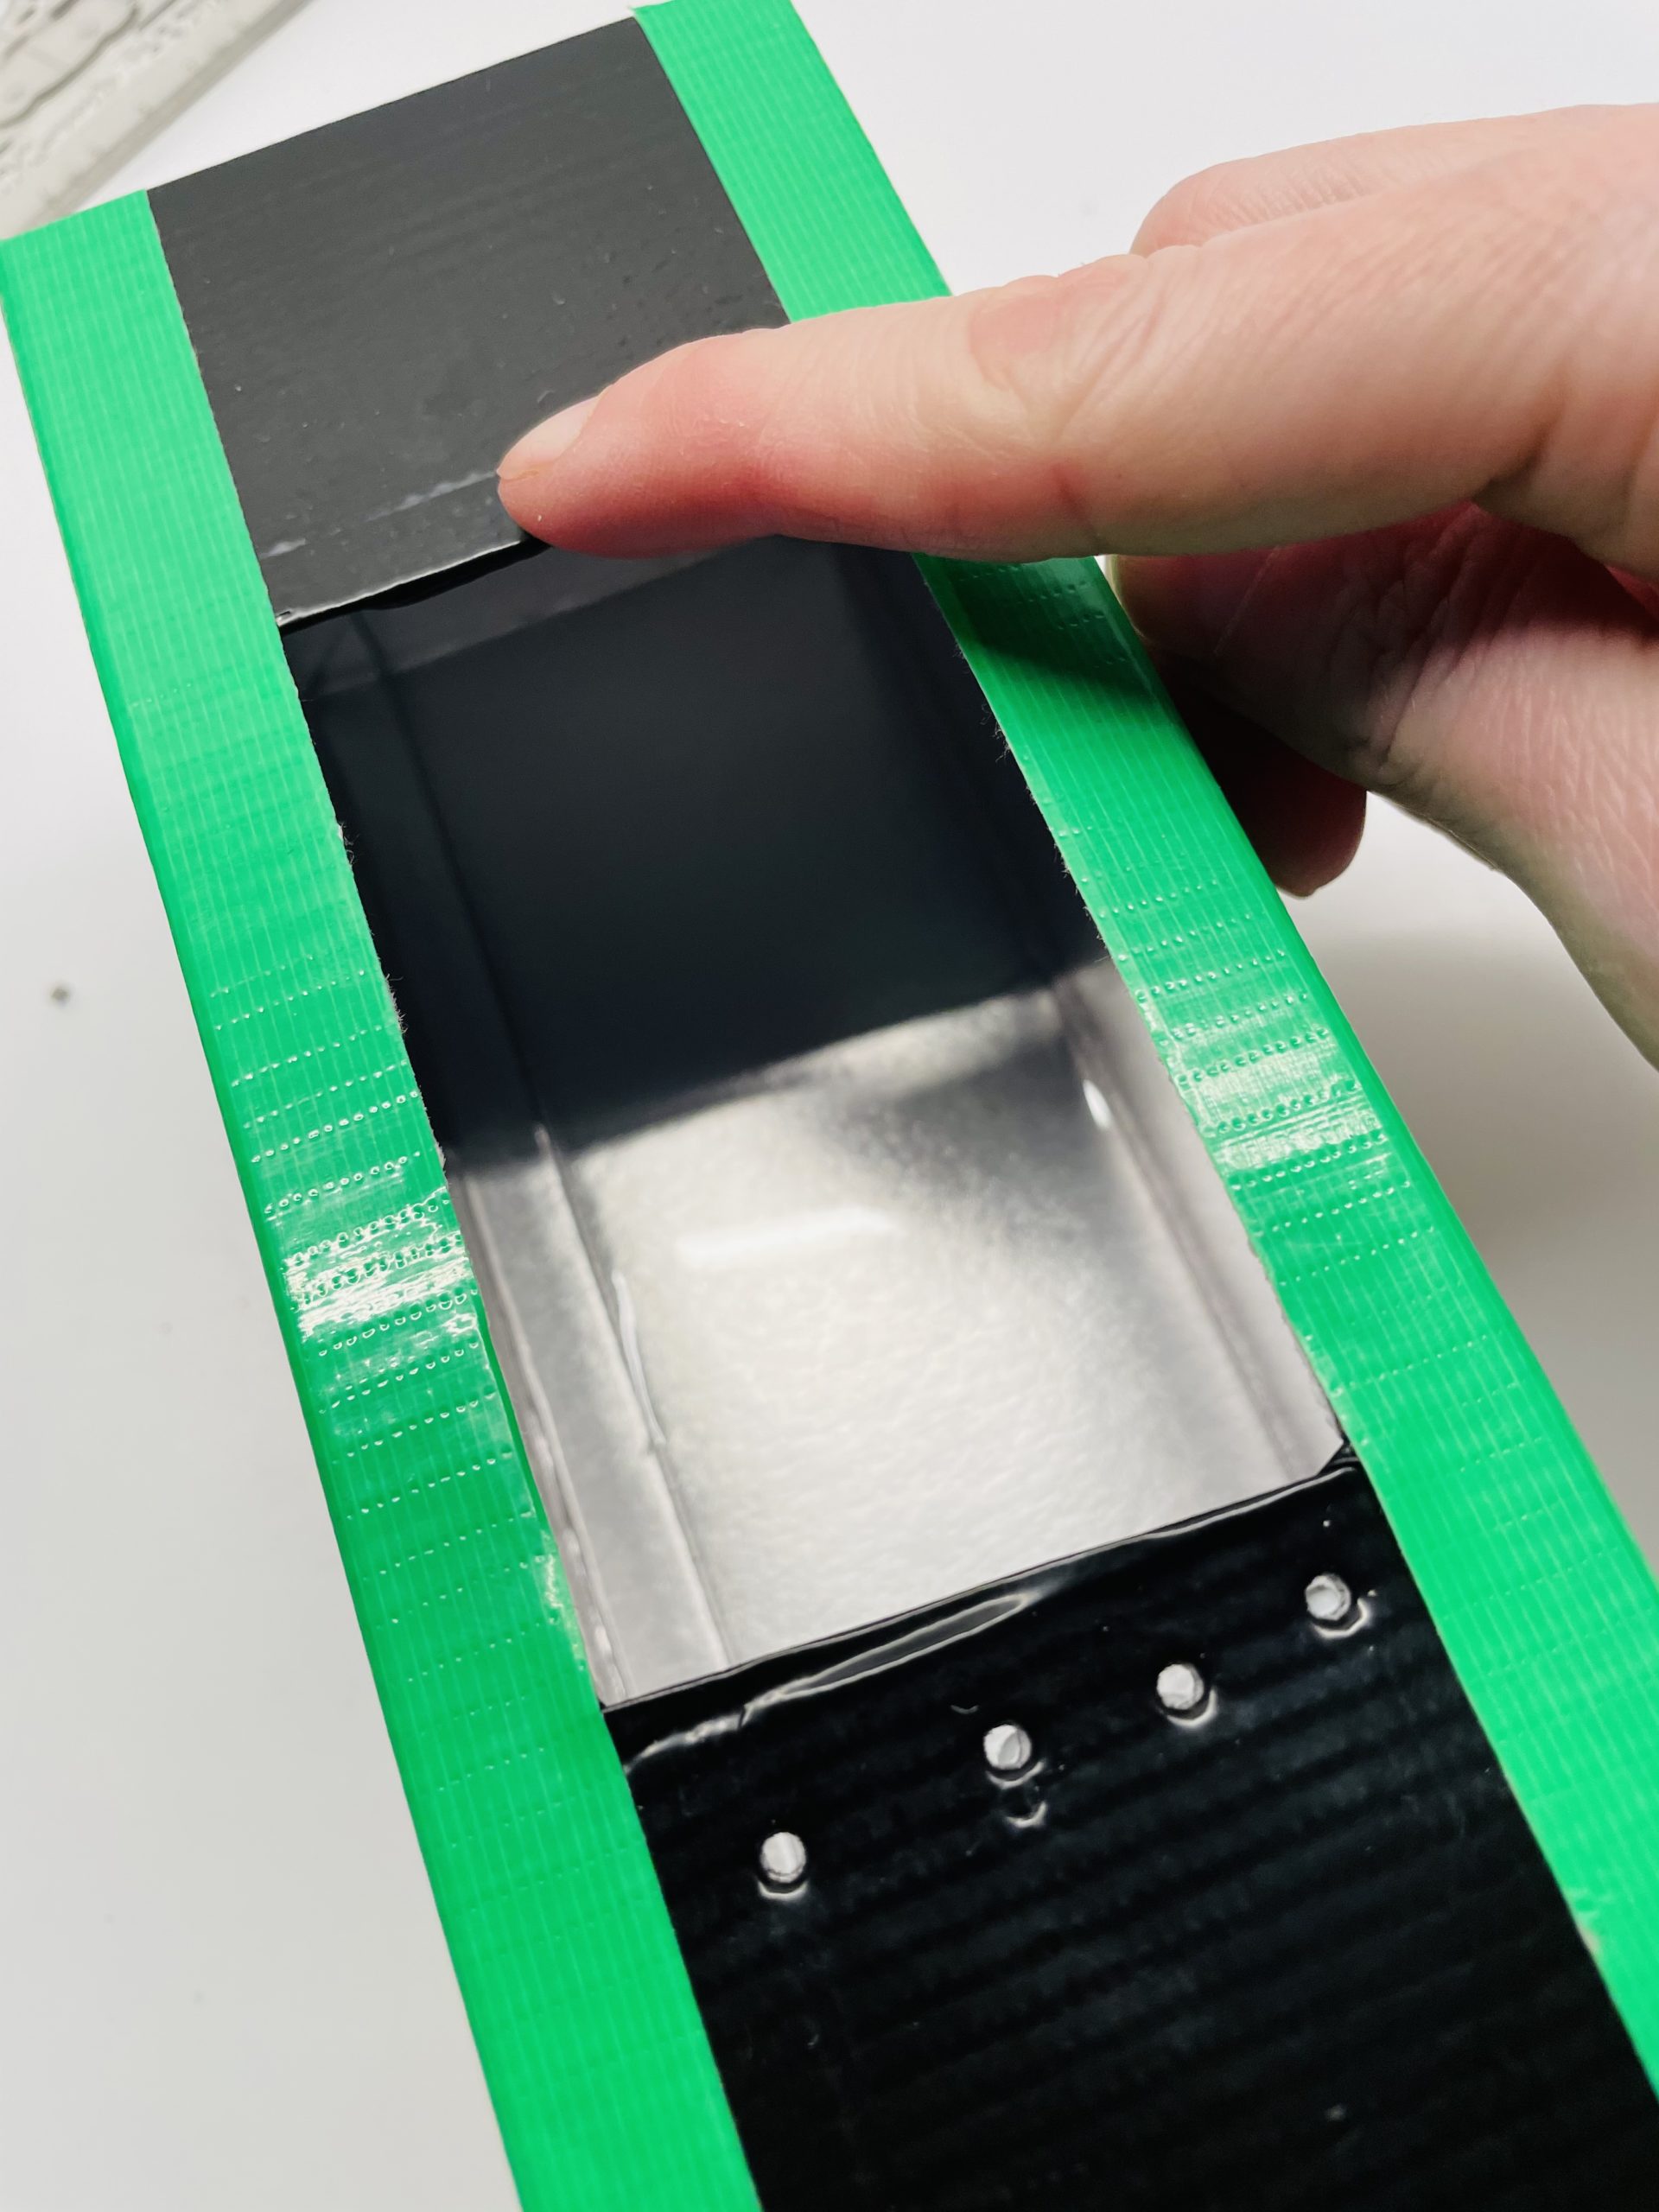
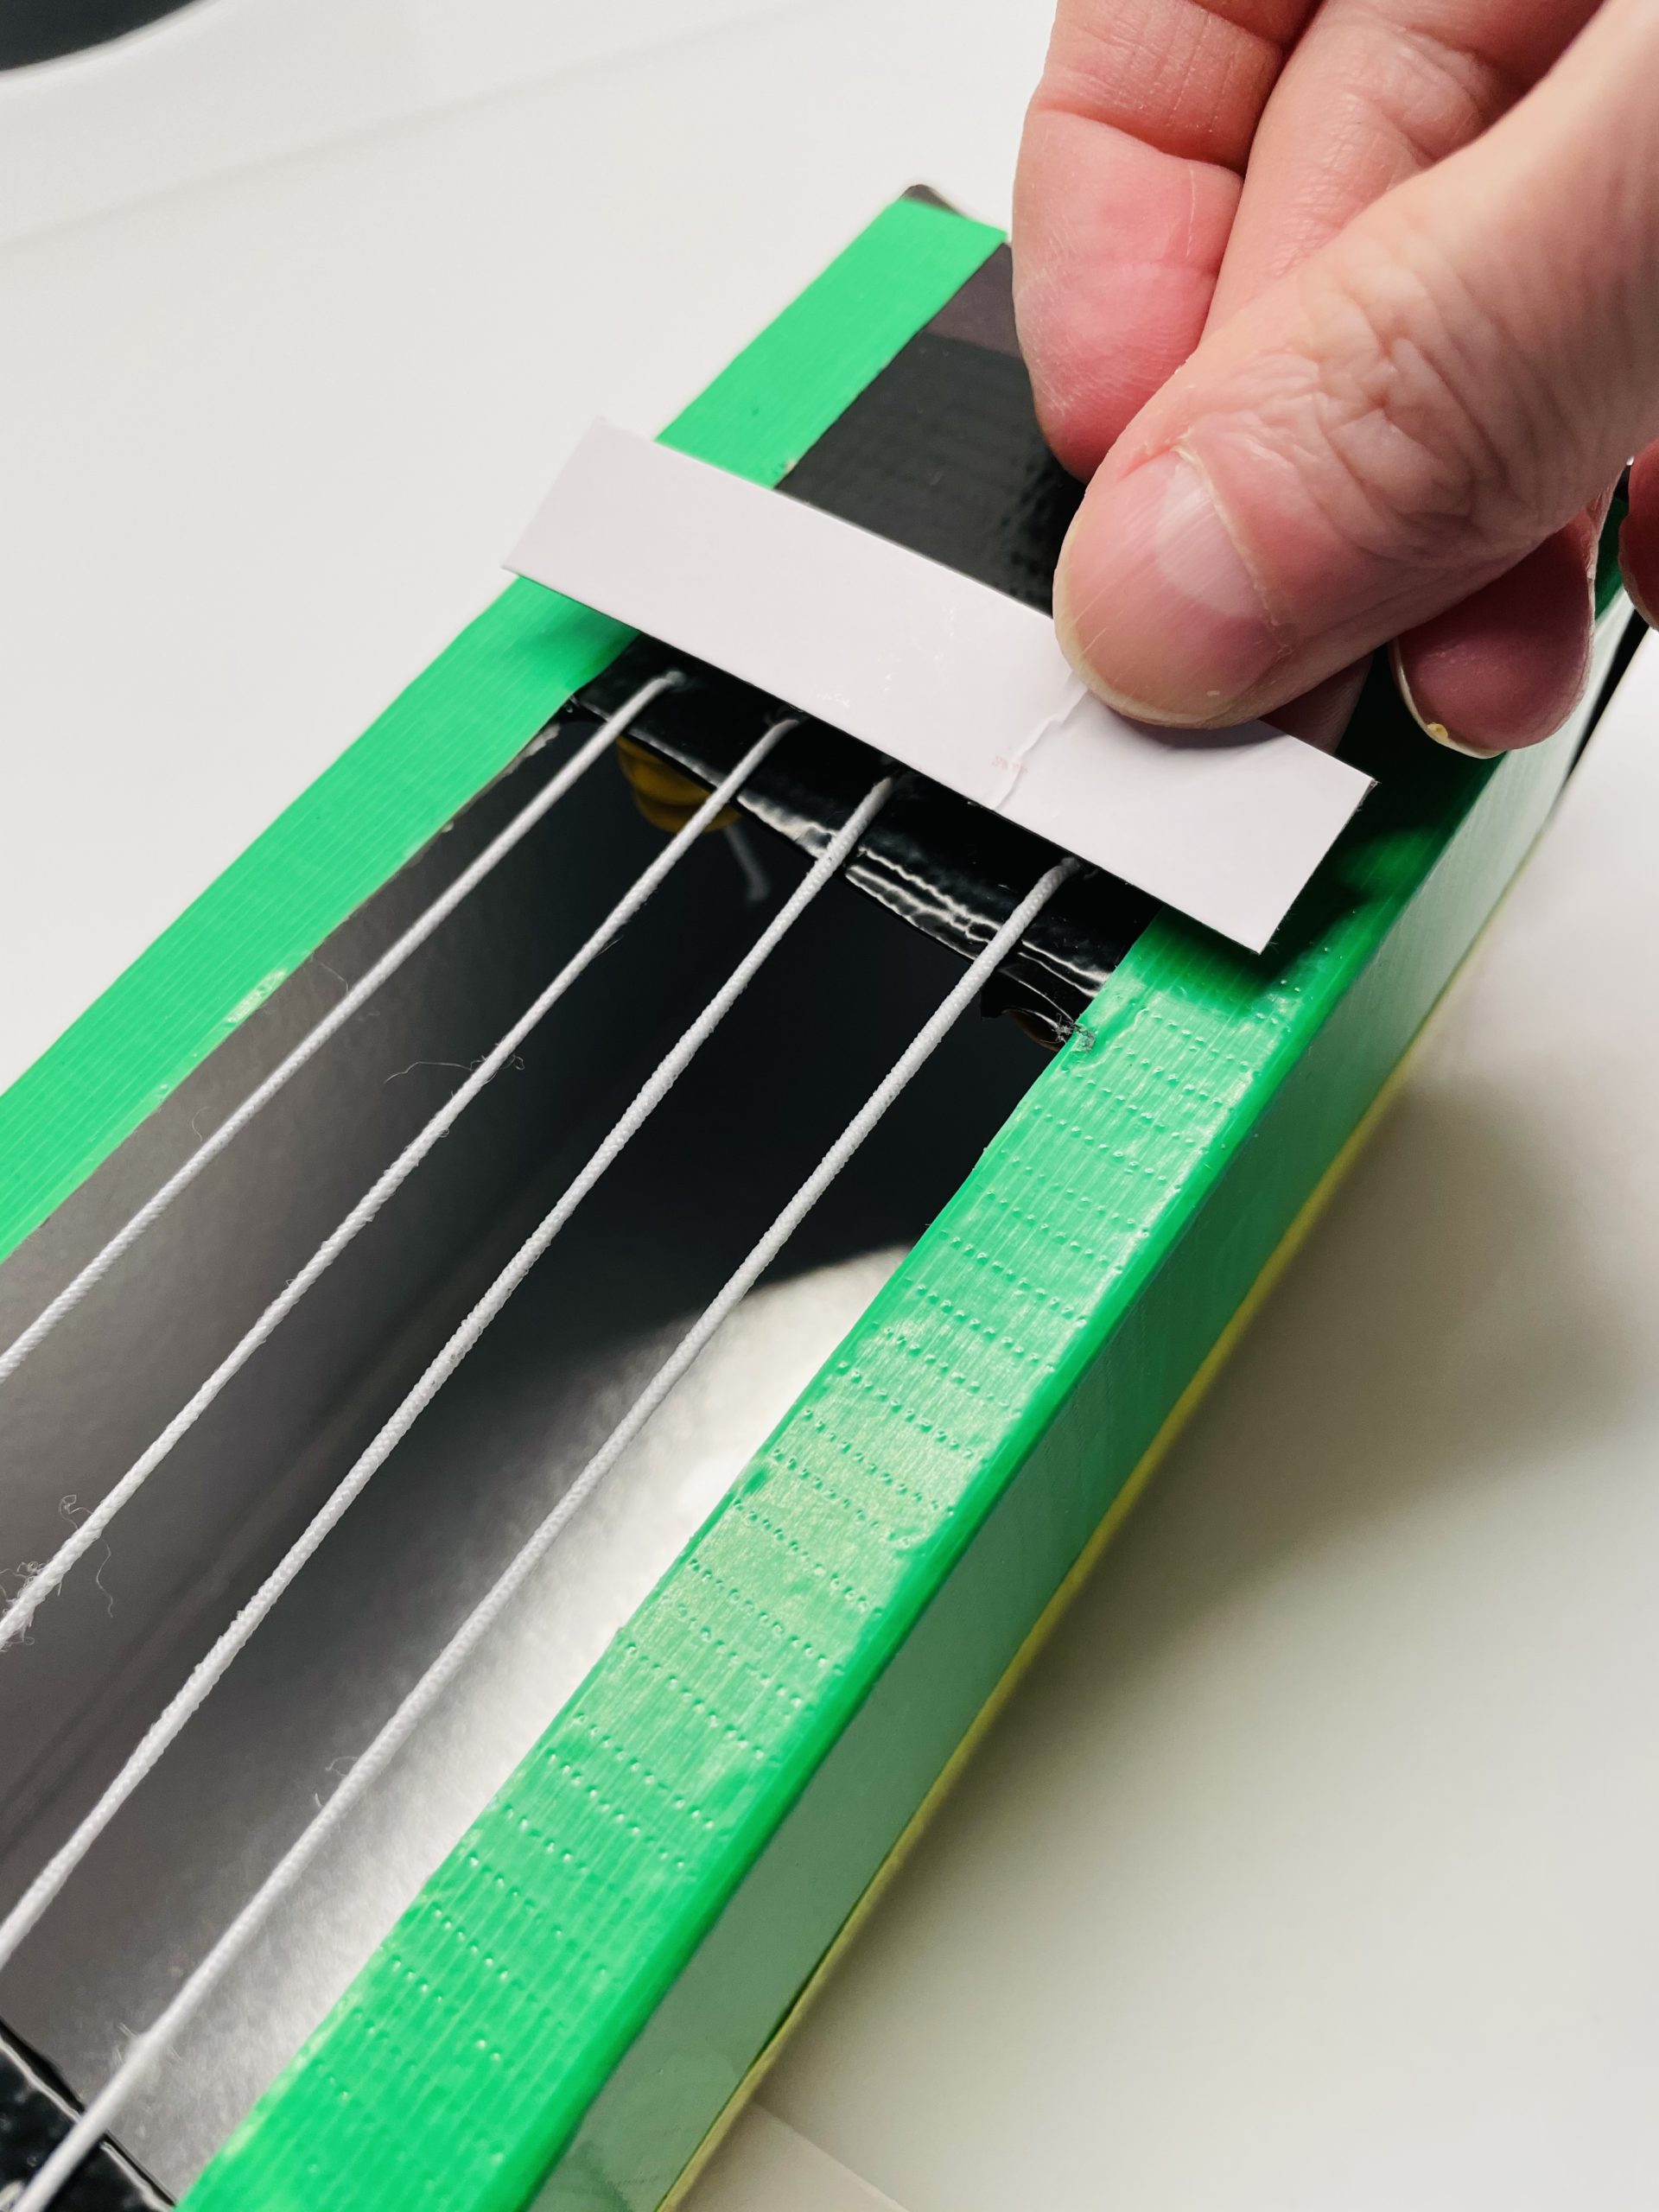
To protect the rows of holes, stick two strips of cardboard over the holes. Cut two strips for this.

Stick these with hot glue on the rows of holes. You can still design them.
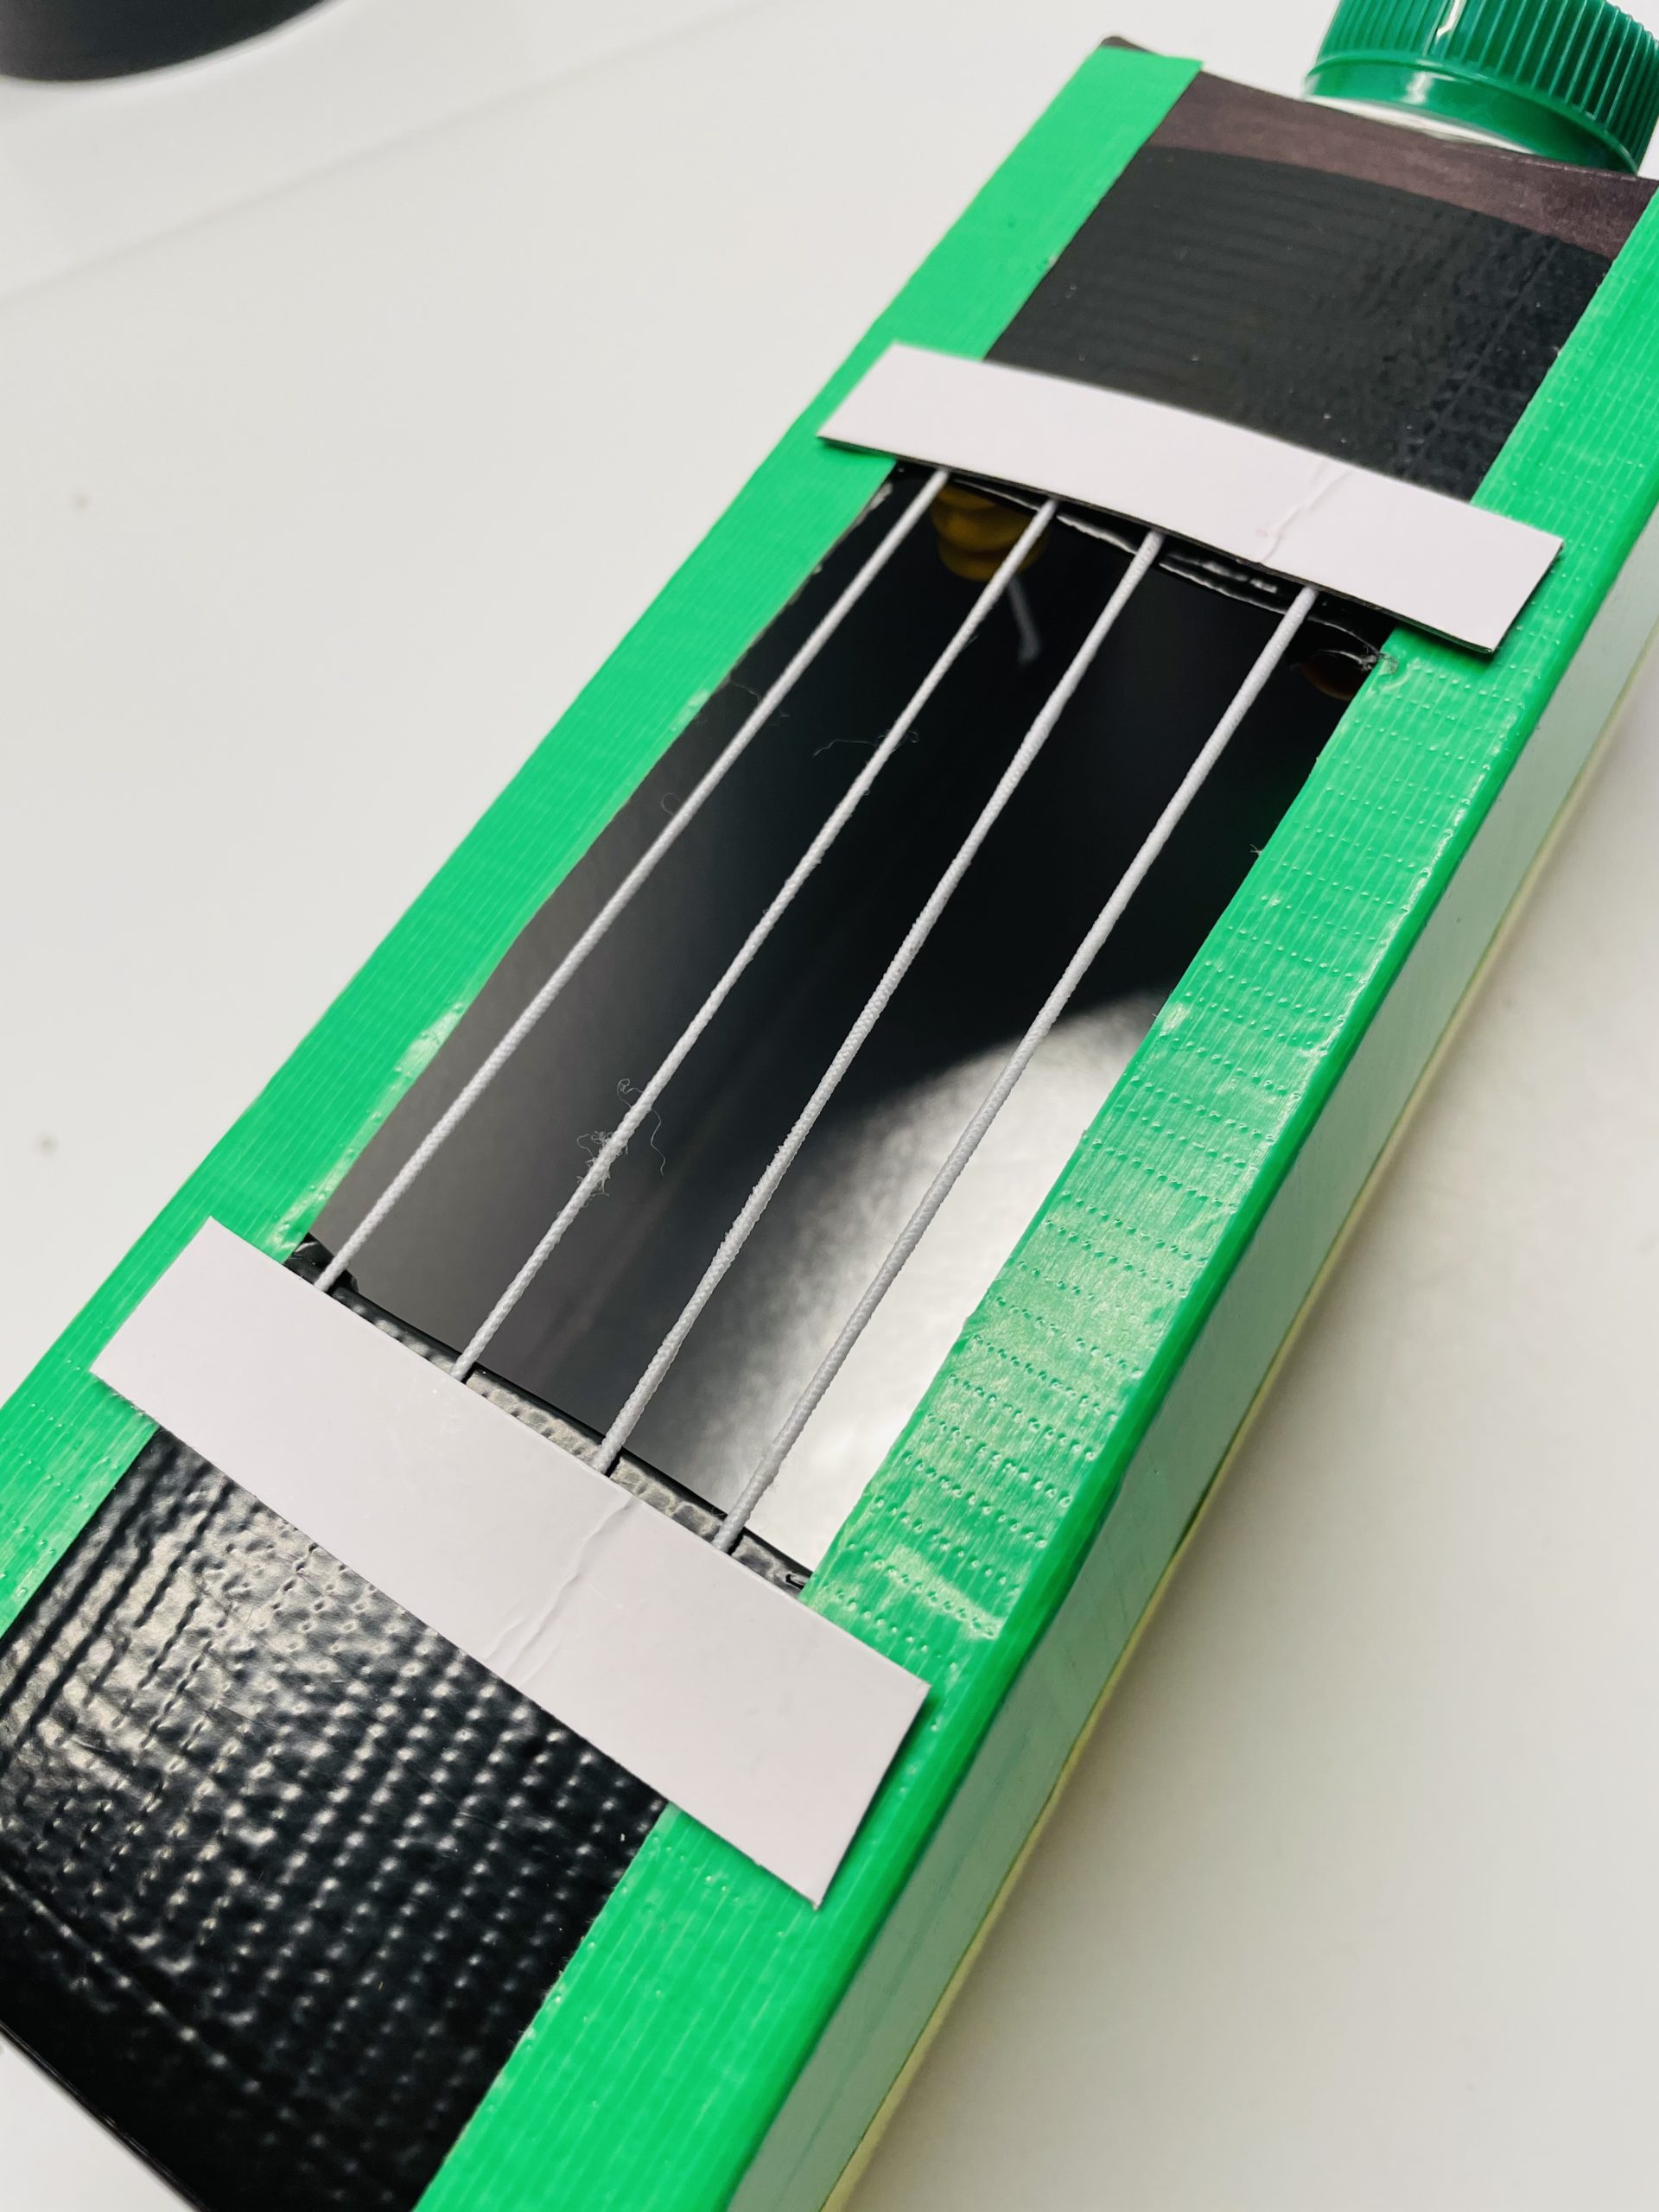
Create your box, too. You could paint notes or patterns, for example!

Enjoy crafting and making music!
Materials
Directions
First, prepare your materials and put out the craft file. Use an empty, clean Tetrapack.
Put it on a long side. Draw on your neckline. Make sure that there is still a cardboard border around the neckline!
Get help with cutting with the cutter knife - risk of injury!
Now you design the Tetrapak. Sticks around the neckline colored adhesive tapes, designs your box with colored paper or paints the cardboard in color.
Then you punch two opposite sides of the cut-out. Use a punched plier and set it to a small hole size. (Only the rubber has to fit through!) Then you punch about 4 -5 holes per side.
You'll need a lot of holes on both sides.
That's what the box looks like now!
Now you need the rubber hat. Thread it from top to bottom through the first hole. Then you thread a pearl. Make sure that the pearl is so large that it does not slip through the hole. Then you tie the pearl to one end.
Pull the bead right behind the first hole. It prevents the rubber band from being pulled out by clamping.
Now you tighten the threads. For this you put the rubber from above into the opposite hole. Then you pull the rubber through the hole and put it from below into the hole right next to it.
Then go back to the opposite side and put the rubber back from top to bottom through the hole. Pull in the rubber cord in this way.
As soon as you arrive at the last hole, tighten the rubber bands. Start with the first hole!
DO NOT cut off the thread yet!
Now you thread another pearl onto the tail piece. Keep the hat cord tensed.
Insert the thread twice through the pearl. Because that's how it holds better. Then you knot the rubber thread. Pull all threads tight again and push the pearl as close as possible to the last hole.
Now you can cut off the remaining piece of rubber.
The bead now slides inside and lies under the last hole. Thus, it keeps the rubber thread on tension.
Your instrument is now ready.
Try out how the individual strings sound, pluck them and brush them over.
To protect the rows of holes, stick two strips of cardboard over the holes. Cut two strips for this.
Stick these with hot glue on the rows of holes. You can still design them.
Create your box, too. You could paint notes or patterns, for example!
Enjoy crafting and making music!
Follow us on Facebook , Instagram and Pinterest
Don't miss any more adventures: Our bottle mail


