Make a little flower fairy out of an egg box bag, a wooden bead as a head, colorful wool for the hair and legs and a few wings made of transparent paper. How to do that, I show you step by step in an illustrated guide.
Media Education for Kindergarten and Hort

Relief in everyday life, targeted promotion of individual children, independent learning and - without any pre-knowledge already usable by the youngest!
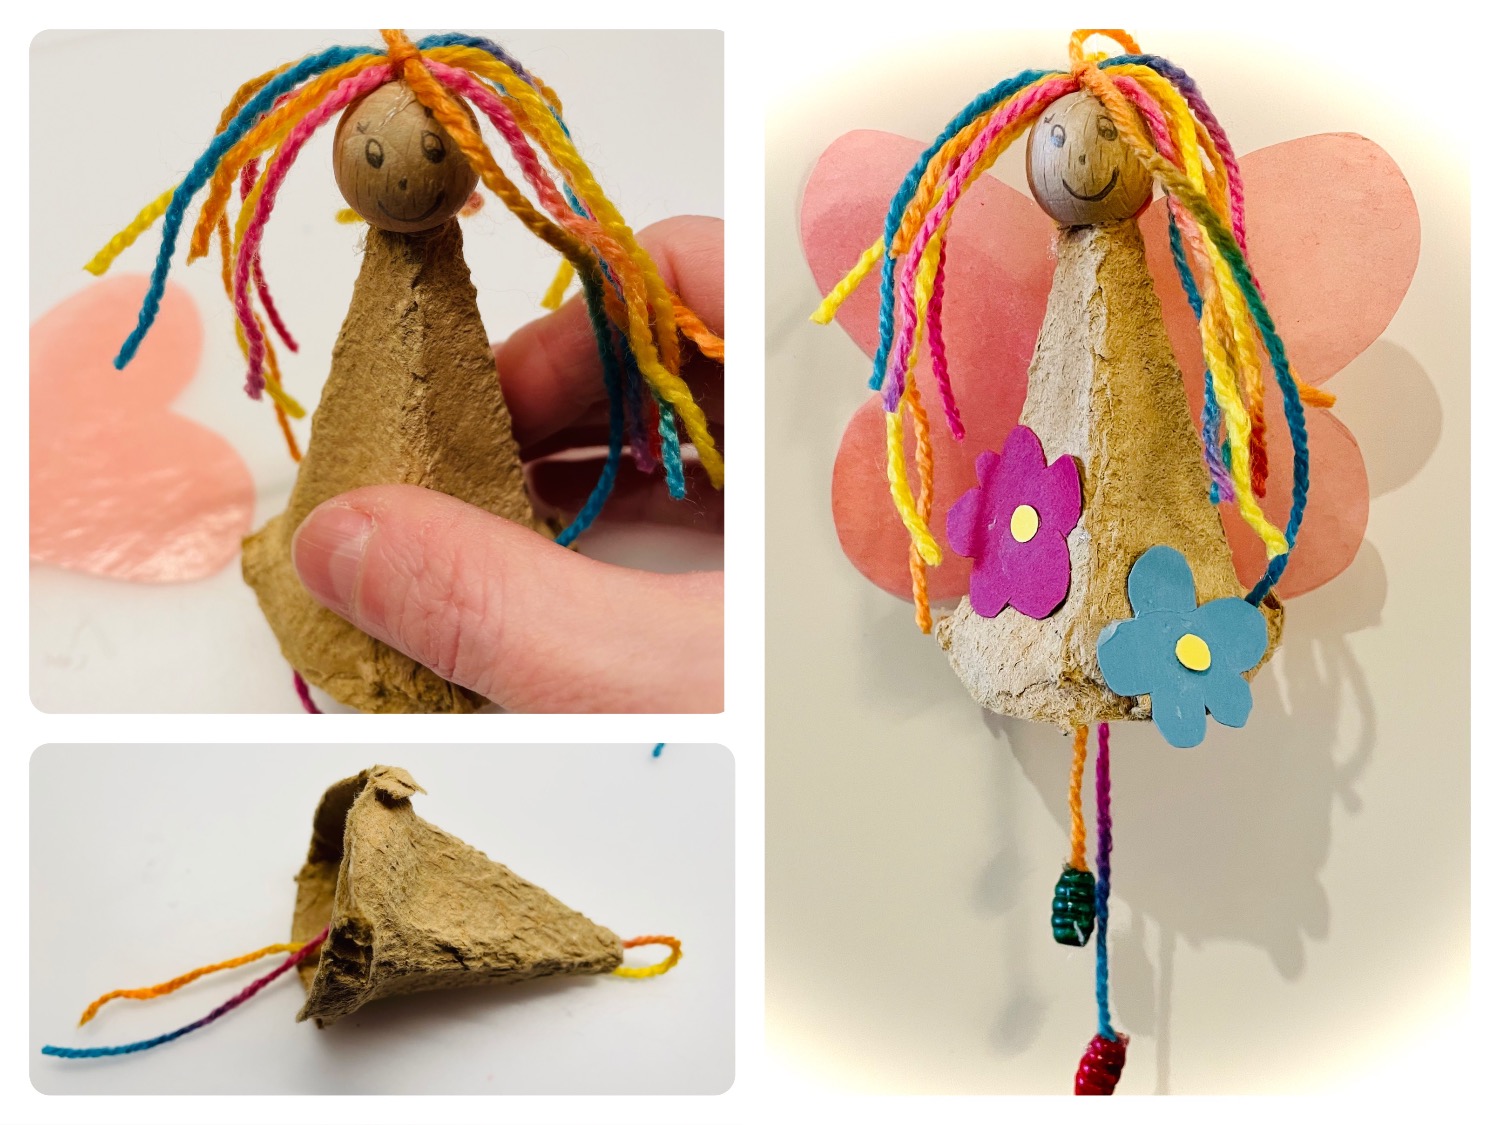
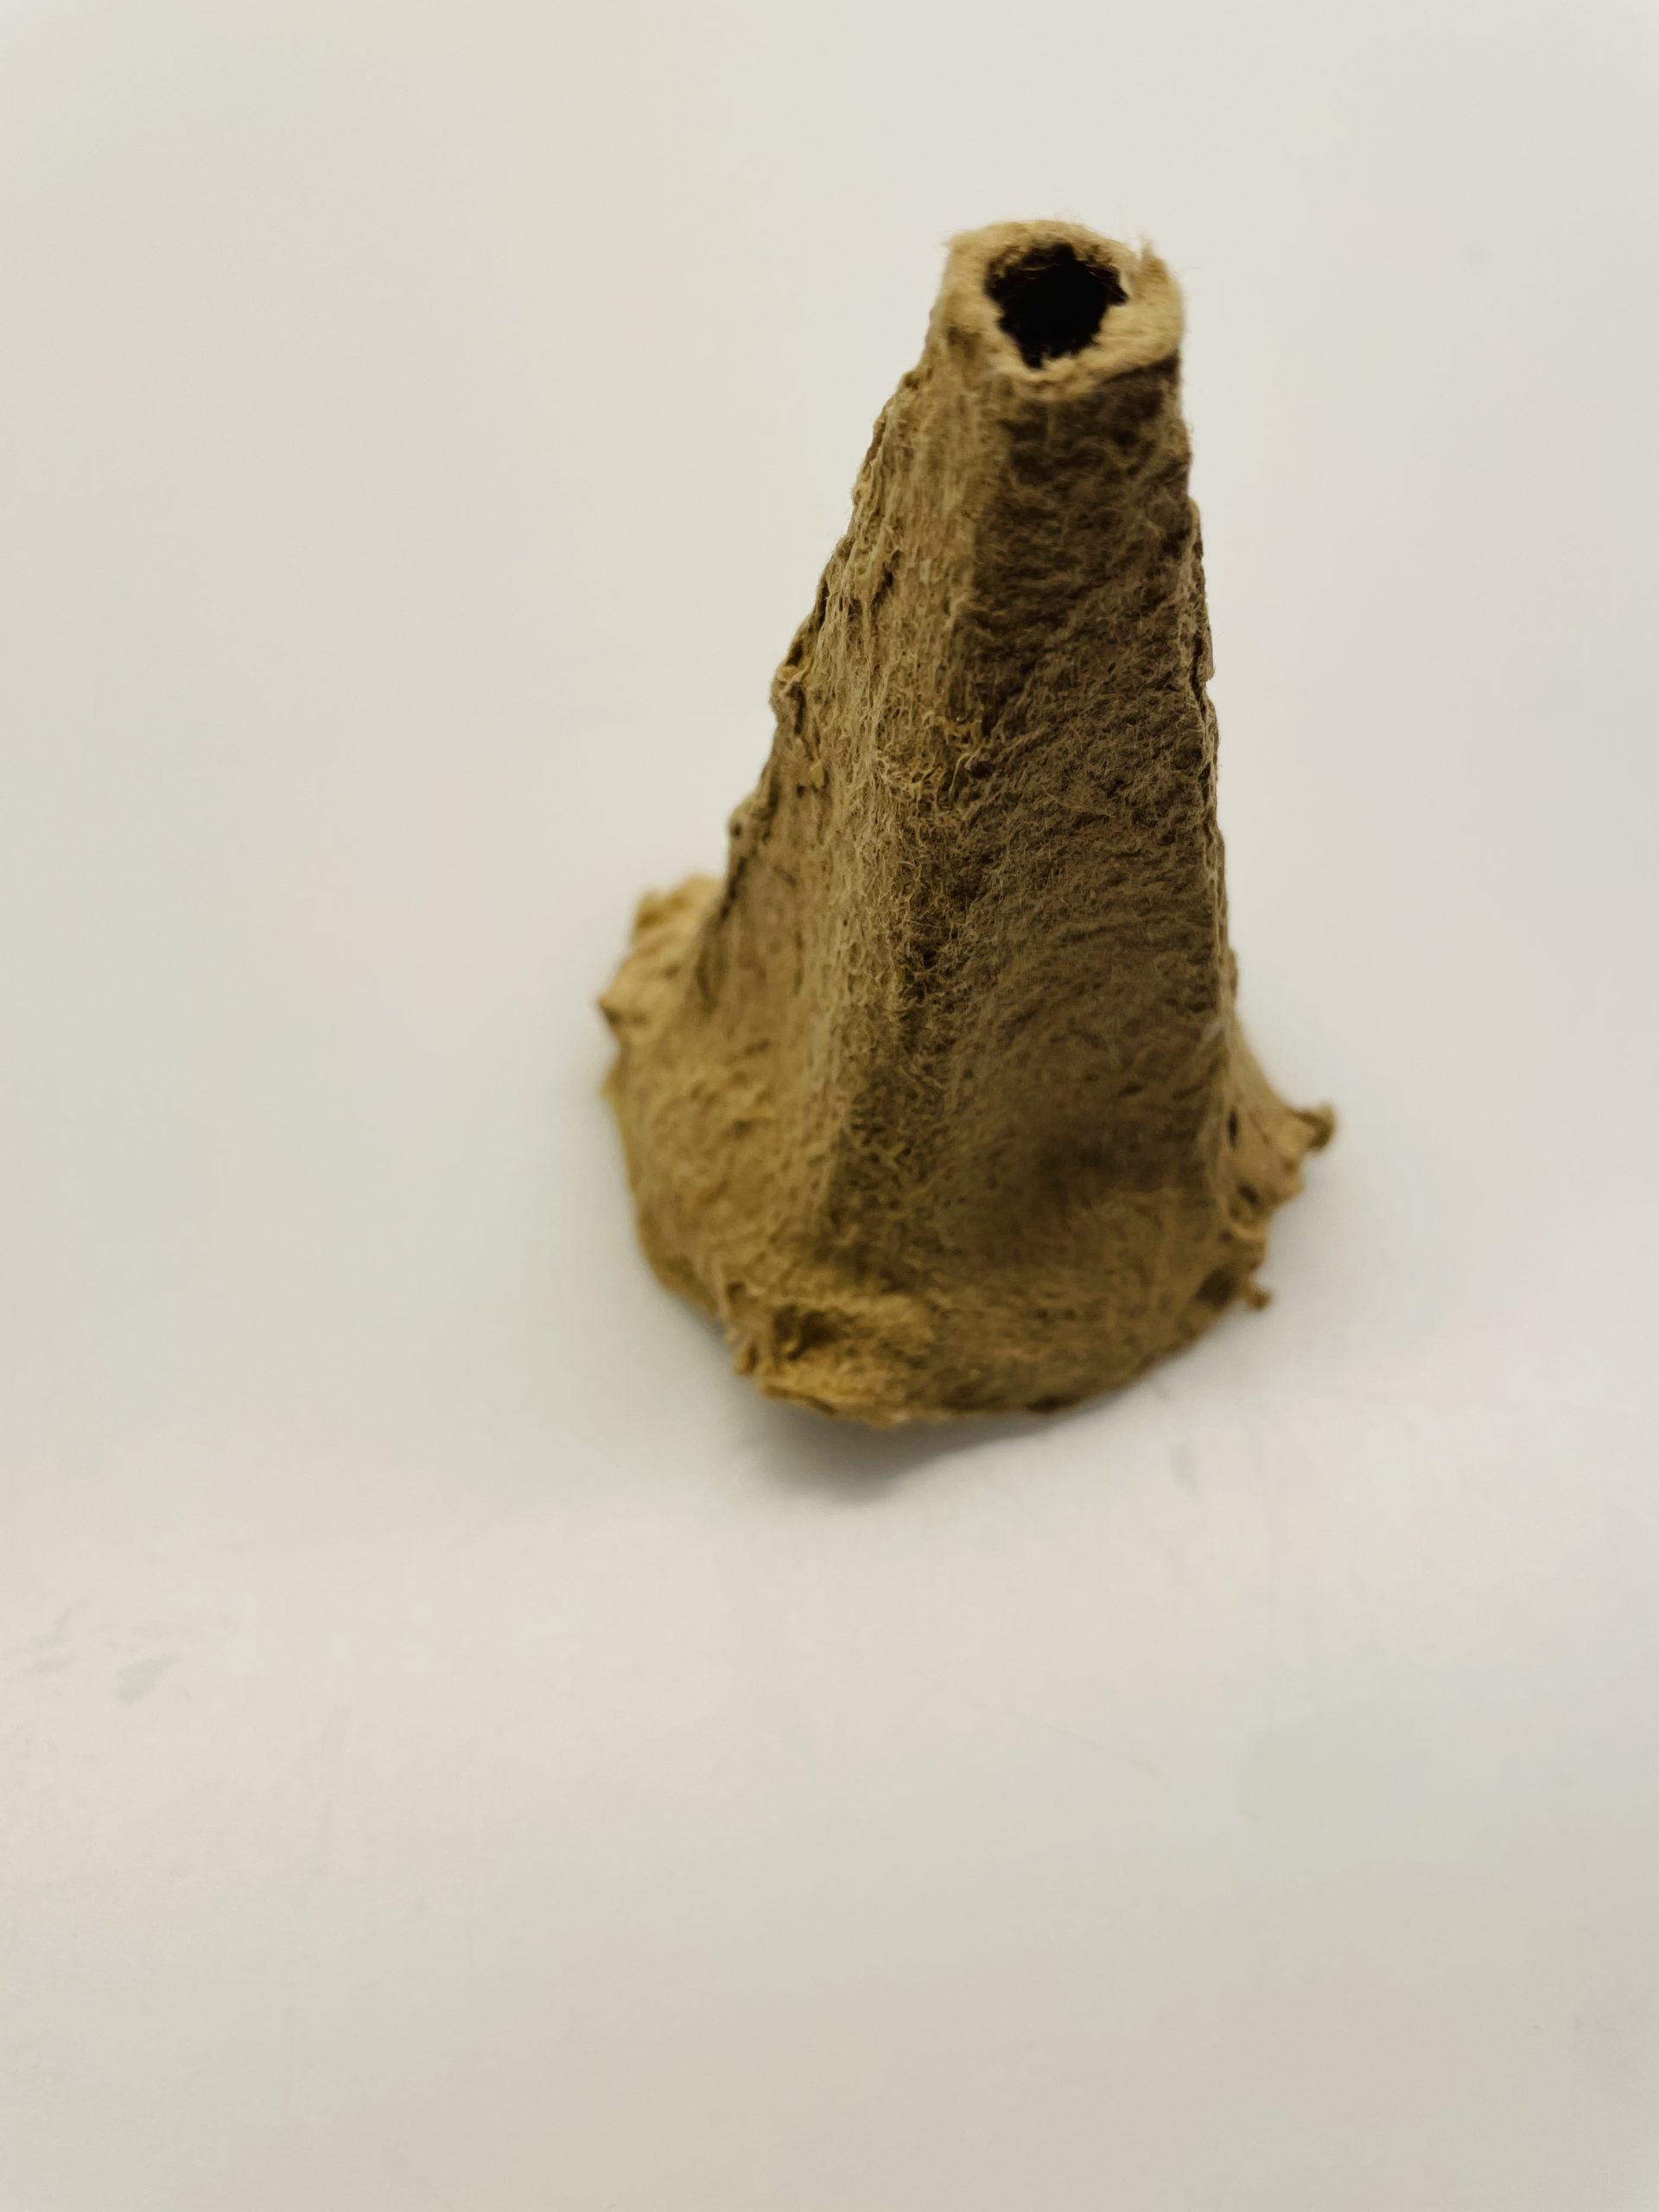
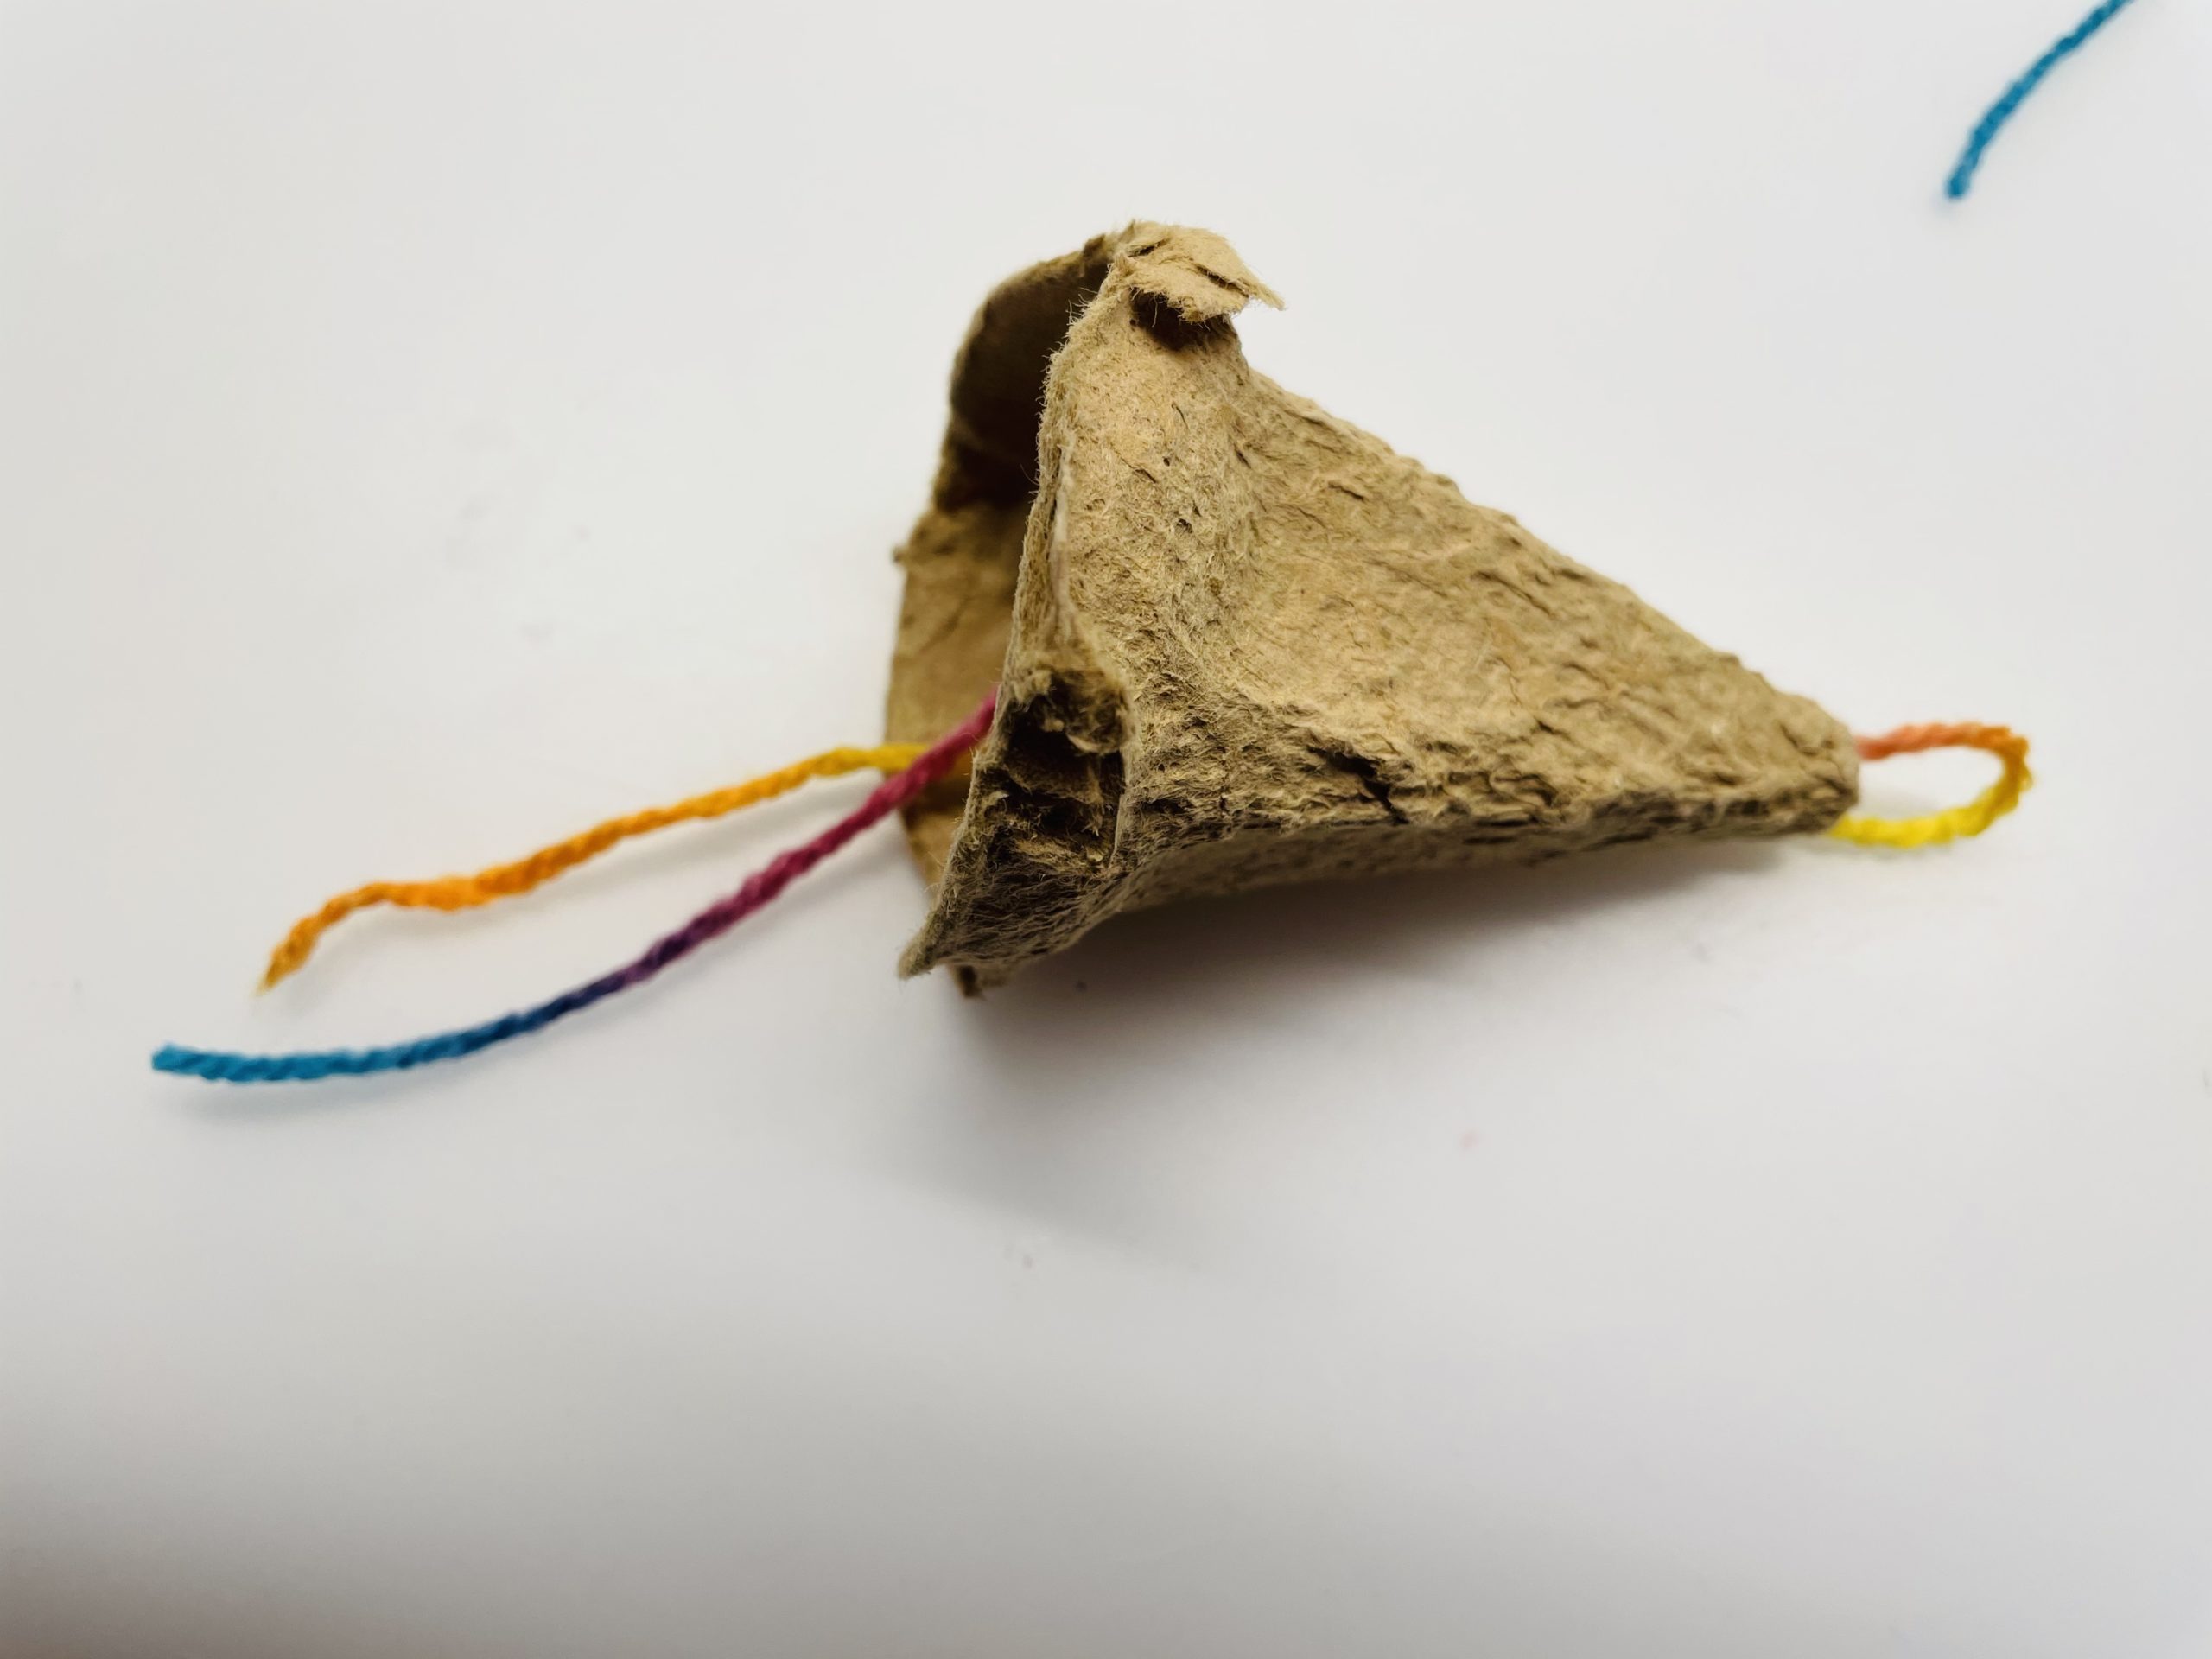
First put out your craft pad and set up your material. Then you separate a tip from an egg box. This becomes the body of the fairy.
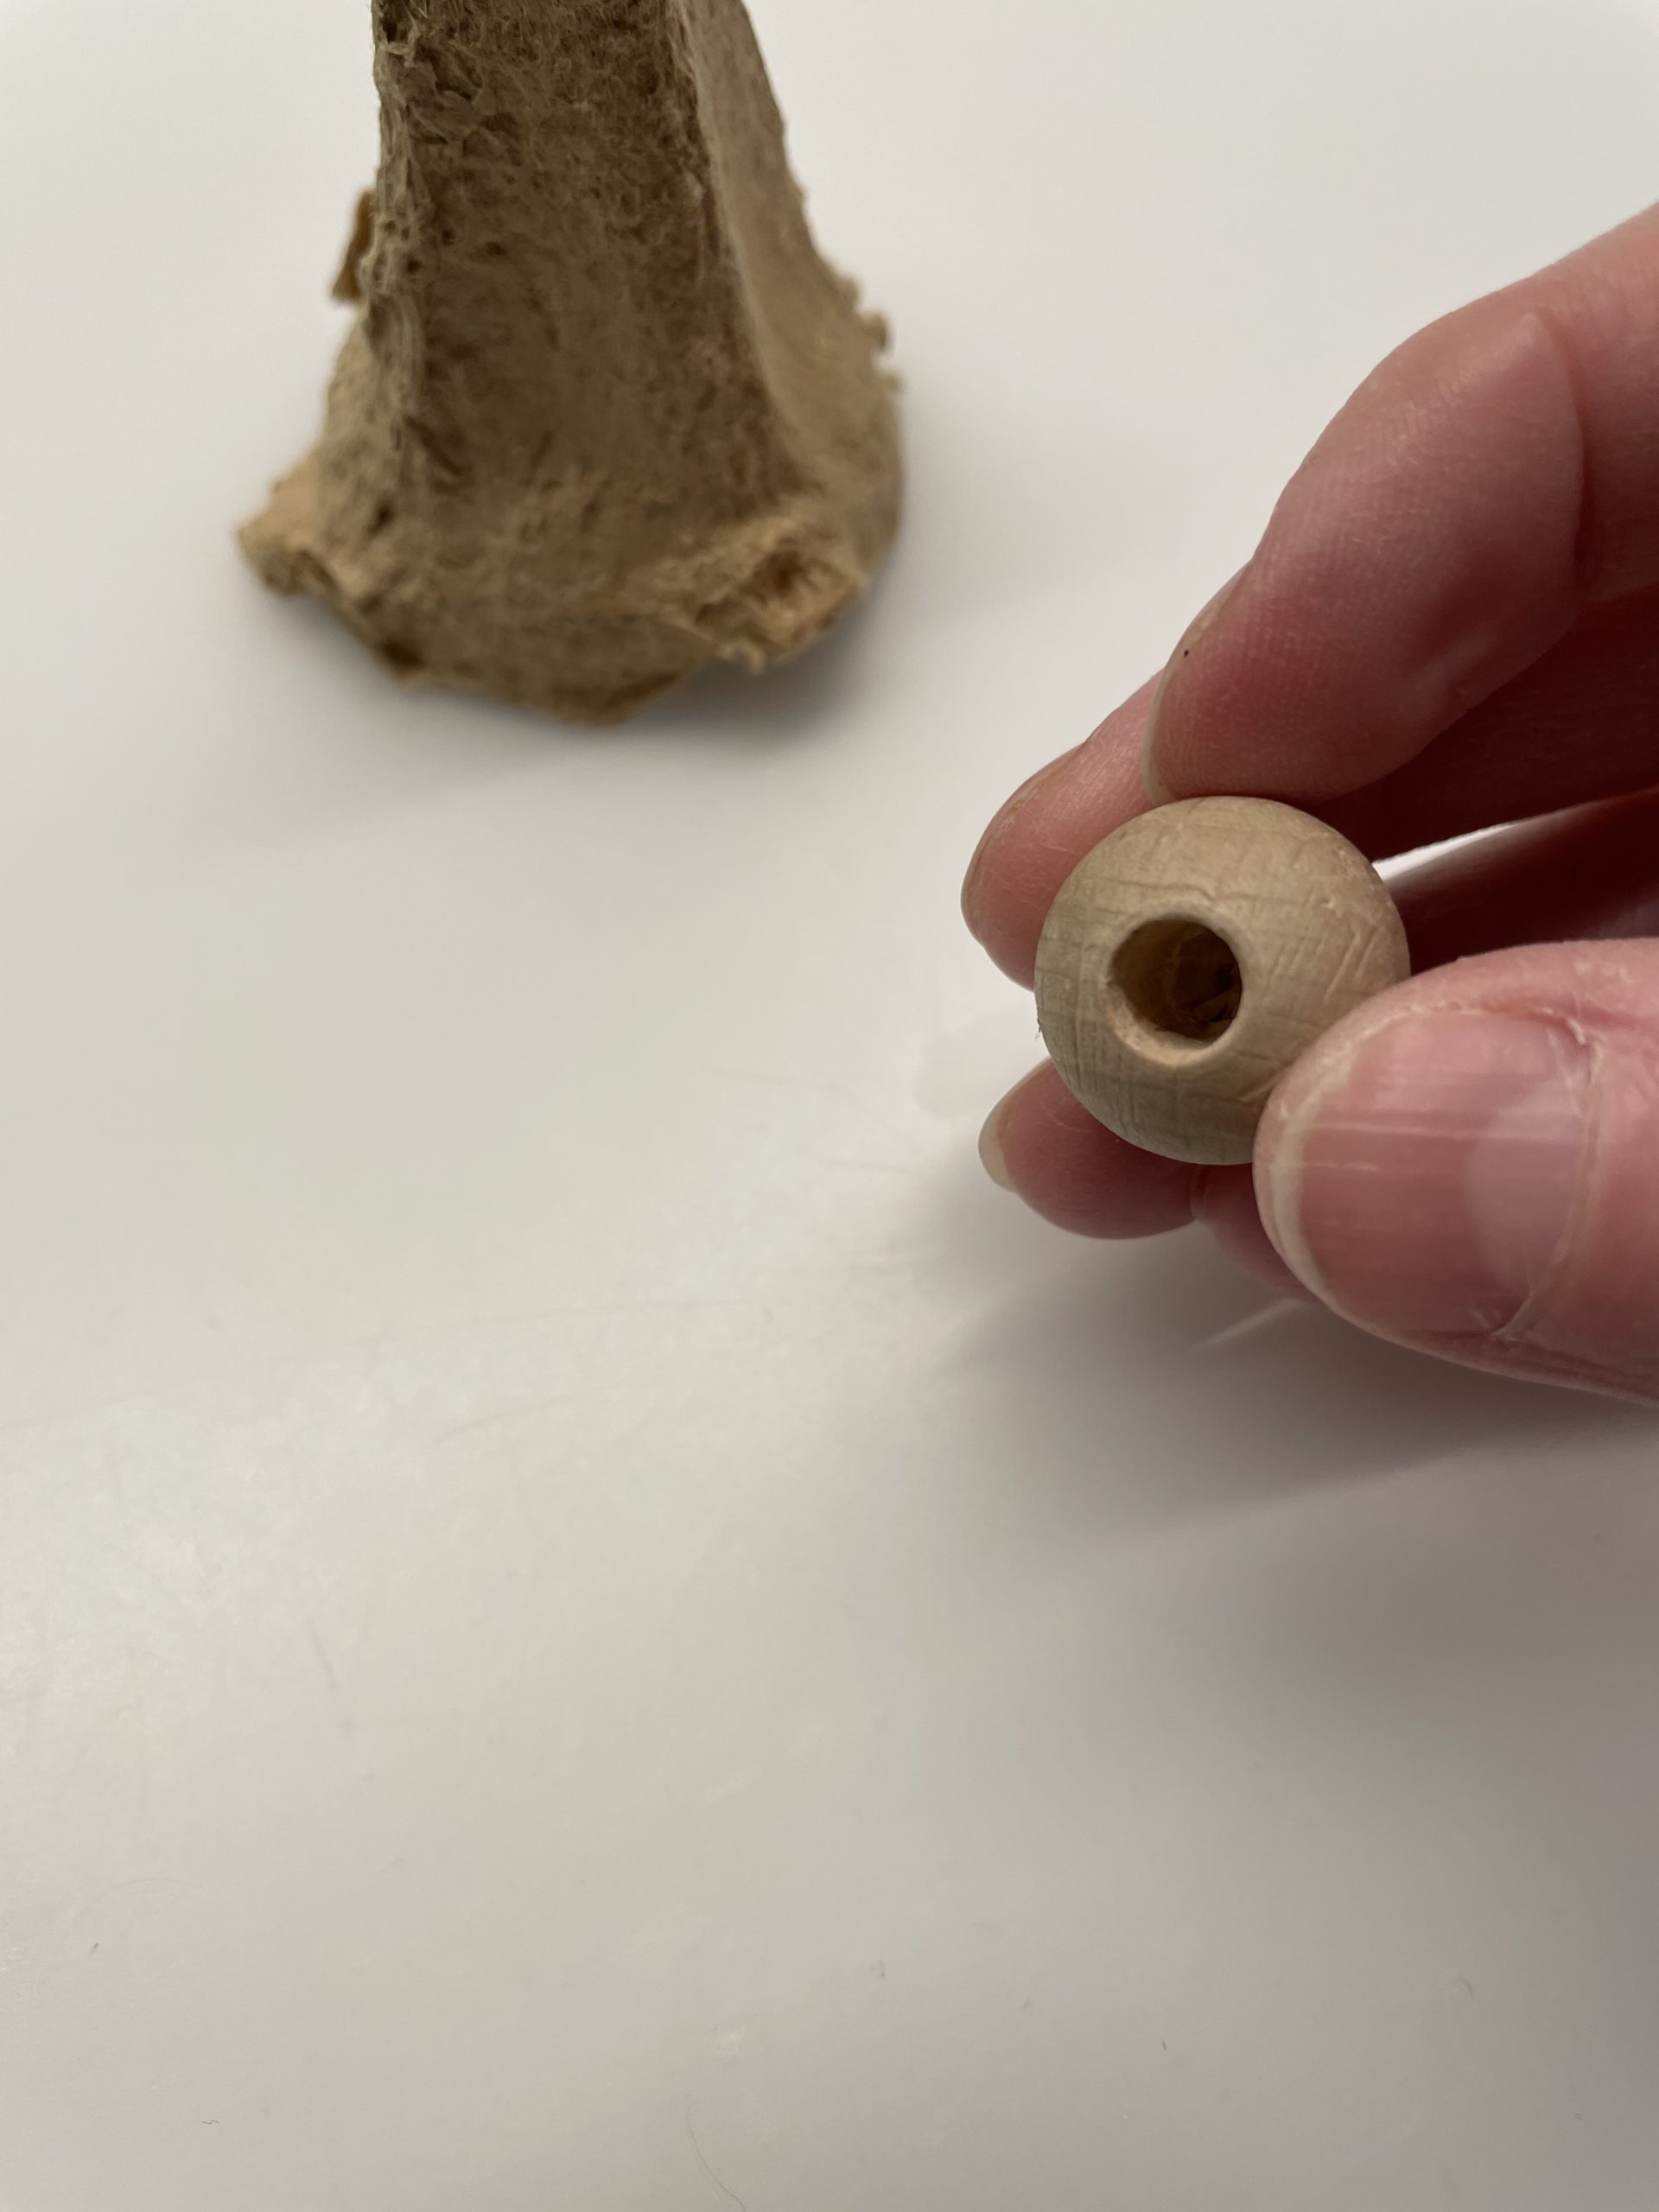
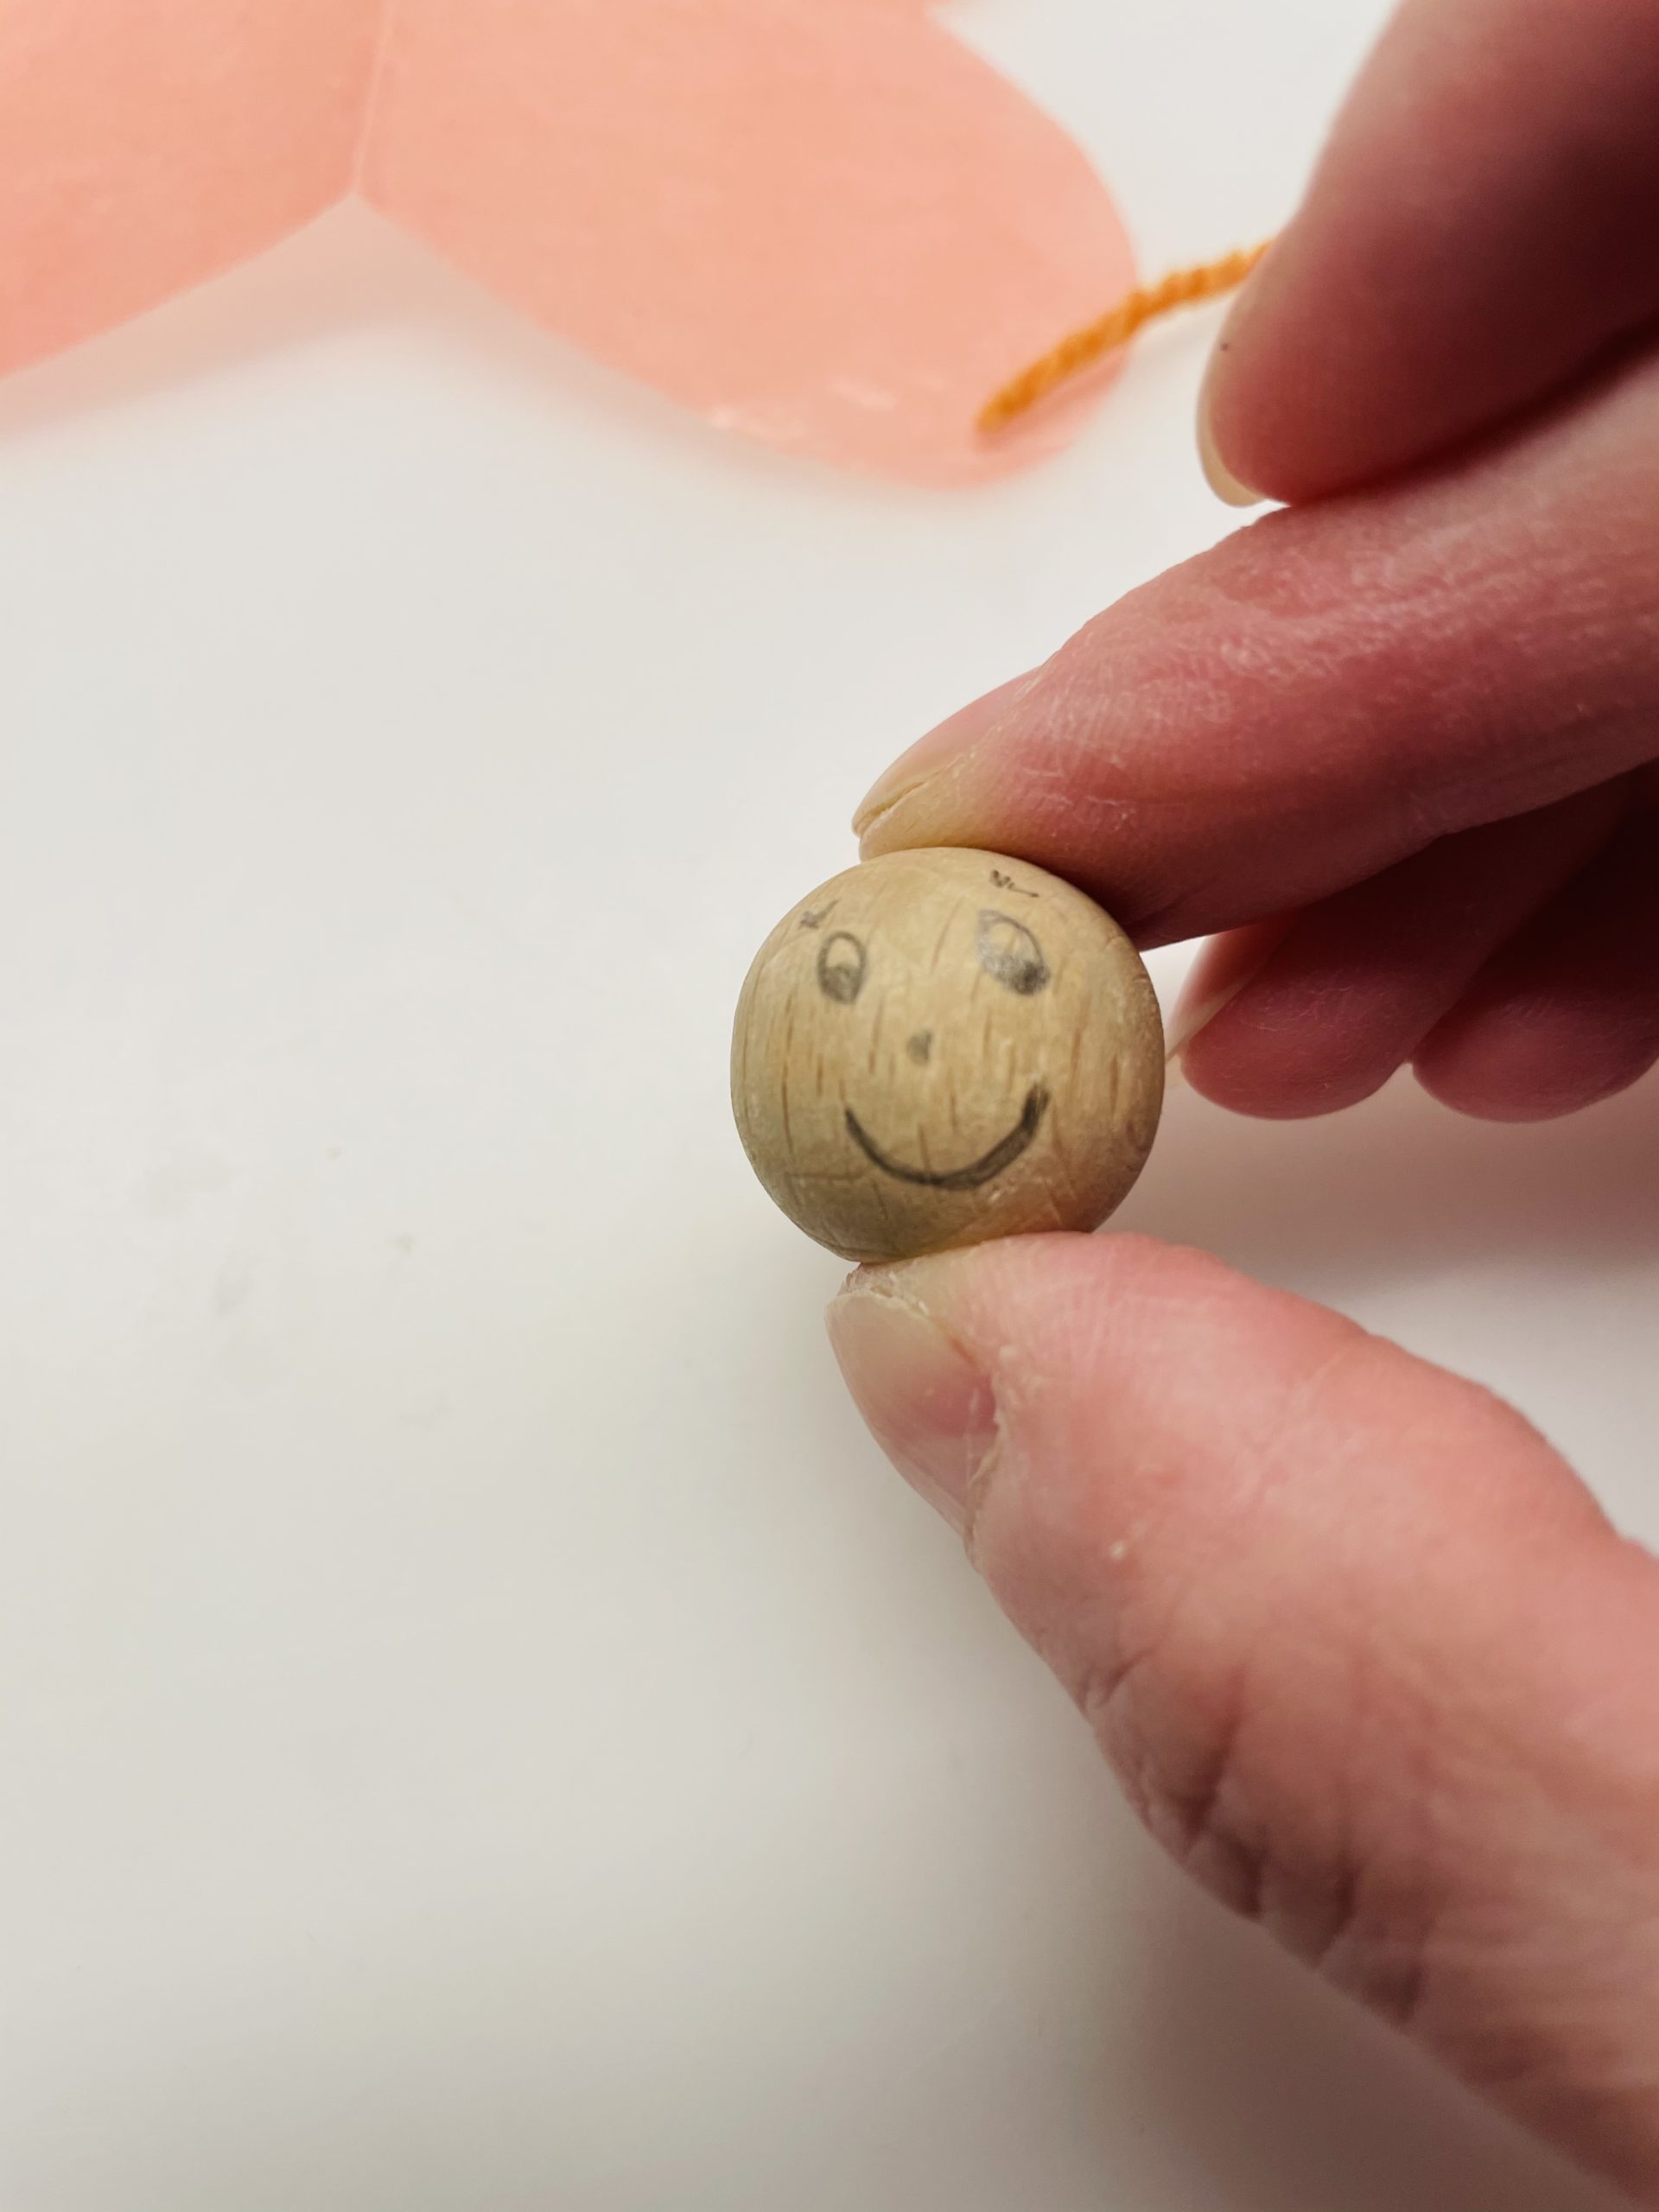
Choose a suitable wooden ball for the head. Make sure that the wooden ball fits as a head from the size to the egg box as a body.
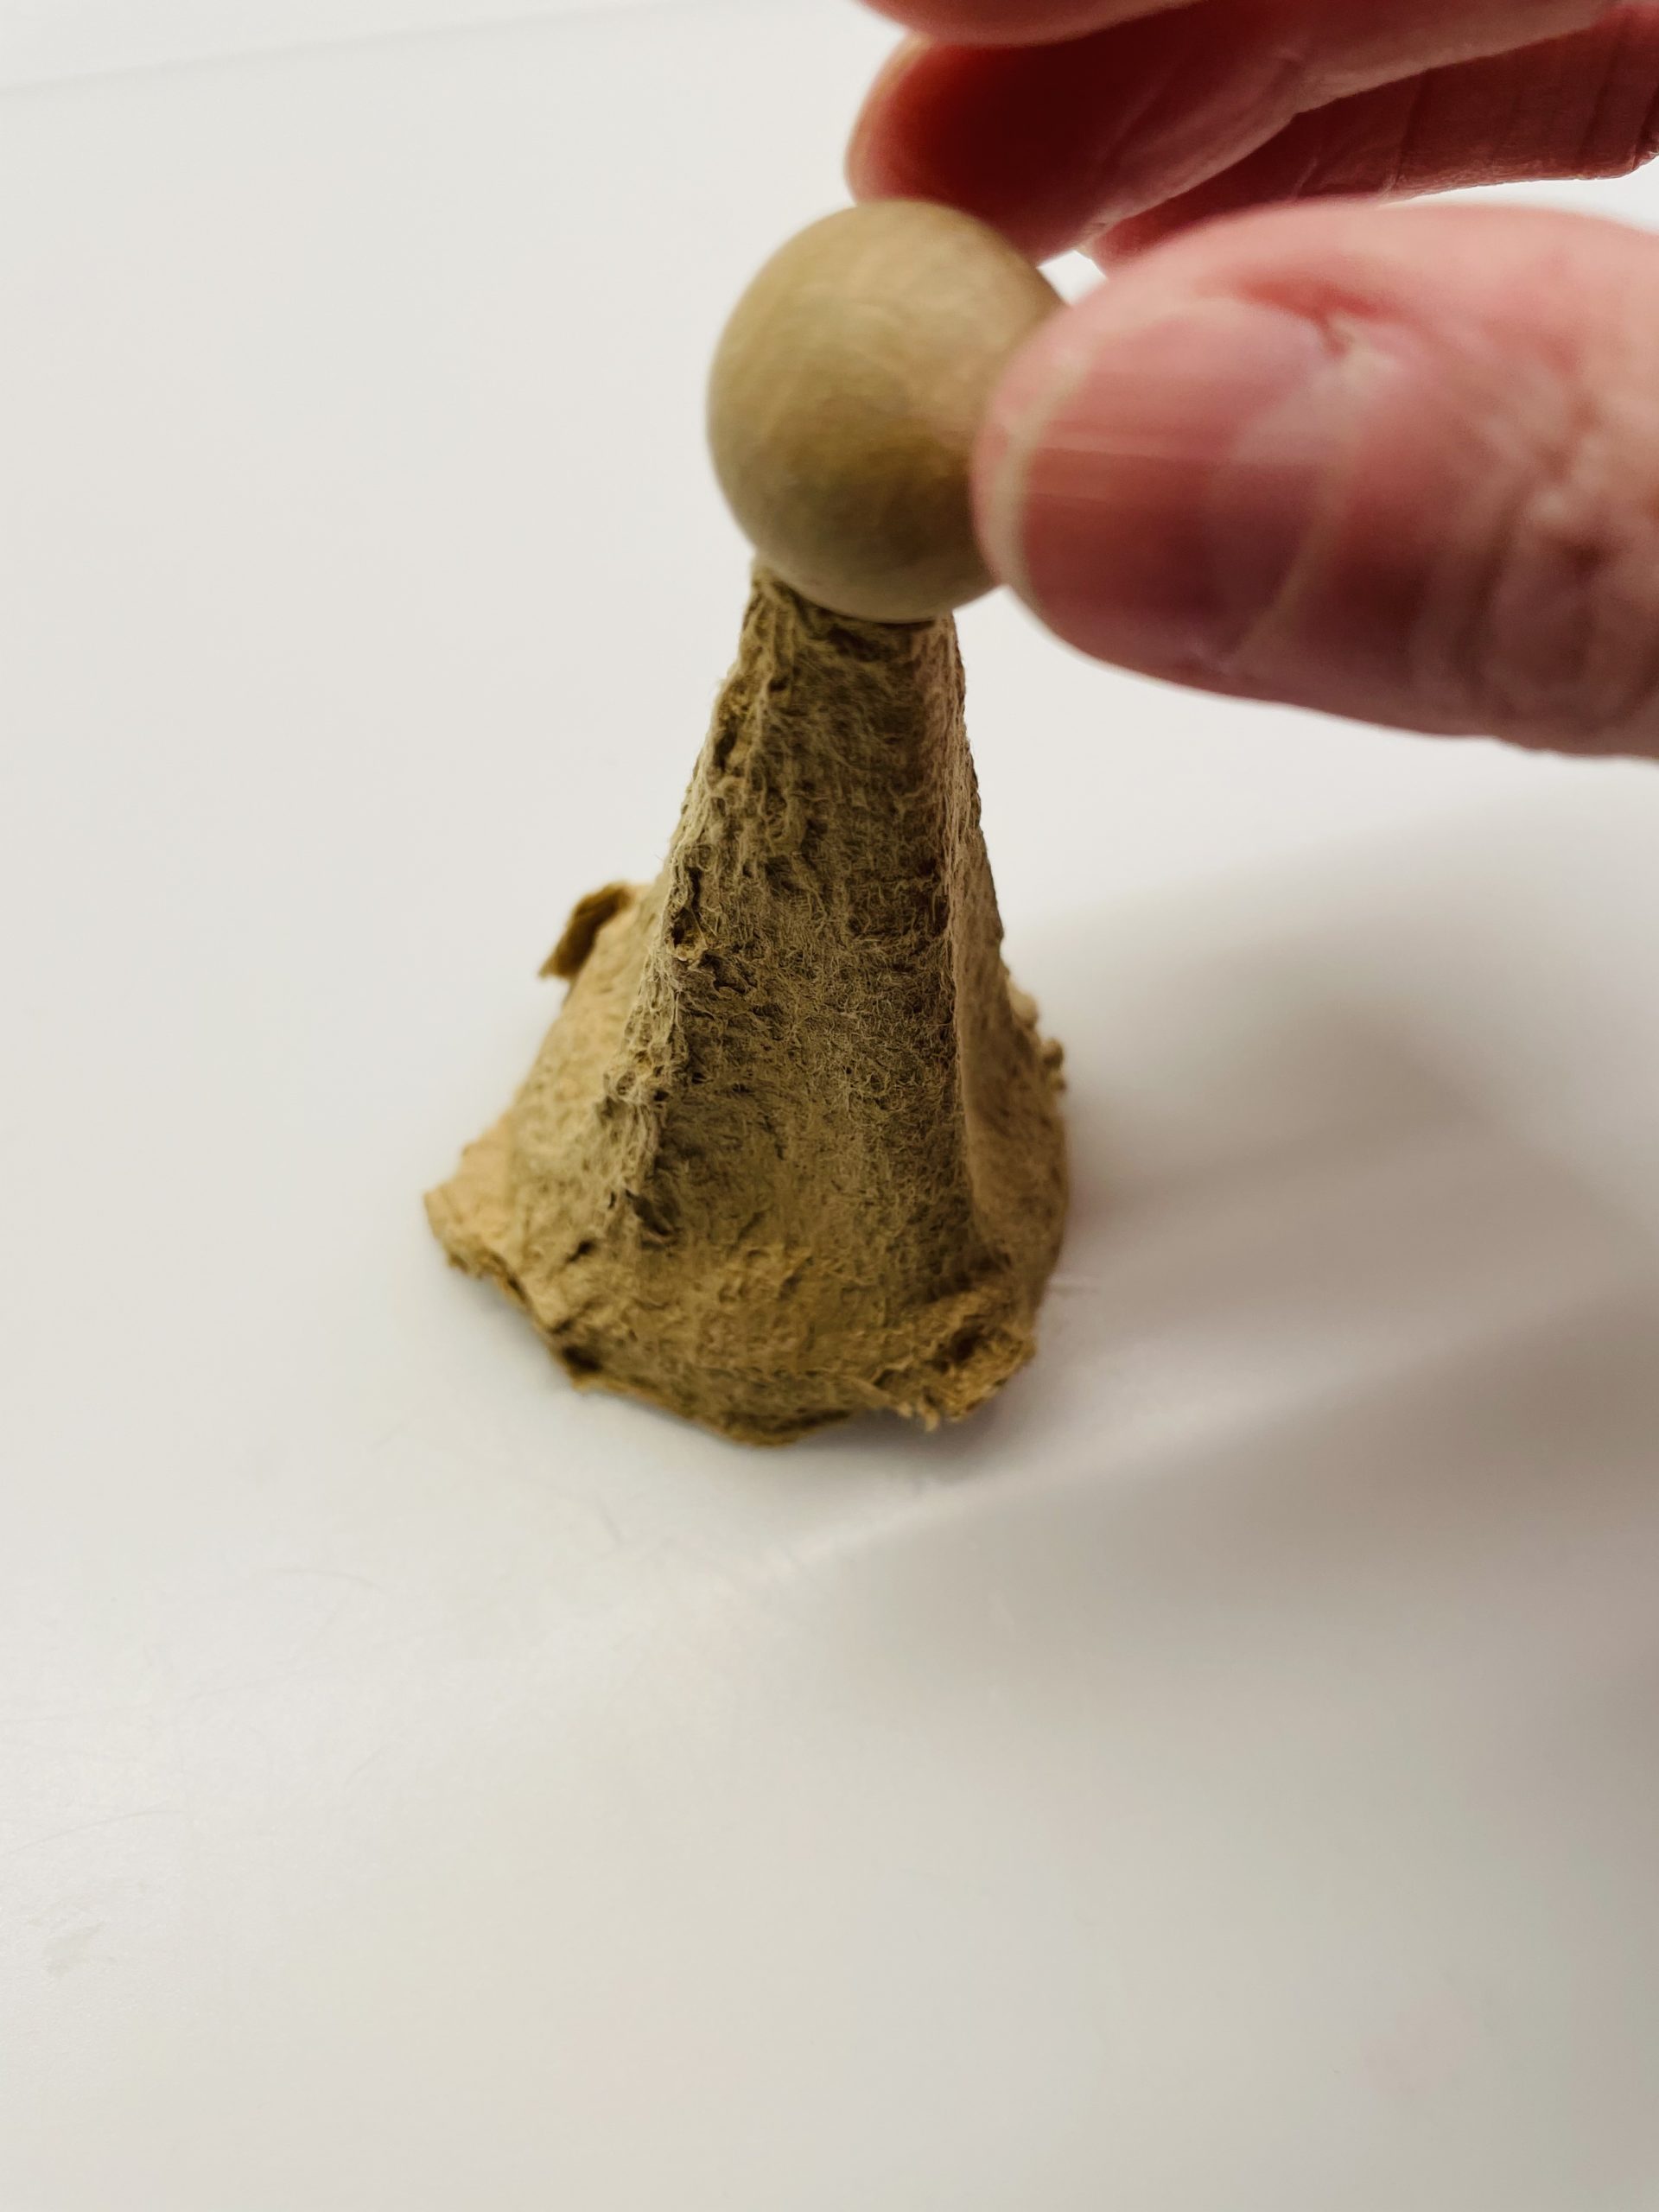
Try this before, put the bullet on it, but don't stick it on yet.
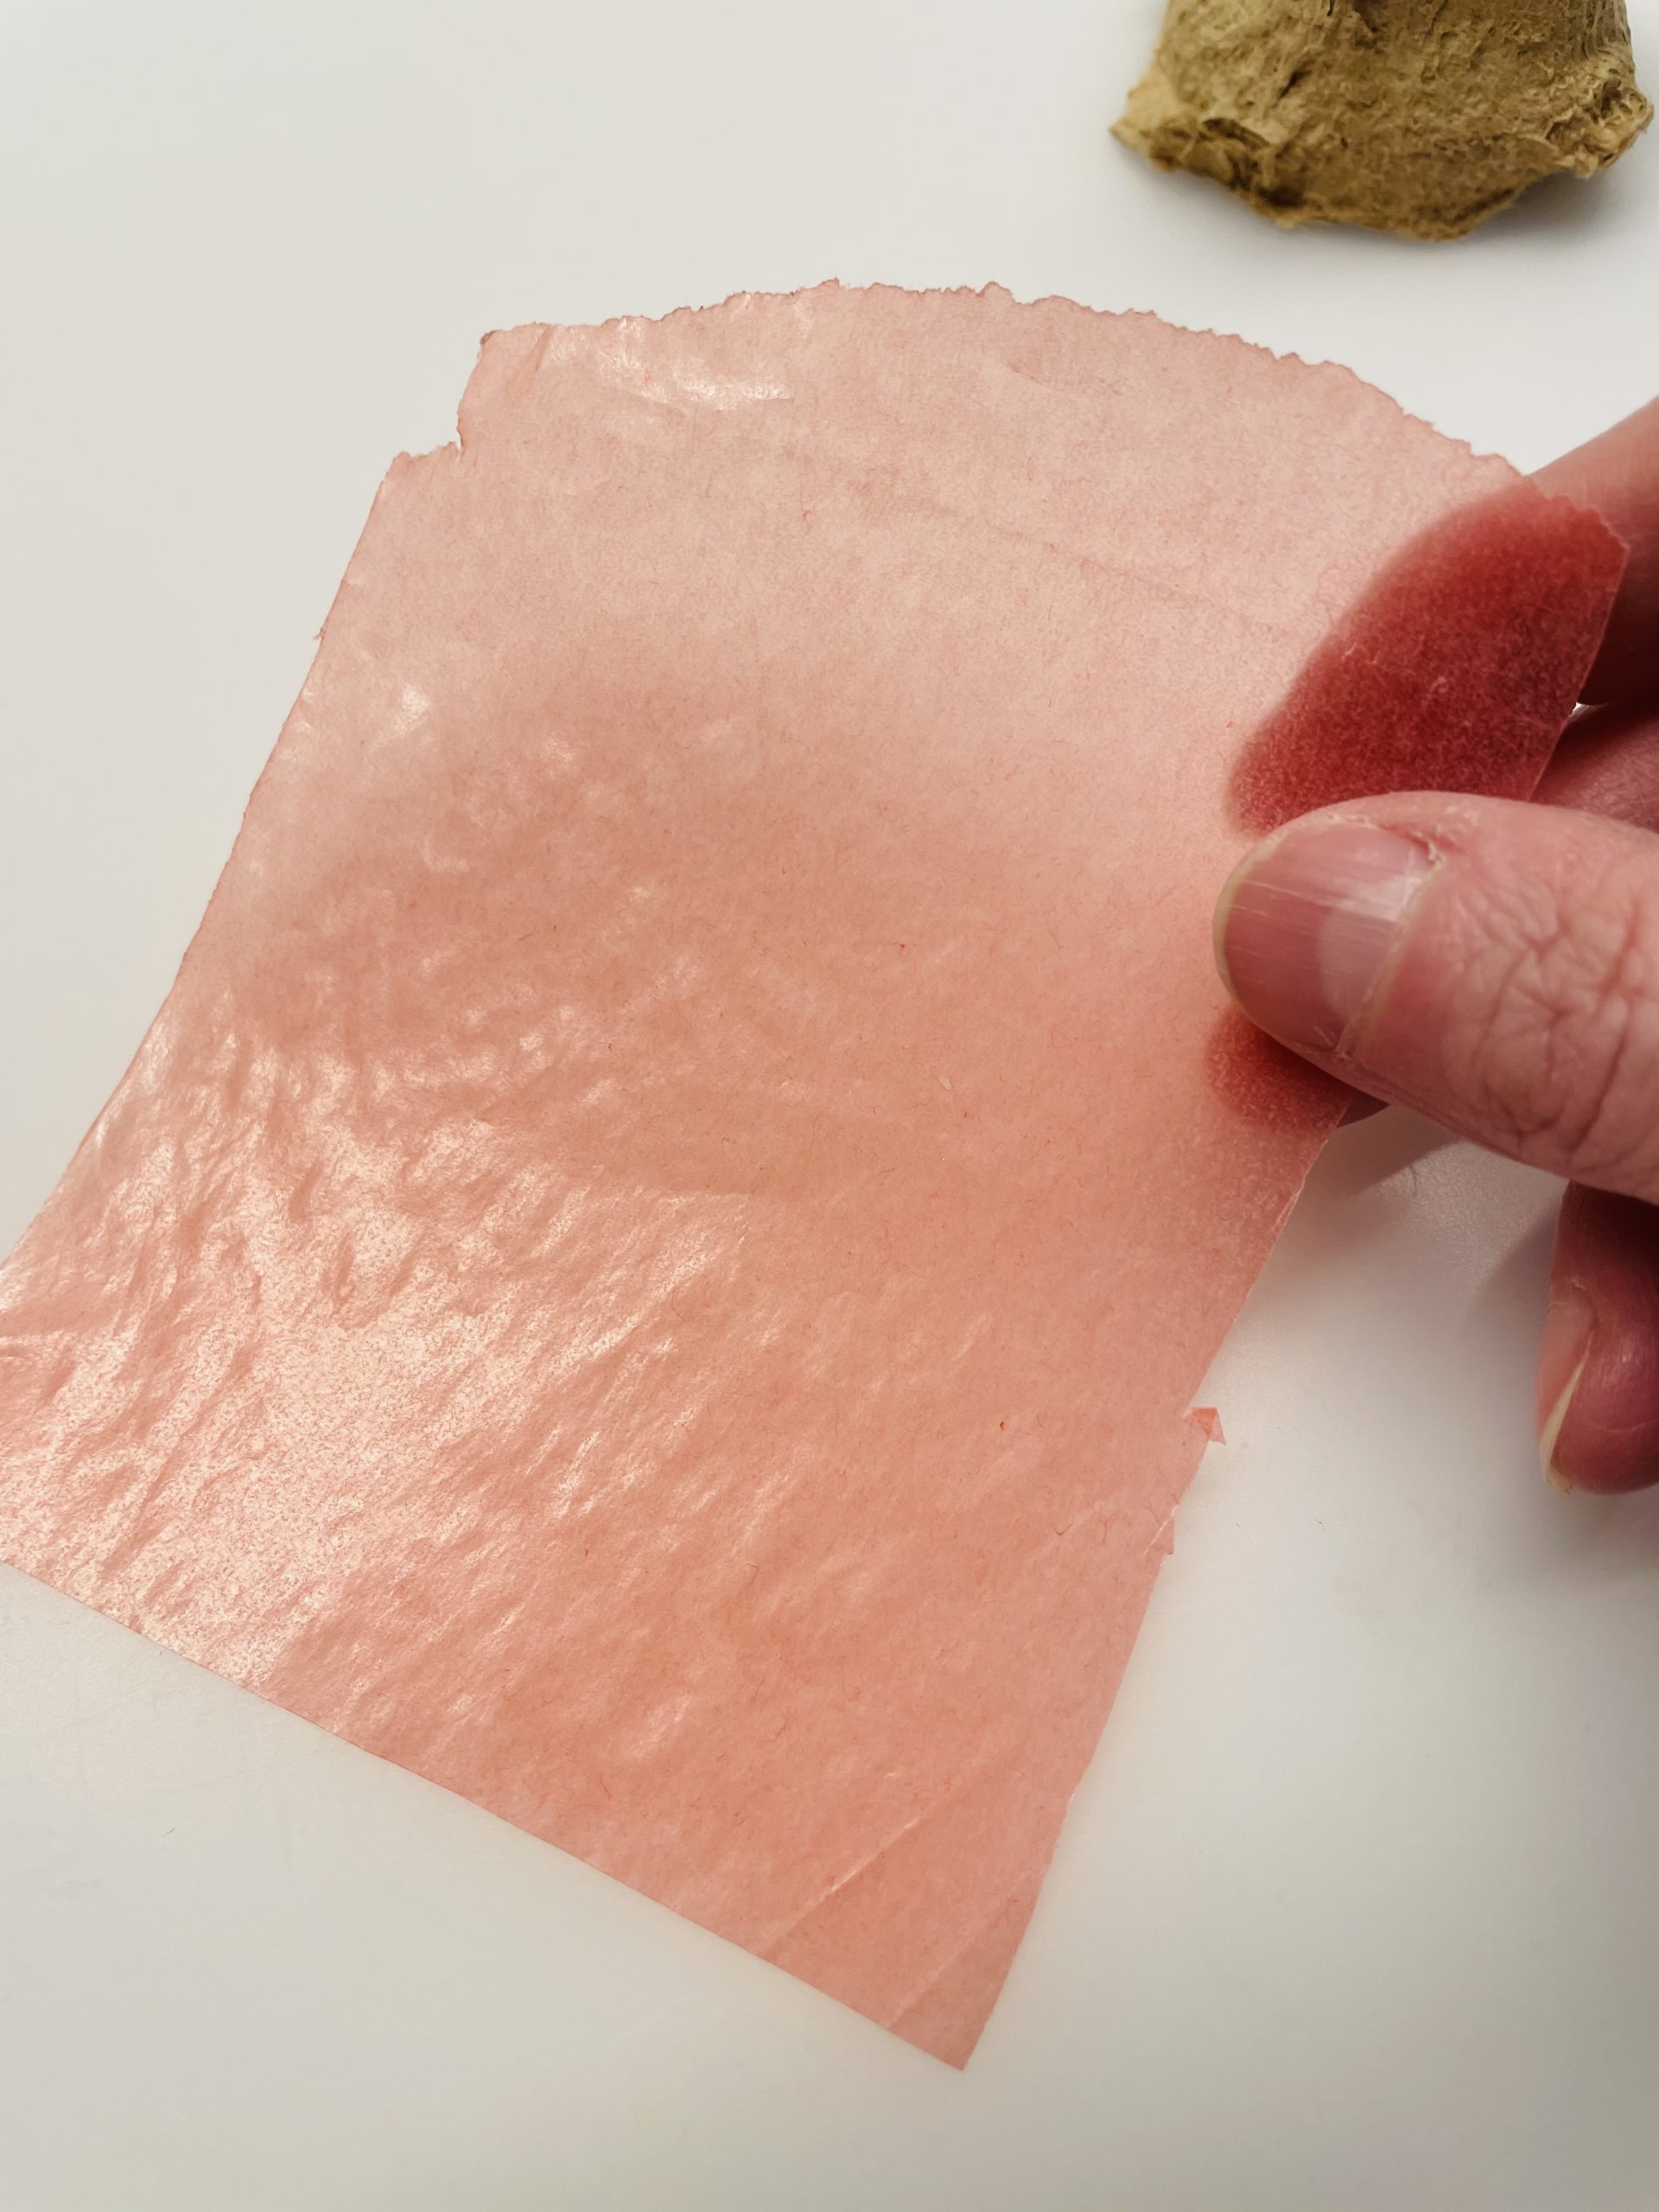
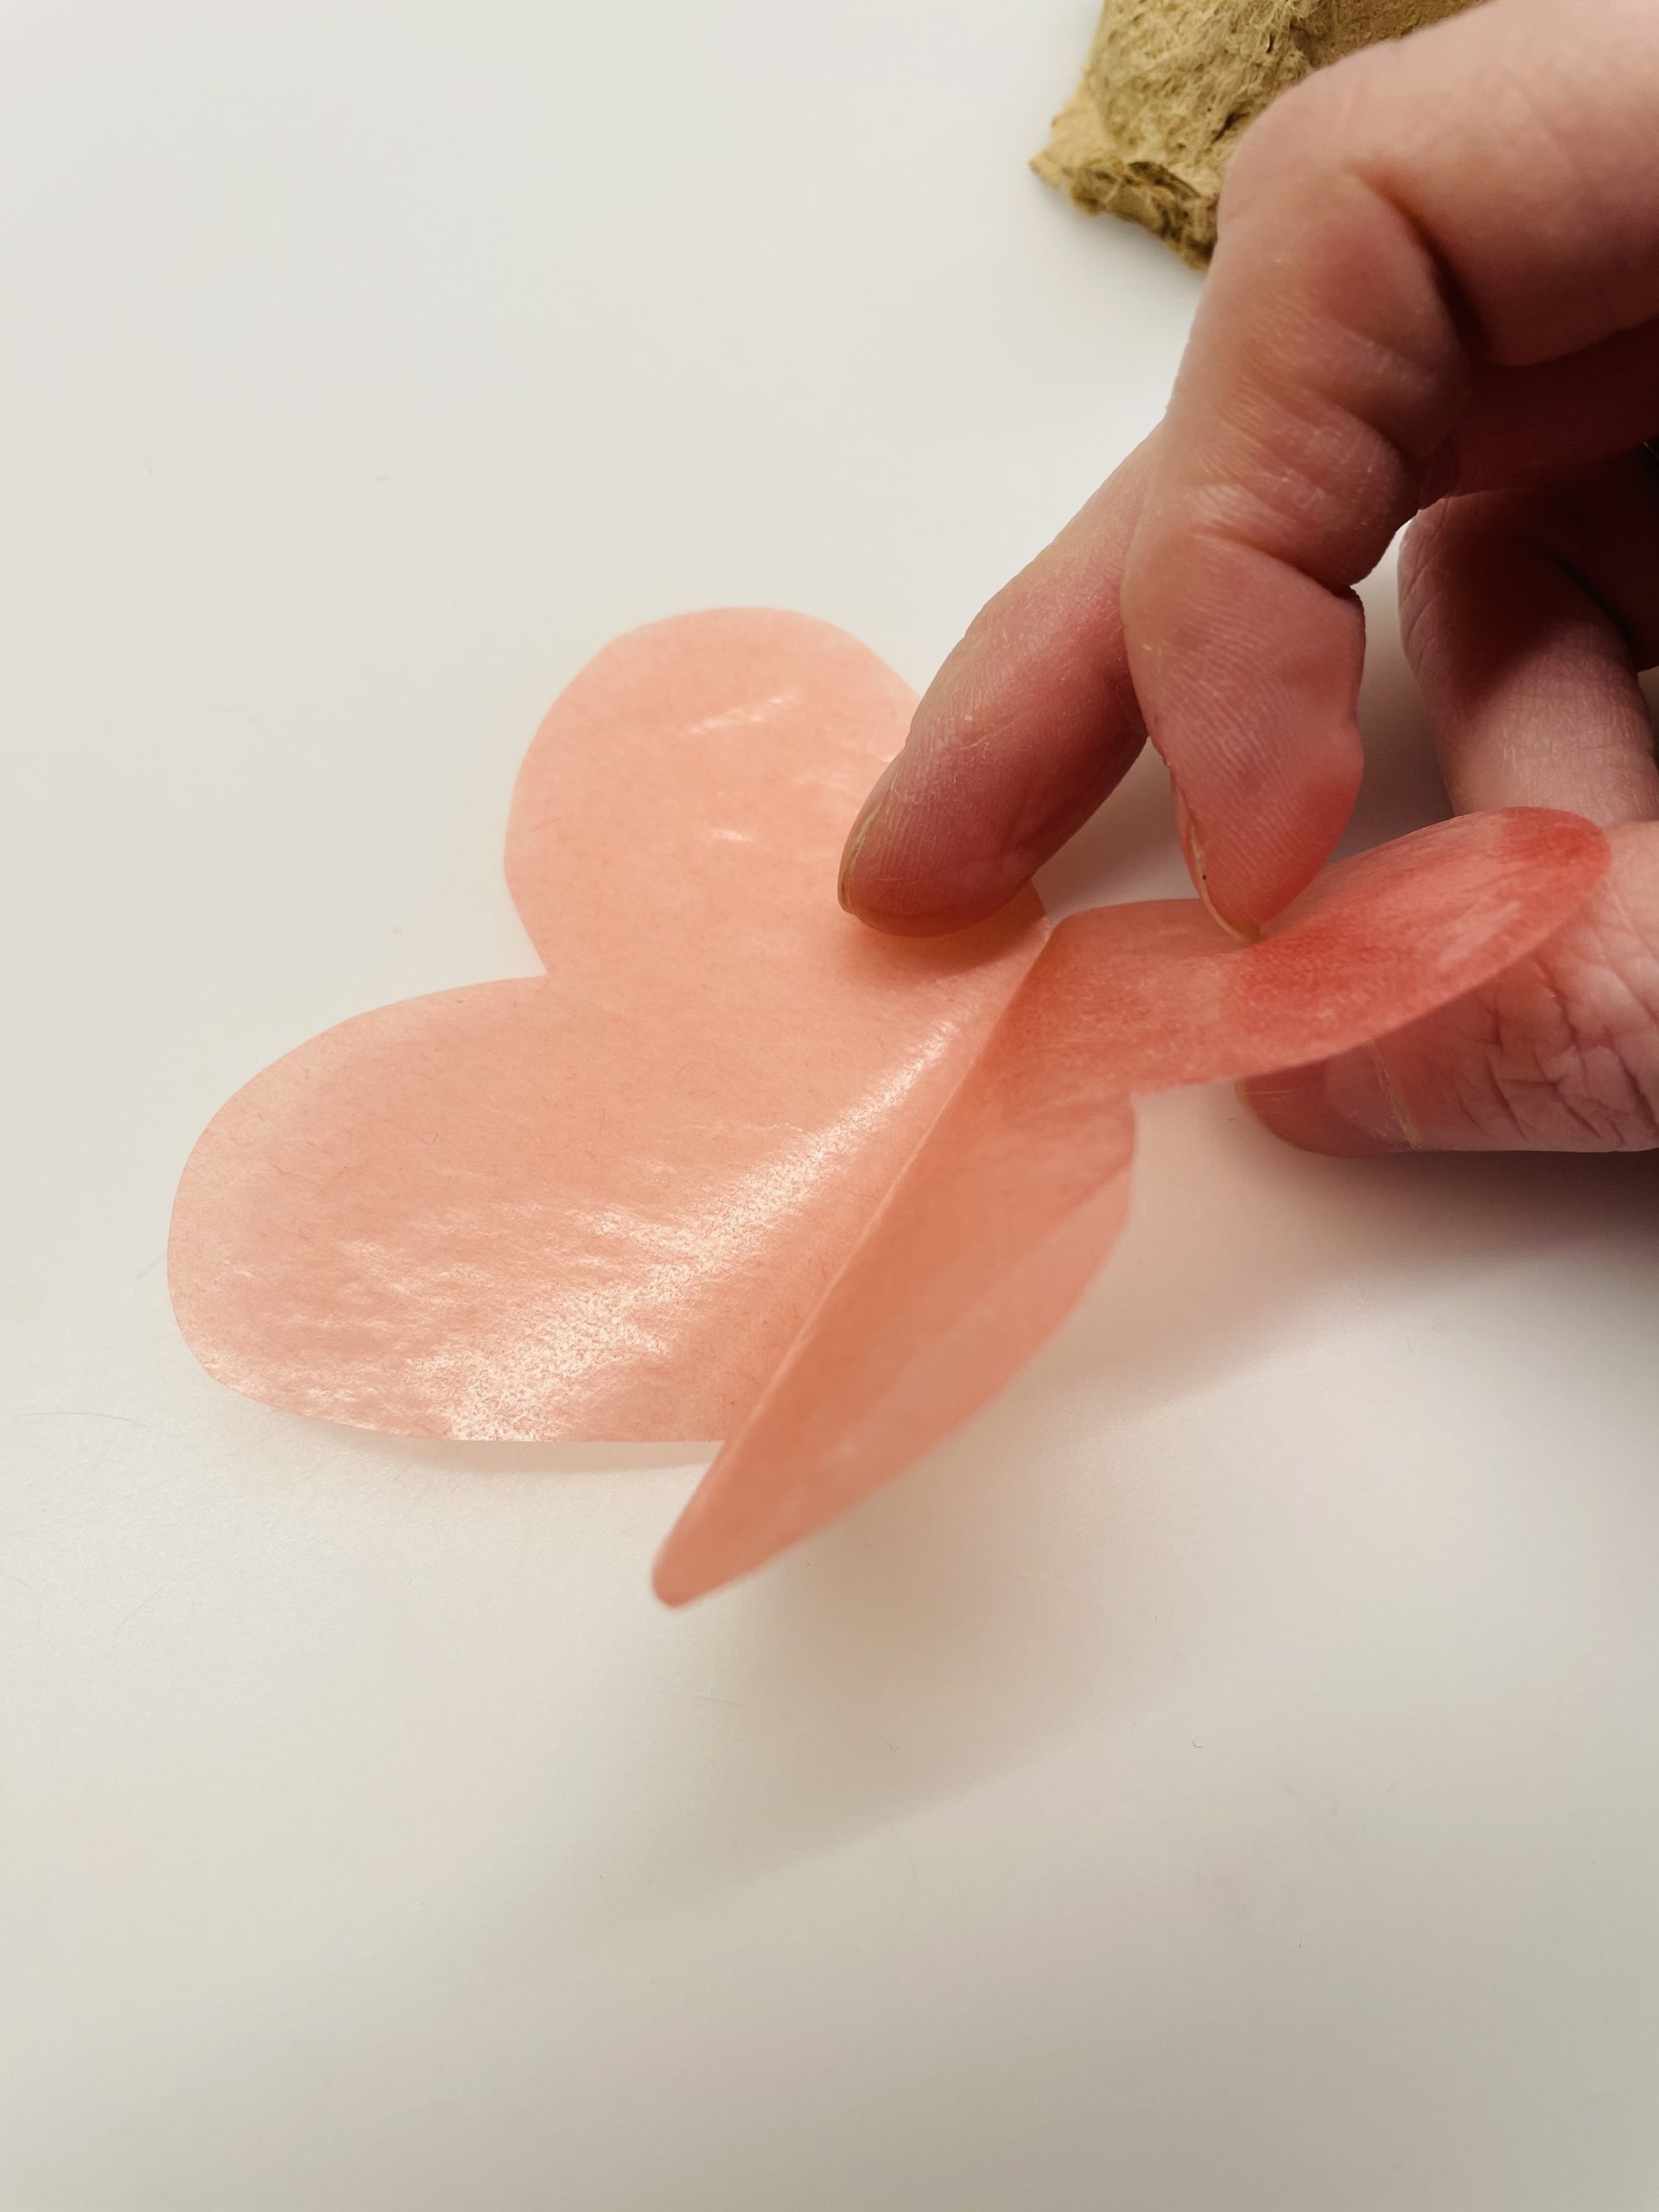
Now you need a piece of transparent paper (10cm x 10cm).
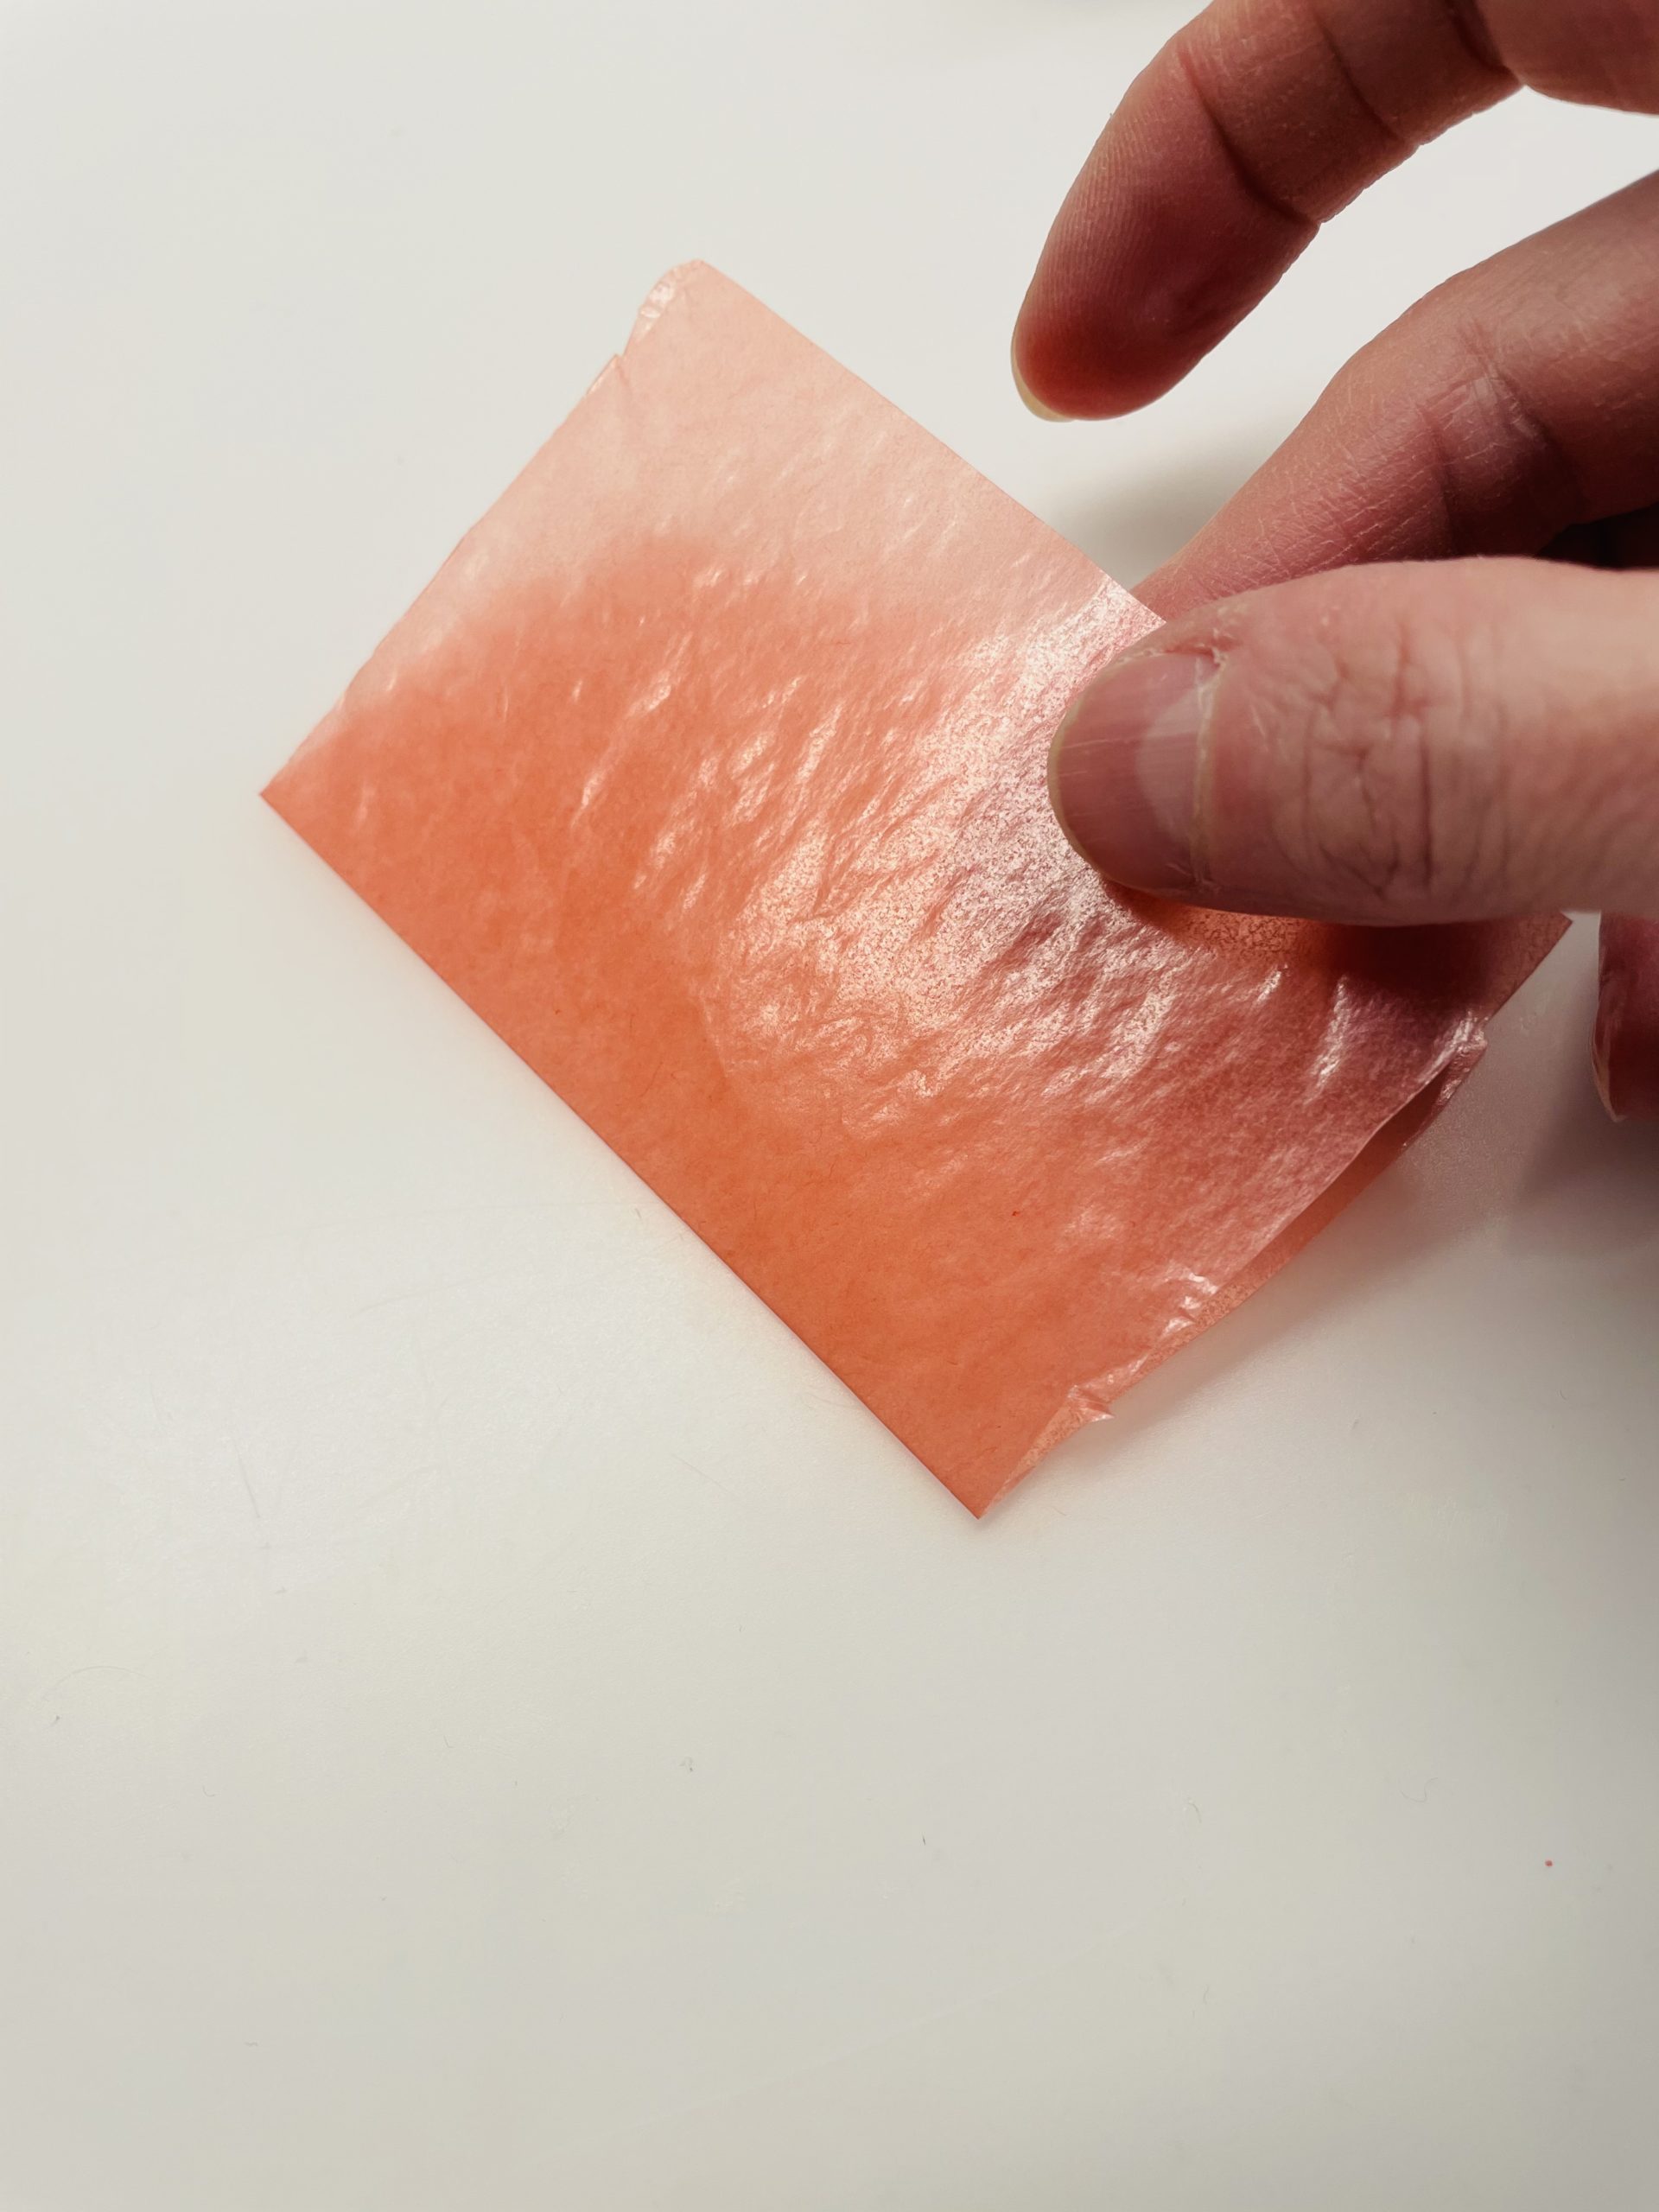
Now fold the transparent paper half-fold.
Now paint a half butterfly wing on one side. Make sure that the middle part begins at the paper break.

Now cut out the marked wings. Leave the paper folded for cutting.
Then she folds the paper apart. The wings are ready.
You look like a butterfly without a body!
Now cut off several threads (10-12cm long) from the wool. The wool threads do not necessarily all have to be the same length.

Now tie up the threads in the middle, put a thread across the other threads.
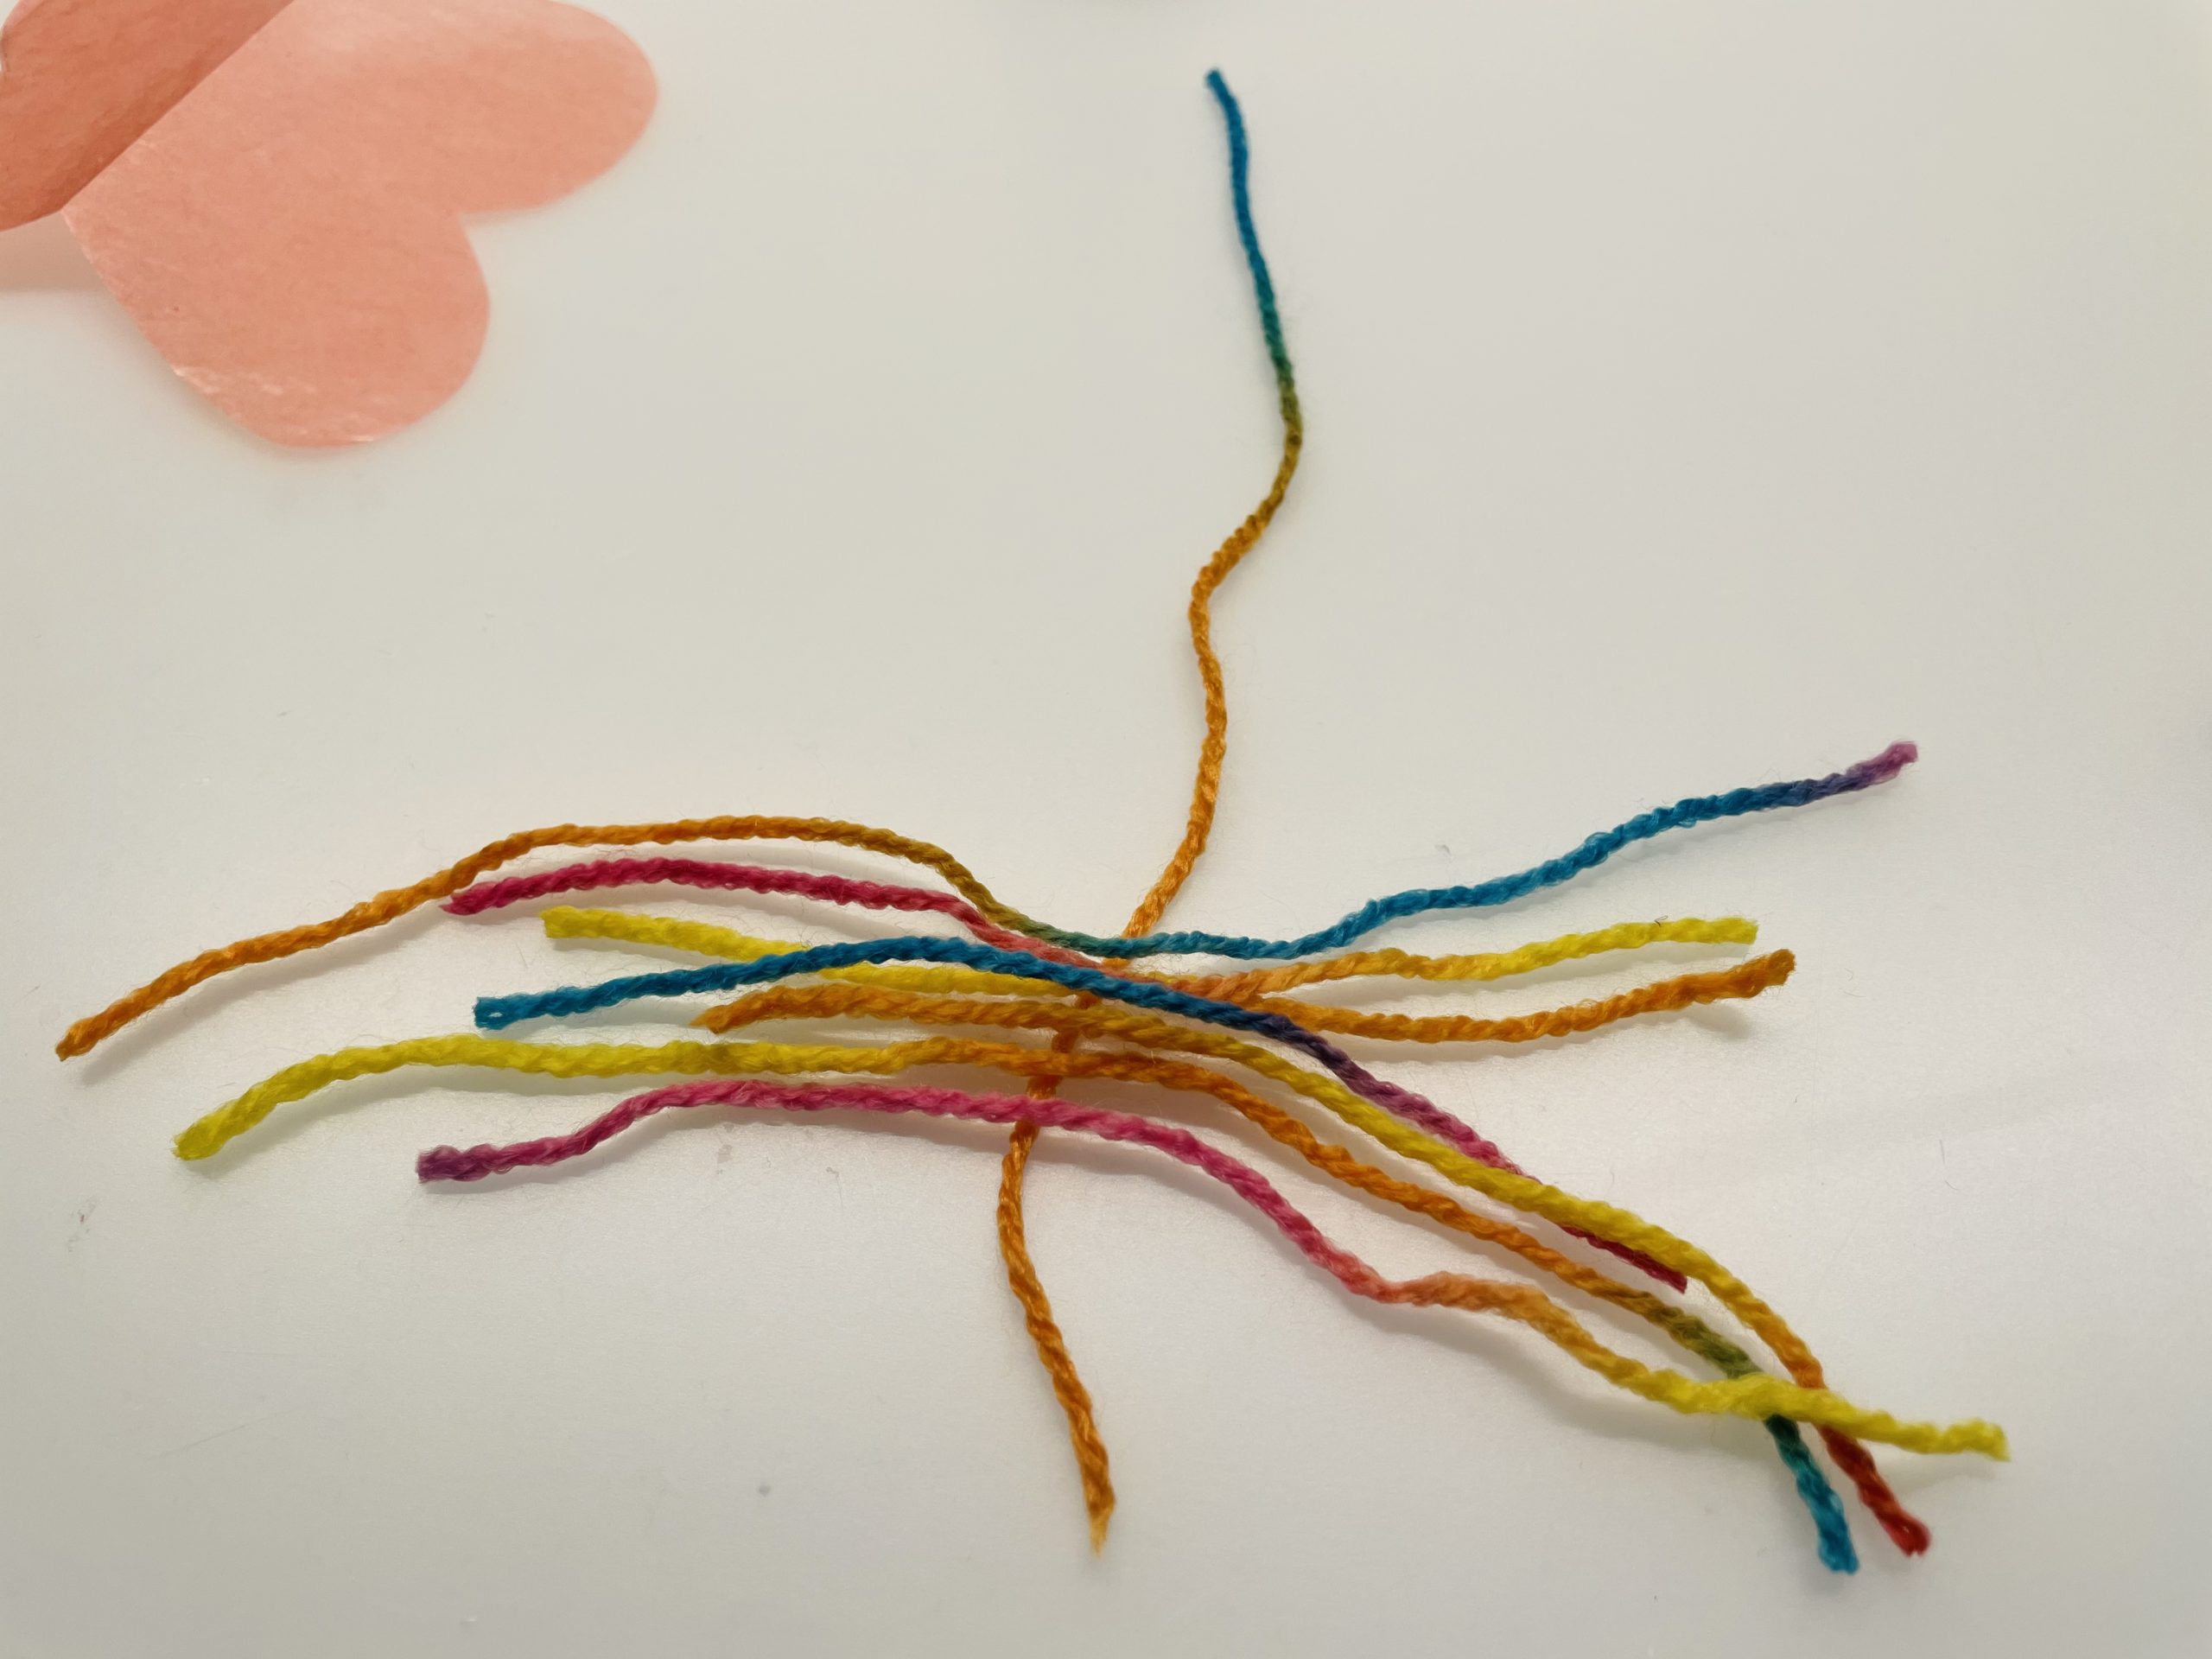
So tie the threads together with a thread.
Then you knot the thread twice.

The fairy's hair is ready.
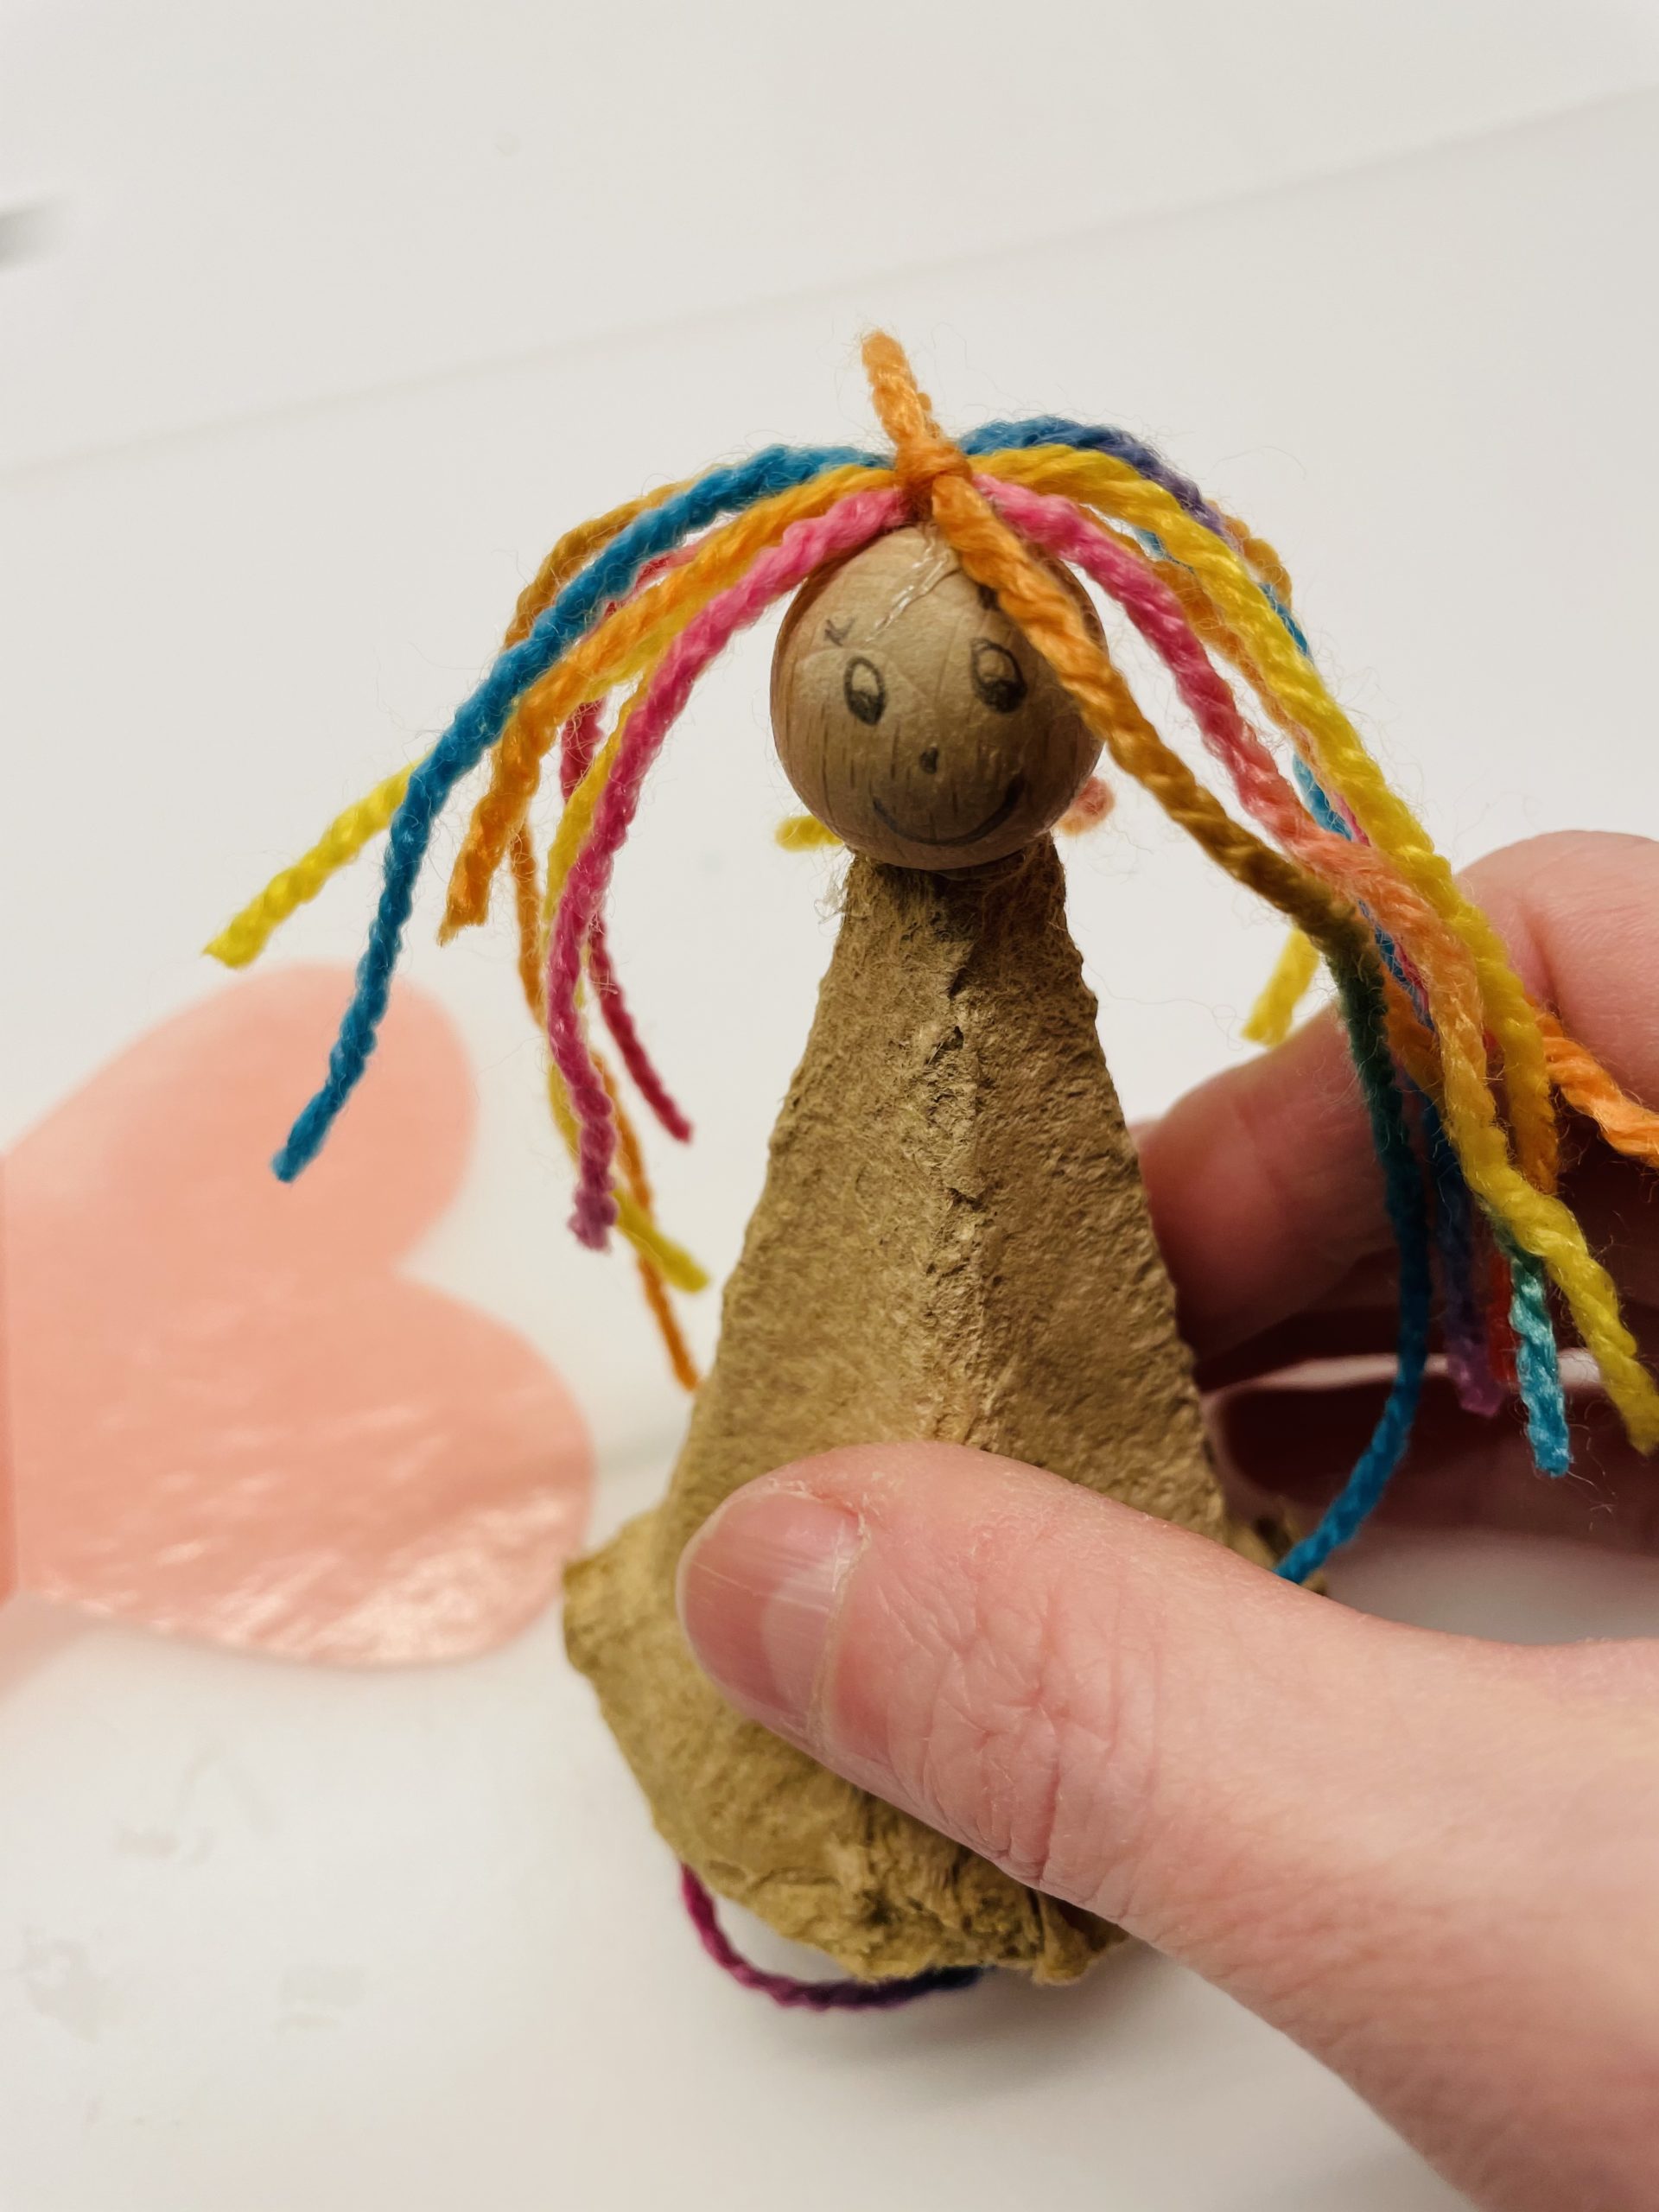
Now you paint a face on the wooden ball.
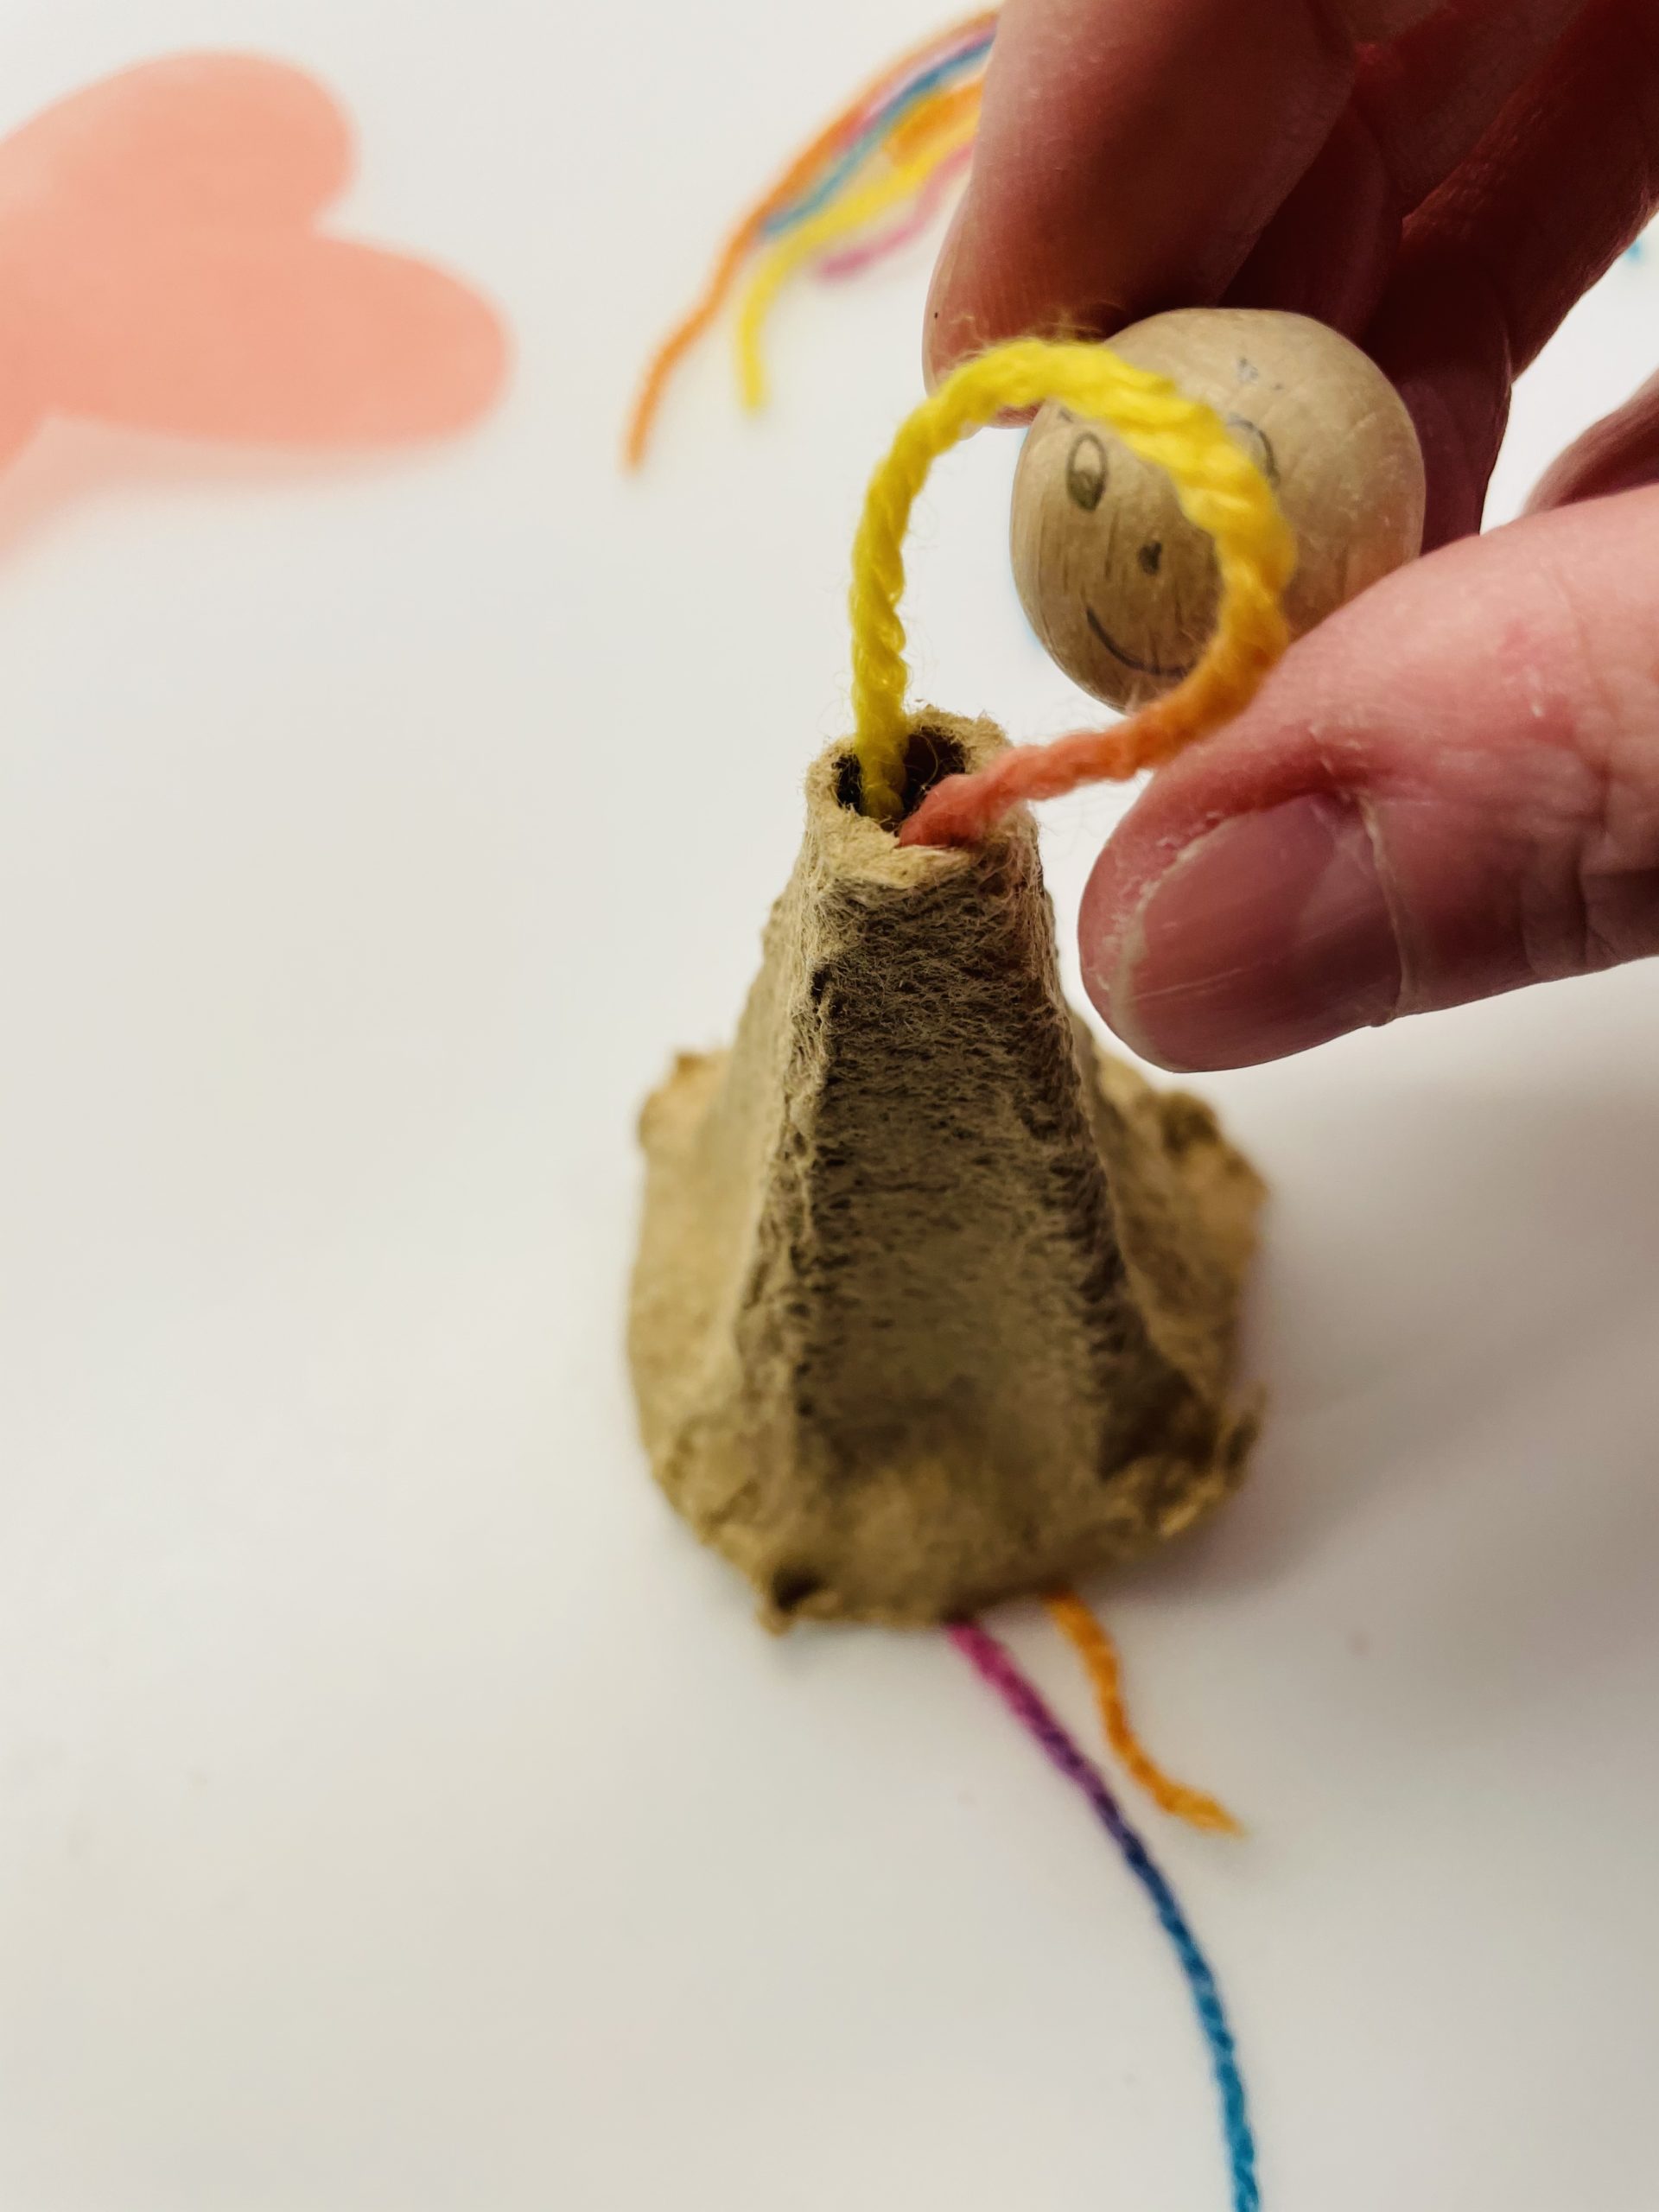
Now cut off another piece of wool (about 20cm long).
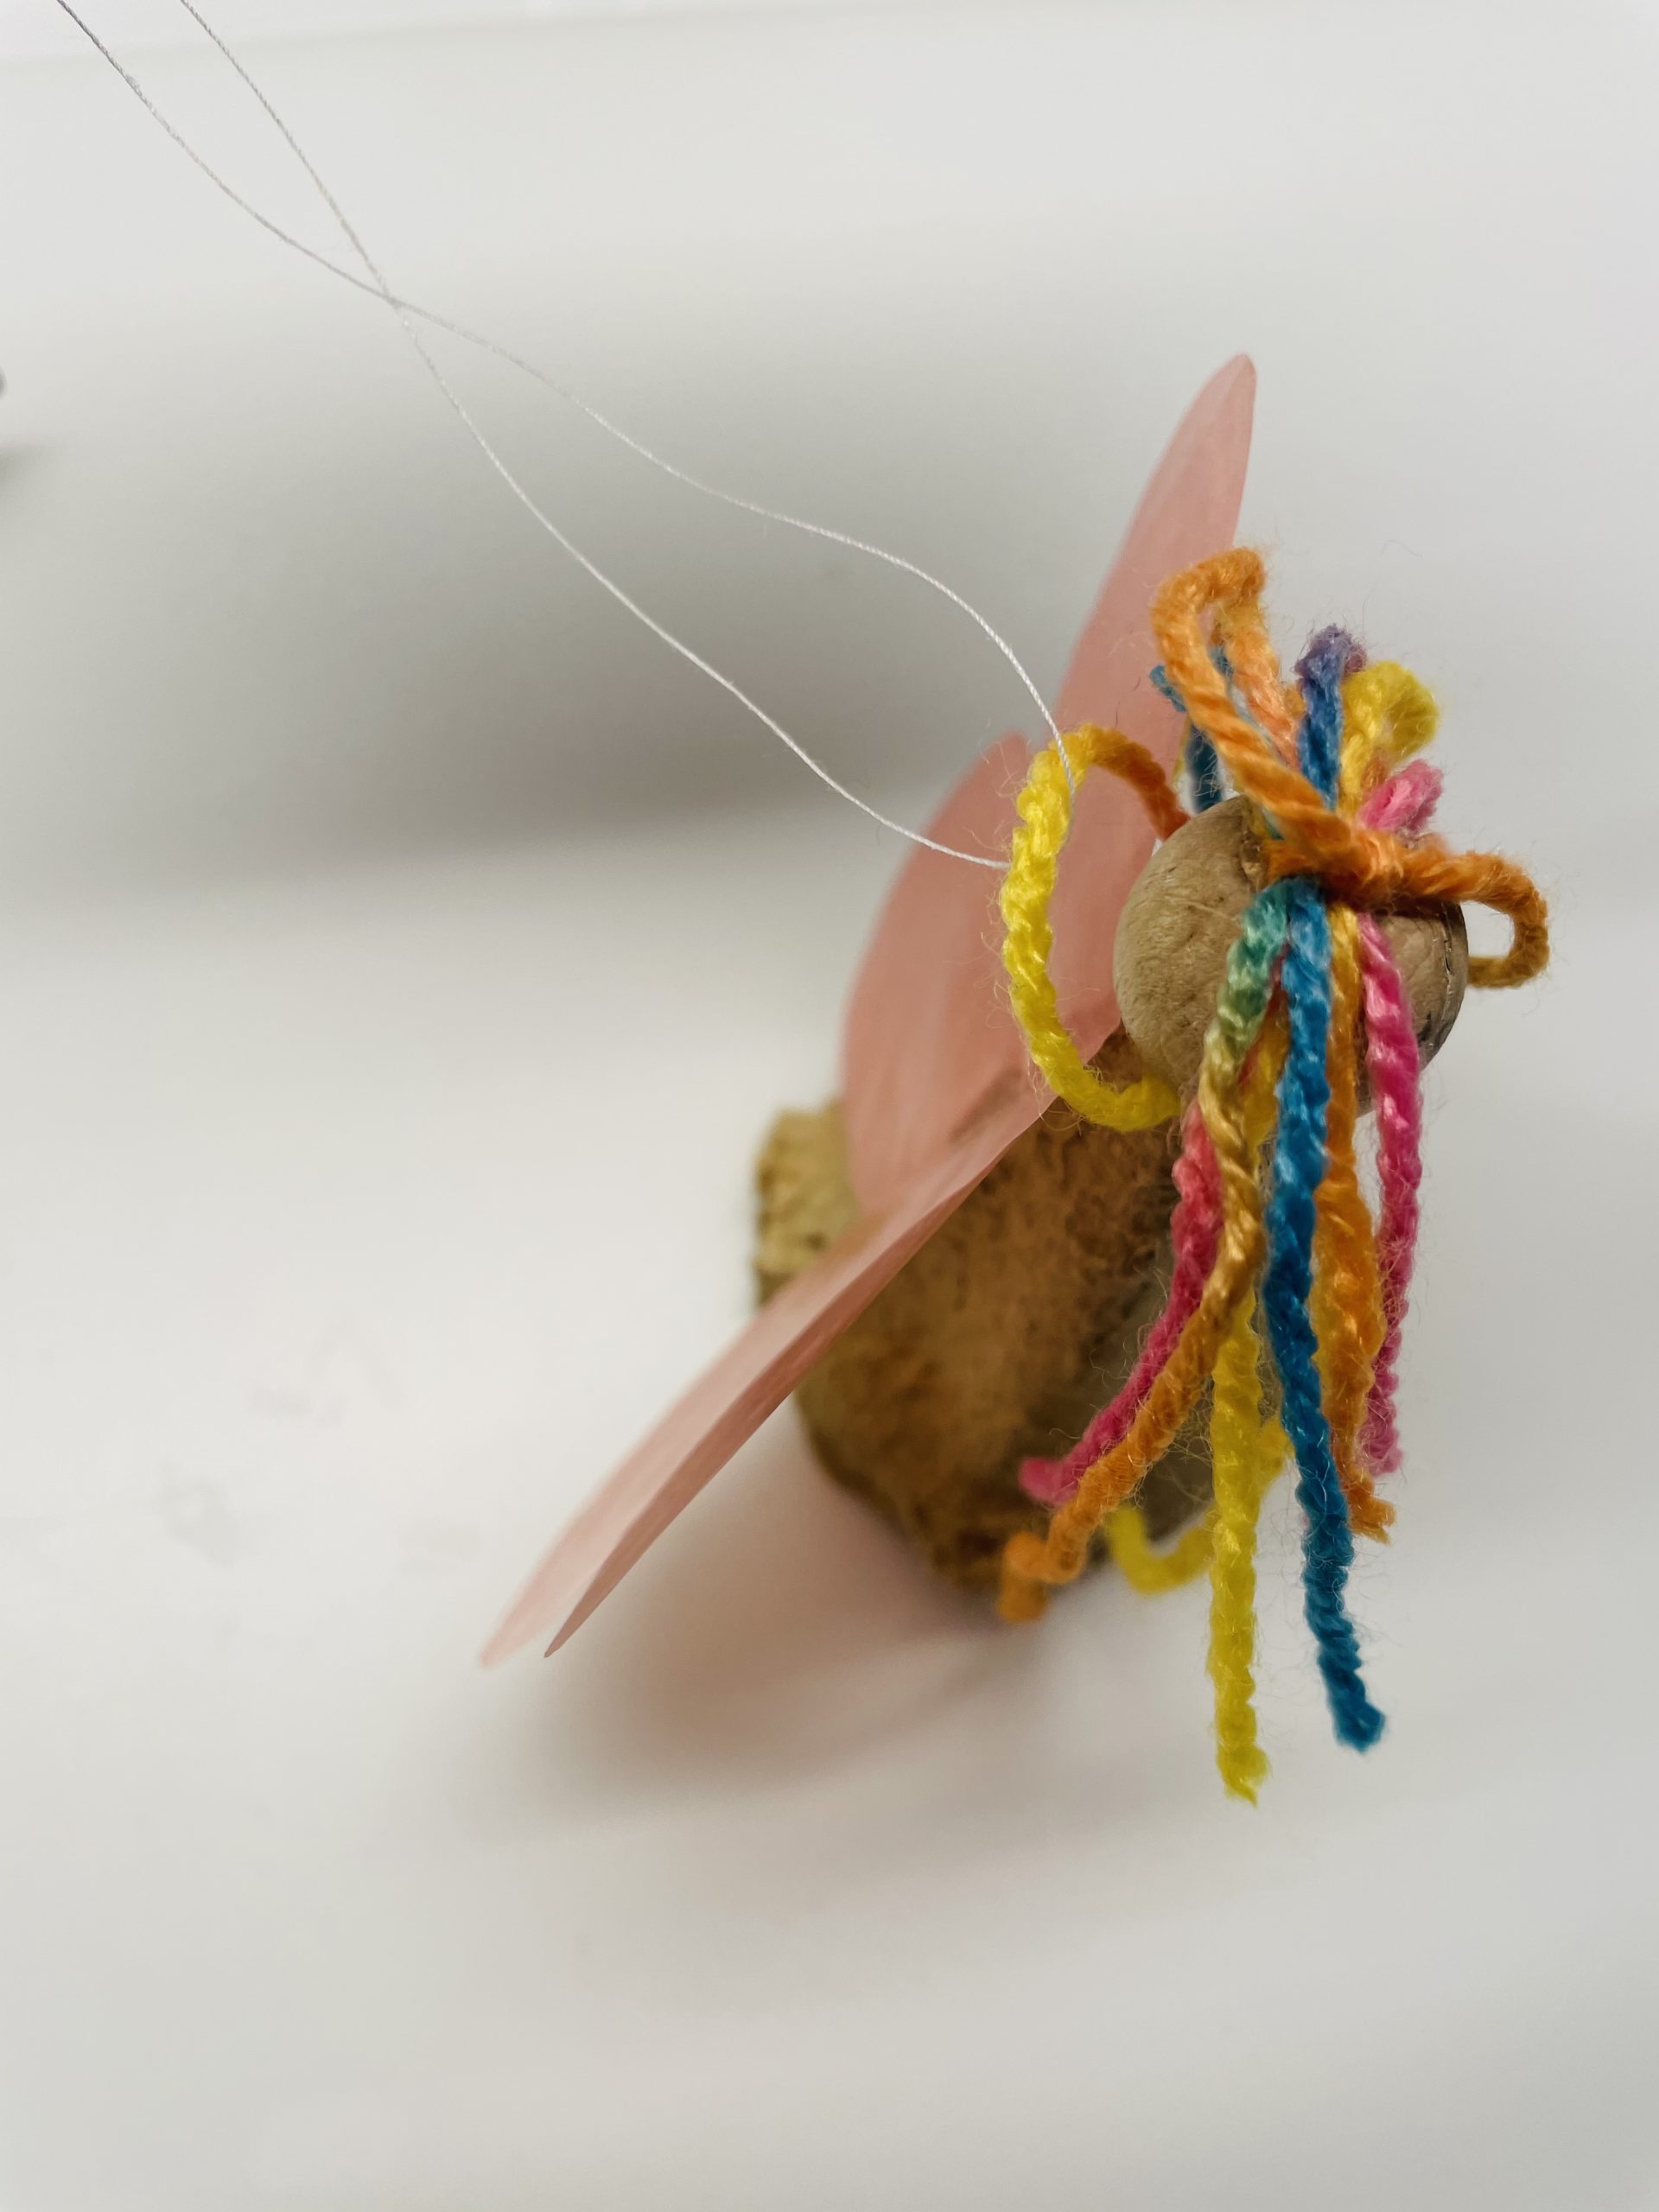
Put the wool thread half on each other and thread the wool with the closed side from bottom to top through the tip of the egg box. Push the thread through the tip of the egg box. Use a pen to get the thread more easily through the tip.

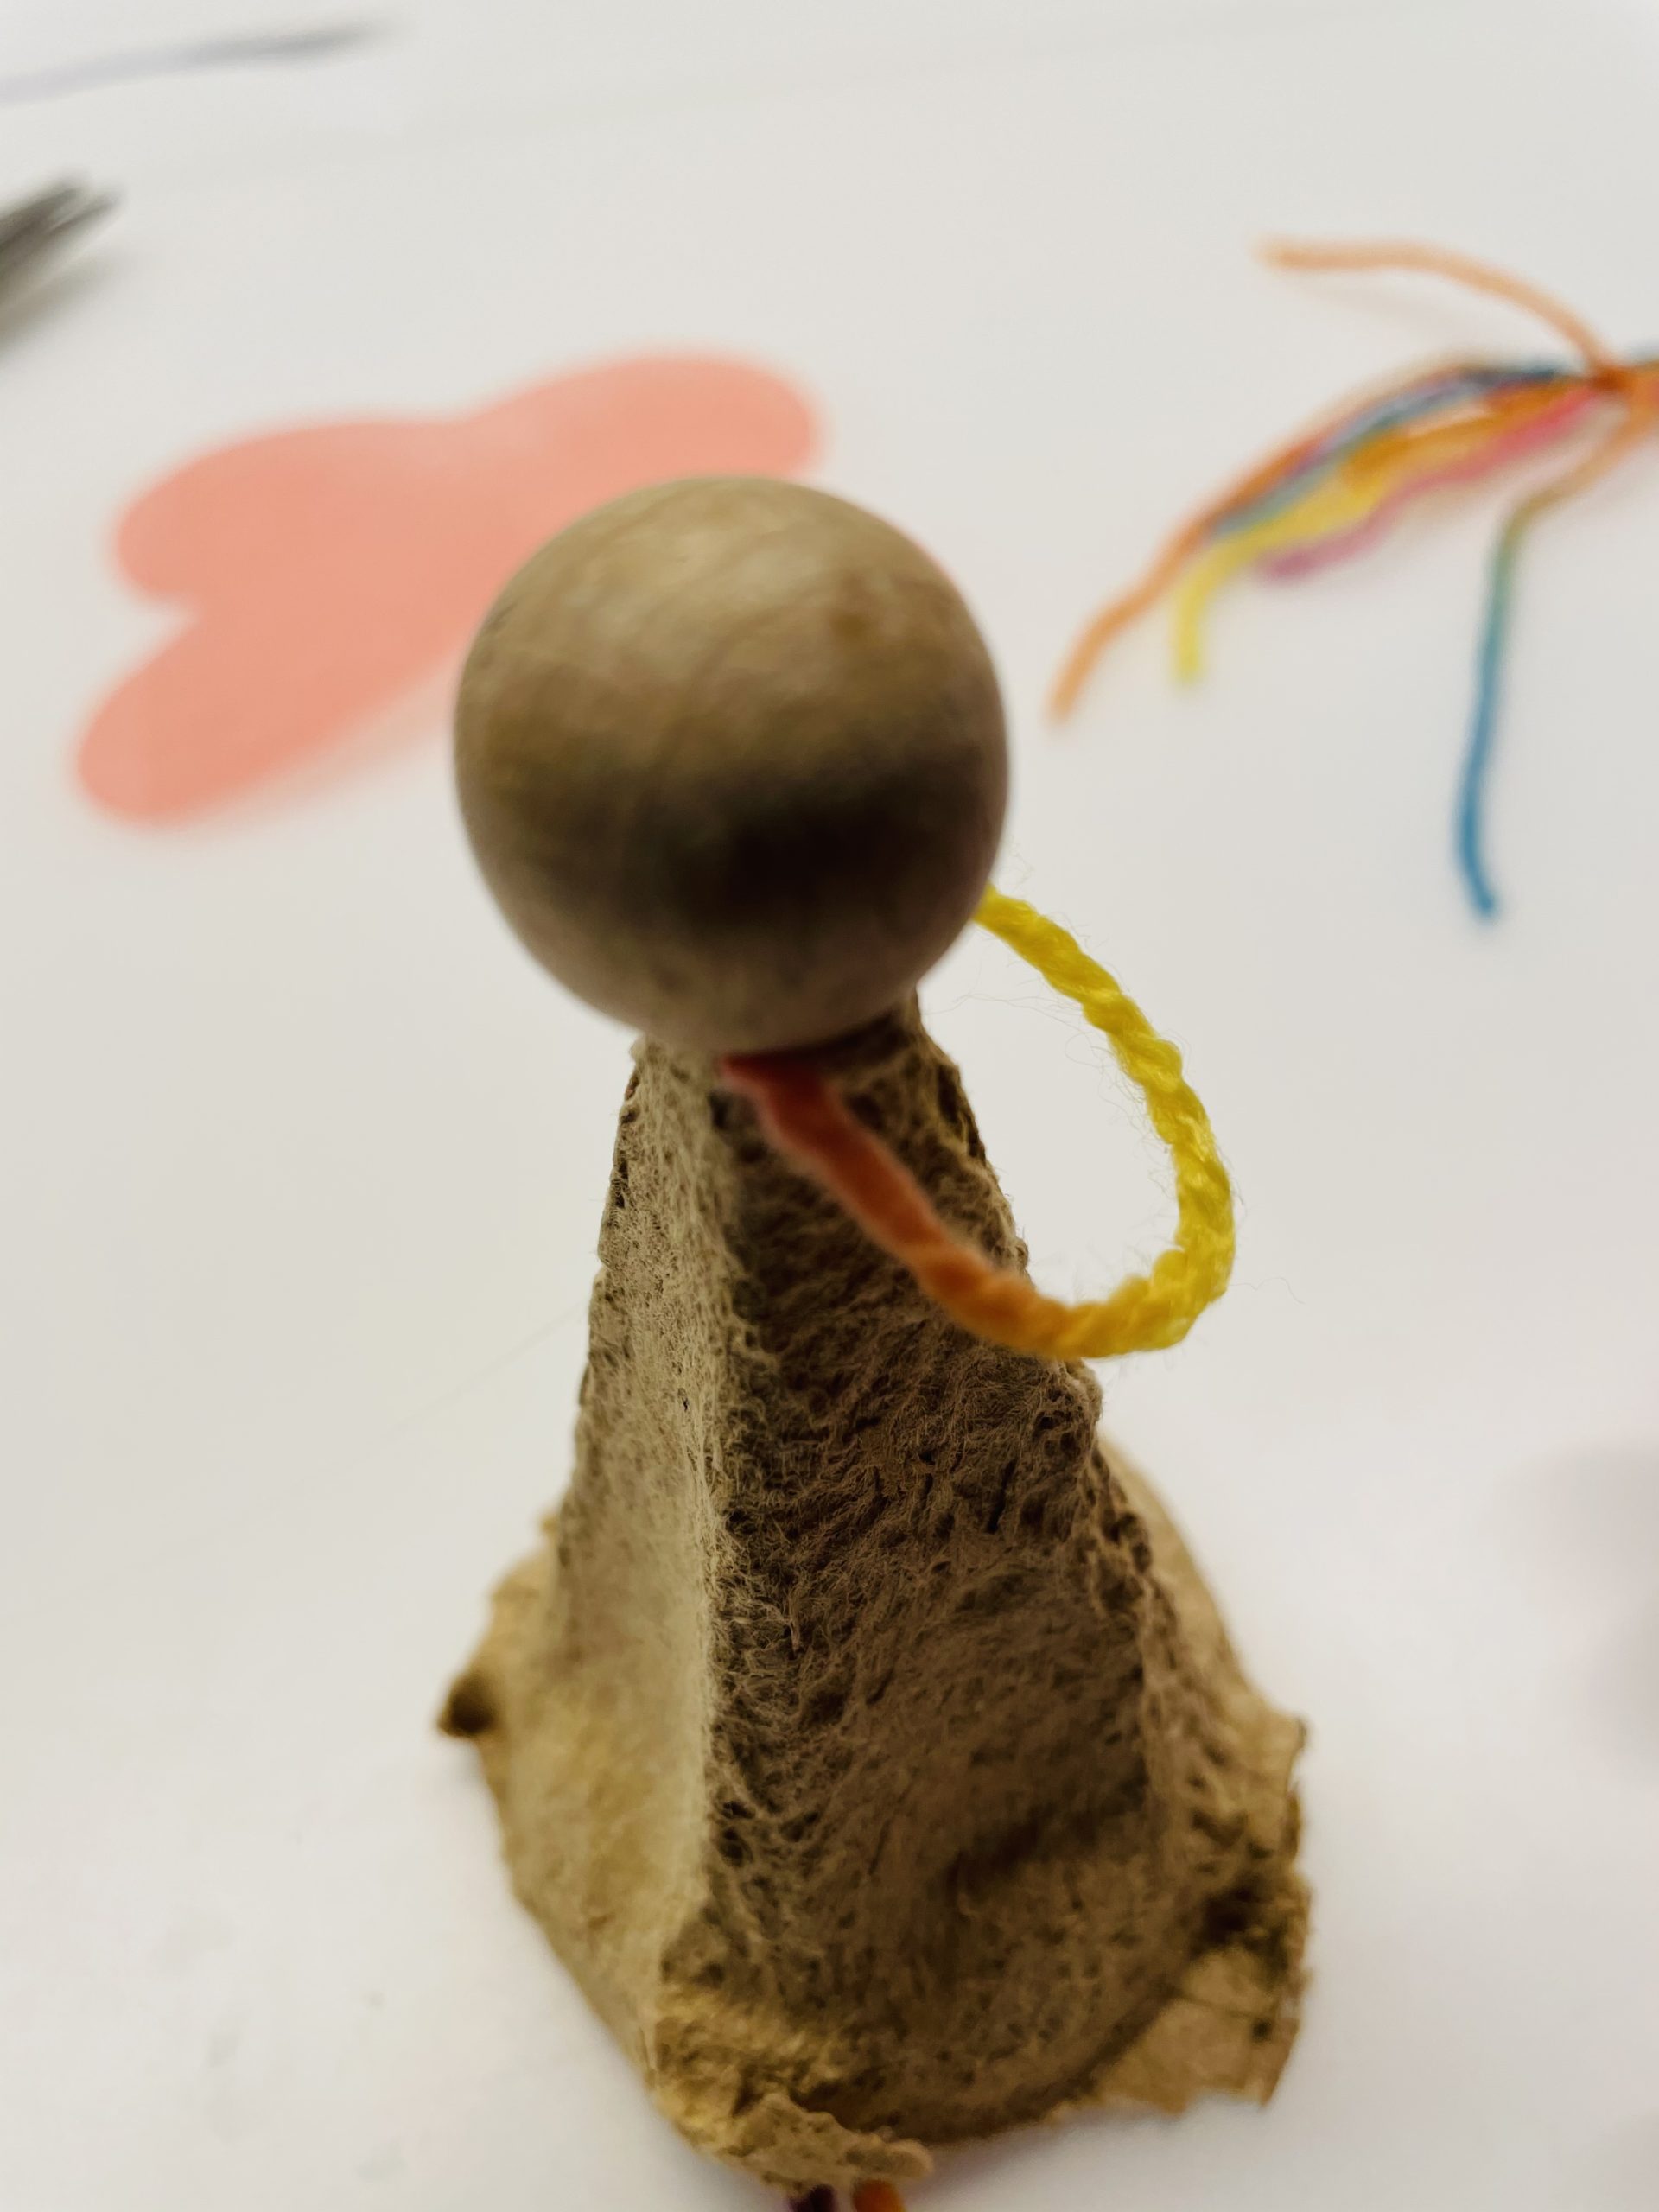
The loop looks a piece out of the tip and is now bent.
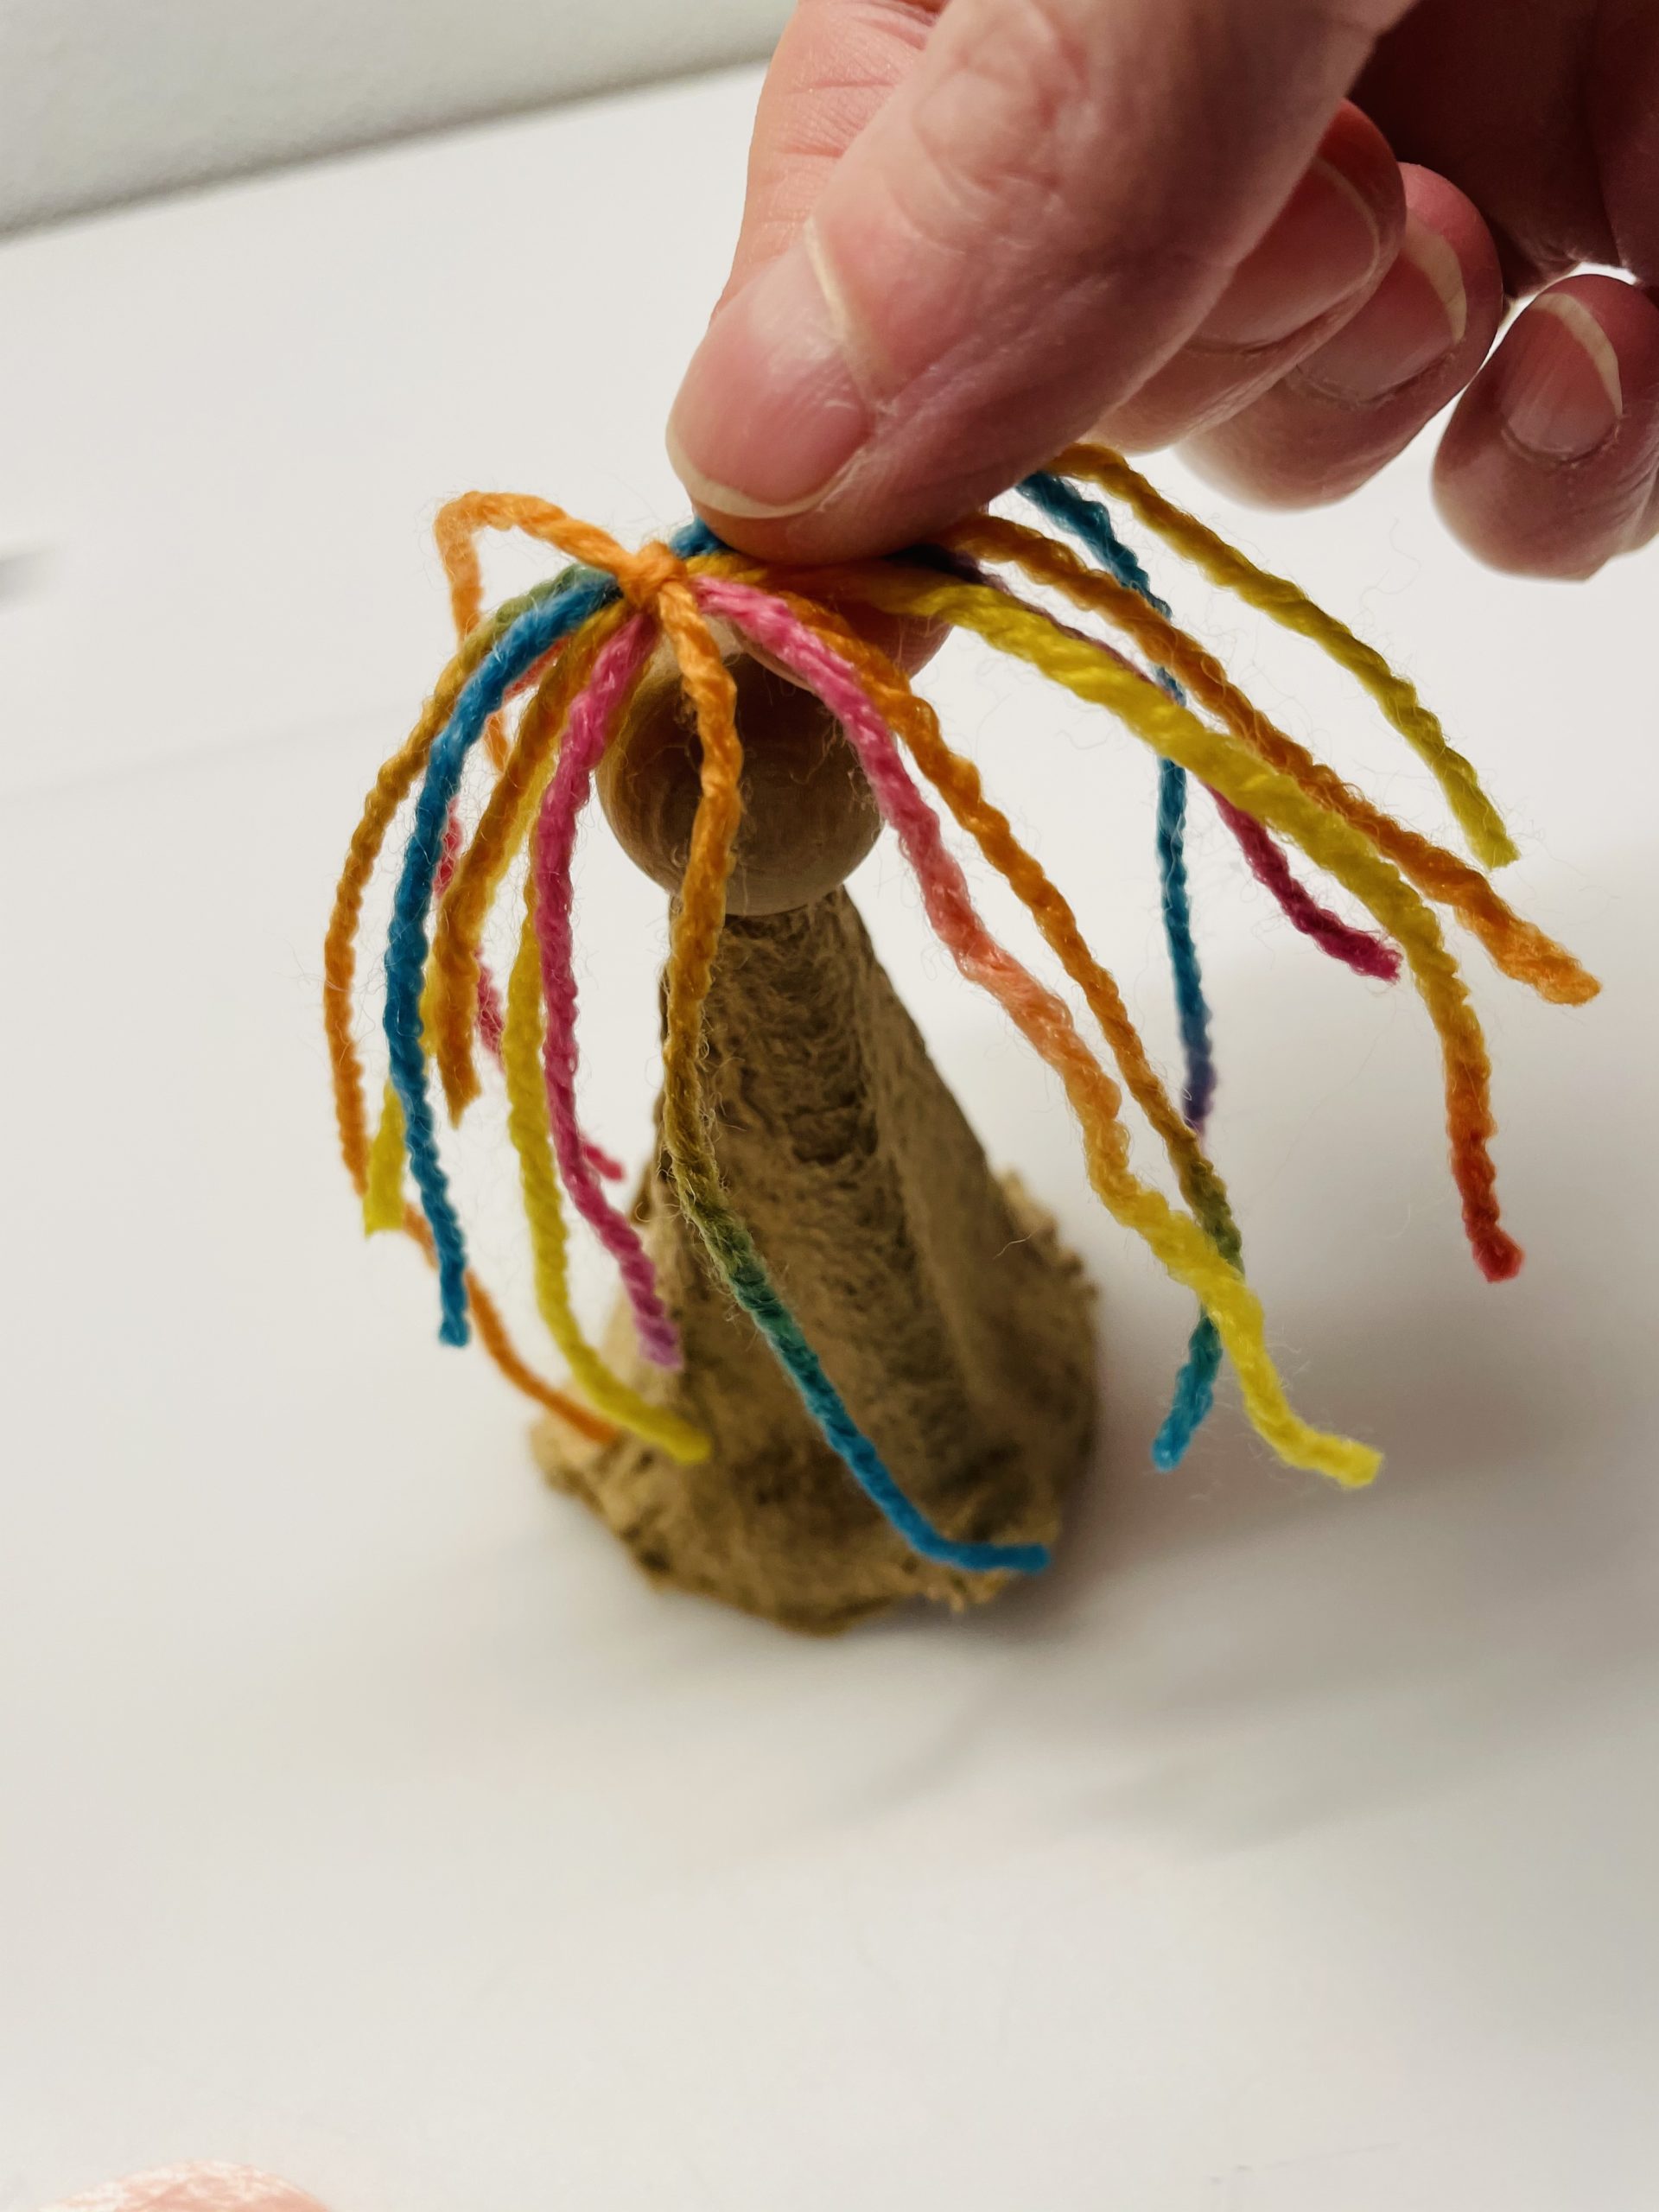
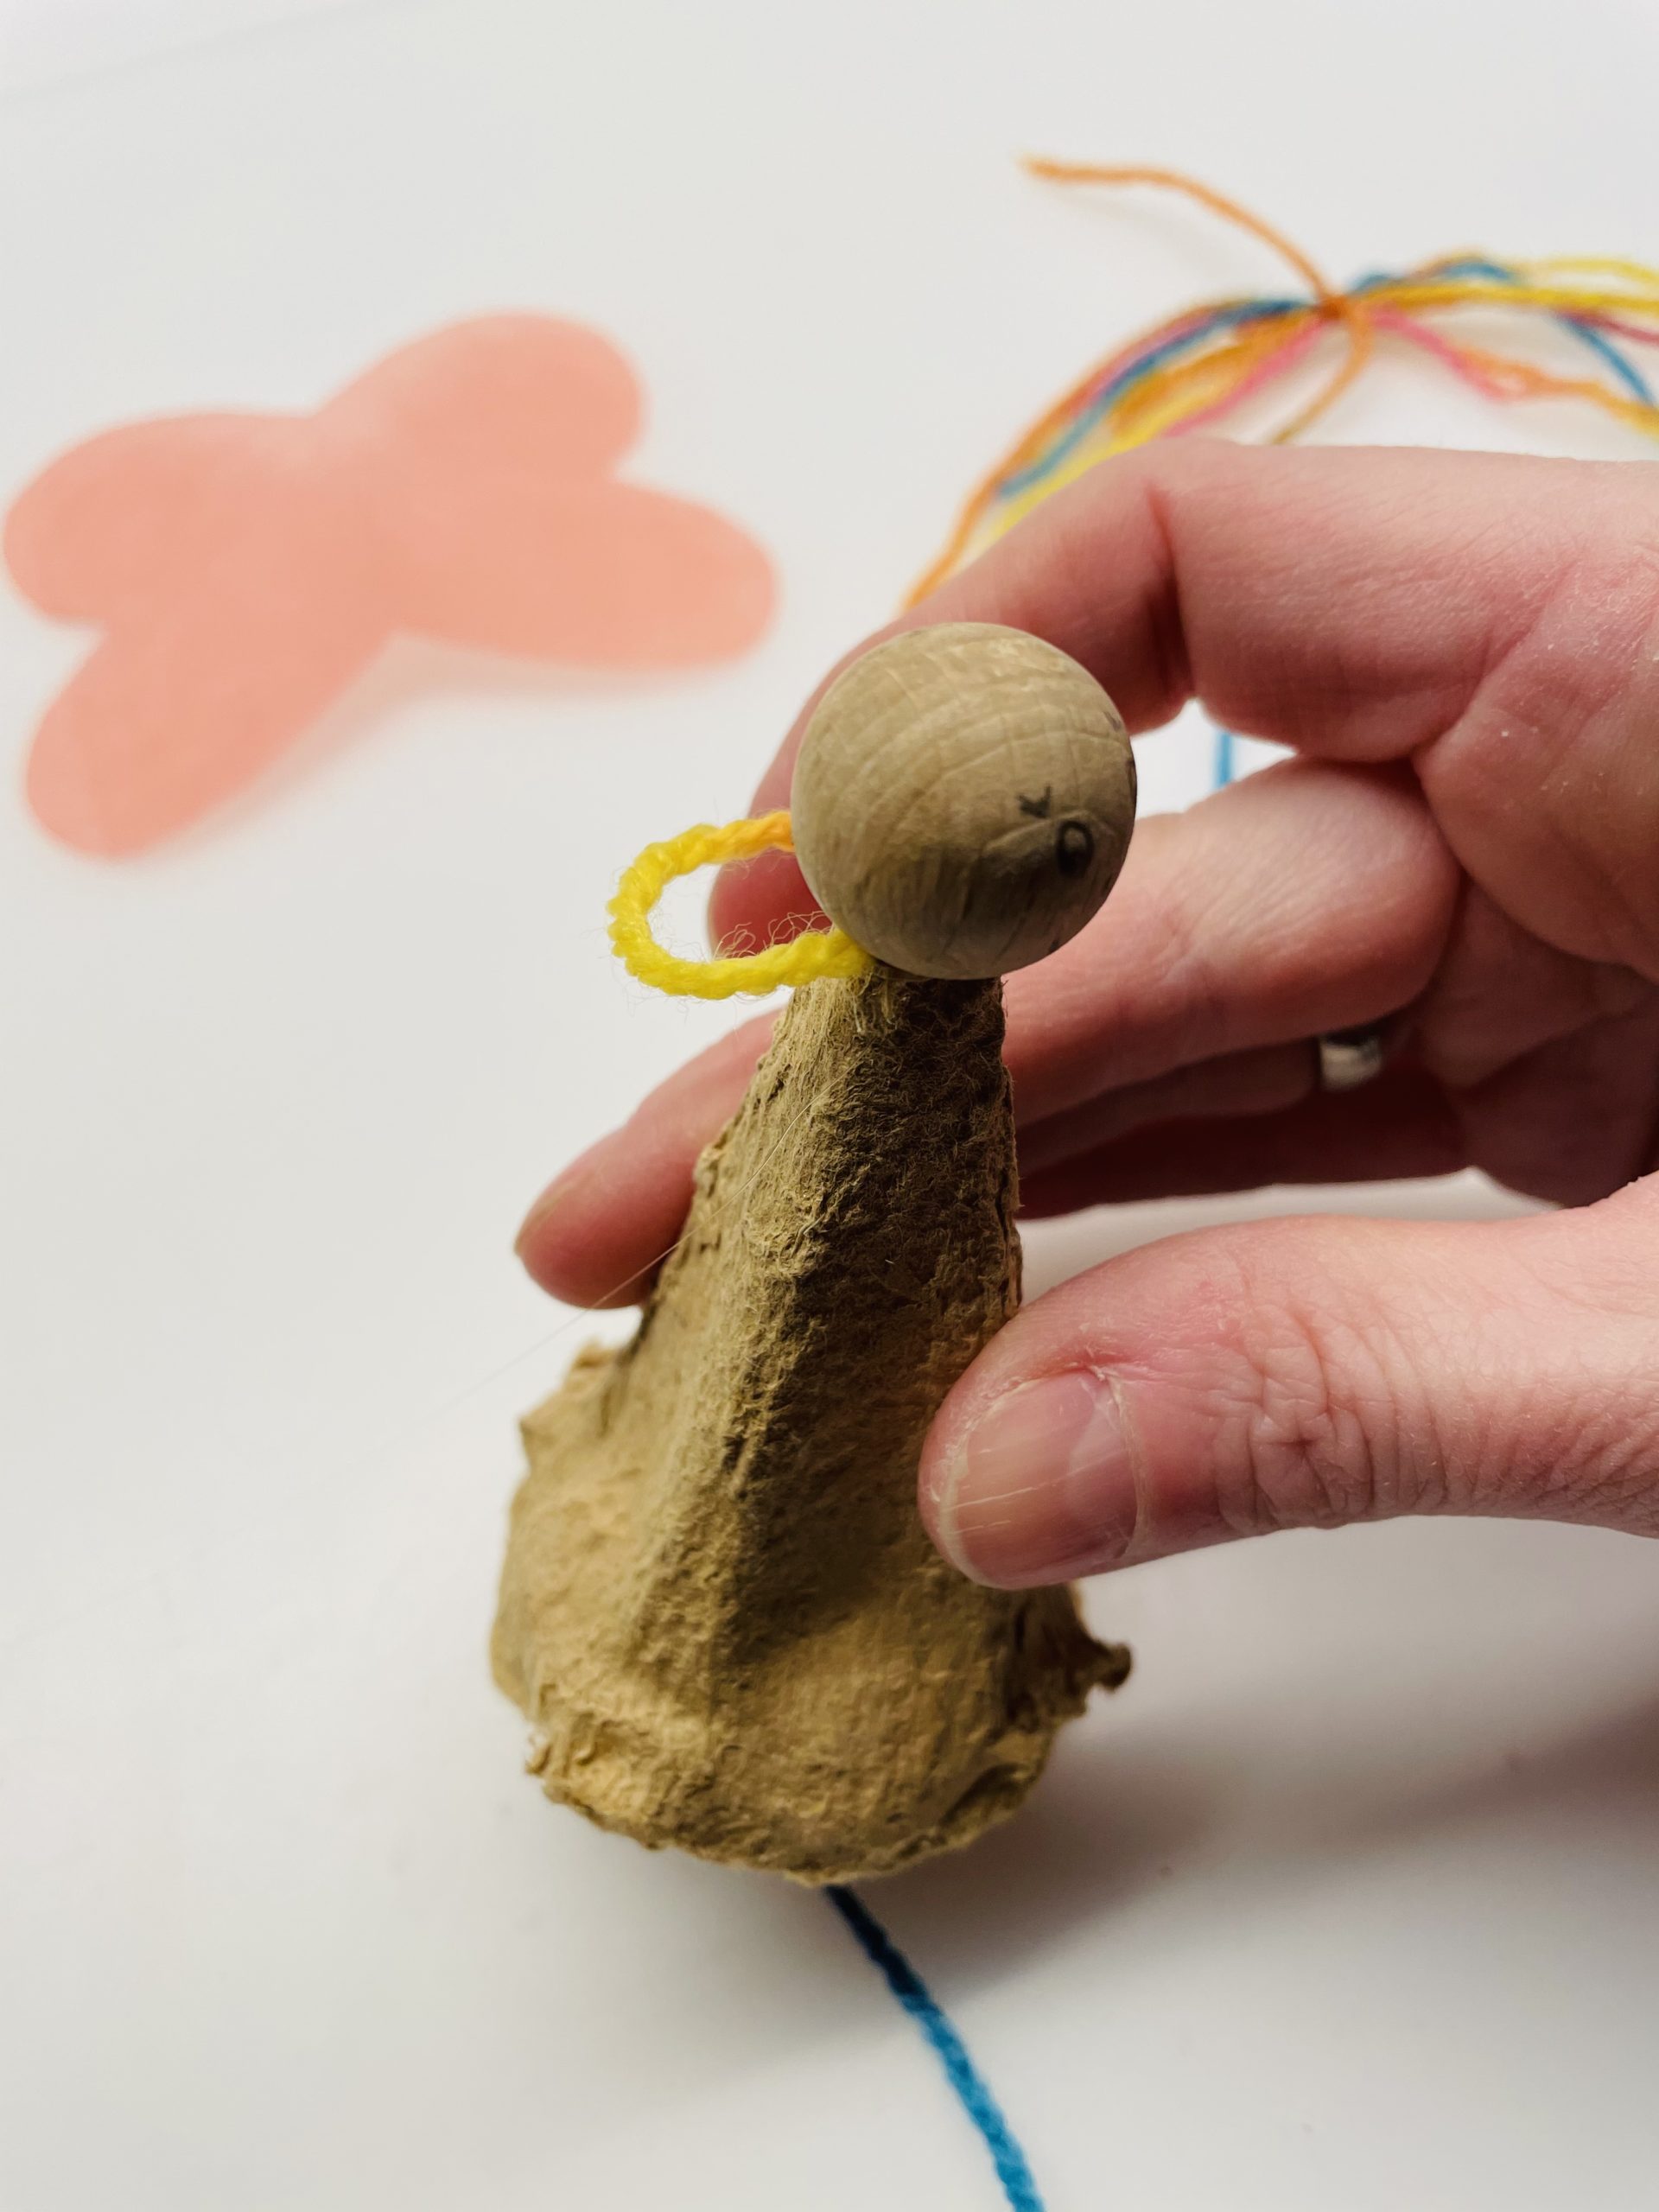
Then you stick the wooden ball with the hot glue to the top.
You can hang the little fairy on the loop later.
Now you put the wool hair on the head of the fairy.
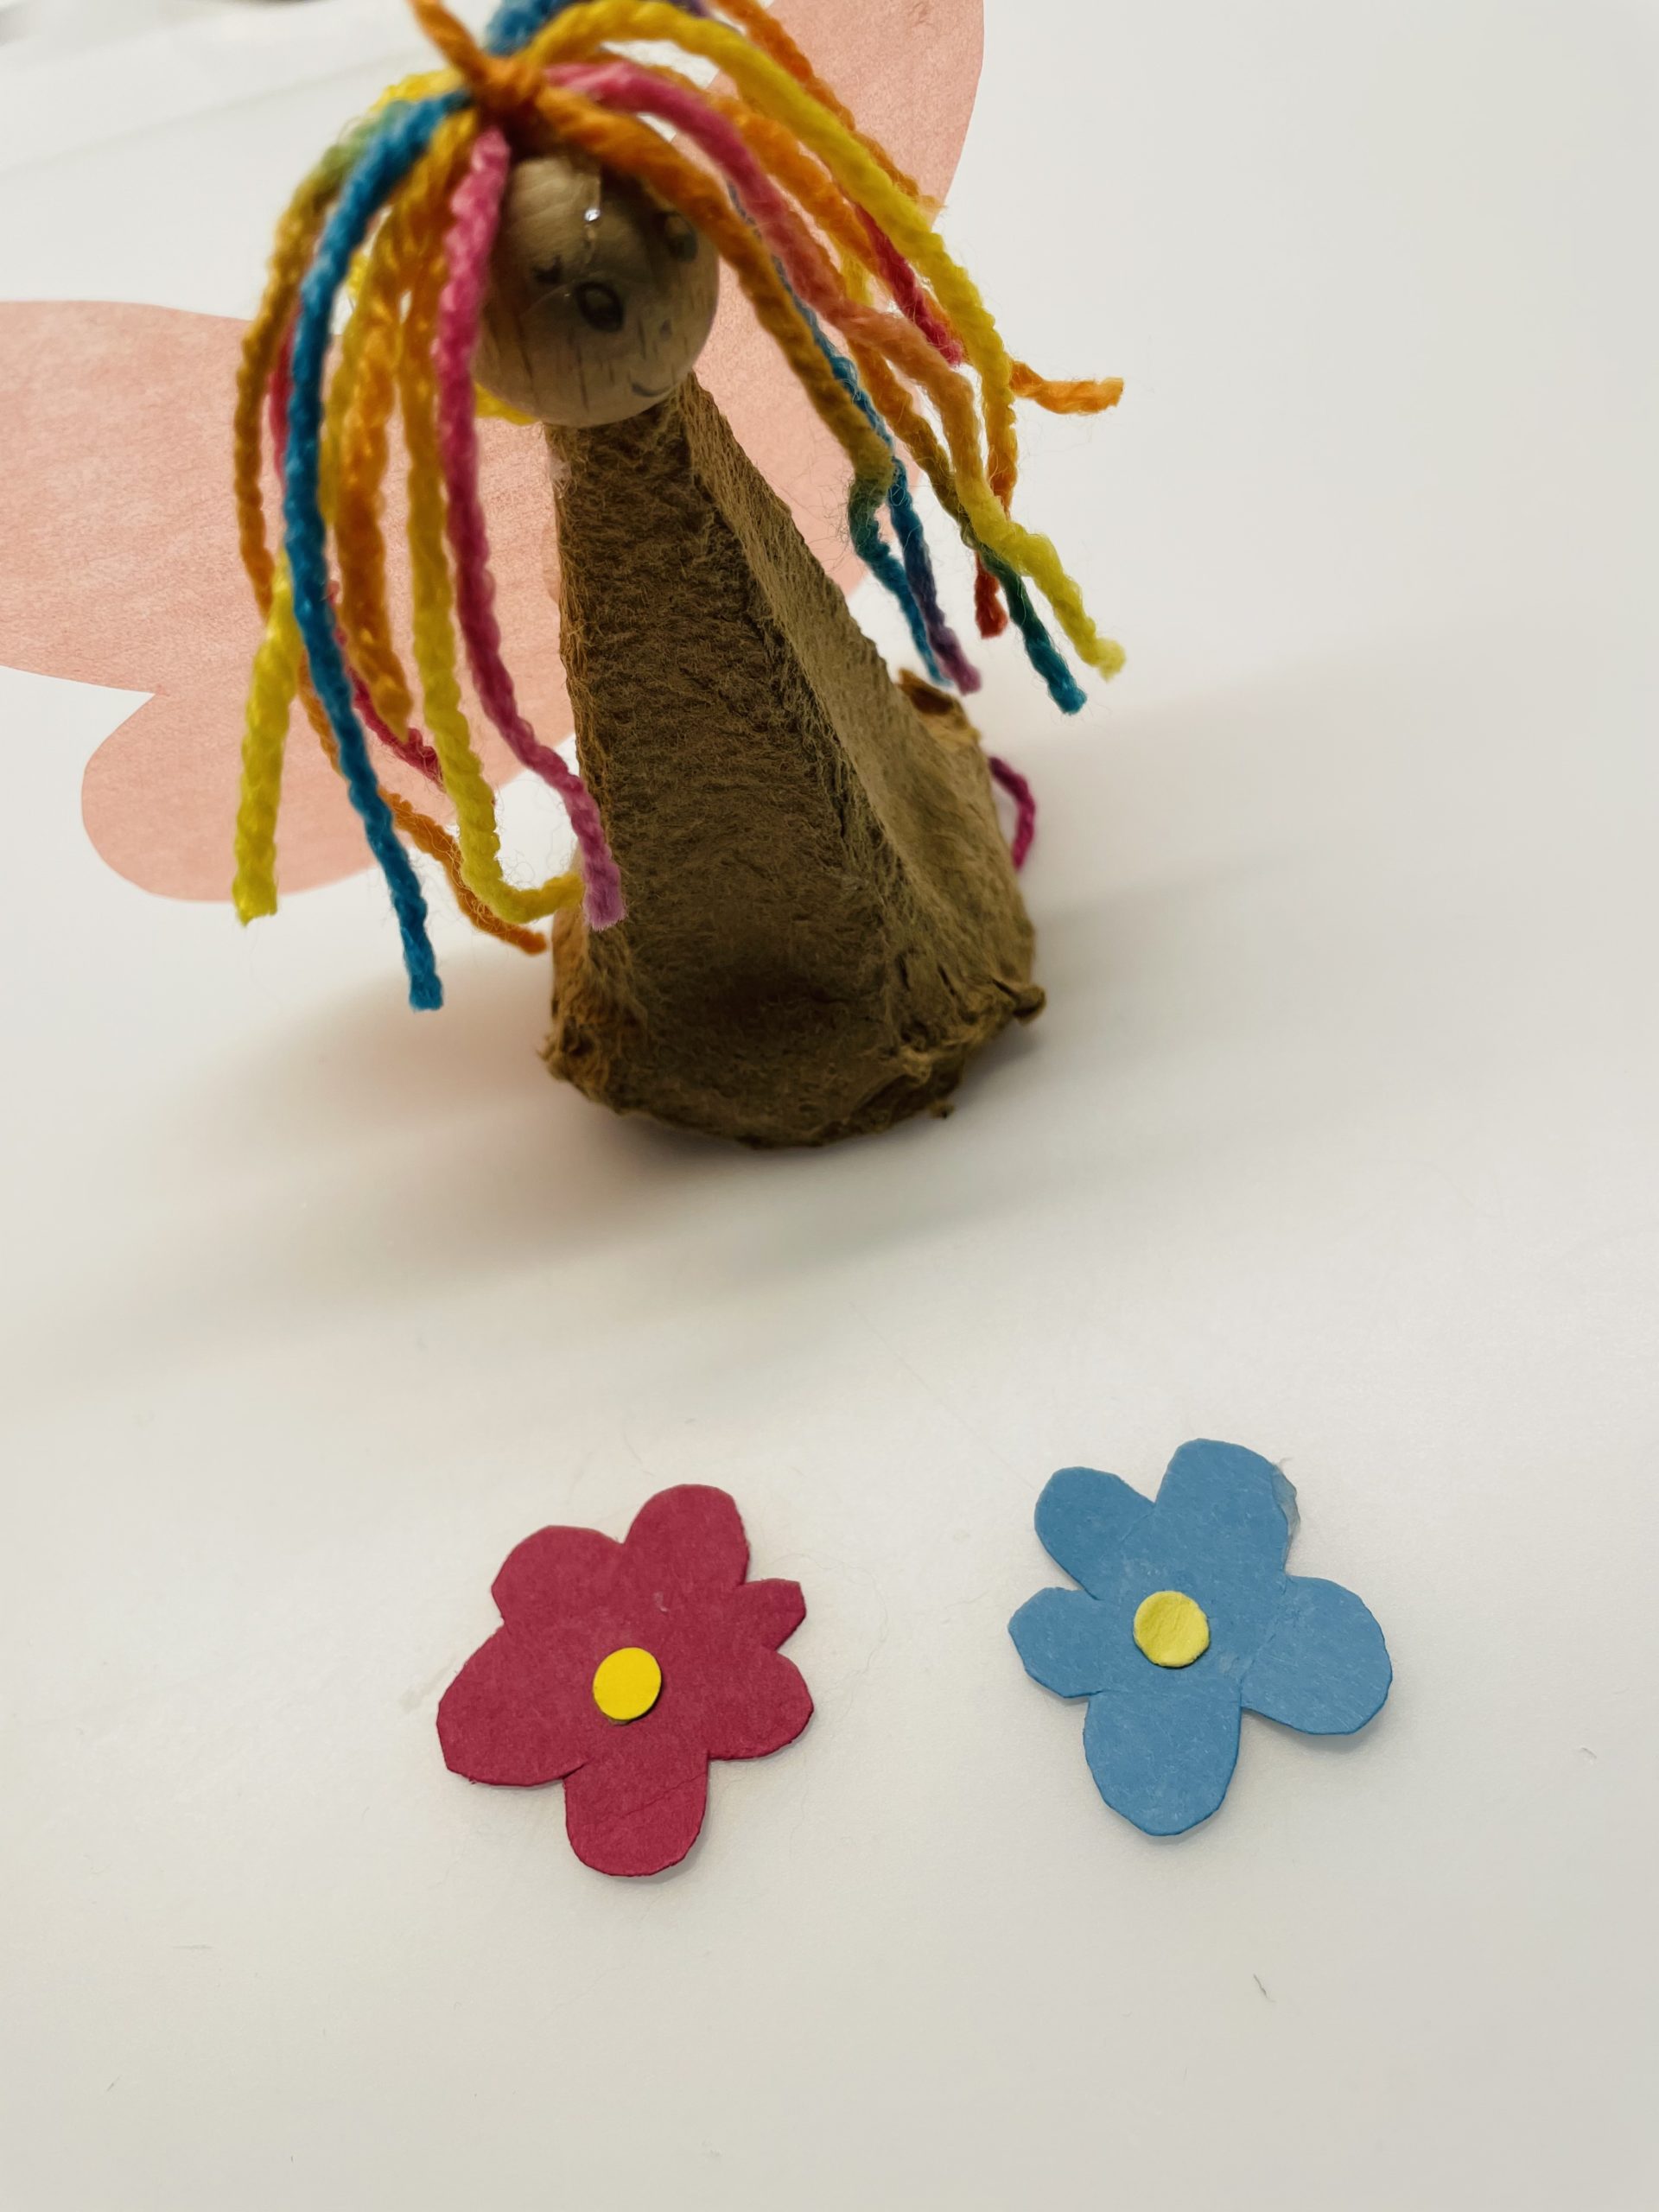
The outstanding threads below become the legs of the fairy.
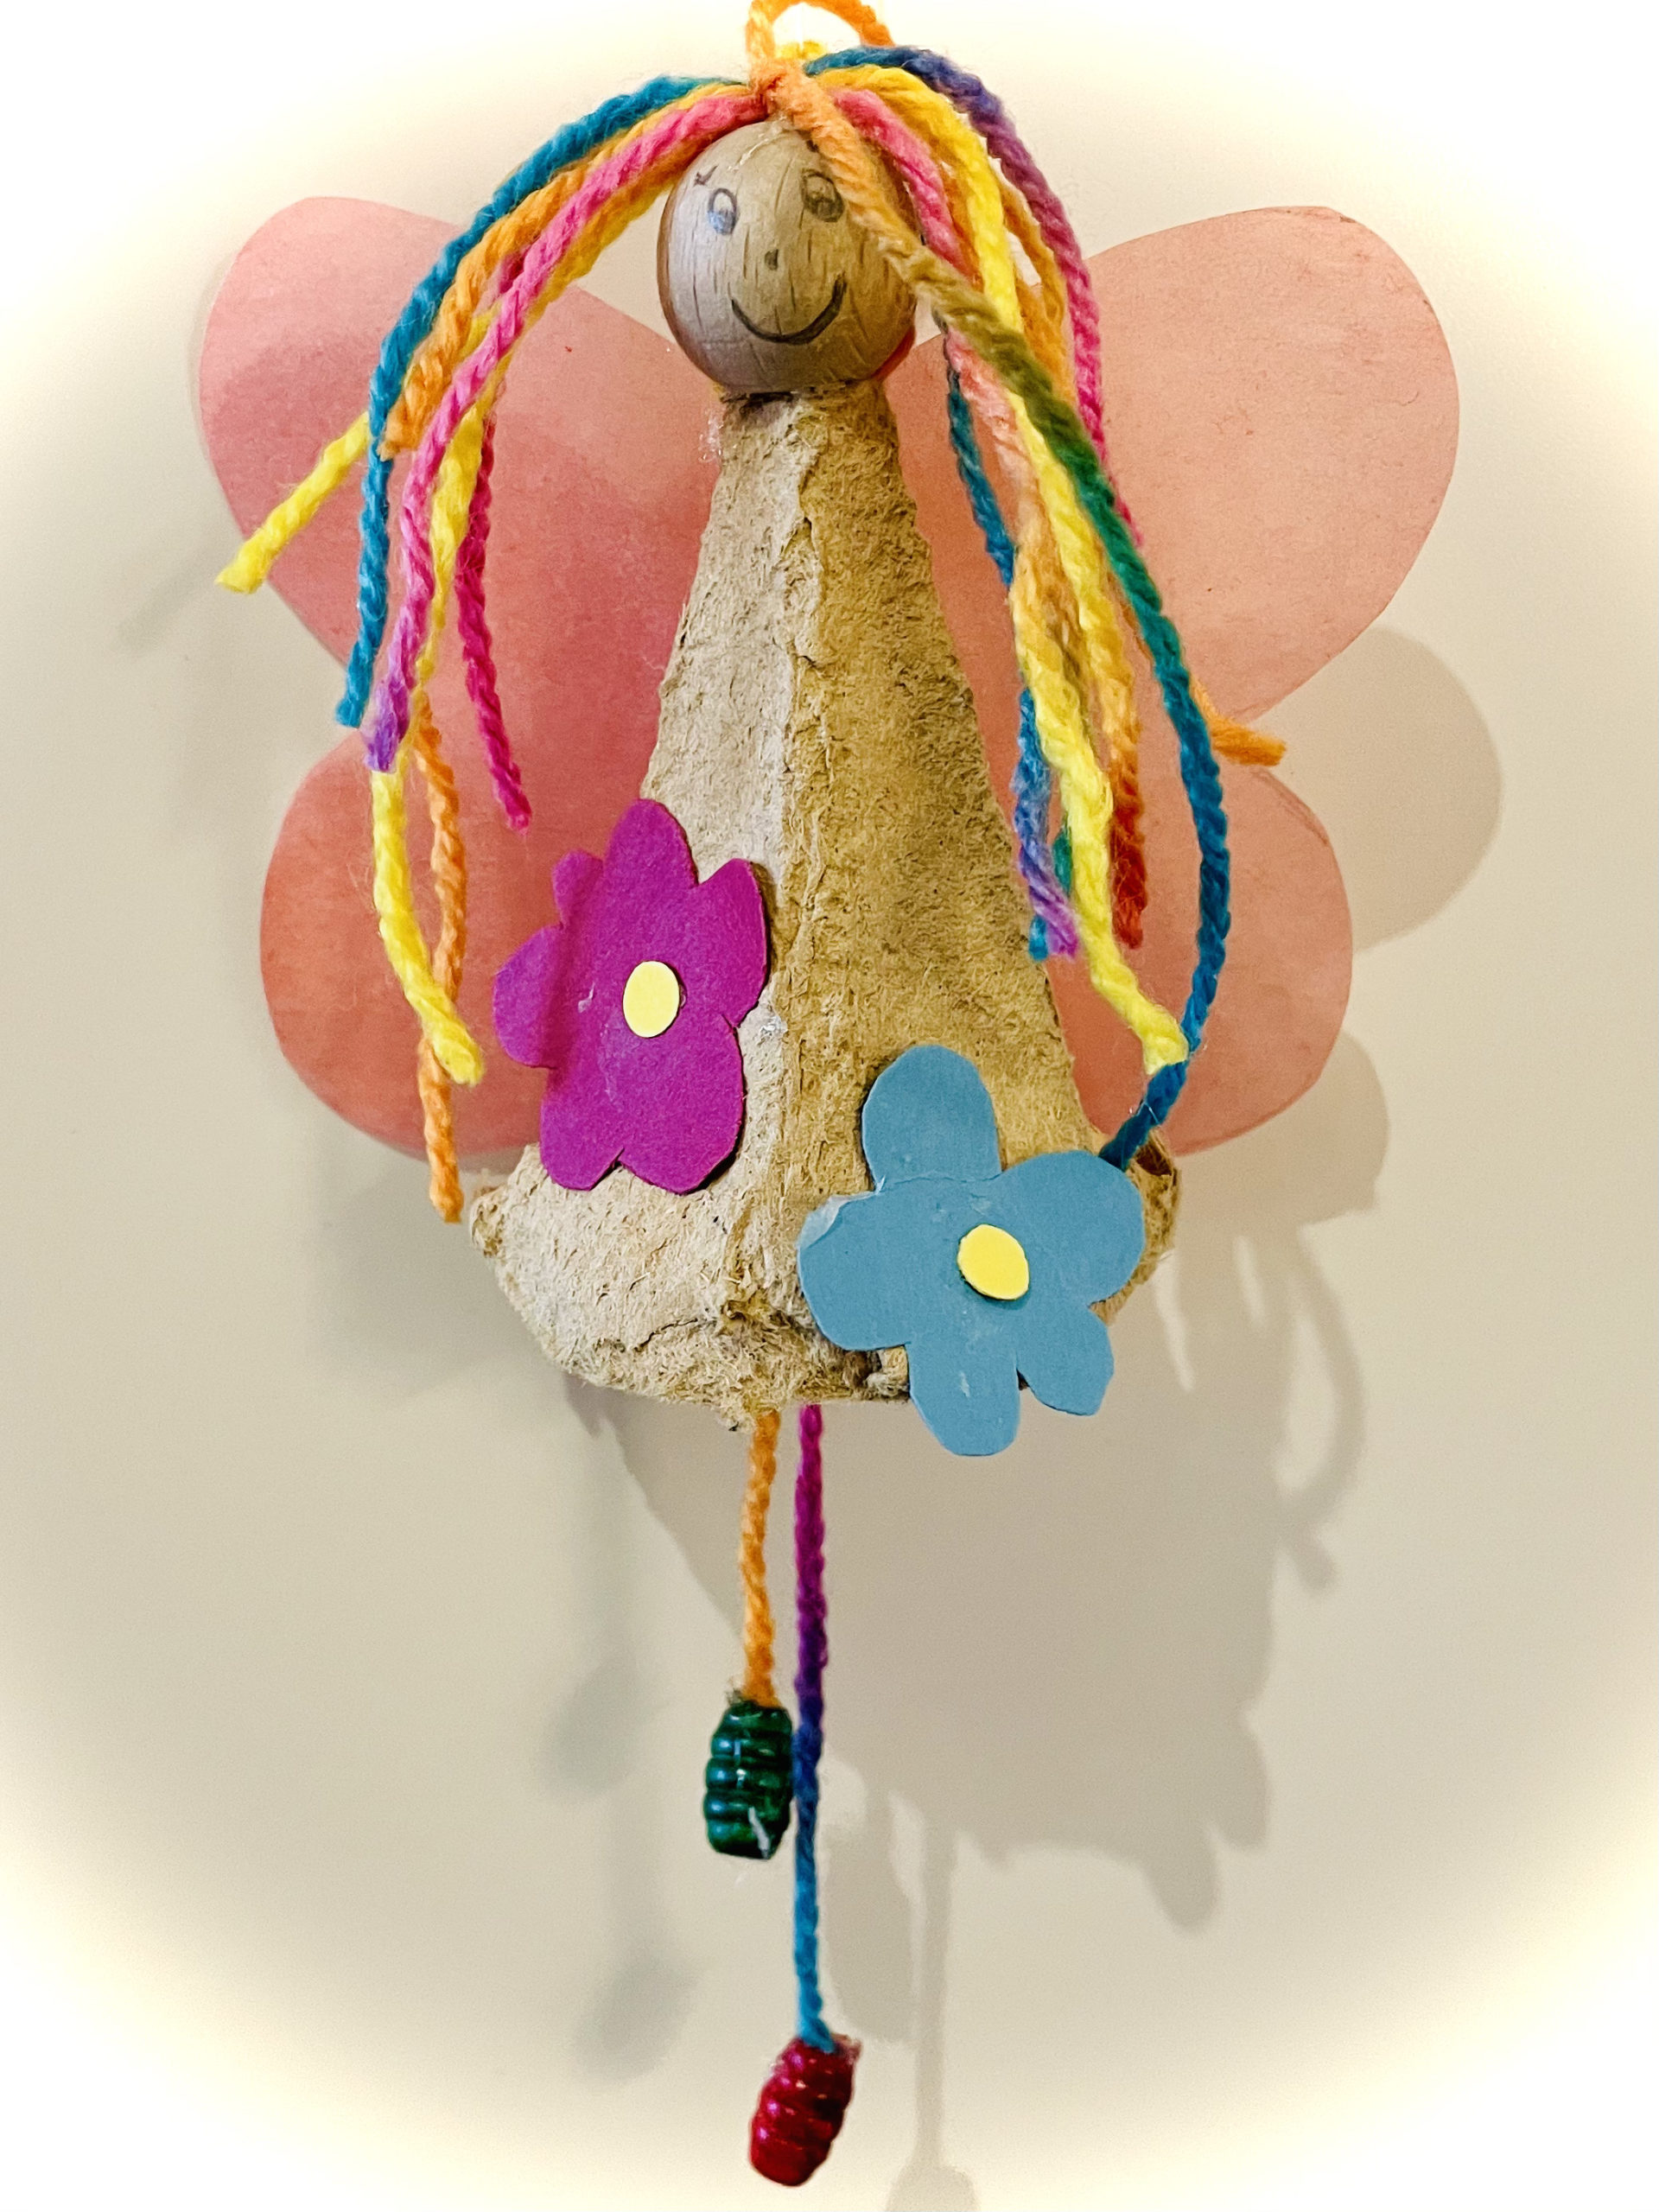
Now glues or knots a small pearl on each thread.

Then you stick the wings on the back of the fairy. For this one glue point is enough.
Now thread a thin thread through the wool loop to hang the fairy.
Finally, create two small flowers and stick them on the front of your fairy's dress.
Now you can hang the fairy.
Have fun doing crafts.
Materials
Directions
First put out your craft pad and set up your material. Then you separate a tip from an egg box. This becomes the body of the fairy.
Choose a suitable wooden ball for the head. Make sure that the wooden ball fits as a head from the size to the egg box as a body.
Try this before, put the bullet on it, but don't stick it on yet.
Now you need a piece of transparent paper (10cm x 10cm).
Now fold the transparent paper half-fold.
Now paint a half butterfly wing on one side. Make sure that the middle part begins at the paper break.
Now cut out the marked wings. Leave the paper folded for cutting.
Then she folds the paper apart. The wings are ready.
You look like a butterfly without a body!
Now cut off several threads (10-12cm long) from the wool. The wool threads do not necessarily all have to be the same length.
Now tie up the threads in the middle, put a thread across the other threads.
So tie the threads together with a thread.
Then you knot the thread twice.
The fairy's hair is ready.
Now you paint a face on the wooden ball.
Now cut off another piece of wool (about 20cm long).
Put the wool thread half on each other and thread the wool with the closed side from bottom to top through the tip of the egg box. Push the thread through the tip of the egg box. Use a pen to get the thread more easily through the tip.
The loop looks a piece out of the tip and is now bent.
Then you stick the wooden ball with the hot glue to the top.
You can hang the little fairy on the loop later.
Now you put the wool hair on the head of the fairy.
The outstanding threads below become the legs of the fairy.
Now glues or knots a small pearl on each thread.
Then you stick the wings on the back of the fairy. For this one glue point is enough.
Now thread a thin thread through the wool loop to hang the fairy.
Finally, create two small flowers and stick them on the front of your fairy's dress.
Now you can hang the fairy.
Have fun doing crafts.
Follow us on Facebook , Instagram and Pinterest
Don't miss any more adventures: Our bottle mail