Flying penguin

AdventurerKatzi
Rating5.03.3 Thousand times & (3) DifficultyAdvanced

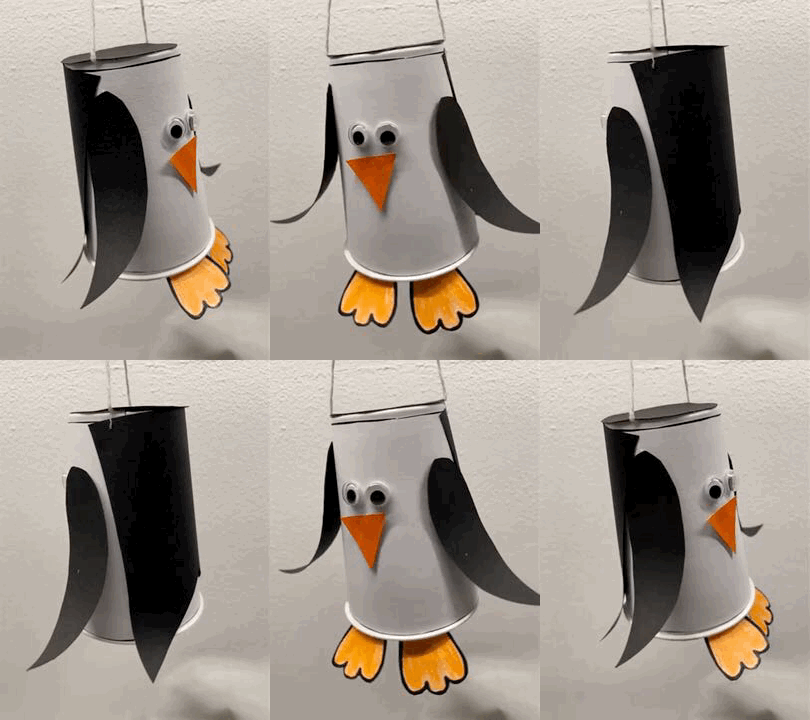
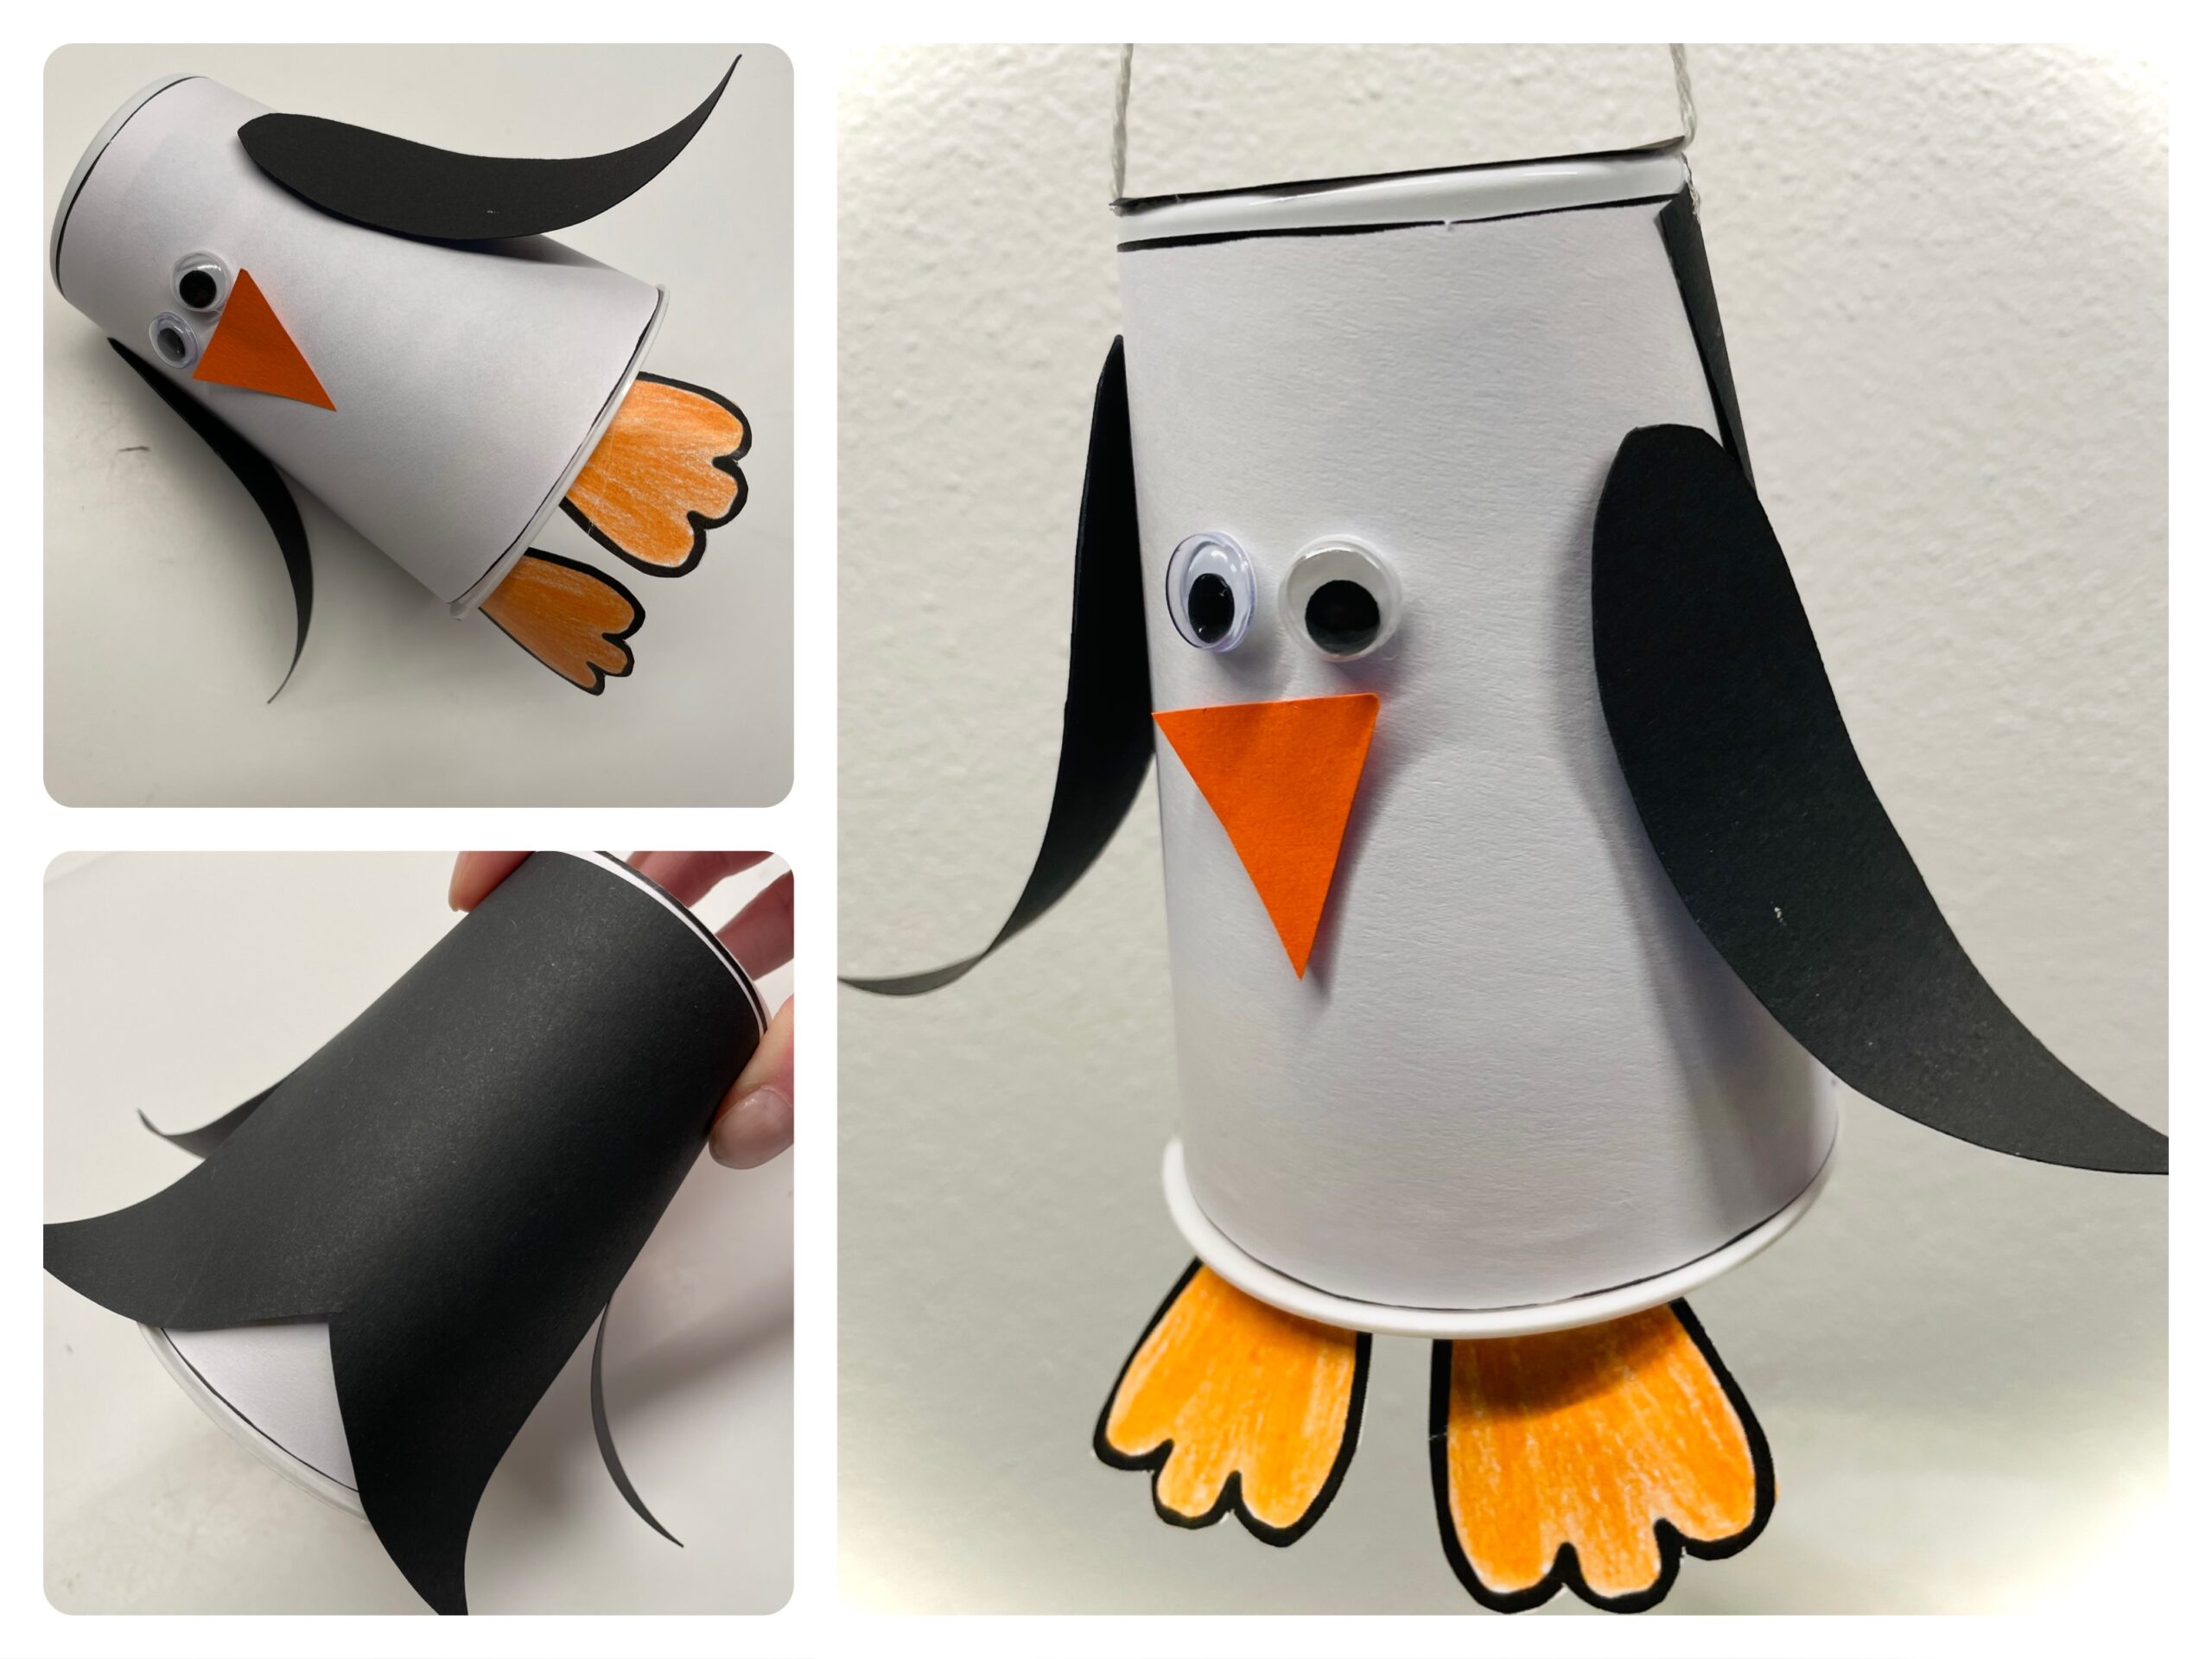
You can hang this special penguin on a branch and you can play with it like a puppet.

The penguin's body consists of a solid plastic cup (e.g. an empty 200g cream cup), which is glued to a white paper banderole.
Made of black clay paper, the wings and back are quickly made. The beak and feet are made of orange clay paper.
Try it out, the instructions are available here.!

Titelbild zur Bastel- und DIY-Idee für Kinder '(944) Fliegender Pinguin'
Material for1 Child
Prep Time5 min.Adv. Time35 min.Total Time40 min.
 1 Cream cup (200g cup)empty and rinsed
 1 White paper
 1 Clay paper black
 1 Orange clay paper
 2 Wax eyes
 1 Pen
 1 Felt pen black
 1 Thread30cm long
 1 Builder's pad
 possible template
All links marked with a shopping cart lead to Amazon - here we have selected products that we would order ourselves and in part also ordered. In a qualified purchase via the advertising link, we as Amazon partner receive a commission, for you there are no costs. You thus support our cost- and advertising banner-free, educational offer.
1

First, put all the materials ready and the craft material out. Then you print out the template (see below) and it. The template fits around a standard 200g cream or smear cup.
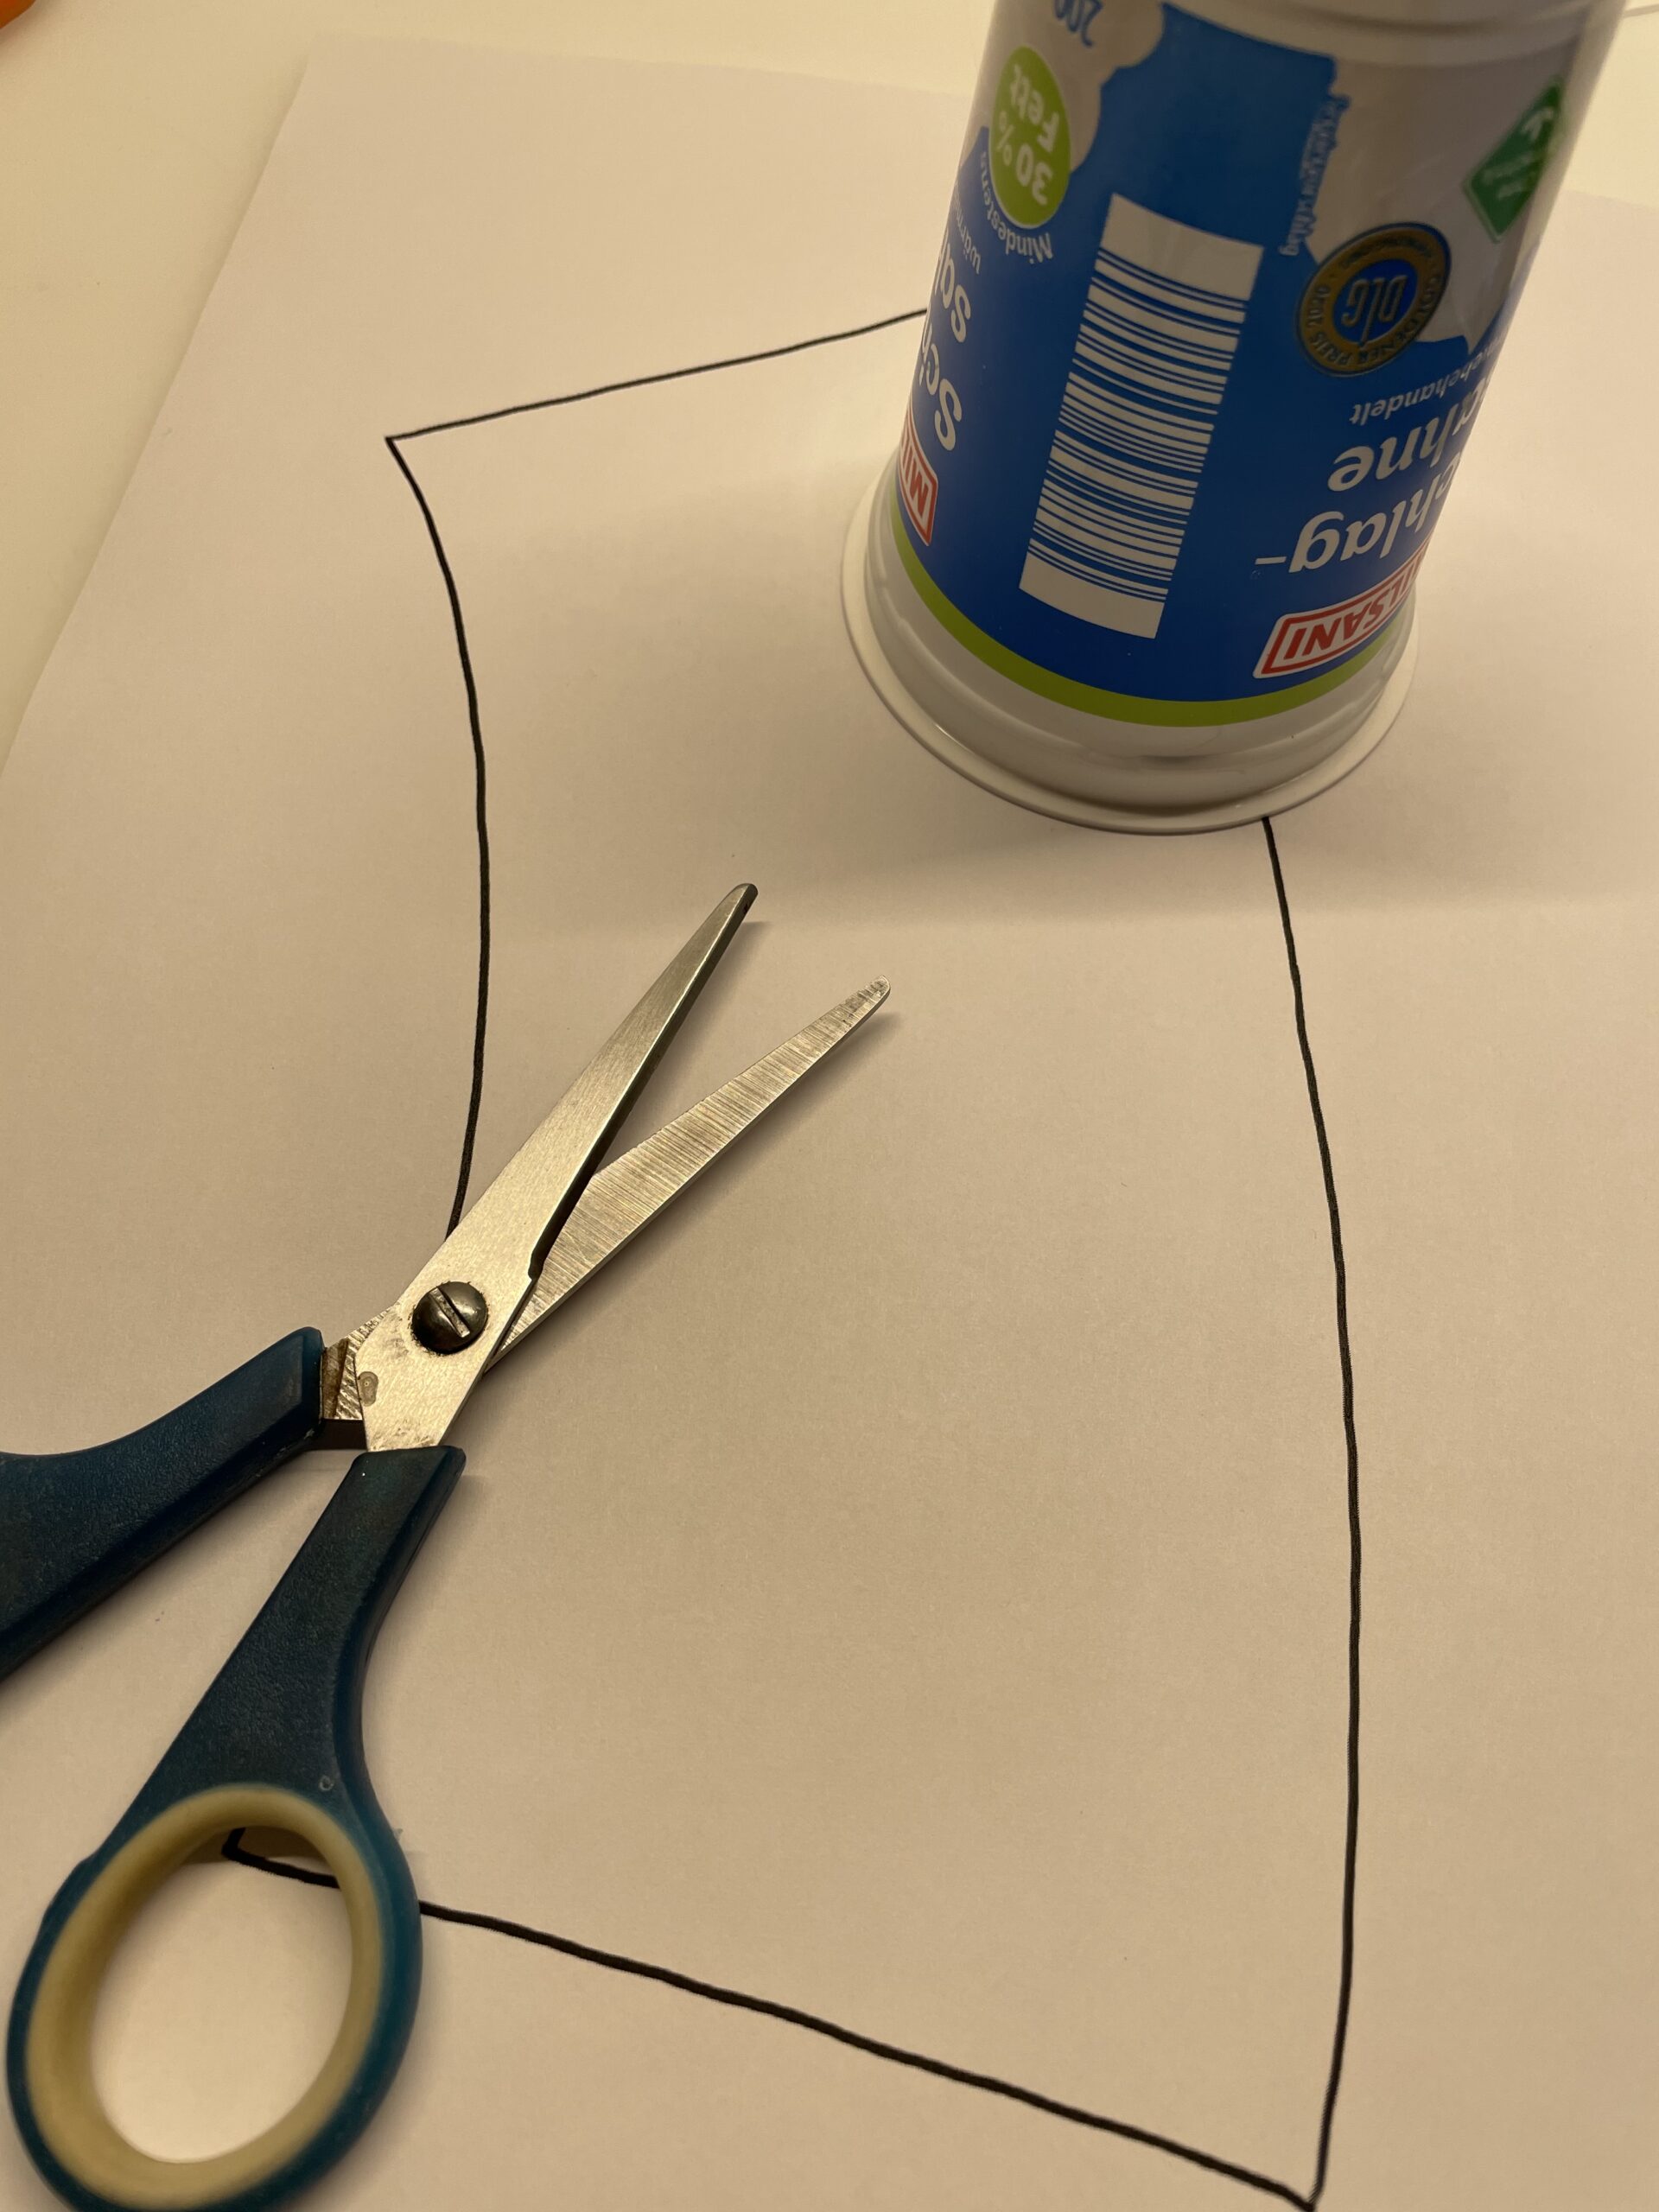
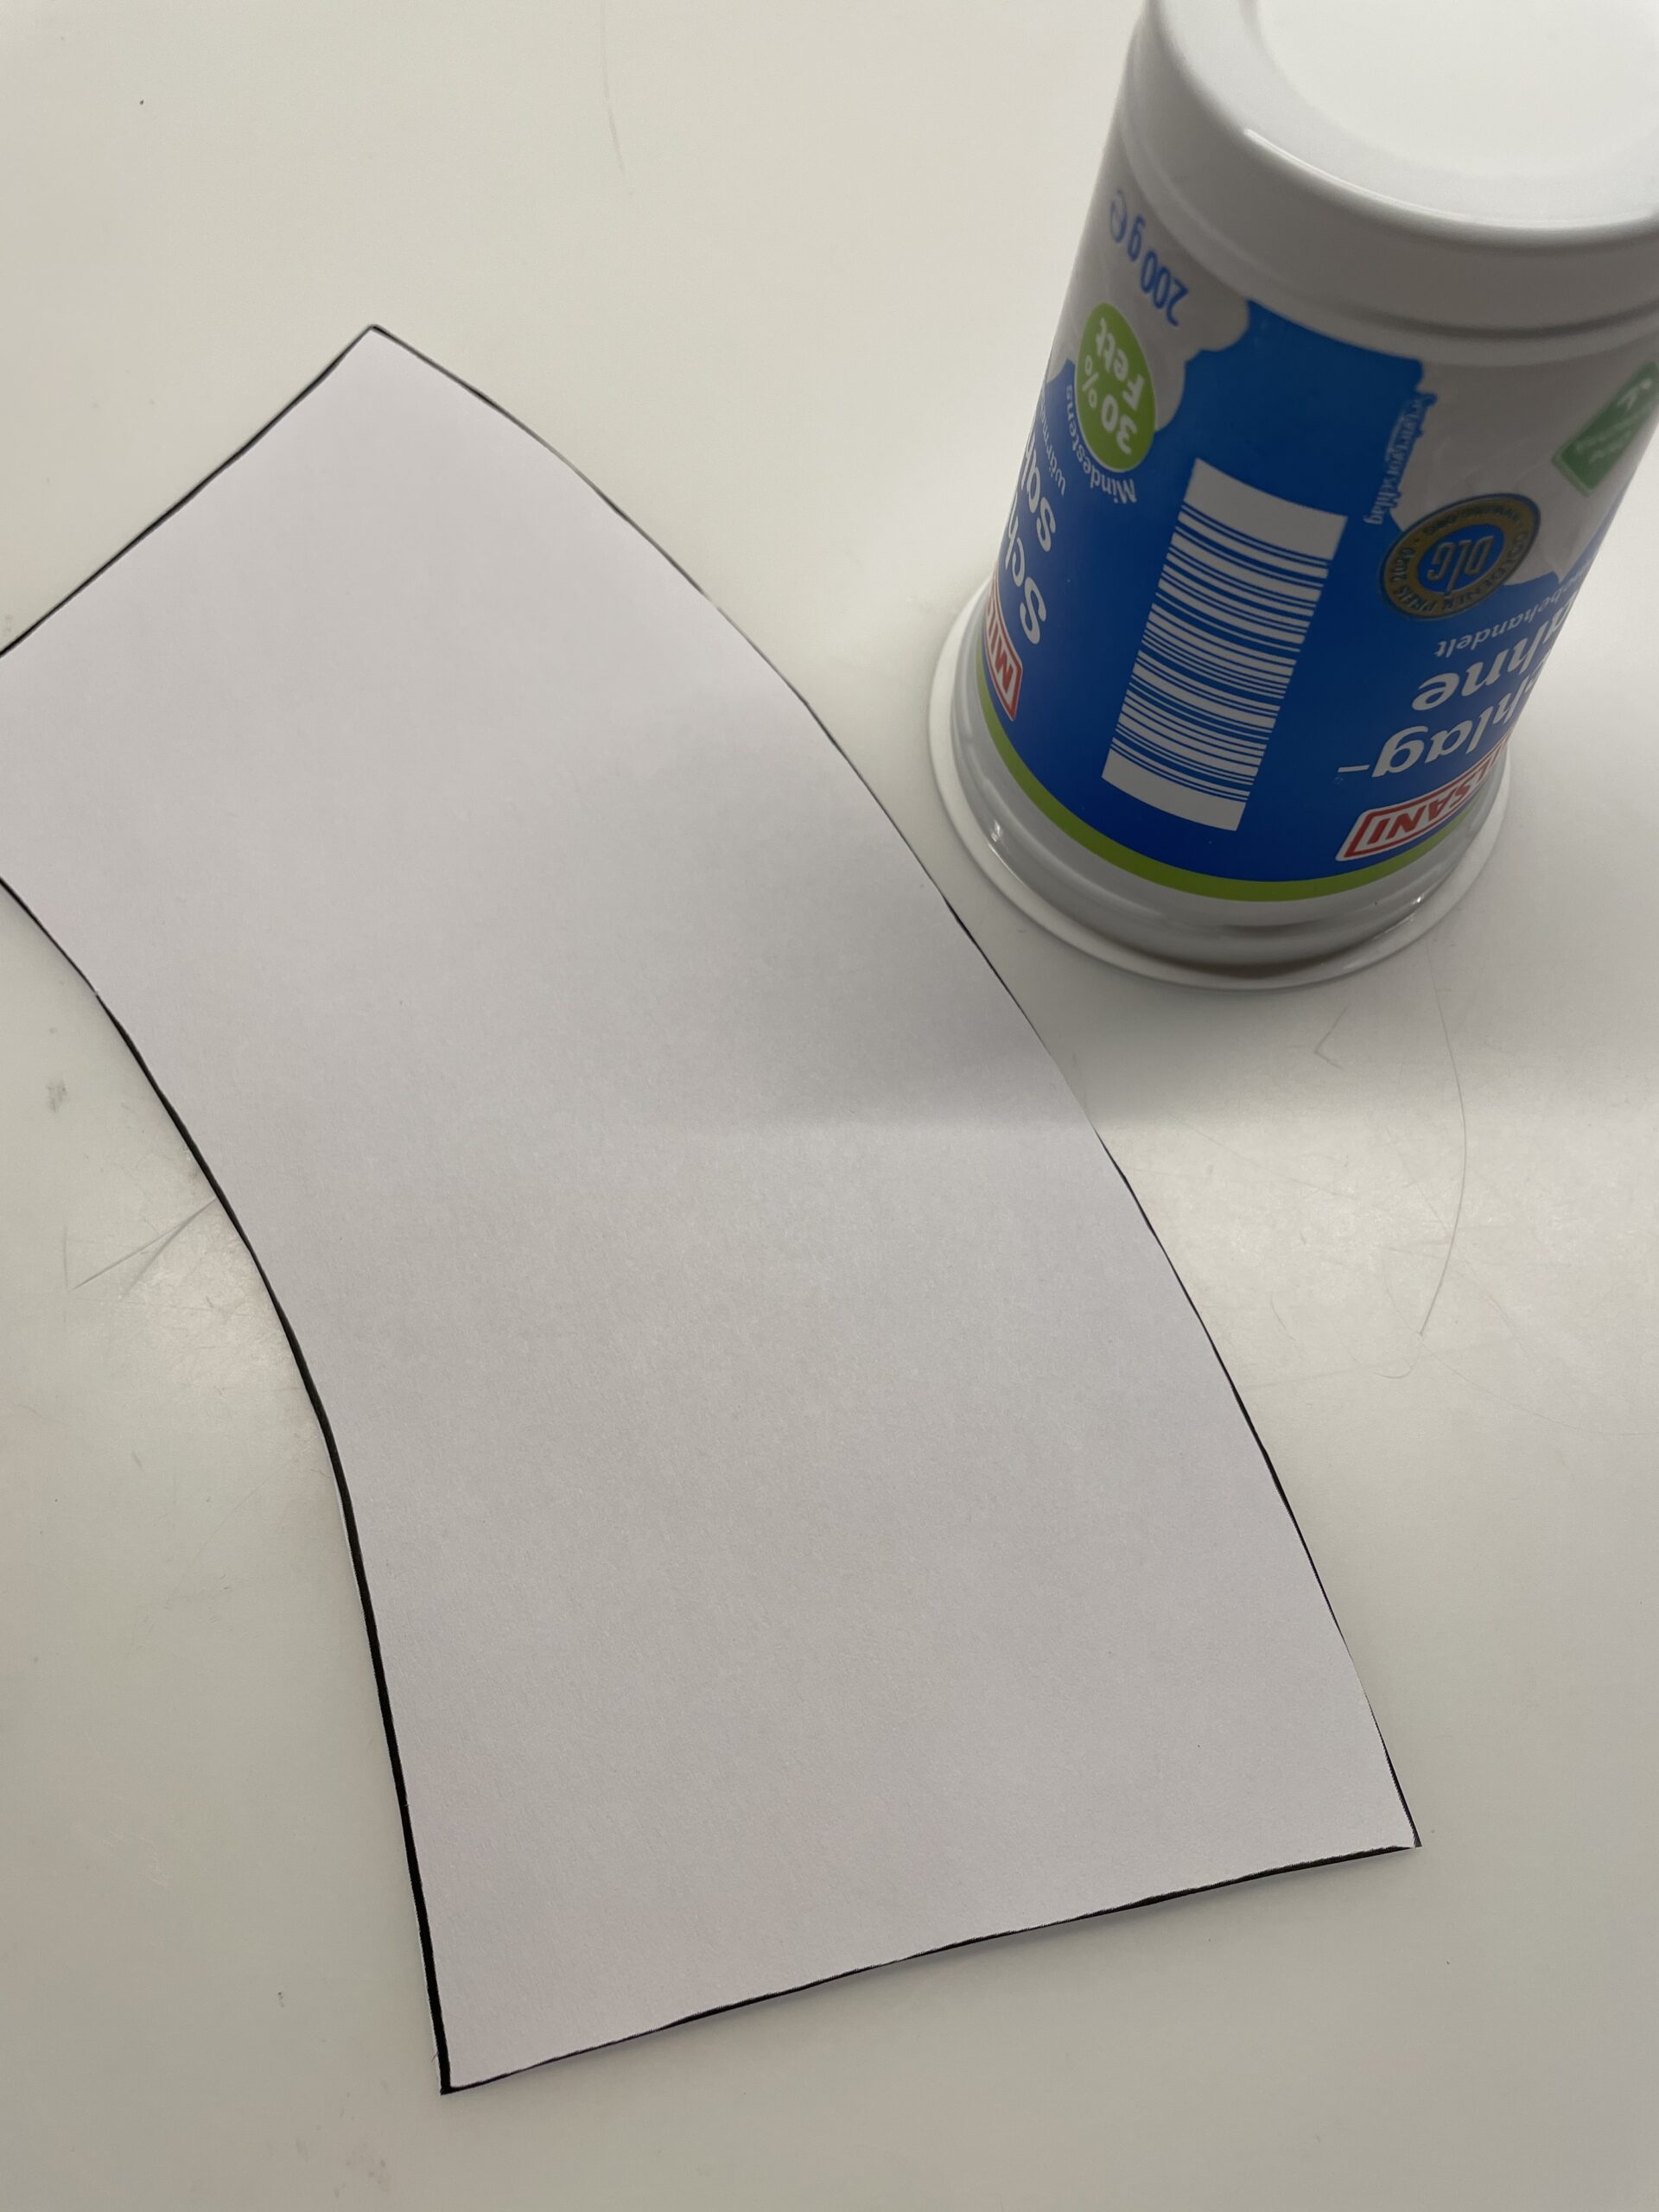
Bild zum Schritt 1 für das Bastel- und DIY-Abenteuer für Kinder: 'Zuerst legt euch alle Materialien bereit und die Bastelunterlage aus....'

2

2. Bild zum Schritt 1 für das Bastel- und DIY-Abenteuer für Kinder: 'Zuerst legt euch alle Materialien bereit und die Bastelunterlage aus....'

3

Then wrap the cut-out paper around the plastic cup.

Bild zum Schritt 3 für das Bastel- und DIY-Abenteuer für Kinder: 'Danach wickelt ihr das ausgeschnittene Papier um den Plastikbecher.'

4

Now stick the paper to the cup. For this you drive on the cup once with the glue stick from top to bottom. Then you place the paper around the cup and glue the end piece also with a strip of glue.

Bild zum Schritt 4 für das Bastel- und DIY-Abenteuer für Kinder: 'Klebt jetzt das Papier am Becher fest. Dafür fahrt ihr...'

5

The paper now covers the whole cup.

Bild zum Schritt 5 für das Bastel- und DIY-Abenteuer für Kinder: 'Das Papier umspannt jetzt den ganzen Becher.'

6

Draw a small triangle on orange paper and cut it out.

Bild zum Schritt 6 für das Bastel- und DIY-Abenteuer für Kinder: 'Zeichnet nun ein kleines Dreieck auf oranges Papier und schneidet...'

7

The cup stands with the opening down on the table. Now you stick your beak and two wobble eyes on the cup.

Alternatively, you paint your eyes with a felt pen.

Bild zum Schritt 7 für das Bastel- und DIY-Abenteuer für Kinder: 'Der Becher steht mit der Öffnung nach unten auf dem...'

8

Now you cut two wings out of black clay paper.

Tip: Fold a strip of about 2cm x 15cm in size to half. This creates two wings at once.

Then you separate the wings in the middle and pull the lower tip over a pen. Through the pressure, the paper rolls in slightly.

Bild zum Schritt 8 für das Bastel- und DIY-Abenteuer für Kinder: 'Aus schwarzem Tonpapier schneidet ihr jetzt zwei Flügel aus. ...'

9

Now you stick both wings to the side of the body. The wings stand down.

Bild zum Schritt 9 für das Bastel- und DIY-Abenteuer für Kinder: 'Jetzt klebt ihr beide Flügel seitlich am Körper fest. Die...'

10

Paint two feet on an orange clay paper.
stick both feet down to the cup opening.
Decide whether they are pointing forward or standing down.

Bild zum Schritt 10 für das Bastel- und DIY-Abenteuer für Kinder: 'Malt euch zwei Füße auf ein orangefarbenes Tonpapier auf. Danach...'

11

Now the penguin still lacks his back; the penguin freckle.

Bild zum Schritt 11 für das Bastel- und DIY-Abenteuer für Kinder: 'Jetzt fehlt dem Pinguin noch dar Rücken; der Pinguinfrack.'

12

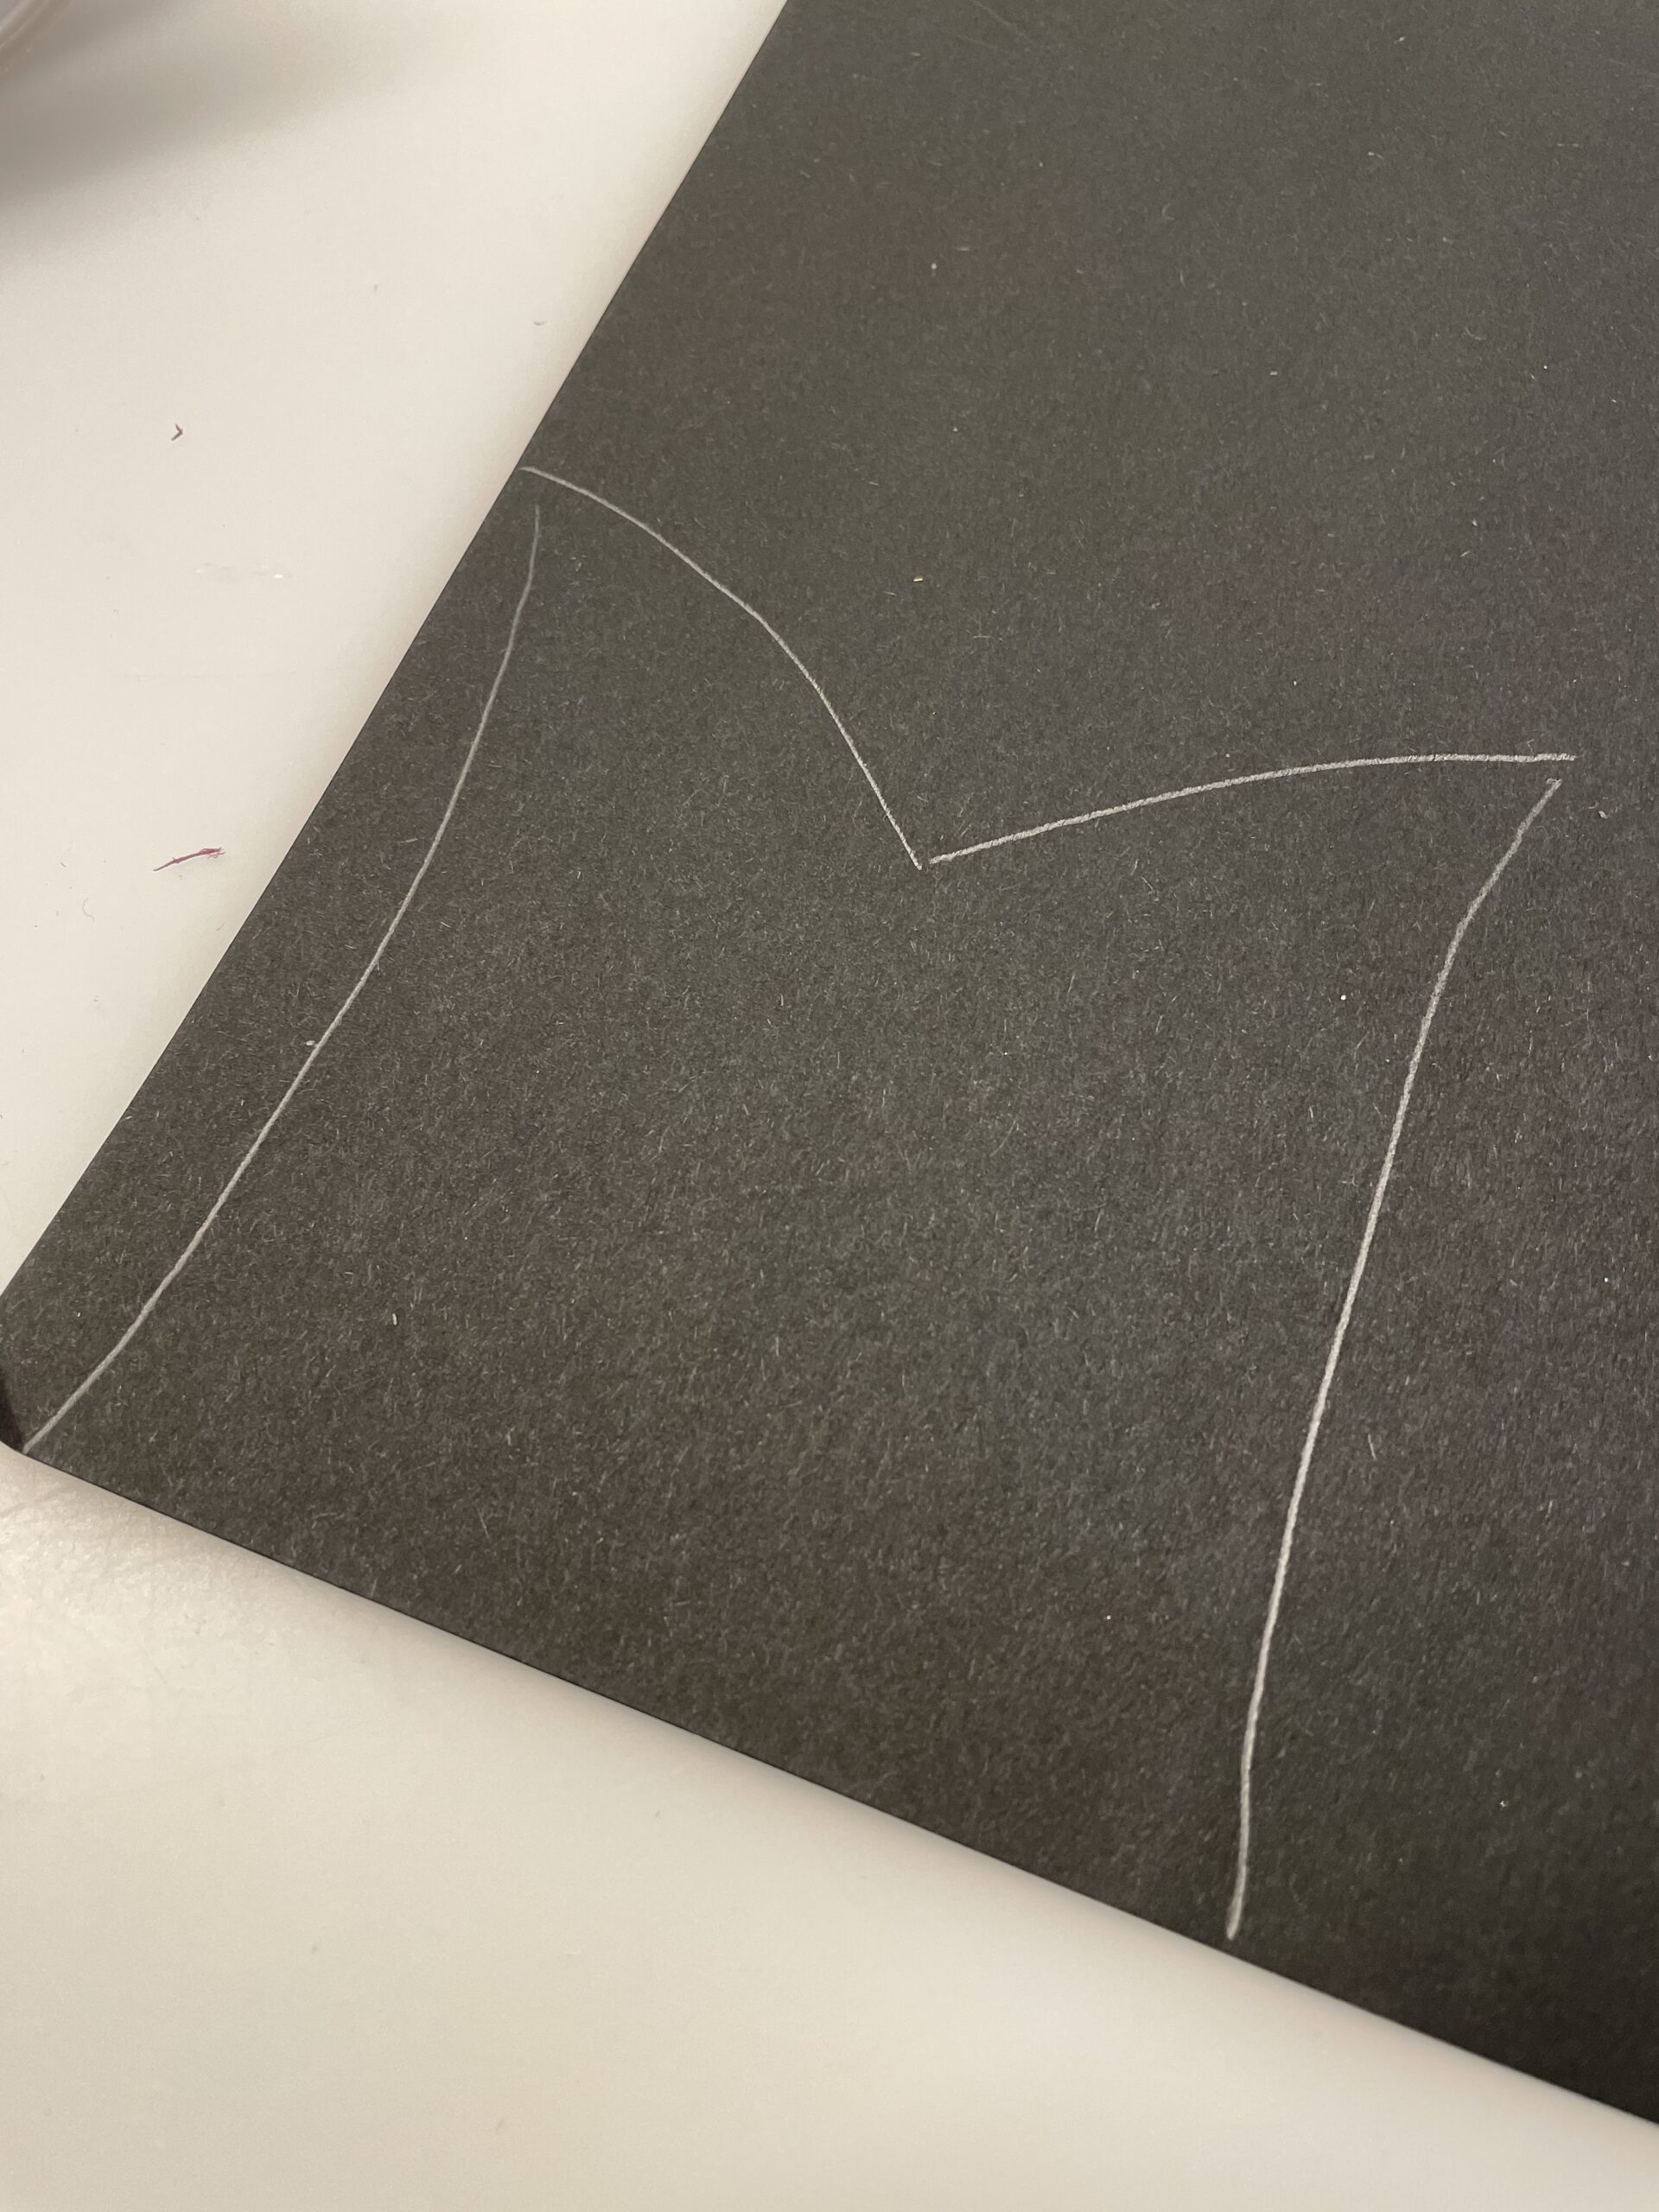
For this you paint on a black clay paper about 10cm x 10 cm and bend the sides slightly inwards. The upper side is straight and at the lower side you cut out a triangle.

Bild zum Schritt 12 für das Bastel- und DIY-Abenteuer für Kinder: 'Dafür malt ihr auf ein schwarzes Tonpapier ca. 10cm x...'

13

2. Bild zum Schritt 12 für das Bastel- und DIY-Abenteuer für Kinder: 'Dafür malt ihr auf ein schwarzes Tonpapier ca. 10cm x...'

14

The clay paper now looks like a freckle.

Bild zum Schritt 14 für das Bastel- und DIY-Abenteuer für Kinder: 'Das Tonpapier sieht jetzt wie ein Frack aus.'

15

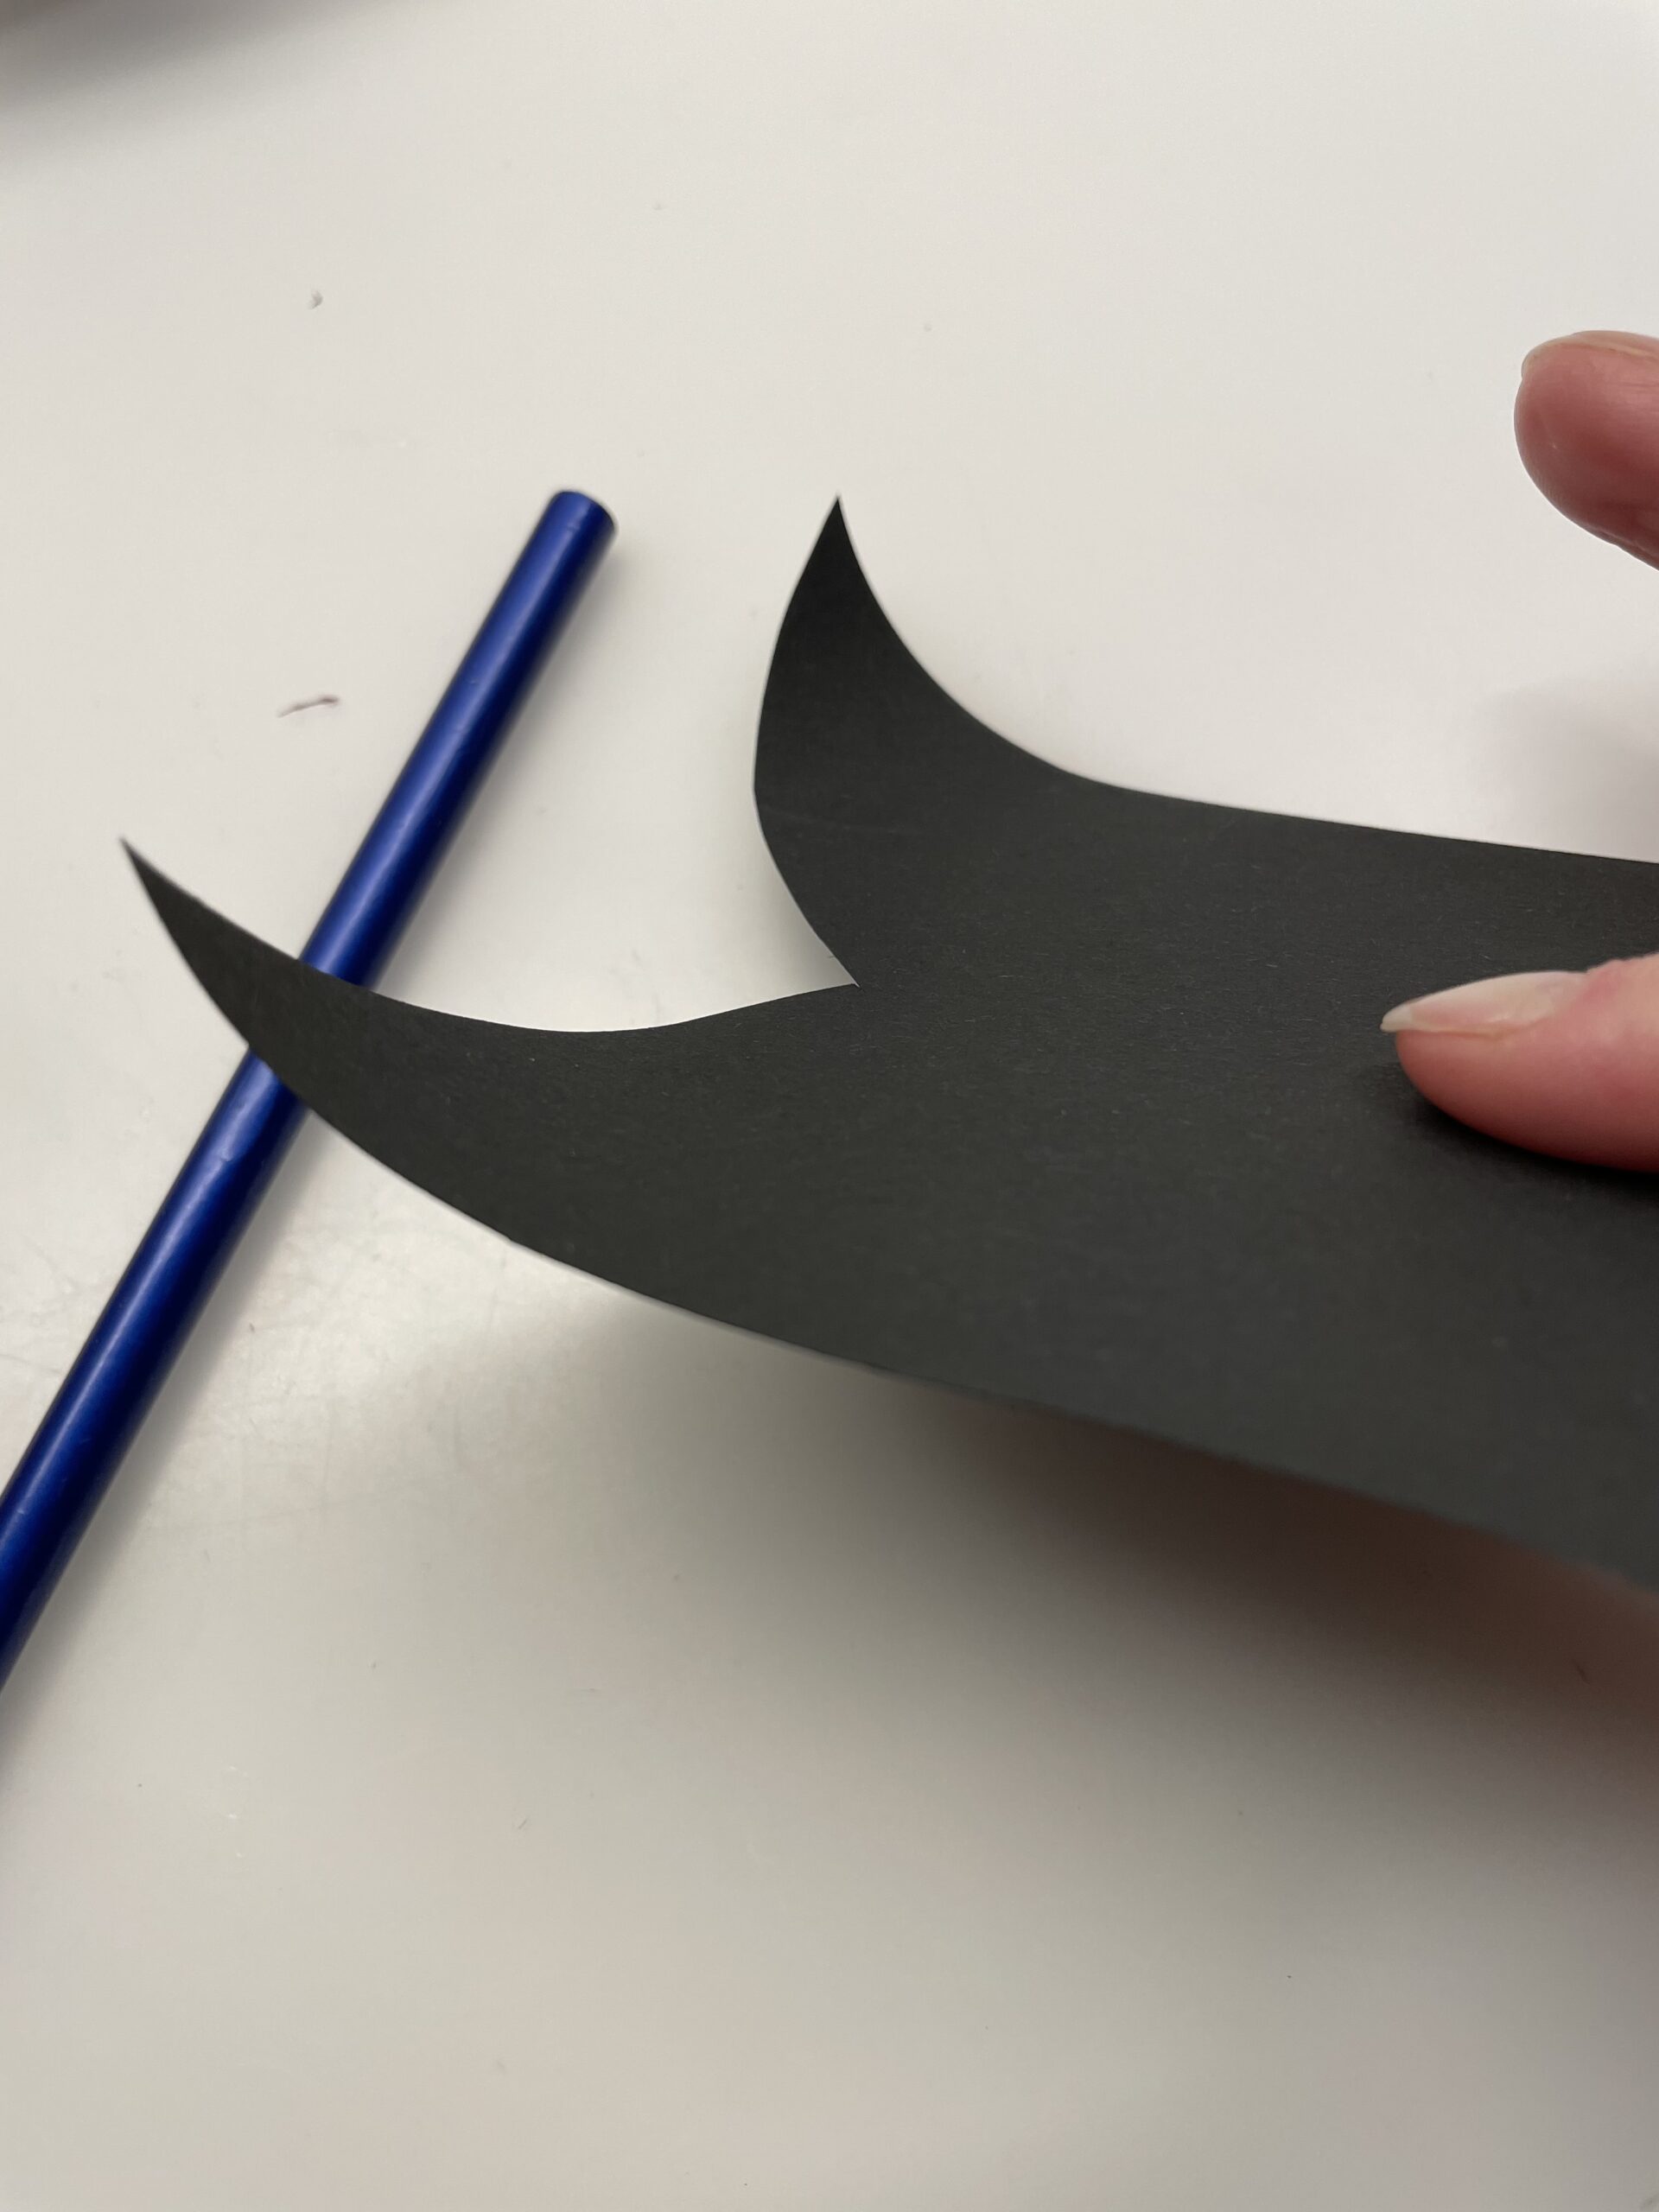
Then you pull the two tips over a pen, so that they bend slightly.

Bild zum Schritt 15 für das Bastel- und DIY-Abenteuer für Kinder: 'Anschließend zieht ihr die beide Spitzen über einen Stift, so...'

16

2. Bild zum Schritt 15 für das Bastel- und DIY-Abenteuer für Kinder: 'Anschließend zieht ihr die beide Spitzen über einen Stift, so...'

17

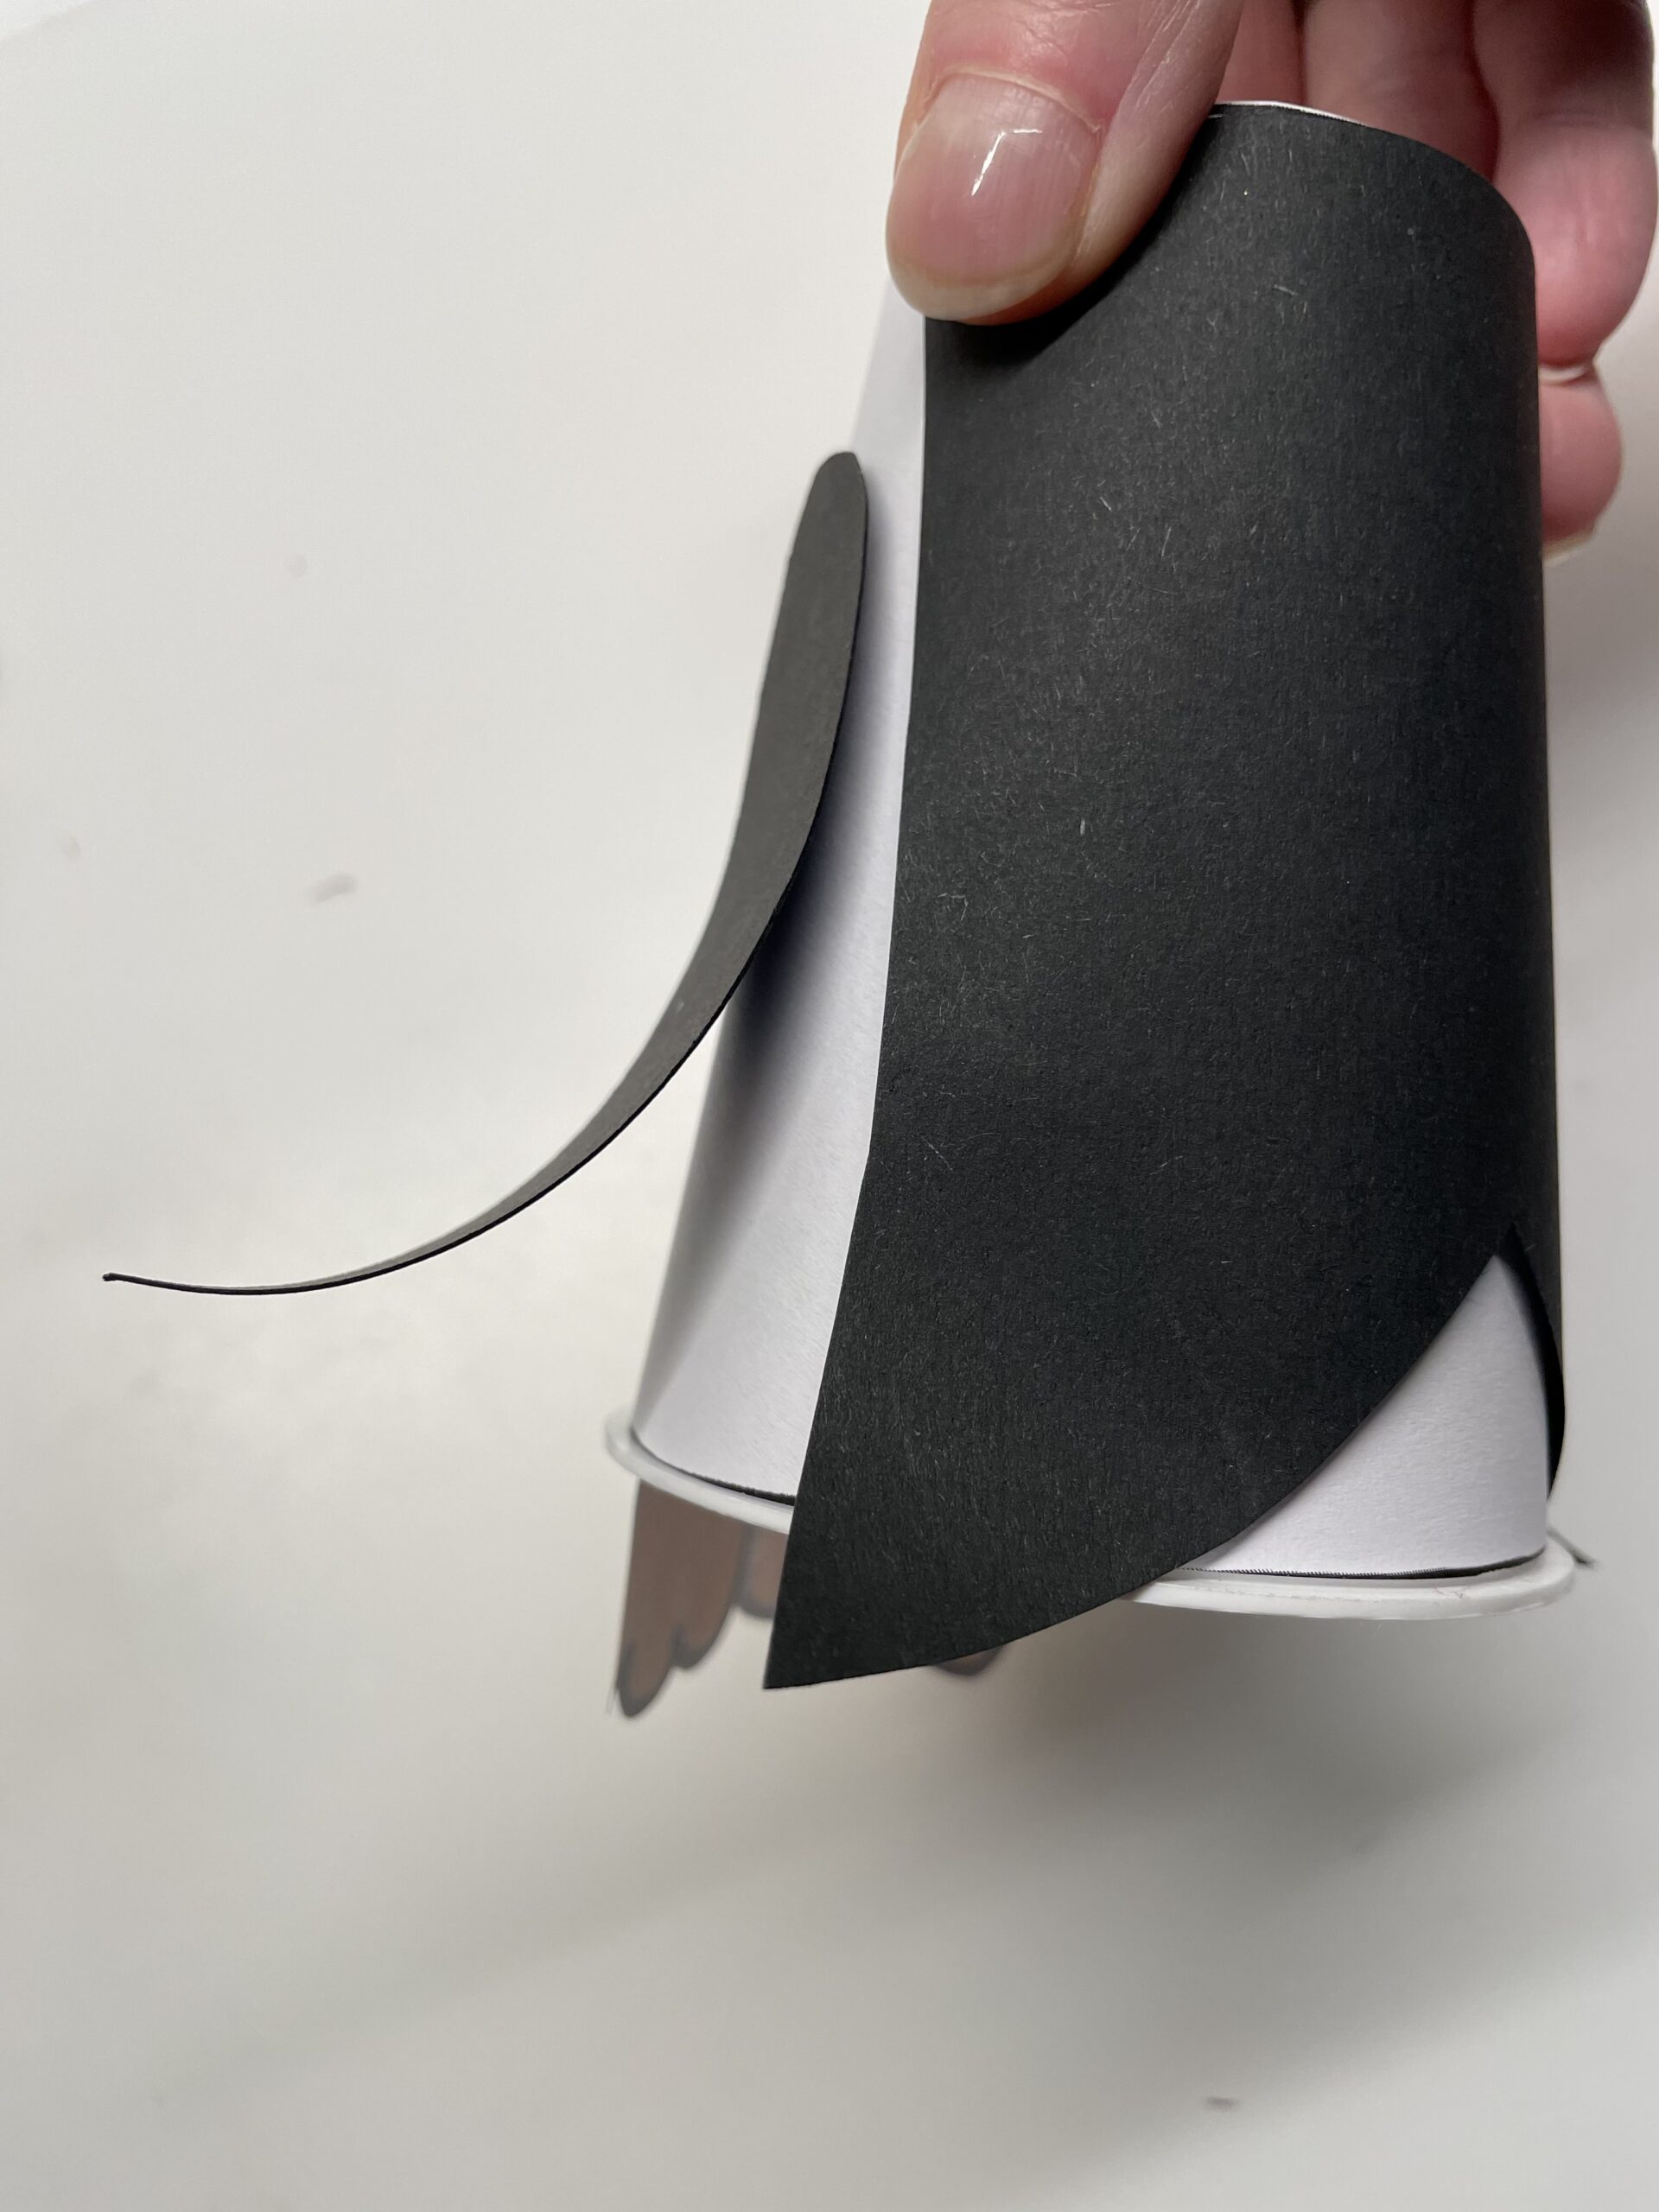
Now you stick the finished tail to the back of the penguin.

Bild zum Schritt 17 für das Bastel- und DIY-Abenteuer für Kinder: 'Jetzt klebt ihr den fertigen Frack an den Rücken des...'

18

The tips are on the outside.

Bild zum Schritt 18 für das Bastel- und DIY-Abenteuer für Kinder: 'Die Spitzen stehen nach außen.'

19

For the penguin's head, you circle around the cup on a black clay paper. Then cut out the circle.

Bild zum Schritt 19 für das Bastel- und DIY-Abenteuer für Kinder: 'Für den Kopf des Pinguins umfahrt ihr den Becher auf...'

20

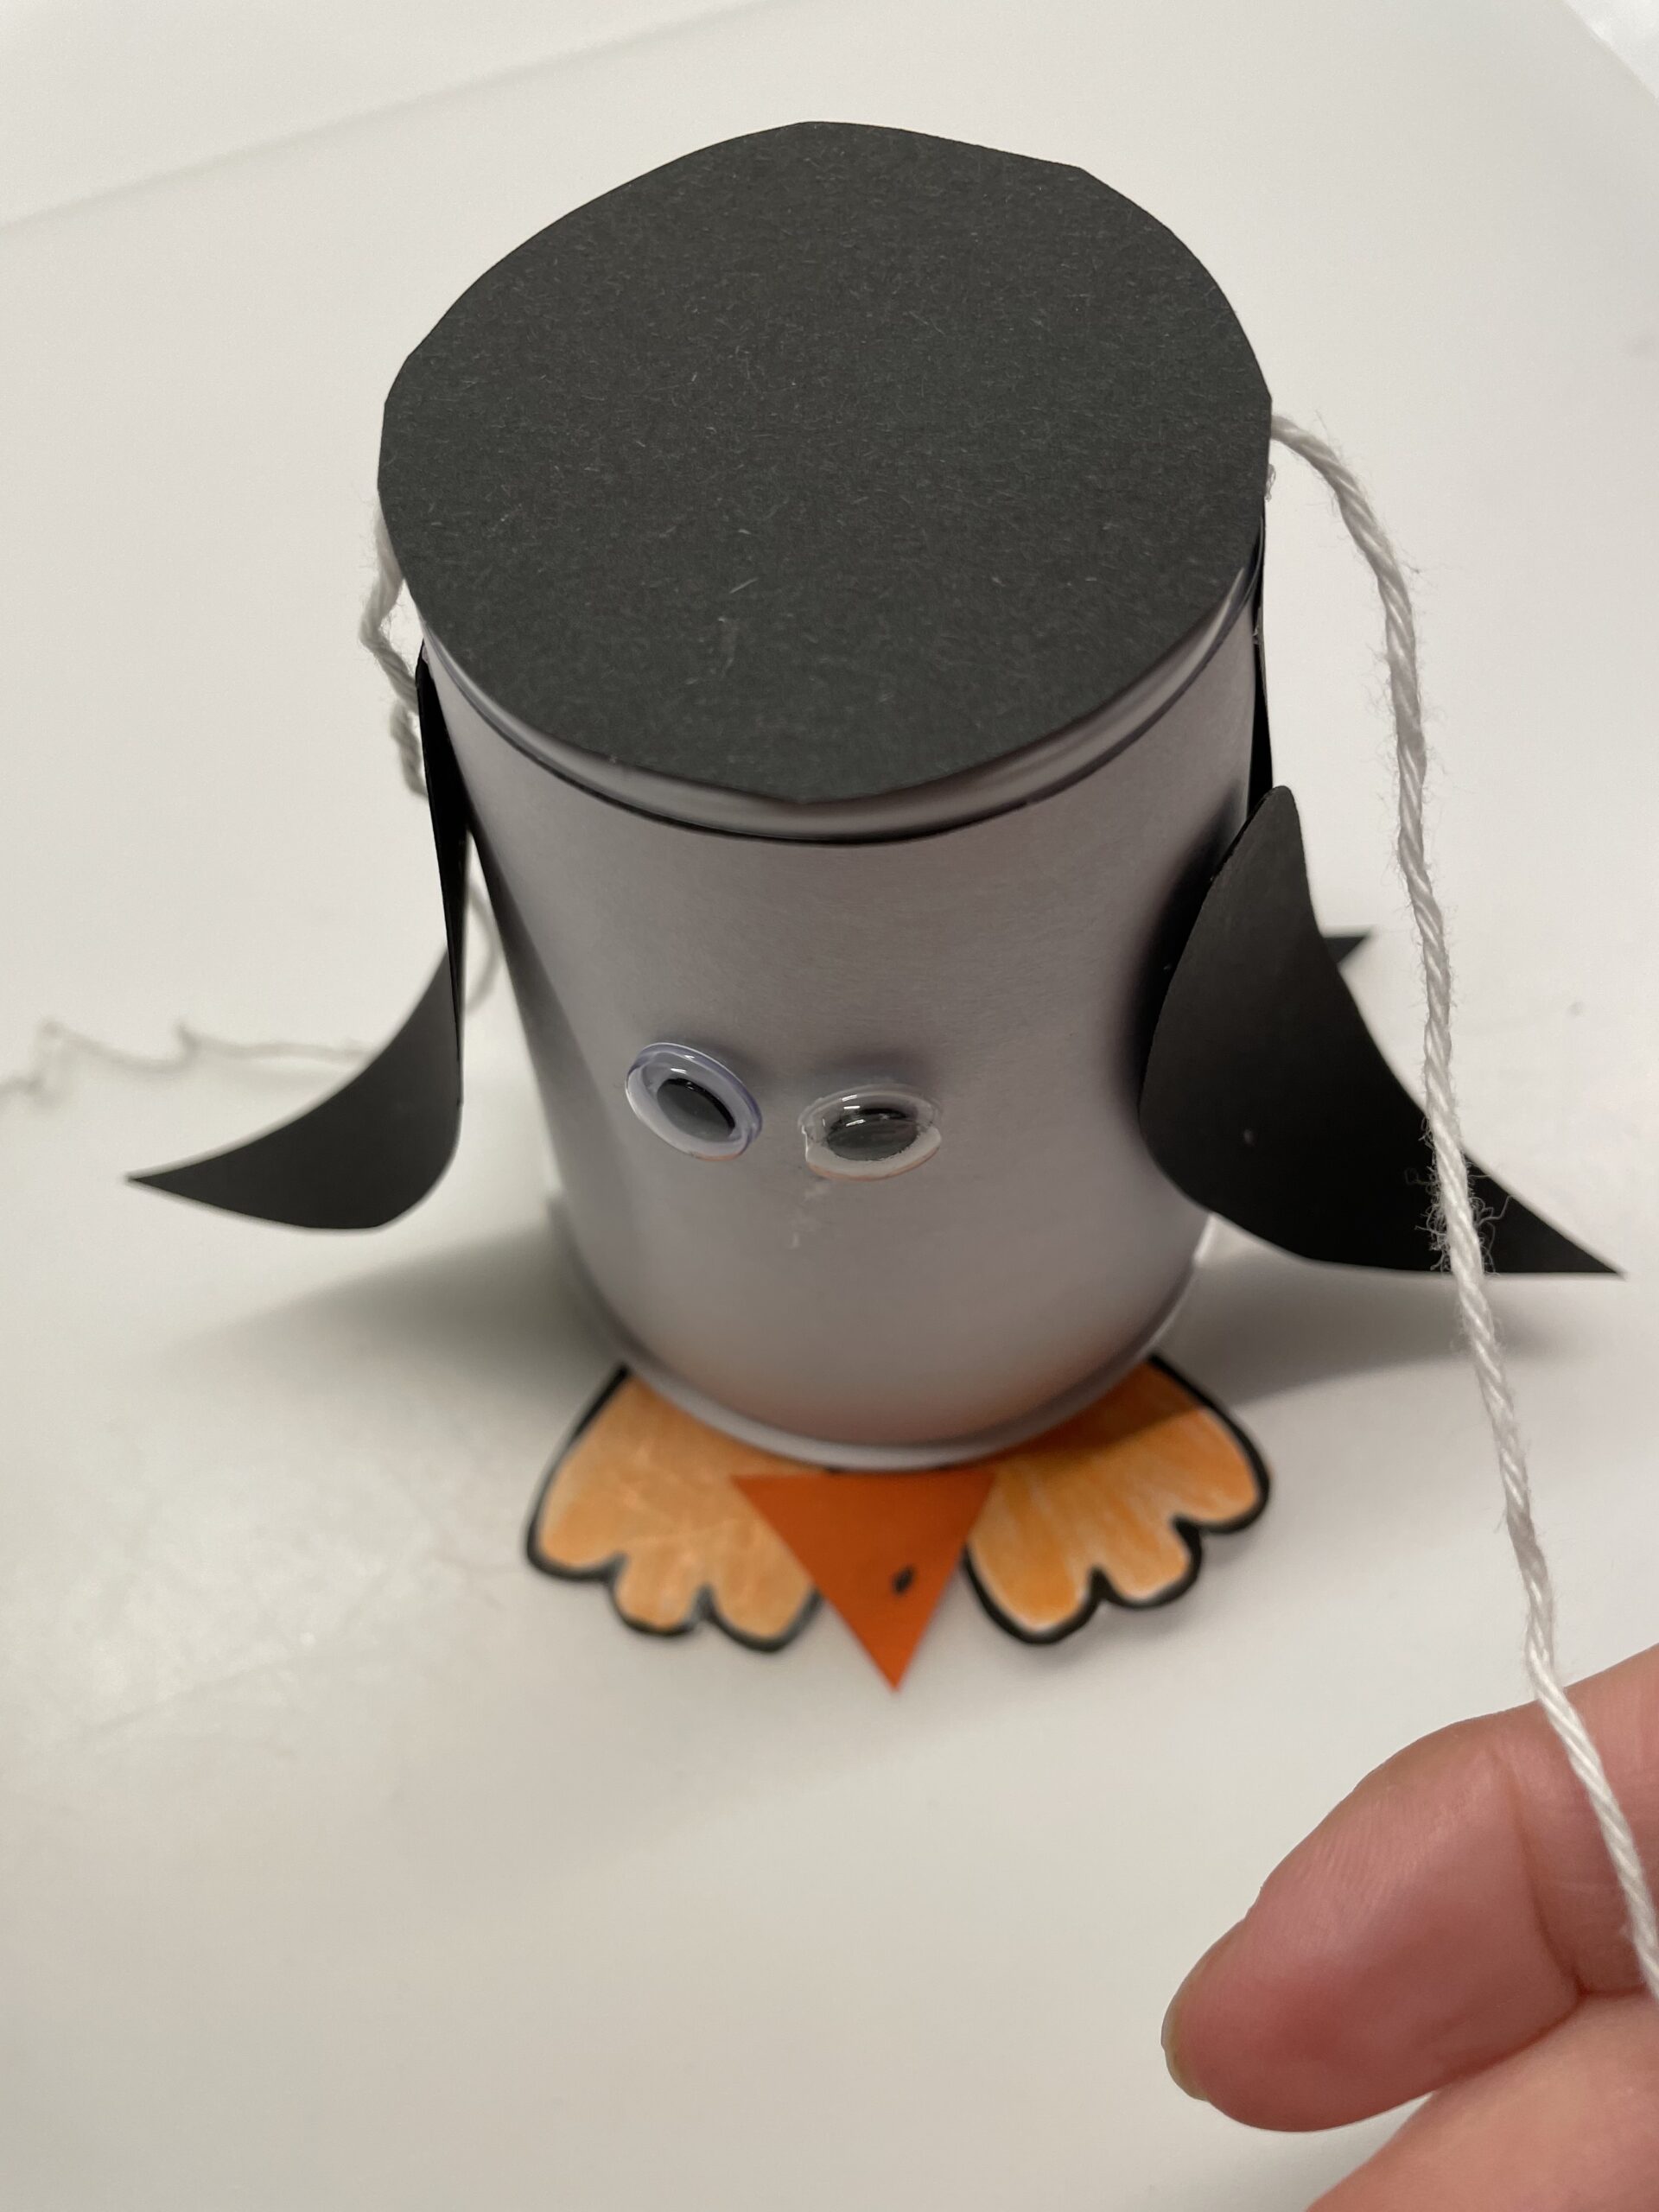
Now cut off a thread on the length of about 30cm. Then place it over the penguin cup and stick it on.

Bild zum Schritt 20 für das Bastel- und DIY-Abenteuer für Kinder: 'Nun schneidet ihr einen Faden auf die Länge von ca....'

21

For this, you cover the complete cup base with glue.

Bild zum Schritt 21 für das Bastel- und DIY-Abenteuer für Kinder: 'Dafür bestreicht ihr den kompletten Becherboden mit Kleber.'

22

Then you put the black circle on it and press it on

Bild zum Schritt 22 für das Bastel- und DIY-Abenteuer für Kinder: 'Anschließend legt ihr den schwarzen Kreis darauf und drückt ihn...'

23

Laterally, the thread looks out.

Bild zum Schritt 23 für das Bastel- und DIY-Abenteuer für Kinder: 'Seitlich schaut der Faden heraus.'

24

Now tie the ends of the thread together.

Bild zum Schritt 24 für das Bastel- und DIY-Abenteuer für Kinder: 'Bindet nun die Enden des Fadens zusammen.'

25

Finished is the flying penguin. Lift him up at the aprons and let him waddle and fly.

Bild zum Schritt 25 für das Bastel- und DIY-Abenteuer für Kinder: 'Fertig ist der fliegende Pinguin. Hebt ihn an den Schüren...'

26

2. Bild zum Schritt 25 für das Bastel- und DIY-Abenteuer für Kinder: 'Fertig ist der fliegende Pinguin. Hebt ihn an den Schüren...'

27

Have fun playing!

Template Banderole
28

This bandarole fits around a 200g cream cup.

Bild zum Schritt 29 für das Bastel- und DIY-Abenteuer für Kinder: 'Diese Bandarole passt um einen 200g Sahnebecher.'

Materials

 1 Cream cup (200g cup)empty and rinsed
 1 White paper
 1 Clay paper black
 1 Orange clay paper
 2 Wax eyes
 1 Pen
 1 Felt pen black
 1 Thread30cm long
 1 Builder's pad
 possible template
All links marked with a shopping cart lead to Amazon - here we have selected products that we would order ourselves and in part also ordered. In a qualified purchase via the advertising link, we as Amazon partner receive a commission, for you there are no costs. You thus support our cost- and advertising banner-free, educational offer.

Directions

1

First, put all the materials ready and the craft material out. Then you print out the template (see below) and it. The template fits around a standard 200g cream or smear cup.

Bild zum Schritt 1 für das Bastel- und DIY-Abenteuer für Kinder: 'Zuerst legt euch alle Materialien bereit und die Bastelunterlage aus....'

2

2. Bild zum Schritt 1 für das Bastel- und DIY-Abenteuer für Kinder: 'Zuerst legt euch alle Materialien bereit und die Bastelunterlage aus....'

3

Then wrap the cut-out paper around the plastic cup.
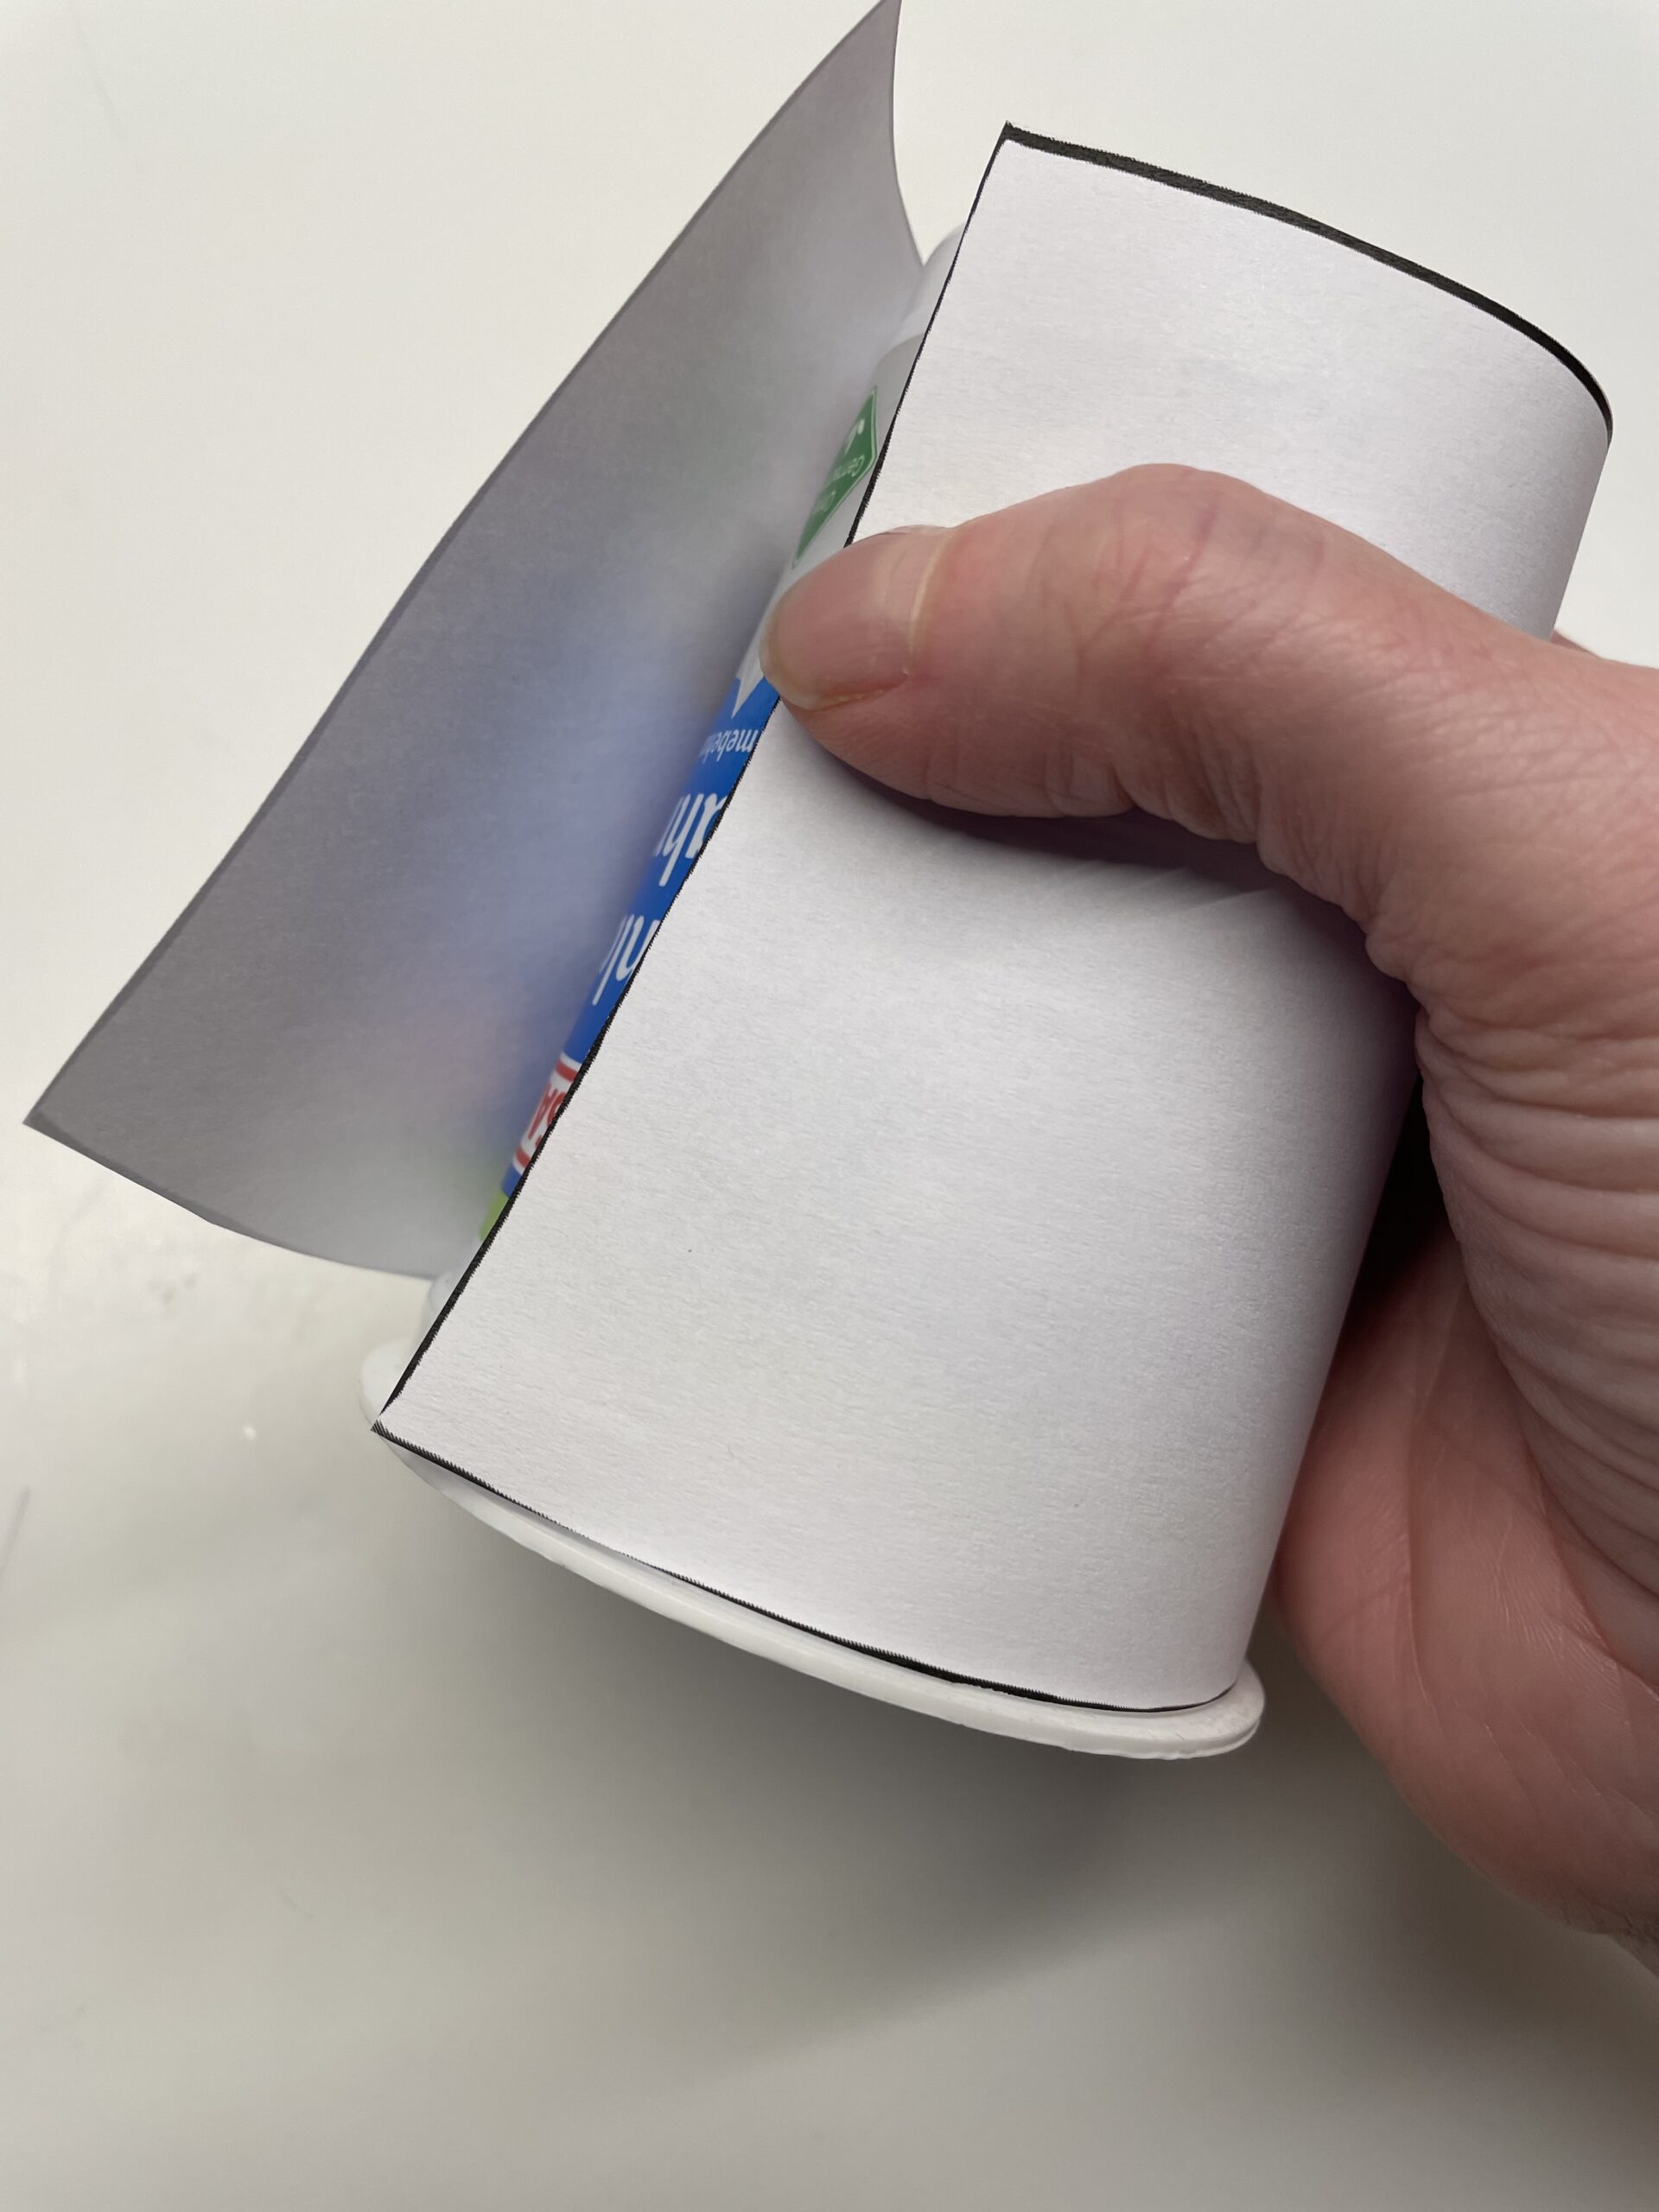
Bild zum Schritt 3 für das Bastel- und DIY-Abenteuer für Kinder: 'Danach wickelt ihr das ausgeschnittene Papier um den Plastikbecher.'

4

Now stick the paper to the cup. For this you drive on the cup once with the glue stick from top to bottom. Then you place the paper around the cup and glue the end piece also with a strip of glue.
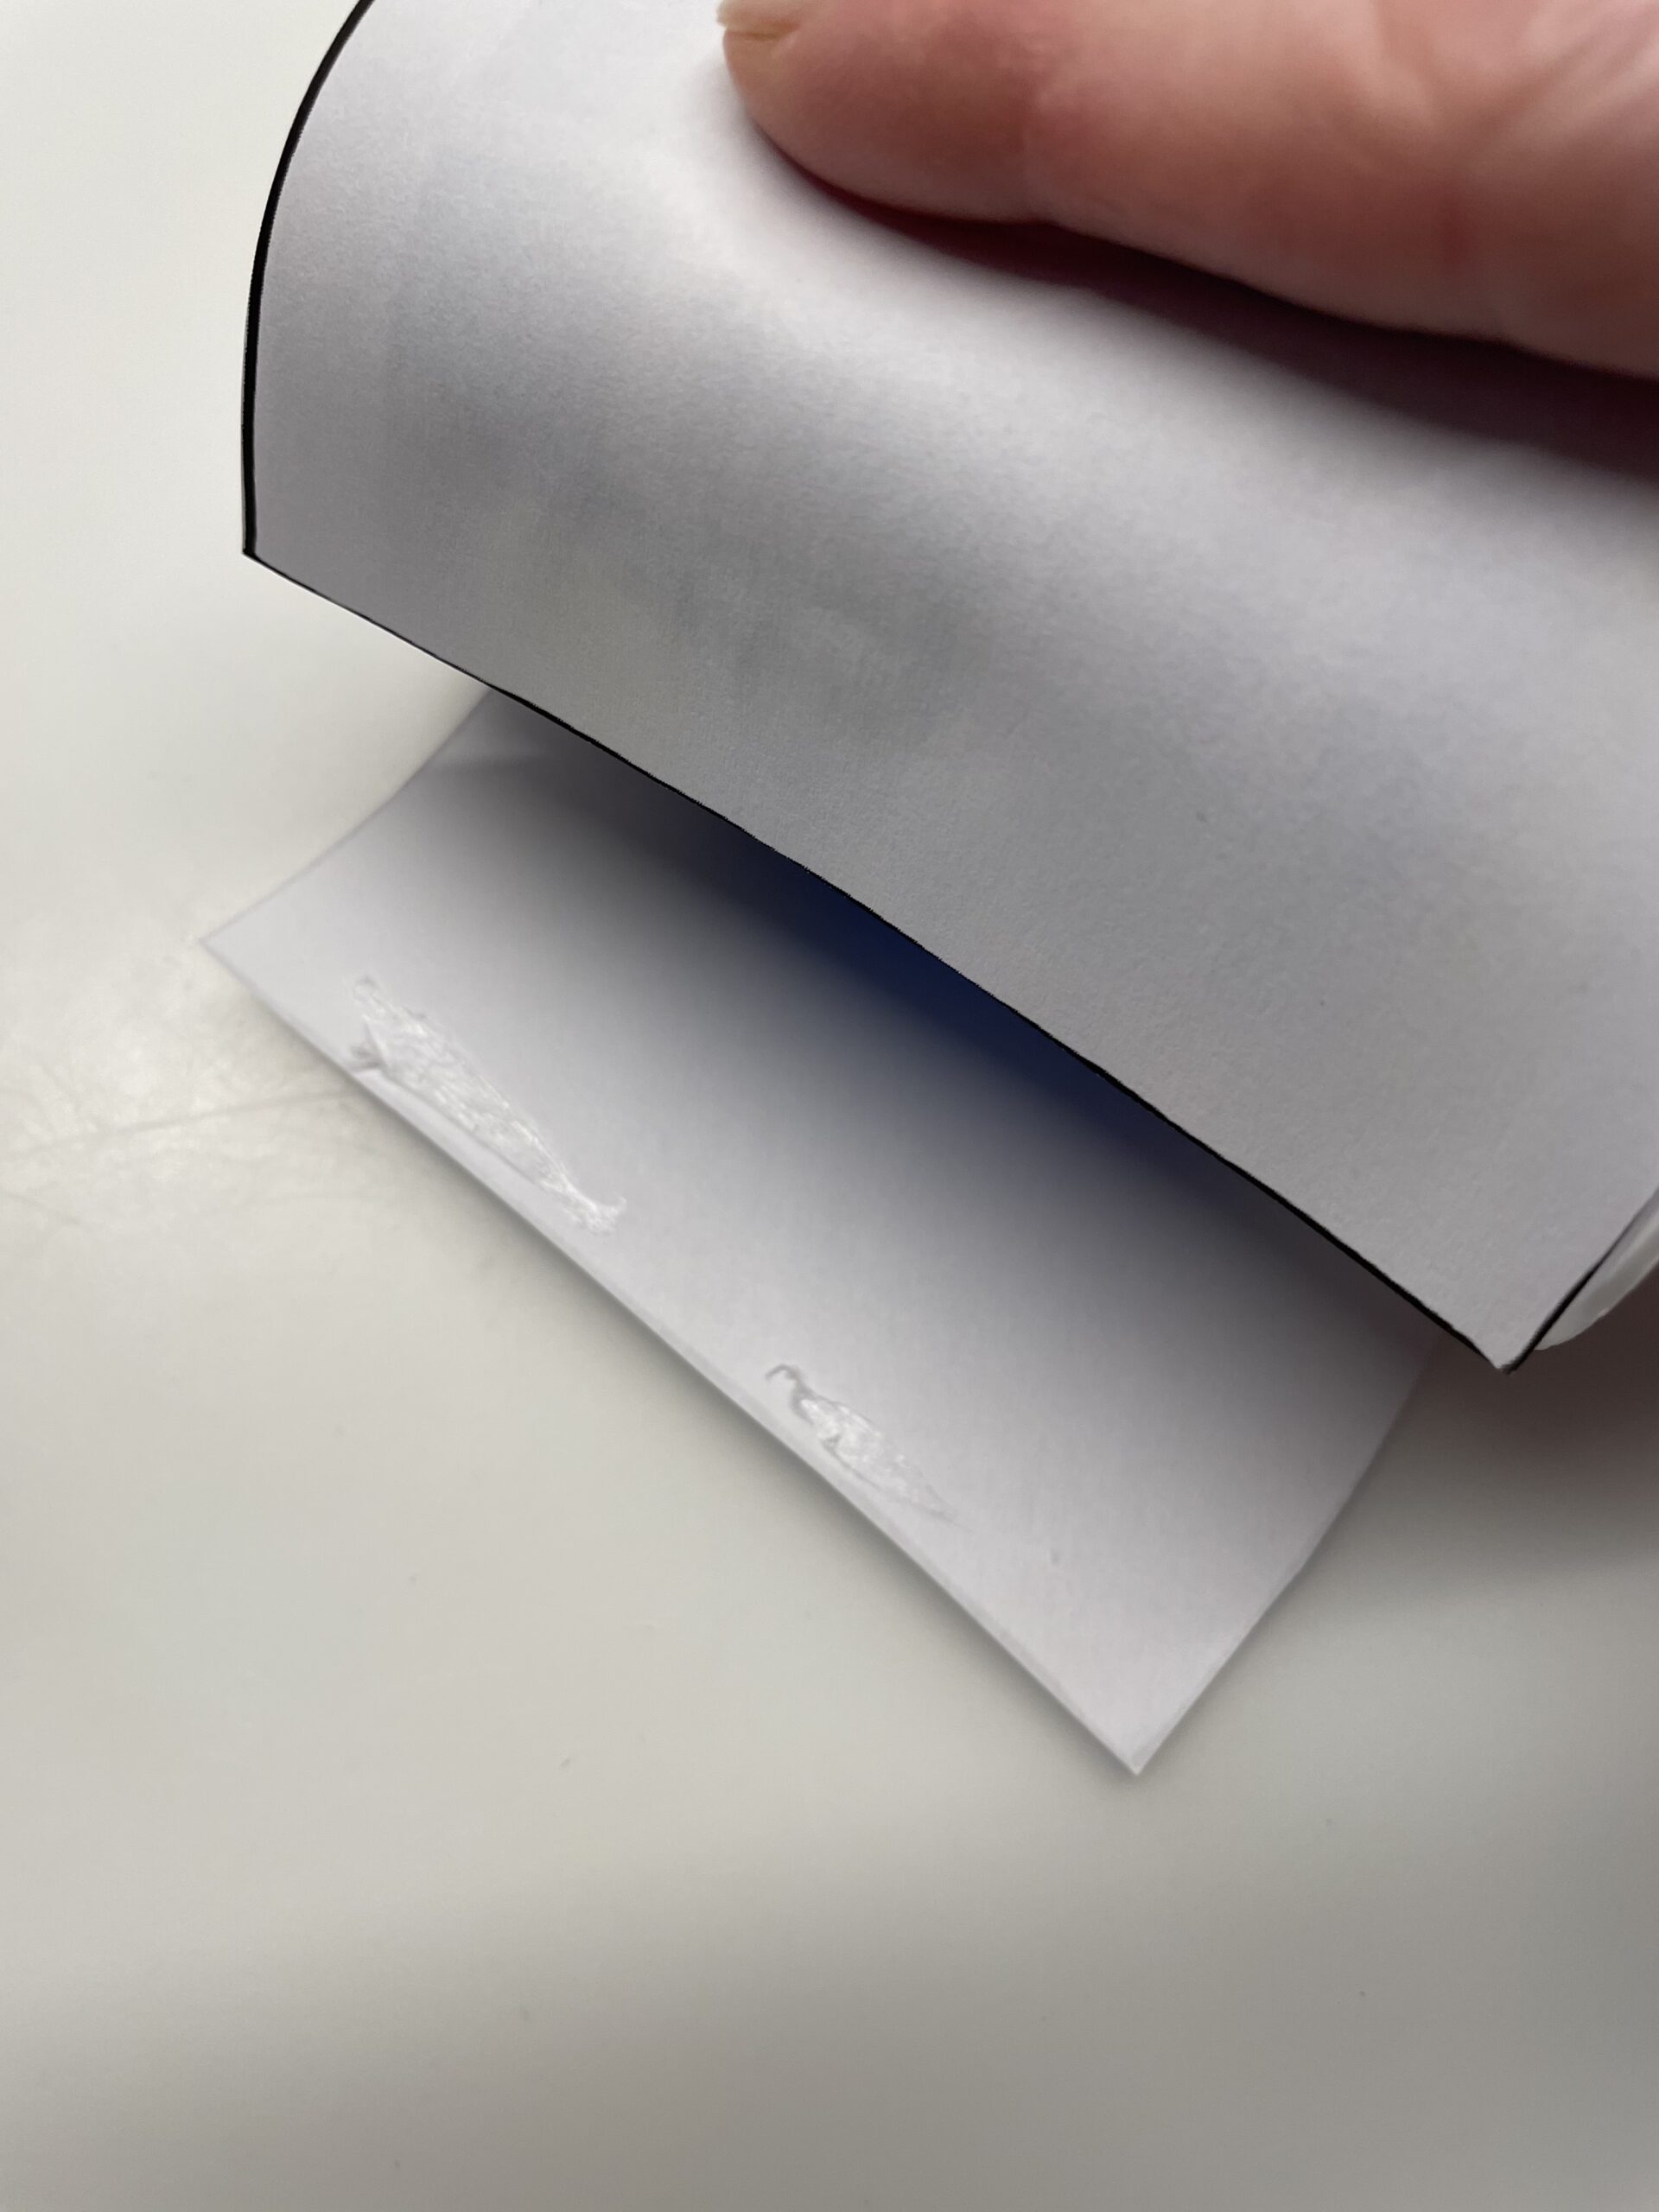
Bild zum Schritt 4 für das Bastel- und DIY-Abenteuer für Kinder: 'Klebt jetzt das Papier am Becher fest. Dafür fahrt ihr...'

5

The paper now covers the whole cup.
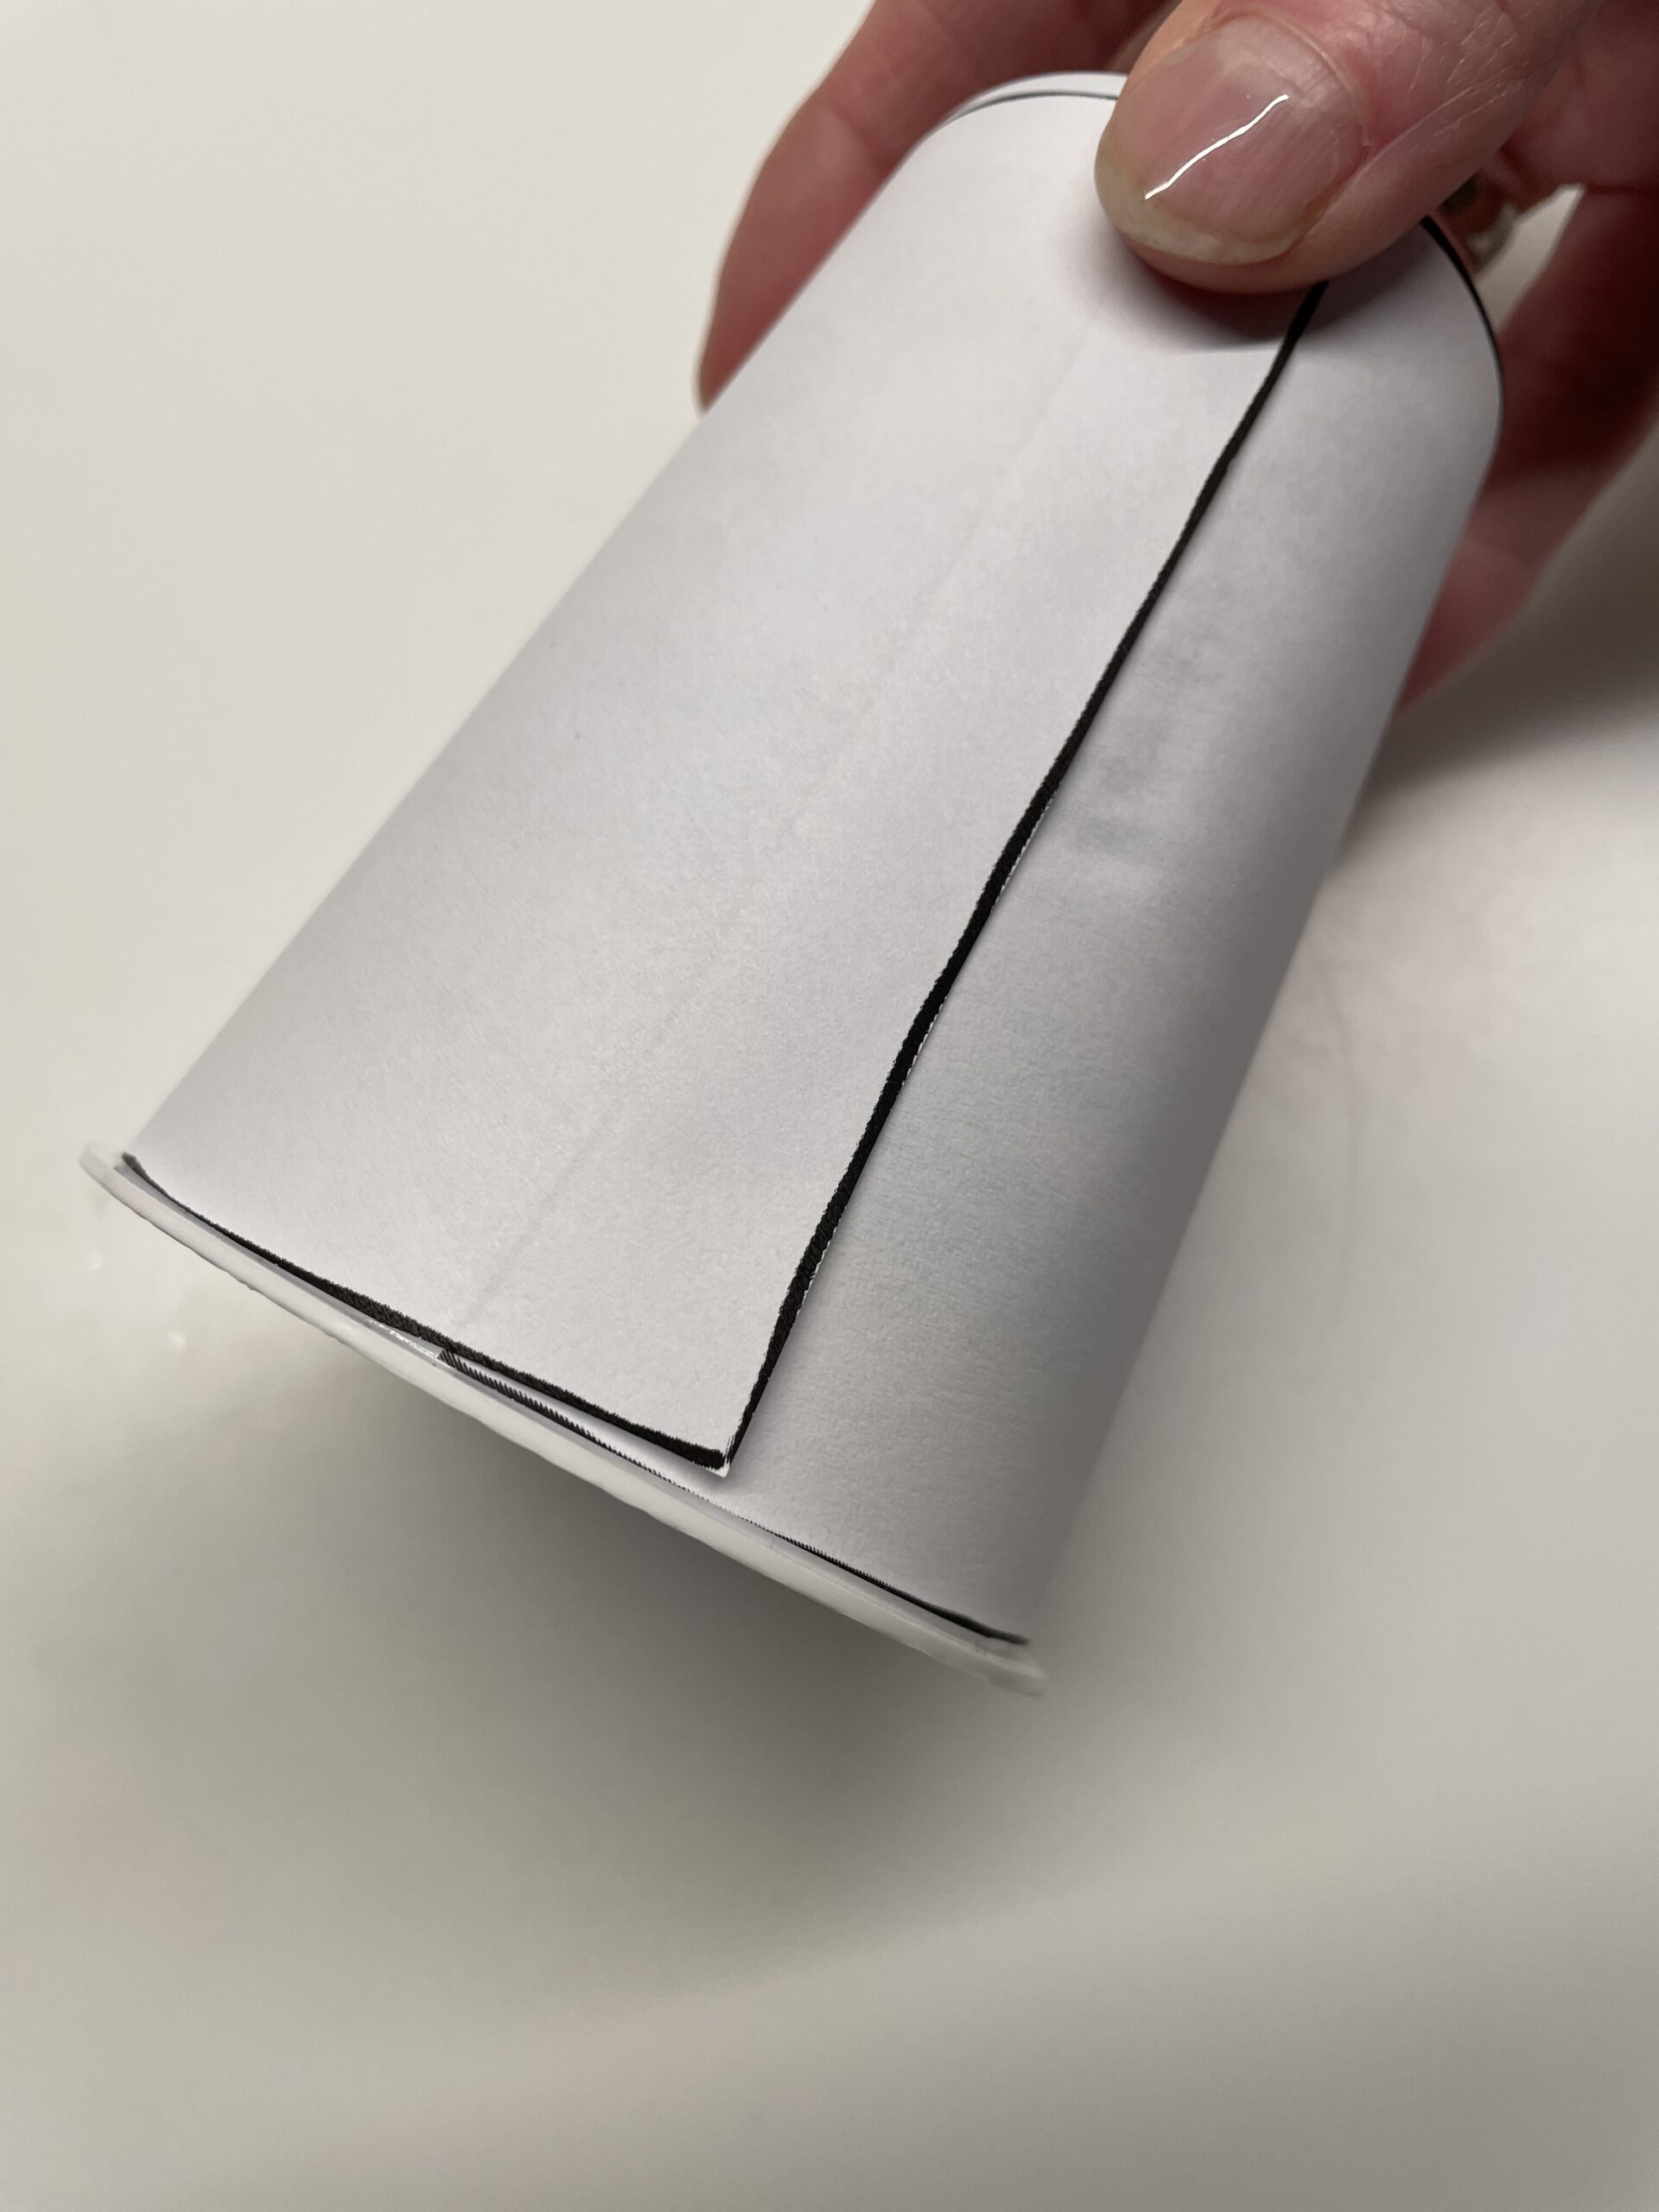
Bild zum Schritt 5 für das Bastel- und DIY-Abenteuer für Kinder: 'Das Papier umspannt jetzt den ganzen Becher.'

6

Draw a small triangle on orange paper and cut it out.
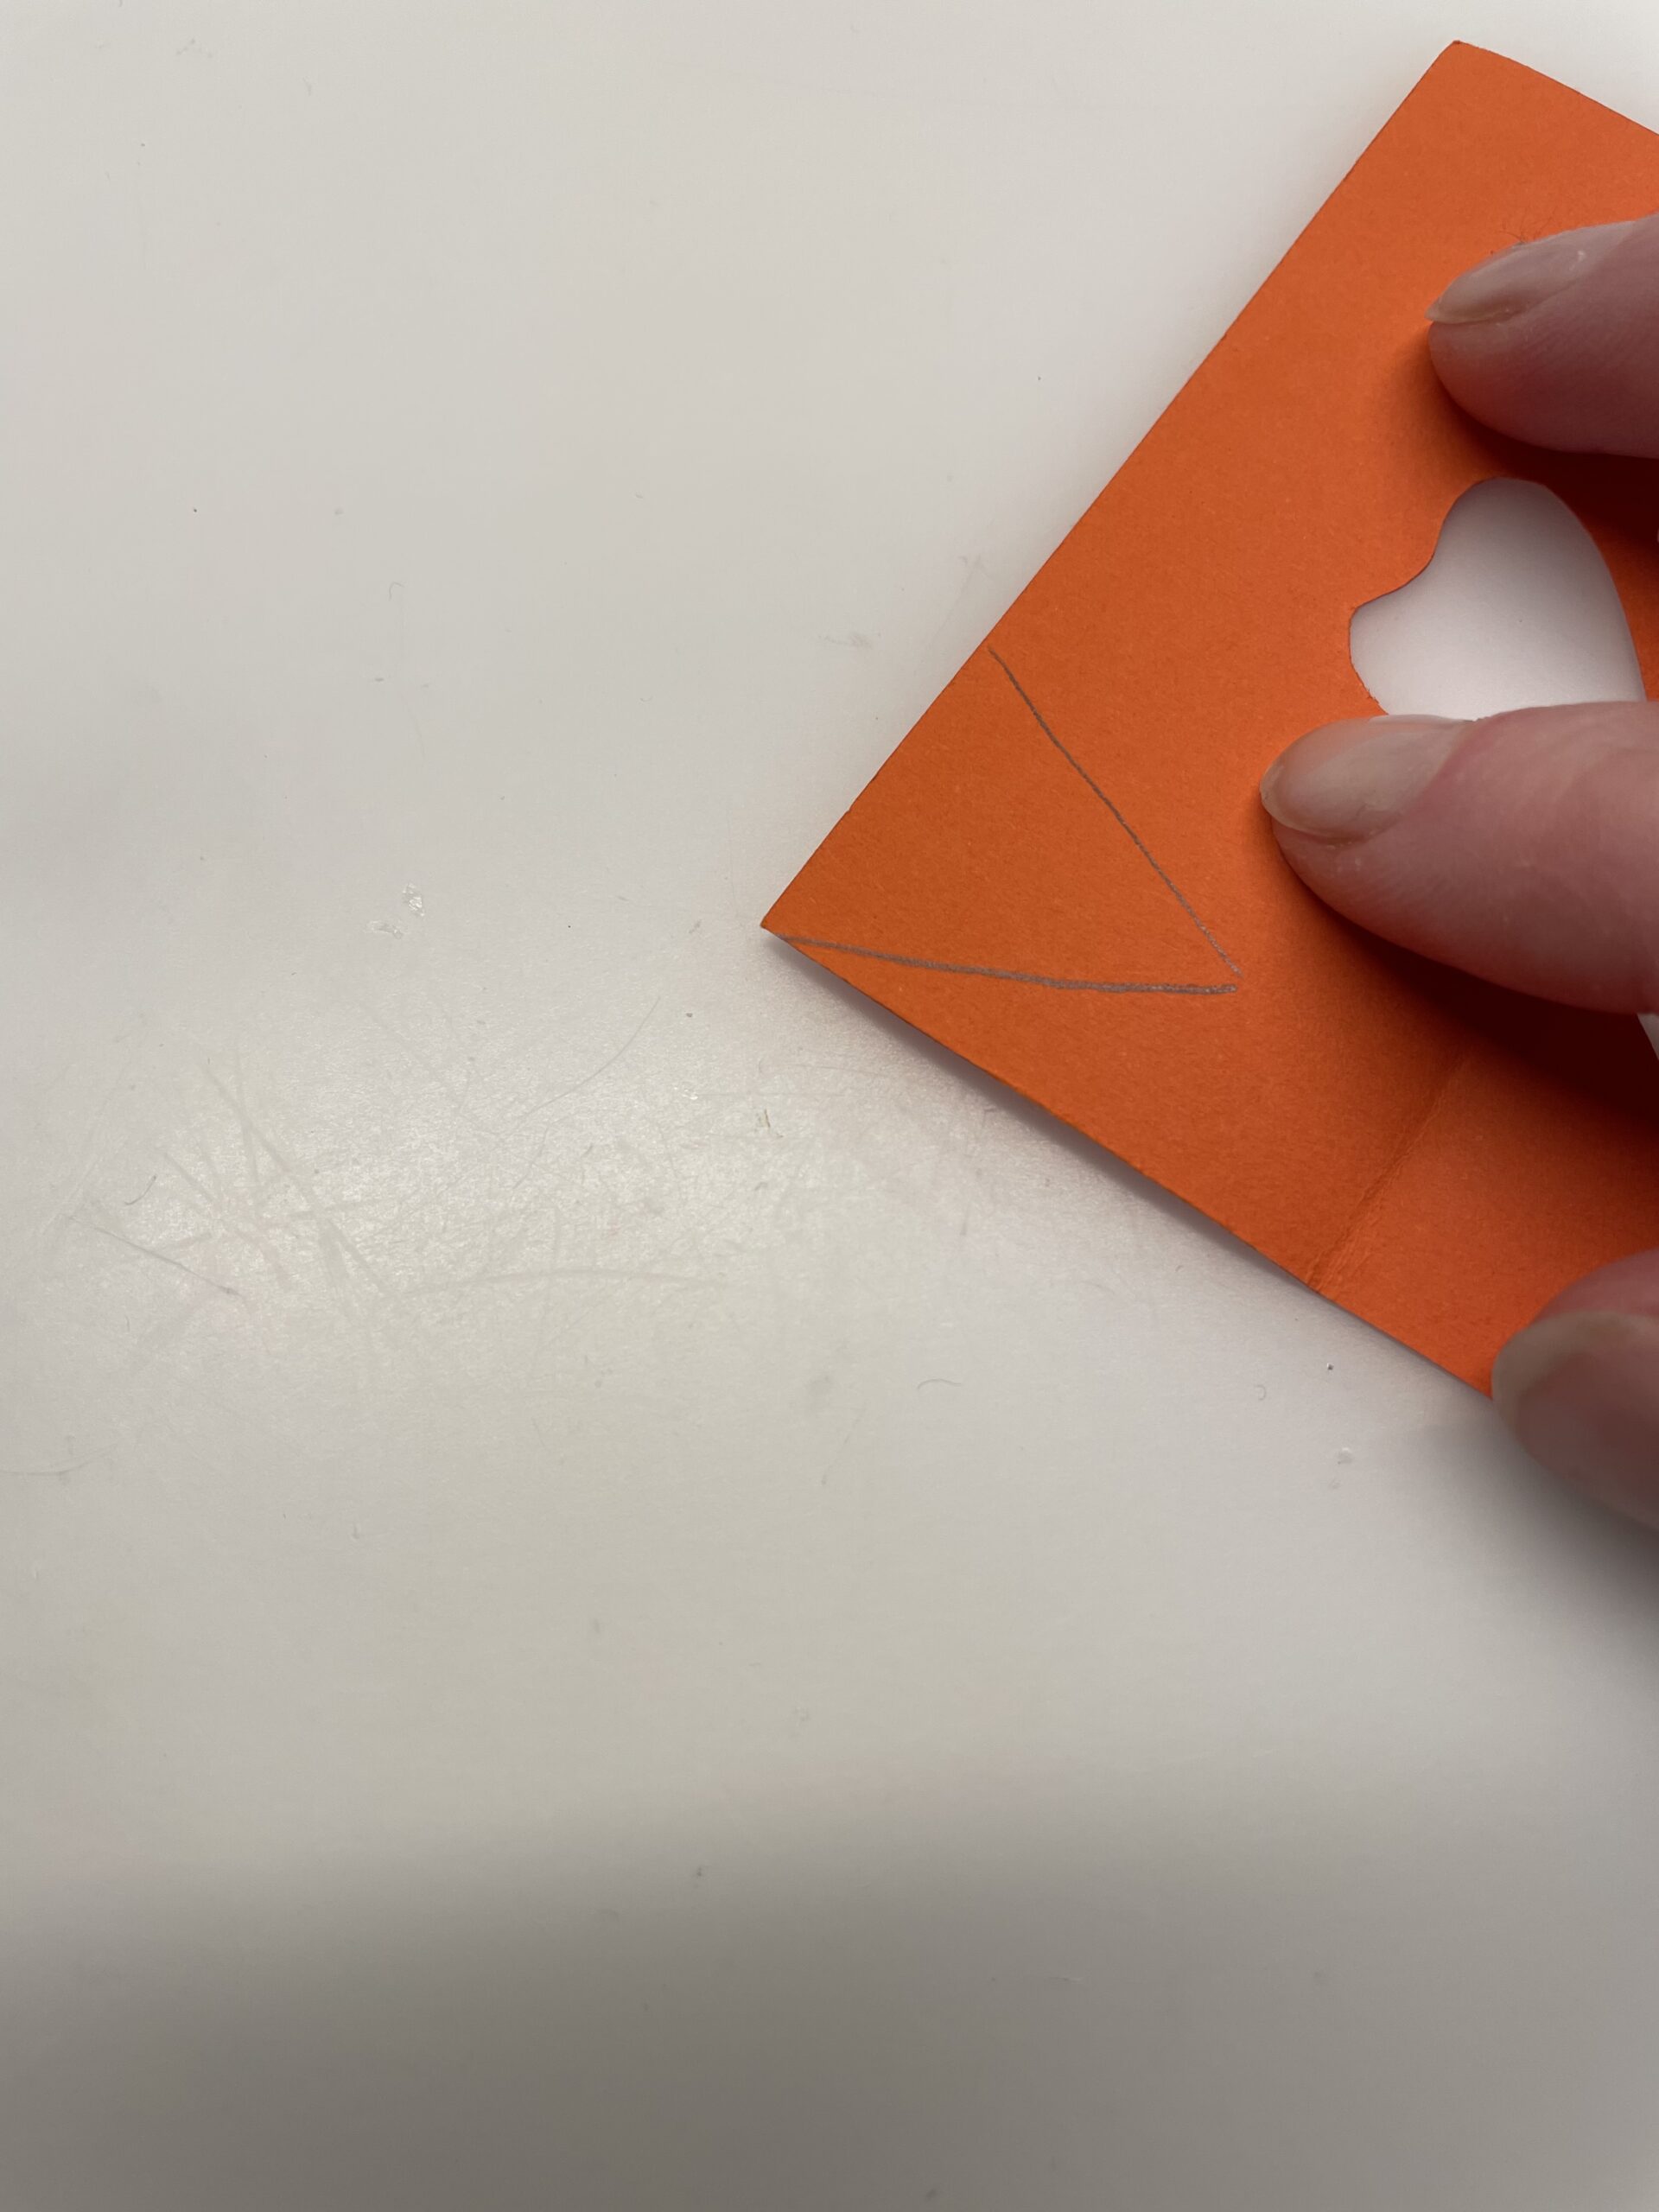
Bild zum Schritt 6 für das Bastel- und DIY-Abenteuer für Kinder: 'Zeichnet nun ein kleines Dreieck auf oranges Papier und schneidet...'

7

The cup stands with the opening down on the table. Now you stick your beak and two wobble eyes on the cup.

Alternatively, you paint your eyes with a felt pen.
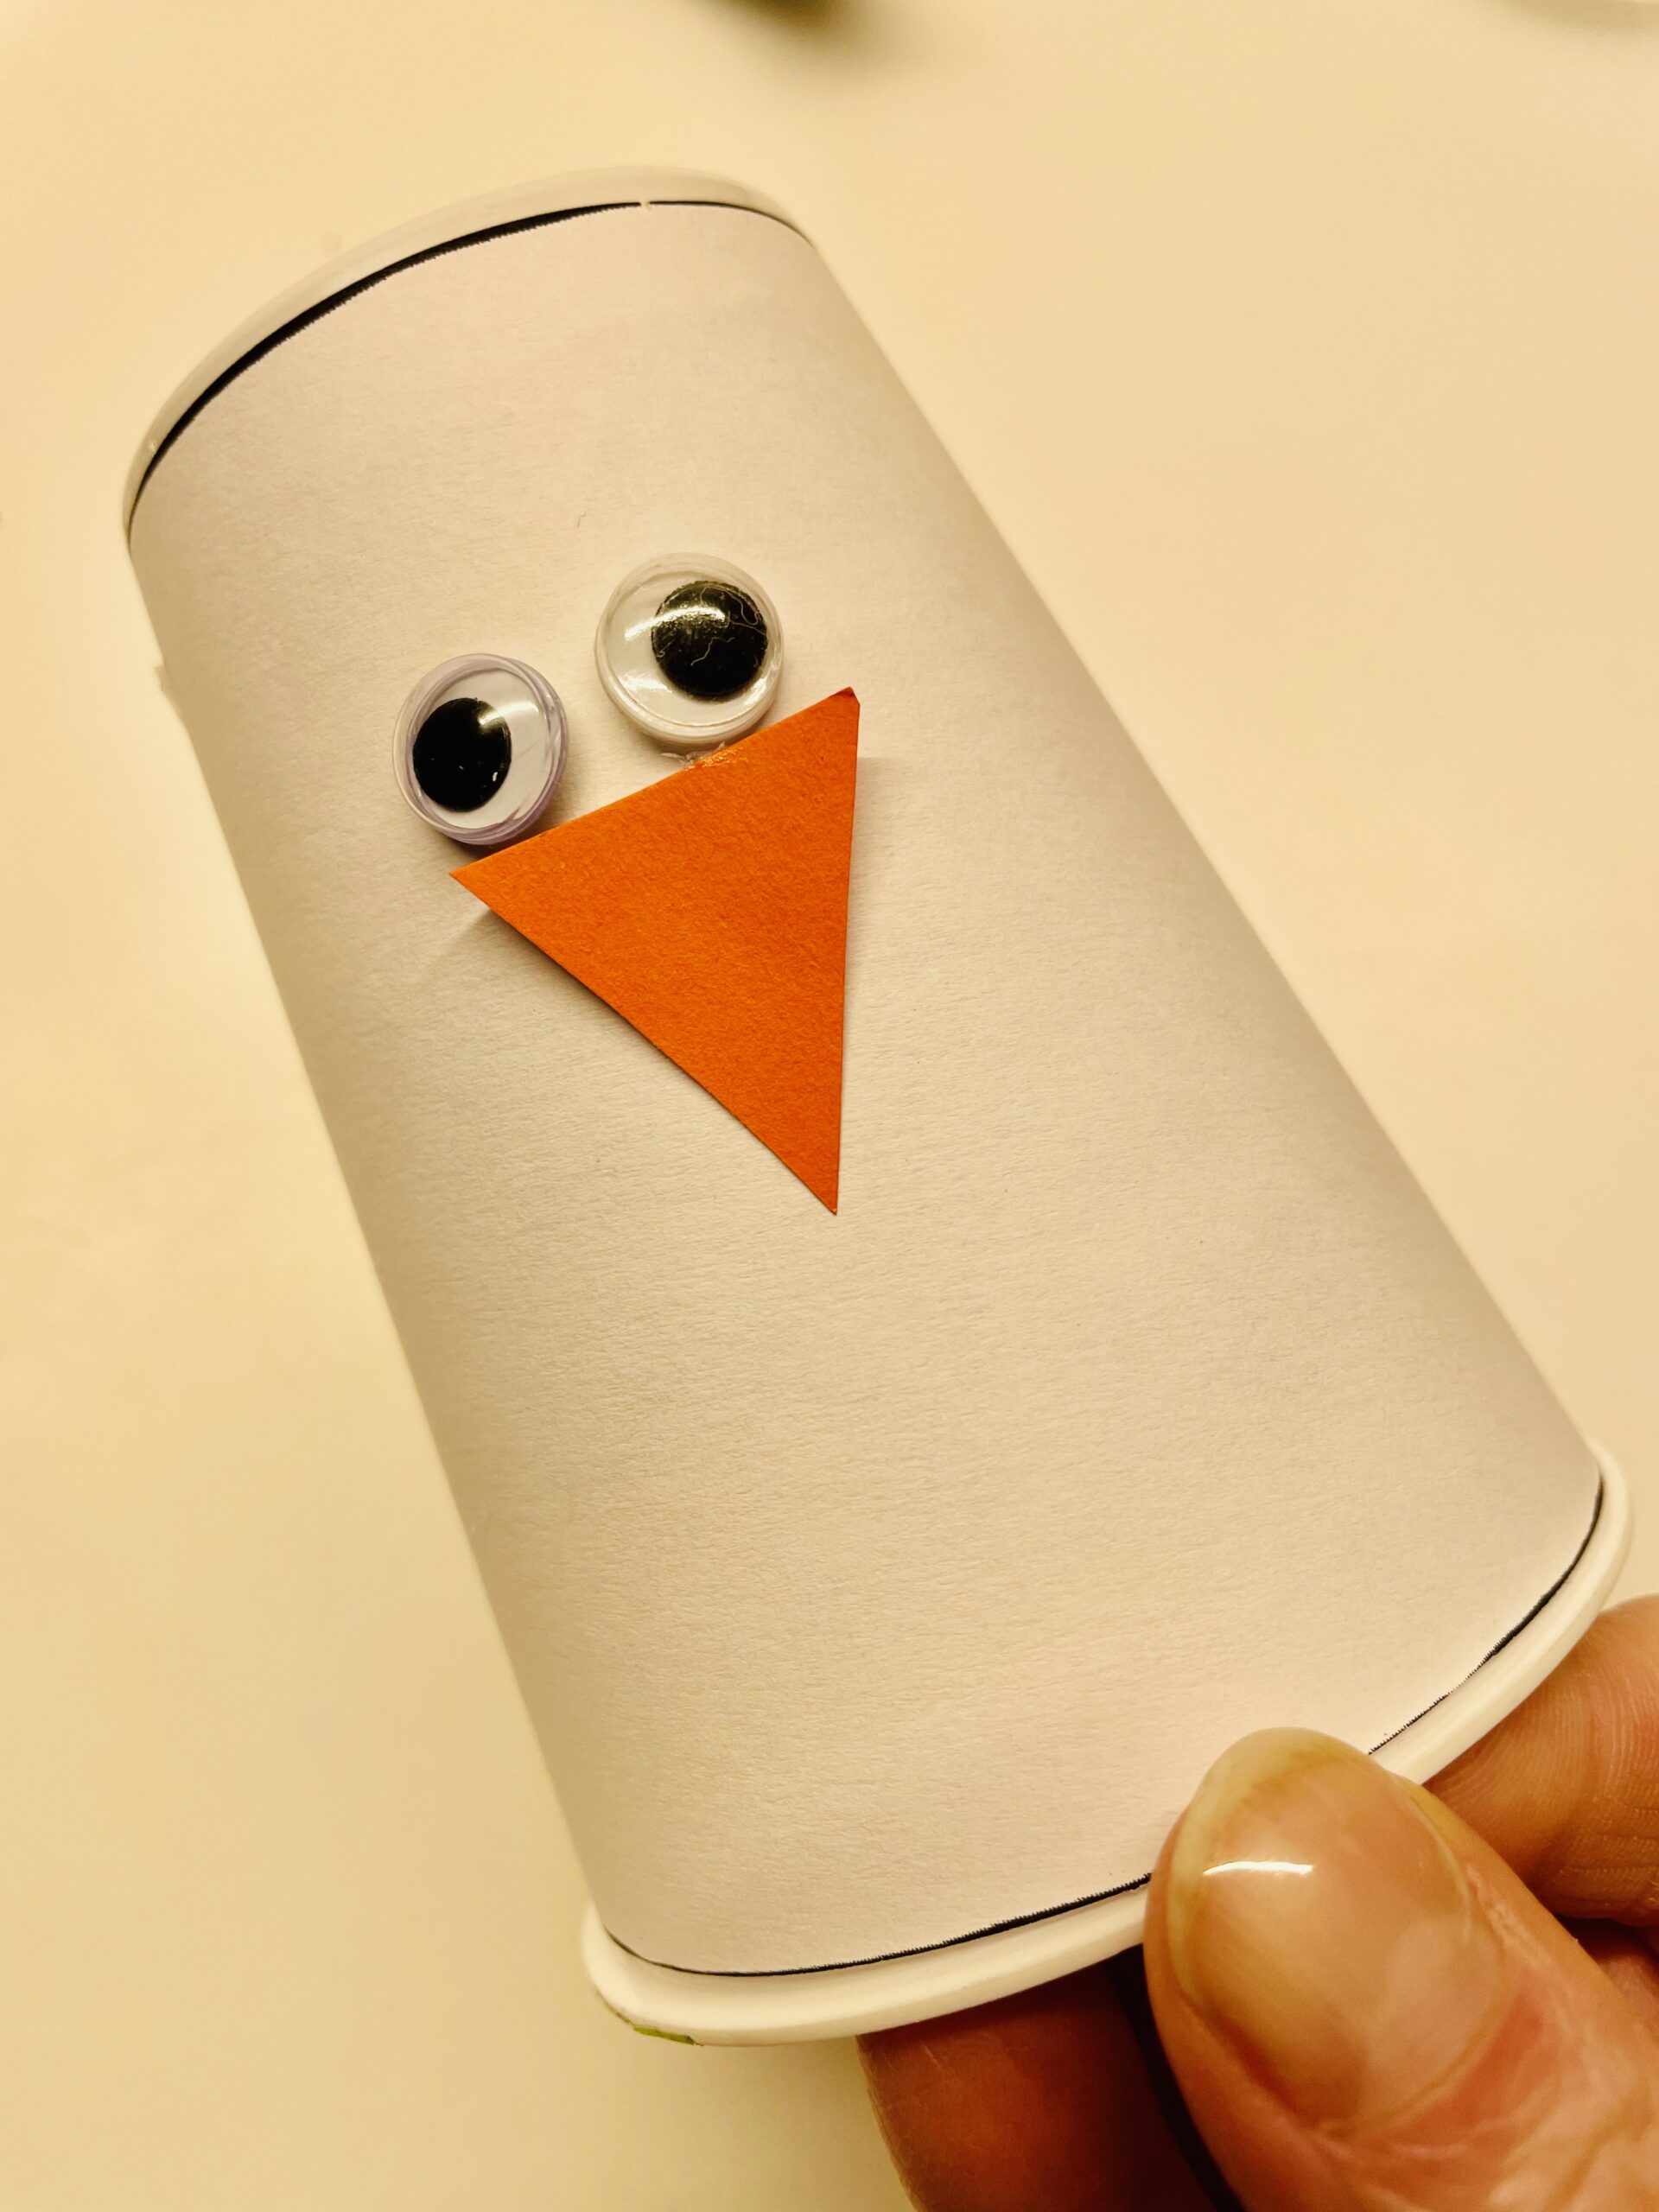
Bild zum Schritt 7 für das Bastel- und DIY-Abenteuer für Kinder: 'Der Becher steht mit der Öffnung nach unten auf dem...'

8

Now you cut two wings out of black clay paper.

Tip: Fold a strip of about 2cm x 15cm in size to half. This creates two wings at once.

Then you separate the wings in the middle and pull the lower tip over a pen. Through the pressure, the paper rolls in slightly.
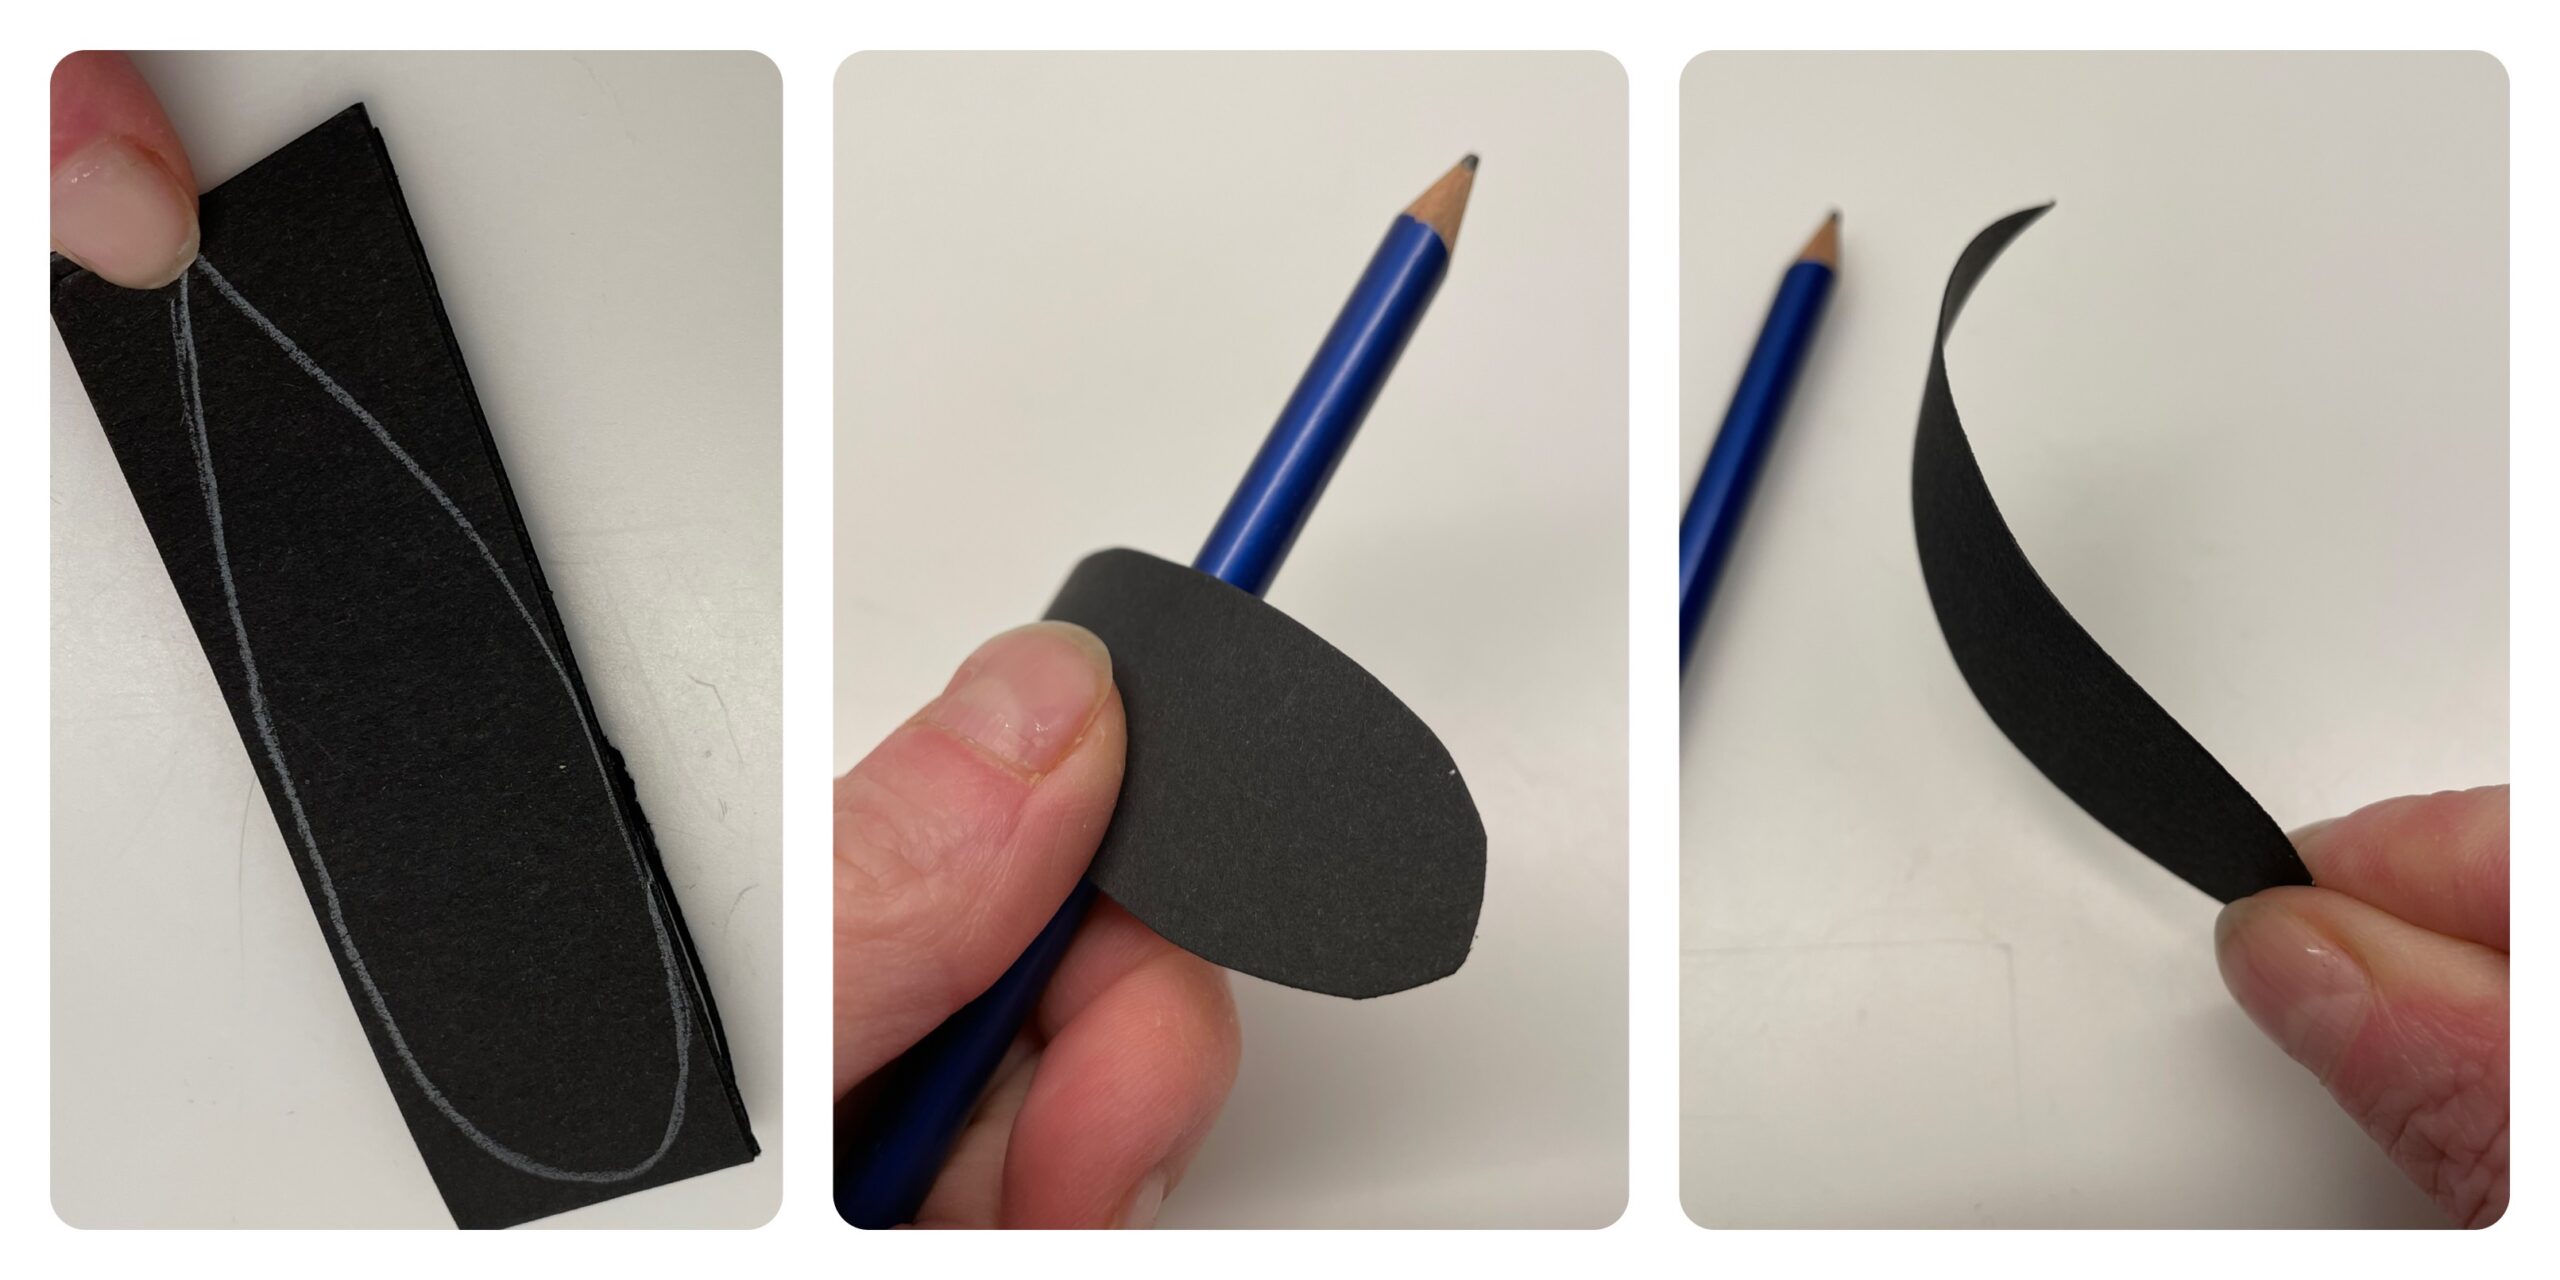
Bild zum Schritt 8 für das Bastel- und DIY-Abenteuer für Kinder: 'Aus schwarzem Tonpapier schneidet ihr jetzt zwei Flügel aus. ...'

9

Now you stick both wings to the side of the body. The wings stand down.
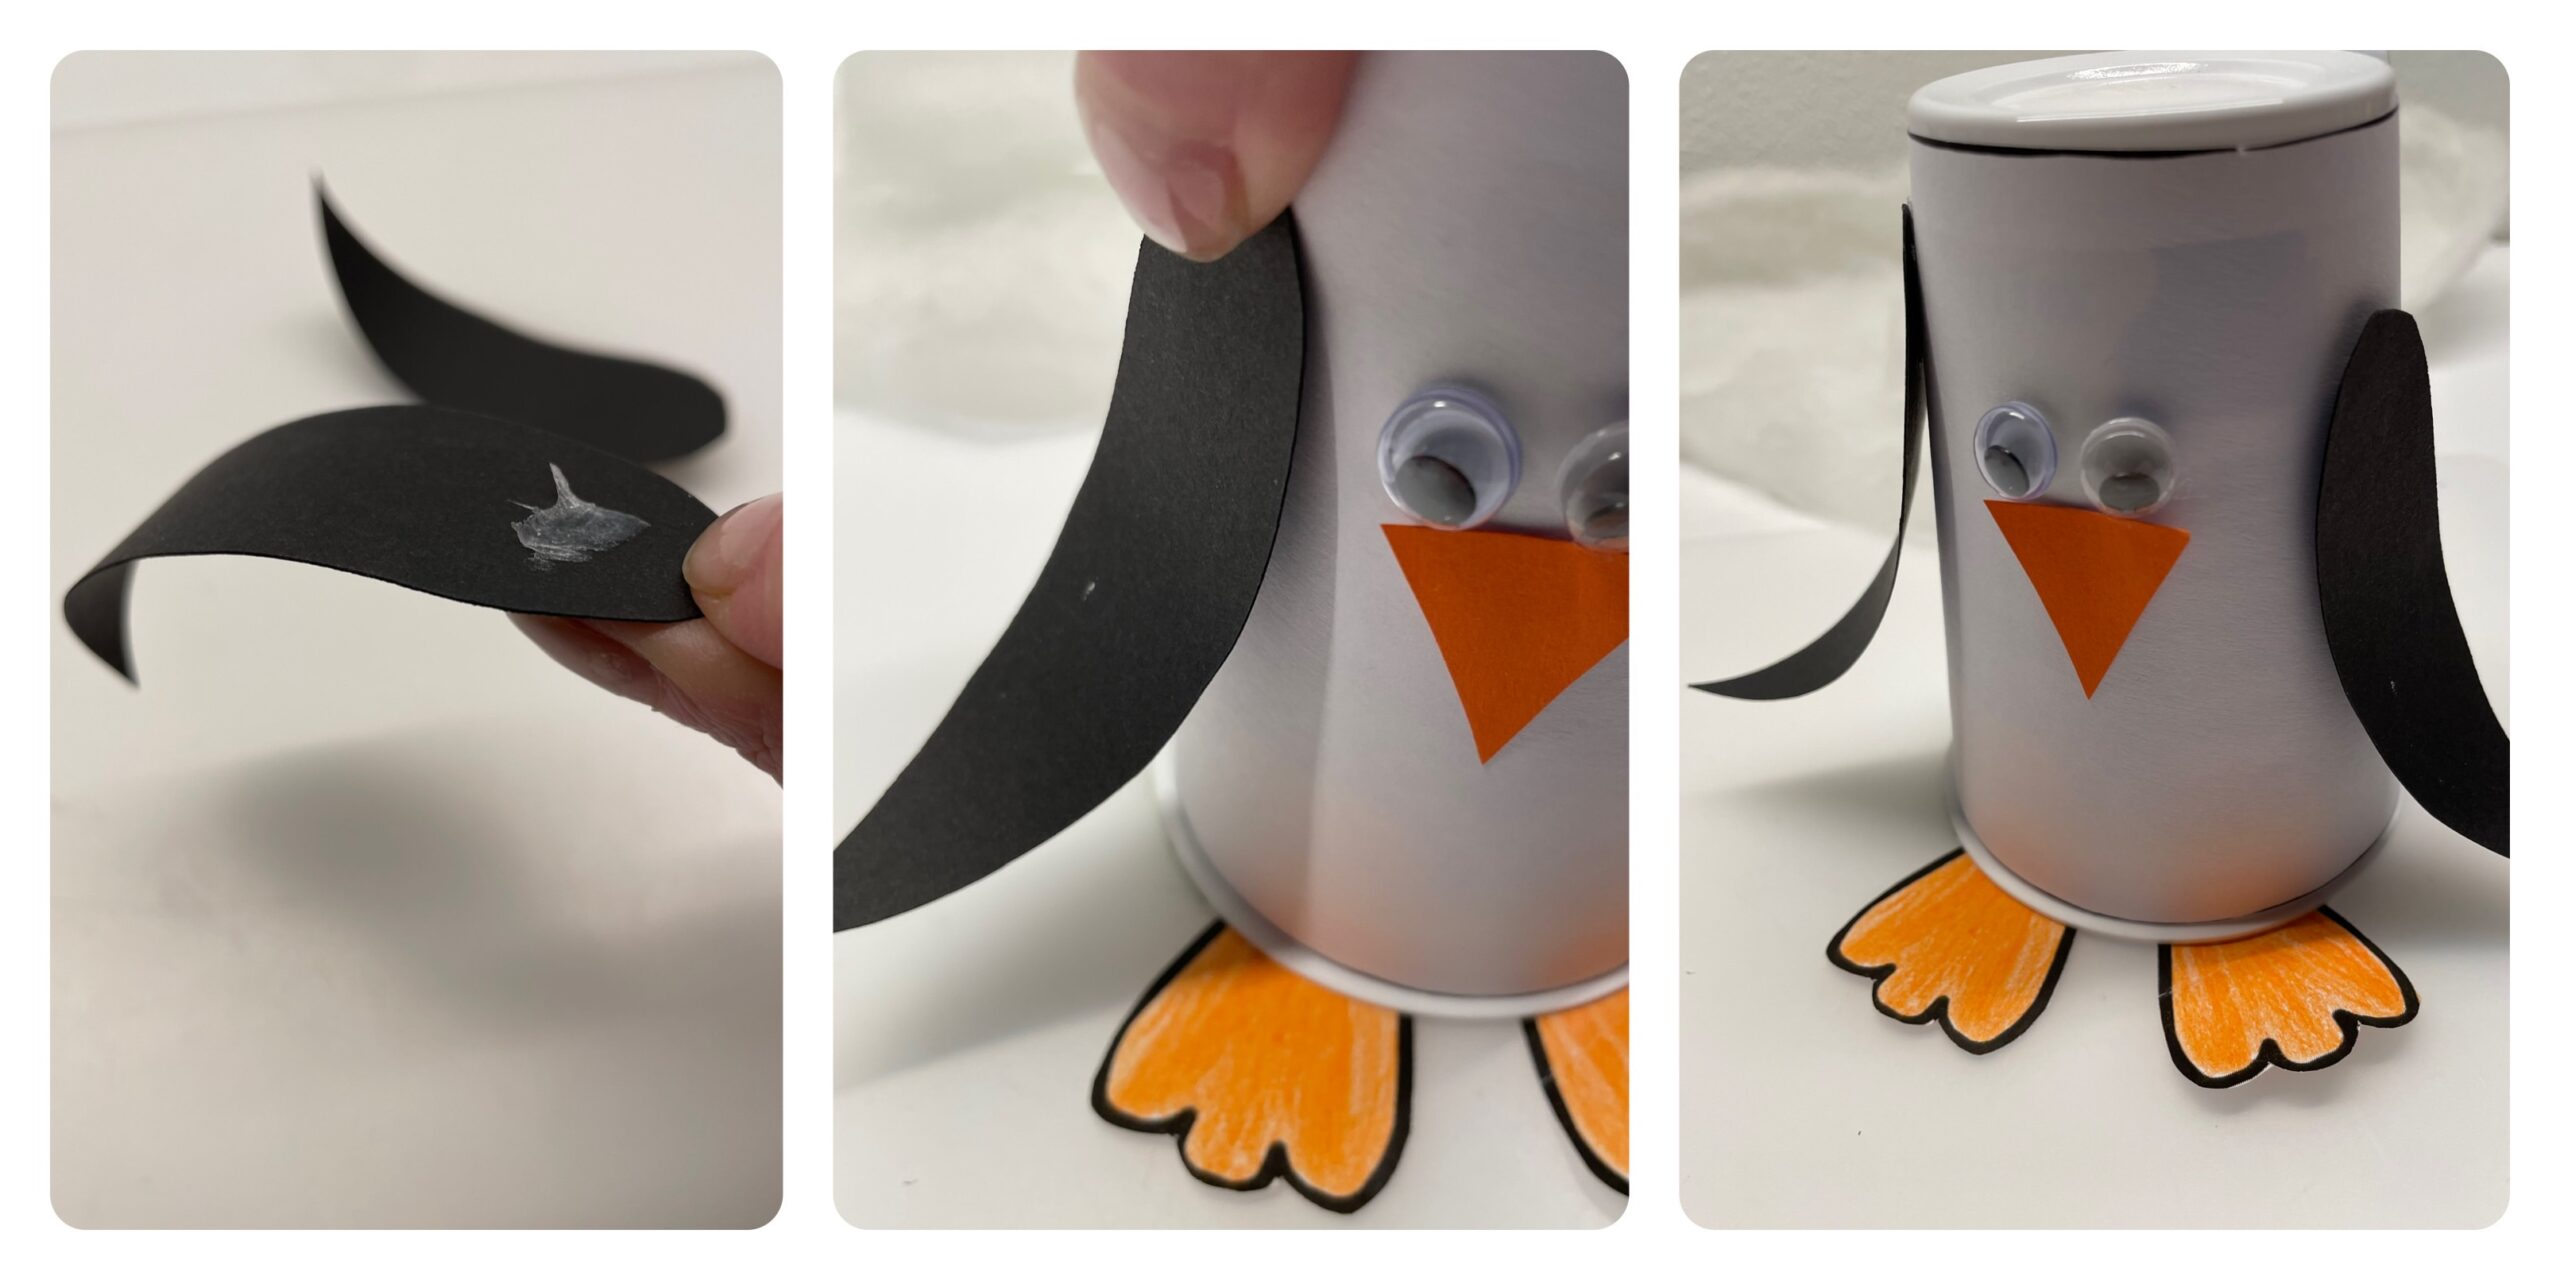
Bild zum Schritt 9 für das Bastel- und DIY-Abenteuer für Kinder: 'Jetzt klebt ihr beide Flügel seitlich am Körper fest. Die...'

10

Paint two feet on an orange clay paper.
stick both feet down to the cup opening.
Decide whether they are pointing forward or standing down.
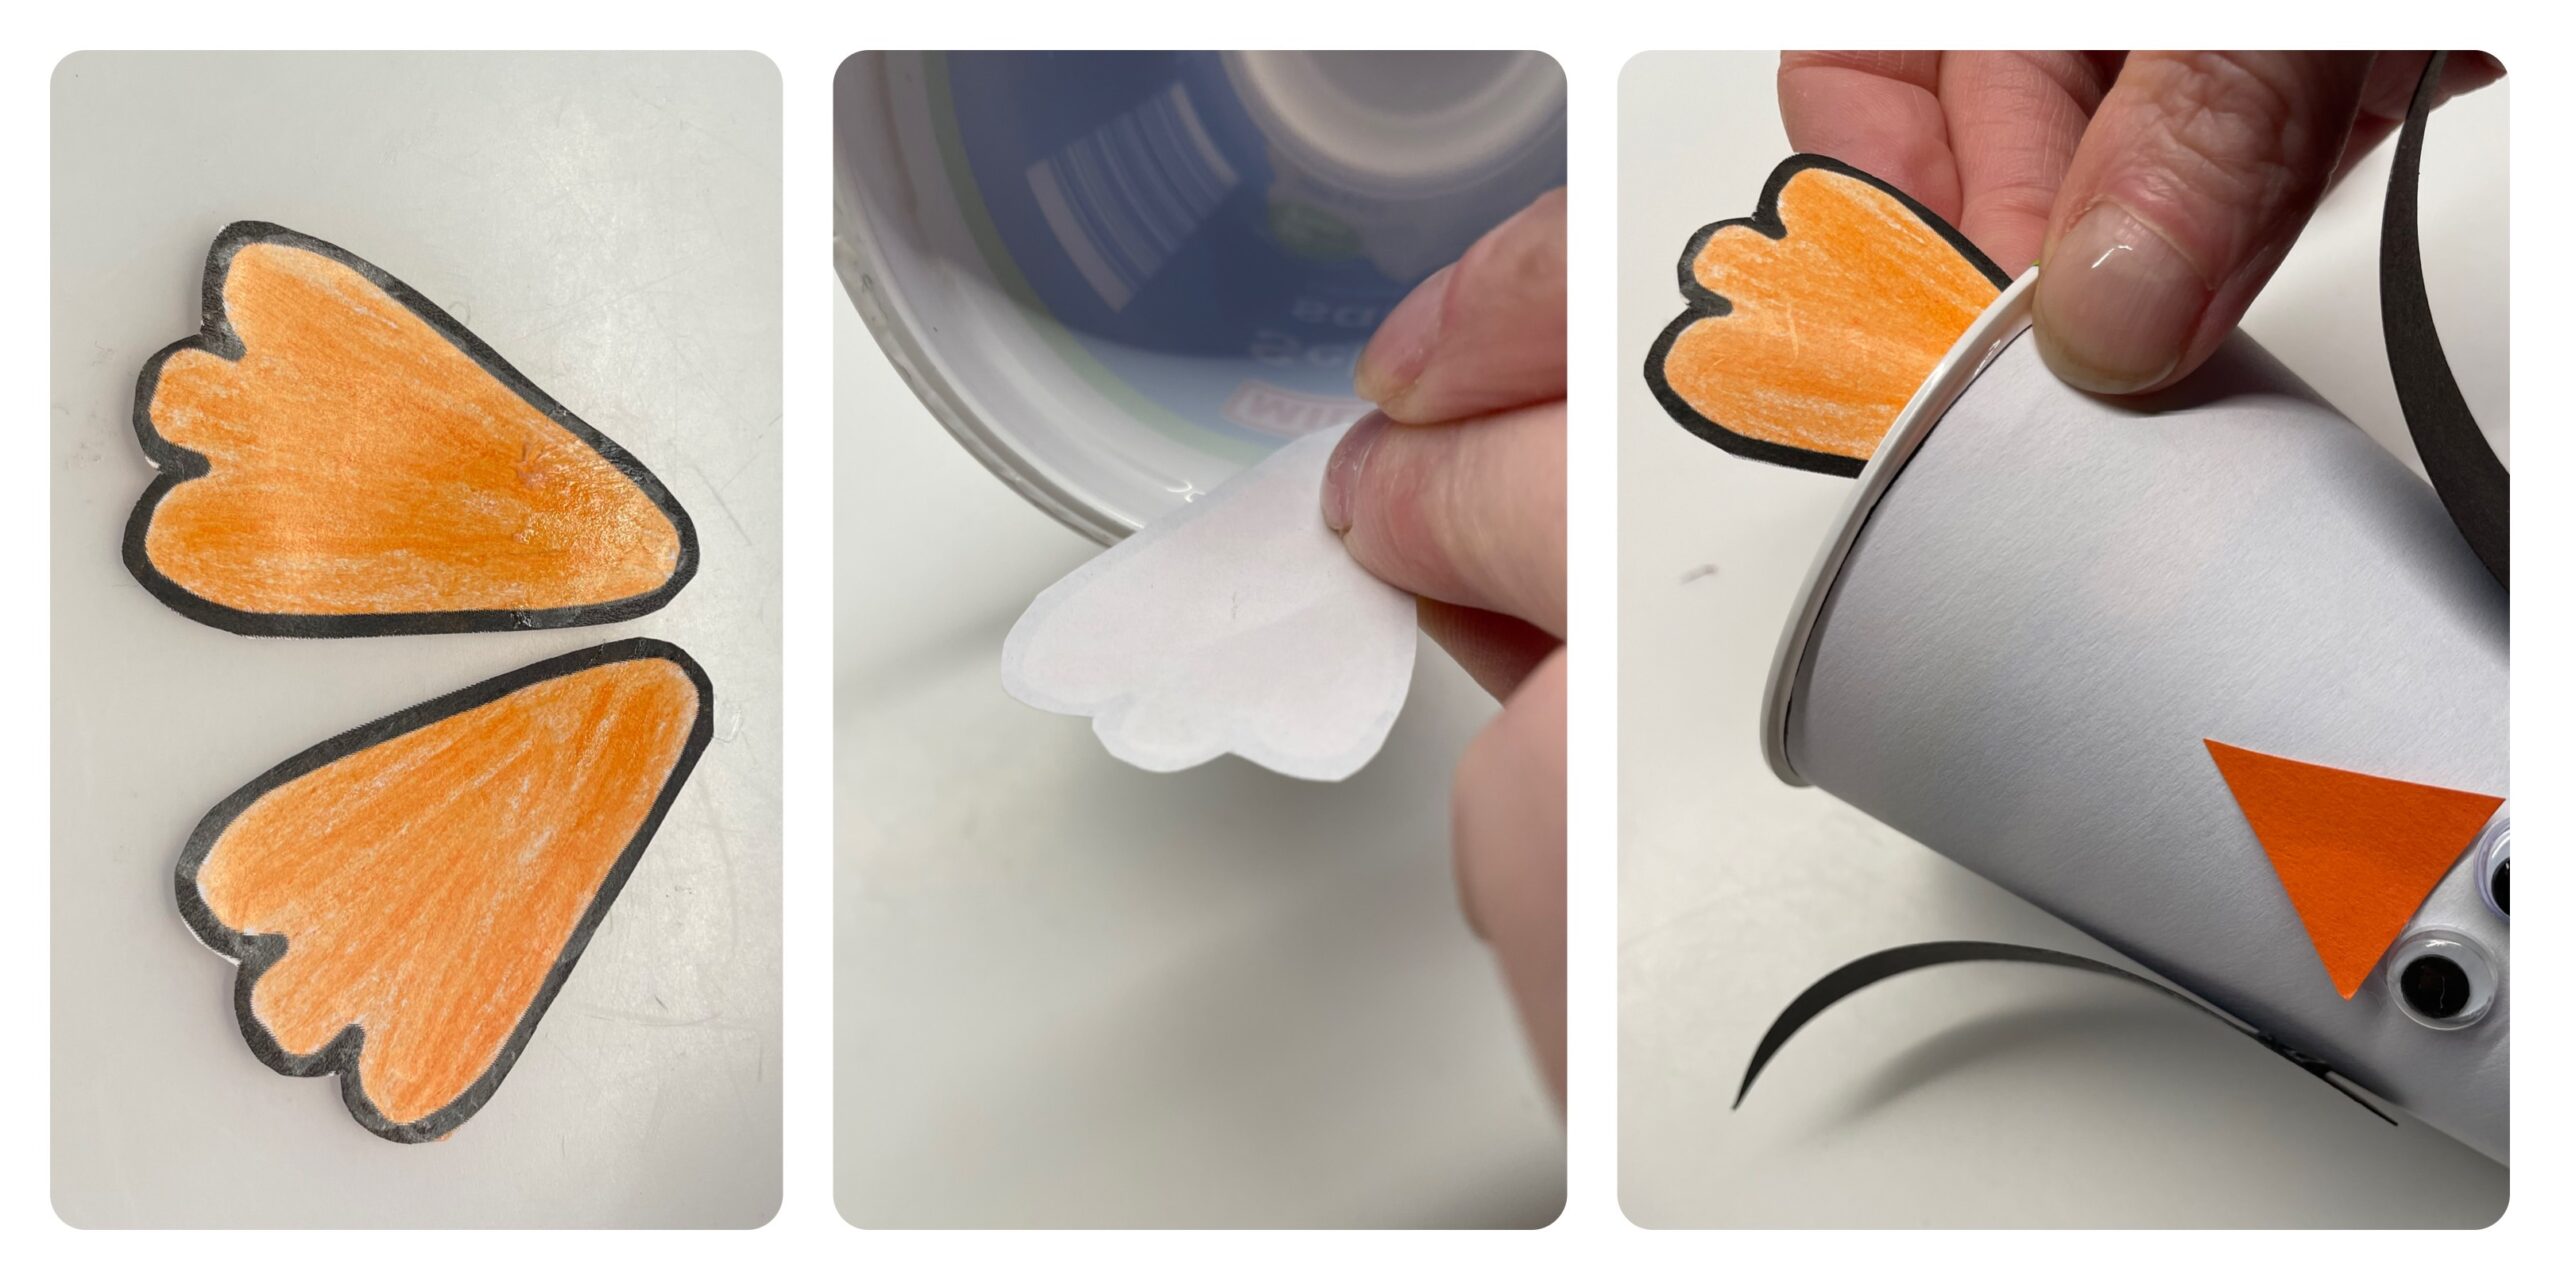
Bild zum Schritt 10 für das Bastel- und DIY-Abenteuer für Kinder: 'Malt euch zwei Füße auf ein orangefarbenes Tonpapier auf. Danach...'

11

Now the penguin still lacks his back; the penguin freckle.
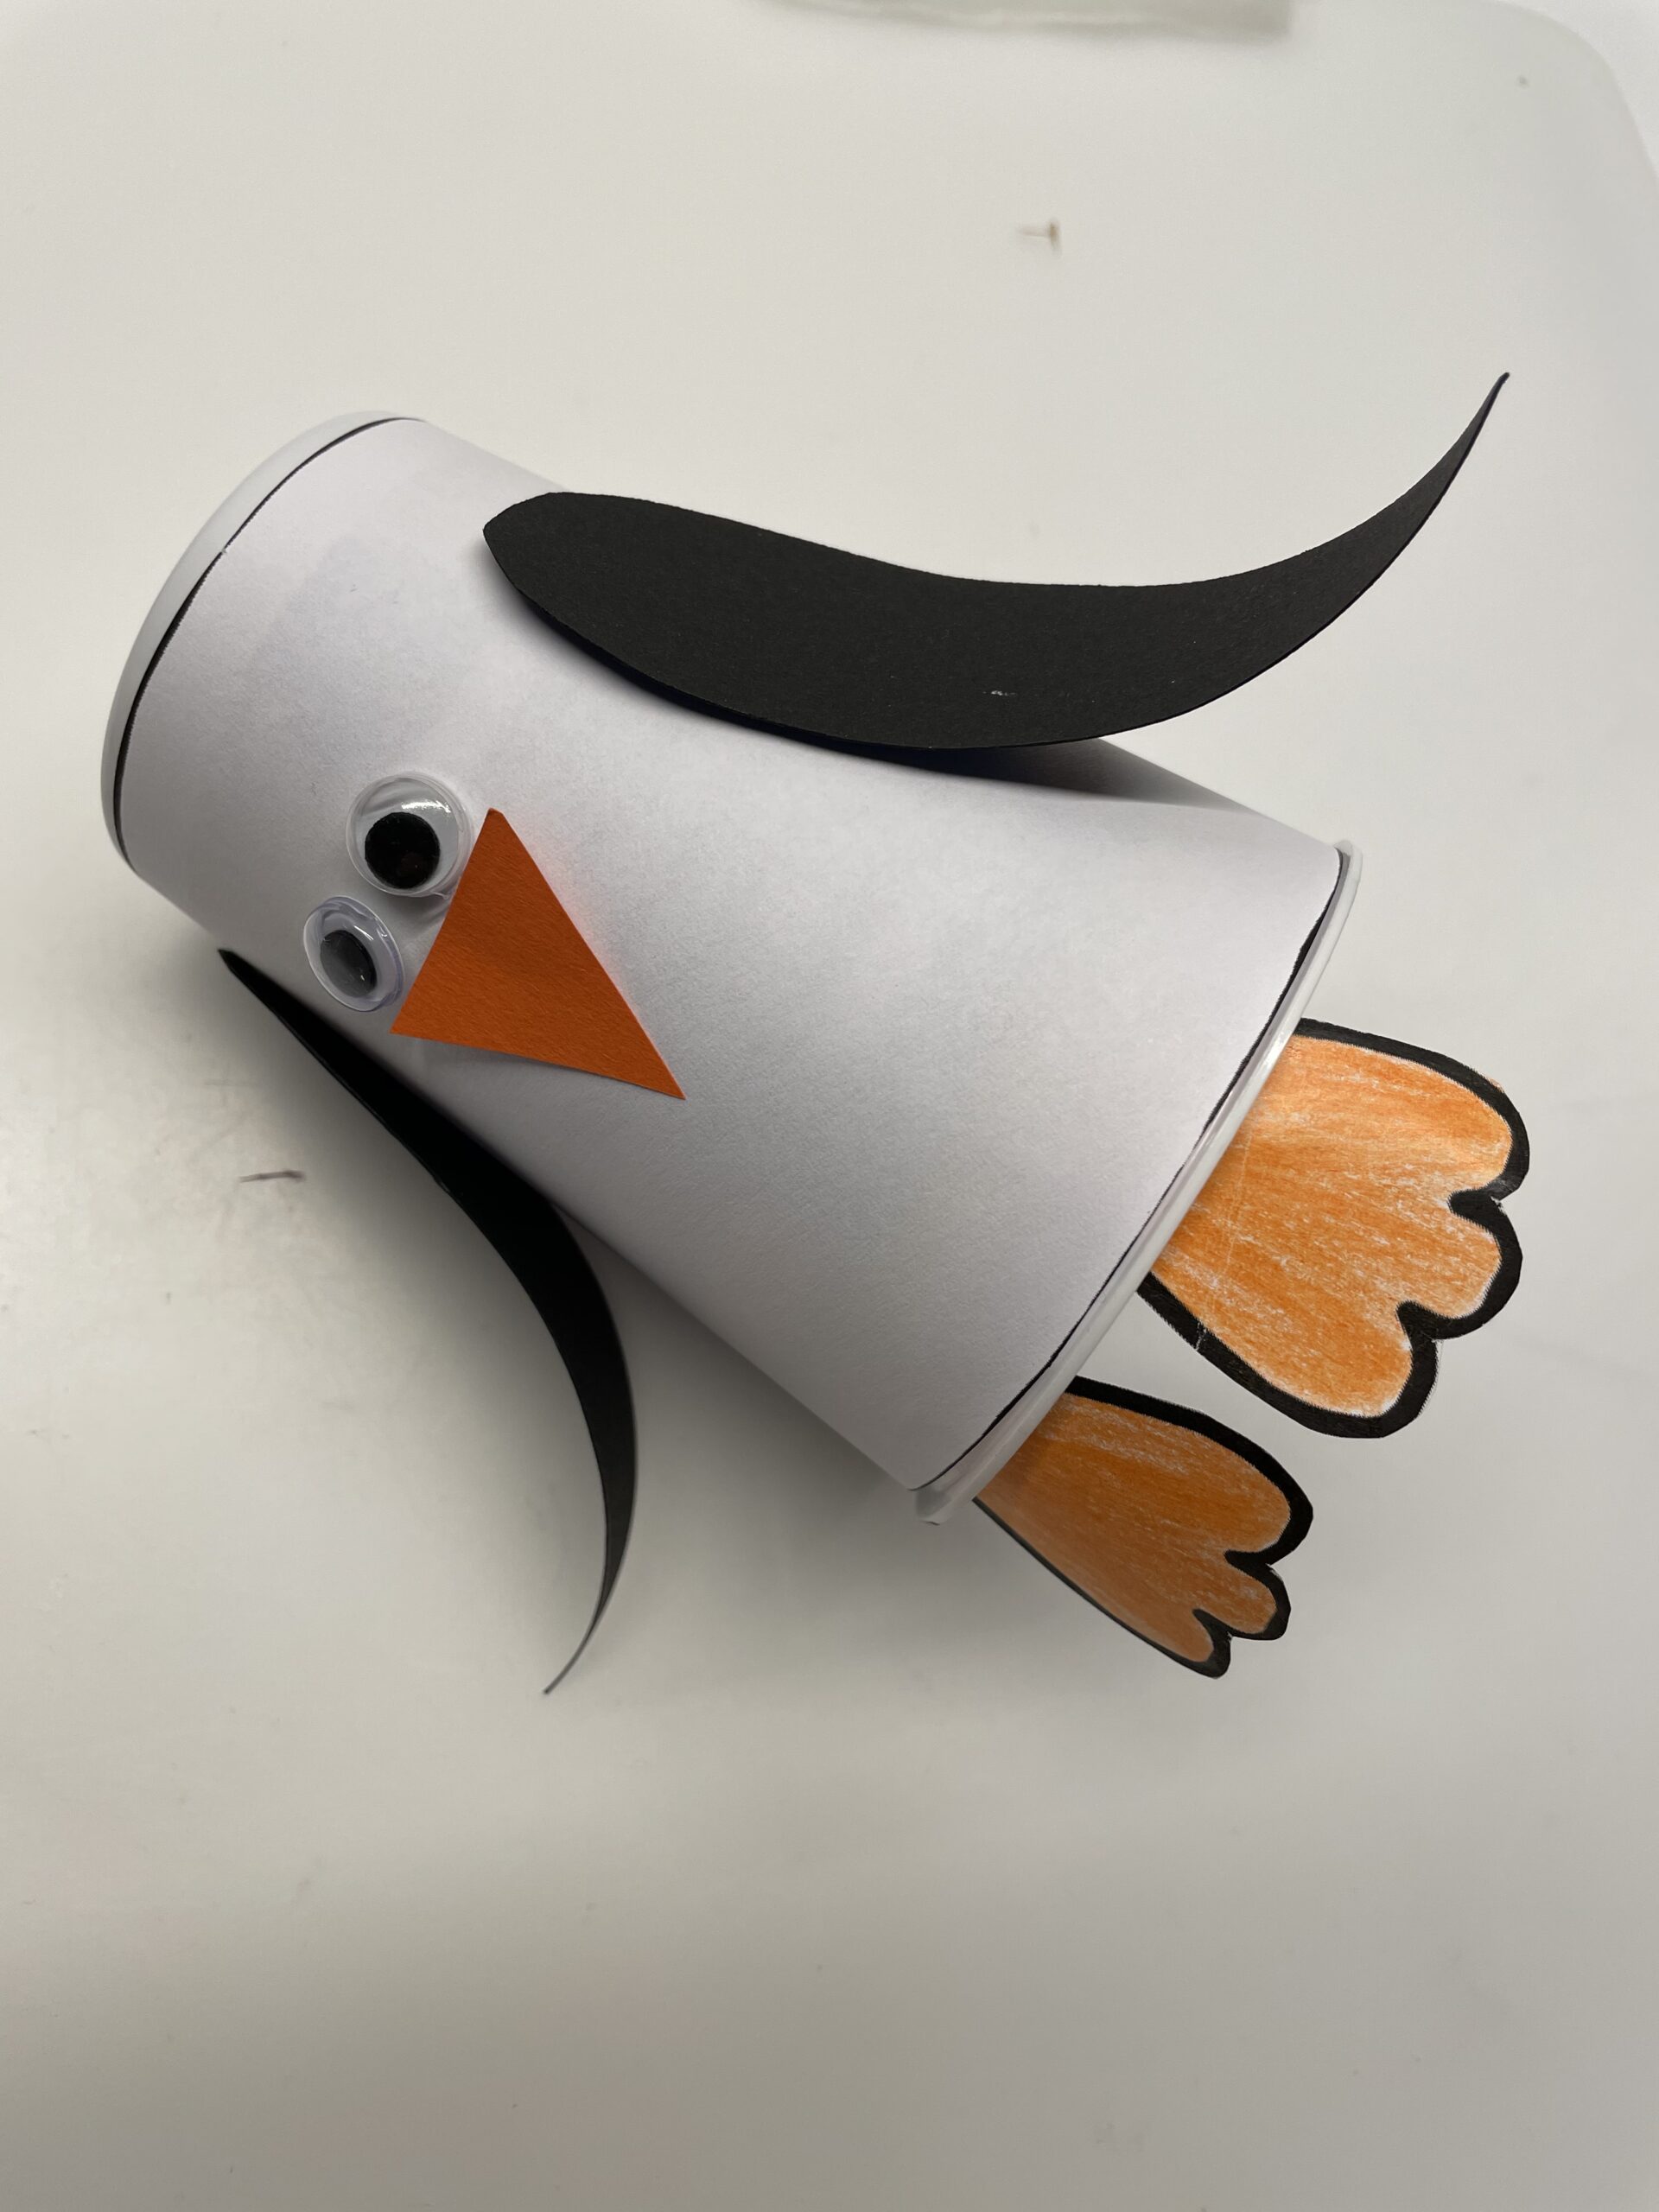
Bild zum Schritt 11 für das Bastel- und DIY-Abenteuer für Kinder: 'Jetzt fehlt dem Pinguin noch dar Rücken; der Pinguinfrack.'

12

For this you paint on a black clay paper about 10cm x 10 cm and bend the sides slightly inwards. The upper side is straight and at the lower side you cut out a triangle.
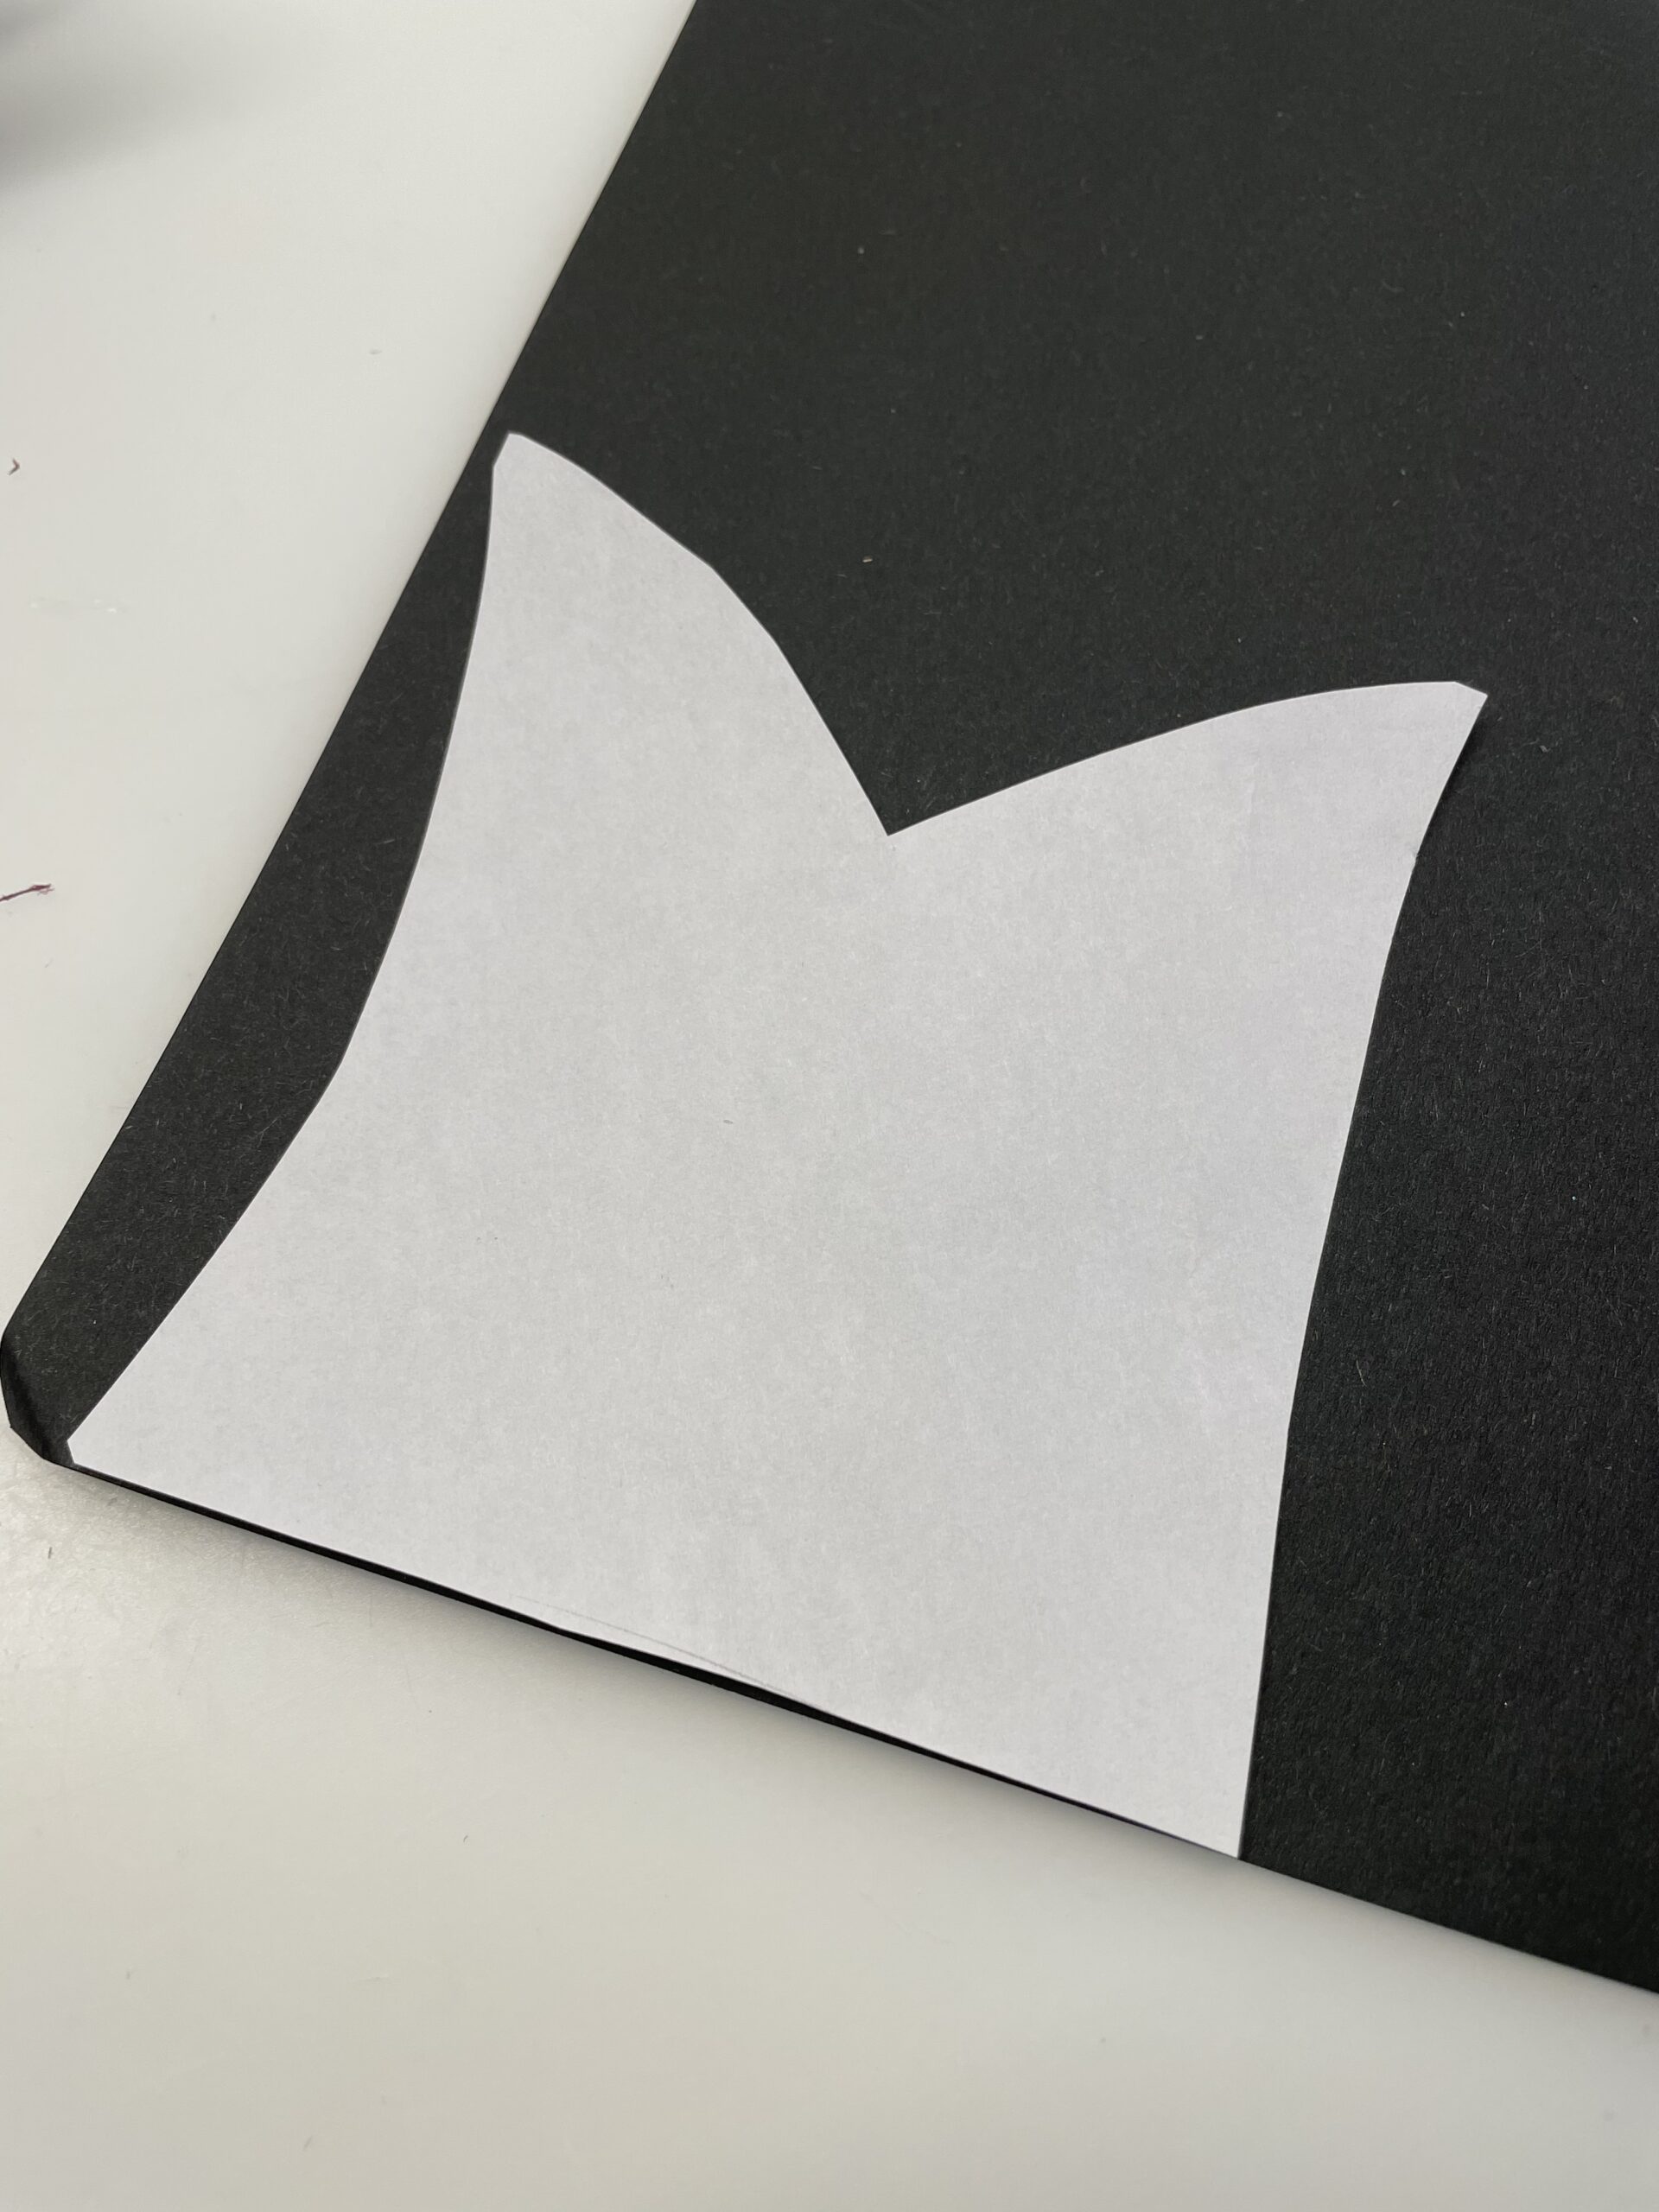
Bild zum Schritt 12 für das Bastel- und DIY-Abenteuer für Kinder: 'Dafür malt ihr auf ein schwarzes Tonpapier ca. 10cm x...'

13

2. Bild zum Schritt 12 für das Bastel- und DIY-Abenteuer für Kinder: 'Dafür malt ihr auf ein schwarzes Tonpapier ca. 10cm x...'

14

The clay paper now looks like a freckle.
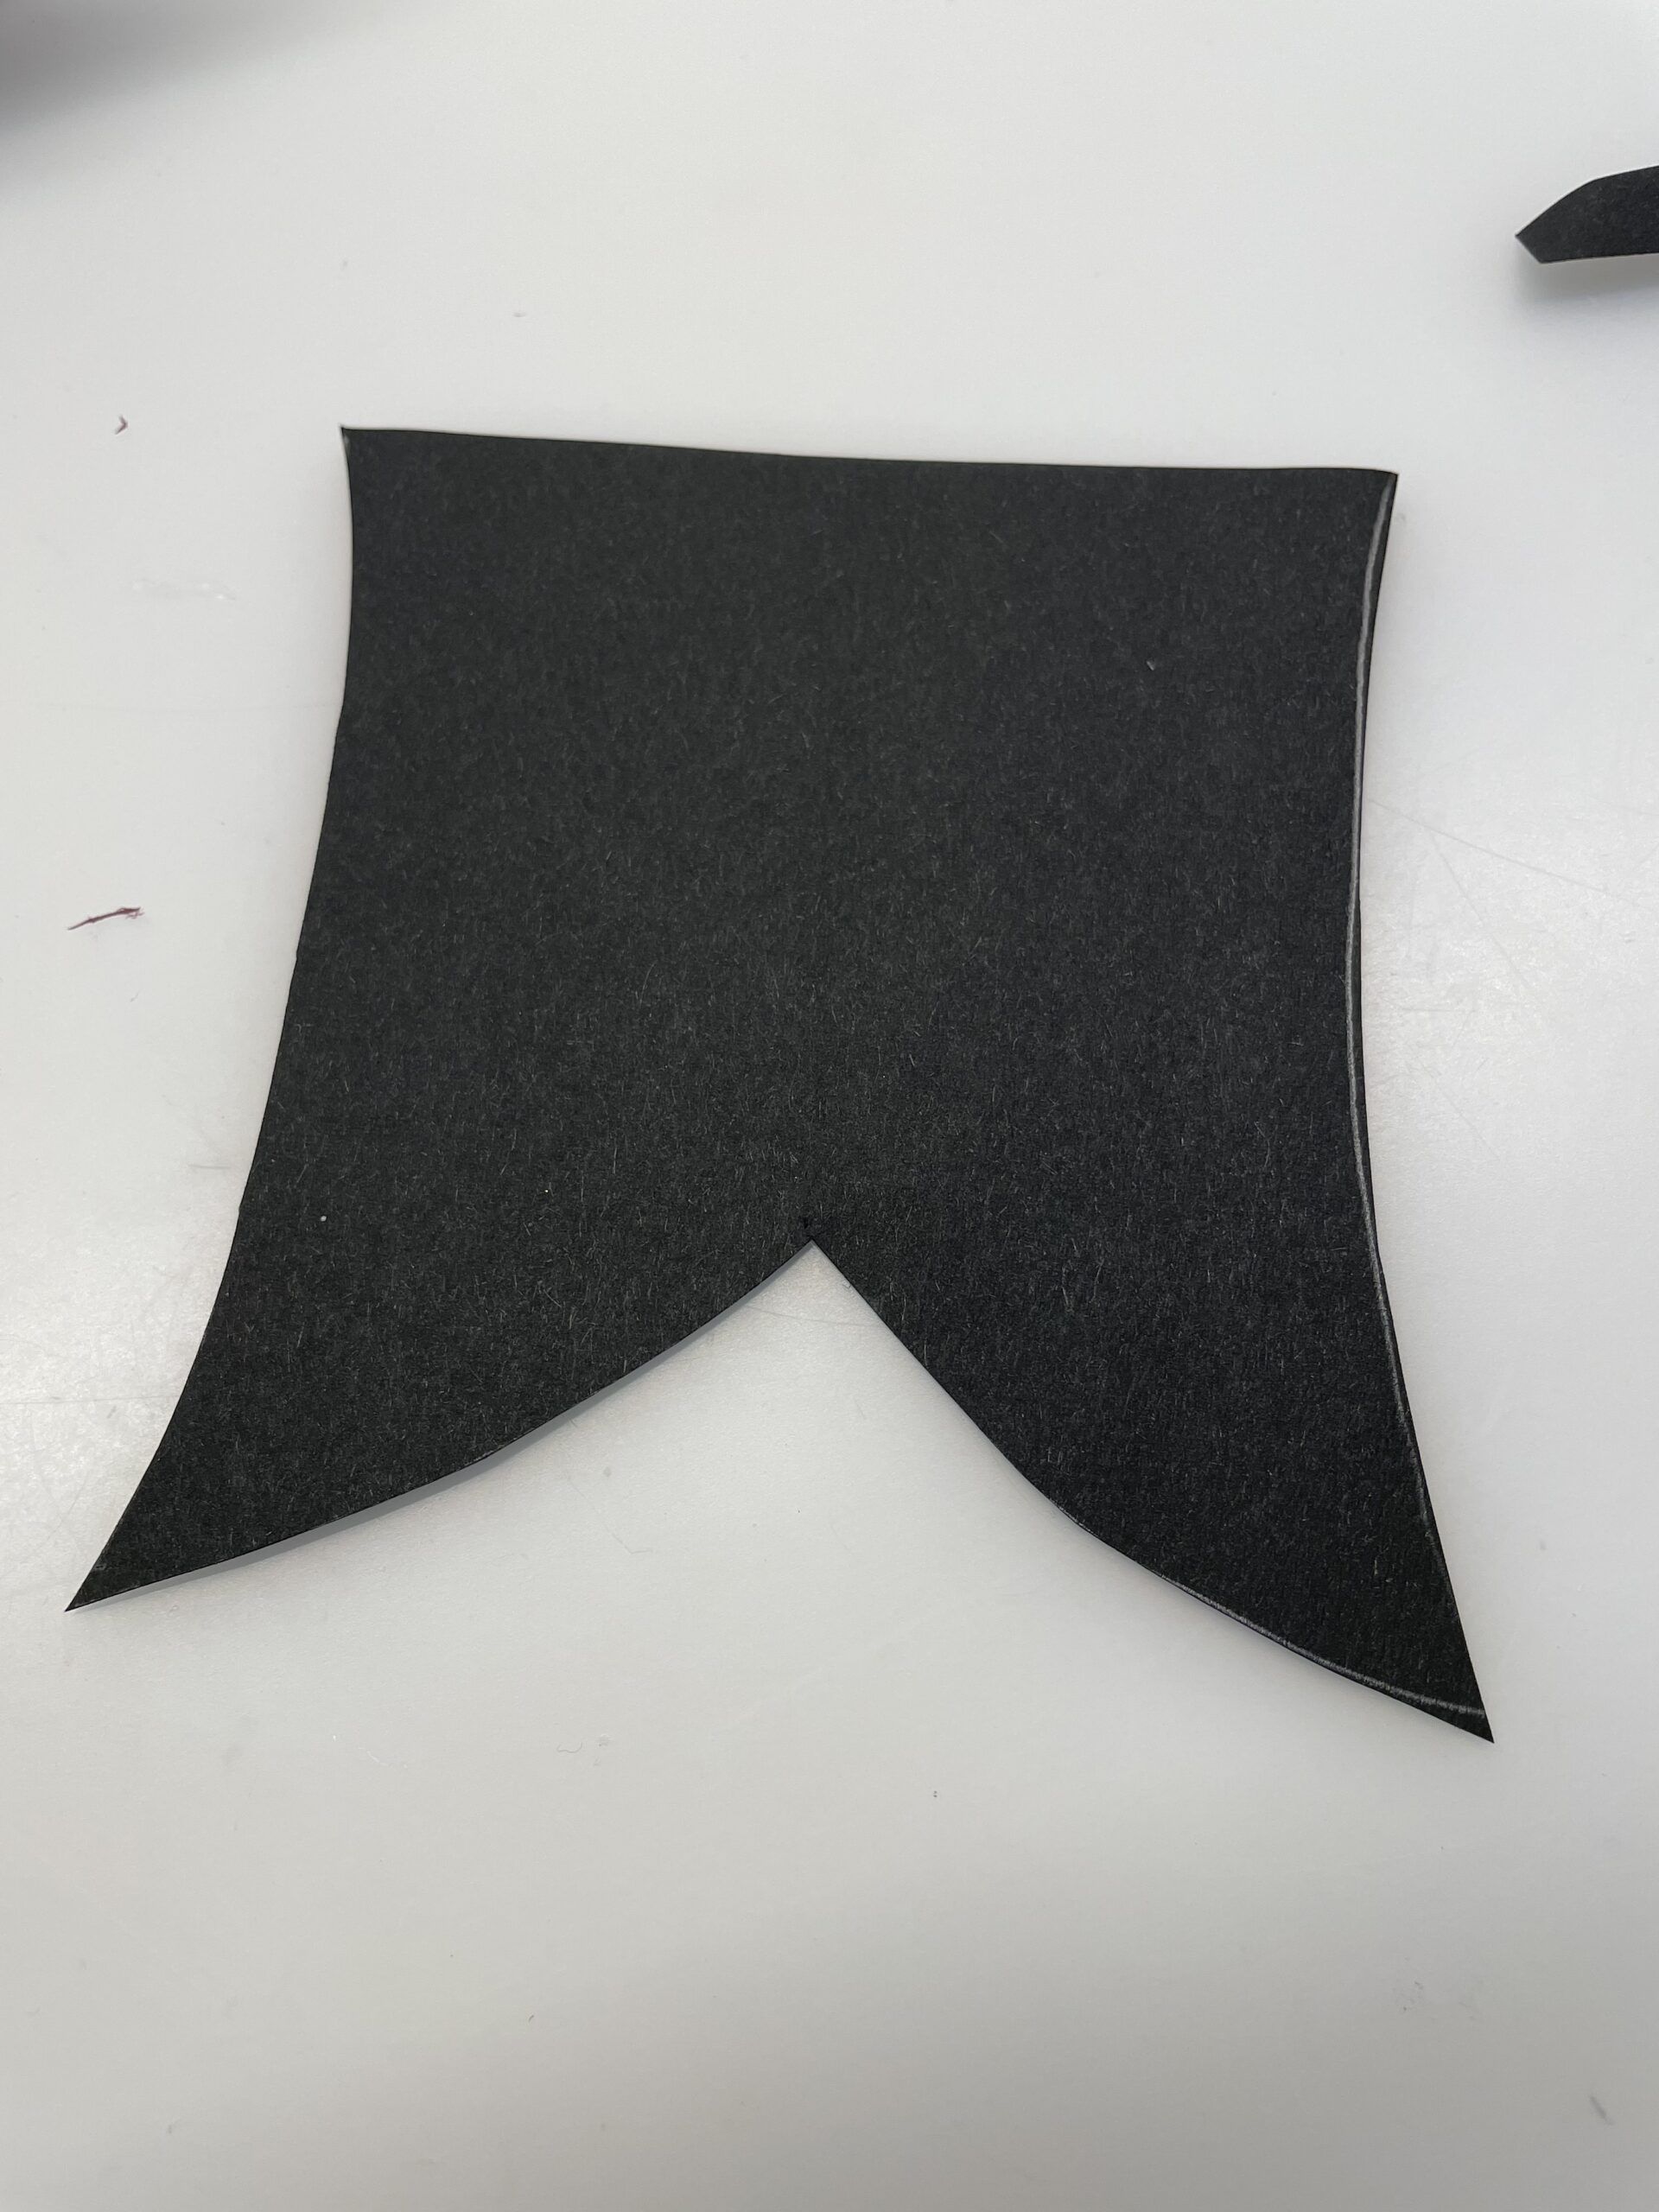
Bild zum Schritt 14 für das Bastel- und DIY-Abenteuer für Kinder: 'Das Tonpapier sieht jetzt wie ein Frack aus.'

15

Then you pull the two tips over a pen, so that they bend slightly.
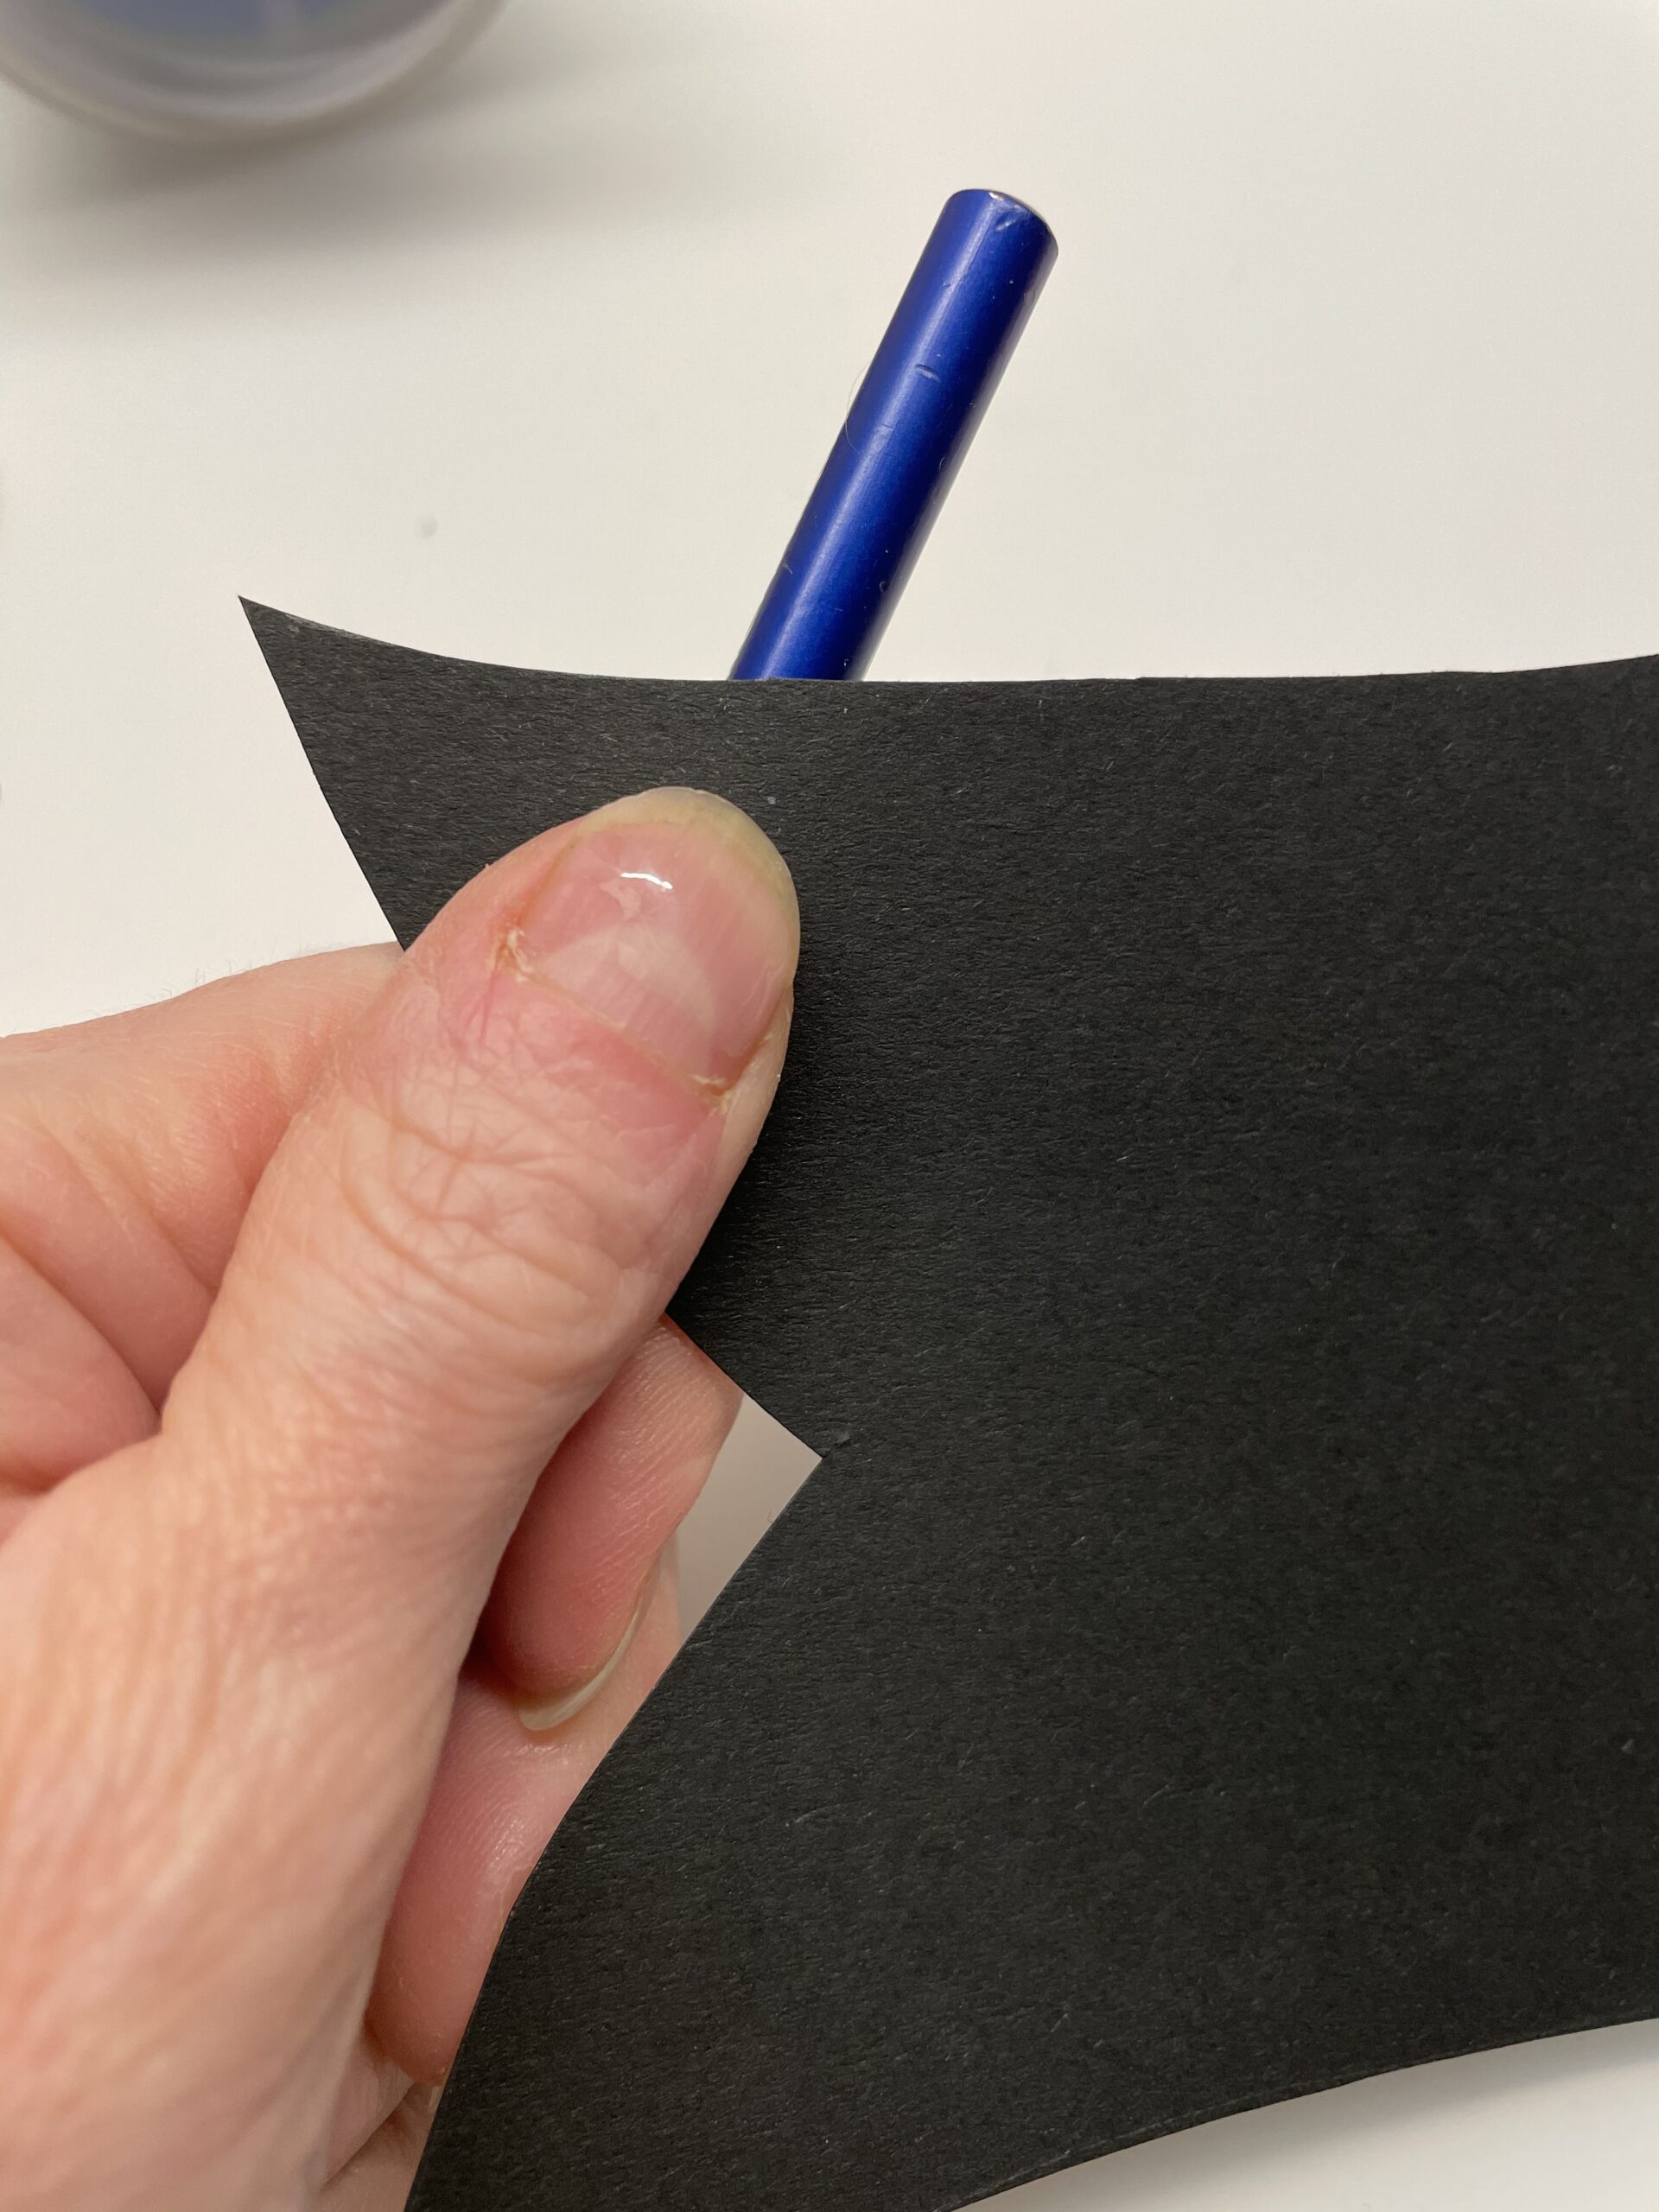
Bild zum Schritt 15 für das Bastel- und DIY-Abenteuer für Kinder: 'Anschließend zieht ihr die beide Spitzen über einen Stift, so...'

16

2. Bild zum Schritt 15 für das Bastel- und DIY-Abenteuer für Kinder: 'Anschließend zieht ihr die beide Spitzen über einen Stift, so...'

17

Now you stick the finished tail to the back of the penguin.
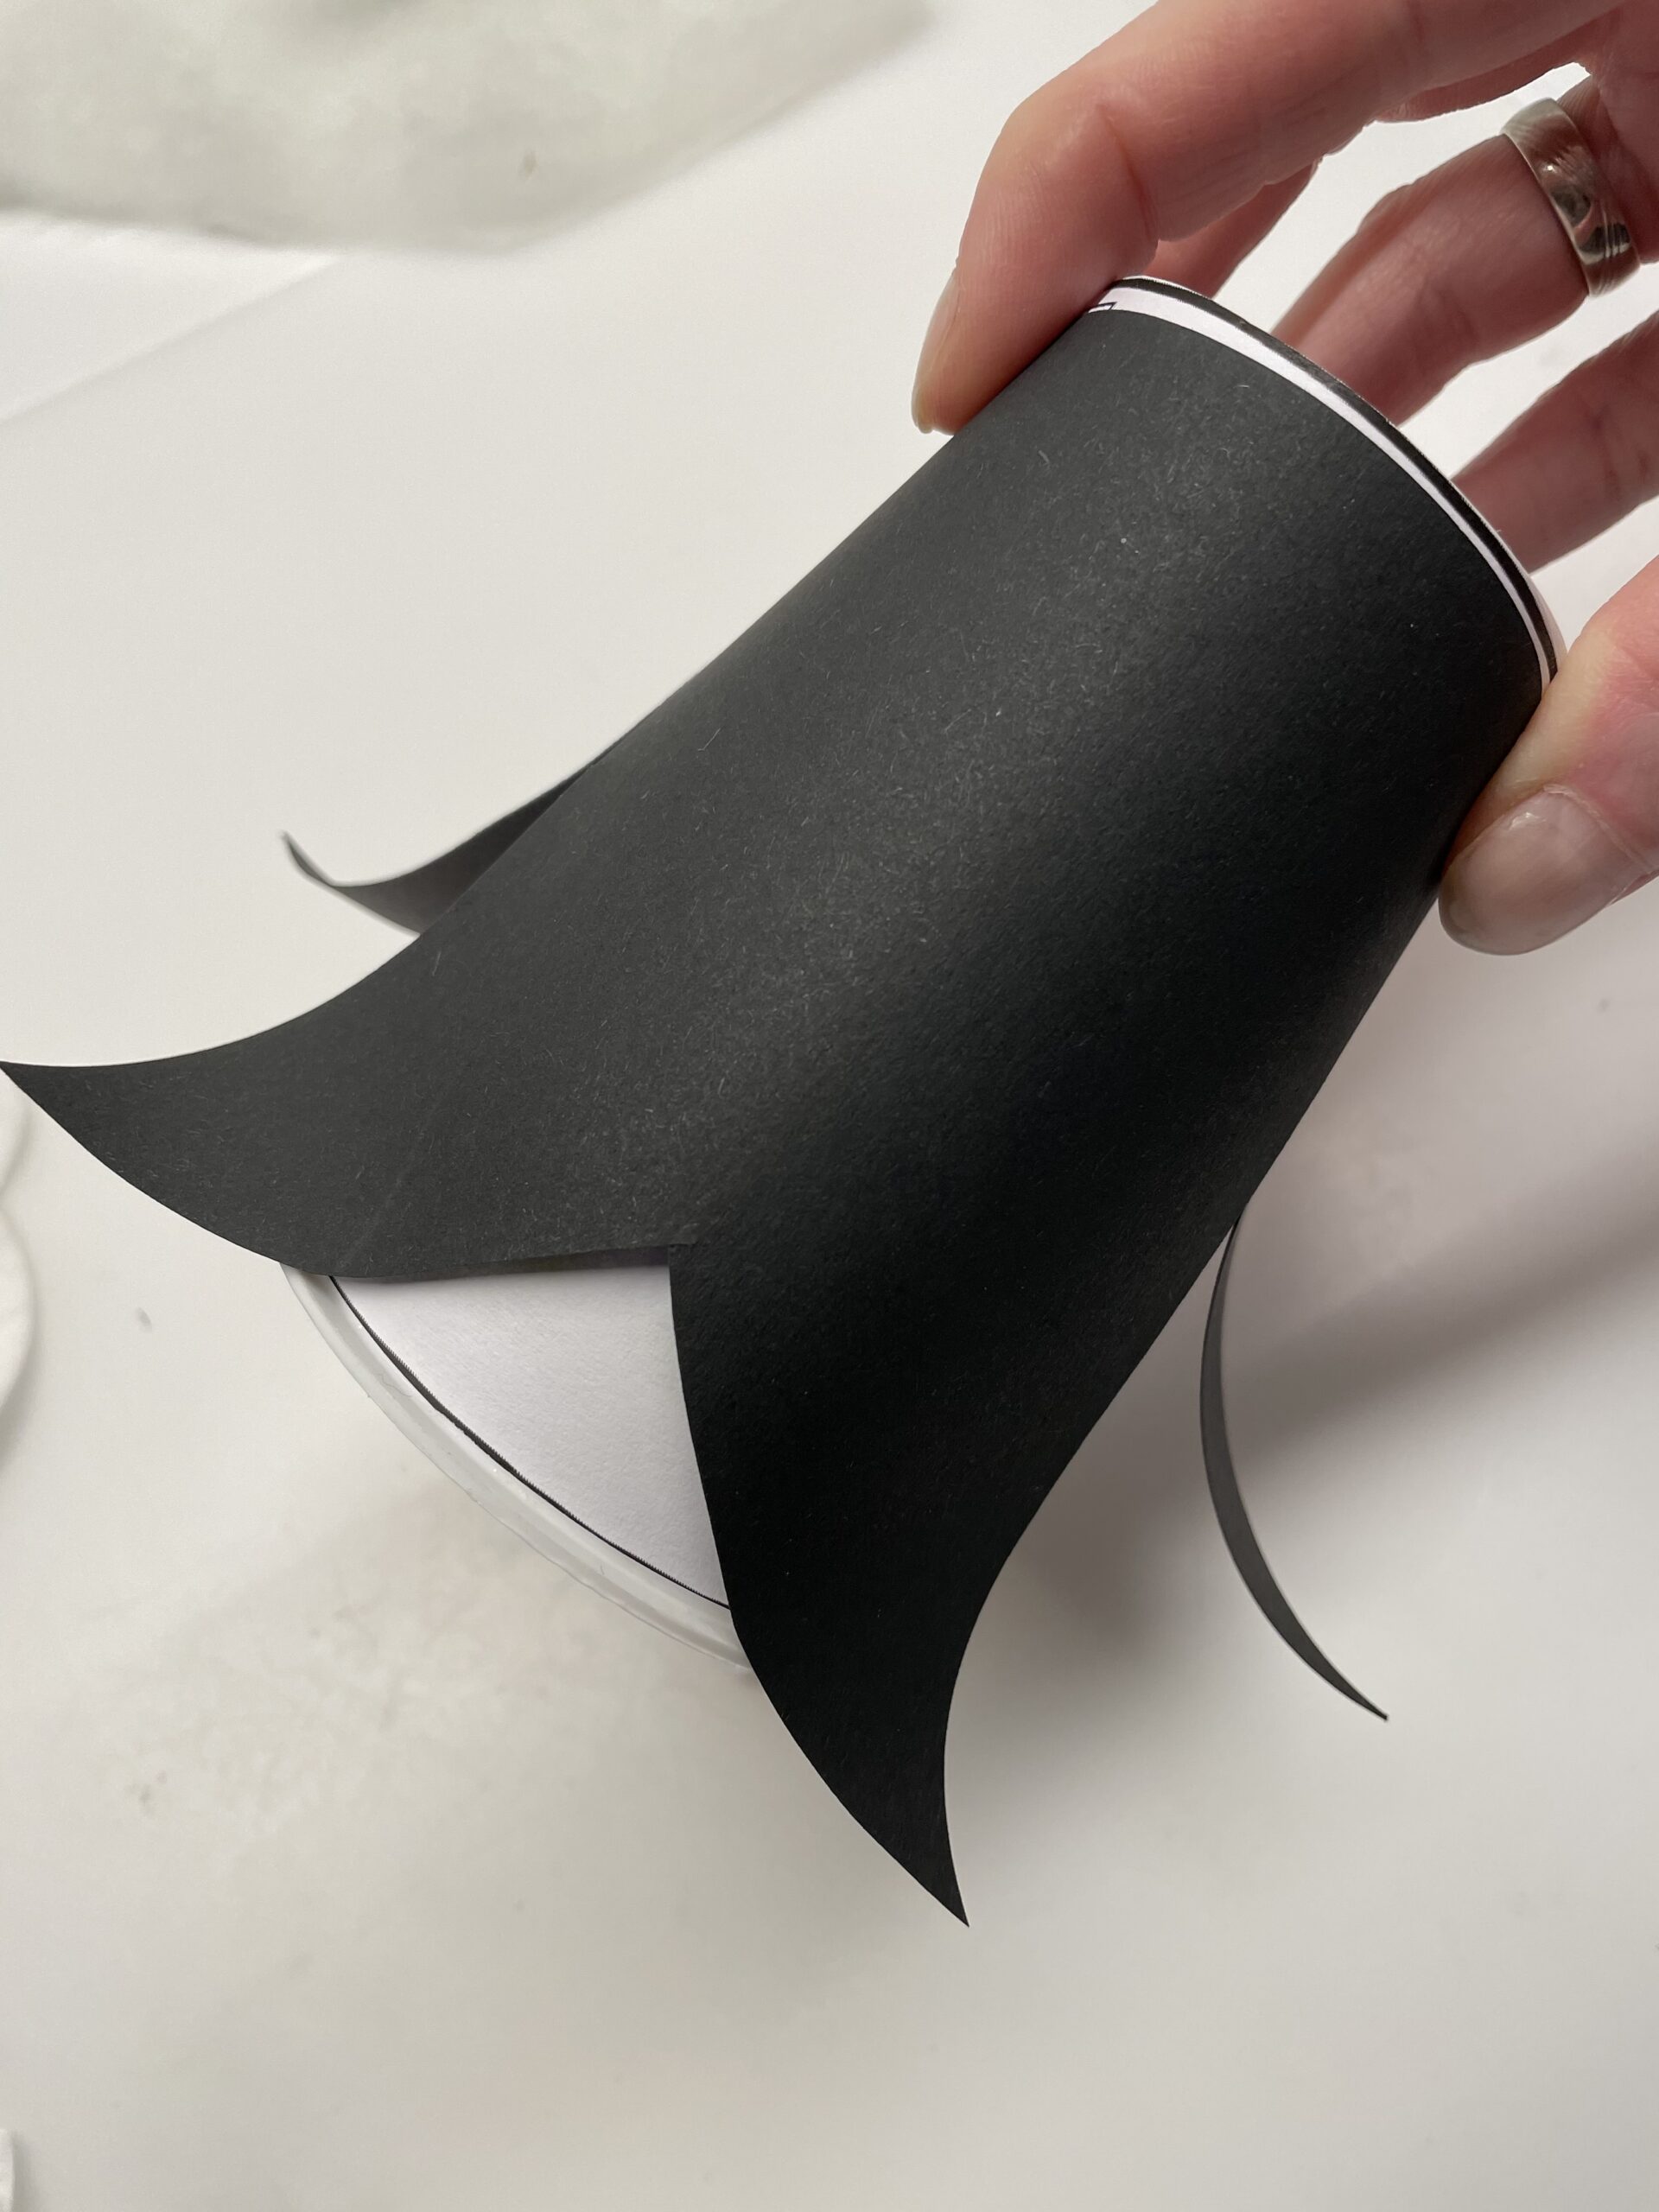
Bild zum Schritt 17 für das Bastel- und DIY-Abenteuer für Kinder: 'Jetzt klebt ihr den fertigen Frack an den Rücken des...'

18

The tips are on the outside.

Bild zum Schritt 18 für das Bastel- und DIY-Abenteuer für Kinder: 'Die Spitzen stehen nach außen.'

19

For the penguin's head, you circle around the cup on a black clay paper. Then cut out the circle.
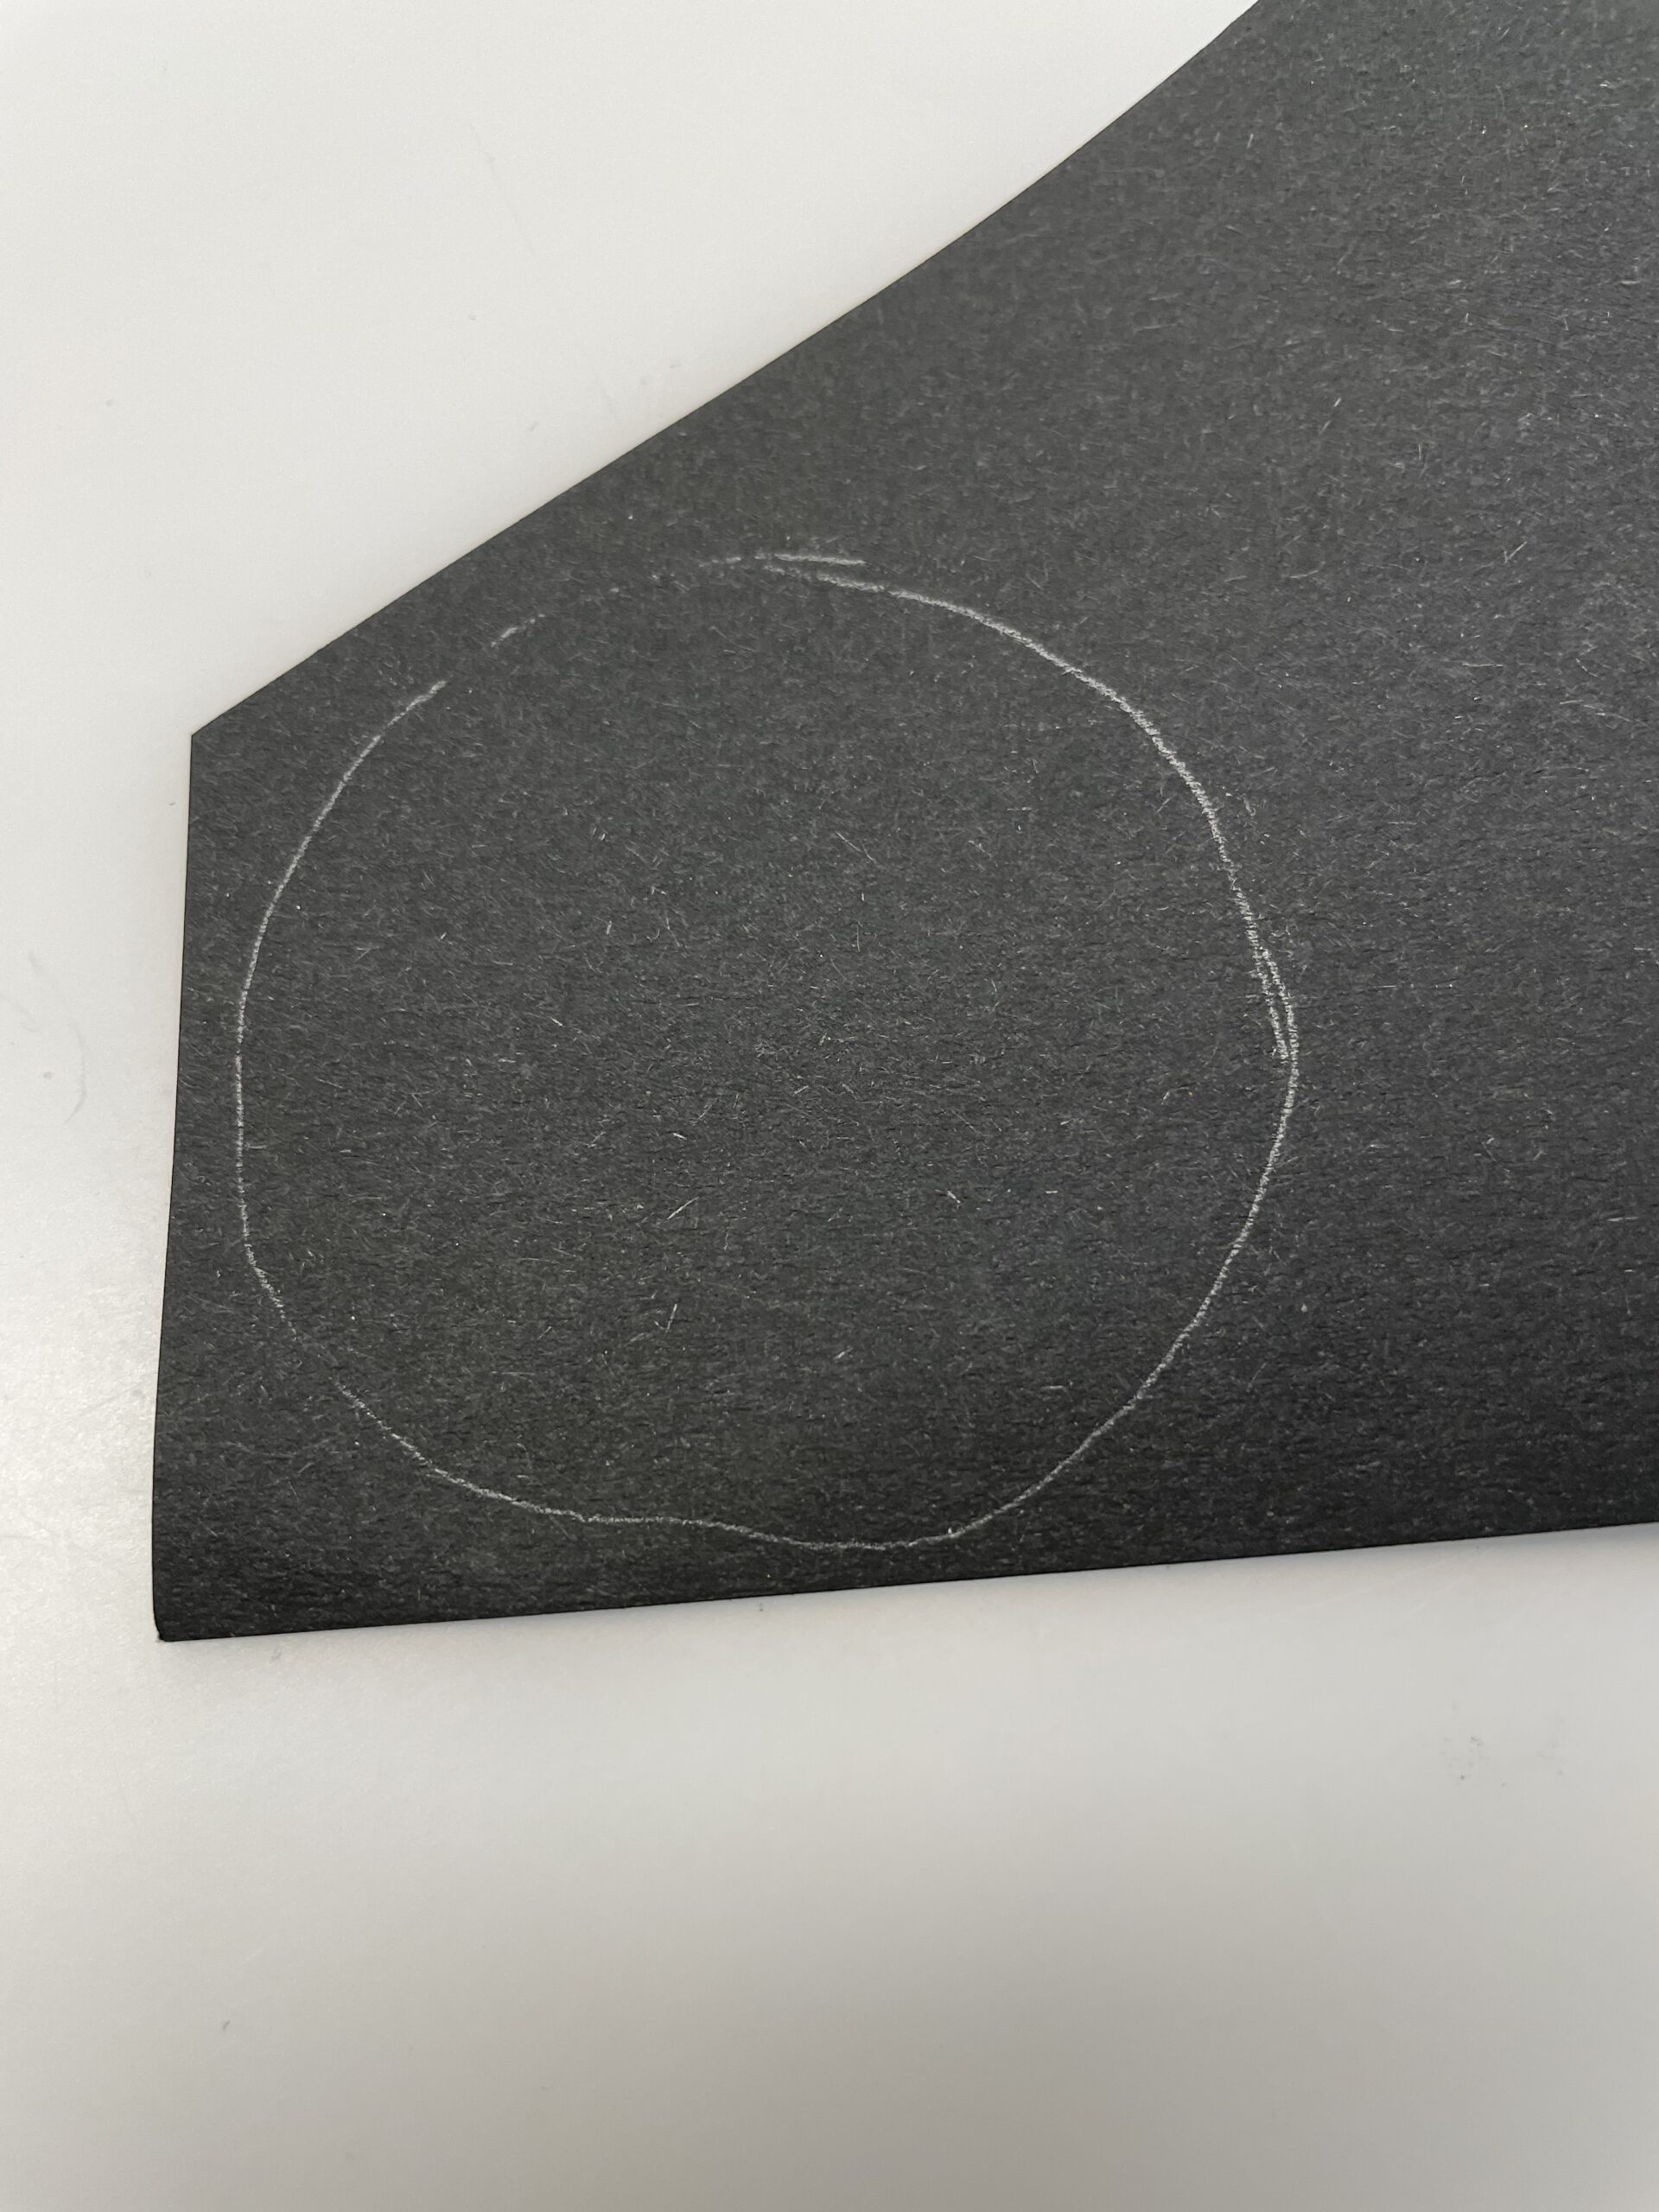
Bild zum Schritt 19 für das Bastel- und DIY-Abenteuer für Kinder: 'Für den Kopf des Pinguins umfahrt ihr den Becher auf...'

20

Now cut off a thread on the length of about 30cm. Then place it over the penguin cup and stick it on.
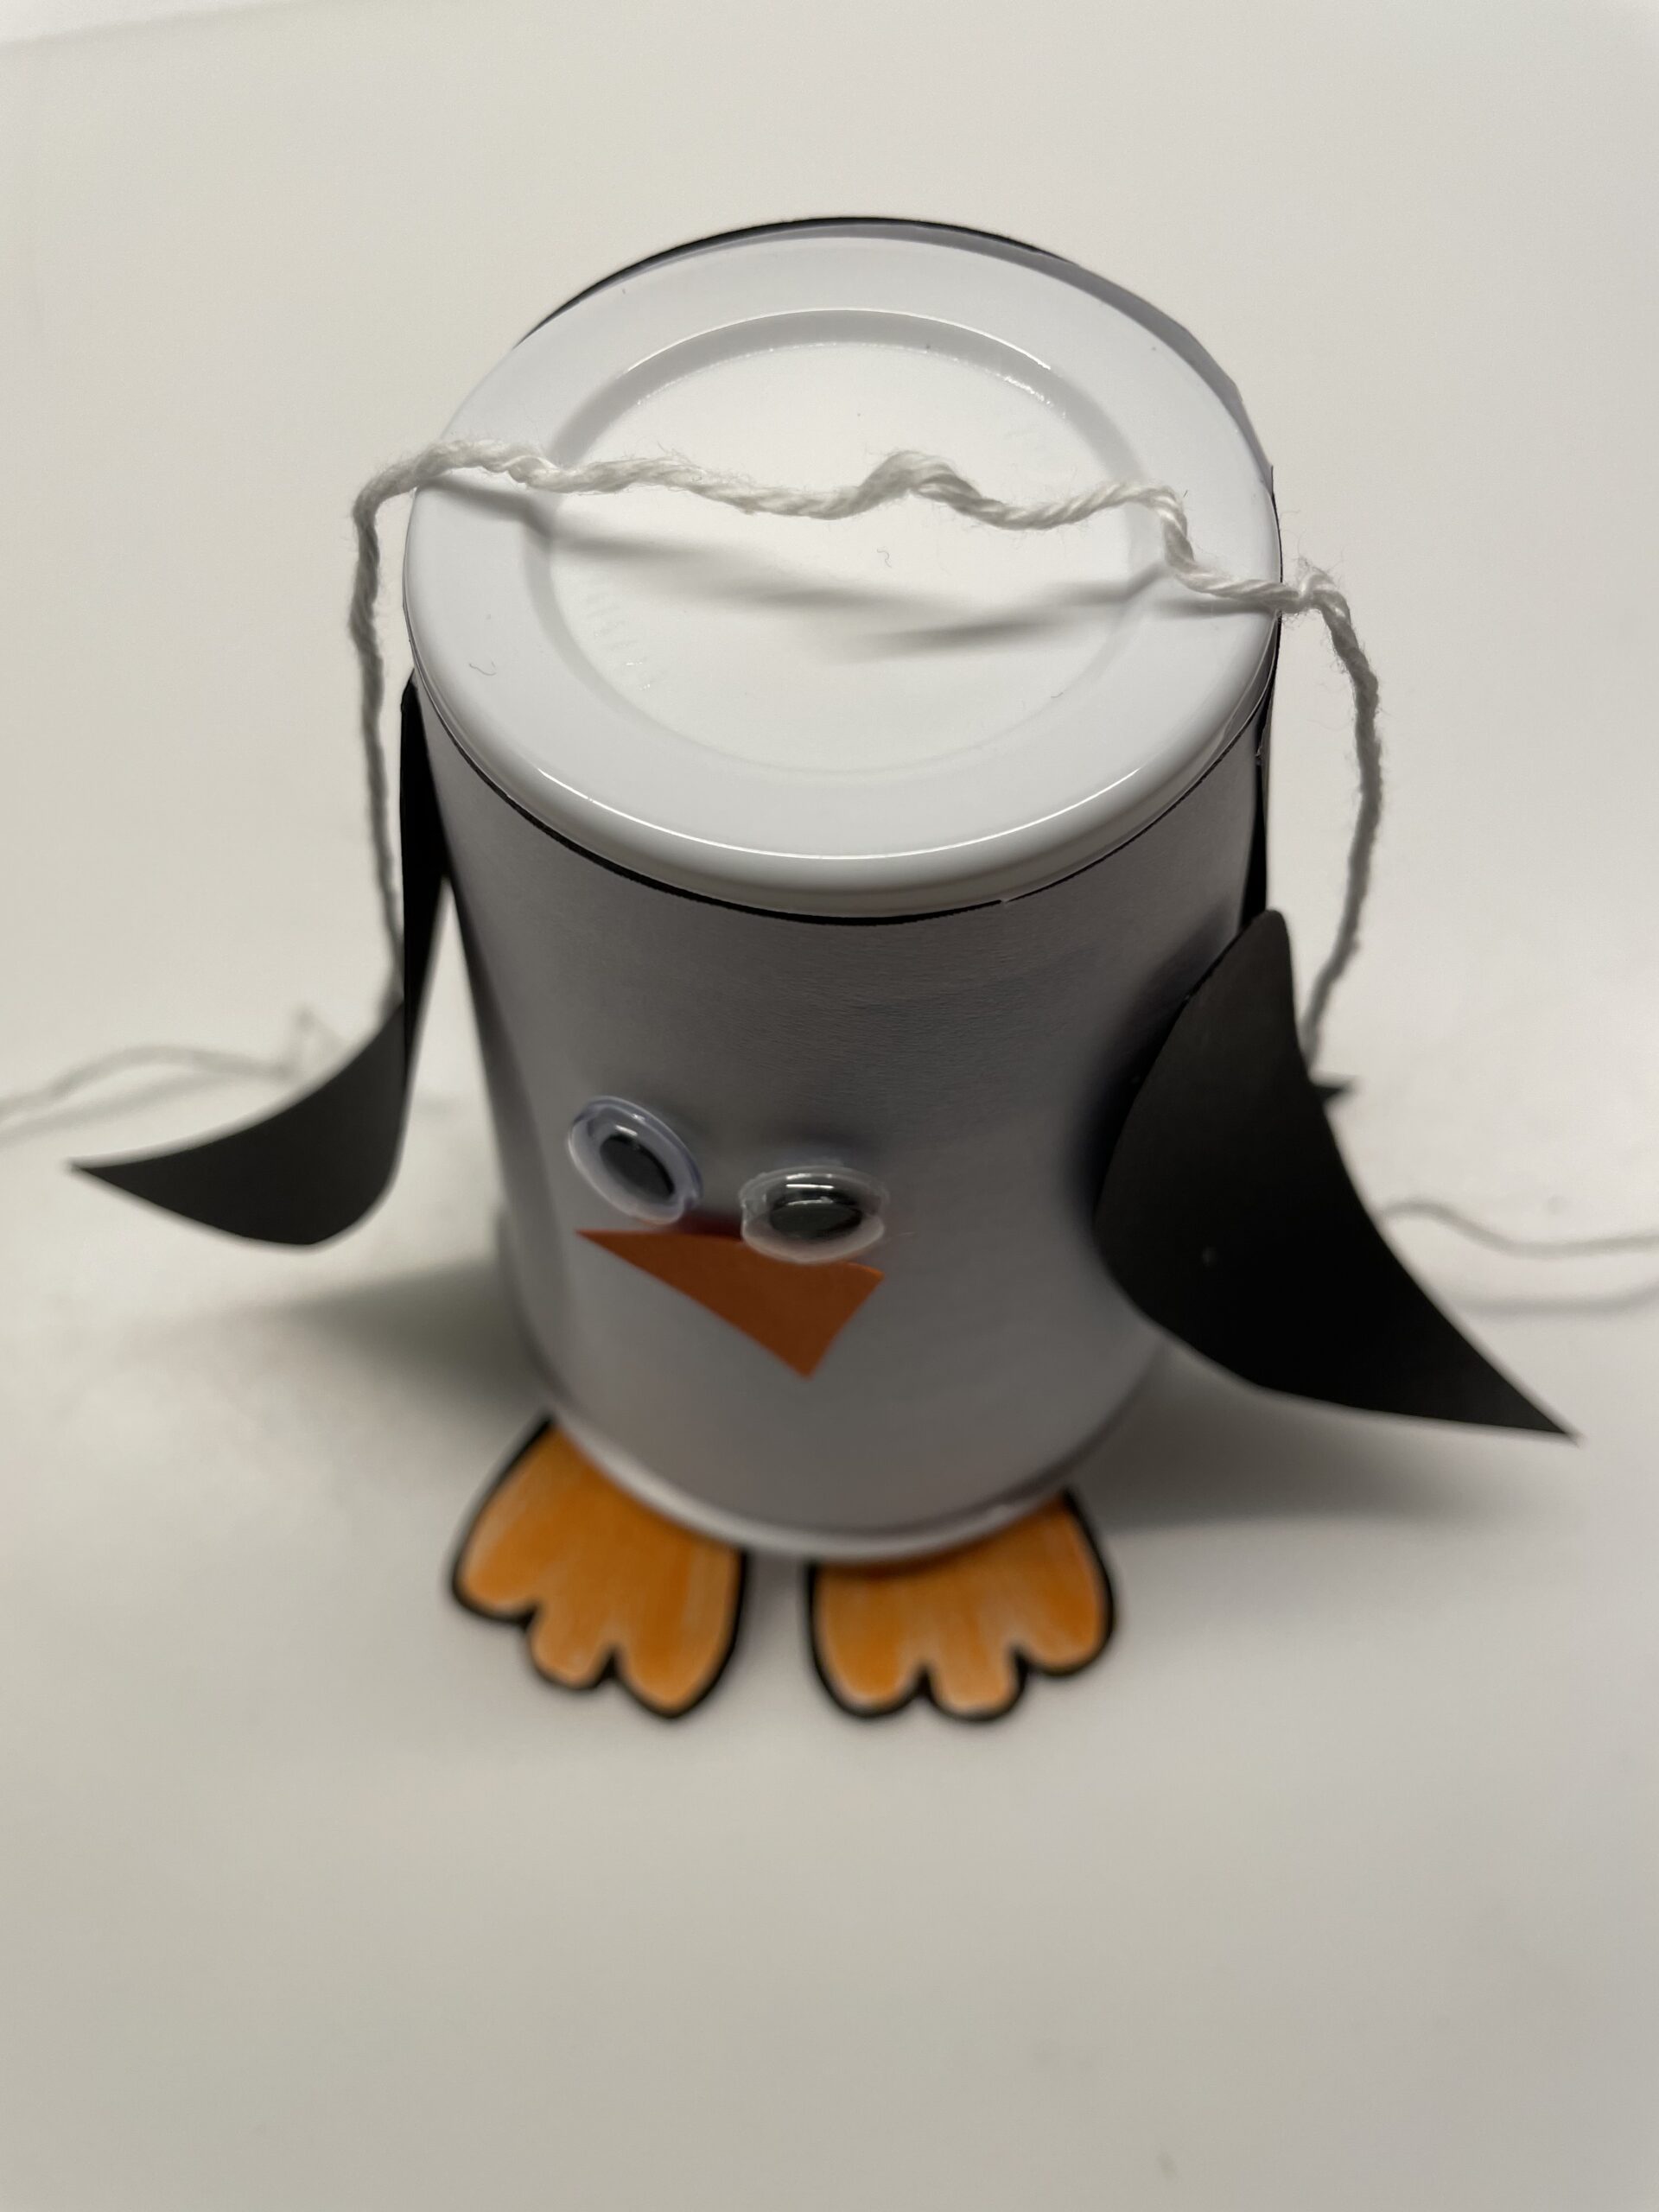
Bild zum Schritt 20 für das Bastel- und DIY-Abenteuer für Kinder: 'Nun schneidet ihr einen Faden auf die Länge von ca....'

21

For this, you cover the complete cup base with glue.
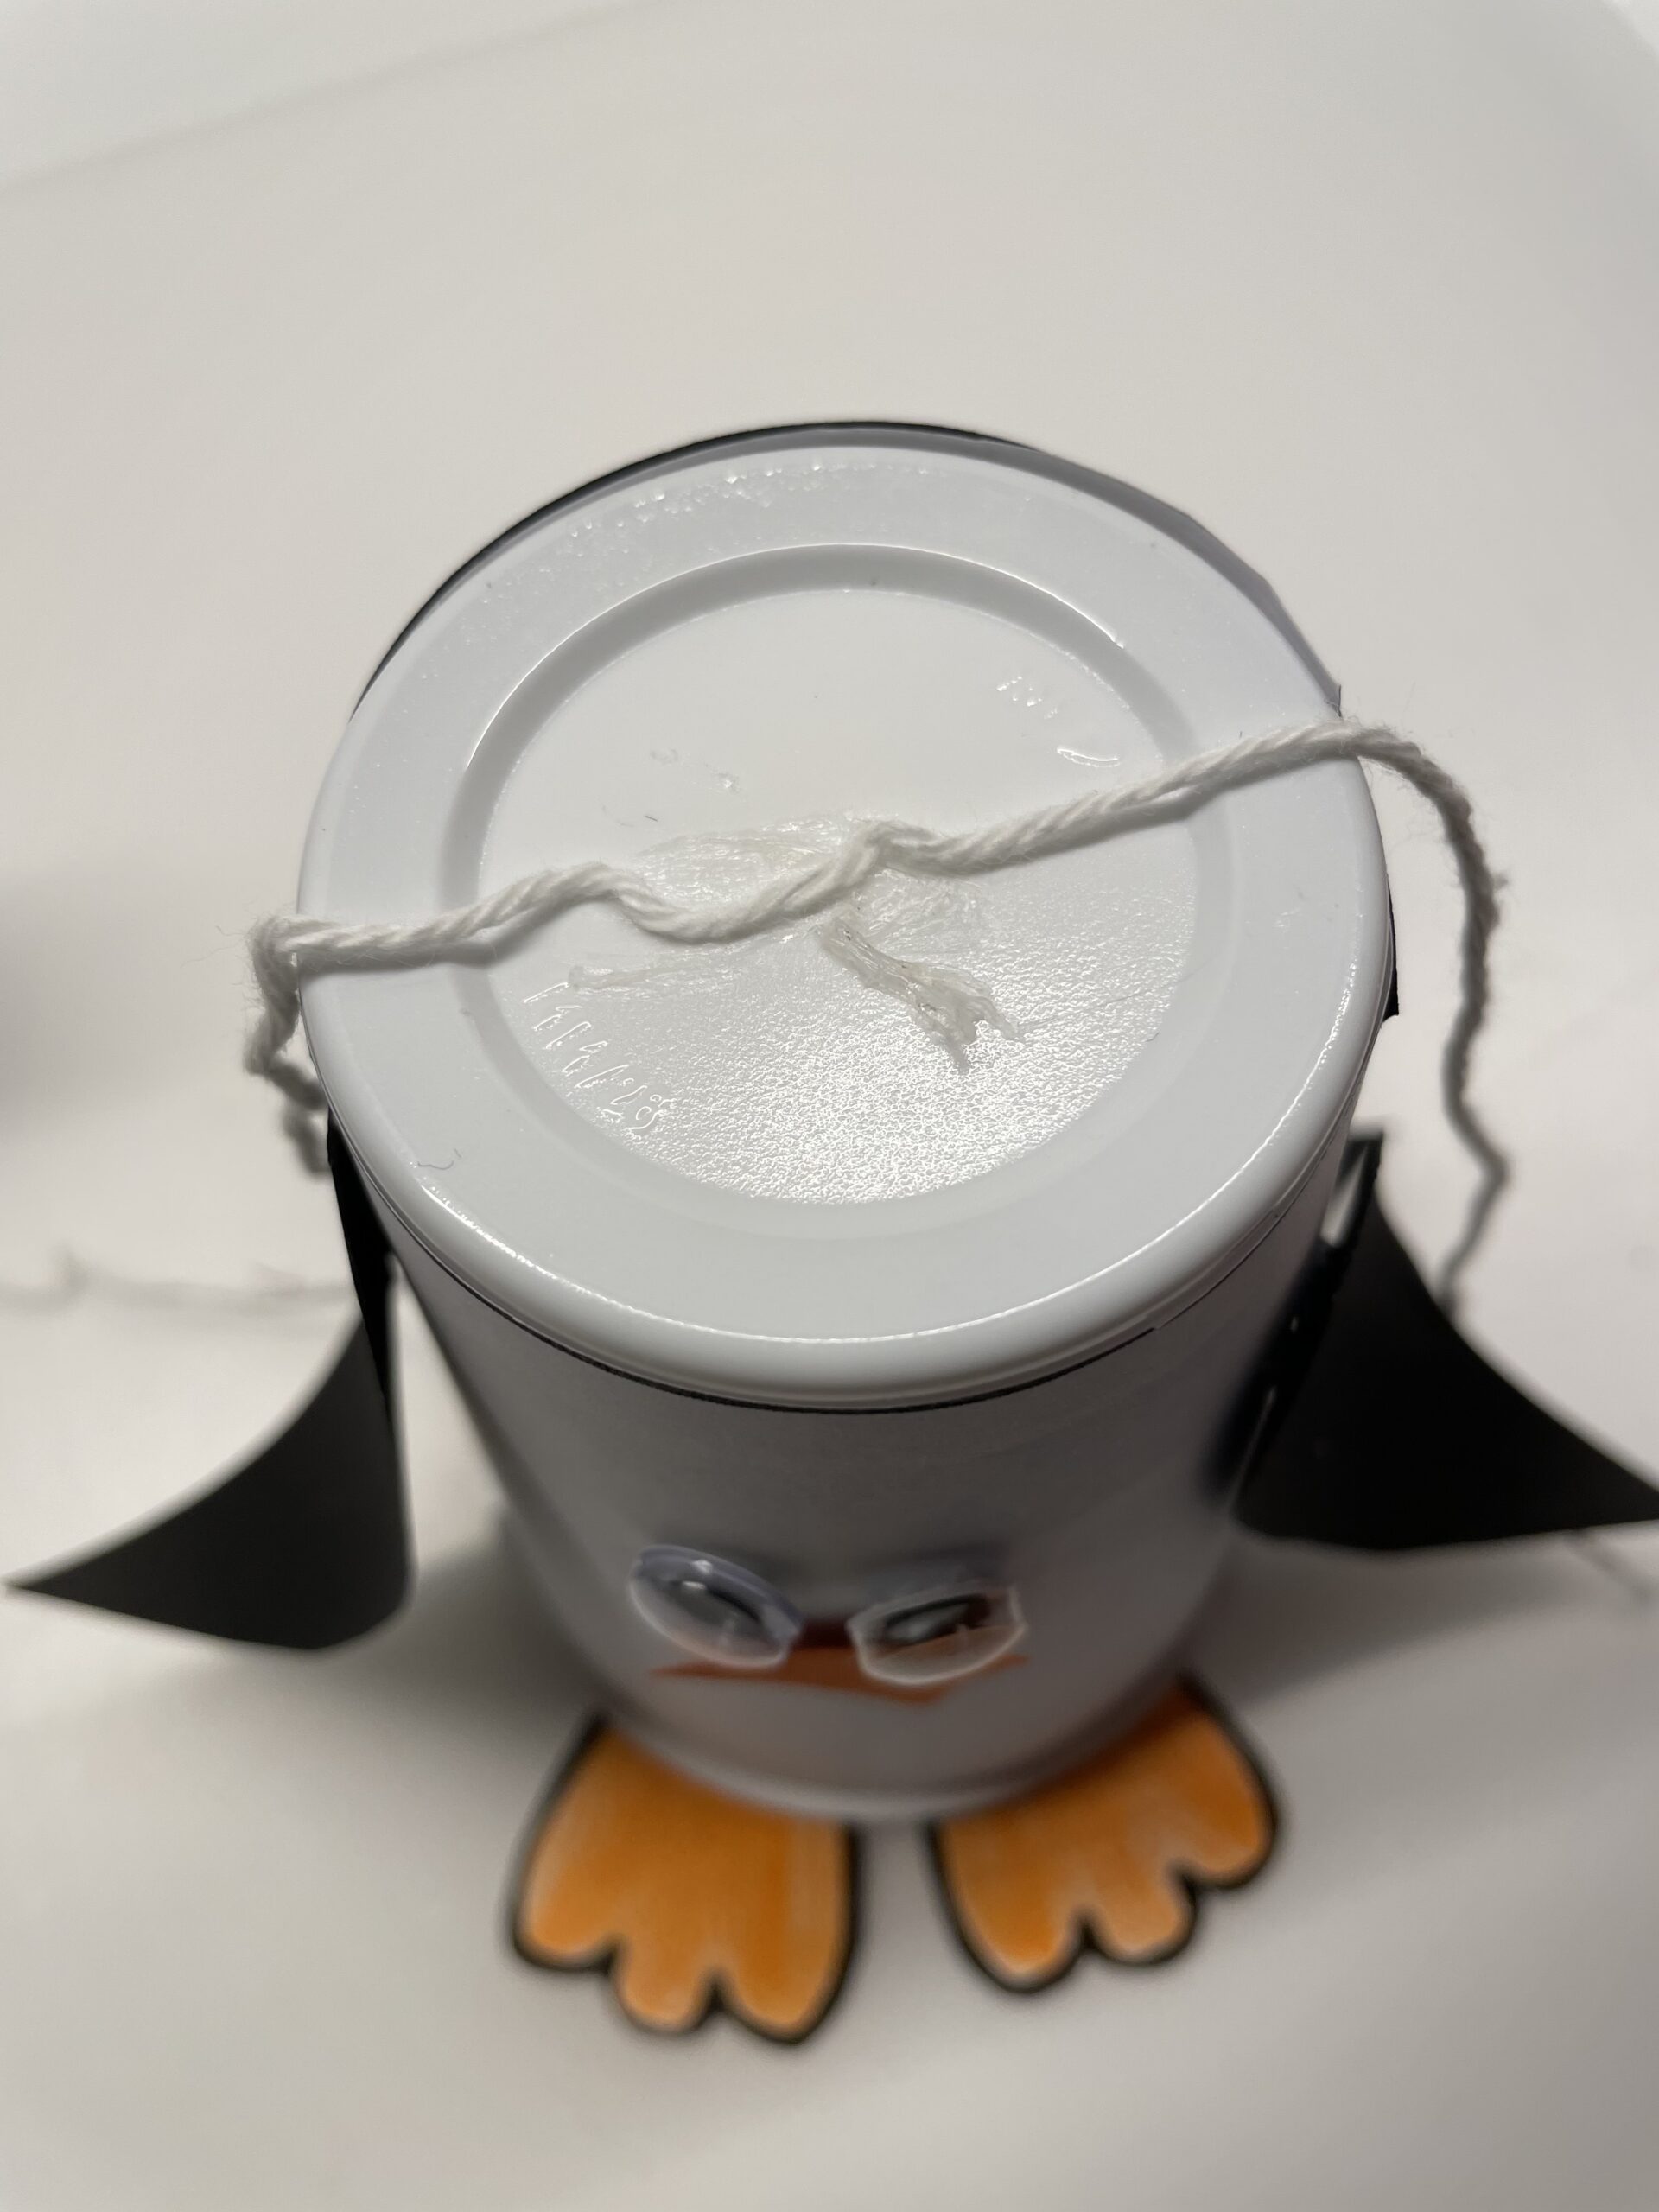
Bild zum Schritt 21 für das Bastel- und DIY-Abenteuer für Kinder: 'Dafür bestreicht ihr den kompletten Becherboden mit Kleber.'

22

Then you put the black circle on it and press it on
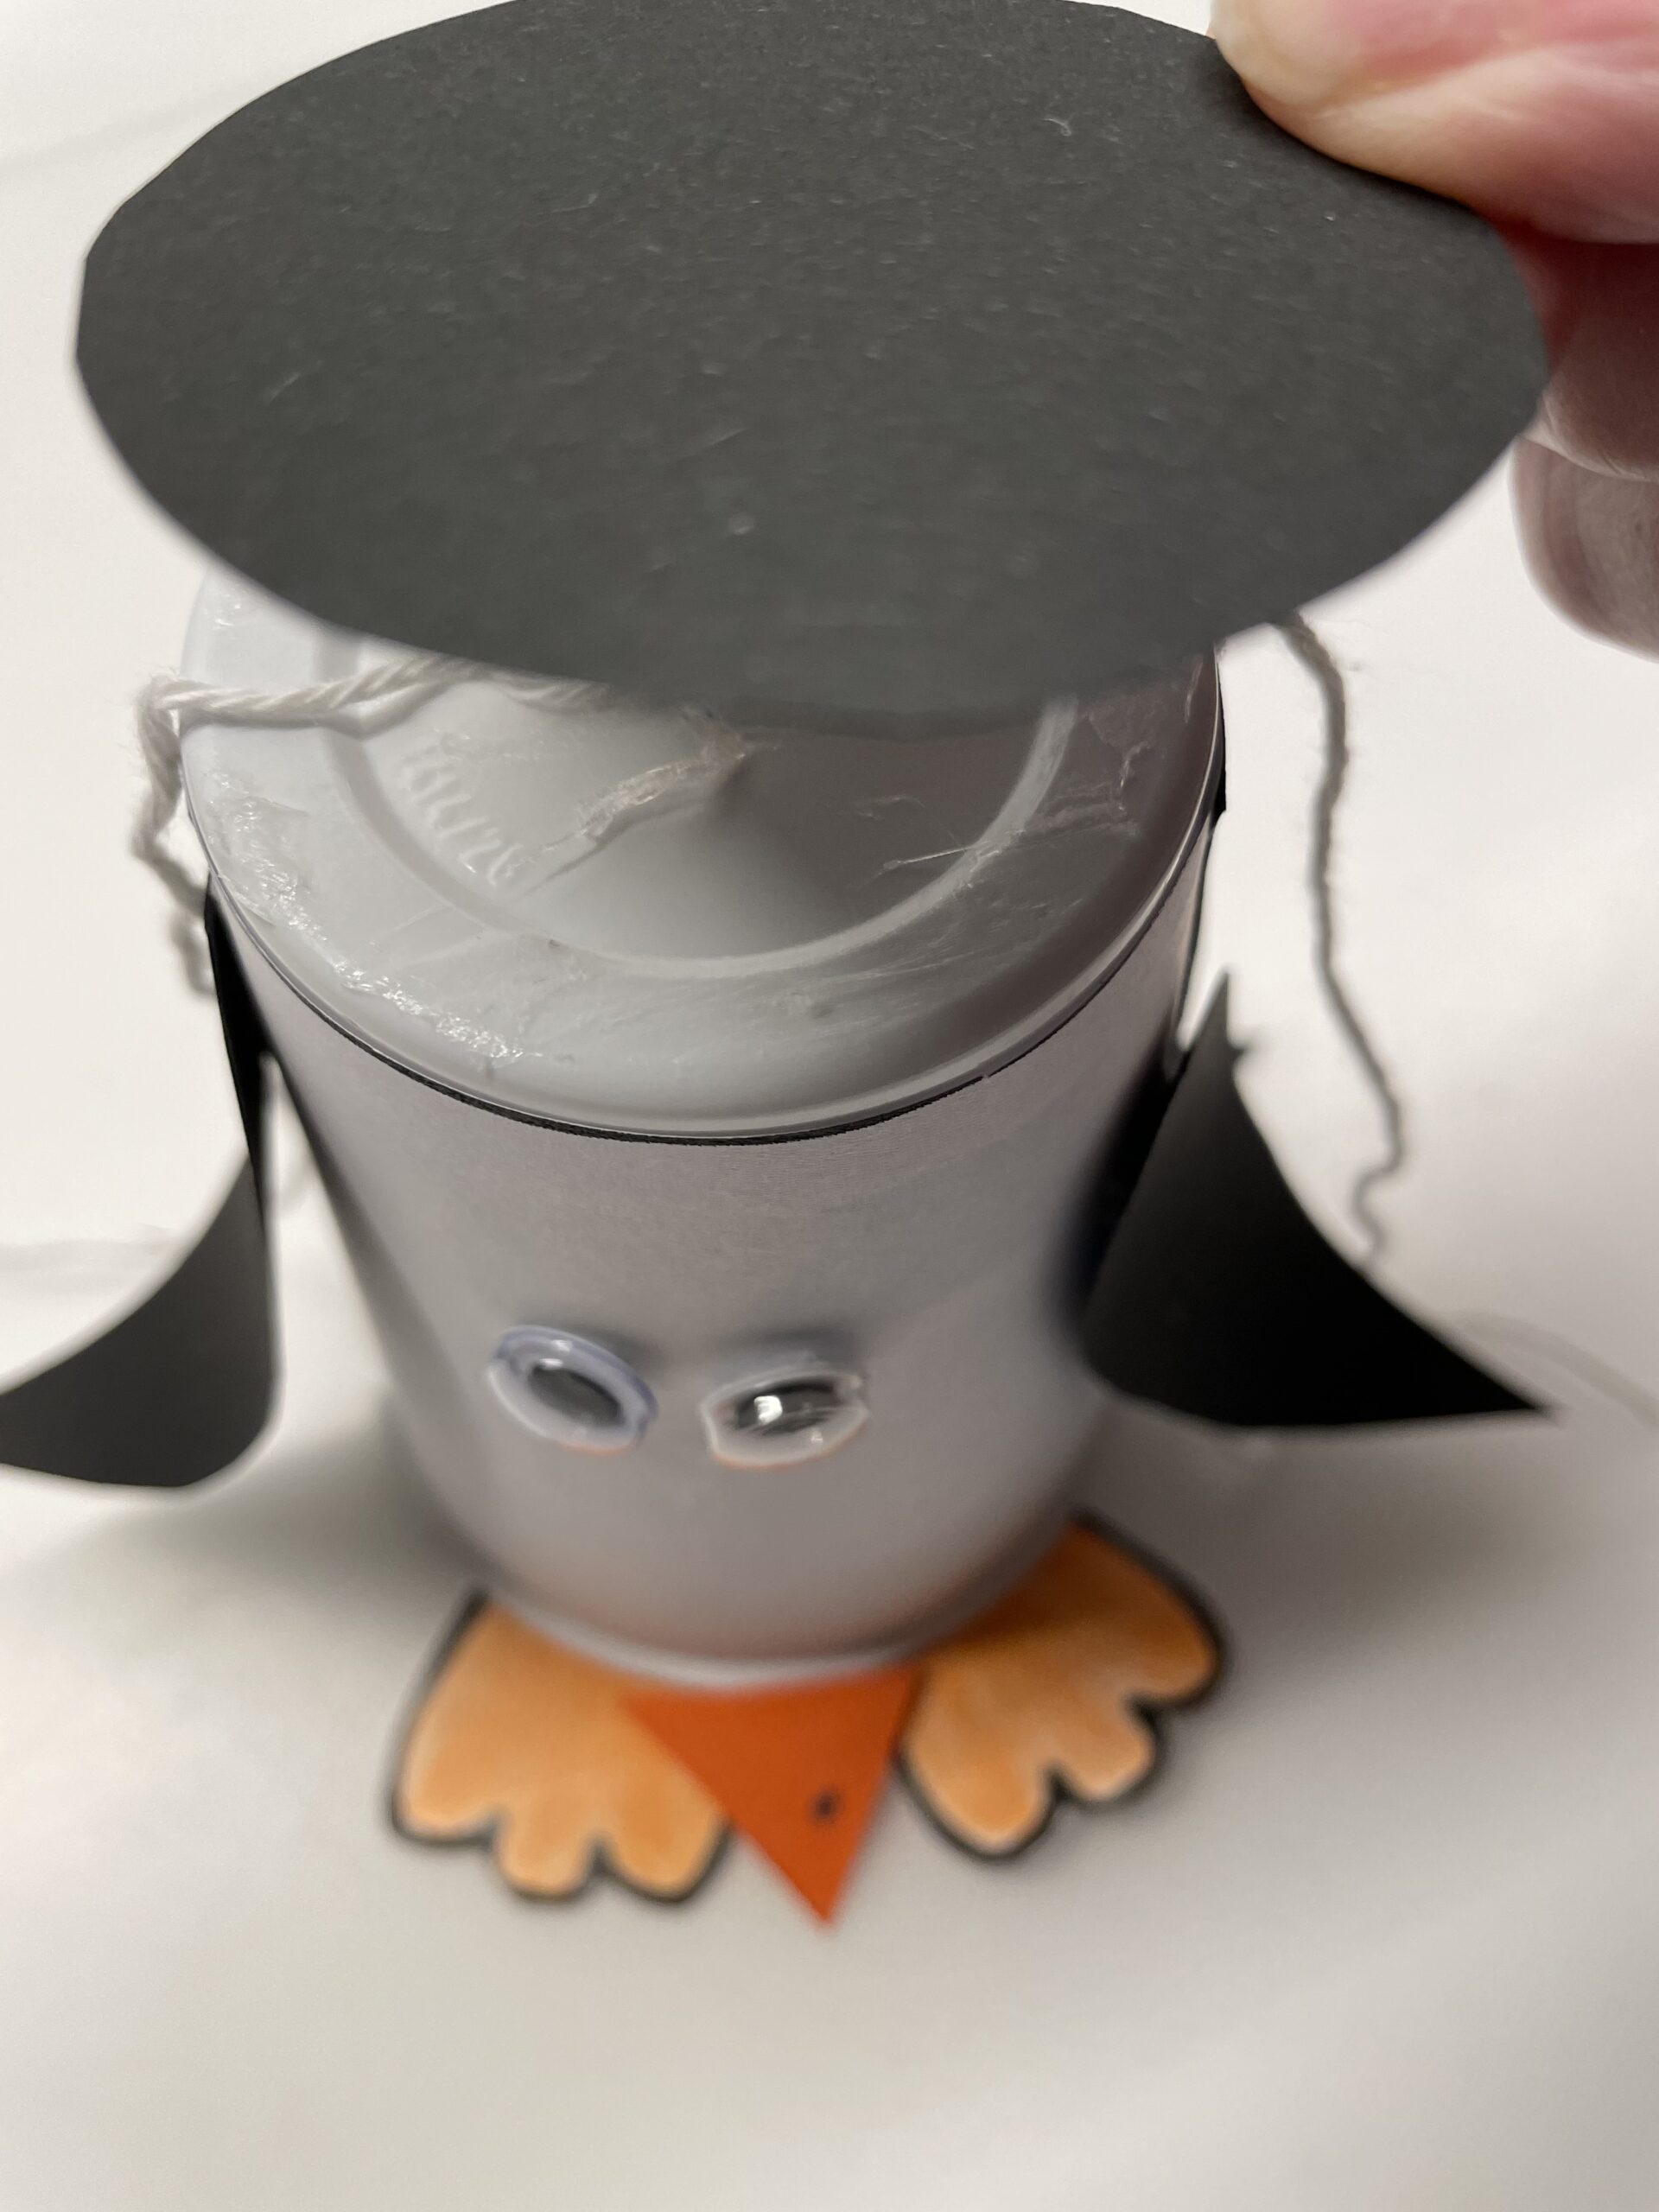
Bild zum Schritt 22 für das Bastel- und DIY-Abenteuer für Kinder: 'Anschließend legt ihr den schwarzen Kreis darauf und drückt ihn...'

23

Laterally, the thread looks out.

Bild zum Schritt 23 für das Bastel- und DIY-Abenteuer für Kinder: 'Seitlich schaut der Faden heraus.'

24

Now tie the ends of the thread together.
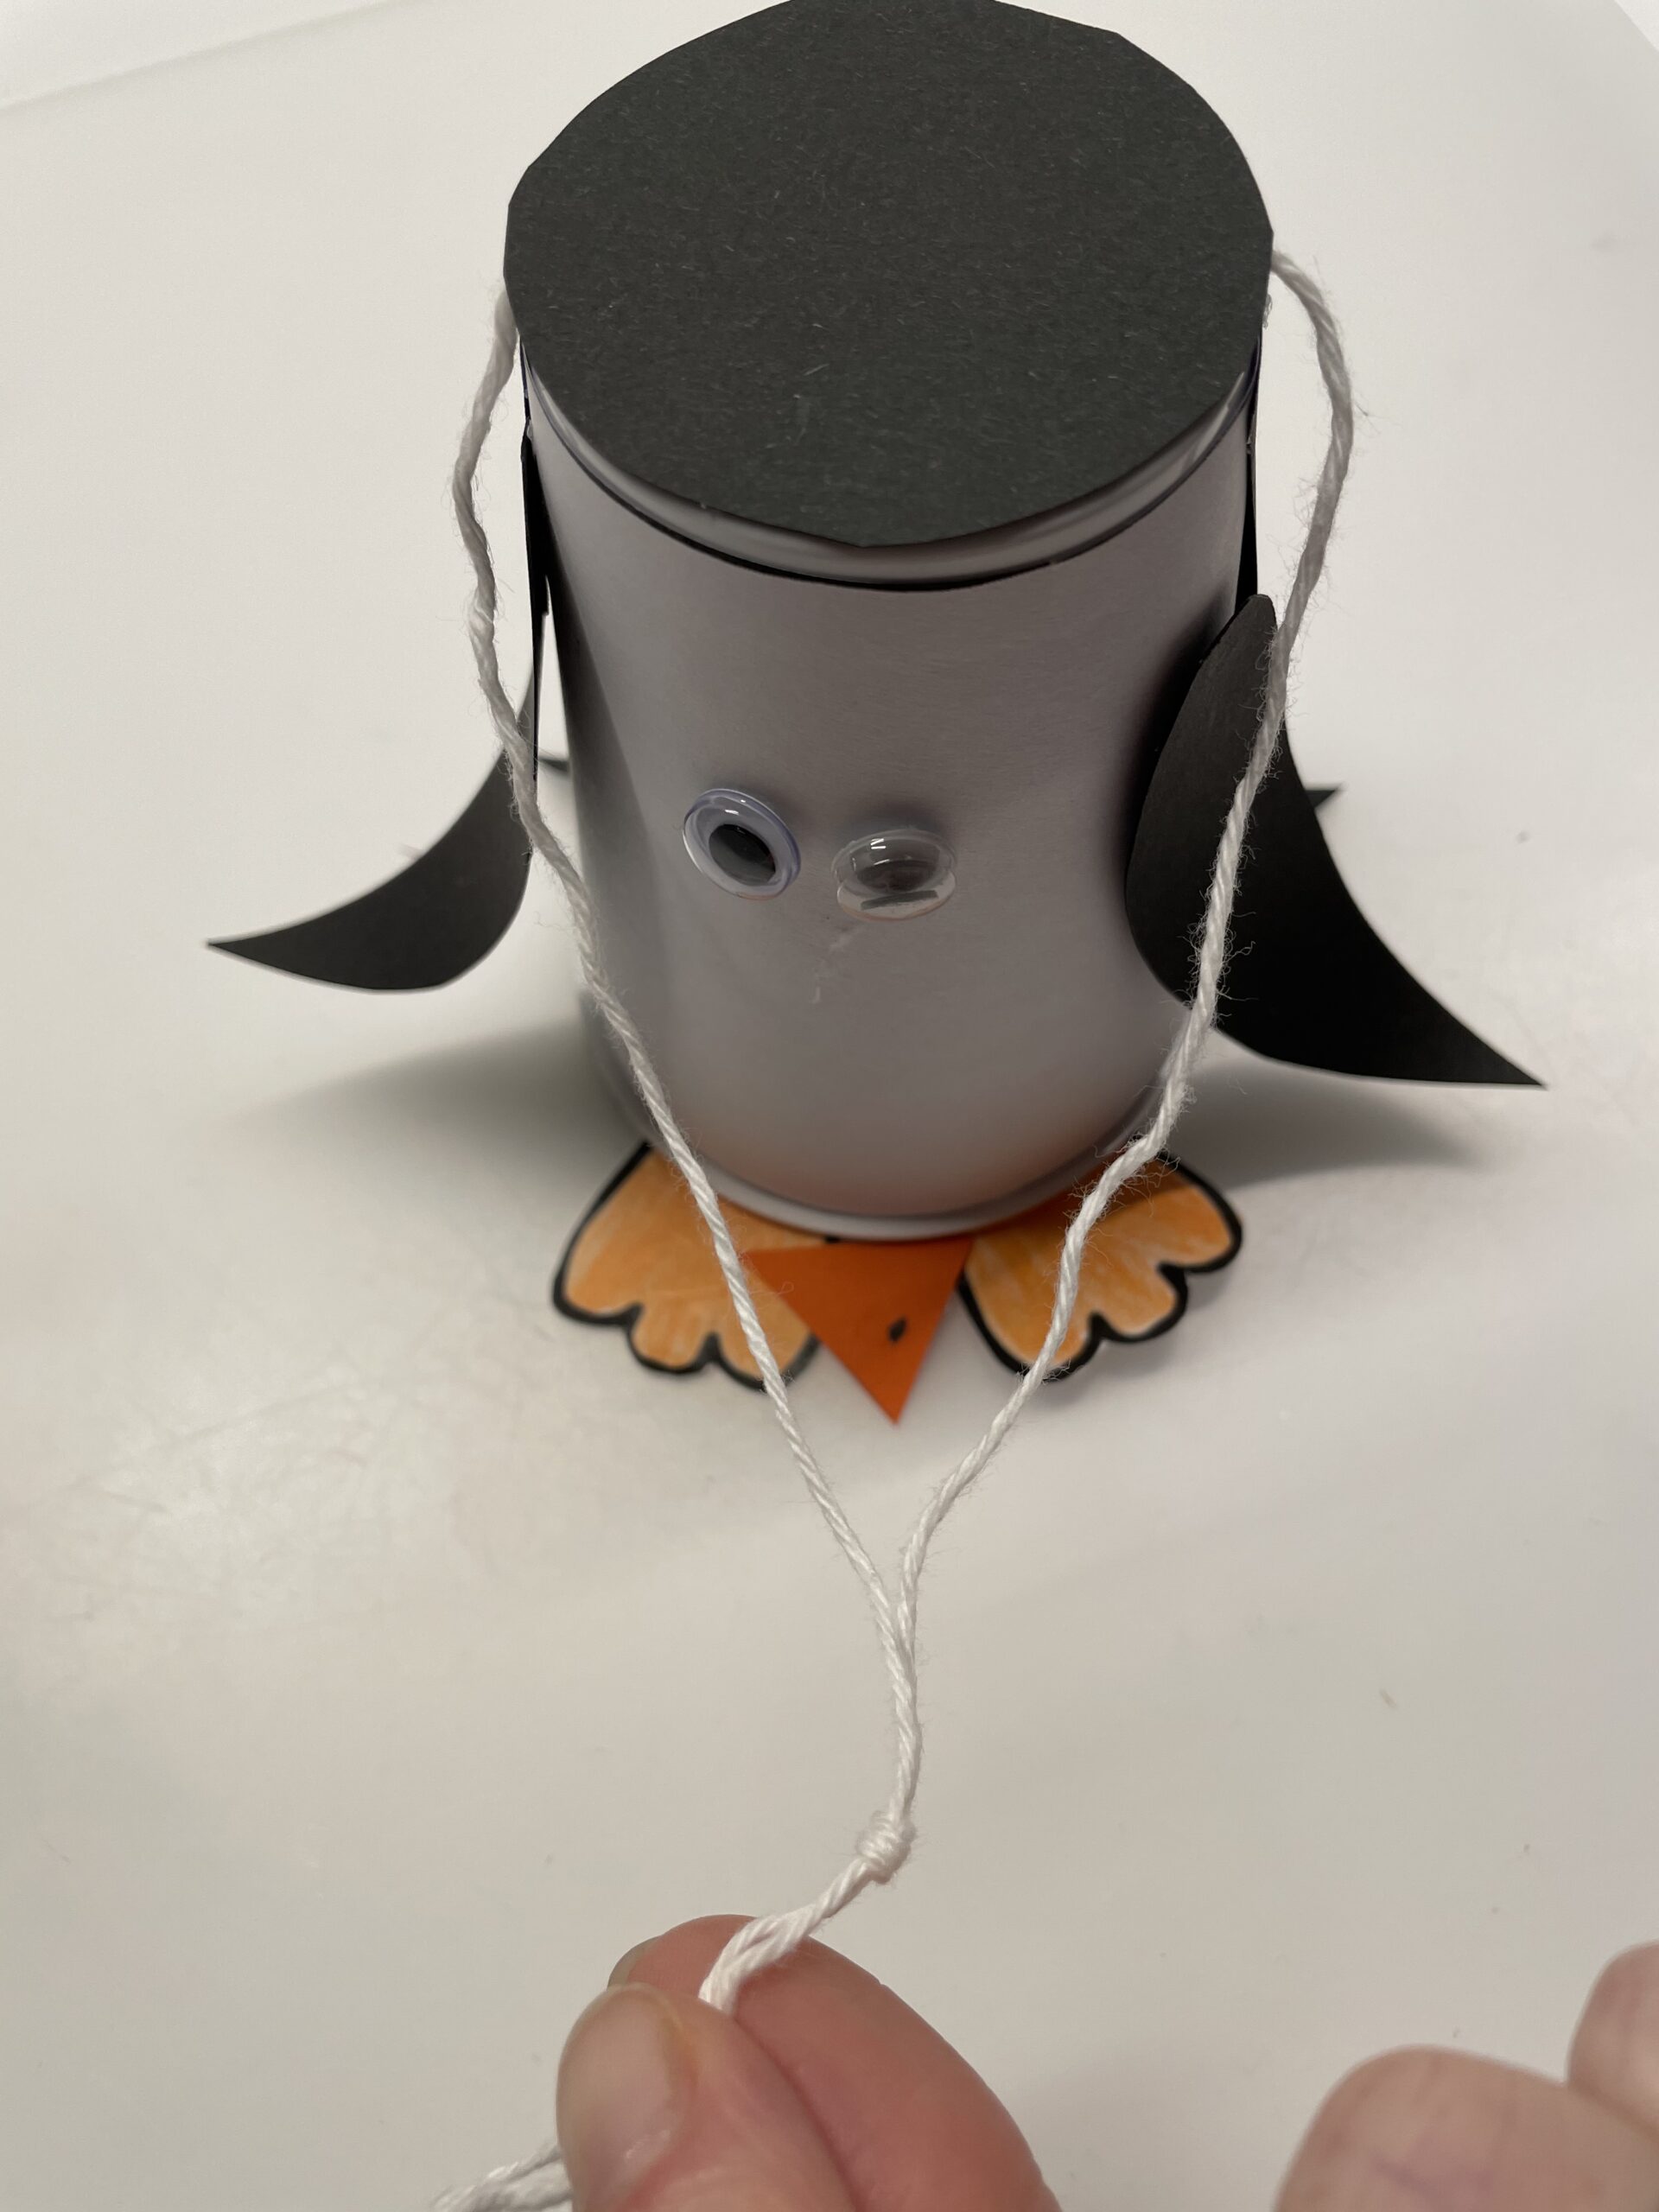
Bild zum Schritt 24 für das Bastel- und DIY-Abenteuer für Kinder: 'Bindet nun die Enden des Fadens zusammen.'

25

Finished is the flying penguin. Lift him up at the aprons and let him waddle and fly.
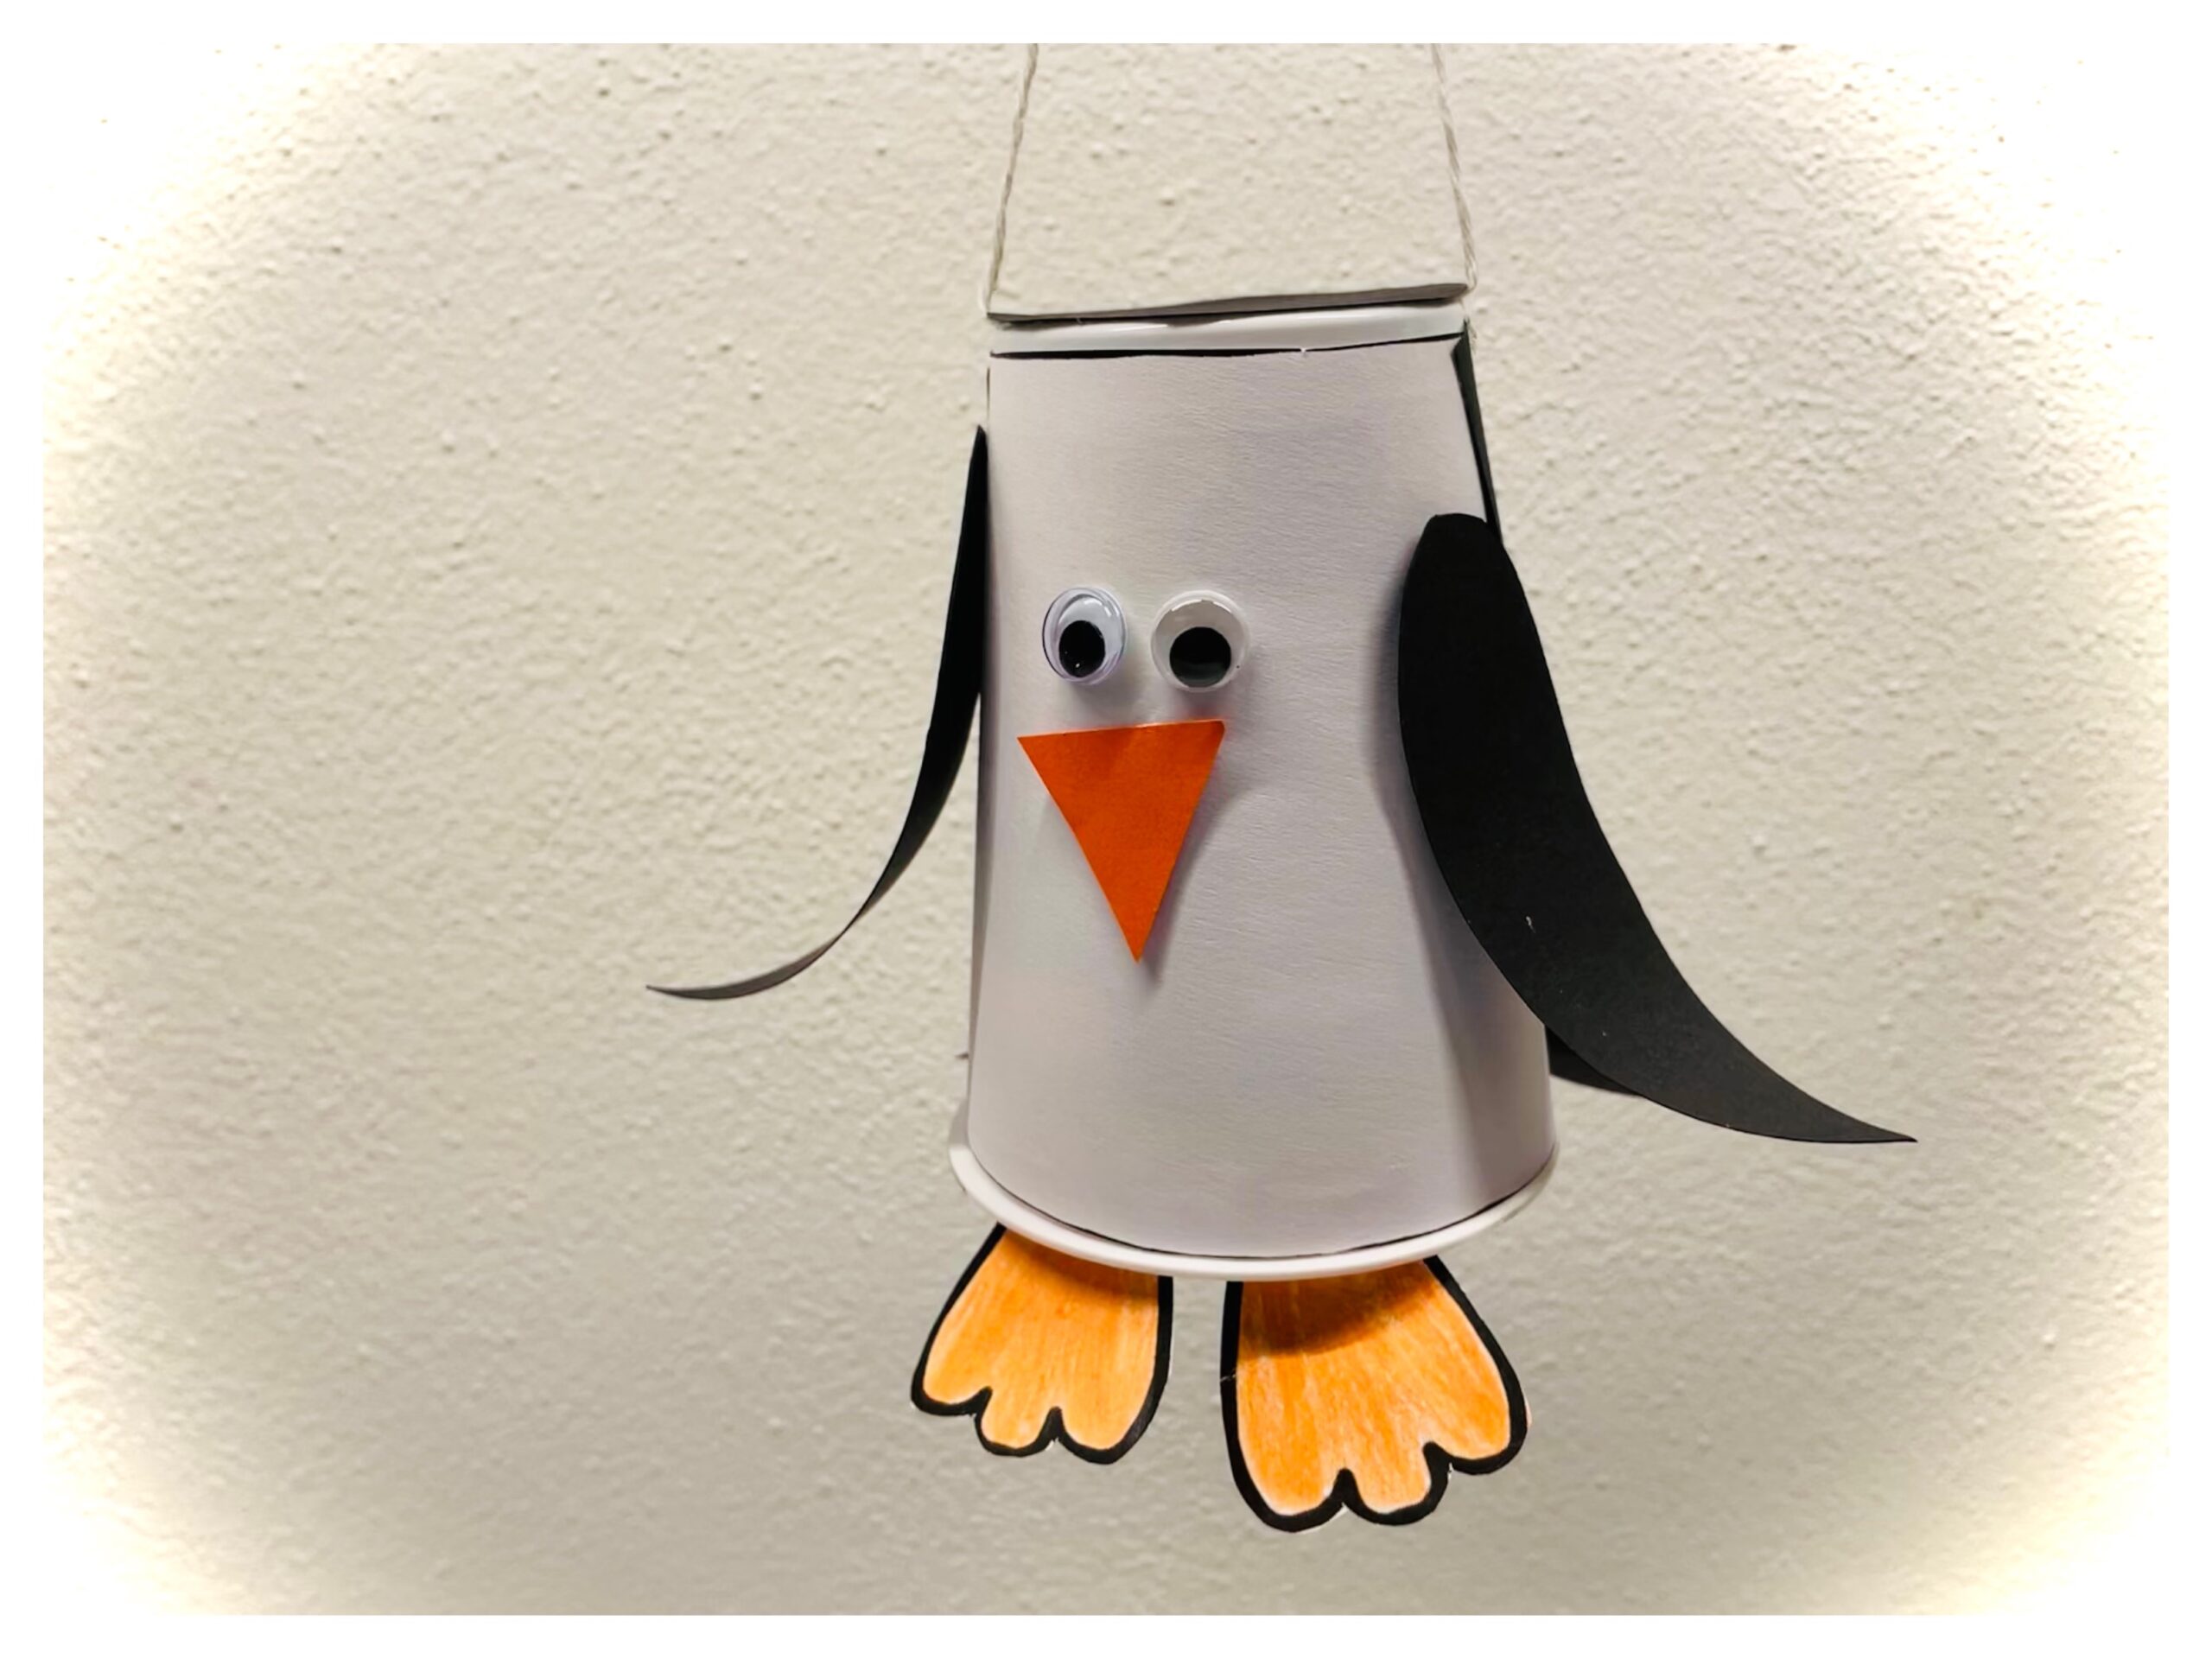
Bild zum Schritt 25 für das Bastel- und DIY-Abenteuer für Kinder: 'Fertig ist der fliegende Pinguin. Hebt ihn an den Schüren...'

26

2. Bild zum Schritt 25 für das Bastel- und DIY-Abenteuer für Kinder: 'Fertig ist der fliegende Pinguin. Hebt ihn an den Schüren...'

27

Have fun playing!

Template Banderole
28

This bandarole fits around a 200g cream cup.
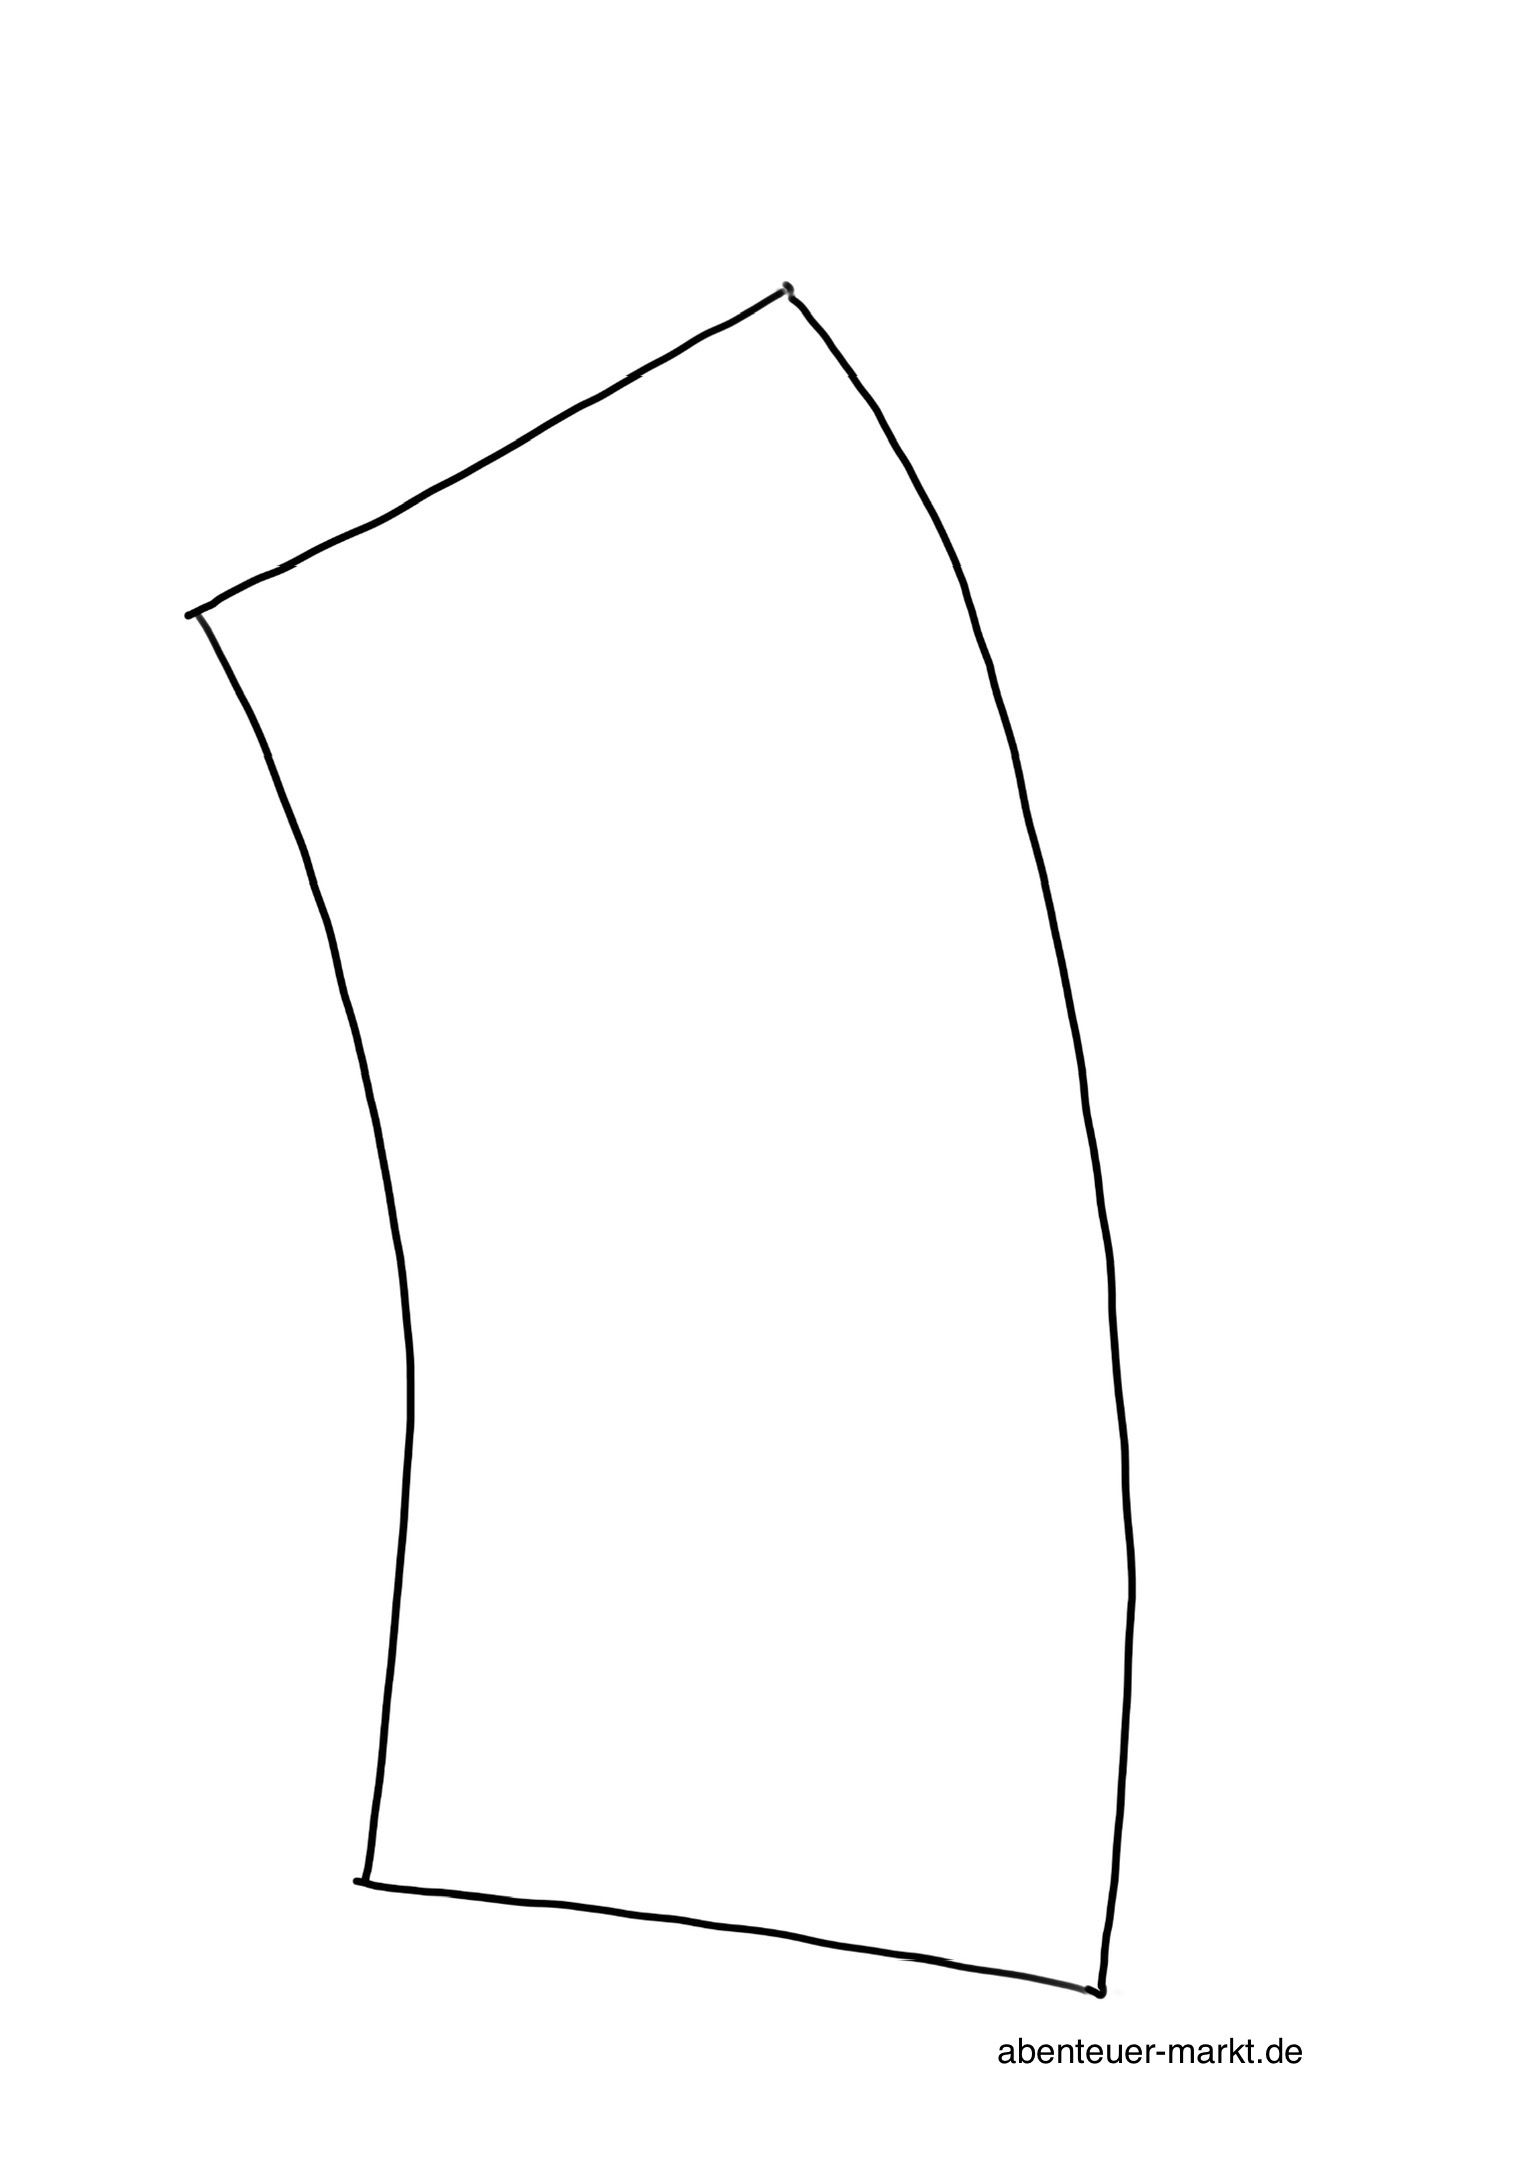
Bild zum Schritt 29 für das Bastel- und DIY-Abenteuer für Kinder: 'Diese Bandarole passt um einen 200g Sahnebecher.'

Flying penguin

Follow us on Facebook , Instagram and Pinterest
Don't miss any more adventures: Our bottle mail

Leave a Reply

Your email address will not be published.

The maximum upload file size: 5 MB. You can upload: image, document. Drop file here