Easter bunny colorful

AdventurerKatzi
Rating5.01.9 thousand times & (1) DifficultyIntermediate

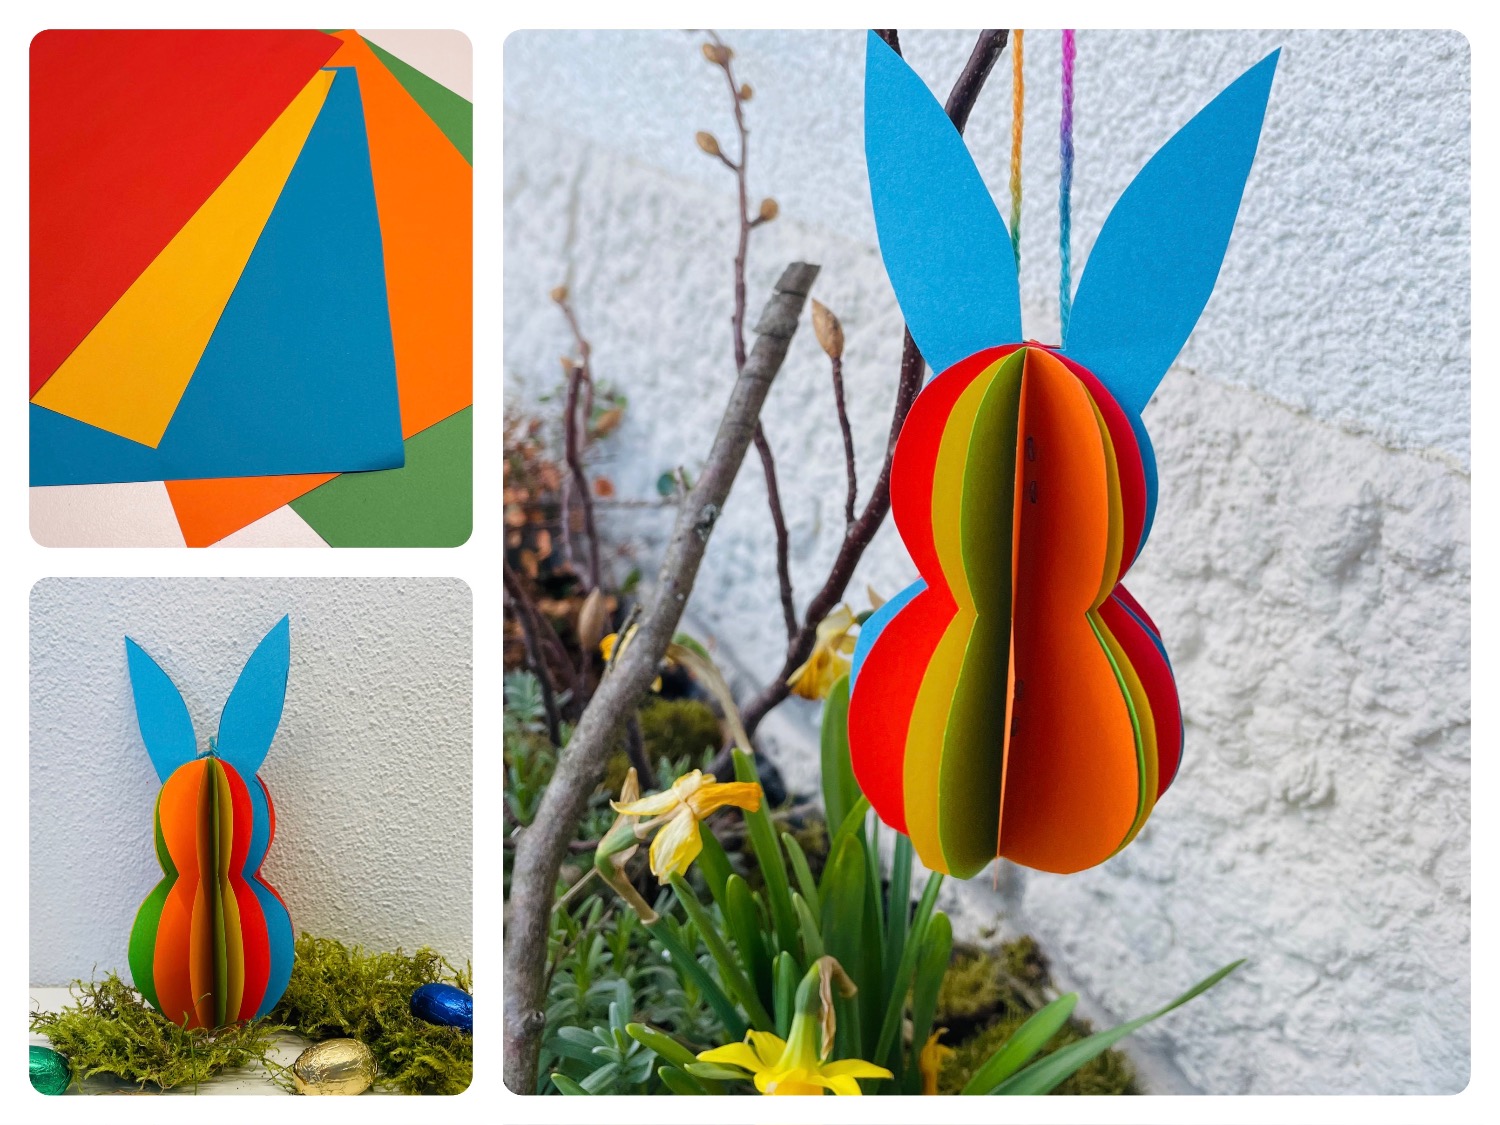
This colorful Easter bunny is quickly crafted with colored paper and scissors and looks very decorative.

Titelbild zur Bastel- und DIY-Idee für Kinder '(1051) Osterhase bunt'
Material for1 Child
Prep Time5 min.Adv. Time30 min.Total Time35 min.
 Colourful paper Clay paper or colorful copying paper
 stencil rabbitself-painting or print template
 1 Pencil
 1 ==References==
 1 Wool thread colorfulApproximately 20cm long
 1 Tacker
All links marked with a shopping cart lead to Amazon - here we have selected products that we would order ourselves and in part also ordered. In a qualified purchase via the advertising link, we as Amazon partner receive a commission, for you there are no costs. You thus support our cost- and advertising banner-free, educational offer.
1

Spread out your craft material and place your craft materials on the table.
Get colorful paper (e.g. colored copy paper) ready. Here you can use any colors. You can also make the rabbit with monochrome brown or white paper.
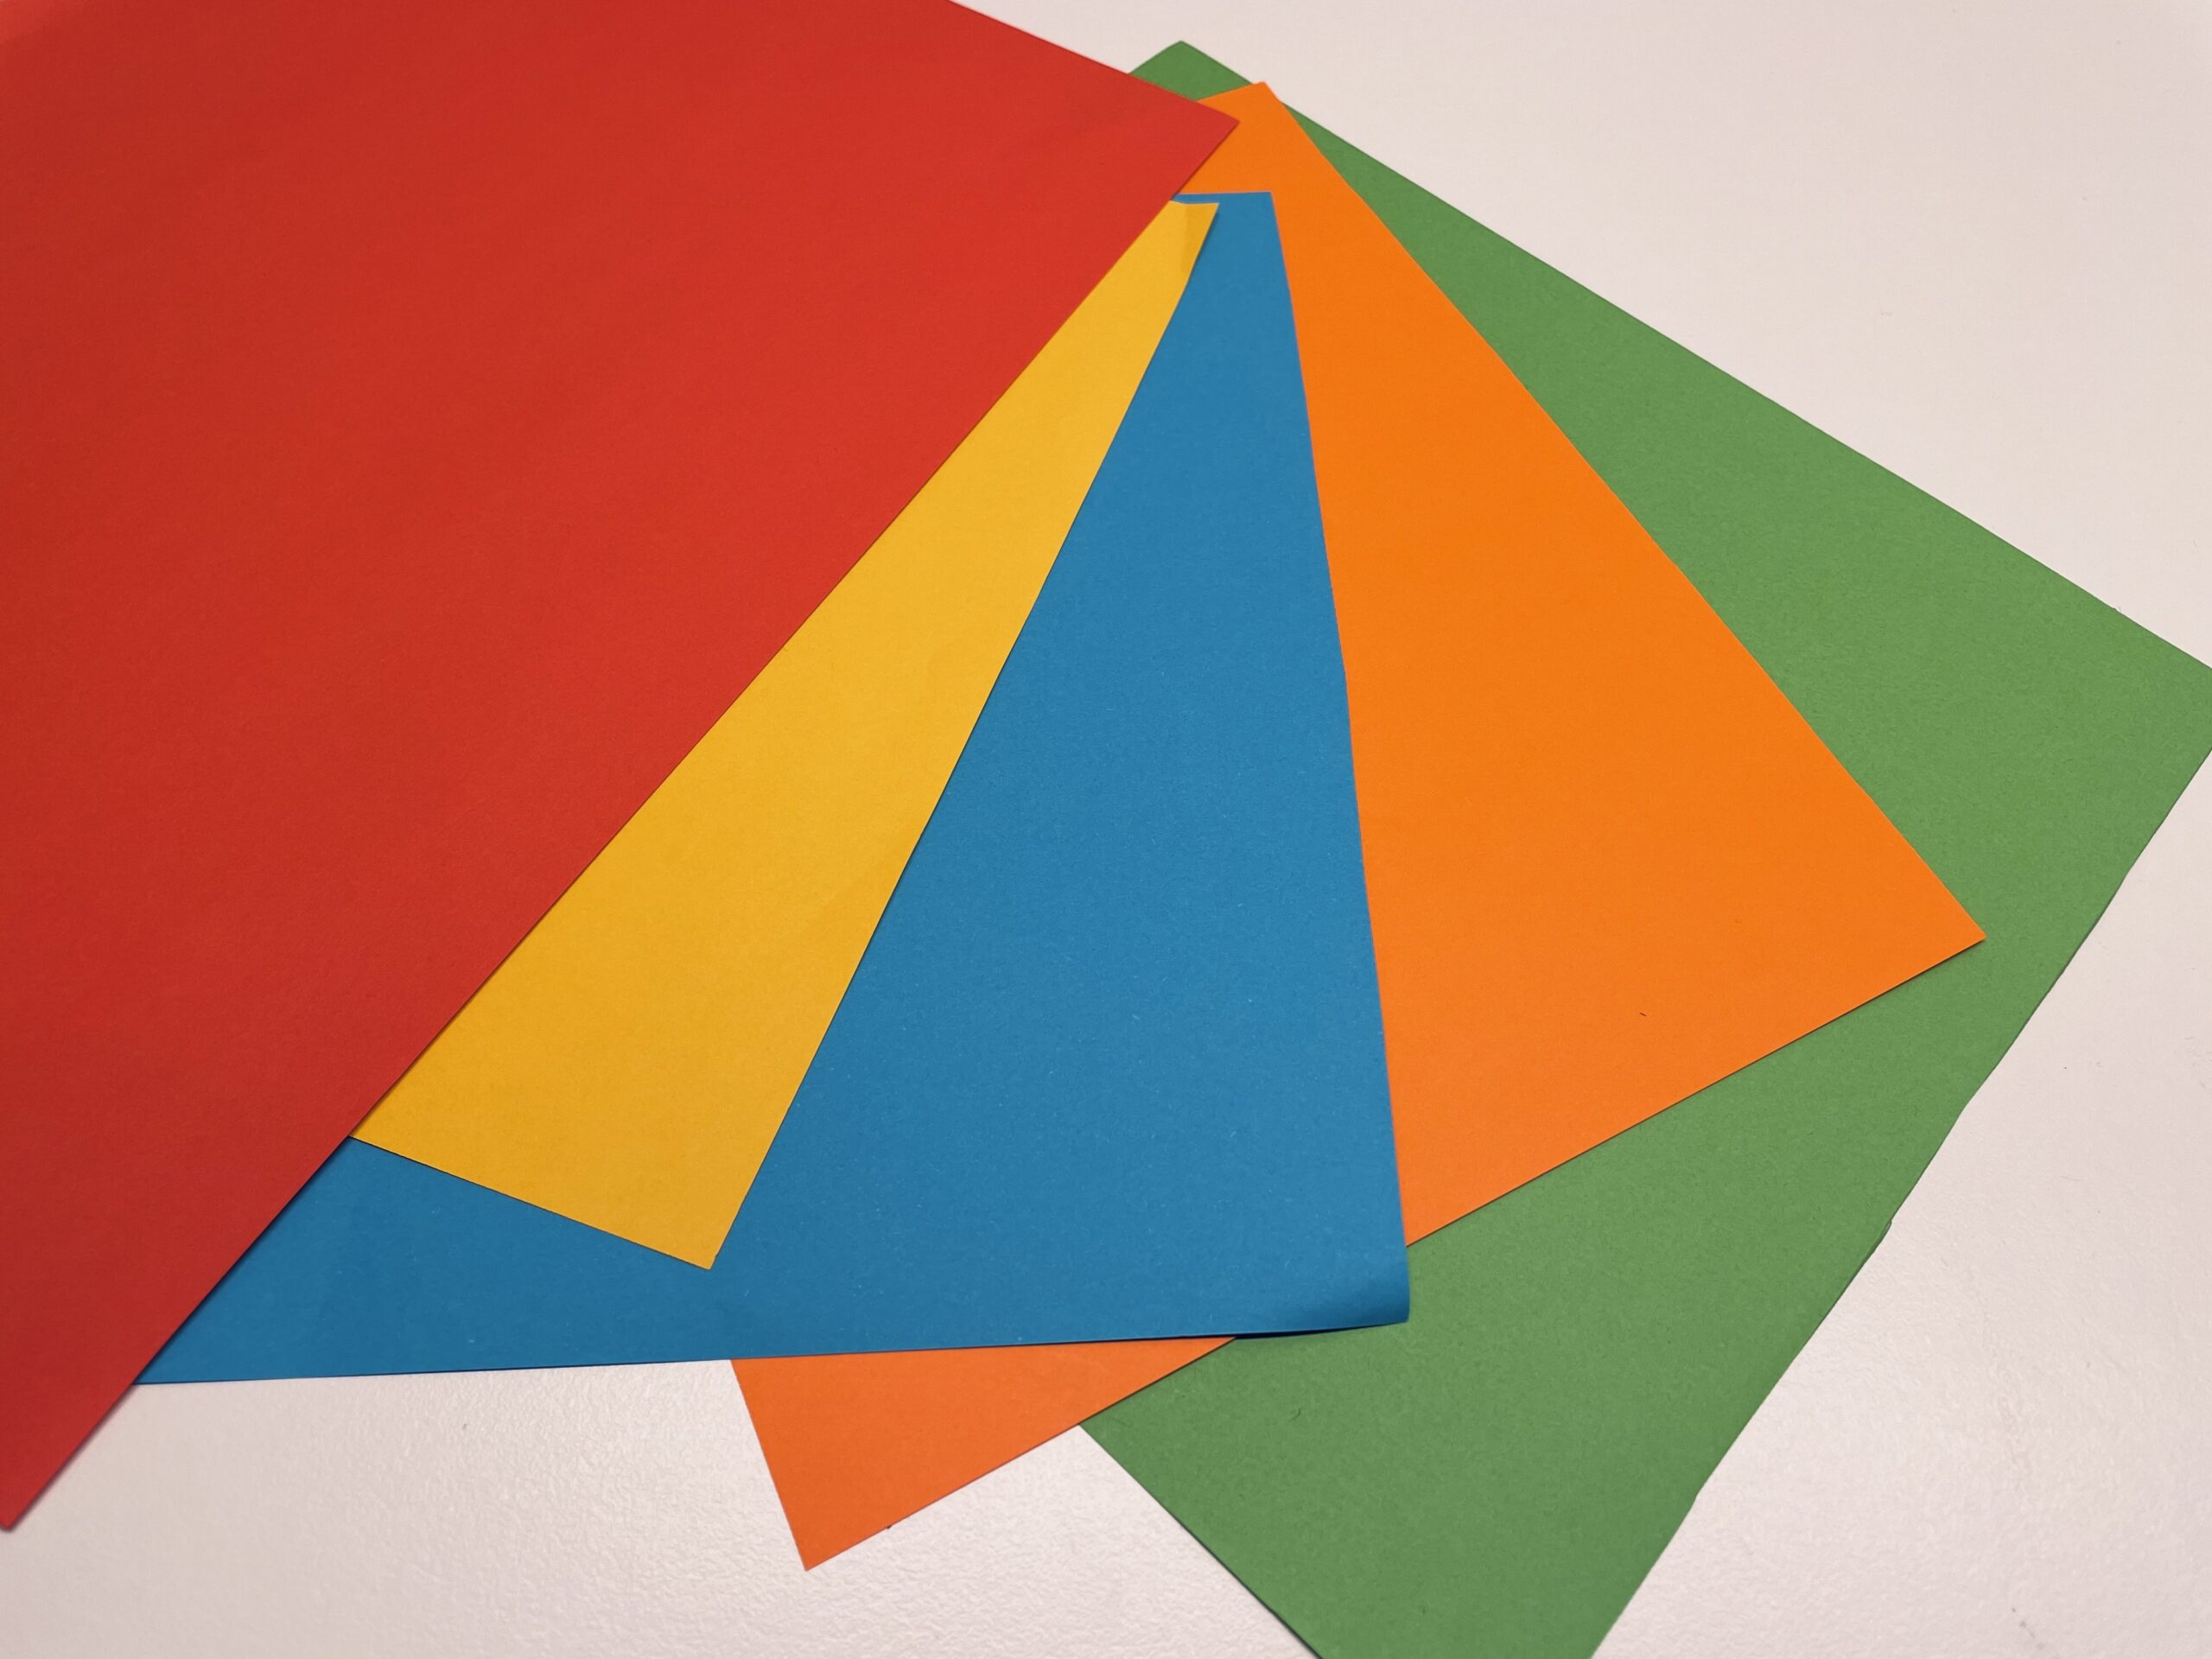
Bild zum Schritt 1 für das Bastel- und DIY-Abenteuer für Kinder: 'Breitet eure Bastelunterlage aus und legt eure Bastelmaterialien auf den...'

2

Paint a rabbit stencil with ears, and the same again without ears. (Or use only a rabbit template and then fold your ears down!)
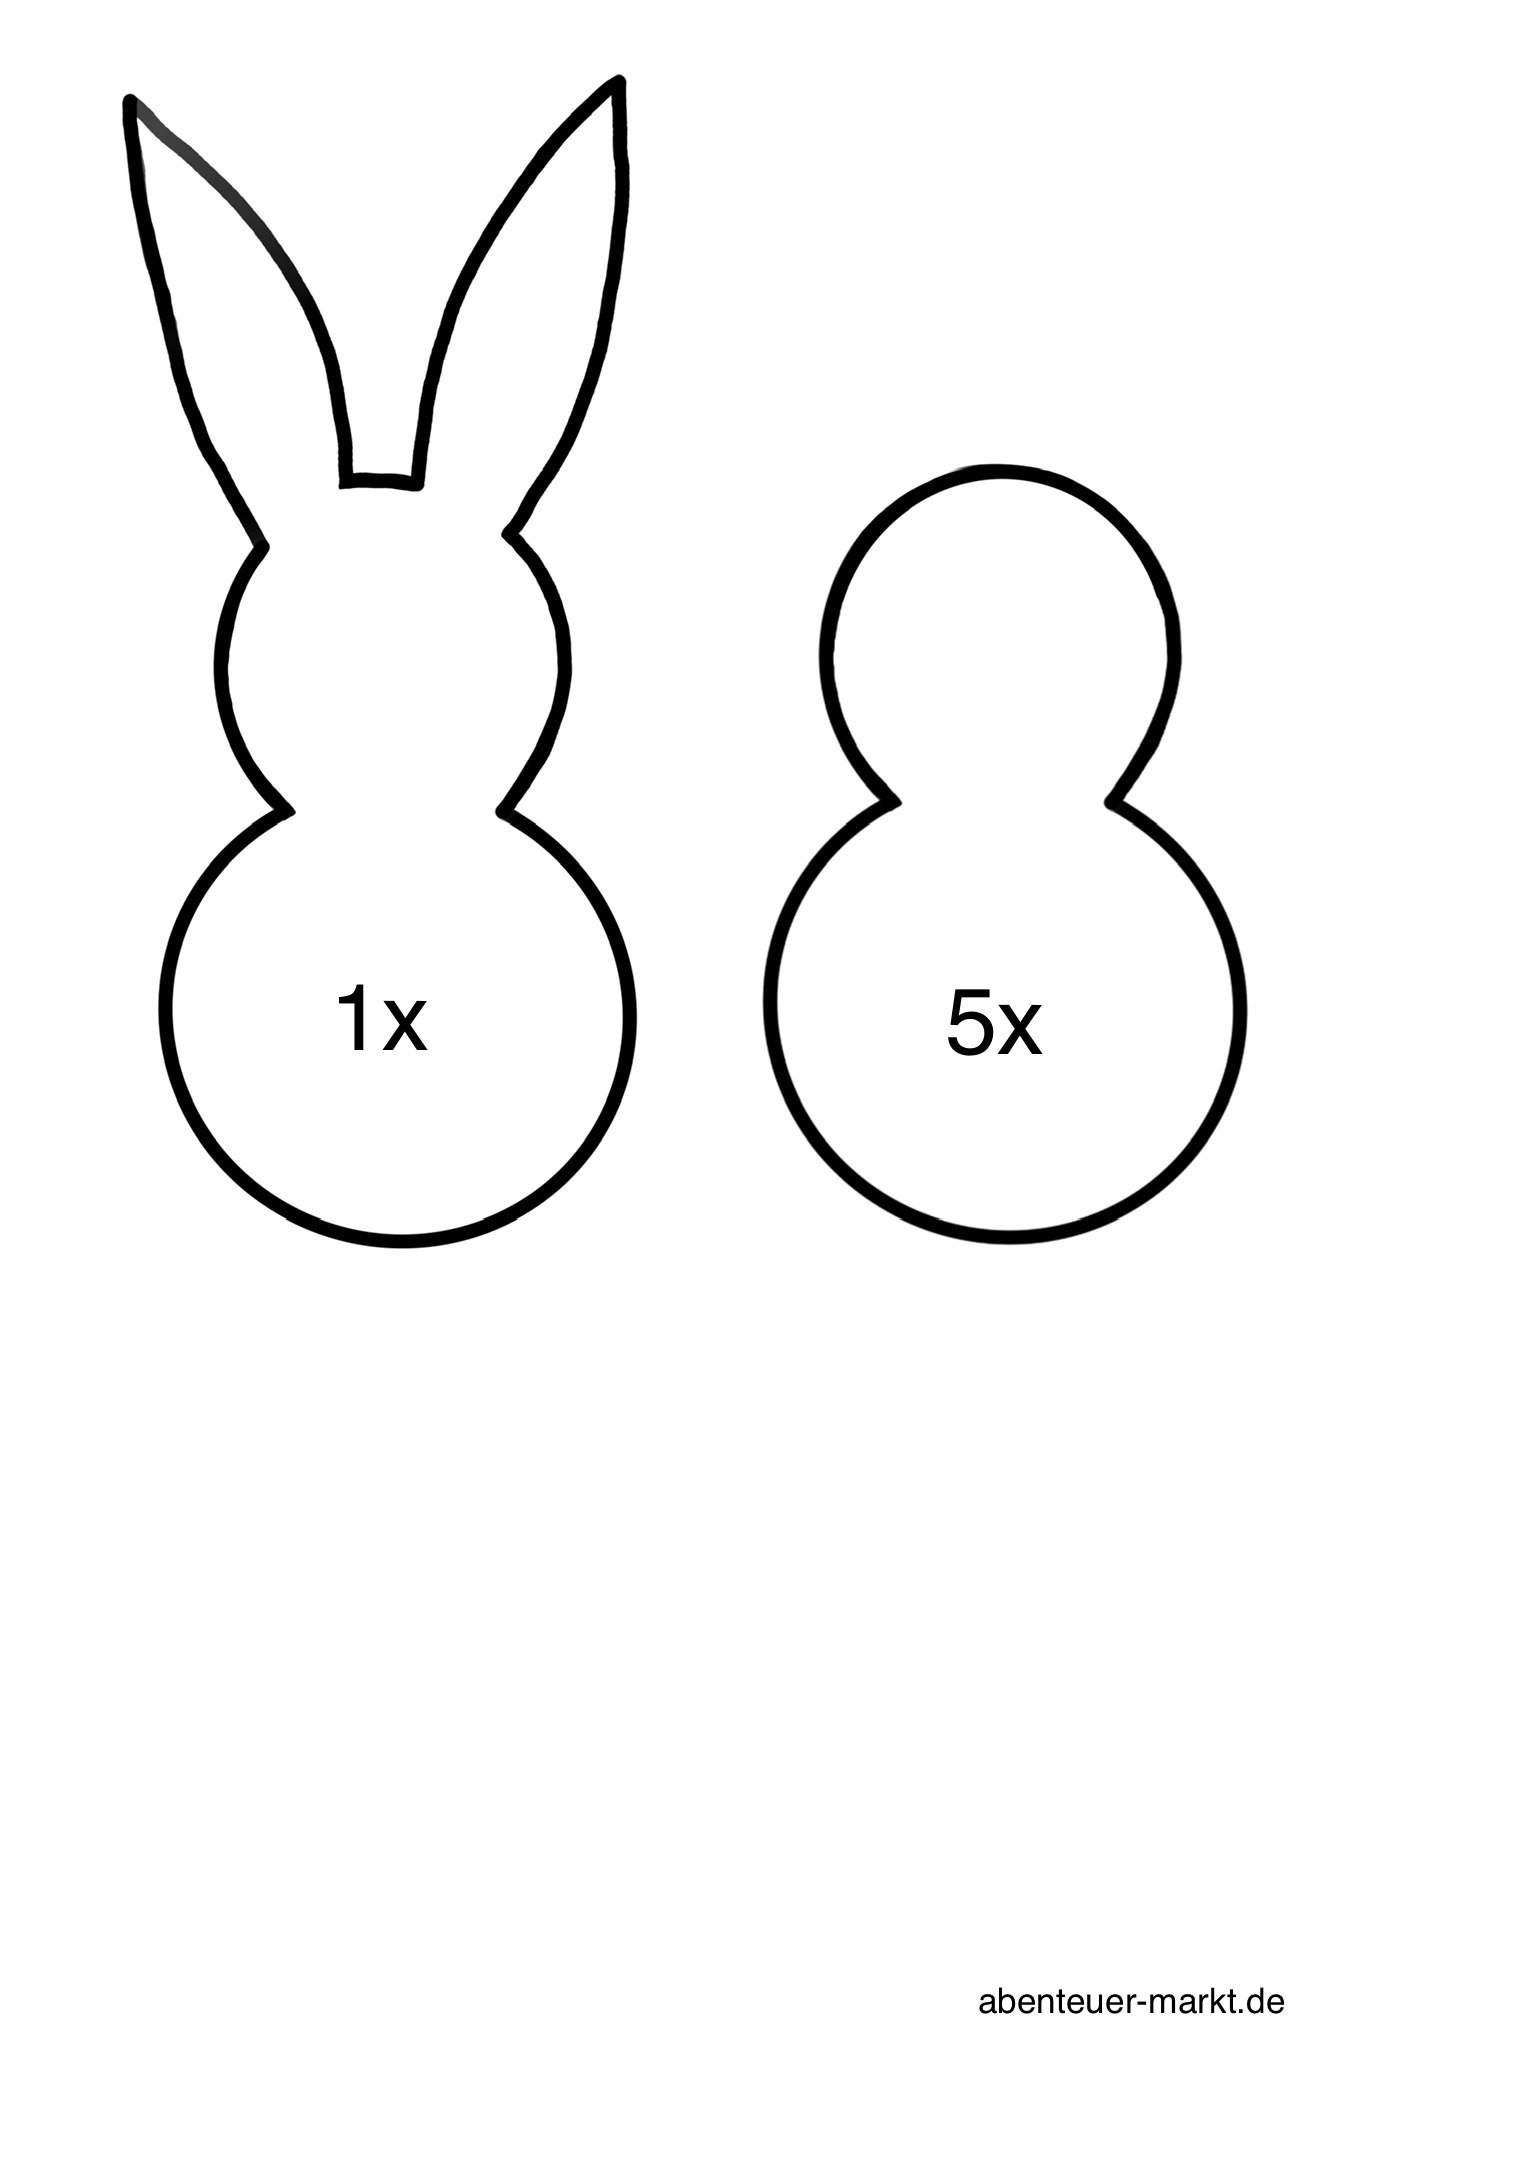
Bild zum Schritt 2 für das Bastel- und DIY-Abenteuer für Kinder: 'Malt euch eine Hasenschablone mit Ohren, und die gleiche noch...'

3

The rabbit with ears is painted once on colored paper.

Bild zum Schritt 3 für das Bastel- und DIY-Abenteuer für Kinder: 'Der Hase mit Ohren wird einmal auf farbigem Papier aufgemalt.'

4

All other papers are made with the template without ears!

Bild zum Schritt 4 für das Bastel- und DIY-Abenteuer für Kinder: 'Alle weiteren Papiere werden mit der Vorlage ohne Ohren angefertigt!'

5

You need 8 rabbits without ears. Four for the front and four for the back.

Bild zum Schritt 5 für das Bastel- und DIY-Abenteuer für Kinder: 'Ihr braucht 8 Hasen ohne Ohren. Vier für die Vorderseite...'

6

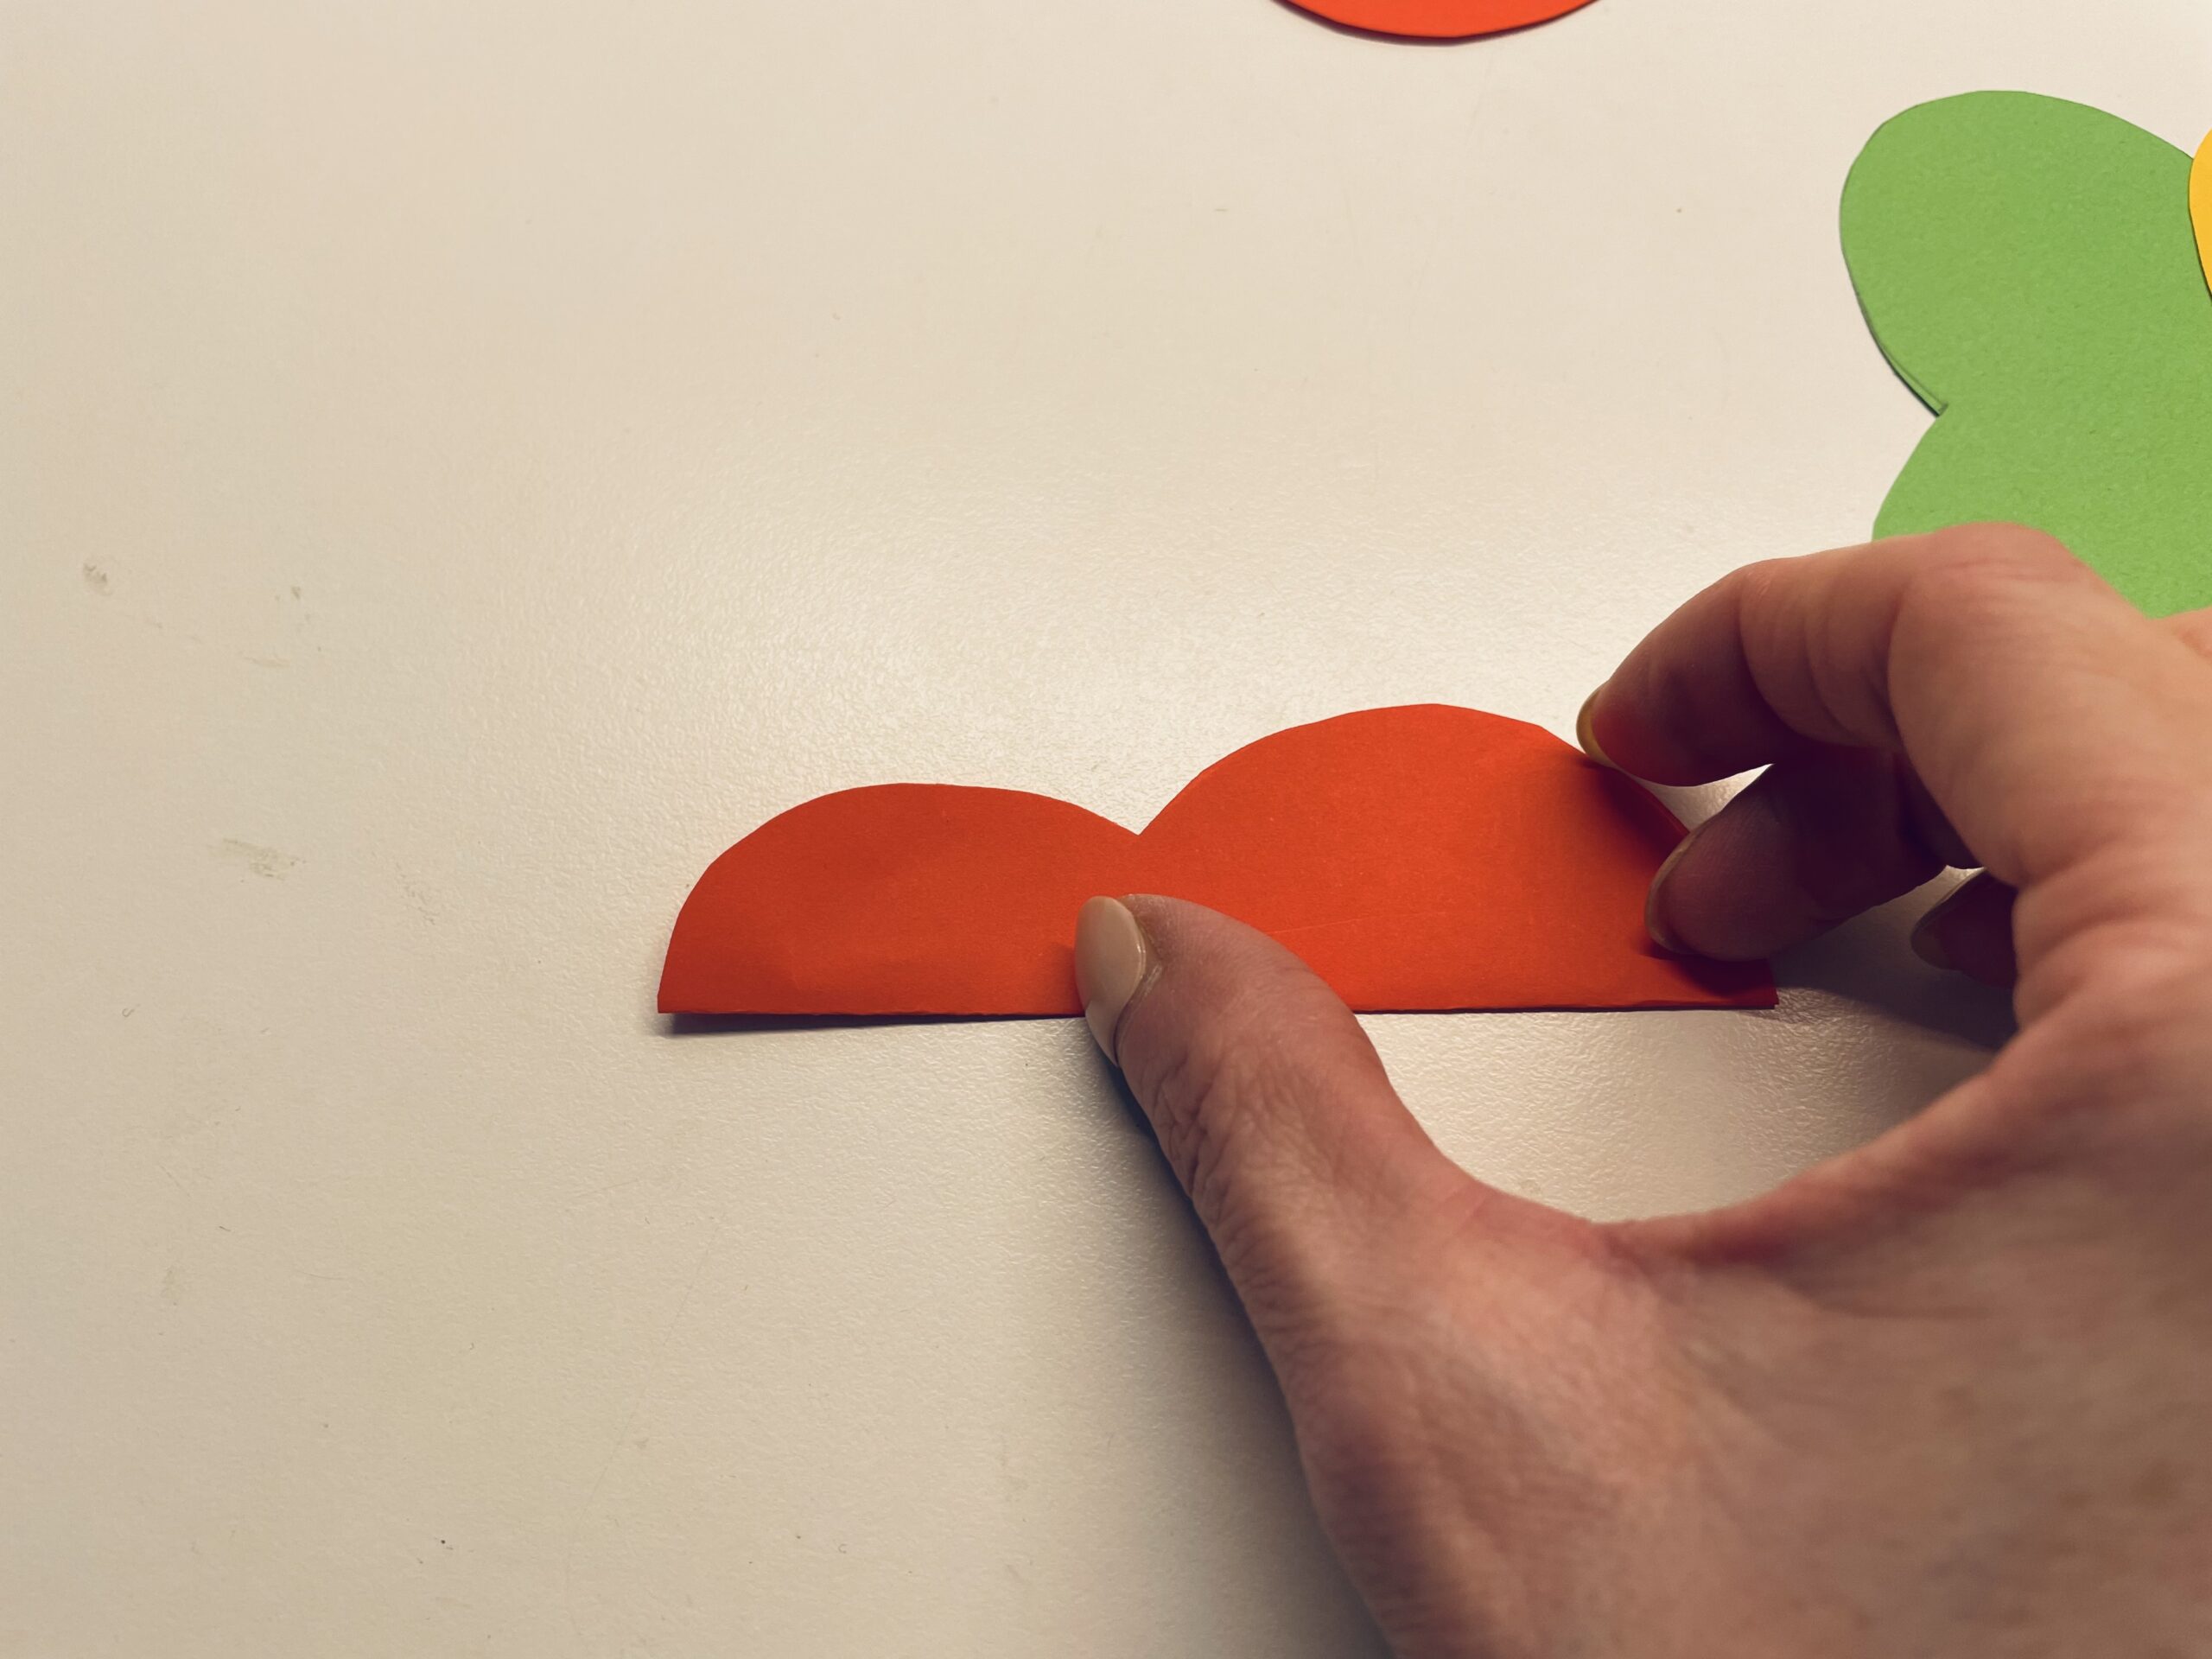
All hare parts without ears, are folded half in length.

Bild zum Schritt 6 für das Bastel- und DIY-Abenteuer für Kinder: 'Alle Hasenteile ohne Ohren, werden der Länge nach zur Hälfte...'

7

Strip the fracture well.

Bild zum Schritt 7 für das Bastel- und DIY-Abenteuer für Kinder: 'Streift den Bruch gut aus.'

8

This is how the folded parts look now.

Bild zum Schritt 8 für das Bastel- und DIY-Abenteuer für Kinder: 'So sehen die gefalteten Teile nun aus.'

9

4 folded hares are now put together.

Bild zum Schritt 9 für das Bastel- und DIY-Abenteuer für Kinder: '4 gefaltete Hasen werden nun ineinander gesteckt.'

10

Arranges the colors for front and back the same.

Bild zum Schritt 10 für das Bastel- und DIY-Abenteuer für Kinder: 'Ordnet die Farben für Vorder- und Rückseite gleich.'

11

The rabbit with ears (here in blue) is used as the middle part.

Bild zum Schritt 11 für das Bastel- und DIY-Abenteuer für Kinder: 'Der Hase mit Ohren (hier in blau) wird als Mittelteil...'

12

First place 4 interlocked hare parts directly on the rabbits with ears. You can press the parts flat again.

Bild zum Schritt 12 für das Bastel- und DIY-Abenteuer für Kinder: 'Legt zuerst 4 ineinander gesteckte Hasenteile direkt auf den Hasen...'

13

The second pack of four with rabbits is turned around once completely, so that the (here) orange side shows down.

Bild zum Schritt 13 für das Bastel- und DIY-Abenteuer für Kinder: 'Der zweiten Viererpack mit Hasen wird einmal komplett umgedreht, so...'

14

Then you place the (blue) hare with the already laid parts completely on it. Align the whole pack with the hare parts neatly that all parts lie exactly on top of each other.
(The blue hare is completely centered)

Bild zum Schritt 14 für das Bastel- und DIY-Abenteuer für Kinder: 'Anschließend legt ihr den (blauen) Hasen mit den bereits aufgelegten...'

15

Now cut off a wool thread about 20cm long.

Bild zum Schritt 15 für das Bastel- und DIY-Abenteuer für Kinder: 'Jetzt schneidet ihr einen ca. 20cm langen Wollfaden ab.'

16

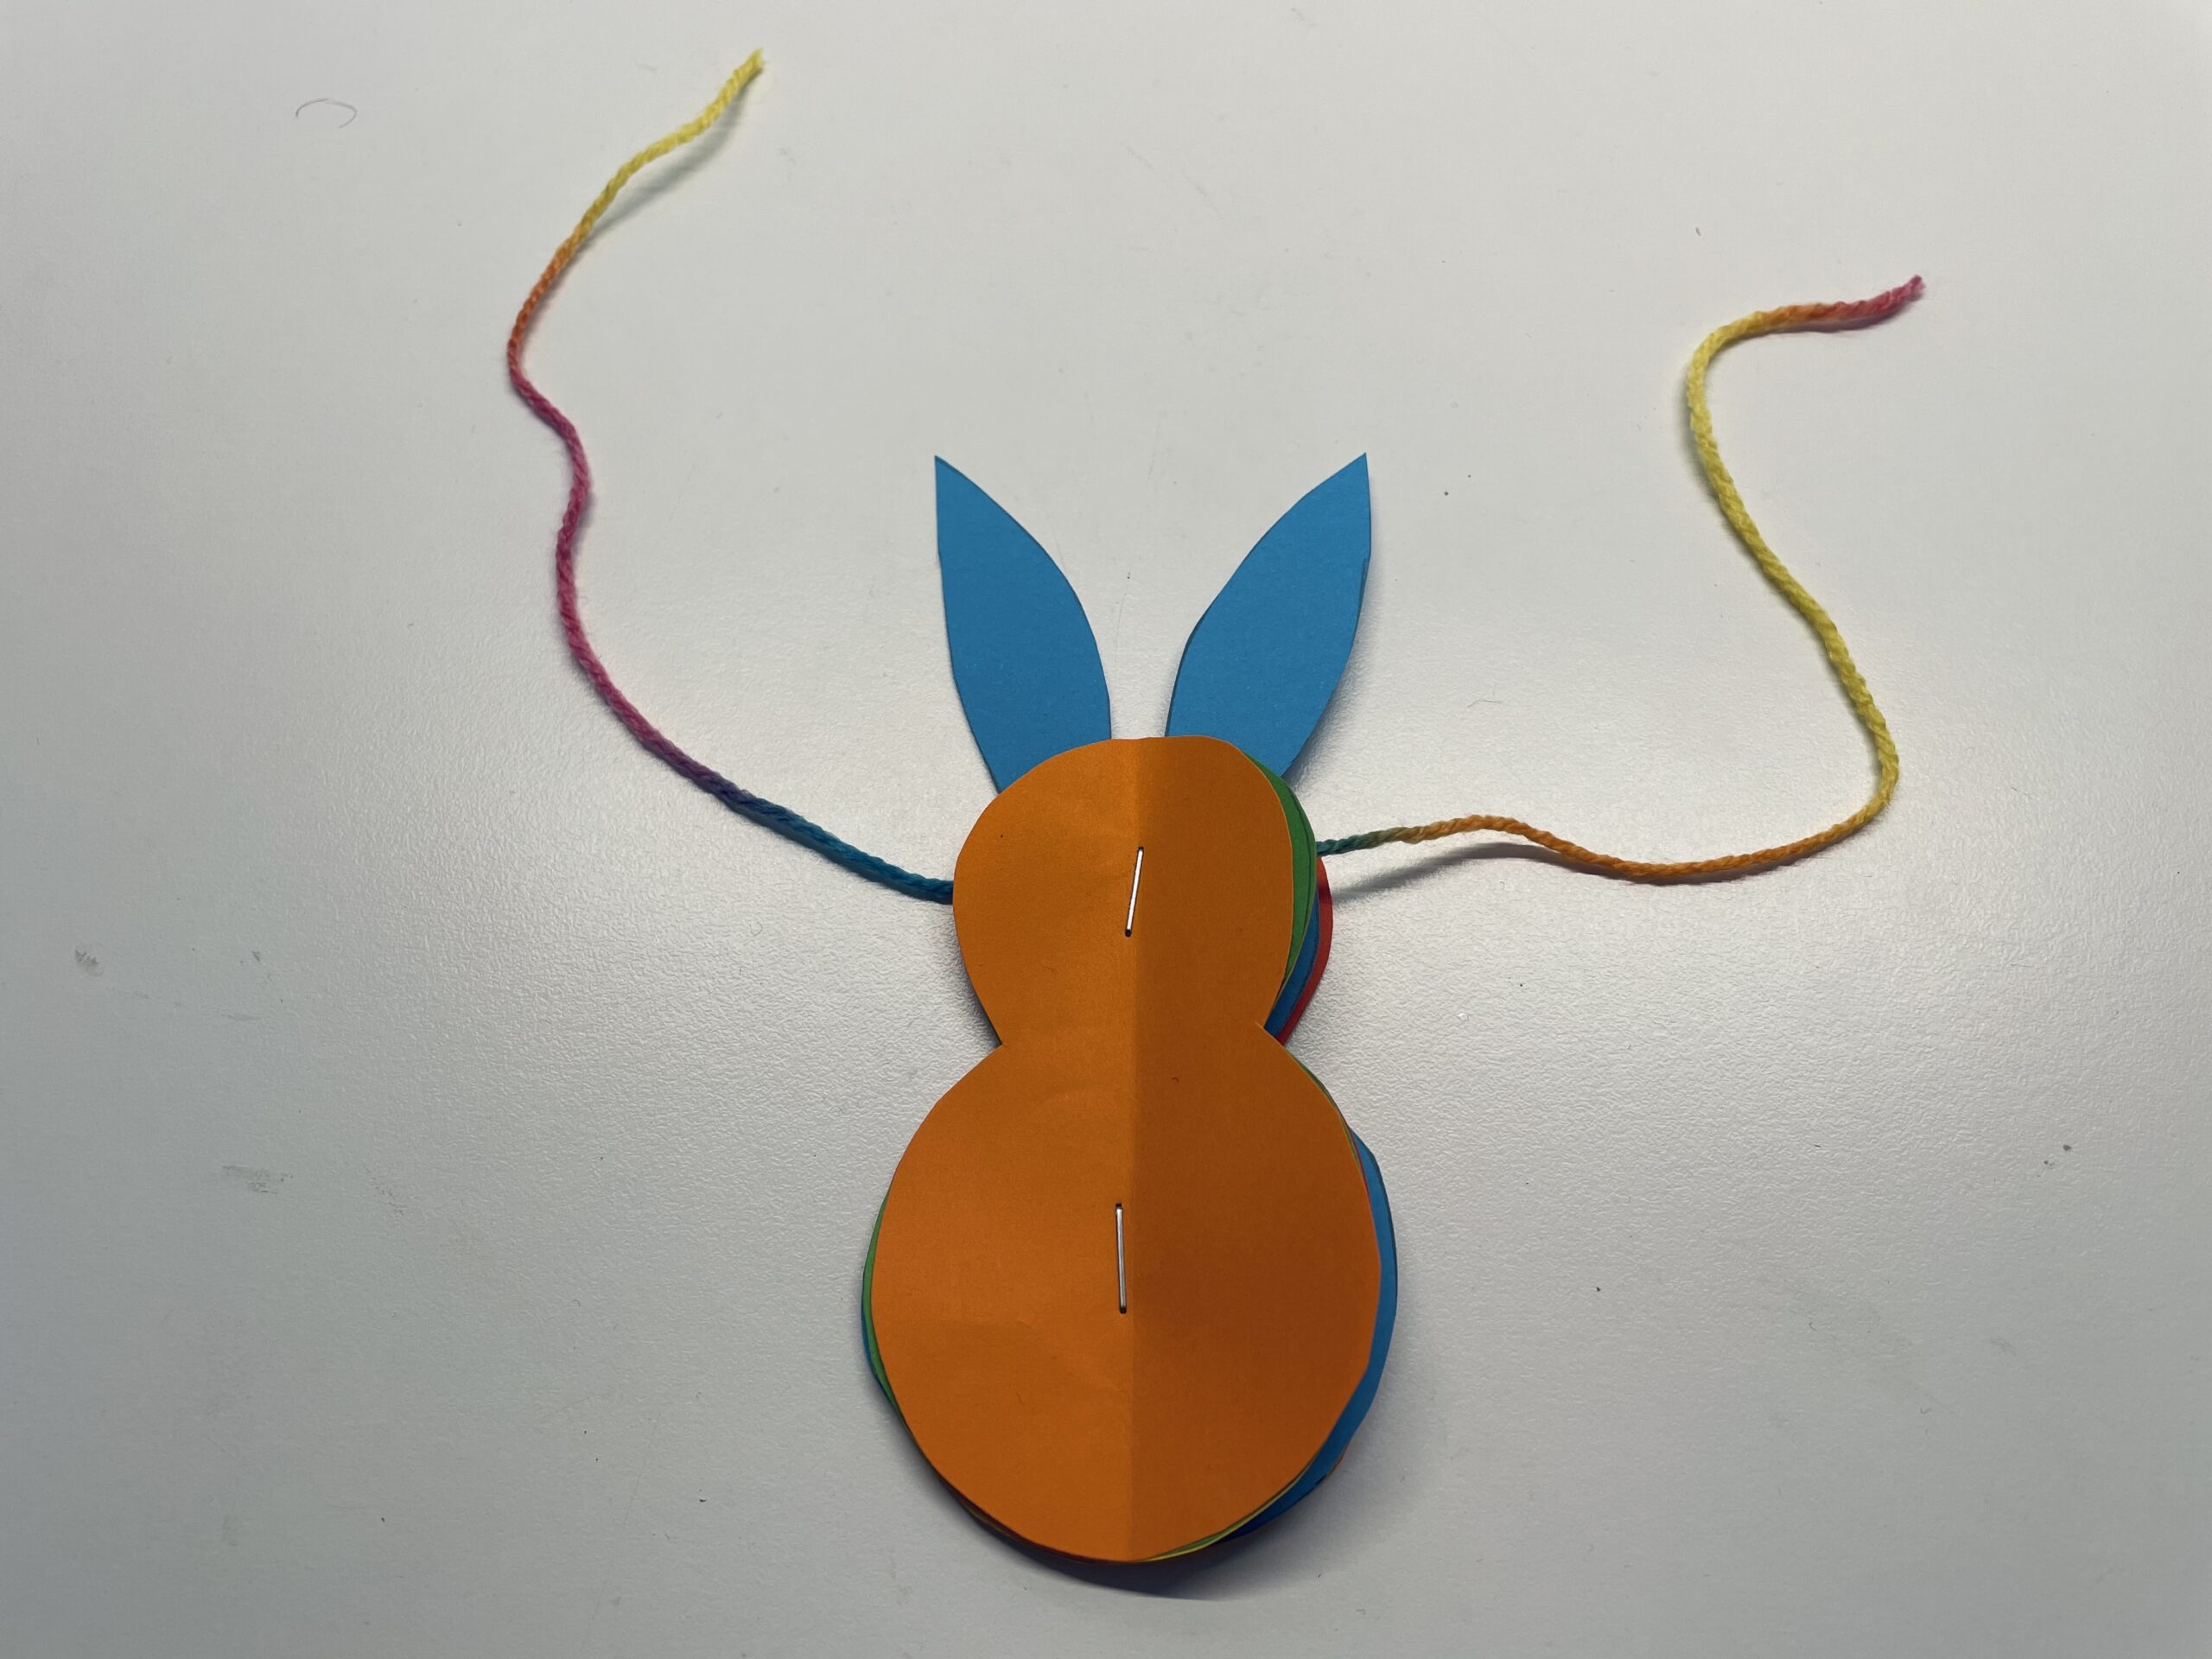
First place the wool thread across the ears and then push it down between the hare parts to the hare head center. At this point the thread is fixed with the staple.

Bild zum Schritt 16 für das Bastel- und DIY-Abenteuer für Kinder: 'Legt den Wollfaden zuerst quer über die Ohren und schiebt...'

17

Place the complete hare (-stack) under the tacker. The tacker clip must sit on the folding line in the middle of the hare head. The wool thread lies exactly in between. (See picture)
Maybe you need the help of an adult.

Bild zum Schritt 17 für das Bastel- und DIY-Abenteuer für Kinder: 'Legt den kompletten Hasen(-Stapel) unter den Tacker. Die Tackerklammer muss...'

18

The first bracket already holds the hare (-stack) together

Bild zum Schritt 18 für das Bastel- und DIY-Abenteuer für Kinder: 'Die erste Klammer hält bereits den Hasen (-Stapel) zusammen'

19

The second staple is placed in the middle of the bunny belly on the folding line.

Bild zum Schritt 19 für das Bastel- und DIY-Abenteuer für Kinder: 'Die zweite Tackerklammer wird mittig vom Hasenbauch auf der Faltlinie...'

20

Now the rabbit is almost done.

Bild zum Schritt 20 für das Bastel- und DIY-Abenteuer für Kinder: 'Nun ist der Hase fast fertig.'

21

Both wool threads are tied together at the top. This is the suspension for the rabbit.

Bild zum Schritt 21 für das Bastel- und DIY-Abenteuer für Kinder: 'Beide Wollfäden werden oben  zusammengebunden. Das ist die Aufhängung...'

22

All individual pieces of paper are folded again. So that they also remain fan-shaped and the body of the rabbit becomes plastic.

Bild zum Schritt 22 für das Bastel- und DIY-Abenteuer für Kinder: 'Alle einzelnen Papierteile werden nochmals nachgefaltet. So dass auch sie...'

23

Completely folded, the flat rabbit has become a roundish-shaped rabbit.

Bild zum Schritt 23 für das Bastel- und DIY-Abenteuer für Kinder: 'Komplett aufgefaltet ist aus dem platten Hasen ein rundlich geformter...'

24

You can also use it without thread as a decoration or sitting in an Easter nest.

Bild zum Schritt 24 für das Bastel- und DIY-Abenteuer für Kinder: 'Ihr könnt ihn auch ohne Faden verwenden als Deko oder...'

25

Or you can hang him on a branch for decoration.

Bild zum Schritt 25 für das Bastel- und DIY-Abenteuer für Kinder: 'Oder ihr hängt ihn an einen Ast zur Deko.'

26

Have fun trying out.

Materials

 Colourful paper Clay paper or colorful copying paper
 stencil rabbitself-painting or print template
 1 Pencil
 1 ==References==
 1 Wool thread colorfulApproximately 20cm long
 1 Tacker
All links marked with a shopping cart lead to Amazon - here we have selected products that we would order ourselves and in part also ordered. In a qualified purchase via the advertising link, we as Amazon partner receive a commission, for you there are no costs. You thus support our cost- and advertising banner-free, educational offer.

Directions

1

Spread out your craft material and place your craft materials on the table.
Get colorful paper (e.g. colored copy paper) ready. Here you can use any colors. You can also make the rabbit with monochrome brown or white paper.

Bild zum Schritt 1 für das Bastel- und DIY-Abenteuer für Kinder: 'Breitet eure Bastelunterlage aus und legt eure Bastelmaterialien auf den...'

2

Paint a rabbit stencil with ears, and the same again without ears. (Or use only a rabbit template and then fold your ears down!)

Bild zum Schritt 2 für das Bastel- und DIY-Abenteuer für Kinder: 'Malt euch eine Hasenschablone mit Ohren, und die gleiche noch...'

3

The rabbit with ears is painted once on colored paper.

Bild zum Schritt 3 für das Bastel- und DIY-Abenteuer für Kinder: 'Der Hase mit Ohren wird einmal auf farbigem Papier aufgemalt.'

4

All other papers are made with the template without ears!
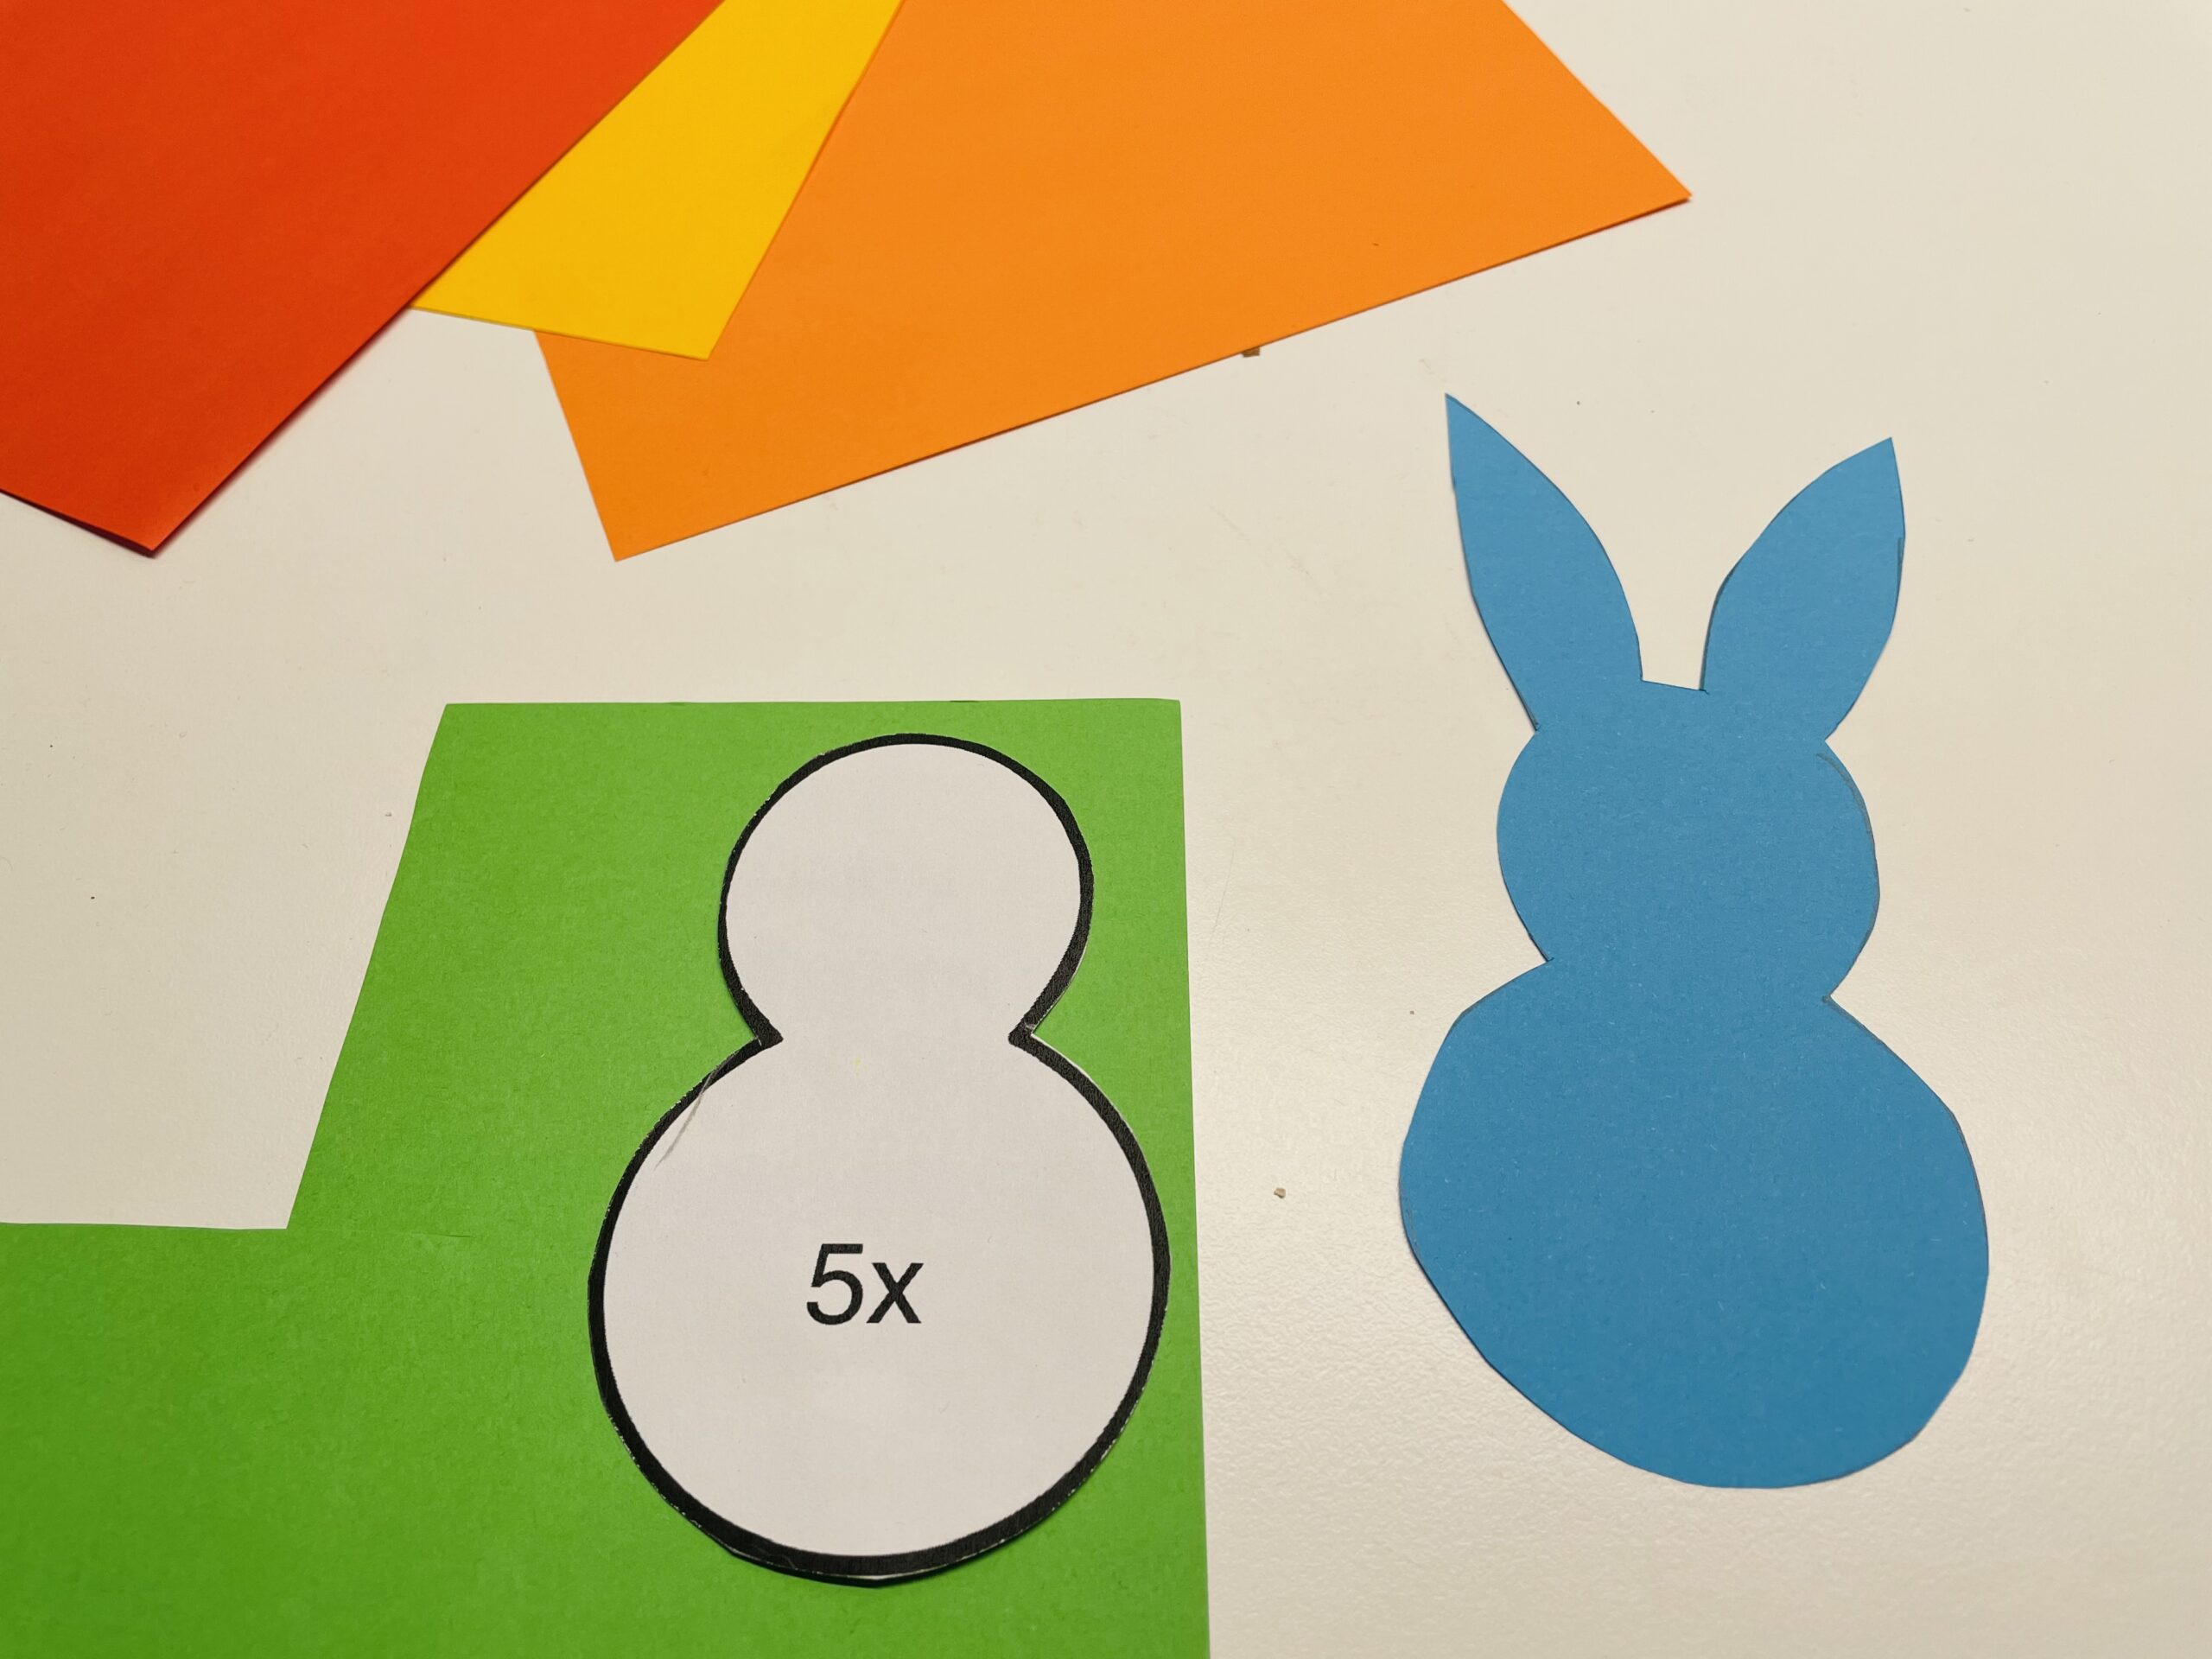
Bild zum Schritt 4 für das Bastel- und DIY-Abenteuer für Kinder: 'Alle weiteren Papiere werden mit der Vorlage ohne Ohren angefertigt!'

5

You need 8 rabbits without ears. Four for the front and four for the back.
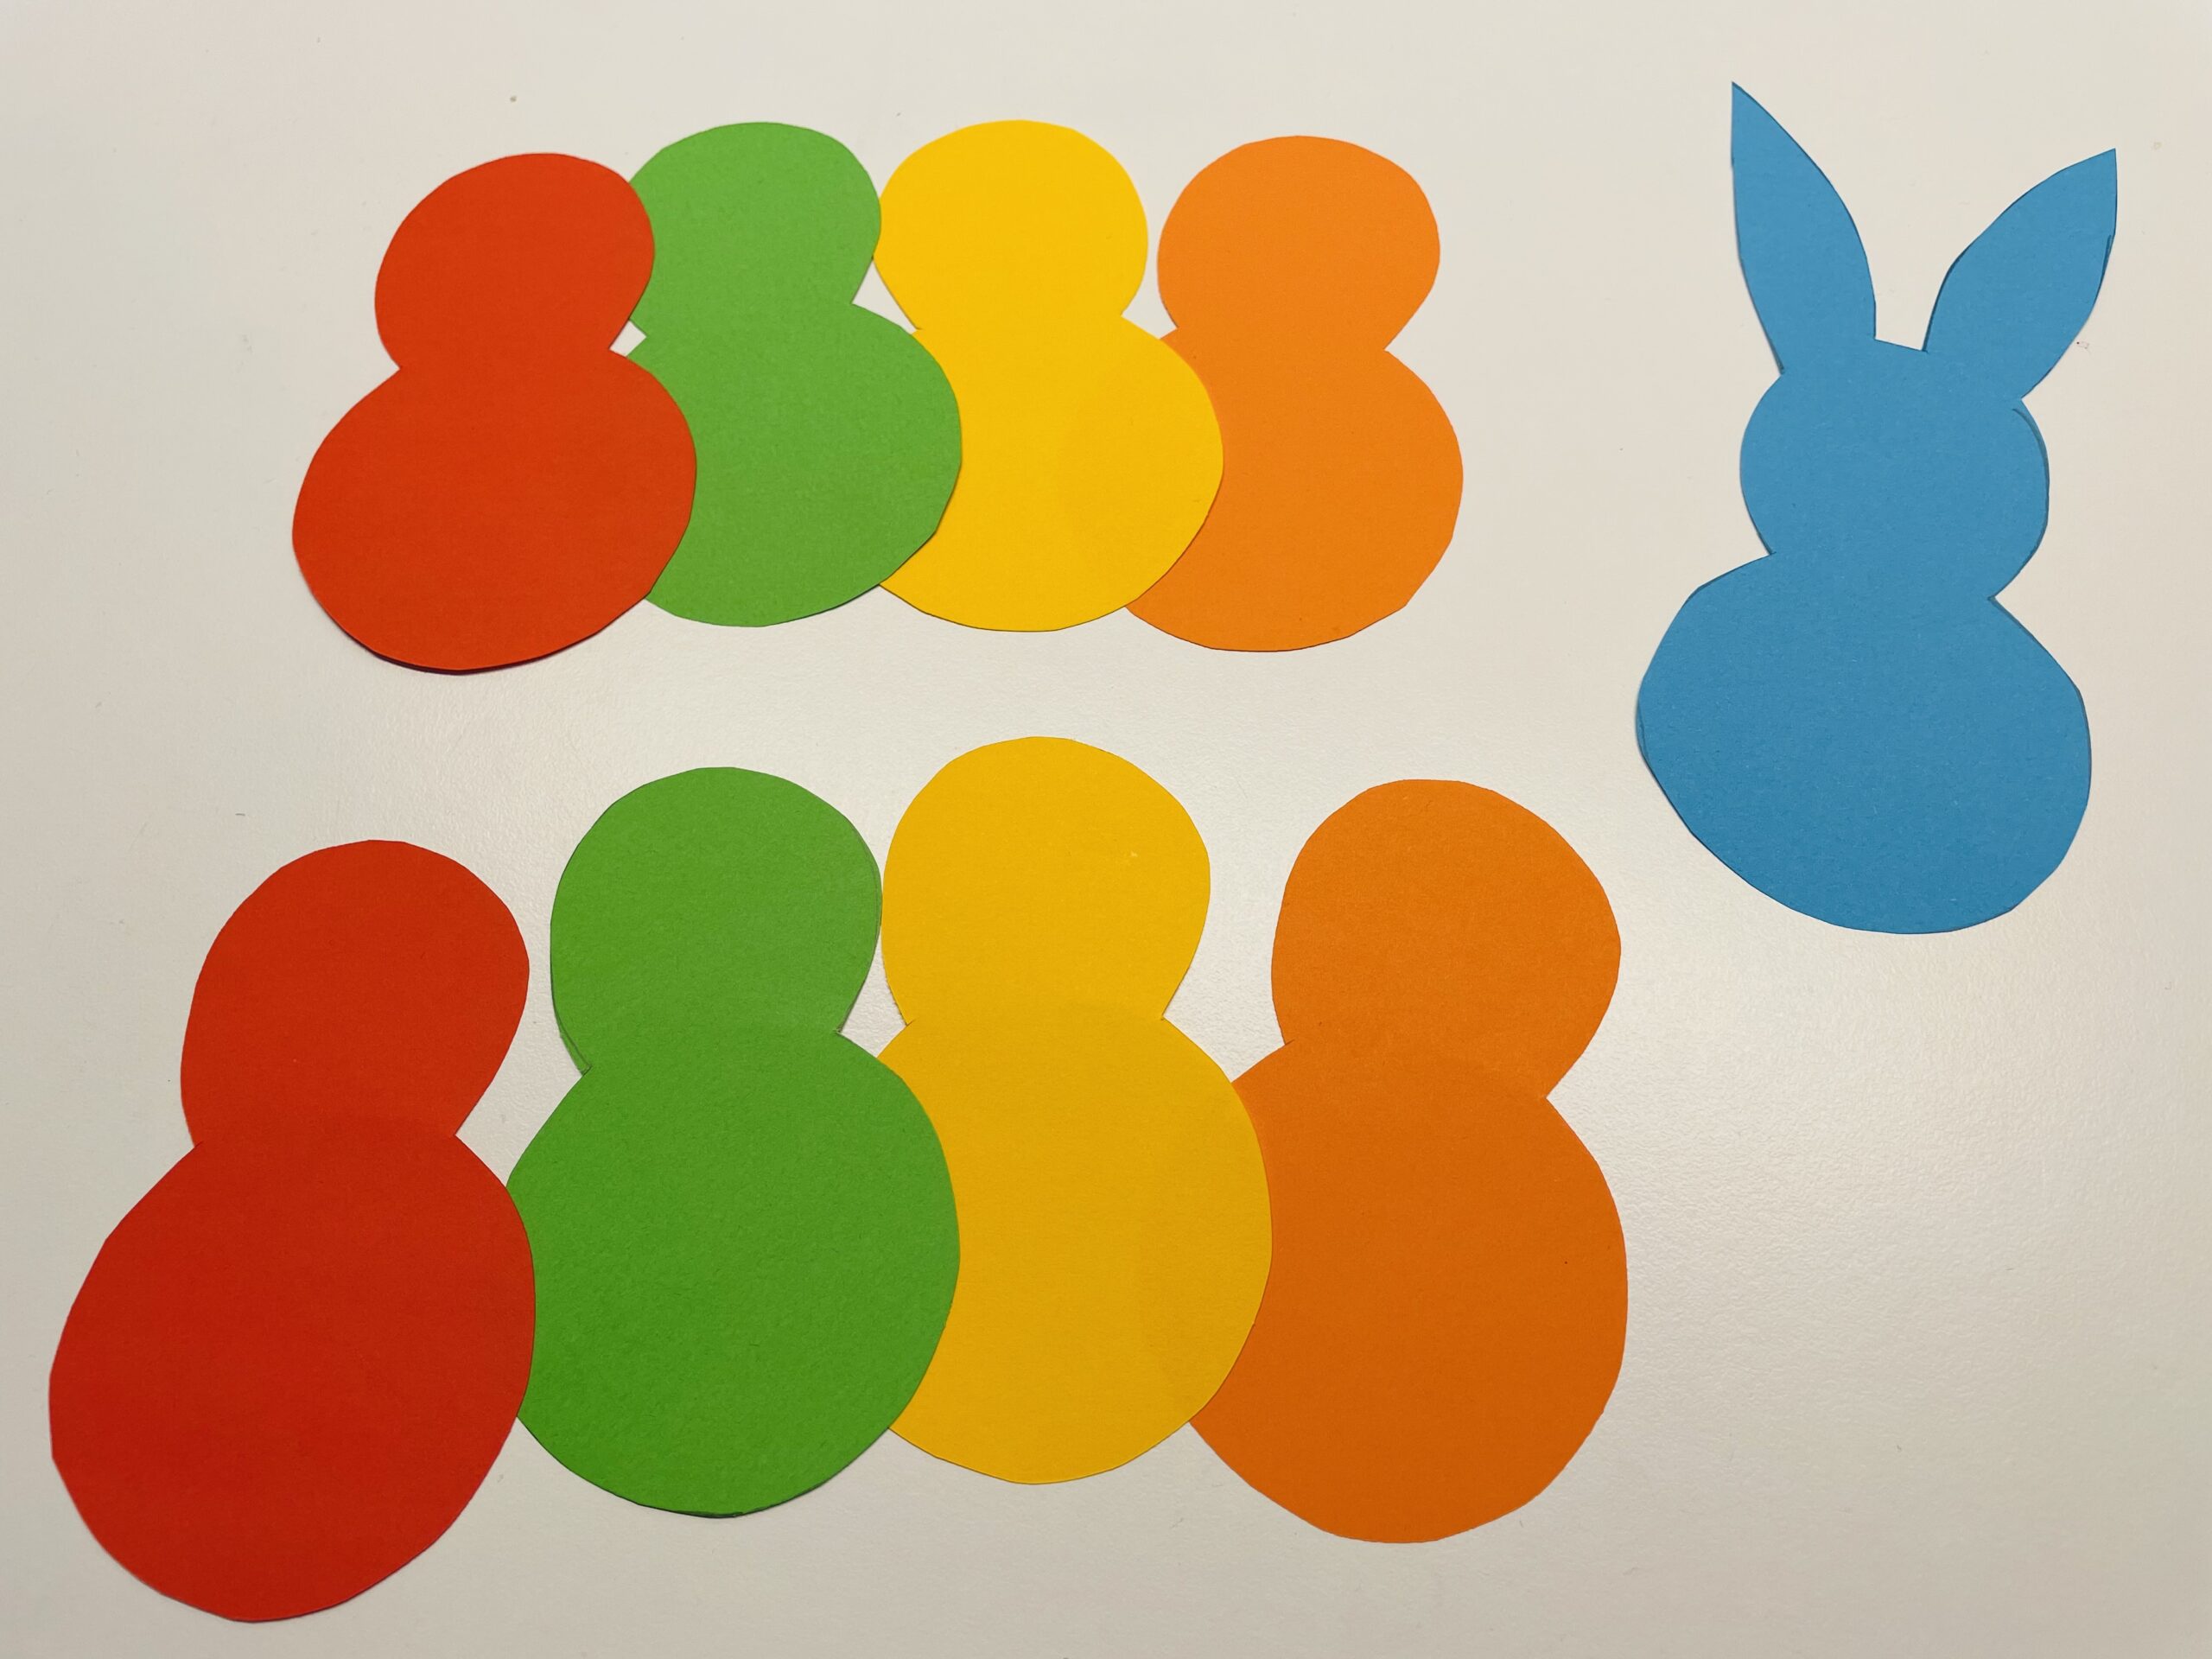
Bild zum Schritt 5 für das Bastel- und DIY-Abenteuer für Kinder: 'Ihr braucht 8 Hasen ohne Ohren. Vier für die Vorderseite...'

6

All hare parts without ears, are folded half in length.
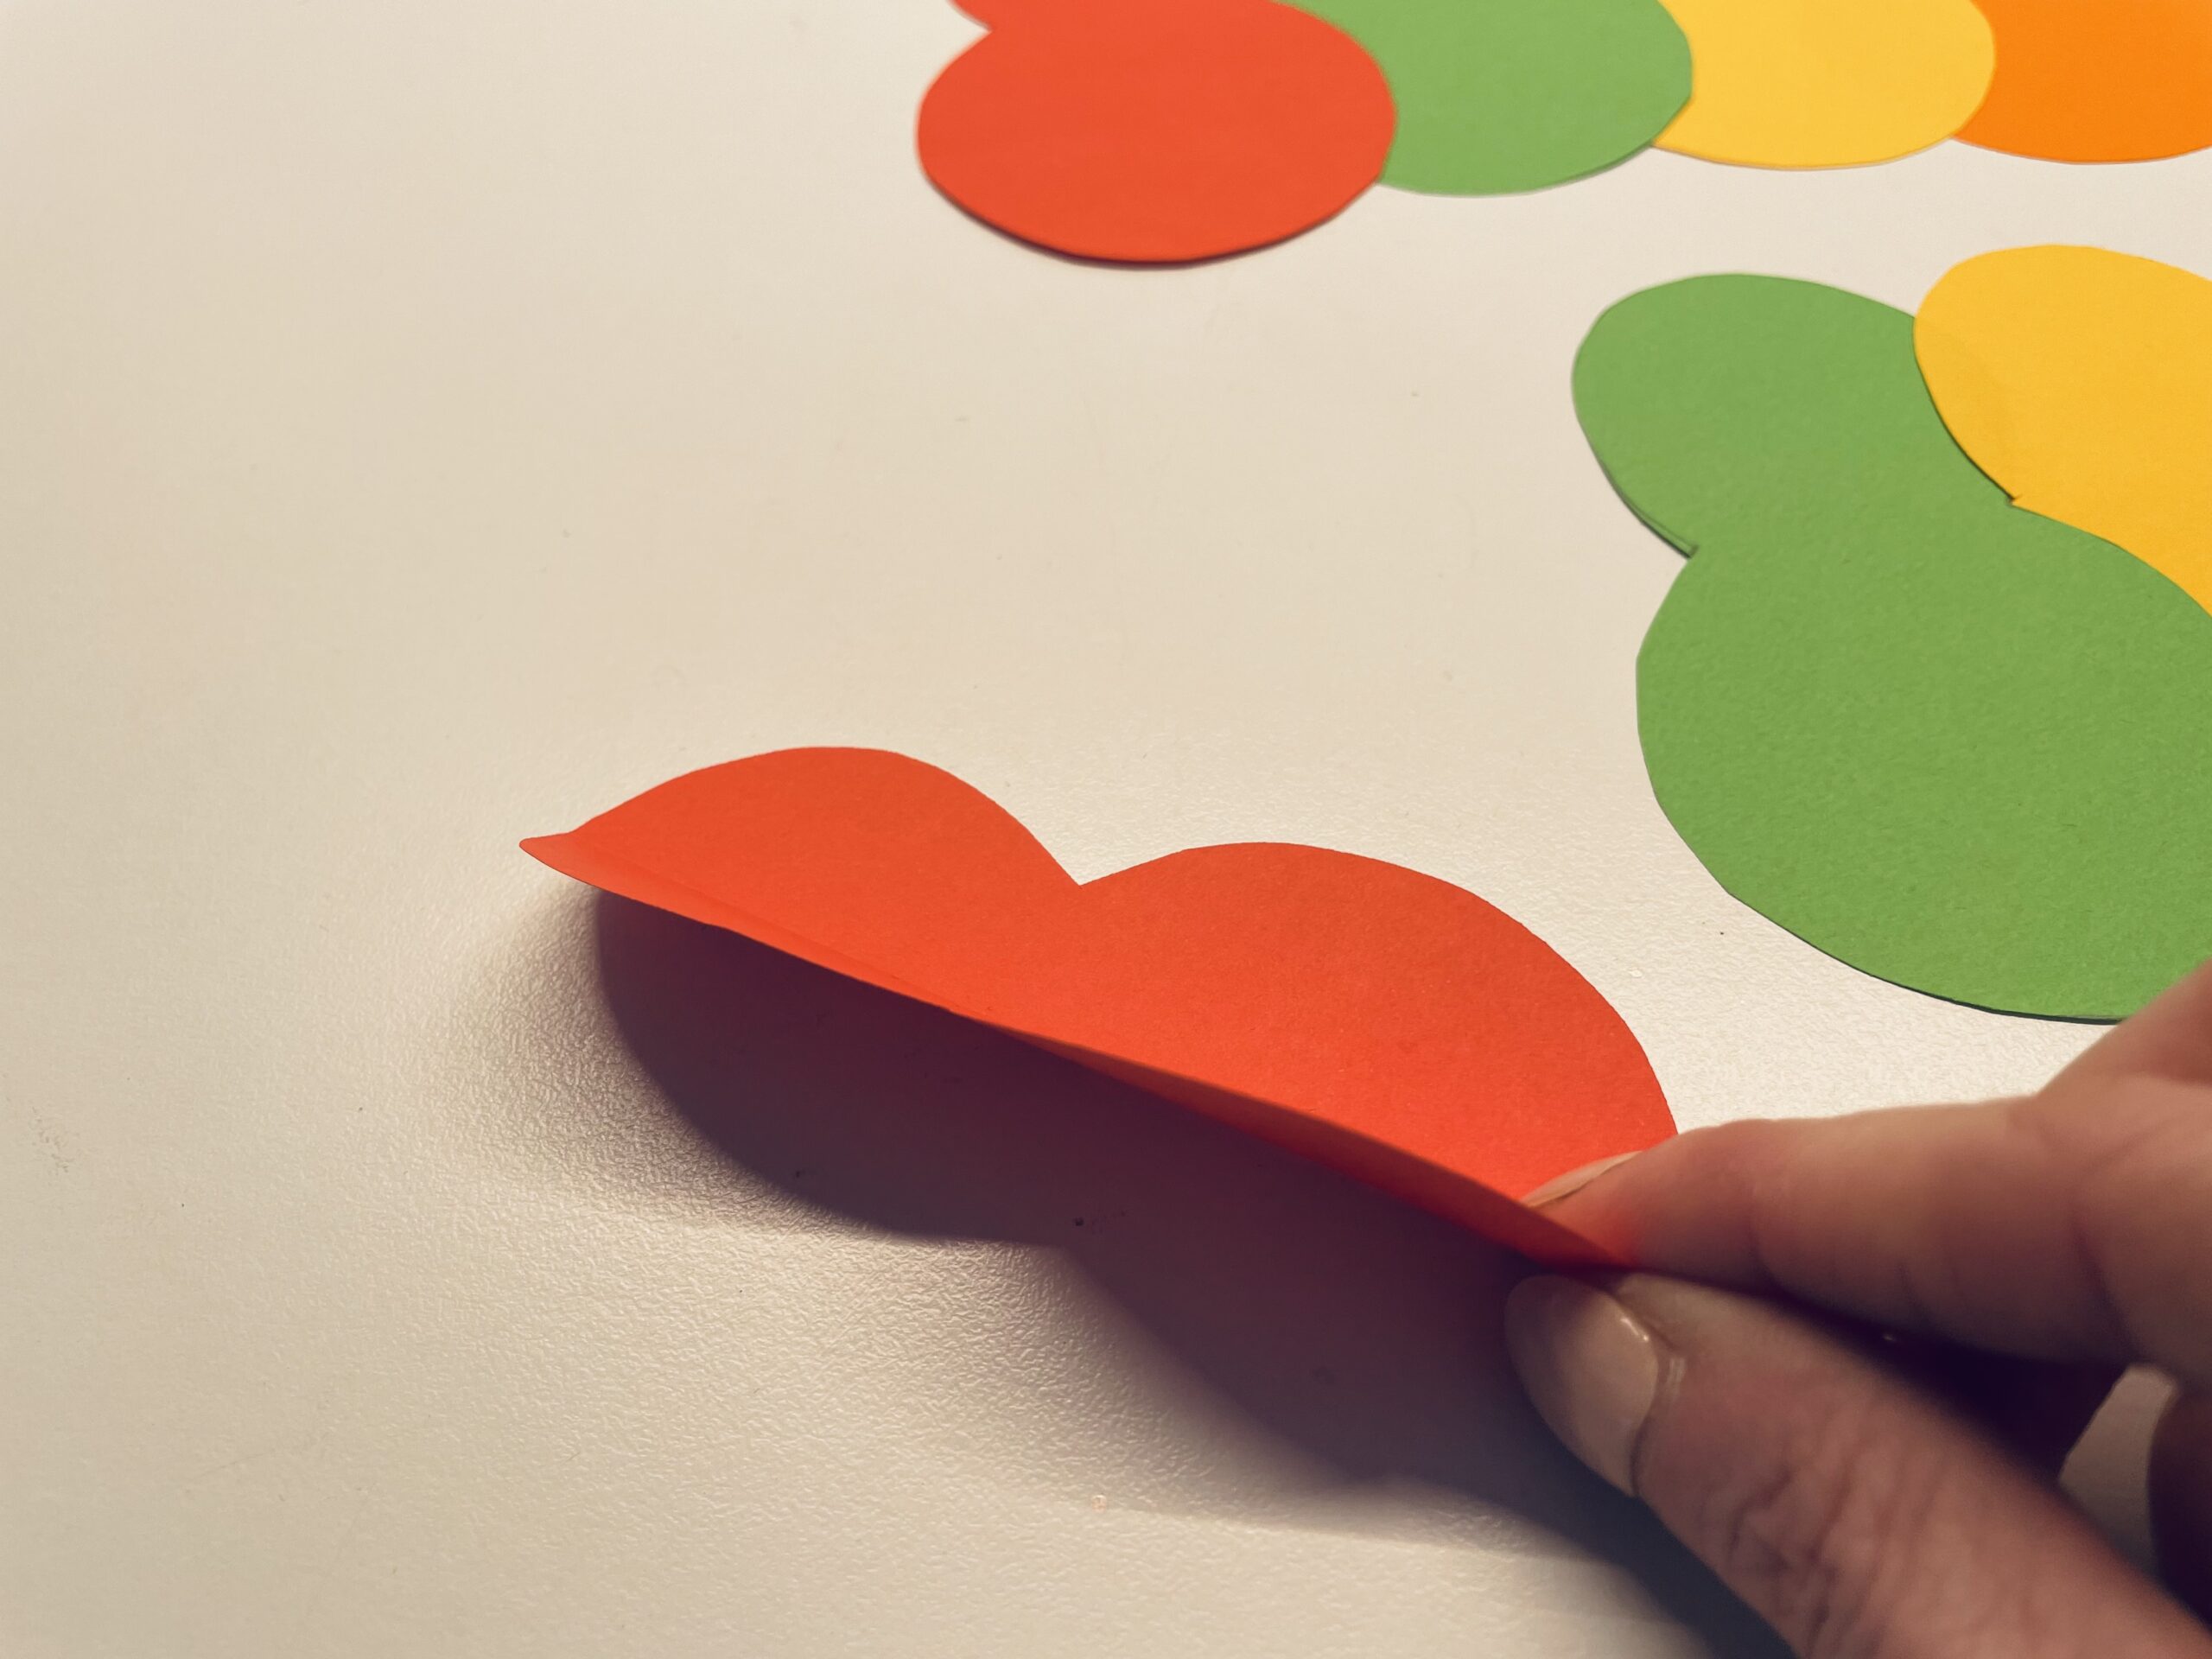
Bild zum Schritt 6 für das Bastel- und DIY-Abenteuer für Kinder: 'Alle Hasenteile ohne Ohren, werden der Länge nach zur Hälfte...'

7

Strip the fracture well.

Bild zum Schritt 7 für das Bastel- und DIY-Abenteuer für Kinder: 'Streift den Bruch gut aus.'

8

This is how the folded parts look now.
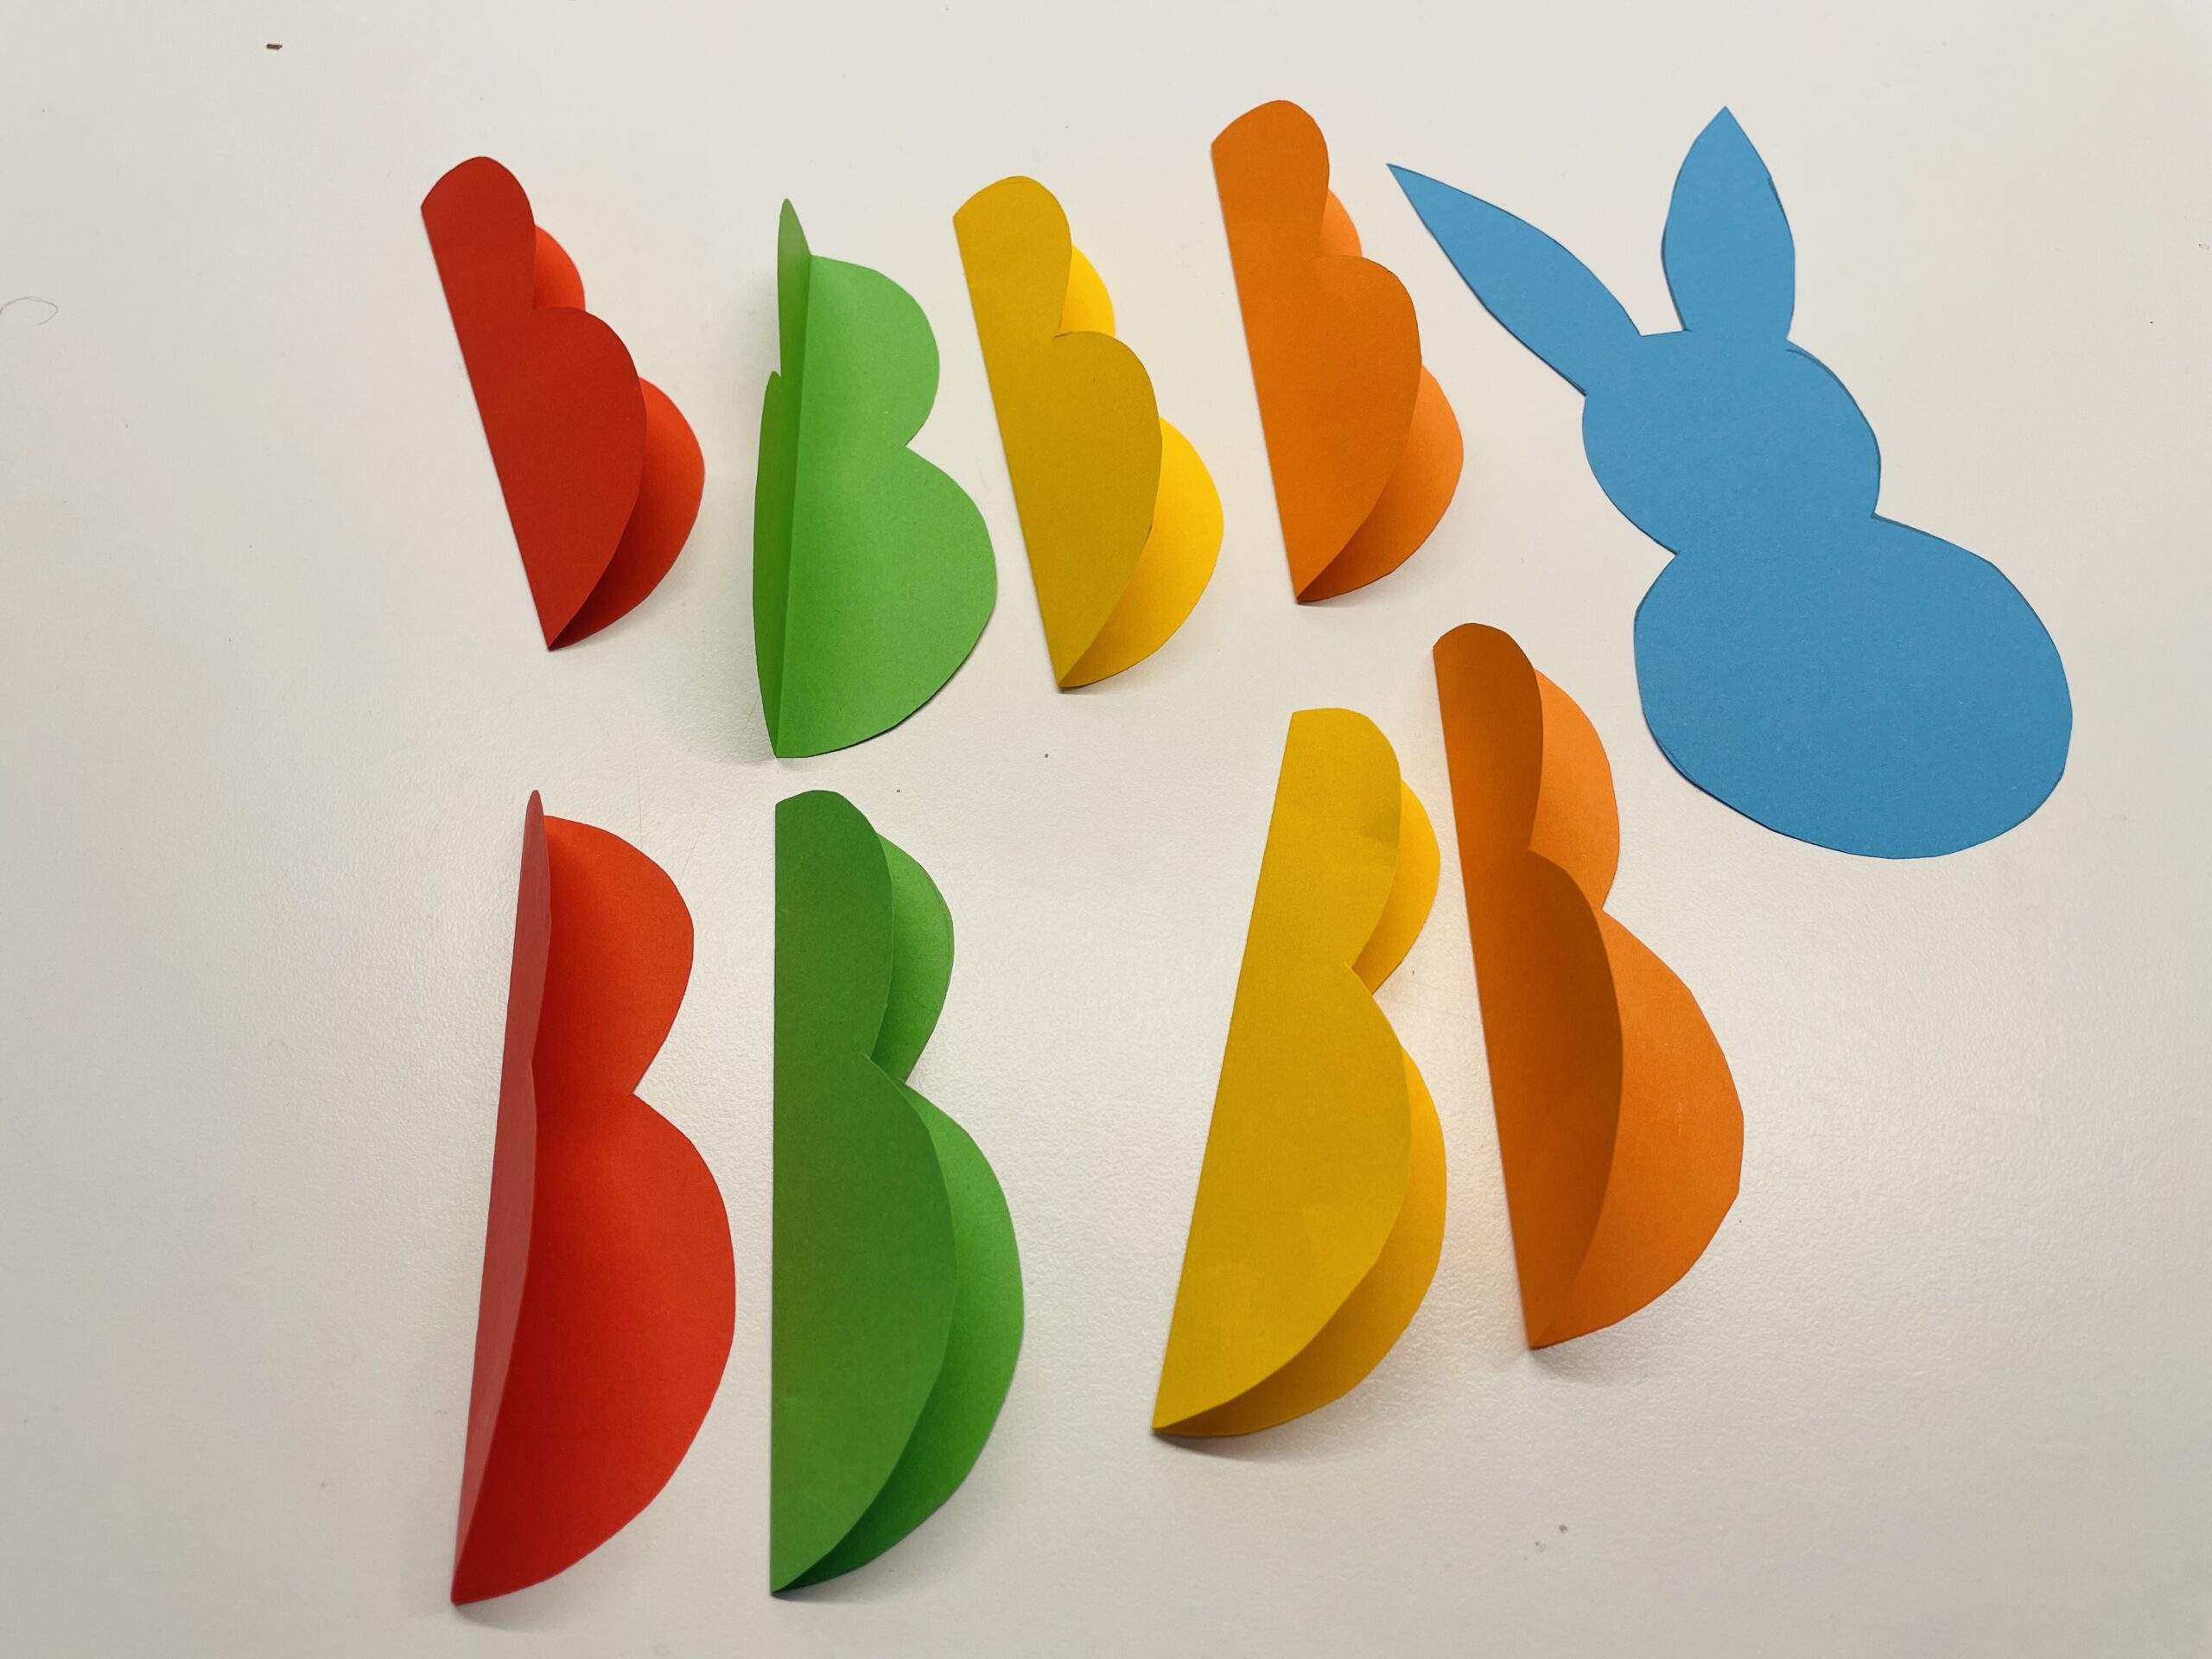
Bild zum Schritt 8 für das Bastel- und DIY-Abenteuer für Kinder: 'So sehen die gefalteten Teile nun aus.'

9

4 folded hares are now put together.
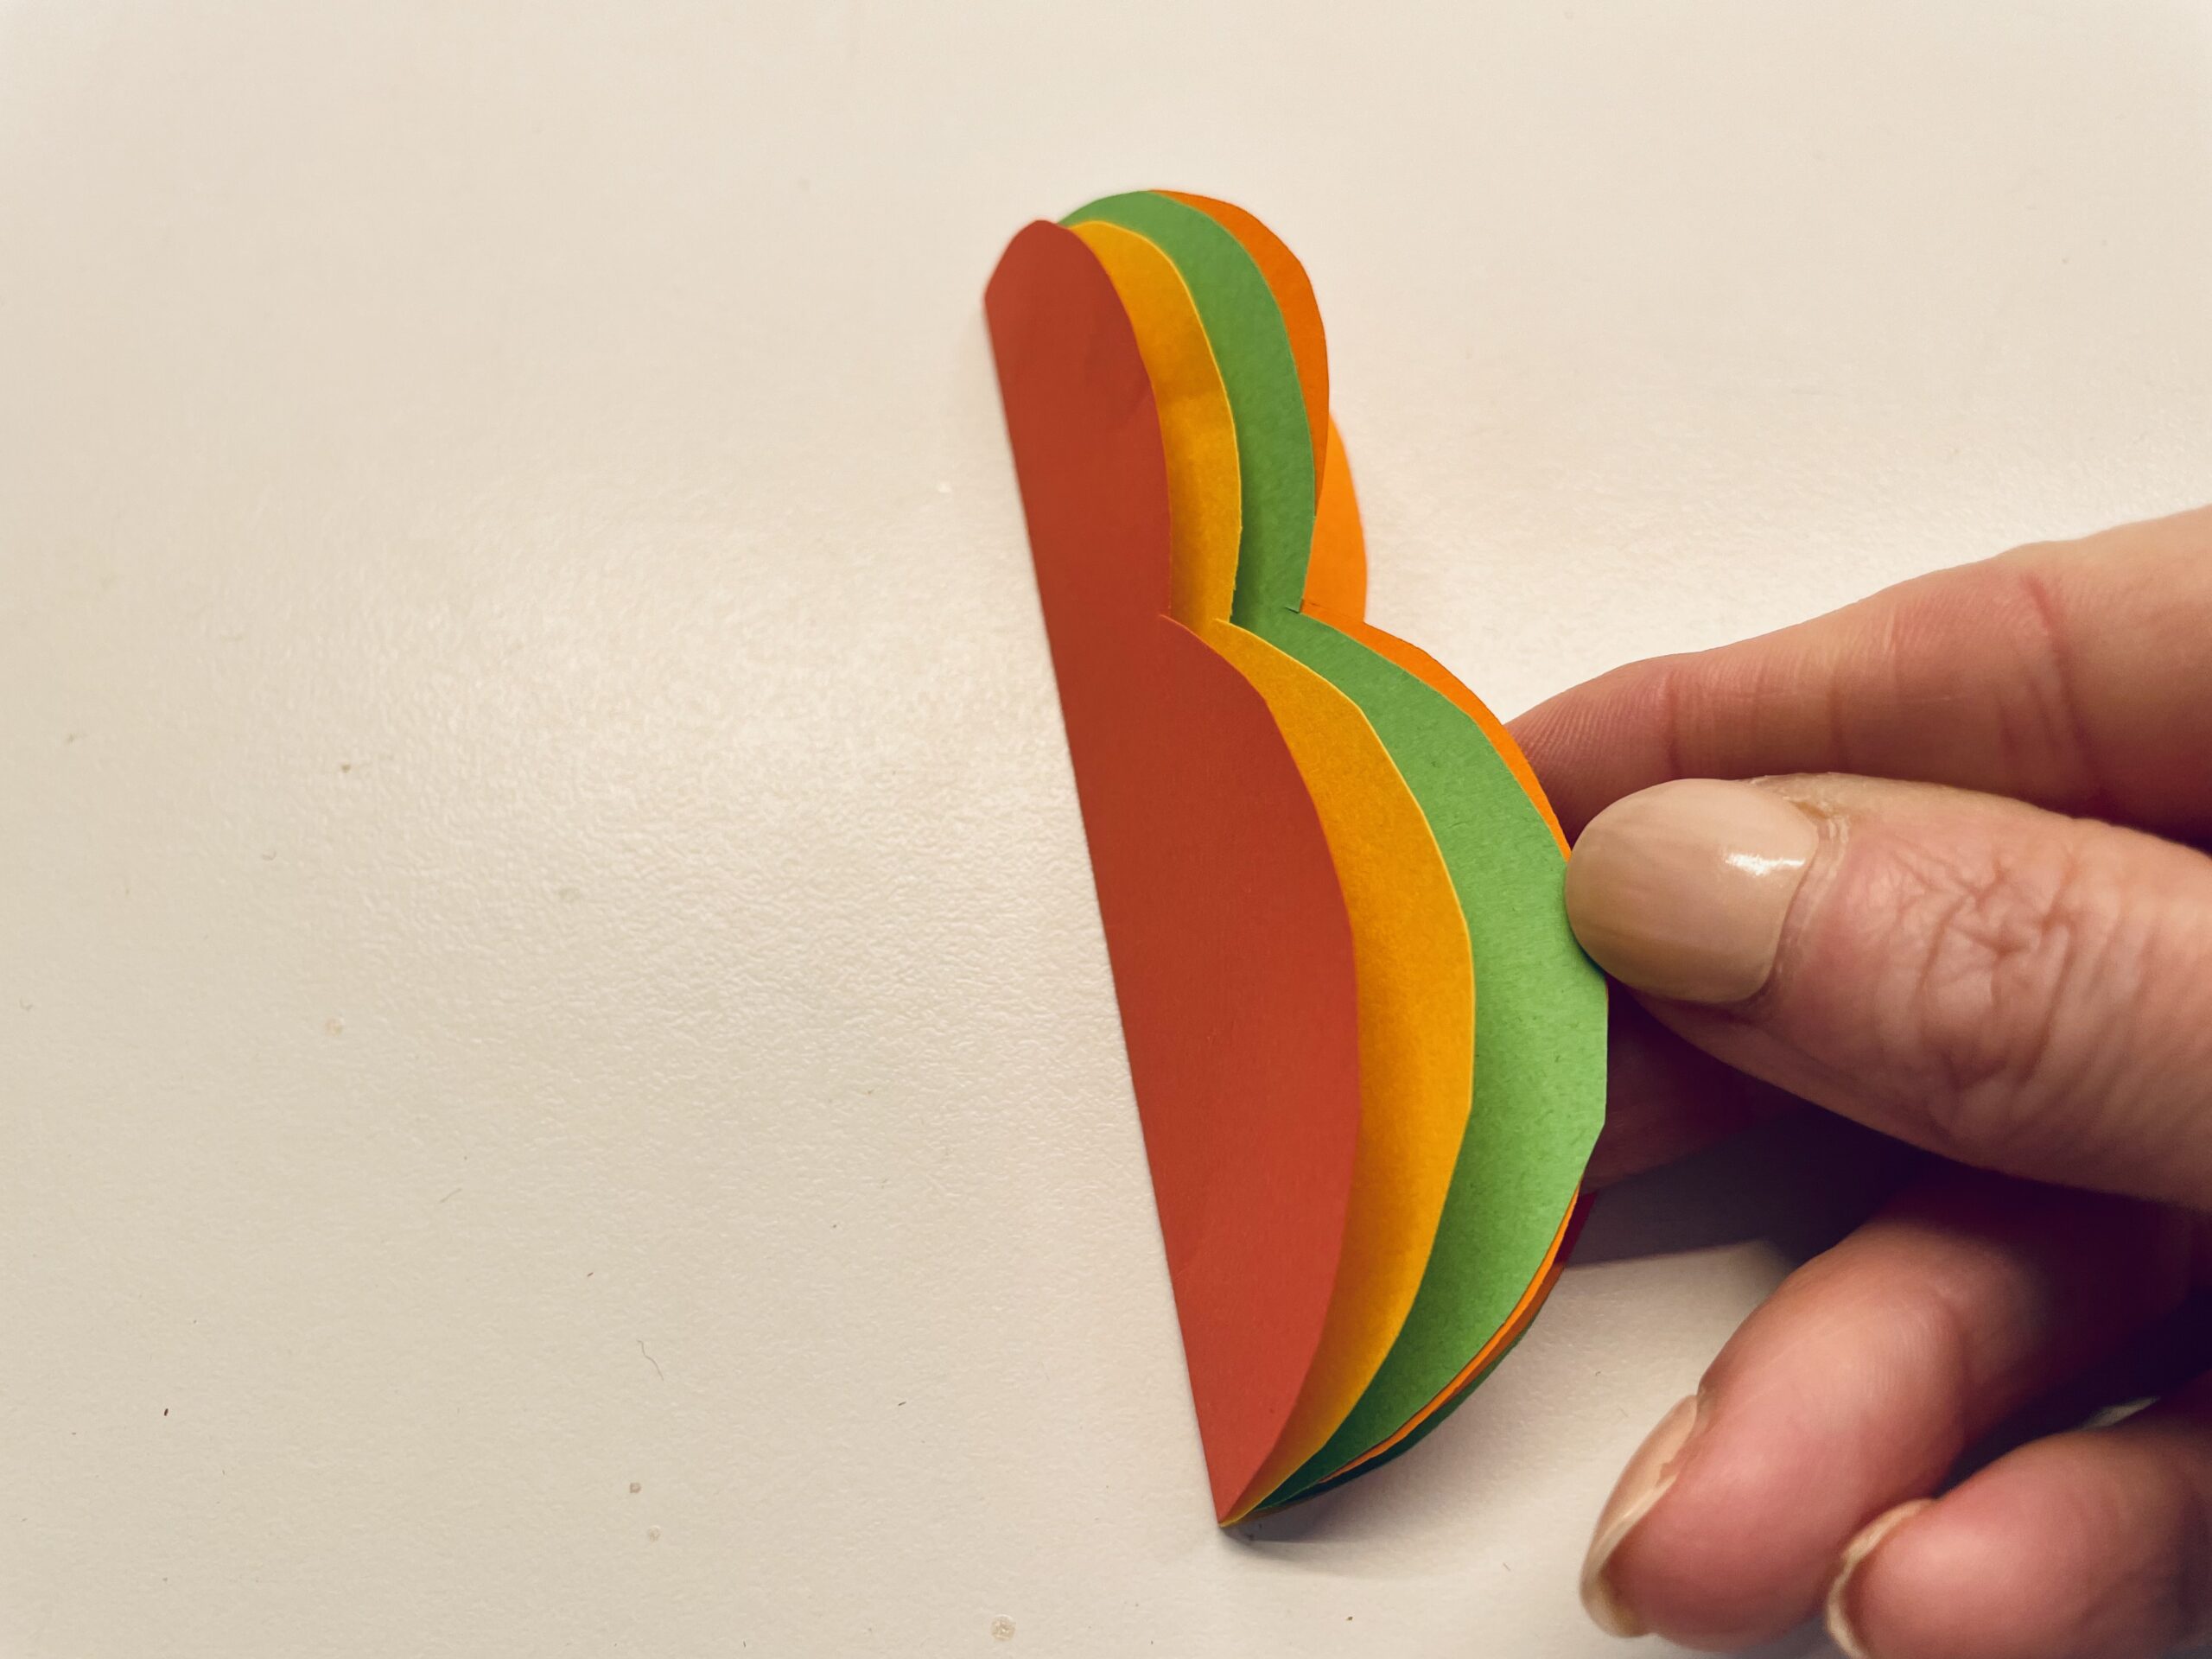
Bild zum Schritt 9 für das Bastel- und DIY-Abenteuer für Kinder: '4 gefaltete Hasen werden nun ineinander gesteckt.'

10

Arranges the colors for front and back the same.
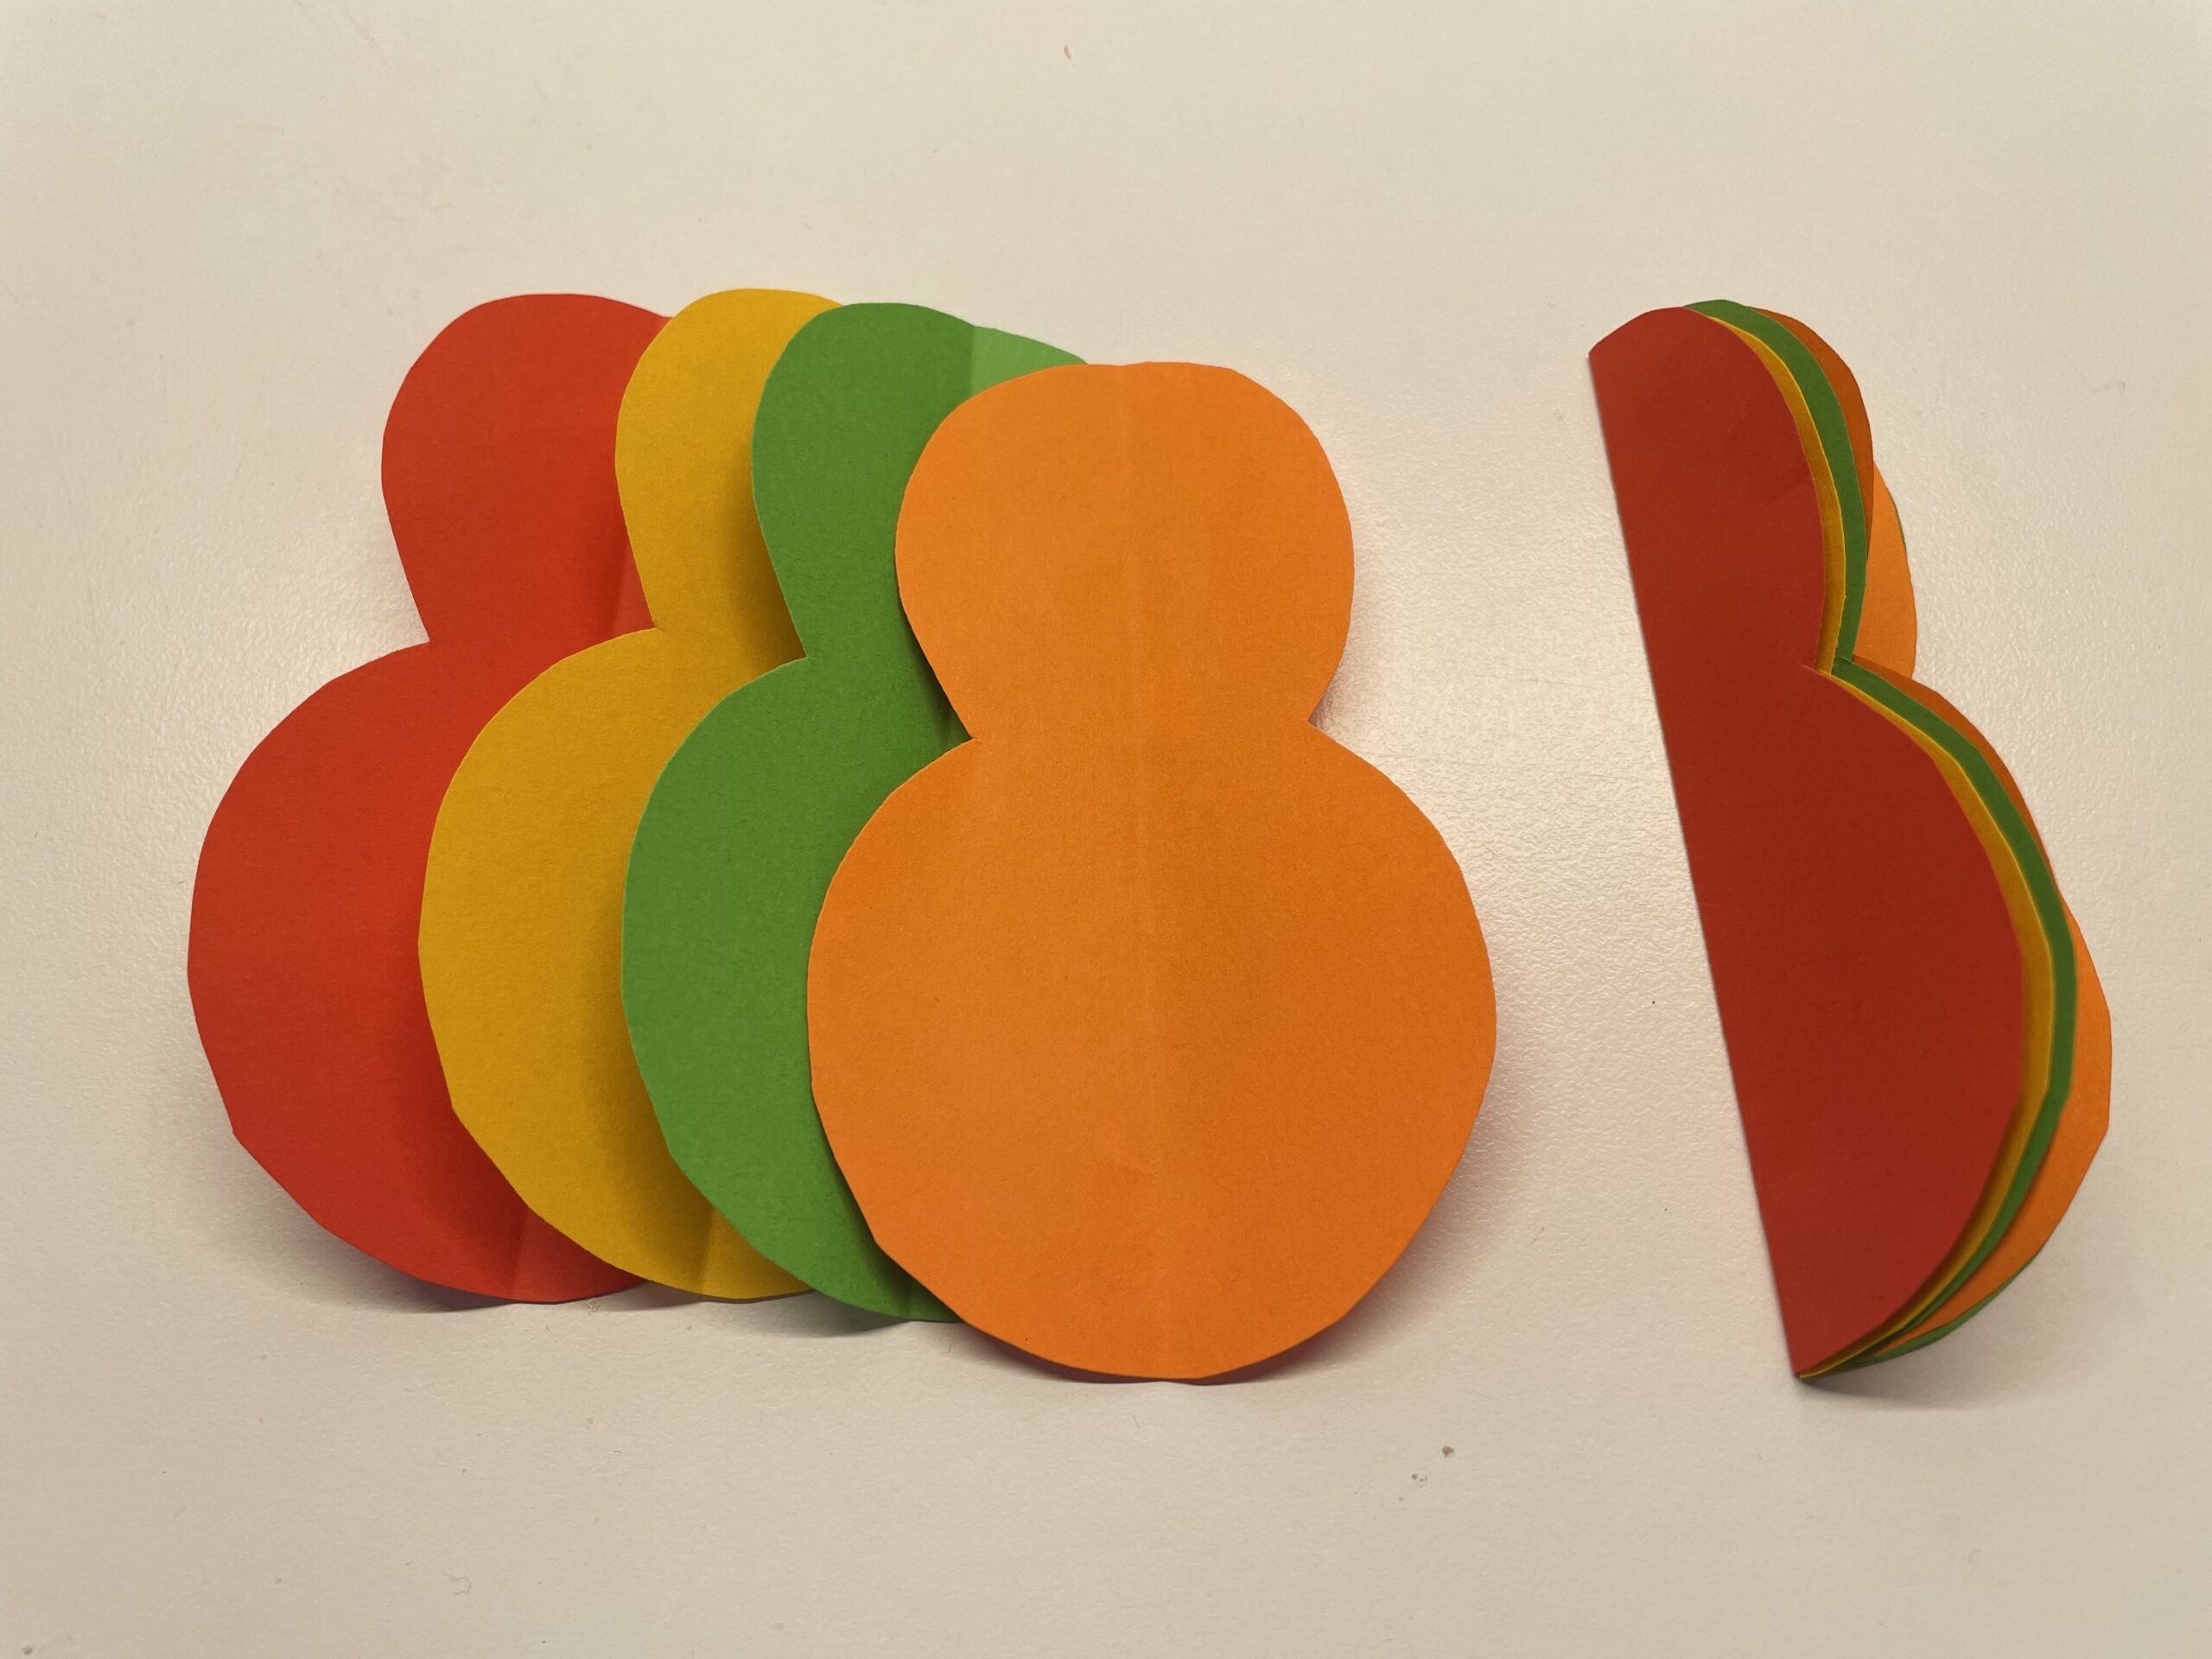
Bild zum Schritt 10 für das Bastel- und DIY-Abenteuer für Kinder: 'Ordnet die Farben für Vorder- und Rückseite gleich.'

11

The rabbit with ears (here in blue) is used as the middle part.
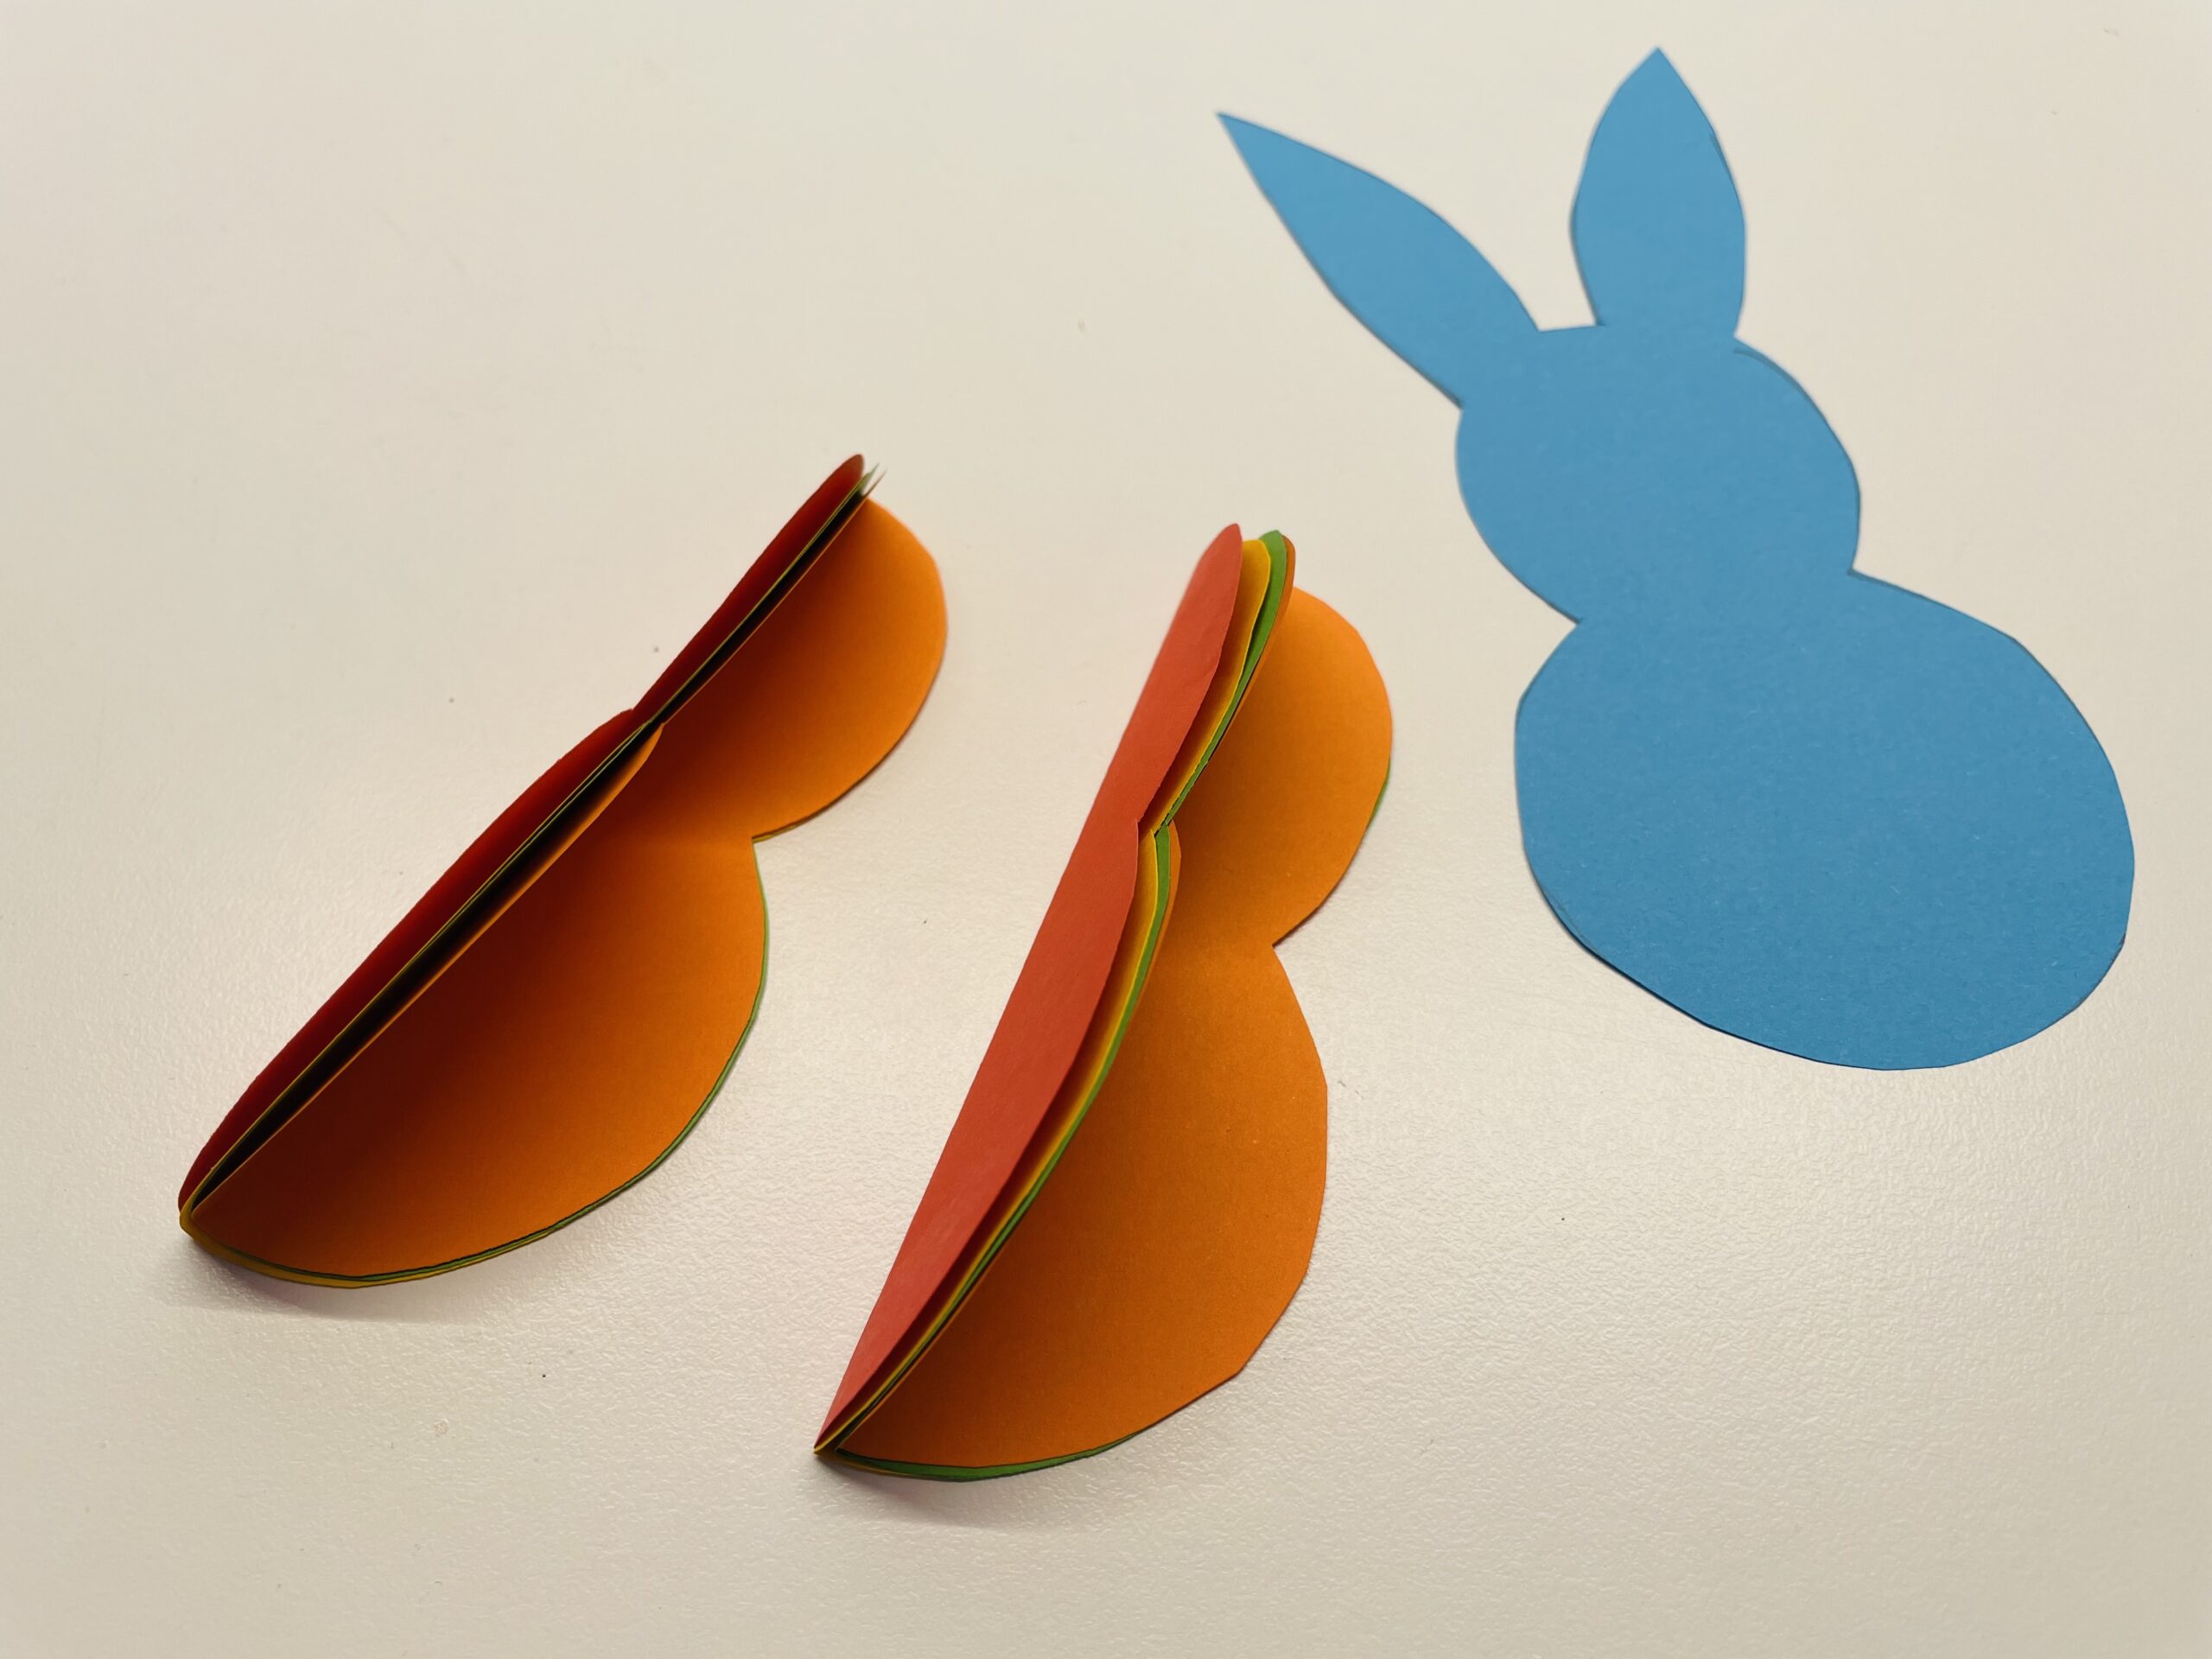
Bild zum Schritt 11 für das Bastel- und DIY-Abenteuer für Kinder: 'Der Hase mit Ohren (hier in blau) wird als Mittelteil...'

12

First place 4 interlocked hare parts directly on the rabbits with ears. You can press the parts flat again.
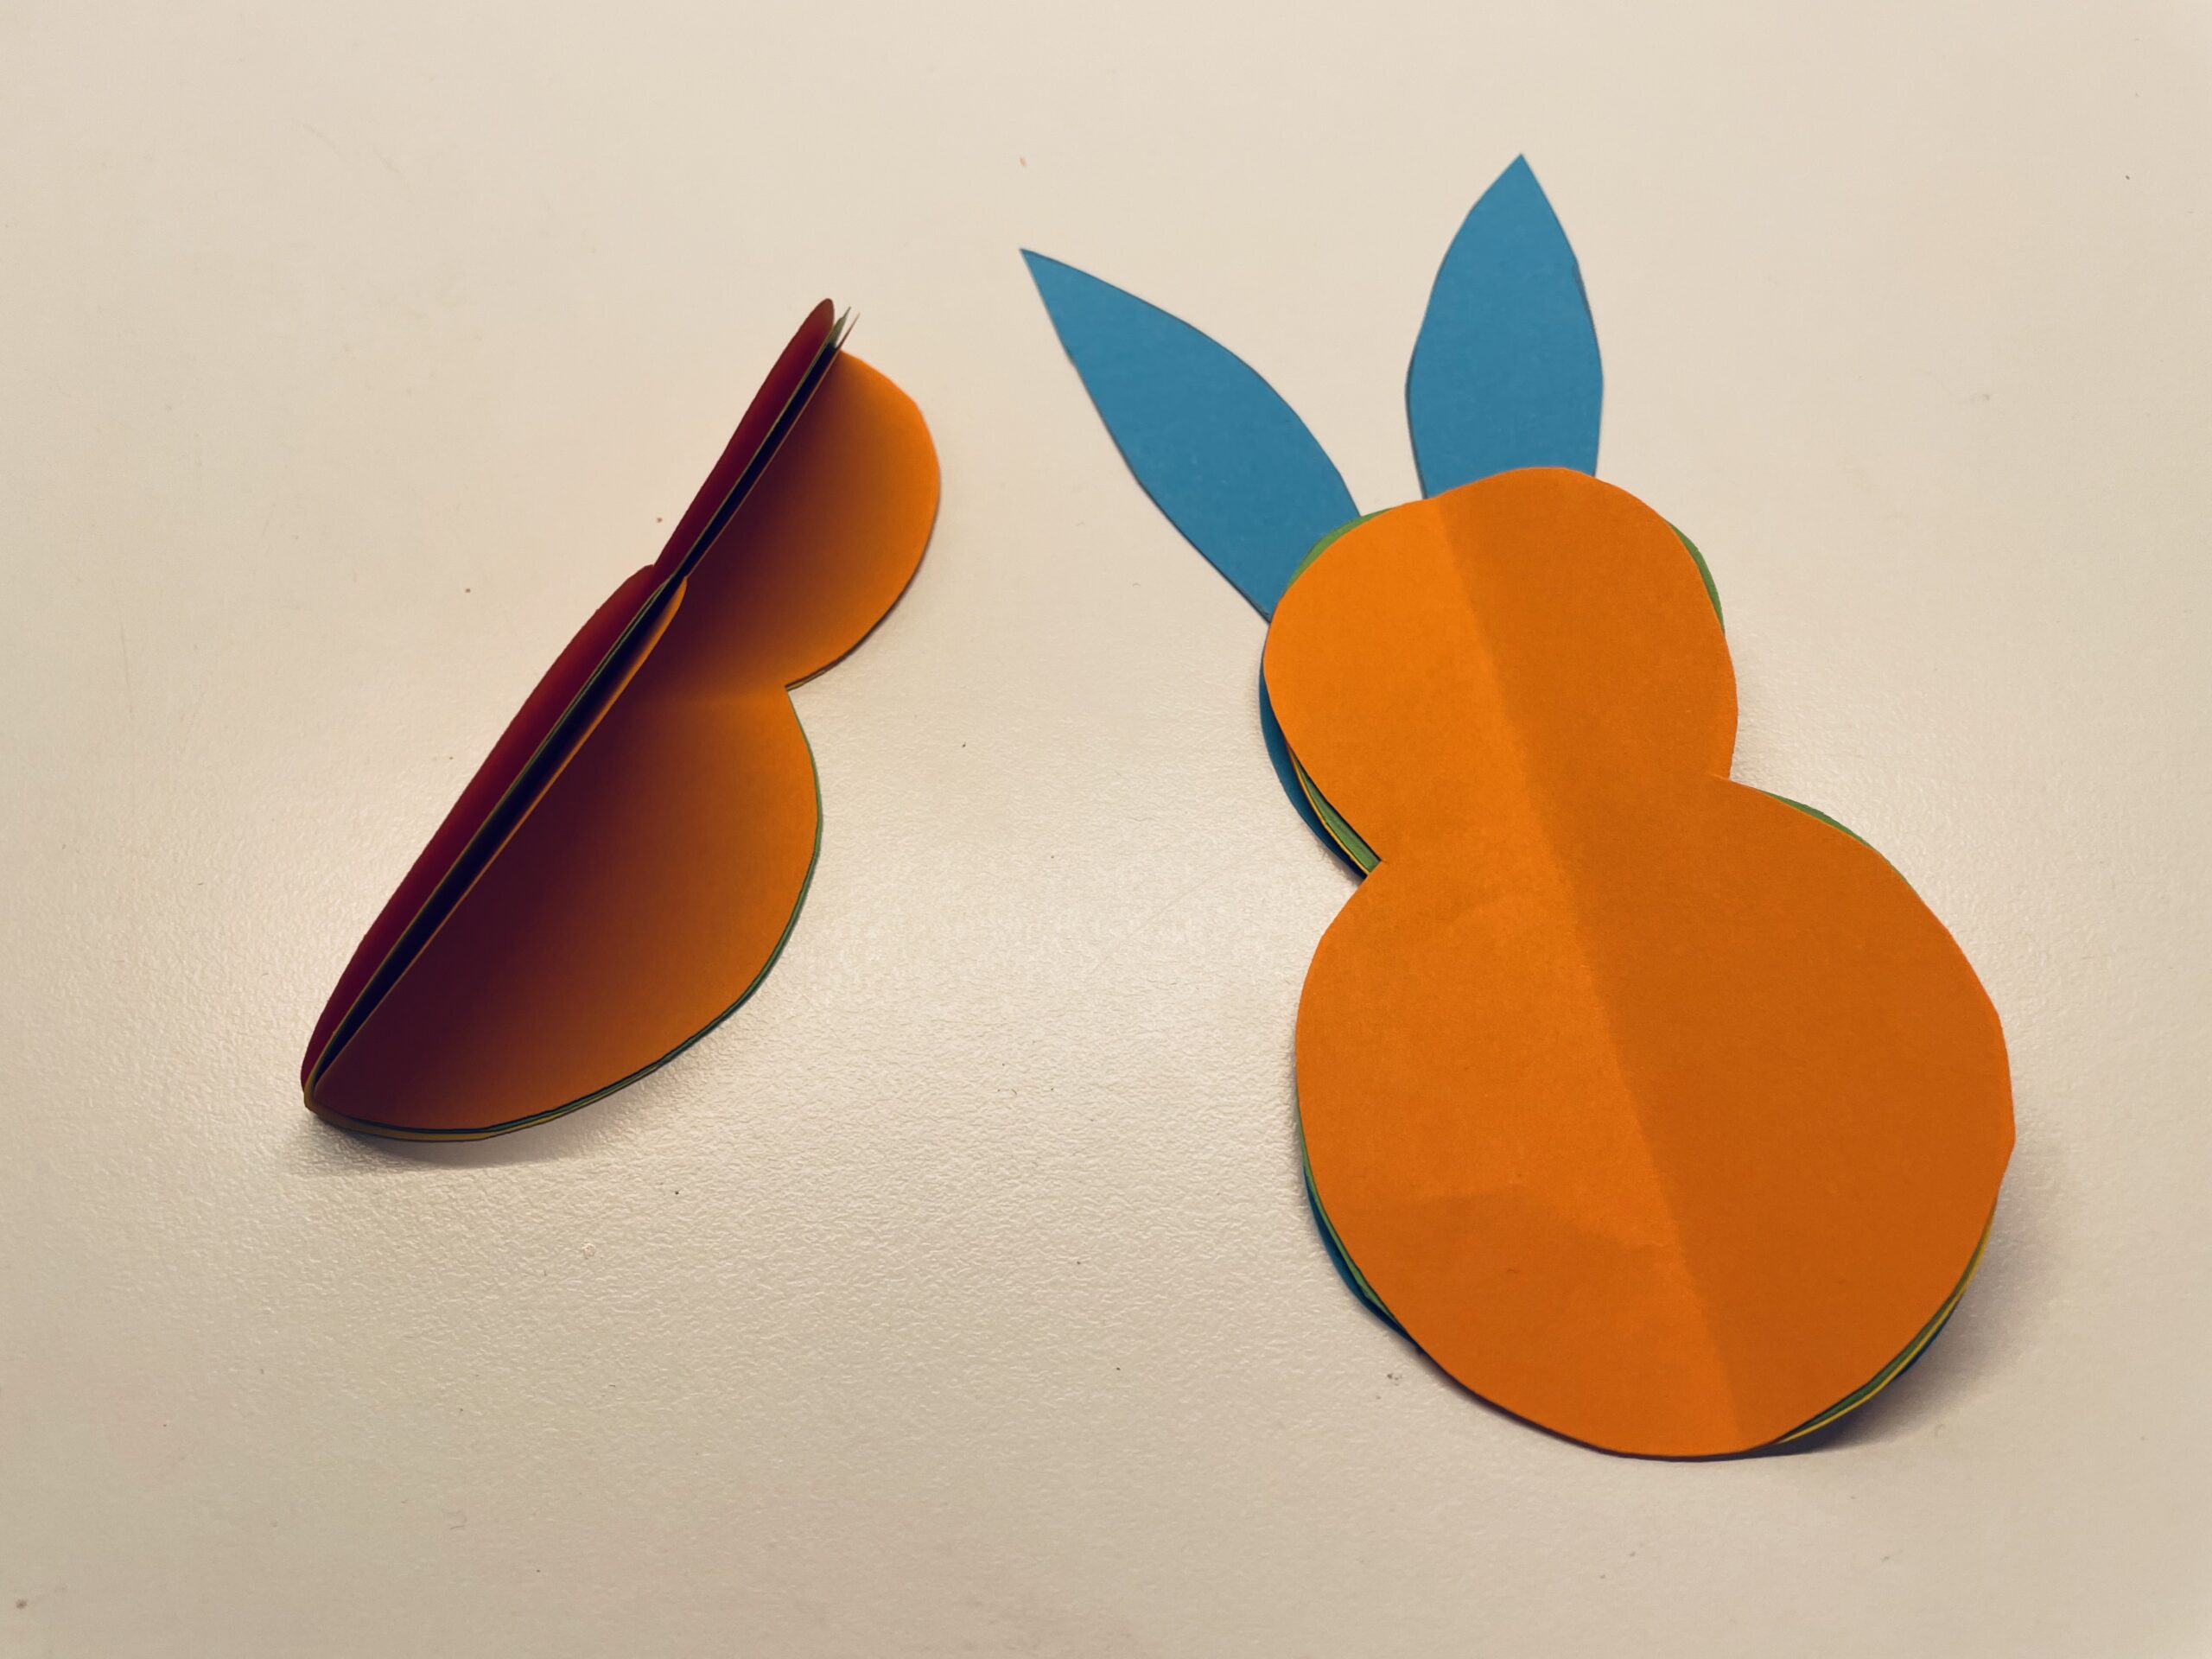
Bild zum Schritt 12 für das Bastel- und DIY-Abenteuer für Kinder: 'Legt zuerst 4 ineinander gesteckte Hasenteile direkt auf den Hasen...'

13

The second pack of four with rabbits is turned around once completely, so that the (here) orange side shows down.
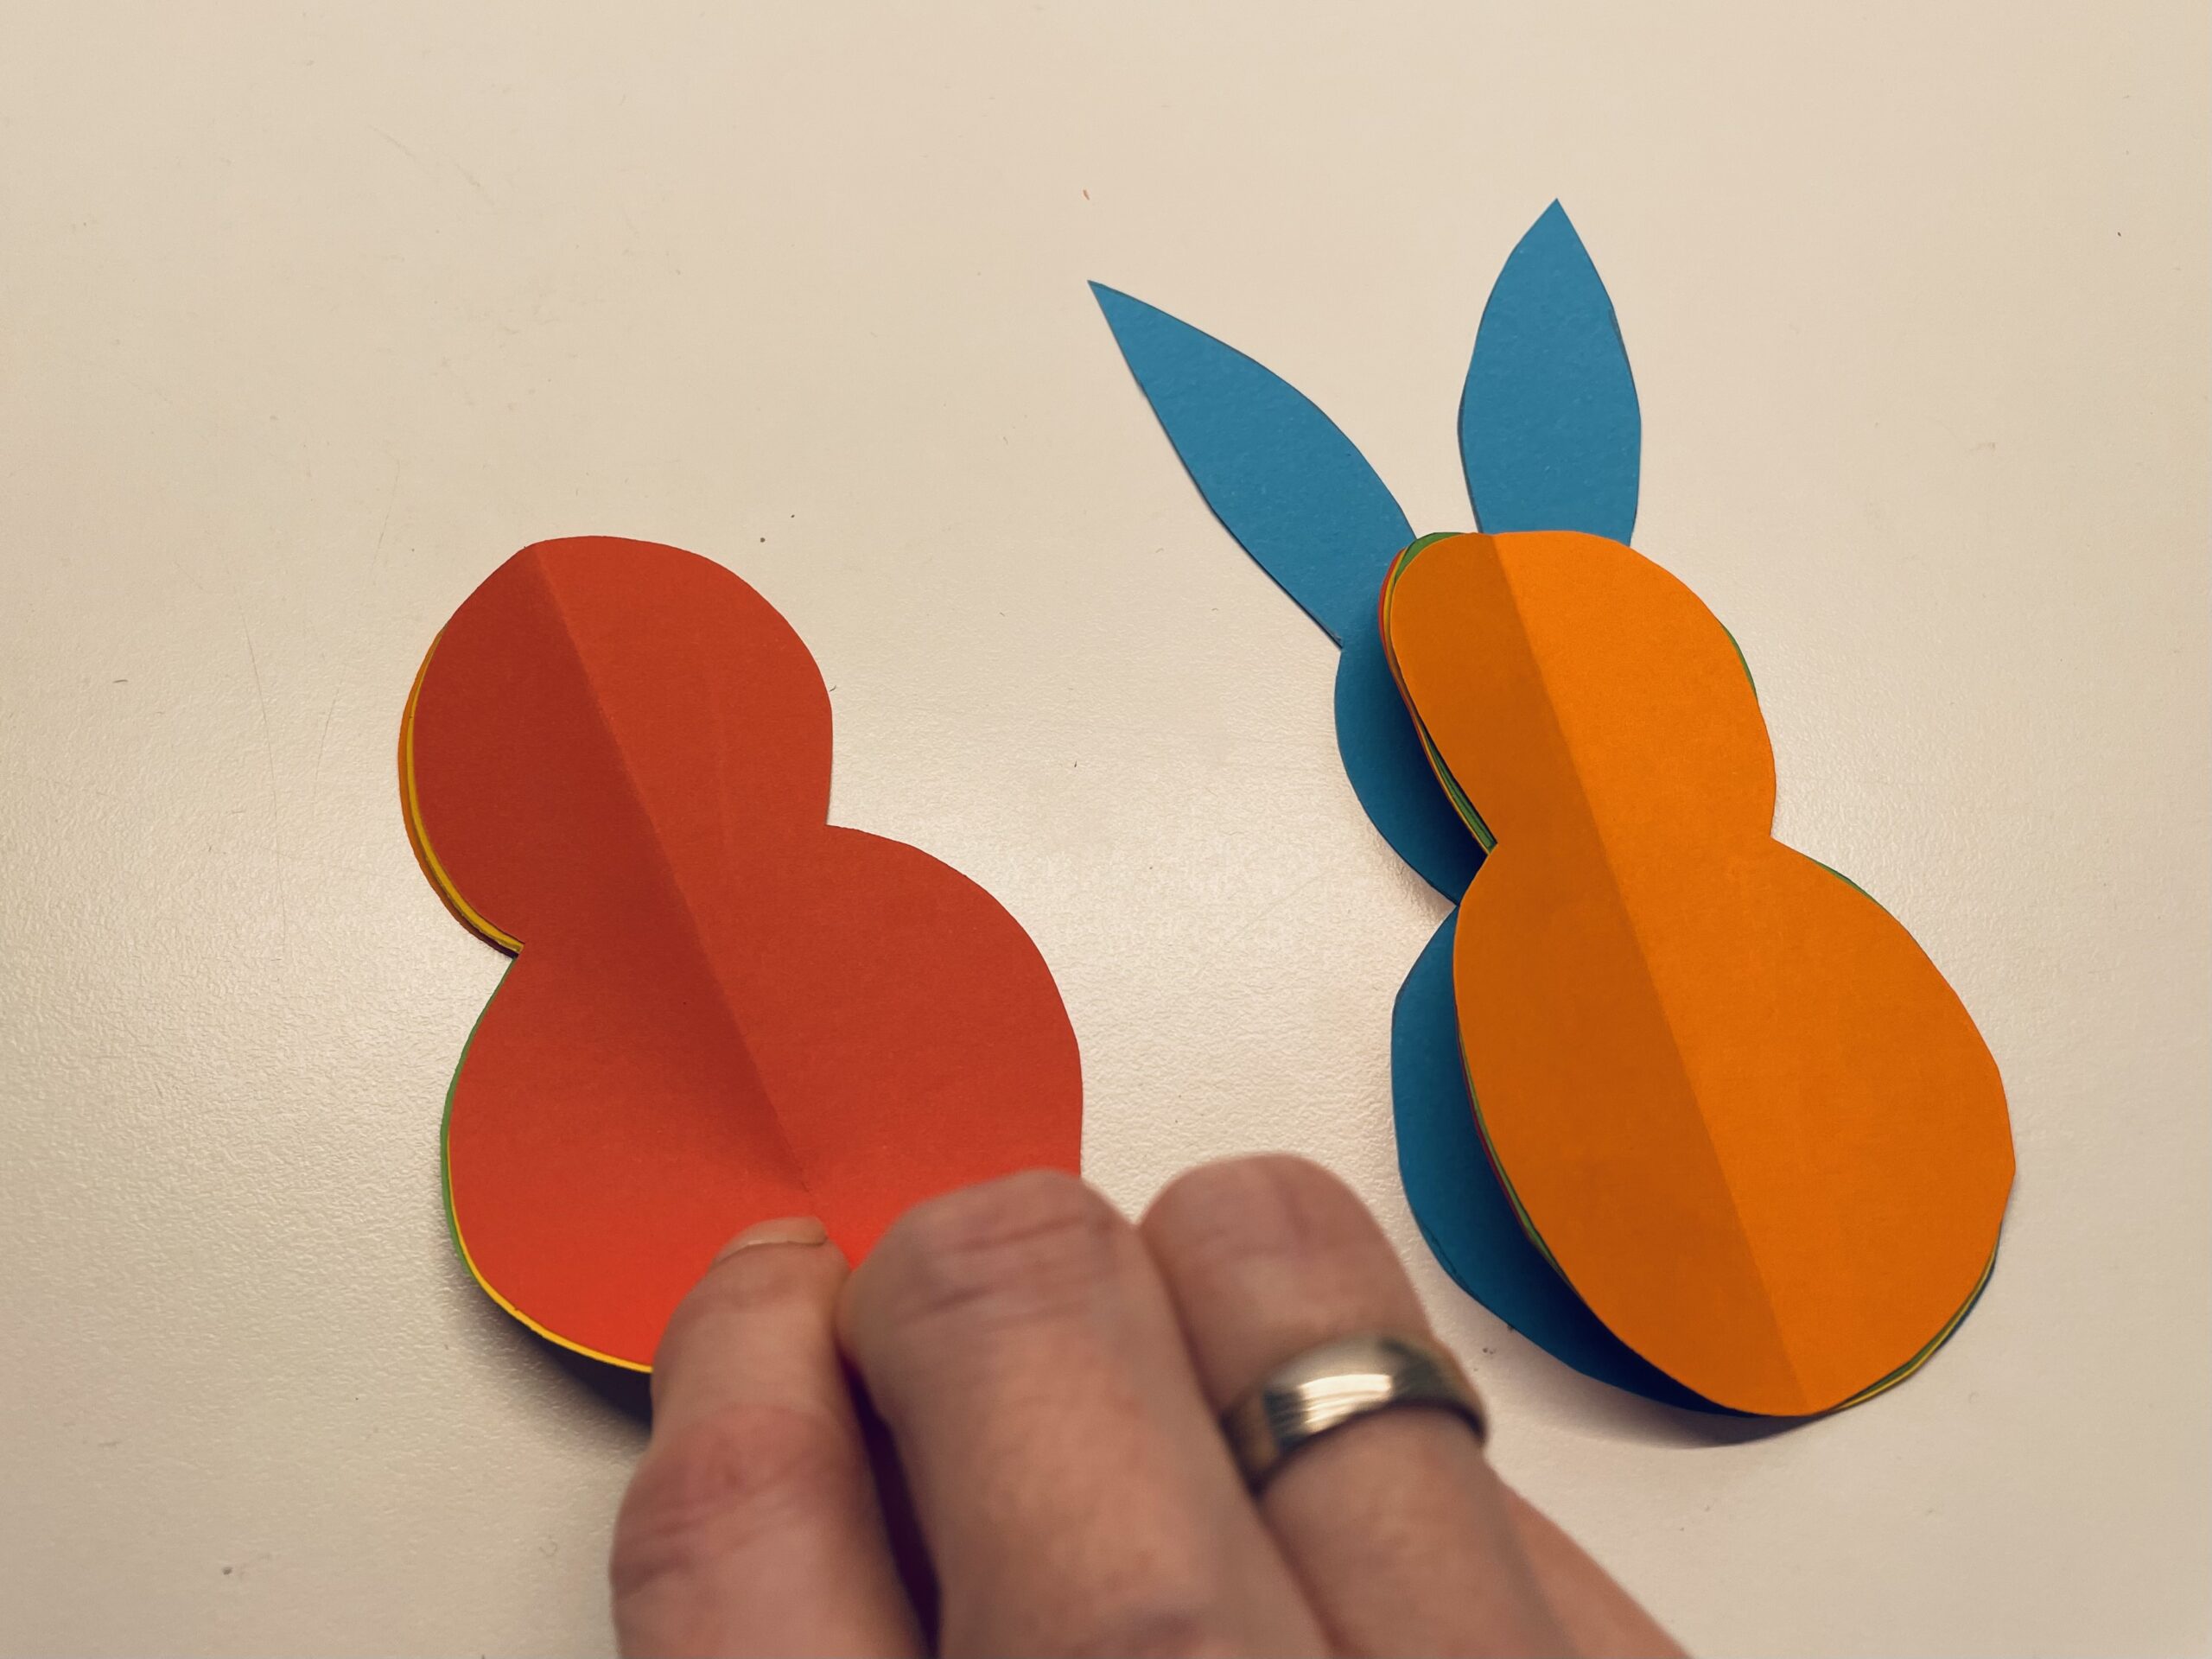
Bild zum Schritt 13 für das Bastel- und DIY-Abenteuer für Kinder: 'Der zweiten Viererpack mit Hasen wird einmal komplett umgedreht, so...'

14

Then you place the (blue) hare with the already laid parts completely on it. Align the whole pack with the hare parts neatly that all parts lie exactly on top of each other.
(The blue hare is completely centered)
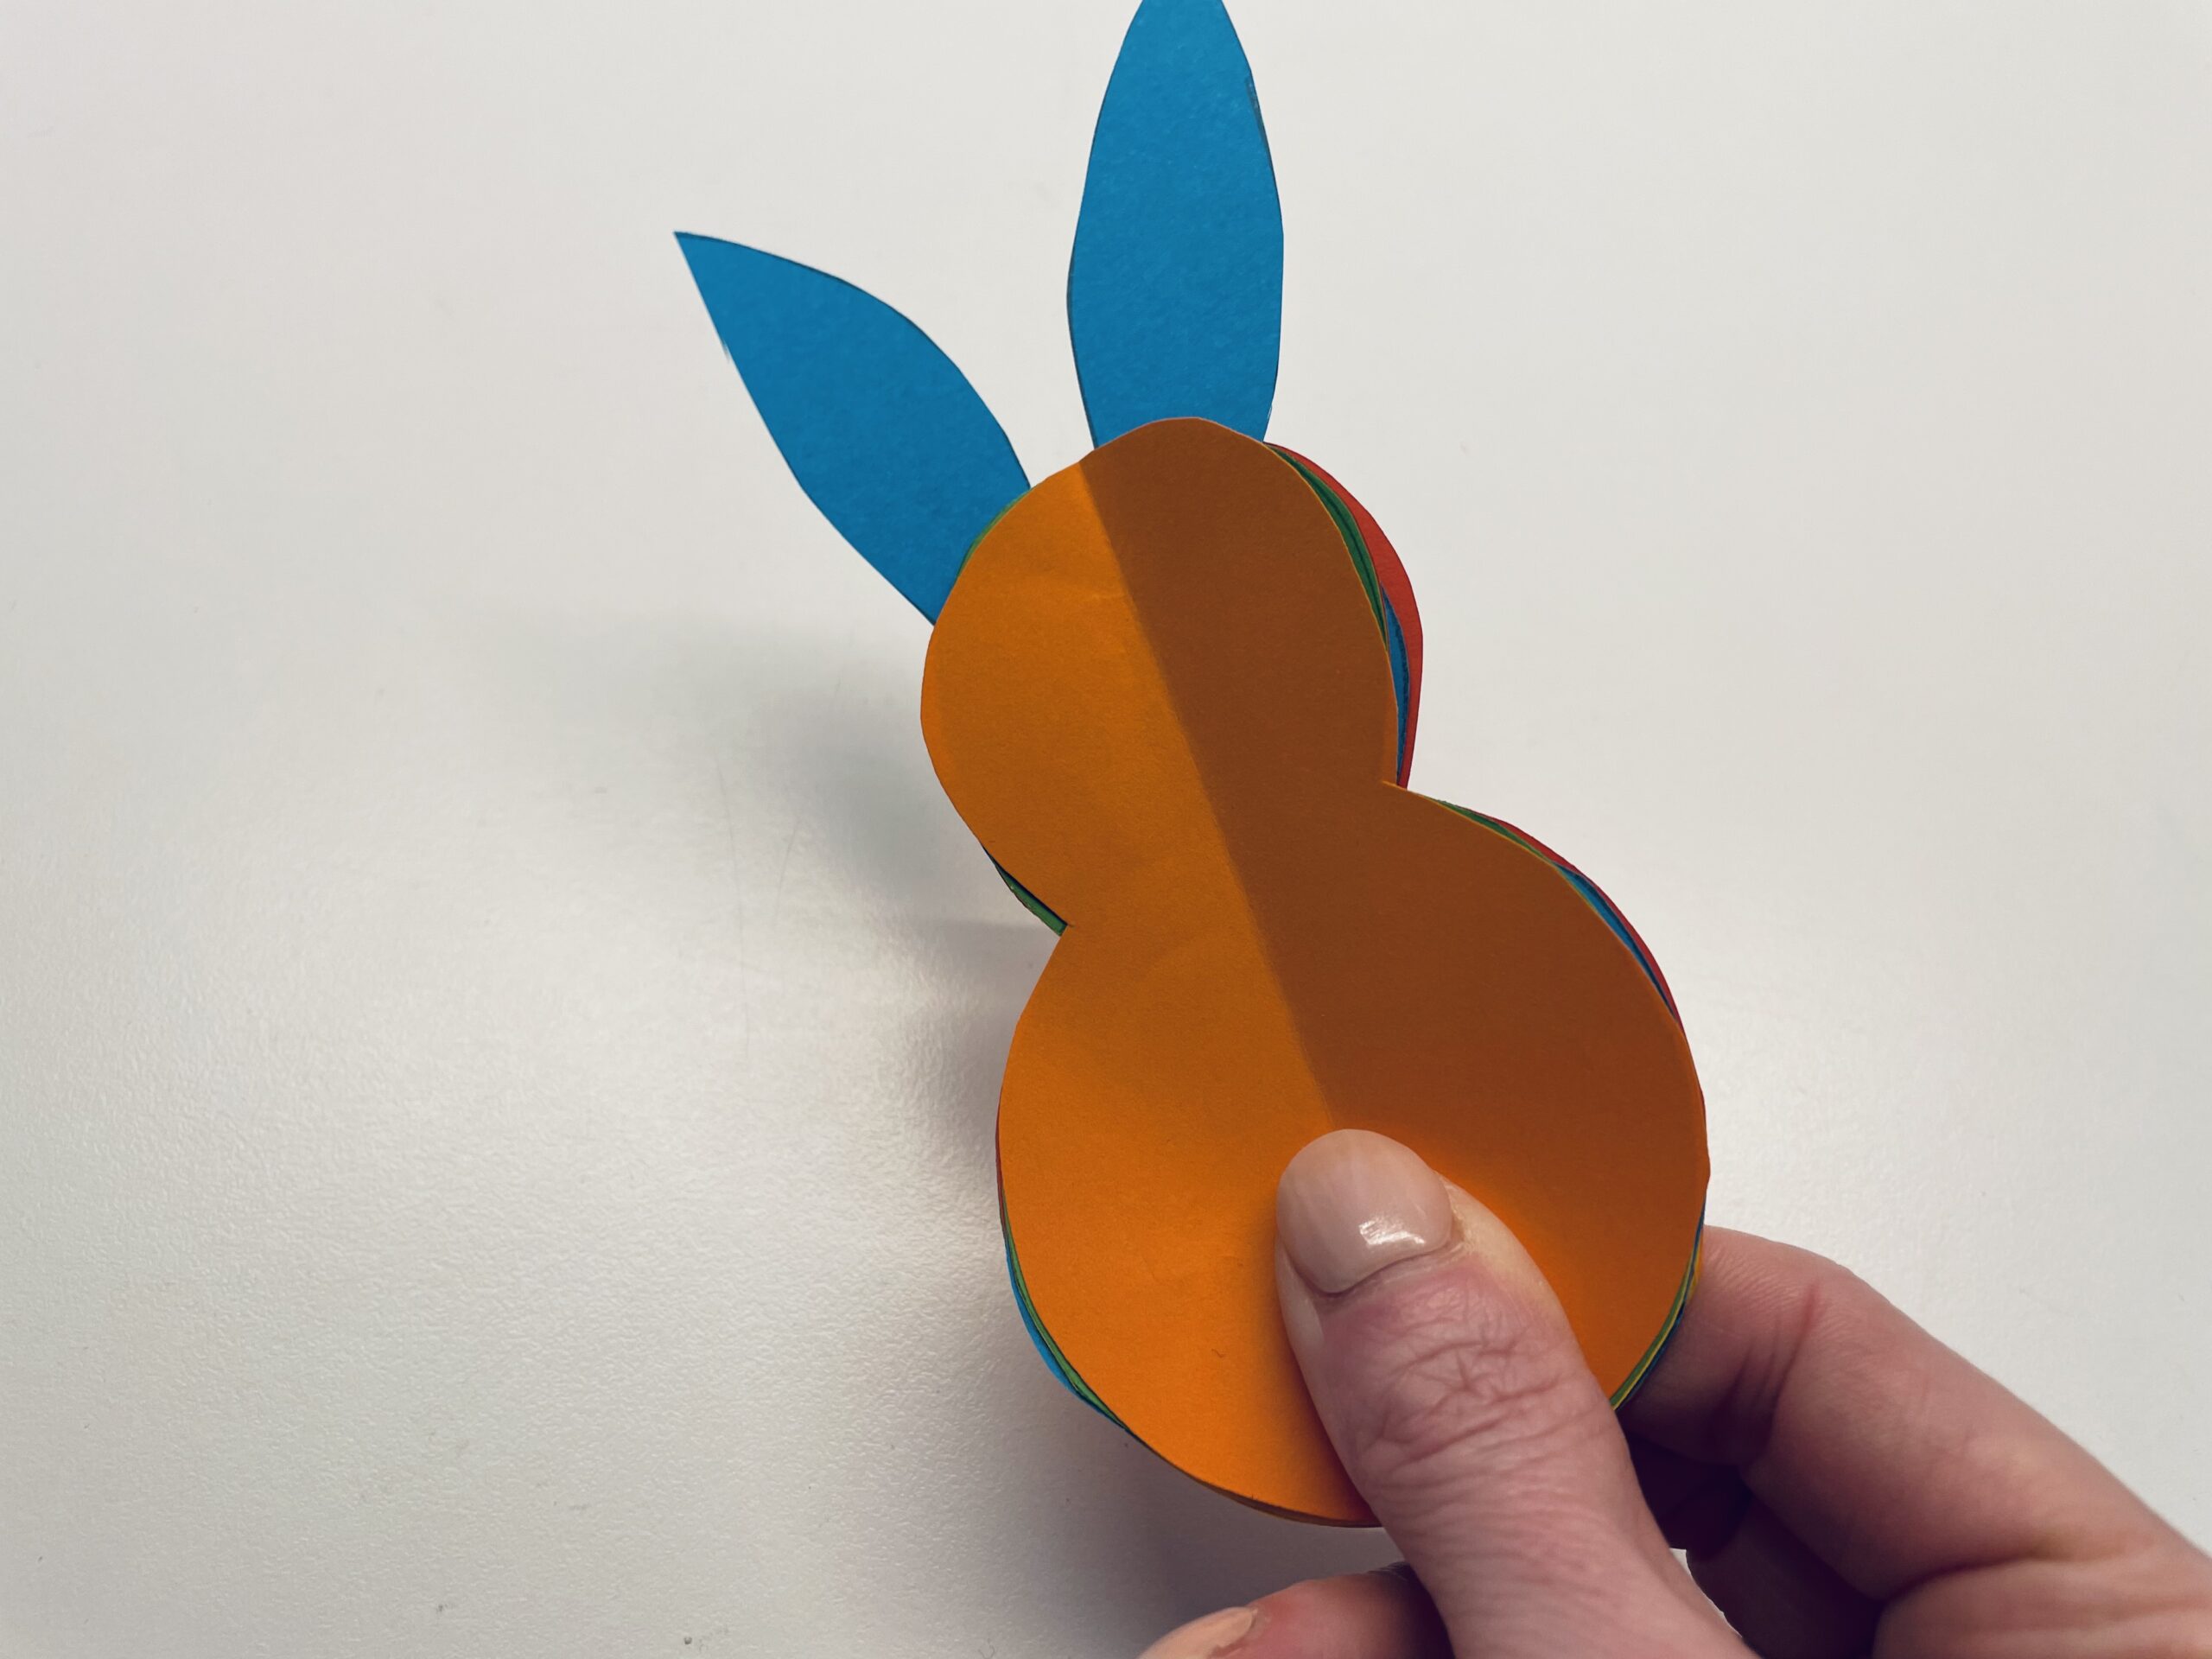
Bild zum Schritt 14 für das Bastel- und DIY-Abenteuer für Kinder: 'Anschließend legt ihr den (blauen) Hasen mit den bereits aufgelegten...'

15

Now cut off a wool thread about 20cm long.
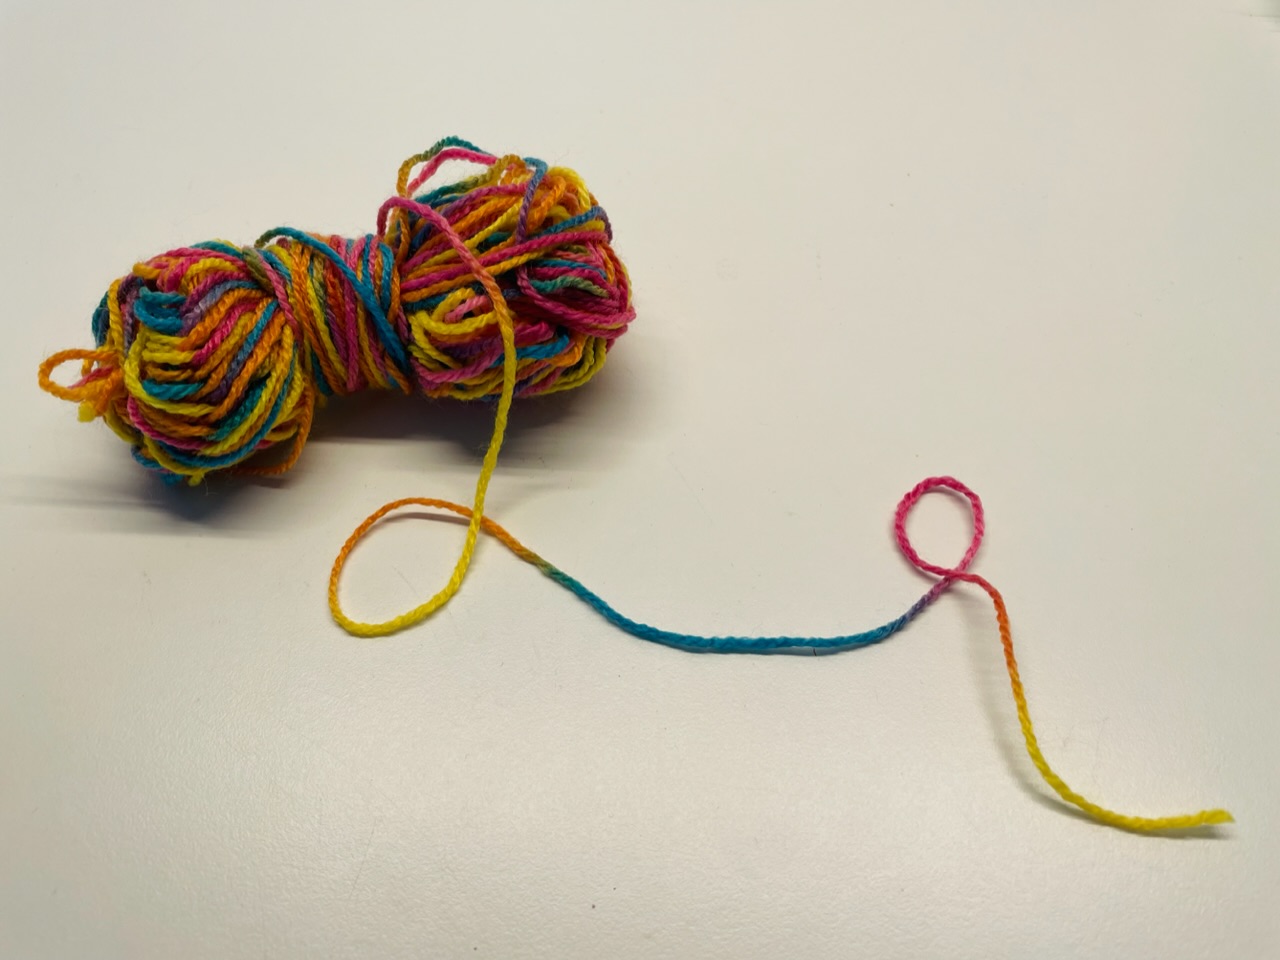
Bild zum Schritt 15 für das Bastel- und DIY-Abenteuer für Kinder: 'Jetzt schneidet ihr einen ca. 20cm langen Wollfaden ab.'

16

First place the wool thread across the ears and then push it down between the hare parts to the hare head center. At this point the thread is fixed with the staple.
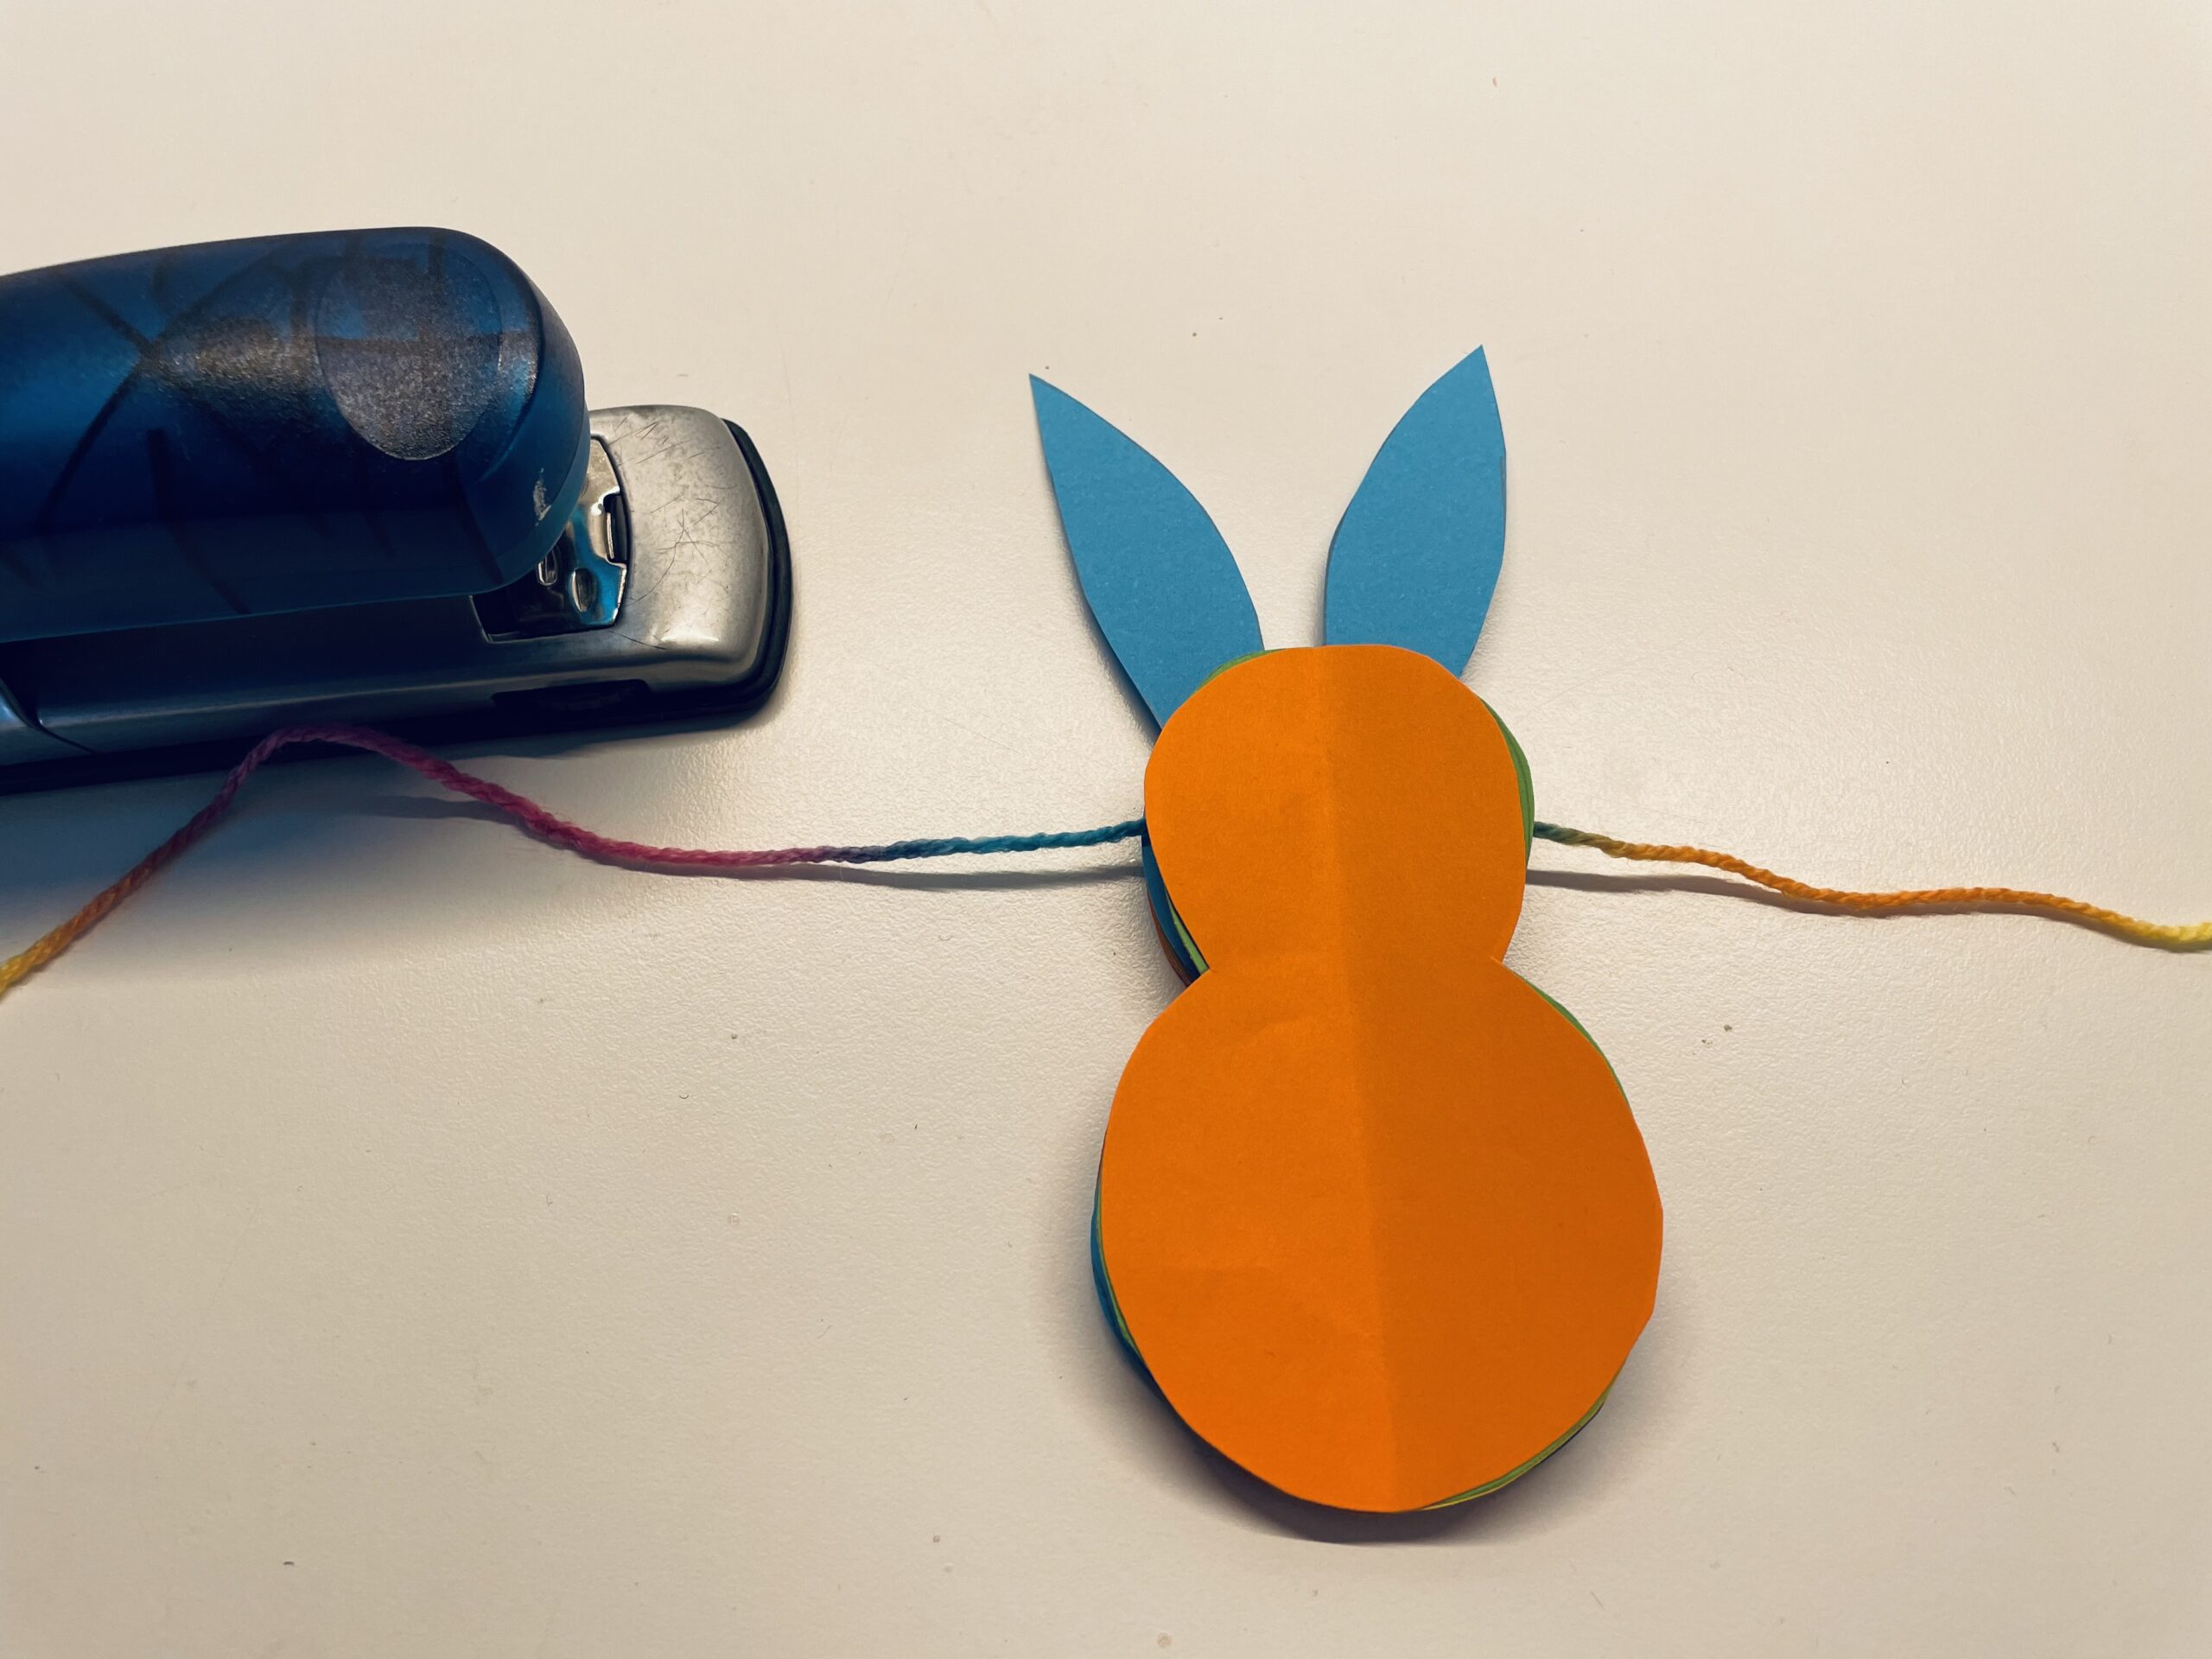
Bild zum Schritt 16 für das Bastel- und DIY-Abenteuer für Kinder: 'Legt den Wollfaden zuerst quer über die Ohren und schiebt...'

17

Place the complete hare (-stack) under the tacker. The tacker clip must sit on the folding line in the middle of the hare head. The wool thread lies exactly in between. (See picture)
Maybe you need the help of an adult.

Bild zum Schritt 17 für das Bastel- und DIY-Abenteuer für Kinder: 'Legt den kompletten Hasen(-Stapel) unter den Tacker. Die Tackerklammer muss...'

18

The first bracket already holds the hare (-stack) together
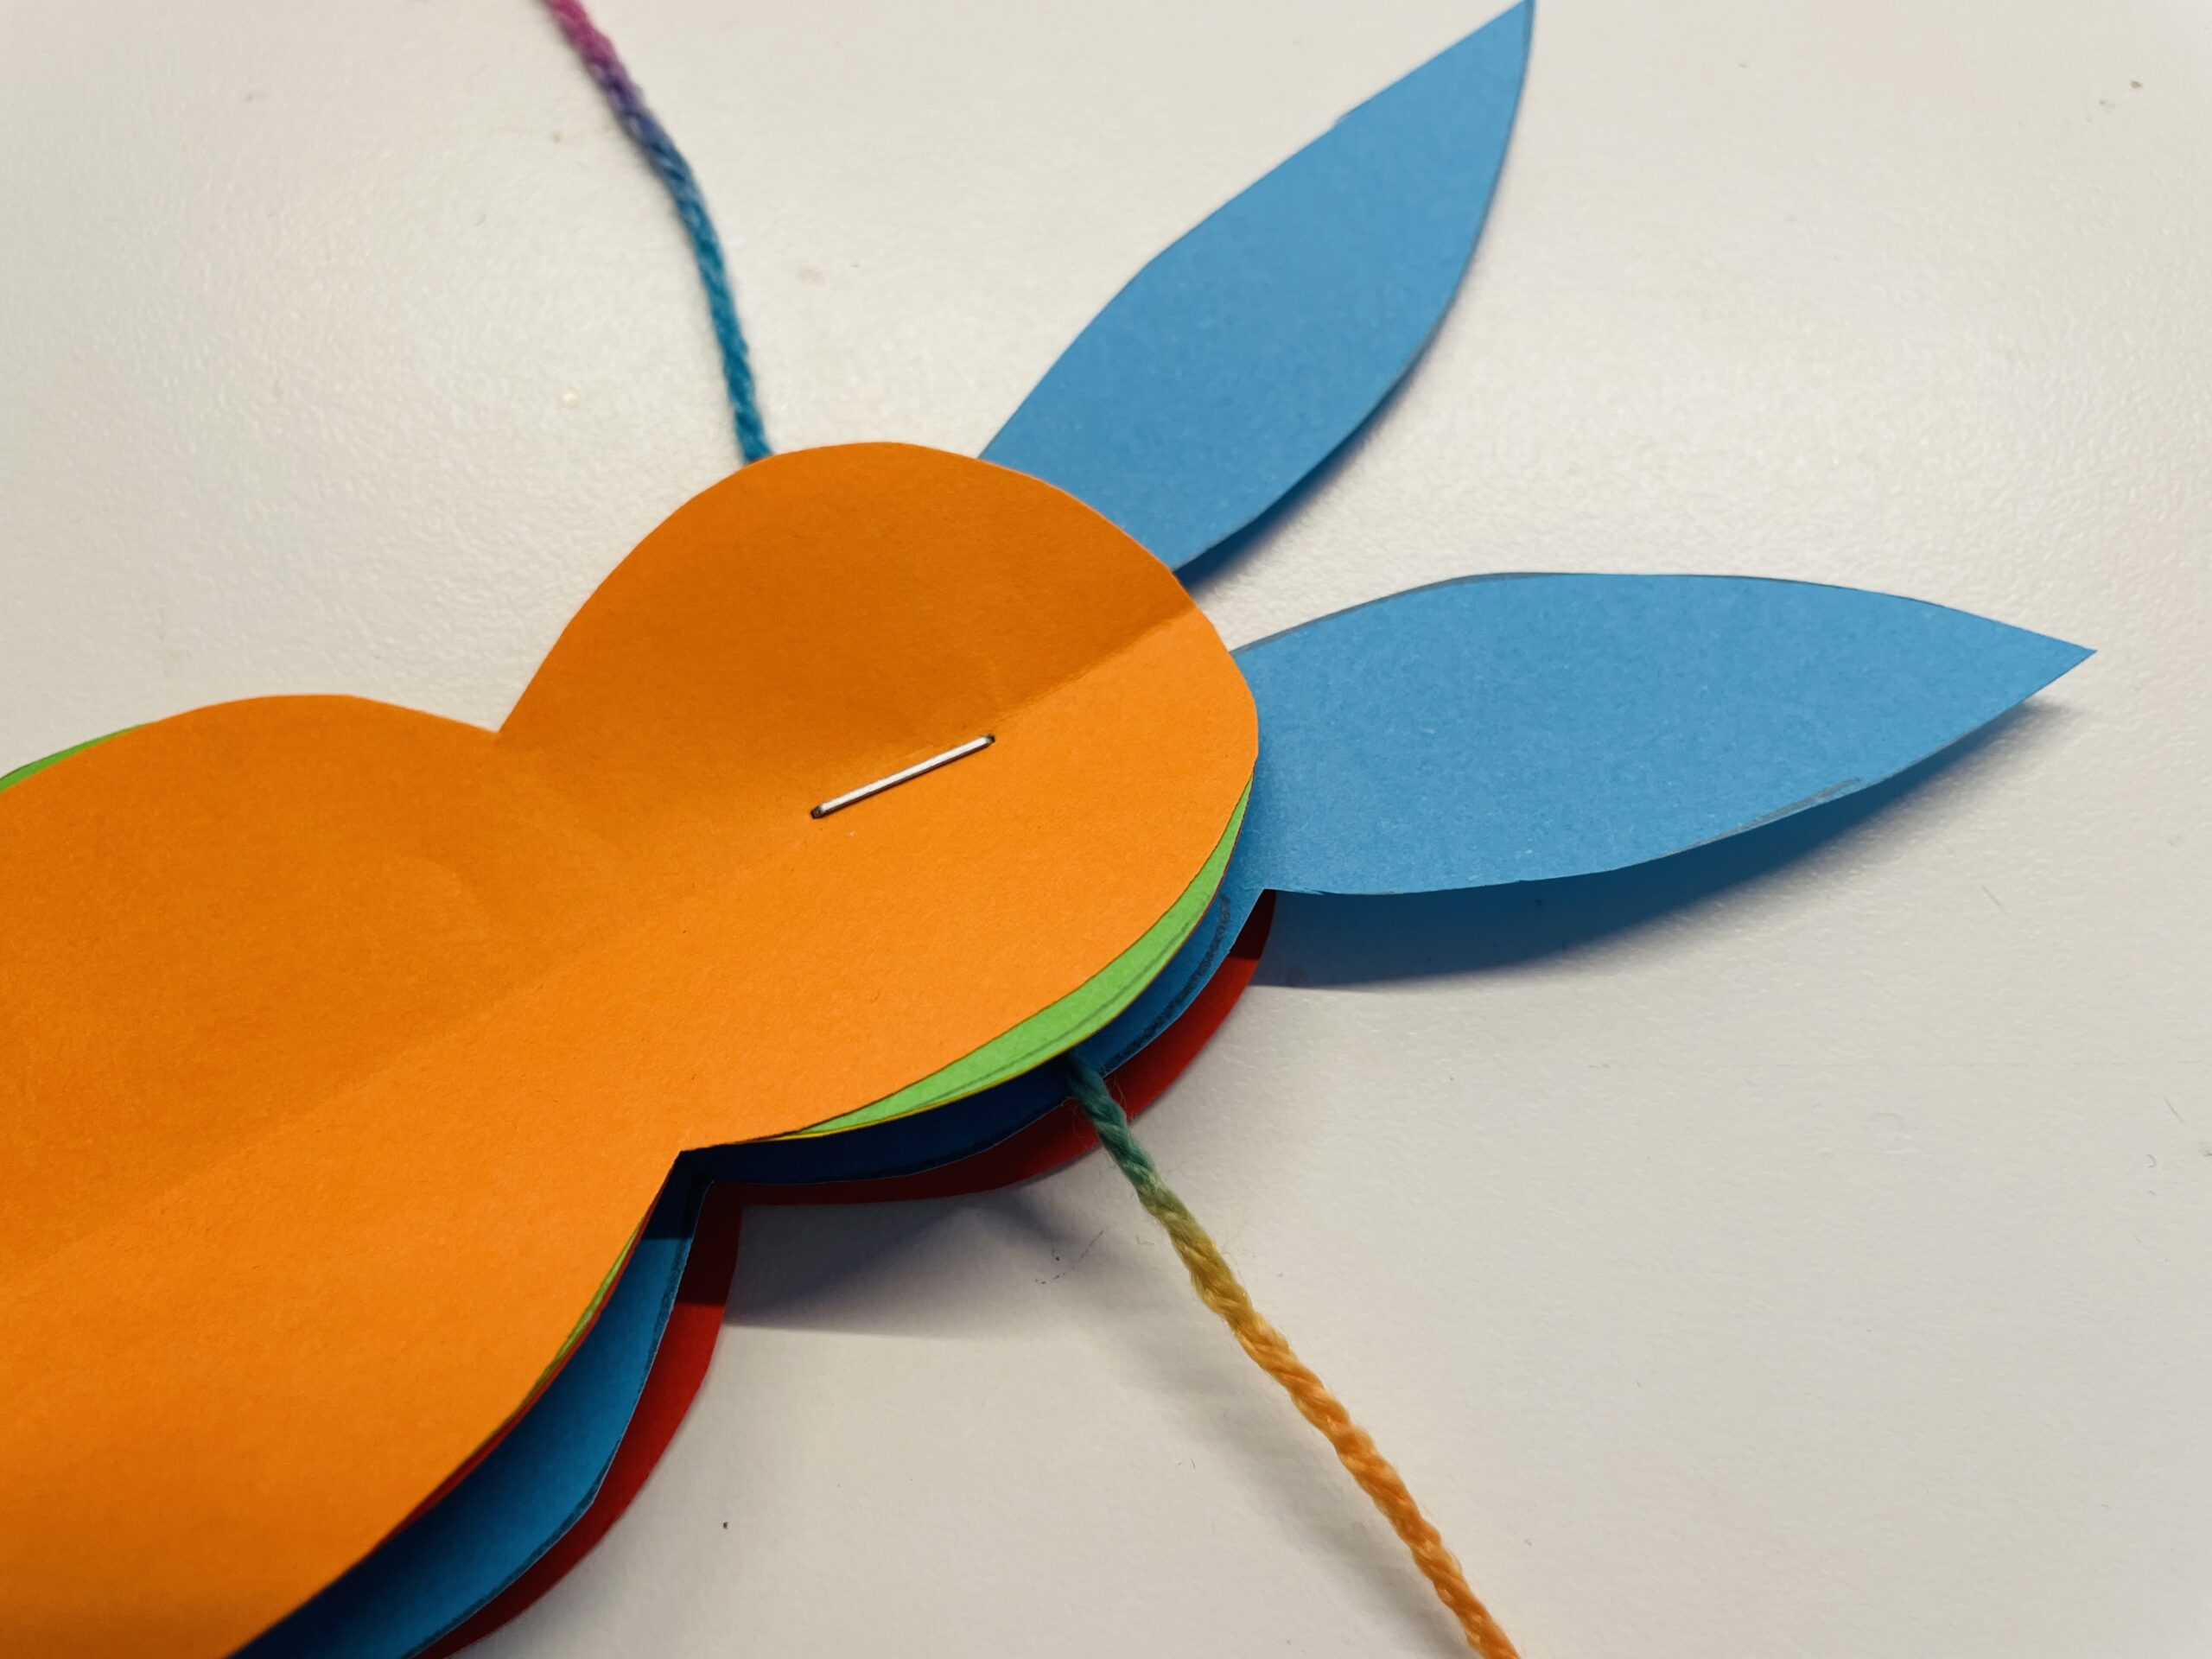
Bild zum Schritt 18 für das Bastel- und DIY-Abenteuer für Kinder: 'Die erste Klammer hält bereits den Hasen (-Stapel) zusammen'

19

The second staple is placed in the middle of the bunny belly on the folding line.
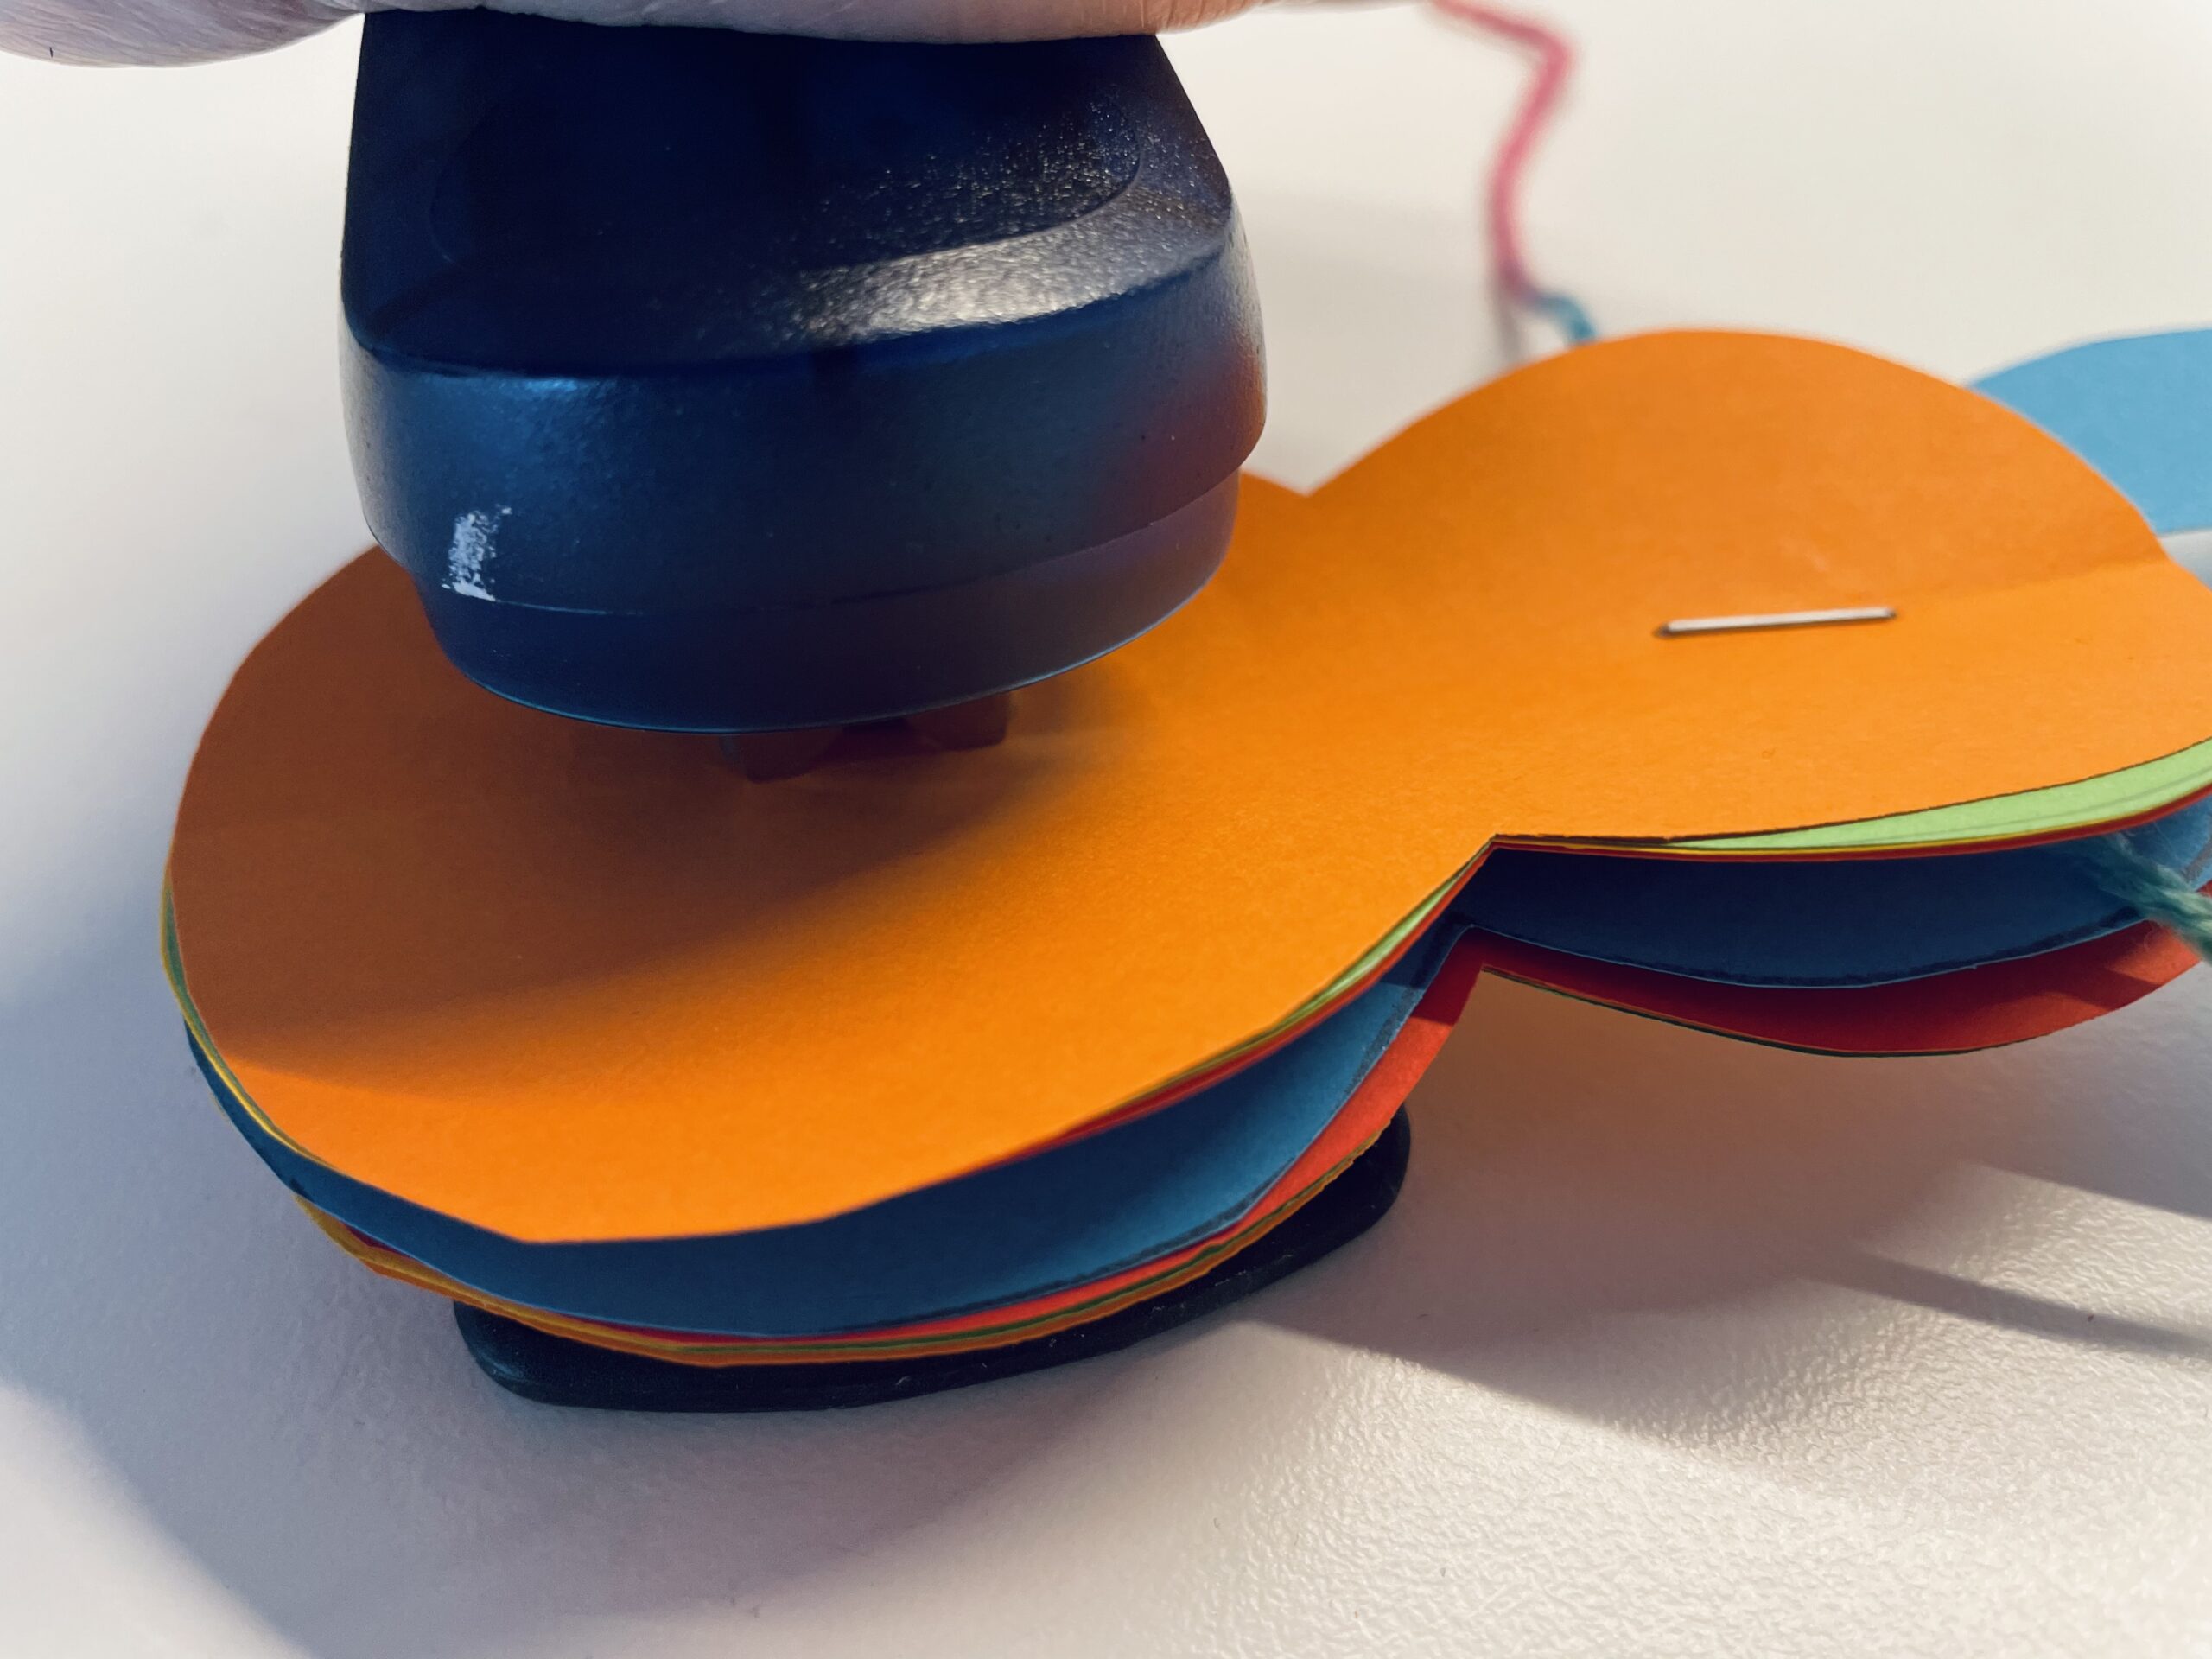
Bild zum Schritt 19 für das Bastel- und DIY-Abenteuer für Kinder: 'Die zweite Tackerklammer wird mittig vom Hasenbauch auf der Faltlinie...'

20

Now the rabbit is almost done.

Bild zum Schritt 20 für das Bastel- und DIY-Abenteuer für Kinder: 'Nun ist der Hase fast fertig.'

21

Both wool threads are tied together at the top. This is the suspension for the rabbit.

Bild zum Schritt 21 für das Bastel- und DIY-Abenteuer für Kinder: 'Beide Wollfäden werden oben  zusammengebunden. Das ist die Aufhängung...'

22

All individual pieces of paper are folded again. So that they also remain fan-shaped and the body of the rabbit becomes plastic.
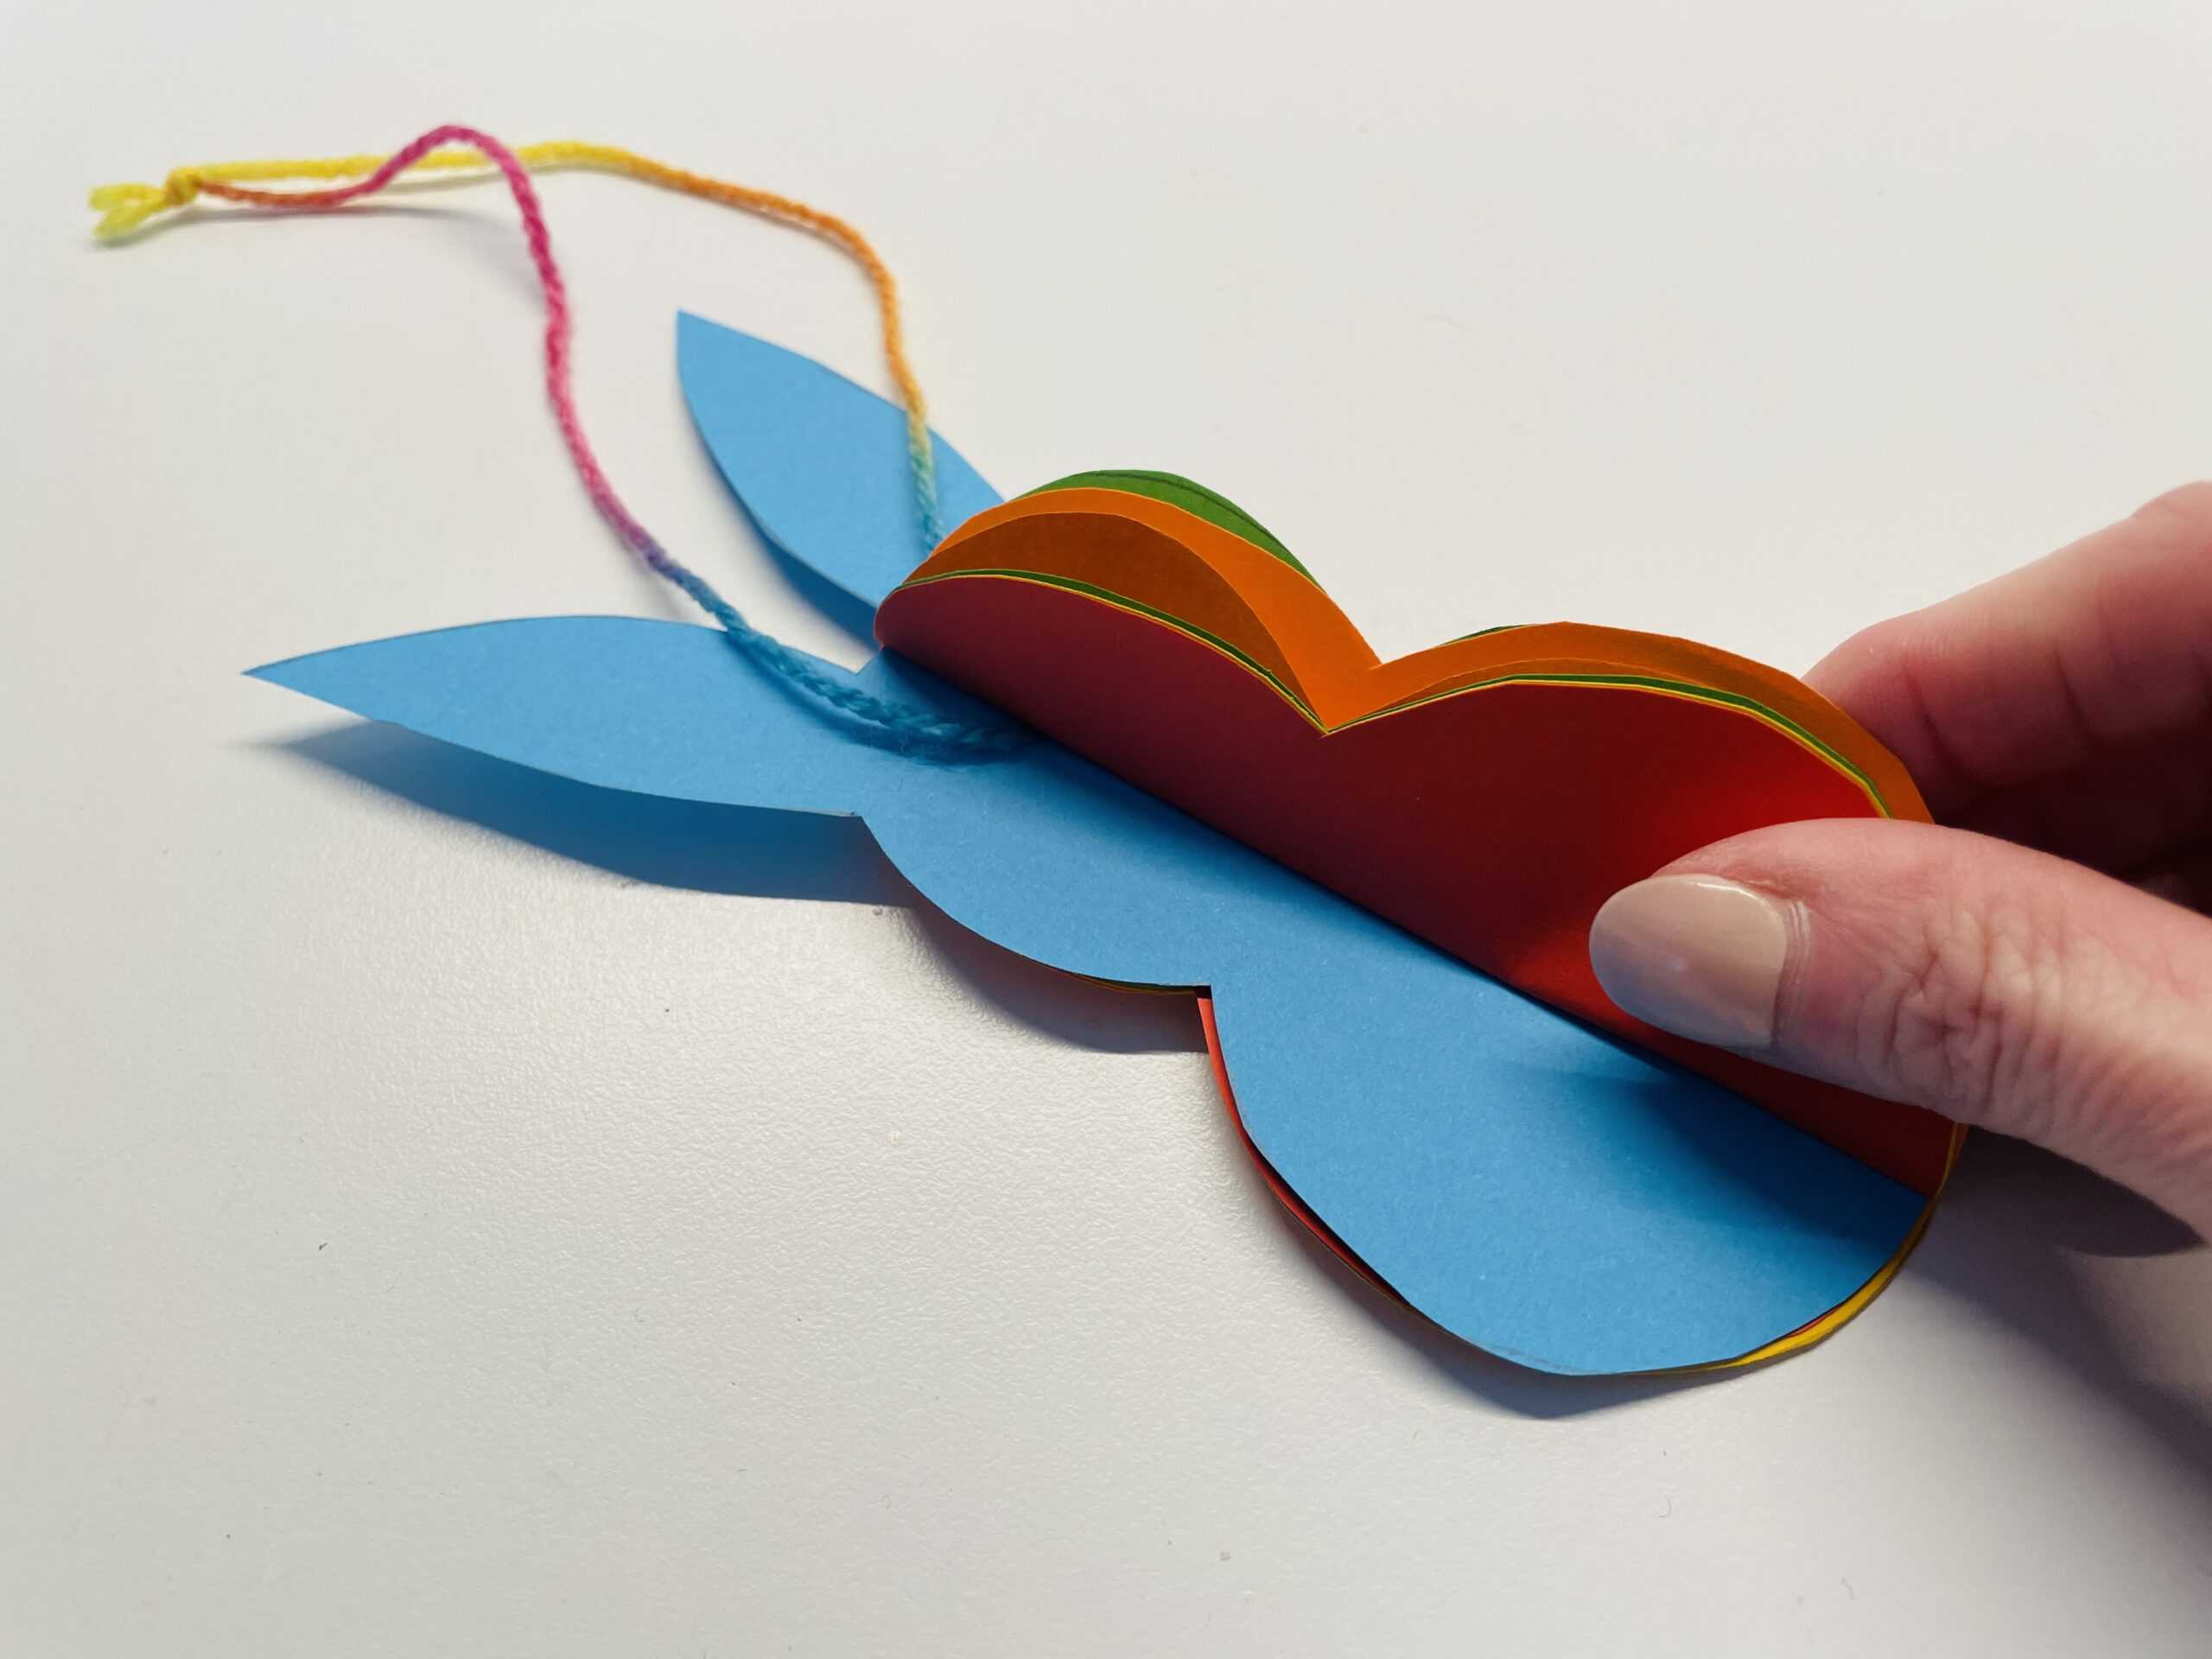
Bild zum Schritt 22 für das Bastel- und DIY-Abenteuer für Kinder: 'Alle einzelnen Papierteile werden nochmals nachgefaltet. So dass auch sie...'

23

Completely folded, the flat rabbit has become a roundish-shaped rabbit.
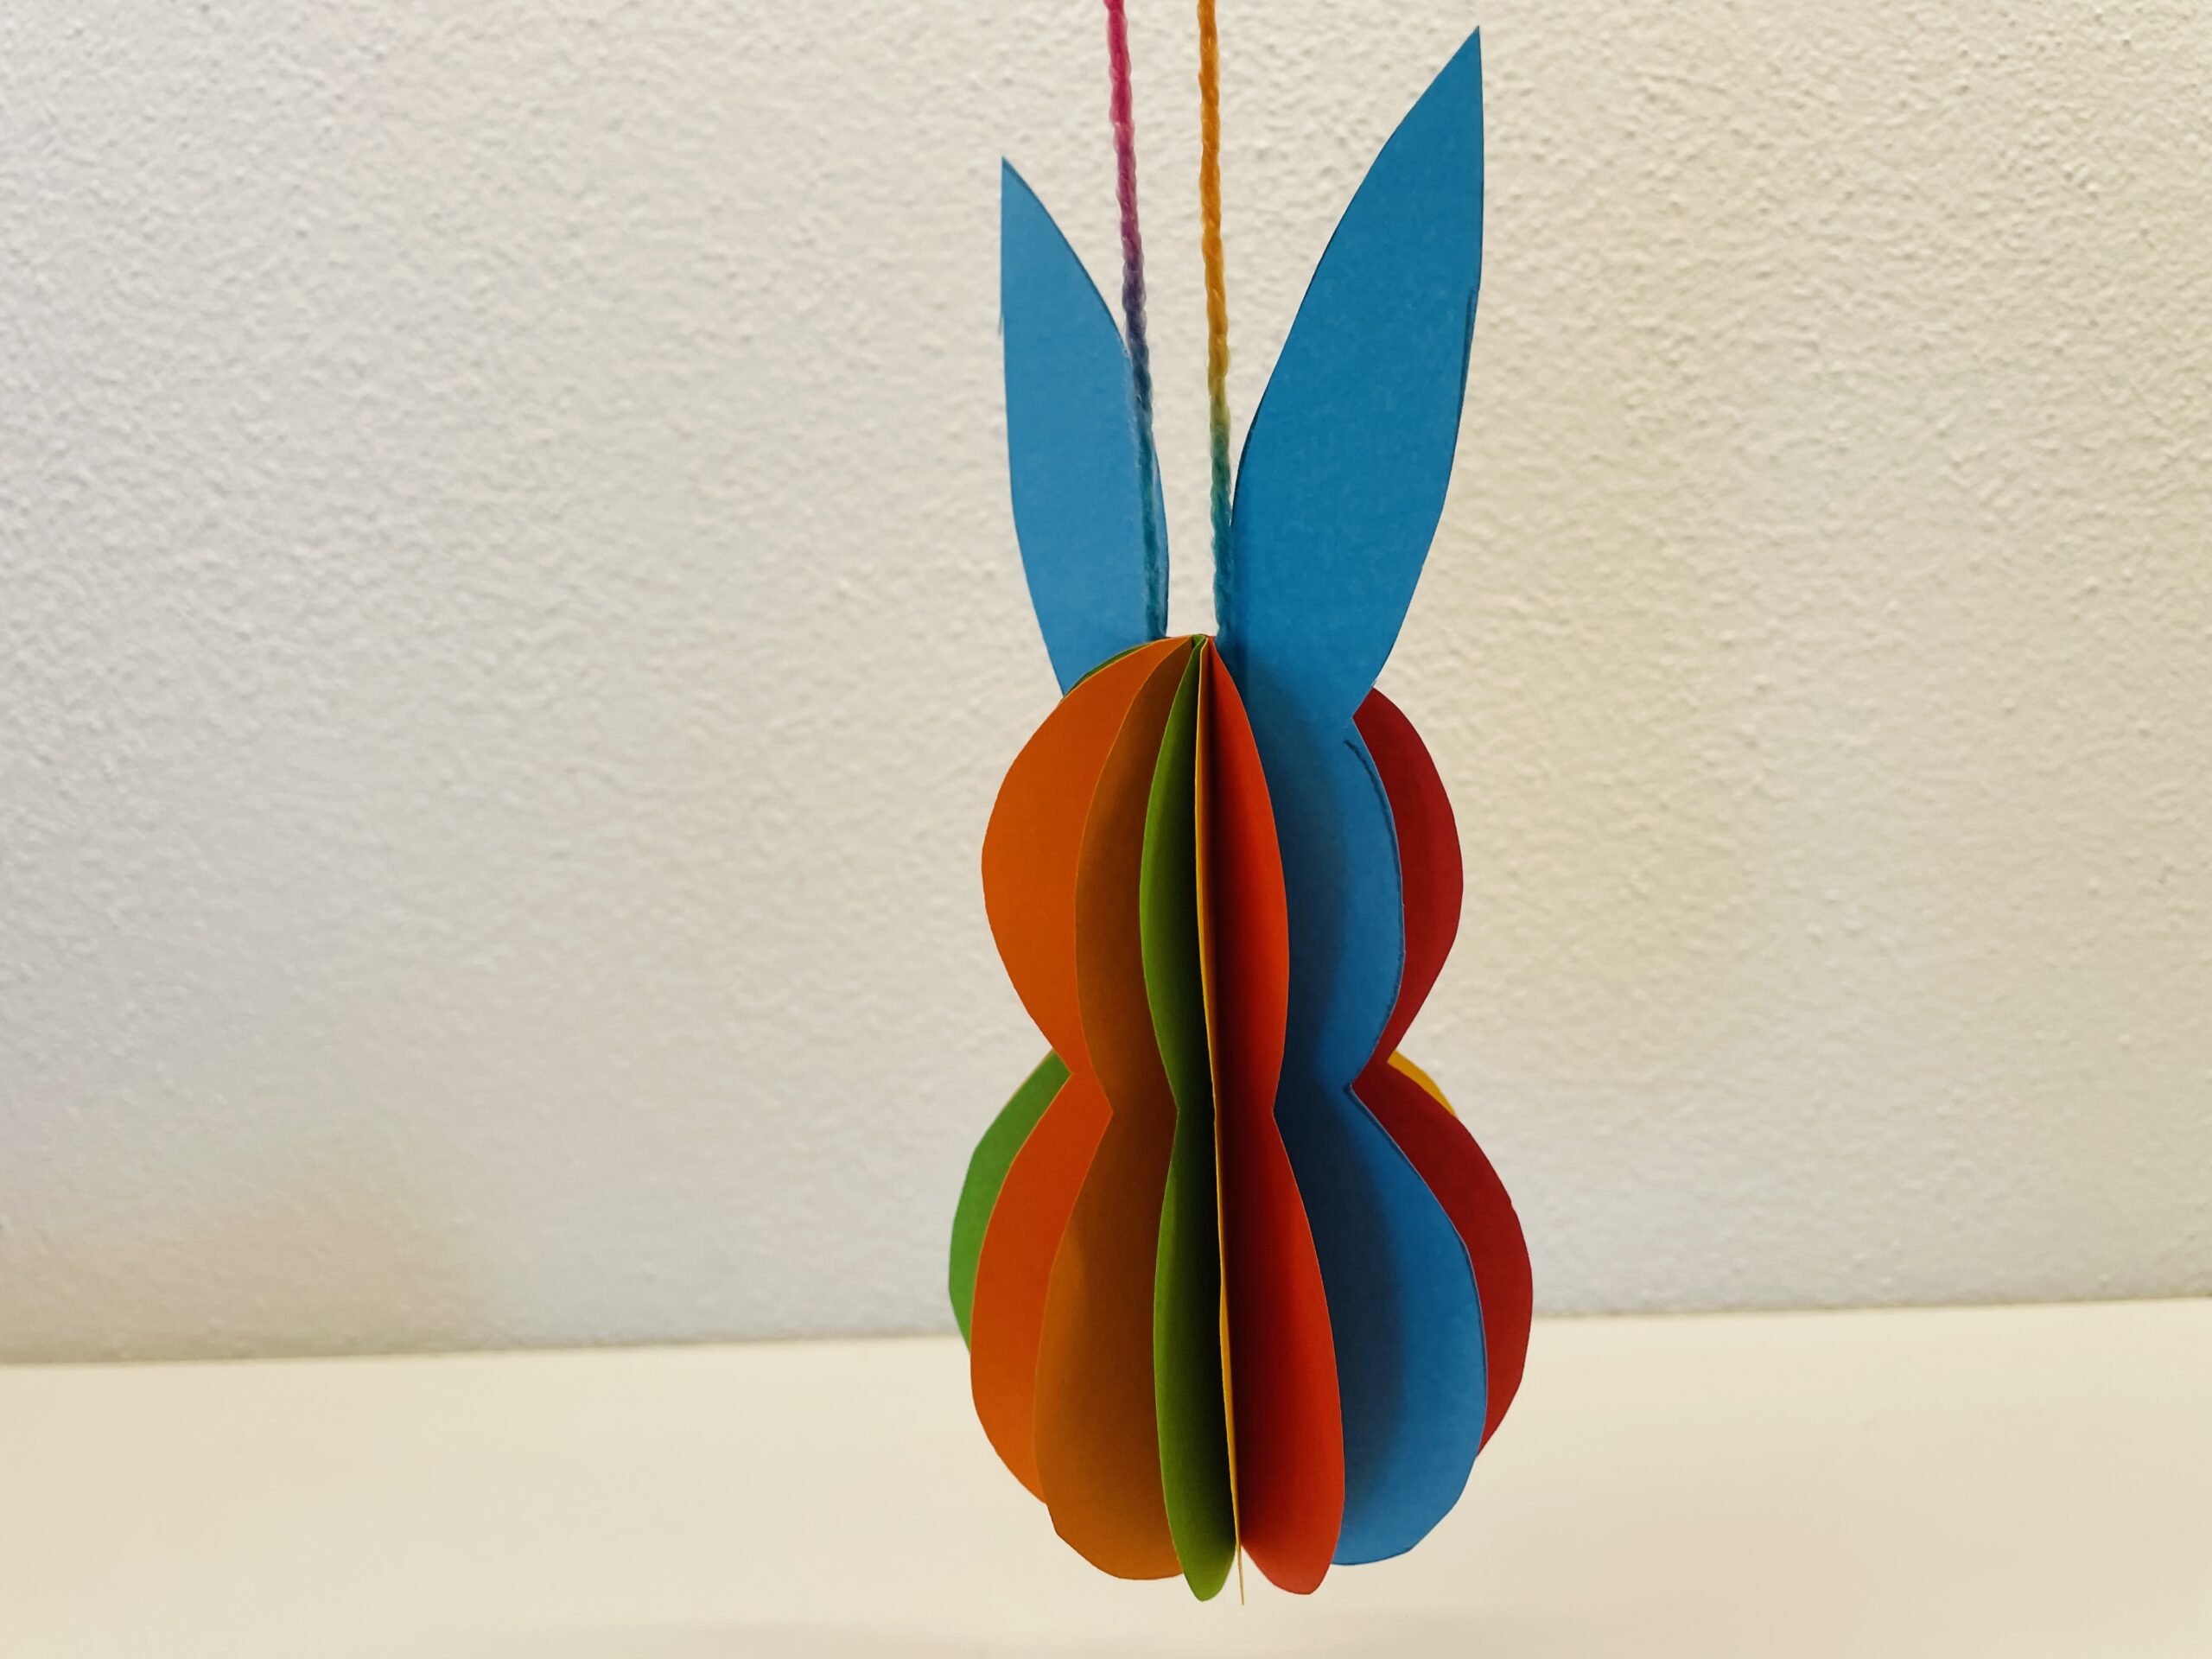
Bild zum Schritt 23 für das Bastel- und DIY-Abenteuer für Kinder: 'Komplett aufgefaltet ist aus dem platten Hasen ein rundlich geformter...'

24

You can also use it without thread as a decoration or sitting in an Easter nest.
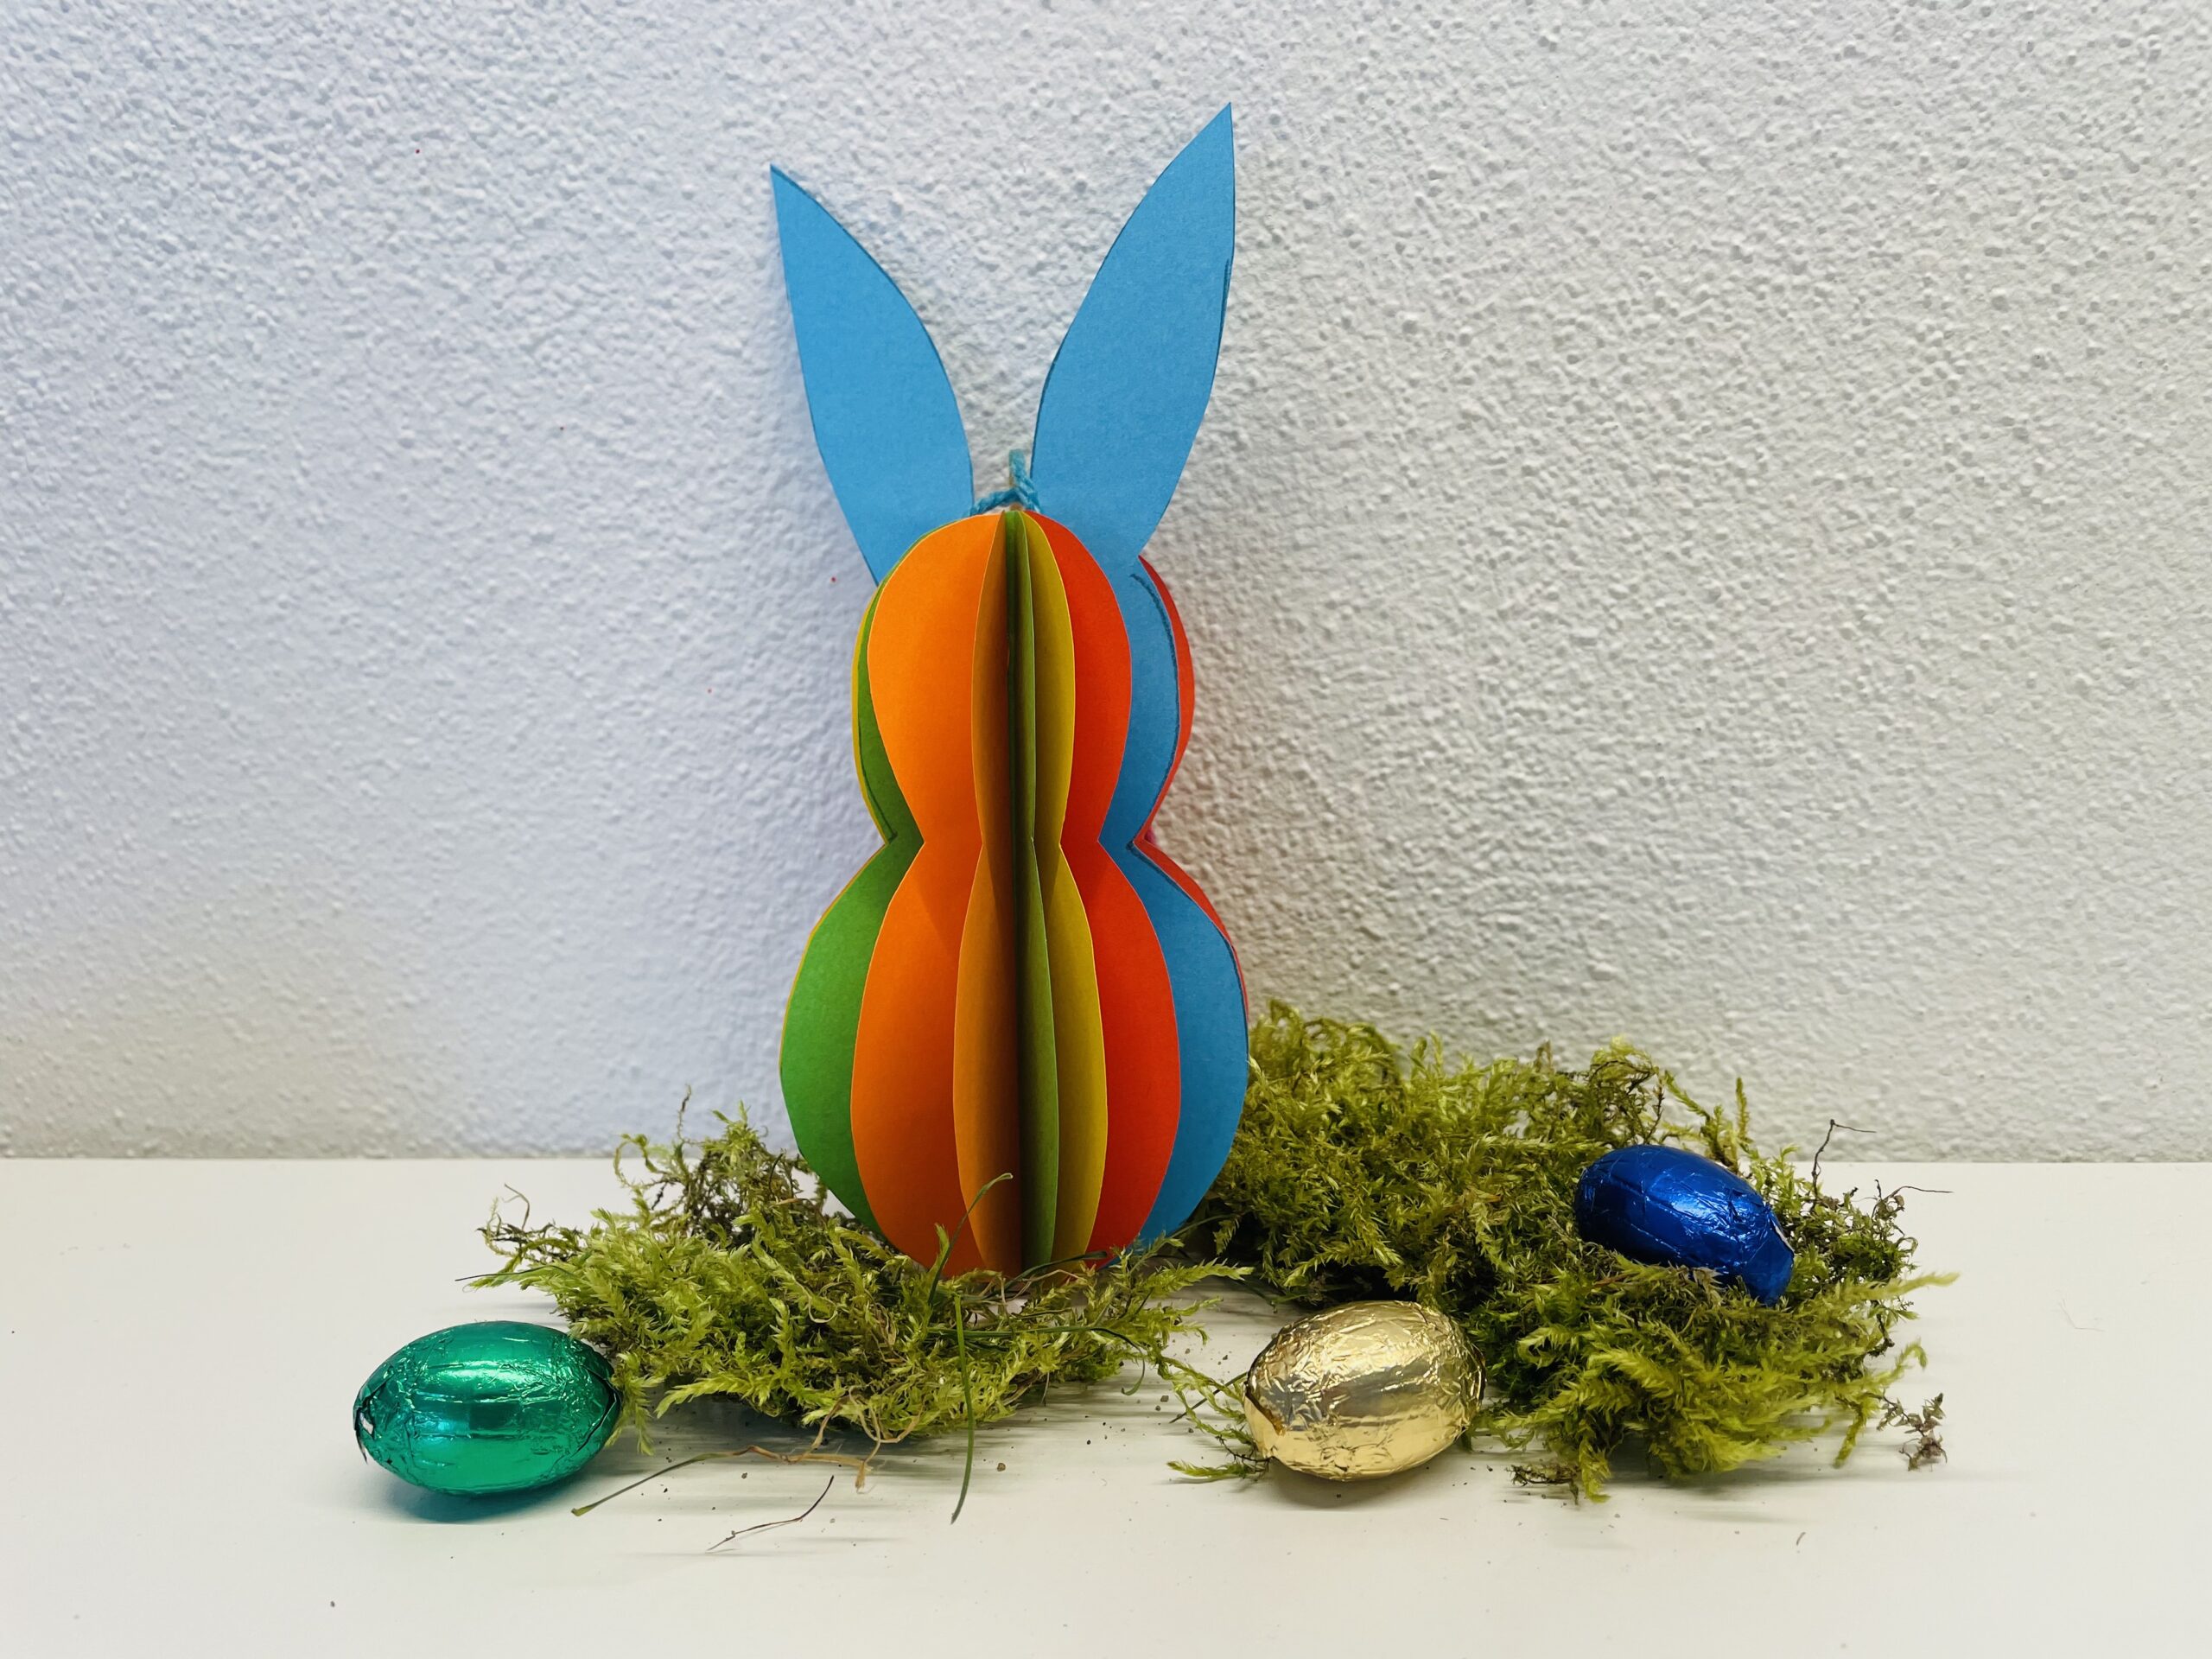
Bild zum Schritt 24 für das Bastel- und DIY-Abenteuer für Kinder: 'Ihr könnt ihn auch ohne Faden verwenden als Deko oder...'

25

Or you can hang him on a branch for decoration.
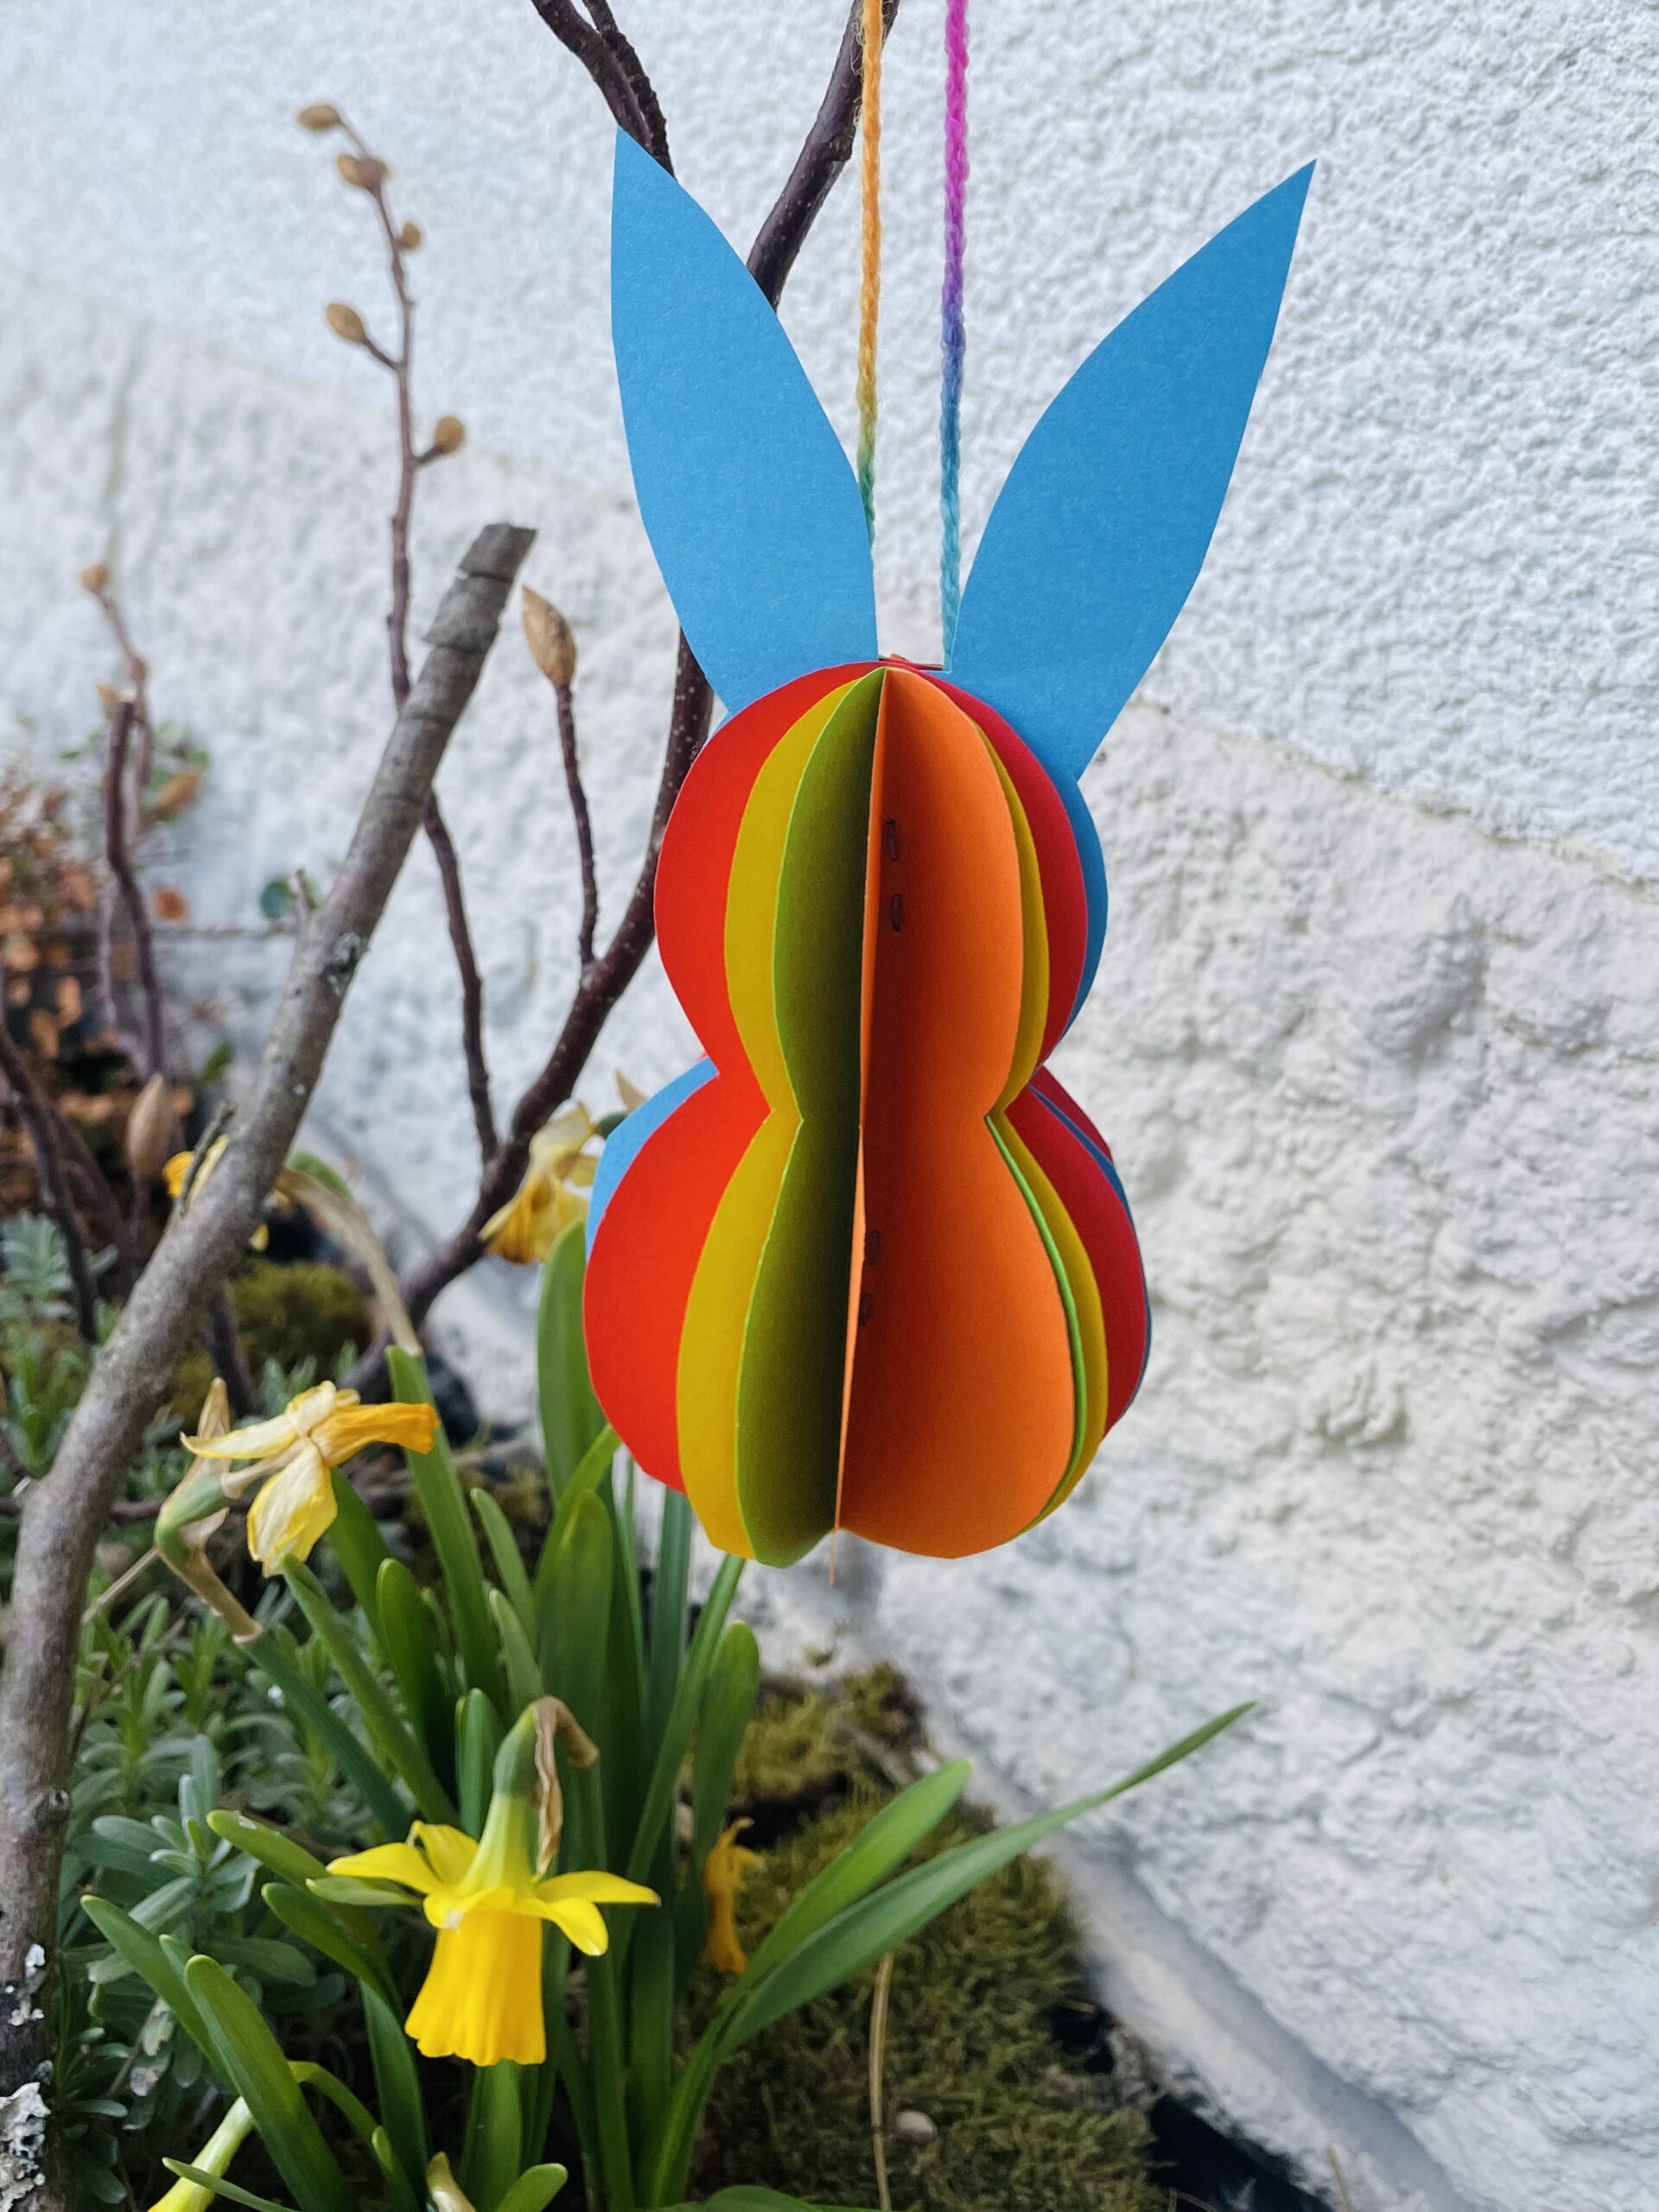
Bild zum Schritt 25 für das Bastel- und DIY-Abenteuer für Kinder: 'Oder ihr hängt ihn an einen Ast zur Deko.'

26

Have fun trying out.

Easter bunny colorful

Follow us on Facebook , Instagram and Pinterest
Don't miss any more adventures: Our bottle mail

Leave a Reply

Your email address will not be published.

The maximum upload file size: 5 MB. You can upload: image, document. Drop file here