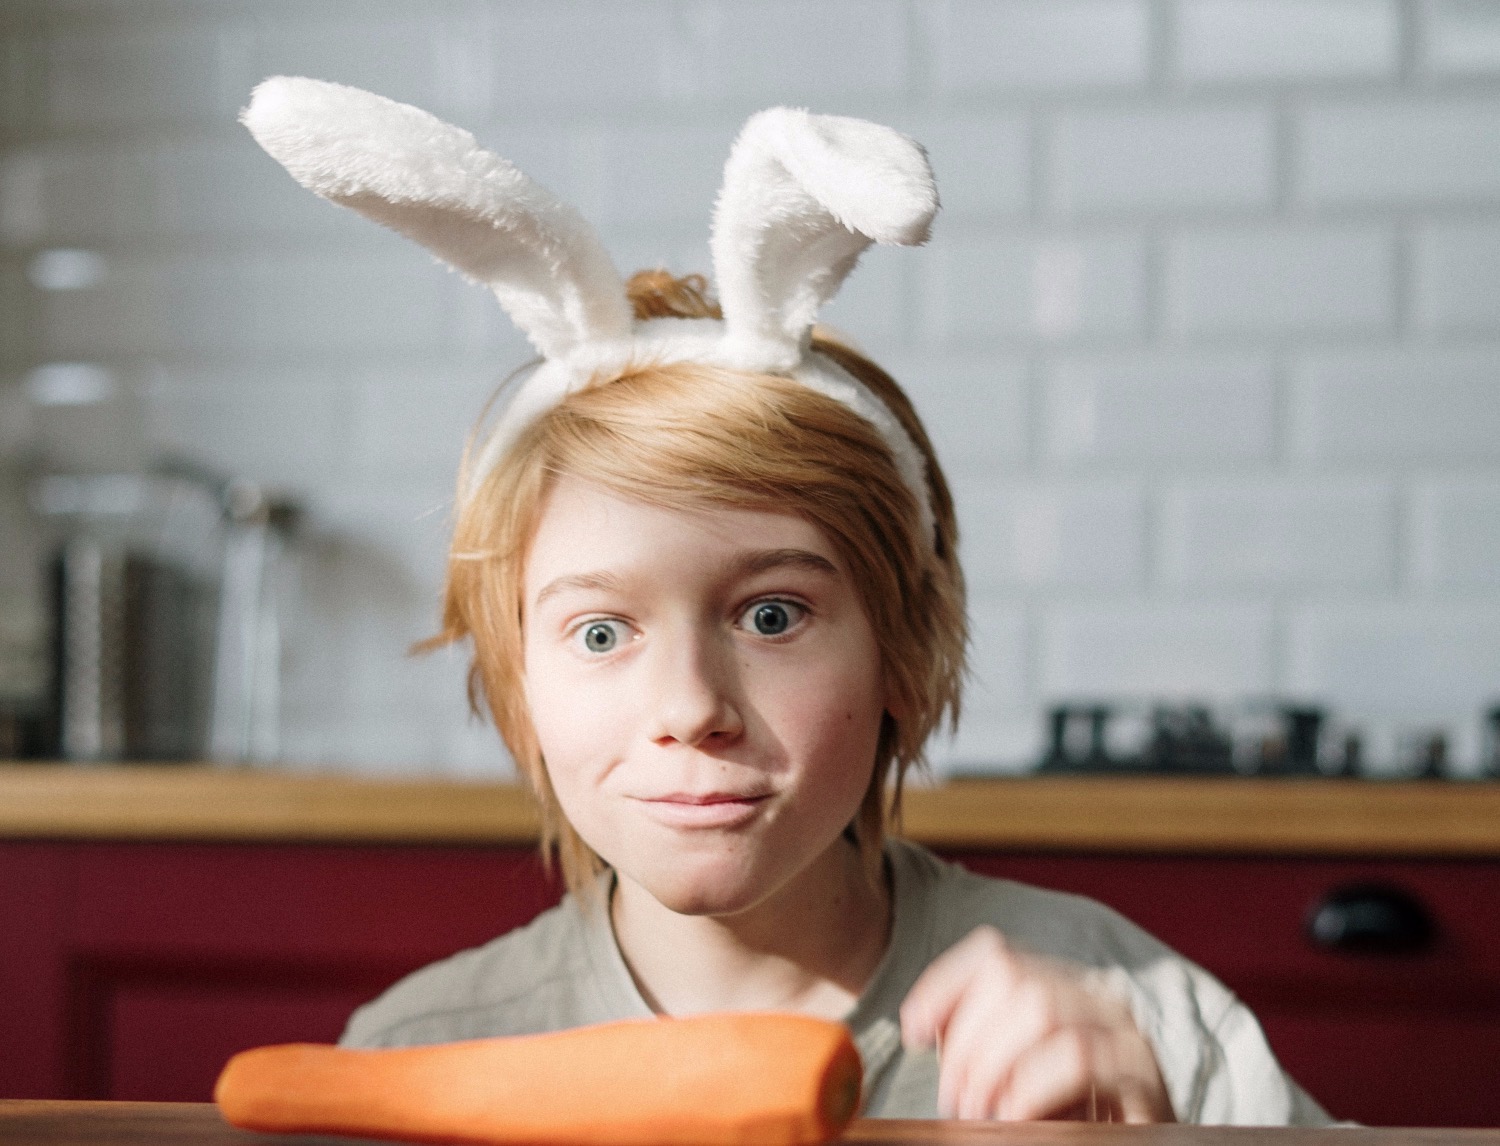
This sewing instruction for rabbit ears is explained in step by step with pictures, so that even beginners can sew these rabbit ears. Primary school children can help and perhaps even make an Easter surprise for smaller siblings. In addition, these rabbit ears are suitable for disguise in carnival.
Media Education for Kindergarten and Hort

Relief in everyday life, targeted promotion of individual children, independent learning and - without any pre-knowledge already usable by the youngest!
First you make a template for the rabbit ears or you print out the template. Then you cut out the template.

The dashed line indicates where you sew your ears together.
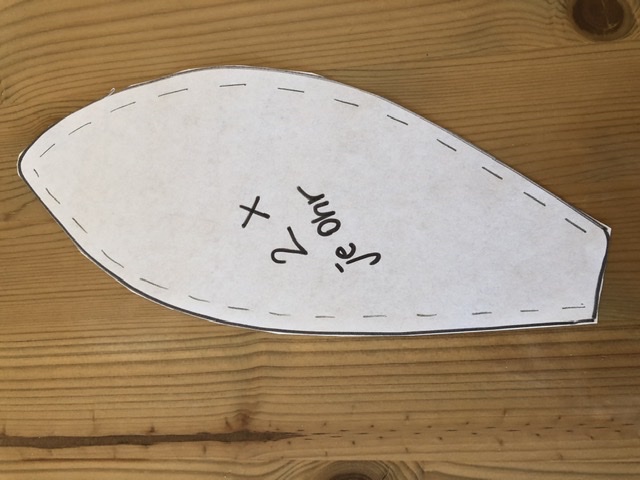
You need a total of 4 trimmings of the rabbit ears from the fleece fabric.
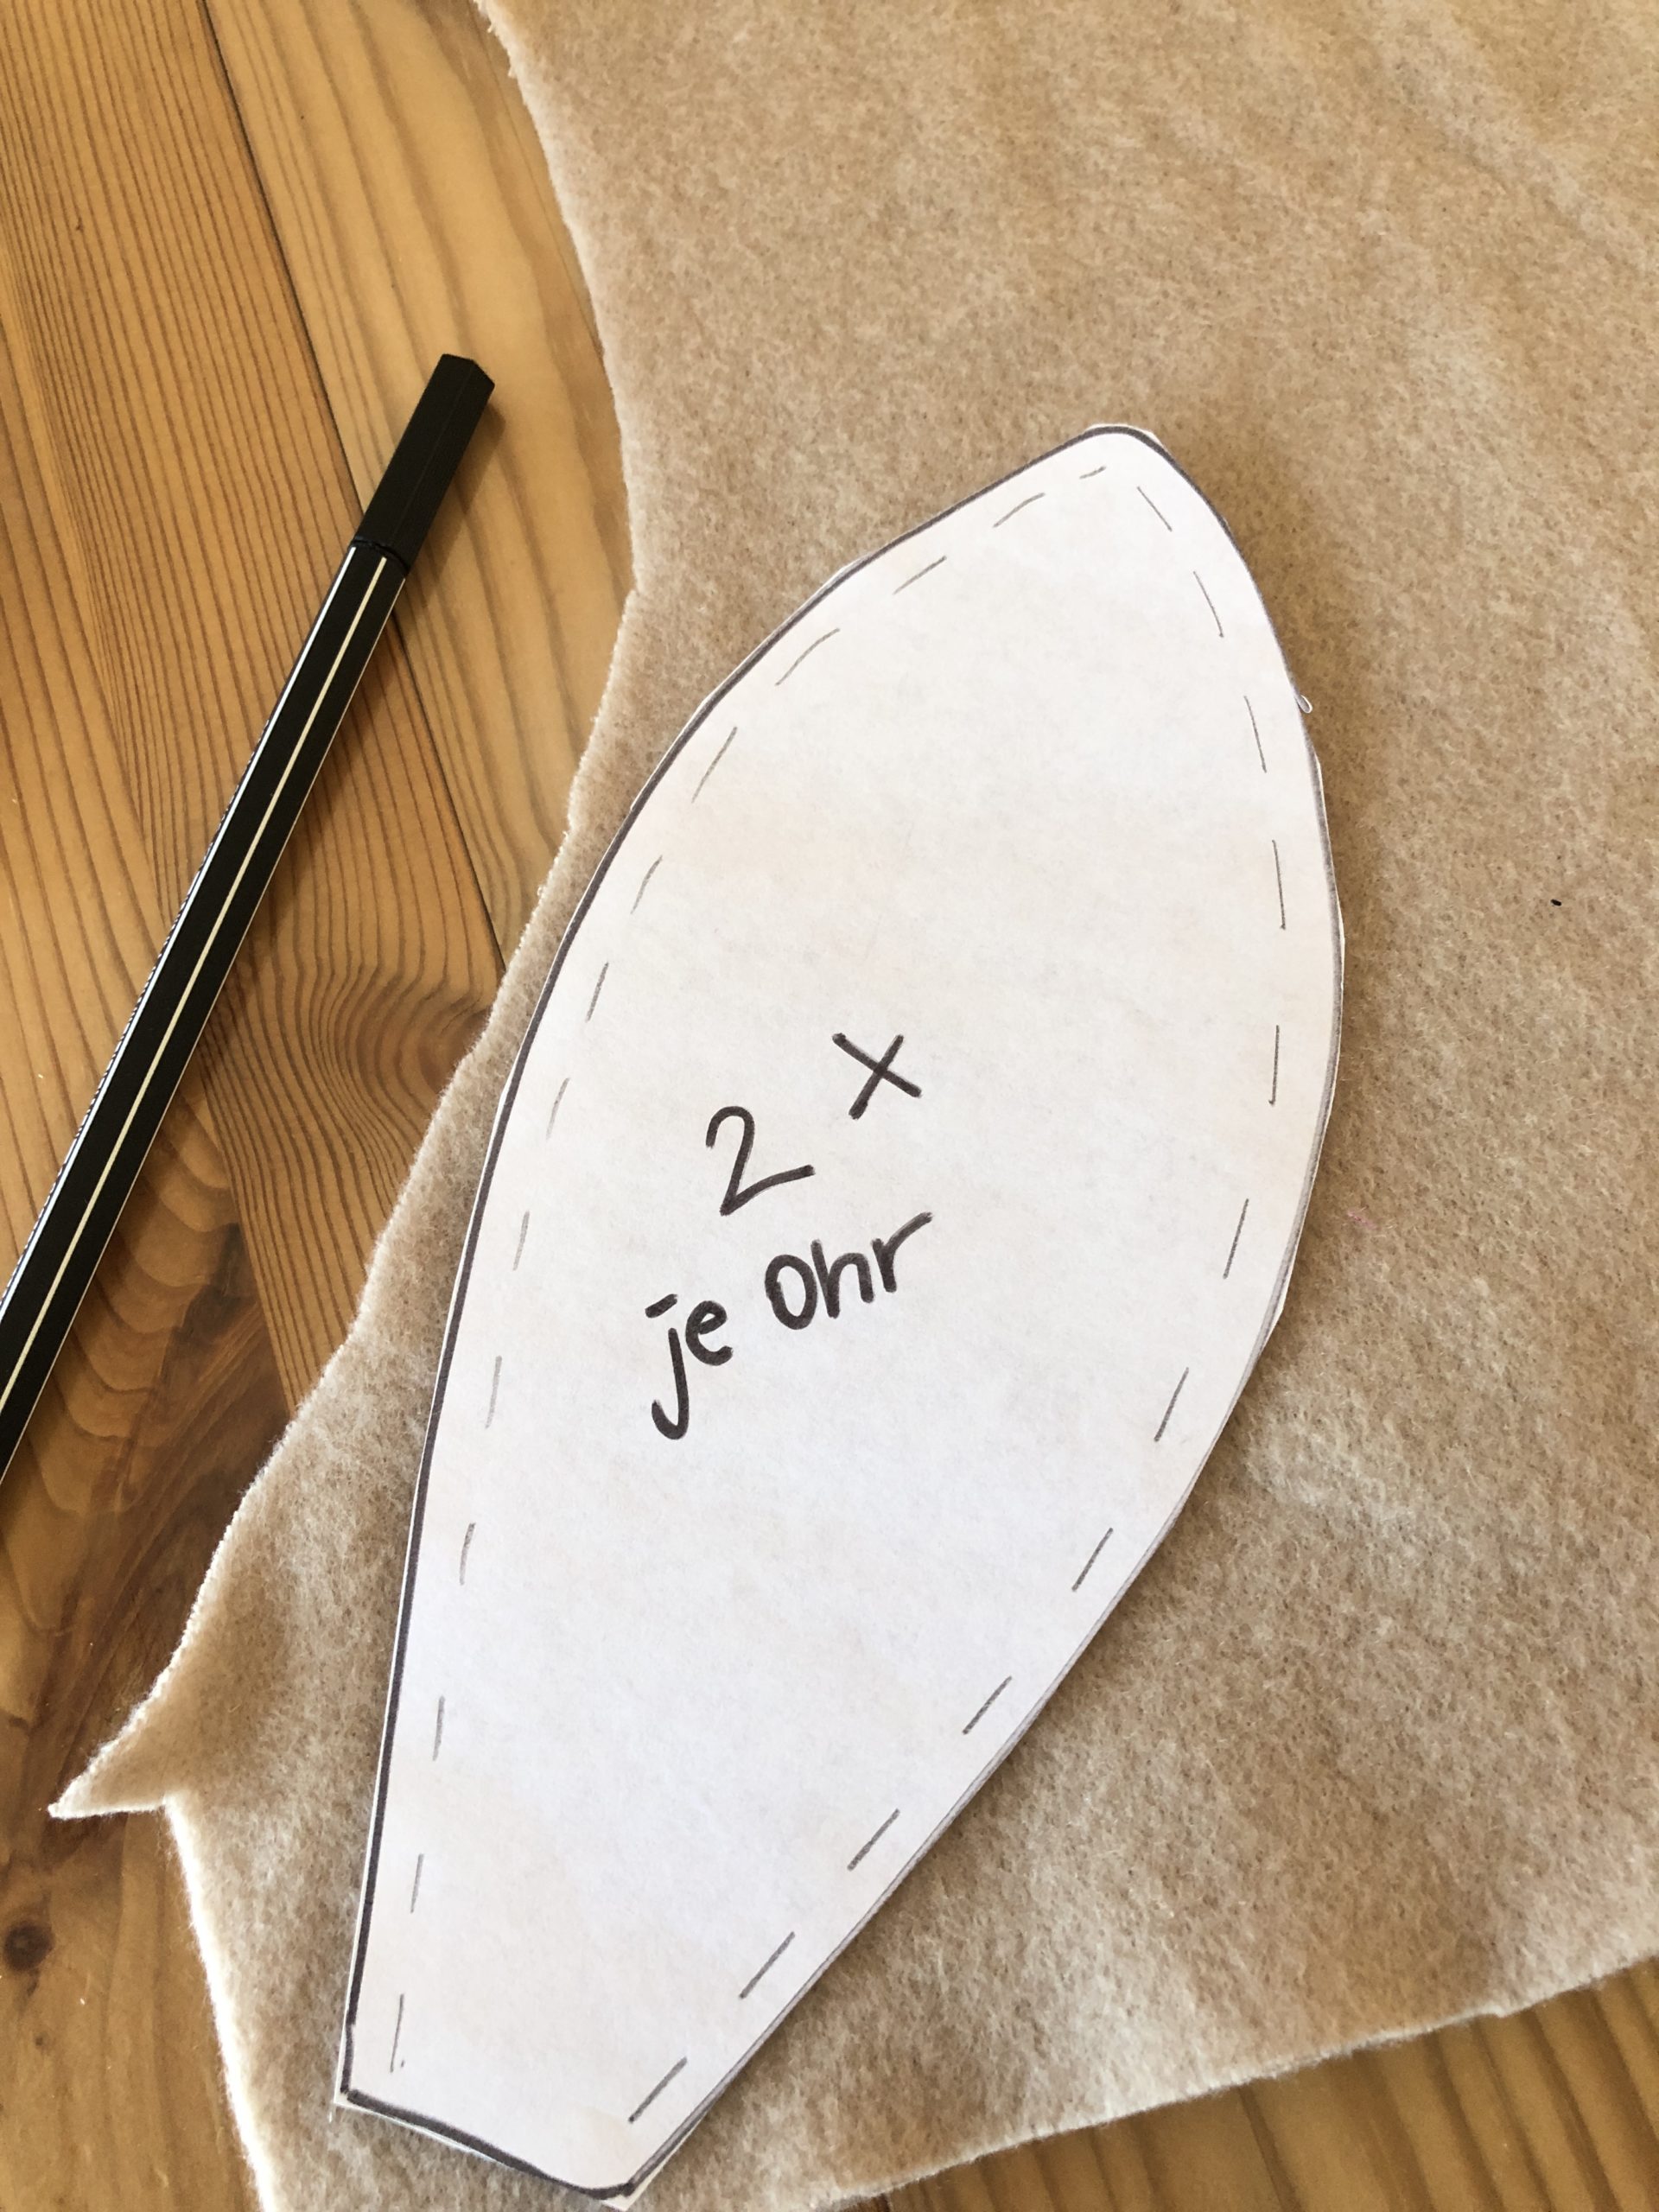
Each finished ear consists of two parts.
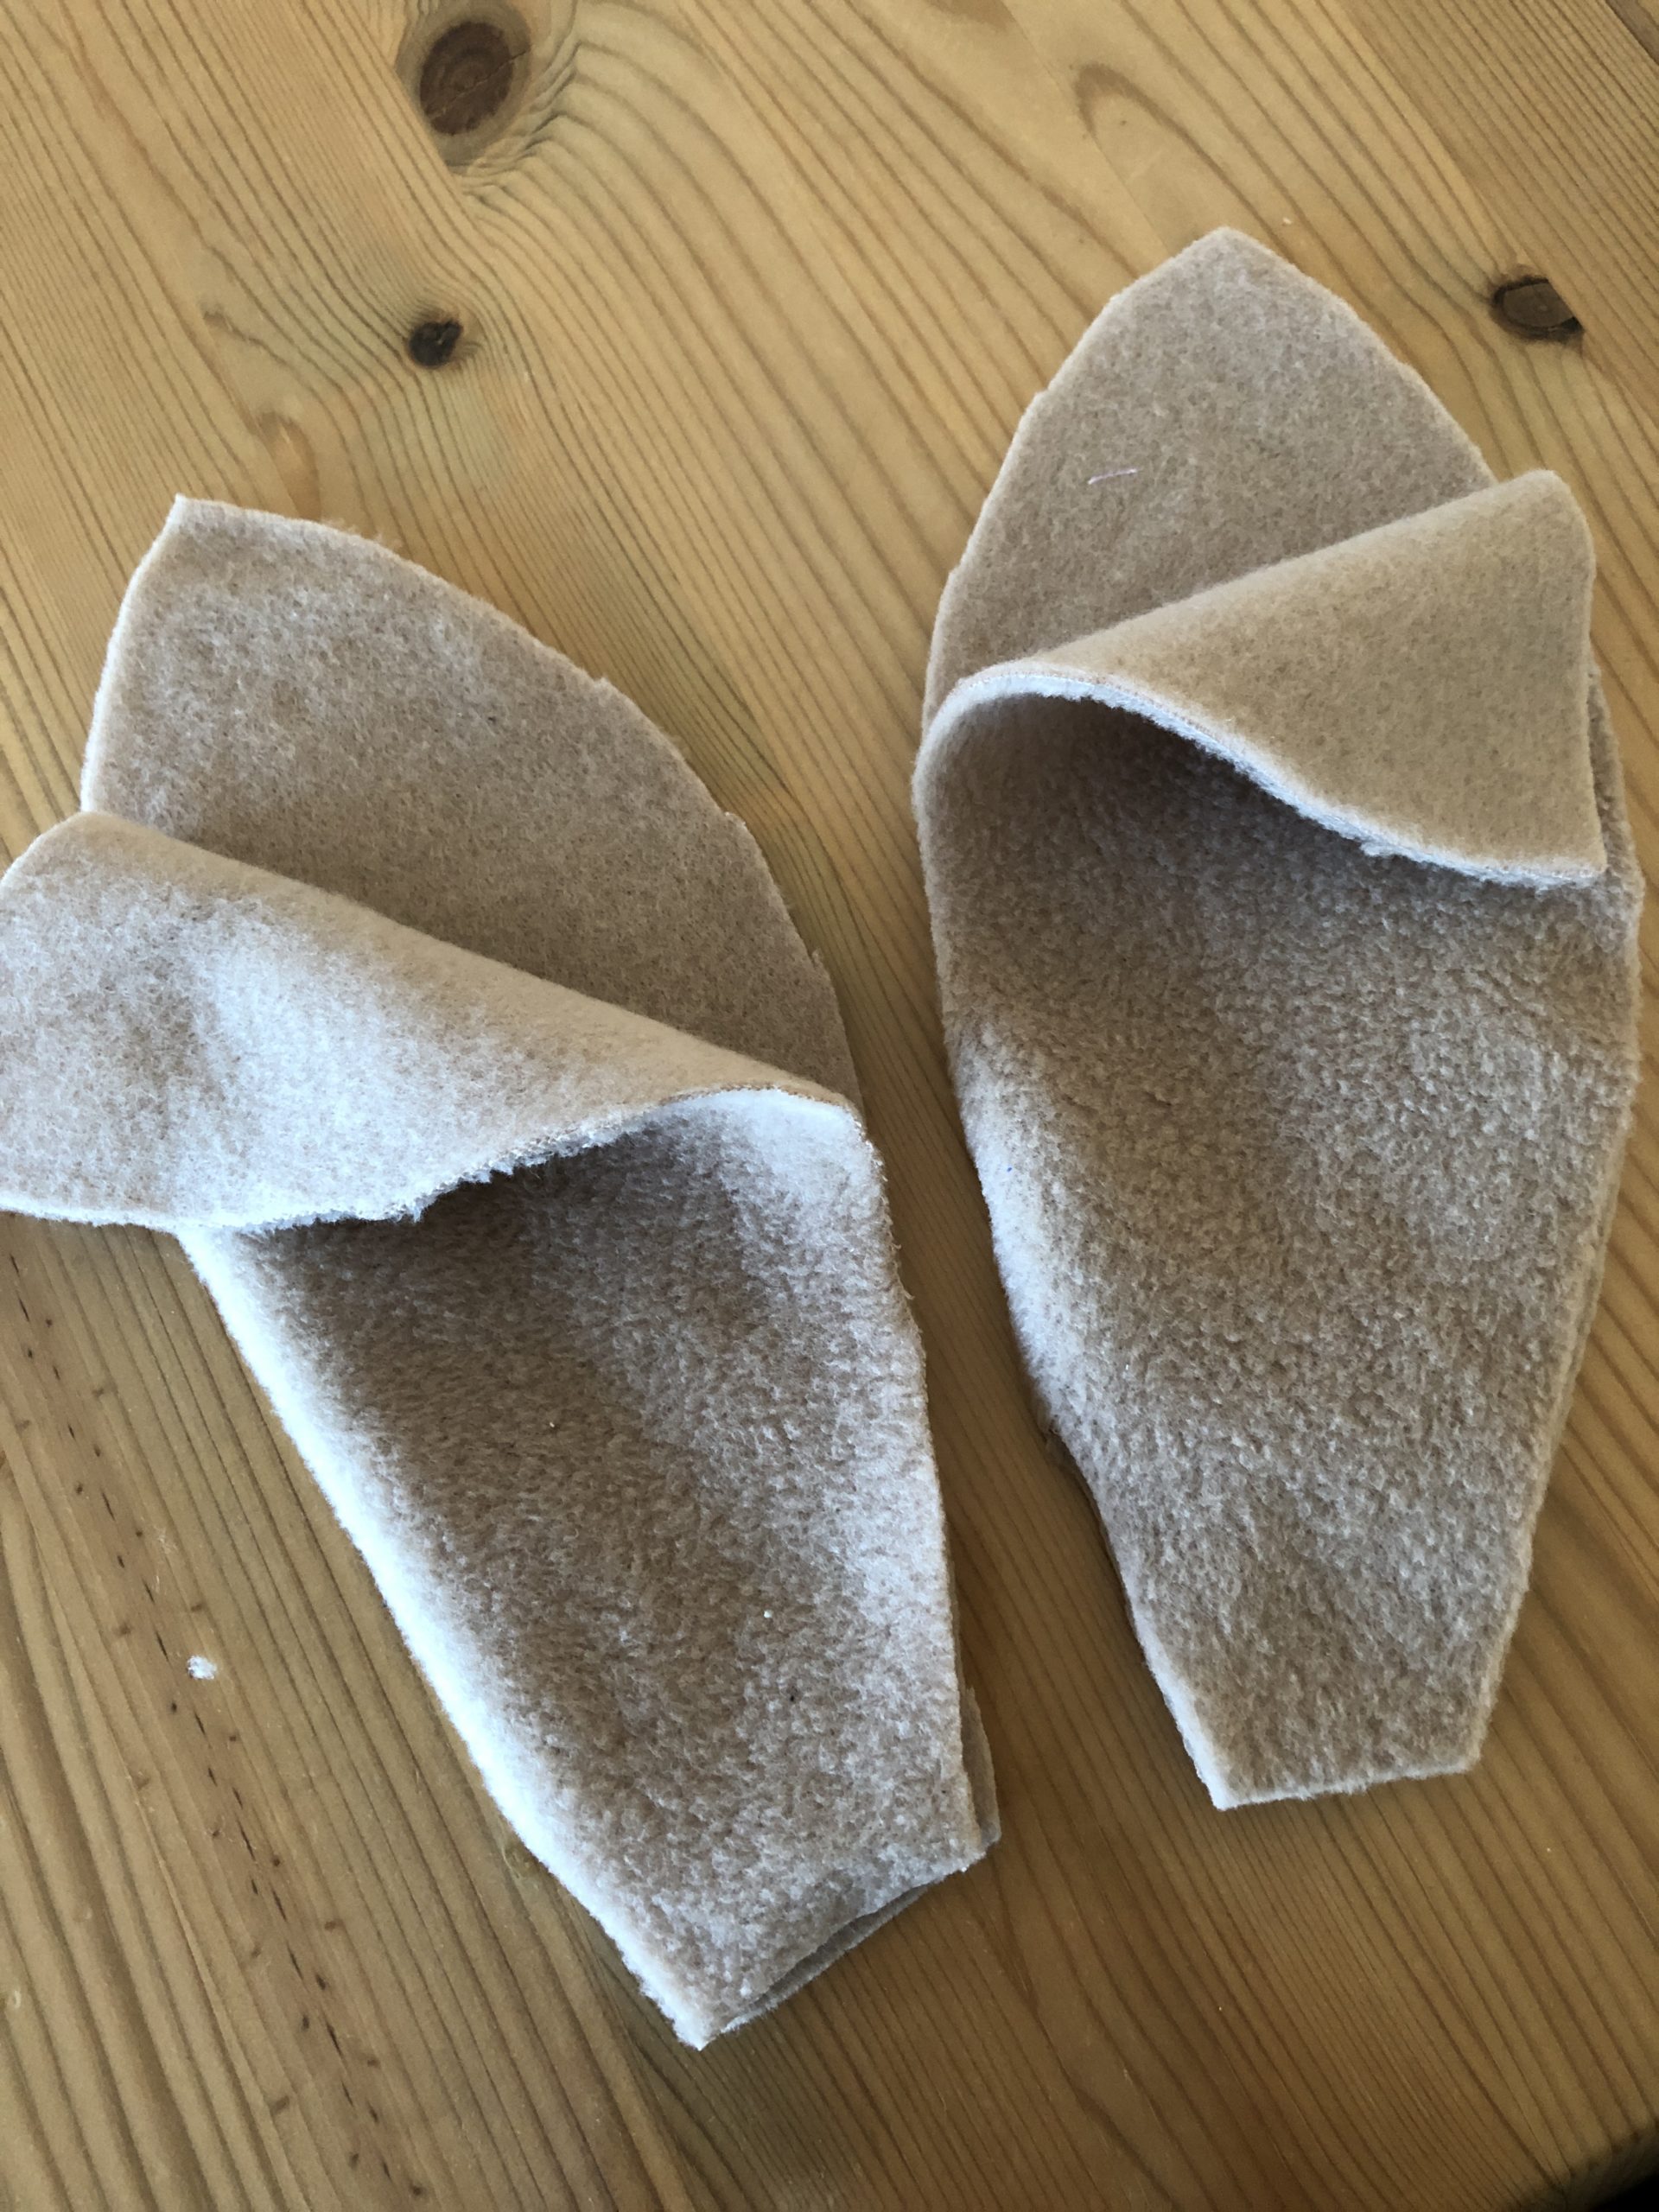
Then sew your ears, right on the right.
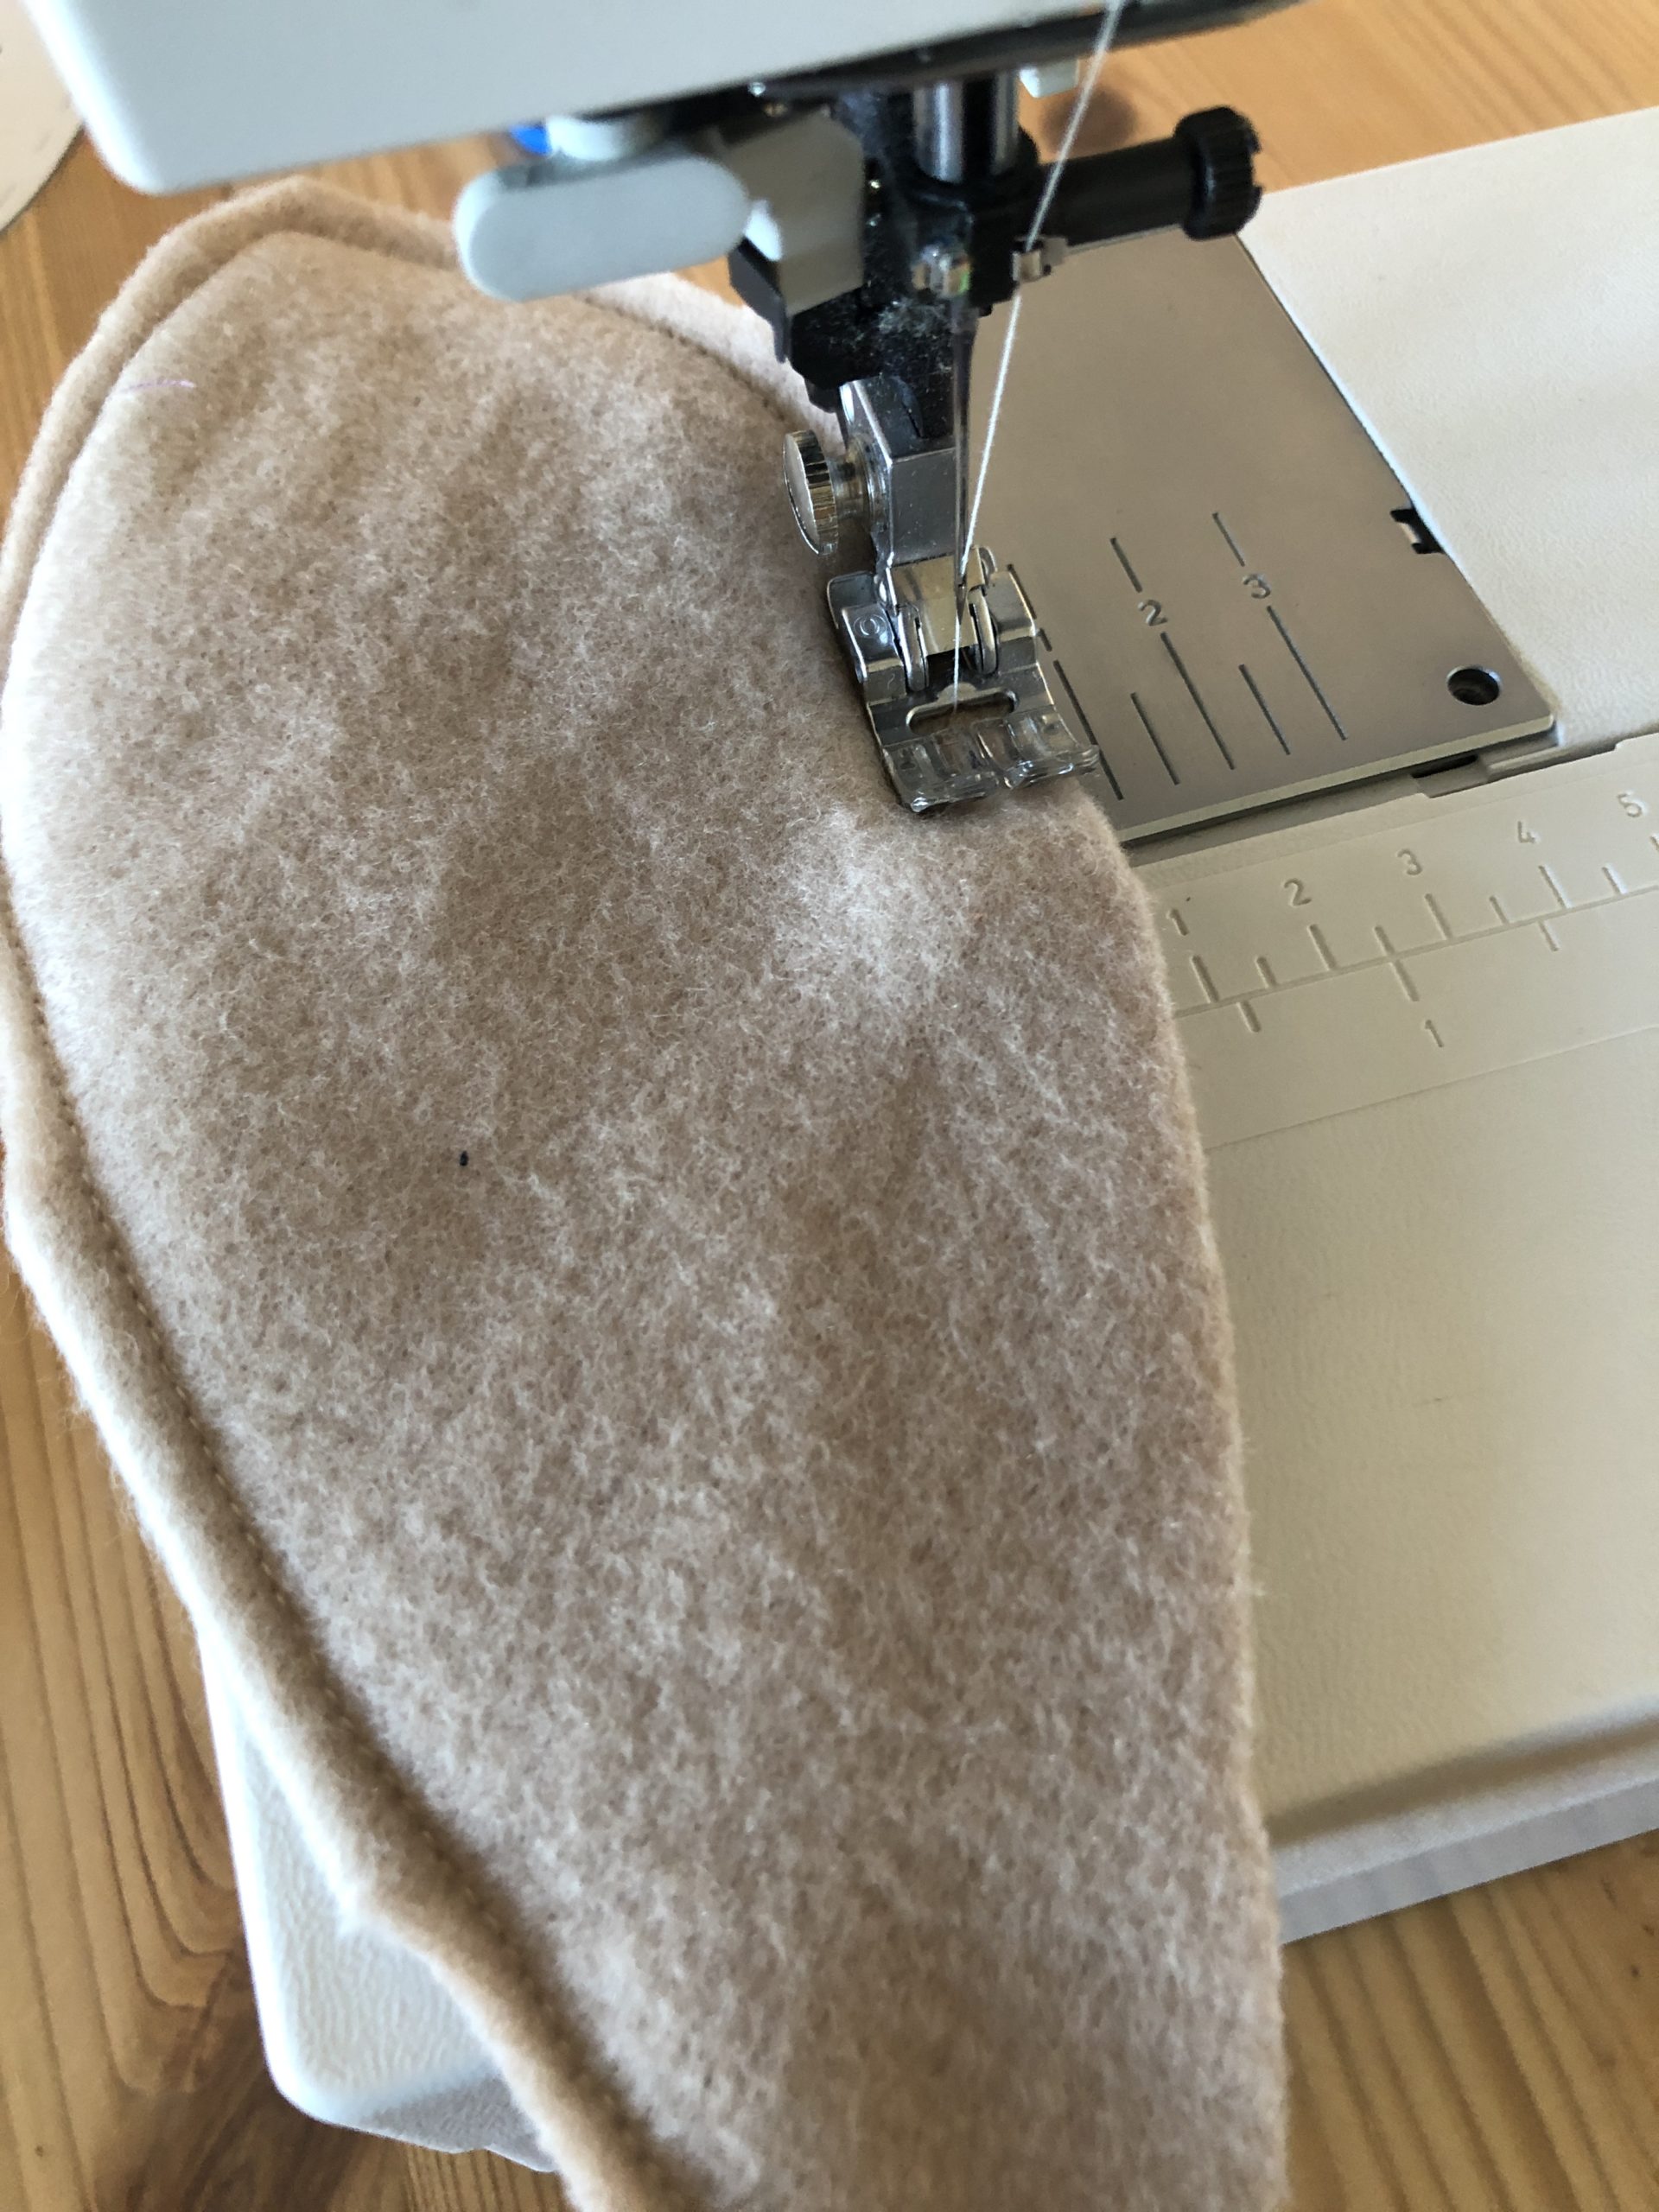
Attention: Do not sew the ears together completely. An opening for turning must remain open.

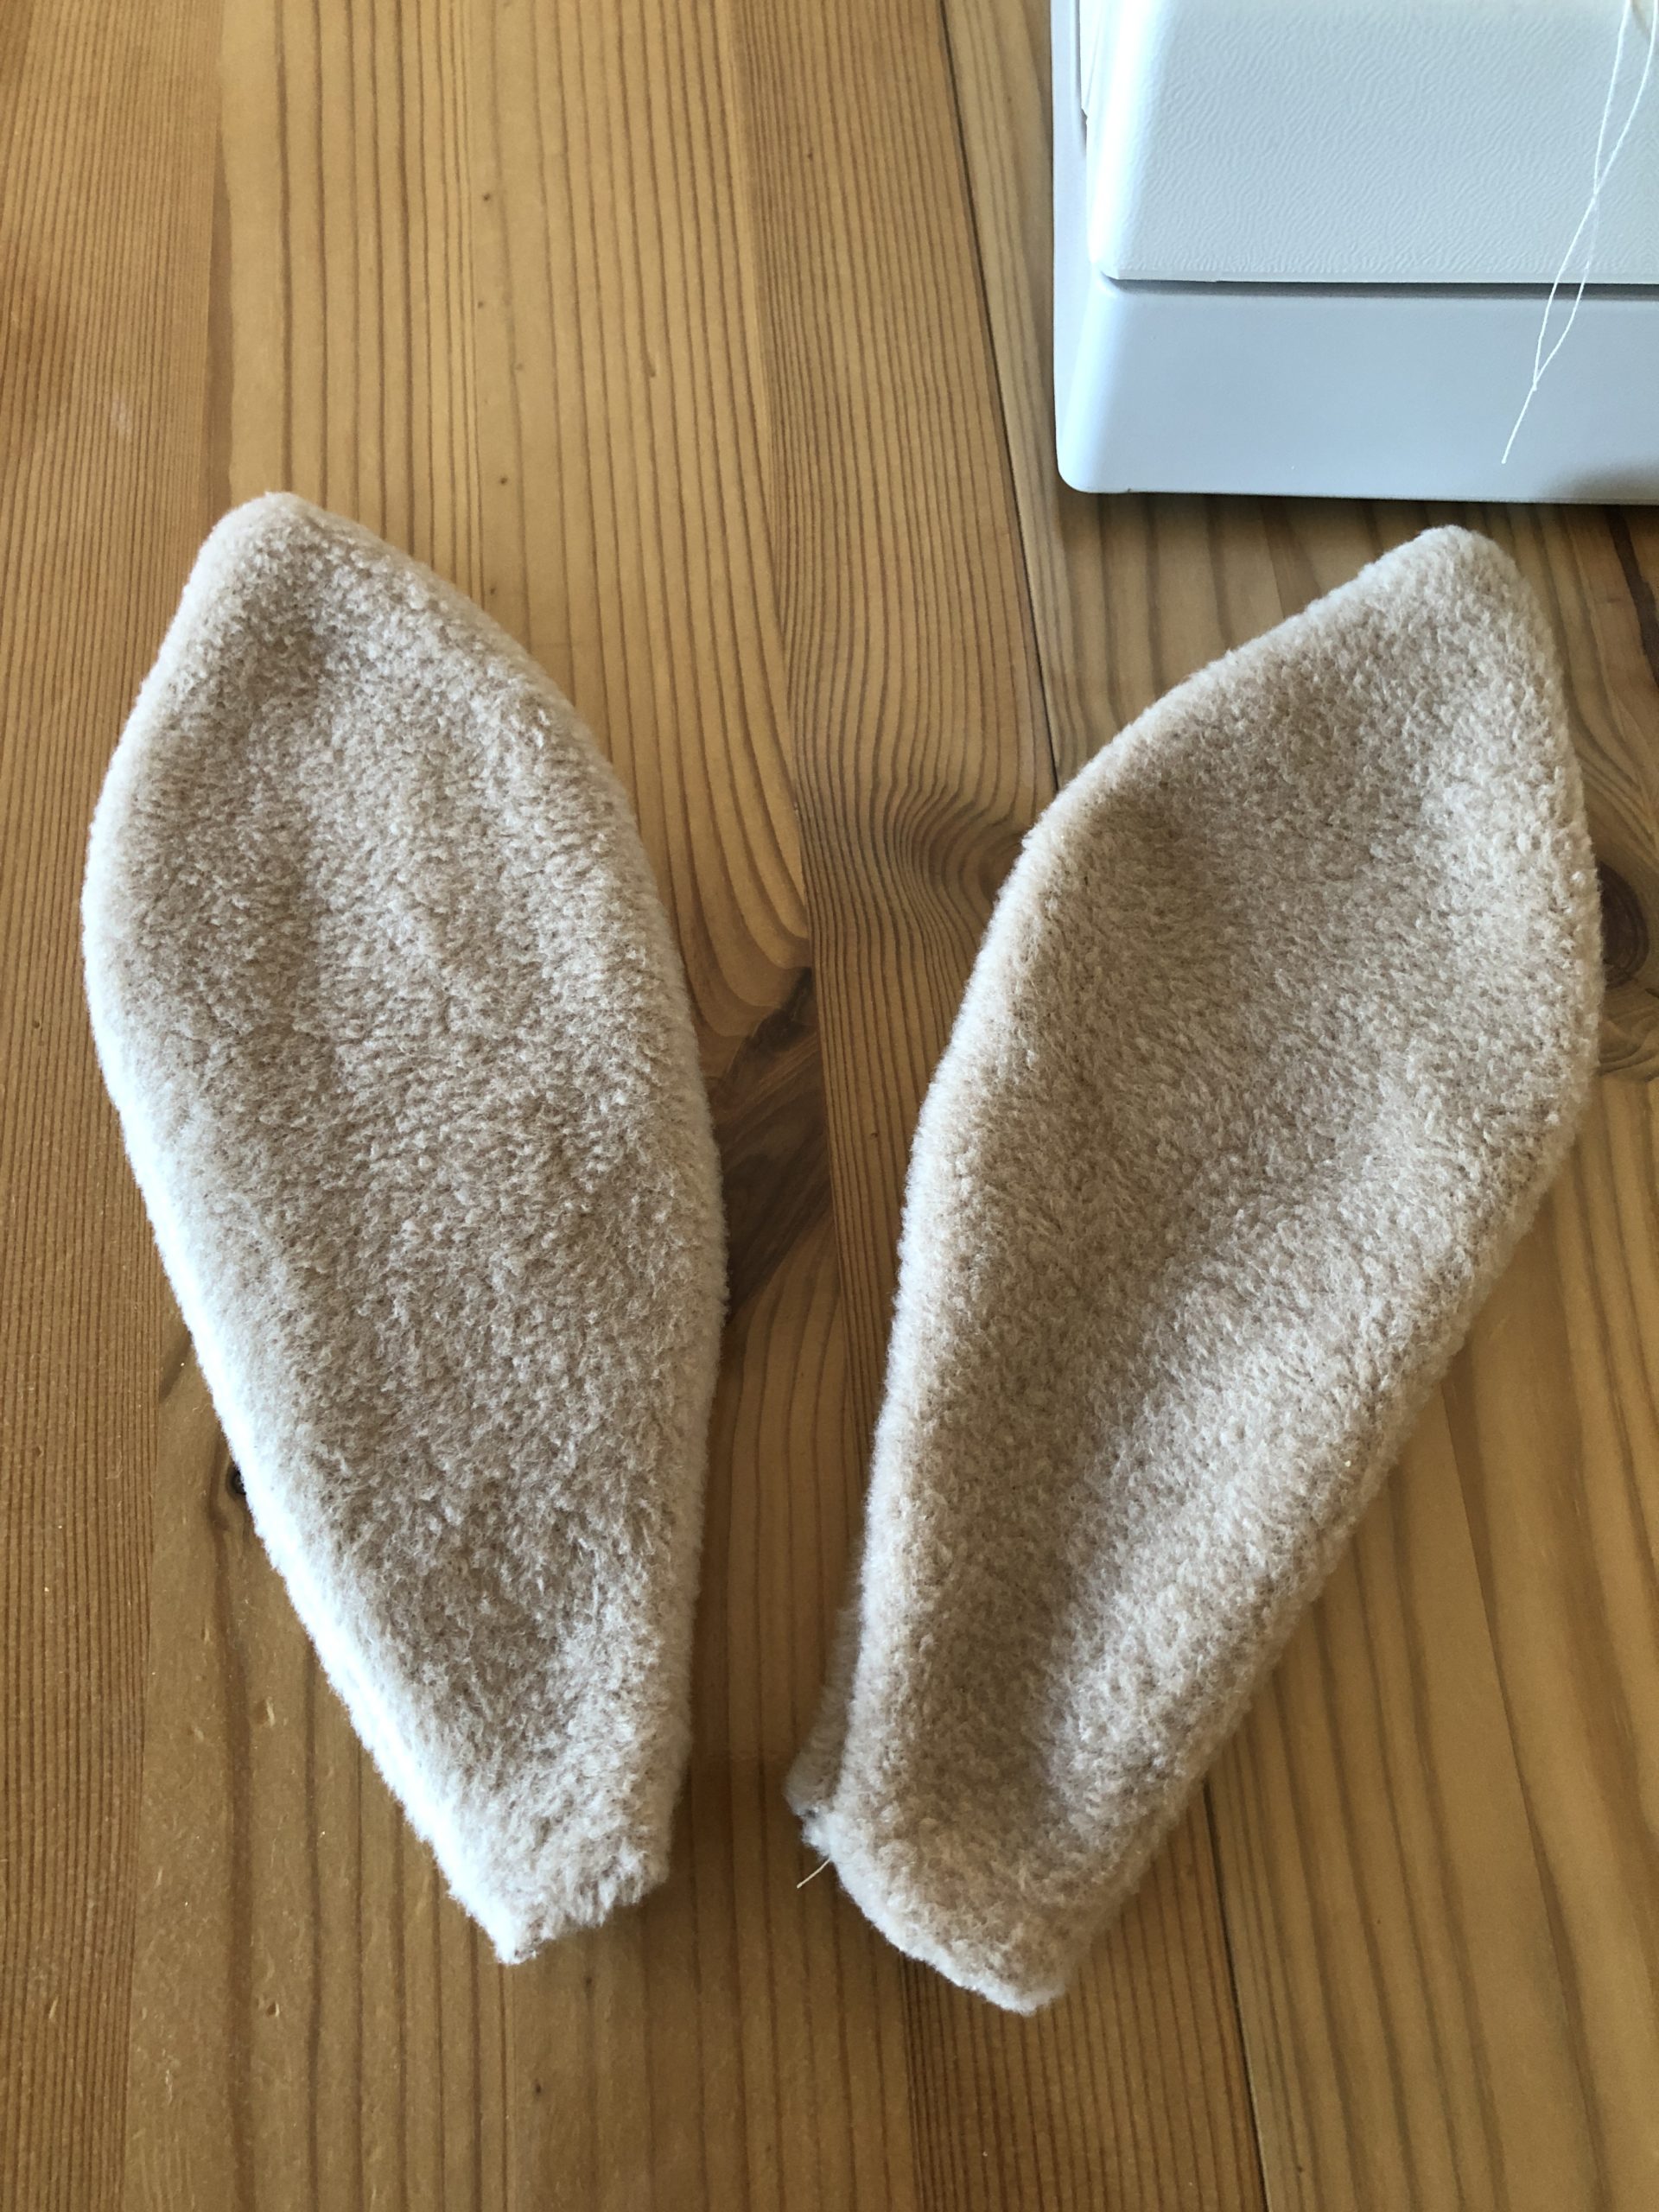
After sewing, turn both ears to the right side.
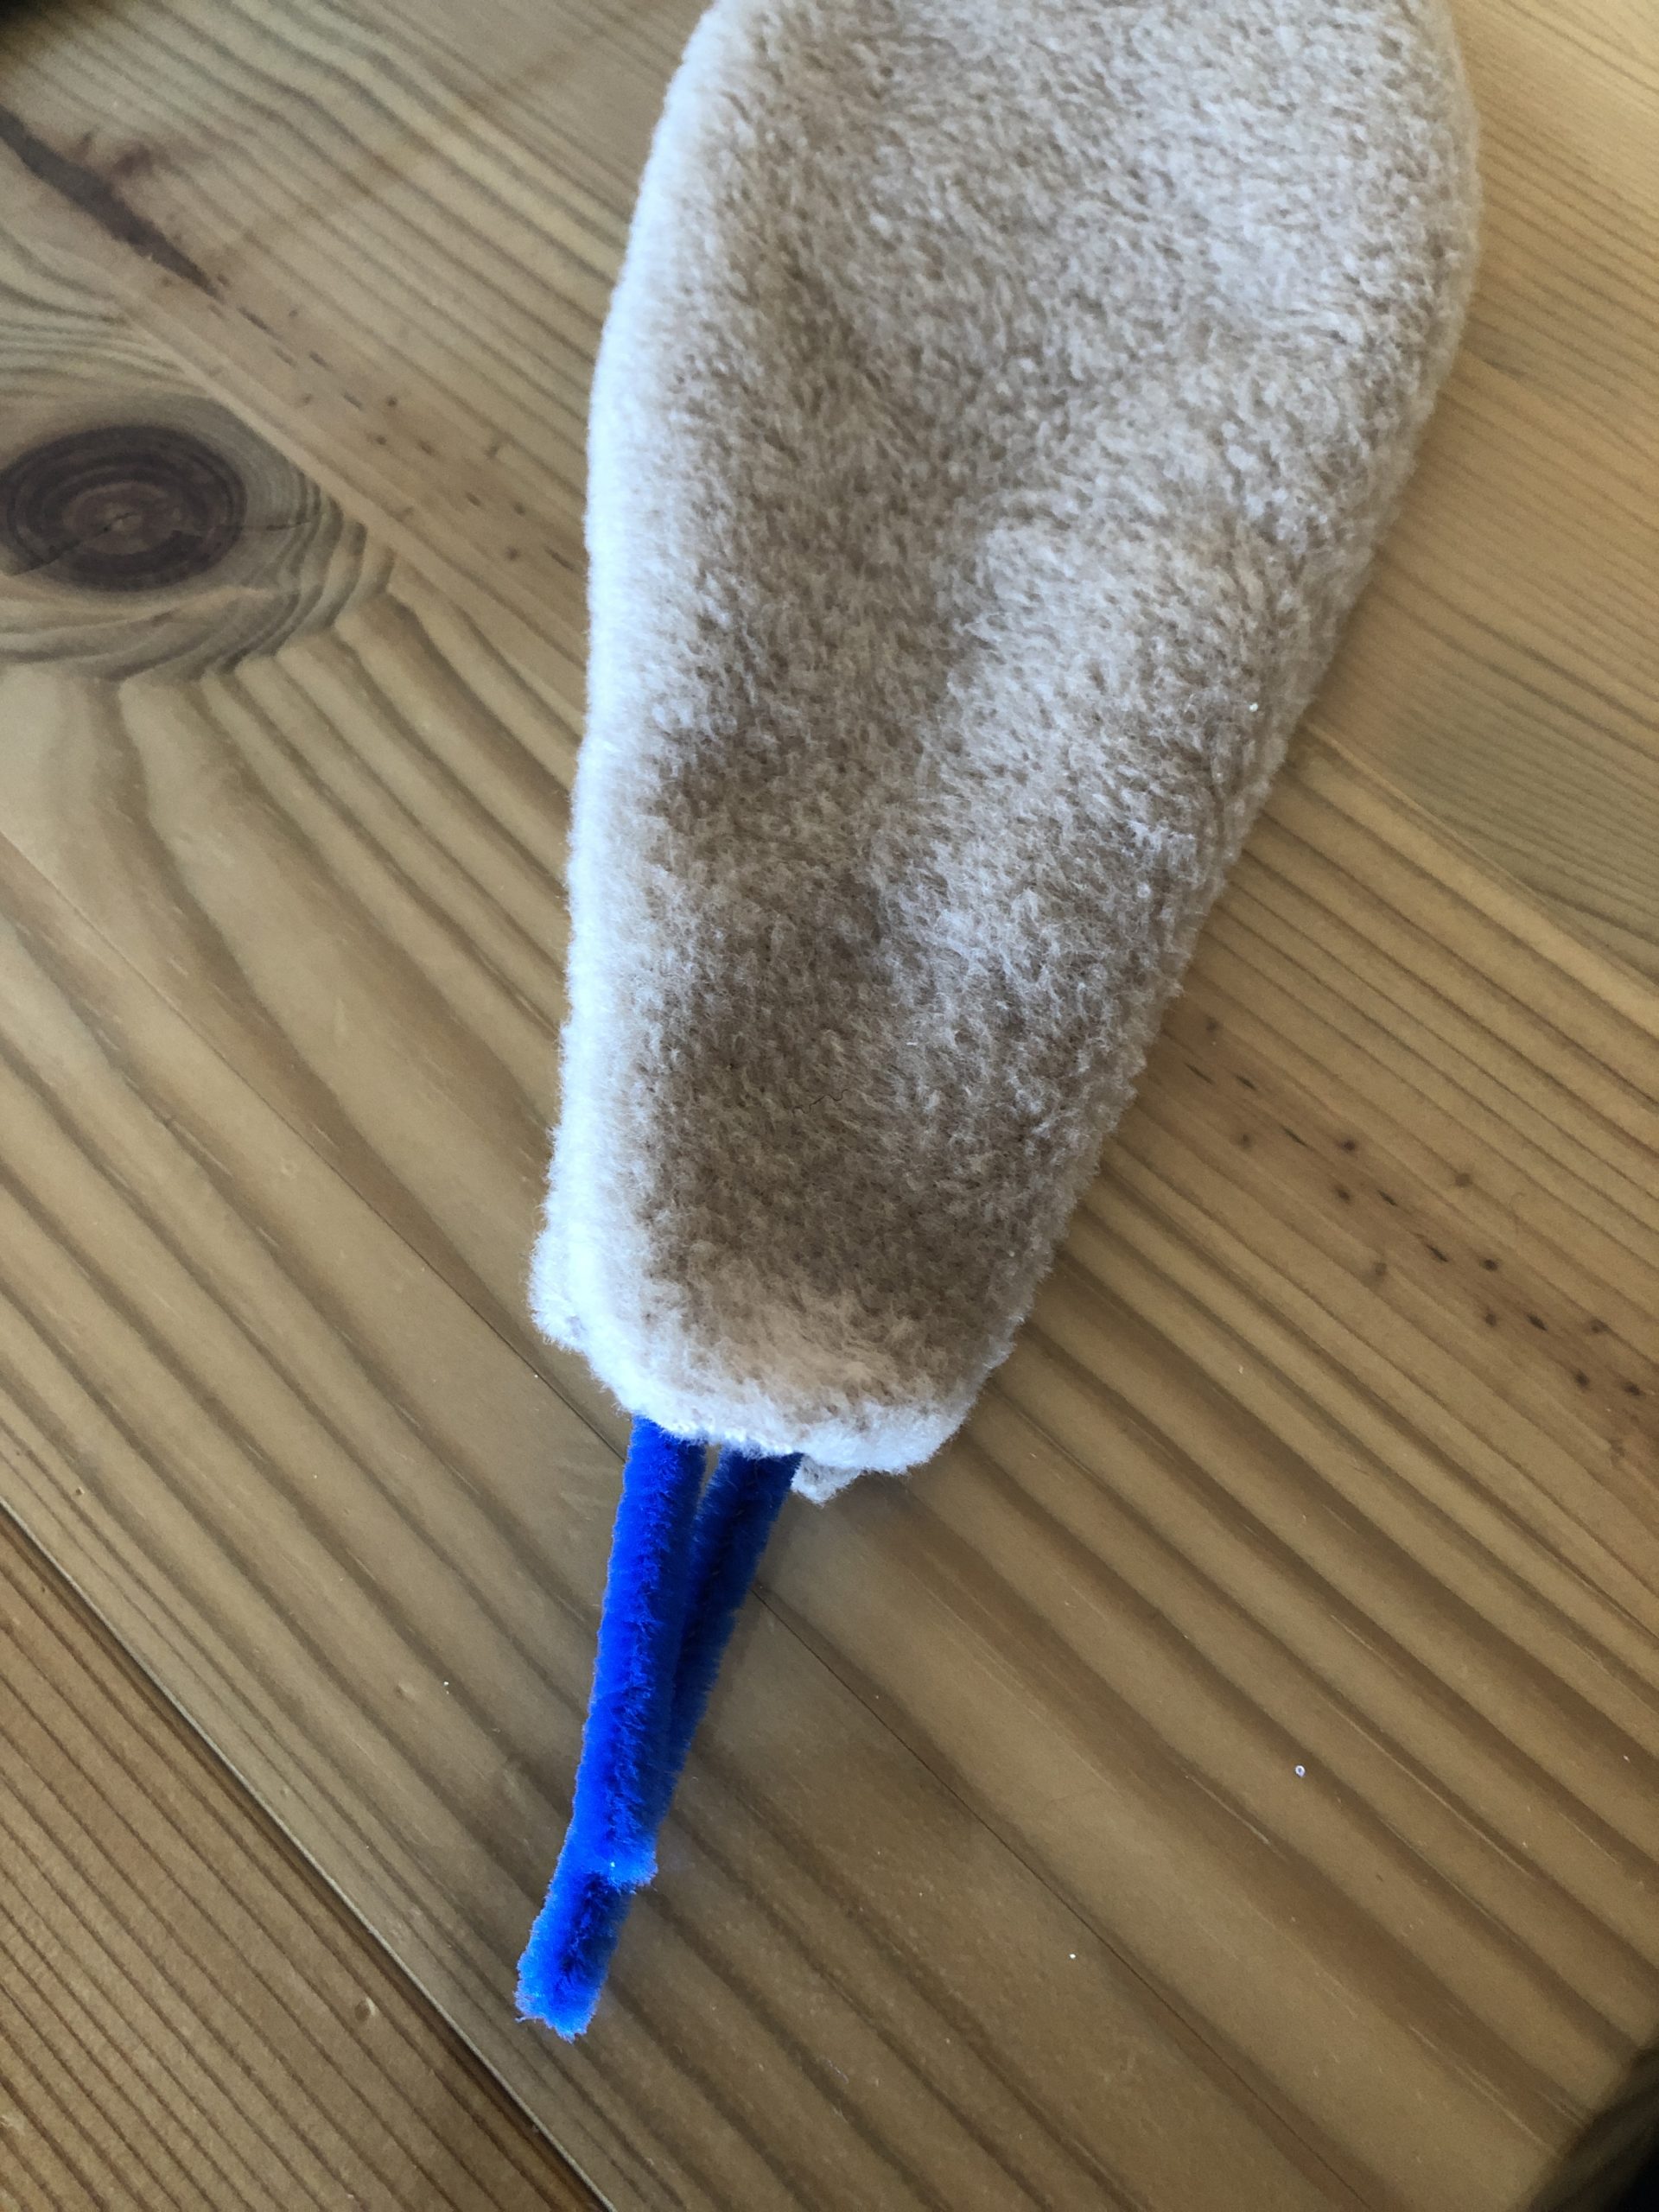
Now you offer the pipe cleaner wire (color doesn't matter!) in the shape of the ears.
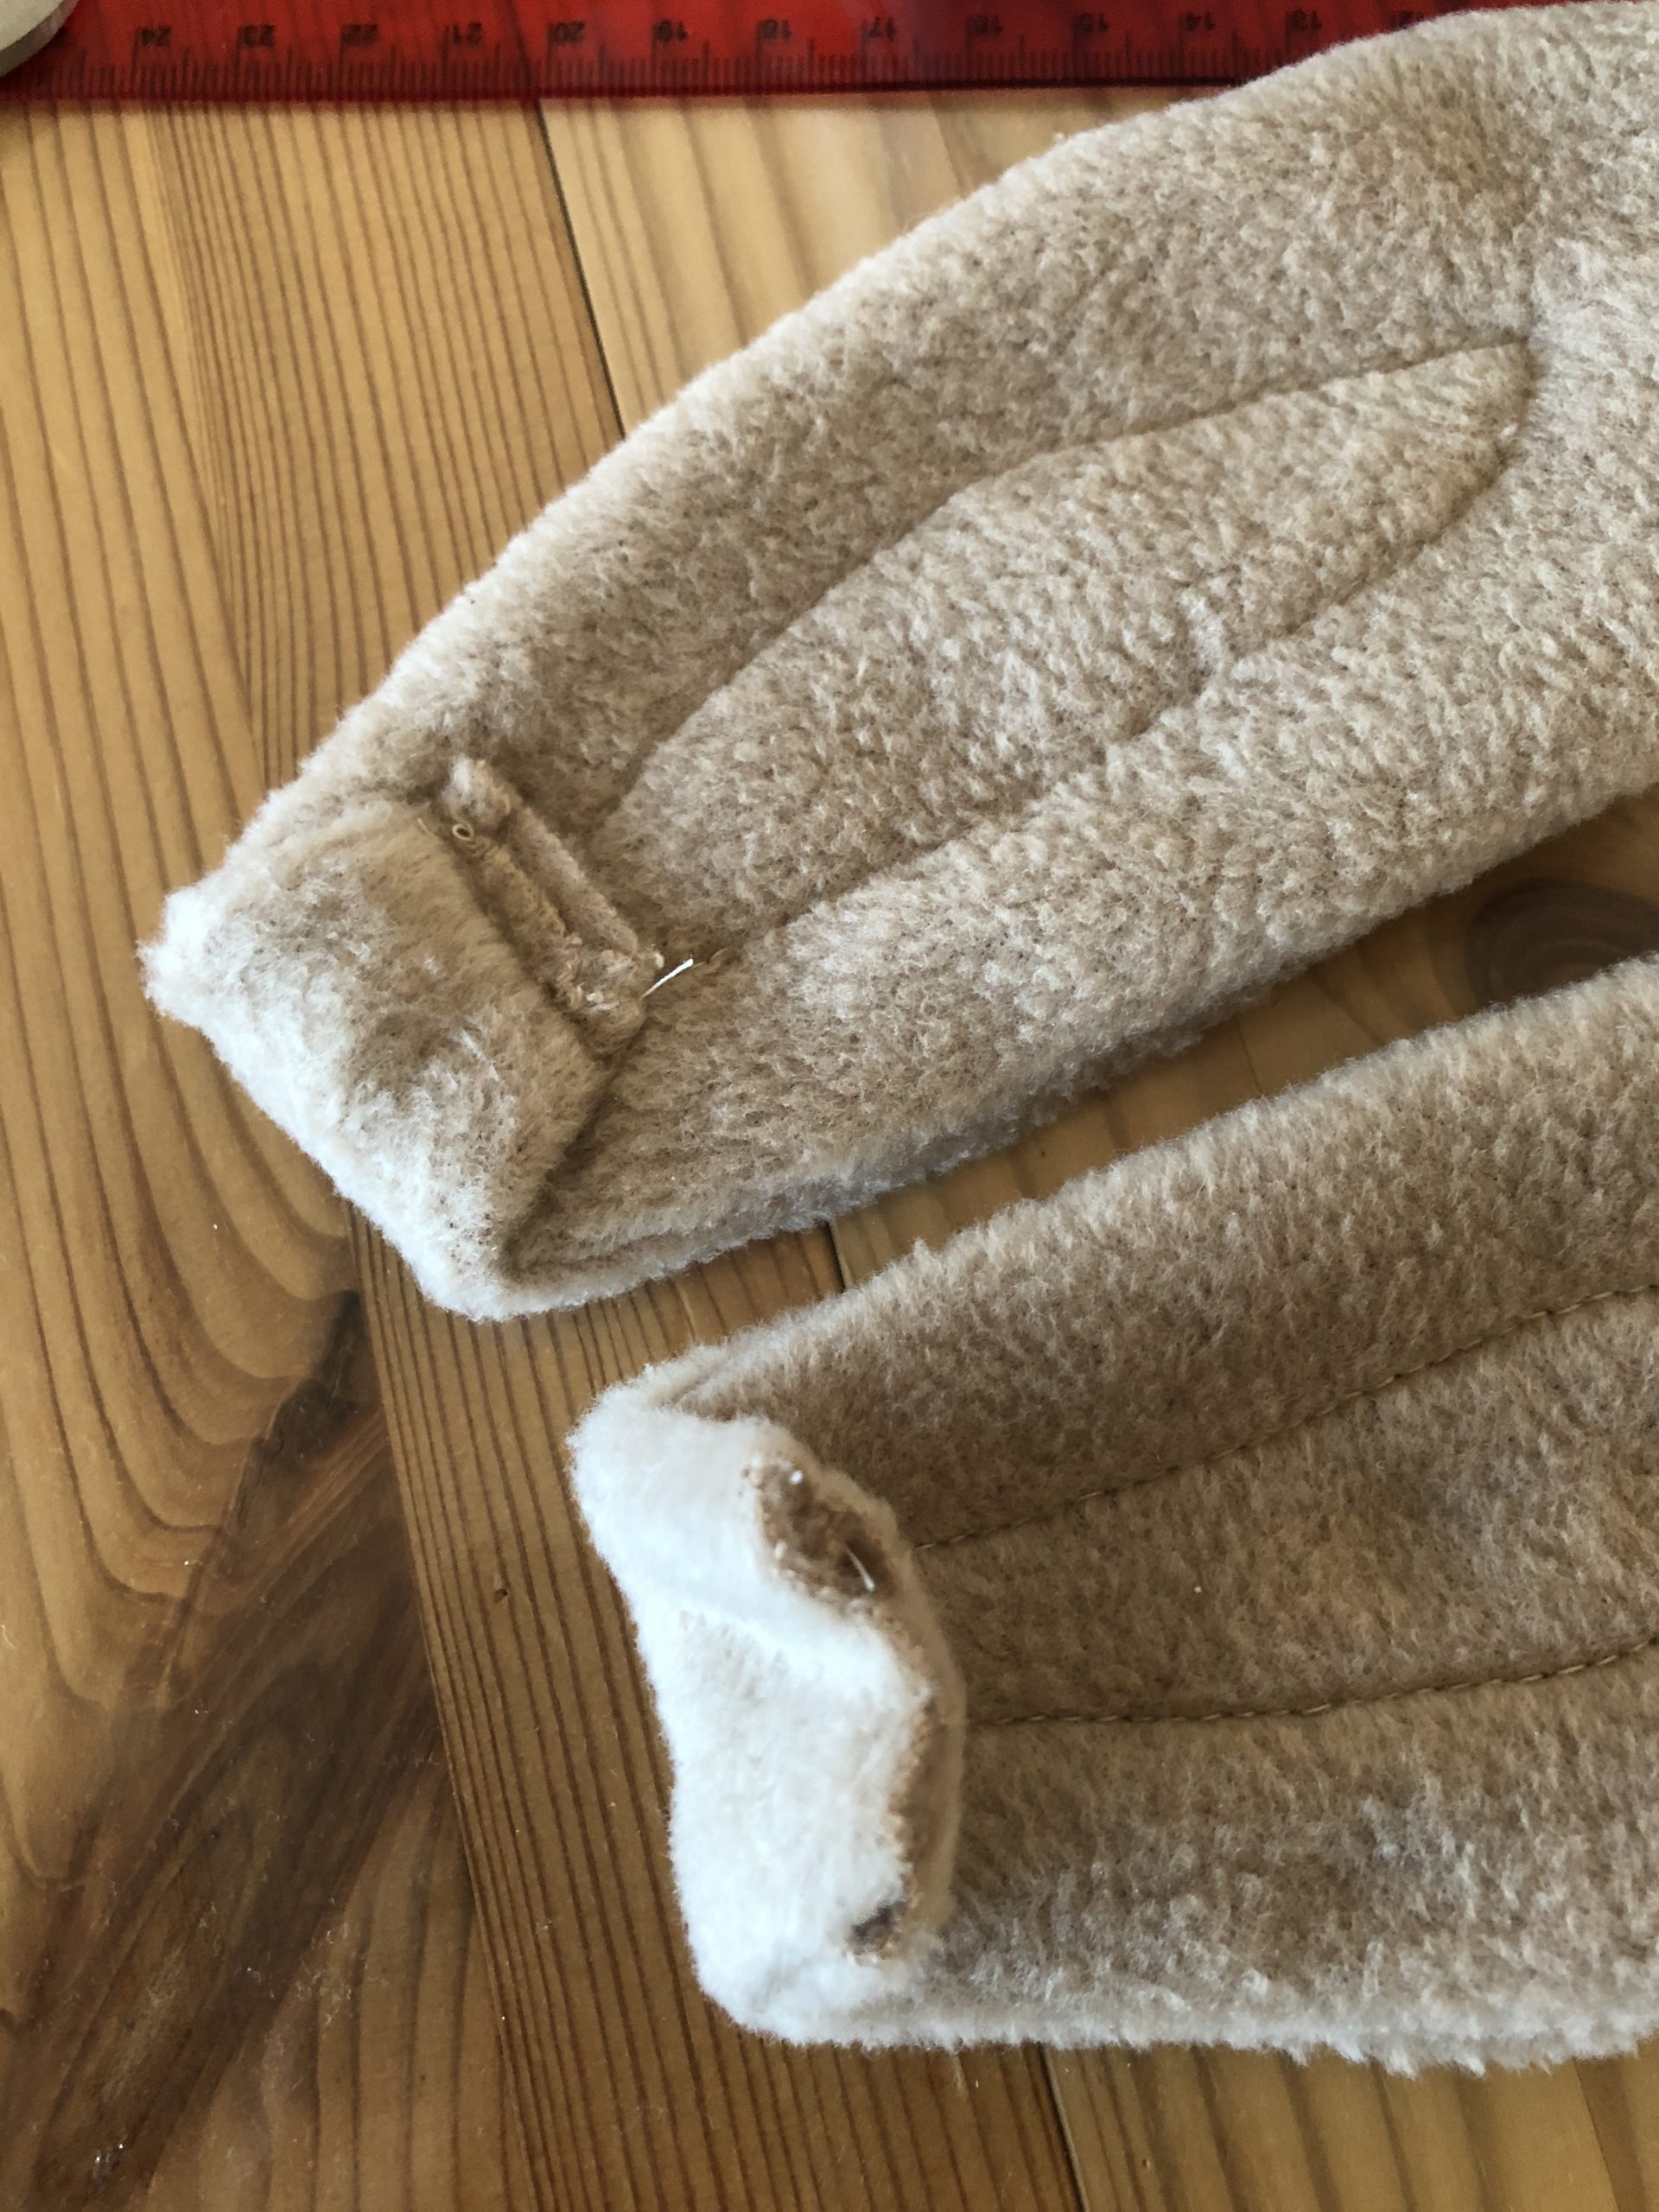
Then you put the wire with the bent side ahead in the rabbit ear.

Push the wire completely into the ear.
Push the wire with your hands until it lies at the outer edge of the ear.
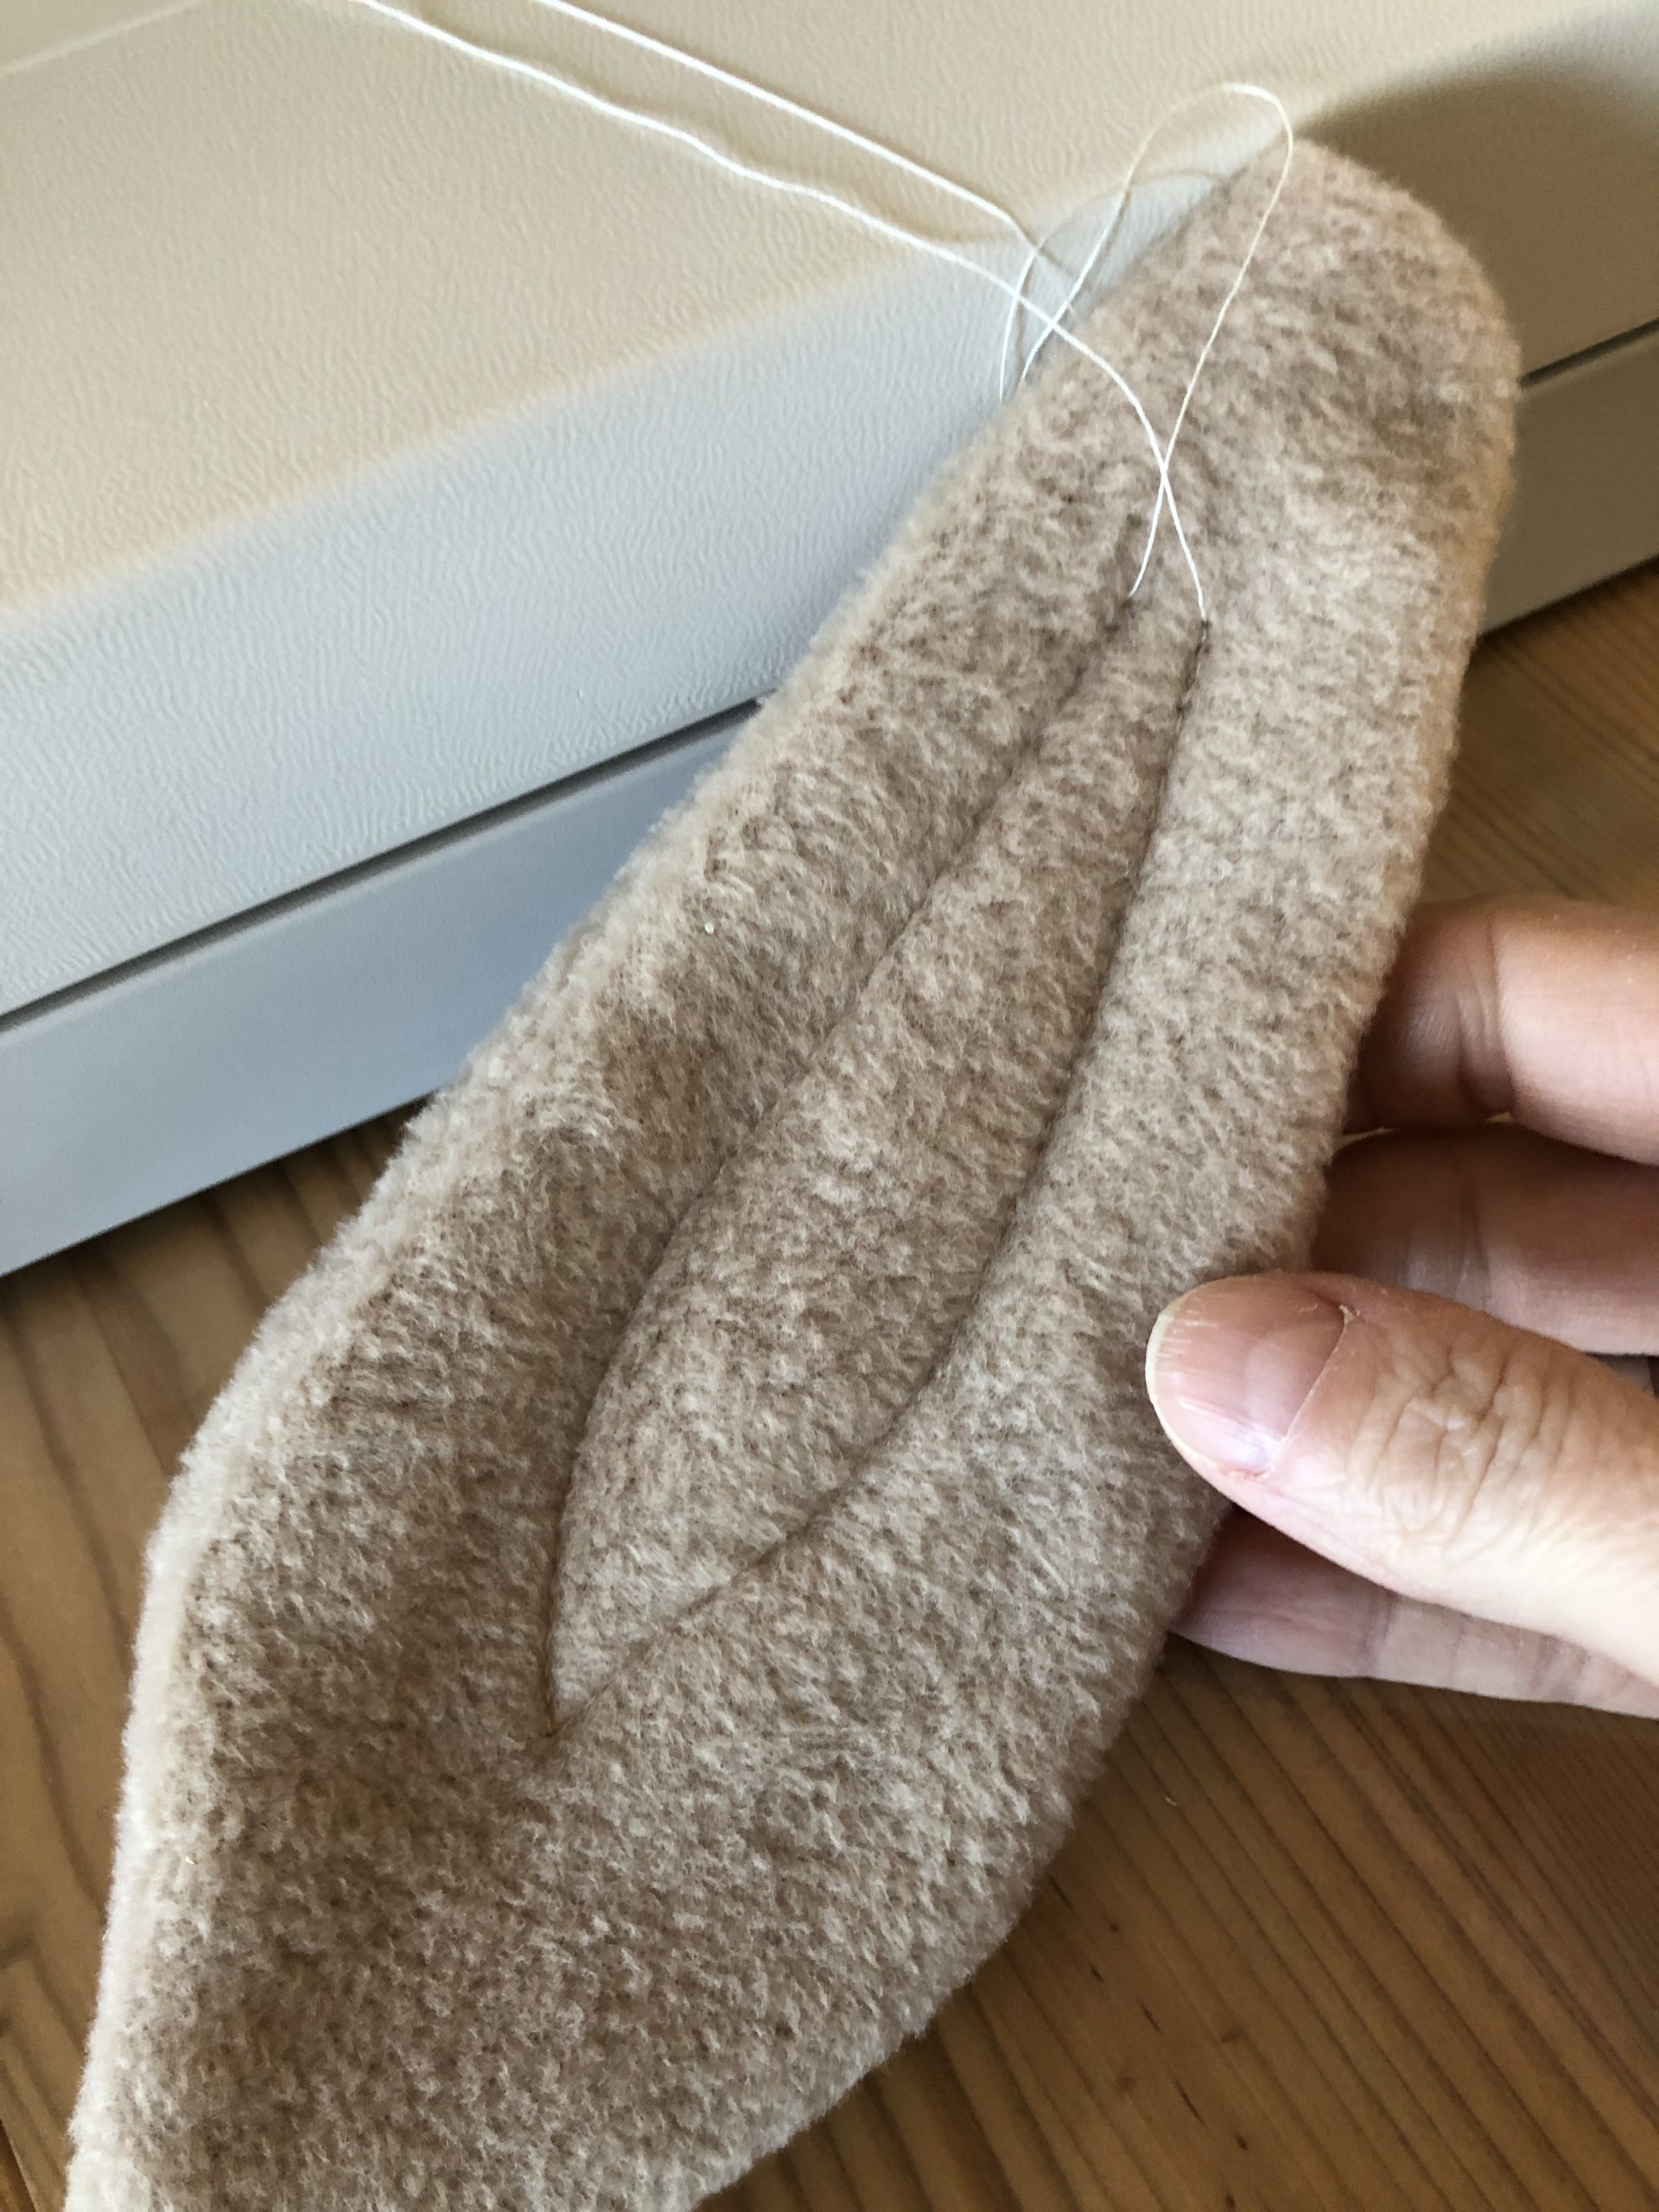
Then you sew up another decorative seam in the middle. This serves to fix the wire in its position.
Attention: do not sew over the wire, this should lie loosely in the ear.
Now you finish the other ear in this way.
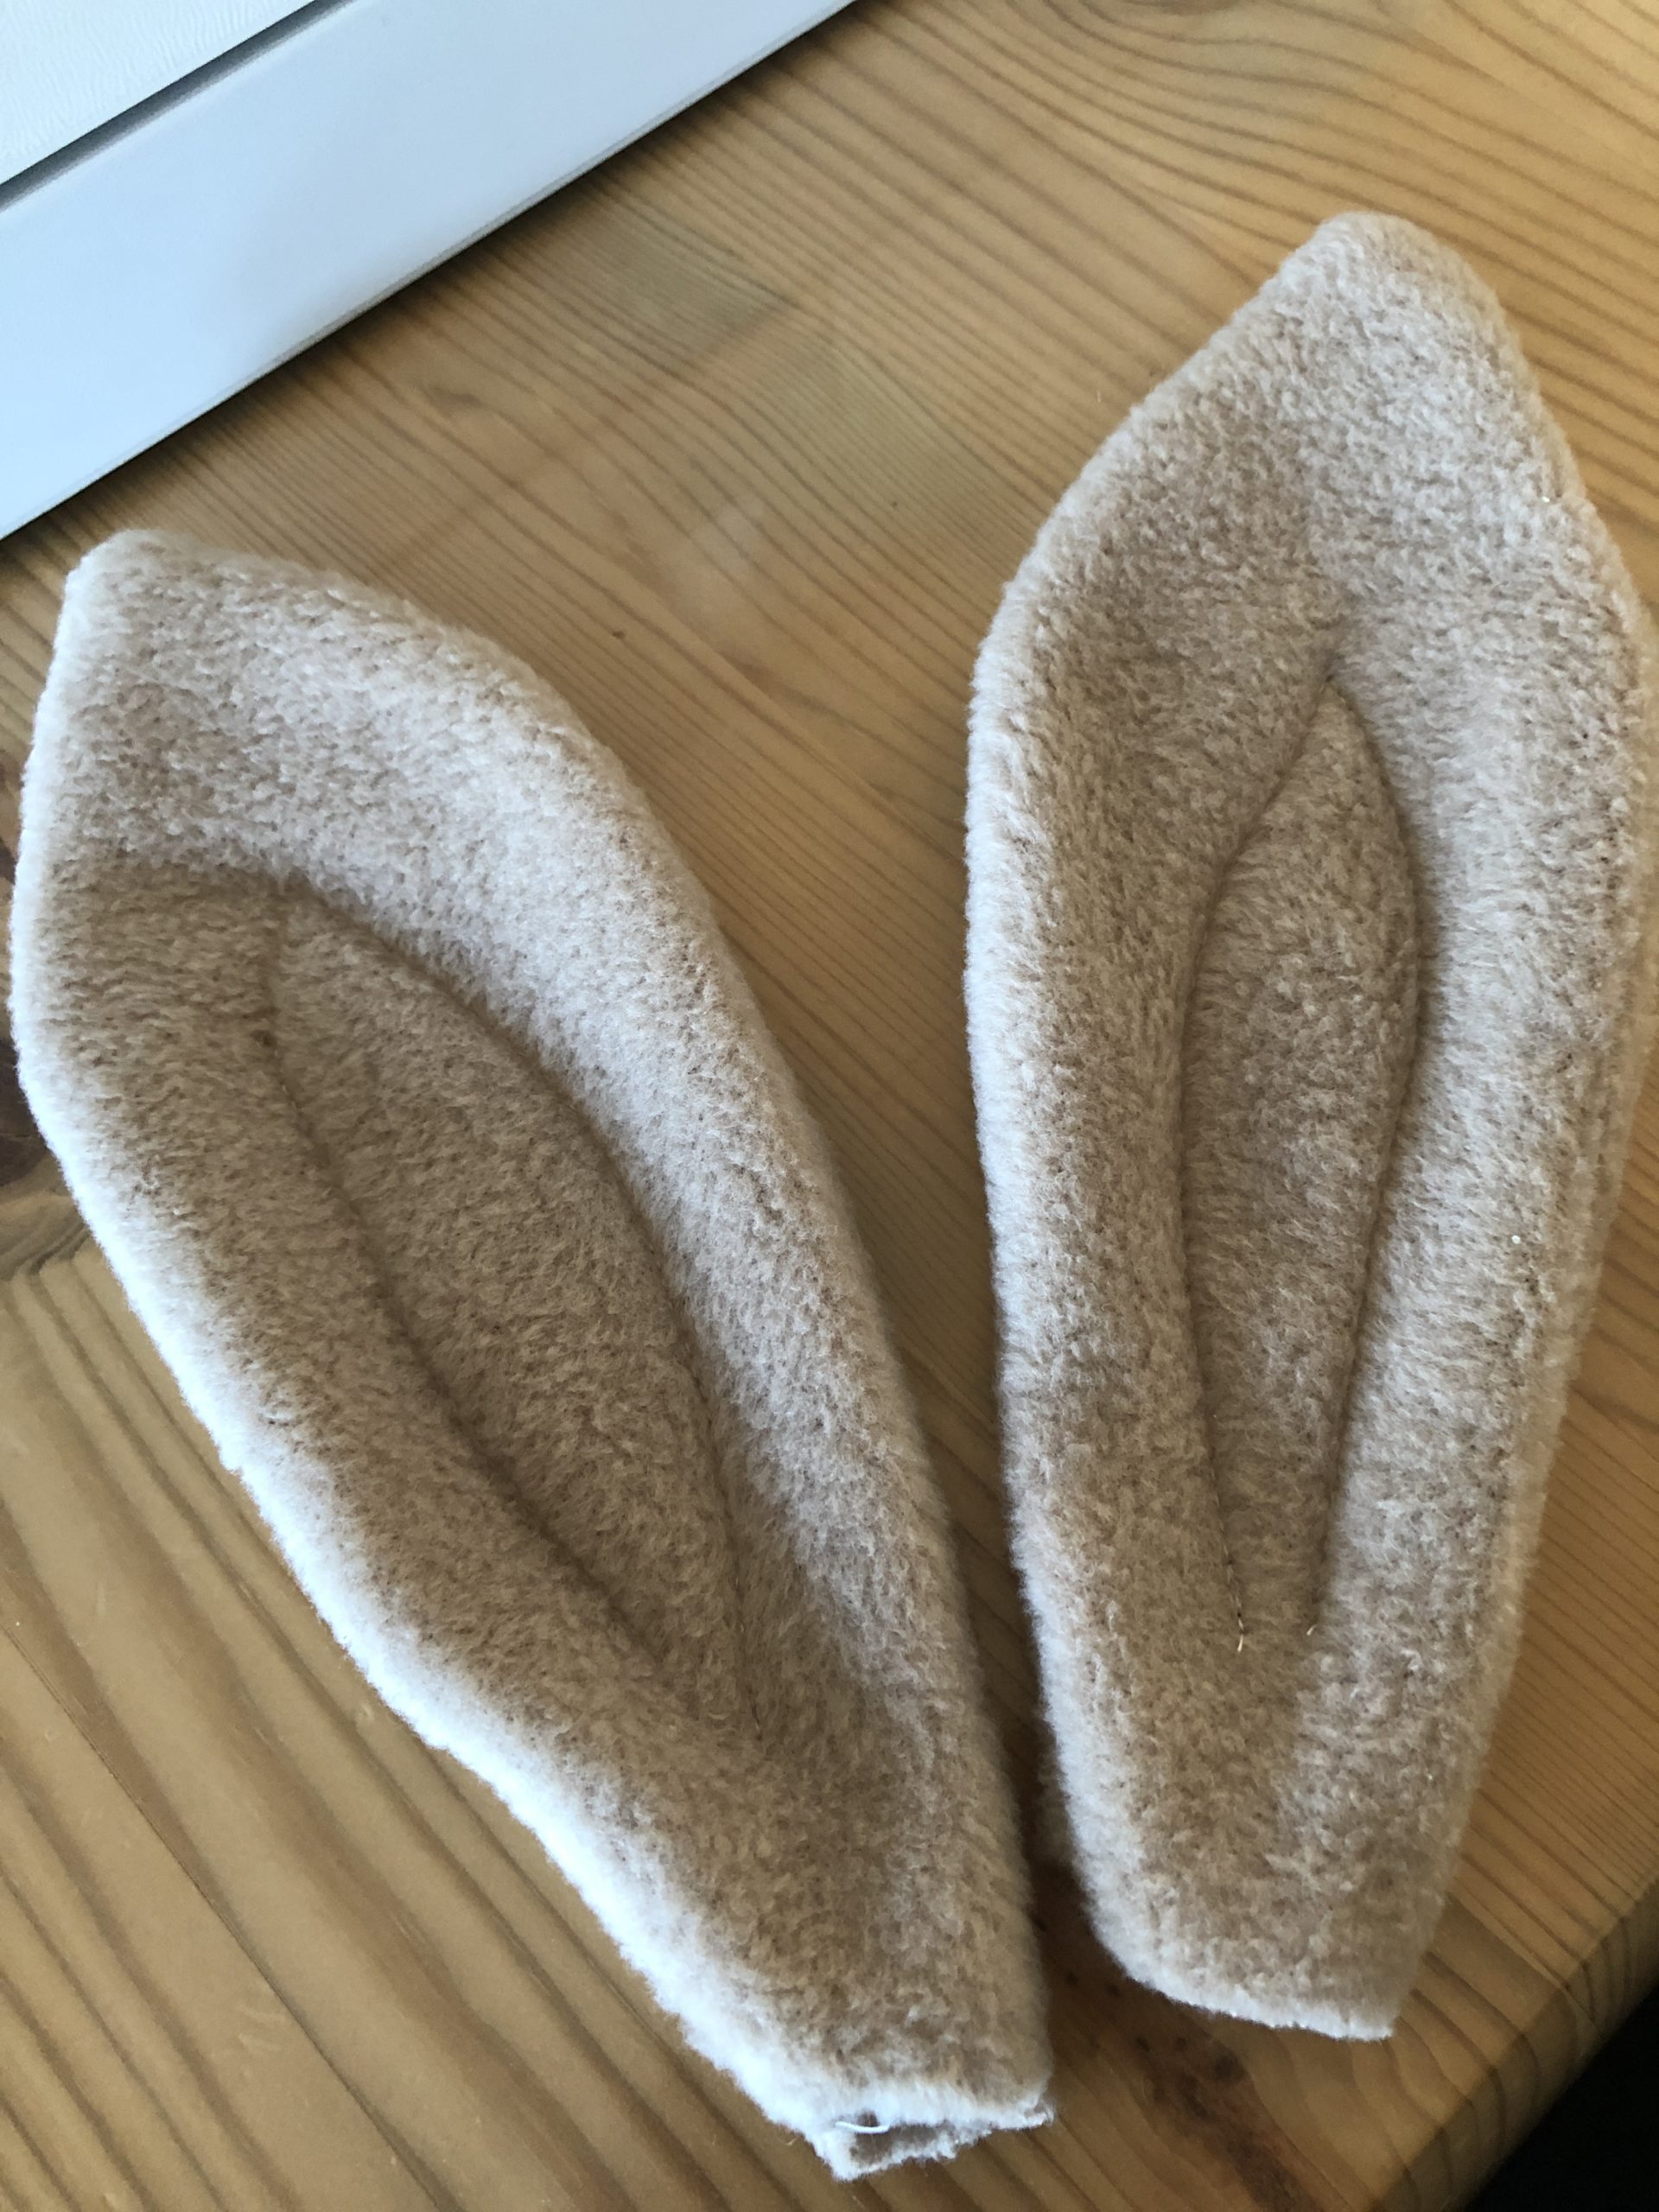
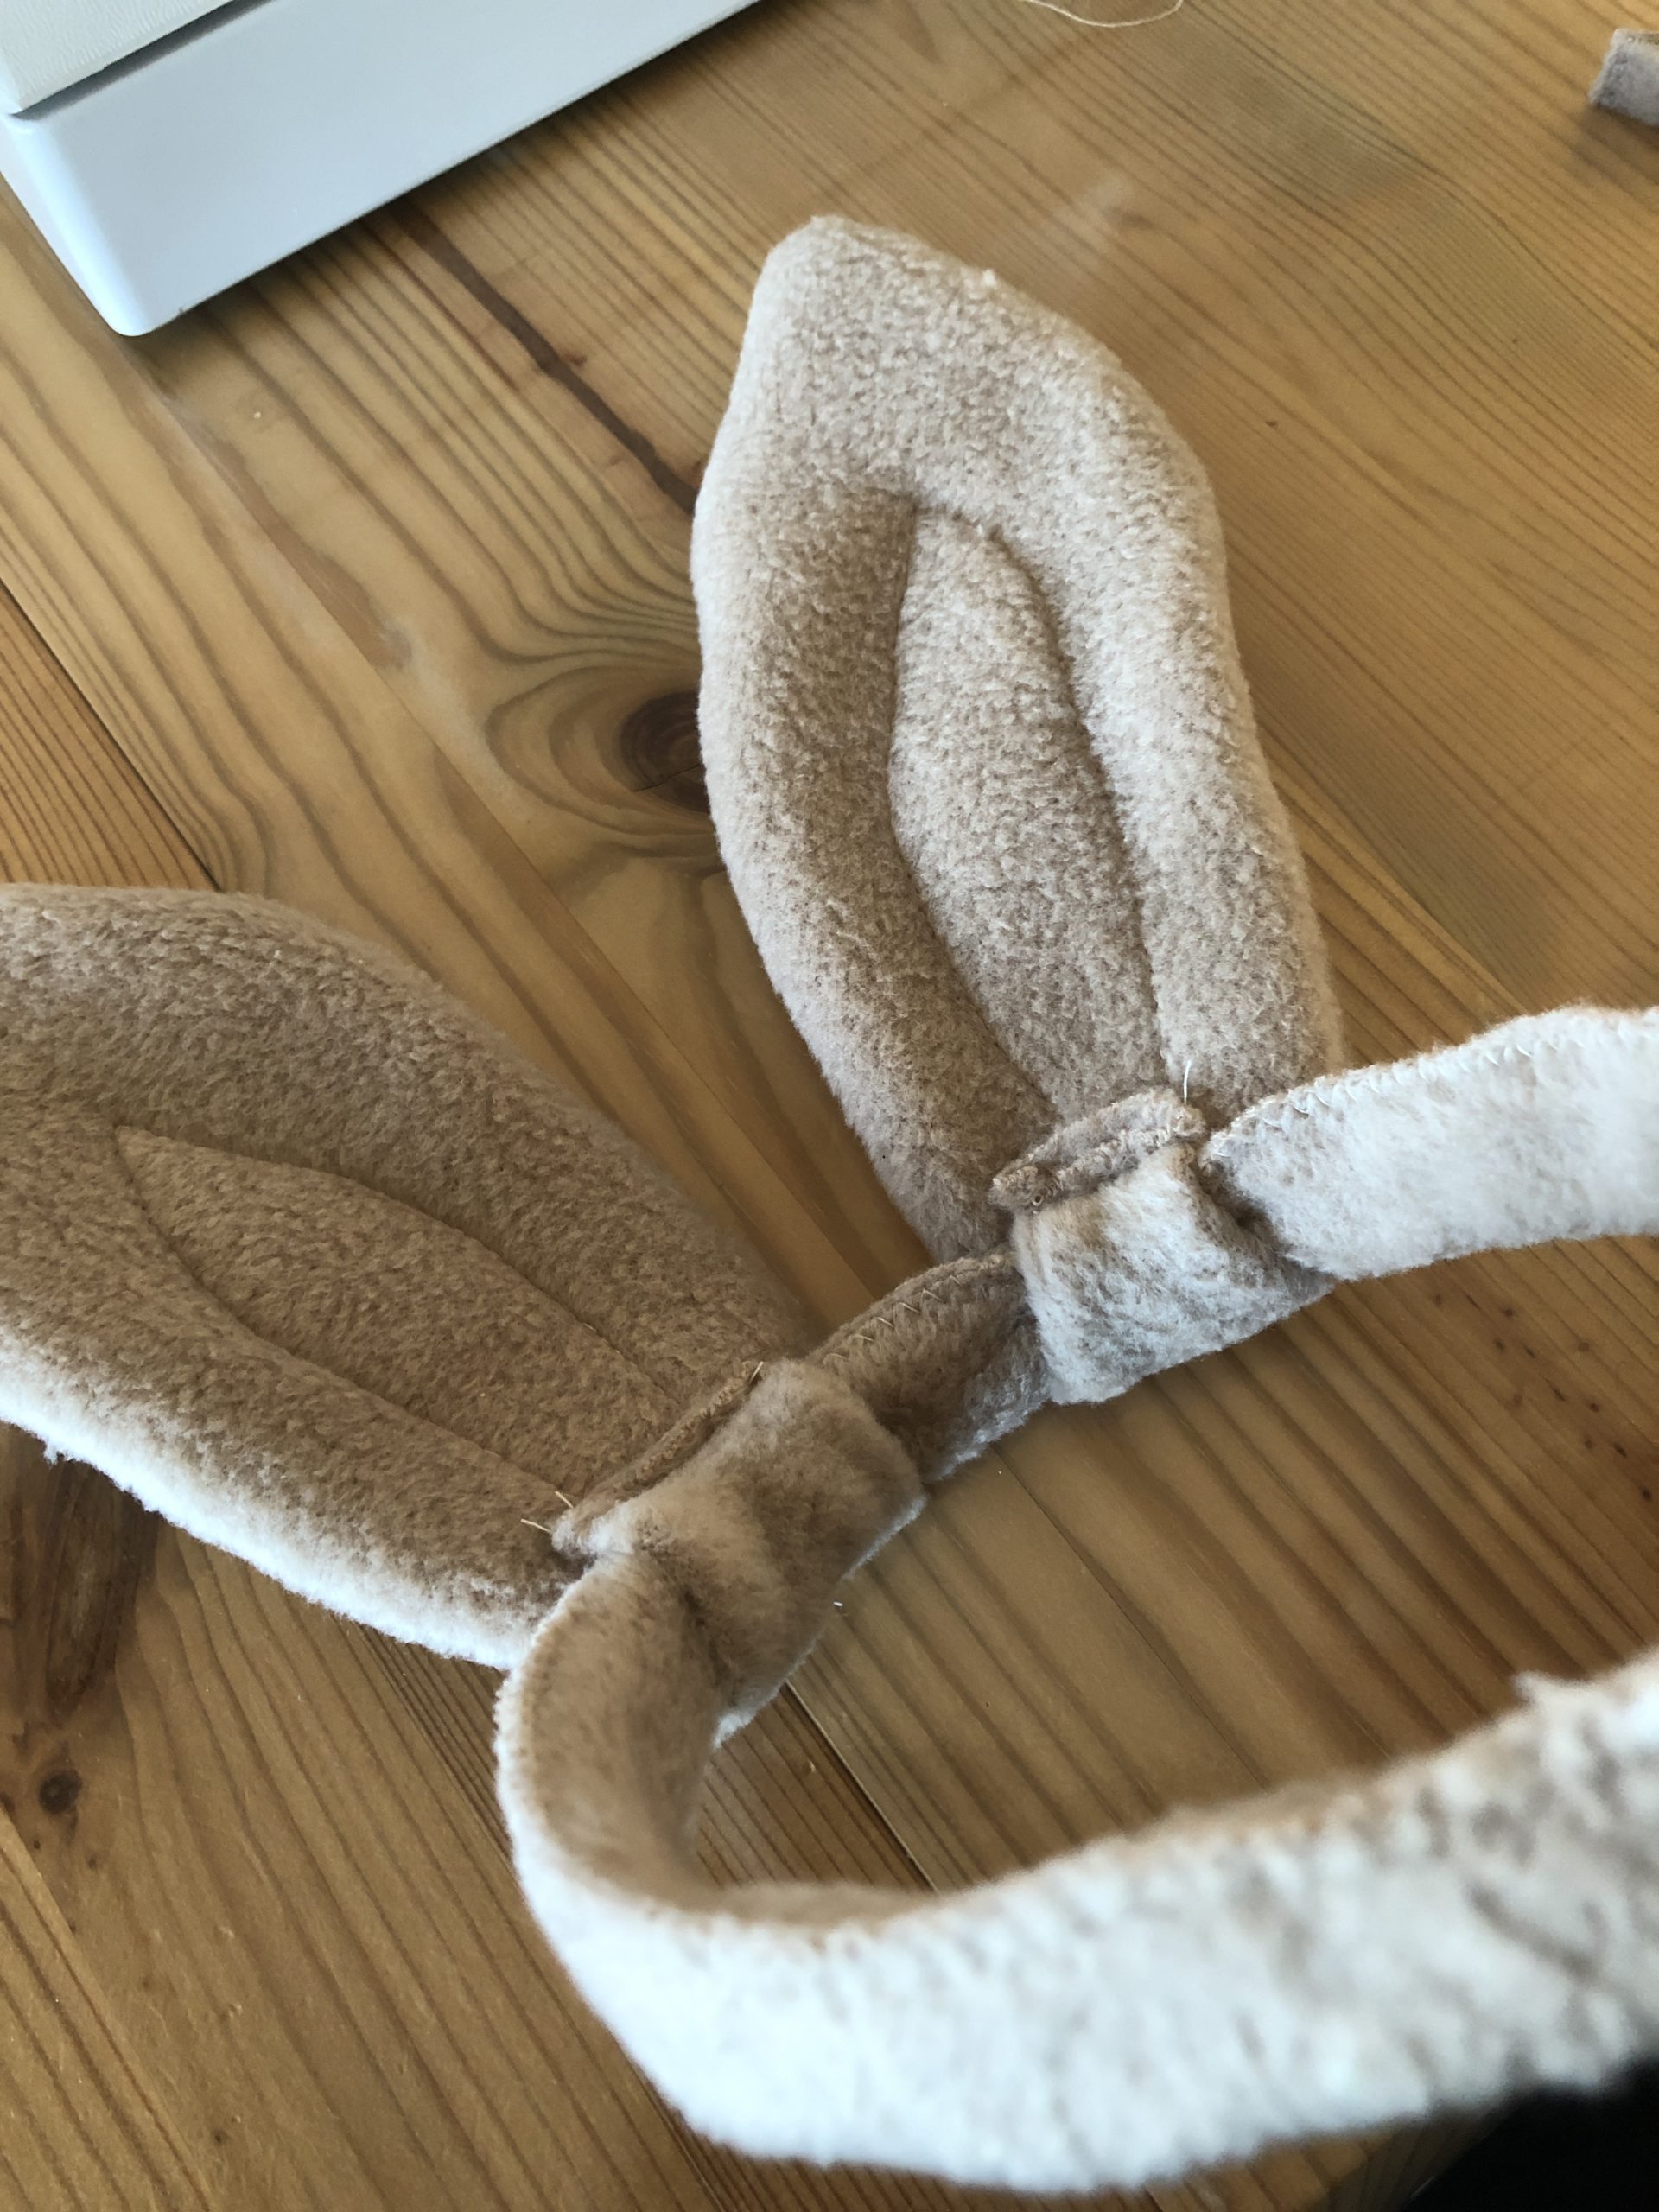
Now bend the ear on the lower side of the ear upwards and sew the open place firmly.
Now you cut a narrow strip 4cm x 35cm.
From this becomes the cover for the headband.
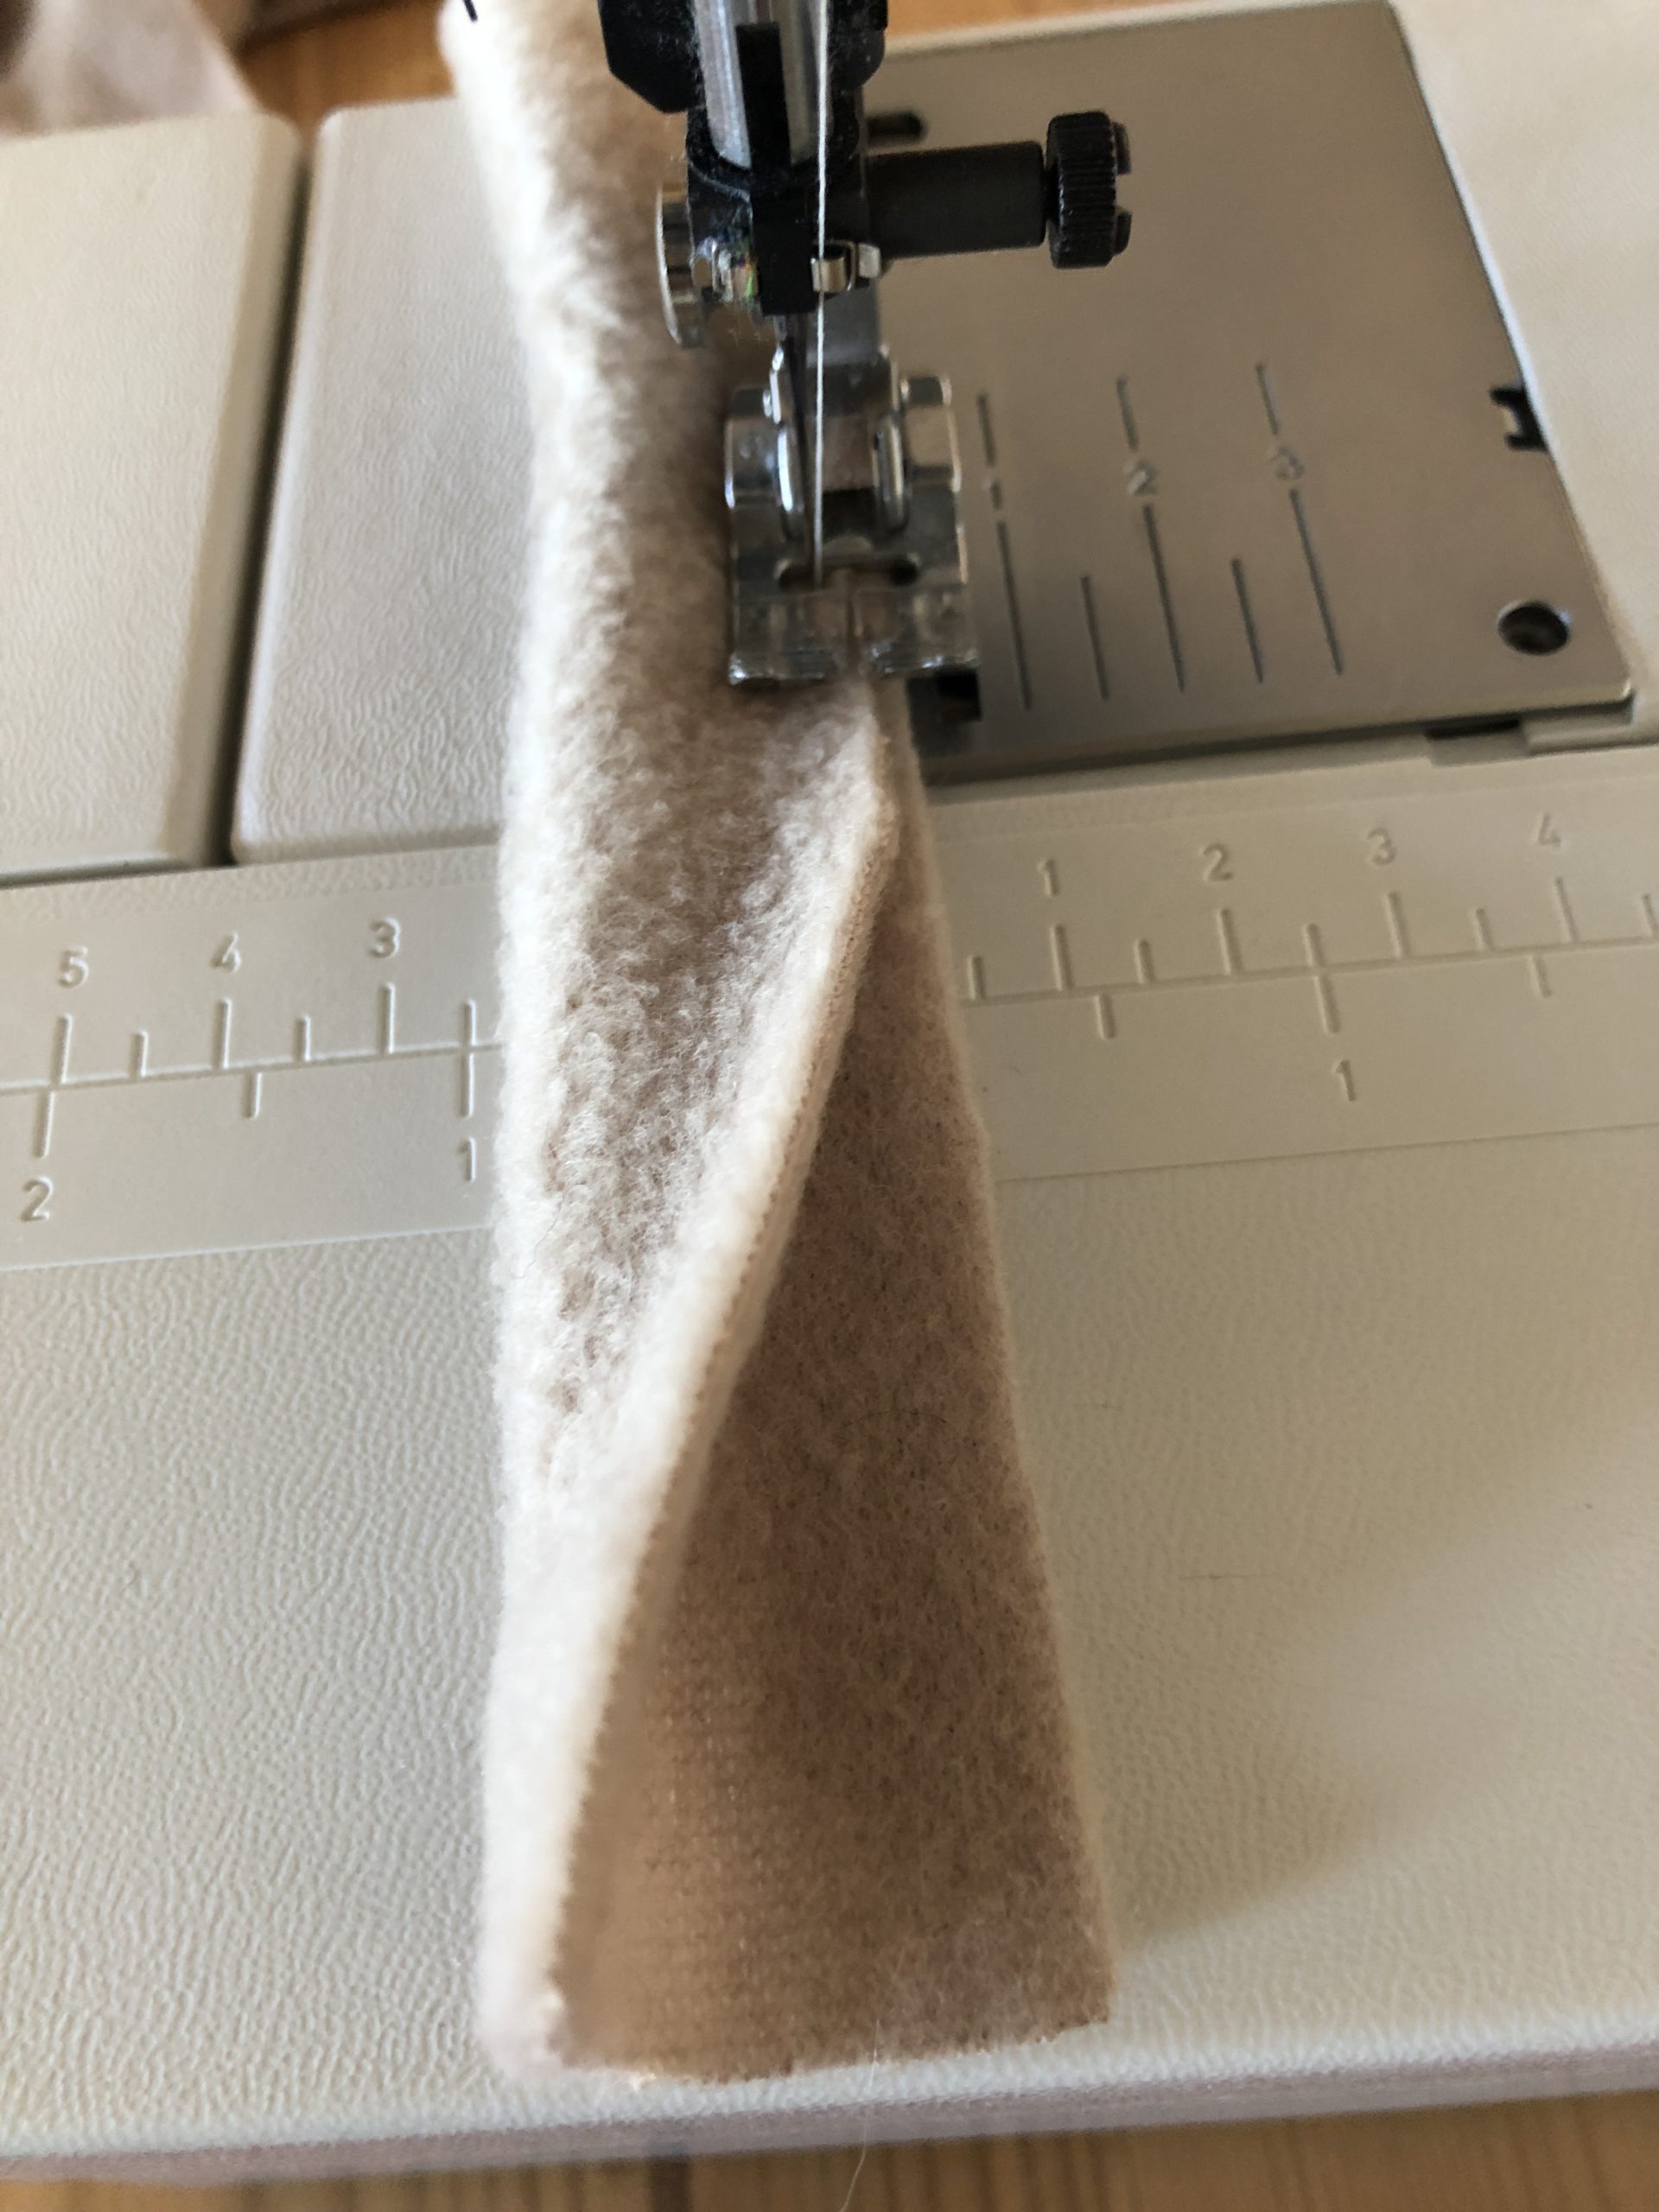
Now sew this strip together with a zig-zag stitch of the length in half.
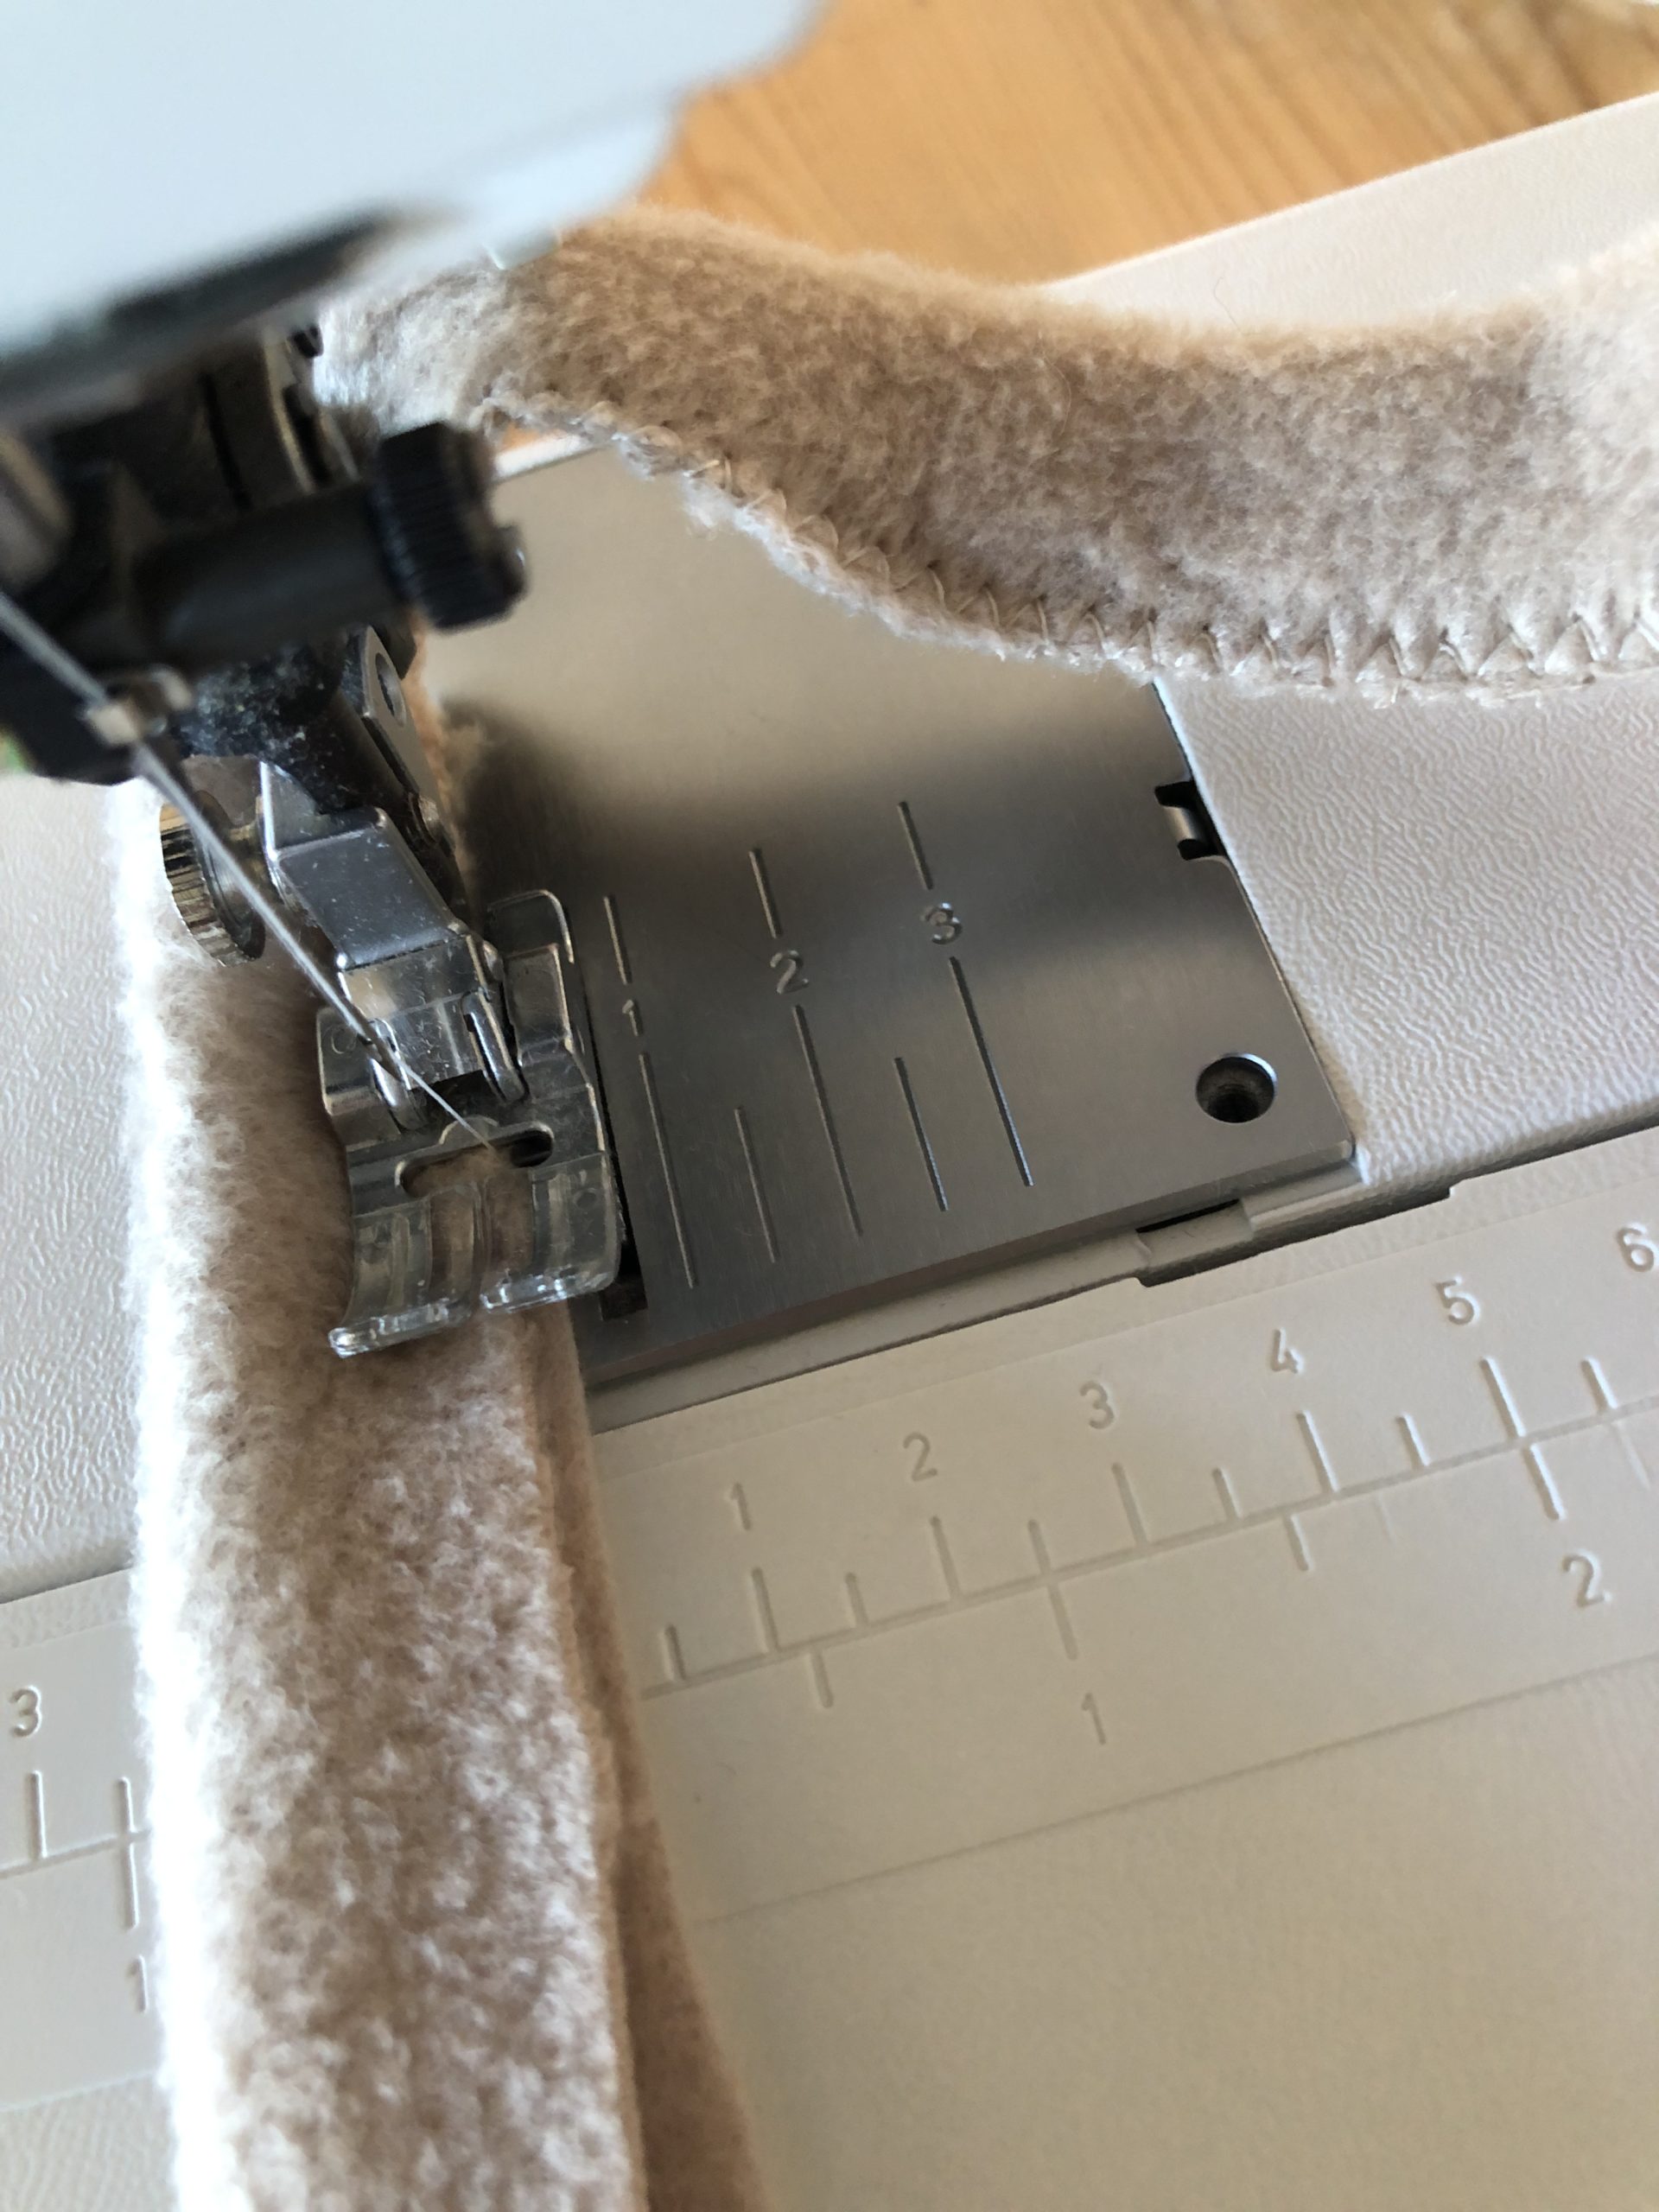
Then you shove the headband into the sewn tube.
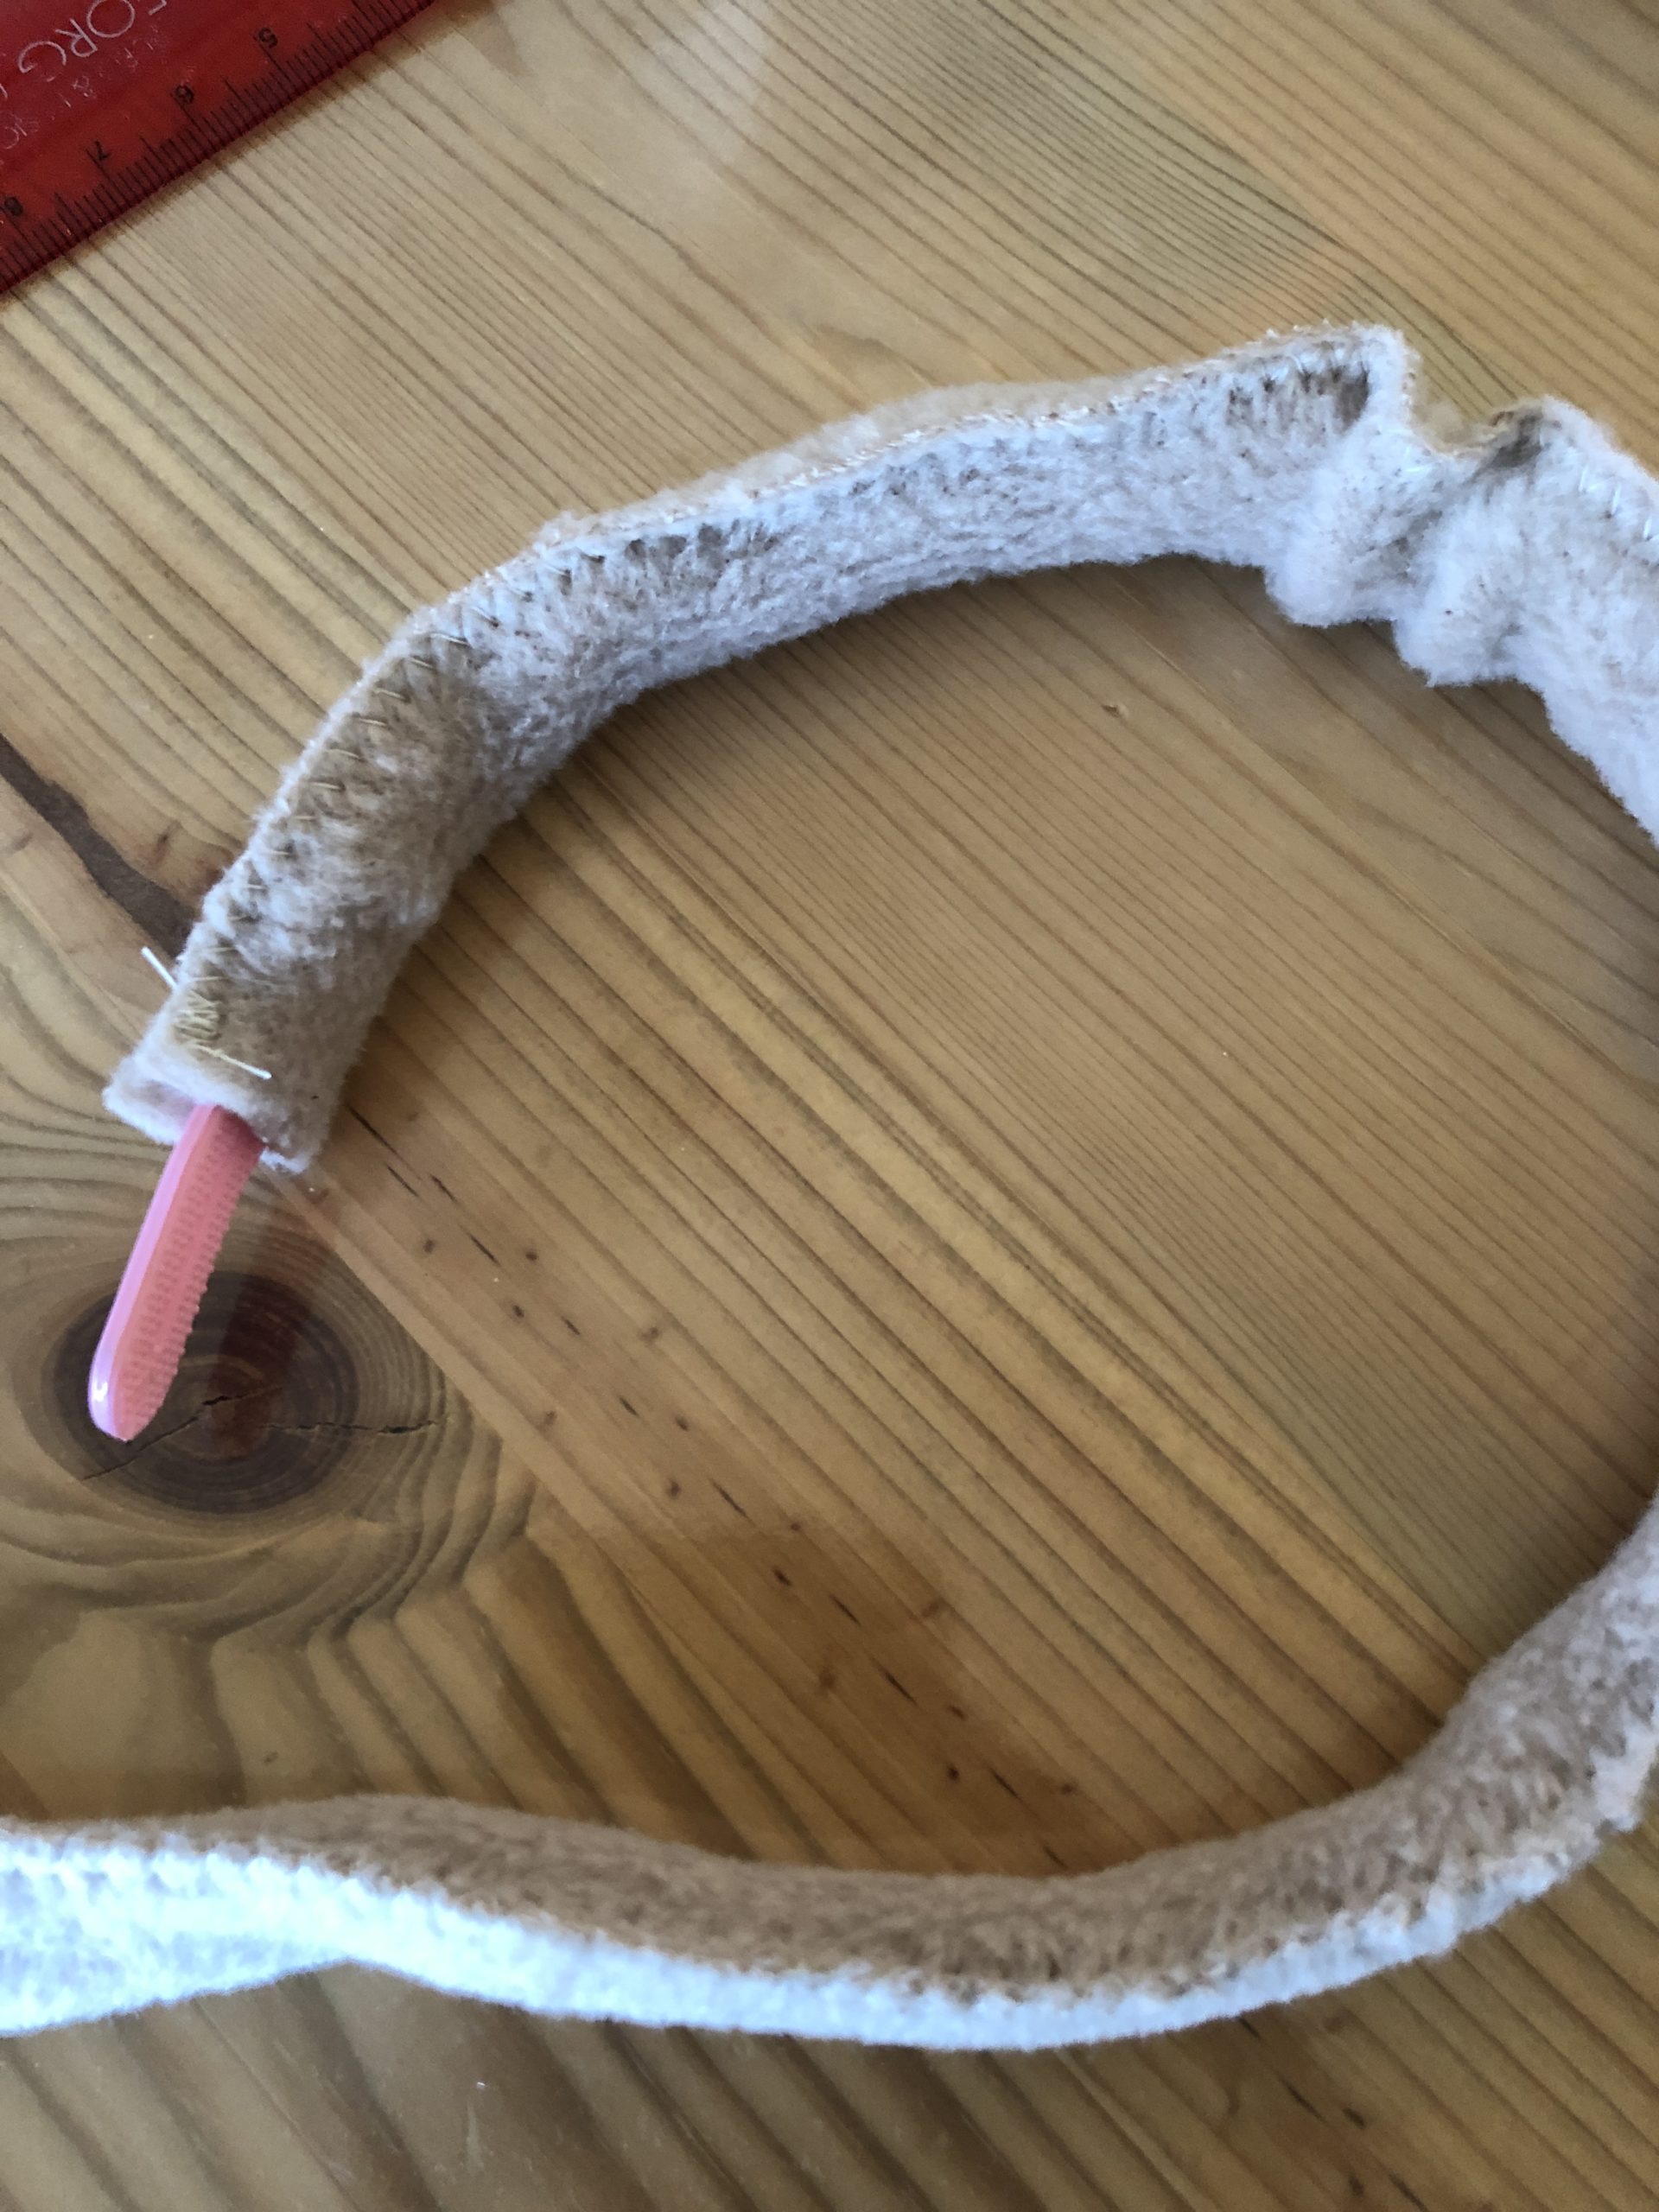
If necessary, season the length and sew the ends.

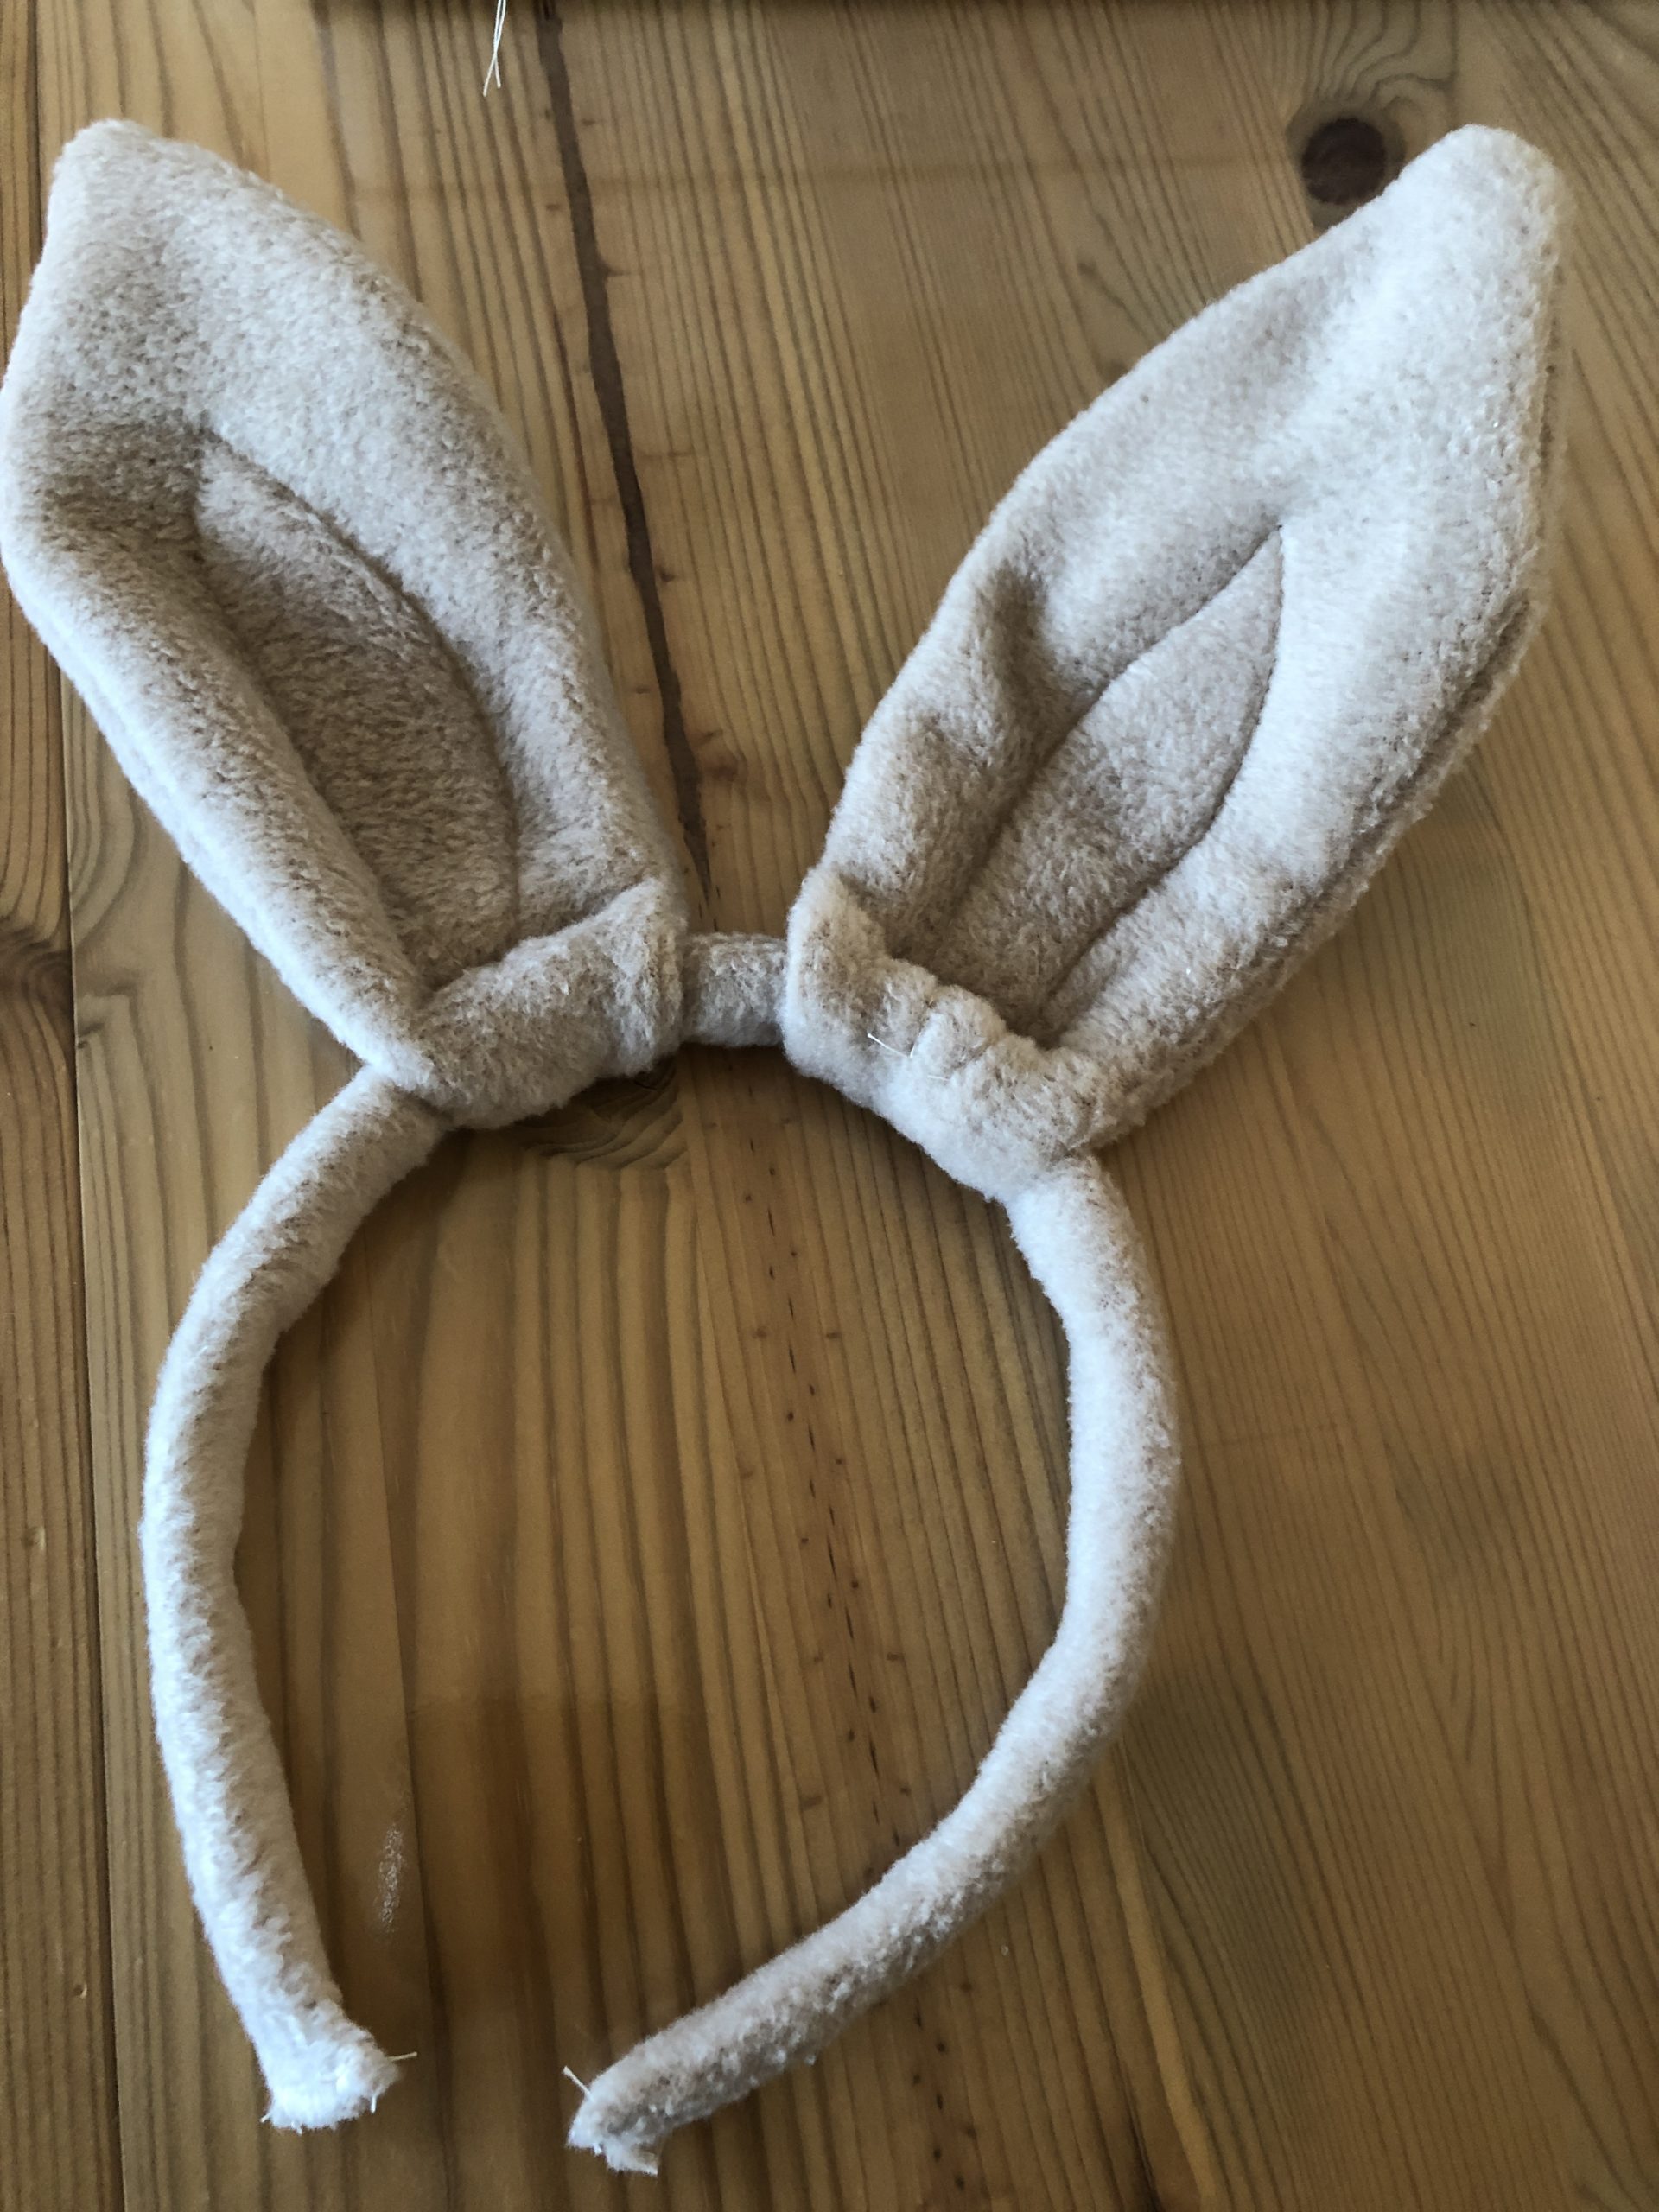
Now you put the rabbit ears on the headband and straighten them out.
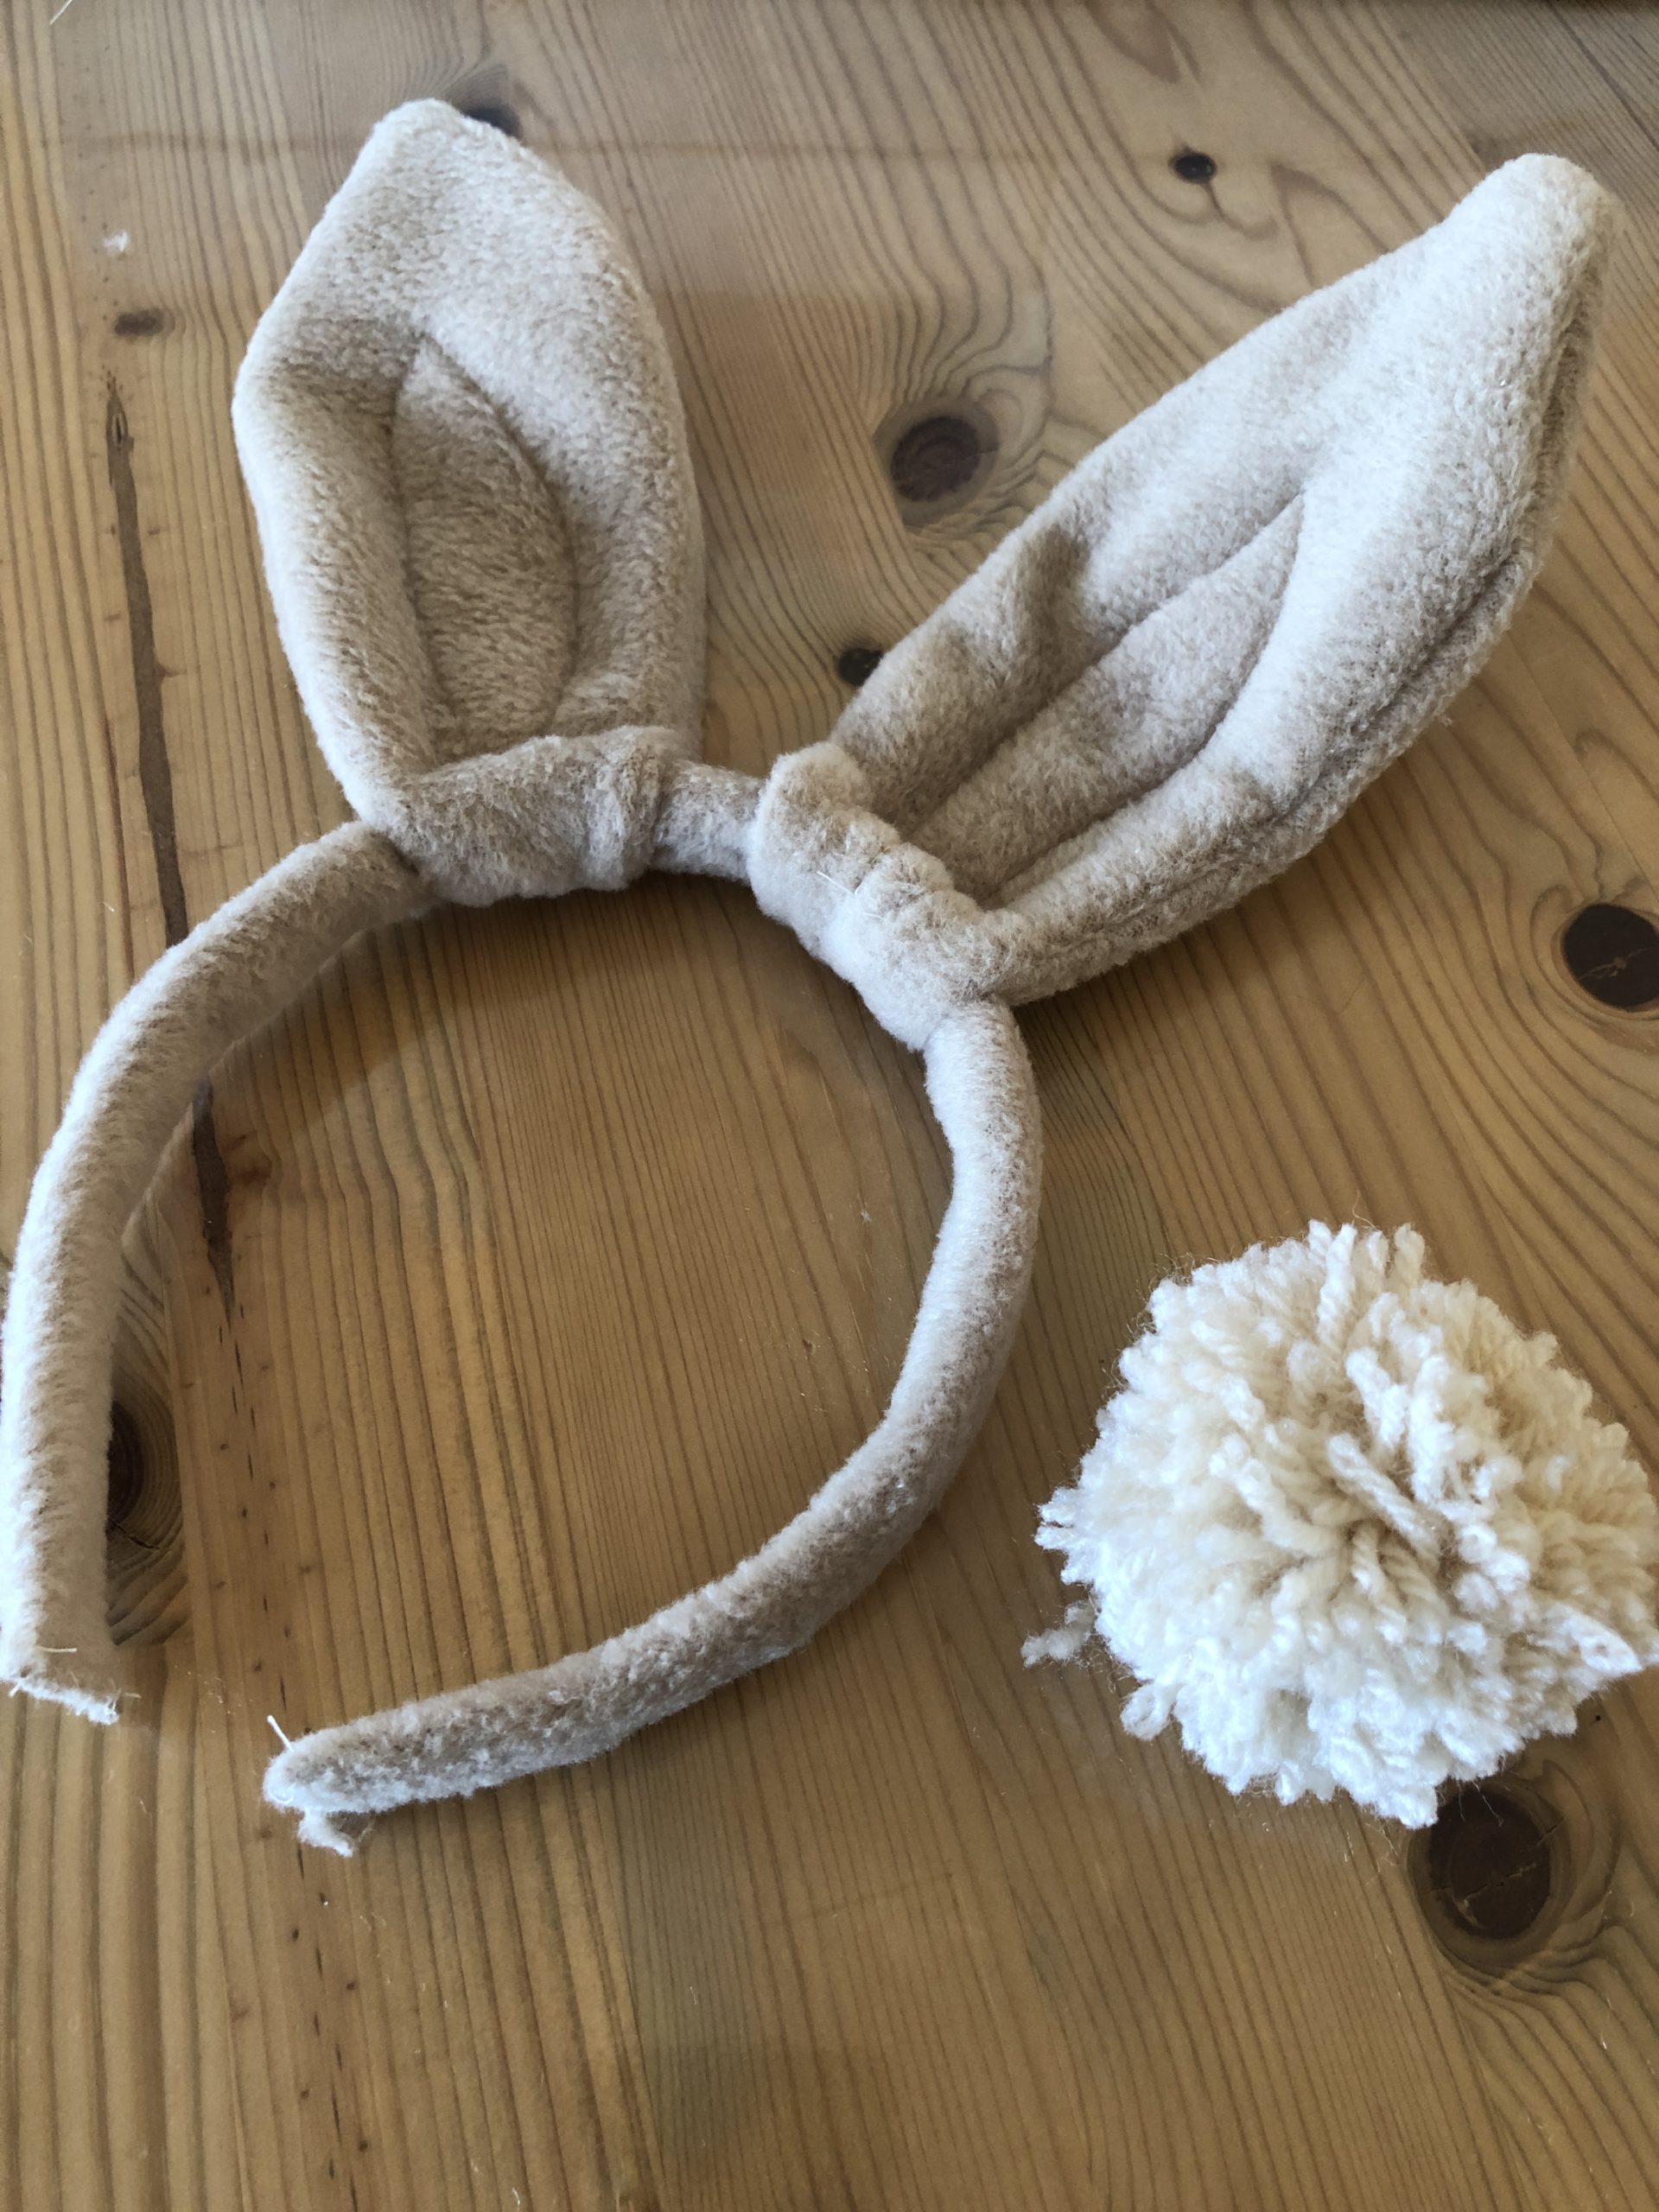
The rabbit ears are ready!
Now you can put it on and hop it!
Materials
Directions
First you make a template for the rabbit ears or you print out the template. Then you cut out the template.
The dashed line indicates where you sew your ears together.
You need a total of 4 trimmings of the rabbit ears from the fleece fabric.
Each finished ear consists of two parts.
Then sew your ears, right on the right.
Attention: Do not sew the ears together completely. An opening for turning must remain open.
After sewing, turn both ears to the right side.
Now you offer the pipe cleaner wire (color doesn't matter!) in the shape of the ears.
Then you put the wire with the bent side ahead in the rabbit ear.
Push the wire completely into the ear.
Push the wire with your hands until it lies at the outer edge of the ear.
Then you sew up another decorative seam in the middle. This serves to fix the wire in its position.
Attention: do not sew over the wire, this should lie loosely in the ear.
Now you finish the other ear in this way.
Now bend the ear on the lower side of the ear upwards and sew the open place firmly.
Now you cut a narrow strip 4cm x 35cm.
From this becomes the cover for the headband.
Now sew this strip together with a zig-zag stitch of the length in half.
Then you shove the headband into the sewn tube.
If necessary, season the length and sew the ends.
Now you put the rabbit ears on the headband and straighten them out.
The rabbit ears are ready!
Now you can put it on and hop it!
Follow us on Facebook , Instagram and Pinterest
Don't miss any more adventures: Our bottle mail


