Winter dream catchers (various variants & instruction for snow crystals)

AdventurerKatzi
Rating5.018.8 thousand times & (5) DifficultyAdvanced

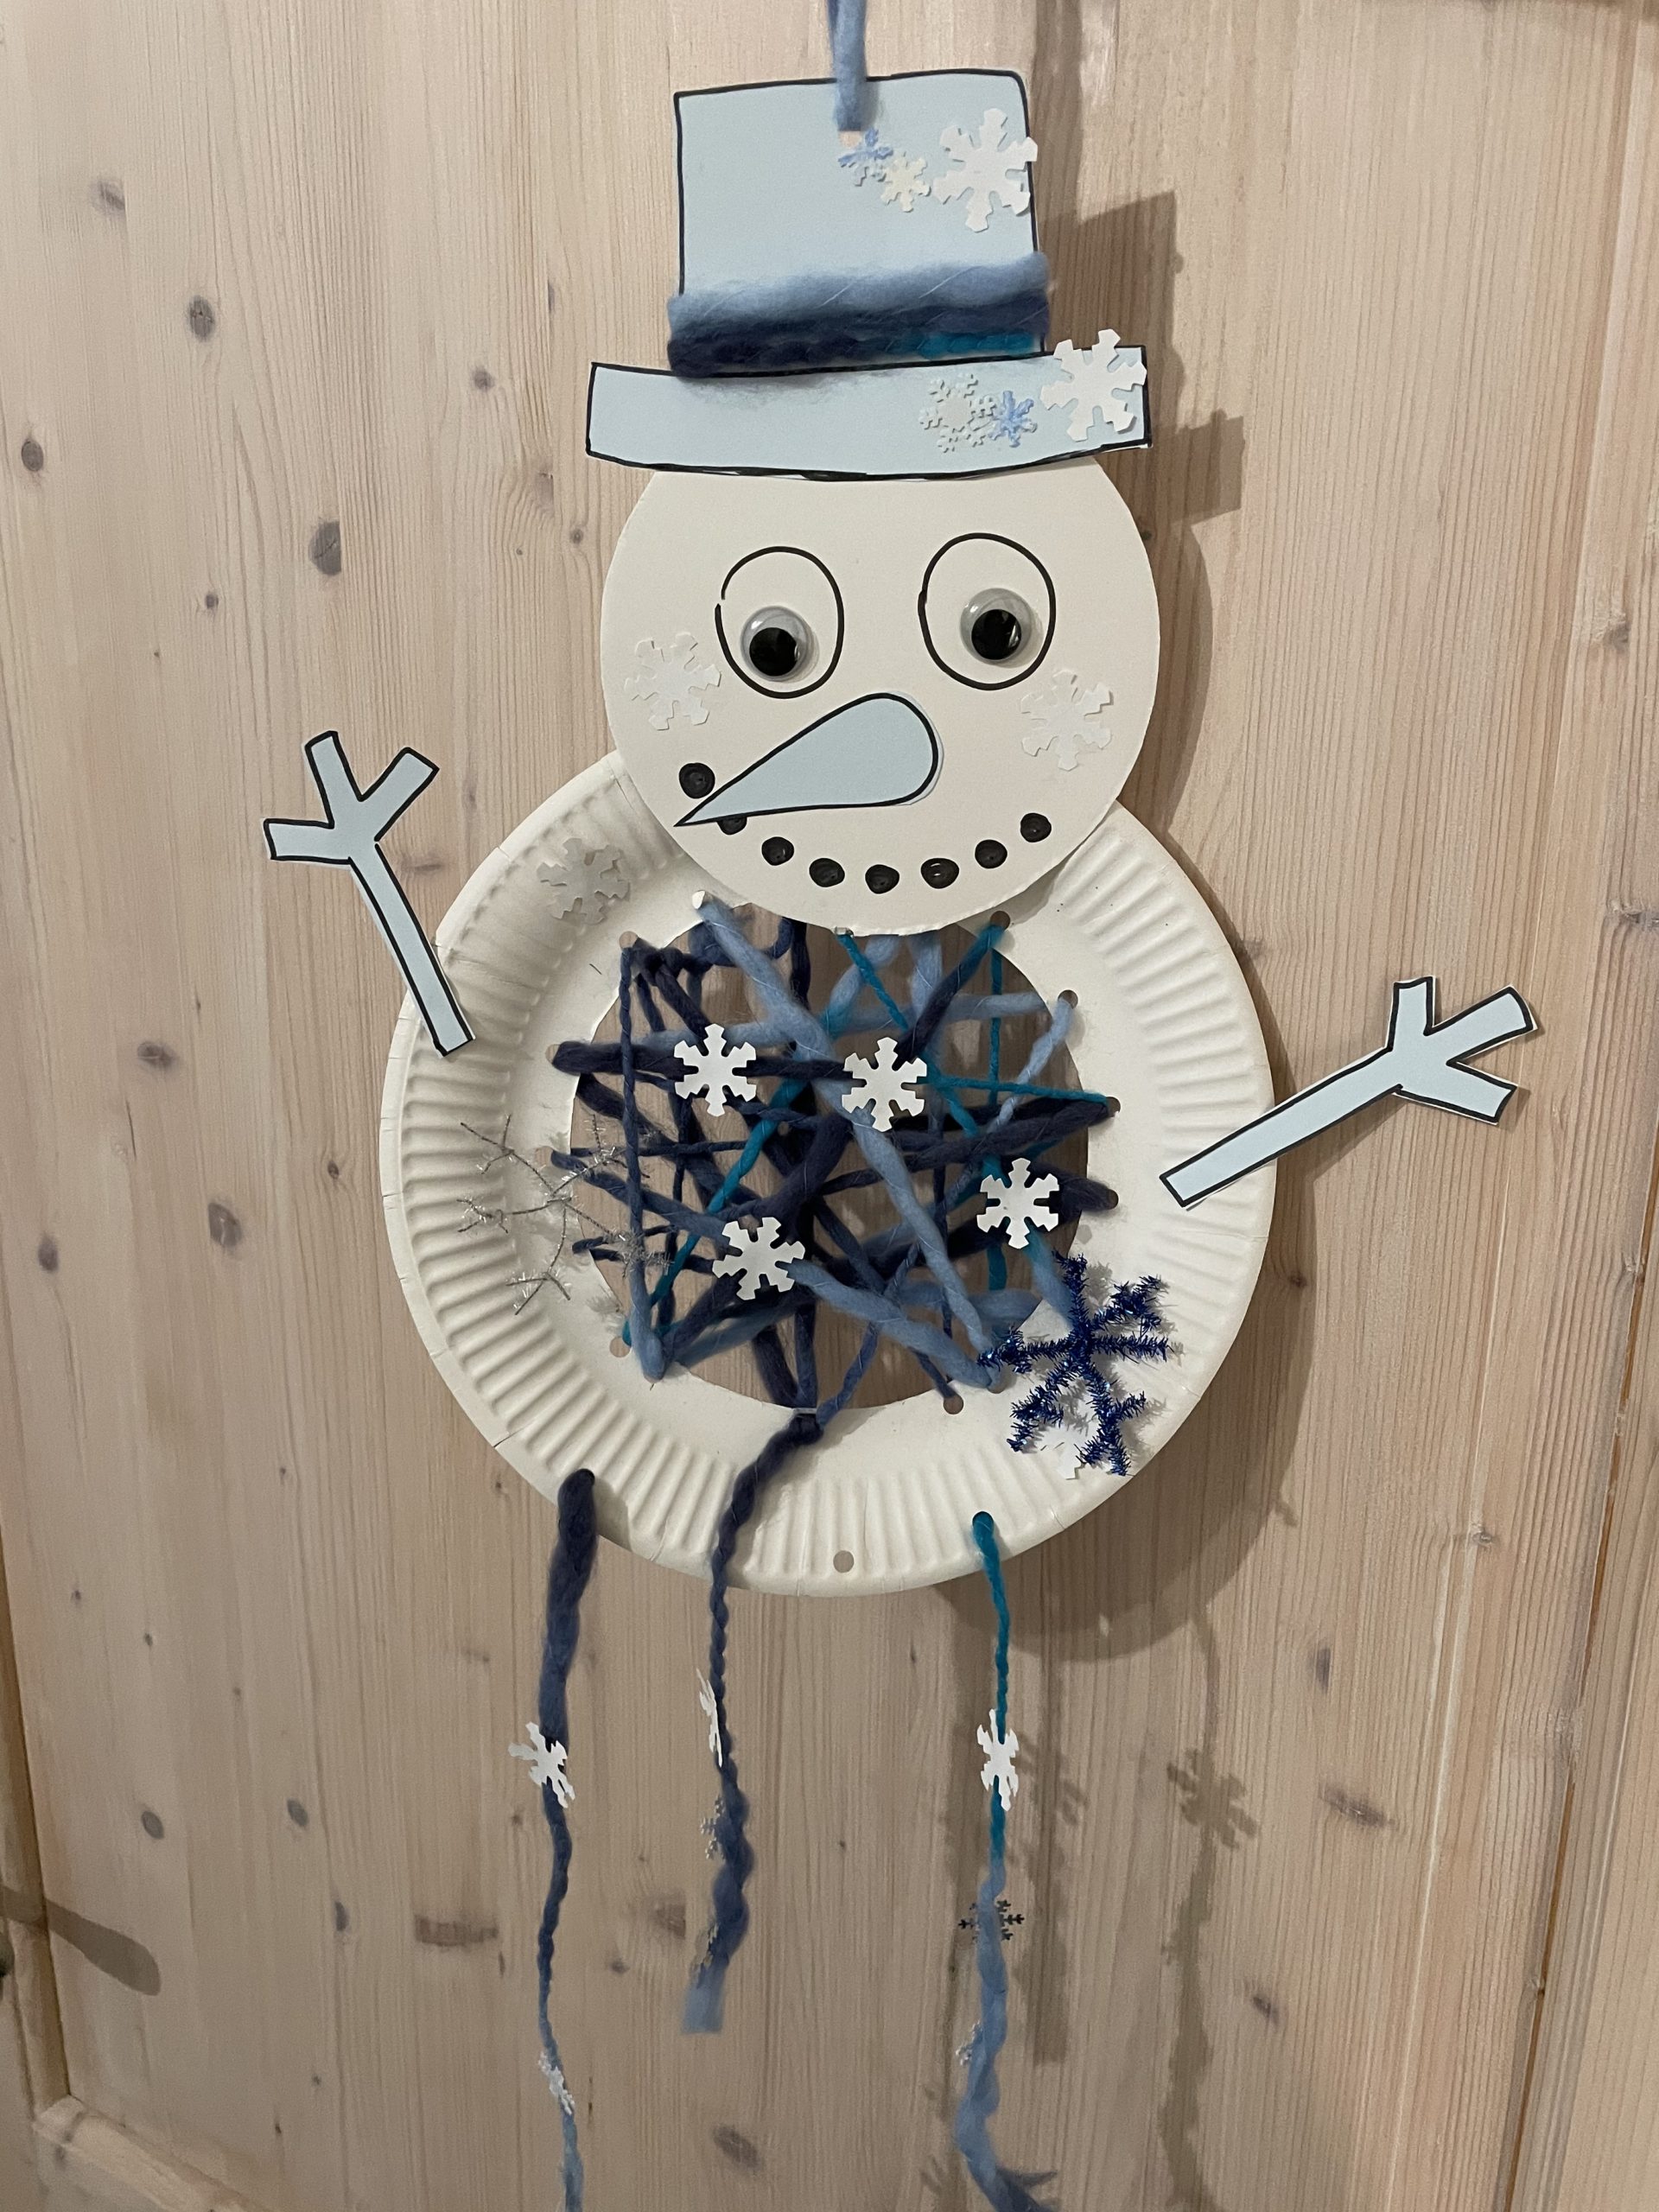
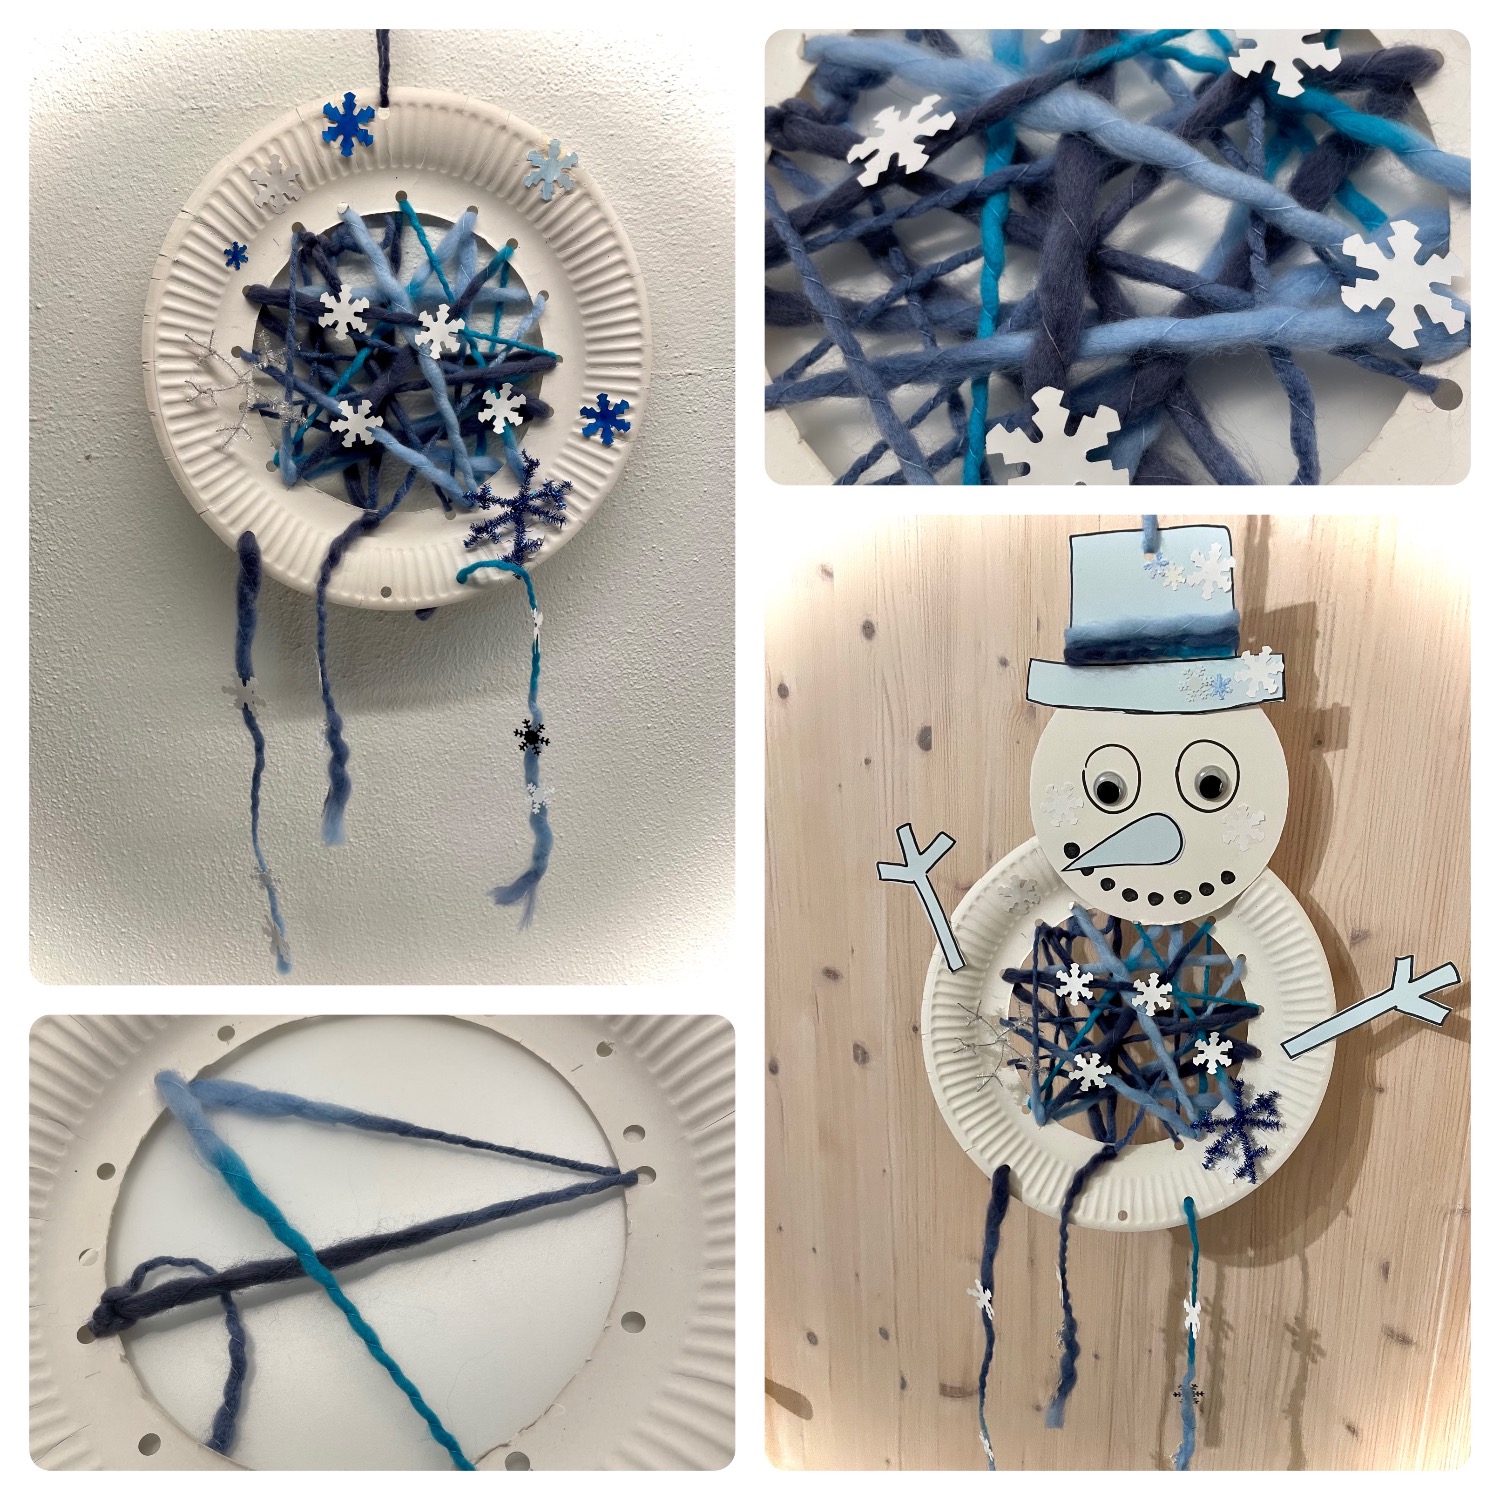
A time-consuming offer for persevering craft lovers. A lot of creativity and own variations are needed here! Create your own winter dream catcher e.g. as a winter snow mobile, snow crystal dream catcher or as a wind game and snowman of a special kind. I show you different variants and an instruction for crafting snow crystals.

An exciting adventure - have fun!!!

Media Education for Kindergarten and Hort

Kind bastelt eine Rassel mit dem Navi
The Adventure Navi, the app for DIY projects, enables media education for the youngest.

Relief in everyday life, targeted promotion of individual children, independent learning and - without any pre-knowledge already usable by the youngest!


Titelbild zur Bastel- und DIY-Idee für Kinder '(580) Wintertraum-Fänger (verschiedene Varianten & Anleitung für Schneekristalle)'
Material for1 Child
Prep Time10 min.Adv. Time50 min.Total Time1 Stunde
 2 Cardboard plates
 Wool A wool with a colour gradient and different thread thickness looks particularly nice.
 Clayboard/tone paper
 Snow crystalse.g. a snow crystal-stancer, spread-deco
 Pipe cleaner wire
 2 Wax eyes
 Beads
 Sequins
 Who also likes small pompons, feathers, cotton balls, glitter etc. to design.
Other aids:
 Perforatoror punched pliers
 PencilsFelt pencils, pencils, crayons
 Adhesive penAdhesive film, possibly hot glue gun
 Pot needle (large blunt needle)
 Customs stockfor measuring the wool
 Builder's pad
All links marked with a shopping cart lead to Amazon - here we have selected products that we would order ourselves and in part also ordered. In a qualified purchase via the advertising link, we as Amazon partner receive a commission, for you there are no costs. You thus support our cost- and advertising banner-free, educational offer.
1

Put out your craft paper, then start with the cardboard plate.
First cut out the inner circle of the cardboard plate.
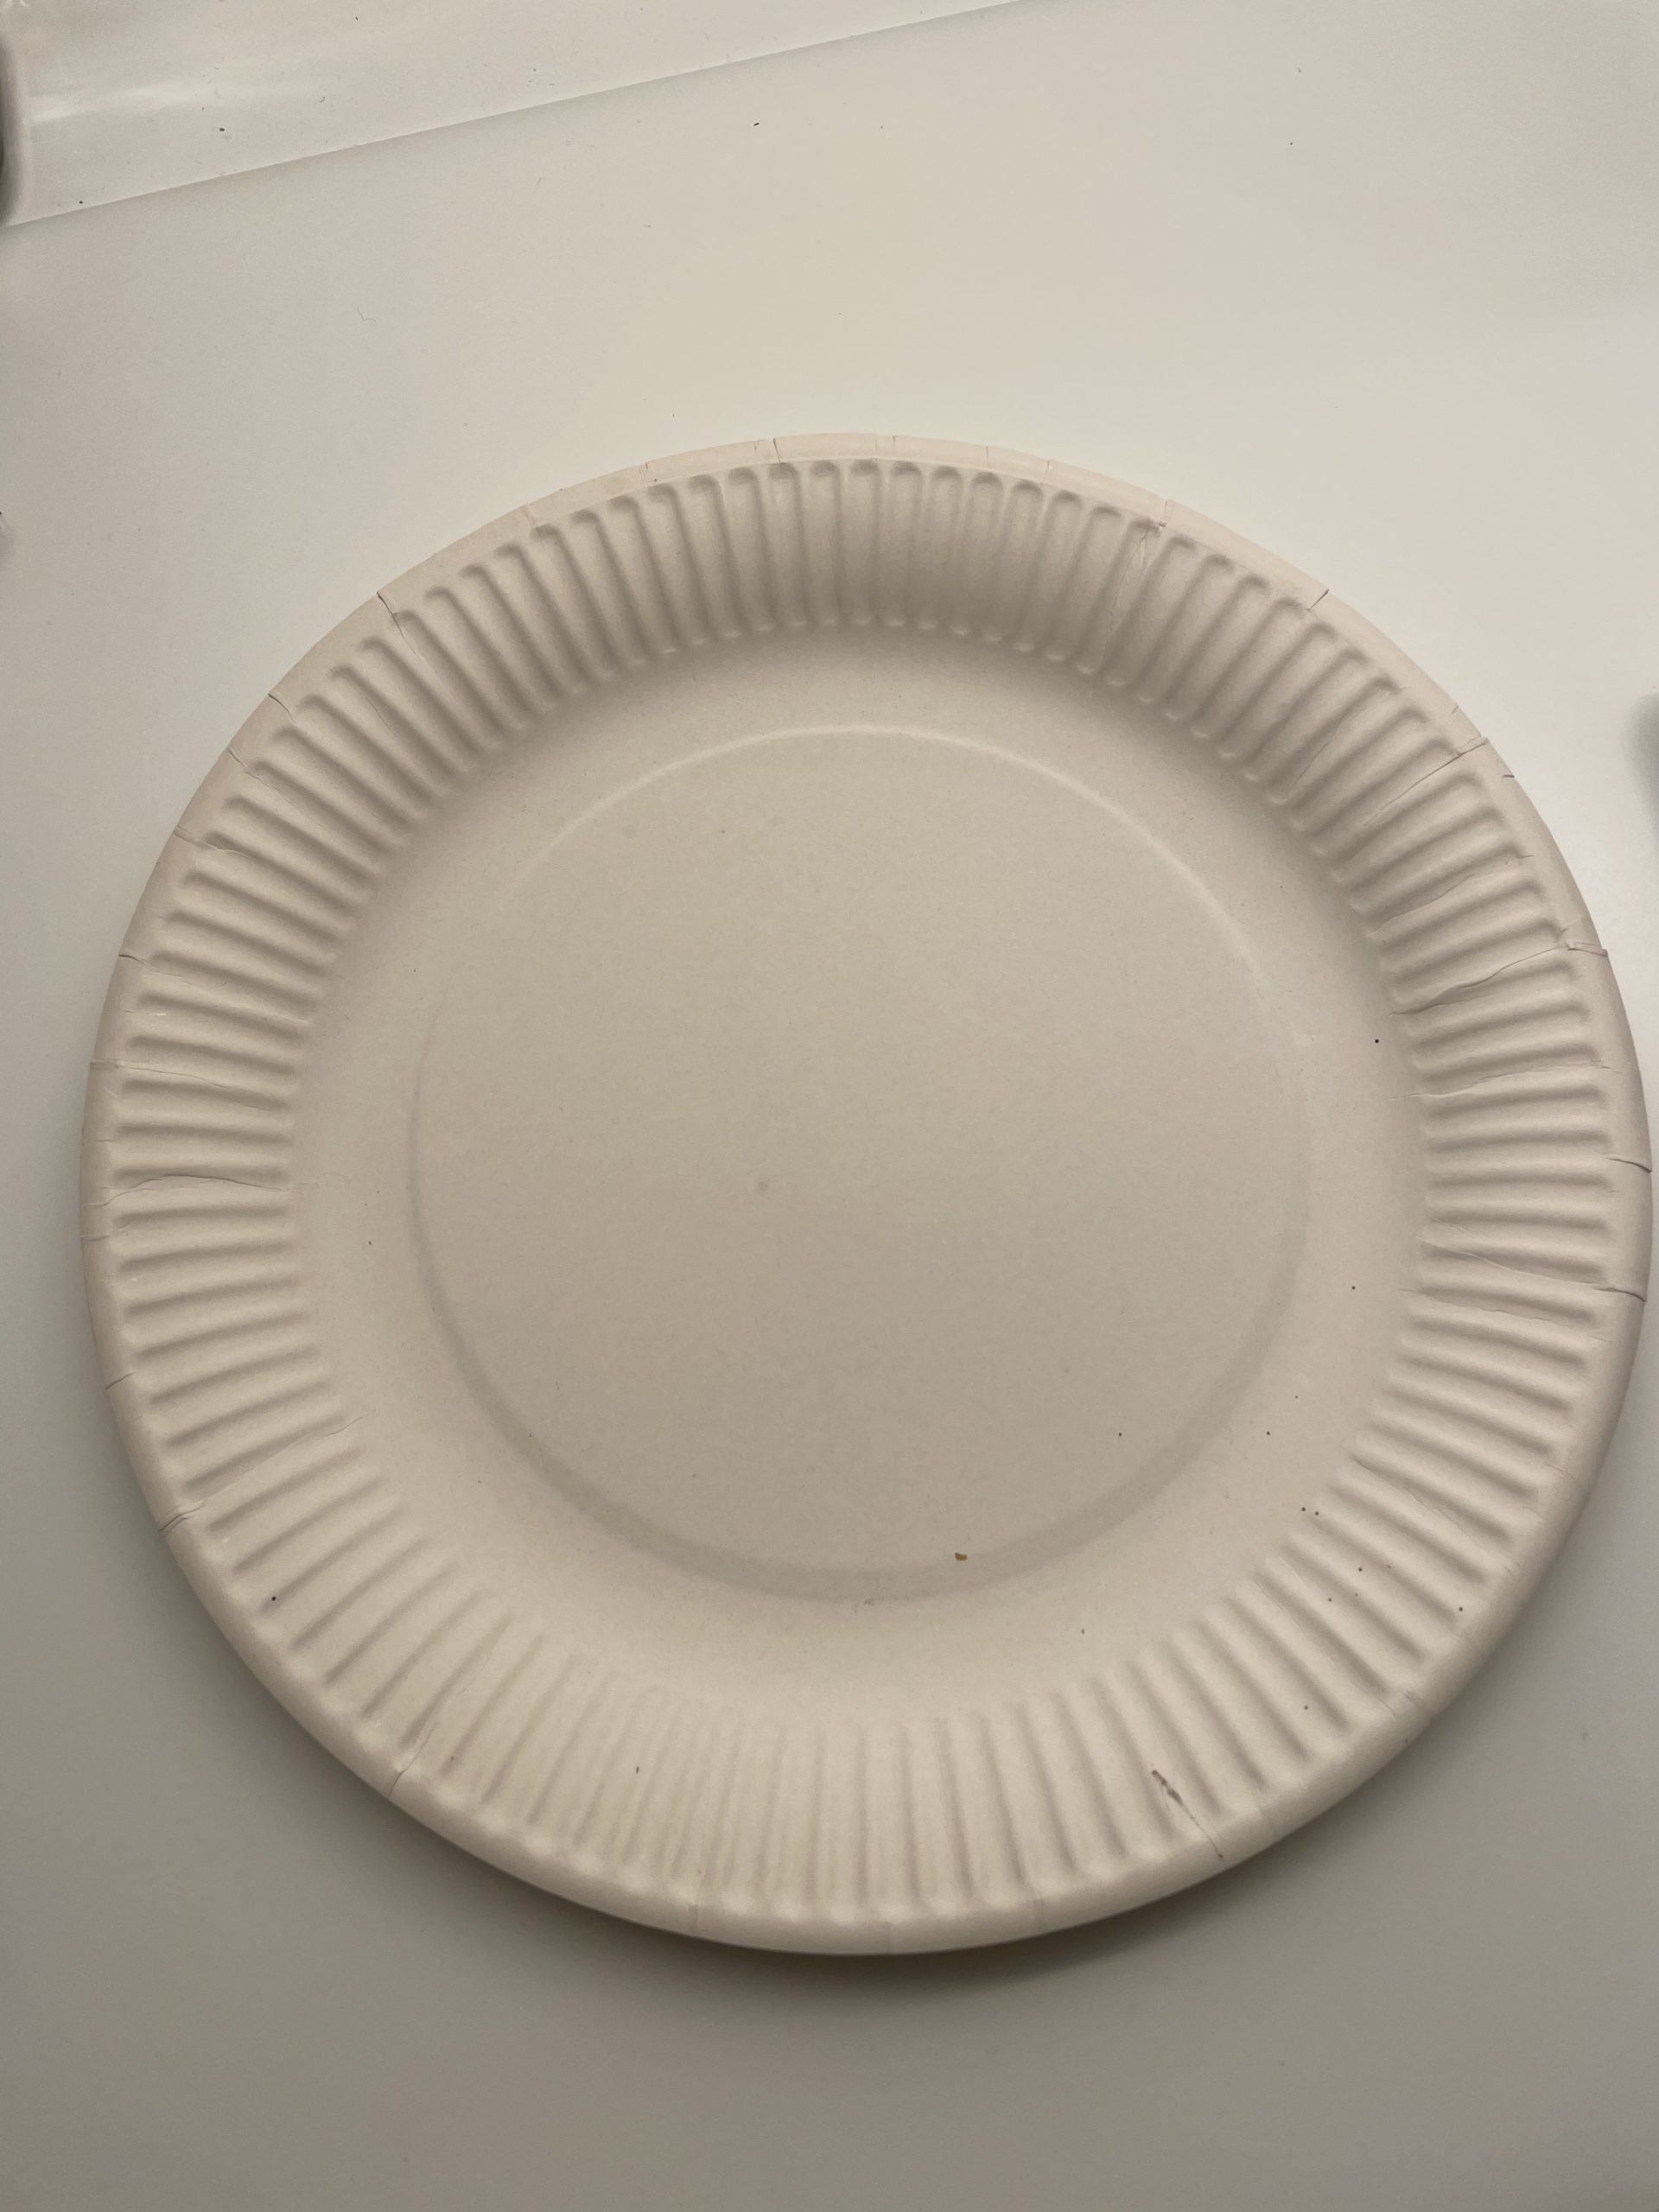
Bild zum Schritt 1 für das Bastel- und DIY-Abenteuer für Kinder: 'Legt eure Bastelunterlage aus. Dann beginnt ihr mit dem Pappteller....'

2

Attention: when stabbing the scissors and cutting out you should be very careful, because you need the ring and the inner circle. If you don't like the cut-out middle part completely, cut the edge slightly with the scissors.

Now you put the inner circle to the side. We start with the outer edge of the snowman, the belly.
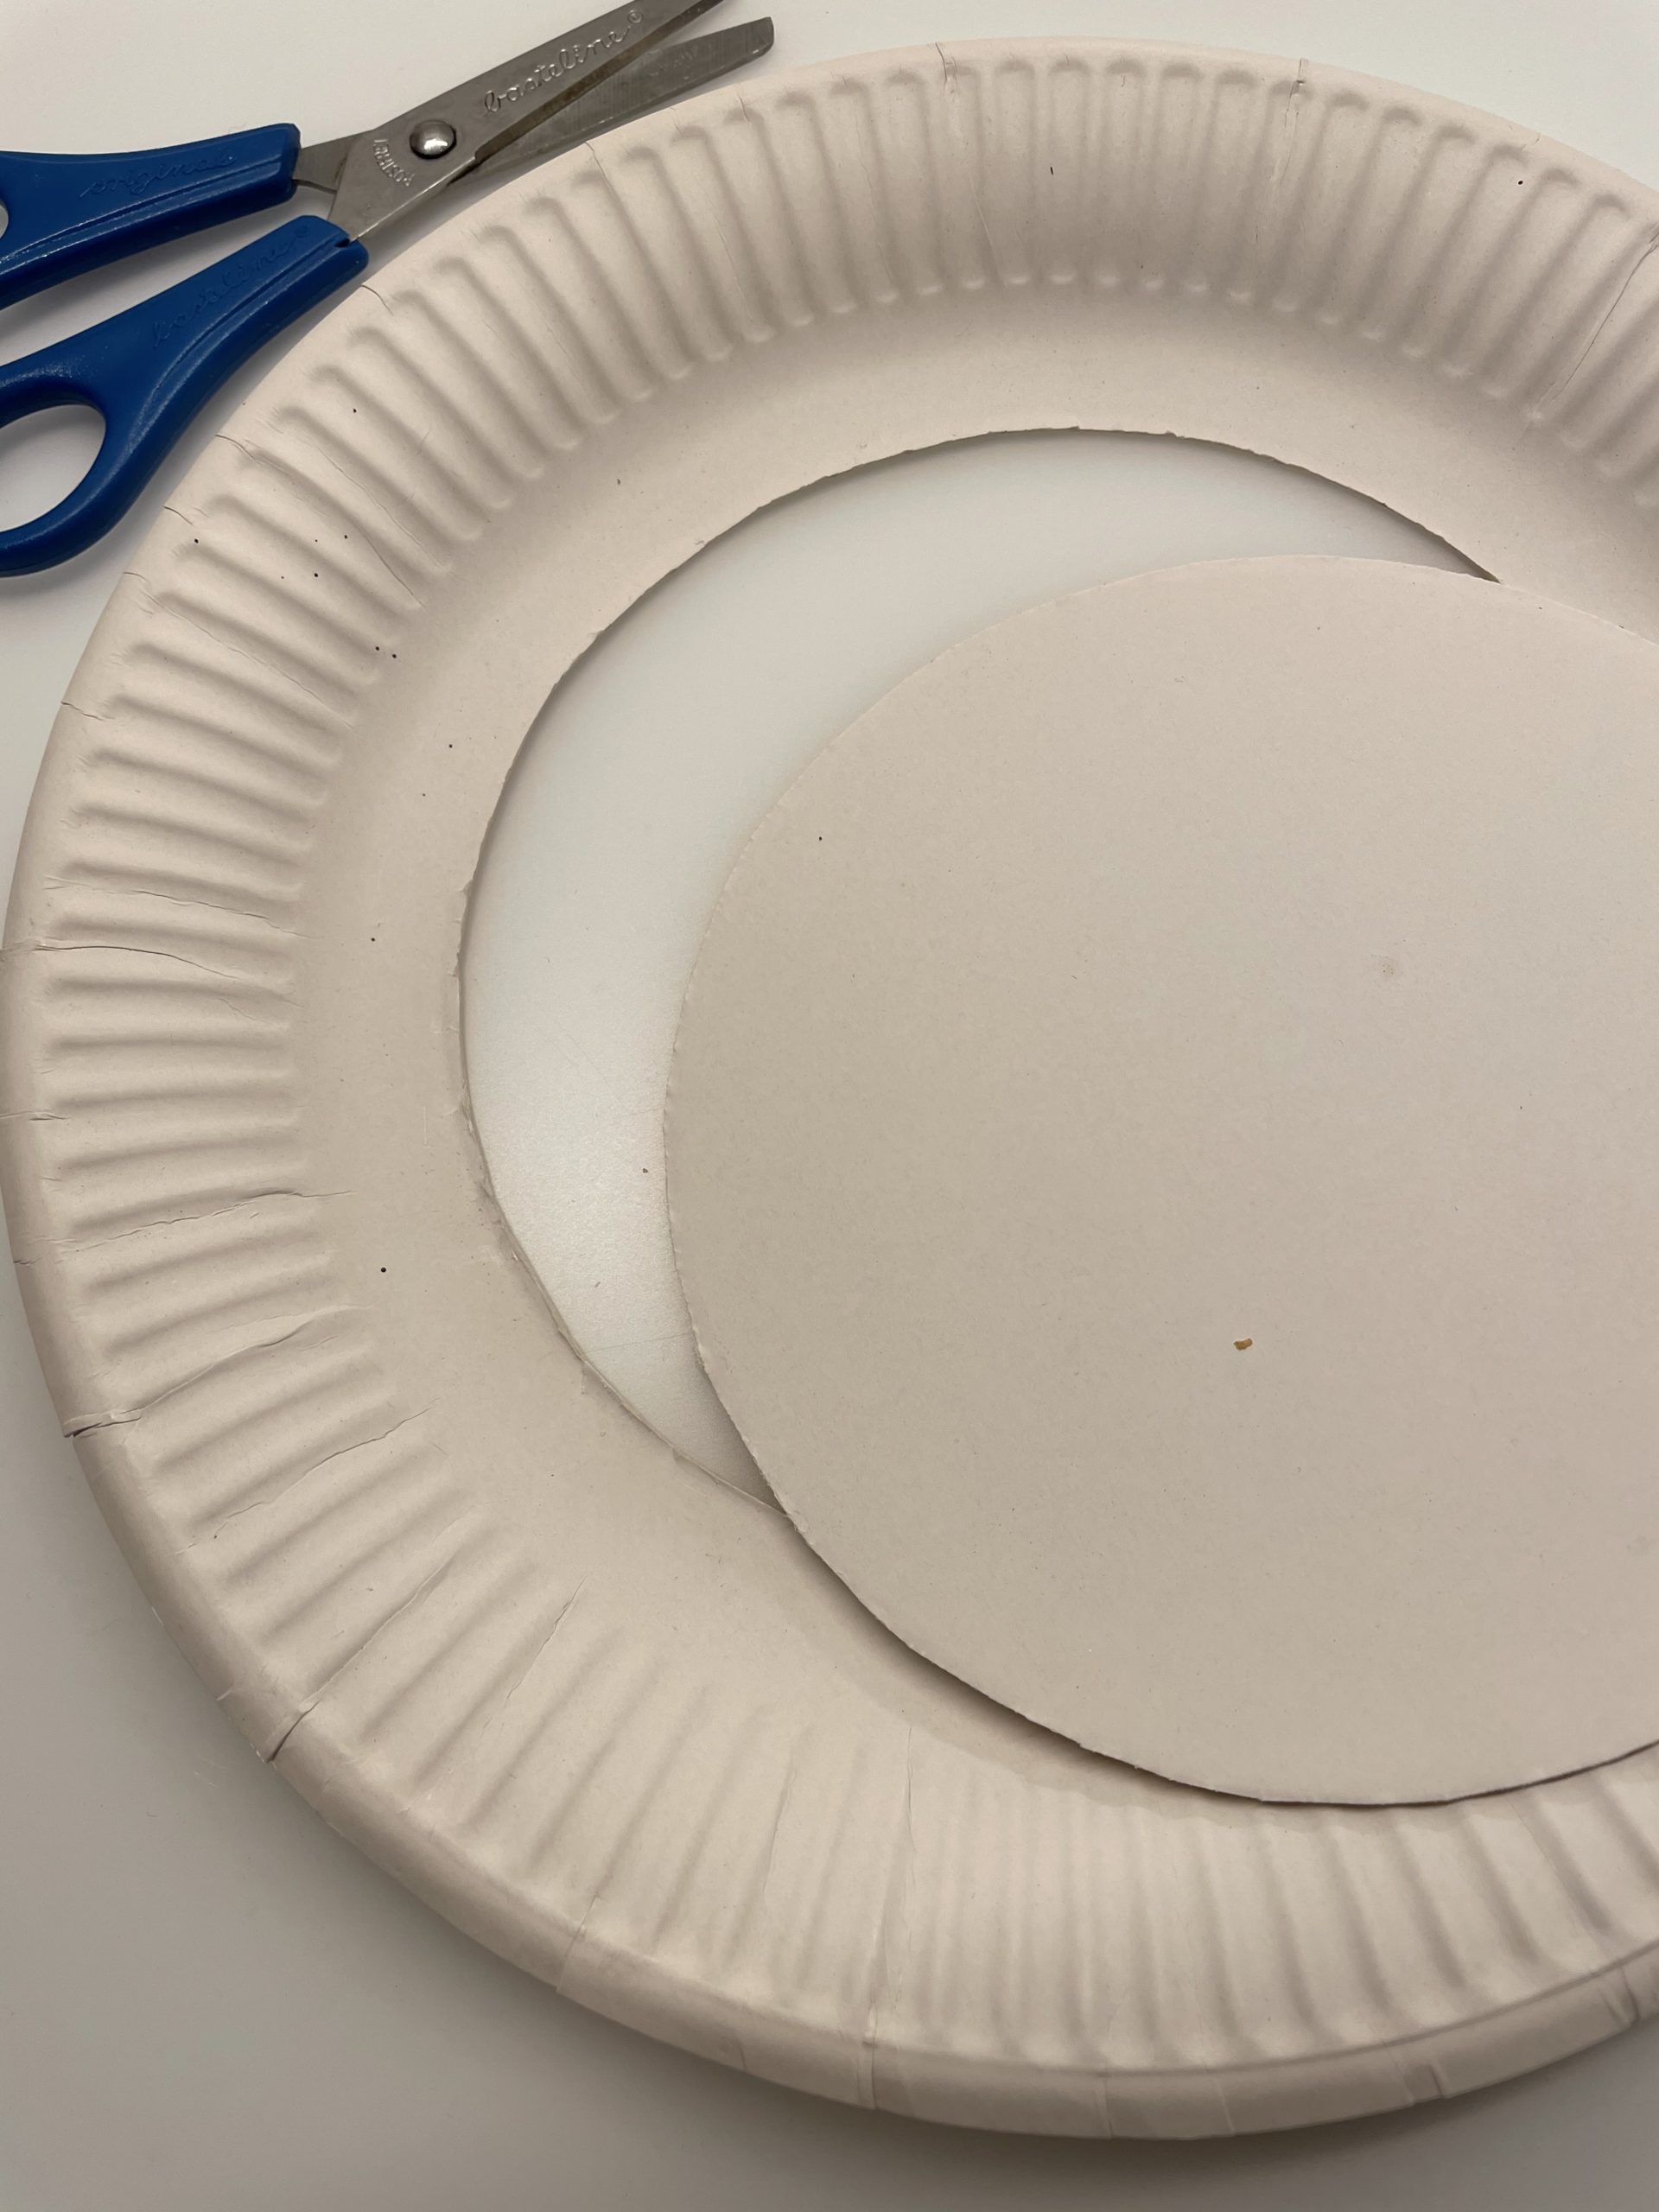
Bild zum Schritt 2 für das Bastel- und DIY-Abenteuer für Kinder: 'Achtung: beim Einstechen der Schere und beim Ausschneiden solltet ihr...'

3

For this you now punch the inside of the cardboard plate. The hole is located in the middle of the ring and from there you push the hole as far as possible into the edge of the cardboard plate. You always punch two holes at the same time. Make sure that the holes sit in as far as possible so that they do not tear out later!

Bild zum Schritt 3 für das Bastel- und DIY-Abenteuer für Kinder: 'Dafür locht ihr nun die Innenseite des Papptellers. Der Locher...'

4

Distribute the holes all around. They don't have to be perfectly distributed.
Tip: Better hole more holes, because in retrospect it is hardly possible to attach any more holes.

Bild zum Schritt 4 für das Bastel- und DIY-Abenteuer für Kinder: 'Verteile die Löcher rundherum. Sie müssen nicht perfekt verteilt sein....'

5

Now take off the wool and take off with an inch stick about 3-4 meters. Now cut off the very long wool thread.

Bild zum Schritt 5 für das Bastel- und DIY-Abenteuer für Kinder: 'Nehmt nun die Wolle und messt mit einem Zollstock circa...'

6

Then thread the thread into the eyelet of a needle.
Now start with the net. For this you pull the thread with the needle through any hole.

Bild zum Schritt 6 für das Bastel- und DIY-Abenteuer für Kinder: 'Anschließend fädelt ihr den Faden in die Öse einer Stopfnadel....'

7

You let a tailpiece of 10cm hang out and knot this.

Bild zum Schritt 7 für das Bastel- und DIY-Abenteuer für Kinder: 'Dabei lasst ihr ein Endstück von 10cm heraushängen und verknotet...'

8

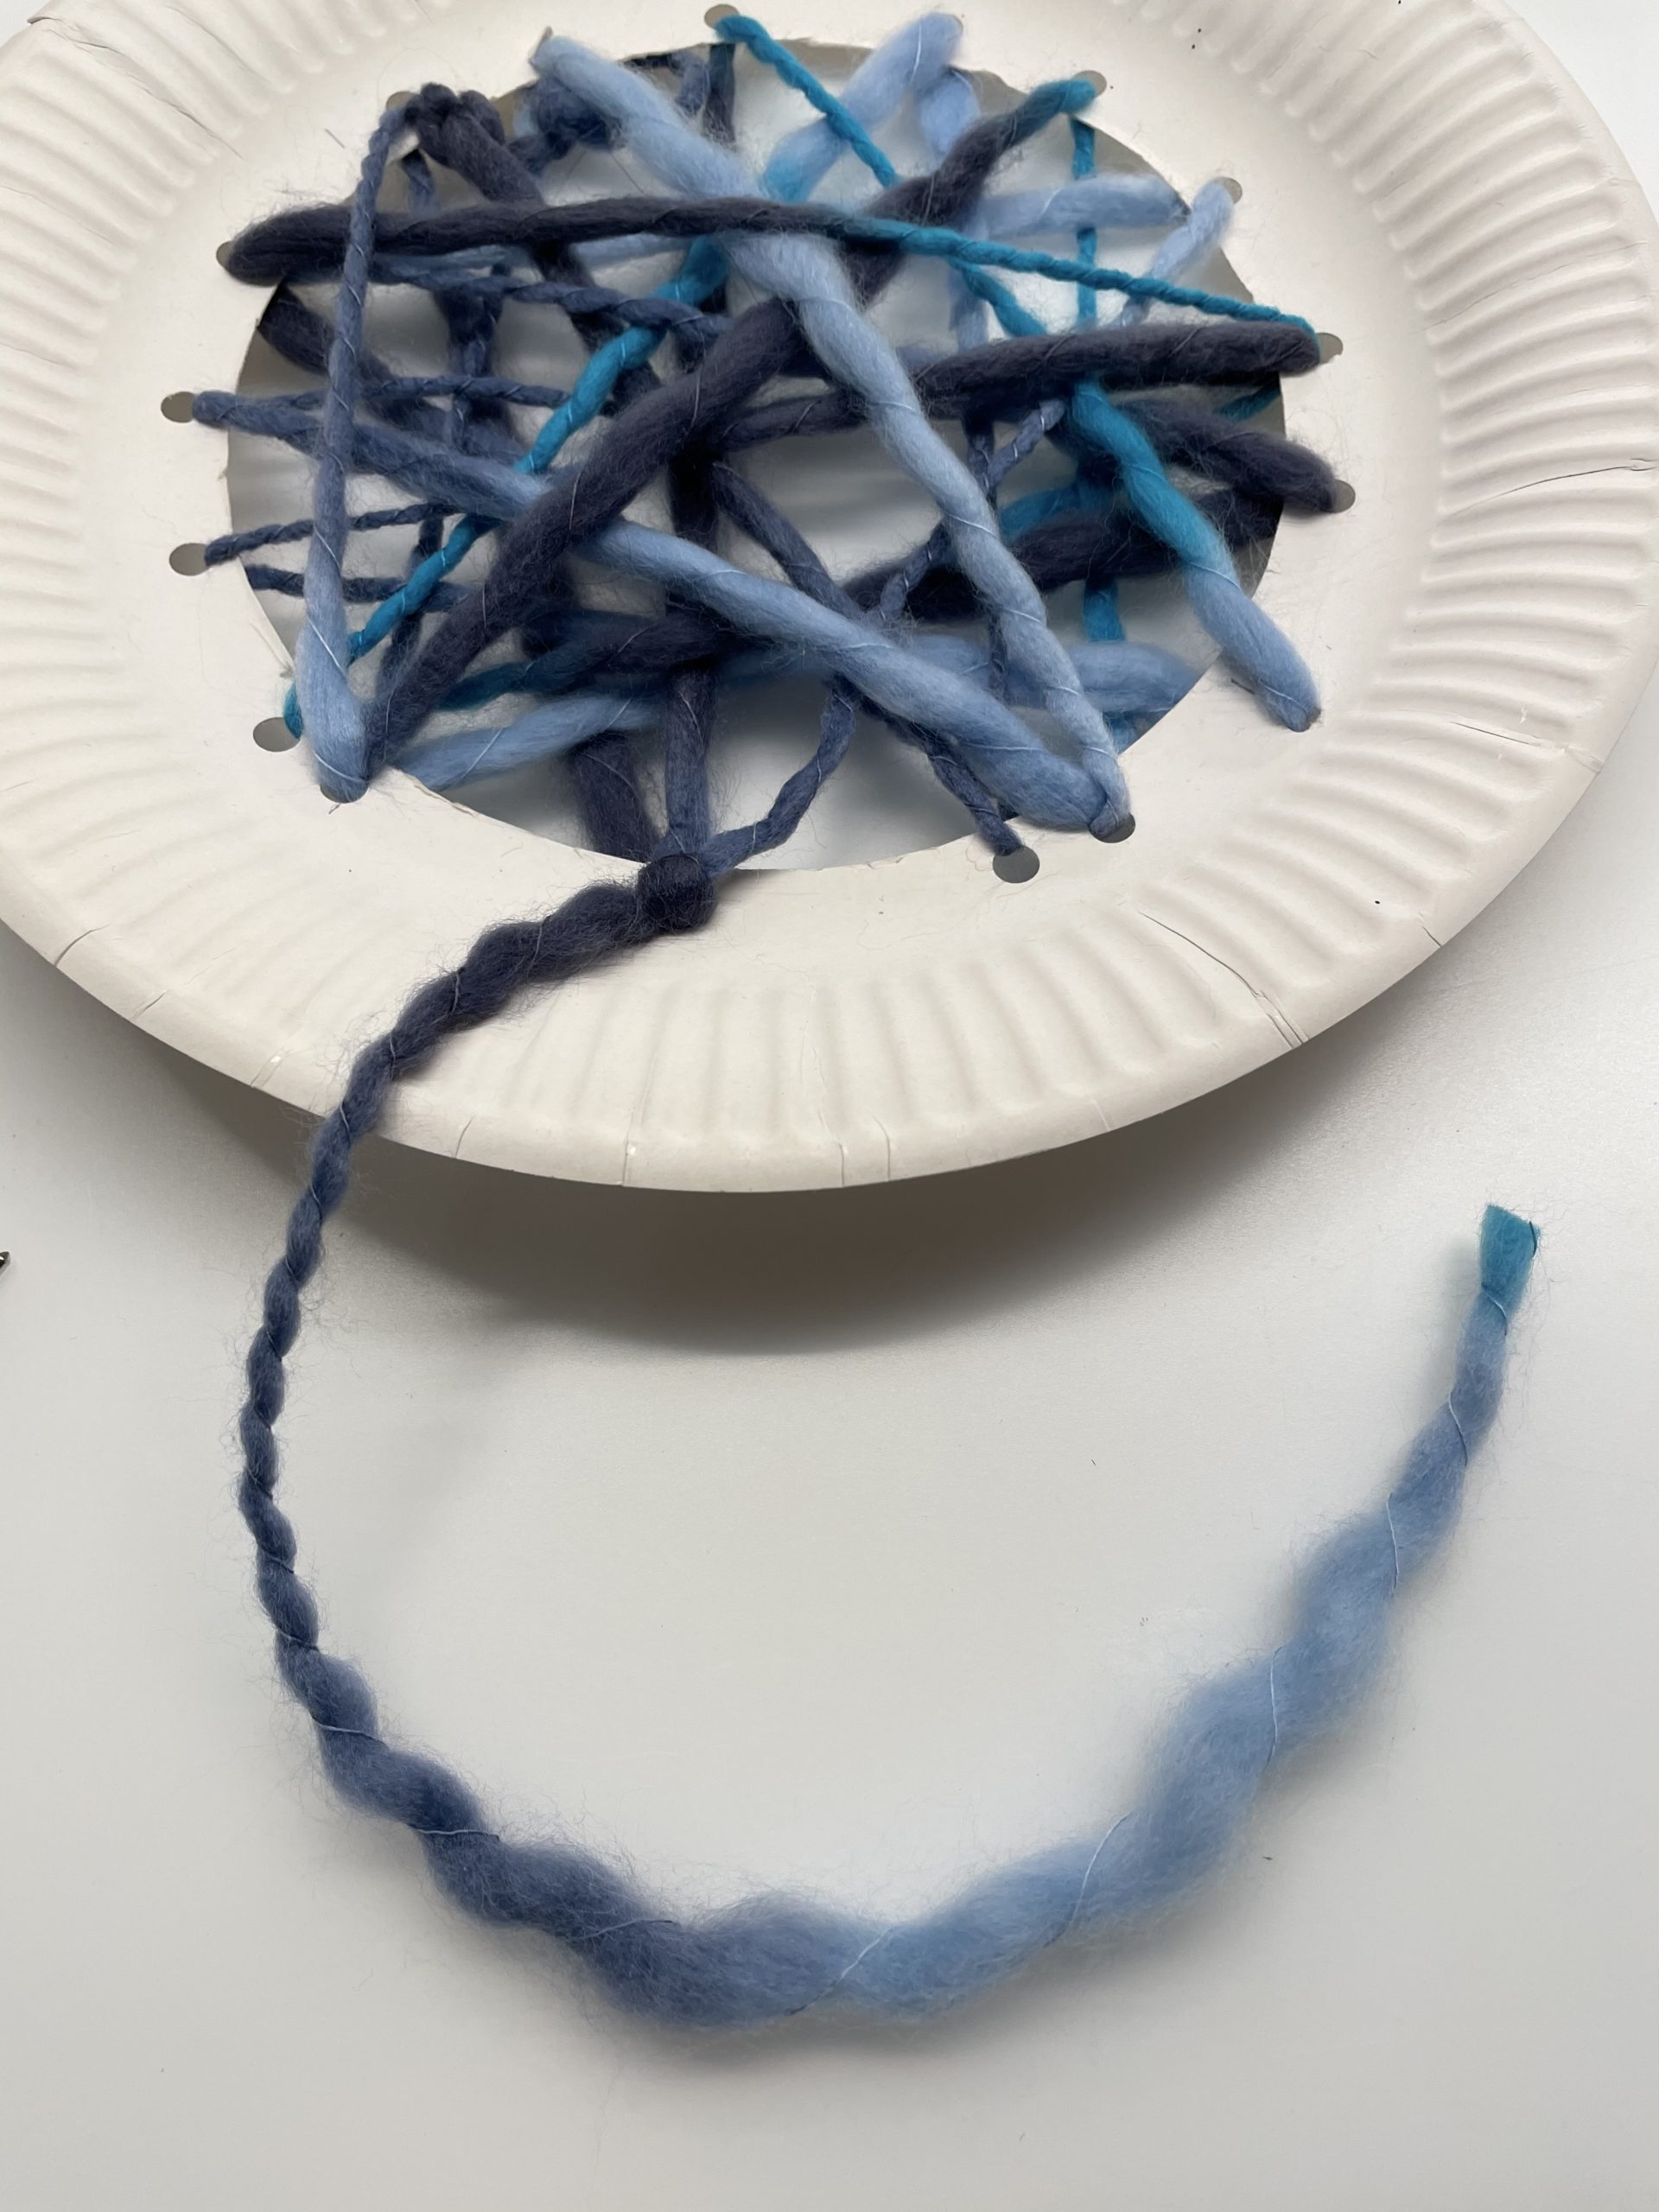
Now you can create a thread net. For this, always pull the thread diagonally on the opposite side and always find a new hole.

Bild zum Schritt 8 für das Bastel- und DIY-Abenteuer für Kinder: 'Nun könnt ihr ein Fadennetz erstellen. Zieht dafür den Faden...'

9

This creates a wonderful zigzag pattern.

Bild zum Schritt 9 für das Bastel- und DIY-Abenteuer für Kinder: 'So entsteht ein wunderbares Zickzack-Muster.'

10

Try to thread the thread in all holes as far as possible.

Bild zum Schritt 10 für das Bastel- und DIY-Abenteuer für Kinder: 'Versucht möglichst in alle Löcher den Faden zu fädeln.'

11

However, should some holes remain free, this is just as appropriate as some holes were to be used twice.

Bild zum Schritt 11 für das Bastel- und DIY-Abenteuer für Kinder: 'Sollten jedoch einige Löcher freibleiben, so ist das ebenso passend,...'

12

If you like the thread mesh, you tie the thread remnant to a hole. Let a piece of the thread survive.

Bild zum Schritt 12 für das Bastel- und DIY-Abenteuer für Kinder: 'Wenn euch das Fadengeflecht gefällt, dann verknotet ihr den Fadenrest...'

13

2. Bild zum Schritt 12 für das Bastel- und DIY-Abenteuer für Kinder: 'Wenn euch das Fadengeflecht gefällt, dann verknotet ihr den Fadenrest...'

14

Now you can decorate the thread net with snow crystals.
You can easily make snow crystals from pipe cleaners.
For this purpose, three pieces of the pipe-puter cut off in the length of about 5cm.

Bild zum Schritt 14 für das Bastel- und DIY-Abenteuer für Kinder: 'Nun könnt ihr das Fadennetz mit Schneekristallen dekorieren.  ...'

15

Now you put a cross from two pieces of pipe cleaner.

Bild zum Schritt 15 für das Bastel- und DIY-Abenteuer für Kinder: 'Jetzt legt ihr aus zwei Stücken Pfeifenputzer ein Kreuz.'

16

Now you bend the two wires to the other side. You can also take a piece of wire in half length and bend around or even a whole wire. So the snow crystal becomes more stable.

Bild zum Schritt 16 für das Bastel- und DIY-Abenteuer für Kinder: 'Nun biegt ihr die zwei Drähte jeweils auf die andere...'

17

On each standing wire you attach a small piece of wire in the length of approx. 2 cm. Bend this small wire also around the other wire.

Bild zum Schritt 17 für das Bastel- und DIY-Abenteuer für Kinder: 'An jedem abstehenden Draht befestigt ihr nun ein kleines Stück...'

18

You can make the snow crystals from one color or make them from different coloured wires.

Bild zum Schritt 18 für das Bastel- und DIY-Abenteuer für Kinder: 'Ihr könnt die Schneekristalle aus einer Farbe herstellen oder aus...'

19

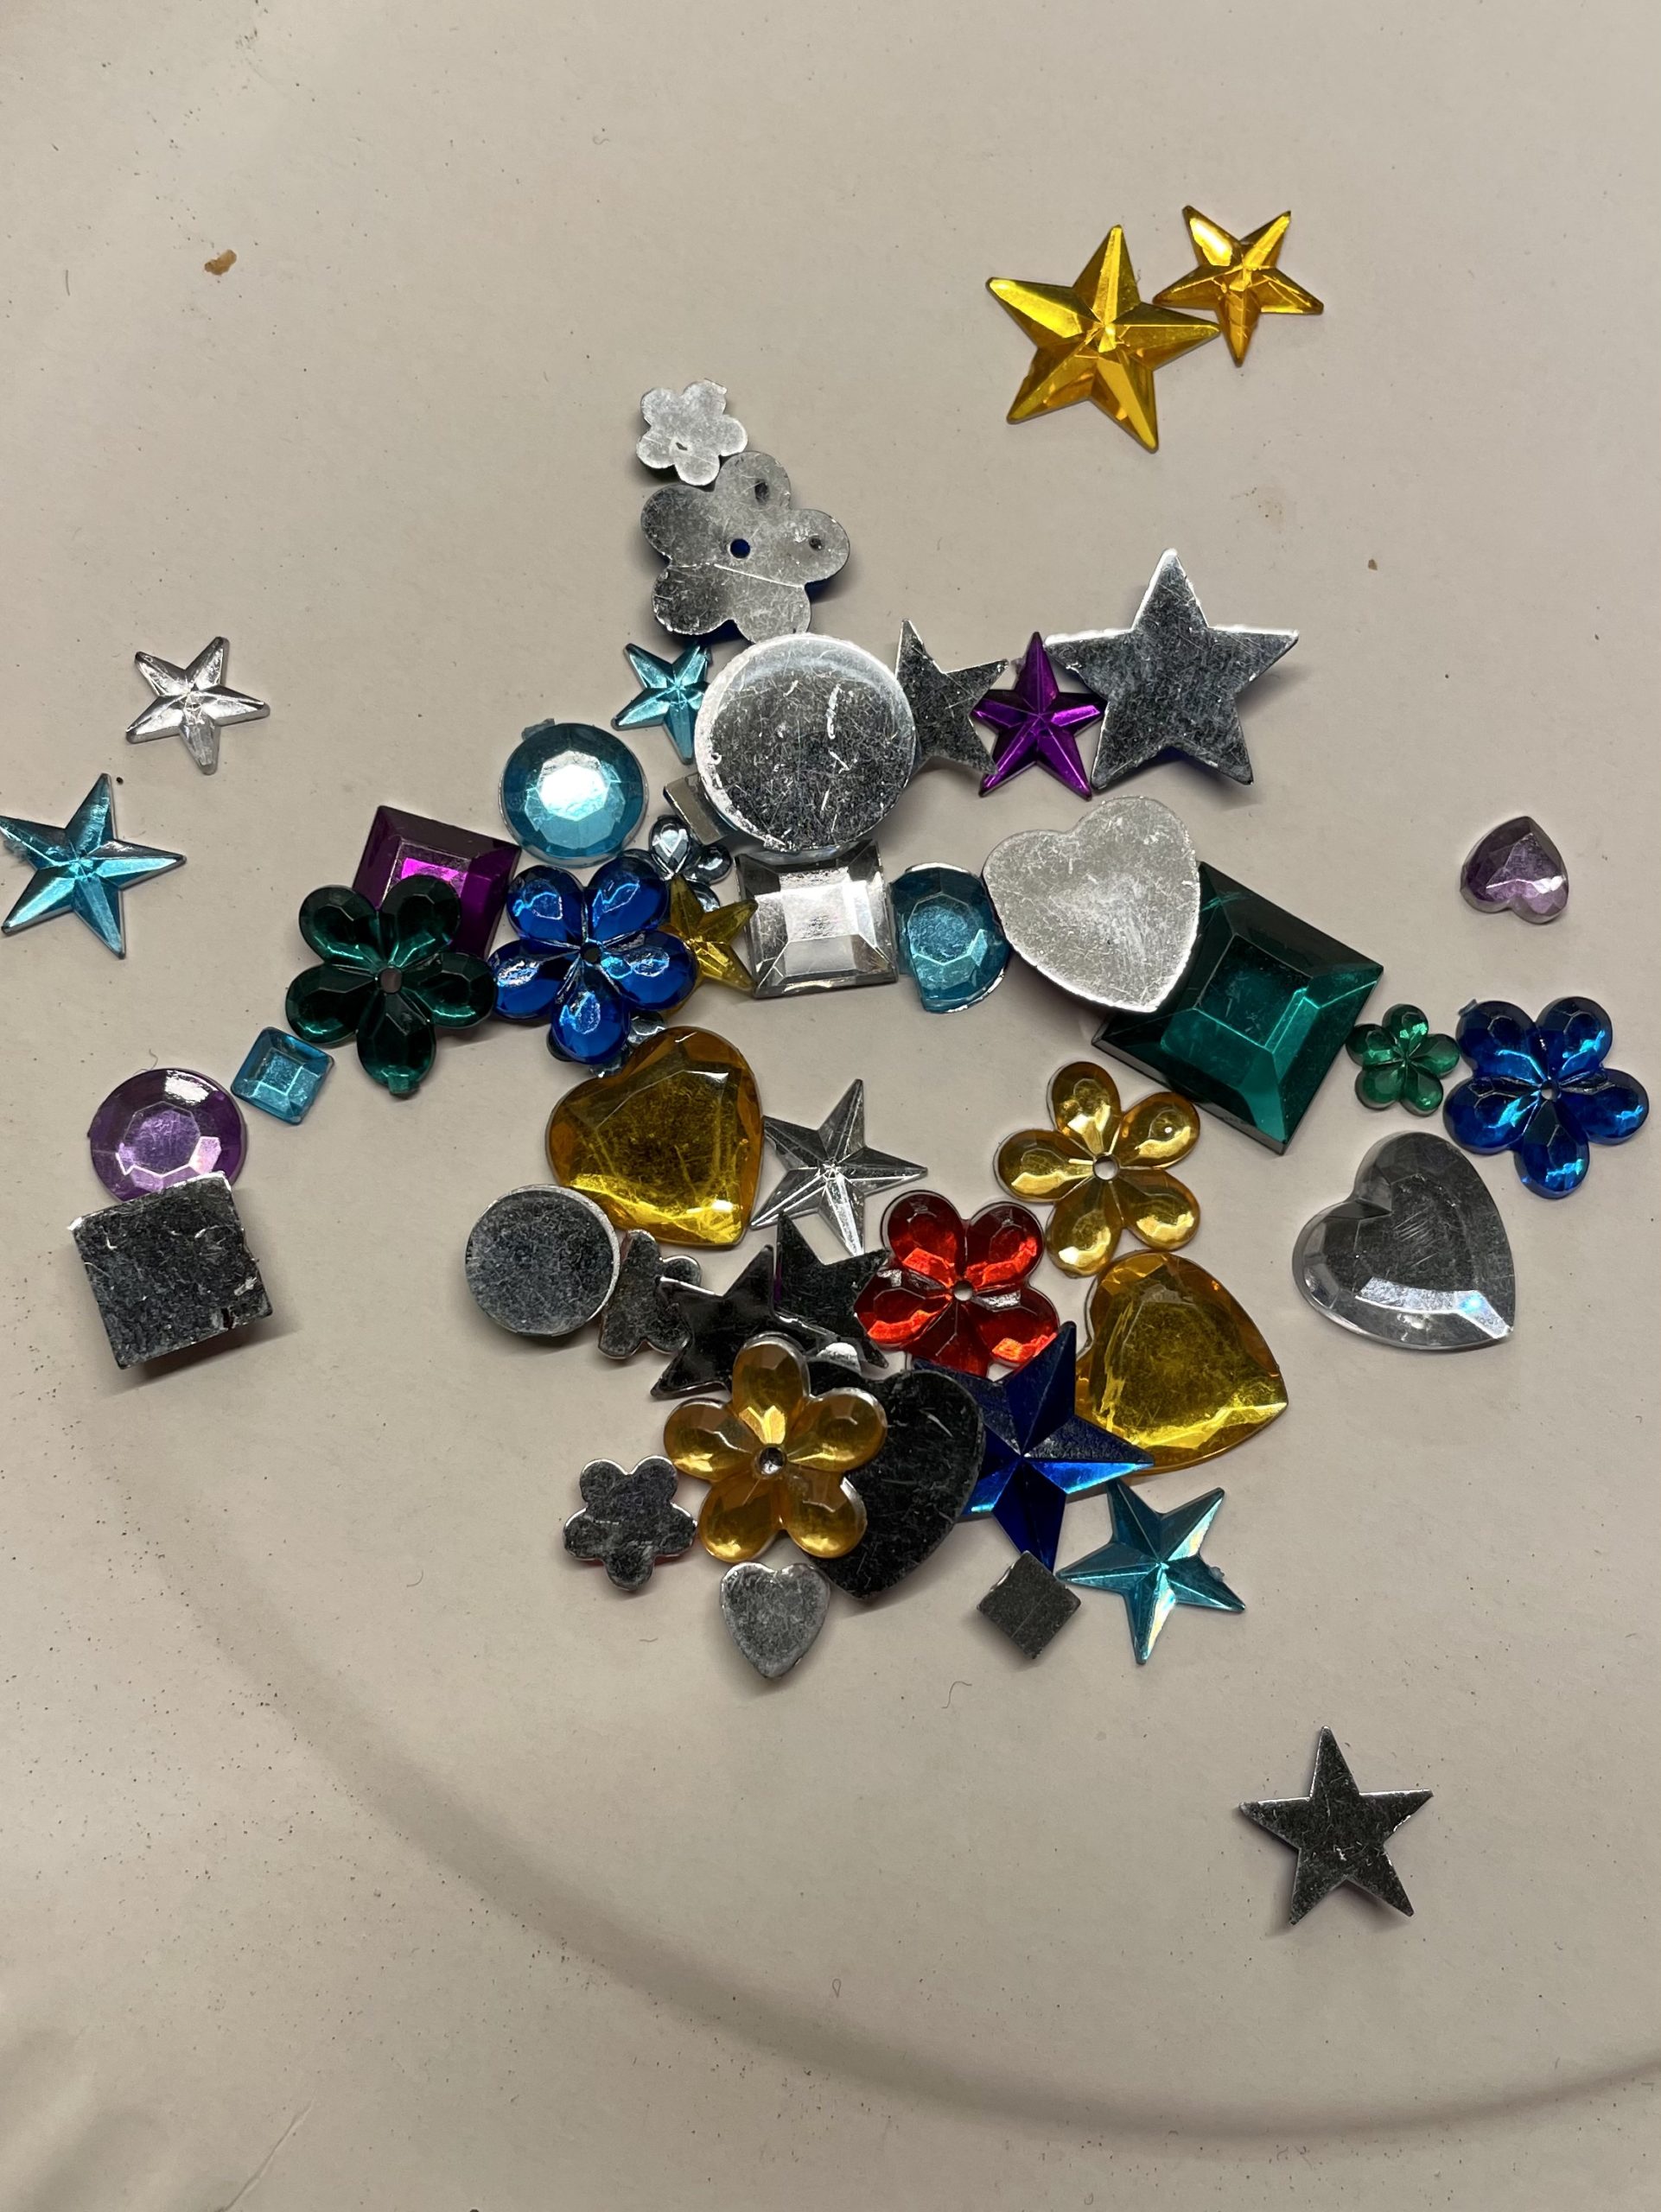
You can also use punched snow crystals, scatter decoration with crystals or small cotton balls.

Bild zum Schritt 19 für das Bastel- und DIY-Abenteuer für Kinder: 'Ihr könnt auch ausgestanzte Schneekristalle verwenden, Streudekoration mit Kristallen oder...'

20

It is also suitable for sequins.

Bild zum Schritt 20 für das Bastel- und DIY-Abenteuer für Kinder: 'Es eignen sich auch Pailletten.'

21

Beautiful also look pearls in the net.

Bild zum Schritt 21 für das Bastel- und DIY-Abenteuer für Kinder: 'Schön sehen auch Perlen im Netz aus.'

22

Decorate the thread net with different snow crystals, beads, feathers and balls. Decorate it as you like it and use what you have at home.

Bild zum Schritt 22 für das Bastel- und DIY-Abenteuer für Kinder: 'Dekoriert das Fadennetz mit unterschiedlichen Schneekristallen, Perlen, Federn und Kugeln....'

23

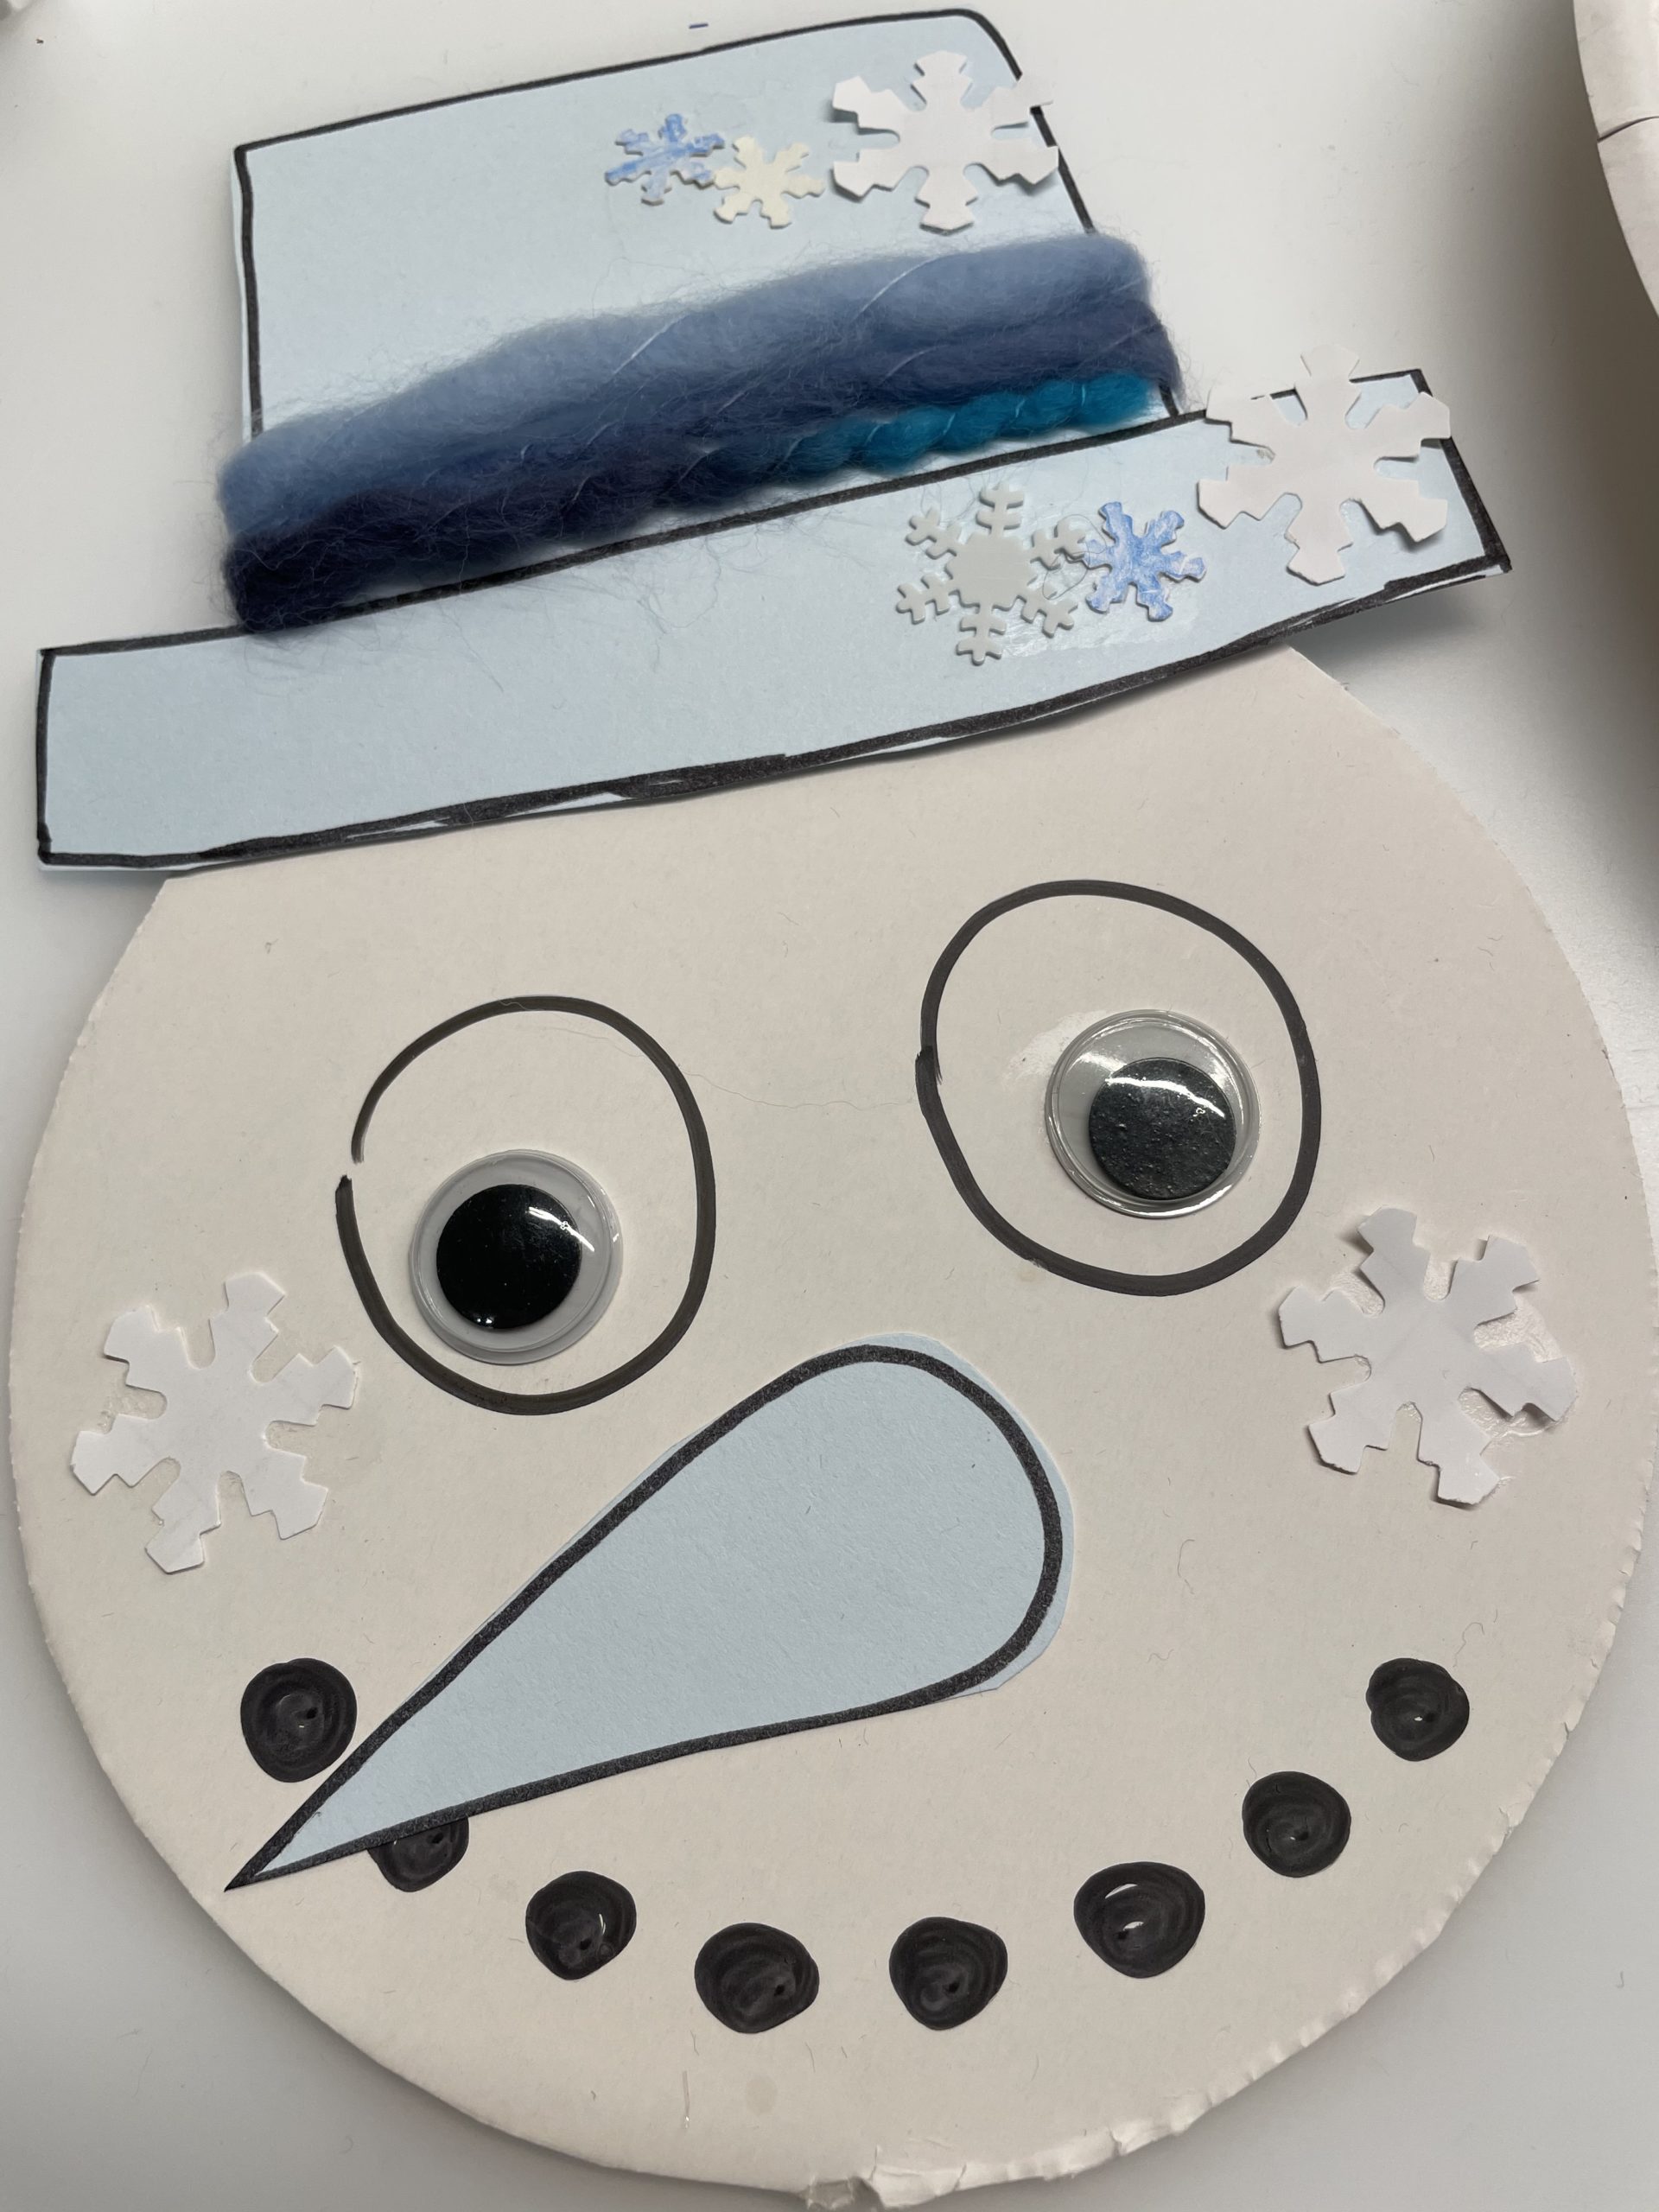
Then you make the head of the snowman out of the inner circle of the cardboard plate. For this you first stick the wobble eyes on the head. Alternatively, you simply paint your eyes on.

Bild zum Schritt 23 für das Bastel- und DIY-Abenteuer für Kinder: 'Anschließend bastelt ihr aus dem inneren Kreis des Papptellers den...'

24

After that, paint your mouth. Design your face according to your ideas.

Bild zum Schritt 24 für das Bastel- und DIY-Abenteuer für Kinder: 'Malt danach den Mund. Gestaltet das Gesicht nach euren Vorstellungen.'

25

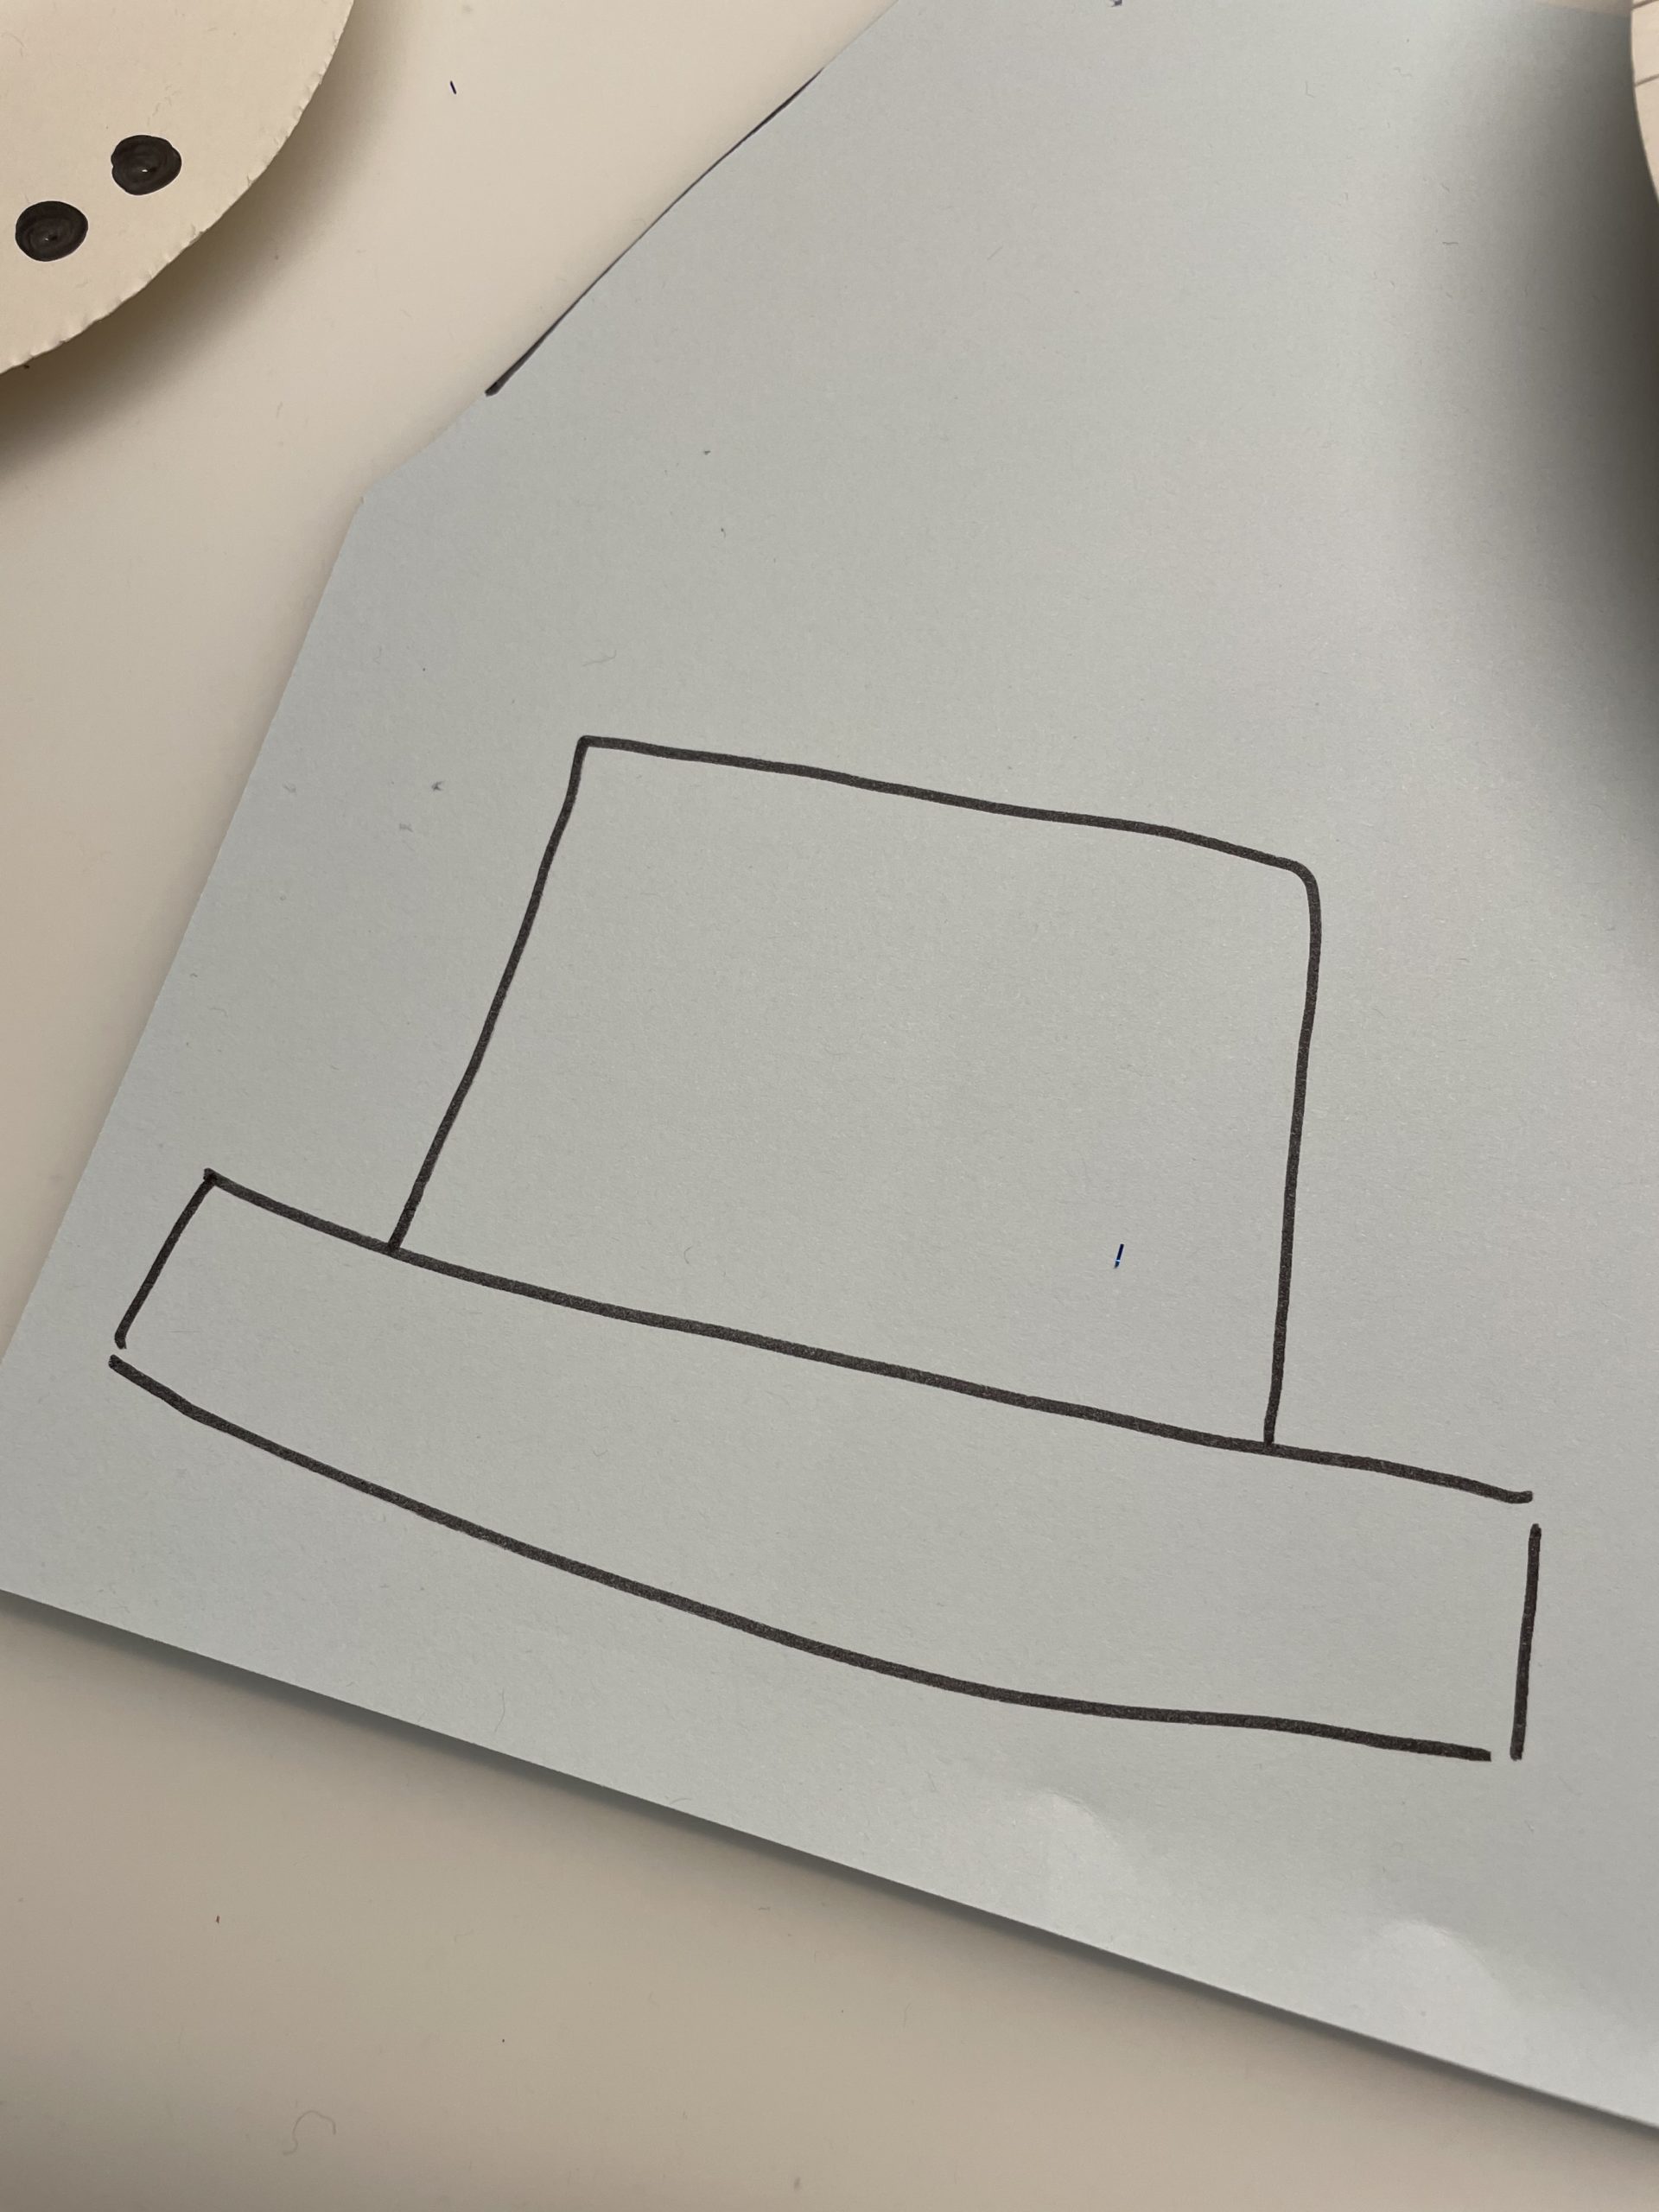
Then paint another nose and cut it out.

Bild zum Schritt 25 für das Bastel- und DIY-Abenteuer für Kinder: 'Anschließend malt noch eine Nase und schneidet diese aus.'

26

And finally, a cylinder.

Bild zum Schritt 26 für das Bastel- und DIY-Abenteuer für Kinder: 'Und zum Schluss noch einen Zylinder.'

27

Tip: You can also leave your painted edges standing when cutting out. This also looks very good.

Bild zum Schritt 27 für das Bastel- und DIY-Abenteuer für Kinder: 'Tipp: Ihr könnt eure gemalten Ränder beim Ausschneiden auch stehen...'

28

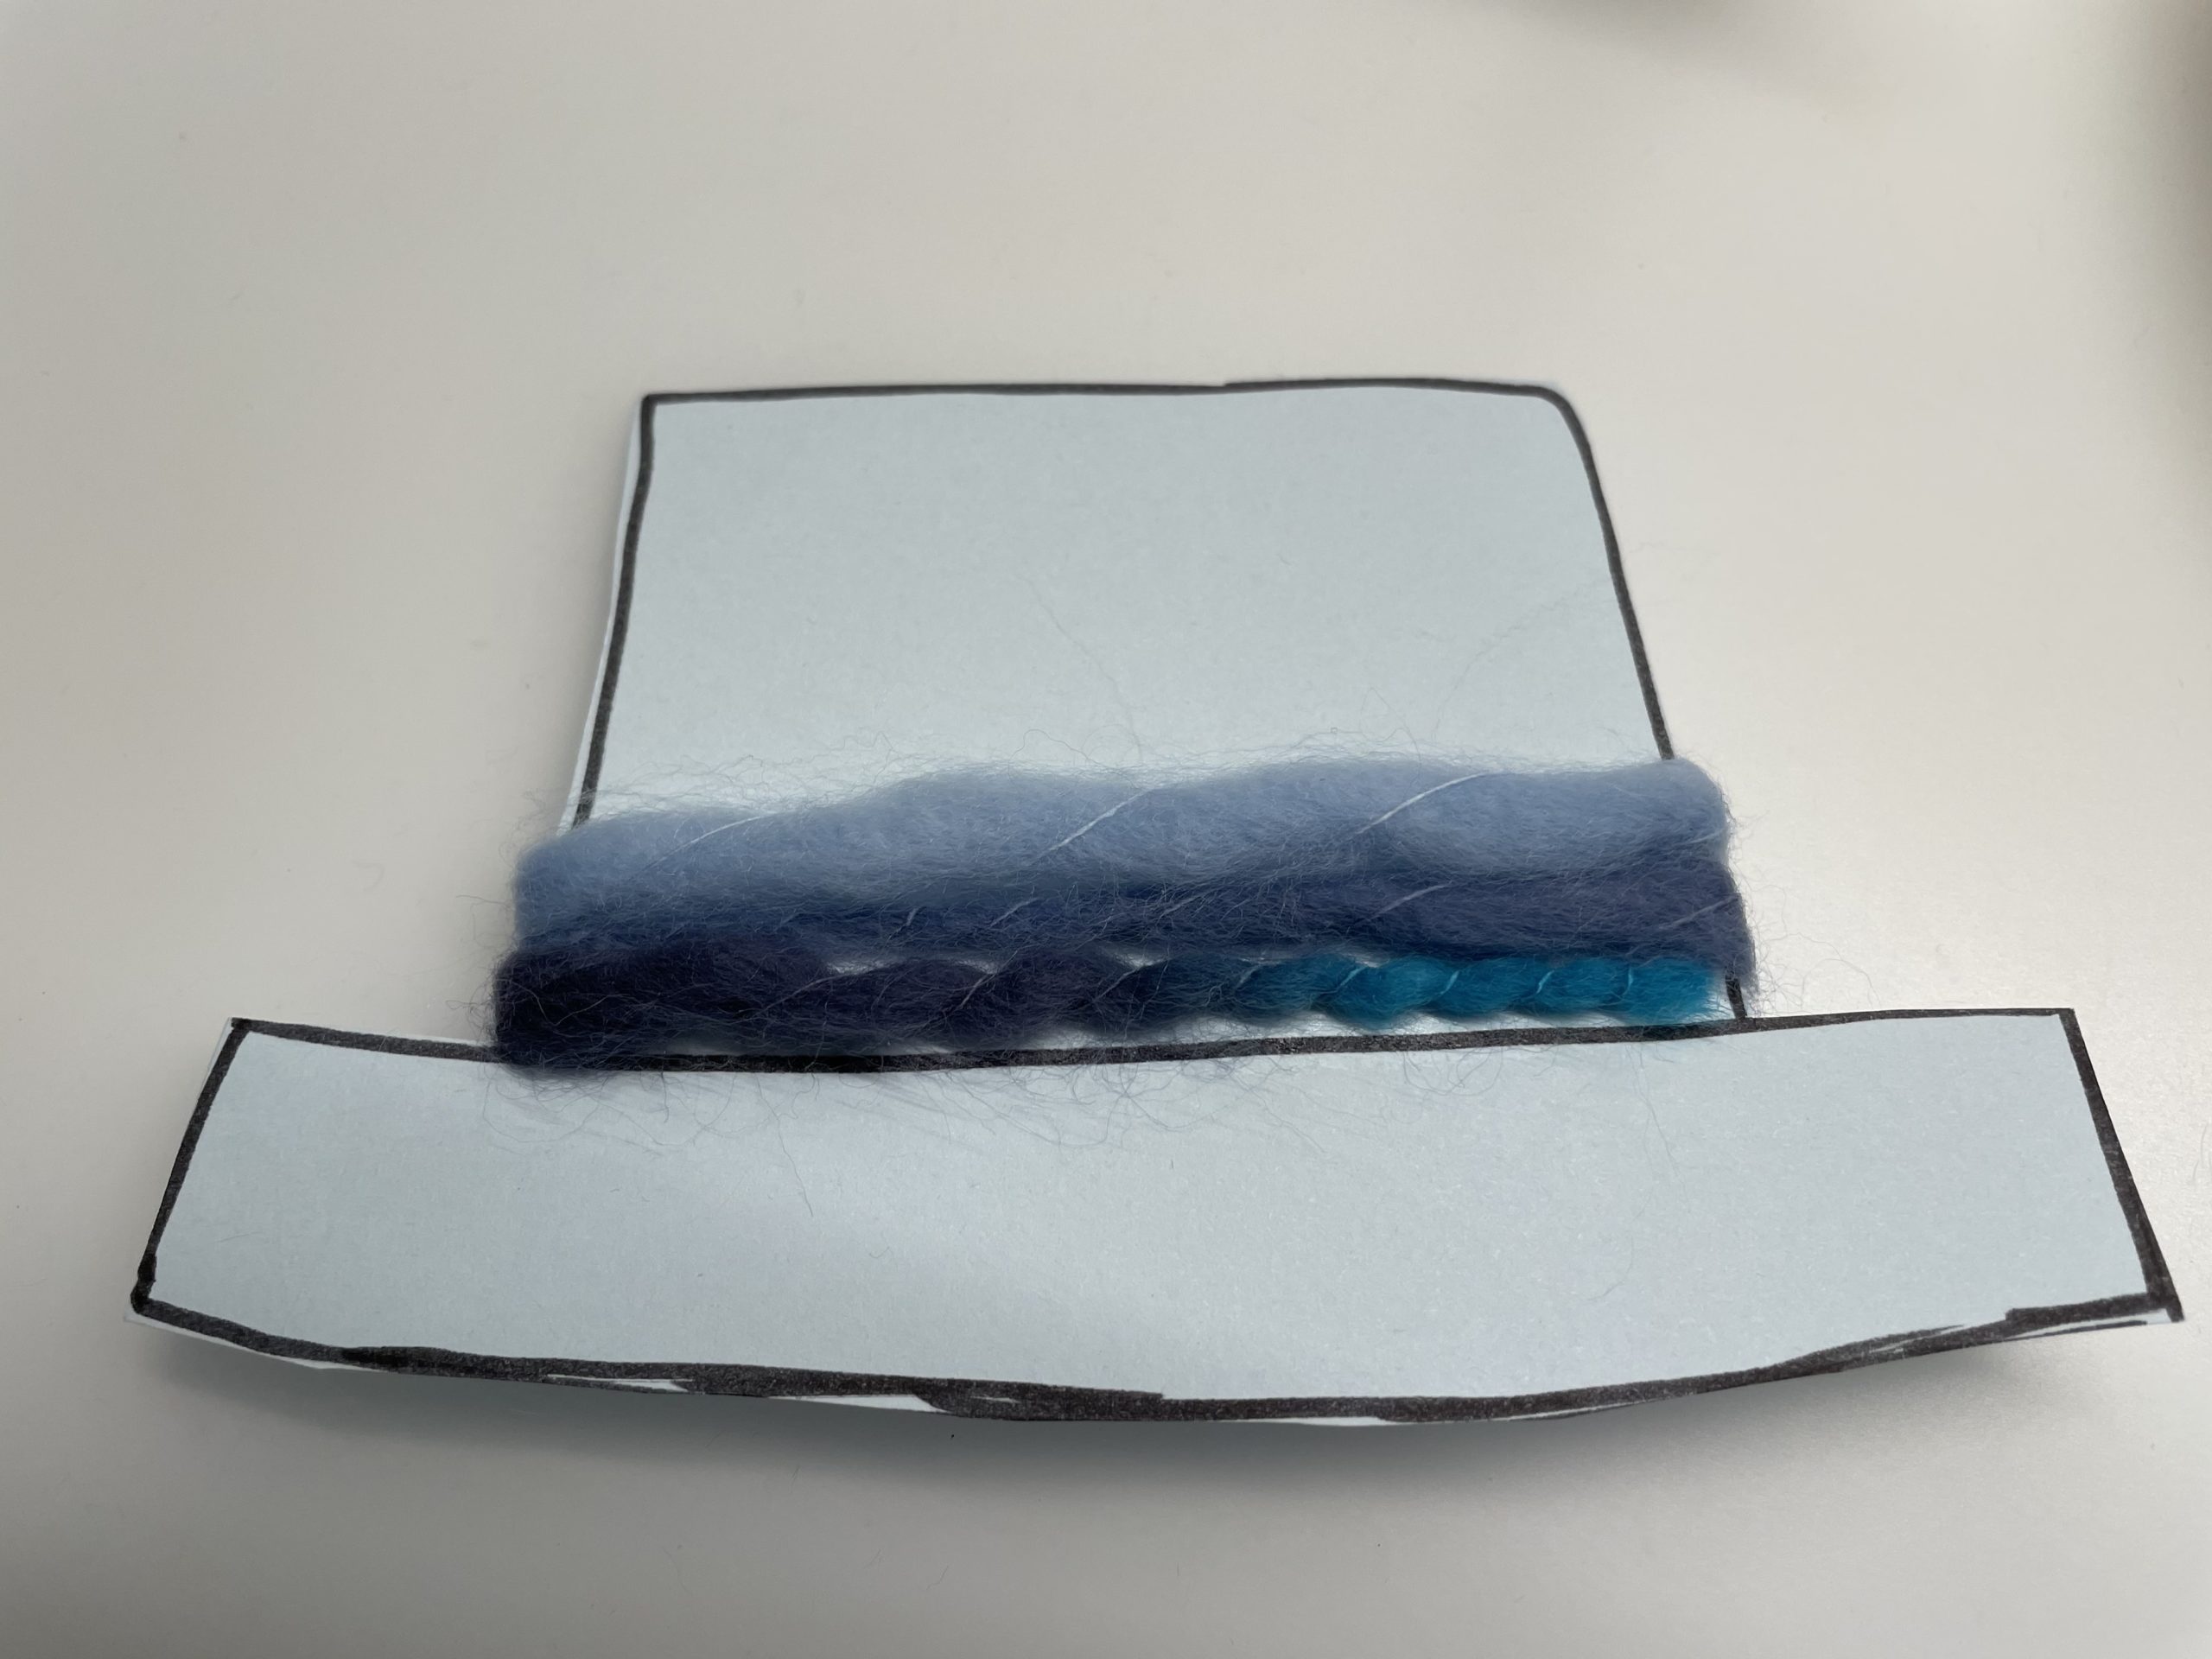
On top of the brim you can glue the hat with a piece of wool thread. For this, you will brush a strip with glue.

Bild zum Schritt 28 für das Bastel- und DIY-Abenteuer für Kinder: 'Oberhalb der Krempe könnt ihr den Hut mit einem Stück...'

29

Now you stick the beginning of the thread to it and wrap the thread around the hat several times along the adhesive strip.

Bild zum Schritt 29 für das Bastel- und DIY-Abenteuer für Kinder: 'Daran klebt ihr nun den Fadenanfang fest und wickelt den...'

30

Then cut off the thread and stick the tailpiece to the back.

Bild zum Schritt 30 für das Bastel- und DIY-Abenteuer für Kinder: 'Schneidet anschließend den Faden ab und klebt das Endstück auf...'

31

2. Bild zum Schritt 30 für das Bastel- und DIY-Abenteuer für Kinder: 'Schneidet anschließend den Faden ab und klebt das Endstück auf...'

32

3. Bild zum Schritt 31 für das Bastel- und DIY-Abenteuer für Kinder: 'Schneidet anschließend den Faden ab und klebt das Endstück auf...'

33

Now embellish the hat with snow crystals, for example.

Bild zum Schritt 33 für das Bastel- und DIY-Abenteuer für Kinder: 'Verschönert nun den Hut zum Beispiel mit Schneekristallen.'

34

Afterwards, she sticks her hat on the head of the snowman.

Bild zum Schritt 34 für das Bastel- und DIY-Abenteuer für Kinder: 'Anschließend klebt ihr den Hut auf den Kopf des Schneemannes.'

35

2. Bild zum Schritt 34 für das Bastel- und DIY-Abenteuer für Kinder: 'Anschließend klebt ihr den Hut auf den Kopf des Schneemannes.'

36

Paint up two arms and cut them out. Leave the painted line here, too.

Bild zum Schritt 36 für das Bastel- und DIY-Abenteuer für Kinder: 'Malt zwei Arme auf und schneidet sie aus. Lass evtl....'

37

Now stick your arms to the snowman.

Bild zum Schritt 37 für das Bastel- und DIY-Abenteuer für Kinder: 'Klebt nun die Arme an den Schneemann.'

38

Now you're punching a few holes at the bottom of the cardboard plate.
Cut off a few more threads from the wool.

Bild zum Schritt 38 für das Bastel- und DIY-Abenteuer für Kinder: 'Jetzt locht ihr am unteren Rand des Papptellers noch einige...'

39

Then attach the threads with a knot to the cardboard plate.

Bild zum Schritt 39 für das Bastel- und DIY-Abenteuer für Kinder: 'Befestige danach die Fäden mit einem Knoten am Pappteller.'

40

Now glues snow crystals, pearls, pompons, cotton wool or feathers to the wool.

Bild zum Schritt 40 für das Bastel- und DIY-Abenteuer für Kinder: 'Klebt nun noch Schneekristallen, Perlen, Pompons, Watte oder Federn auf...'

41

At the end you hole a hole for the suspension in the hat. Thereby thread a piece of wool to hang up and knot the ends.

Bild zum Schritt 41 für das Bastel- und DIY-Abenteuer für Kinder: 'Zum Abschluss locht ihr ein Loch für die Aufhängung in...'

42

Your winter dream catcher is ready.

Bild zum Schritt 42 für das Bastel- und DIY-Abenteuer für Kinder: 'Fertig ist euer Wintertraum-Fänger.'

43

Have fun with it!

Bild zum Schritt 43 für das Bastel- und DIY-Abenteuer für Kinder: 'Viel Freude damit!'

A winter dream catcher as a winter snow-mobile or snow crystal dream catcher:
44

For this purpose, exclusively design the edge of the cardboard plate and dispense with all snowman parts.

Bild zum Schritt 45 für das Bastel- und DIY-Abenteuer für Kinder: 'Gestalte dafür ausschließlich den Rand des Papptellers und verzichtet auf...'

45

Finished is a beautiful winter snow mobile or a snow crystal dream catcher!

Bild zum Schritt 46 für das Bastel- und DIY-Abenteuer für Kinder: 'Fertig ist ein schönes Winter-Schnee-Mobile oder ein Schneekristall-Traumfänger!'

46

Have fun doing crafts.

Tip:
47

Creates this craft in the same colors: blues, rosés, glitters and whites look very nice for the winter theme!

48

Try it yourself!

Materials

 2 Cardboard plates
 Wool A wool with a colour gradient and different thread thickness looks particularly nice.
 Clayboard/tone paper
 Snow crystalse.g. a snow crystal-stancer, spread-deco
 Pipe cleaner wire
 2 Wax eyes
 Beads
 Sequins
 Who also likes small pompons, feathers, cotton balls, glitter etc. to design.
Other aids:
 Perforatoror punched pliers
 PencilsFelt pencils, pencils, crayons
 Adhesive penAdhesive film, possibly hot glue gun
 Pot needle (large blunt needle)
 Customs stockfor measuring the wool
 Builder's pad
All links marked with a shopping cart lead to Amazon - here we have selected products that we would order ourselves and in part also ordered. In a qualified purchase via the advertising link, we as Amazon partner receive a commission, for you there are no costs. You thus support our cost- and advertising banner-free, educational offer.

Directions

1

Put out your craft paper, then start with the cardboard plate.
First cut out the inner circle of the cardboard plate.

Bild zum Schritt 1 für das Bastel- und DIY-Abenteuer für Kinder: 'Legt eure Bastelunterlage aus. Dann beginnt ihr mit dem Pappteller....'

2

Attention: when stabbing the scissors and cutting out you should be very careful, because you need the ring and the inner circle. If you don't like the cut-out middle part completely, cut the edge slightly with the scissors.

Now you put the inner circle to the side. We start with the outer edge of the snowman, the belly.

Bild zum Schritt 2 für das Bastel- und DIY-Abenteuer für Kinder: 'Achtung: beim Einstechen der Schere und beim Ausschneiden solltet ihr...'

3

For this you now punch the inside of the cardboard plate. The hole is located in the middle of the ring and from there you push the hole as far as possible into the edge of the cardboard plate. You always punch two holes at the same time. Make sure that the holes sit in as far as possible so that they do not tear out later!
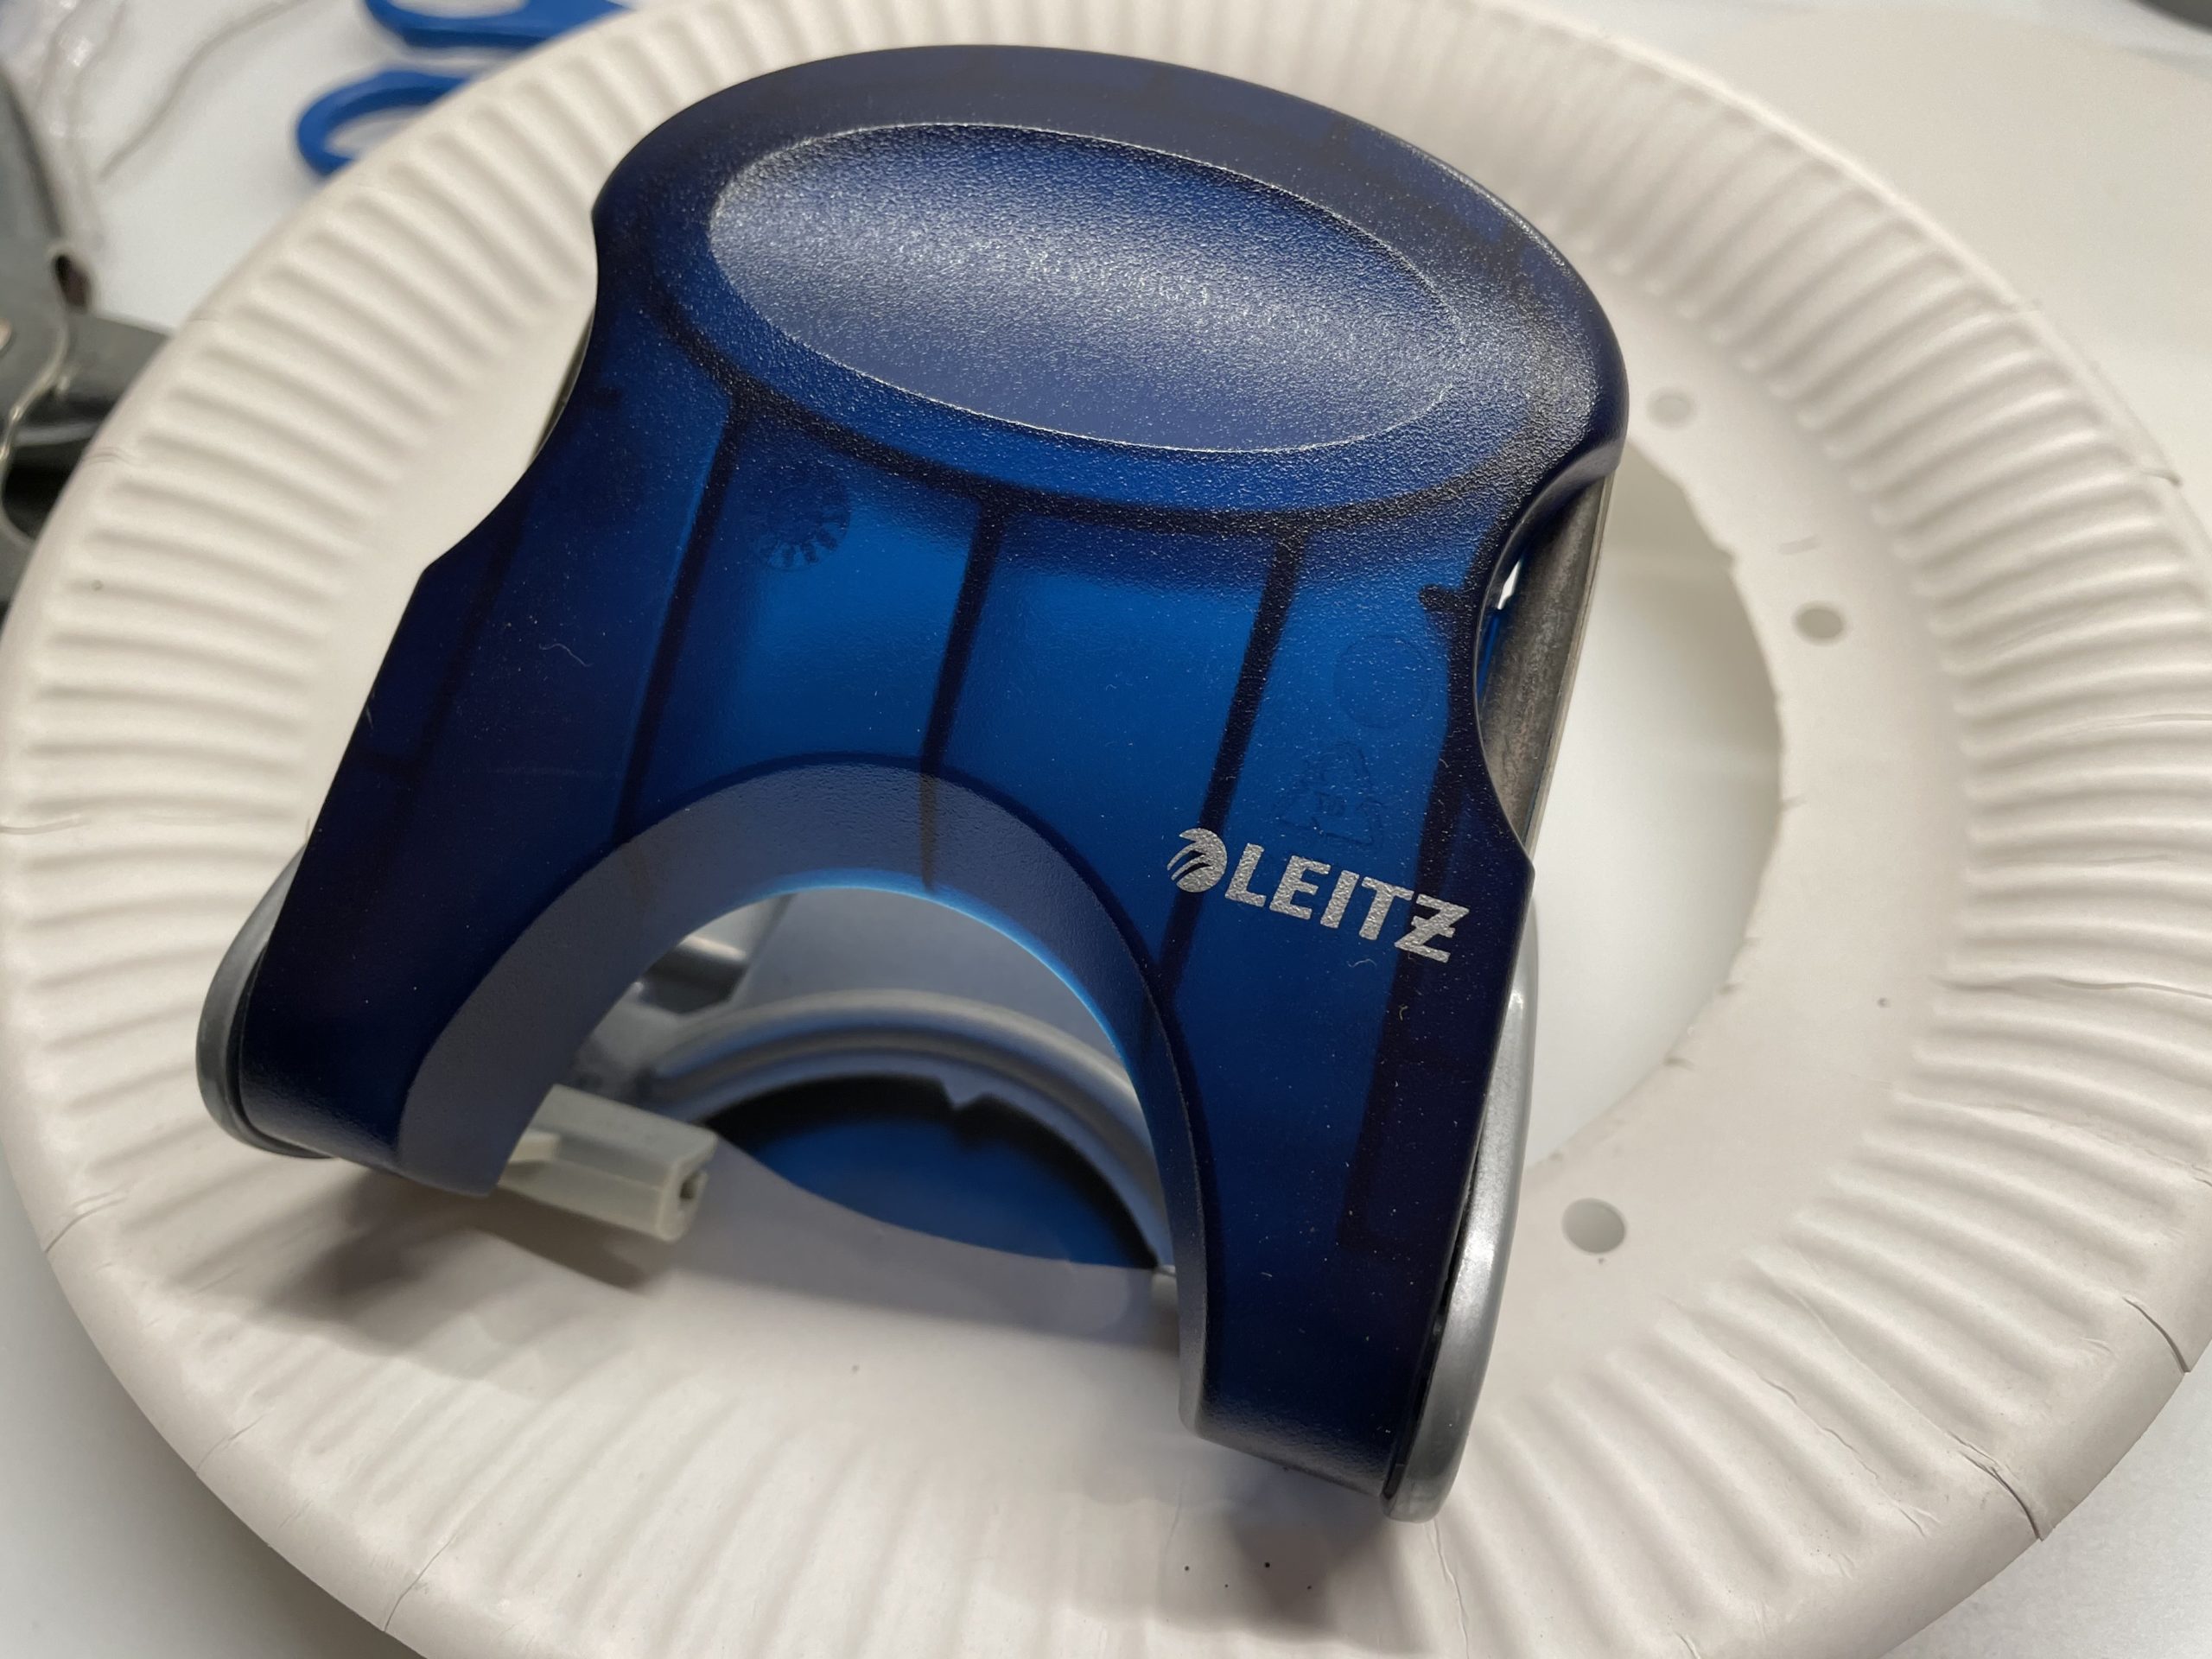
Bild zum Schritt 3 für das Bastel- und DIY-Abenteuer für Kinder: 'Dafür locht ihr nun die Innenseite des Papptellers. Der Locher...'

4

Distribute the holes all around. They don't have to be perfectly distributed.
Tip: Better hole more holes, because in retrospect it is hardly possible to attach any more holes.
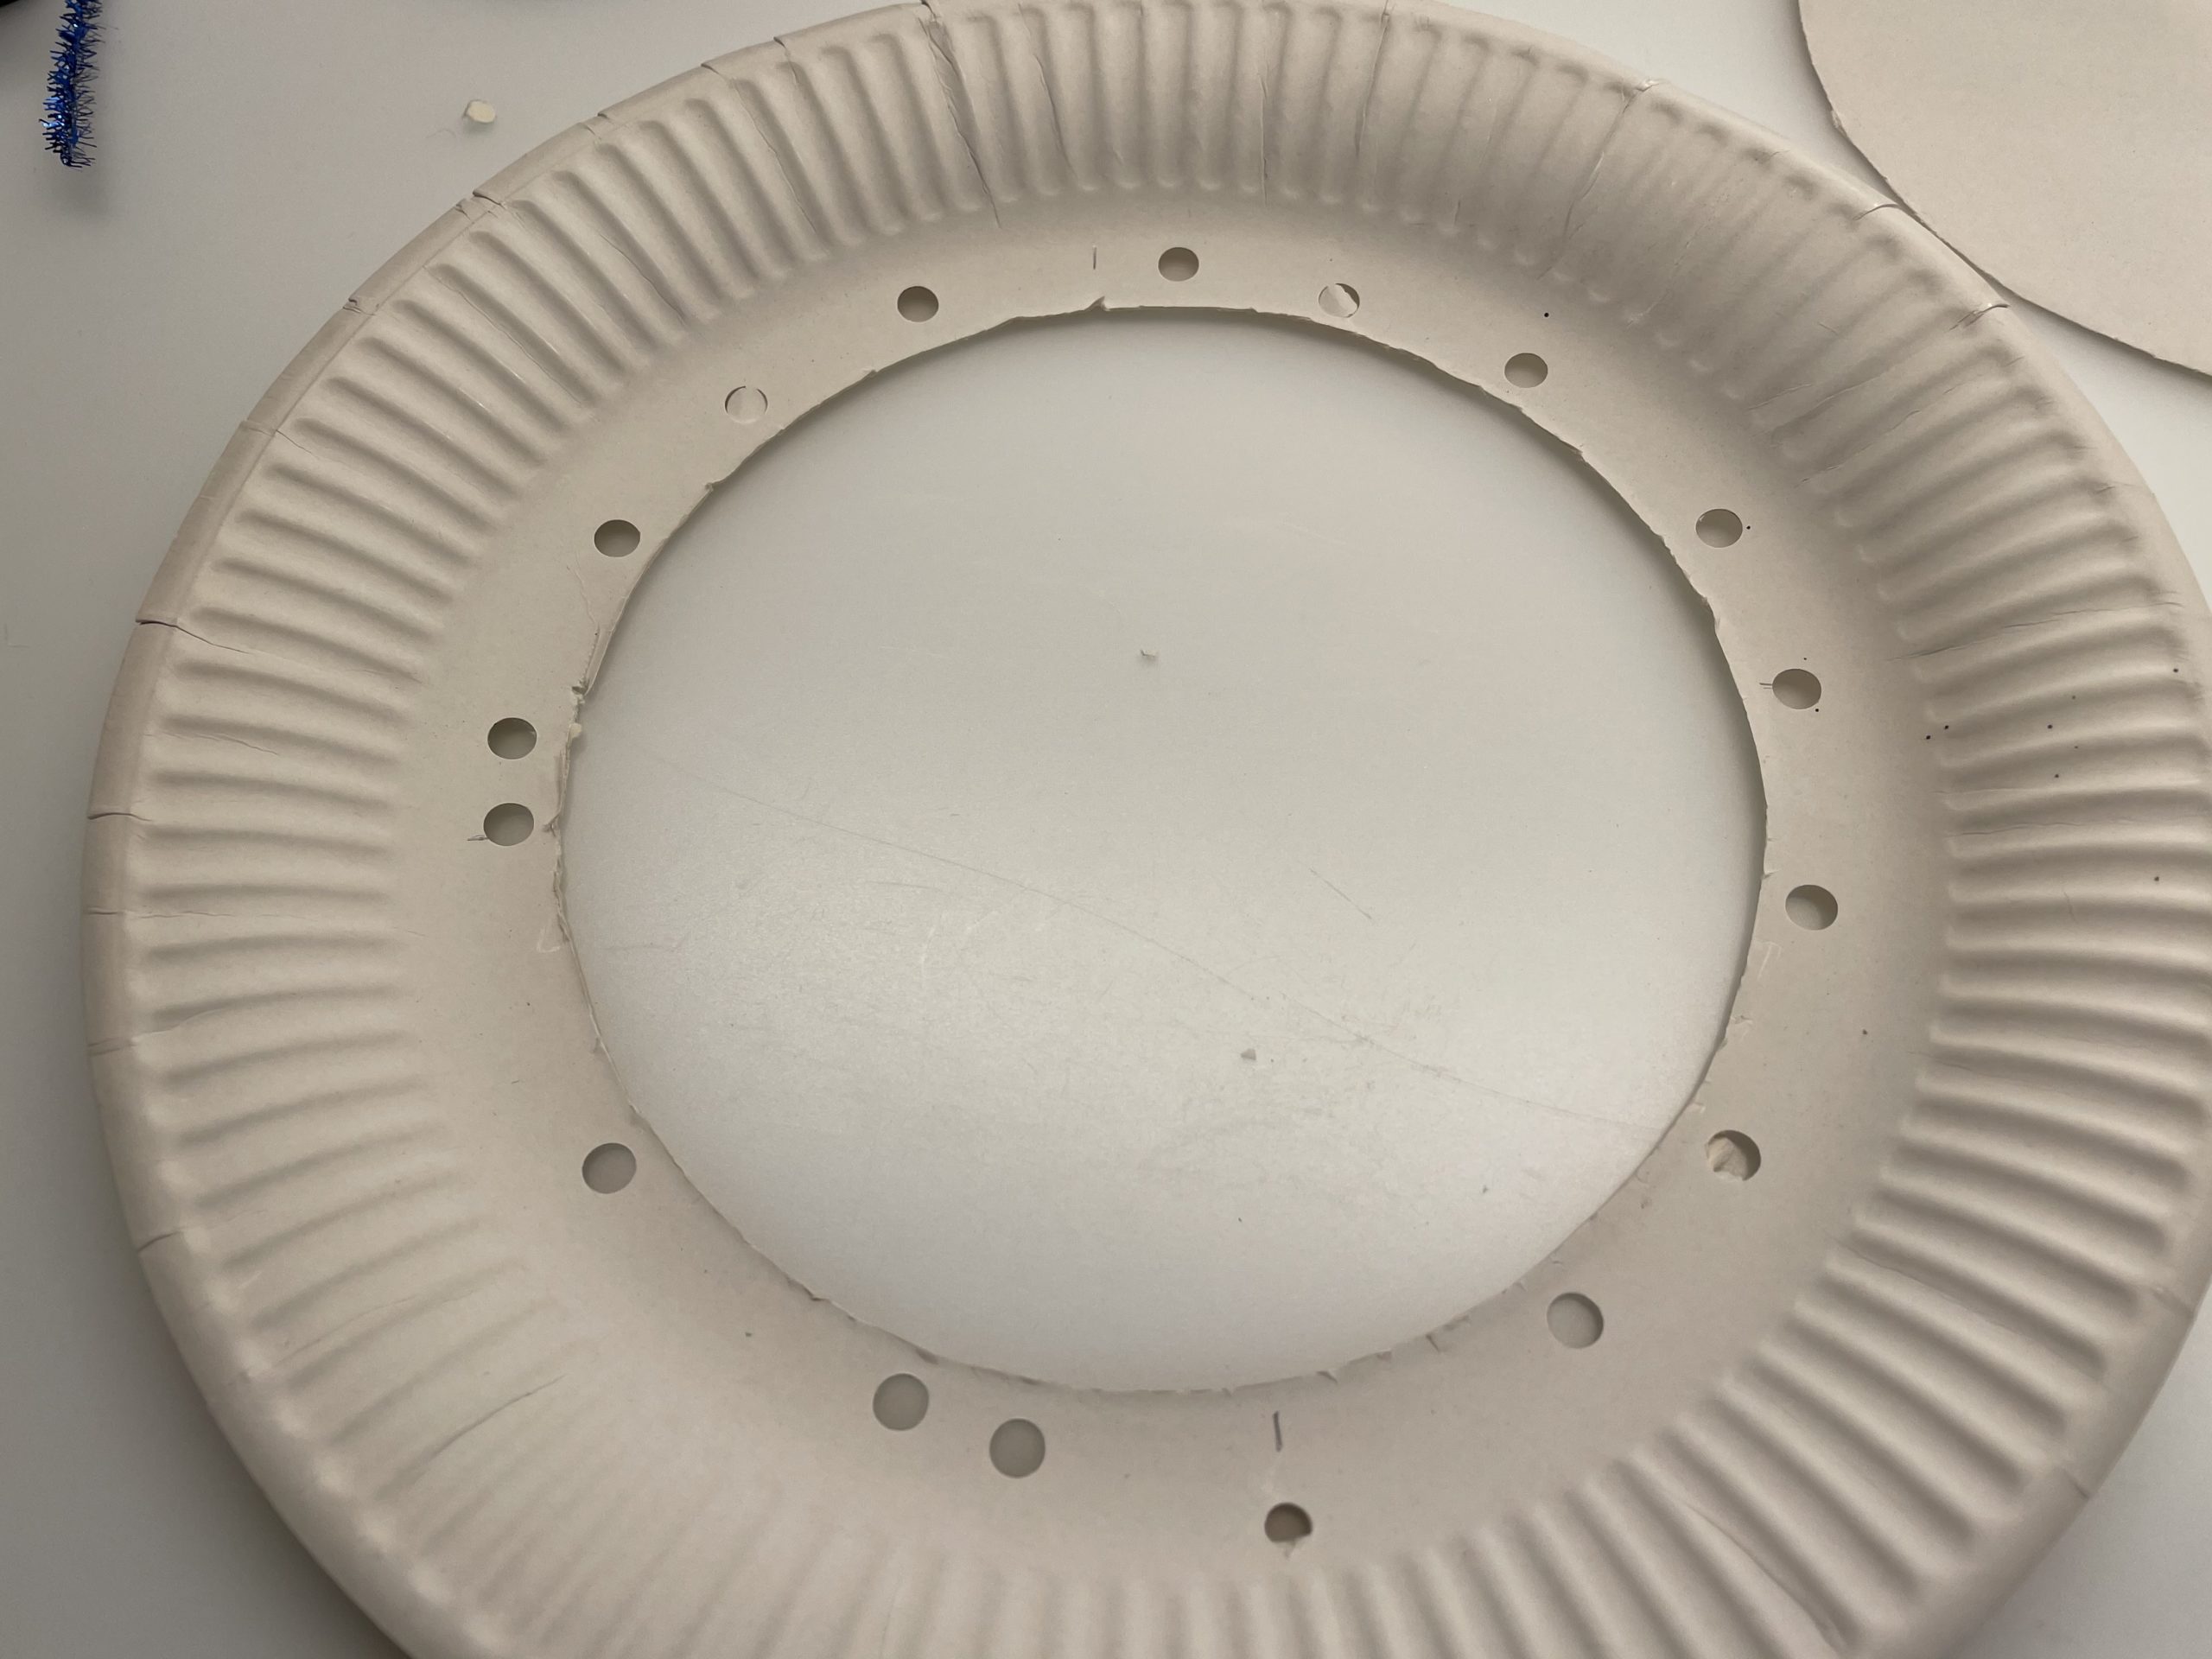
Bild zum Schritt 4 für das Bastel- und DIY-Abenteuer für Kinder: 'Verteile die Löcher rundherum. Sie müssen nicht perfekt verteilt sein....'

5

Now take off the wool and take off with an inch stick about 3-4 meters. Now cut off the very long wool thread.
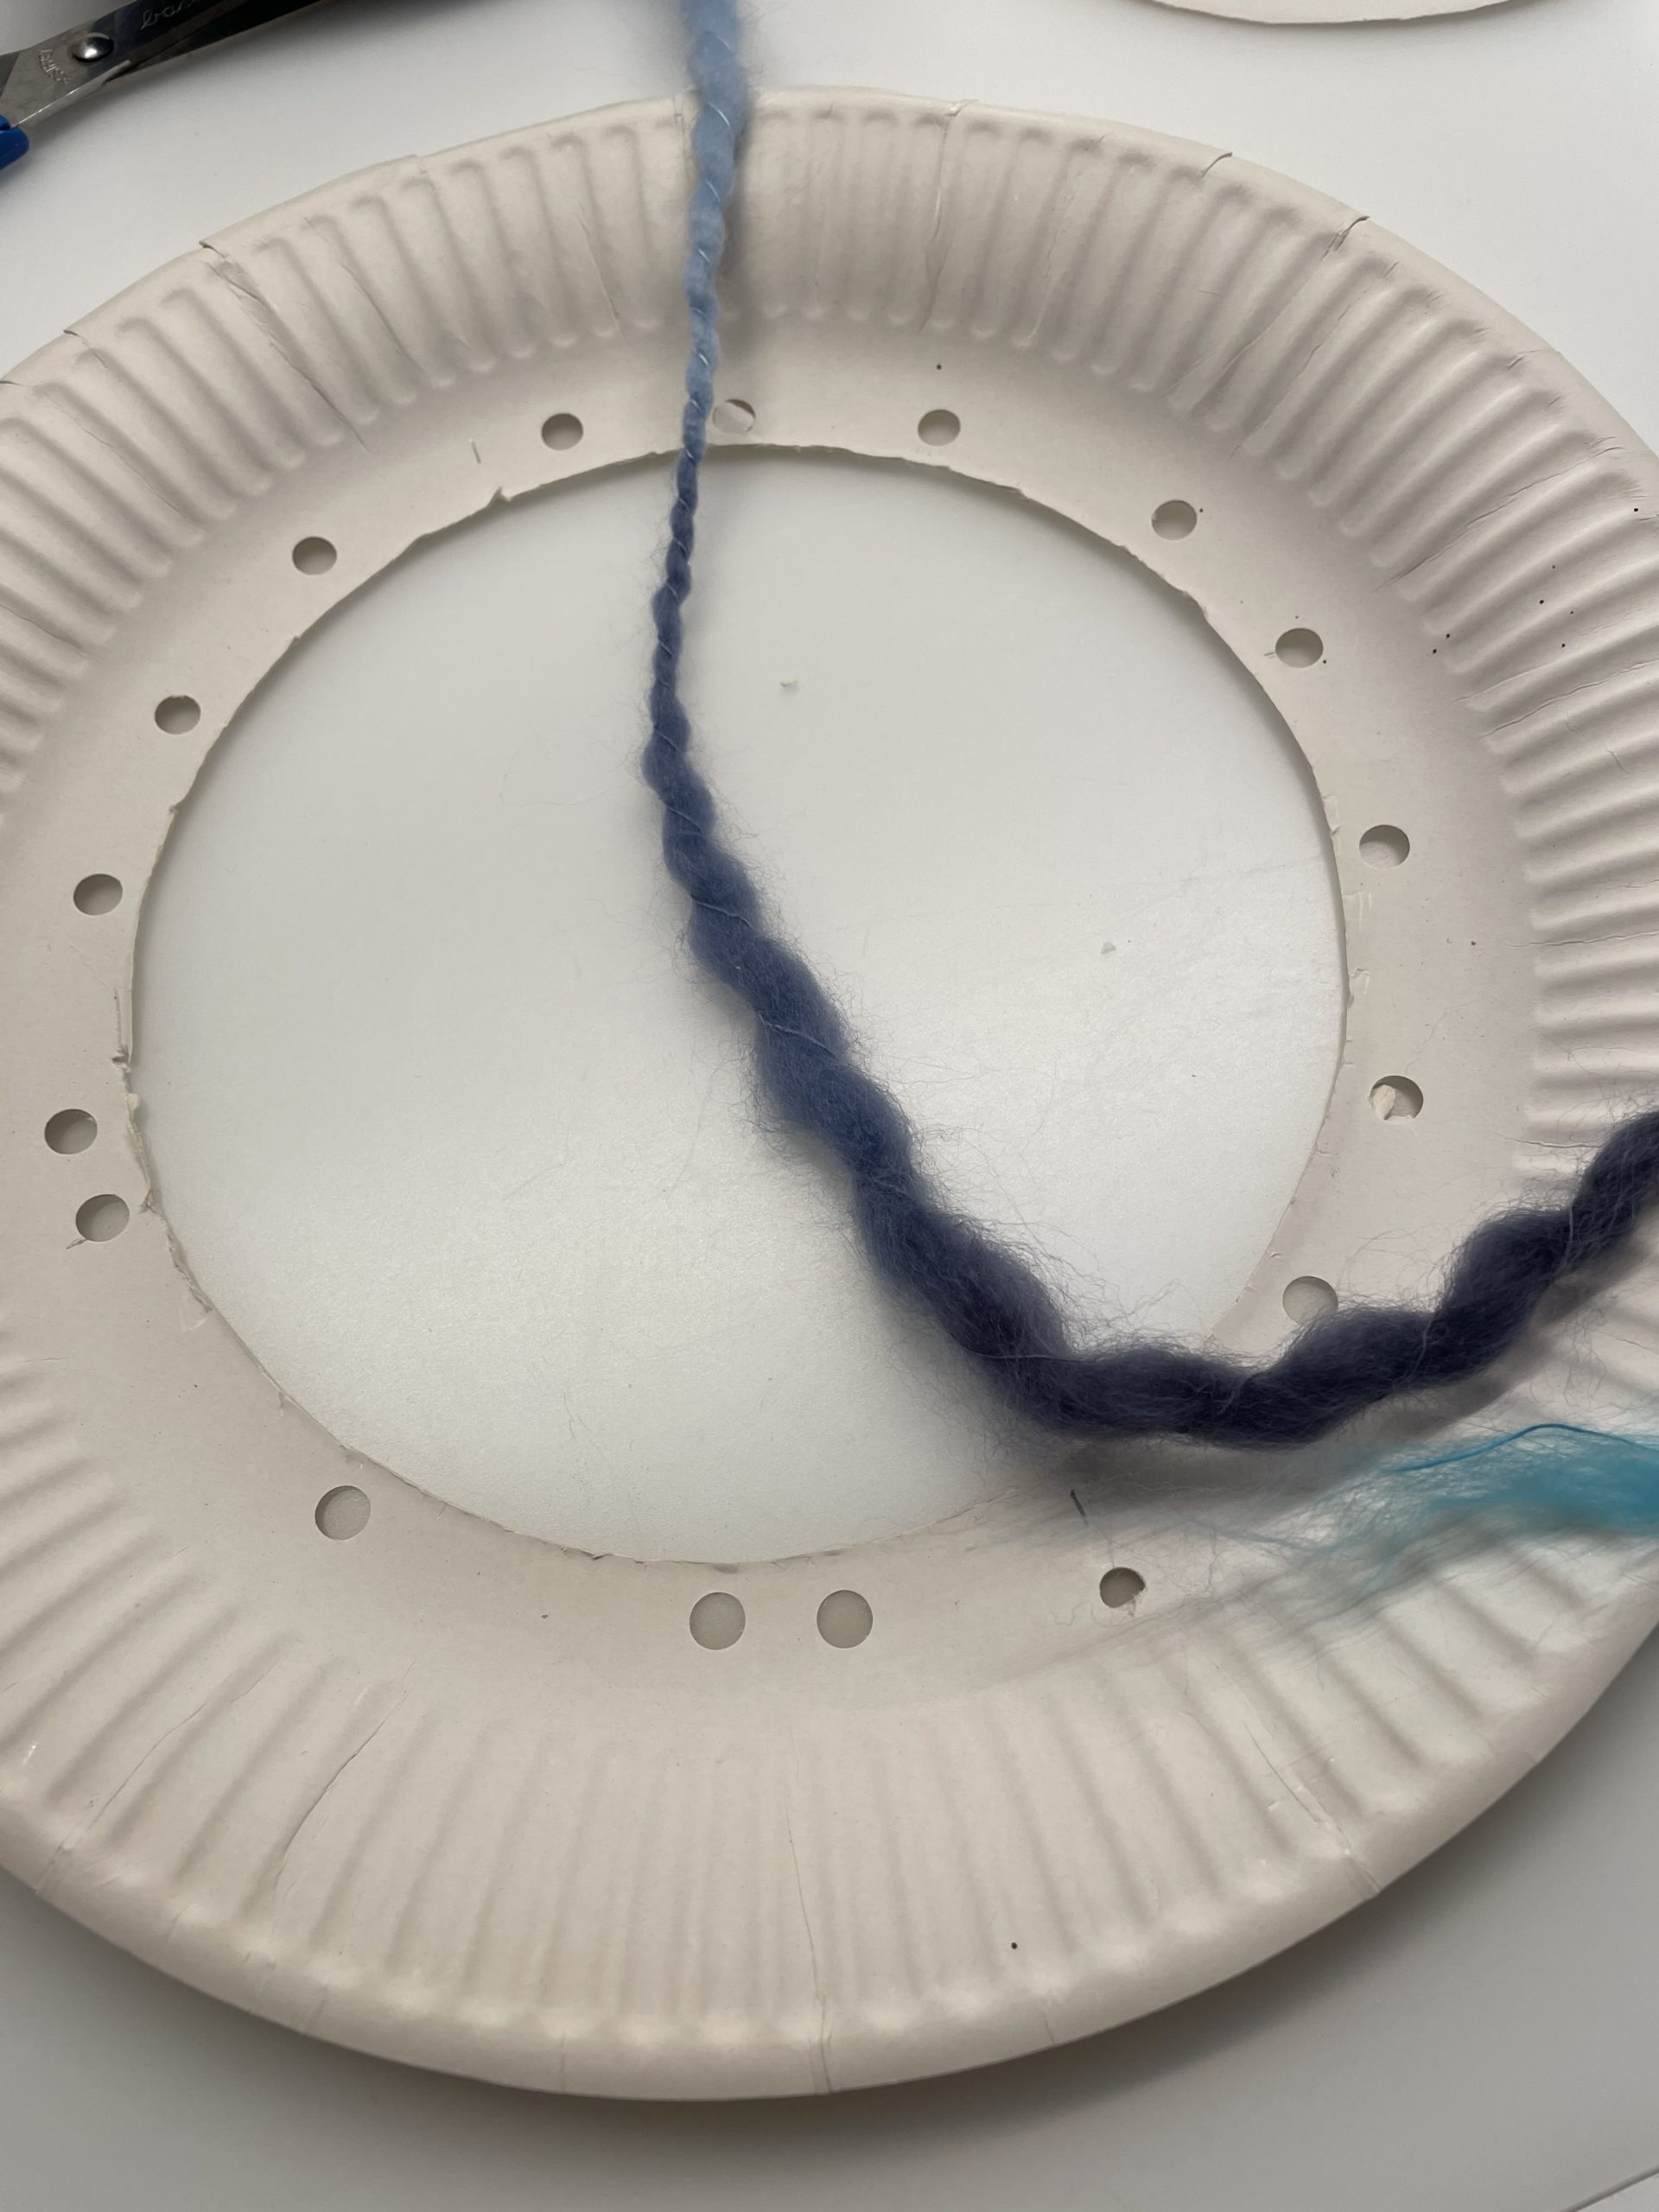
Bild zum Schritt 5 für das Bastel- und DIY-Abenteuer für Kinder: 'Nehmt nun die Wolle und messt mit einem Zollstock circa...'

6

Then thread the thread into the eyelet of a needle.
Now start with the net. For this you pull the thread with the needle through any hole.
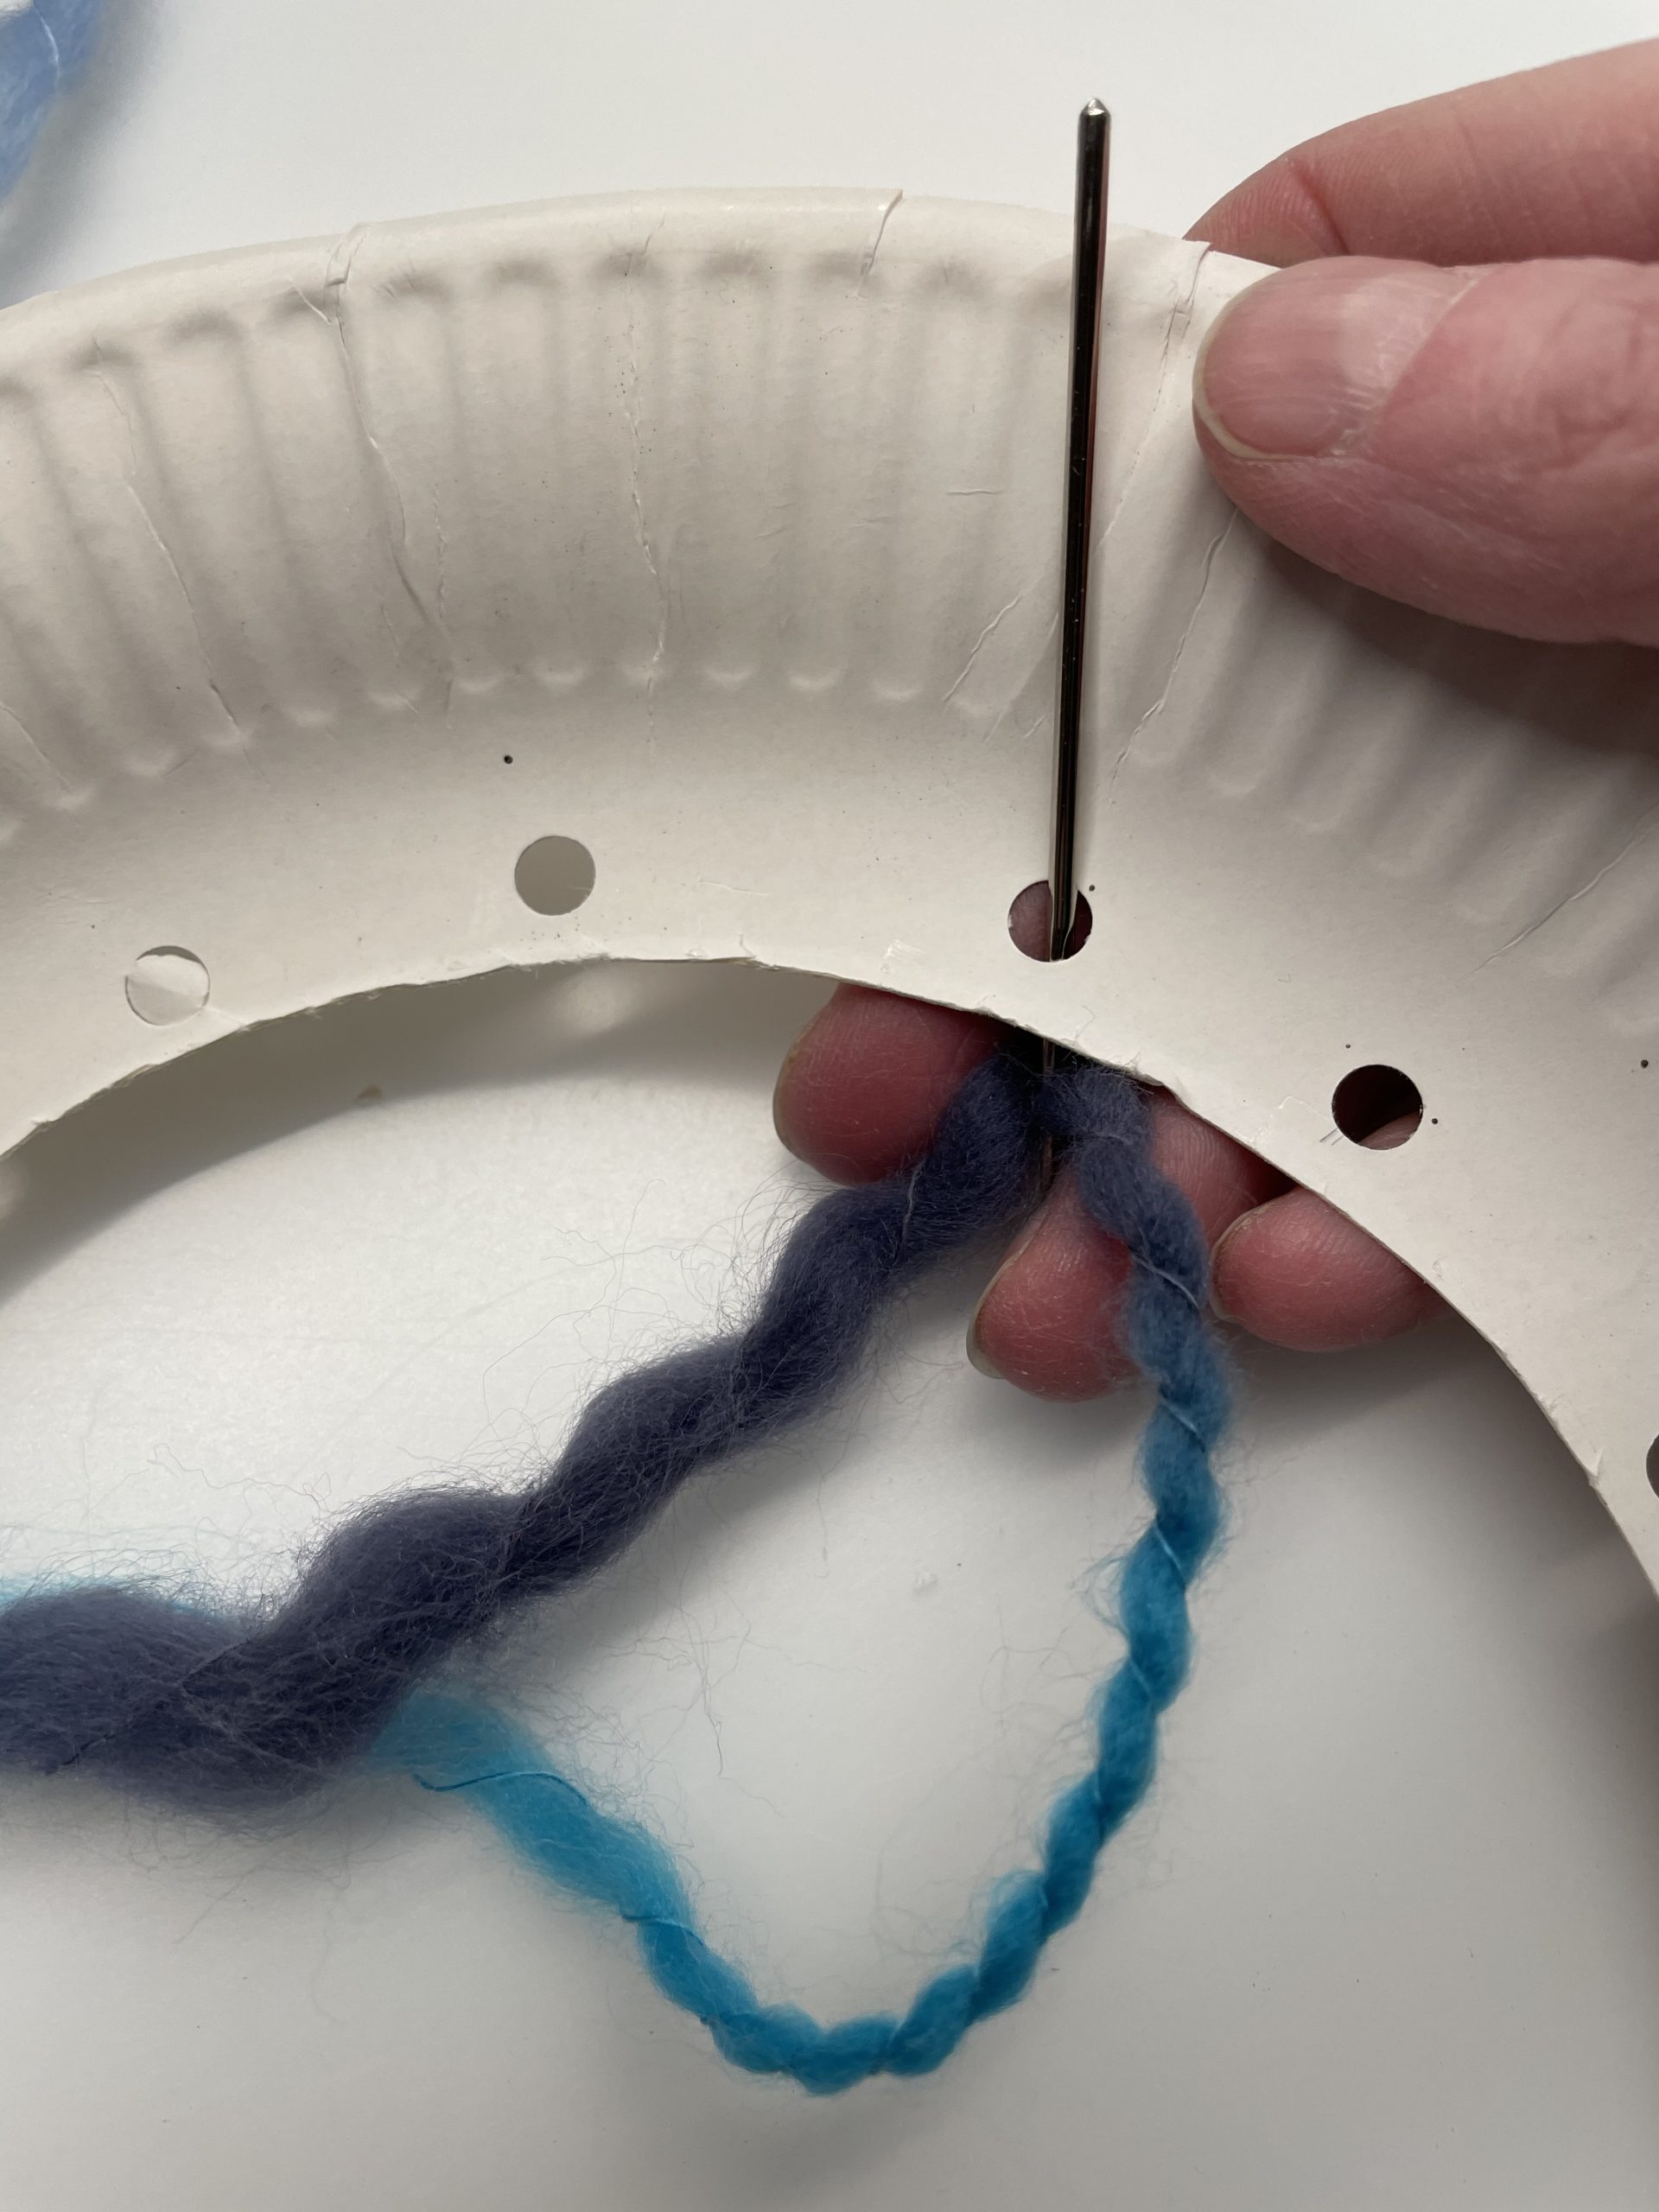
Bild zum Schritt 6 für das Bastel- und DIY-Abenteuer für Kinder: 'Anschließend fädelt ihr den Faden in die Öse einer Stopfnadel....'

7

You let a tailpiece of 10cm hang out and knot this.
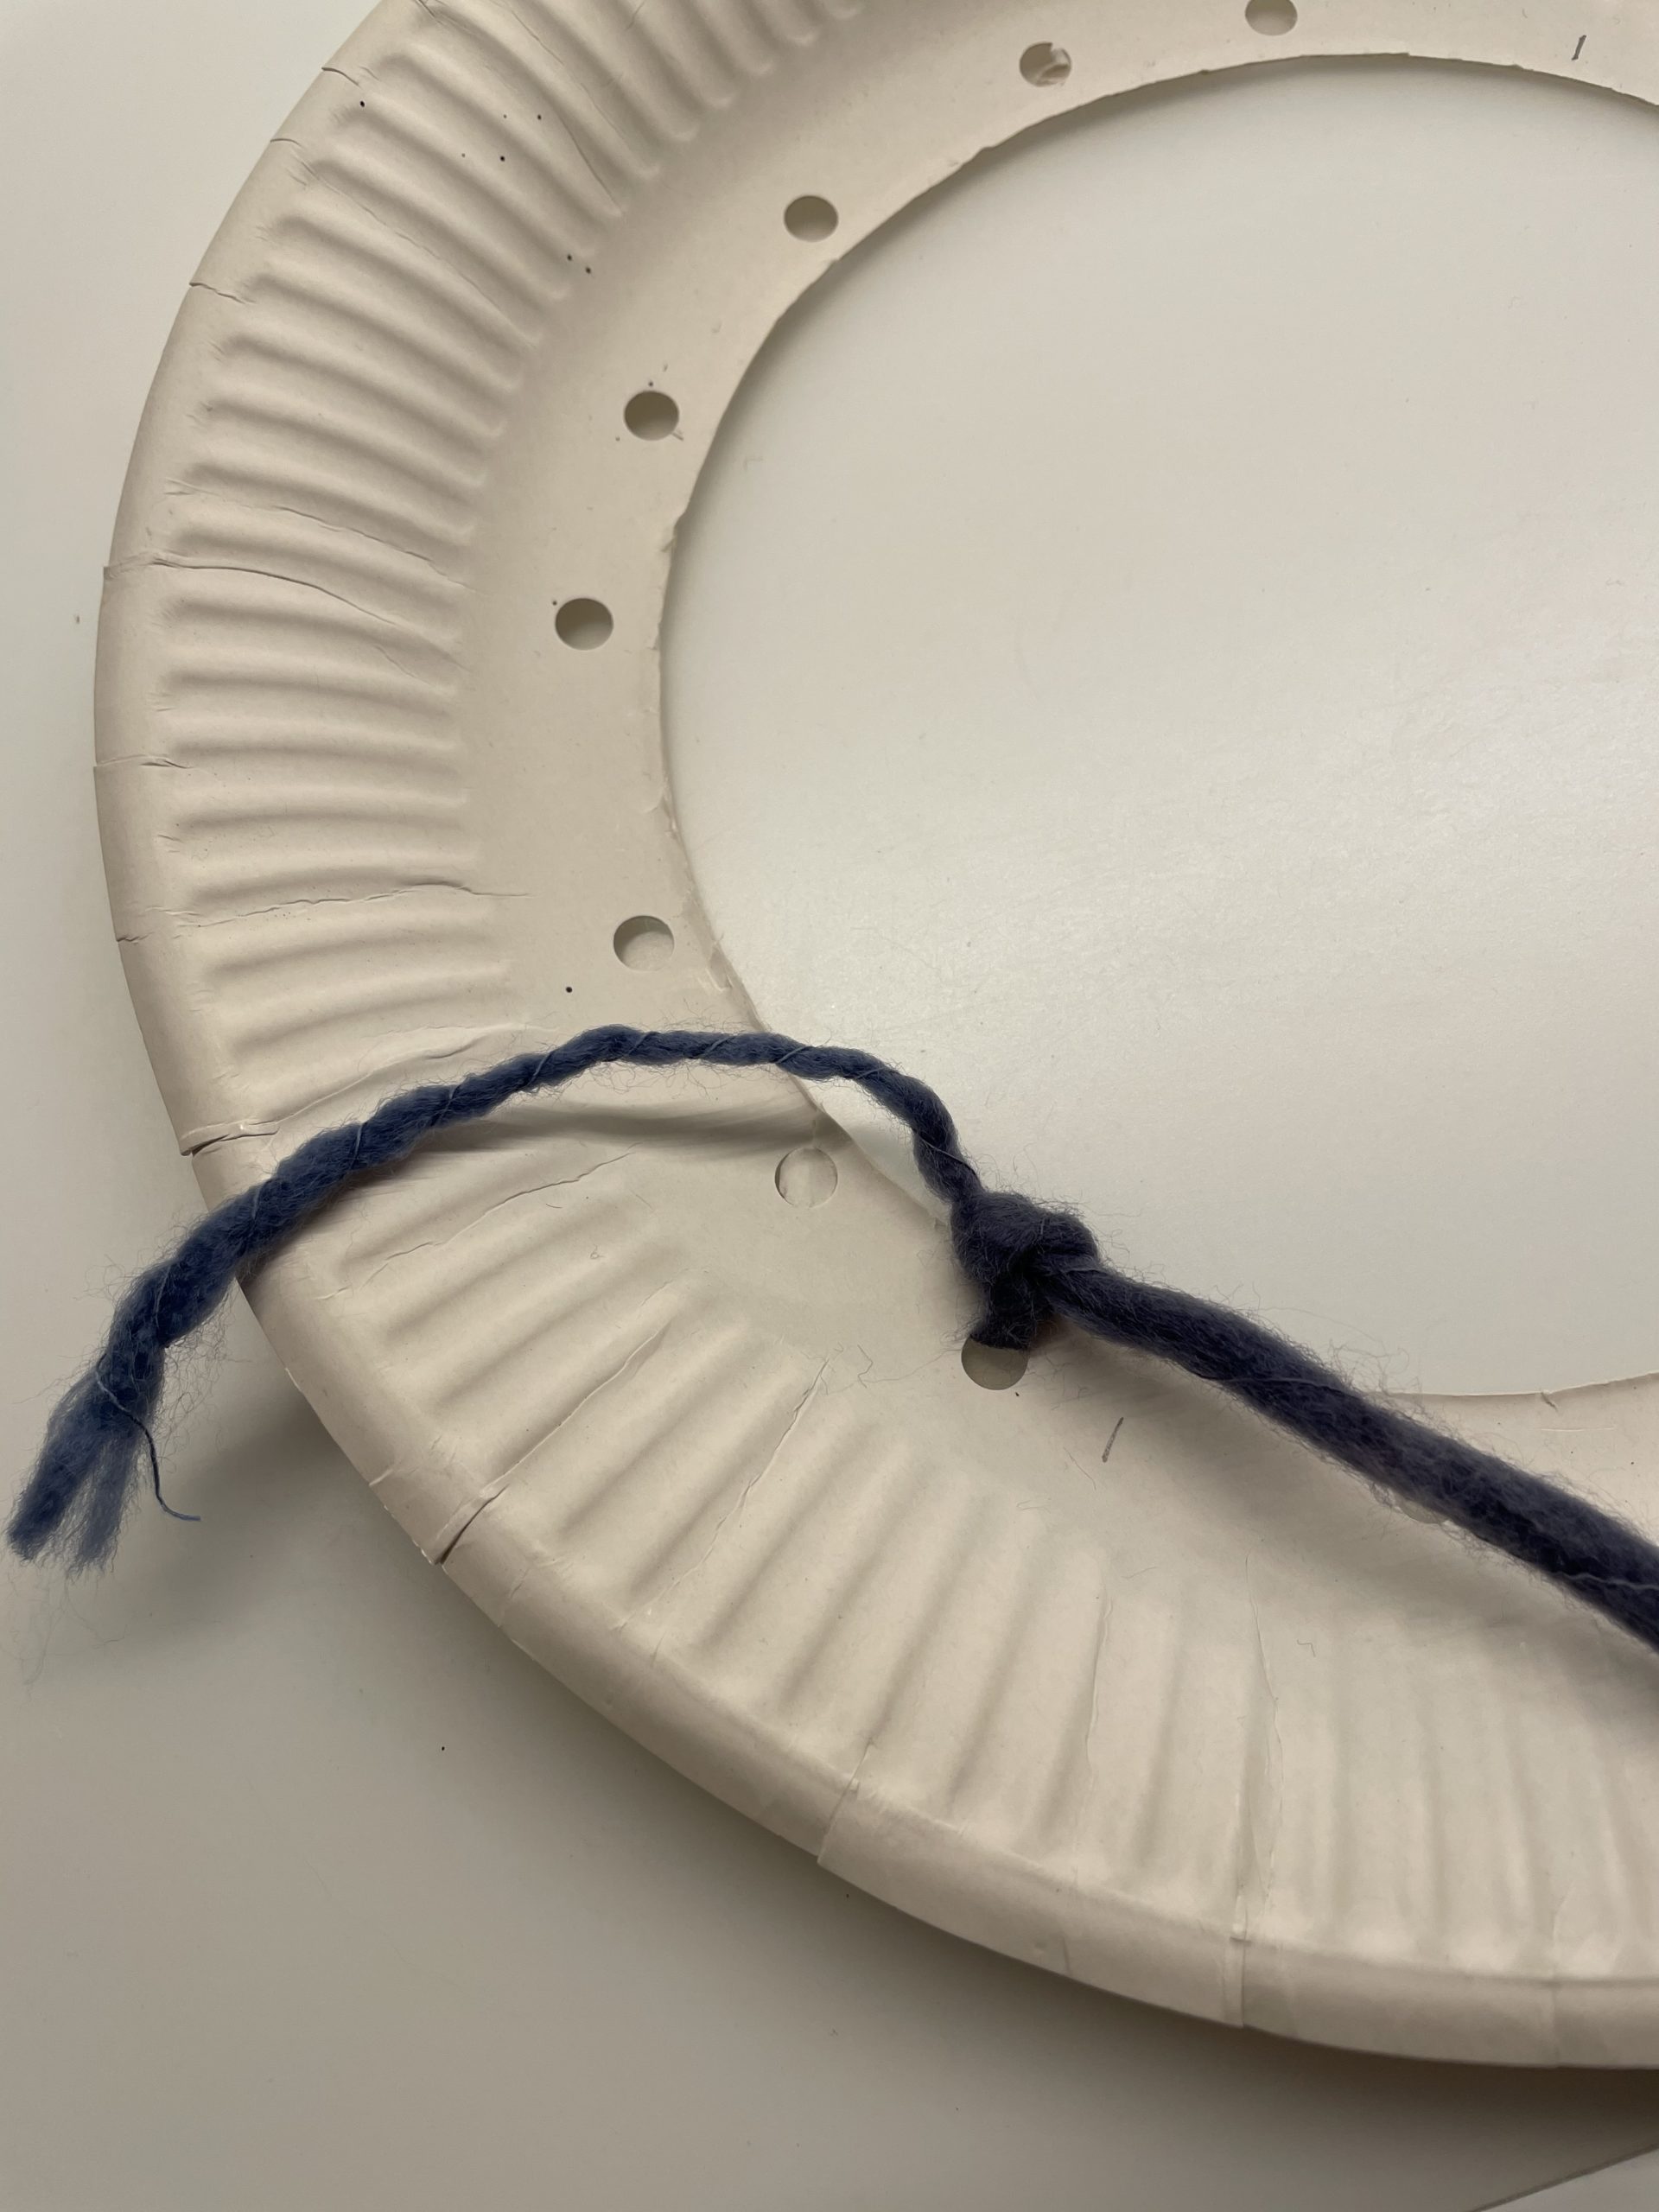
Bild zum Schritt 7 für das Bastel- und DIY-Abenteuer für Kinder: 'Dabei lasst ihr ein Endstück von 10cm heraushängen und verknotet...'

8

Now you can create a thread net. For this, always pull the thread diagonally on the opposite side and always find a new hole.
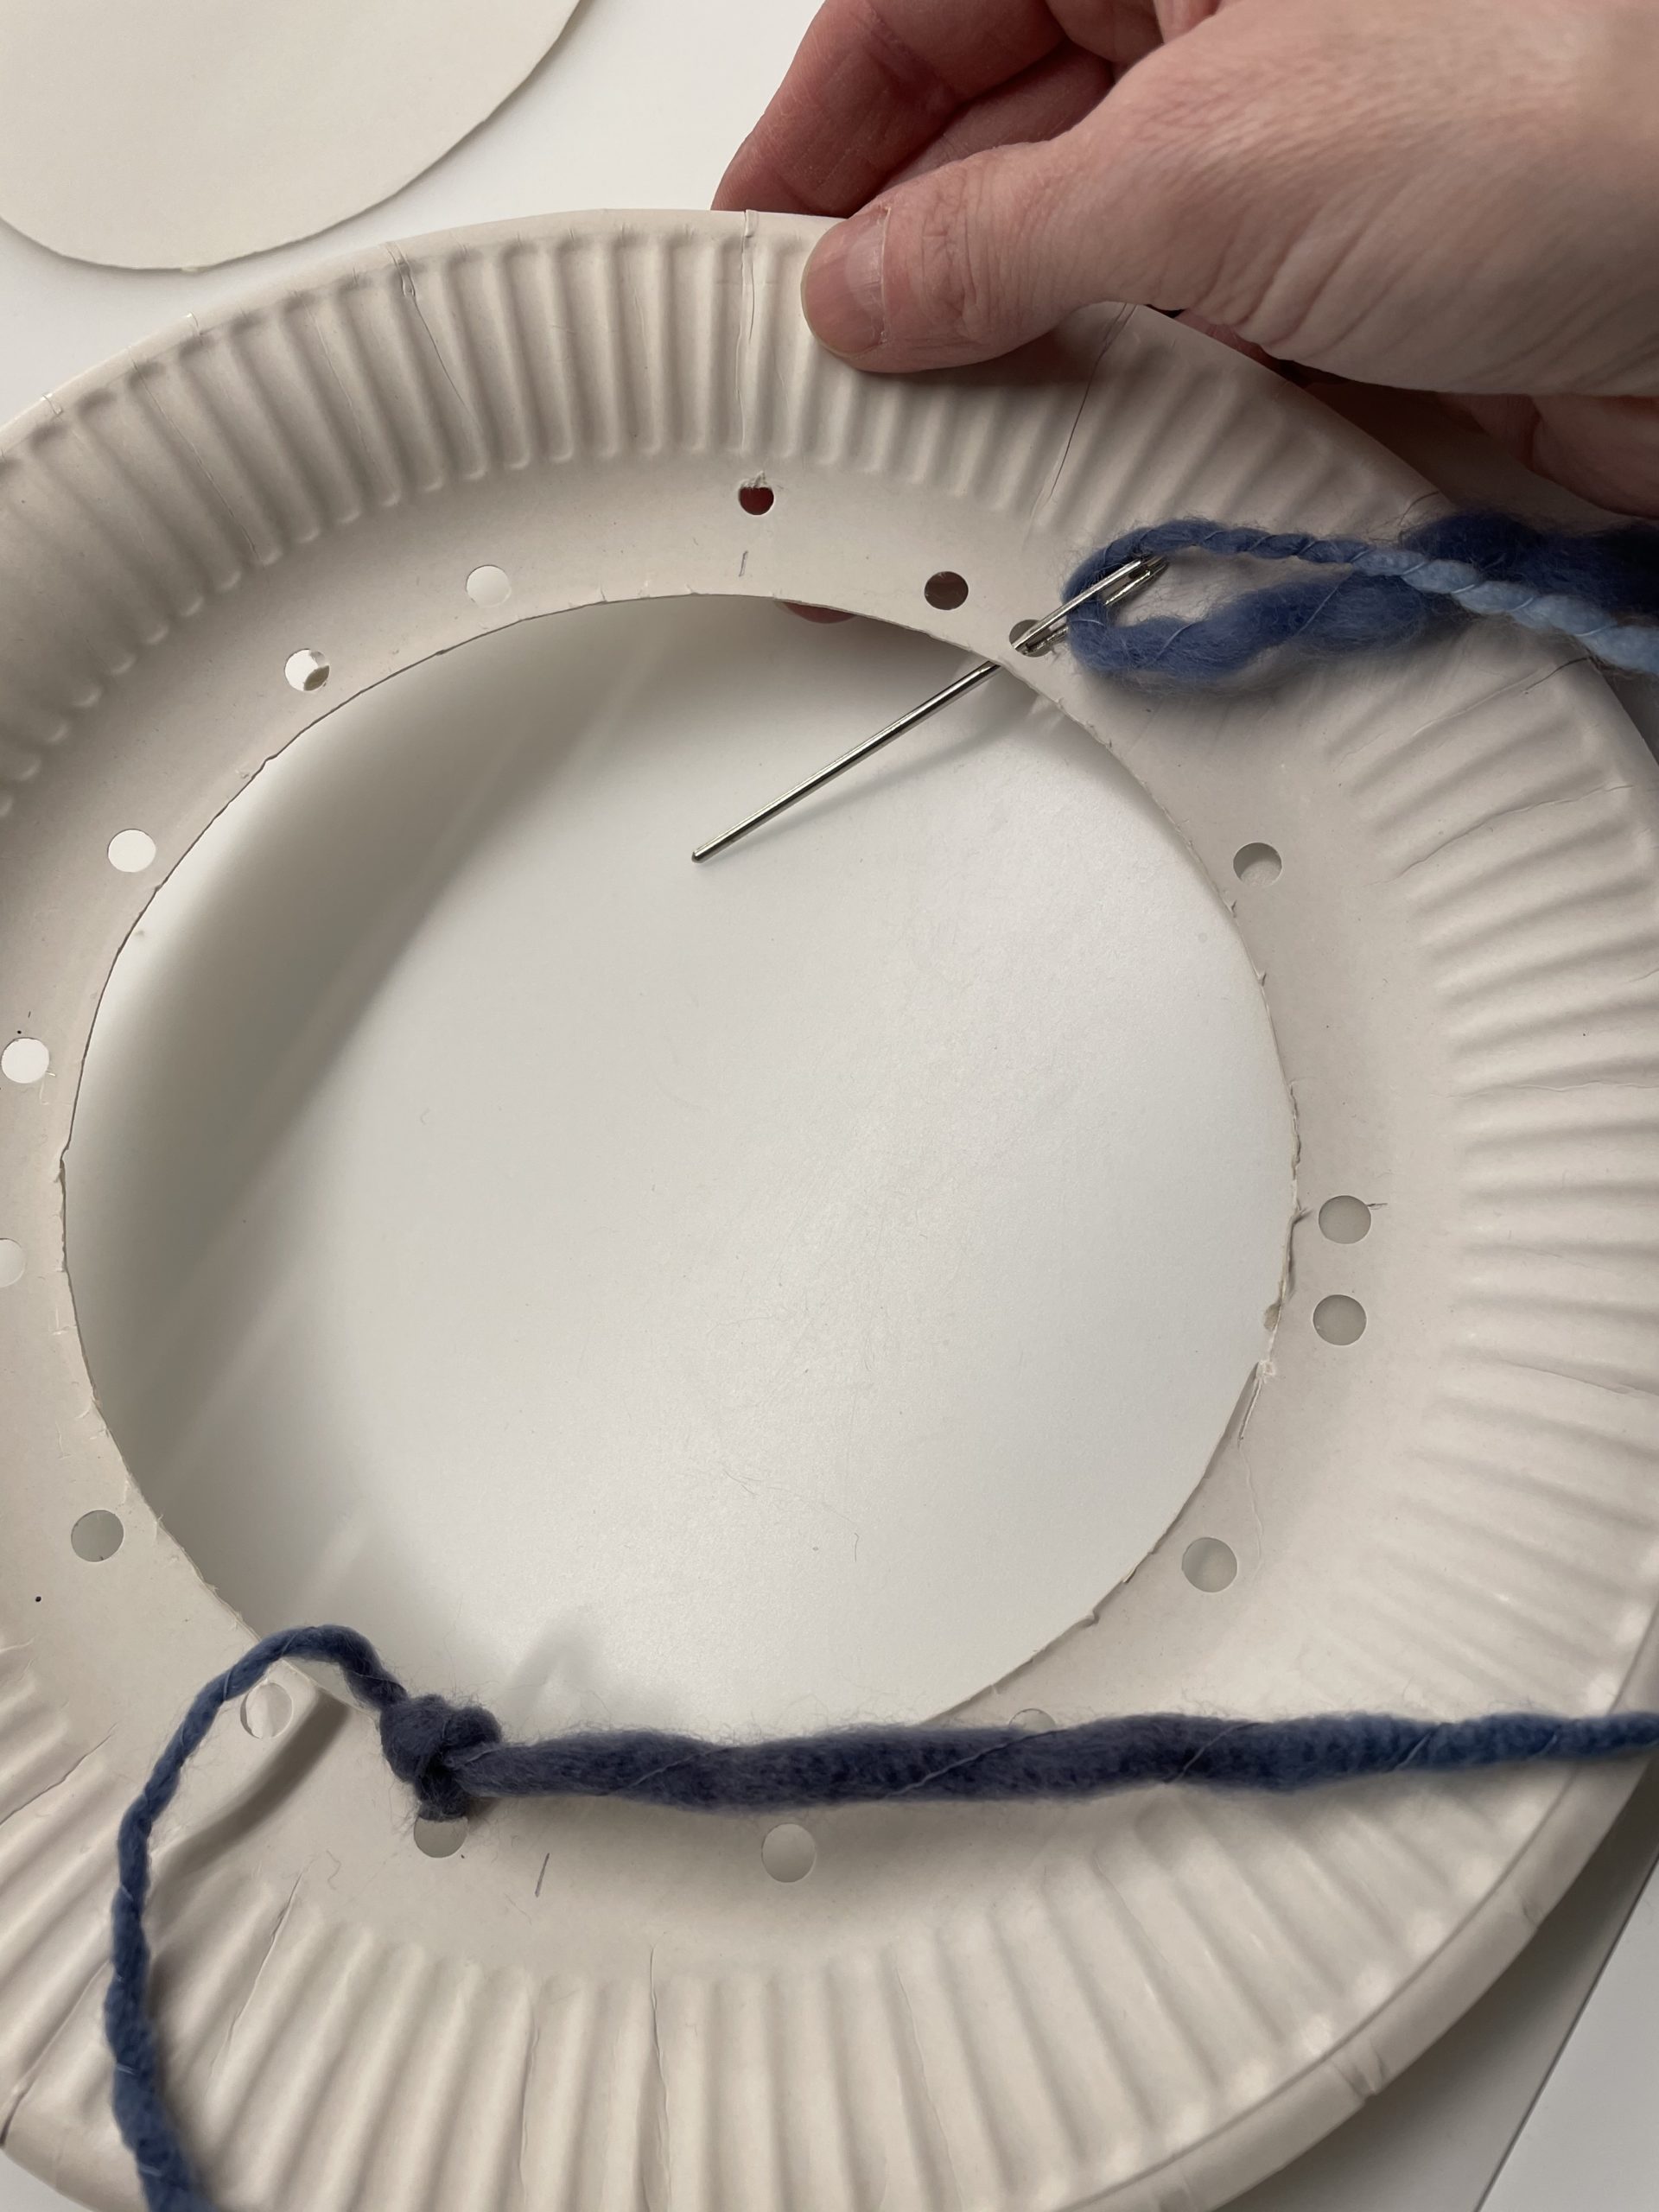
Bild zum Schritt 8 für das Bastel- und DIY-Abenteuer für Kinder: 'Nun könnt ihr ein Fadennetz erstellen. Zieht dafür den Faden...'

9

This creates a wonderful zigzag pattern.
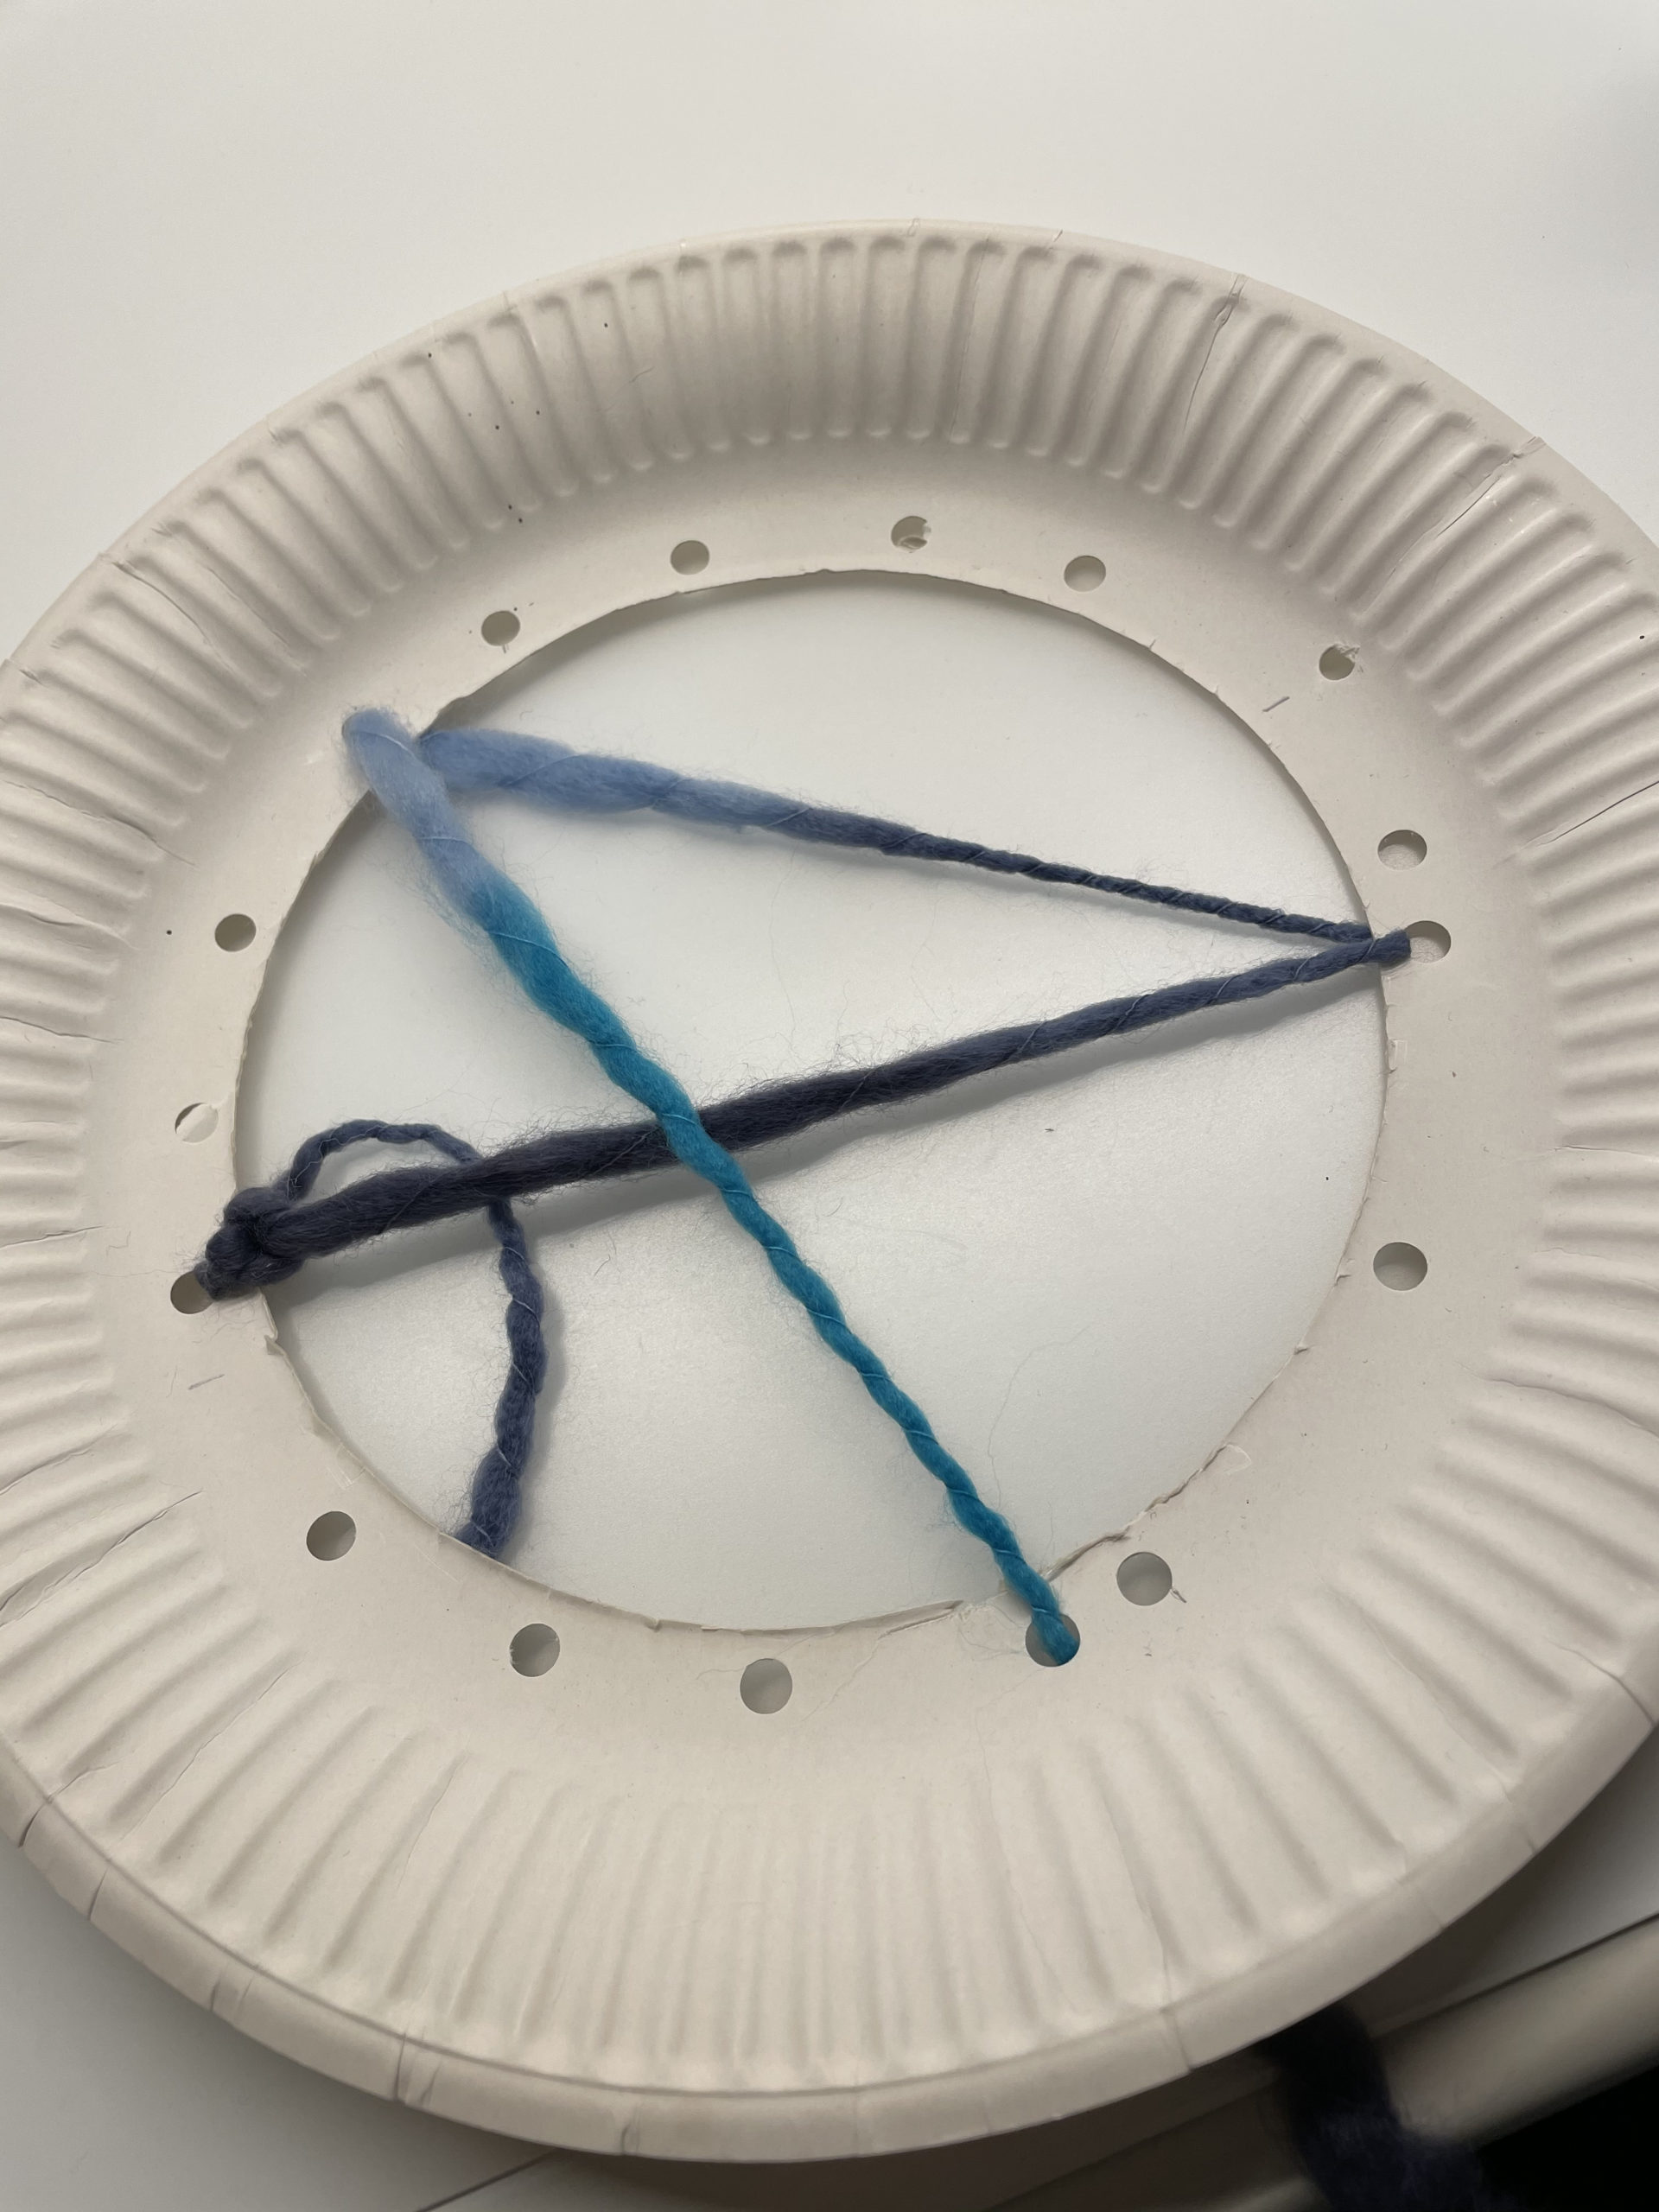
Bild zum Schritt 9 für das Bastel- und DIY-Abenteuer für Kinder: 'So entsteht ein wunderbares Zickzack-Muster.'

10

Try to thread the thread in all holes as far as possible.
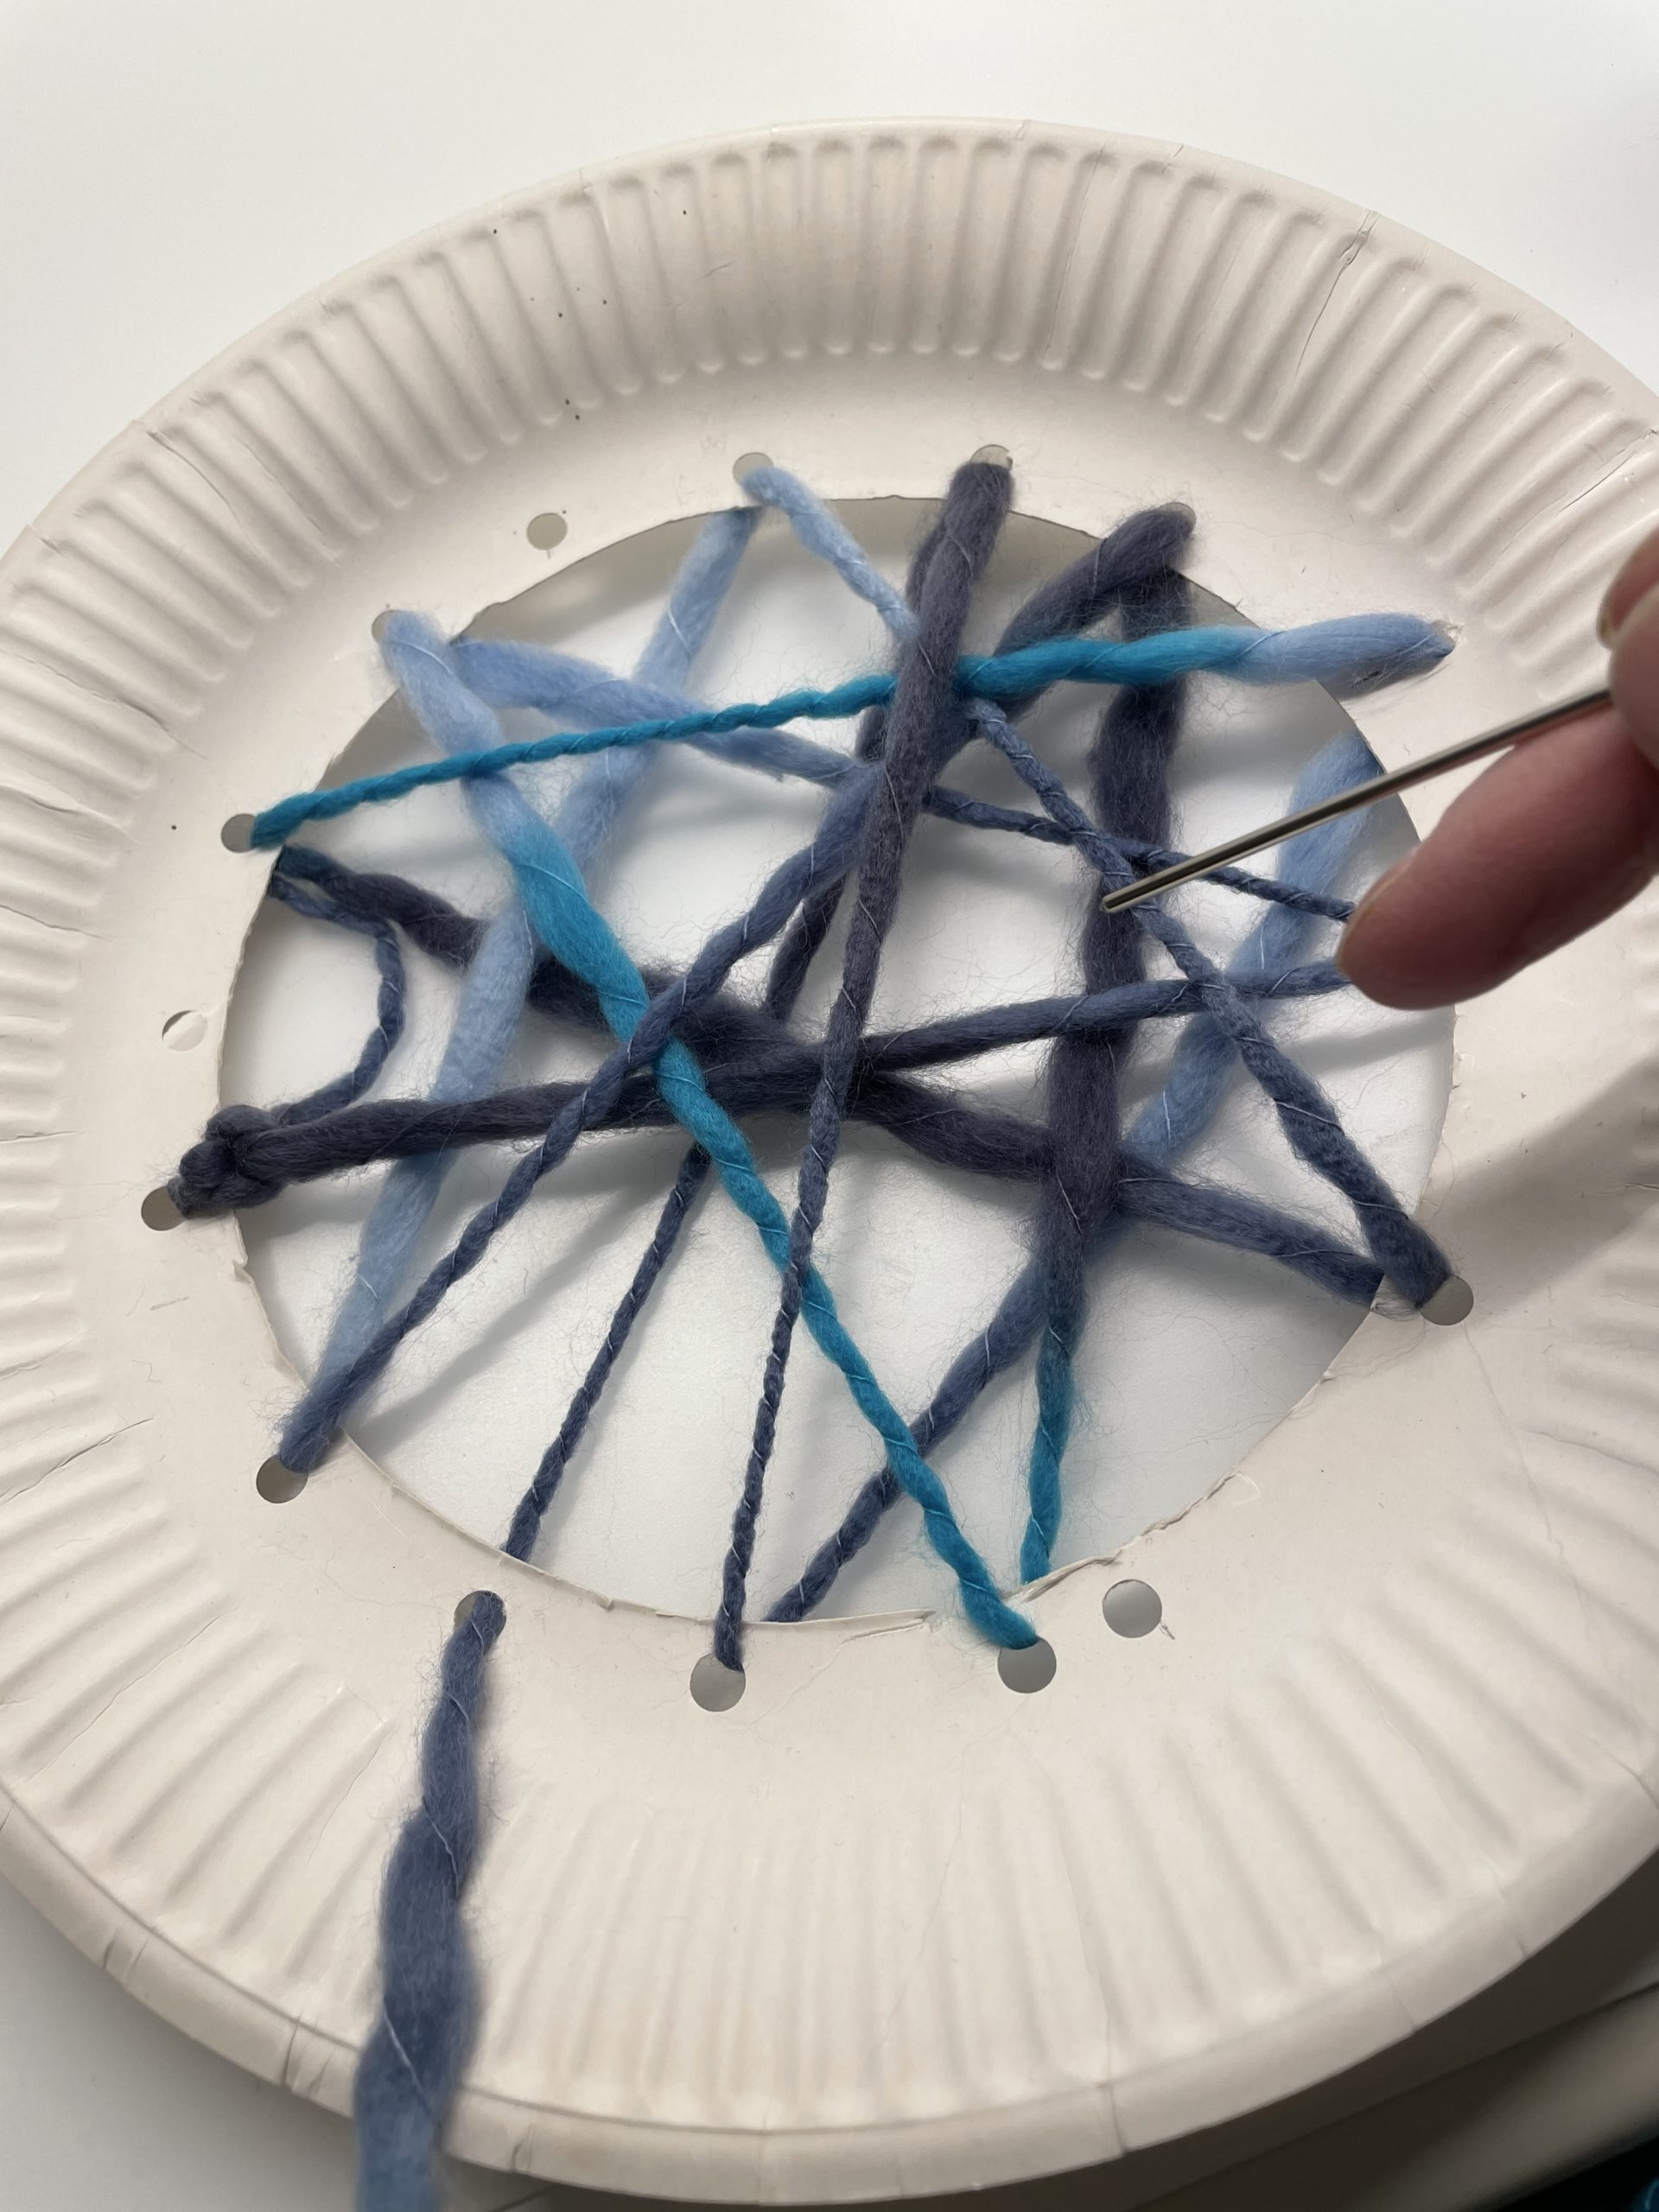
Bild zum Schritt 10 für das Bastel- und DIY-Abenteuer für Kinder: 'Versucht möglichst in alle Löcher den Faden zu fädeln.'

11

However, should some holes remain free, this is just as appropriate as some holes were to be used twice.
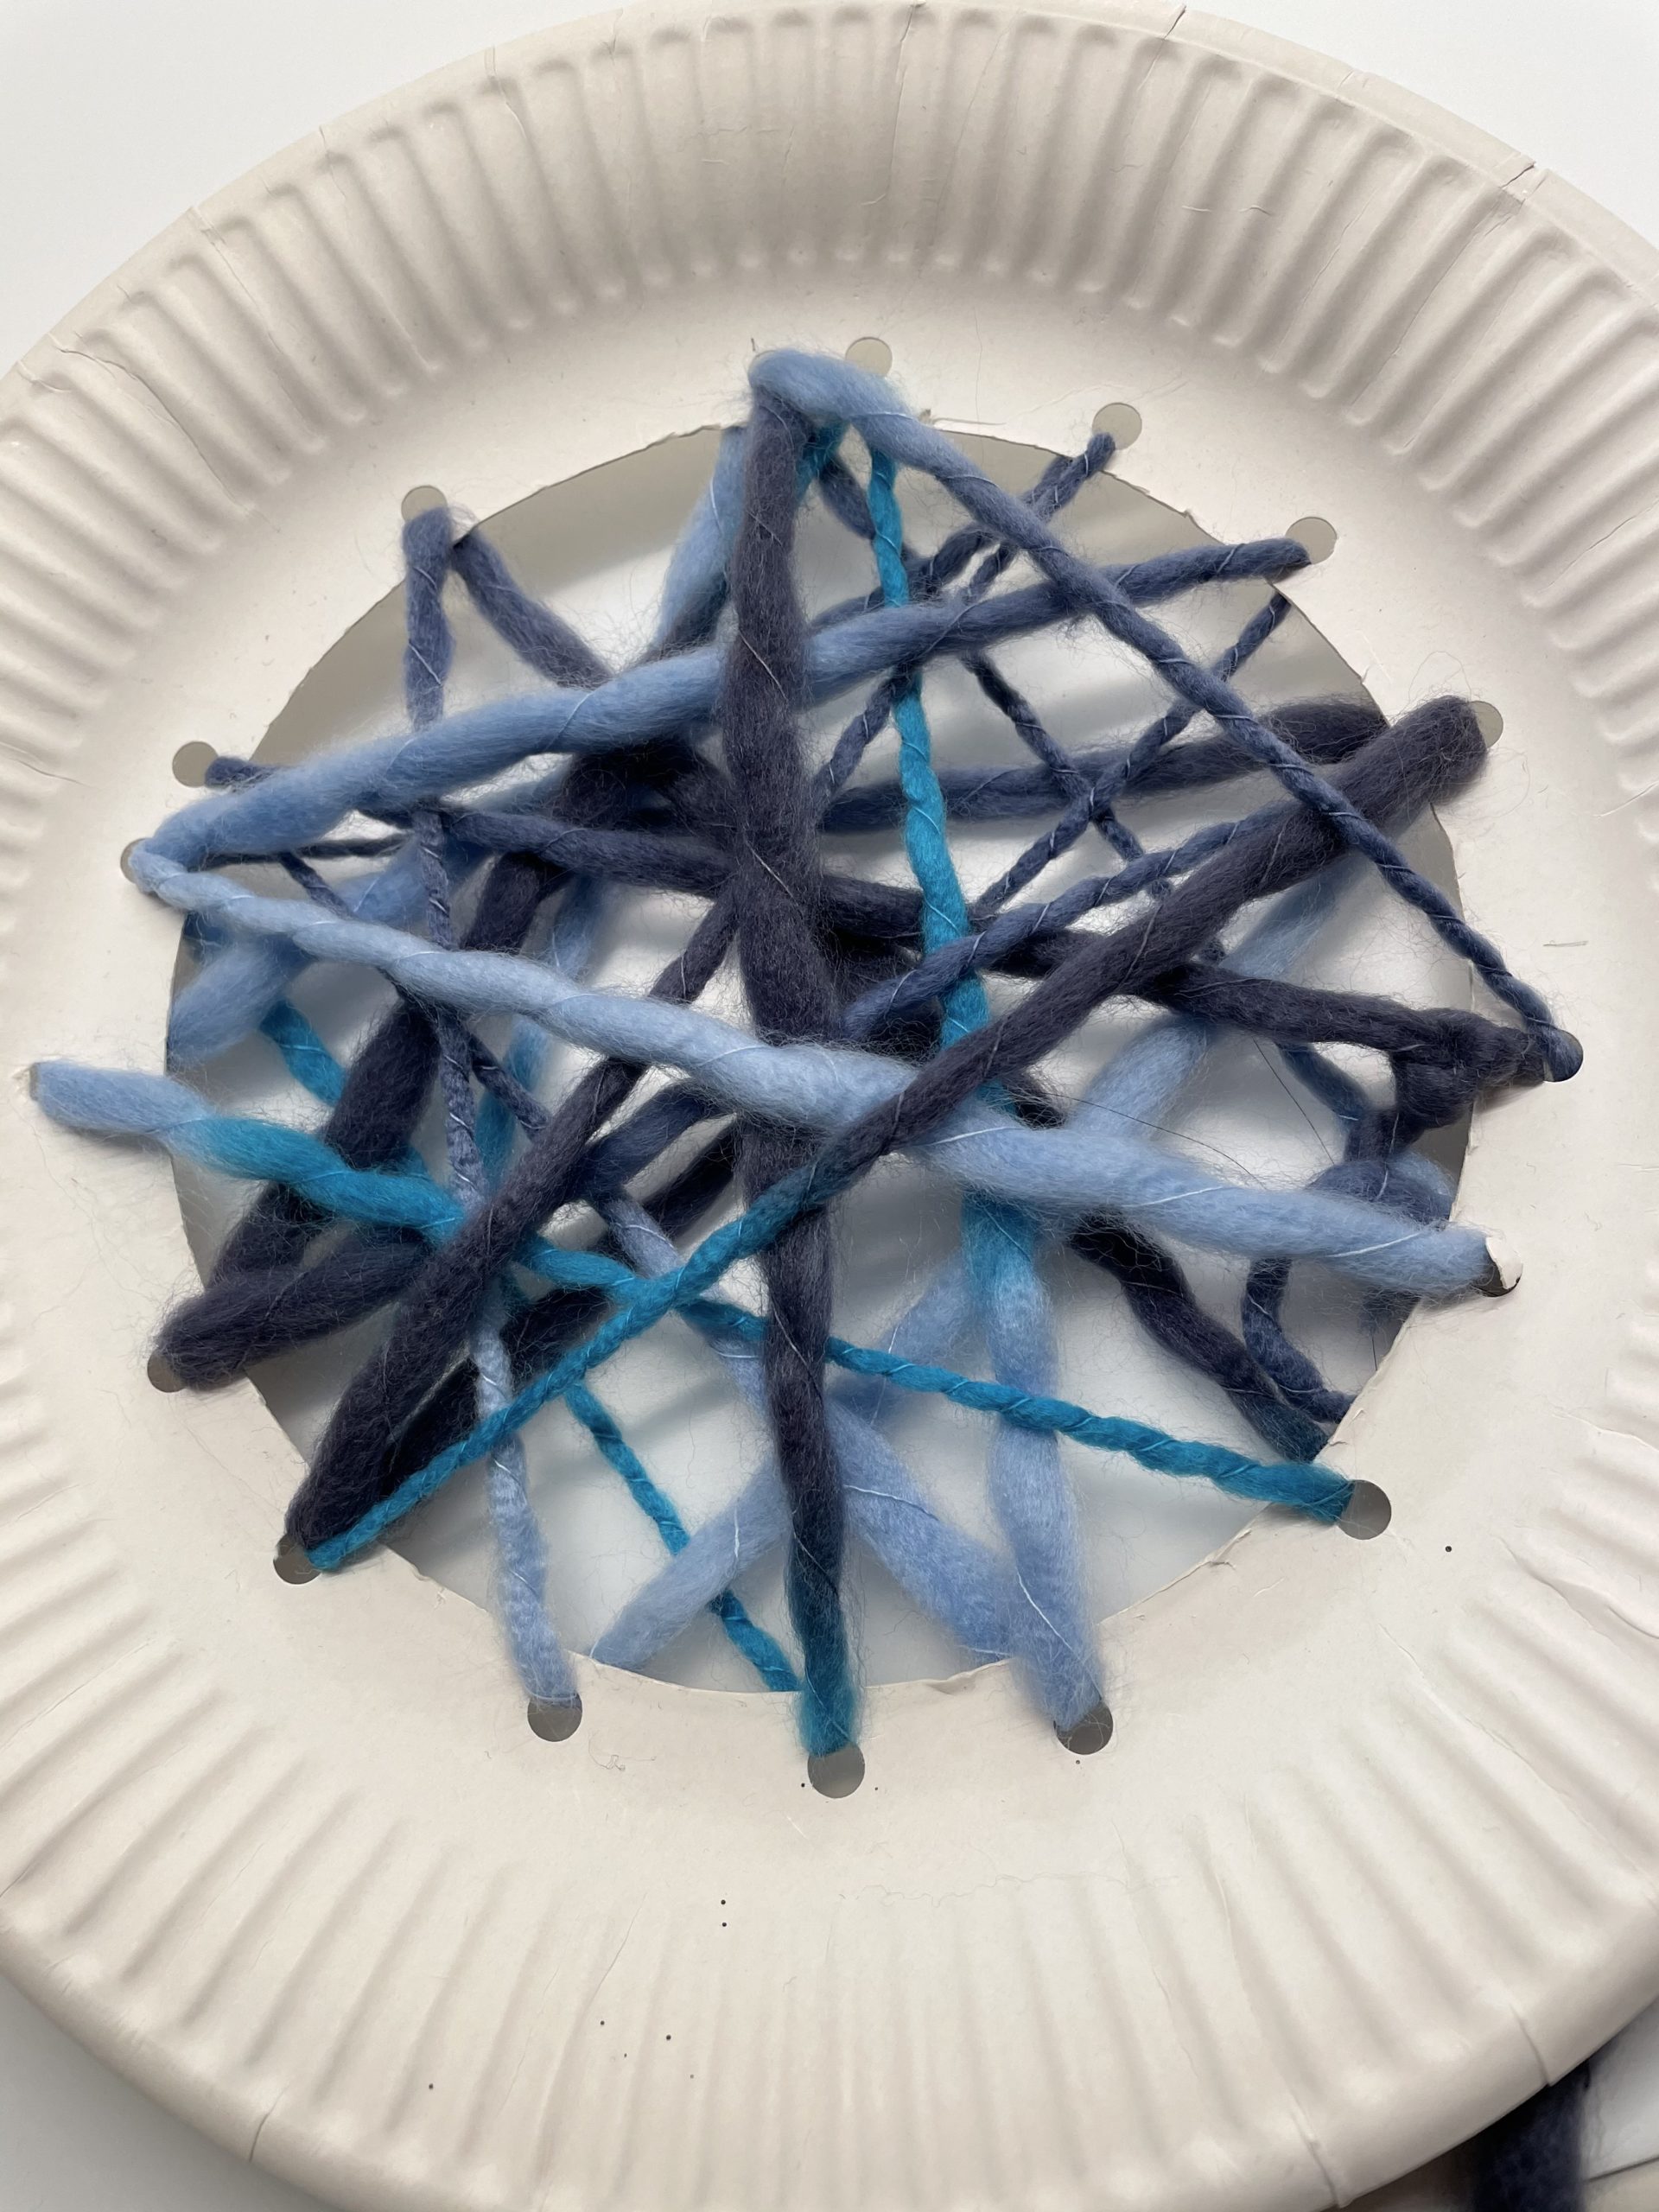
Bild zum Schritt 11 für das Bastel- und DIY-Abenteuer für Kinder: 'Sollten jedoch einige Löcher freibleiben, so ist das ebenso passend,...'

12

If you like the thread mesh, you tie the thread remnant to a hole. Let a piece of the thread survive.
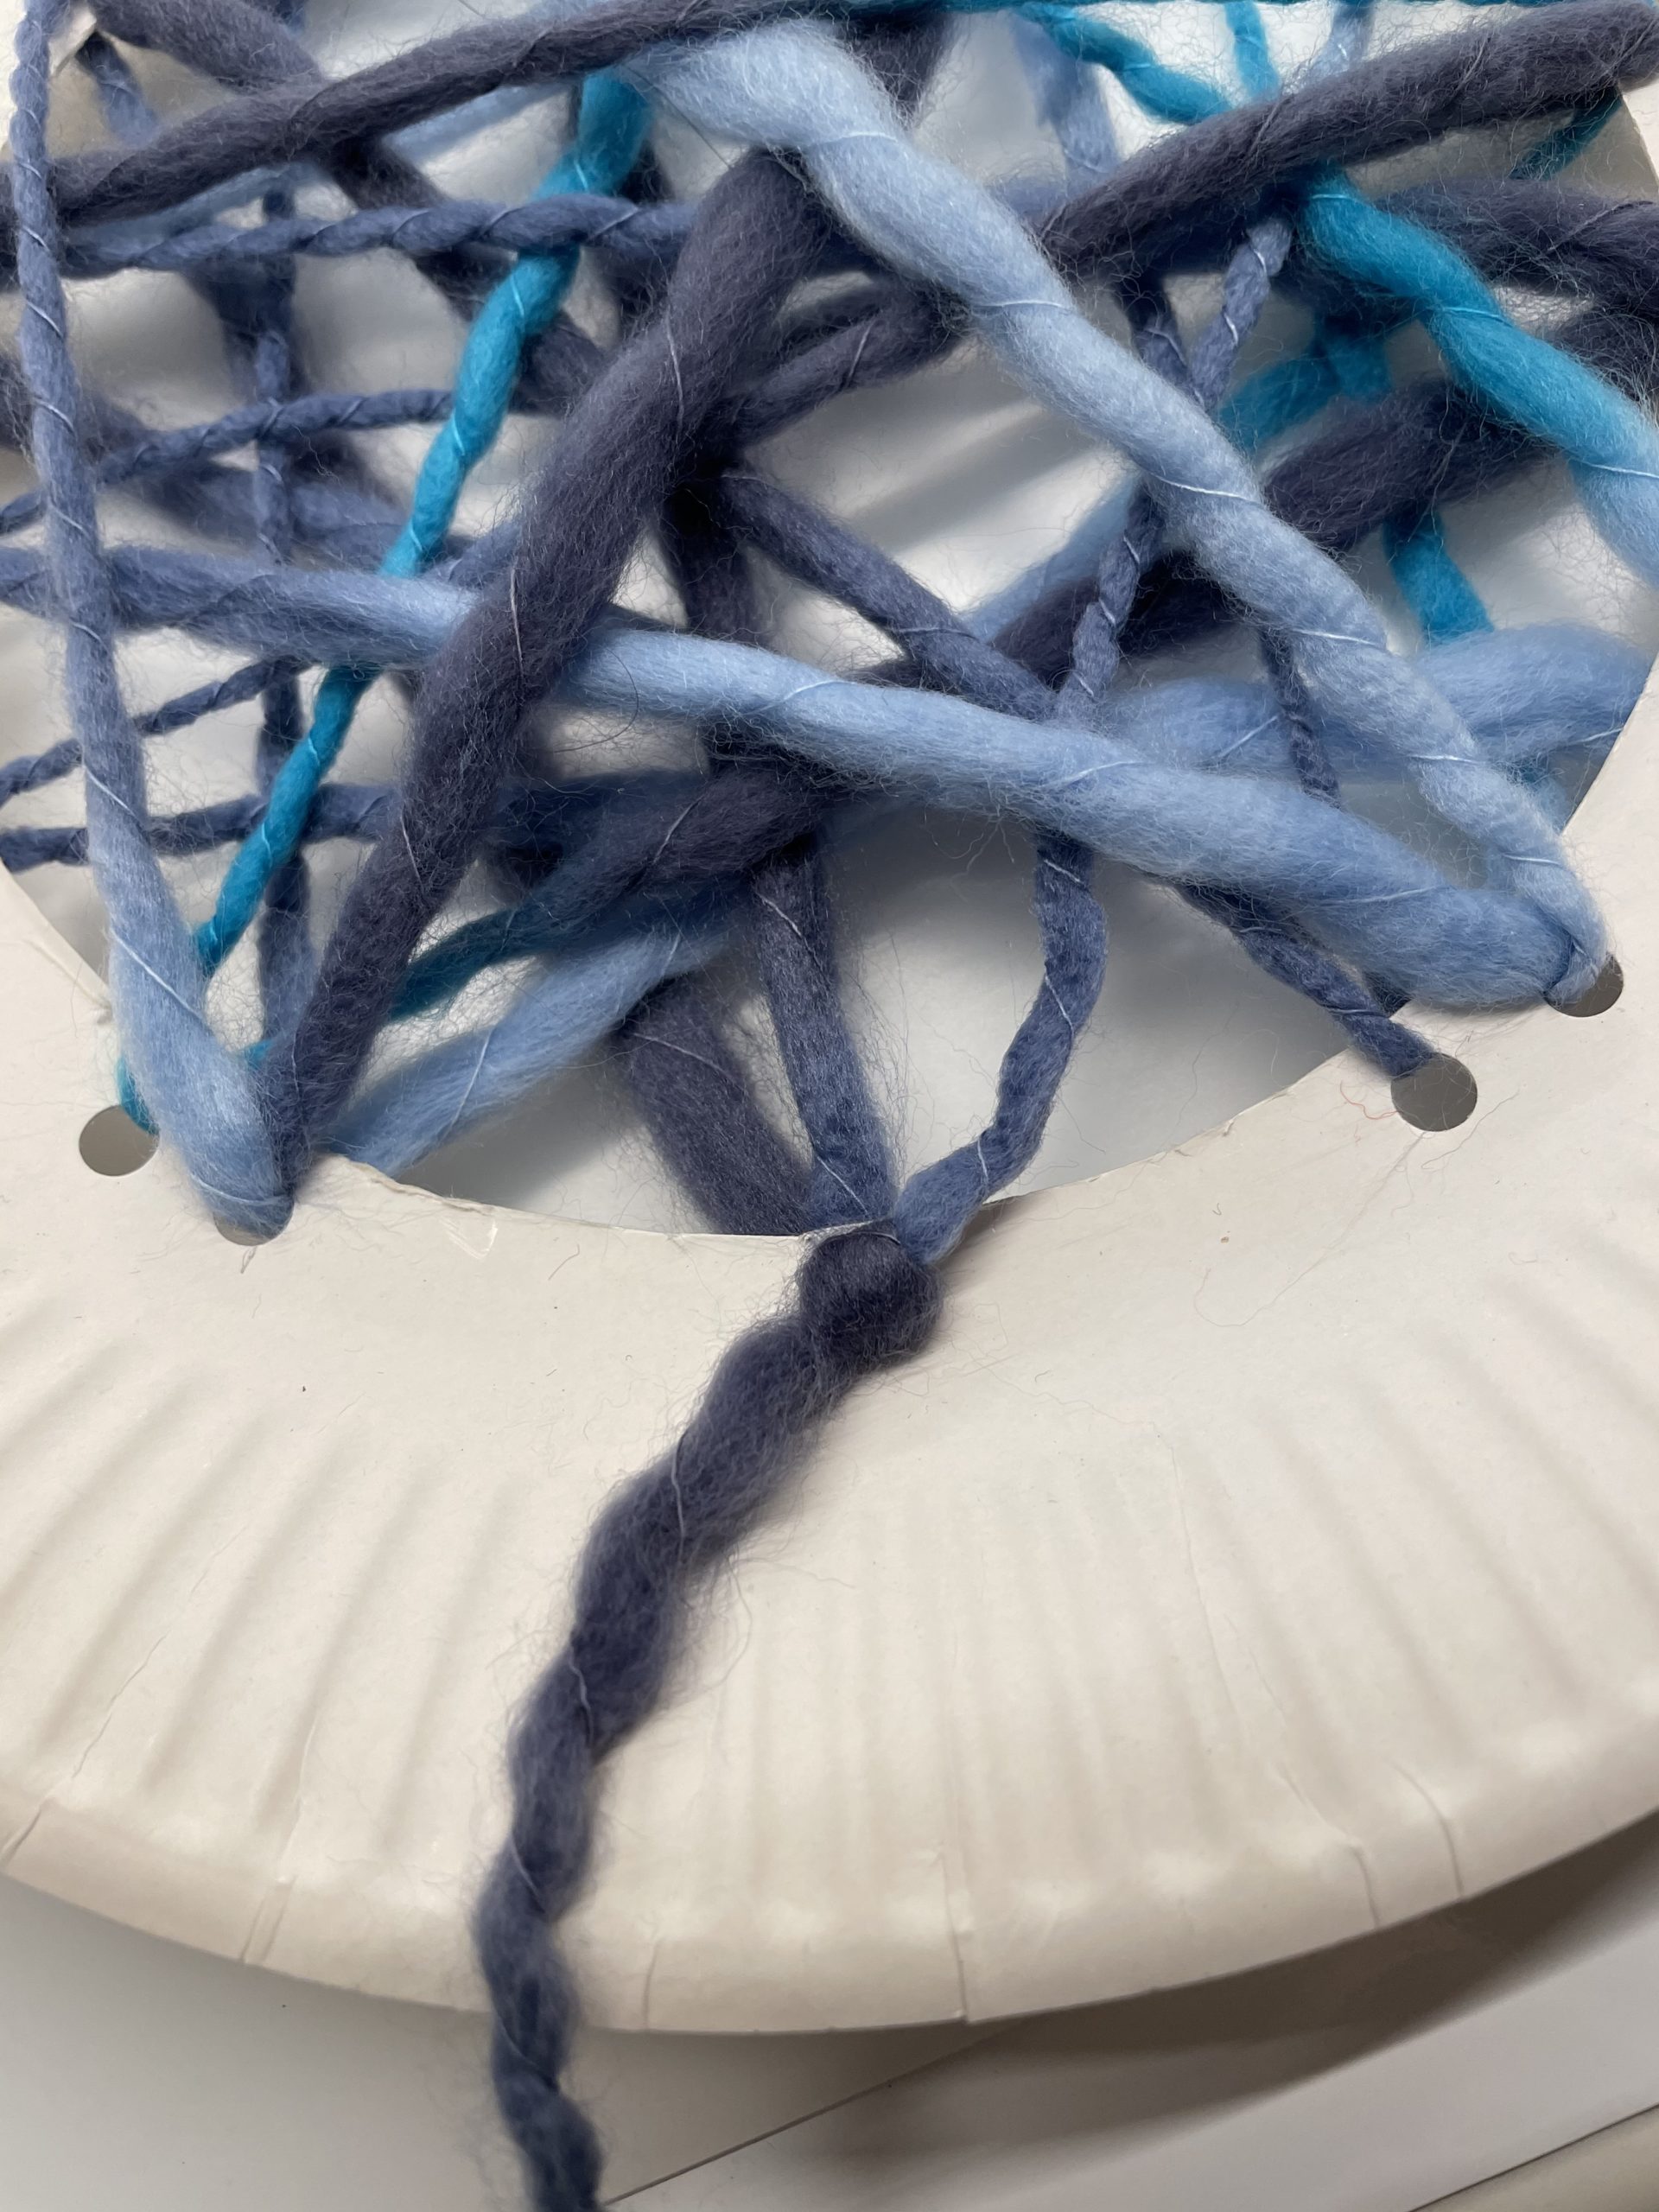
Bild zum Schritt 12 für das Bastel- und DIY-Abenteuer für Kinder: 'Wenn euch das Fadengeflecht gefällt, dann verknotet ihr den Fadenrest...'

13

2. Bild zum Schritt 12 für das Bastel- und DIY-Abenteuer für Kinder: 'Wenn euch das Fadengeflecht gefällt, dann verknotet ihr den Fadenrest...'

14

Now you can decorate the thread net with snow crystals.
You can easily make snow crystals from pipe cleaners.
For this purpose, three pieces of the pipe-puter cut off in the length of about 5cm.
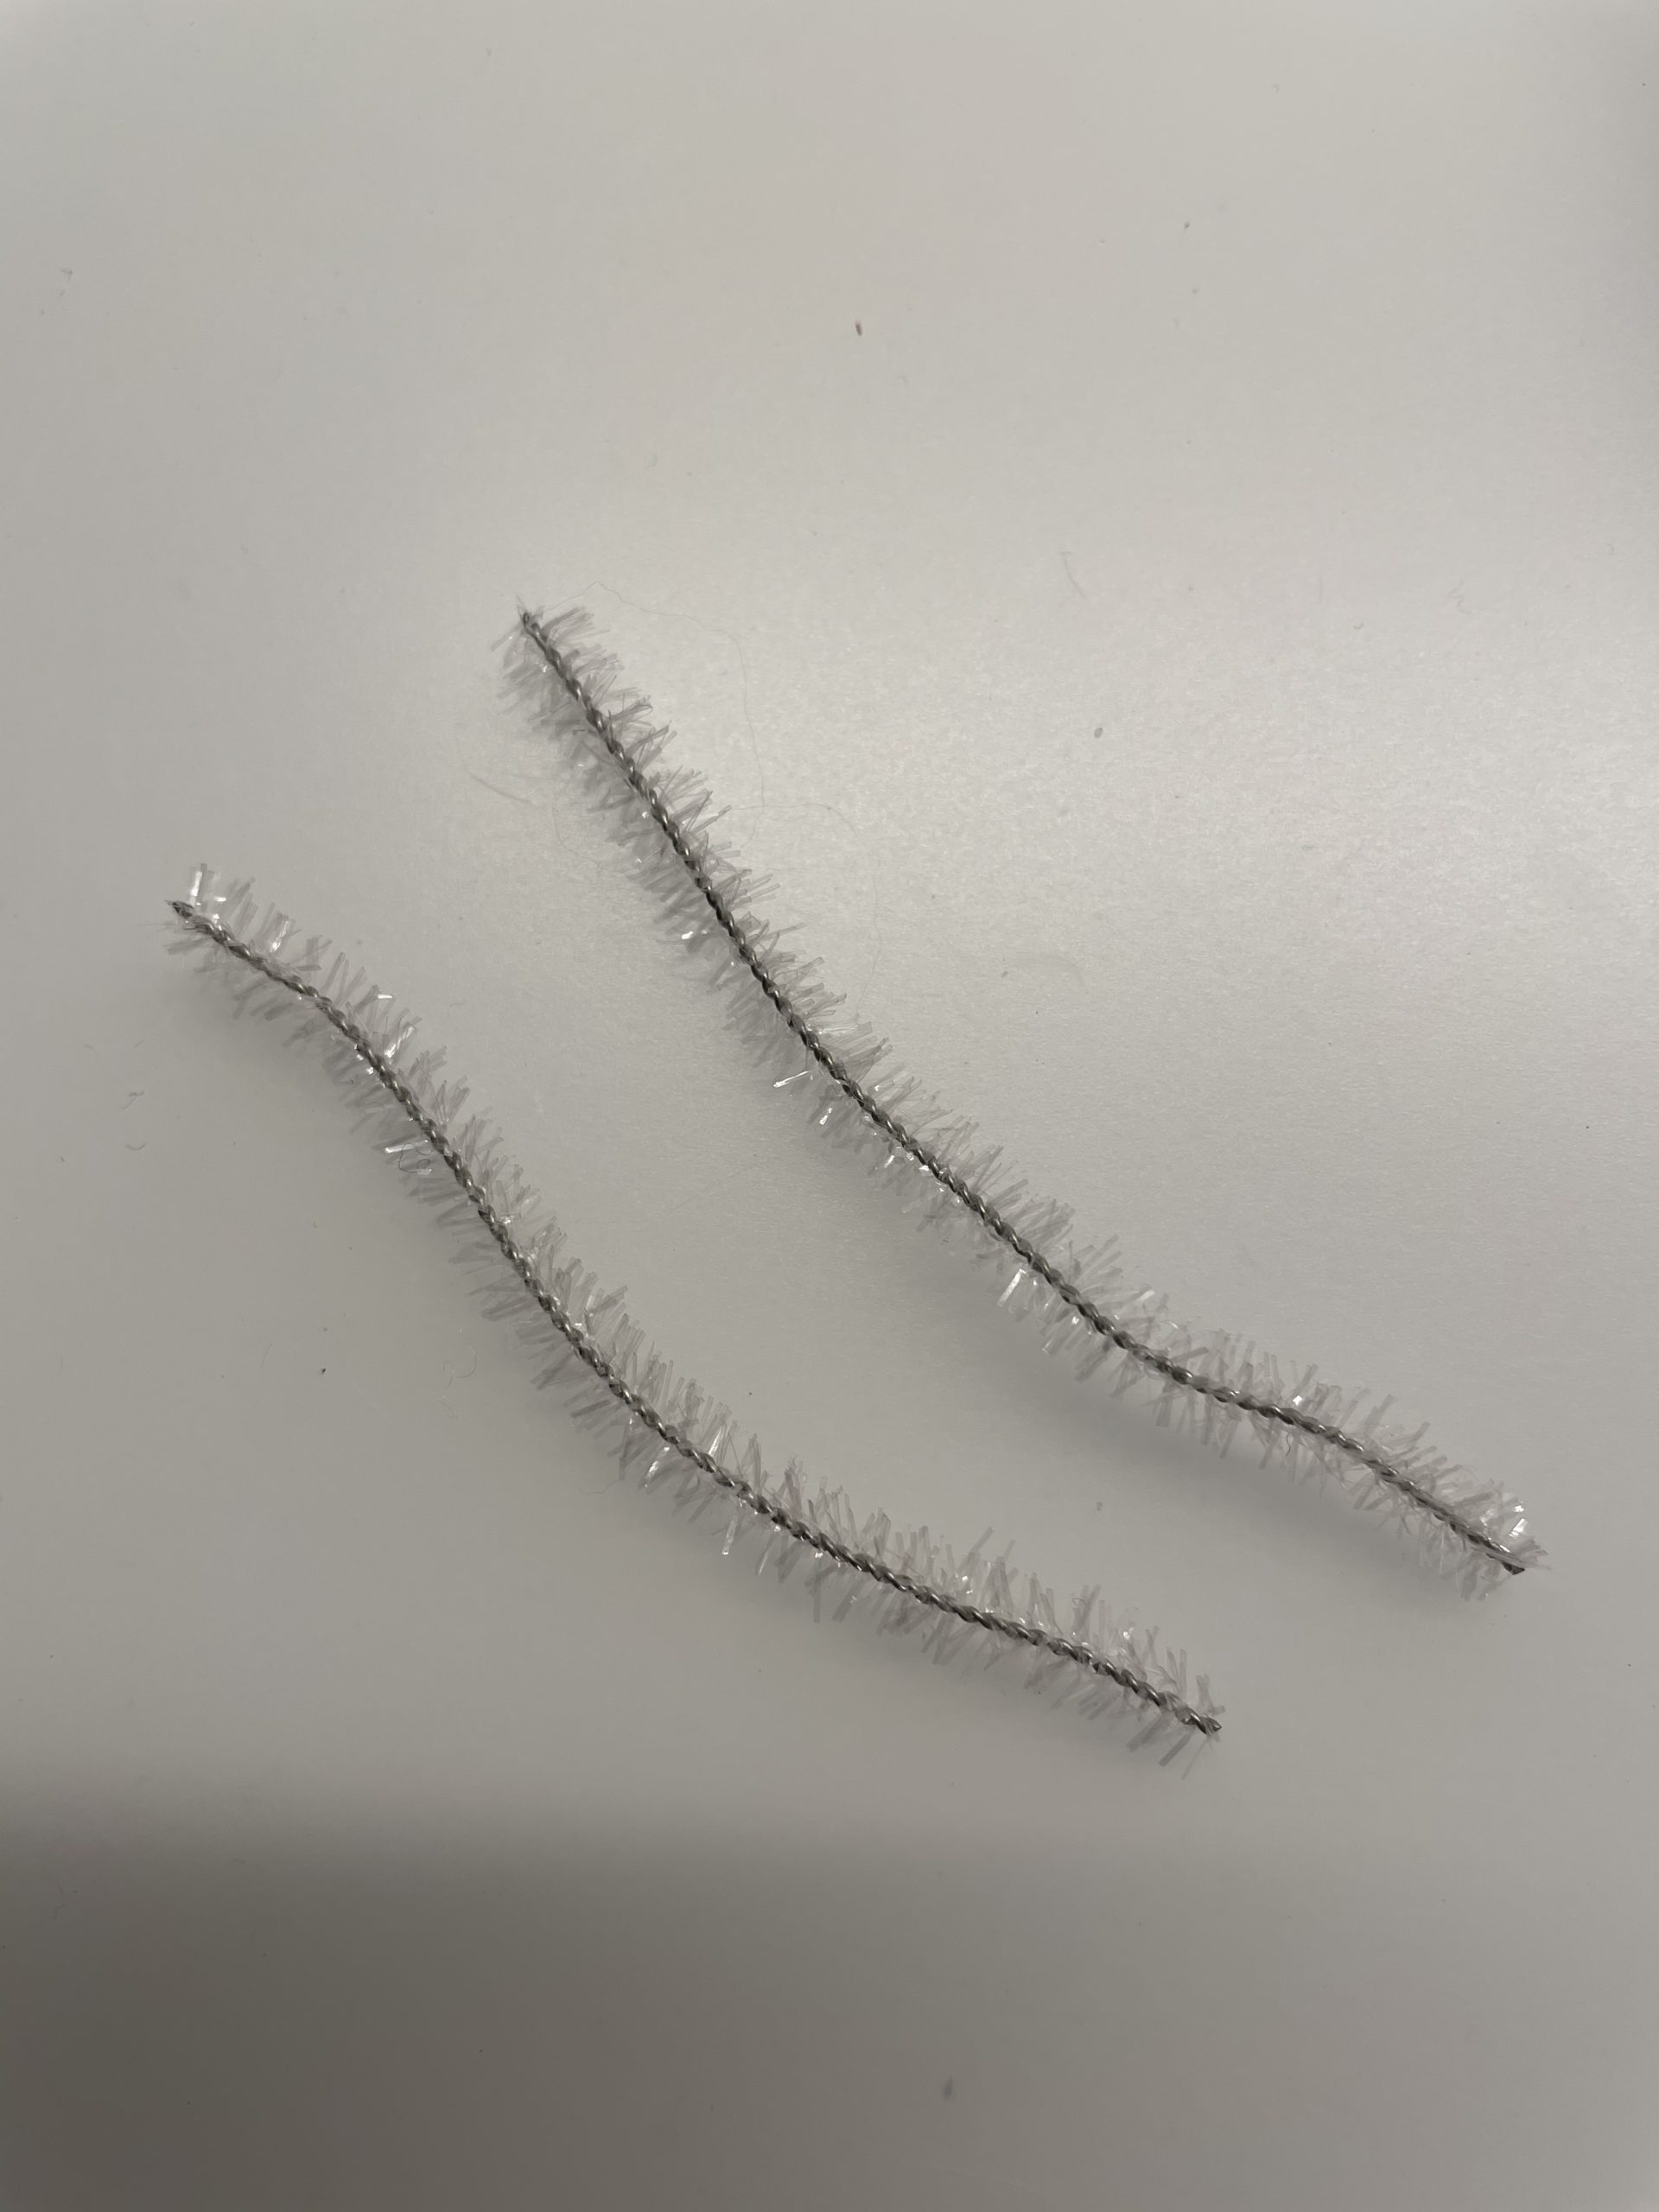
Bild zum Schritt 14 für das Bastel- und DIY-Abenteuer für Kinder: 'Nun könnt ihr das Fadennetz mit Schneekristallen dekorieren.  ...'

15

Now you put a cross from two pieces of pipe cleaner.

Bild zum Schritt 15 für das Bastel- und DIY-Abenteuer für Kinder: 'Jetzt legt ihr aus zwei Stücken Pfeifenputzer ein Kreuz.'

16

Now you bend the two wires to the other side. You can also take a piece of wire in half length and bend around or even a whole wire. So the snow crystal becomes more stable.
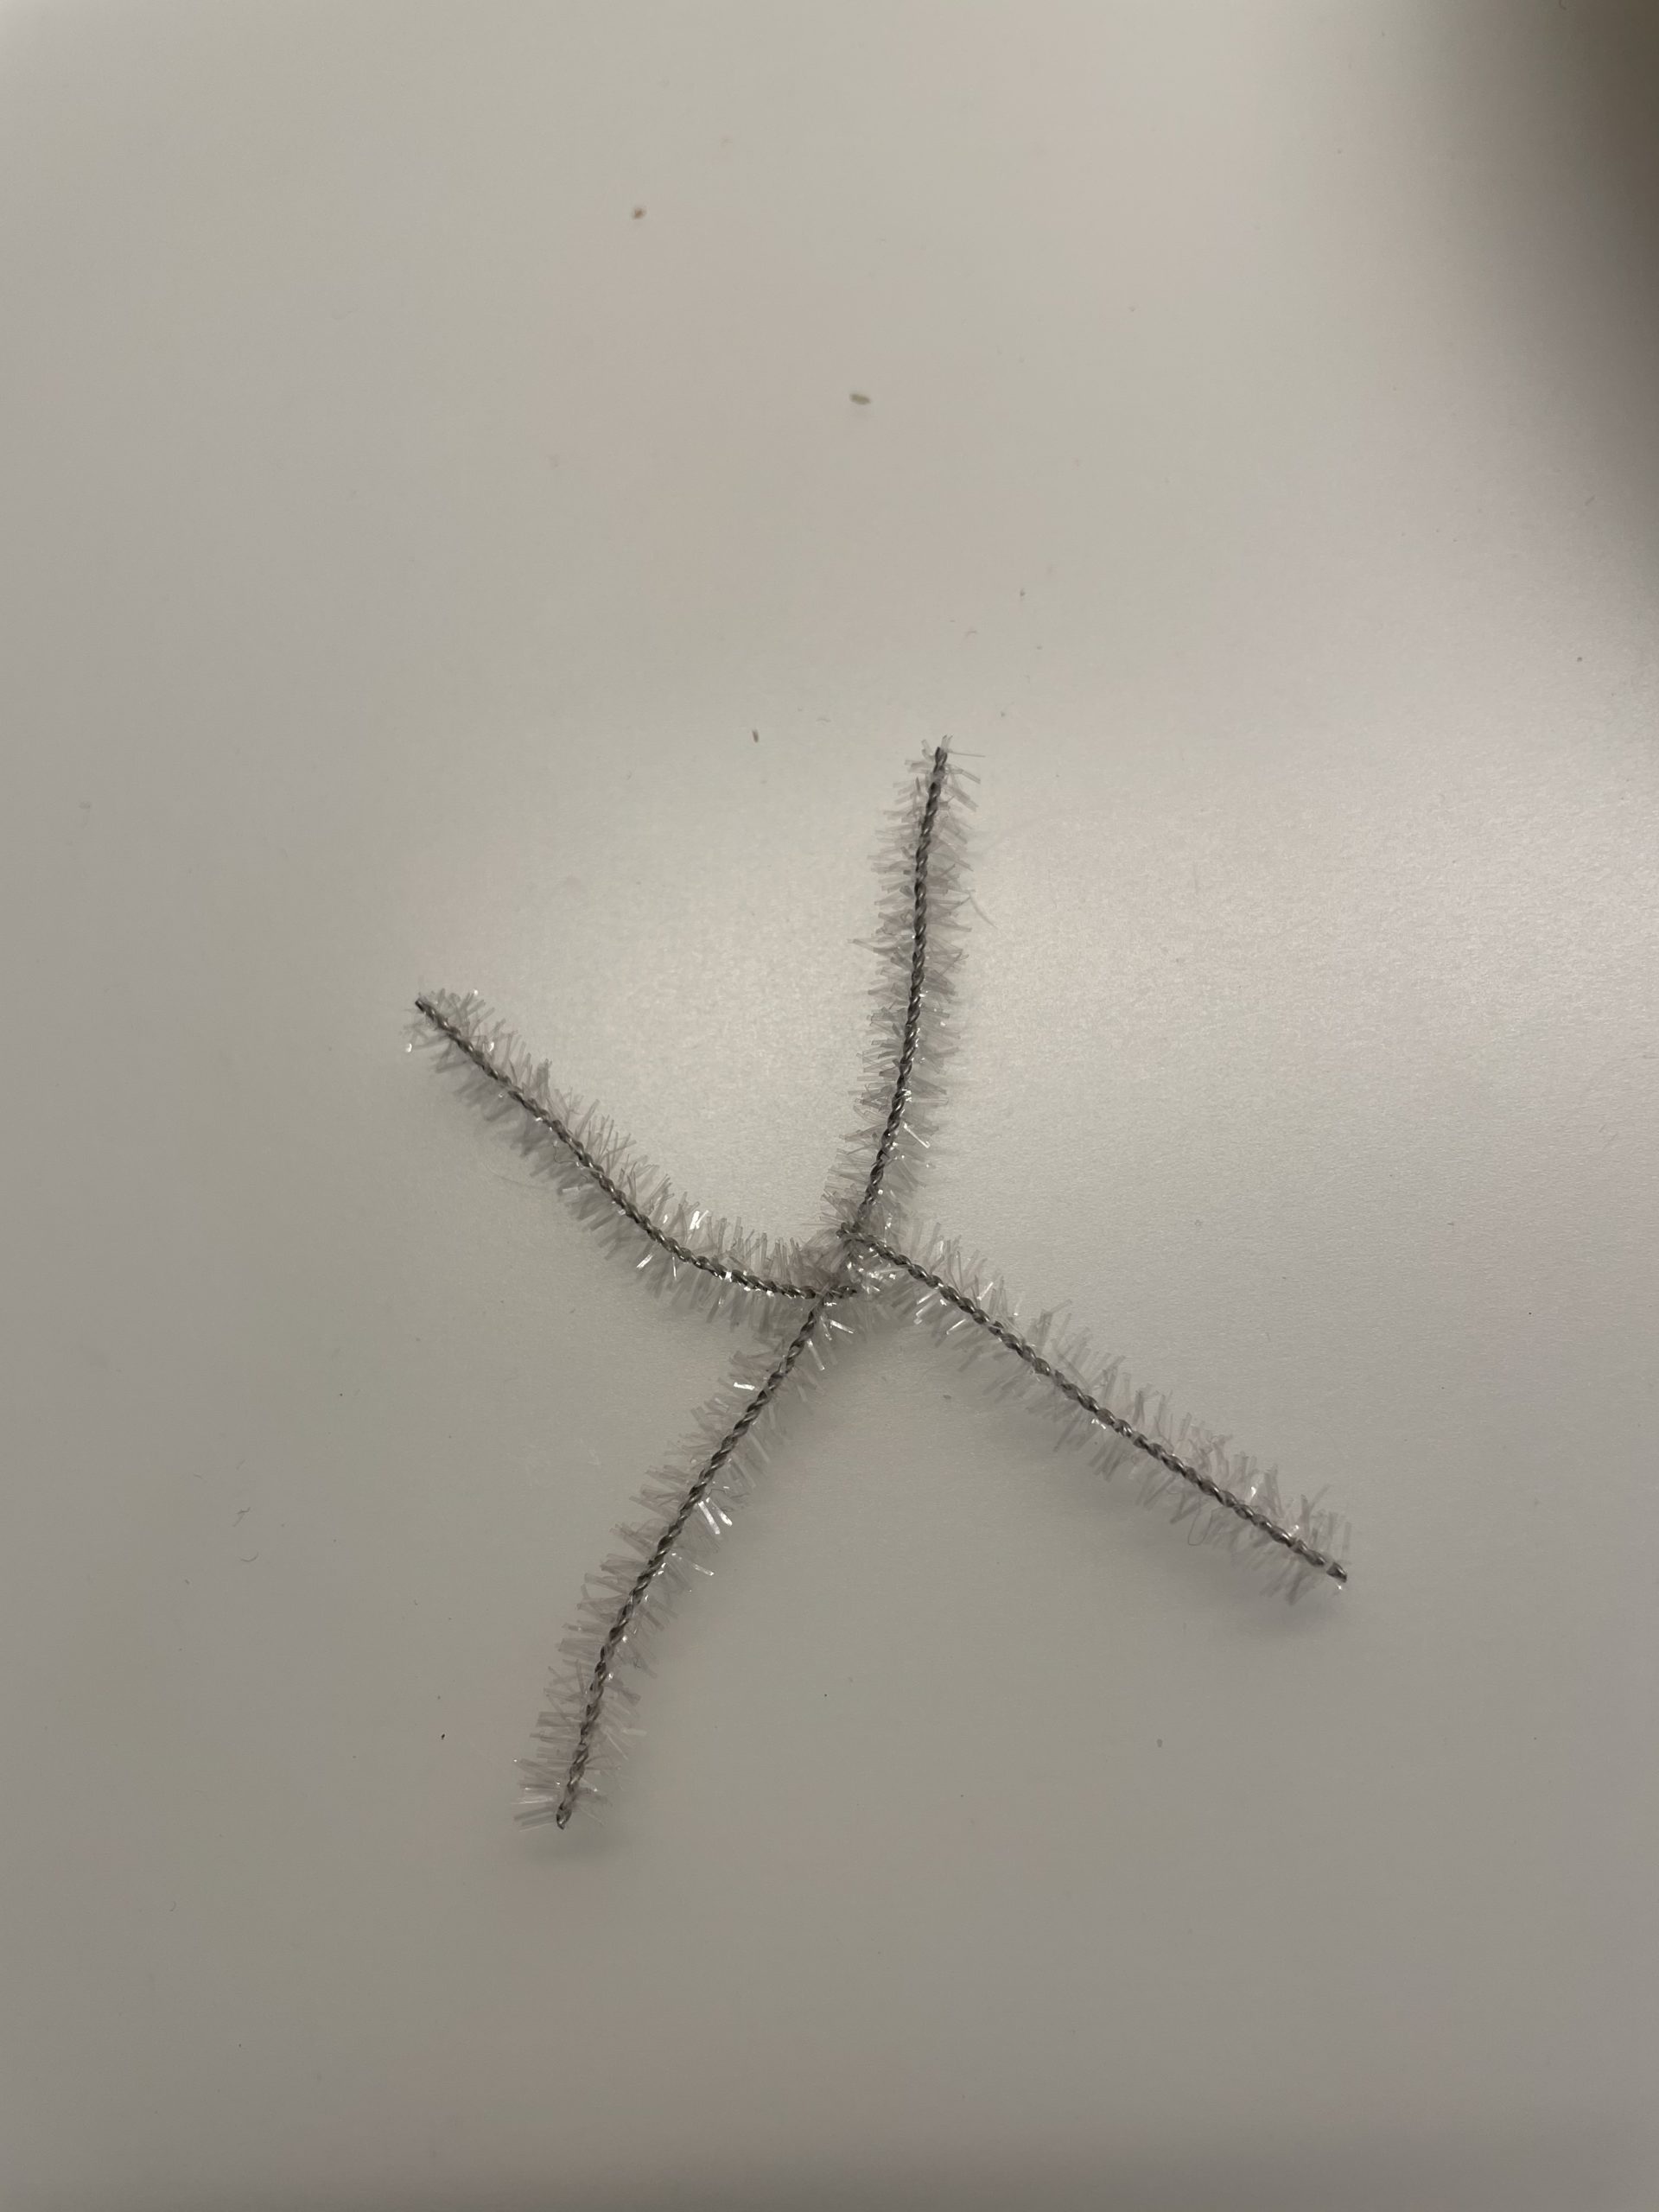
Bild zum Schritt 16 für das Bastel- und DIY-Abenteuer für Kinder: 'Nun biegt ihr die zwei Drähte jeweils auf die andere...'

17

On each standing wire you attach a small piece of wire in the length of approx. 2 cm. Bend this small wire also around the other wire.
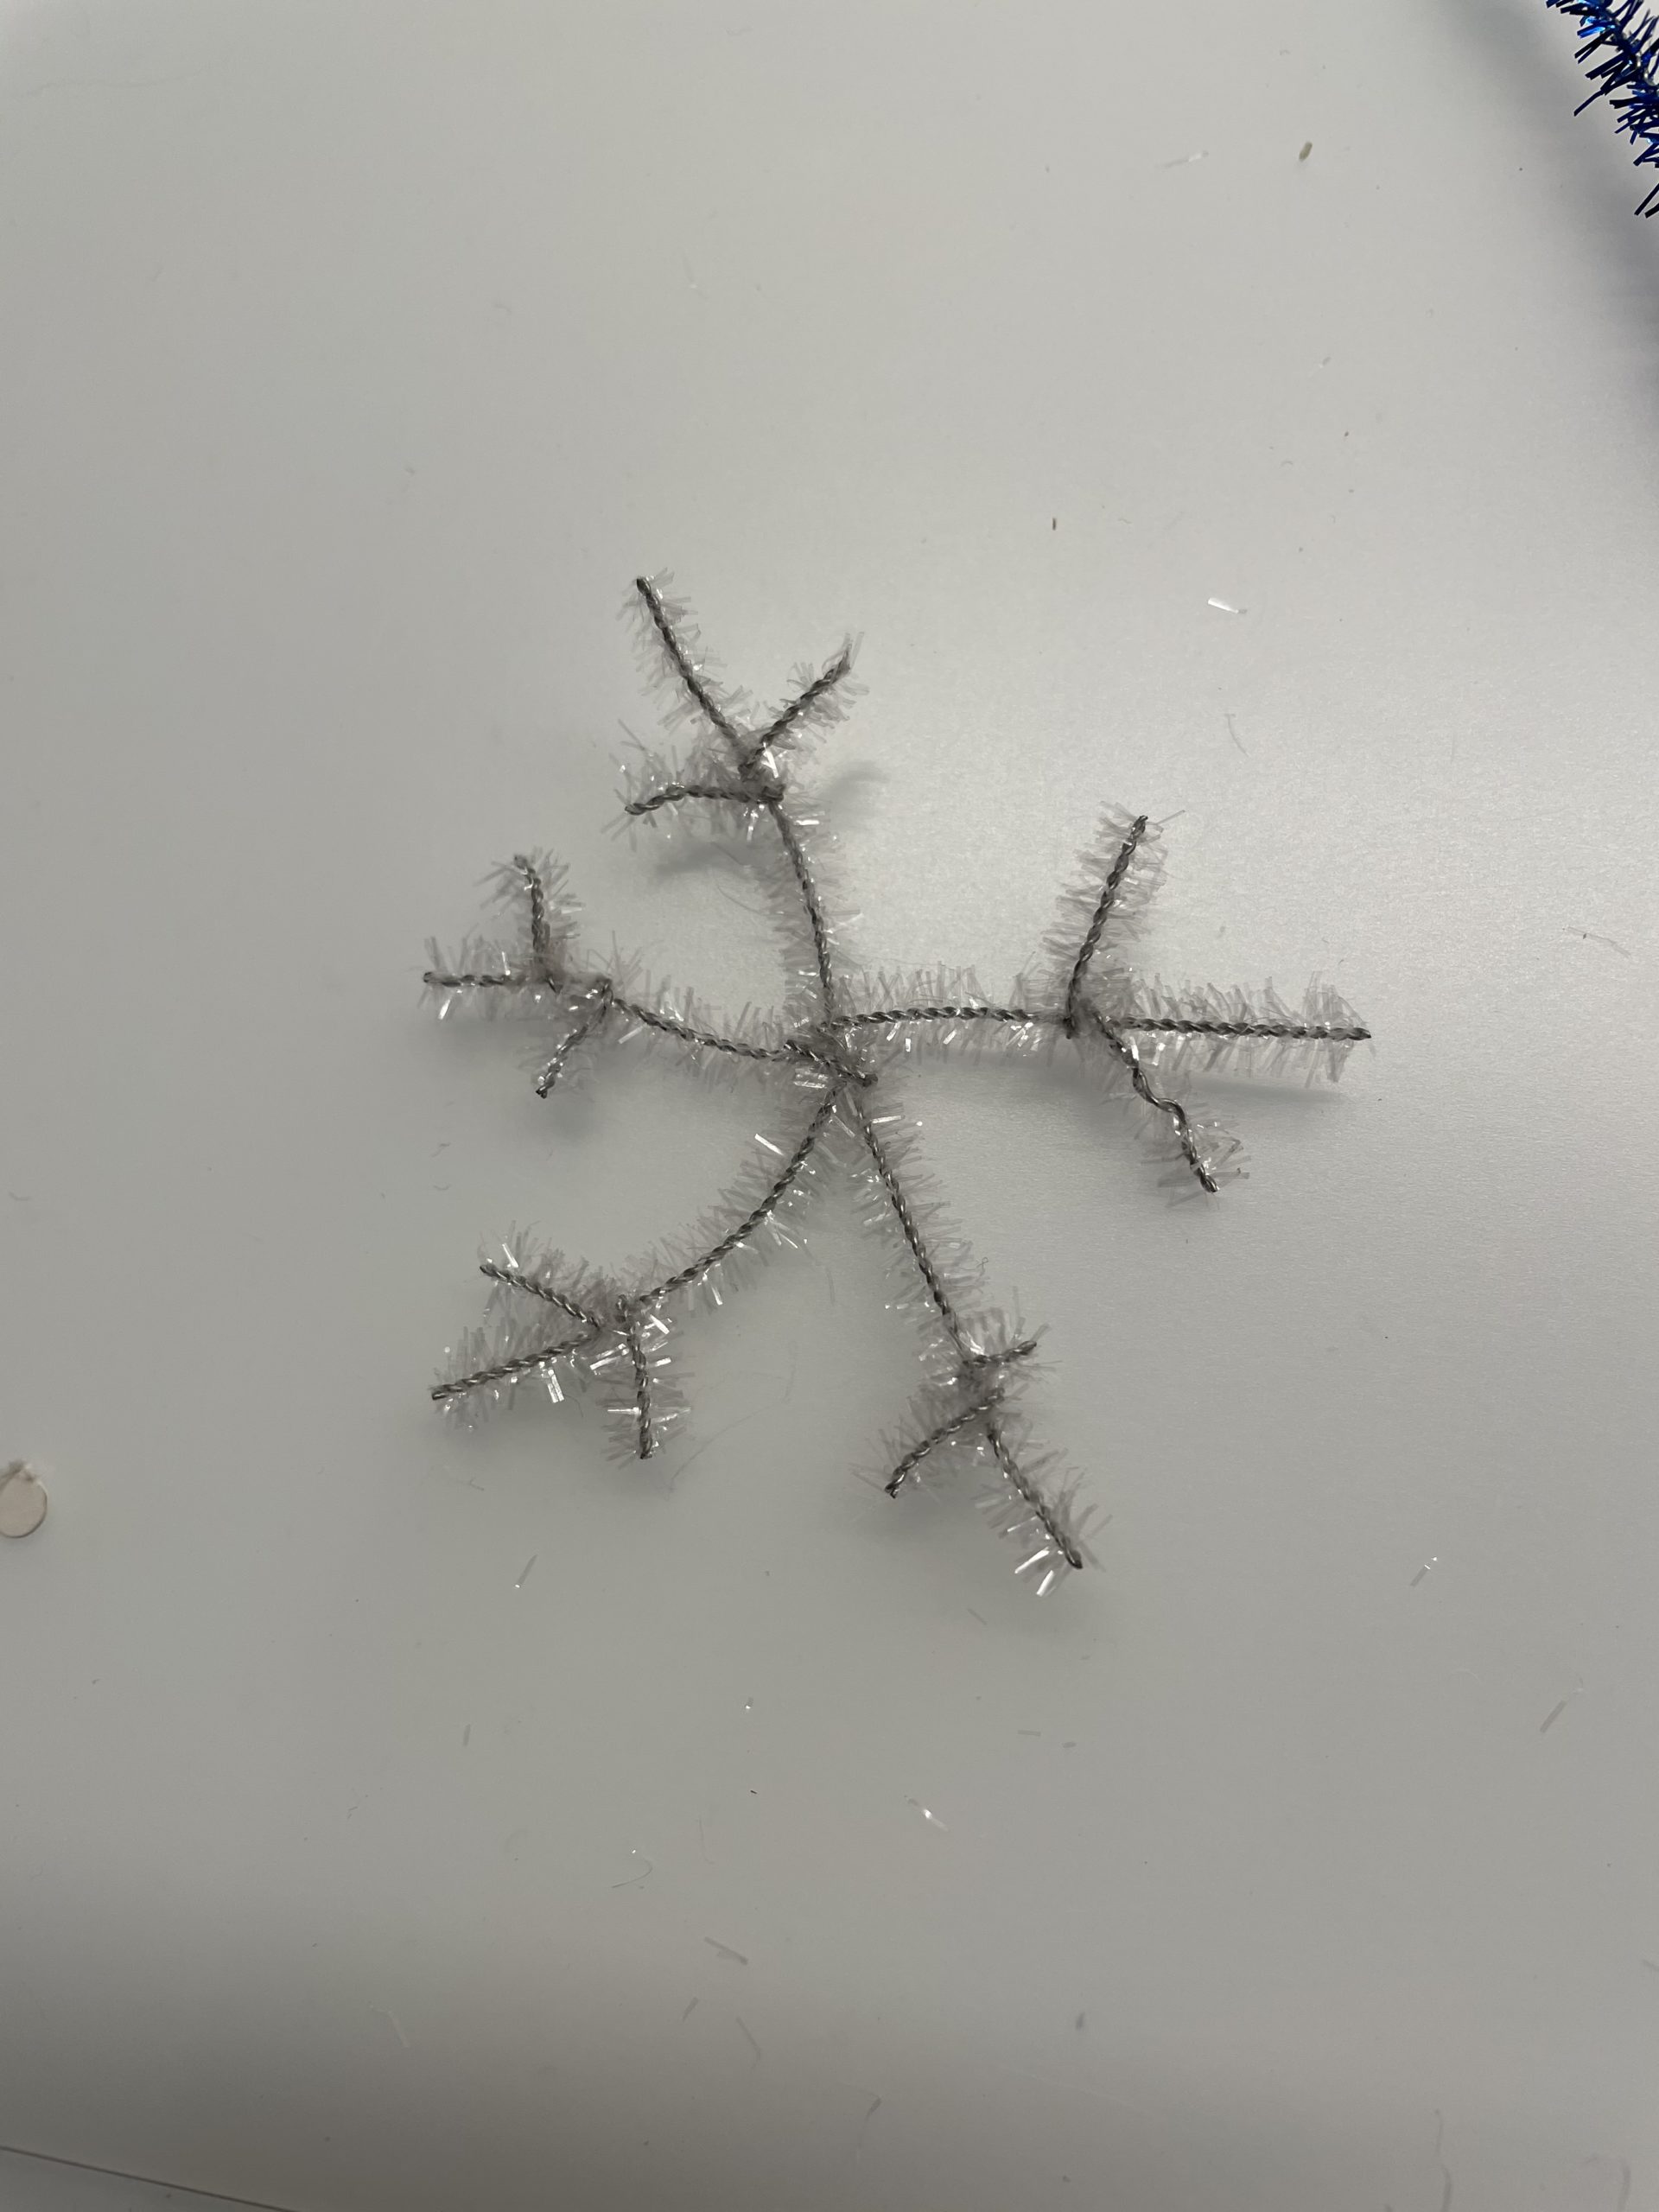
Bild zum Schritt 17 für das Bastel- und DIY-Abenteuer für Kinder: 'An jedem abstehenden Draht befestigt ihr nun ein kleines Stück...'

18

You can make the snow crystals from one color or make them from different coloured wires.
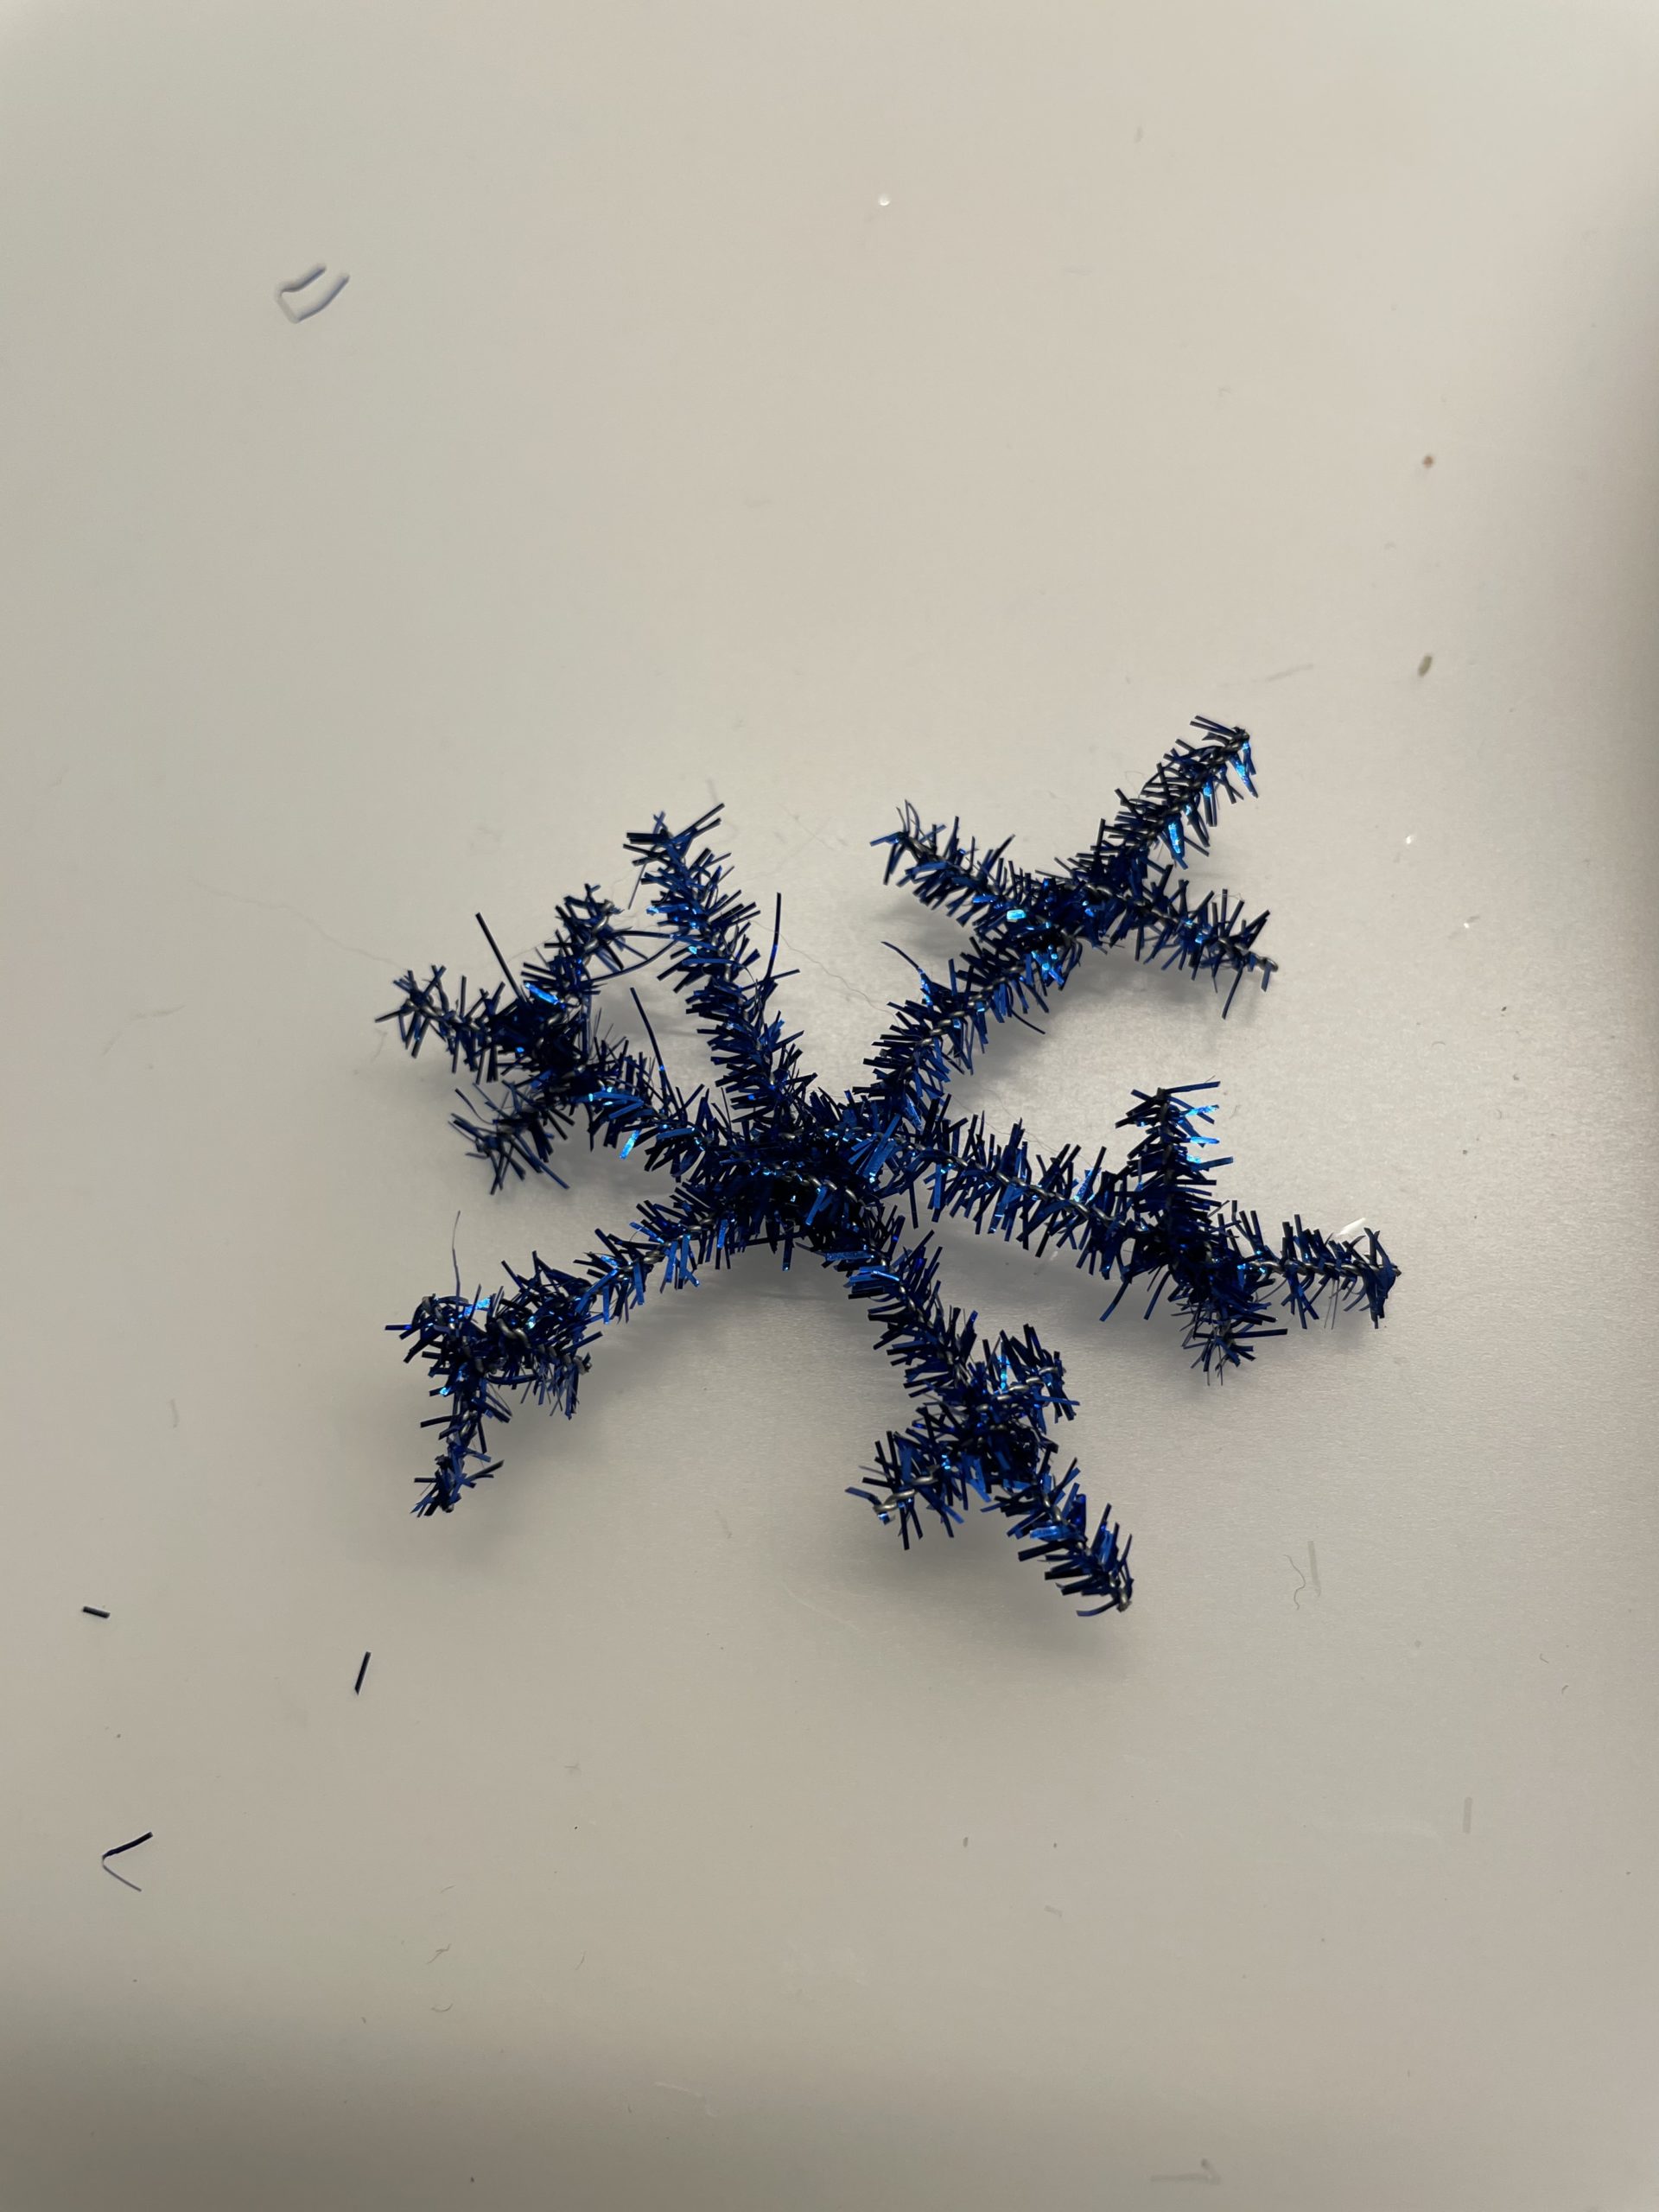
Bild zum Schritt 18 für das Bastel- und DIY-Abenteuer für Kinder: 'Ihr könnt die Schneekristalle aus einer Farbe herstellen oder aus...'

19

You can also use punched snow crystals, scatter decoration with crystals or small cotton balls.
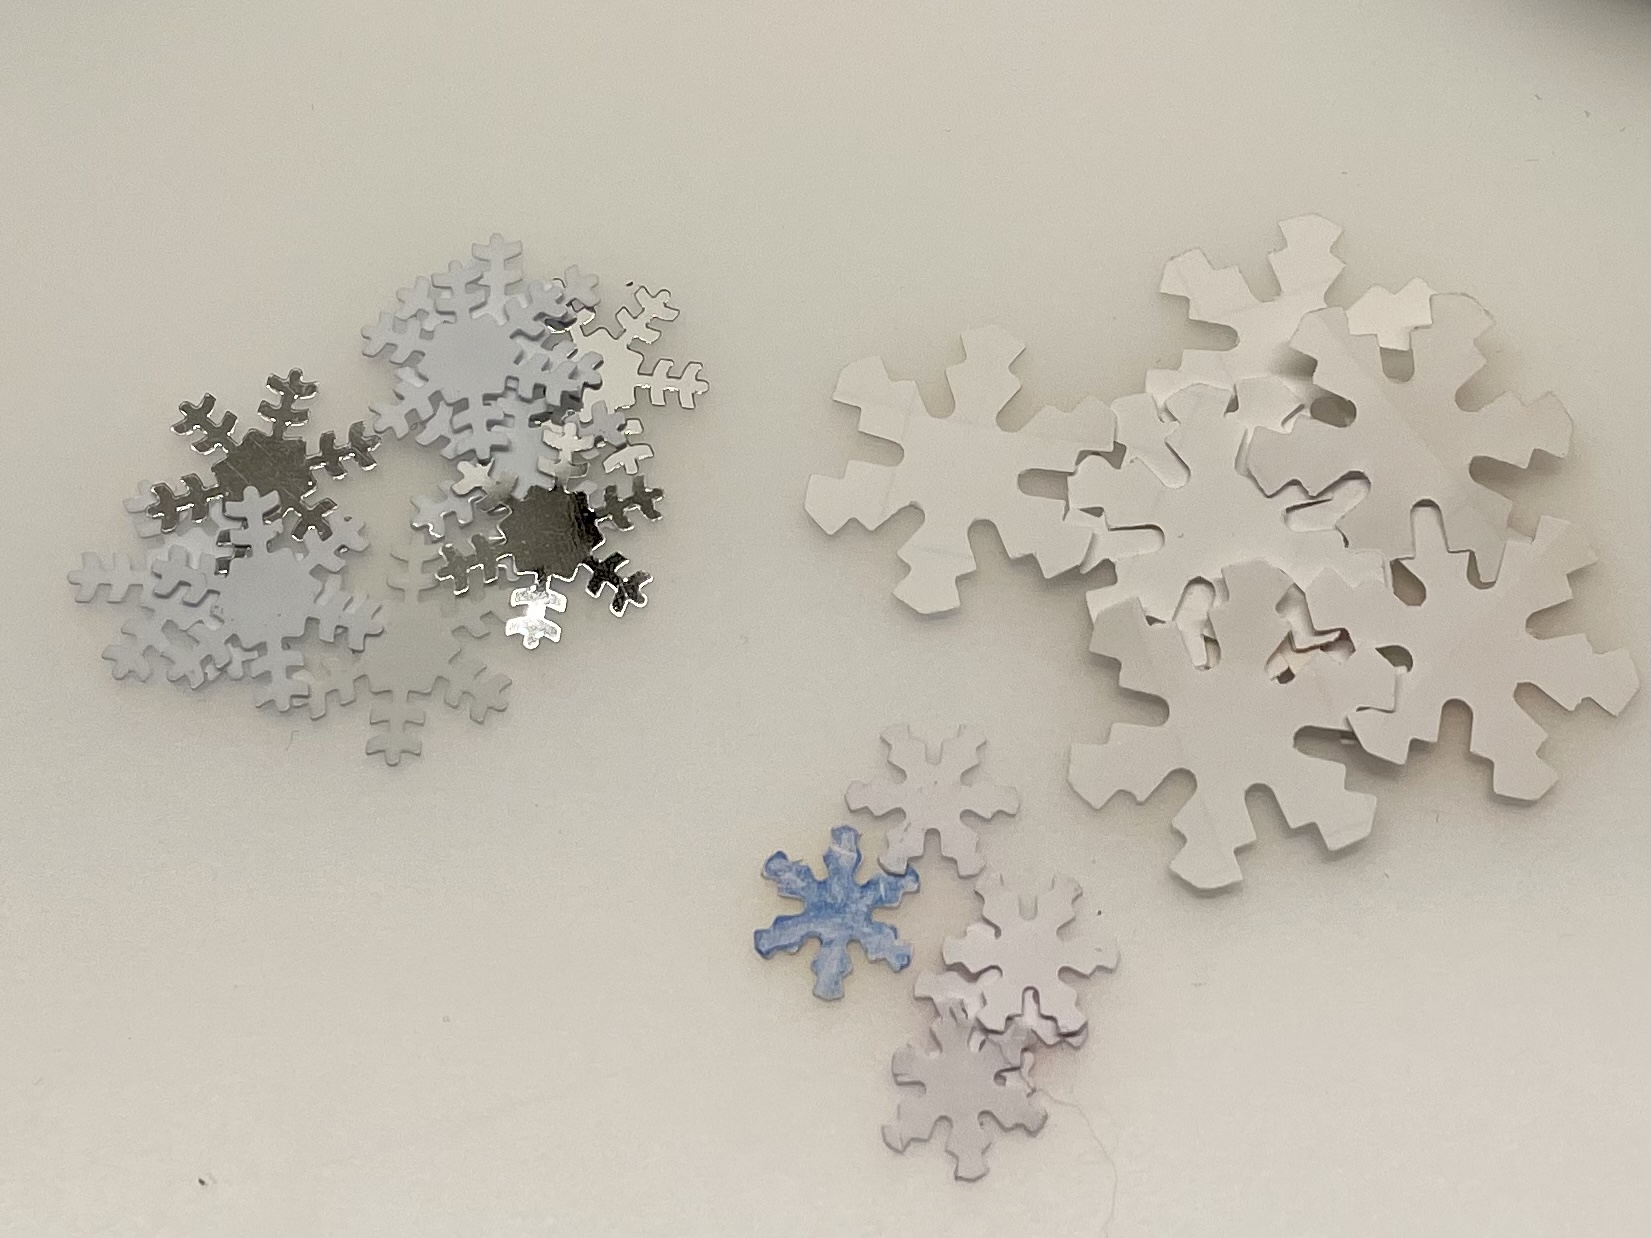
Bild zum Schritt 19 für das Bastel- und DIY-Abenteuer für Kinder: 'Ihr könnt auch ausgestanzte Schneekristalle verwenden, Streudekoration mit Kristallen oder...'

20

It is also suitable for sequins.

Bild zum Schritt 20 für das Bastel- und DIY-Abenteuer für Kinder: 'Es eignen sich auch Pailletten.'

21

Beautiful also look pearls in the net.
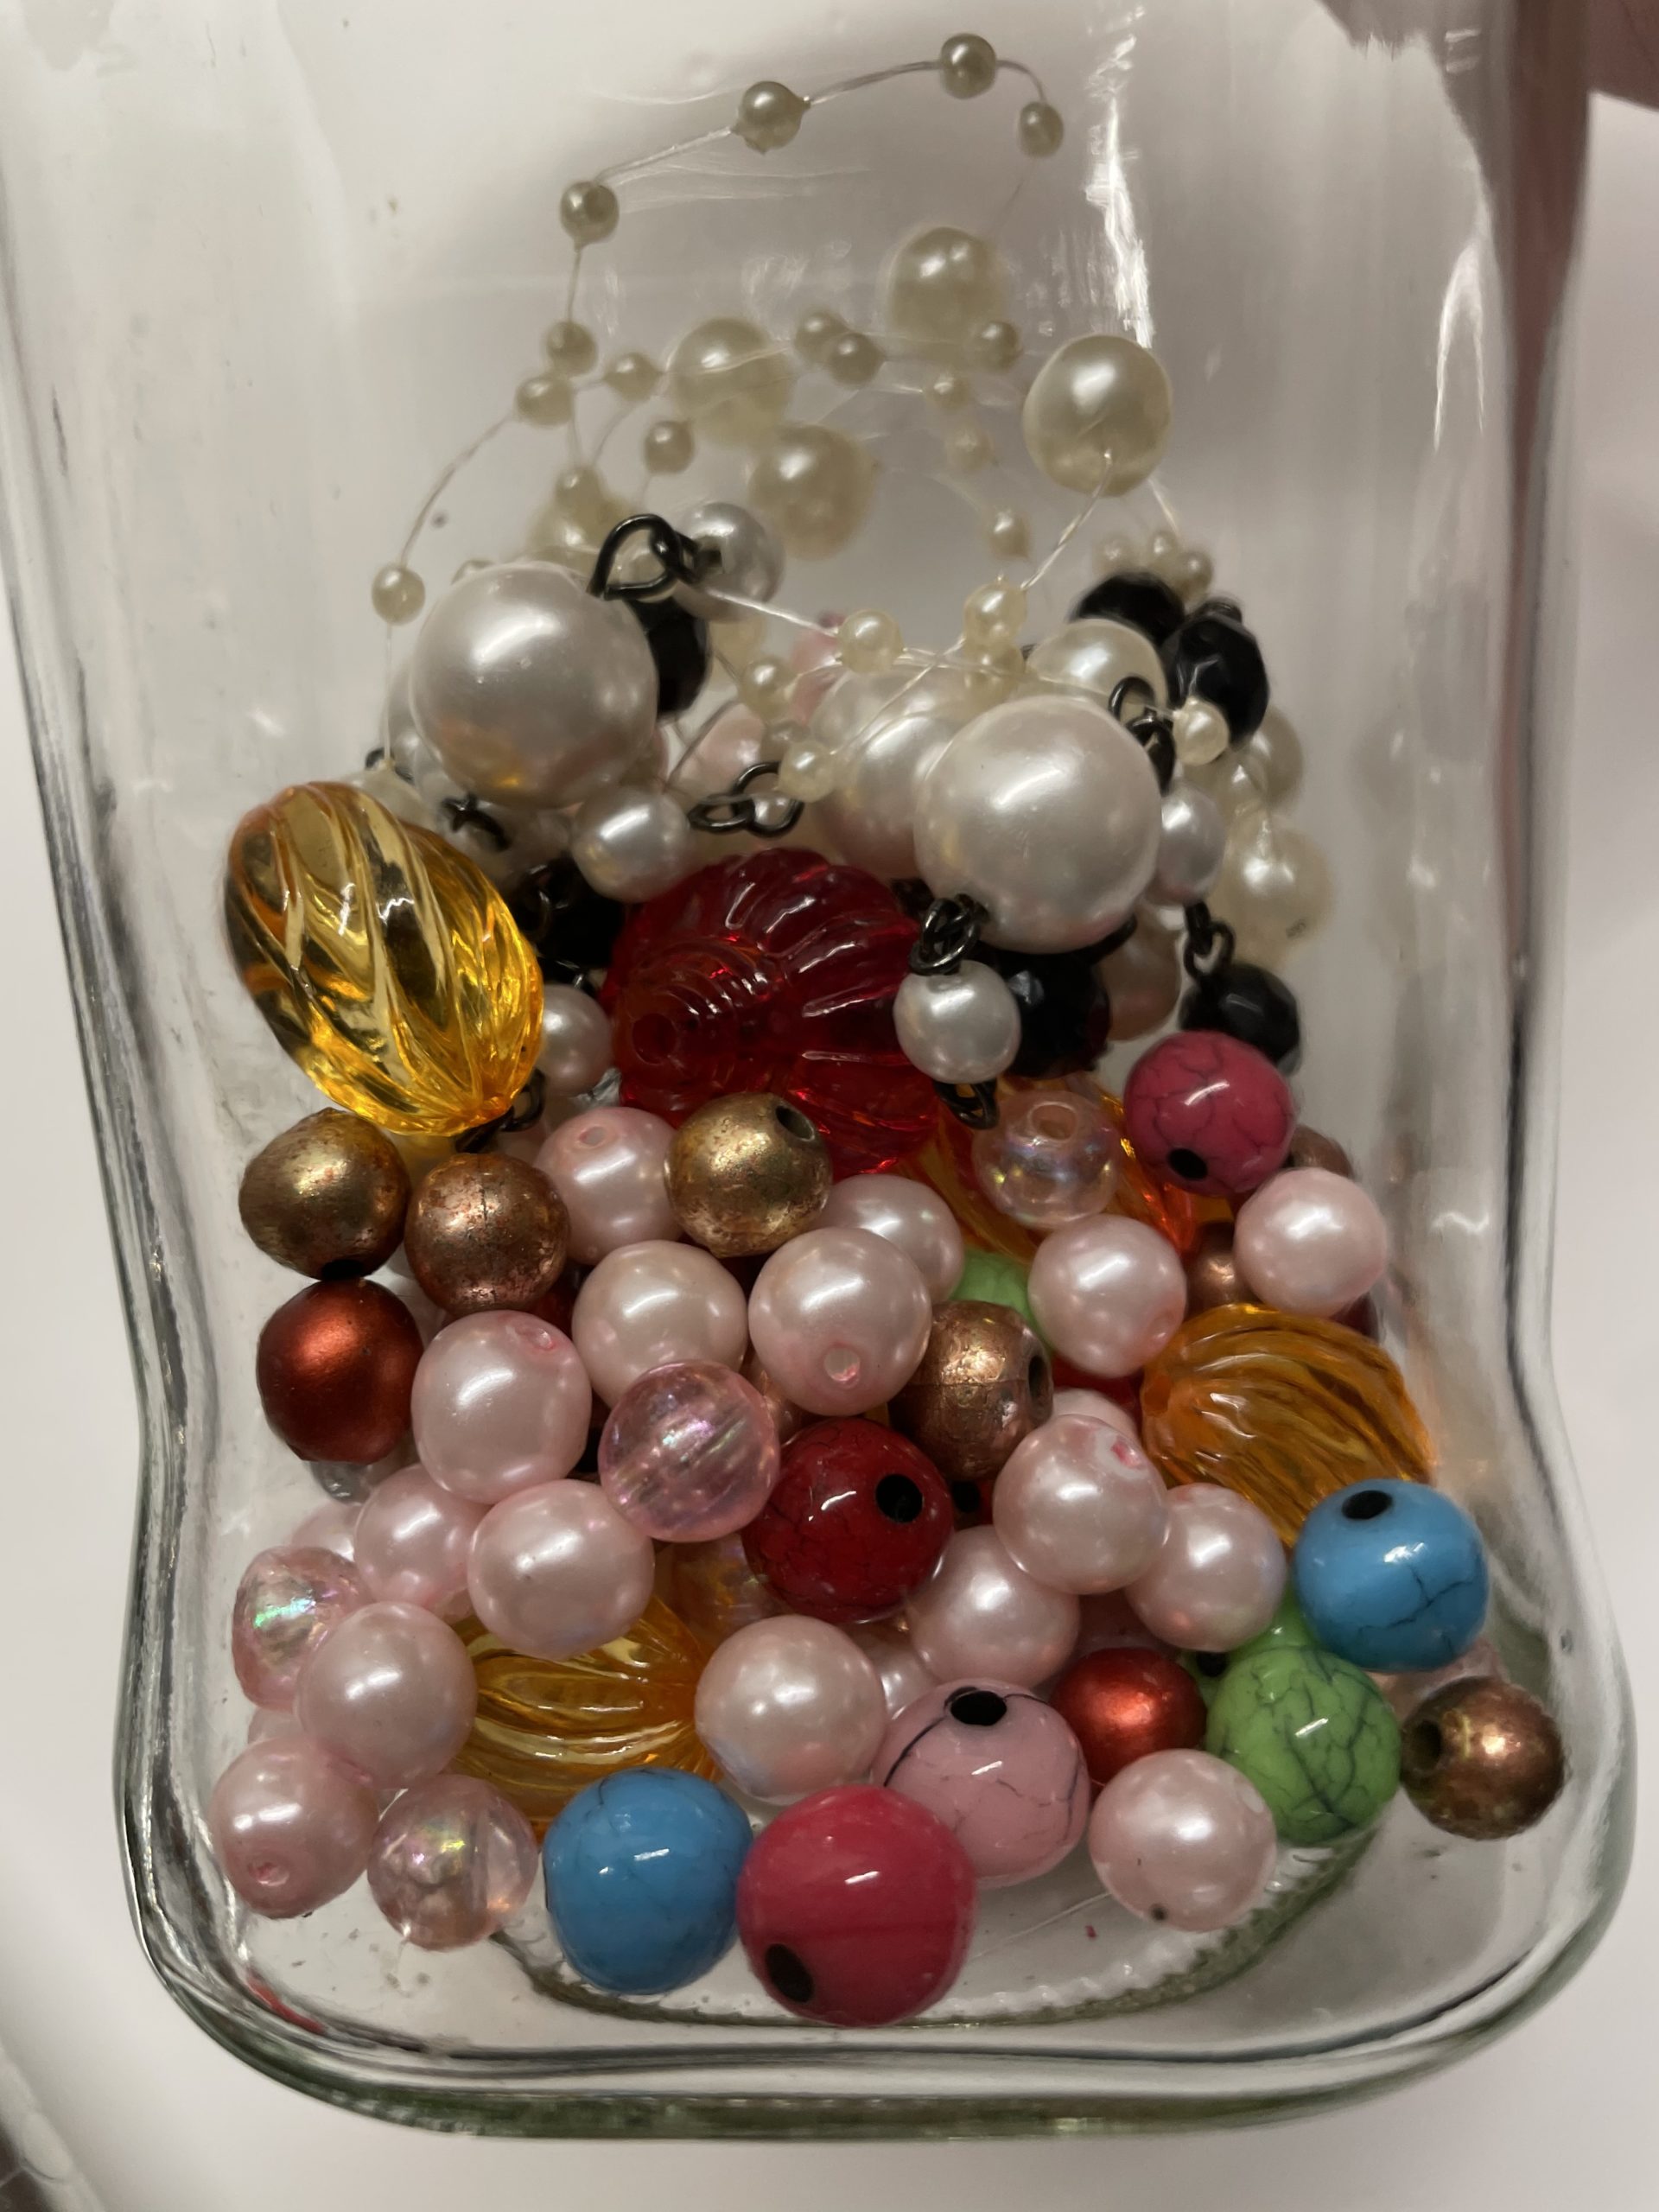
Bild zum Schritt 21 für das Bastel- und DIY-Abenteuer für Kinder: 'Schön sehen auch Perlen im Netz aus.'

22

Decorate the thread net with different snow crystals, beads, feathers and balls. Decorate it as you like it and use what you have at home.
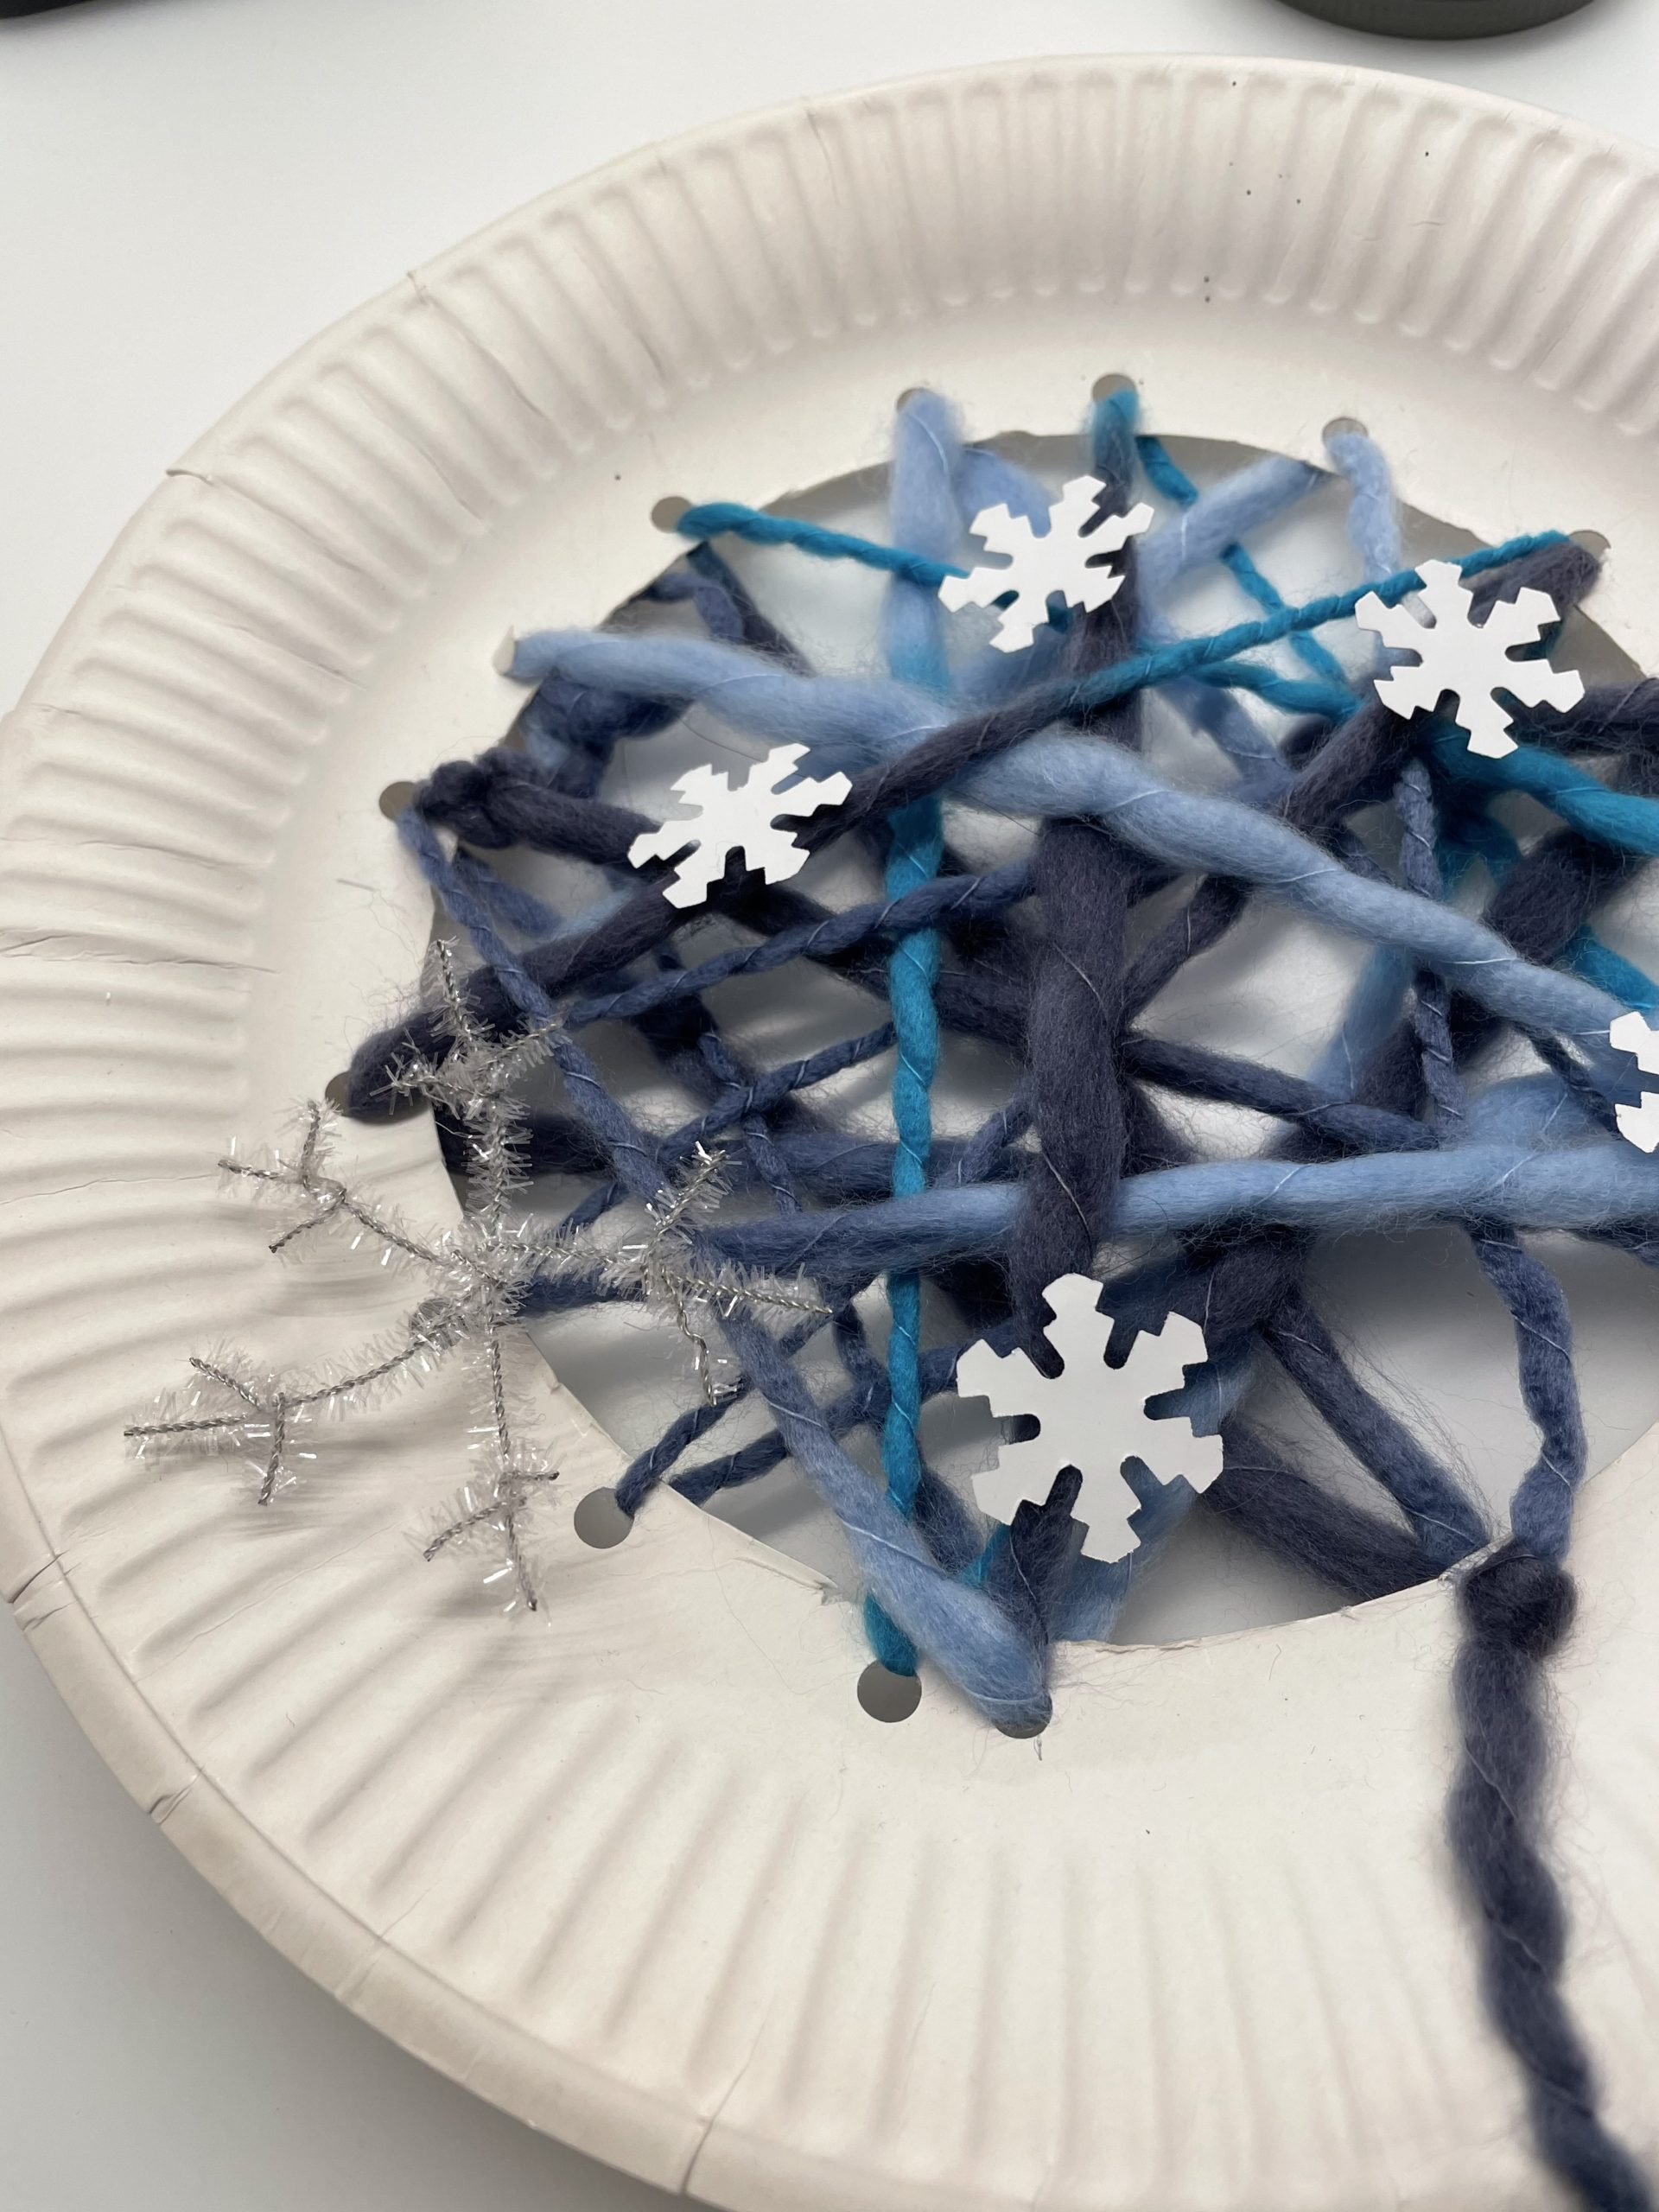
Bild zum Schritt 22 für das Bastel- und DIY-Abenteuer für Kinder: 'Dekoriert das Fadennetz mit unterschiedlichen Schneekristallen, Perlen, Federn und Kugeln....'

23

Then you make the head of the snowman out of the inner circle of the cardboard plate. For this you first stick the wobble eyes on the head. Alternatively, you simply paint your eyes on.
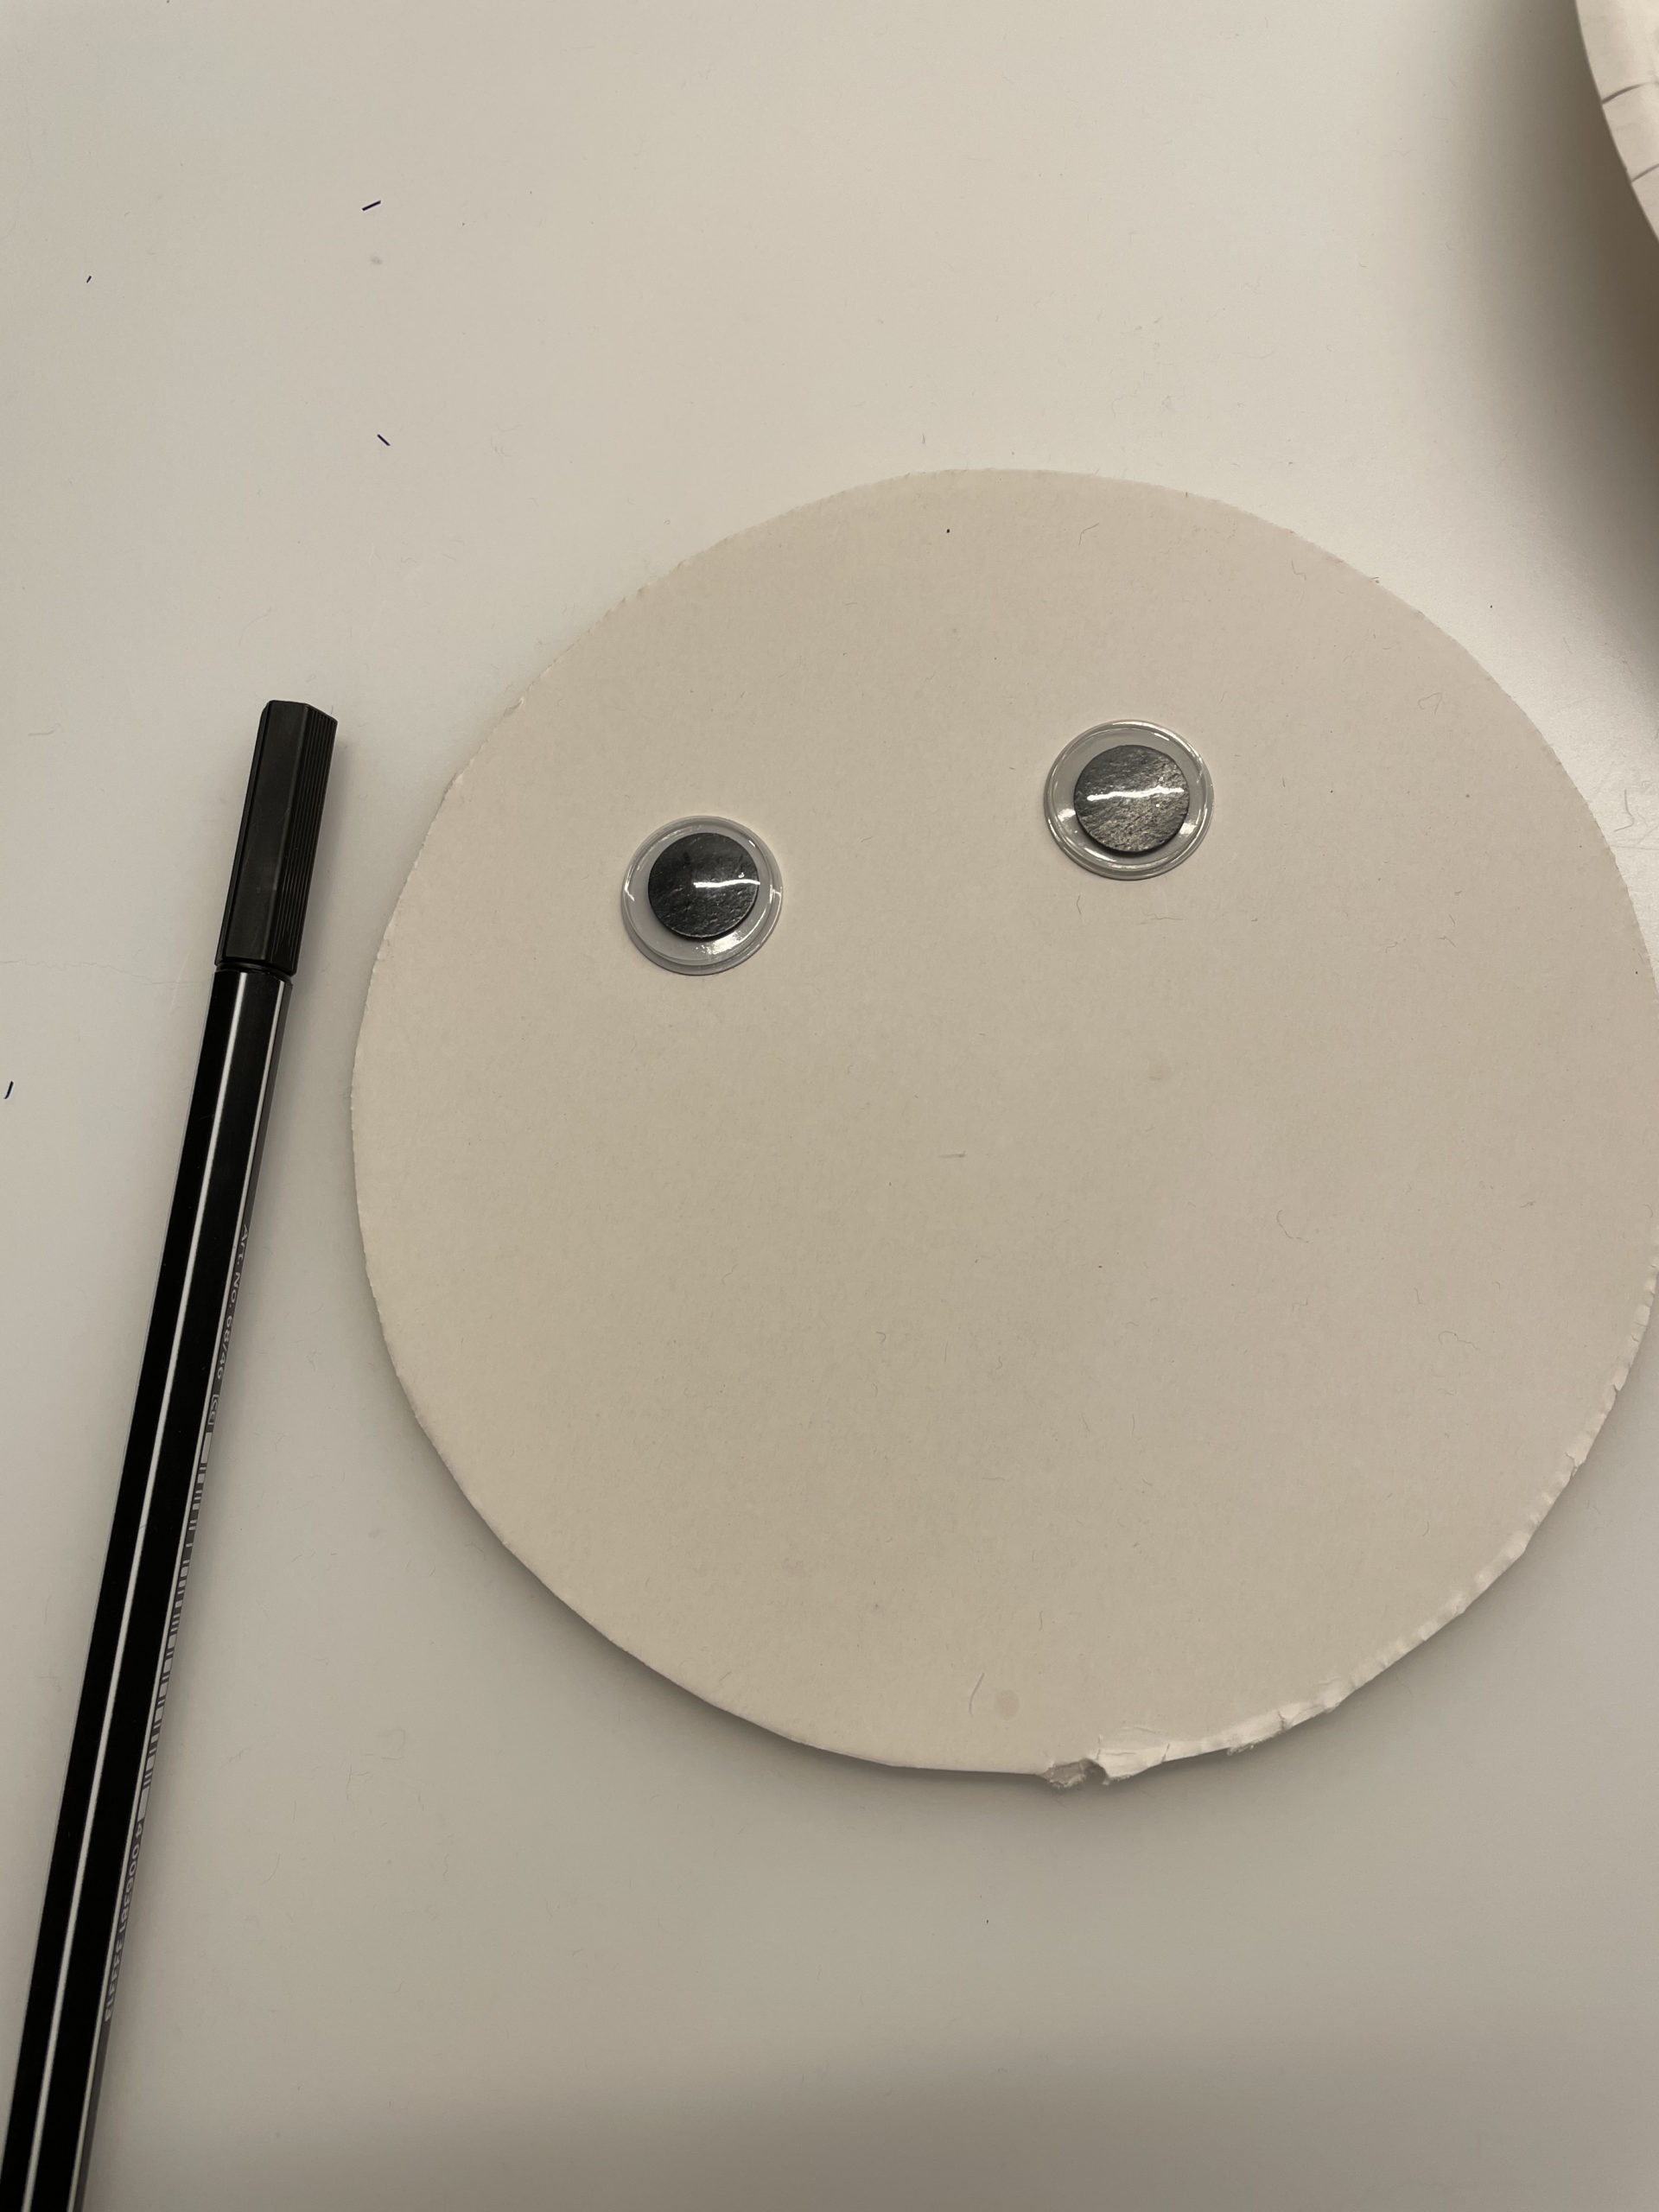
Bild zum Schritt 23 für das Bastel- und DIY-Abenteuer für Kinder: 'Anschließend bastelt ihr aus dem inneren Kreis des Papptellers den...'

24

After that, paint your mouth. Design your face according to your ideas.
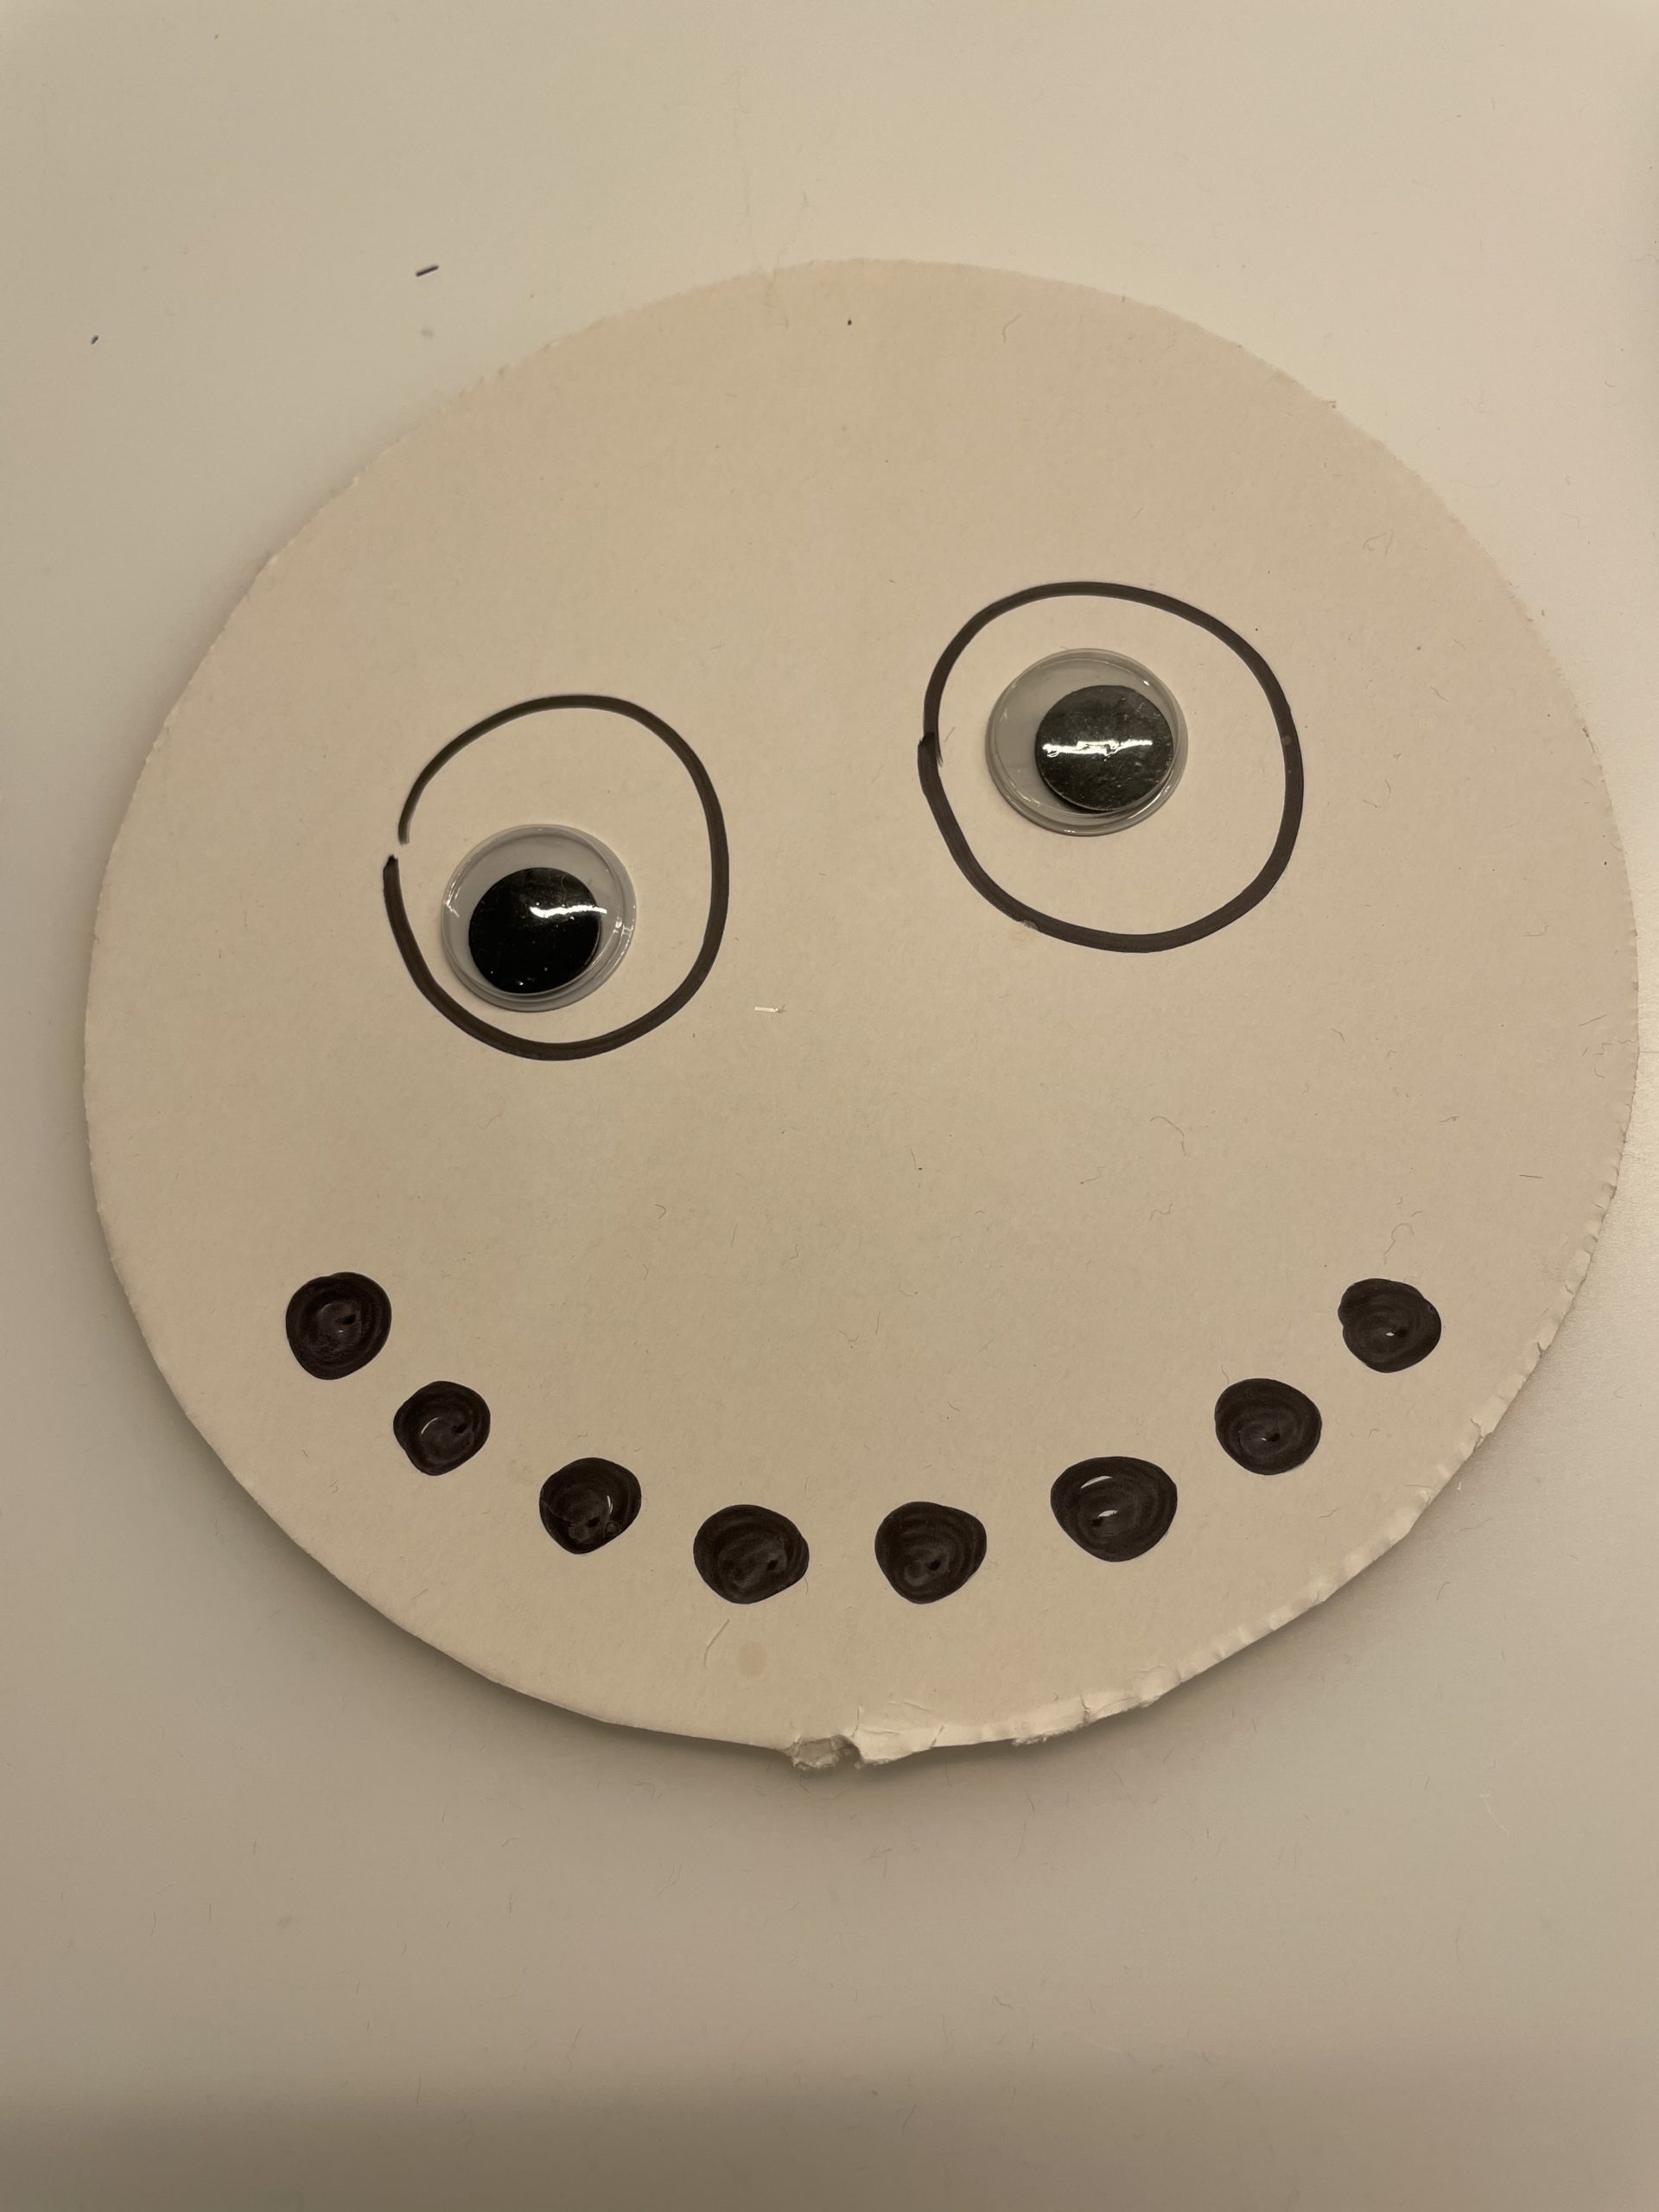
Bild zum Schritt 24 für das Bastel- und DIY-Abenteuer für Kinder: 'Malt danach den Mund. Gestaltet das Gesicht nach euren Vorstellungen.'

25

Then paint another nose and cut it out.
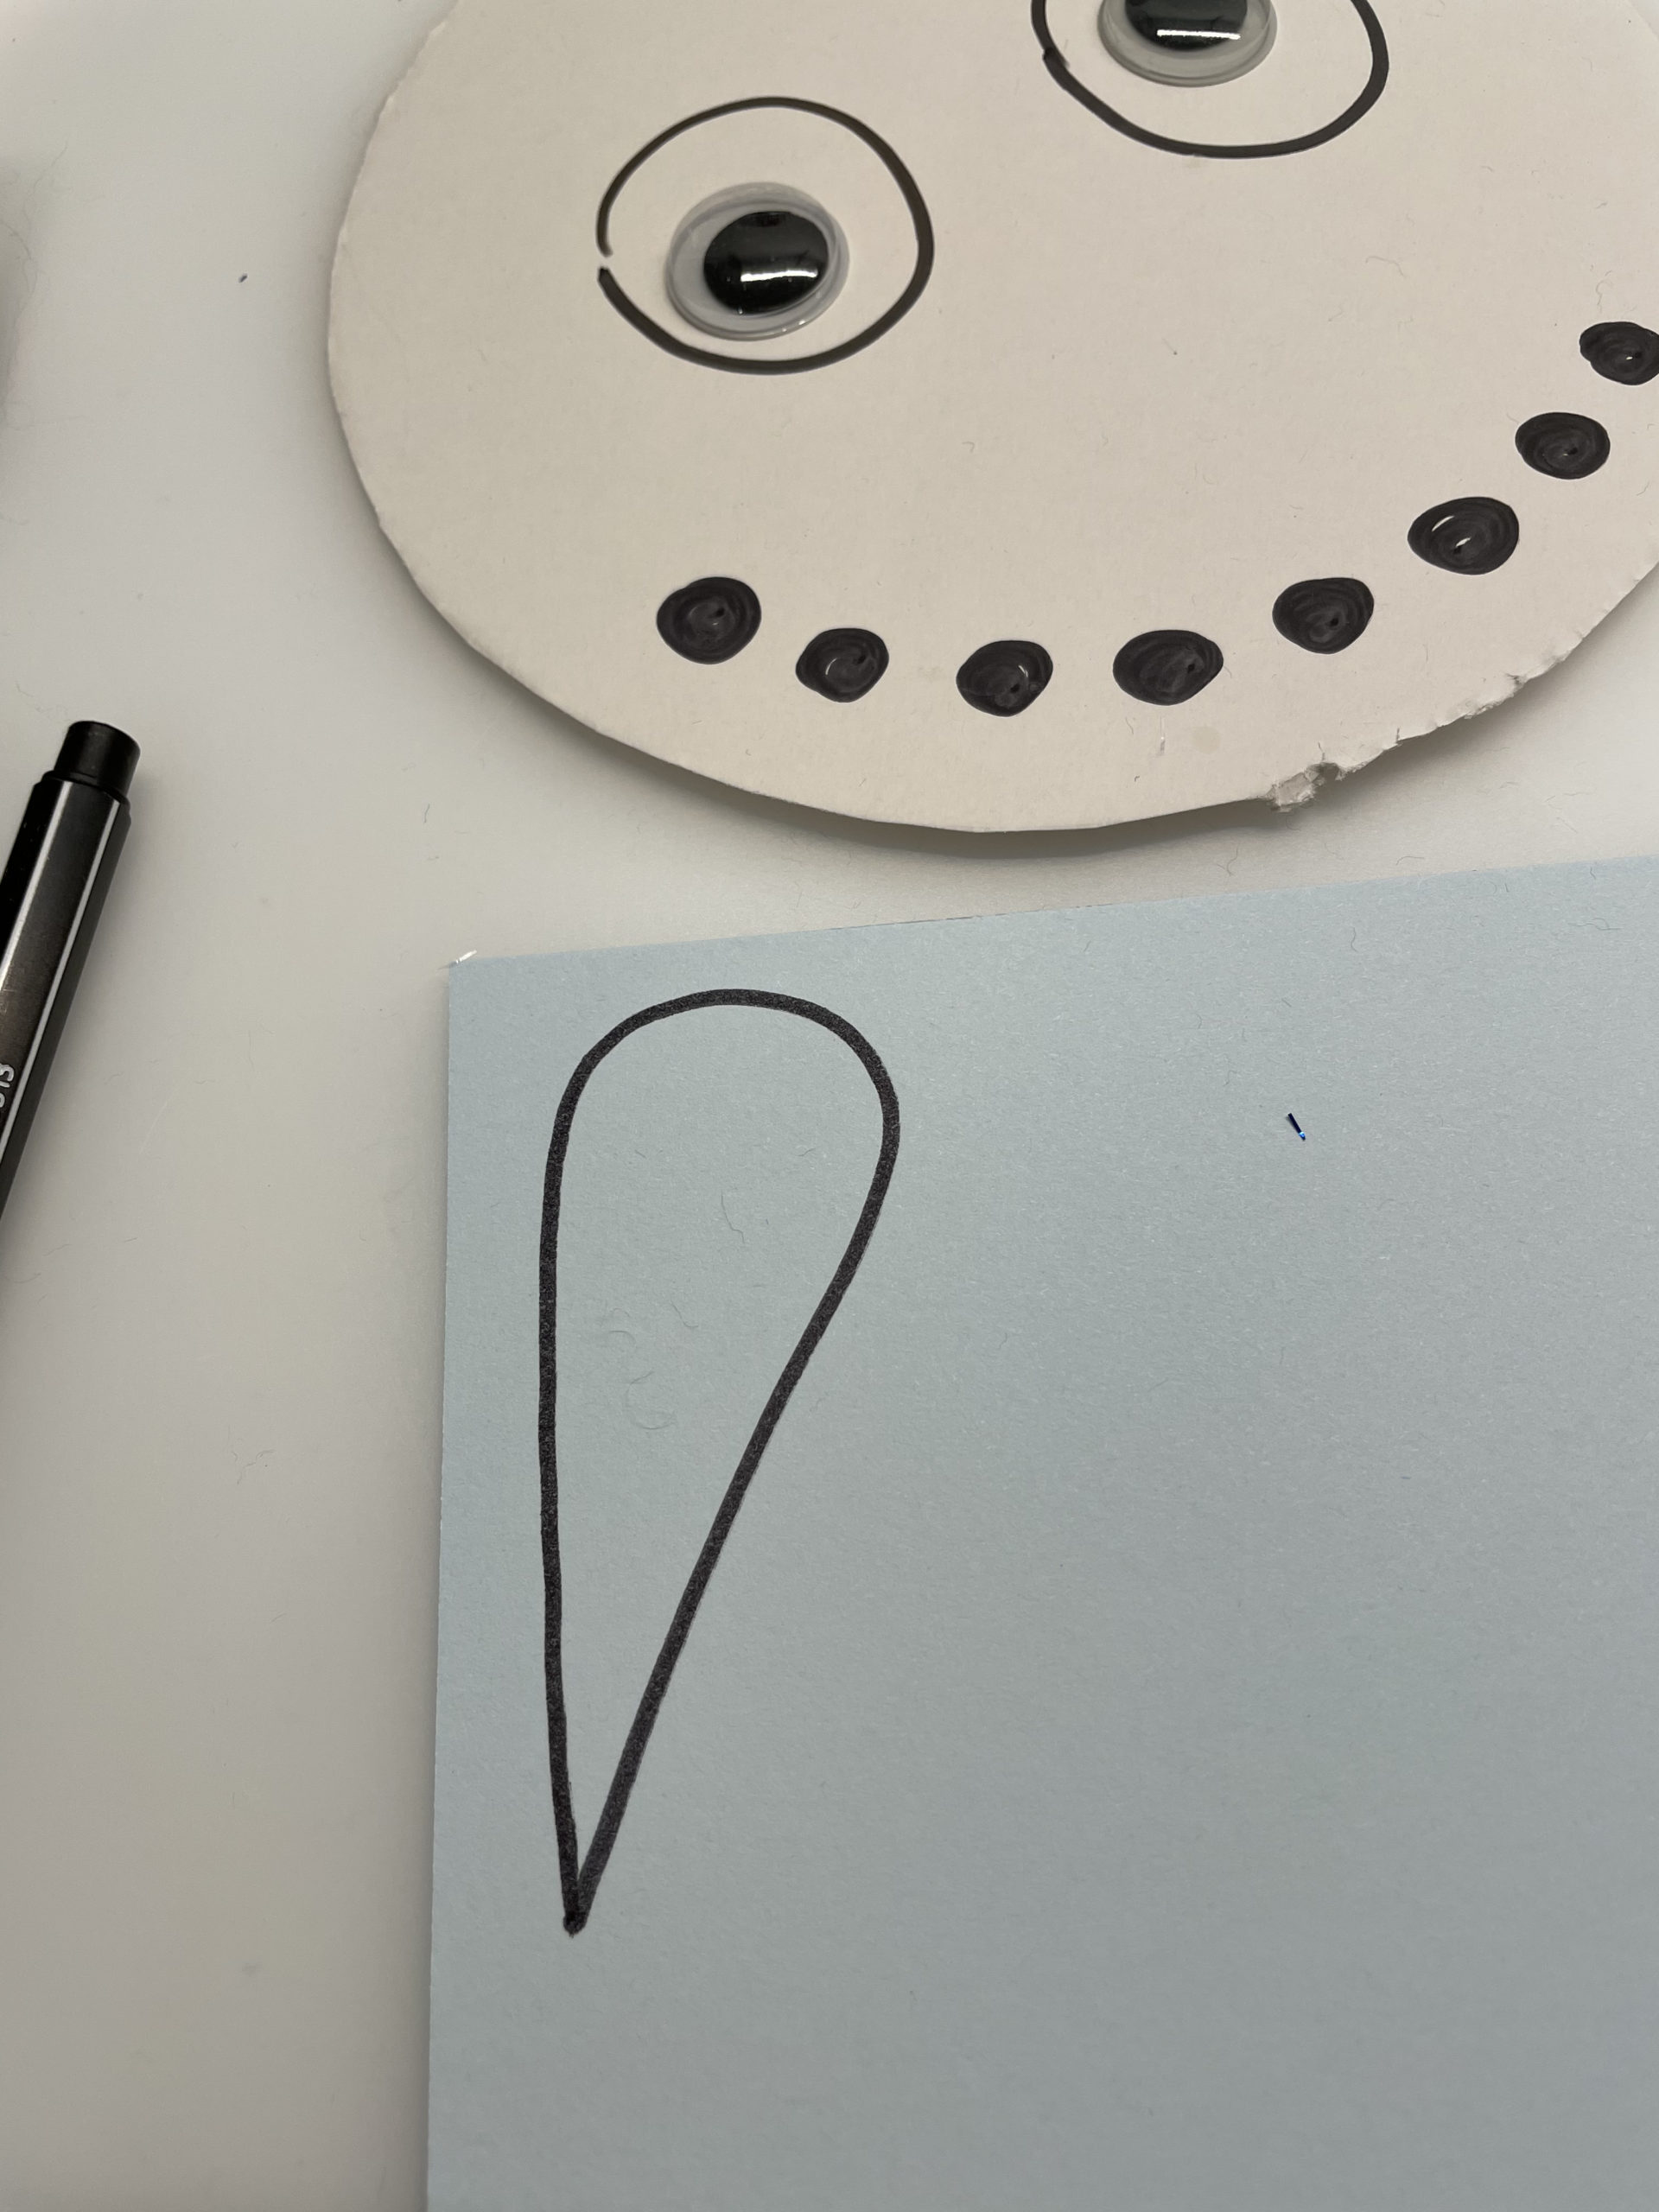
Bild zum Schritt 25 für das Bastel- und DIY-Abenteuer für Kinder: 'Anschließend malt noch eine Nase und schneidet diese aus.'

26

And finally, a cylinder.

Bild zum Schritt 26 für das Bastel- und DIY-Abenteuer für Kinder: 'Und zum Schluss noch einen Zylinder.'

27

Tip: You can also leave your painted edges standing when cutting out. This also looks very good.
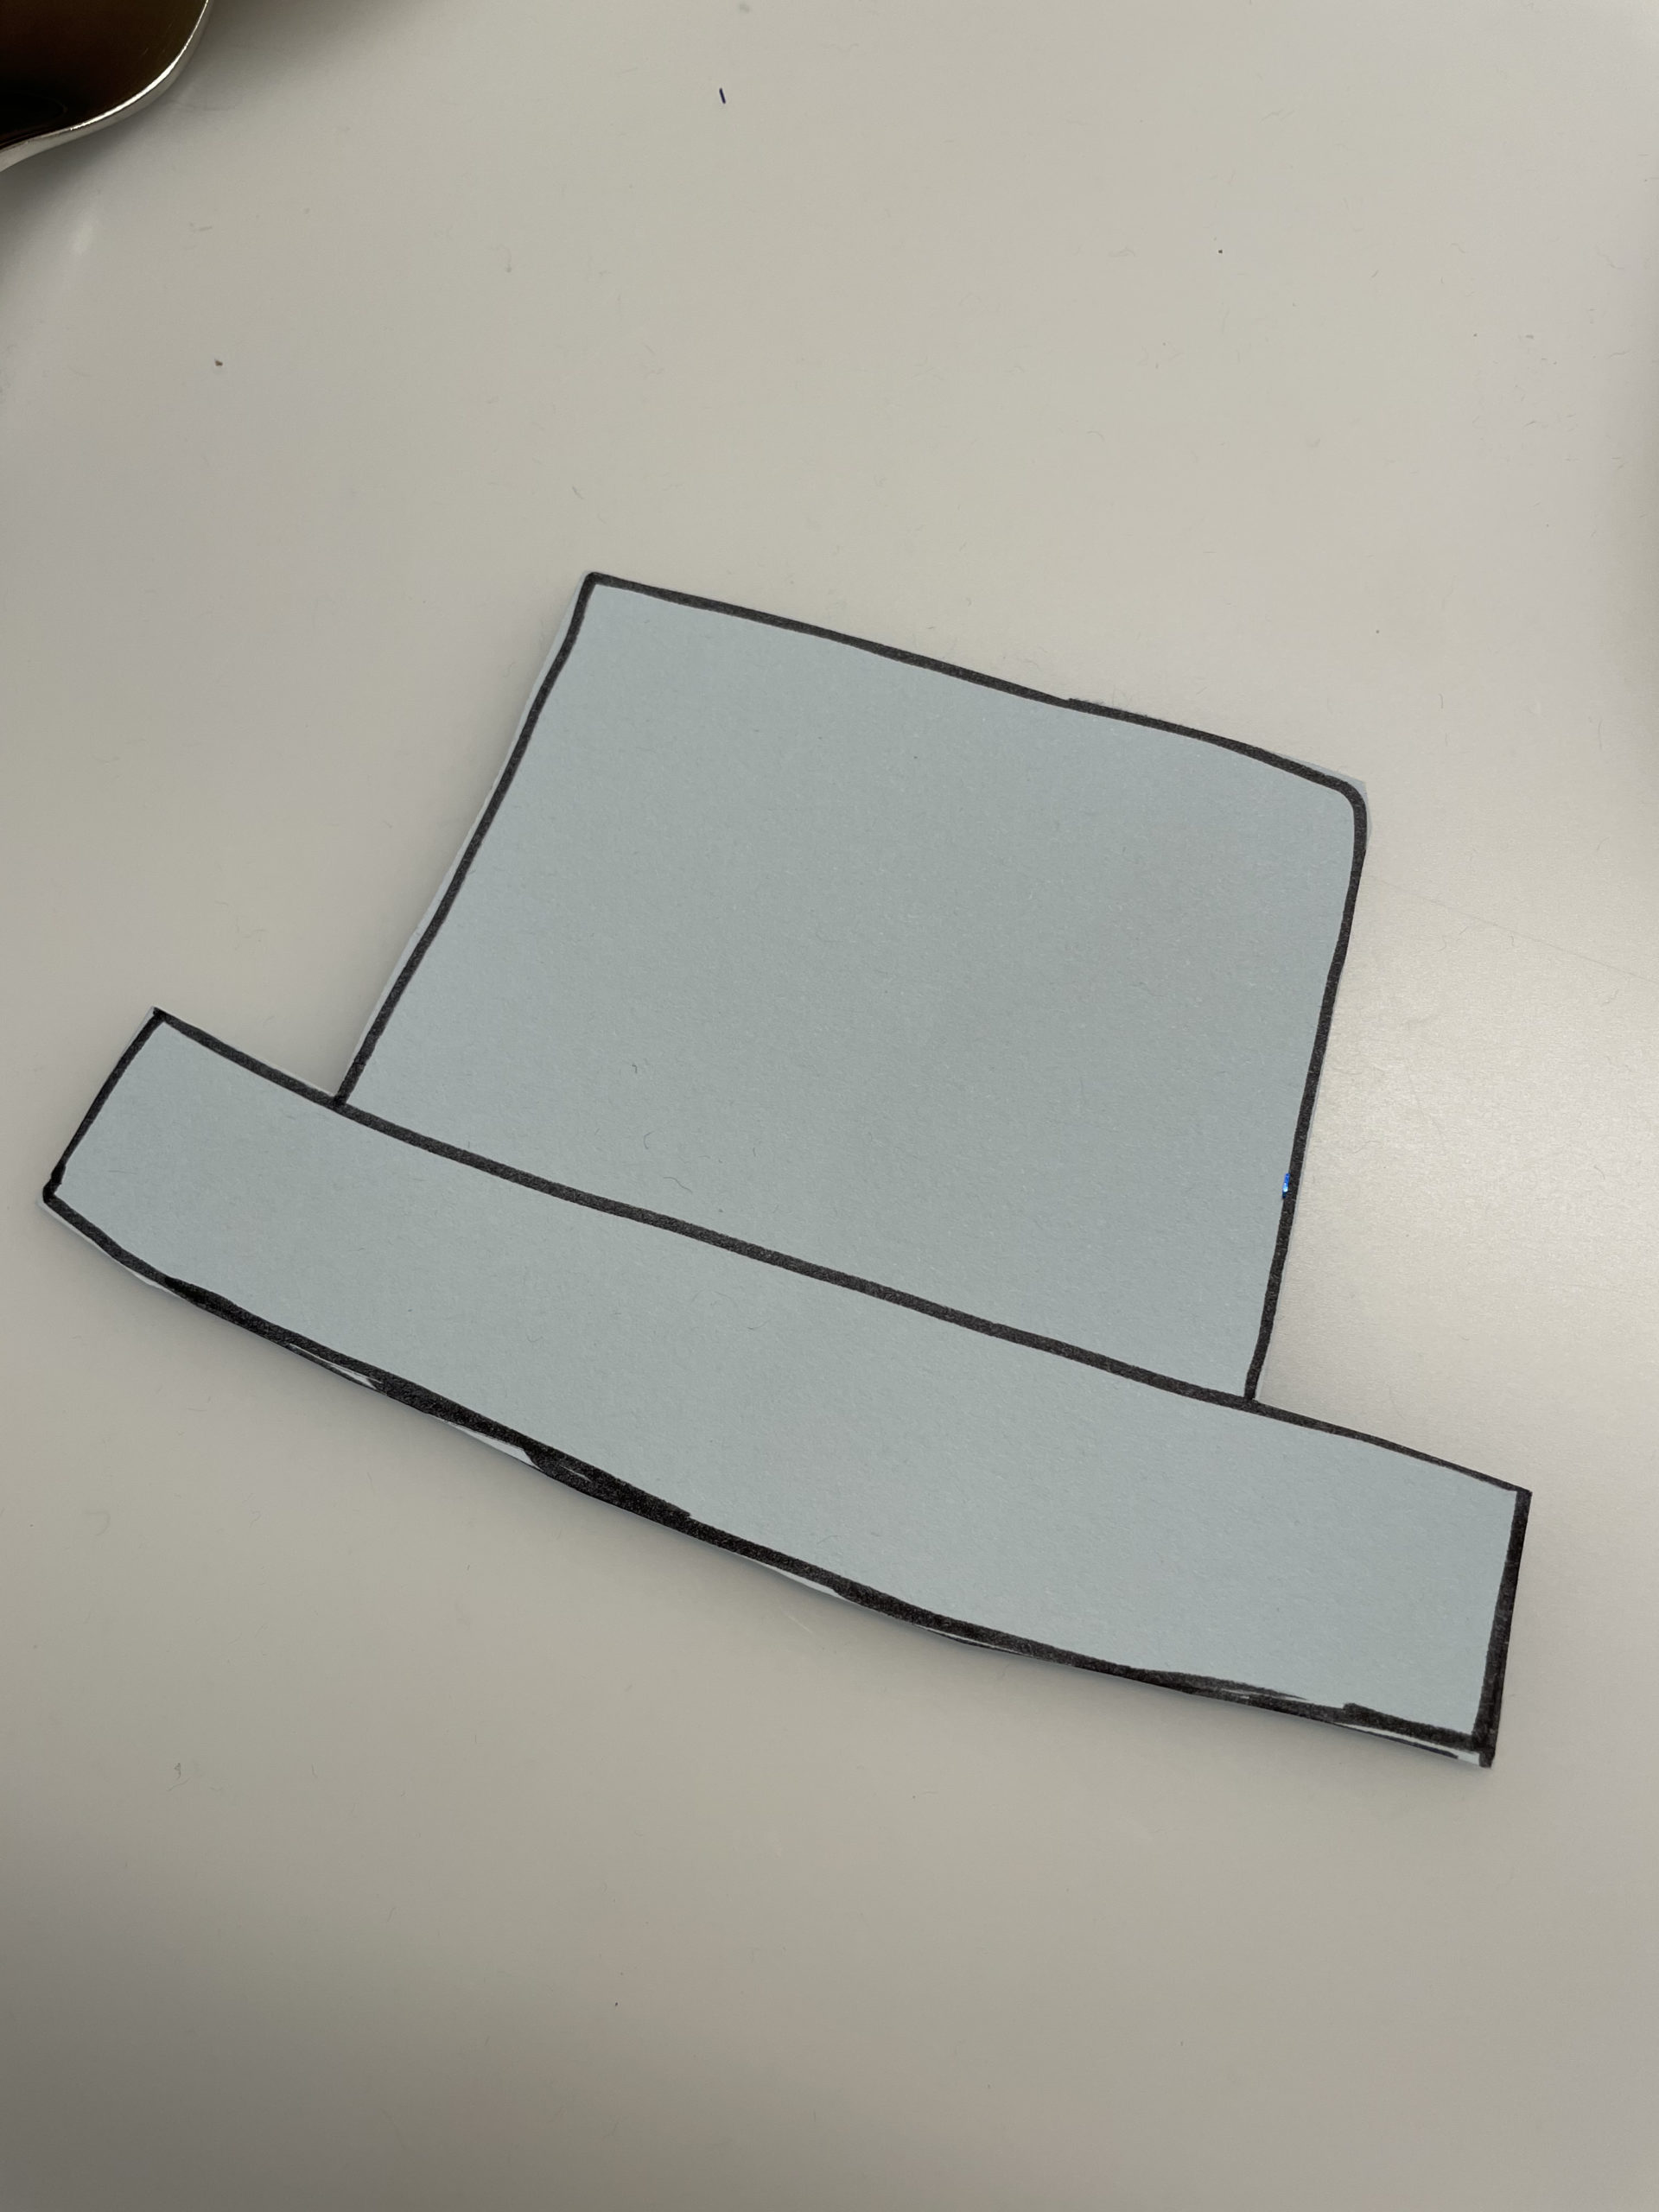
Bild zum Schritt 27 für das Bastel- und DIY-Abenteuer für Kinder: 'Tipp: Ihr könnt eure gemalten Ränder beim Ausschneiden auch stehen...'

28

On top of the brim you can glue the hat with a piece of wool thread. For this, you will brush a strip with glue.
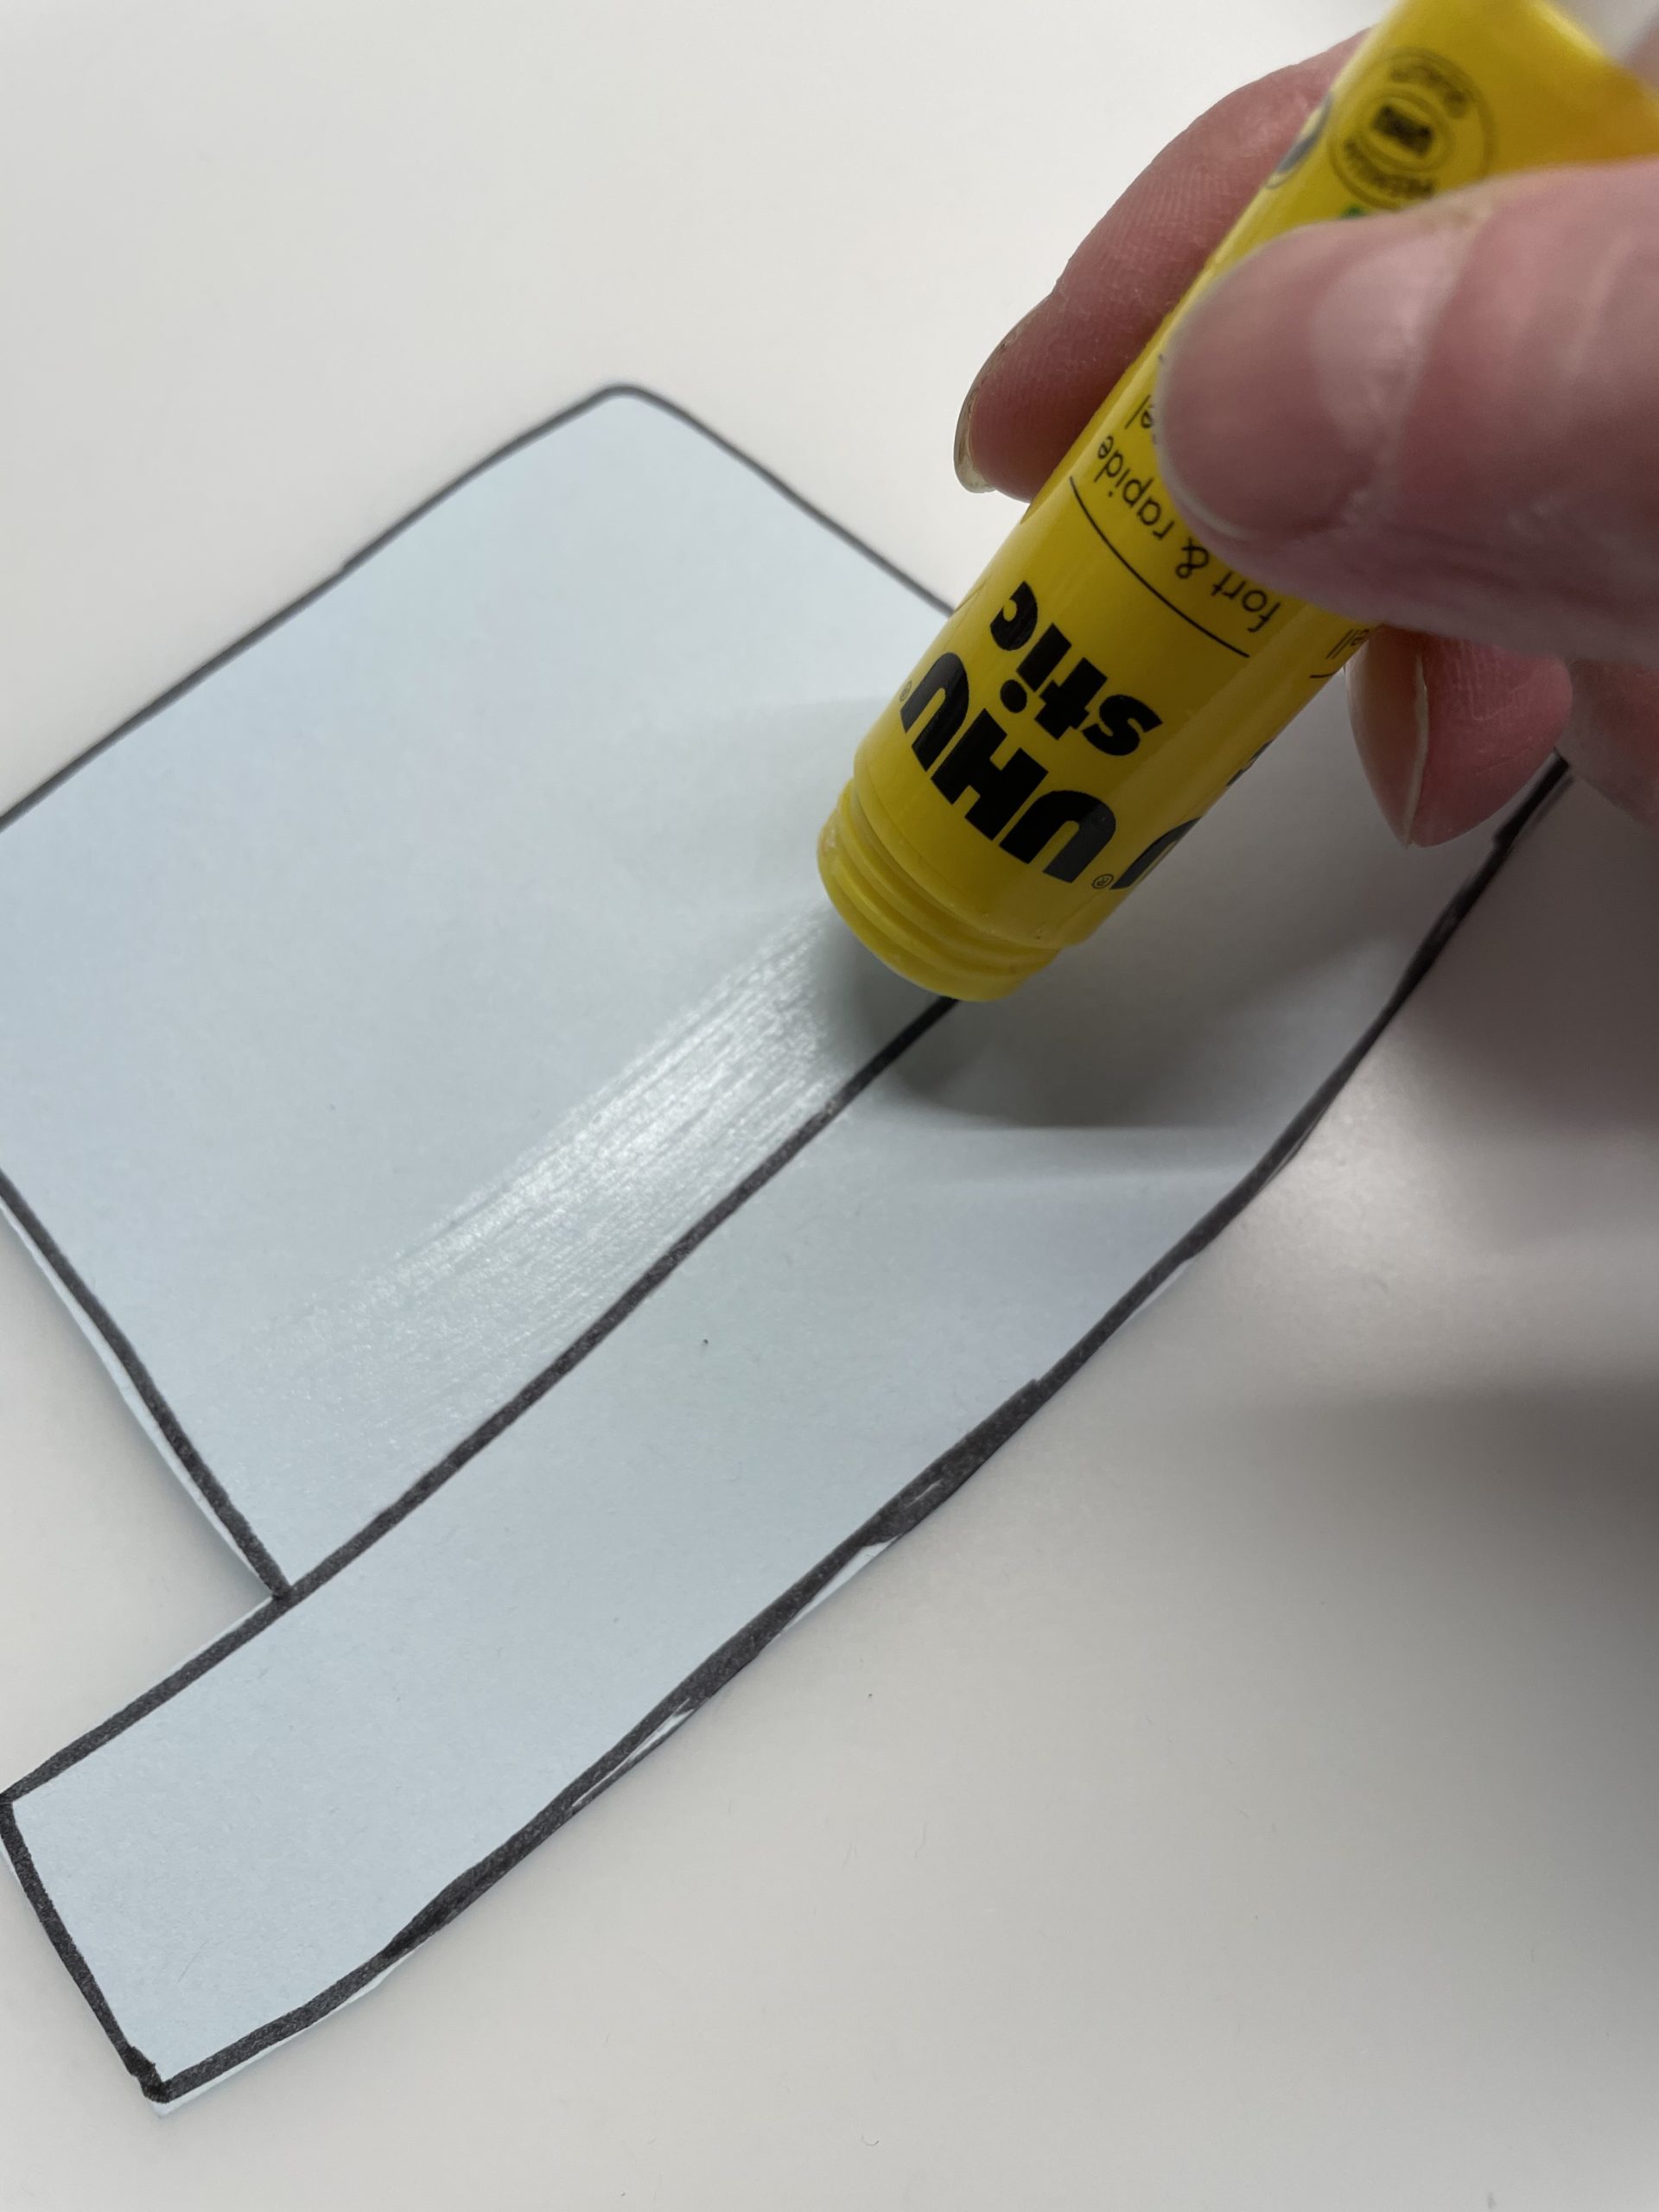
Bild zum Schritt 28 für das Bastel- und DIY-Abenteuer für Kinder: 'Oberhalb der Krempe könnt ihr den Hut mit einem Stück...'

29

Now you stick the beginning of the thread to it and wrap the thread around the hat several times along the adhesive strip.
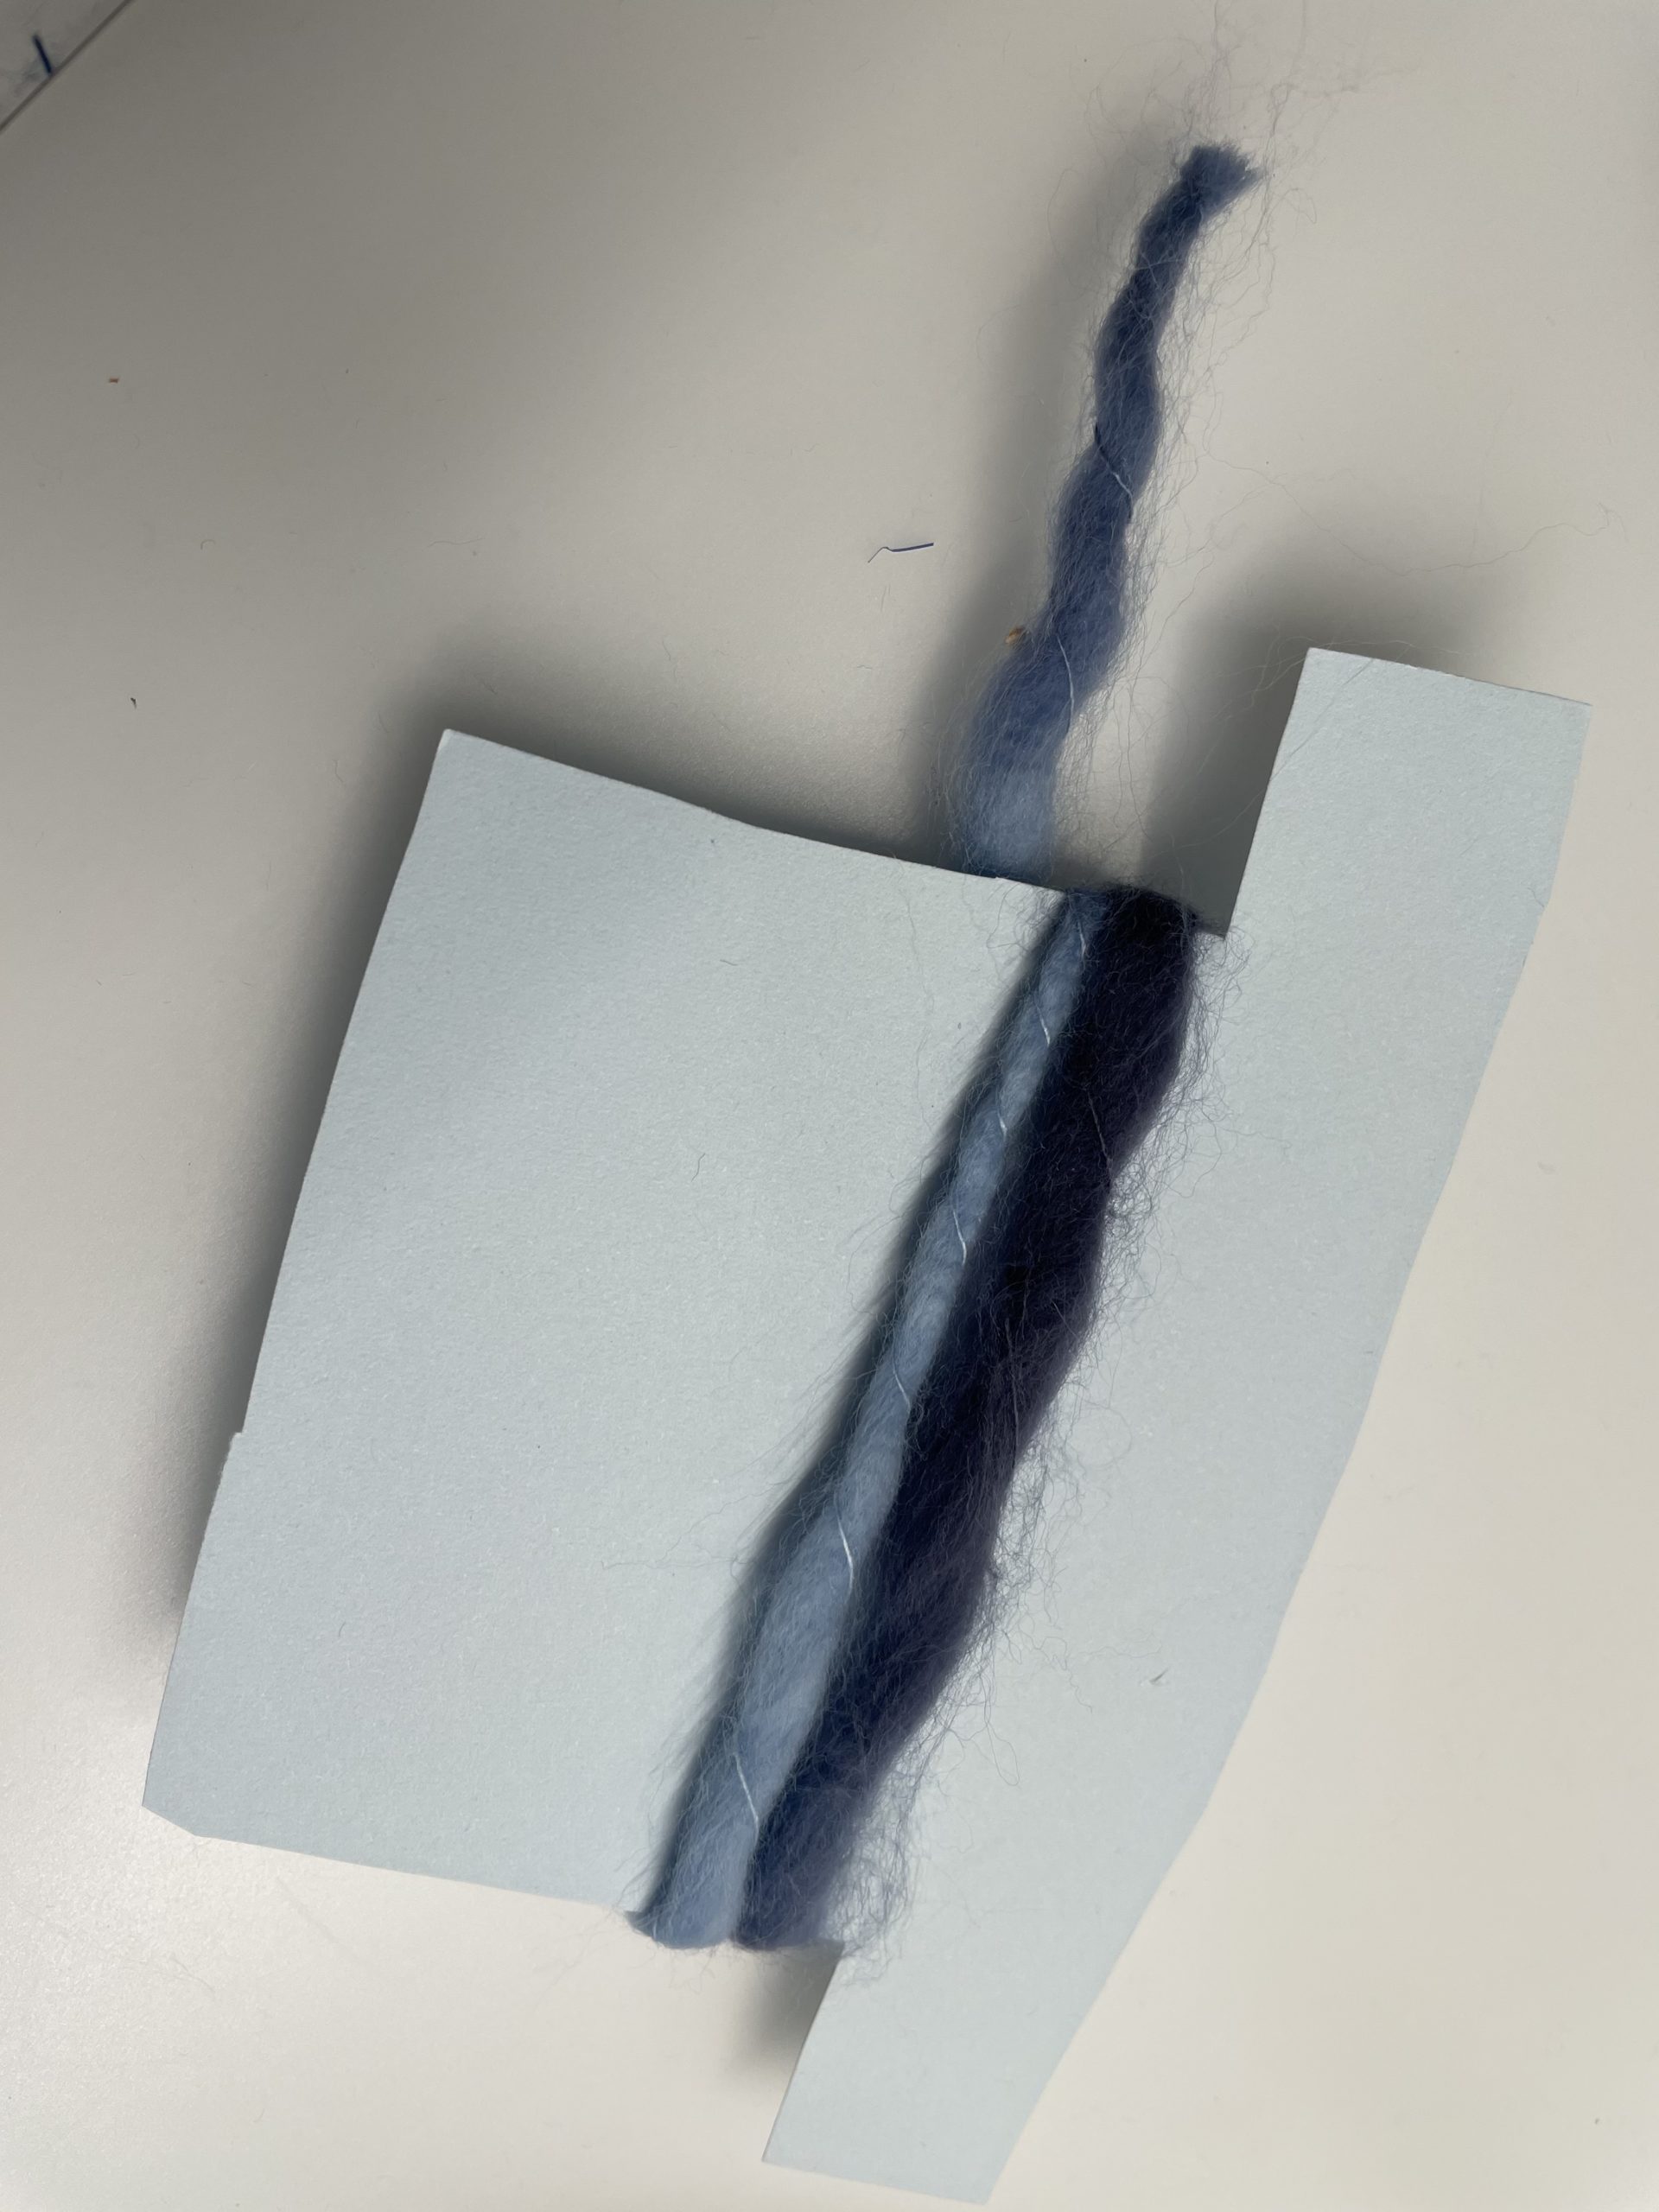
Bild zum Schritt 29 für das Bastel- und DIY-Abenteuer für Kinder: 'Daran klebt ihr nun den Fadenanfang fest und wickelt den...'

30

Then cut off the thread and stick the tailpiece to the back.

Bild zum Schritt 30 für das Bastel- und DIY-Abenteuer für Kinder: 'Schneidet anschließend den Faden ab und klebt das Endstück auf...'

31

2. Bild zum Schritt 30 für das Bastel- und DIY-Abenteuer für Kinder: 'Schneidet anschließend den Faden ab und klebt das Endstück auf...'

32

3. Bild zum Schritt 31 für das Bastel- und DIY-Abenteuer für Kinder: 'Schneidet anschließend den Faden ab und klebt das Endstück auf...'

33

Now embellish the hat with snow crystals, for example.
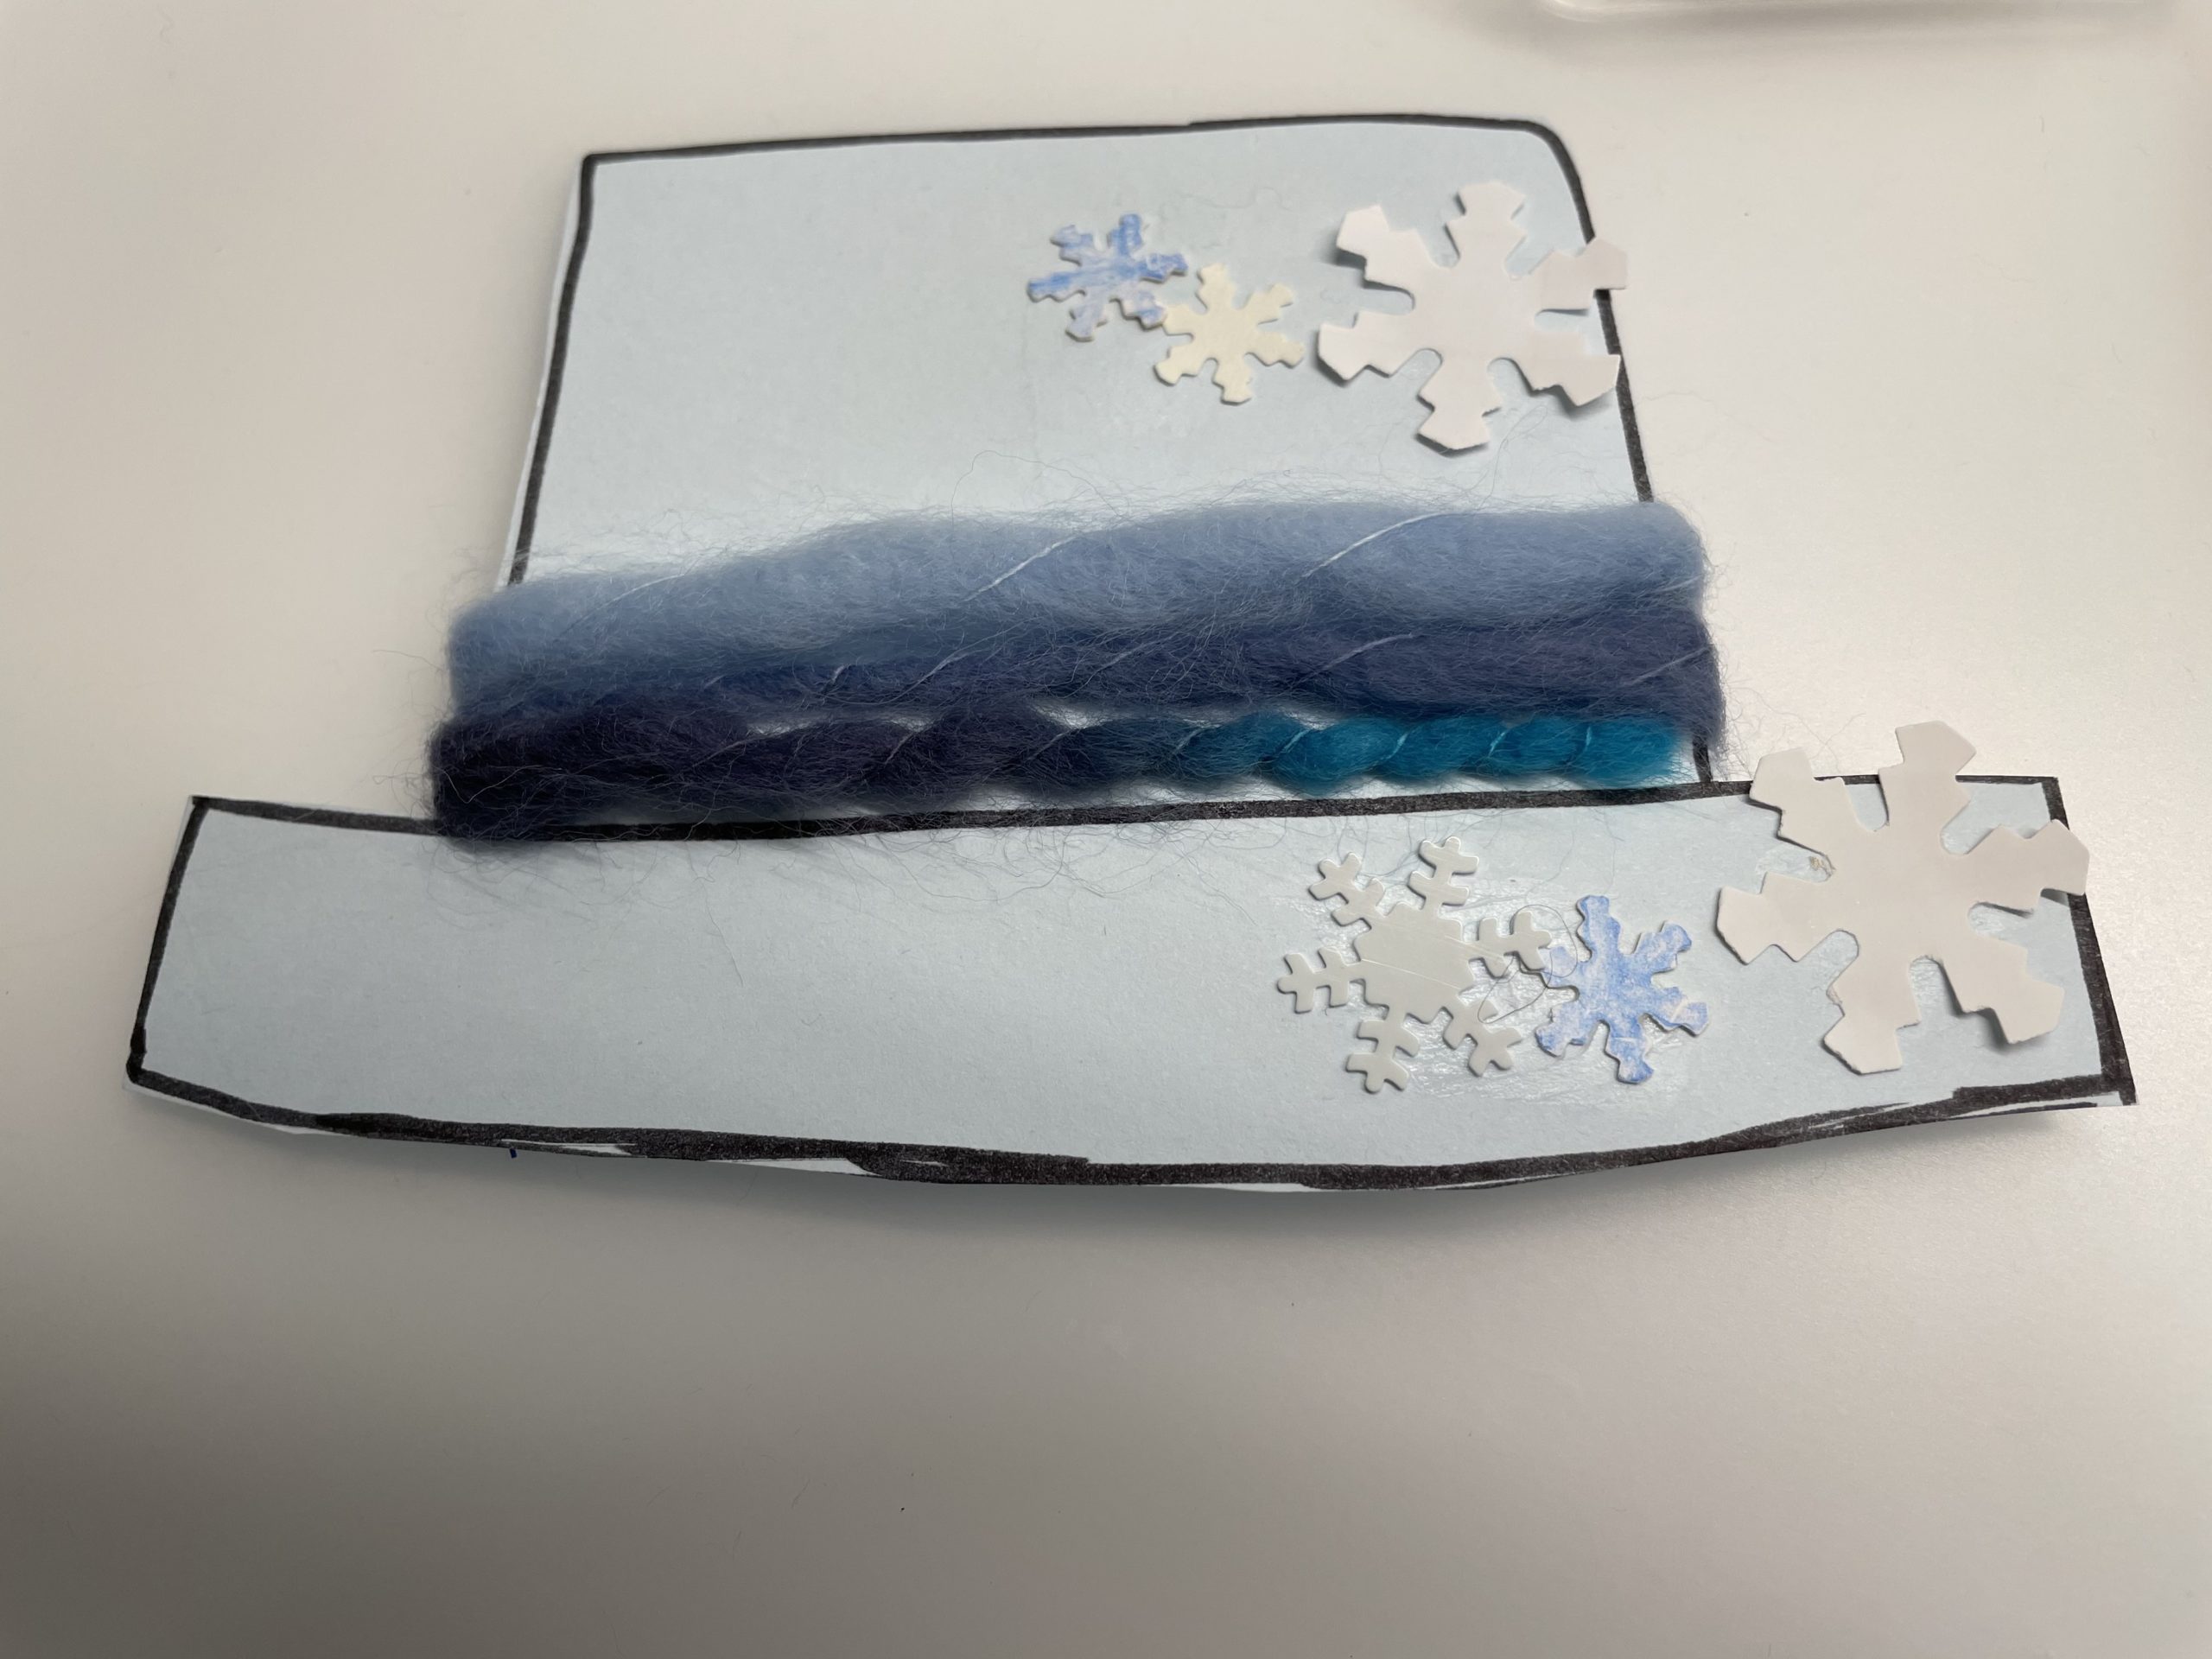
Bild zum Schritt 33 für das Bastel- und DIY-Abenteuer für Kinder: 'Verschönert nun den Hut zum Beispiel mit Schneekristallen.'

34

Afterwards, she sticks her hat on the head of the snowman.
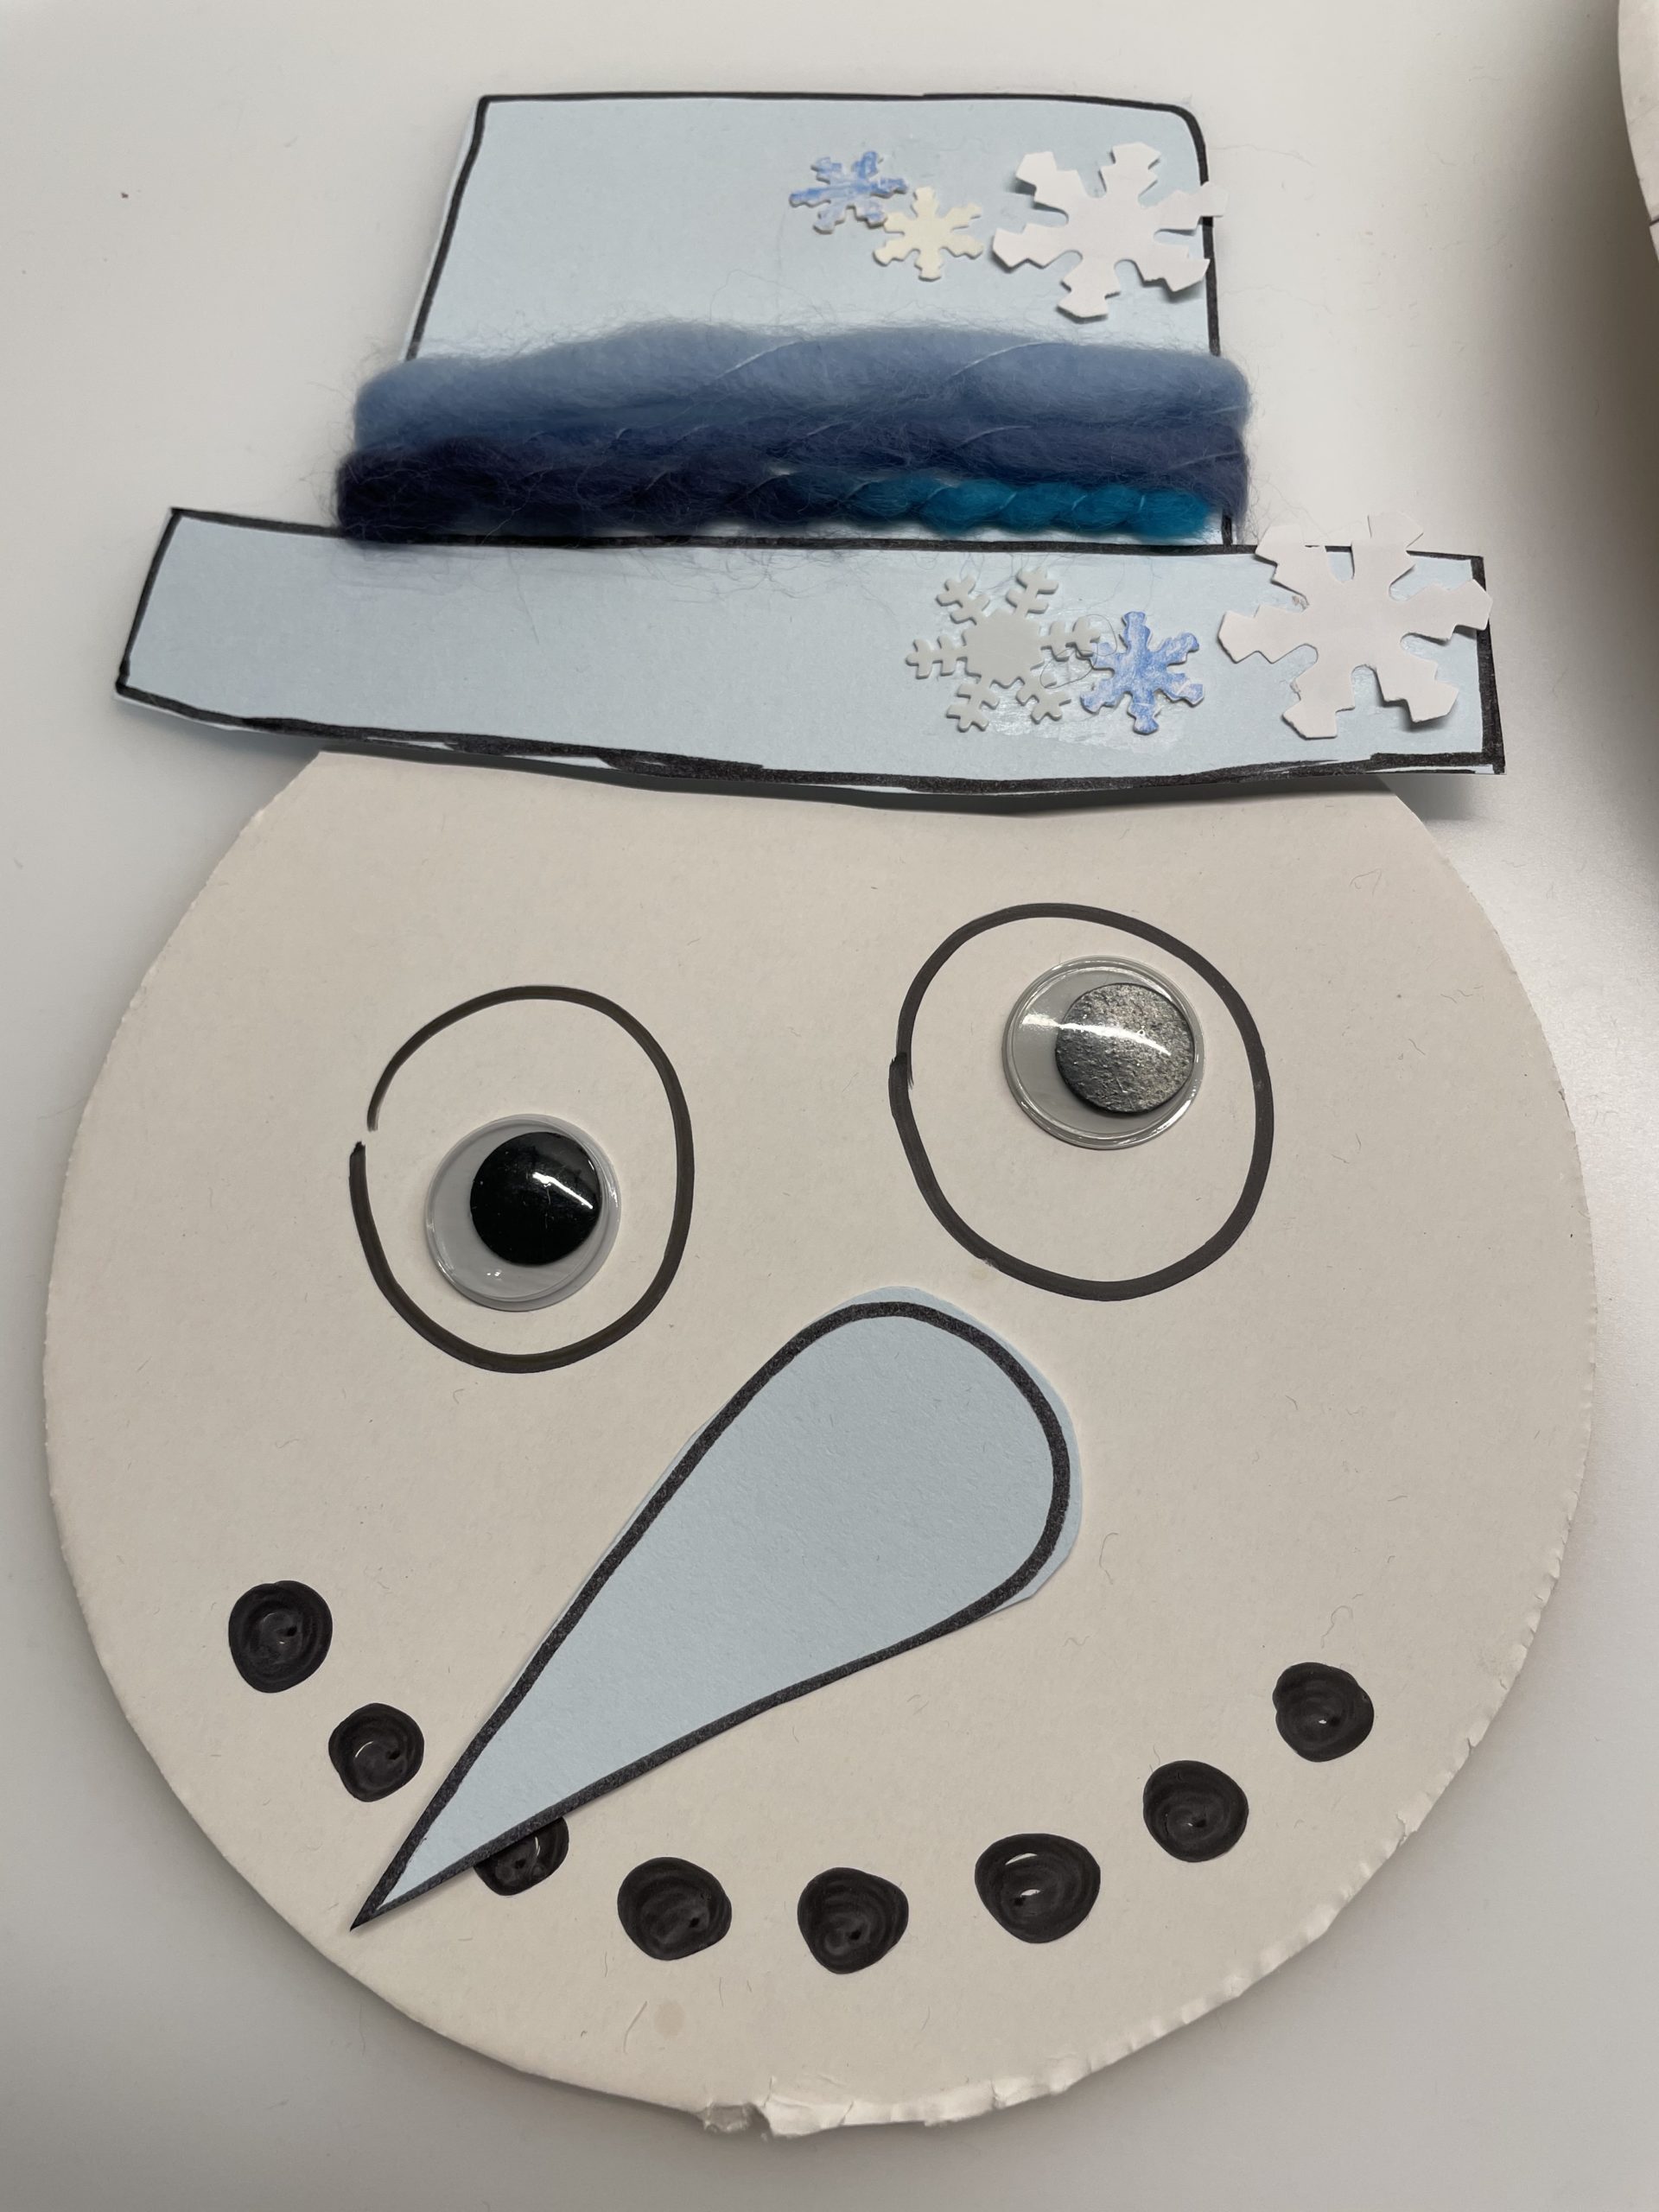
Bild zum Schritt 34 für das Bastel- und DIY-Abenteuer für Kinder: 'Anschließend klebt ihr den Hut auf den Kopf des Schneemannes.'

35

2. Bild zum Schritt 34 für das Bastel- und DIY-Abenteuer für Kinder: 'Anschließend klebt ihr den Hut auf den Kopf des Schneemannes.'

36

Paint up two arms and cut them out. Leave the painted line here, too.
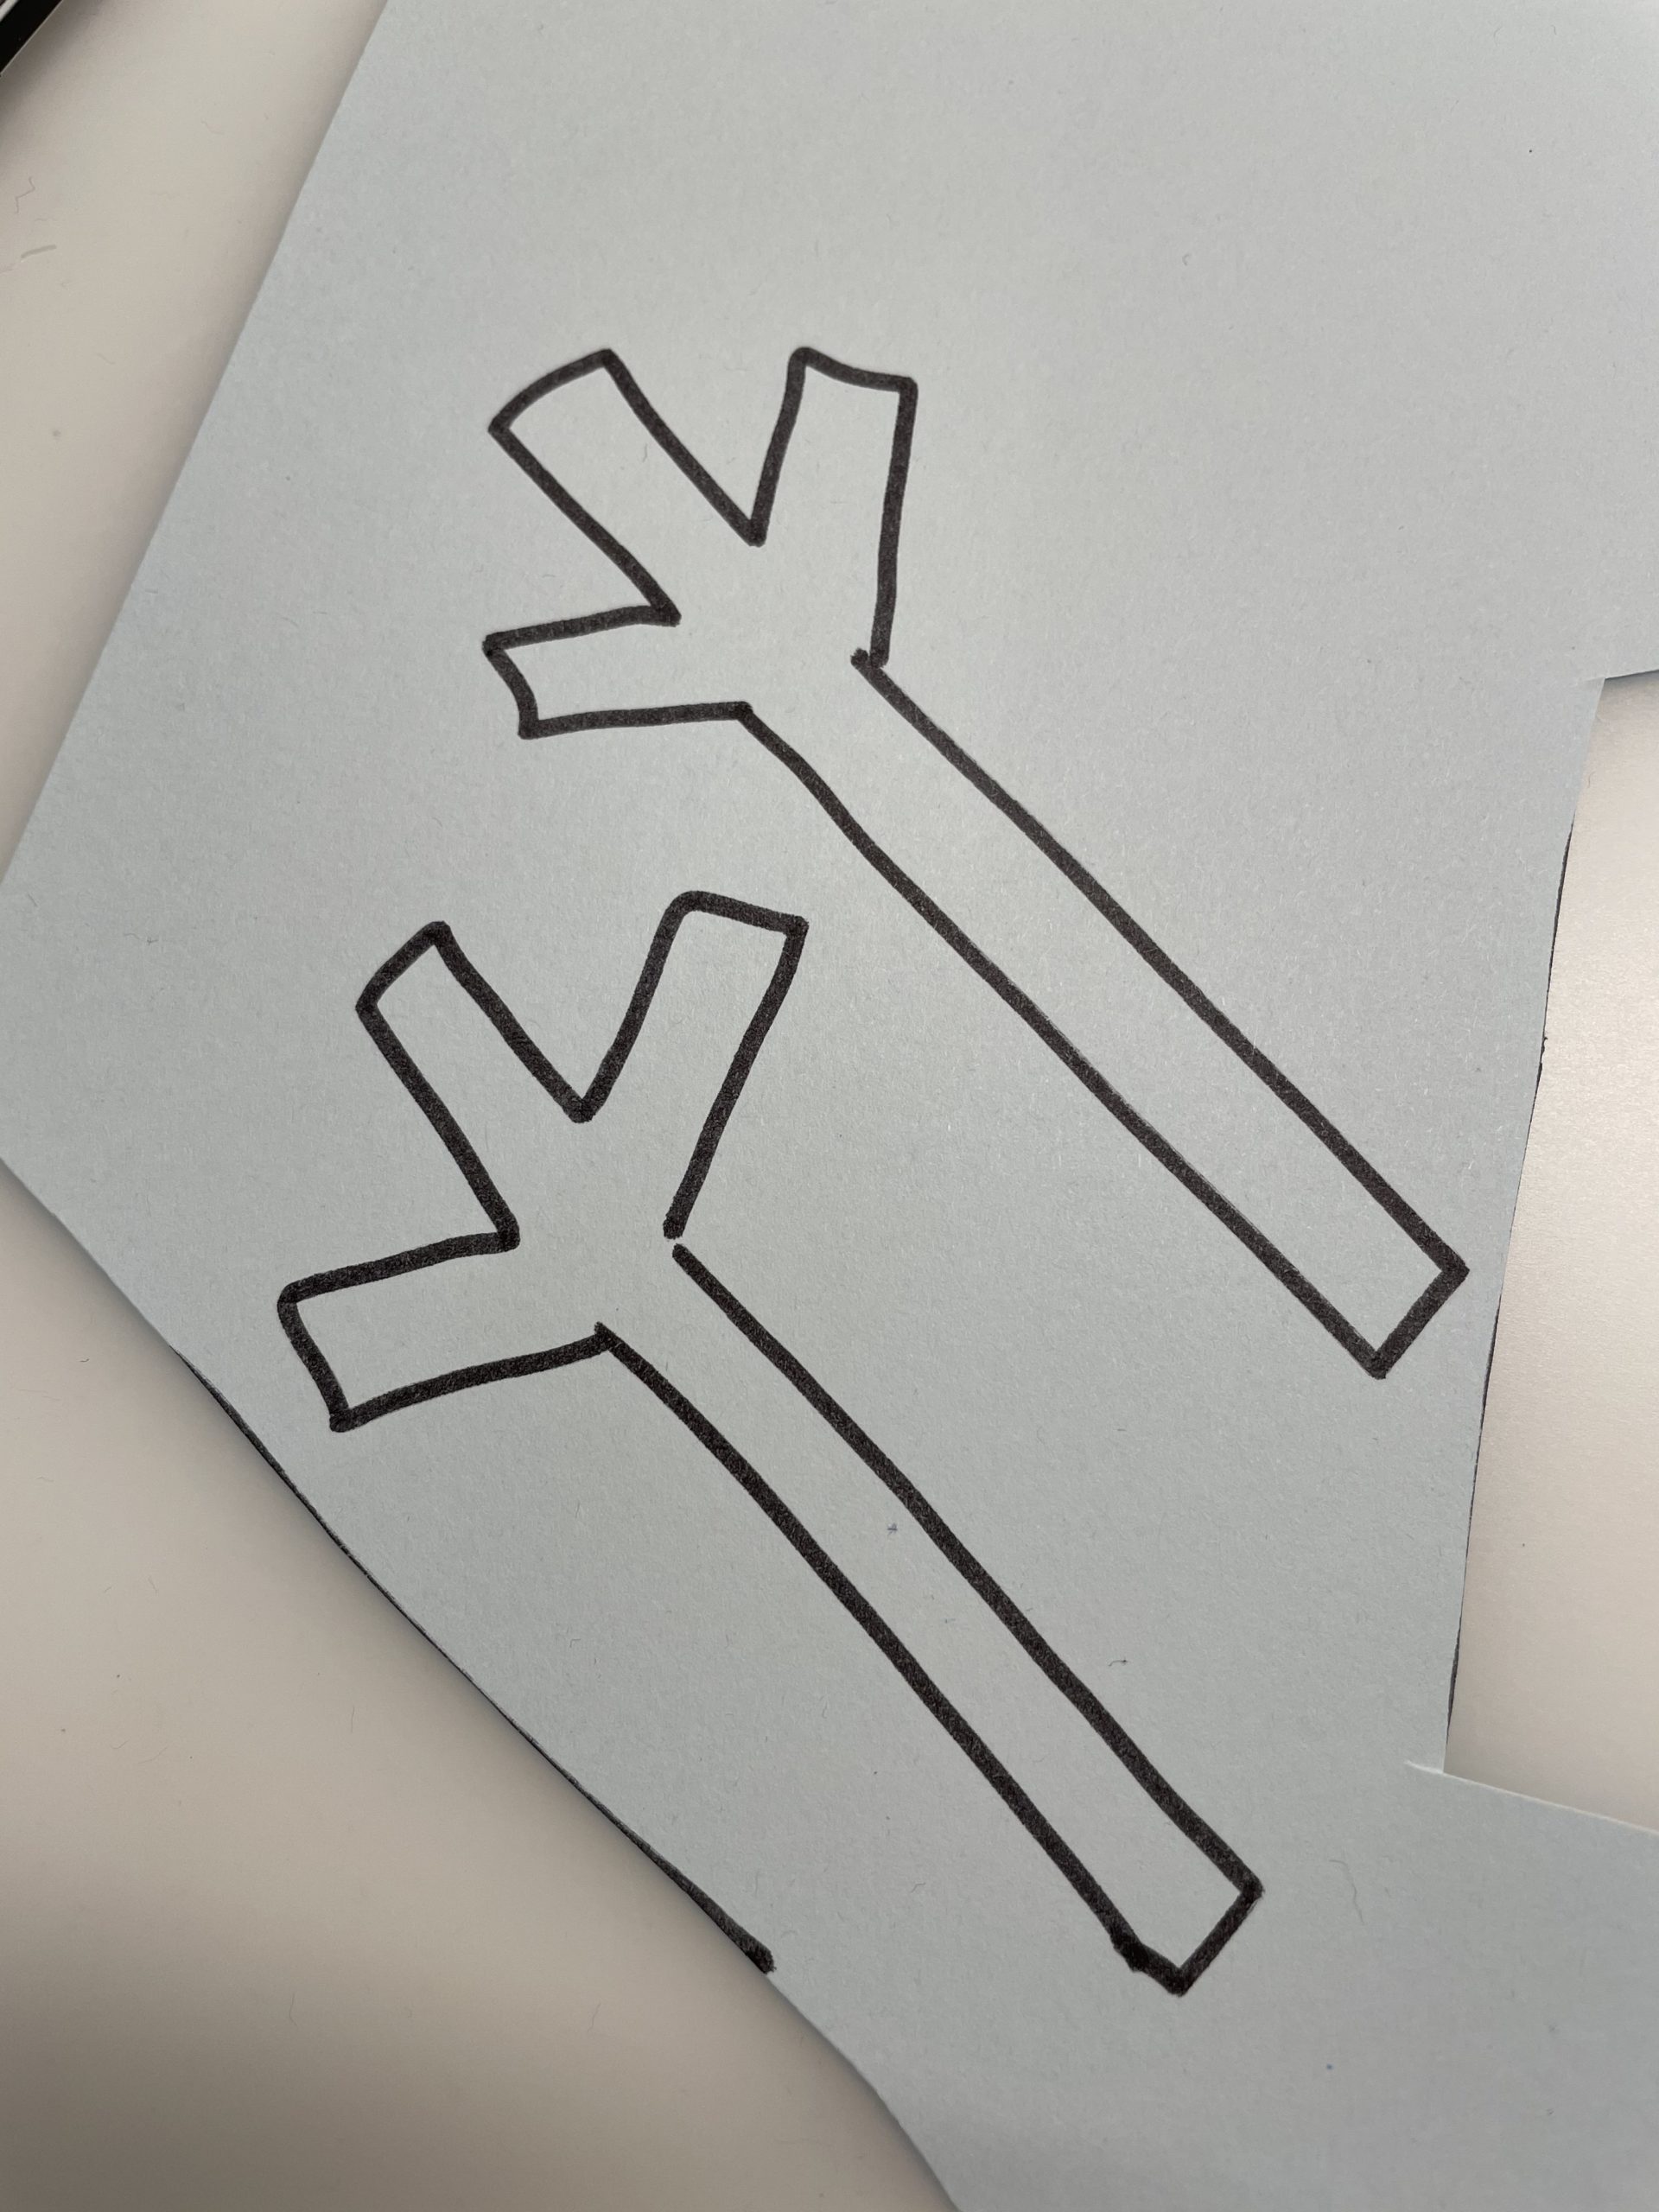
Bild zum Schritt 36 für das Bastel- und DIY-Abenteuer für Kinder: 'Malt zwei Arme auf und schneidet sie aus. Lass evtl....'

37

Now stick your arms to the snowman.
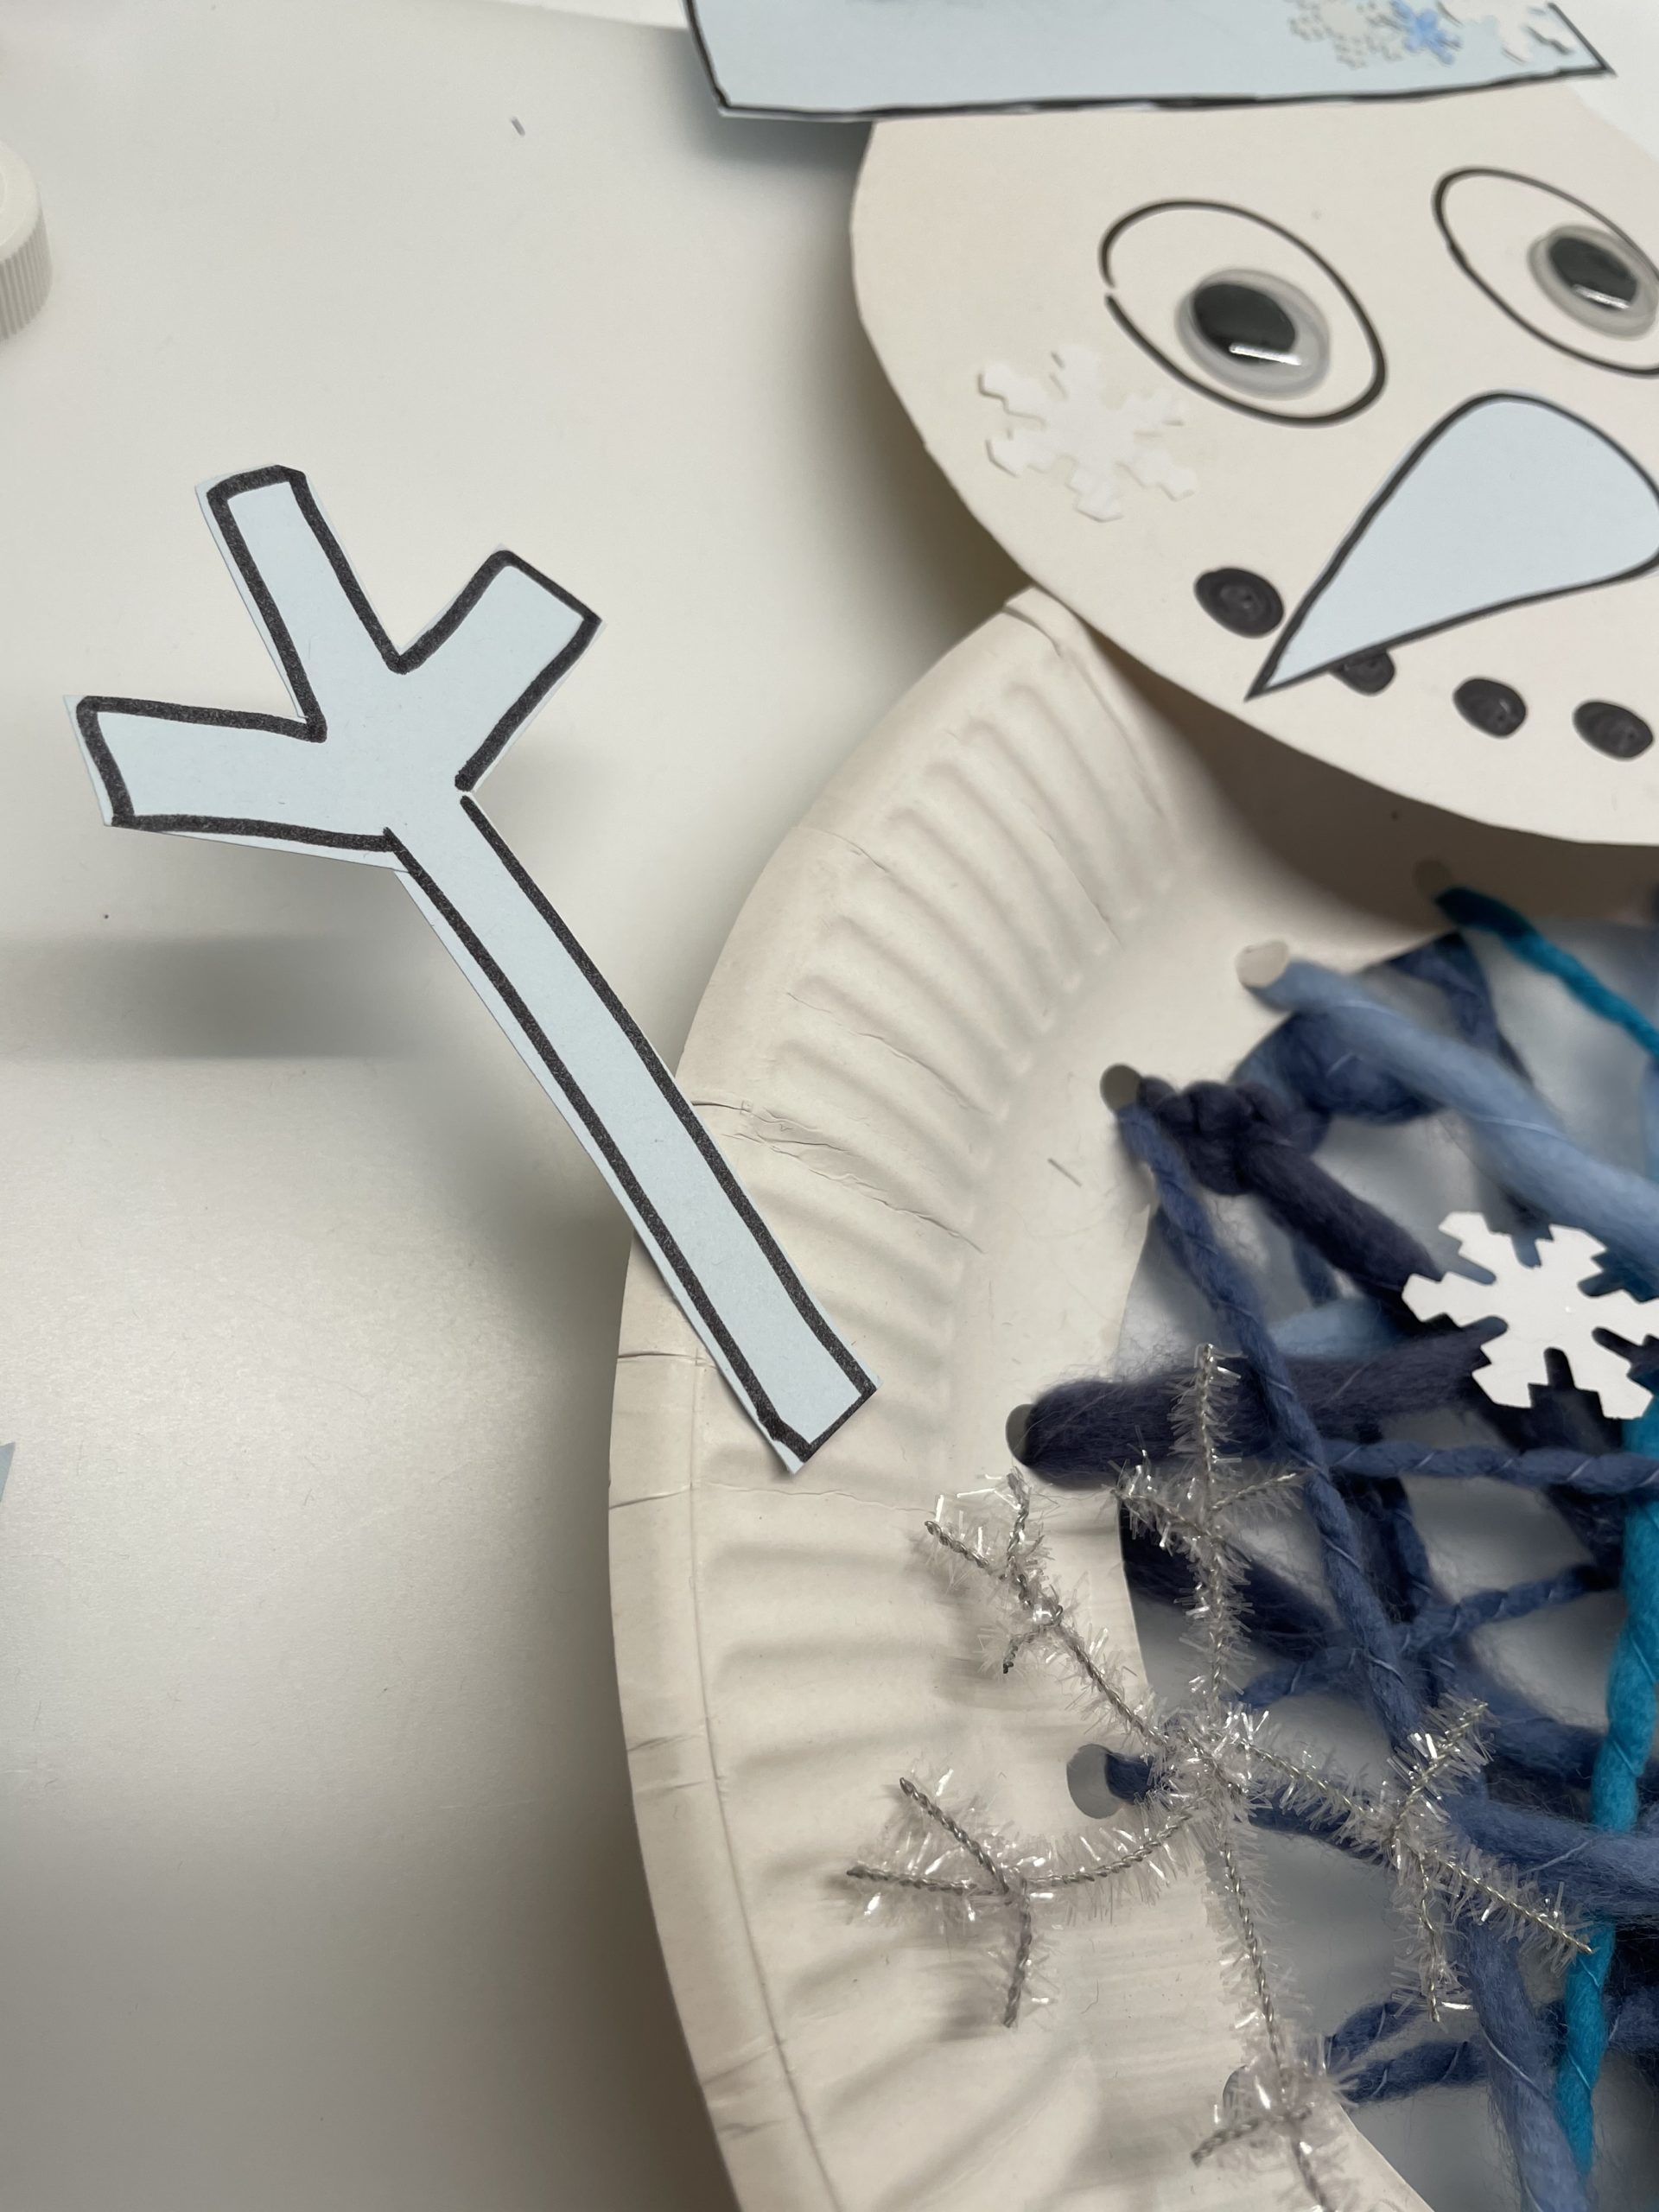
Bild zum Schritt 37 für das Bastel- und DIY-Abenteuer für Kinder: 'Klebt nun die Arme an den Schneemann.'

38

Now you're punching a few holes at the bottom of the cardboard plate.
Cut off a few more threads from the wool.
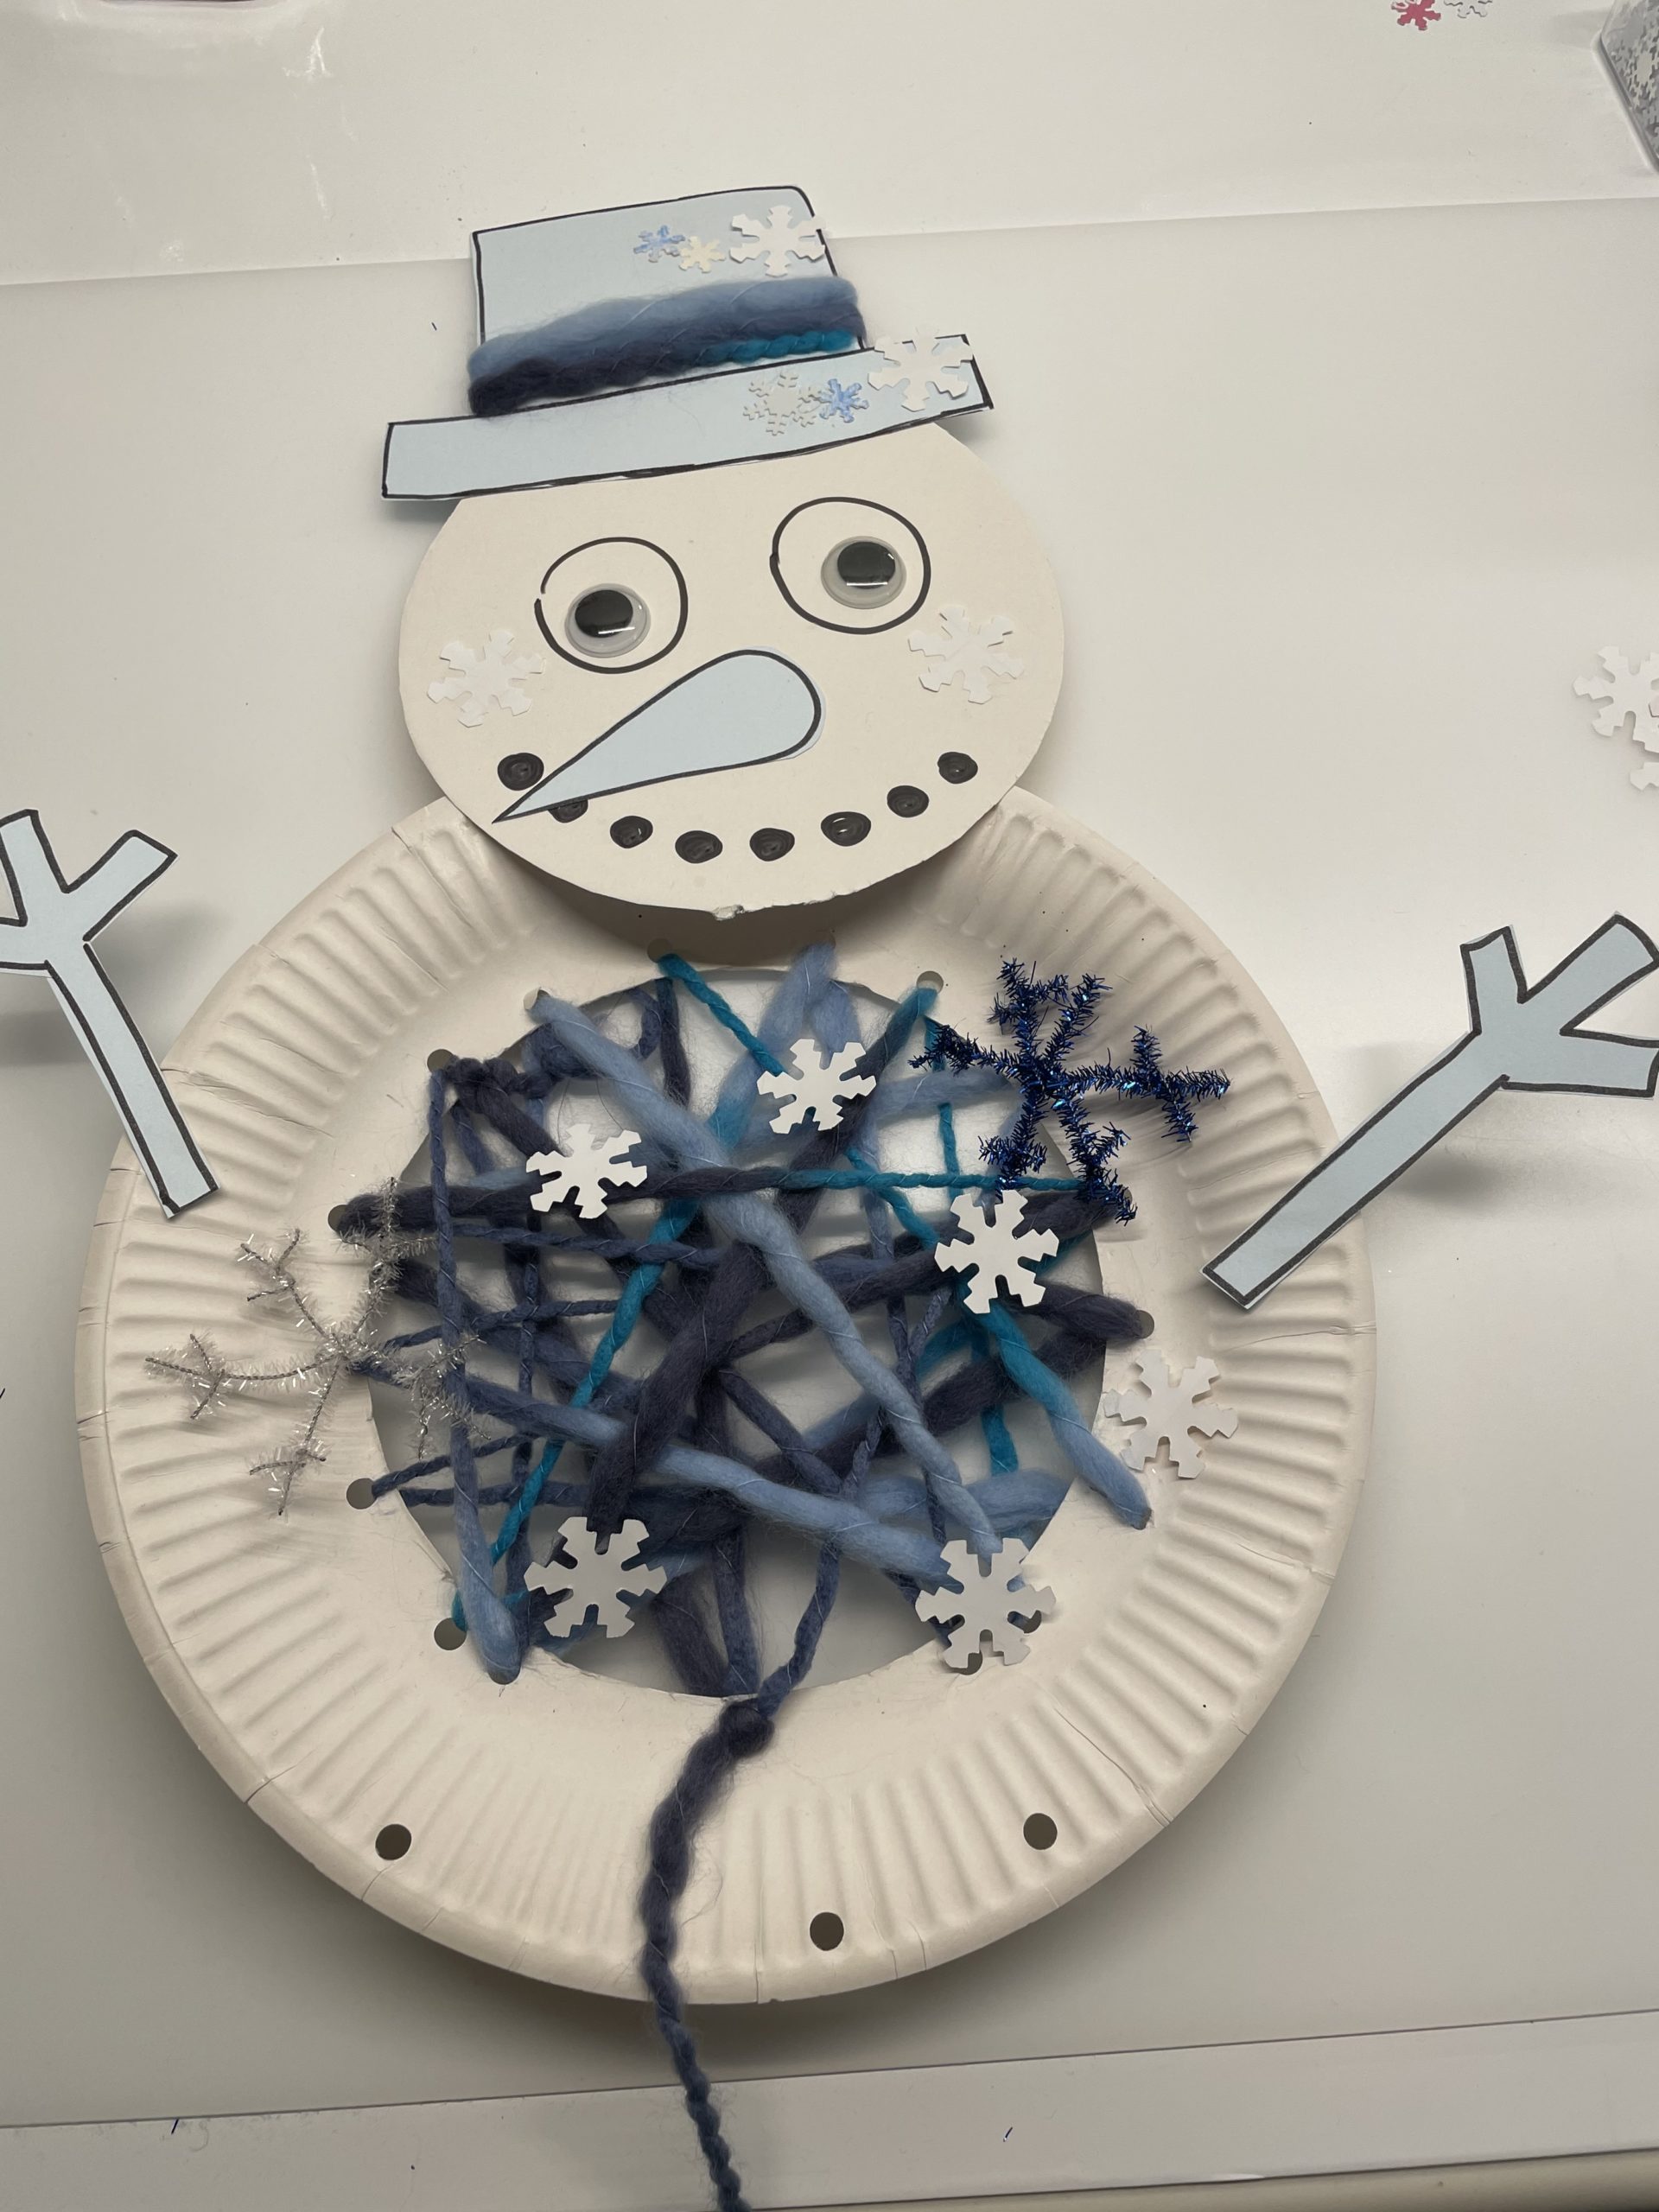
Bild zum Schritt 38 für das Bastel- und DIY-Abenteuer für Kinder: 'Jetzt locht ihr am unteren Rand des Papptellers noch einige...'

39

Then attach the threads with a knot to the cardboard plate.
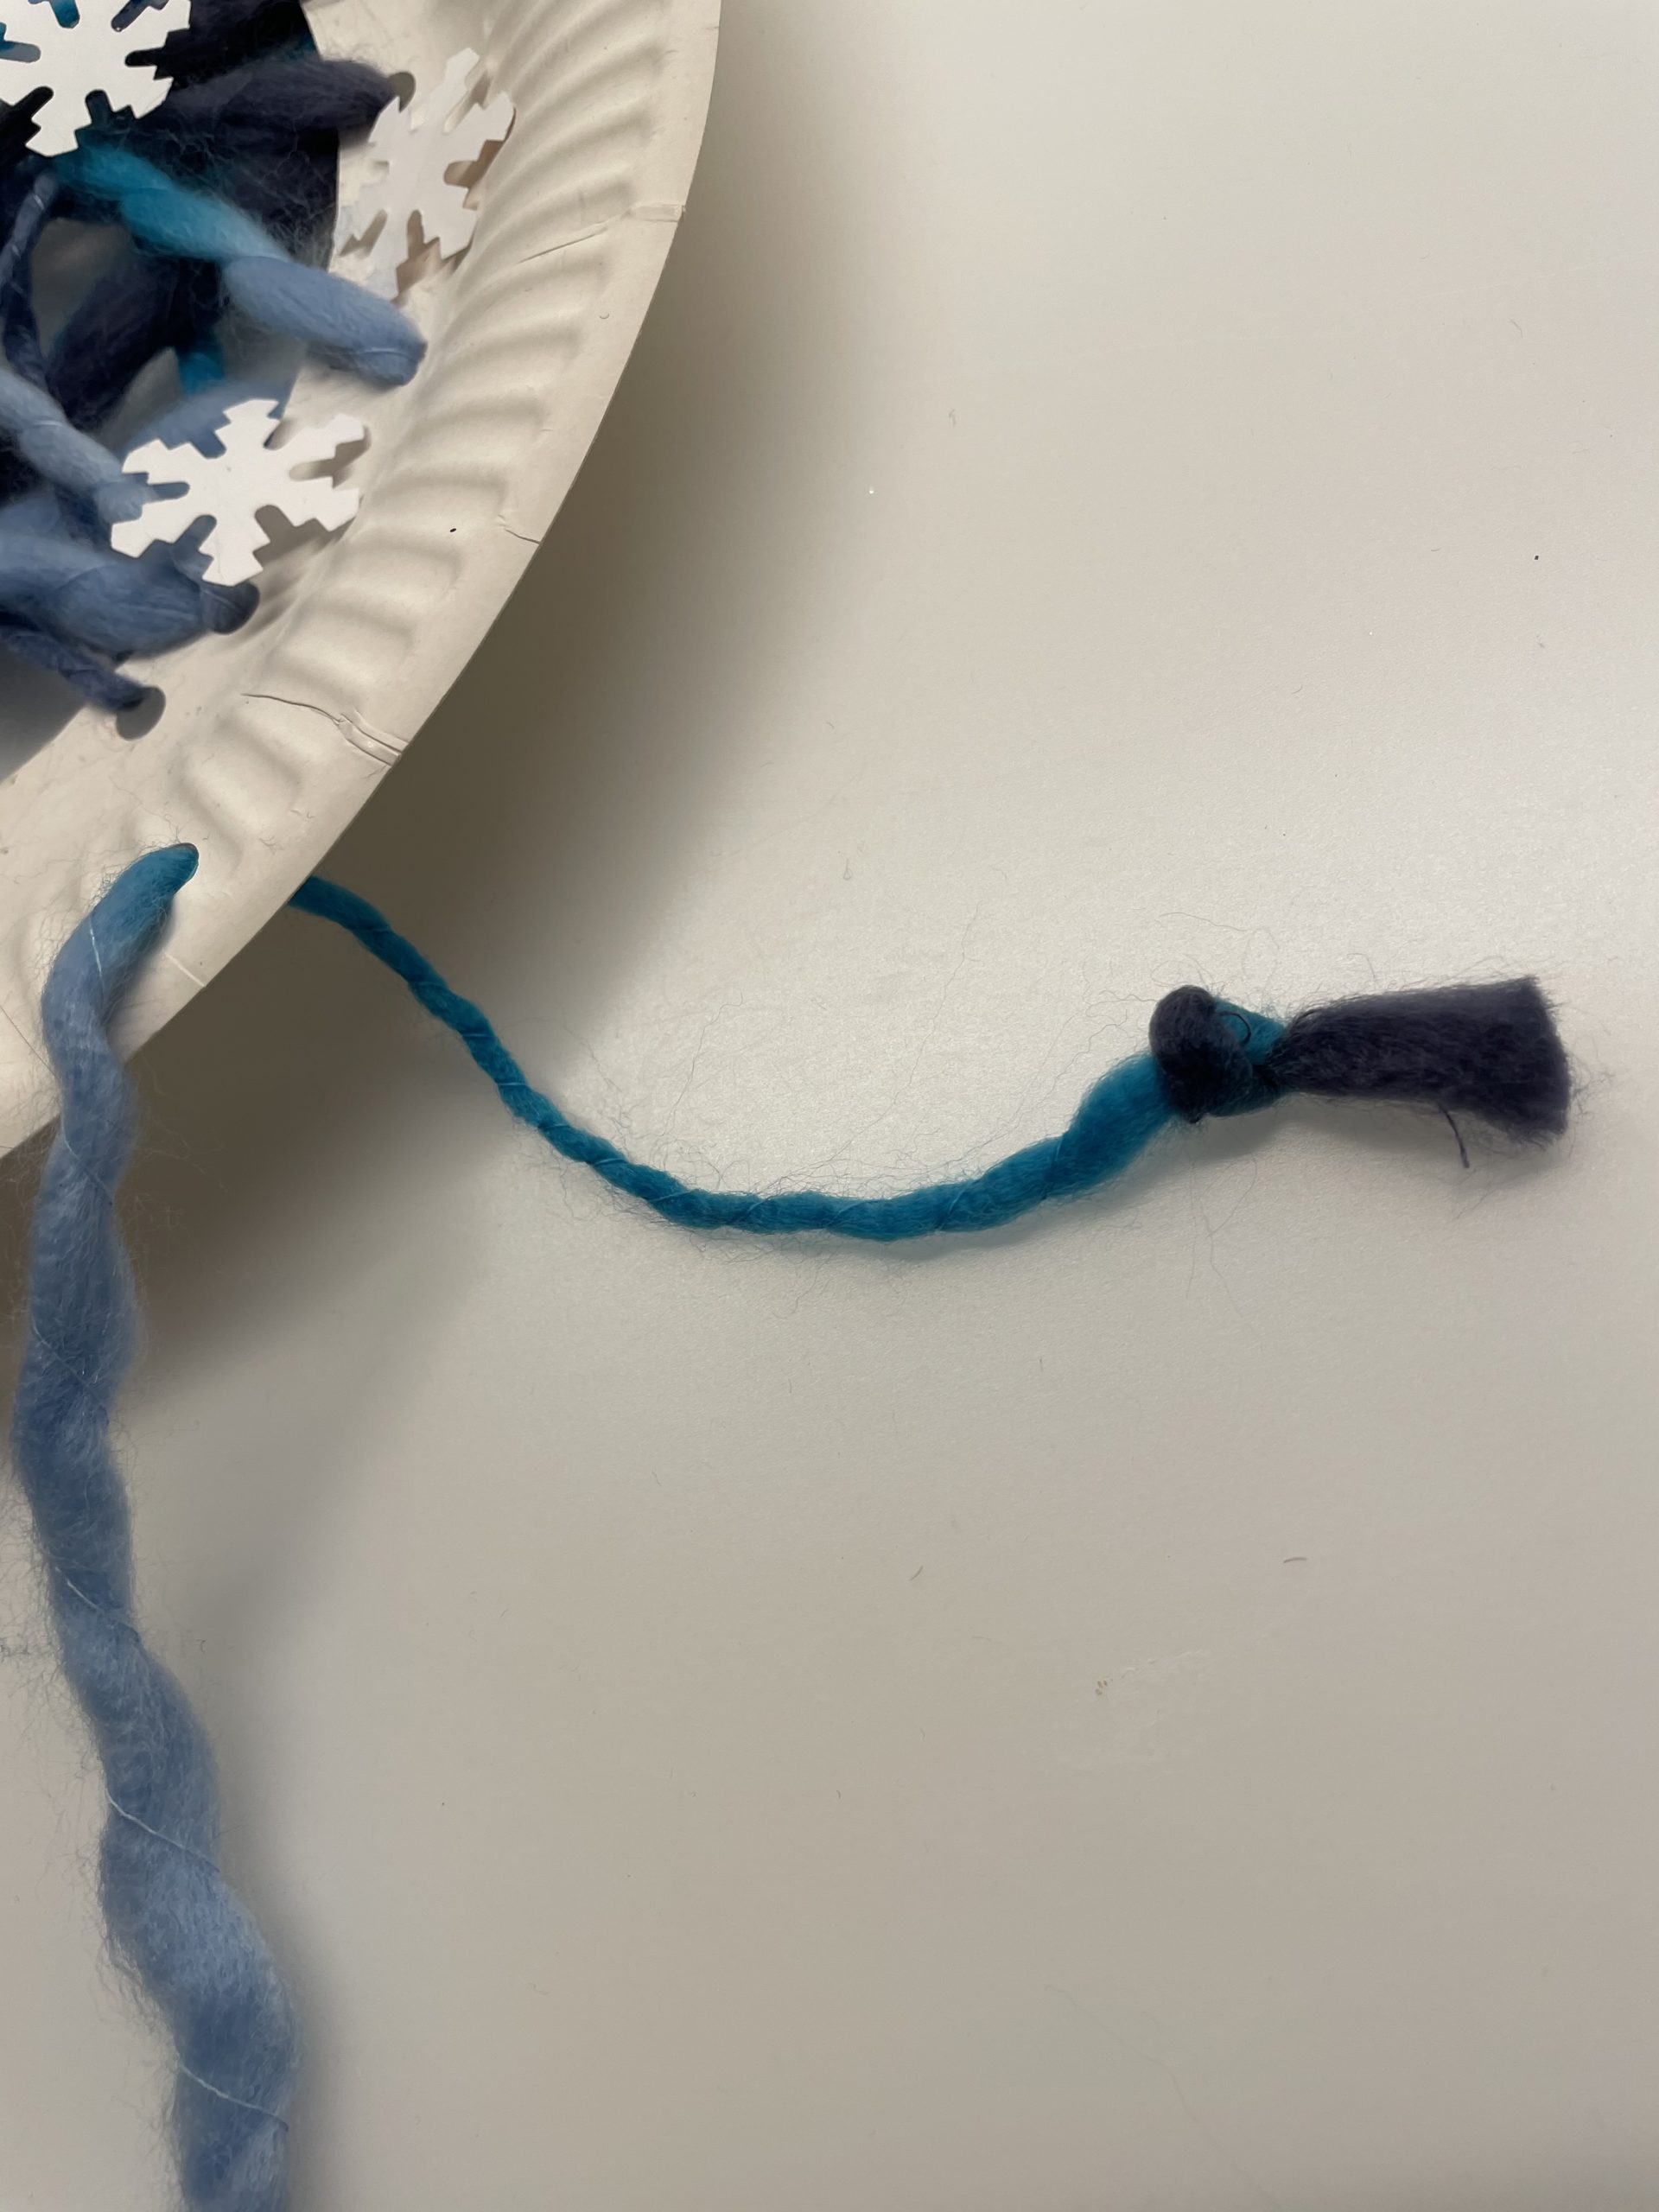
Bild zum Schritt 39 für das Bastel- und DIY-Abenteuer für Kinder: 'Befestige danach die Fäden mit einem Knoten am Pappteller.'

40

Now glues snow crystals, pearls, pompons, cotton wool or feathers to the wool.

Bild zum Schritt 40 für das Bastel- und DIY-Abenteuer für Kinder: 'Klebt nun noch Schneekristallen, Perlen, Pompons, Watte oder Federn auf...'

41

At the end you hole a hole for the suspension in the hat. Thereby thread a piece of wool to hang up and knot the ends.
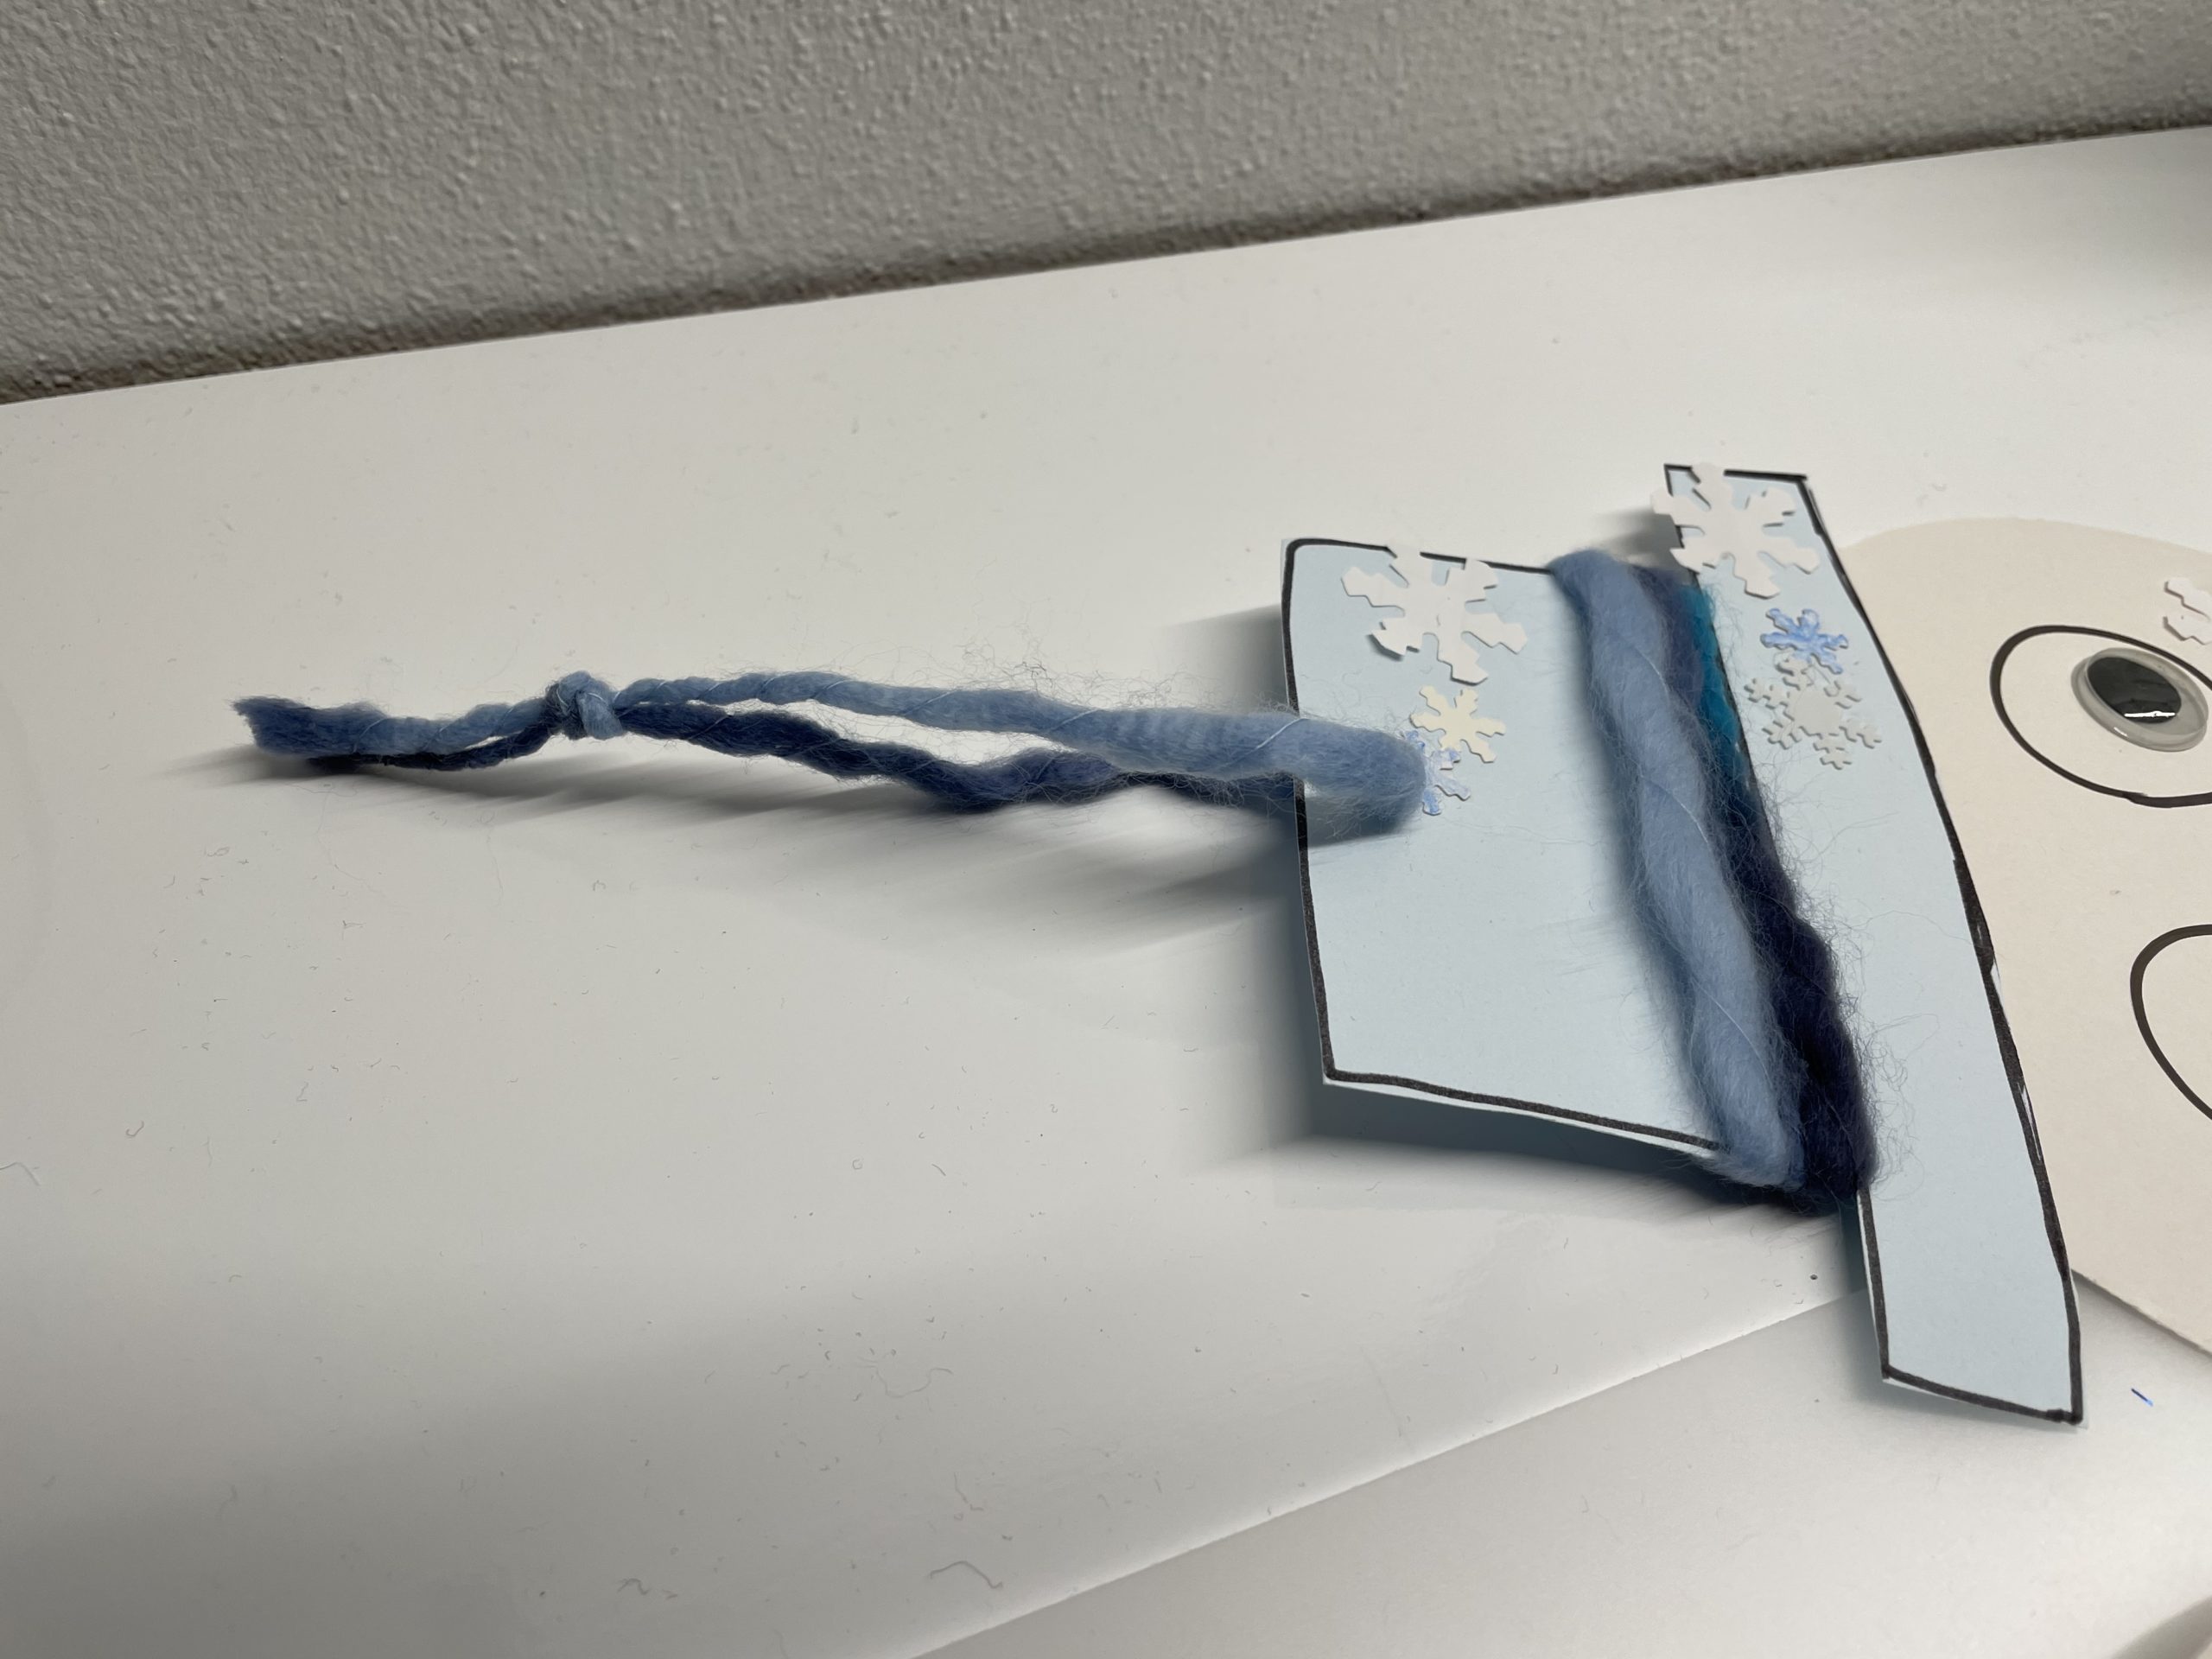
Bild zum Schritt 41 für das Bastel- und DIY-Abenteuer für Kinder: 'Zum Abschluss locht ihr ein Loch für die Aufhängung in...'

42

Your winter dream catcher is ready.

Bild zum Schritt 42 für das Bastel- und DIY-Abenteuer für Kinder: 'Fertig ist euer Wintertraum-Fänger.'

43

Have fun with it!

Bild zum Schritt 43 für das Bastel- und DIY-Abenteuer für Kinder: 'Viel Freude damit!'

A winter dream catcher as a winter snow-mobile or snow crystal dream catcher:
44

For this purpose, exclusively design the edge of the cardboard plate and dispense with all snowman parts.
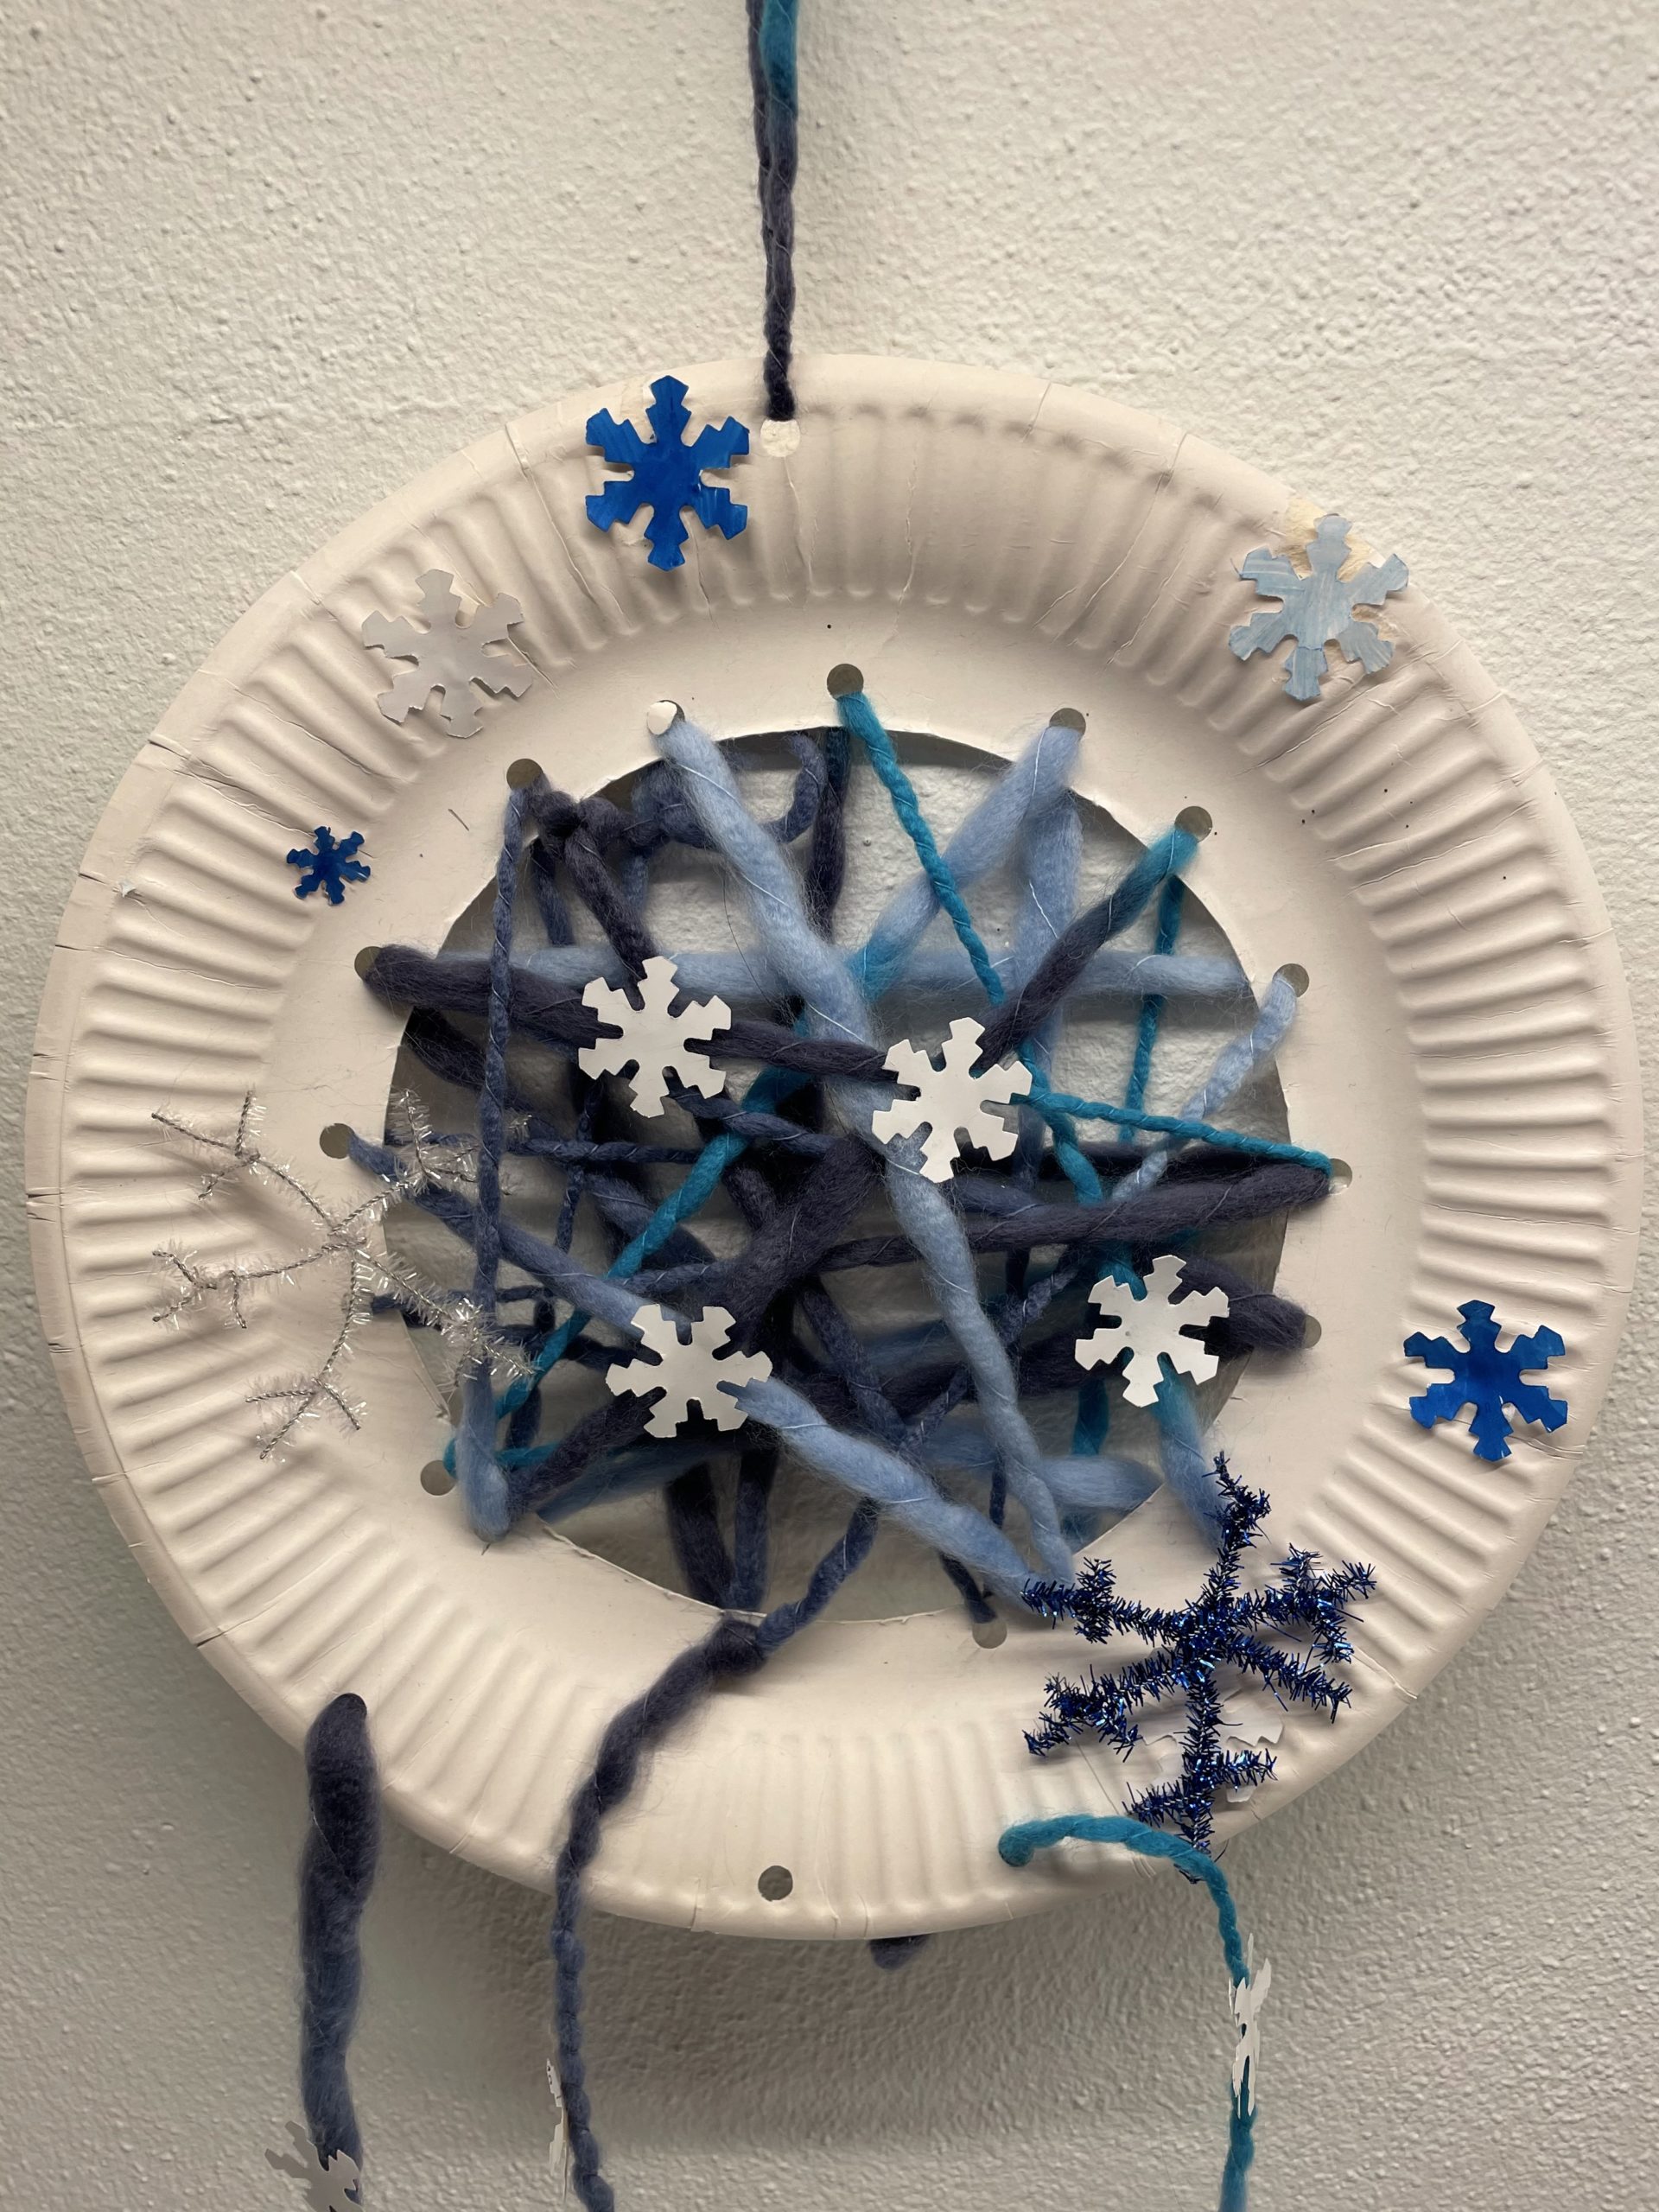
Bild zum Schritt 45 für das Bastel- und DIY-Abenteuer für Kinder: 'Gestalte dafür ausschließlich den Rand des Papptellers und verzichtet auf...'

45

Finished is a beautiful winter snow mobile or a snow crystal dream catcher!
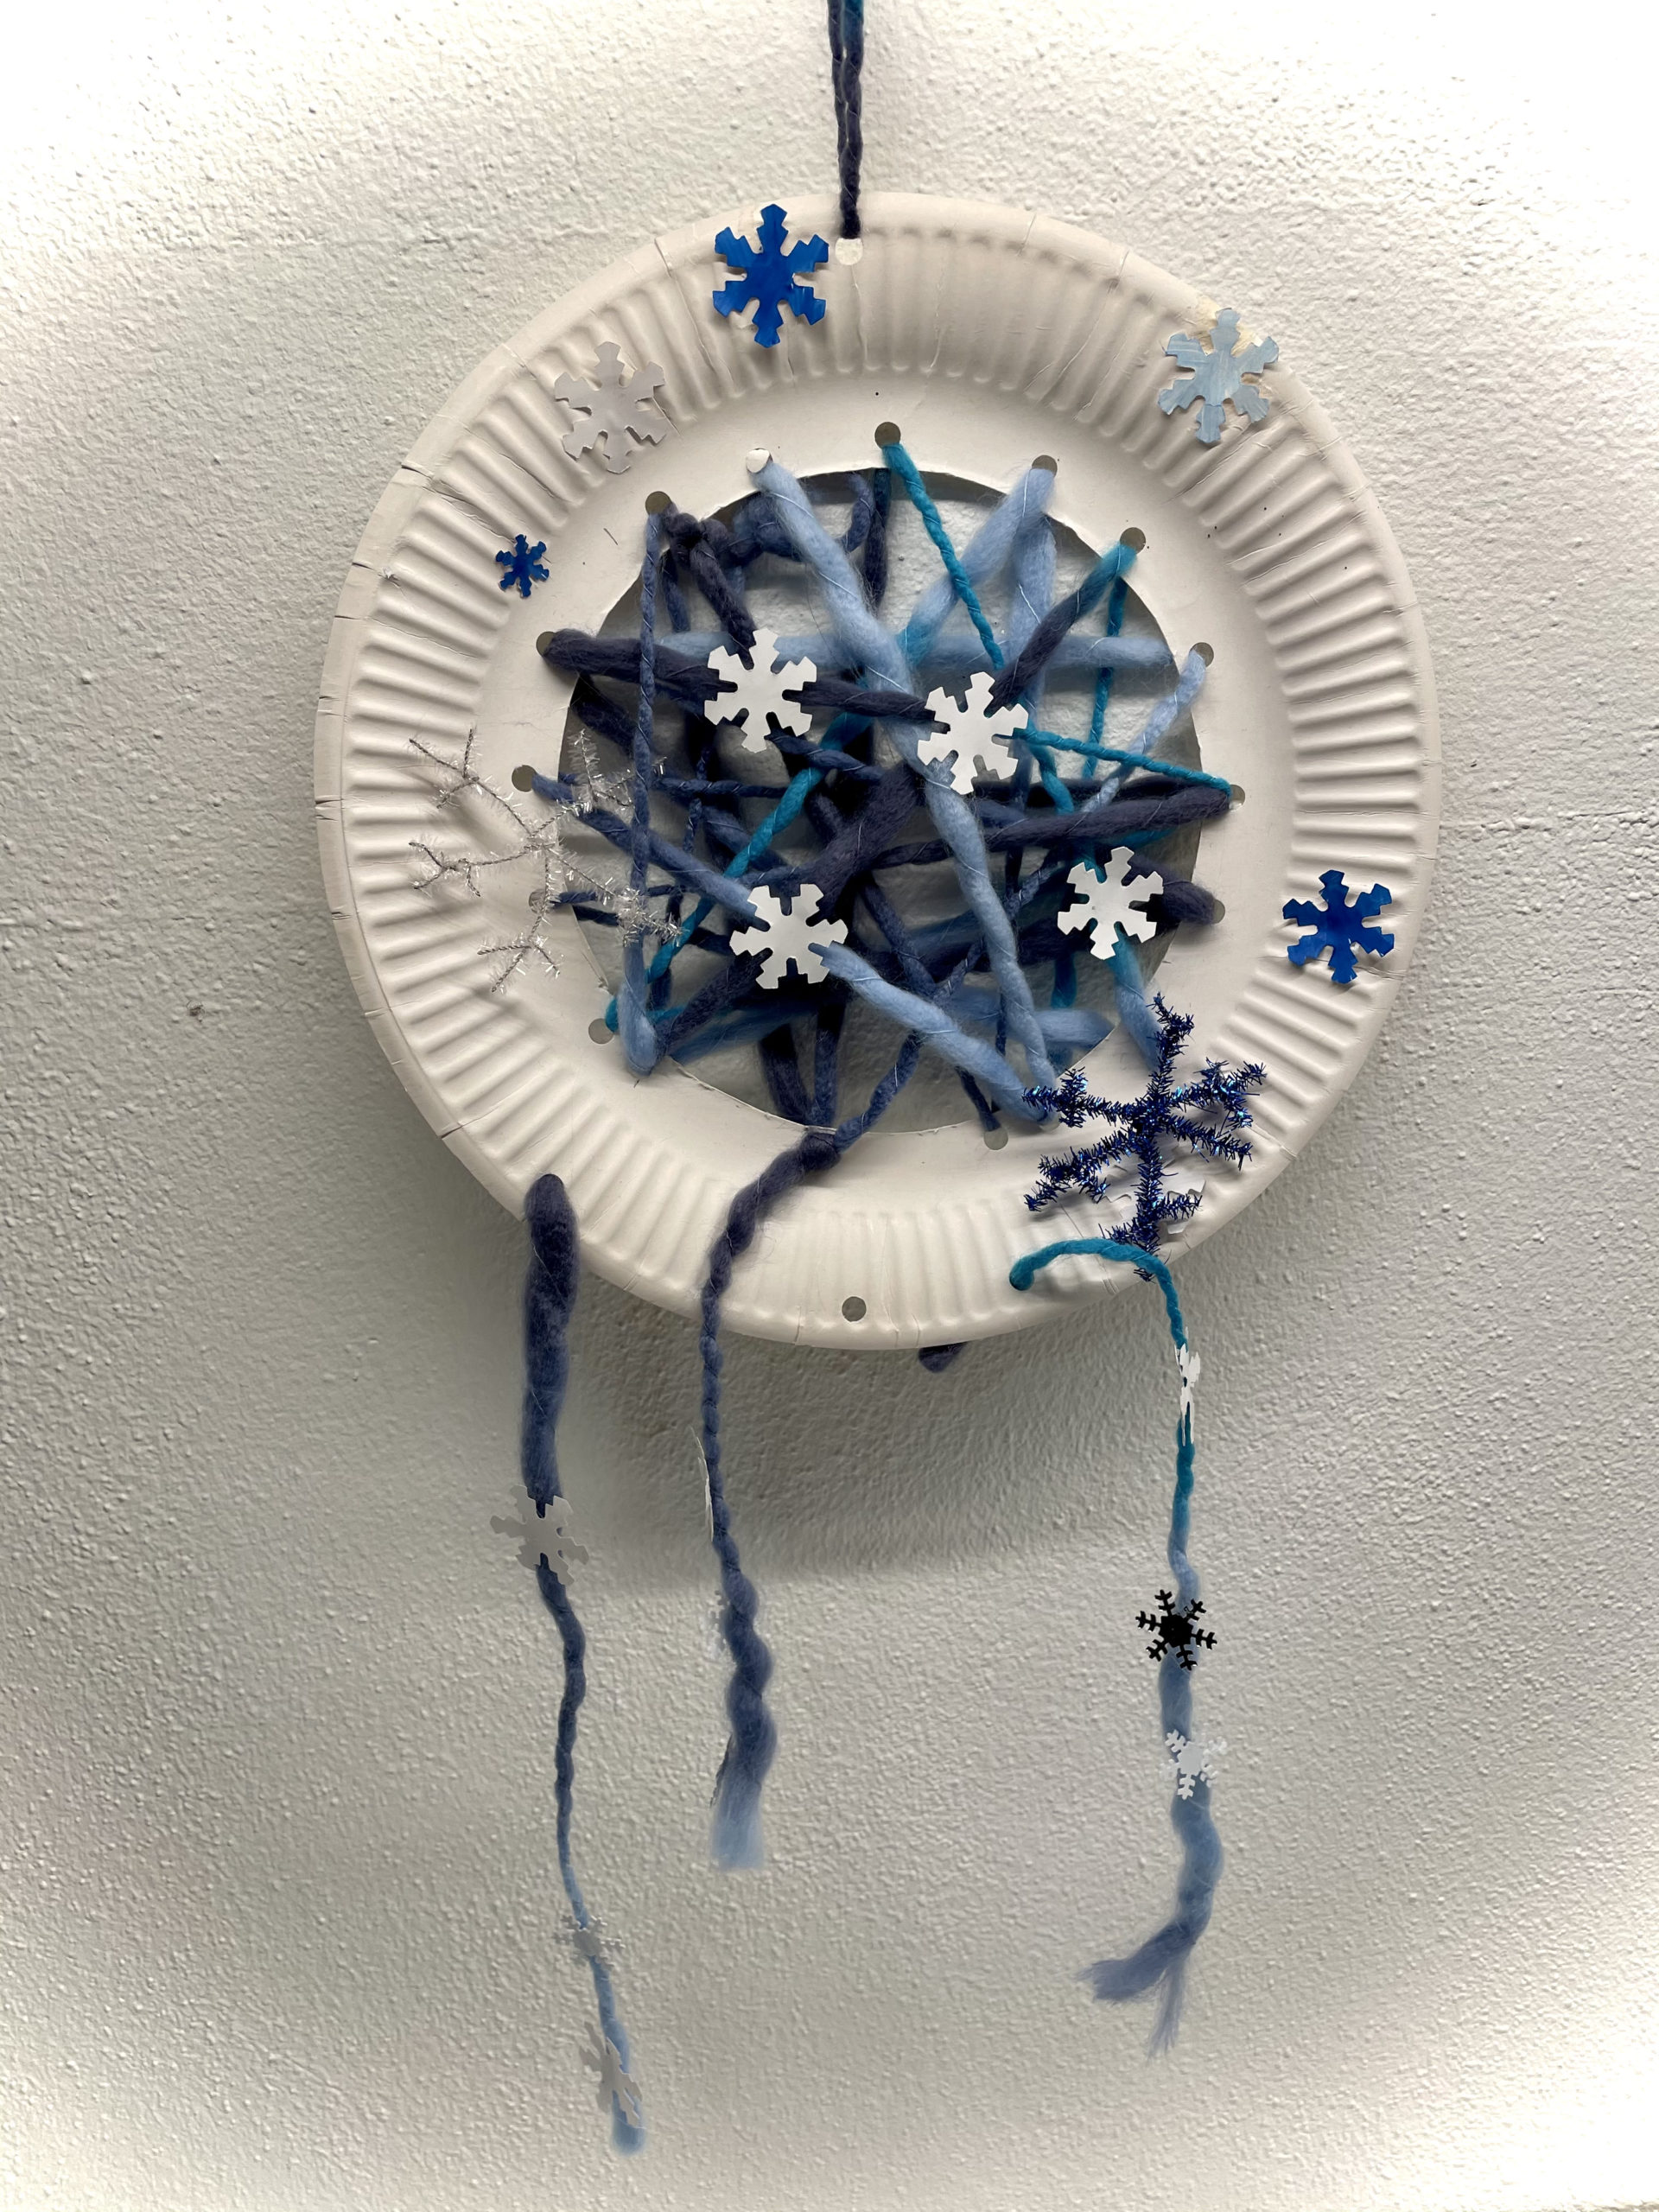
Bild zum Schritt 46 für das Bastel- und DIY-Abenteuer für Kinder: 'Fertig ist ein schönes Winter-Schnee-Mobile oder ein Schneekristall-Traumfänger!'

46

Have fun doing crafts.

Tip:
47

Creates this craft in the same colors: blues, rosés, glitters and whites look very nice for the winter theme!

48

Try it yourself!

Winter dream catchers (various variants & instruction for snow crystals)

Follow us on Facebook , Instagram and Pinterest
Don't miss any more adventures: Our bottle mail

Leave a Reply

Your email address will not be published.

The maximum upload file size: 5 MB. You can upload: image, document. Drop file here