Snowman from Birkenstamm

AdventurerKatzi
Rating4.58.2 Thousand times & (4) DifficultyIntermediate

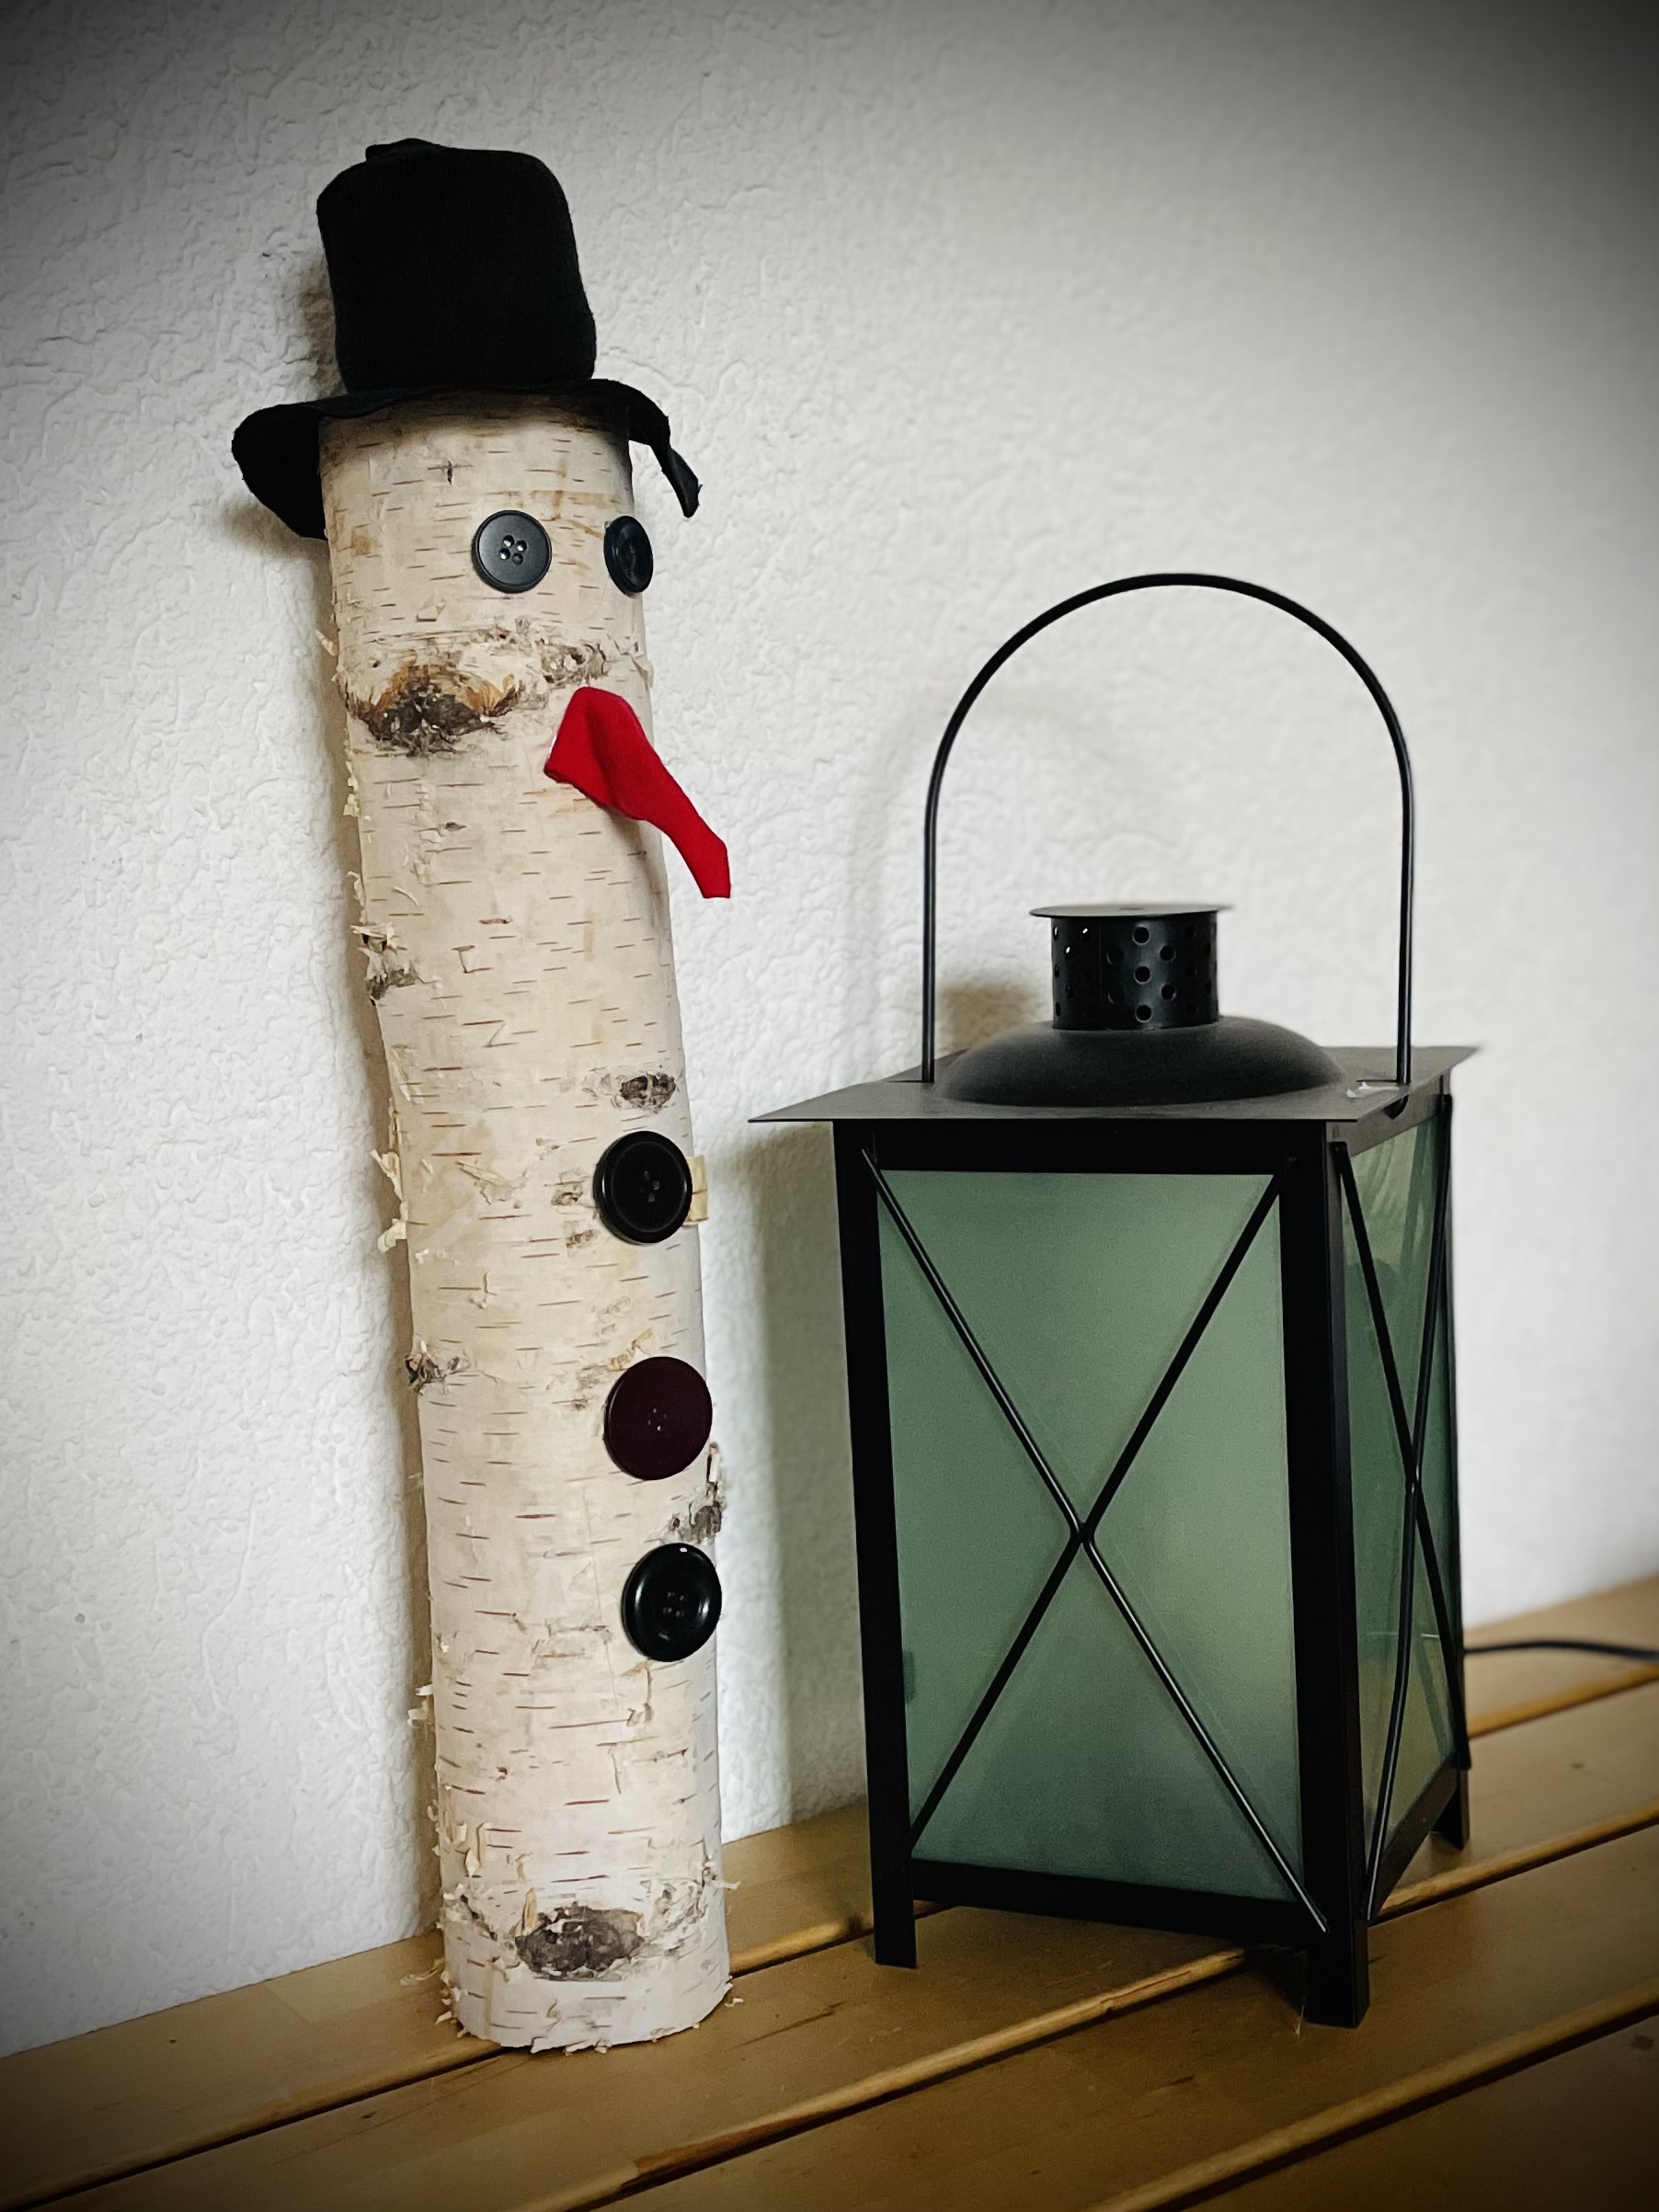
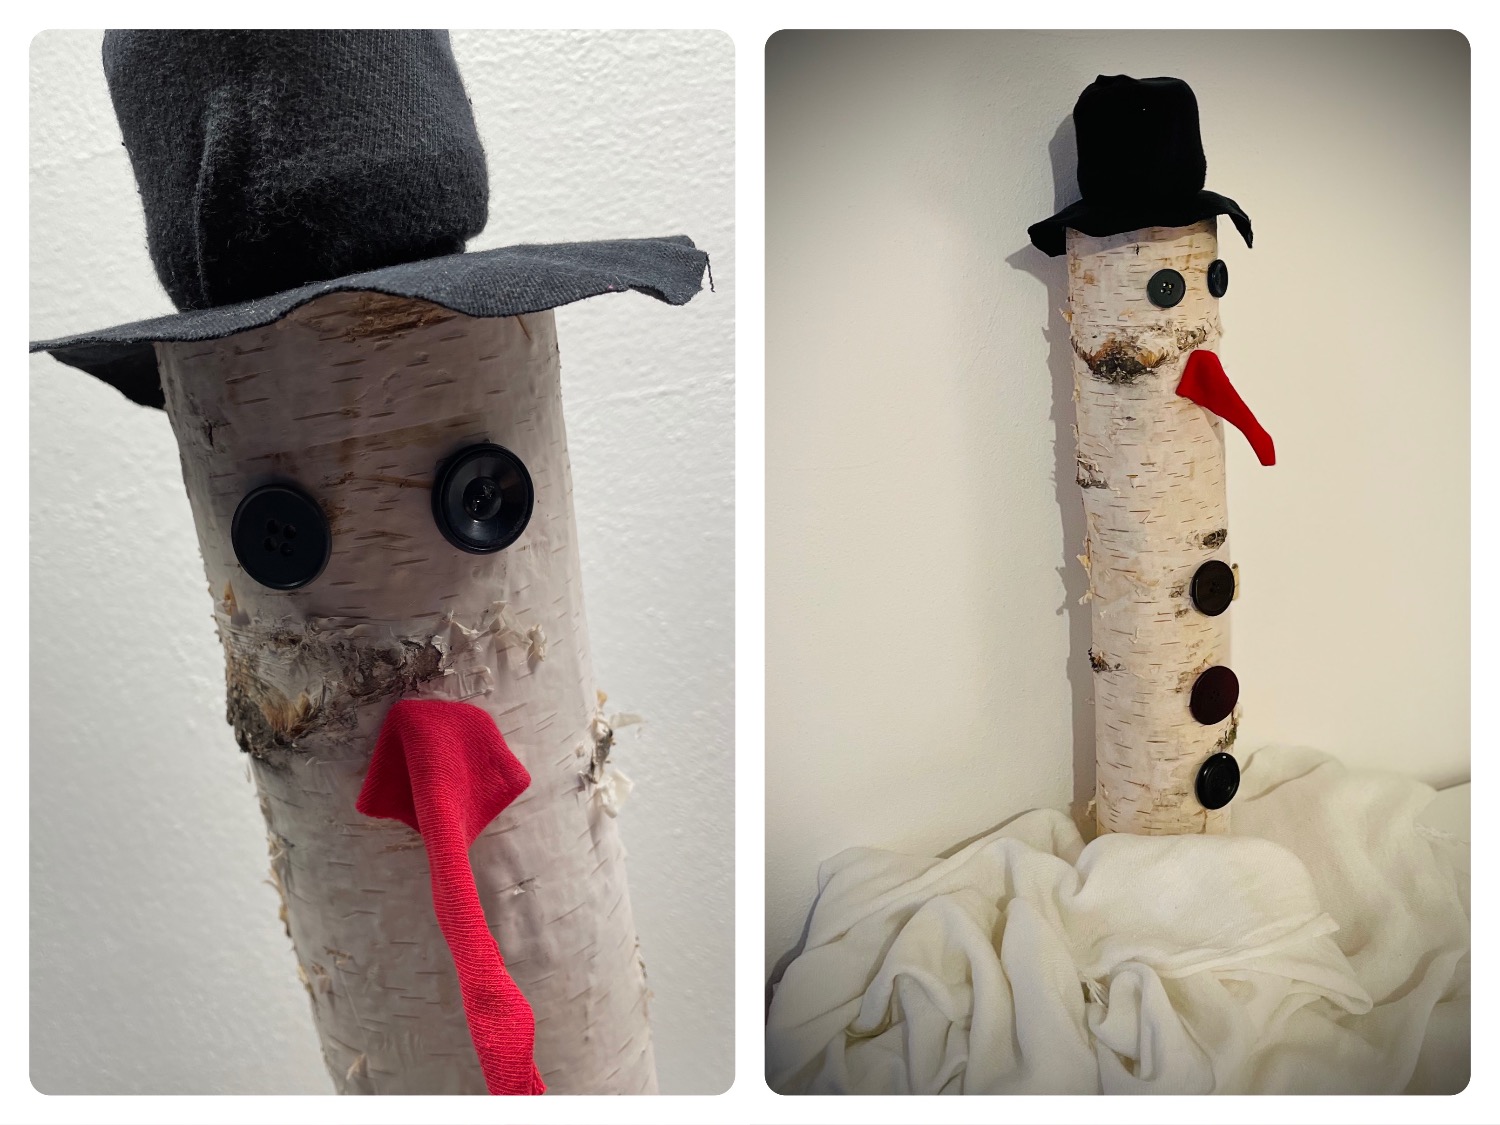
A little snowman emerges from a birch trunk in no time. You need an old black sock, a small empty jam jar without lid, a black fabric circle, a small red fabric triangle and big dark buttons. Then you can start!

Media Education for Kindergarten and Hort

Kind bastelt eine Rassel mit dem Navi
The Adventure Navi, the app for DIY projects, enables media education for the youngest.

Relief in everyday life, targeted promotion of individual children, independent learning and - without any pre-knowledge already usable by the youngest!


Titelbild zur Bastel- und DIY-Idee für Kinder '(561) Schneemann aus Birkenstamm'
Material for1 Child
Prep Time5 min.Adv. Time20 min.Total Time25 min.
 1 Birch strain approximately 30-50cm long and 8-10cm thick
 1 small straight jam glass
 1 black fabric circle (approx. 20cm diameter)
 2 Smaller dark buttons
 4 big dark buttons
 1 small red fabric triangleRemaining piece: about 5-8 cm
 Hot glue
 Builder's pad
All links marked with a shopping cart lead to Amazon - here we have selected products that we would order ourselves and in part also ordered. In a qualified purchase via the advertising link, we as Amazon partner receive a commission, for you there are no costs. You thus support our cost- and advertising banner-free, educational offer.
1

First, prepare all the materials and spread out your craft material.
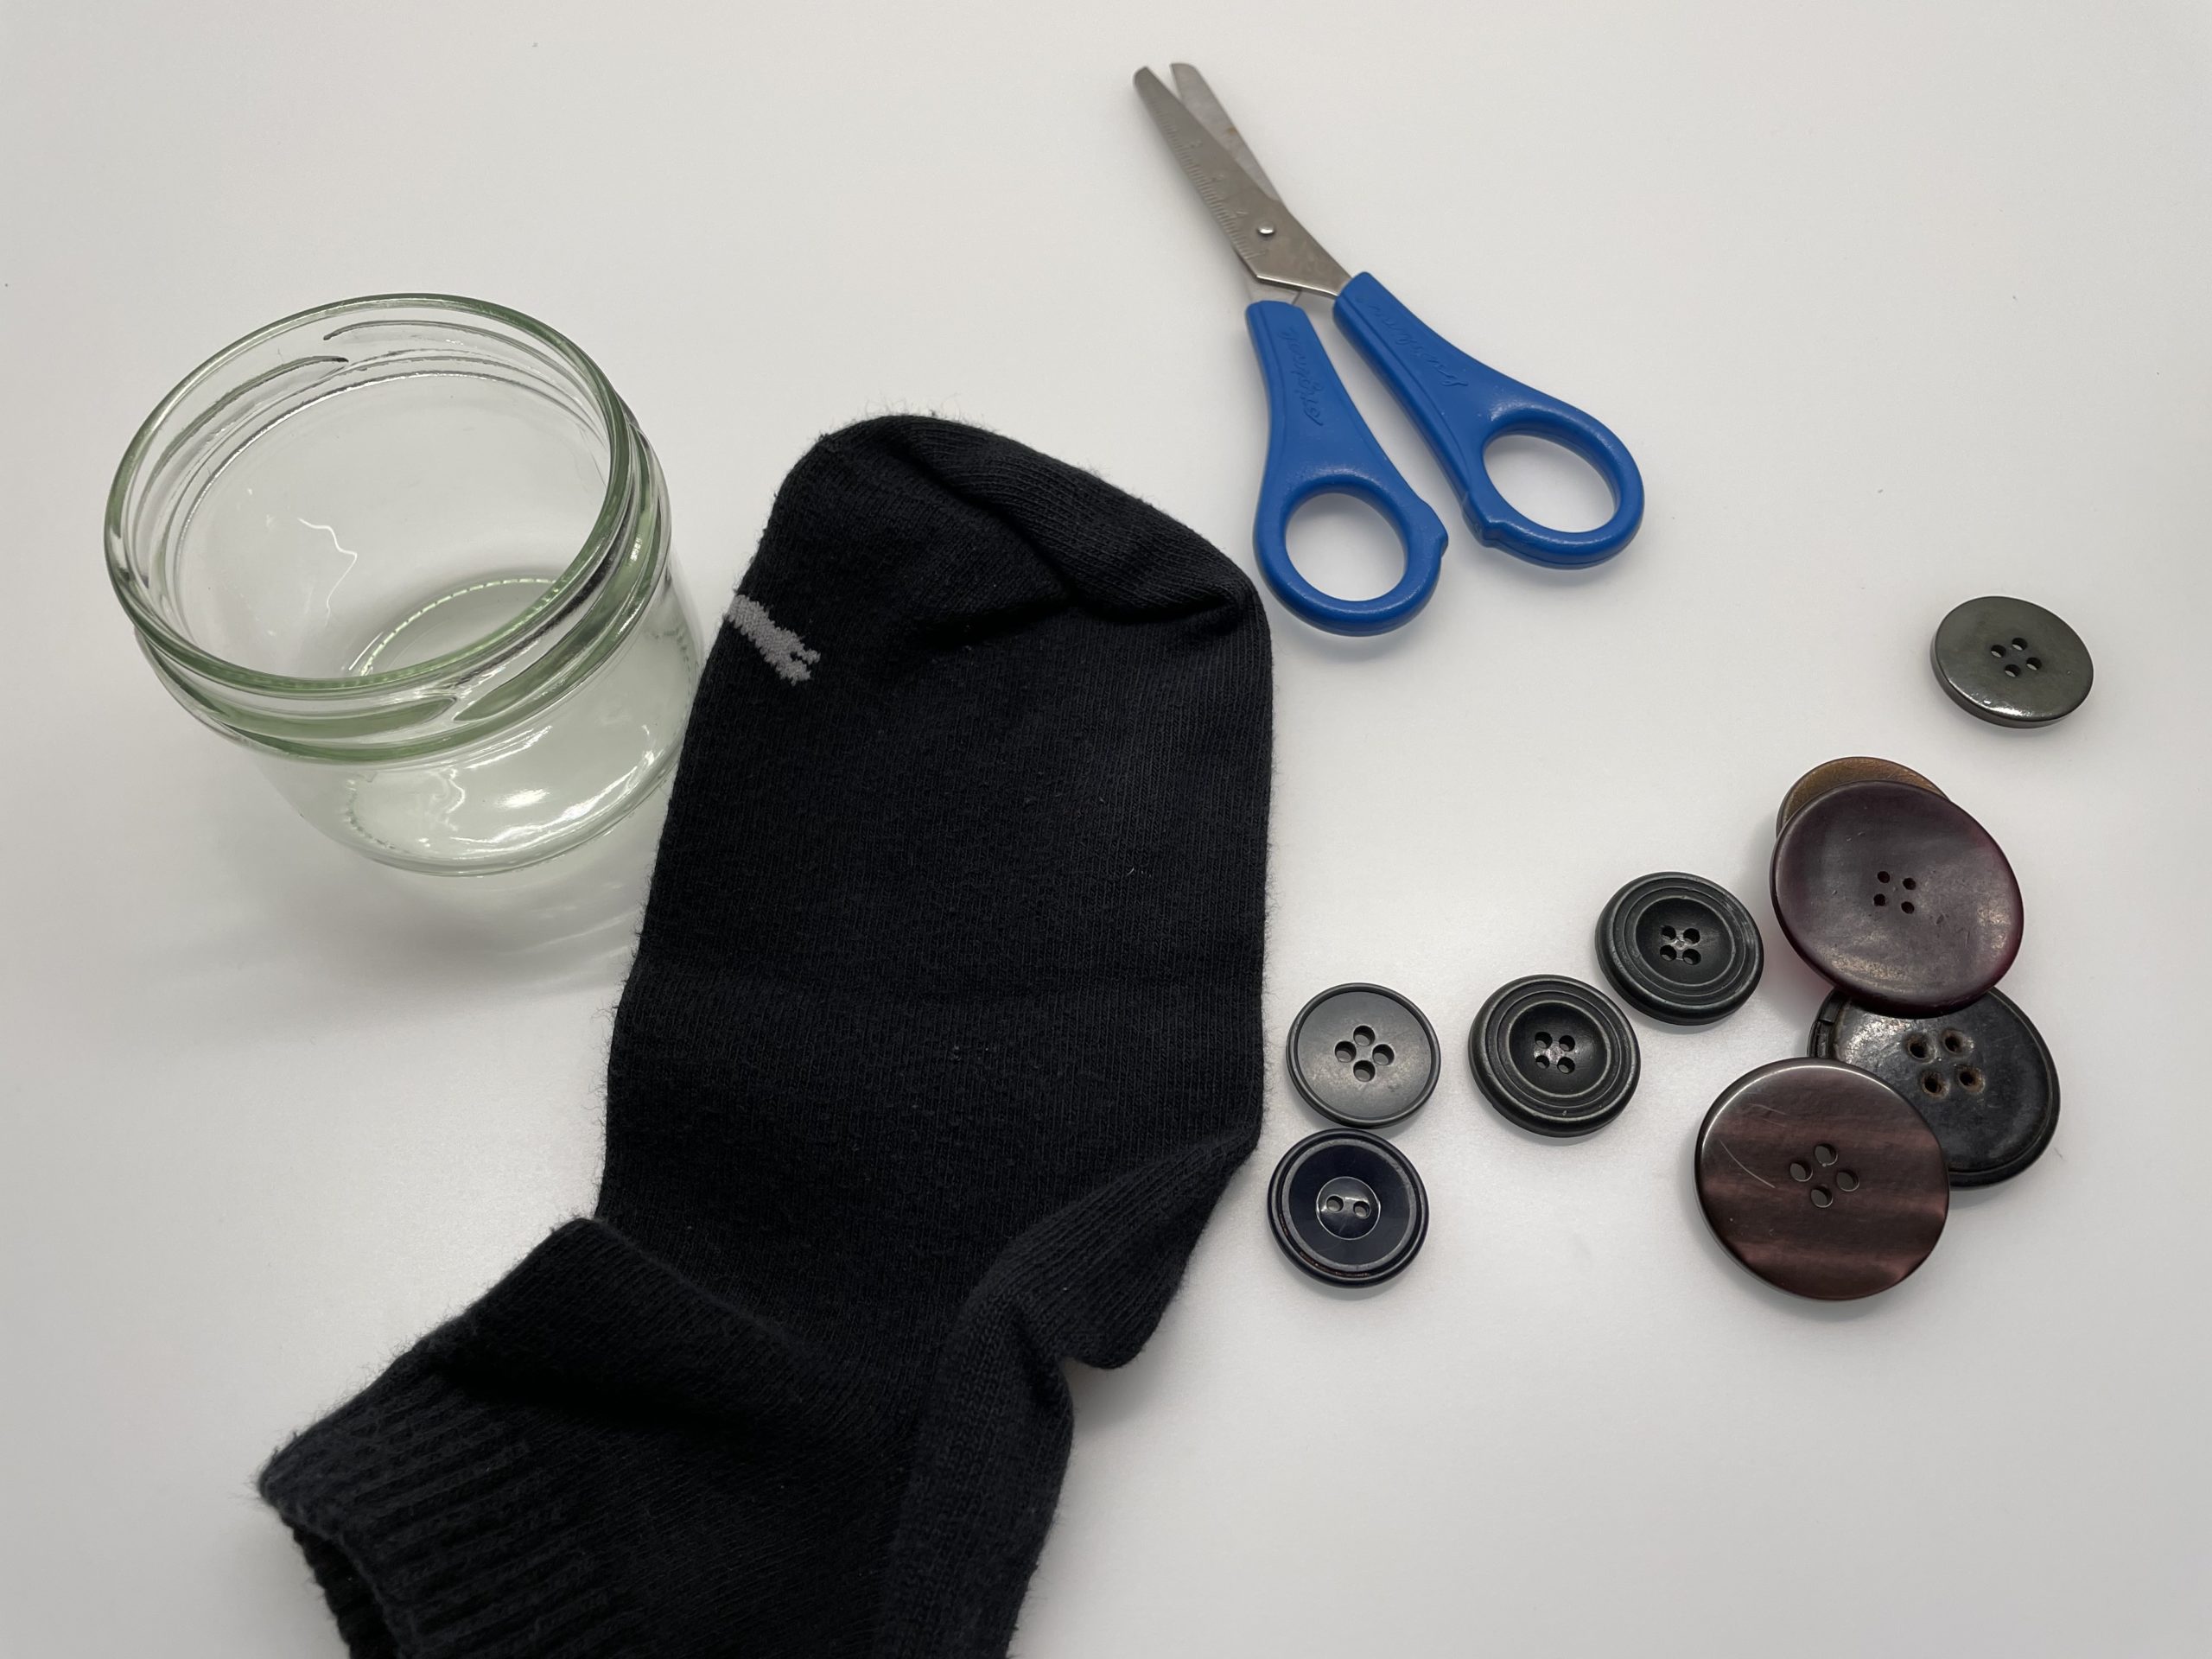
Bild zum Schritt 1 für das Bastel- und DIY-Abenteuer für Kinder: 'Legt zuerst alle Materialien bereit und breitet eure Bastelunterlage aus.'

2

Then you put the jam jar completely into the sock.
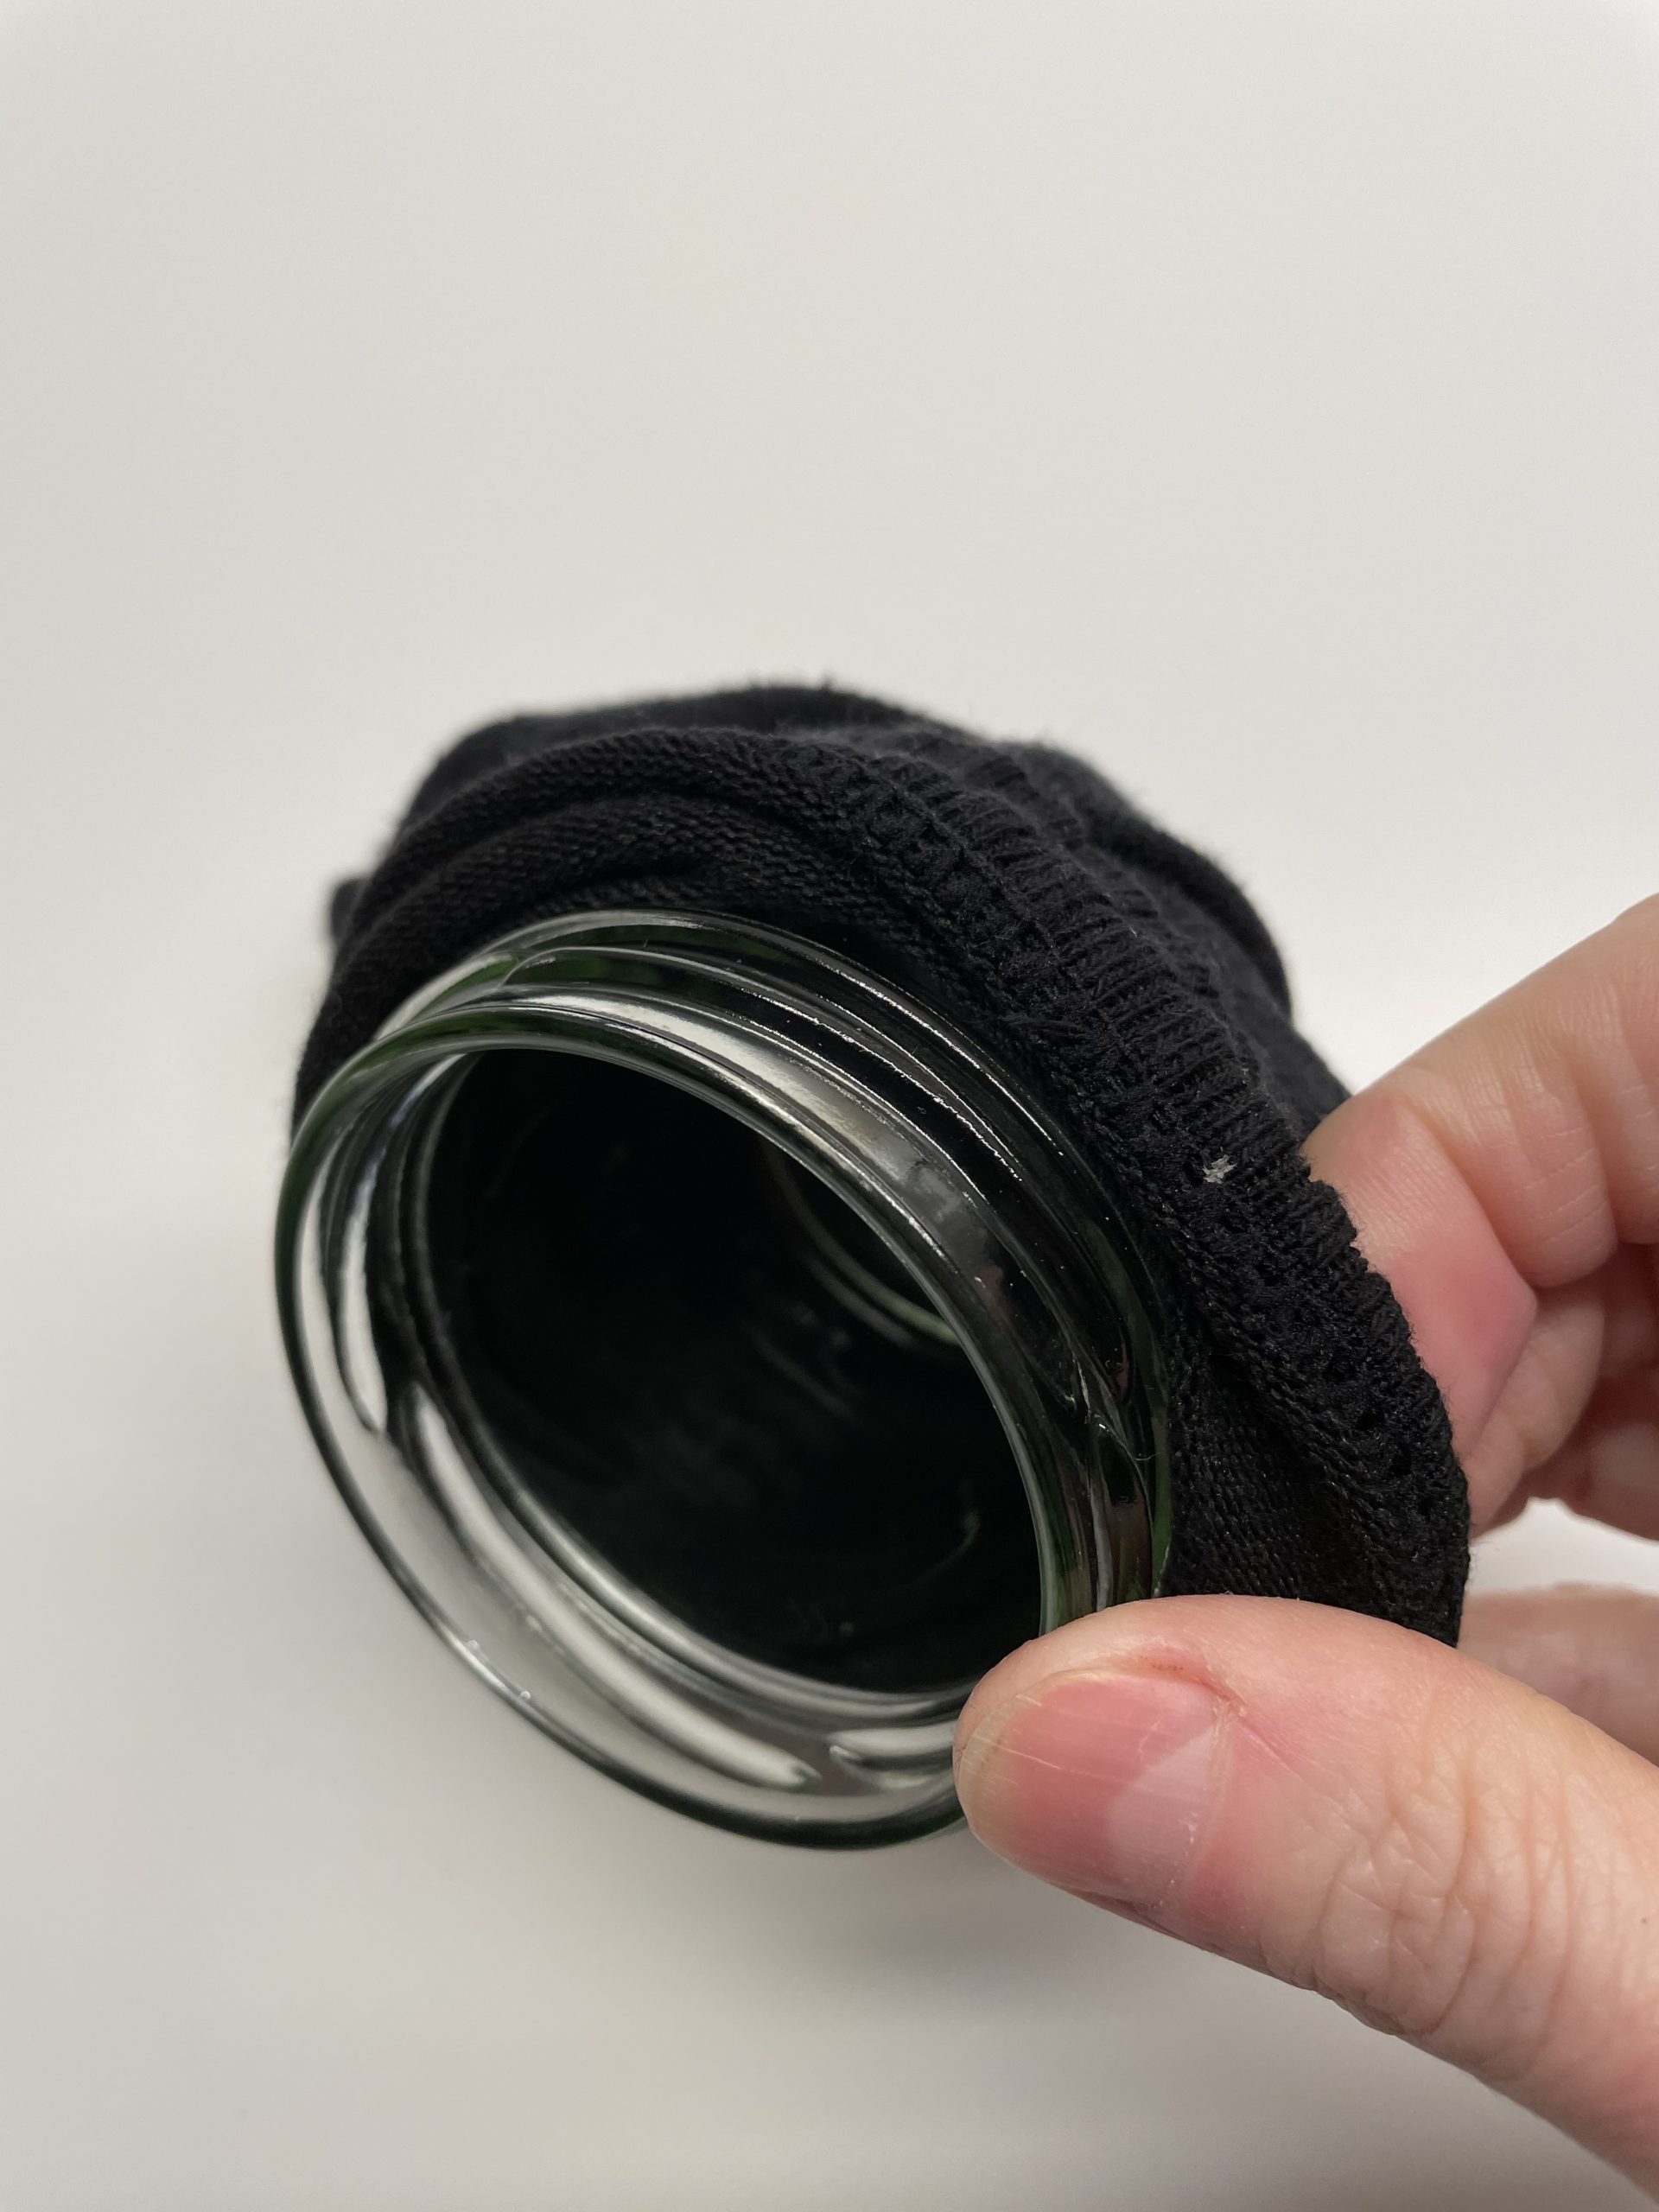
Bild zum Schritt 2 für das Bastel- und DIY-Abenteuer für Kinder: 'Dann steckt ihr das Marmeladenglas ganz in die Socke hinein.'

3

Now pull the sock tightly over the glass and put the overhanging part of the sock into the inside of the glass.

Bild zum Schritt 3 für das Bastel- und DIY-Abenteuer für Kinder: 'Die Socke zieht ihr jetzt straff über das Glas und...'

4

The overhanging part of the sock must disappear completely in the glass.

Bild zum Schritt 4 für das Bastel- und DIY-Abenteuer für Kinder: 'Der überstehende Teil der Socke muss komplett im Glas verschwinden.'

5

Now you cut a circle out of the black fabric.
For example, use a plate to draw and then cut out the circle.

Bild zum Schritt 5 für das Bastel- und DIY-Abenteuer für Kinder: 'Jetzt schneidet ihr einen Kreis aus dem schwarzen Stoff aus....'

6

Under the glass you now place the black fabric circle.
The fabric circle protrudes around about 3cm beyond the birch trunk.

Bild zum Schritt 6 für das Bastel- und DIY-Abenteuer für Kinder: 'Unter das Glas platziert ihr nun den schwarzen Stoffkreis. ...'

7

Now you first stick the fabric circle with hot glue on the trunk.
Then you fix the glass edge also with hot glue on the fabric circle.
The snowman's hat is ready.
Attention when handling the hot glue - burn risk!

Bild zum Schritt 7 für das Bastel- und DIY-Abenteuer für Kinder: 'Jetzt klebt ihr zuerst der Stoffkreis mit Heißkleber auf den...'

8

Now cut a triangle from a red fabric residue.
Tip: the triangle doesn't have to be perfect. Paints one with your hand and cuts it out.

Bild zum Schritt 8 für das Bastel- und DIY-Abenteuer für Kinder: 'Schneidet nun ein Dreieck aus einem roten Stoffrest zu. ...'

9

Then you roll the fabric triangle into a carrot nose.
For this, you brush the edge of the fabric with a glue stick. Only then the nose retains its shape.

Bild zum Schritt 9 für das Bastel- und DIY-Abenteuer für Kinder: 'Dann rollt ihr das Stoffdreieck zu einer Karotten-Nase zusammen. ...'

10

Now hit the edge a bit inwards at the broad end. So you get a small surface to stick on.

Bild zum Schritt 10 für das Bastel- und DIY-Abenteuer für Kinder: 'Nun schlagt ihr am breiten Ende den Rand etwas nach...'

11

Now you stick your nose to the trunk with hot glue.

Bild zum Schritt 11 für das Bastel- und DIY-Abenteuer für Kinder: 'Mit Heißkleber klebt ihr jetzt die Nase am Stamm fest.'

12

Now place two smaller buttons above the nose than eyes.
To do this, you pat a point with hot glue at the desired place on the trunk.
Then you press the button carefully.

Bild zum Schritt 12 für das Bastel- und DIY-Abenteuer für Kinder: 'Setzt nun oberhalb der Nase zwei kleinere Knöpfe als Augen....'

13

At the big buttons on the belly of the snowman you proceed the same way afterwards.

Bild zum Schritt 13 für das Bastel- und DIY-Abenteuer für Kinder: 'Bei den großen Knöpfen am Bauch des Schneemannes geht ihr...'

14

The snowman is ready.
Now look for a nice place!

Bild zum Schritt 14 für das Bastel- und DIY-Abenteuer für Kinder: 'Fertig ist der Schneemann.   Sucht euch nun noch...'

15

2. Bild zum Schritt 14 für das Bastel- und DIY-Abenteuer für Kinder: 'Fertig ist der Schneemann.   Sucht euch nun noch...'

16

Have fun doing crafts!

Materials

 1 Birch strain approximately 30-50cm long and 8-10cm thick
 1 small straight jam glass
 1 black fabric circle (approx. 20cm diameter)
 2 Smaller dark buttons
 4 big dark buttons
 1 small red fabric triangleRemaining piece: about 5-8 cm
 Hot glue
 Builder's pad
All links marked with a shopping cart lead to Amazon - here we have selected products that we would order ourselves and in part also ordered. In a qualified purchase via the advertising link, we as Amazon partner receive a commission, for you there are no costs. You thus support our cost- and advertising banner-free, educational offer.

Directions

1

First, prepare all the materials and spread out your craft material.

Bild zum Schritt 1 für das Bastel- und DIY-Abenteuer für Kinder: 'Legt zuerst alle Materialien bereit und breitet eure Bastelunterlage aus.'

2

Then you put the jam jar completely into the sock.

Bild zum Schritt 2 für das Bastel- und DIY-Abenteuer für Kinder: 'Dann steckt ihr das Marmeladenglas ganz in die Socke hinein.'

3

Now pull the sock tightly over the glass and put the overhanging part of the sock into the inside of the glass.
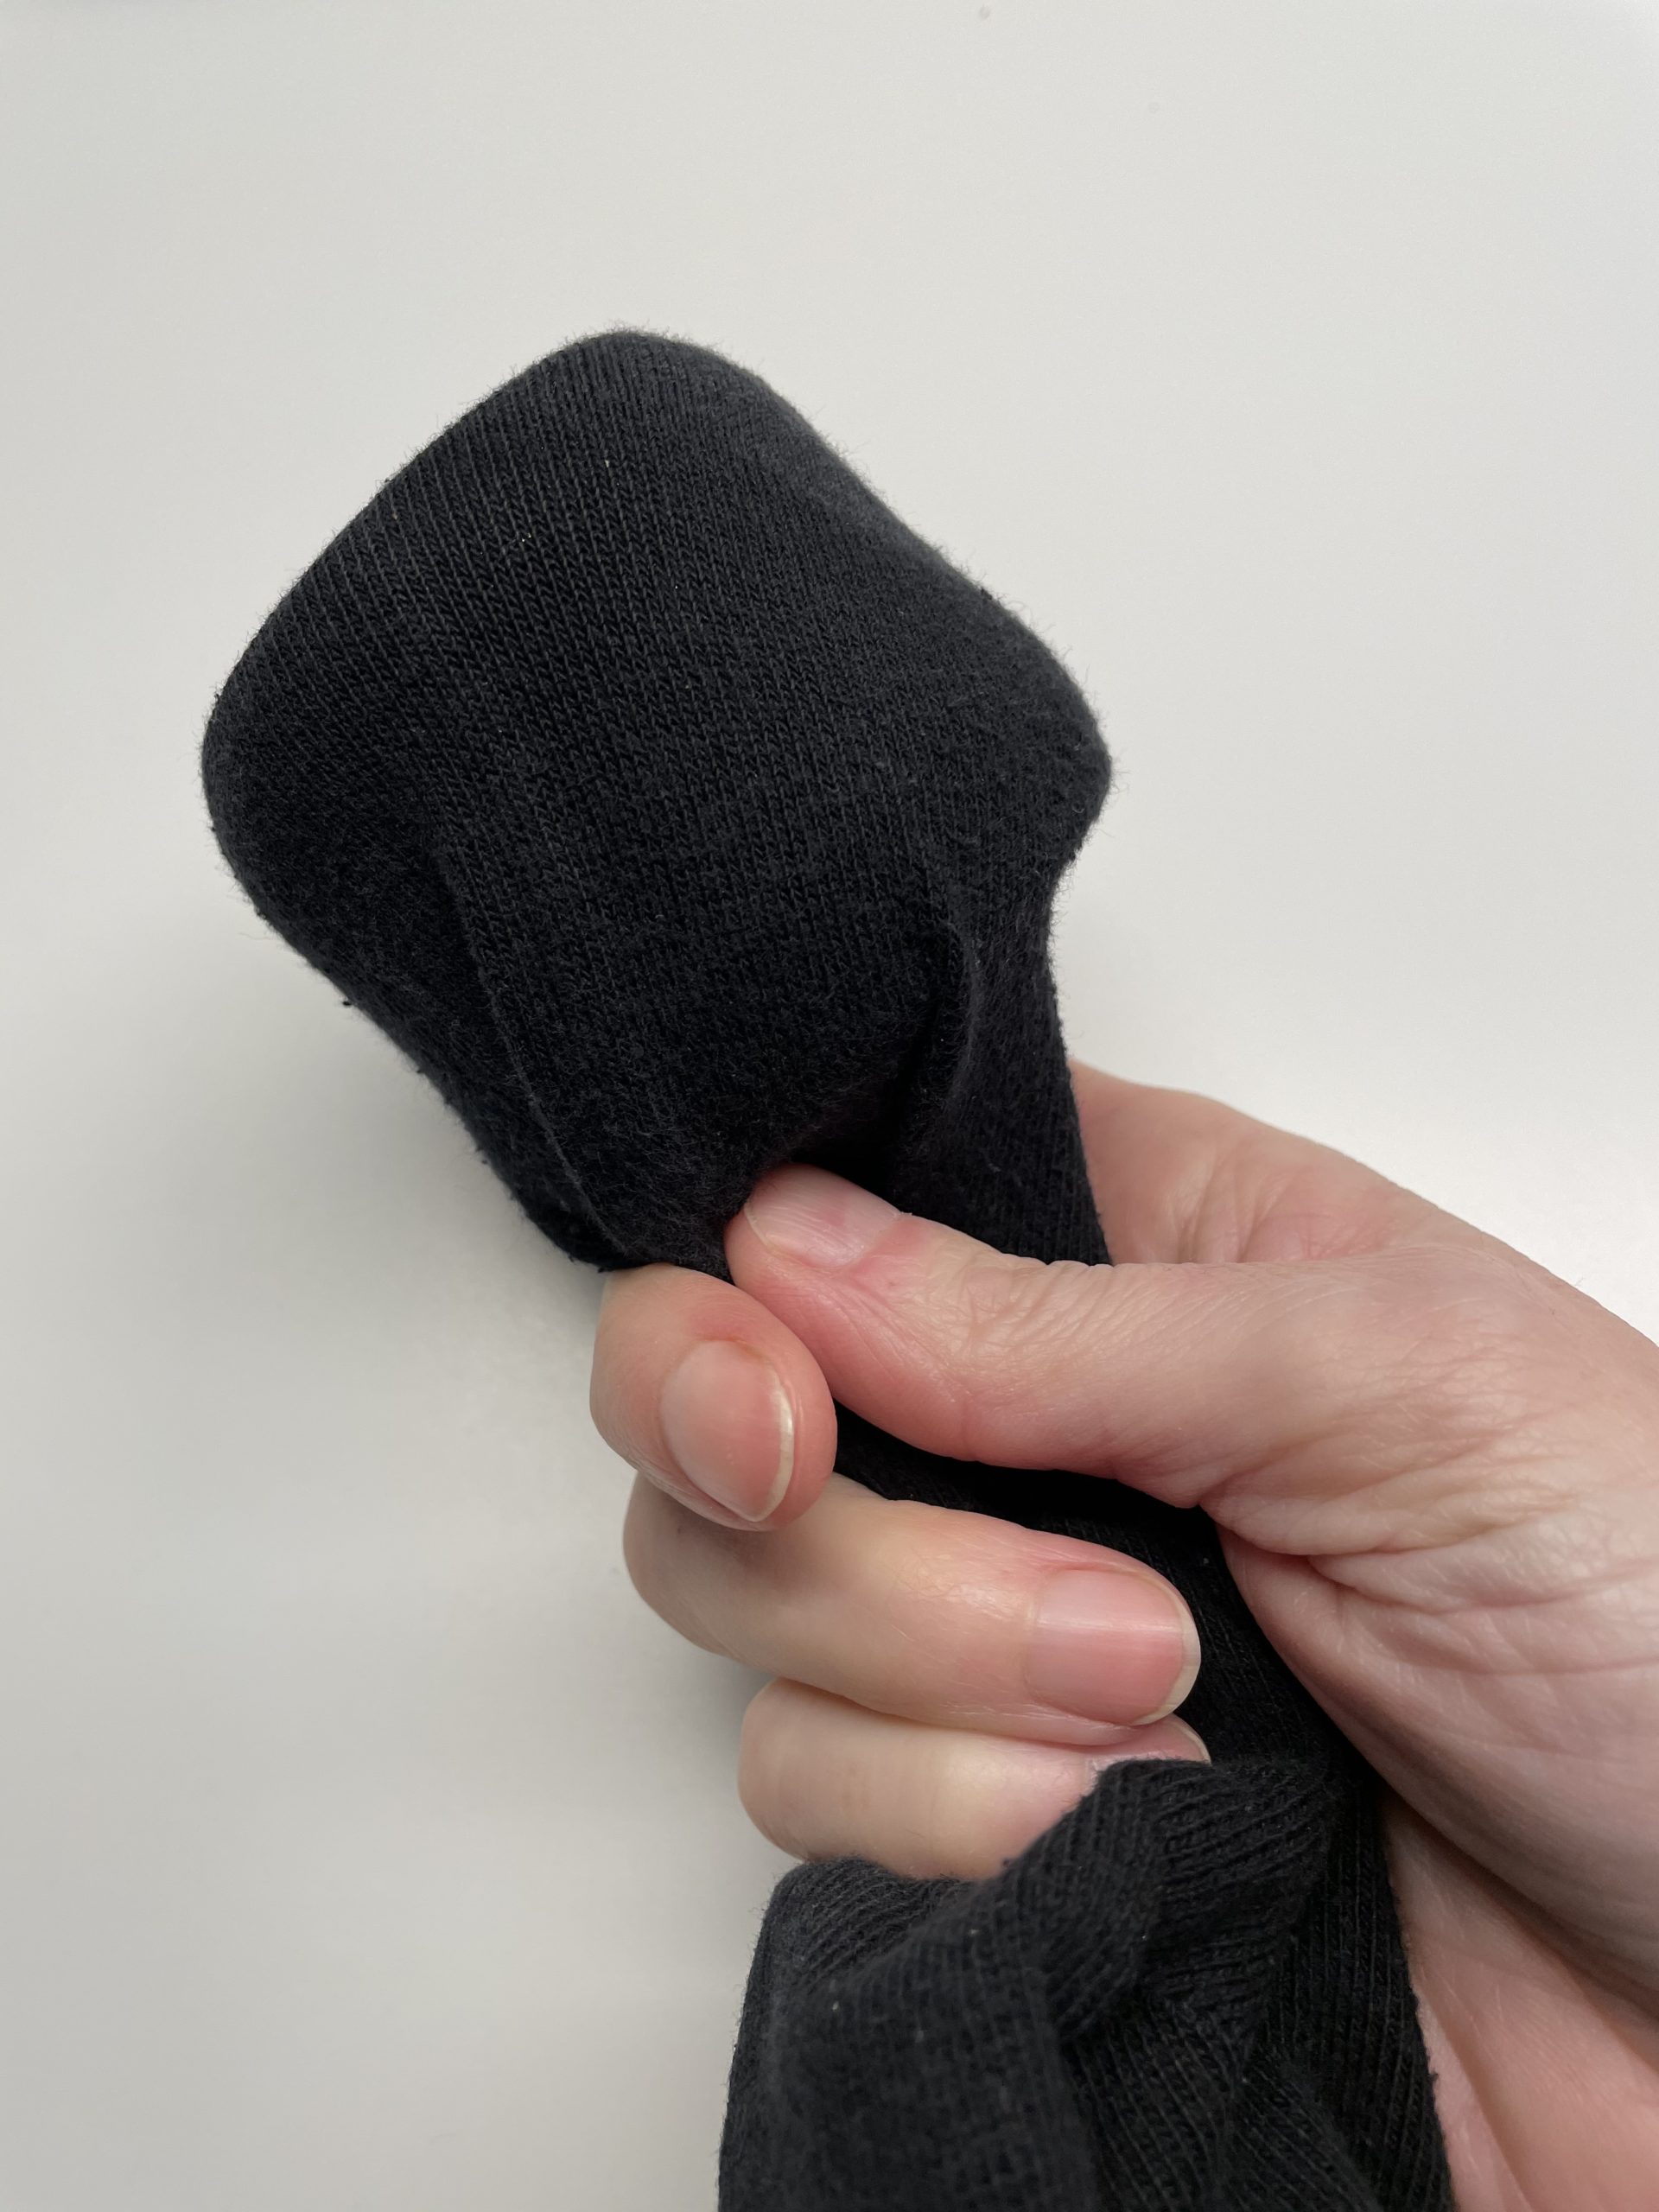
Bild zum Schritt 3 für das Bastel- und DIY-Abenteuer für Kinder: 'Die Socke zieht ihr jetzt straff über das Glas und...'

4

The overhanging part of the sock must disappear completely in the glass.
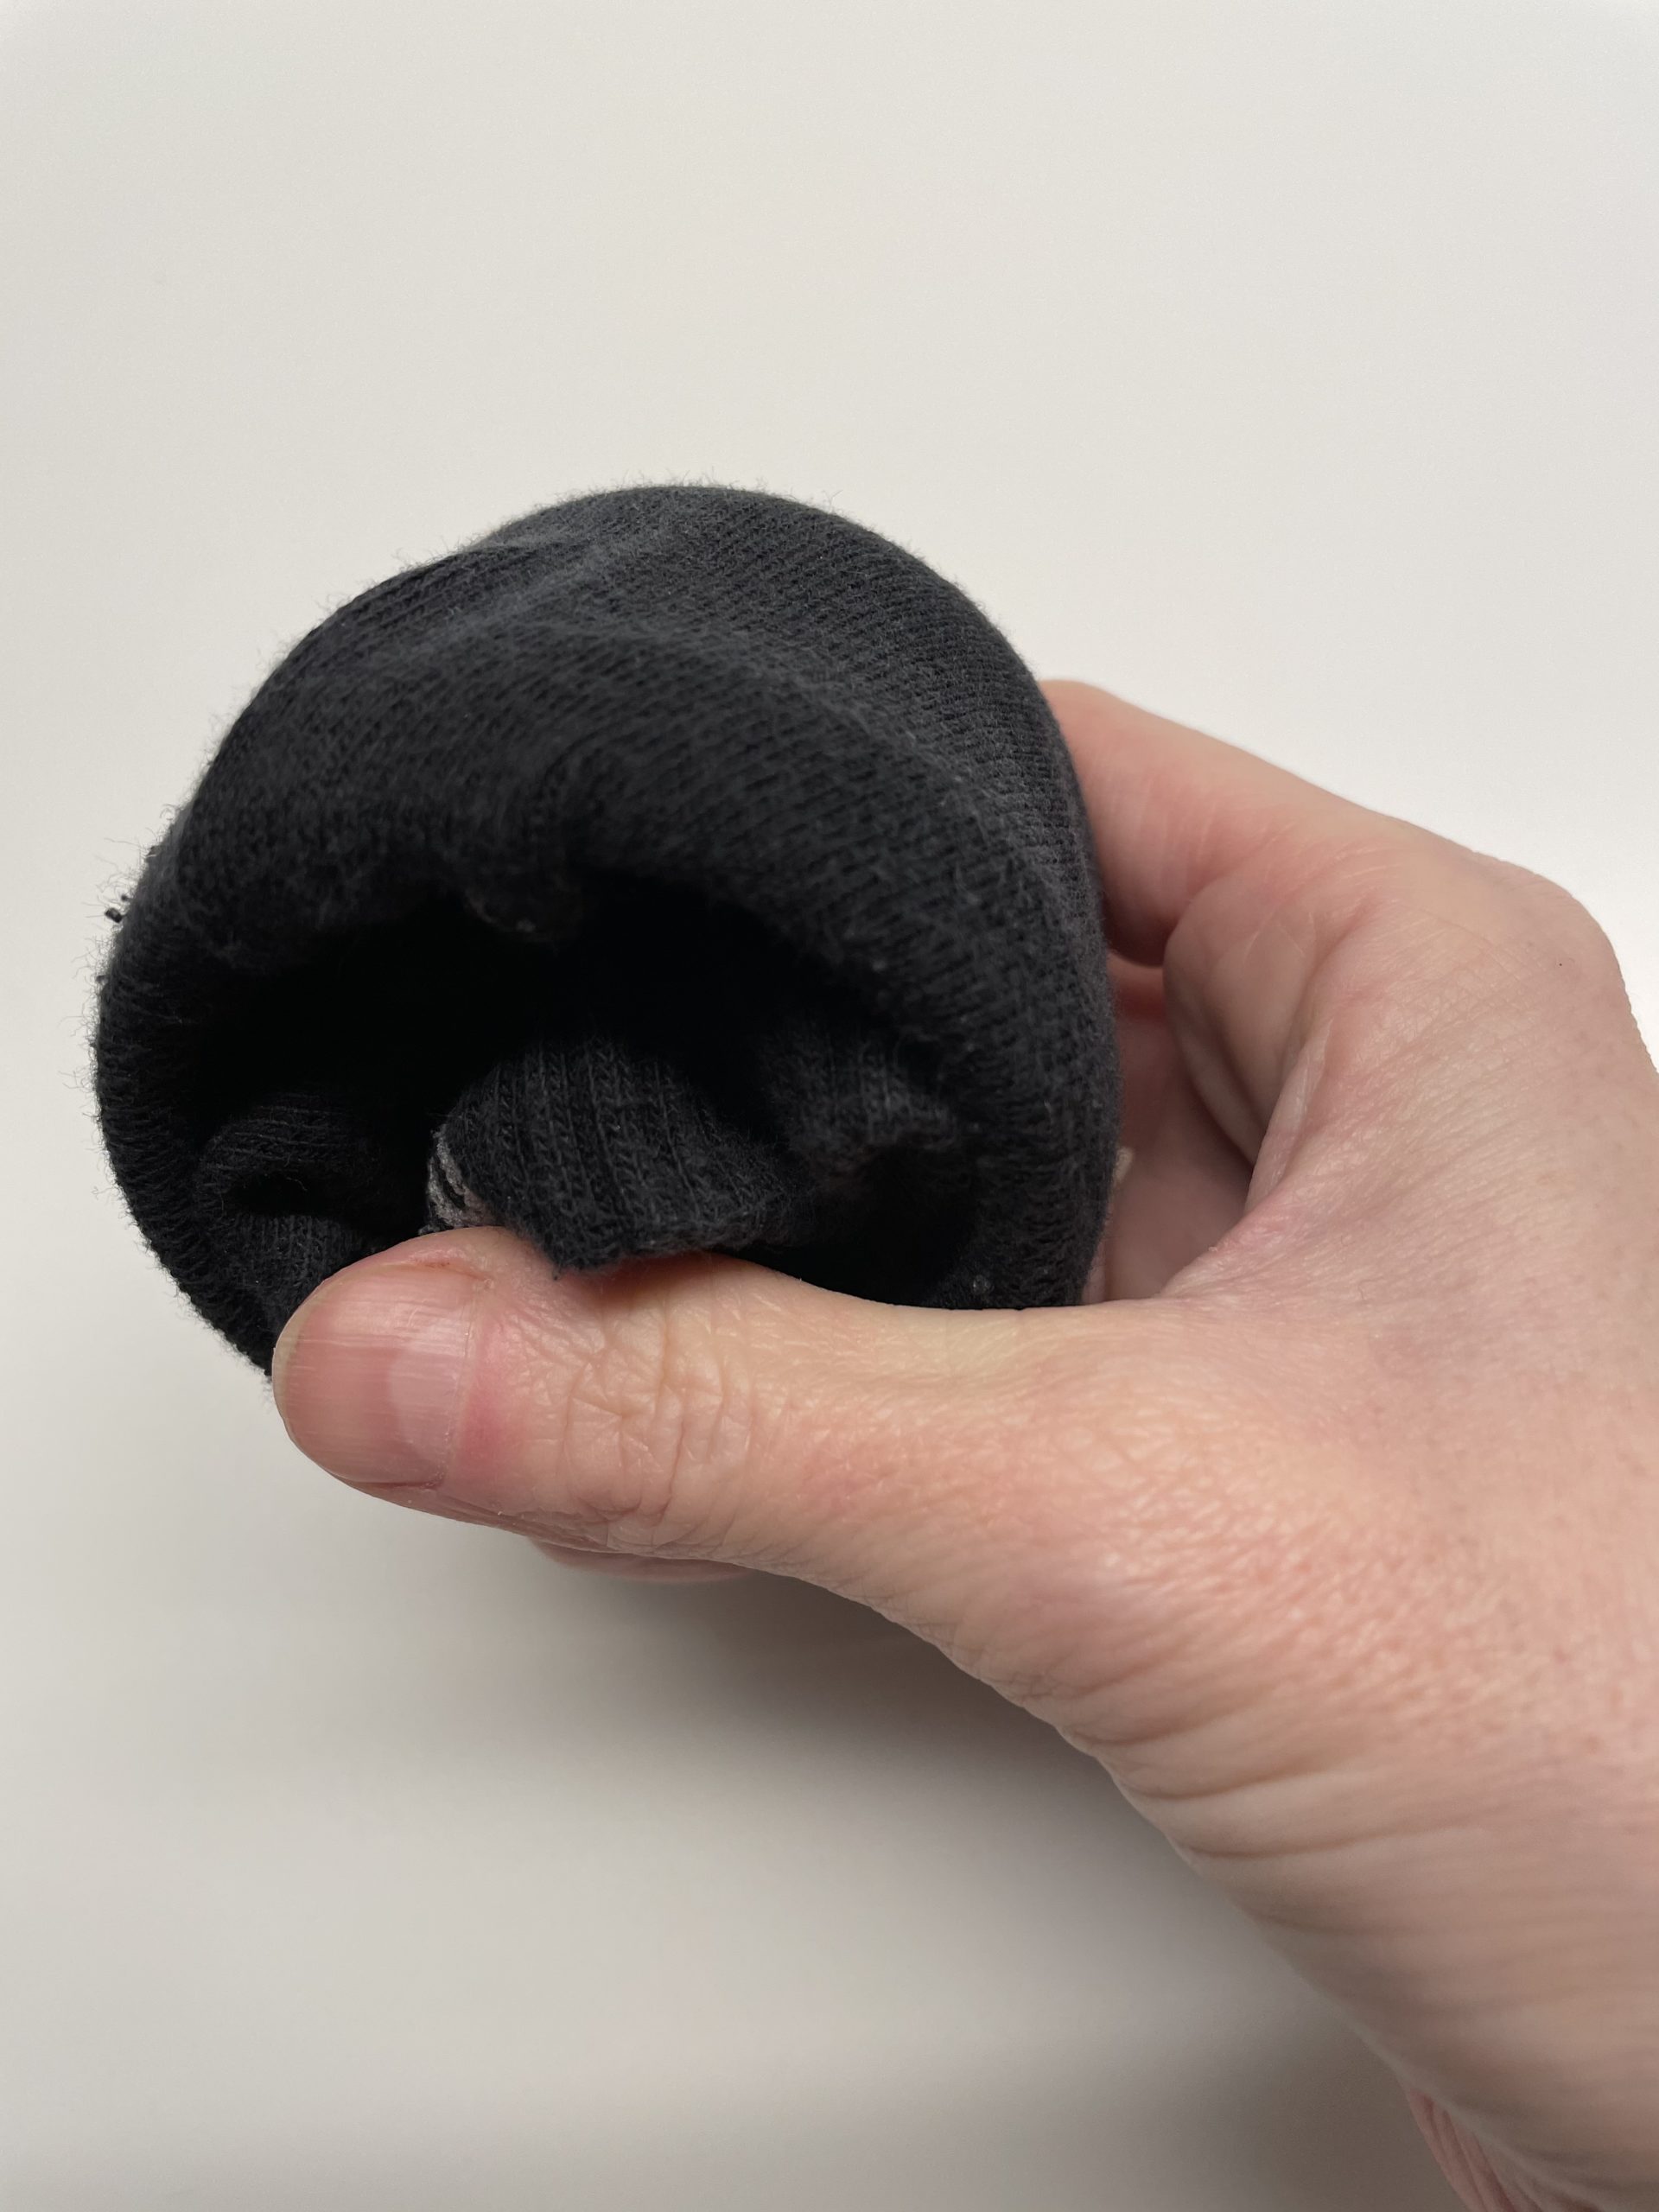
Bild zum Schritt 4 für das Bastel- und DIY-Abenteuer für Kinder: 'Der überstehende Teil der Socke muss komplett im Glas verschwinden.'

5

Now you cut a circle out of the black fabric.
For example, use a plate to draw and then cut out the circle.
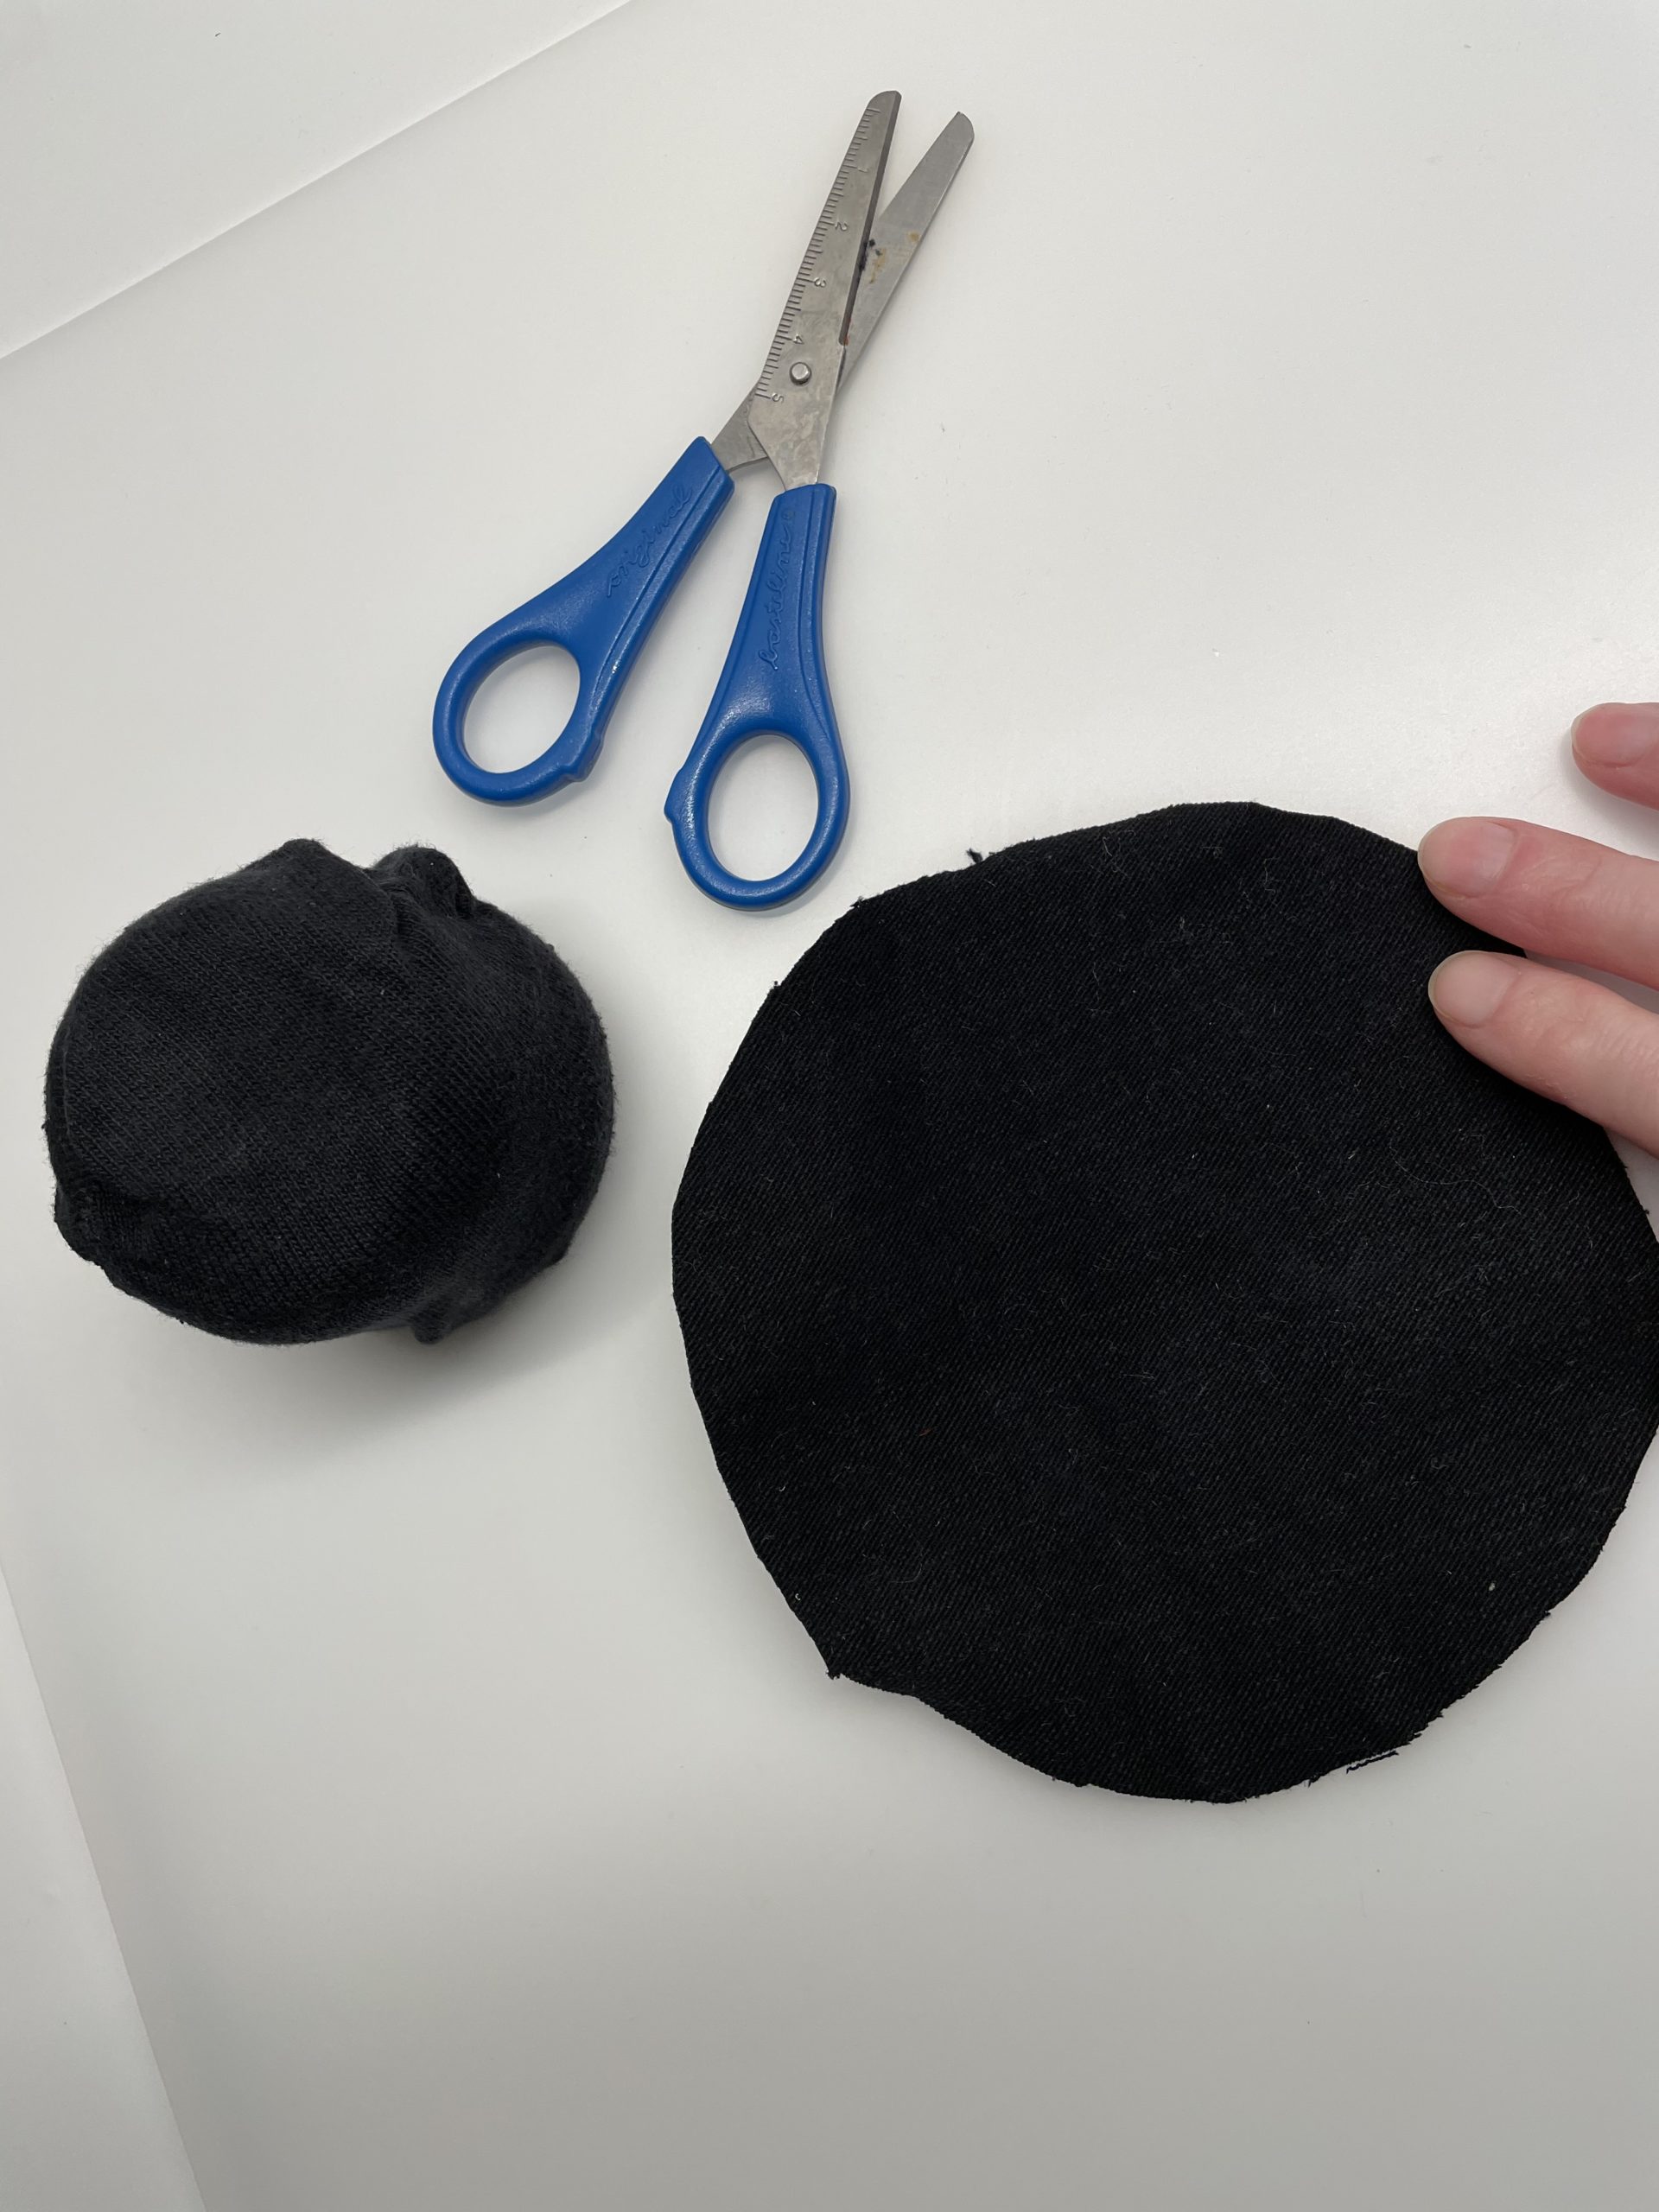
Bild zum Schritt 5 für das Bastel- und DIY-Abenteuer für Kinder: 'Jetzt schneidet ihr einen Kreis aus dem schwarzen Stoff aus....'

6

Under the glass you now place the black fabric circle.
The fabric circle protrudes around about 3cm beyond the birch trunk.

Bild zum Schritt 6 für das Bastel- und DIY-Abenteuer für Kinder: 'Unter das Glas platziert ihr nun den schwarzen Stoffkreis. ...'

7

Now you first stick the fabric circle with hot glue on the trunk.
Then you fix the glass edge also with hot glue on the fabric circle.
The snowman's hat is ready.
Attention when handling the hot glue - burn risk!
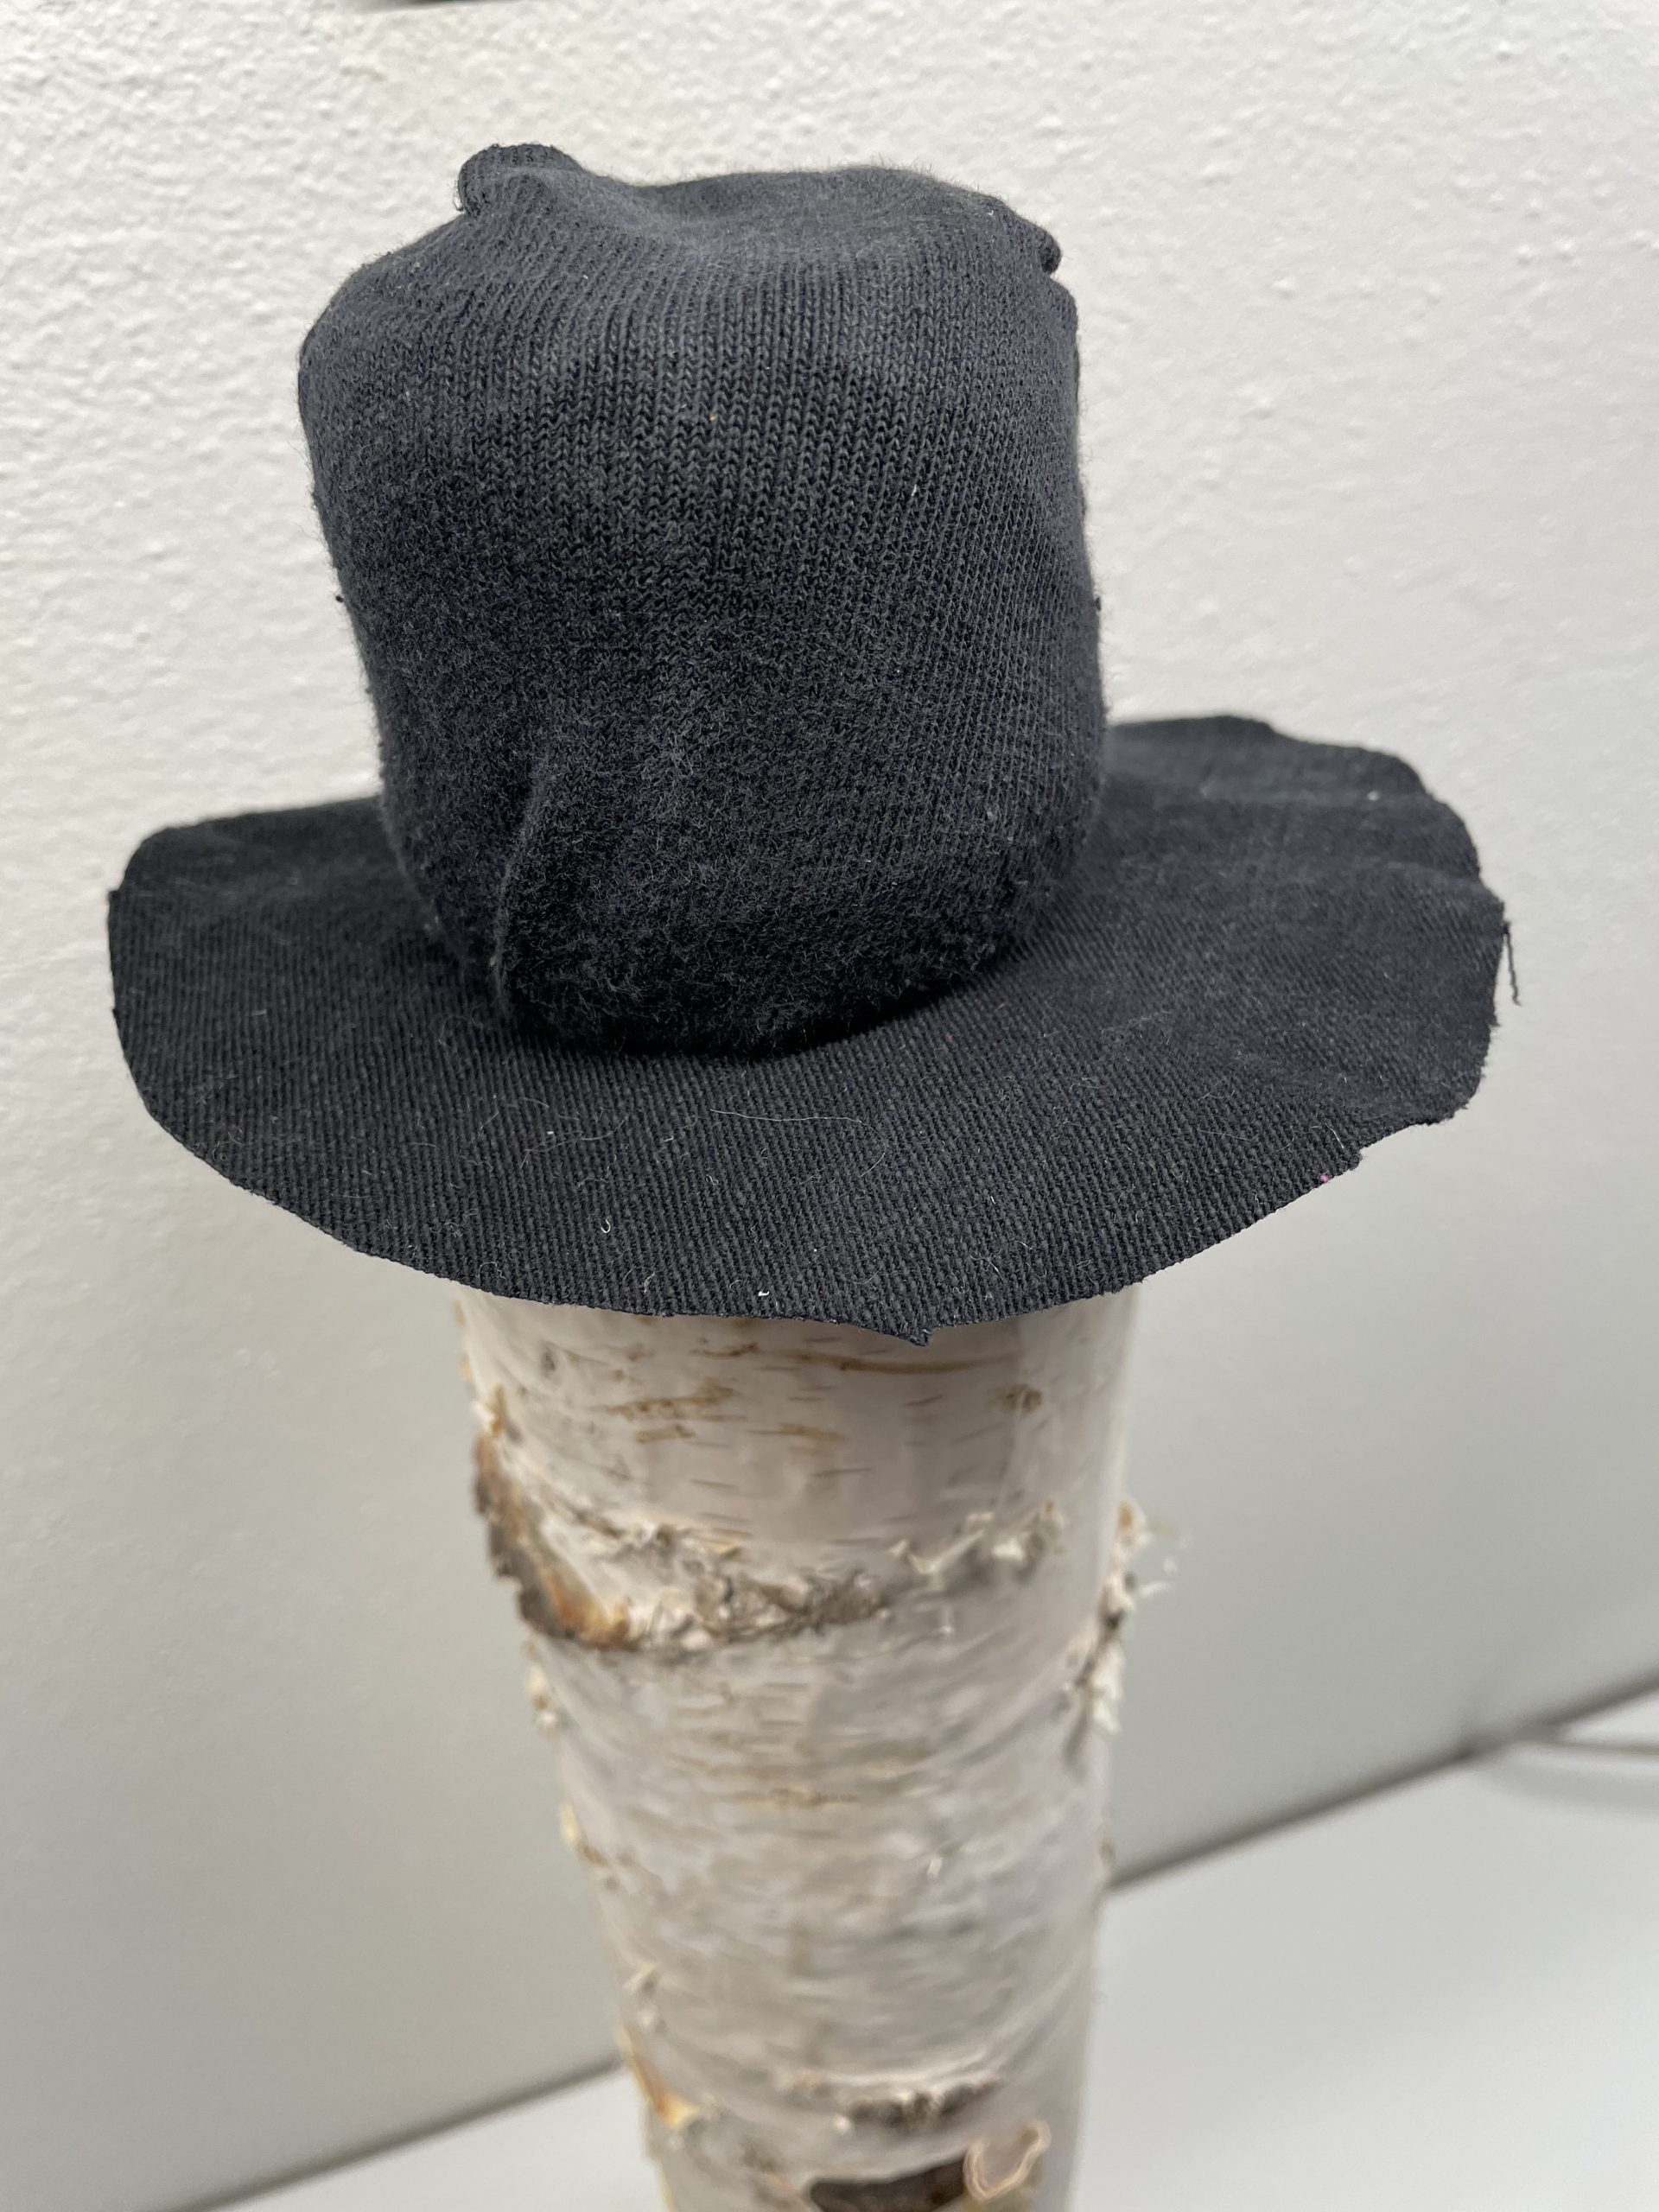
Bild zum Schritt 7 für das Bastel- und DIY-Abenteuer für Kinder: 'Jetzt klebt ihr zuerst der Stoffkreis mit Heißkleber auf den...'

8

Now cut a triangle from a red fabric residue.
Tip: the triangle doesn't have to be perfect. Paints one with your hand and cuts it out.
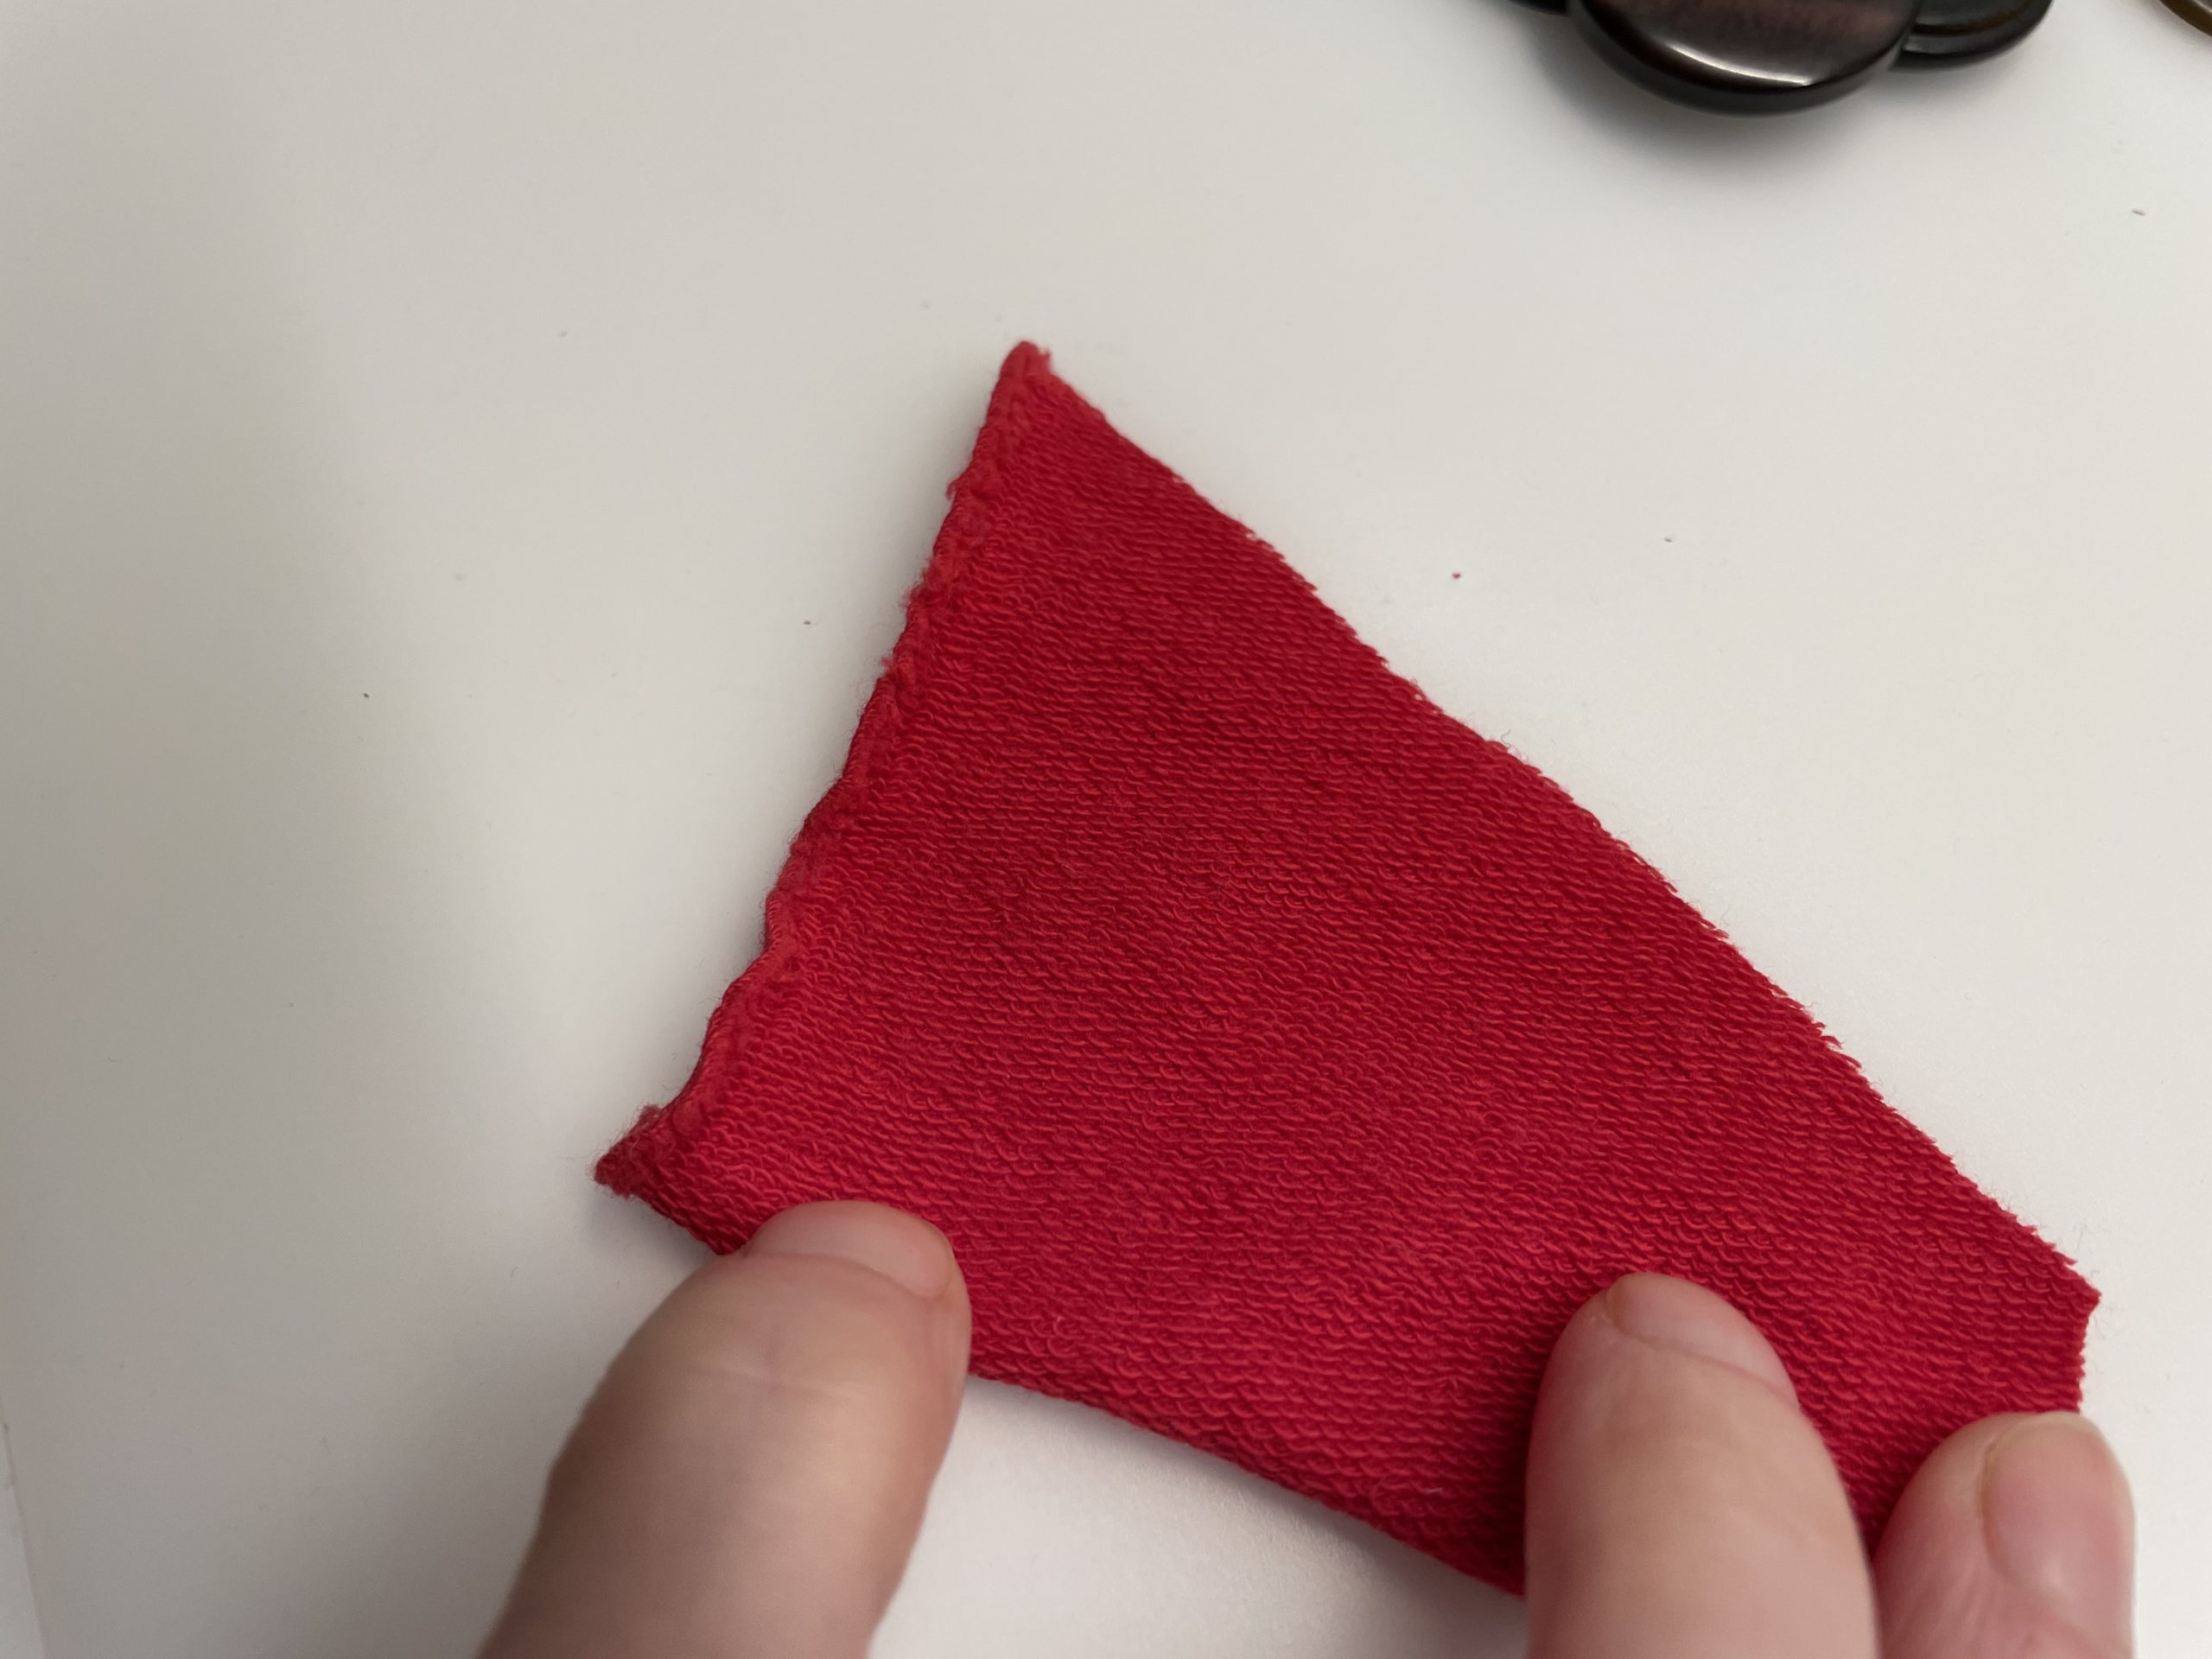
Bild zum Schritt 8 für das Bastel- und DIY-Abenteuer für Kinder: 'Schneidet nun ein Dreieck aus einem roten Stoffrest zu. ...'

9

Then you roll the fabric triangle into a carrot nose.
For this, you brush the edge of the fabric with a glue stick. Only then the nose retains its shape.
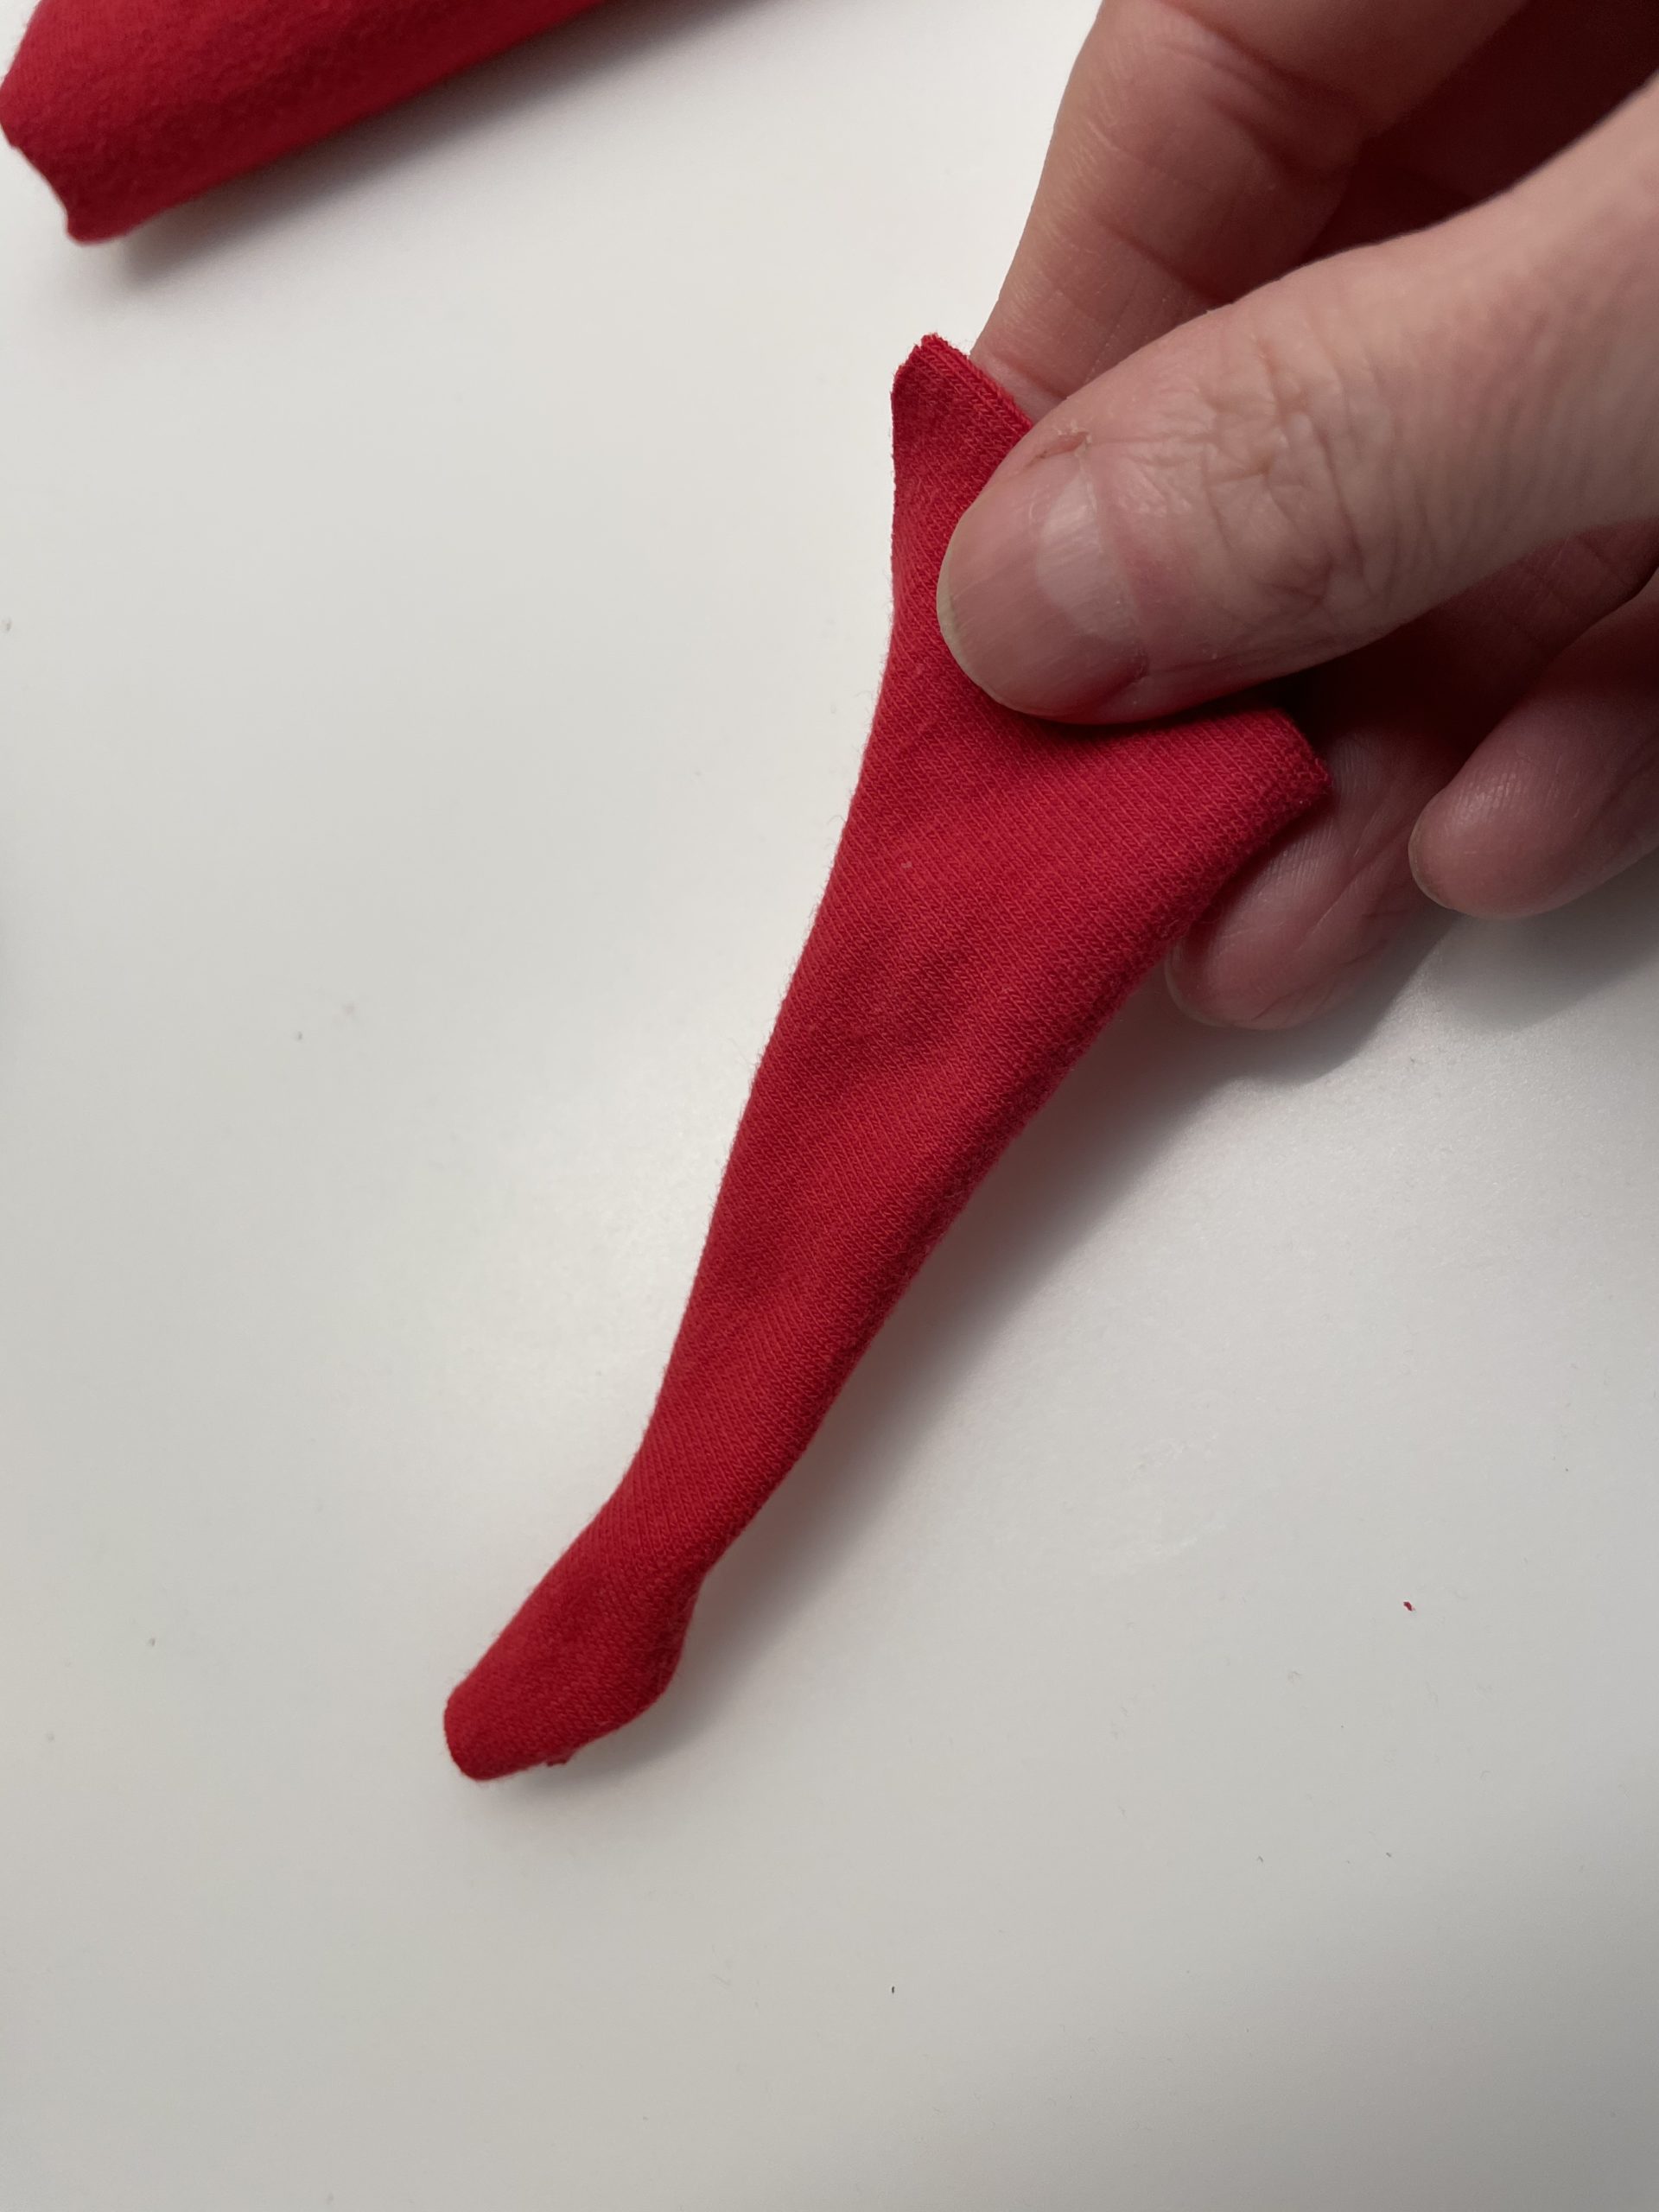
Bild zum Schritt 9 für das Bastel- und DIY-Abenteuer für Kinder: 'Dann rollt ihr das Stoffdreieck zu einer Karotten-Nase zusammen. ...'

10

Now hit the edge a bit inwards at the broad end. So you get a small surface to stick on.
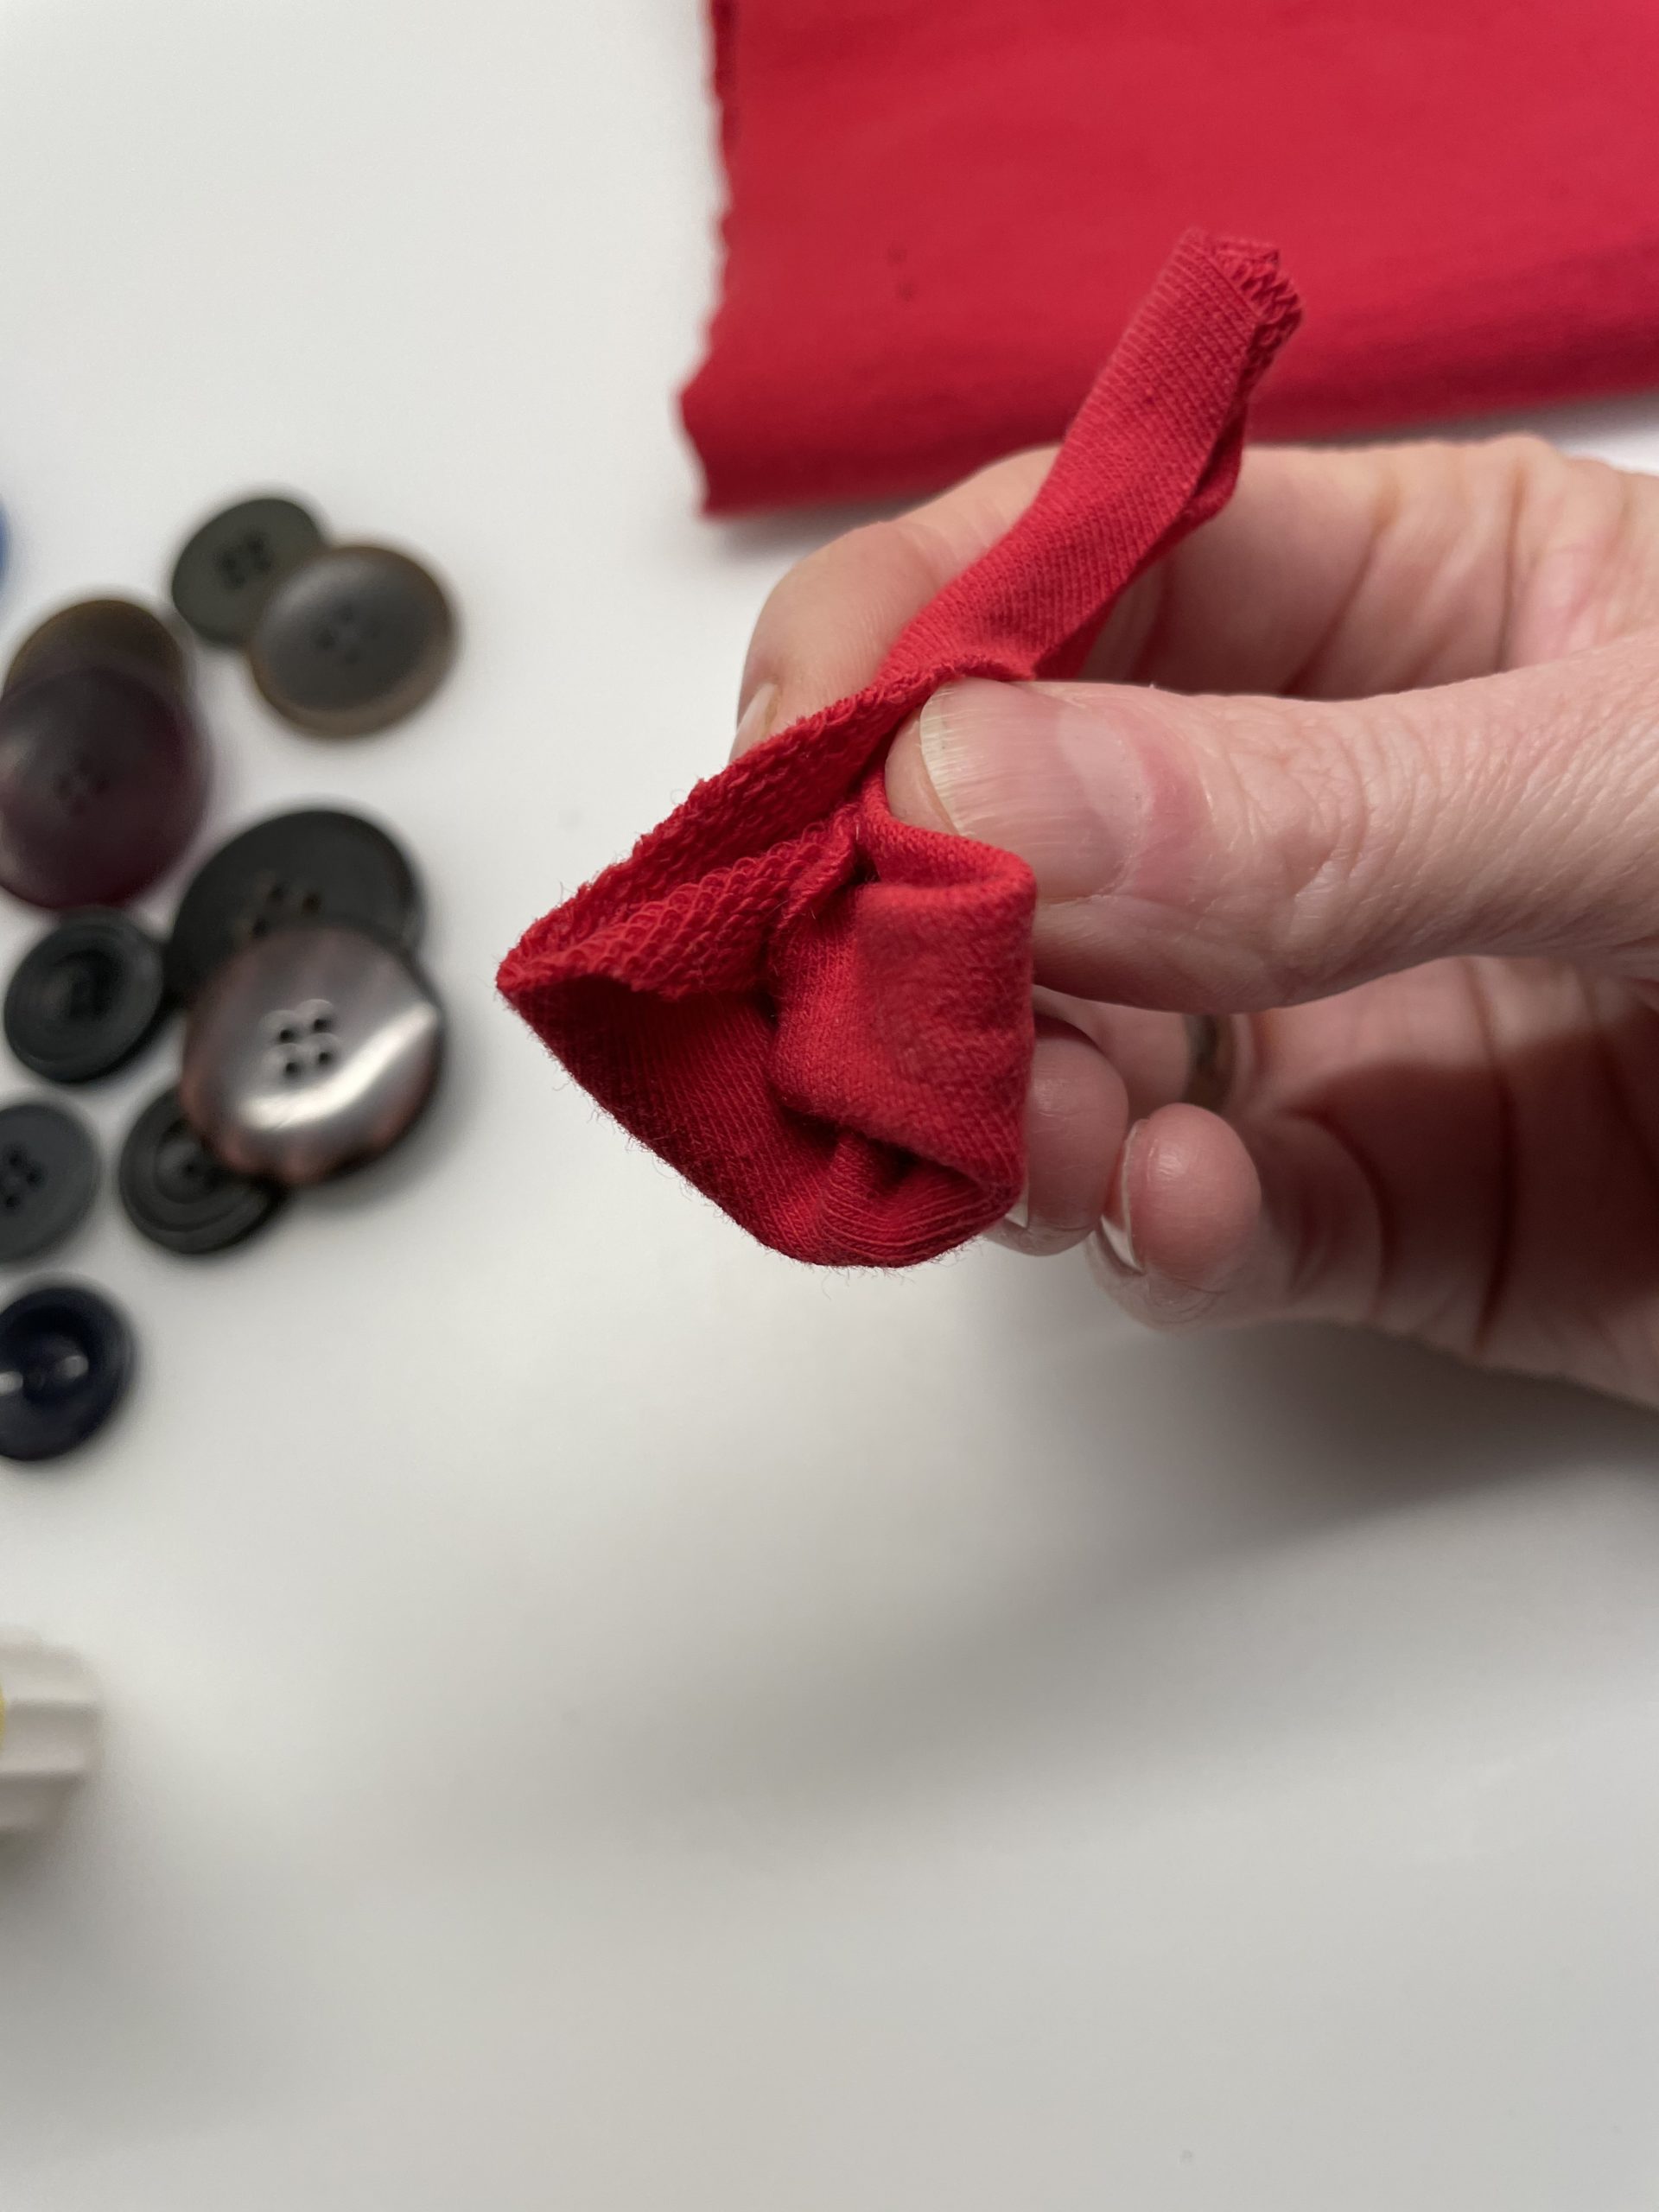
Bild zum Schritt 10 für das Bastel- und DIY-Abenteuer für Kinder: 'Nun schlagt ihr am breiten Ende den Rand etwas nach...'

11

Now you stick your nose to the trunk with hot glue.
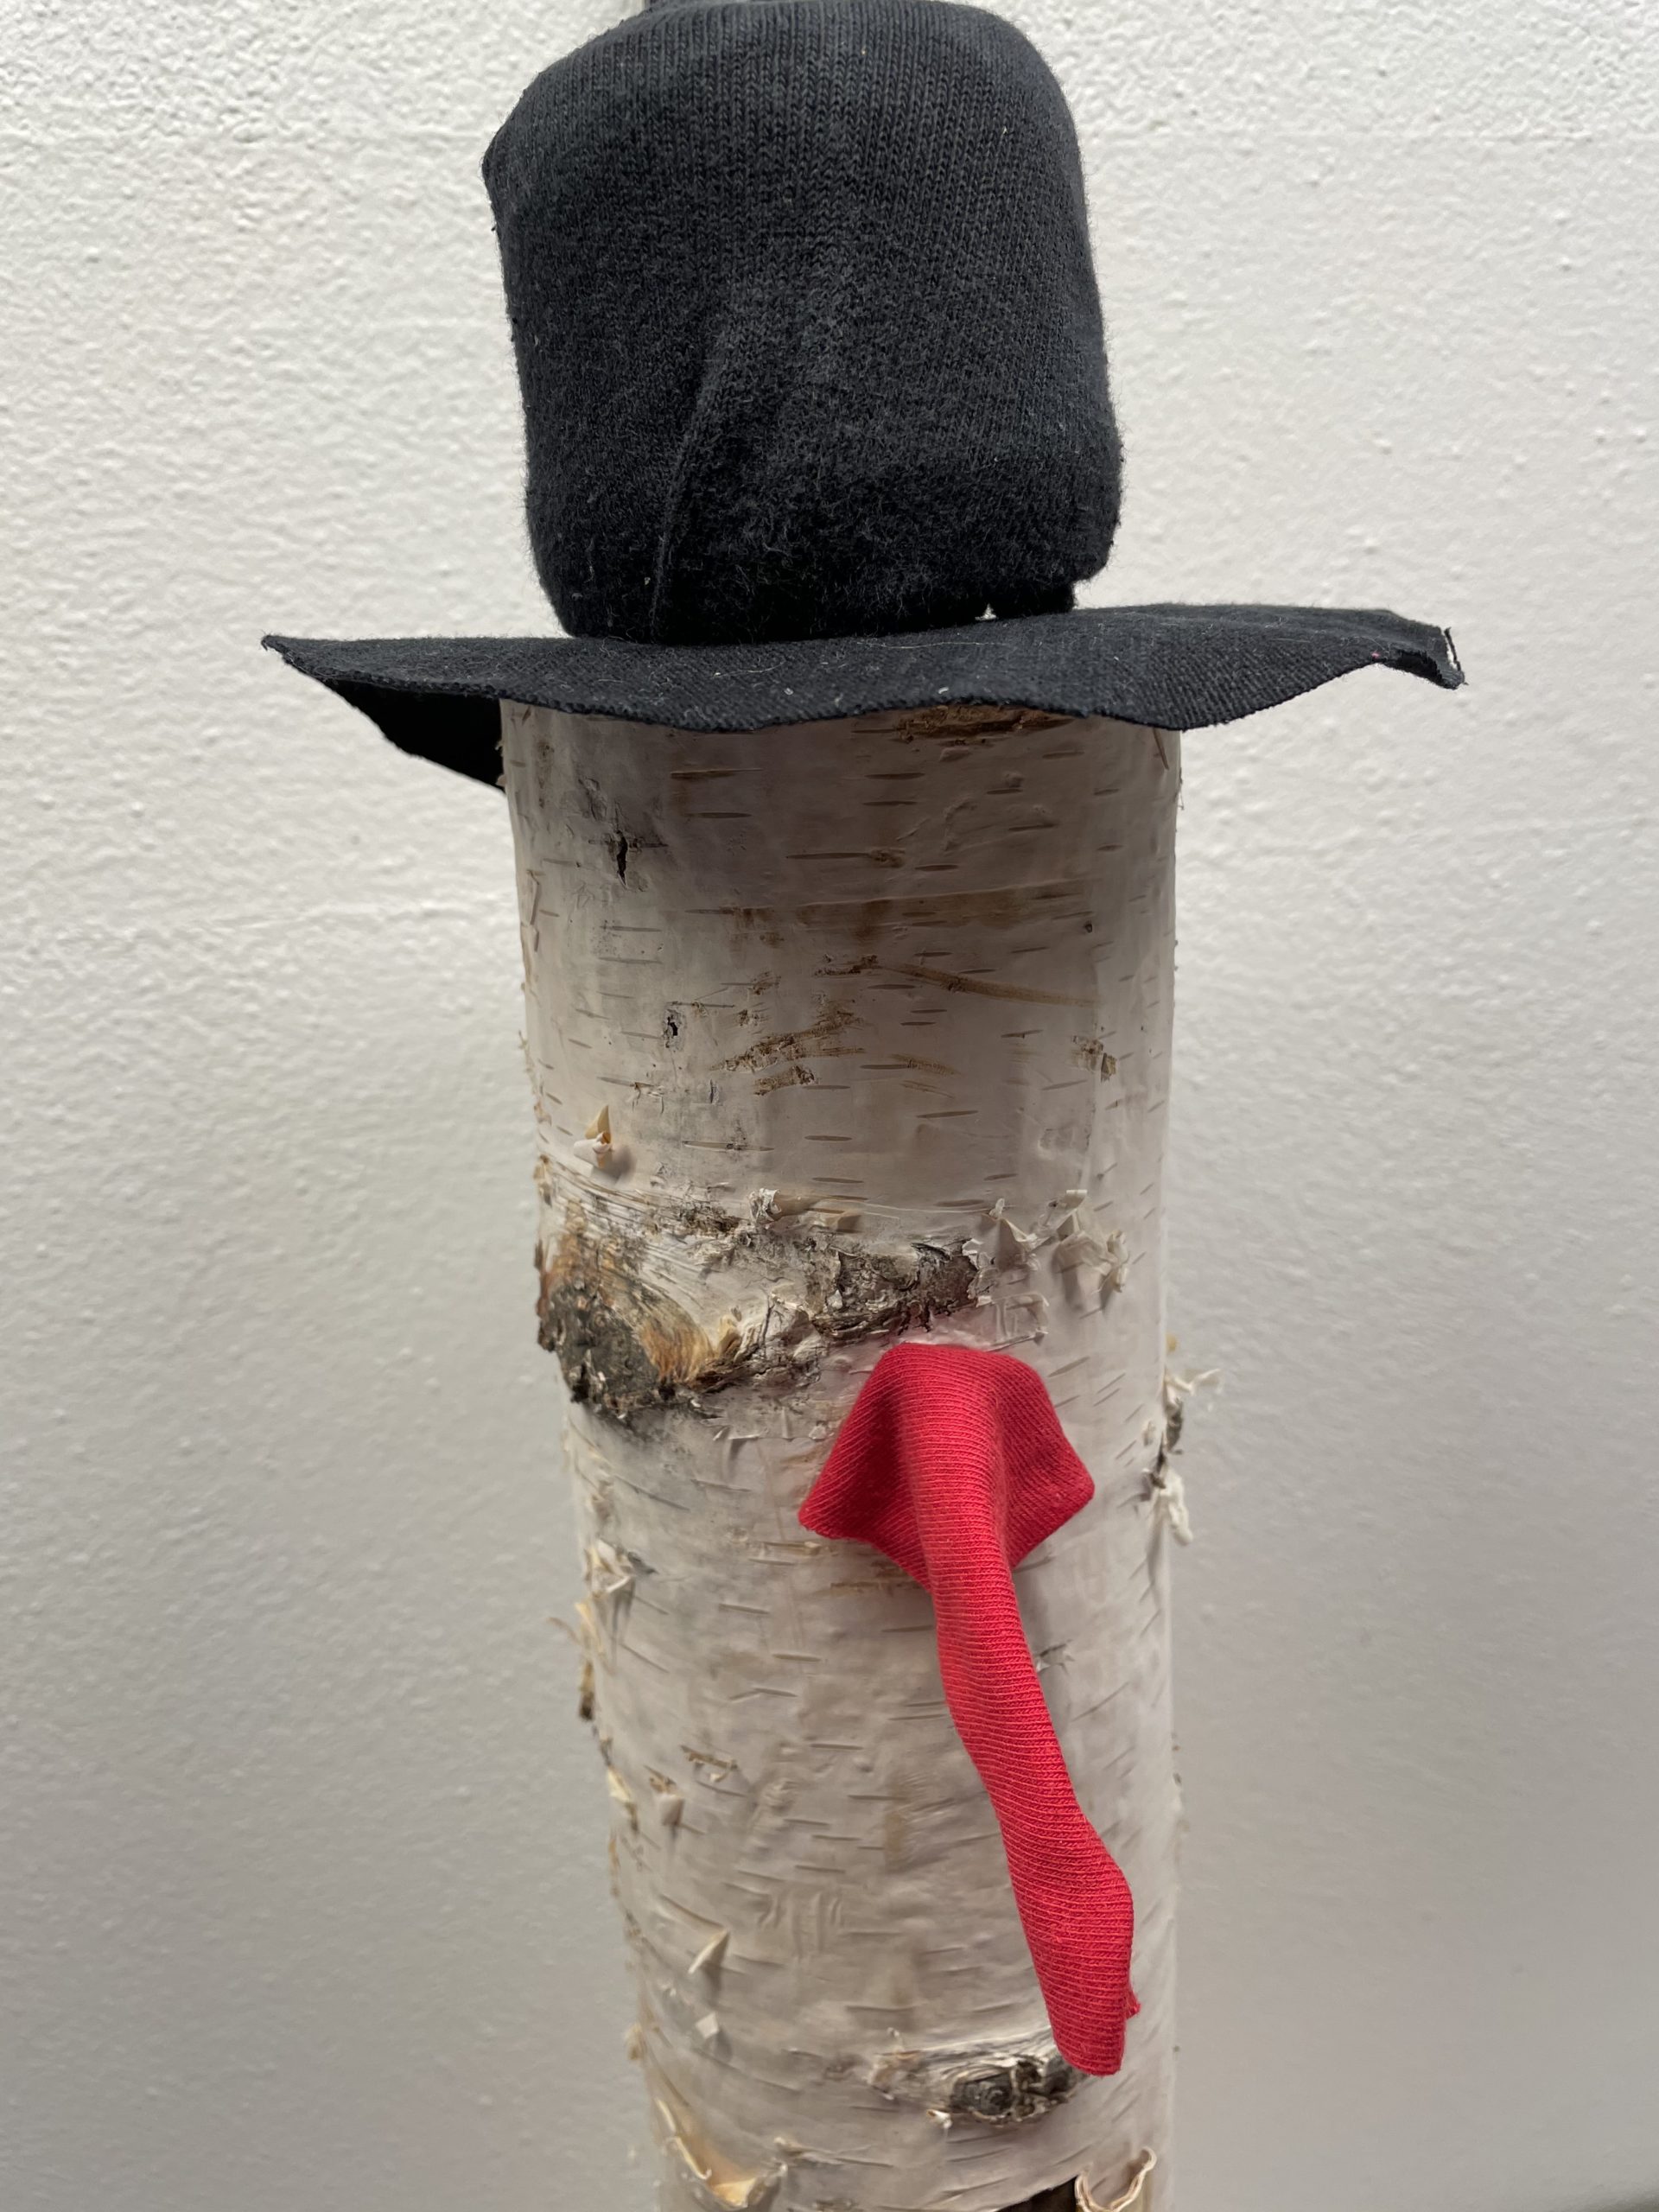
Bild zum Schritt 11 für das Bastel- und DIY-Abenteuer für Kinder: 'Mit Heißkleber klebt ihr jetzt die Nase am Stamm fest.'

12

Now place two smaller buttons above the nose than eyes.
To do this, you pat a point with hot glue at the desired place on the trunk.
Then you press the button carefully.
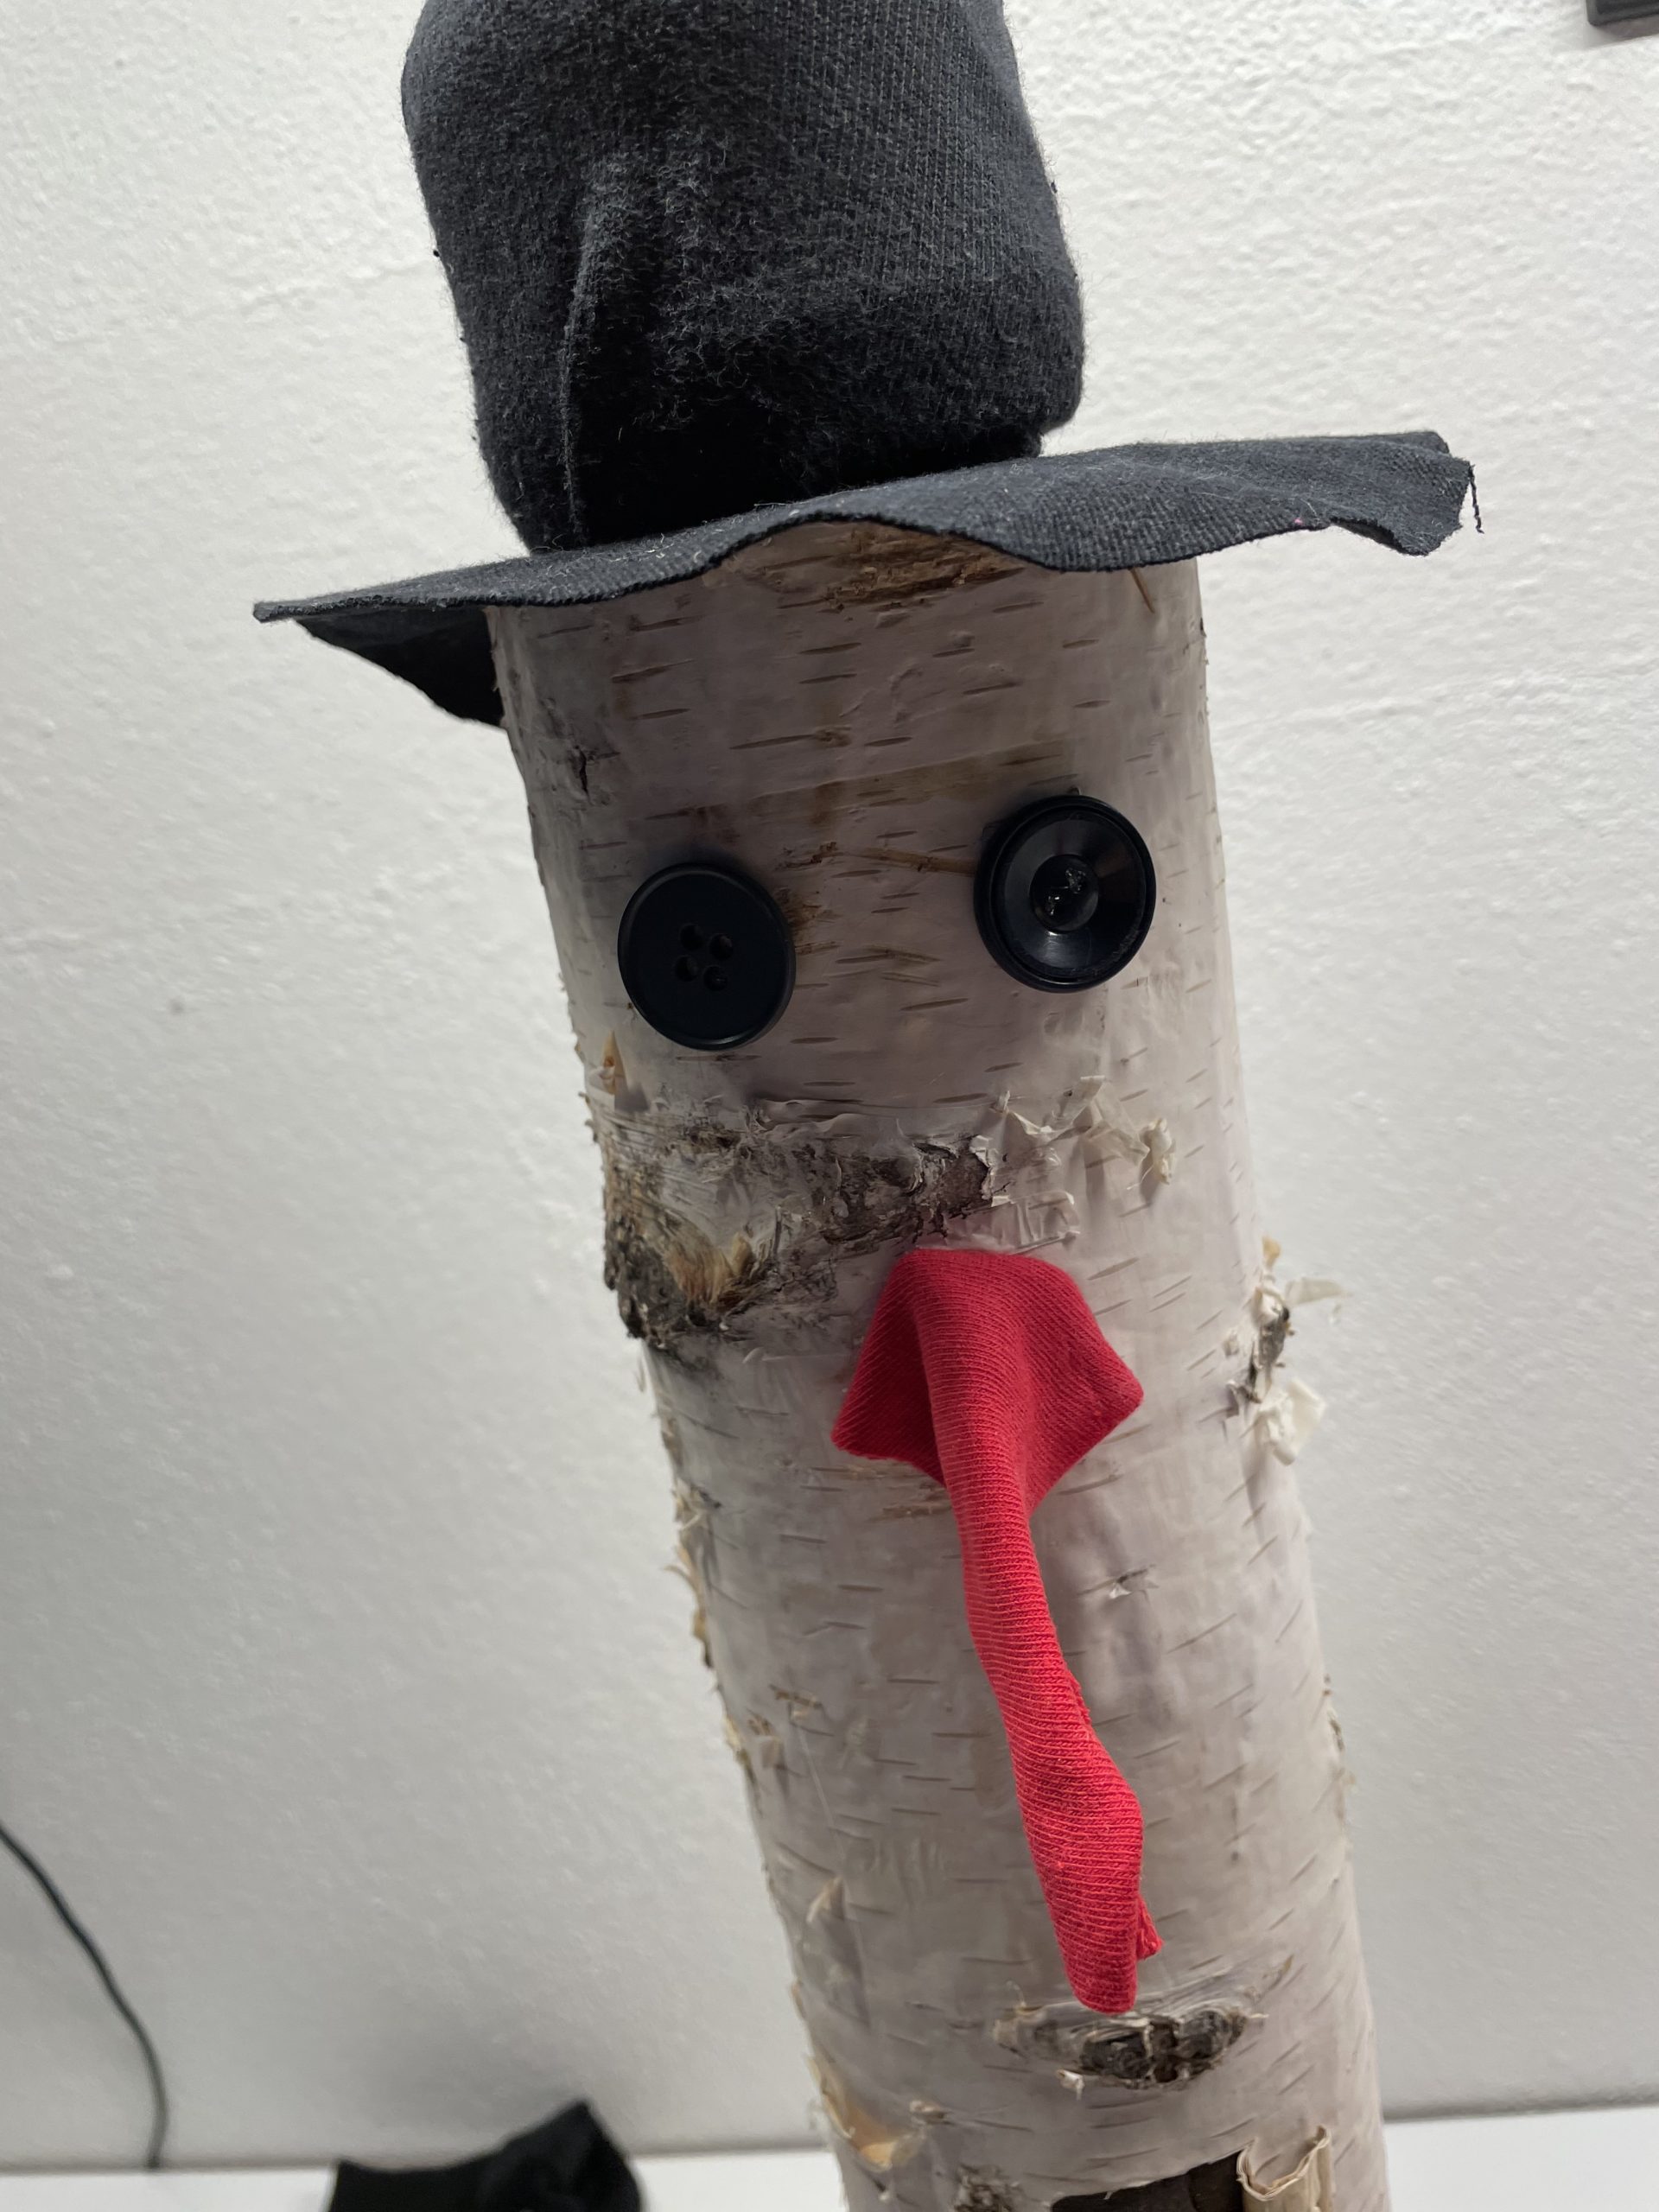
Bild zum Schritt 12 für das Bastel- und DIY-Abenteuer für Kinder: 'Setzt nun oberhalb der Nase zwei kleinere Knöpfe als Augen....'

13

At the big buttons on the belly of the snowman you proceed the same way afterwards.
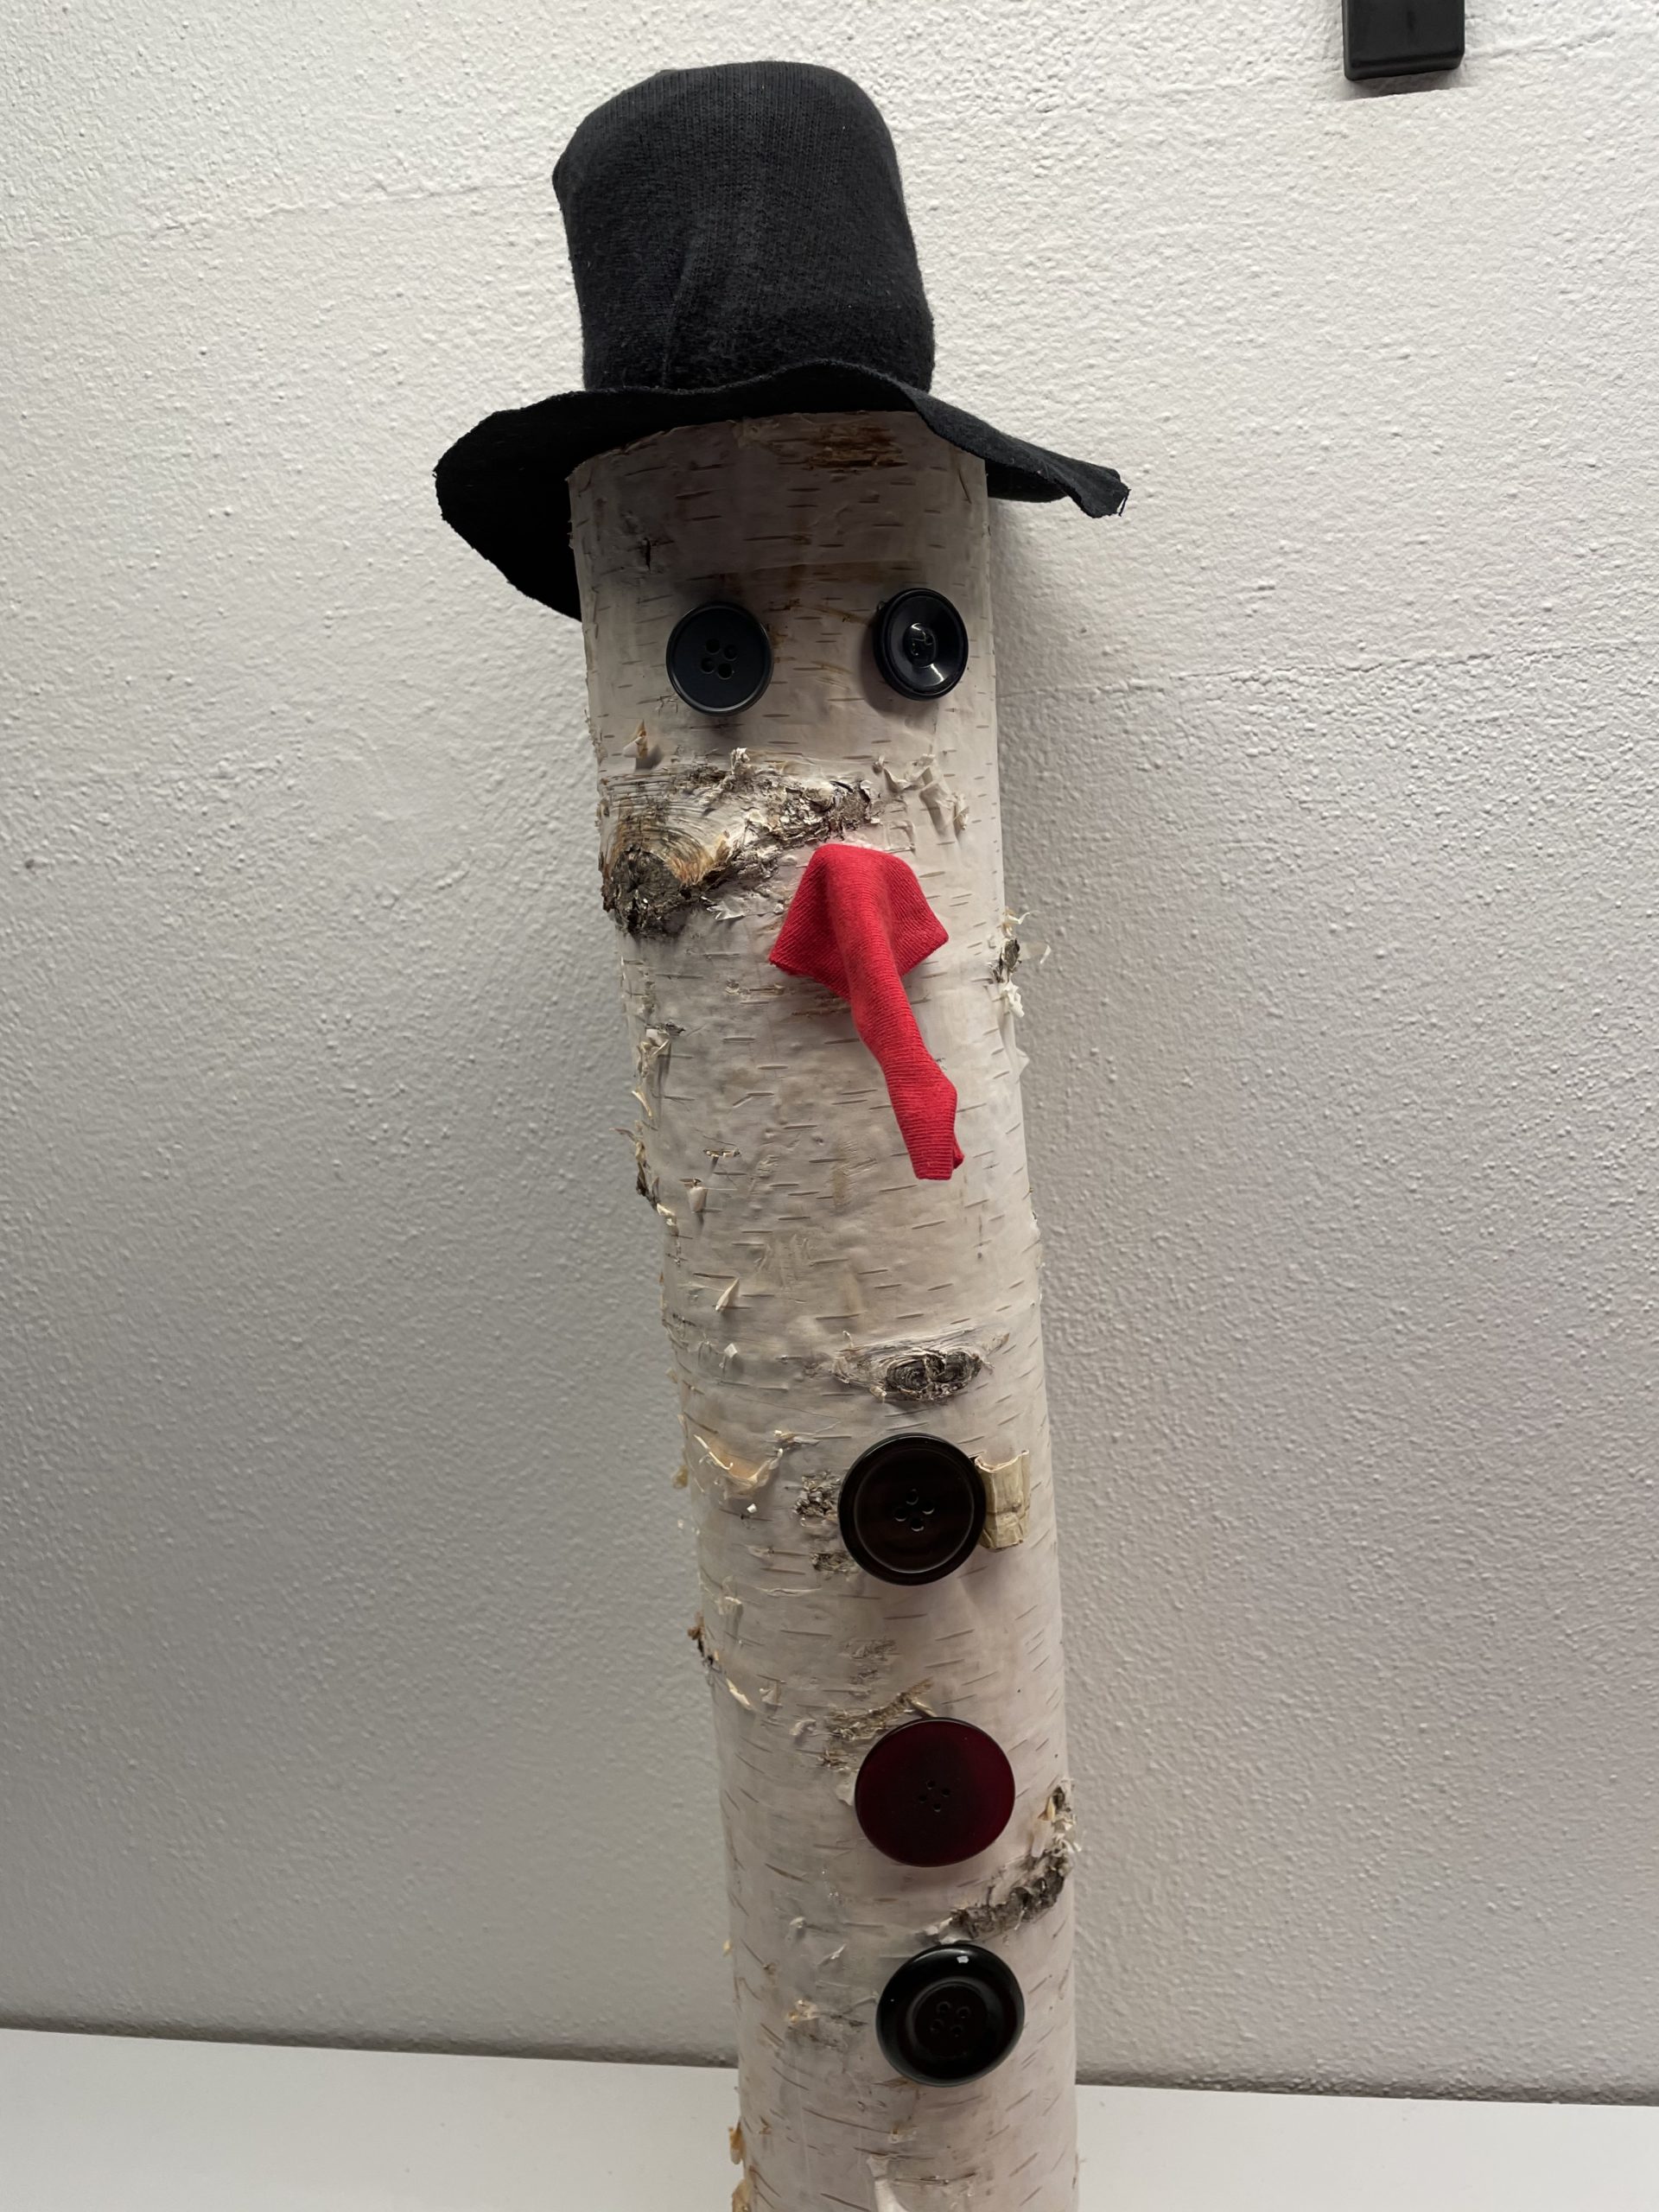
Bild zum Schritt 13 für das Bastel- und DIY-Abenteuer für Kinder: 'Bei den großen Knöpfen am Bauch des Schneemannes geht ihr...'

14

The snowman is ready.
Now look for a nice place!
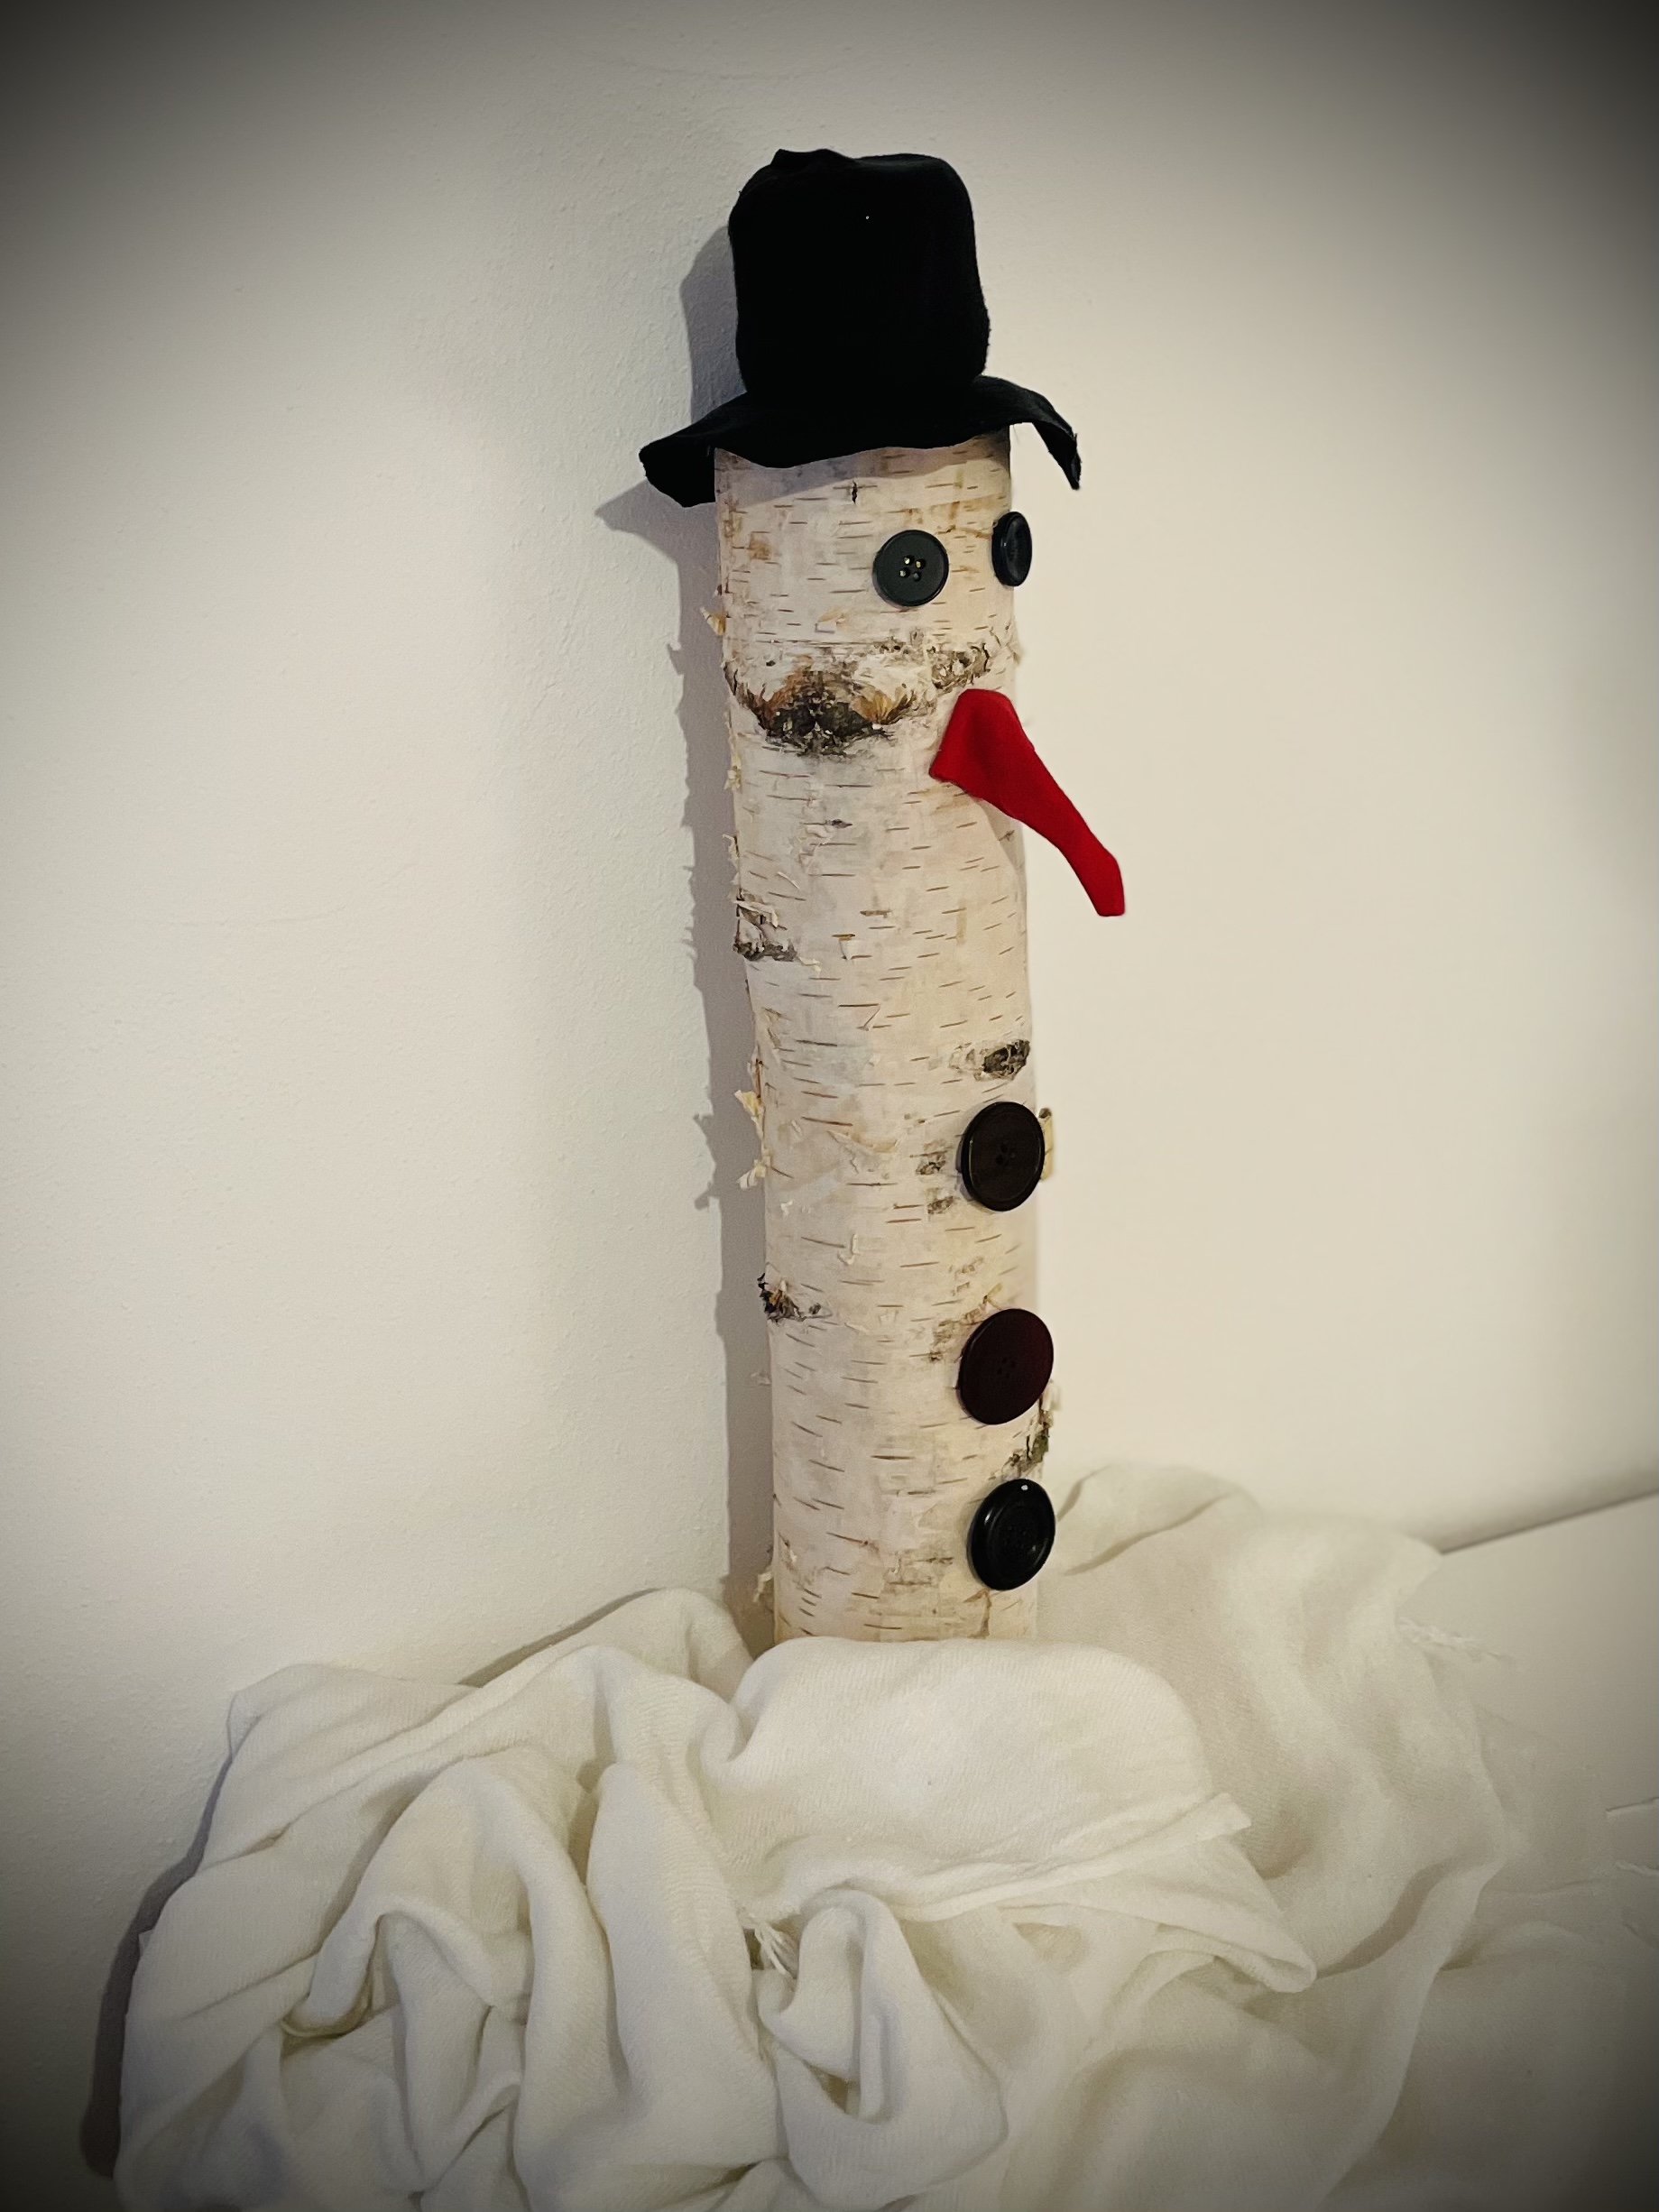
Bild zum Schritt 14 für das Bastel- und DIY-Abenteuer für Kinder: 'Fertig ist der Schneemann.   Sucht euch nun noch...'

15

2. Bild zum Schritt 14 für das Bastel- und DIY-Abenteuer für Kinder: 'Fertig ist der Schneemann.   Sucht euch nun noch...'

16

Have fun doing crafts!

Snowman from Birkenstamm

Follow us on Facebook , Instagram and Pinterest
Don't miss any more adventures: Our bottle mail

Leave a Reply

Your email address will not be published.

The maximum upload file size: 5 MB. You can upload: image, document. Drop file here