We are busy with birds especially in winter. Children like to feed and watch them. So many children have fun making birds. A unique possibility is the crafting of a bird from a wooden disc.
All you need for that are a few feathers, a pointed beak and thin legs.
The individual steps are described here and are very easy to implement. Have fun!
Media Education for Kindergarten and Hort

Relief in everyday life, targeted promotion of individual children, independent learning and - without any pre-knowledge already usable by the youngest!
First prepare your materials and put out your craft pad. Then cut out your eyes and two triangles for the paper beak.

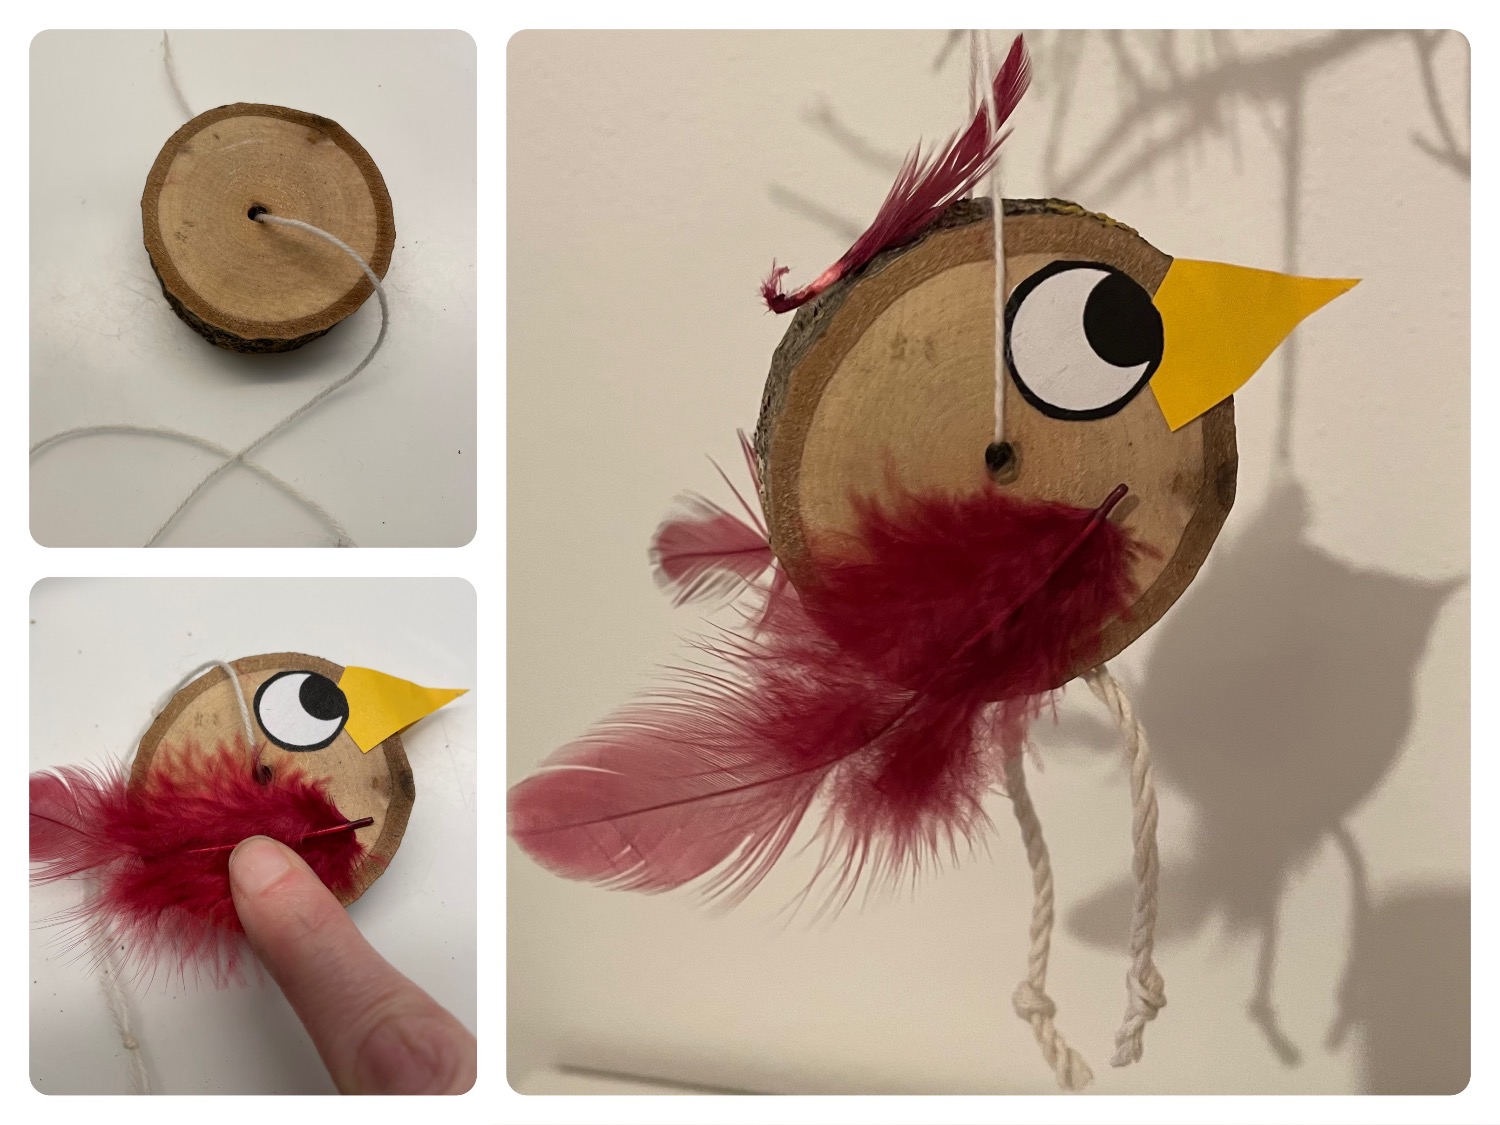
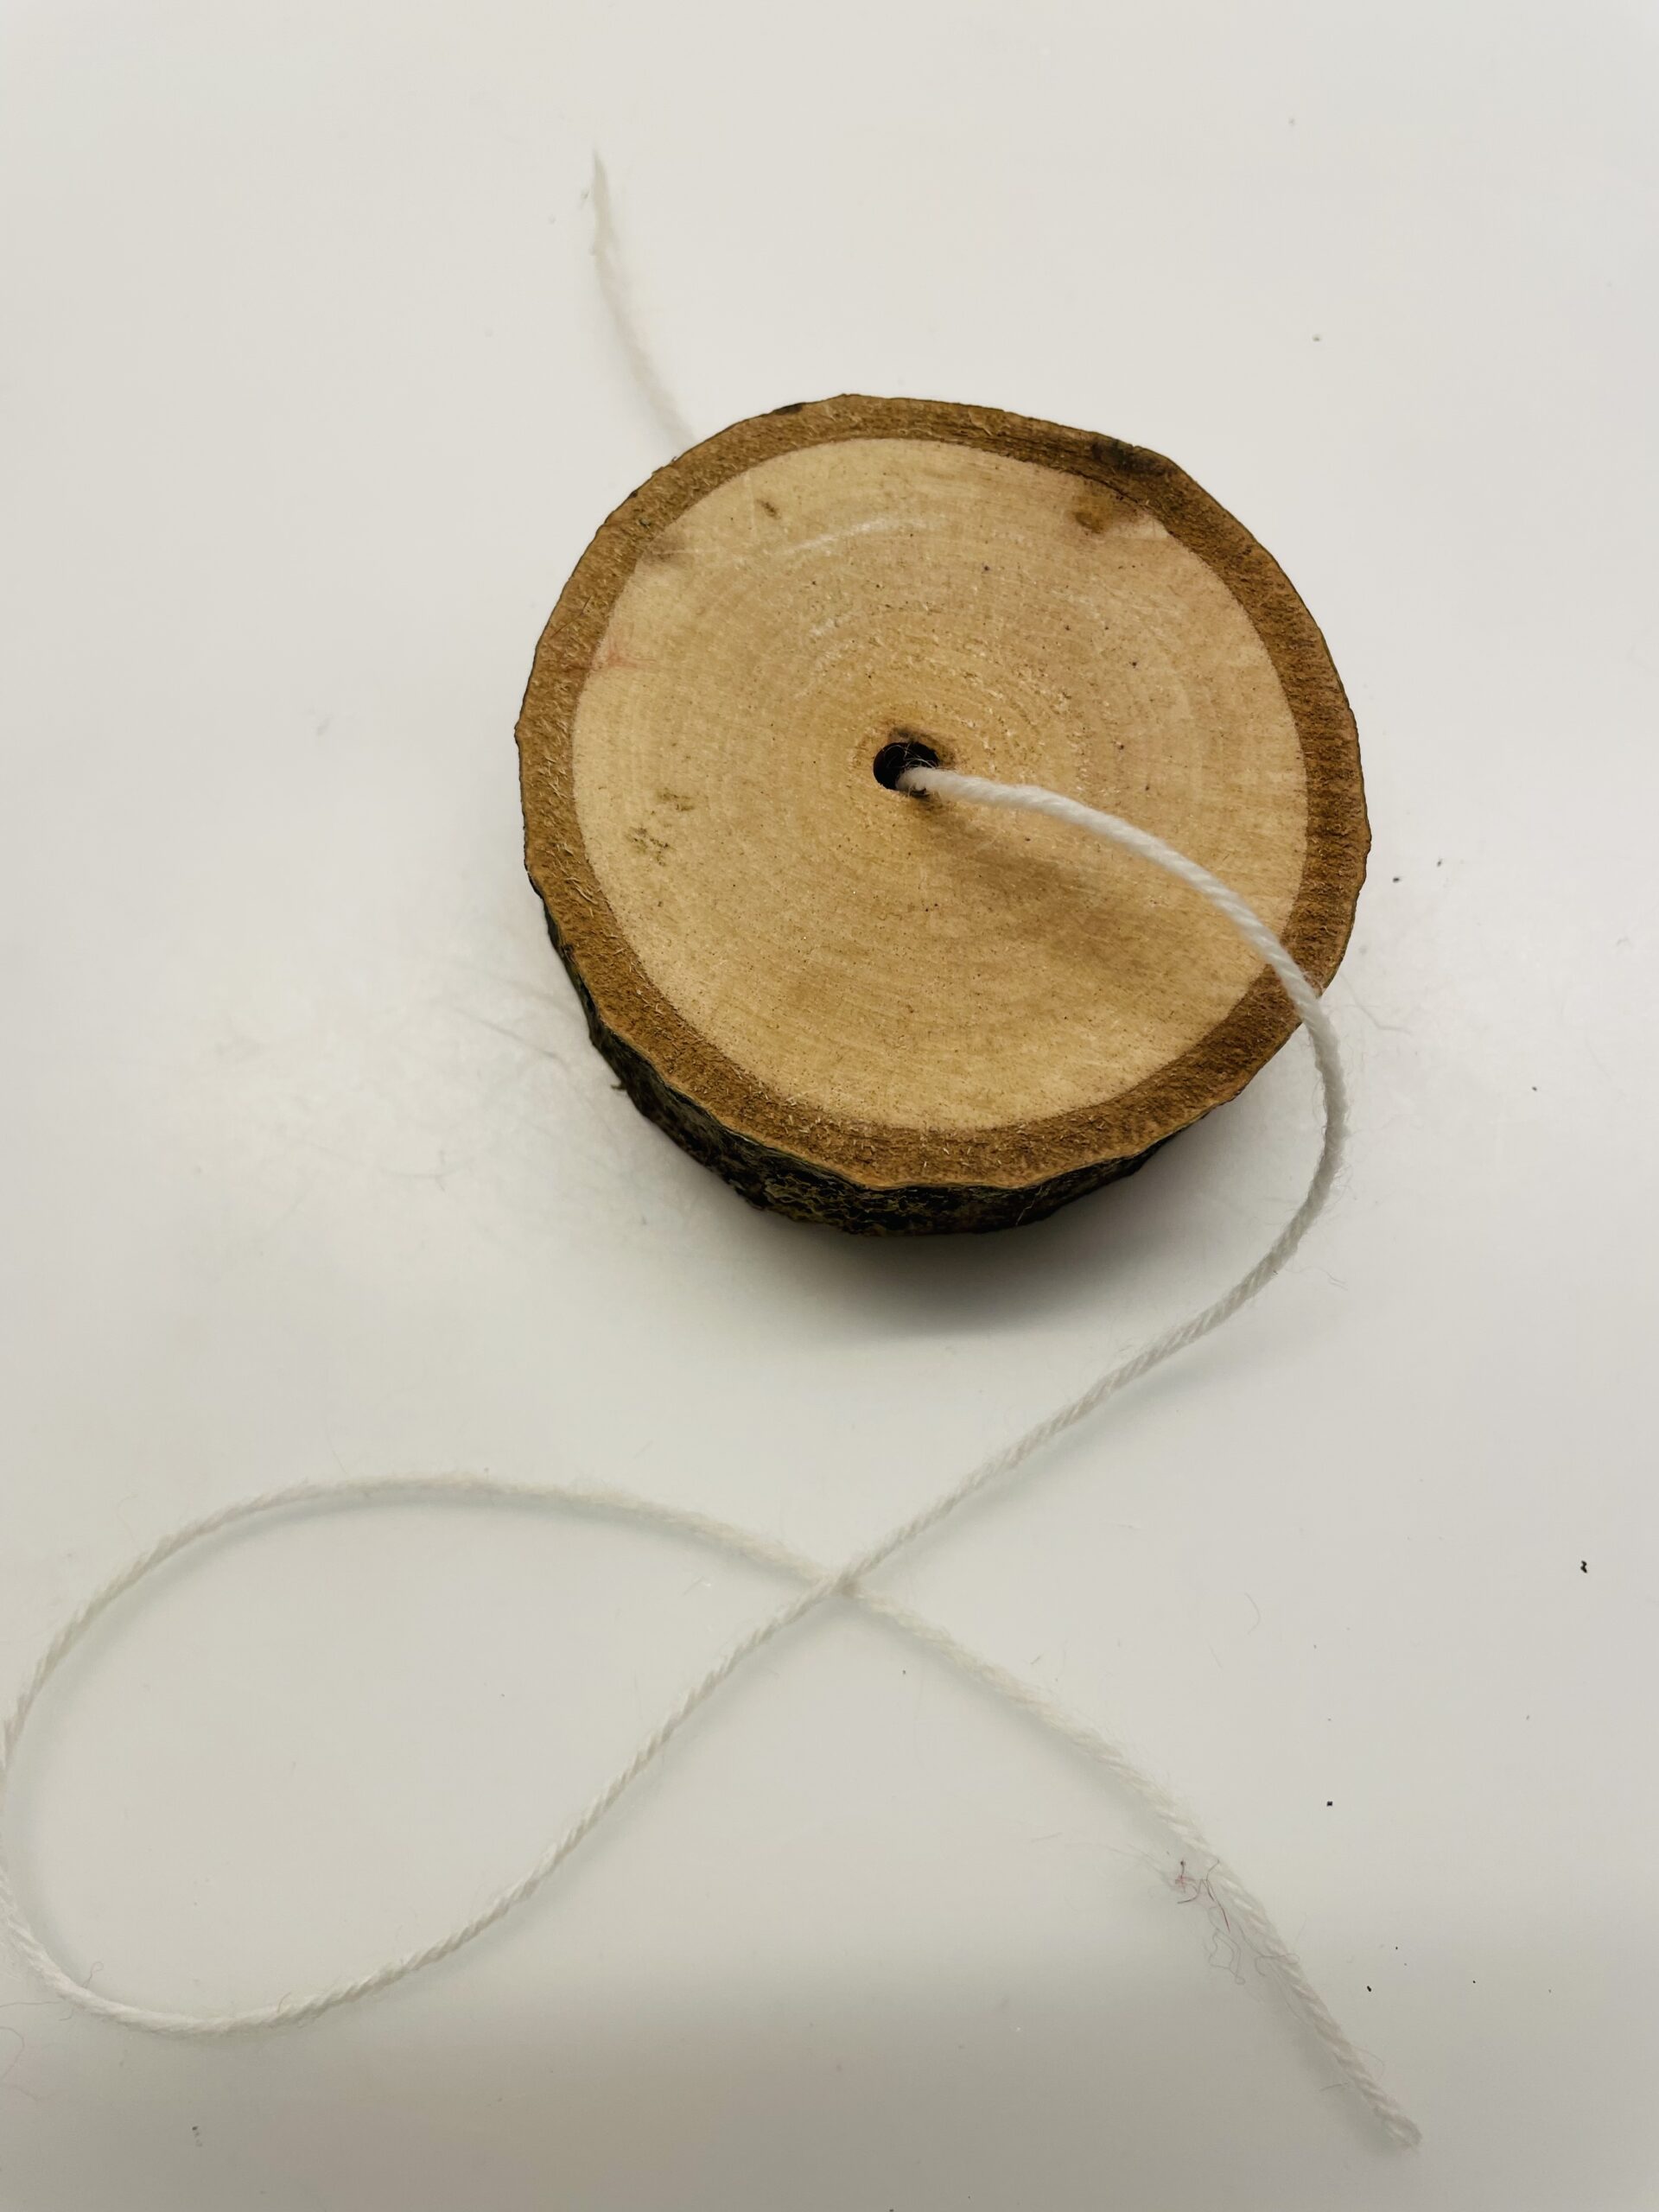
Now thread the thread through the hole in the wood disc.
Then you place the thread ends on top of each other and knot the thread directly above the wooden disc.

Then you tie the ends of the thread together.

Now you stick a triangle for the beak to the left and right of the wooden disc from the back and front at the same height.

Then glue her beak together at the front.

After that, her eyes stick to the front and back of her beak.

Now a large feather sticks to the side of the bird.

Then you stick a small feather between the thread on the bark of the wood disc. Let the feather stand up, because this is how the bird looks more alive.


Now you make the legs and feet of the bird out of a cord. First you make a knot at both ends of the cord. For this you first place a loop through which you then put the above cord.

When the loop is tightened, a knot is created.


Finally, the middle piece of the cord sticks to the lower side of the wooden disc. Halves the cord to know exactly where the center is.

Press the string with your fingers.

The small wooden disc bird is ready.

Variety of your own feather. Enjoy creative design!
Materials
Directions
First prepare your materials and put out your craft pad. Then cut out your eyes and two triangles for the paper beak.
Now thread the thread through the hole in the wood disc.
Then you place the thread ends on top of each other and knot the thread directly above the wooden disc.
Then you tie the ends of the thread together.
Now you stick a triangle for the beak to the left and right of the wooden disc from the back and front at the same height.
Then glue her beak together at the front.
After that, her eyes stick to the front and back of her beak.
Now a large feather sticks to the side of the bird.
Then you stick a small feather between the thread on the bark of the wood disc. Let the feather stand up, because this is how the bird looks more alive.
Now you make the legs and feet of the bird out of a cord. First you make a knot at both ends of the cord. For this you first place a loop through which you then put the above cord.
When the loop is tightened, a knot is created.
Finally, the middle piece of the cord sticks to the lower side of the wooden disc. Halves the cord to know exactly where the center is.
Press the string with your fingers.
The small wooden disc bird is ready.
Variety of your own feather. Enjoy creative design!
Follow us on Facebook , Instagram and Pinterest
Don't miss any more adventures: Our bottle mail