This little paper penguin conjures the winter to the window. Many children love penguins, although most of us probably only know them from the zoo. In addition, this craft work trains and strengthens the understanding of shapes. Have fun!
Media Education for Kindergarten and Hort

Relief in everyday life, targeted promotion of individual children, independent learning and - without any pre-knowledge already usable by the youngest!
Print first the Template and picks all the materials together.

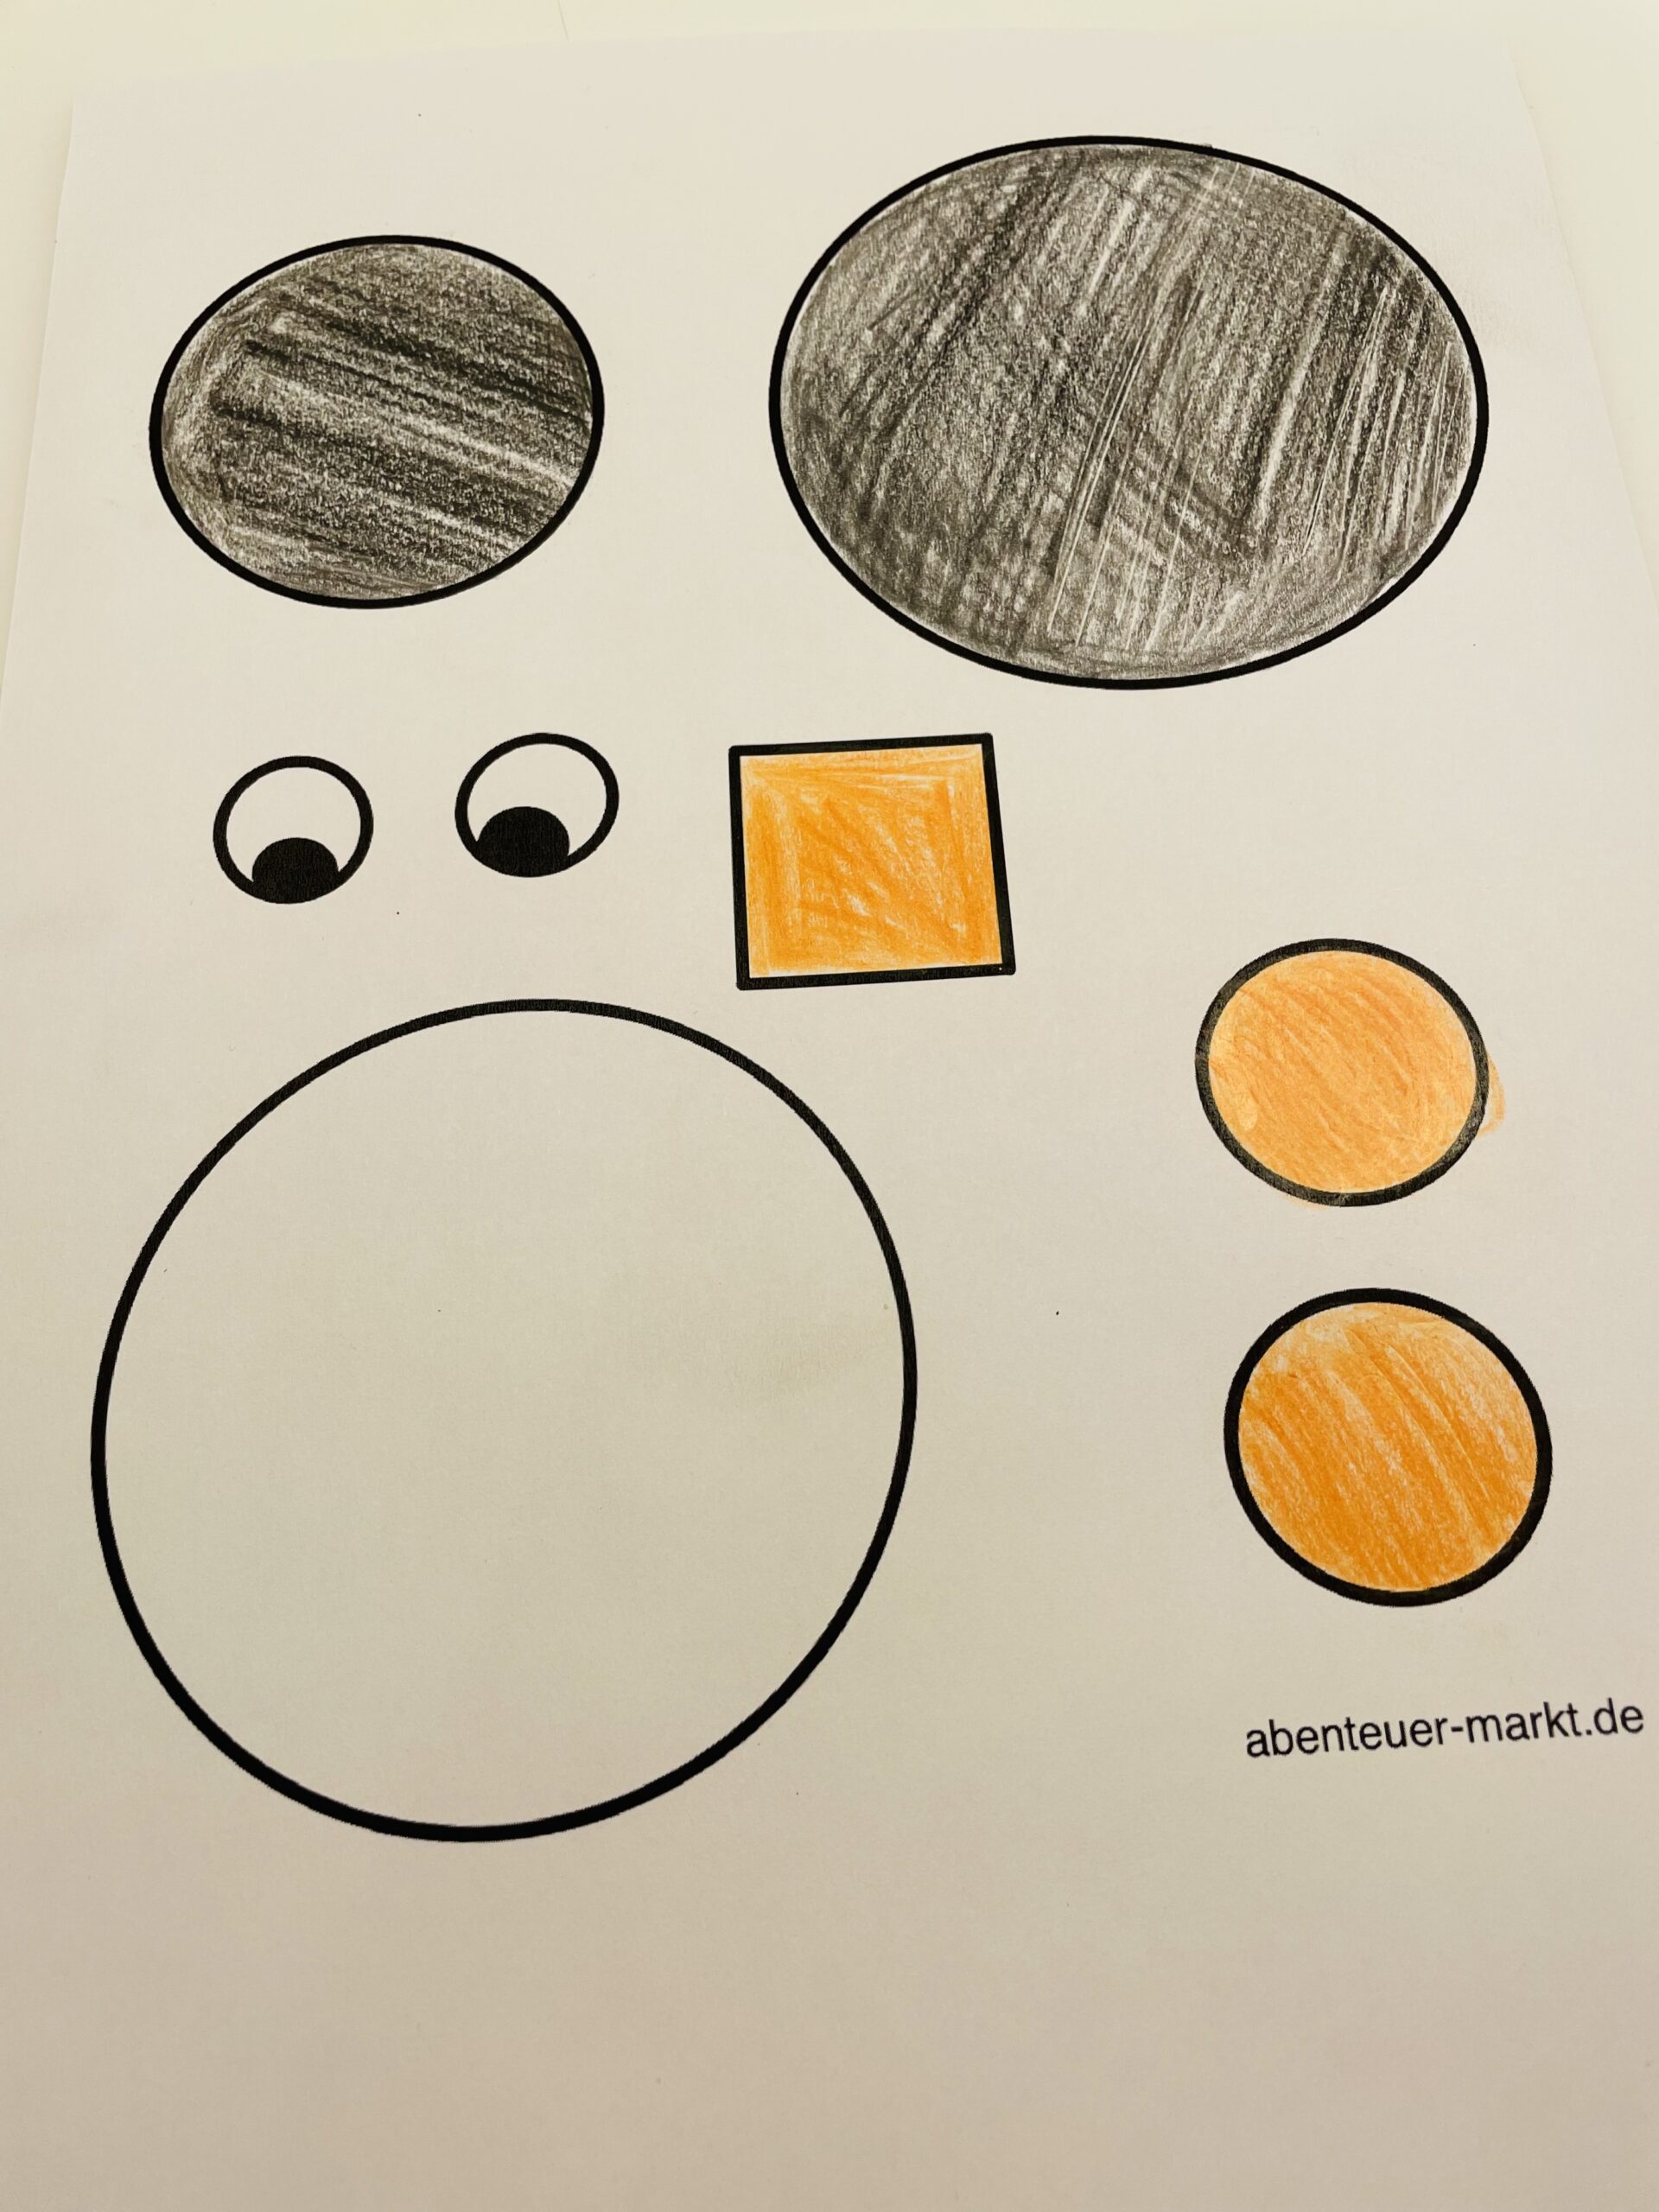
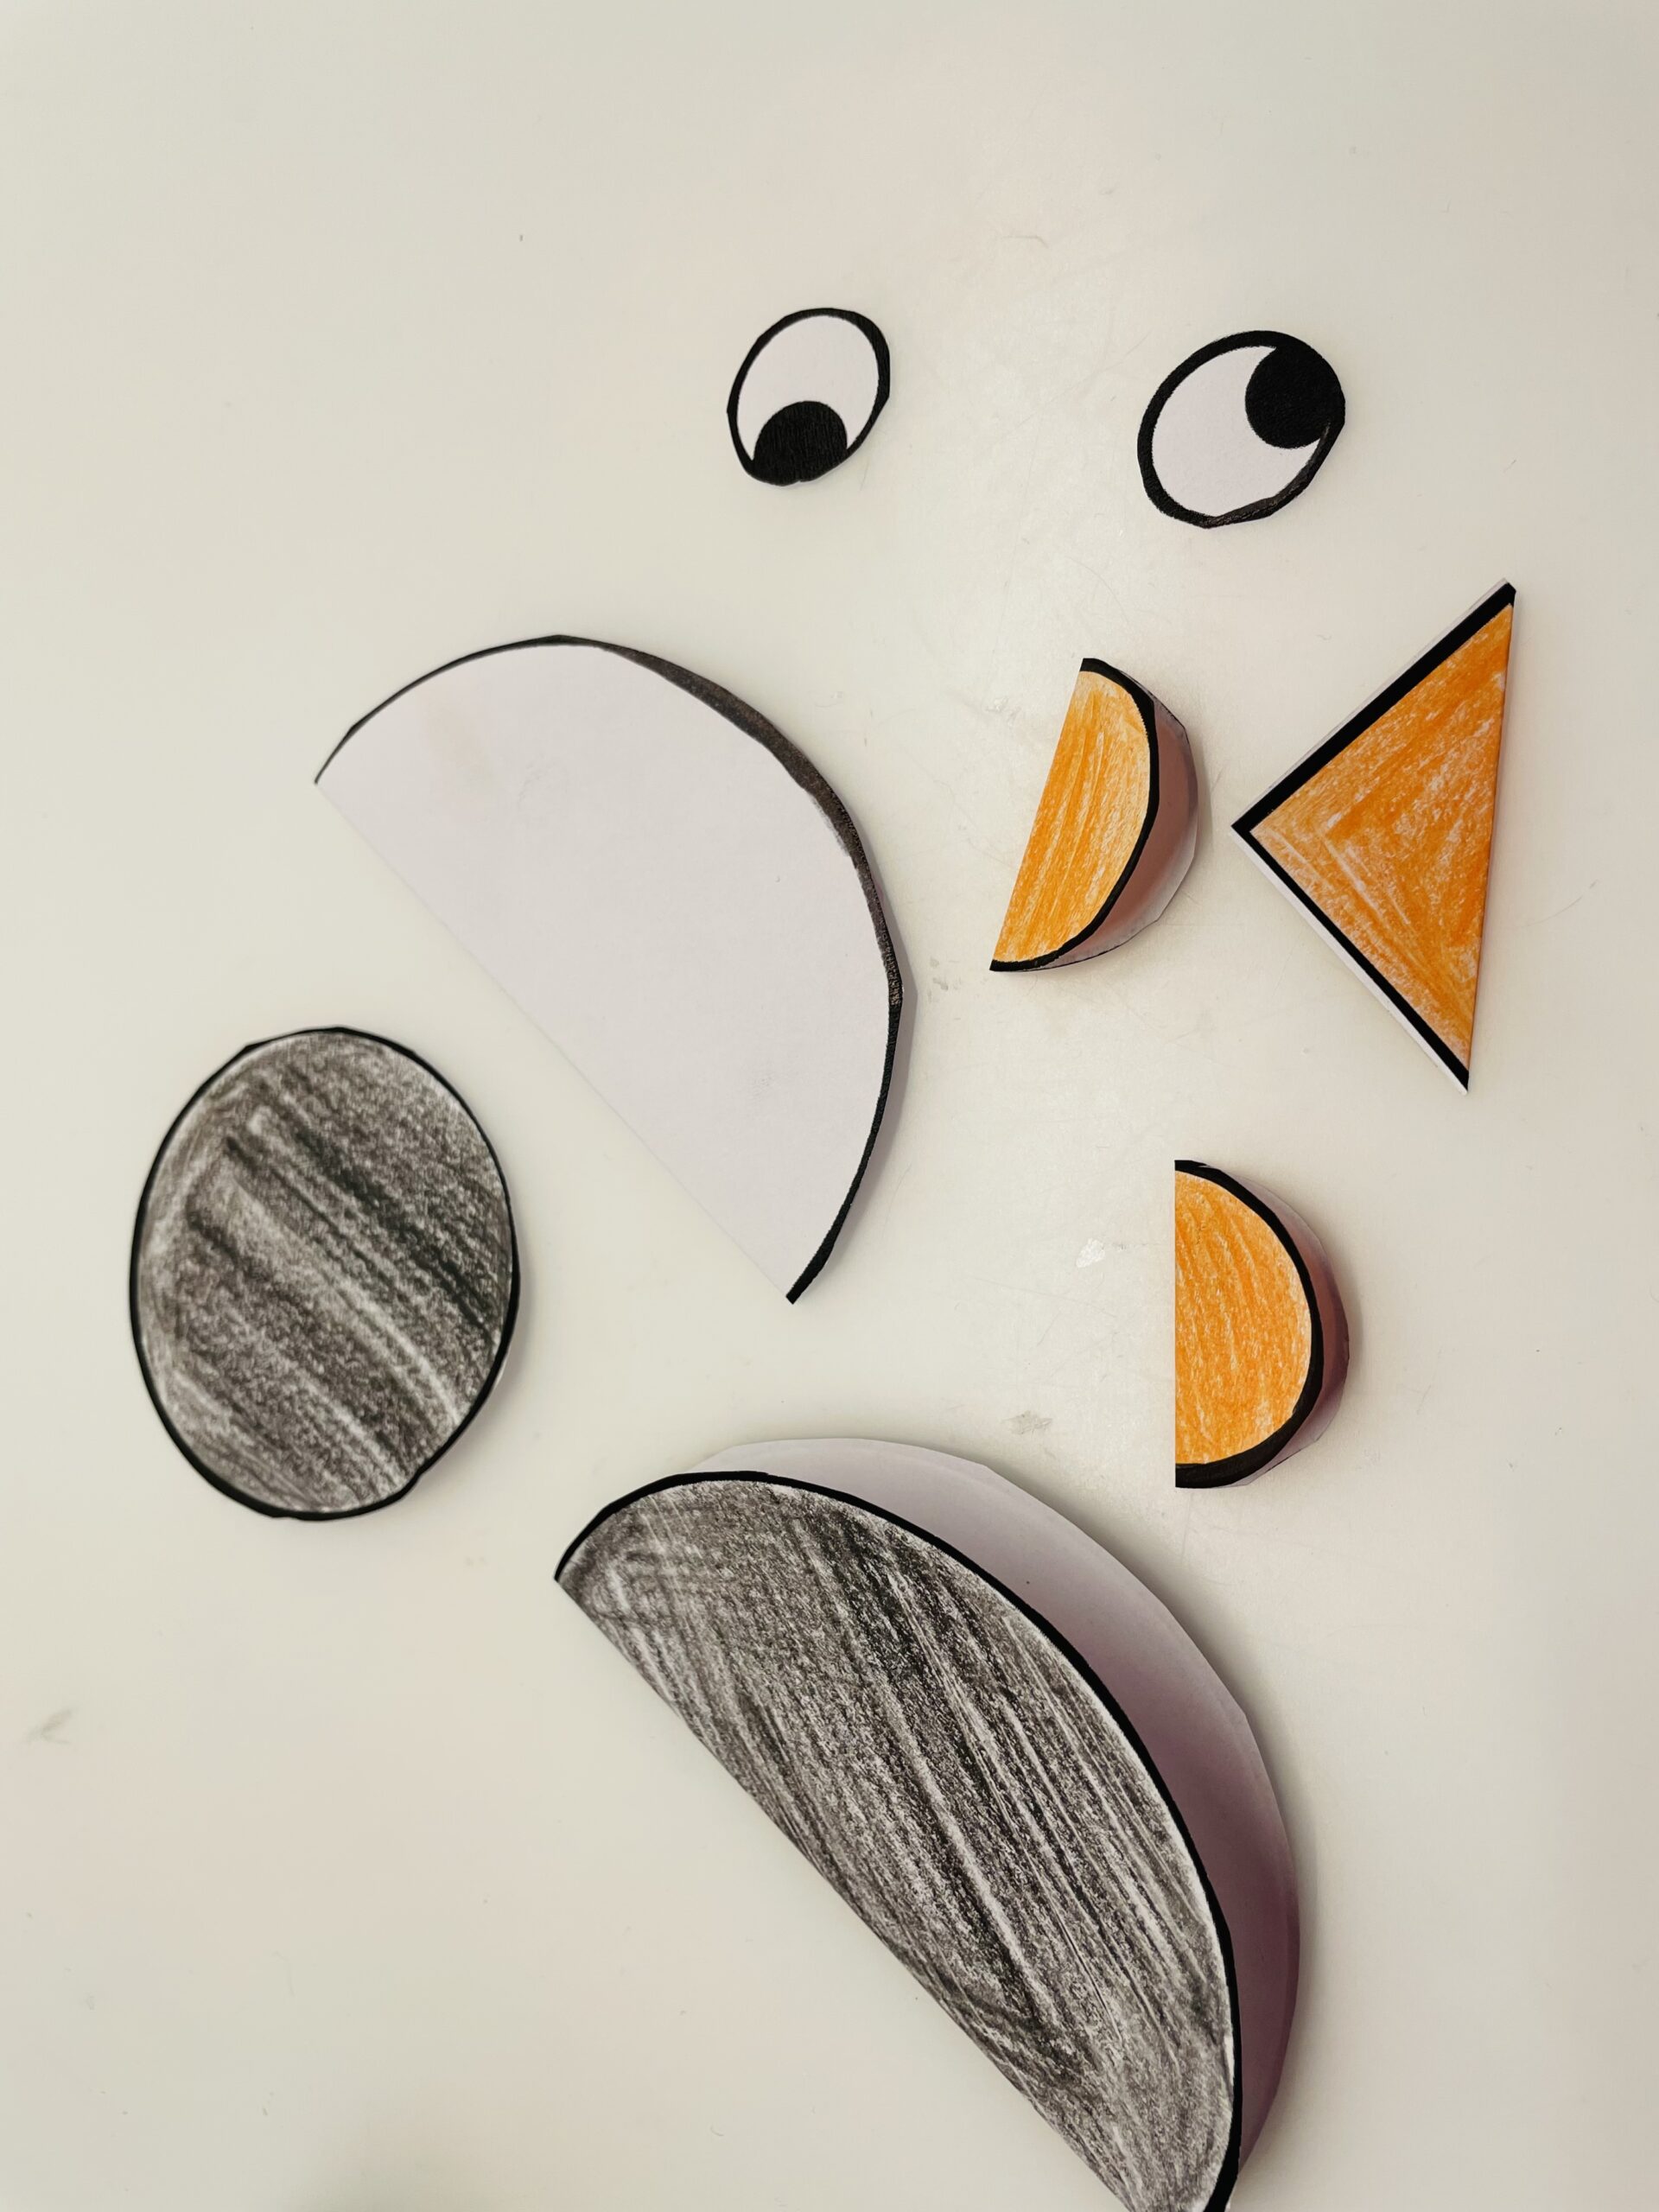
Then paint out the individual circles in the respective colors (see picture). Uses crayons, markers, crayons or watercolours.
Then you cut out the items.

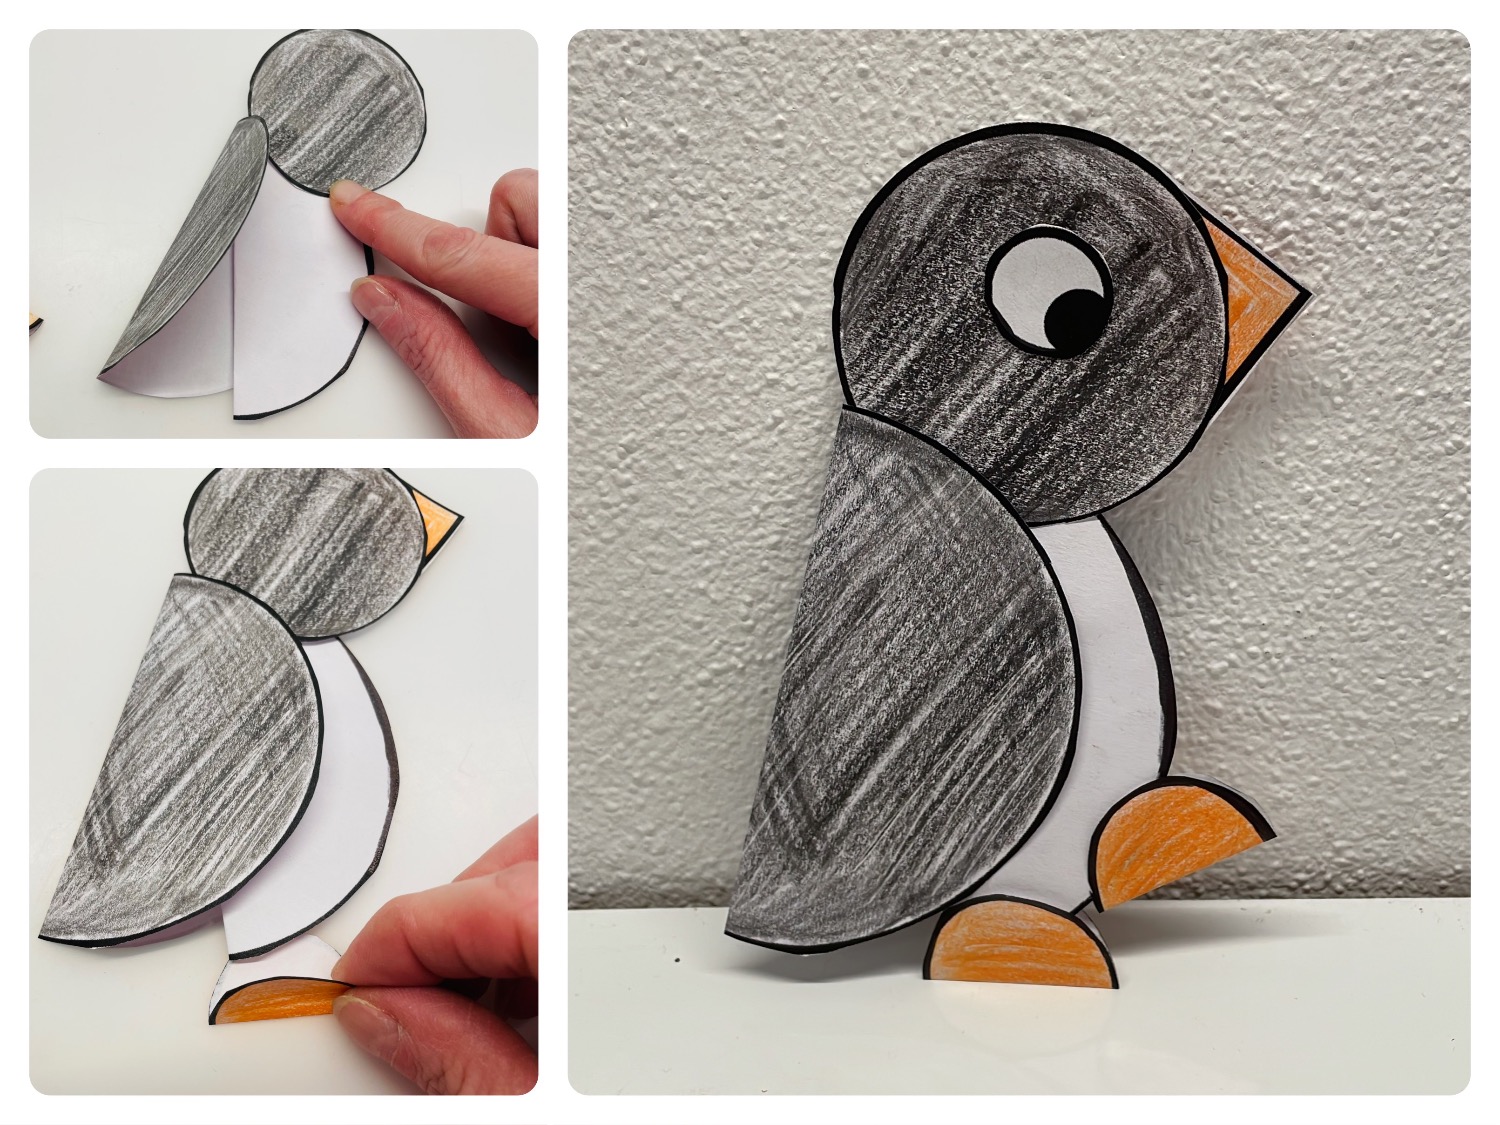
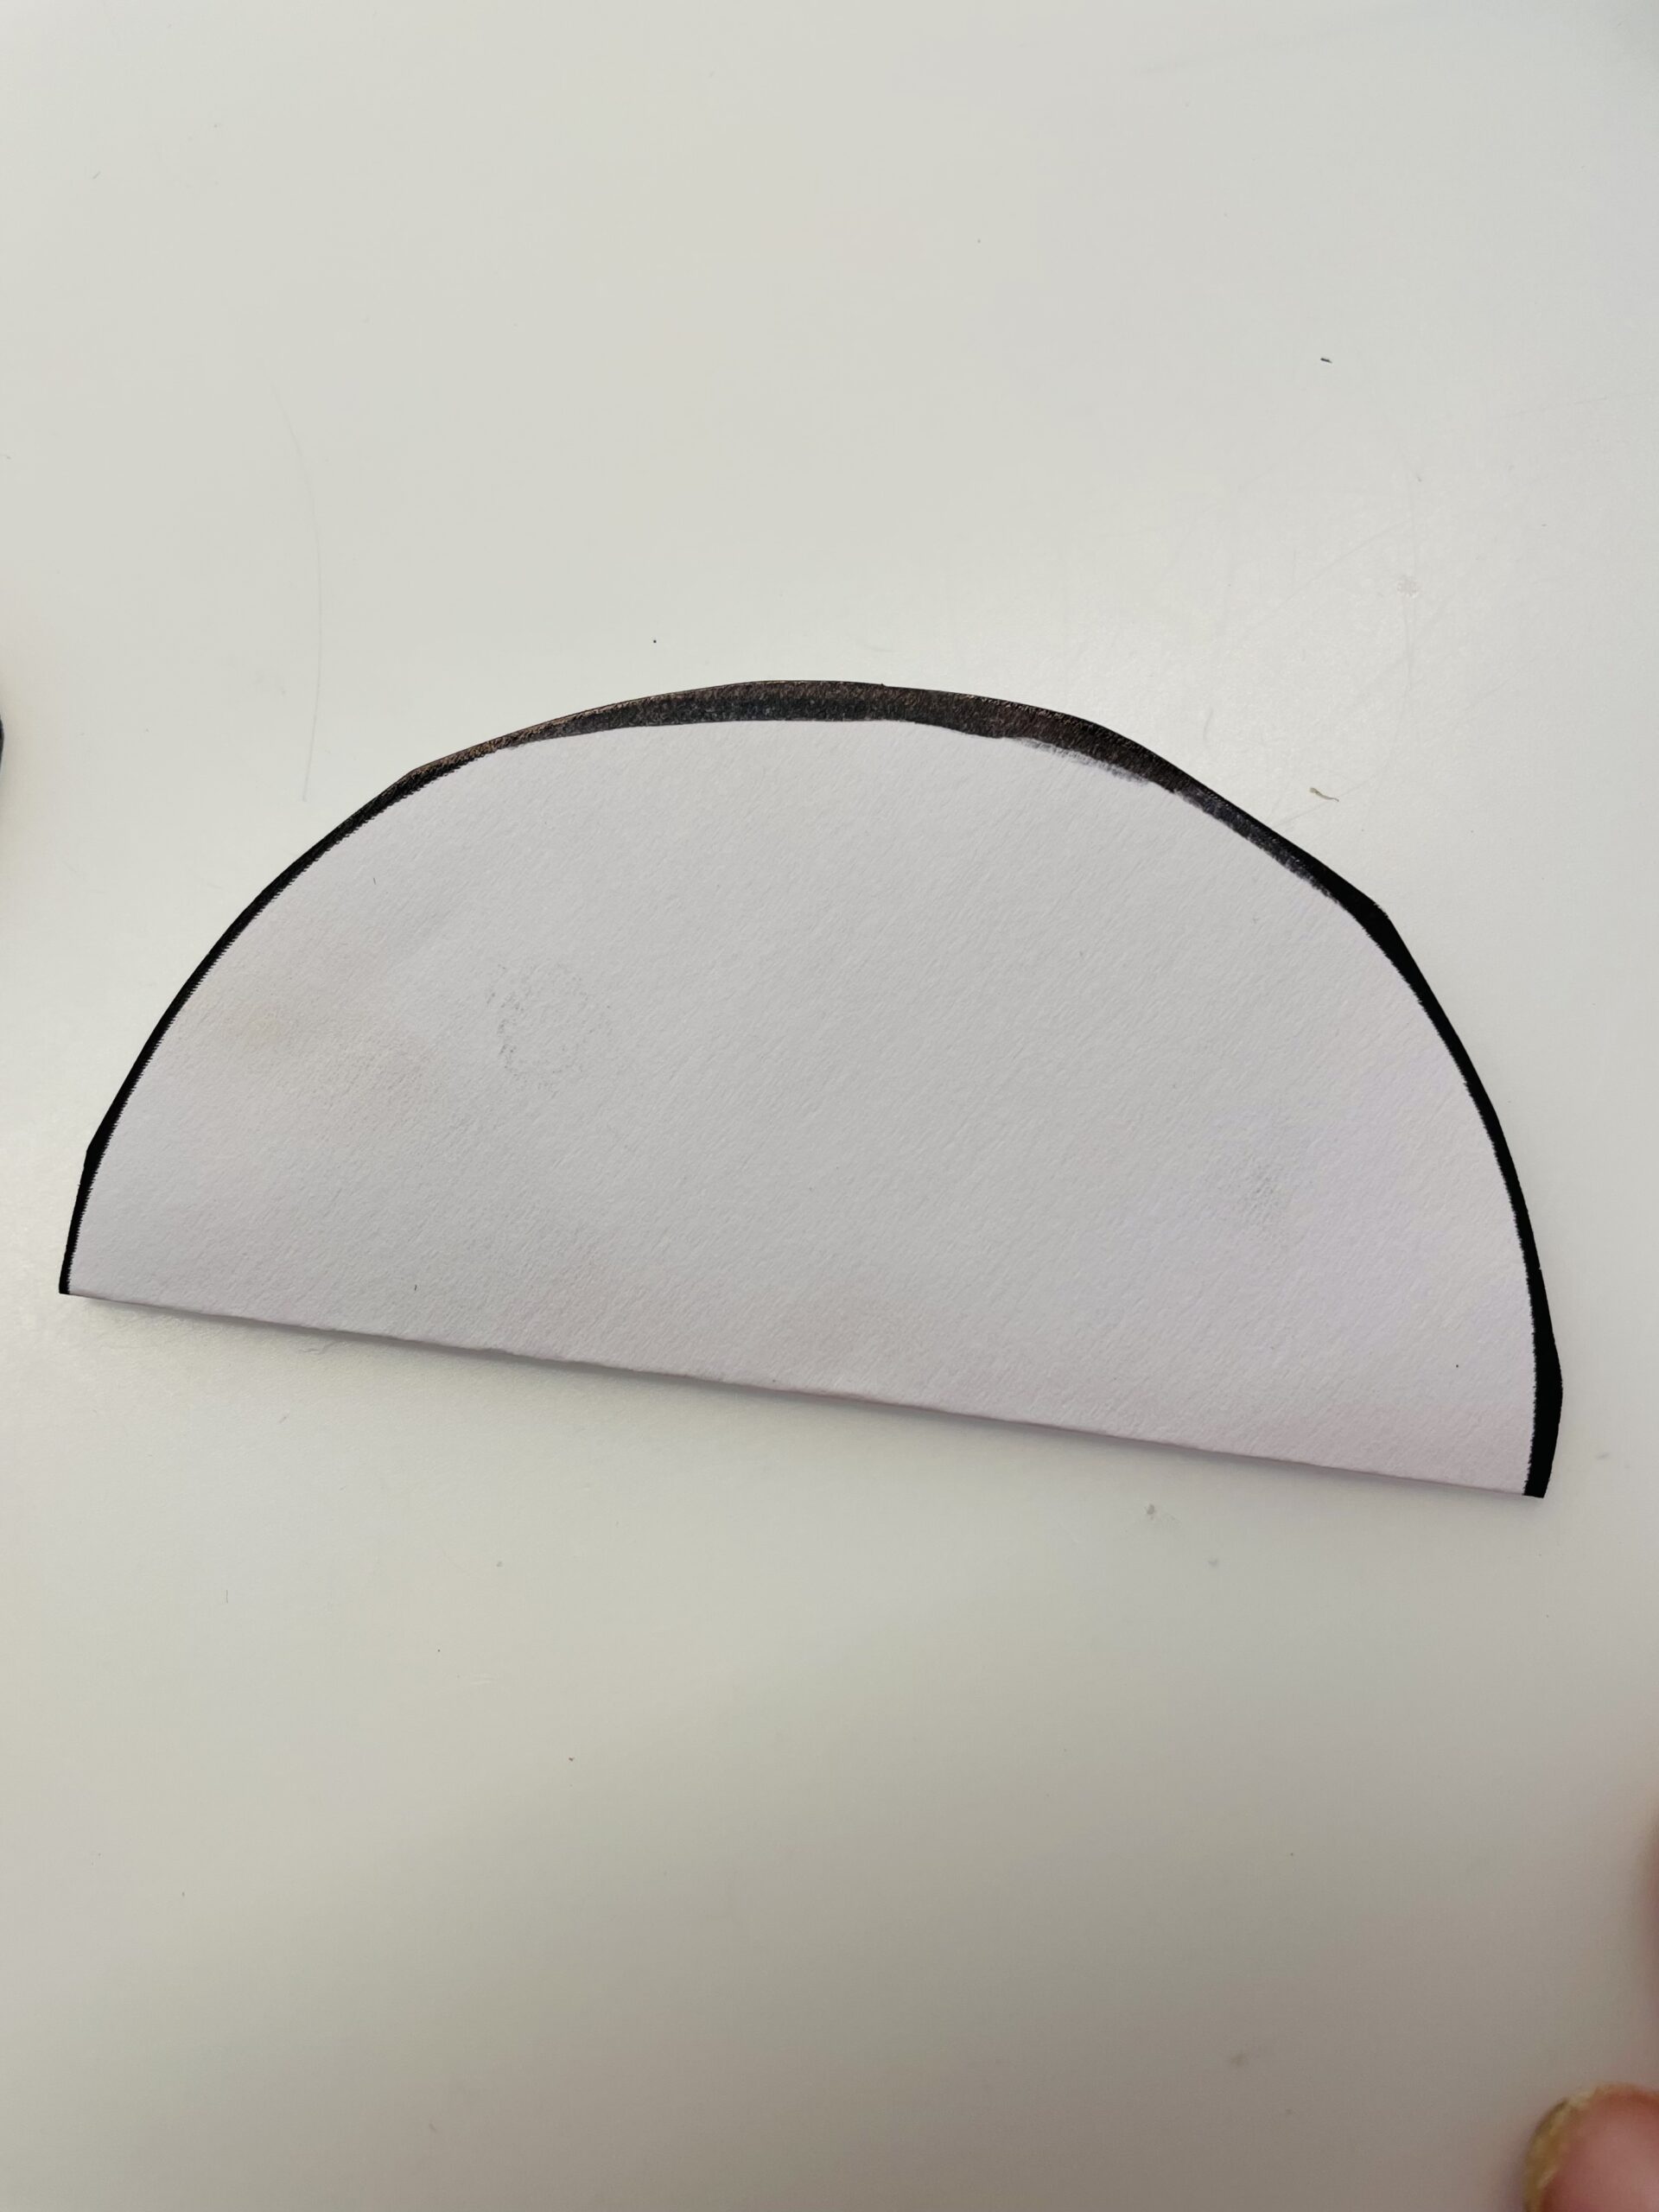
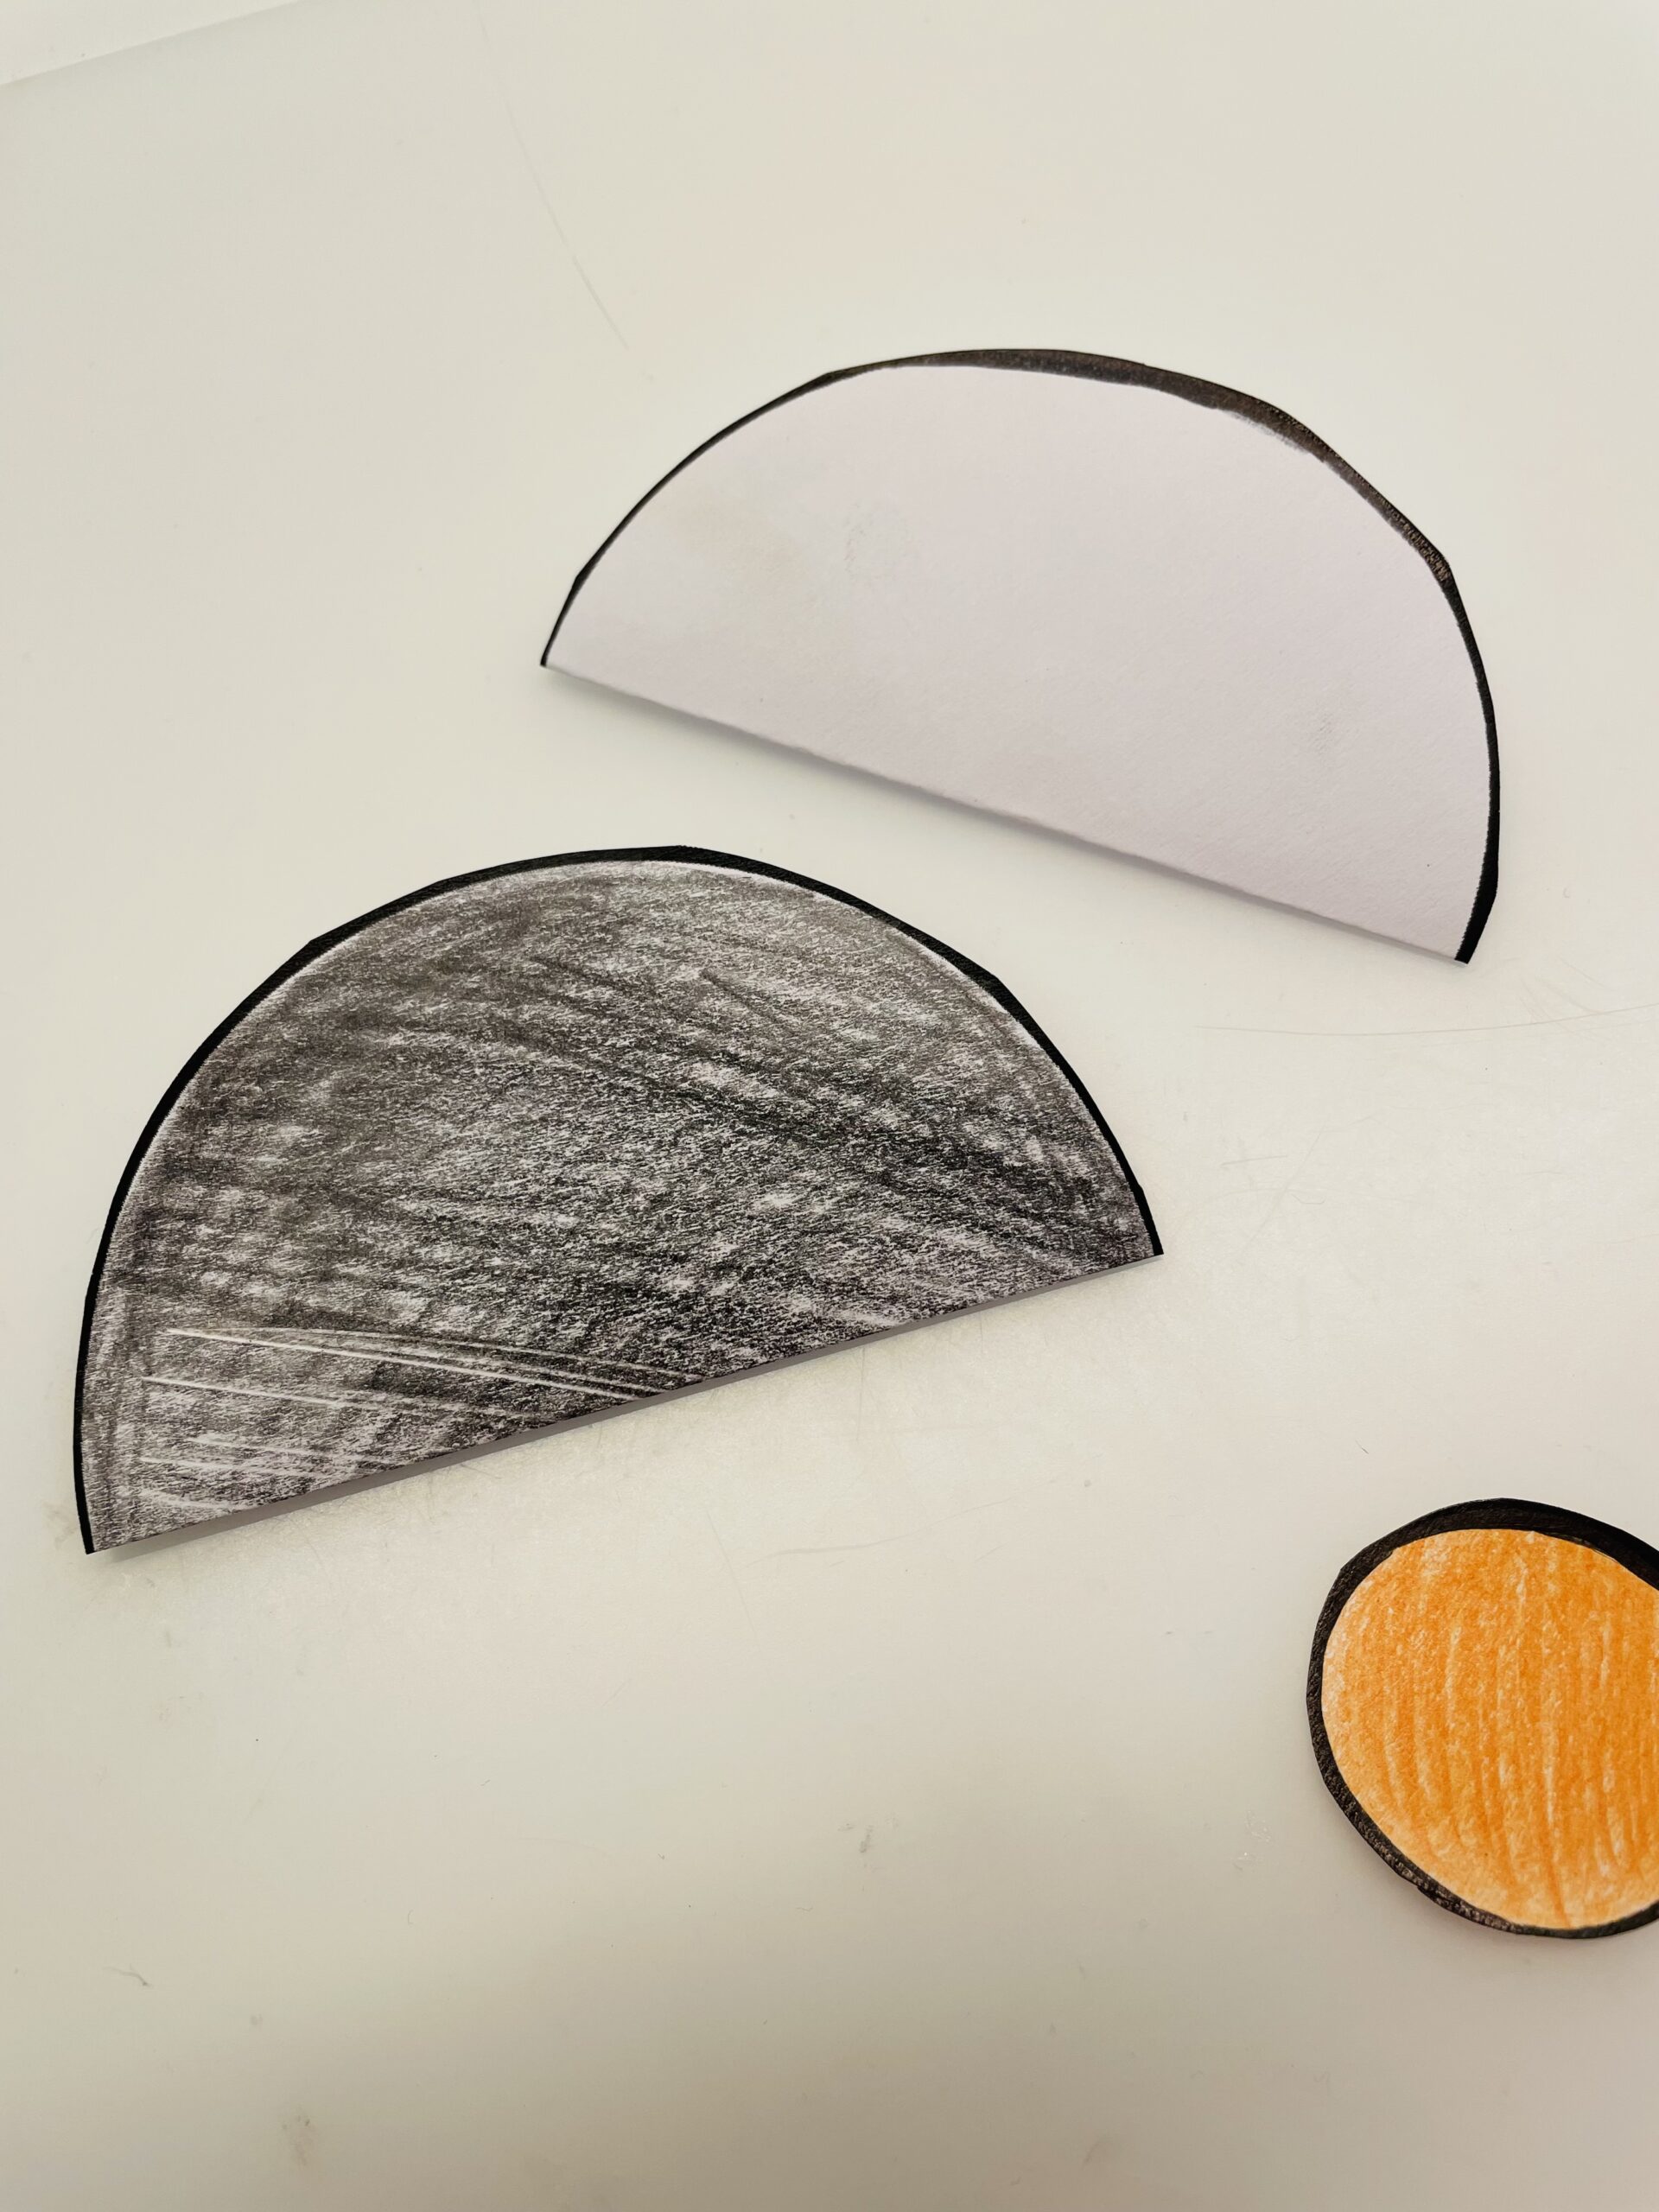
Then you fold half the large white circle.
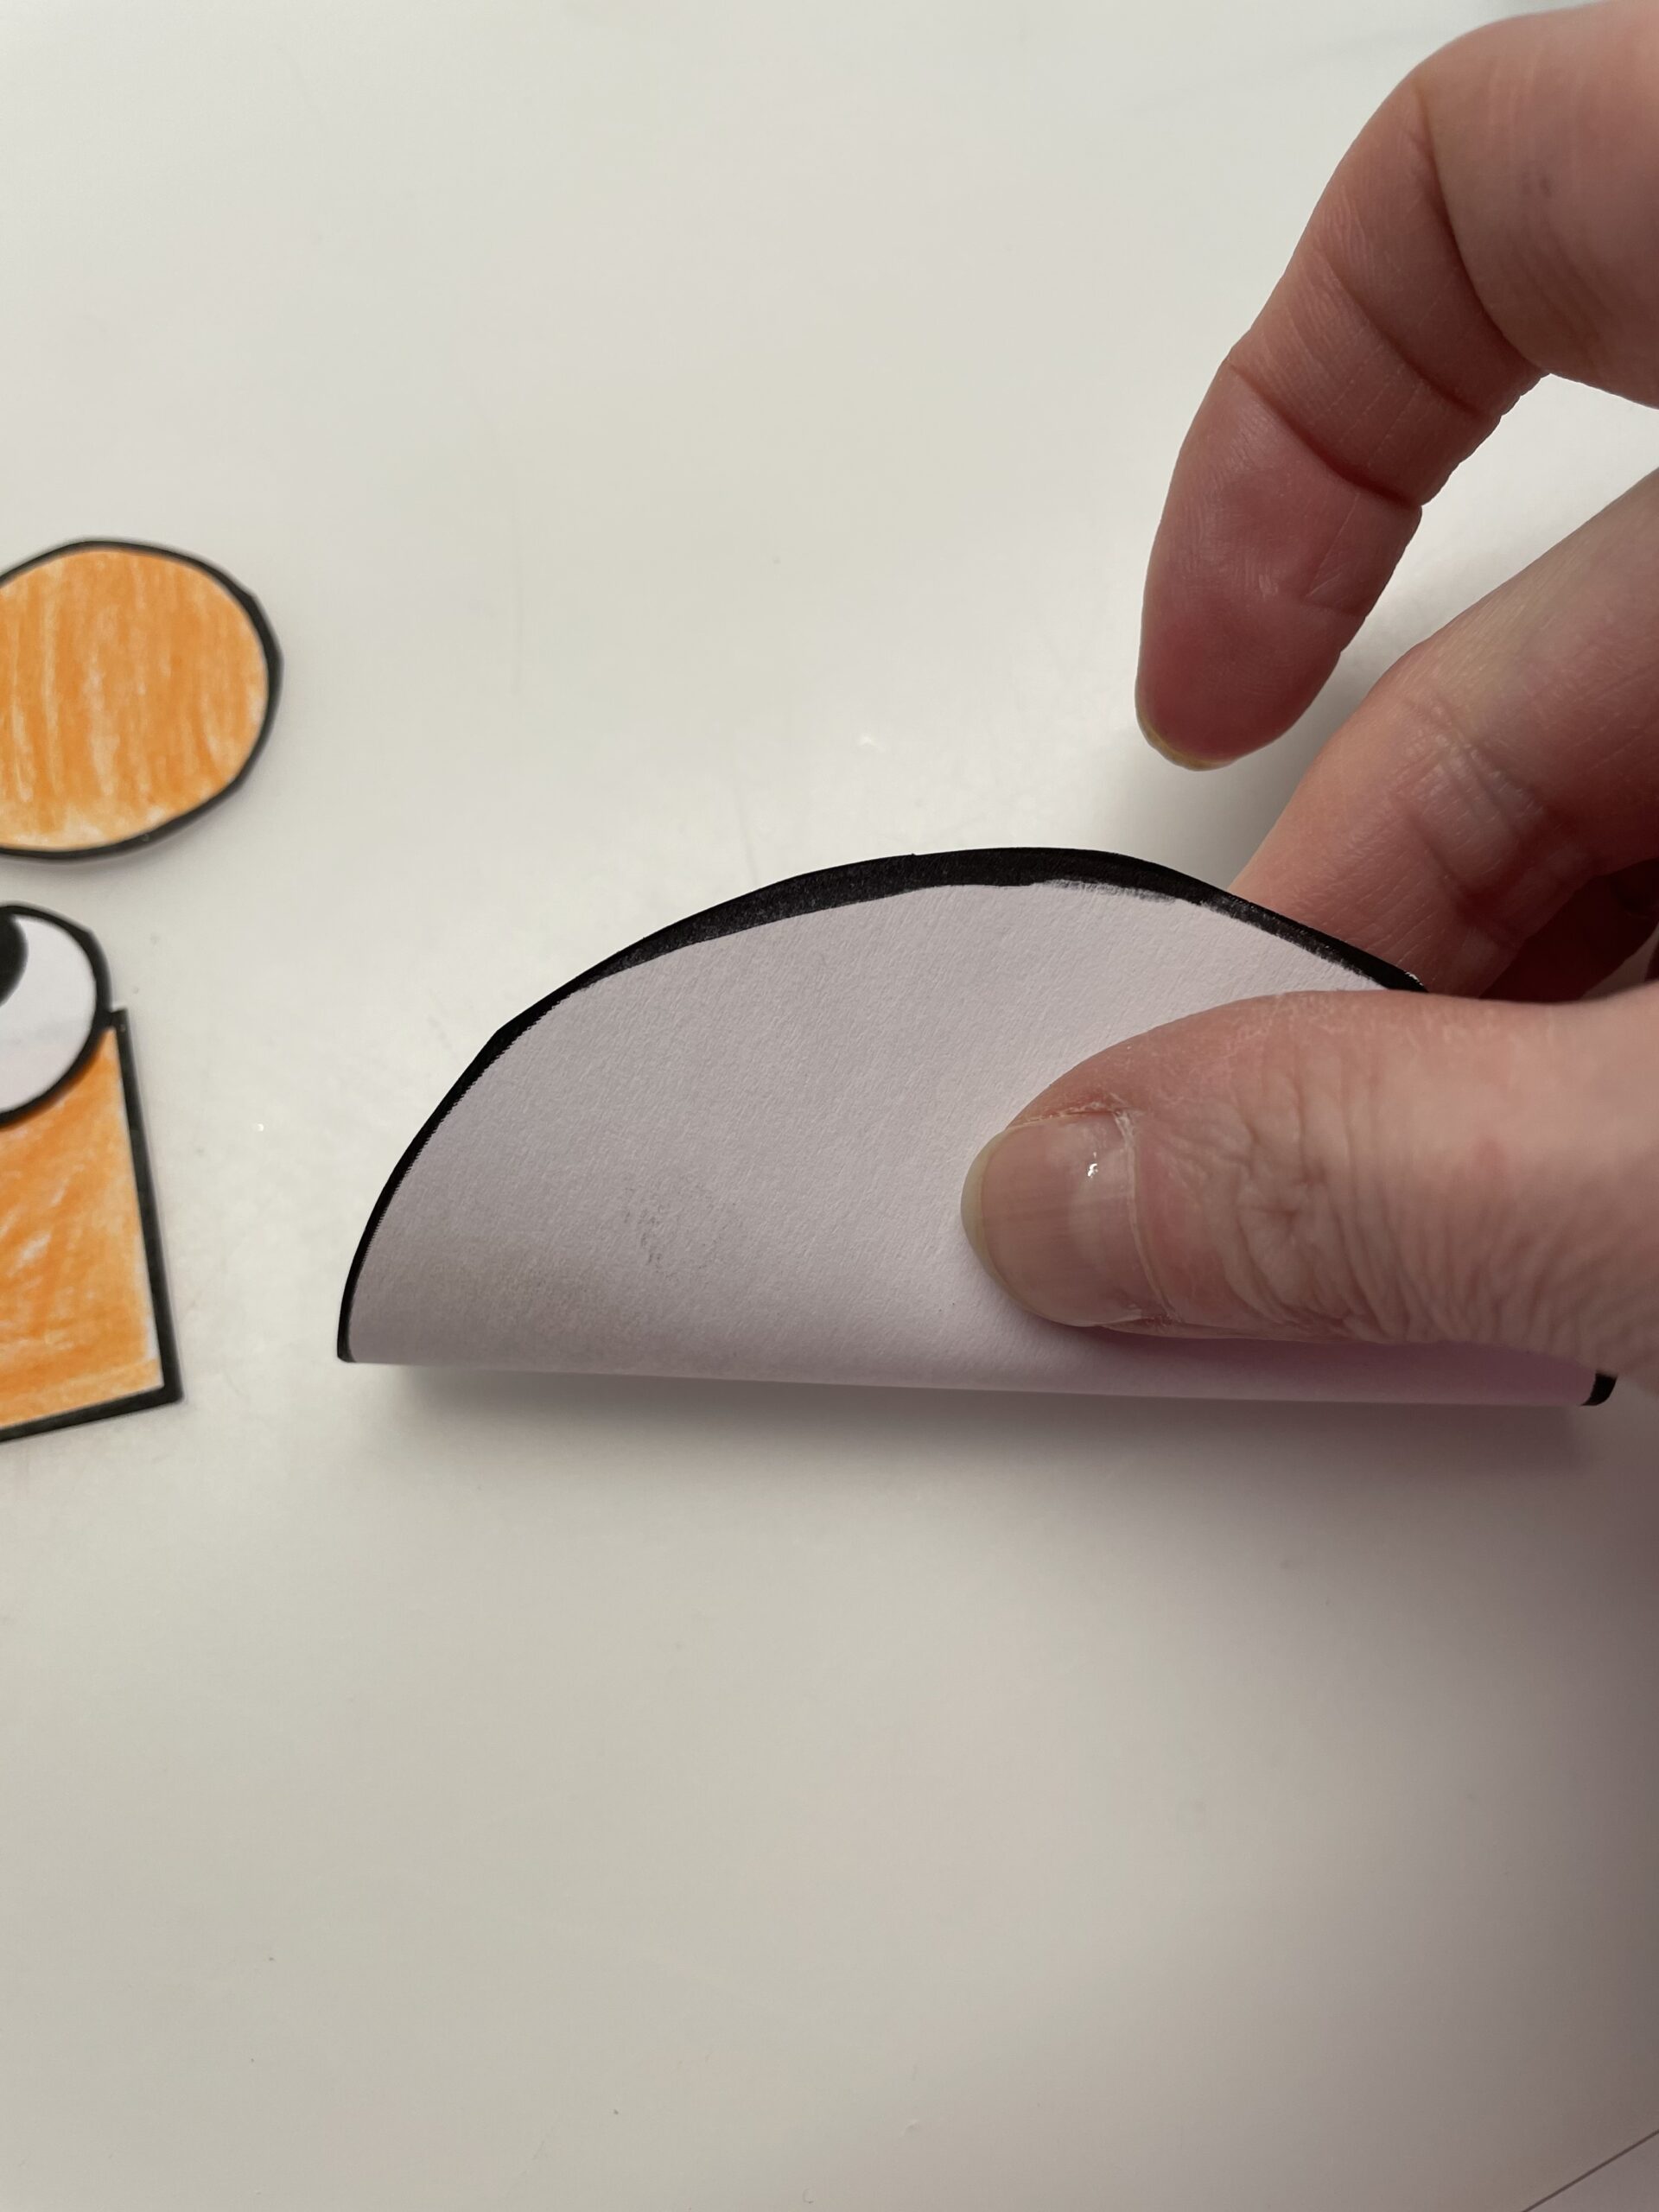
Then you strip the fracture with your fingers.
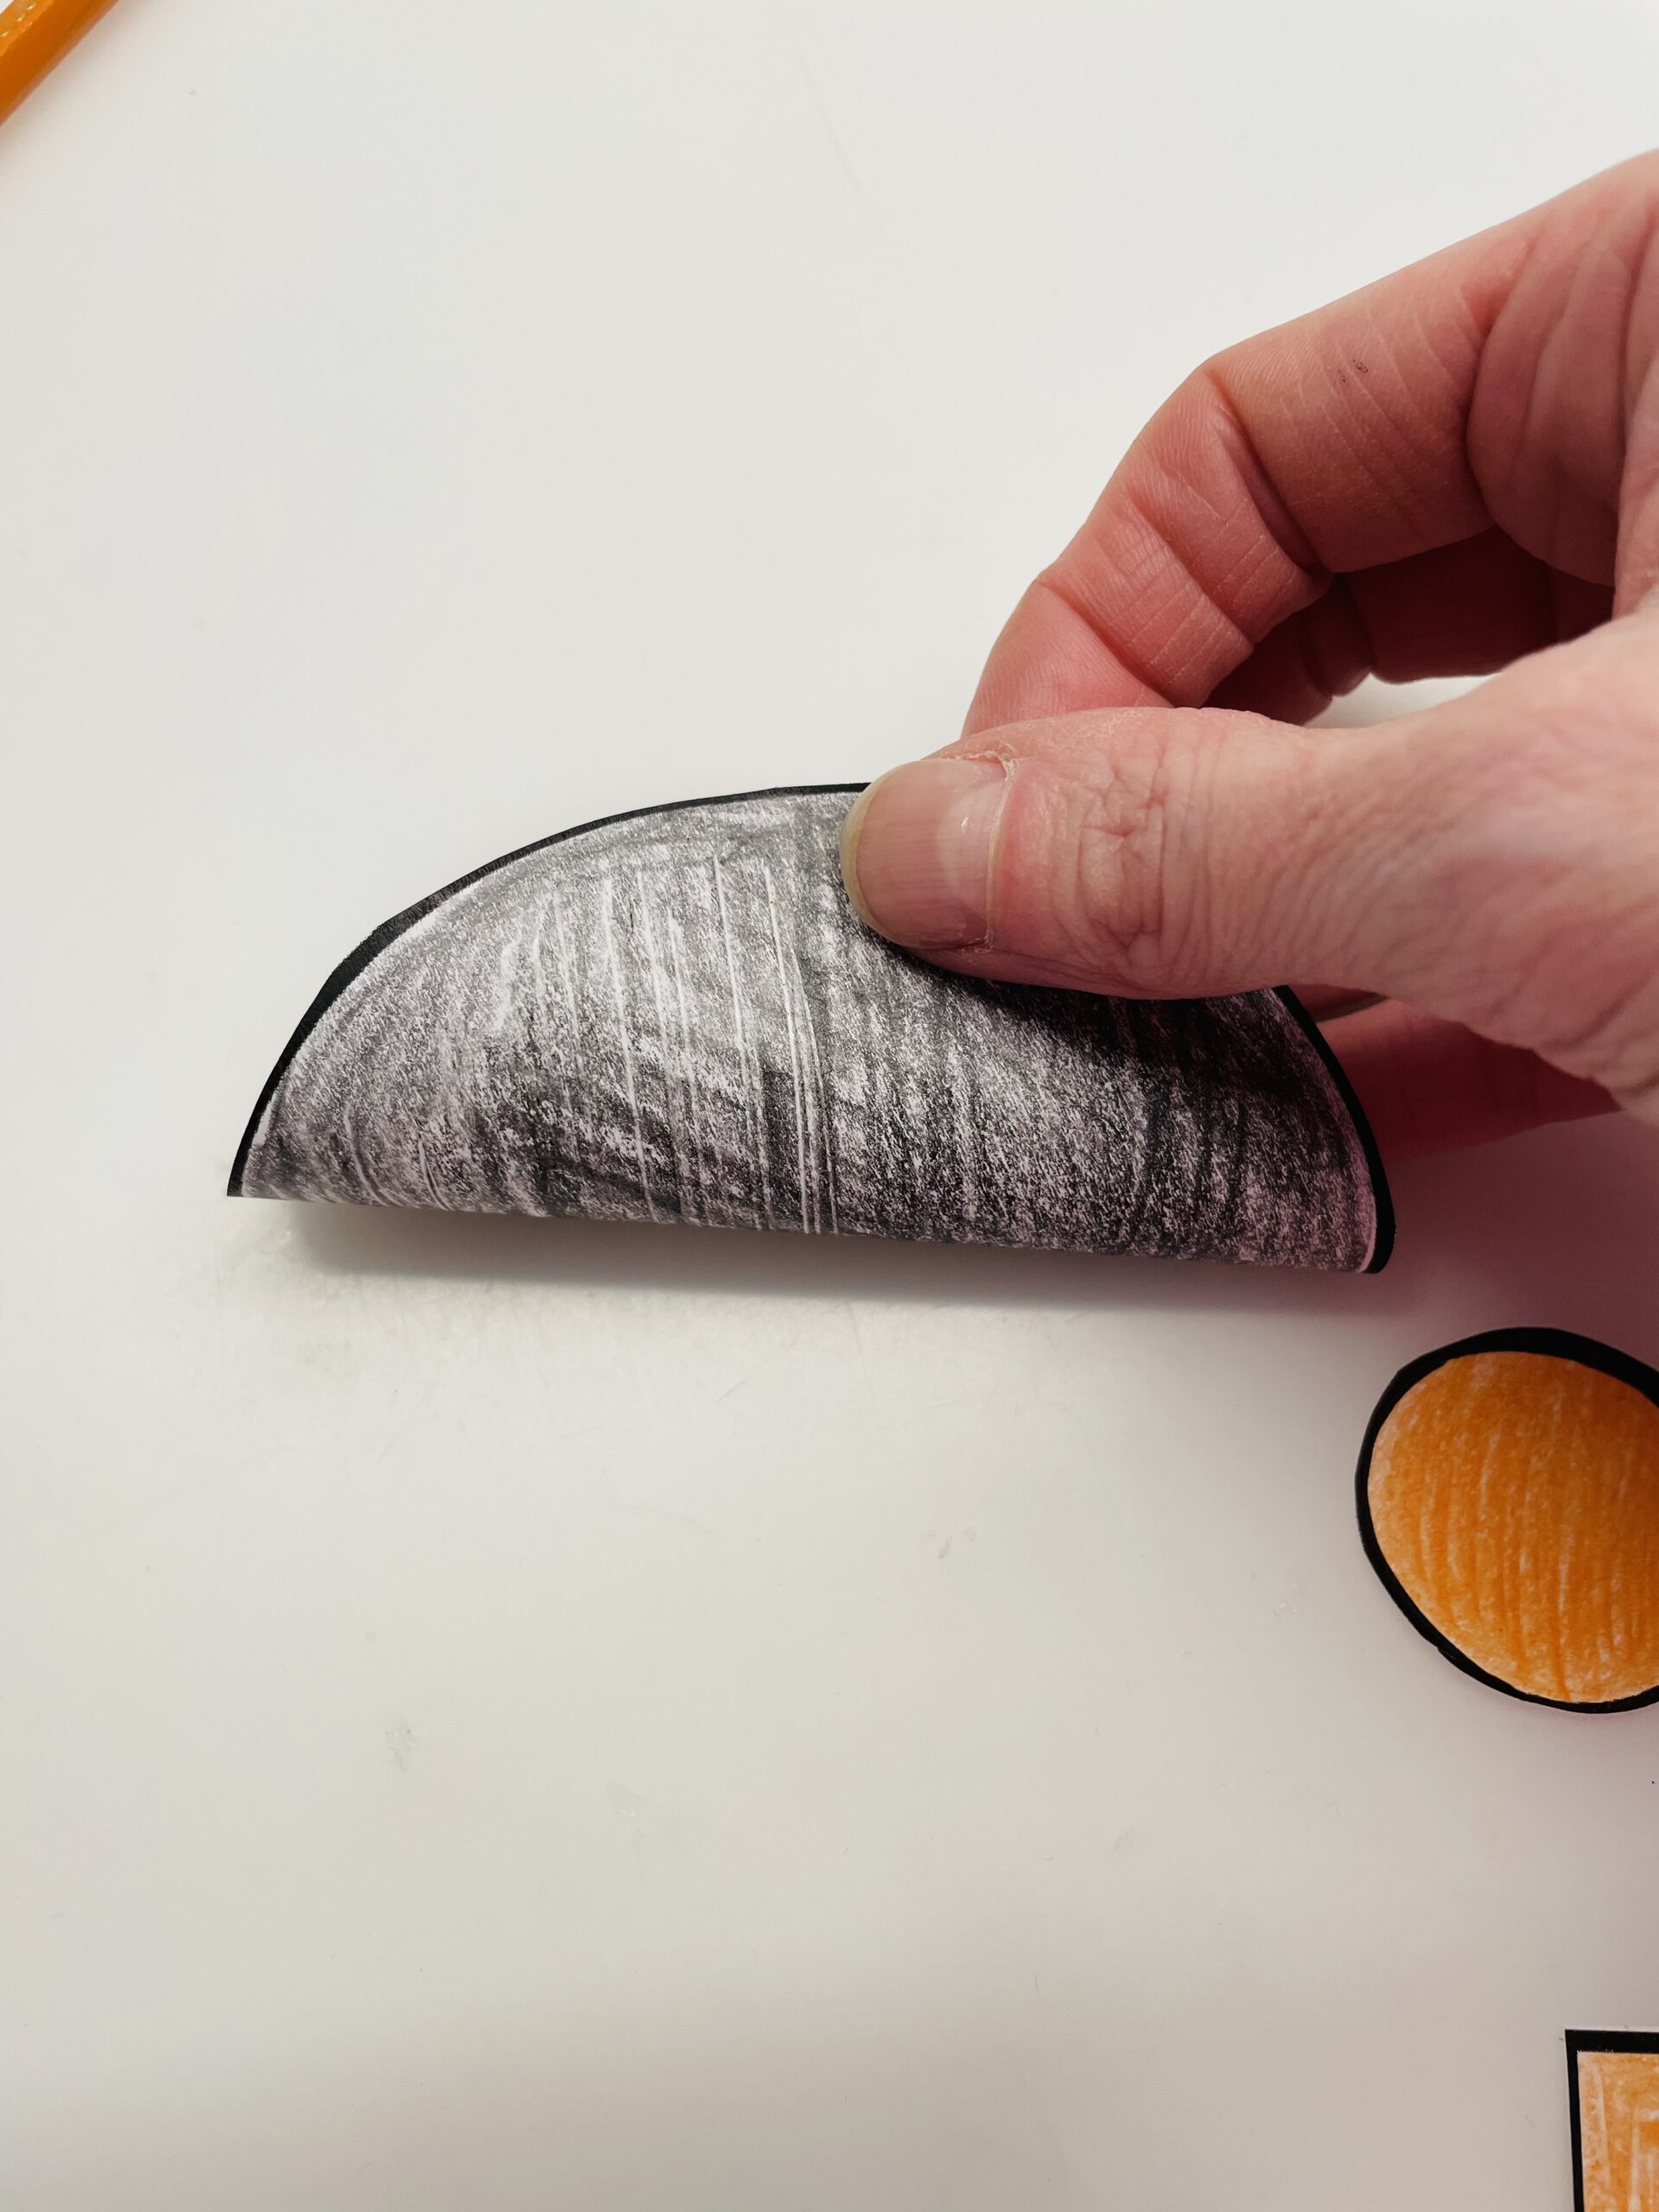
Then you fold the black large circle half as well.
Also the orange square folds it. Fold it diagonally so that a triangle develops.

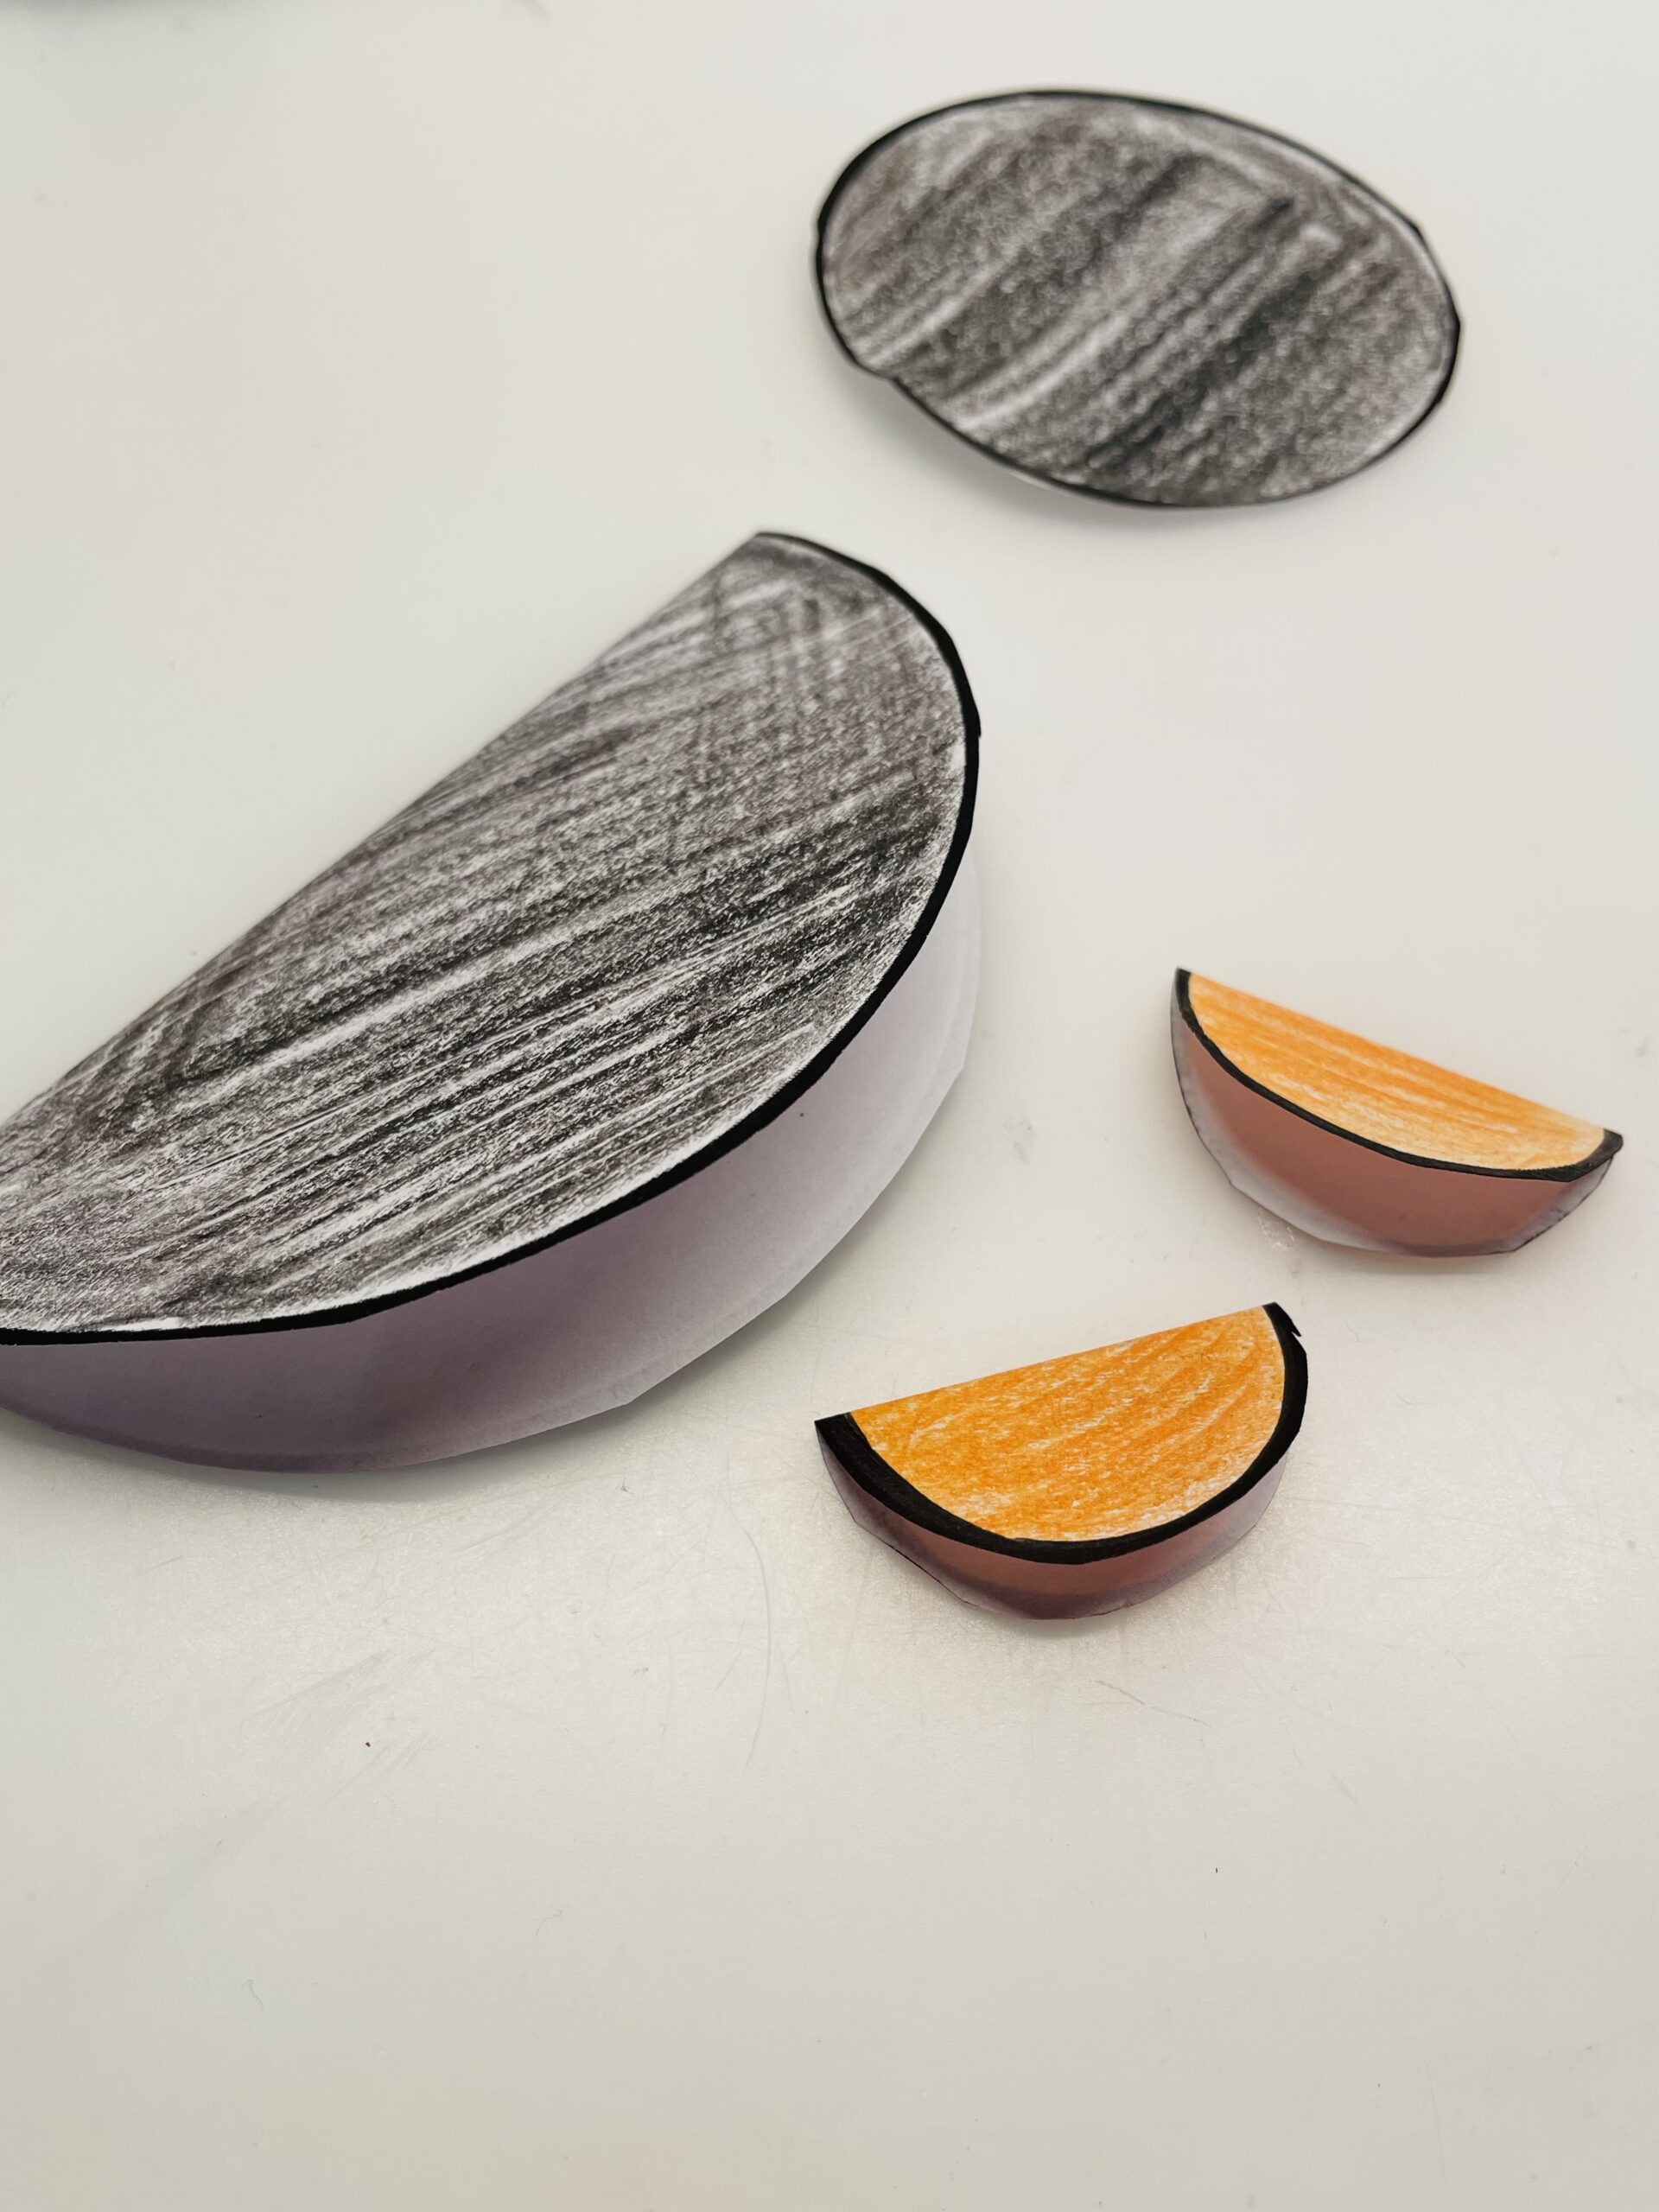
Now you fold the small orange circles in half.
The small black circle remains, which becomes the head of the penguin. You need it twice, if you want to hang the penguin on the window.
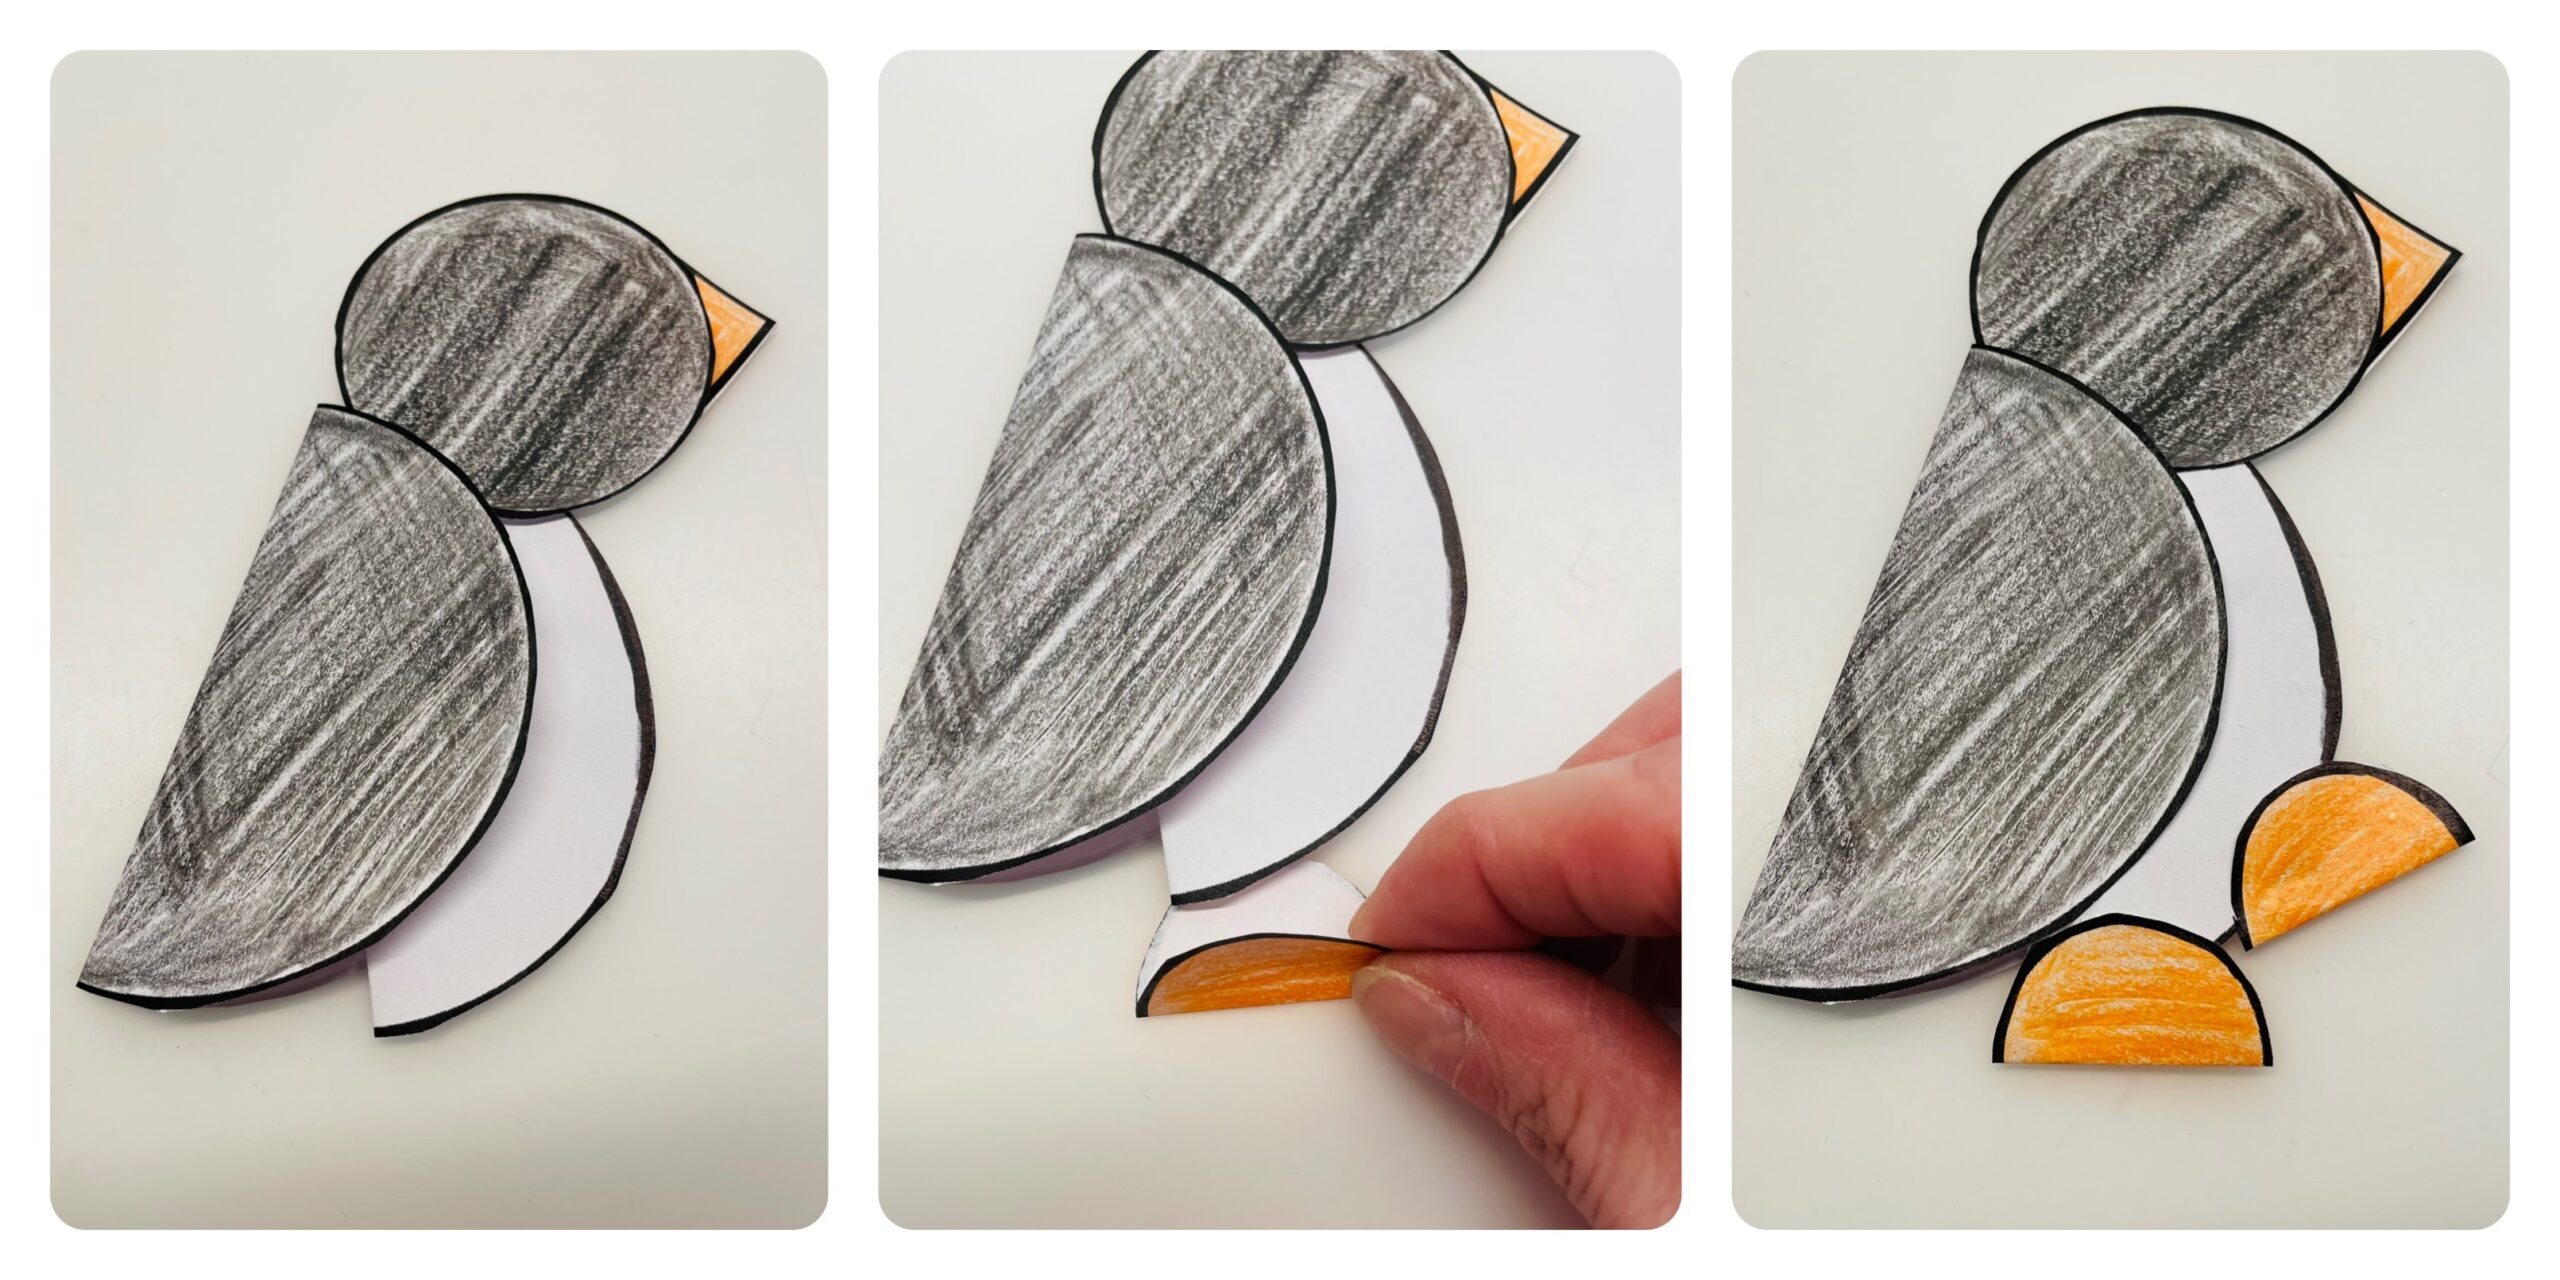
Now you put the folded circles together, as in the picture. A penguin is created.

You stick the beak on the back of the head. If you use two circles, you stick the beak between both circles.
The feet stick to the body from below. Push the half circle to the white half circle, so that the white belly lies between the folded orange feet. Then you stick everything together.
Finally, an eye sticks to her middle of the head. The other eye sticks to her back of the head.
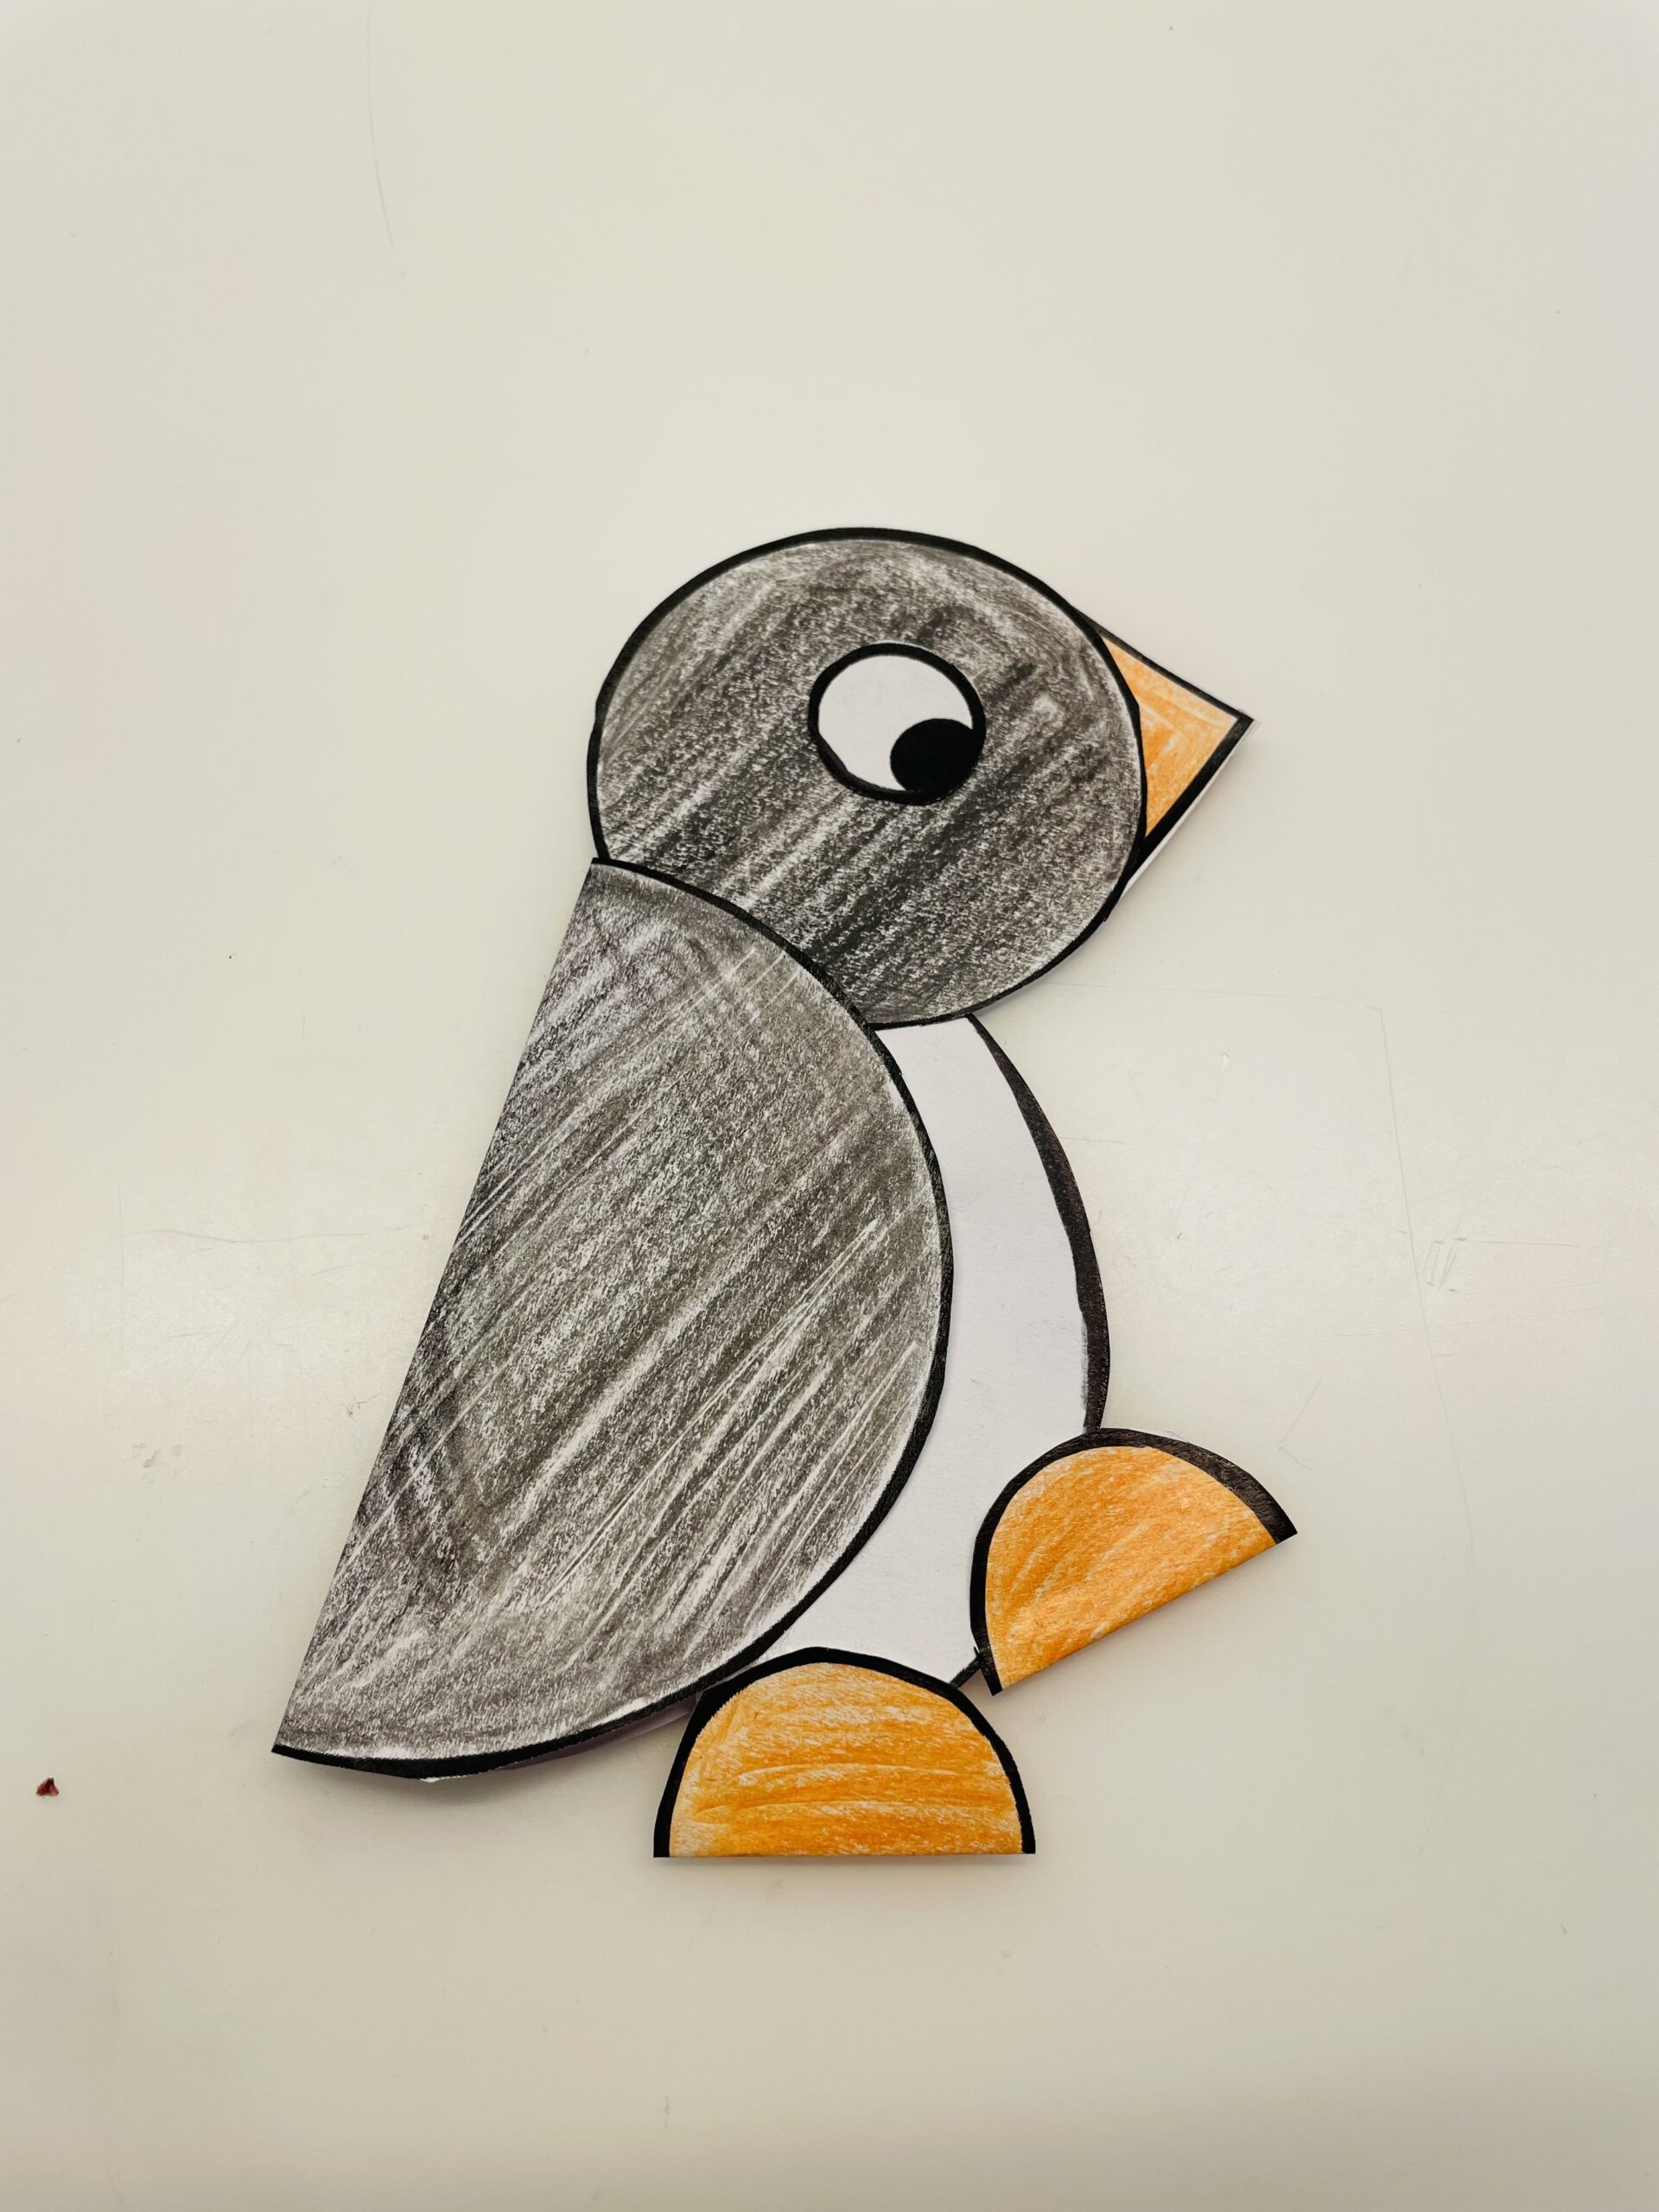
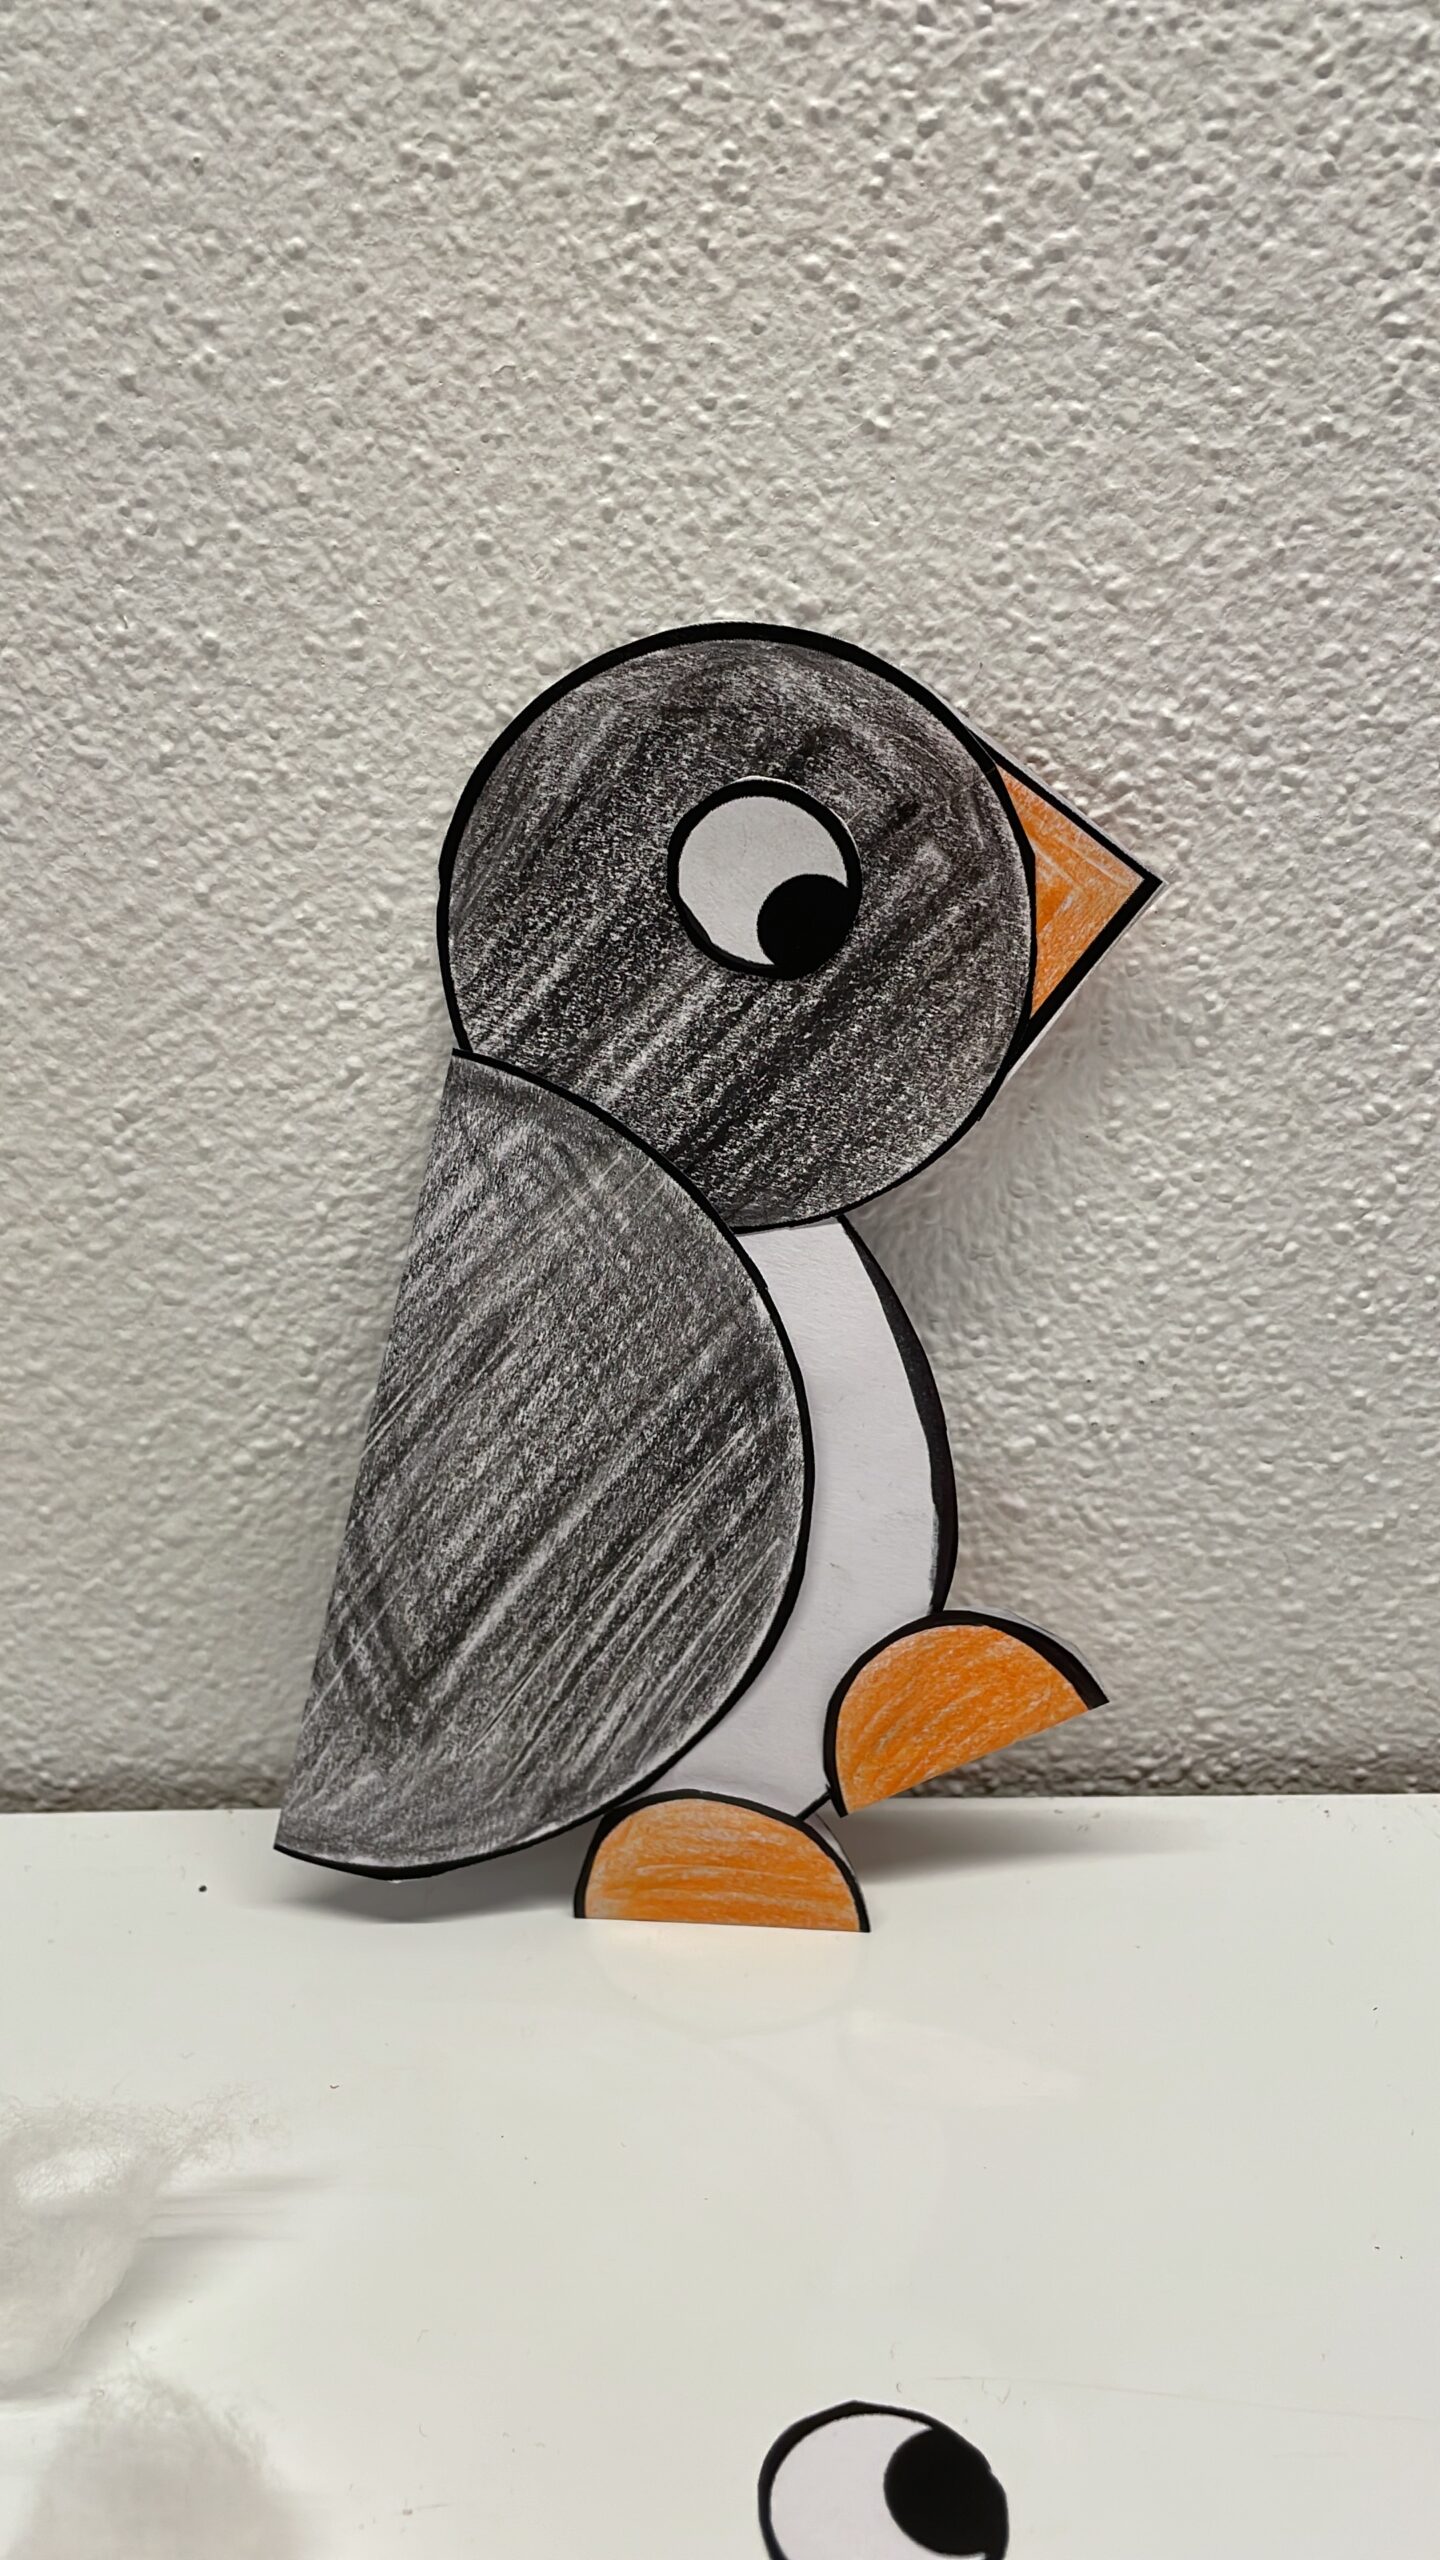
The little penguin is finished. Use it for a card or decorate a window with it.
Stay creative and enjoy crafting and designing!
Materials
Directions
Print first the Template and picks all the materials together.
Then paint out the individual circles in the respective colors (see picture). Uses crayons, markers, crayons or watercolours.
Then you cut out the items.
Then you fold half the large white circle.
Then you strip the fracture with your fingers.
Then you fold the black large circle half as well.
Also the orange square folds it. Fold it diagonally so that a triangle develops.
Now you fold the small orange circles in half.
The small black circle remains, which becomes the head of the penguin. You need it twice, if you want to hang the penguin on the window.
Now you put the folded circles together, as in the picture. A penguin is created.
You stick the beak on the back of the head. If you use two circles, you stick the beak between both circles.
The feet stick to the body from below. Push the half circle to the white half circle, so that the white belly lies between the folded orange feet. Then you stick everything together.
Finally, an eye sticks to her middle of the head. The other eye sticks to her back of the head.
The little penguin is finished. Use it for a card or decorate a window with it.
Stay creative and enjoy crafting and designing!
Follow us on Facebook , Instagram and Pinterest
Don't miss any more adventures: Our bottle mail