Crafting King with Cork – Crafting Princess of Cork

AdventurerKatzi
Rating0.03.6 Thousand times. (0) DifficultyAdvanced

These princesses or kings are made of cork and crown cork and embellished with wool.
Makes the cork kings and cork princesses to play for a puppet theatre or role playing. They are also suitable for a Christmas crib as figures. Have fun crafting with cork!

Media Education for Kindergarten and Hort

Kind bastelt eine Rassel mit dem Navi
The Adventure Navi, the app for DIY projects, enables media education for the youngest.

Relief in everyday life, targeted promotion of individual children, independent learning and - without any pre-knowledge already usable by the youngest!
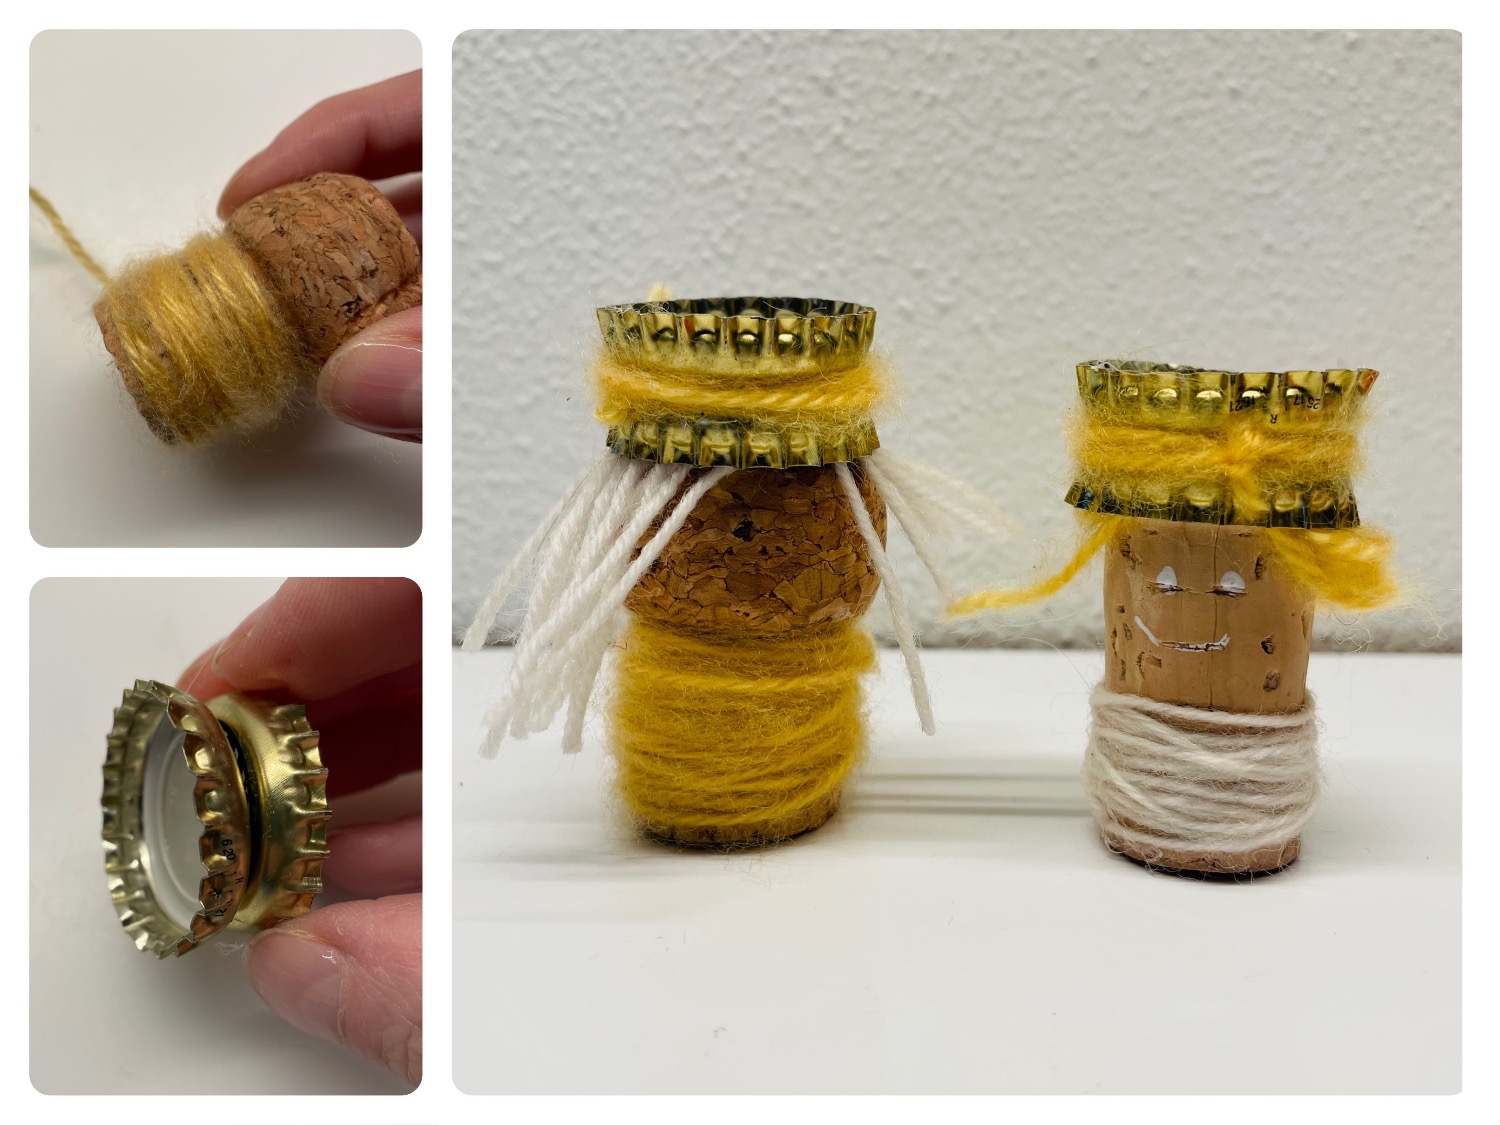


Titelbild zur Bastel- und DIY-Idee für Kinder '(973) König mit Korken basteln – Prinzessin aus Korken basteln'
Material for1 Child
Prep Time5 min.Adv. Time30 min.Total Time35 min.
 1 Corks
 Wool
 1 Felt pen
 1 Hot glue gun or double-sided adhesive tape
 1 Builder's pad
All links marked with a shopping cart lead to Amazon - here we have selected products that we would order ourselves and in part also ordered. In a qualified purchase via the advertising link, we as Amazon partner receive a commission, for you there are no costs. You thus support our cost- and advertising banner-free, educational offer.
1

For each king and princess you need a cork and two crown corks.

Bild zum Schritt 1 für das Bastel- und DIY-Abenteuer für Kinder: 'Für jeden König und jede Prinzessin braucht ihr einen Korken...'

2

In addition, you put out your craft pad and prepare wool for your hair and for your clothes.
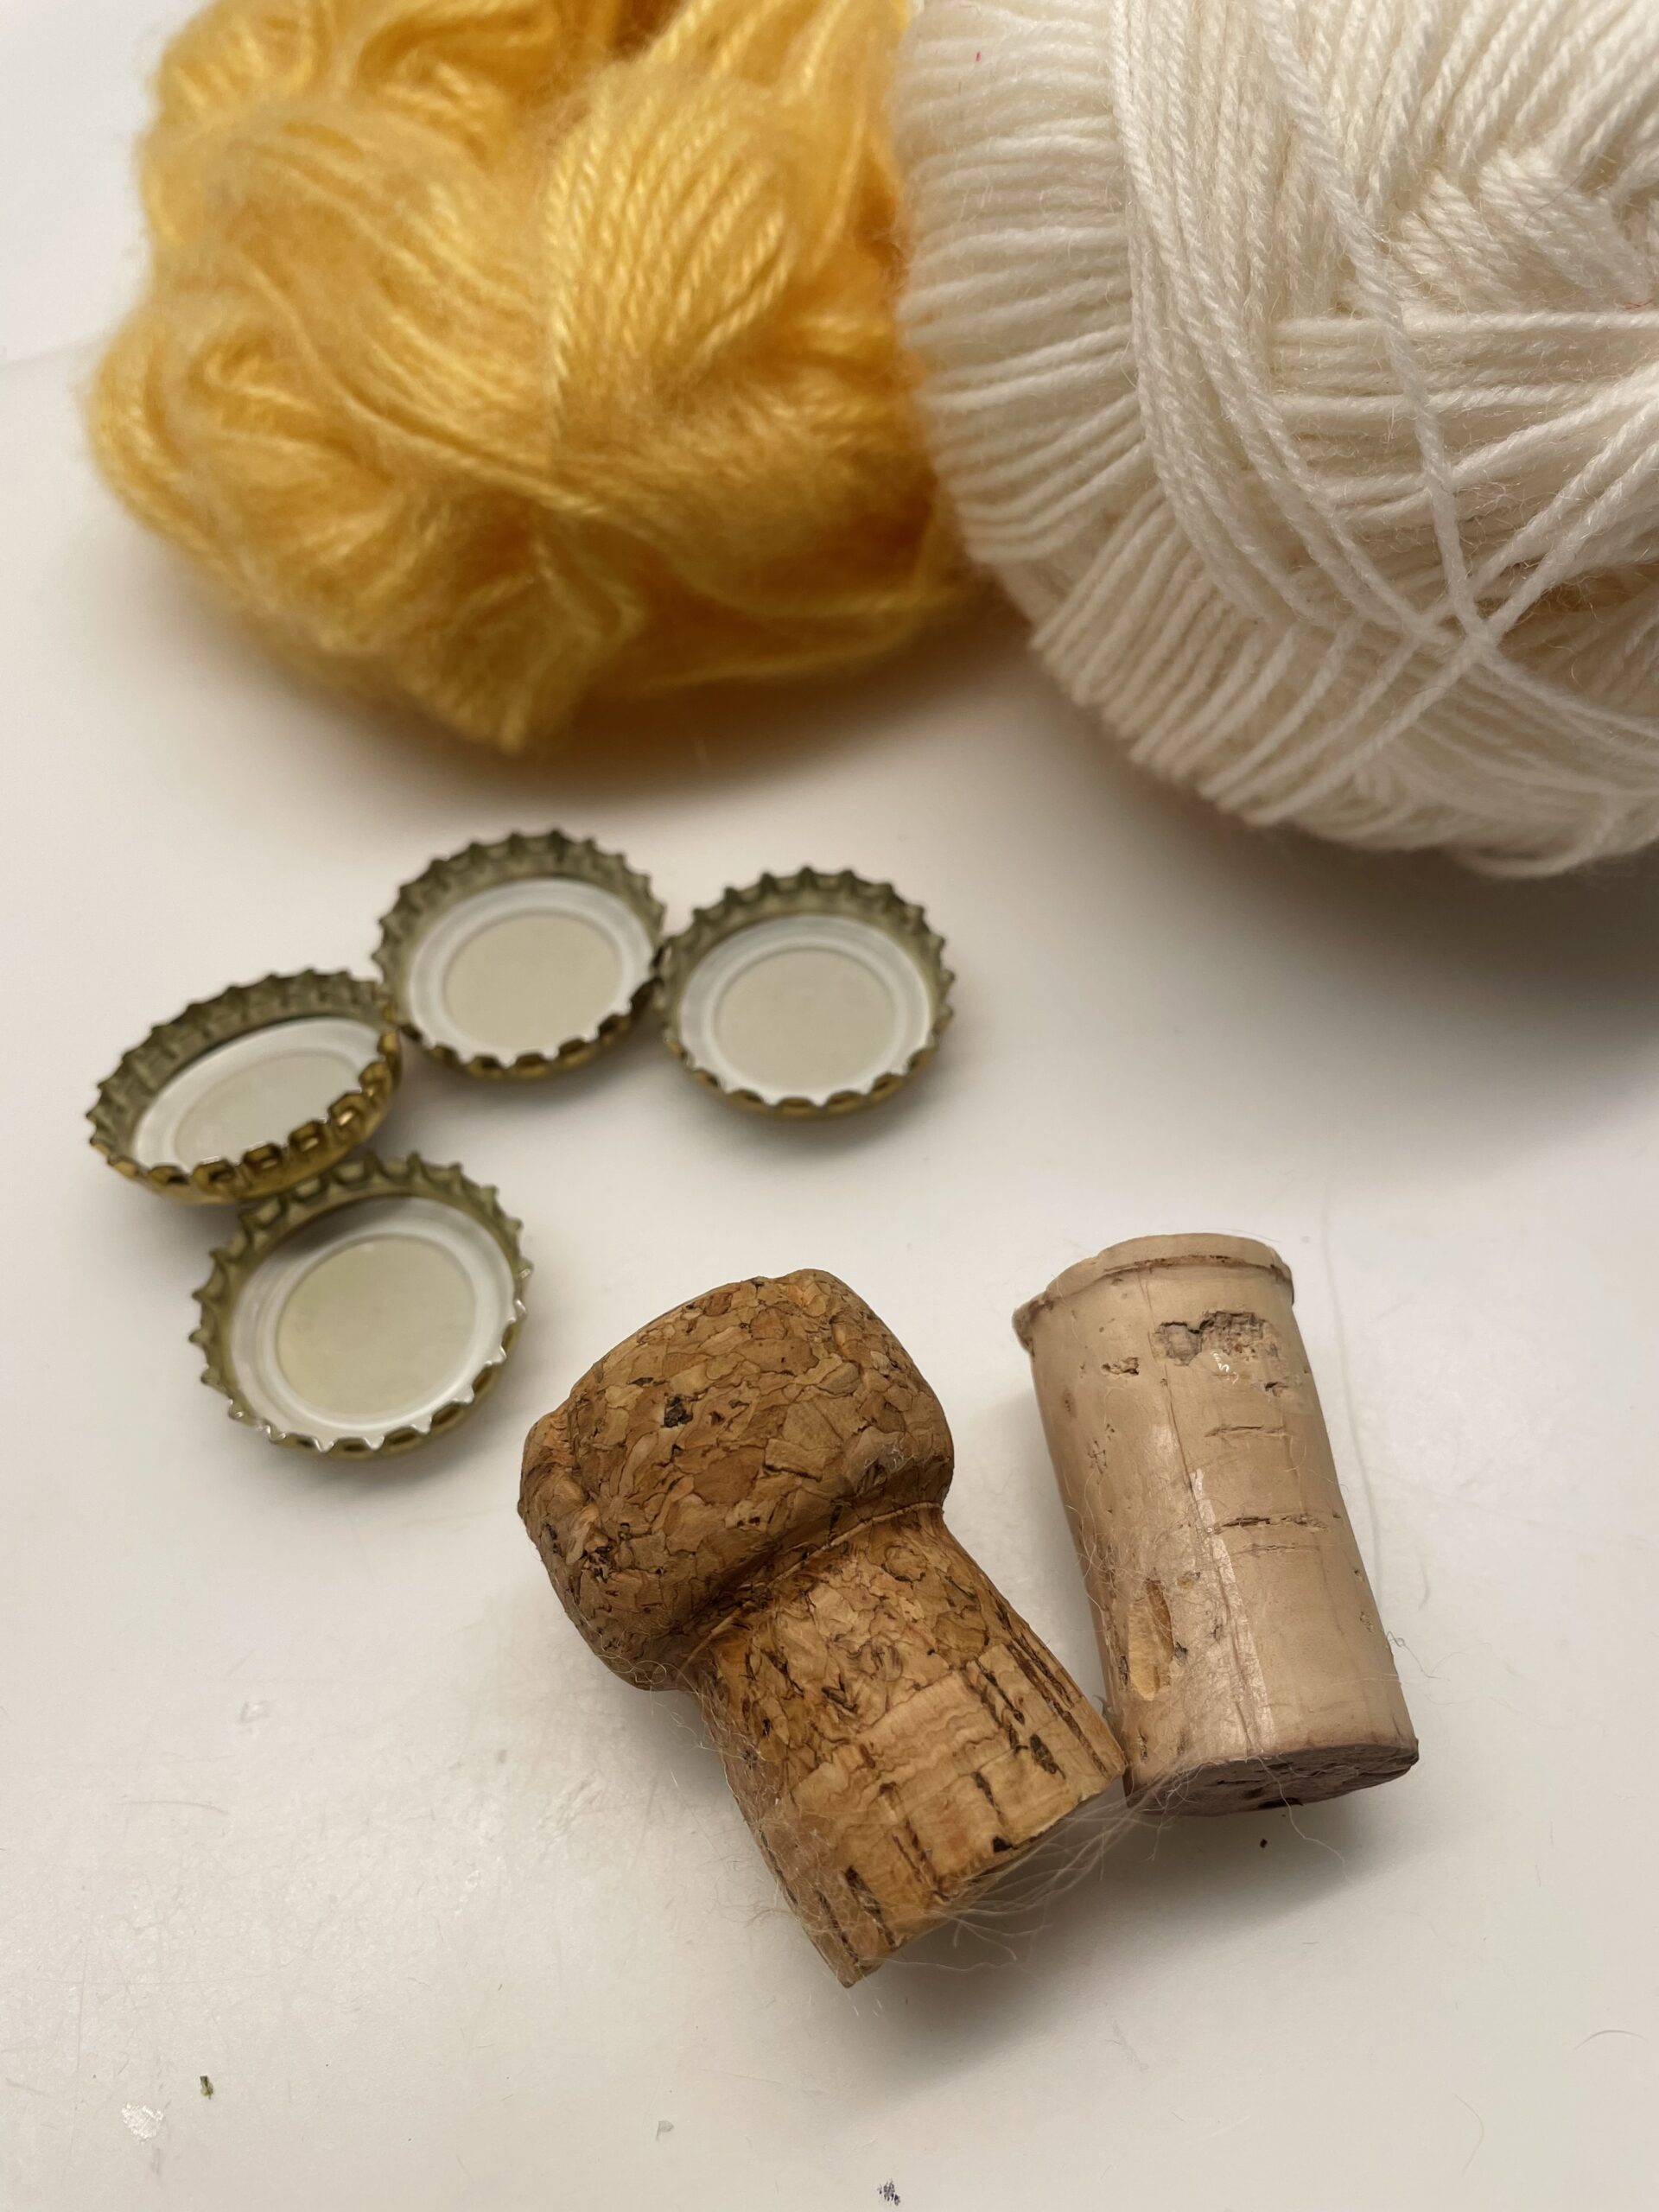
Bild zum Schritt 2 für das Bastel- und DIY-Abenteuer für Kinder: 'Zusätzlich legt ihr eure Bastelunterlage aus und legt euch Wolle...'

3

Start by wrapping the lower part of a cork with wool. You stick the initial thread with an adhesive point. Wrap so much wool around the cork until the cork is no longer visible. Then cut off the thread and stick the end to the cork.

Bild zum Schritt 3 für das Bastel- und DIY-Abenteuer für Kinder: 'Beginnt damit den unteren Teil eines Korkens mit Wolle zu...'

4

With an evenly thick cork, you wrap half of the cork with wool.

Bild zum Schritt 4 für das Bastel- und DIY-Abenteuer für Kinder: 'Bei einem gleichmäßig dicken Korken umwickelt ihr die Hälfte des...'

5

Now you stick two crown caps together with the upper side. For this a hot glue gun is suitable. Attention when handling the hot glue - risk of injury! Please do not extend into the inner surfaces of the lids. These become hot!!! The crown is finished!

Tip: Alternatively, glue the lids together with a double-sided tape!

Bild zum Schritt 5 für das Bastel- und DIY-Abenteuer für Kinder: 'Jetzt klebt ihr zwei Kronenkorken mit der oberen Seite aneinander....'

6

Now she sticks small woolen threads to the underside. This is how the hair is created. Afterwards, the crown sticks to her corks.

Bild zum Schritt 6 für das Bastel- und DIY-Abenteuer für Kinder: 'Jetzt klebt ihr an die Unterseite kleine Wollfäden. So entstehen...'

7

Tip: The crown beautifies you by, for example, sticking some wool around the sticky spot between the two crown caps. For this, you wrap the wool thread several times around the middle and then knot both ends together. Alternatively, you stick the threads firmly together.

Bild zum Schritt 7 für das Bastel- und DIY-Abenteuer für Kinder: 'Tipp: Die Krone verschönert ihr, indem ihr z.B. etwas Wolle...'

8

Alternatively, stick her hair on the corks.

Bild zum Schritt 8 für das Bastel- und DIY-Abenteuer für Kinder: 'Alternativ kleb ihr die Haare auf den Korken.'

9

Then put the crown on the cork with a hot glue point.

Bild zum Schritt 9 für das Bastel- und DIY-Abenteuer für Kinder: 'Anschließend setzt ihr die Krone mit einem Heißklebepunkt auf den...'

10

Finally, the crafted cork kings and cork princesses paint a face.
Your little cork kings or princesses are ready.

Bild zum Schritt 10 für das Bastel- und DIY-Abenteuer für Kinder: 'Abschließend malt den gebastelten Korkenkönigen und Korkenprinzessinen ein Gesicht. ...'

11

Tip: Use them as game figures or for a nativity scene! Make more figures and stay creative!

Materials

 1 Corks
 Wool
 1 Felt pen
 1 Hot glue gun or double-sided adhesive tape
 1 Builder's pad
All links marked with a shopping cart lead to Amazon - here we have selected products that we would order ourselves and in part also ordered. In a qualified purchase via the advertising link, we as Amazon partner receive a commission, for you there are no costs. You thus support our cost- and advertising banner-free, educational offer.

Directions

1

For each king and princess you need a cork and two crown corks.

Bild zum Schritt 1 für das Bastel- und DIY-Abenteuer für Kinder: 'Für jeden König und jede Prinzessin braucht ihr einen Korken...'

2

In addition, you put out your craft pad and prepare wool for your hair and for your clothes.

Bild zum Schritt 2 für das Bastel- und DIY-Abenteuer für Kinder: 'Zusätzlich legt ihr eure Bastelunterlage aus und legt euch Wolle...'

3

Start by wrapping the lower part of a cork with wool. You stick the initial thread with an adhesive point. Wrap so much wool around the cork until the cork is no longer visible. Then cut off the thread and stick the end to the cork.
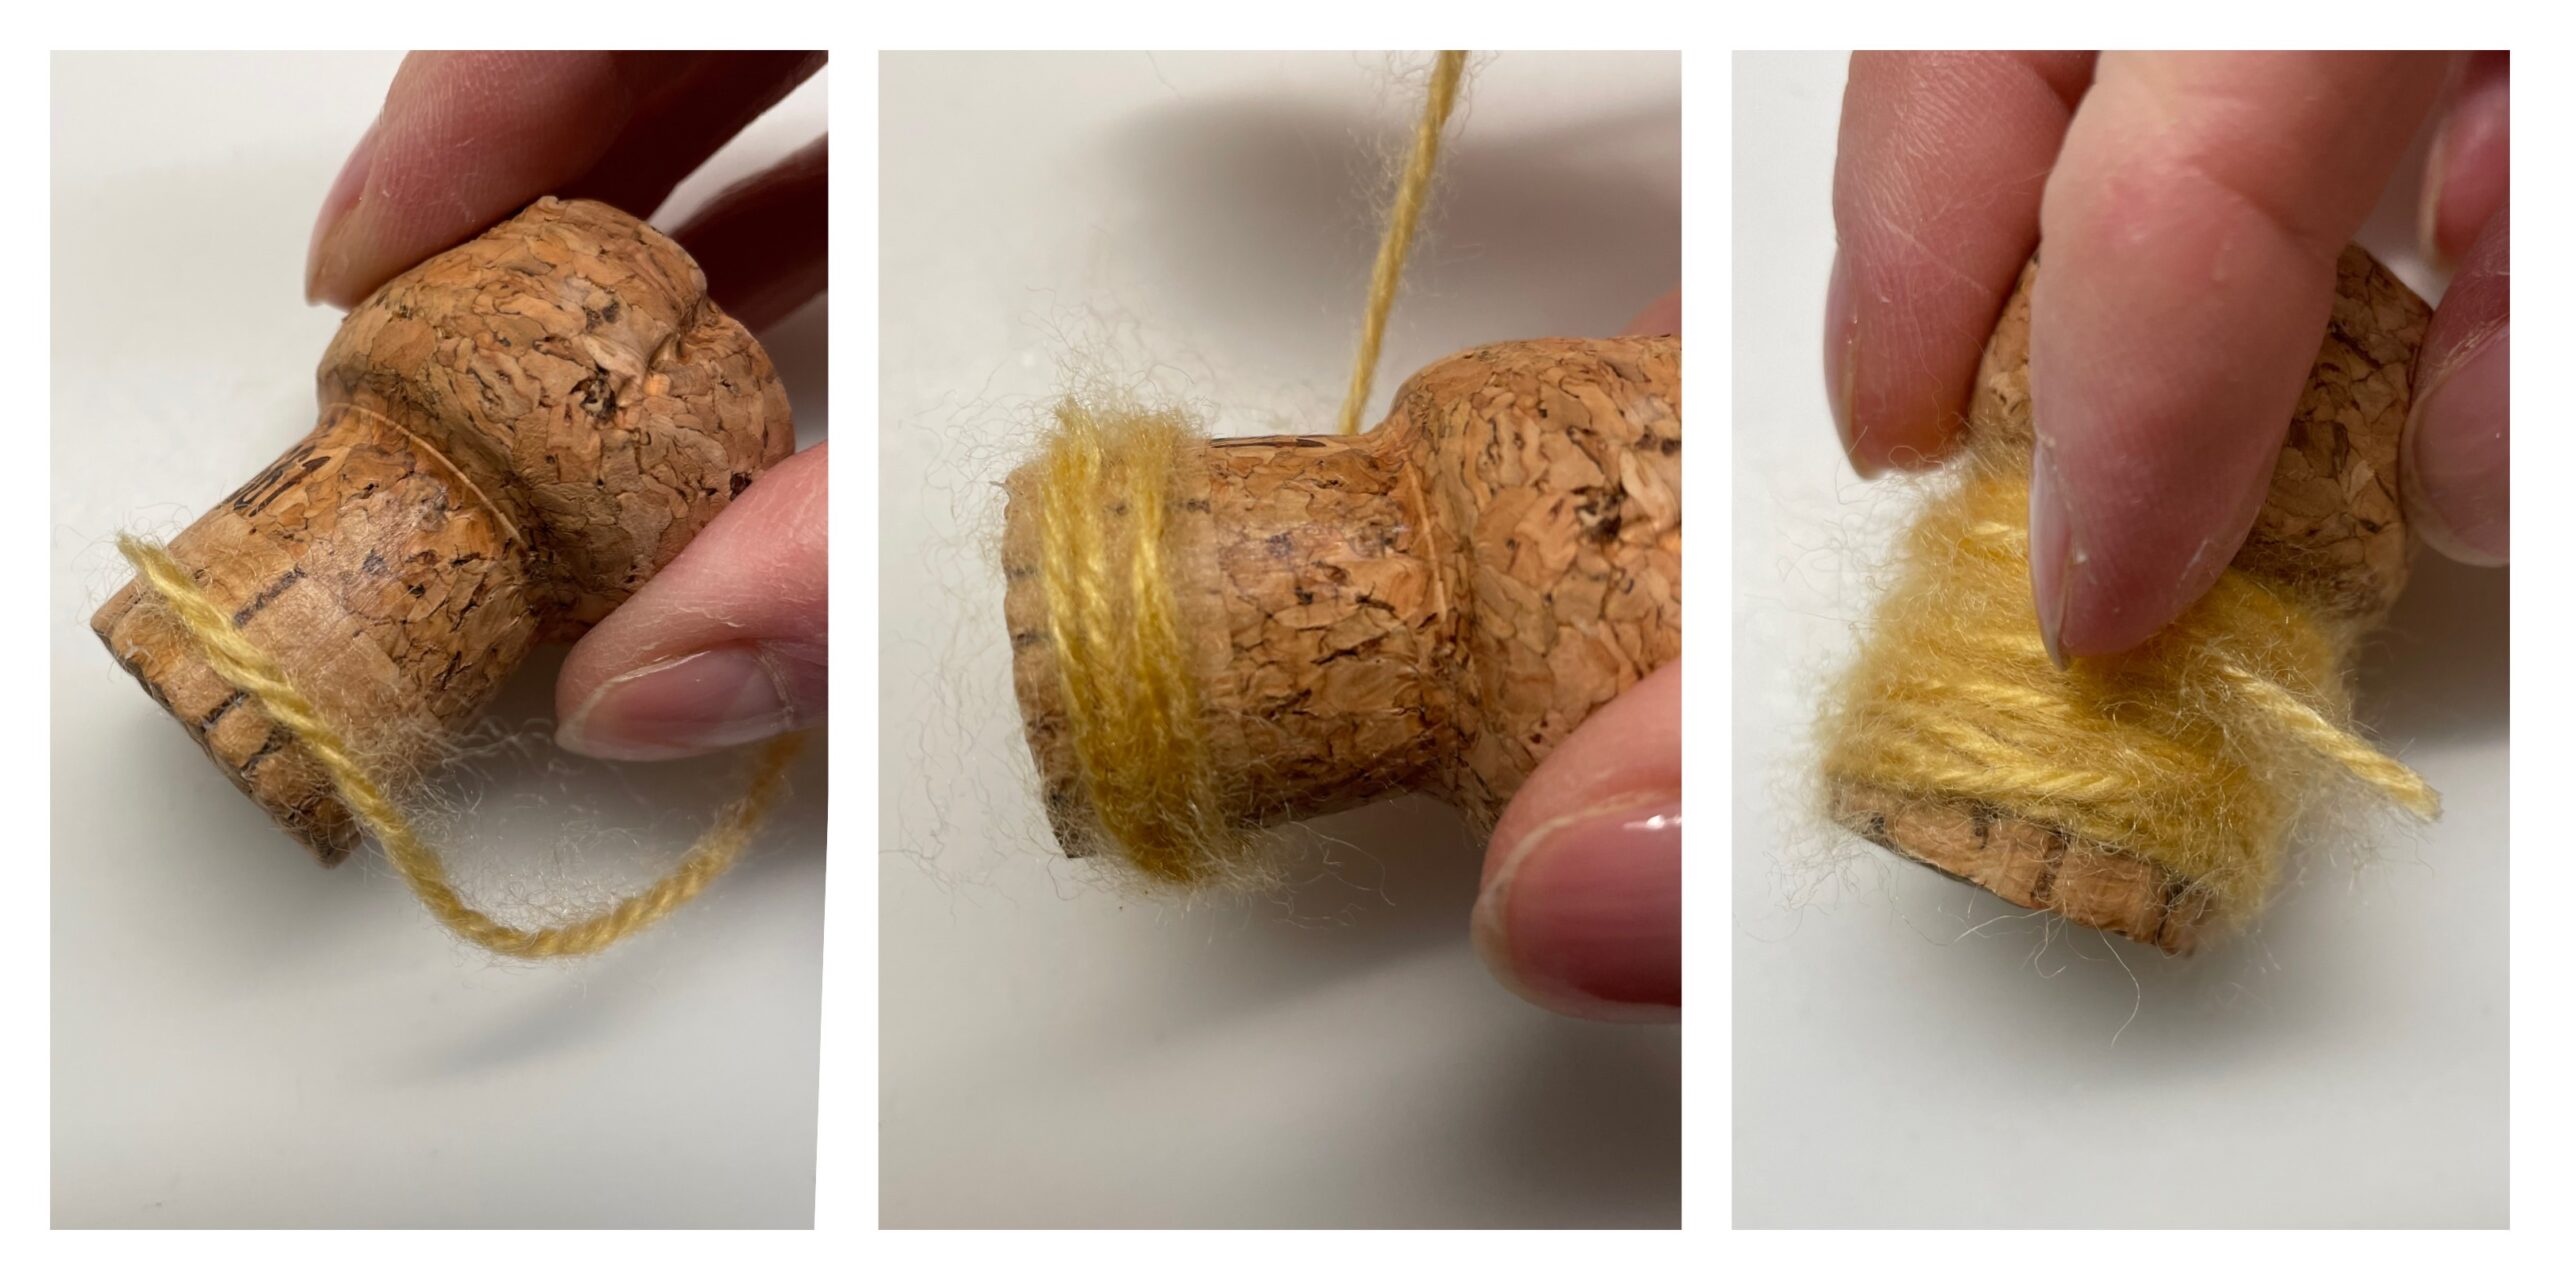
Bild zum Schritt 3 für das Bastel- und DIY-Abenteuer für Kinder: 'Beginnt damit den unteren Teil eines Korkens mit Wolle zu...'

4

With an evenly thick cork, you wrap half of the cork with wool.
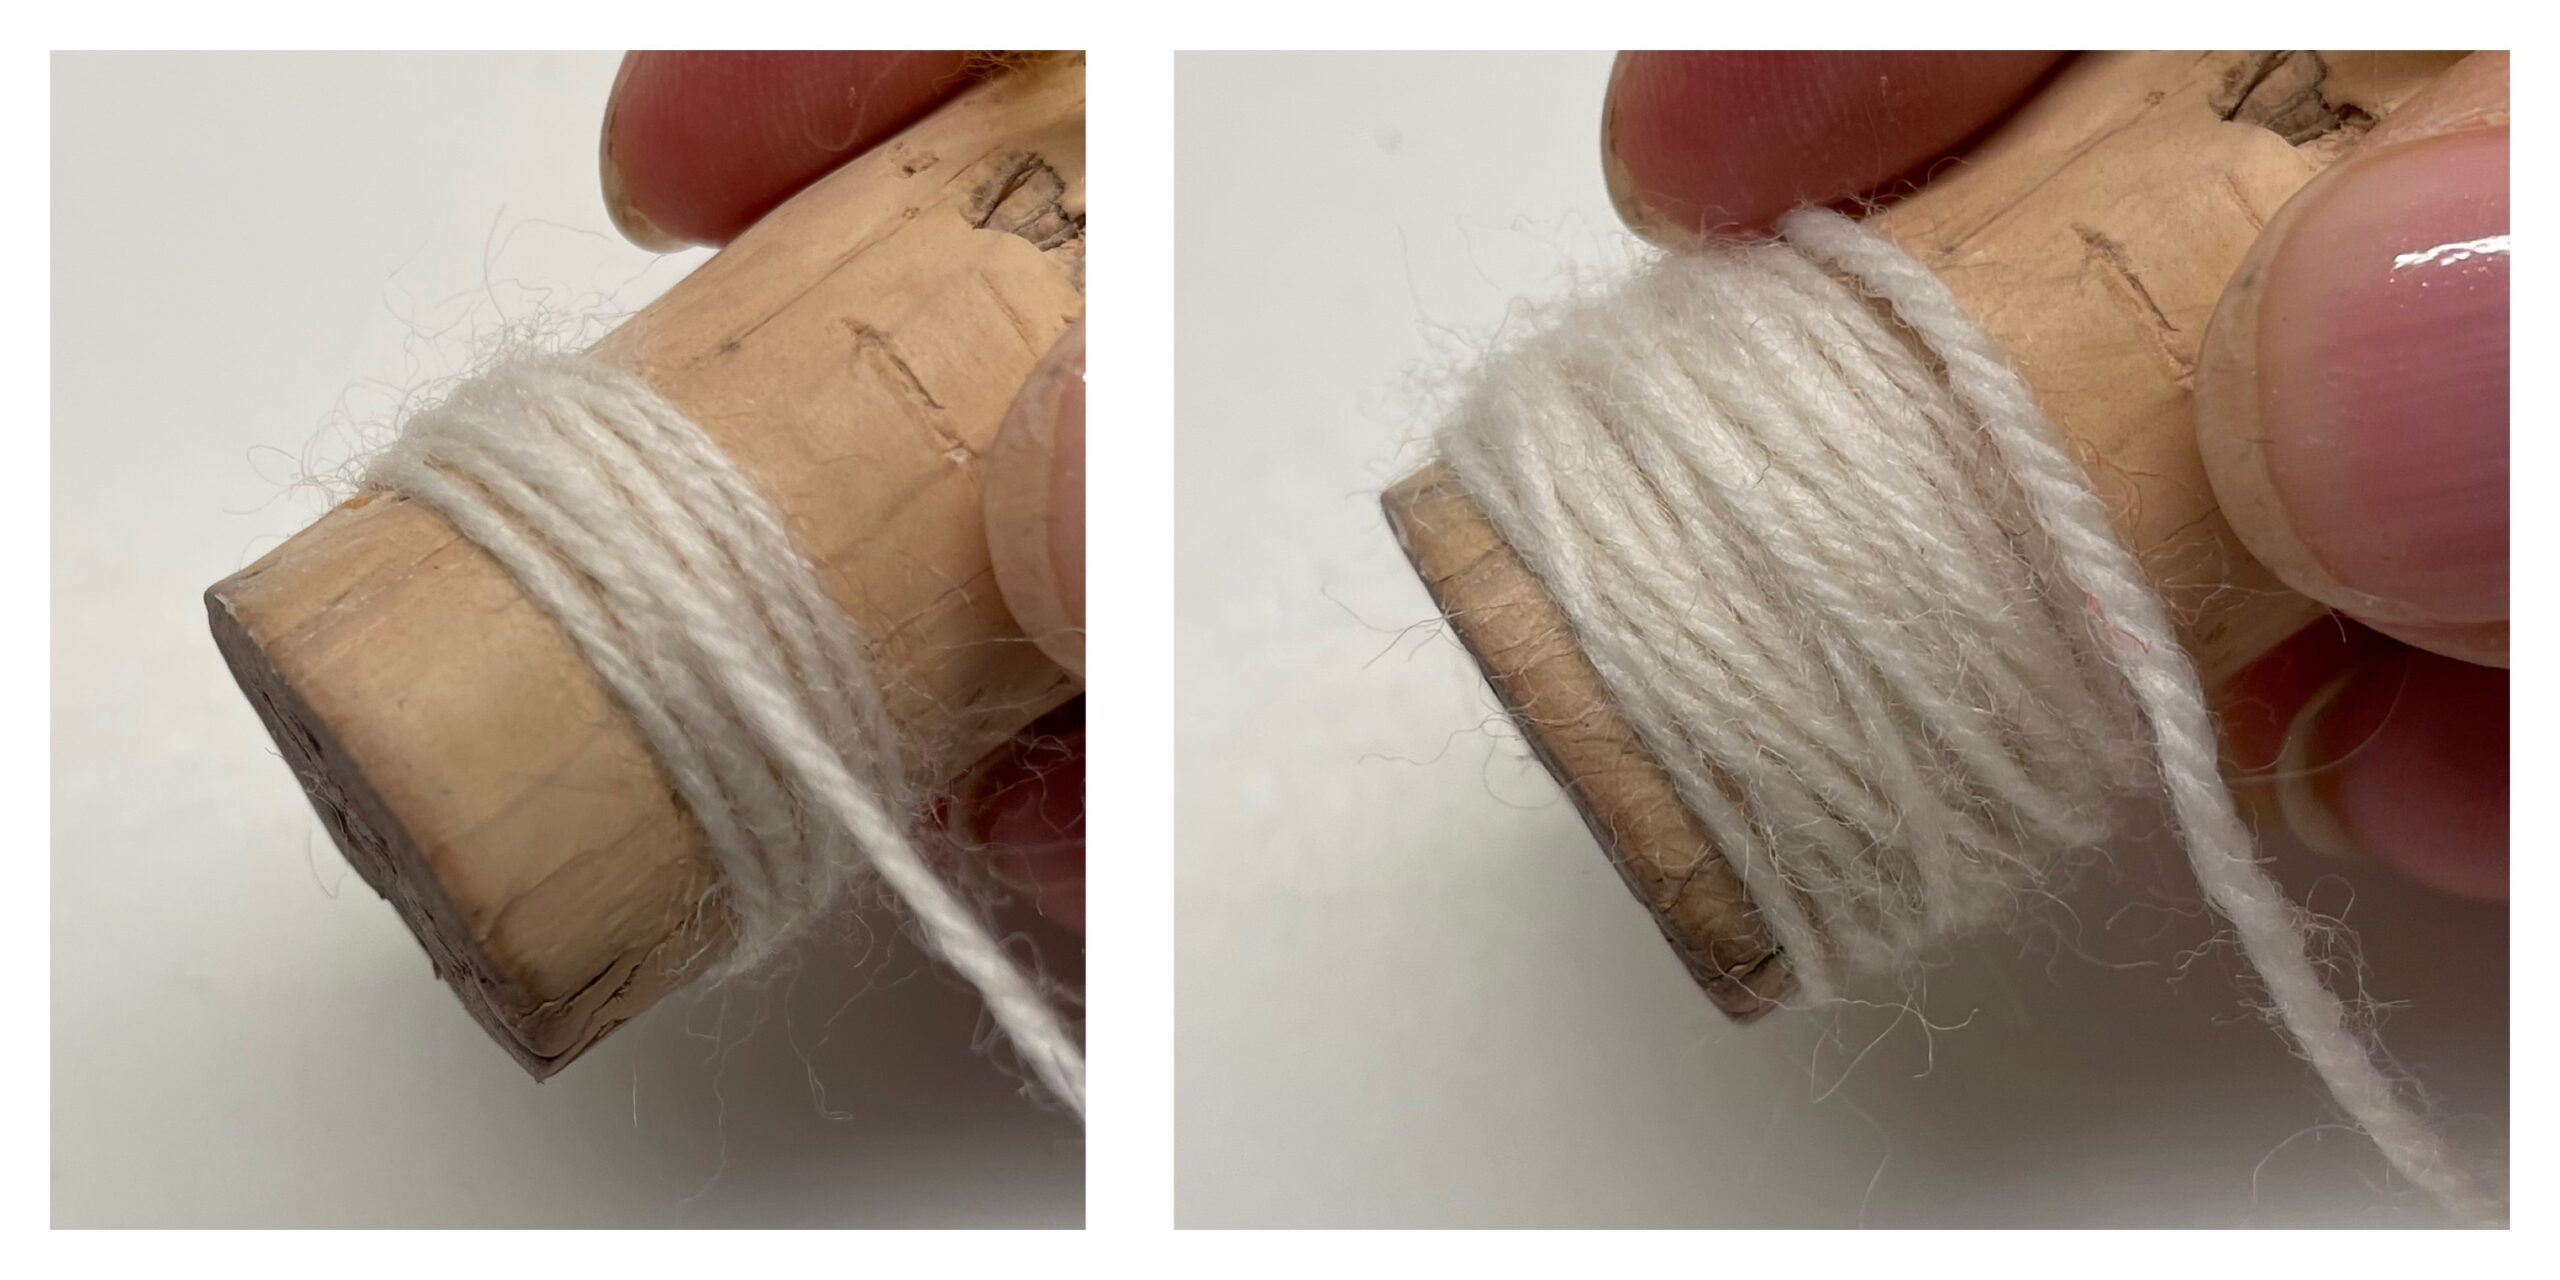
Bild zum Schritt 4 für das Bastel- und DIY-Abenteuer für Kinder: 'Bei einem gleichmäßig dicken Korken umwickelt ihr die Hälfte des...'

5

Now you stick two crown caps together with the upper side. For this a hot glue gun is suitable. Attention when handling the hot glue - risk of injury! Please do not extend into the inner surfaces of the lids. These become hot!!! The crown is finished!

Tip: Alternatively, glue the lids together with a double-sided tape!
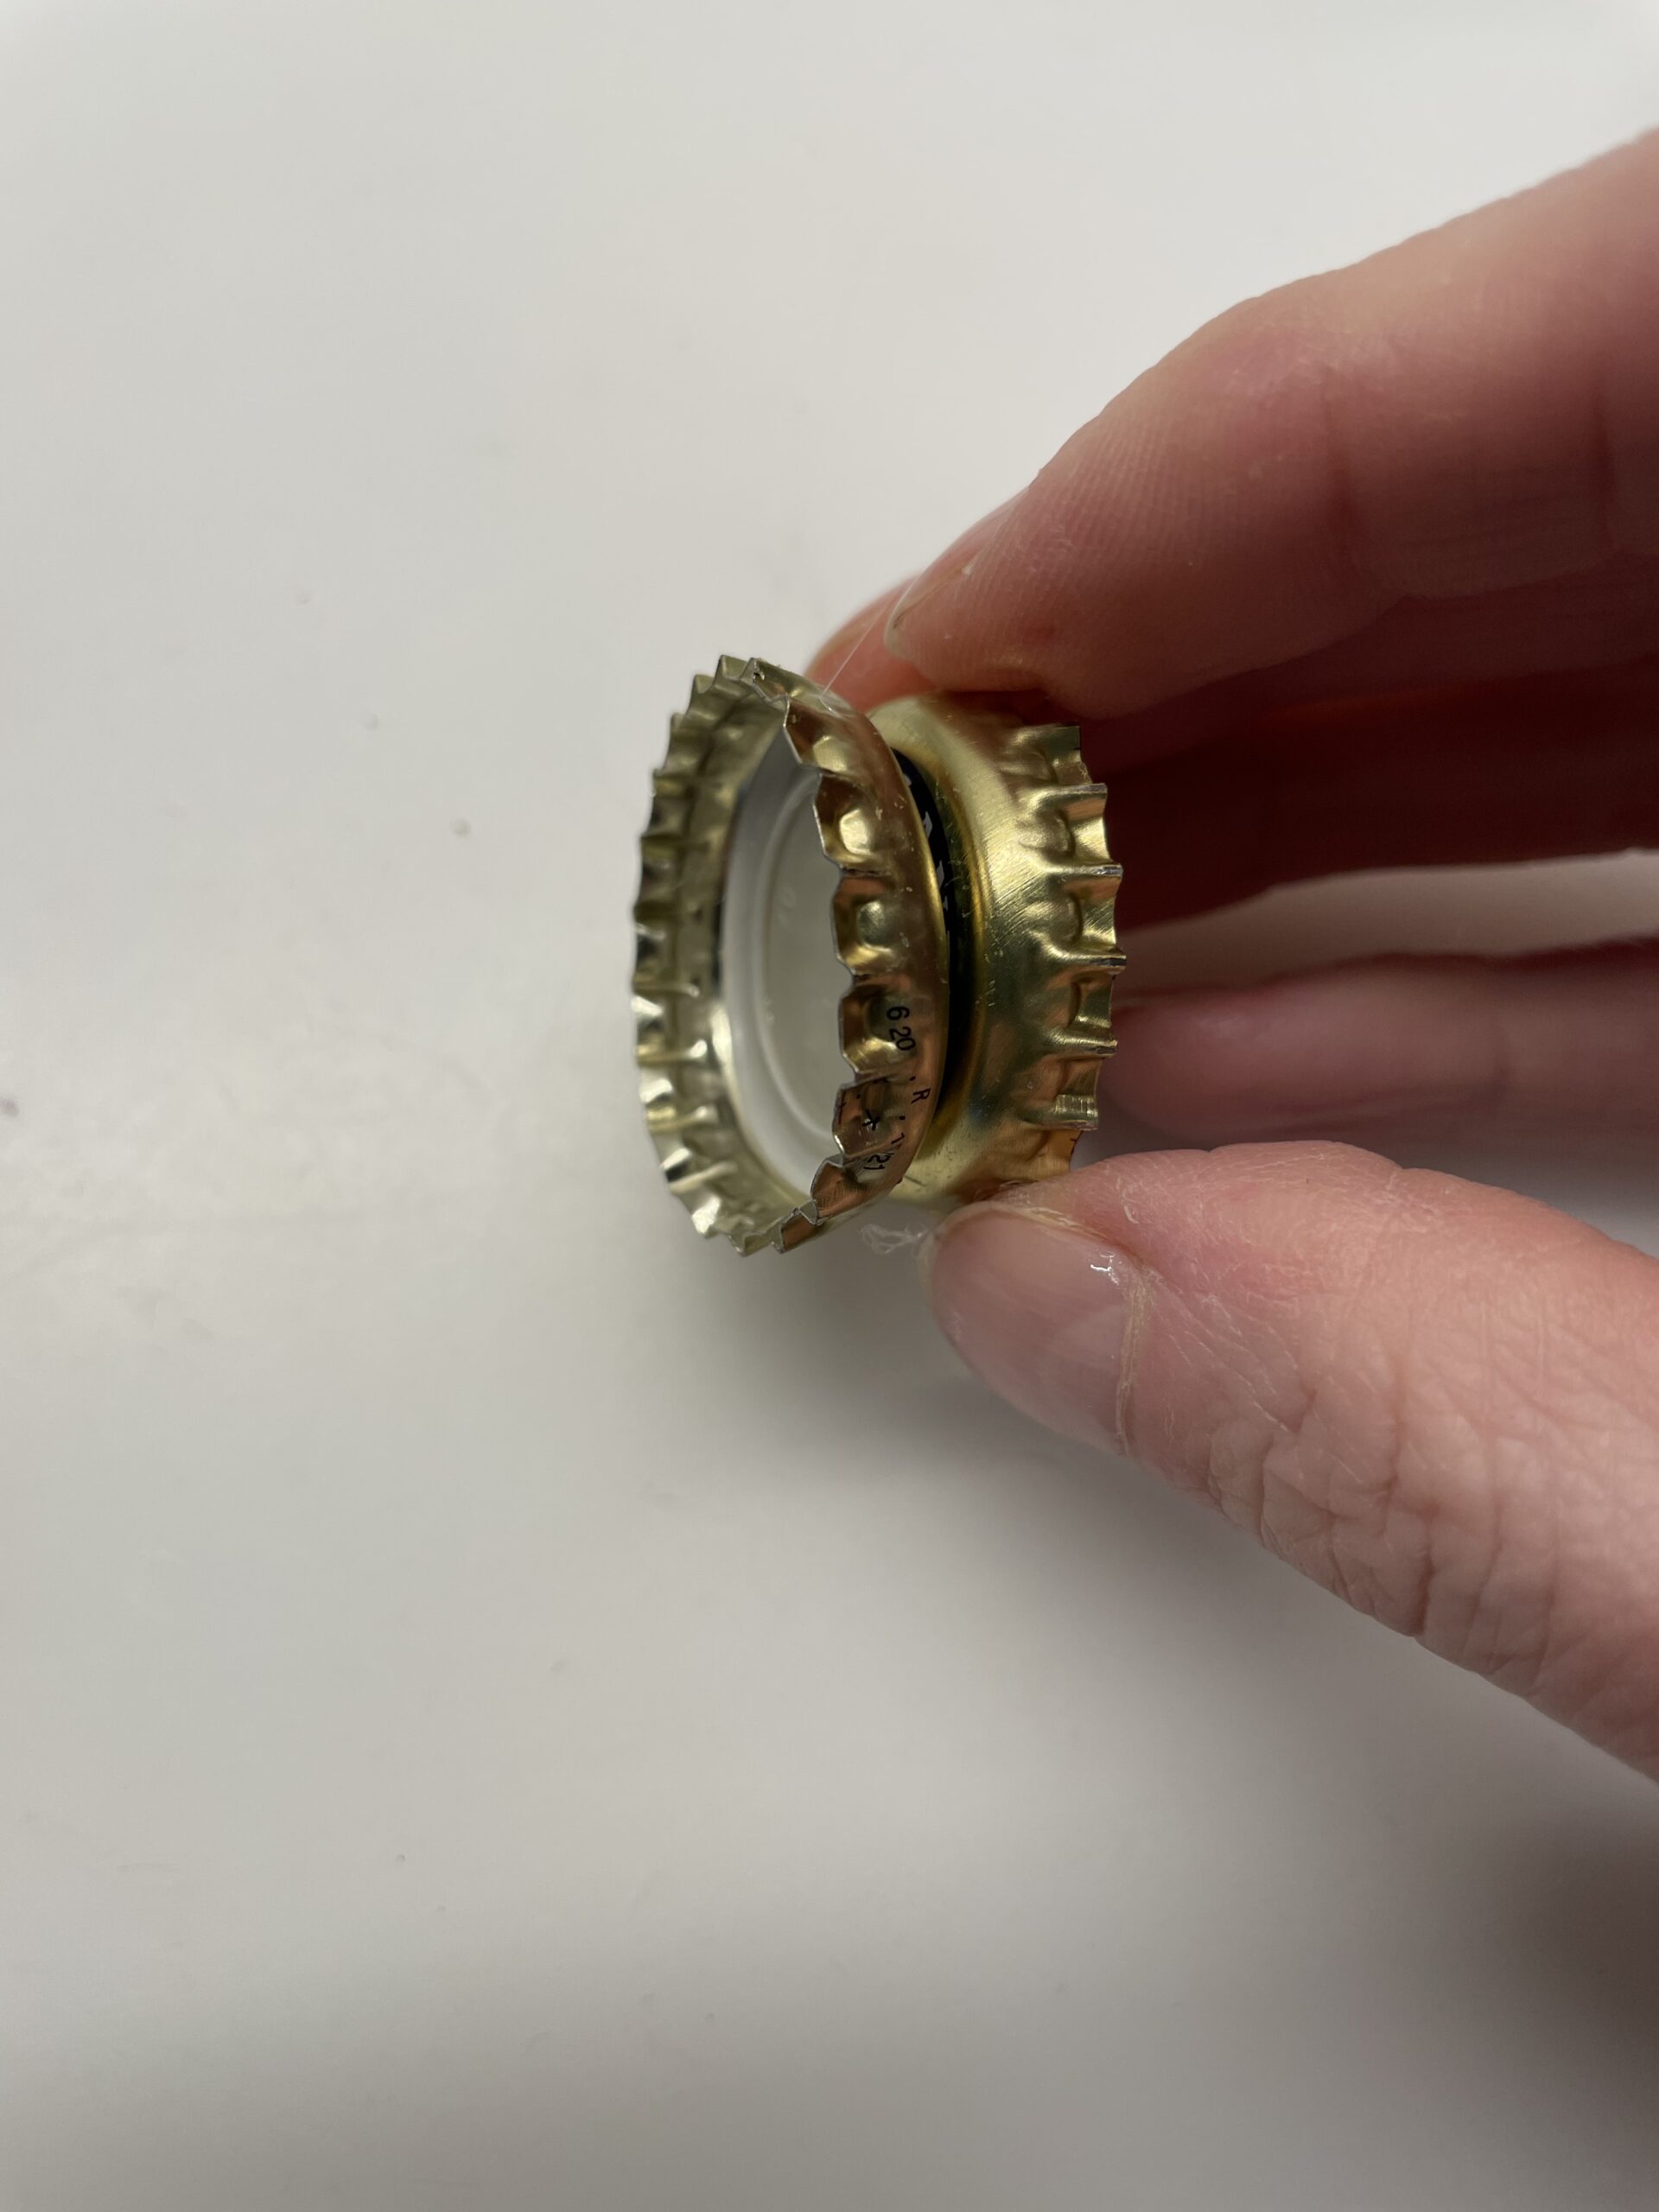
Bild zum Schritt 5 für das Bastel- und DIY-Abenteuer für Kinder: 'Jetzt klebt ihr zwei Kronenkorken mit der oberen Seite aneinander....'

6

Now she sticks small woolen threads to the underside. This is how the hair is created. Afterwards, the crown sticks to her corks.

Bild zum Schritt 6 für das Bastel- und DIY-Abenteuer für Kinder: 'Jetzt klebt ihr an die Unterseite kleine Wollfäden. So entstehen...'

7

Tip: The crown beautifies you by, for example, sticking some wool around the sticky spot between the two crown caps. For this, you wrap the wool thread several times around the middle and then knot both ends together. Alternatively, you stick the threads firmly together.
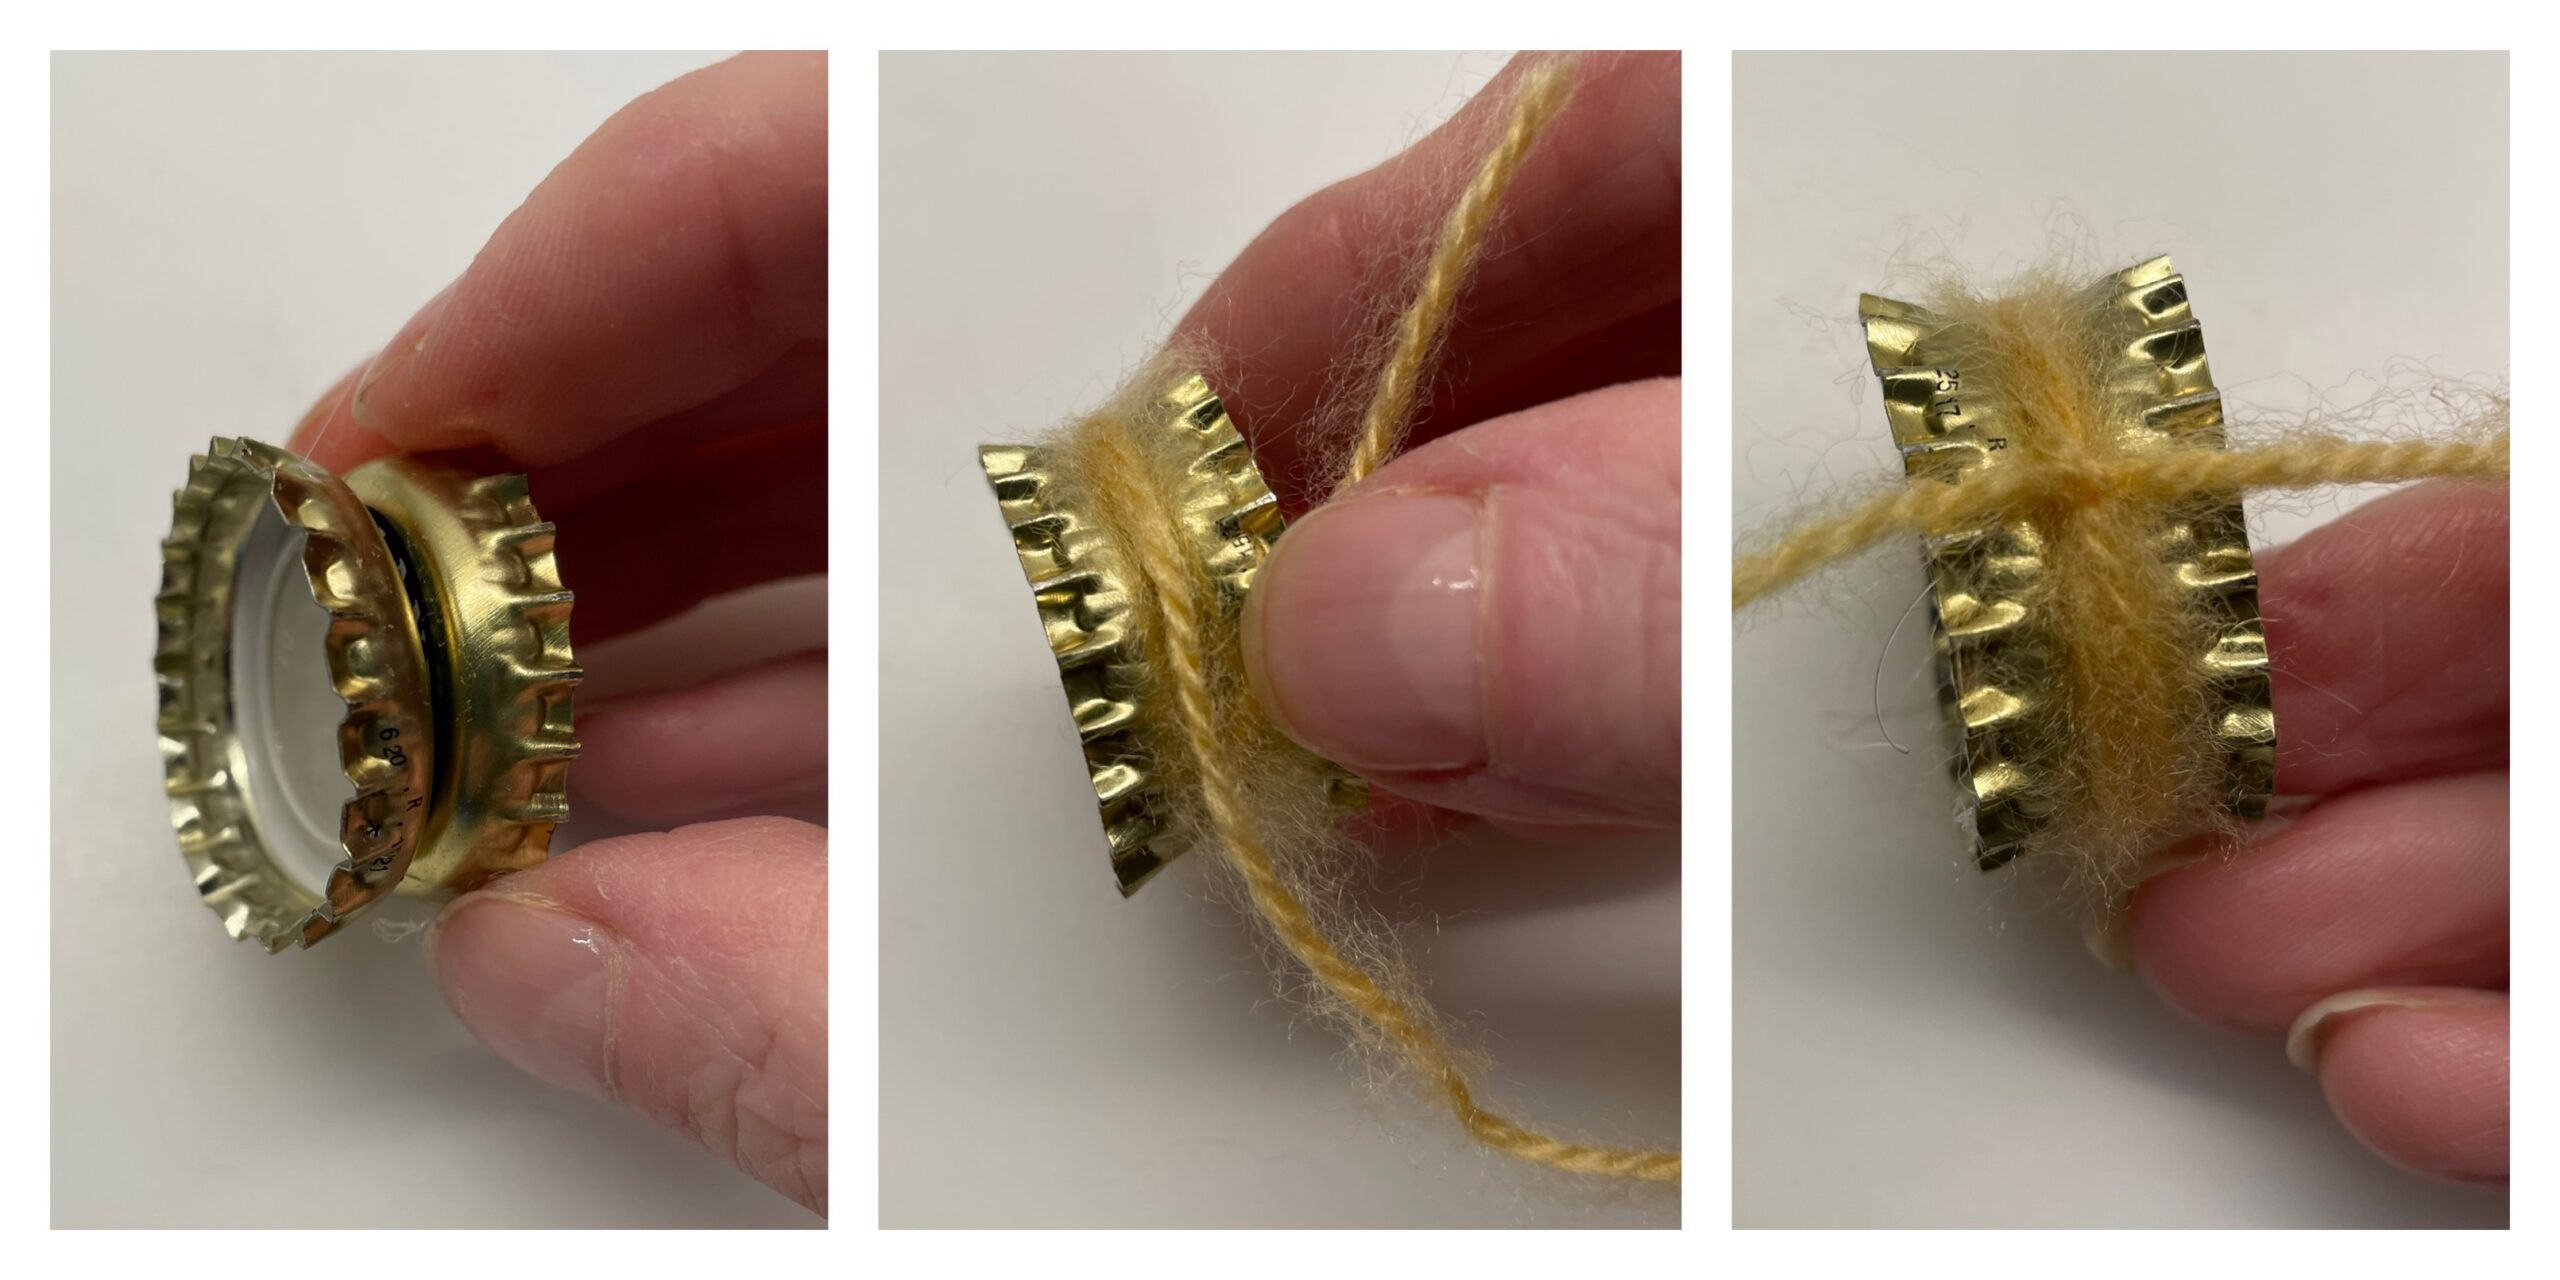
Bild zum Schritt 7 für das Bastel- und DIY-Abenteuer für Kinder: 'Tipp: Die Krone verschönert ihr, indem ihr z.B. etwas Wolle...'

8

Alternatively, stick her hair on the corks.
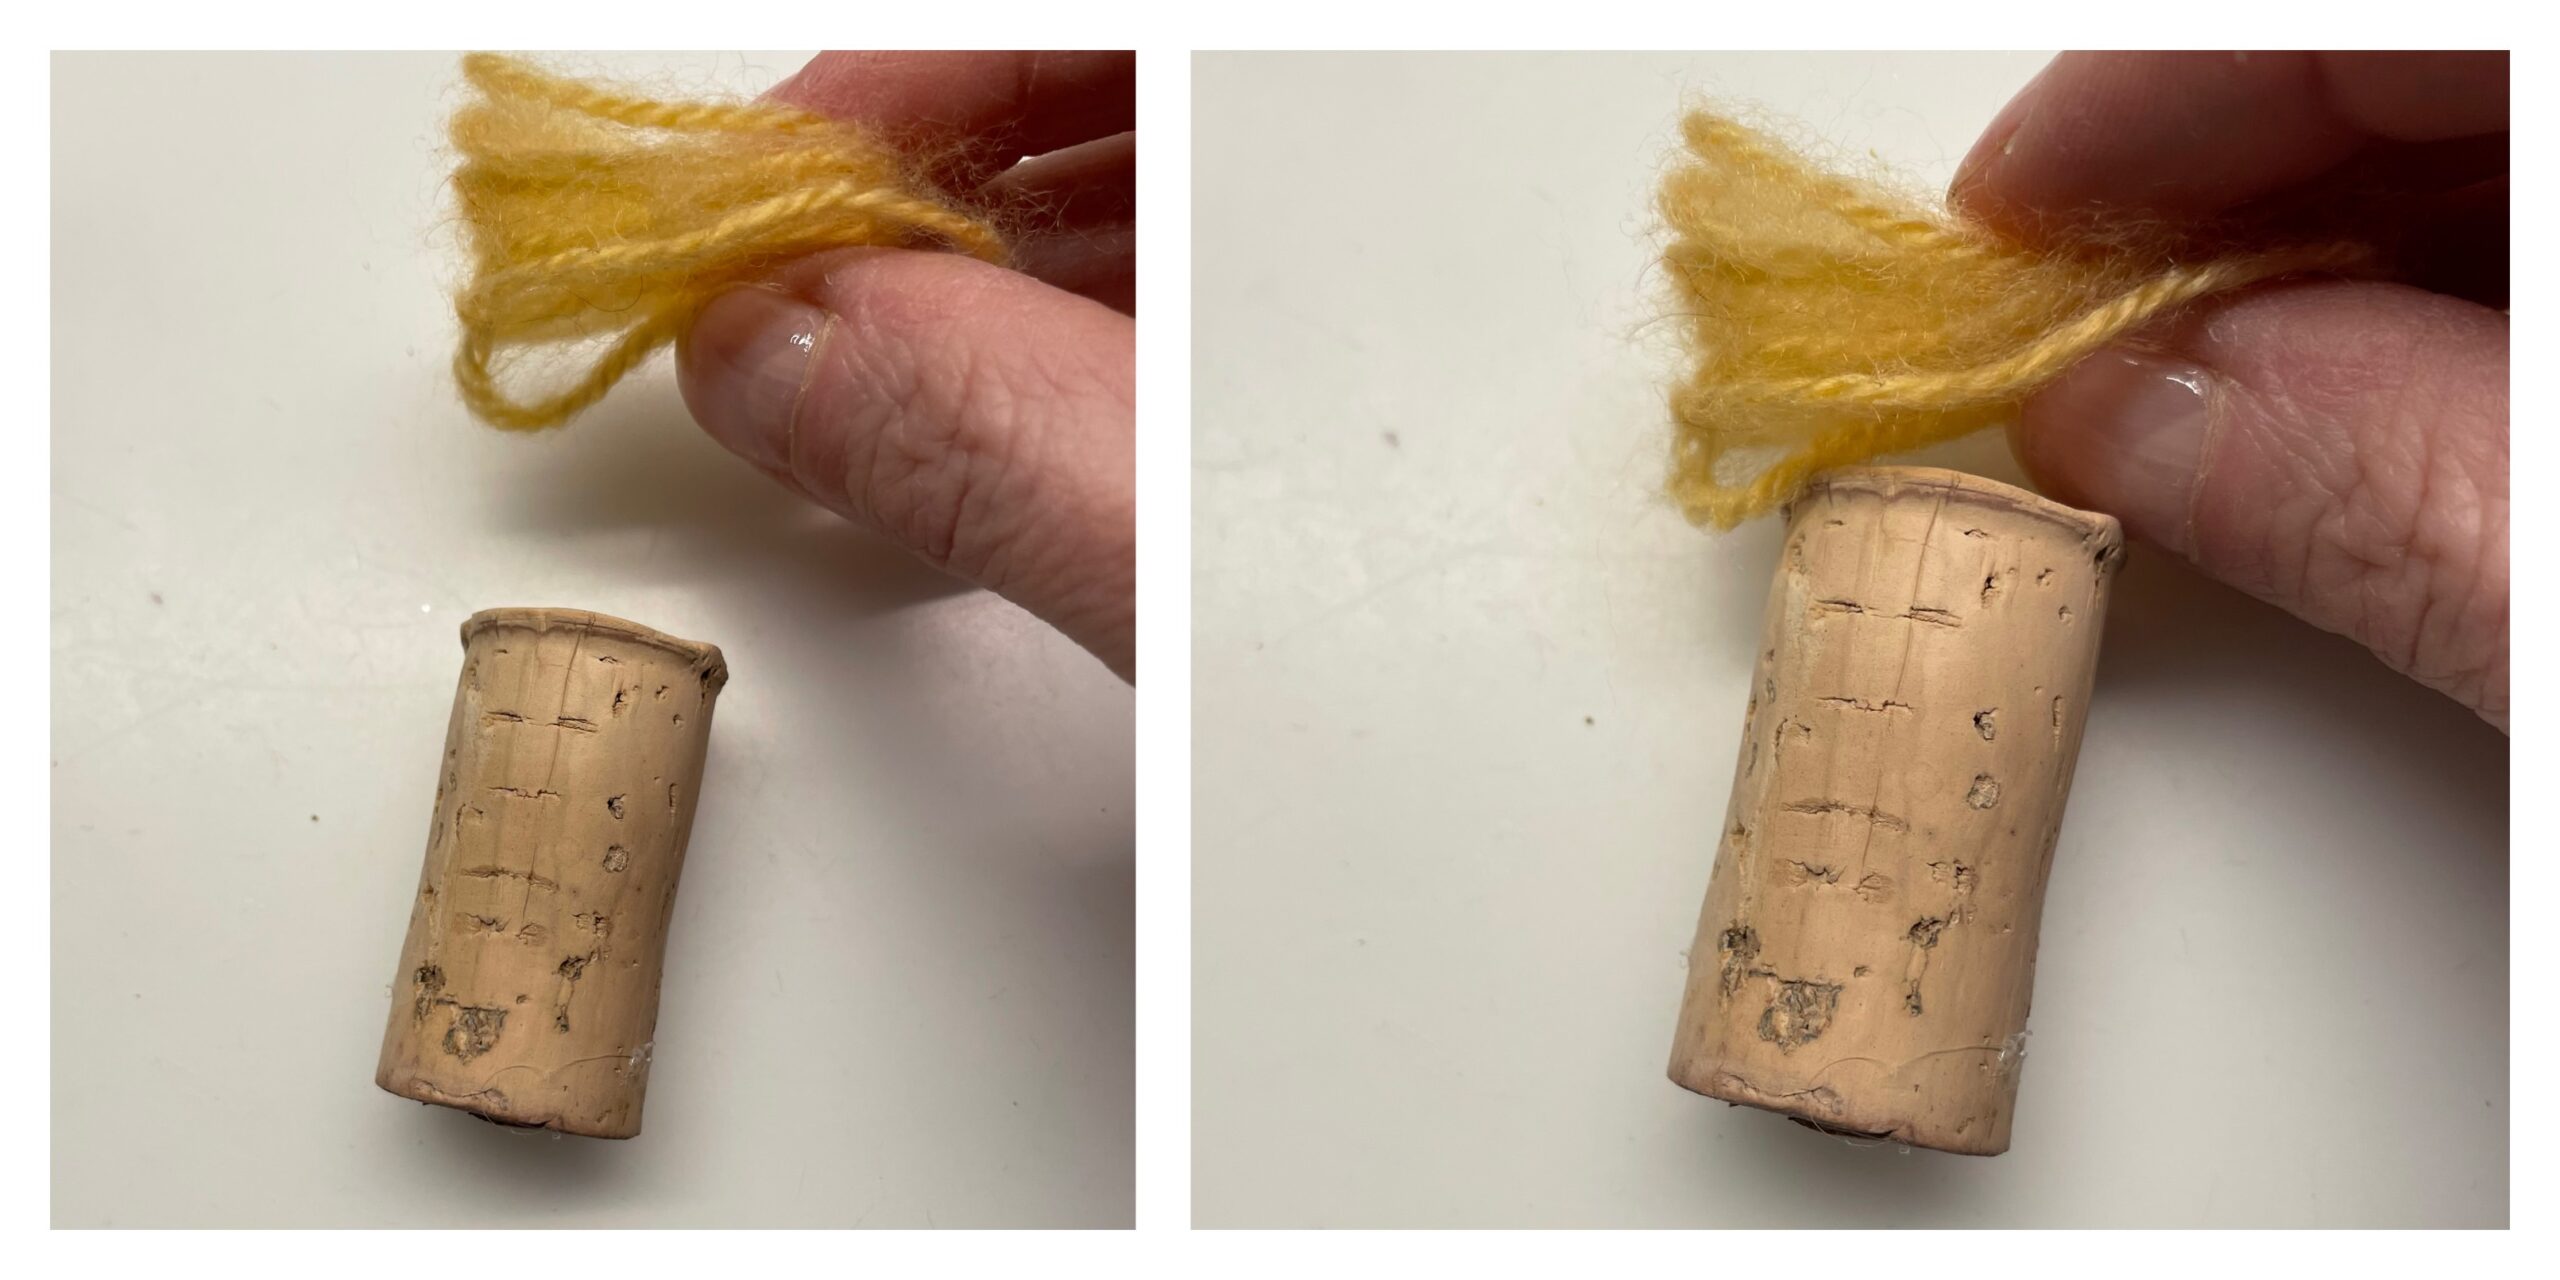
Bild zum Schritt 8 für das Bastel- und DIY-Abenteuer für Kinder: 'Alternativ kleb ihr die Haare auf den Korken.'

9

Then put the crown on the cork with a hot glue point.

Bild zum Schritt 9 für das Bastel- und DIY-Abenteuer für Kinder: 'Anschließend setzt ihr die Krone mit einem Heißklebepunkt auf den...'

10

Finally, the crafted cork kings and cork princesses paint a face.
Your little cork kings or princesses are ready.
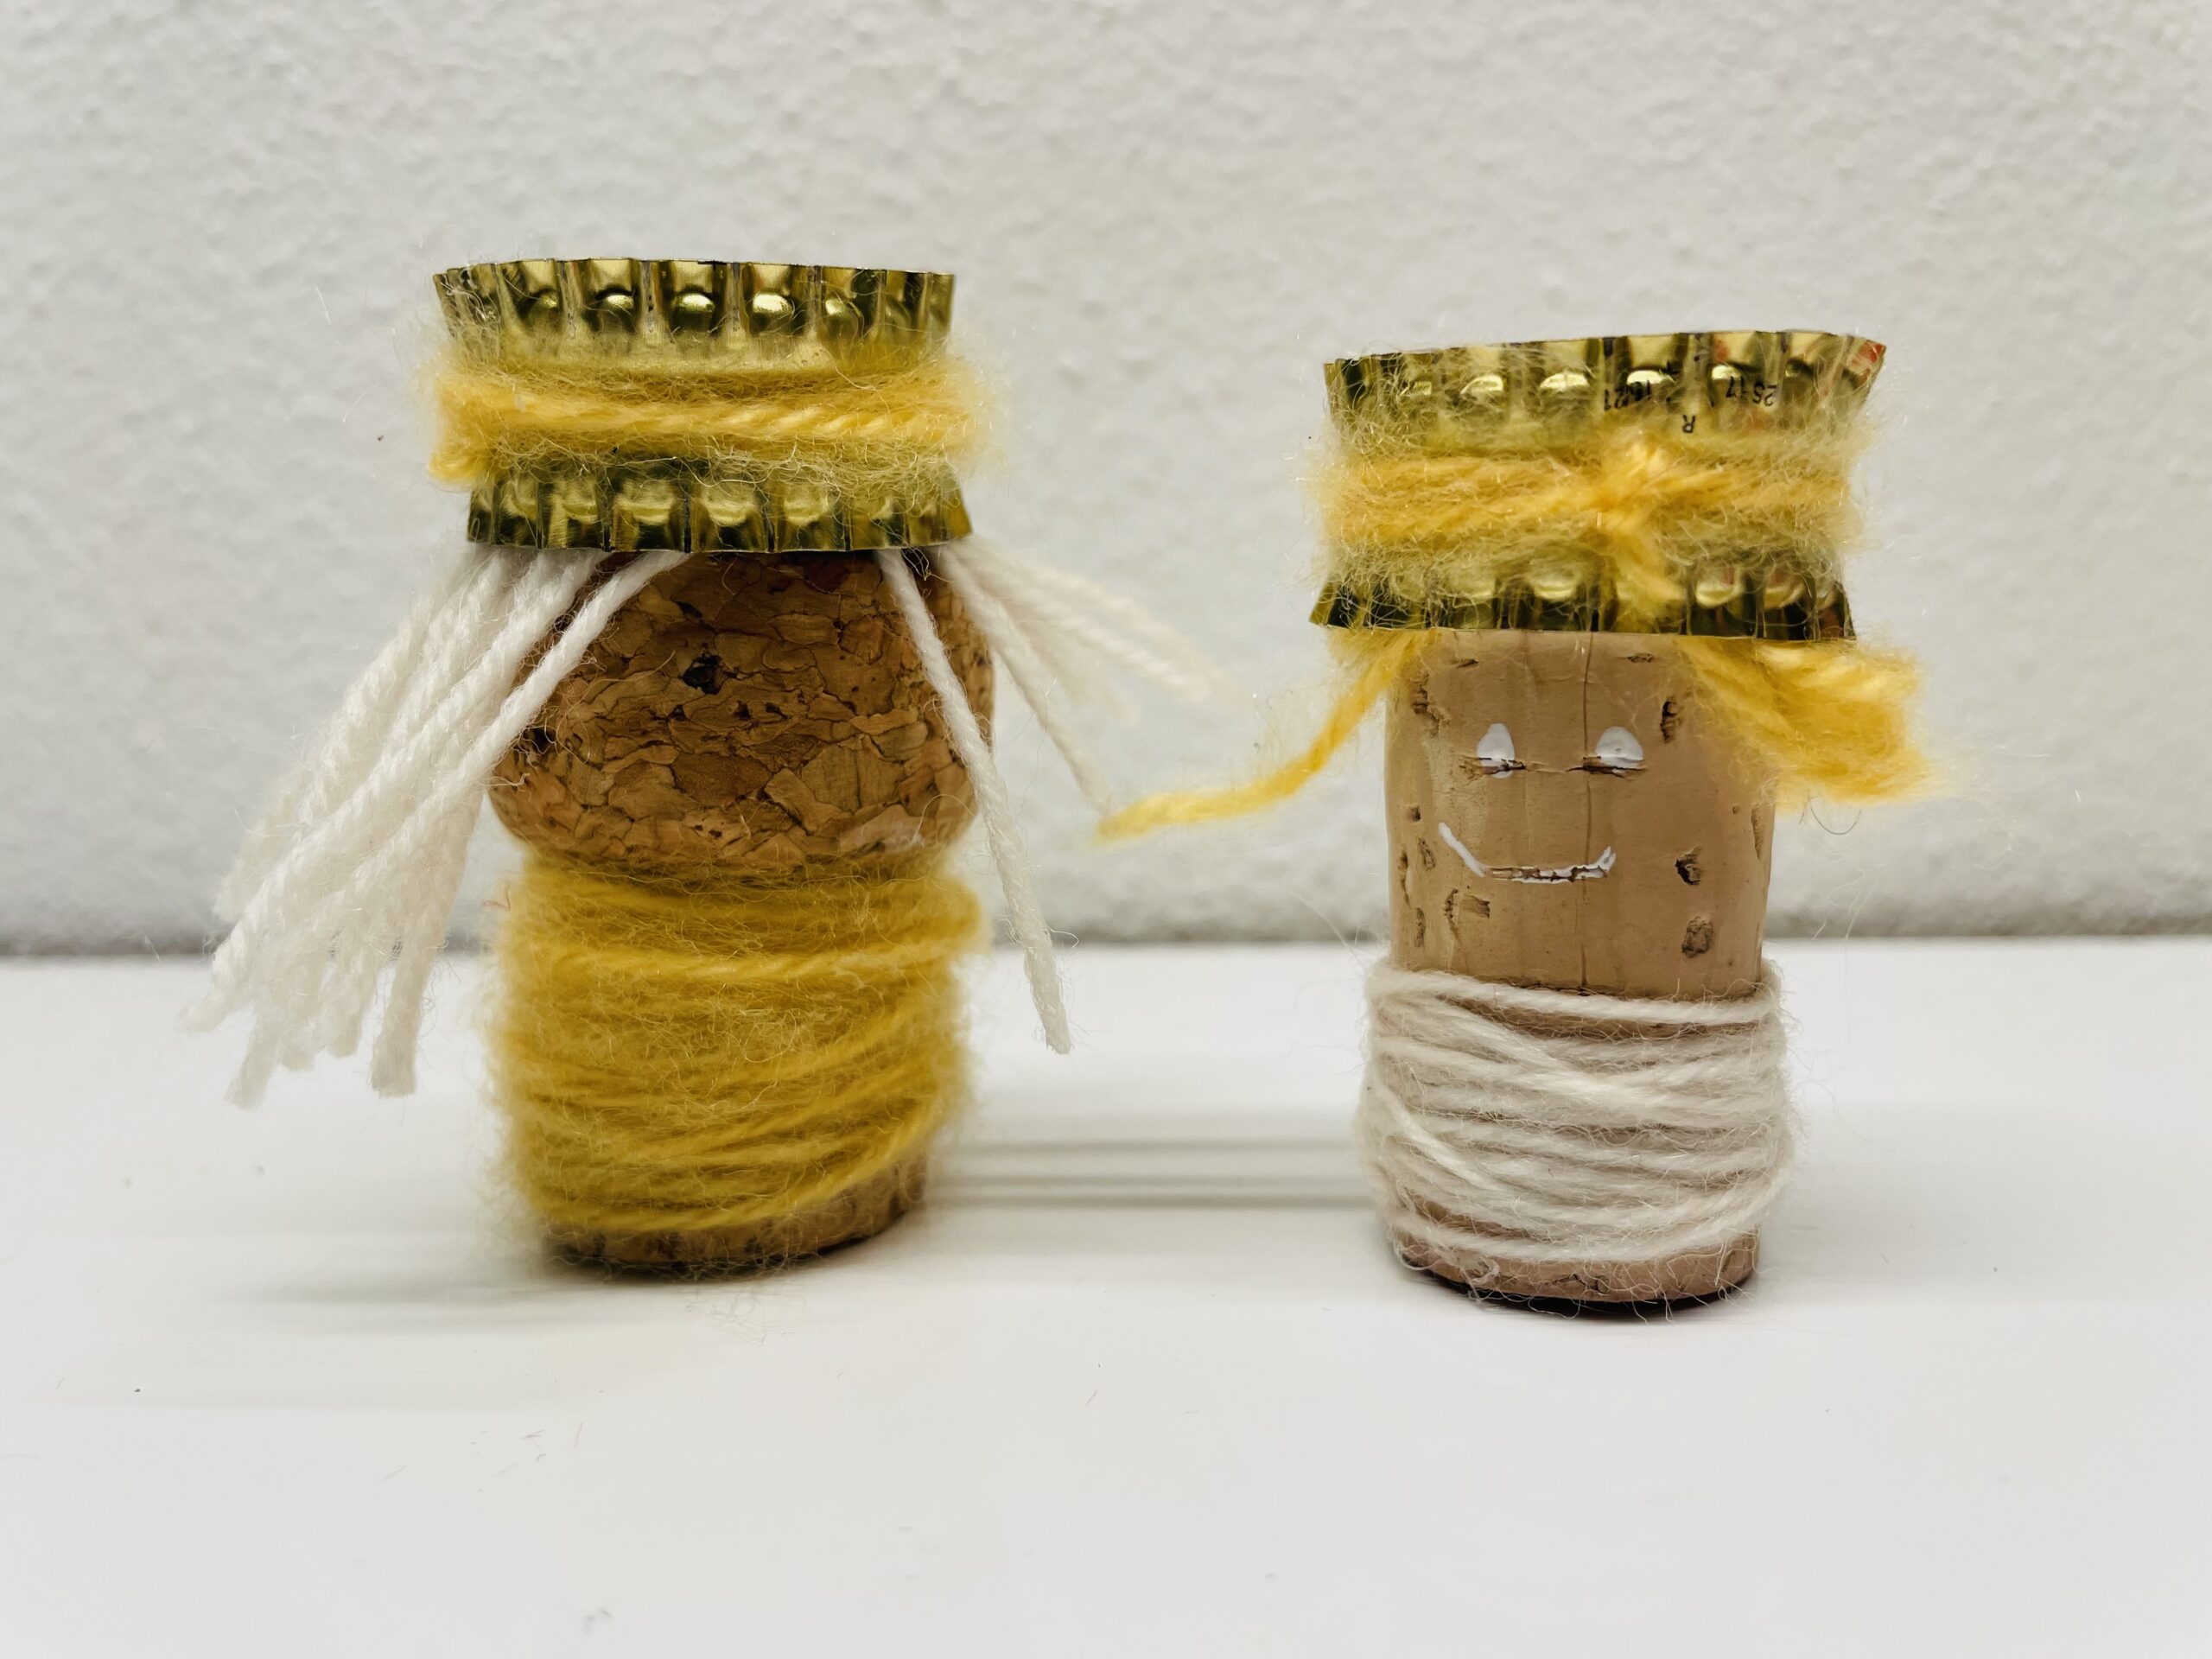
Bild zum Schritt 10 für das Bastel- und DIY-Abenteuer für Kinder: 'Abschließend malt den gebastelten Korkenkönigen und Korkenprinzessinen ein Gesicht. ...'

11

Tip: Use them as game figures or for a nativity scene! Make more figures and stay creative!

Crafting King with Cork – Crafting Princess of Cork

Follow us on Facebook , Instagram and Pinterest
Don't miss any more adventures: Our bottle mail

Leave a Reply

Your email address will not be published.

The maximum upload file size: 5 MB. You can upload: image, document. Drop file here