This little clover leaf and this flower require a lot of sensitivity. This is a very delicate crafting. With flower wire and a pen you bend leaves and flowers over which the nail polish is pulled like a skin. However, this sounds more complicated than it is in the end! All you need is a little patience on the first leaf. Look at the instructions!
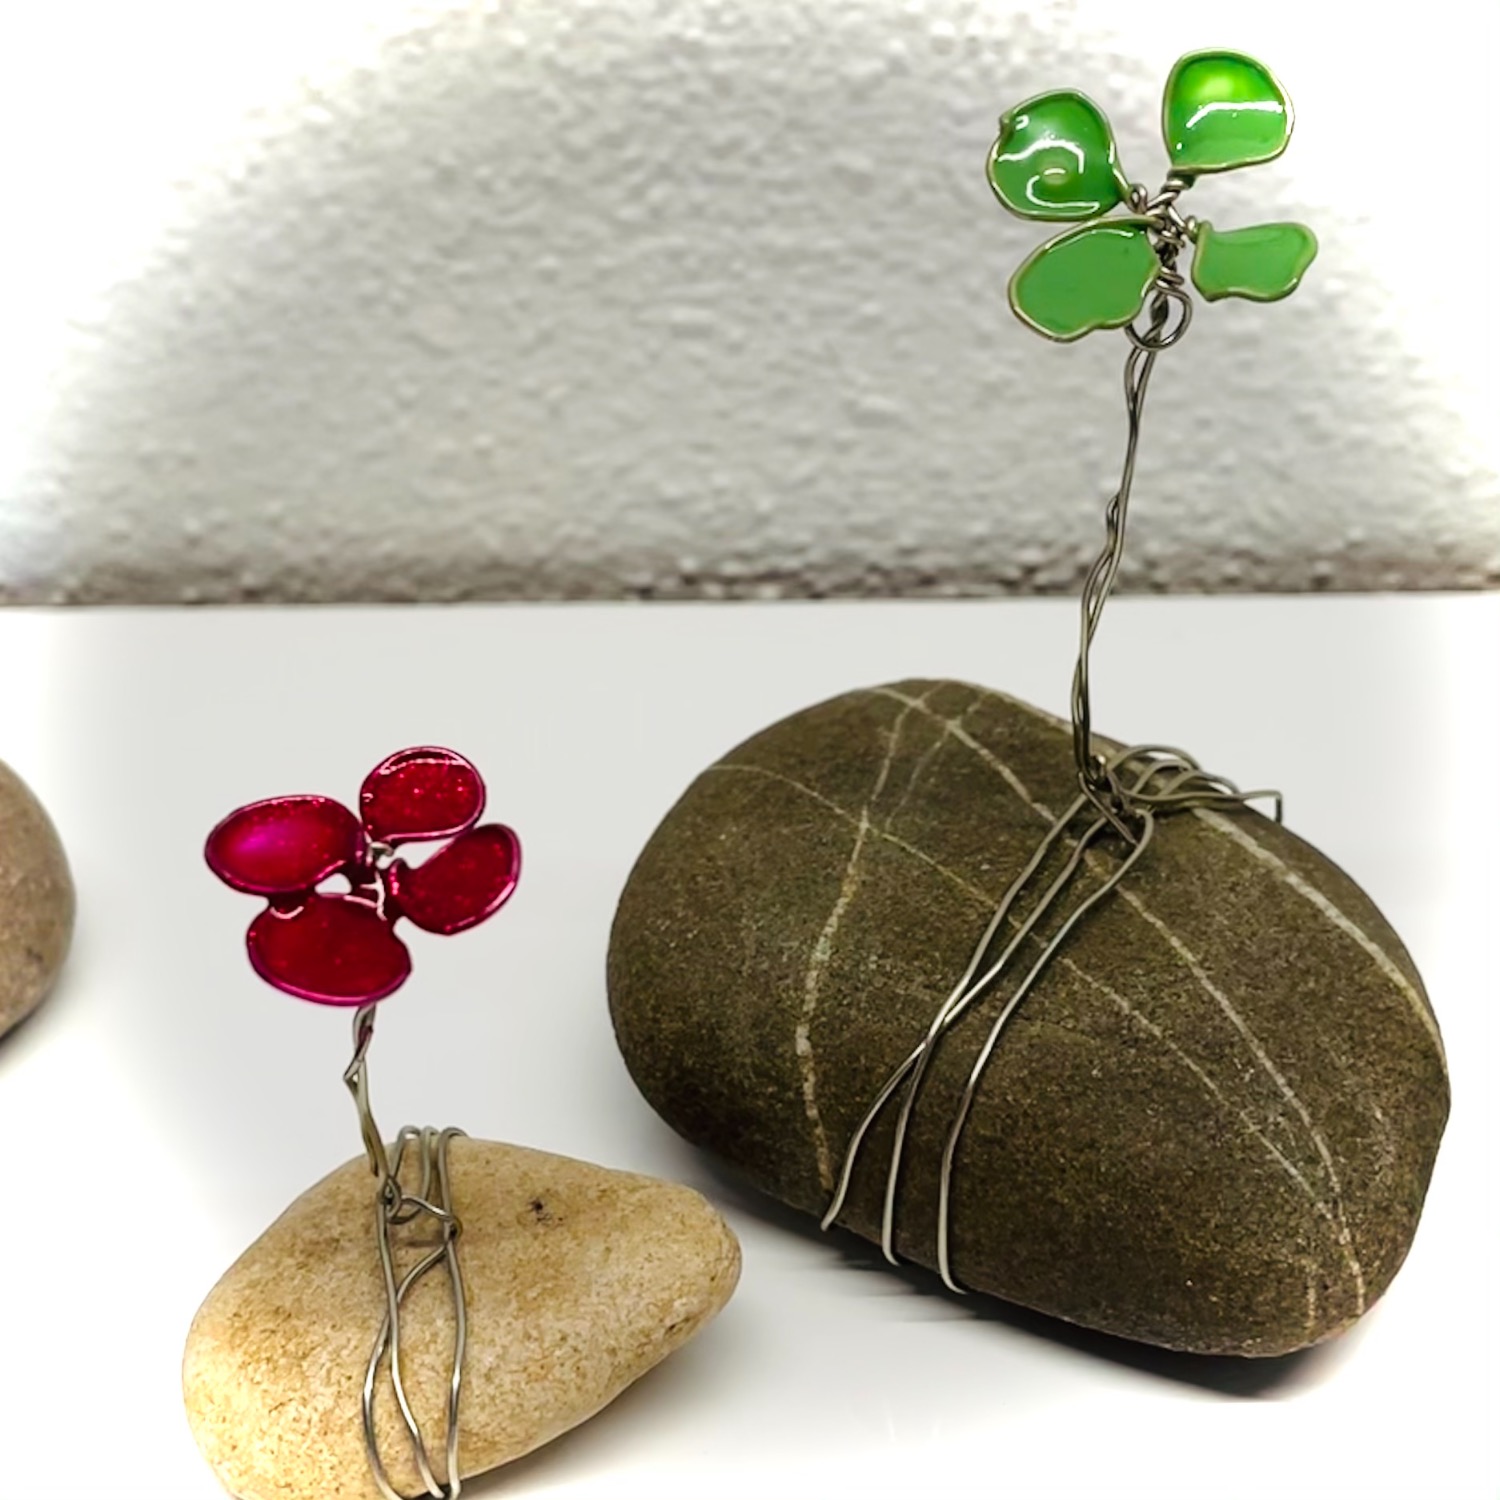
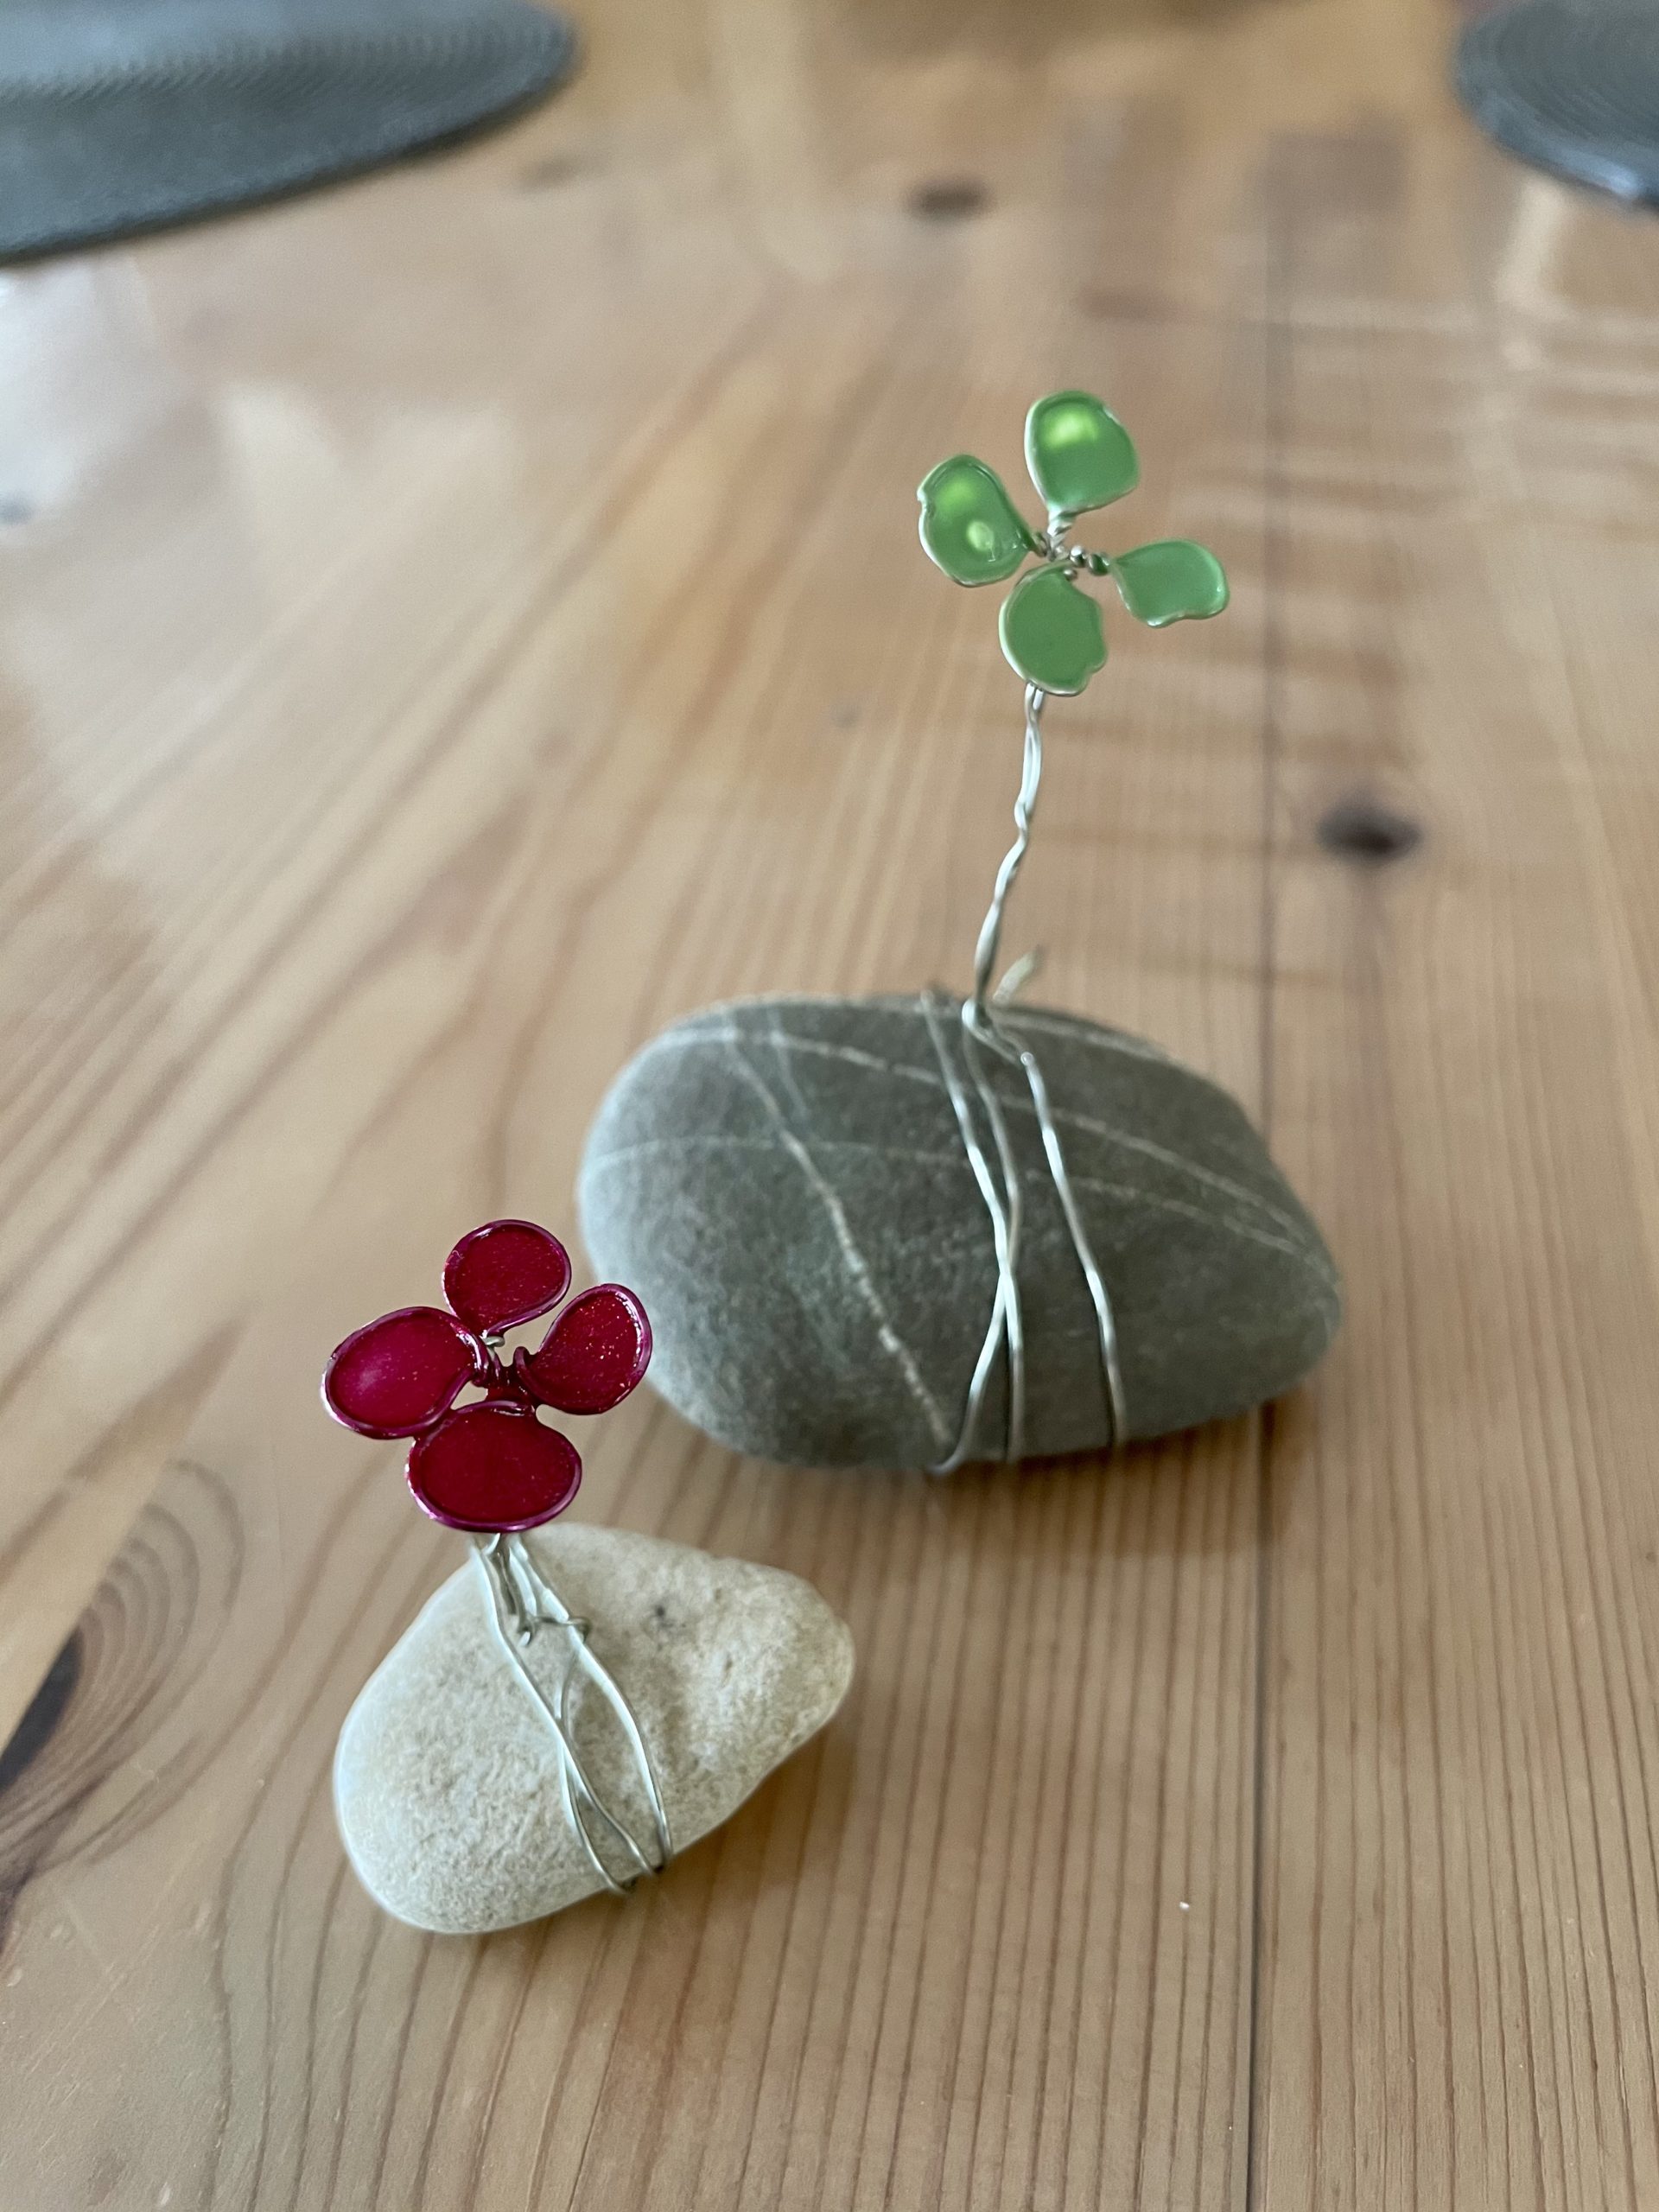
You can then tie the dried works of art on a stone. Use the wire flower as a small gift or table decoration. The clover leaf can be given as a lucky charm for New Year or for birthday or also for Mother's Day.
Media Education for Kindergarten and Hort

Relief in everyday life, targeted promotion of individual children, independent learning and - without any pre-knowledge already usable by the youngest!
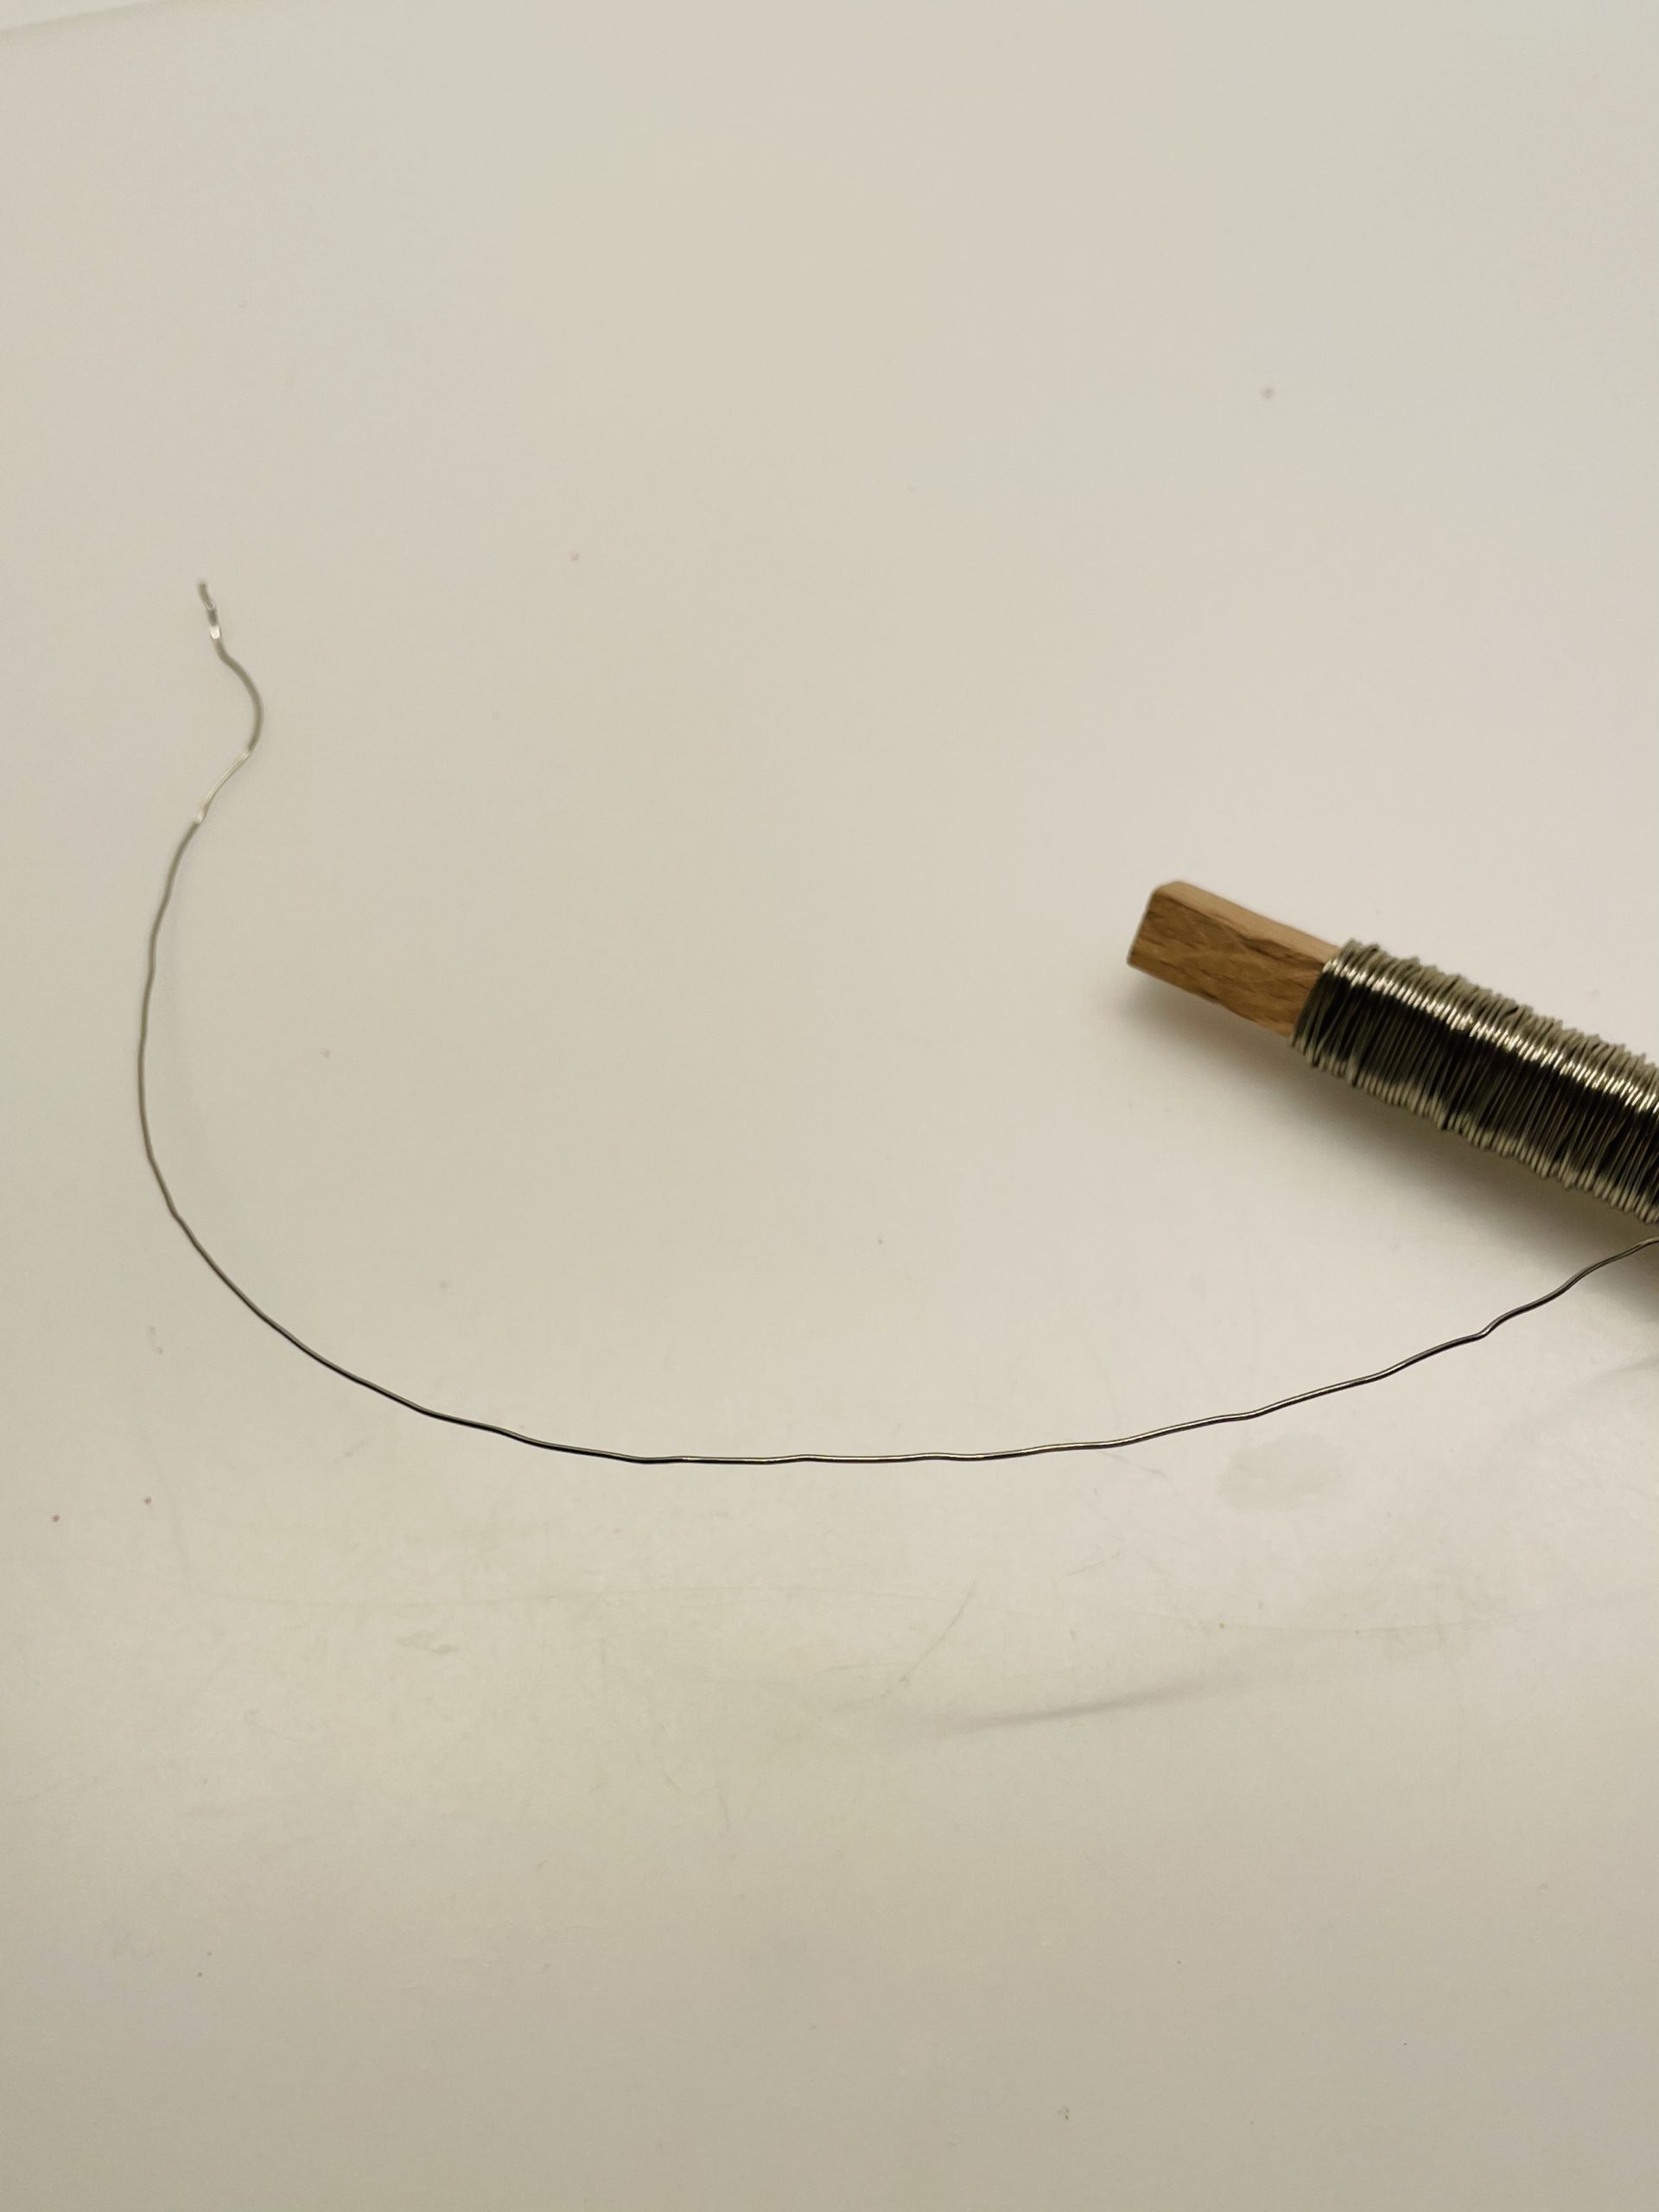
First cut off about 20 cm of flower wire.
Alternatively, you can also leave the wire on the roll. However, it works easier, handling is with a smaller piece of wire.
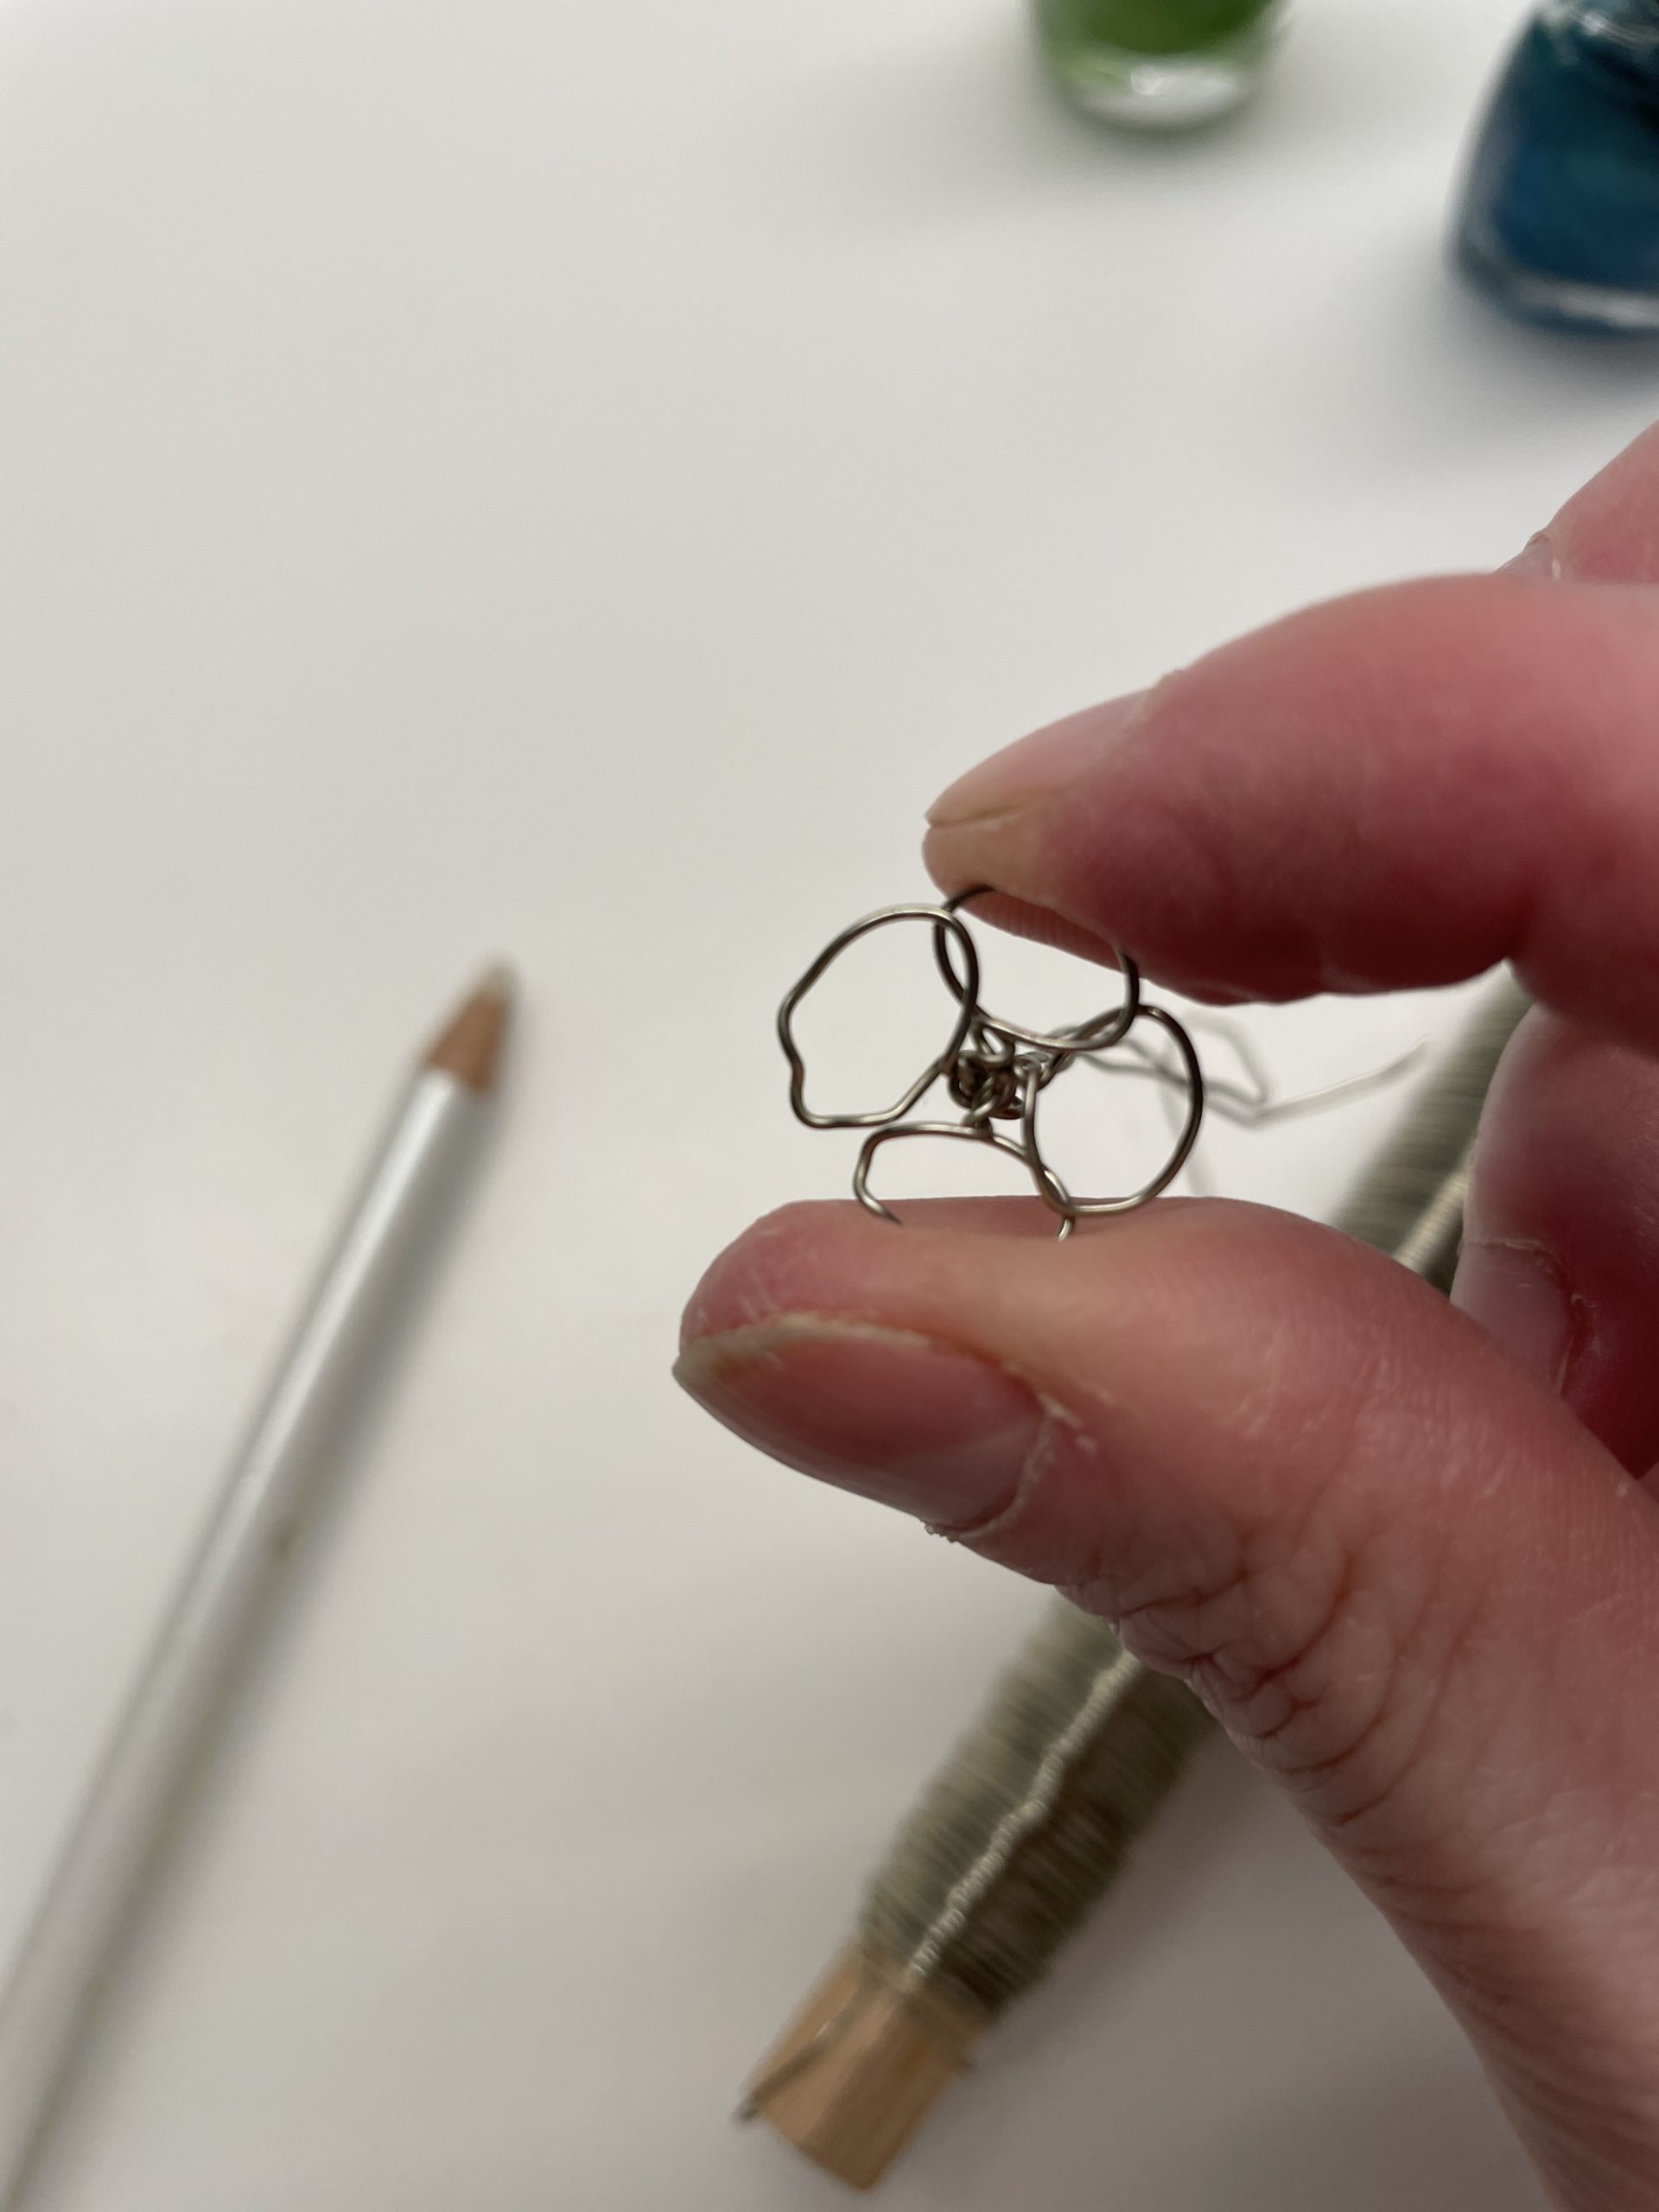
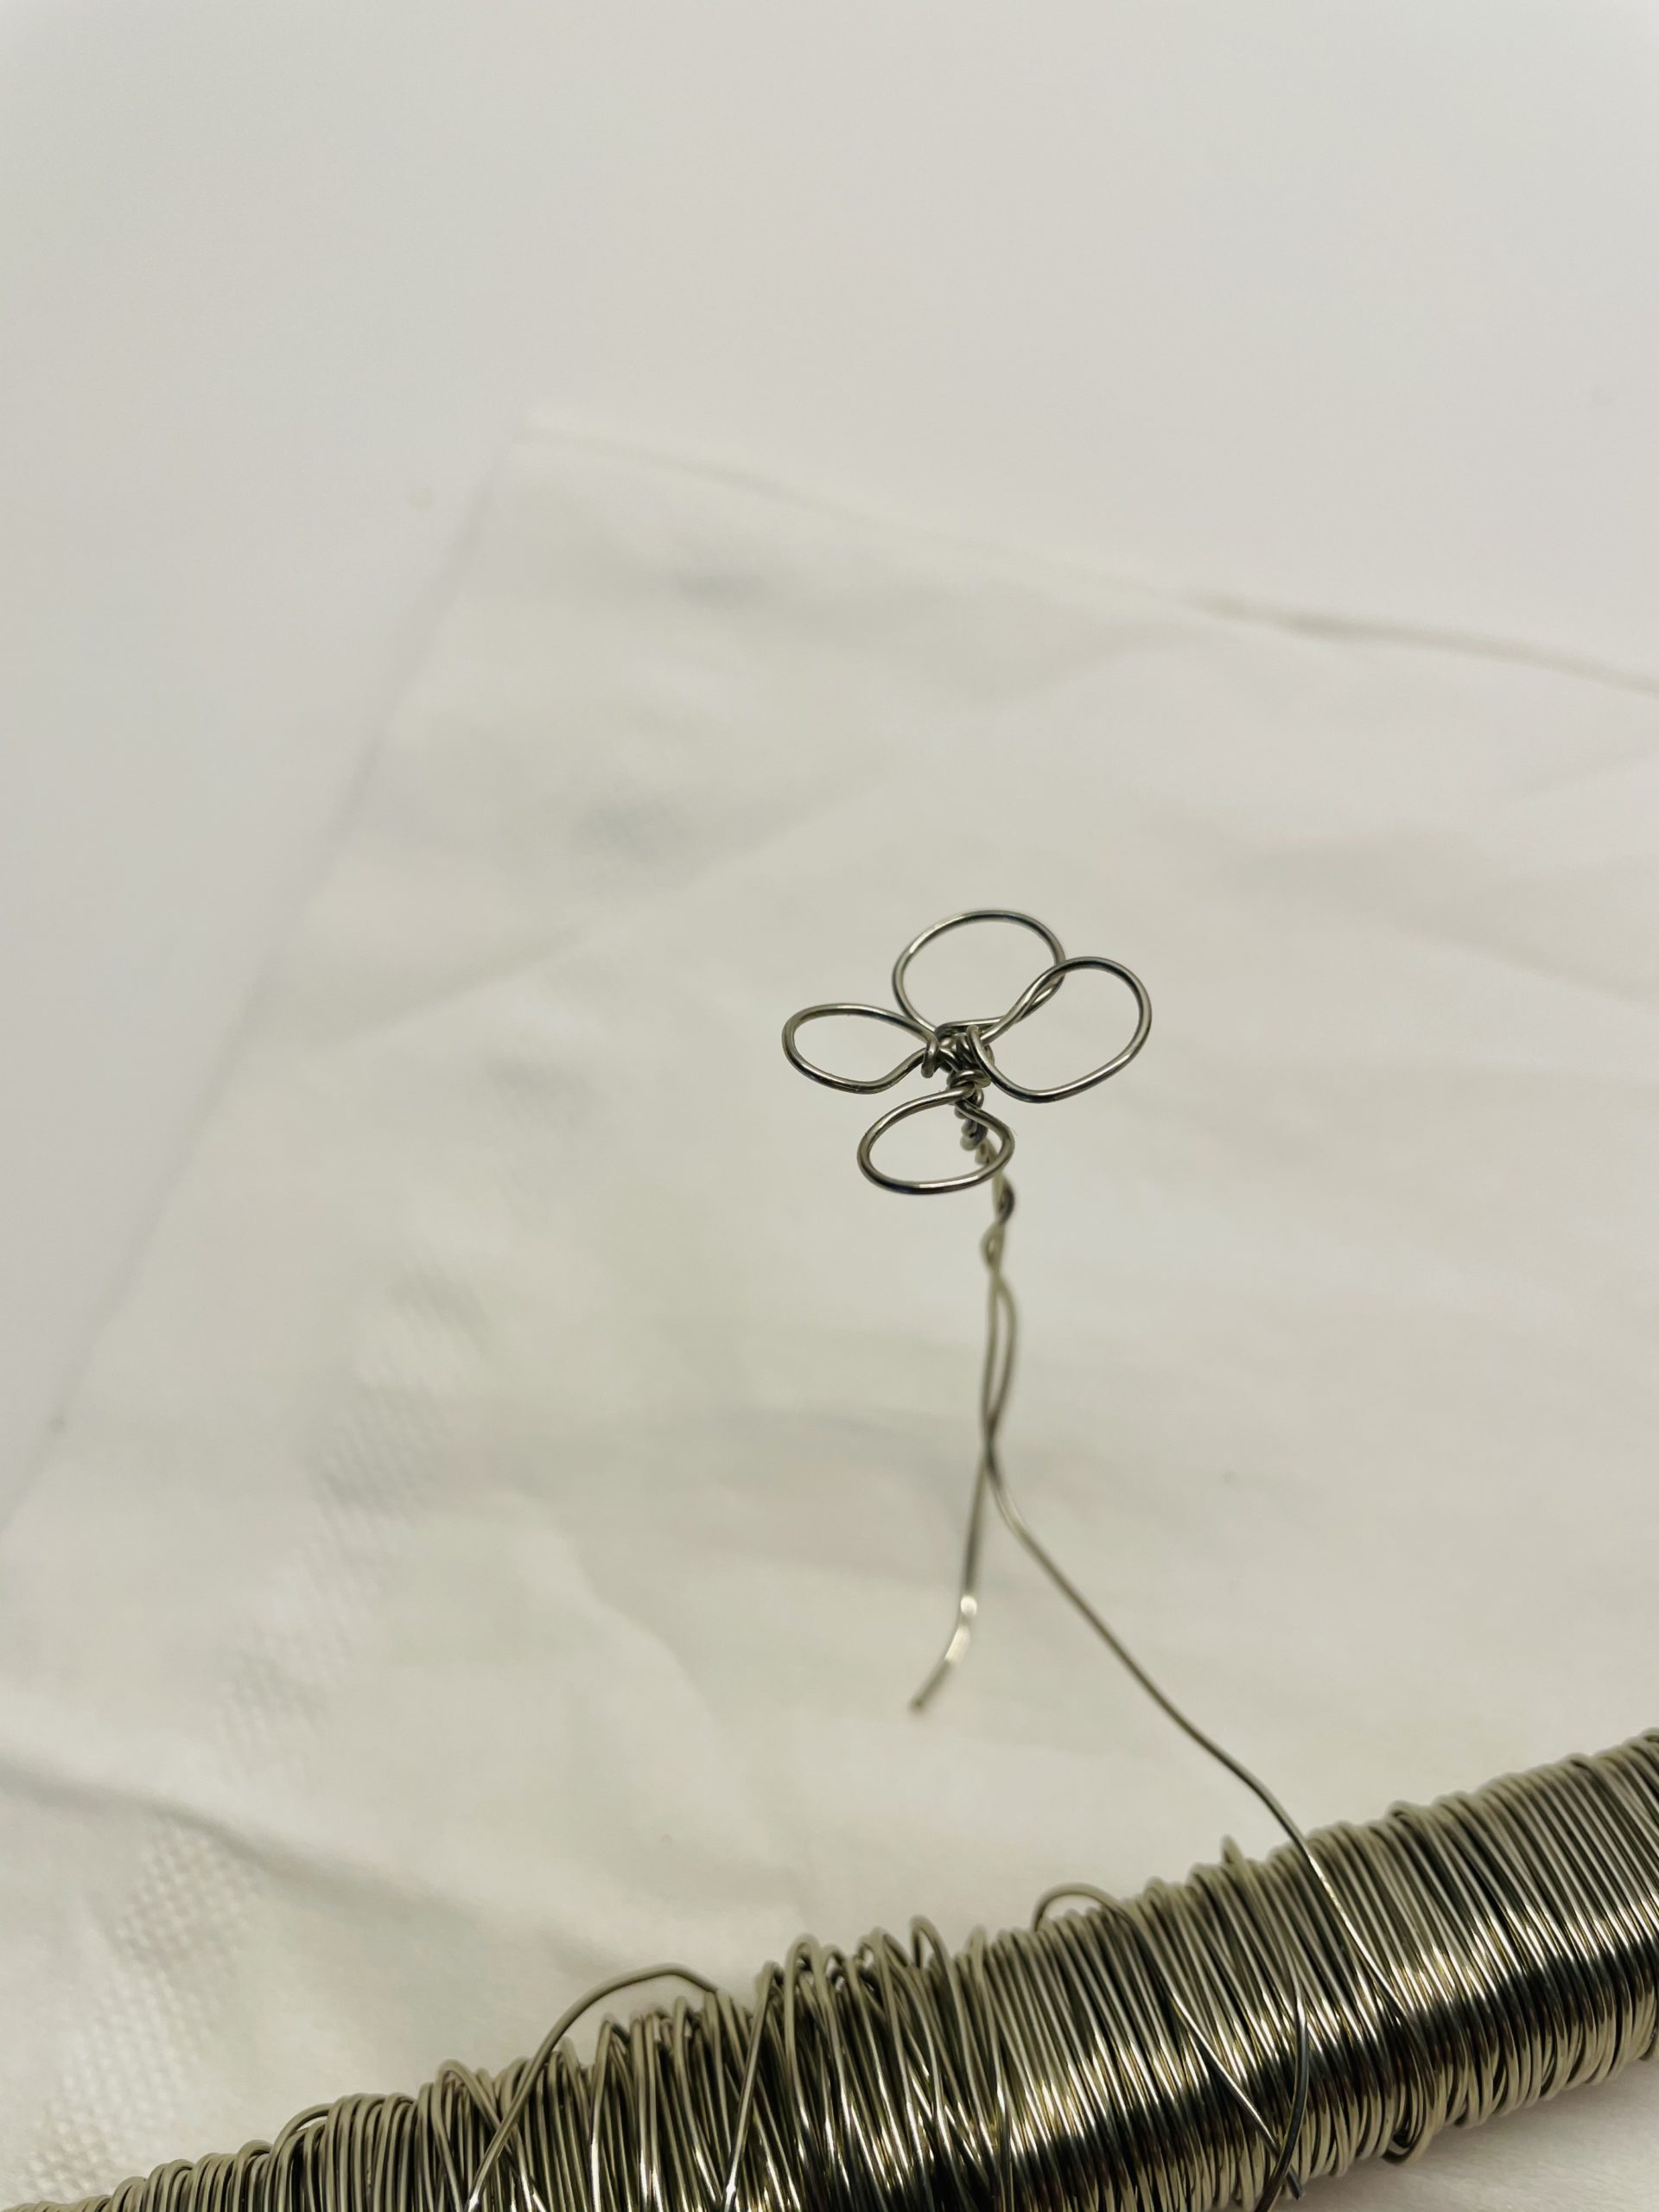
Then wrap the wire around a round pen four times.
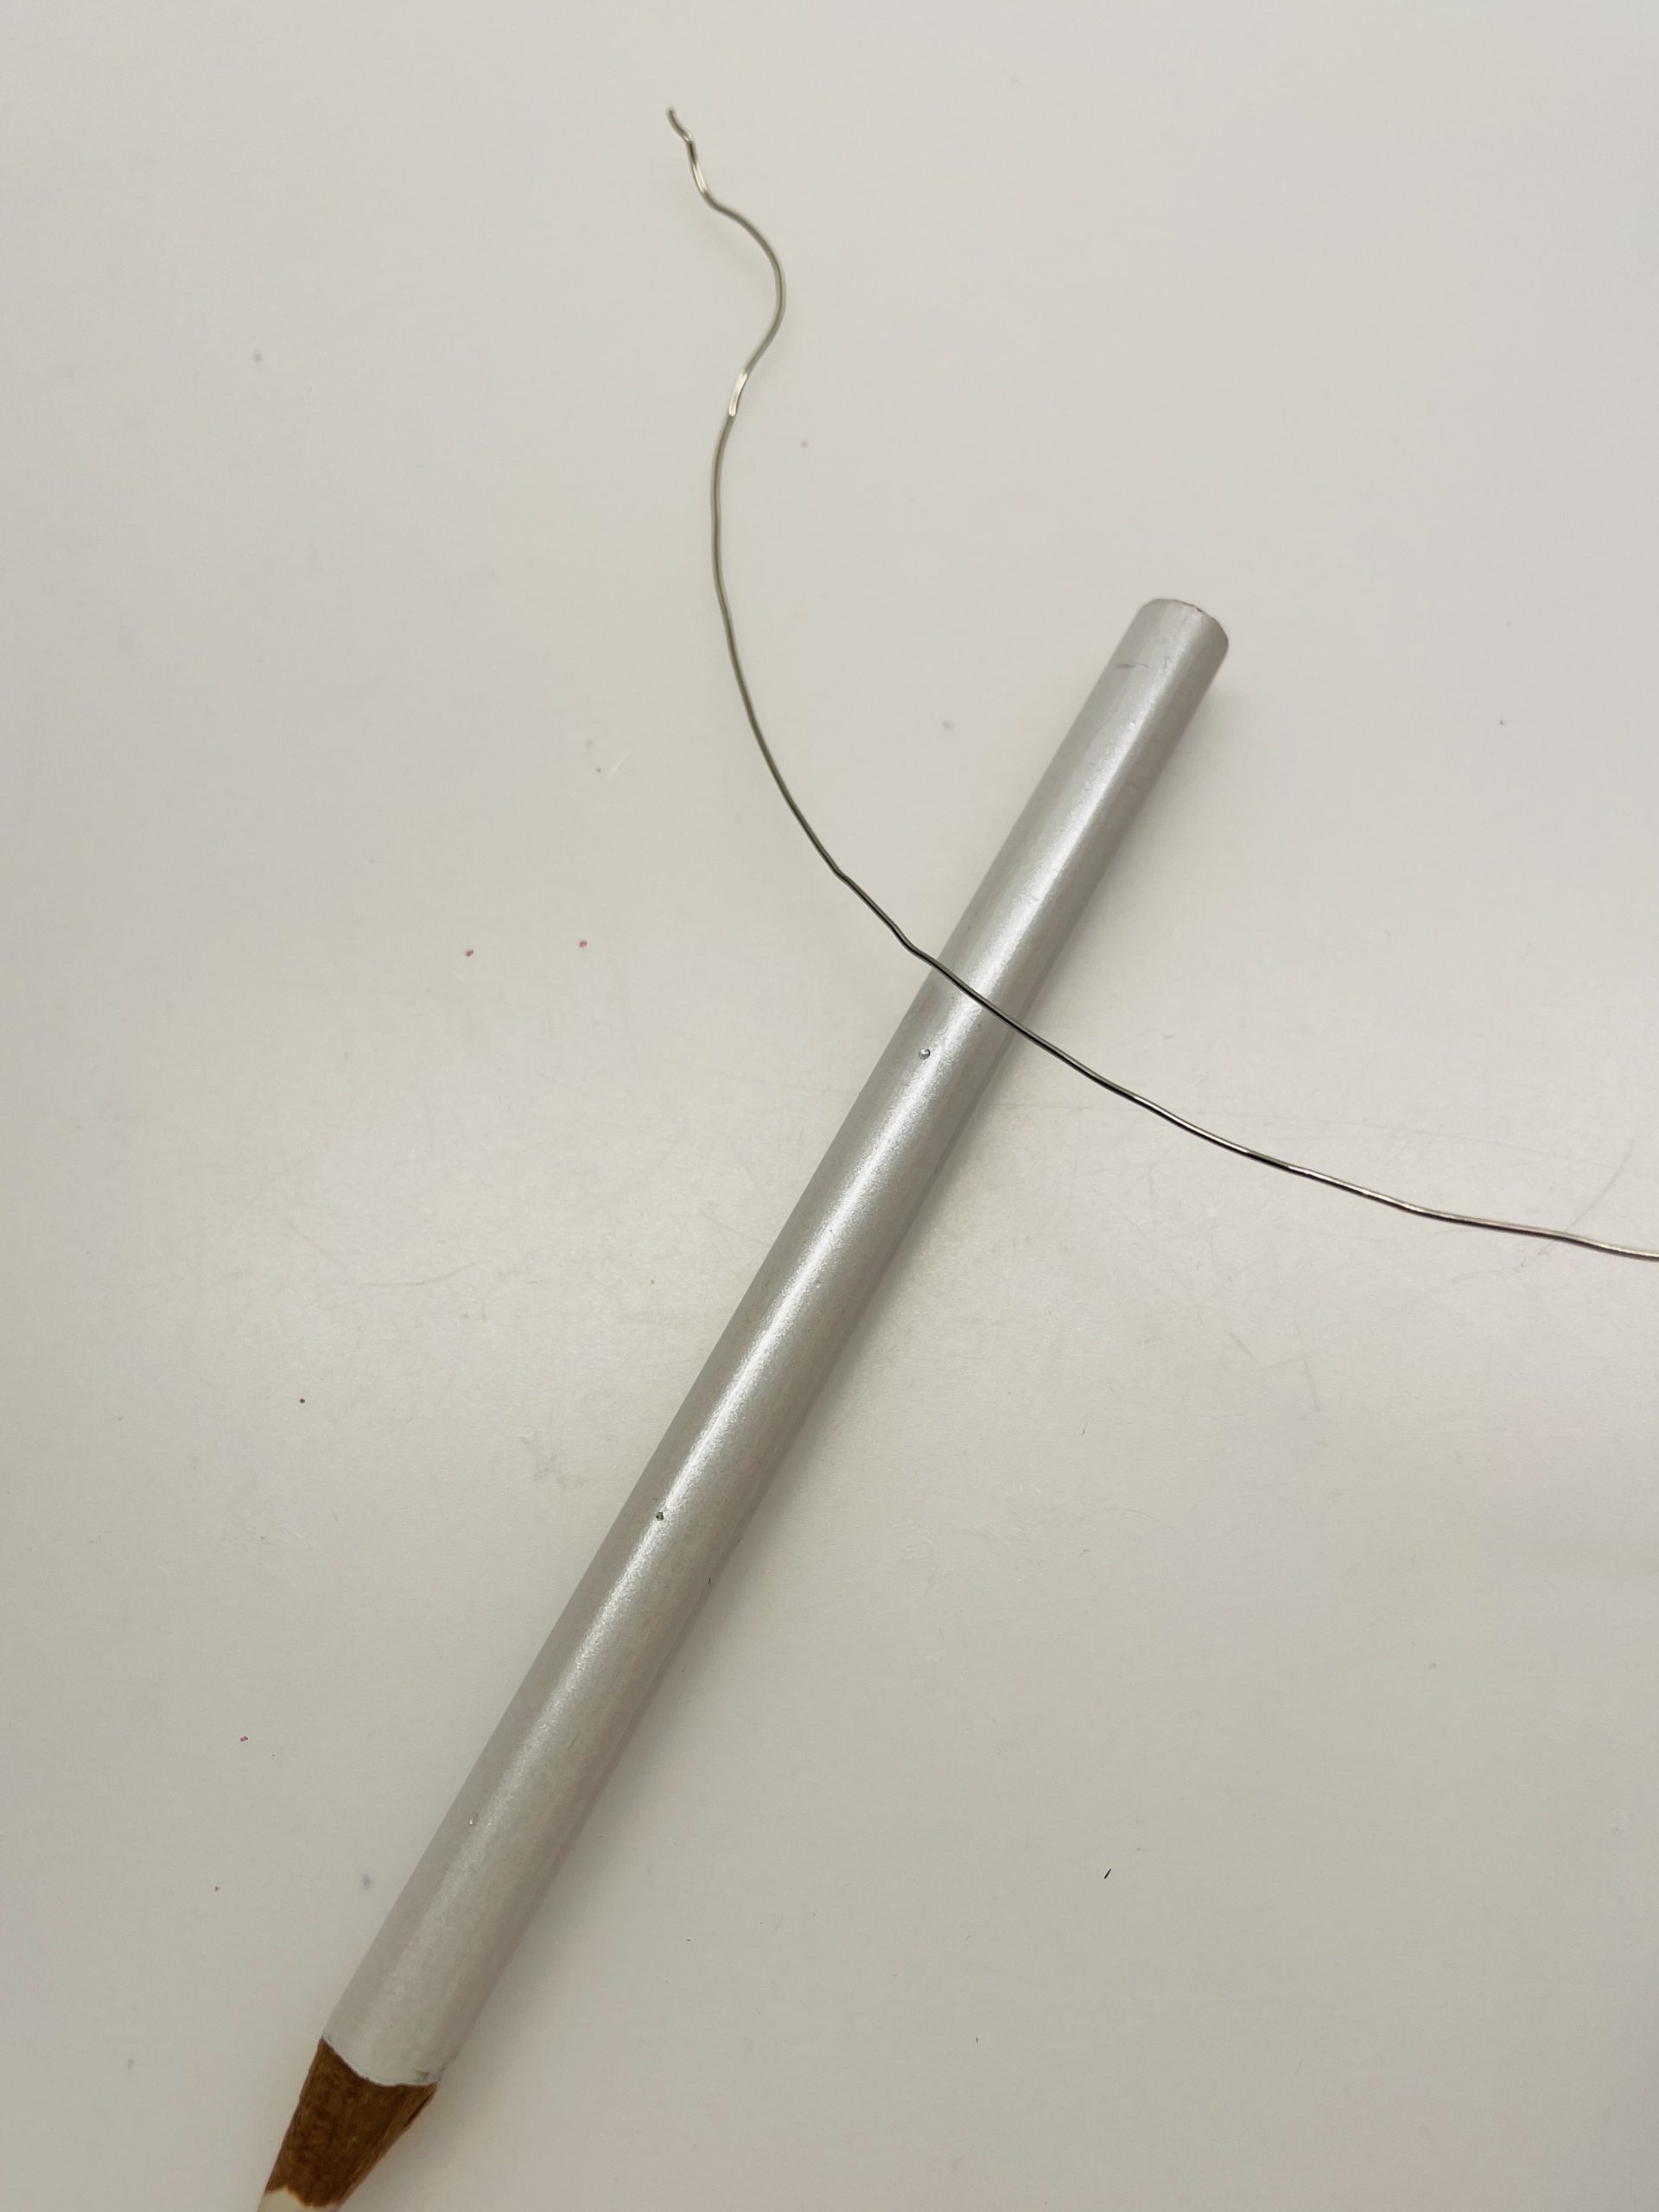
Make sure that both ends of the wire survive a little 10 cm long.
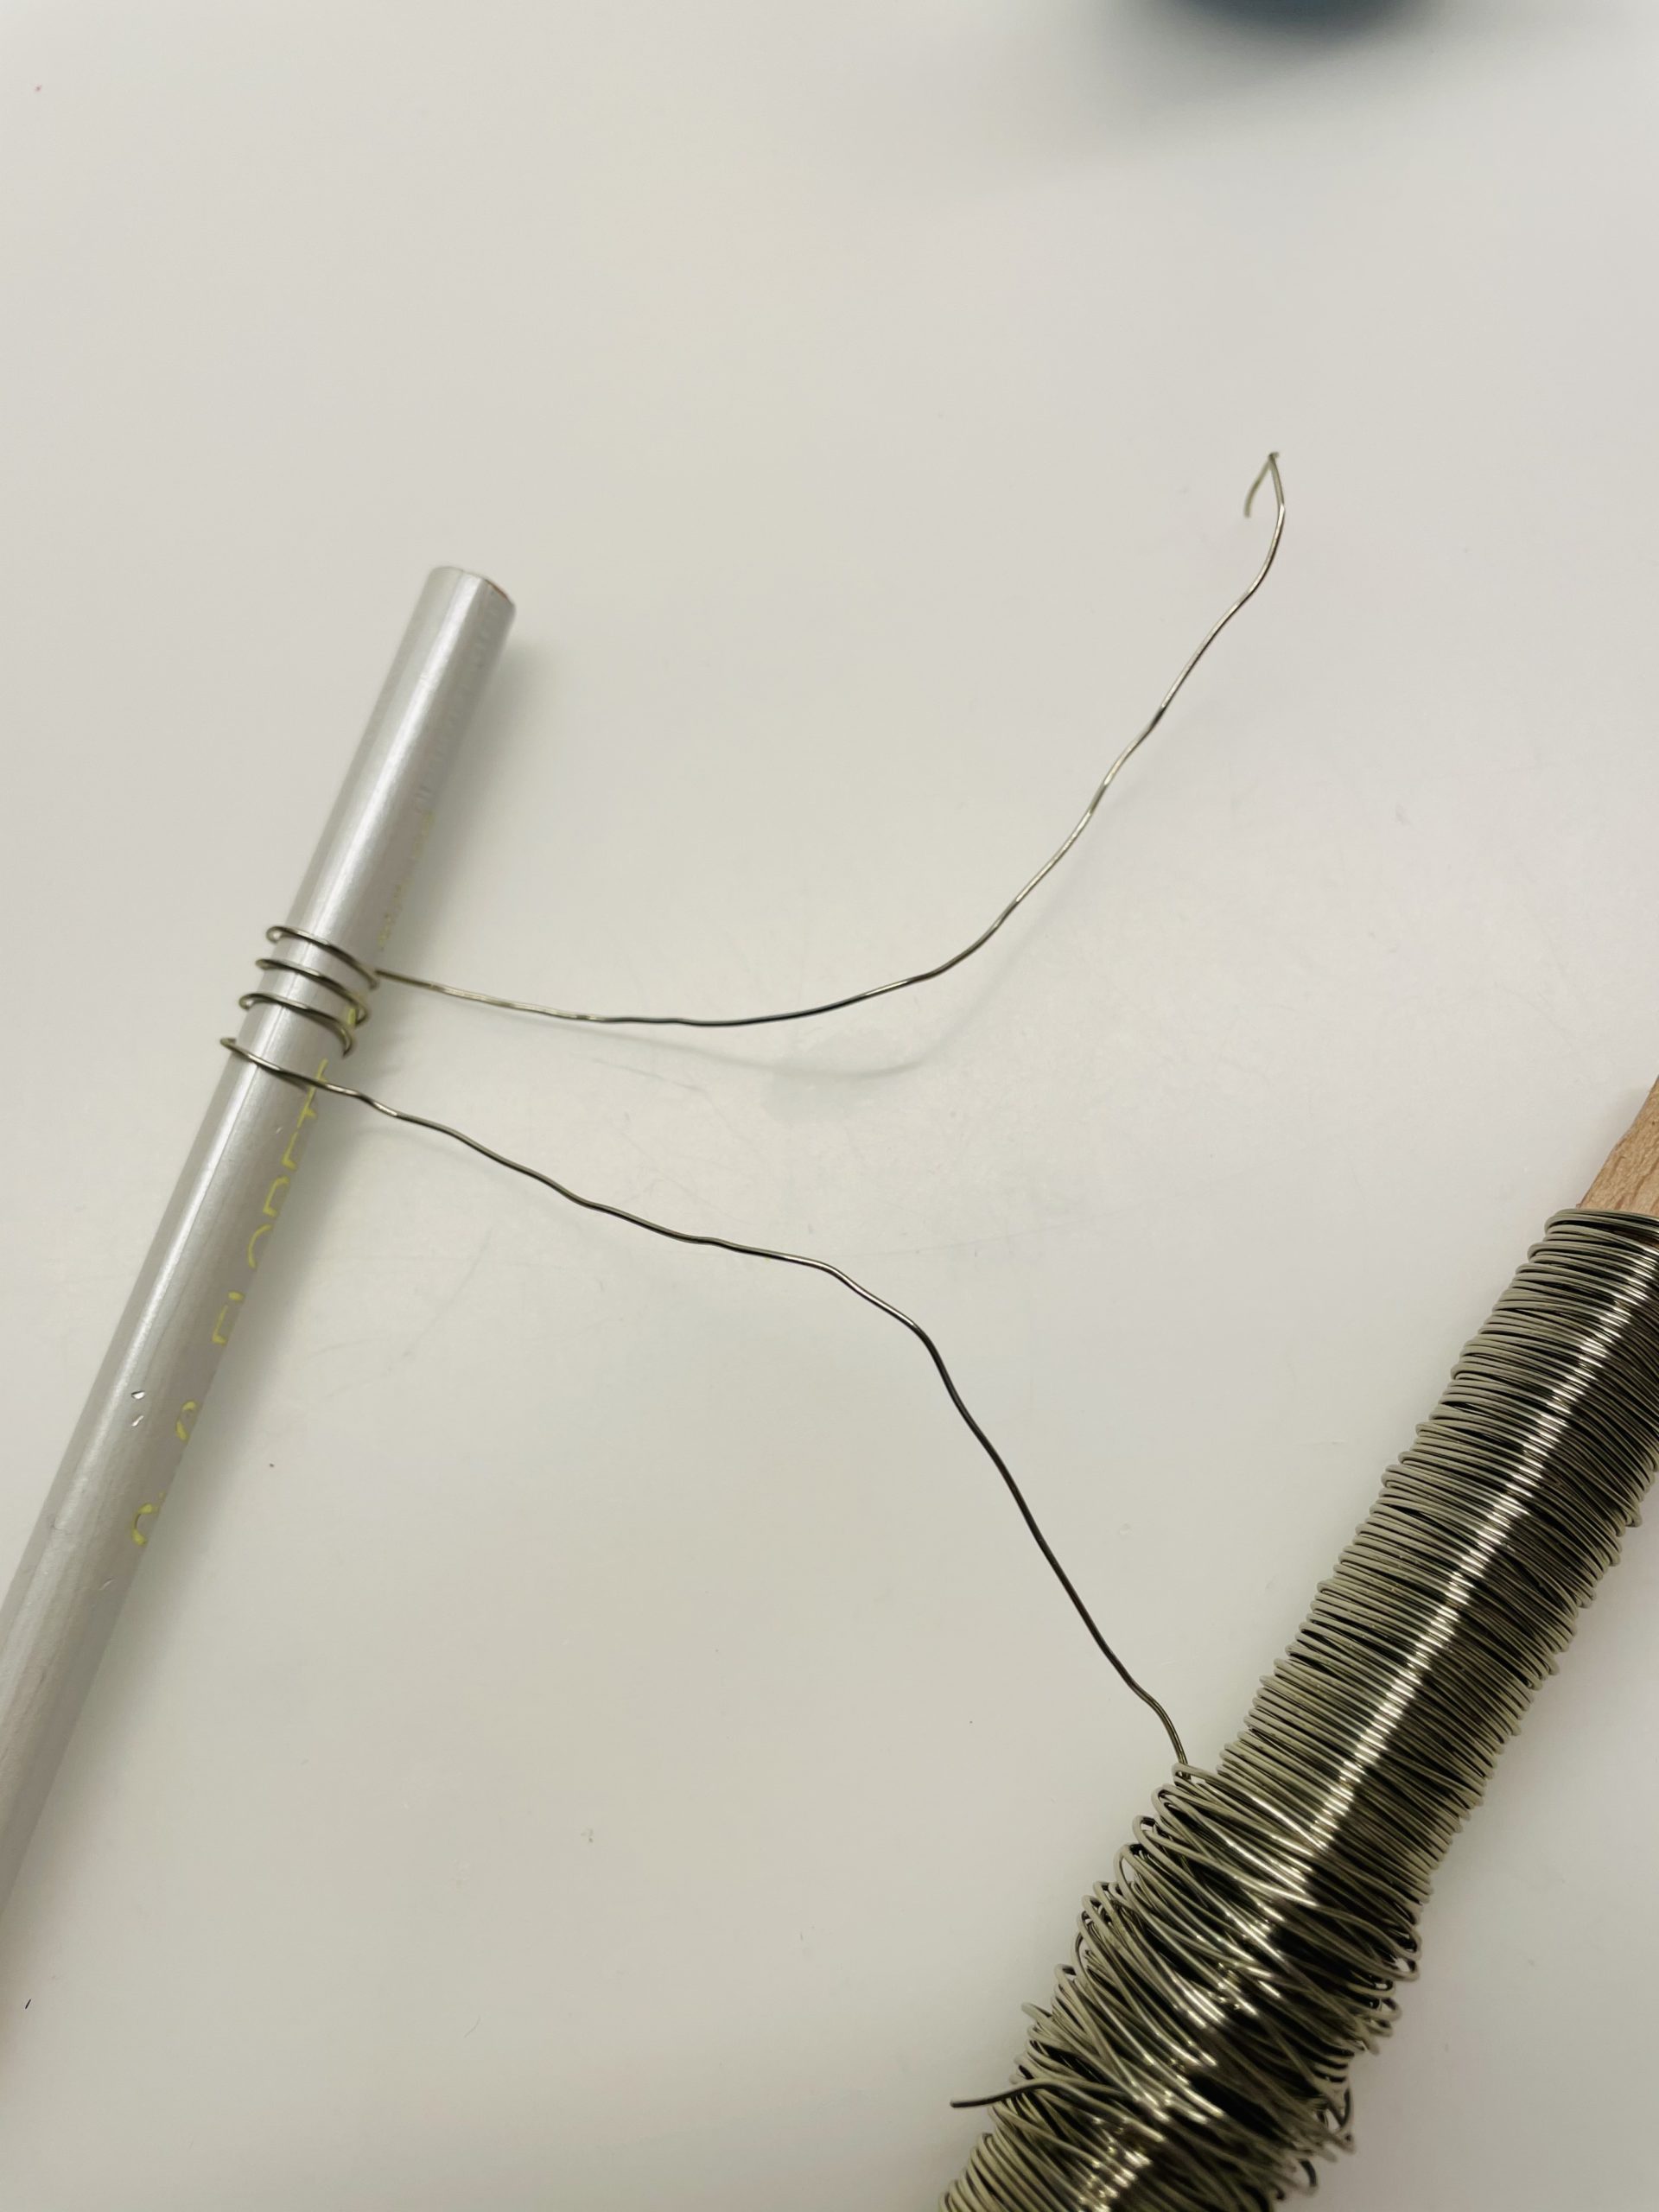
Push the loops close together.
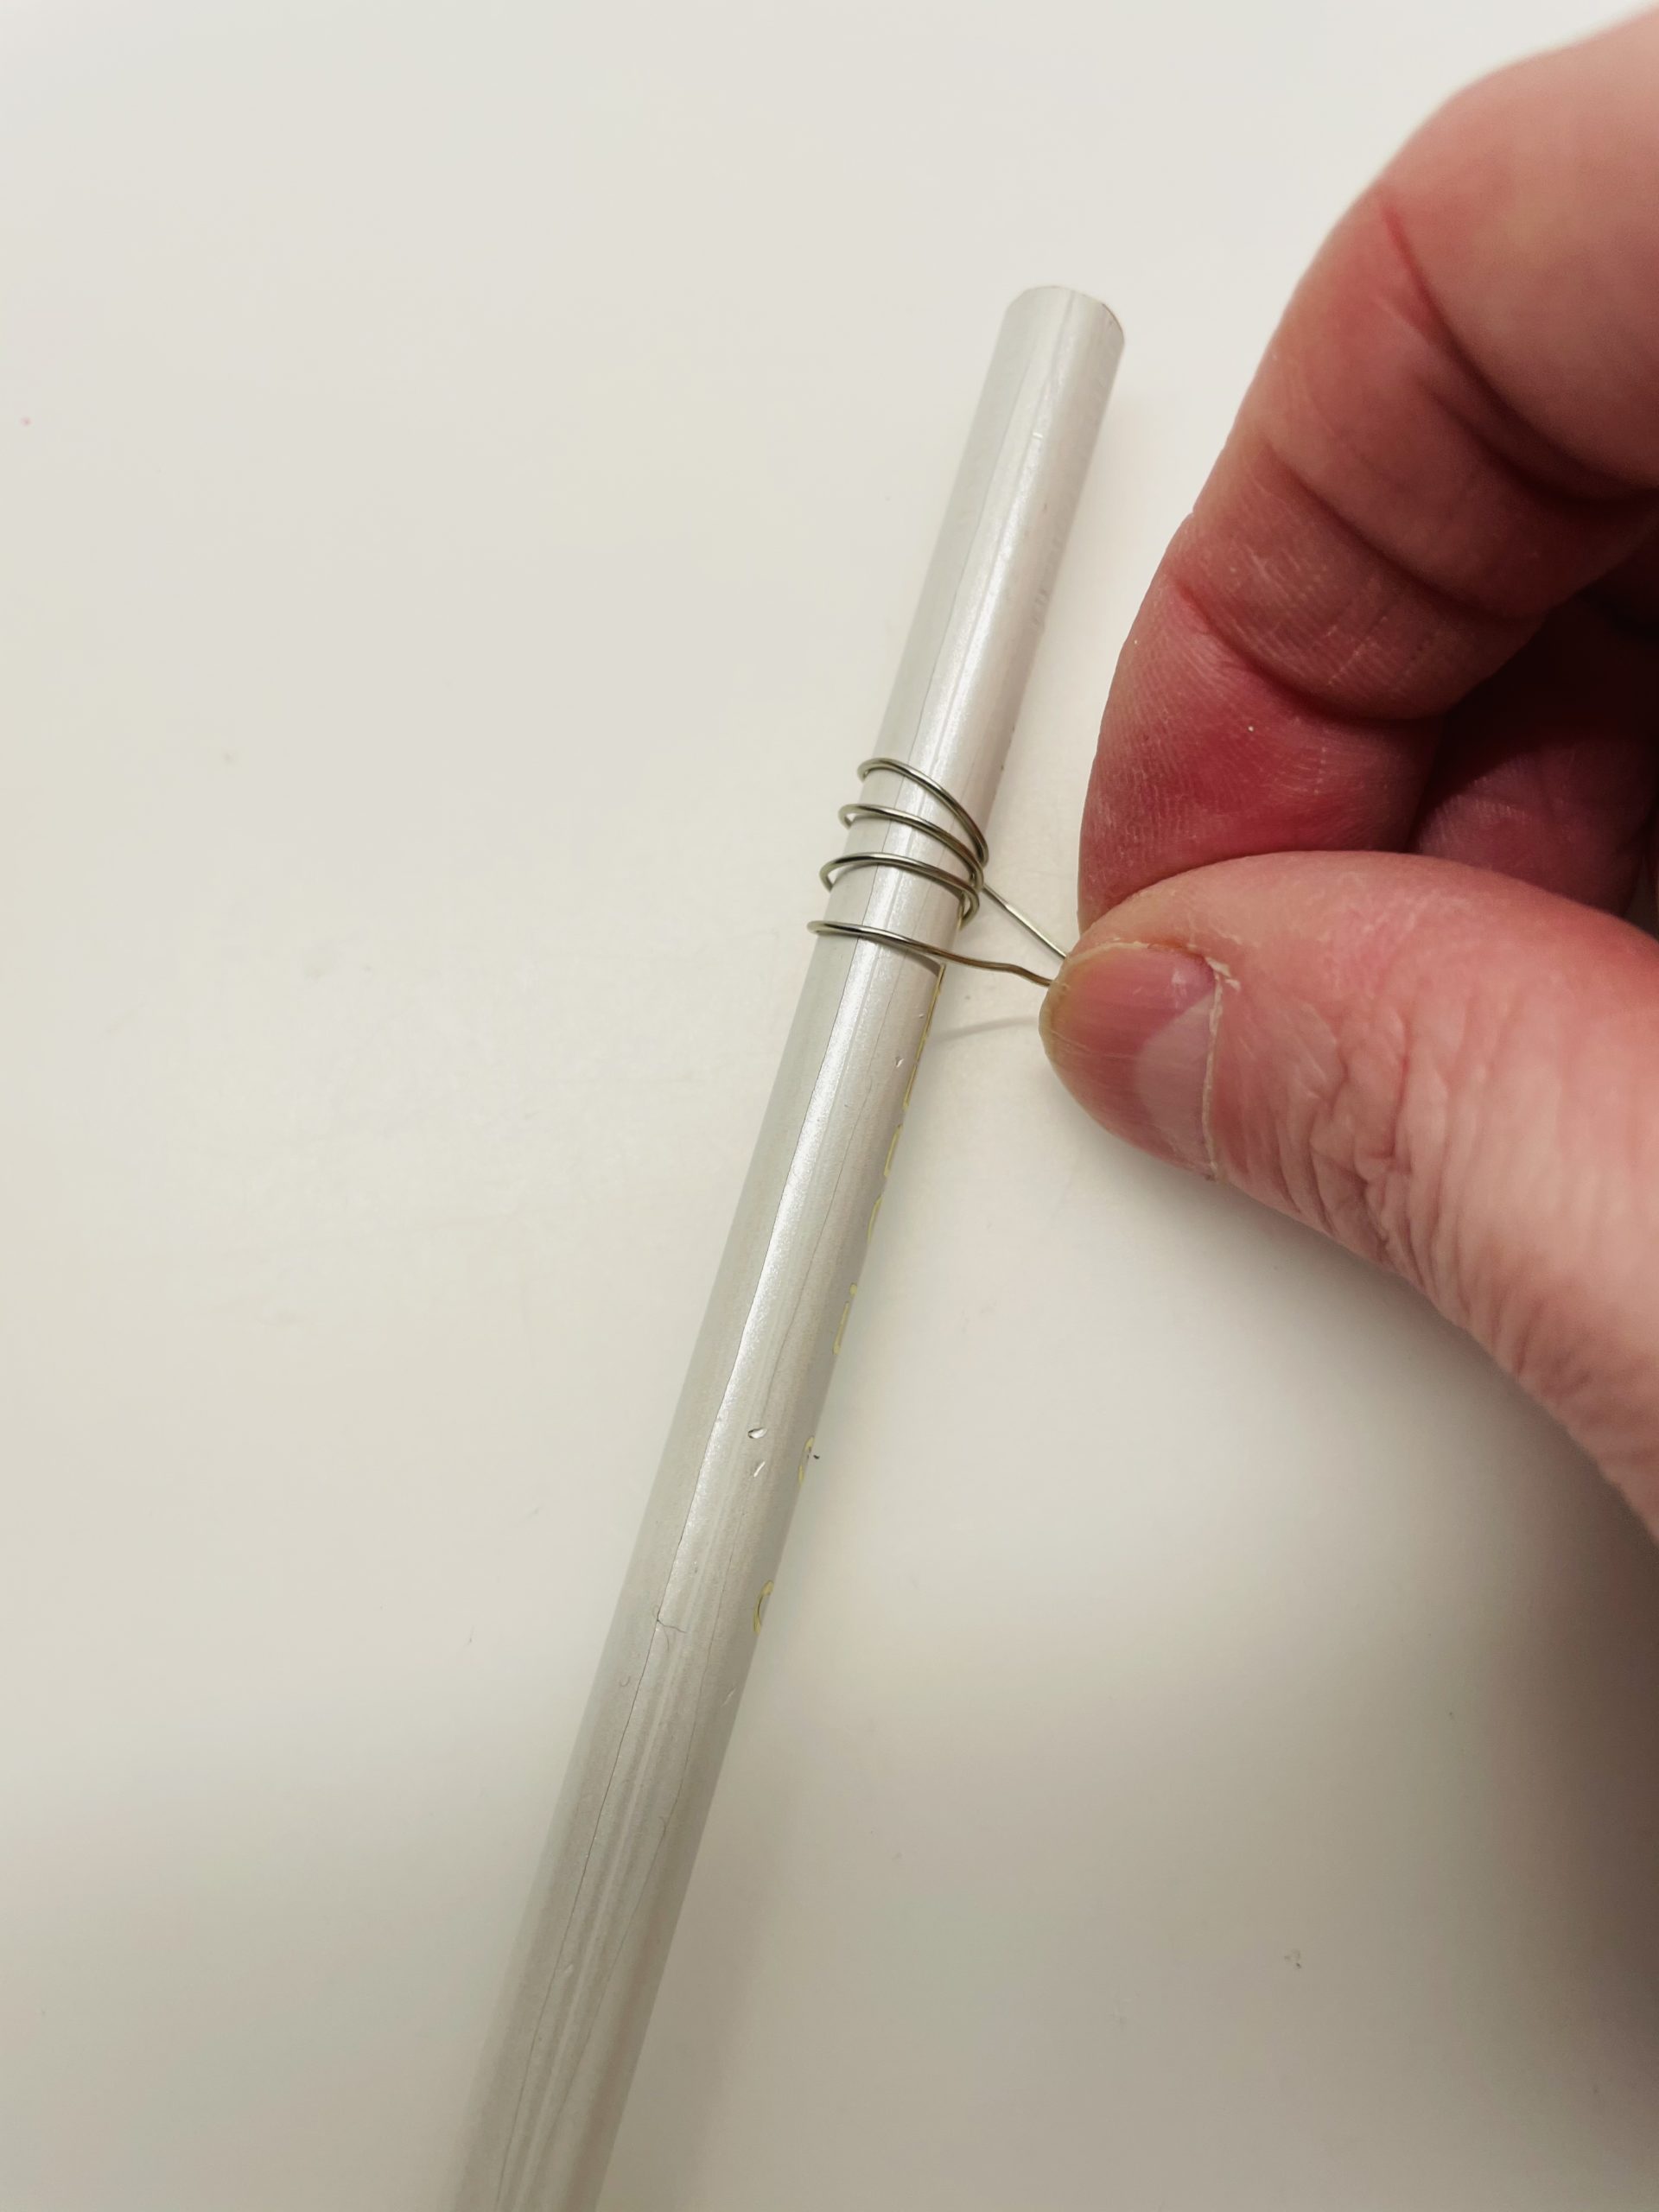
Rotates the wire several times, so that the loops sit firmly on the pen.
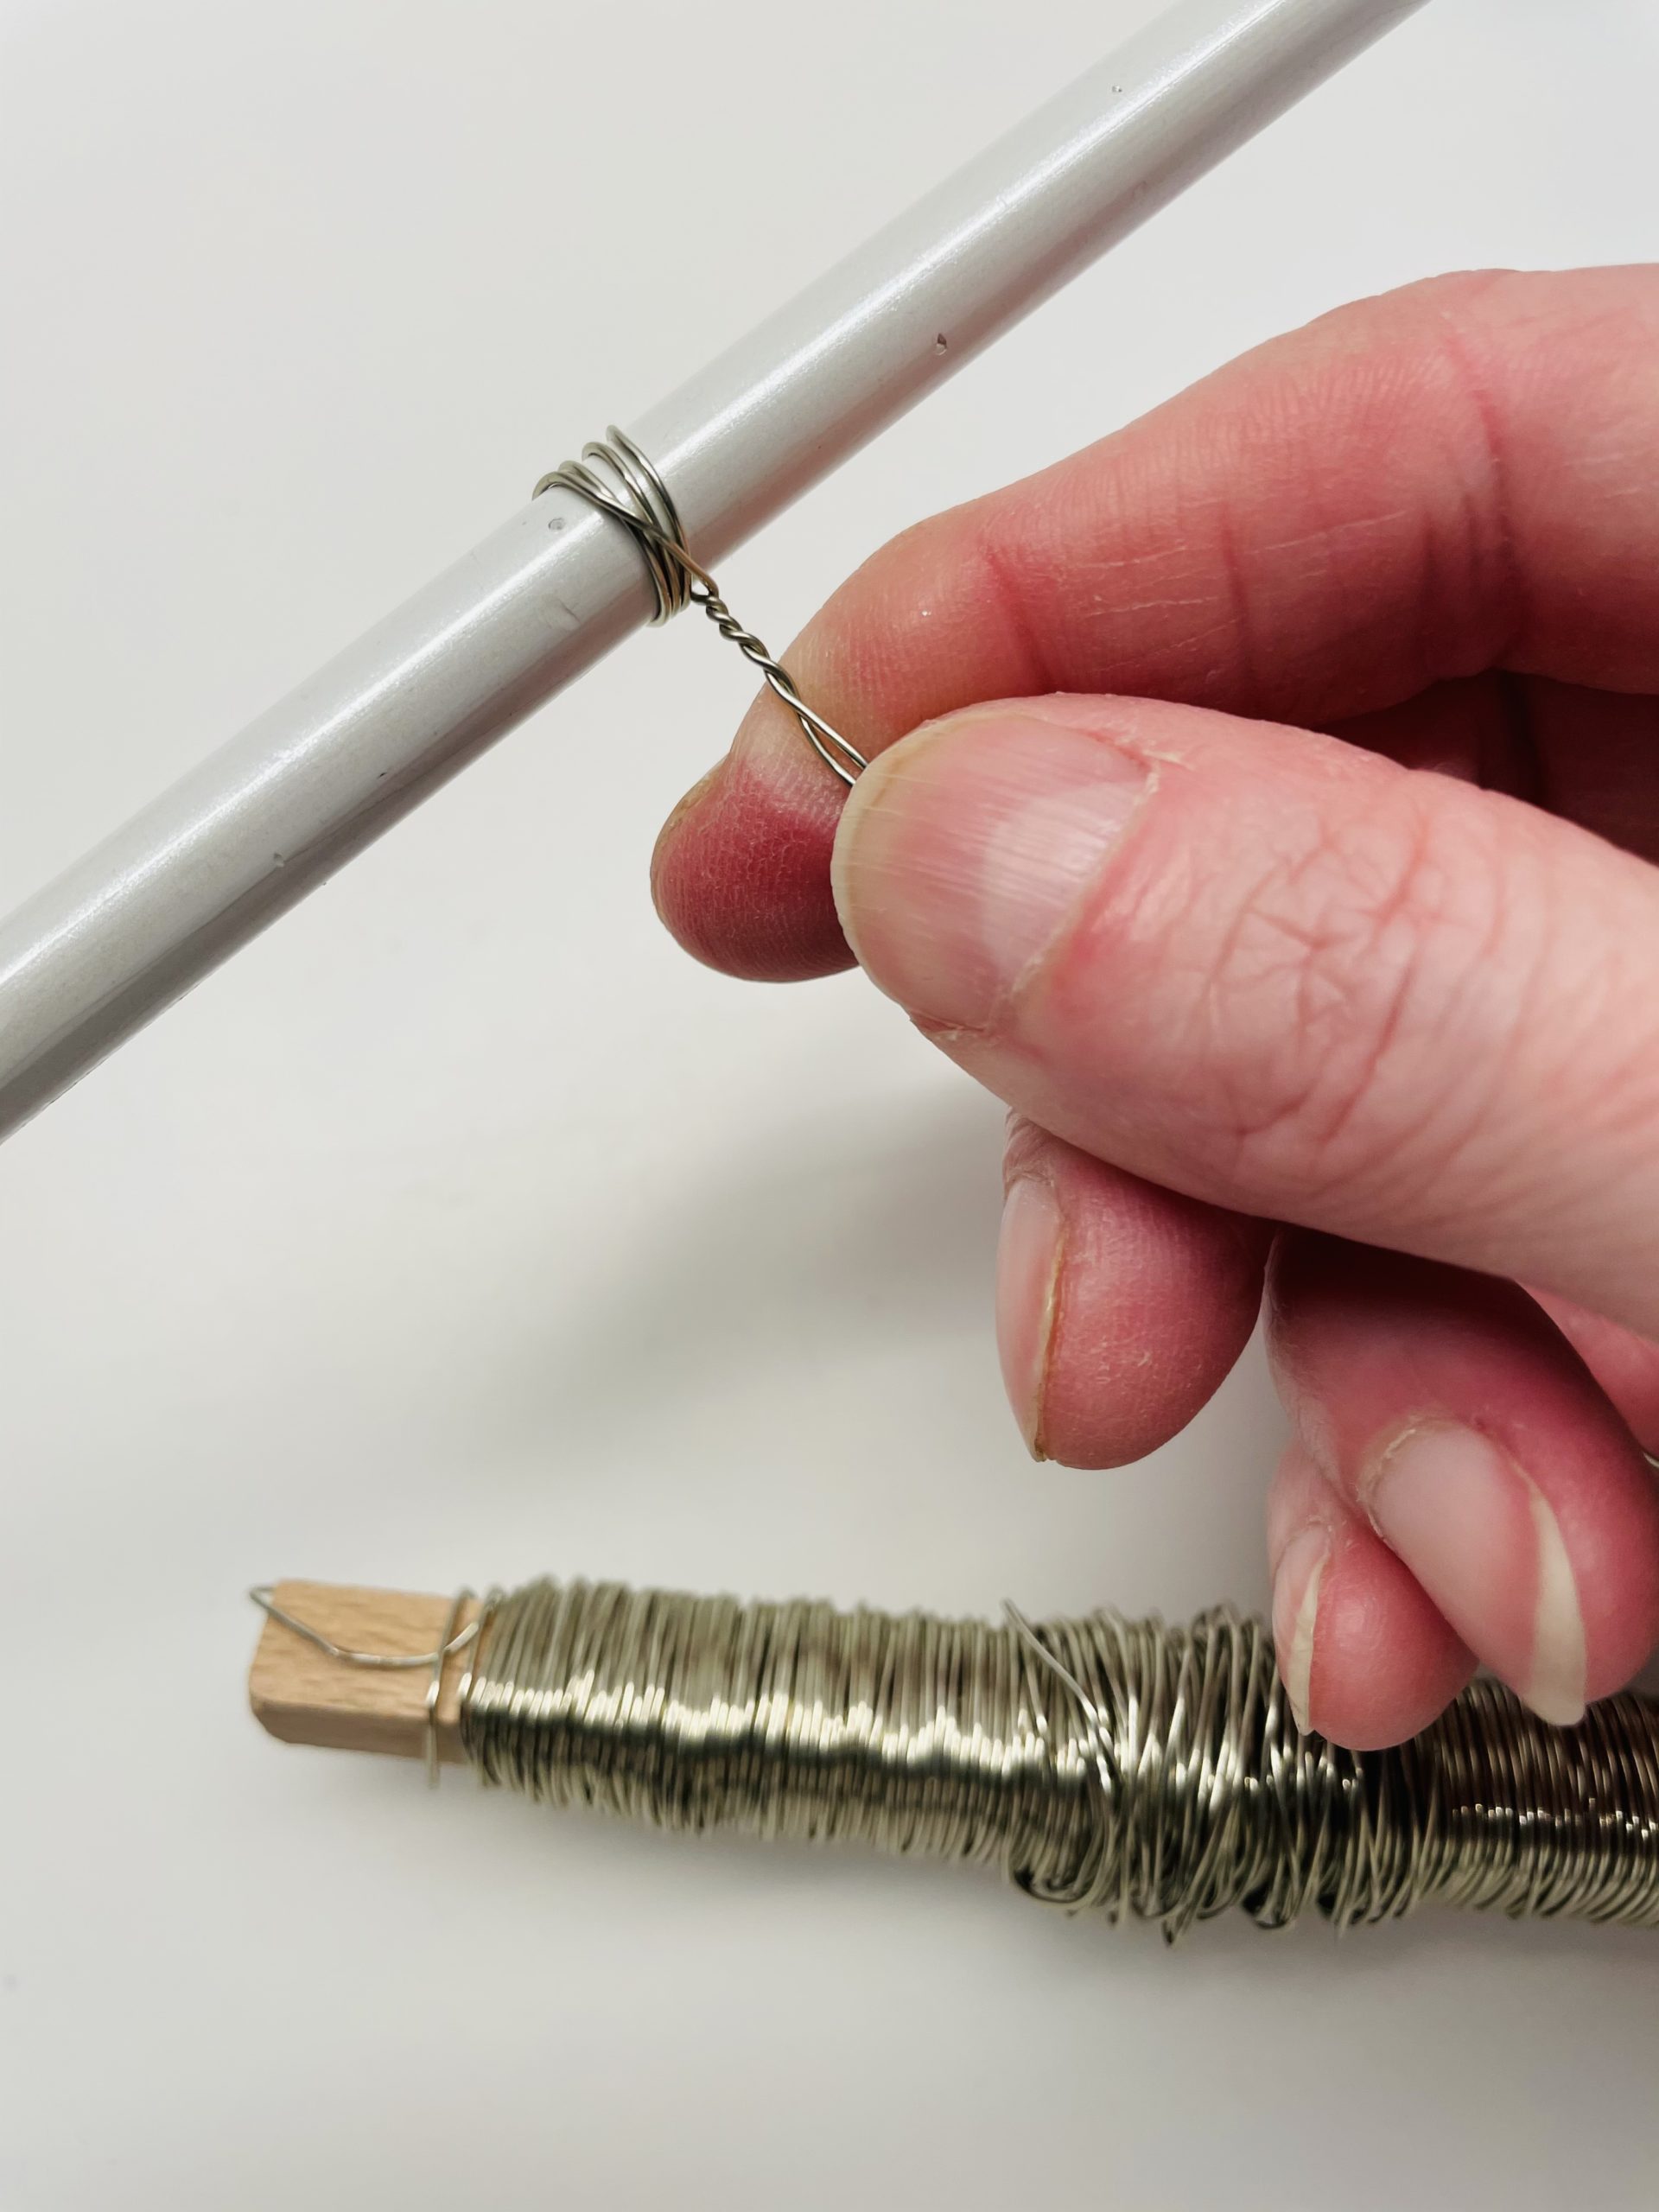
Now you push the four loops off the pen.
Now gently bend one loop after the other away from the other. Rotate the away loop once or twice around itself.
Then you turn off the next loop. Rotate this loop once or twice. So you get the second leaf.
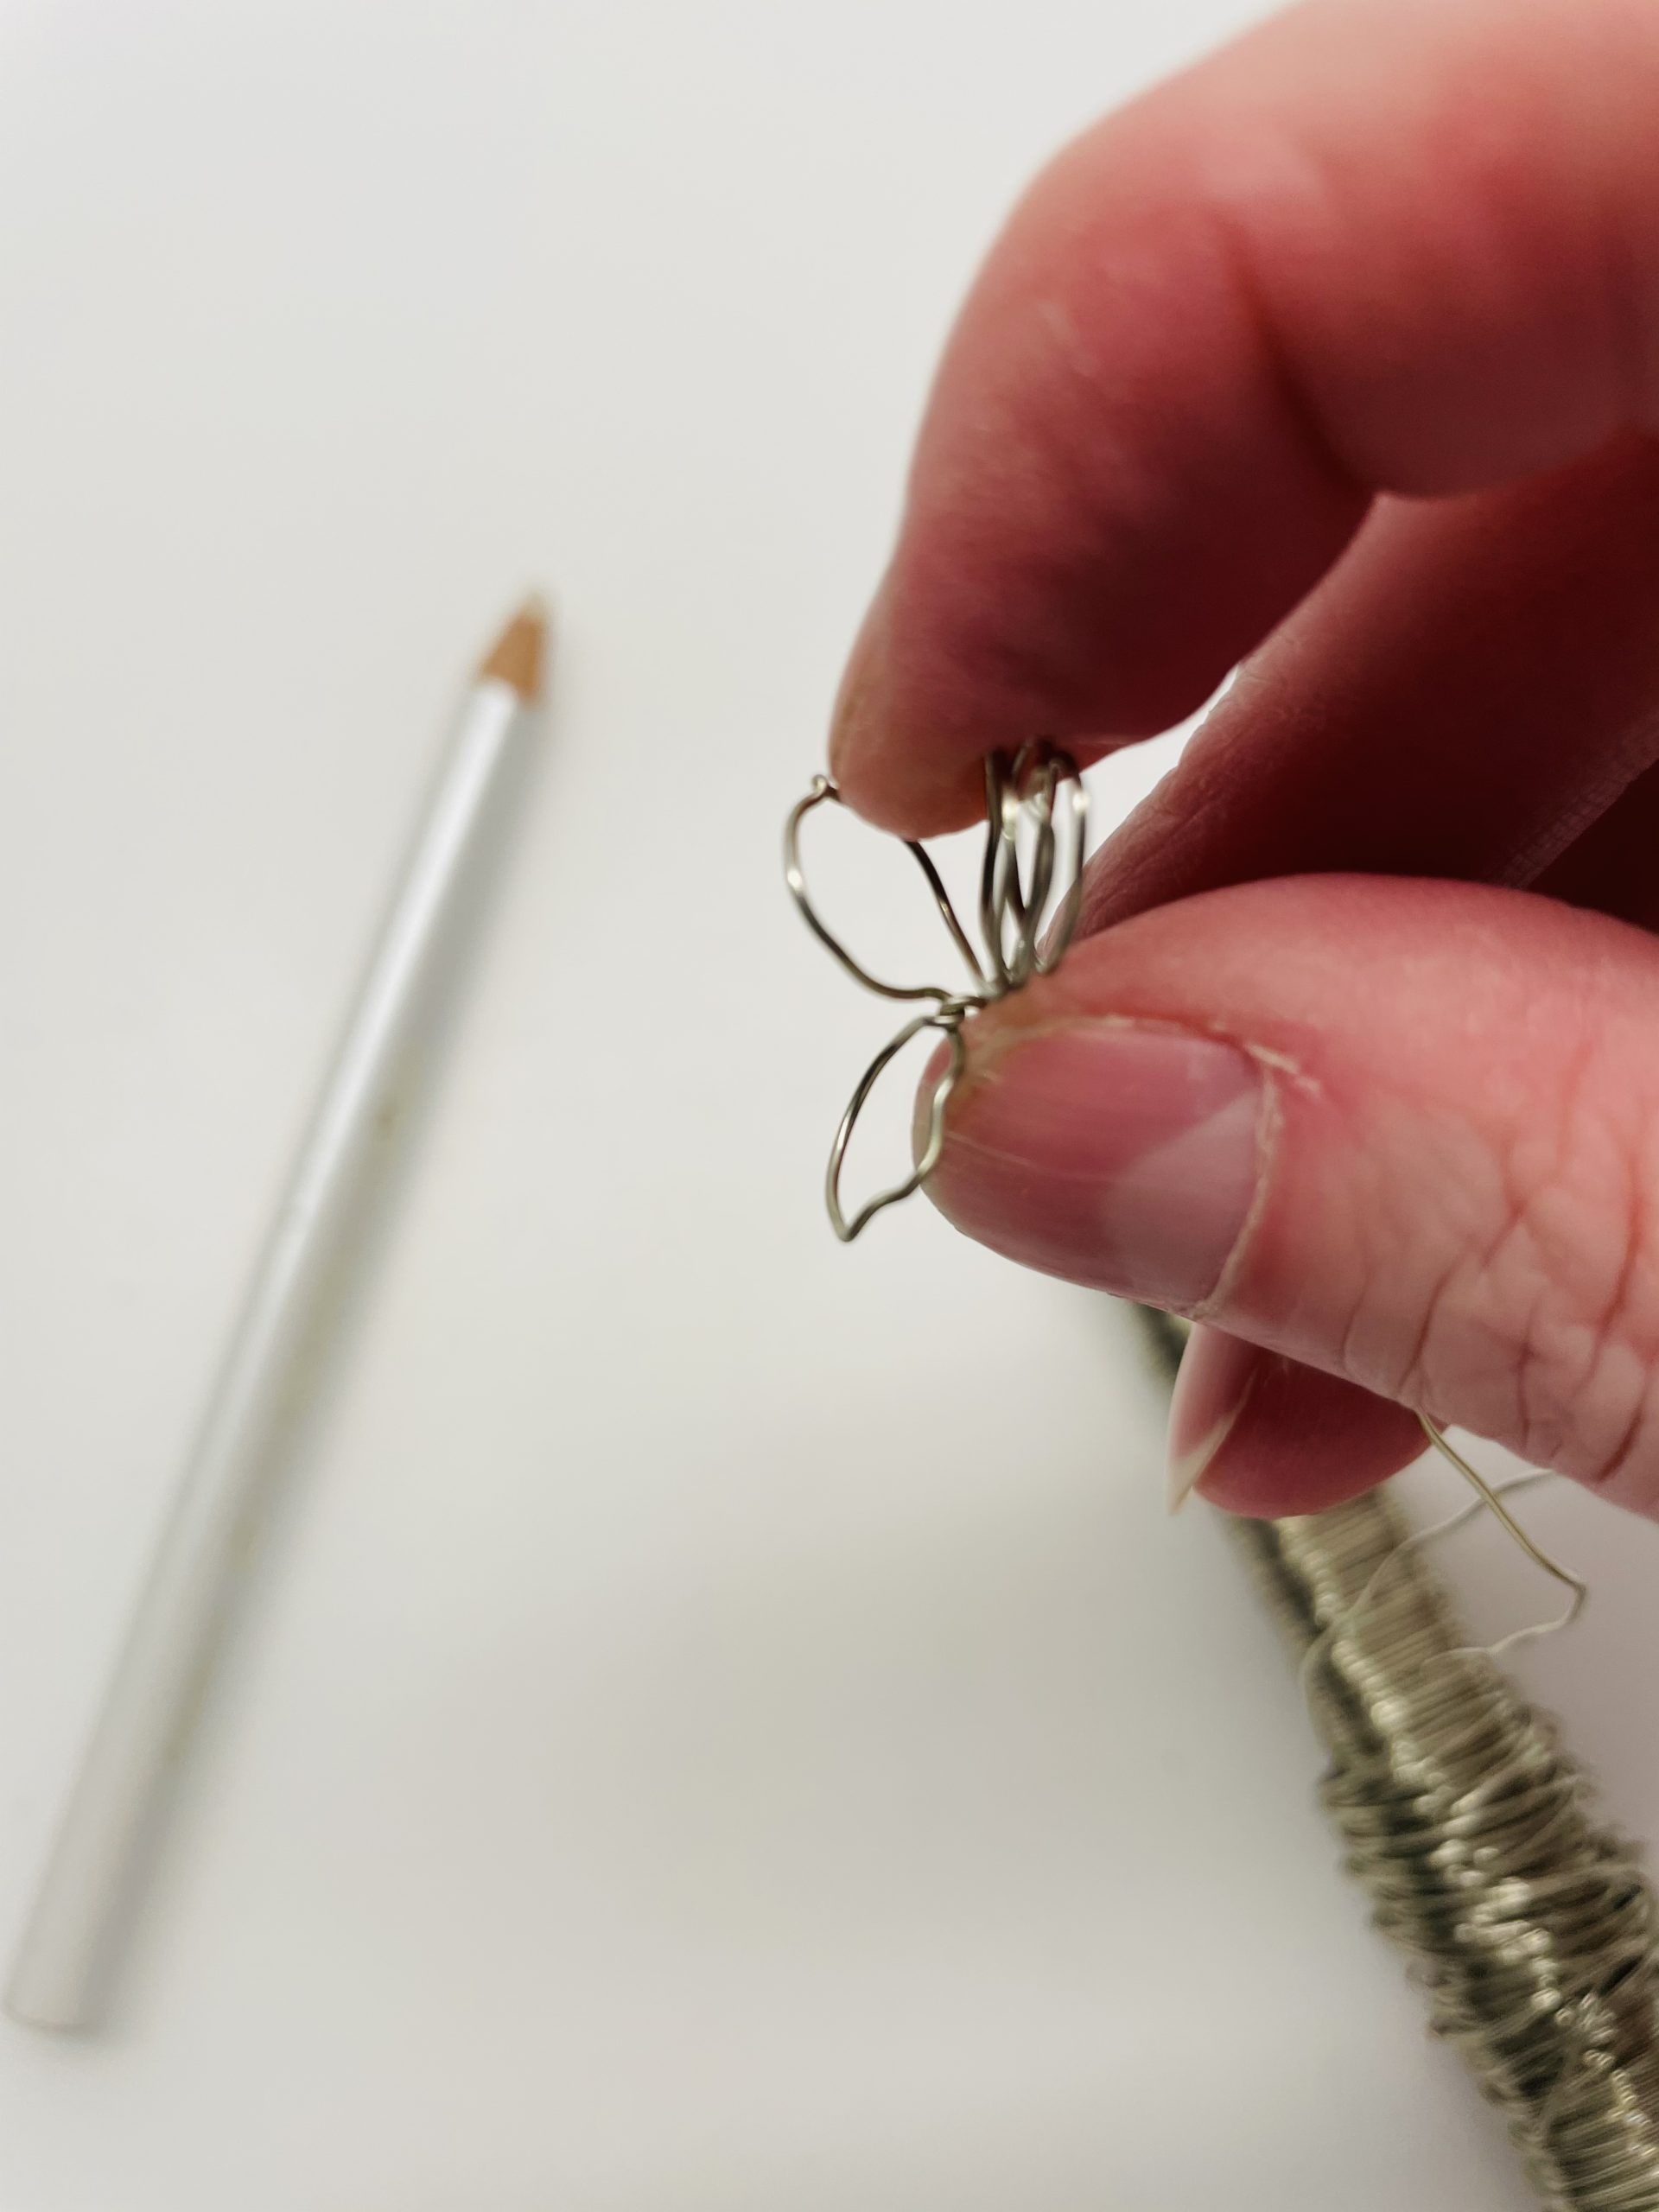
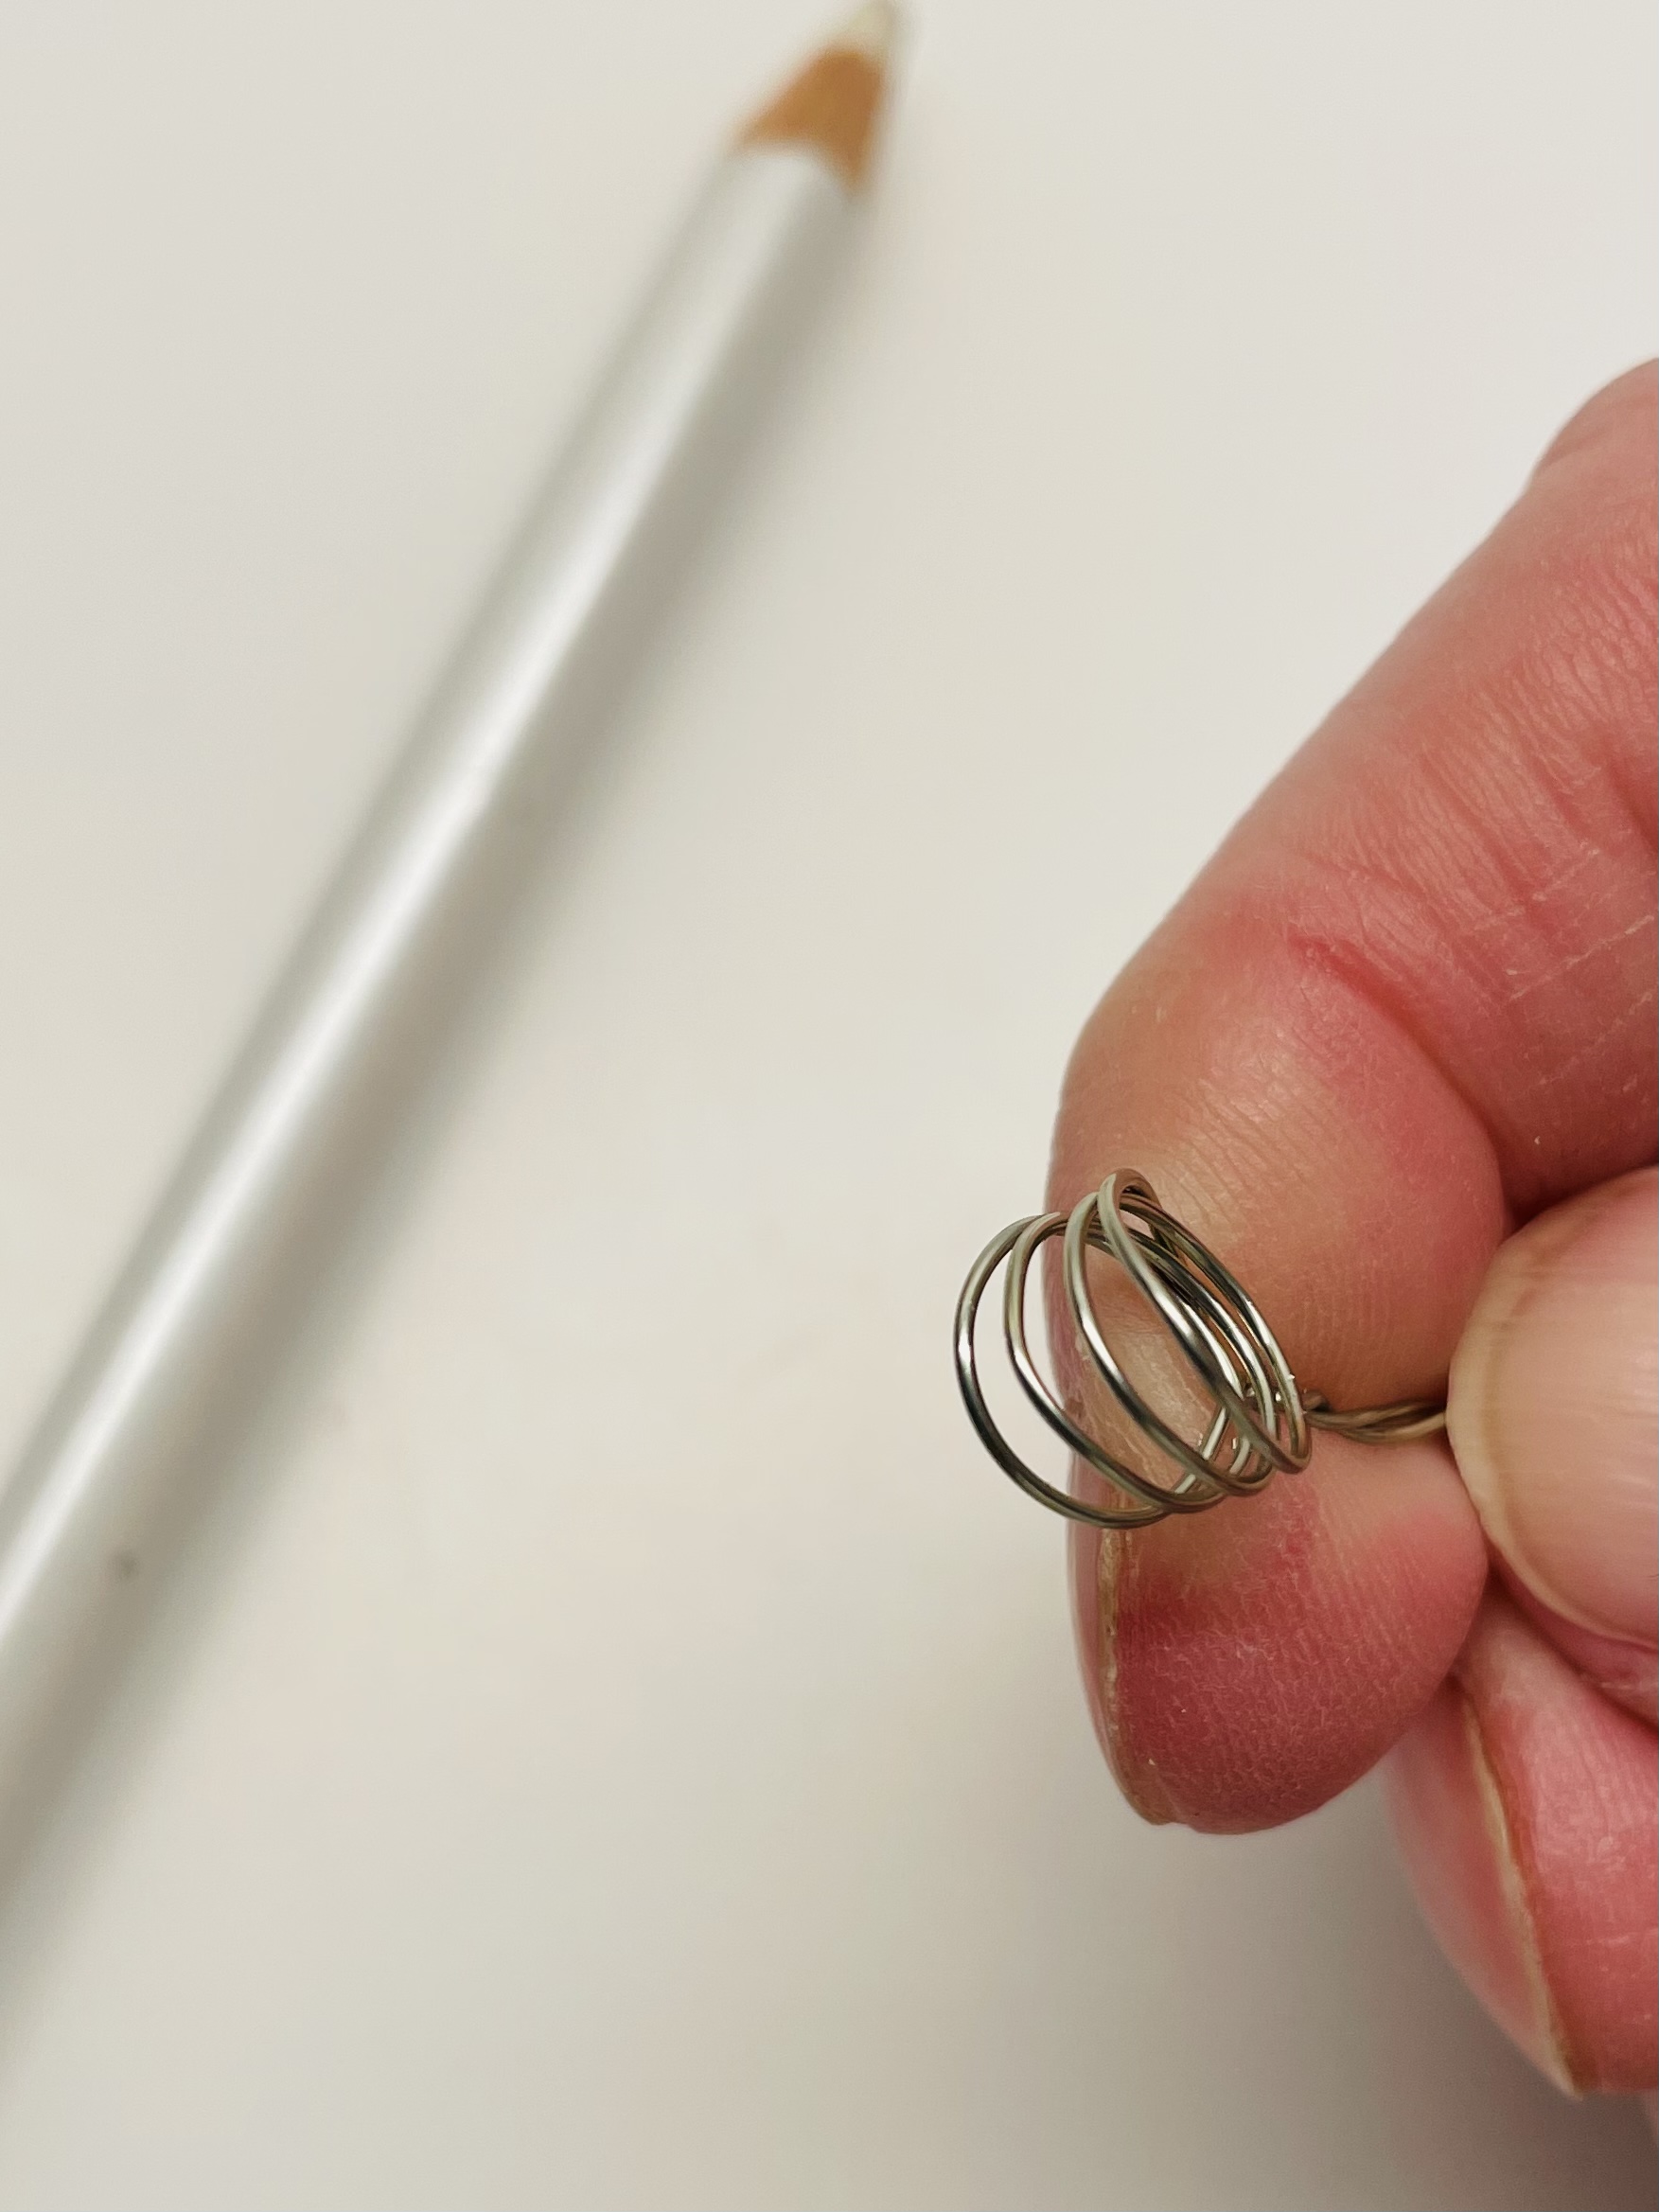
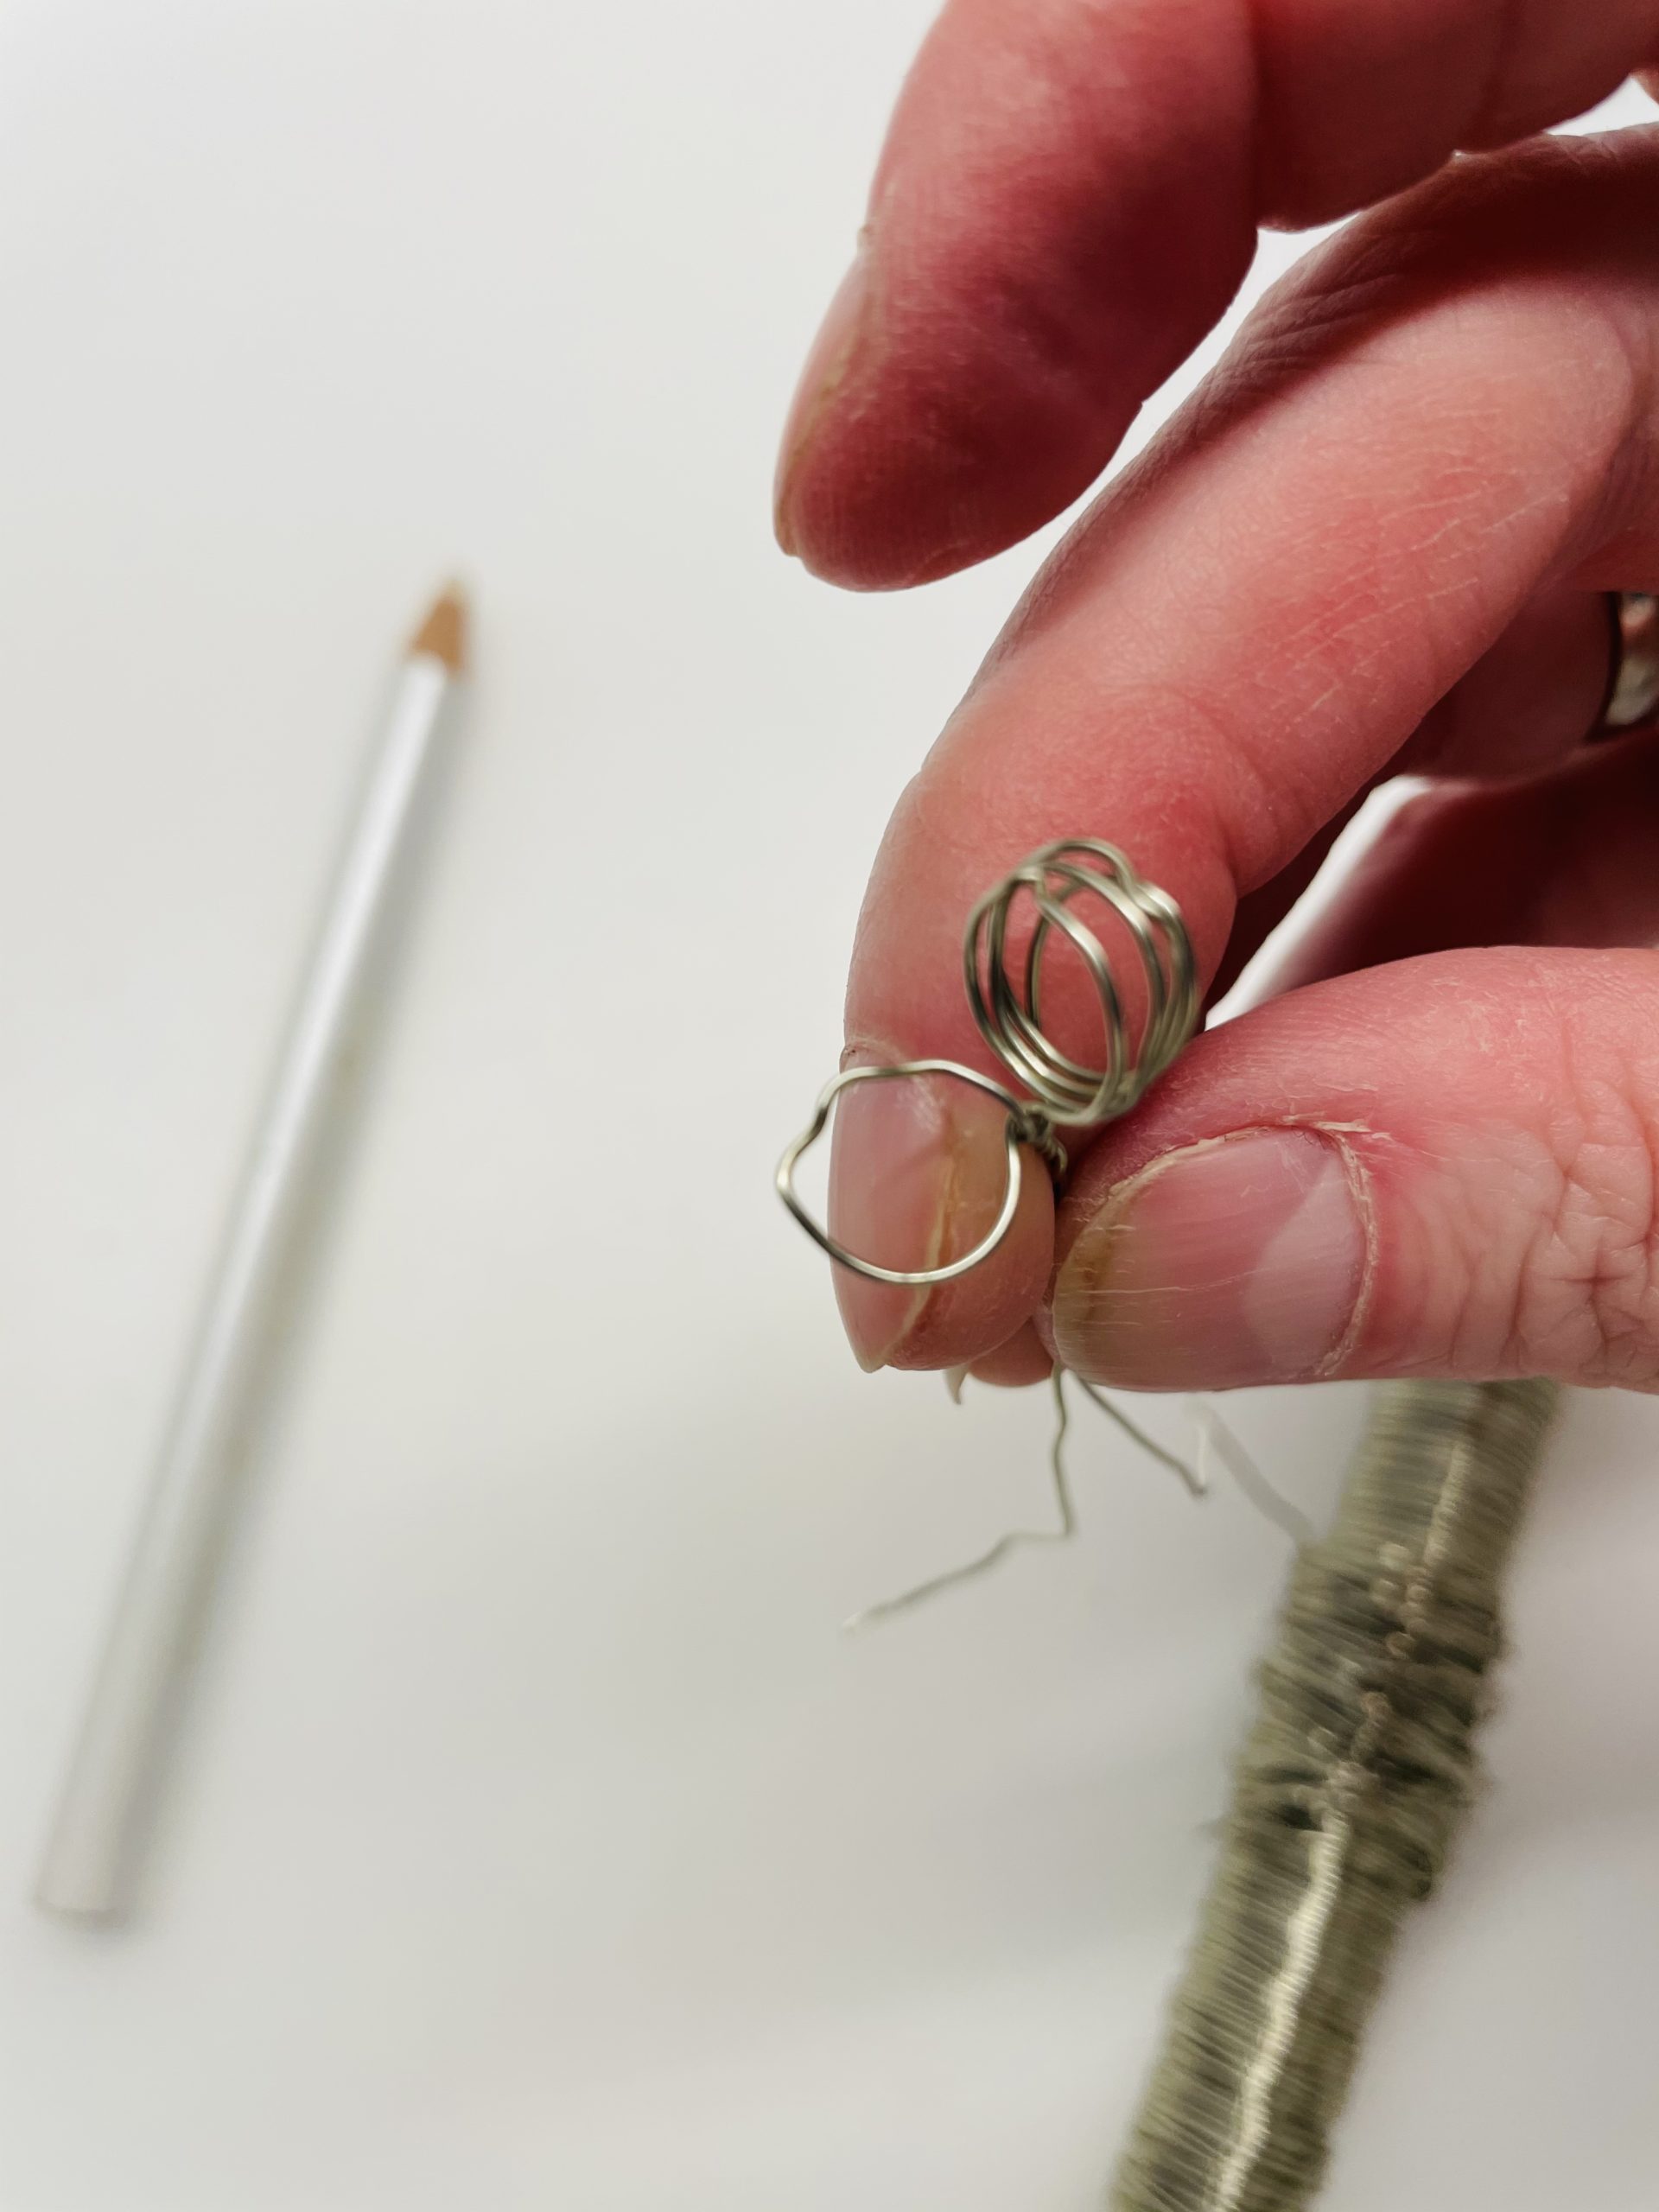
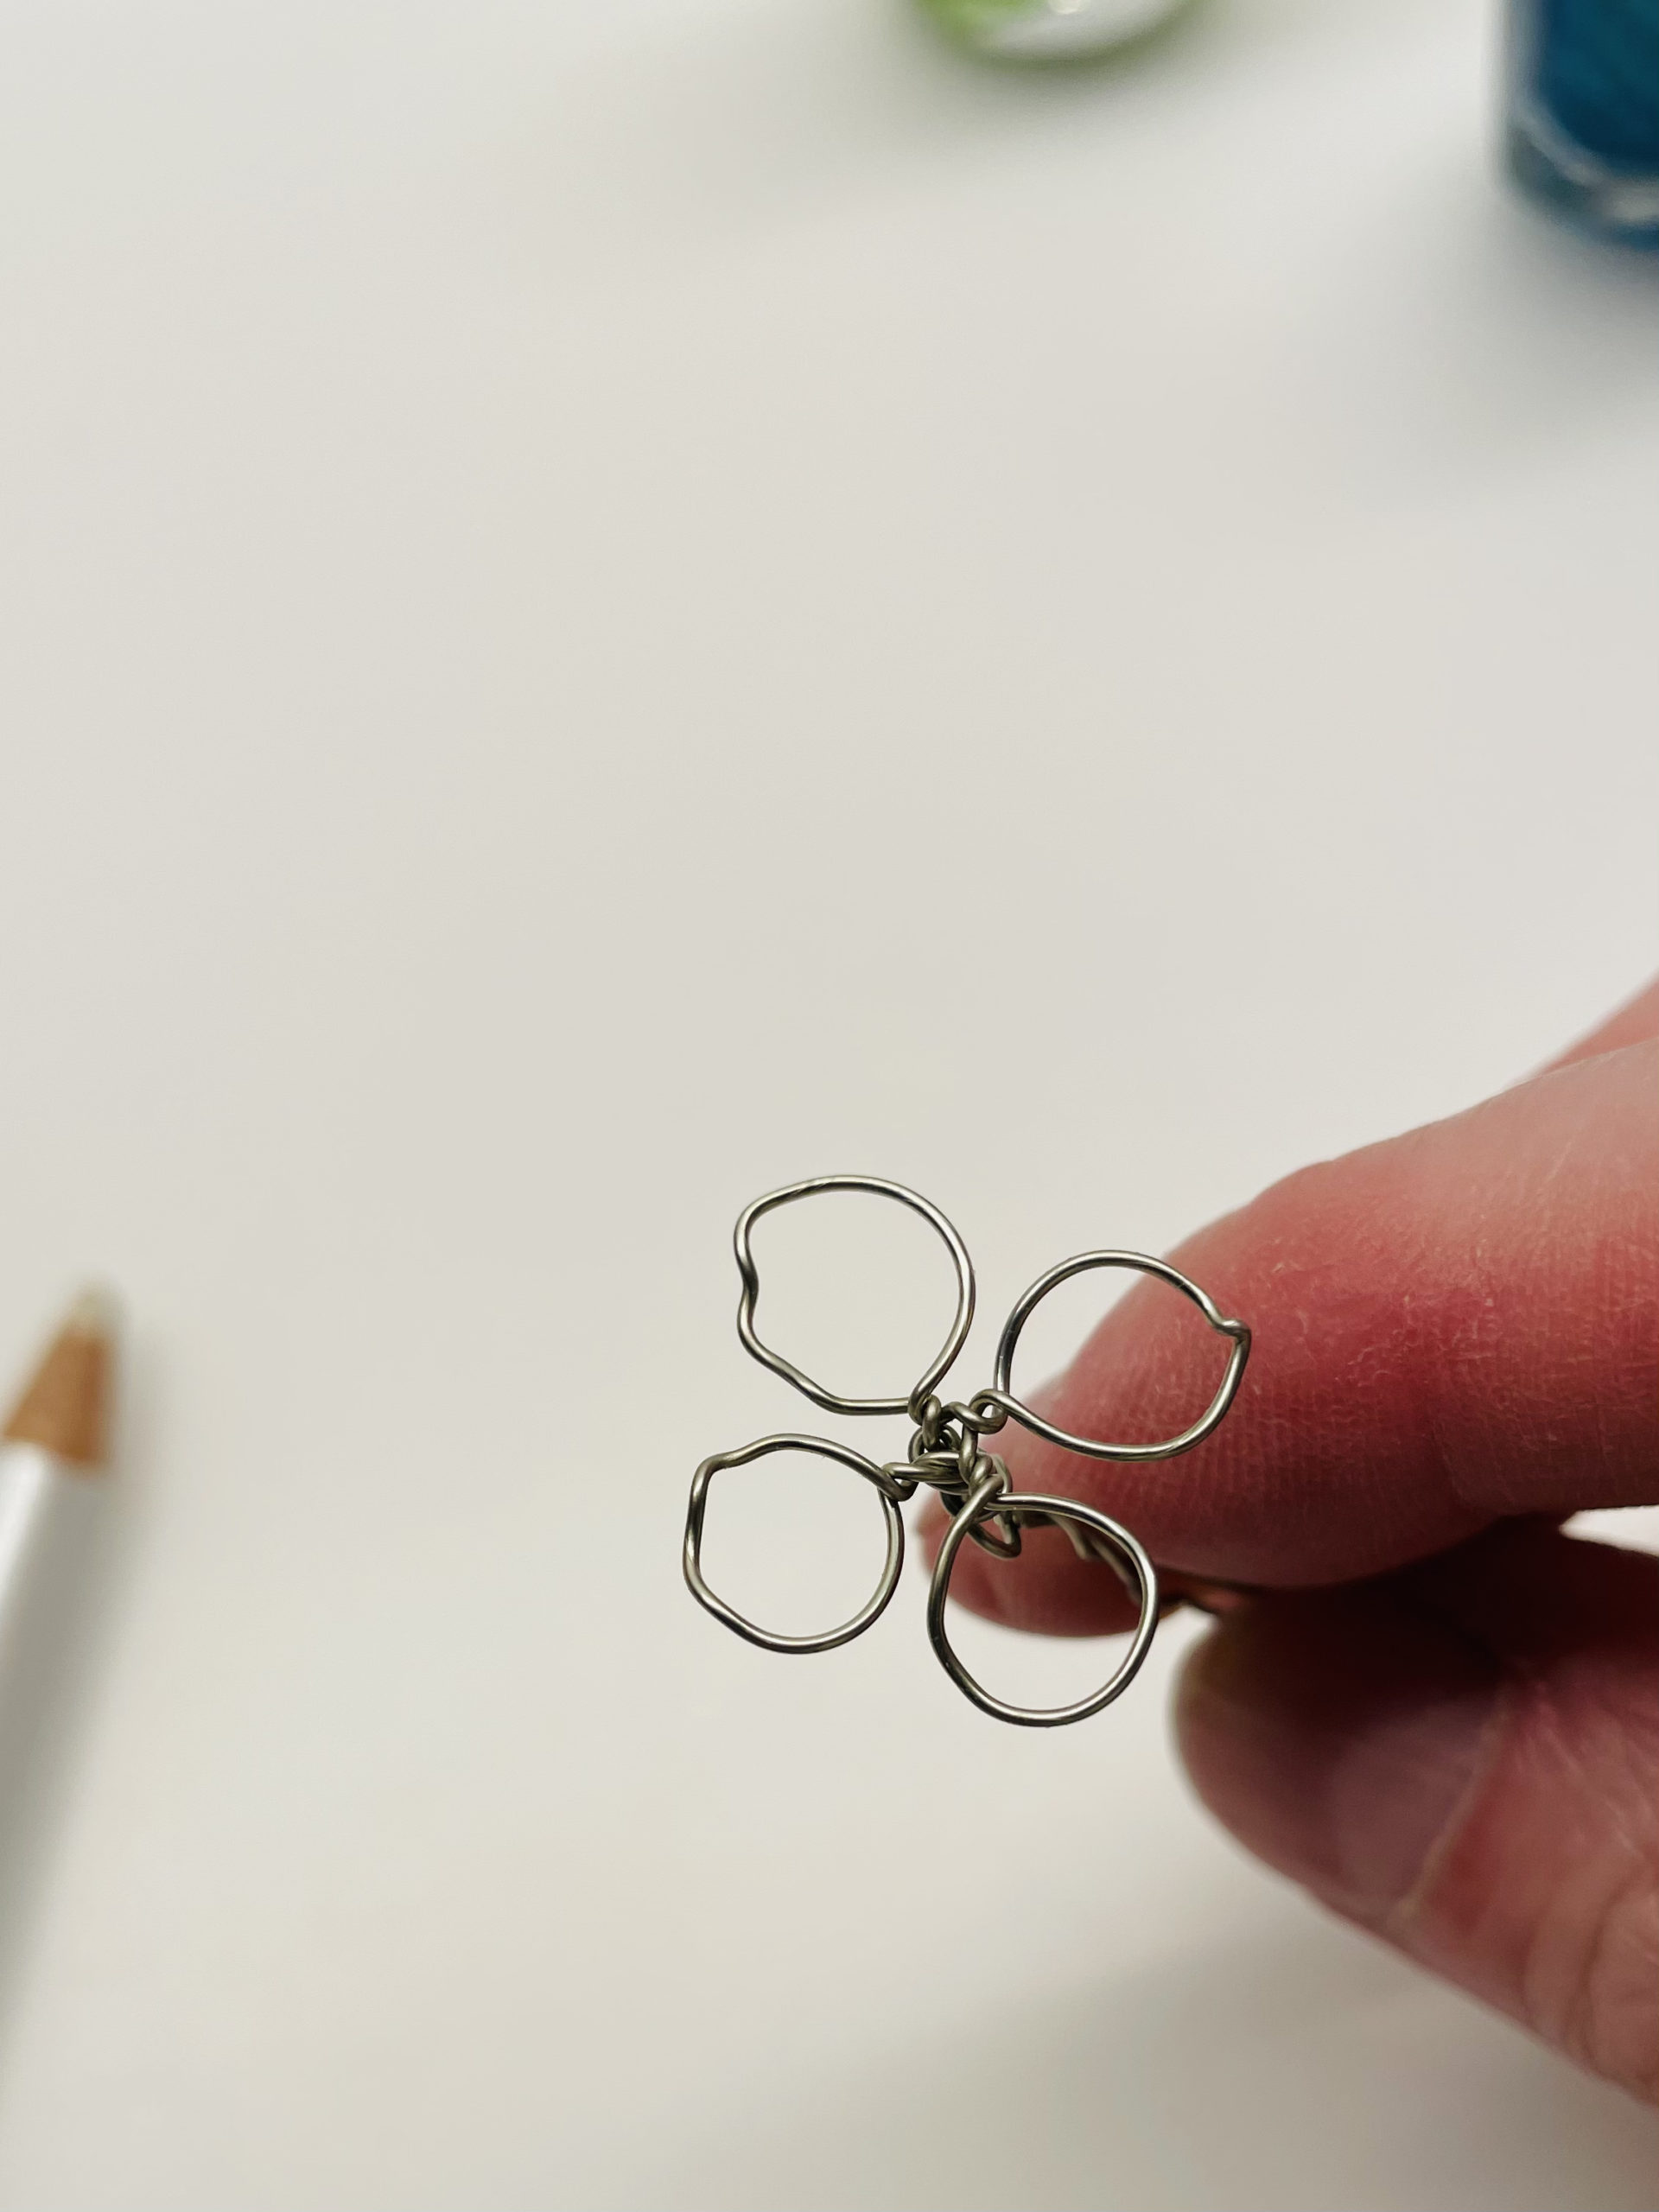
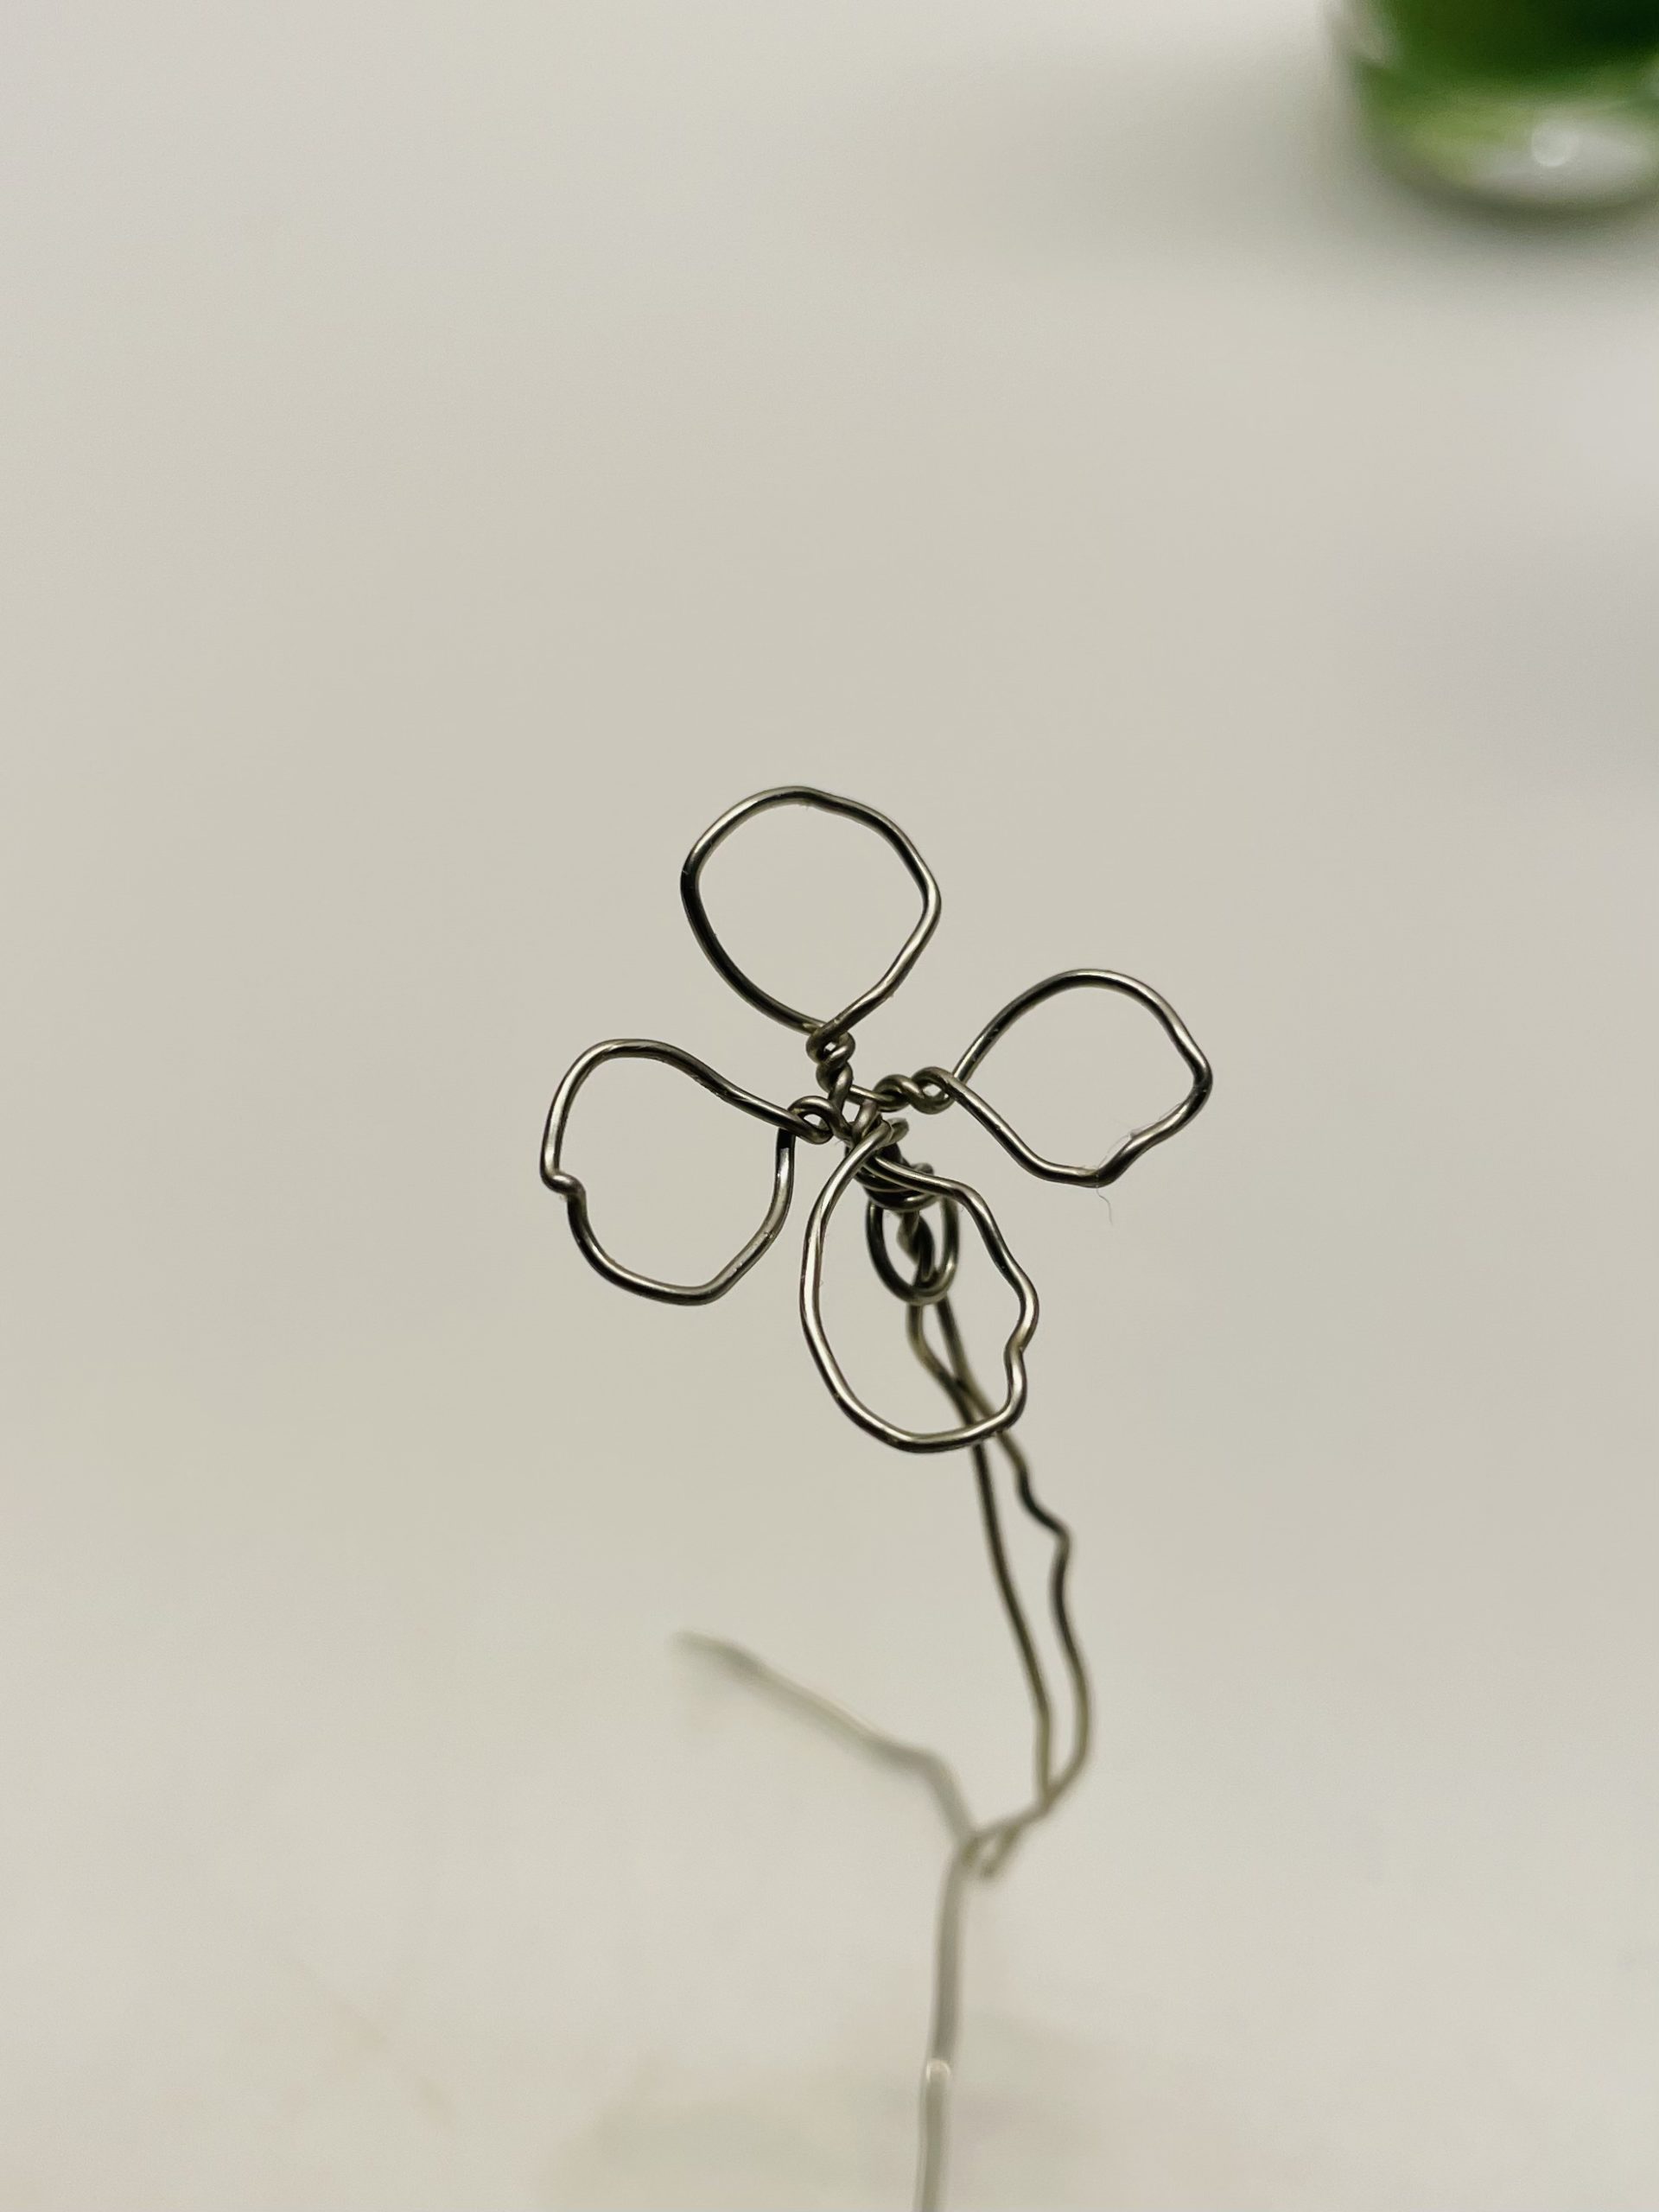
Bending all loops apart in this way.
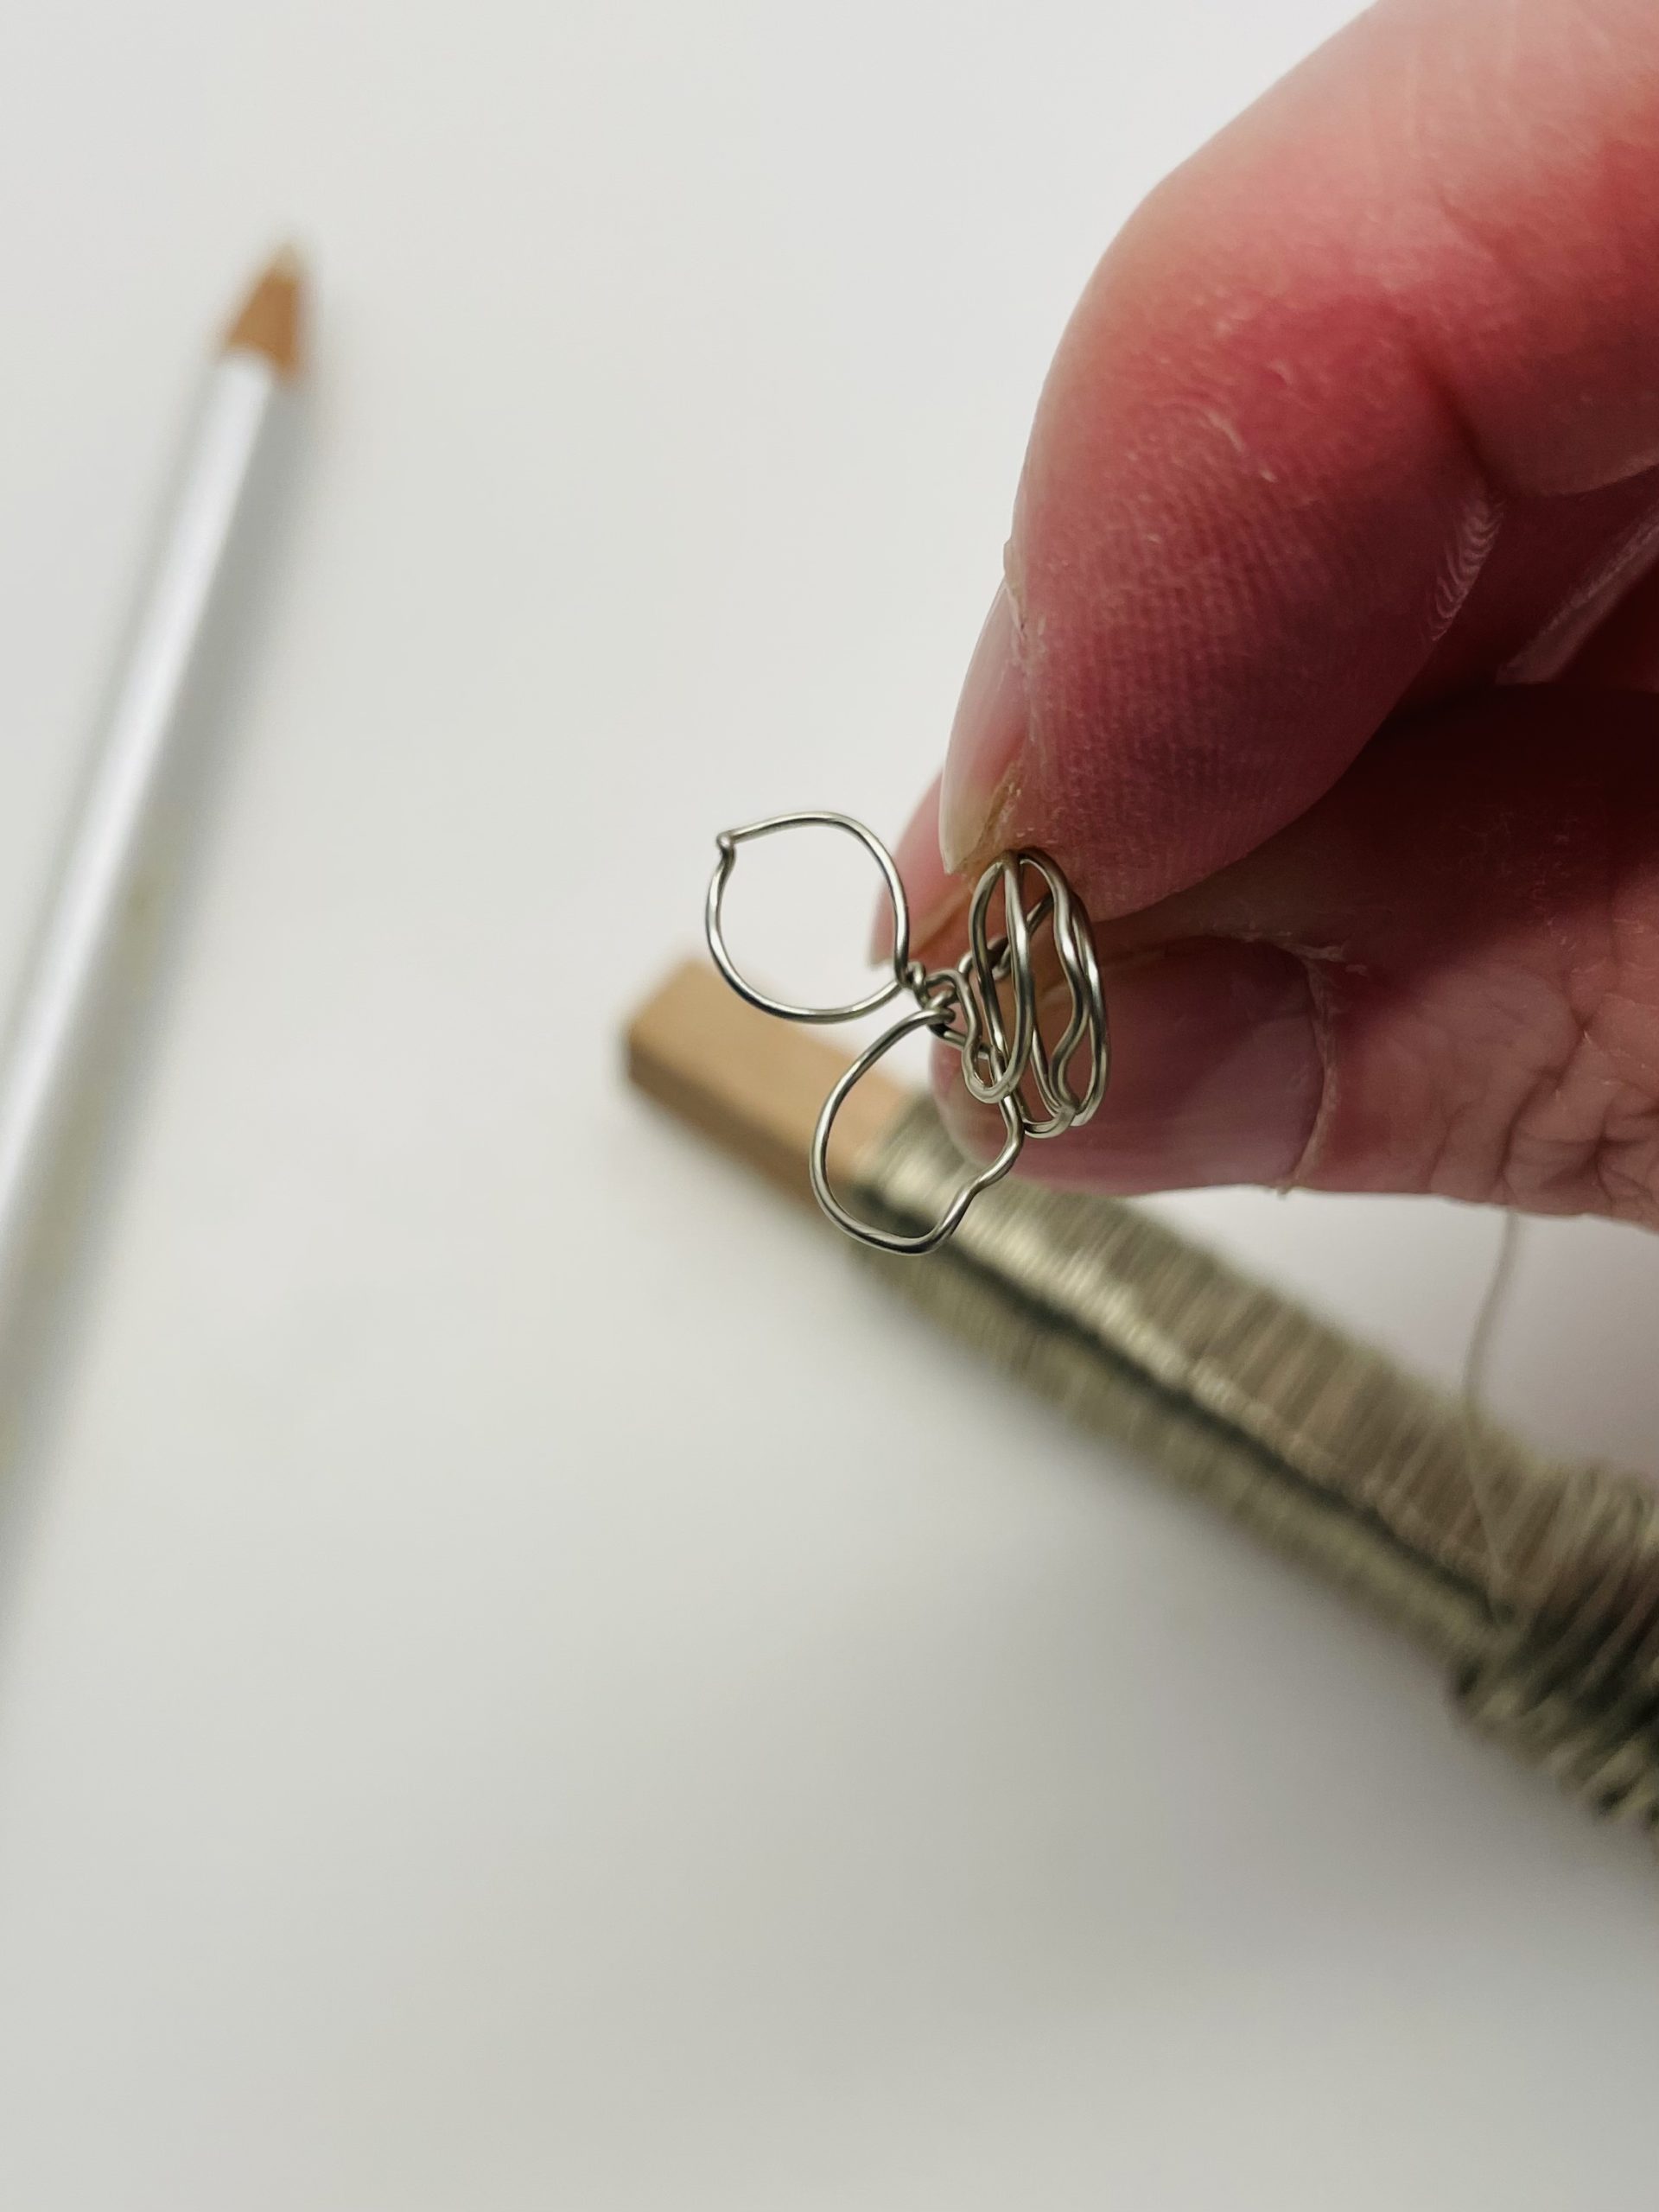
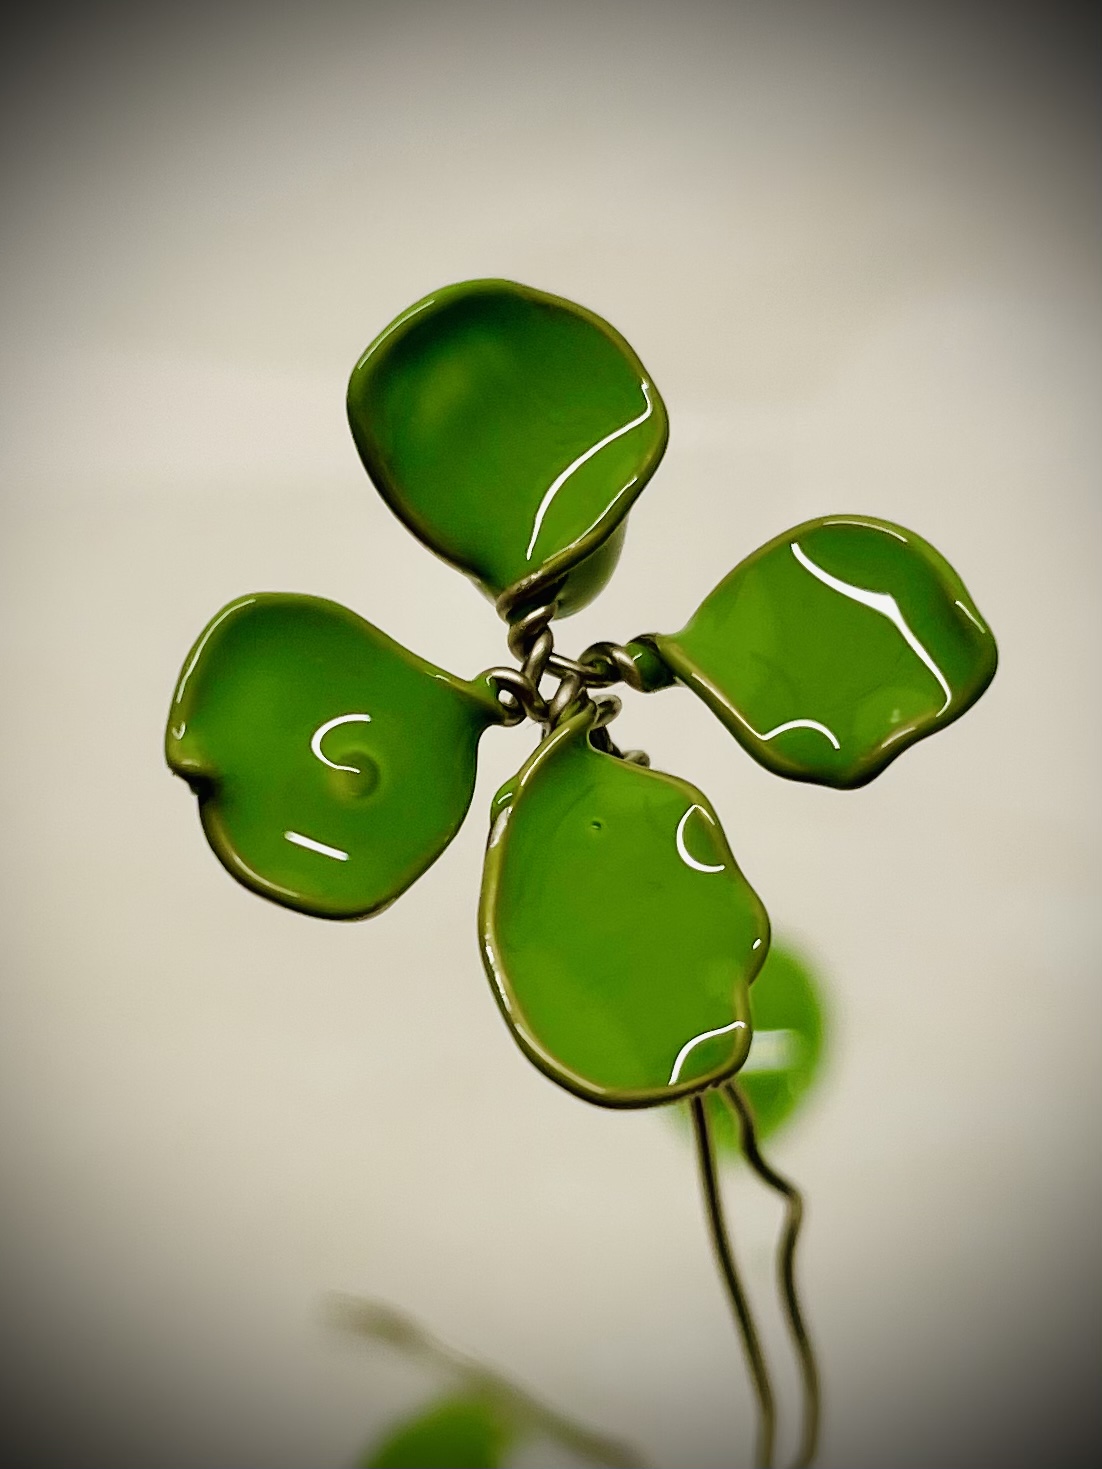
That's what your clover looks like.
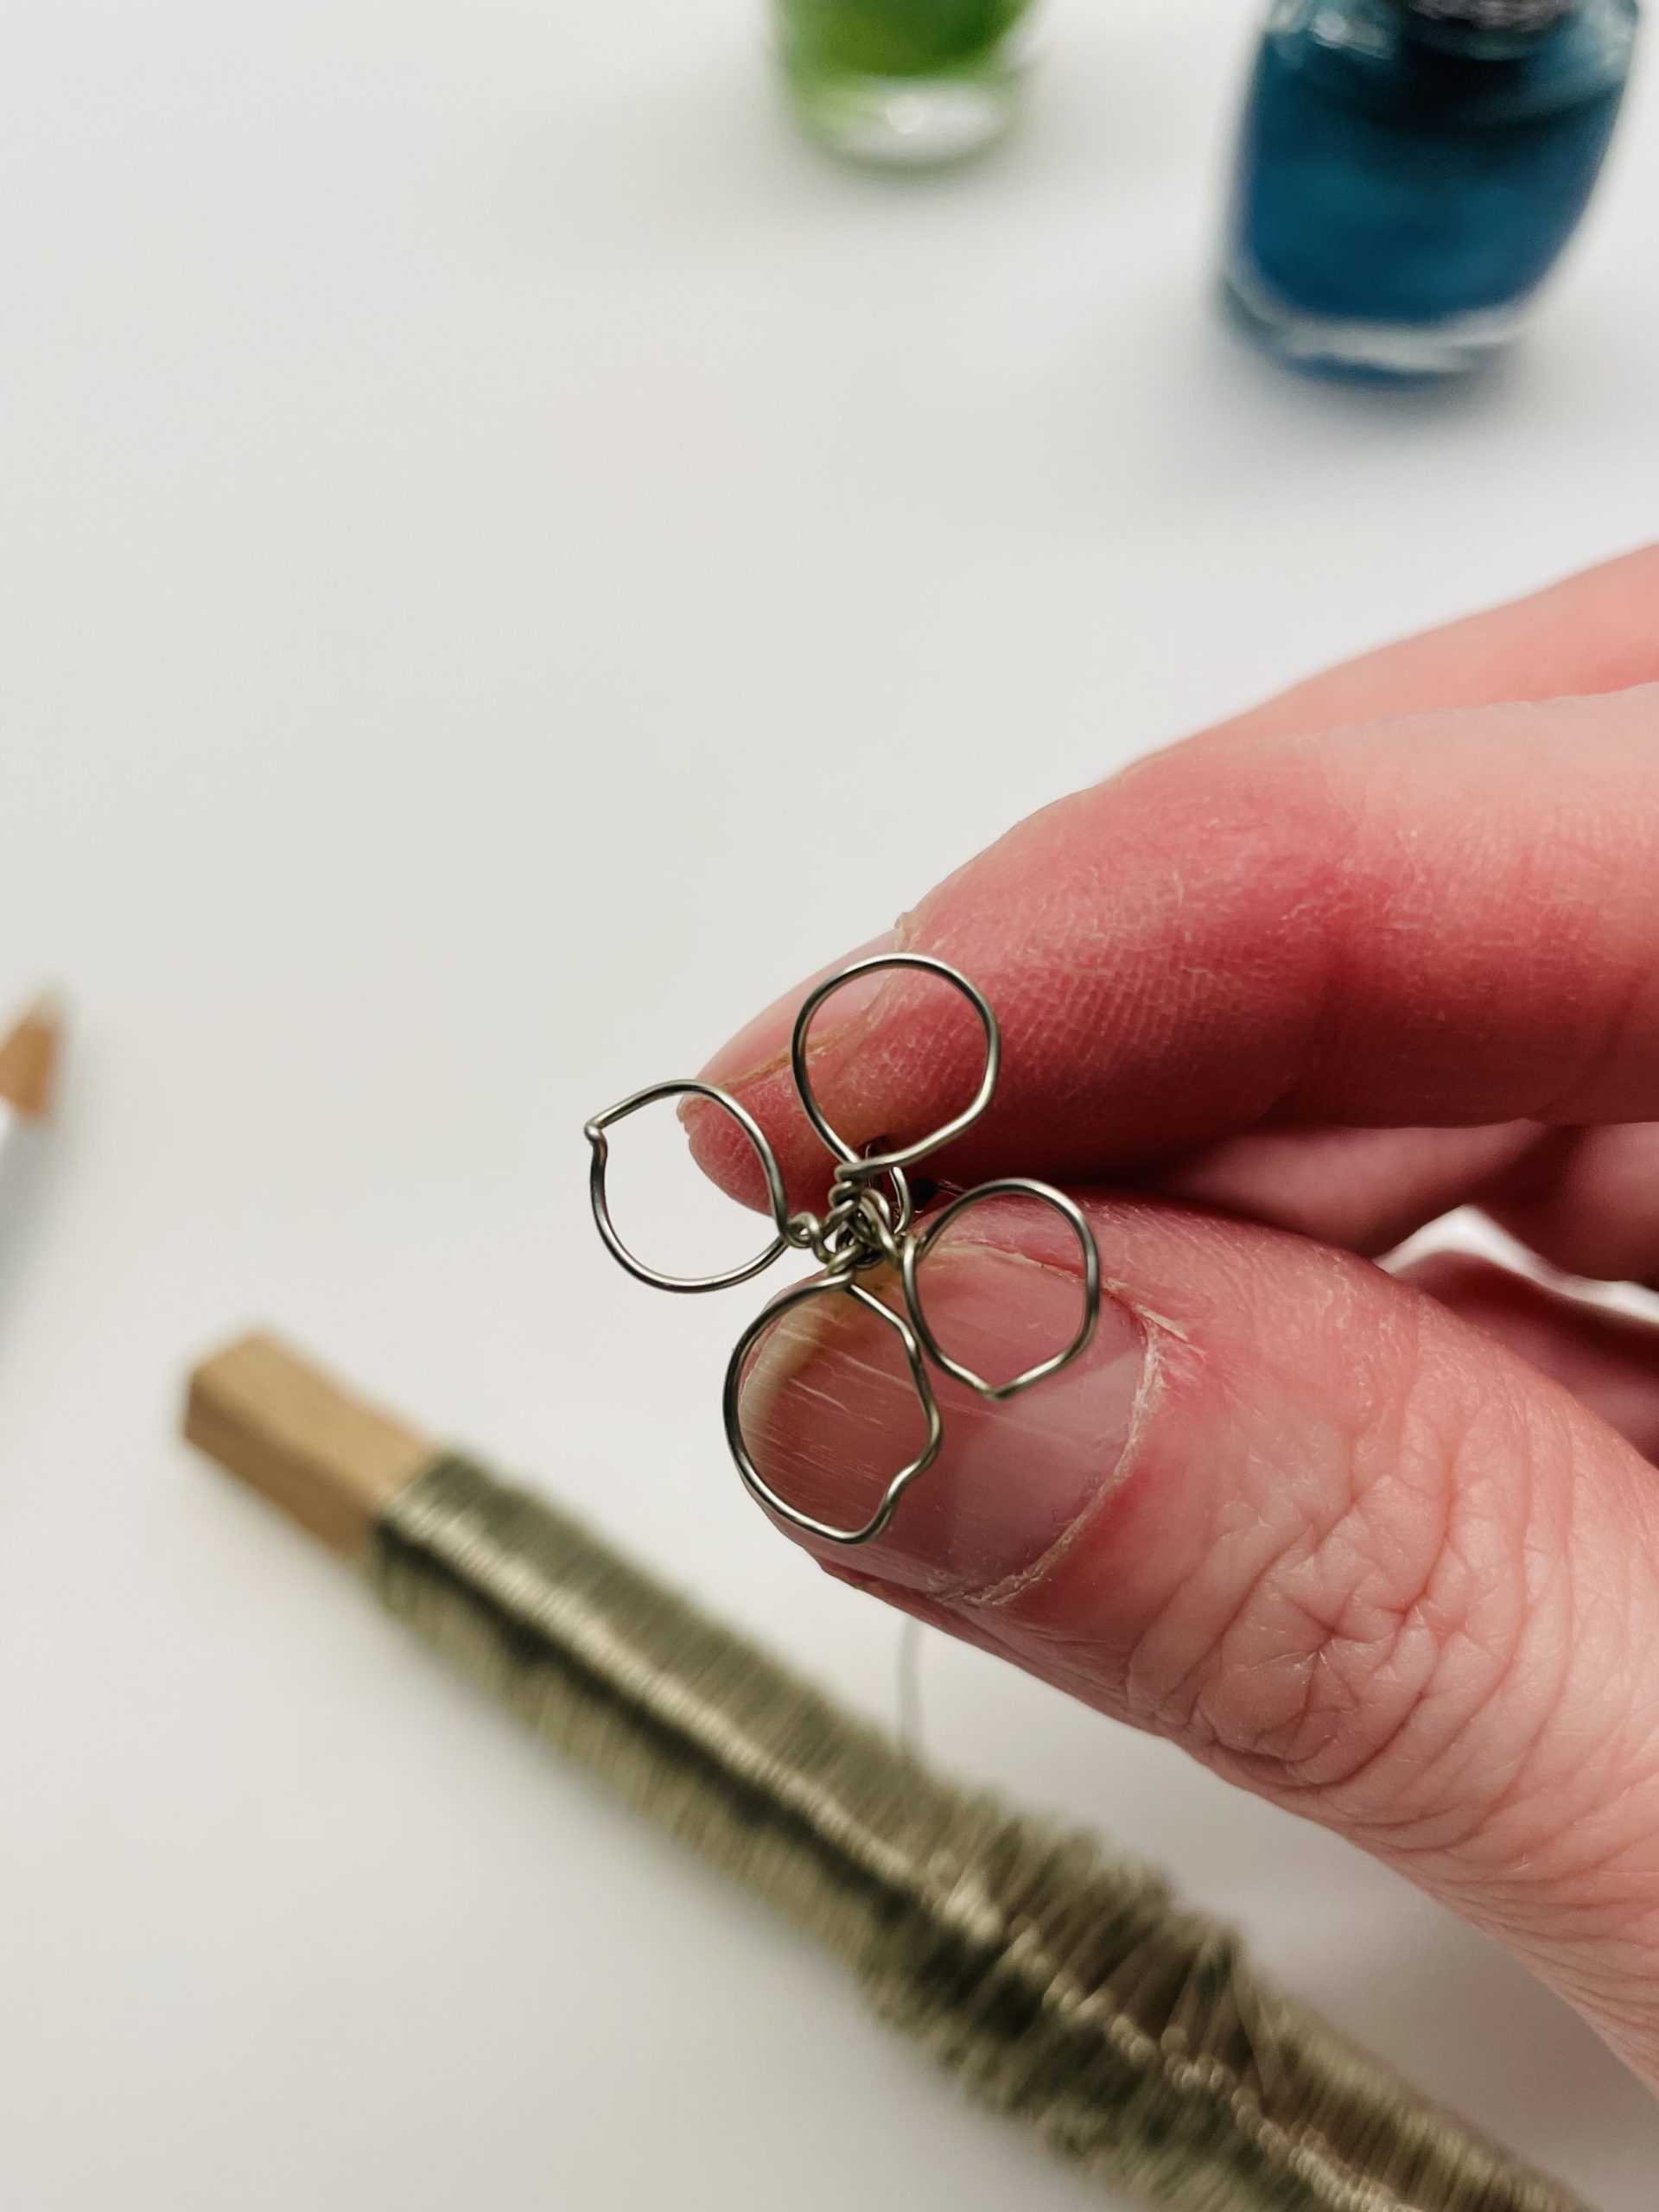
Presses the opposite leaves slightly flat with thumb and index finger.
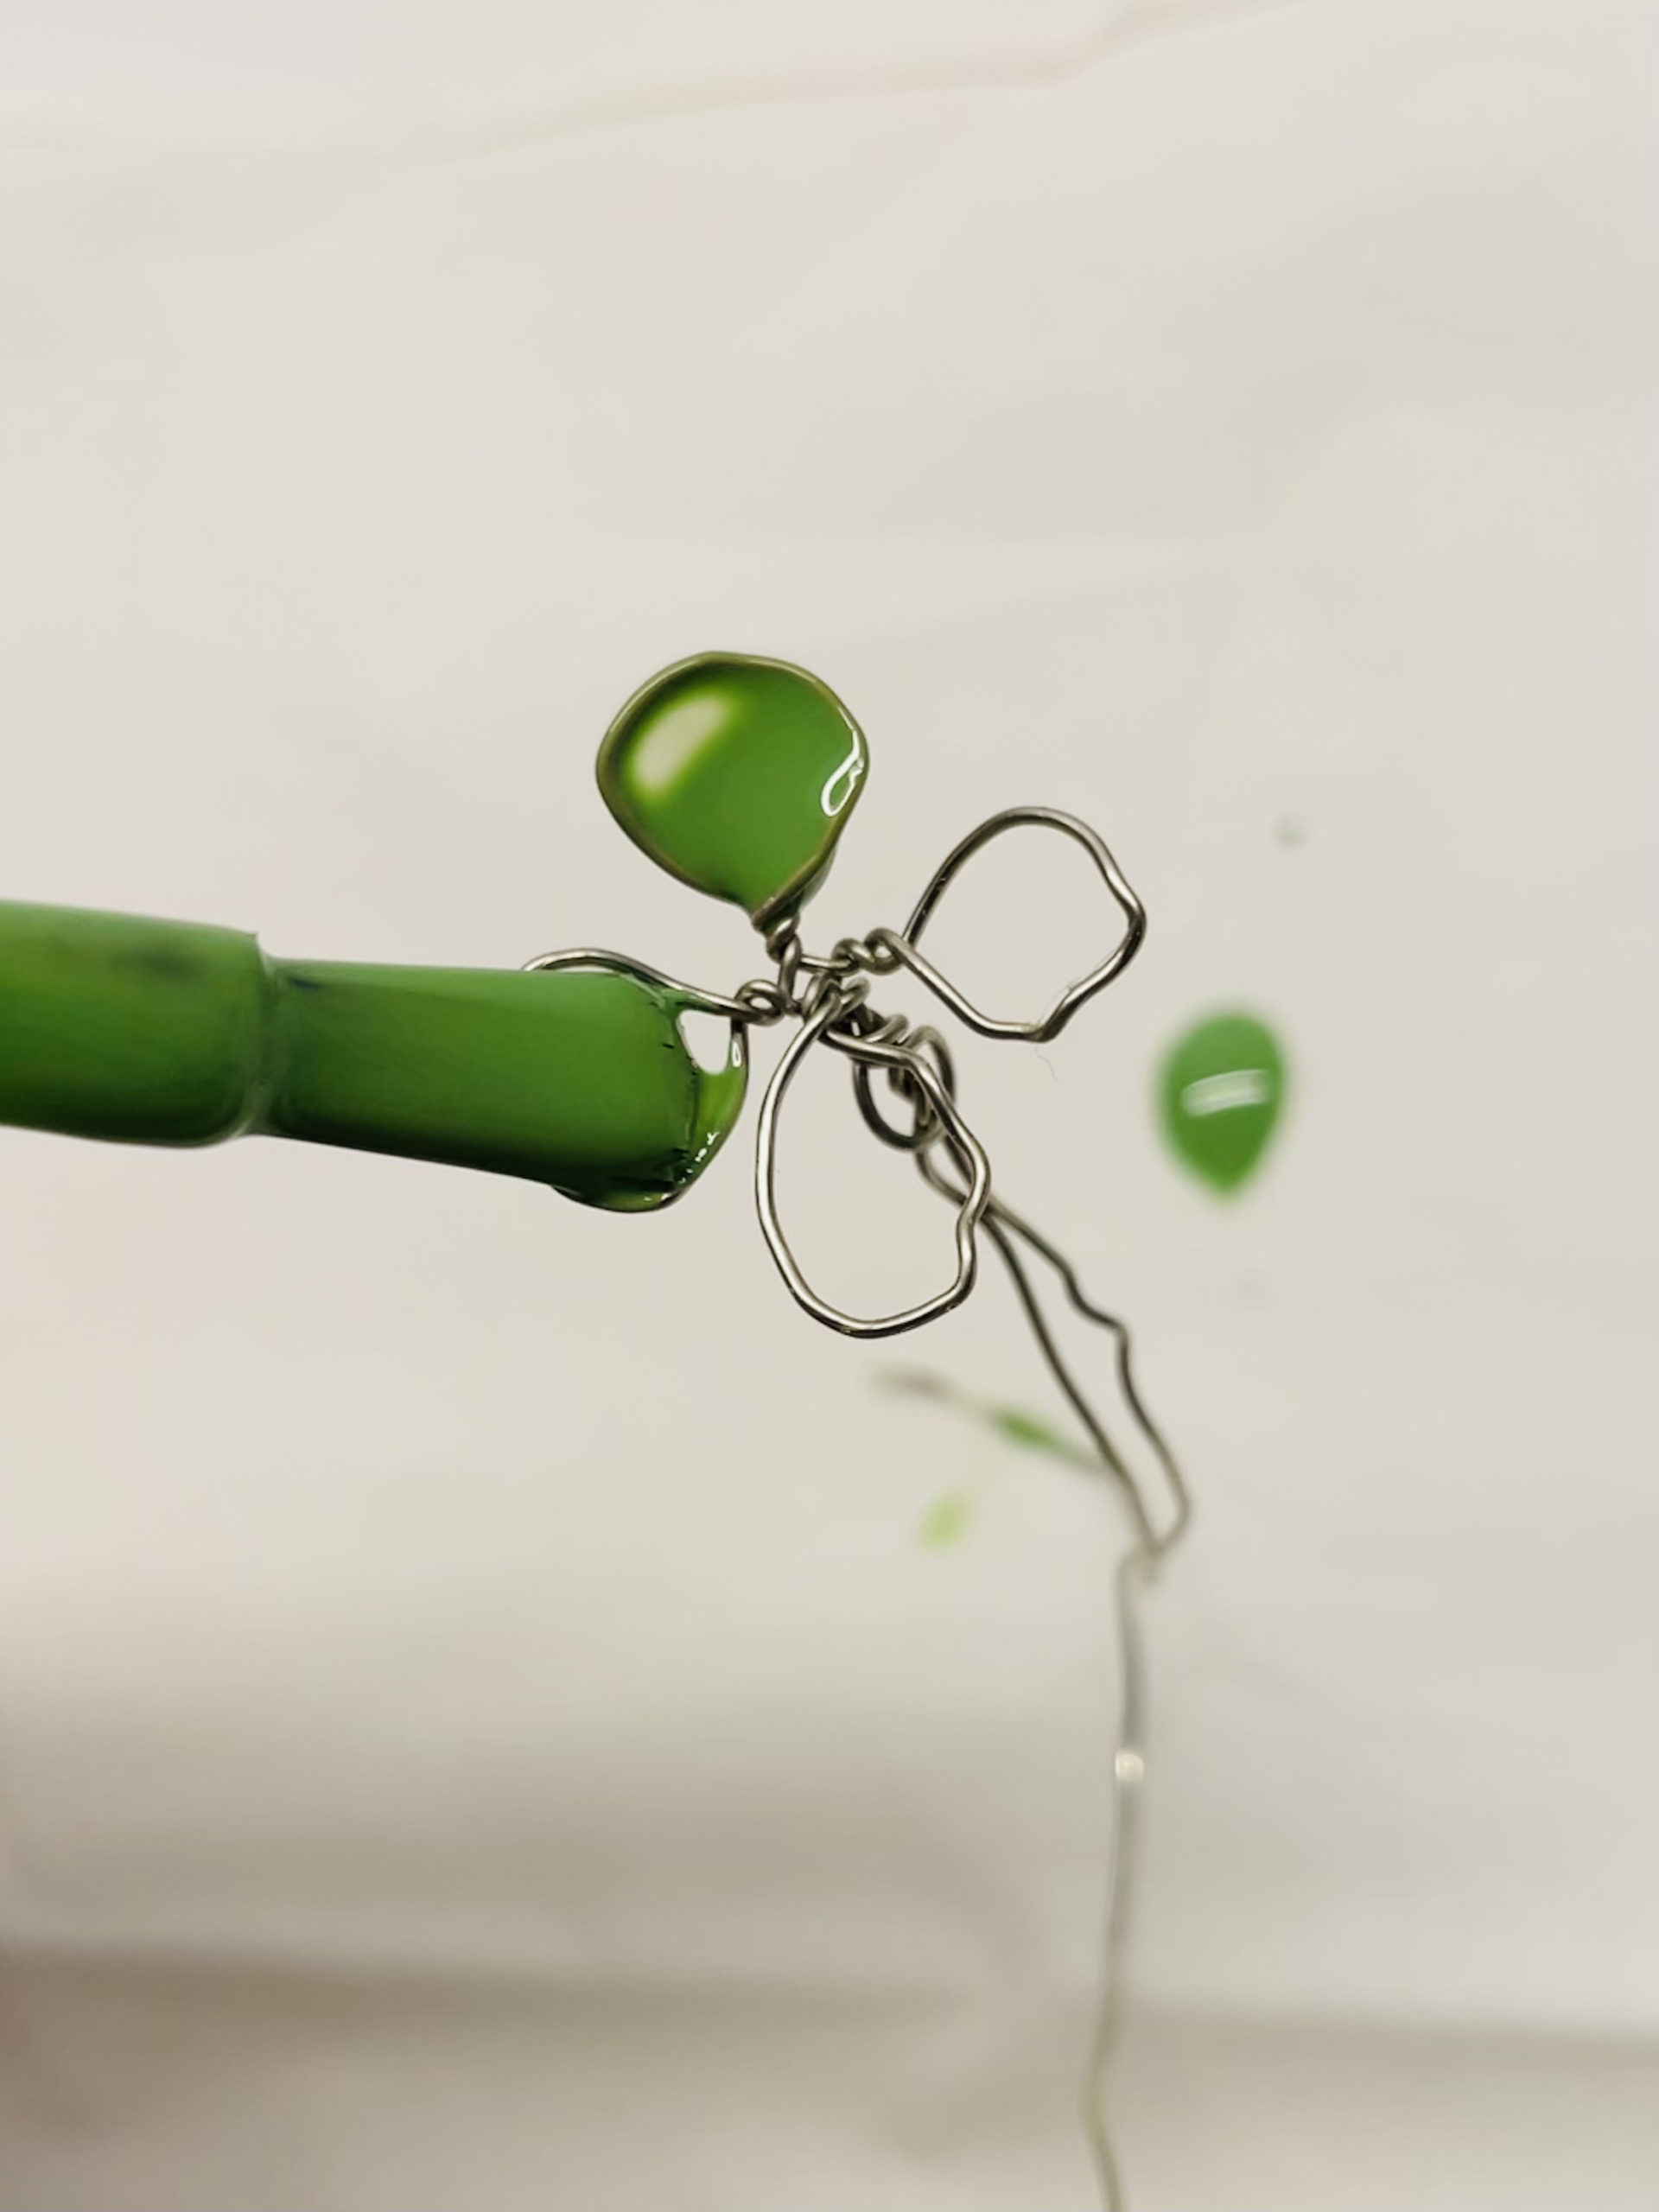
Now you need the nail polish. Prepare it and put a kitchen crepe or handkerchief under it.
She uses green nail polish for a clover leaf.
Dive the nail polish brush into the paint and carefully brush over the first sheet. You need a lot of paint on the brush. Then you gently brush over a sheet. Have some patience, it often only works after several attempts until the nail polish stretches from one side to the next and lays over the wire like a thin film.

Make this leaf by leaf. If it doesn't work, something stays on the wire loop with a full brush and then slowly pulls the brush over the loop.
Tip: Thicker paint works easier, whereas thinner paint more drips.
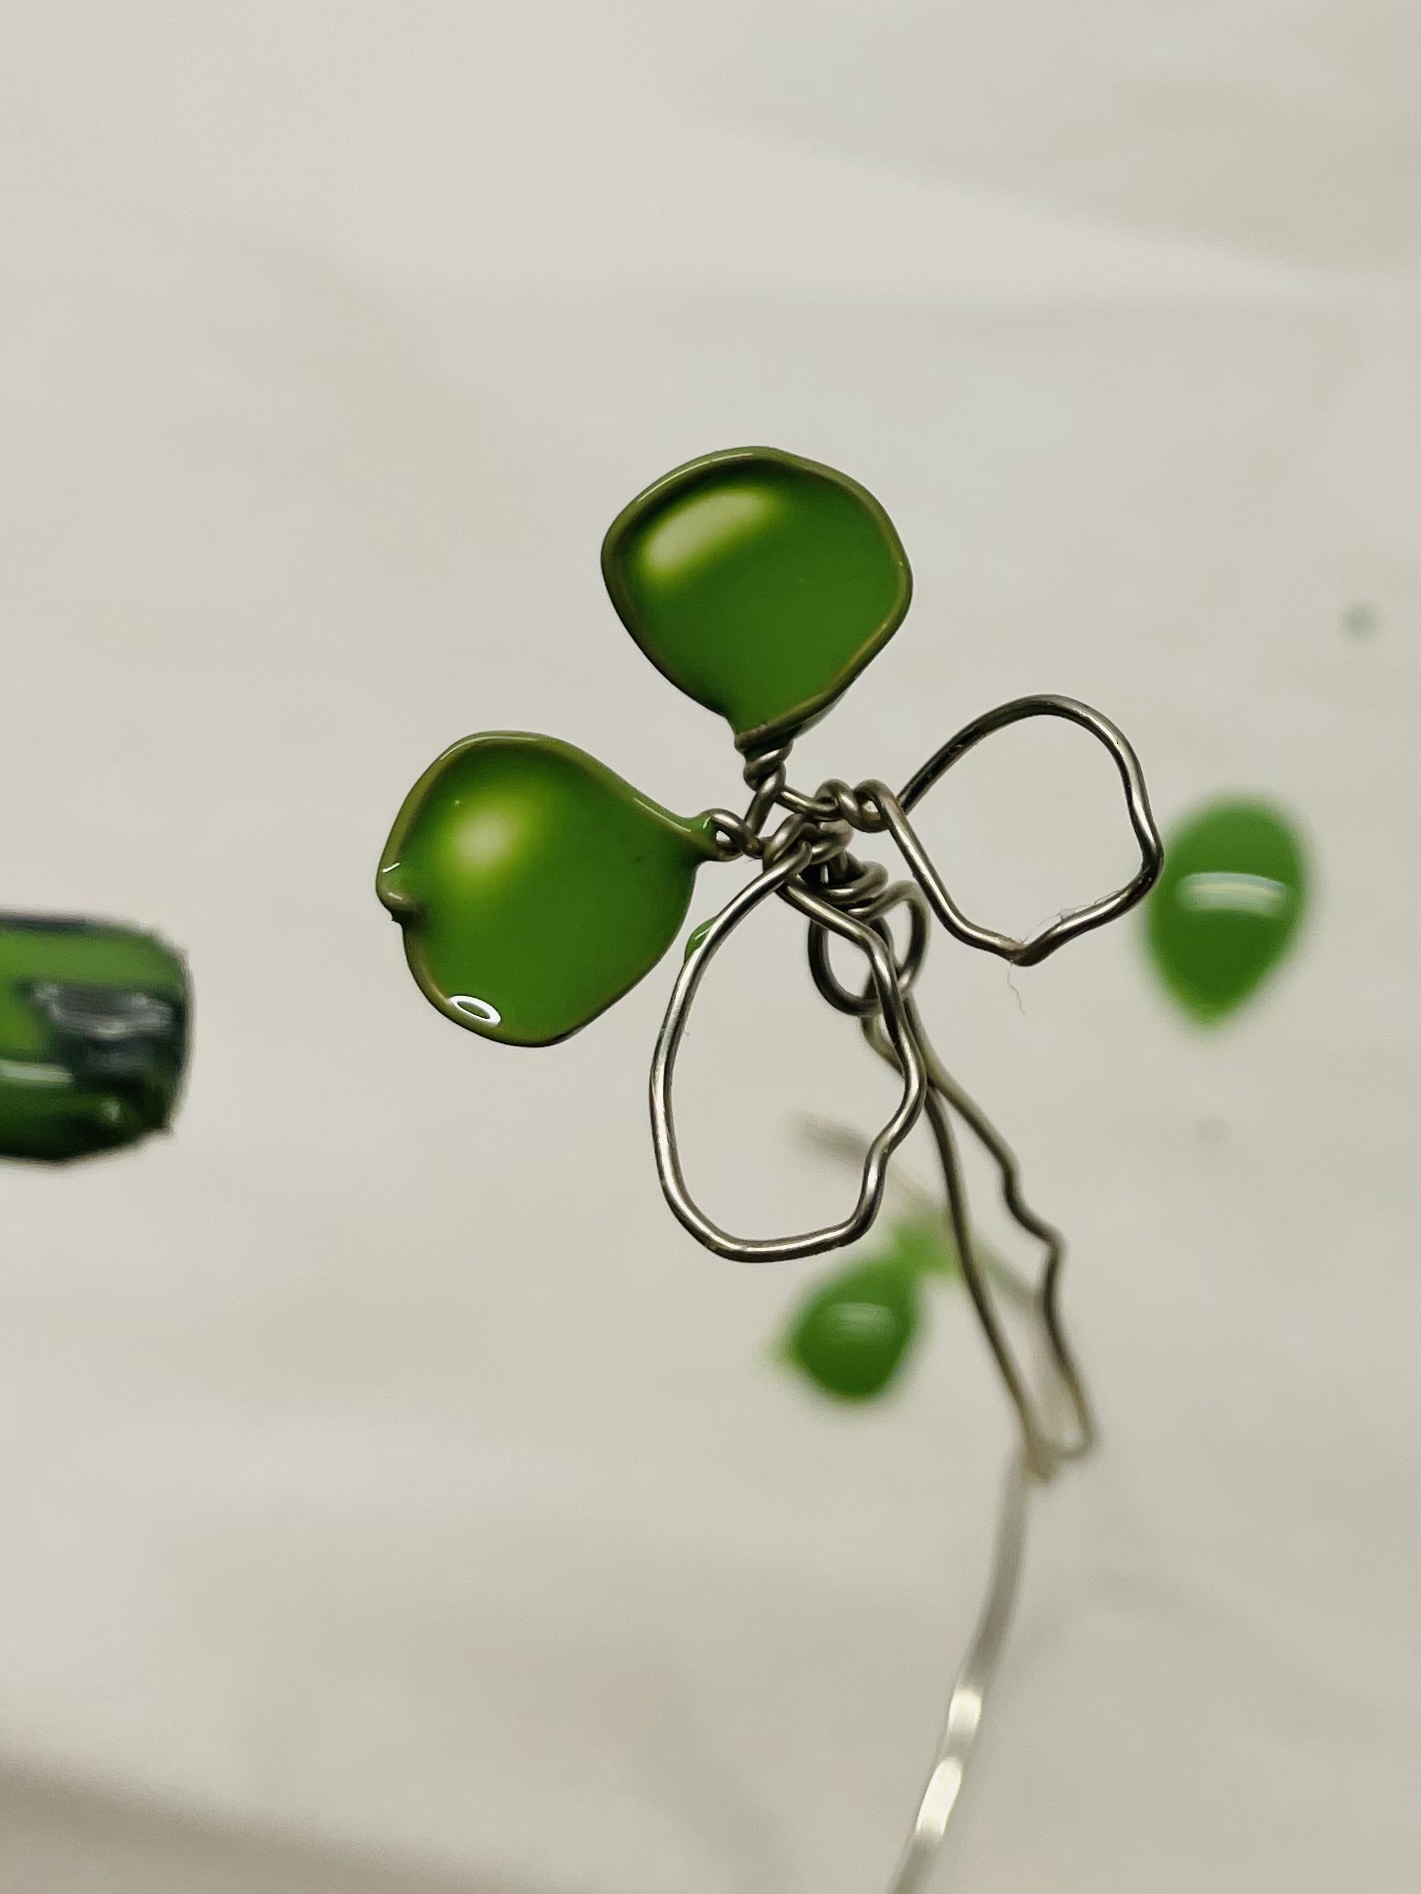
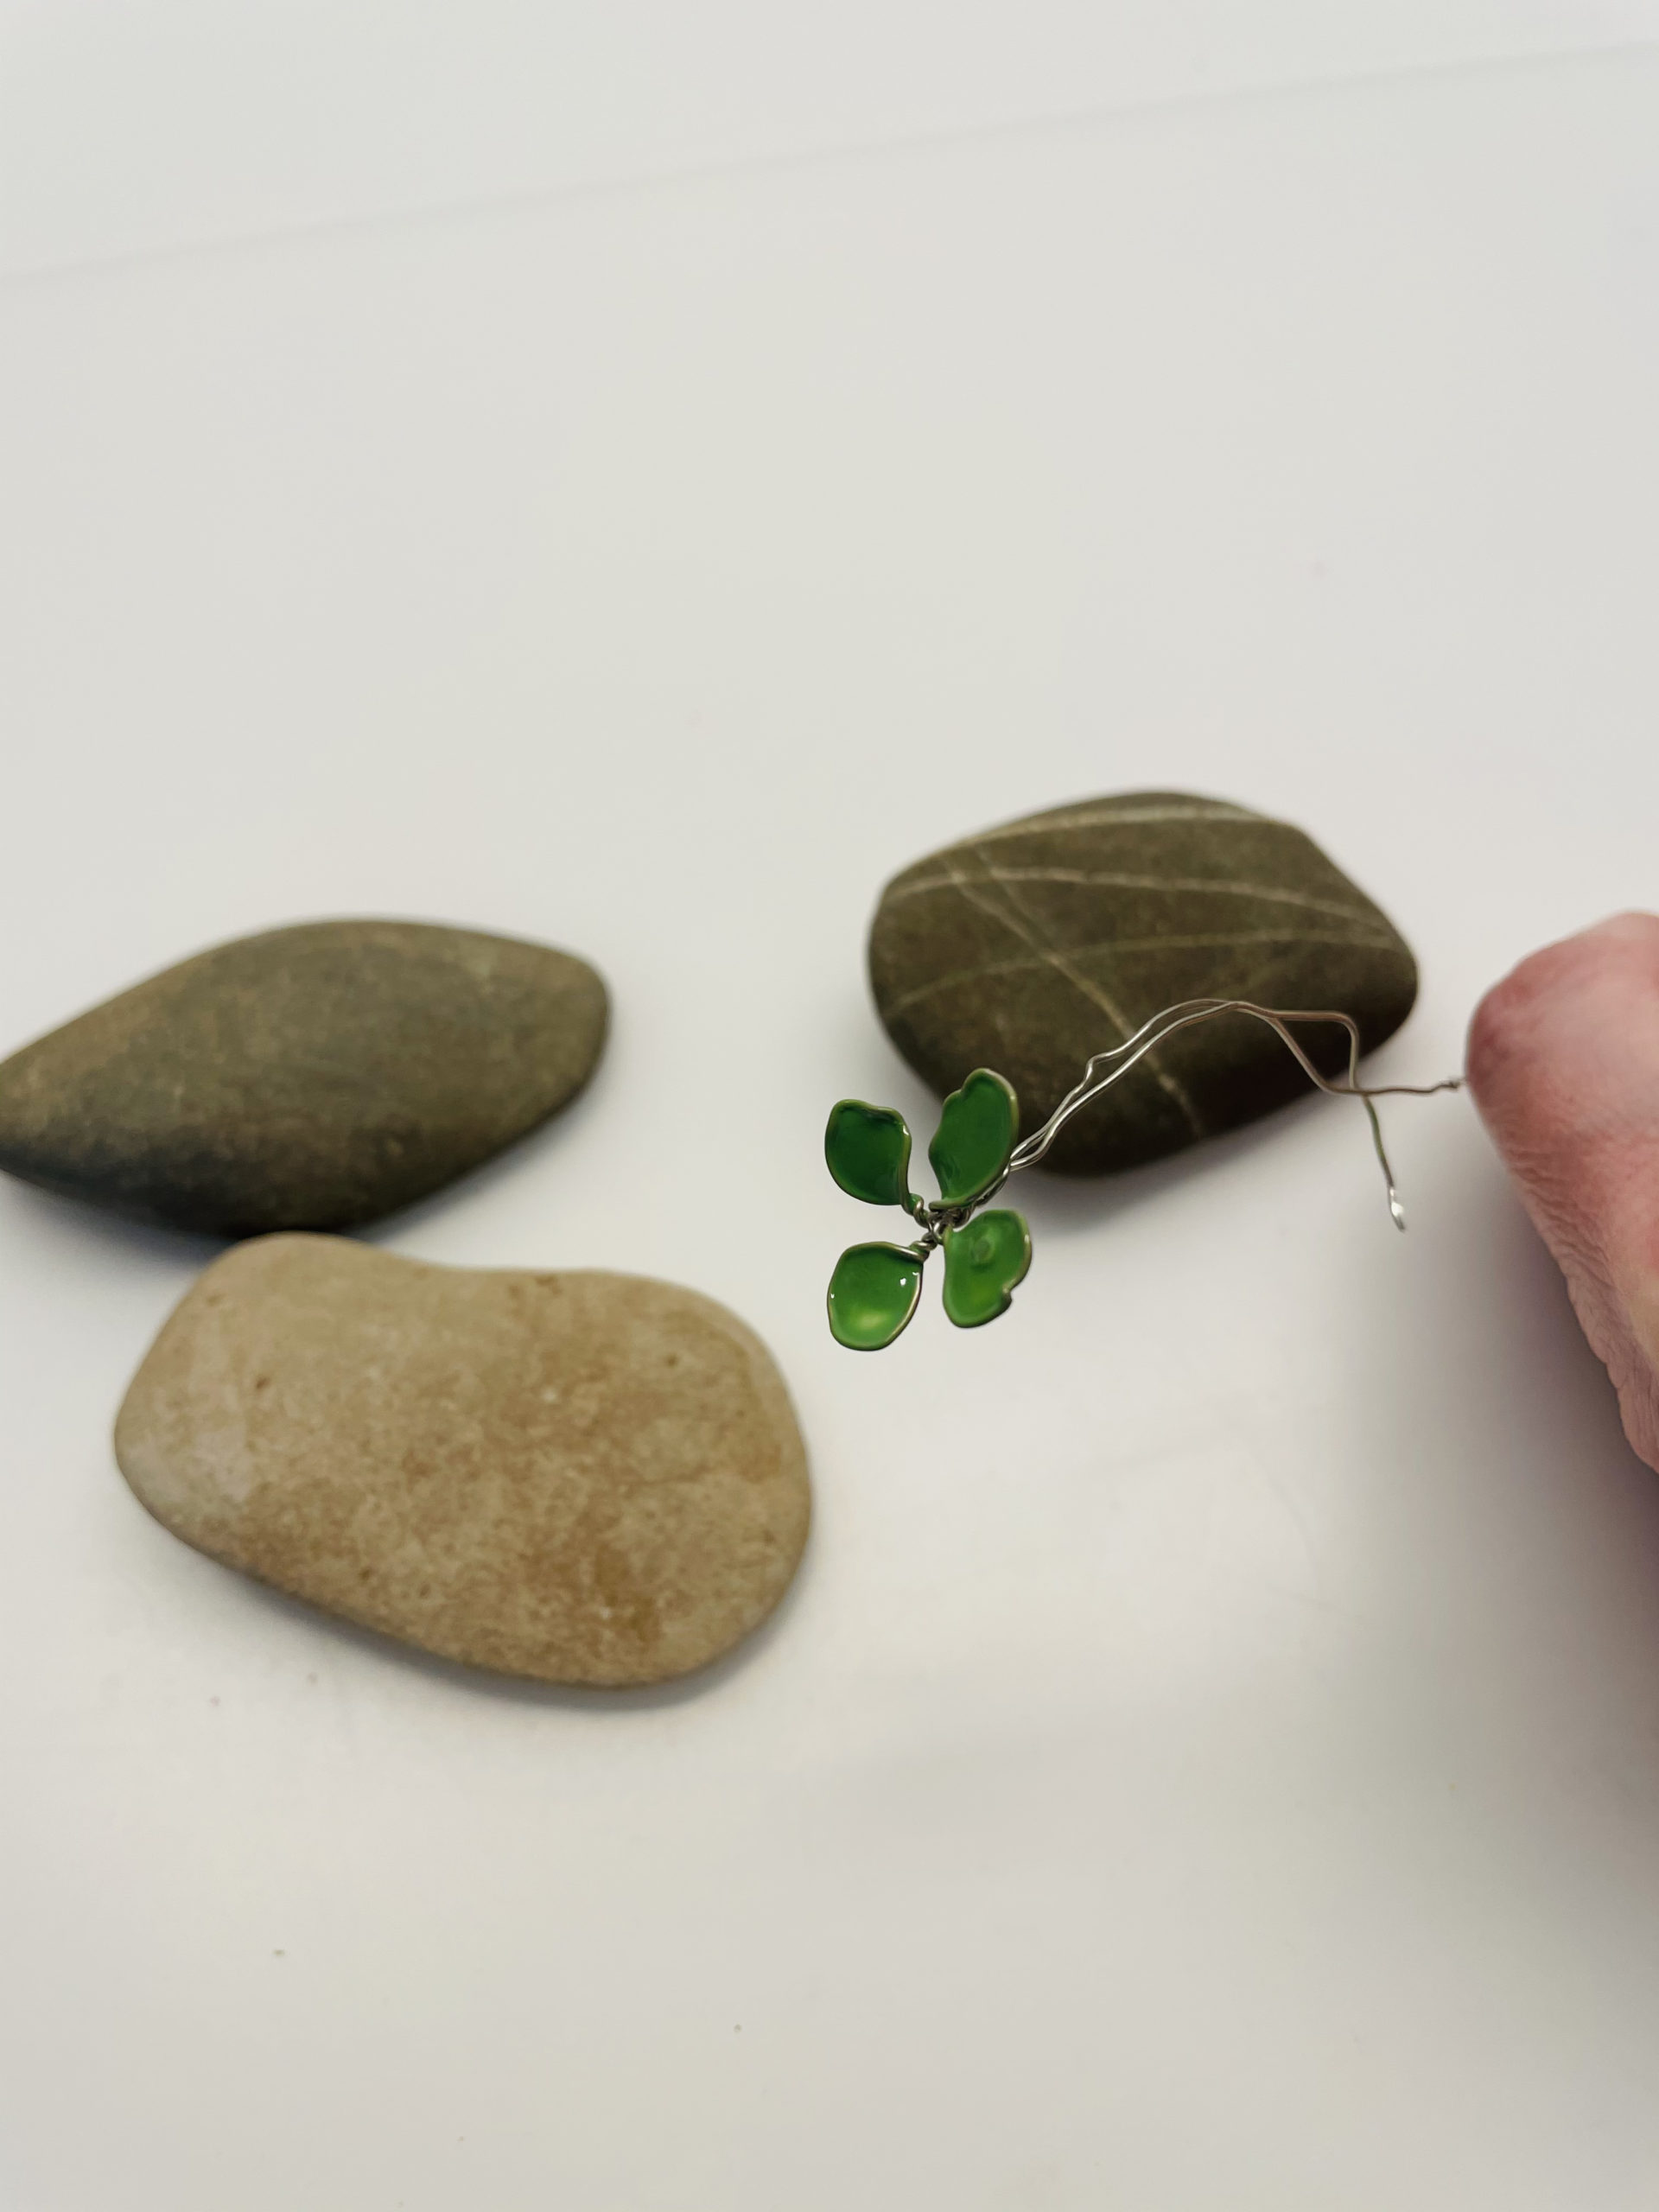
Now all four leaves are ready and need to dry.
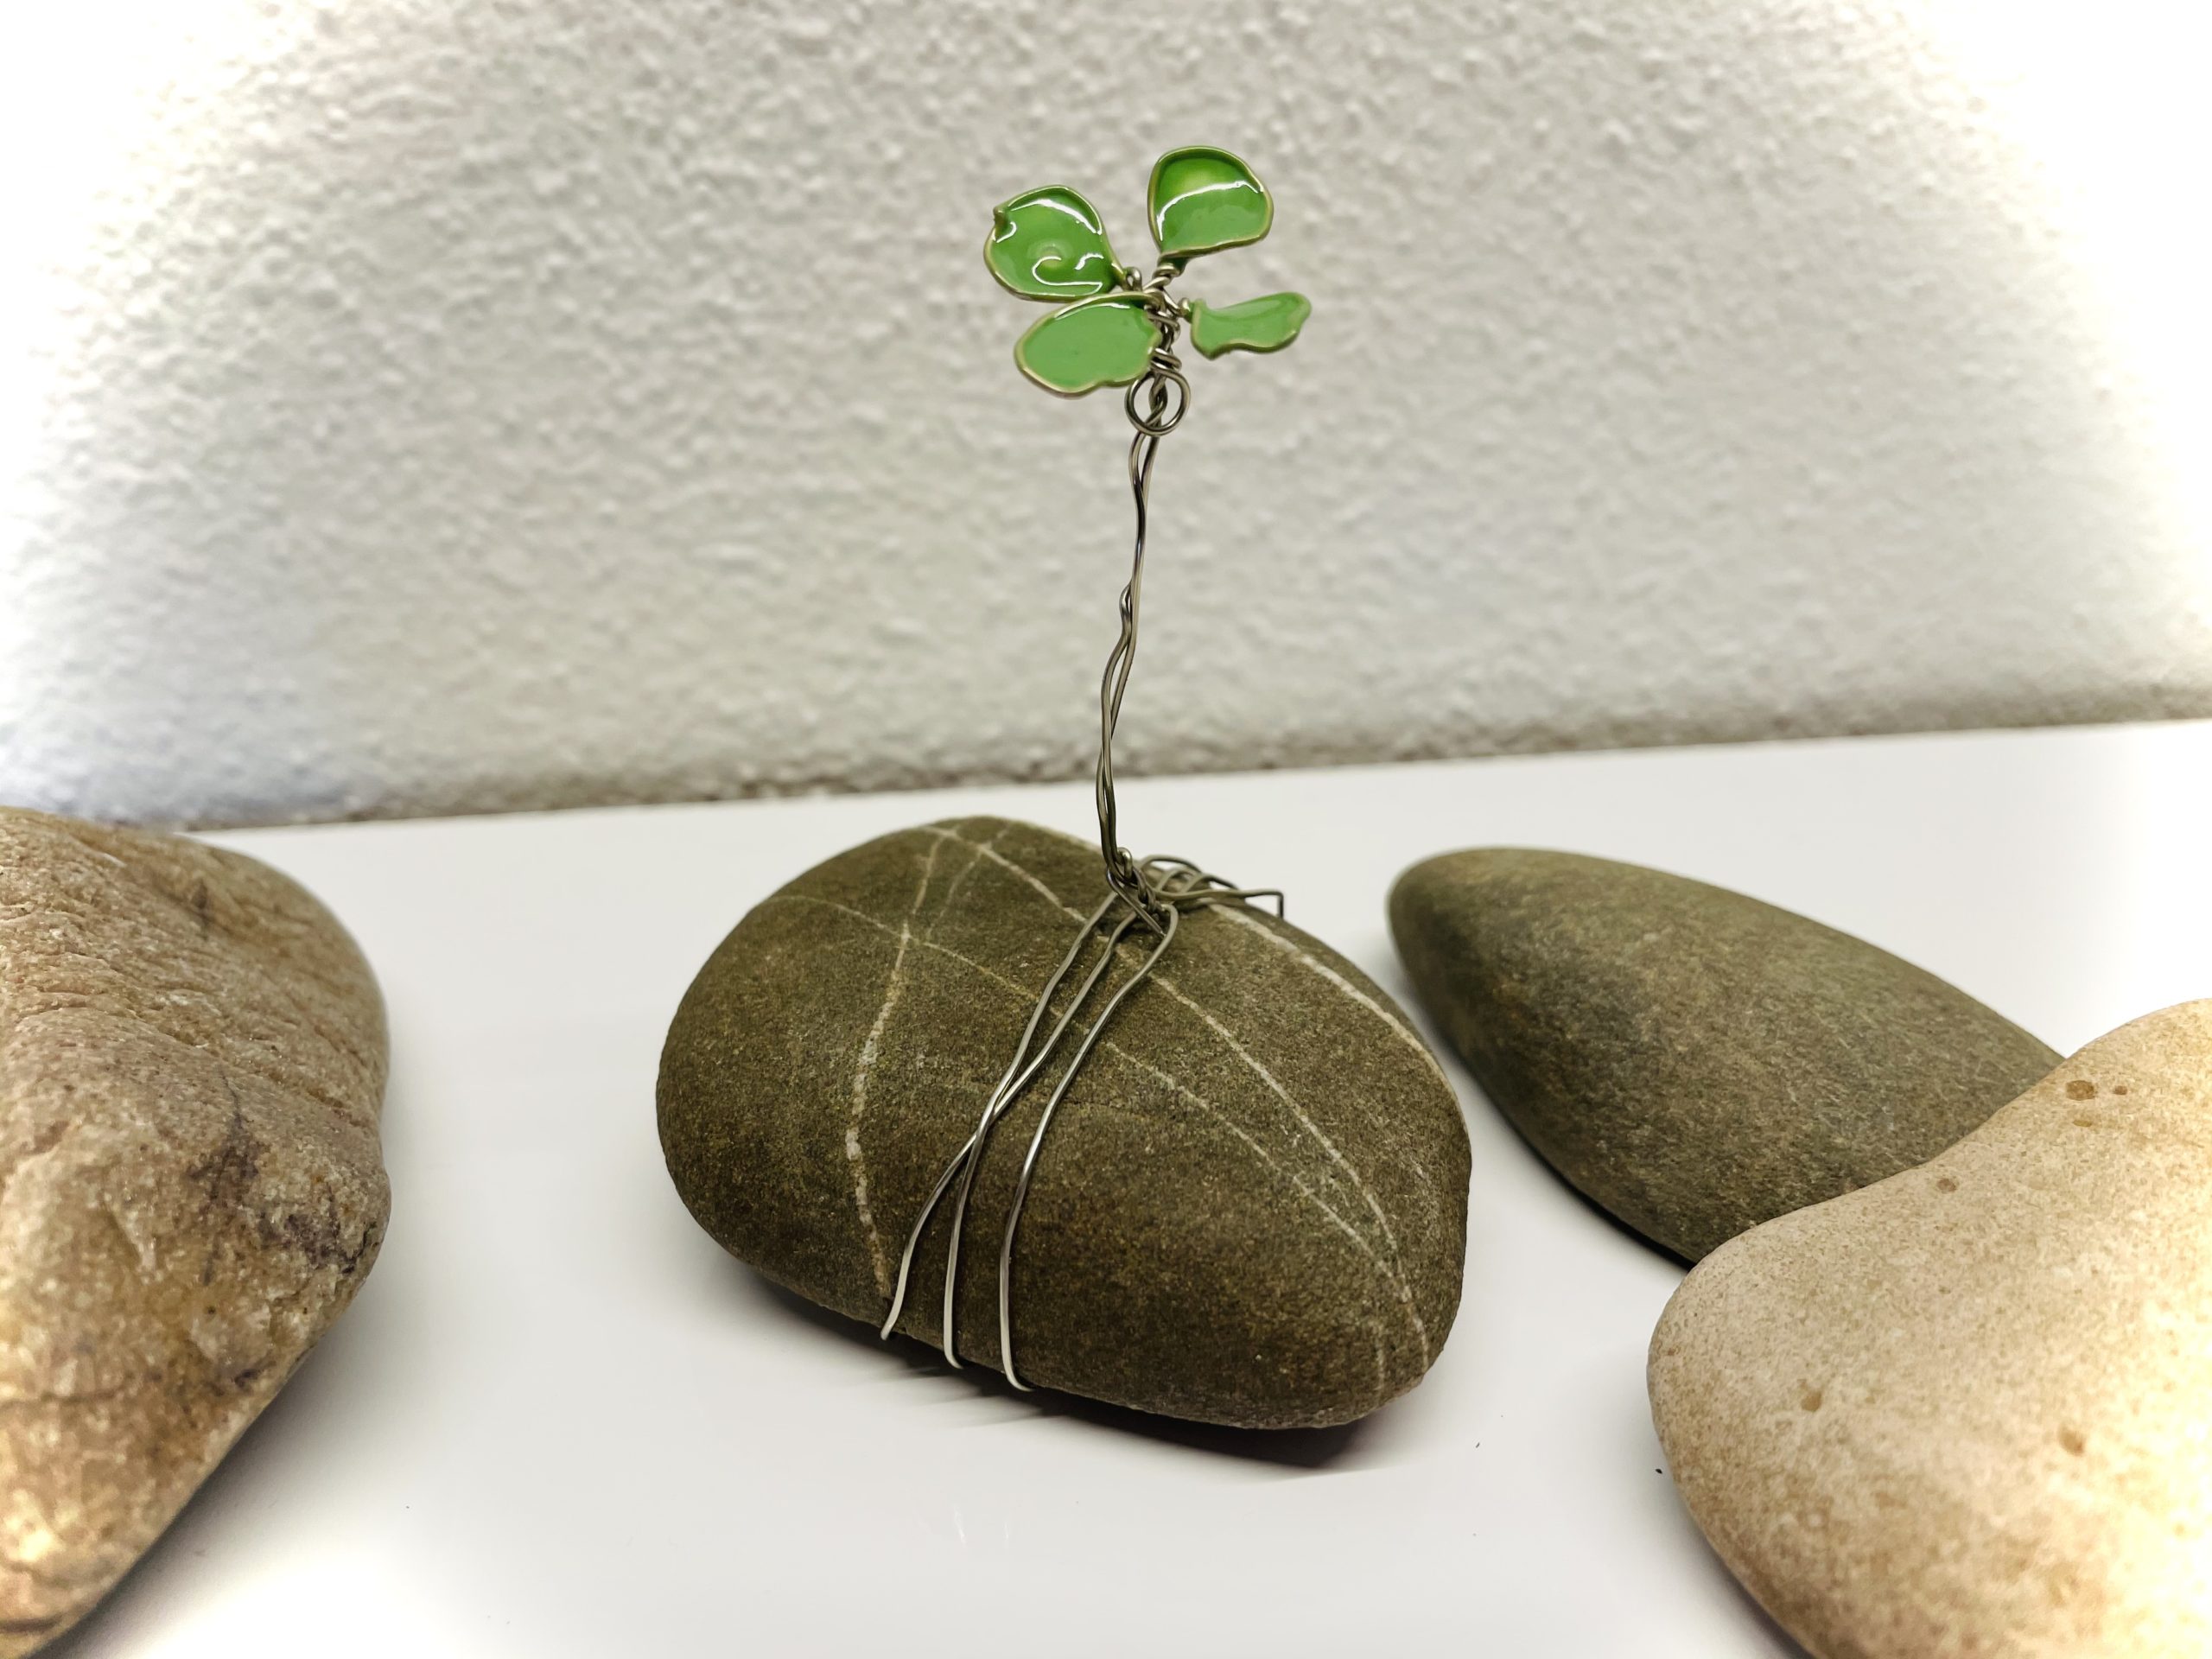
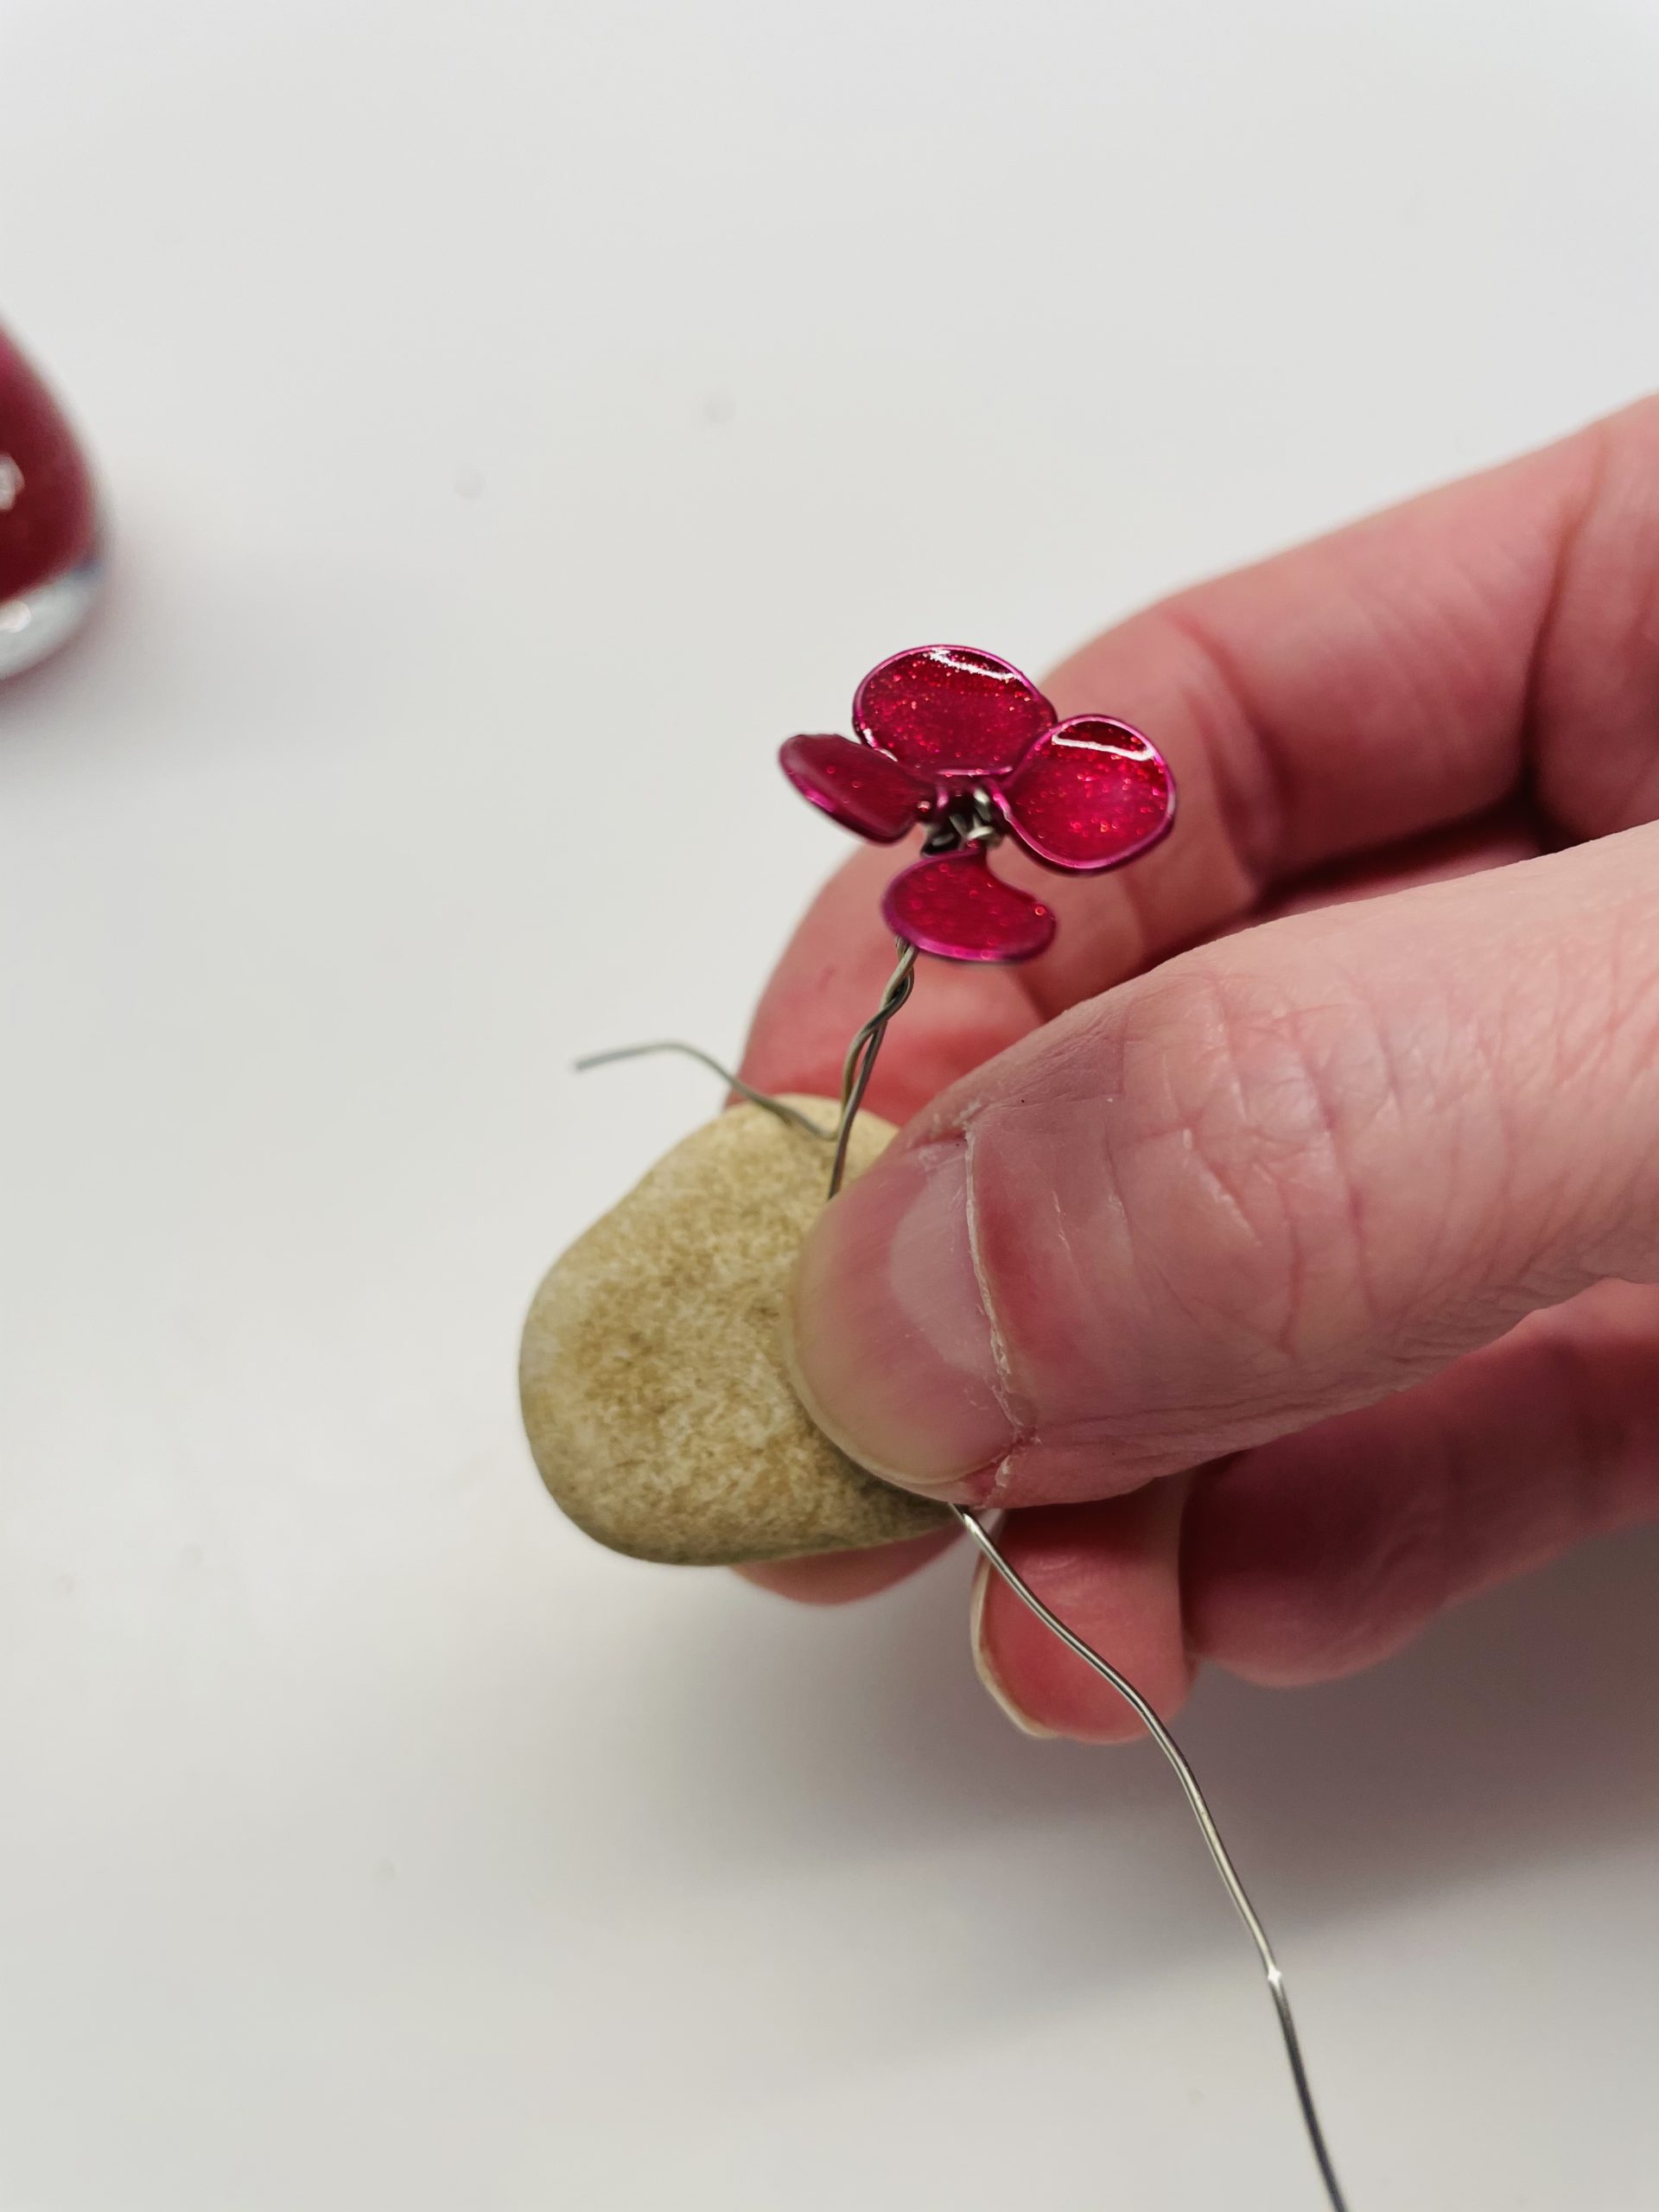
Choose a stone to attach the clover leaf.
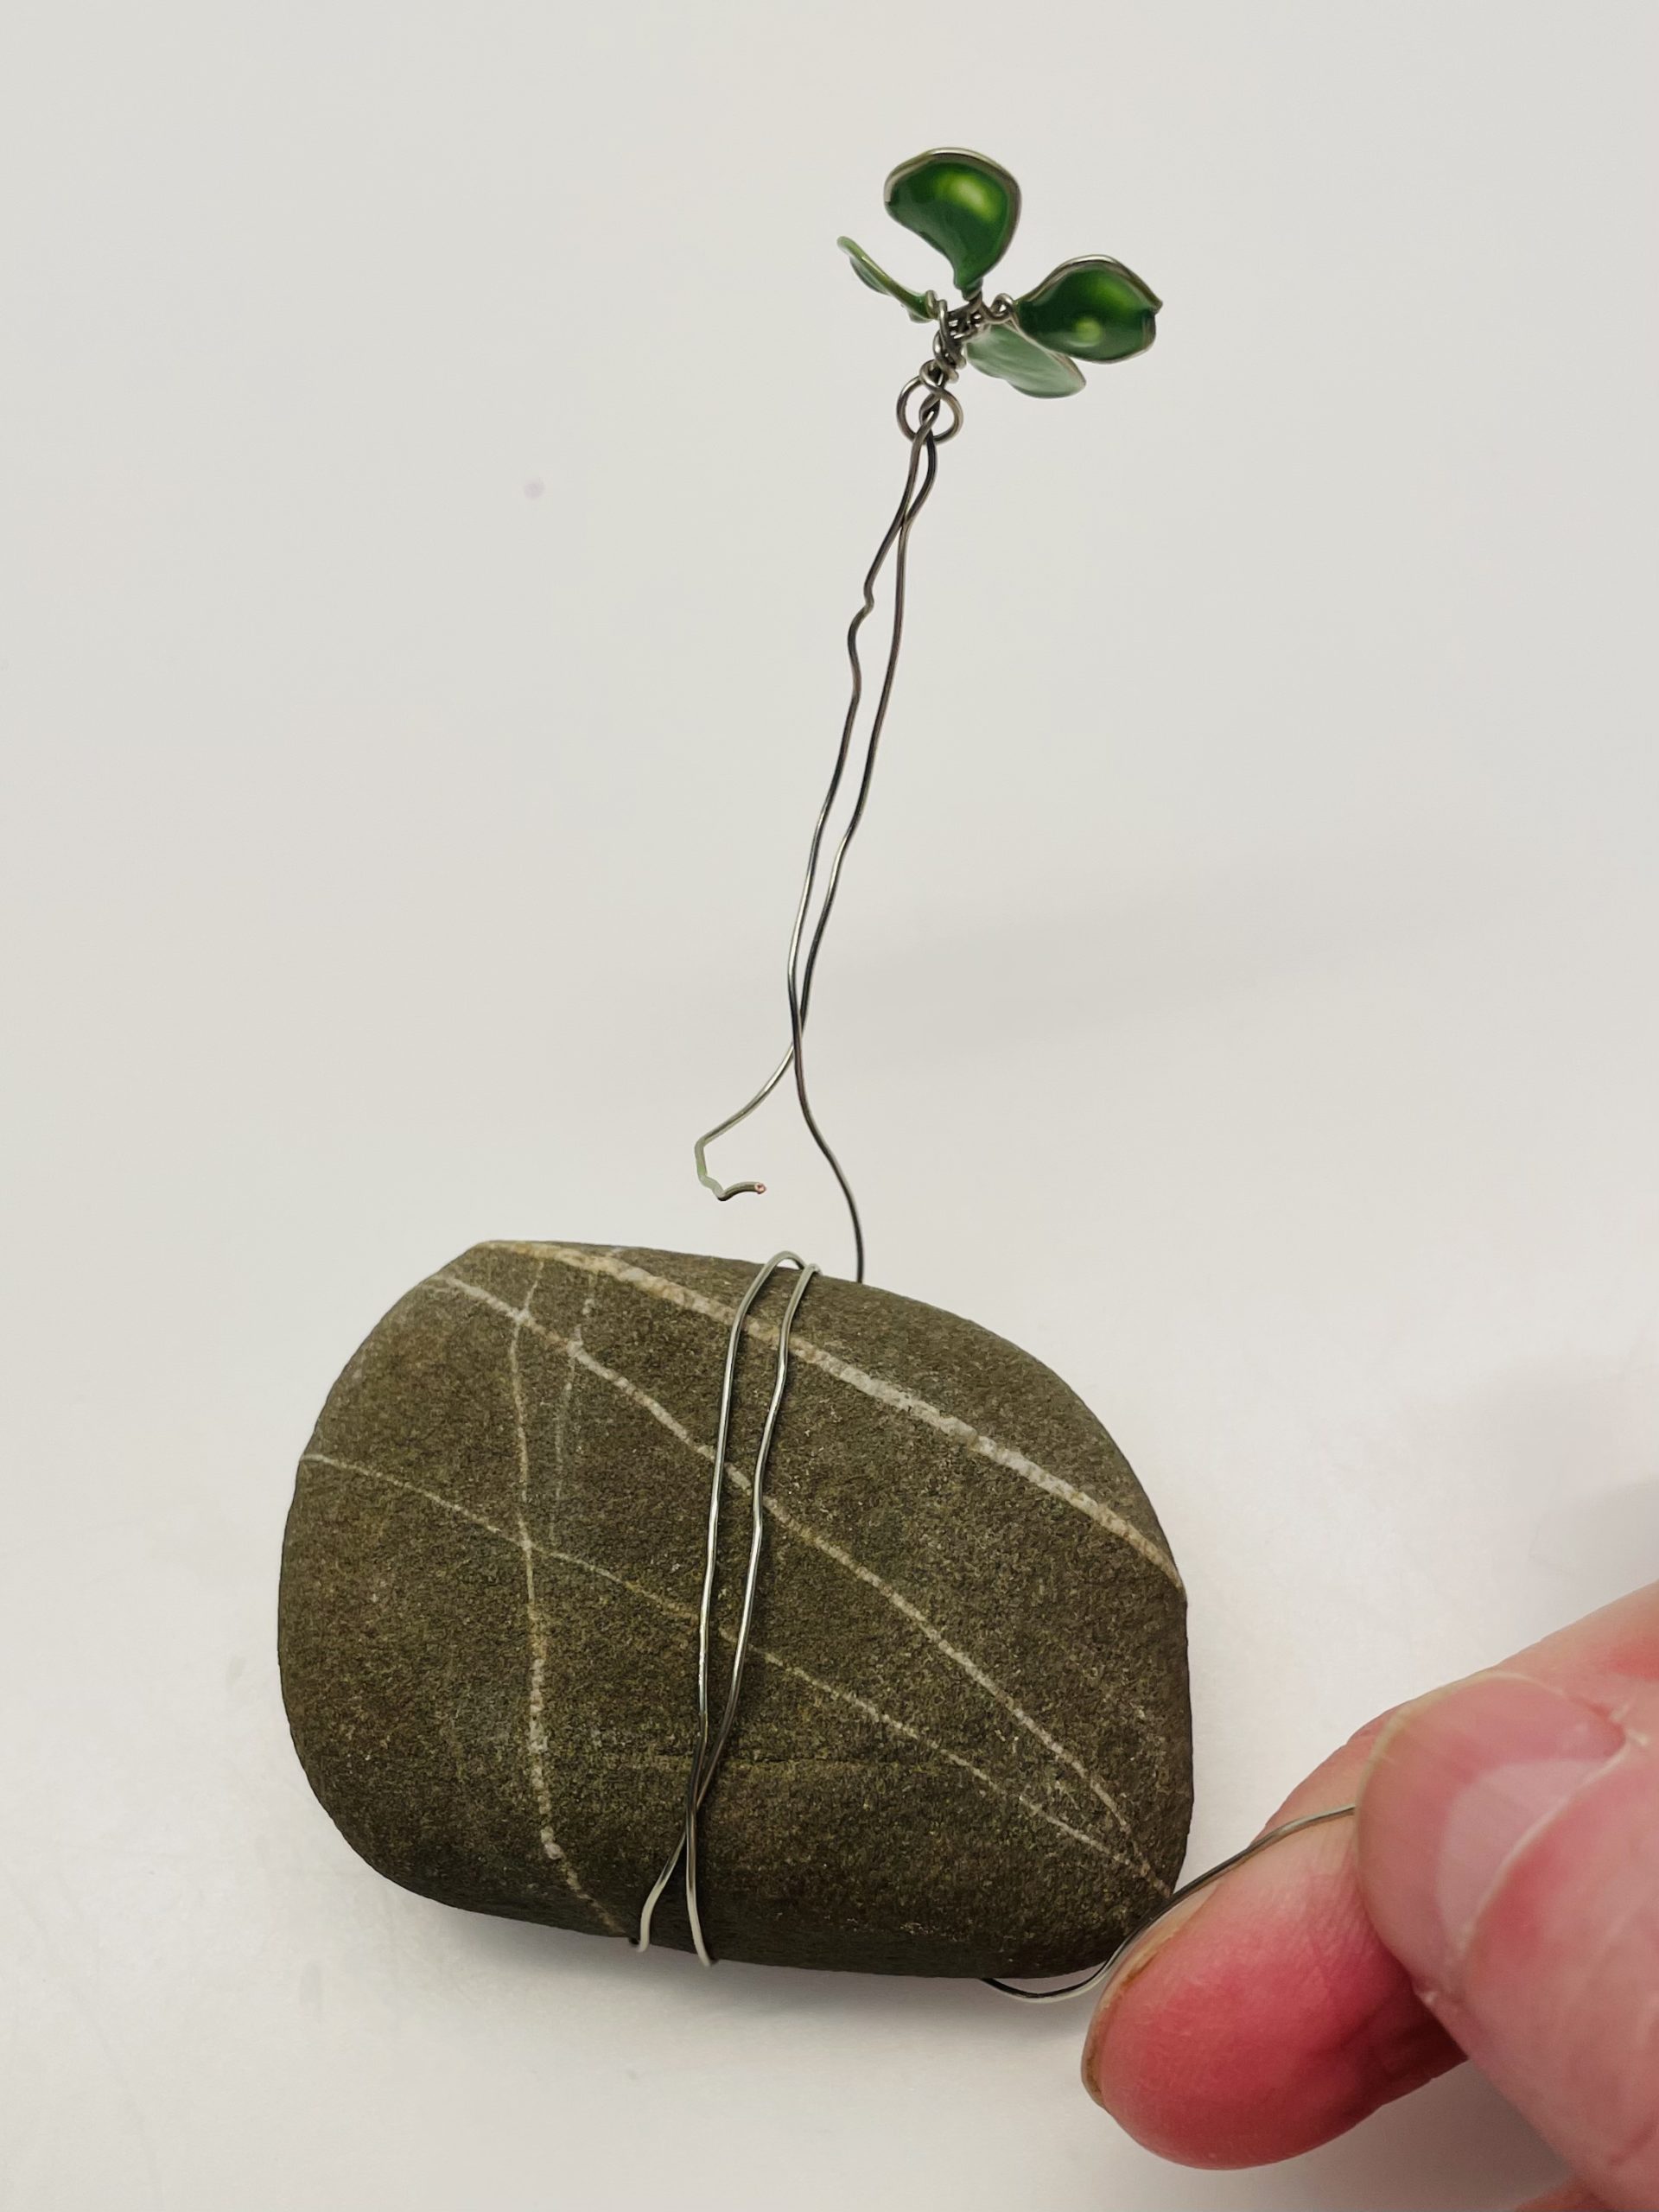
Wrap the wire several times around the stone until the clover is placed in the middle of the stone.
Set up the clover.
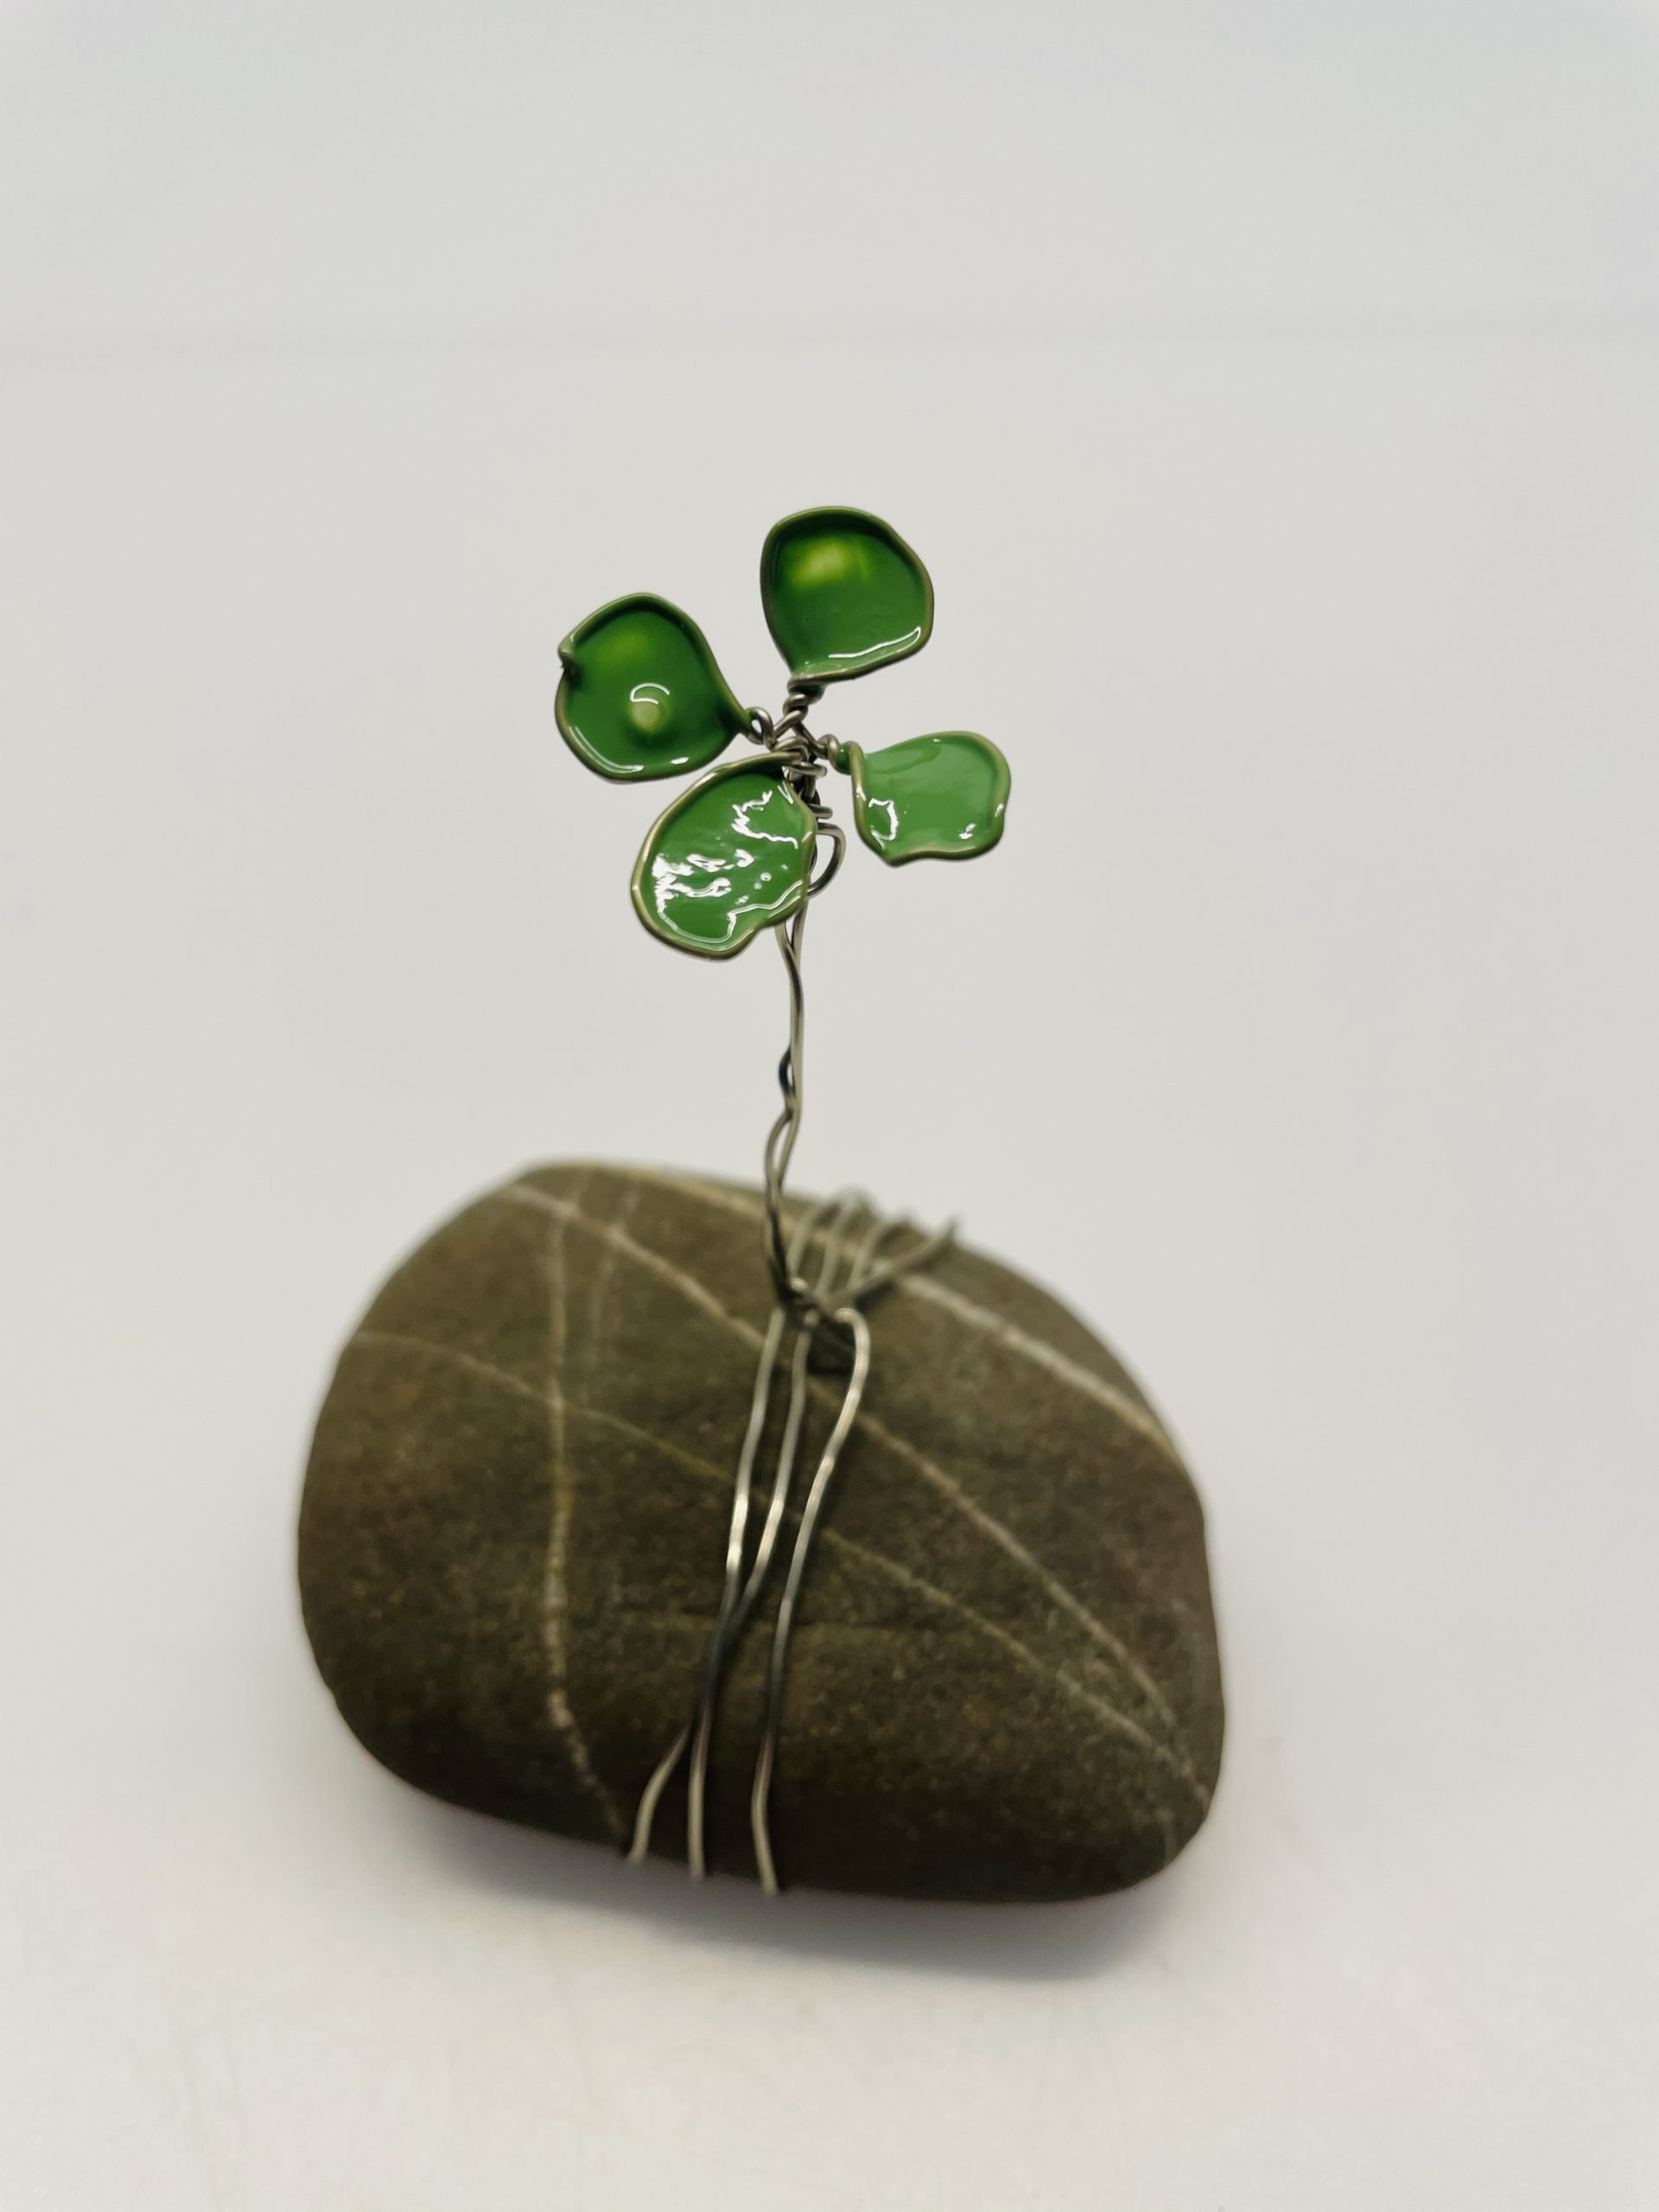
So you get a magical little gift or a decoration for the table.
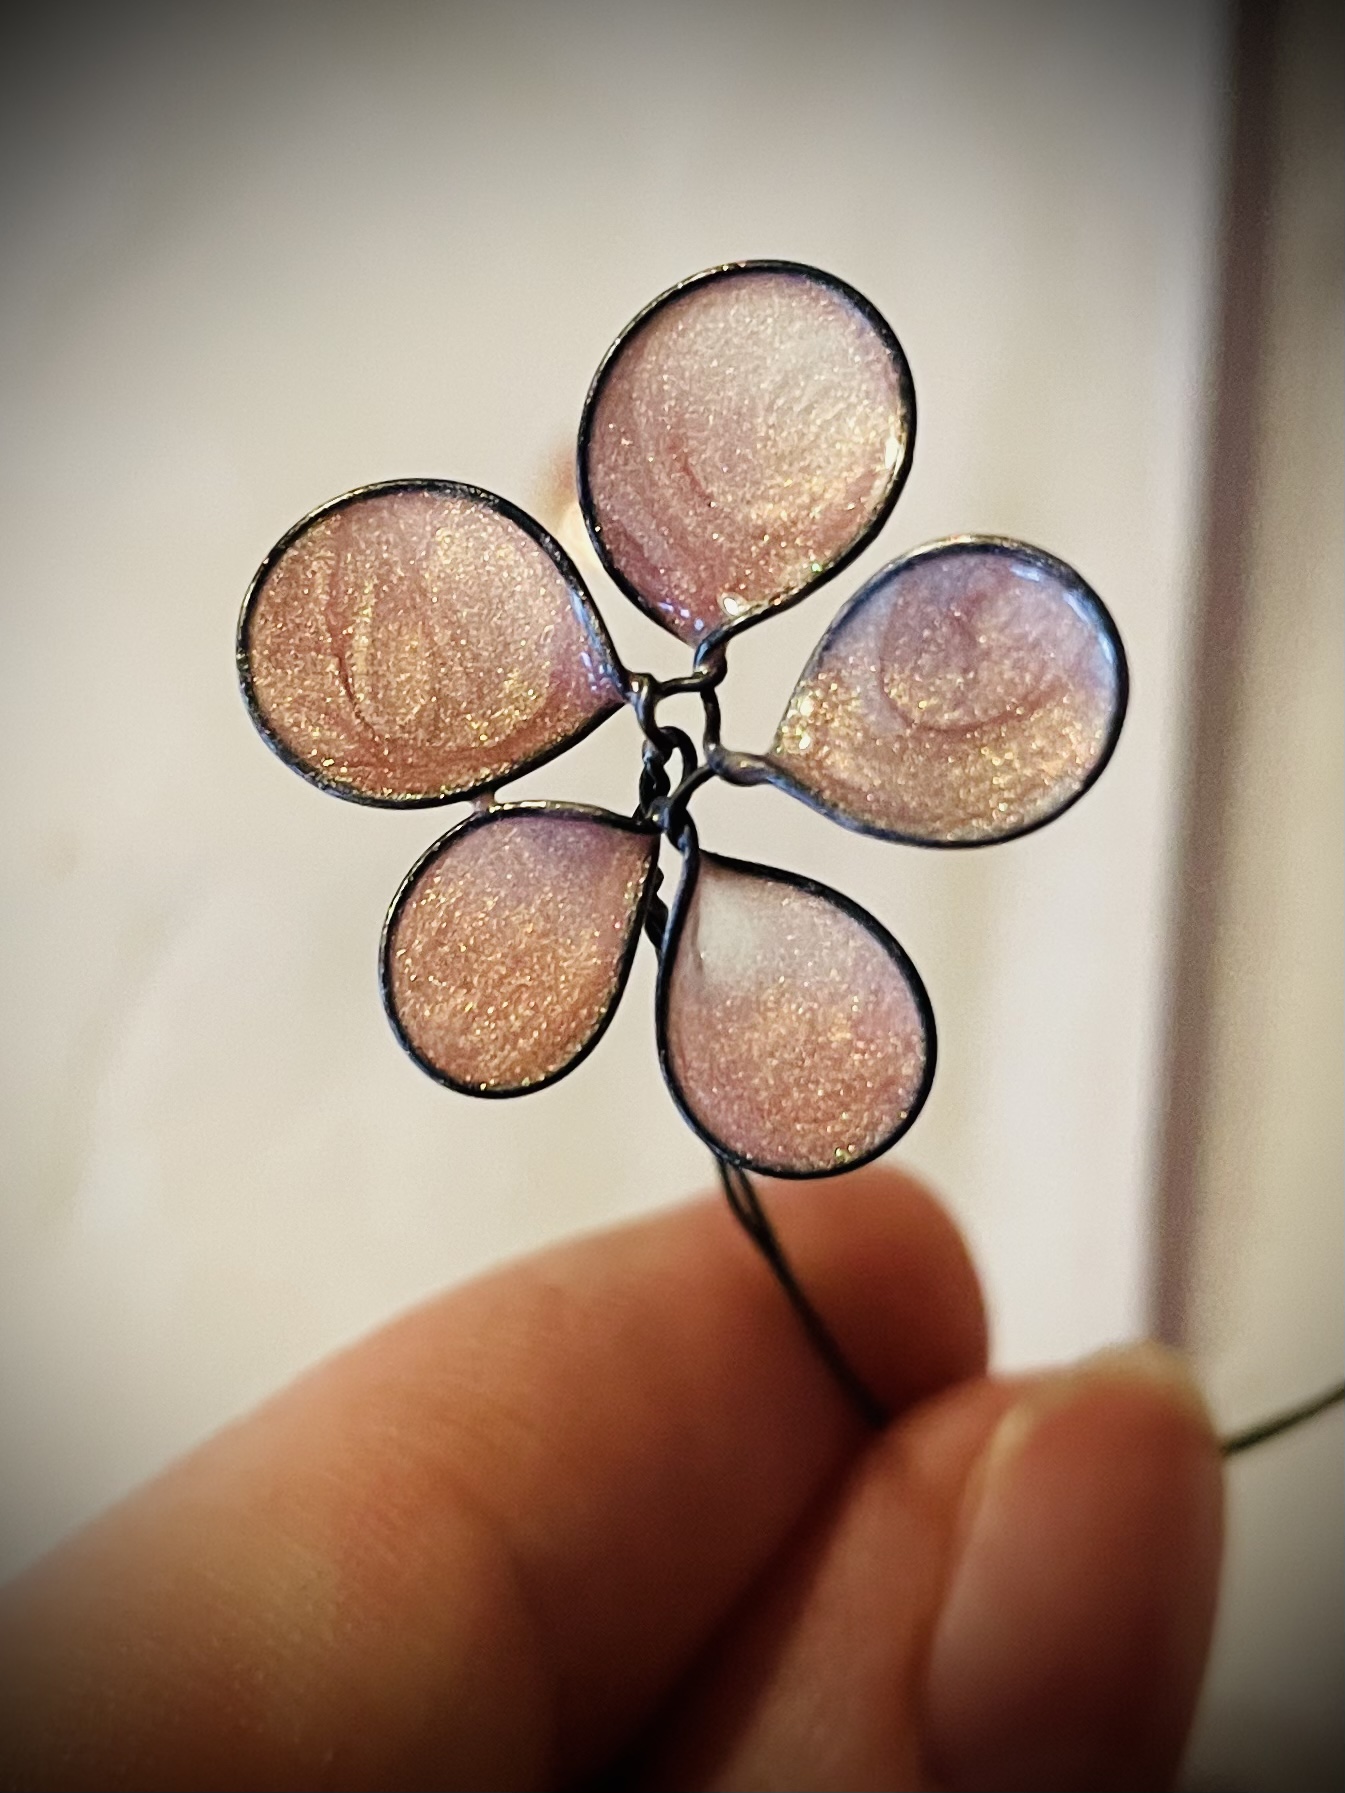
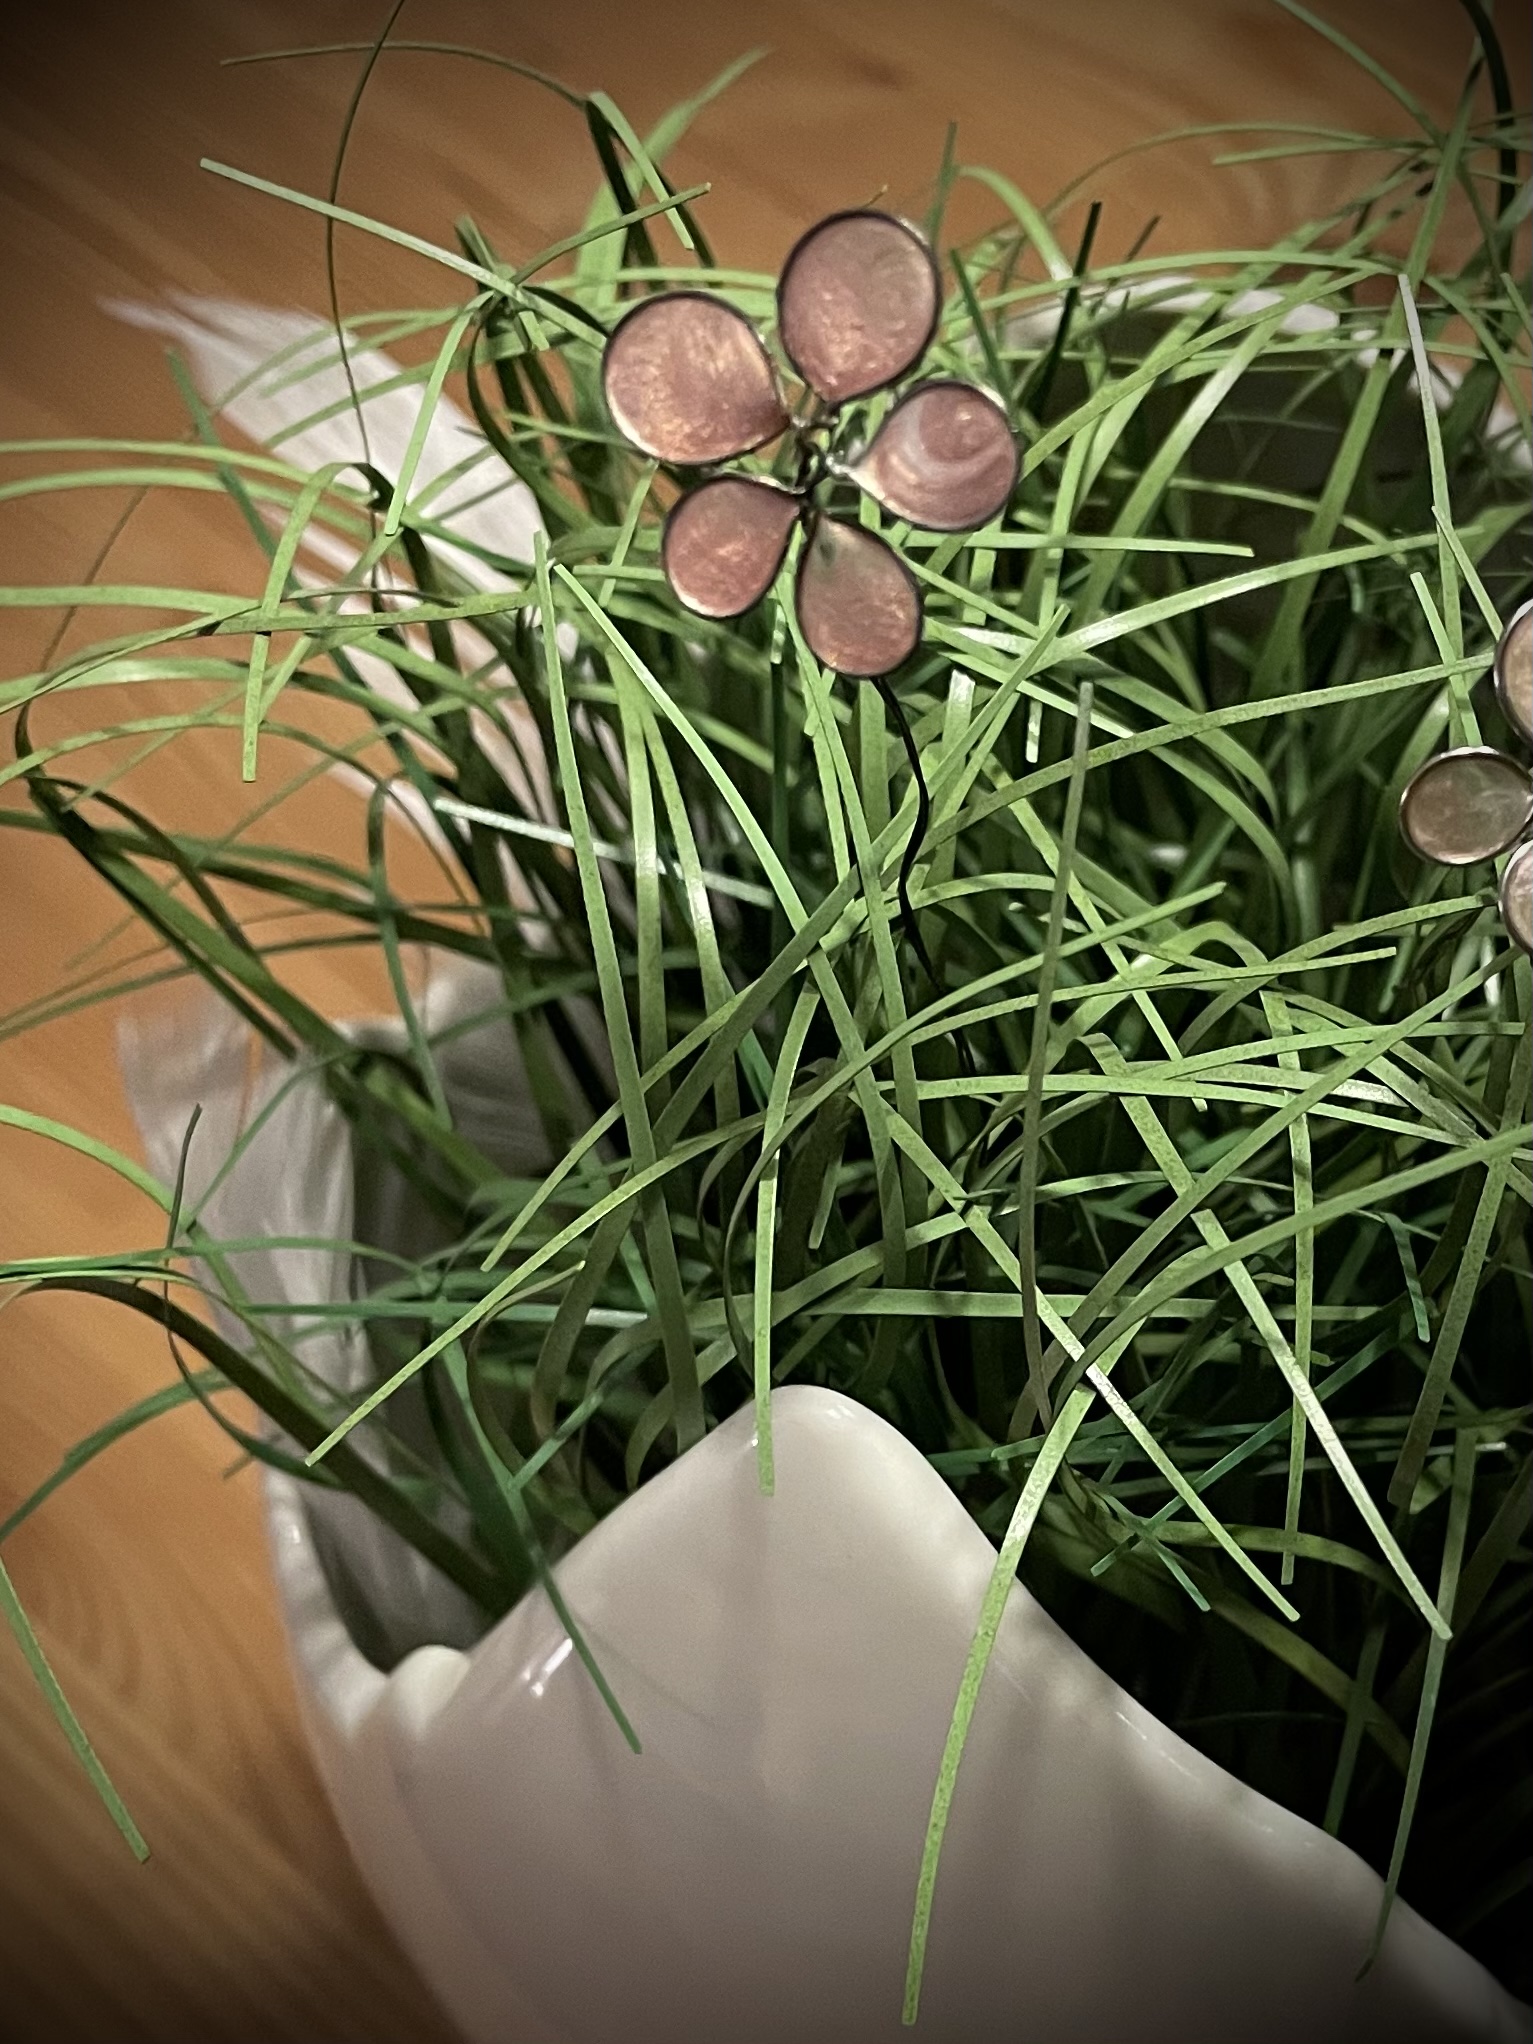
Turn the wire into petals as well as you did with the clover. Leave the petals round, however. I.e. do not push them flat.
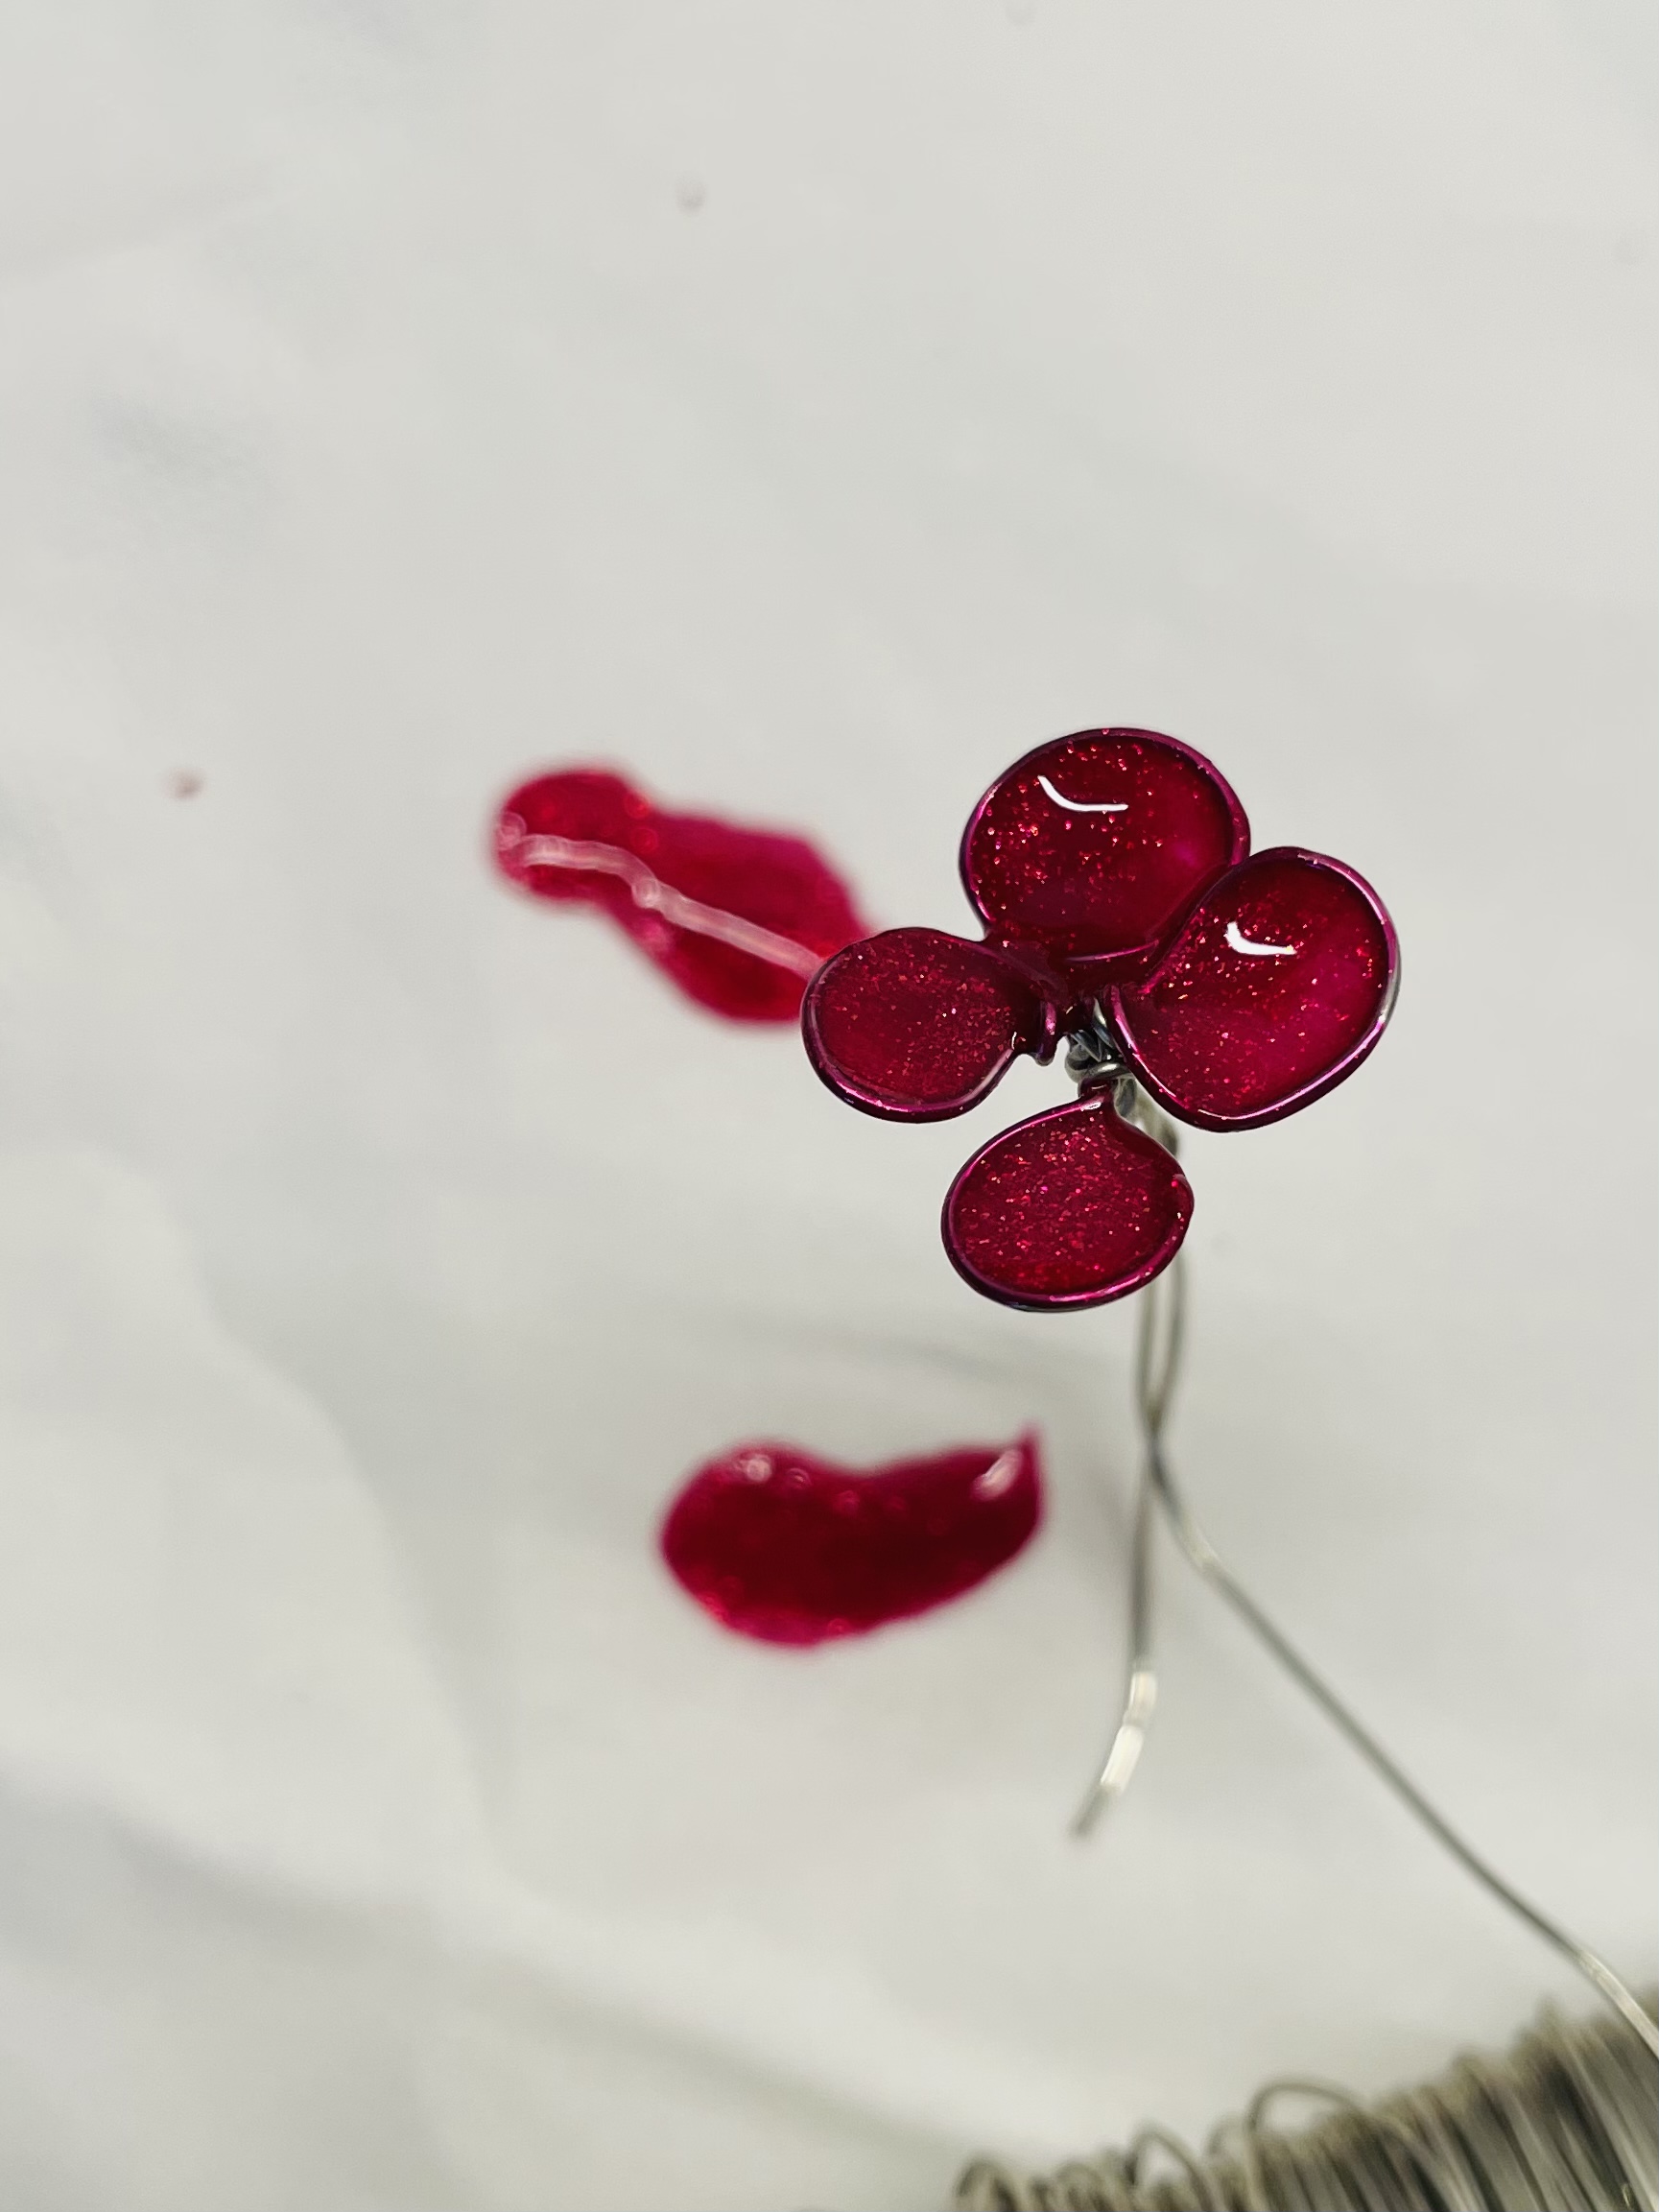
Now put on a glowing nail polish. Put a handkerchief or the like under before, as the varnish can easily drip when applied.
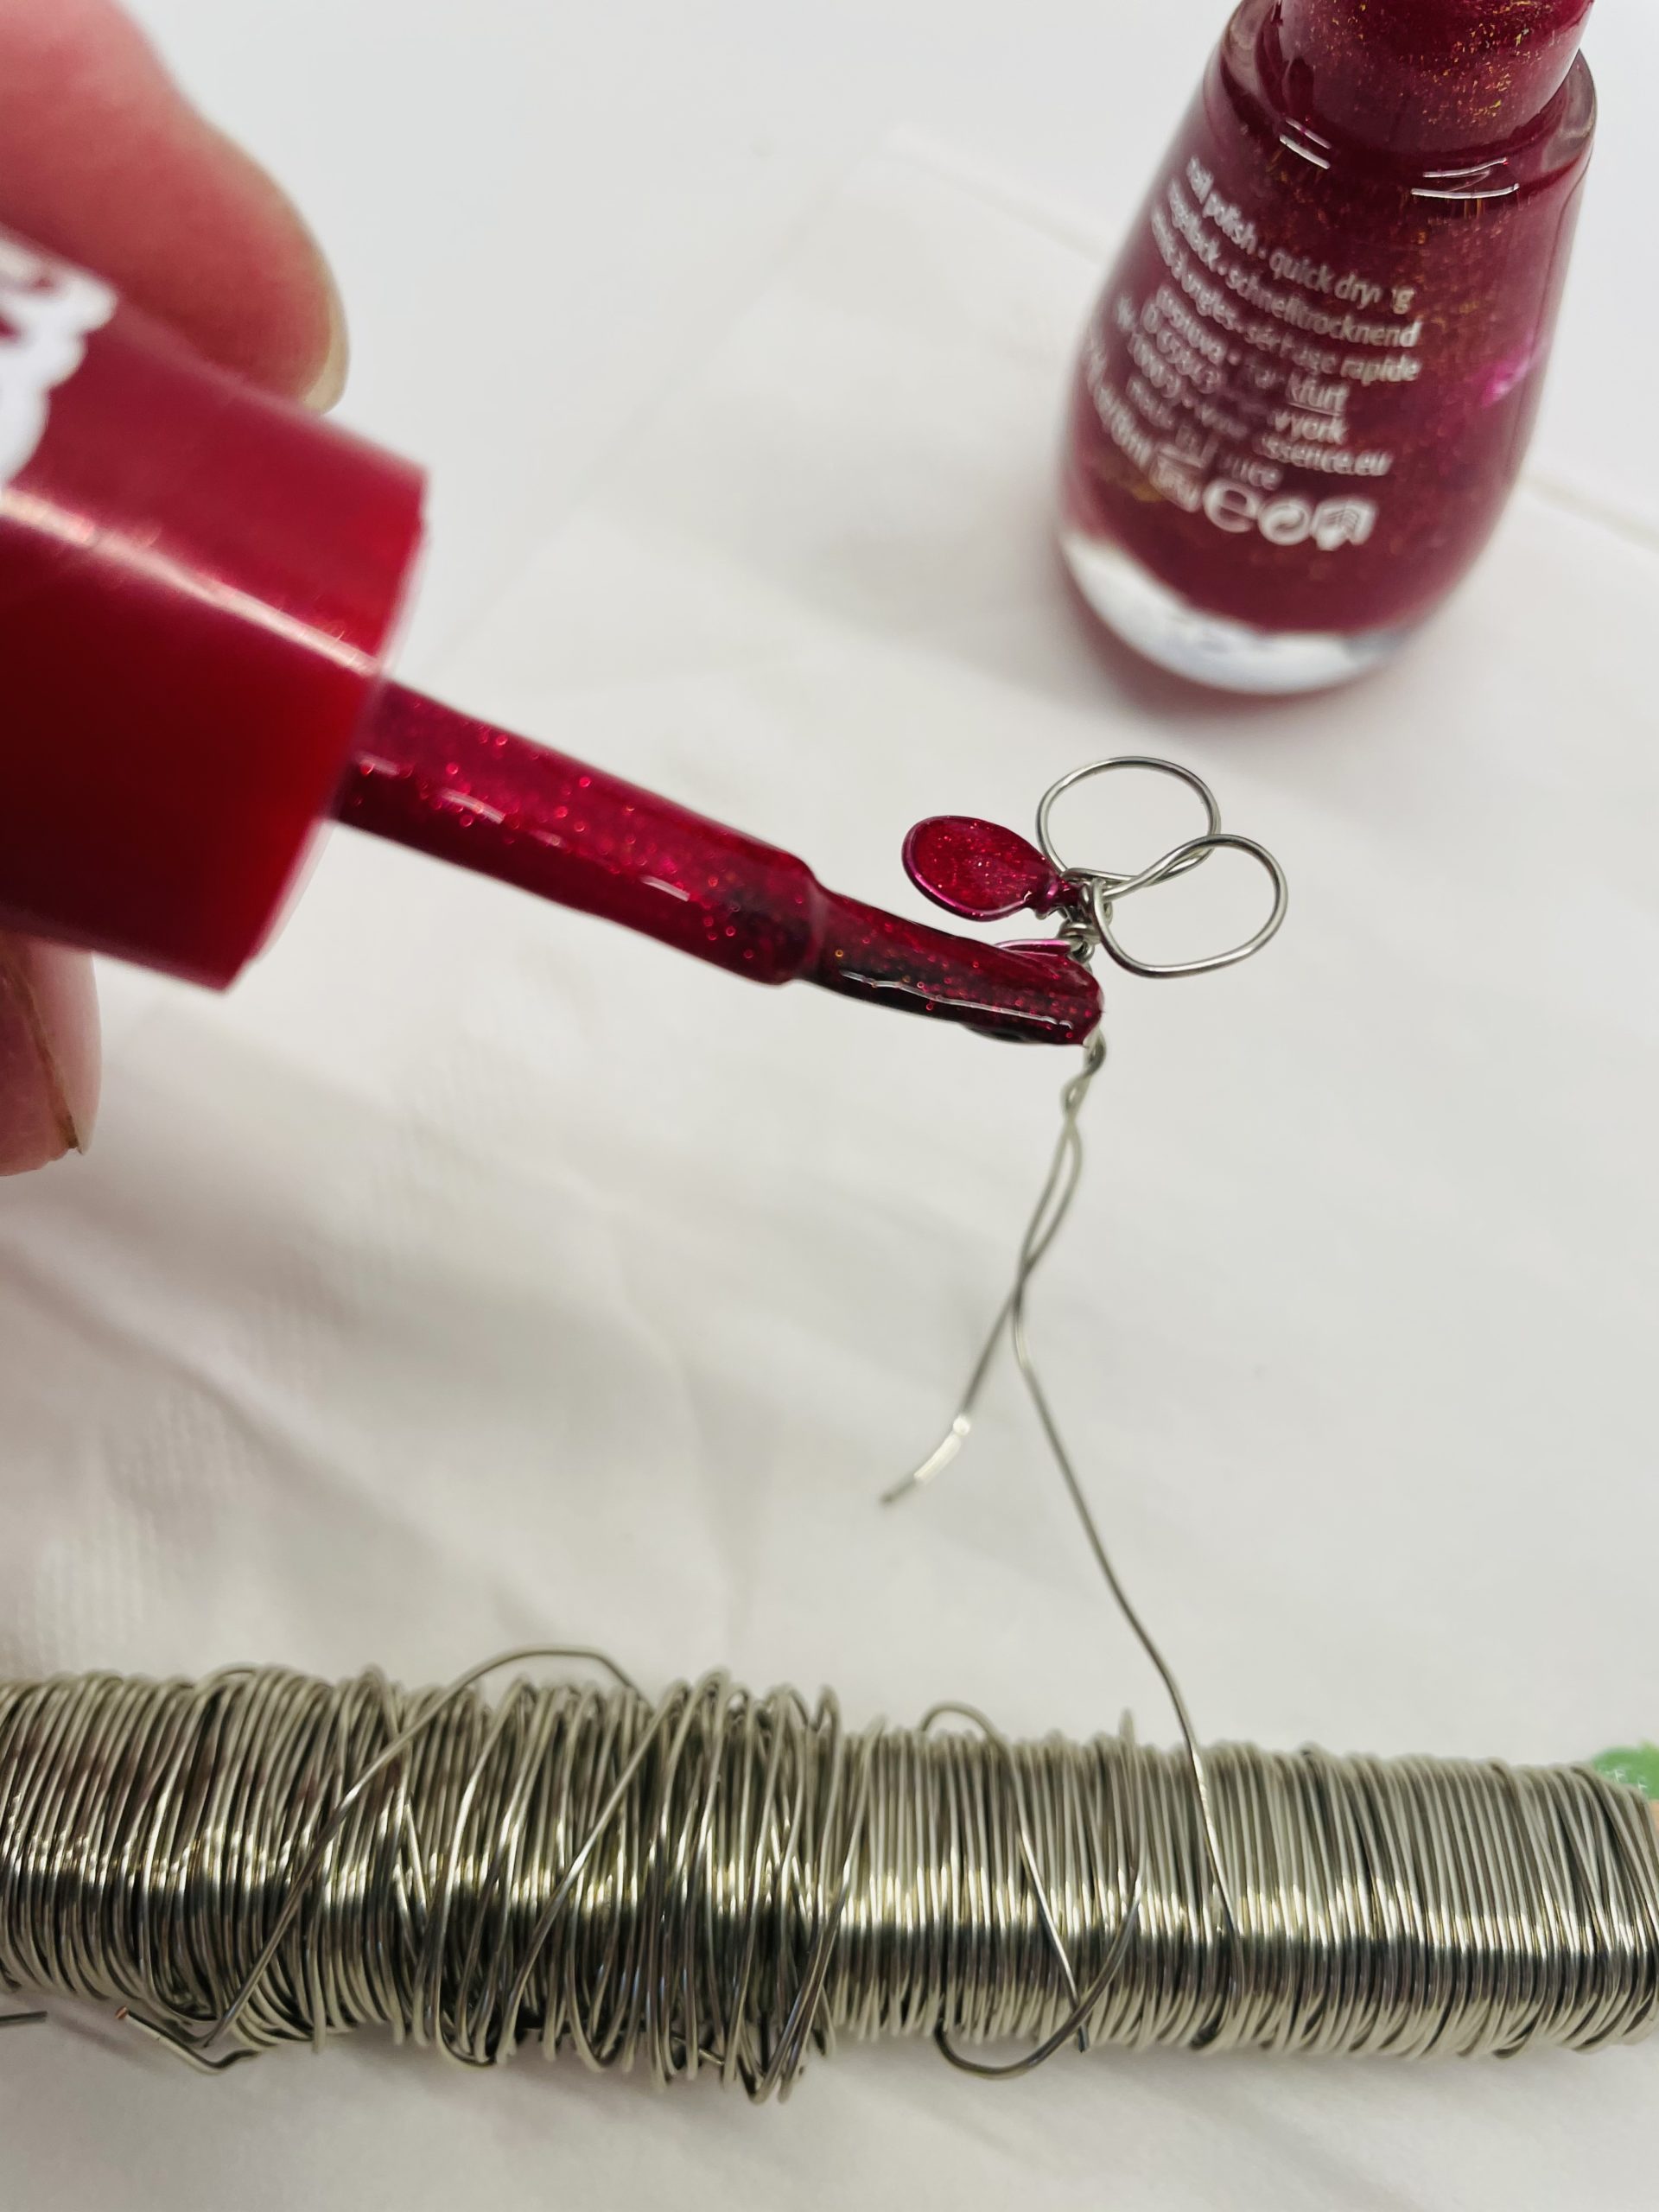
With the application brush pulls carefully and very slowly over the individual wire loops. The varnish pulls like a thin film over the individual petals. Have some patience (see above).
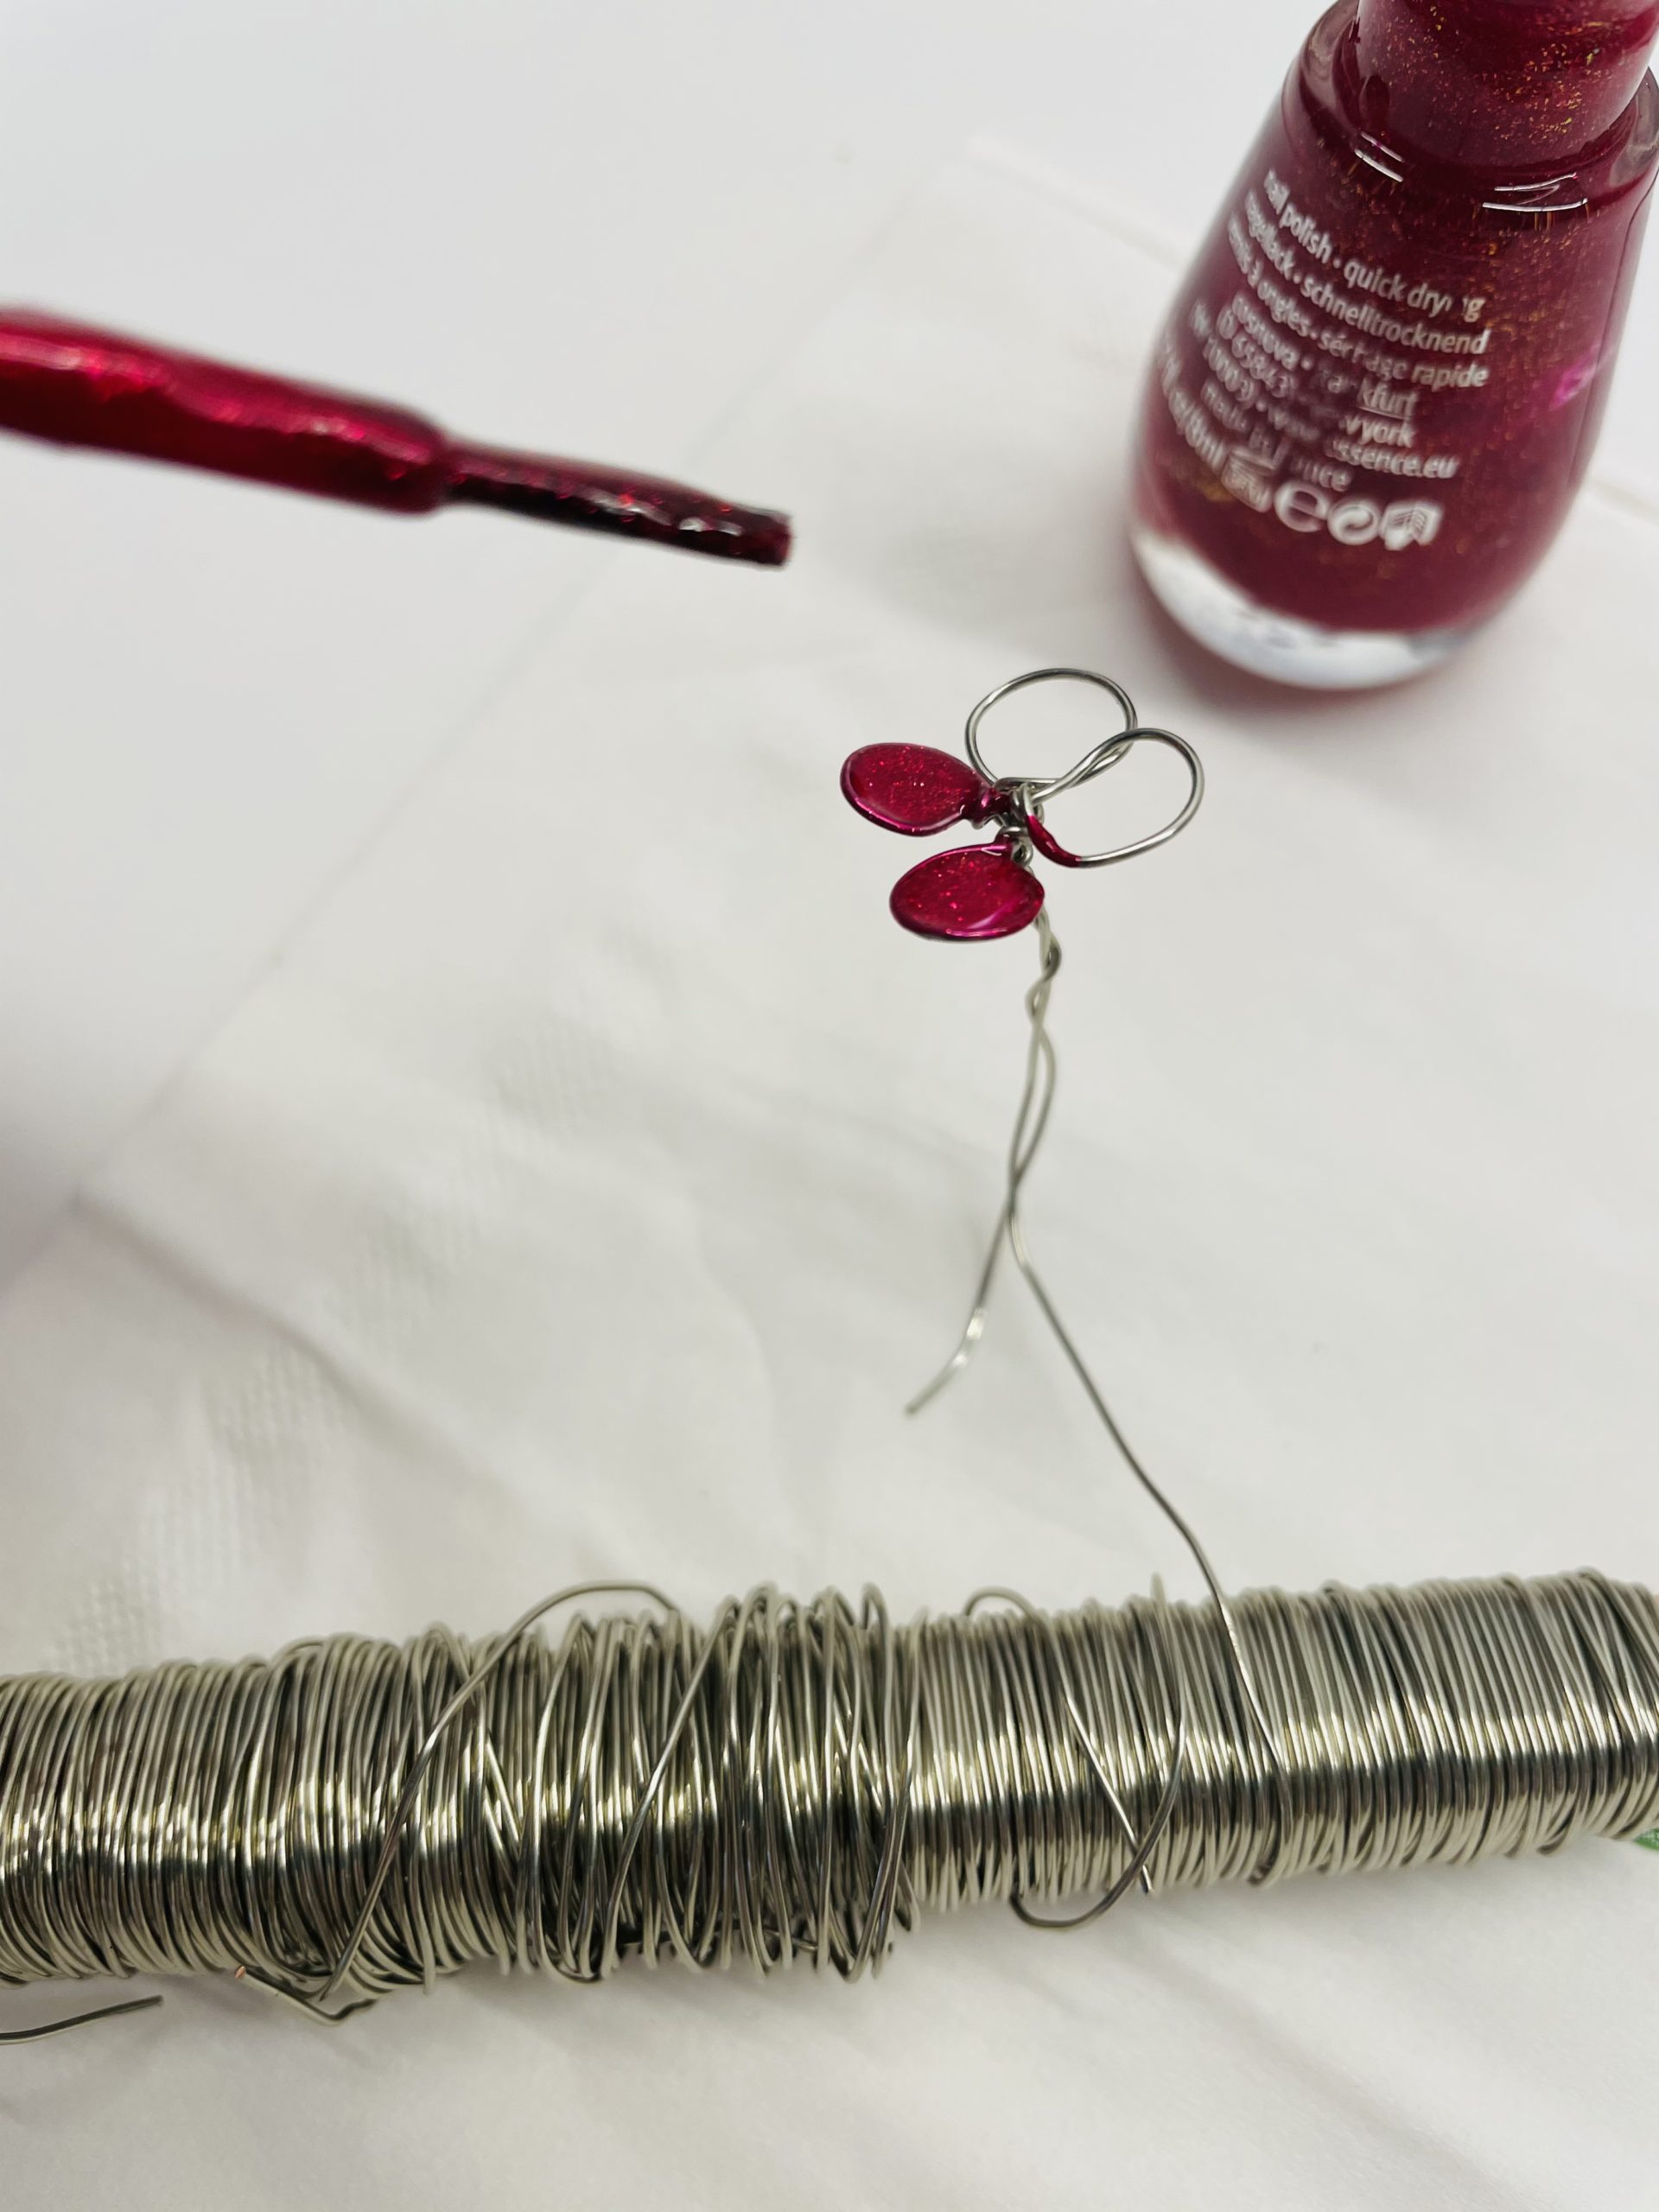
If all the flowers are finished, they must dry.
If nail polish still hangs between the individual flowers when brushing, remove it with a thin needle.
Now attach the flower to a beautiful stone. Wrap the wire several times around the stone and align the flower so that it sits on top of the stone.
Try it if you succeed in making the first flower, then it is even more fun to make.
Look here:
For this you wrap the wire 5 times around the pen.
A decoration idea!
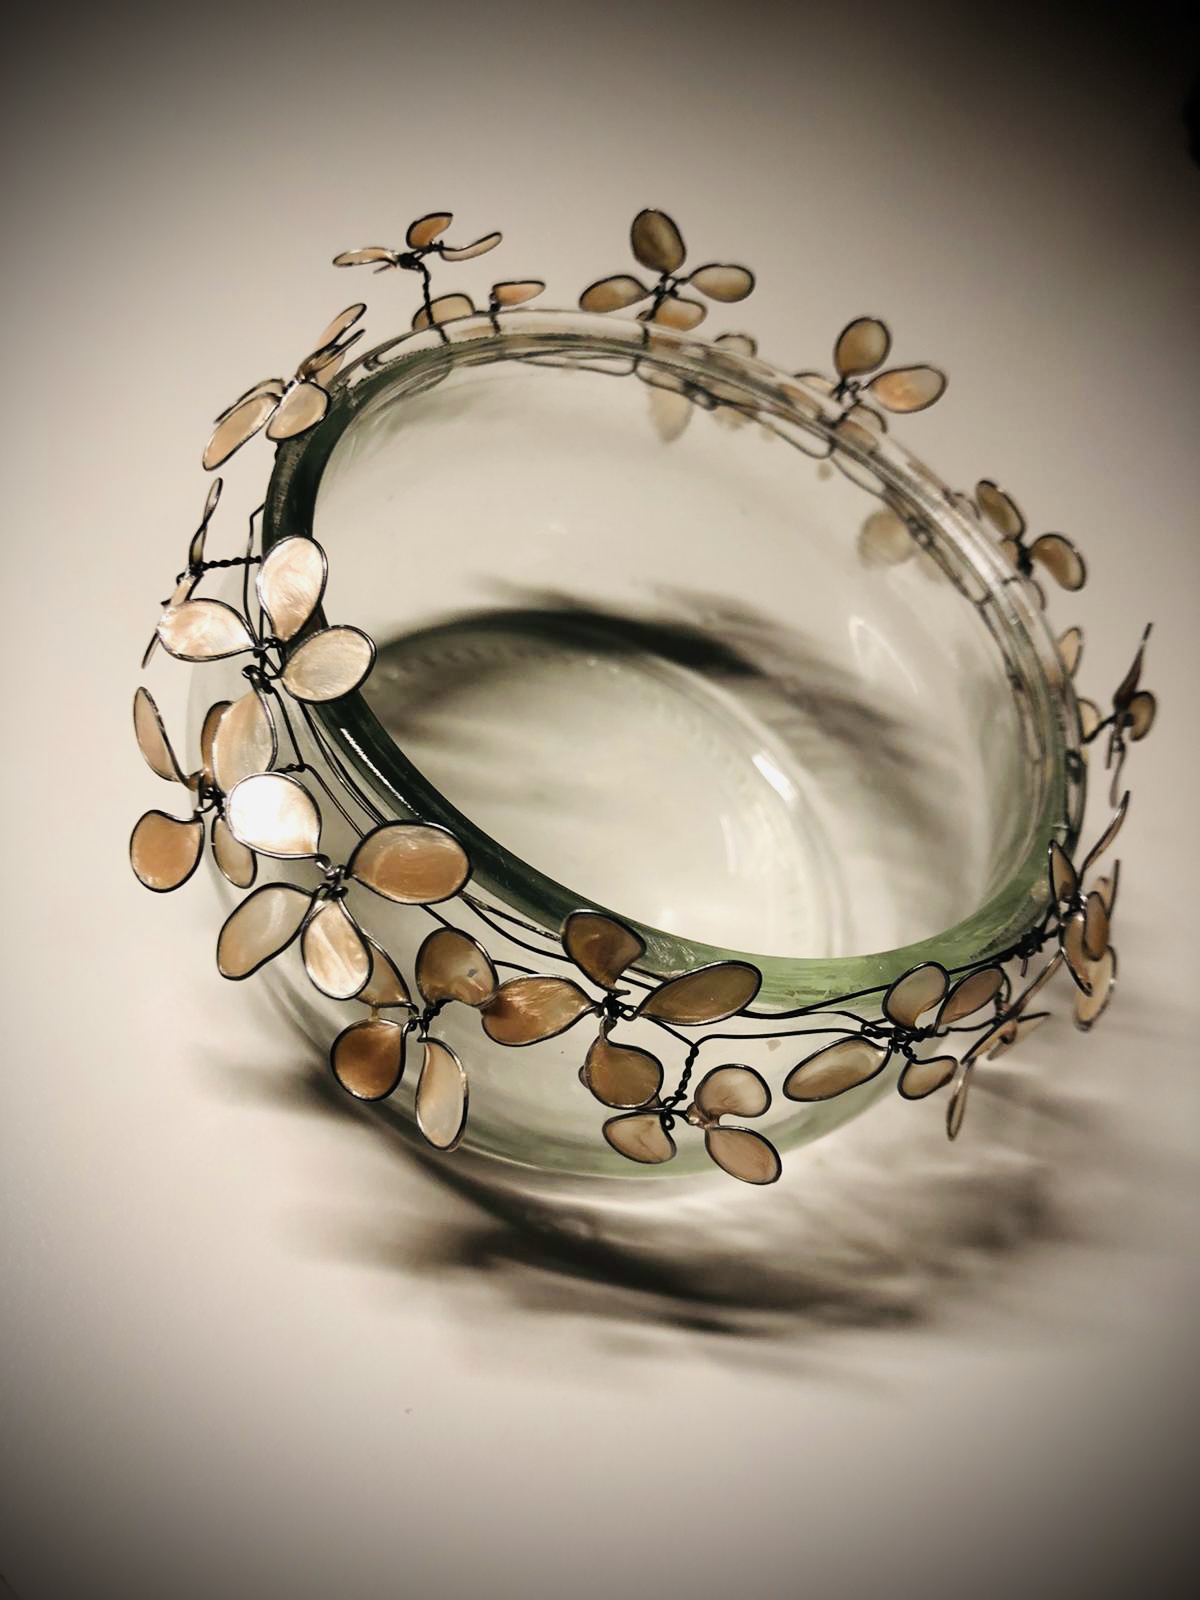
For this you do not cut the wire off. Here you bend one single flower after the other and wrap a glass with it. Always leave a small piece of wire between the individual flowers straight.
If all flowers are turned and bent accordingly, then you cover them with nail polish.
Don't forget to put in a kitchen crepe!
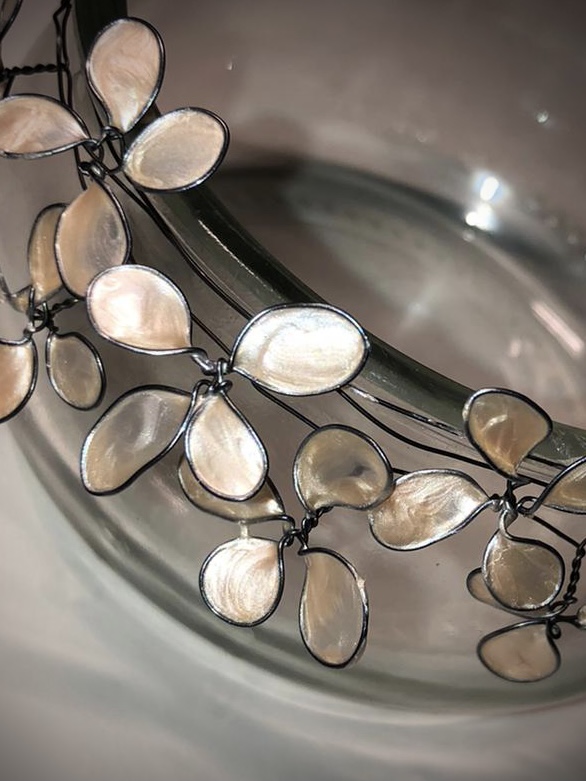
That's how your finished flower tendril could look!
Stay creative! Have fun experimenting!
Materials
Directions
First cut off about 20 cm of flower wire.
Alternatively, you can also leave the wire on the roll. However, it works easier, handling is with a smaller piece of wire.
Then wrap the wire around a round pen four times.
Make sure that both ends of the wire survive a little 10 cm long.
Push the loops close together.
Rotates the wire several times, so that the loops sit firmly on the pen.
Now you push the four loops off the pen.
Now gently bend one loop after the other away from the other. Rotate the away loop once or twice around itself.
Then you turn off the next loop. Rotate this loop once or twice. So you get the second leaf.
Bending all loops apart in this way.
That's what your clover looks like.
Presses the opposite leaves slightly flat with thumb and index finger.
Now you need the nail polish. Prepare it and put a kitchen crepe or handkerchief under it.
She uses green nail polish for a clover leaf.
Dive the nail polish brush into the paint and carefully brush over the first sheet. You need a lot of paint on the brush. Then you gently brush over a sheet. Have some patience, it often only works after several attempts until the nail polish stretches from one side to the next and lays over the wire like a thin film.
Make this leaf by leaf. If it doesn't work, something stays on the wire loop with a full brush and then slowly pulls the brush over the loop.
Tip: Thicker paint works easier, whereas thinner paint more drips.
Now all four leaves are ready and need to dry.
Choose a stone to attach the clover leaf.
Wrap the wire several times around the stone until the clover is placed in the middle of the stone.
Set up the clover.
So you get a magical little gift or a decoration for the table.
Turn the wire into petals as well as you did with the clover. Leave the petals round, however. I.e. do not push them flat.
Now put on a glowing nail polish. Put a handkerchief or the like under before, as the varnish can easily drip when applied.
With the application brush pulls carefully and very slowly over the individual wire loops. The varnish pulls like a thin film over the individual petals. Have some patience (see above).
If all the flowers are finished, they must dry.
If nail polish still hangs between the individual flowers when brushing, remove it with a thin needle.
Now attach the flower to a beautiful stone. Wrap the wire several times around the stone and align the flower so that it sits on top of the stone.
Try it if you succeed in making the first flower, then it is even more fun to make.
Look here:
For this you wrap the wire 5 times around the pen.
A decoration idea!
For this you do not cut the wire off. Here you bend one single flower after the other and wrap a glass with it. Always leave a small piece of wire between the individual flowers straight.
If all flowers are turned and bent accordingly, then you cover them with nail polish.
Don't forget to put in a kitchen crepe!
That's how your finished flower tendril could look!
Stay creative! Have fun experimenting!
Follow us on Facebook , Instagram and Pinterest
Don't miss any more adventures: Our bottle mail


These artworks have just reached us. A great inspiration for all those who want to try this adventure. ♥-thanks for sharing?