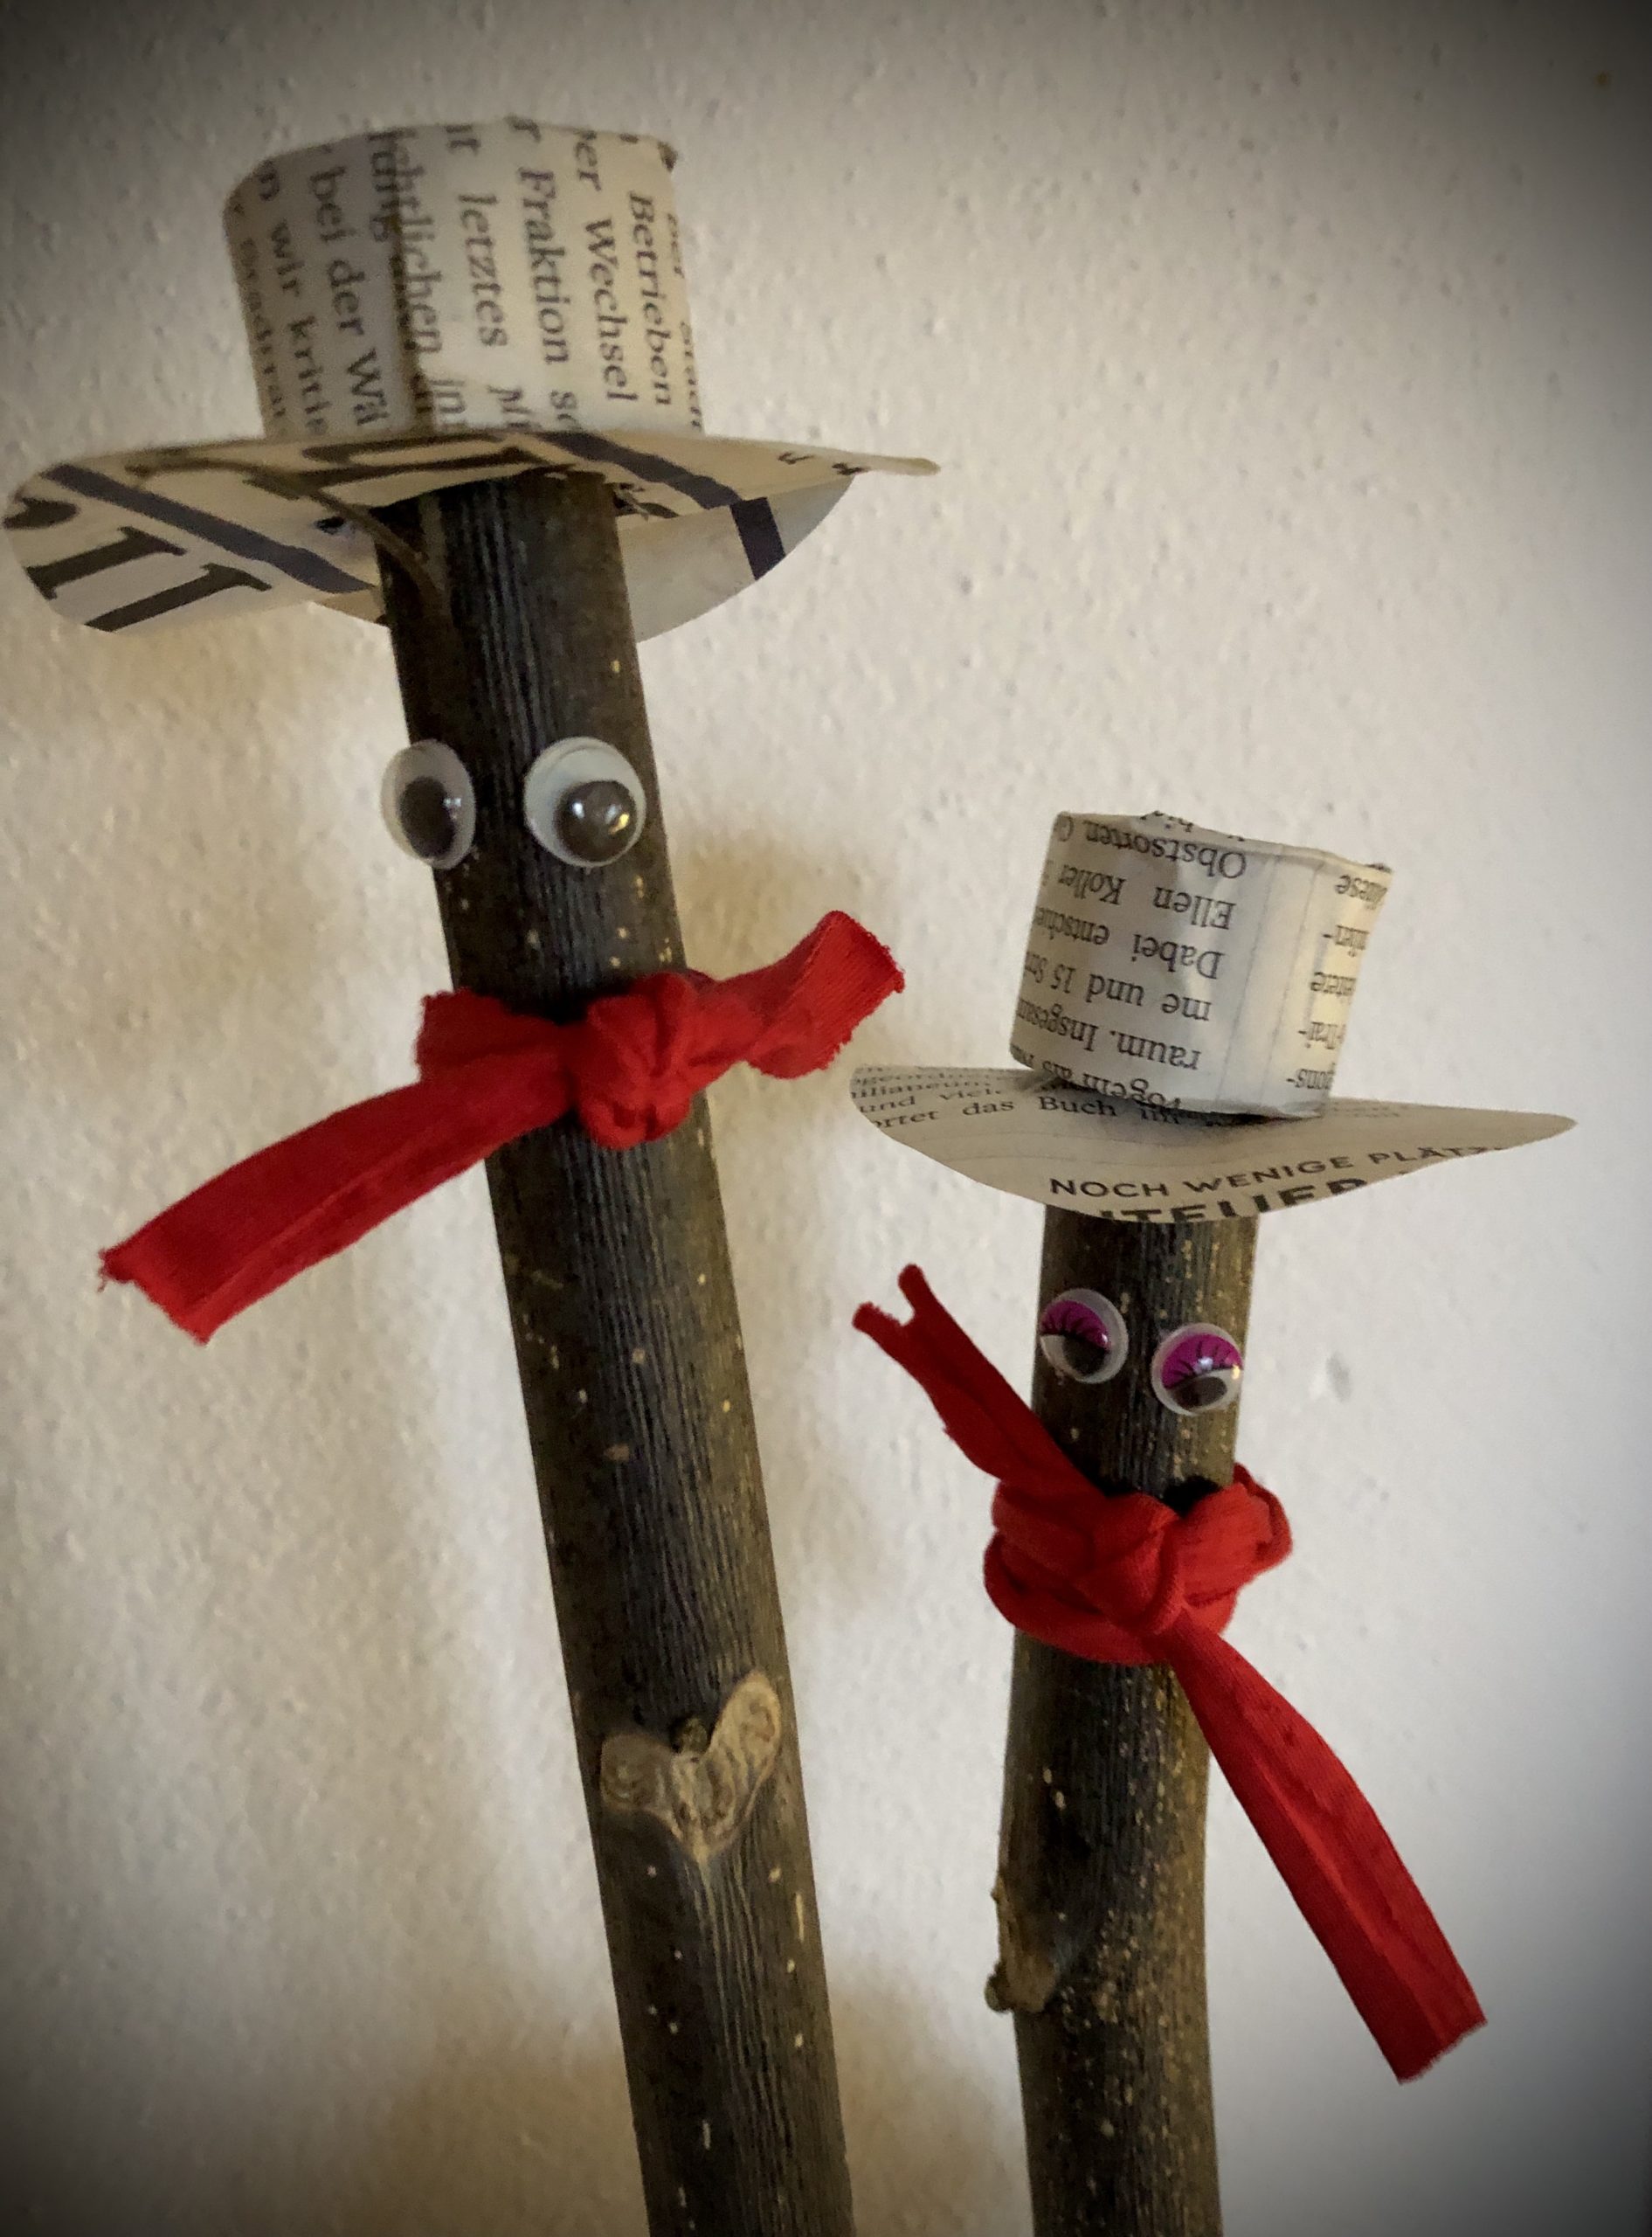
These small chimney sweepers are easy to make. From newspaper you conjure up a small hat and put it on a branch. A cord serves as a scarf and the wobble eyes breathe a little liveliness into the small chimney sweeper.
A quick gift that can be made as a lucky charm for the new year or for a special event even with small children. Good luck!
Media Education for Kindergarten and Hort

Relief in everyday life, targeted promotion of individual children, independent learning and - without any pre-knowledge already usable by the youngest!
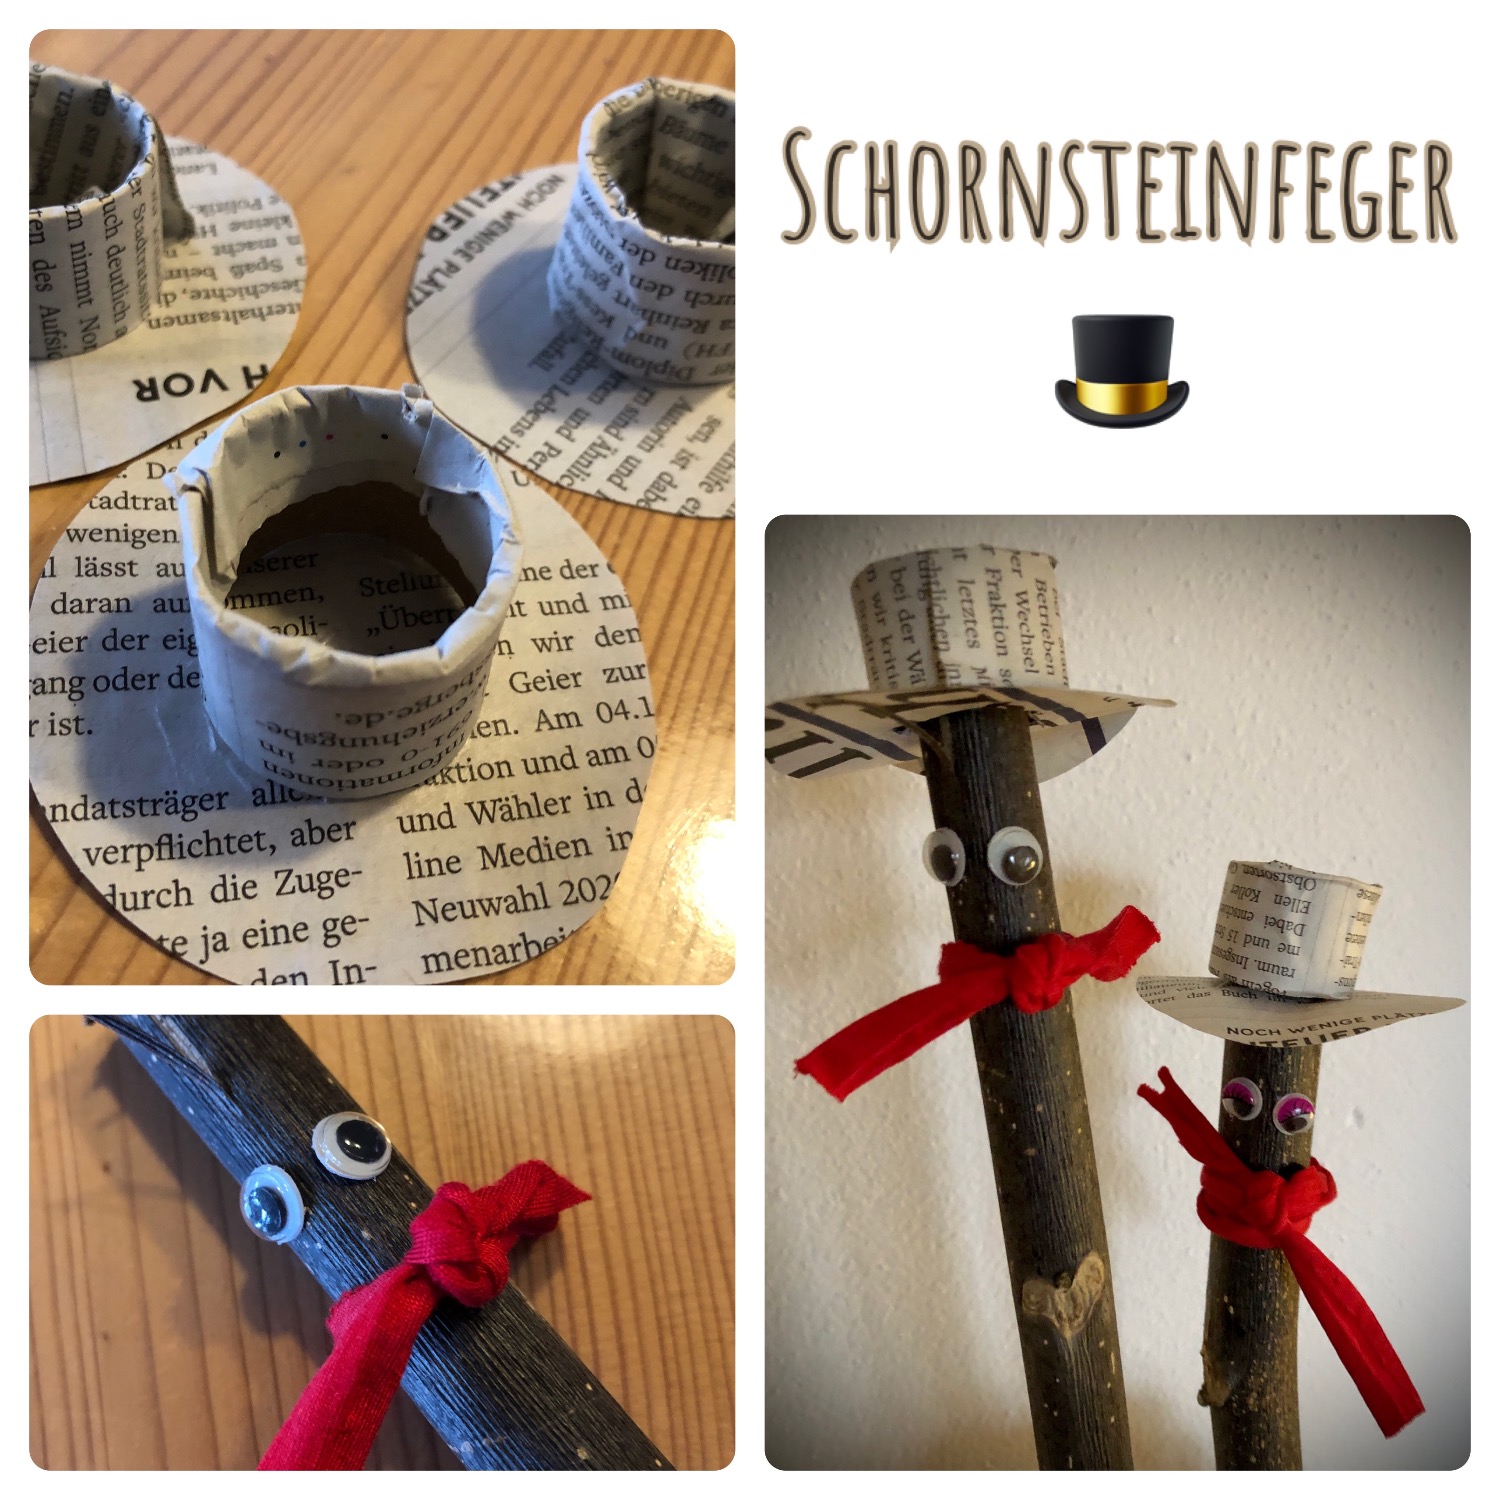
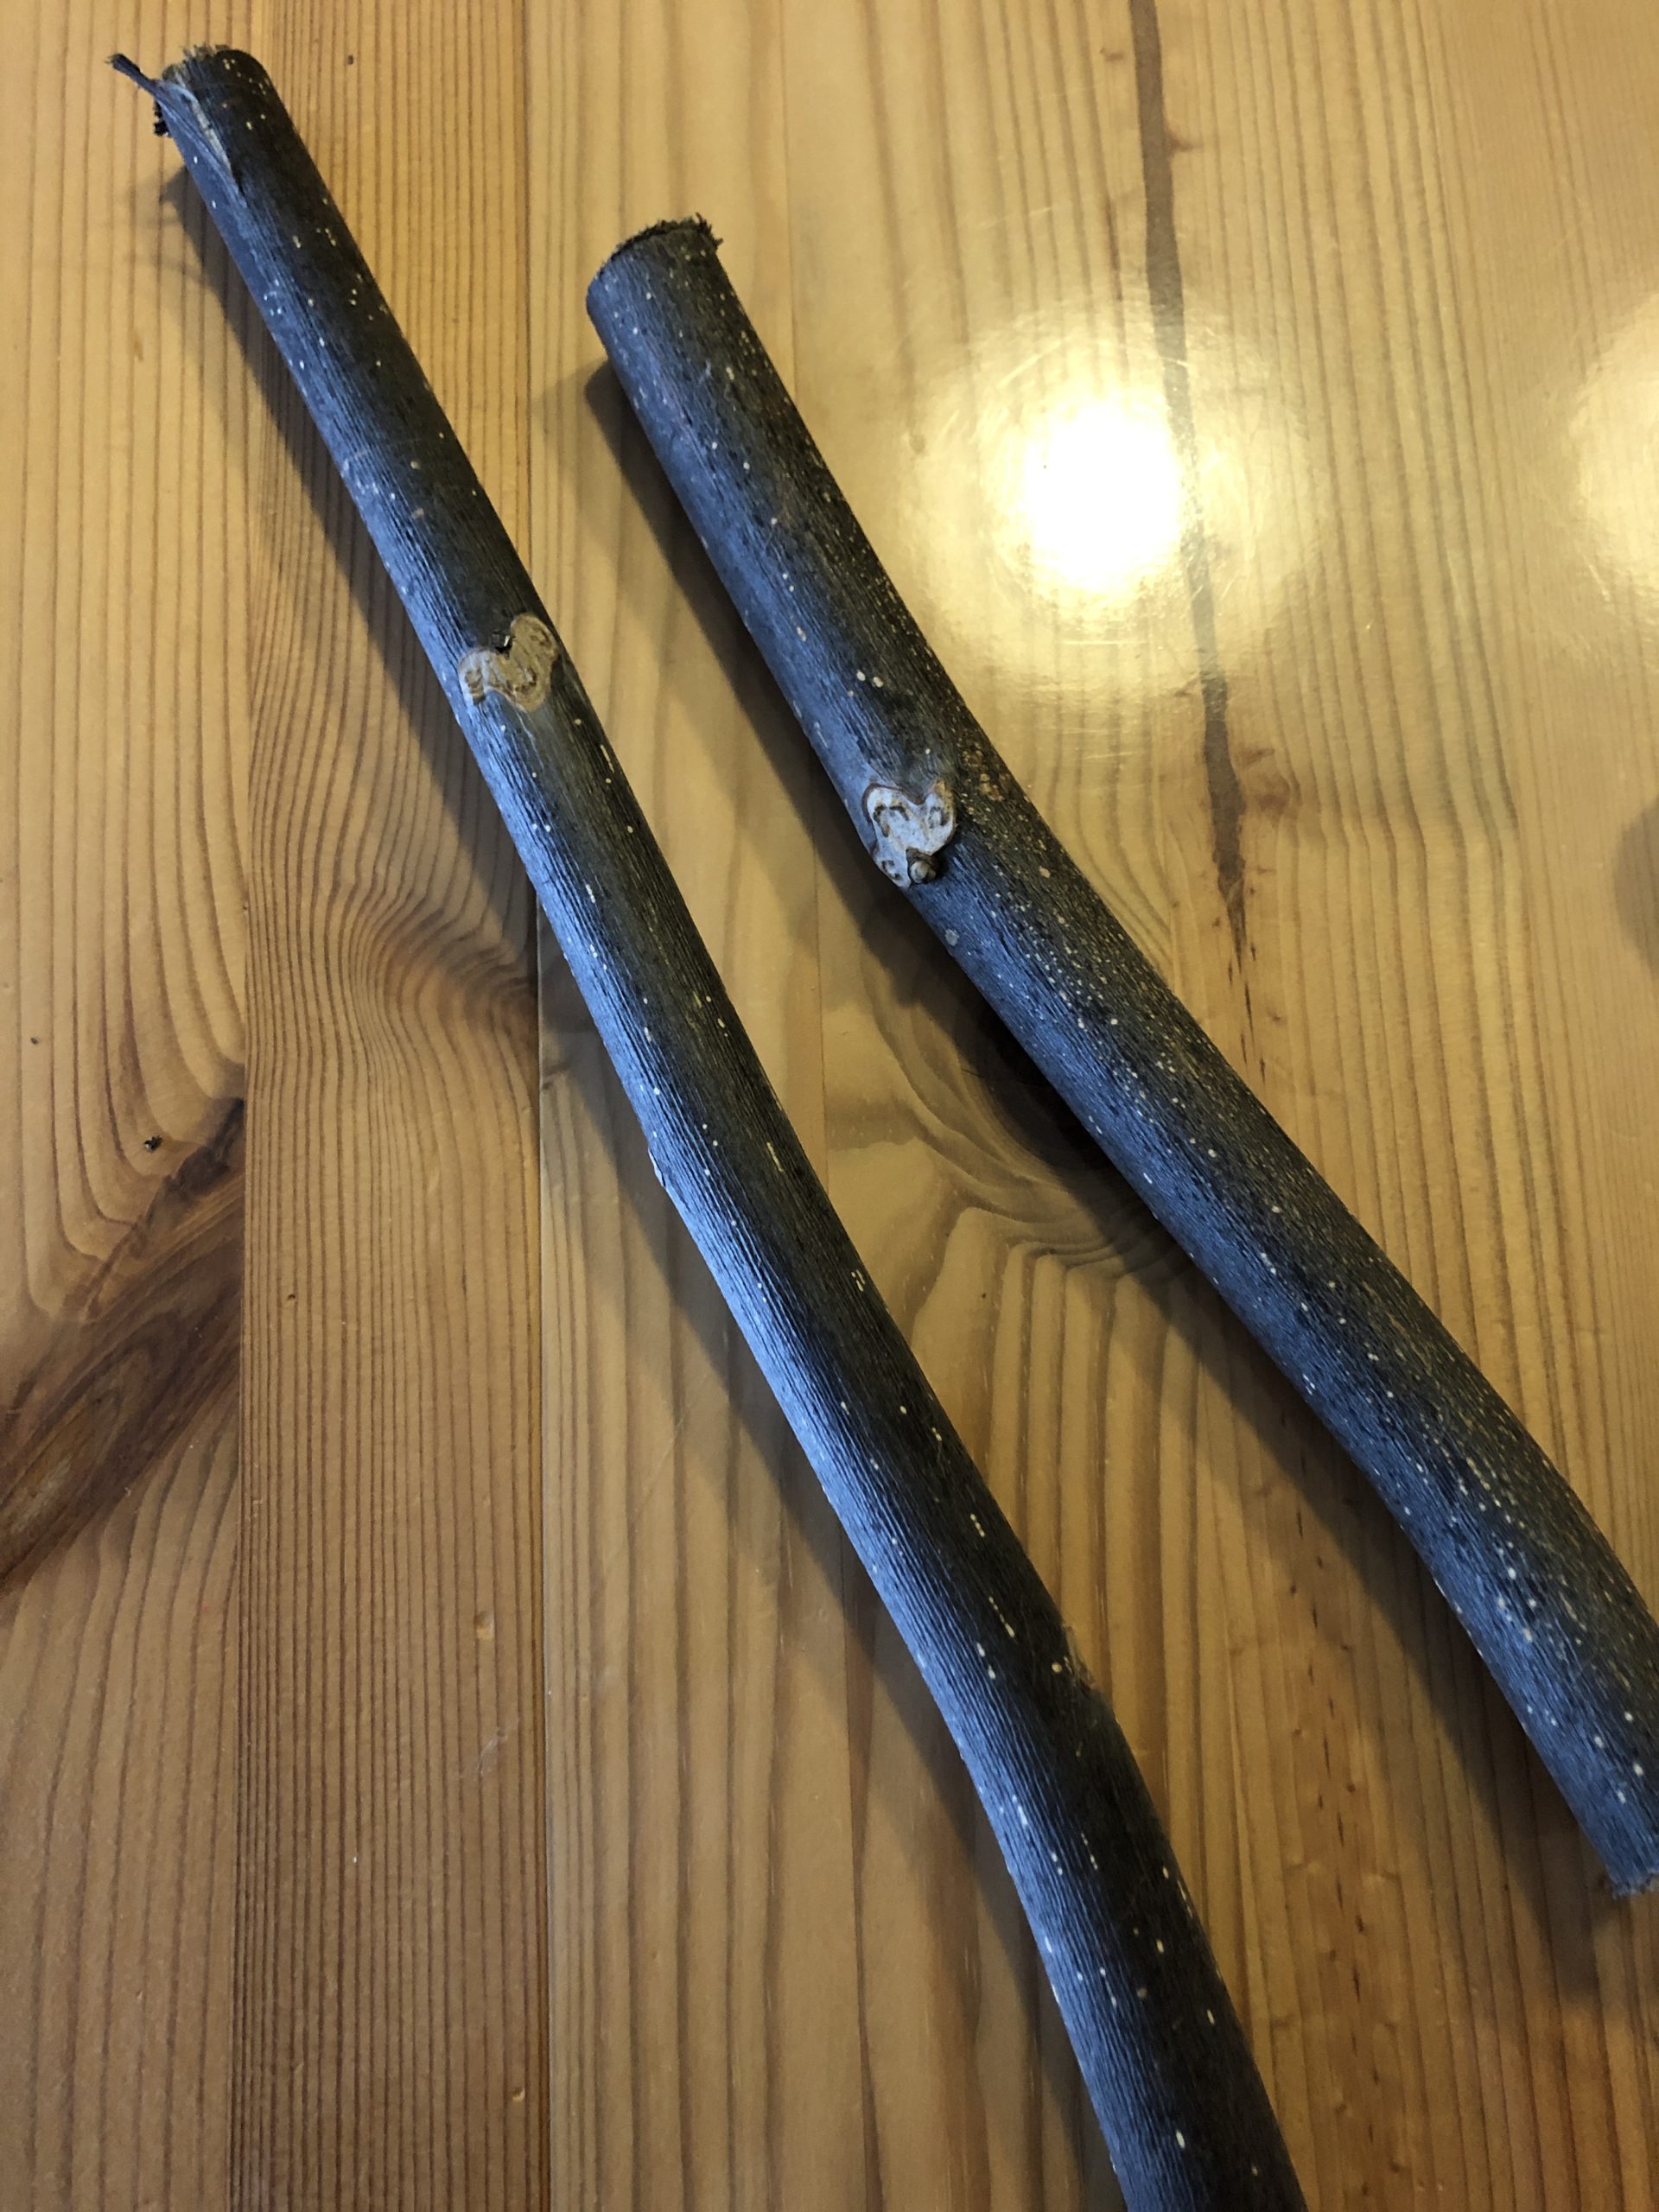
Find a thicker branch.
Tip: Many children like to collect branches and sticks. You can use them for this!
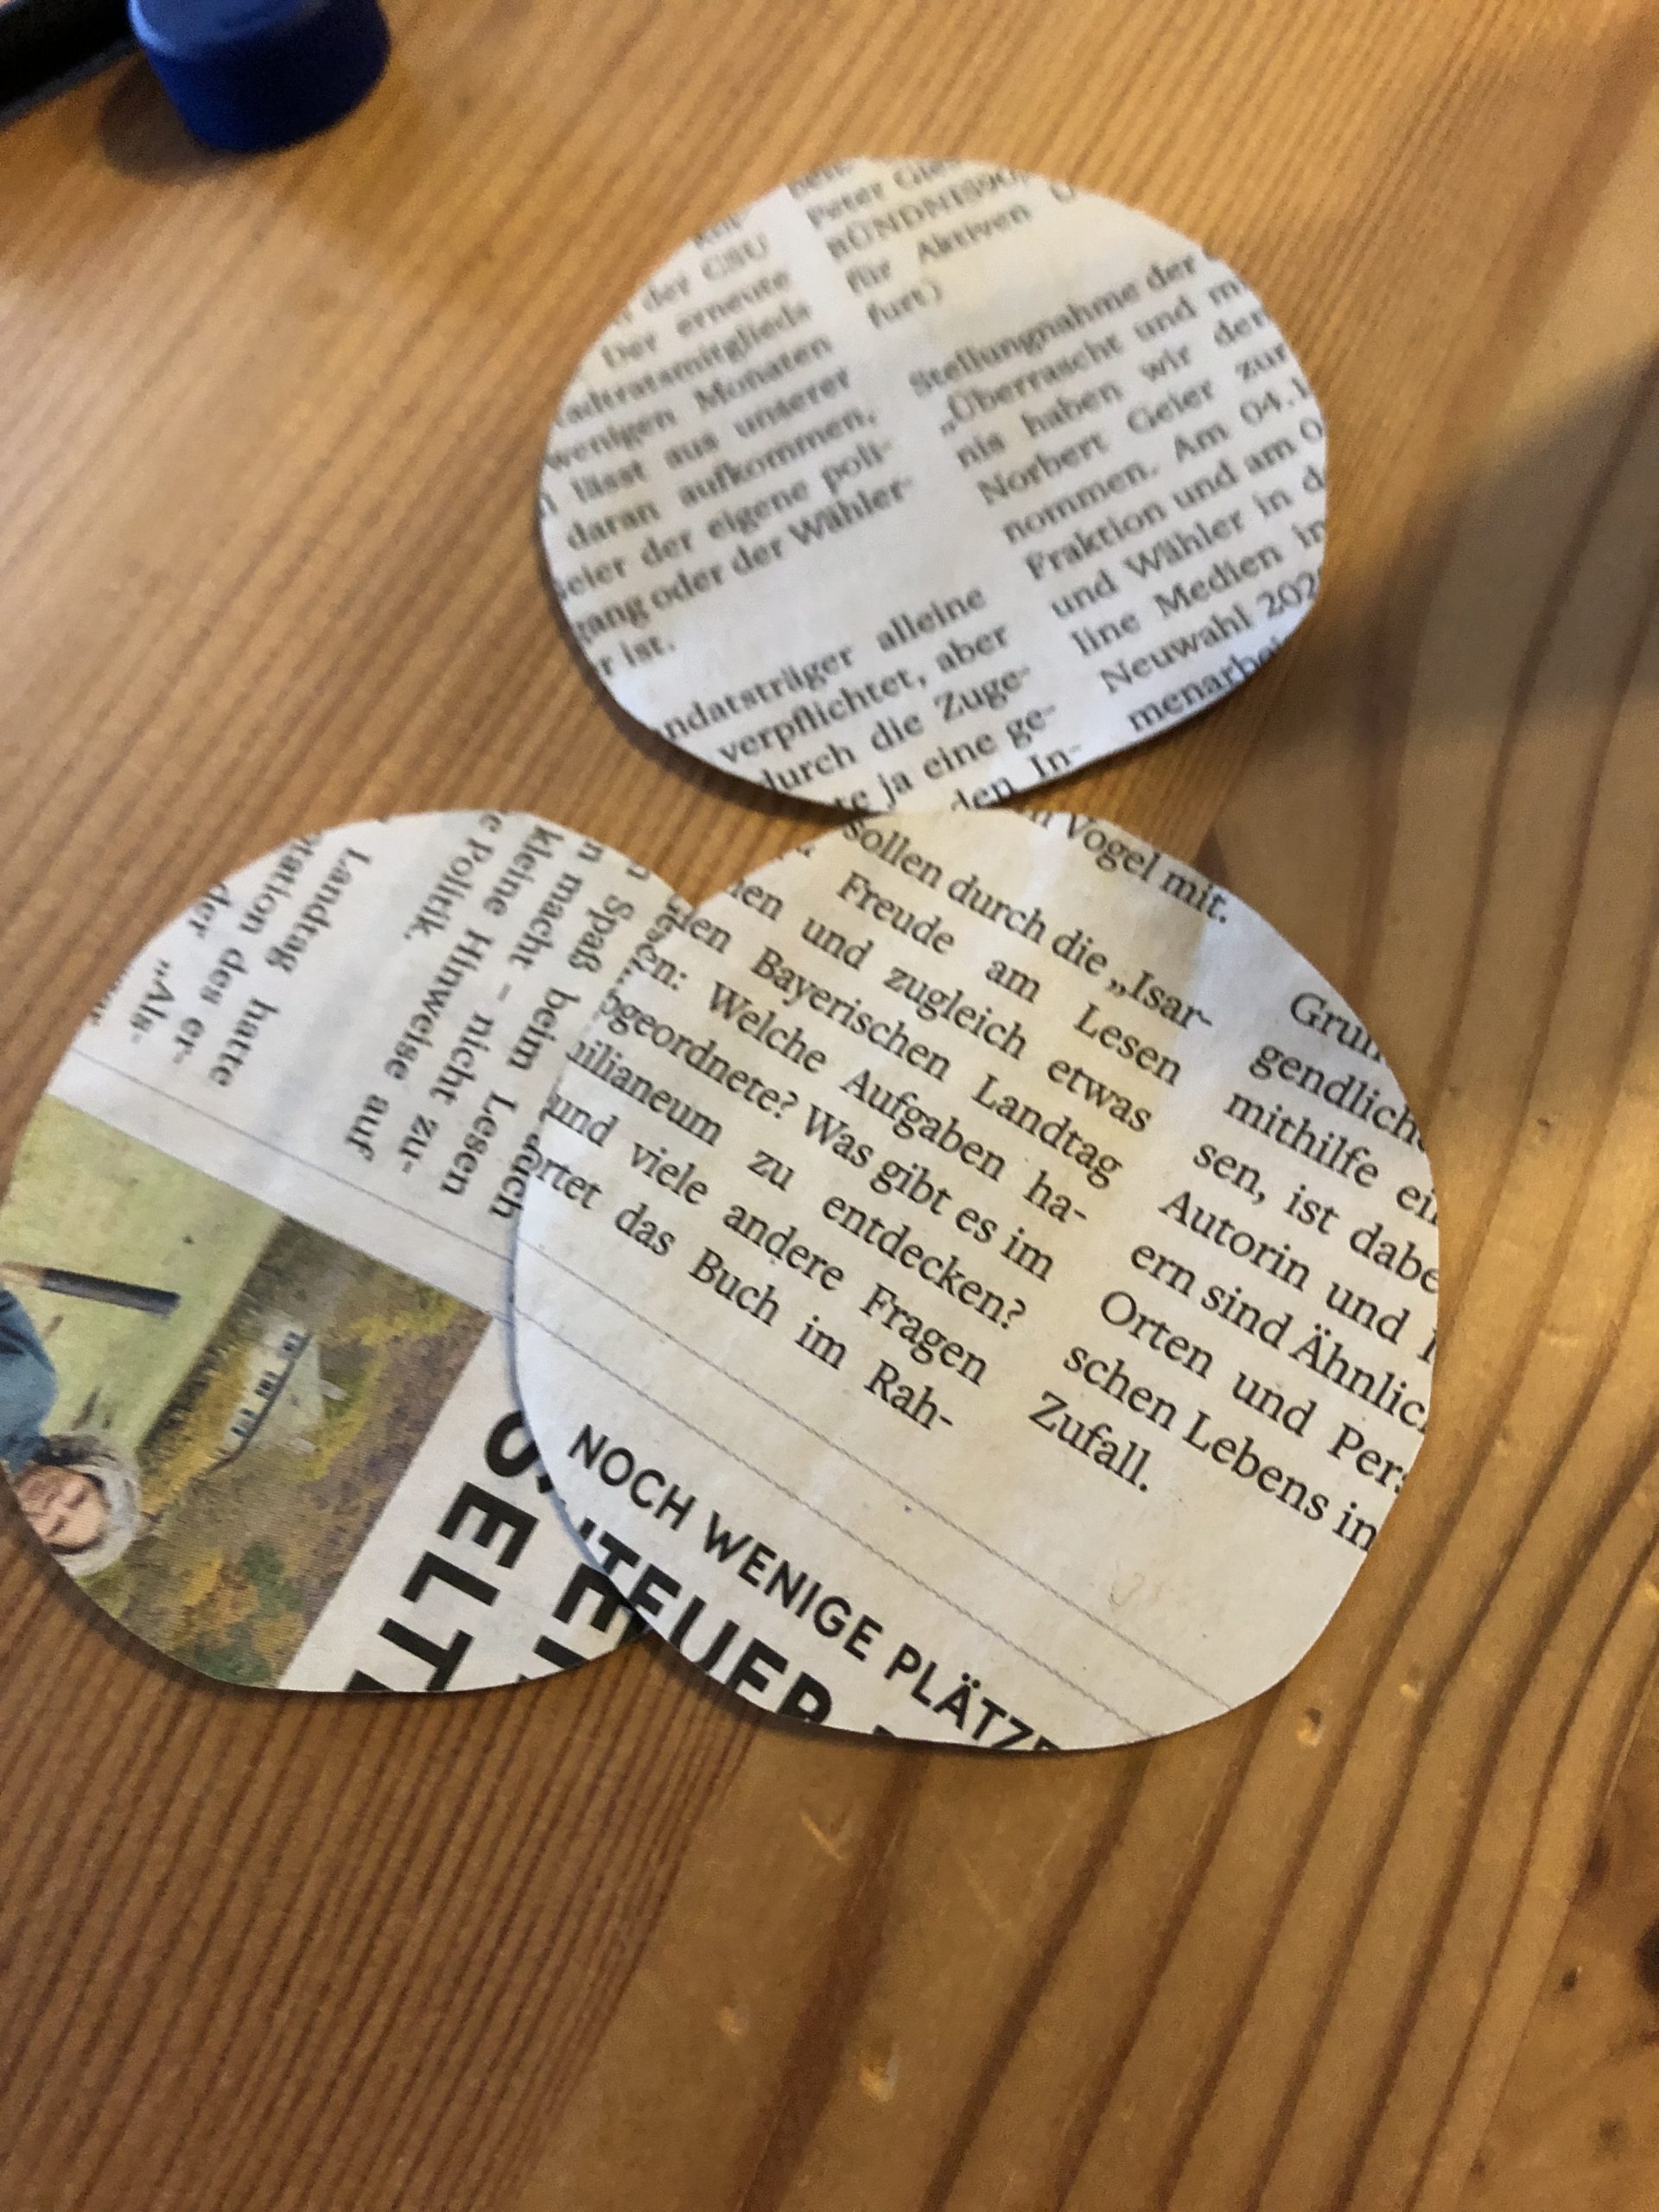
Put out the craft pad and paint a circle for each hat (about 7cm in diameter). Then cut it out.
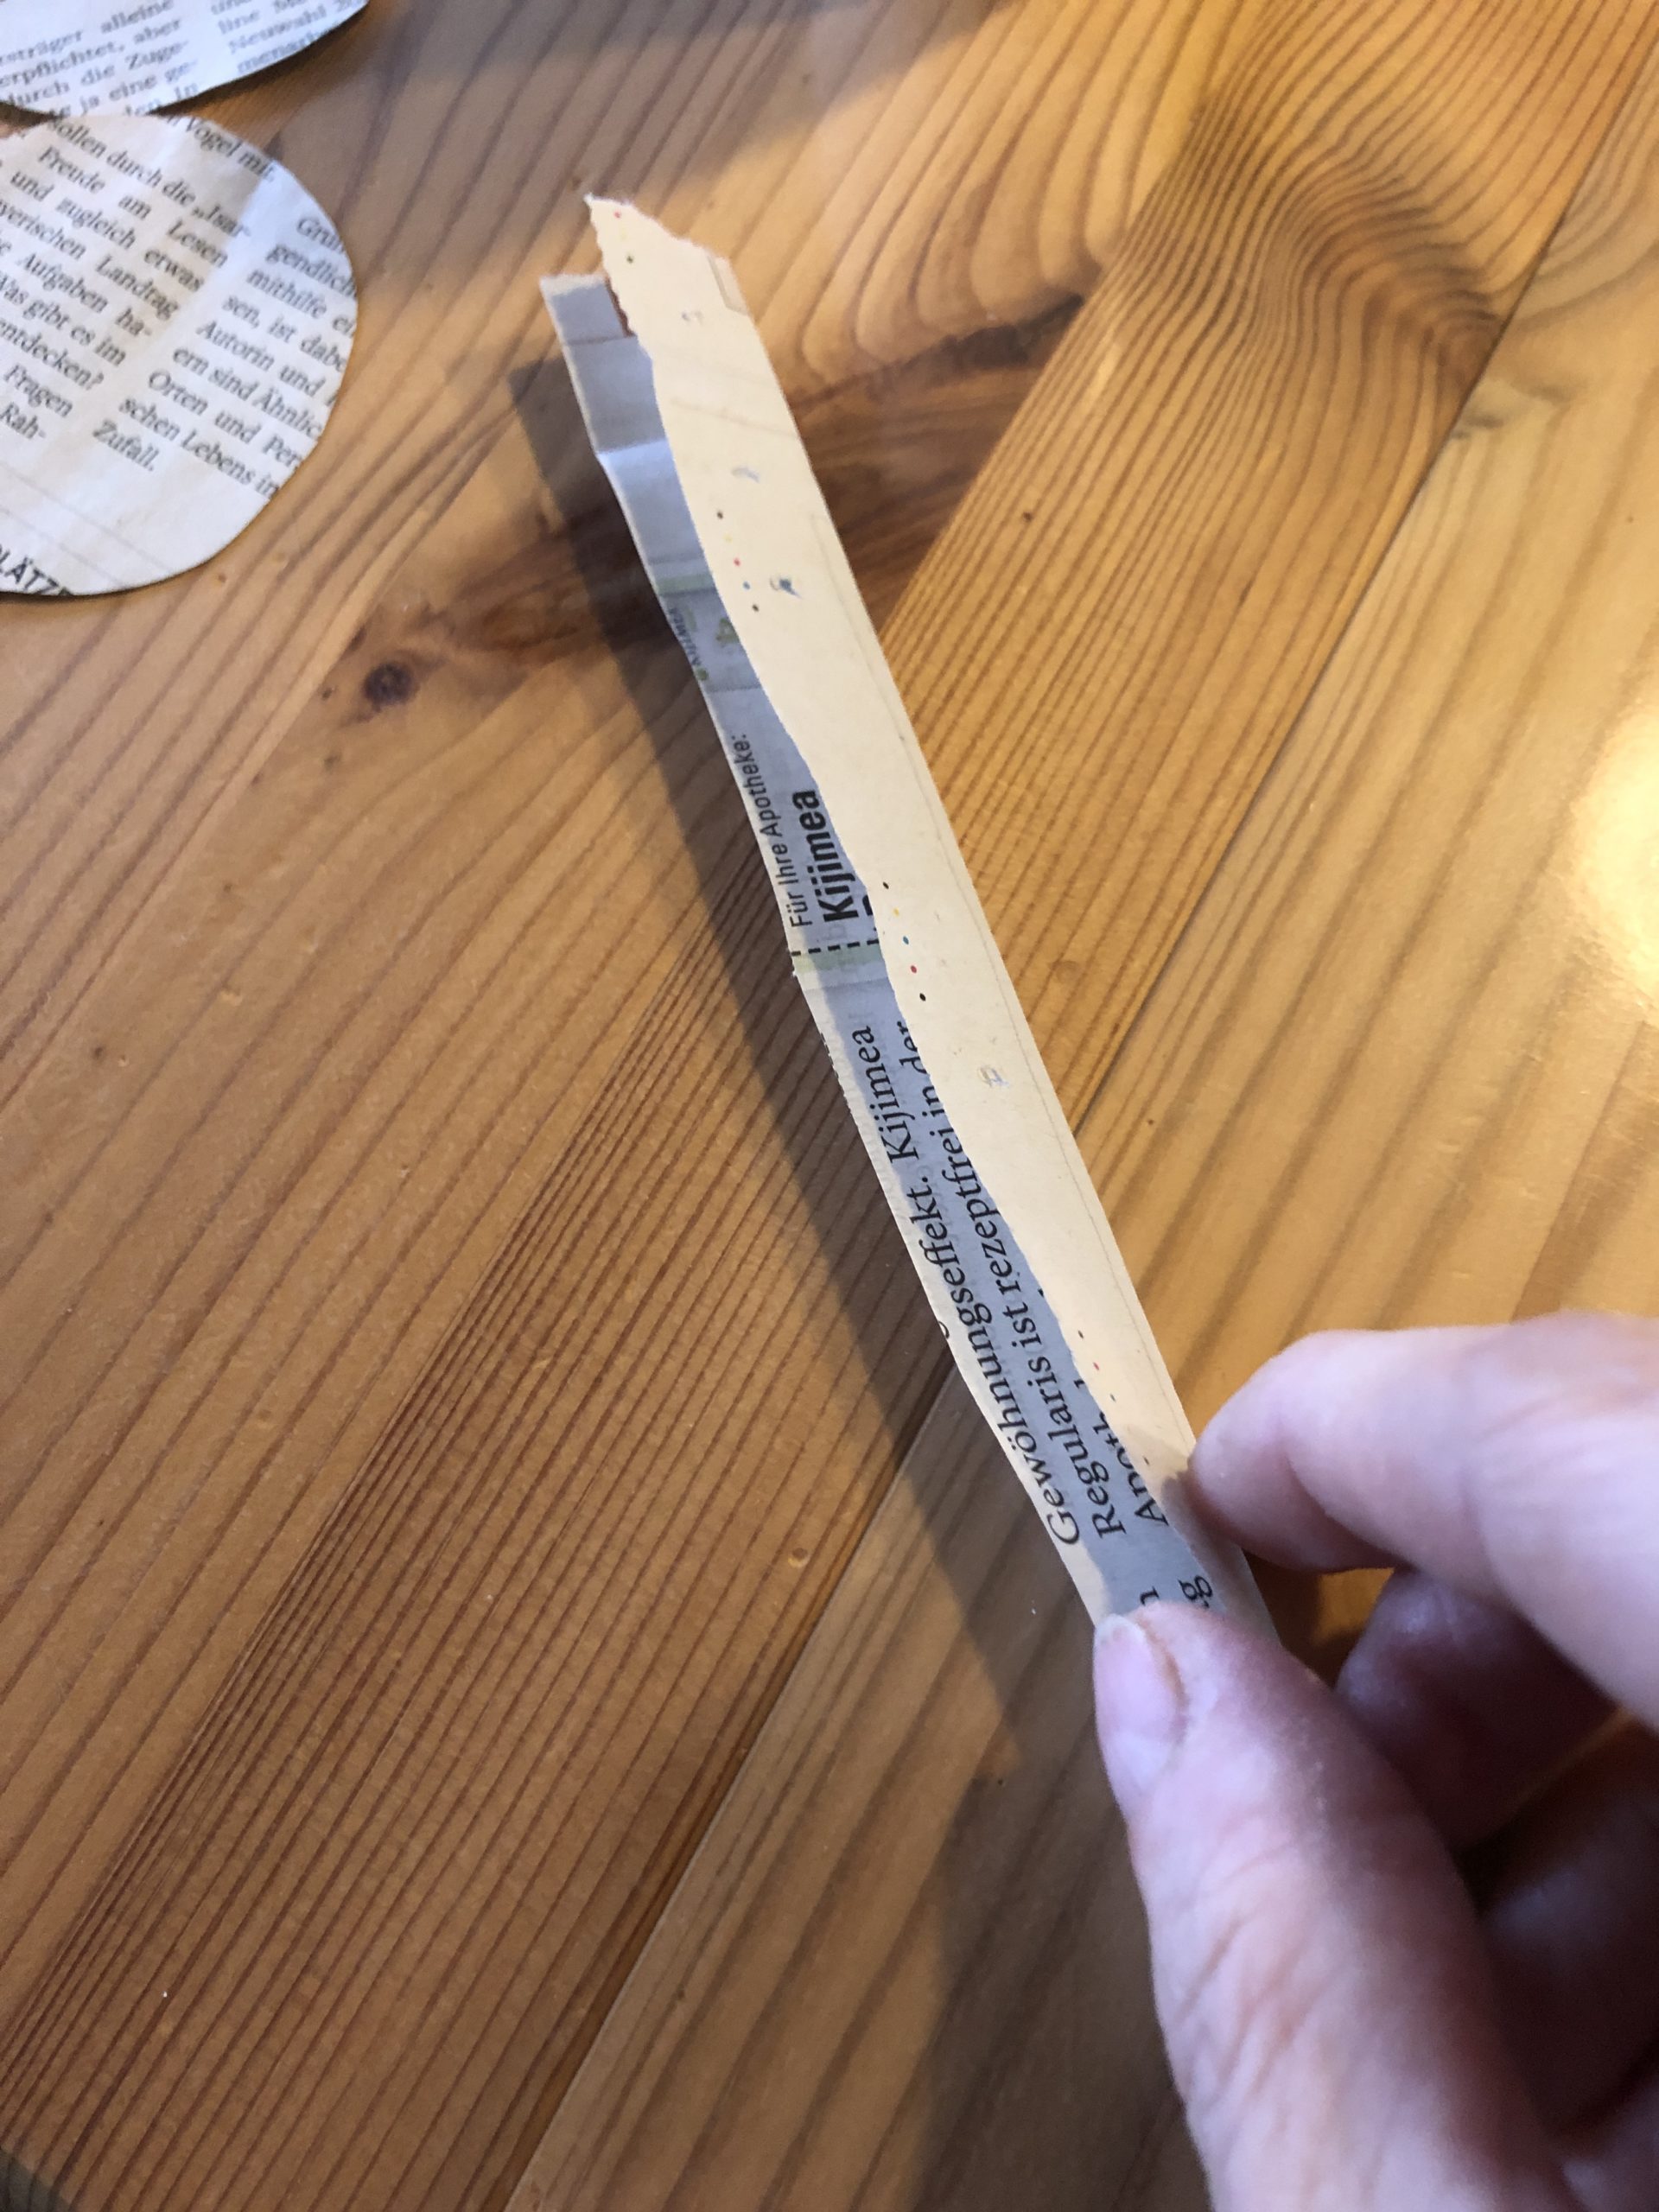
Then you cut a strip of newspaper (also about 7cm long), which you fold in the middle once after the length.
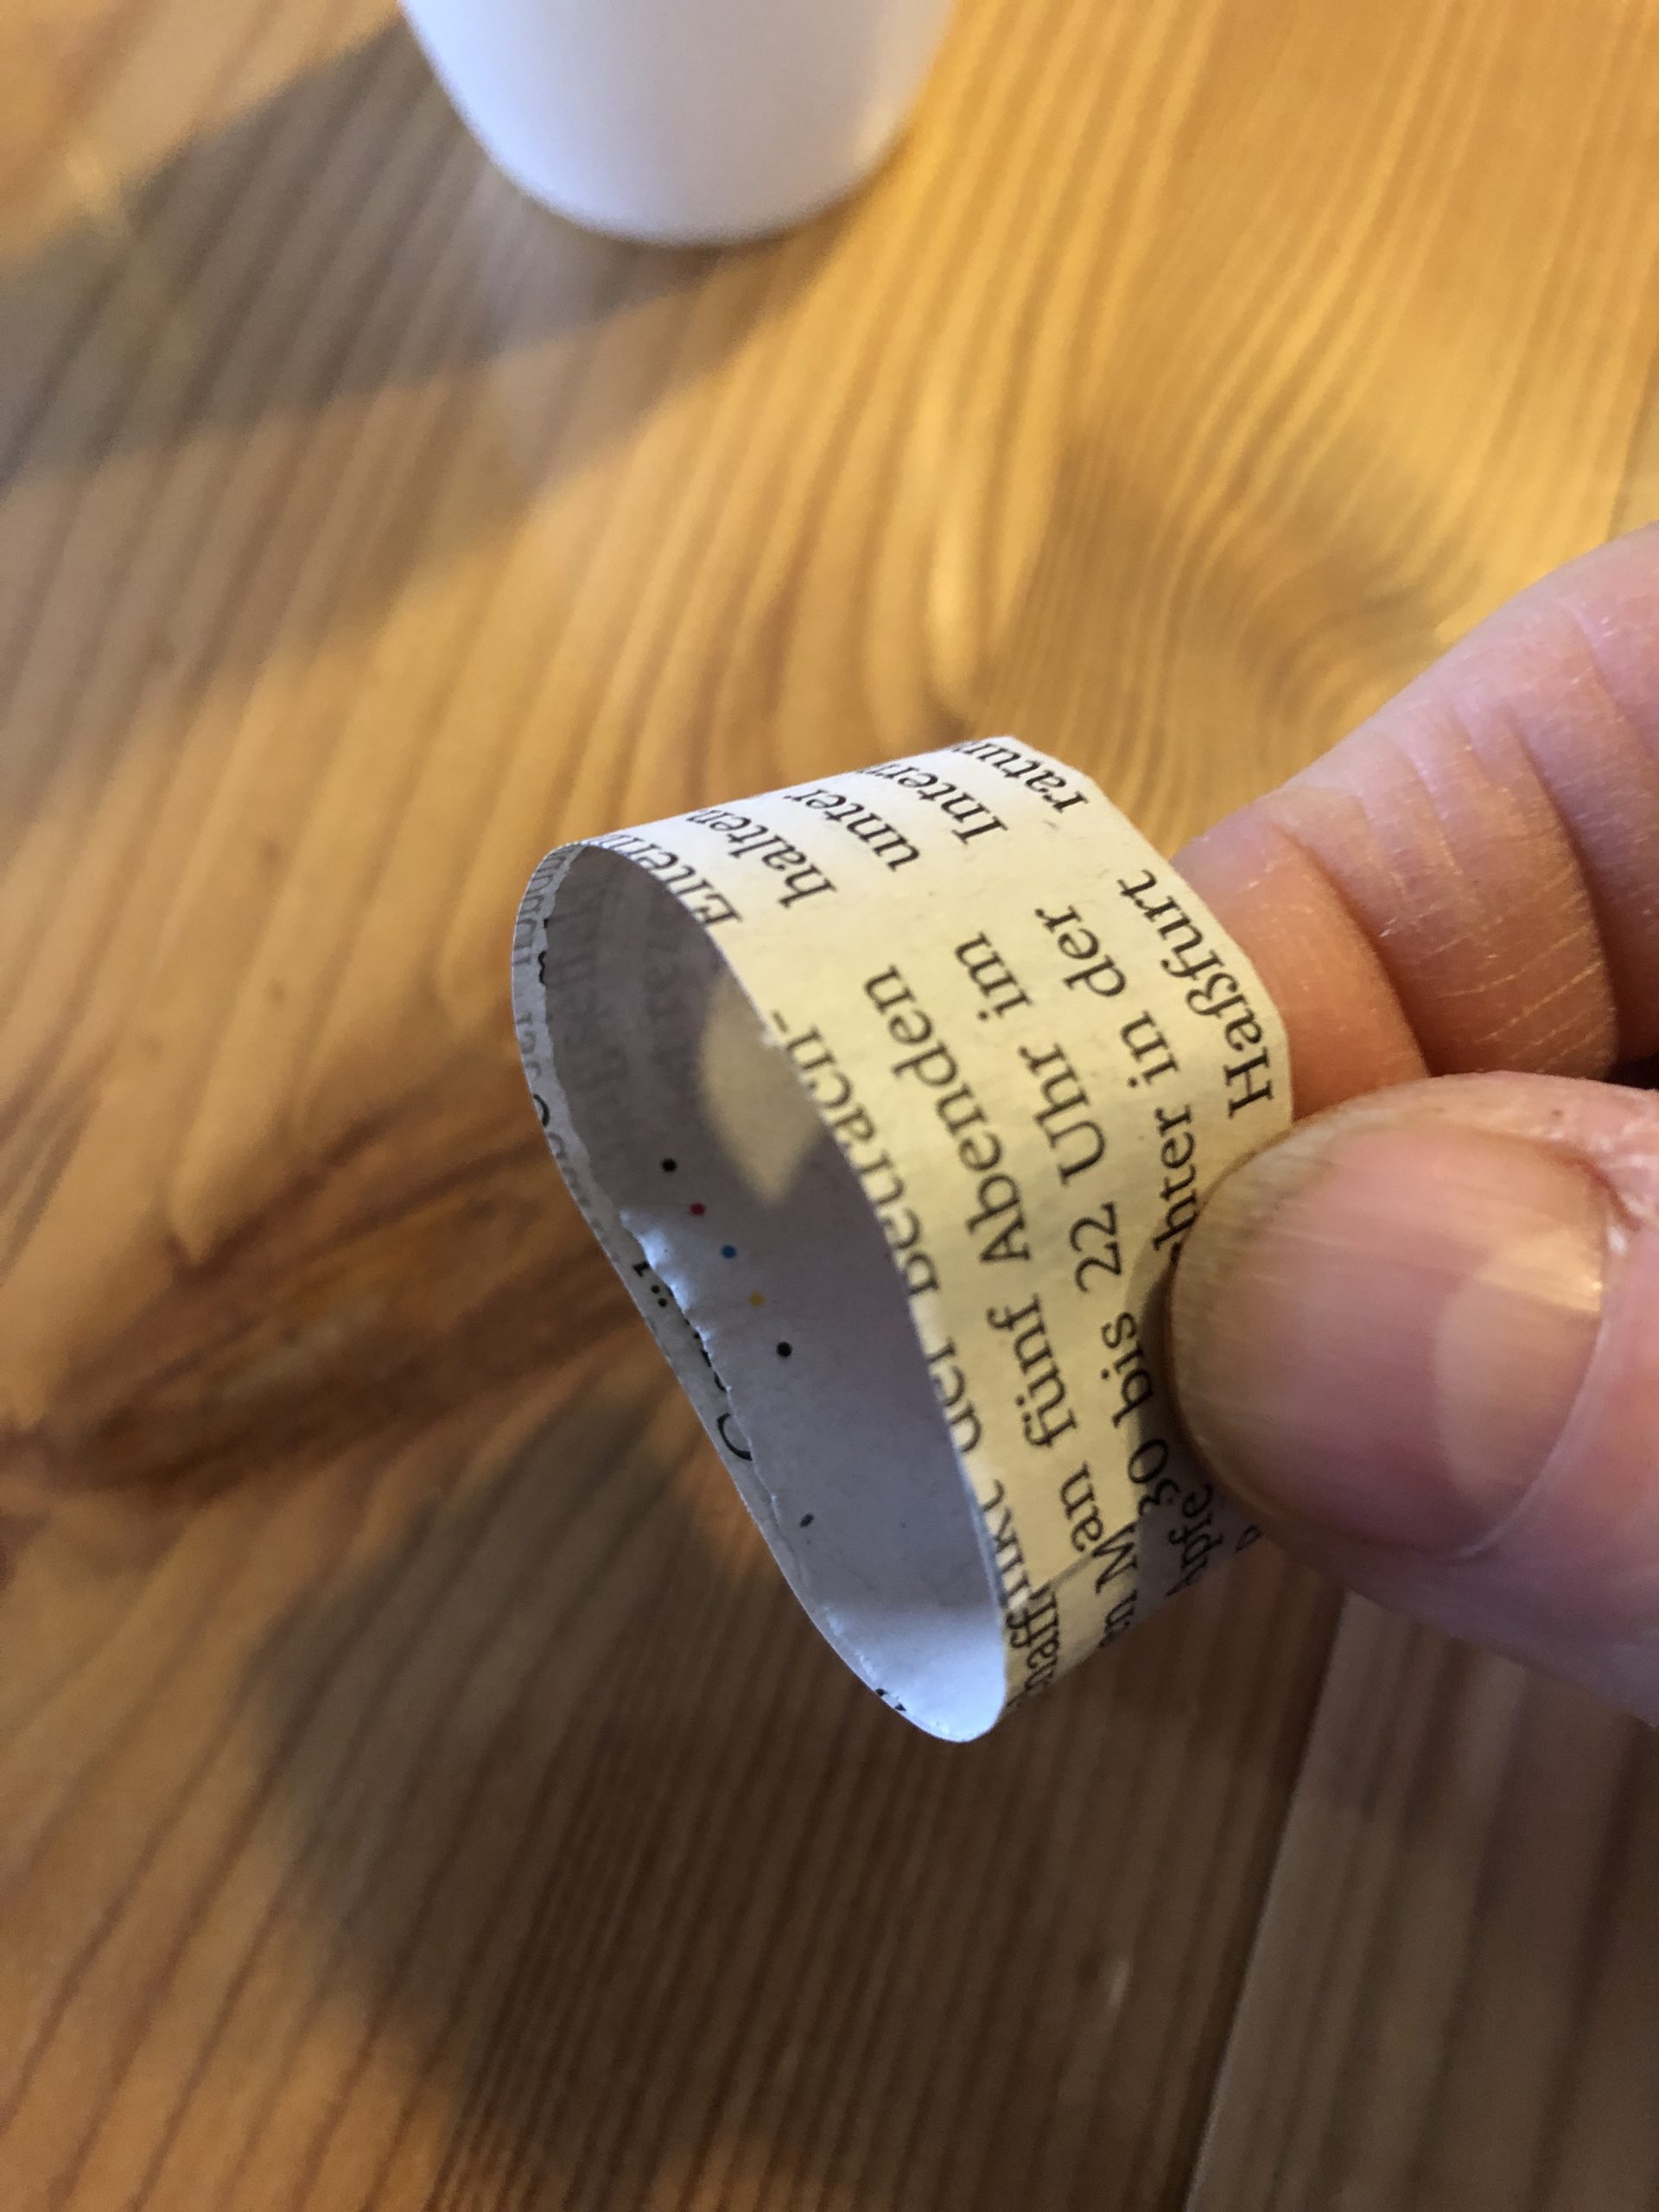
Now you put the strip as a ring and stick the ends together on top of each other.
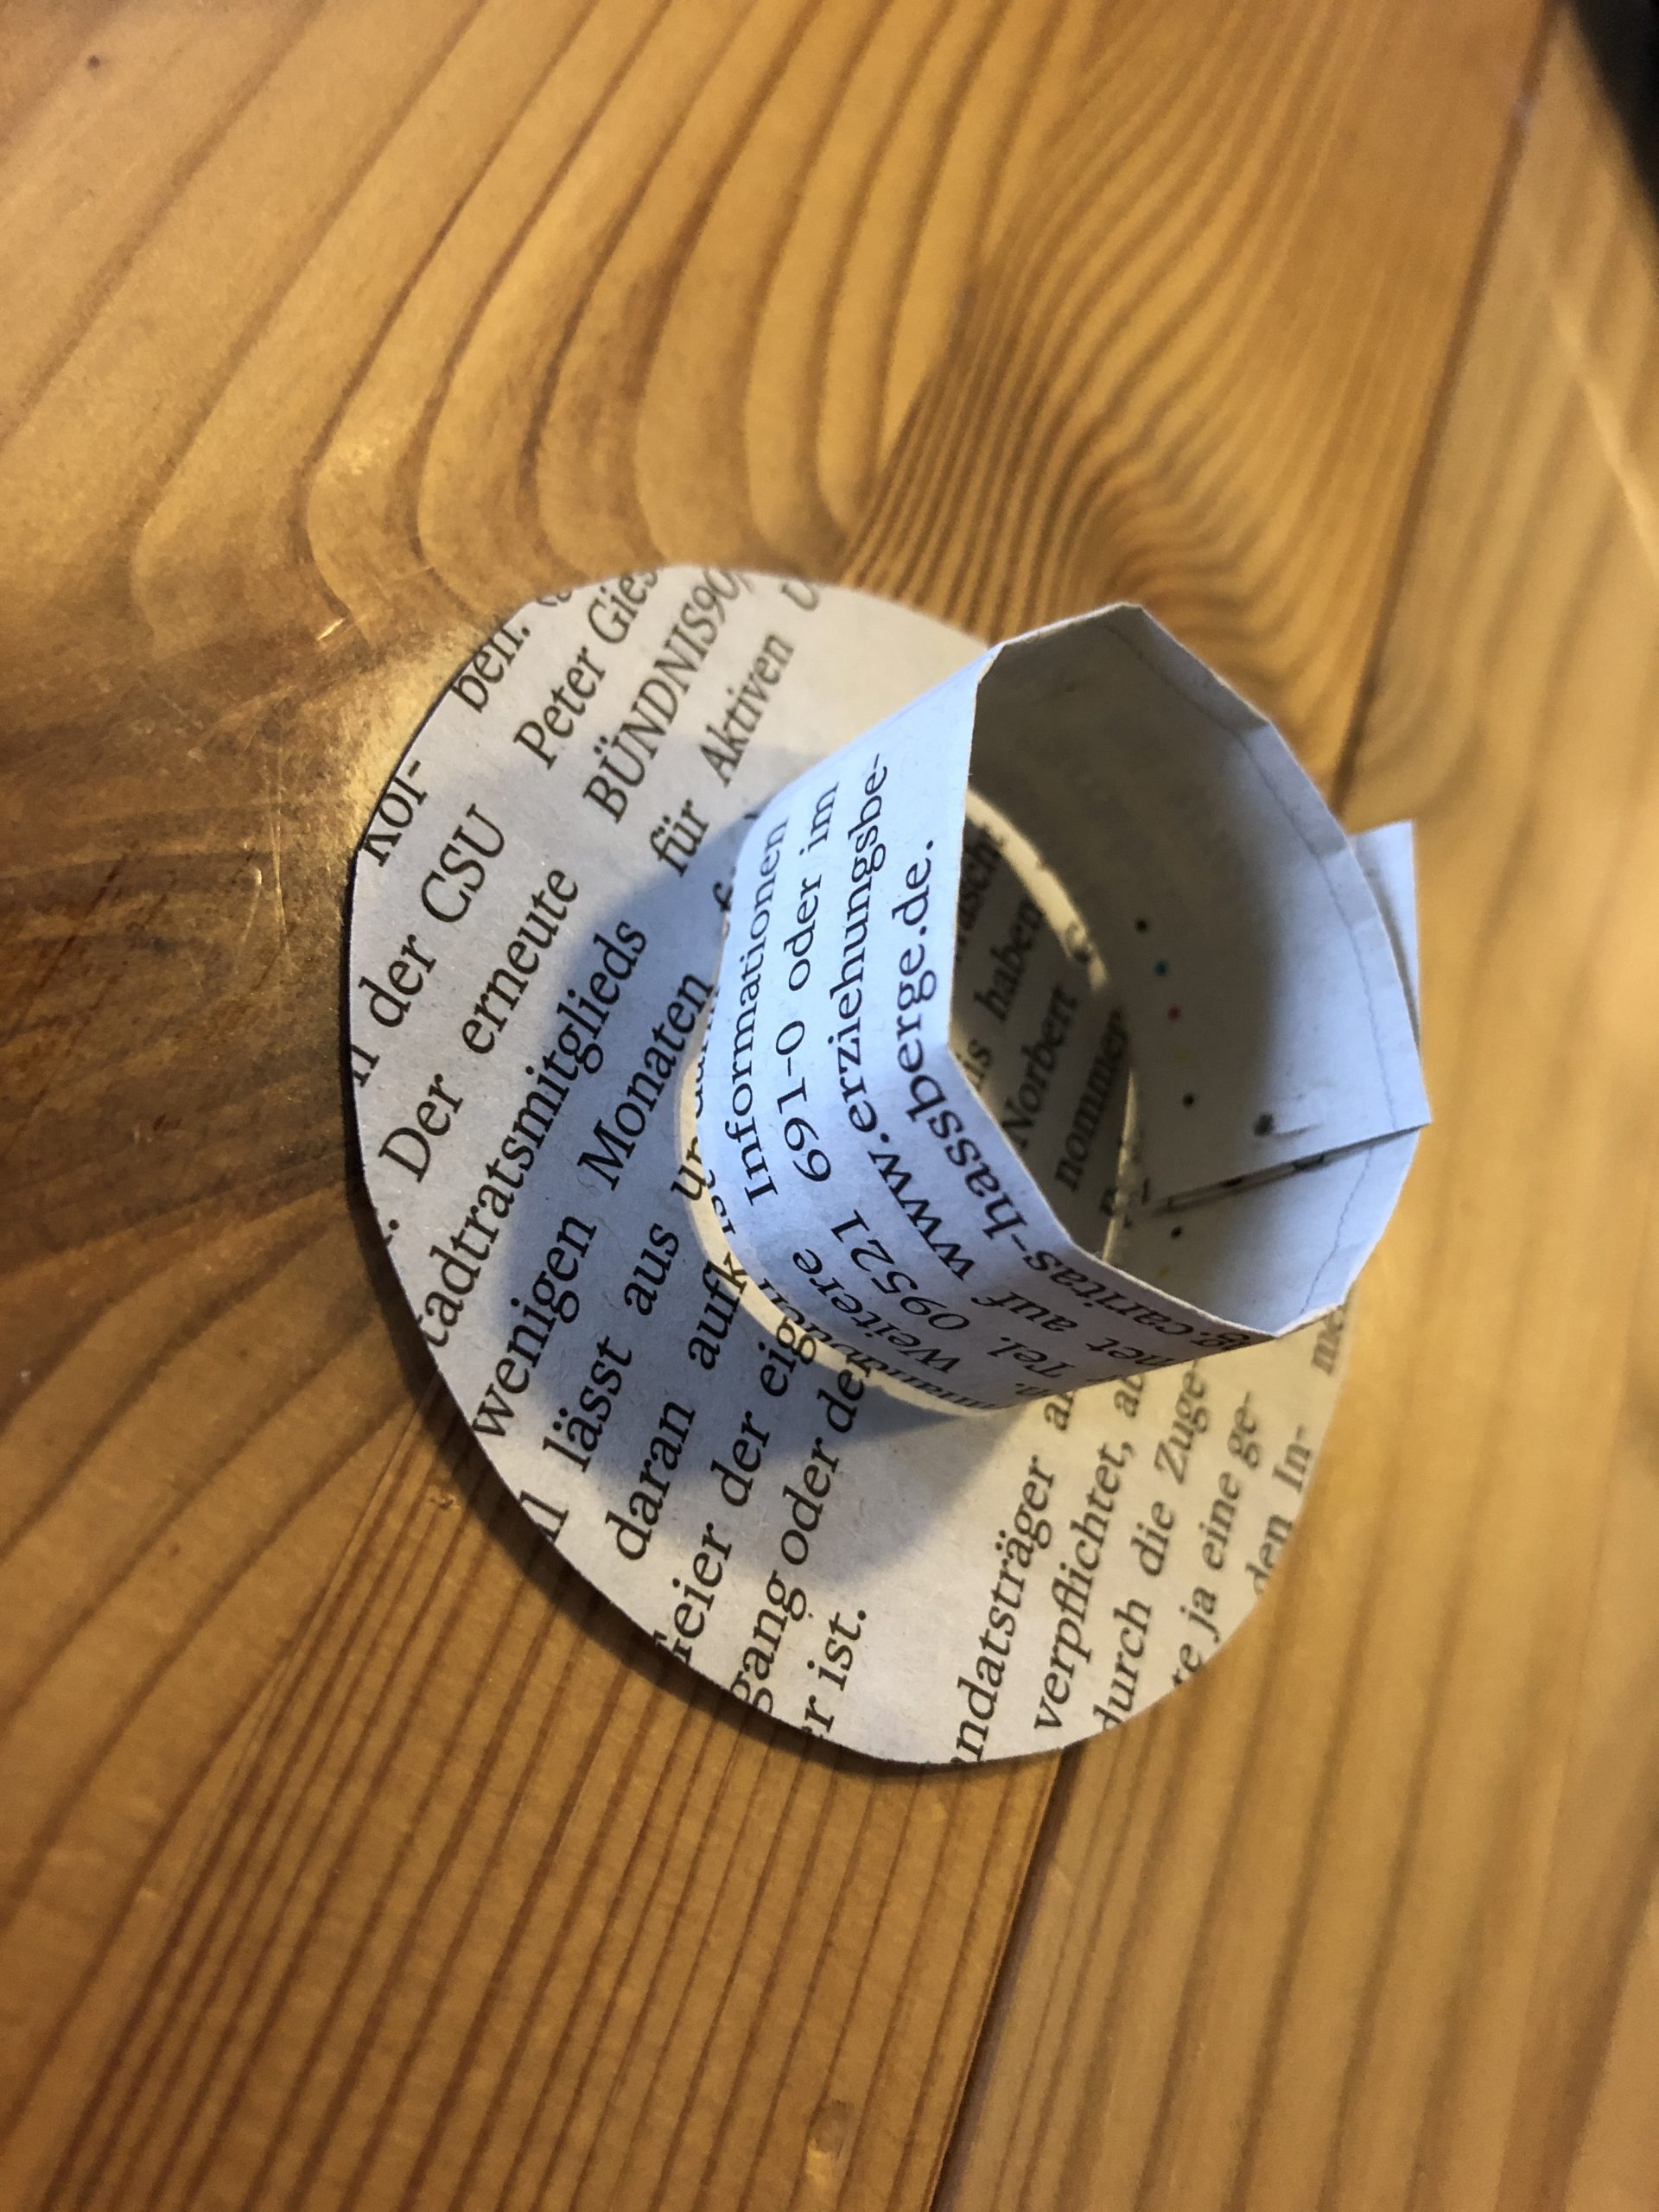
This newspaper ring serves as the top of the hat. Stick it centered on the paper circle.
Your hat's ready.
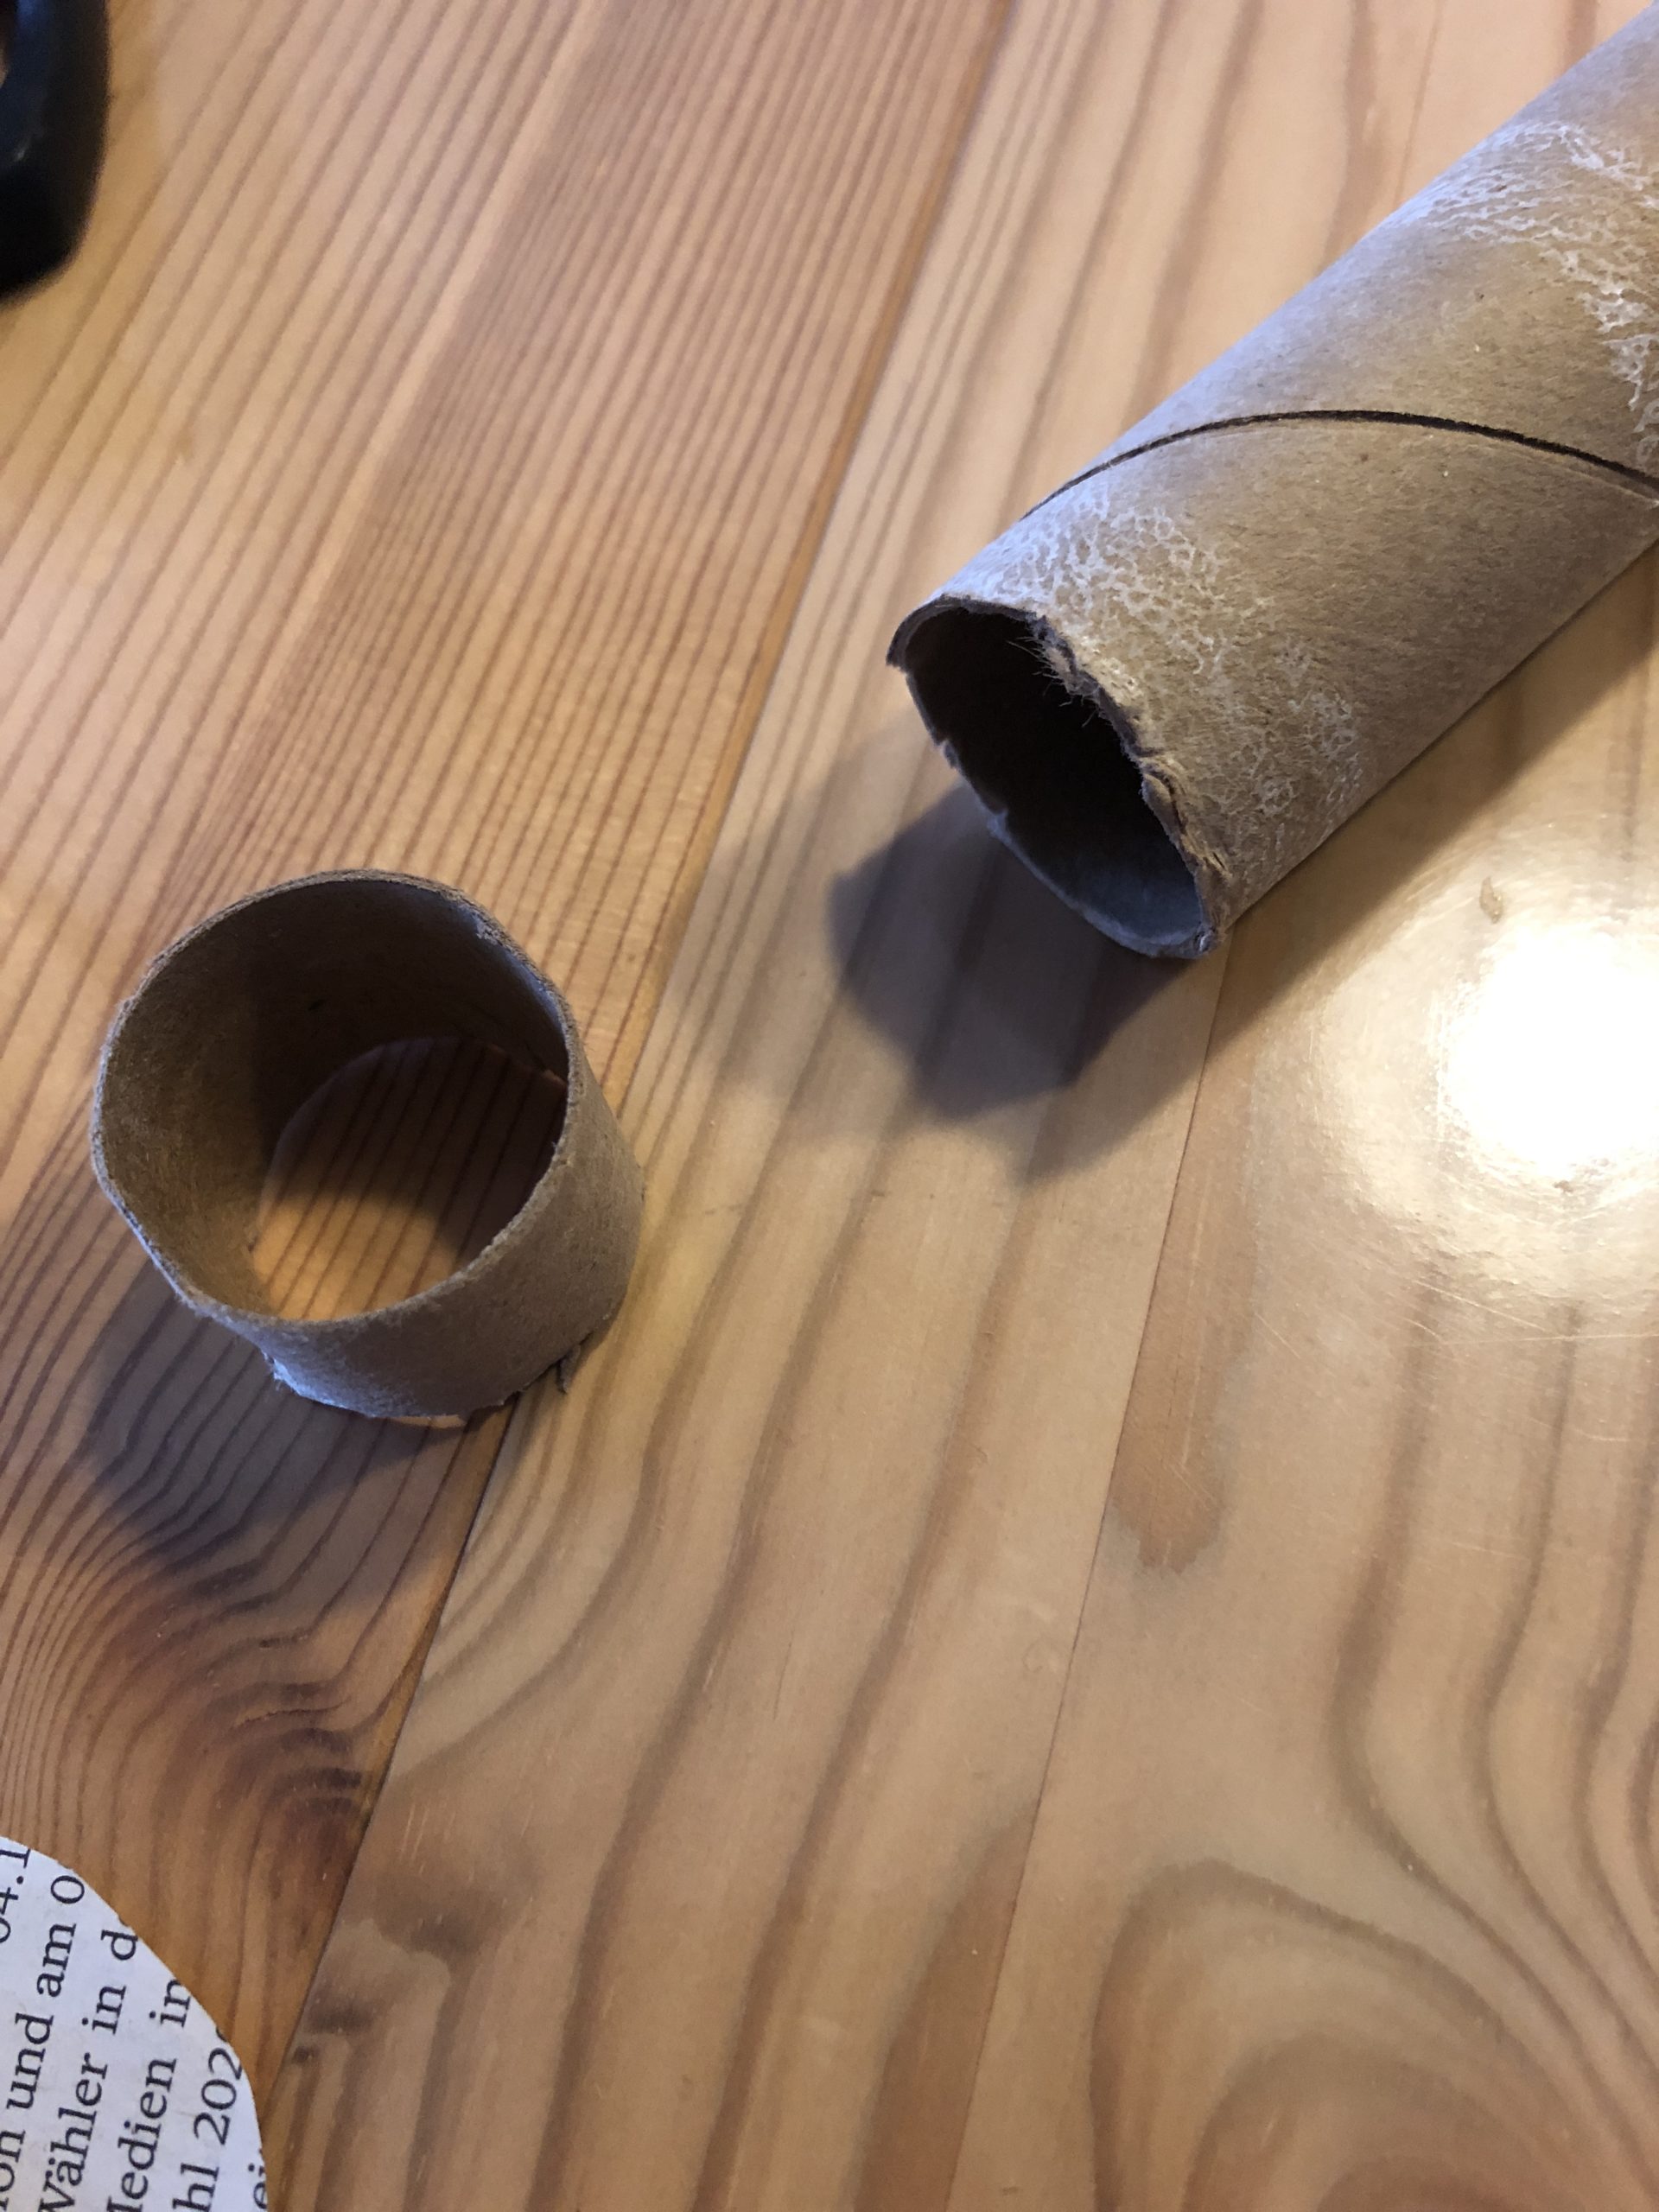
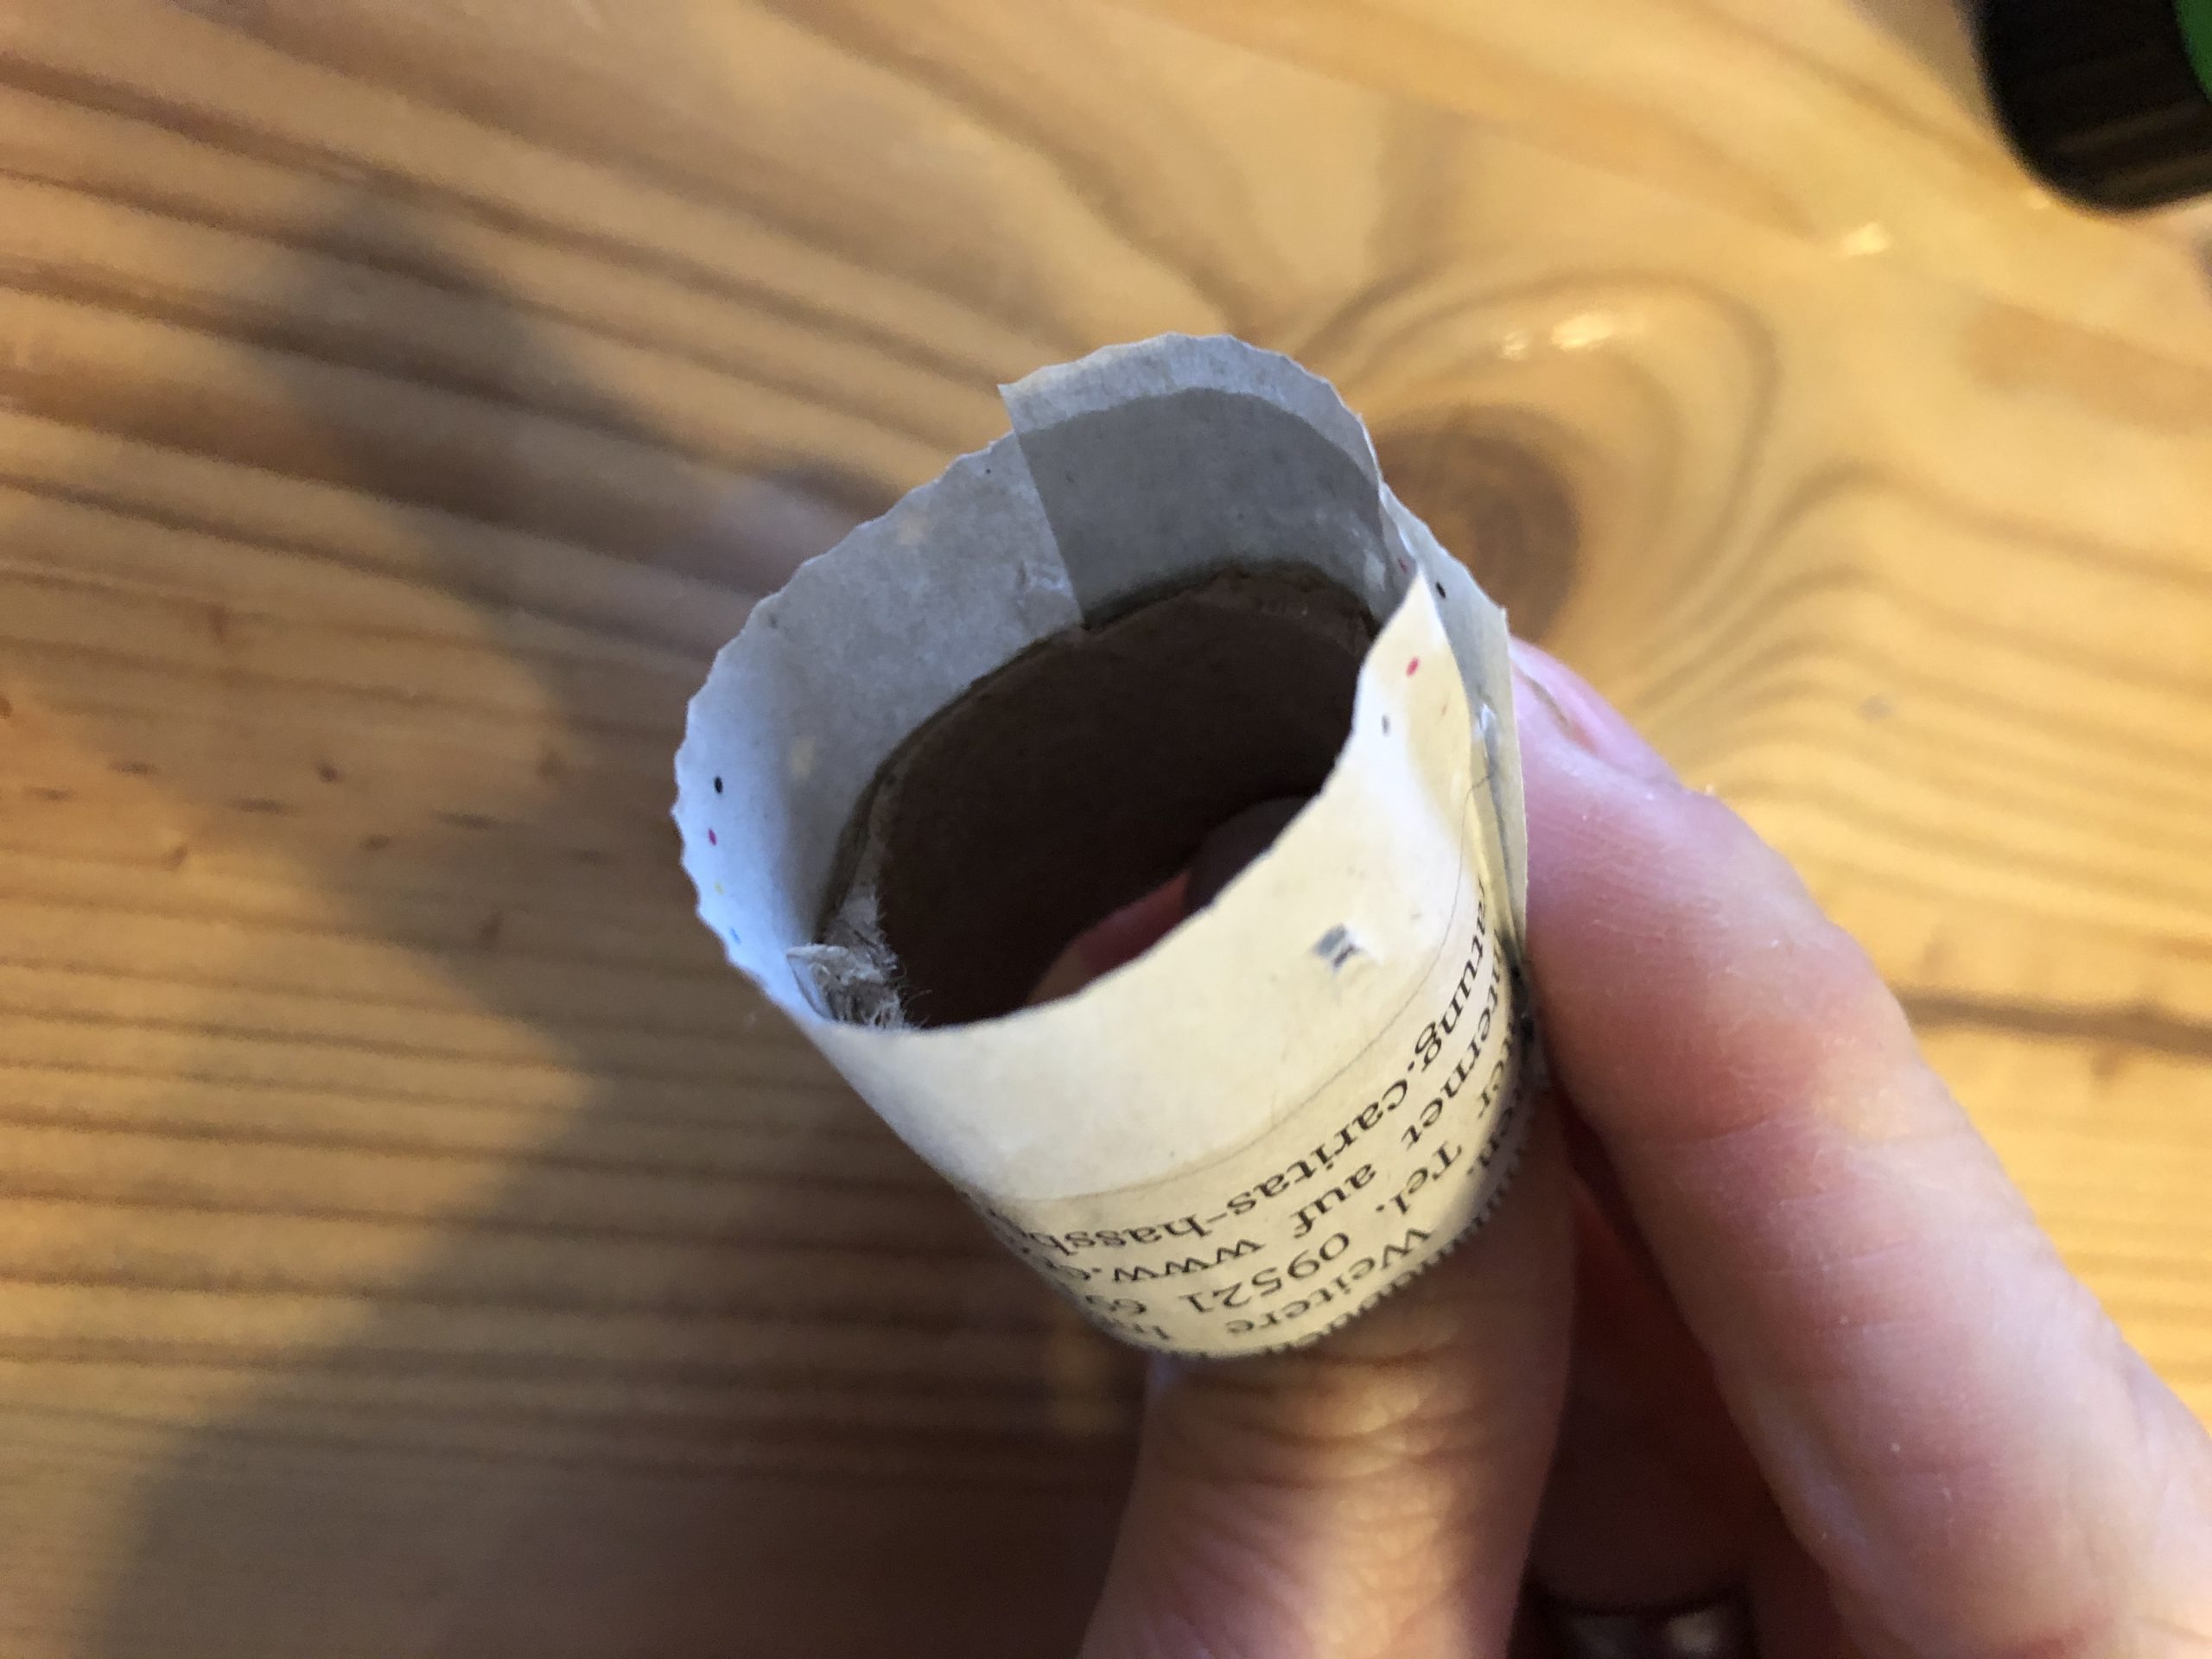
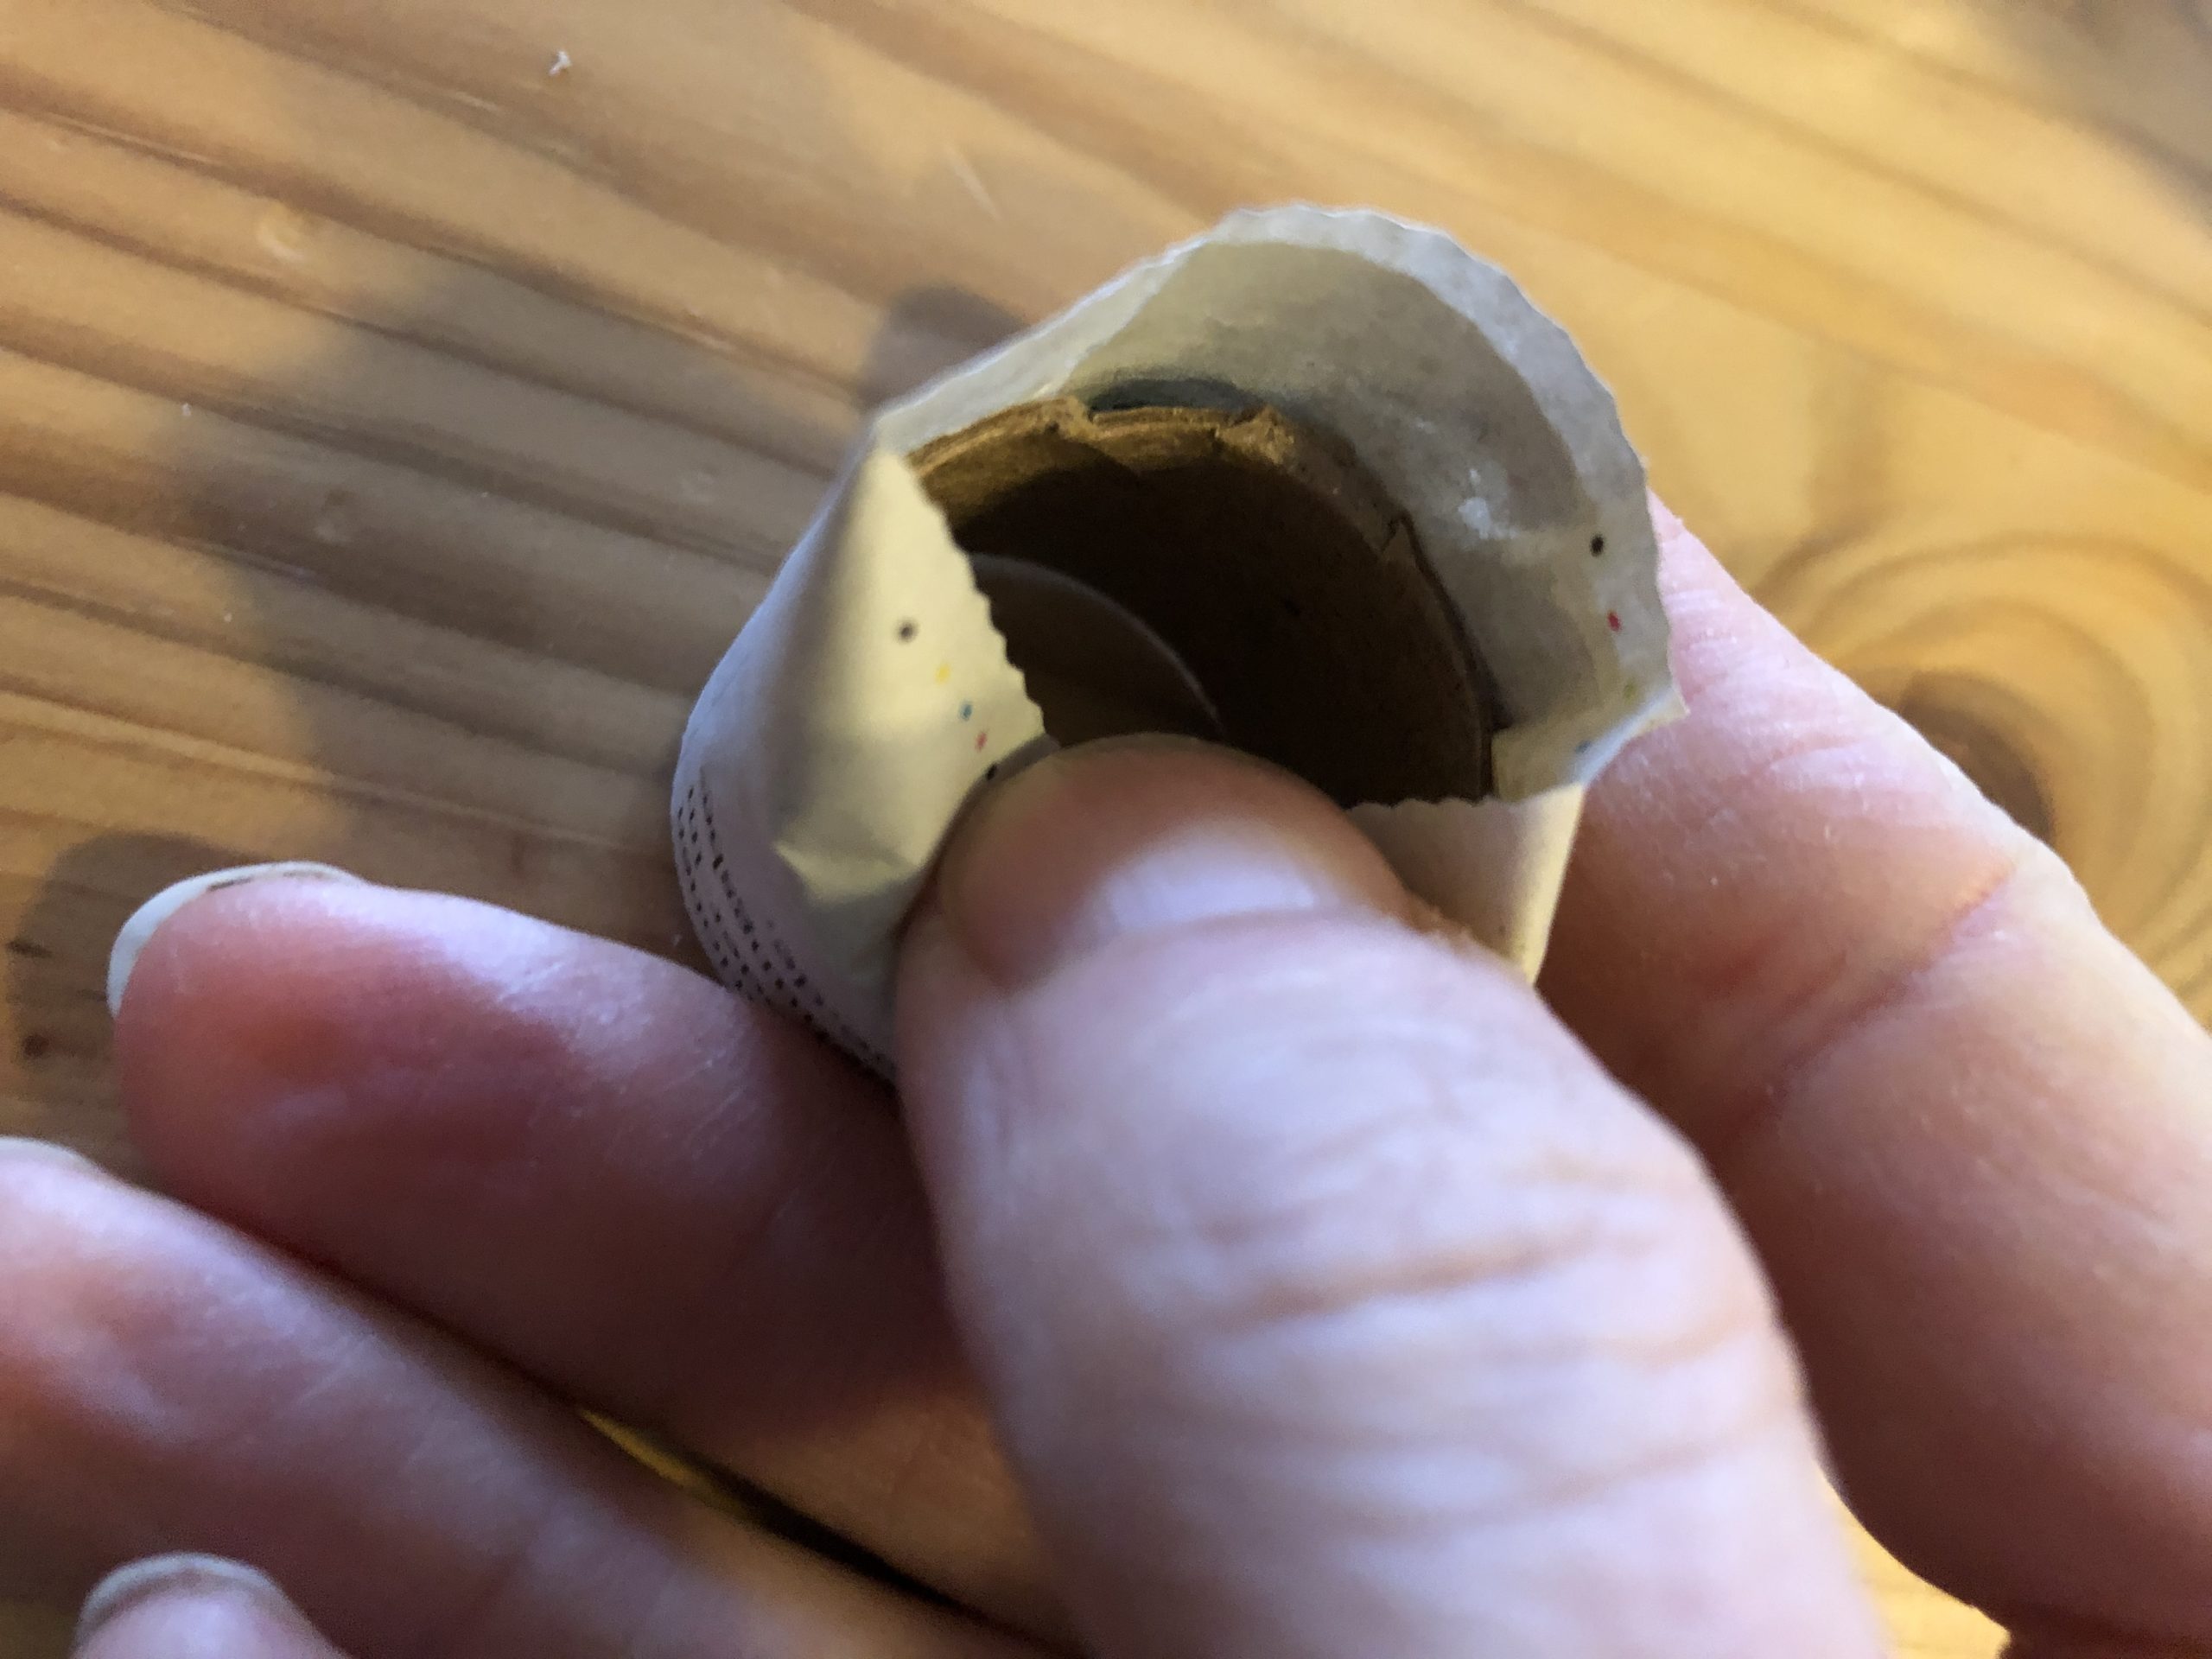
For this you cut off a piece of a cardboard roll (e.g. toilet roll or kitchen roll) (circa 2cm).
Then cut off a strip of newspaper and stick it around the roll. Make sure that you close the newspaper strip with the roll on one side and survive the newspaper on the other side.
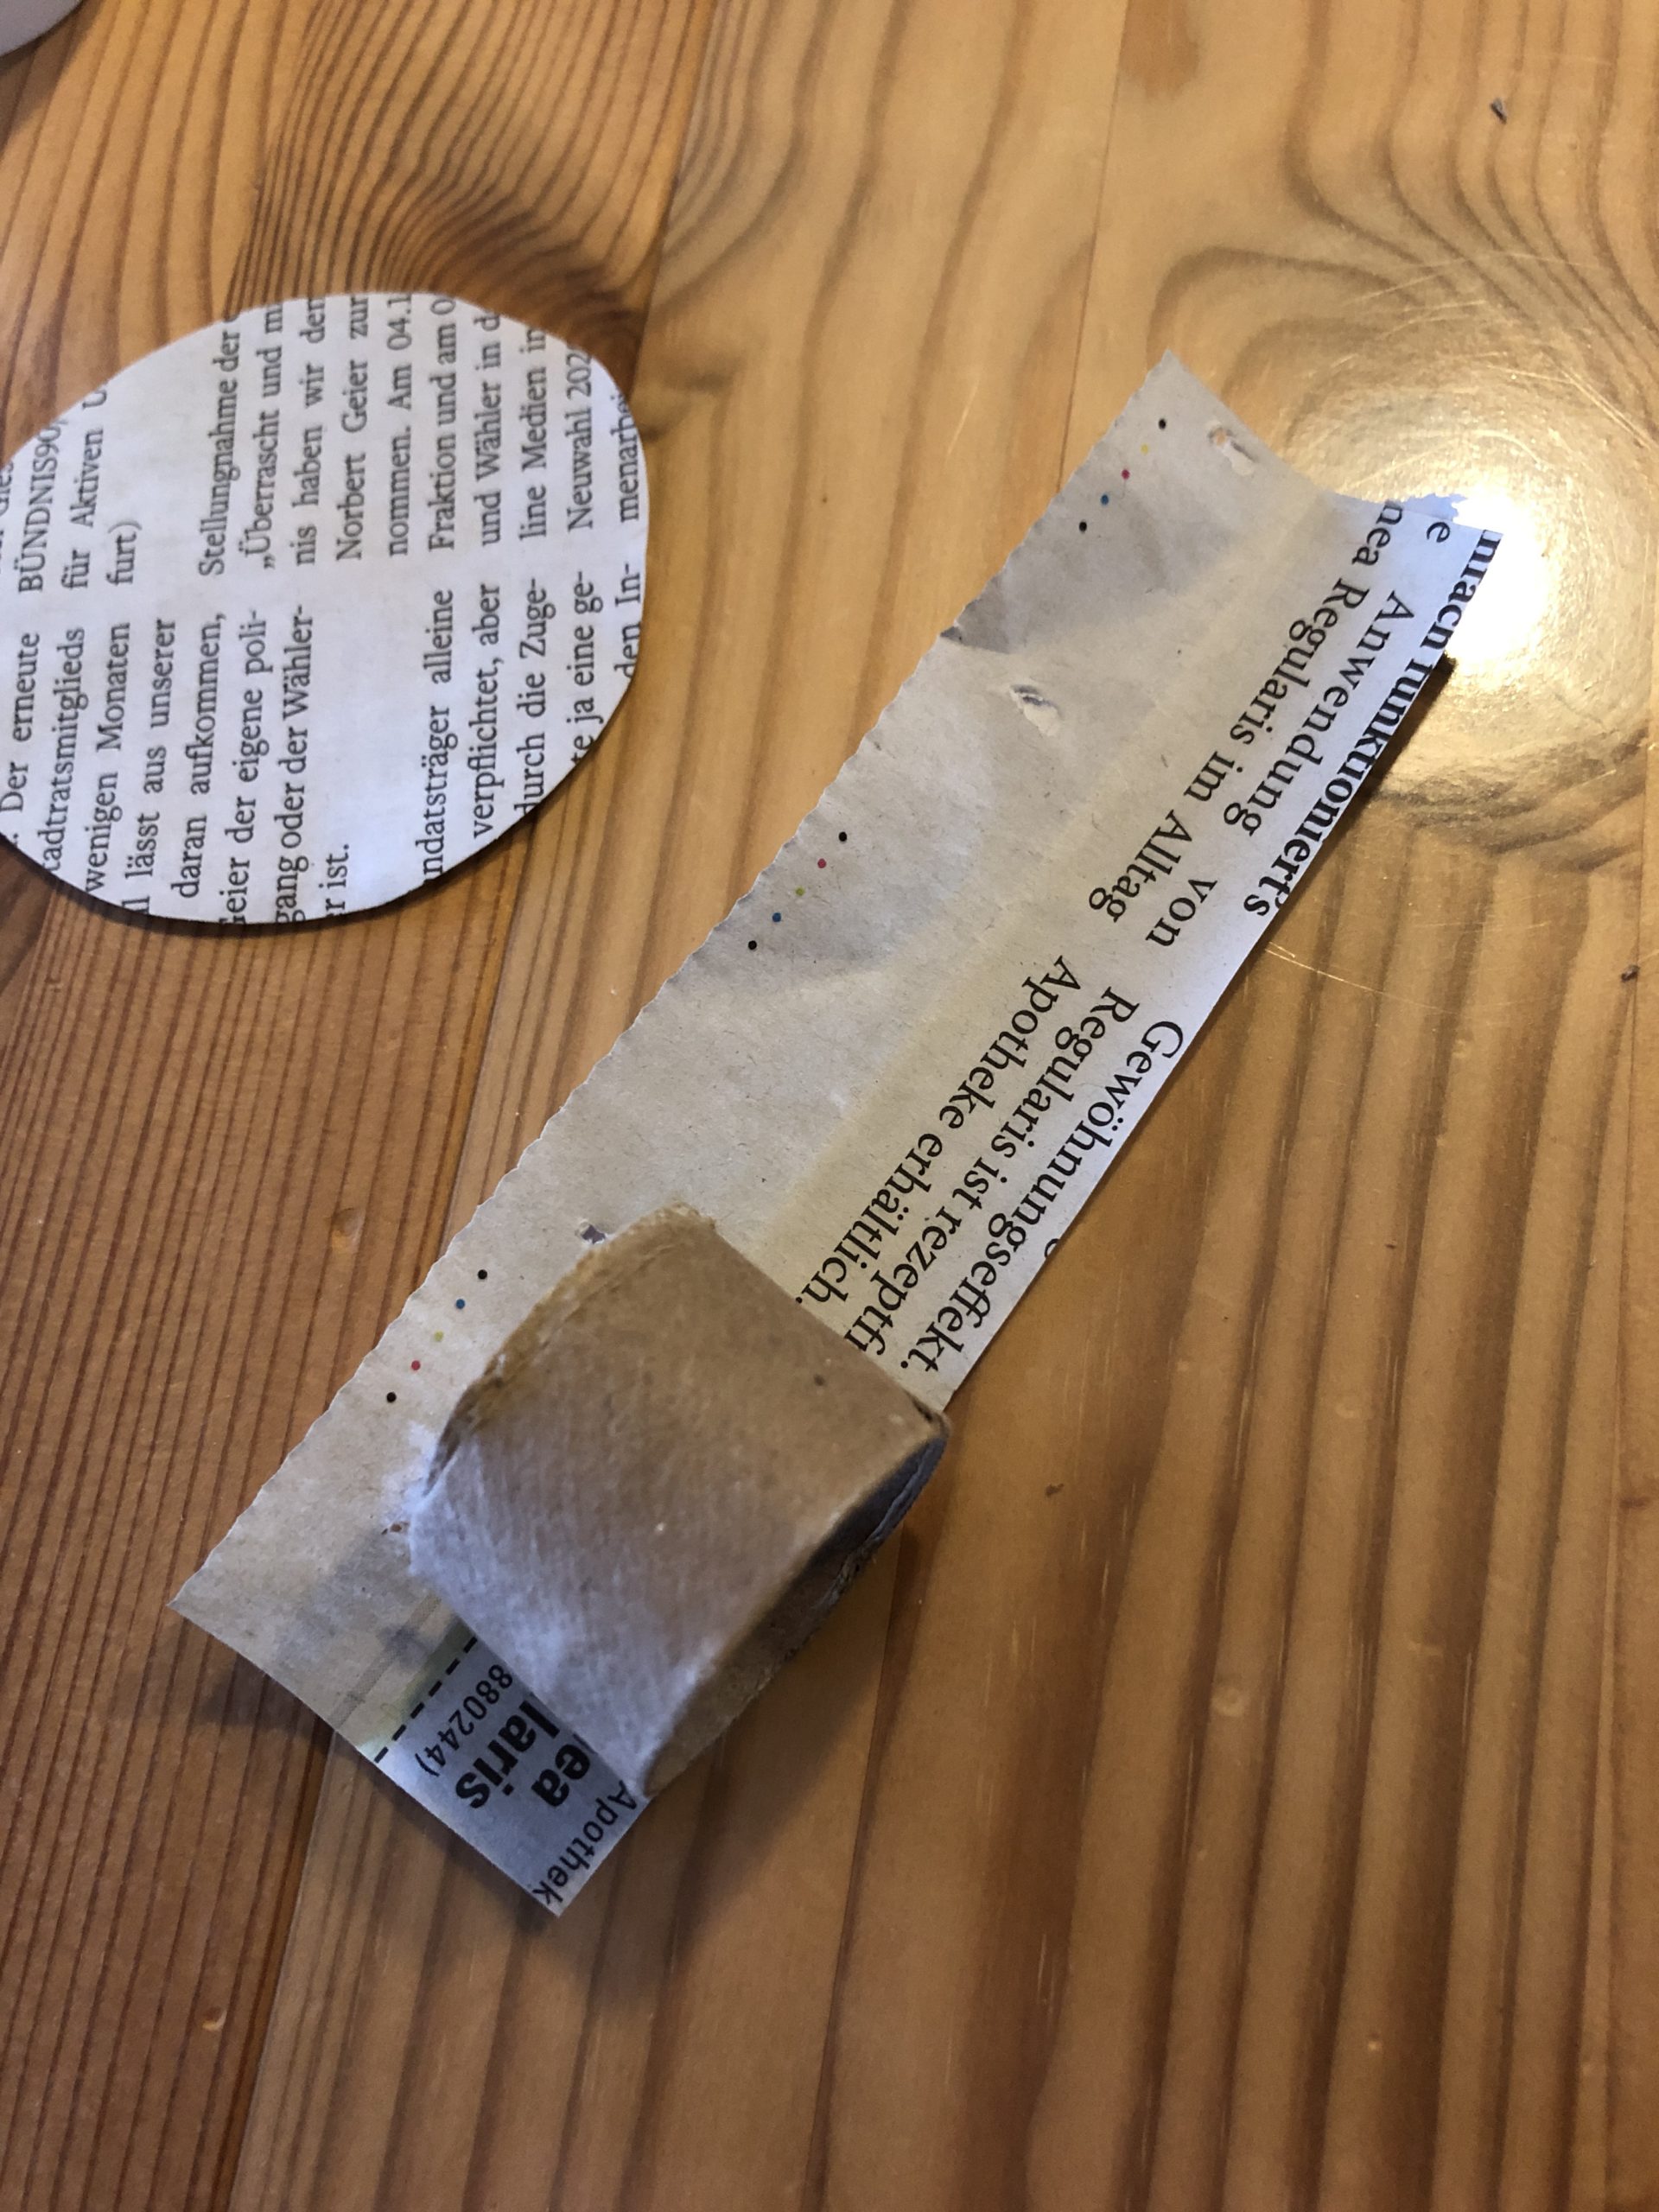
Now bend the overhanging piece of the newspaper inward.
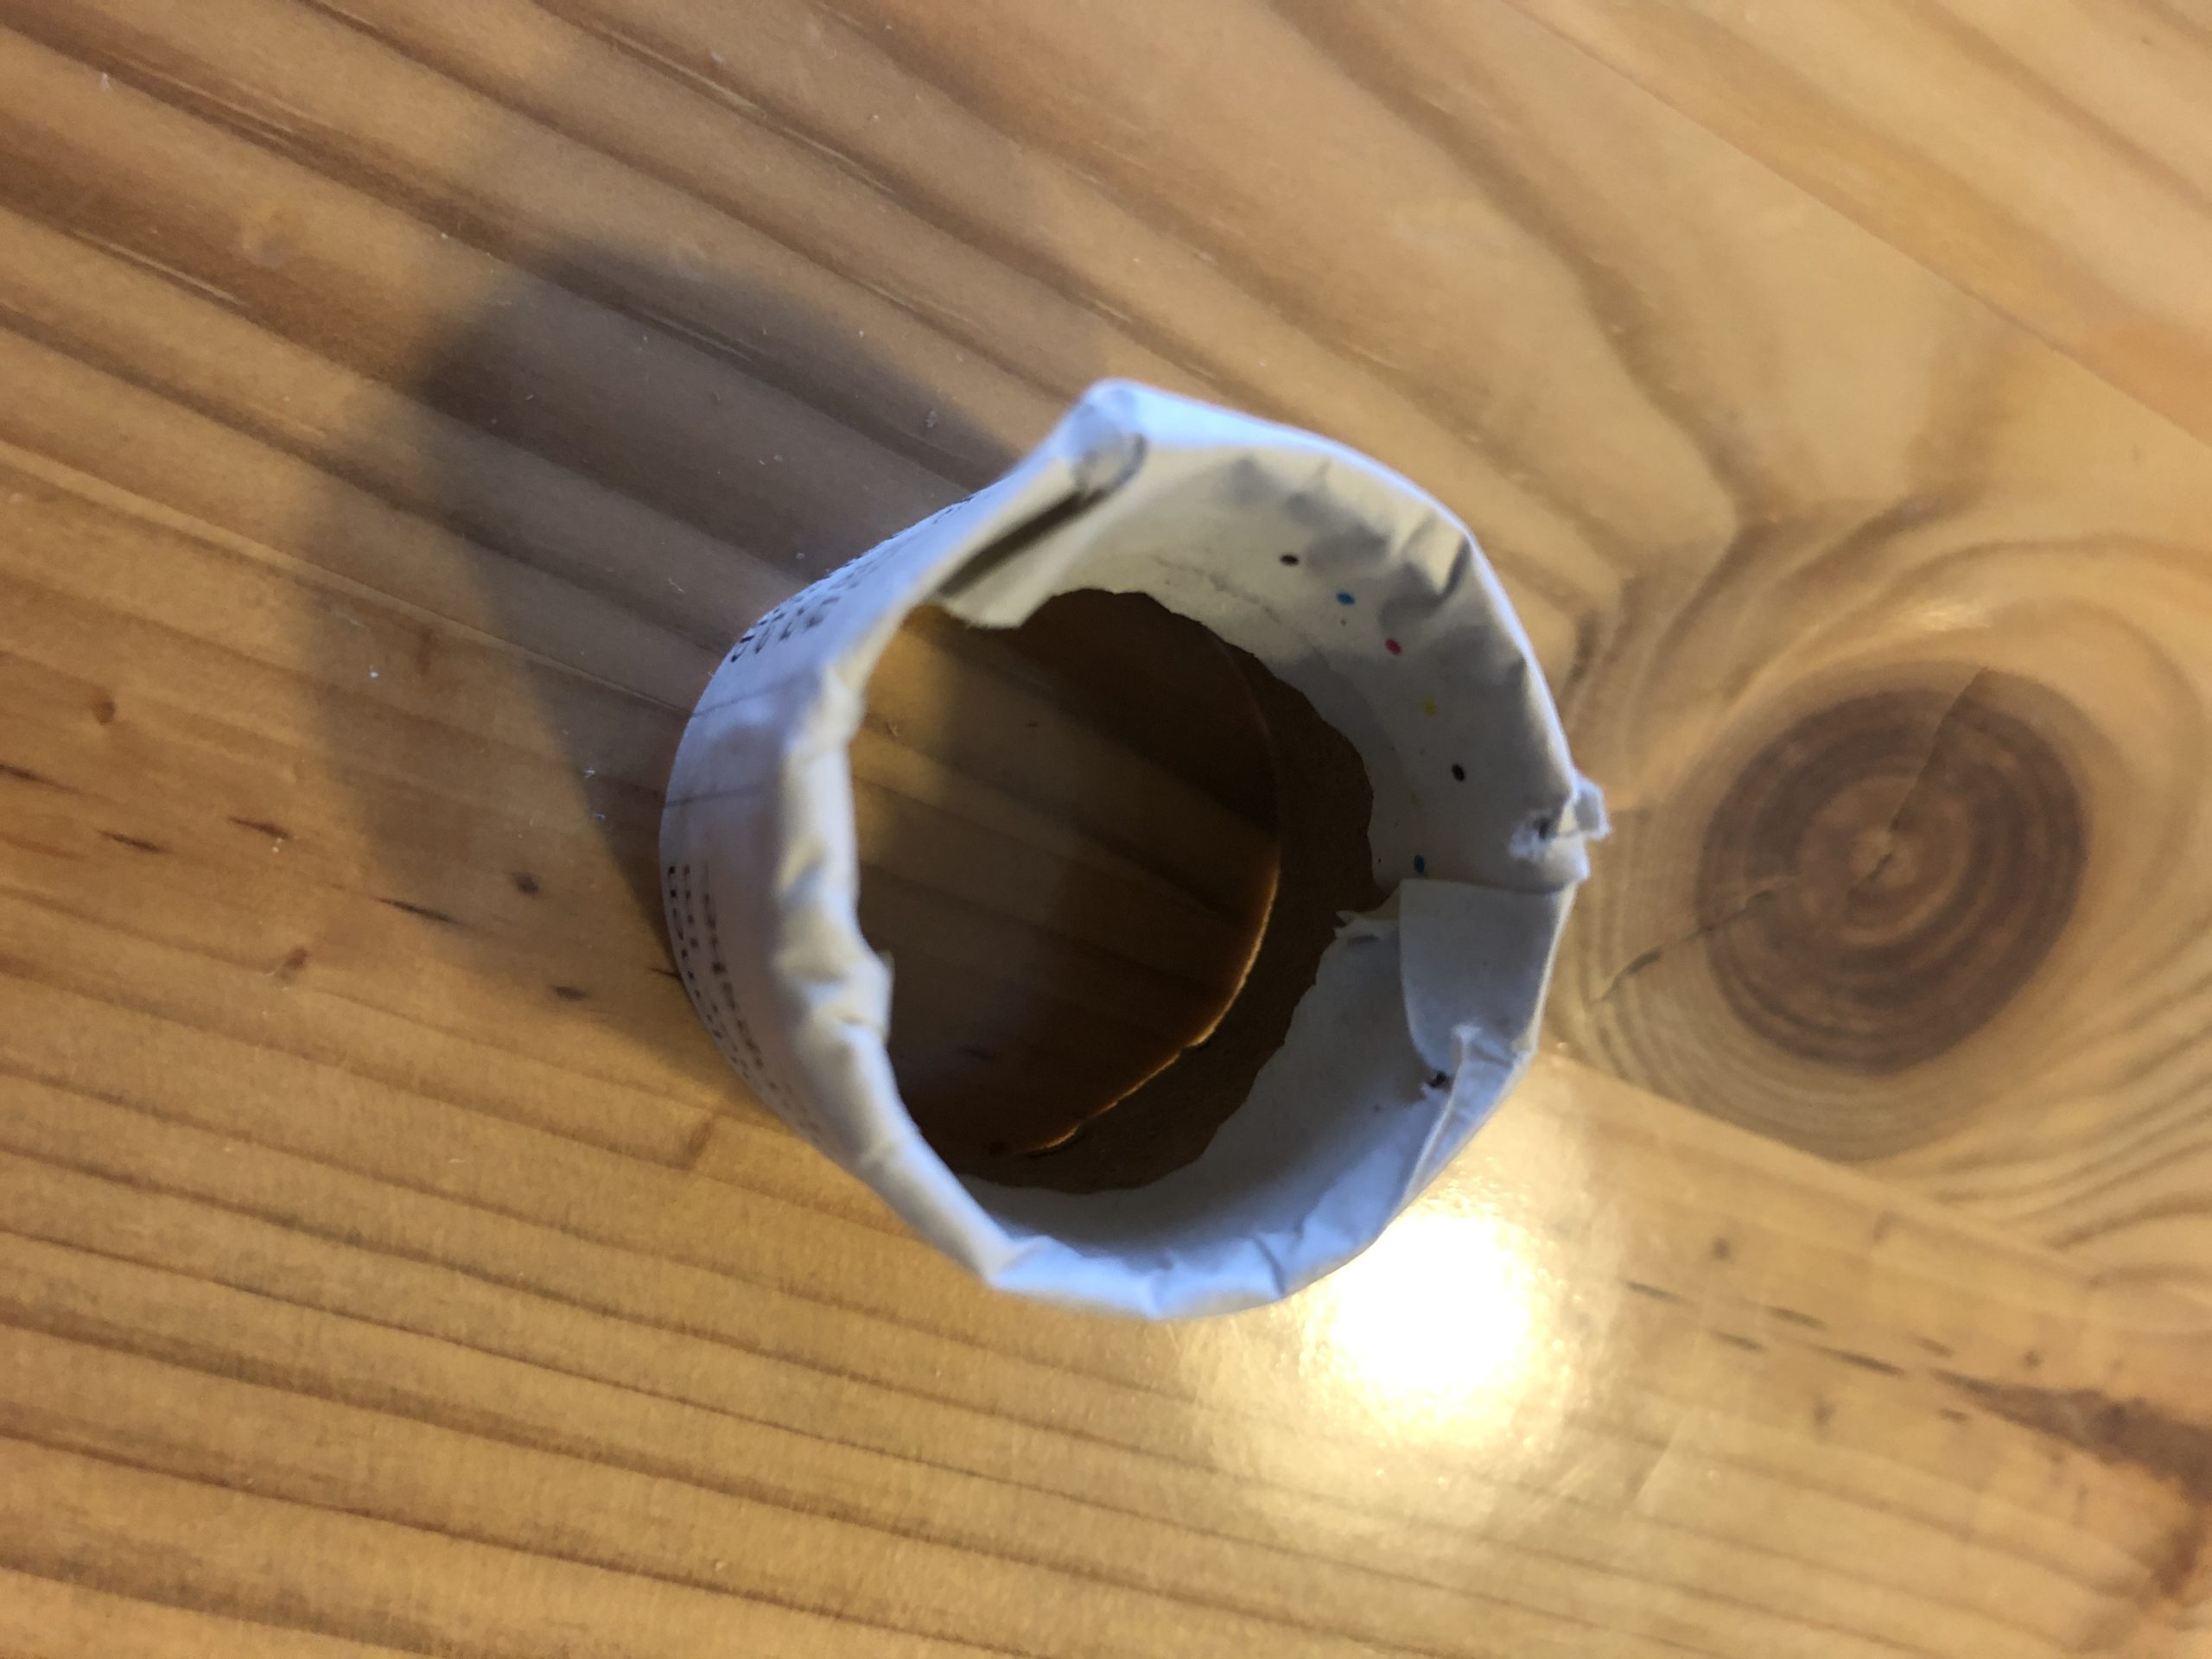
Afterwards, she sticks the newspaper ring on the paper circle.
The hat's ready.
Tip: You can also design the hat with black clay paper or paint it with water color black.
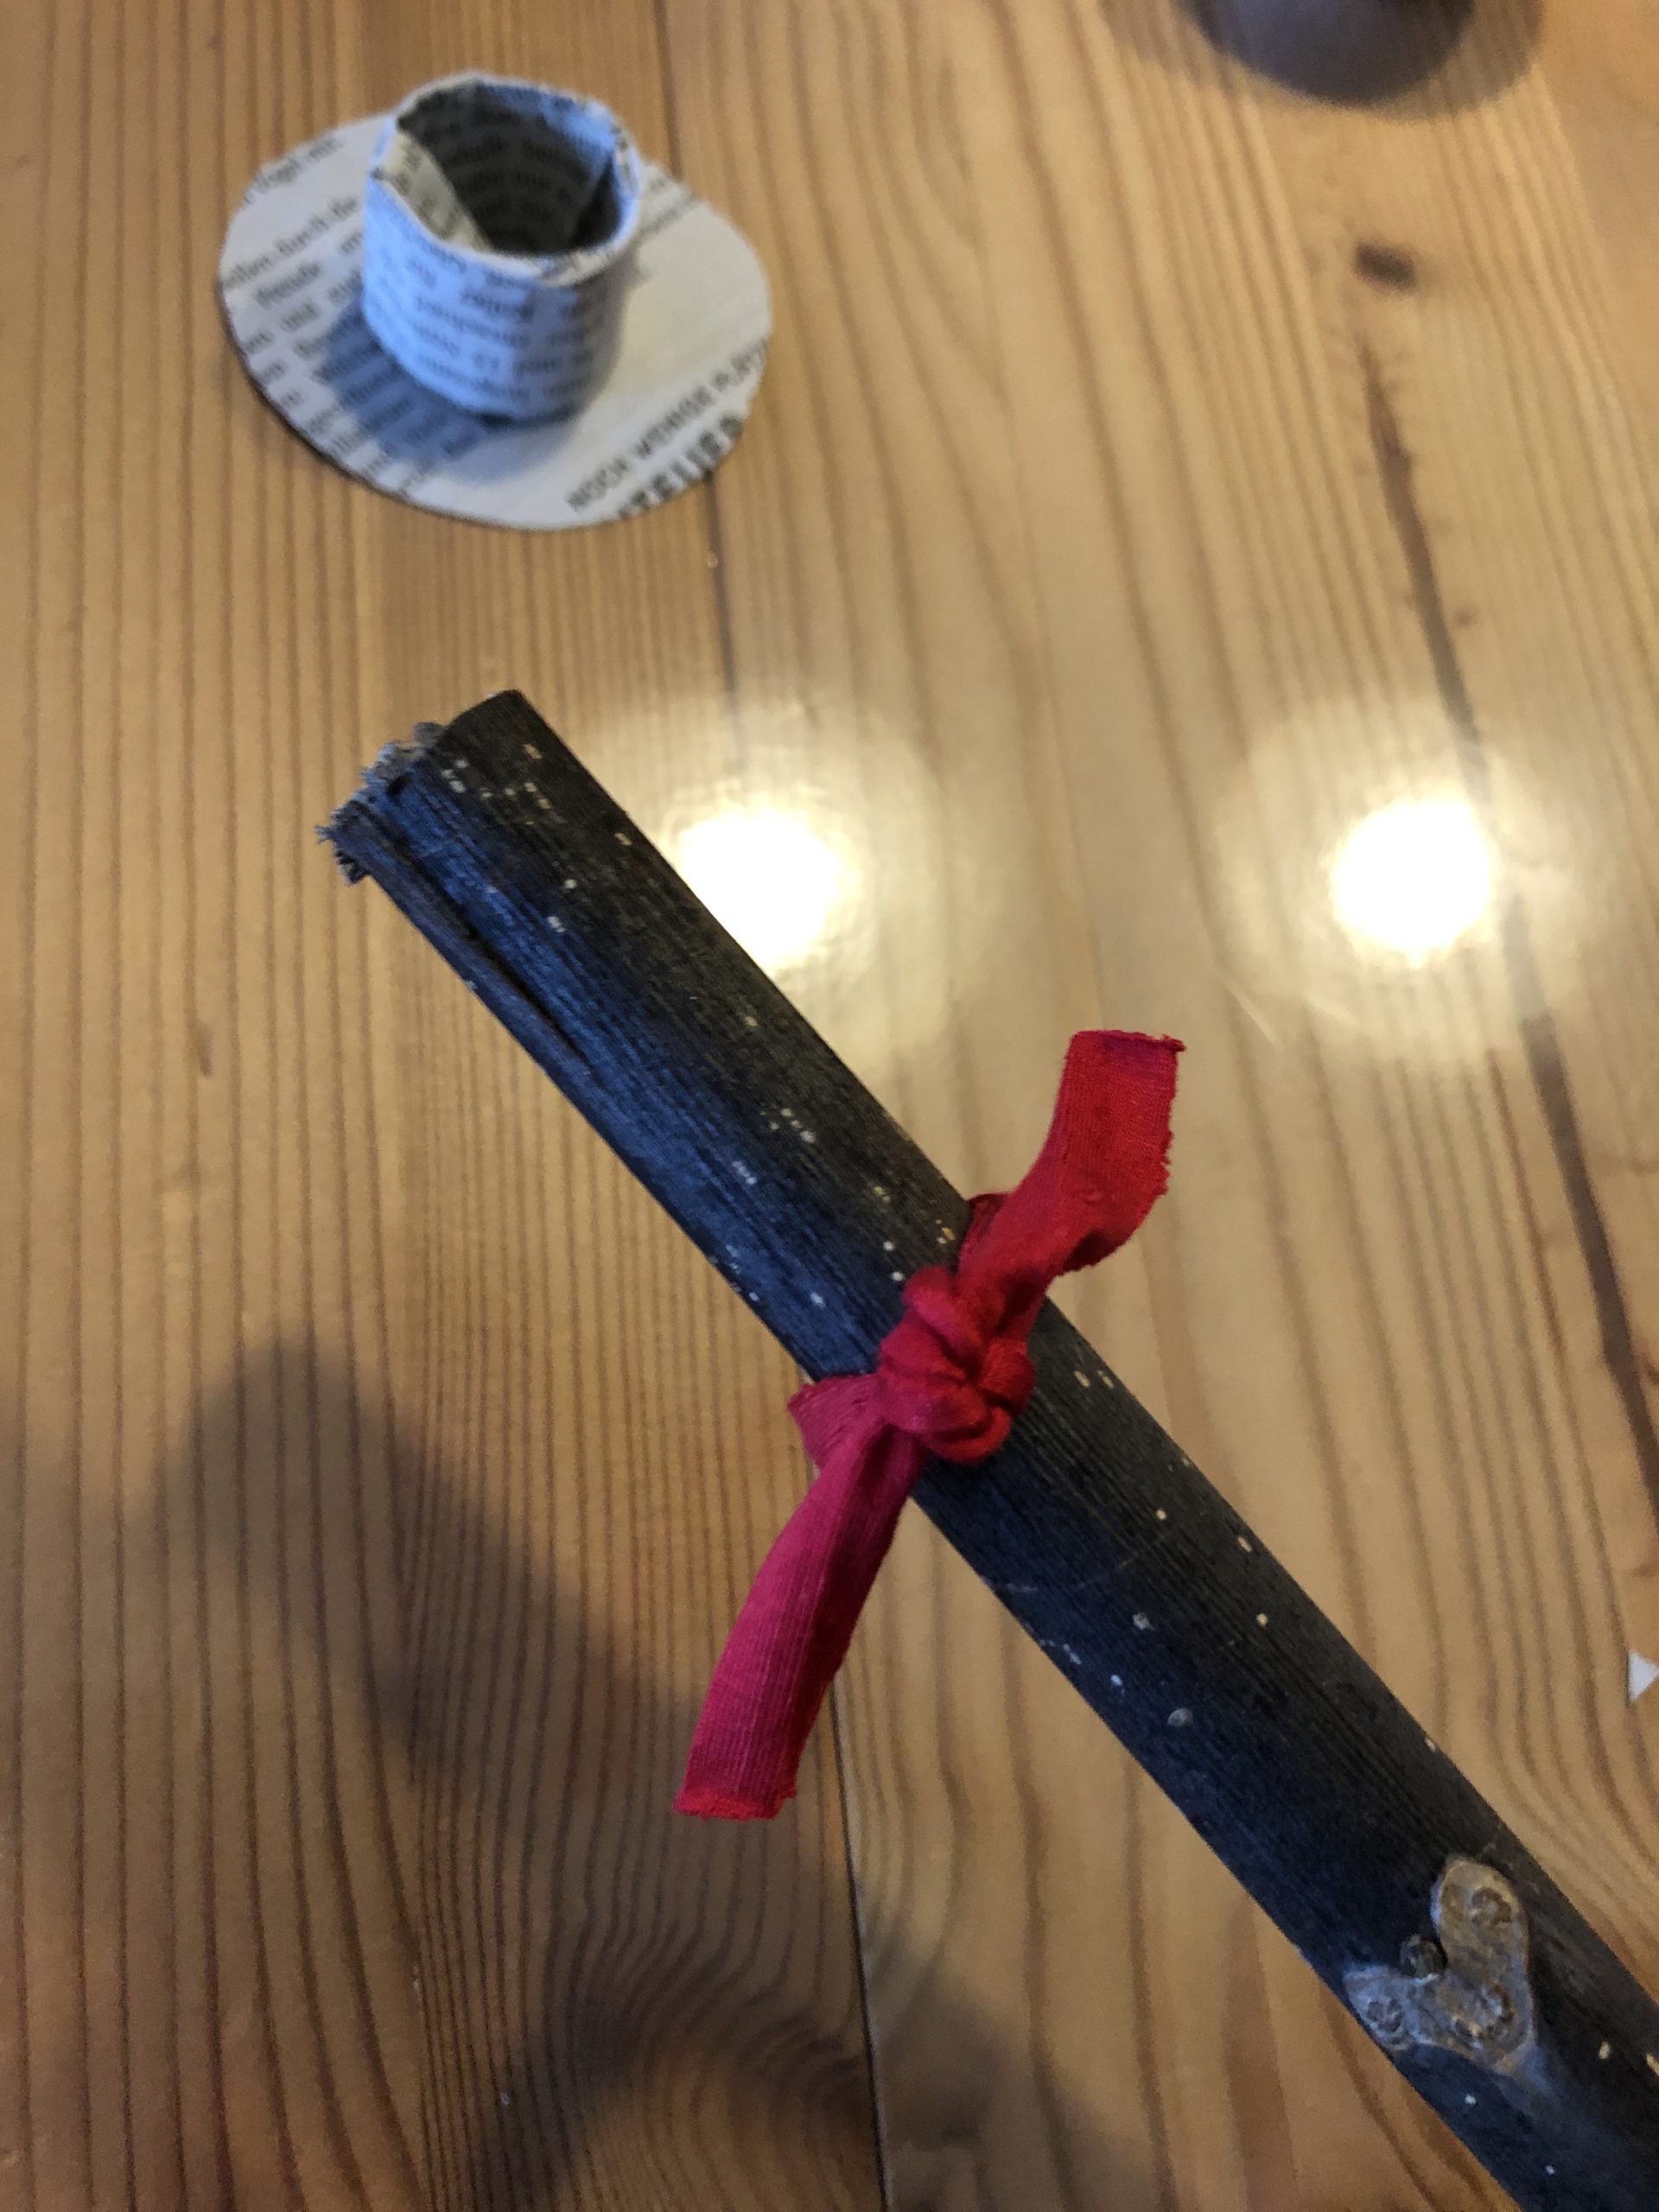
Now tie a cord as a scarf around the branch. Make a knot and hang down the overhanging ends.
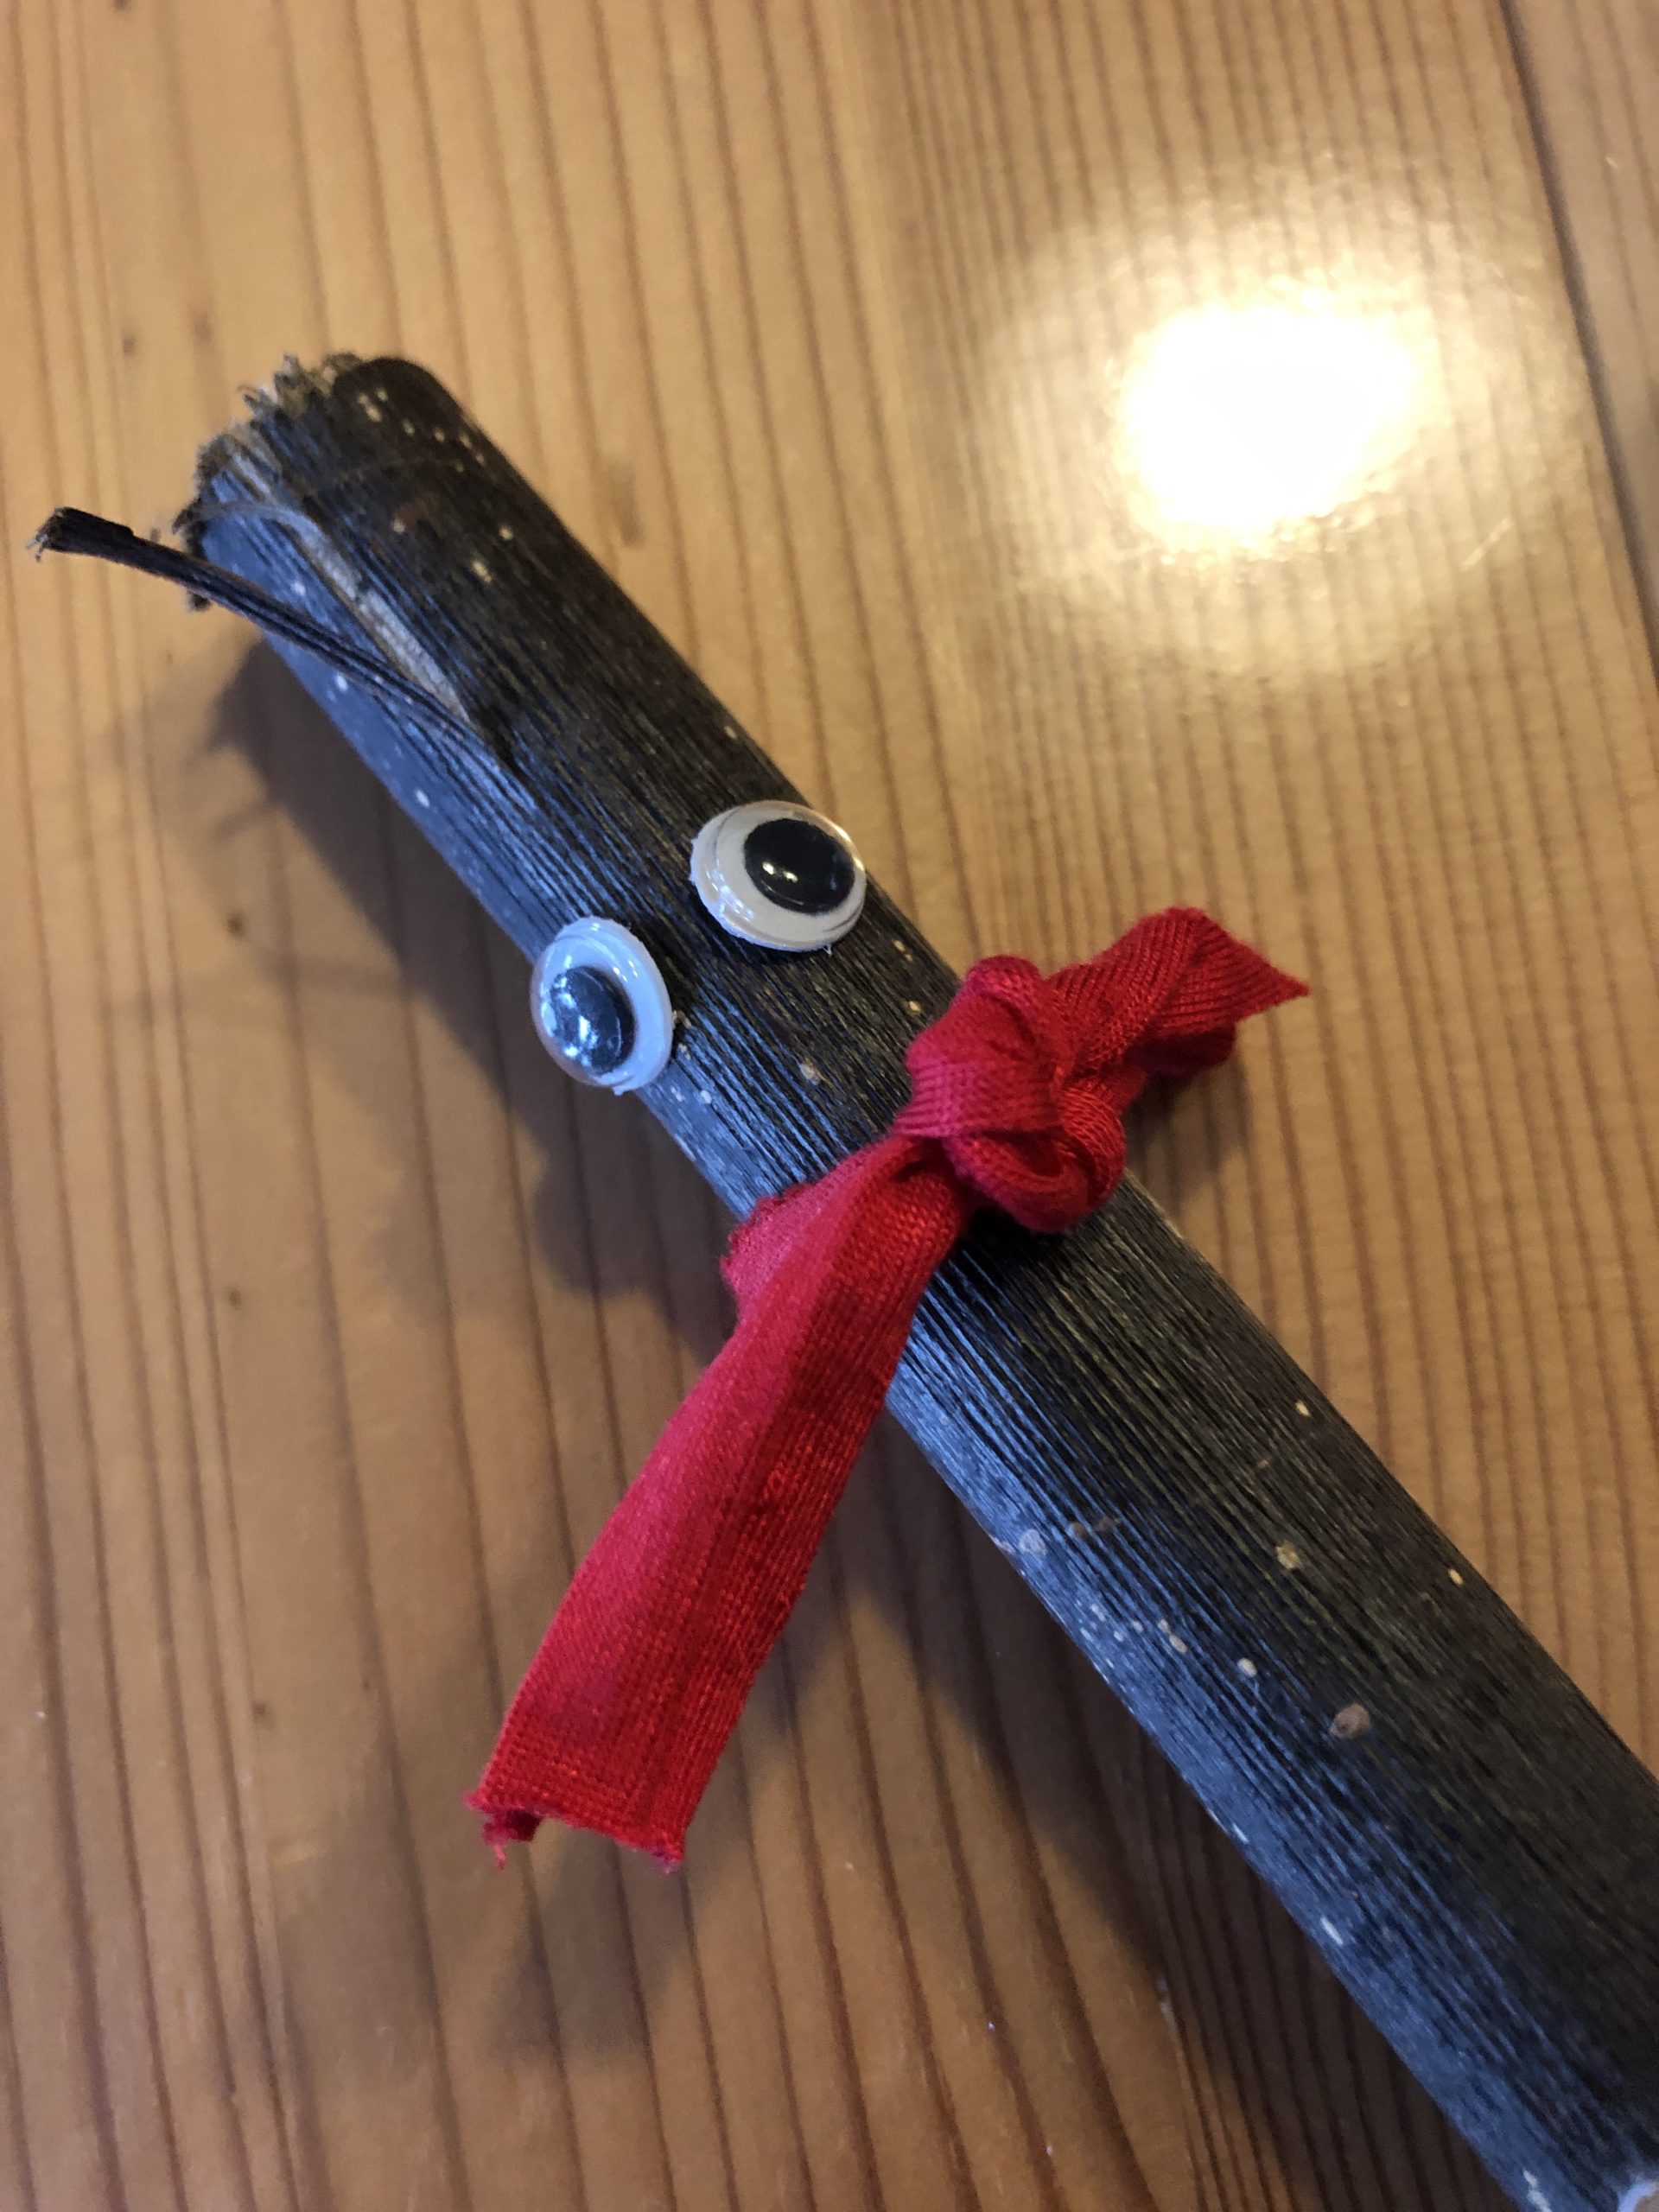
Then you put two wobble eyes on the branch.
Now put your hat on the branch.
Your chimney sweep is ready.
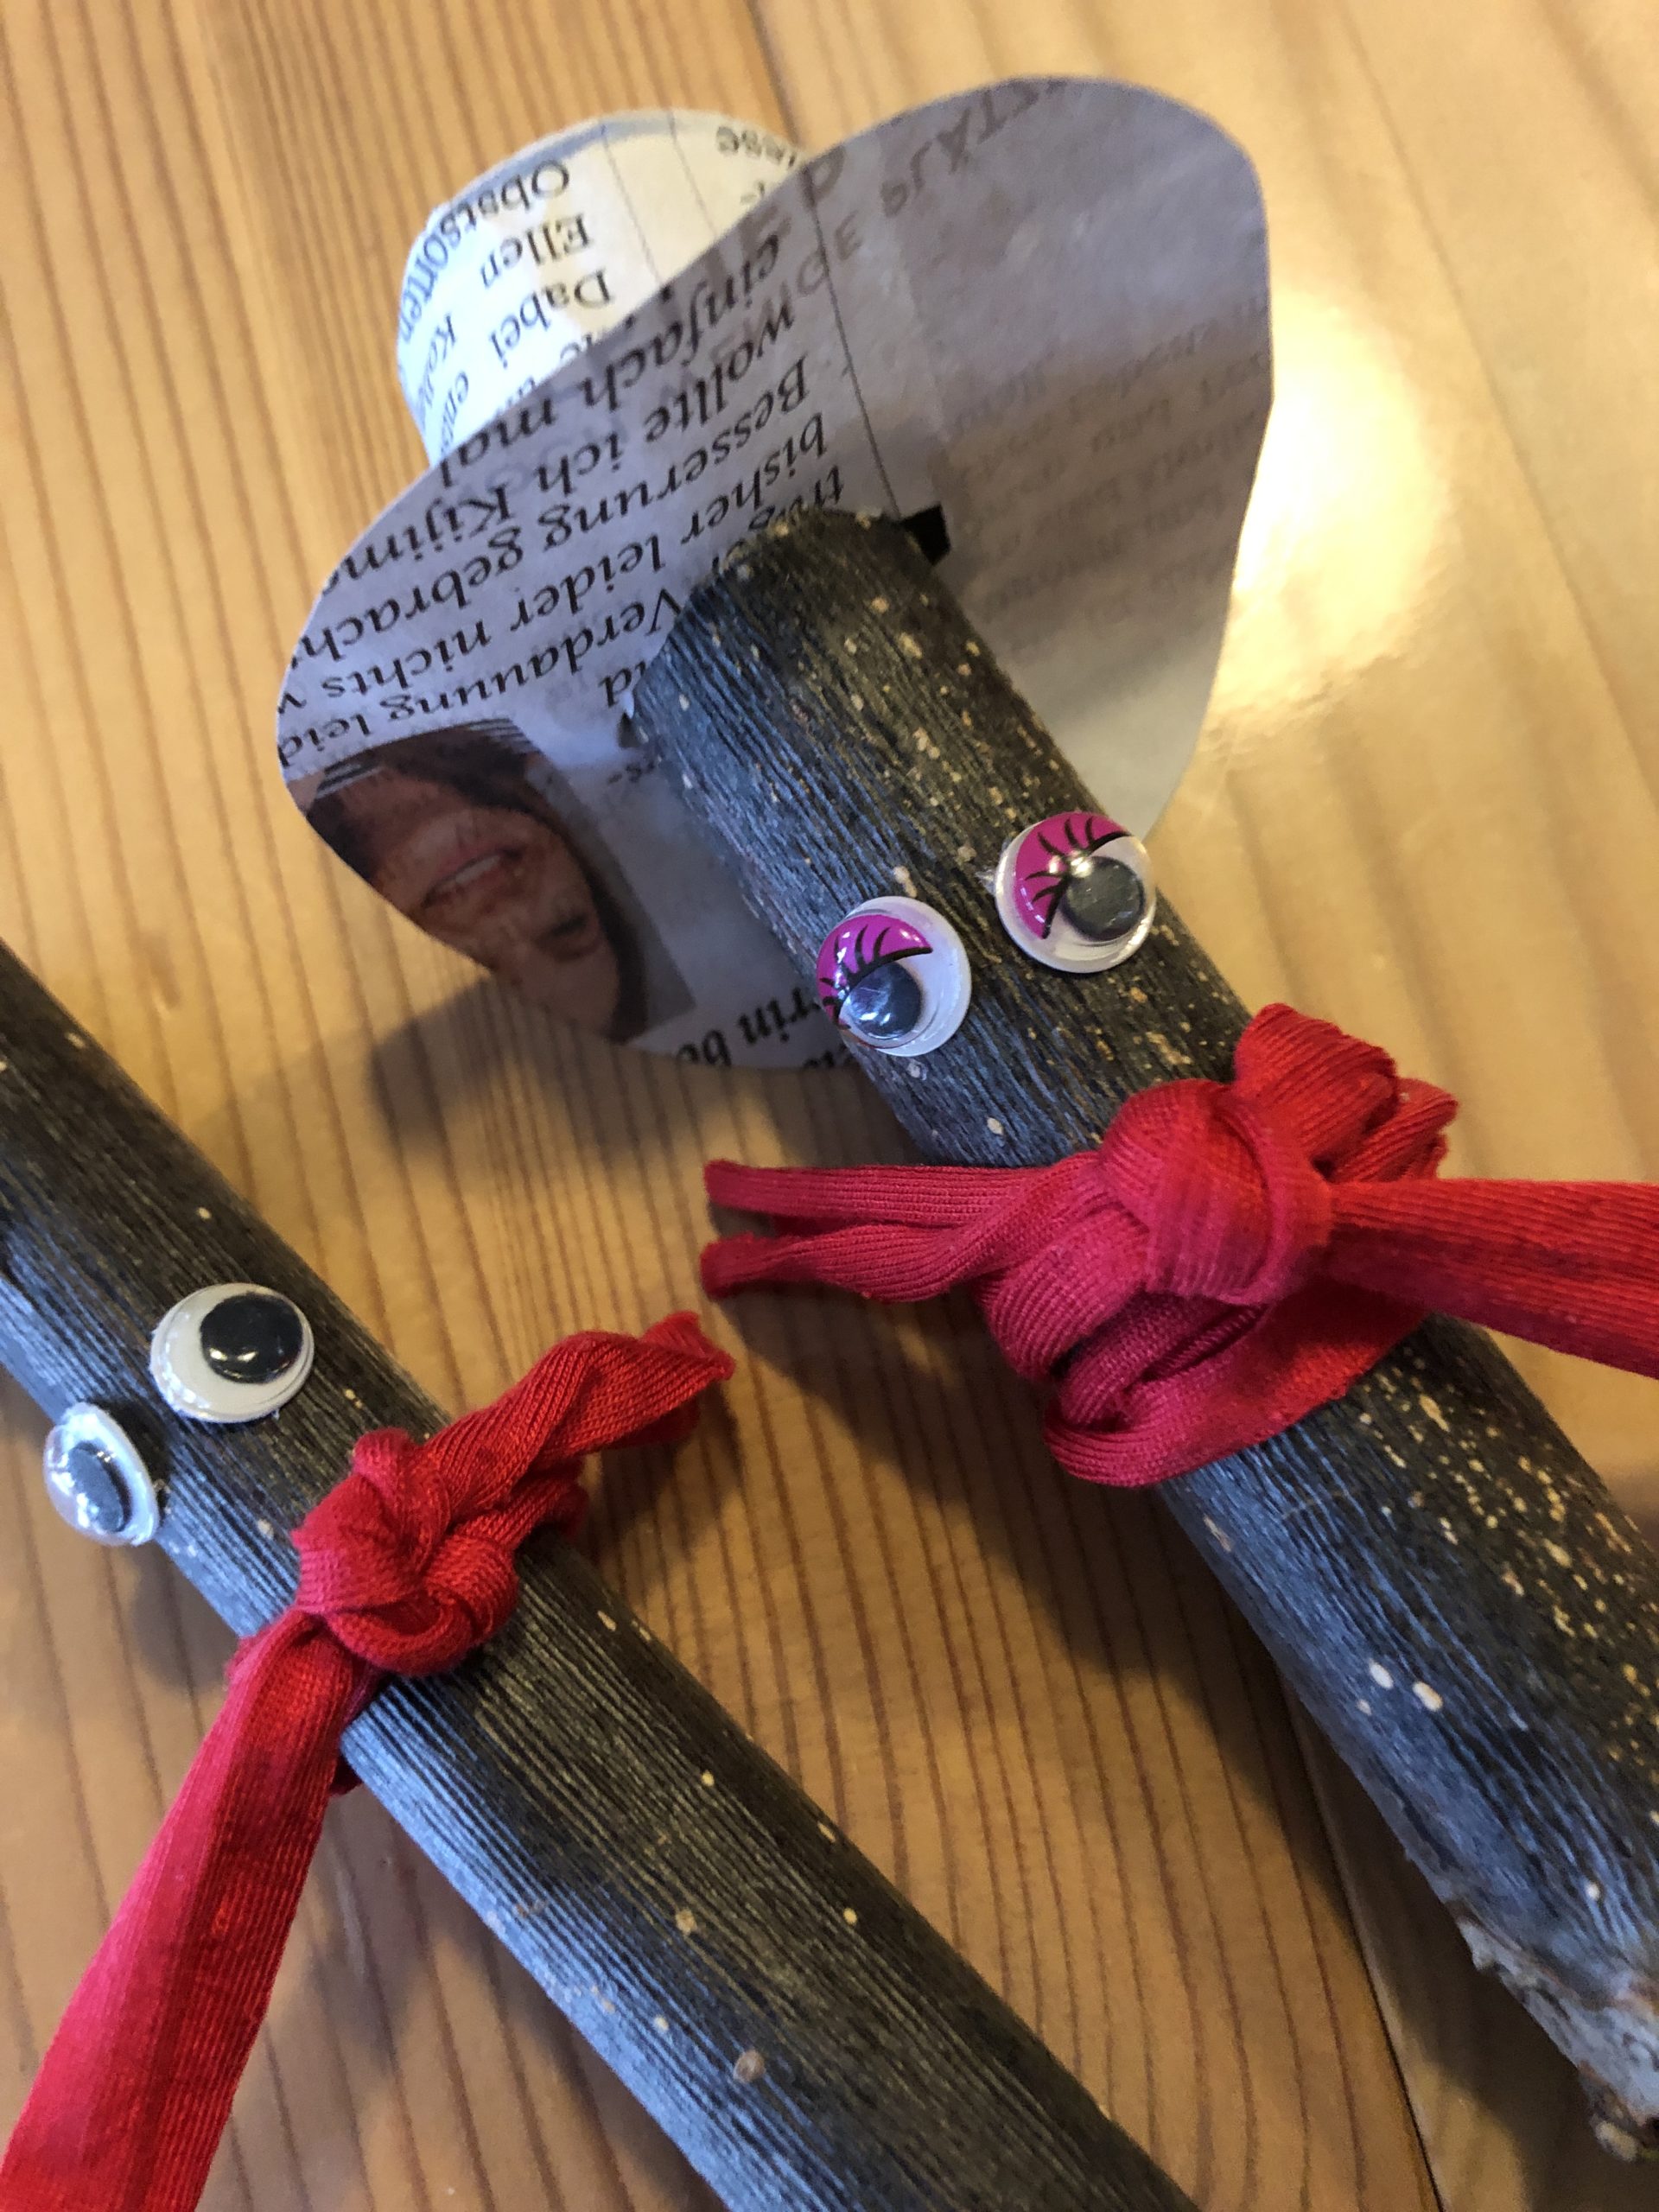
Make up two or three chimney sweepers. They look beautiful together in different lengths.
Tip: You can use it as a flower plug or put it in a vase as a decoration.
Have fun trying and good luck!
Materials
Directions
Find a thicker branch.
Tip: Many children like to collect branches and sticks. You can use them for this!
Put out the craft pad and paint a circle for each hat (about 7cm in diameter). Then cut it out.
Then you cut a strip of newspaper (also about 7cm long), which you fold in the middle once after the length.
Now you put the strip as a ring and stick the ends together on top of each other.
This newspaper ring serves as the top of the hat. Stick it centered on the paper circle.
Your hat's ready.
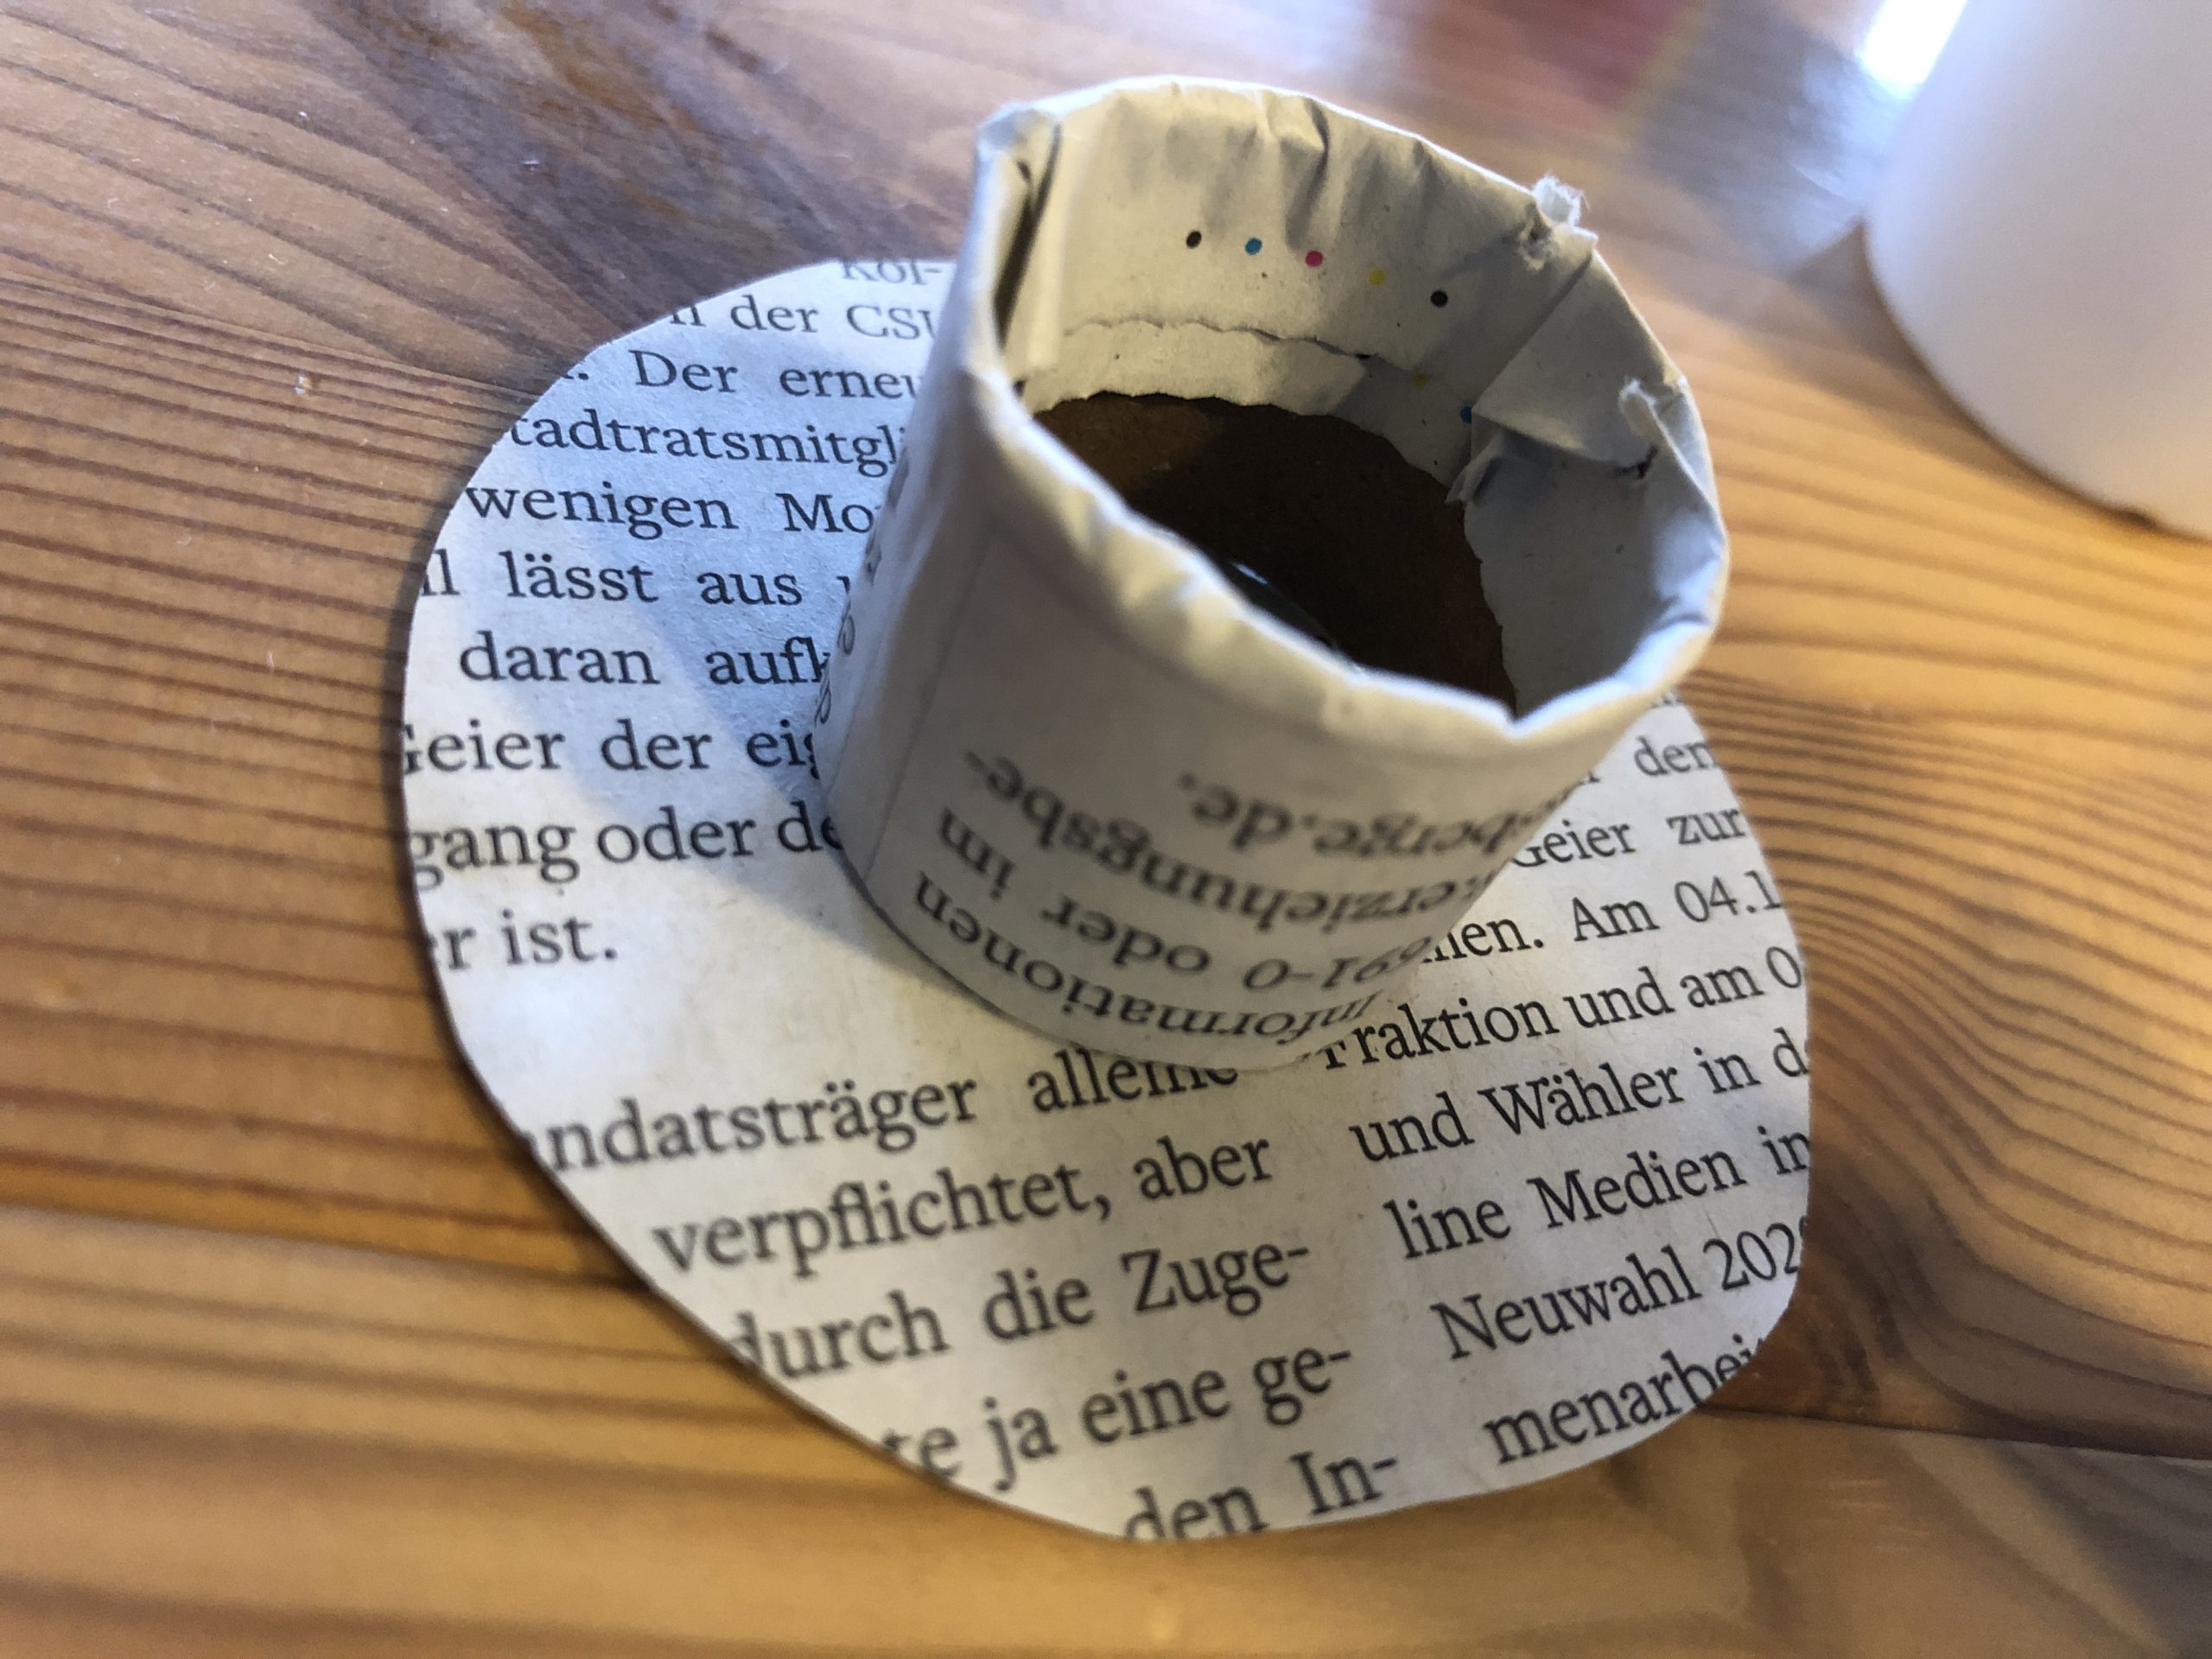
For this you cut off a piece of a cardboard roll (e.g. toilet roll or kitchen roll) (circa 2cm).
Then cut off a strip of newspaper and stick it around the roll. Make sure that you close the newspaper strip with the roll on one side and survive the newspaper on the other side.
Now bend the overhanging piece of the newspaper inward.
Afterwards, she sticks the newspaper ring on the paper circle.
The hat's ready.
Tip: You can also design the hat with black clay paper or paint it with water color black.
Now tie a cord as a scarf around the branch. Make a knot and hang down the overhanging ends.
Then you put two wobble eyes on the branch.
Now put your hat on the branch.
Your chimney sweep is ready.
Make up two or three chimney sweepers. They look beautiful together in different lengths.
Tip: You can use it as a flower plug or put it in a vase as a decoration.
Have fun trying and good luck!
Follow us on Facebook , Instagram and Pinterest
Don't miss any more adventures: Our bottle mail