Table as Gift Pendant – Card – Table Card

AdventurerKatzi
Rating5.04.8 thousand times & (4) DifficultyBeginner

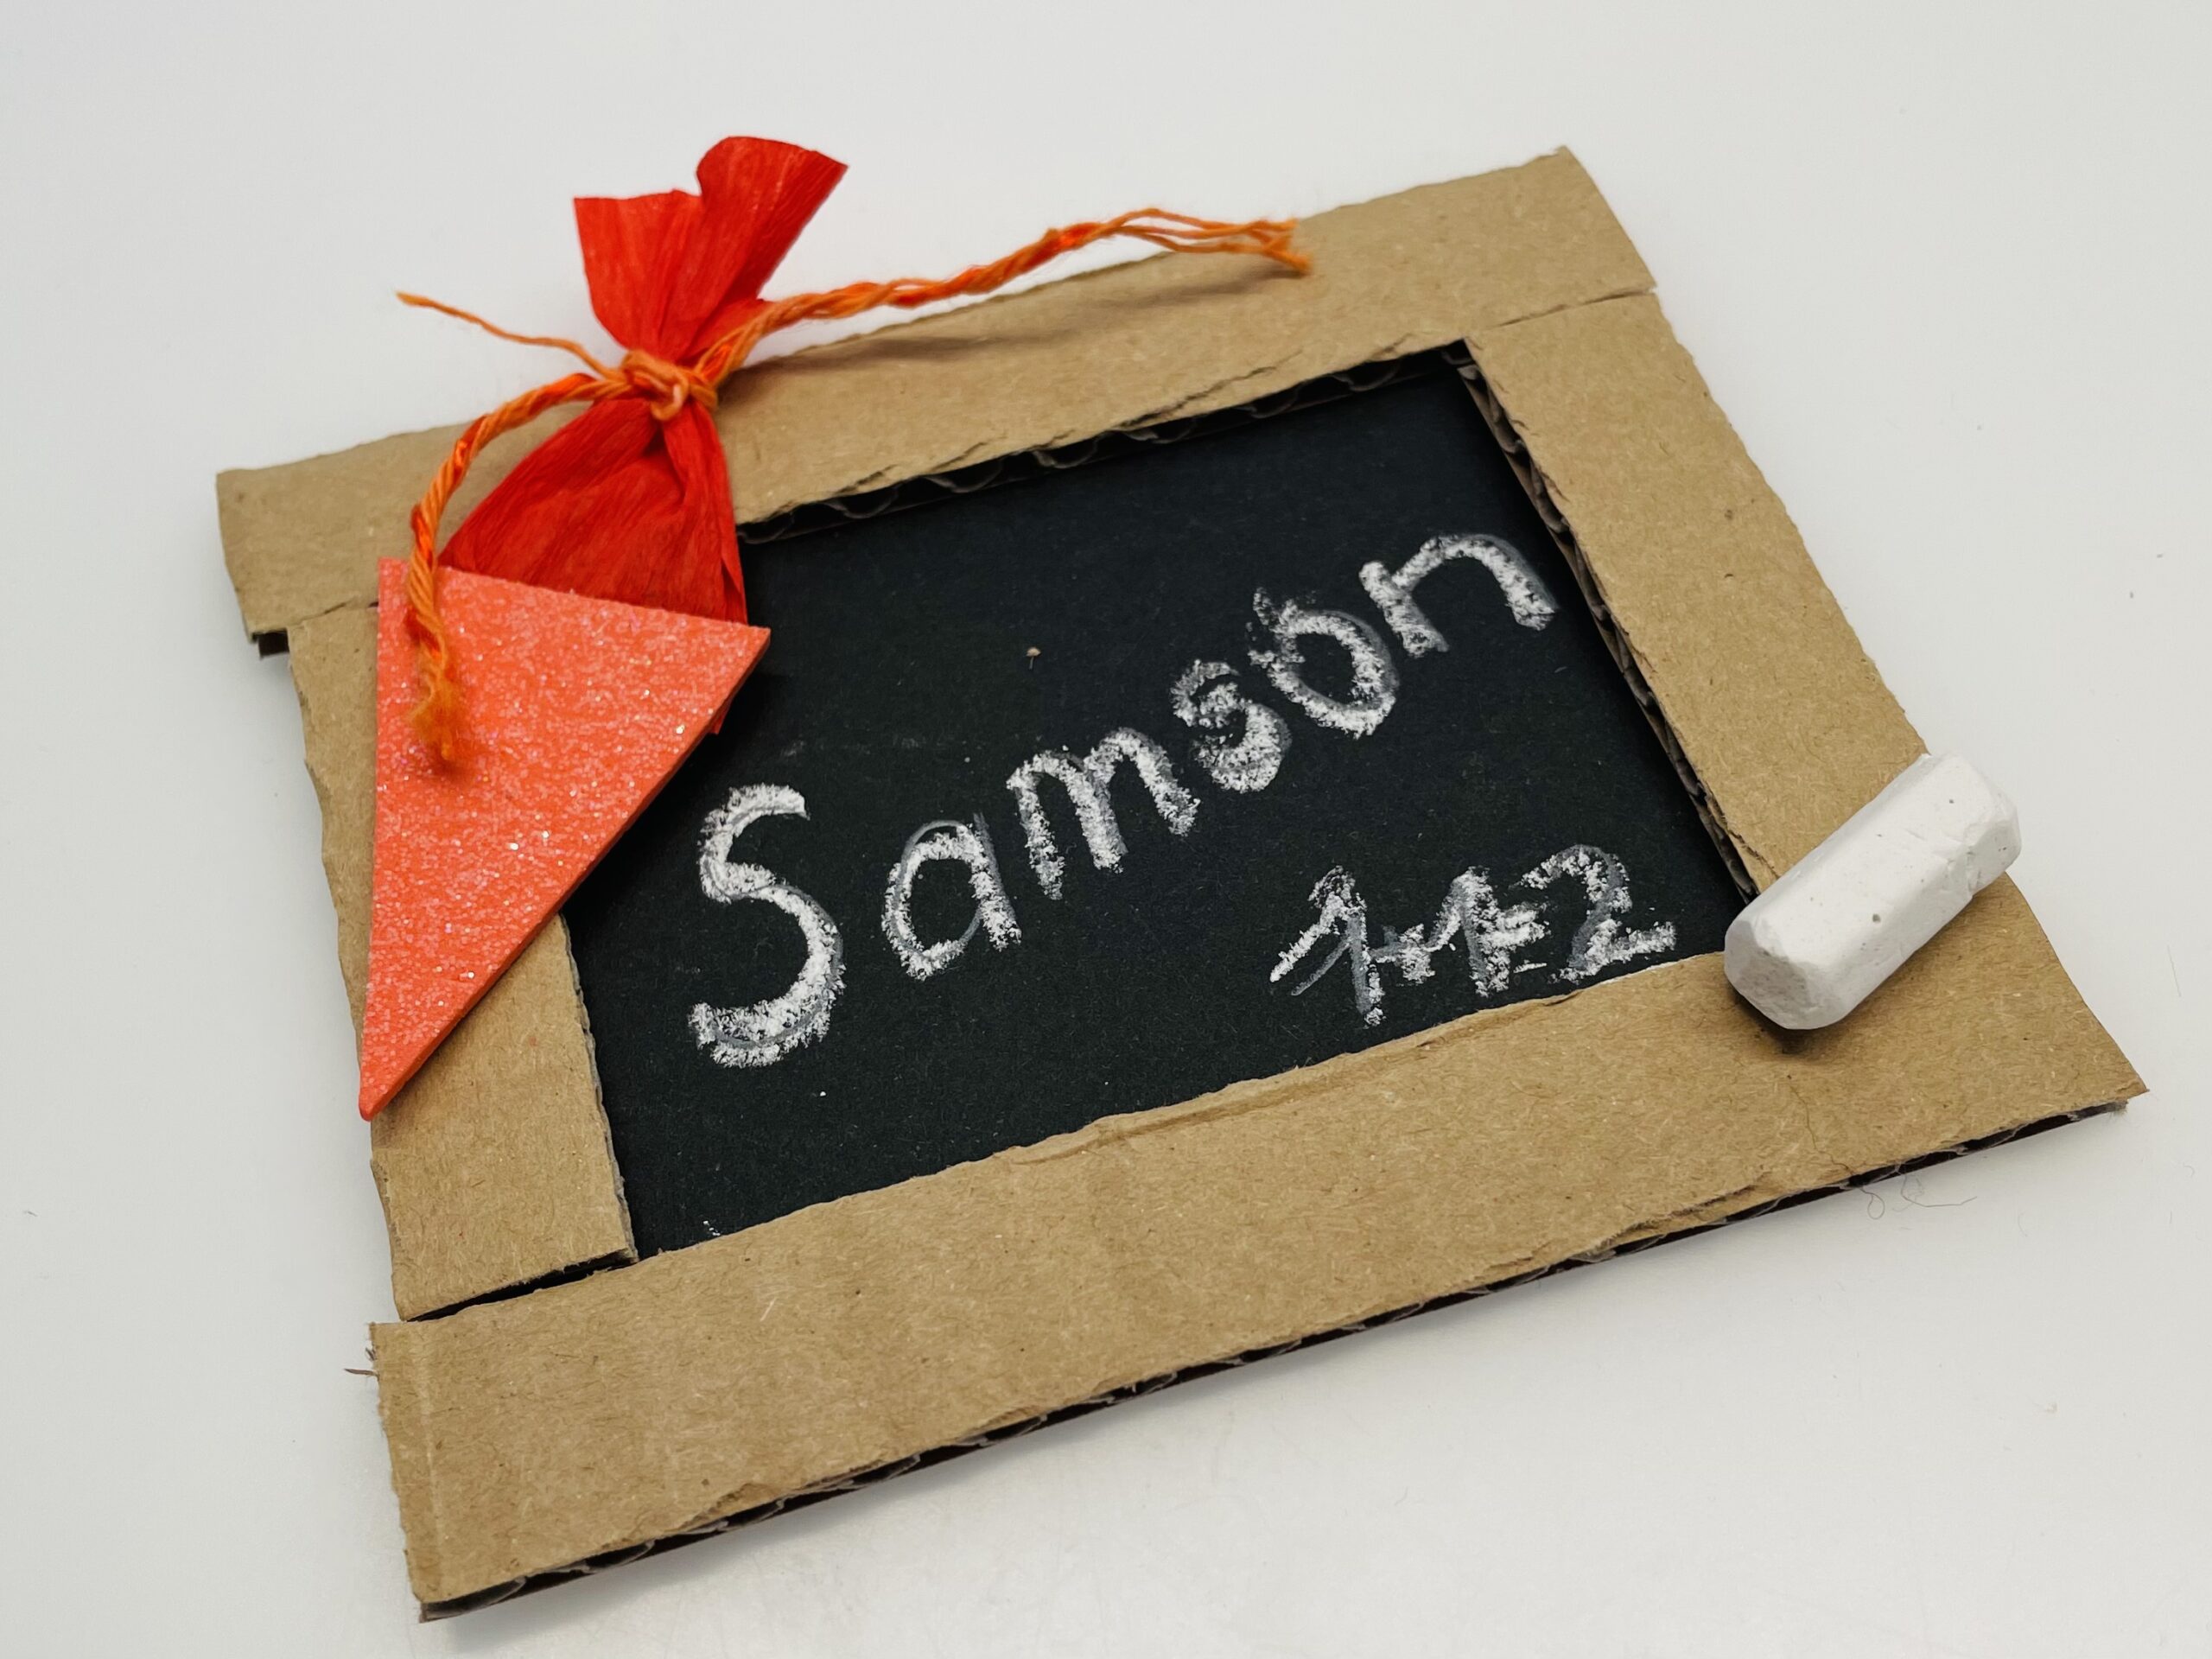
For the first day of school, this simple craft is crafted with a few simple steps. The small card can be used as a place card or as a gift pendant.

Media Education for Kindergarten and Hort

Kind bastelt eine Rassel mit dem Navi
The Adventure Navi, the app for DIY projects, enables media education for the youngest.

Relief in everyday life, targeted promotion of individual children, independent learning and - without any pre-knowledge already usable by the youngest!
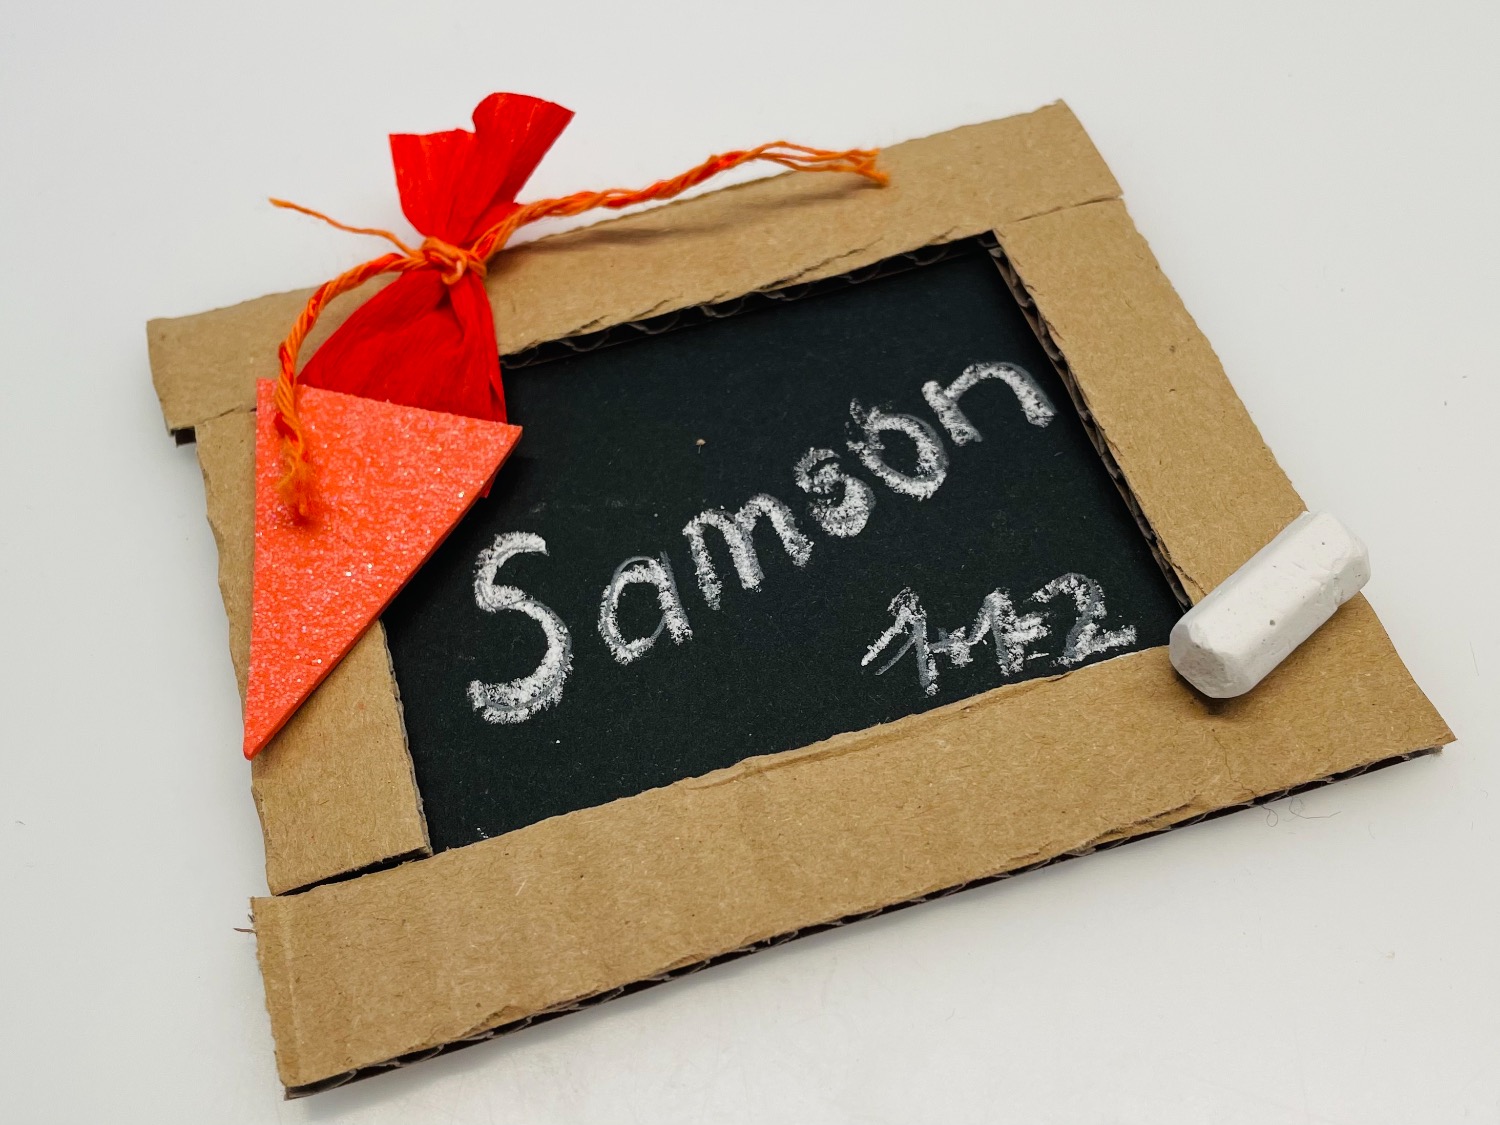


Titelbild zur Bastel- und DIY-Idee für Kinder '(837) Tafel als Geschenkanhänger – Karte – Tischkarte'
Material for1 Child
Prep Time5 min.Adv. Time15 min.Total Time20 min.
 1 black photo box
 Carton residues
 Coloured pencil whiteor chalk
 Paper remnants colorful Clay paper, foam rubber and crepe paper
 1 Wool Gift ribbon
 1 Builder's pad
All links marked with a shopping cart lead to Amazon - here we have selected products that we would order ourselves and in part also ordered. In a qualified purchase via the advertising link, we as Amazon partner receive a commission, for you there are no costs. You thus support our cost- and advertising banner-free, educational offer.
1

First, prepare a black clay paper and a narrow strip of cardboard.
Size paper: approx. 7cm x 10cm
Cardboard strips: maximum 1cm wide

Bild zum Schritt 1 für das Bastel- und DIY-Abenteuer für Kinder: 'Legt euch zuerst ein schwarzes Tonpapier und einen schmalen Streifen...'

2

Now cut off the cardboard strips. Put the cardboard on the clay paper and cut off the lengths.
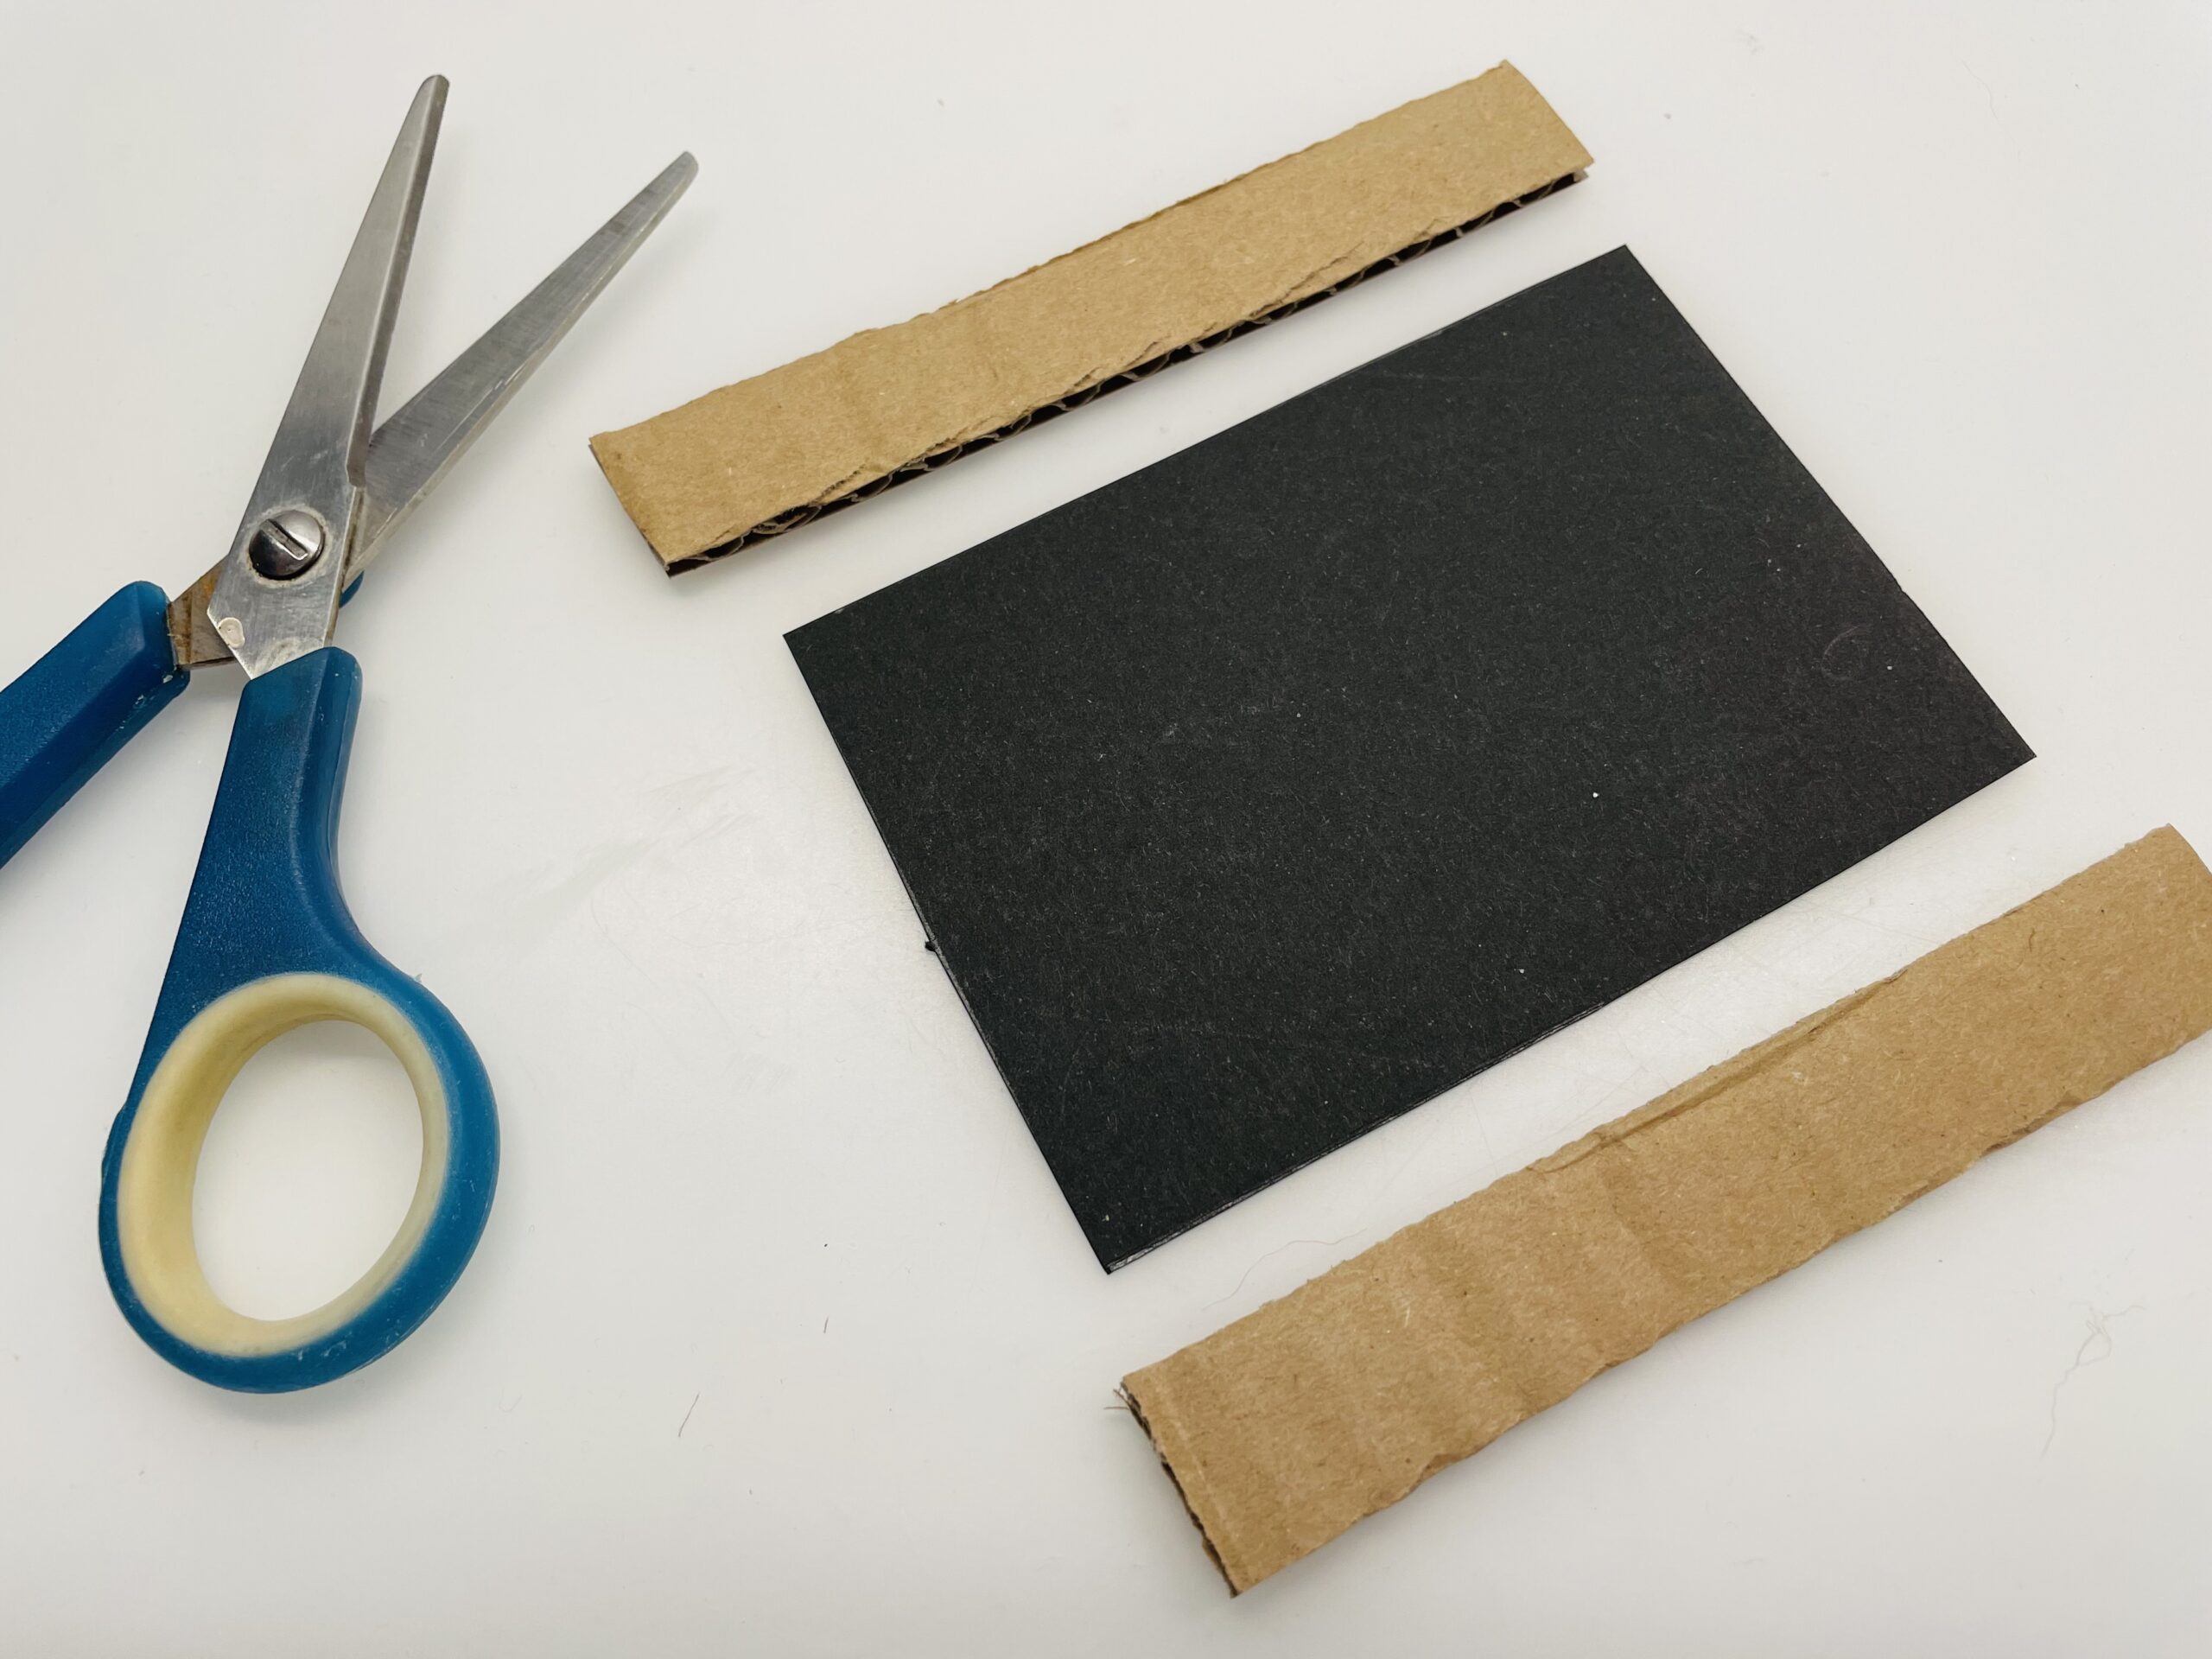
Bild zum Schritt 2 für das Bastel- und DIY-Abenteuer für Kinder: 'Jetzt schneidet ihr die Pappstreifen zu. Legt dafür die Pappe...'

3

Then measure the short pieces by holding off the cardboard and cut them up.

Bild zum Schritt 3 für das Bastel- und DIY-Abenteuer für Kinder: 'Messt dann die kurzen Stücke durch hinhalten der Pappe ab...'

4

Then glue the cardboard strips onto the edge of the black clay paper.

Bild zum Schritt 4 für das Bastel- und DIY-Abenteuer für Kinder: 'Anschließend klebt ihr die Kartonstreifen auf den Rand des schwarzen...'

5

Now you can label the "panel". Prescribe with a white crayon and then paint with a chalk.

Bild zum Schritt 5 für das Bastel- und DIY-Abenteuer für Kinder: 'Nun könnt ihr die „Tafel“ beschriften. Schreibt mit einem weißen...'

6

Now you make a small school bag of paper leftovers.

Bild zum Schritt 6 für das Bastel- und DIY-Abenteuer für Kinder: 'Aus Papierresten bastelt ihr nun eine kleine Schultüte.'

7

Cuts a small triangle for this. Sticks a narrow strip of crepe paper to the upper edge and puts a wool thread to the bow around the crepe strip. The small school bag is ready.

Bild zum Schritt 7 für das Bastel- und DIY-Abenteuer für Kinder: 'Schneidet dafür ein kleines Dreieck zu. Klebt einen schmalen Streifen...'

8

Attach the school bag to the top of the card. You can also let the school bag survive a bit.

Bild zum Schritt 8 für das Bastel- und DIY-Abenteuer für Kinder: 'Befestigt die Schultüte nun am oberen Rand der Karte. Ihr...'

9

Have fun trying it out!

Bild zum Schritt 9 für das Bastel- und DIY-Abenteuer für Kinder: 'Viel Spaß beim Ausprobieren!'

Materials

 1 black photo box
 Carton residues
 Coloured pencil whiteor chalk
 Paper remnants colorful Clay paper, foam rubber and crepe paper
 1 Wool Gift ribbon
 1 Builder's pad
All links marked with a shopping cart lead to Amazon - here we have selected products that we would order ourselves and in part also ordered. In a qualified purchase via the advertising link, we as Amazon partner receive a commission, for you there are no costs. You thus support our cost- and advertising banner-free, educational offer.

Directions

1

First, prepare a black clay paper and a narrow strip of cardboard.
Size paper: approx. 7cm x 10cm
Cardboard strips: maximum 1cm wide

Bild zum Schritt 1 für das Bastel- und DIY-Abenteuer für Kinder: 'Legt euch zuerst ein schwarzes Tonpapier und einen schmalen Streifen...'

2

Now cut off the cardboard strips. Put the cardboard on the clay paper and cut off the lengths.

Bild zum Schritt 2 für das Bastel- und DIY-Abenteuer für Kinder: 'Jetzt schneidet ihr die Pappstreifen zu. Legt dafür die Pappe...'

3

Then measure the short pieces by holding off the cardboard and cut them up.

Bild zum Schritt 3 für das Bastel- und DIY-Abenteuer für Kinder: 'Messt dann die kurzen Stücke durch hinhalten der Pappe ab...'

4

Then glue the cardboard strips onto the edge of the black clay paper.
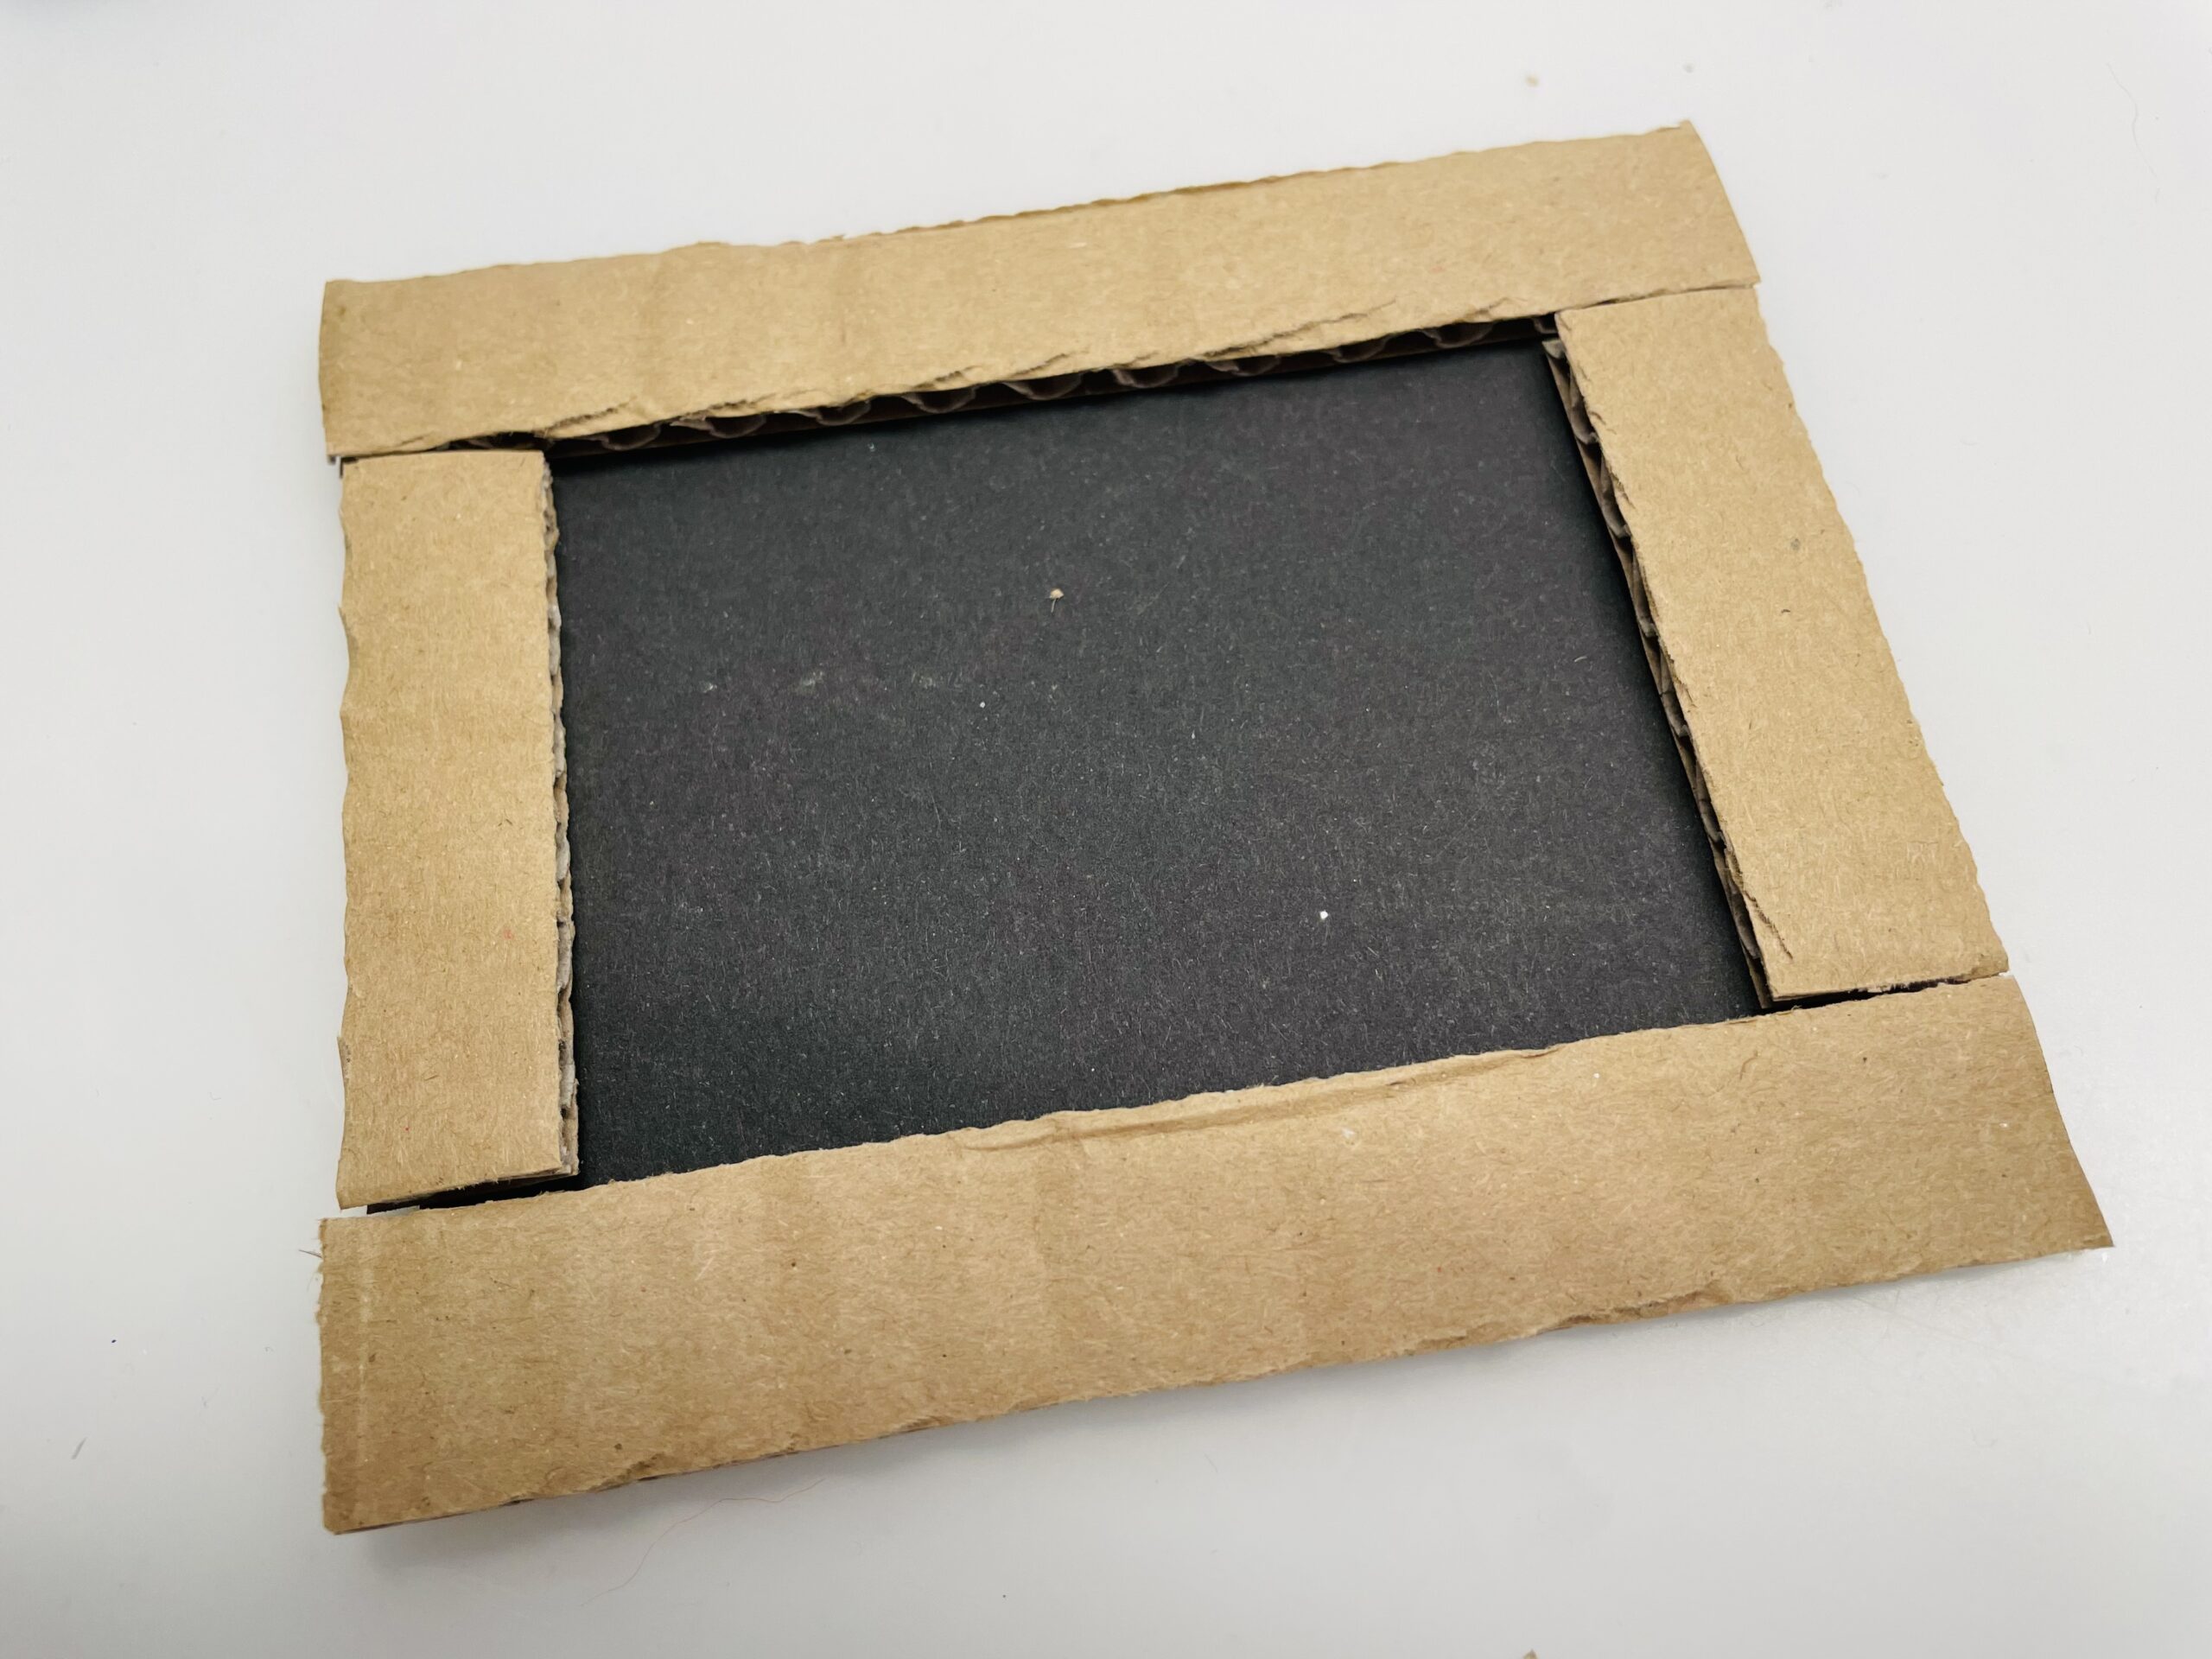
Bild zum Schritt 4 für das Bastel- und DIY-Abenteuer für Kinder: 'Anschließend klebt ihr die Kartonstreifen auf den Rand des schwarzen...'

5

Now you can label the "panel". Prescribe with a white crayon and then paint with a chalk.
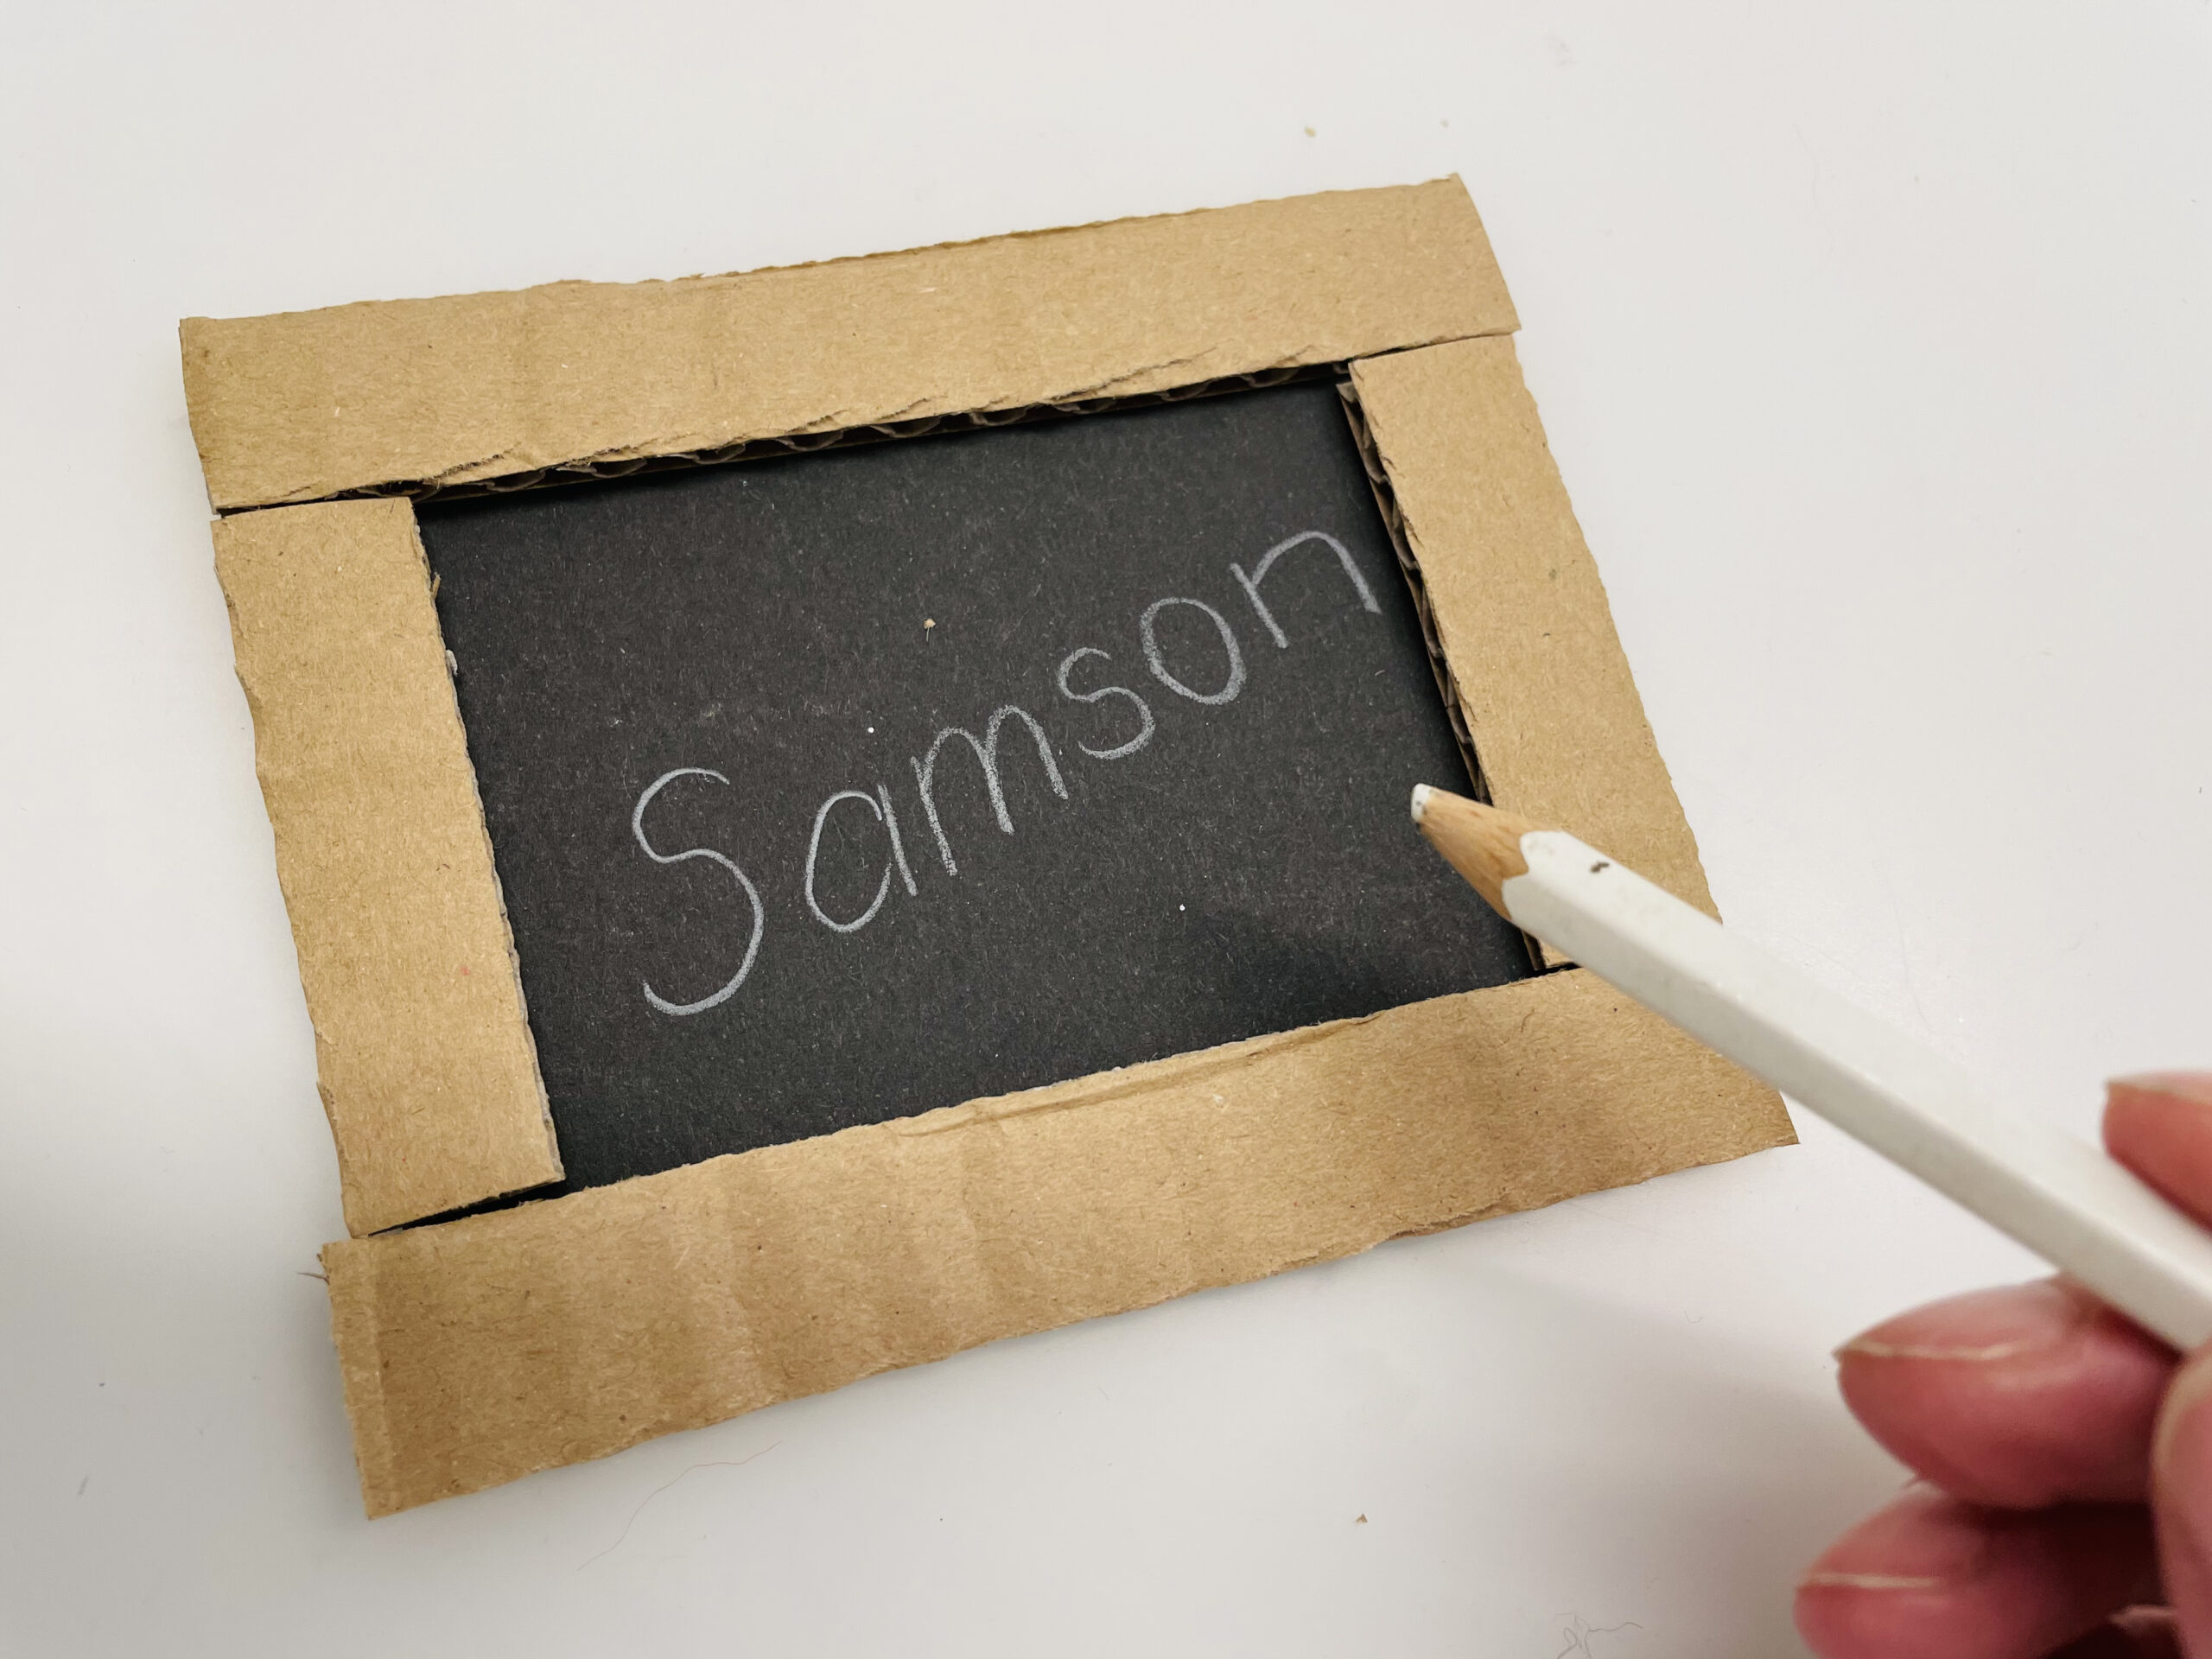
Bild zum Schritt 5 für das Bastel- und DIY-Abenteuer für Kinder: 'Nun könnt ihr die „Tafel“ beschriften. Schreibt mit einem weißen...'

6

Now you make a small school bag of paper leftovers.
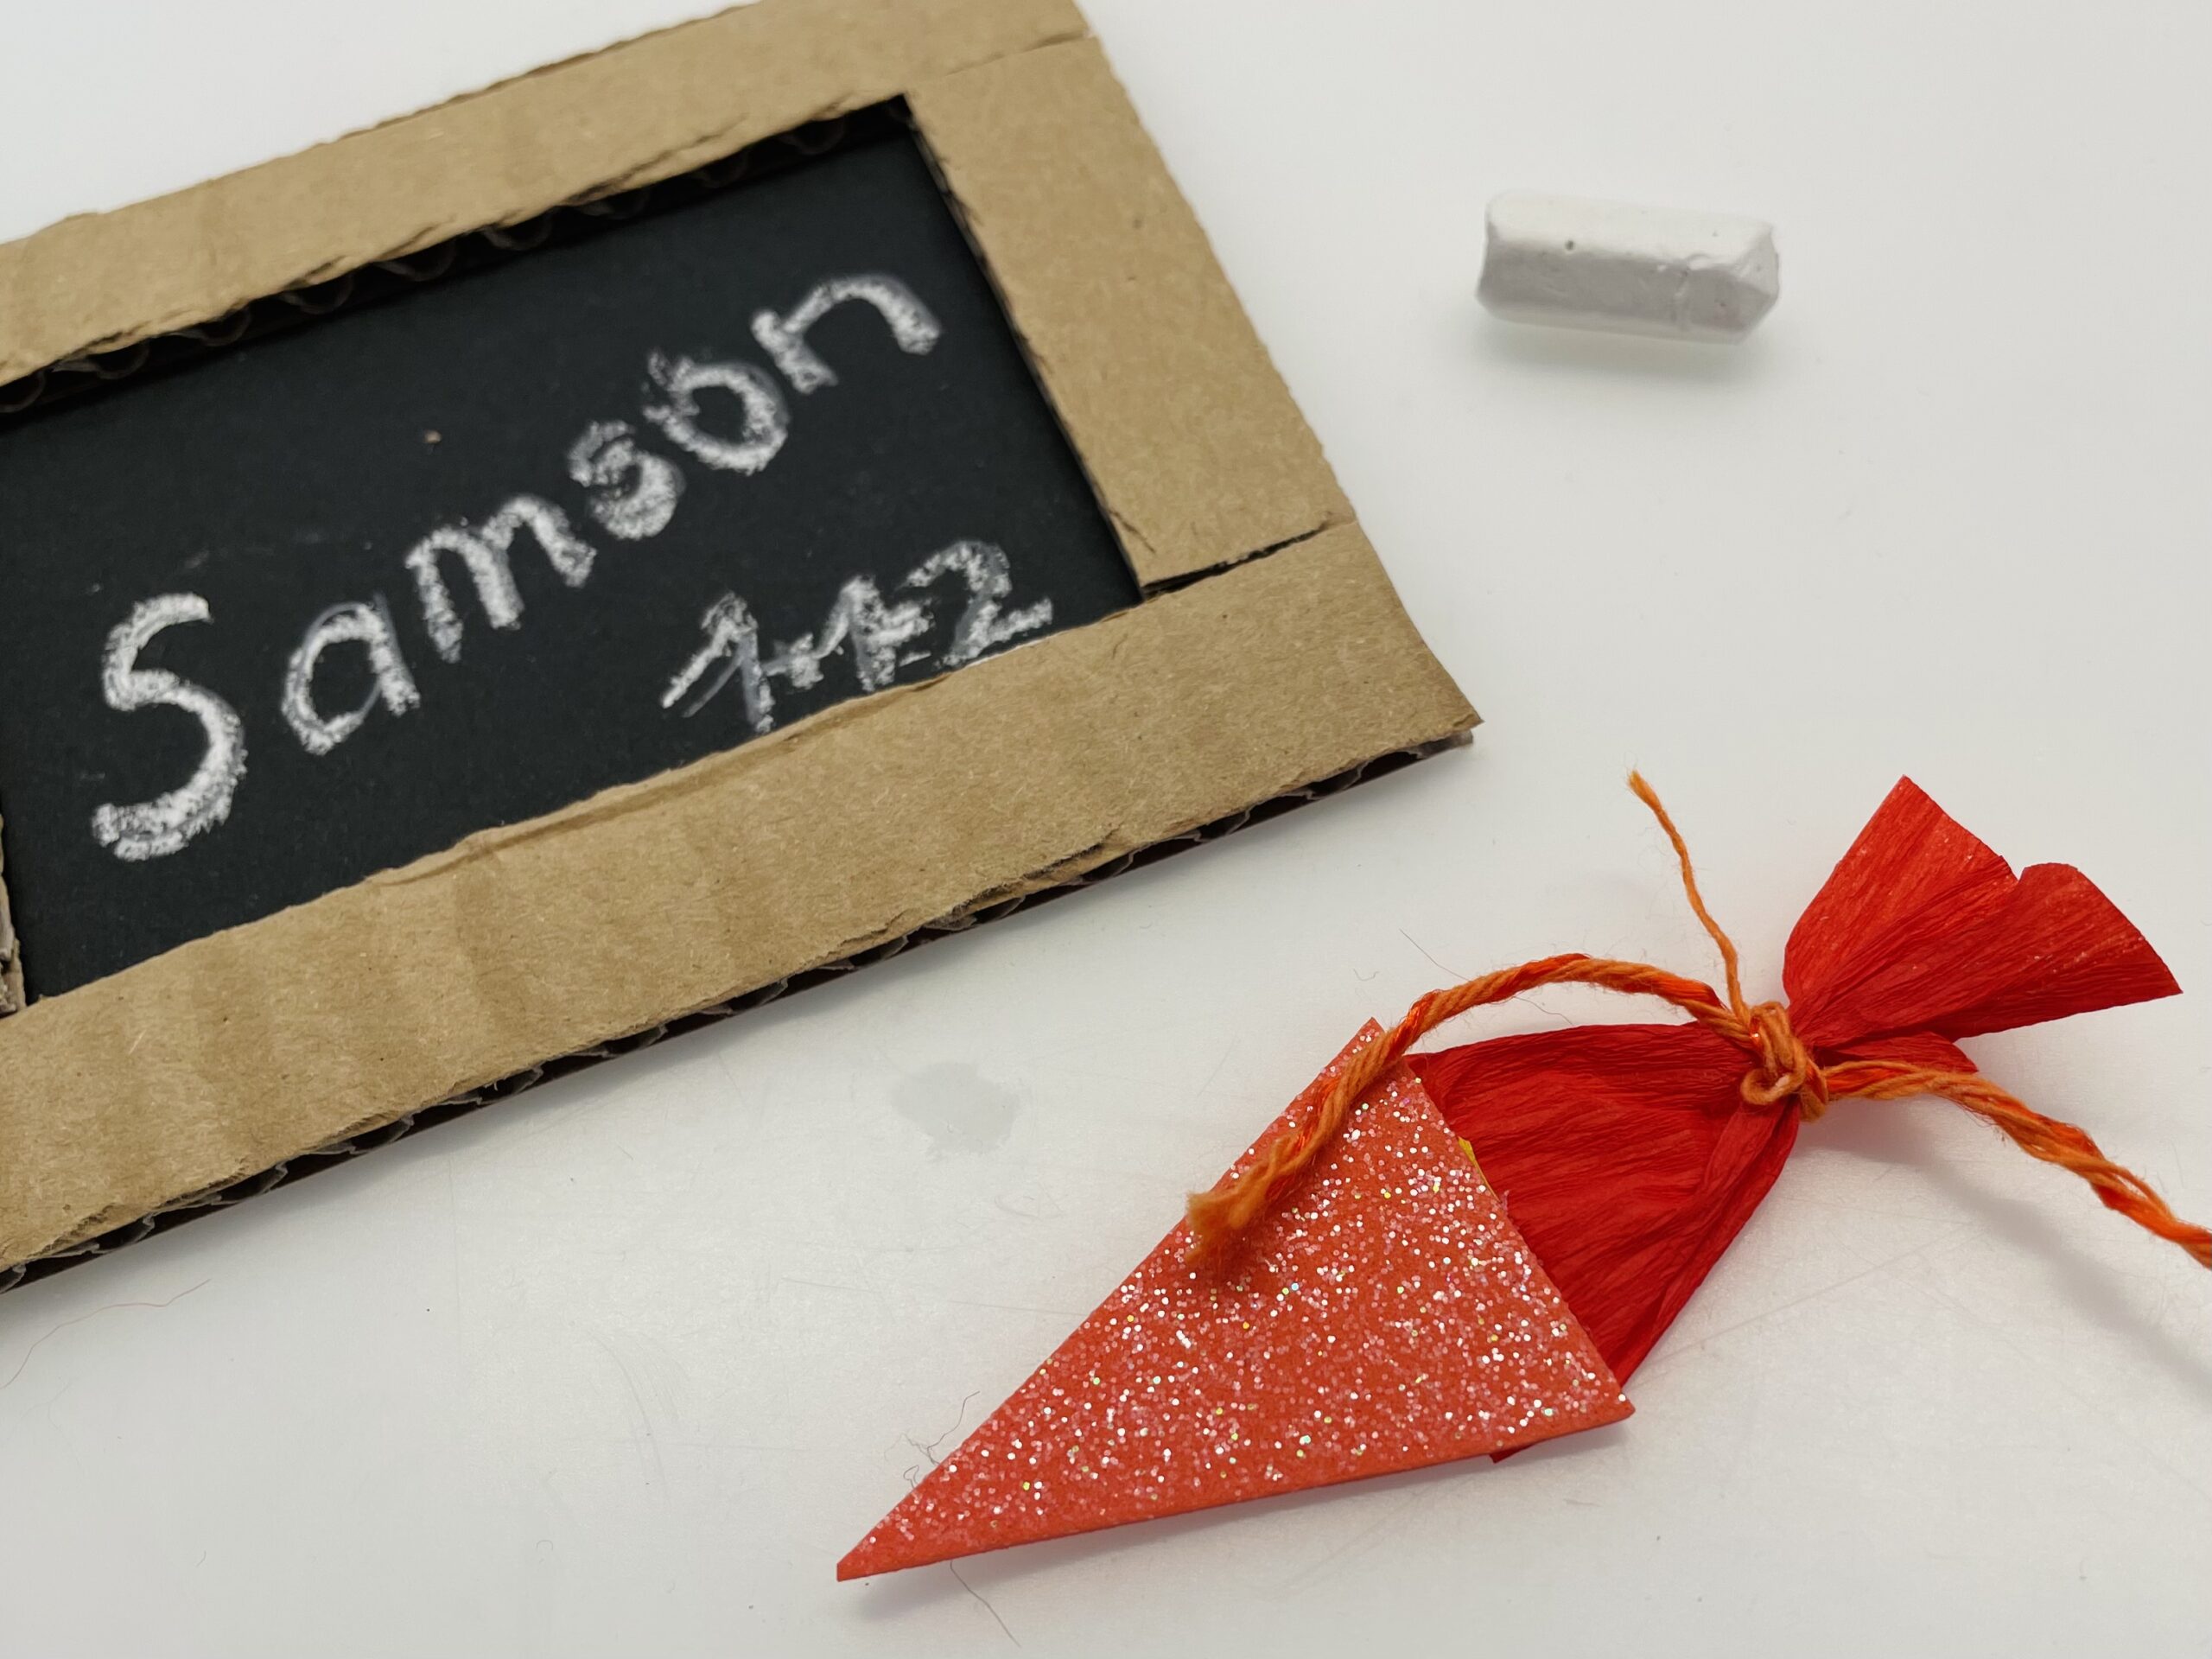
Bild zum Schritt 6 für das Bastel- und DIY-Abenteuer für Kinder: 'Aus Papierresten bastelt ihr nun eine kleine Schultüte.'

7

Cuts a small triangle for this. Sticks a narrow strip of crepe paper to the upper edge and puts a wool thread to the bow around the crepe strip. The small school bag is ready.
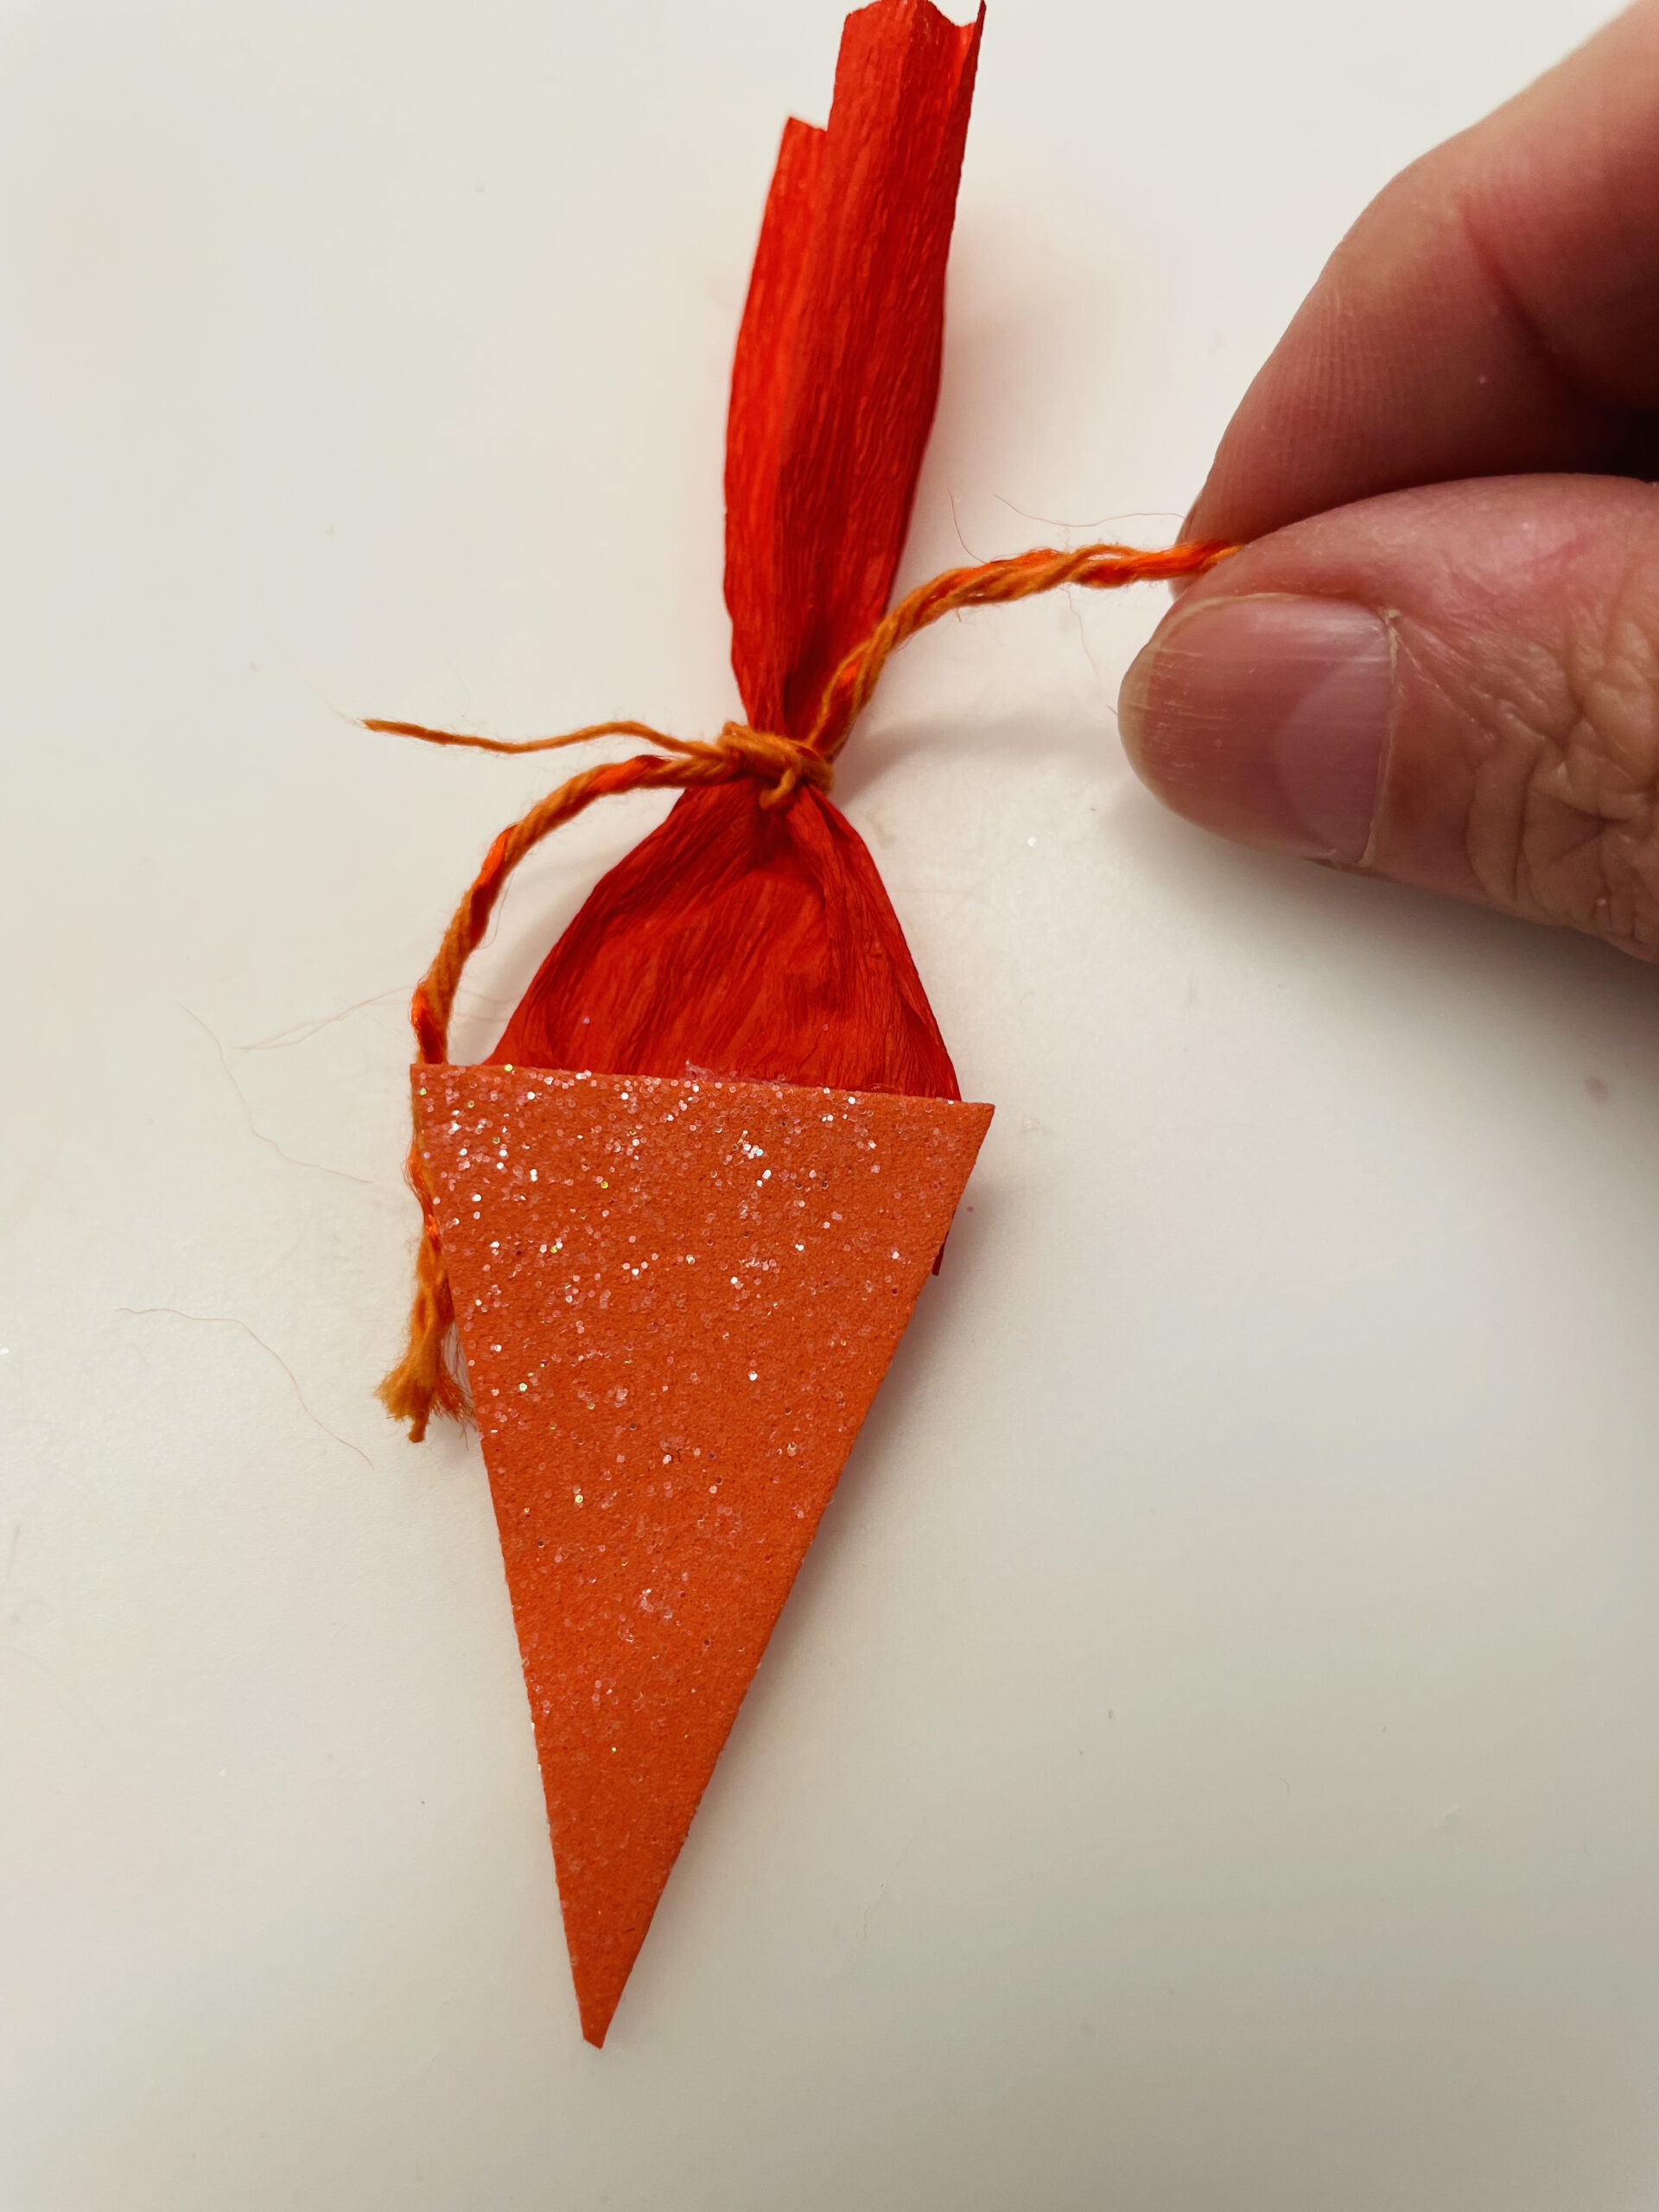
Bild zum Schritt 7 für das Bastel- und DIY-Abenteuer für Kinder: 'Schneidet dafür ein kleines Dreieck zu. Klebt einen schmalen Streifen...'

8

Attach the school bag to the top of the card. You can also let the school bag survive a bit.

Bild zum Schritt 8 für das Bastel- und DIY-Abenteuer für Kinder: 'Befestigt die Schultüte nun am oberen Rand der Karte. Ihr...'

9

Have fun trying it out!

Bild zum Schritt 9 für das Bastel- und DIY-Abenteuer für Kinder: 'Viel Spaß beim Ausprobieren!'

Table as Gift Pendant – Card – Table Card

Follow us on Facebook , Instagram and Pinterest
Don't miss any more adventures: Our bottle mail

Leave a Reply

Your email address will not be published.

The maximum upload file size: 5 MB. You can upload: image, document. Drop file here