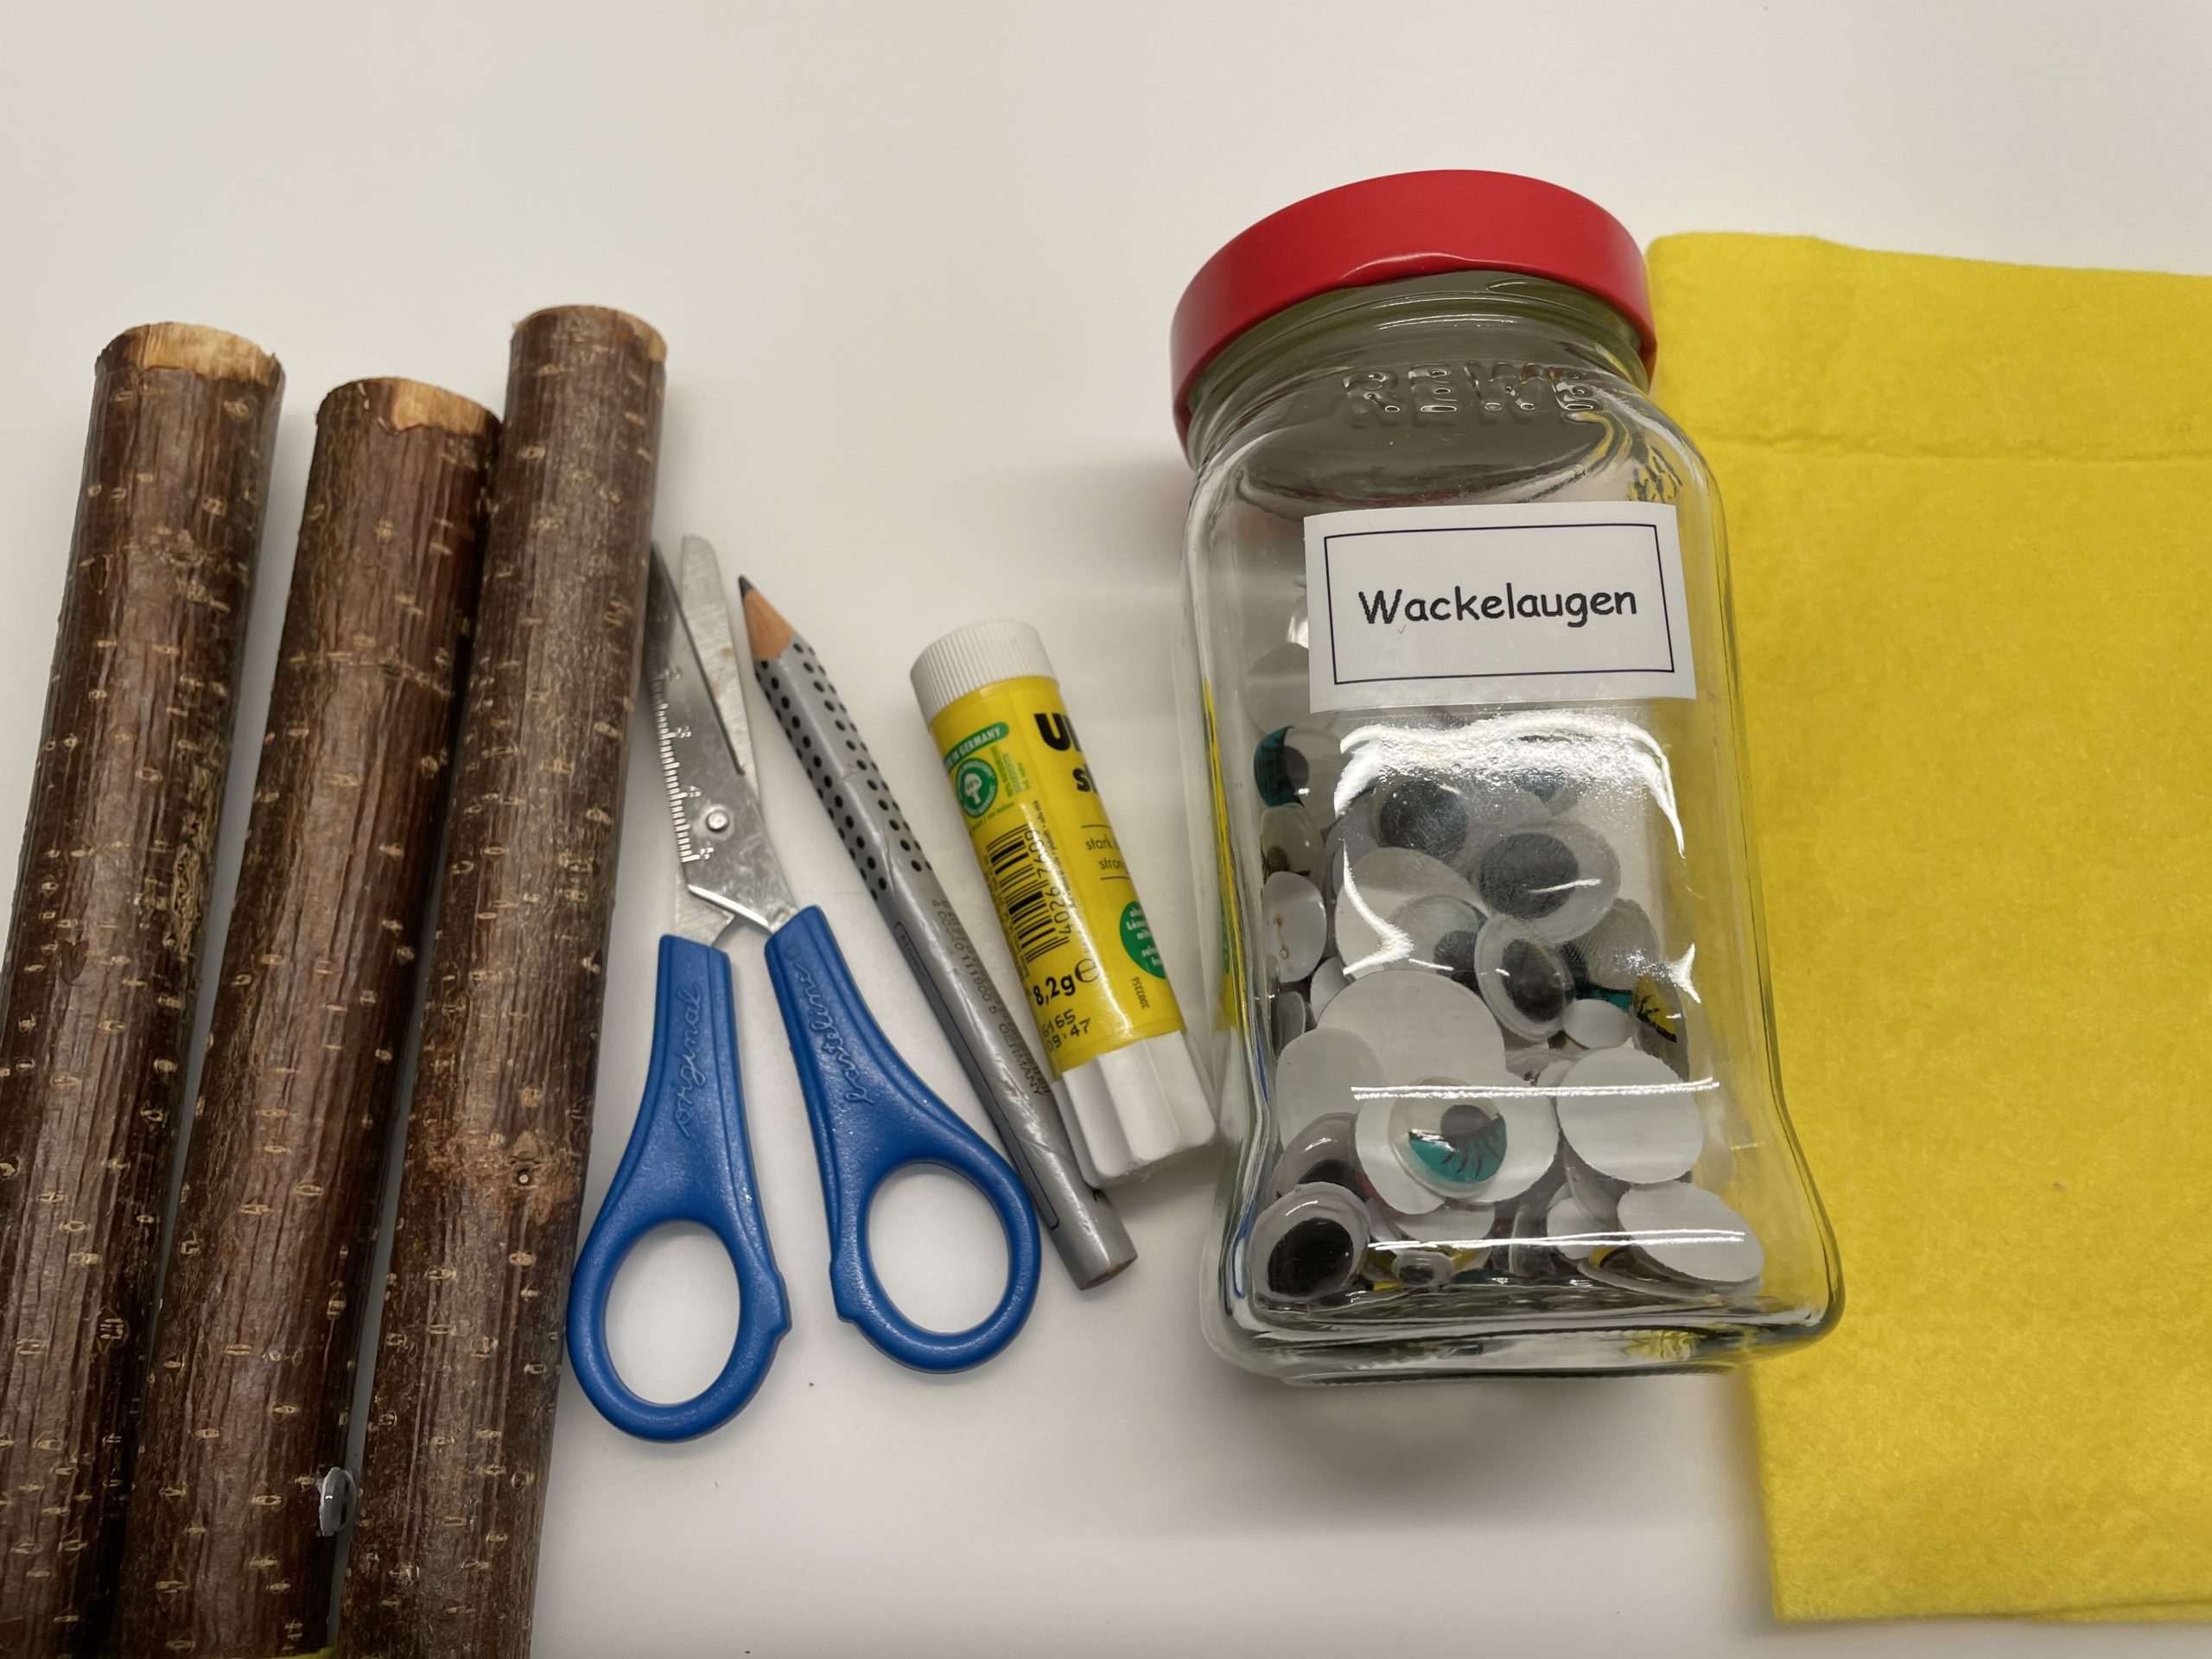
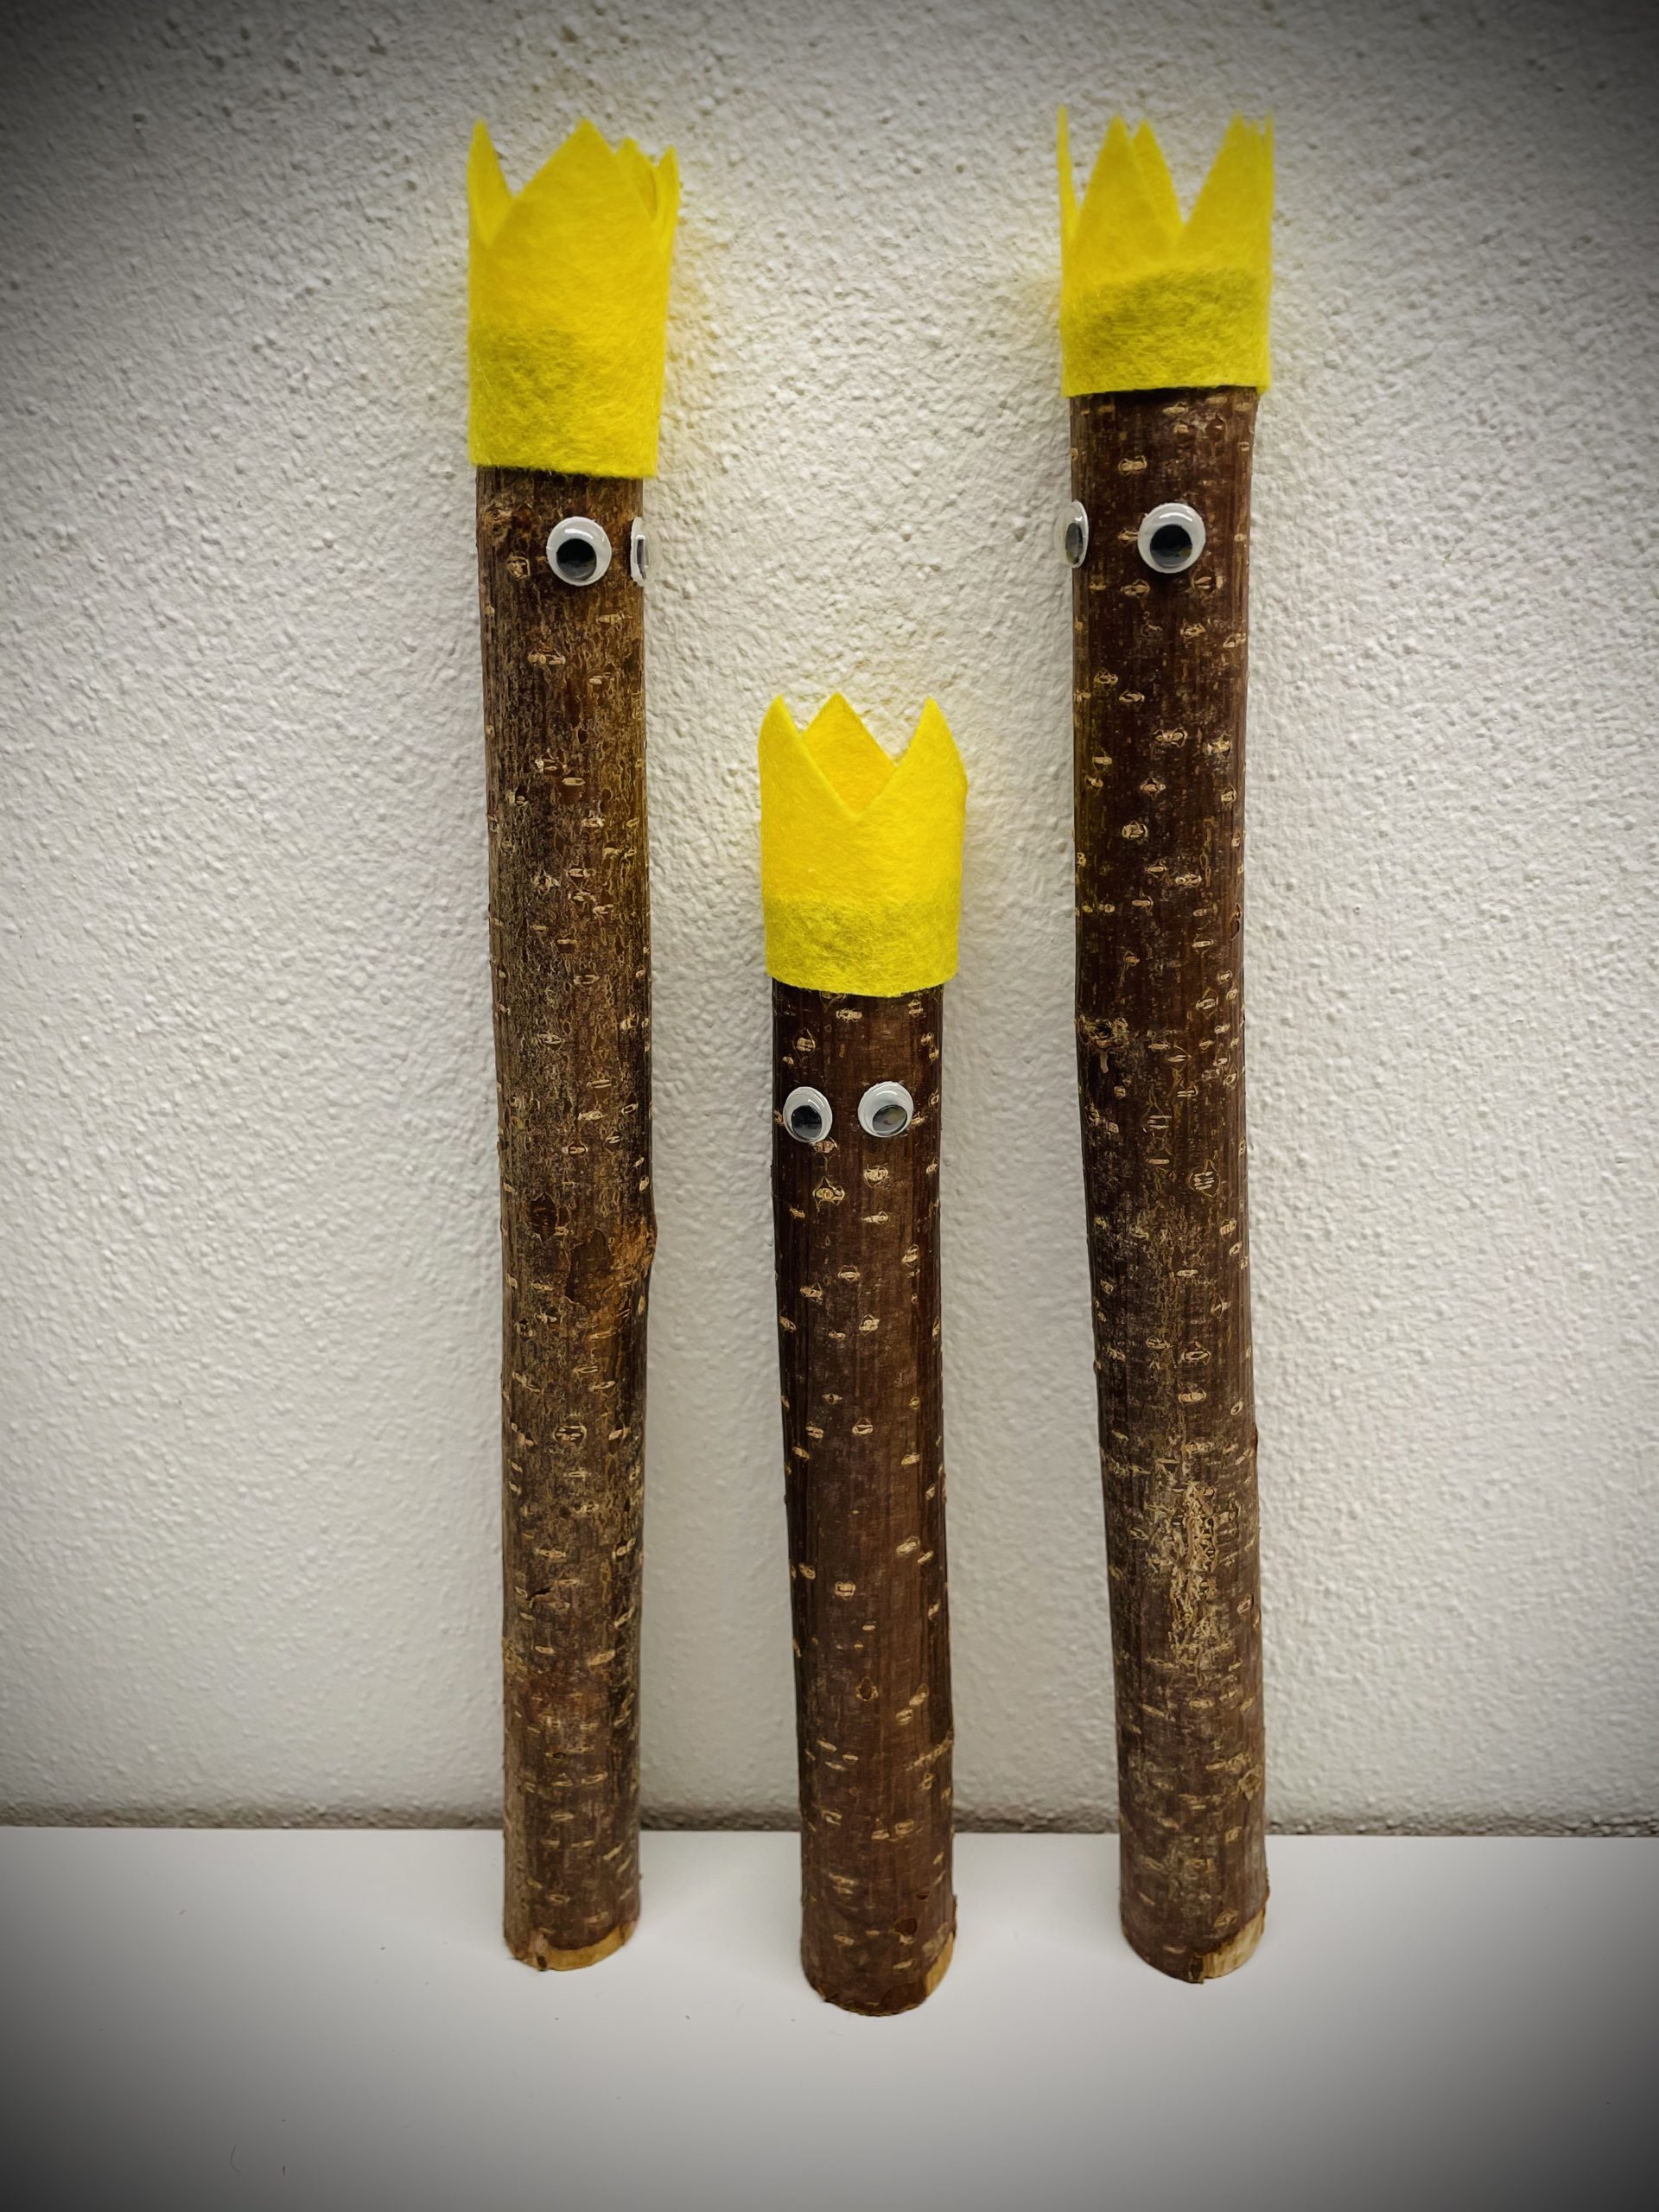
The three kings from the morning country. A craft action that is easy to implement and is also suitable after the three-king day for a birthday, an honorary day, for carnival or simply so. You need uniformly thick branches, a dishcloth or another fabric residue and for each king two wobble eyes. Let's start.
Media Education for Kindergarten and Hort

Relief in everyday life, targeted promotion of individual children, independent learning and - without any pre-knowledge already usable by the youngest!
First you put all the materials ready and spread out your craft material.
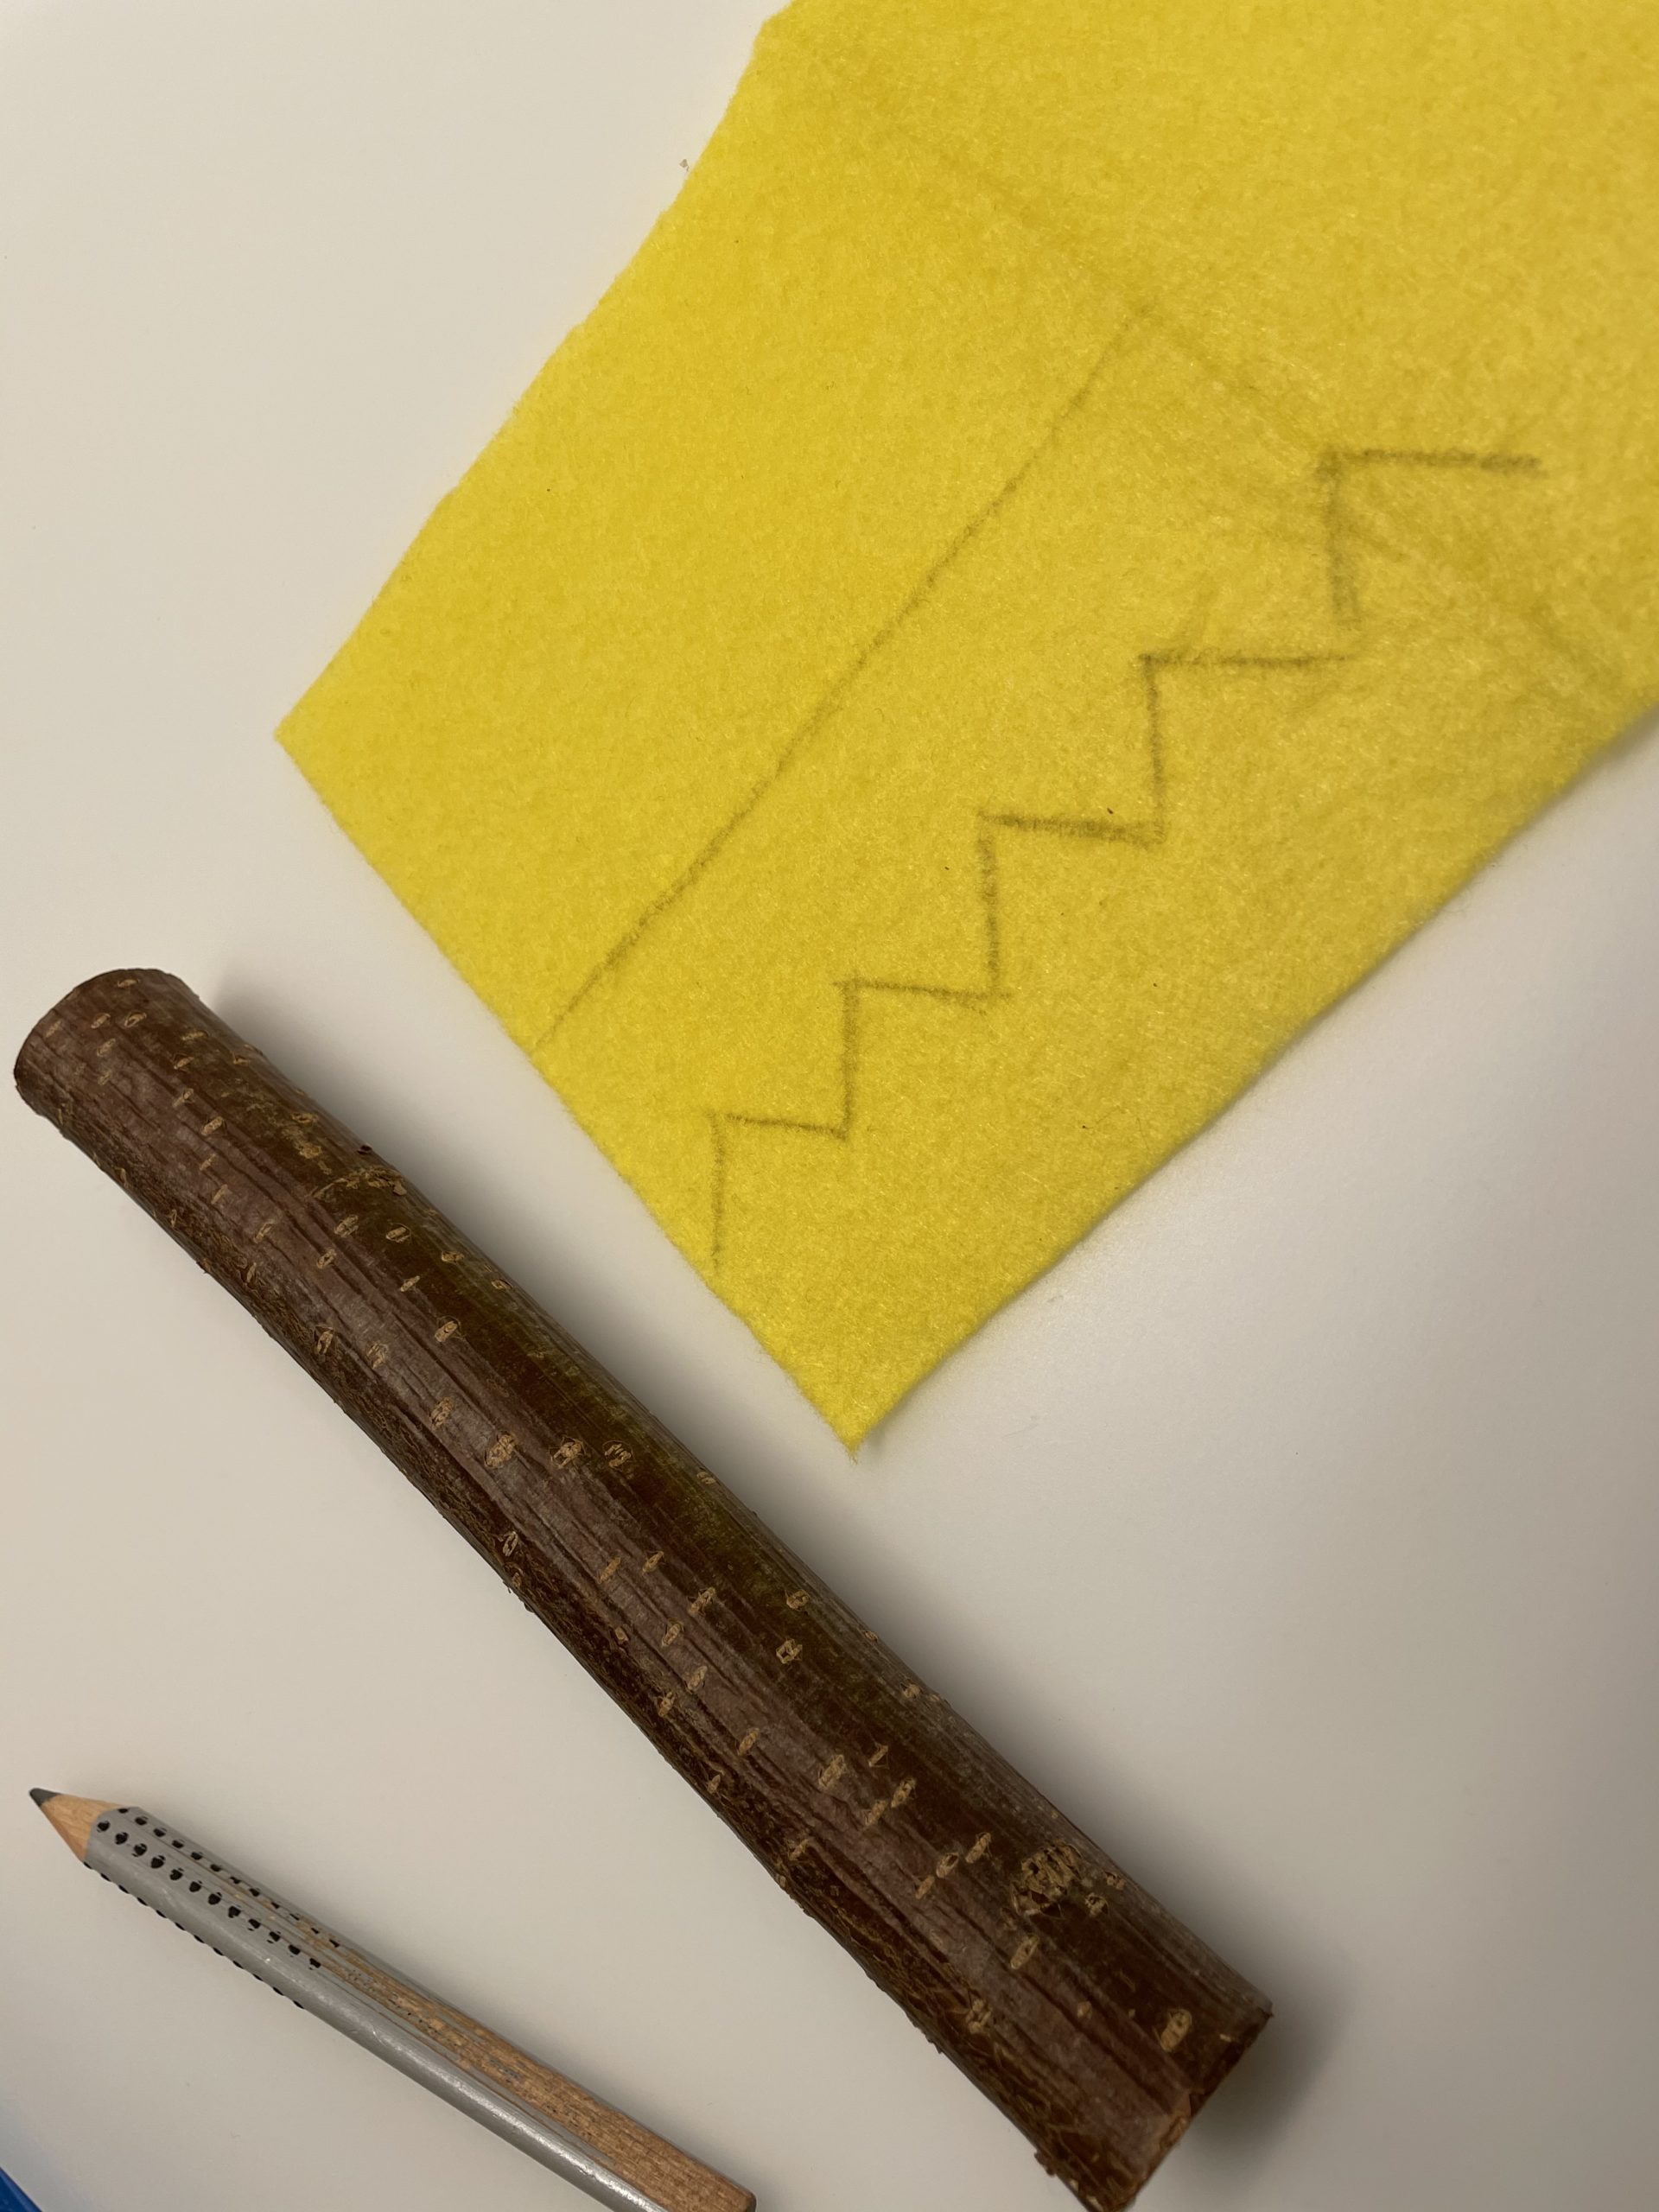
First you take the dishcloth and a pen to make the crowns.

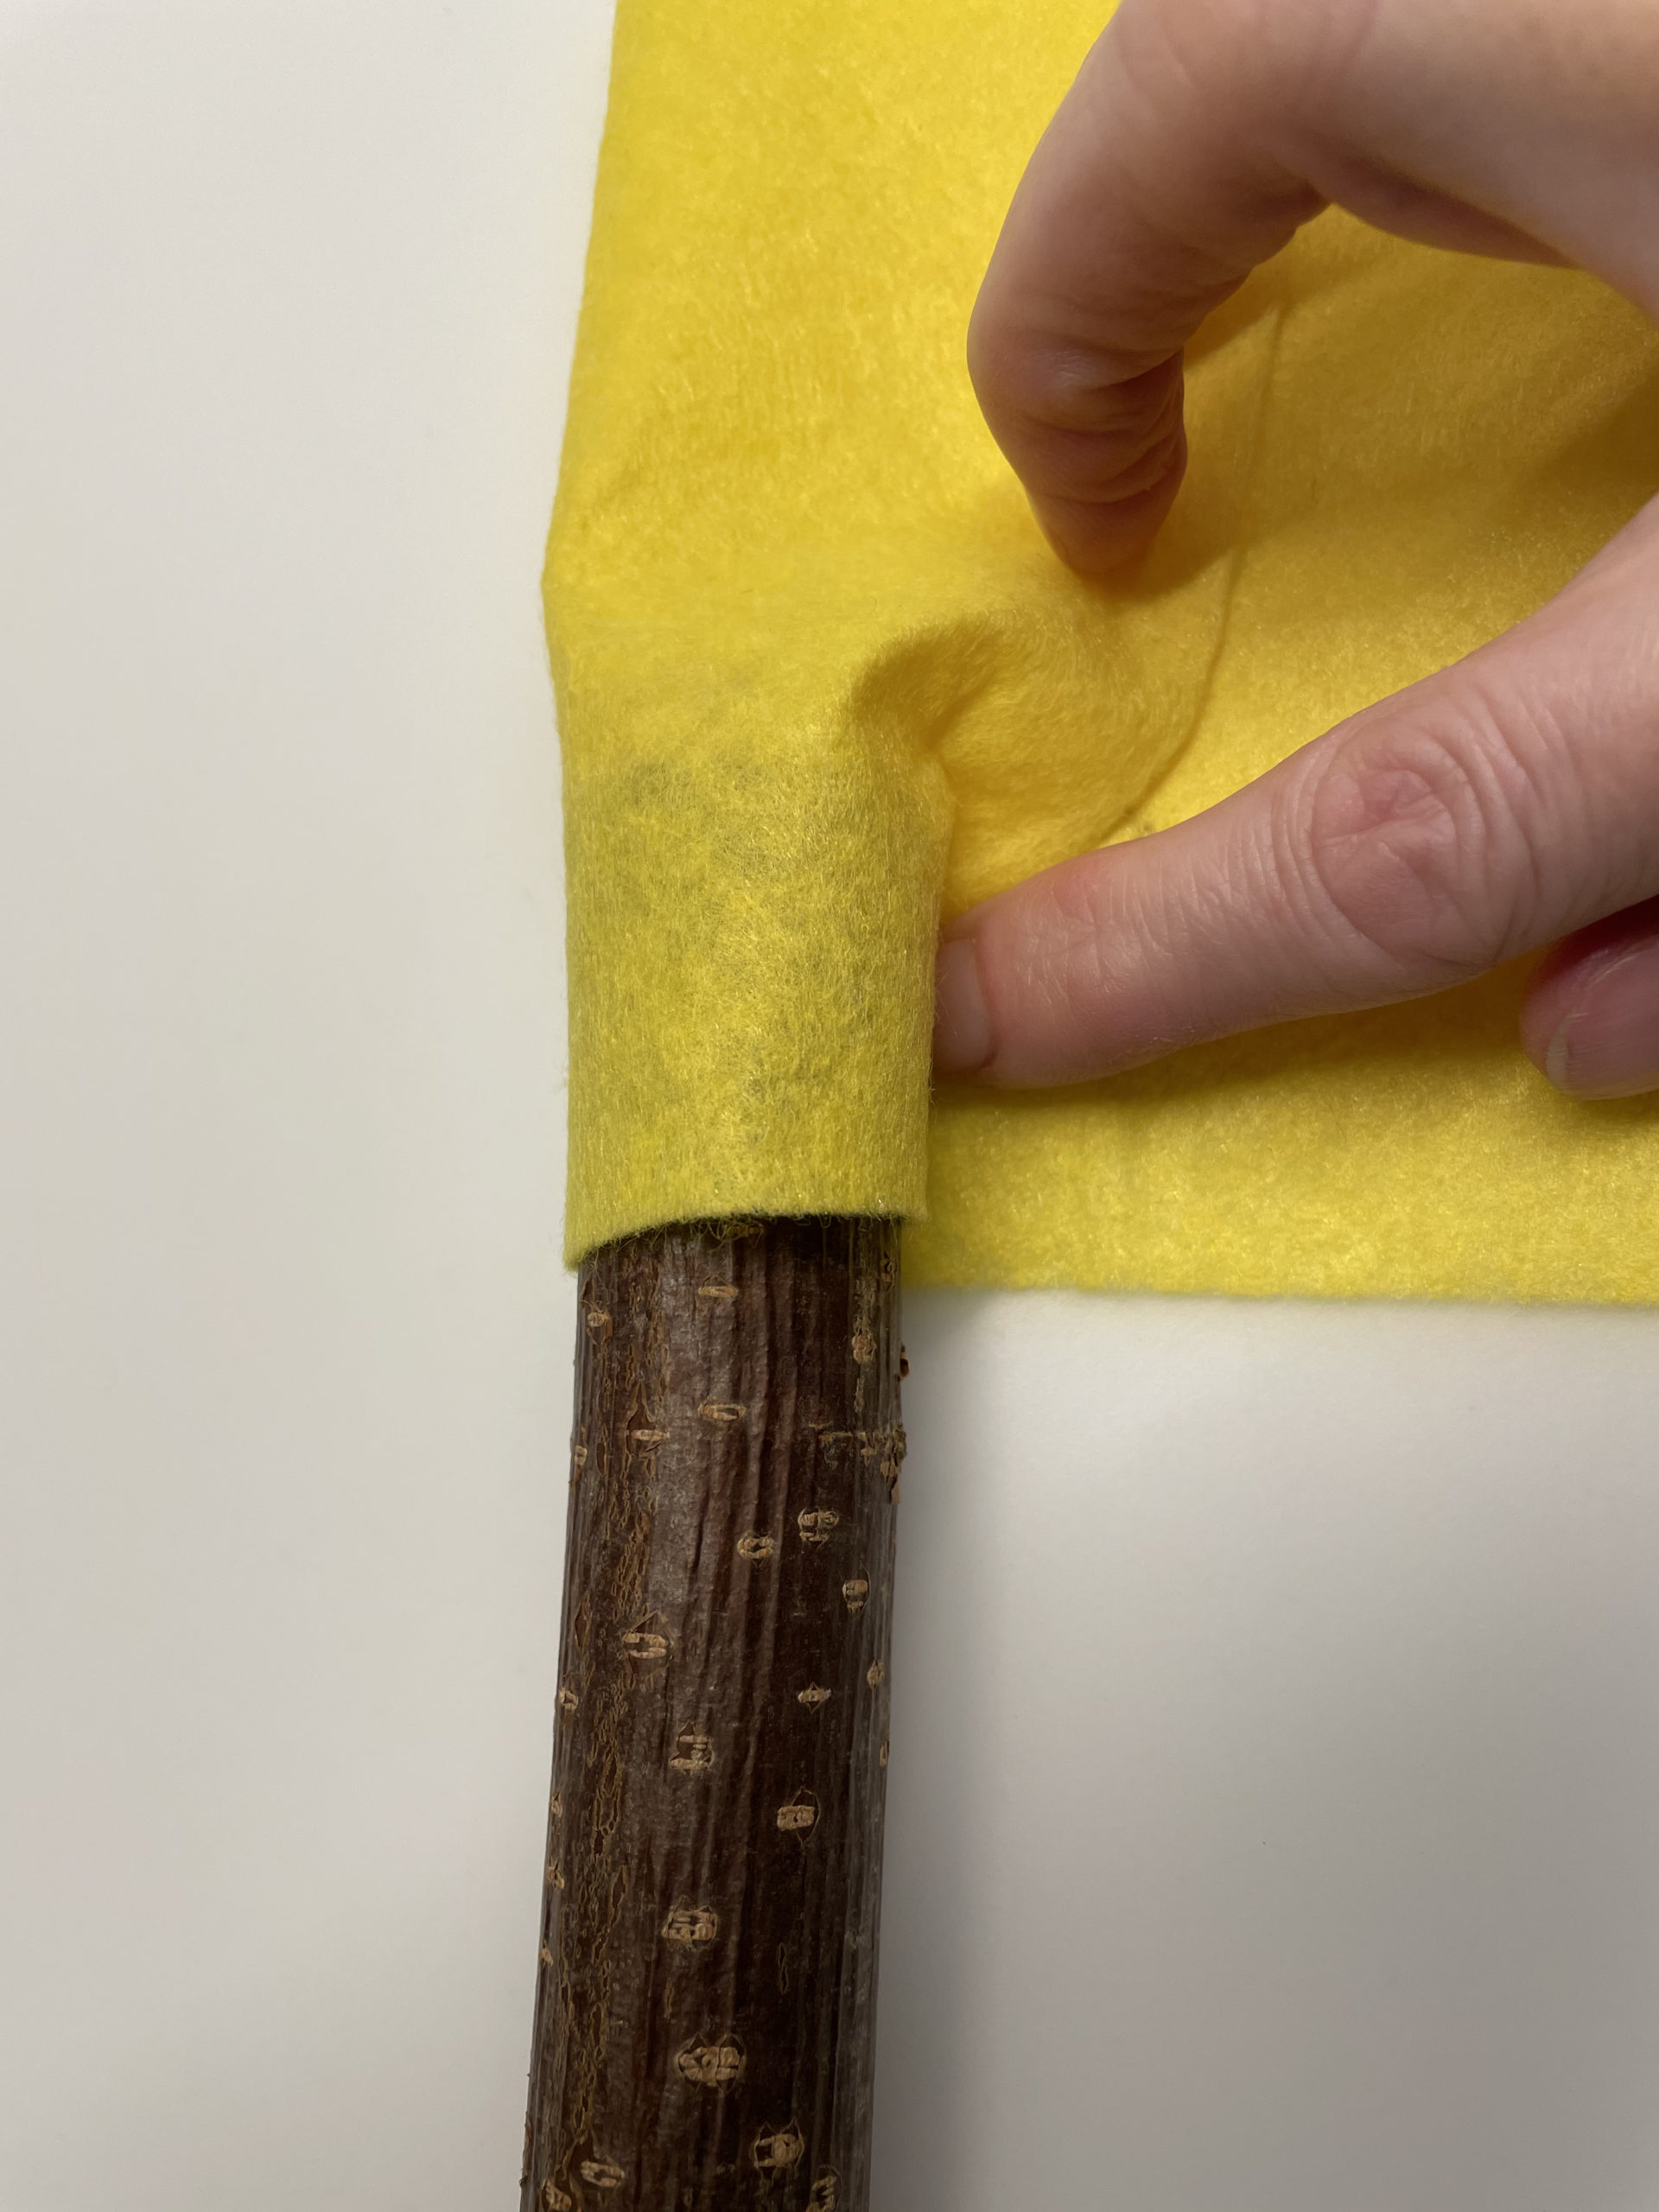
Now take a branch and measure about the width of the fabric you broke for the crown. For this, wrap the branch and add about 1cm of fabric. So you can stick it together a bit overlapping later.
For the height of the crown you need about 3-5 cm. For this you now paint a zigzag pattern over the entire width of the fabric.
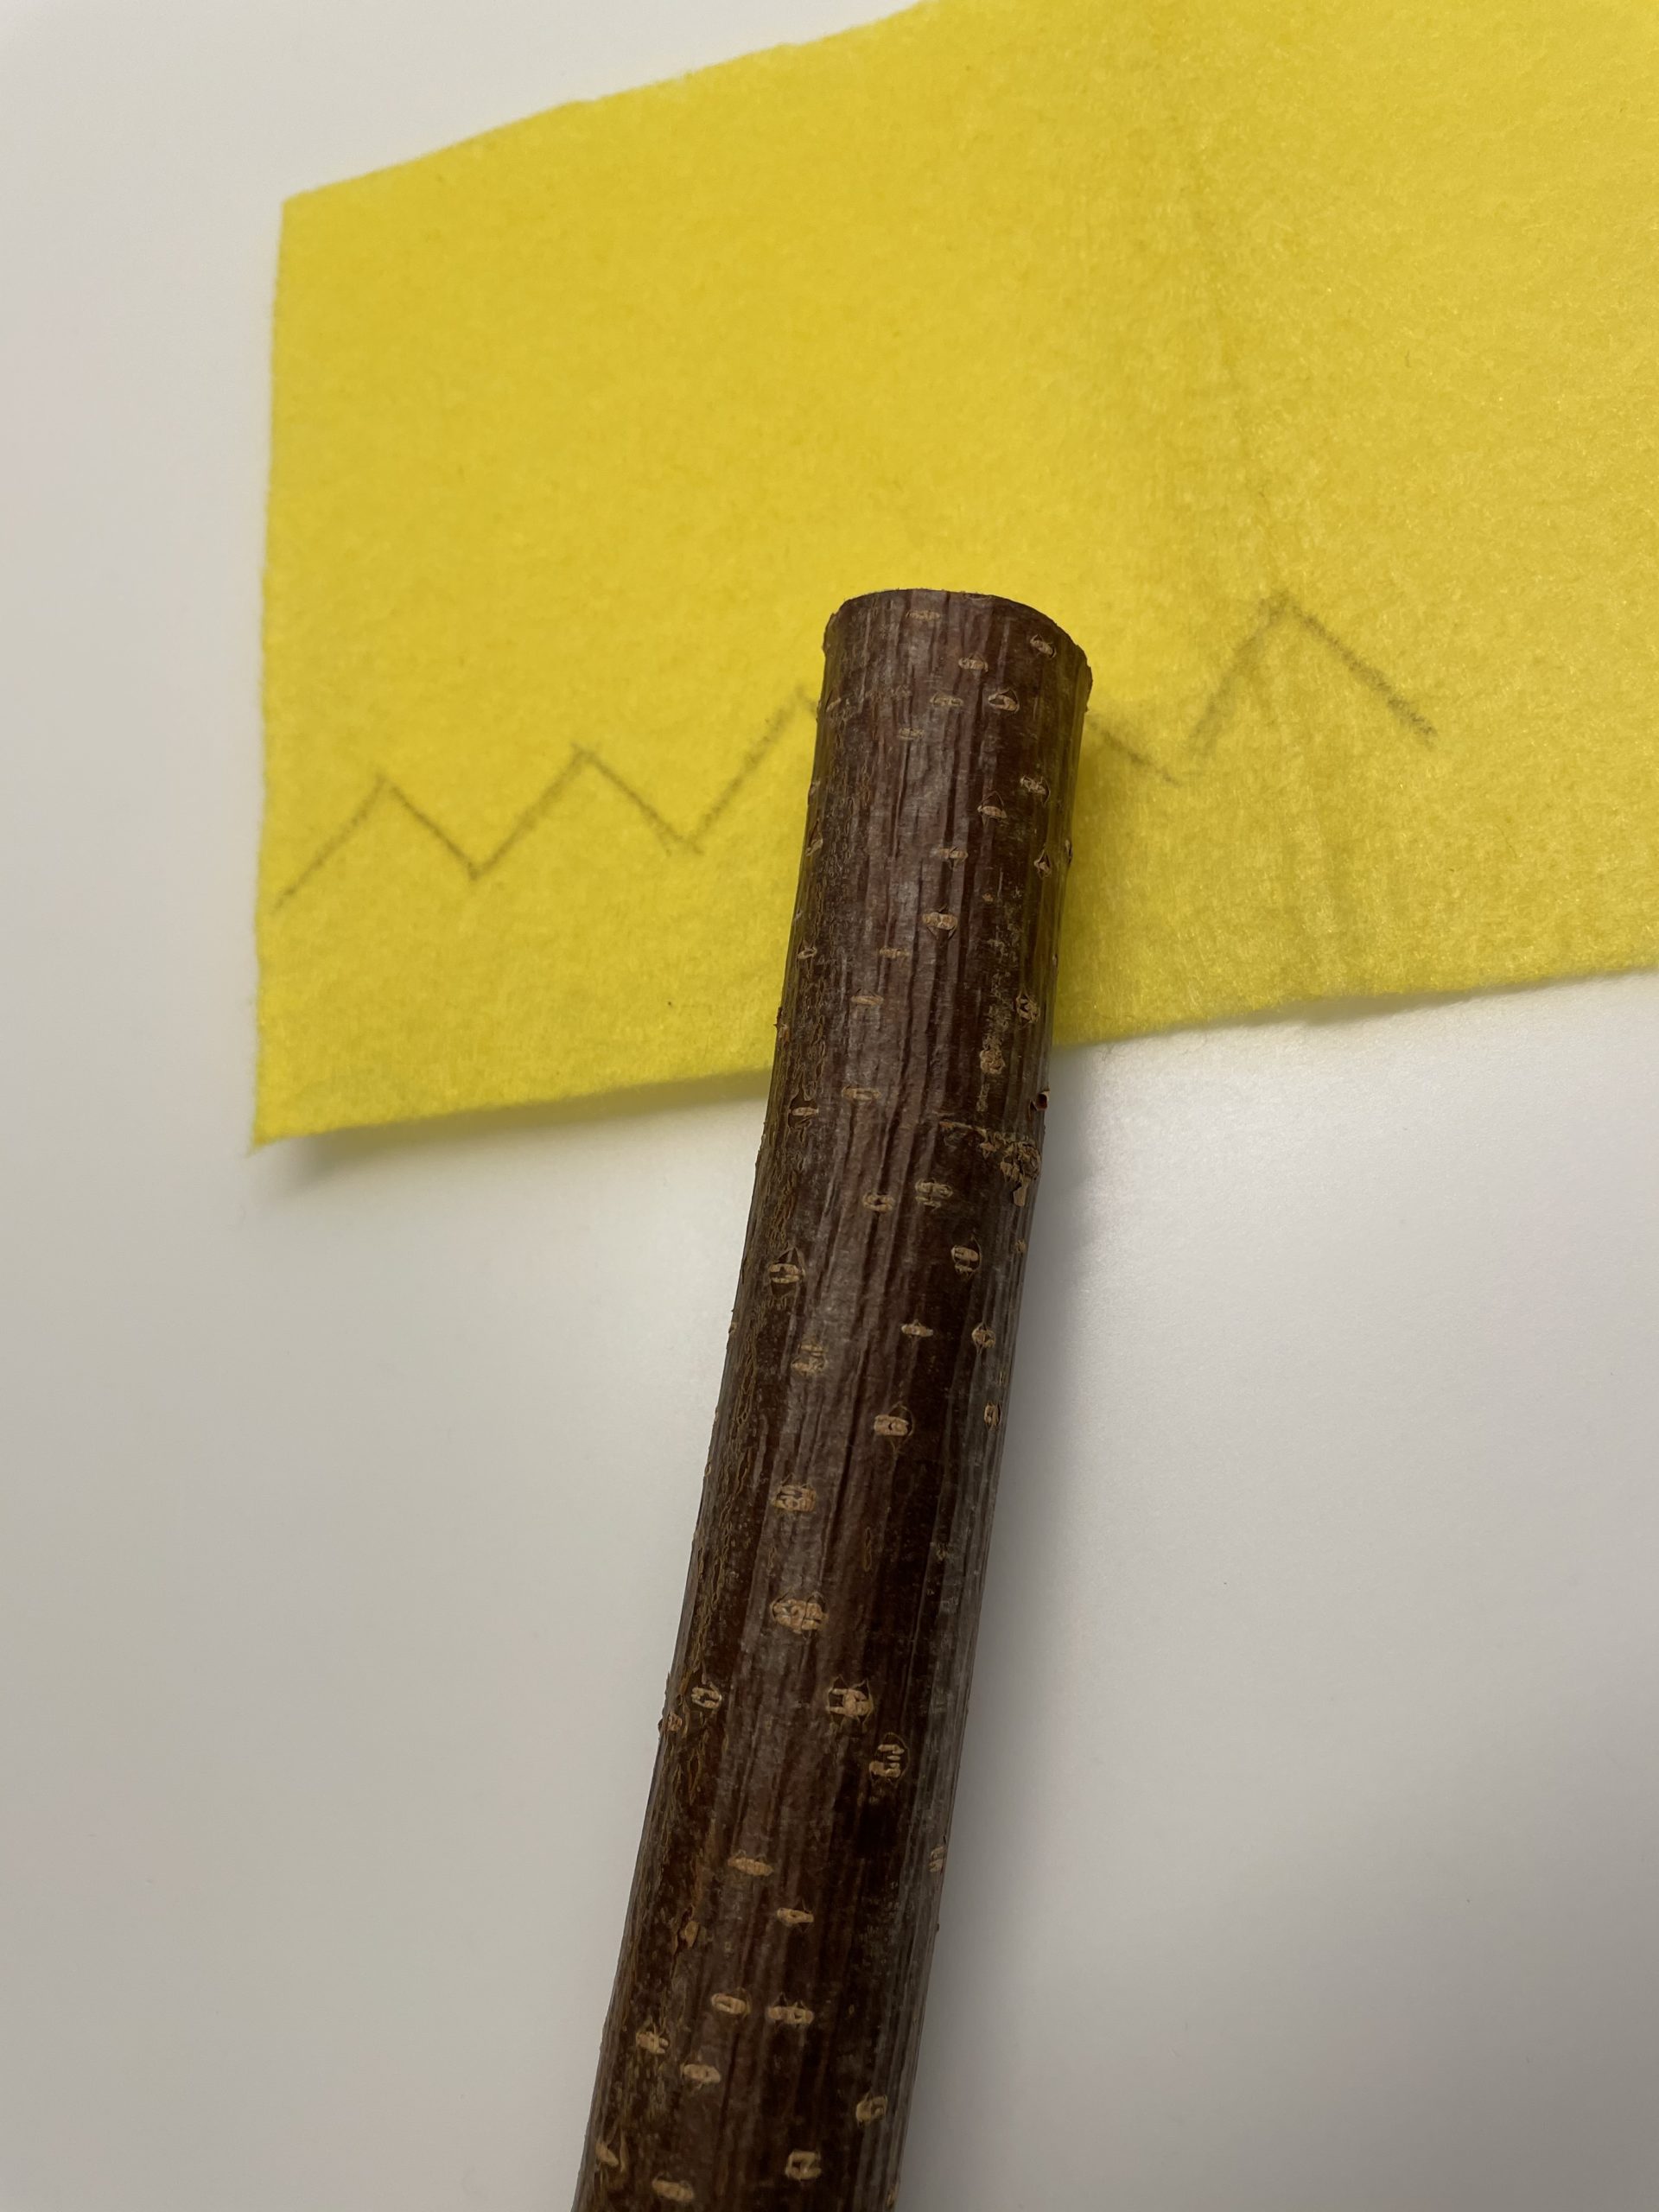
Tip: Now you measure the distance between the zigzag line and your lower line and paint another straight line at the same distance over your zigzag mark.
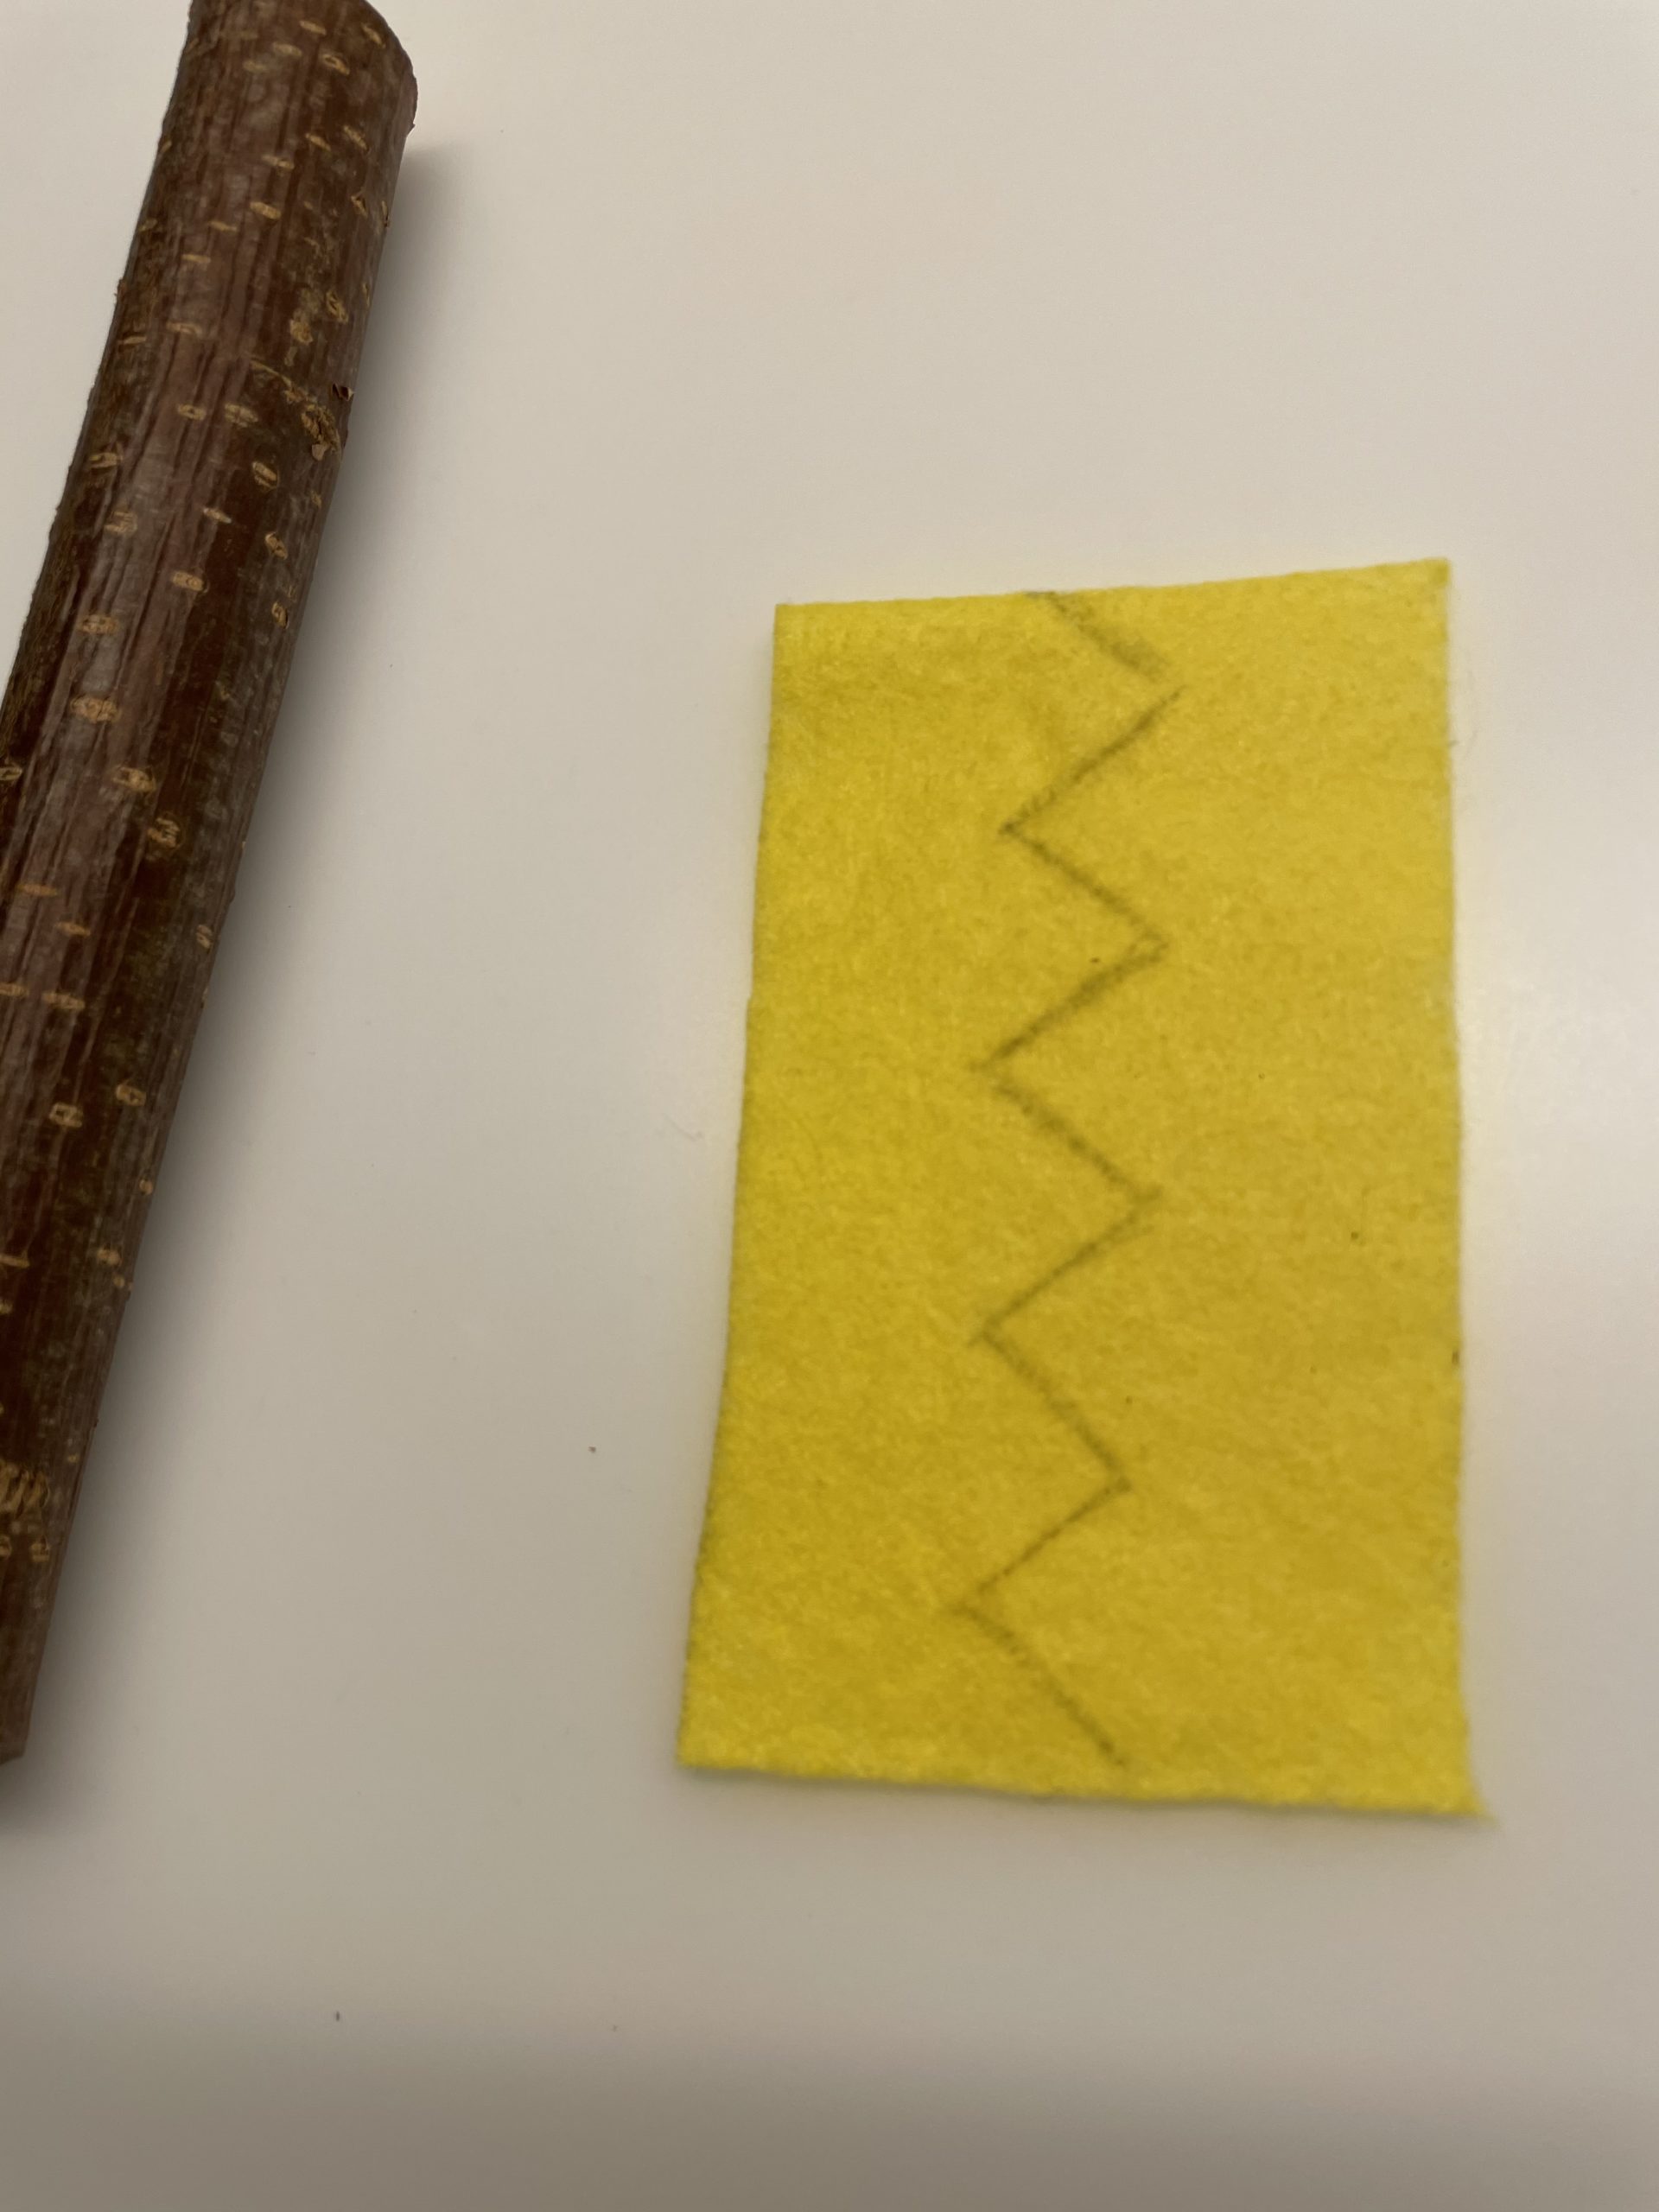
That's how you get two crowns!
Cut off the fabric on the straight line. Now you can cut much easier along the zigzag line. Attention: cut exactly on the line. Since you want to use both parts, the cutting edge should fit for both crowns.
Check again if the crown is around your branch.

Now you have two ways to stick it to the branch.
1. Either you paint your fabric strip with glue and then stick the crown to the branch. The difficulty here is that the fabric can make a difference.
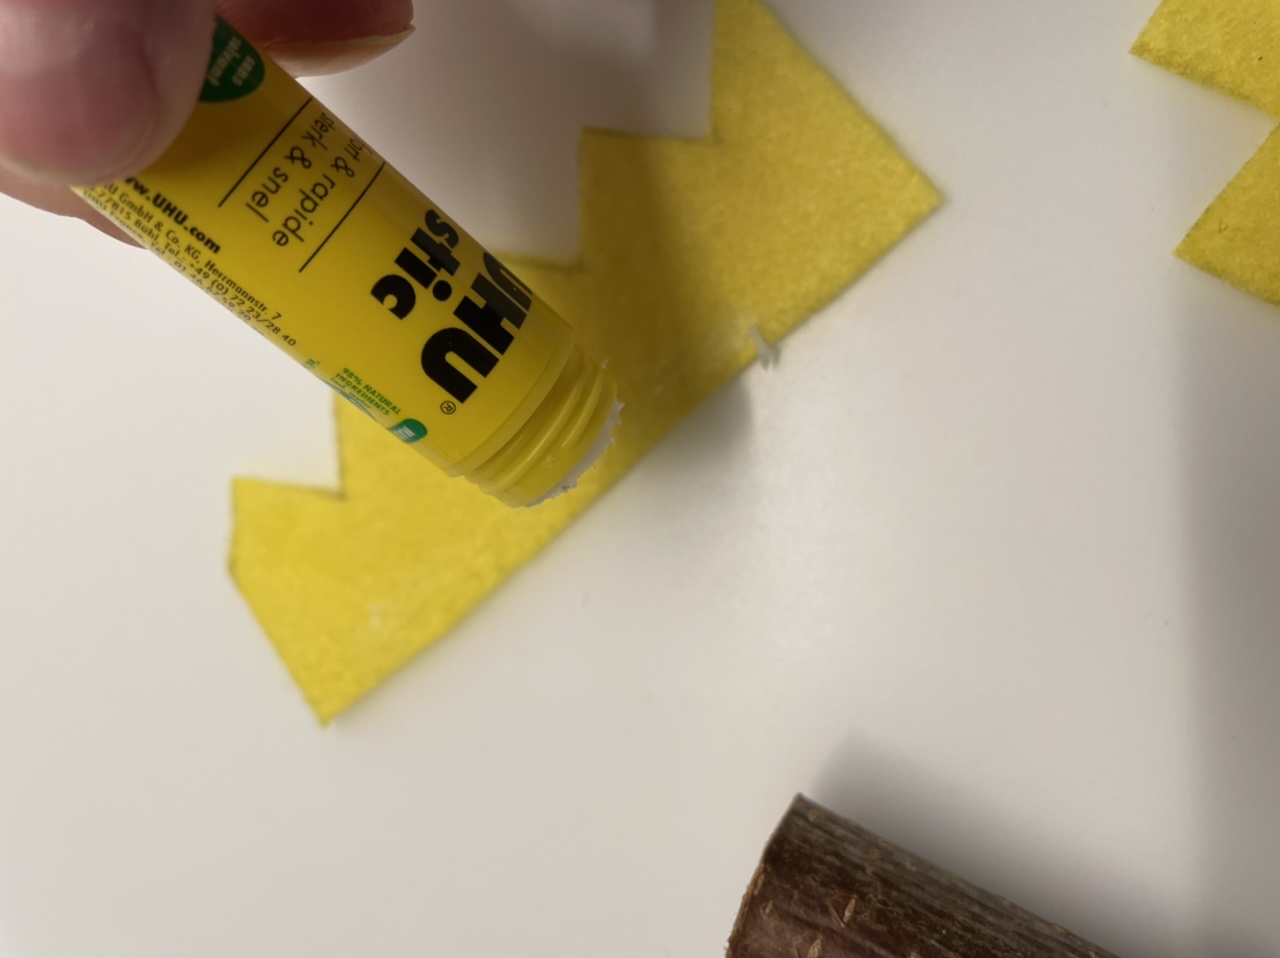
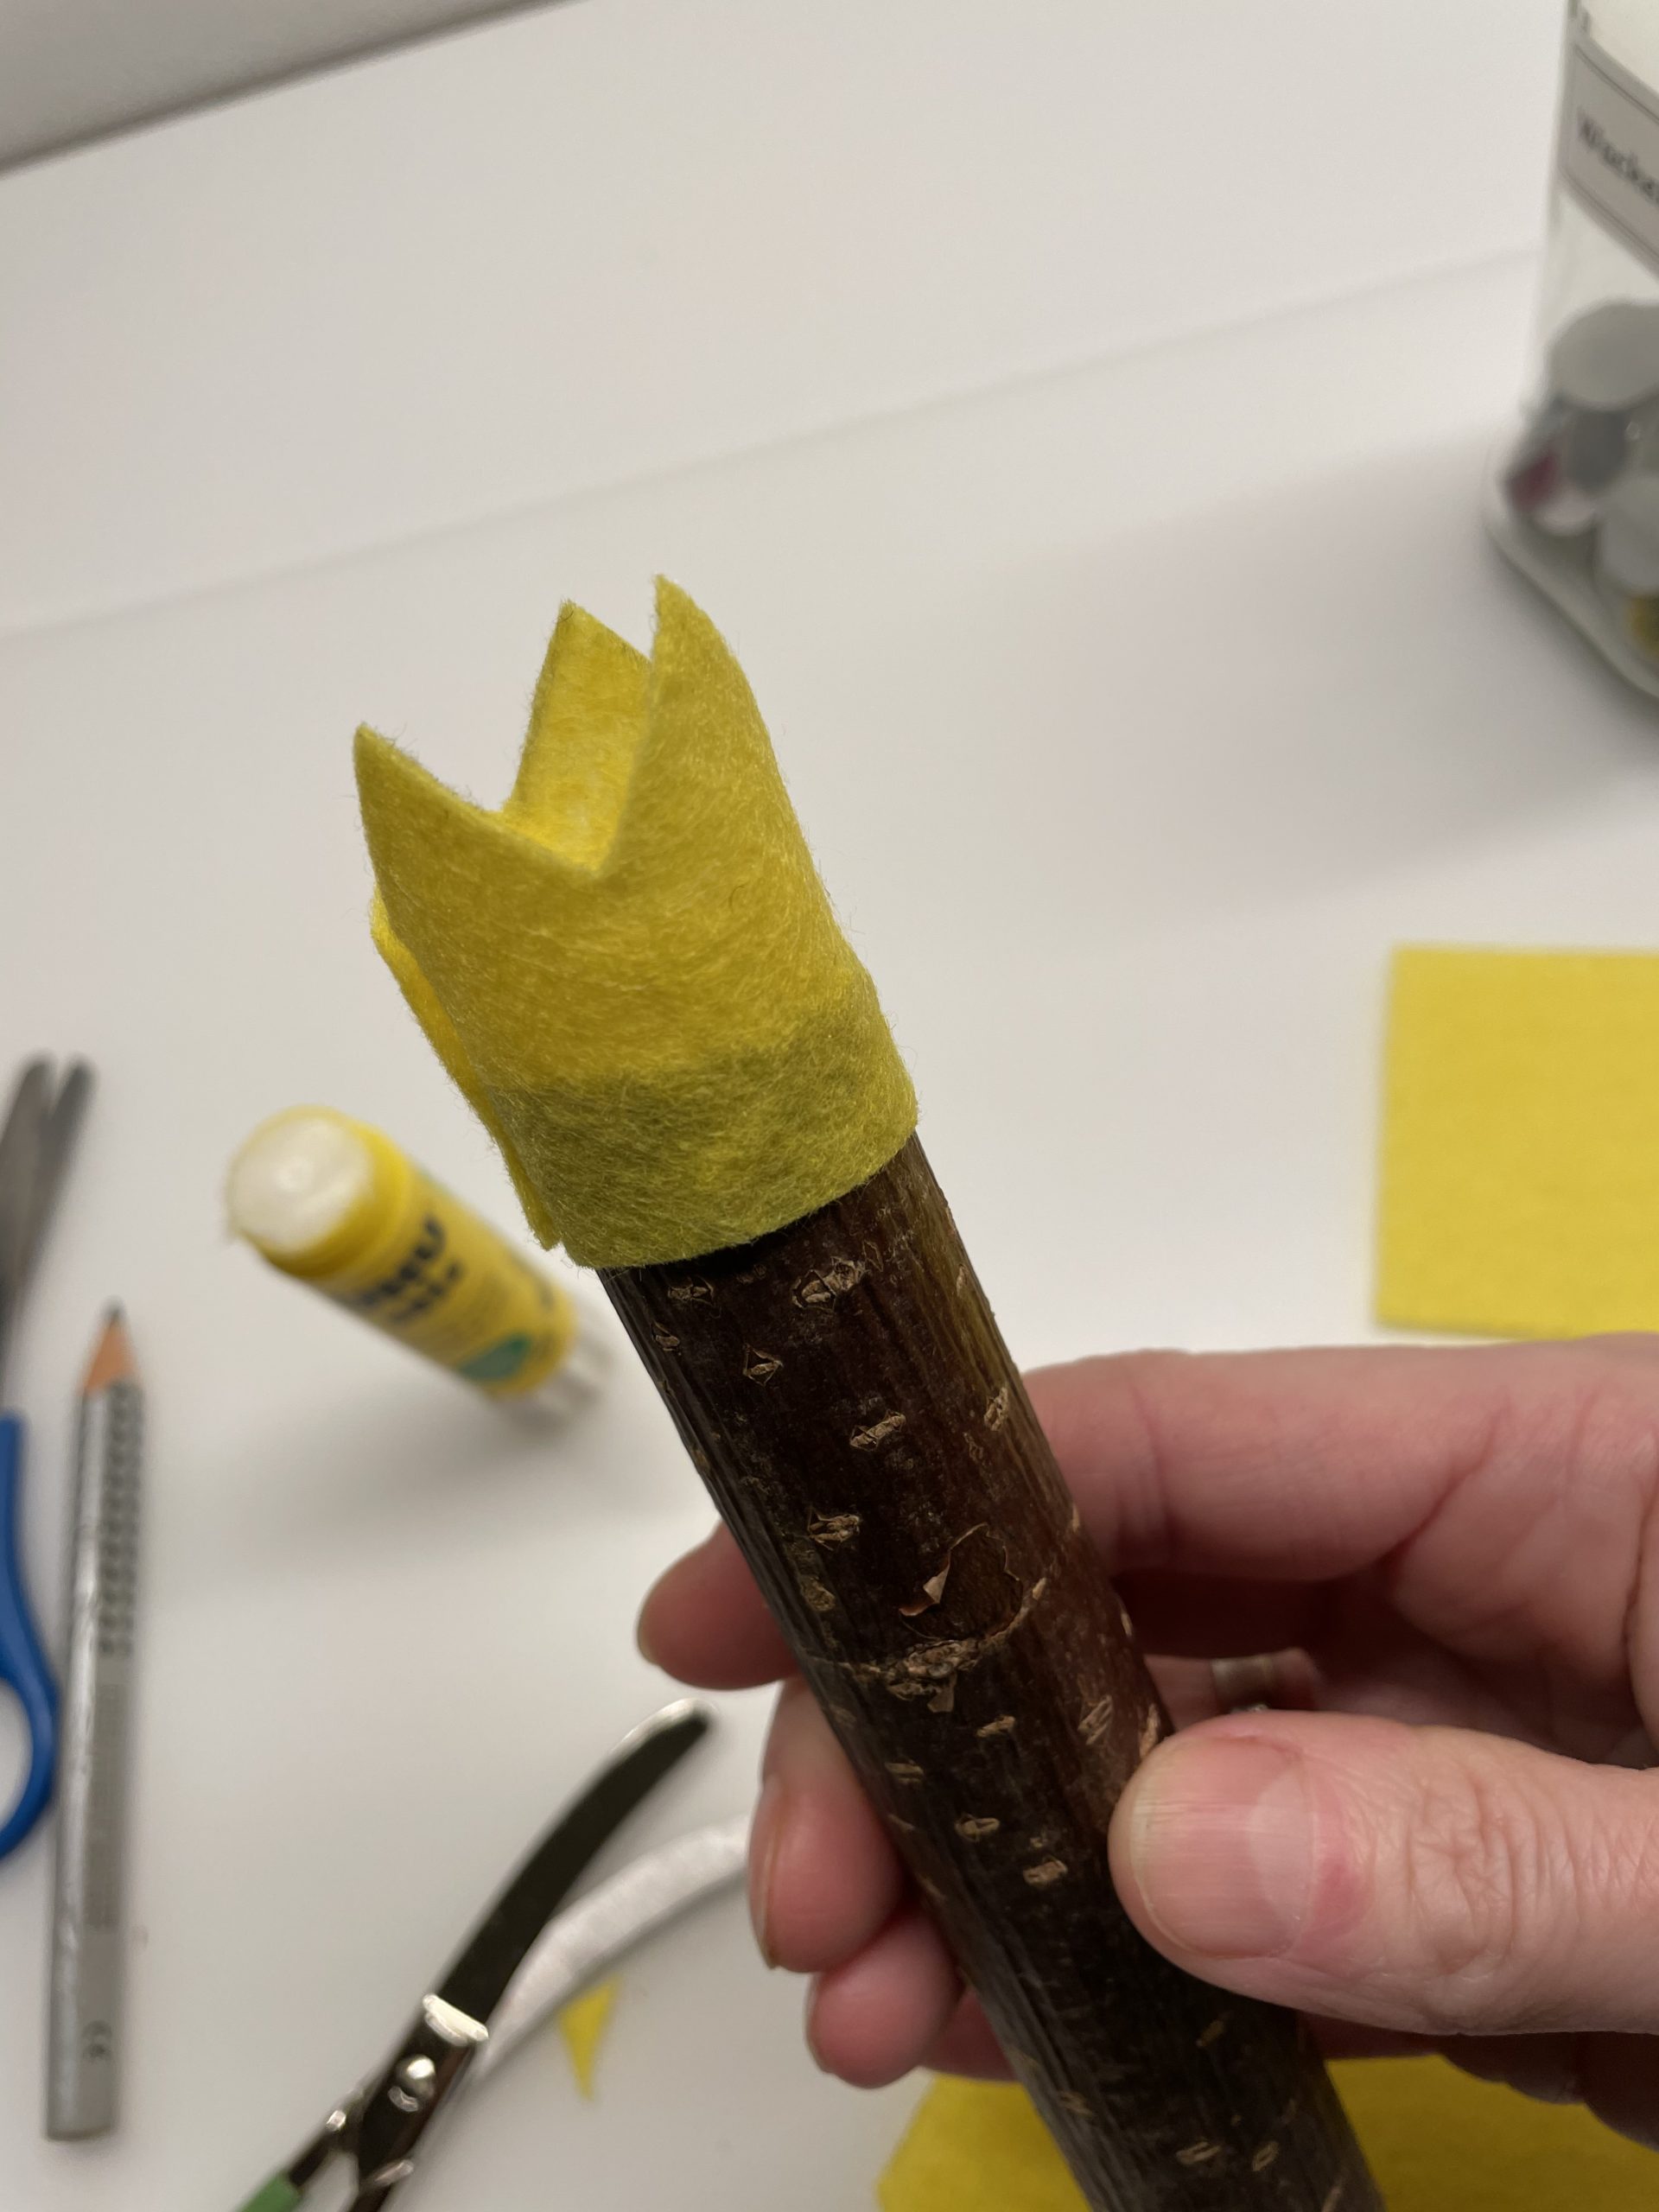
2. You paint the branch on the top edge with glue and wrap the fabric around the glue.

For this, you place the end of the branch half on the fabric and press it on the branch.
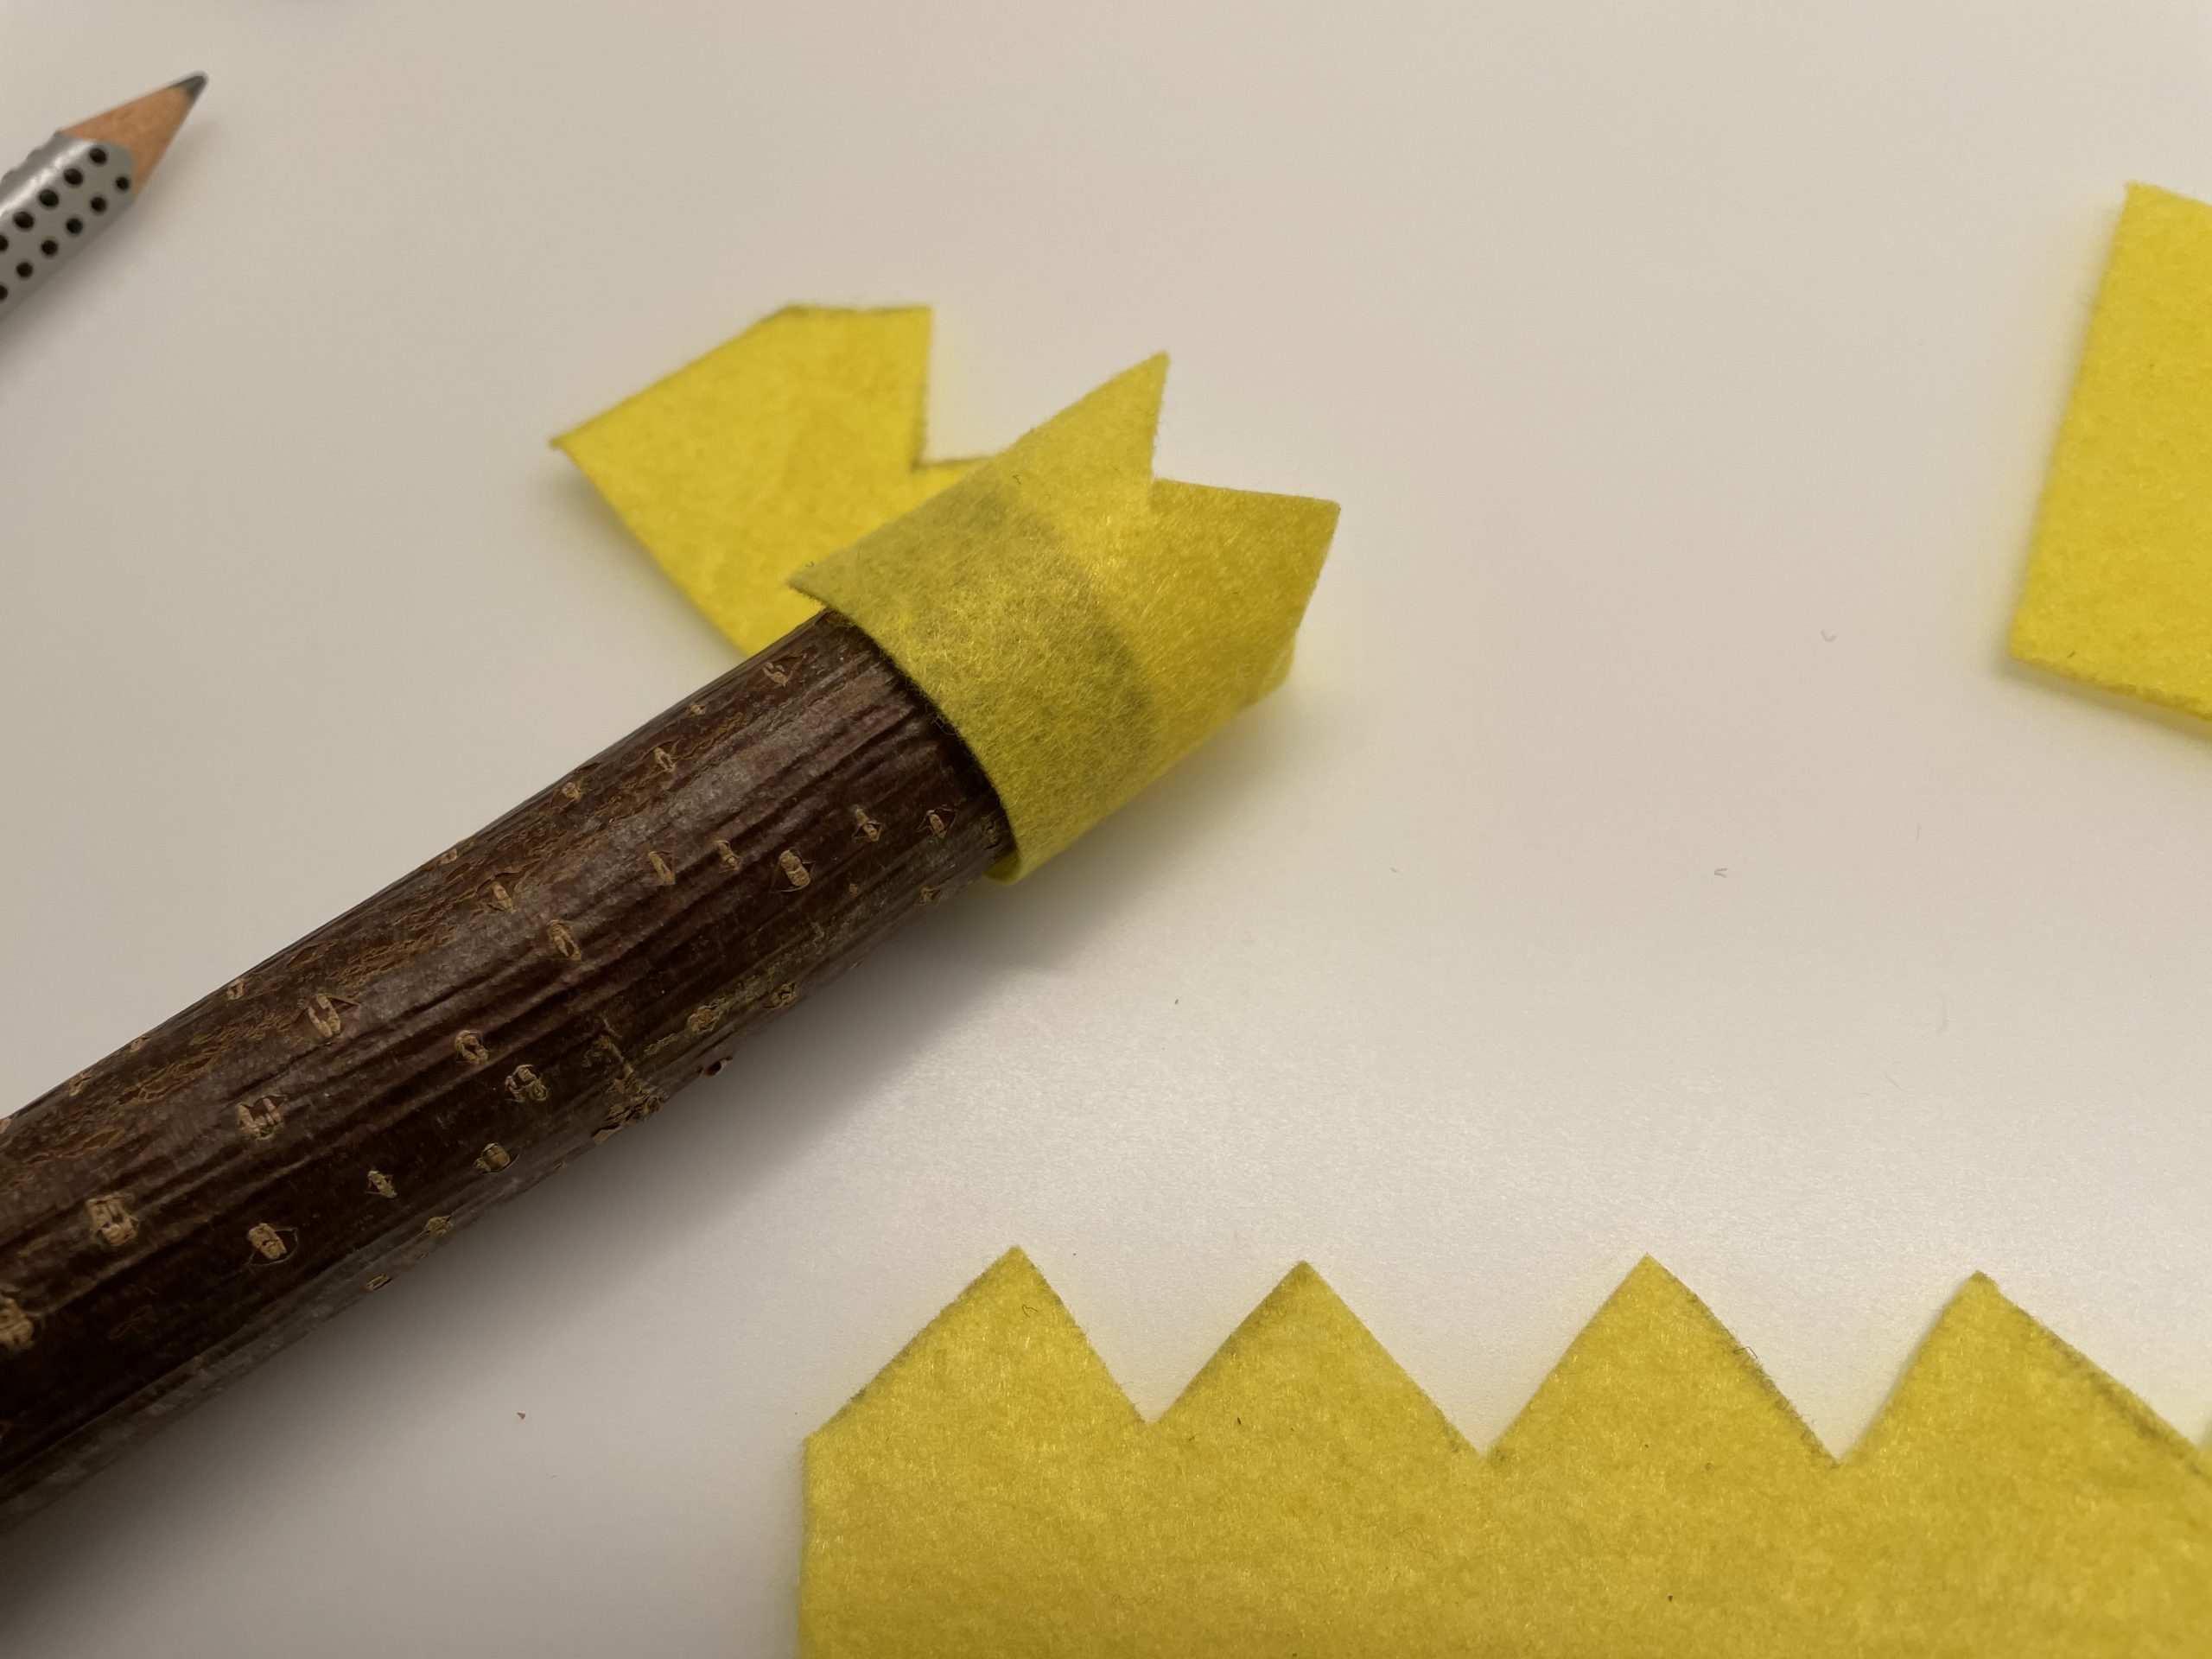
You fix the overlapping fabric with an additional adhesive point on the branch.
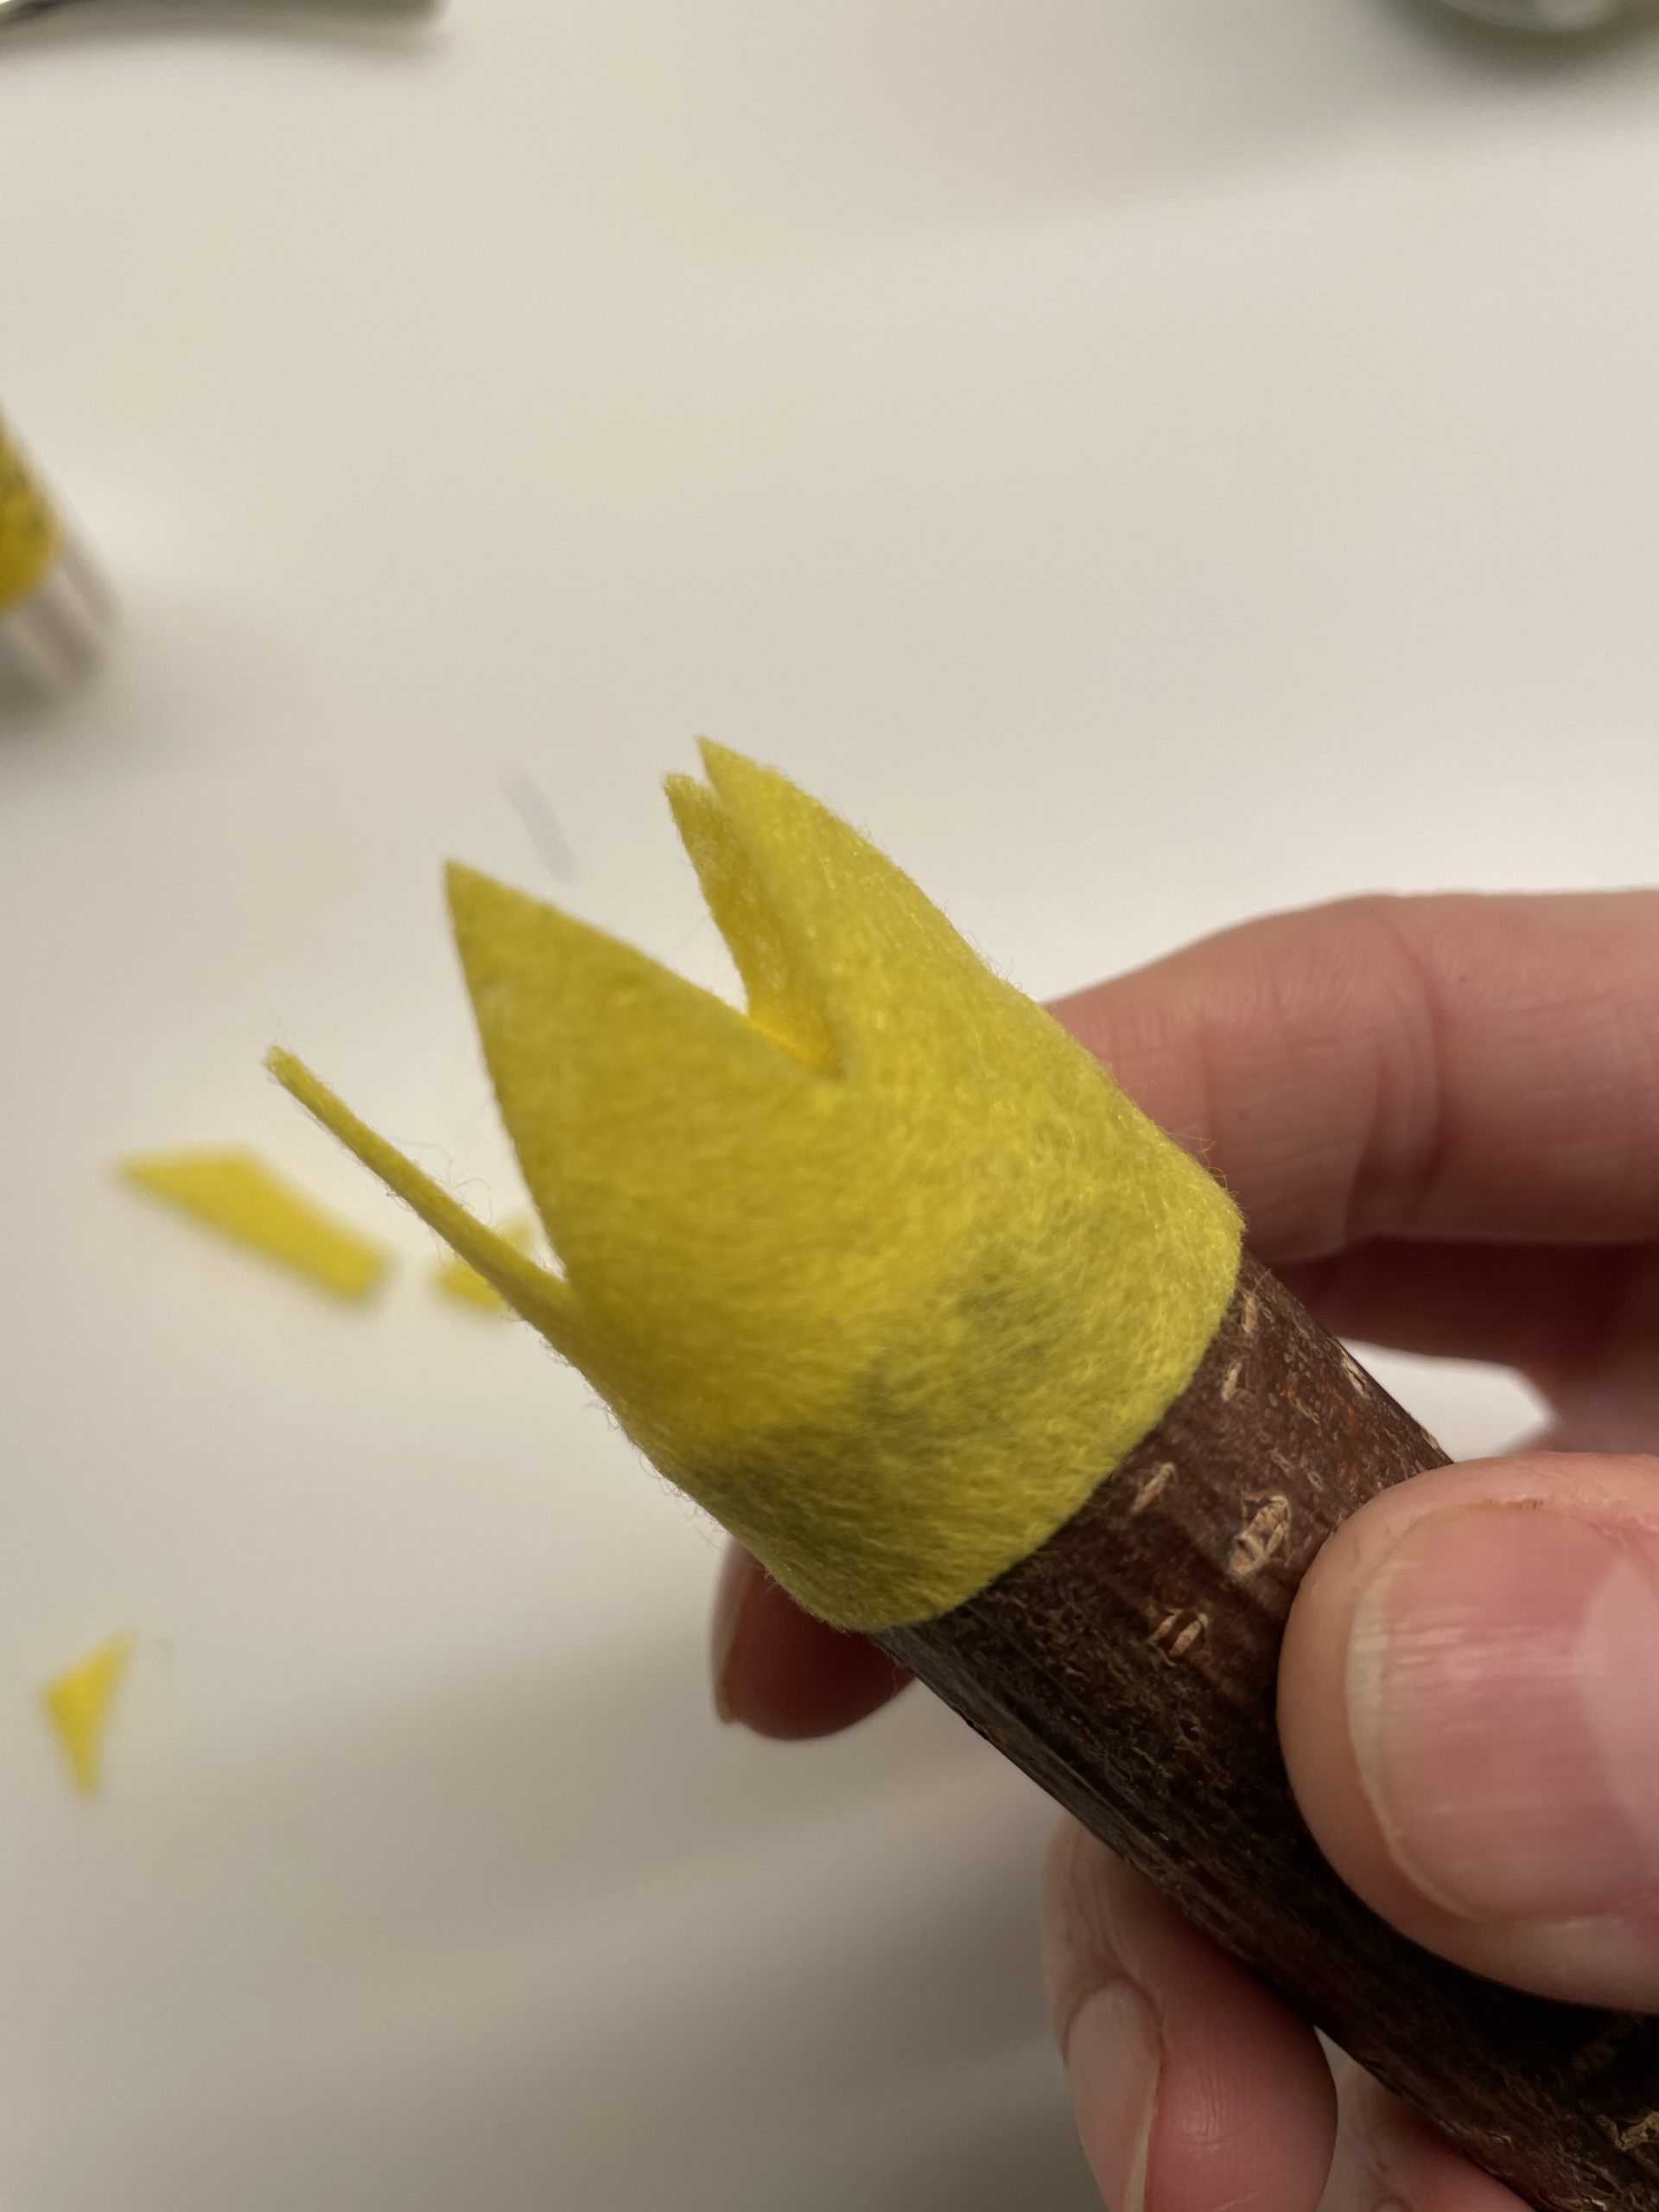
If the spikes do not match exactly to each other when overlapping, then cut them with the scissors.
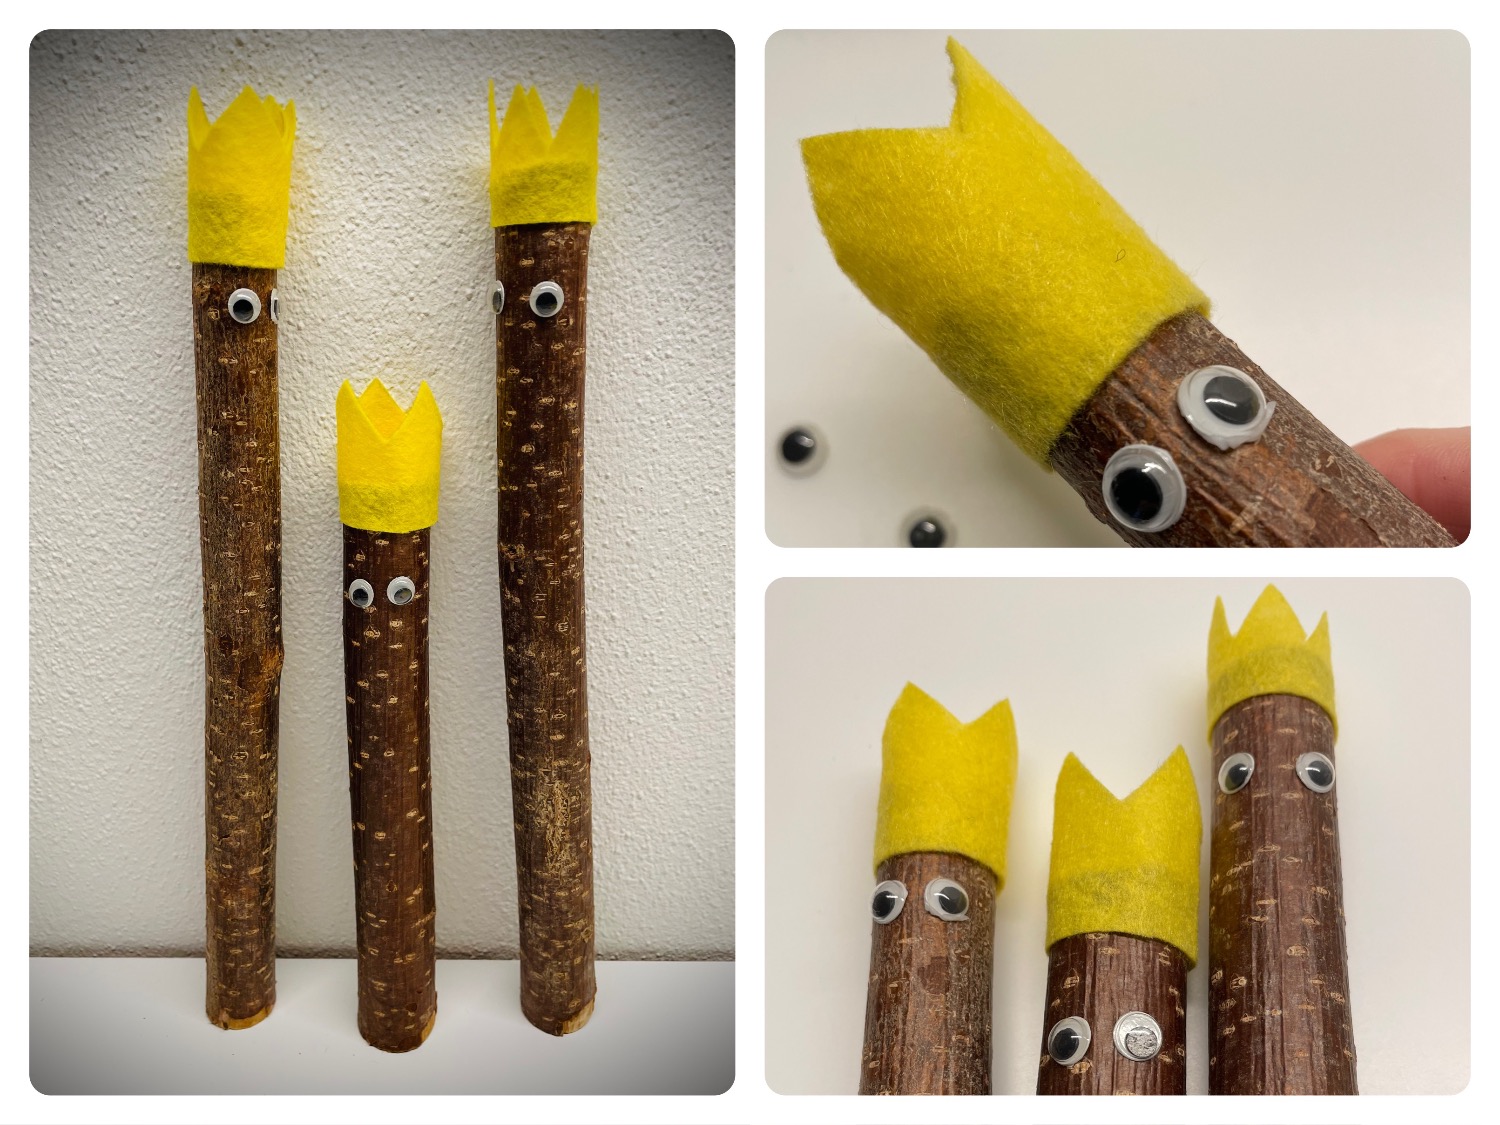
In this way, make three kings.
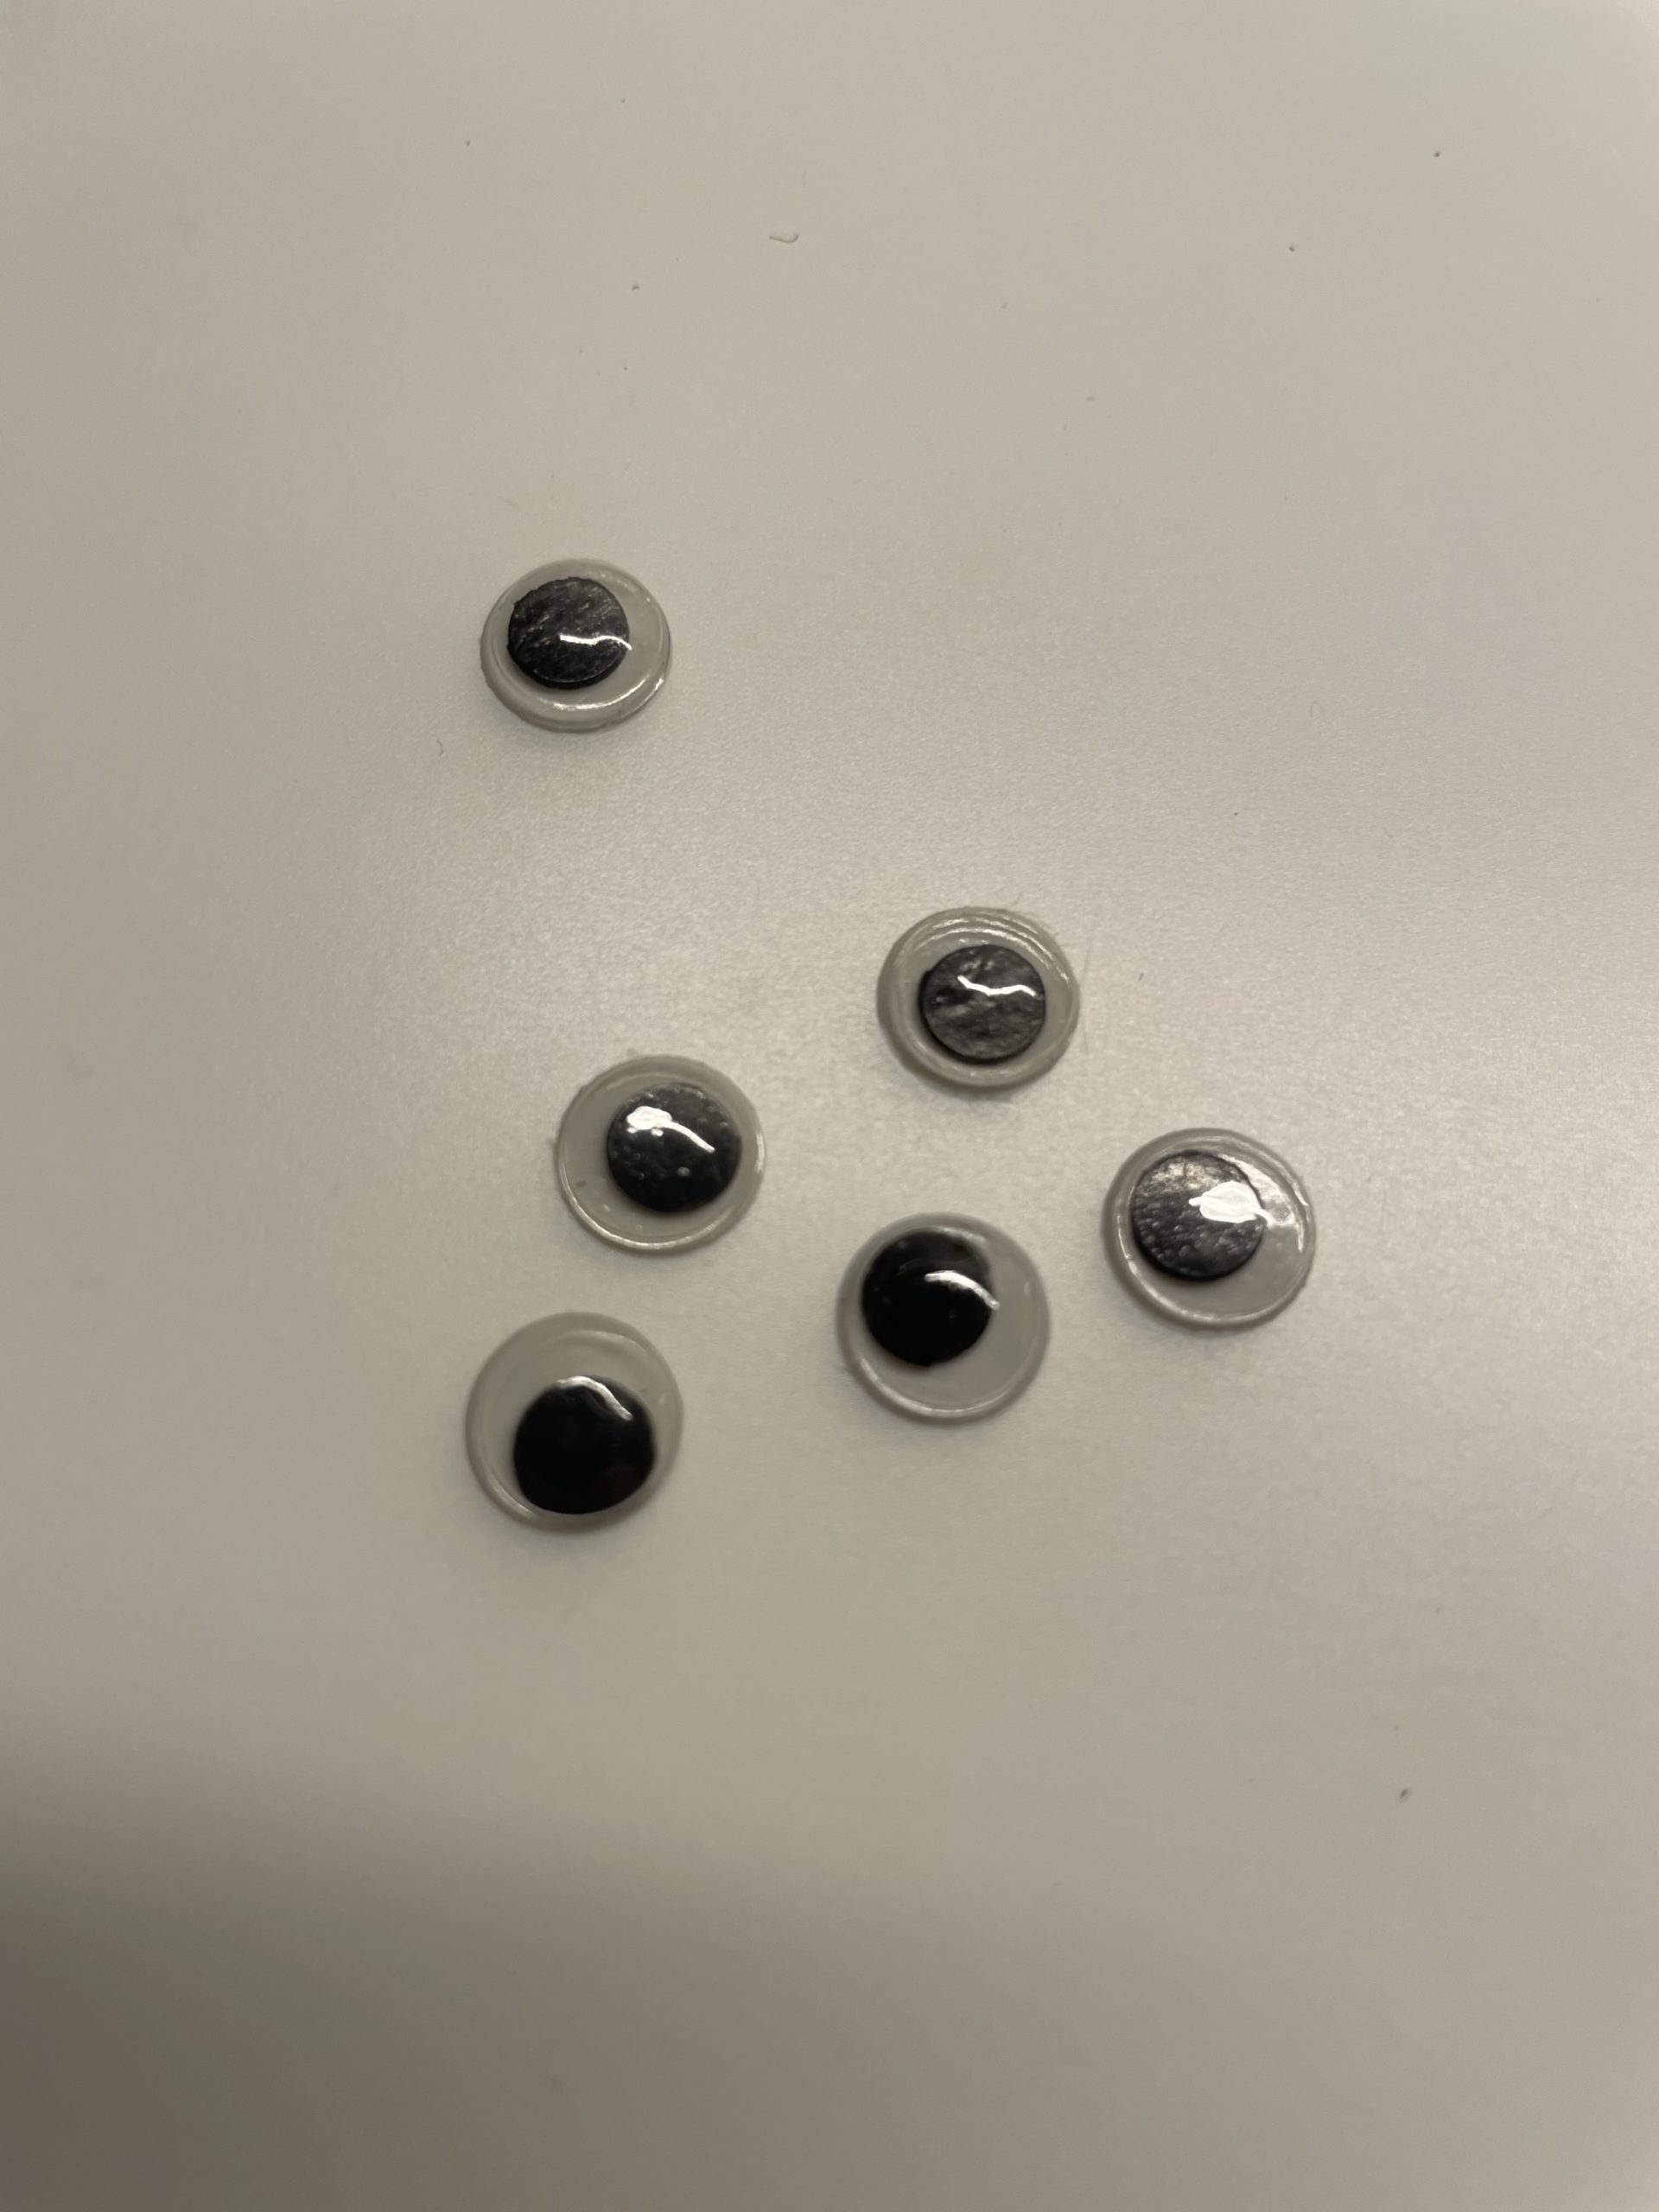
Then you need two little wobble eyes for each king.
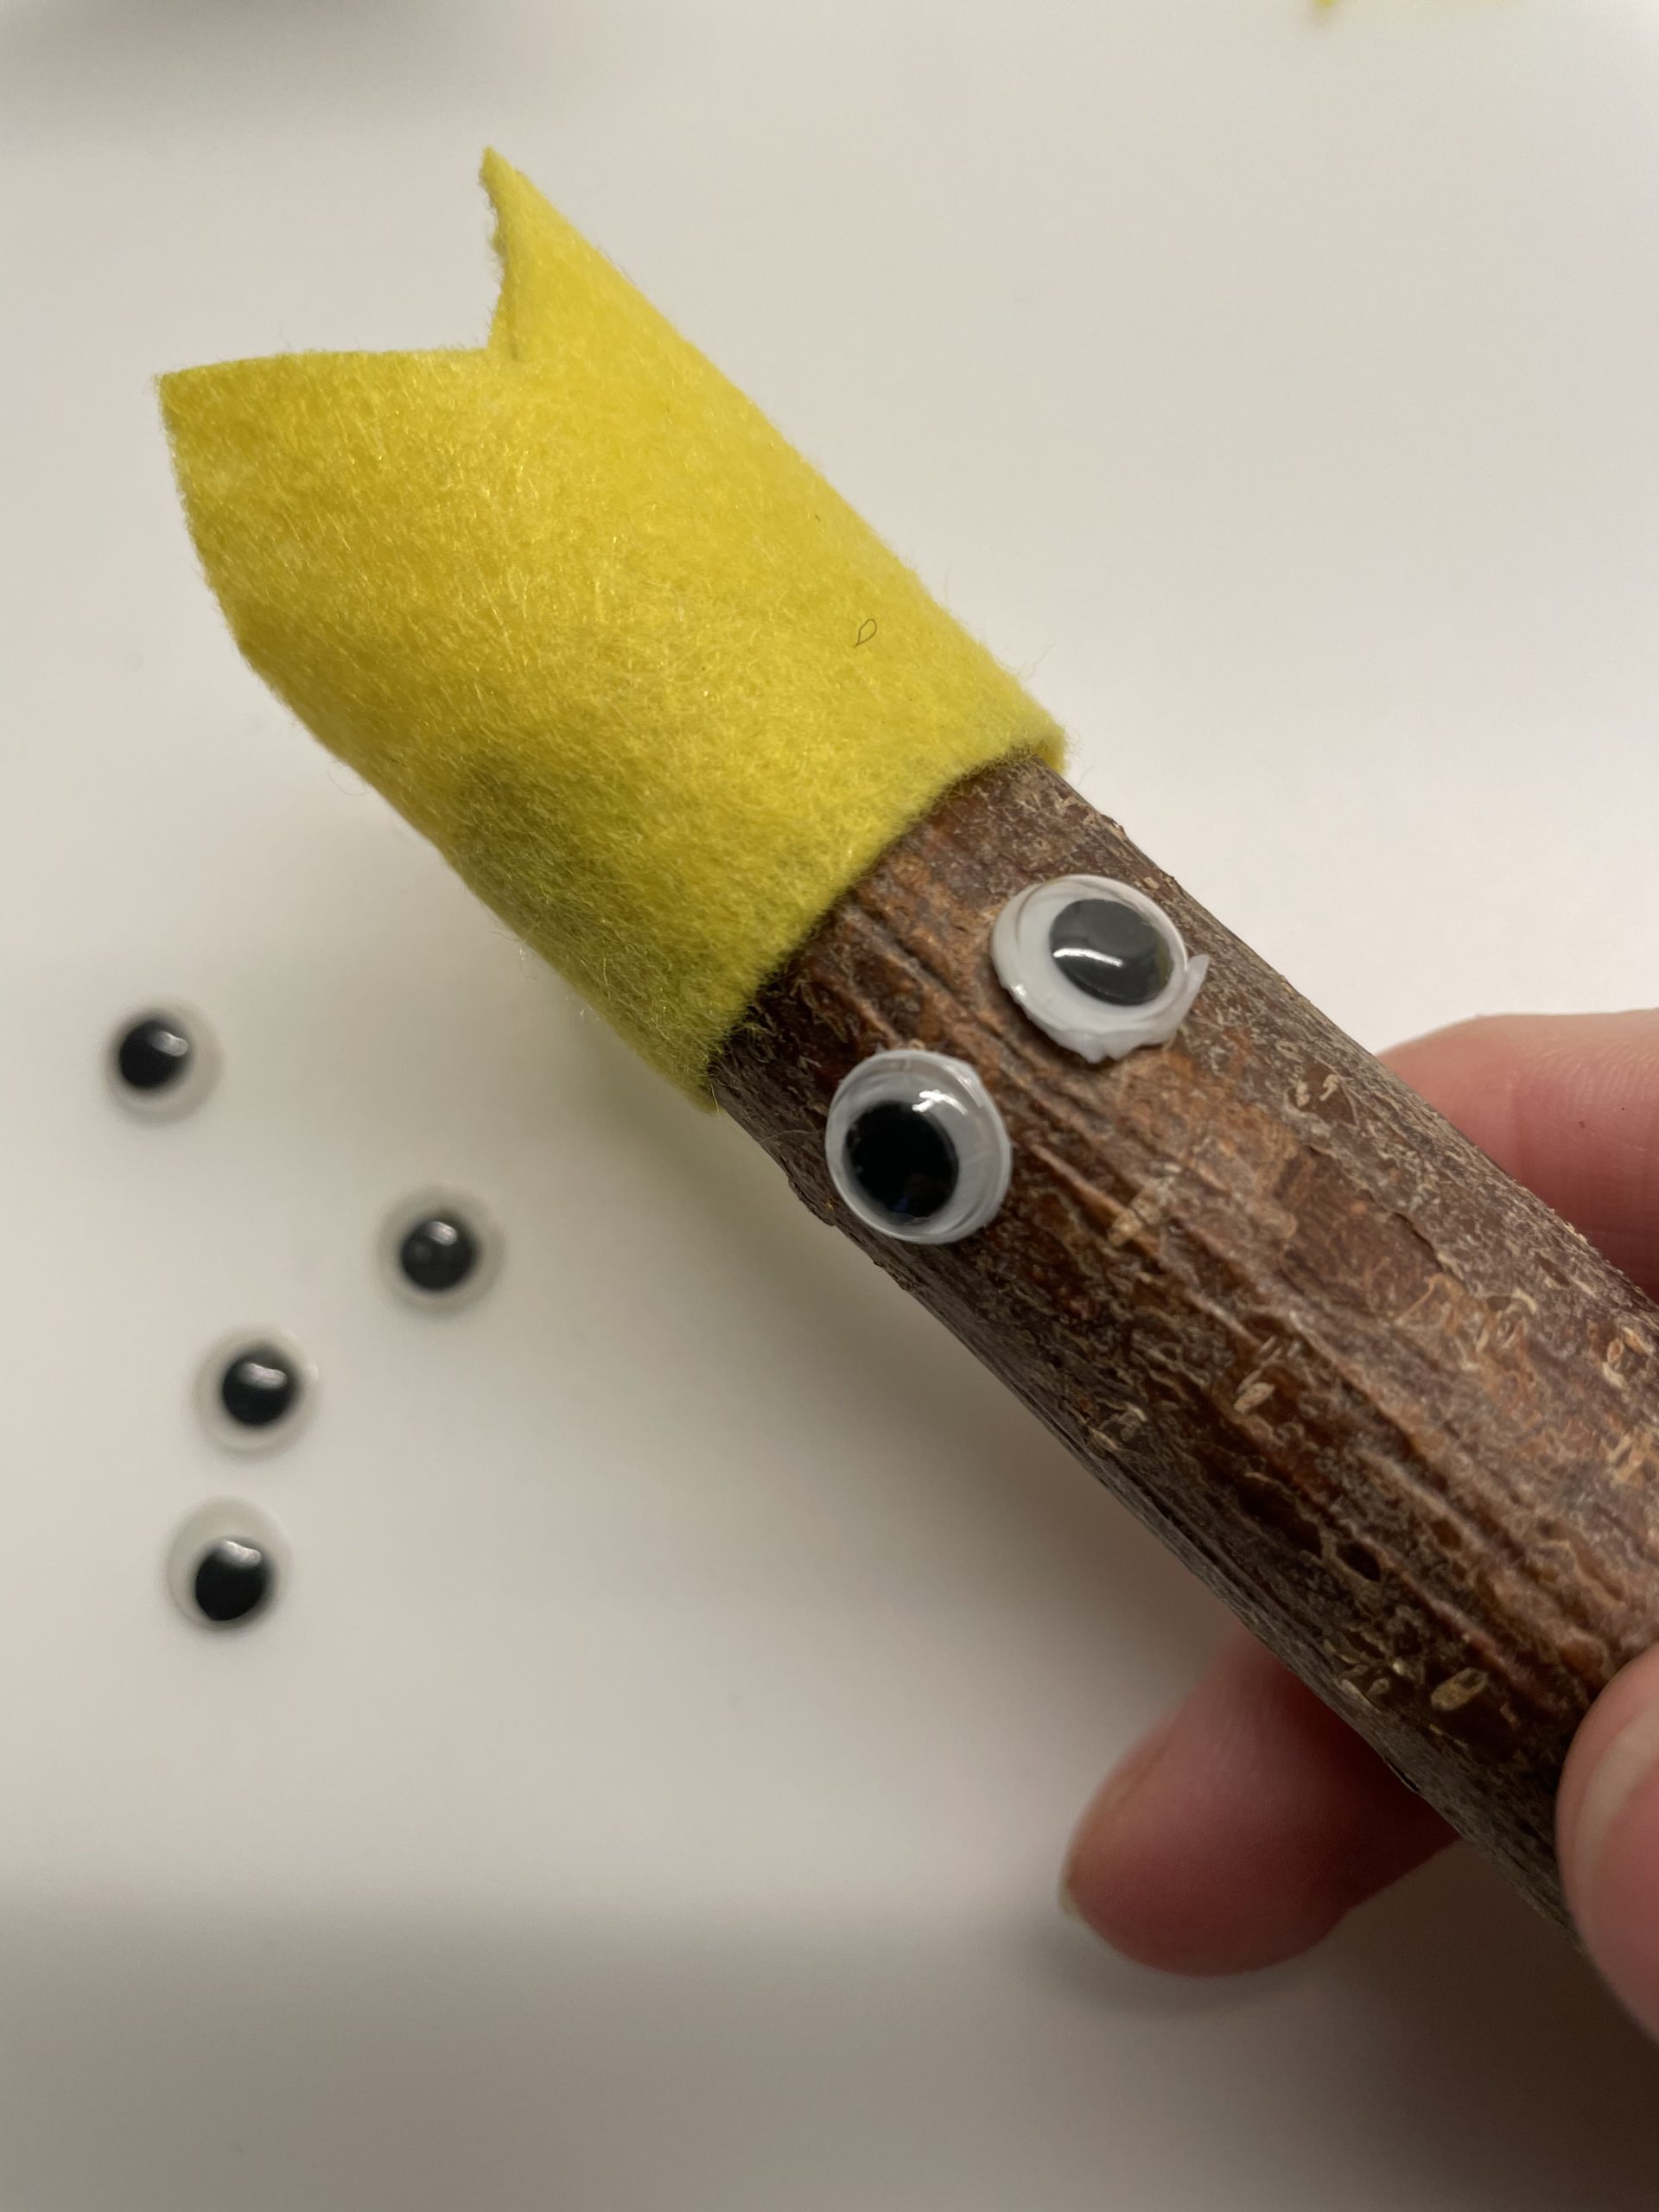
Now glue the wobble eyes with the stick on the branch. The eyes sit at a distance below the crown.
The kings are ready.

Place the kings as a group of three or put them in a flower pot.
You can also use them individually, e.g. as a small gift or as a steckenkönig for e.g. a puppet theatre or a Kasperltheater.
Stay creative and decide for yourself what you want to do with the King or the Kings.
Make your king's hair out of wool, bast or ringing band. So you can make a branch queen or a princess.
You can also make your complete characters for a Kasperltheater in this way.
Have fun!
Materials
Directions
First you put all the materials ready and spread out your craft material.
First you take the dishcloth and a pen to make the crowns.
Now take a branch and measure about the width of the fabric you broke for the crown. For this, wrap the branch and add about 1cm of fabric. So you can stick it together a bit overlapping later.
For the height of the crown you need about 3-5 cm. For this you now paint a zigzag pattern over the entire width of the fabric.
Tip: Now you measure the distance between the zigzag line and your lower line and paint another straight line at the same distance over your zigzag mark.
That's how you get two crowns!
Cut off the fabric on the straight line. Now you can cut much easier along the zigzag line. Attention: cut exactly on the line. Since you want to use both parts, the cutting edge should fit for both crowns.
Check again if the crown is around your branch.
Now you have two ways to stick it to the branch.
1. Either you paint your fabric strip with glue and then stick the crown to the branch. The difficulty here is that the fabric can make a difference.
2. You paint the branch on the top edge with glue and wrap the fabric around the glue.
For this, you place the end of the branch half on the fabric and press it on the branch.
You fix the overlapping fabric with an additional adhesive point on the branch.
If the spikes do not match exactly to each other when overlapping, then cut them with the scissors.
In this way, make three kings.
Then you need two little wobble eyes for each king.
Now glue the wobble eyes with the stick on the branch. The eyes sit at a distance below the crown.
The kings are ready.
Place the kings as a group of three or put them in a flower pot.
You can also use them individually, e.g. as a small gift or as a steckenkönig for e.g. a puppet theatre or a Kasperltheater.
Stay creative and decide for yourself what you want to do with the King or the Kings.
Make your king's hair out of wool, bast or ringing band. So you can make a branch queen or a princess.
You can also make your complete characters for a Kasperltheater in this way.
Have fun!
Follow us on Facebook , Instagram and Pinterest
Don't miss any more adventures: Our bottle mail


Hello, we made two kings today and a queen and a mermaid. We carved and painted the faces and we dressed the figures beautifully. It was a lot of fun.
That's what they look like, our wooden dolls.