Socks-Snowman

AdventurerKatzi
Rating5.010.3 thousand times & (3) DifficultyAdvanced

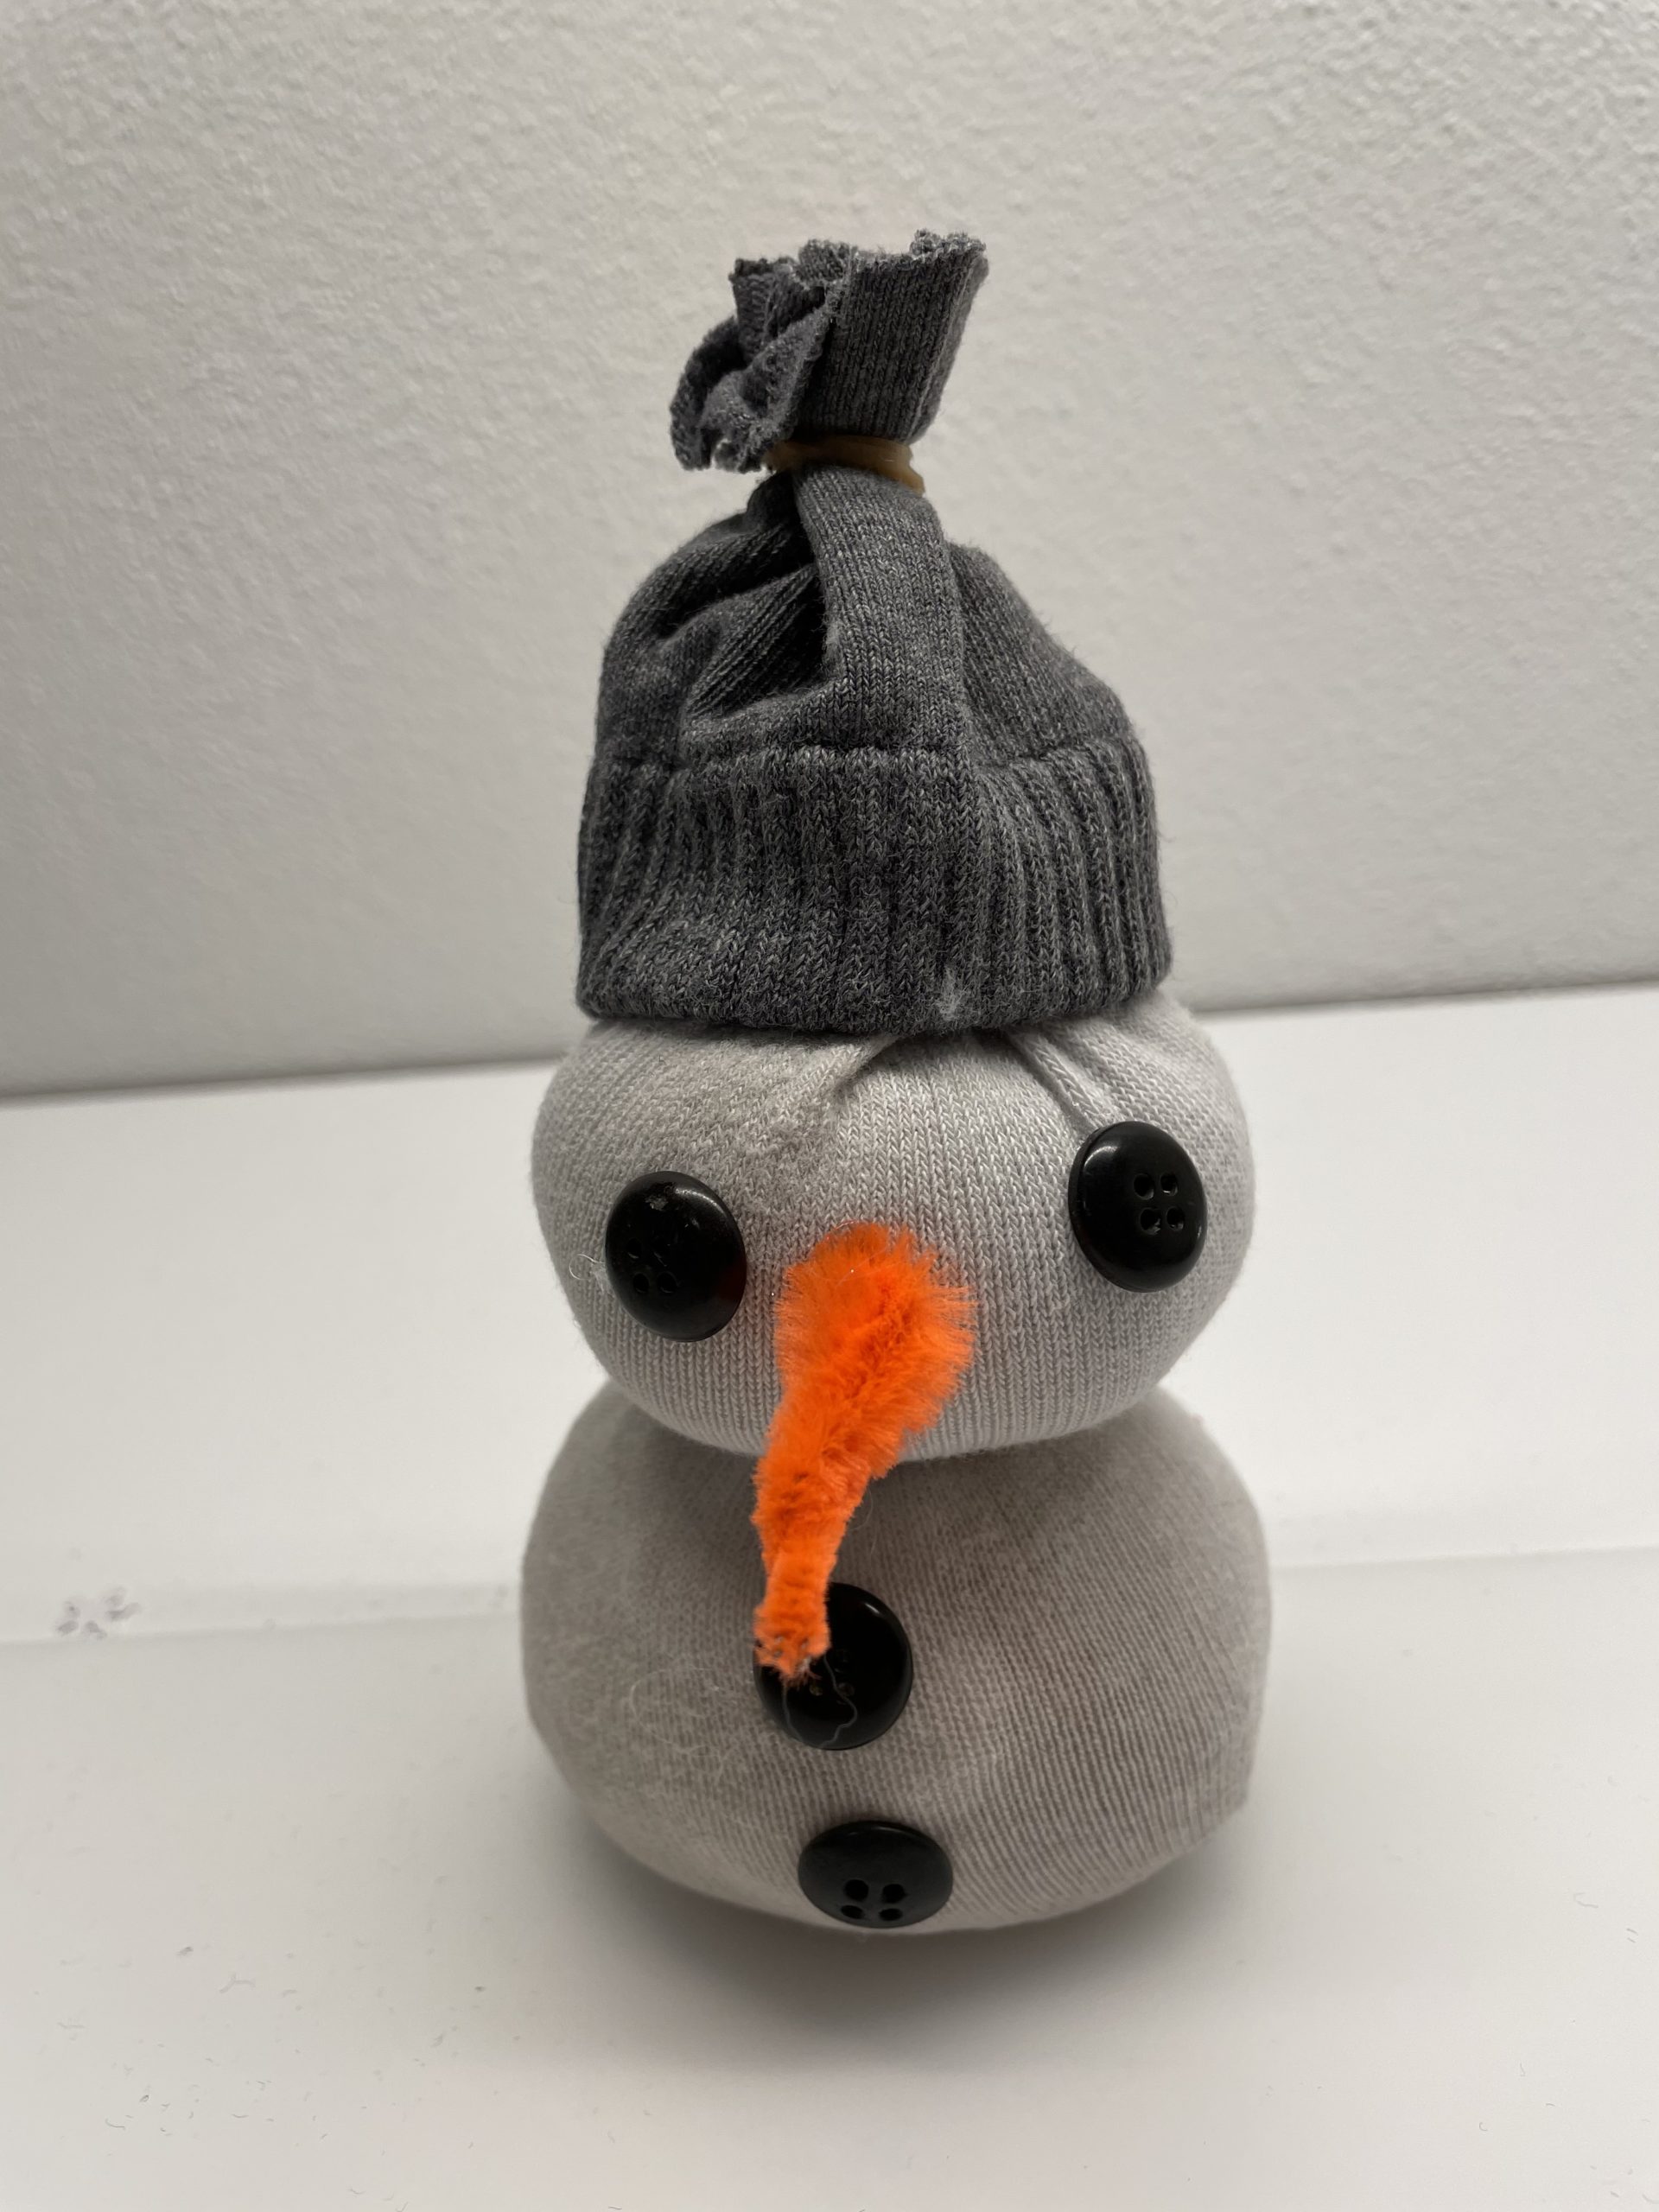
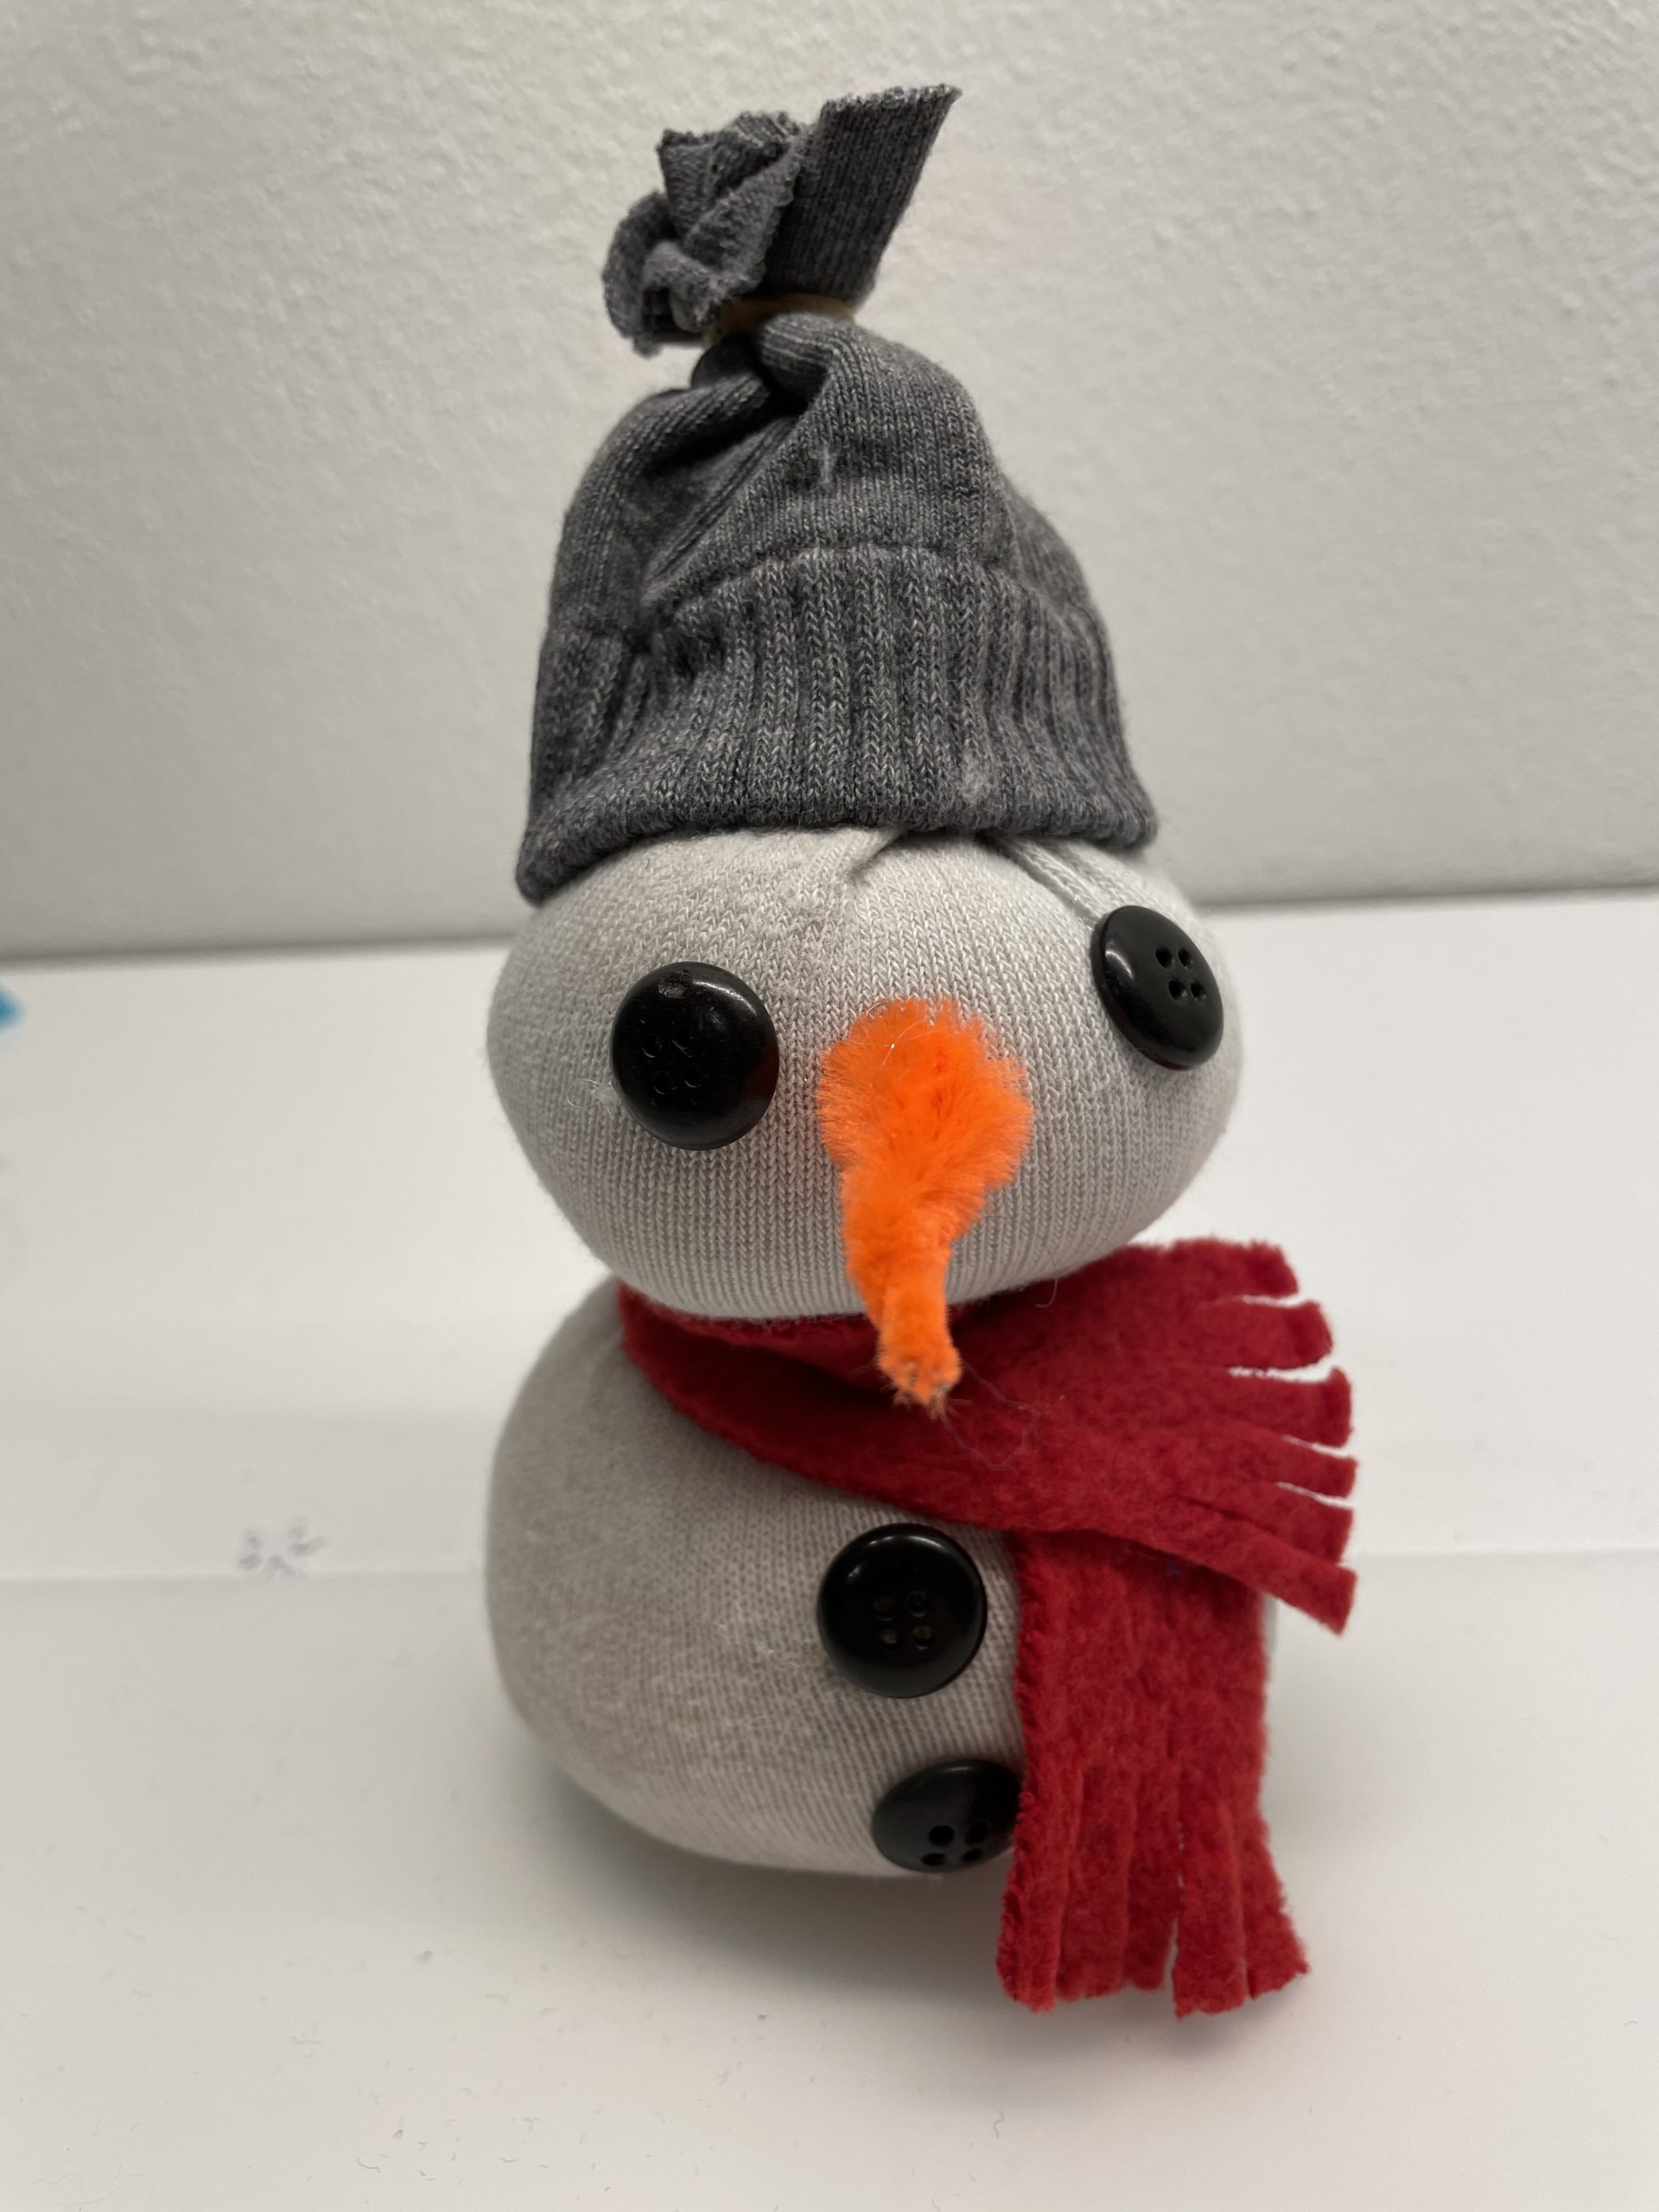
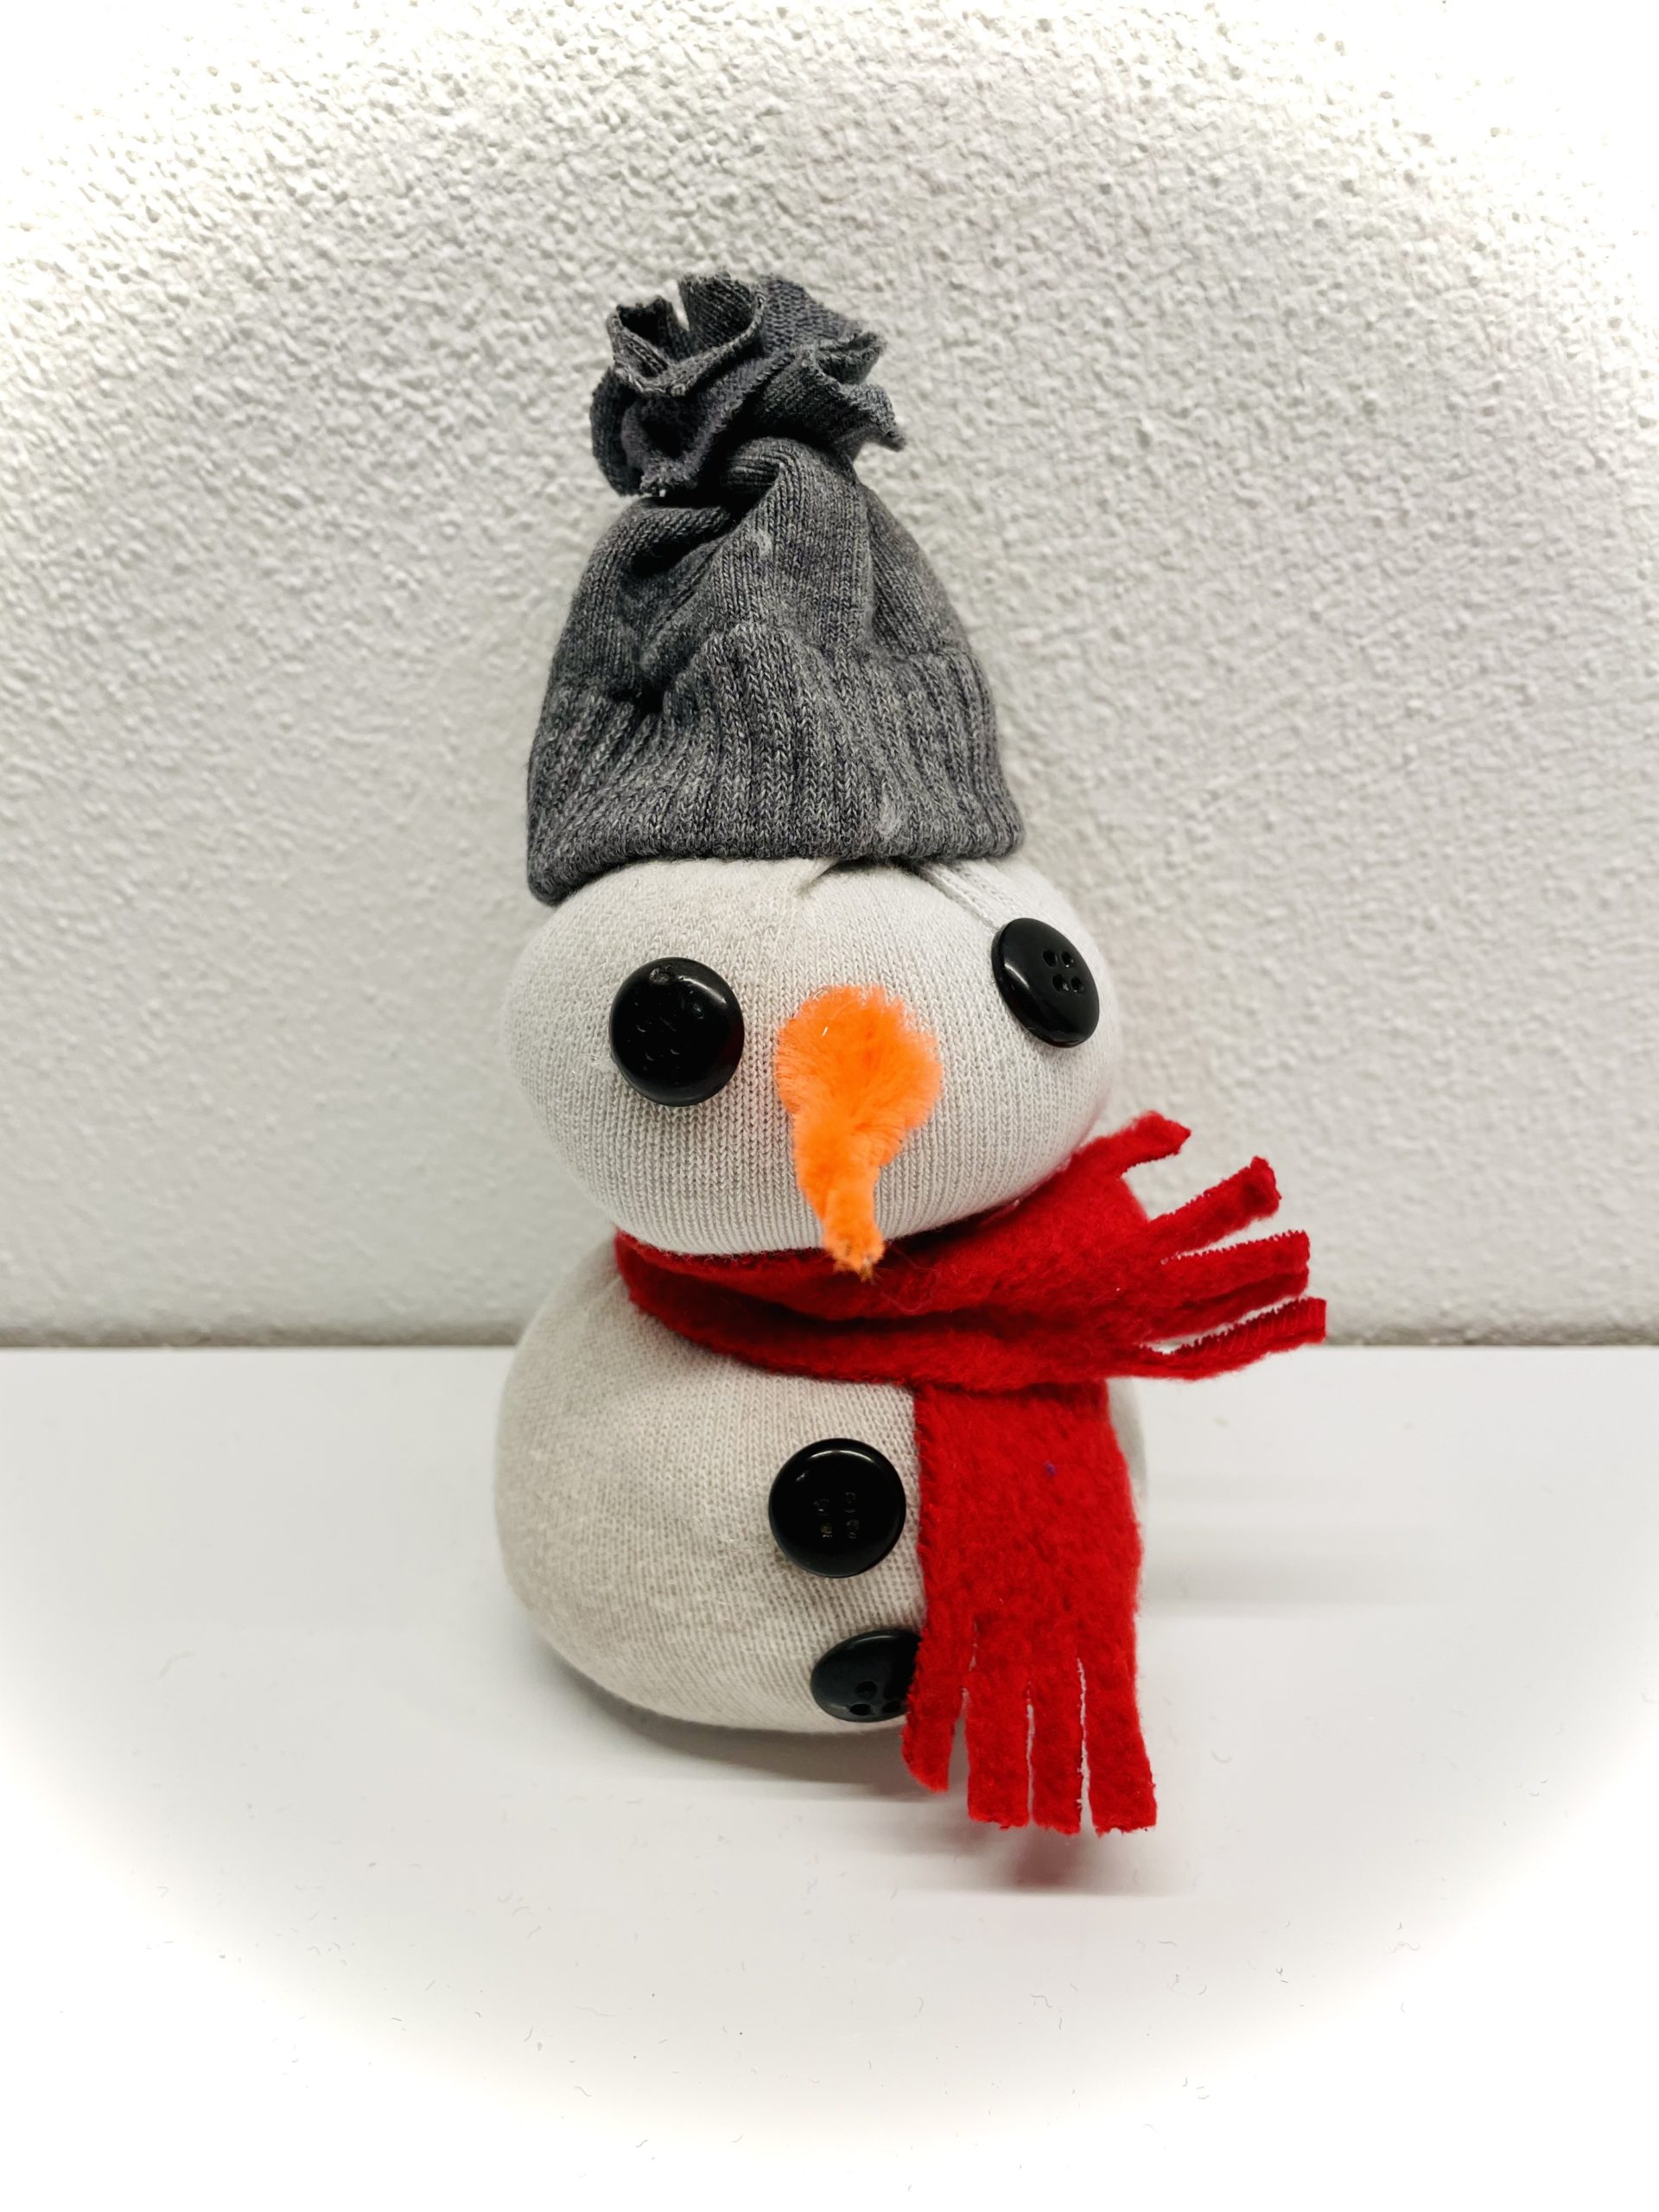
This cute snowman is made from a white sock! A small hat (also made from a sock) or a somewhat elaborate hat, buttons and a piece of pipe cleaner as a nose are glued quickly.
Here I have a step by step guide for both variants! Choose which snowman you like!

Media Education for Kindergarten and Hort

Kind bastelt eine Rassel mit dem Navi
The Adventure Navi, the app for DIY projects, enables media education for the youngest.

Relief in everyday life, targeted promotion of individual children, independent learning and - without any pre-knowledge already usable by the youngest!


Titelbild zur Bastel- und DIY-Idee für Kinder '(581) Socken-Schneemann'
Material for1 Child
Prep Time10 min.Adv. Time30 min.Total Time40 min.
 1 single white sock
 black fabric or black paper for the hator a second coloured sock
 4 small black buttons
 1 Piece of orange pipe cleaner or a piece of felt
 25cm x 2cm red felt or Fleece
 Rice or speltFor filling
 Filling padsor fabric residues, paper handkerchiefs, etc.
 3 Small household rubbers
 1 Breakfast bags
Other tools:
 1 ScissorsPossibly a fabric shear
 1 Pen
 1 Hot glue gun
 1 Builder's pad
 possible small bracketsFor fixation
 1 Ruleror customs stock
All links marked with a shopping cart lead to Amazon - here we have selected products that we would order ourselves and in part also ordered. In a qualified purchase via the advertising link, we as Amazon partner receive a commission, for you there are no costs. You thus support our cost- and advertising banner-free, educational offer.
1

Find all the materials together and put out your craft file.
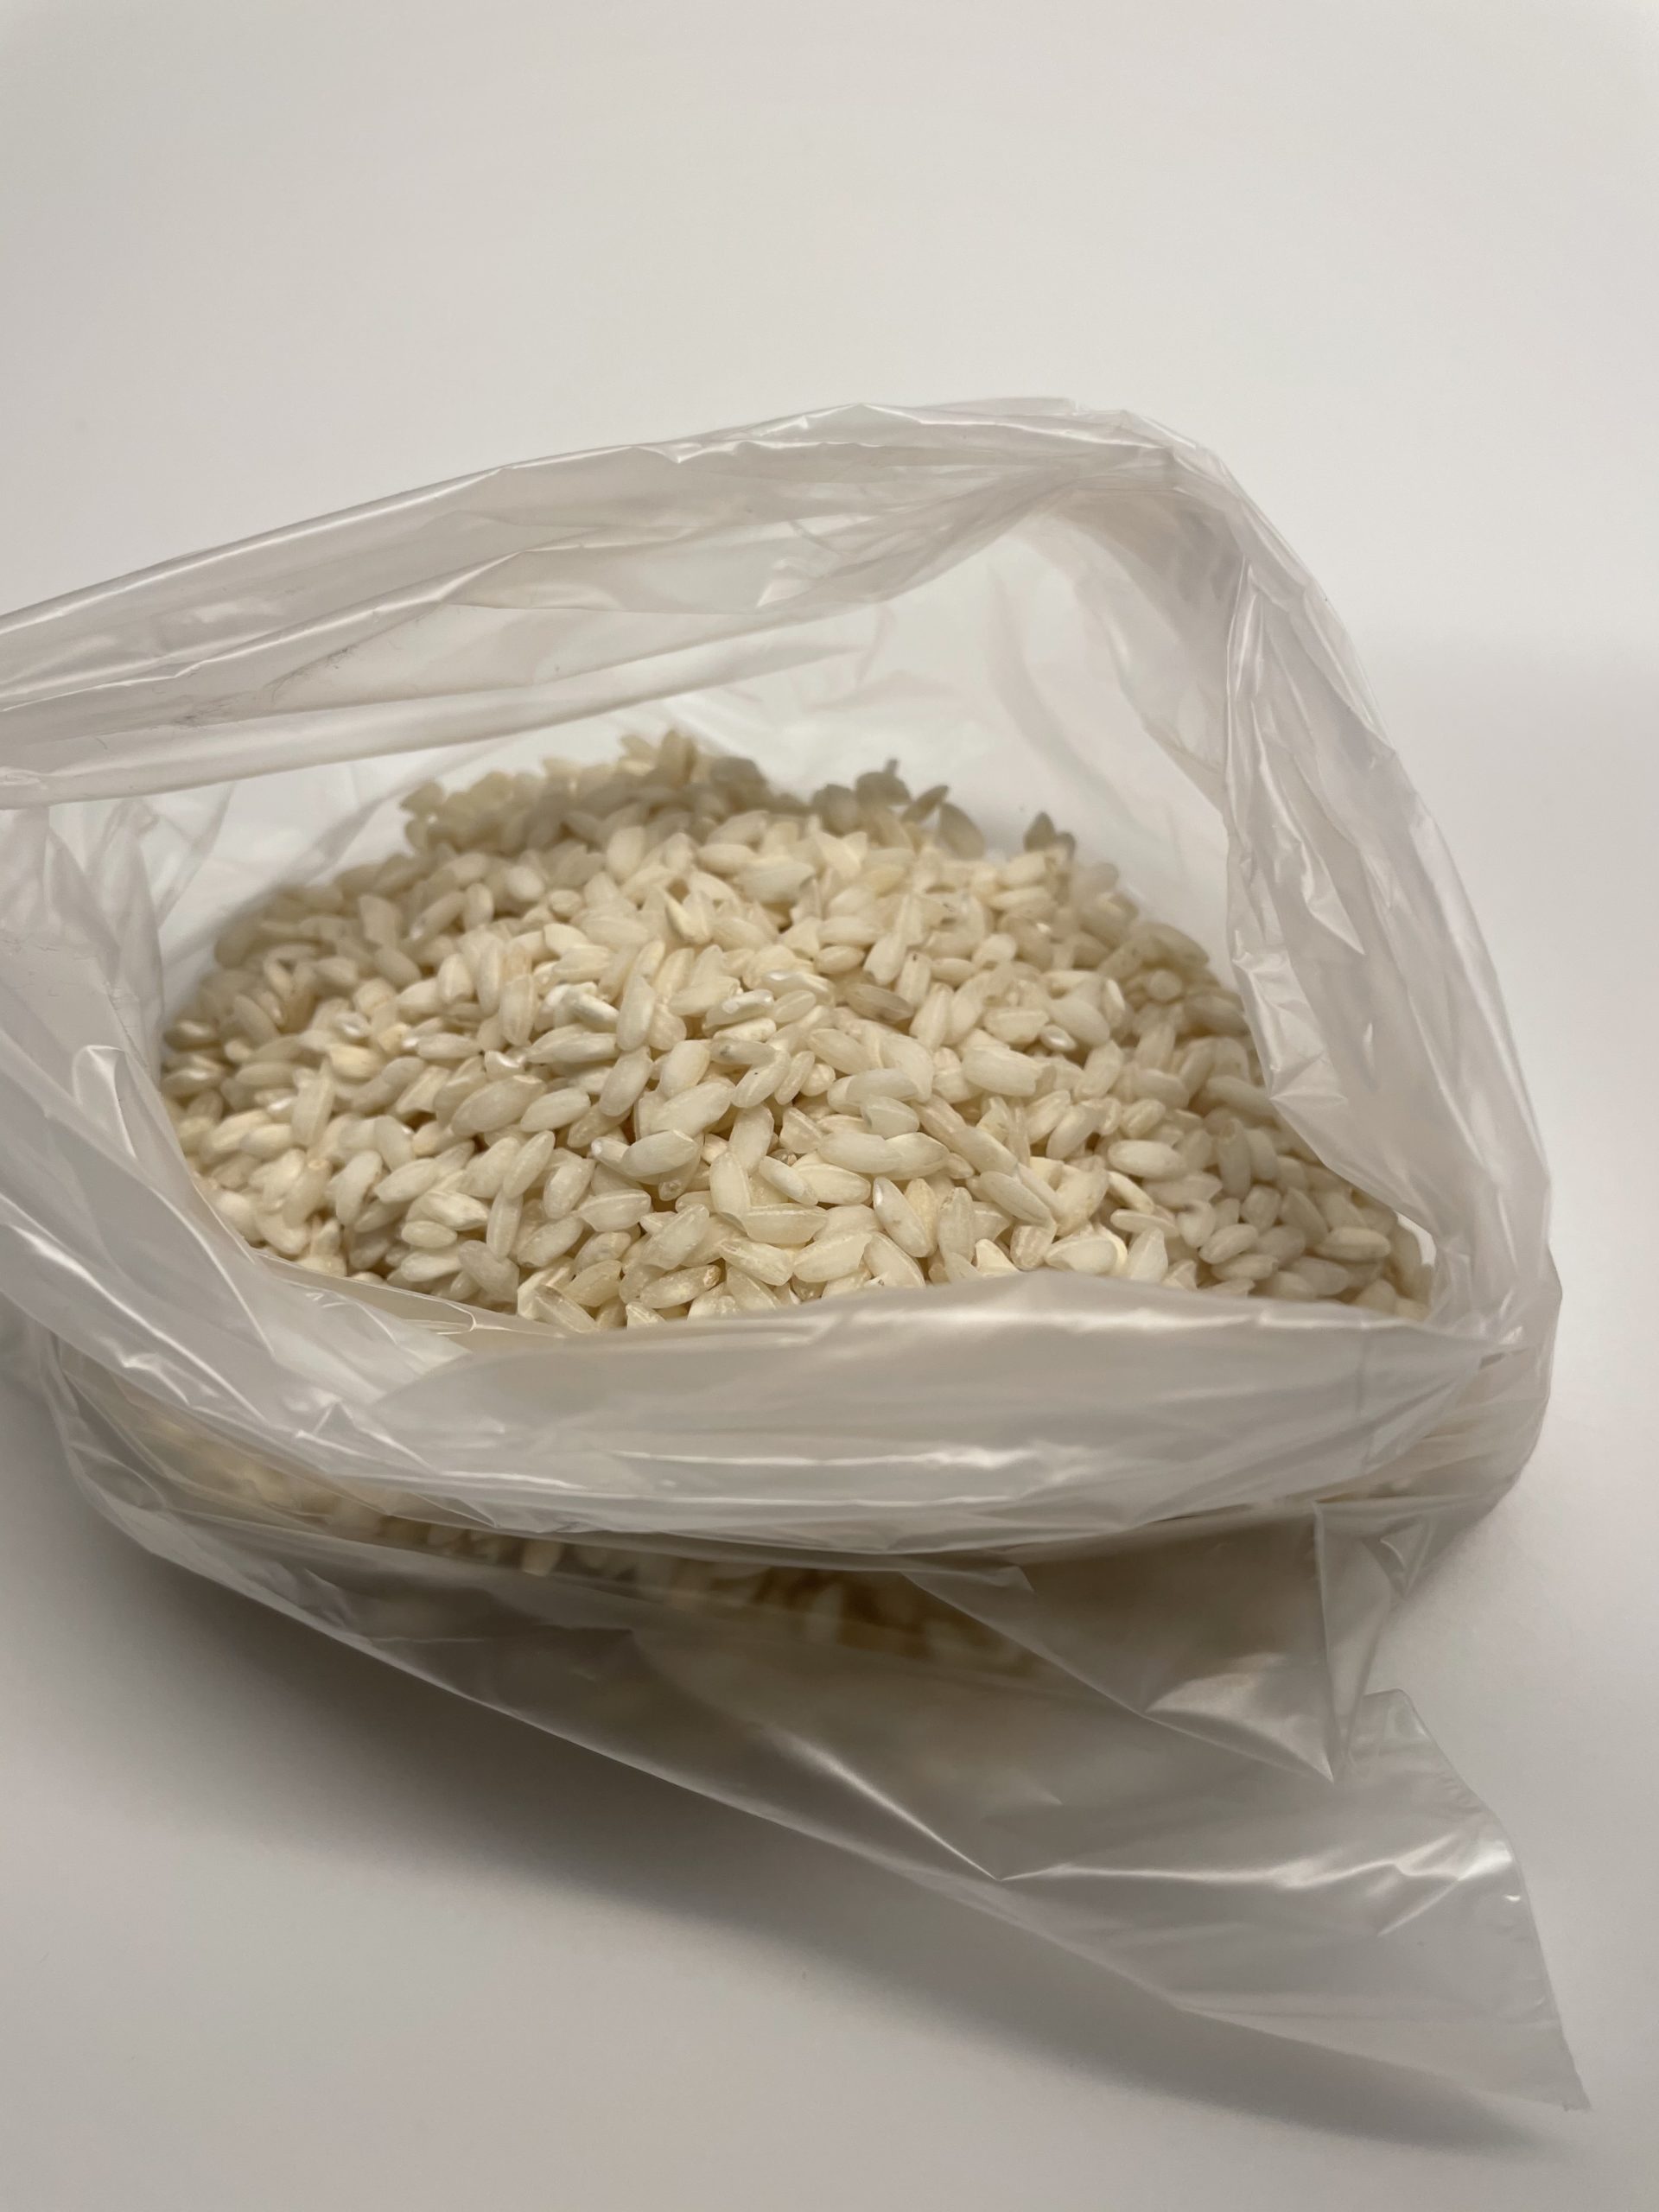
Then fill rice in a cup first.
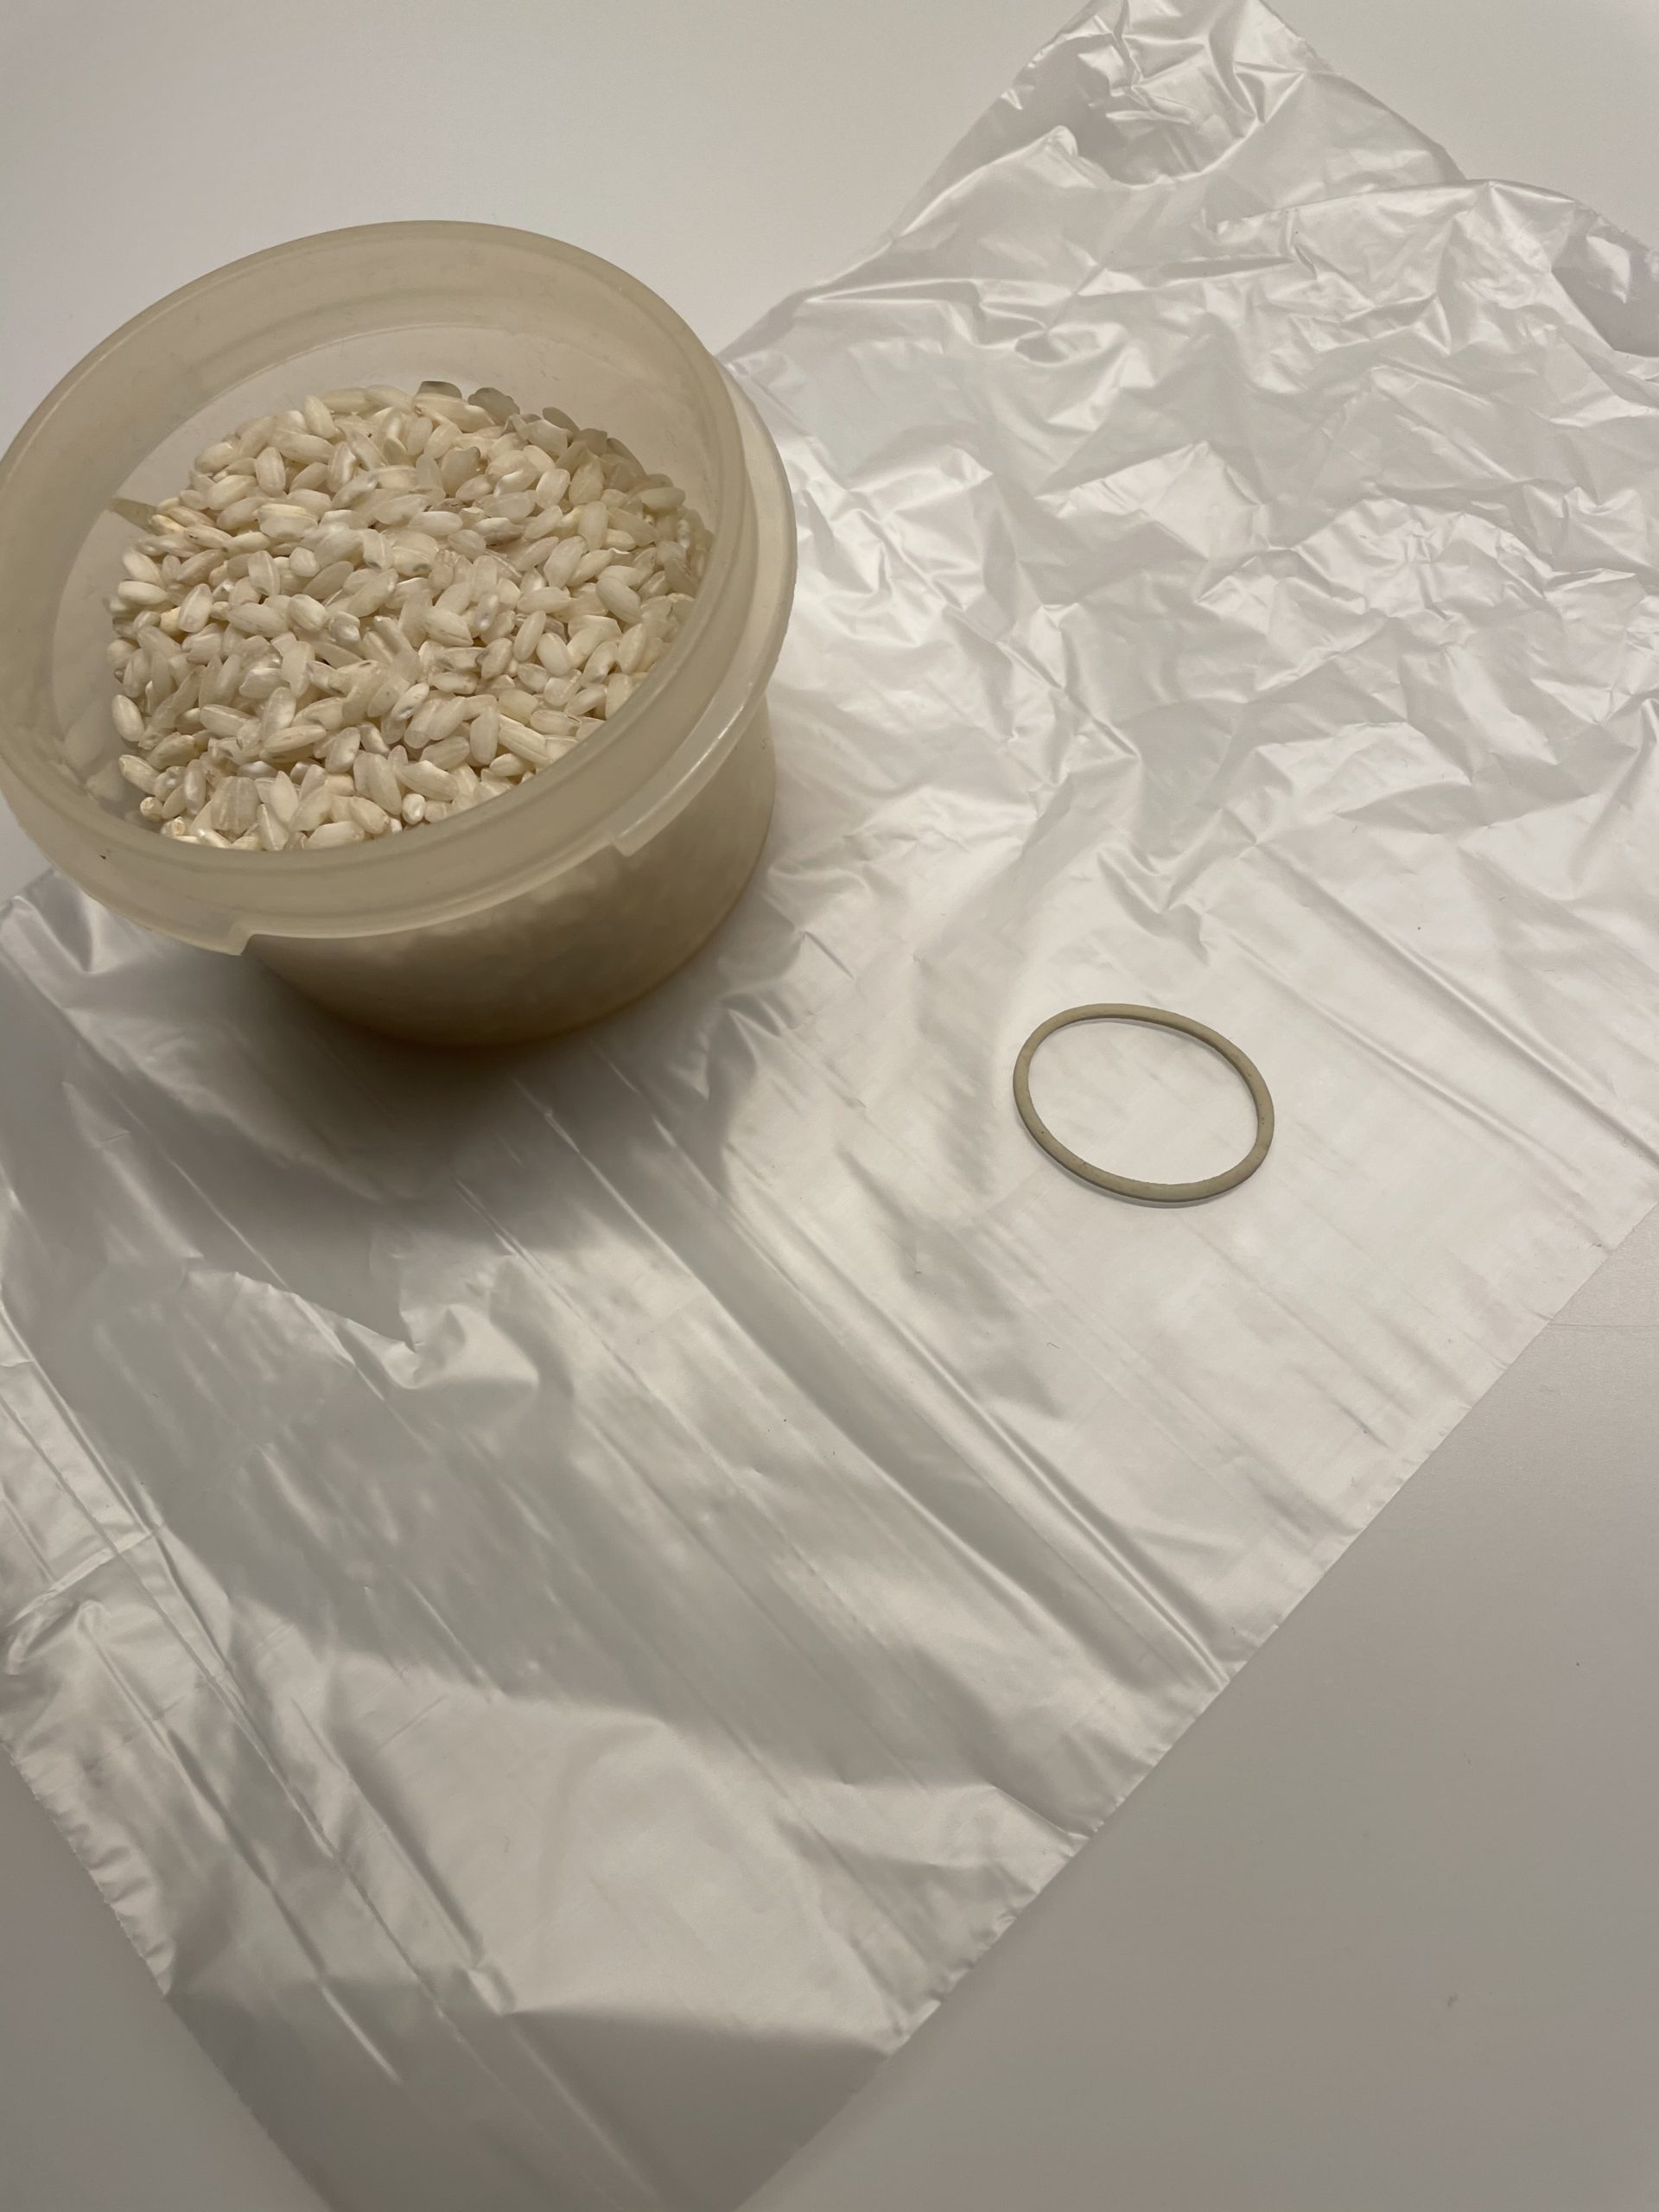
Bild zum Schritt 1 für das Bastel- und DIY-Abenteuer für Kinder: 'Sucht alle Materialien zusammen und legt eure Bastelunterlage aus. ...'

2

This fills her in the breakfast bag.
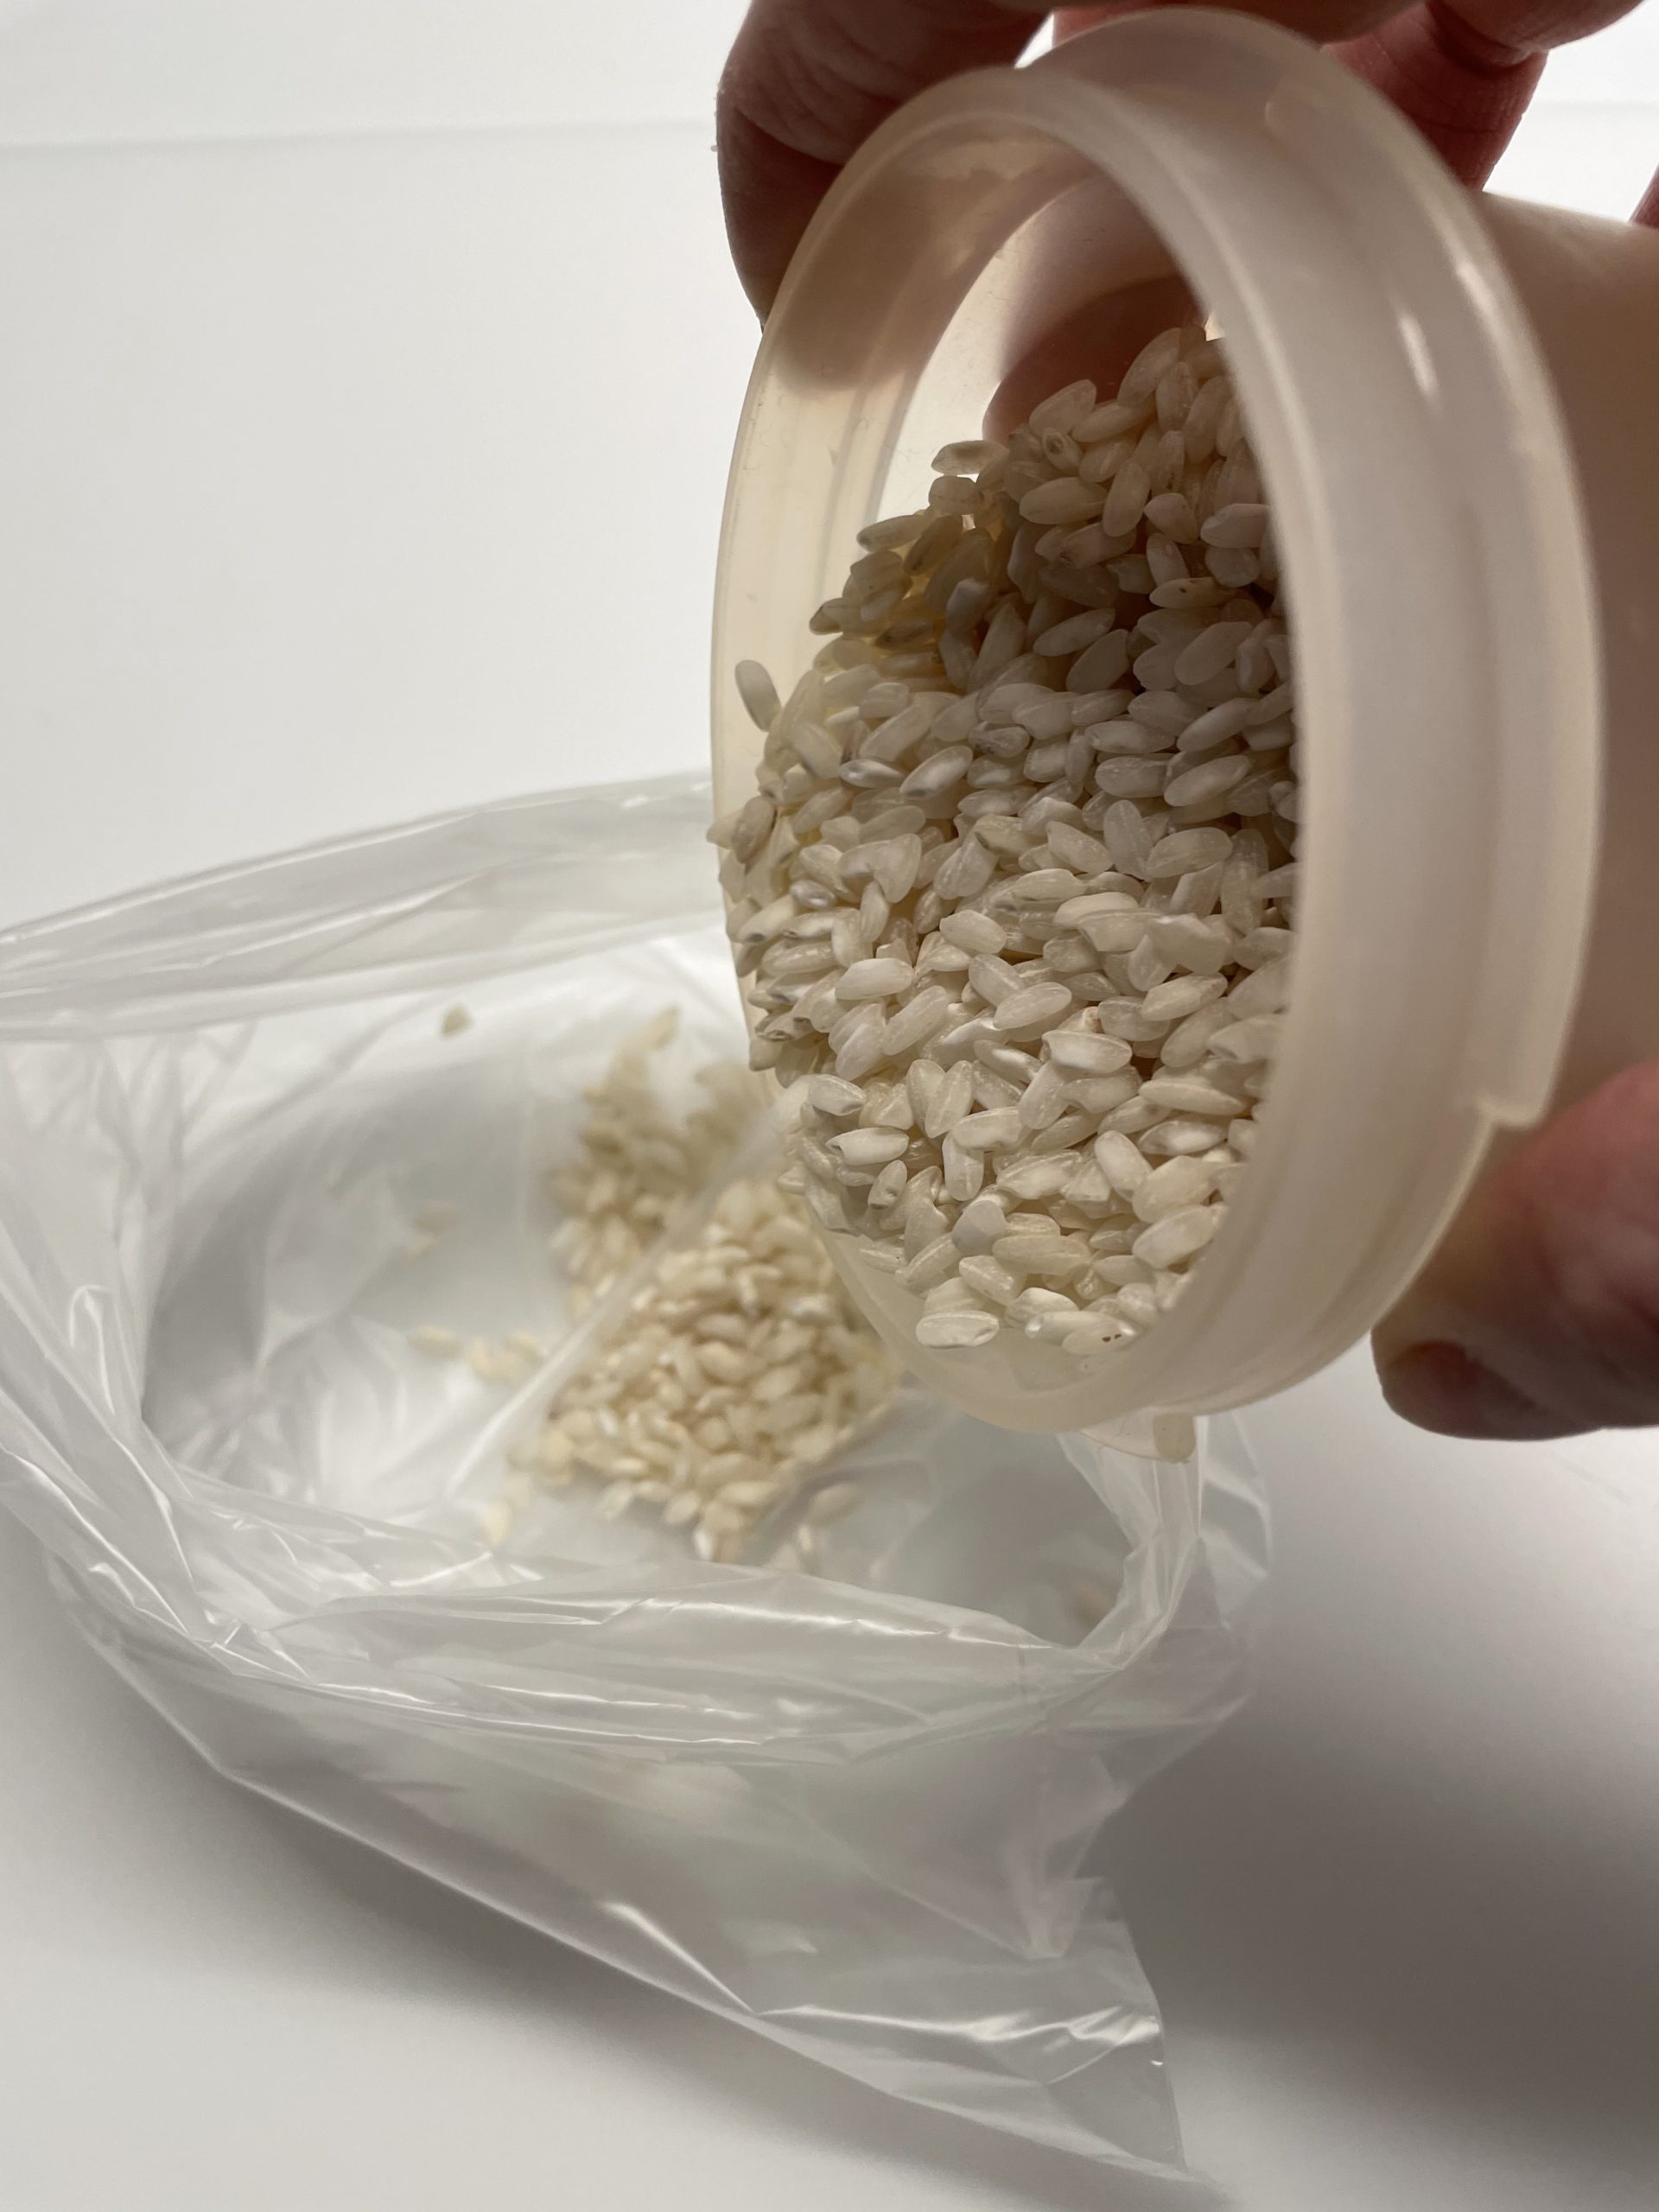
Bild zum Schritt 2 für das Bastel- und DIY-Abenteuer für Kinder: 'Diese füllt ihr dann in den Frühstücksbeutel.'

3

2. Bild zum Schritt 2 für das Bastel- und DIY-Abenteuer für Kinder: 'Diese füllt ihr dann in den Frühstücksbeutel.'

4

Knot the bag and push out the air before you tighten the knot.

Bild zum Schritt 4 für das Bastel- und DIY-Abenteuer für Kinder: 'Verknotet den Beutel und drückt zuvor die Luft heraus, bevor...'

5

Now take the sock and put the rice bag in the sock.

Bild zum Schritt 5 für das Bastel- und DIY-Abenteuer für Kinder: 'Nehmt jetzt die Socke und steckt den Reisbeutel in die...'

6

Now push the rice at the bottom and squeeze the socks over it.

Bild zum Schritt 6 für das Bastel- und DIY-Abenteuer für Kinder: 'Schiebt nun den Reis ganz unten und drückt den Socken...'

7

Now you fix the socks with a small household rubber. Place them tightly around, so that a ball is created.

Bild zum Schritt 7 für das Bastel- und DIY-Abenteuer für Kinder: 'Jetzt fixiert ihr den Socken mit einem kleinen Haushaltsgummi. Legt...'

8

Now you put the cotton wool in the sock, on the first ball and form the second ball from it. Make sure that the second ball is filled round and plump.

Bild zum Schritt 8 für das Bastel- und DIY-Abenteuer für Kinder: 'Nun stopft ihr die Watte in die Socke, auf die...'

9

Press the socks on the top tightly and close the second ball with a household rubber as well.

Bild zum Schritt 9 für das Bastel- und DIY-Abenteuer für Kinder: 'Drückt die Socken oben fest zusammen und verschließt die zweite...'

10

Upstairs a small piece of the sock stands still. This piece you need, since hat or cap so much more hold to get.

Bild zum Schritt 10 für das Bastel- und DIY-Abenteuer für Kinder: 'Oben bleibt nun noch ein kleines Stück der Socke stehen....'

11

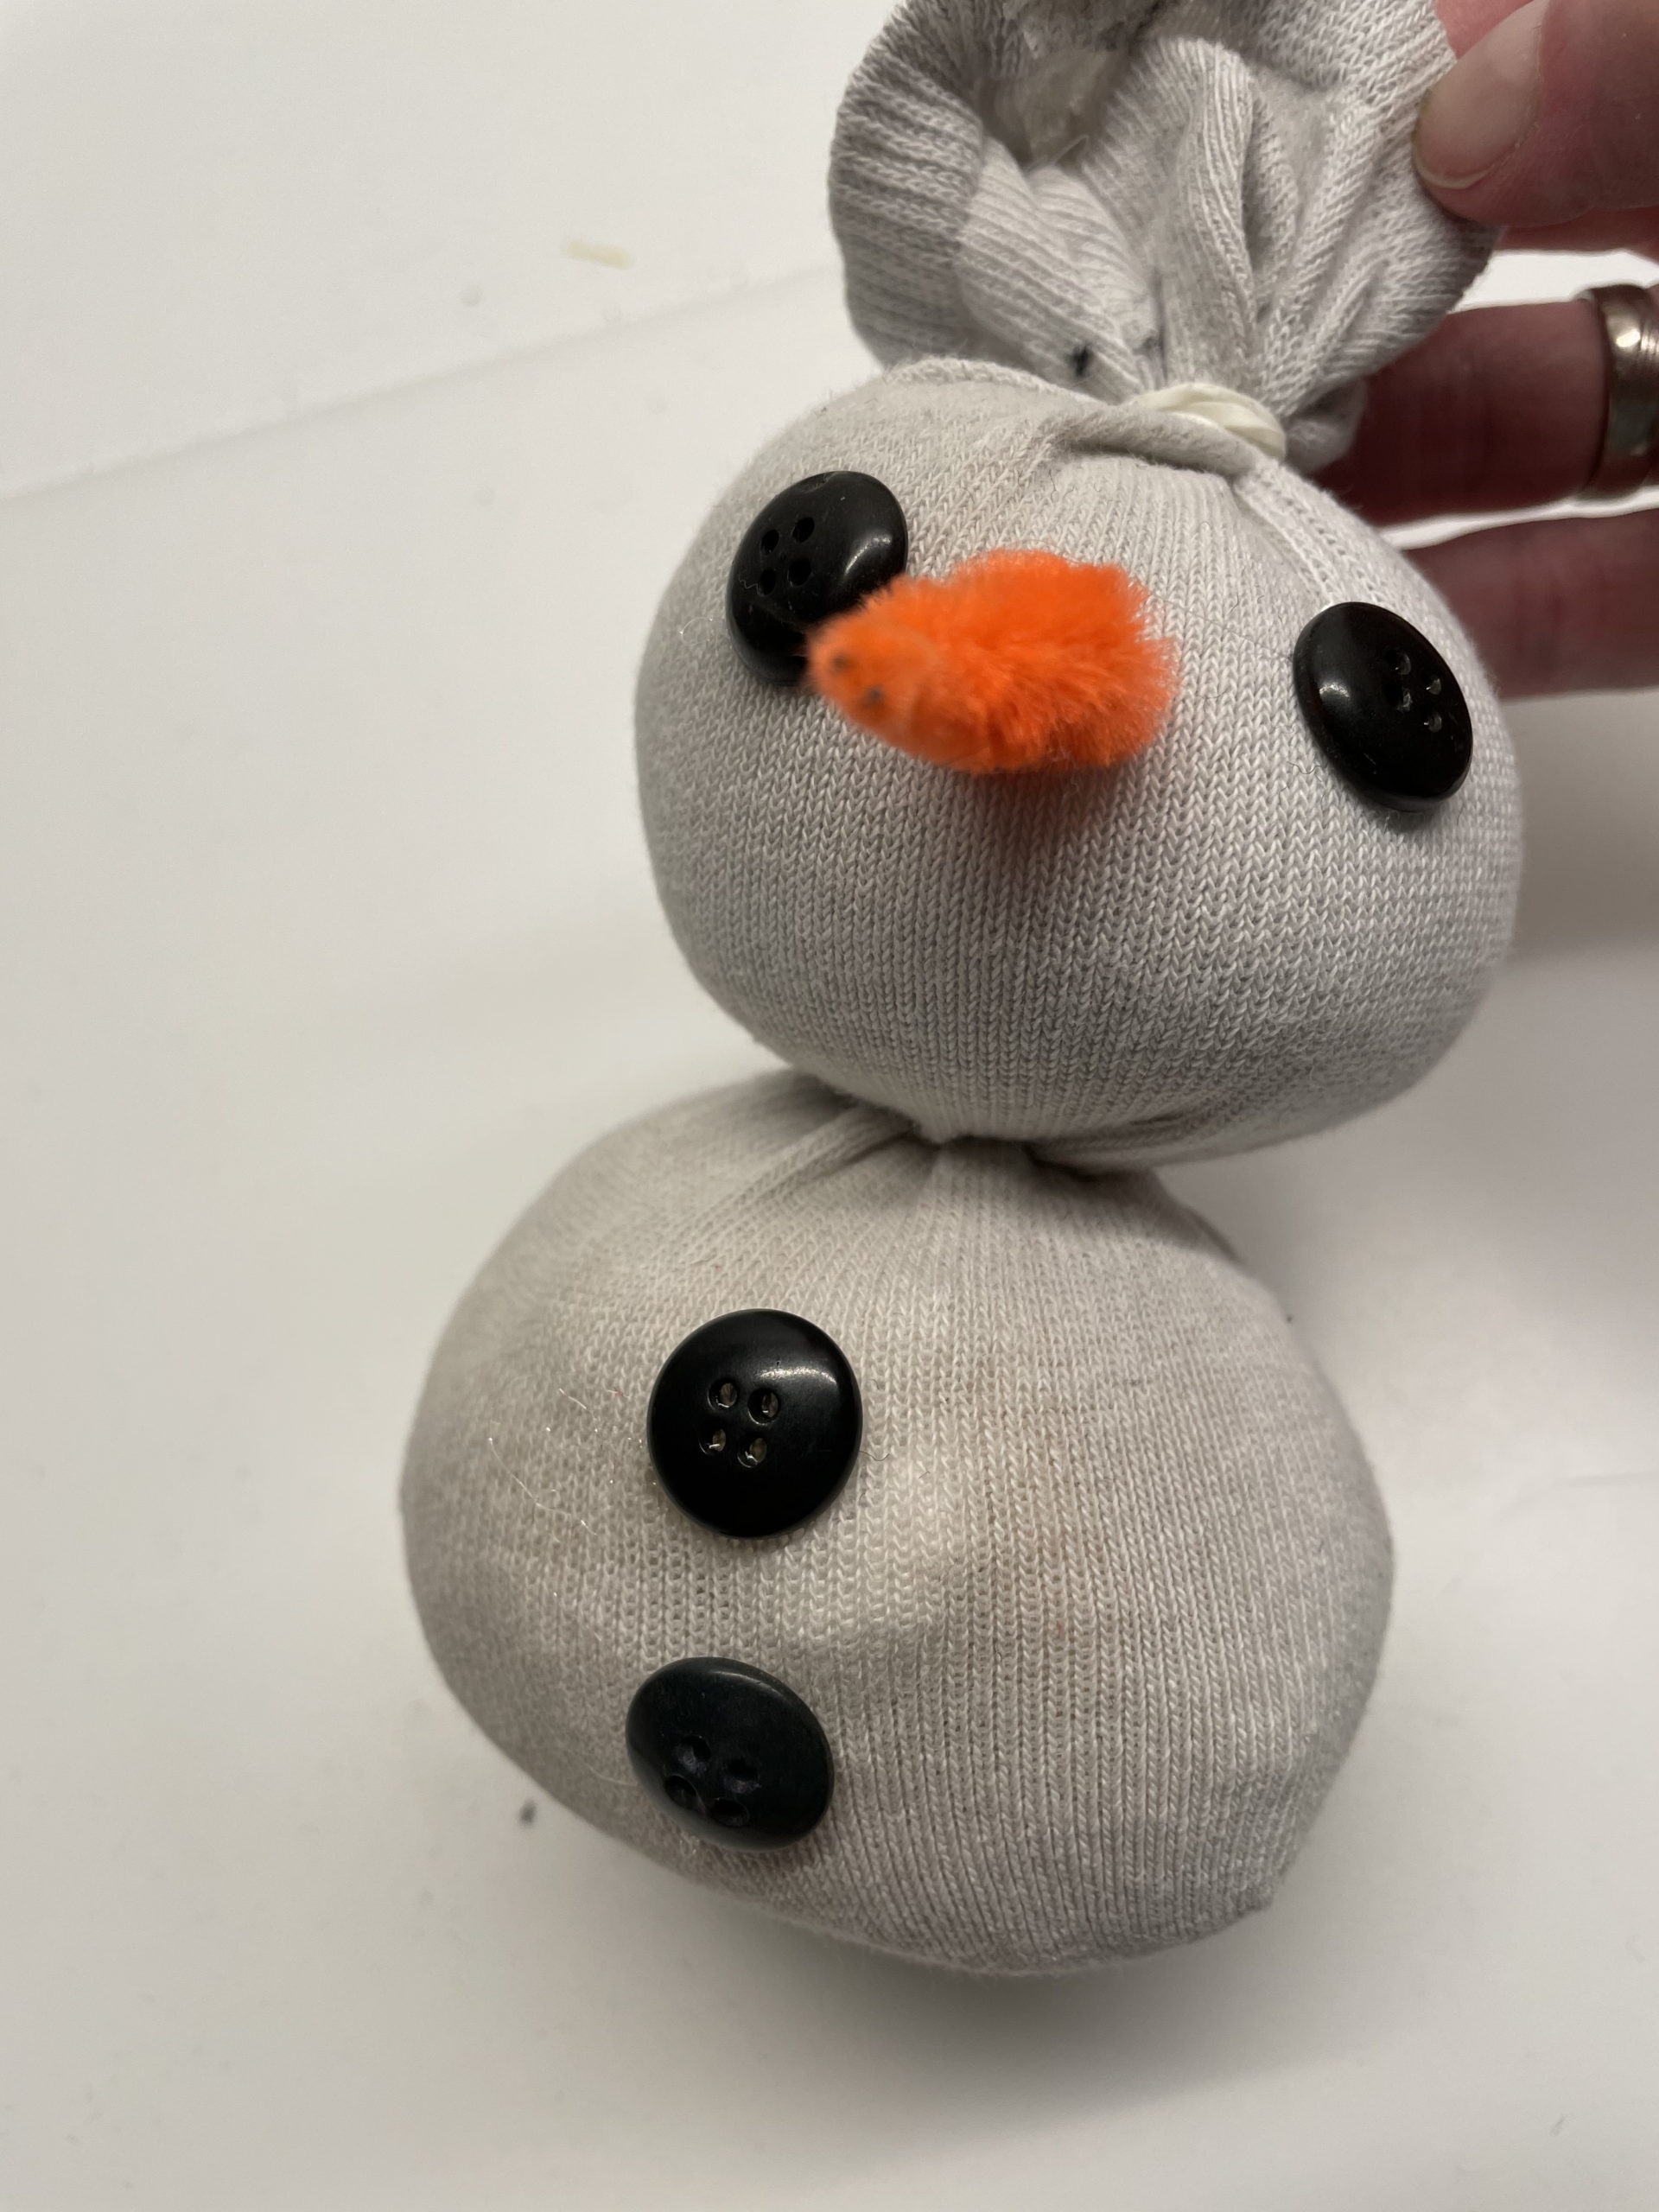
Now you're sticking your eyes and buttons on the snowman.
Then you bend the orange pipe cleaner into the shape of a carrot.

Bild zum Schritt 11 für das Bastel- und DIY-Abenteuer für Kinder: 'Jetzt klebt ihr dem Schneemann noch Augen und Knöpfe an....'

12

Then stick her nose on. Use the hot glue for this.
Attention: Let an adult help you with this - risk of injury!

Bild zum Schritt 12 für das Bastel- und DIY-Abenteuer für Kinder: 'Anschließend klebt ihr die Nase auf. Nutzt dafür eventuell den...'

13

2. Bild zum Schritt 12 für das Bastel- und DIY-Abenteuer für Kinder: 'Anschließend klebt ihr die Nase auf. Nutzt dafür eventuell den...'

14

Now you're making your hat.
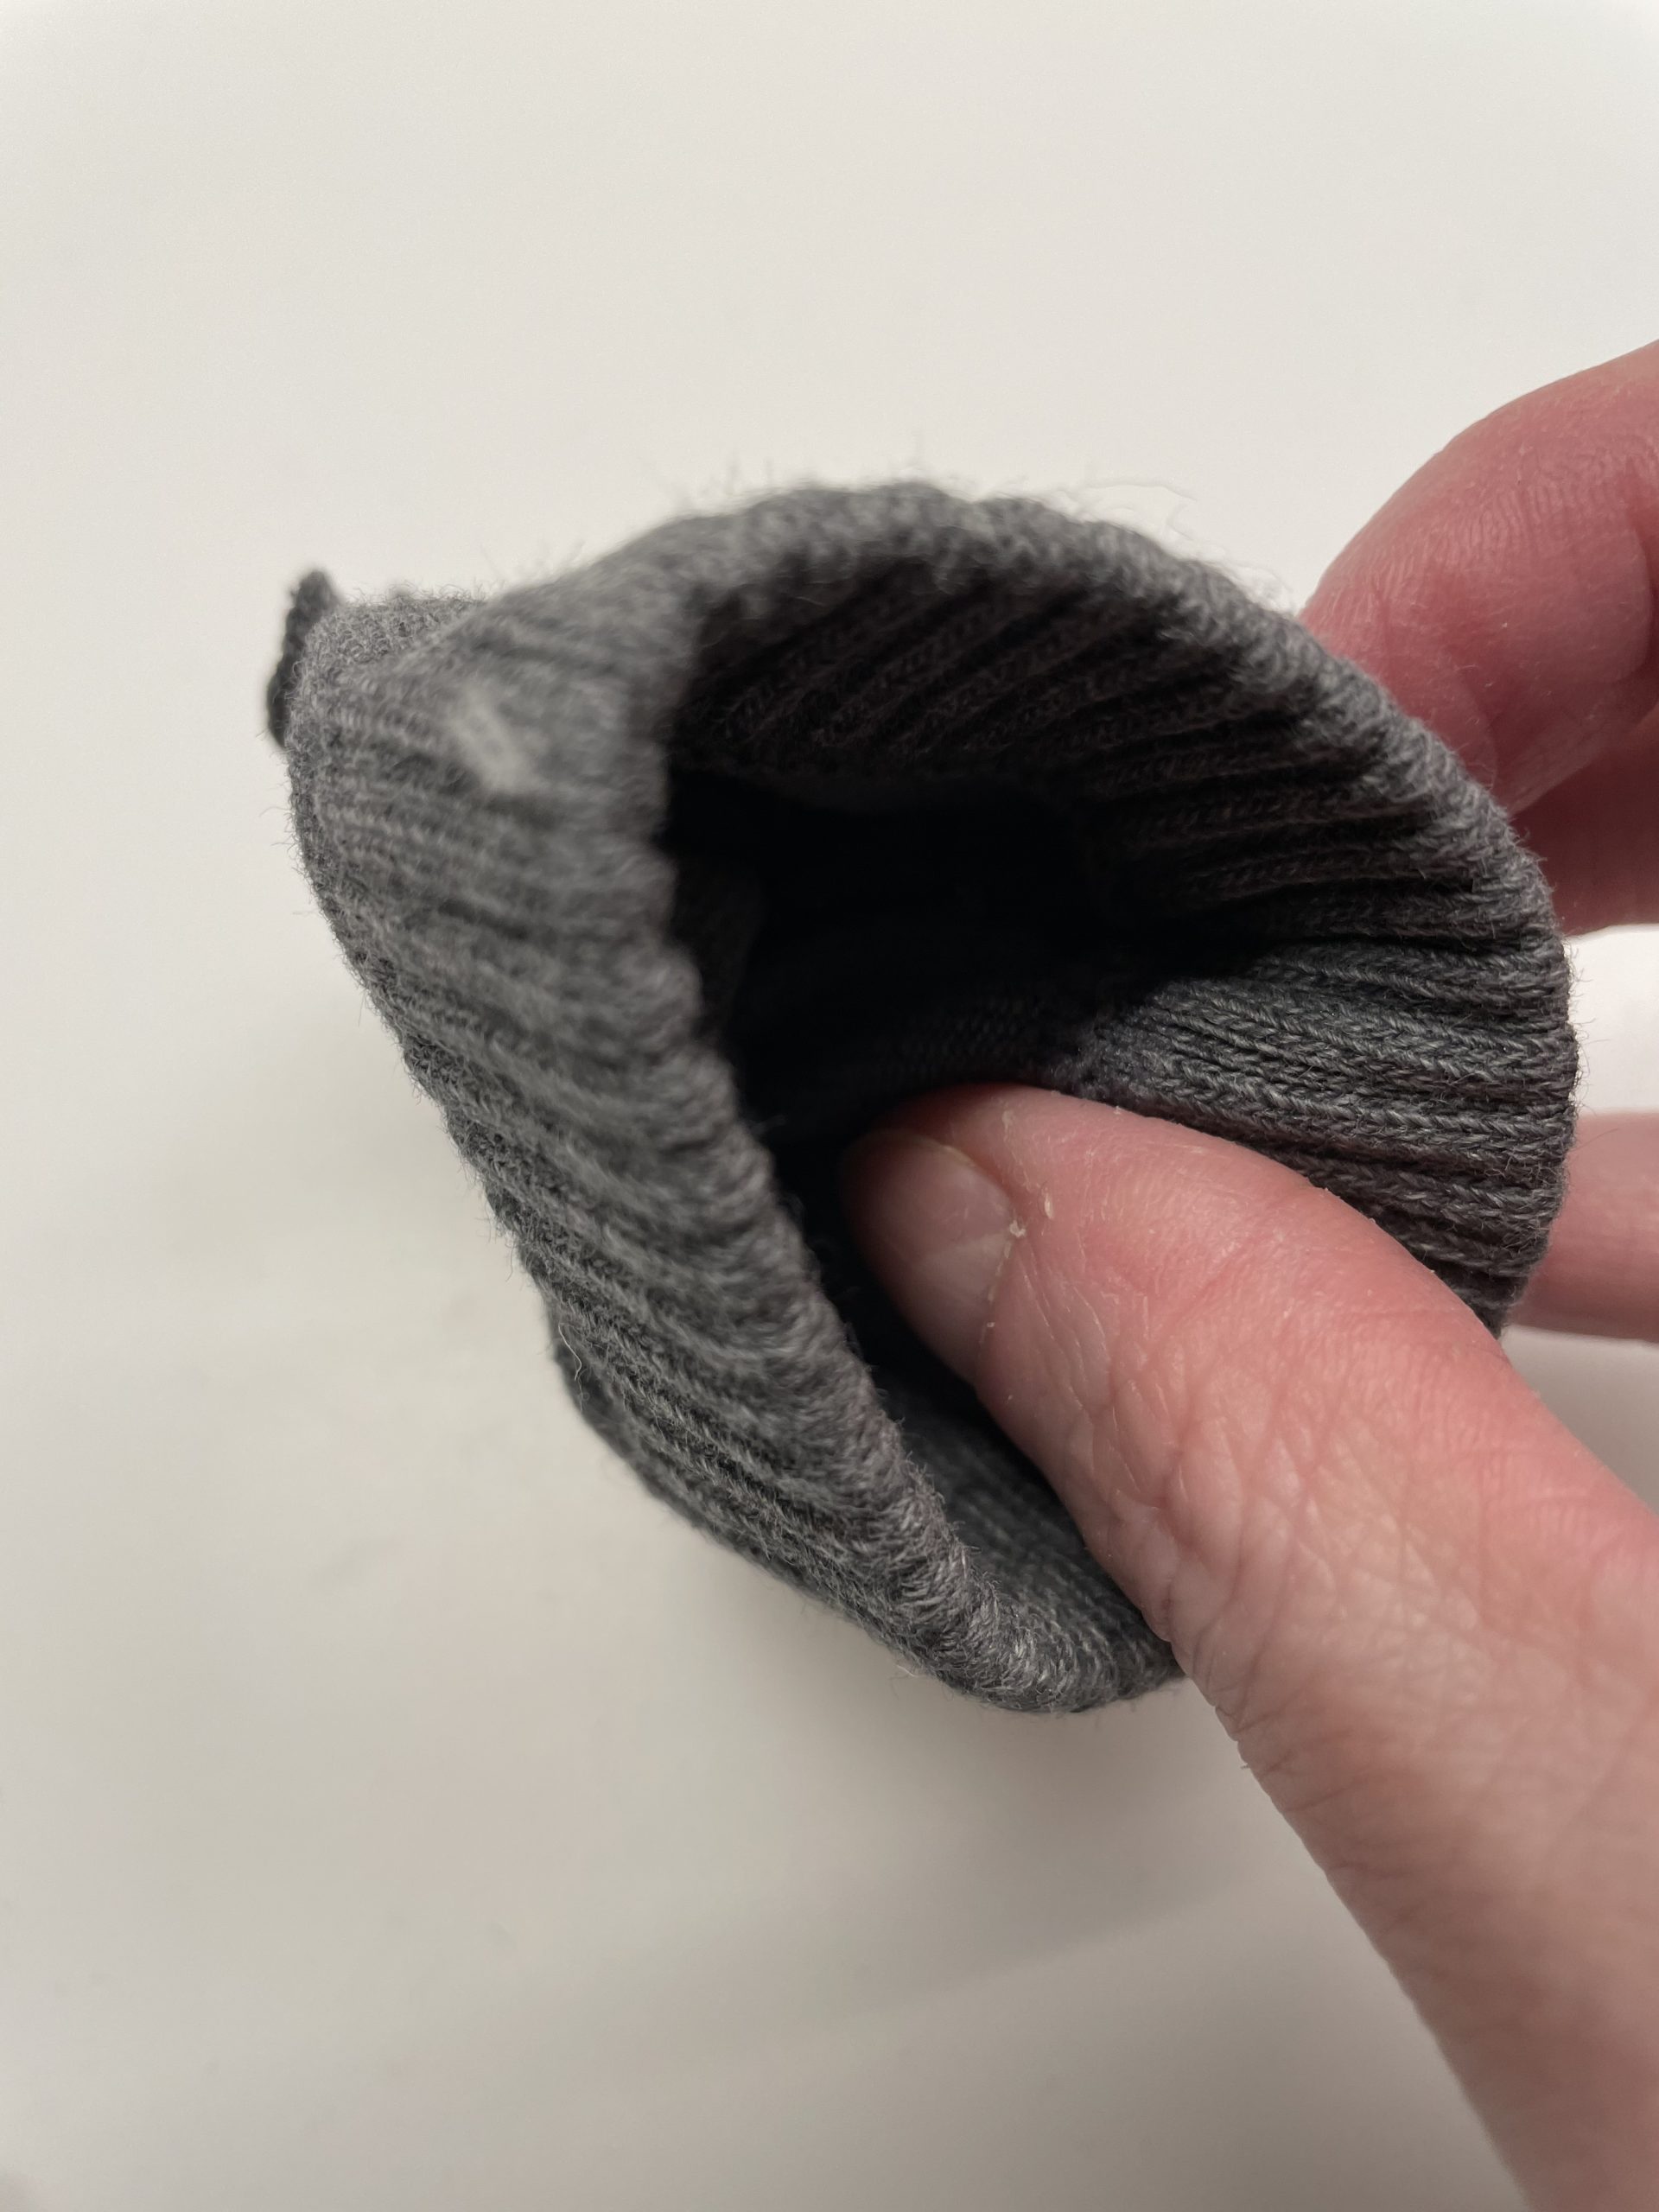
For this you cut off a sock about 8 cm long. Measure the length from the cuff.

Bild zum Schritt 14 für das Bastel- und DIY-Abenteuer für Kinder: 'Nun bastelt ihr die Mütze.    Dafür schneidet...'

15

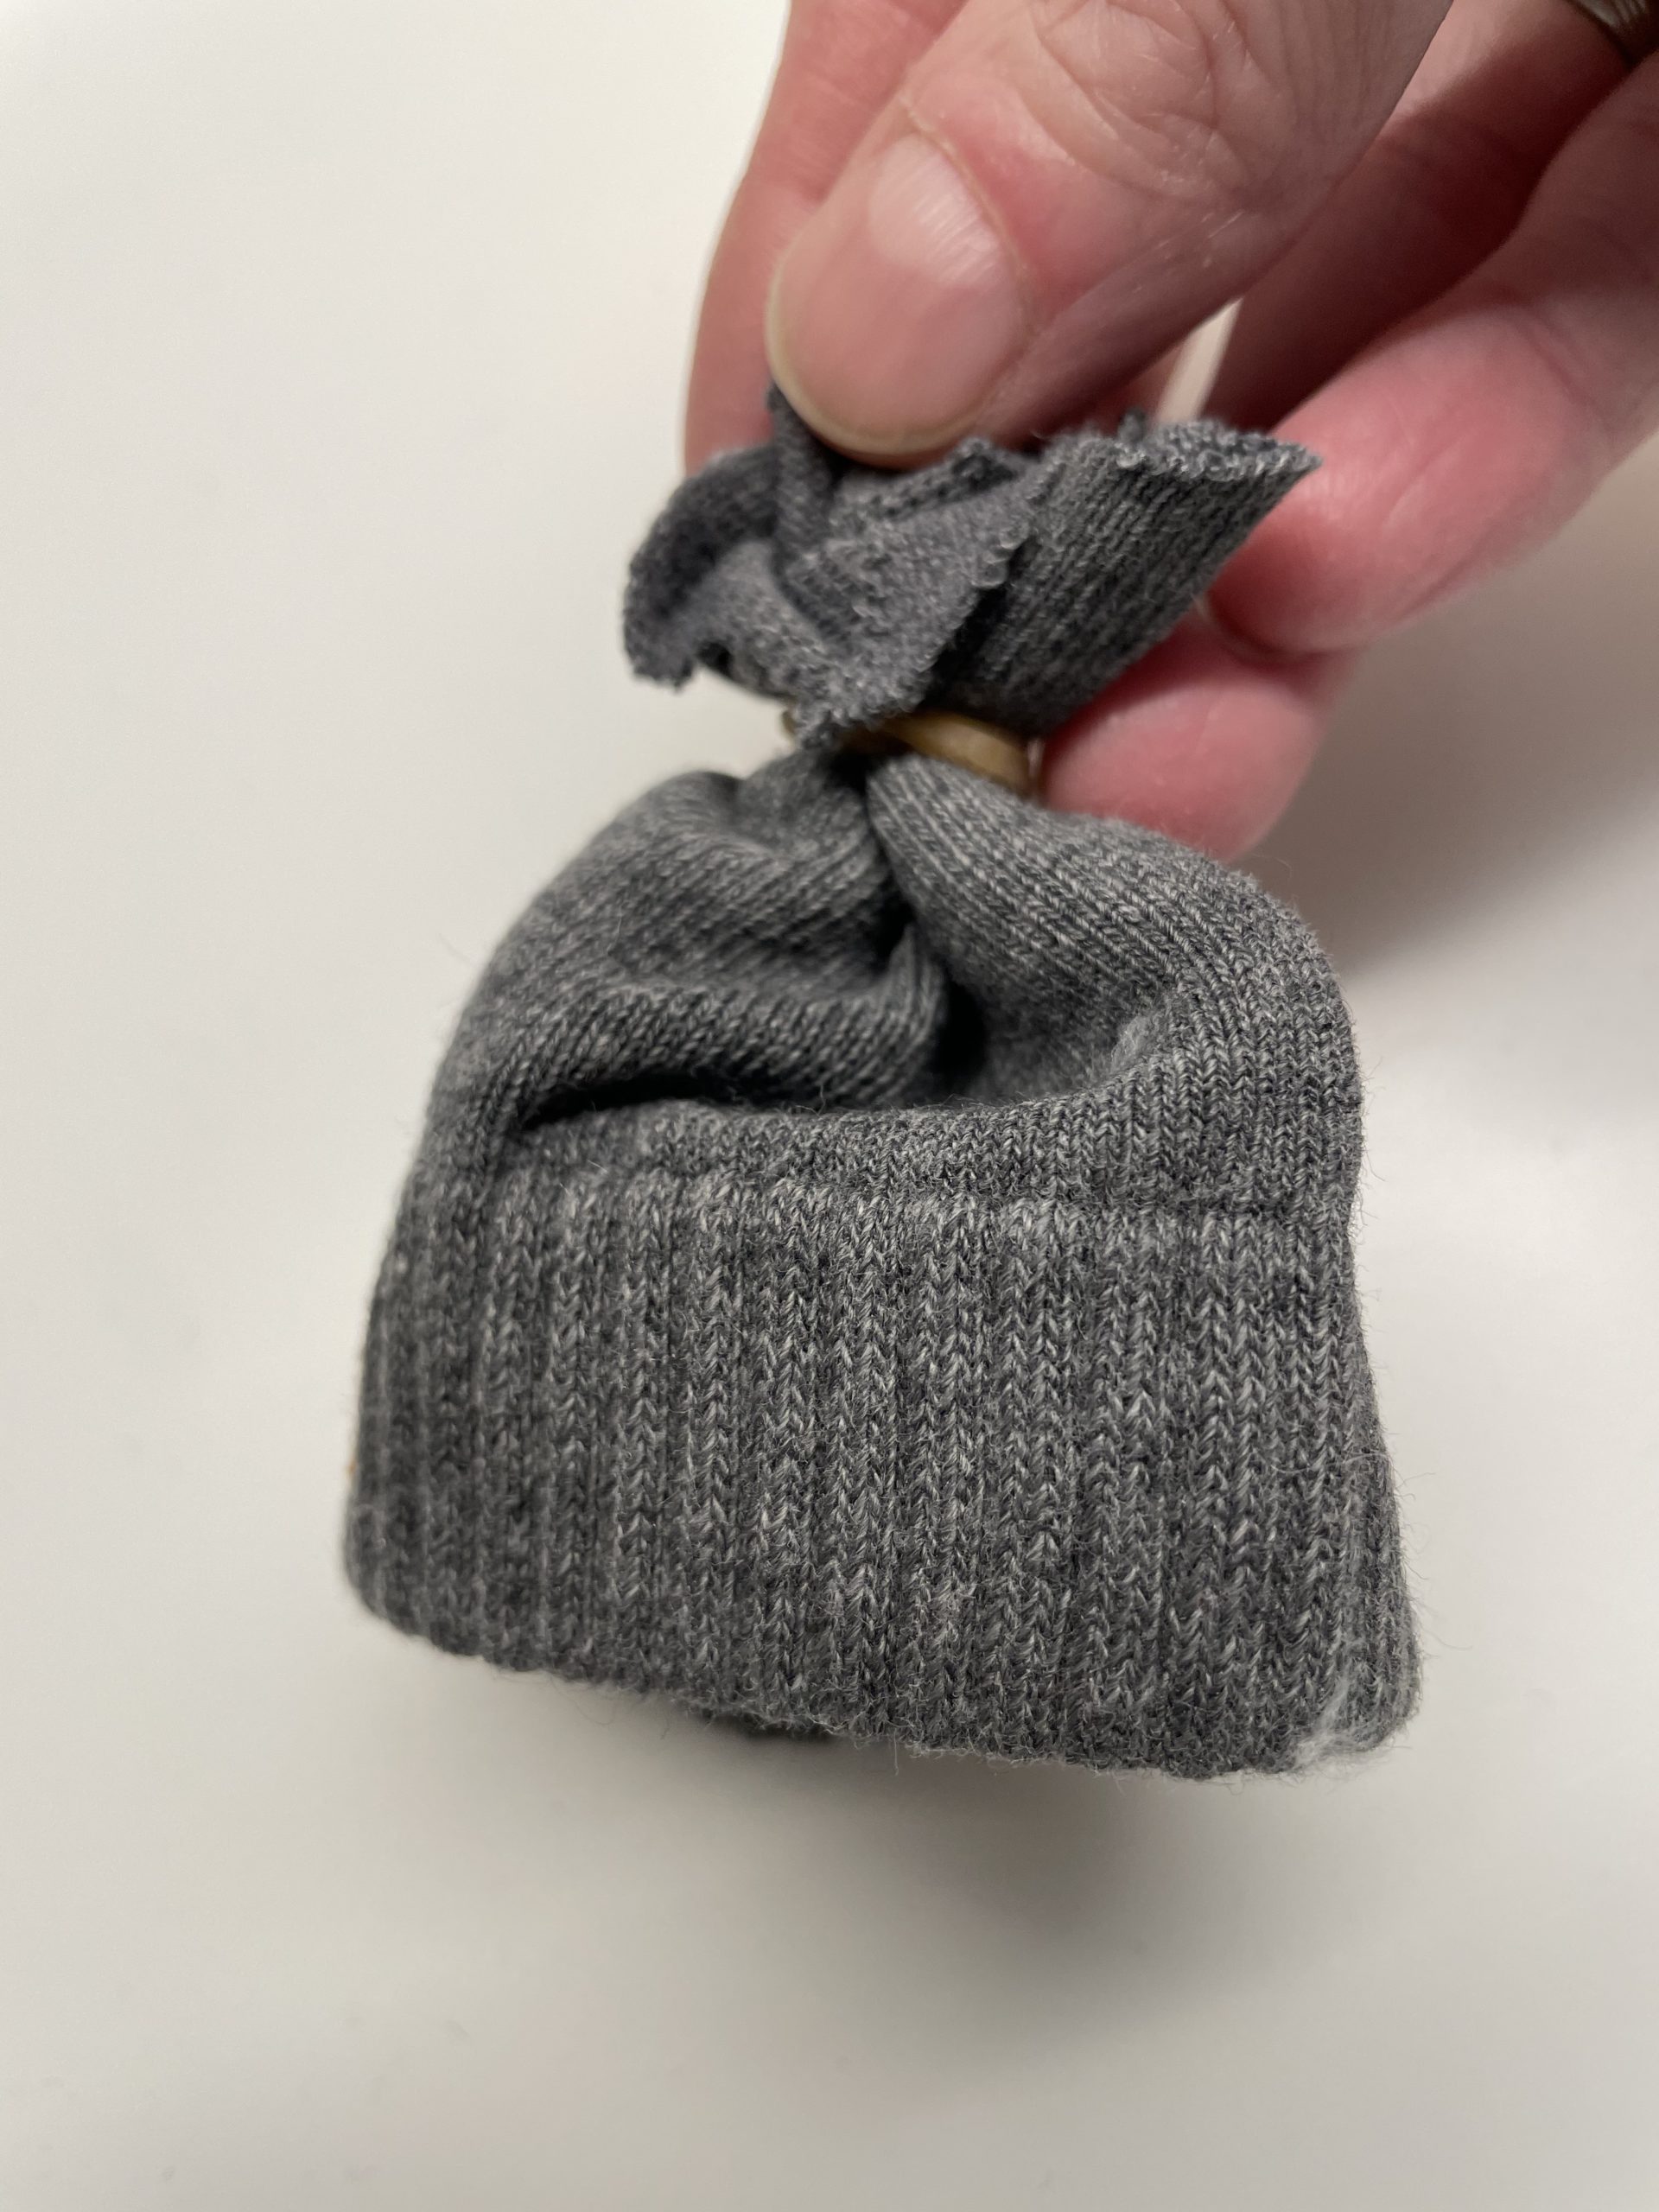
Now you bind the interface with a rubber or a cord.

Tip: You can also bind the sock first in the desired length and then cut it off.

Bild zum Schritt 15 für das Bastel- und DIY-Abenteuer für Kinder: 'Jetzt bindet ihr die Schnittstelle mit einem Gummi oder einer...'

16

Finished is the small cap. Put on the cap and pull the upper end a little apart - this creates a bobble.

Bild zum Schritt 16 für das Bastel- und DIY-Abenteuer für Kinder: 'Fertig ist die kleine Mütze. Setzt die Mütze auf und...'

17

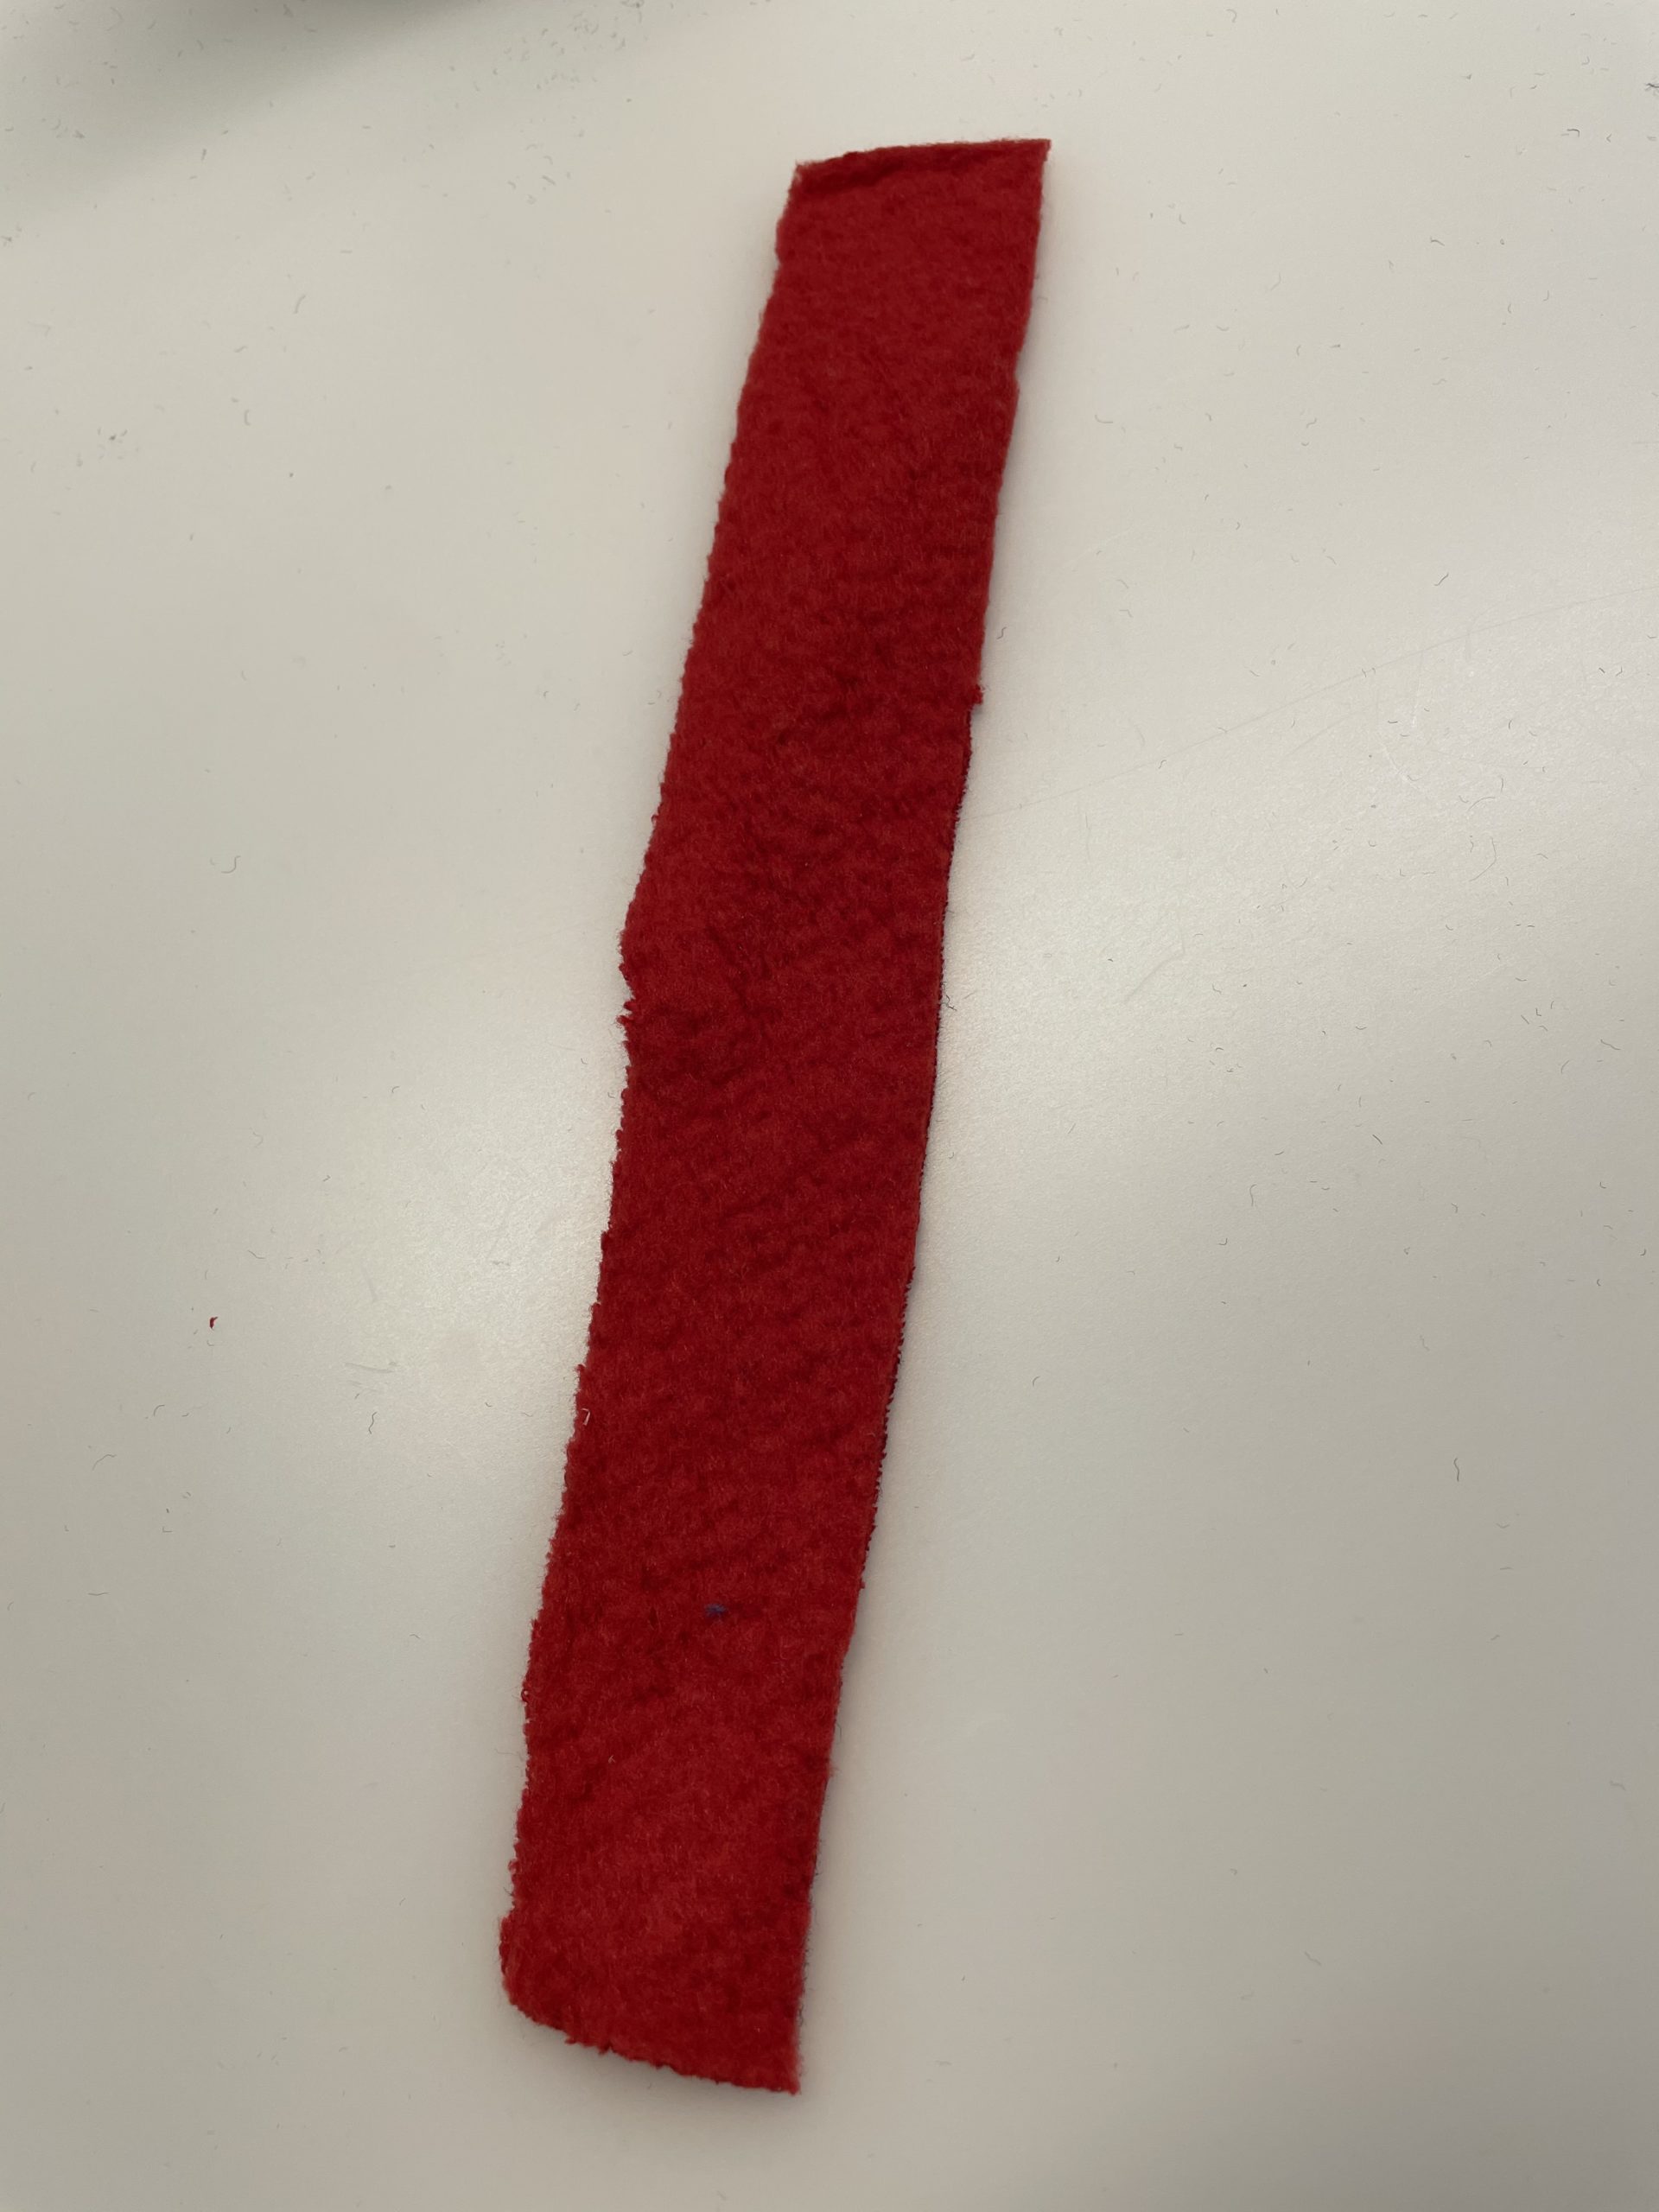
Now cut her the scarf of the snowman. For this cut a felt strip to the dimensions 25cm x 2cm.

Bild zum Schritt 17 für das Bastel- und DIY-Abenteuer für Kinder: 'Nun schneidet ihr den Schal des Schneemannes zu. Dafür schneidet...'

18

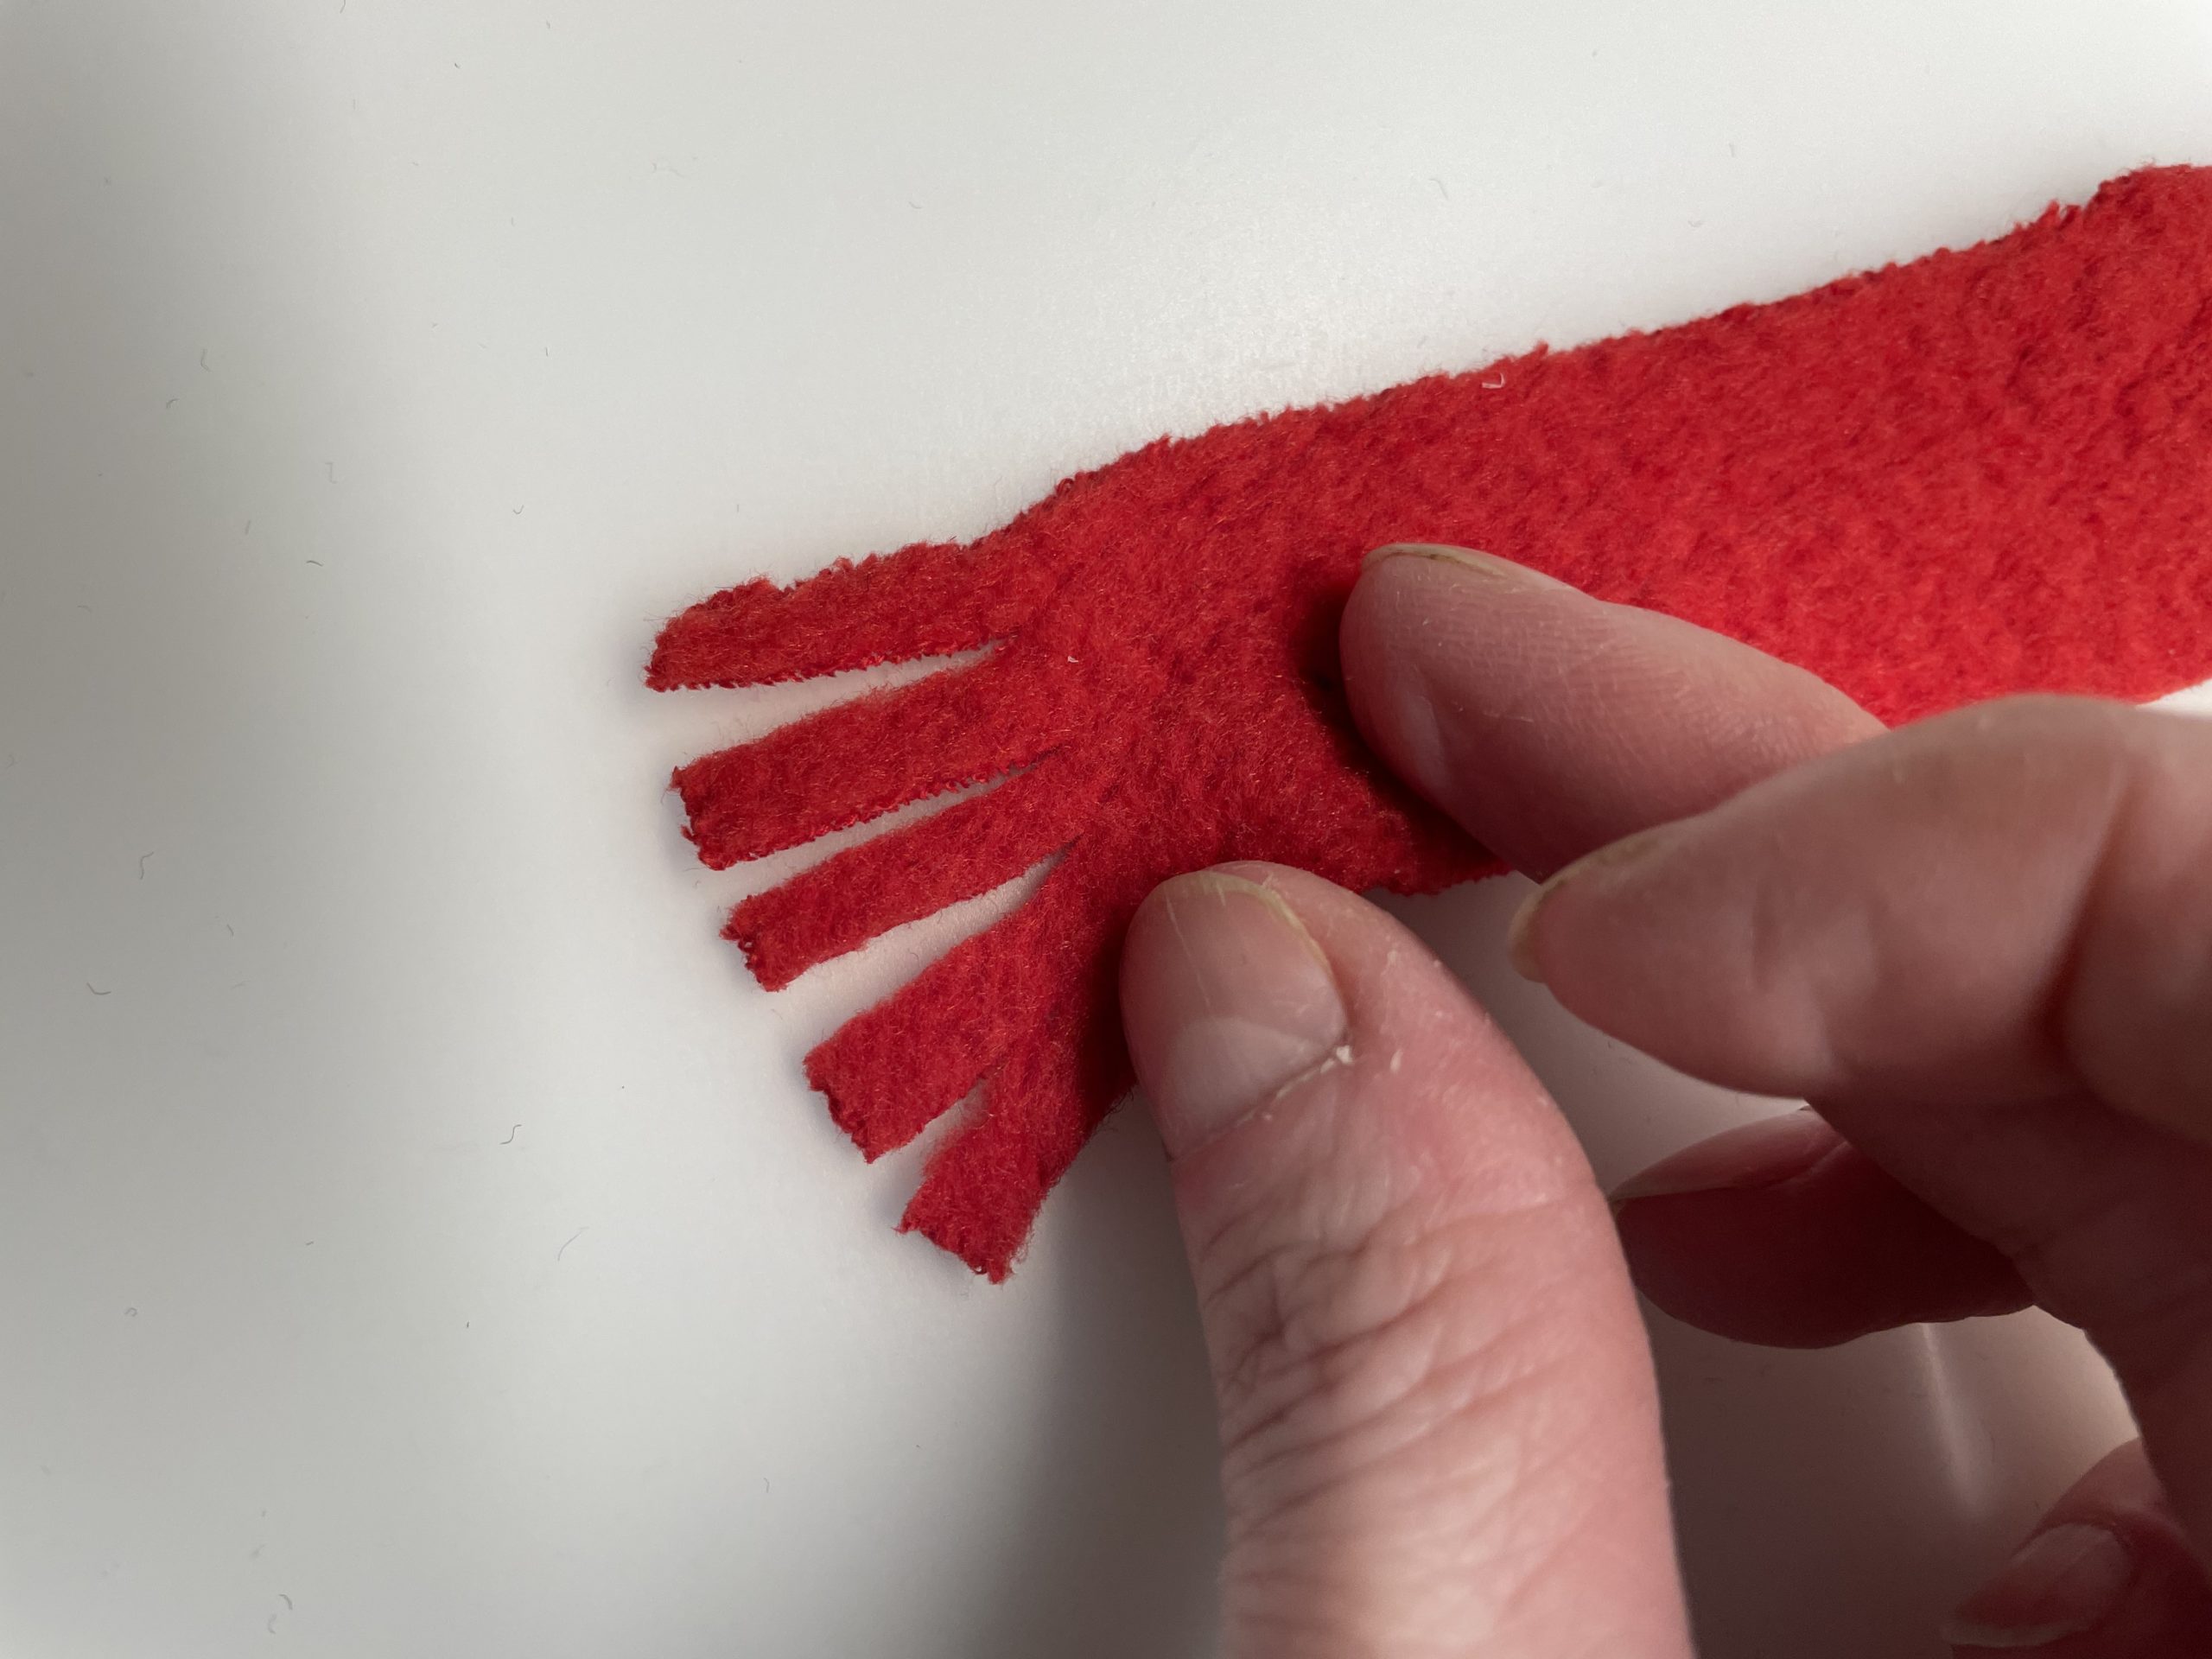
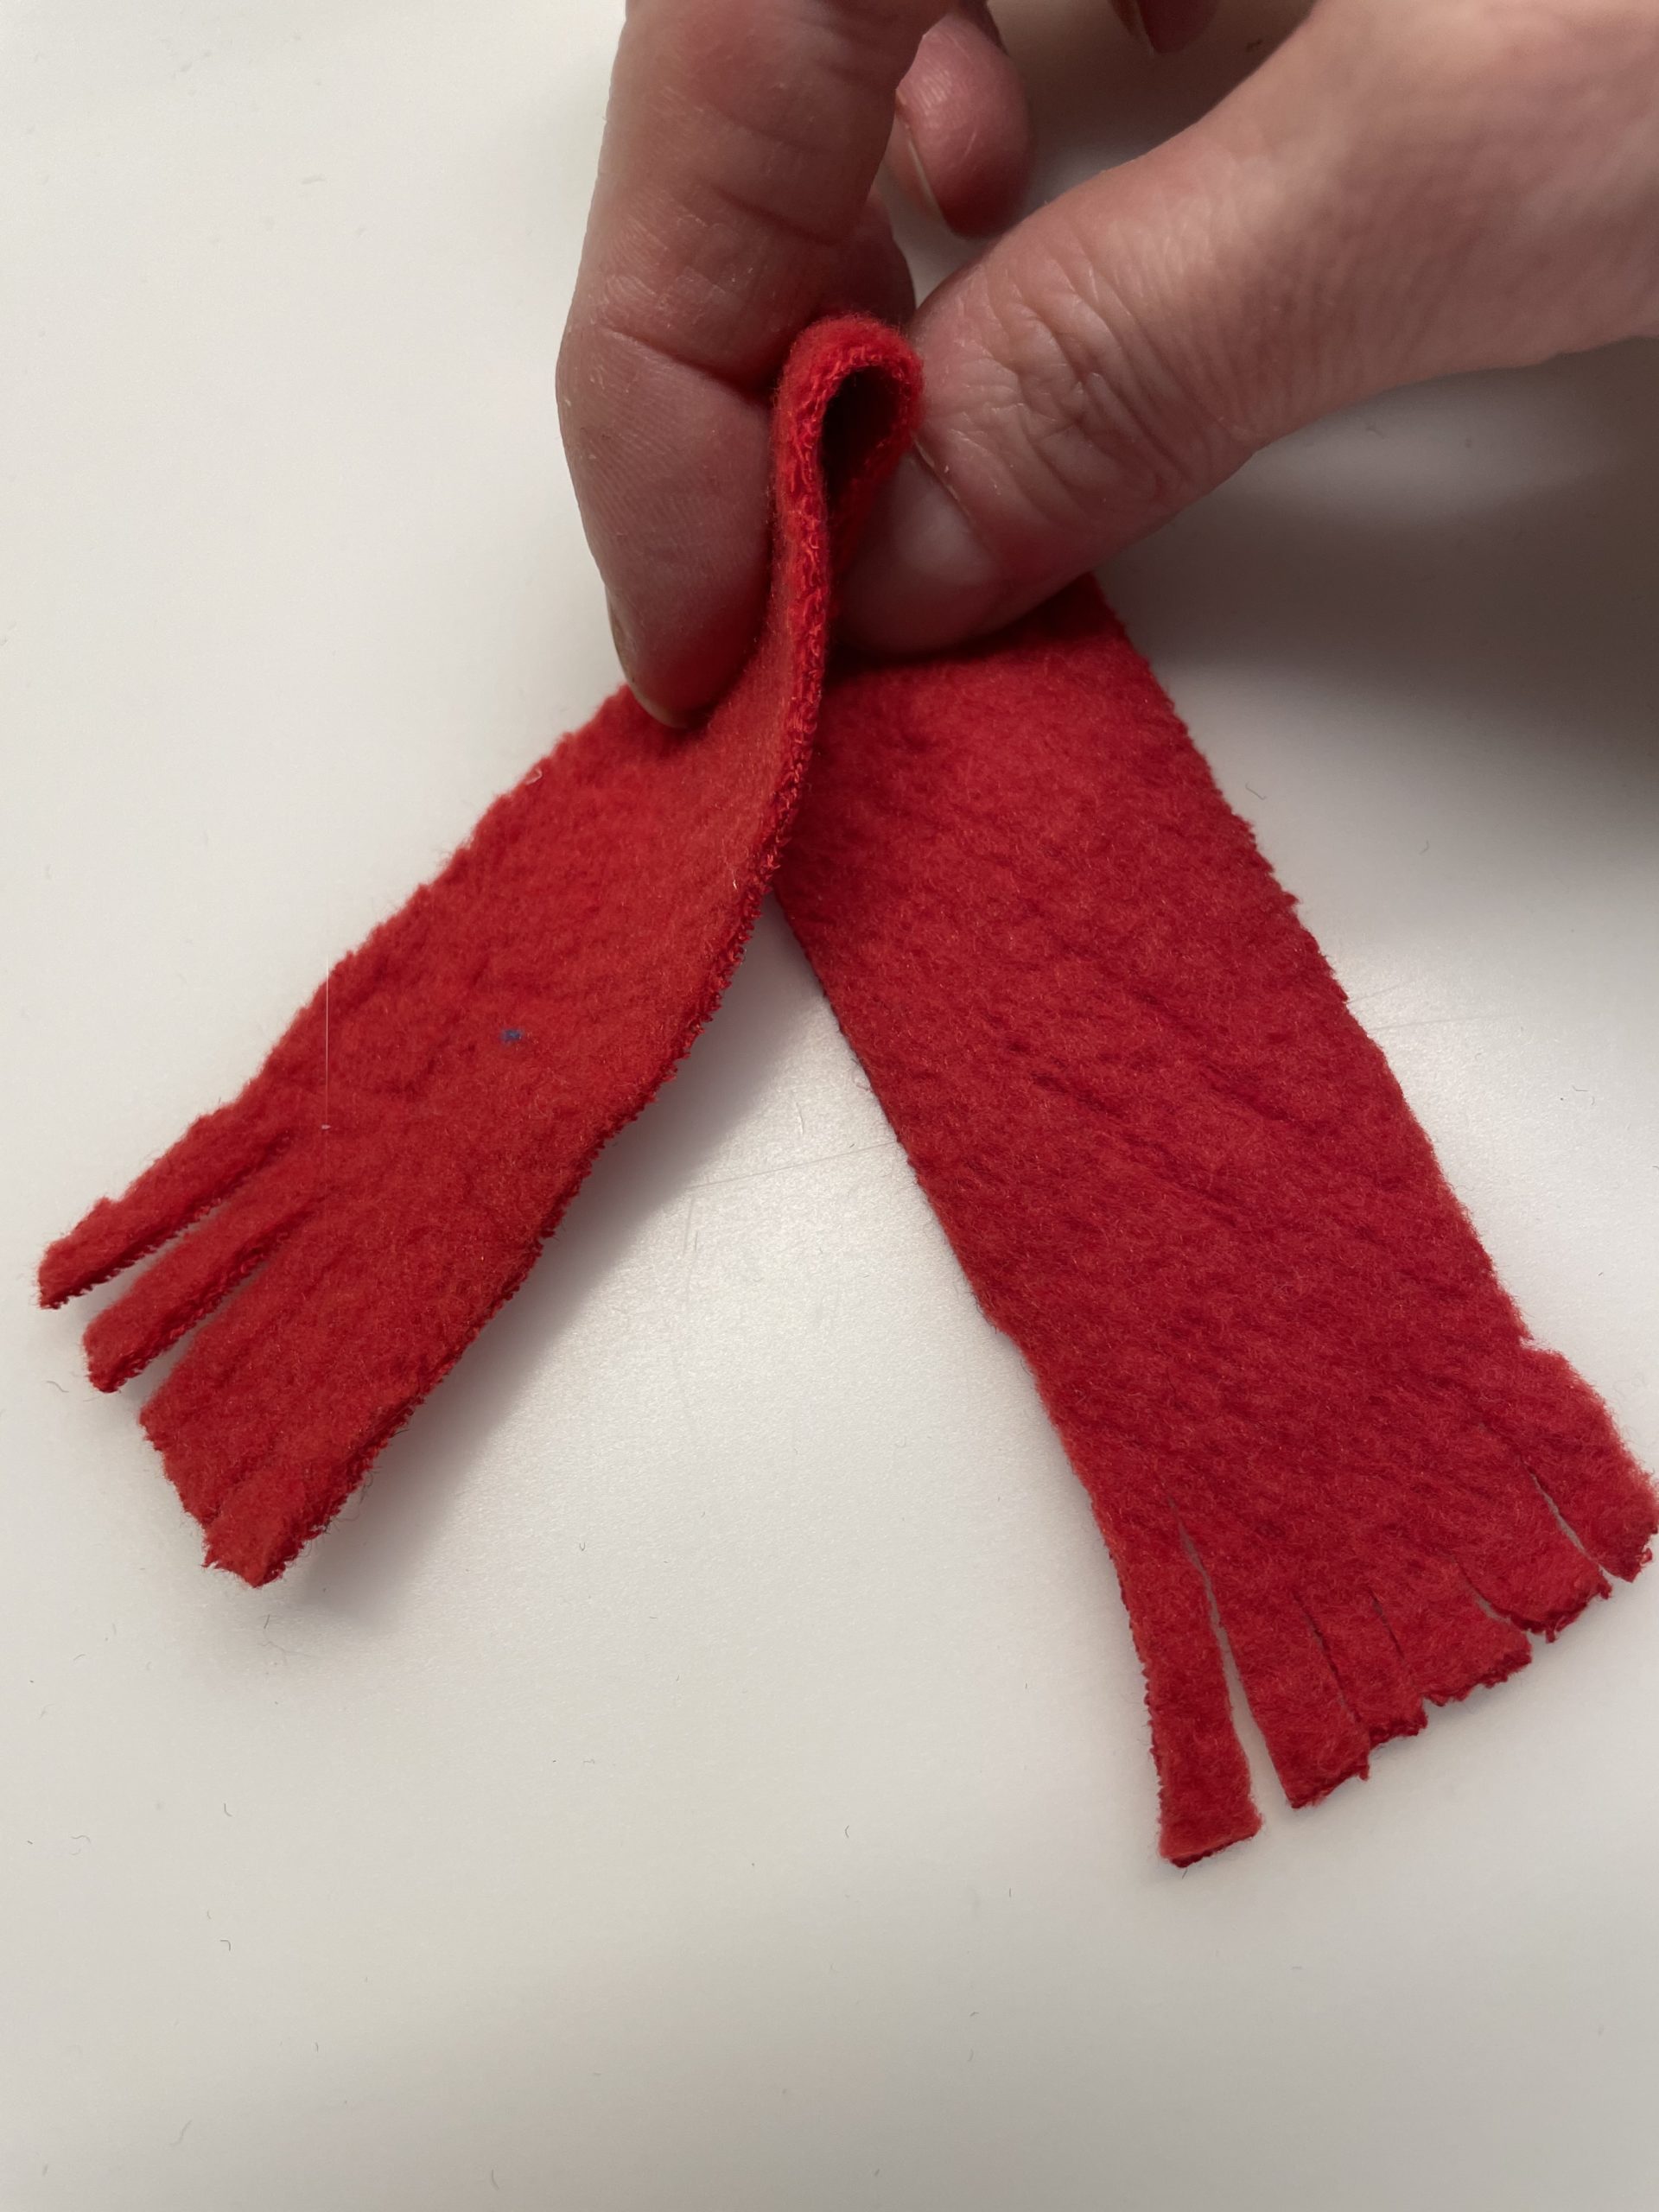
Then you cut the strip several times at both ends with the scissors about 1cm.

Bild zum Schritt 18 für das Bastel- und DIY-Abenteuer für Kinder: 'Anschließend schneidet ihr den Streifen an beiden Enden mit der...'

19

2. Bild zum Schritt 18 für das Bastel- und DIY-Abenteuer für Kinder: 'Anschließend schneidet ihr den Streifen an beiden Enden mit der...'

20

The scarf is ready.

Bild zum Schritt 20 für das Bastel- und DIY-Abenteuer für Kinder: 'Fertig ist der Schal.'

21

Now tie the scarf around the snowman.

Bild zum Schritt 21 für das Bastel- und DIY-Abenteuer für Kinder: 'Bindet jetzt den Schal um den Schneemann herum.'

22

The snowman is ready.

Bild zum Schritt 22 für das Bastel- und DIY-Abenteuer für Kinder: 'Fertig ist der Schneemann.'

Snowman with hat:
23

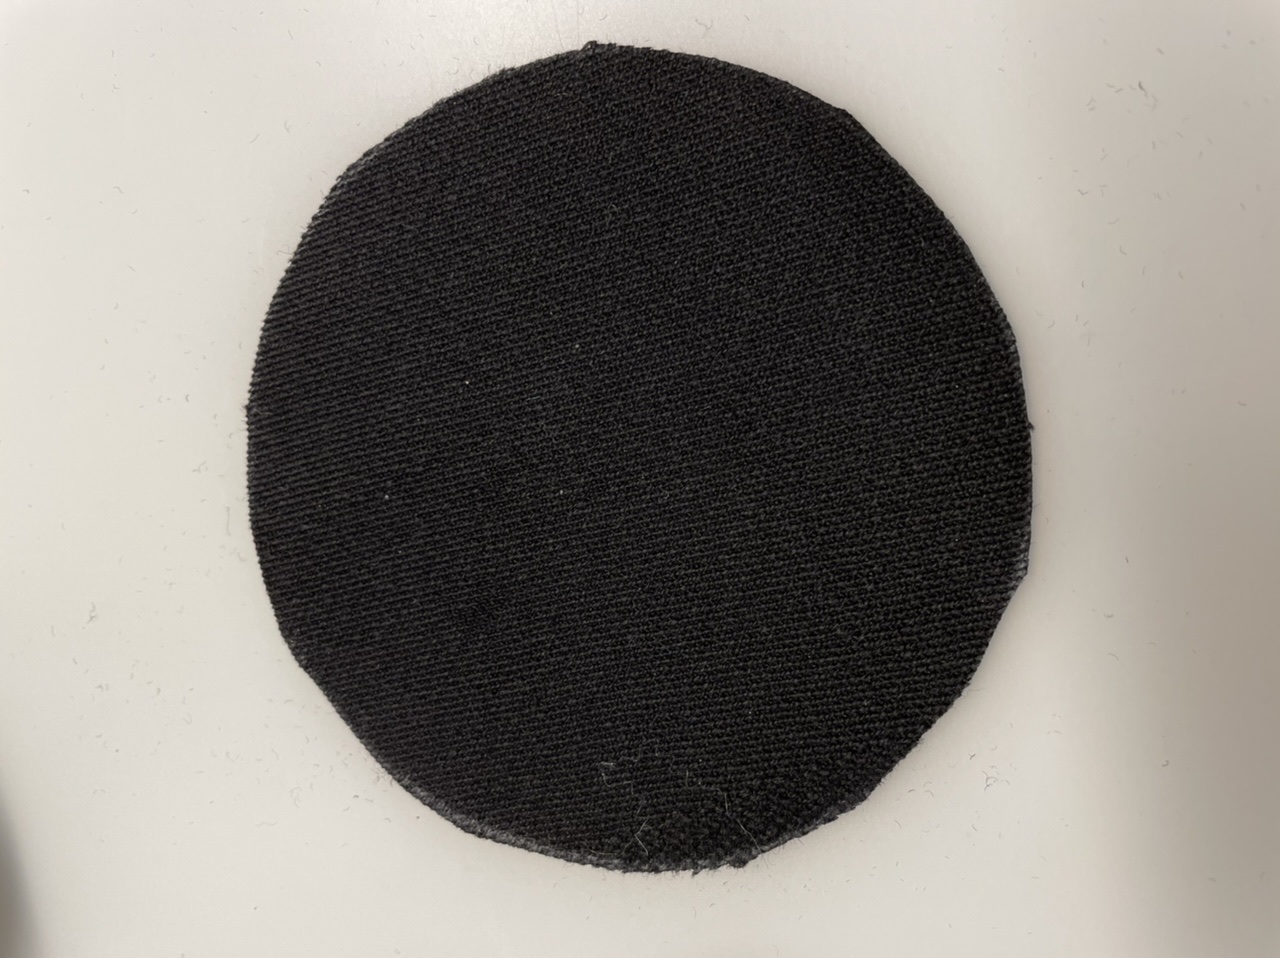
Cuts out an 8cm circle from a black piece of fabric or felt for the hat.

Bild zum Schritt 24 für das Bastel- und DIY-Abenteuer für Kinder: 'Schneidet für den Hut einen 8cm großen Kreis aus einem...'

24

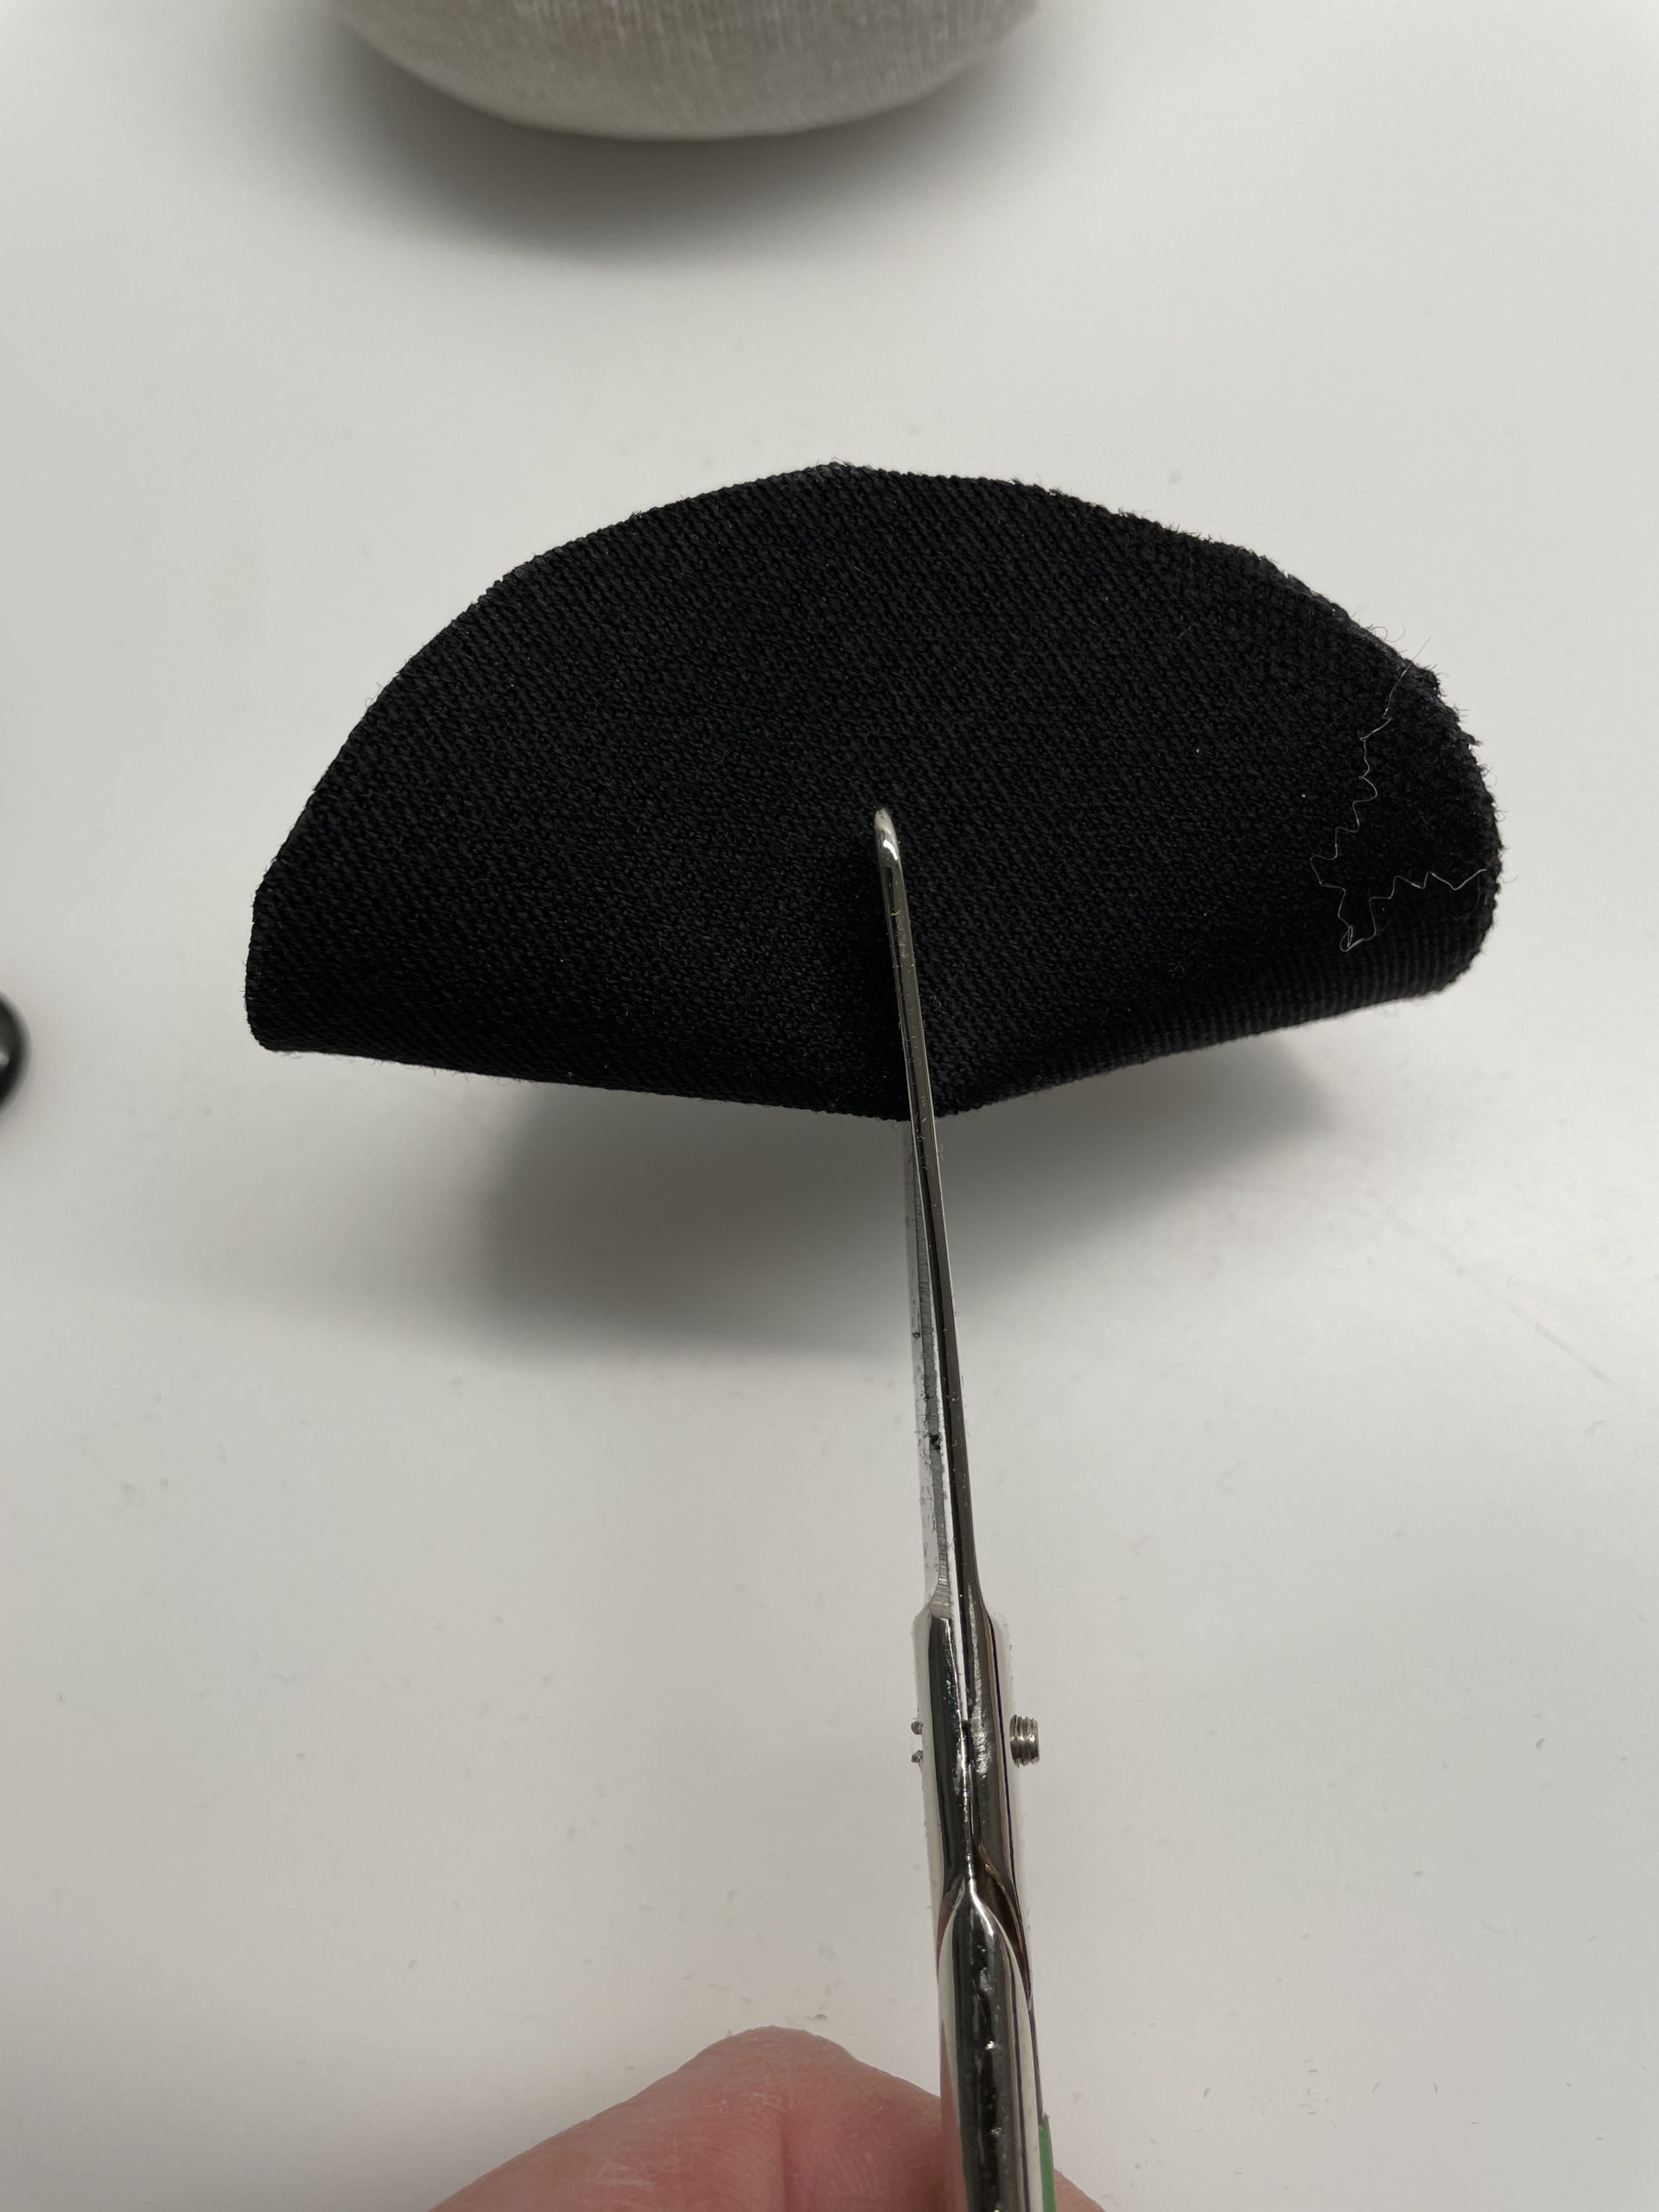
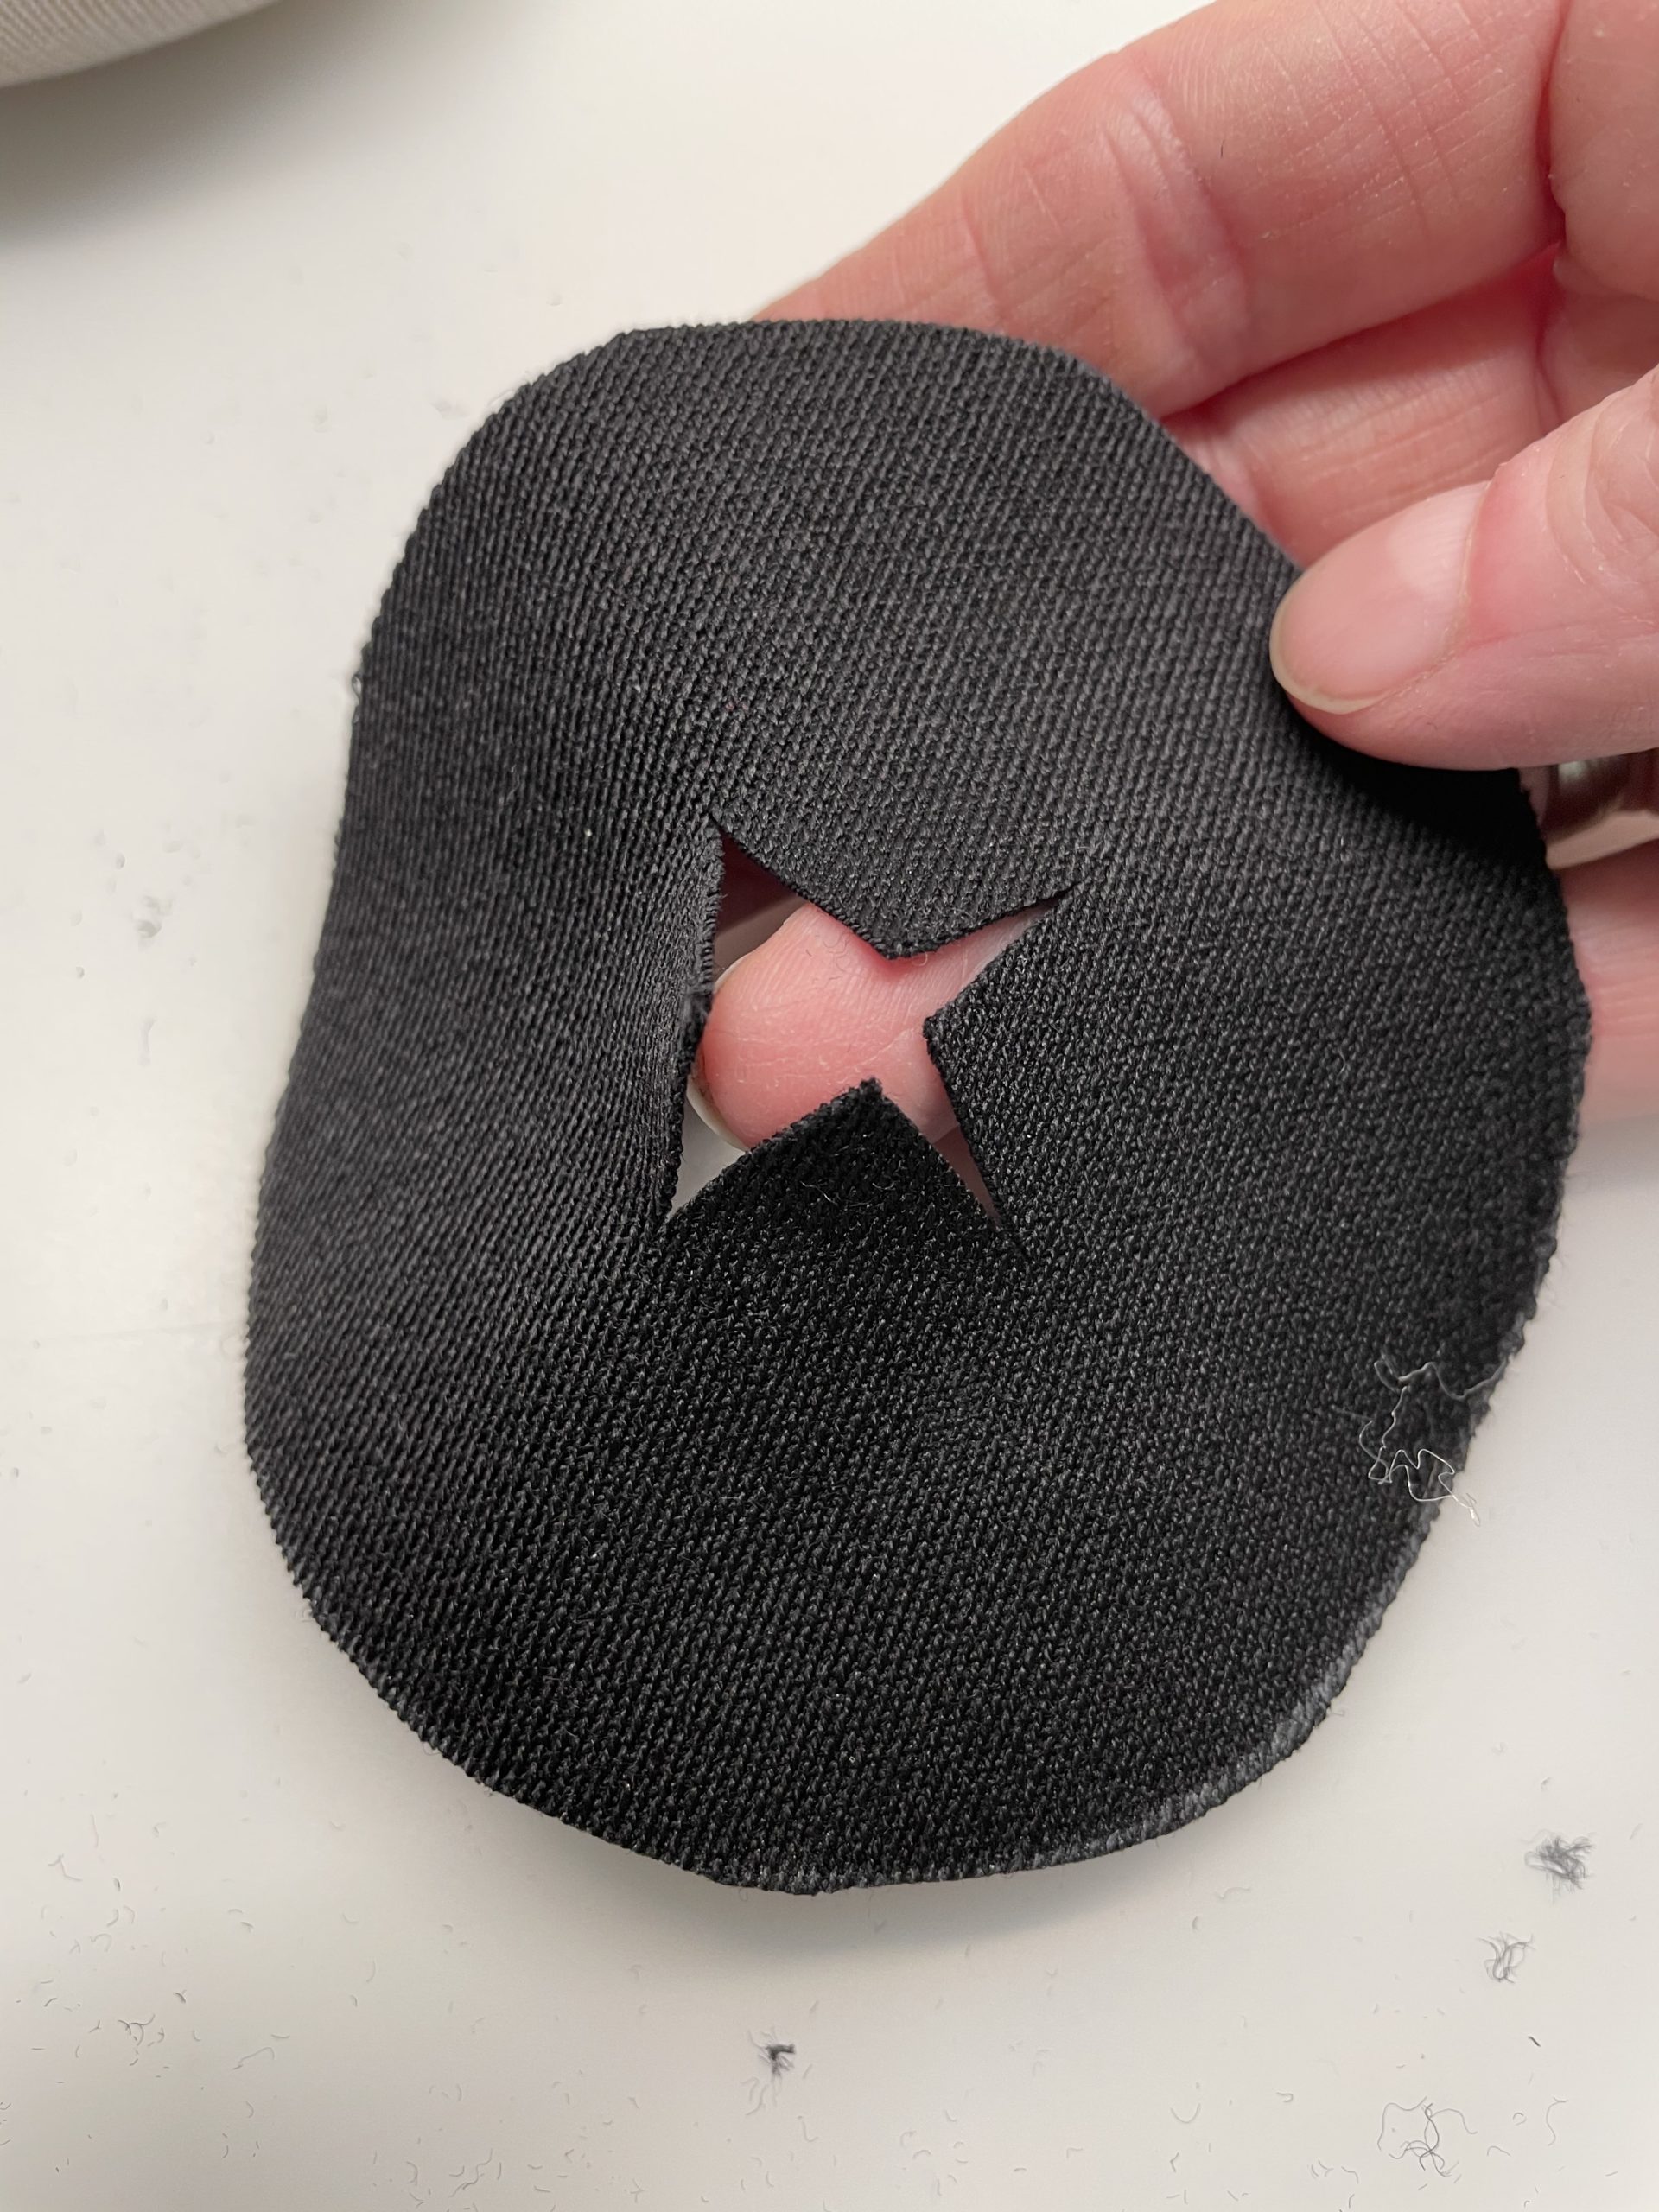
Now fold the circle half and cut it in the middle a small piece.

Bild zum Schritt 25 für das Bastel- und DIY-Abenteuer für Kinder: 'Faltet nun den Kreis zur Hälfte und schneidet diesen in...'

25

Now fold the circle and fold it again in the other direction. Cut a small piece in the middle again. This creates a cross-cut in the middle.

Bild zum Schritt 26 für das Bastel- und DIY-Abenteuer für Kinder: 'Faltet jetzt den Kreis auf und faltet ihn noch einmal...'

26

Now roll the fabric circle over the socks.

Bild zum Schritt 27 für das Bastel- und DIY-Abenteuer für Kinder: 'Stülpt nun den Stoffkreis über den Sockenüberstand.'

27

Now cut a strip, which is about 15cm x 8cm large.

Bild zum Schritt 28 für das Bastel- und DIY-Abenteuer für Kinder: 'Jetzt schneidet ihr einen Streifen zu, der ca. 15cm x...'

28

Then stick this strip together to form a hose. Use any hot glue. Attention: Let an adult help you with this - risk of injury!

Bild zum Schritt 29 für das Bastel- und DIY-Abenteuer für Kinder: 'Klebt danach diesen Streifen zu einem Schlauch zusammen. Nutzt dafür...'

29

Now you're half-inside the fabric hose.
If the fold doesn't hold, just put on a few brackets.

Bild zum Schritt 30 für das Bastel- und DIY-Abenteuer für Kinder: 'Jetzt schlagt ihr den Stoffschlauch zur Hälfte nach innen um....'

30

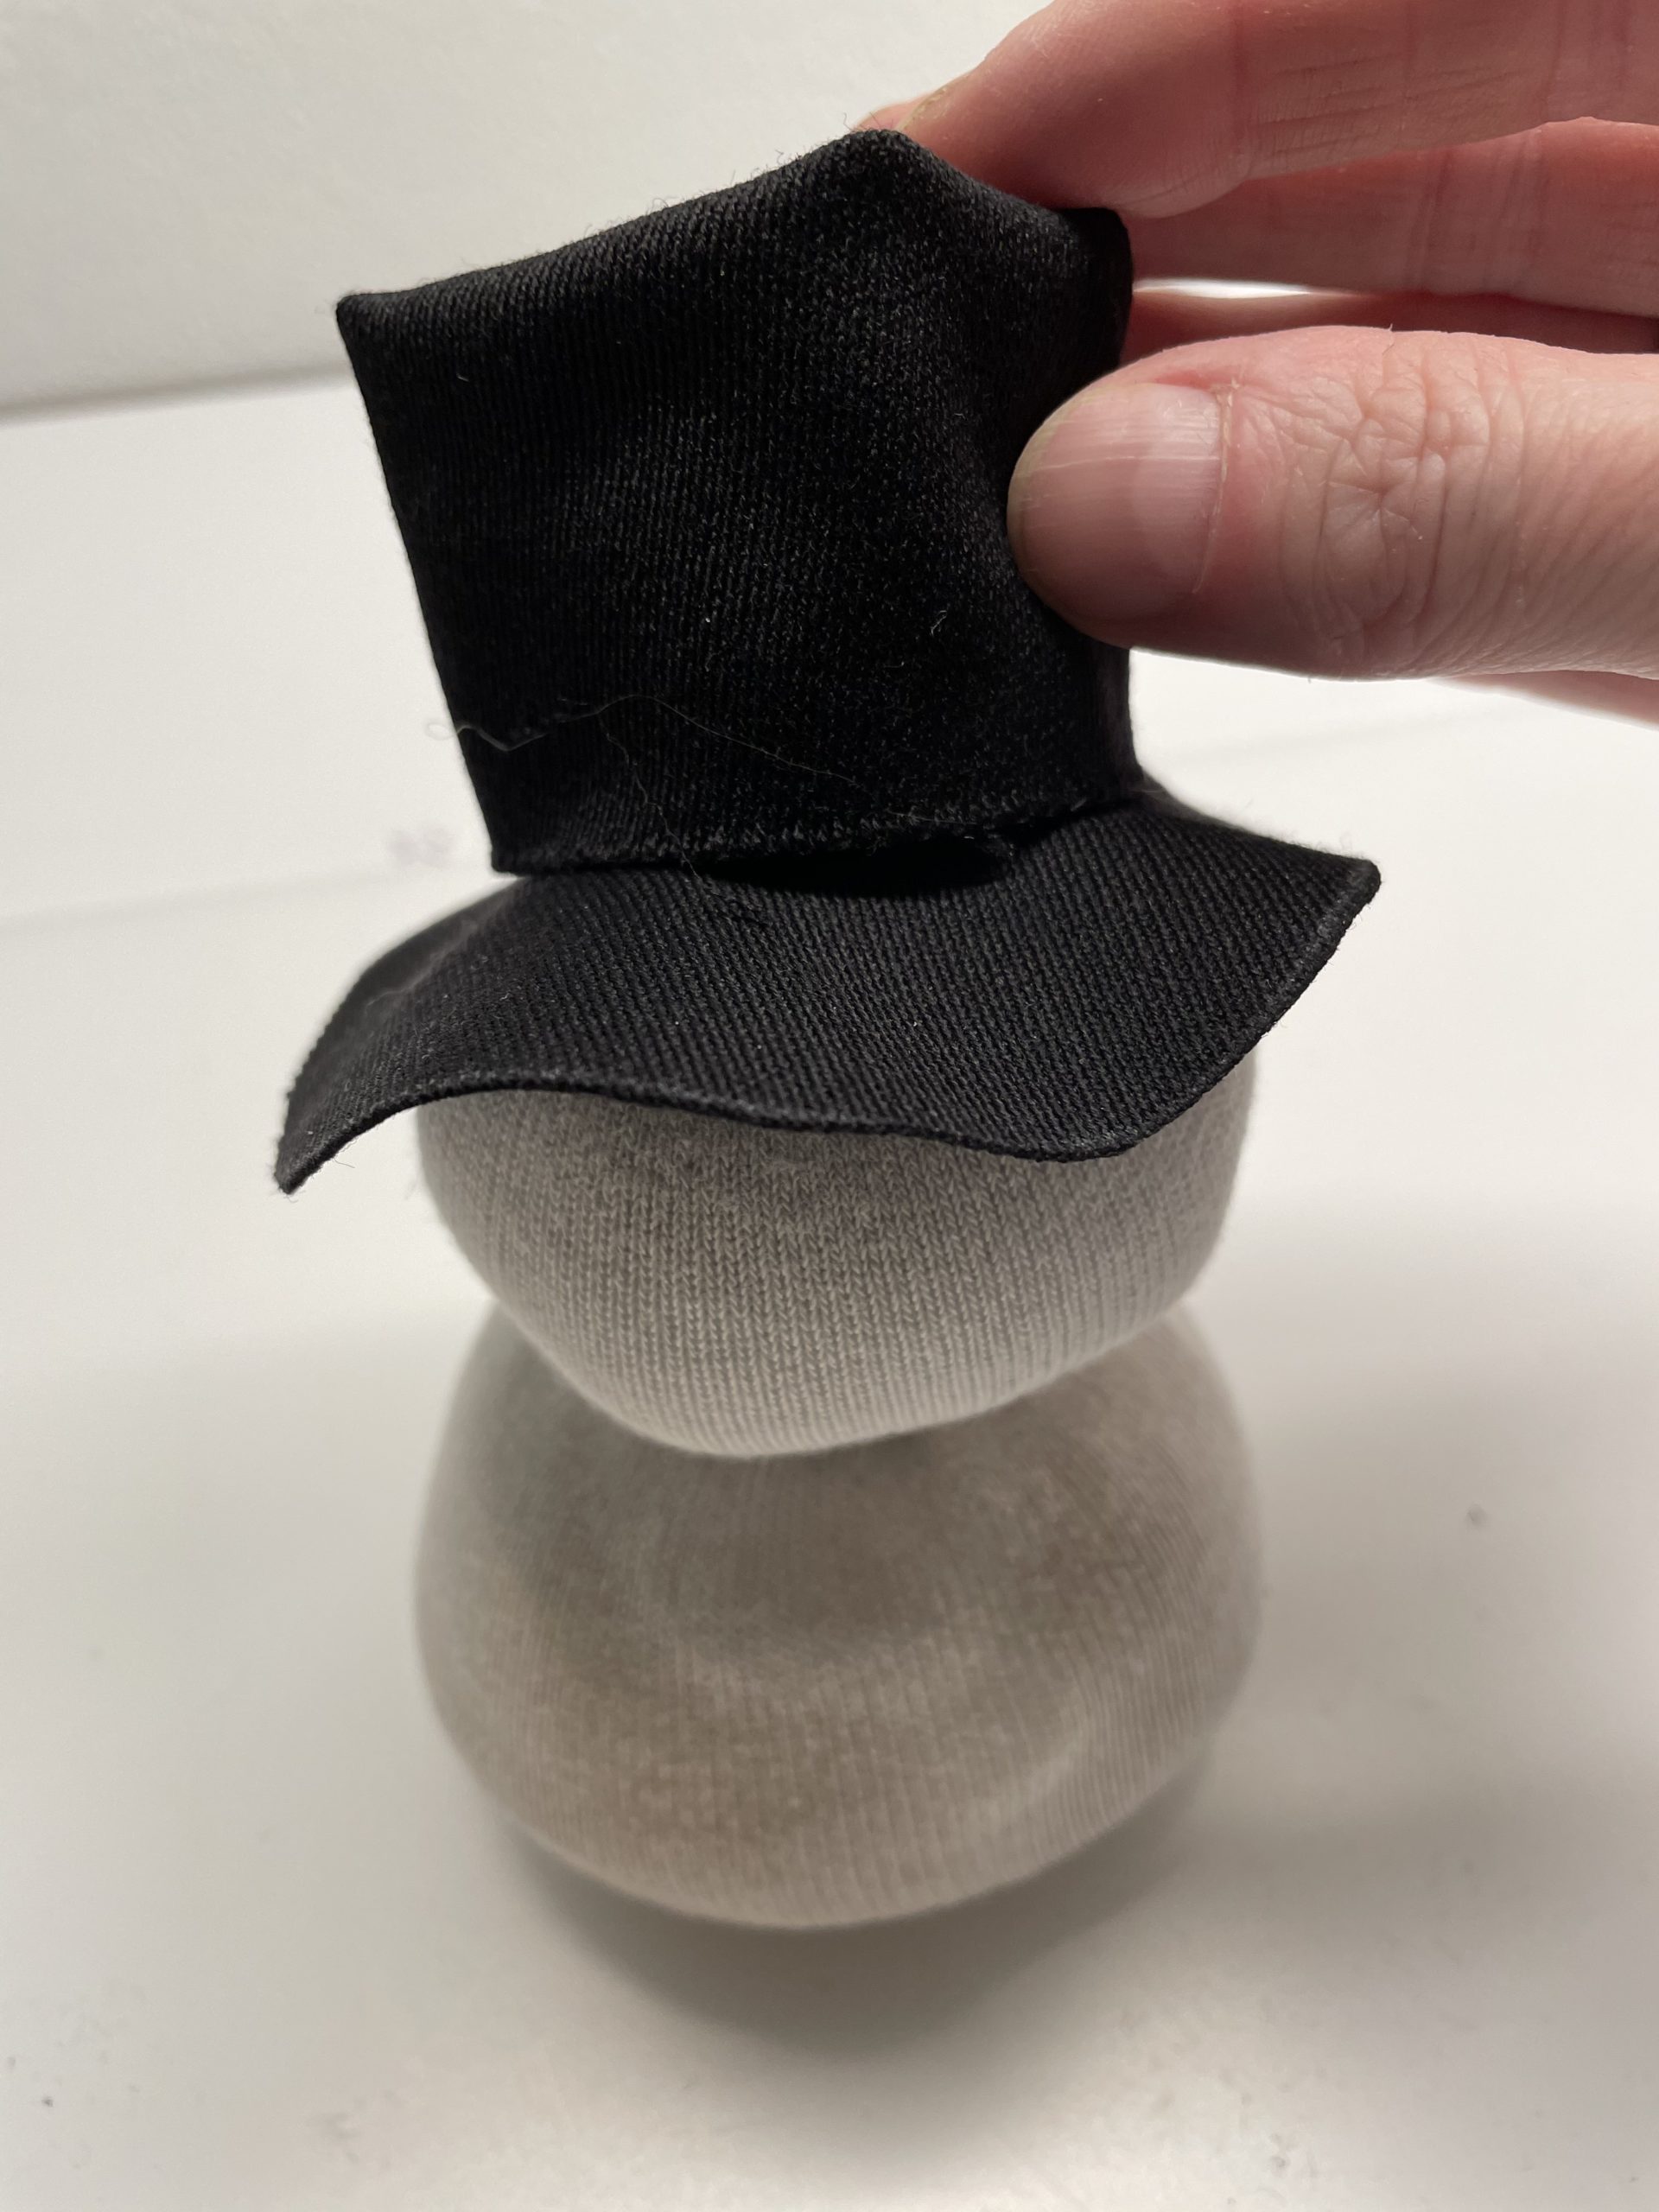
Now you put the fabric hose over the socks.
Now stick the fabric hose to the circle with hot glue. Add some hot glue and put immediately the hat edge on it.

Bild zum Schritt 31 für das Bastel- und DIY-Abenteuer für Kinder: 'Jetzt stülpt ihr den Stoffschlauch über den Sockenüberstand.  Klebt...'

31

Tighten the fabric hose.

Bild zum Schritt 32 für das Bastel- und DIY-Abenteuer für Kinder: 'Drückt den Stoffschlauch fest.'

32

Now cut a small fabric circle with a diameter of about 4cm.

Bild zum Schritt 33 für das Bastel- und DIY-Abenteuer für Kinder: 'Jetzt schneidet ihr einen kleinen Stoffkreis mit ca. 4cm Durchmesser...'

33

Then stick this on the hat and close the open place on the hat.

Bild zum Schritt 34 für das Bastel- und DIY-Abenteuer für Kinder: 'Diesen klebt ihr anschließend auf den Hut darauf und schließt...'

34

2. Bild zum Schritt 34 für das Bastel- und DIY-Abenteuer für Kinder: 'Diesen klebt ihr anschließend auf den Hut darauf und schließt...'

35

3. Bild zum Schritt 35 für das Bastel- und DIY-Abenteuer für Kinder: 'Diesen klebt ihr anschließend auf den Hut darauf und schließt...'

36

Design the snowman as described above with buttons, eyes, pipe cleaner nose and a scarf.

Bild zum Schritt 37 für das Bastel- und DIY-Abenteuer für Kinder: 'Gestalte den Schneemann wie oben beschrieben mit Knöpfen, Augen, Pfeifenputzer-Nase...'

37

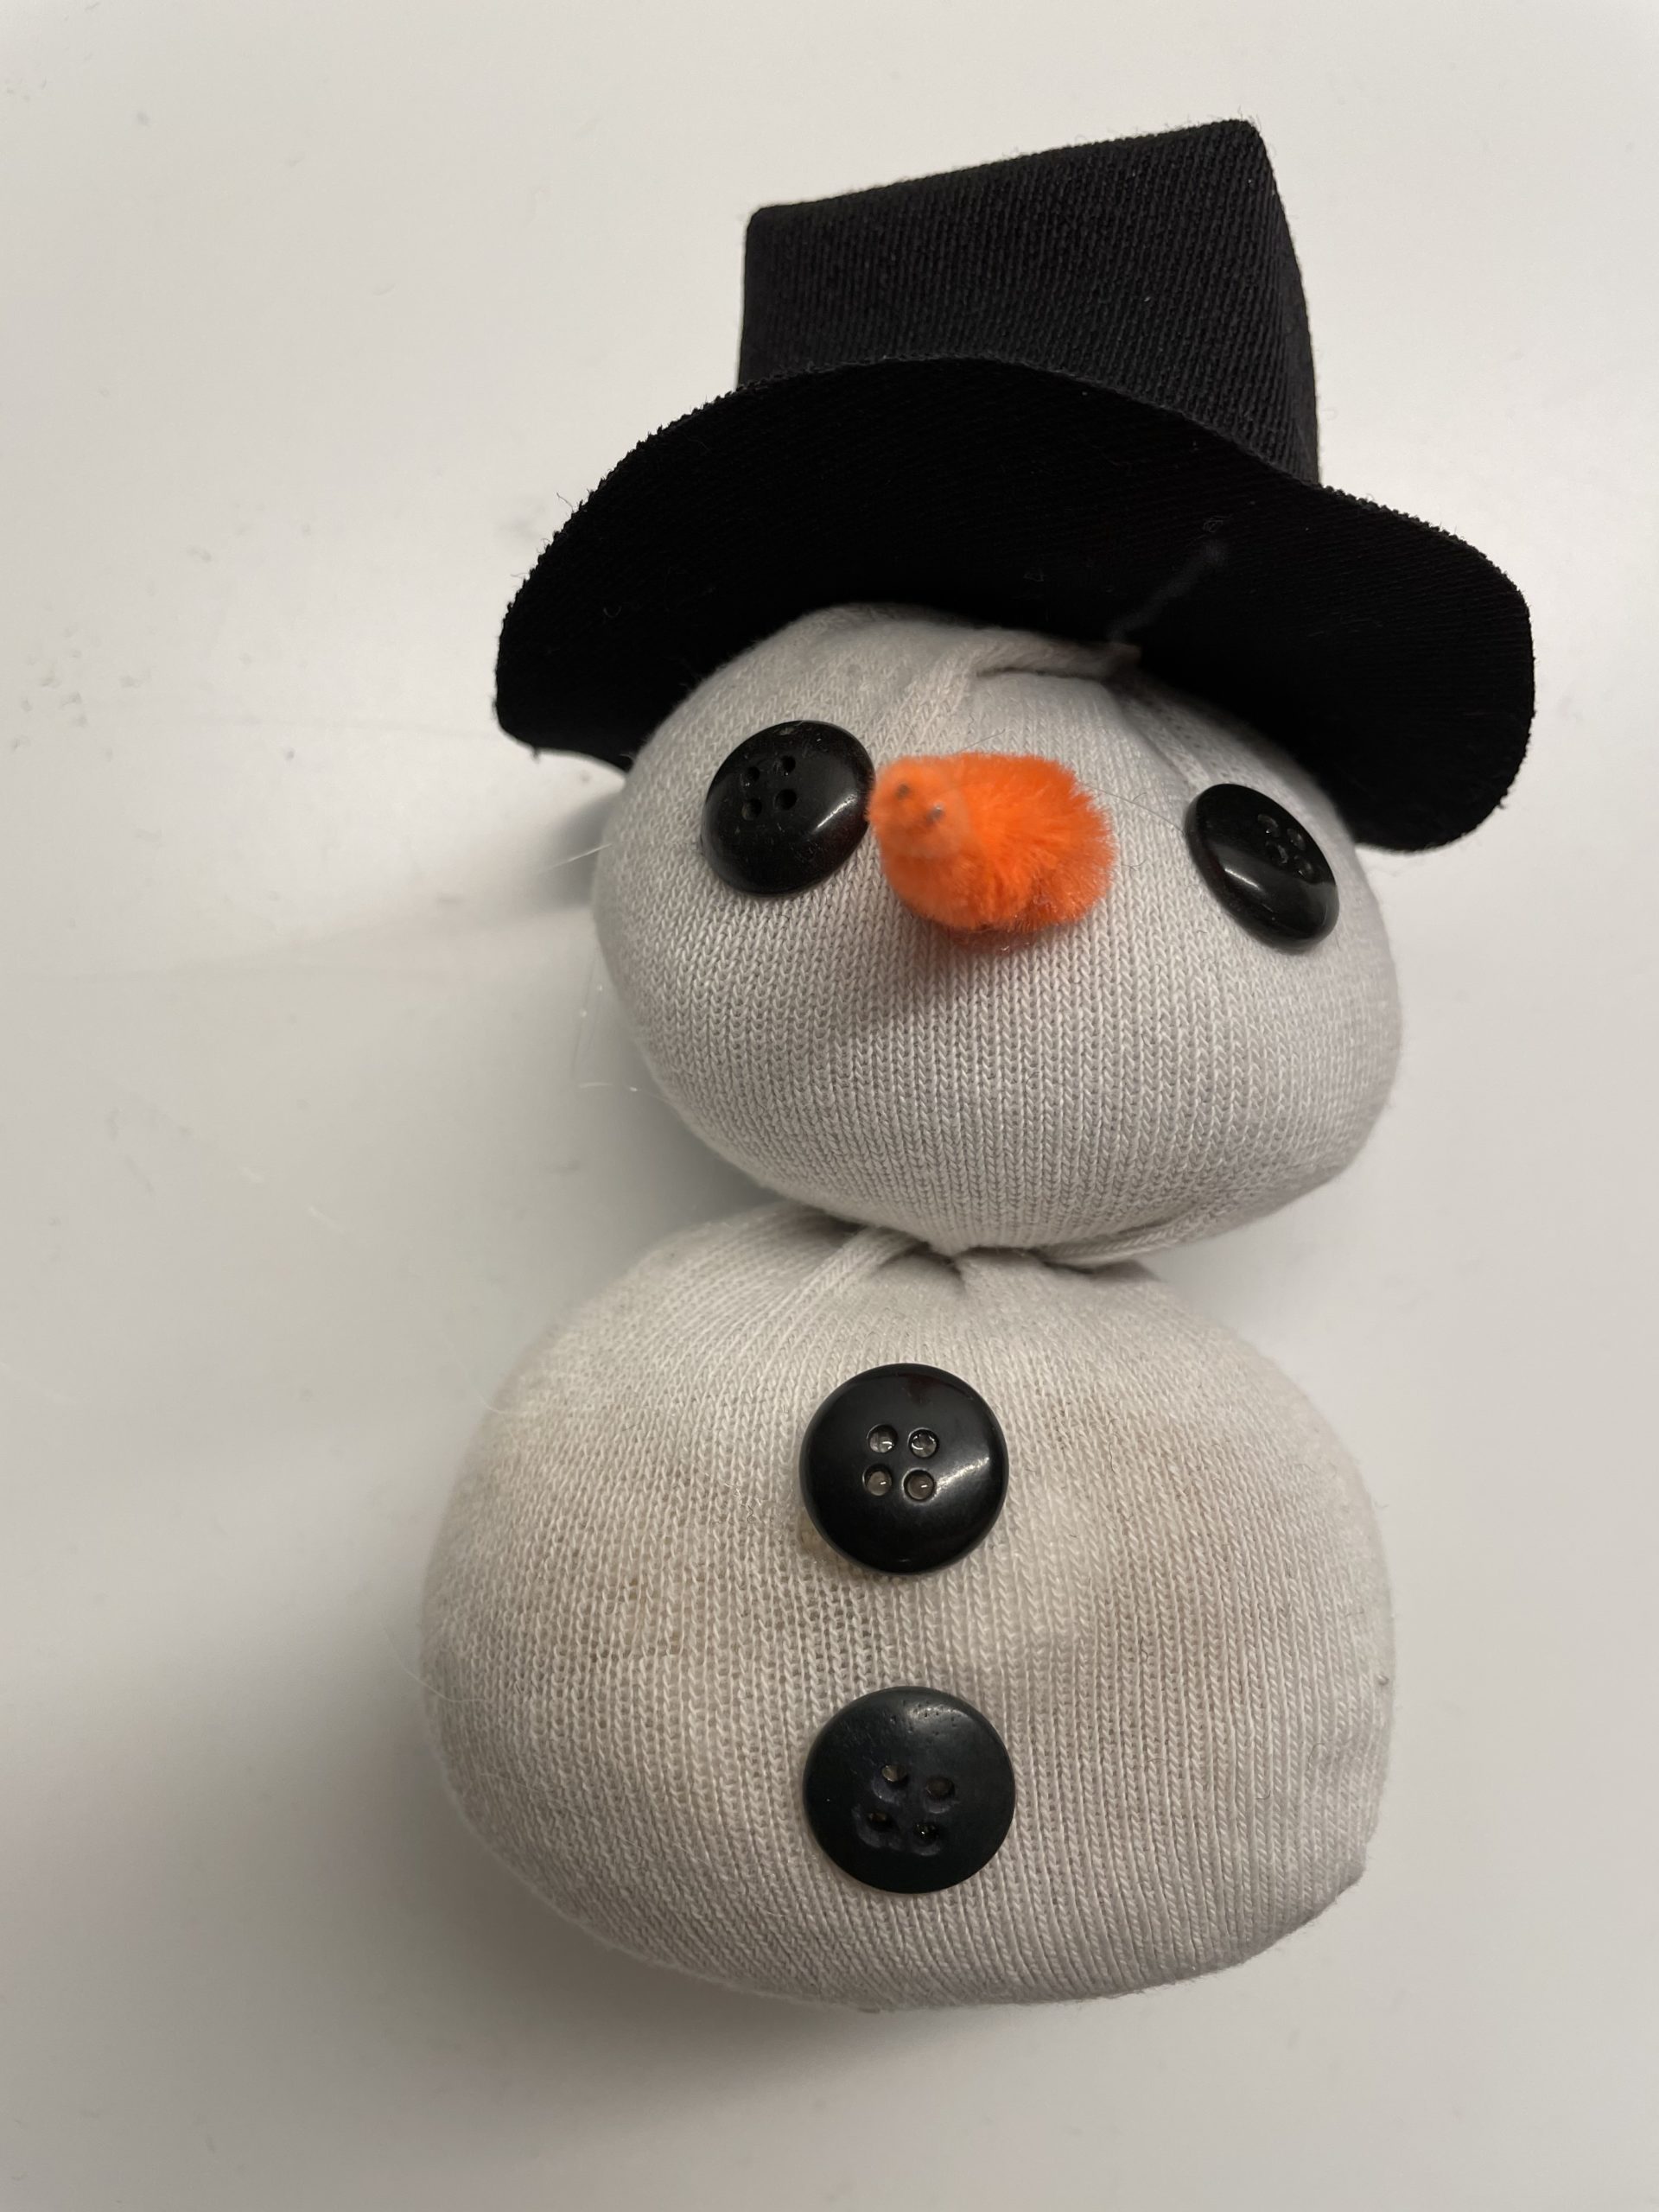
The snowman is finished with a hat.

Bild zum Schritt 38 für das Bastel- und DIY-Abenteuer für Kinder: 'Fertig ist der Schneemann mit Hut.'

38

Have fun doing crafts.

Snowman with cap:

Materials

 1 single white sock
 black fabric or black paper for the hator a second coloured sock
 4 small black buttons
 1 Piece of orange pipe cleaner or a piece of felt
 25cm x 2cm red felt or Fleece
 Rice or speltFor filling
 Filling padsor fabric residues, paper handkerchiefs, etc.
 3 Small household rubbers
 1 Breakfast bags
Other tools:
 1 ScissorsPossibly a fabric shear
 1 Pen
 1 Hot glue gun
 1 Builder's pad
 possible small bracketsFor fixation
 1 Ruleror customs stock
All links marked with a shopping cart lead to Amazon - here we have selected products that we would order ourselves and in part also ordered. In a qualified purchase via the advertising link, we as Amazon partner receive a commission, for you there are no costs. You thus support our cost- and advertising banner-free, educational offer.

Directions

1

Find all the materials together and put out your craft file.
Then fill rice in a cup first.

Bild zum Schritt 1 für das Bastel- und DIY-Abenteuer für Kinder: 'Sucht alle Materialien zusammen und legt eure Bastelunterlage aus. ...'

2

This fills her in the breakfast bag.

Bild zum Schritt 2 für das Bastel- und DIY-Abenteuer für Kinder: 'Diese füllt ihr dann in den Frühstücksbeutel.'

3

2. Bild zum Schritt 2 für das Bastel- und DIY-Abenteuer für Kinder: 'Diese füllt ihr dann in den Frühstücksbeutel.'

4

Knot the bag and push out the air before you tighten the knot.
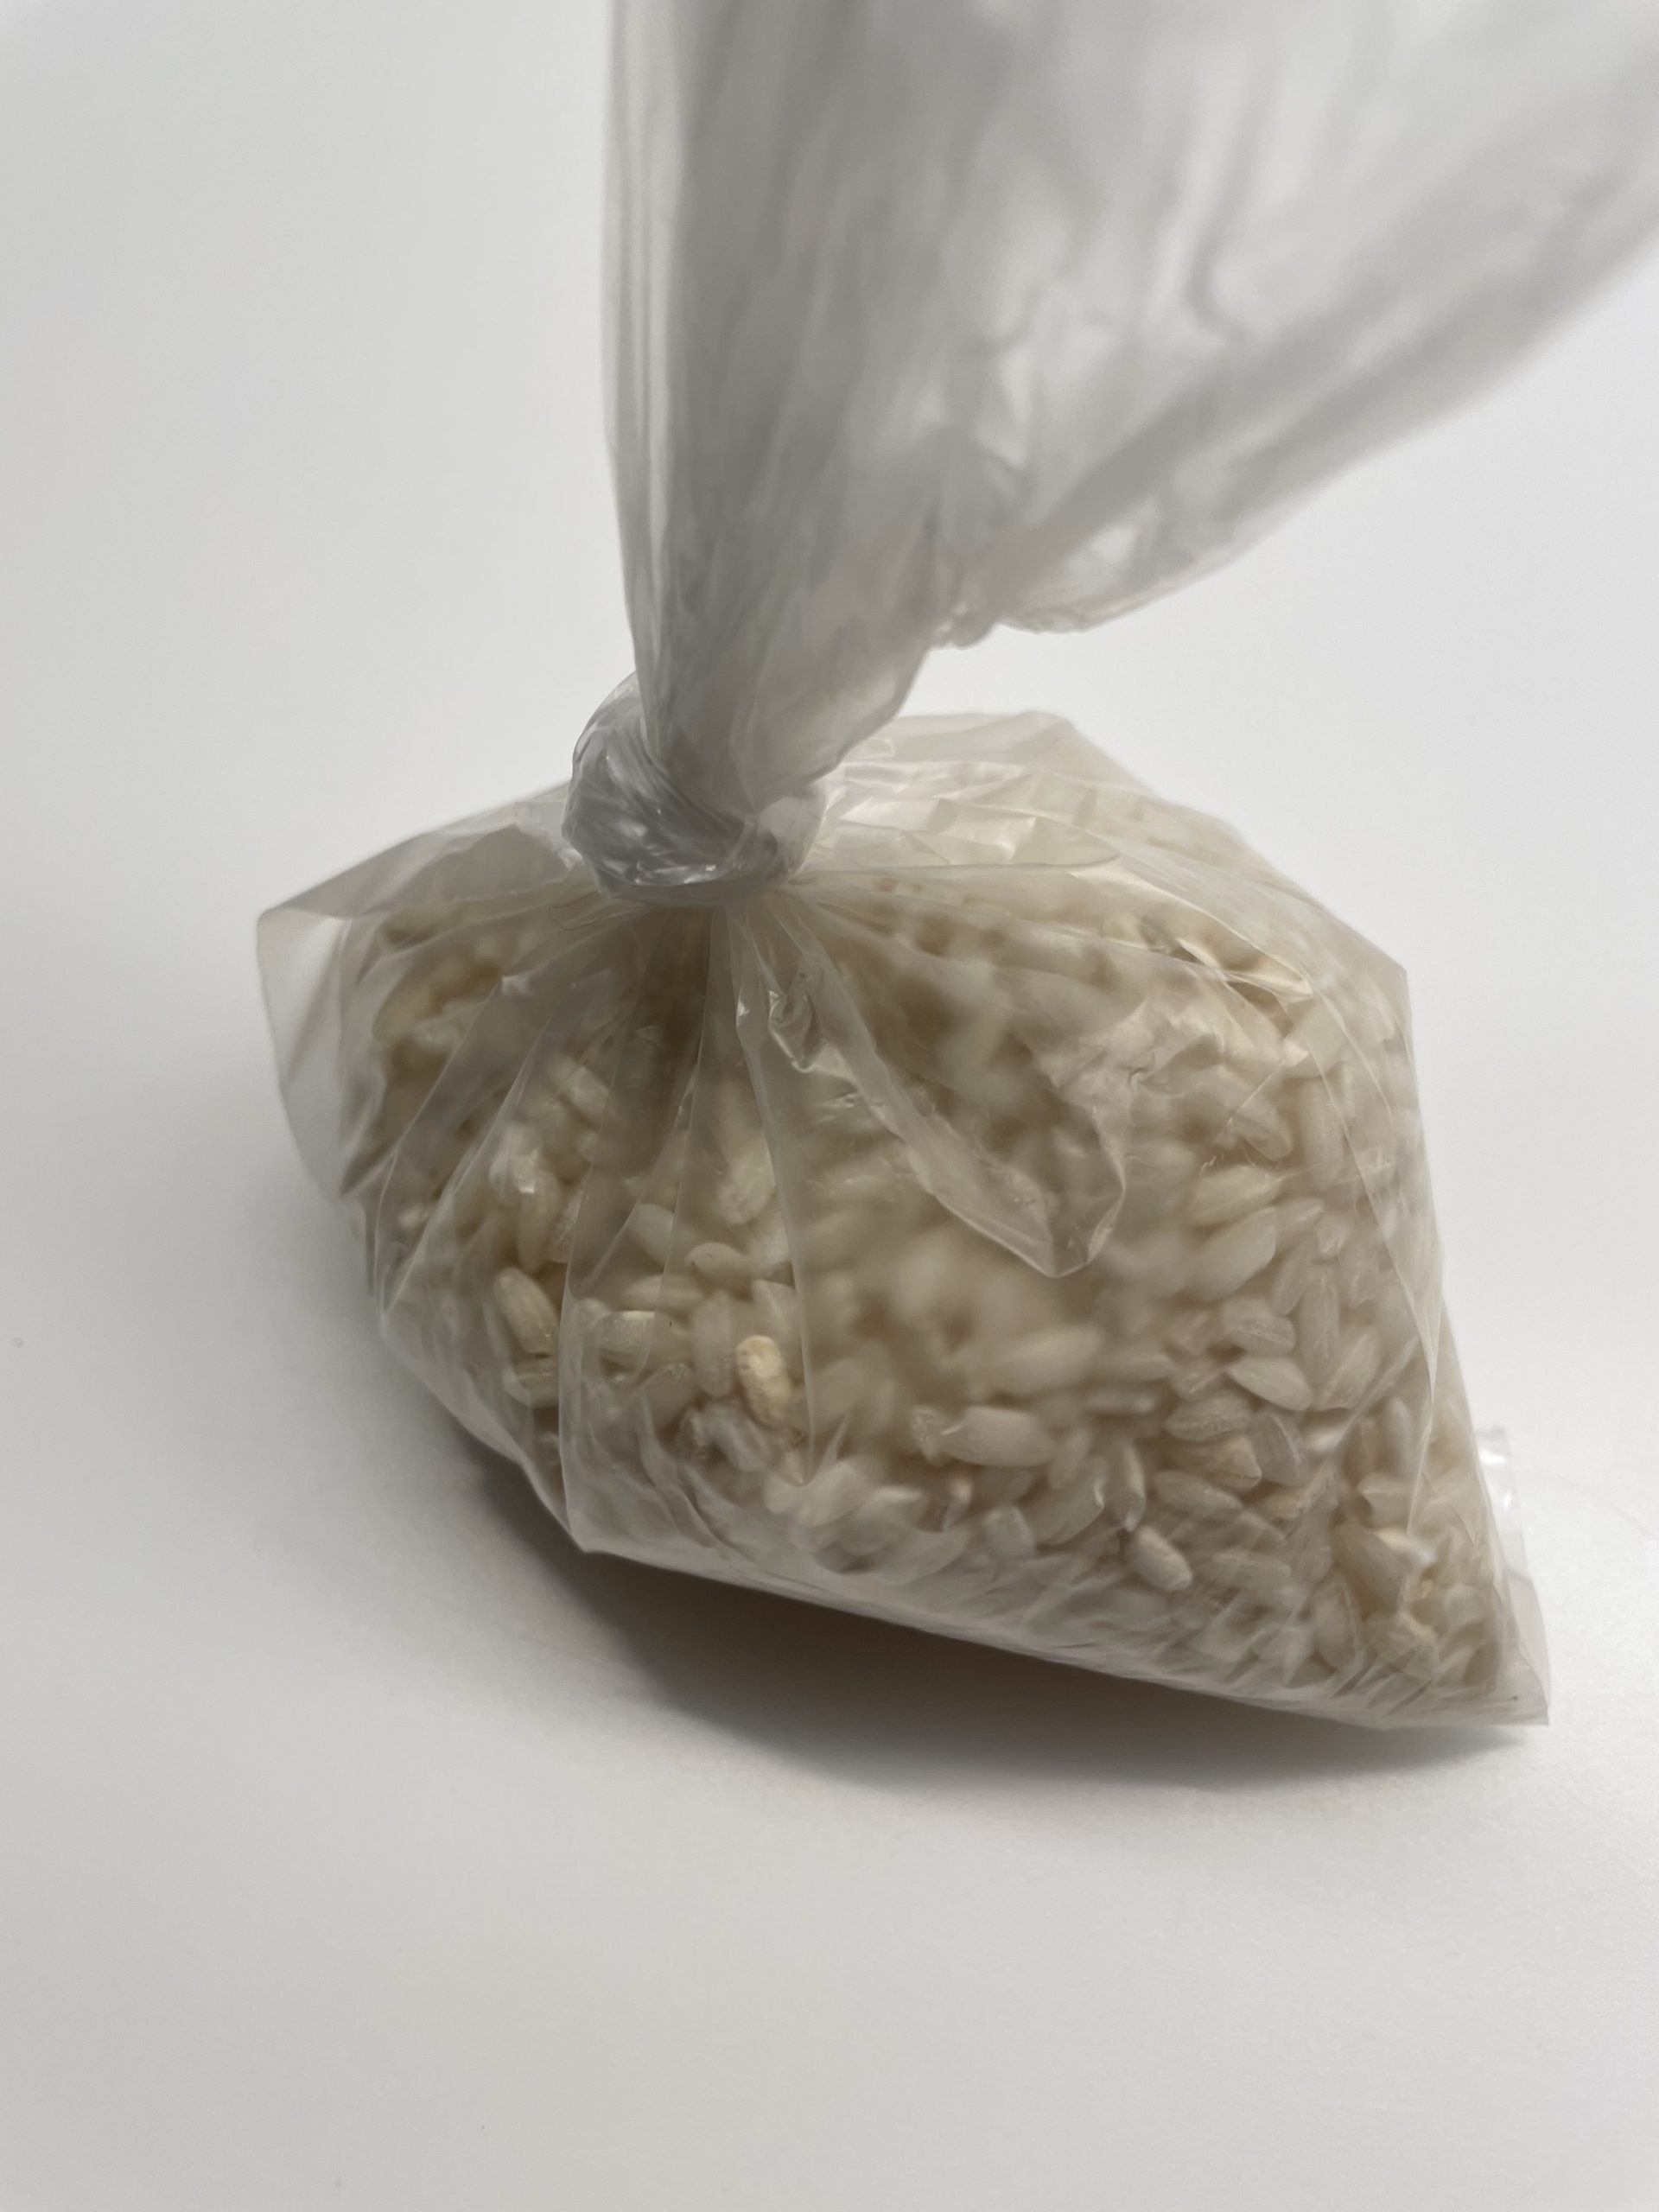
Bild zum Schritt 4 für das Bastel- und DIY-Abenteuer für Kinder: 'Verknotet den Beutel und drückt zuvor die Luft heraus, bevor...'

5

Now take the sock and put the rice bag in the sock.
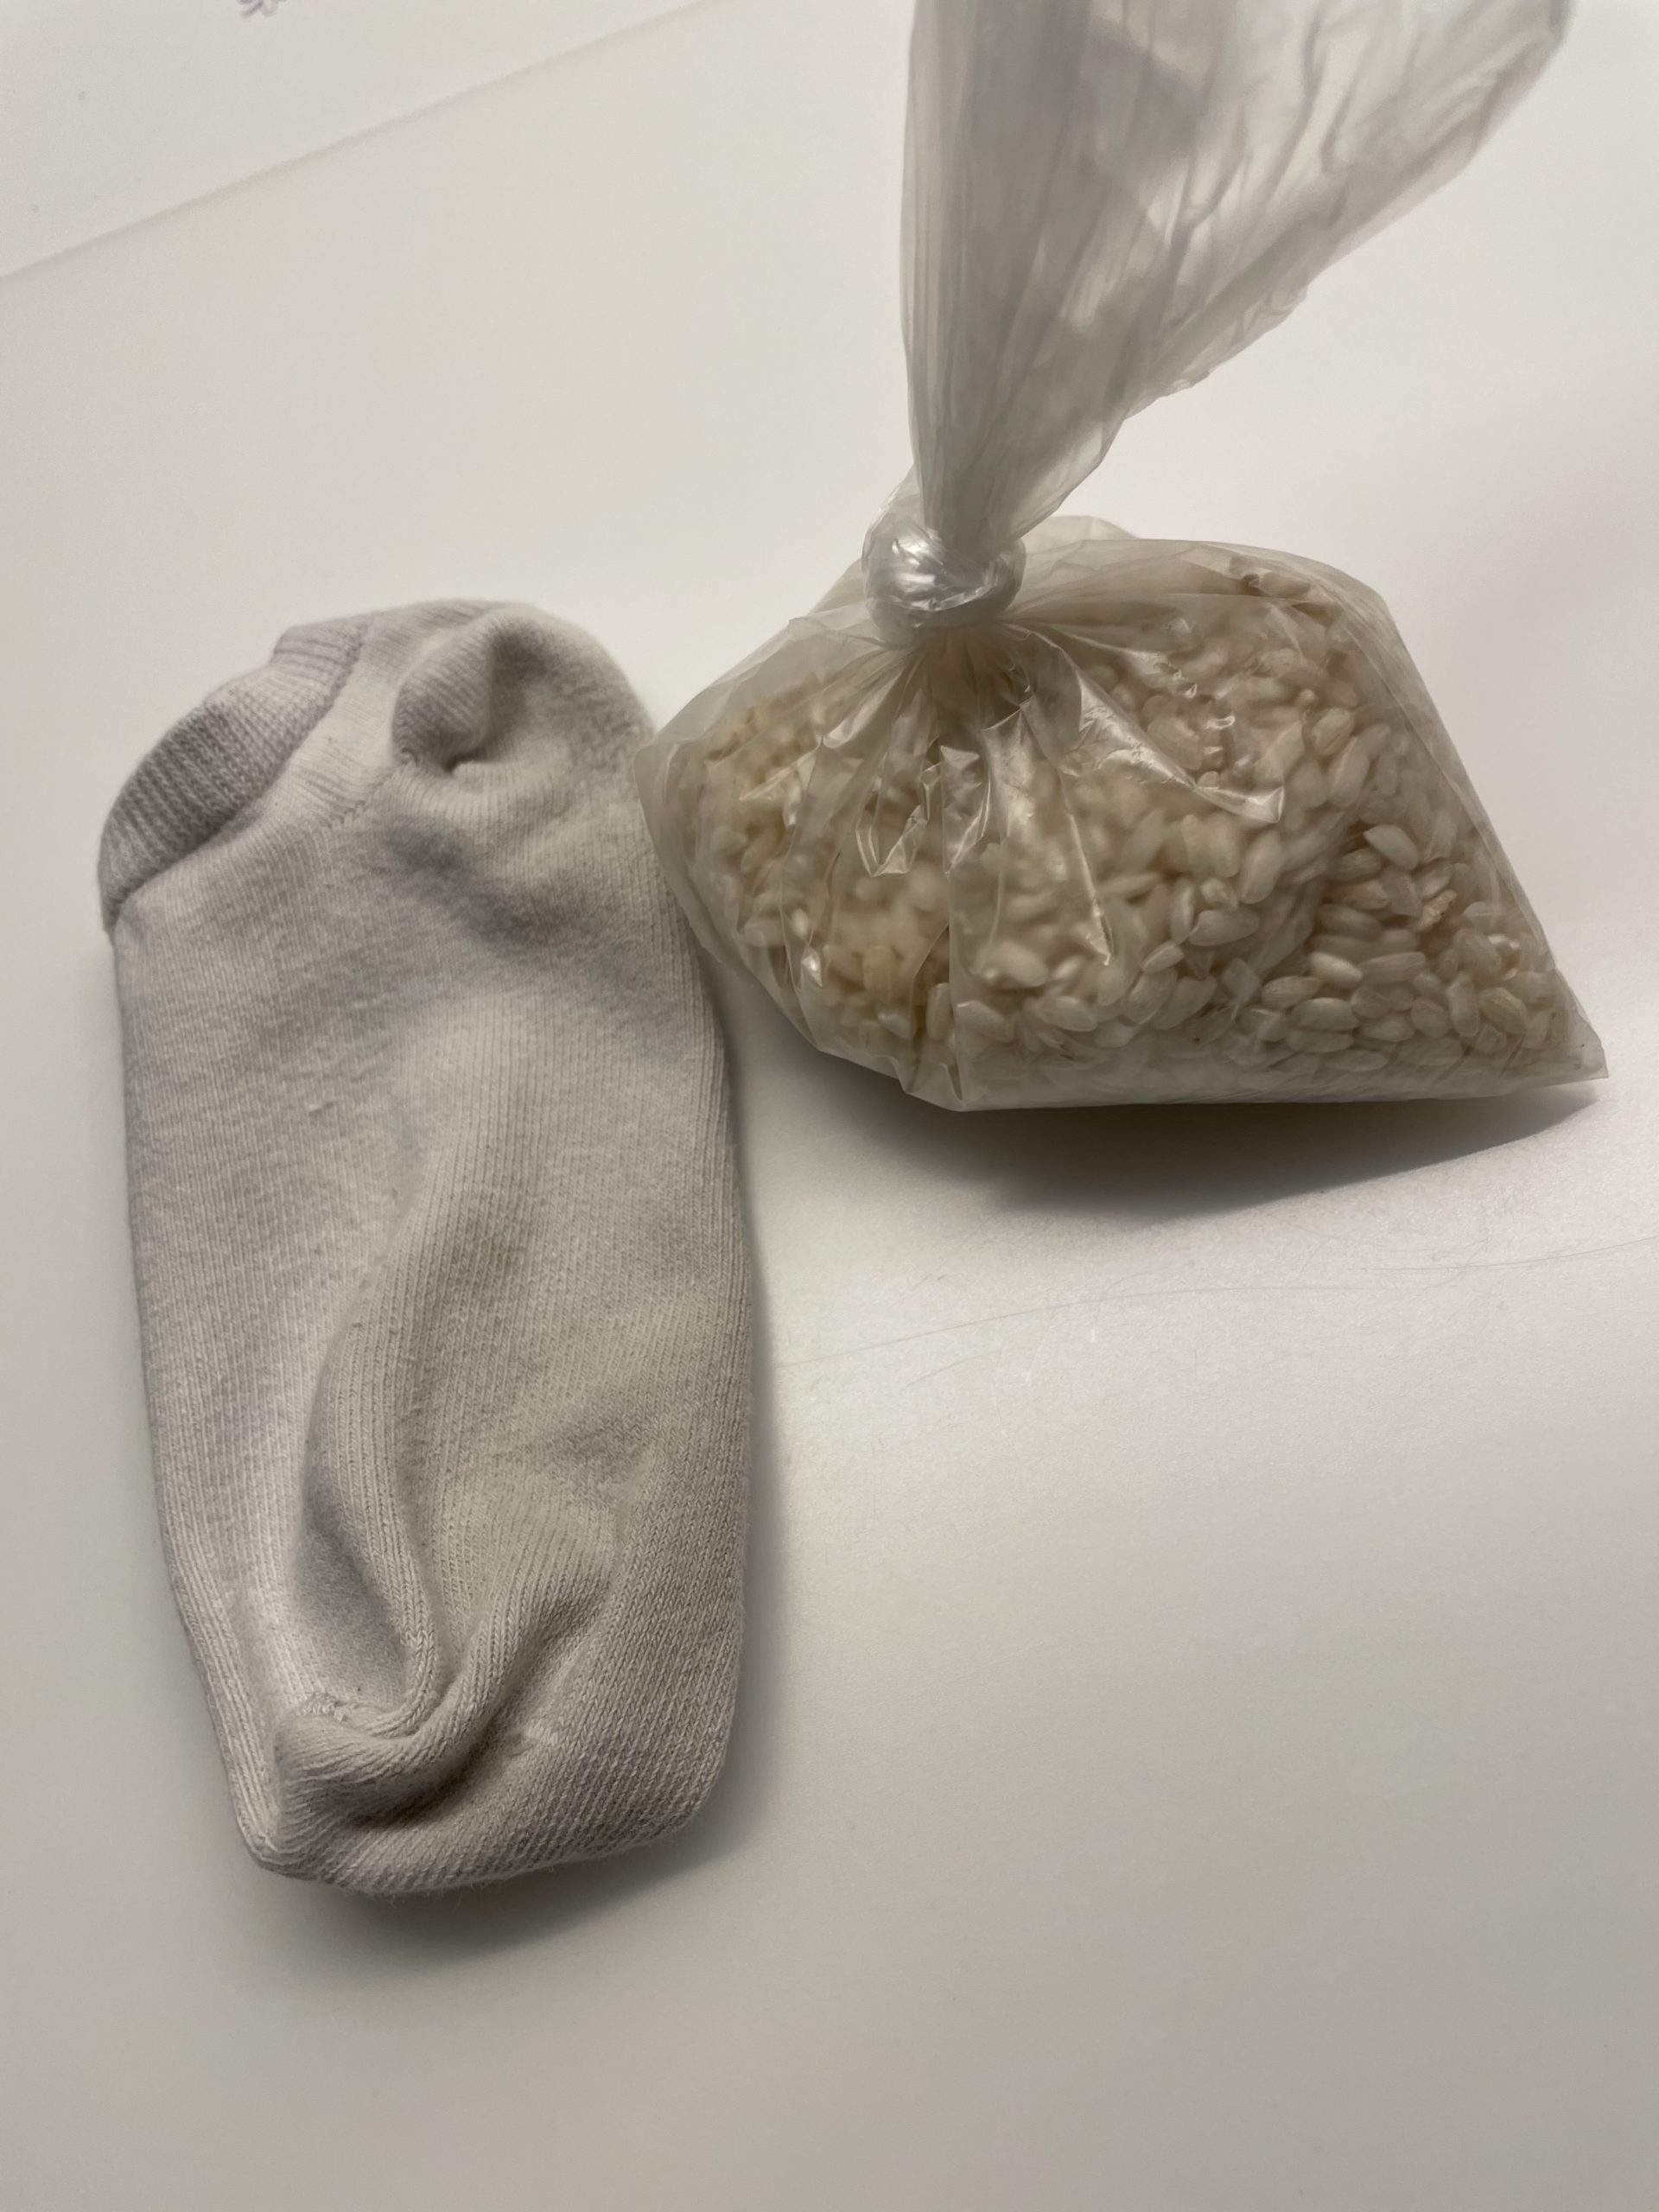
Bild zum Schritt 5 für das Bastel- und DIY-Abenteuer für Kinder: 'Nehmt jetzt die Socke und steckt den Reisbeutel in die...'

6

Now push the rice at the bottom and squeeze the socks over it.
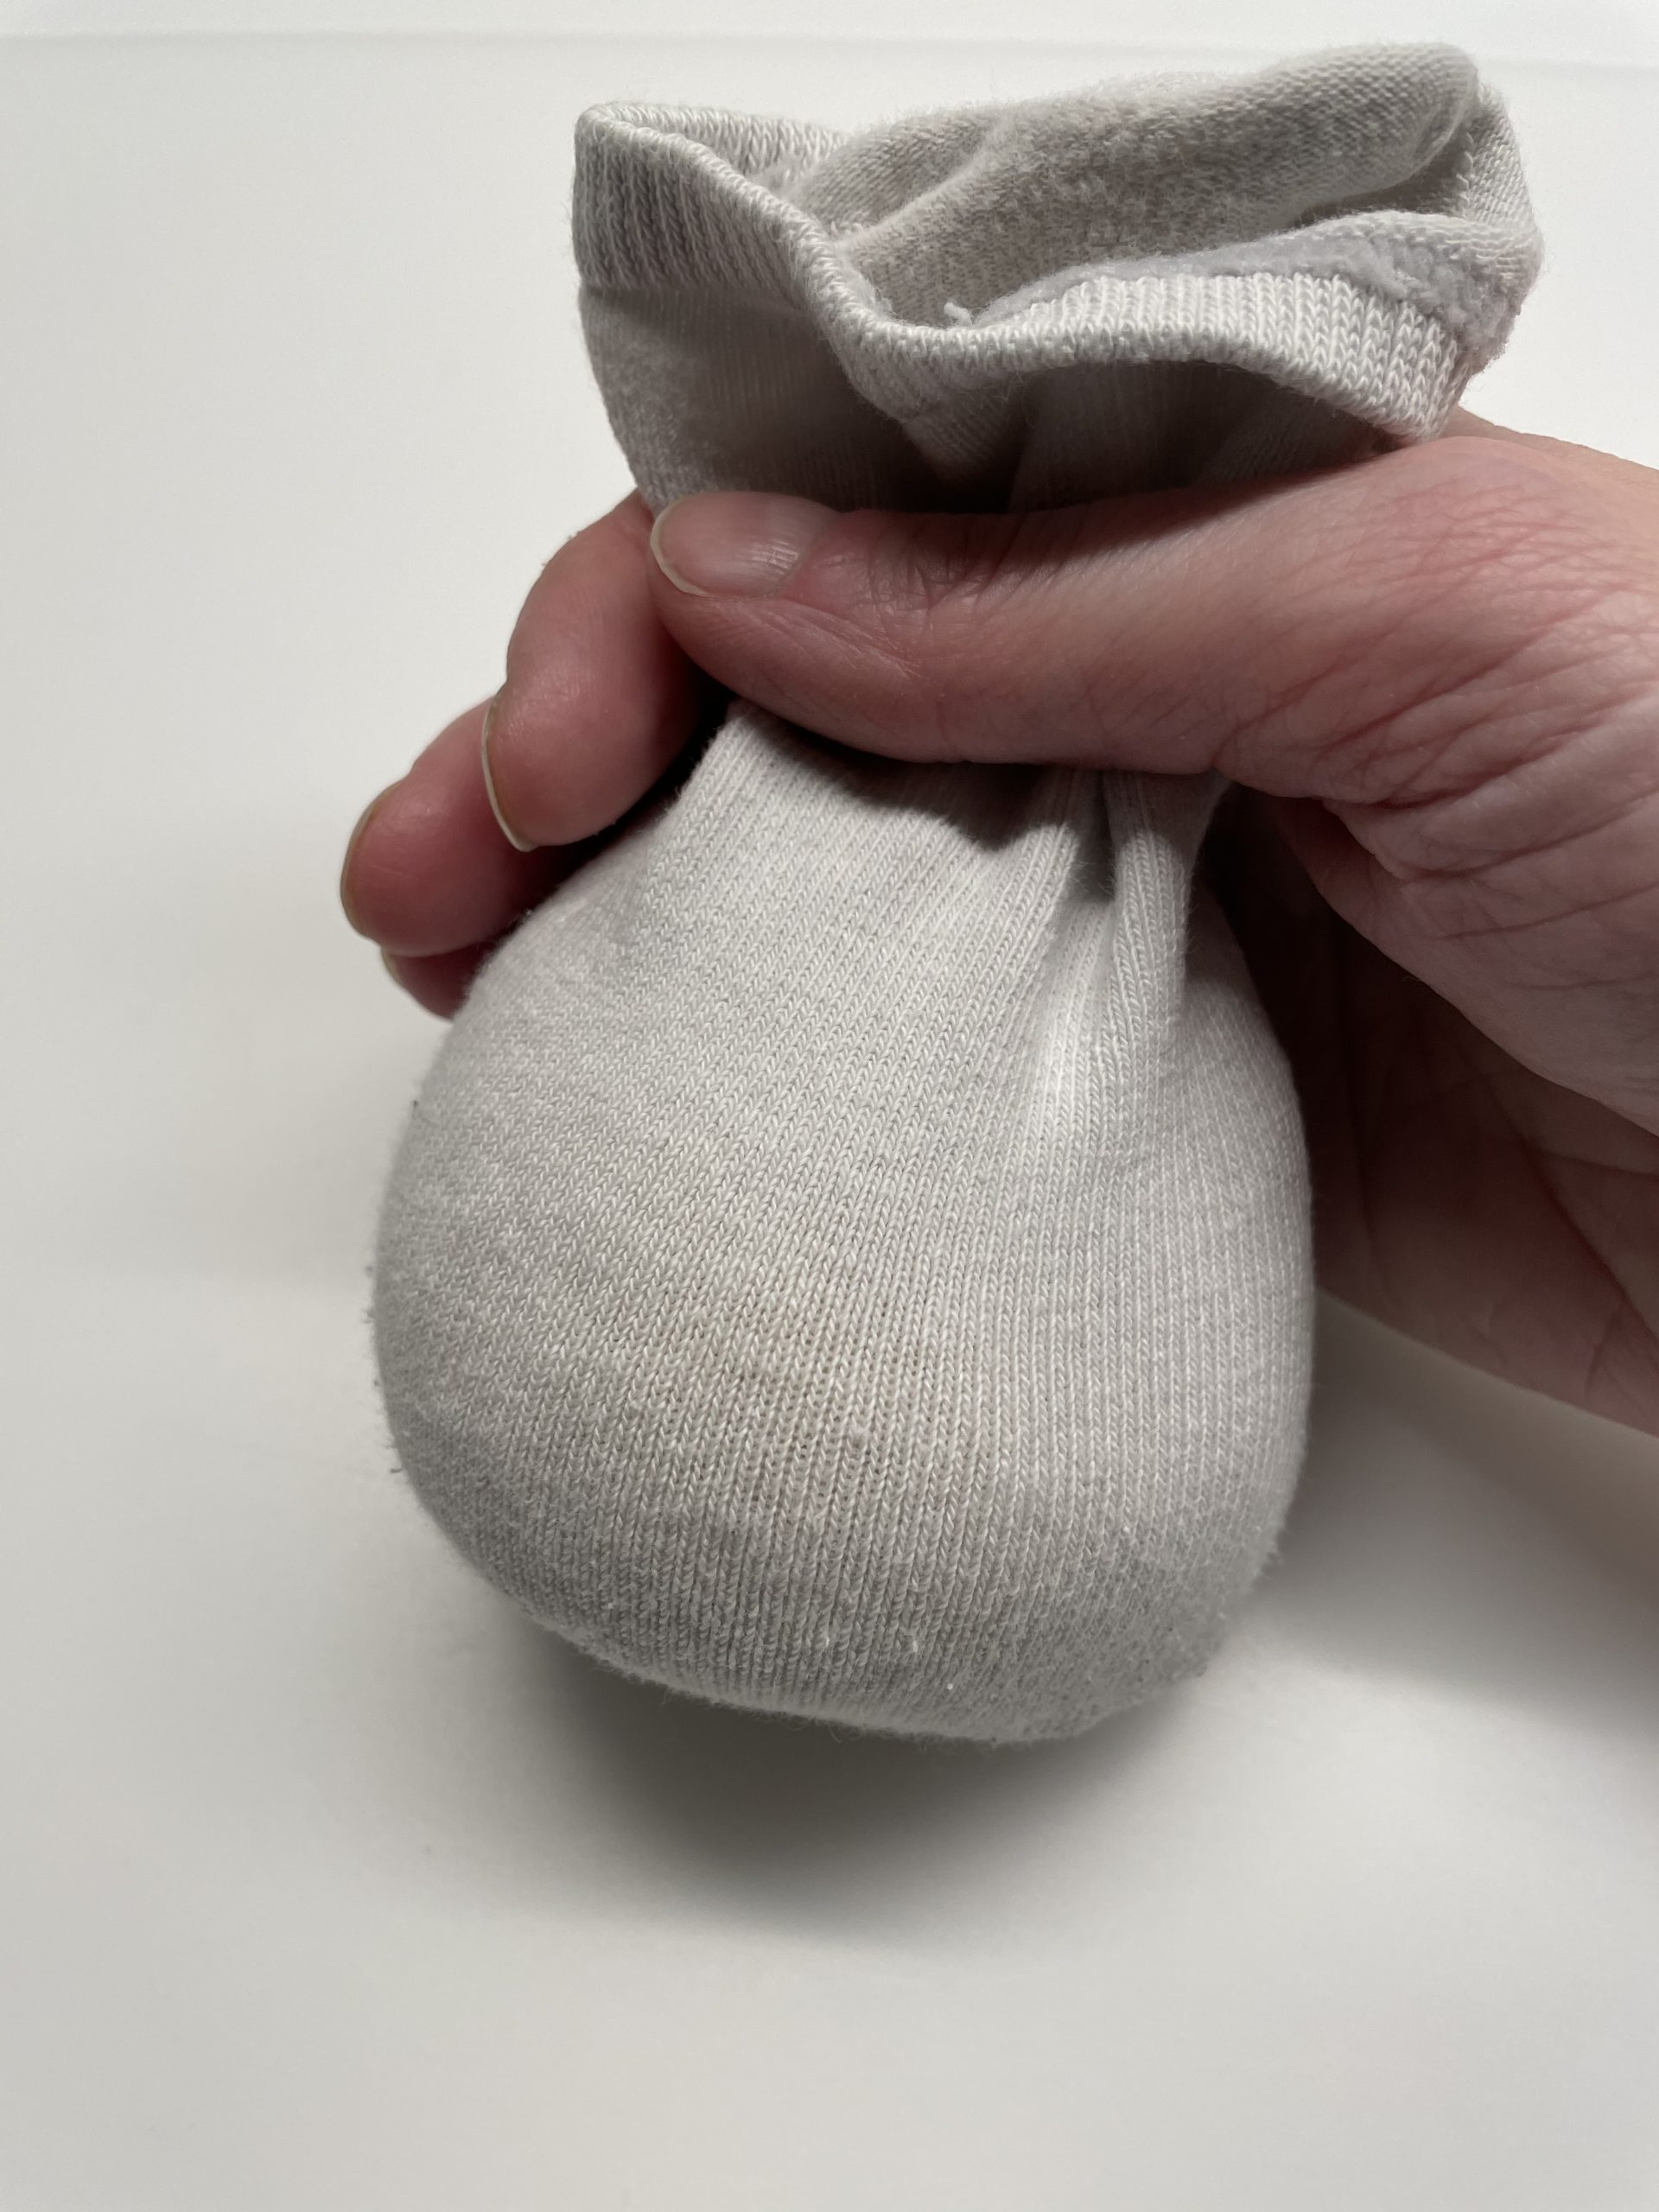
Bild zum Schritt 6 für das Bastel- und DIY-Abenteuer für Kinder: 'Schiebt nun den Reis ganz unten und drückt den Socken...'

7

Now you fix the socks with a small household rubber. Place them tightly around, so that a ball is created.
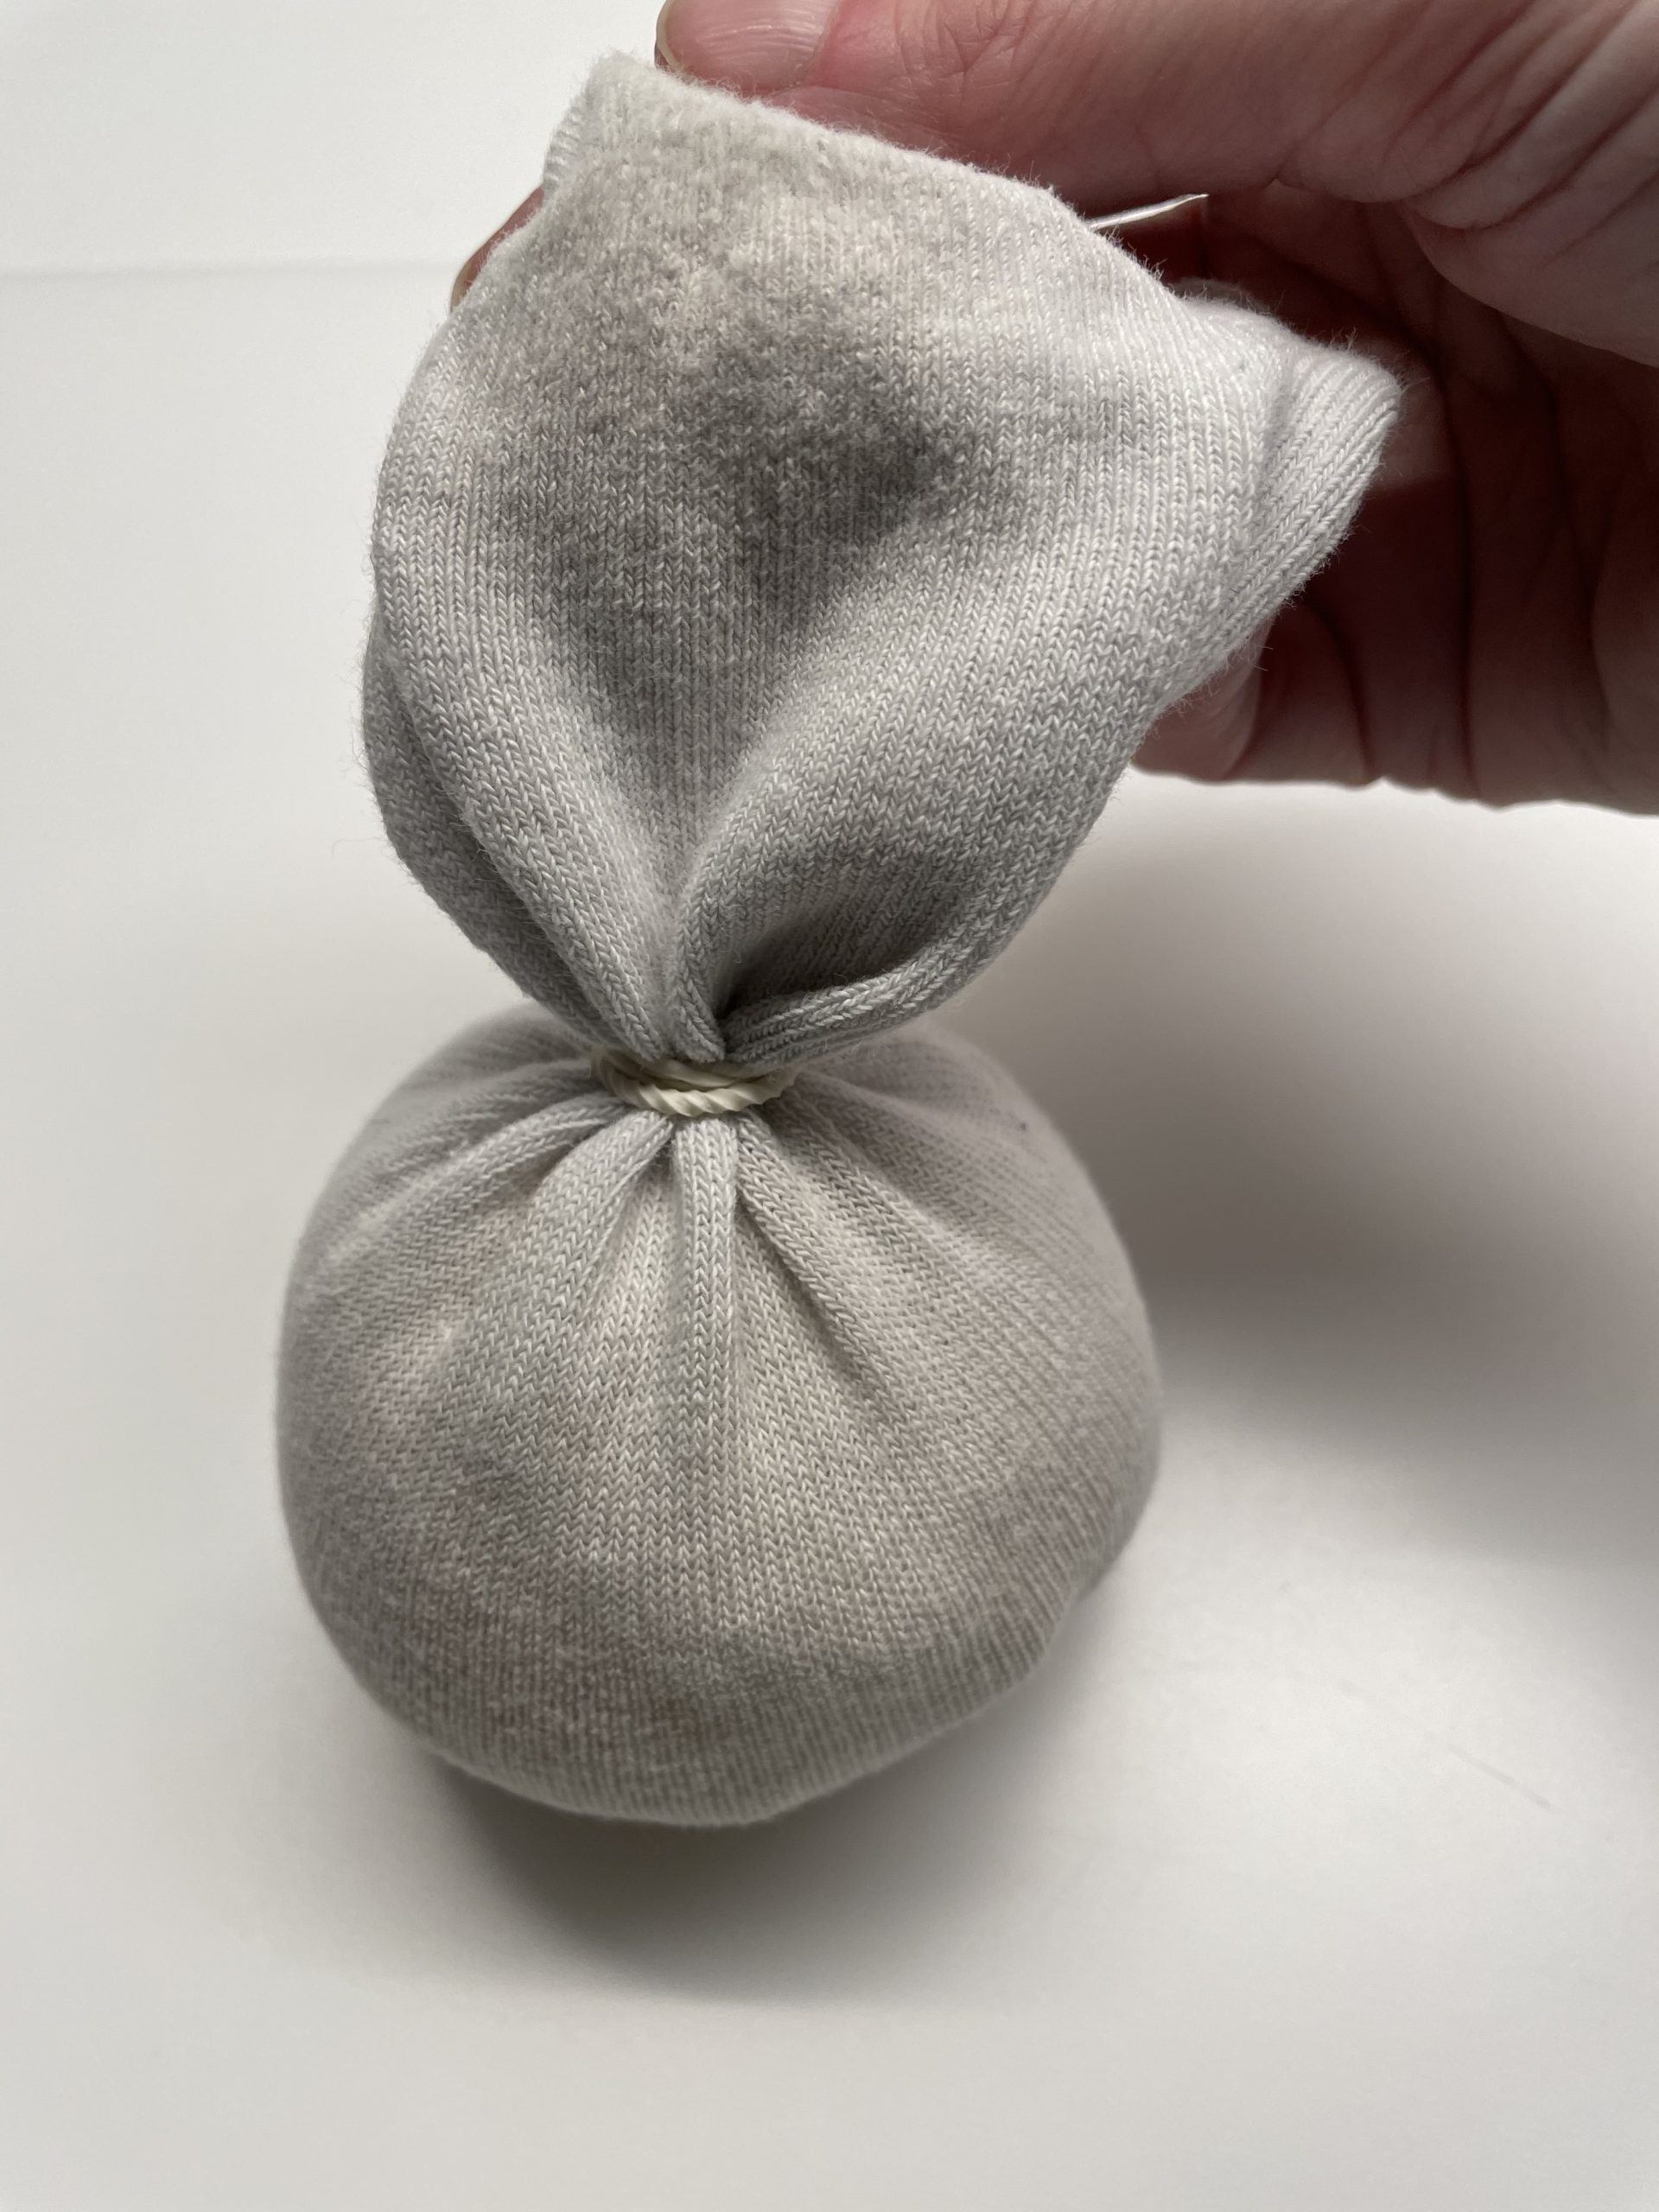
Bild zum Schritt 7 für das Bastel- und DIY-Abenteuer für Kinder: 'Jetzt fixiert ihr den Socken mit einem kleinen Haushaltsgummi. Legt...'

8

Now you put the cotton wool in the sock, on the first ball and form the second ball from it. Make sure that the second ball is filled round and plump.
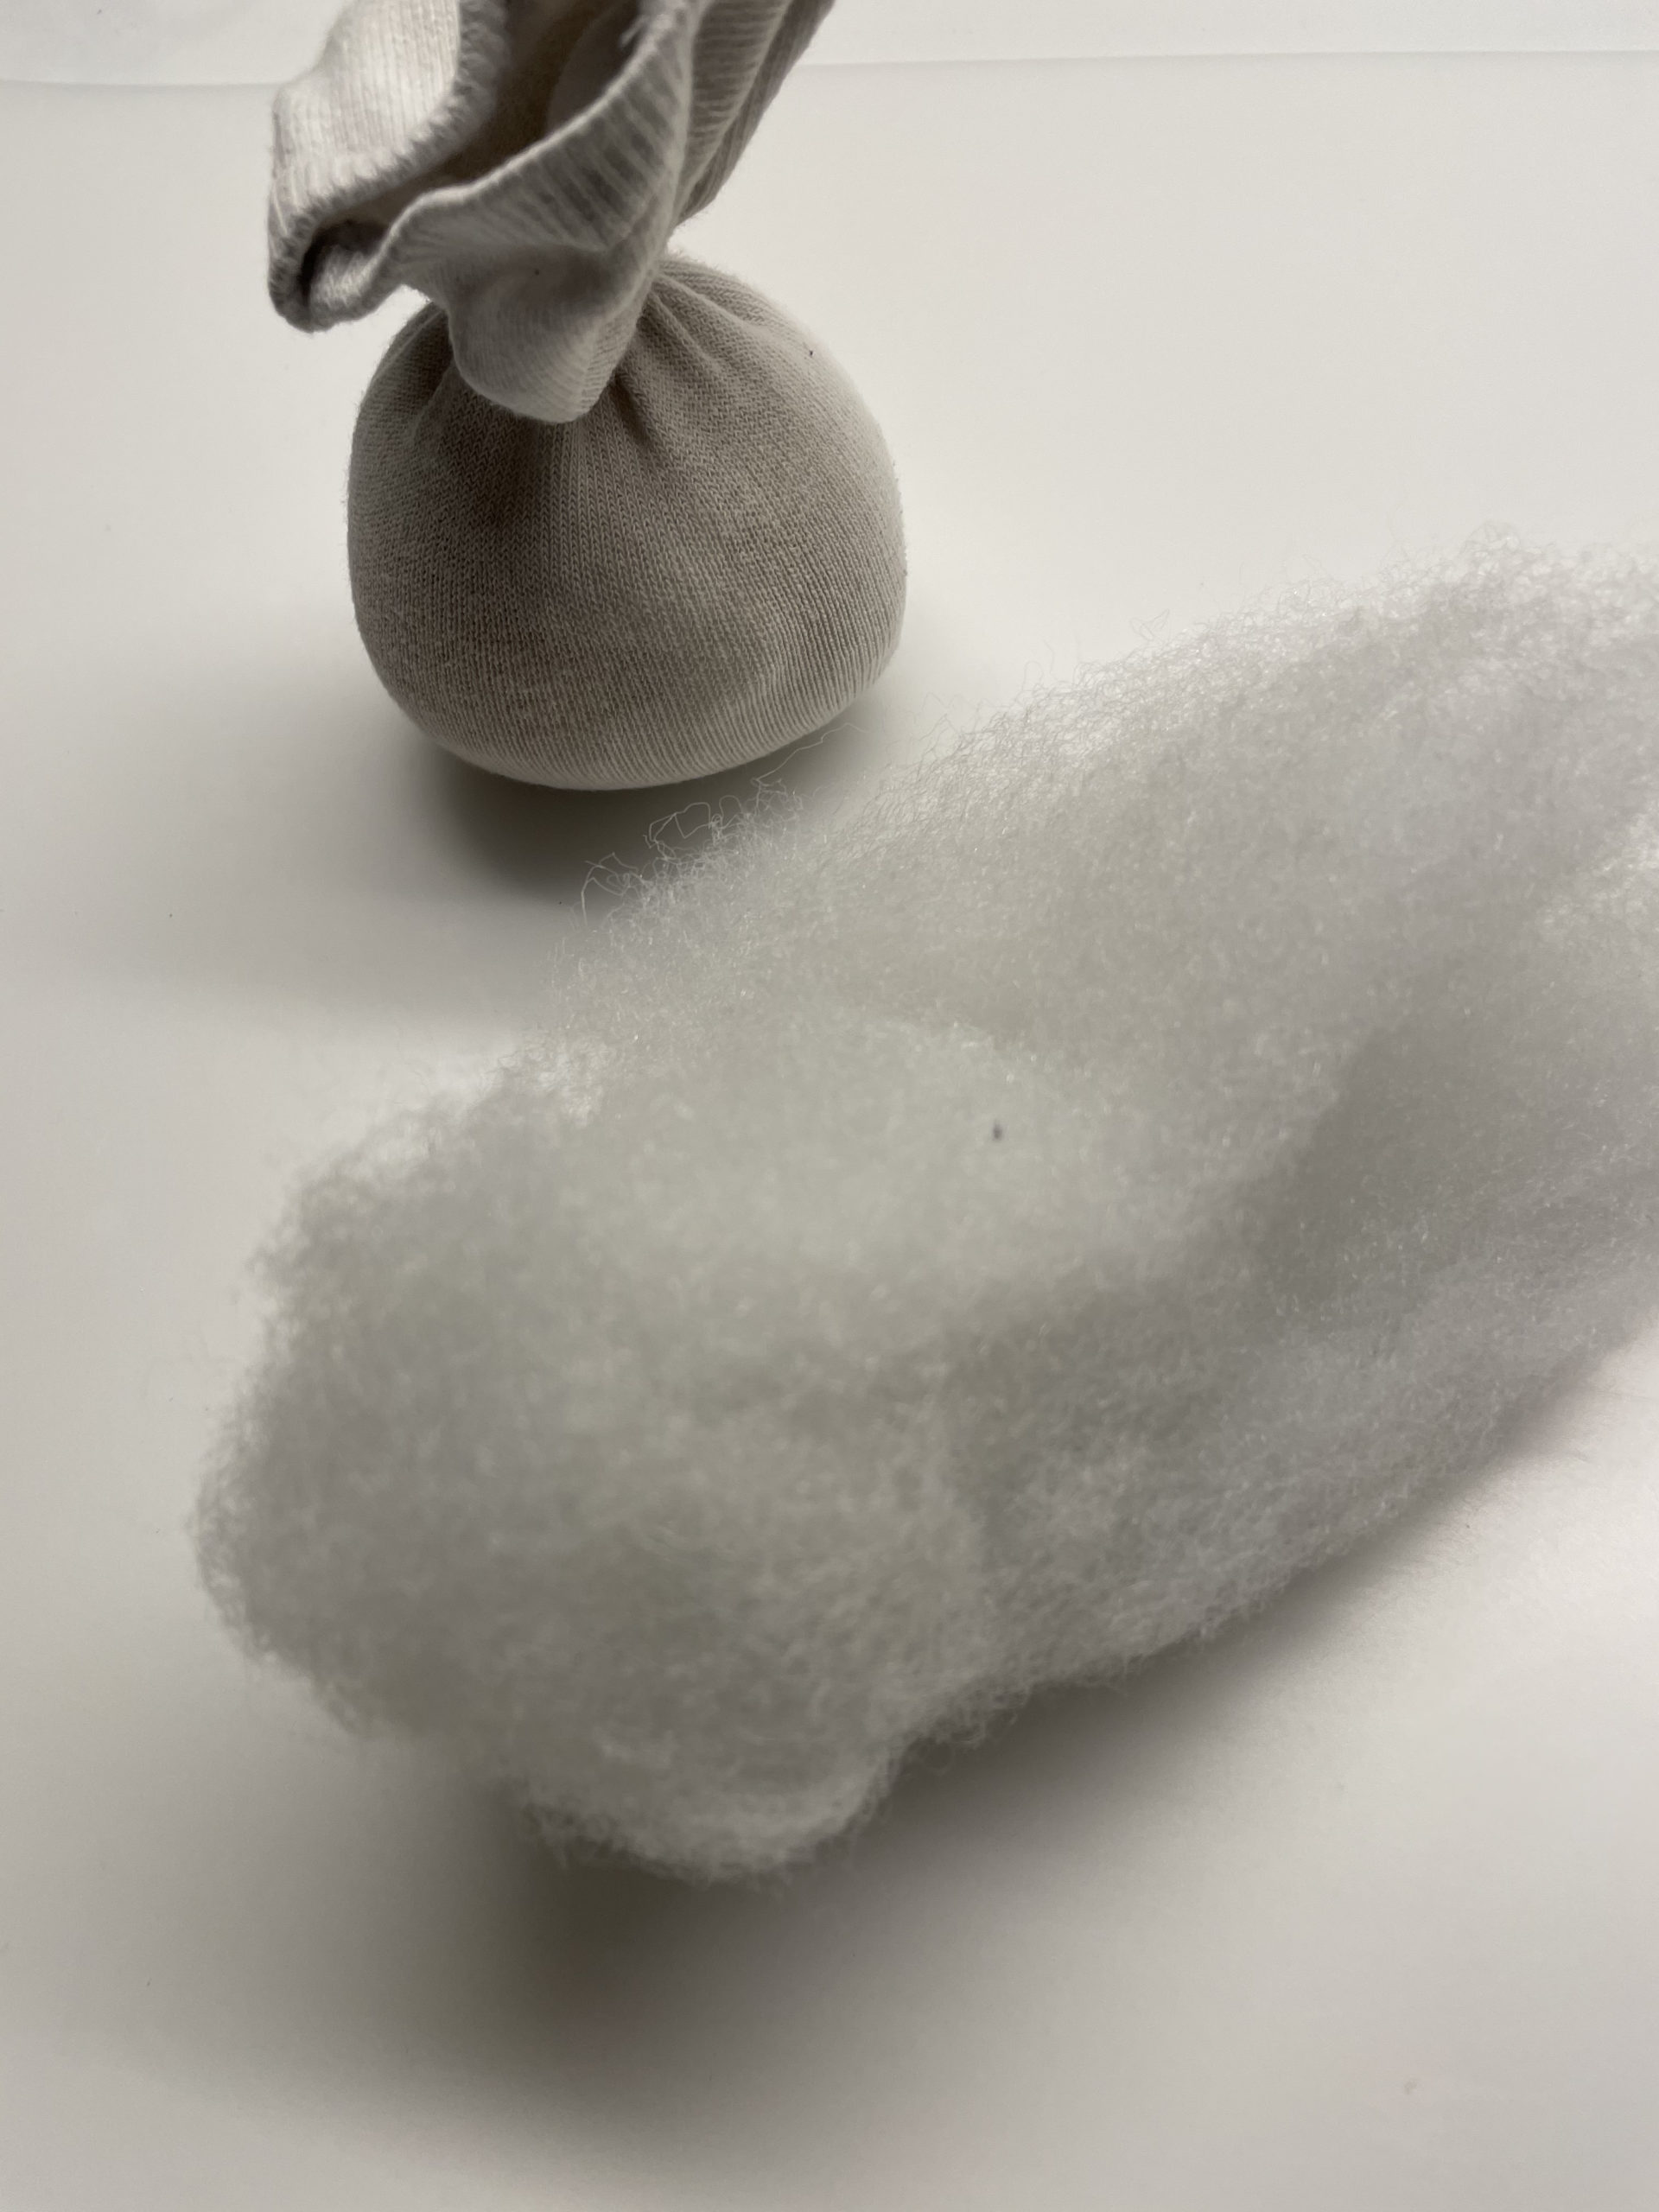
Bild zum Schritt 8 für das Bastel- und DIY-Abenteuer für Kinder: 'Nun stopft ihr die Watte in die Socke, auf die...'

9

Press the socks on the top tightly and close the second ball with a household rubber as well.

Bild zum Schritt 9 für das Bastel- und DIY-Abenteuer für Kinder: 'Drückt die Socken oben fest zusammen und verschließt die zweite...'

10

Upstairs a small piece of the sock stands still. This piece you need, since hat or cap so much more hold to get.
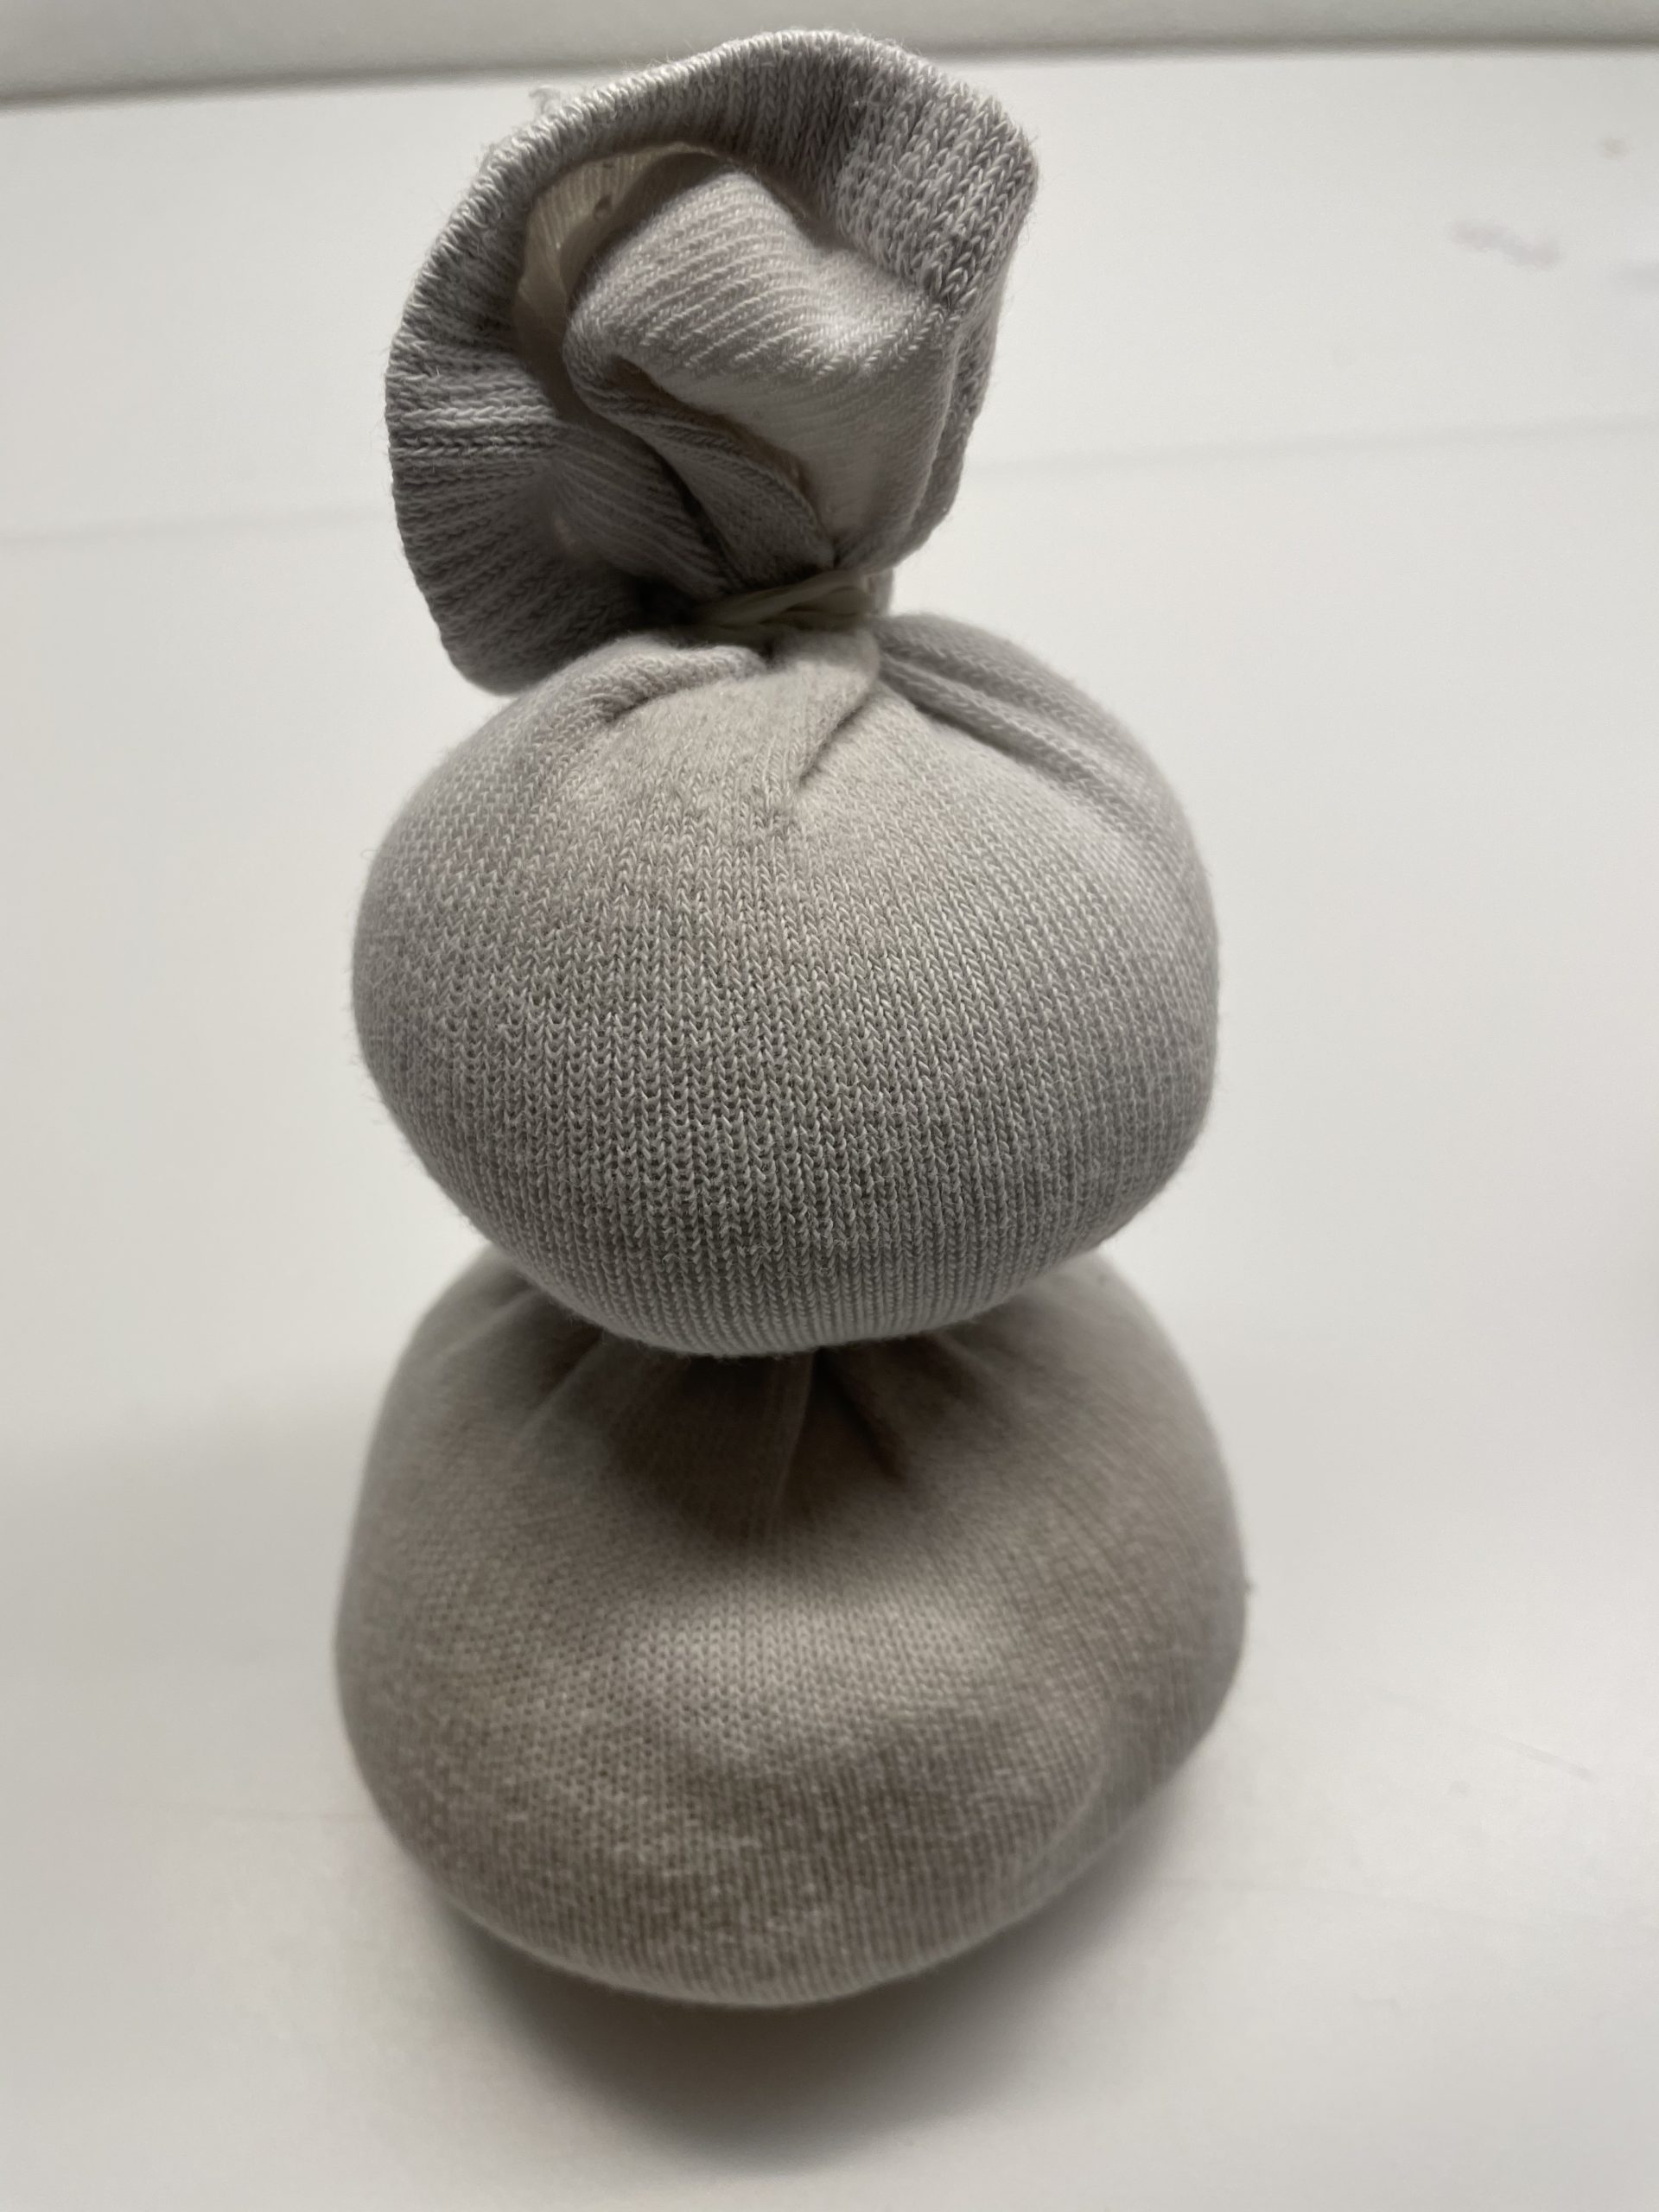
Bild zum Schritt 10 für das Bastel- und DIY-Abenteuer für Kinder: 'Oben bleibt nun noch ein kleines Stück der Socke stehen....'

11

Now you're sticking your eyes and buttons on the snowman.
Then you bend the orange pipe cleaner into the shape of a carrot.
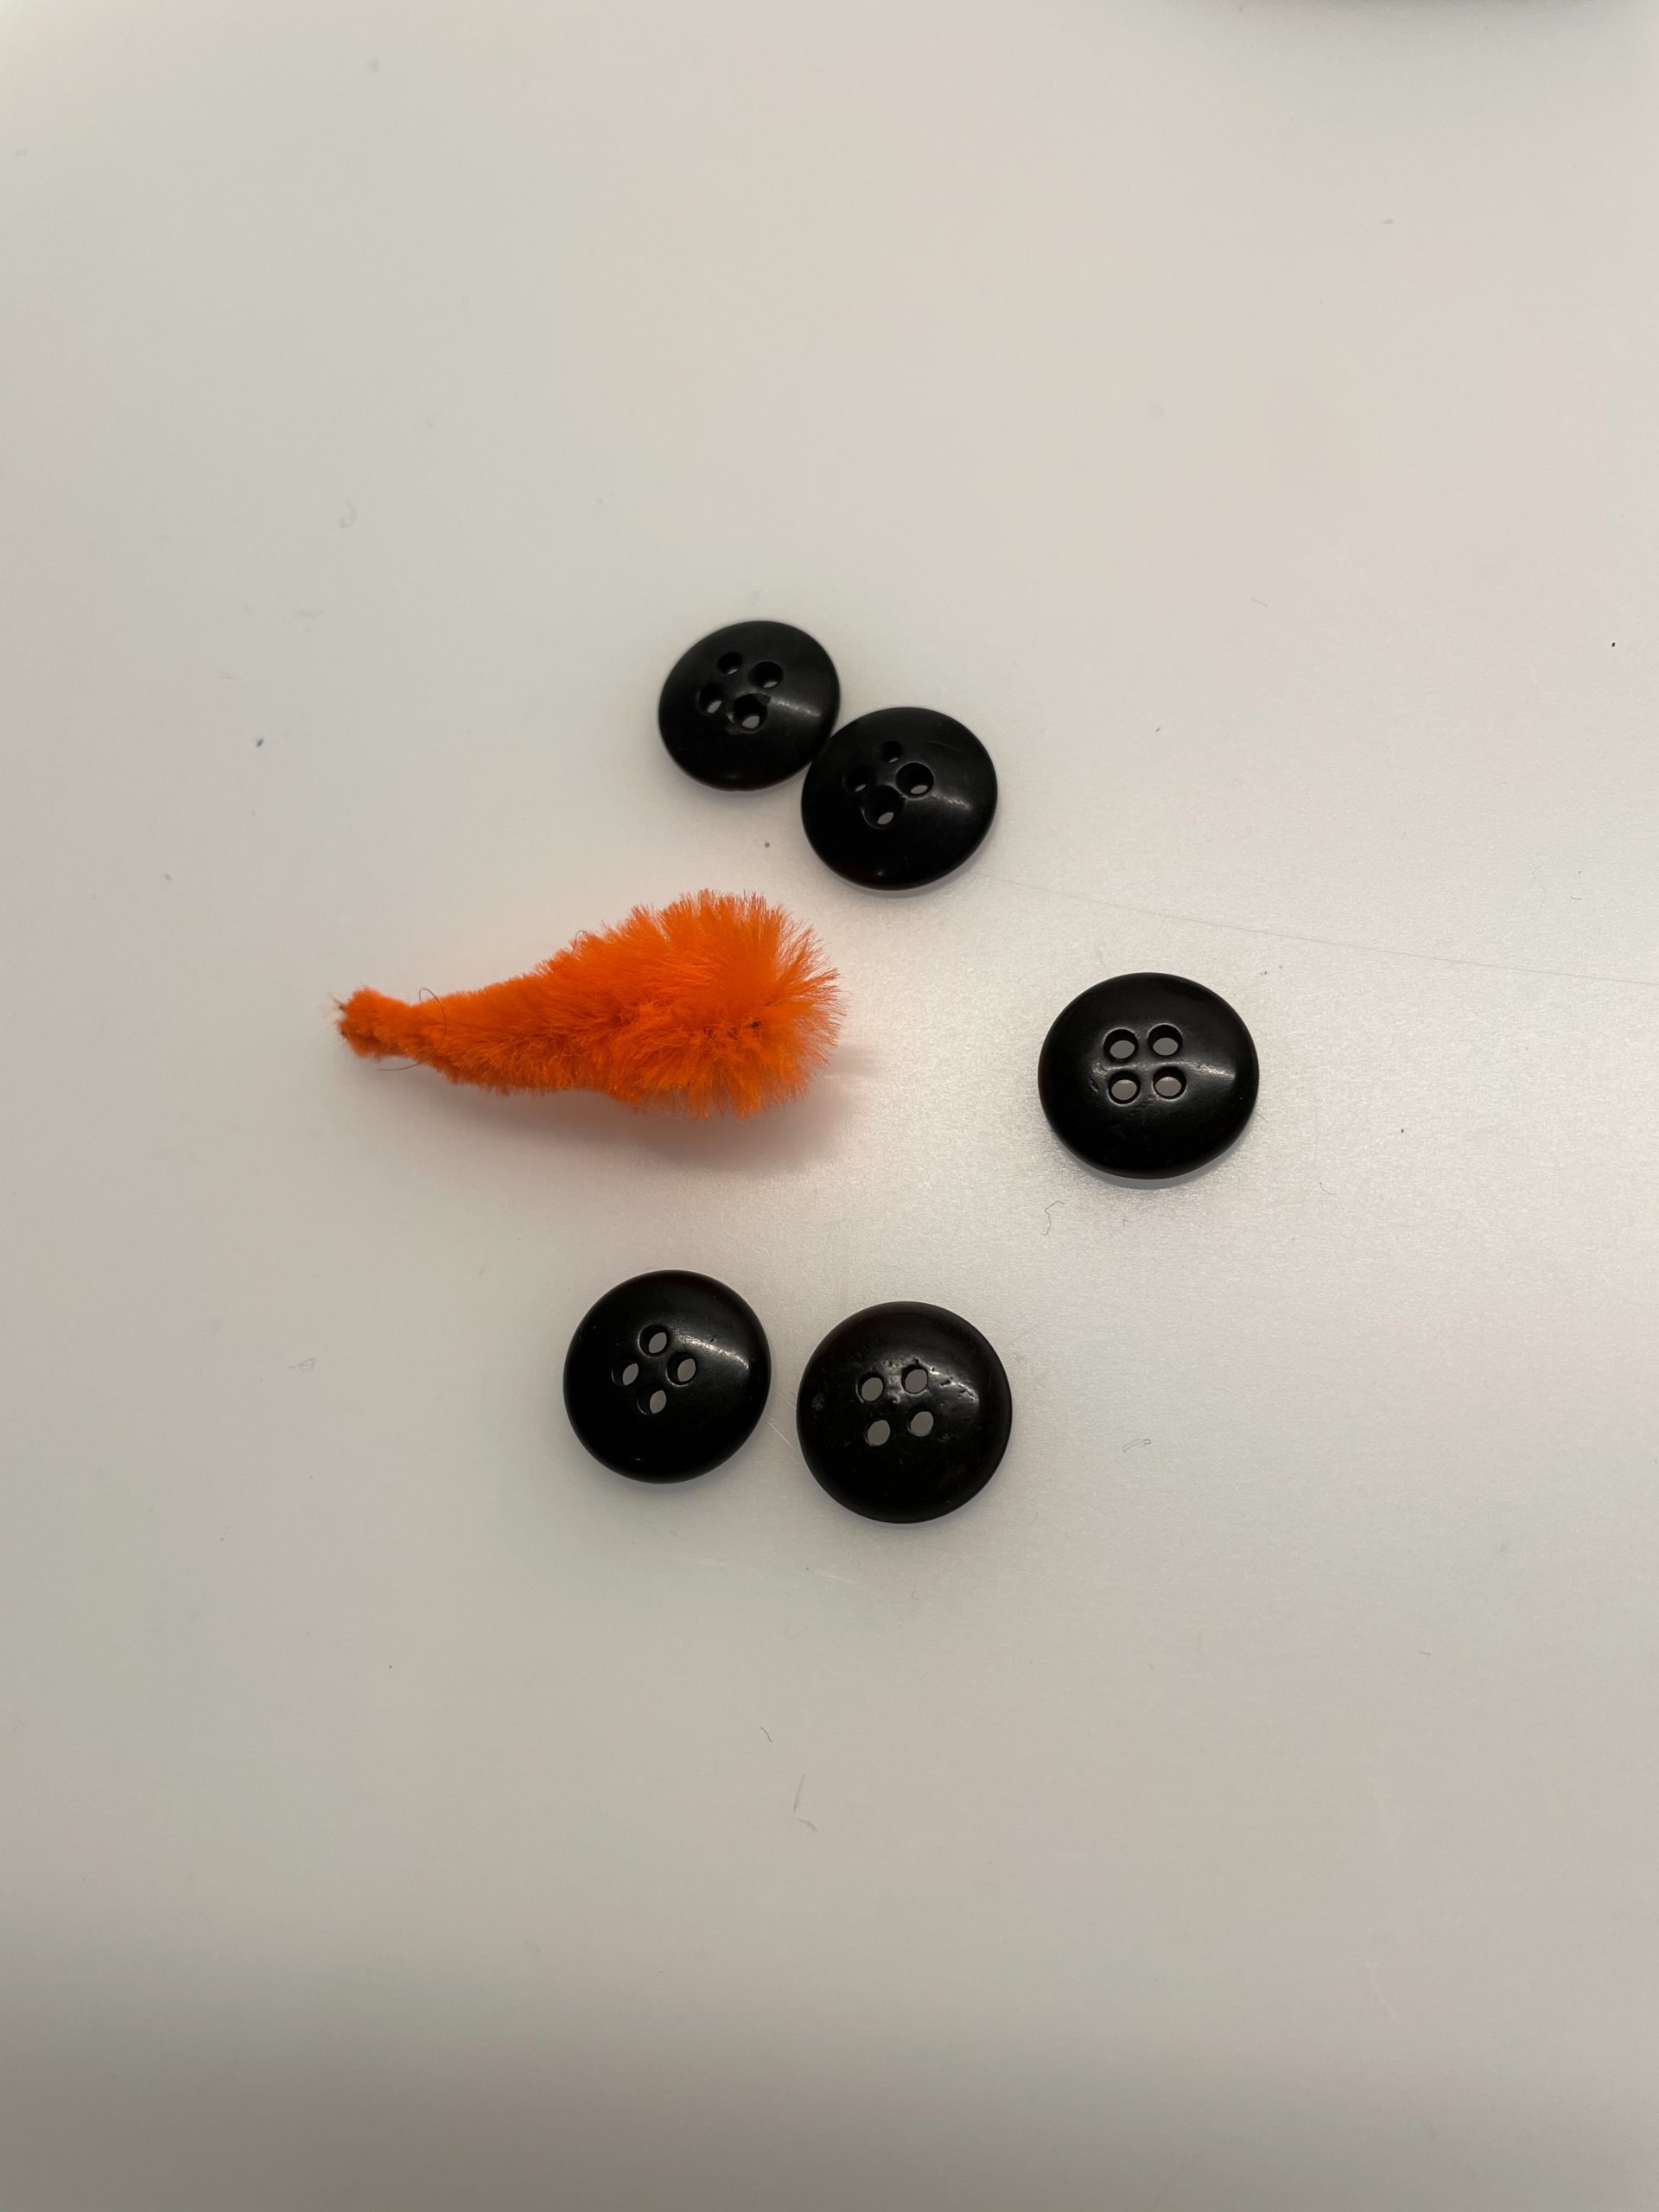
Bild zum Schritt 11 für das Bastel- und DIY-Abenteuer für Kinder: 'Jetzt klebt ihr dem Schneemann noch Augen und Knöpfe an....'

12

Then stick her nose on. Use the hot glue for this.
Attention: Let an adult help you with this - risk of injury!
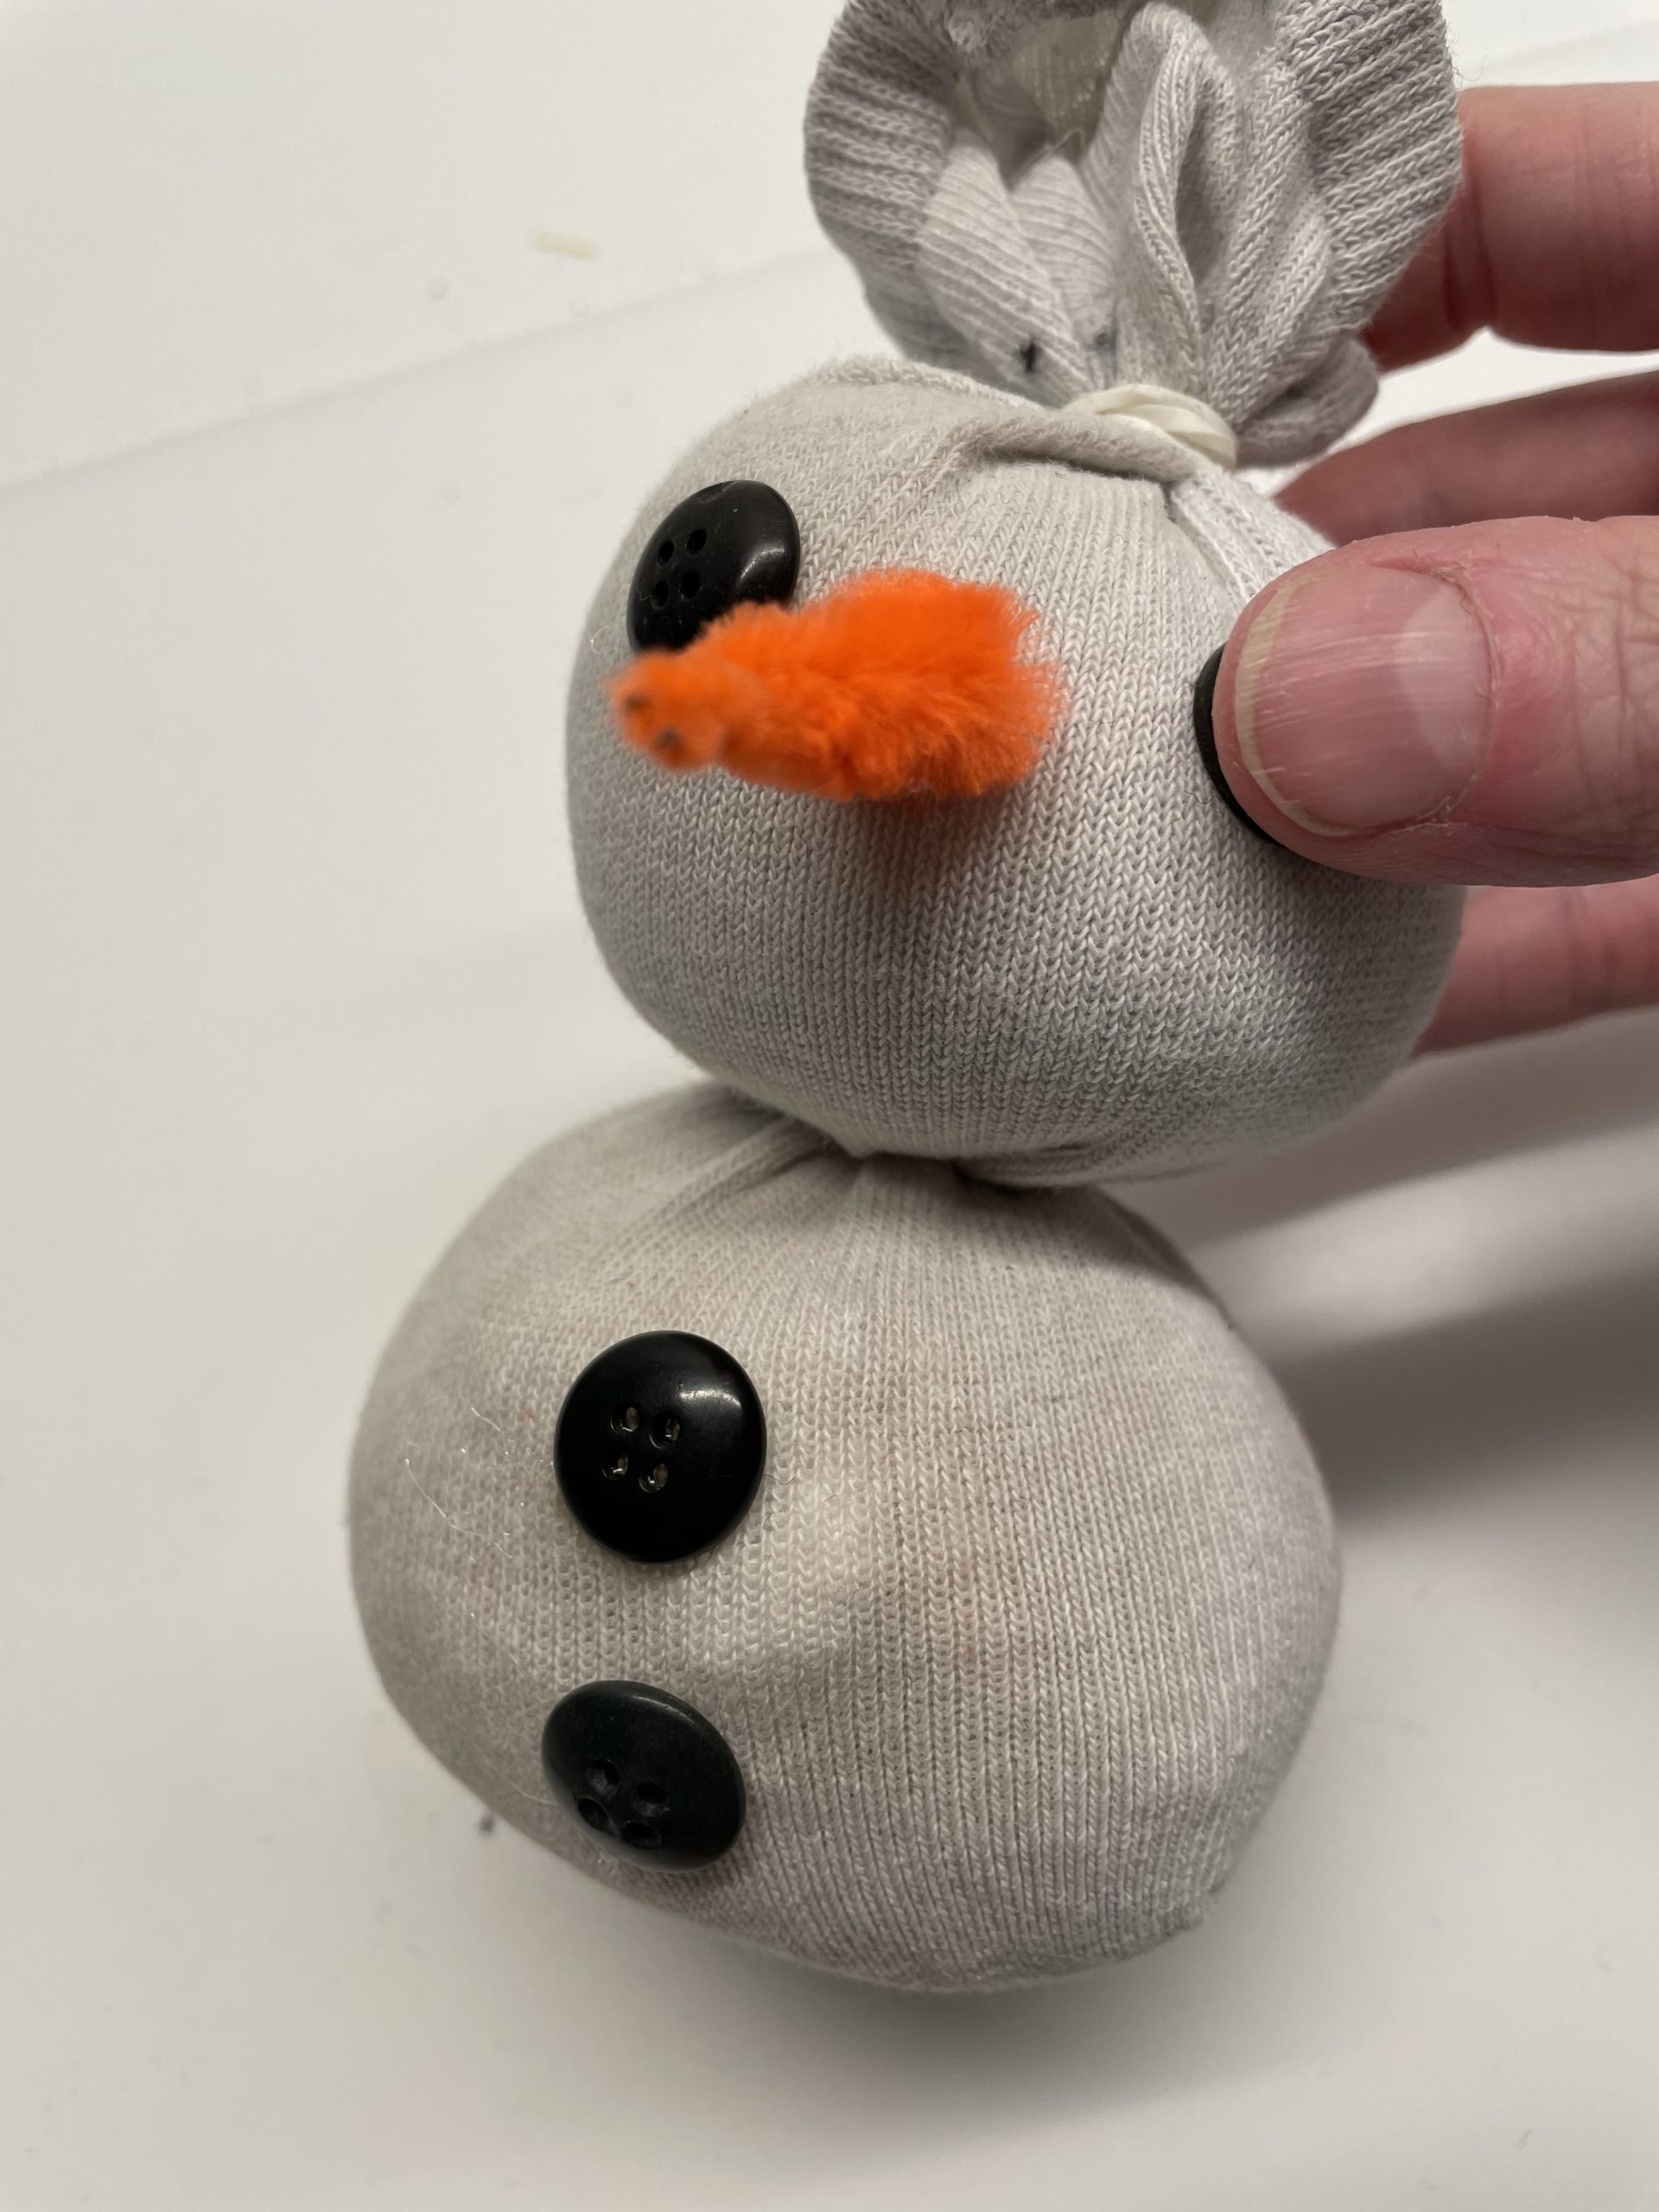
Bild zum Schritt 12 für das Bastel- und DIY-Abenteuer für Kinder: 'Anschließend klebt ihr die Nase auf. Nutzt dafür eventuell den...'

13

2. Bild zum Schritt 12 für das Bastel- und DIY-Abenteuer für Kinder: 'Anschließend klebt ihr die Nase auf. Nutzt dafür eventuell den...'

14

Now you're making your hat.
For this you cut off a sock about 8 cm long. Measure the length from the cuff.

Bild zum Schritt 14 für das Bastel- und DIY-Abenteuer für Kinder: 'Nun bastelt ihr die Mütze.    Dafür schneidet...'

15

Now you bind the interface with a rubber or a cord.

Tip: You can also bind the sock first in the desired length and then cut it off.

Bild zum Schritt 15 für das Bastel- und DIY-Abenteuer für Kinder: 'Jetzt bindet ihr die Schnittstelle mit einem Gummi oder einer...'

16

Finished is the small cap. Put on the cap and pull the upper end a little apart - this creates a bobble.

Bild zum Schritt 16 für das Bastel- und DIY-Abenteuer für Kinder: 'Fertig ist die kleine Mütze. Setzt die Mütze auf und...'

17

Now cut her the scarf of the snowman. For this cut a felt strip to the dimensions 25cm x 2cm.

Bild zum Schritt 17 für das Bastel- und DIY-Abenteuer für Kinder: 'Nun schneidet ihr den Schal des Schneemannes zu. Dafür schneidet...'

18

Then you cut the strip several times at both ends with the scissors about 1cm.

Bild zum Schritt 18 für das Bastel- und DIY-Abenteuer für Kinder: 'Anschließend schneidet ihr den Streifen an beiden Enden mit der...'

19

2. Bild zum Schritt 18 für das Bastel- und DIY-Abenteuer für Kinder: 'Anschließend schneidet ihr den Streifen an beiden Enden mit der...'

20

The scarf is ready.

Bild zum Schritt 20 für das Bastel- und DIY-Abenteuer für Kinder: 'Fertig ist der Schal.'

21

Now tie the scarf around the snowman.

Bild zum Schritt 21 für das Bastel- und DIY-Abenteuer für Kinder: 'Bindet jetzt den Schal um den Schneemann herum.'

22

The snowman is ready.

Bild zum Schritt 22 für das Bastel- und DIY-Abenteuer für Kinder: 'Fertig ist der Schneemann.'

Snowman with hat:
23

Cuts out an 8cm circle from a black piece of fabric or felt for the hat.

Bild zum Schritt 24 für das Bastel- und DIY-Abenteuer für Kinder: 'Schneidet für den Hut einen 8cm großen Kreis aus einem...'

24

Now fold the circle half and cut it in the middle a small piece.

Bild zum Schritt 25 für das Bastel- und DIY-Abenteuer für Kinder: 'Faltet nun den Kreis zur Hälfte und schneidet diesen in...'

25

Now fold the circle and fold it again in the other direction. Cut a small piece in the middle again. This creates a cross-cut in the middle.

Bild zum Schritt 26 für das Bastel- und DIY-Abenteuer für Kinder: 'Faltet jetzt den Kreis auf und faltet ihn noch einmal...'

26

Now roll the fabric circle over the socks.

Bild zum Schritt 27 für das Bastel- und DIY-Abenteuer für Kinder: 'Stülpt nun den Stoffkreis über den Sockenüberstand.'

27

Now cut a strip, which is about 15cm x 8cm large.

Bild zum Schritt 28 für das Bastel- und DIY-Abenteuer für Kinder: 'Jetzt schneidet ihr einen Streifen zu, der ca. 15cm x...'

28

Then stick this strip together to form a hose. Use any hot glue. Attention: Let an adult help you with this - risk of injury!

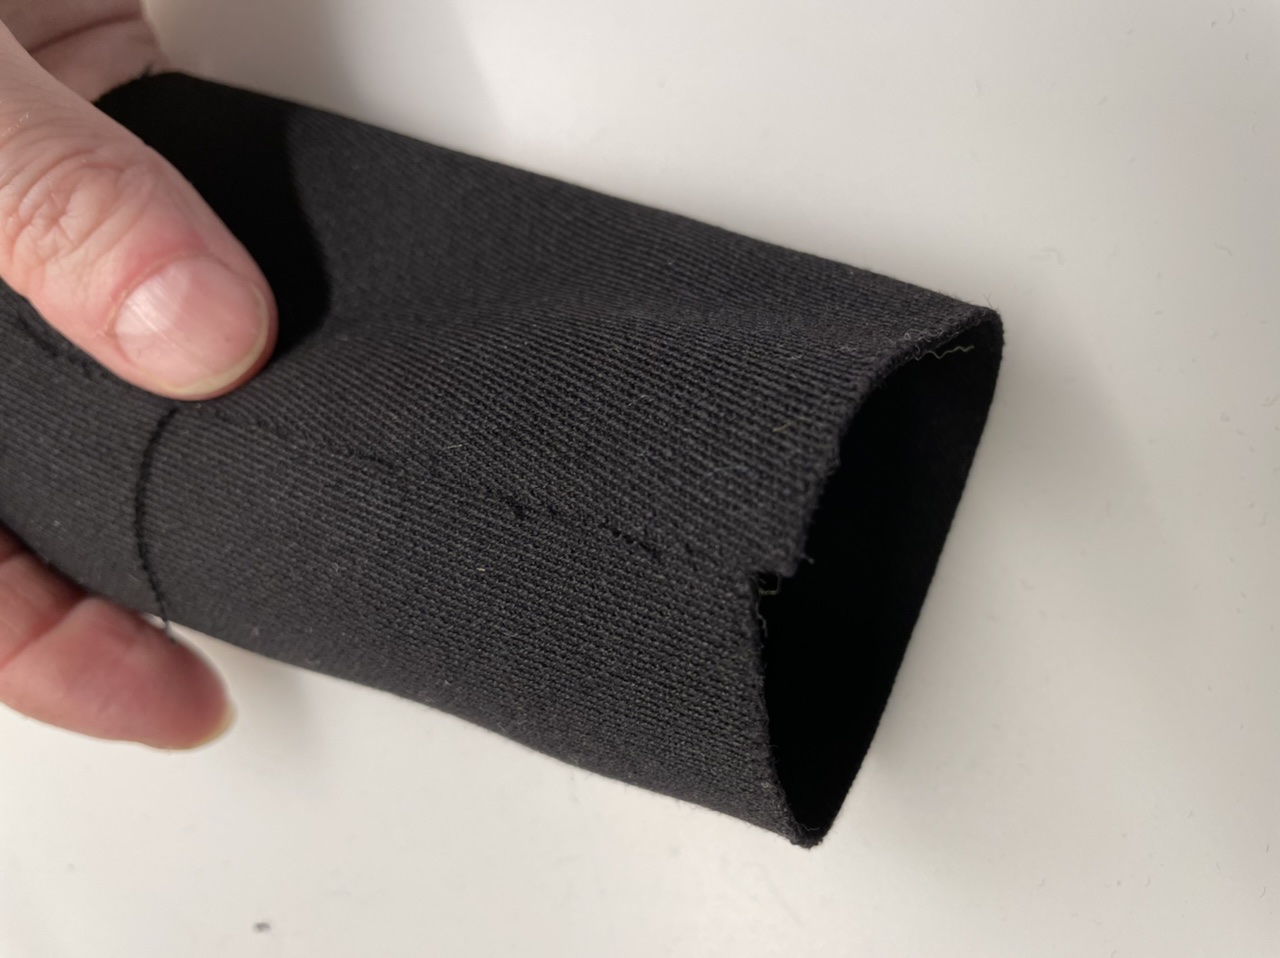
Bild zum Schritt 29 für das Bastel- und DIY-Abenteuer für Kinder: 'Klebt danach diesen Streifen zu einem Schlauch zusammen. Nutzt dafür...'

29

Now you're half-inside the fabric hose.
If the fold doesn't hold, just put on a few brackets.
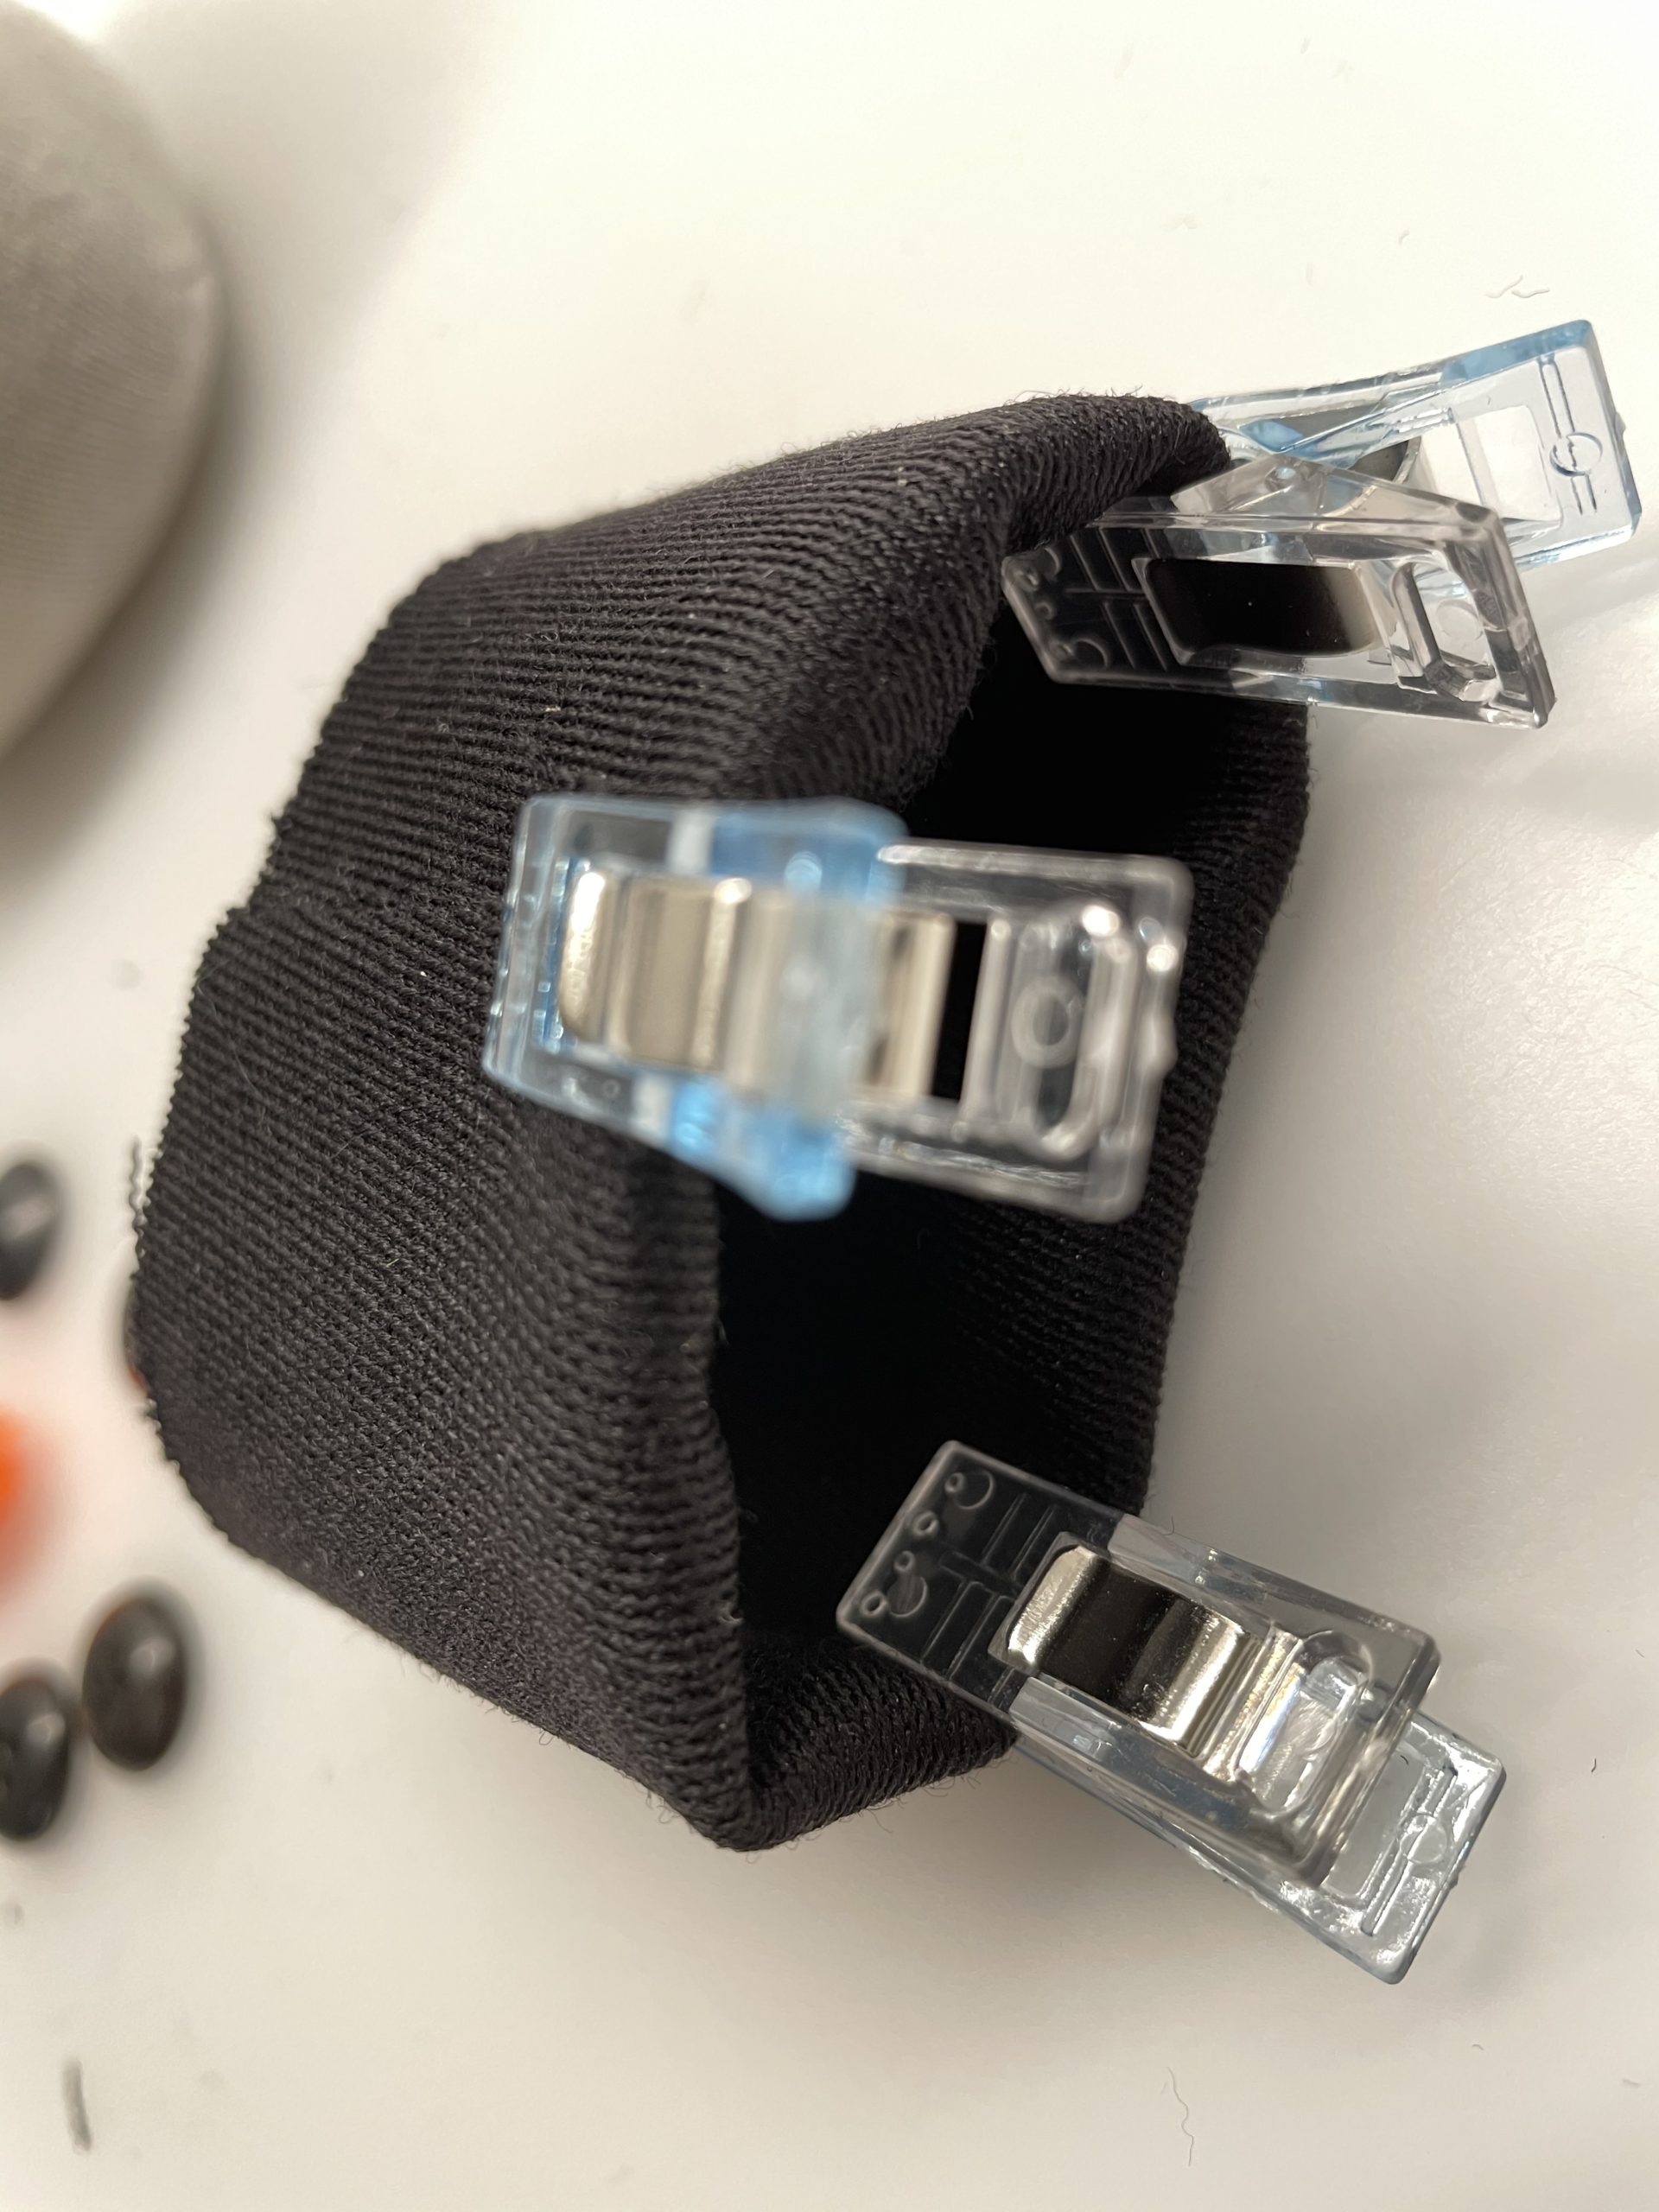
Bild zum Schritt 30 für das Bastel- und DIY-Abenteuer für Kinder: 'Jetzt schlagt ihr den Stoffschlauch zur Hälfte nach innen um....'

30

Now you put the fabric hose over the socks.
Now stick the fabric hose to the circle with hot glue. Add some hot glue and put immediately the hat edge on it.
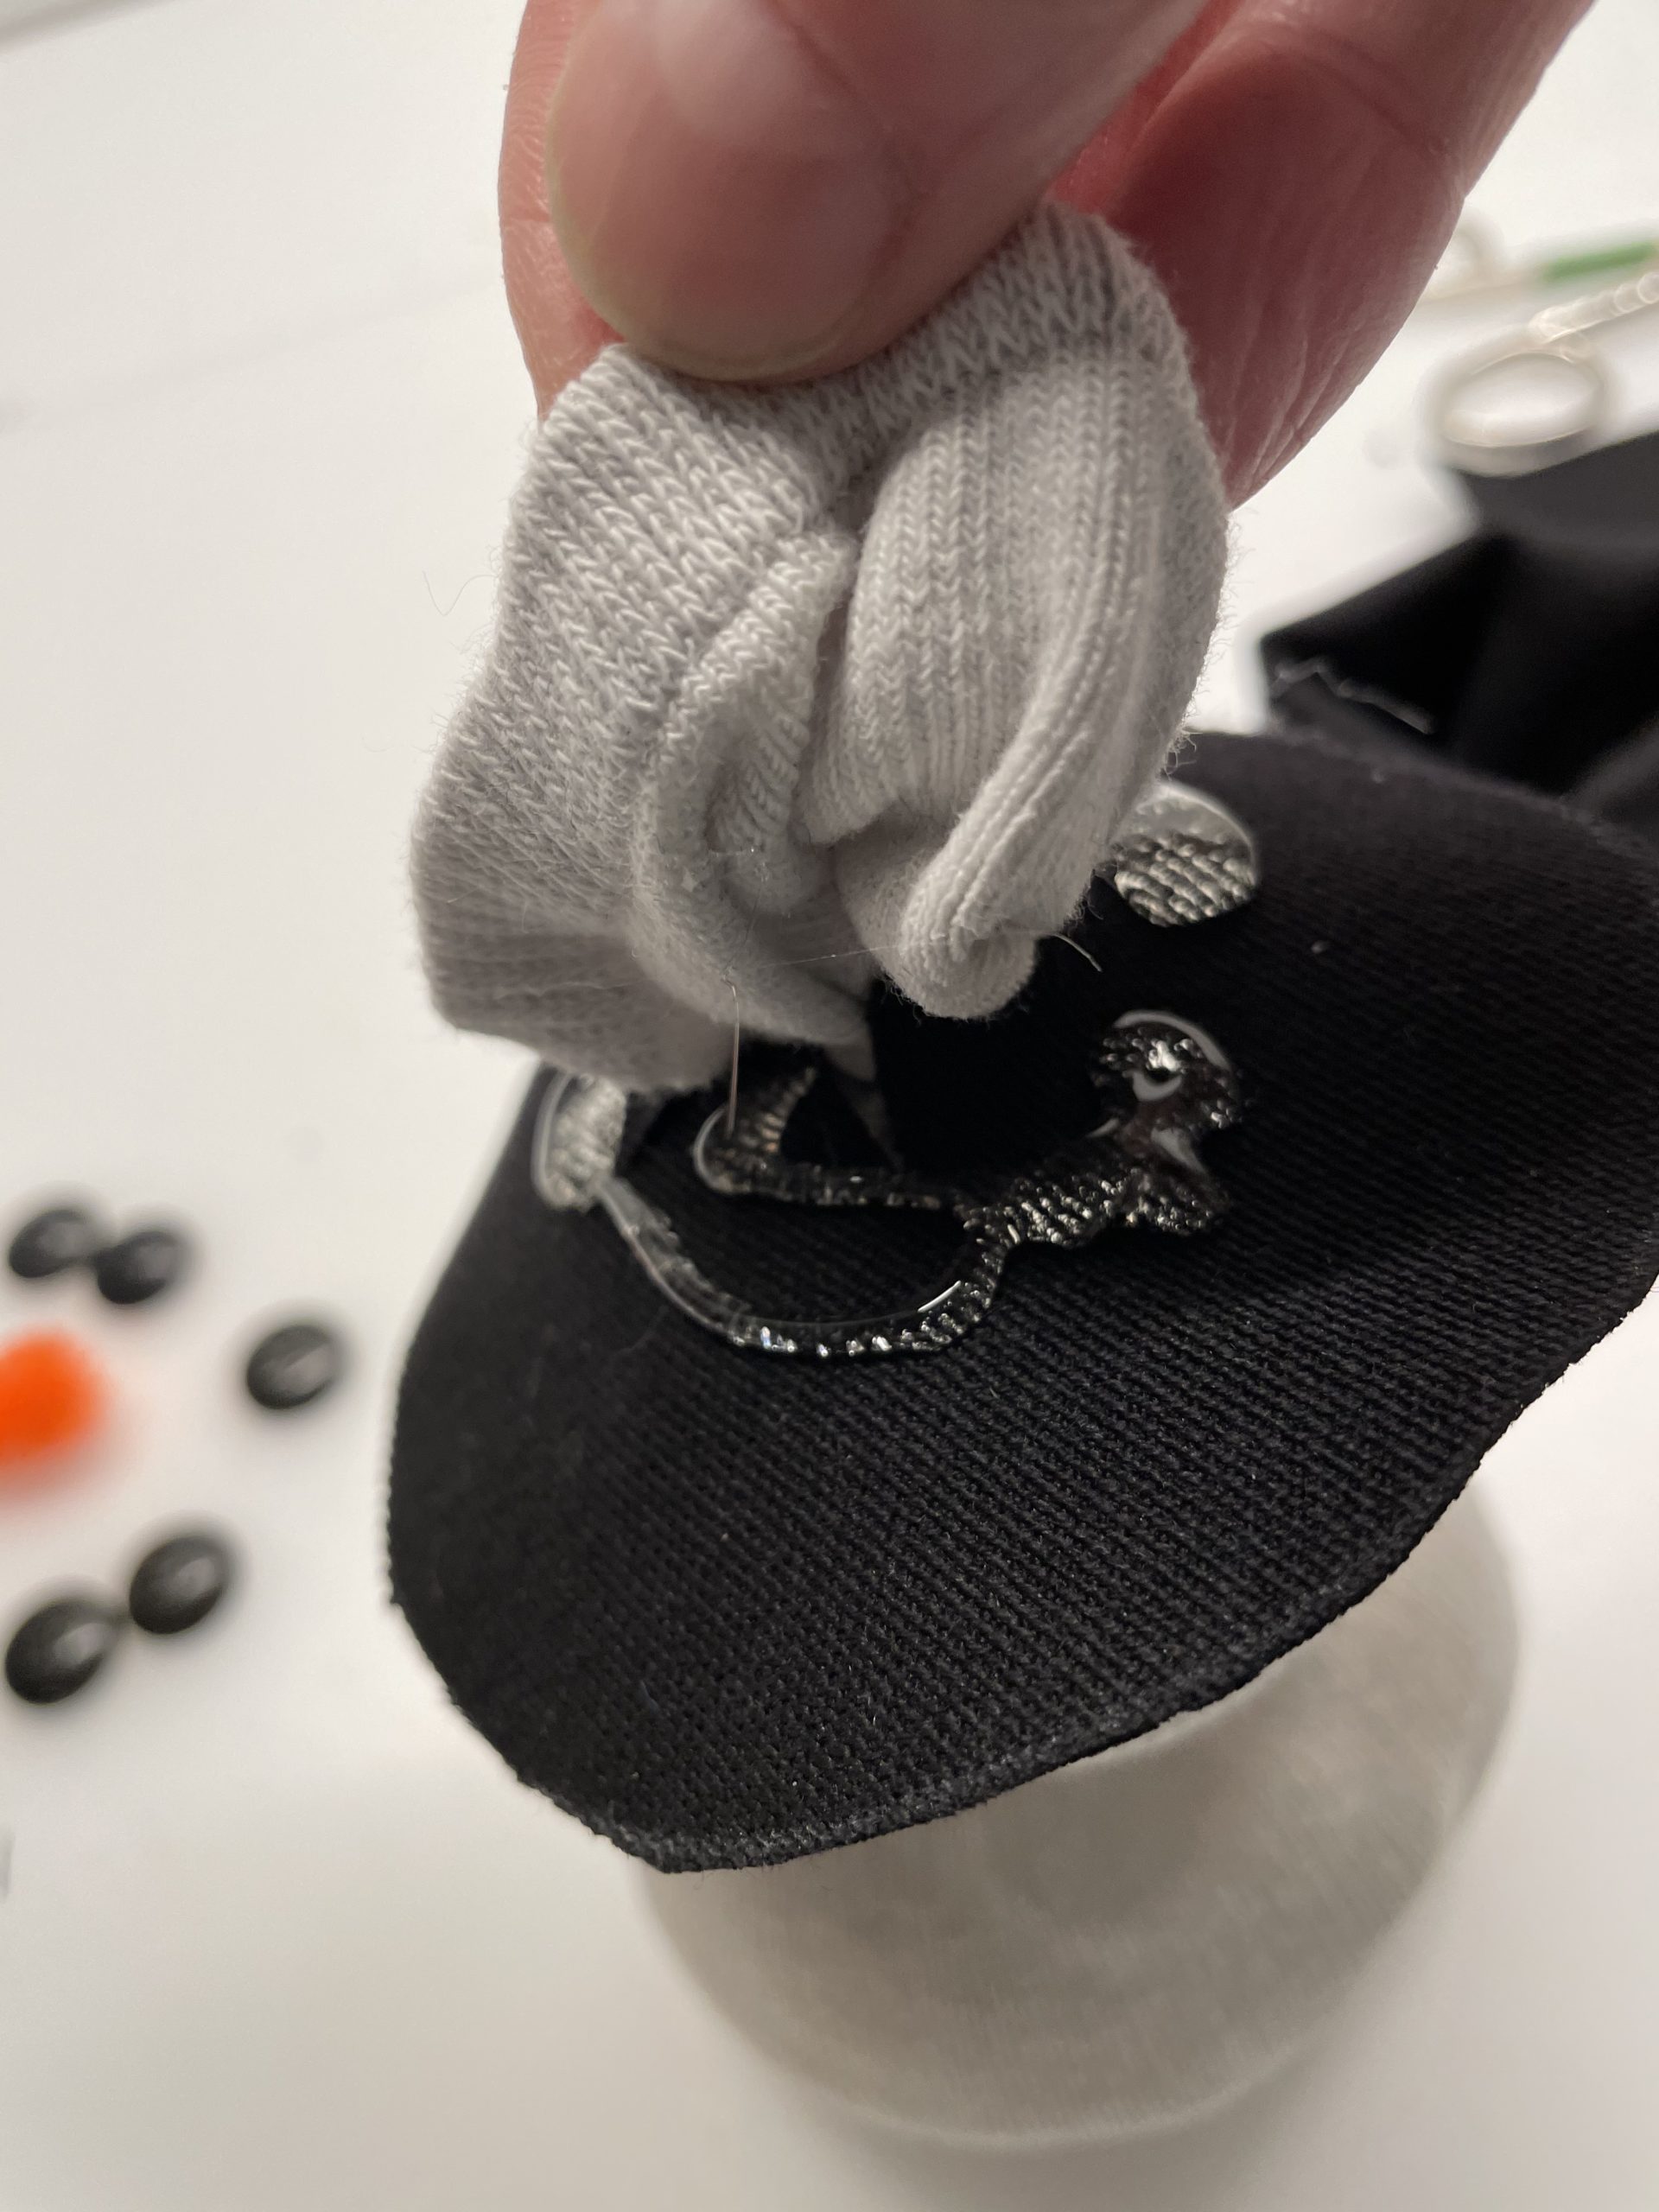
Bild zum Schritt 31 für das Bastel- und DIY-Abenteuer für Kinder: 'Jetzt stülpt ihr den Stoffschlauch über den Sockenüberstand.  Klebt...'

31

Tighten the fabric hose.

Bild zum Schritt 32 für das Bastel- und DIY-Abenteuer für Kinder: 'Drückt den Stoffschlauch fest.'

32

Now cut a small fabric circle with a diameter of about 4cm.
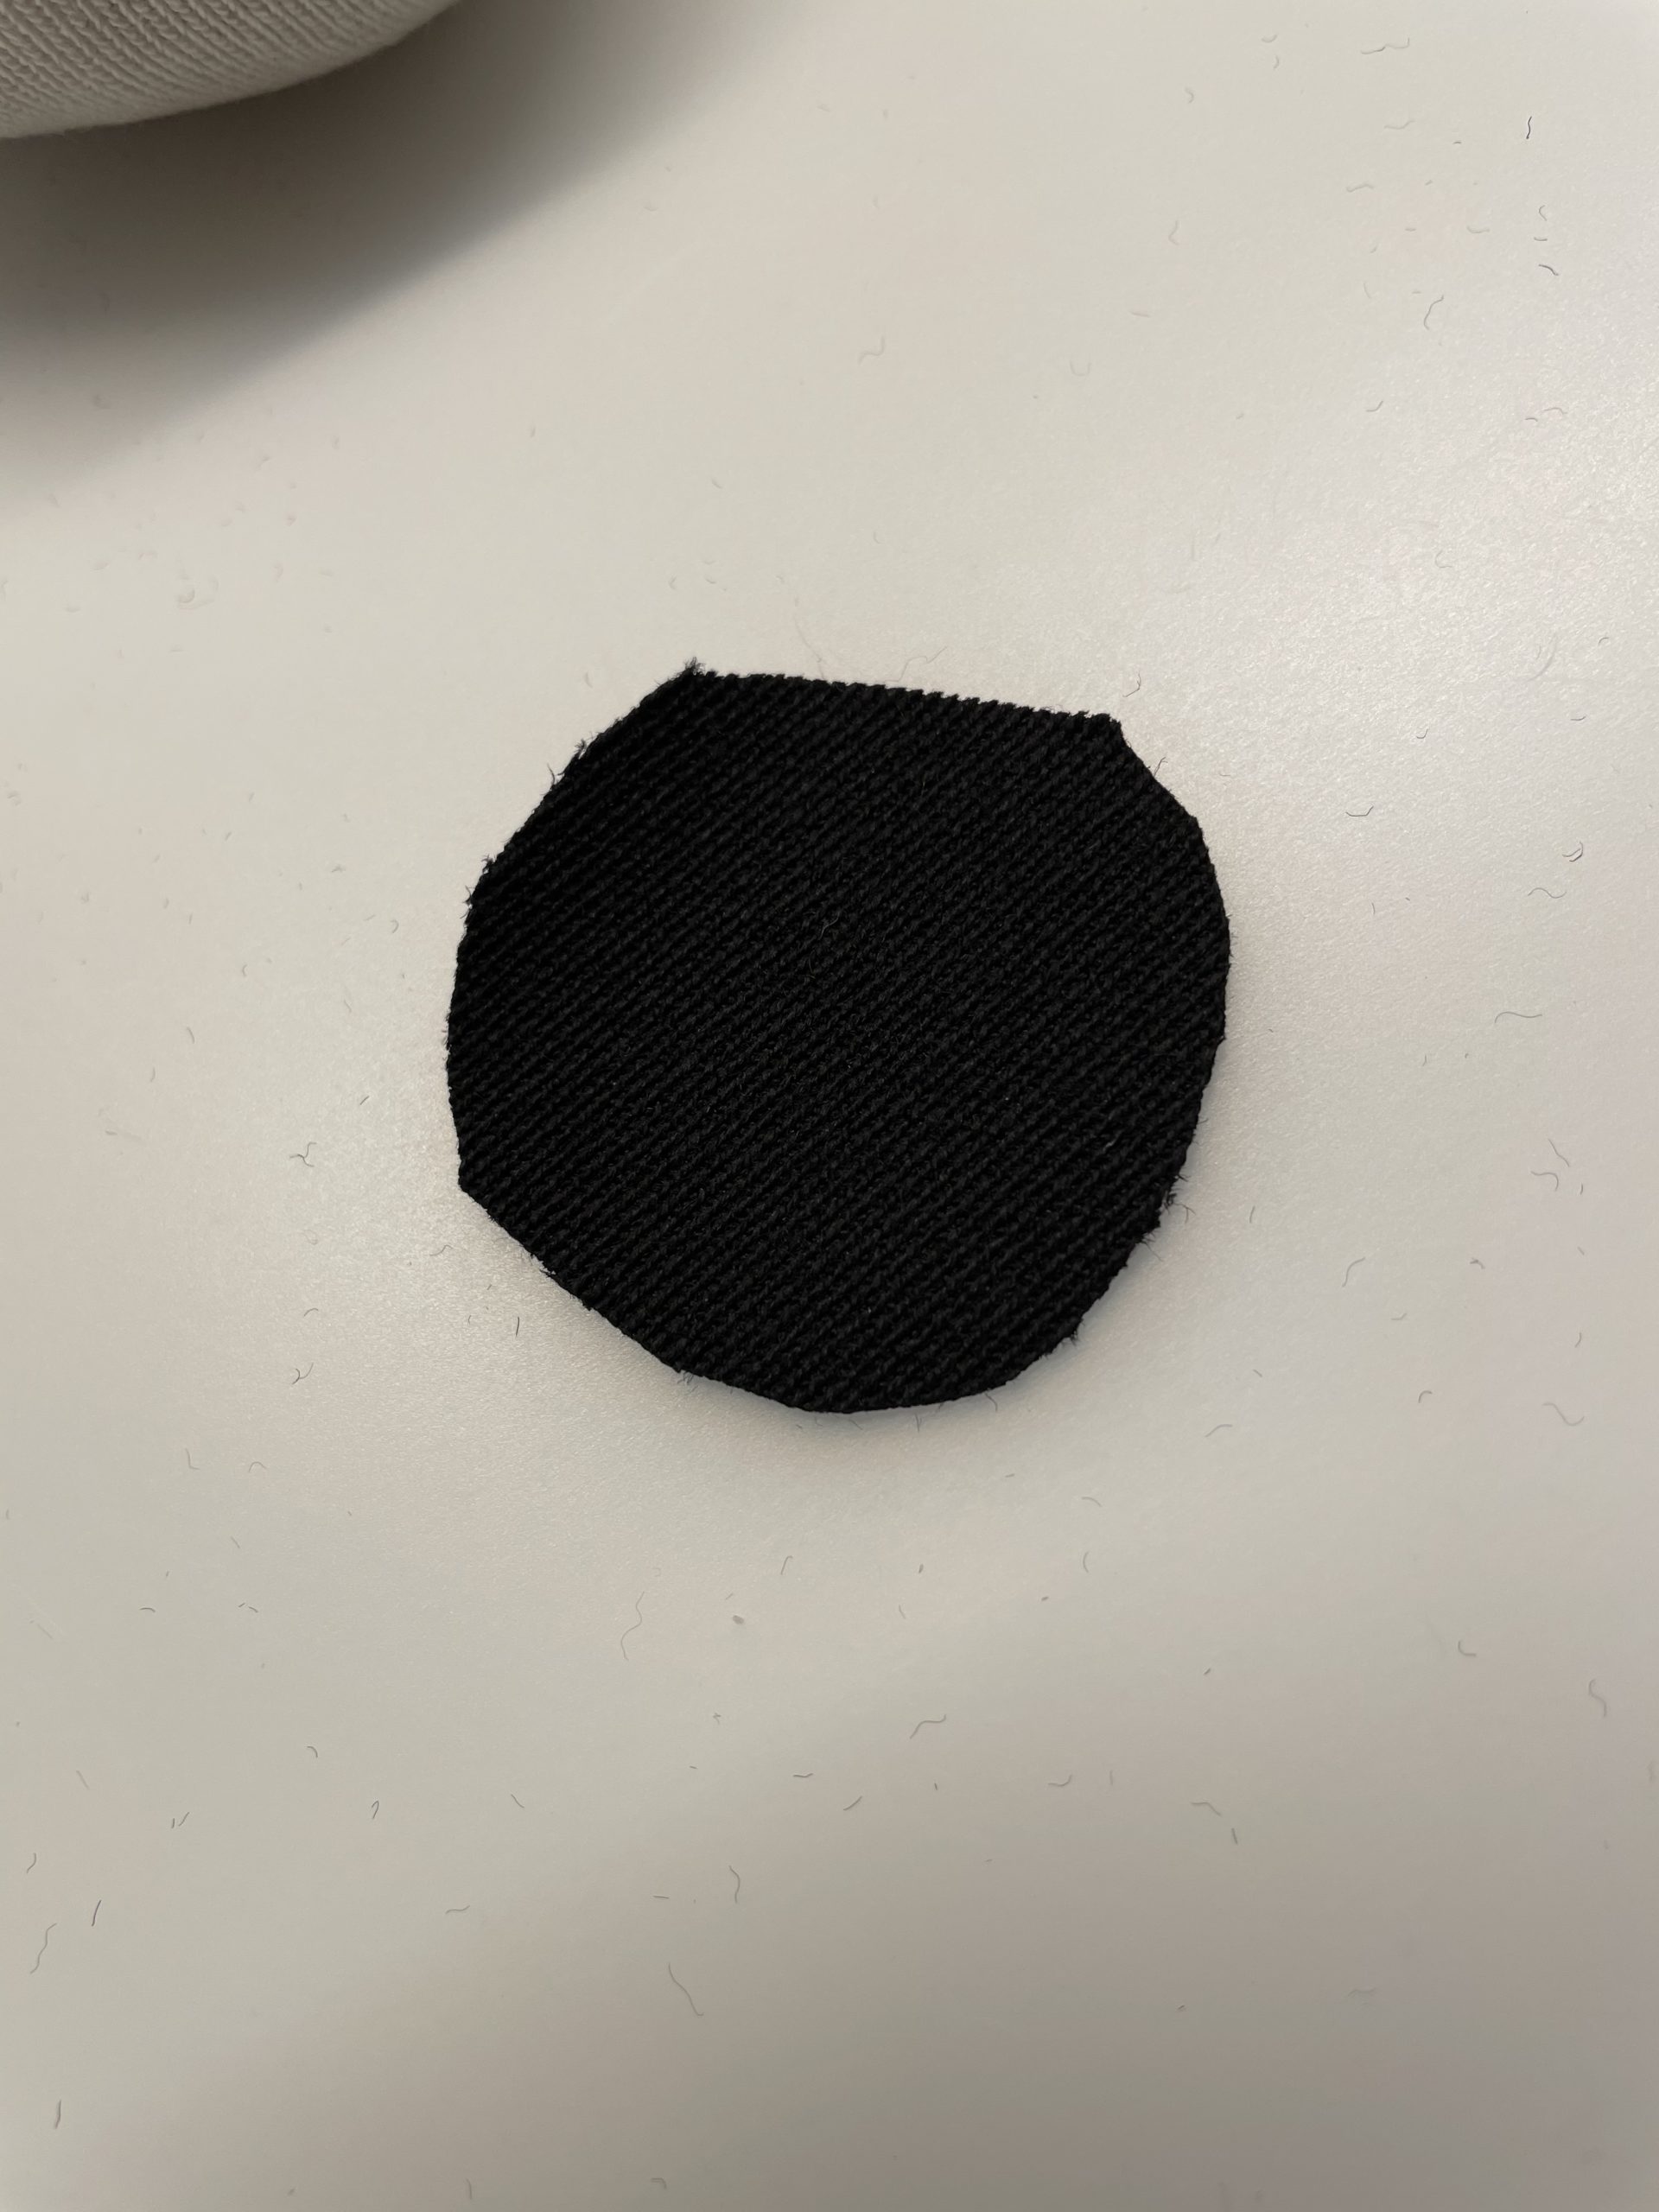
Bild zum Schritt 33 für das Bastel- und DIY-Abenteuer für Kinder: 'Jetzt schneidet ihr einen kleinen Stoffkreis mit ca. 4cm Durchmesser...'

33

Then stick this on the hat and close the open place on the hat.

Bild zum Schritt 34 für das Bastel- und DIY-Abenteuer für Kinder: 'Diesen klebt ihr anschließend auf den Hut darauf und schließt...'

34

2. Bild zum Schritt 34 für das Bastel- und DIY-Abenteuer für Kinder: 'Diesen klebt ihr anschließend auf den Hut darauf und schließt...'

35

3. Bild zum Schritt 35 für das Bastel- und DIY-Abenteuer für Kinder: 'Diesen klebt ihr anschließend auf den Hut darauf und schließt...'

36

Design the snowman as described above with buttons, eyes, pipe cleaner nose and a scarf.
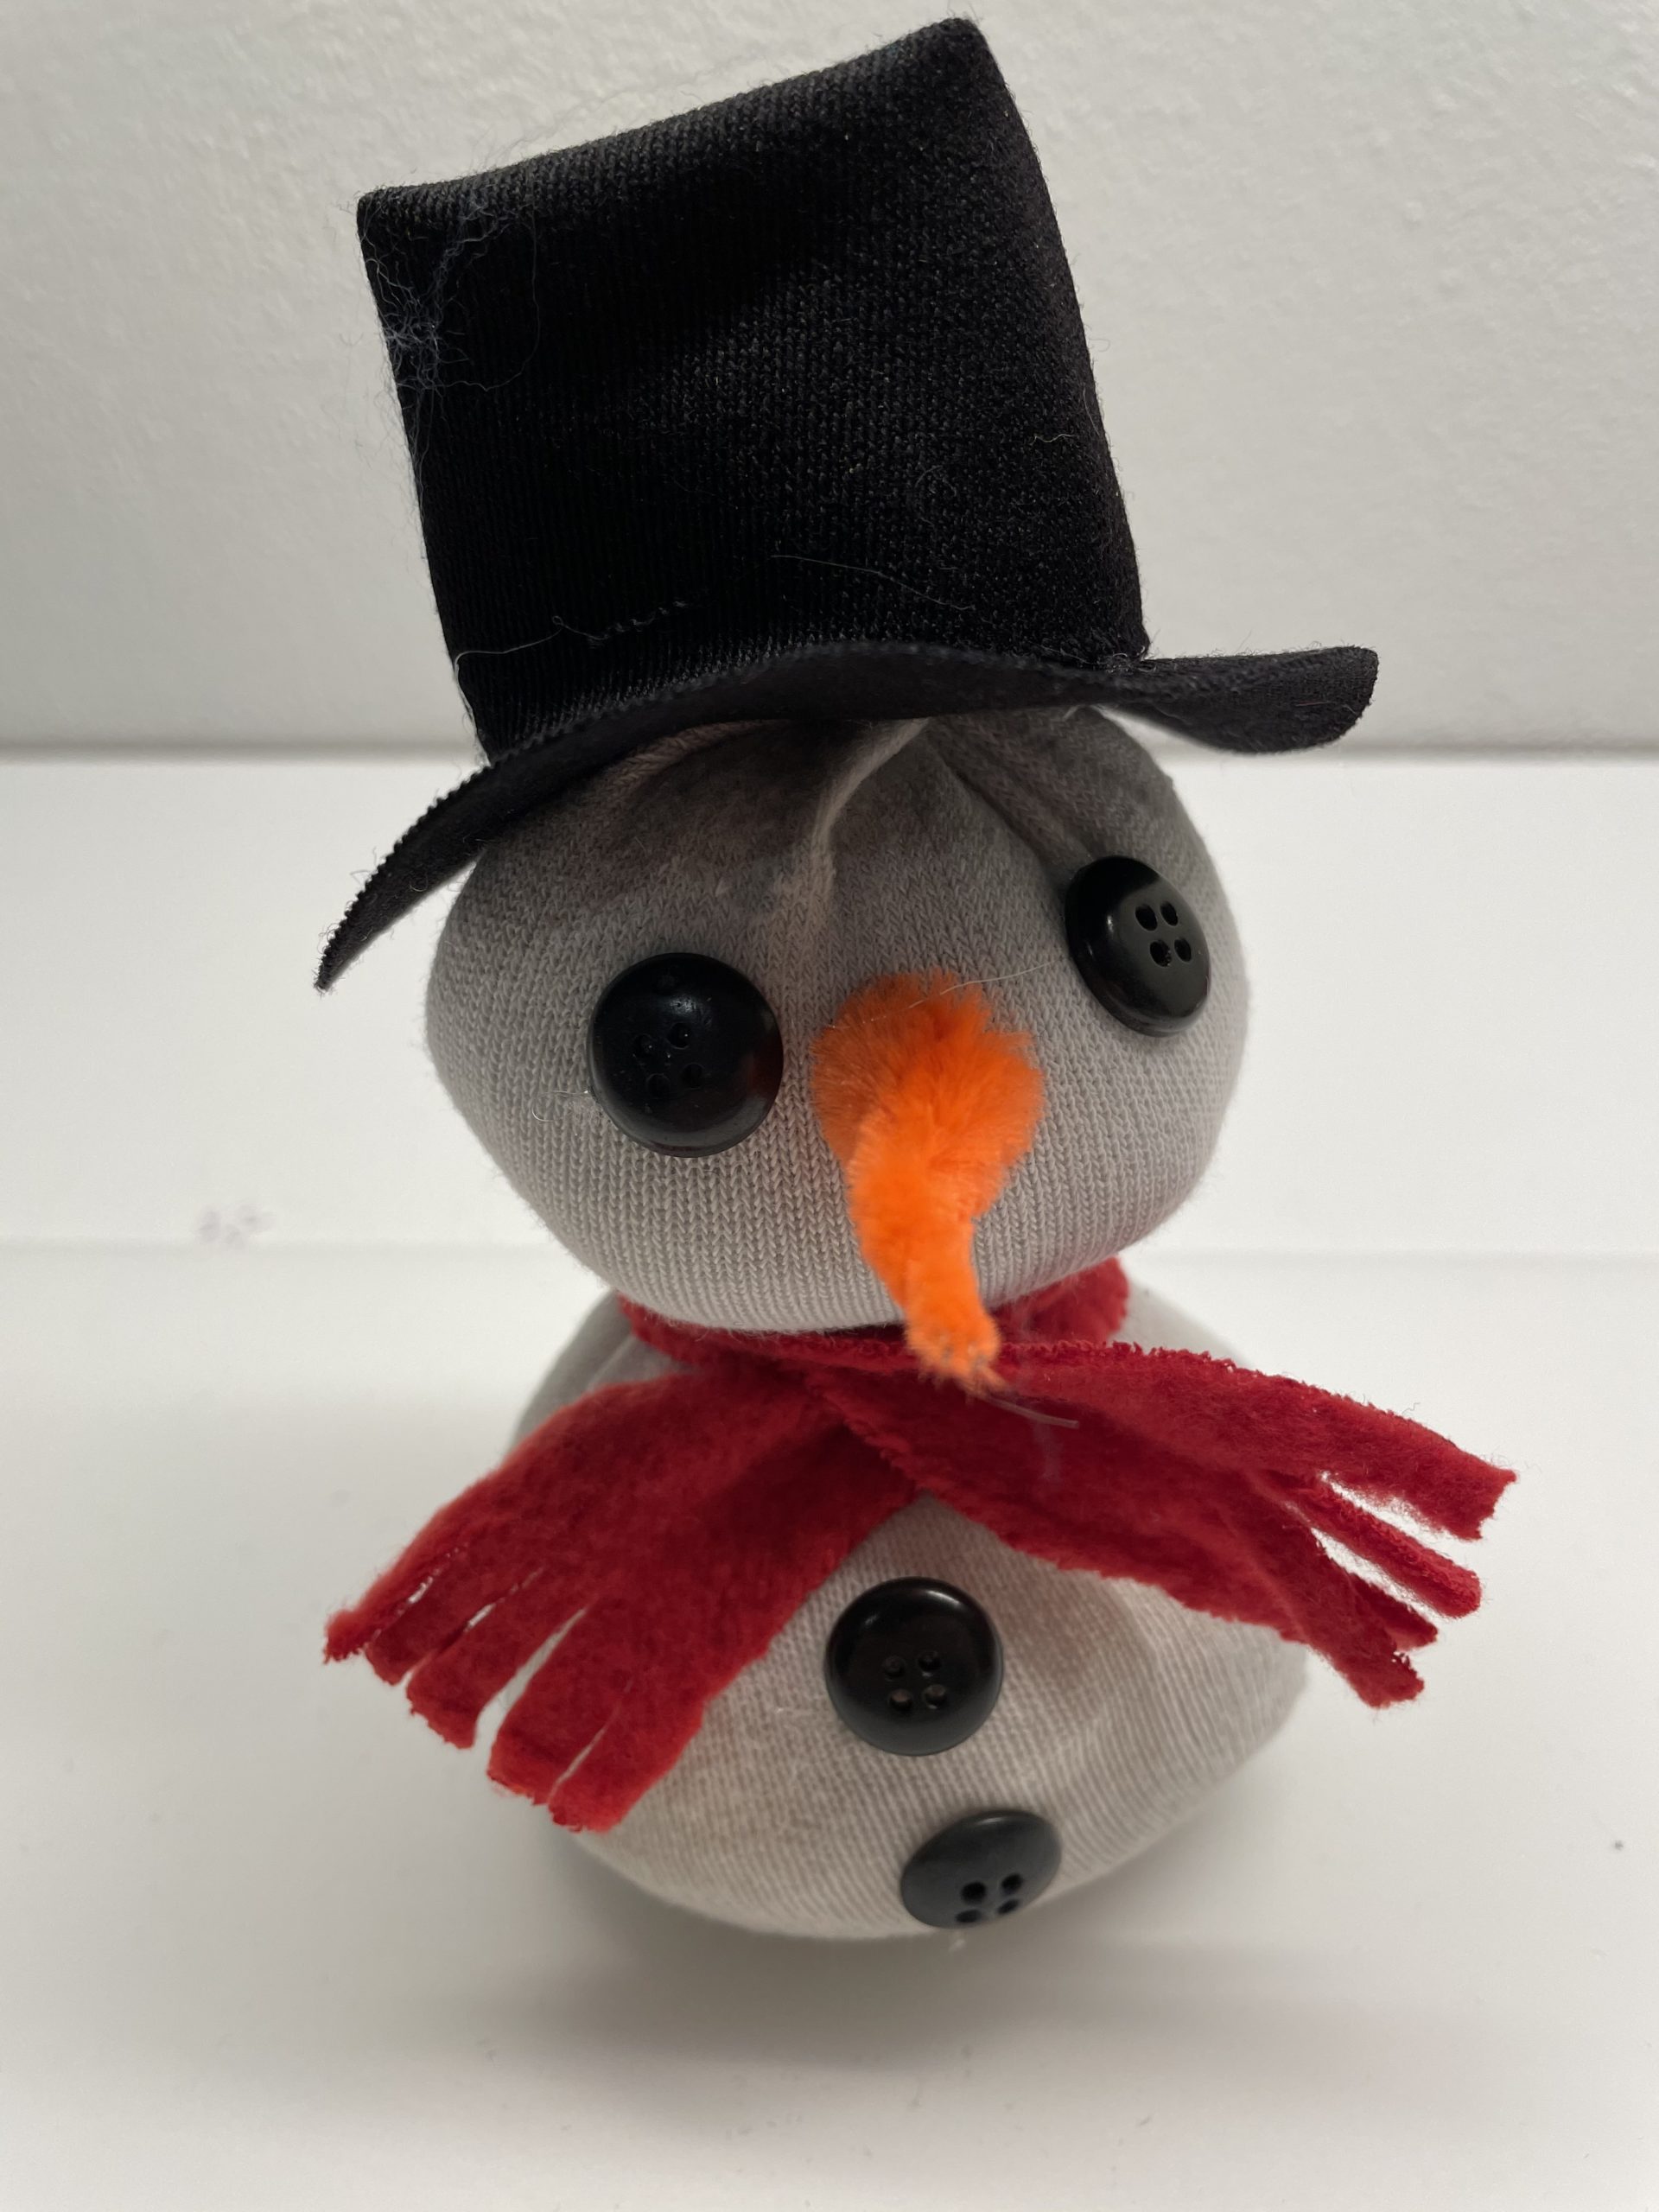
Bild zum Schritt 37 für das Bastel- und DIY-Abenteuer für Kinder: 'Gestalte den Schneemann wie oben beschrieben mit Knöpfen, Augen, Pfeifenputzer-Nase...'

37

The snowman is finished with a hat.
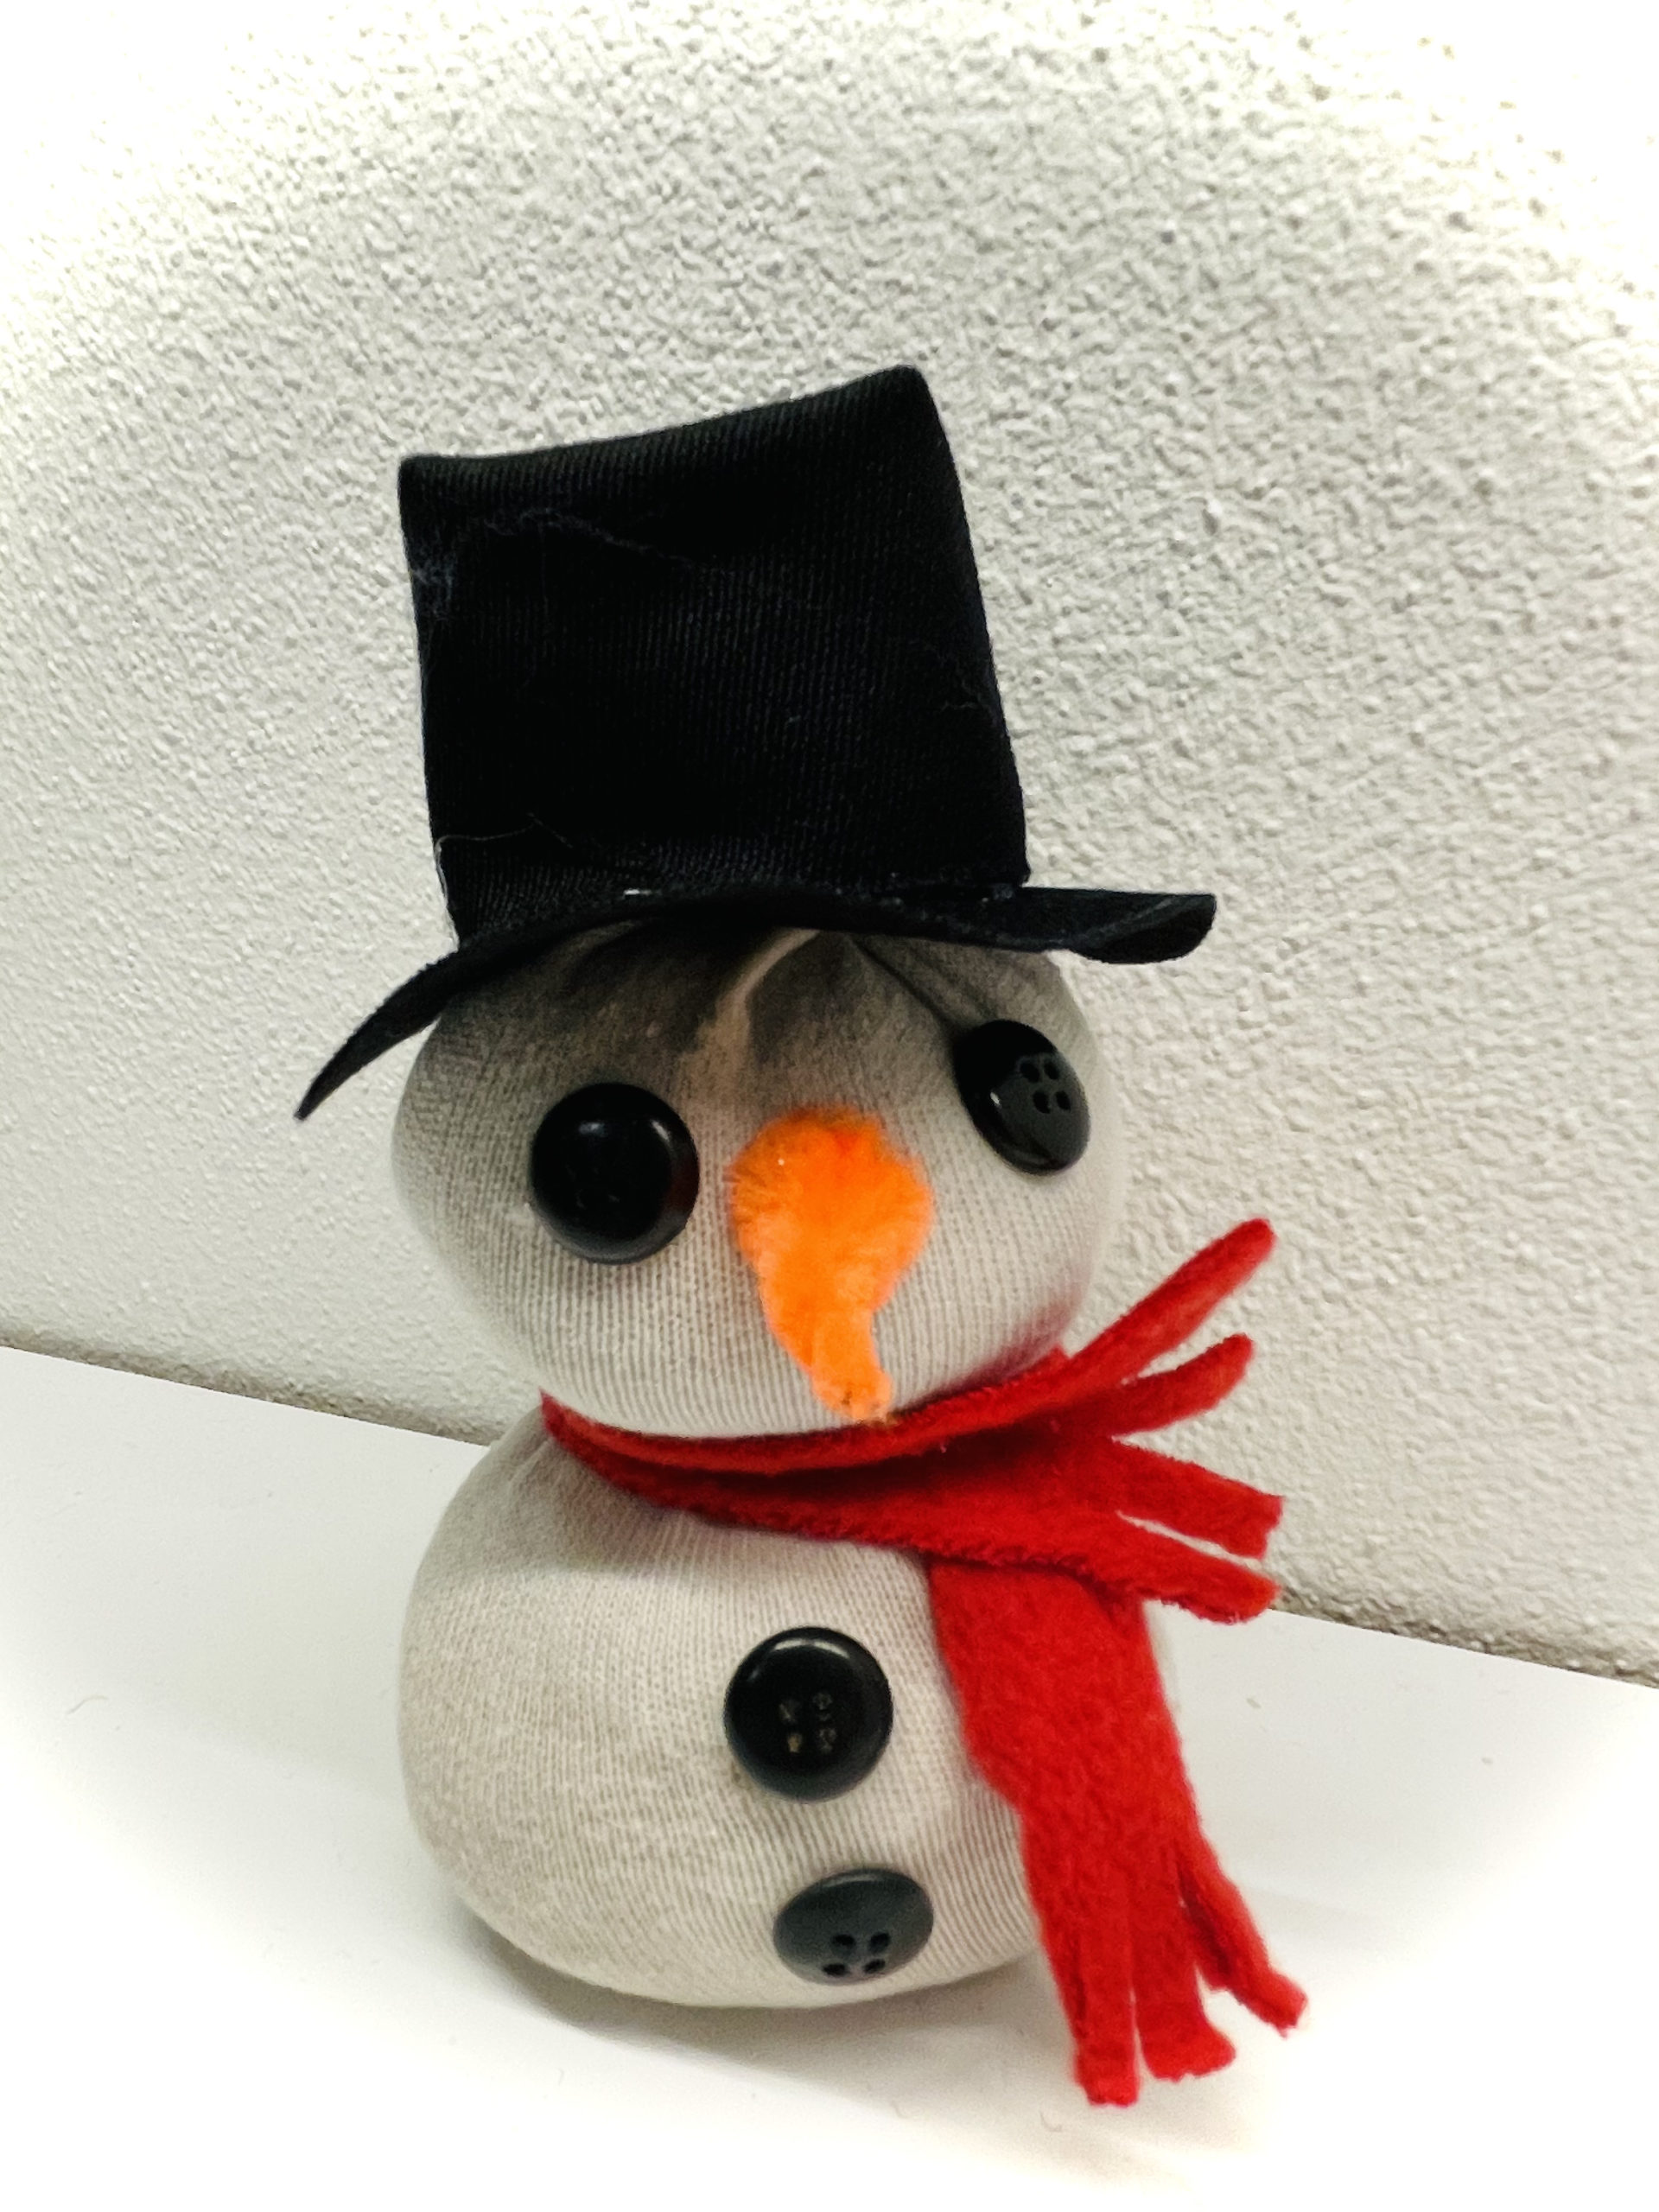
Bild zum Schritt 38 für das Bastel- und DIY-Abenteuer für Kinder: 'Fertig ist der Schneemann mit Hut.'

38

Have fun doing crafts.

Snowman with cap:
Socks-Snowman

Follow us on Facebook , Instagram and Pinterest
Don't miss any more adventures: Our bottle mail

Leave a Reply

Your email address will not be published.

The maximum upload file size: 5 MB. You can upload: image, document. Drop file here