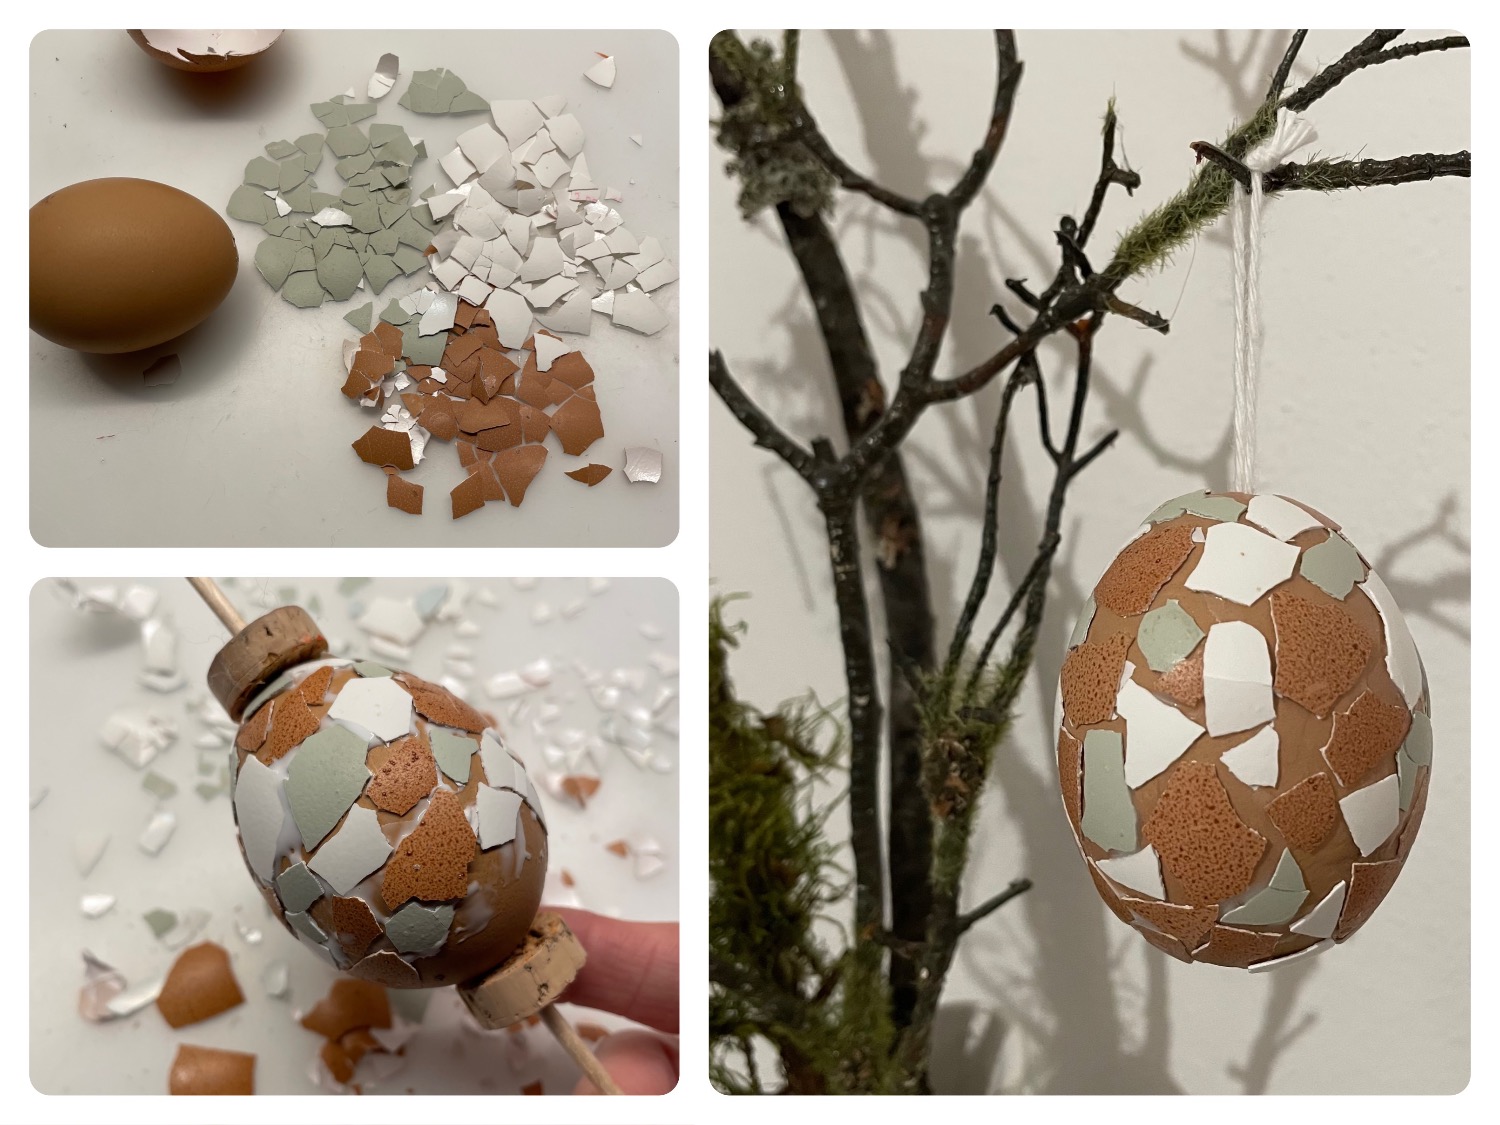
Easter egg with eggshells

AdventurerKatzi
Rating5.03.9 Thousand times & (3) DifficultyAdvanced

These Easter eggs are just the right thing for experienced hobbyists. There is a need for tact and patience. The effort is rewarded by a great result. Since working with blown eggs can quickly break an egg, I recommend you to use a plastic Easter egg for the first time. The difference can hardly be recognized later, but you save disappointed faces. How to implement these Easter eggs from eggshells step by step, you will find out here. Have fun!

Media Education for Kindergarten and Hort

Kind bastelt eine Rassel mit dem Navi
The Adventure Navi, the app for DIY projects, enables media education for the youngest.

Relief in everyday life, targeted promotion of individual children, independent learning and - without any pre-knowledge already usable by the youngest!


Titelbild zur Bastel- und DIY-Idee für Kinder '(1037) Osterei mit Eierschalen'
Material for1 Child
Prep Time5 min.Adv. Time20 min.Total Time25 min.
 1 Egg blown outor plastic egg
 Eggshells in different egg colours
 Wood glue
 Matches
 Thread
 1 Shashlikstab
 2 Cork discsOf a bottled cork
 1 Egg carton
 1 Screw-glass lids Possibly for glue
 1 Brushespossibly for application
 1 Builder's pad
 1 LapsWet to wipe the finger
All links marked with a shopping cart lead to Amazon - here we have selected products that we would order ourselves and in part also ordered. In a qualified purchase via the advertising link, we as Amazon partner receive a commission, for you there are no costs. You thus support our cost- and advertising banner-free, educational offer.
1

Use different colored egg shells, which you collect and let dry already days before.

First you crush the eggshells with a flat hand on the table and leave them broken apart in colour.
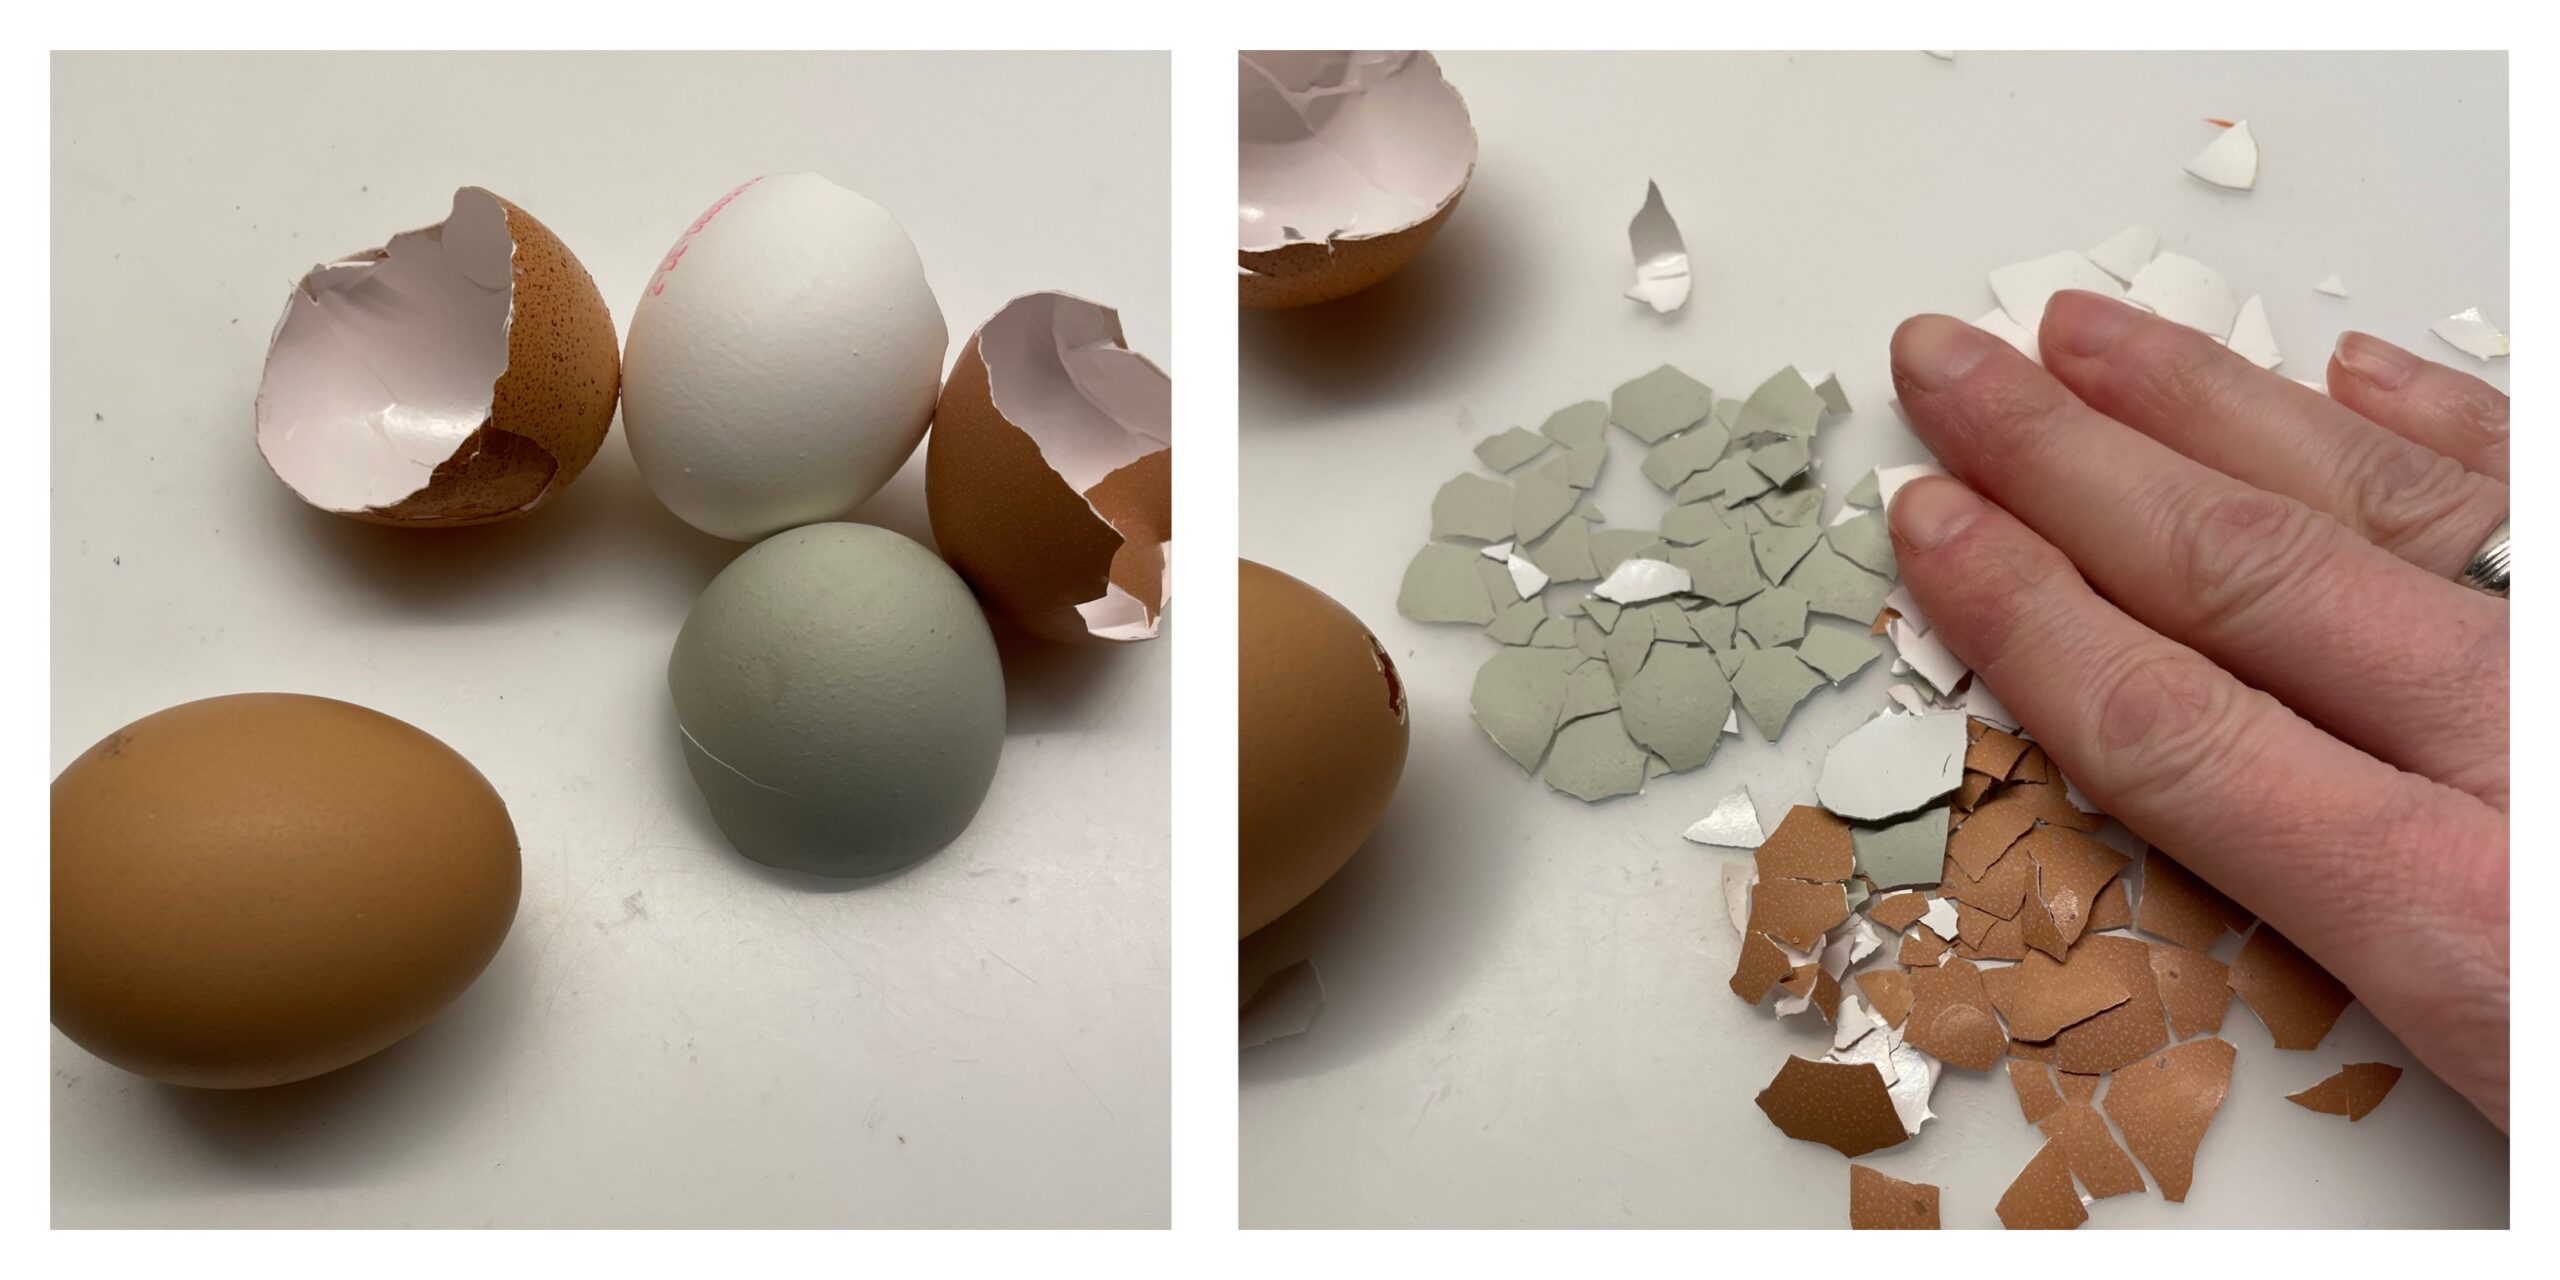
Bild zum Schritt 1 für das Bastel- und DIY-Abenteuer für Kinder: 'Verwendet verschiedenfarbige Eierschalen, die ihr bereits Tage vorher schon sammelt...'

2

Now you put a blown-out egg on a shishlikstab and fix it with a piece of cork. Then you put wood glue on the top and start to stick the eggshells on.
Do not stick the eggshells on top of each other, but leave gaps between the eggshells. The wood glue becomes transparent when drying!
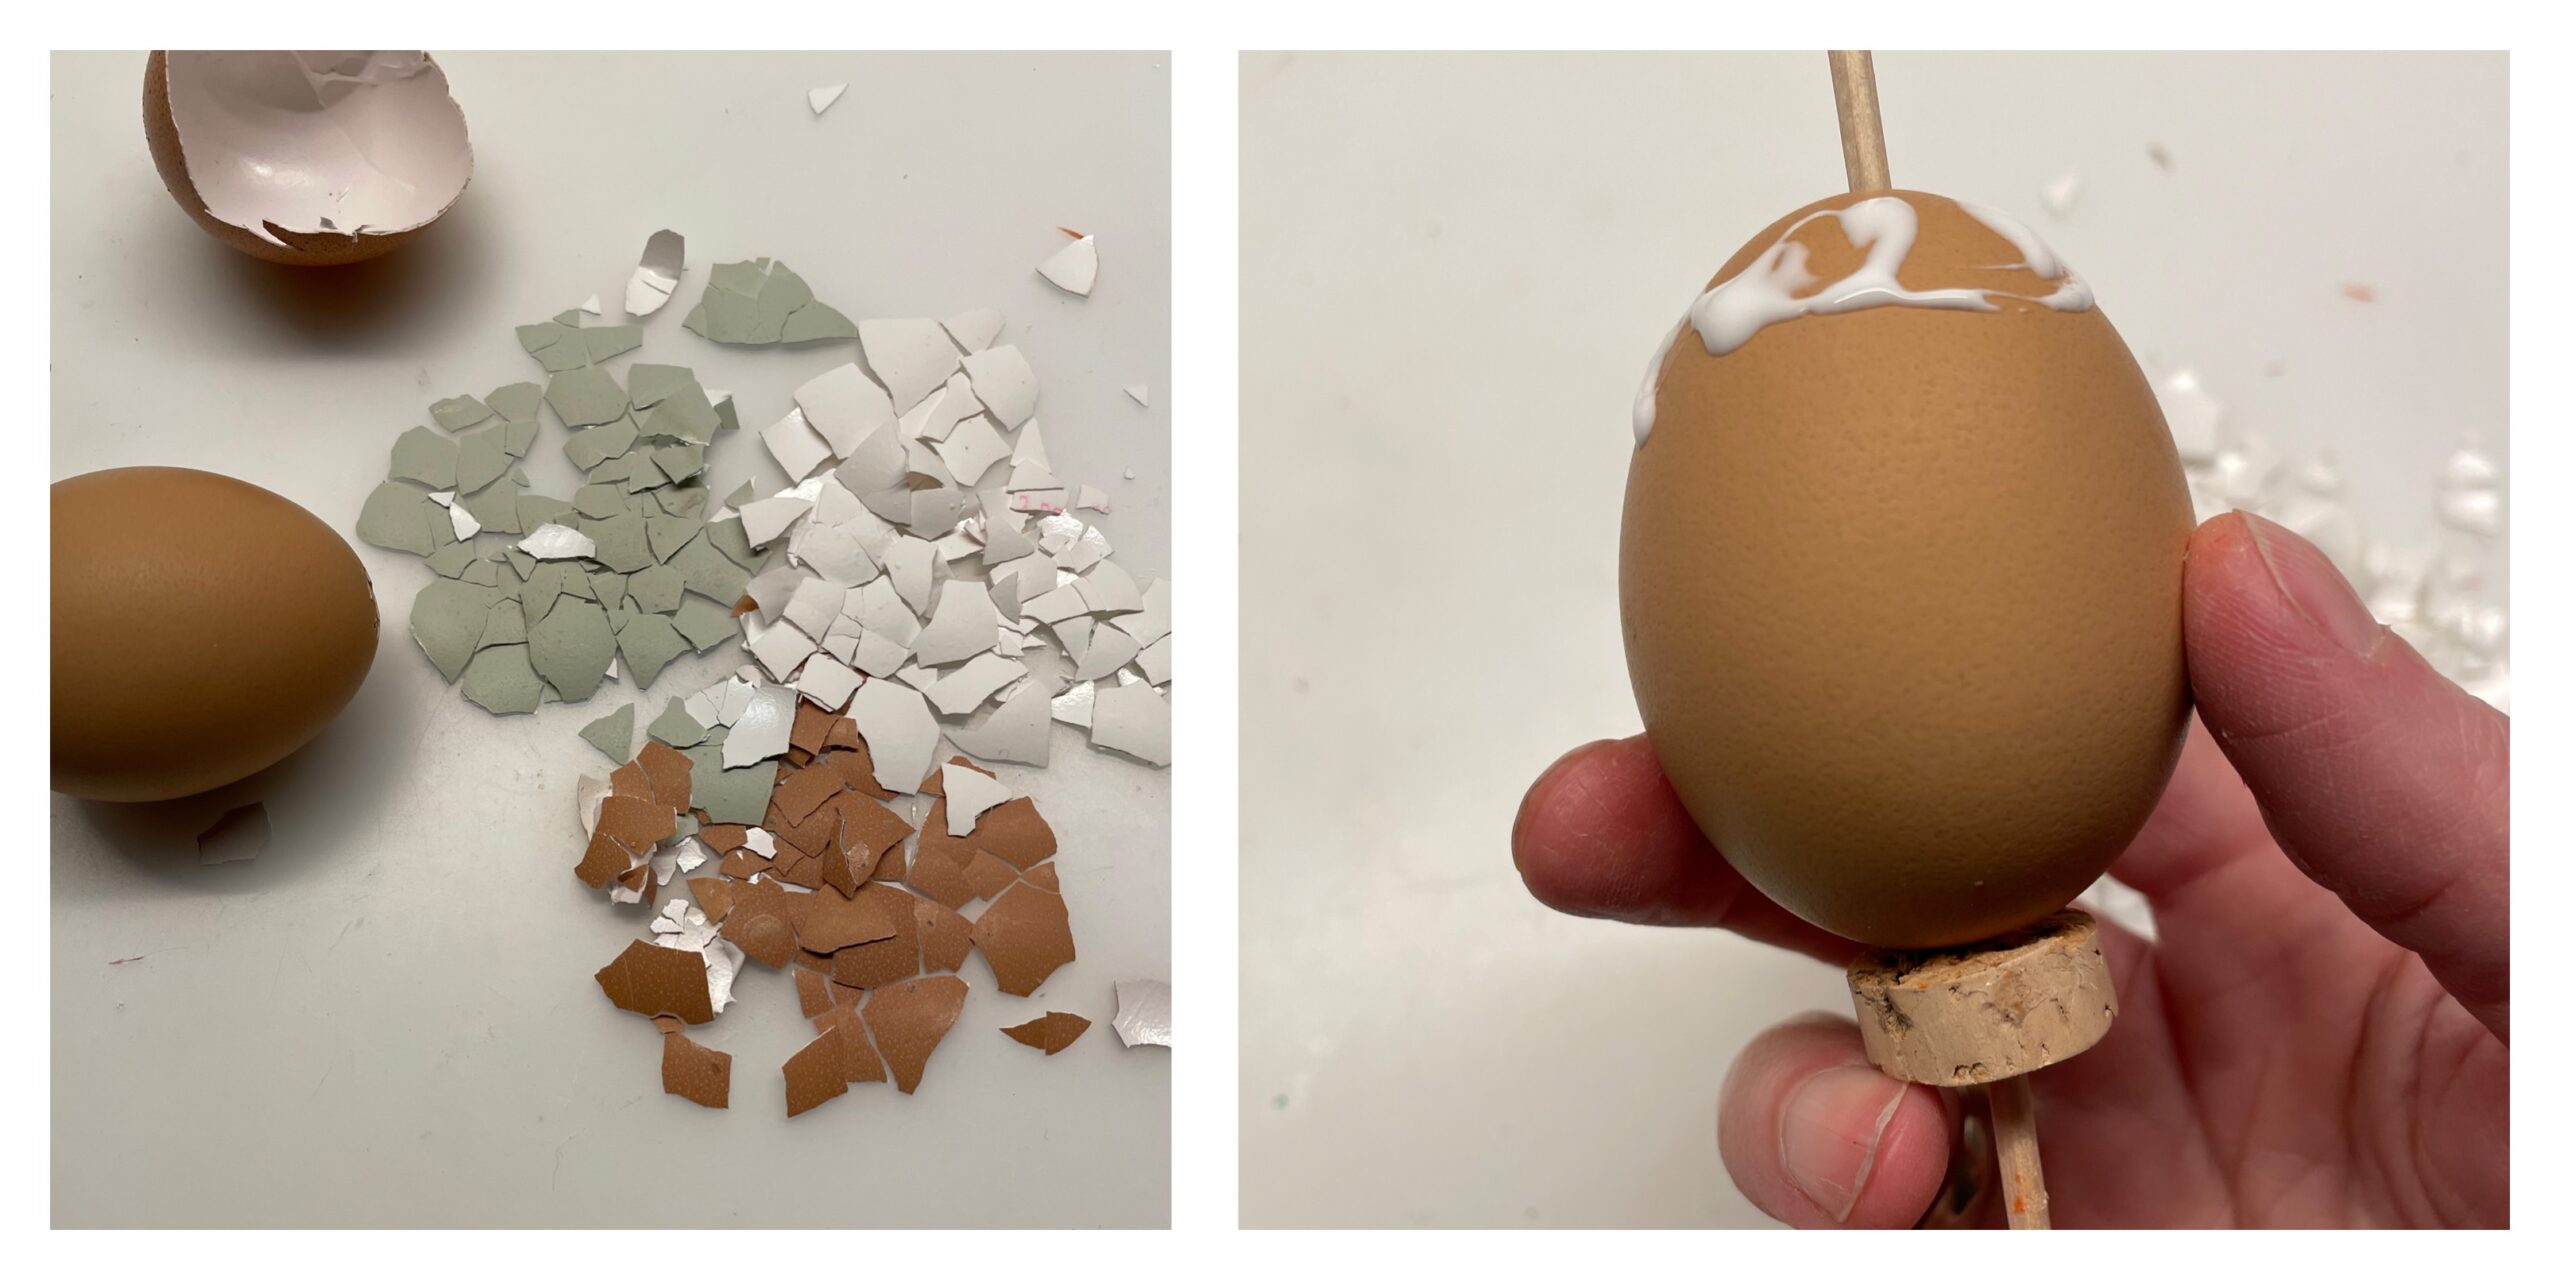
Bild zum Schritt 2 für das Bastel- und DIY-Abenteuer für Kinder: 'Jetzt steckt ihr ein ausgeblasenes Ei auf einen Schaschlikstab und...'

3

As soon as the cap is glued, put the second cork on her. Because this way the egg can be held and glued better.

Bild zum Schritt 3 für das Bastel- und DIY-Abenteuer für Kinder: 'Sobald die Kuppe beklebt ist, steckt ihr den zweiten Kork...'

4

Due to its thick consistency, wood glue is very practical for gluing the egg shells. These adhere quickly and can still be moved and put into shape.

Bild zum Schritt 4 für das Bastel- und DIY-Abenteuer für Kinder: 'Holzleim ist durch seine dickflüssige Konsistenz sehr praktisch für das...'

5

If the entire egg is glued, you pull the cork back and place the egg with the wooden skewer over the lid of an egg box for drying. Important: The egg must not lie on any place!

Bild zum Schritt 5 für das Bastel- und DIY-Abenteuer für Kinder: 'Ist das komplette Ei beklebt, dann zieht ihr die Korken...'

6

After drying you make the hanger. For this you need a burnt match (or toothpick) and a thread. Put the thread double on the table and the match diagonally on it. Now you pull the closed thread loops apart a little, so that a small loop develops.

Bild zum Schritt 6 für das Bastel- und DIY-Abenteuer für Kinder: 'Nach dem Trocknen bastelt ihr euch die Aufhängung. Dafür braucht...'

7

Now you put the double thread on the other side through the loop and push the loop to the match. Thus the thread holds on the match. Now push the knot into the lower half of the match and break the match in half.

Bild zum Schritt 7 für das Bastel- und DIY-Abenteuer für Kinder: 'Nun steckt ihr den doppelt liegenden Faden der anderen Seite...'

8

Now you push the thread with the match into the upper opening of the ice. Make sure that the knot does not slip from the match.

Bild zum Schritt 8 für das Bastel- und DIY-Abenteuer für Kinder: 'Jetzt schiebt ihr der Faden mit dem Streichholz in die...'

9

If the match disappears in the egg, it positions itself and thus holds the thread to hang up. Then you knot the open thread end and the suspension is ready.

Bild zum Schritt 9 für das Bastel- und DIY-Abenteuer für Kinder: 'Verschwindet das Streichholz im Ei, positioniert es sich von alleine...'

10

Finally decorates the egg with eggshells on an Easter bouquet.

Bild zum Schritt 10 für das Bastel- und DIY-Abenteuer für Kinder: 'Dekoriert abschließend das Ei mit Eierschalen an einem Osterstrauß.'

11

Stay creative and have fun trying out and decorating!

Materials

 1 Egg blown outor plastic egg
 Eggshells in different egg colours
 Wood glue
 Matches
 Thread
 1 Shashlikstab
 2 Cork discsOf a bottled cork
 1 Egg carton
 1 Screw-glass lids Possibly for glue
 1 Brushespossibly for application
 1 Builder's pad
 1 LapsWet to wipe the finger
All links marked with a shopping cart lead to Amazon - here we have selected products that we would order ourselves and in part also ordered. In a qualified purchase via the advertising link, we as Amazon partner receive a commission, for you there are no costs. You thus support our cost- and advertising banner-free, educational offer.

Directions

1

Use different colored egg shells, which you collect and let dry already days before.

First you crush the eggshells with a flat hand on the table and leave them broken apart in colour.

Bild zum Schritt 1 für das Bastel- und DIY-Abenteuer für Kinder: 'Verwendet verschiedenfarbige Eierschalen, die ihr bereits Tage vorher schon sammelt...'

2

Now you put a blown-out egg on a shishlikstab and fix it with a piece of cork. Then you put wood glue on the top and start to stick the eggshells on.
Do not stick the eggshells on top of each other, but leave gaps between the eggshells. The wood glue becomes transparent when drying!

Bild zum Schritt 2 für das Bastel- und DIY-Abenteuer für Kinder: 'Jetzt steckt ihr ein ausgeblasenes Ei auf einen Schaschlikstab und...'

3

As soon as the cap is glued, put the second cork on her. Because this way the egg can be held and glued better.
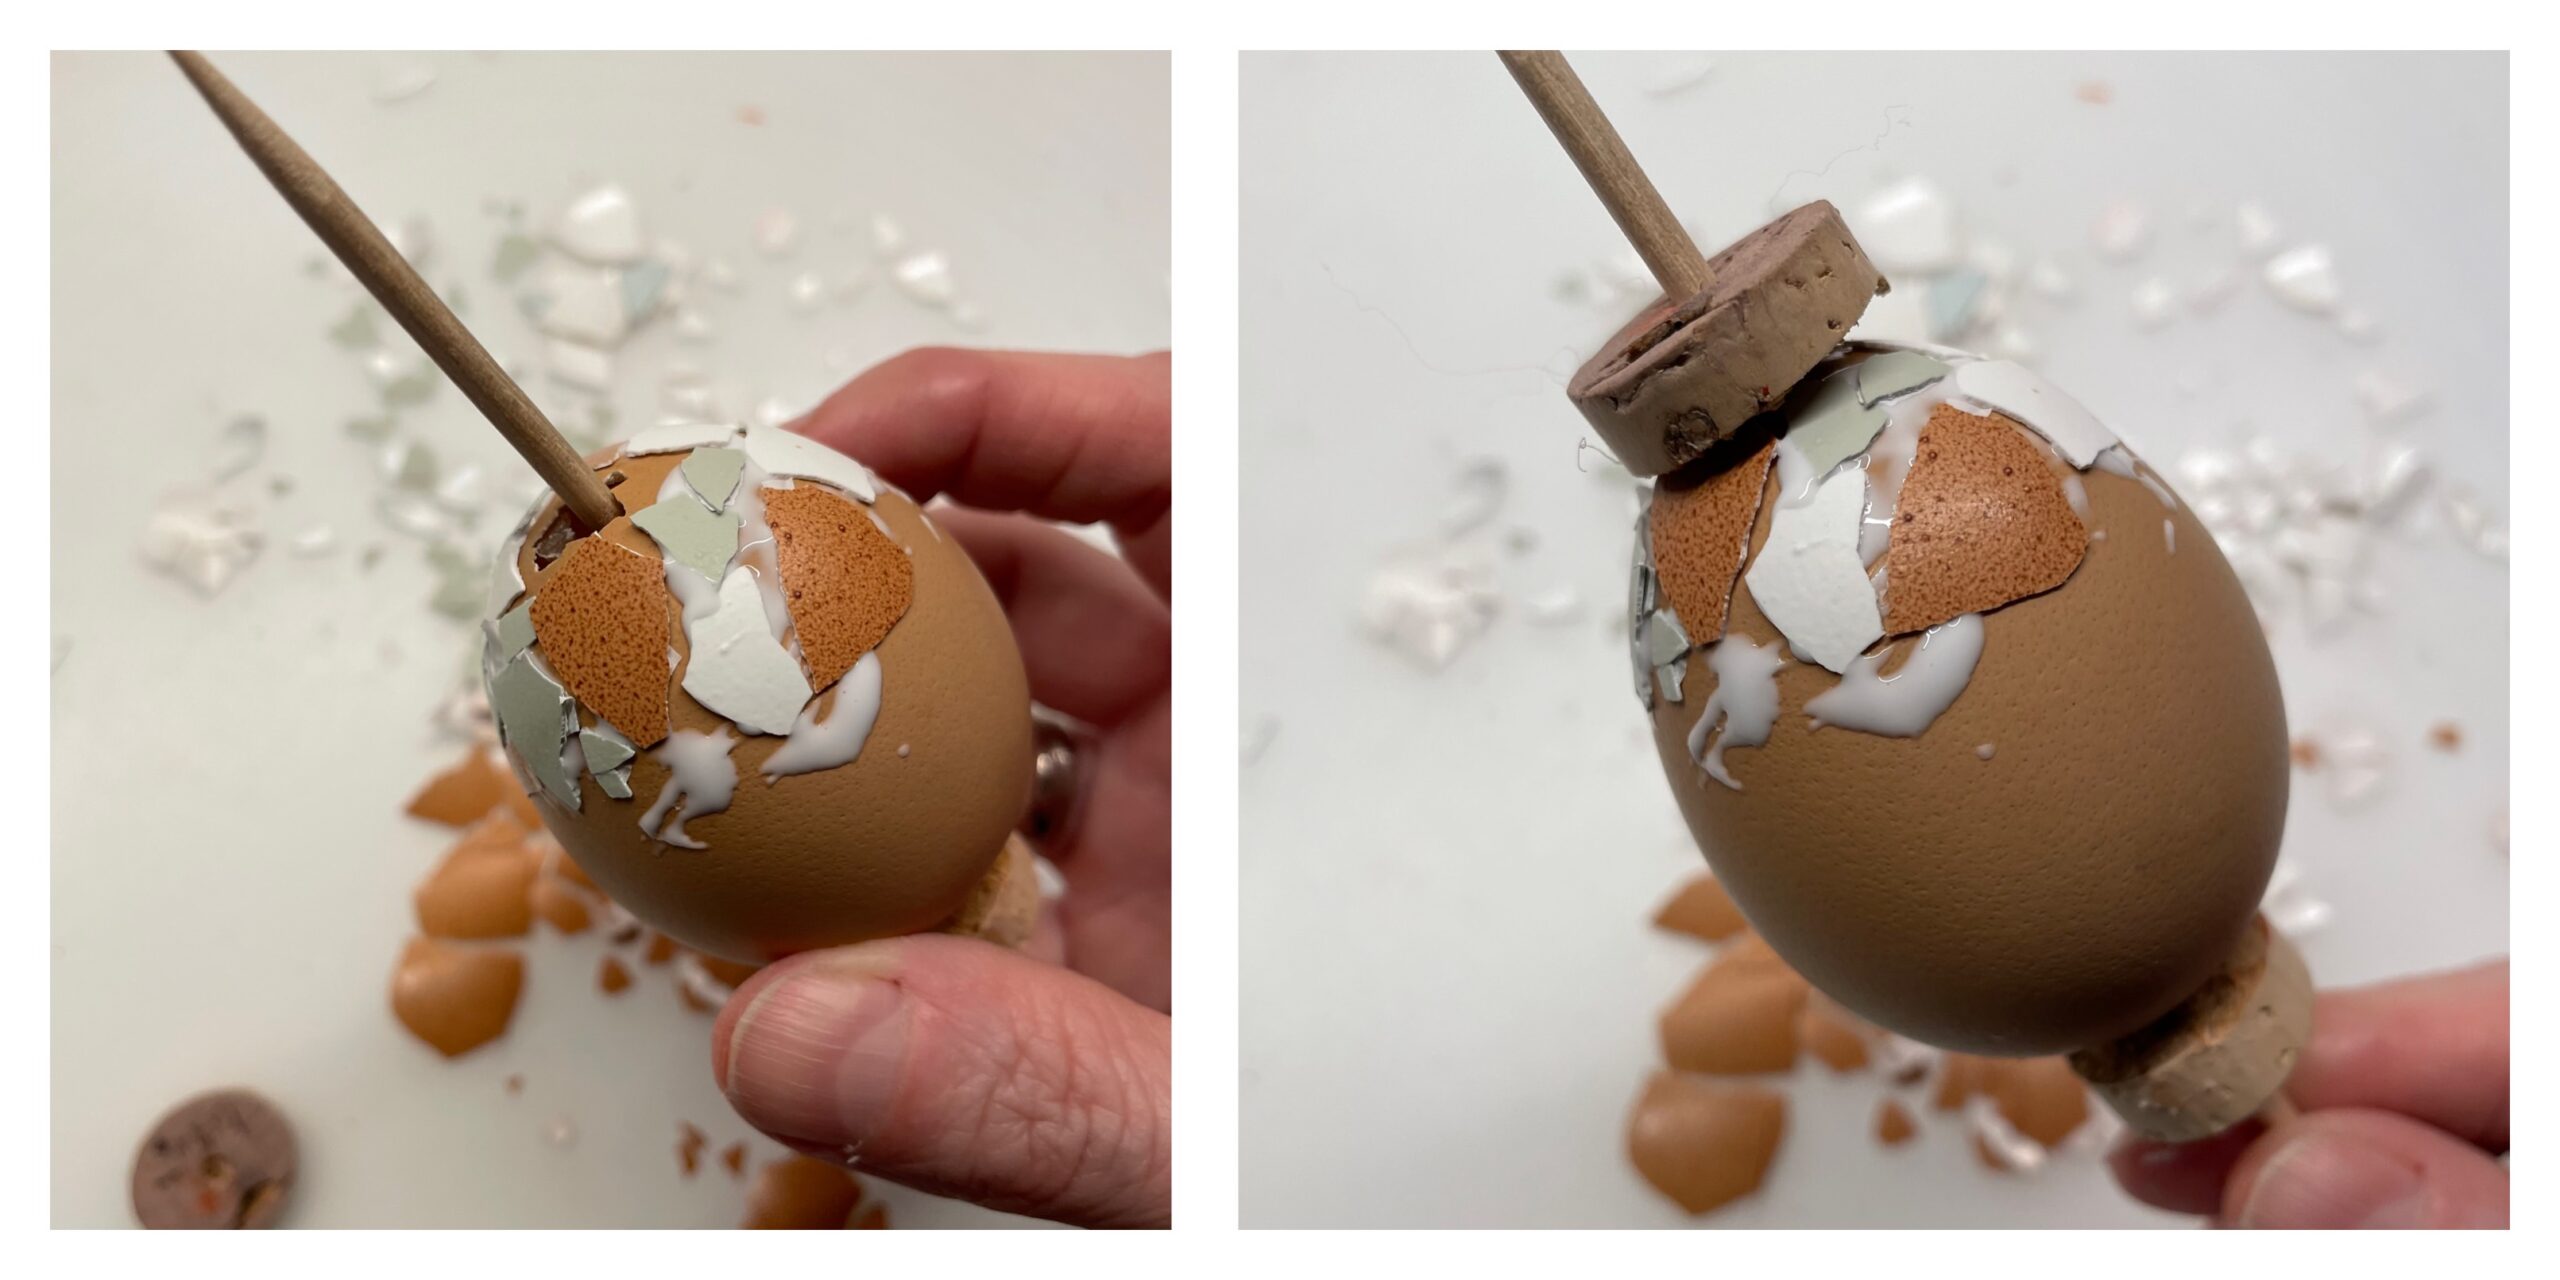
Bild zum Schritt 3 für das Bastel- und DIY-Abenteuer für Kinder: 'Sobald die Kuppe beklebt ist, steckt ihr den zweiten Kork...'

4

Due to its thick consistency, wood glue is very practical for gluing the egg shells. These adhere quickly and can still be moved and put into shape.
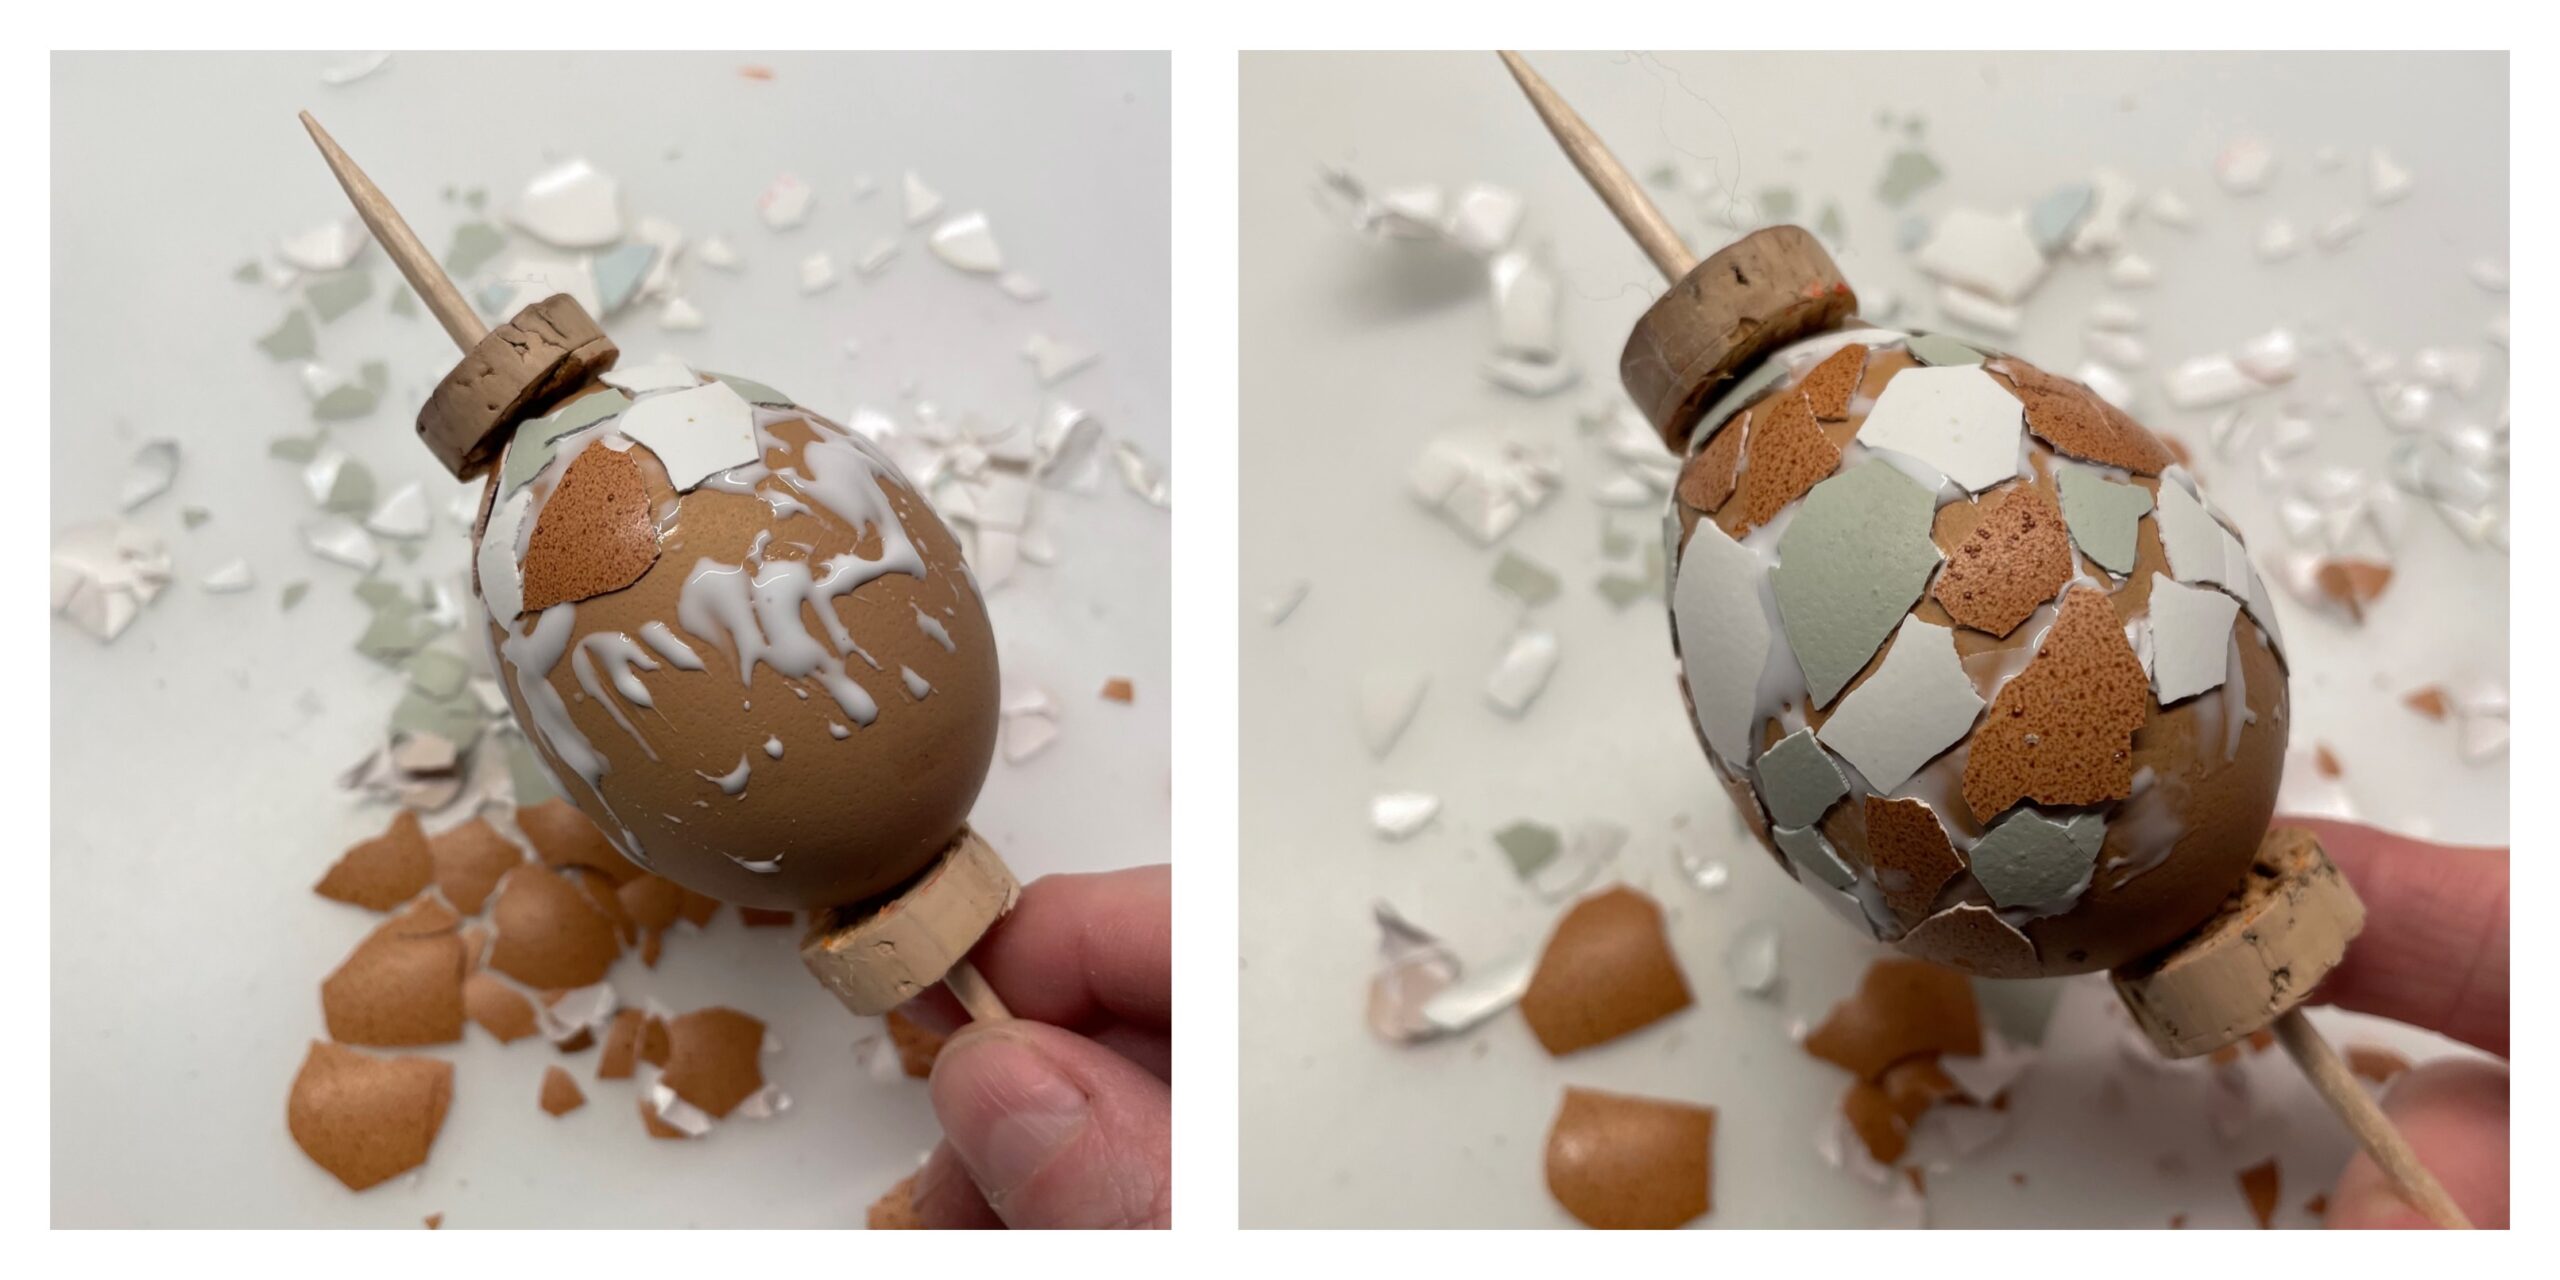
Bild zum Schritt 4 für das Bastel- und DIY-Abenteuer für Kinder: 'Holzleim ist durch seine dickflüssige Konsistenz sehr praktisch für das...'

5

If the entire egg is glued, you pull the cork back and place the egg with the wooden skewer over the lid of an egg box for drying. Important: The egg must not lie on any place!
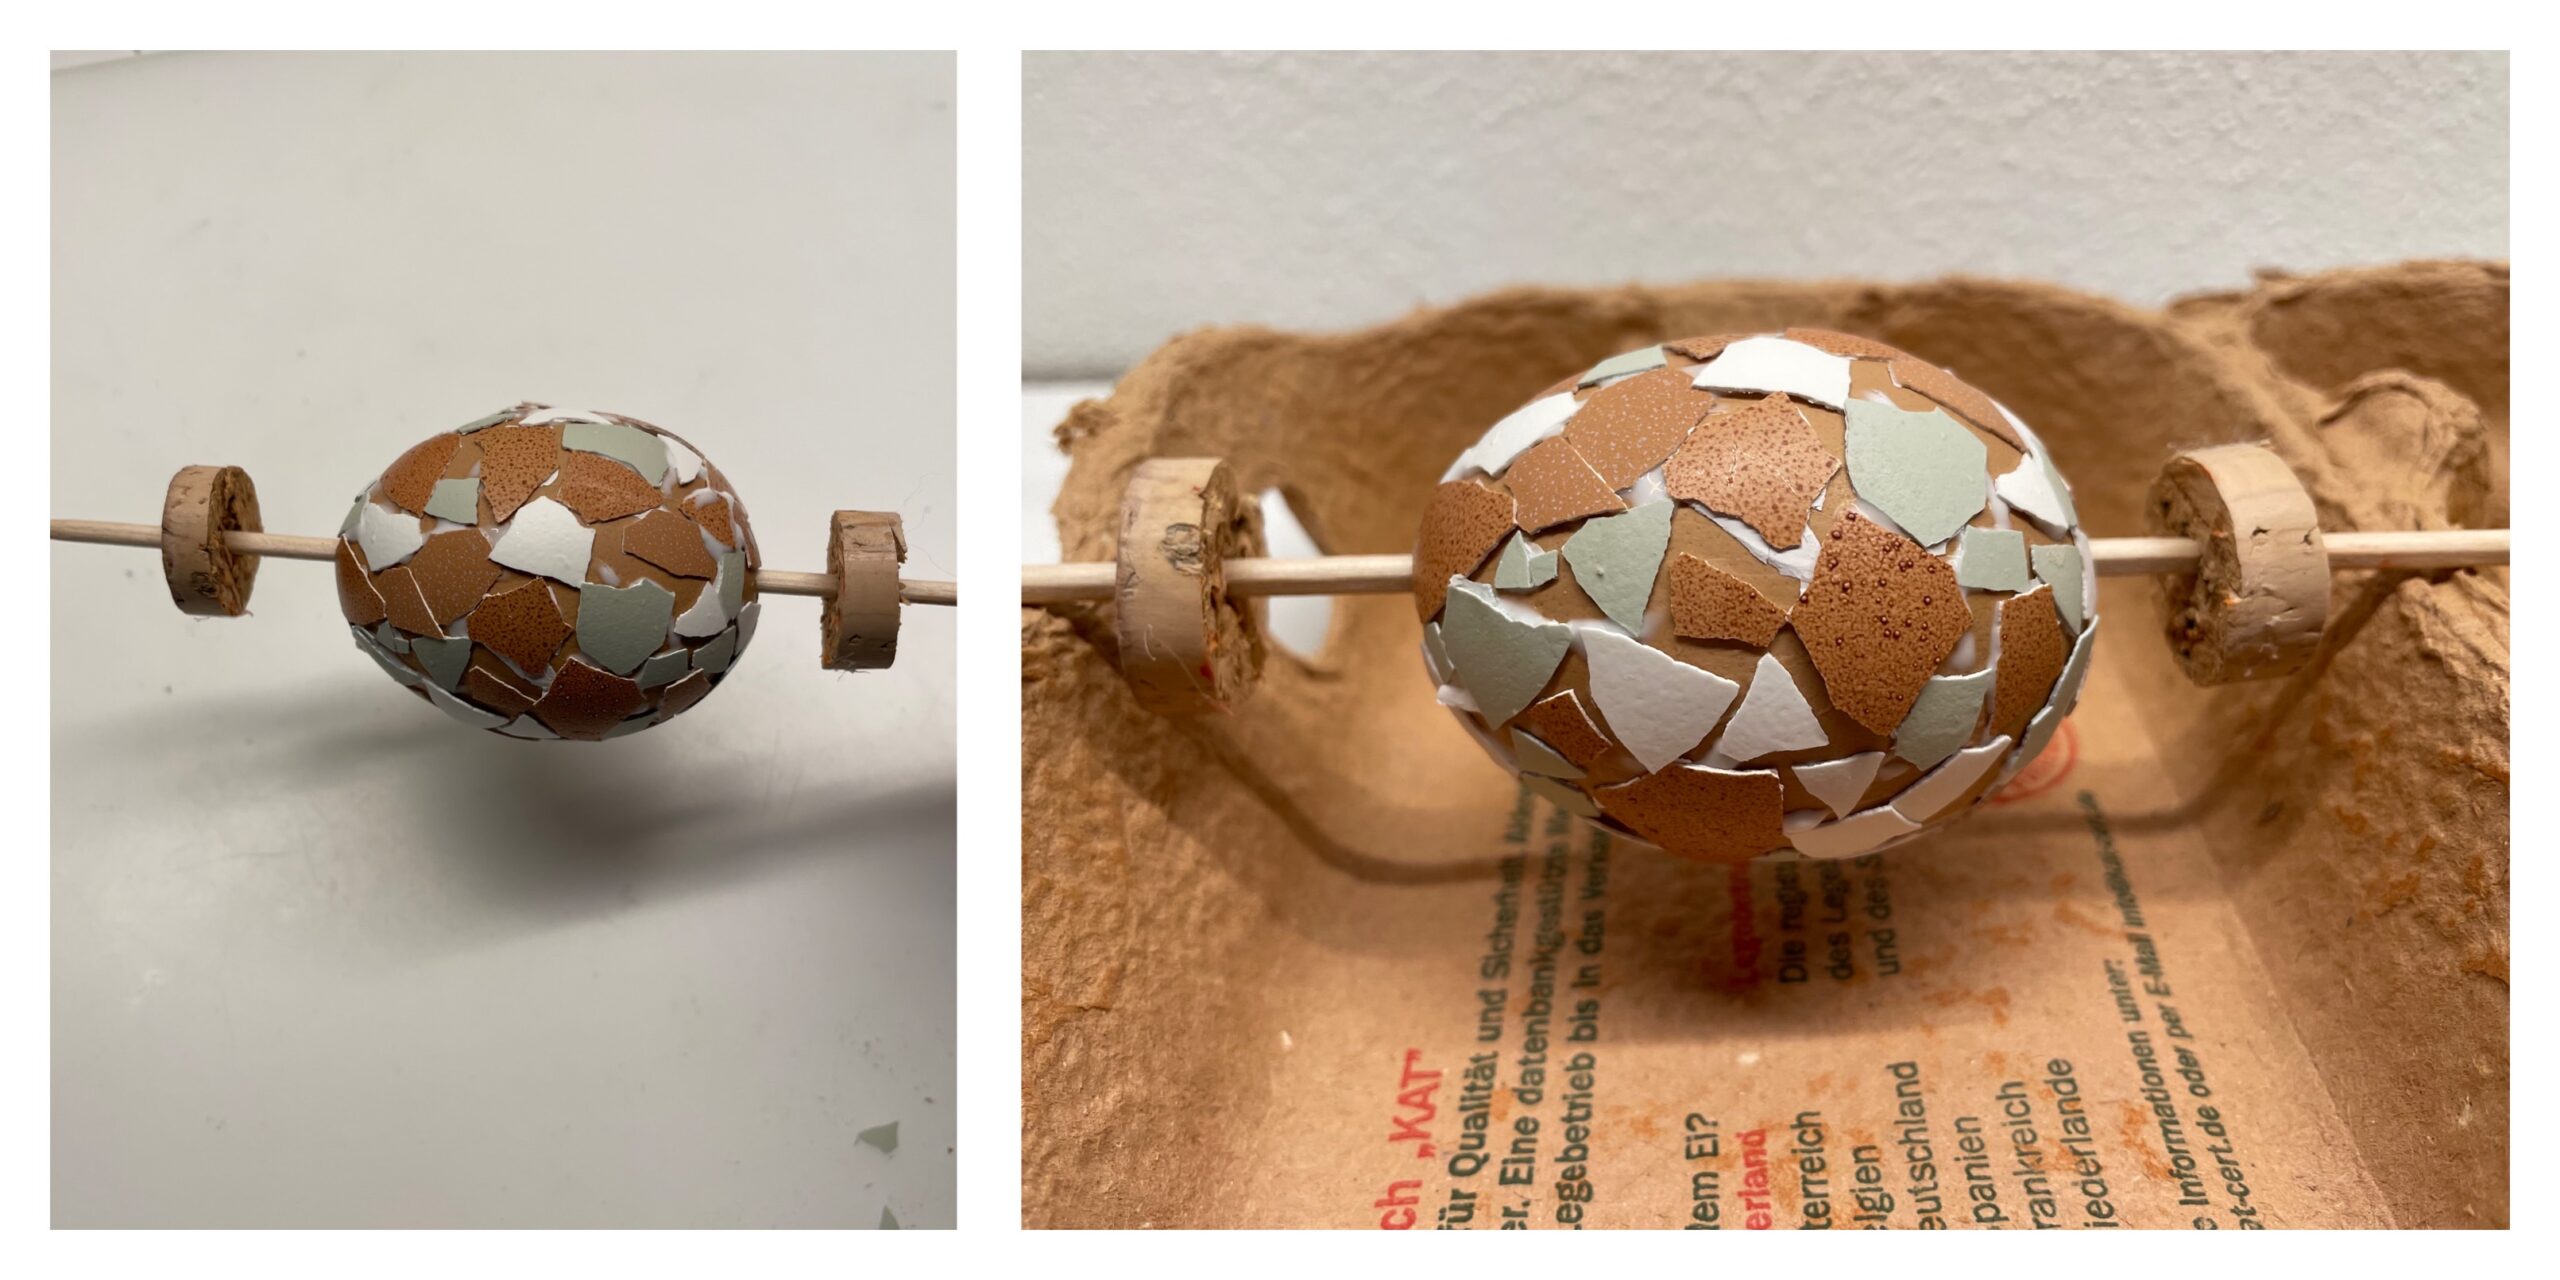
Bild zum Schritt 5 für das Bastel- und DIY-Abenteuer für Kinder: 'Ist das komplette Ei beklebt, dann zieht ihr die Korken...'

6

After drying you make the hanger. For this you need a burnt match (or toothpick) and a thread. Put the thread double on the table and the match diagonally on it. Now you pull the closed thread loops apart a little, so that a small loop develops.
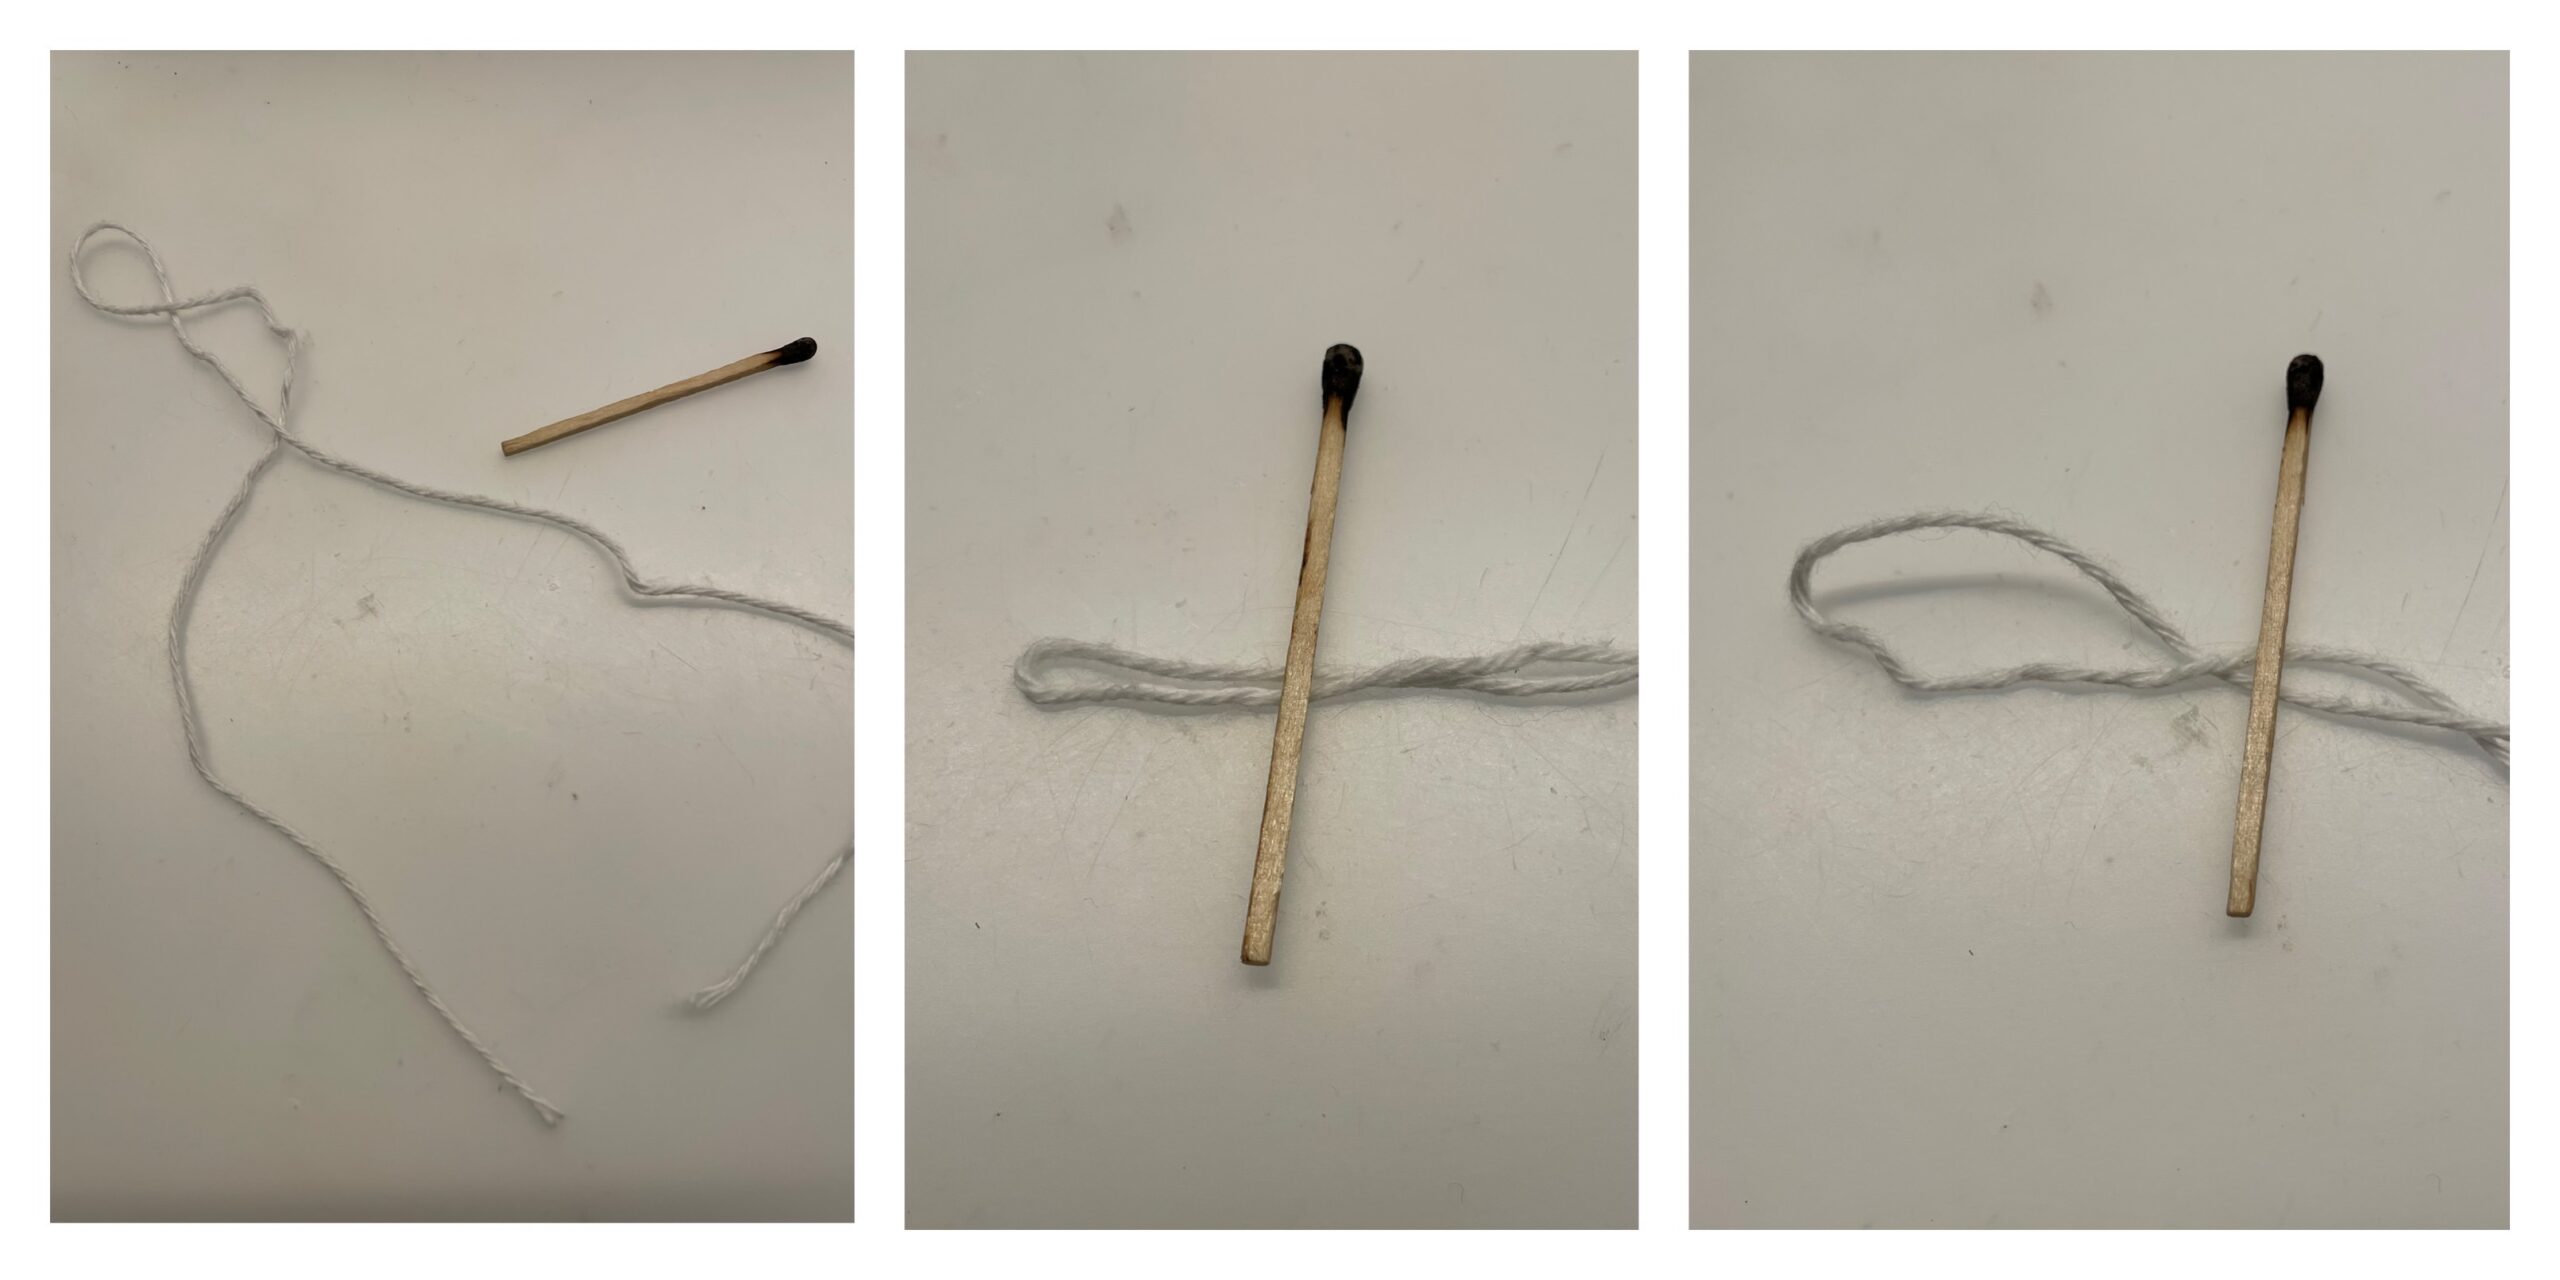
Bild zum Schritt 6 für das Bastel- und DIY-Abenteuer für Kinder: 'Nach dem Trocknen bastelt ihr euch die Aufhängung. Dafür braucht...'

7

Now you put the double thread on the other side through the loop and push the loop to the match. Thus the thread holds on the match. Now push the knot into the lower half of the match and break the match in half.
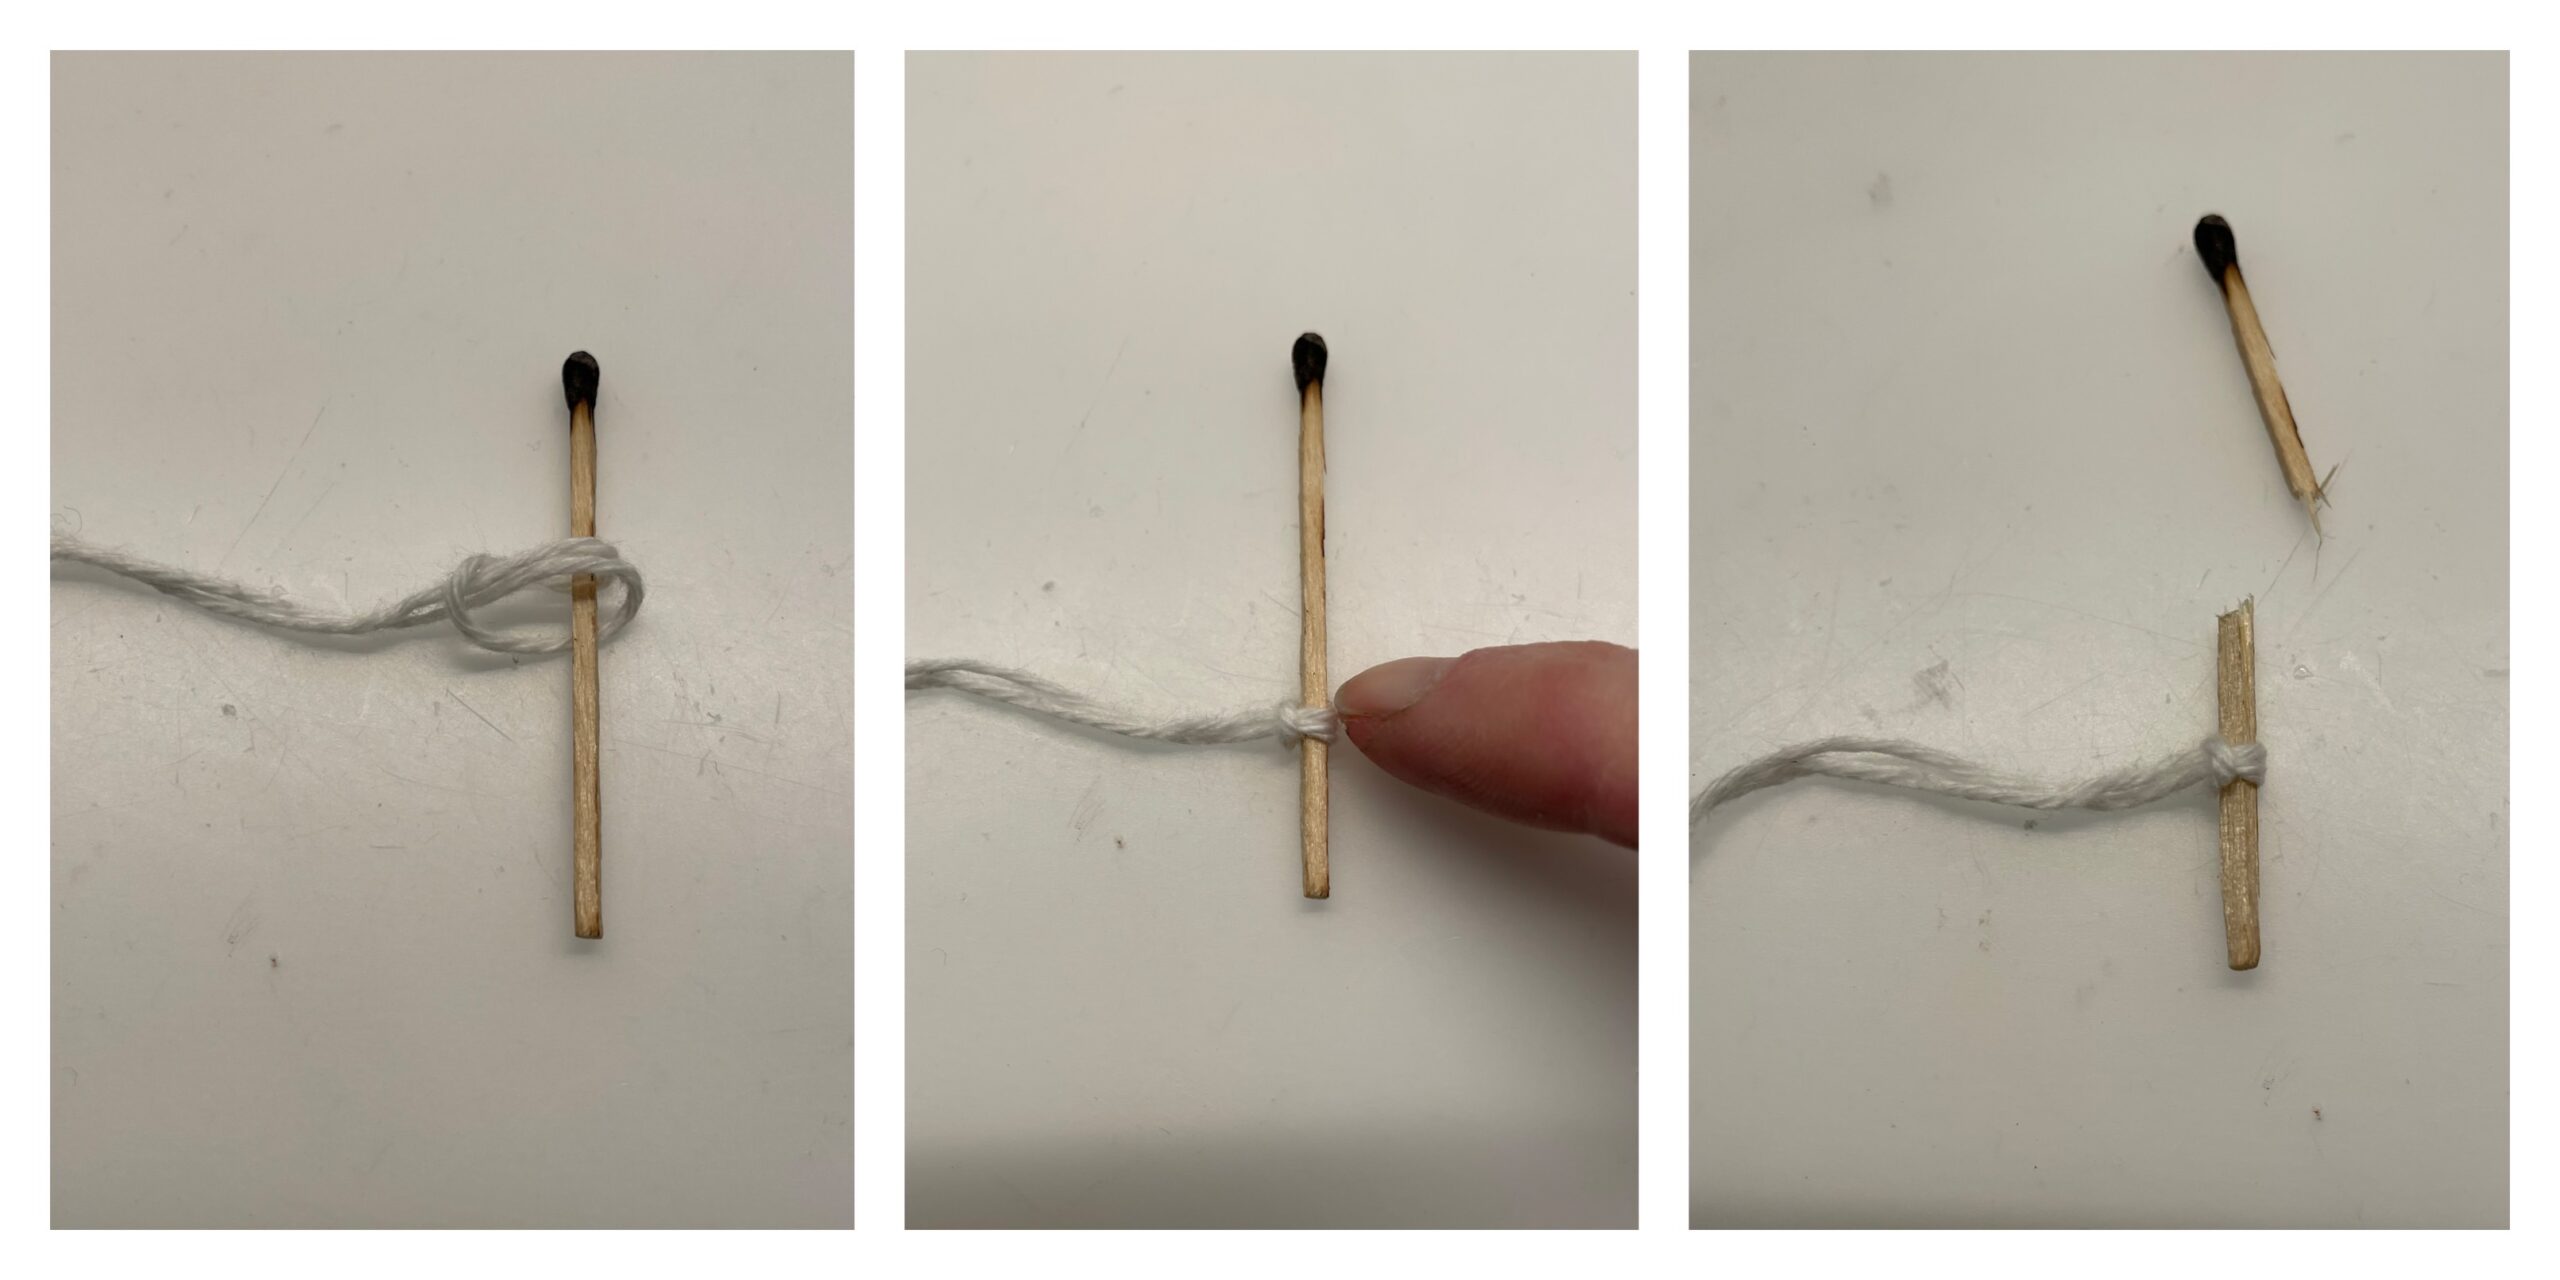
Bild zum Schritt 7 für das Bastel- und DIY-Abenteuer für Kinder: 'Nun steckt ihr den doppelt liegenden Faden der anderen Seite...'

8

Now you push the thread with the match into the upper opening of the ice. Make sure that the knot does not slip from the match.
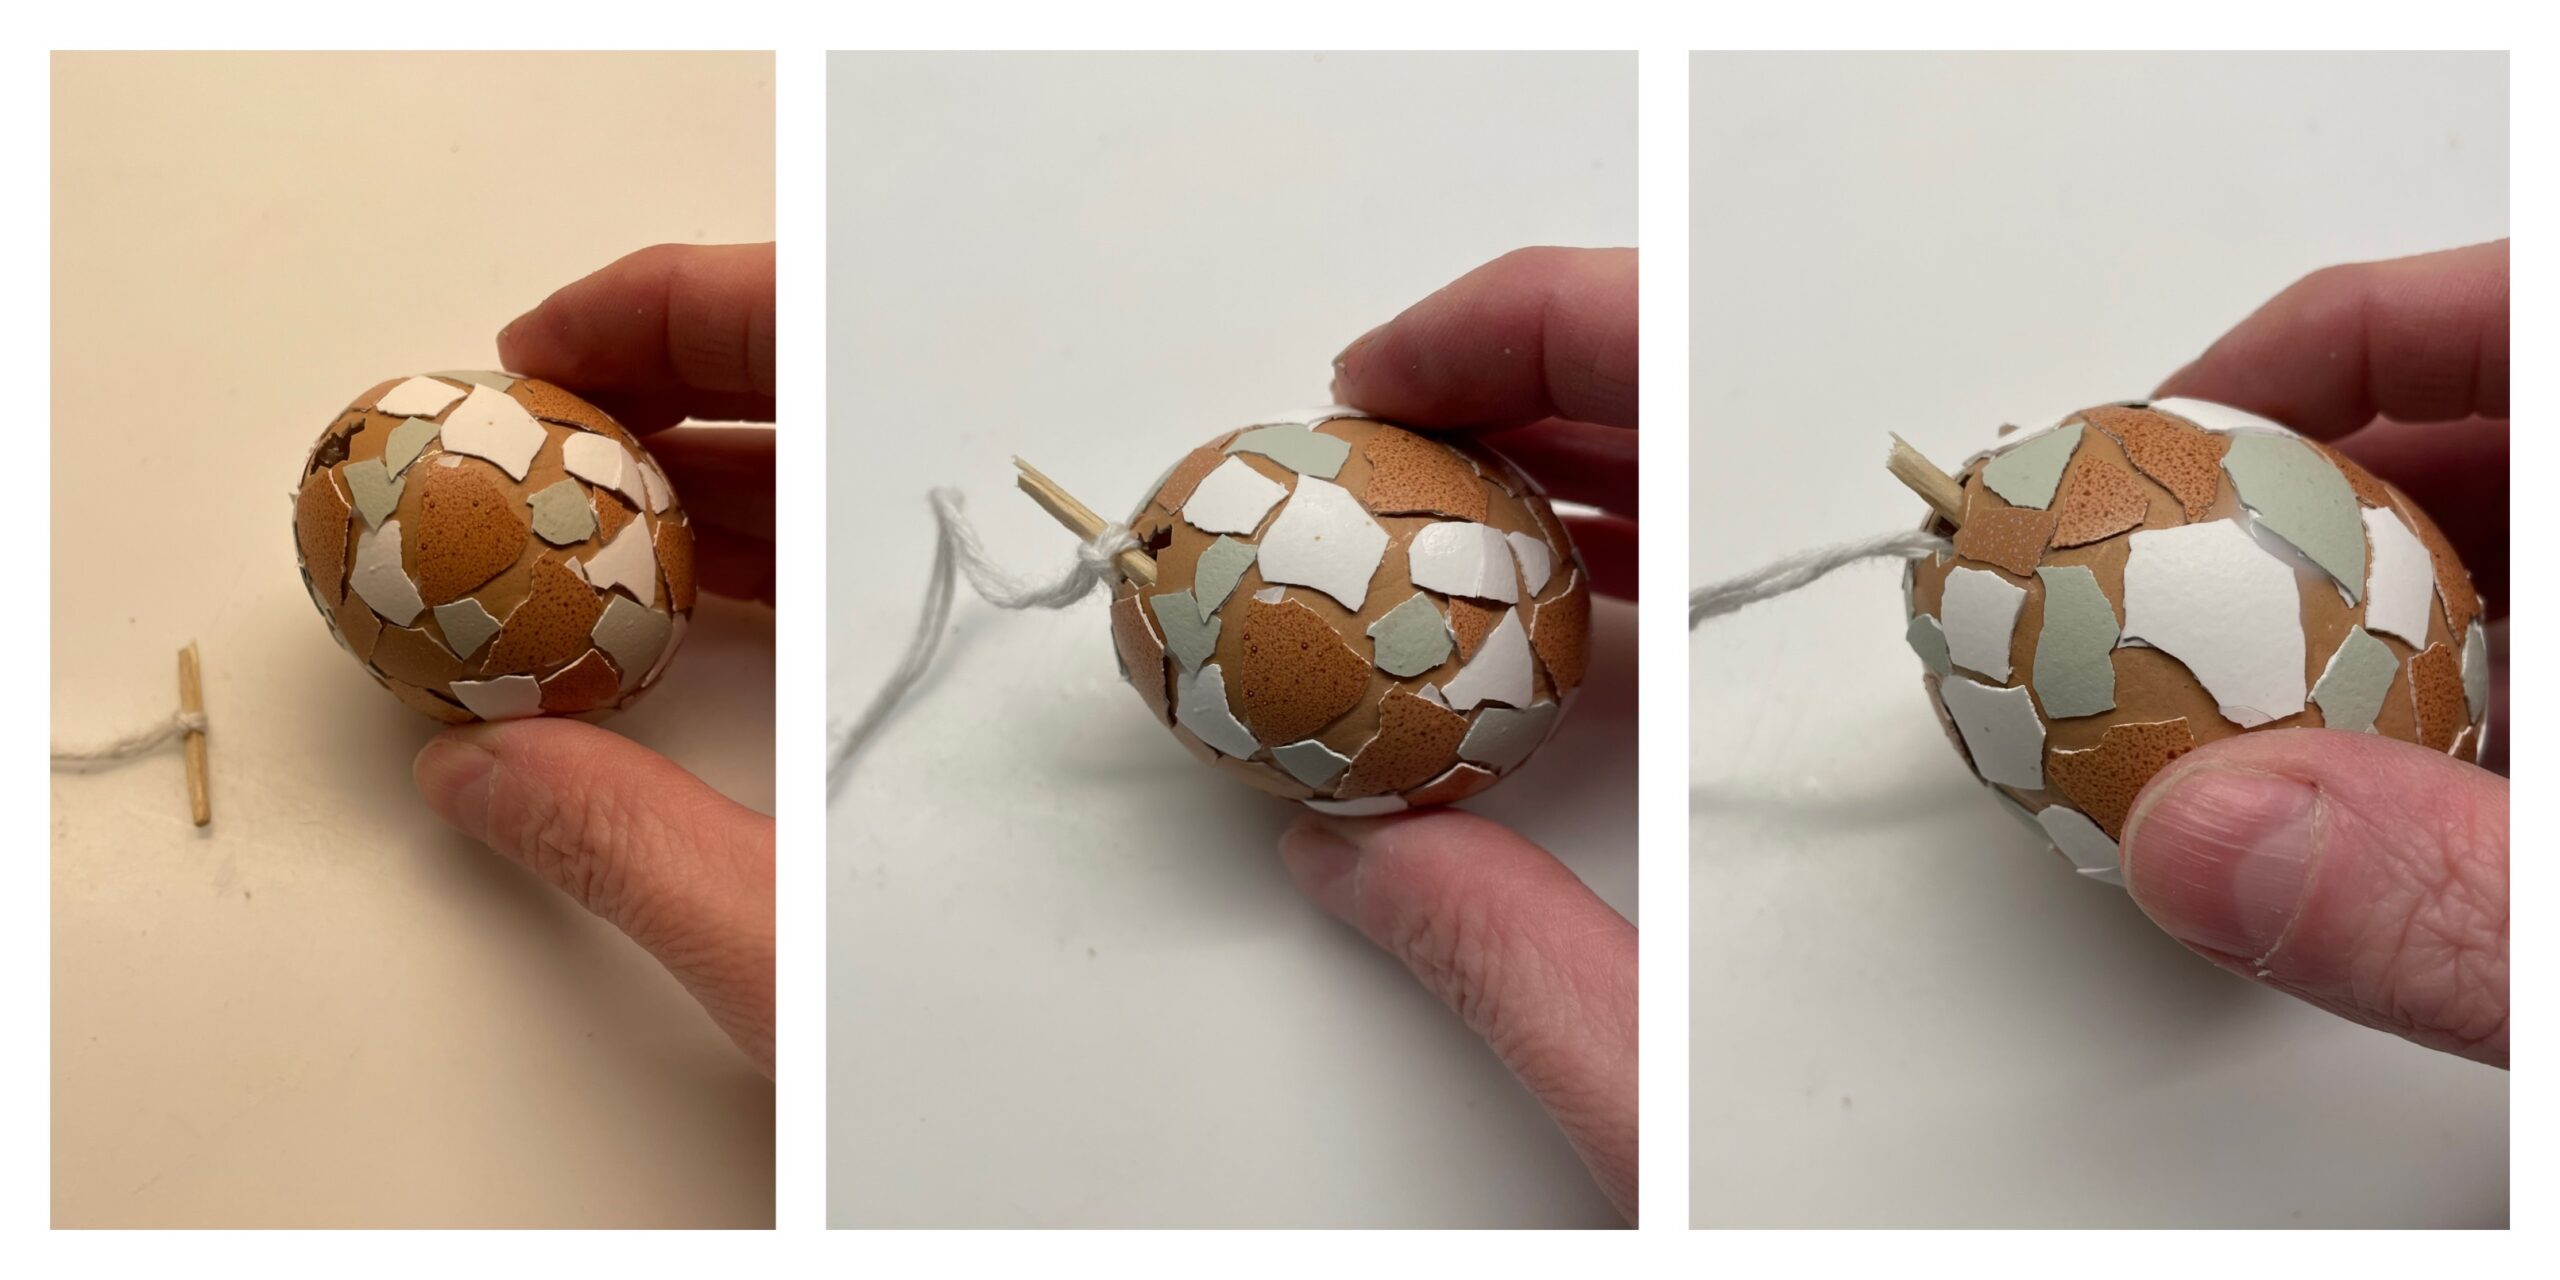
Bild zum Schritt 8 für das Bastel- und DIY-Abenteuer für Kinder: 'Jetzt schiebt ihr der Faden mit dem Streichholz in die...'

9

If the match disappears in the egg, it positions itself and thus holds the thread to hang up. Then you knot the open thread end and the suspension is ready.
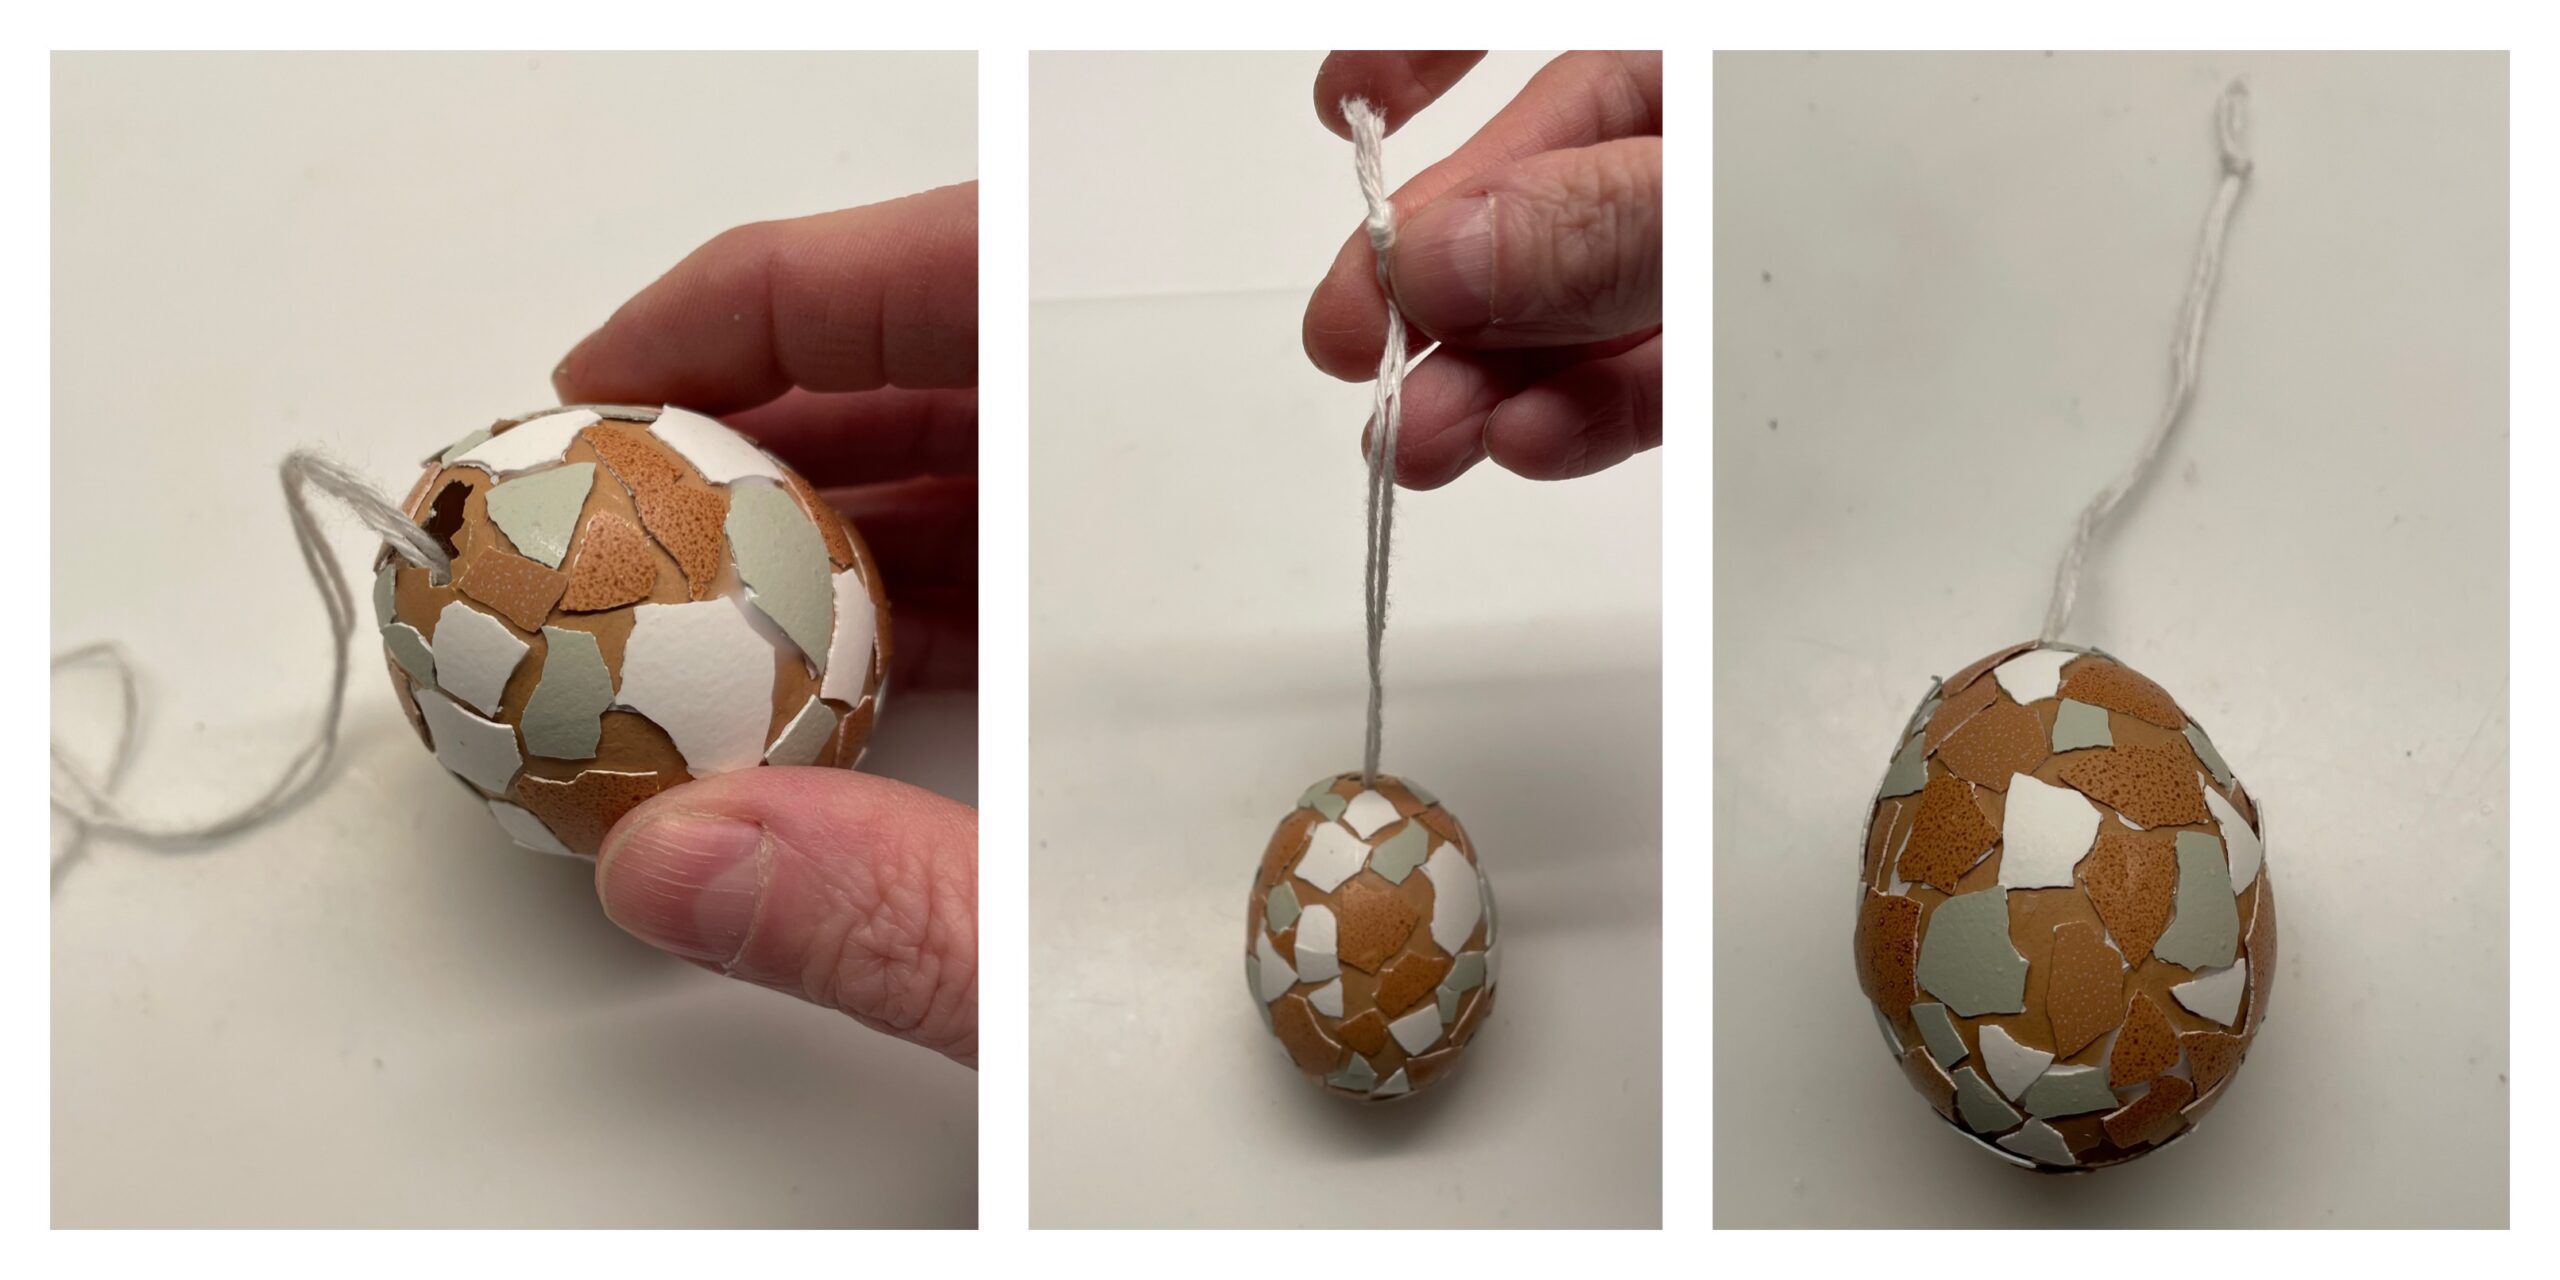
Bild zum Schritt 9 für das Bastel- und DIY-Abenteuer für Kinder: 'Verschwindet das Streichholz im Ei, positioniert es sich von alleine...'

10

Finally decorates the egg with eggshells on an Easter bouquet.
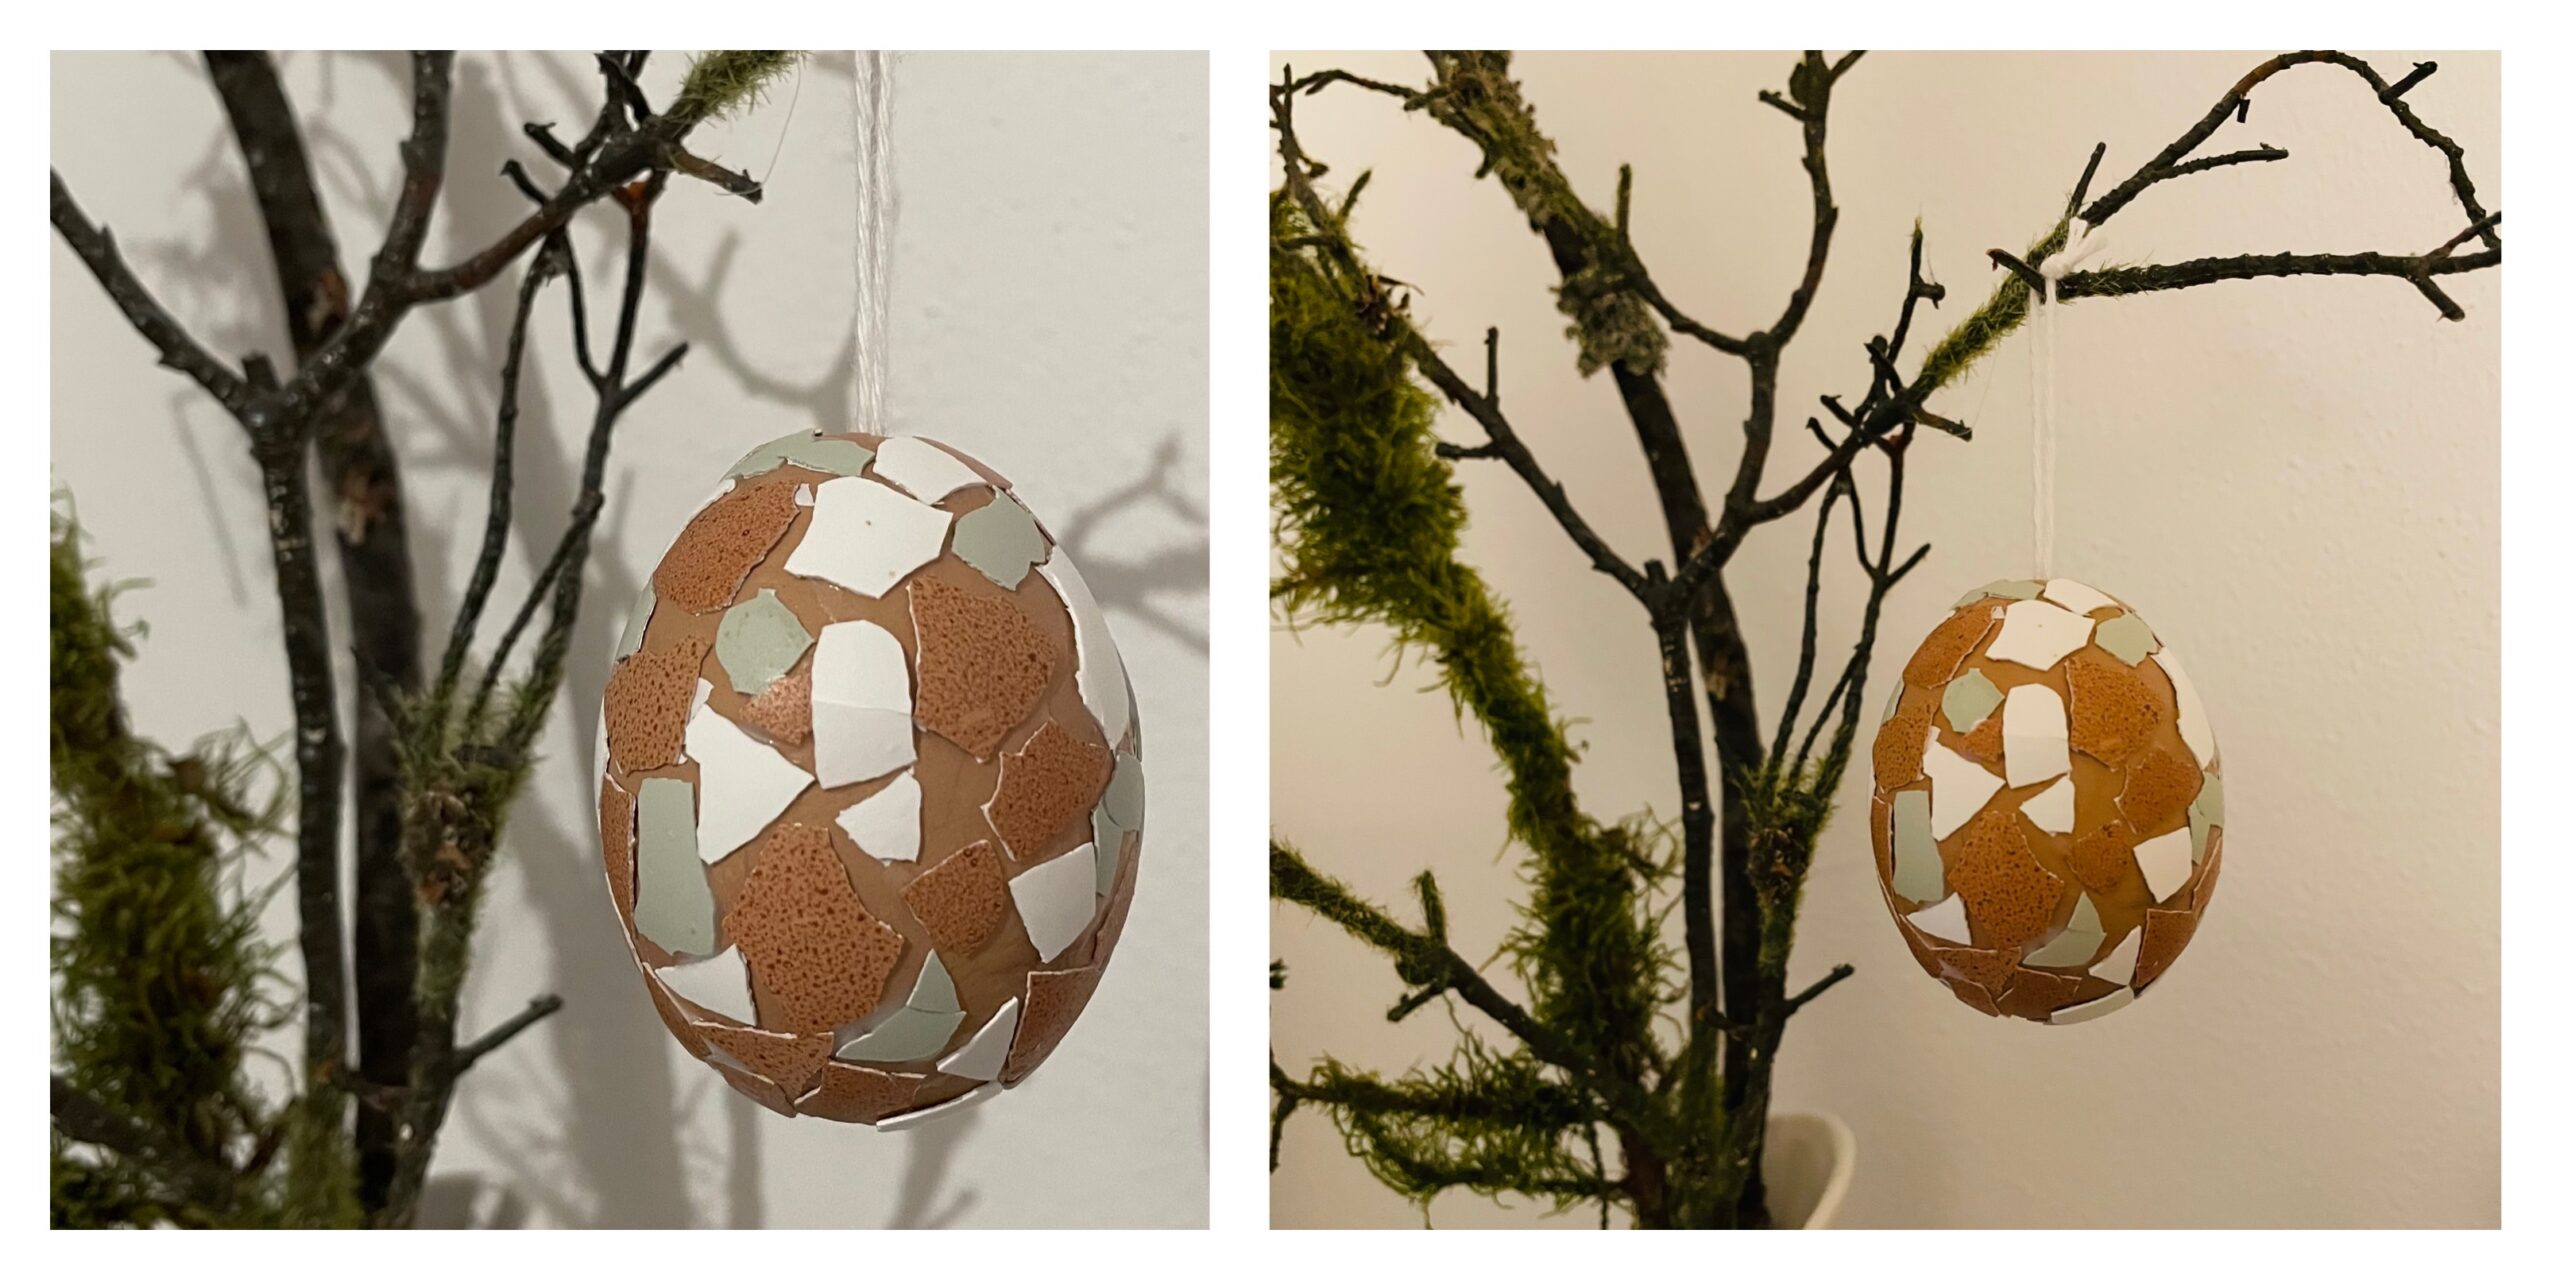
Bild zum Schritt 10 für das Bastel- und DIY-Abenteuer für Kinder: 'Dekoriert abschließend das Ei mit Eierschalen an einem Osterstrauß.'

11

Stay creative and have fun trying out and decorating!

Easter egg with eggshells

Follow us on Facebook , Instagram and Pinterest
Don't miss any more adventures: Our bottle mail

Leave a Reply

Your email address will not be published.

The maximum upload file size: 5 MB. You can upload: image, document. Drop file here