Sewing chestnut fish

AdventurerKatzi
Rating5.07.3 Thousand times & (1) DifficultyAdvanced

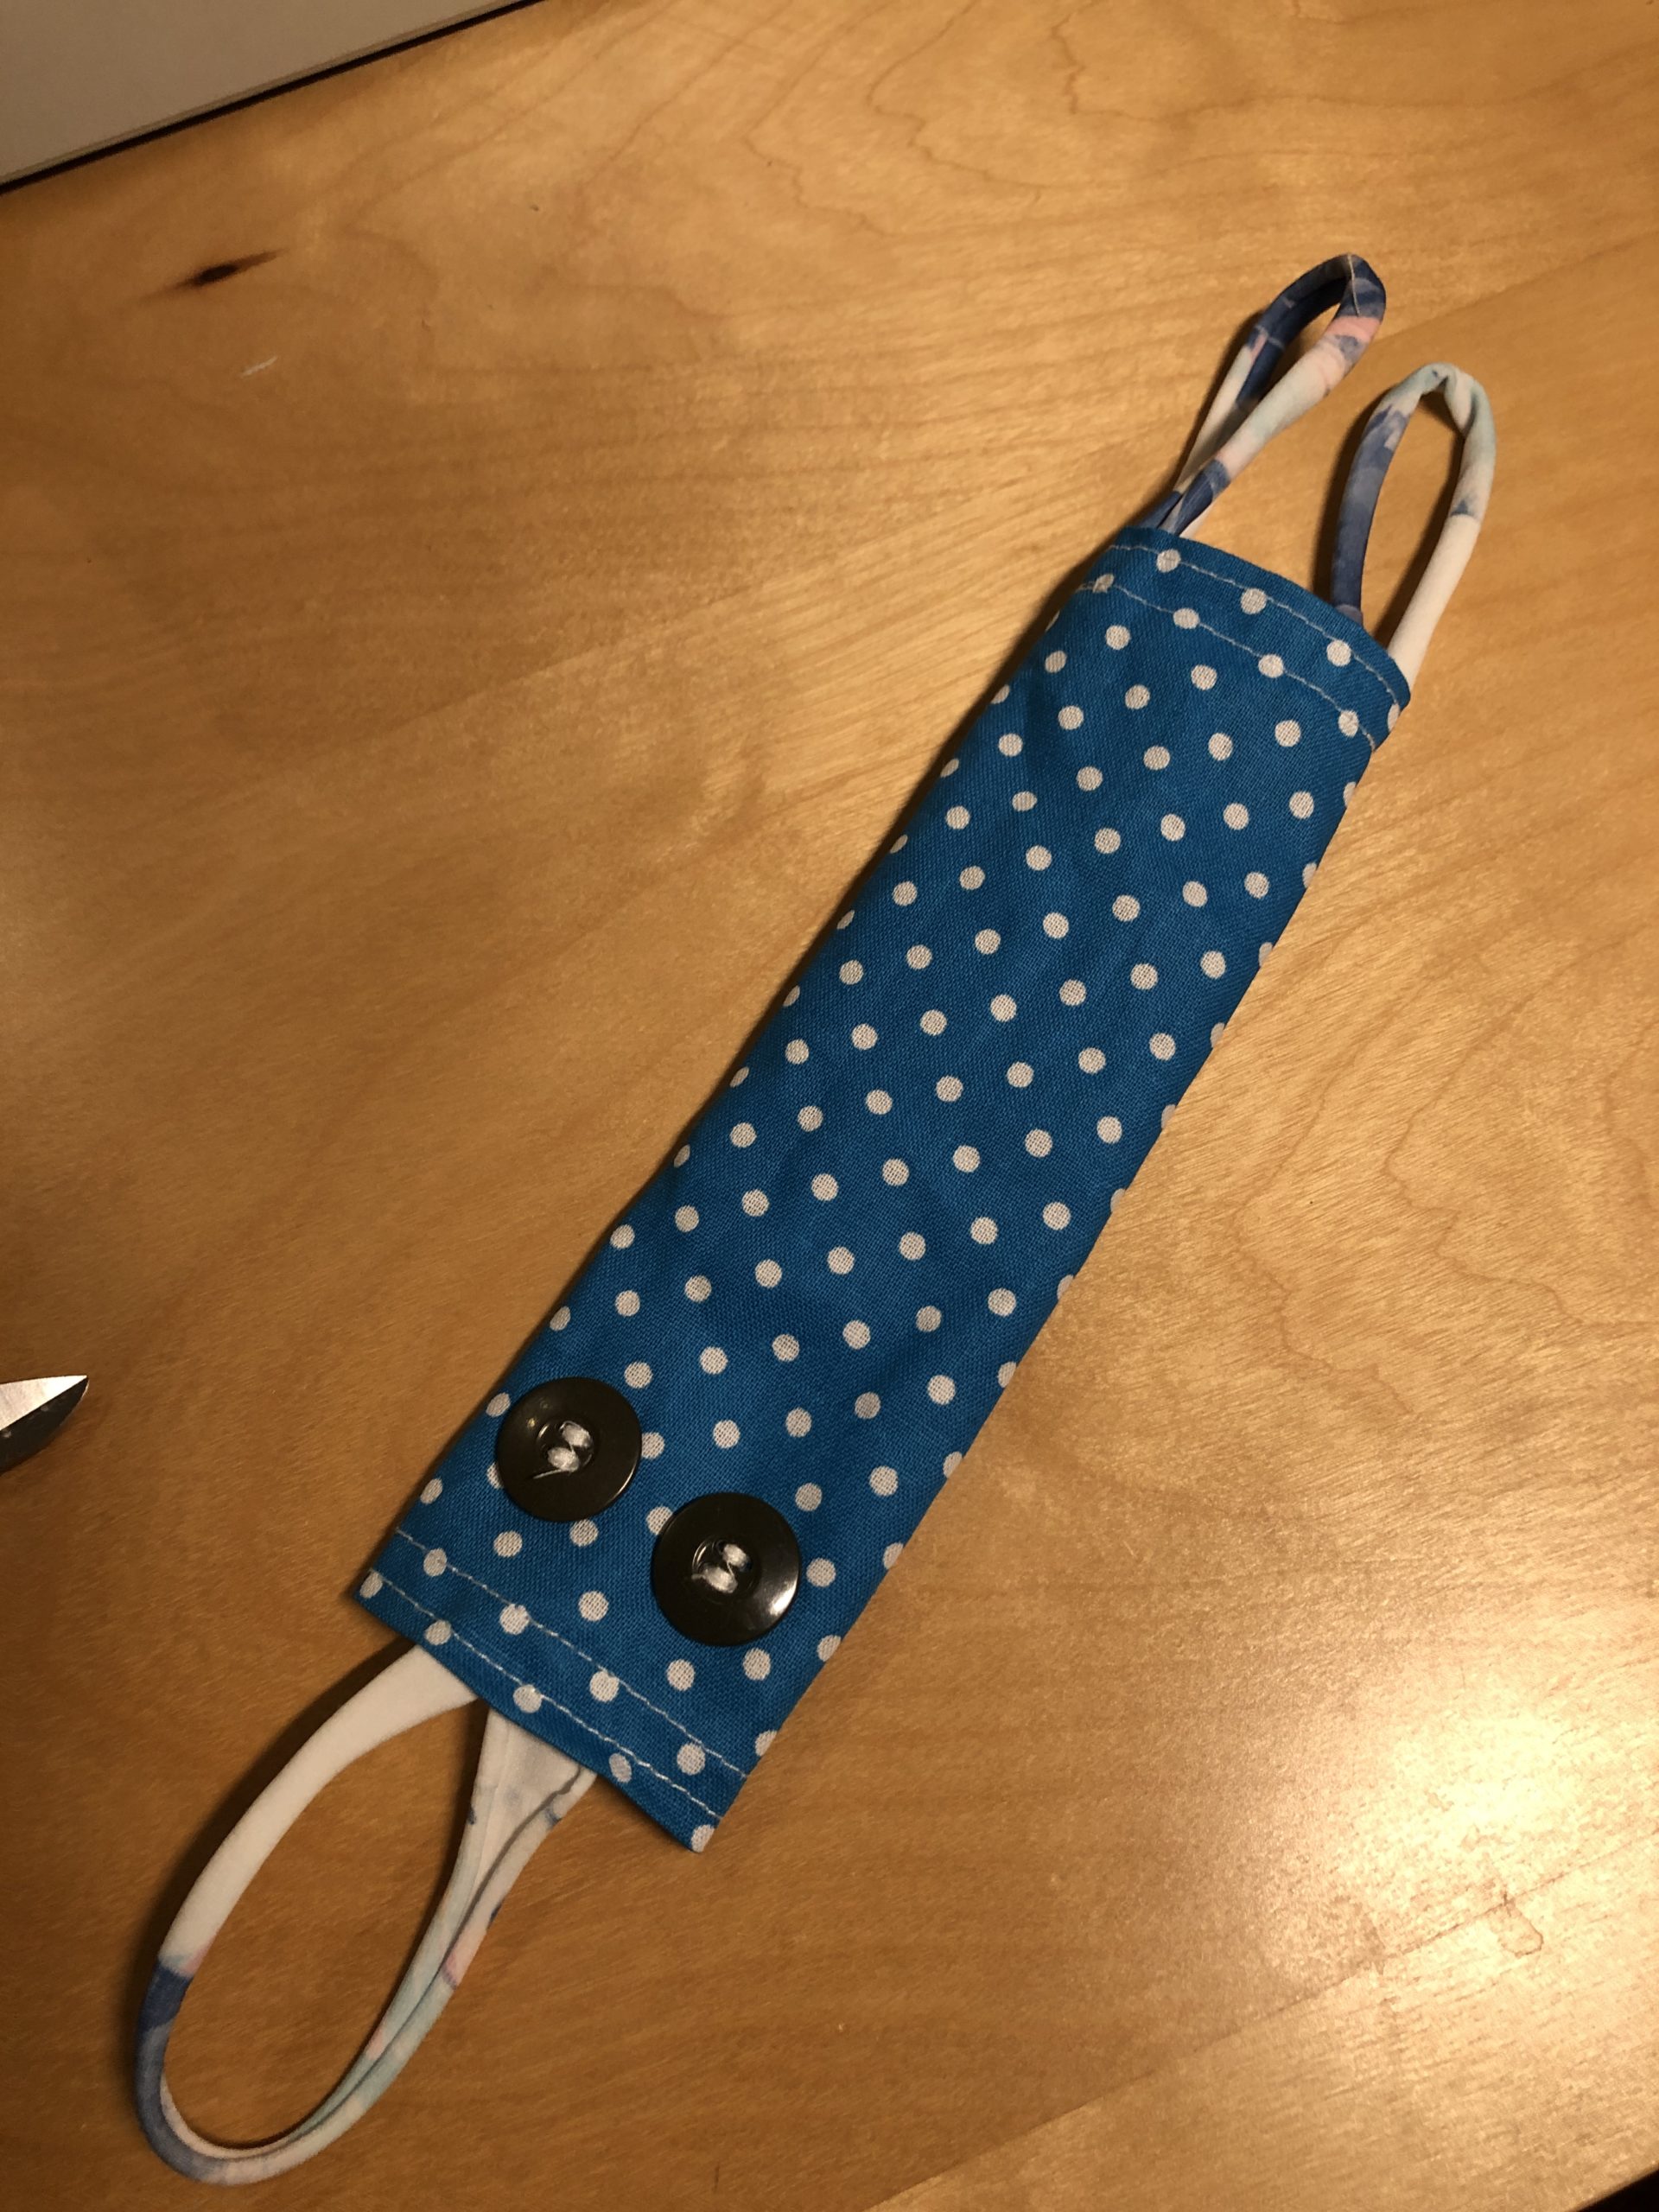
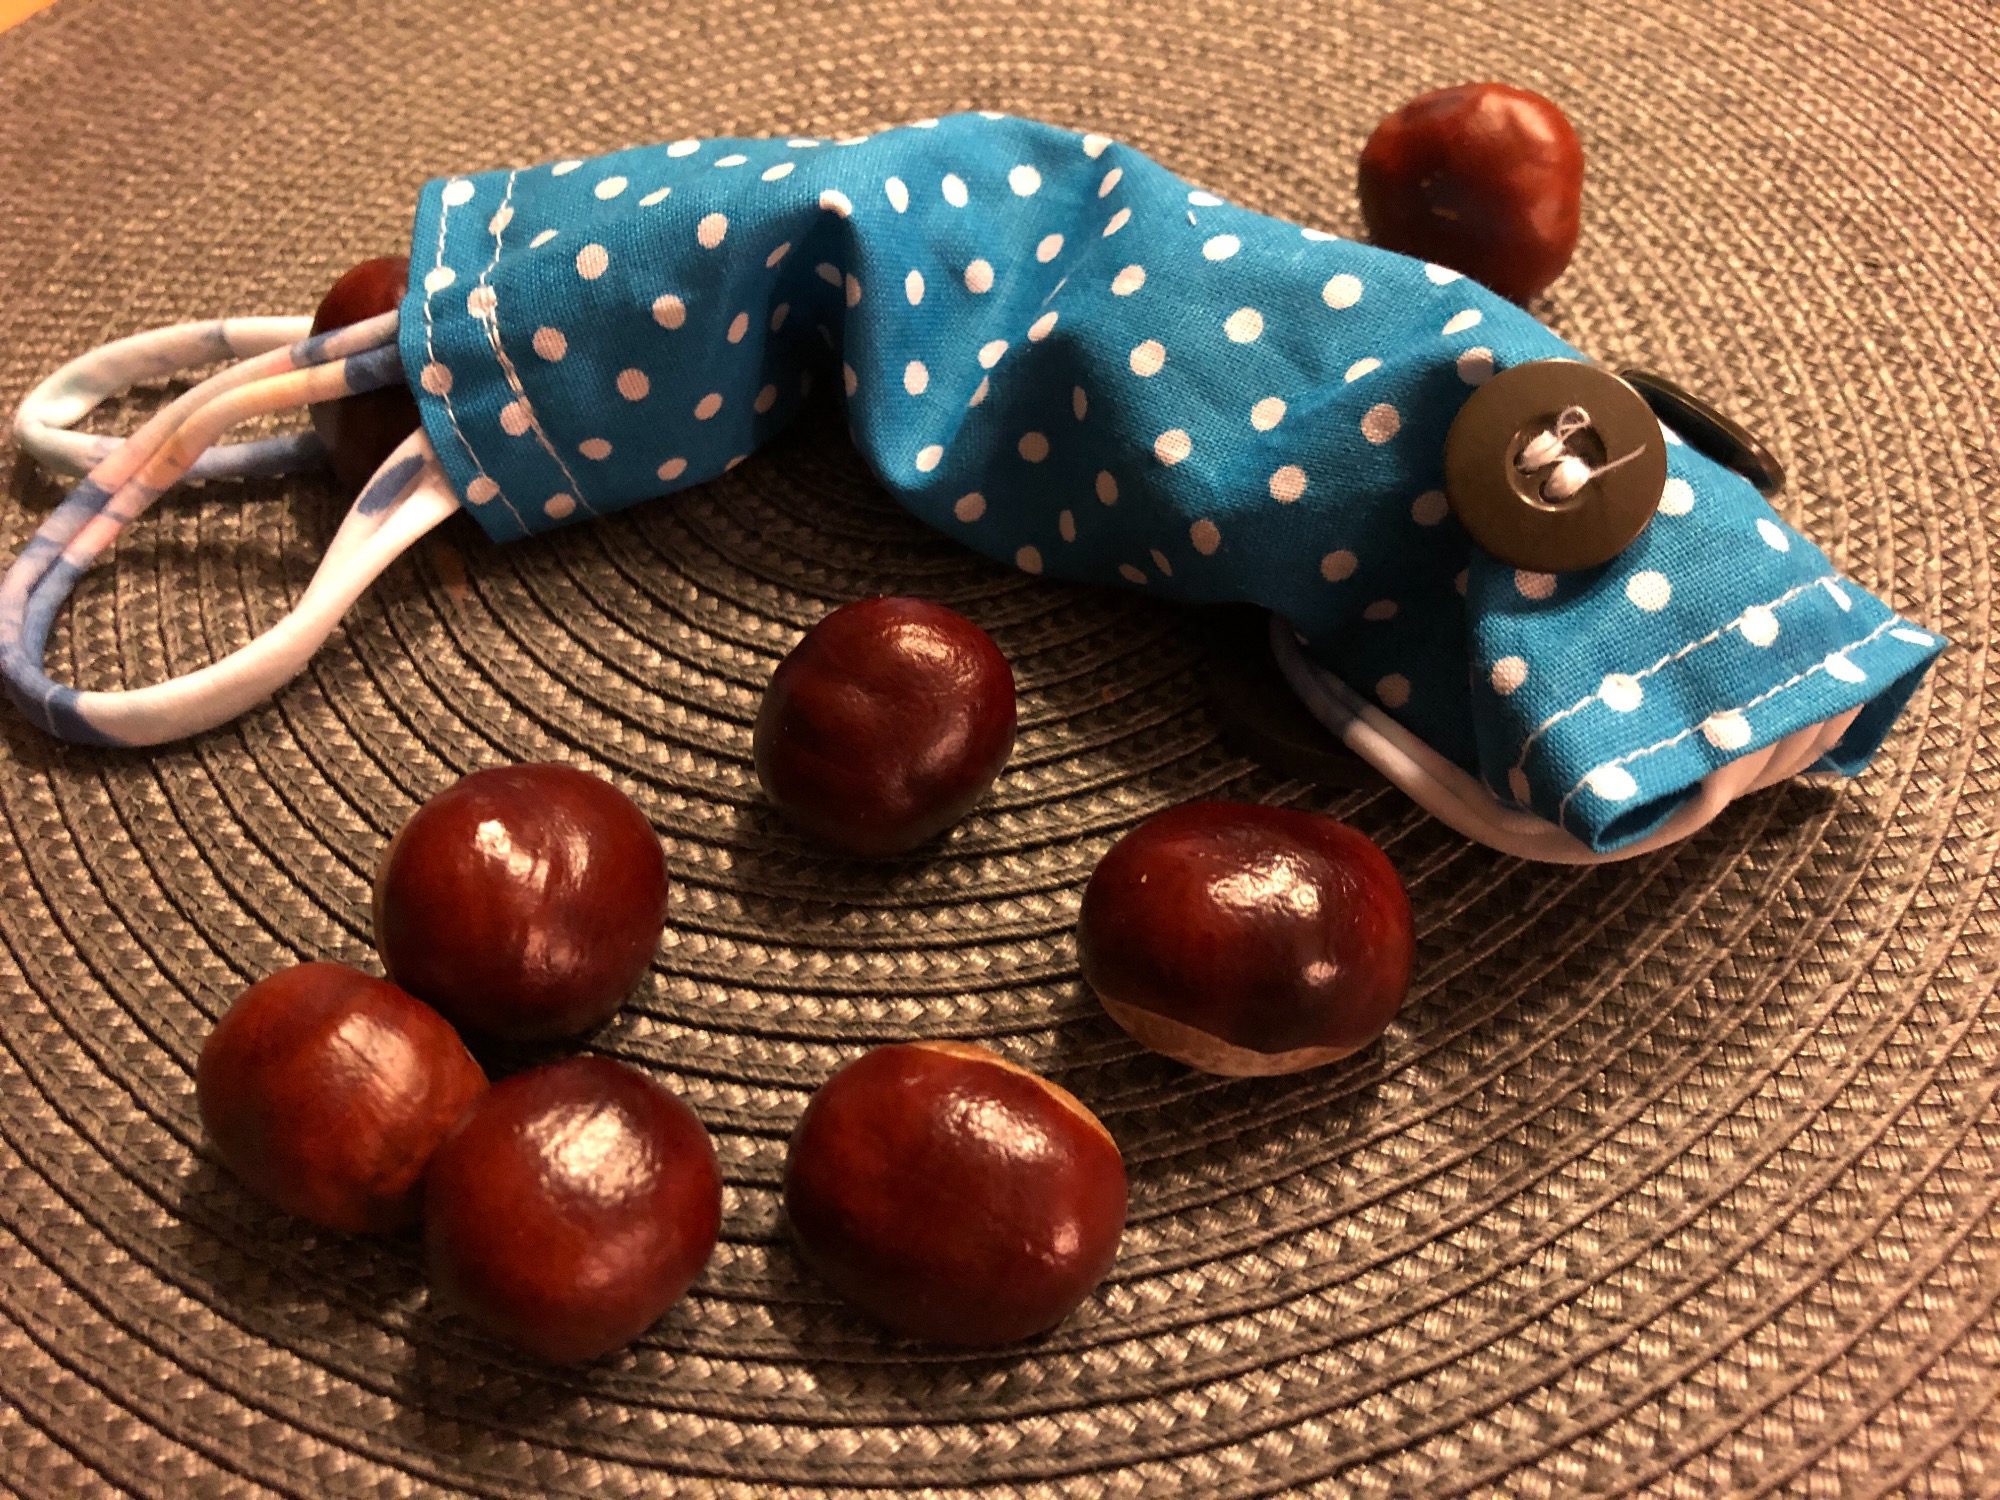
A fish with chestnuts in its belly.
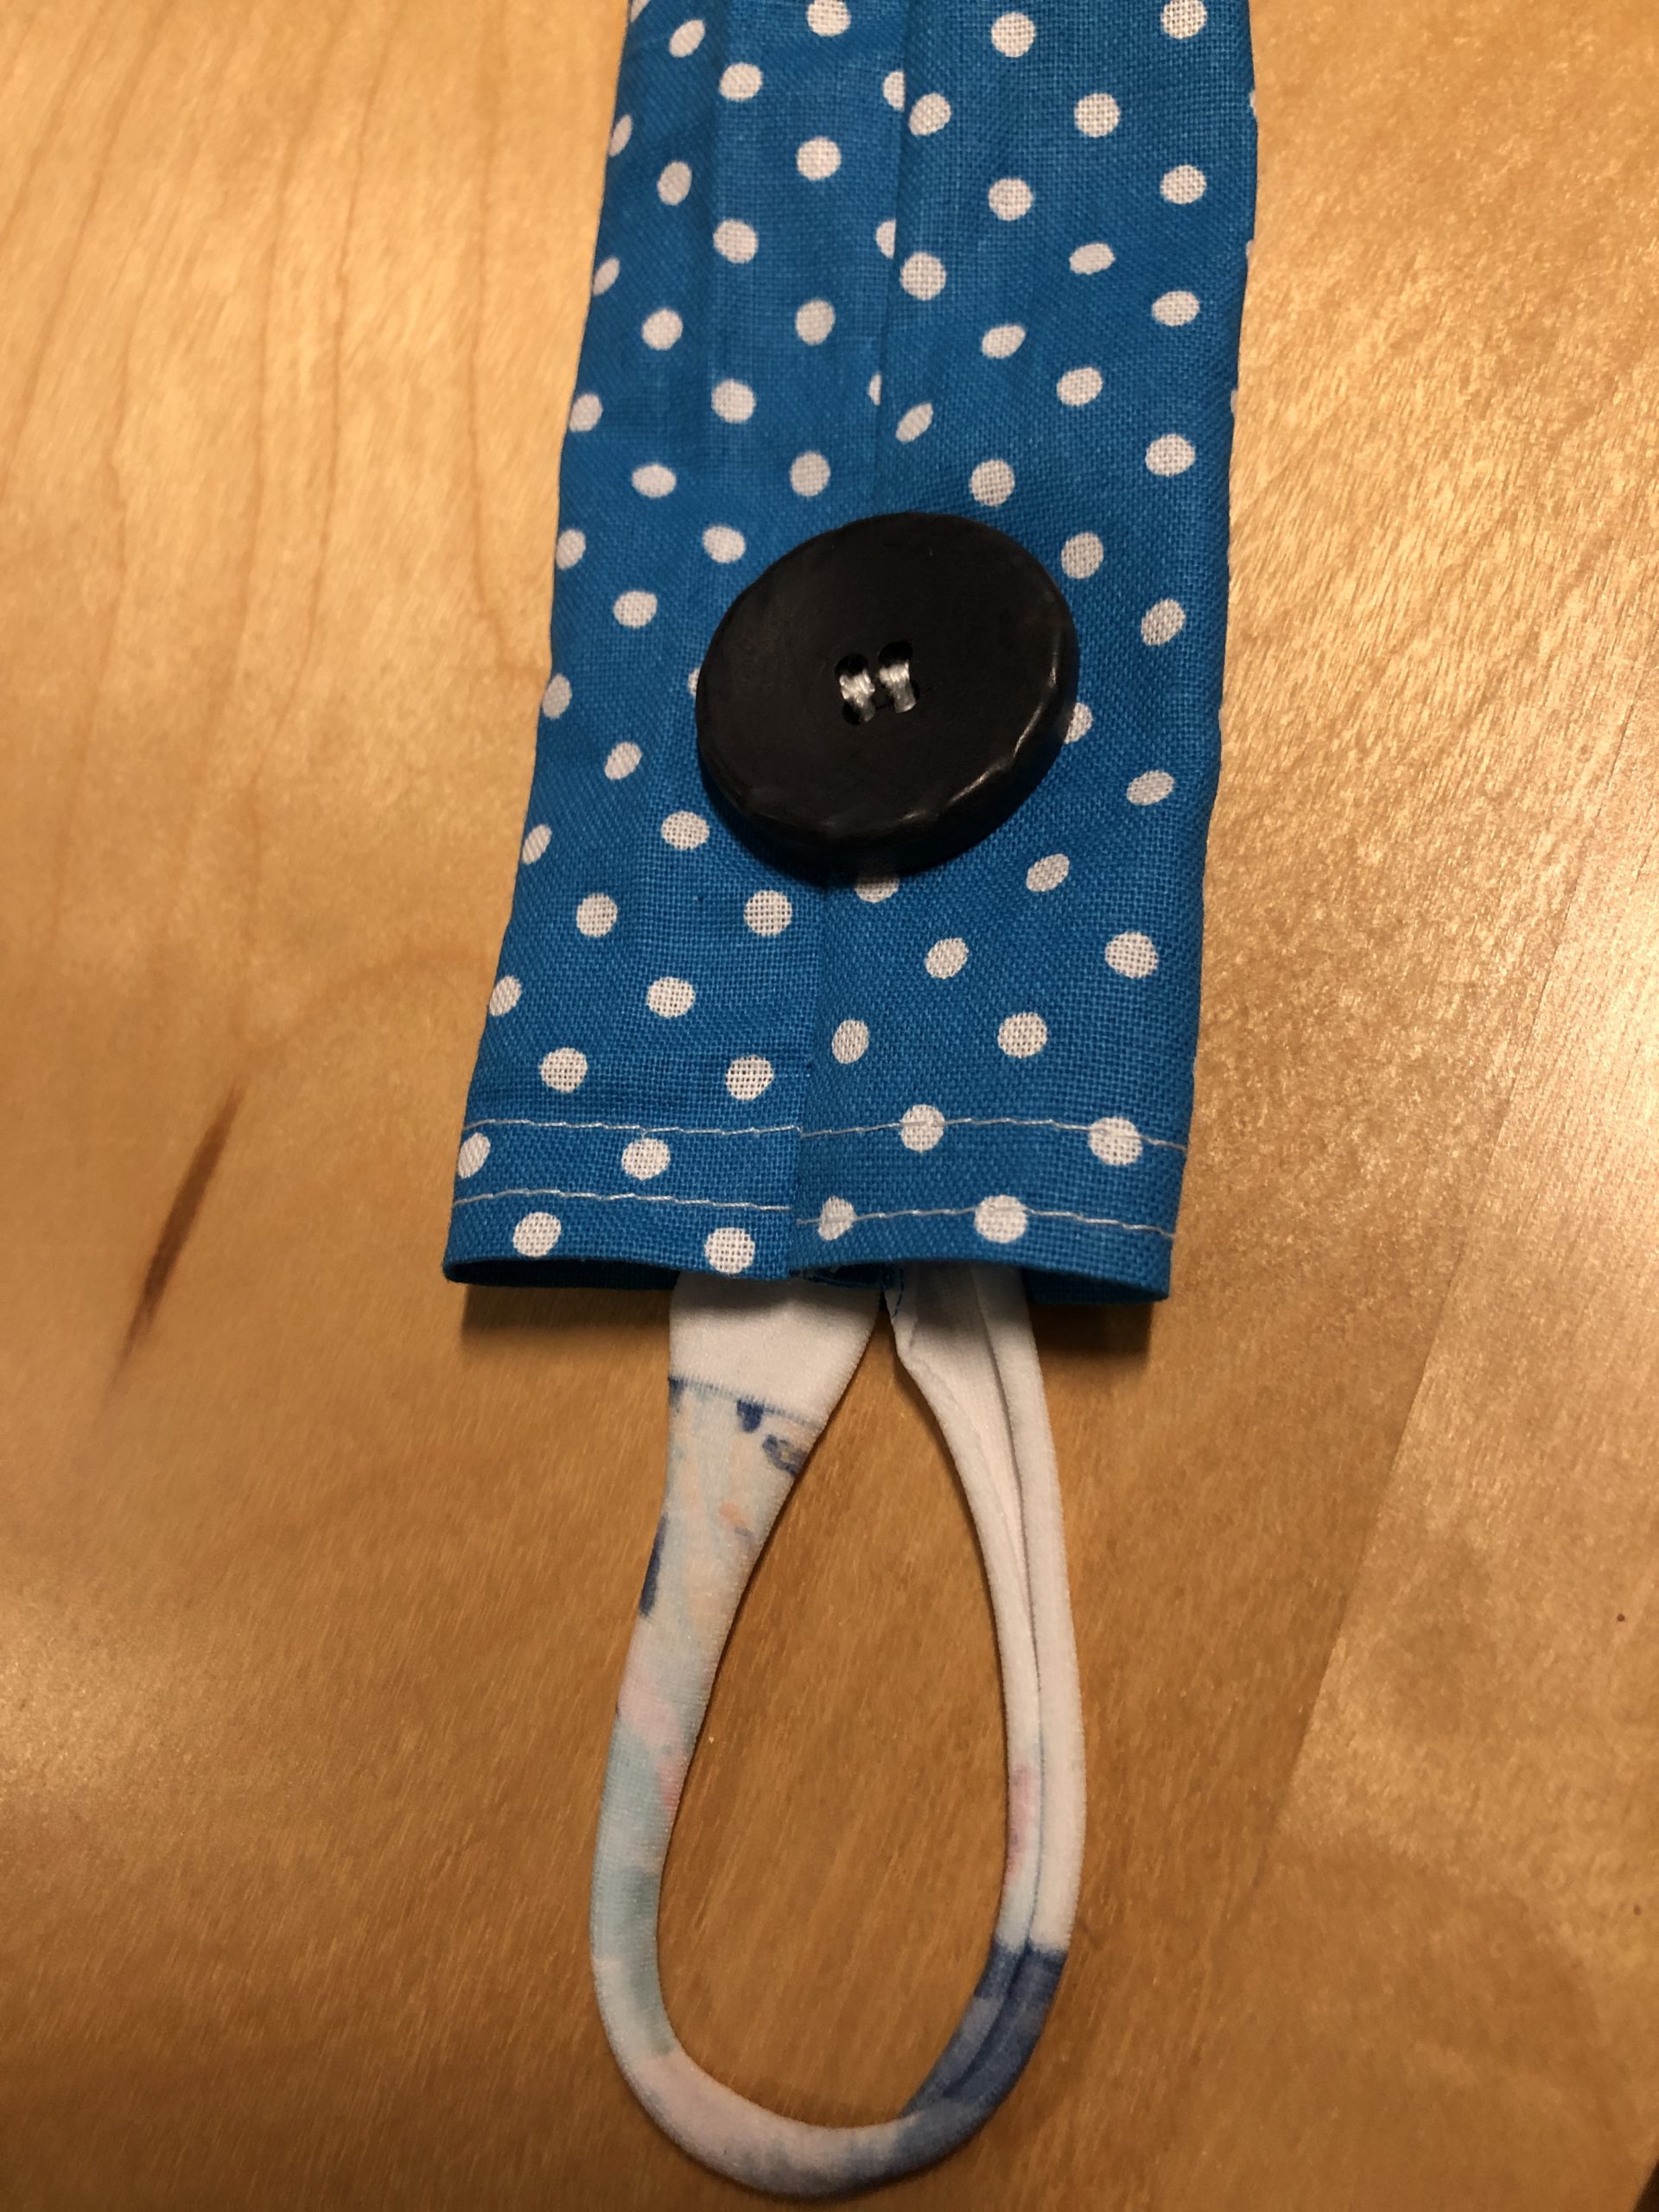
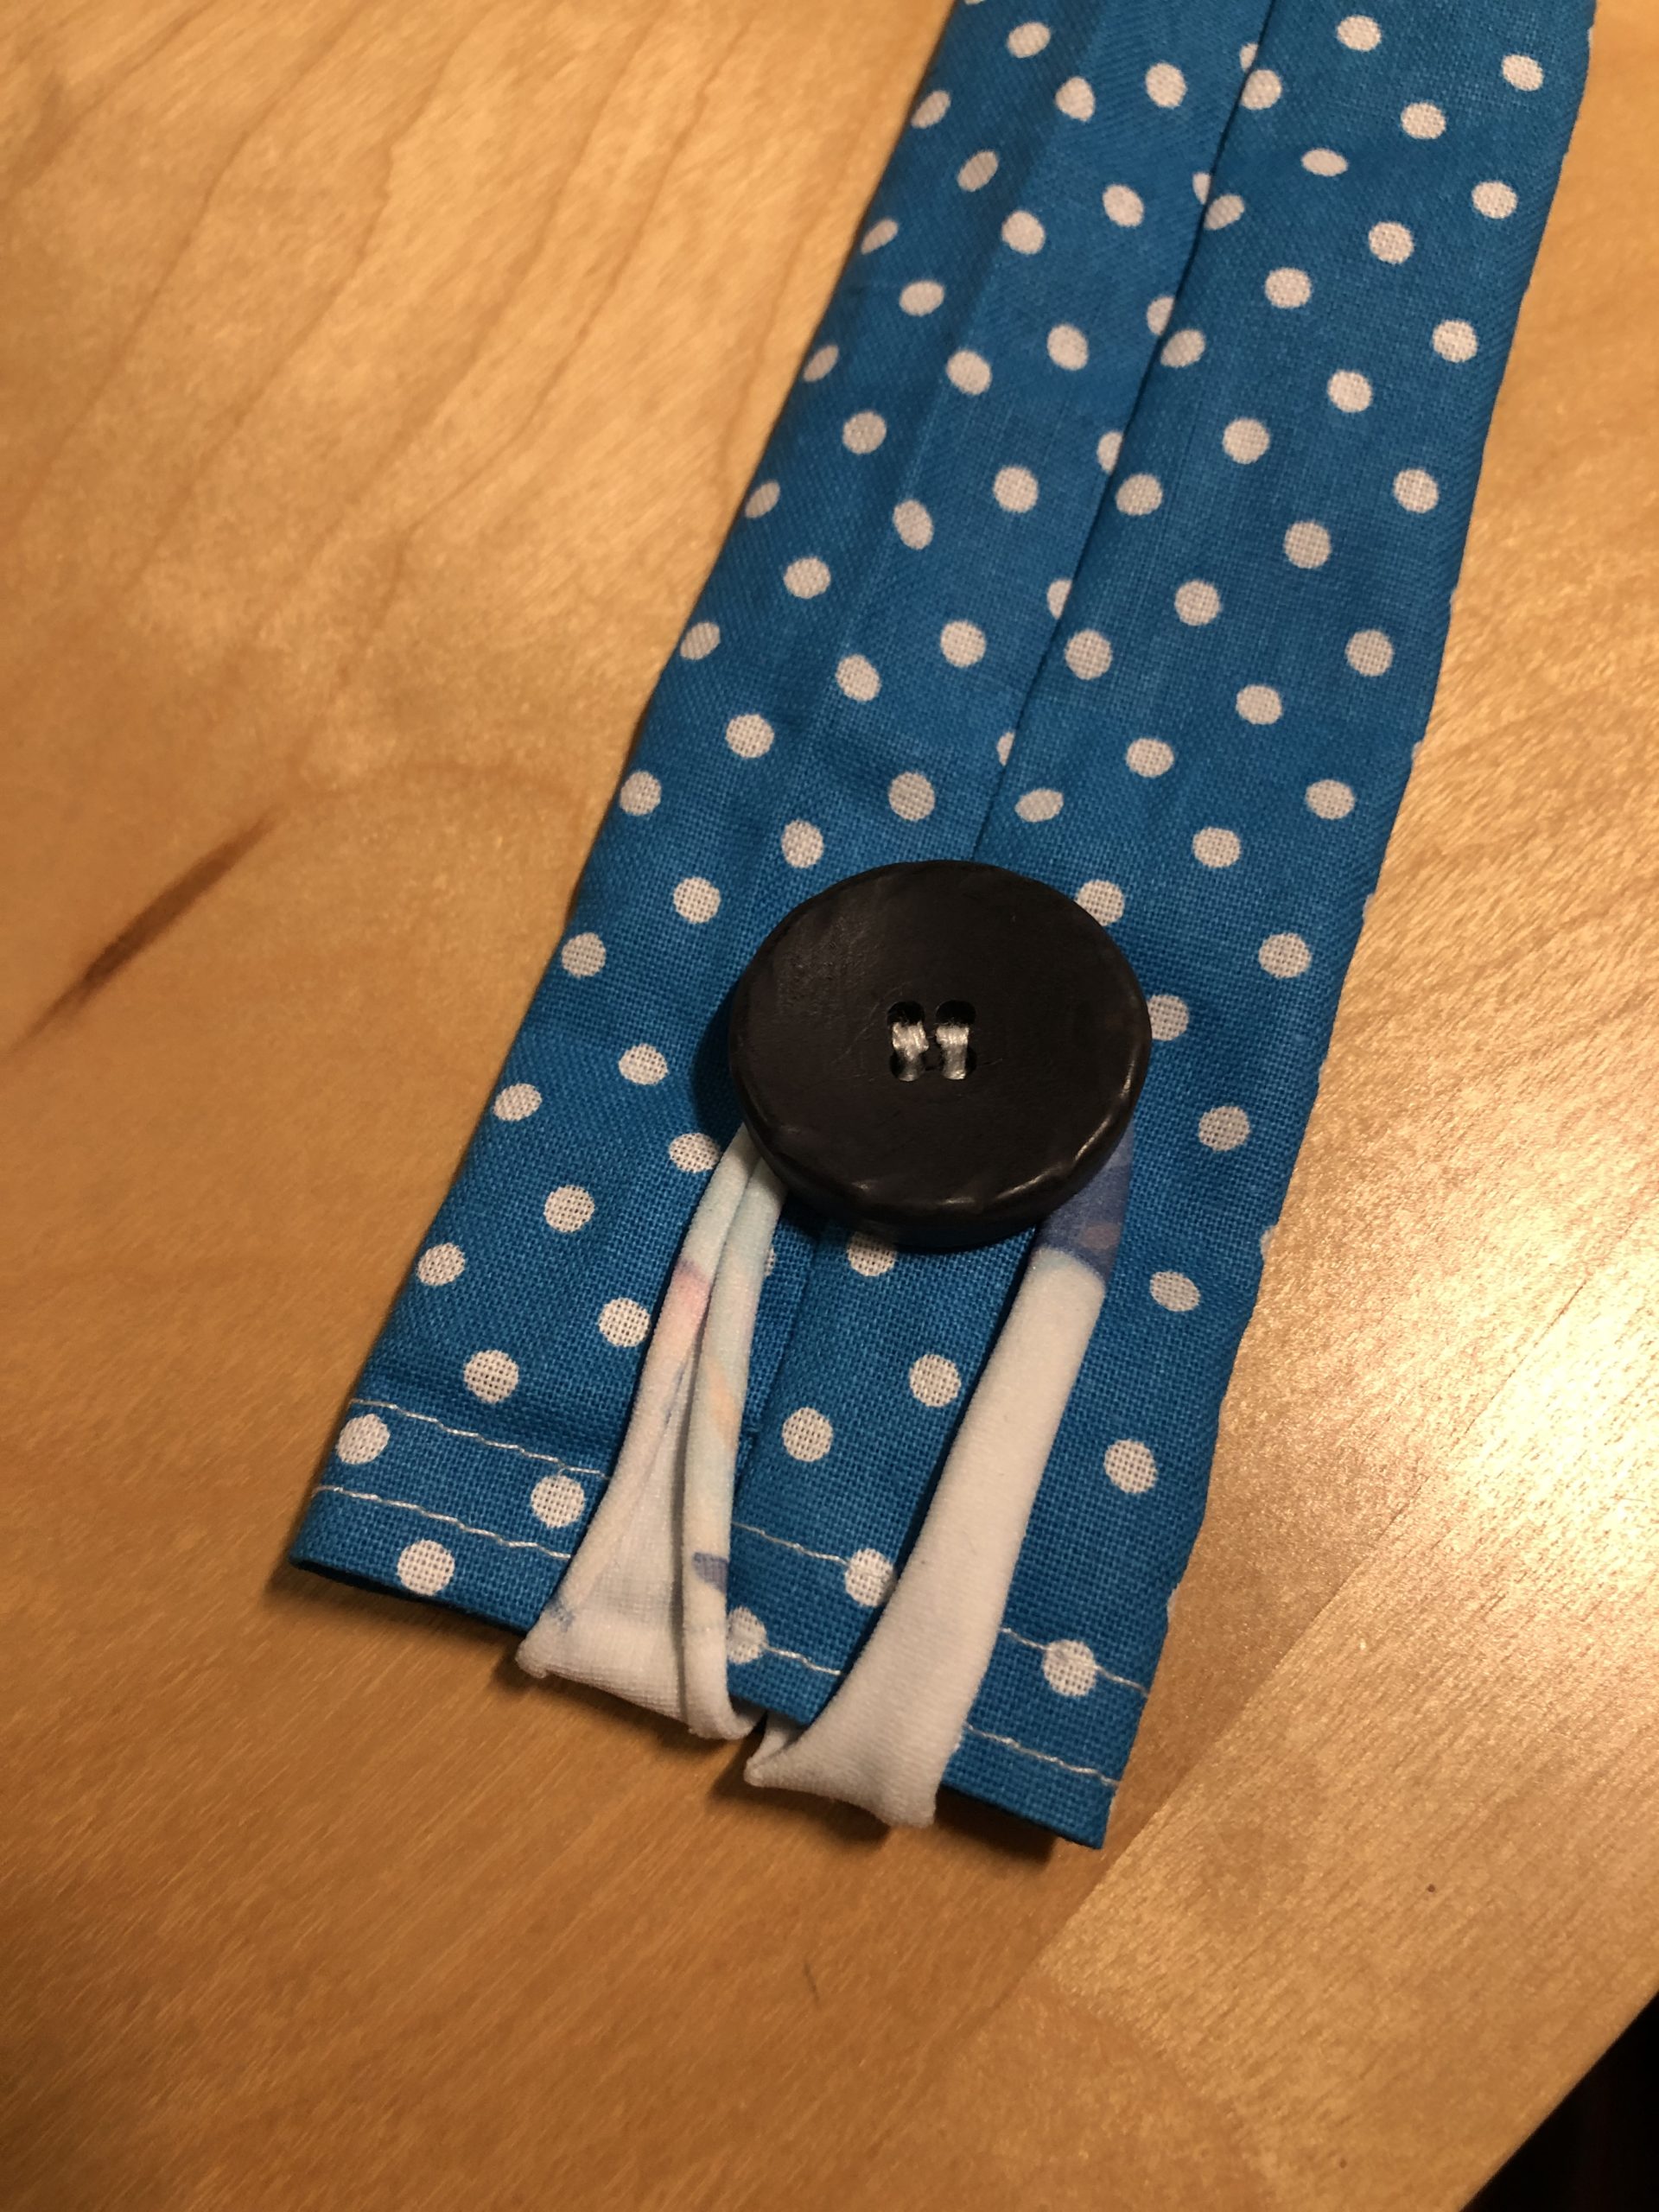
In the back there are two fins for holding and helping to fill the fish with chestnuts. At the front the fish mouth is closed with another rubber band and keeps the filled chestnuts in the fish belly. By loosening the rubber the fish can "spew" the whole chestnuts again. A nice material, which is especially popular with crib children. Easy to manufacture and versatile in use. You can also fill with other things, such as marbles or walnuts, small wuschel balls or cotton balls.
Stay creative and try it out!

Media Education for Kindergarten and Hort

Kind bastelt eine Rassel mit dem Navi
The Adventure Navi, the app for DIY projects, enables media education for the youngest.

Relief in everyday life, targeted promotion of individual children, independent learning and - without any pre-knowledge already usable by the youngest!


Titelbild zur Bastel- und DIY-Idee für Kinder '(425) Kastanien-Fisch nähen'
Material for1 Child
Prep Time20 min.Adv. Time20 min.Total Time40 min.
 fabric rest about 25cm x 14cm
 1 wide hair rubber
 2 Same buttons
 1 Large button
 Sewing machine
 Substance shears
 Ruler
 Pen
 Needle
 Thread
1

Cut the fabric to the dimensions 25cm x 14cm.
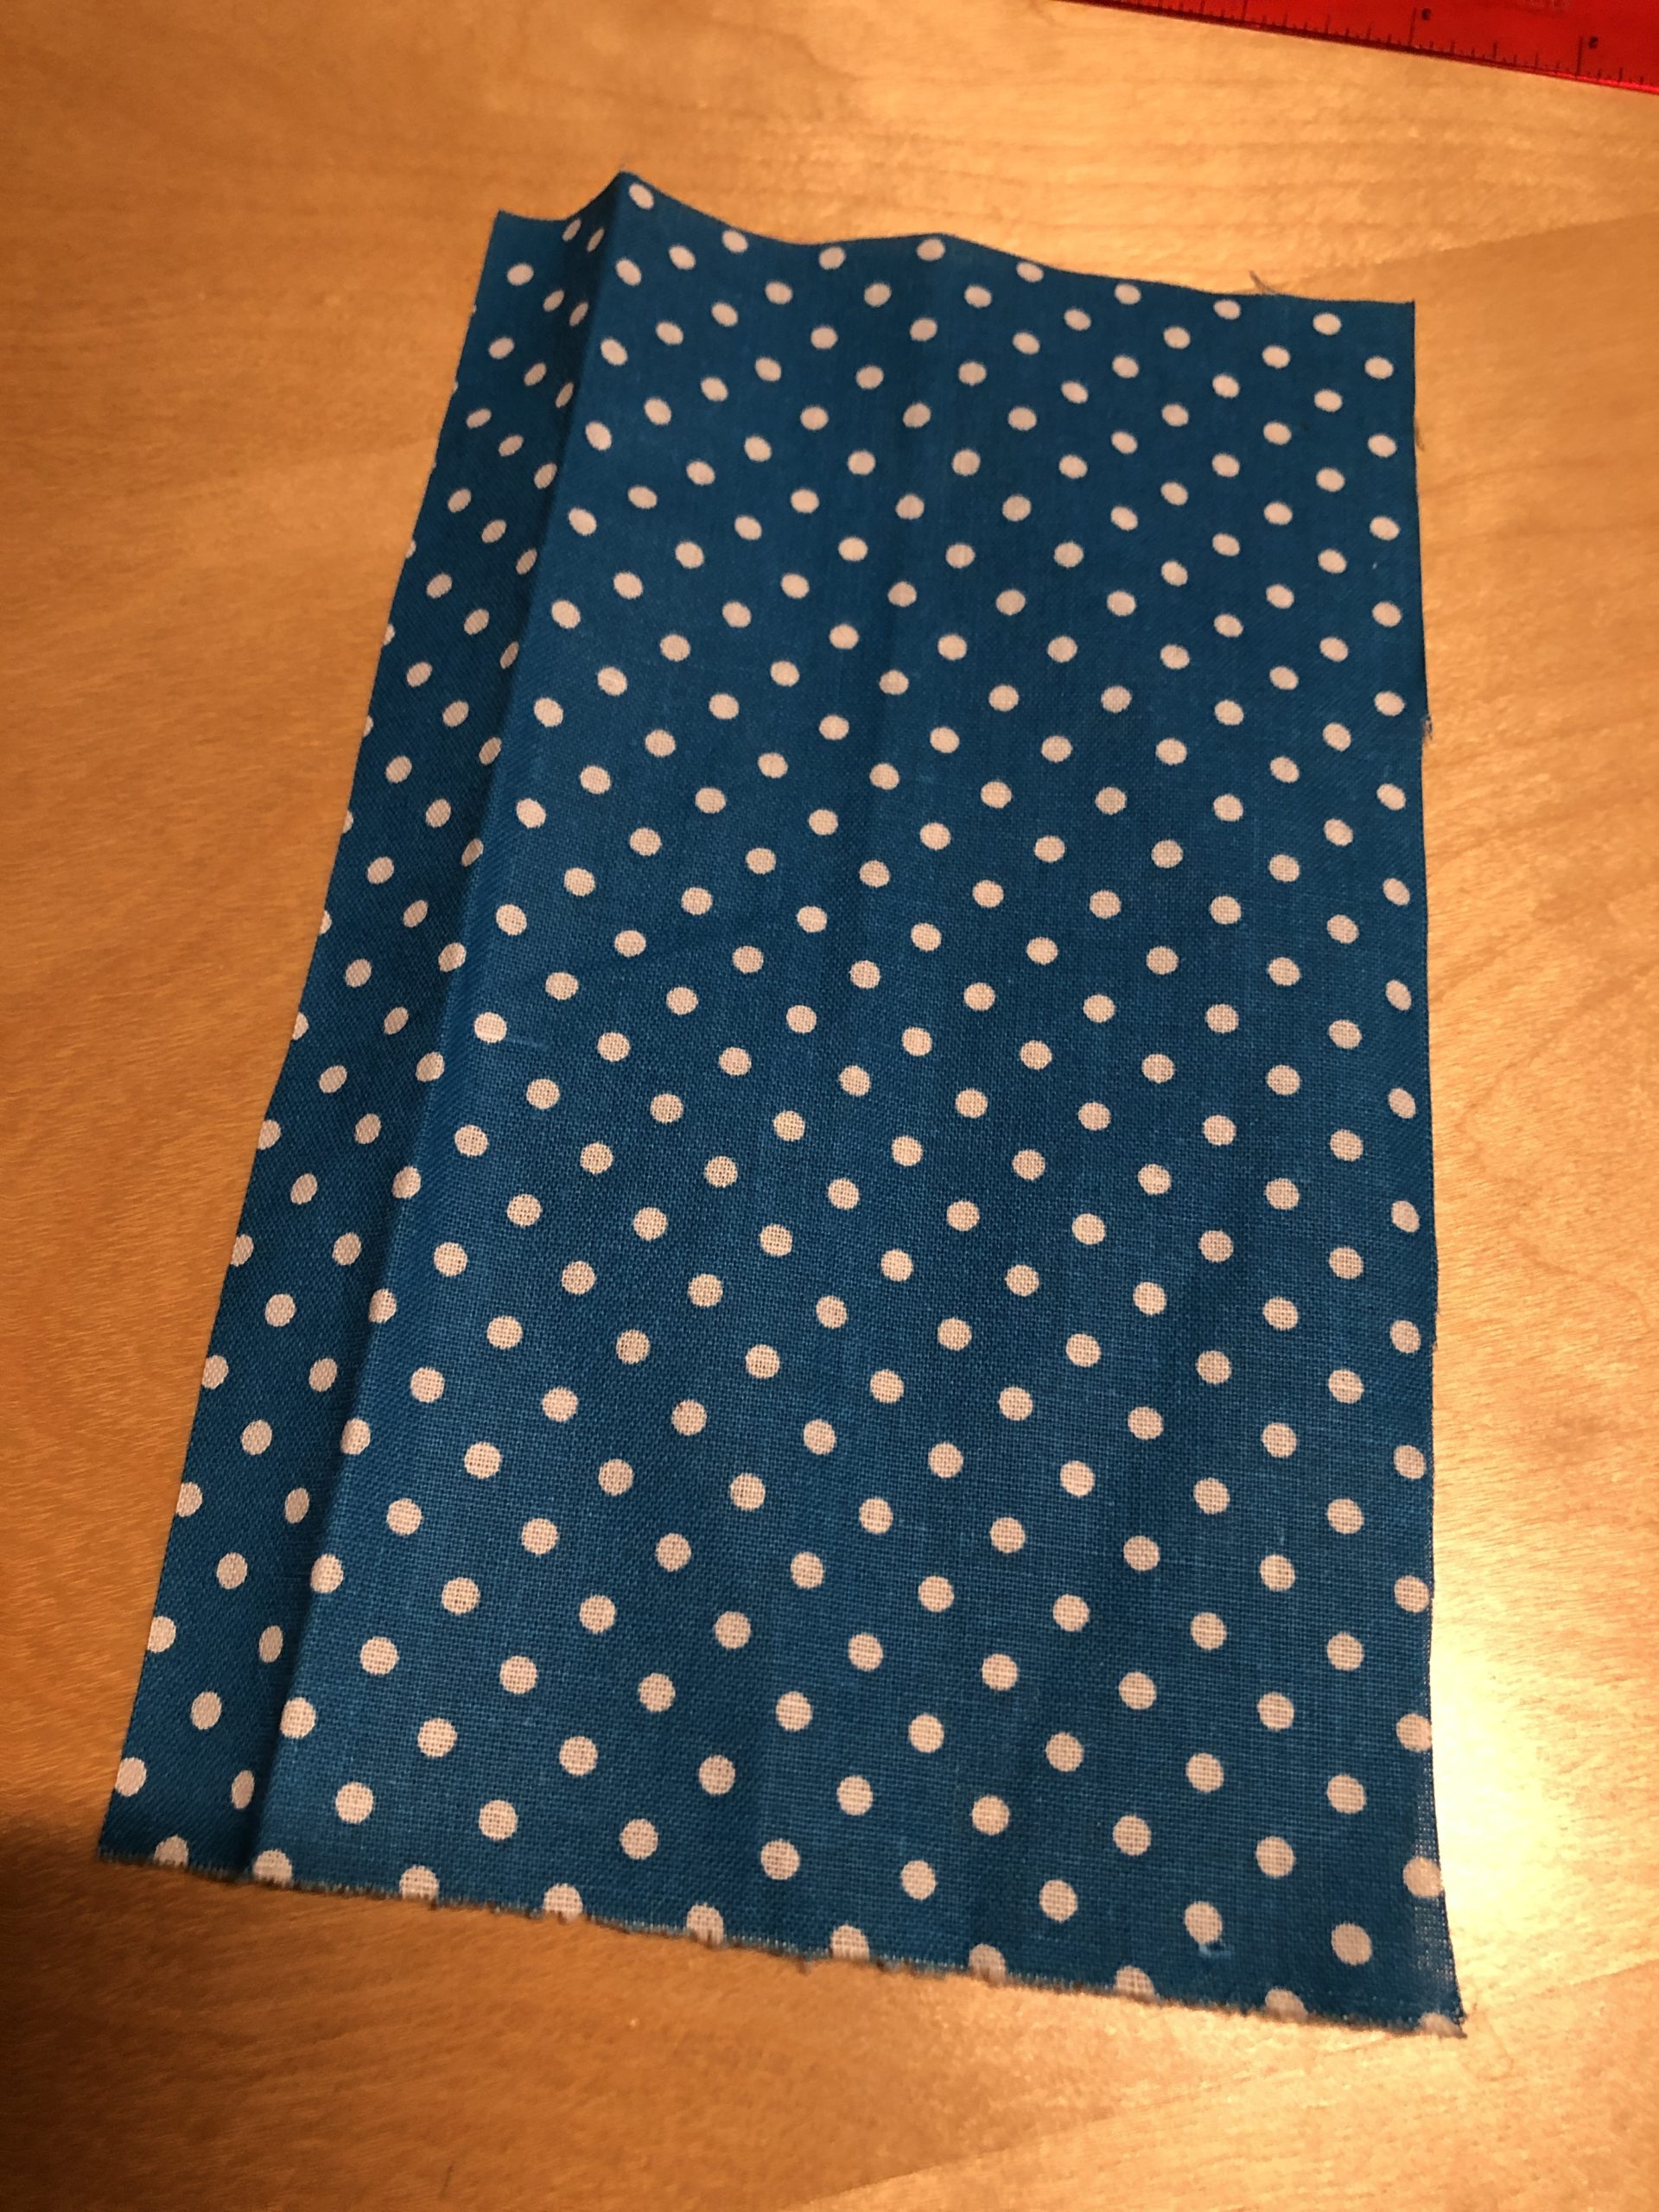
Bild zum Schritt 1 für das Bastel- und DIY-Abenteuer für Kinder: 'Den Stoff auf die Maße 25cm x 14cm zuschneiden.'

2

Two rubber bands. For this I cut a hair rubber into three equal parts. Two of the three parts we use for the grips and one for the fish mouth.
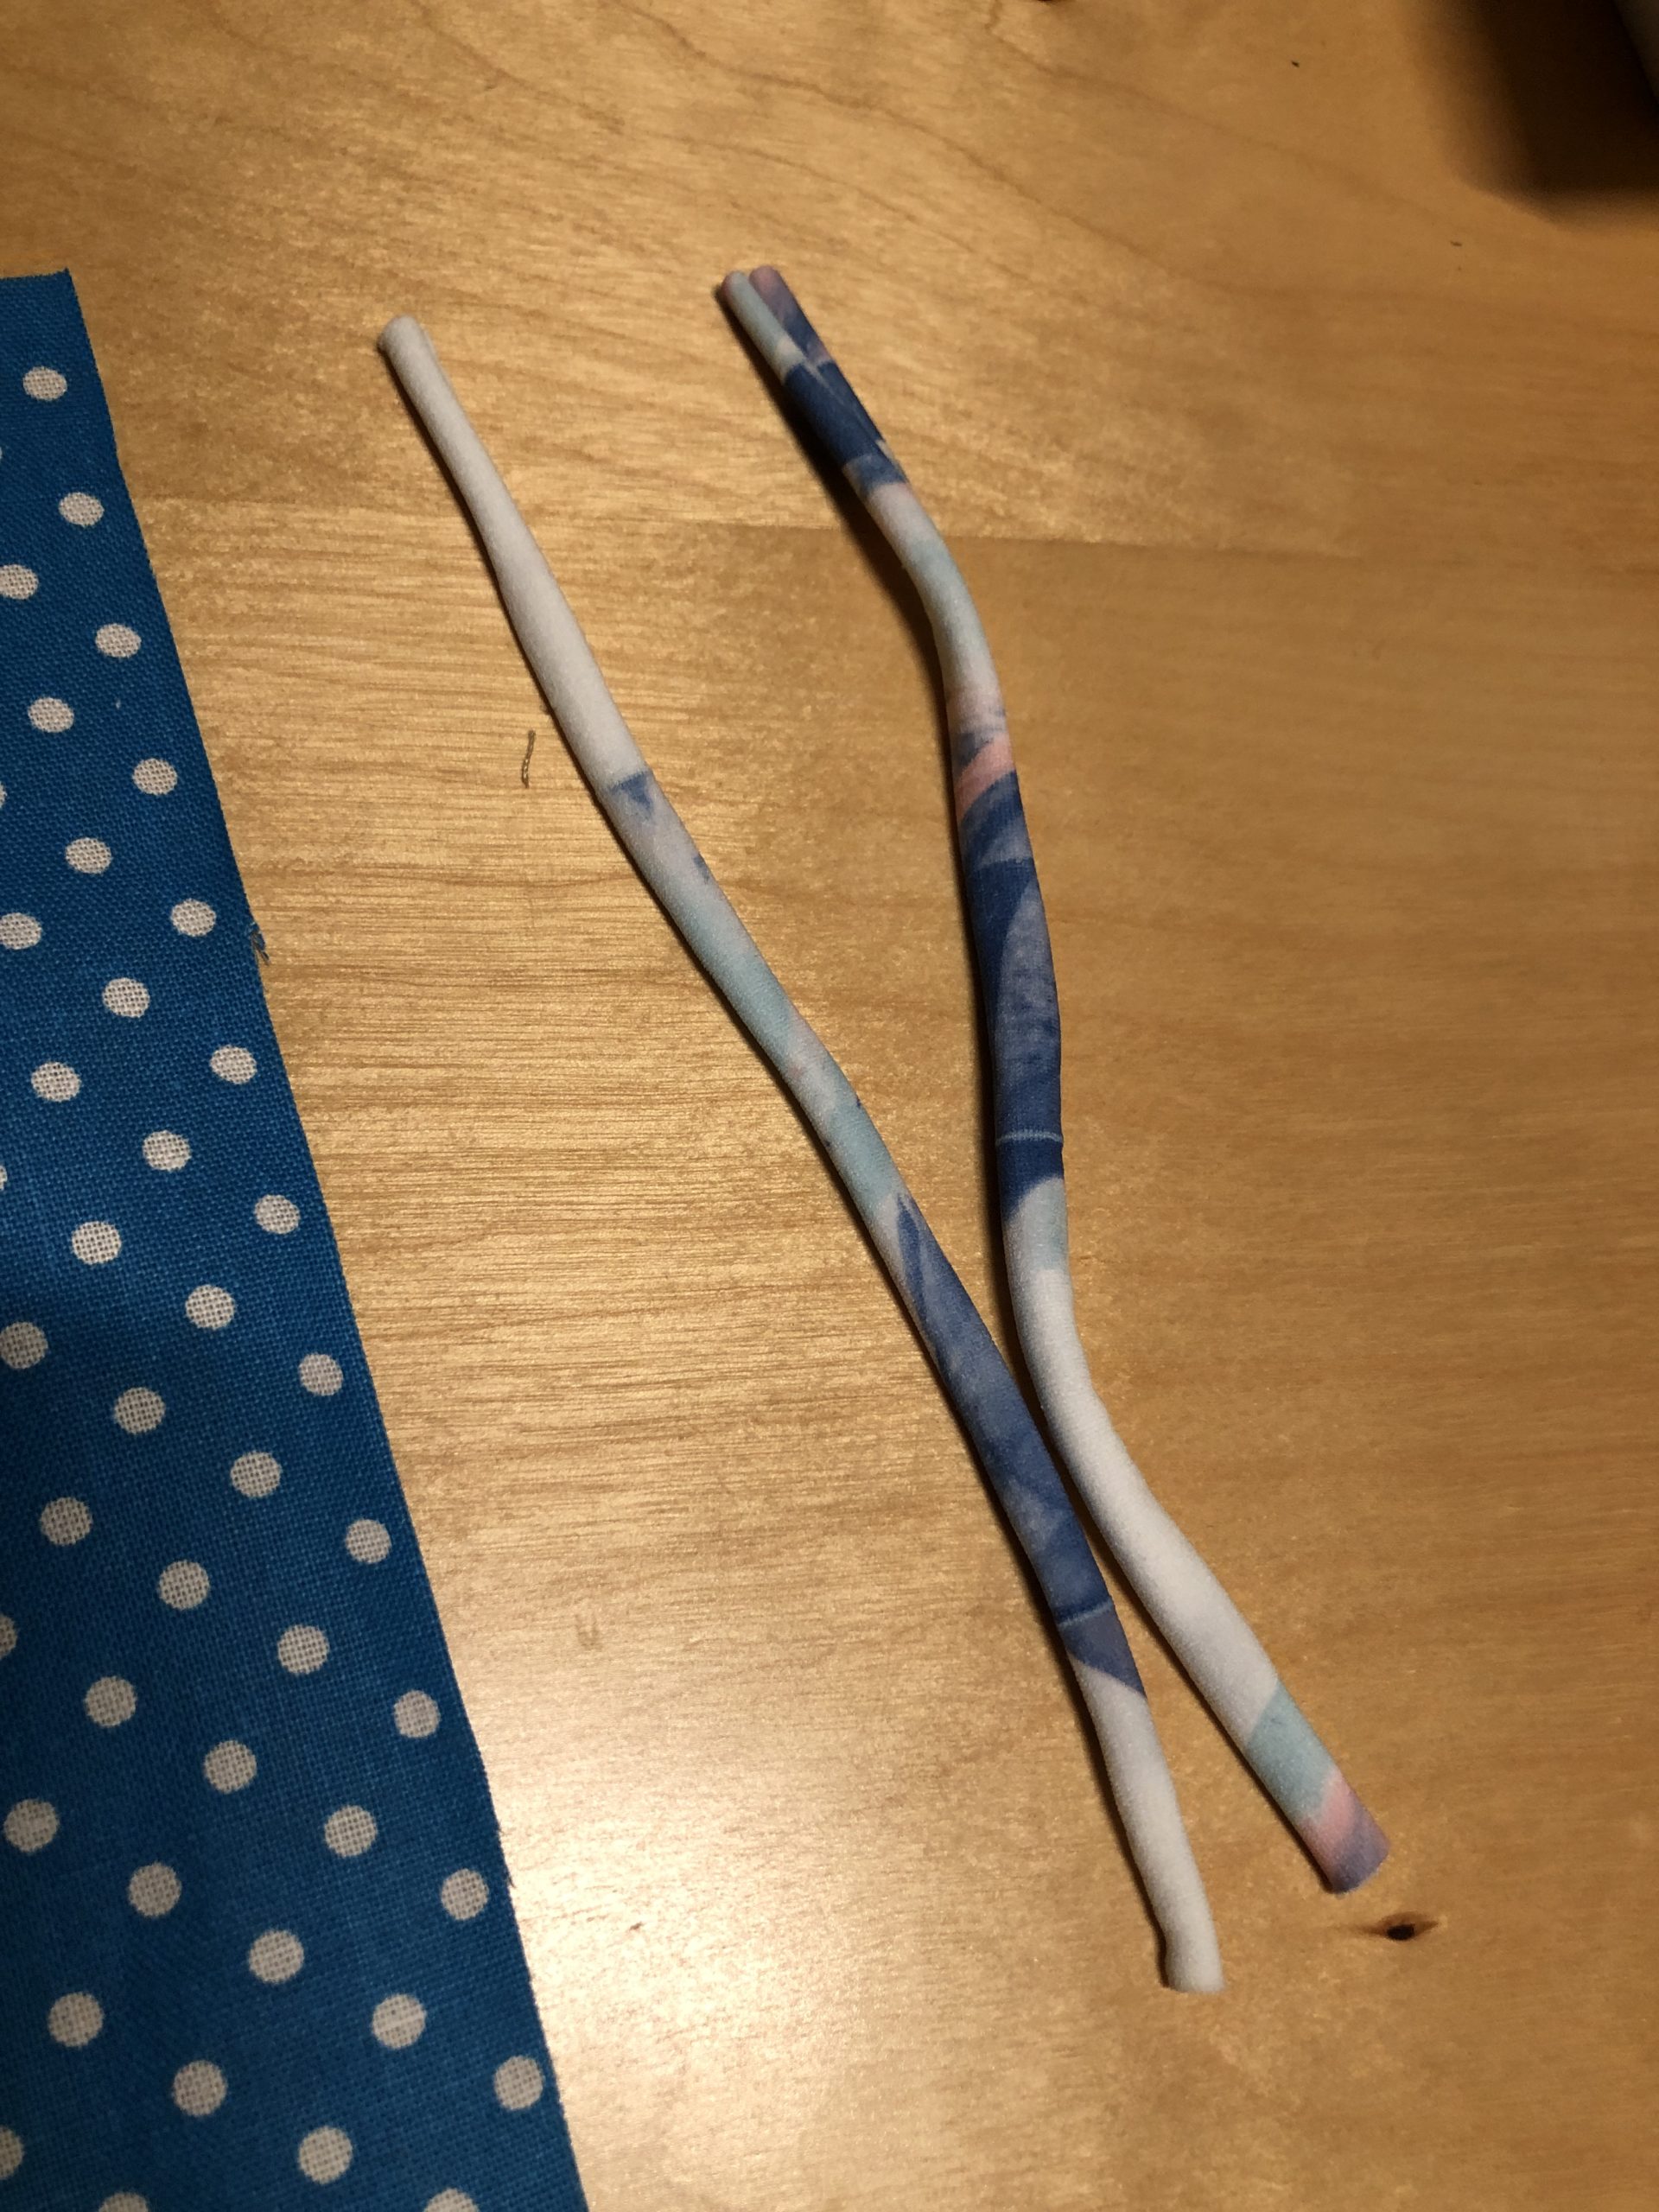
Bild zum Schritt 2 für das Bastel- und DIY-Abenteuer für Kinder: 'Zwei Gummibänder zurechtlegen. Dafür habe ich einen Haargummi in drei...'

3

Strip off the short sides of the fabric with zigzag stitch.

Bild zum Schritt 3 für das Bastel- und DIY-Abenteuer für Kinder: 'Die kurzen Seiten des Stoffes mit Zickzack-Stich absteppen.'

4

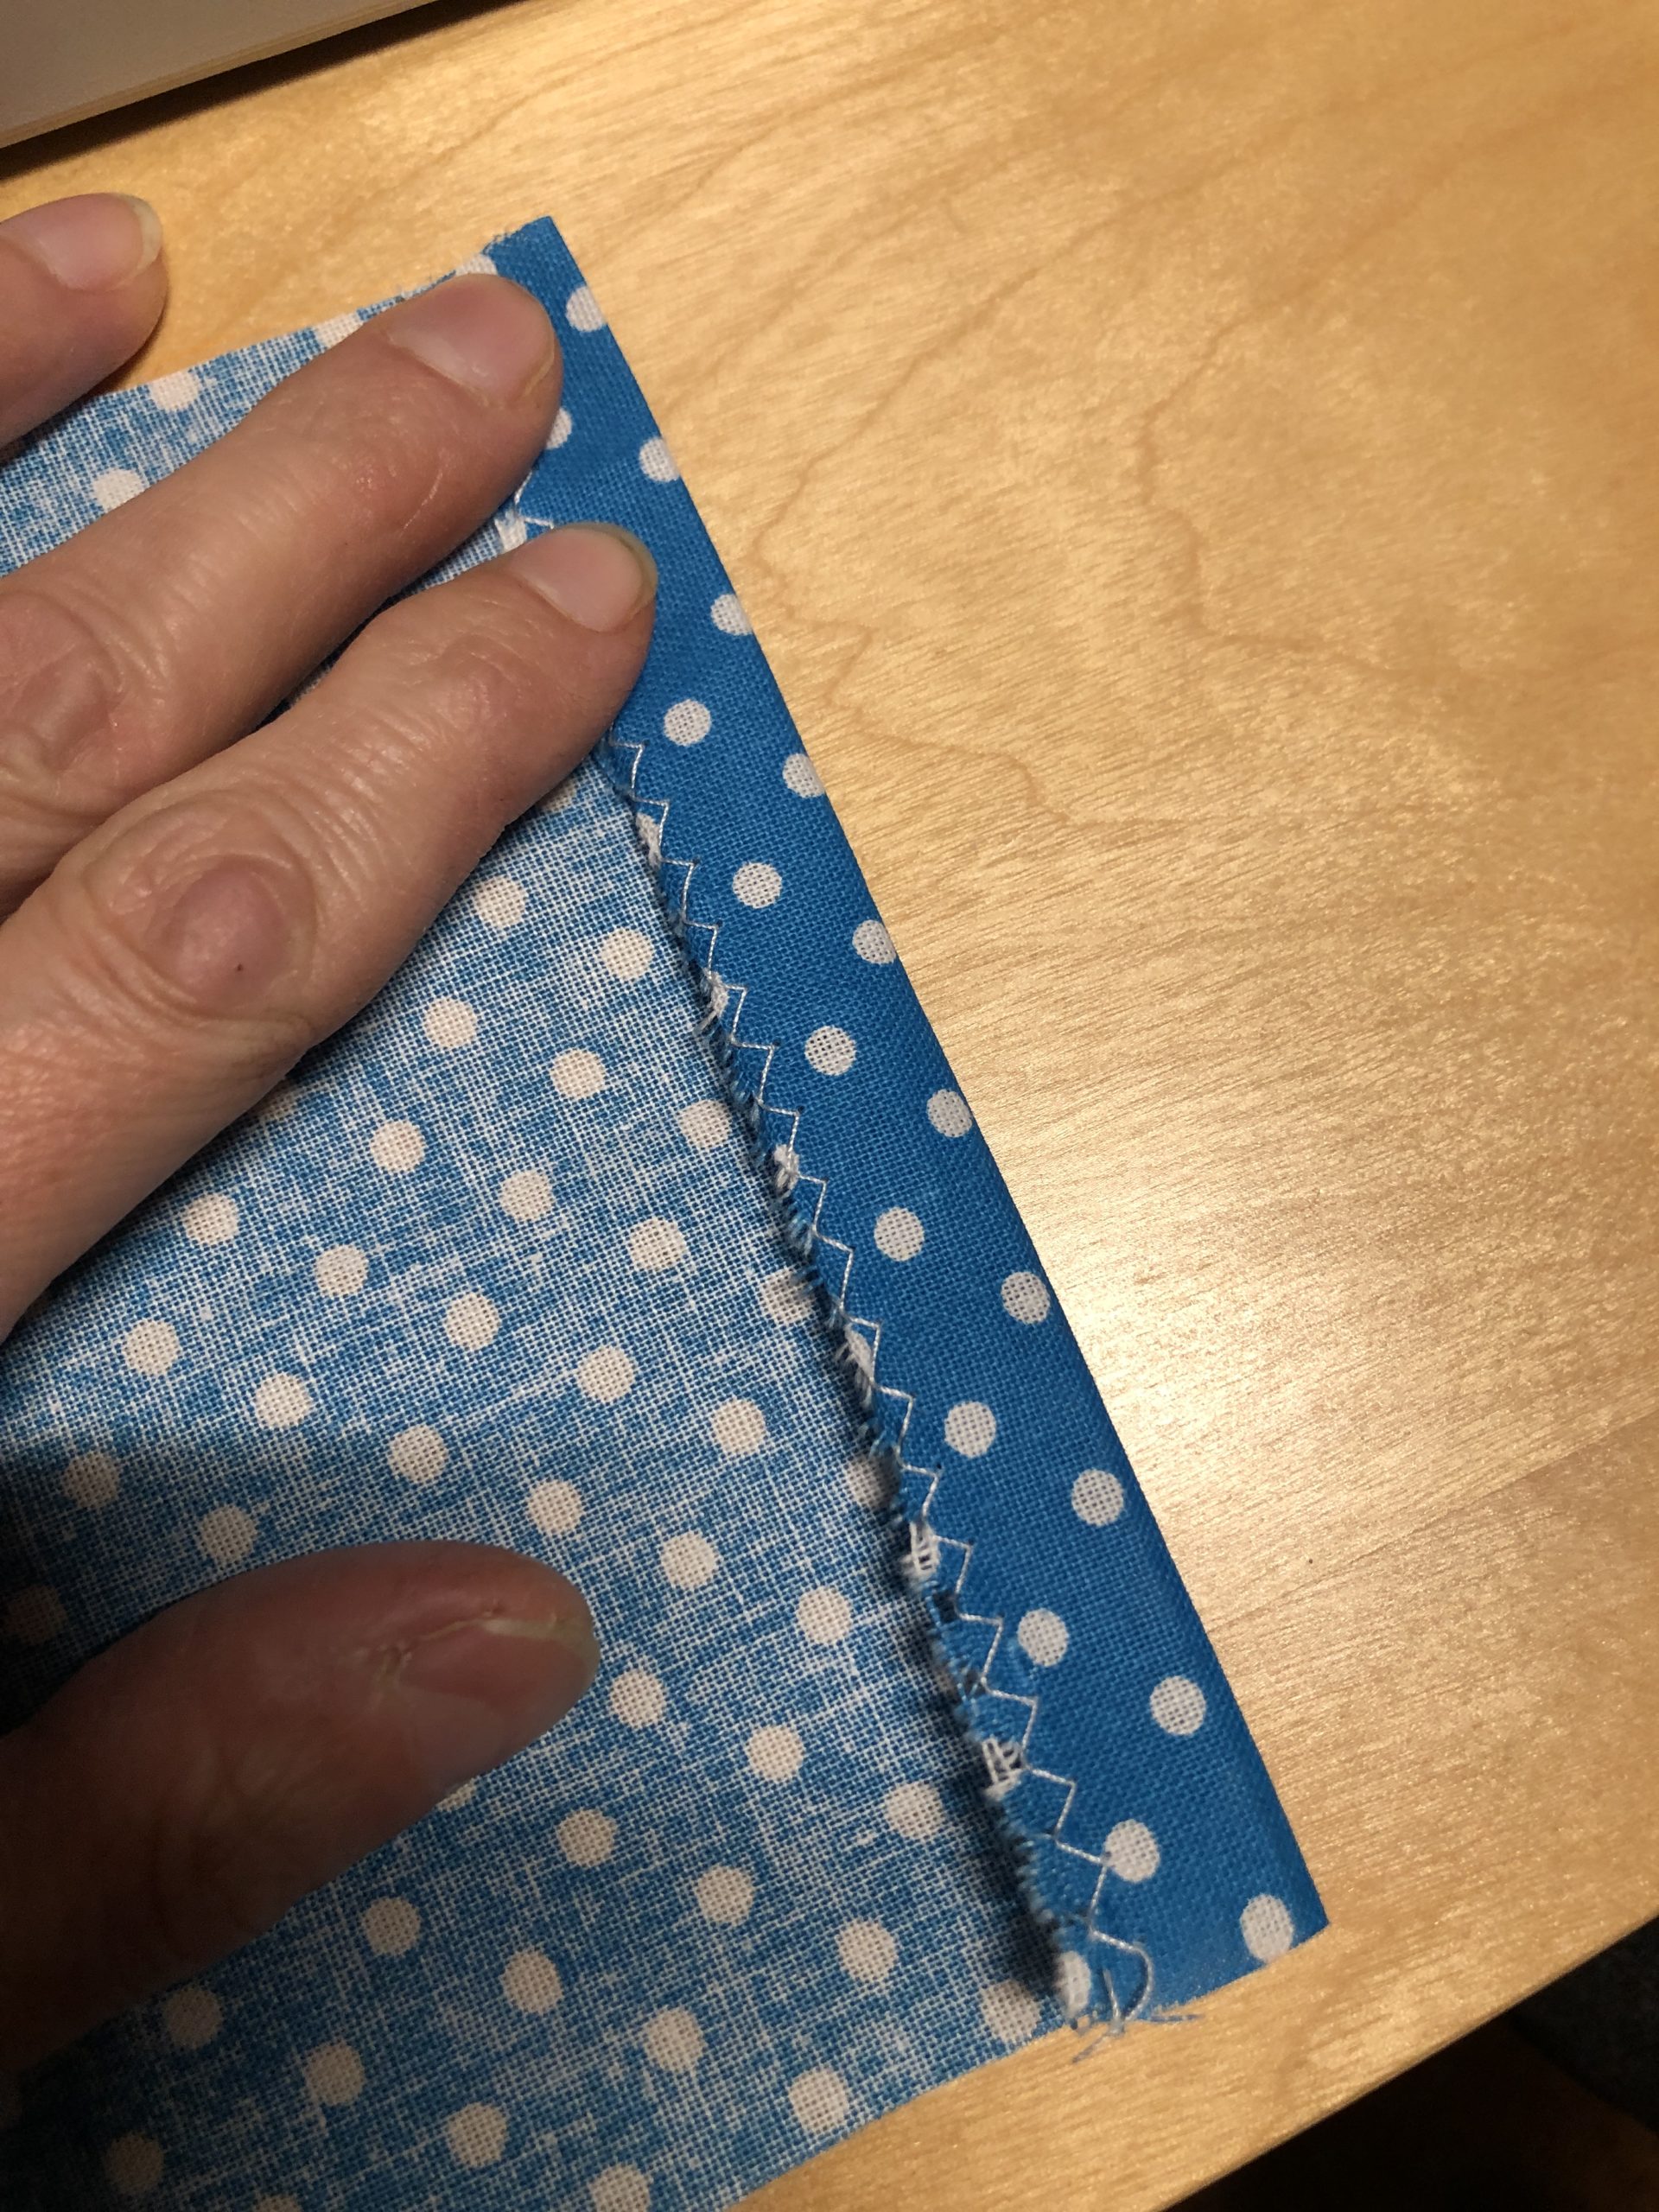
Then flip over an inch.

Bild zum Schritt 4 für das Bastel- und DIY-Abenteuer für Kinder: 'Dann einen Zentimeter umschlagen.'

5

Then place the two parts of the hair rubber as handles. To do this, put them into a loop. Check out the picture.

Bild zum Schritt 5 für das Bastel- und DIY-Abenteuer für Kinder: 'Anschließend die zwei Haargummi-Teile als Haltegriffe legen. Dazu legt ihr...'

6

You can also put pins on this before you sew.

Bild zum Schritt 6 für das Bastel- und DIY-Abenteuer für Kinder: 'Ihr könnt das auch mit Stecknadeln anstecken, bevor ihr näht.'

7

2. Bild zum Schritt 6 für das Bastel- und DIY-Abenteuer für Kinder: 'Ihr könnt das auch mit Stecknadeln anstecken, bevor ihr näht.'

8

Now you sew it on with a second seam. To do this, turn the fabric around so that you sew on the front of the fabric.

Bild zum Schritt 8 für das Bastel- und DIY-Abenteuer für Kinder: 'Jetzt näht ihr diese mit einer zweiten Naht an. Dazu...'

9

Line the other short side of the fabric also with a zigzag stitch. Then turn over another centimeter and then use the third hair rubber. Place it in the middle of the short side to a loop and then sew it as well.

Bild zum Schritt 9 für das Bastel- und DIY-Abenteuer für Kinder: 'Die andere kurze Seite des Stoffes ebenfalls mit einem Zickzack-Stich...'

10

Then you sew a second seam on both sides (i.e. both sides are sewn twice).

Bild zum Schritt 10 für das Bastel- und DIY-Abenteuer für Kinder: 'Dann näht ihr auf beiden Seiten noch jeweils eine zweite...'

11

Now position the two same heads on the short side with the one loop. The two buttons serve as eyes and are sewn on. Attention: sew on the eyes before sewing the long side together!

Bild zum Schritt 11 für das Bastel- und DIY-Abenteuer für Kinder: 'Jetzt positioniert die zwei gleichen Köpfe auf der kurzen Seite...'

12

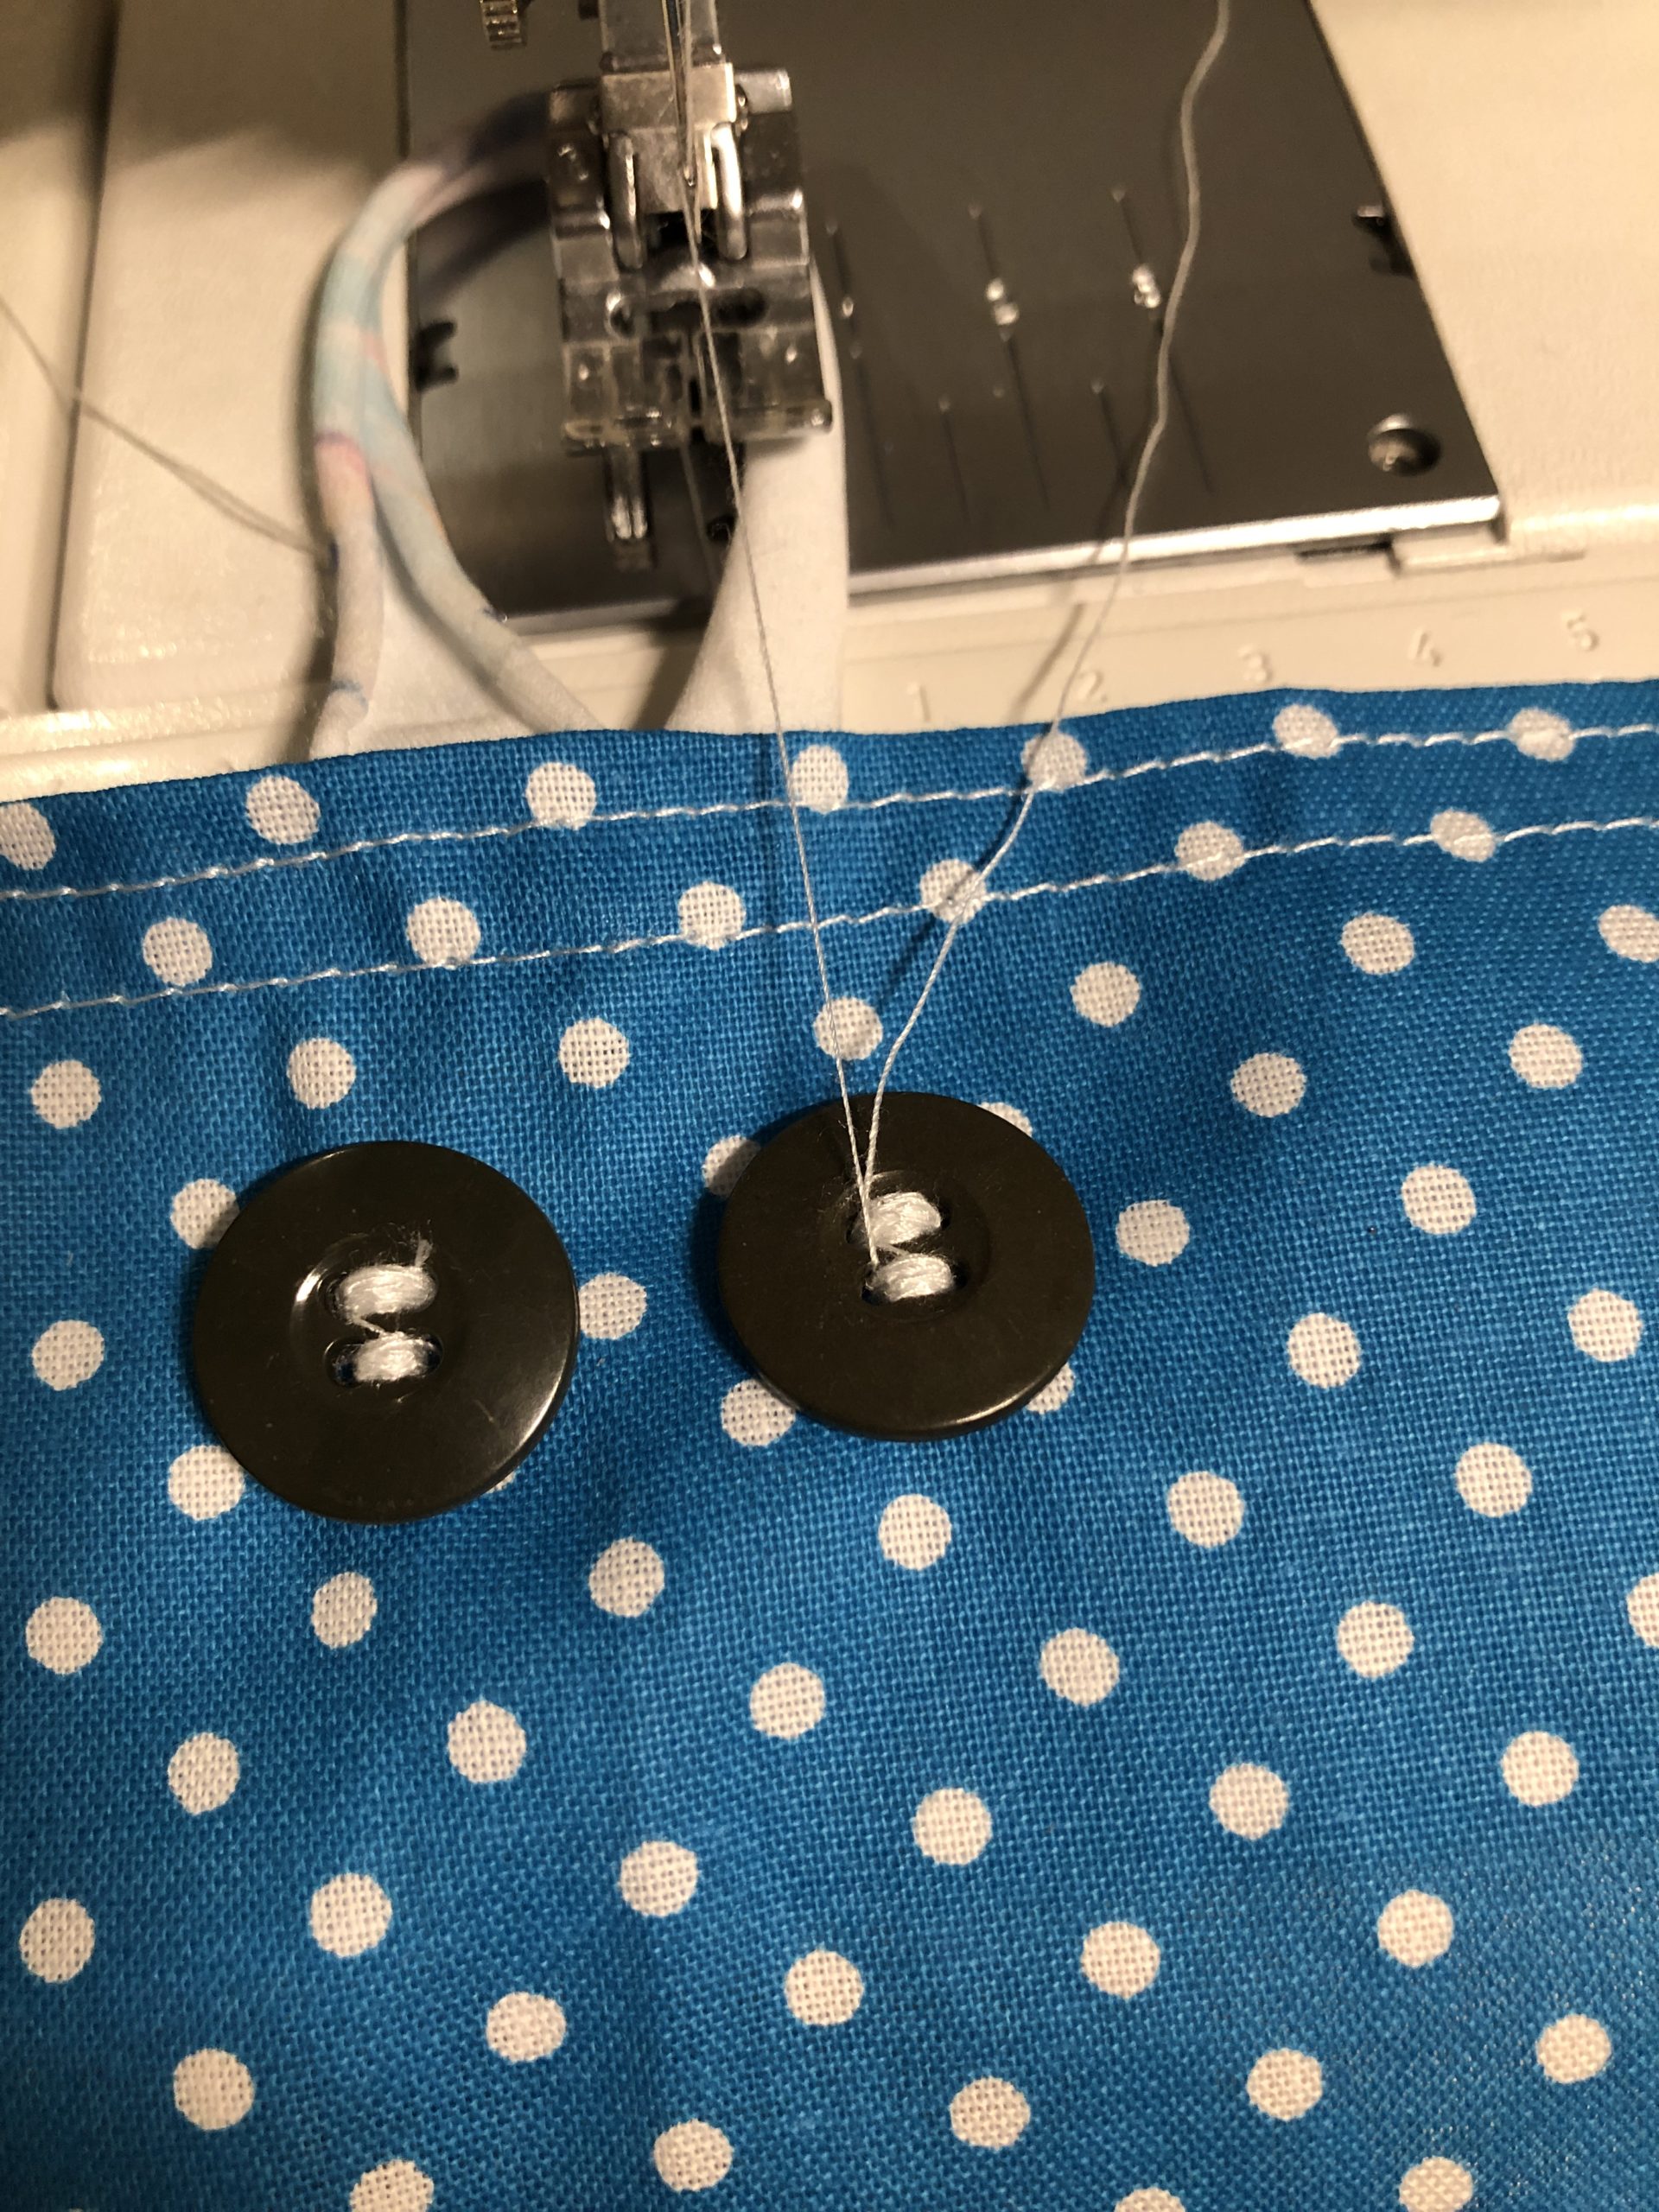
The buttons can be fastened with the sewing machine or with the hand. I do it with the sewing machine and sink the transport feet (so the button remains quiet).

Bild zum Schritt 12 für das Bastel- und DIY-Abenteuer für Kinder: 'Die Knöpfe können mit der Nähmaschine oder mit der Hand...'

13

2. Bild zum Schritt 12 für das Bastel- und DIY-Abenteuer für Kinder: 'Die Knöpfe können mit der Nähmaschine oder mit der Hand...'

14

3. Bild zum Schritt 13 für das Bastel- und DIY-Abenteuer für Kinder: 'Die Knöpfe können mit der Nähmaschine oder mit der Hand...'

15

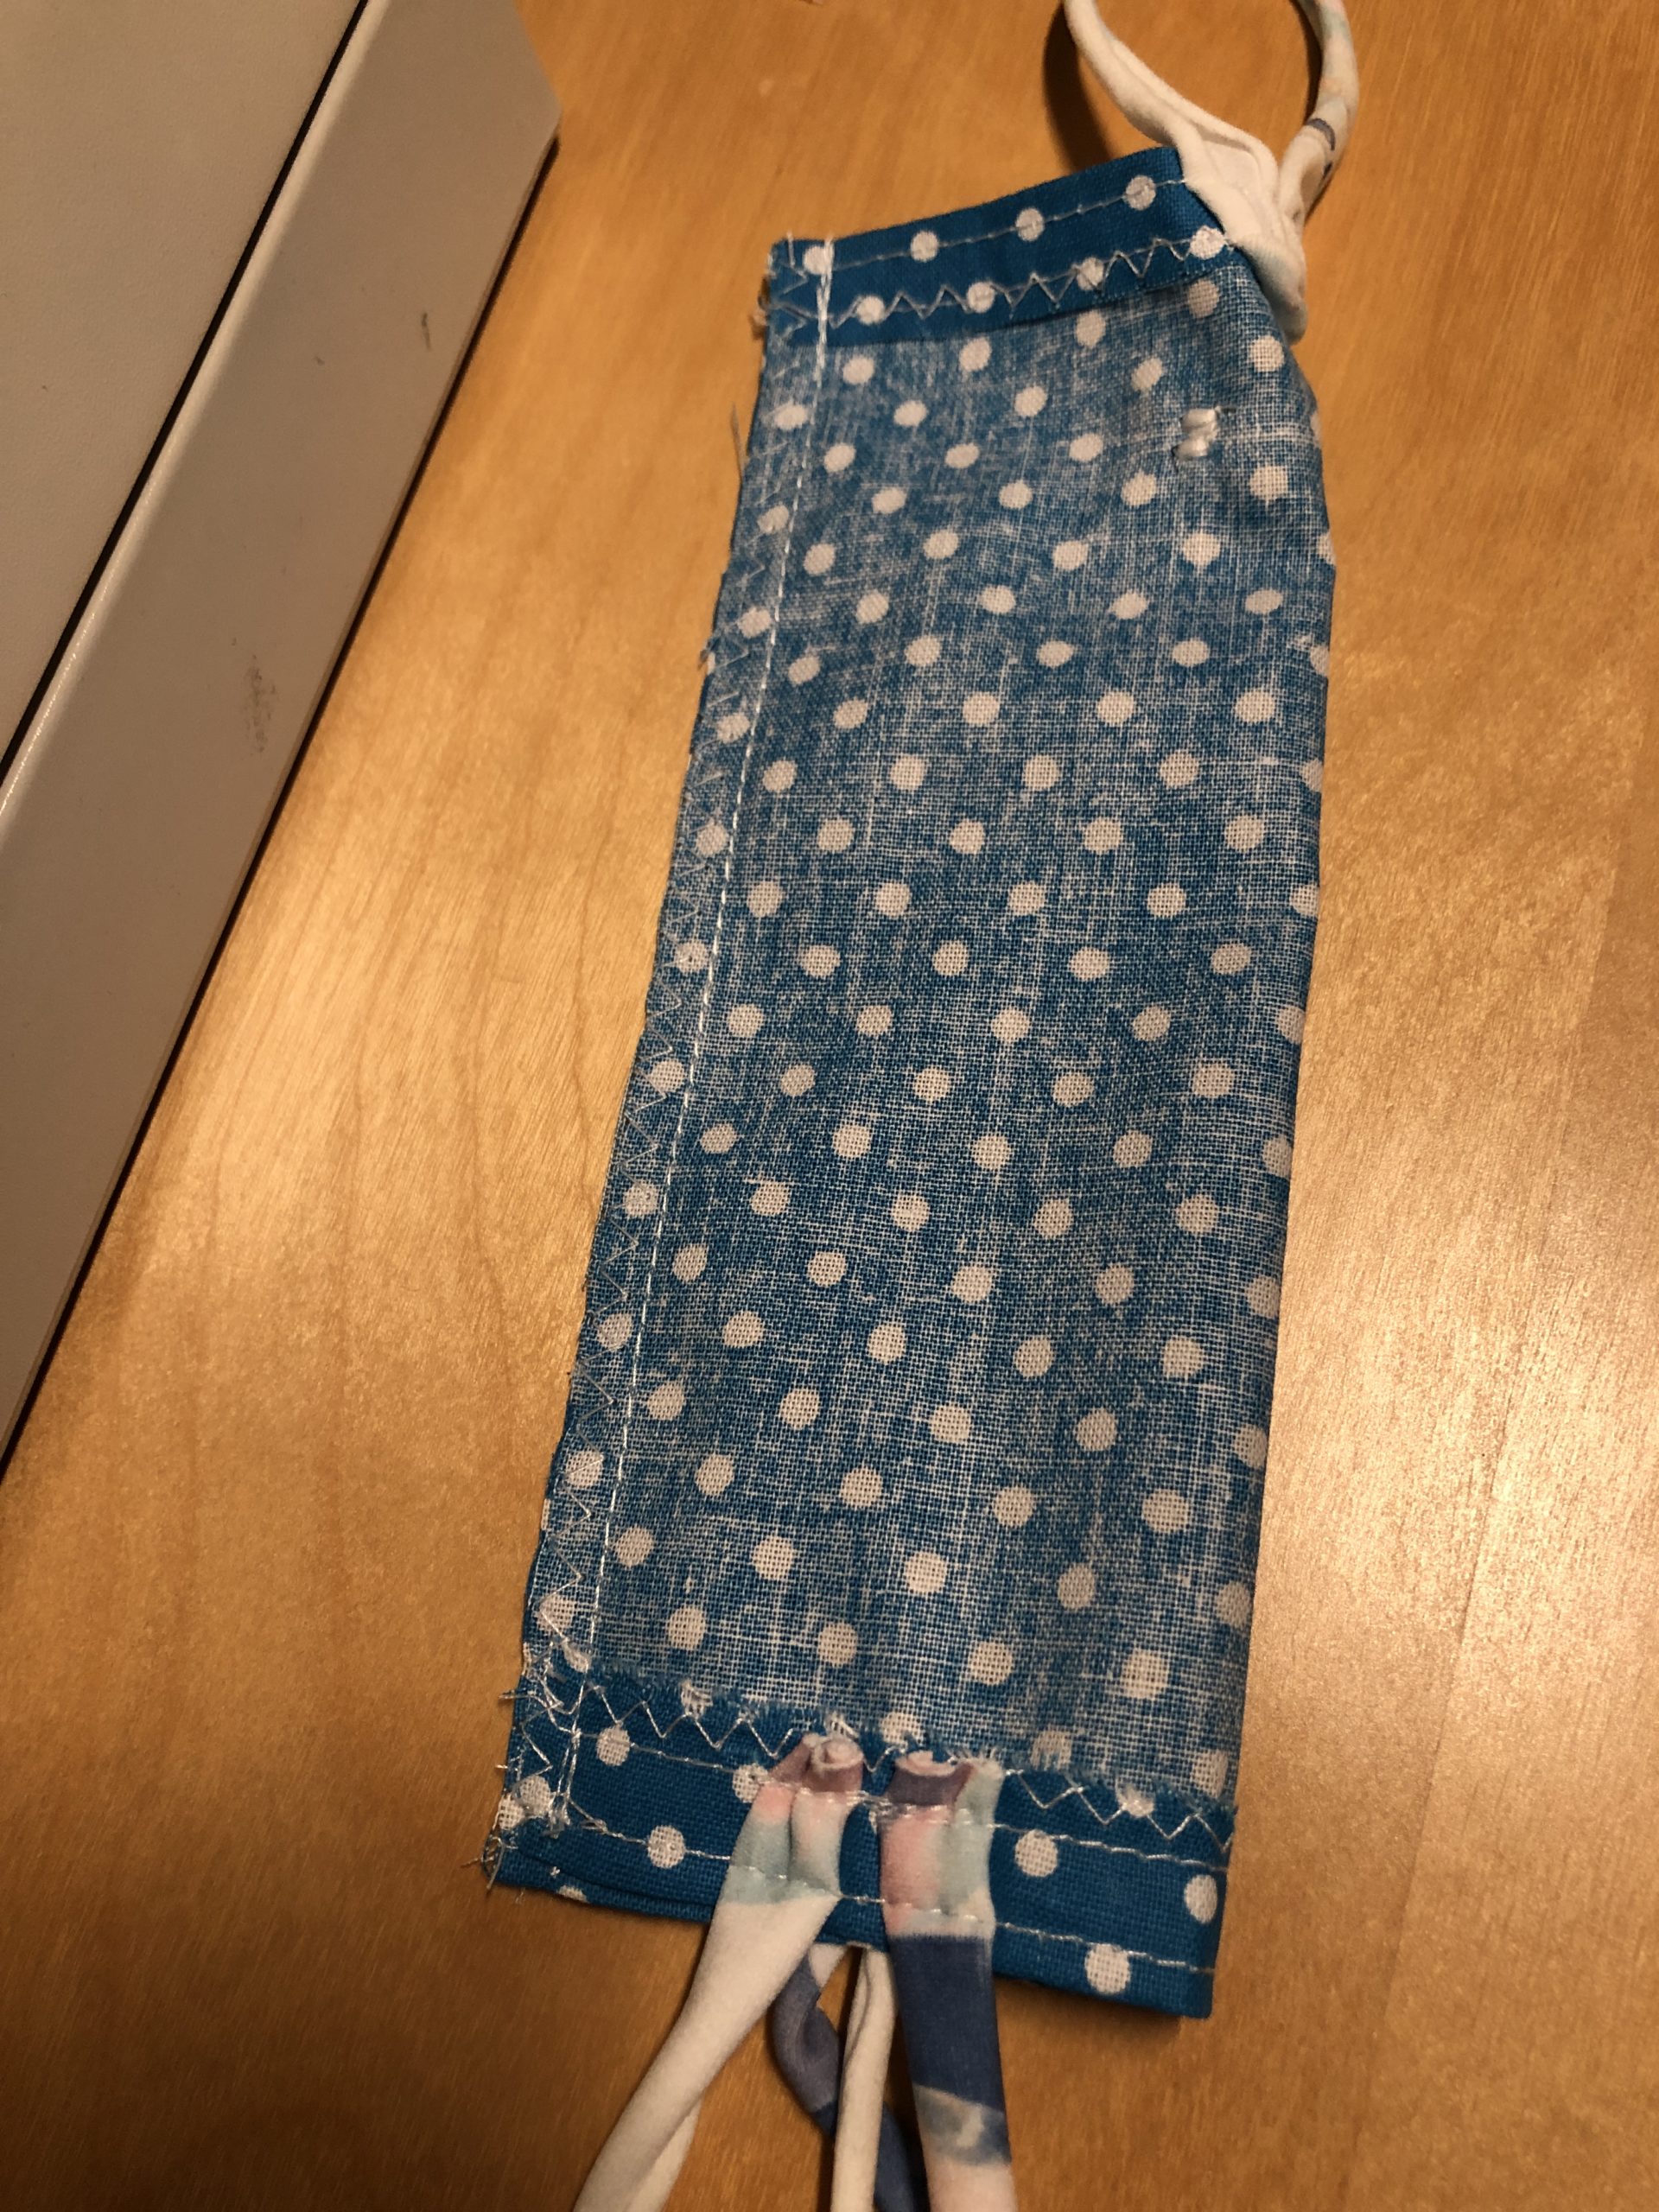
When the buttons are attached, put together the fabric lengthwise. The beautiful fabric side is now inside and the inside of the fabric looks at you.

Bild zum Schritt 15 für das Bastel- und DIY-Abenteuer für Kinder: 'Wenn die Knöpfe angebracht sind, den Stoff der Länge nach...'

16

With a straight stitch you sew the long side together. Then you line the edge with a zigzag stick.

Bild zum Schritt 16 für das Bastel- und DIY-Abenteuer für Kinder: 'Mit einem geraden Stich näht ihr die lange Seite zusammen....'

17

2. Bild zum Schritt 16 für das Bastel- und DIY-Abenteuer für Kinder: 'Mit einem geraden Stich näht ihr die lange Seite zusammen....'

18

Now you turn the sewn tube around.

Bild zum Schritt 18 für das Bastel- und DIY-Abenteuer für Kinder: 'Jetzt dreht ihr den genähten Schlauch um.'

19

That's the front of the fish.

Bild zum Schritt 19 für das Bastel- und DIY-Abenteuer für Kinder: 'Das ist die Vorderseite des Fisches.'

20

Now put the fish on the back. On the back you sew on the big button. It is used to close the fish mouth with the rubber loop.

Bild zum Schritt 20 für das Bastel- und DIY-Abenteuer für Kinder: 'Den Fisch nun auf den Rücken legen. Auf der Rückseite...'

21

Now test which place the button has to lie before you sew it.

Bild zum Schritt 21 für das Bastel- und DIY-Abenteuer für Kinder: 'Testet jetzt an welcher Stelle der Knopf liegen muss, bevor...'

22

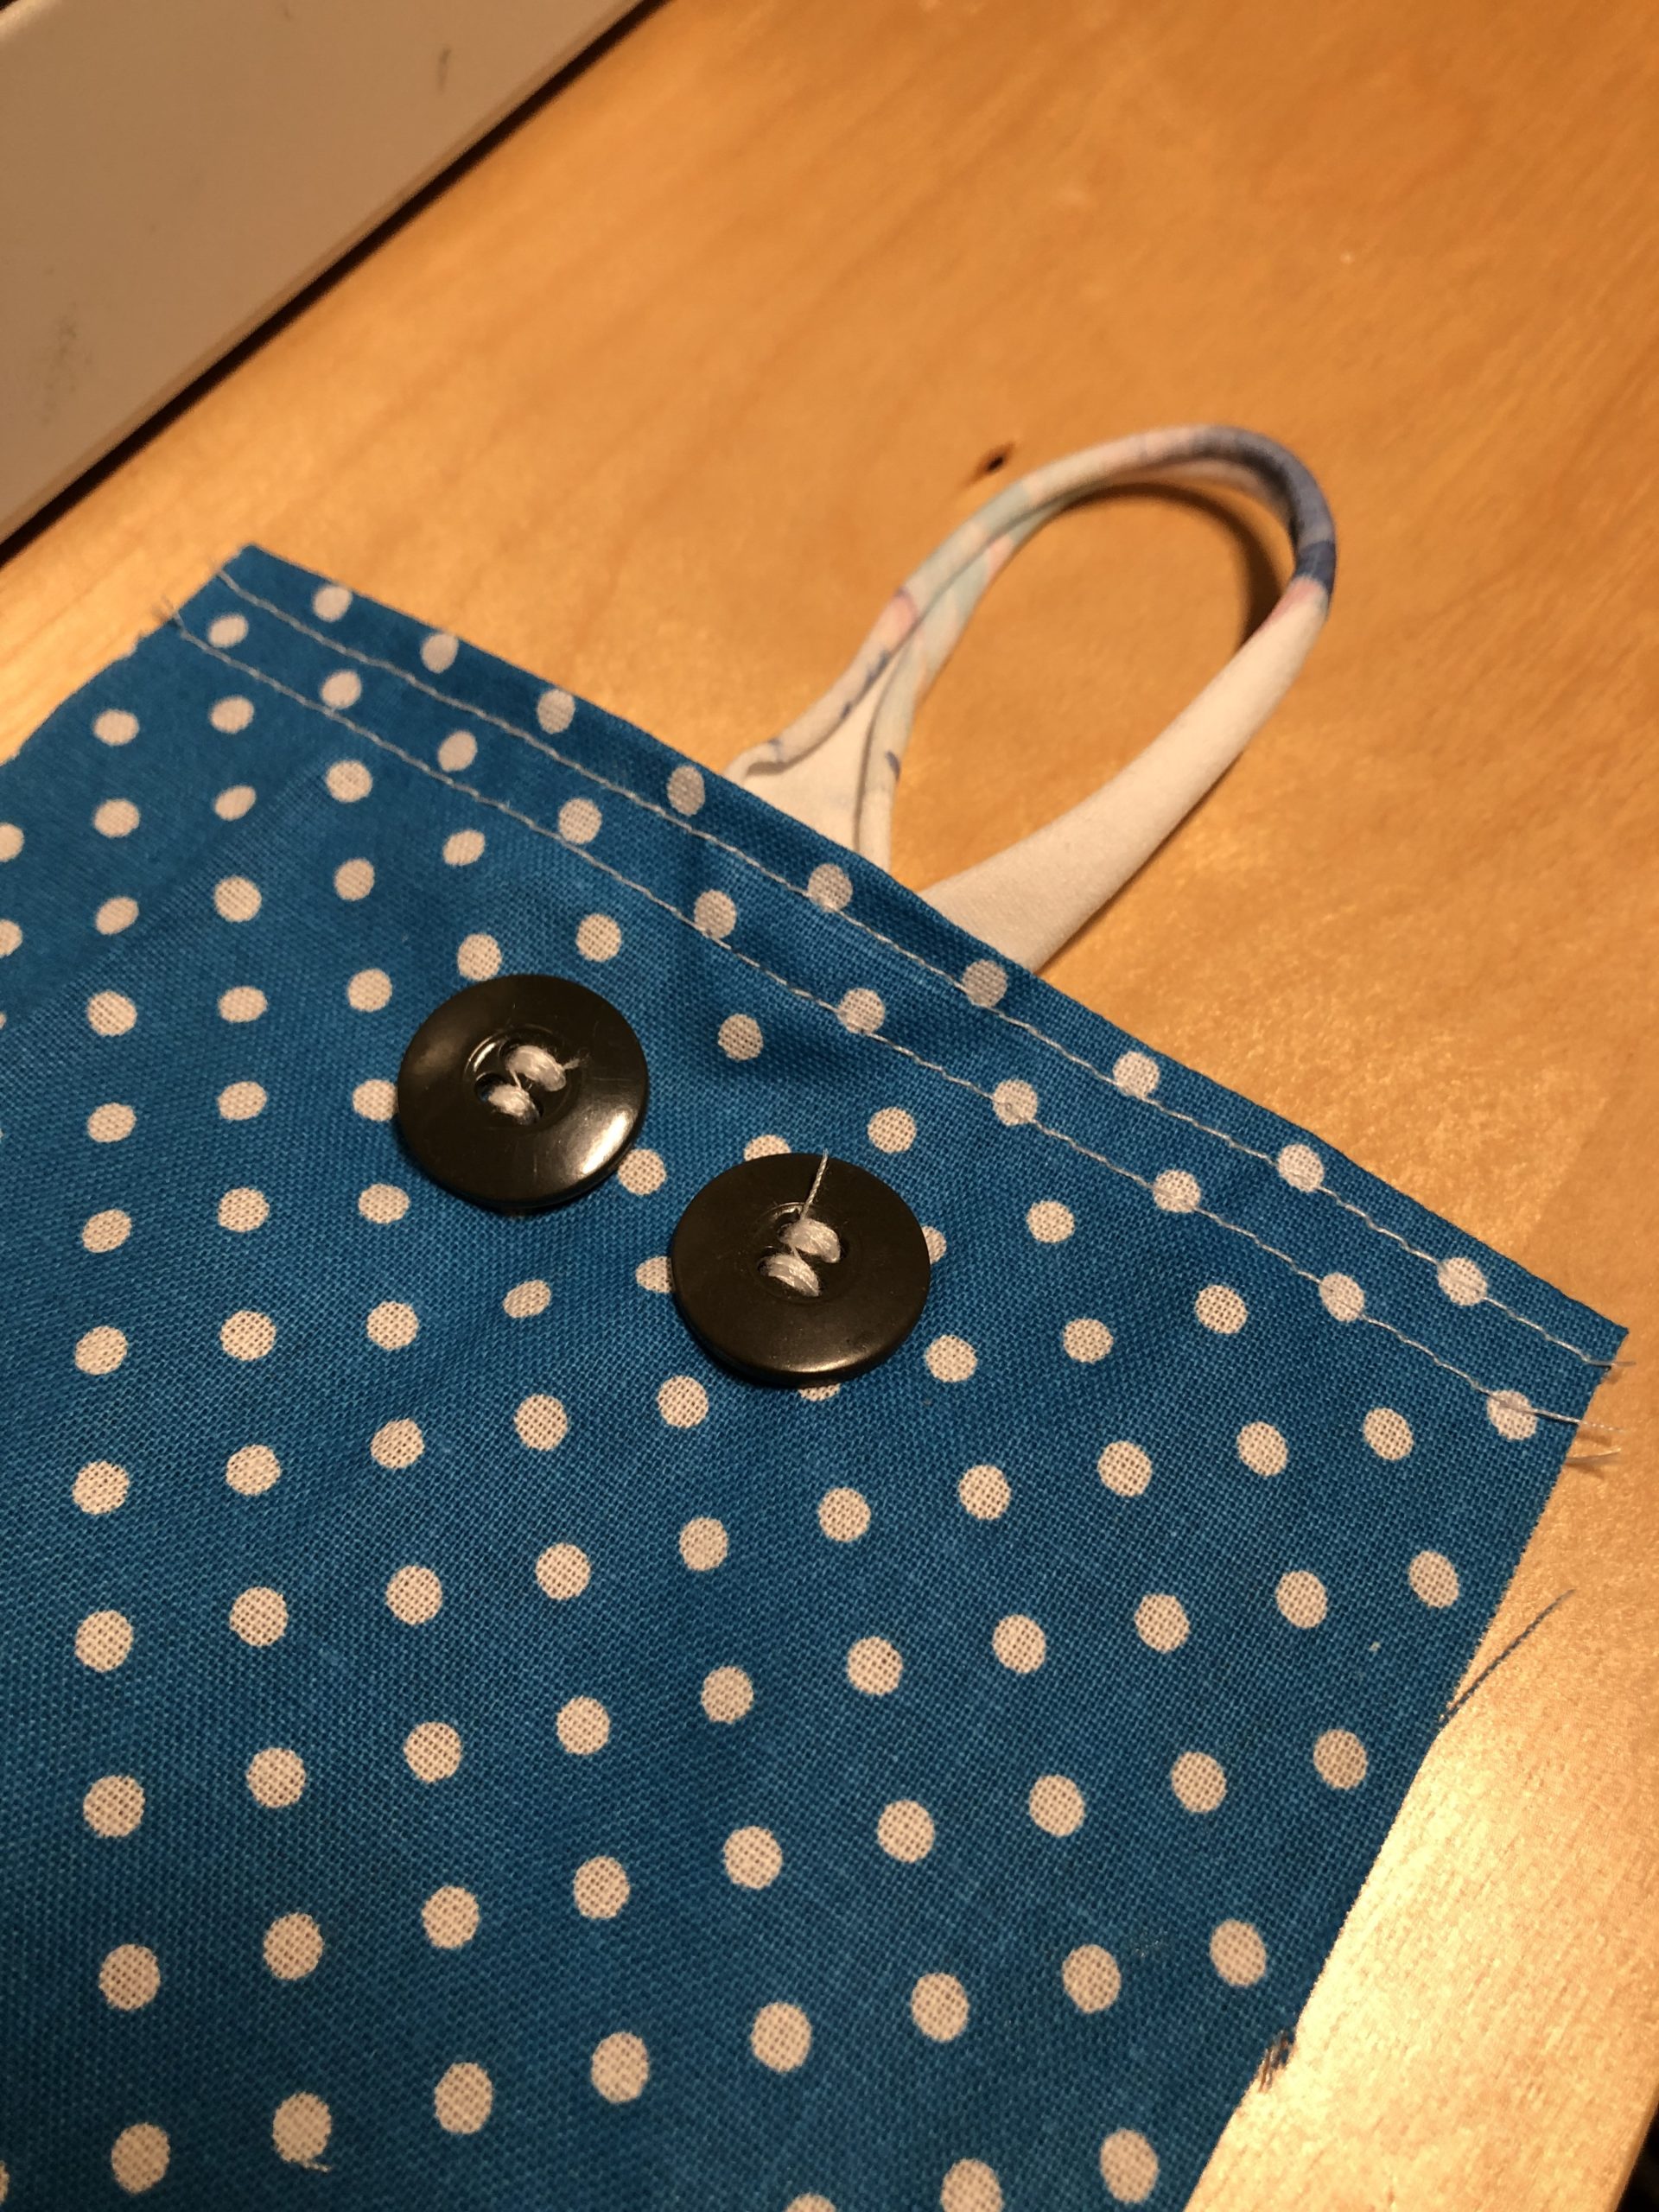
Take a needle and a thread and sew the button with your hand.

Bild zum Schritt 22 für das Bastel- und DIY-Abenteuer für Kinder: 'Nehmt eine Nadel und einen Faden und näht den Knopf...'

23

2. Bild zum Schritt 22 für das Bastel- und DIY-Abenteuer für Kinder: 'Nehmt eine Nadel und einen Faden und näht den Knopf...'

24

Now close your mouth.

Bild zum Schritt 24 für das Bastel- und DIY-Abenteuer für Kinder: 'Jetzt verschließt das Maul.'

25

Ready!
Now the fish can be filled with chestnuts.

Bild zum Schritt 25 für das Bastel- und DIY-Abenteuer für Kinder: 'Fertig!   Nun kann der Fisch mit Kastanien gefüllt...'

26

You can open your mouth when the fish belly is filled, then all the chestnuts will go out again! Little children have a huge fun falling into the chestnuts and having them go out again.

Bild zum Schritt 26 für das Bastel- und DIY-Abenteuer für Kinder: 'Ihr könnt das Maul öffnen, wenn der Fischbauch gefüllt ist,...'

27

2. Bild zum Schritt 26 für das Bastel- und DIY-Abenteuer für Kinder: 'Ihr könnt das Maul öffnen, wenn der Fischbauch gefüllt ist,...'

28

Have fun trying it out!

29

A nice material for the autumn!
Suitable for playing with natural materials as well as for training fine motor skills and tactile perception.
It is especially beautiful when you have collected the chestnuts yourself!

Materials

 fabric rest about 25cm x 14cm
 1 wide hair rubber
 2 Same buttons
 1 Large button
 Sewing machine
 Substance shears
 Ruler
 Pen
 Needle
 Thread

Directions

1

Cut the fabric to the dimensions 25cm x 14cm.

Bild zum Schritt 1 für das Bastel- und DIY-Abenteuer für Kinder: 'Den Stoff auf die Maße 25cm x 14cm zuschneiden.'

2

Two rubber bands. For this I cut a hair rubber into three equal parts. Two of the three parts we use for the grips and one for the fish mouth.

Bild zum Schritt 2 für das Bastel- und DIY-Abenteuer für Kinder: 'Zwei Gummibänder zurechtlegen. Dafür habe ich einen Haargummi in drei...'

3

Strip off the short sides of the fabric with zigzag stitch.
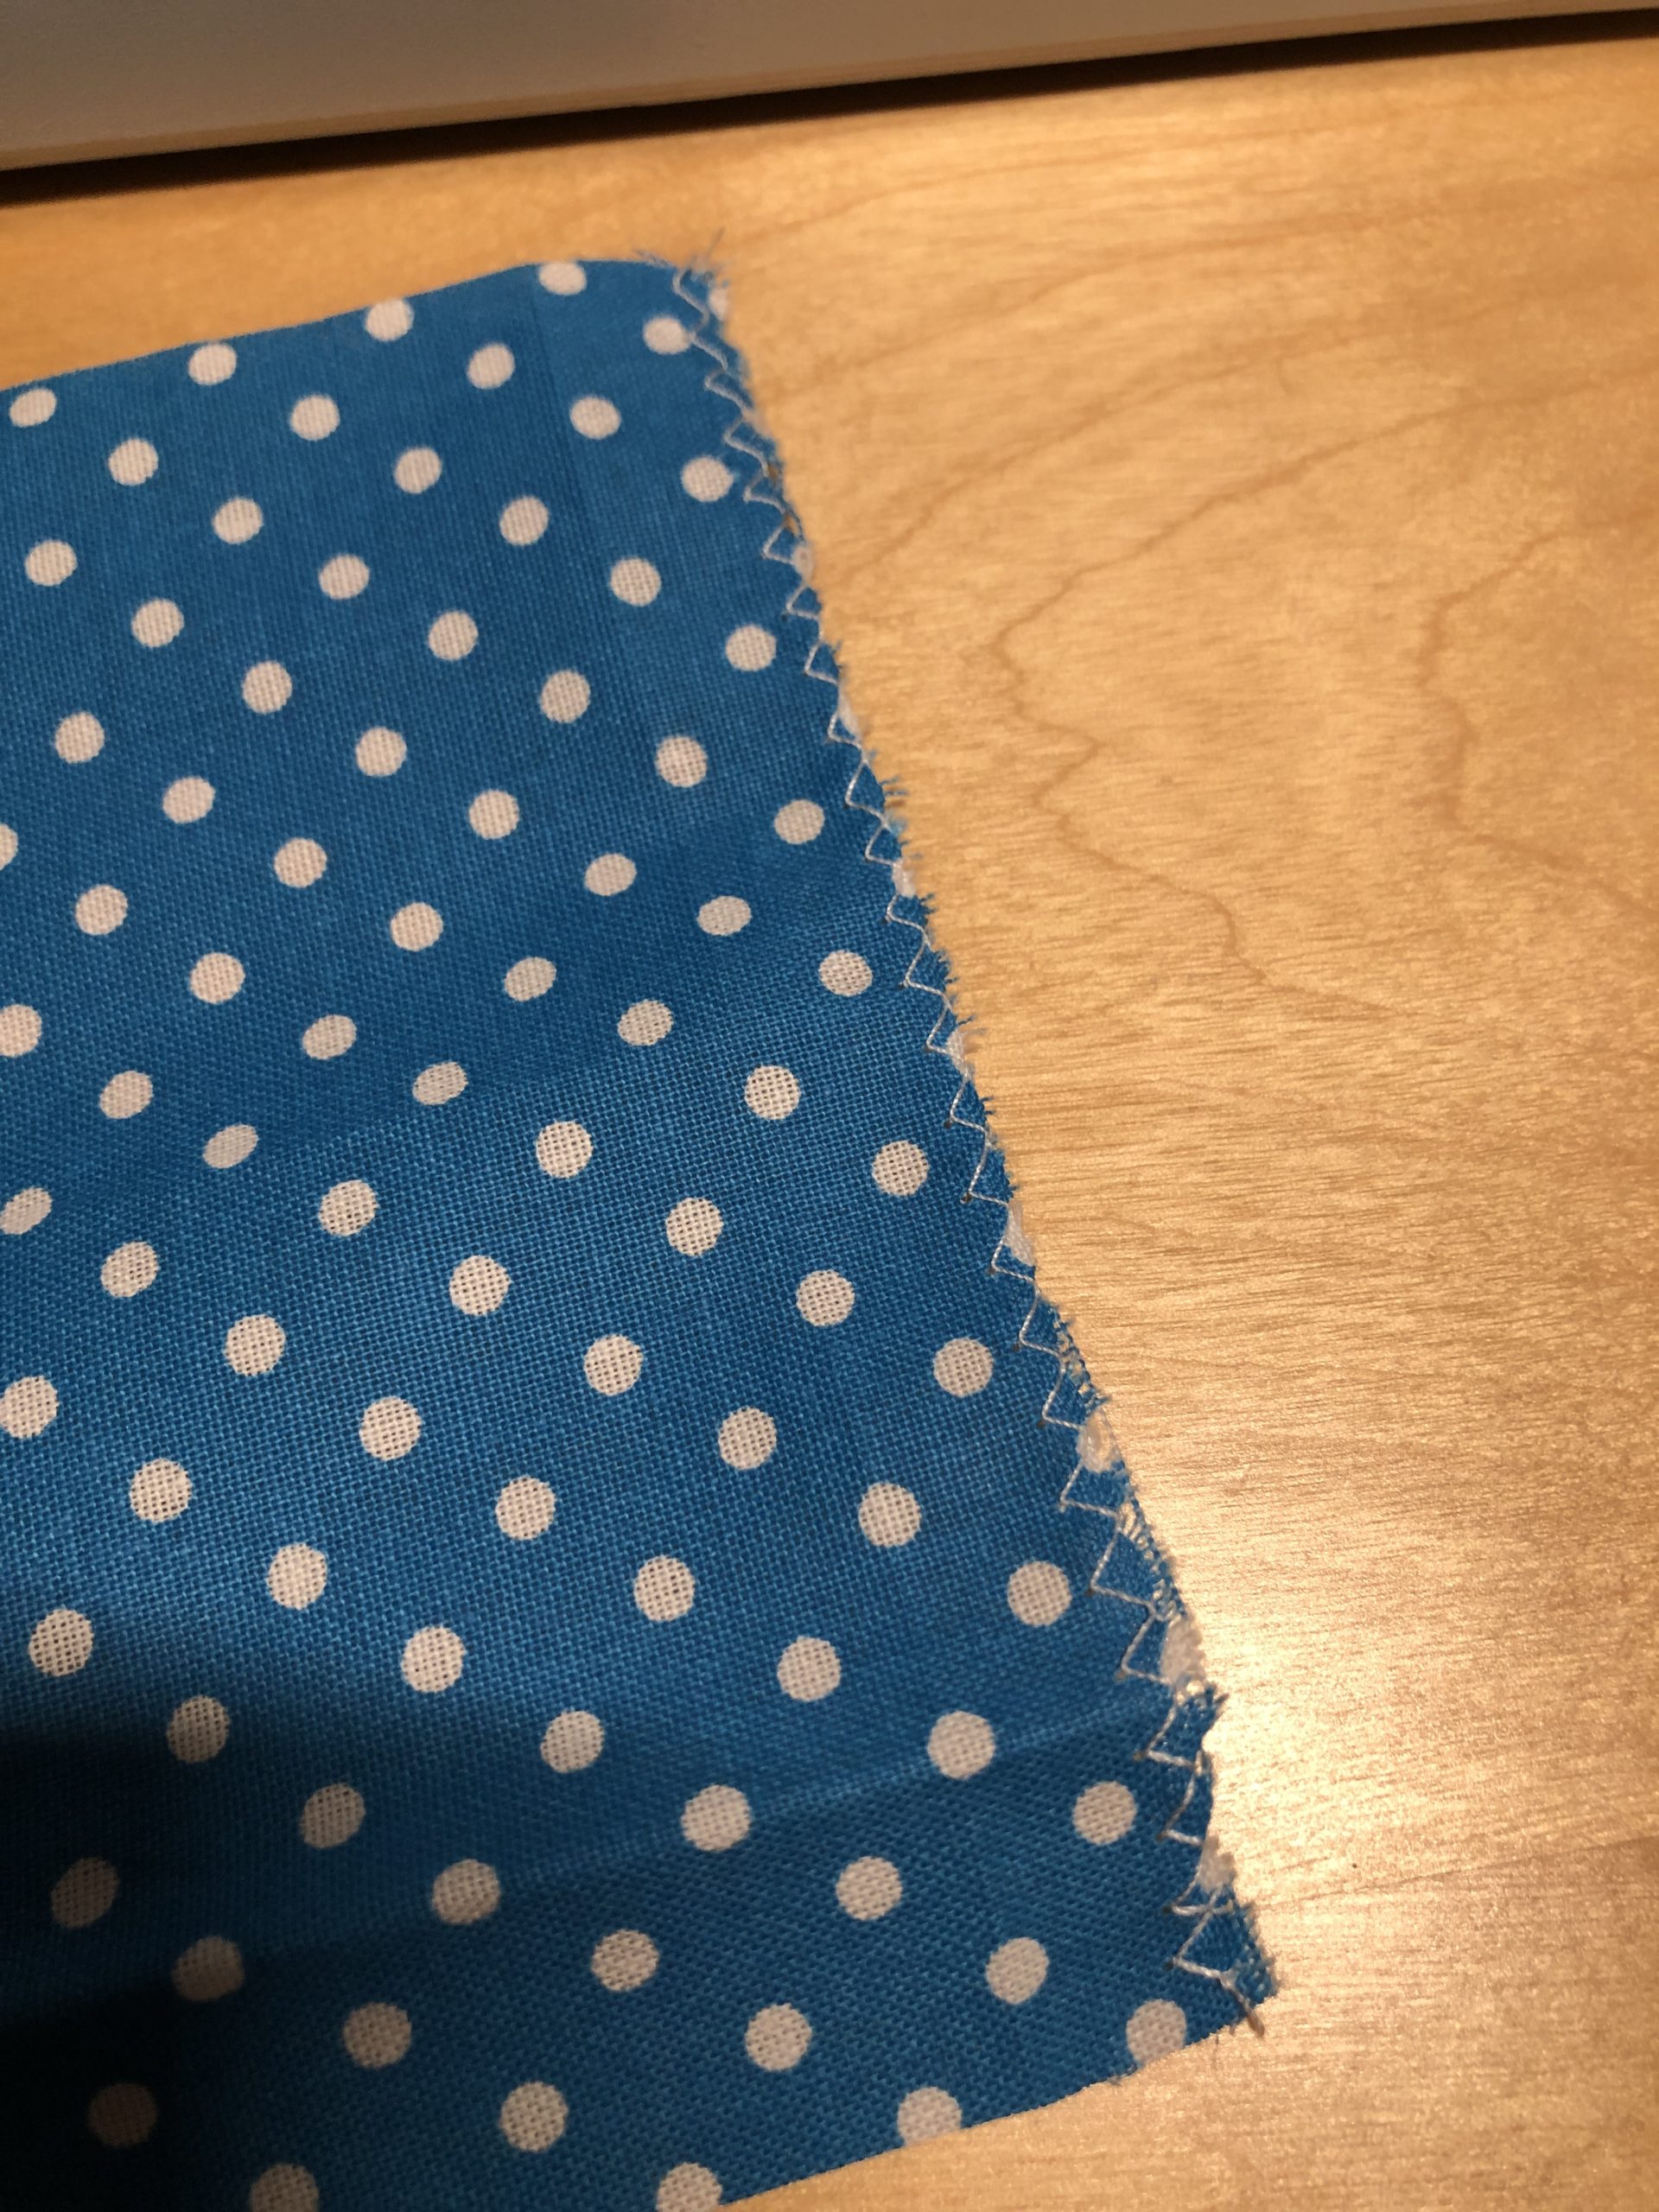
Bild zum Schritt 3 für das Bastel- und DIY-Abenteuer für Kinder: 'Die kurzen Seiten des Stoffes mit Zickzack-Stich absteppen.'

4

Then flip over an inch.

Bild zum Schritt 4 für das Bastel- und DIY-Abenteuer für Kinder: 'Dann einen Zentimeter umschlagen.'

5

Then place the two parts of the hair rubber as handles. To do this, put them into a loop. Check out the picture.
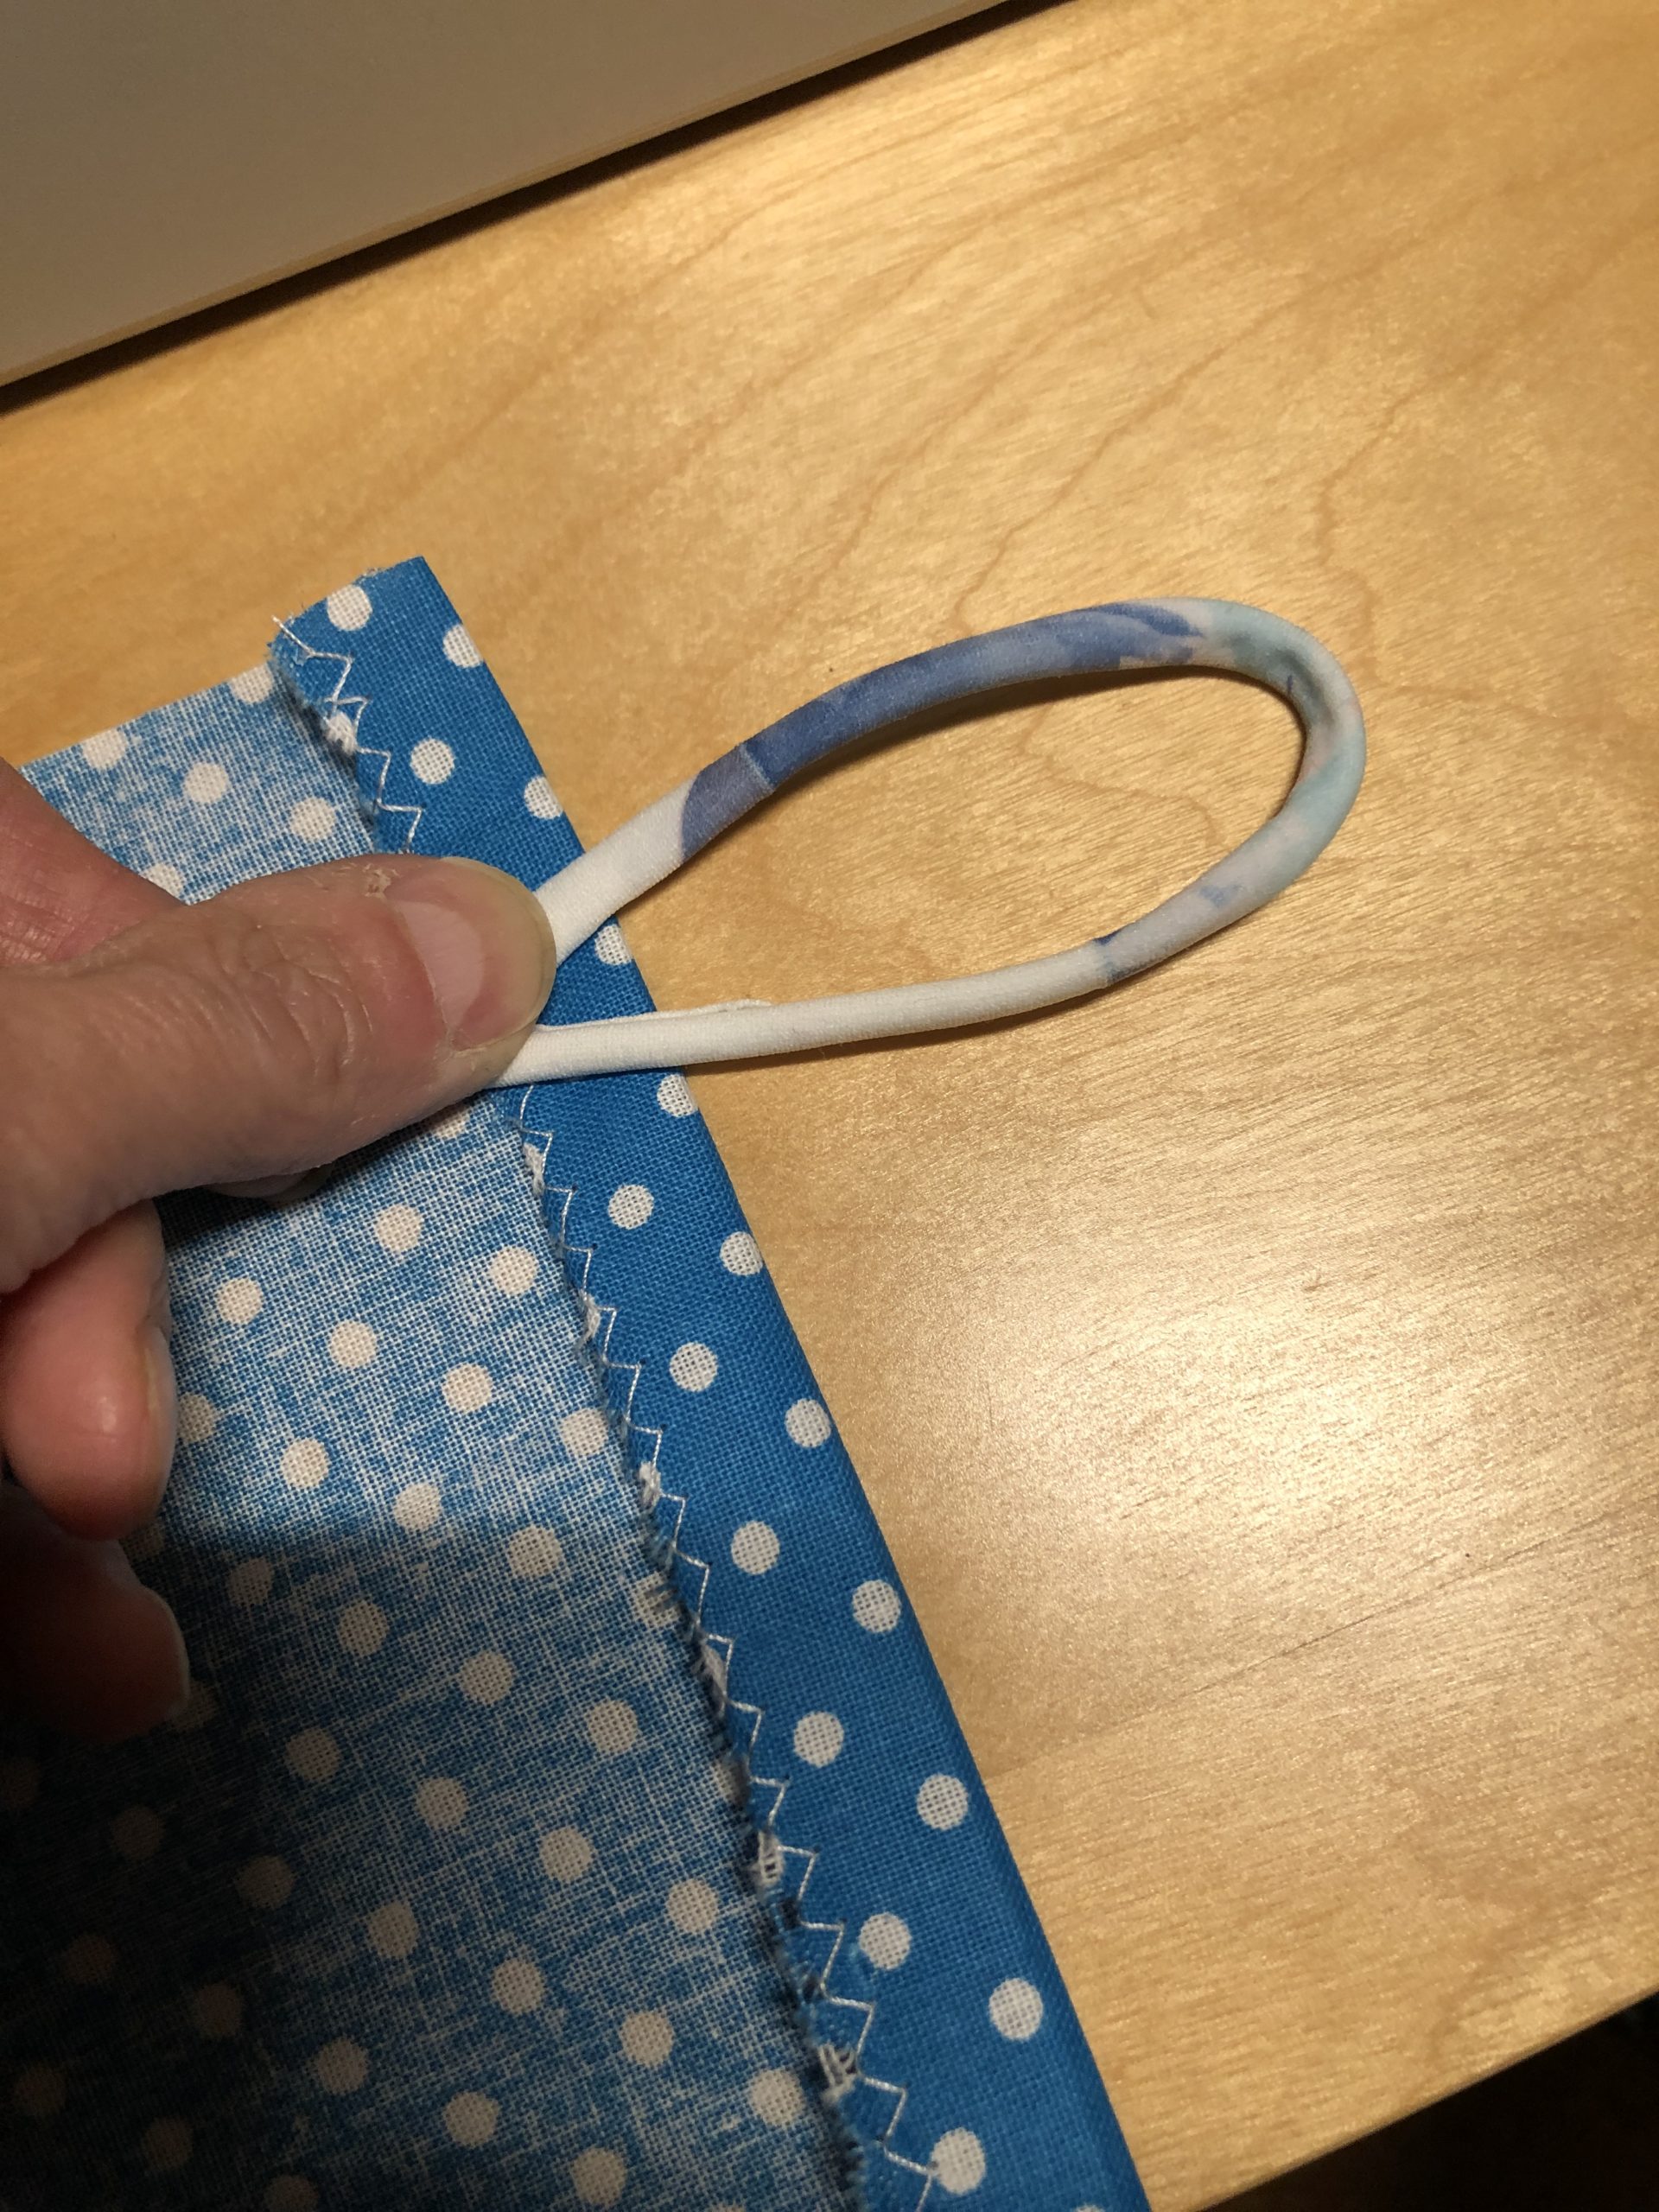
Bild zum Schritt 5 für das Bastel- und DIY-Abenteuer für Kinder: 'Anschließend die zwei Haargummi-Teile als Haltegriffe legen. Dazu legt ihr...'

6

You can also put pins on this before you sew.
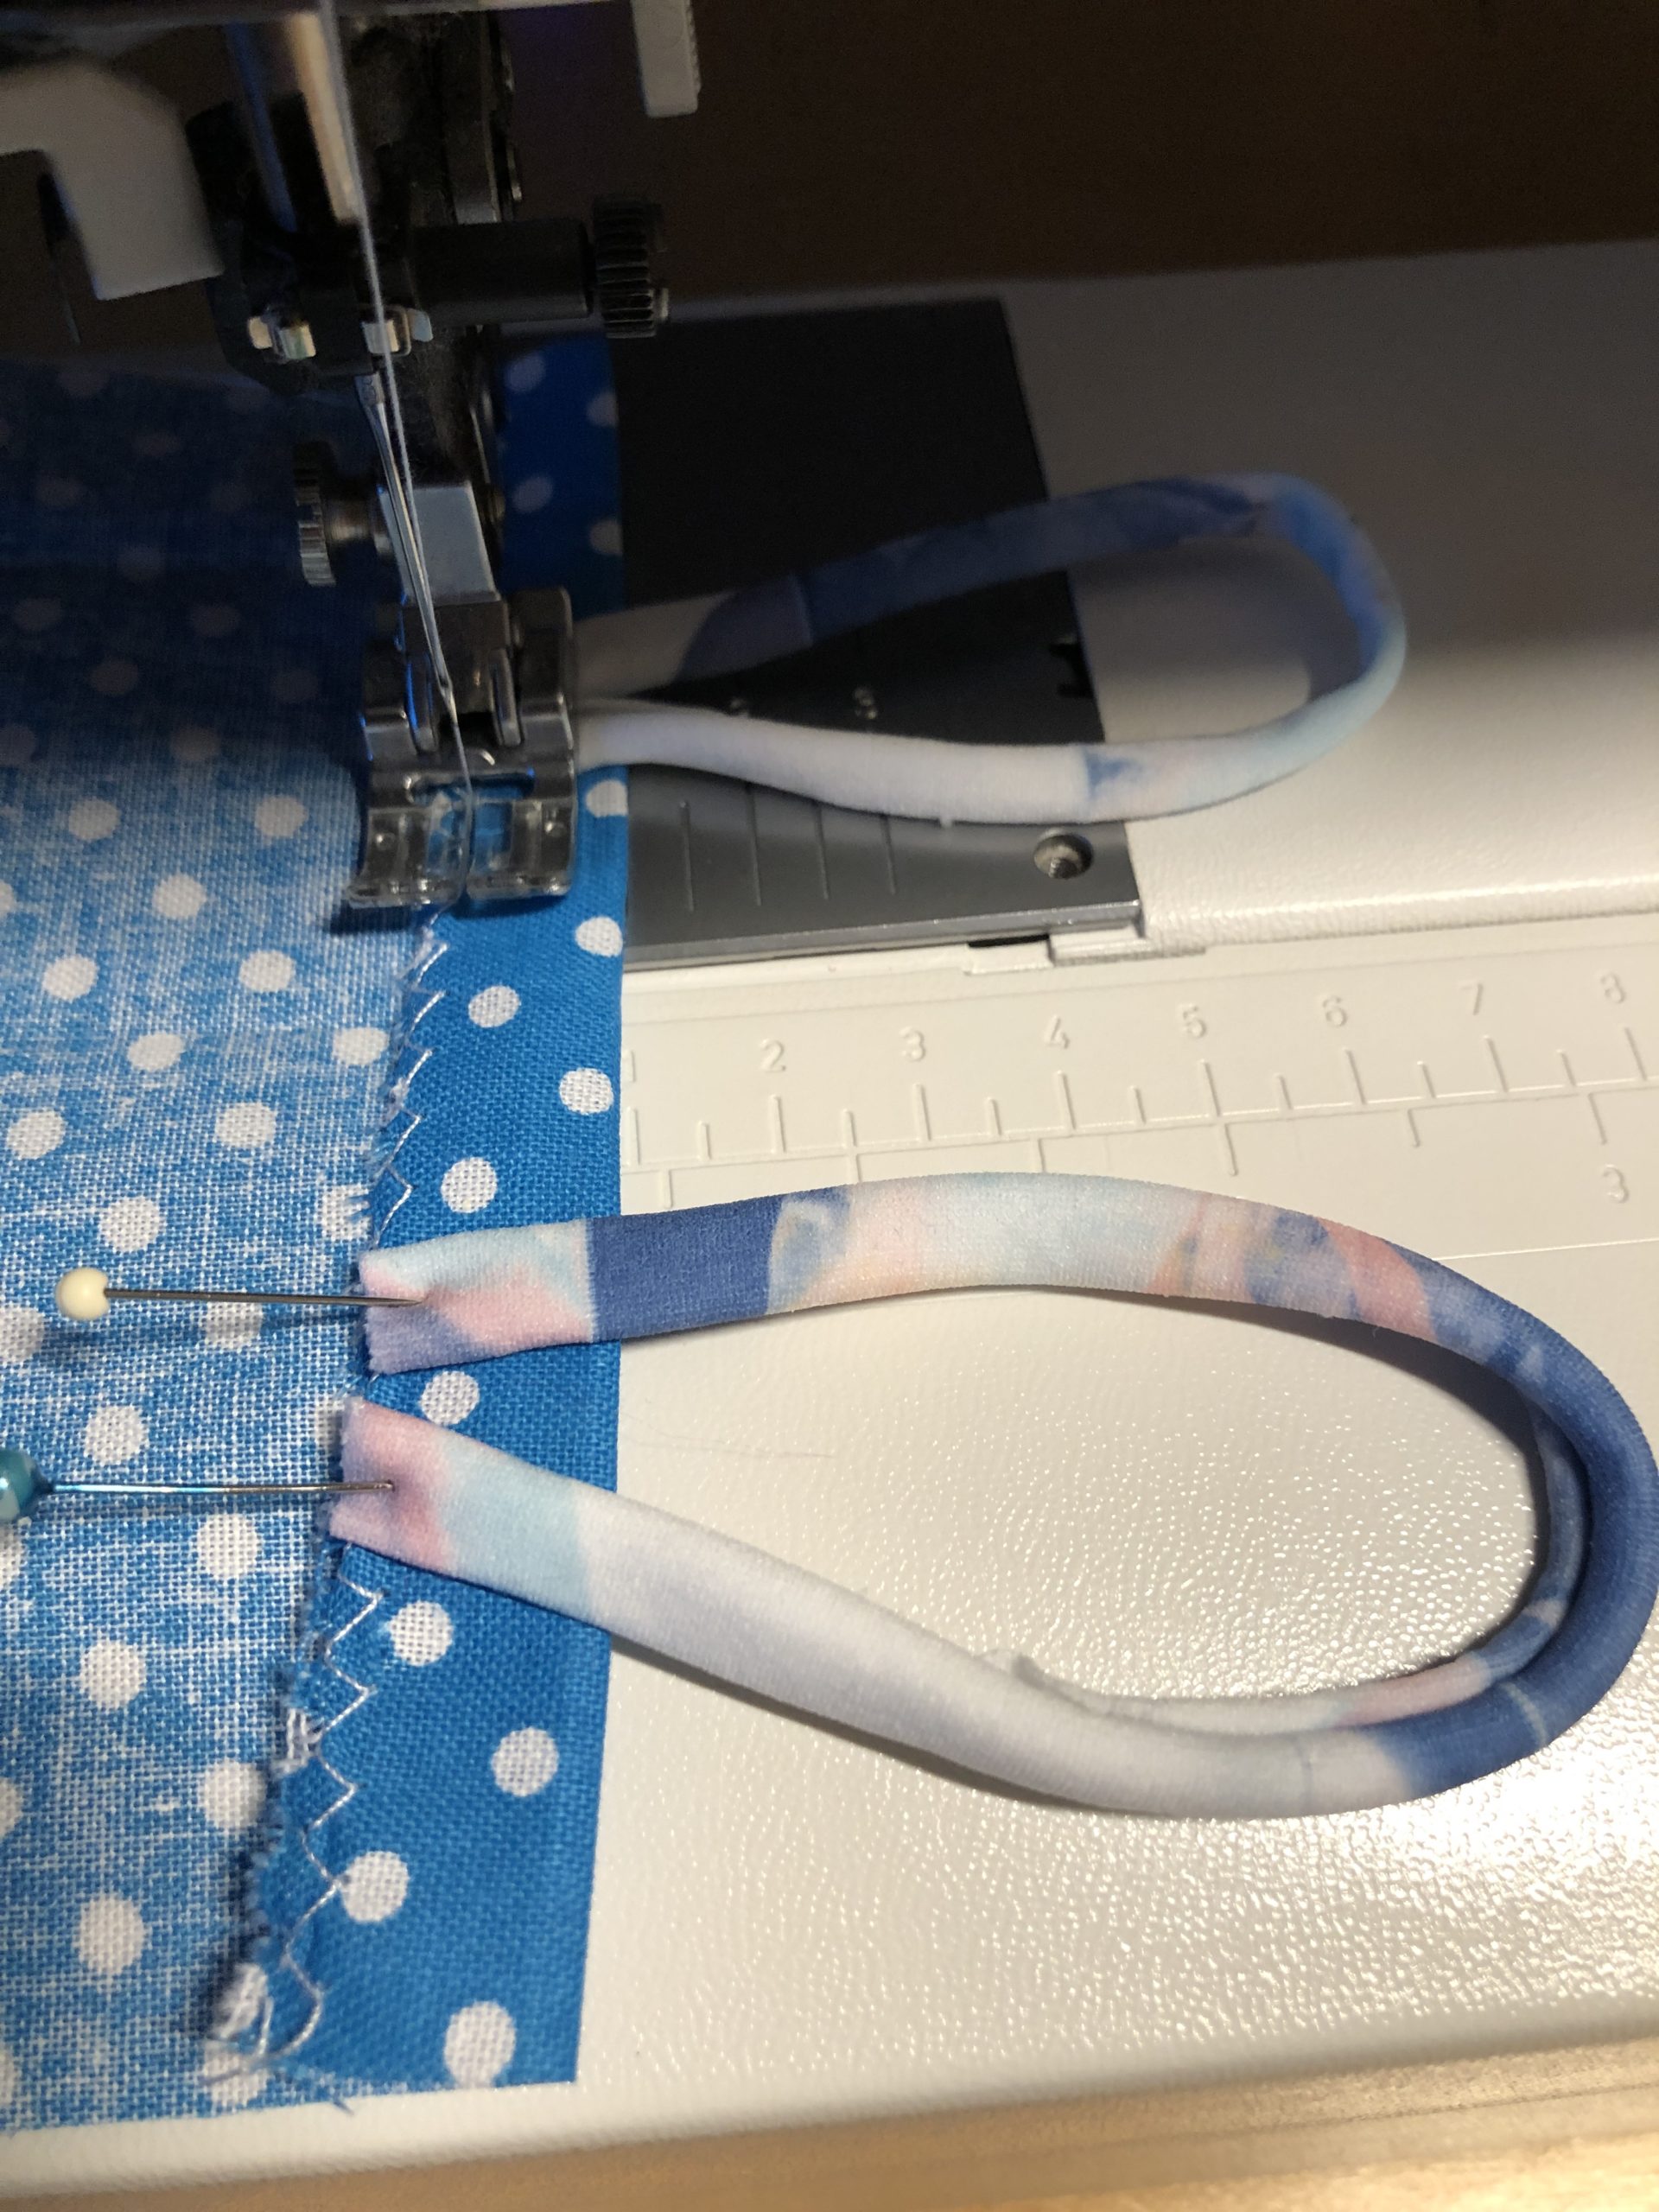
Bild zum Schritt 6 für das Bastel- und DIY-Abenteuer für Kinder: 'Ihr könnt das auch mit Stecknadeln anstecken, bevor ihr näht.'

7

2. Bild zum Schritt 6 für das Bastel- und DIY-Abenteuer für Kinder: 'Ihr könnt das auch mit Stecknadeln anstecken, bevor ihr näht.'

8

Now you sew it on with a second seam. To do this, turn the fabric around so that you sew on the front of the fabric.

Bild zum Schritt 8 für das Bastel- und DIY-Abenteuer für Kinder: 'Jetzt näht ihr diese mit einer zweiten Naht an. Dazu...'

9

Line the other short side of the fabric also with a zigzag stitch. Then turn over another centimeter and then use the third hair rubber. Place it in the middle of the short side to a loop and then sew it as well.

Bild zum Schritt 9 für das Bastel- und DIY-Abenteuer für Kinder: 'Die andere kurze Seite des Stoffes ebenfalls mit einem Zickzack-Stich...'

10

Then you sew a second seam on both sides (i.e. both sides are sewn twice).
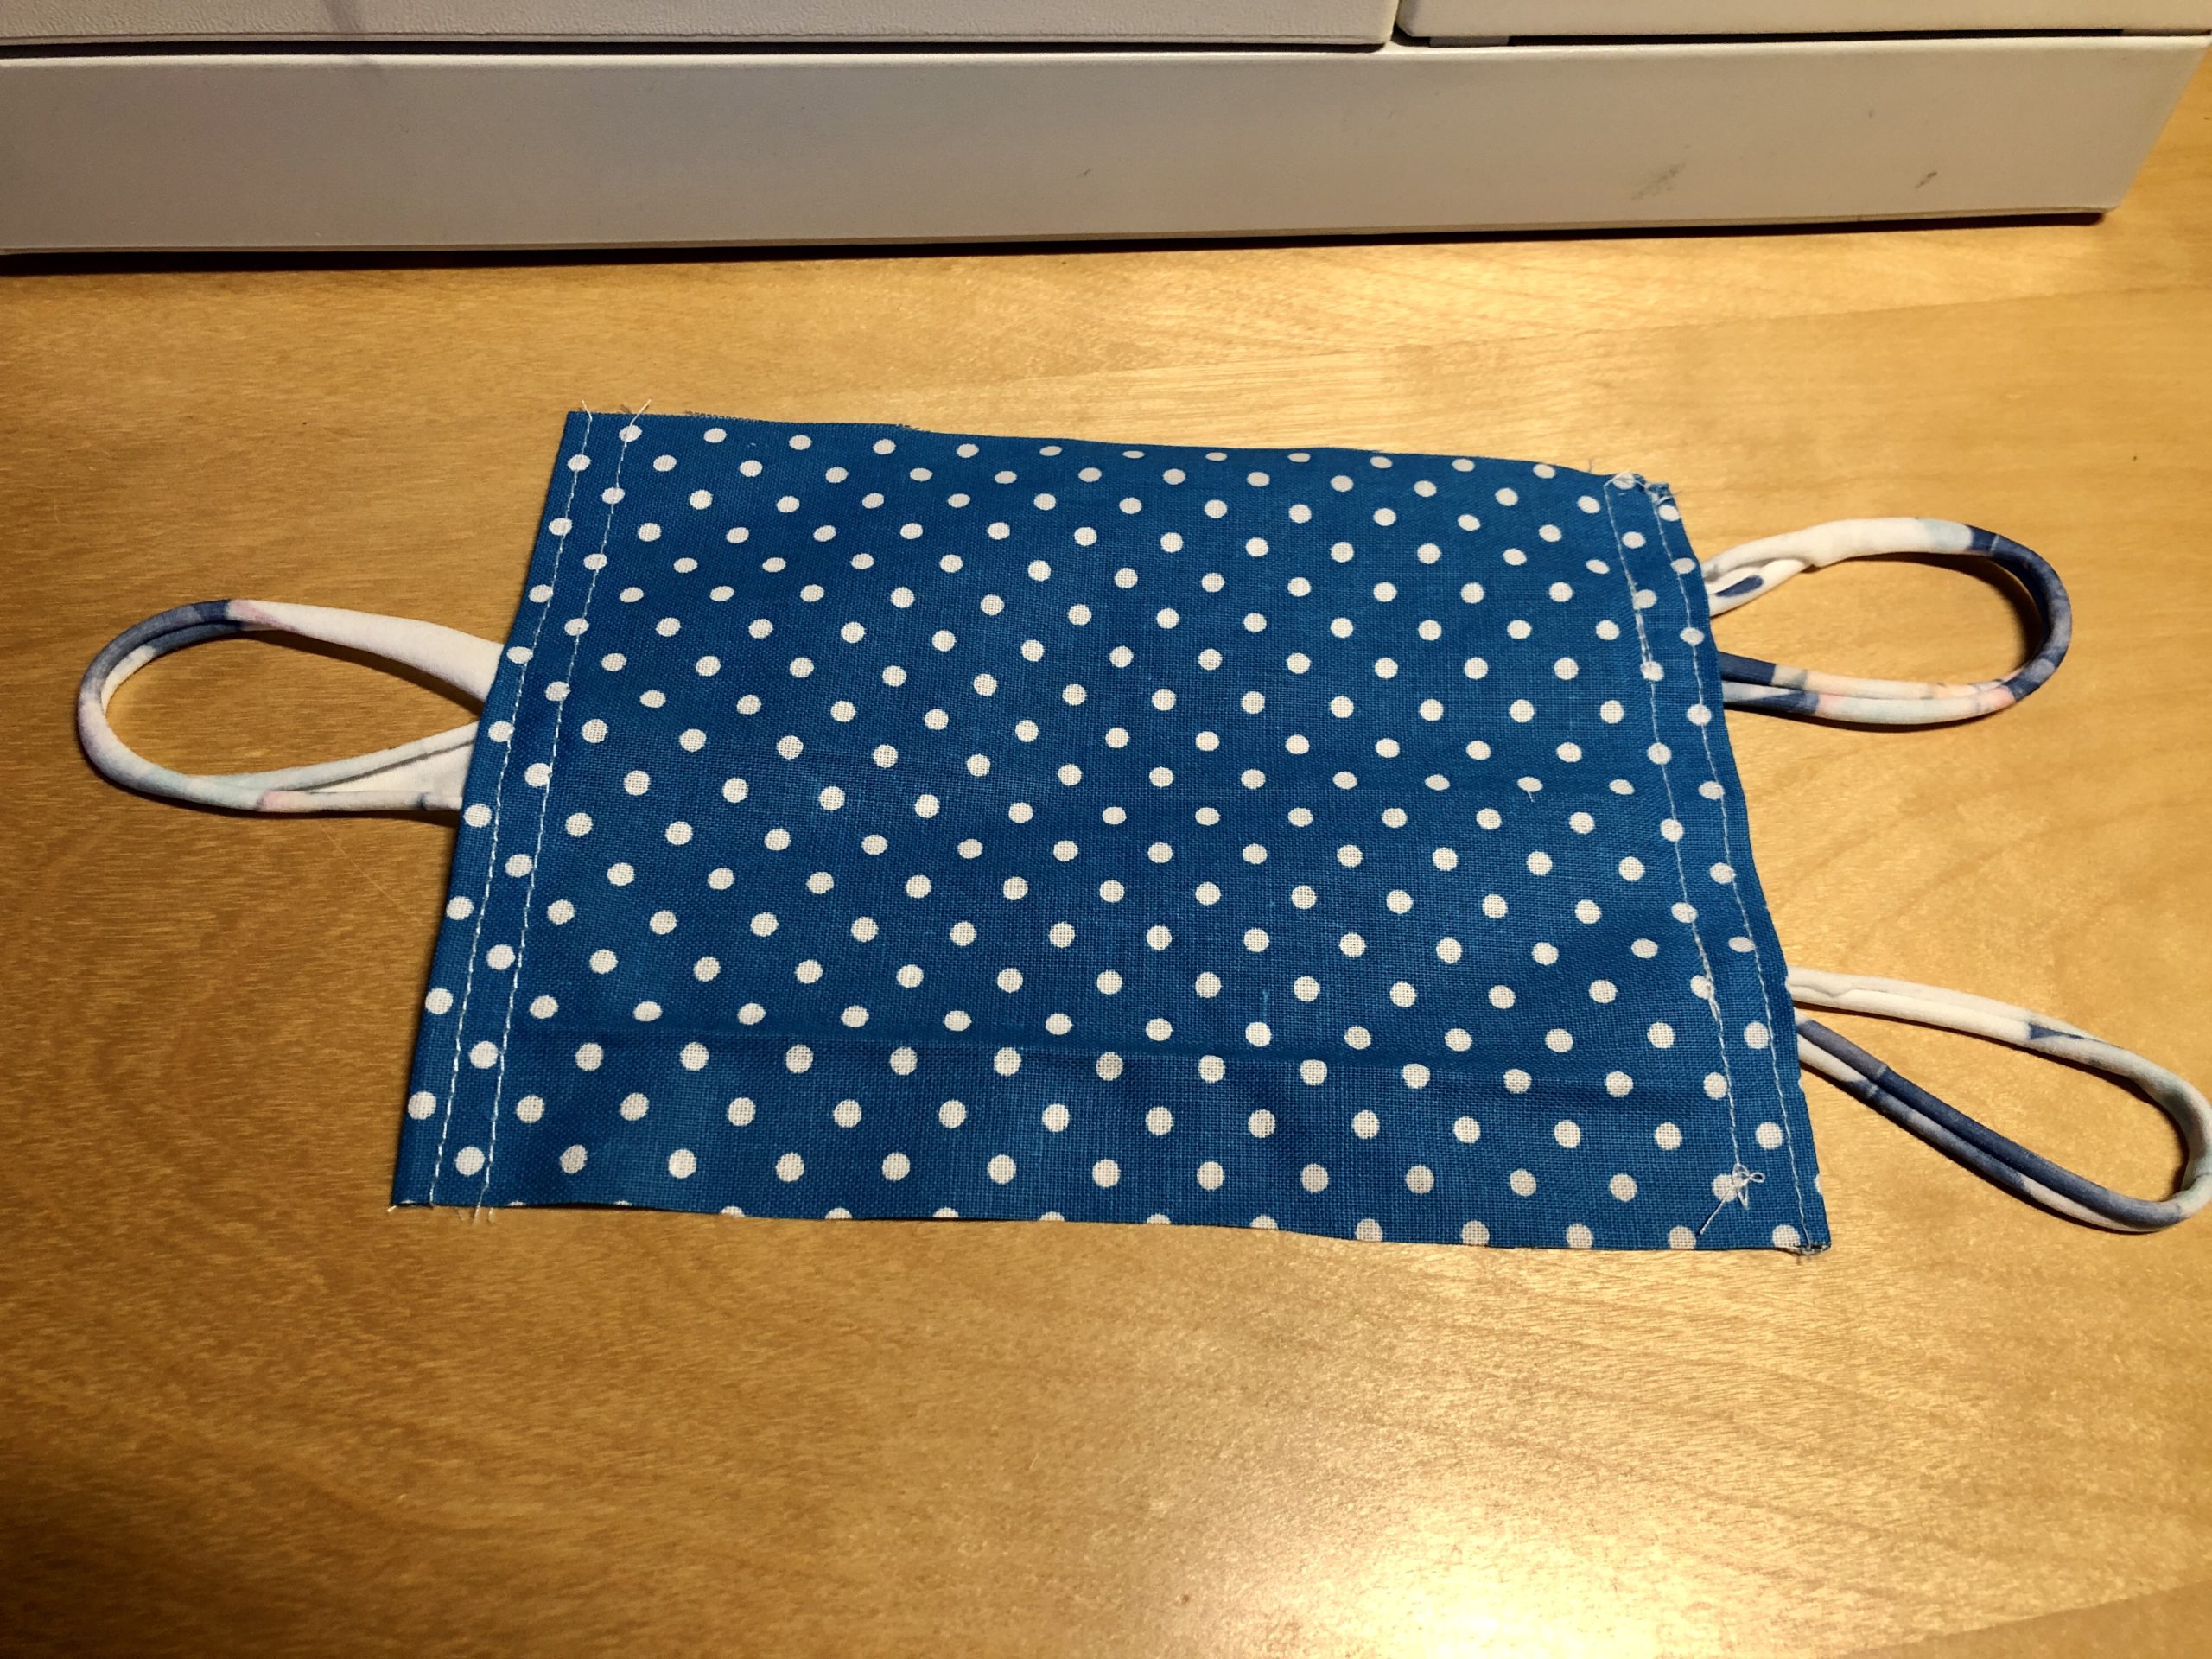
Bild zum Schritt 10 für das Bastel- und DIY-Abenteuer für Kinder: 'Dann näht ihr auf beiden Seiten noch jeweils eine zweite...'

11

Now position the two same heads on the short side with the one loop. The two buttons serve as eyes and are sewn on. Attention: sew on the eyes before sewing the long side together!
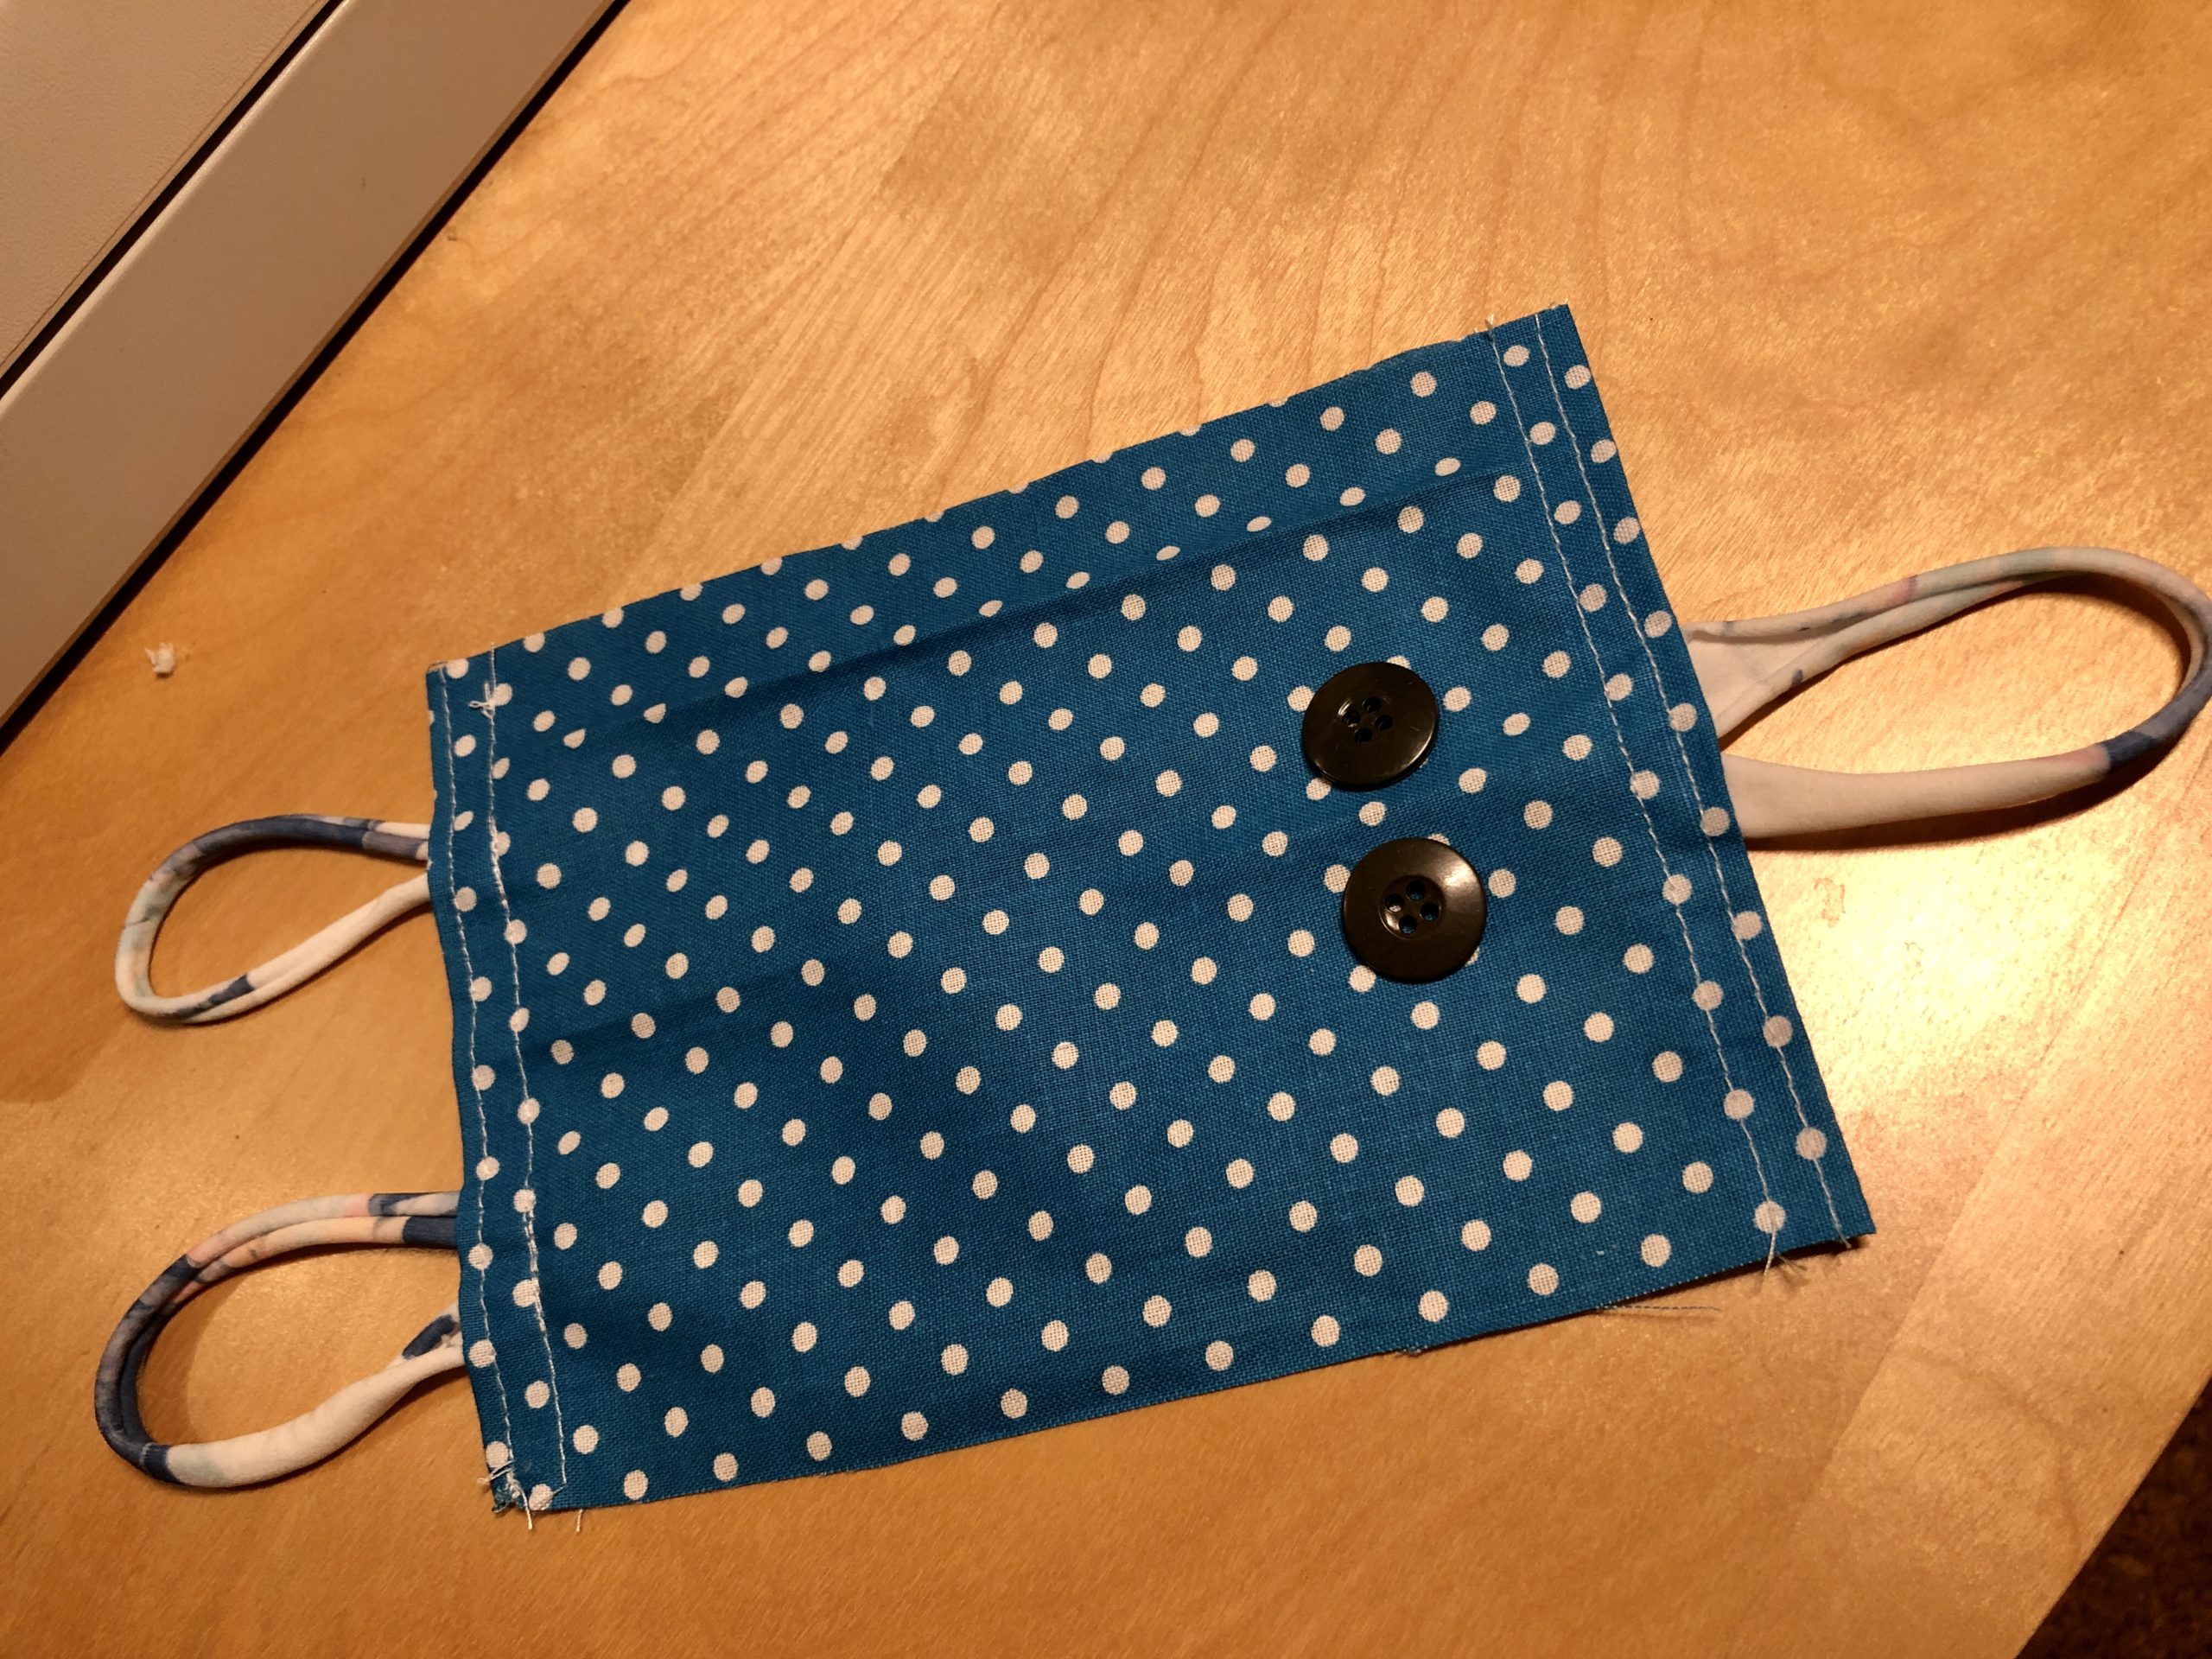
Bild zum Schritt 11 für das Bastel- und DIY-Abenteuer für Kinder: 'Jetzt positioniert die zwei gleichen Köpfe auf der kurzen Seite...'

12

The buttons can be fastened with the sewing machine or with the hand. I do it with the sewing machine and sink the transport feet (so the button remains quiet).
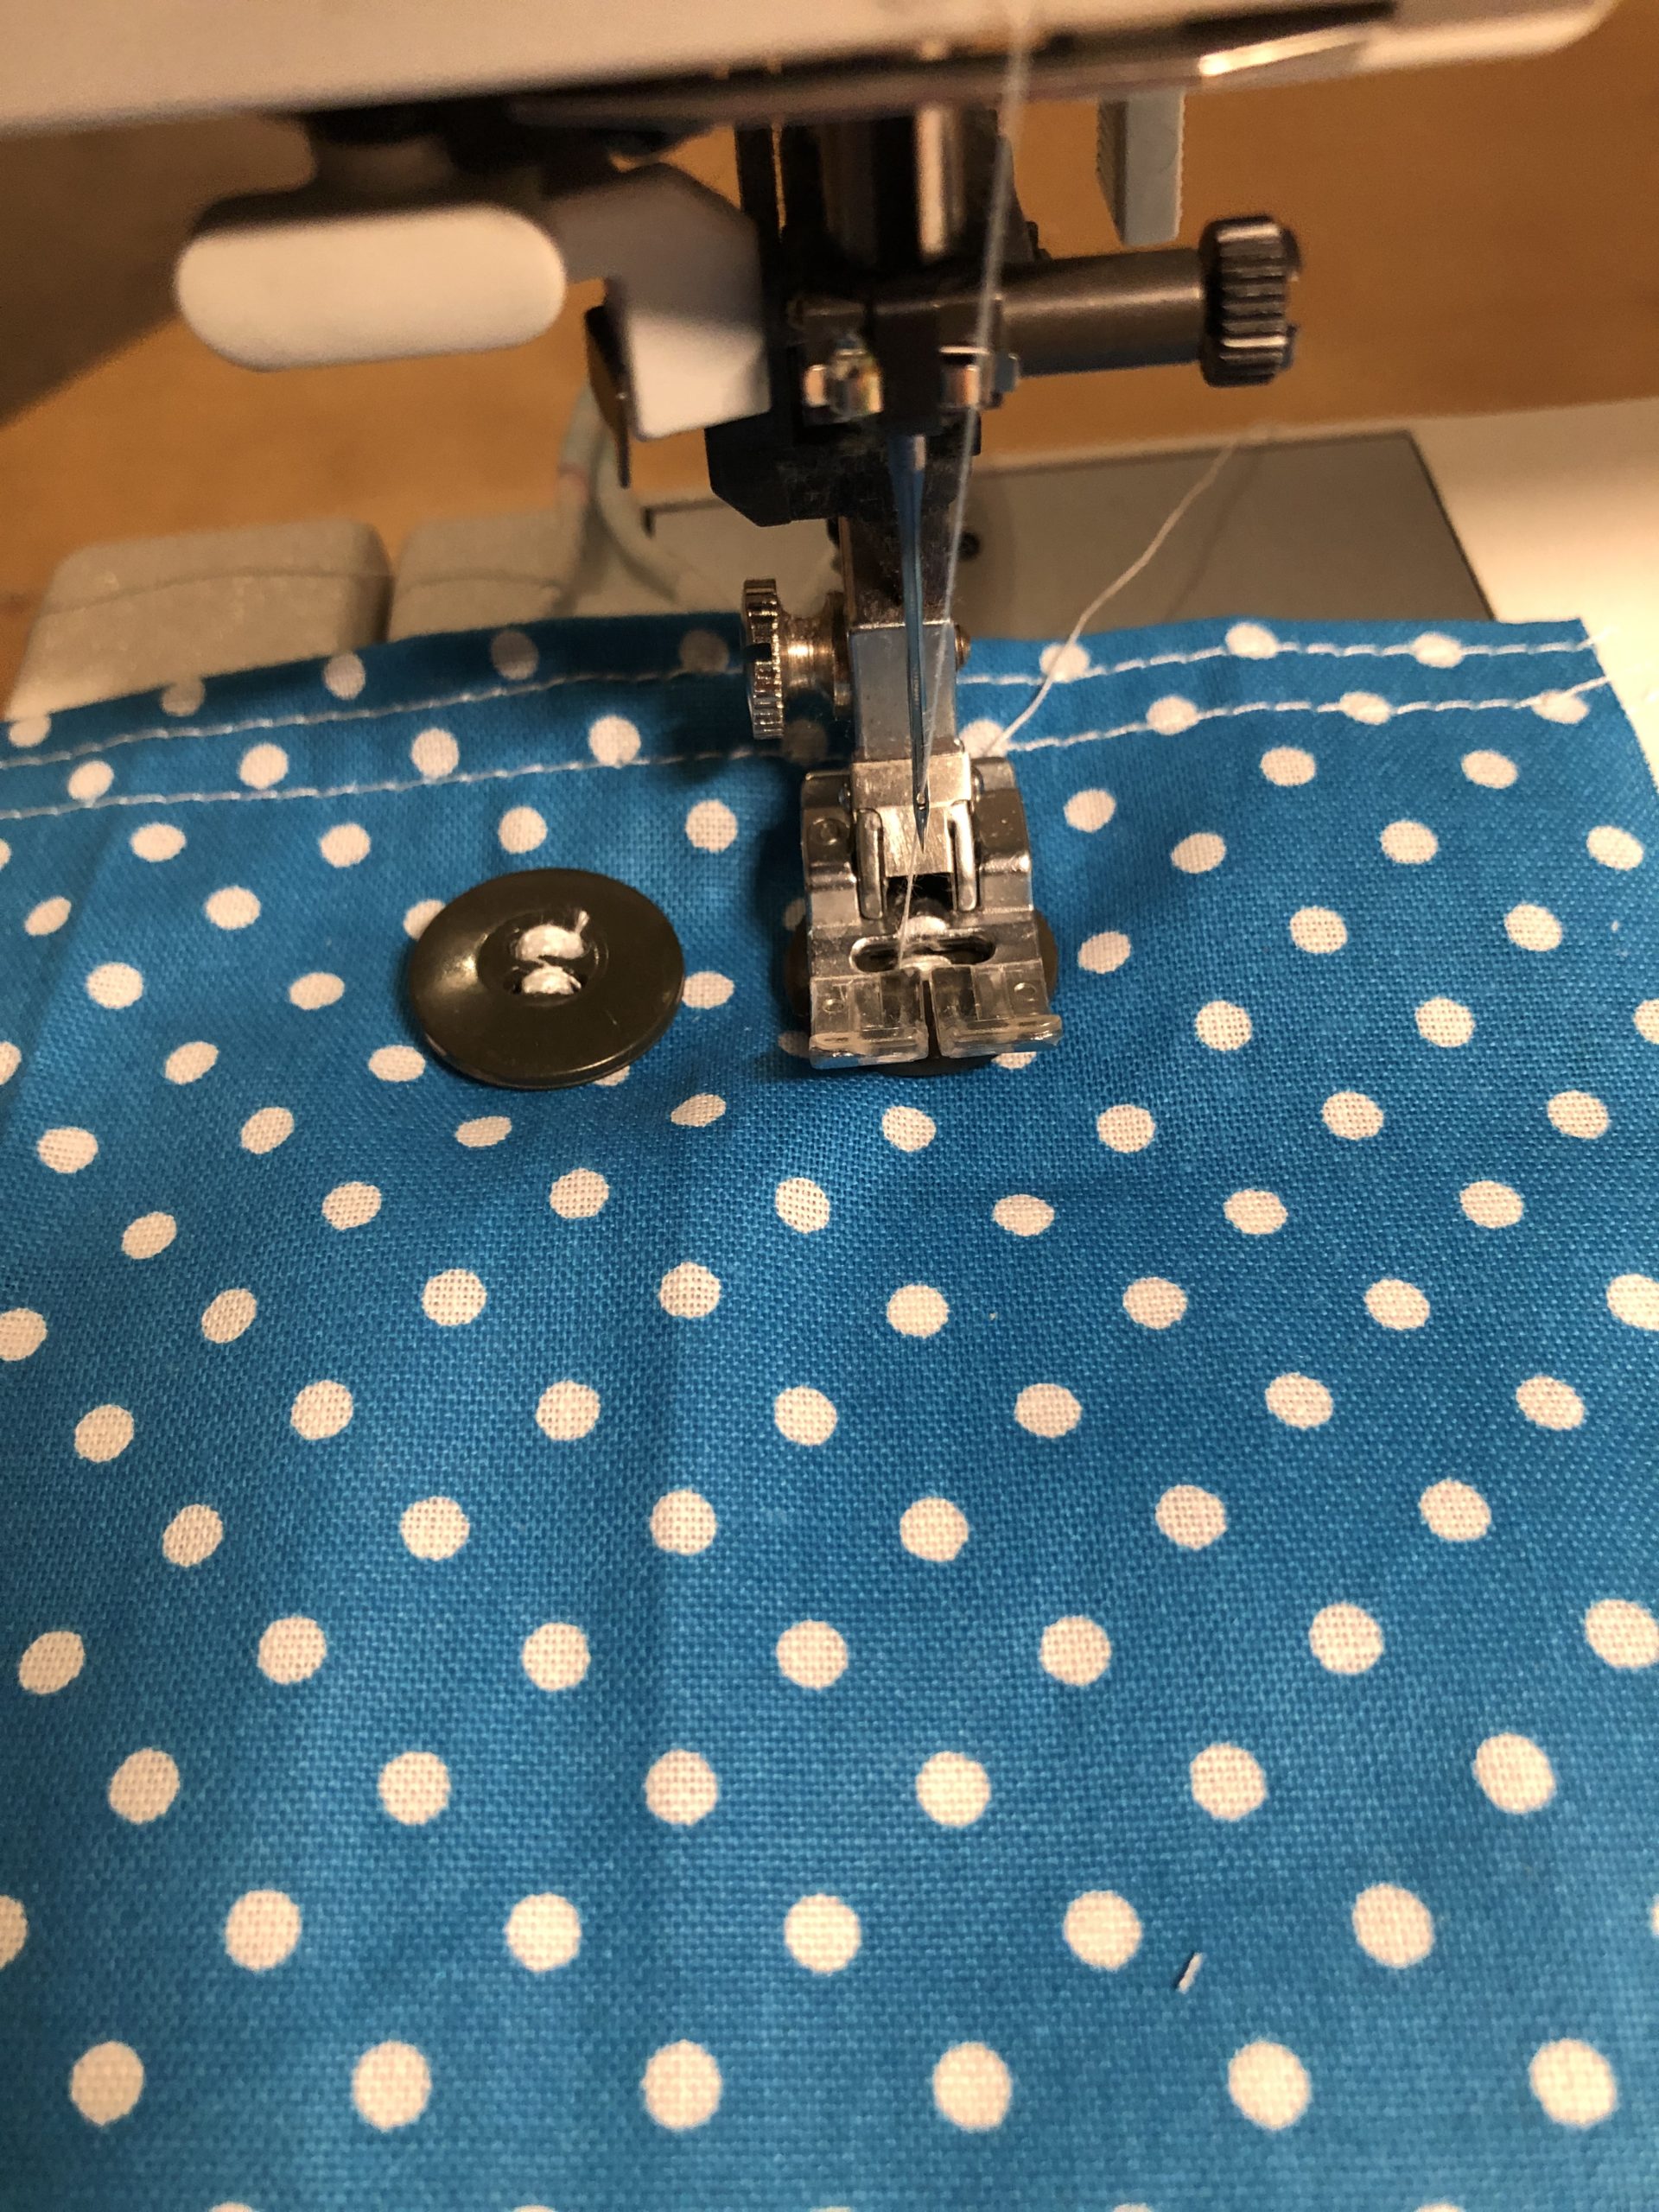
Bild zum Schritt 12 für das Bastel- und DIY-Abenteuer für Kinder: 'Die Knöpfe können mit der Nähmaschine oder mit der Hand...'

13

2. Bild zum Schritt 12 für das Bastel- und DIY-Abenteuer für Kinder: 'Die Knöpfe können mit der Nähmaschine oder mit der Hand...'

14

3. Bild zum Schritt 13 für das Bastel- und DIY-Abenteuer für Kinder: 'Die Knöpfe können mit der Nähmaschine oder mit der Hand...'

15

When the buttons are attached, put together the fabric lengthwise. The beautiful fabric side is now inside and the inside of the fabric looks at you.
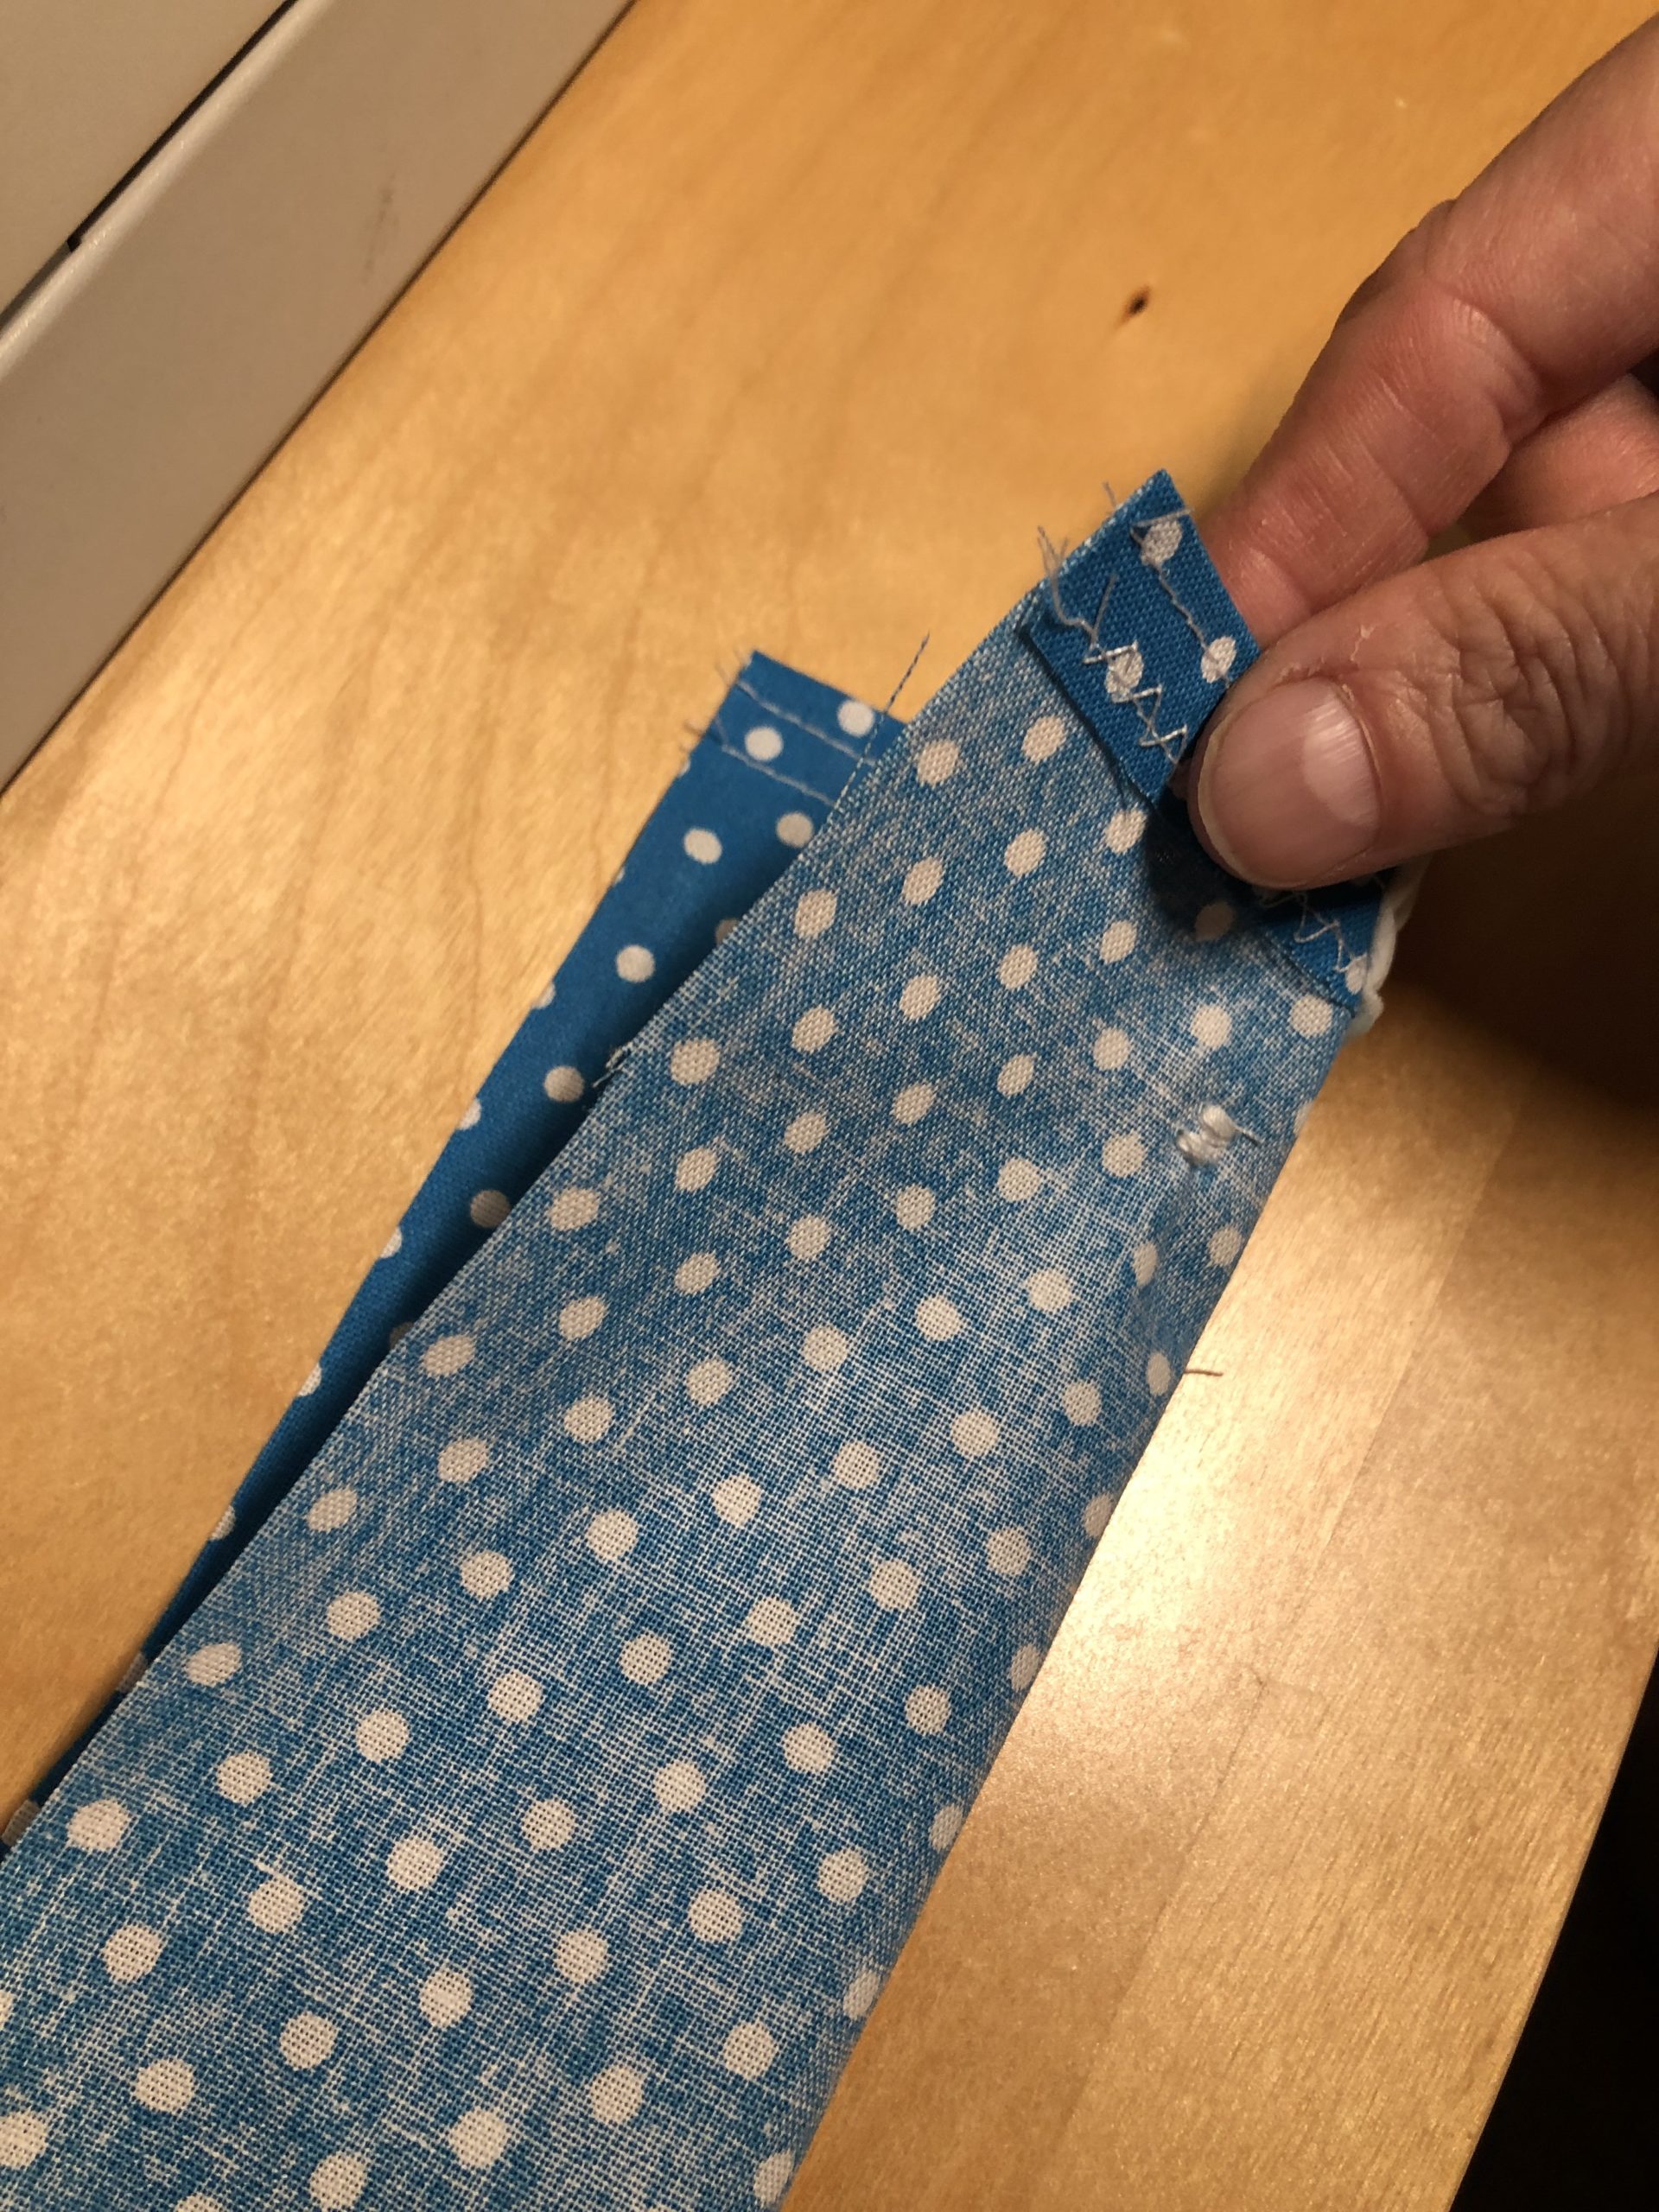
Bild zum Schritt 15 für das Bastel- und DIY-Abenteuer für Kinder: 'Wenn die Knöpfe angebracht sind, den Stoff der Länge nach...'

16

With a straight stitch you sew the long side together. Then you line the edge with a zigzag stick.

Bild zum Schritt 16 für das Bastel- und DIY-Abenteuer für Kinder: 'Mit einem geraden Stich näht ihr die lange Seite zusammen....'

17

2. Bild zum Schritt 16 für das Bastel- und DIY-Abenteuer für Kinder: 'Mit einem geraden Stich näht ihr die lange Seite zusammen....'

18

Now you turn the sewn tube around.
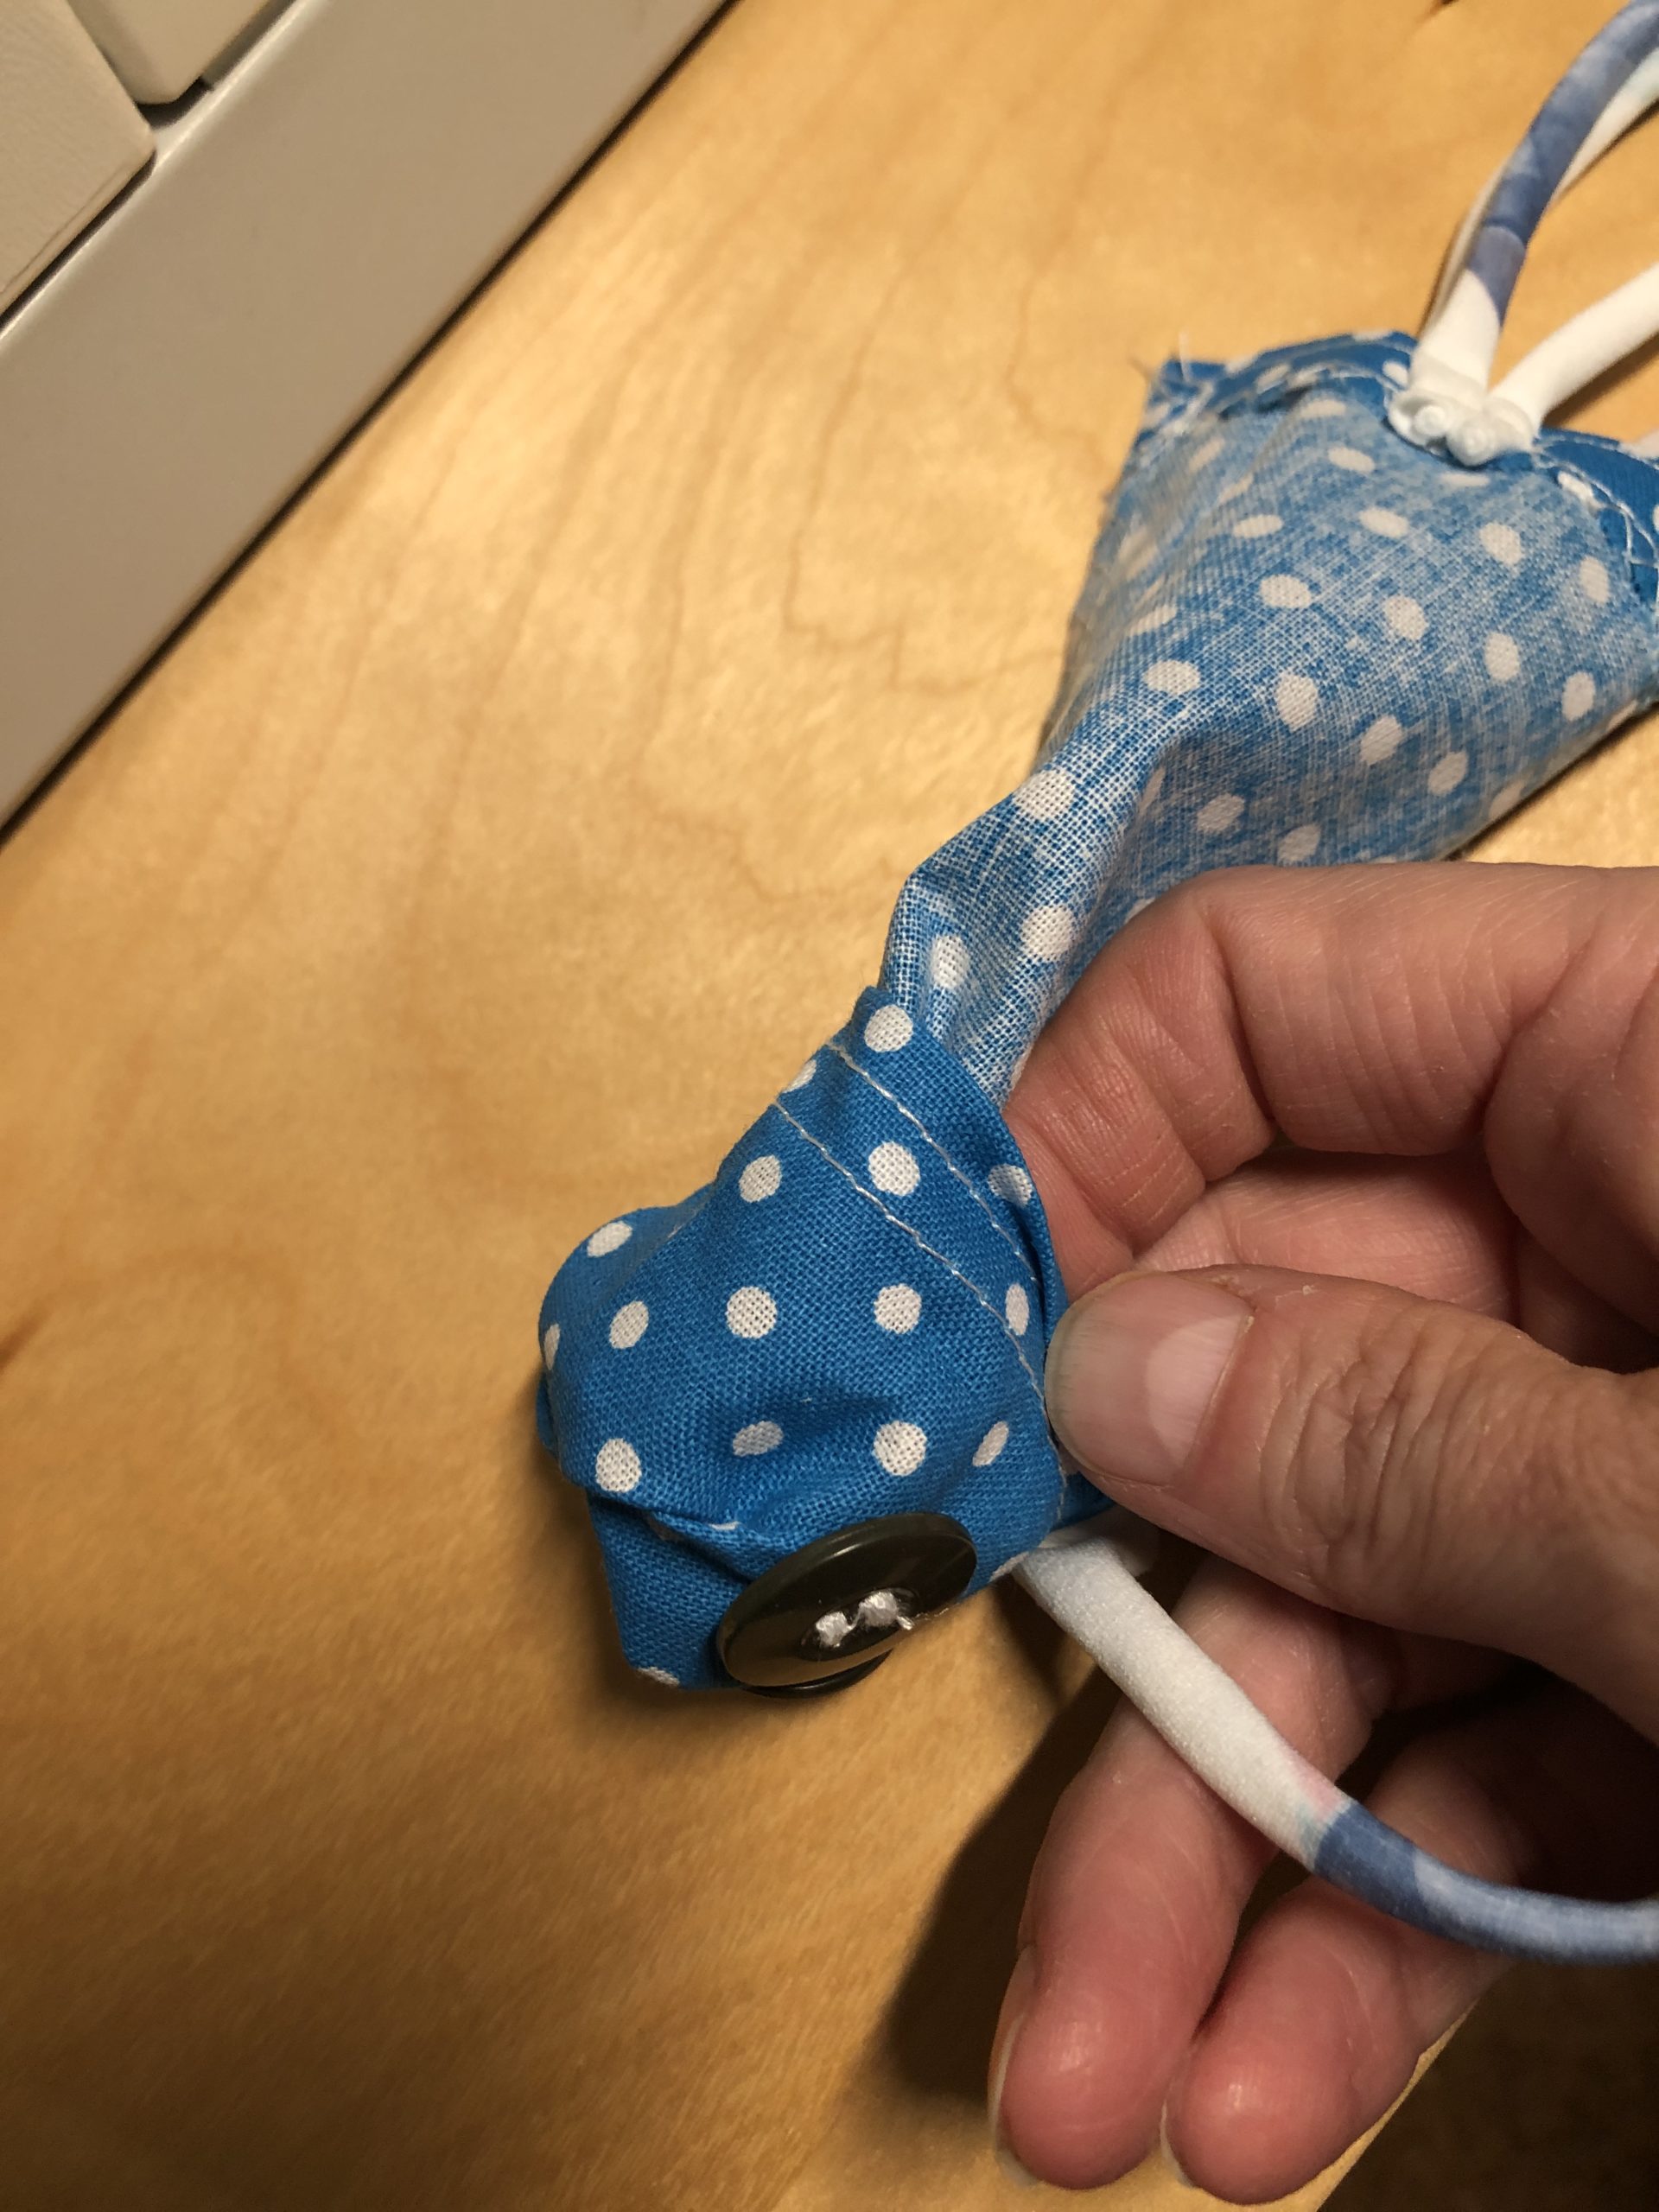
Bild zum Schritt 18 für das Bastel- und DIY-Abenteuer für Kinder: 'Jetzt dreht ihr den genähten Schlauch um.'

19

That's the front of the fish.

Bild zum Schritt 19 für das Bastel- und DIY-Abenteuer für Kinder: 'Das ist die Vorderseite des Fisches.'

20

Now put the fish on the back. On the back you sew on the big button. It is used to close the fish mouth with the rubber loop.
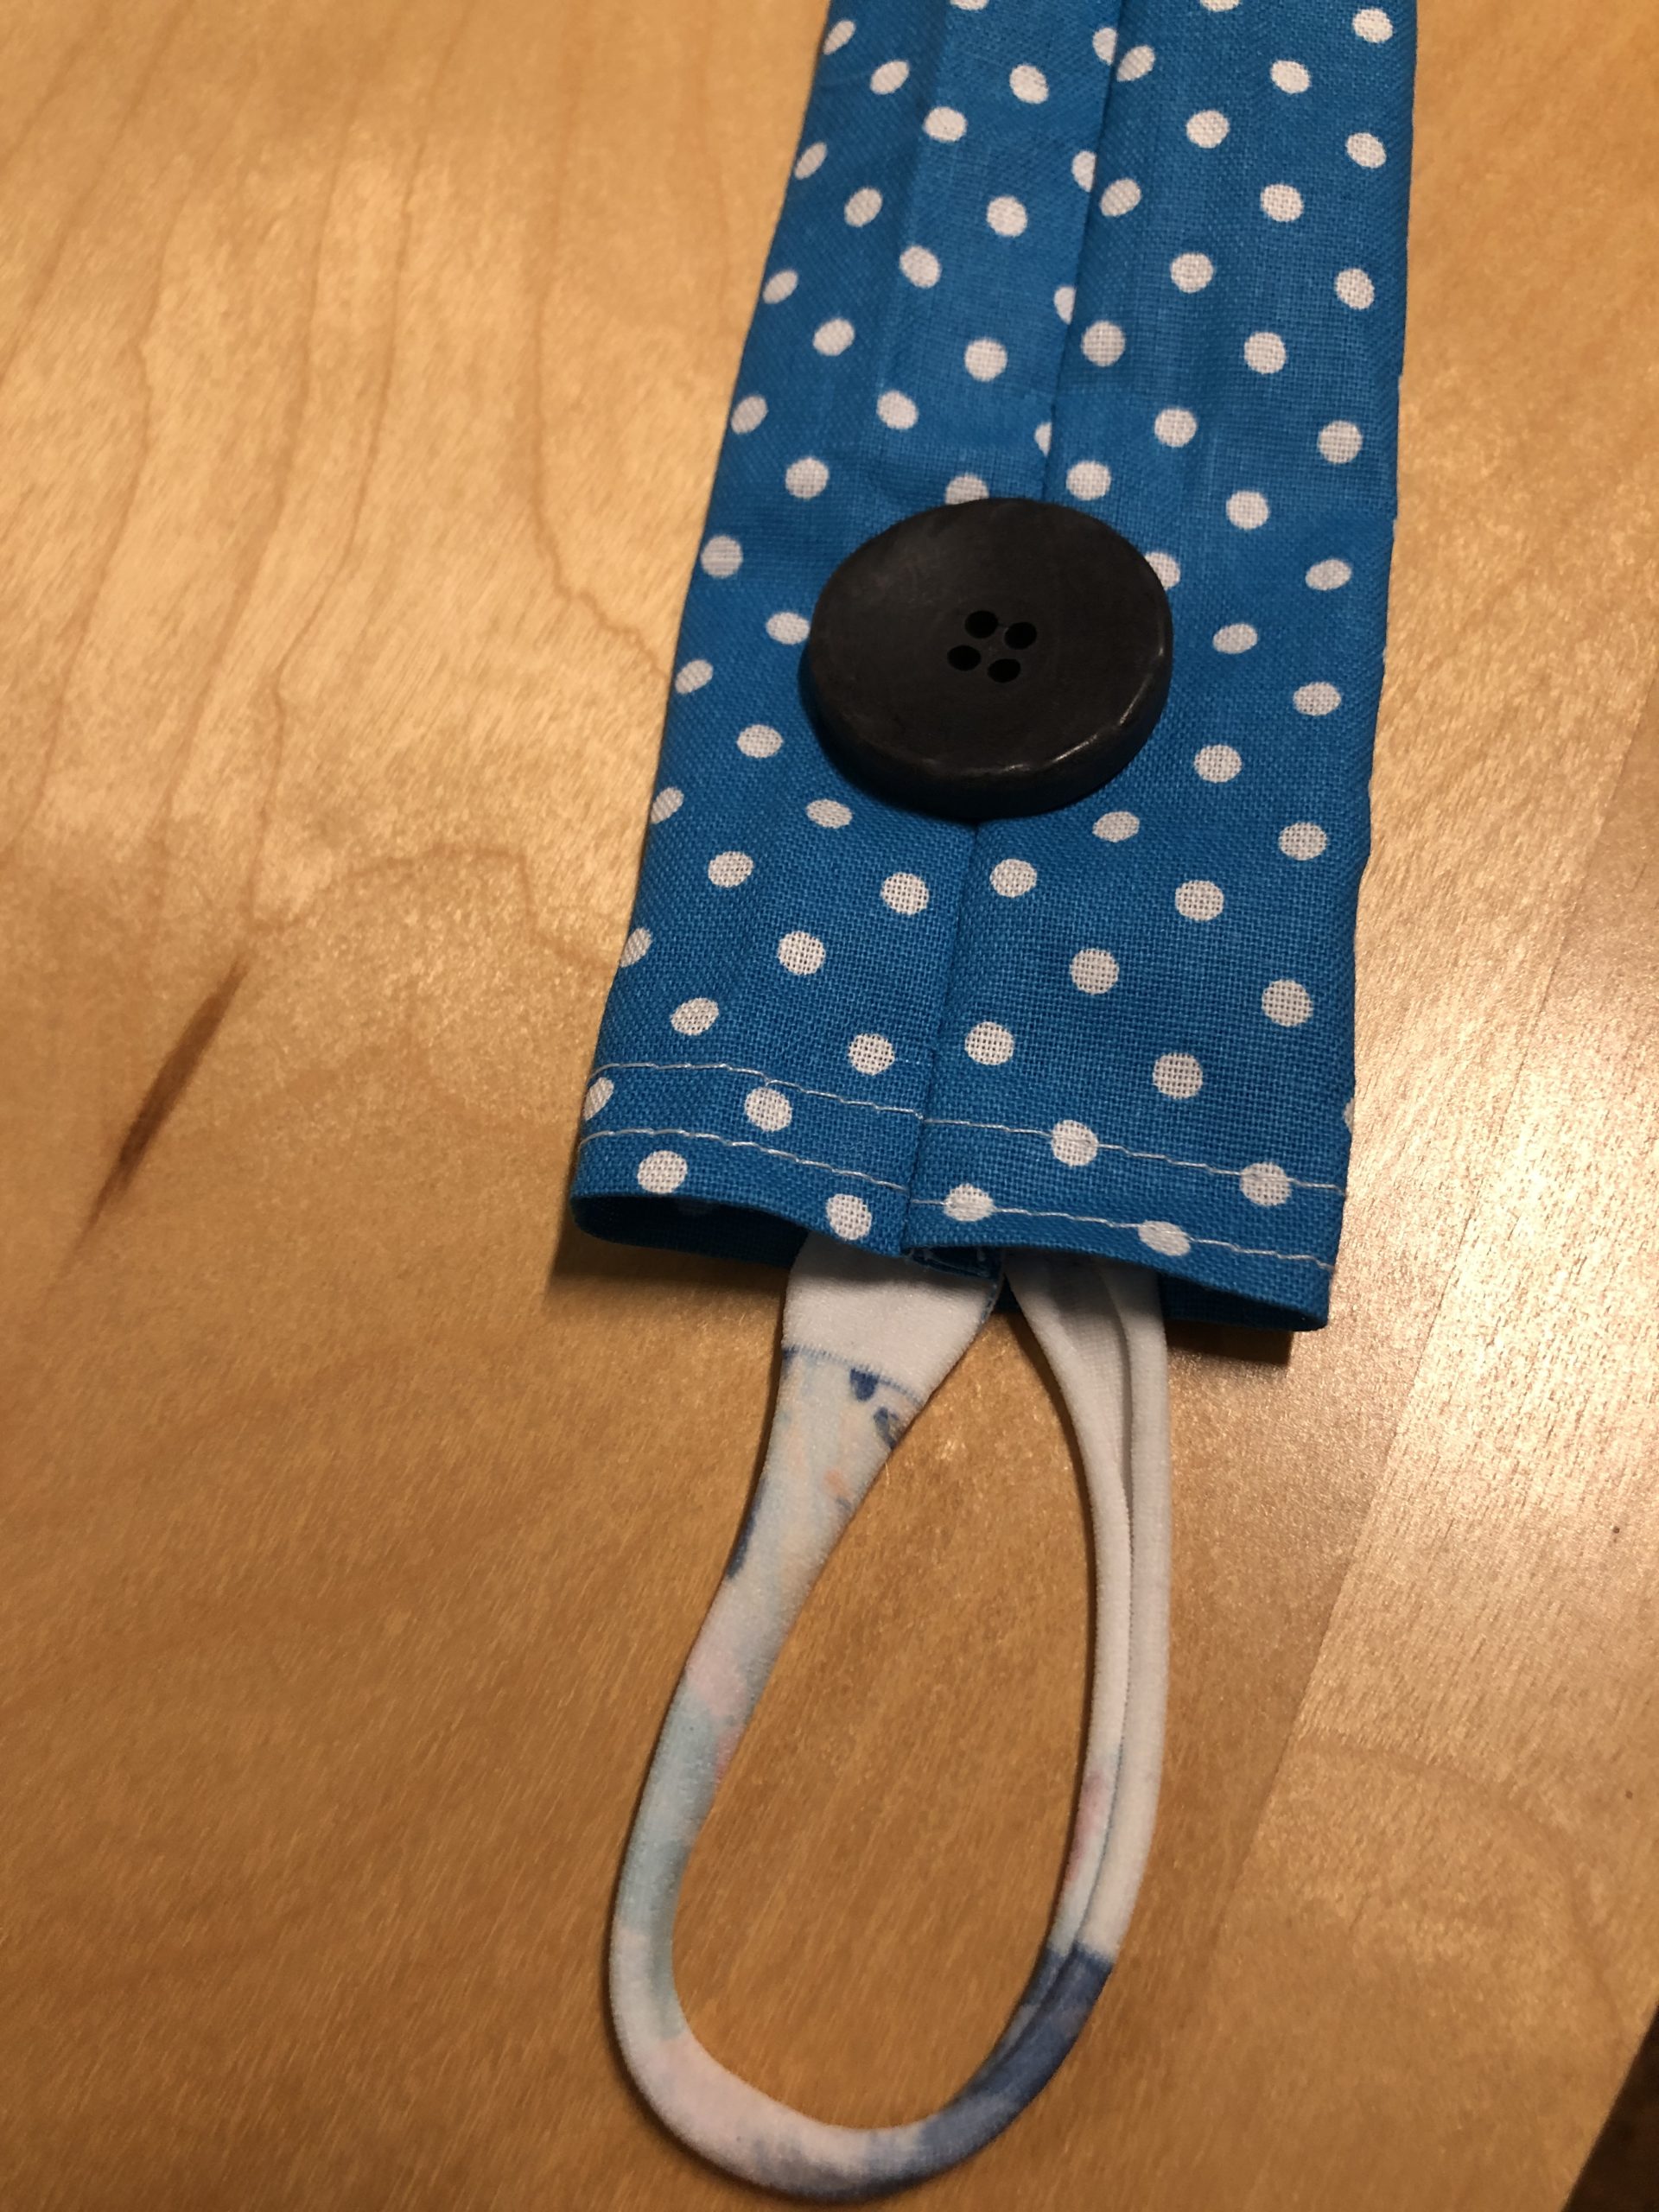
Bild zum Schritt 20 für das Bastel- und DIY-Abenteuer für Kinder: 'Den Fisch nun auf den Rücken legen. Auf der Rückseite...'

21

Now test which place the button has to lie before you sew it.
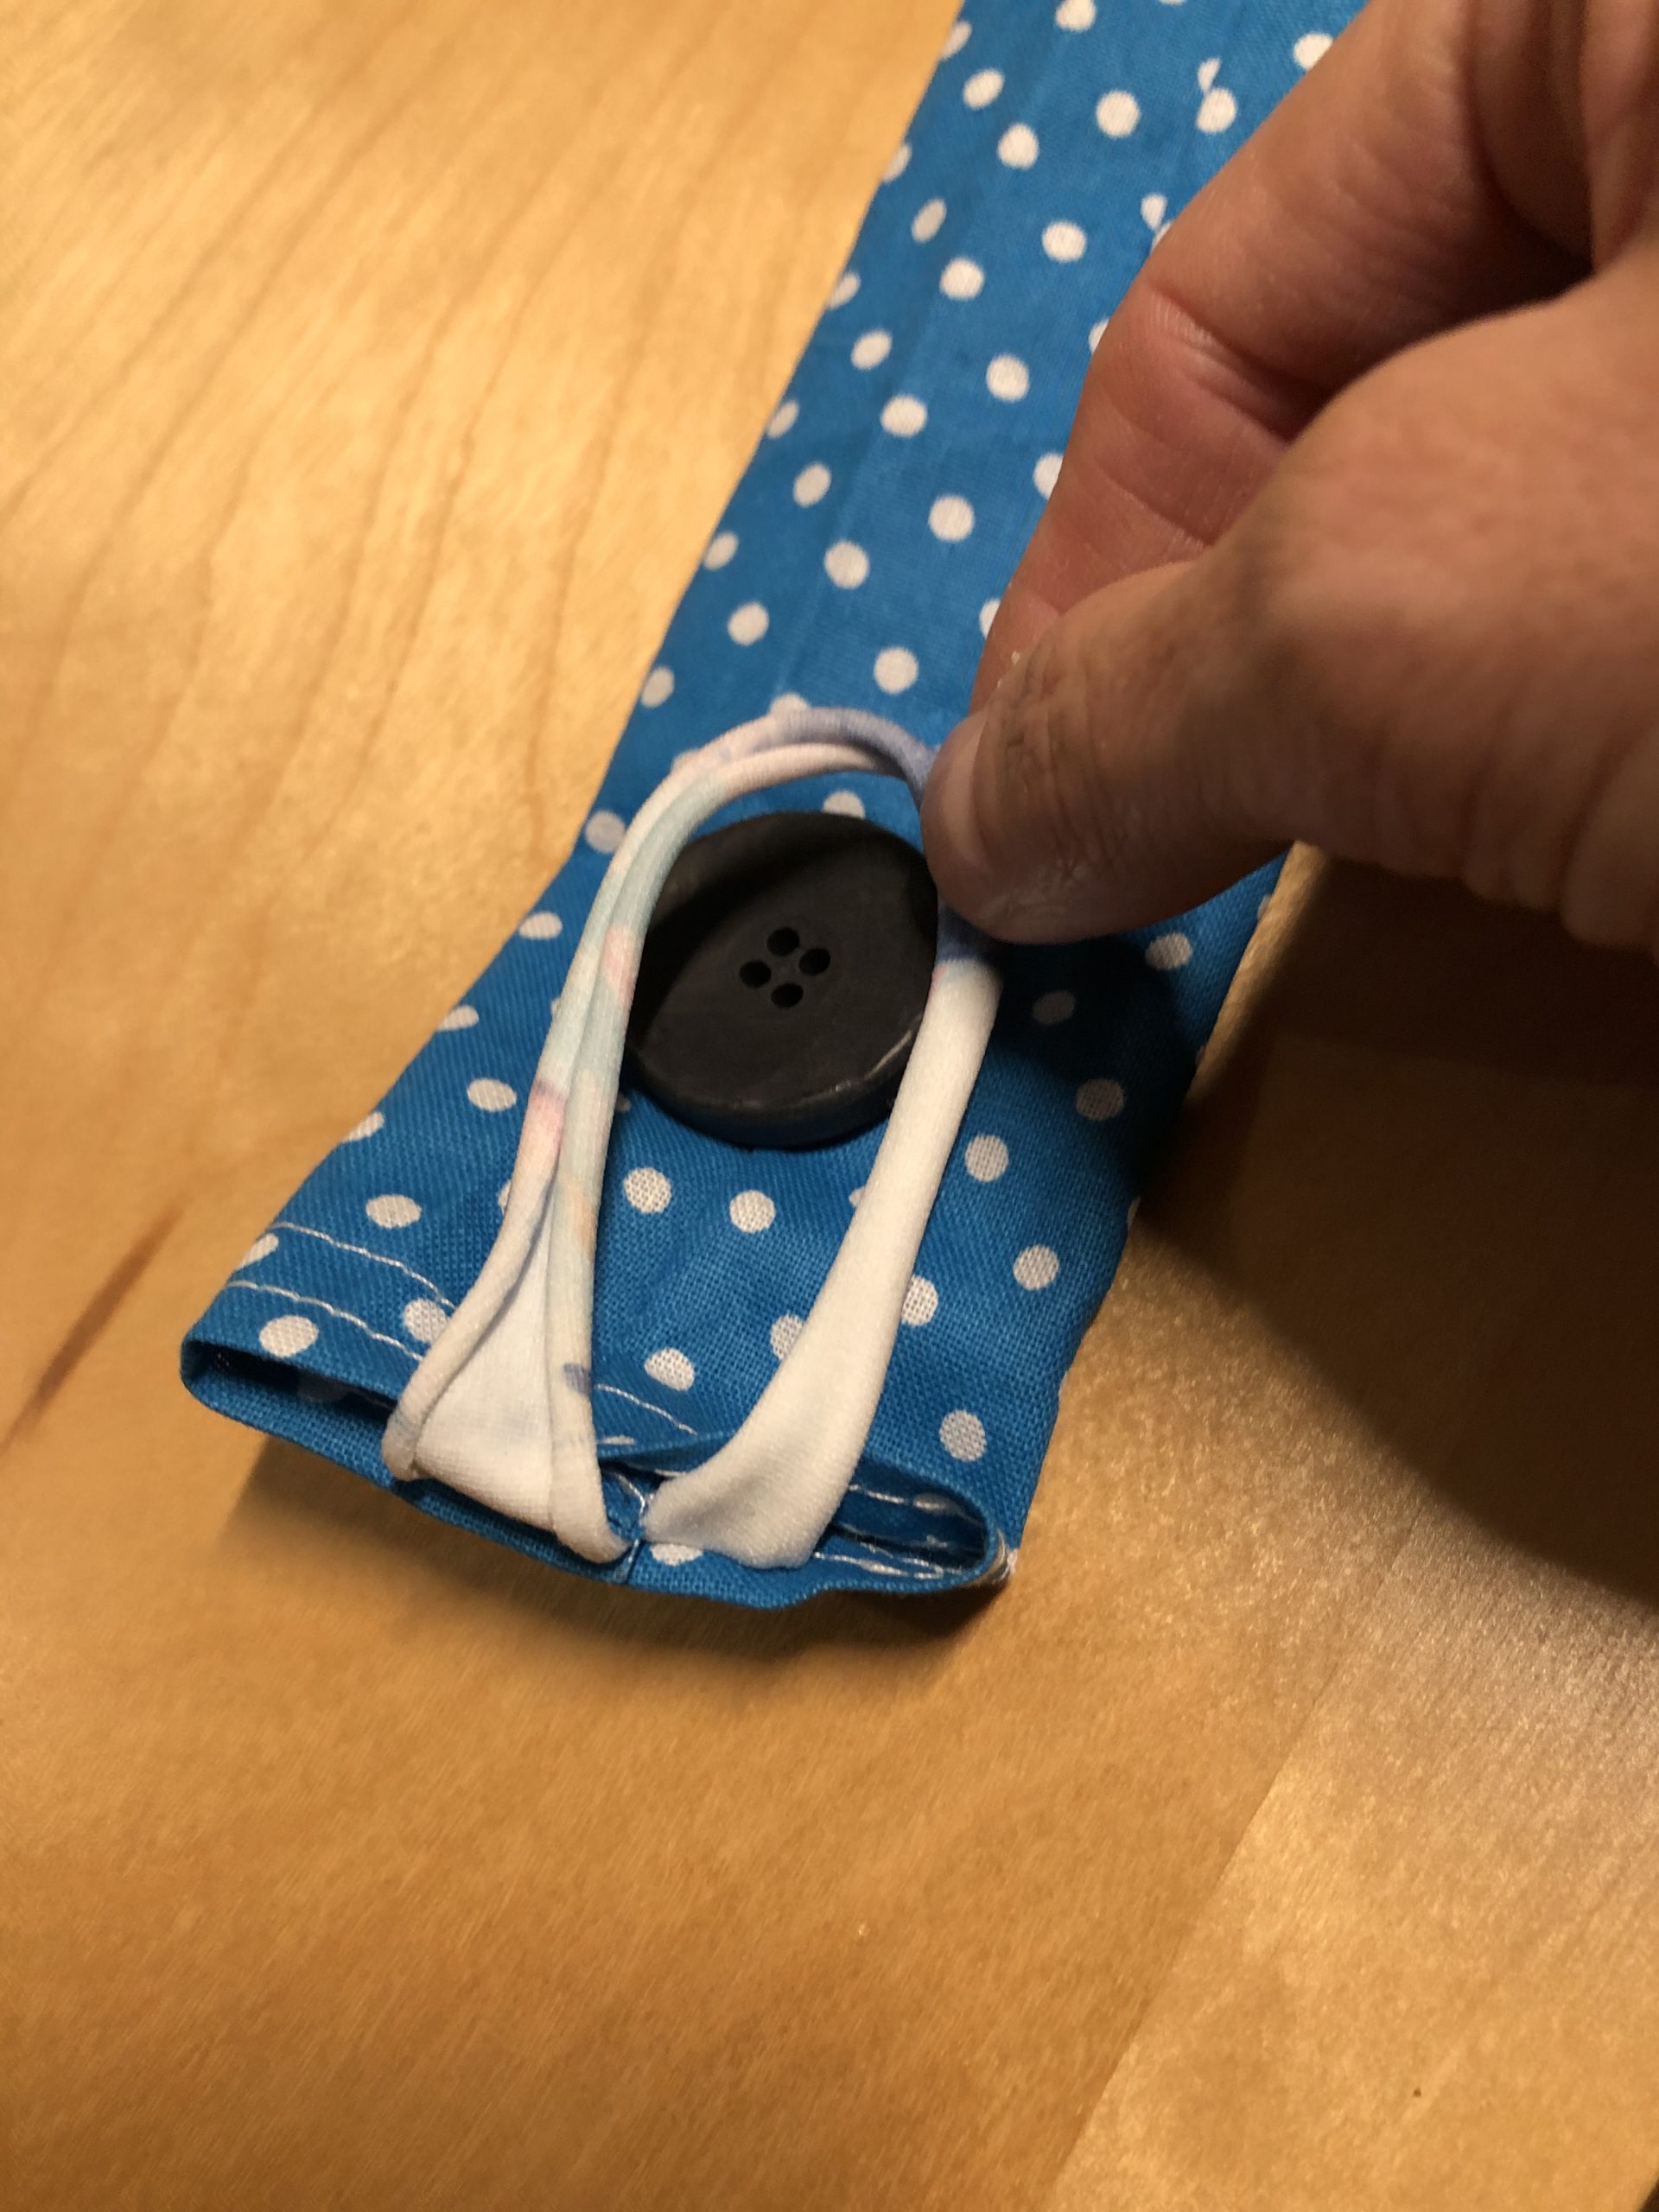
Bild zum Schritt 21 für das Bastel- und DIY-Abenteuer für Kinder: 'Testet jetzt an welcher Stelle der Knopf liegen muss, bevor...'

22

Take a needle and a thread and sew the button with your hand.
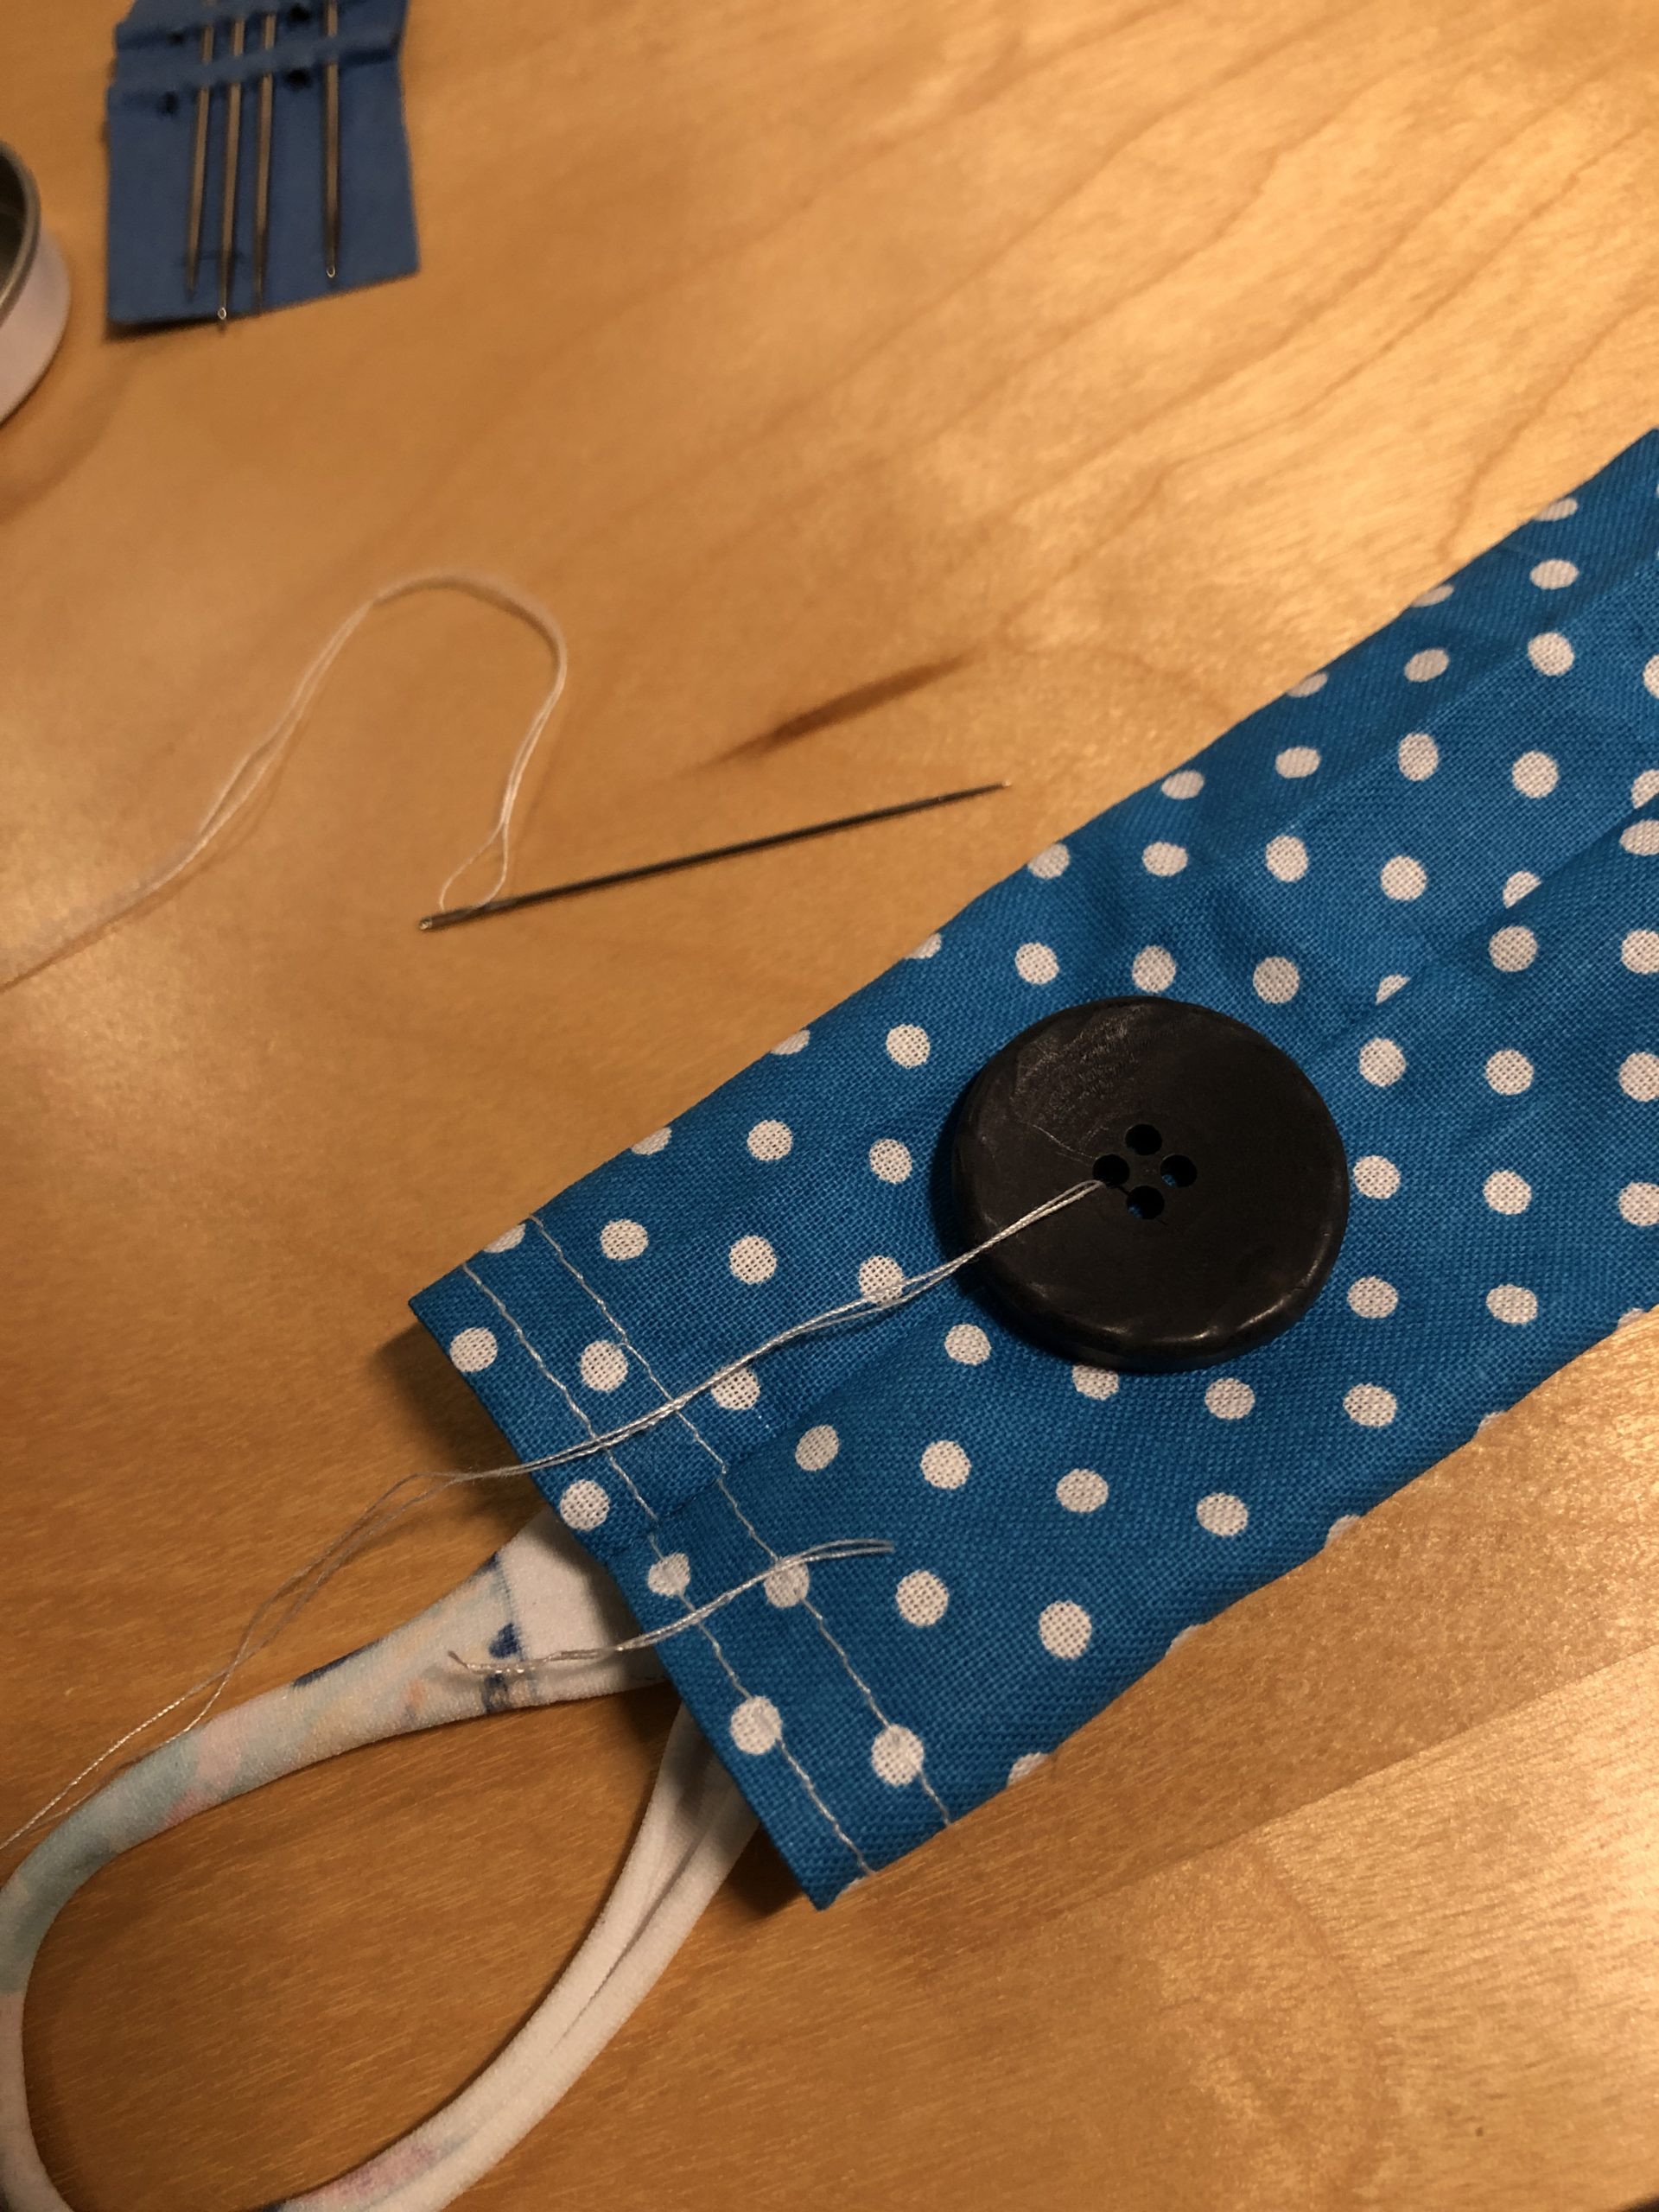
Bild zum Schritt 22 für das Bastel- und DIY-Abenteuer für Kinder: 'Nehmt eine Nadel und einen Faden und näht den Knopf...'

23

2. Bild zum Schritt 22 für das Bastel- und DIY-Abenteuer für Kinder: 'Nehmt eine Nadel und einen Faden und näht den Knopf...'

24

Now close your mouth.

Bild zum Schritt 24 für das Bastel- und DIY-Abenteuer für Kinder: 'Jetzt verschließt das Maul.'

25

Ready!
Now the fish can be filled with chestnuts.
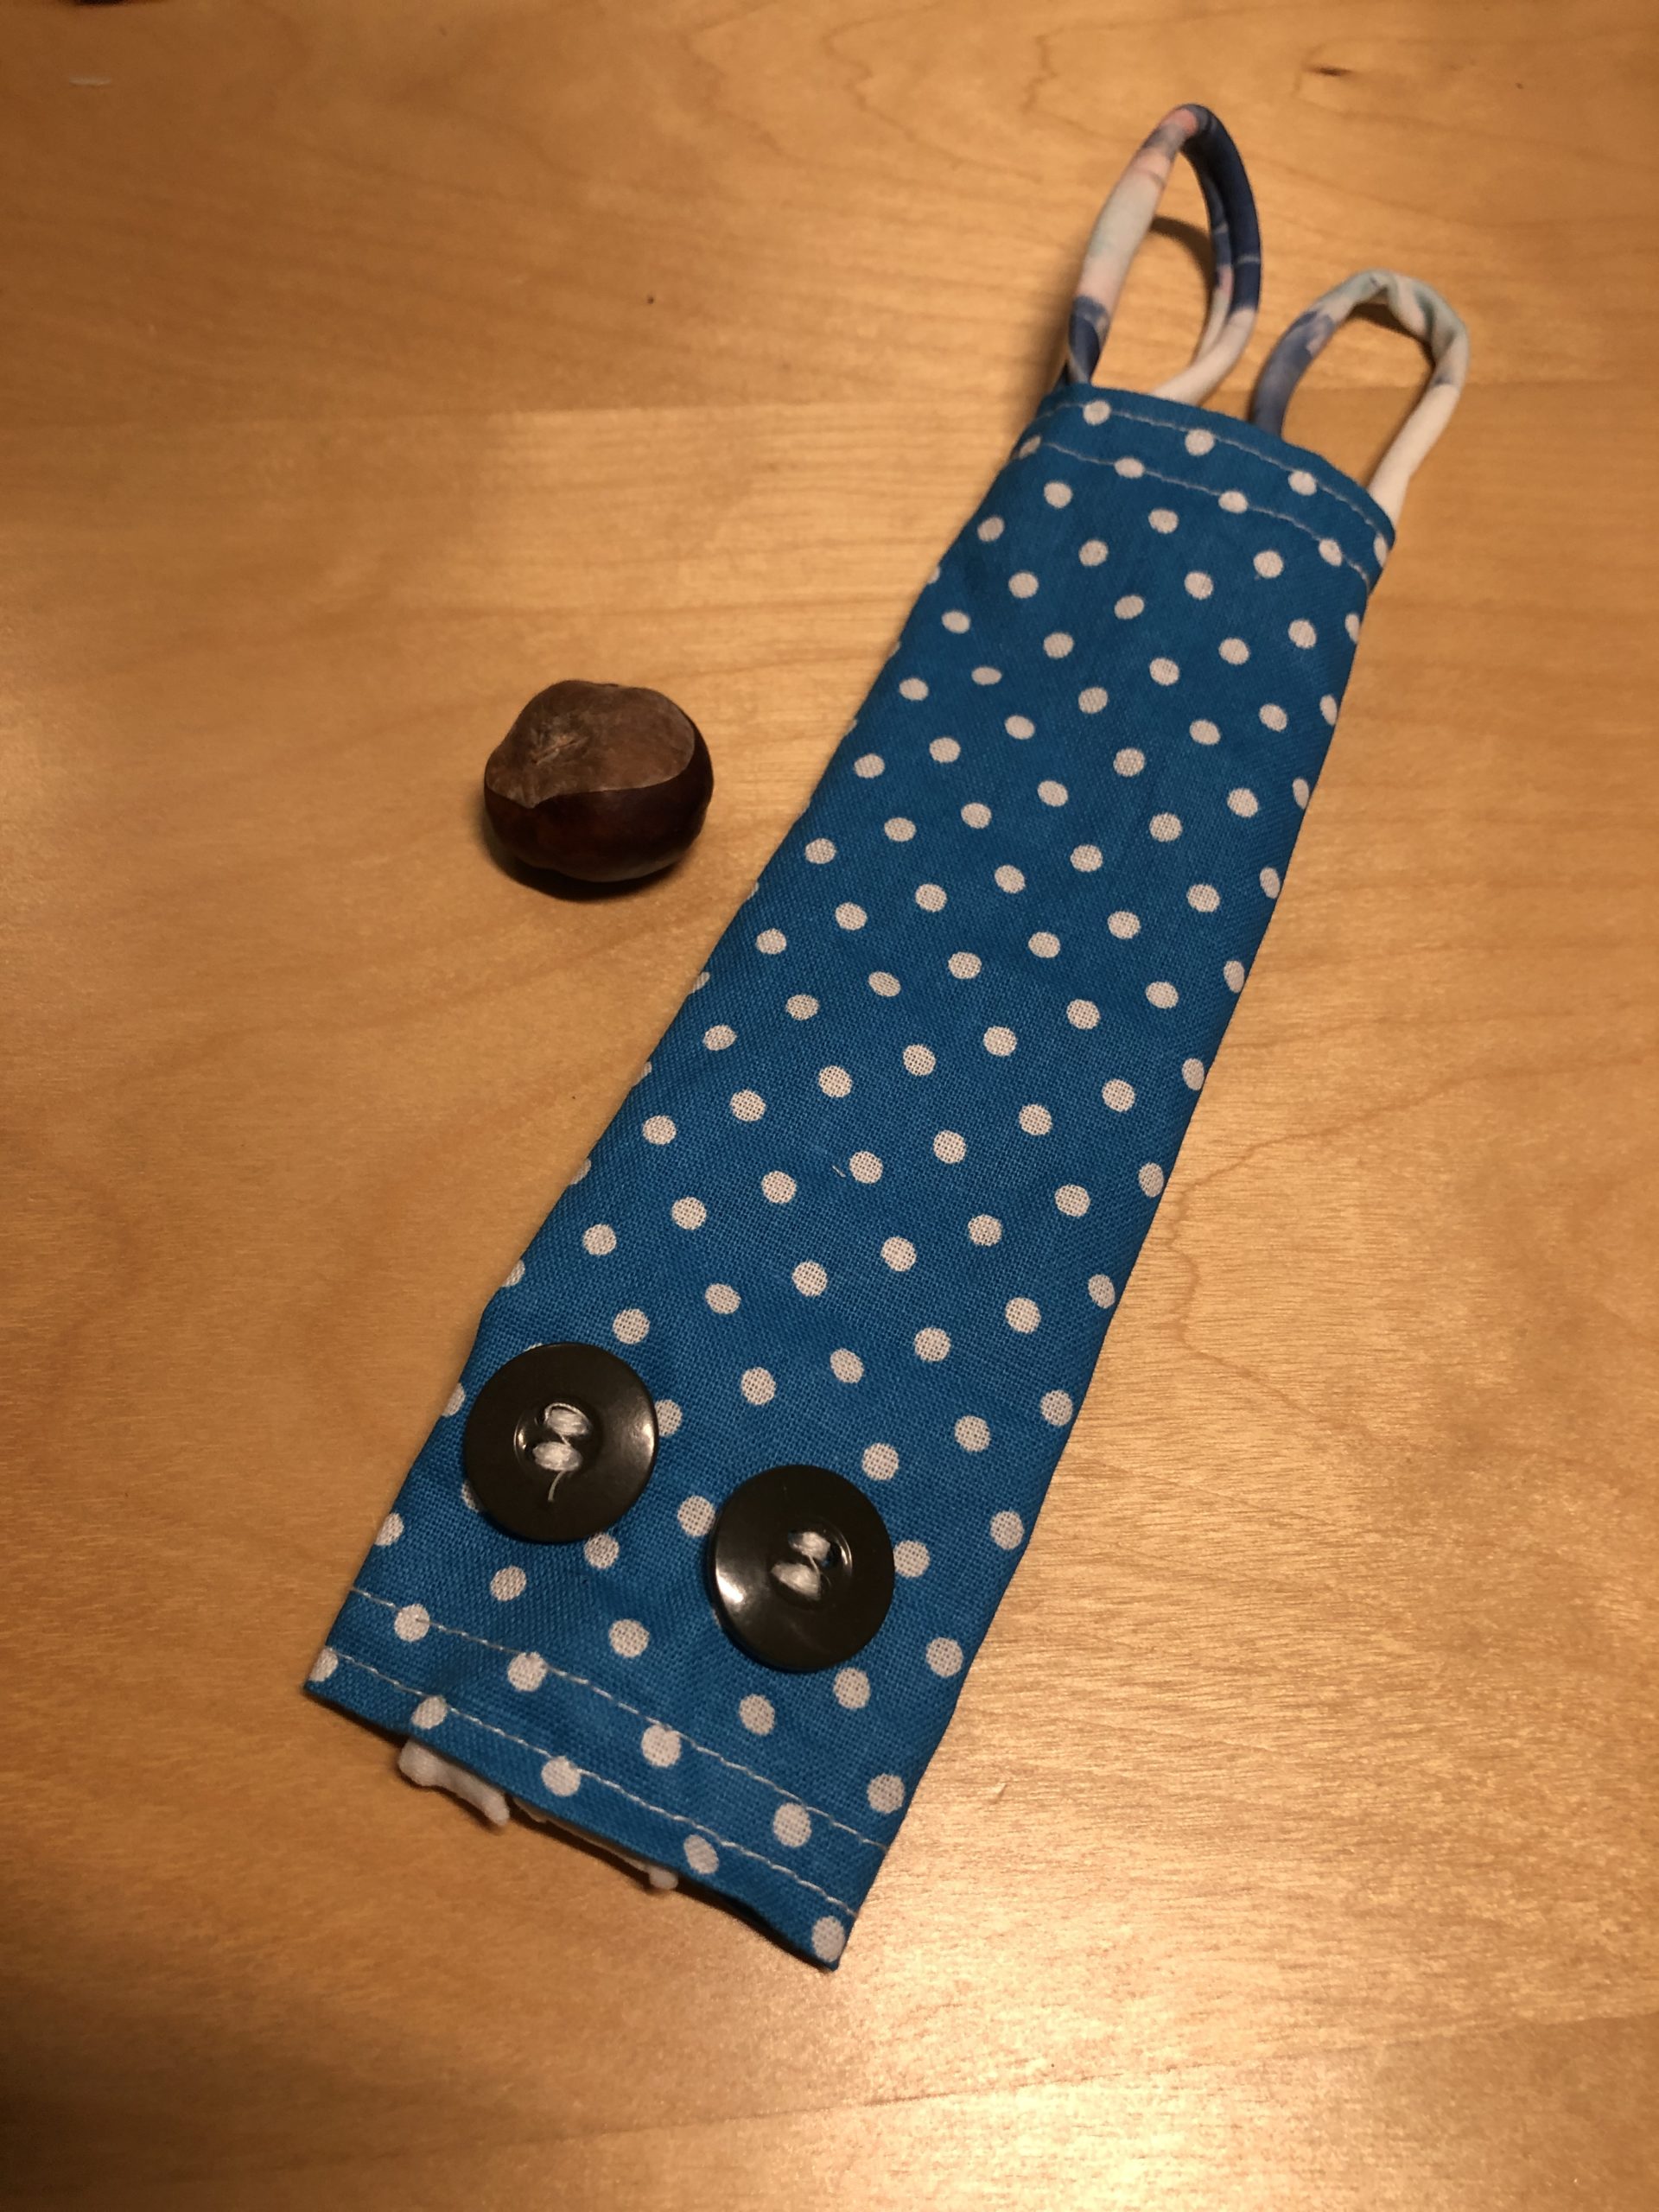
Bild zum Schritt 25 für das Bastel- und DIY-Abenteuer für Kinder: 'Fertig!   Nun kann der Fisch mit Kastanien gefüllt...'

26

You can open your mouth when the fish belly is filled, then all the chestnuts will go out again! Little children have a huge fun falling into the chestnuts and having them go out again.
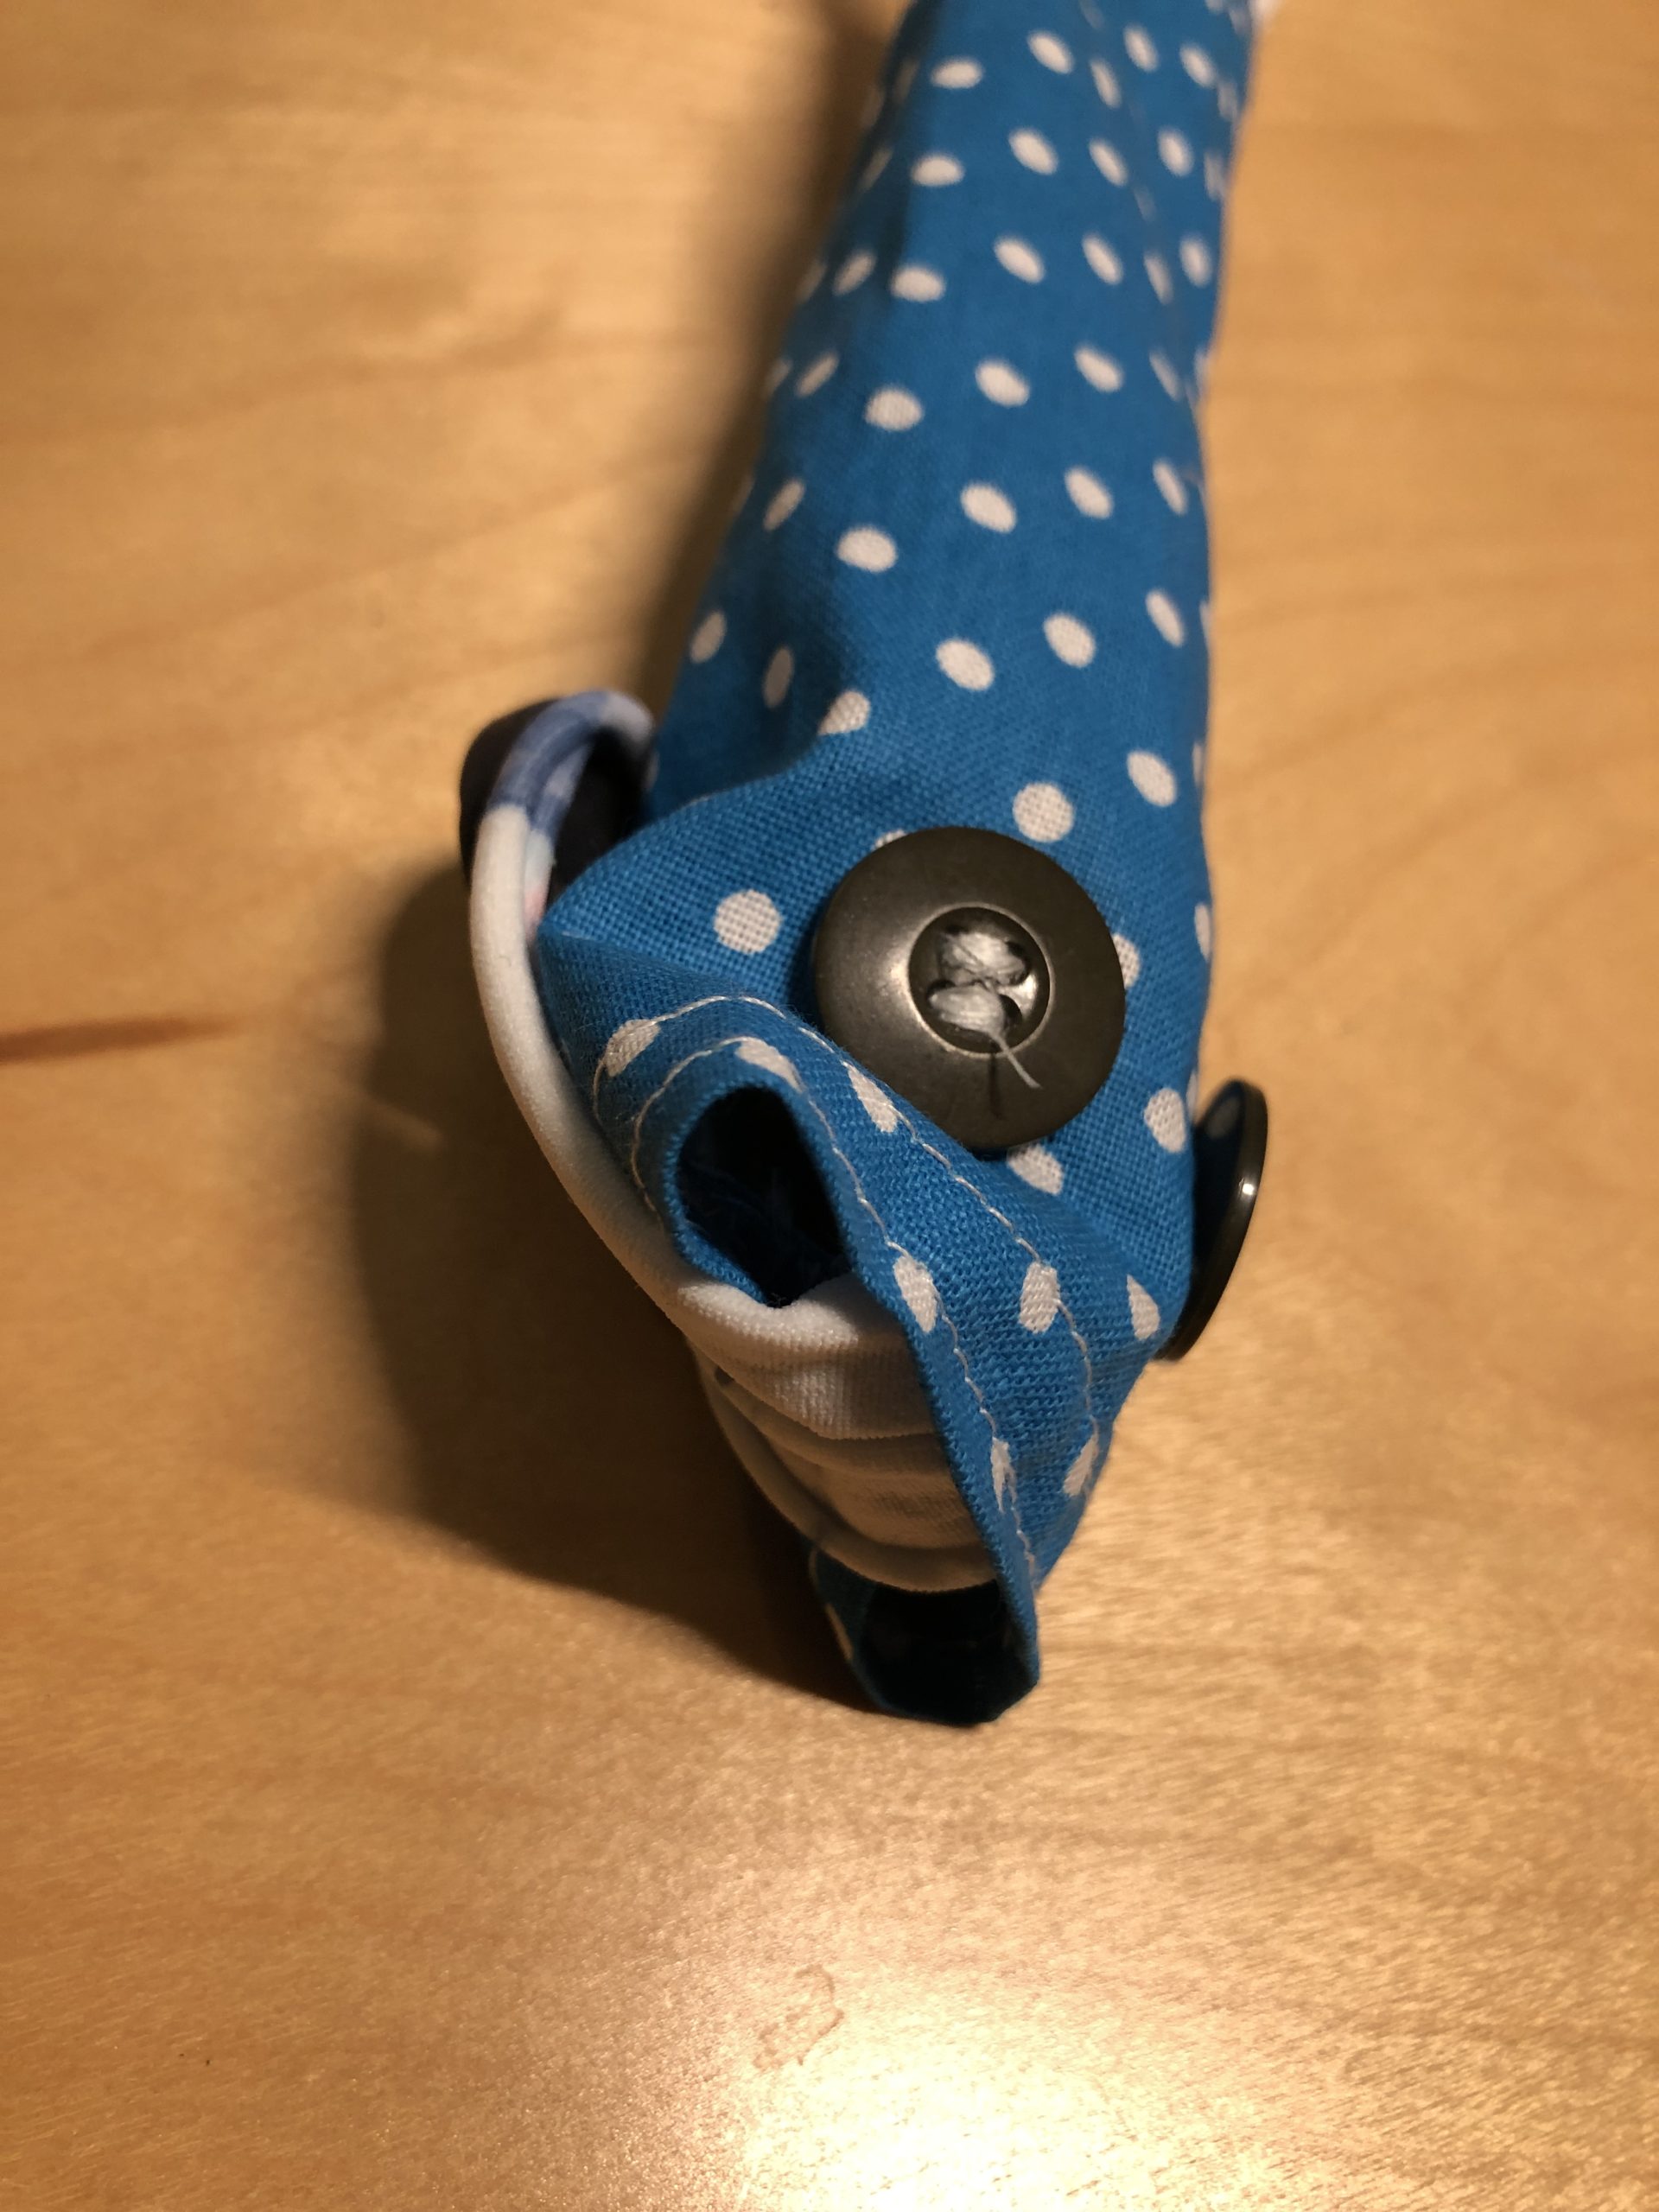
Bild zum Schritt 26 für das Bastel- und DIY-Abenteuer für Kinder: 'Ihr könnt das Maul öffnen, wenn der Fischbauch gefüllt ist,...'

27

2. Bild zum Schritt 26 für das Bastel- und DIY-Abenteuer für Kinder: 'Ihr könnt das Maul öffnen, wenn der Fischbauch gefüllt ist,...'

28

Have fun trying it out!

29

A nice material for the autumn!
Suitable for playing with natural materials as well as for training fine motor skills and tactile perception.
It is especially beautiful when you have collected the chestnuts yourself!

Sewing chestnut fish

Follow us on Facebook , Instagram and Pinterest
Don't miss any more adventures: Our bottle mail

Leave a Reply

Your email address will not be published.

The maximum upload file size: 5 MB. You can upload: image, document. Drop file here