This bumblebee is a very fragile craft. A challenge for school children who learn how to handle fragile things so perfectly. Just try it out! If necessary, you paint several eggshells. Have courage and dare to craft this bumblebee! Have fun! You will be rewarded with a pretty little bumblebee!
Media Education for Kindergarten and Hort

Relief in everyday life, targeted promotion of individual children, independent learning and - without any pre-knowledge already usable by the youngest!
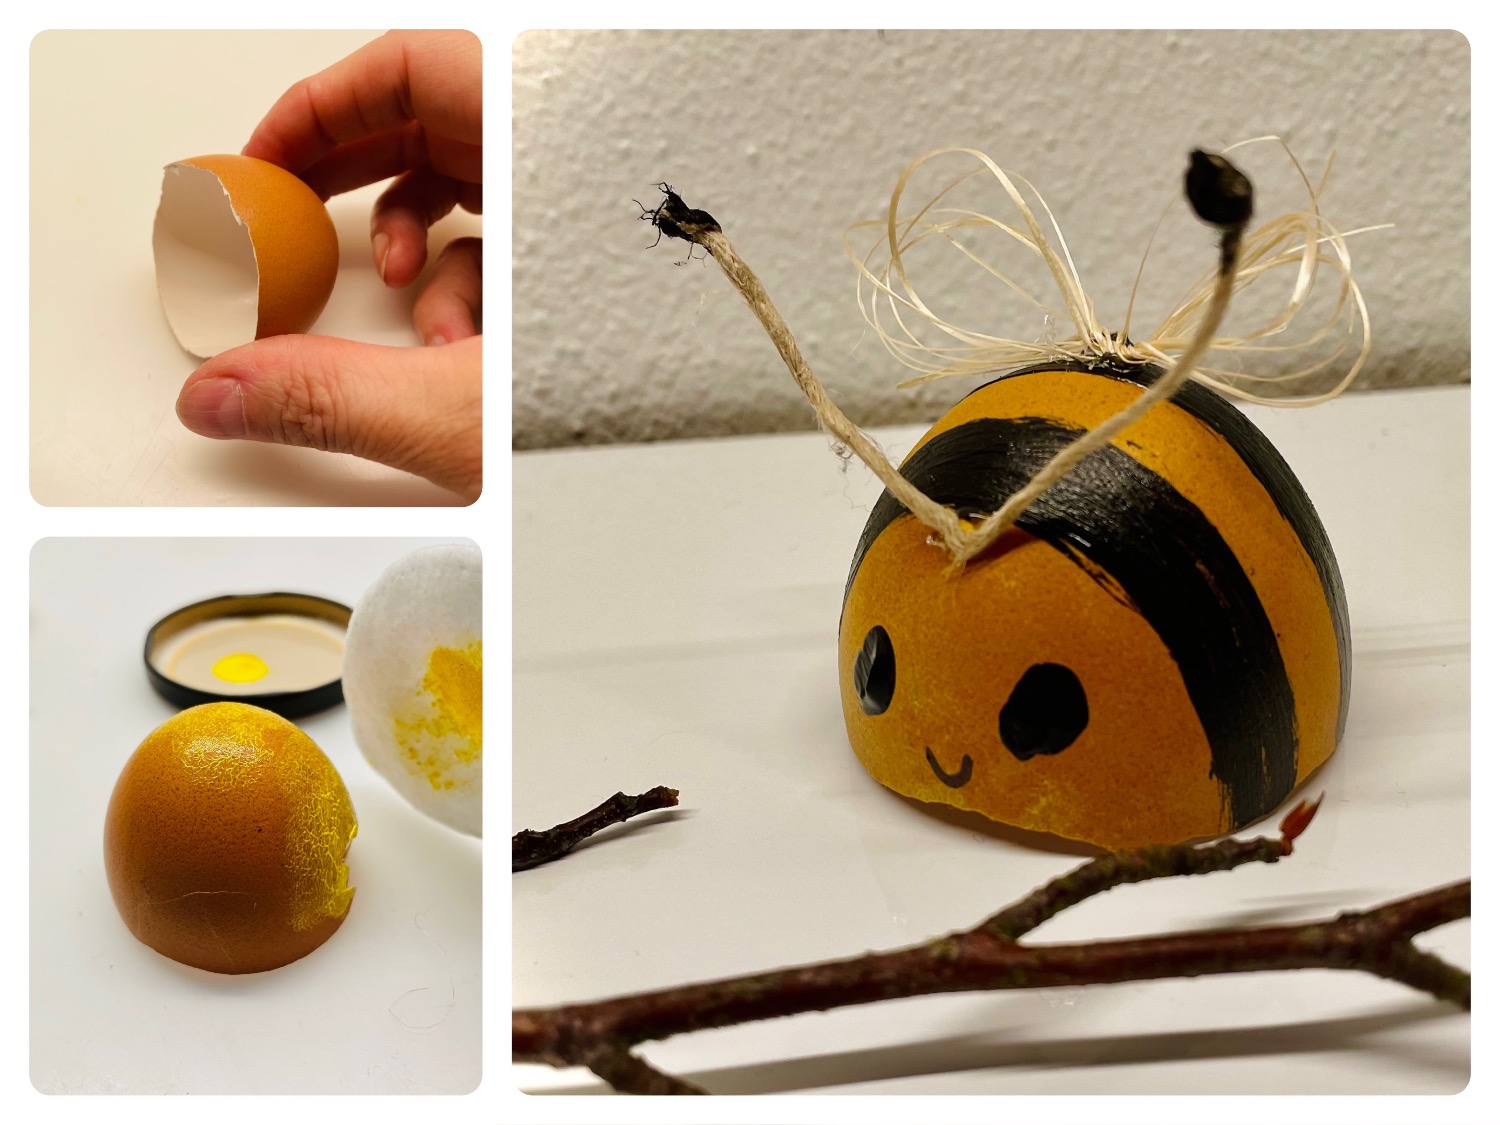
Wash out the eggshell skins, which are produced during cooking or baking, with water and let them dry. From this you can easily make a small thick bumblebee.

Place the craft pad and the eggshell with the open side on it. It becomes the body of the bumblebee.

Drape a small paint stick on a lower plate or a screw glass lid and prepare the cotton pad.
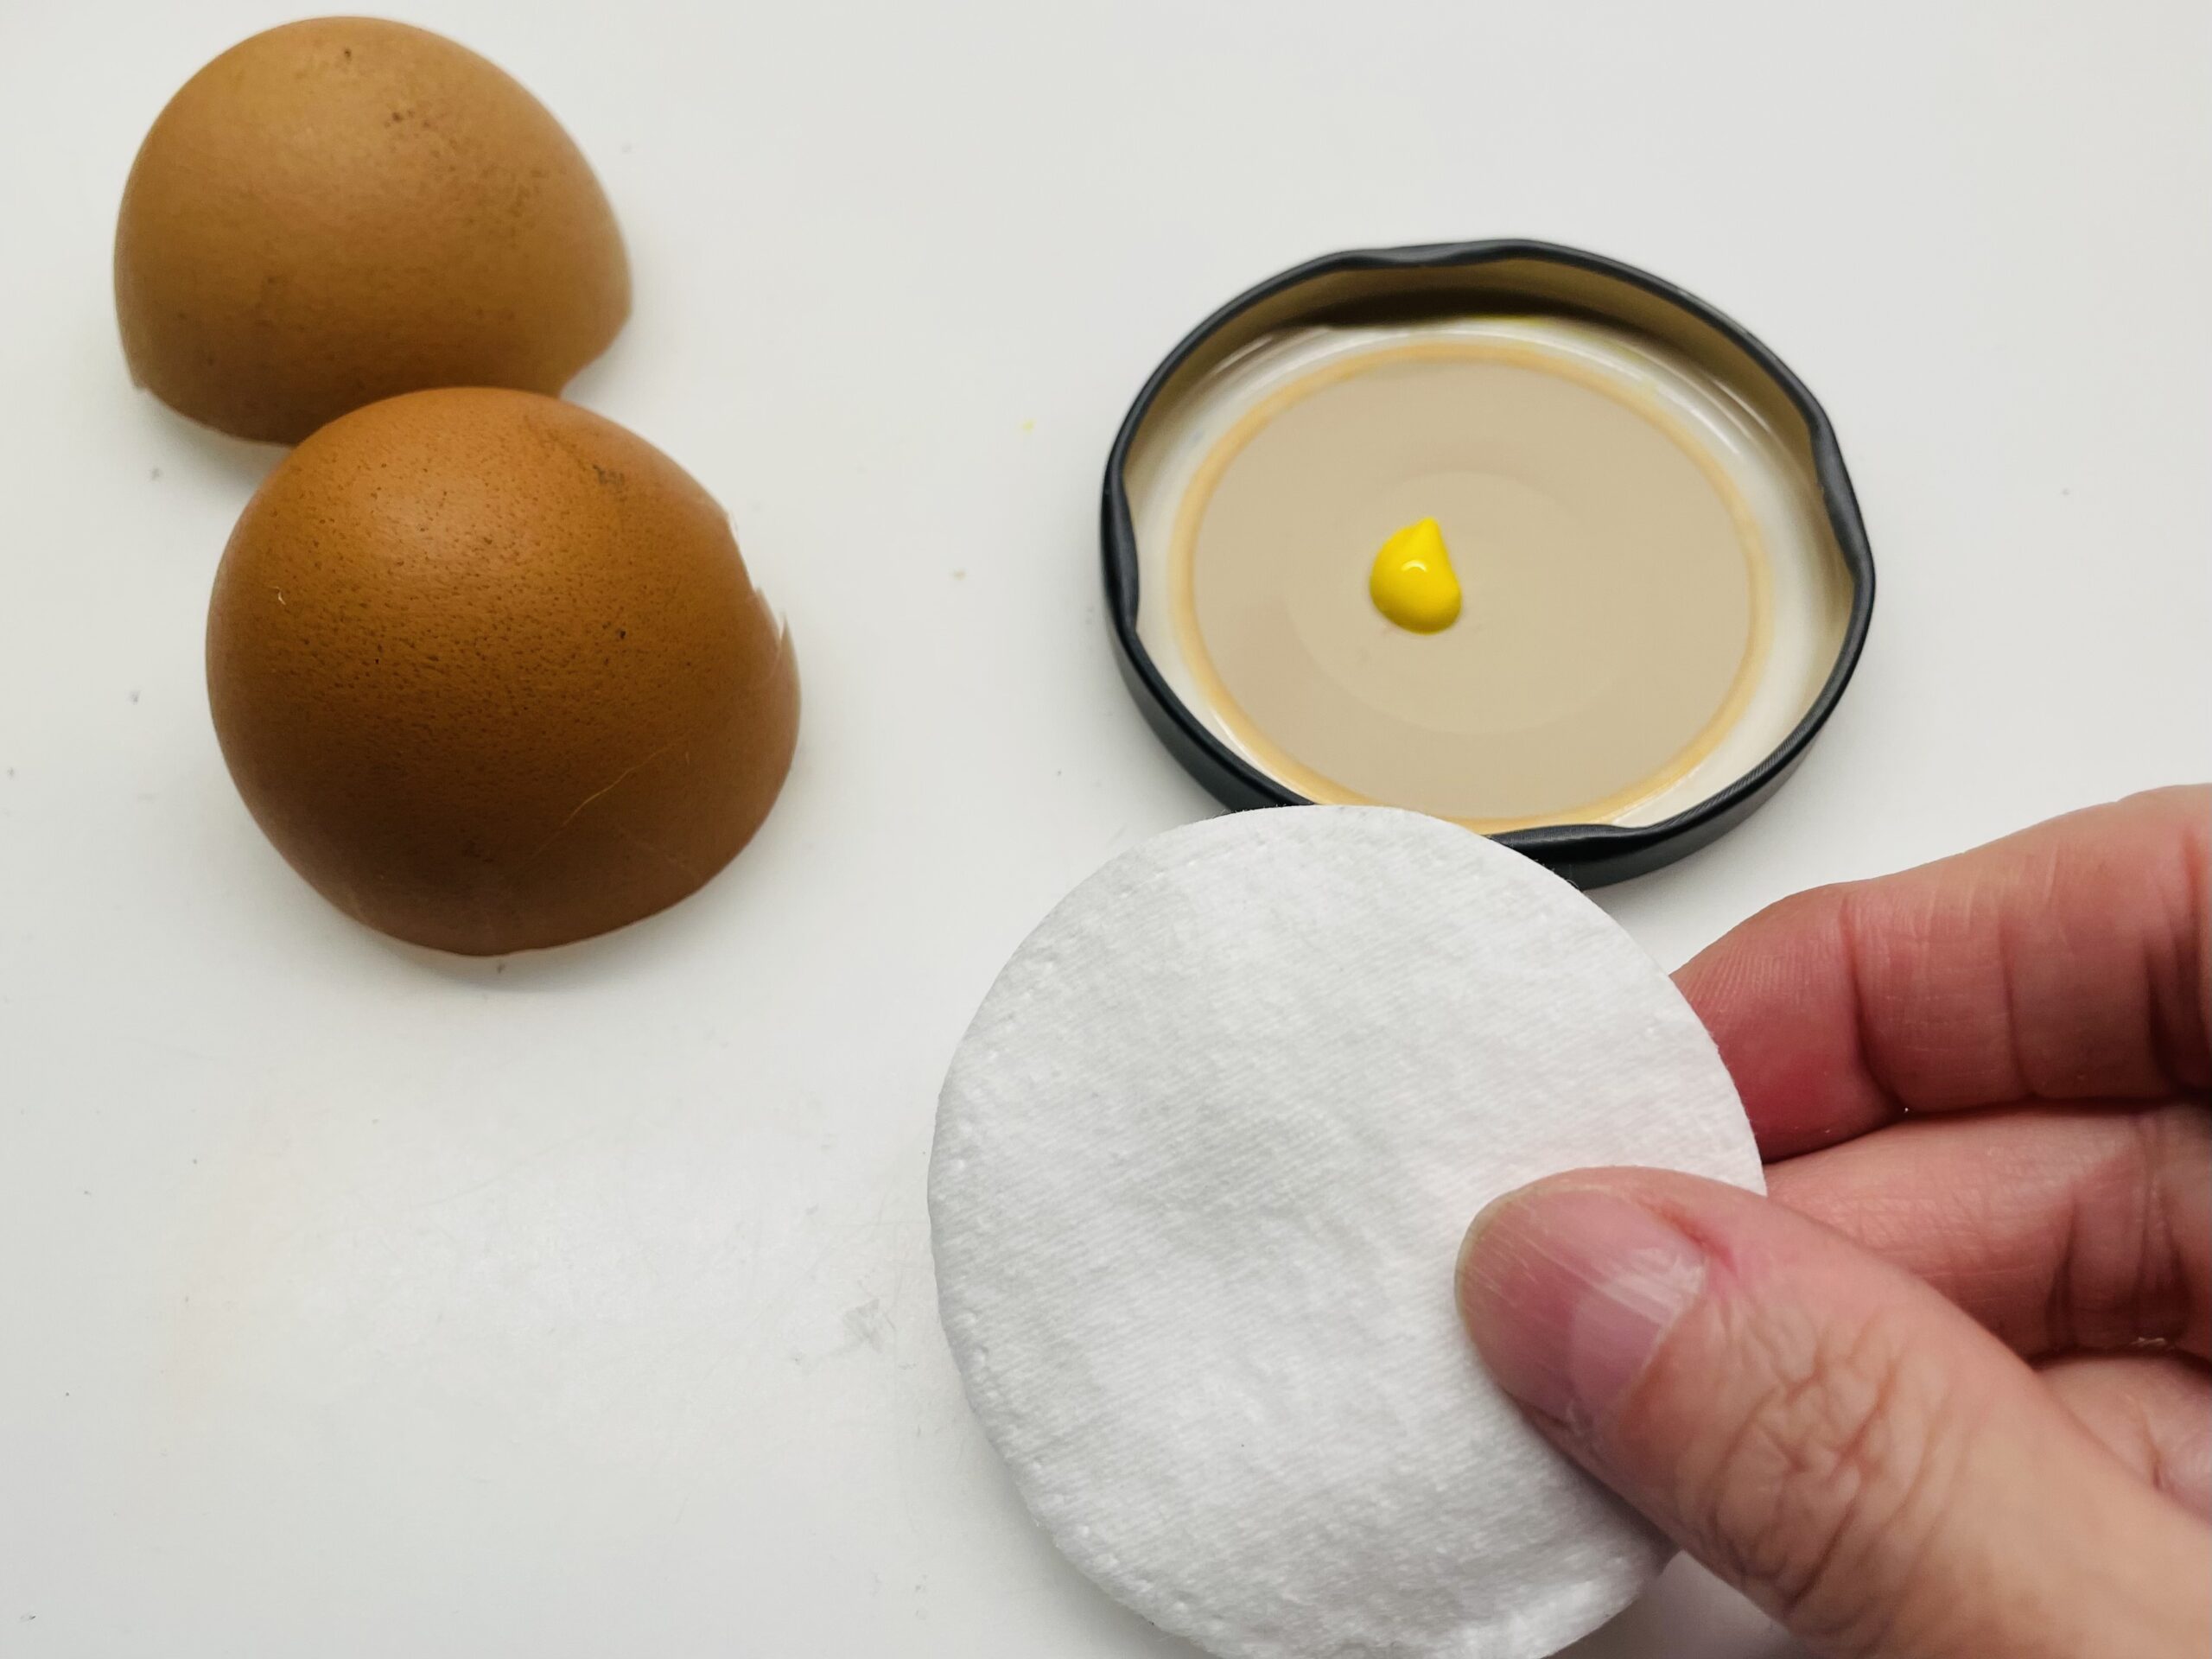
Then you dip the cotton pad in the color.
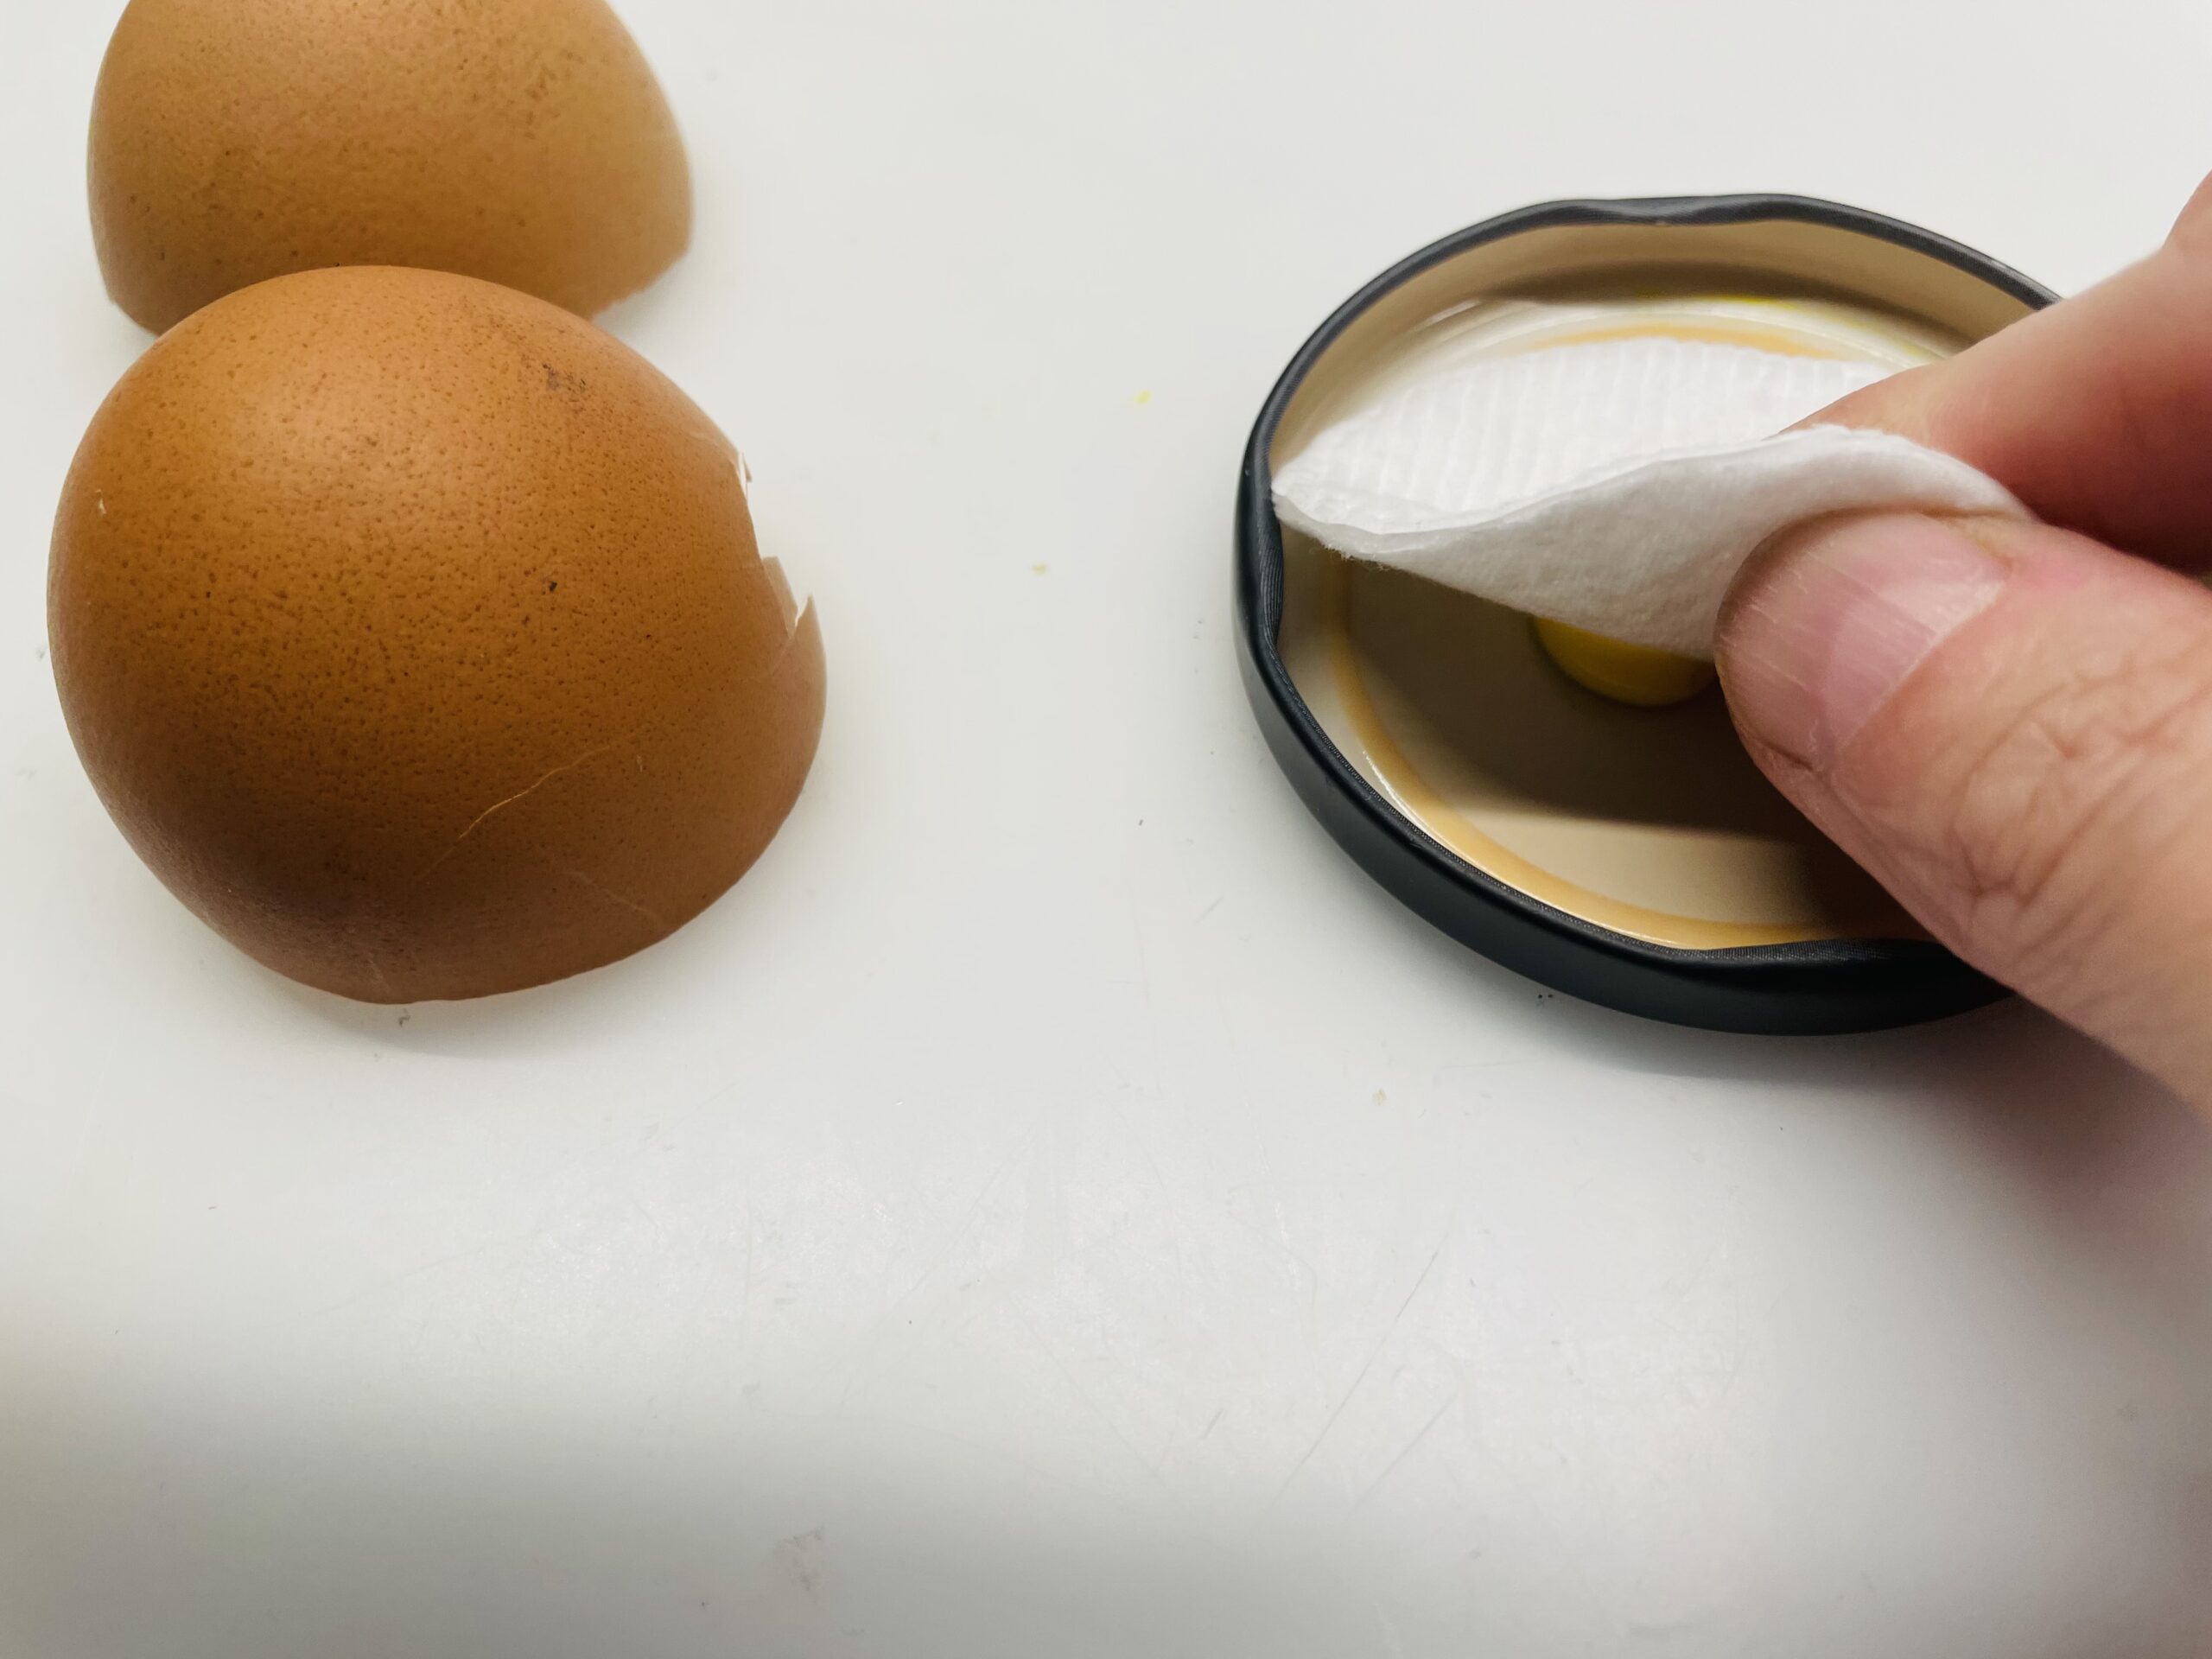
Now you gently pat the paint on the eggshell.
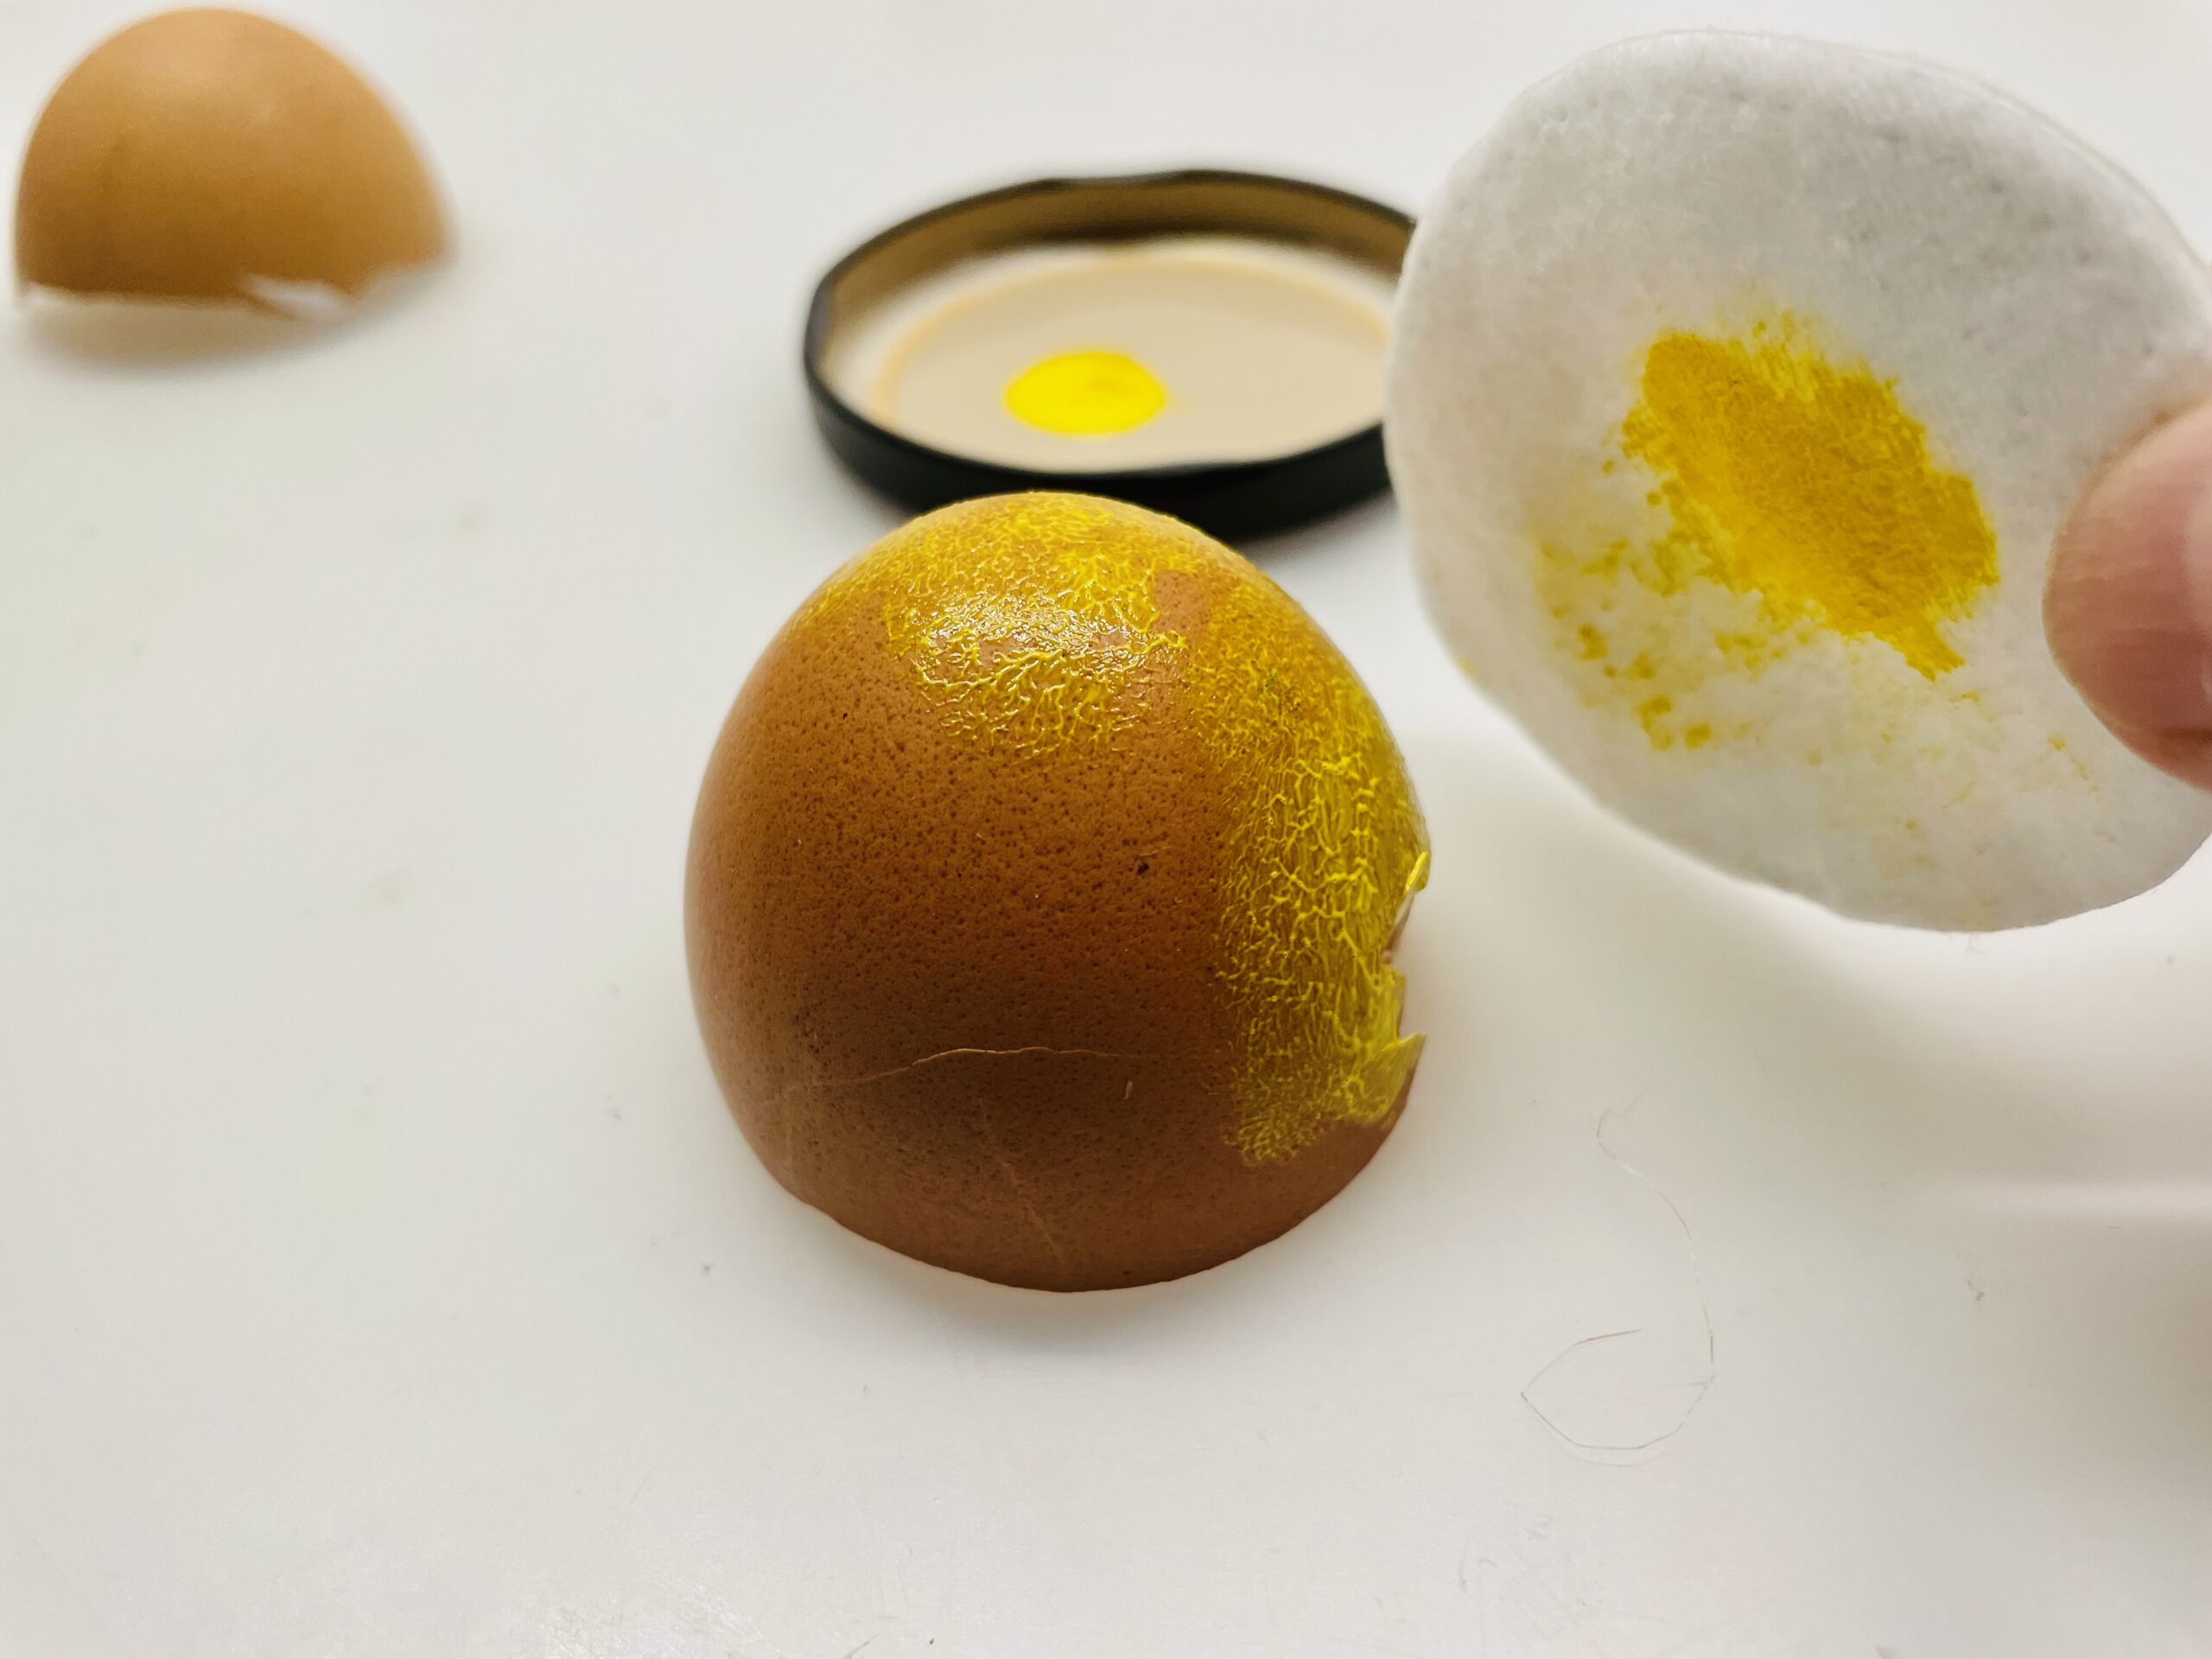
Don't miss a job.
Then let the paint dry on the eggshell.

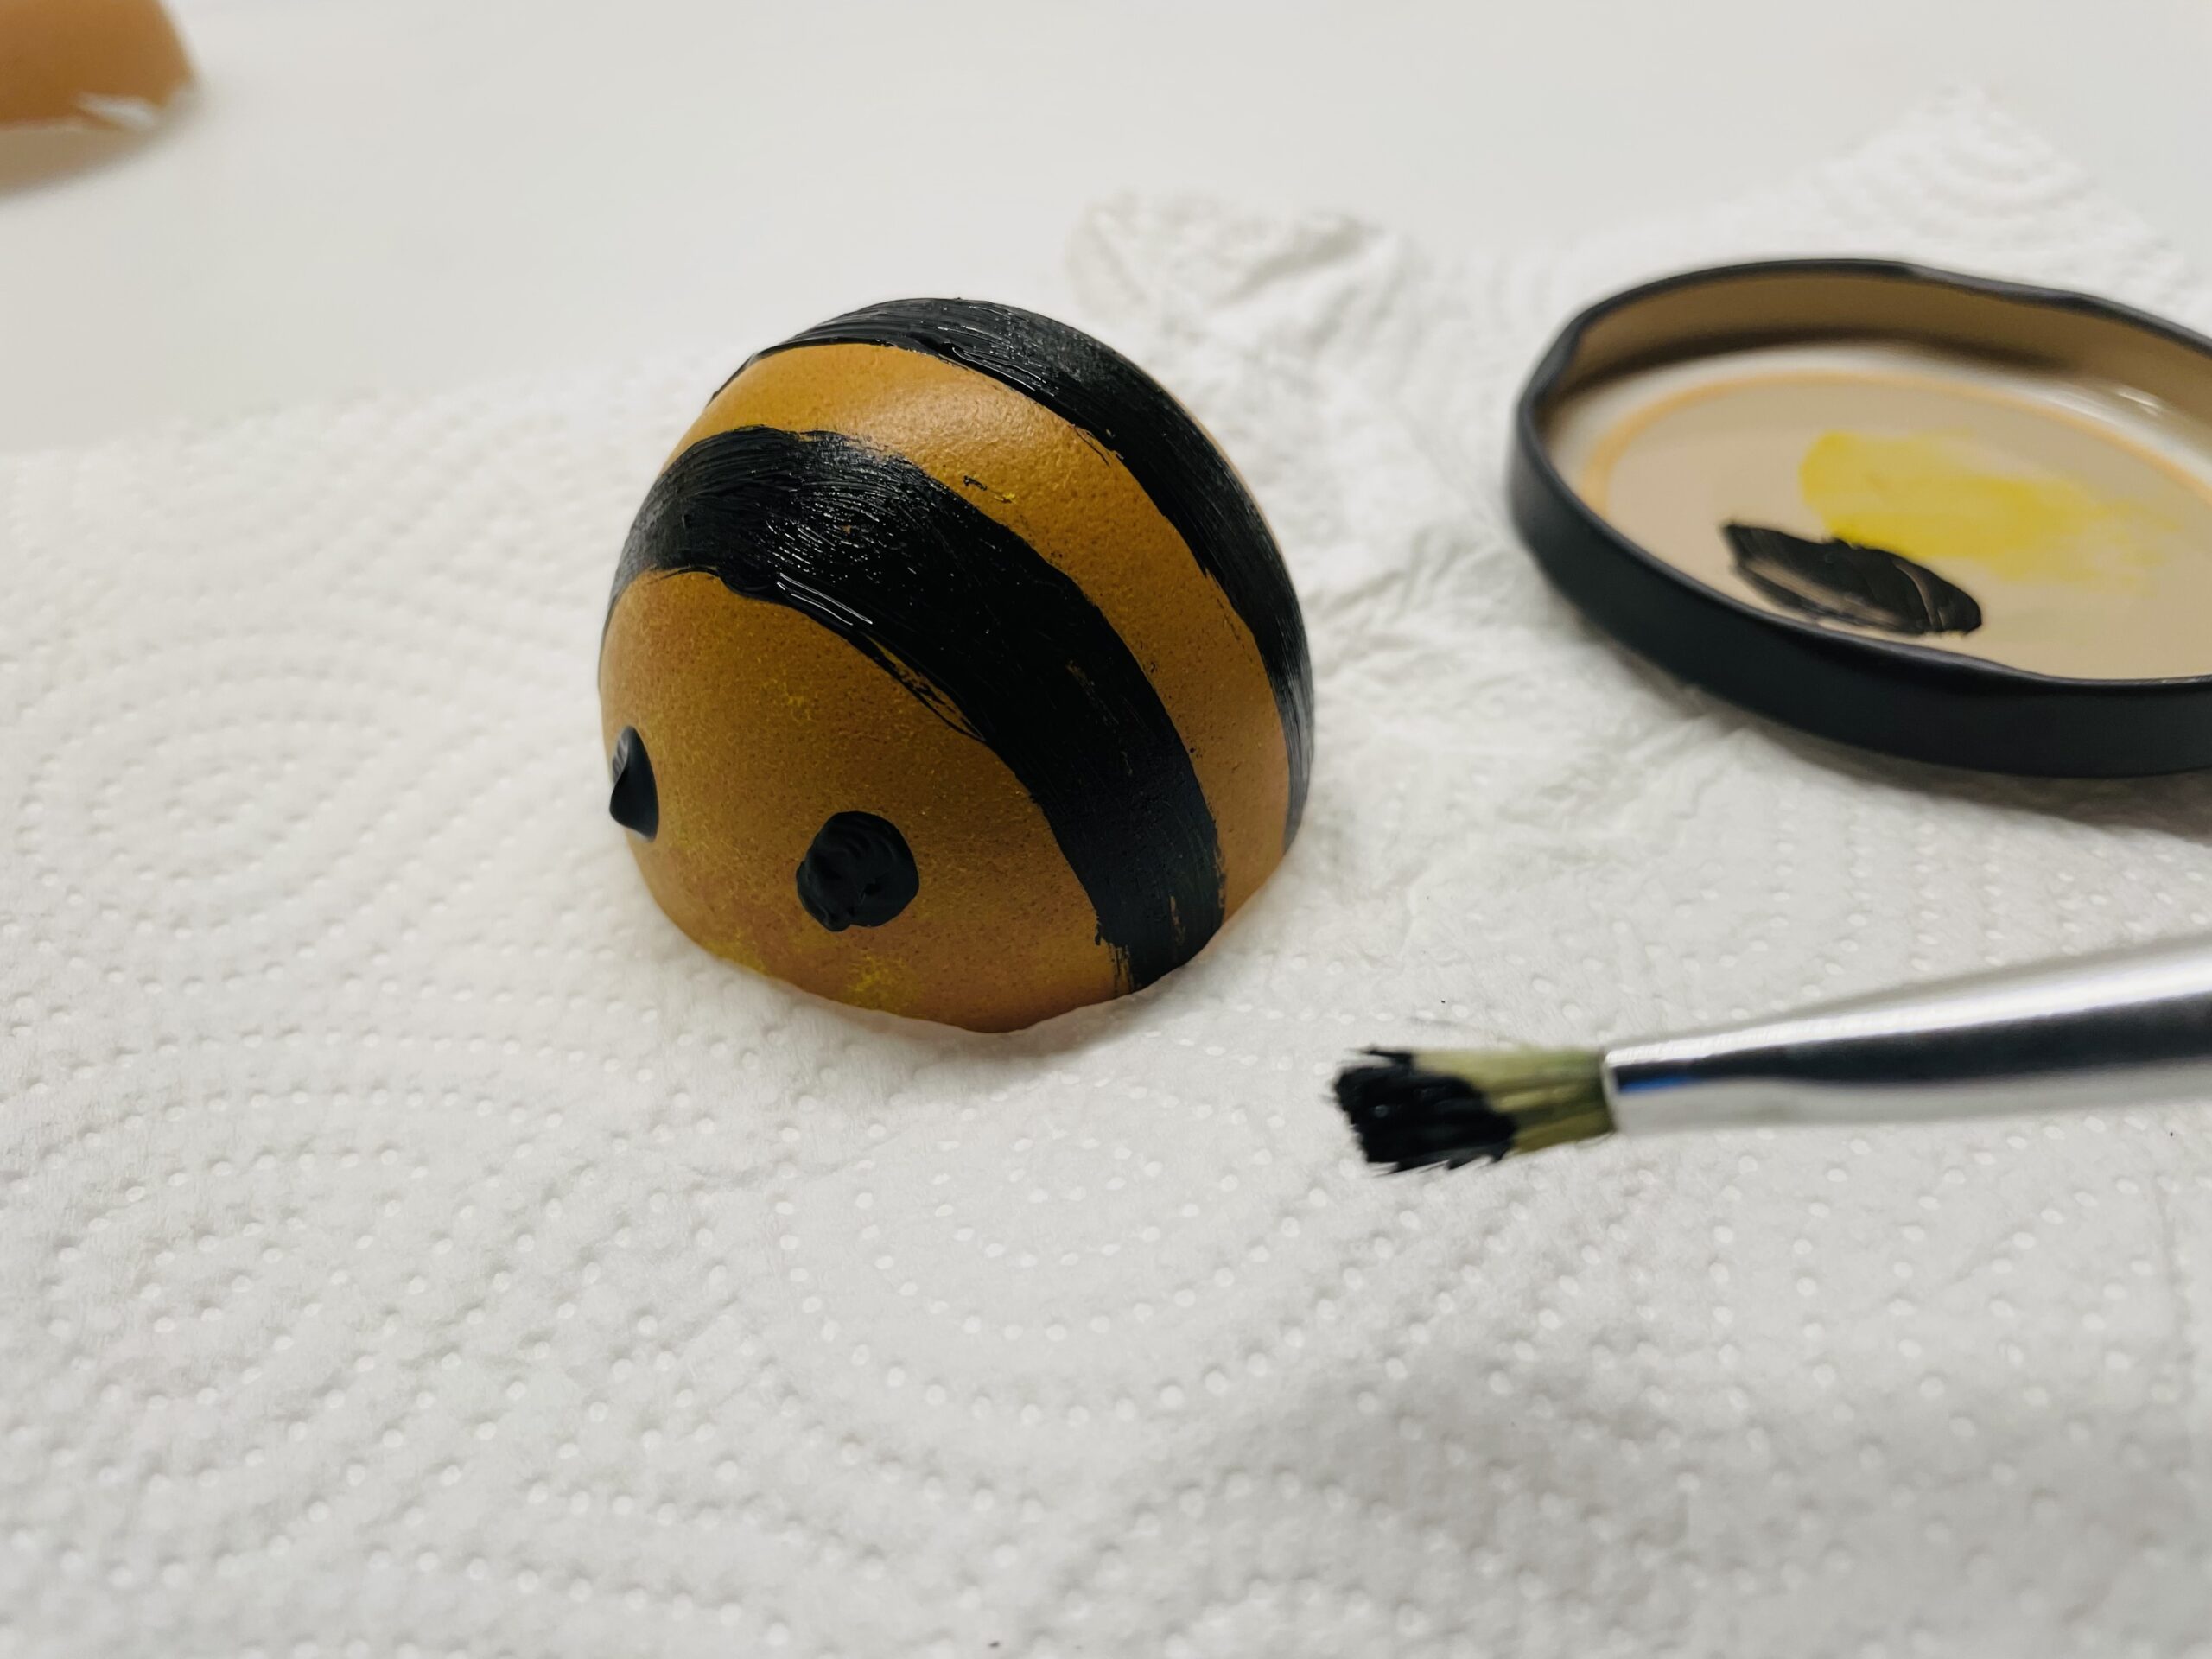
Then you paint stripes and eyes with black paint and a brush.
Tip: alternatively, you paint the stripes and eyes with a felt pen.
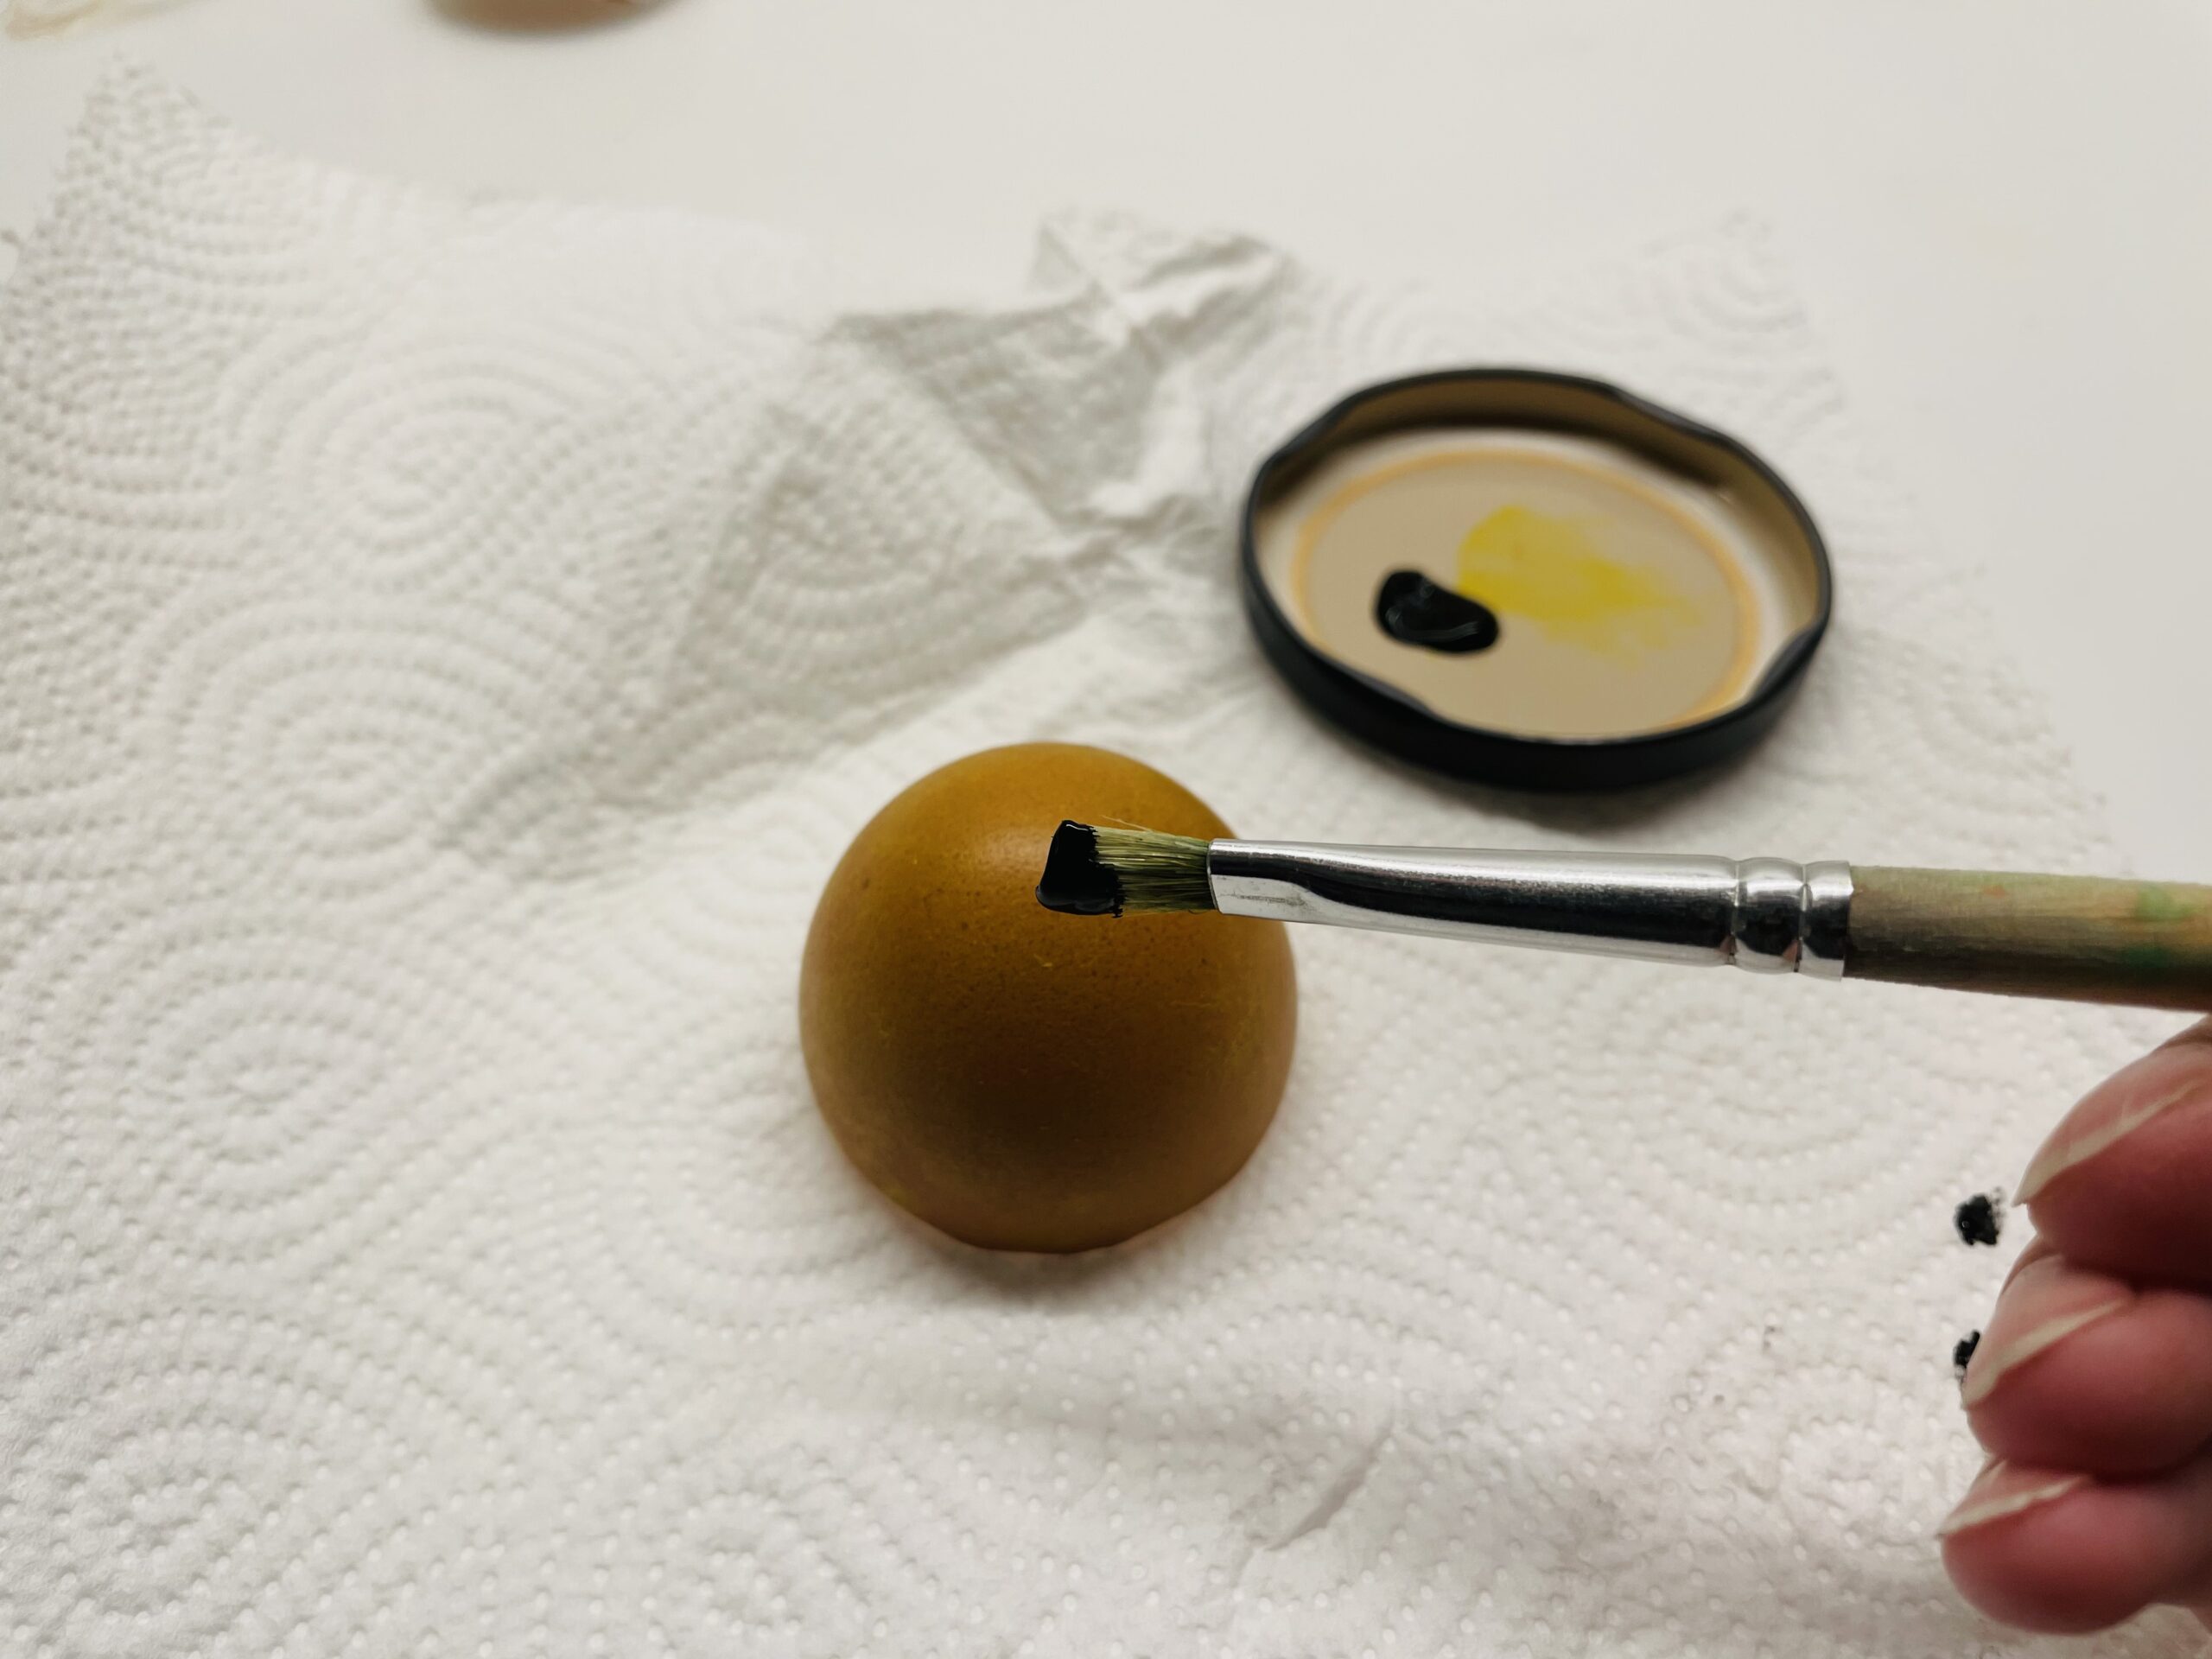
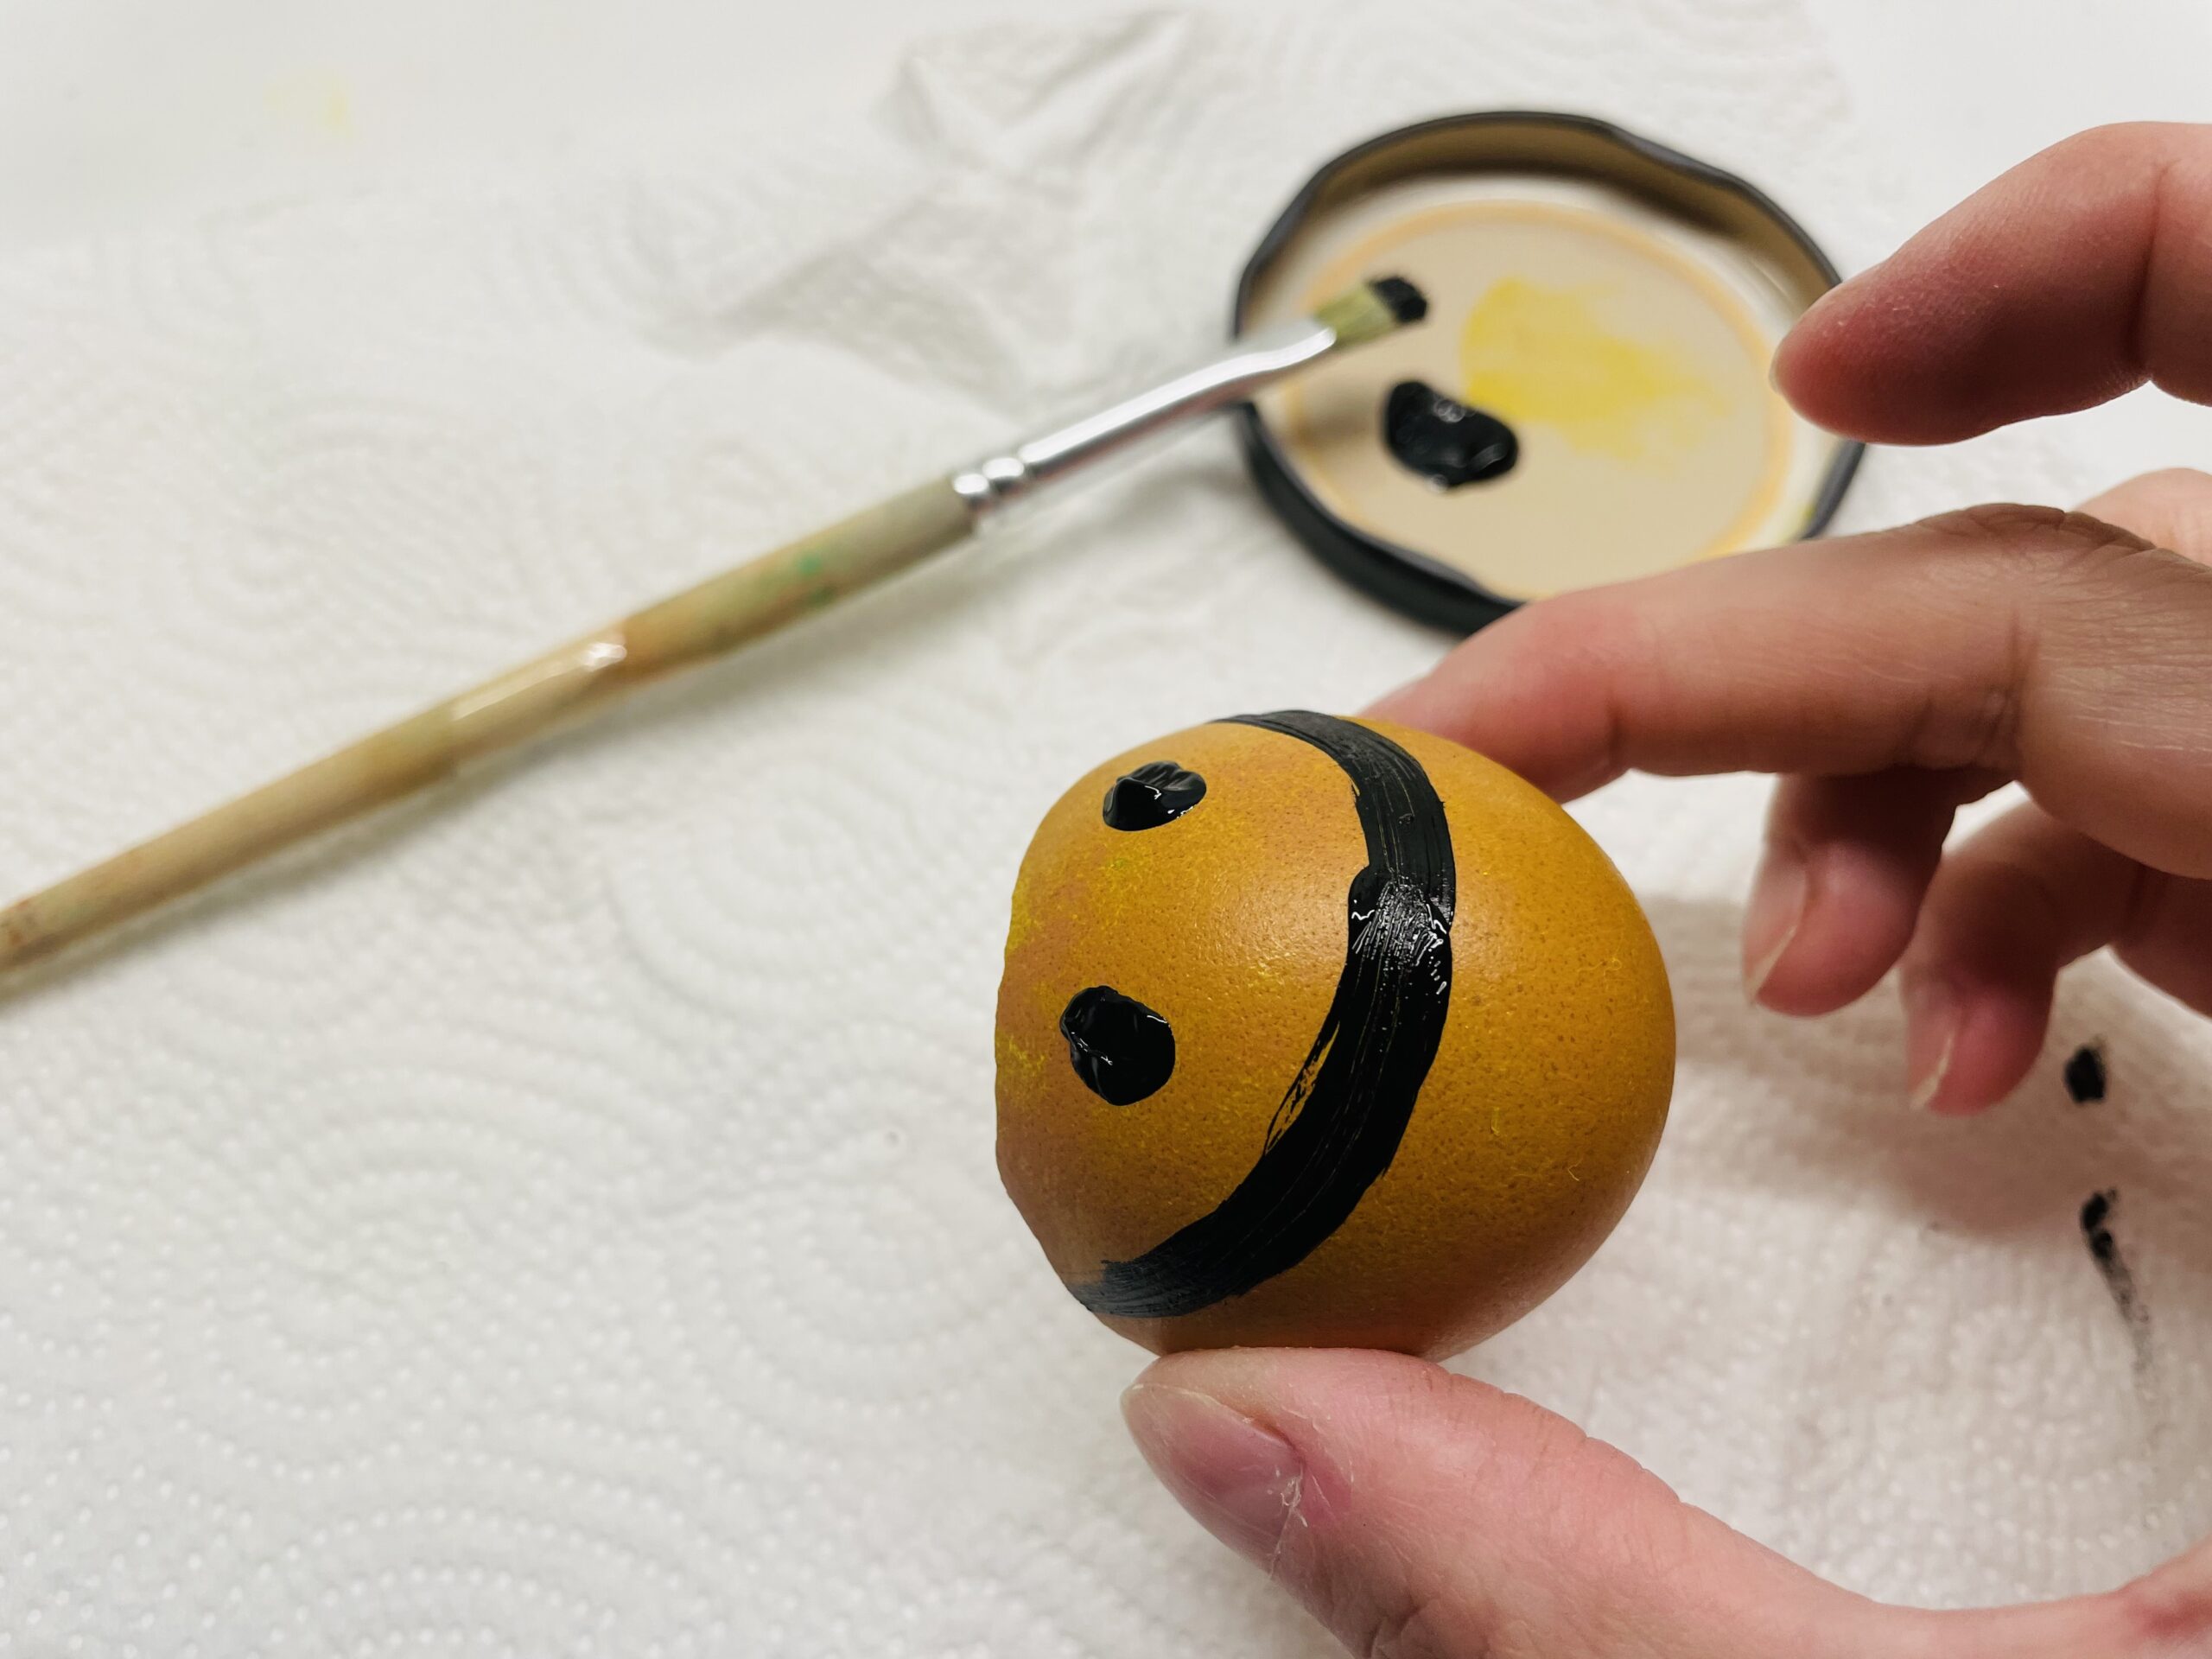
Then let the paint dry.
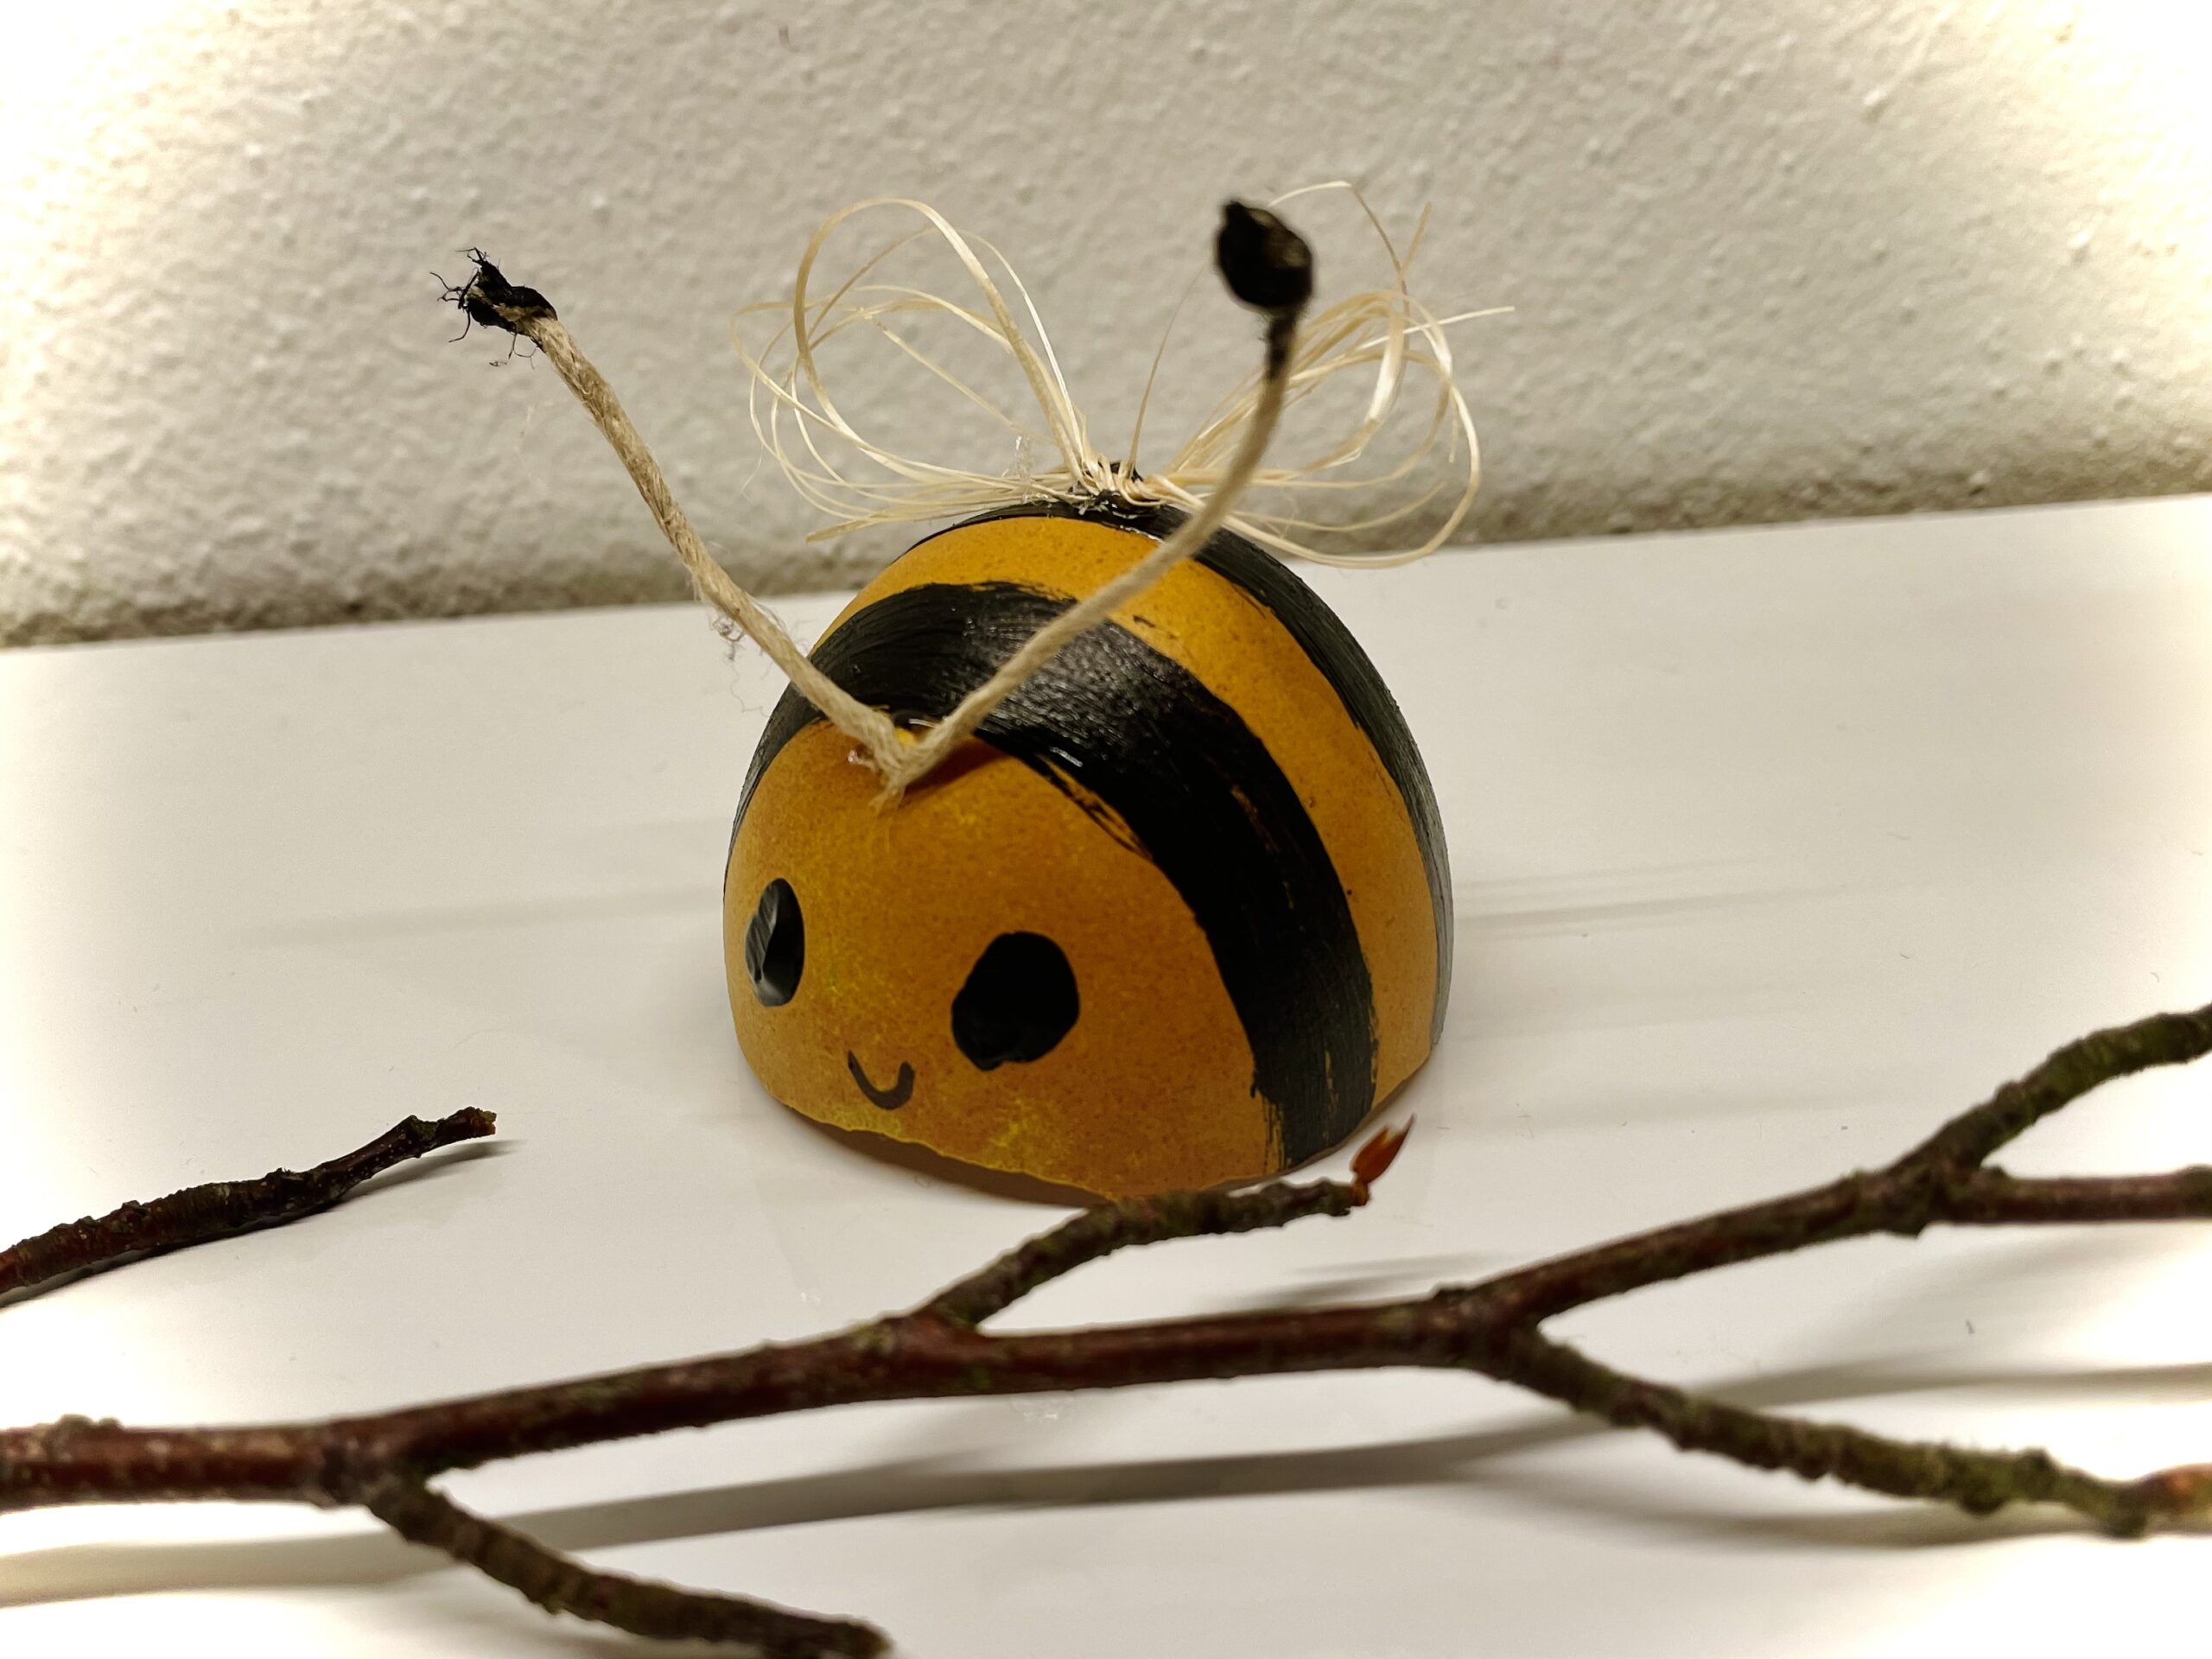
You now make your wings out of thin sisal strings. Wrap some cords several times around a few fingers. Then you push the resulting ring off your fingers and squeeze it together.
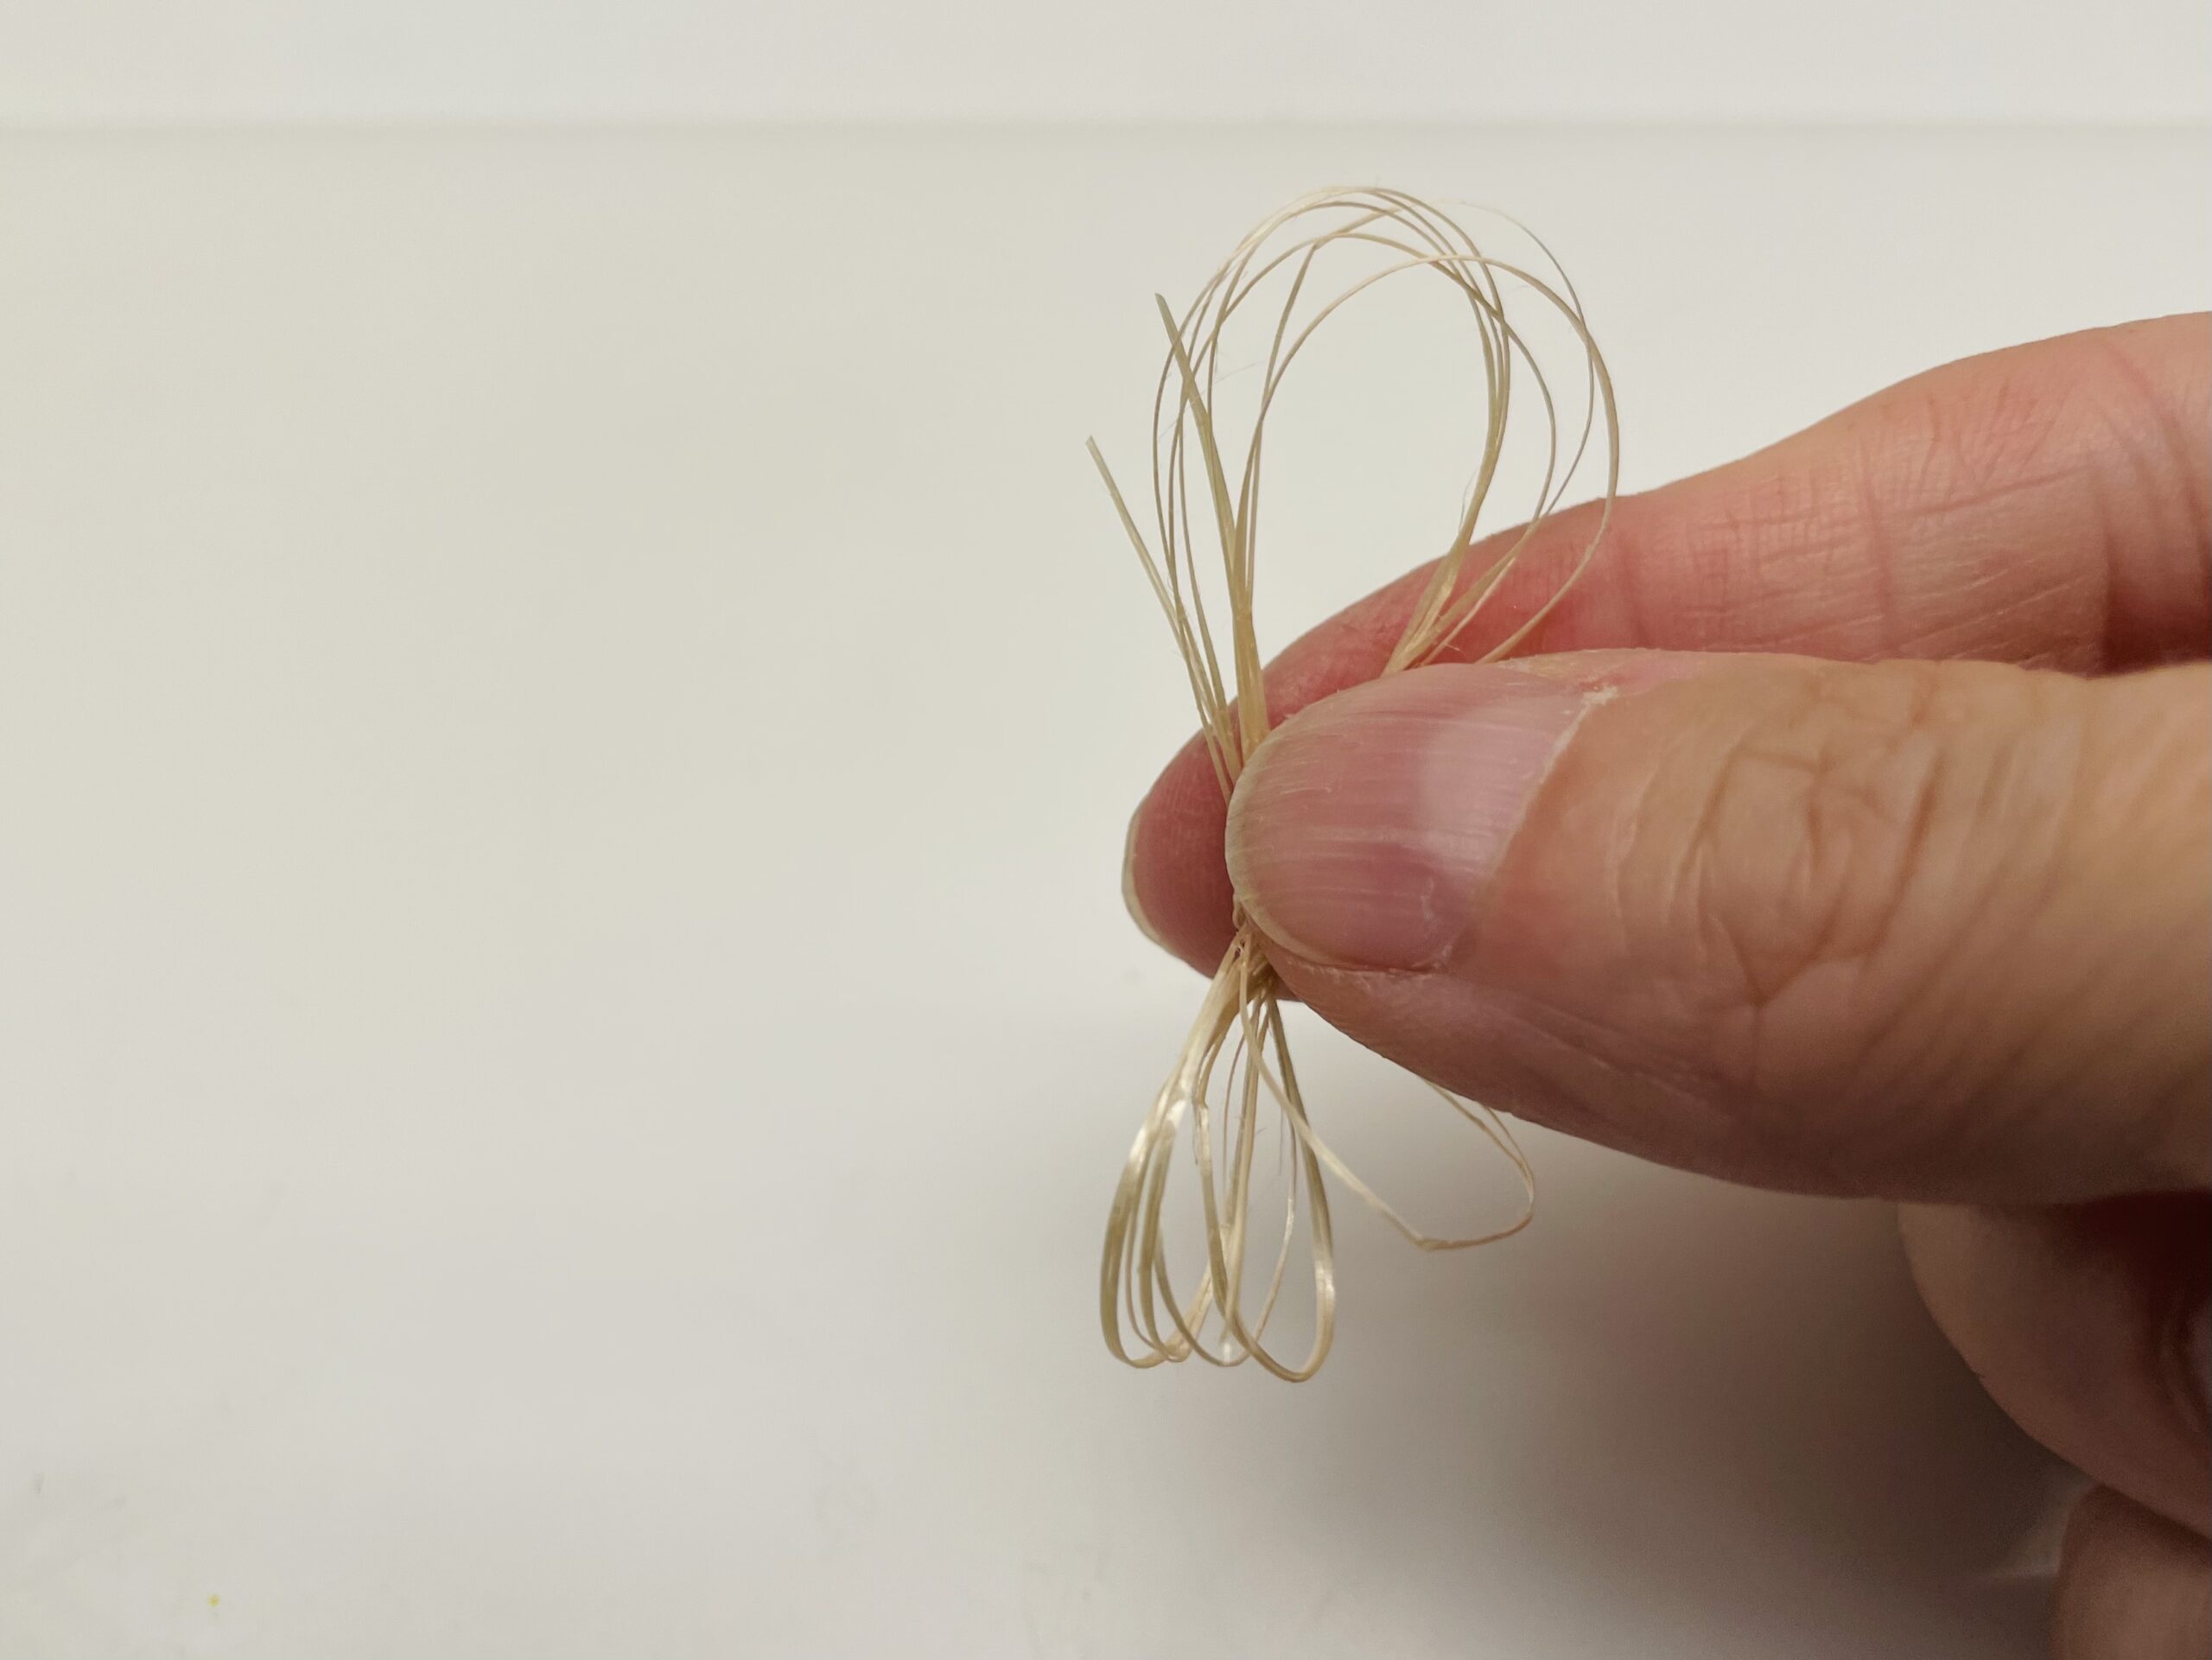
Press the sisal ring flat and pinch it in the middle.

Then turn both sides in the opposite direction.
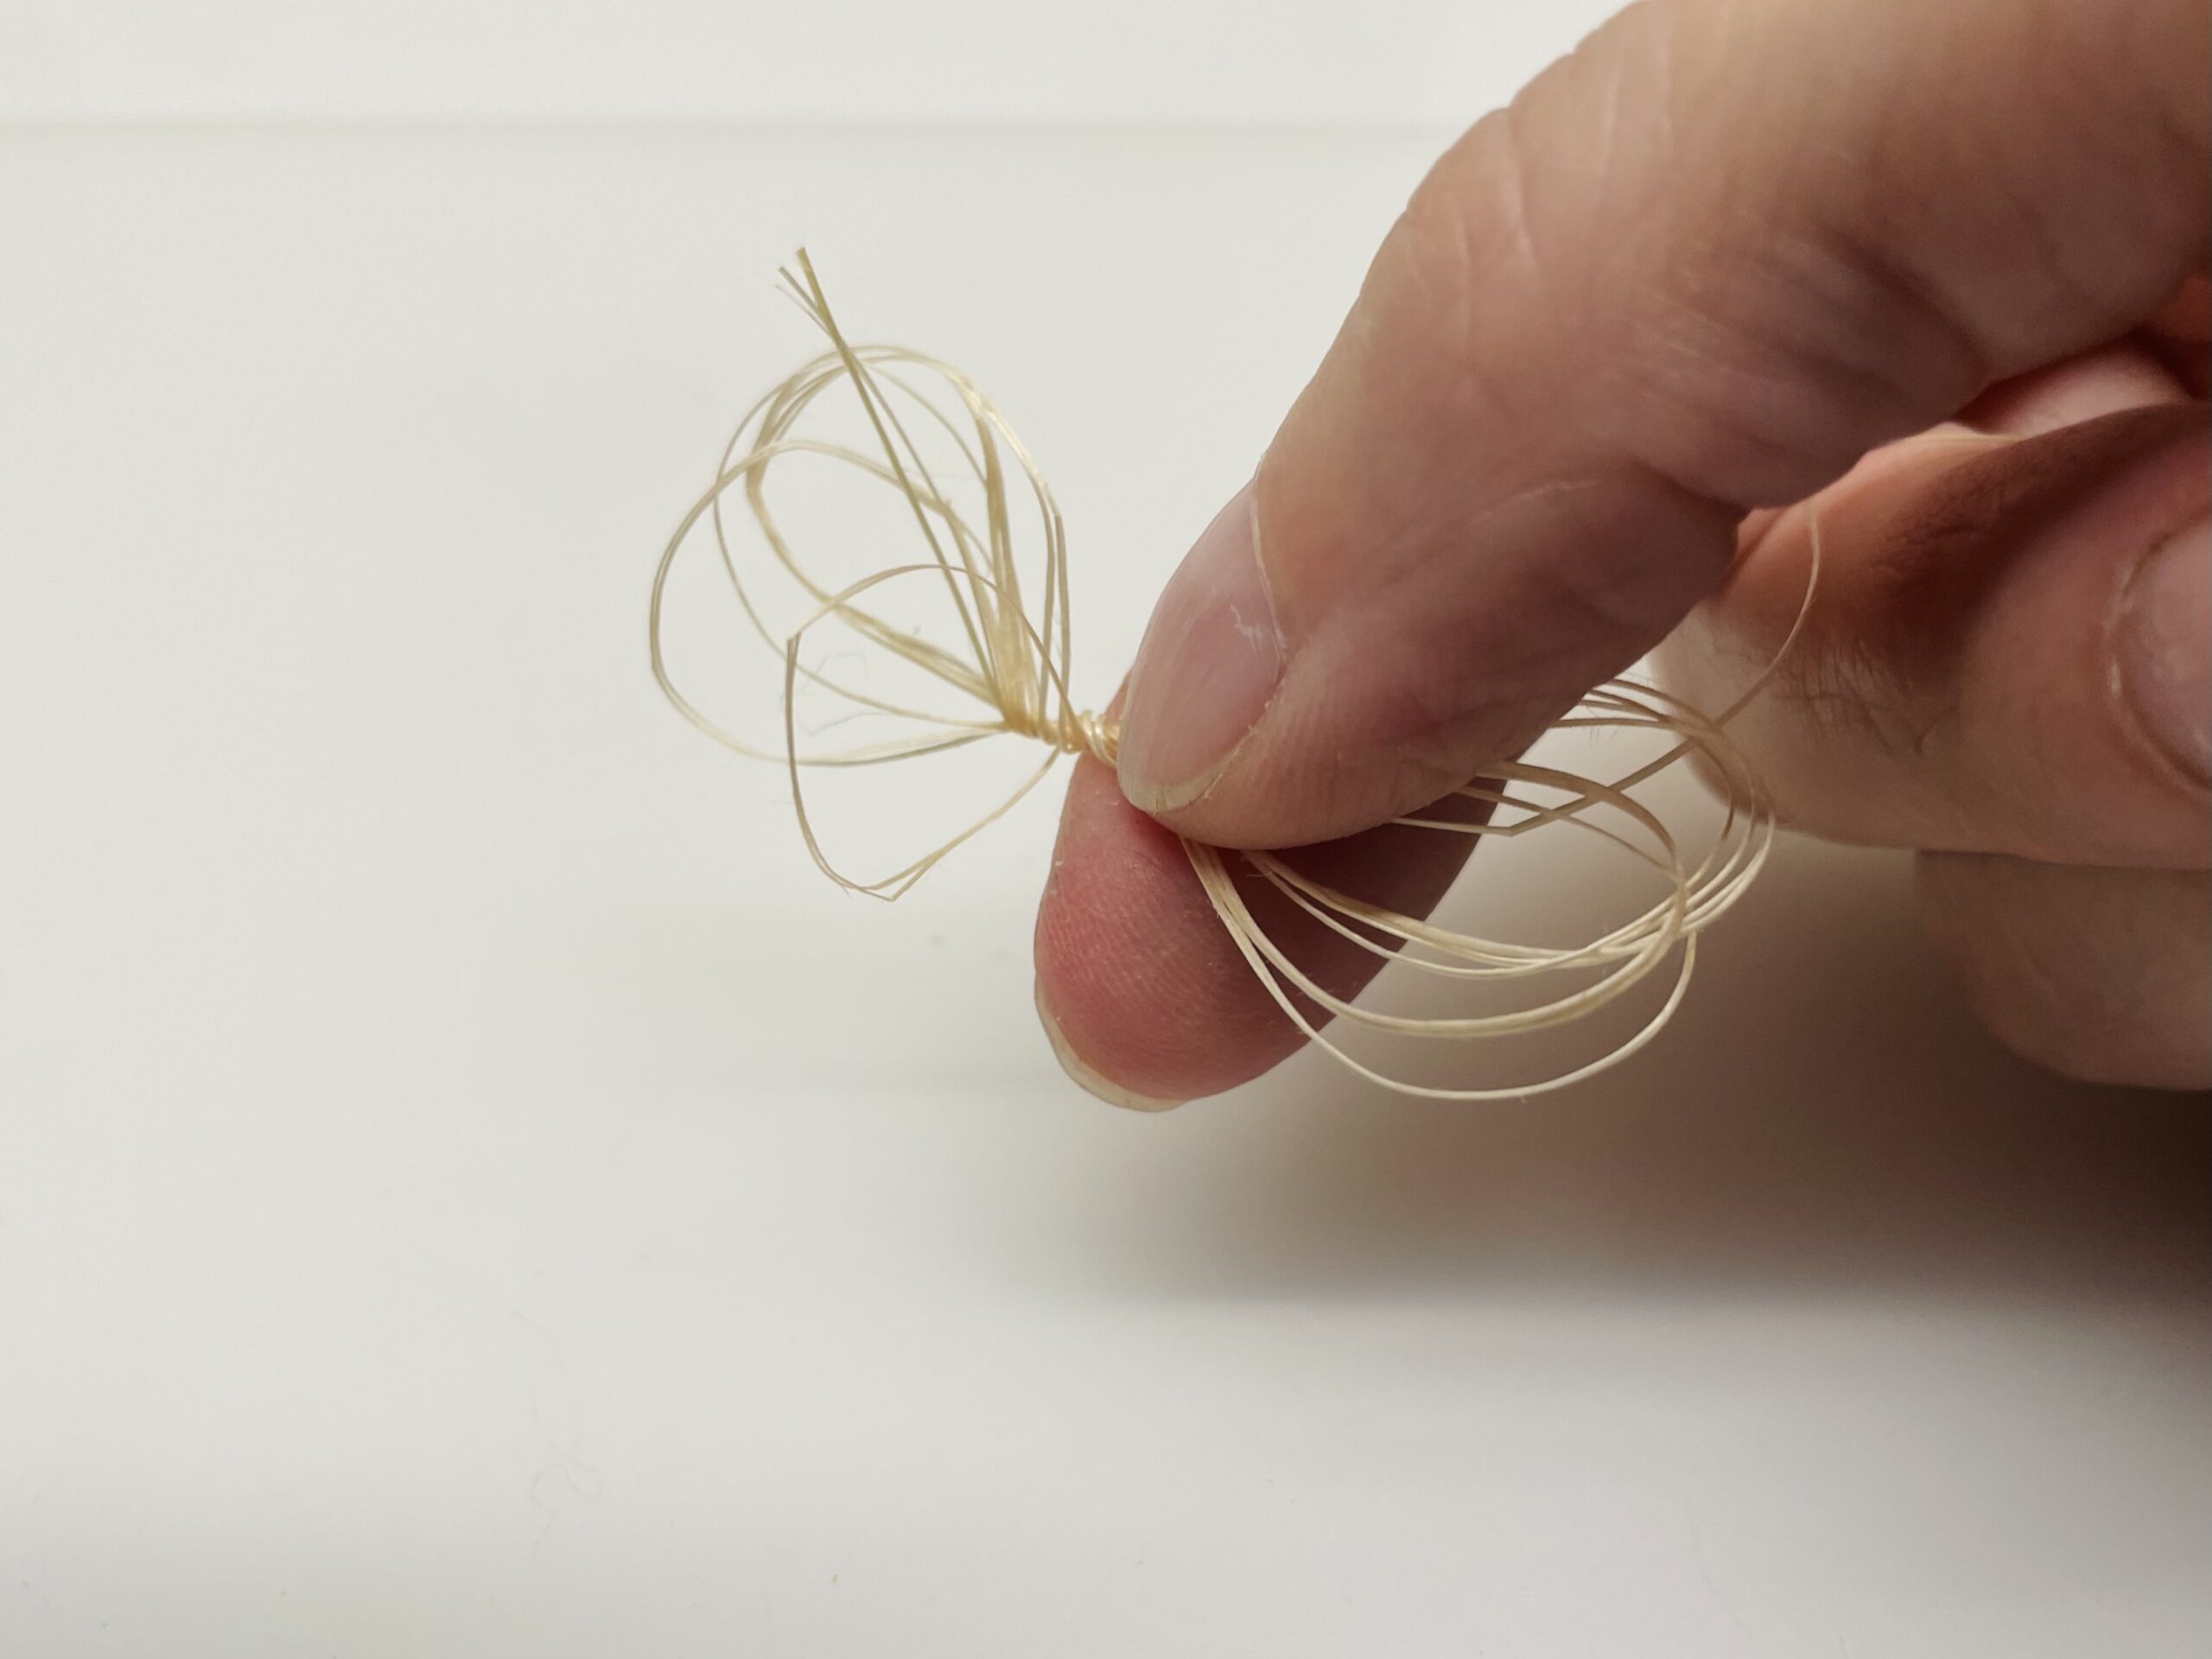
Turn until the loops that have been created hold on their own. These are the wings.
Now cut off the overhanging ends.
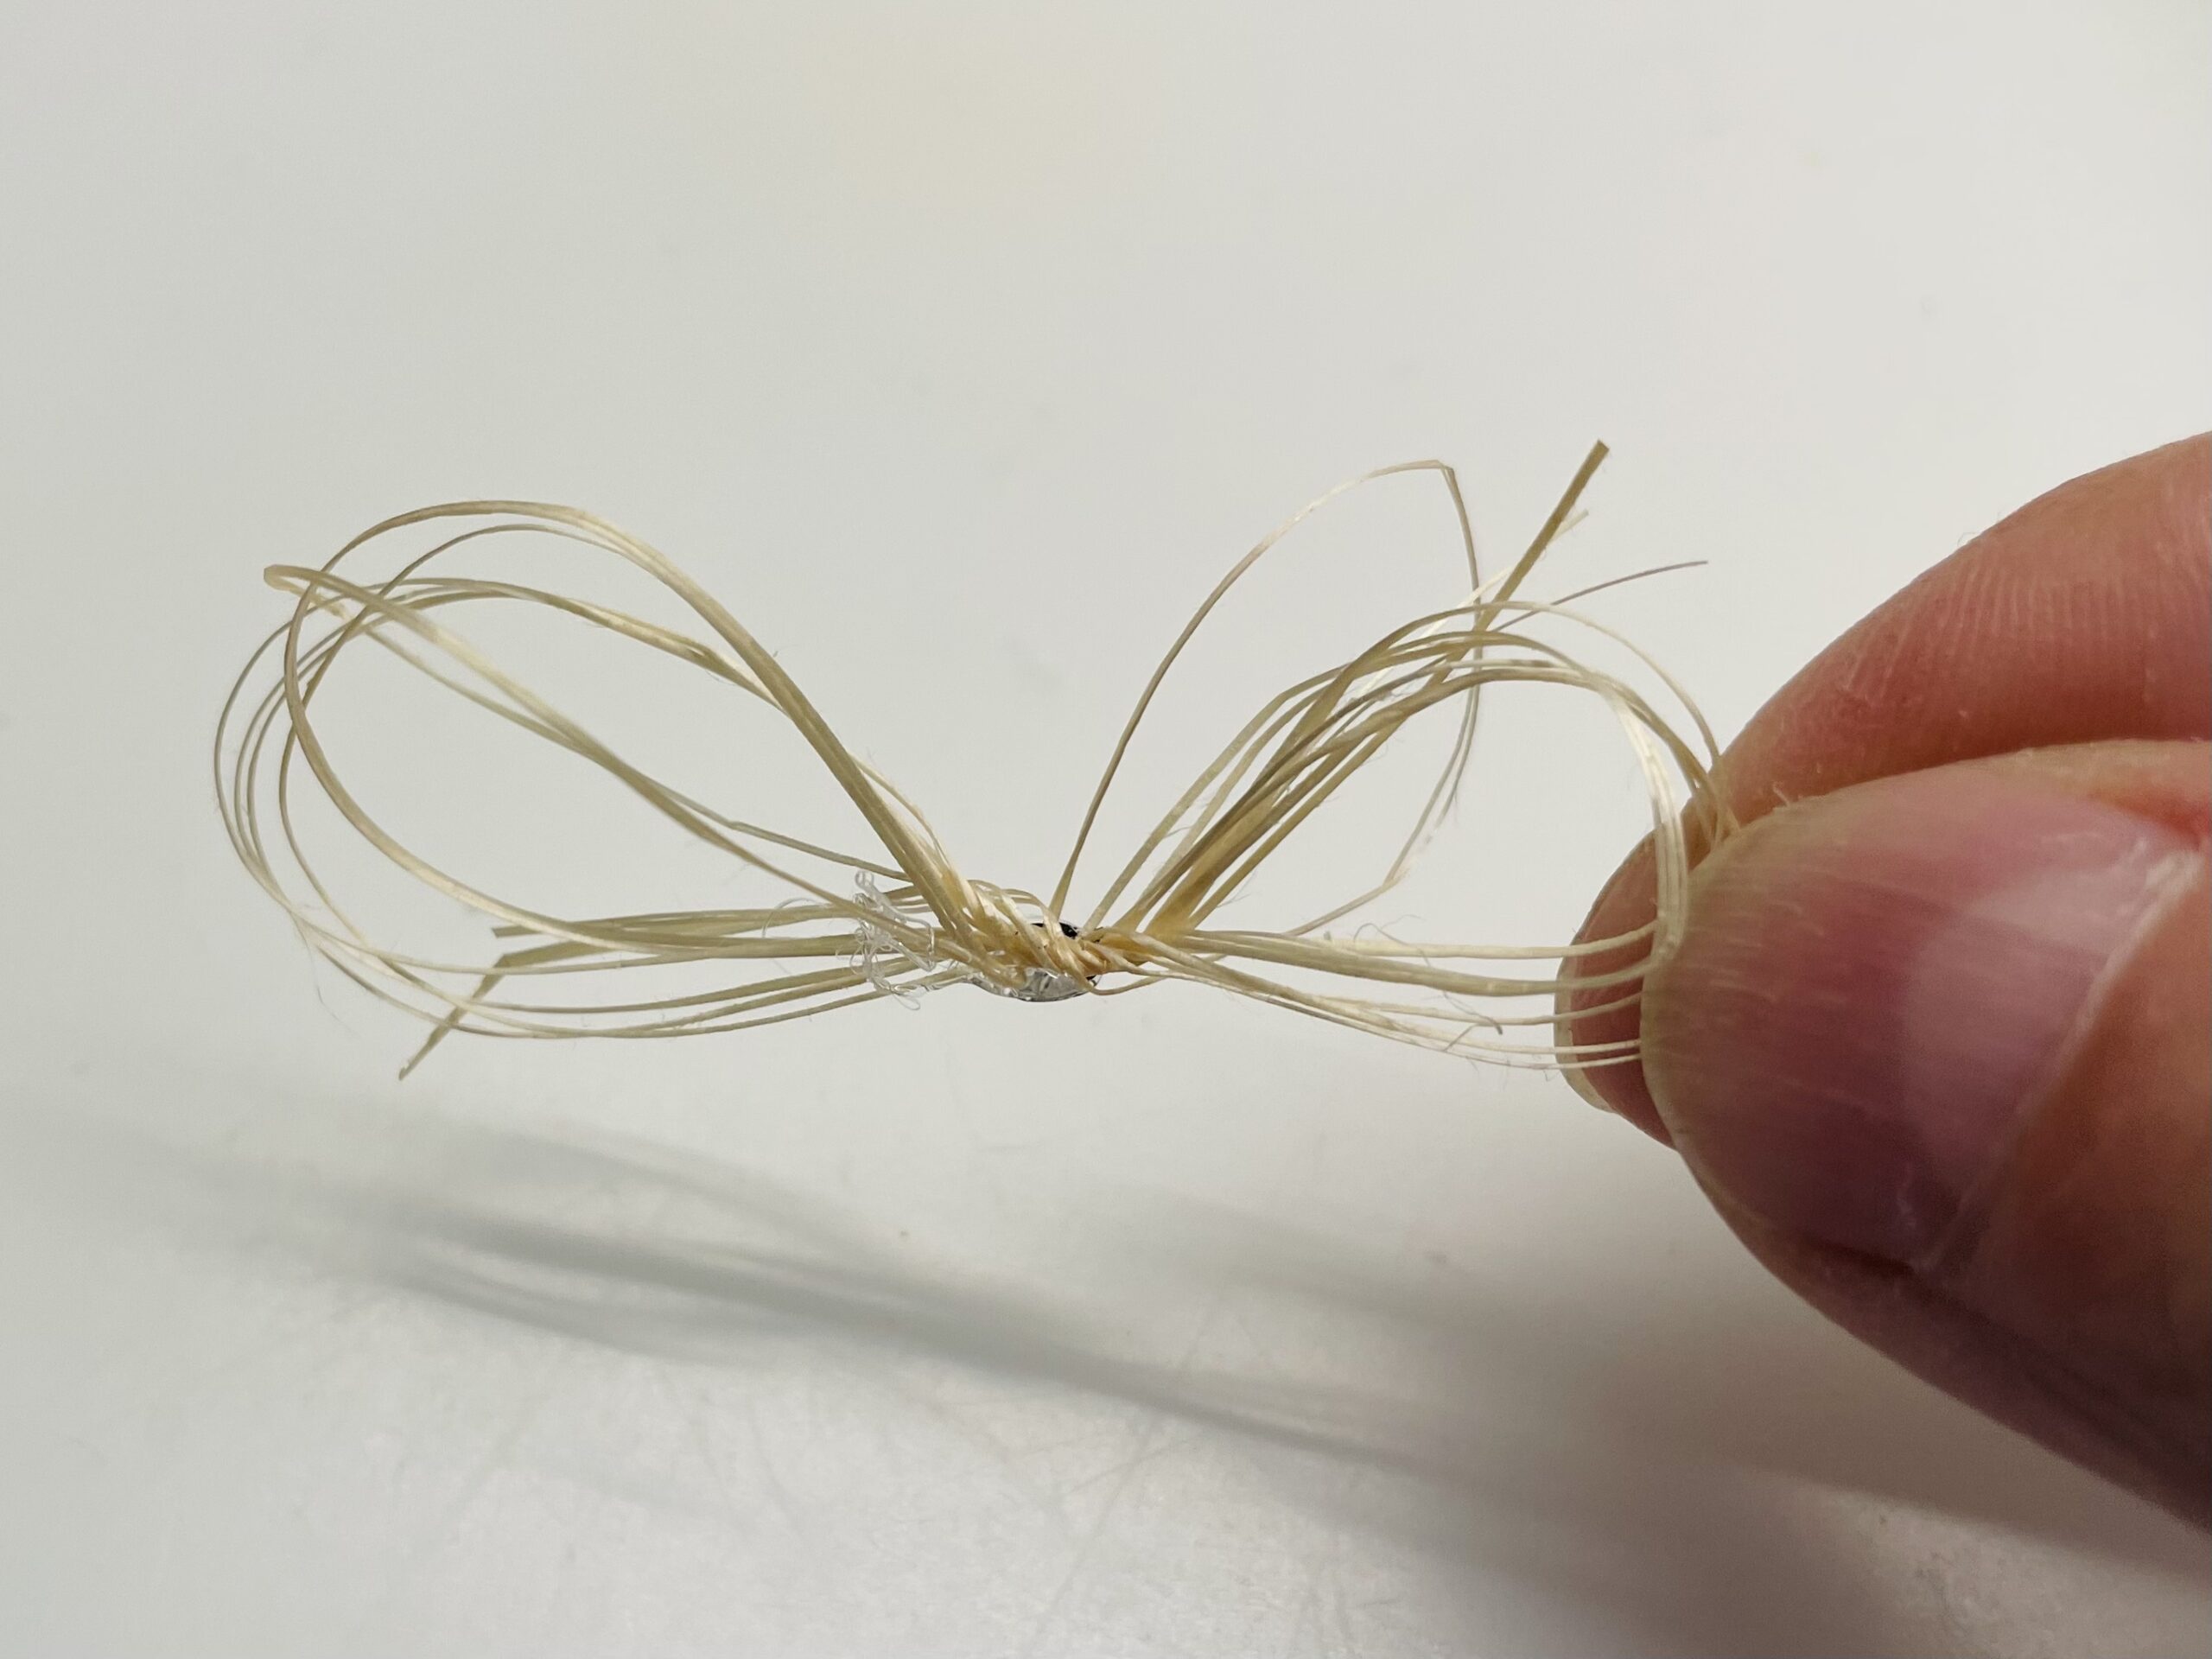
The wings are ready for the bumblebees.
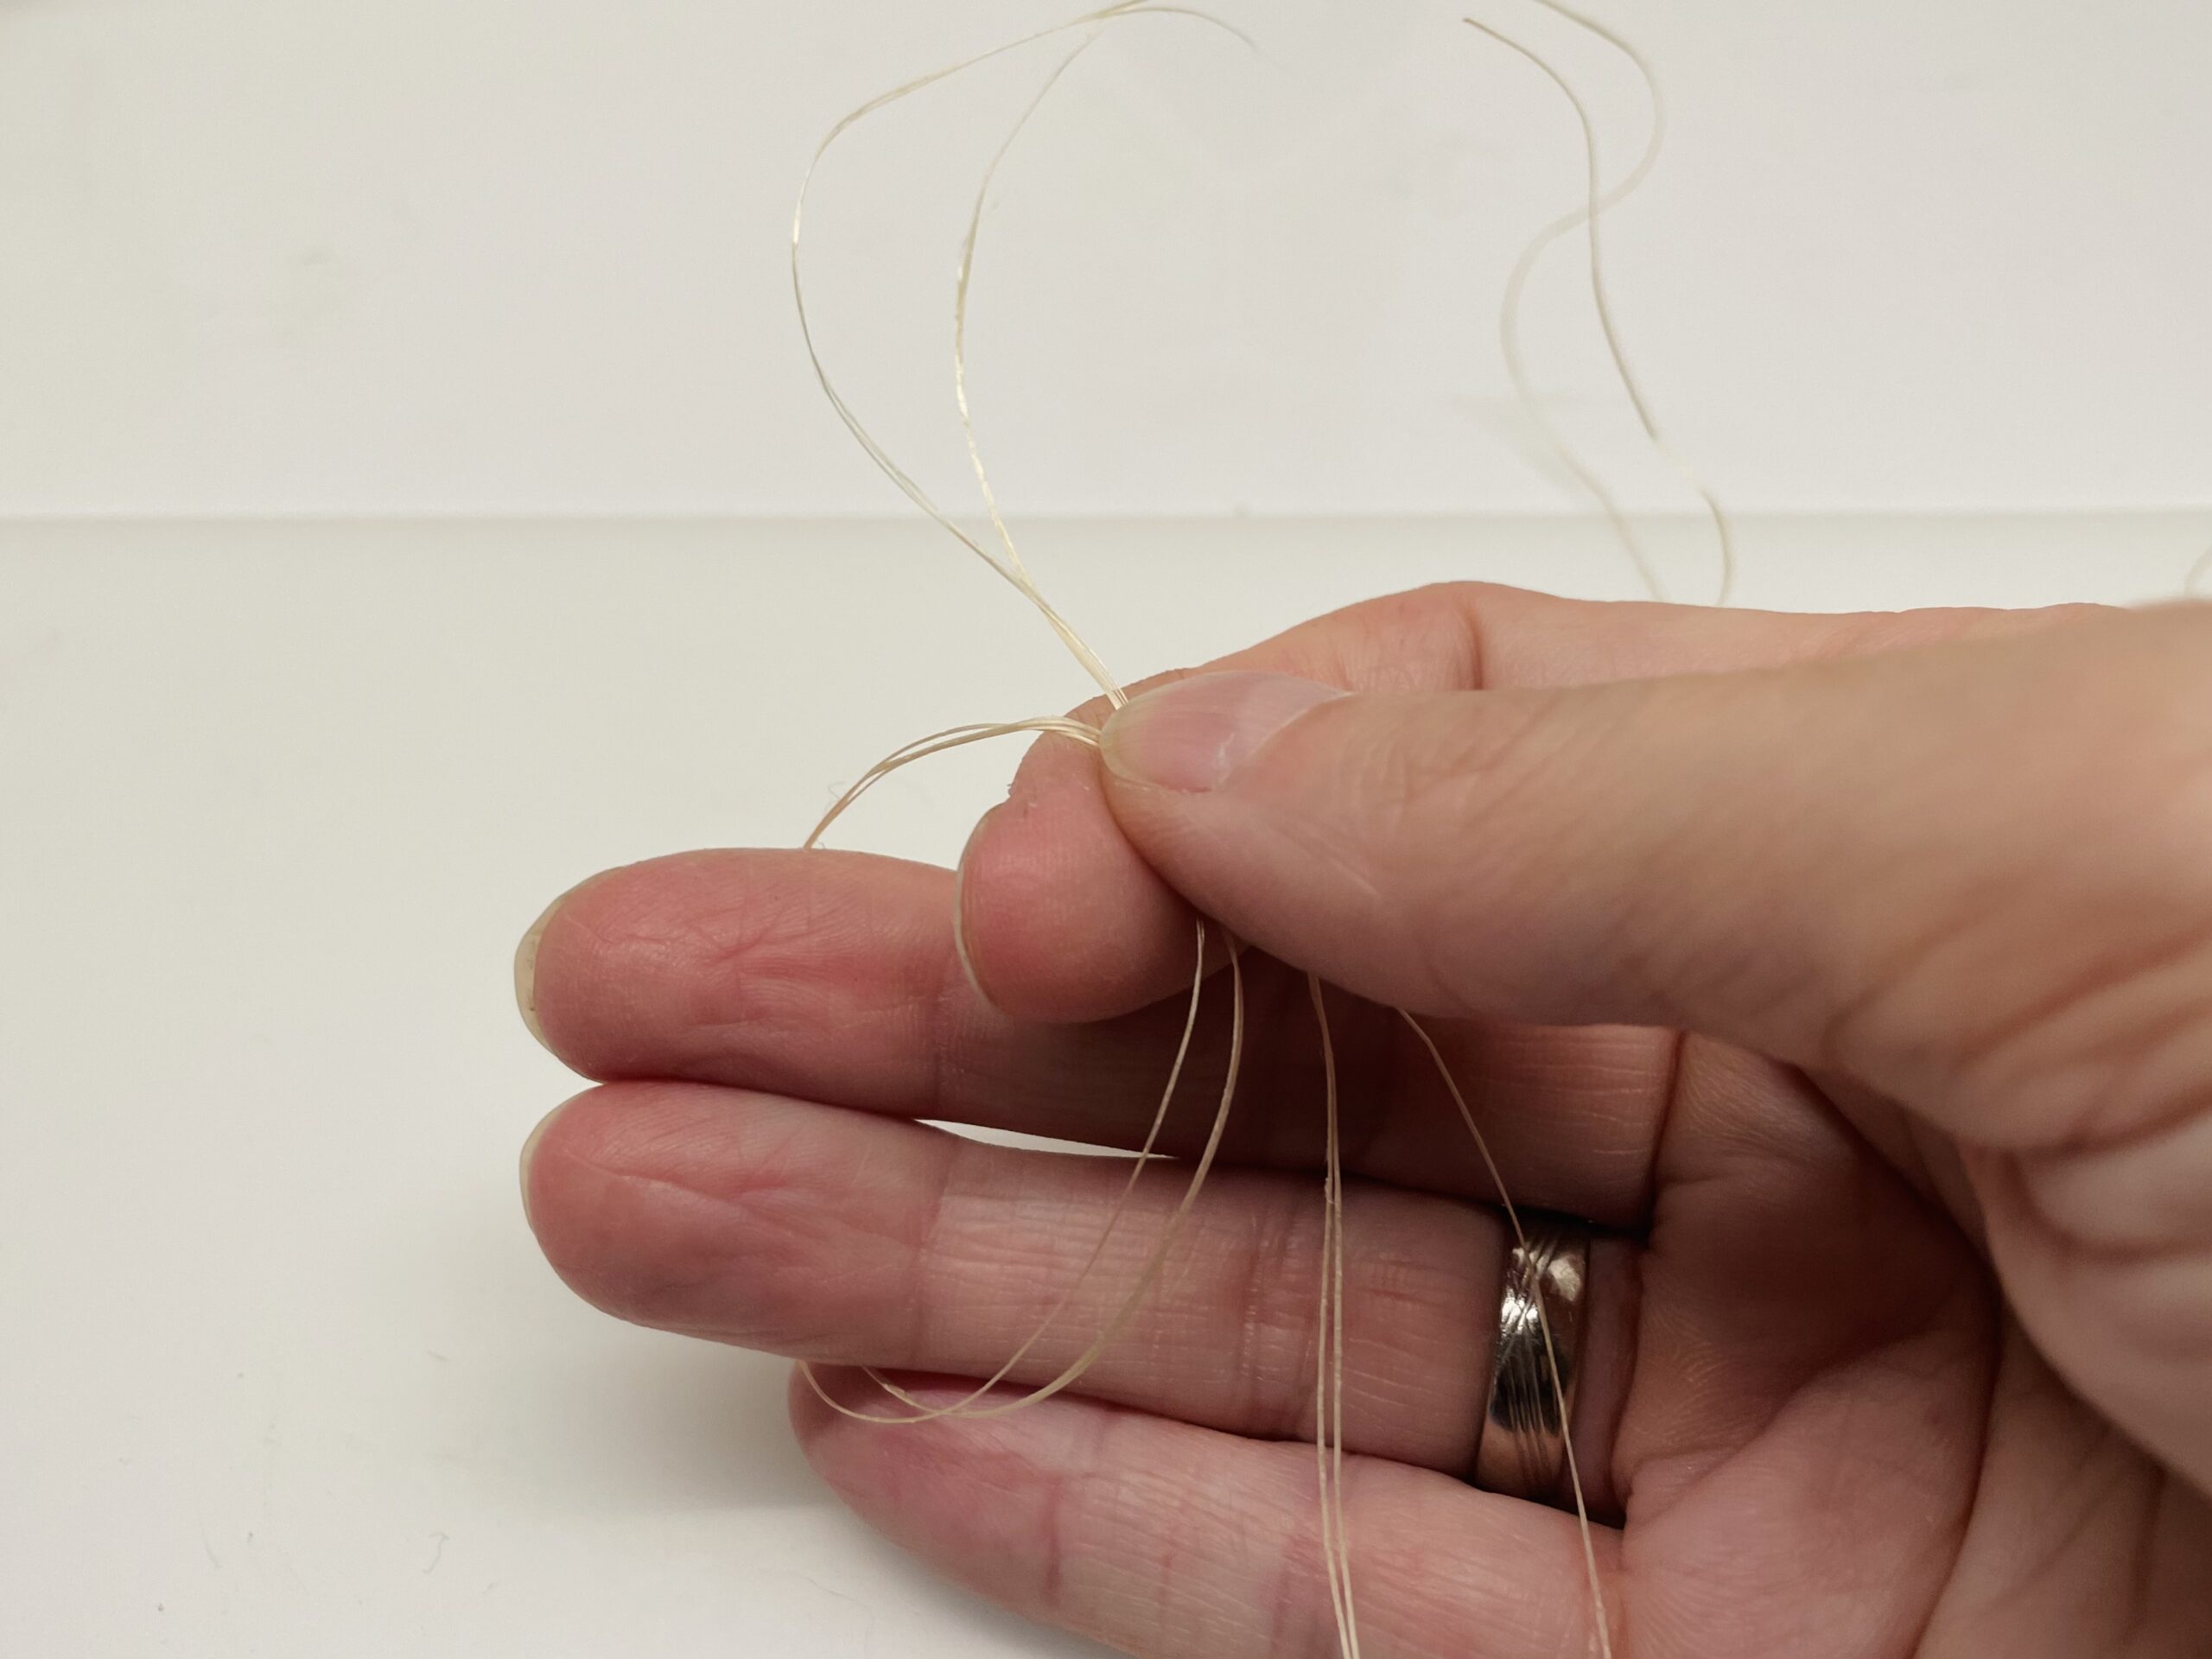
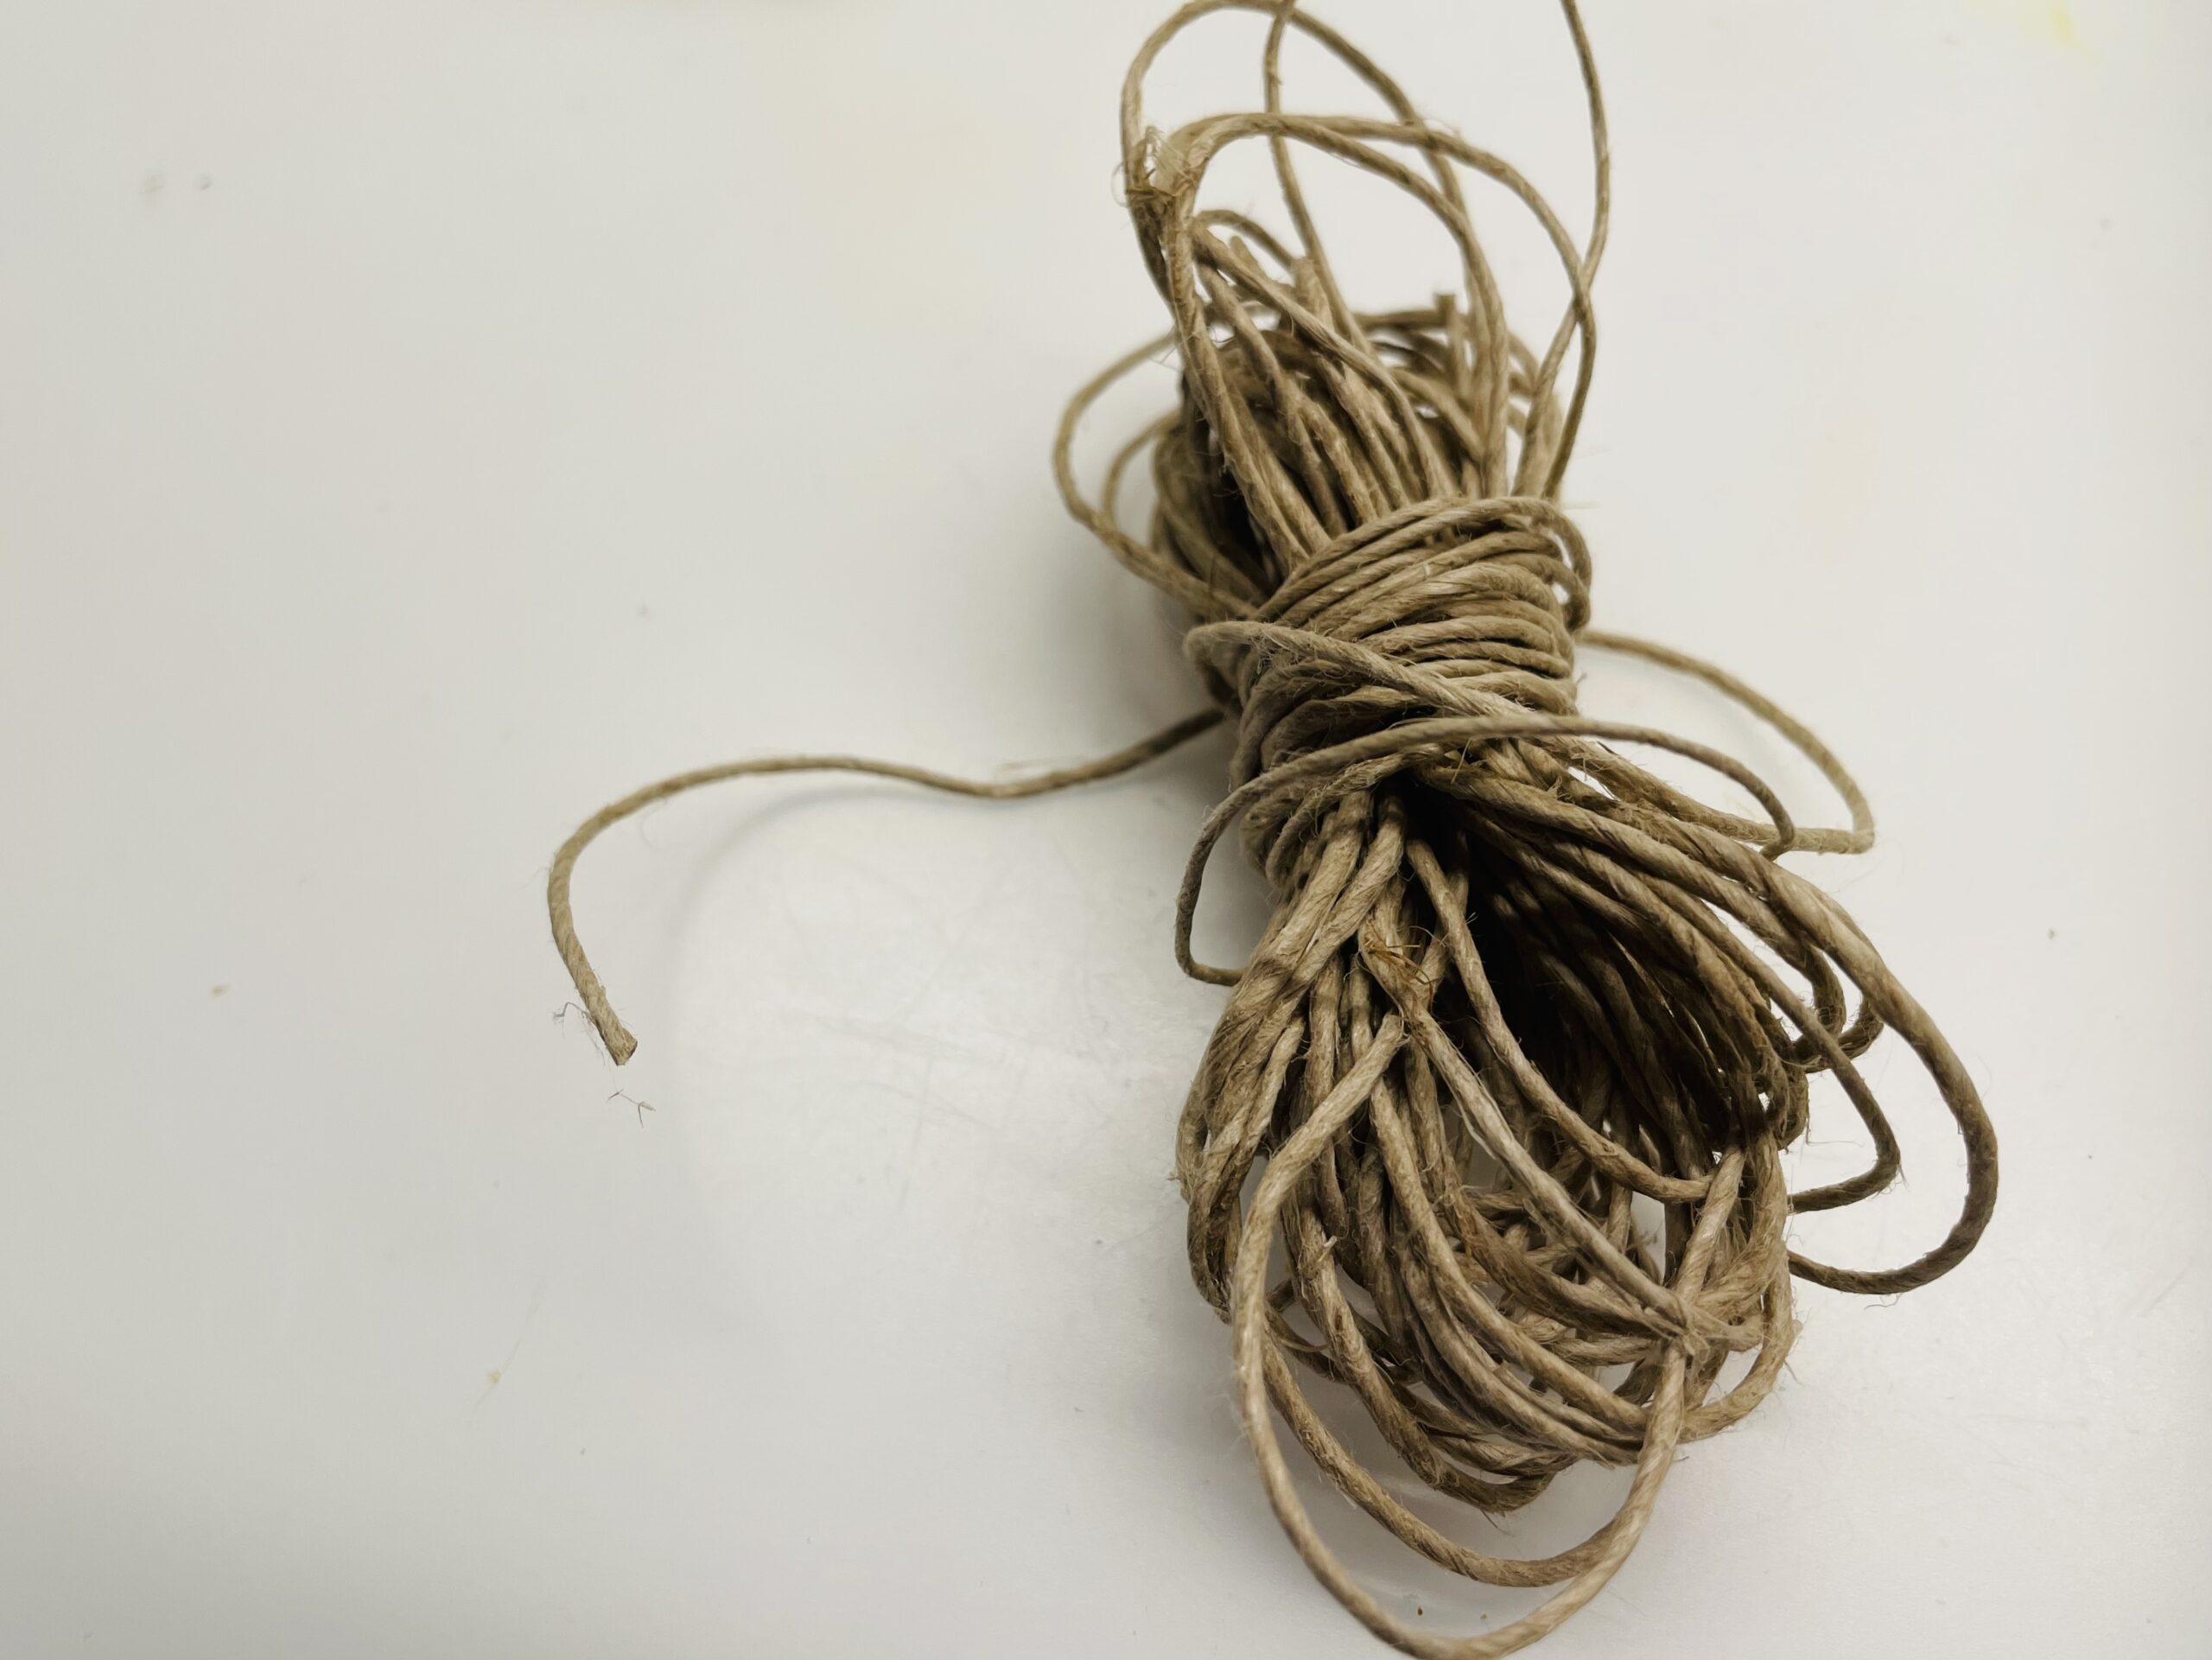
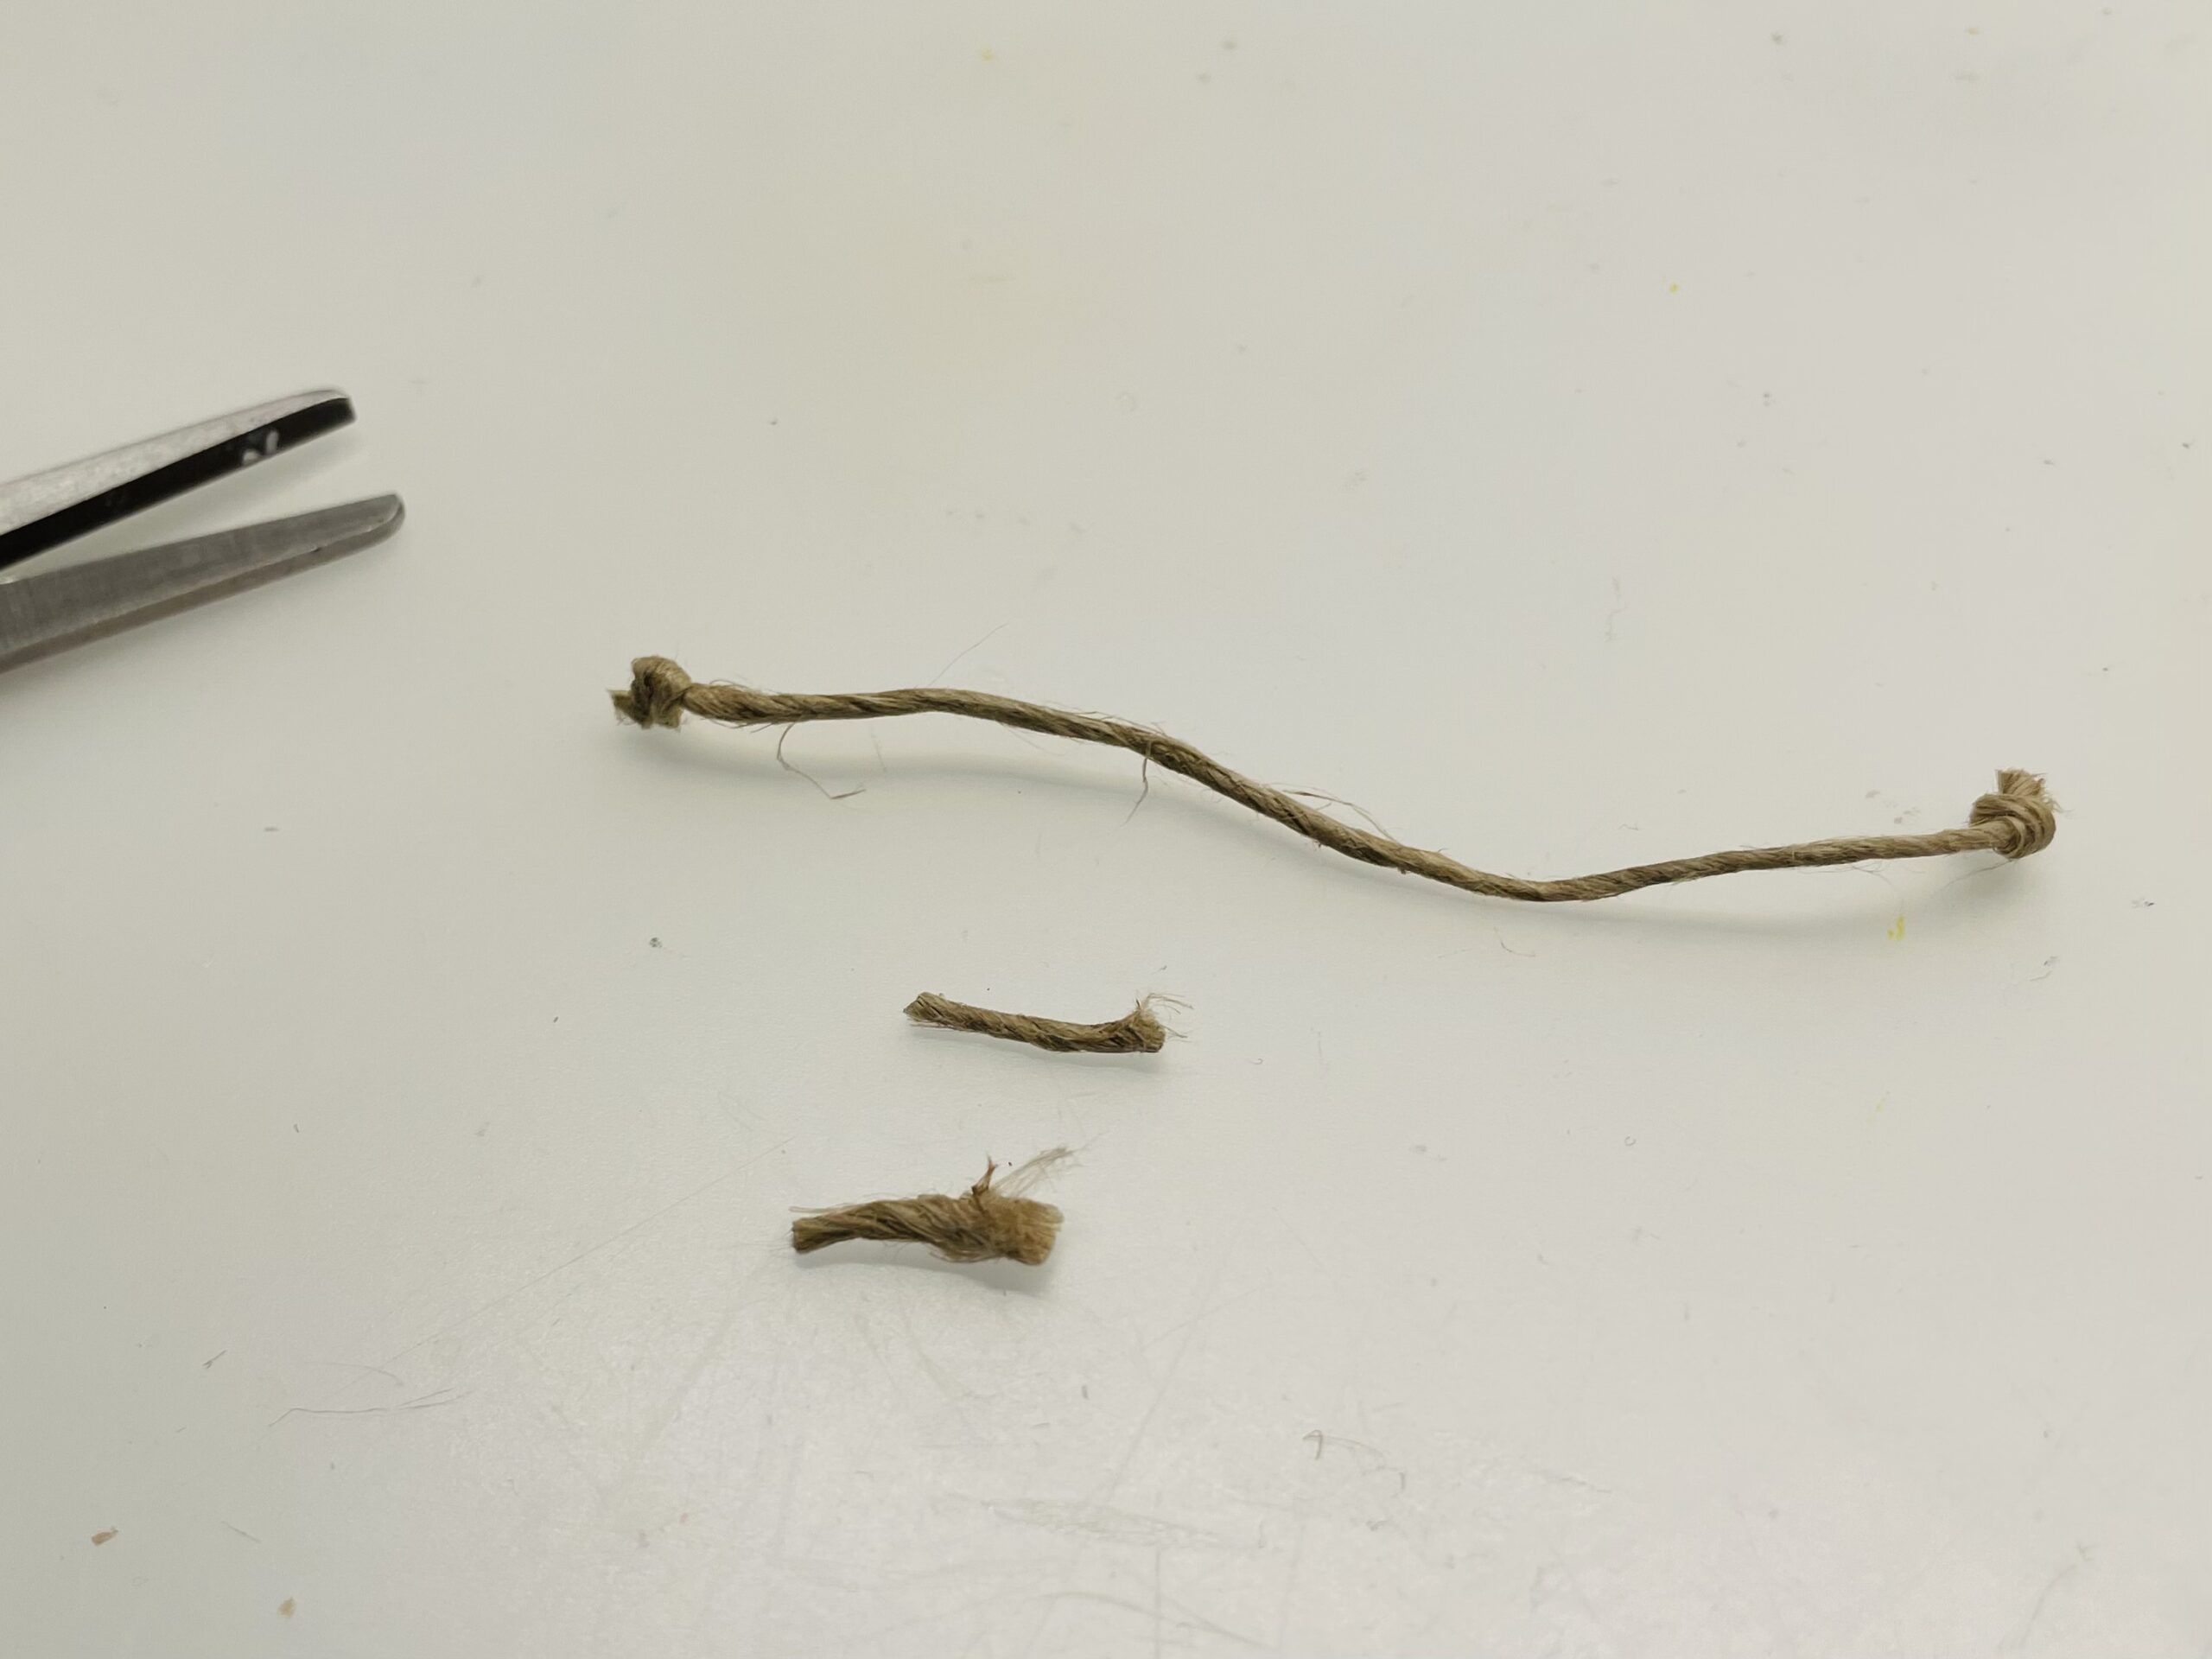
Now you make the feelers for the bumblebees out of package scour. For this you first cut off approx. 7cm of the scour.
Then you put a knot at the beginning of the cord.
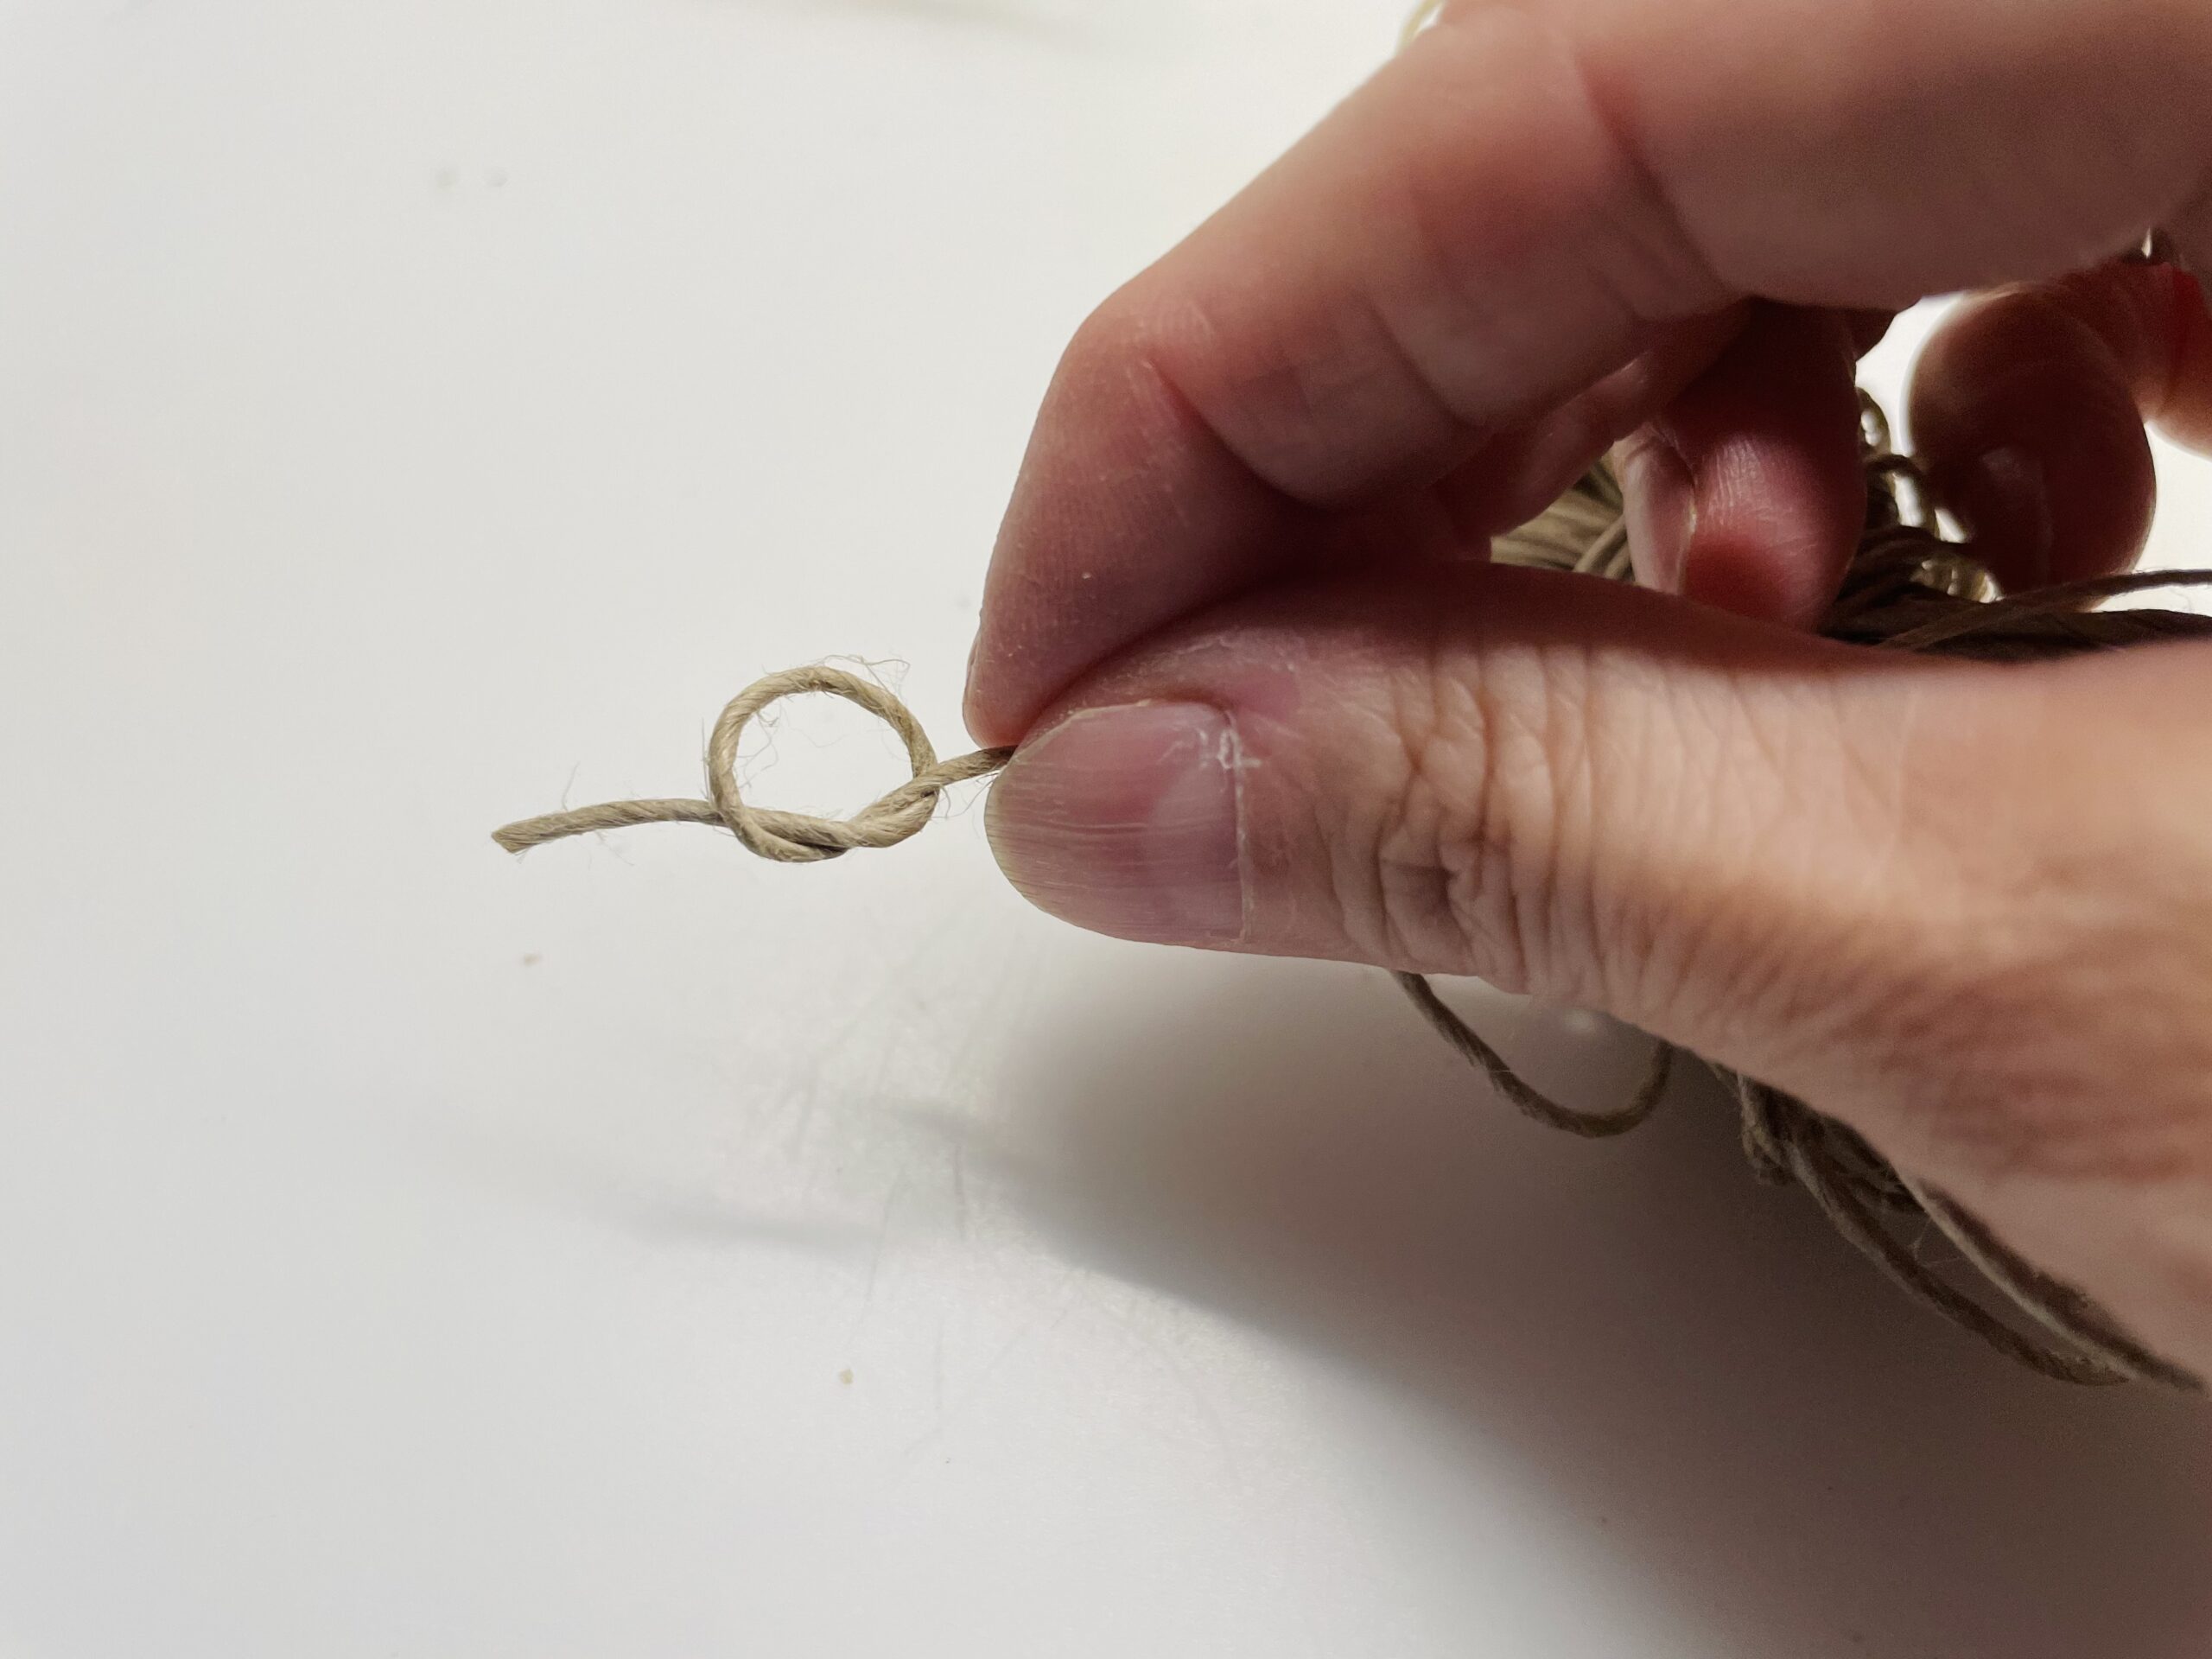
Pull the knot.

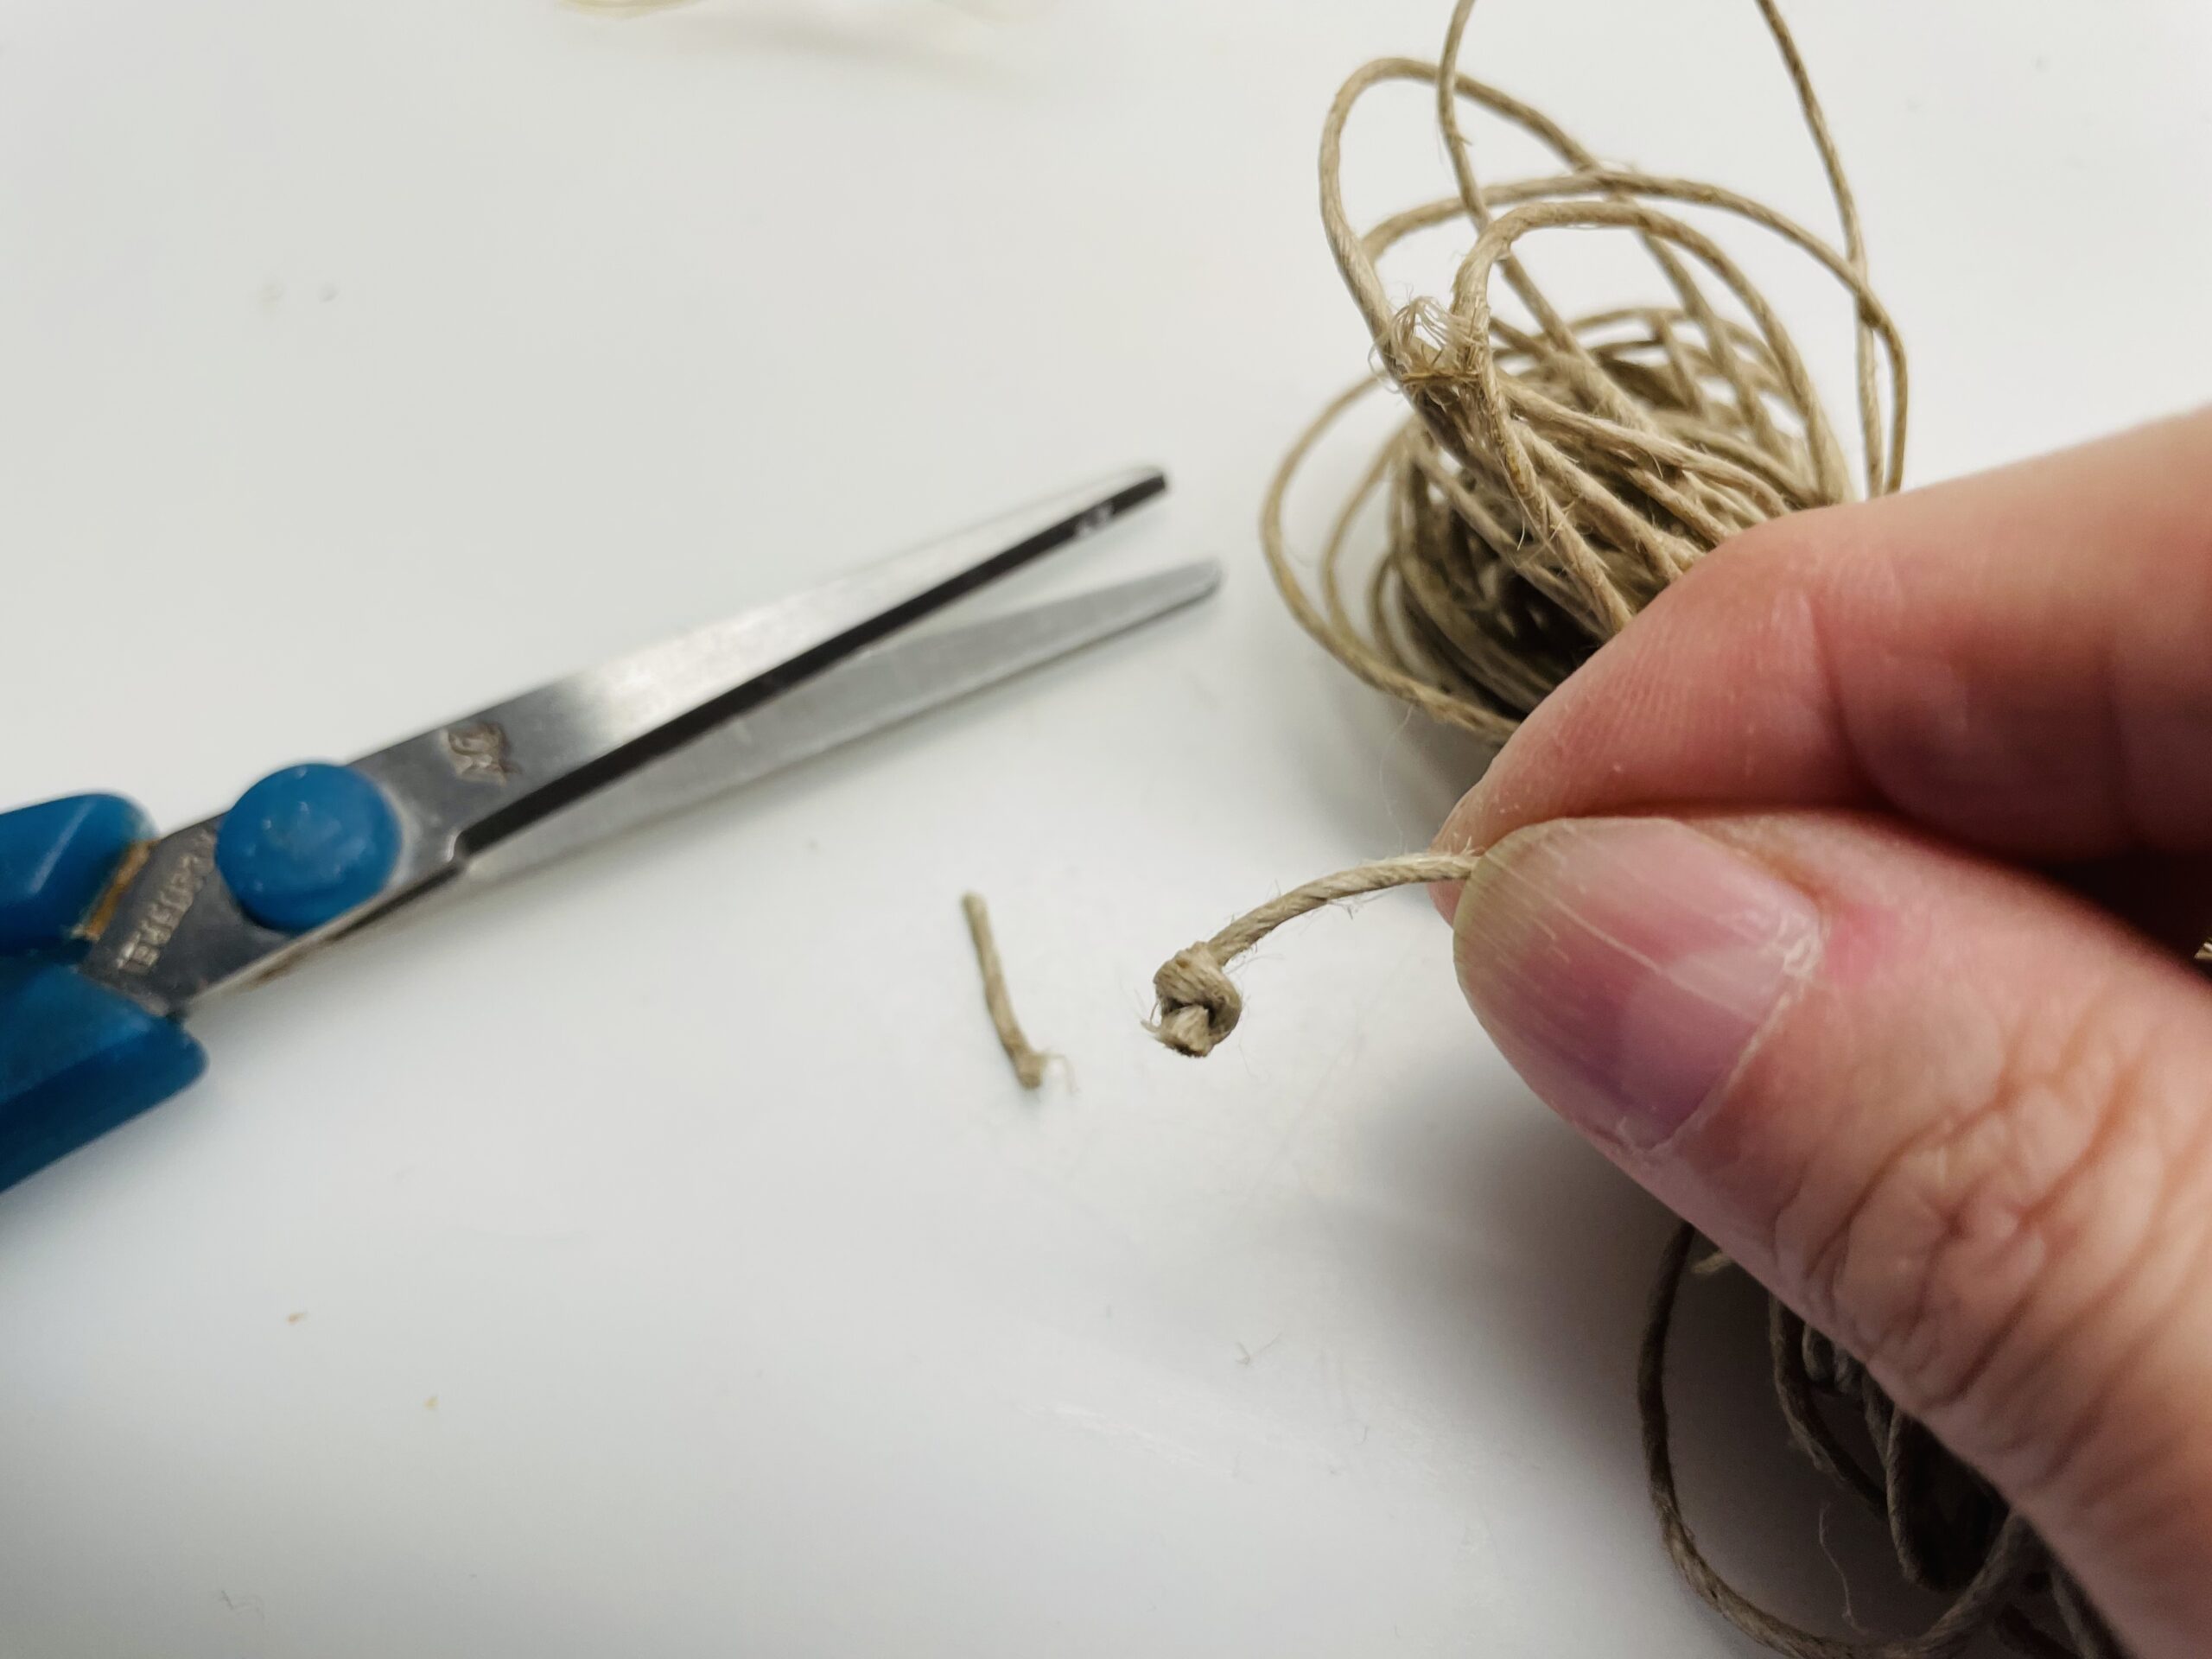
Then you cut off the overhanging villain at the beginning.
Now place a knot on the other side, tighten it and cut off the end piece after the knot.
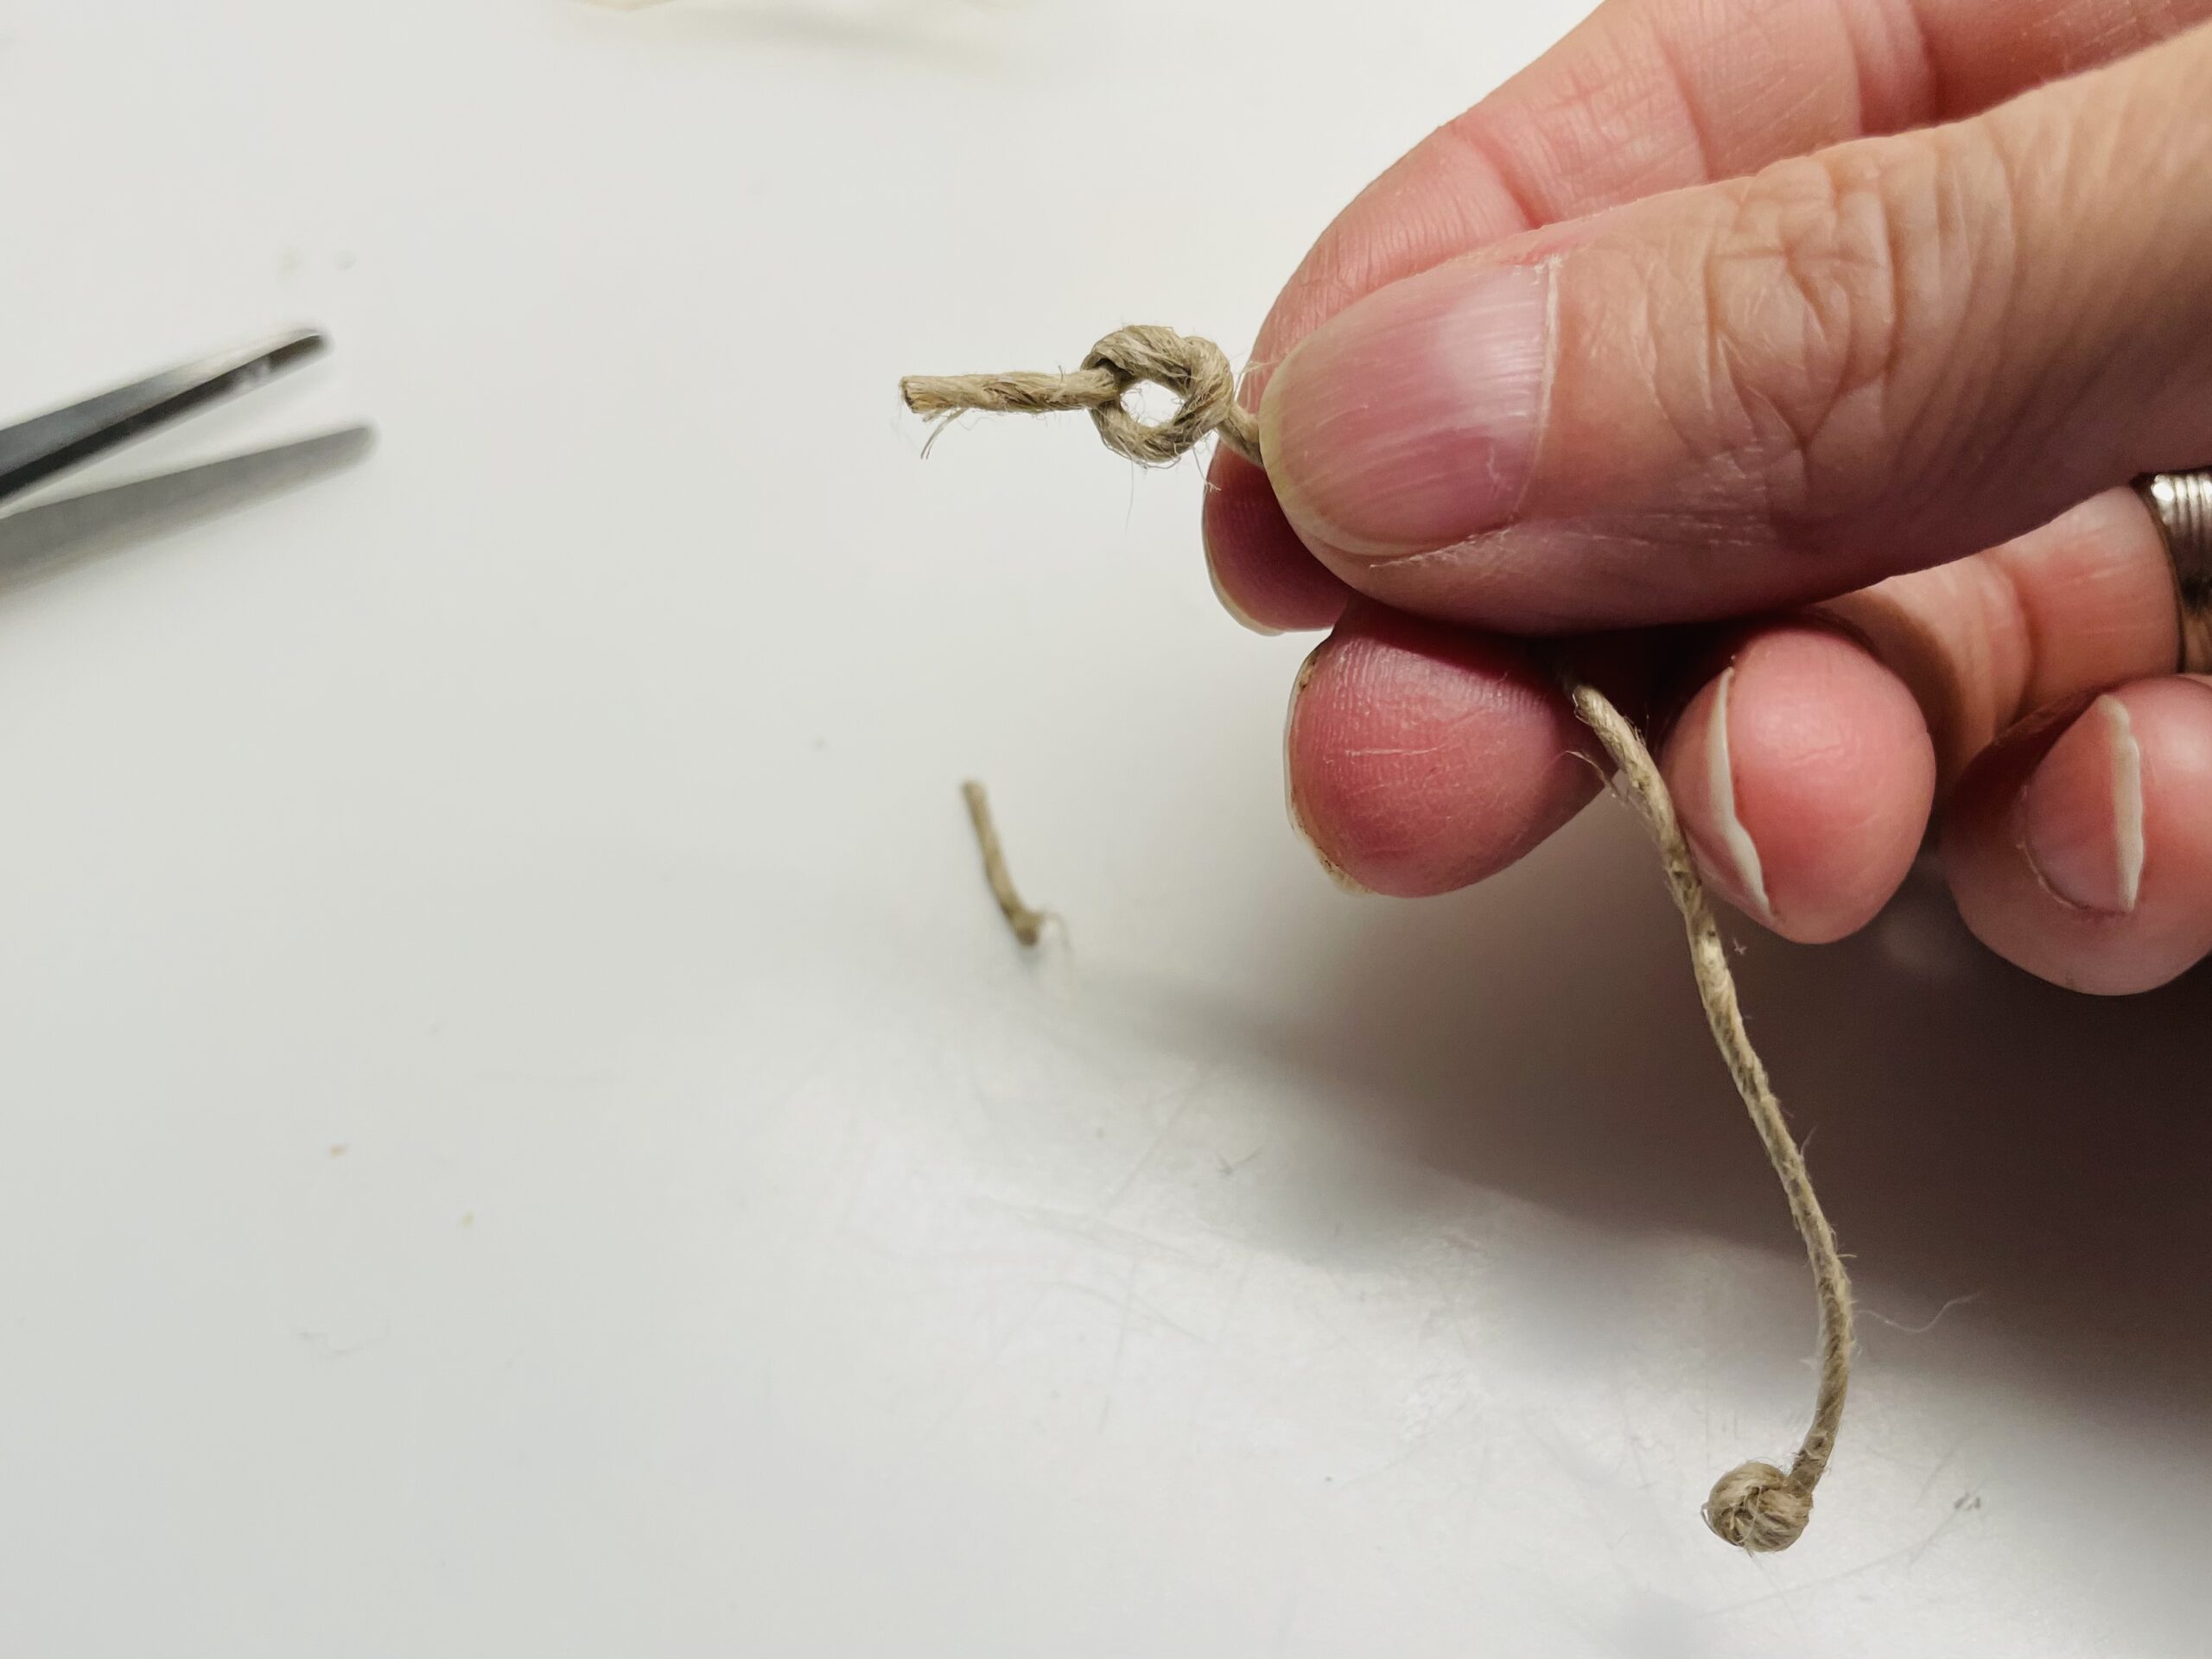
From this one piece of the package line the two probes arise.
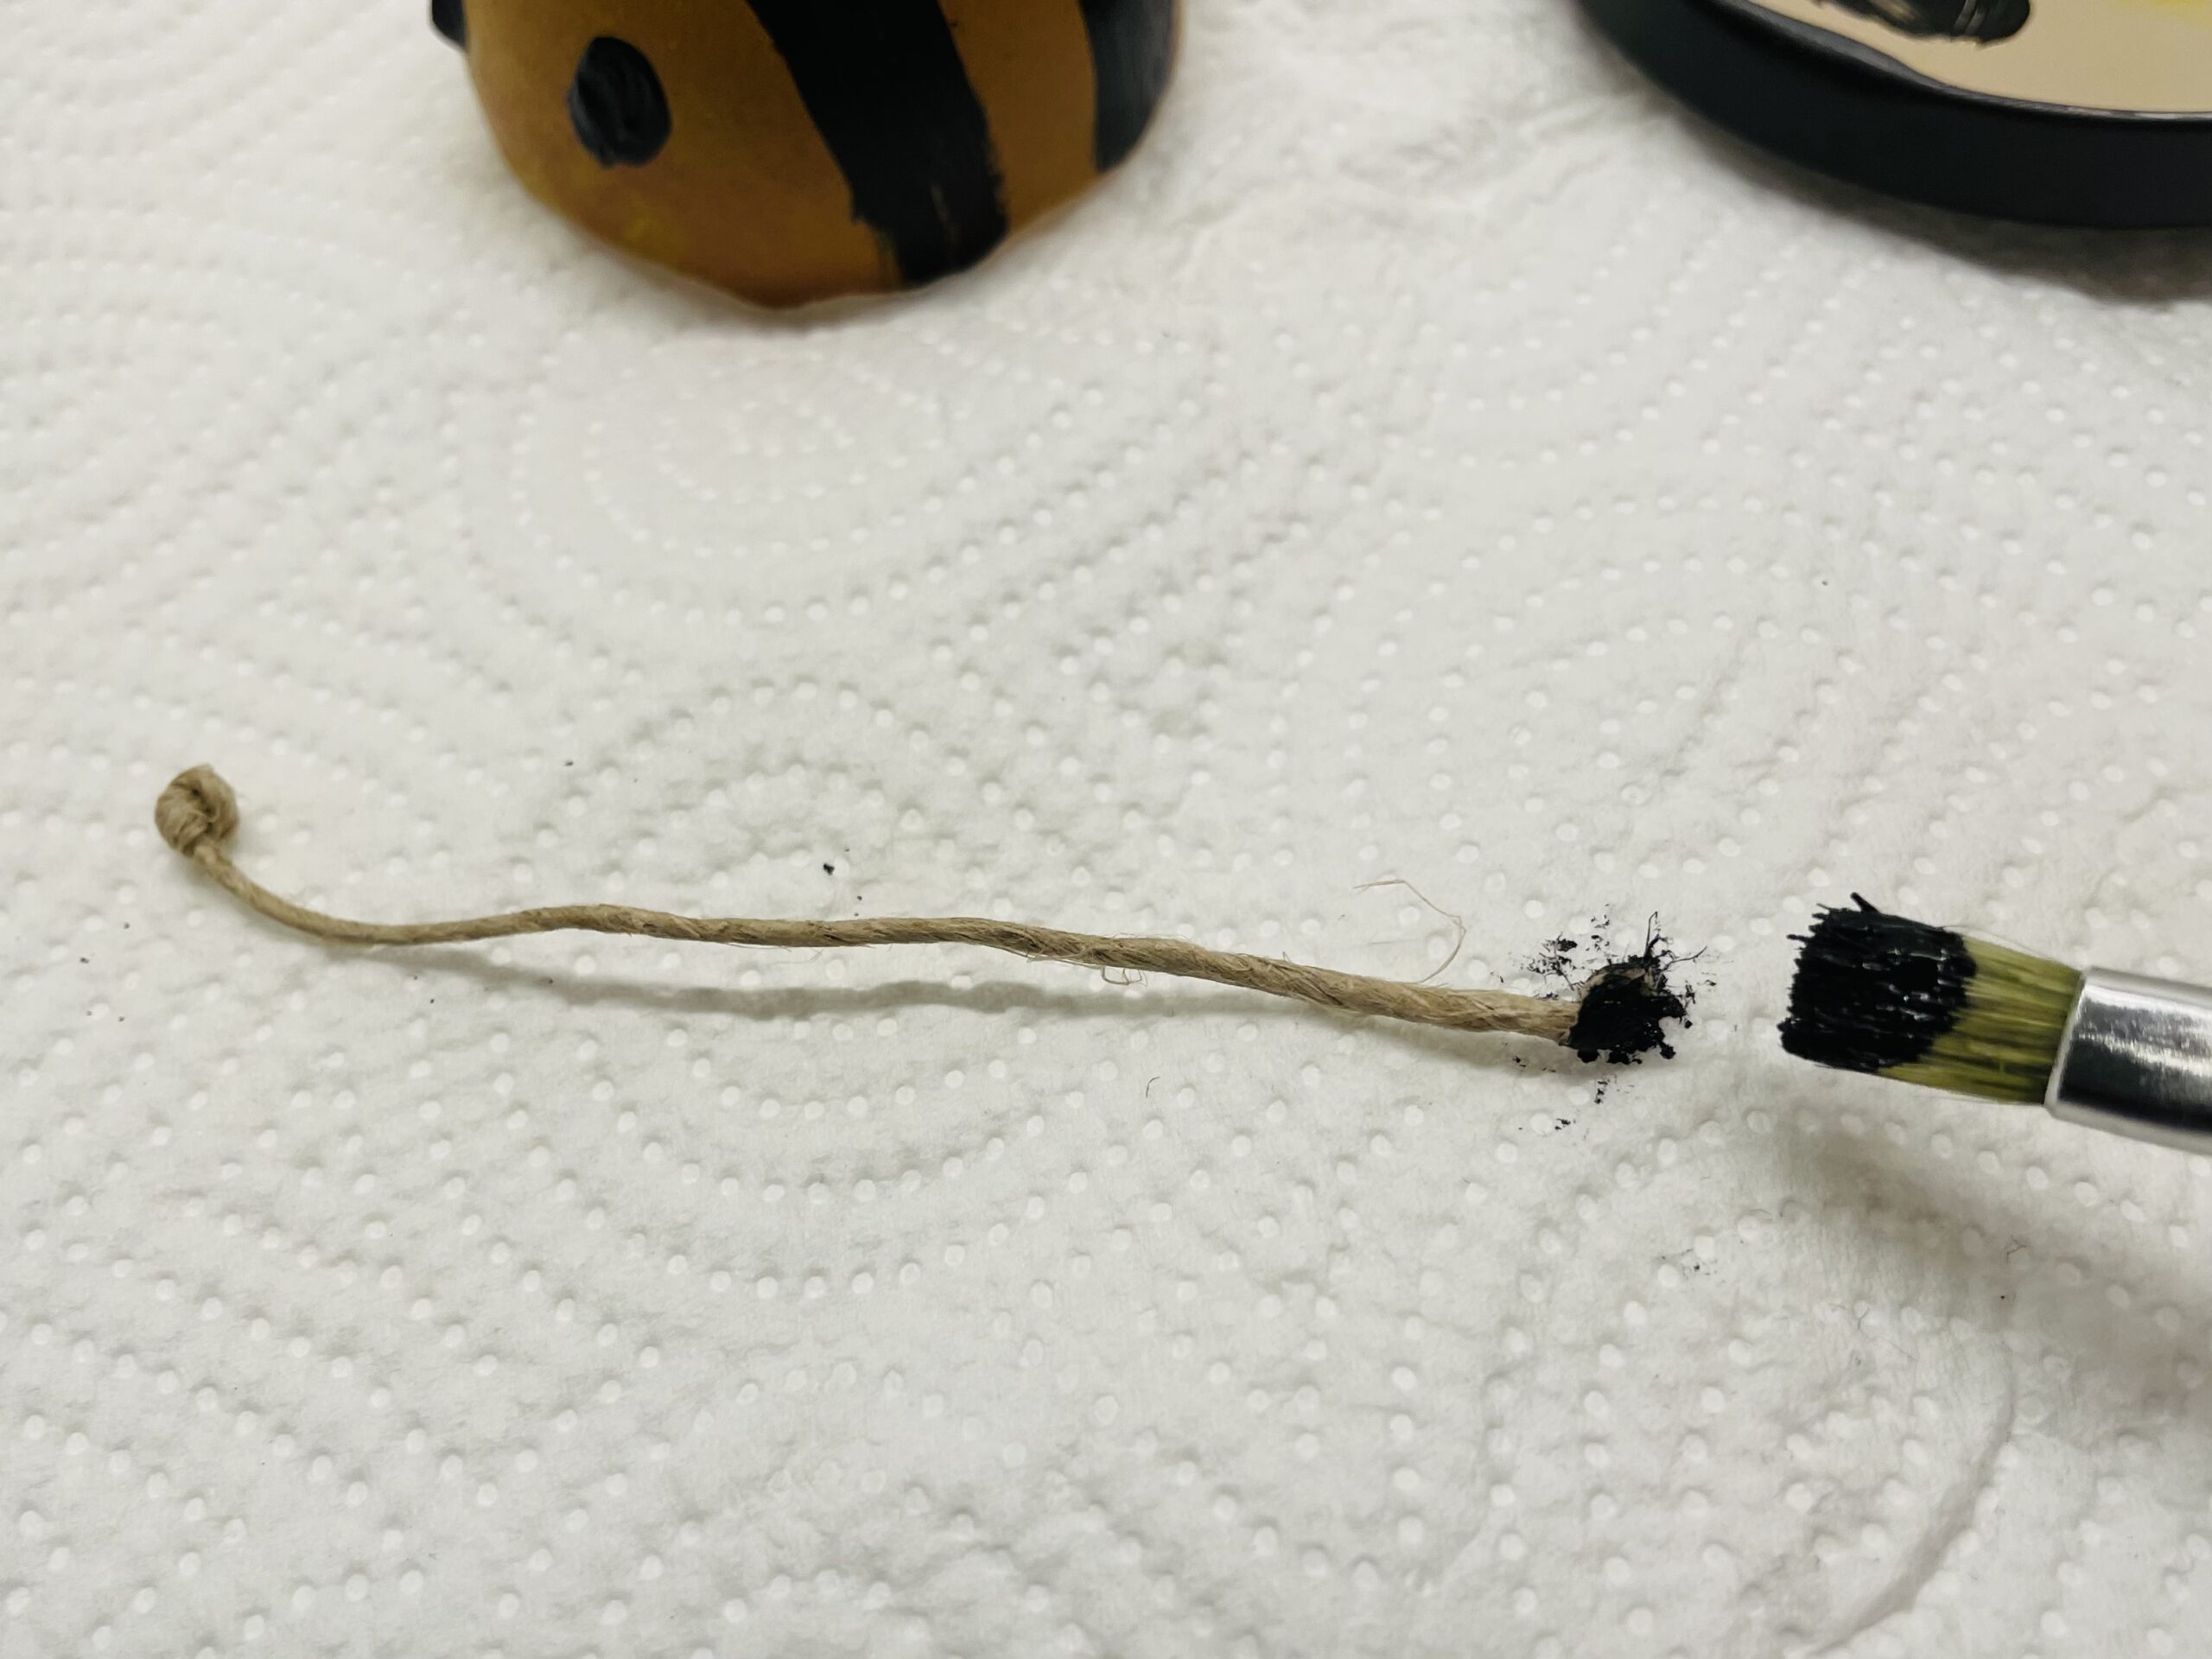
You now paint both nodules with black paint. Either with the brush and black paint or with a black felt pen.
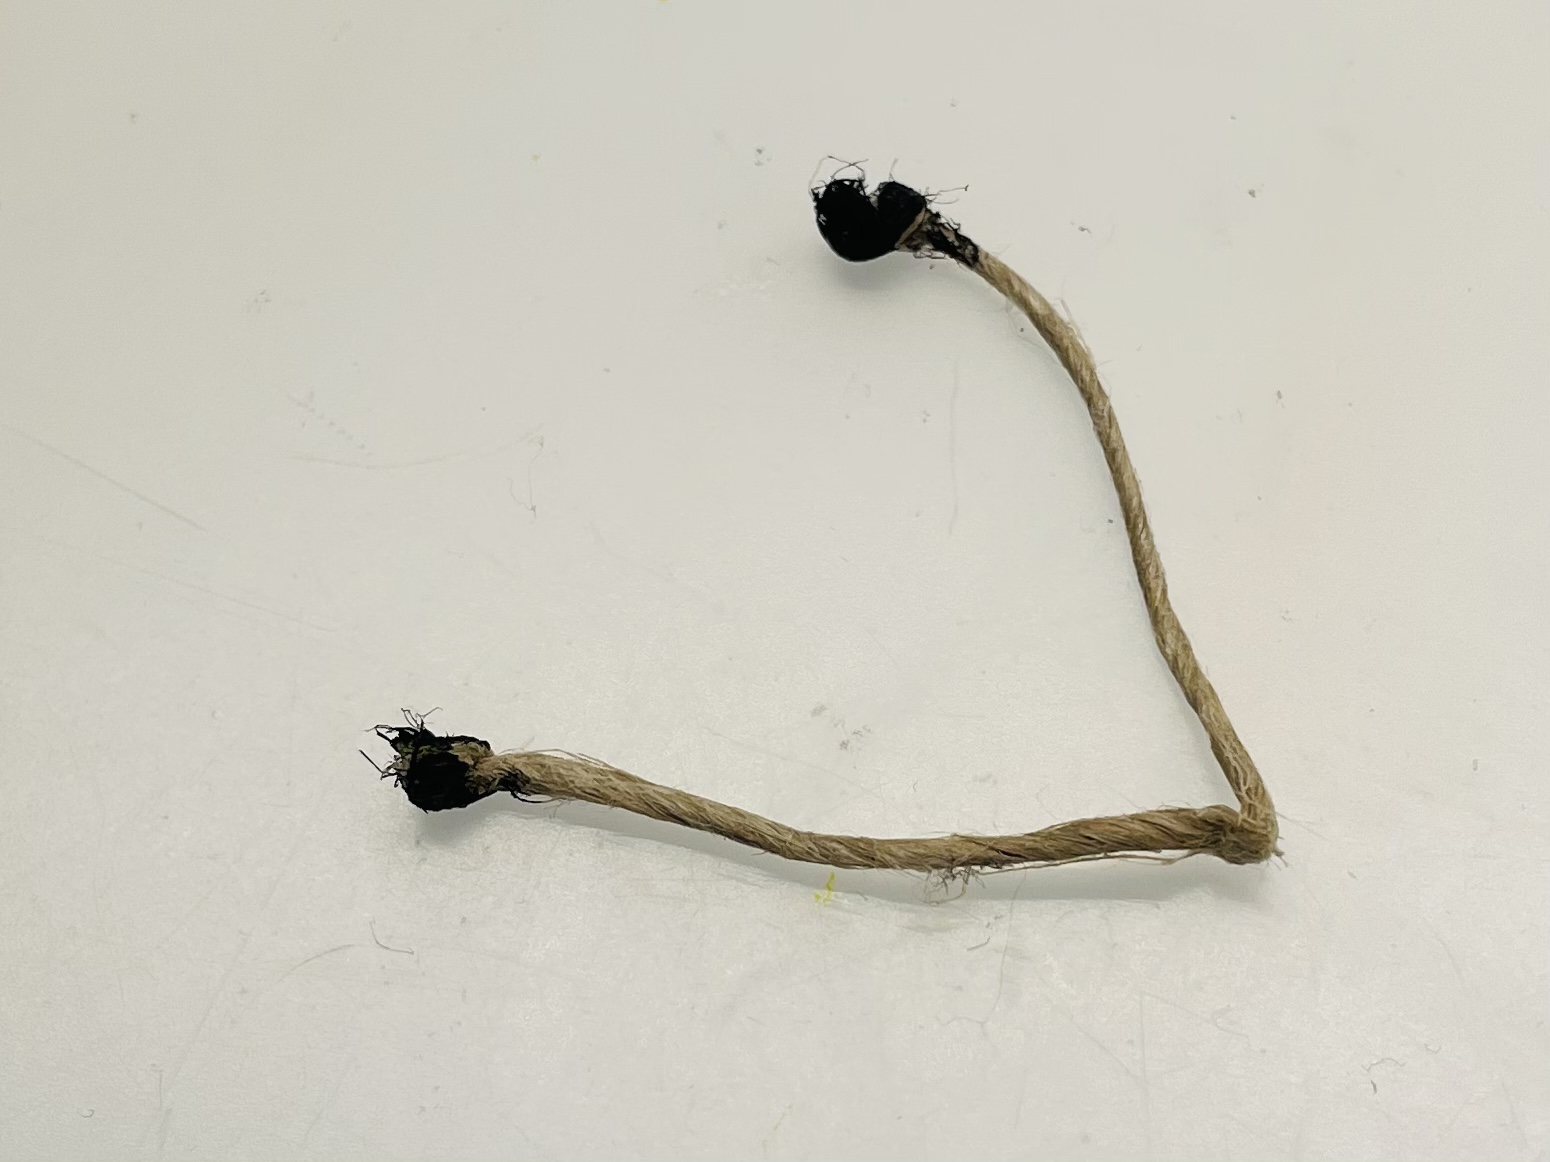
After drying the paint you pinch the cord in the middle.

That's what the probes look like now.
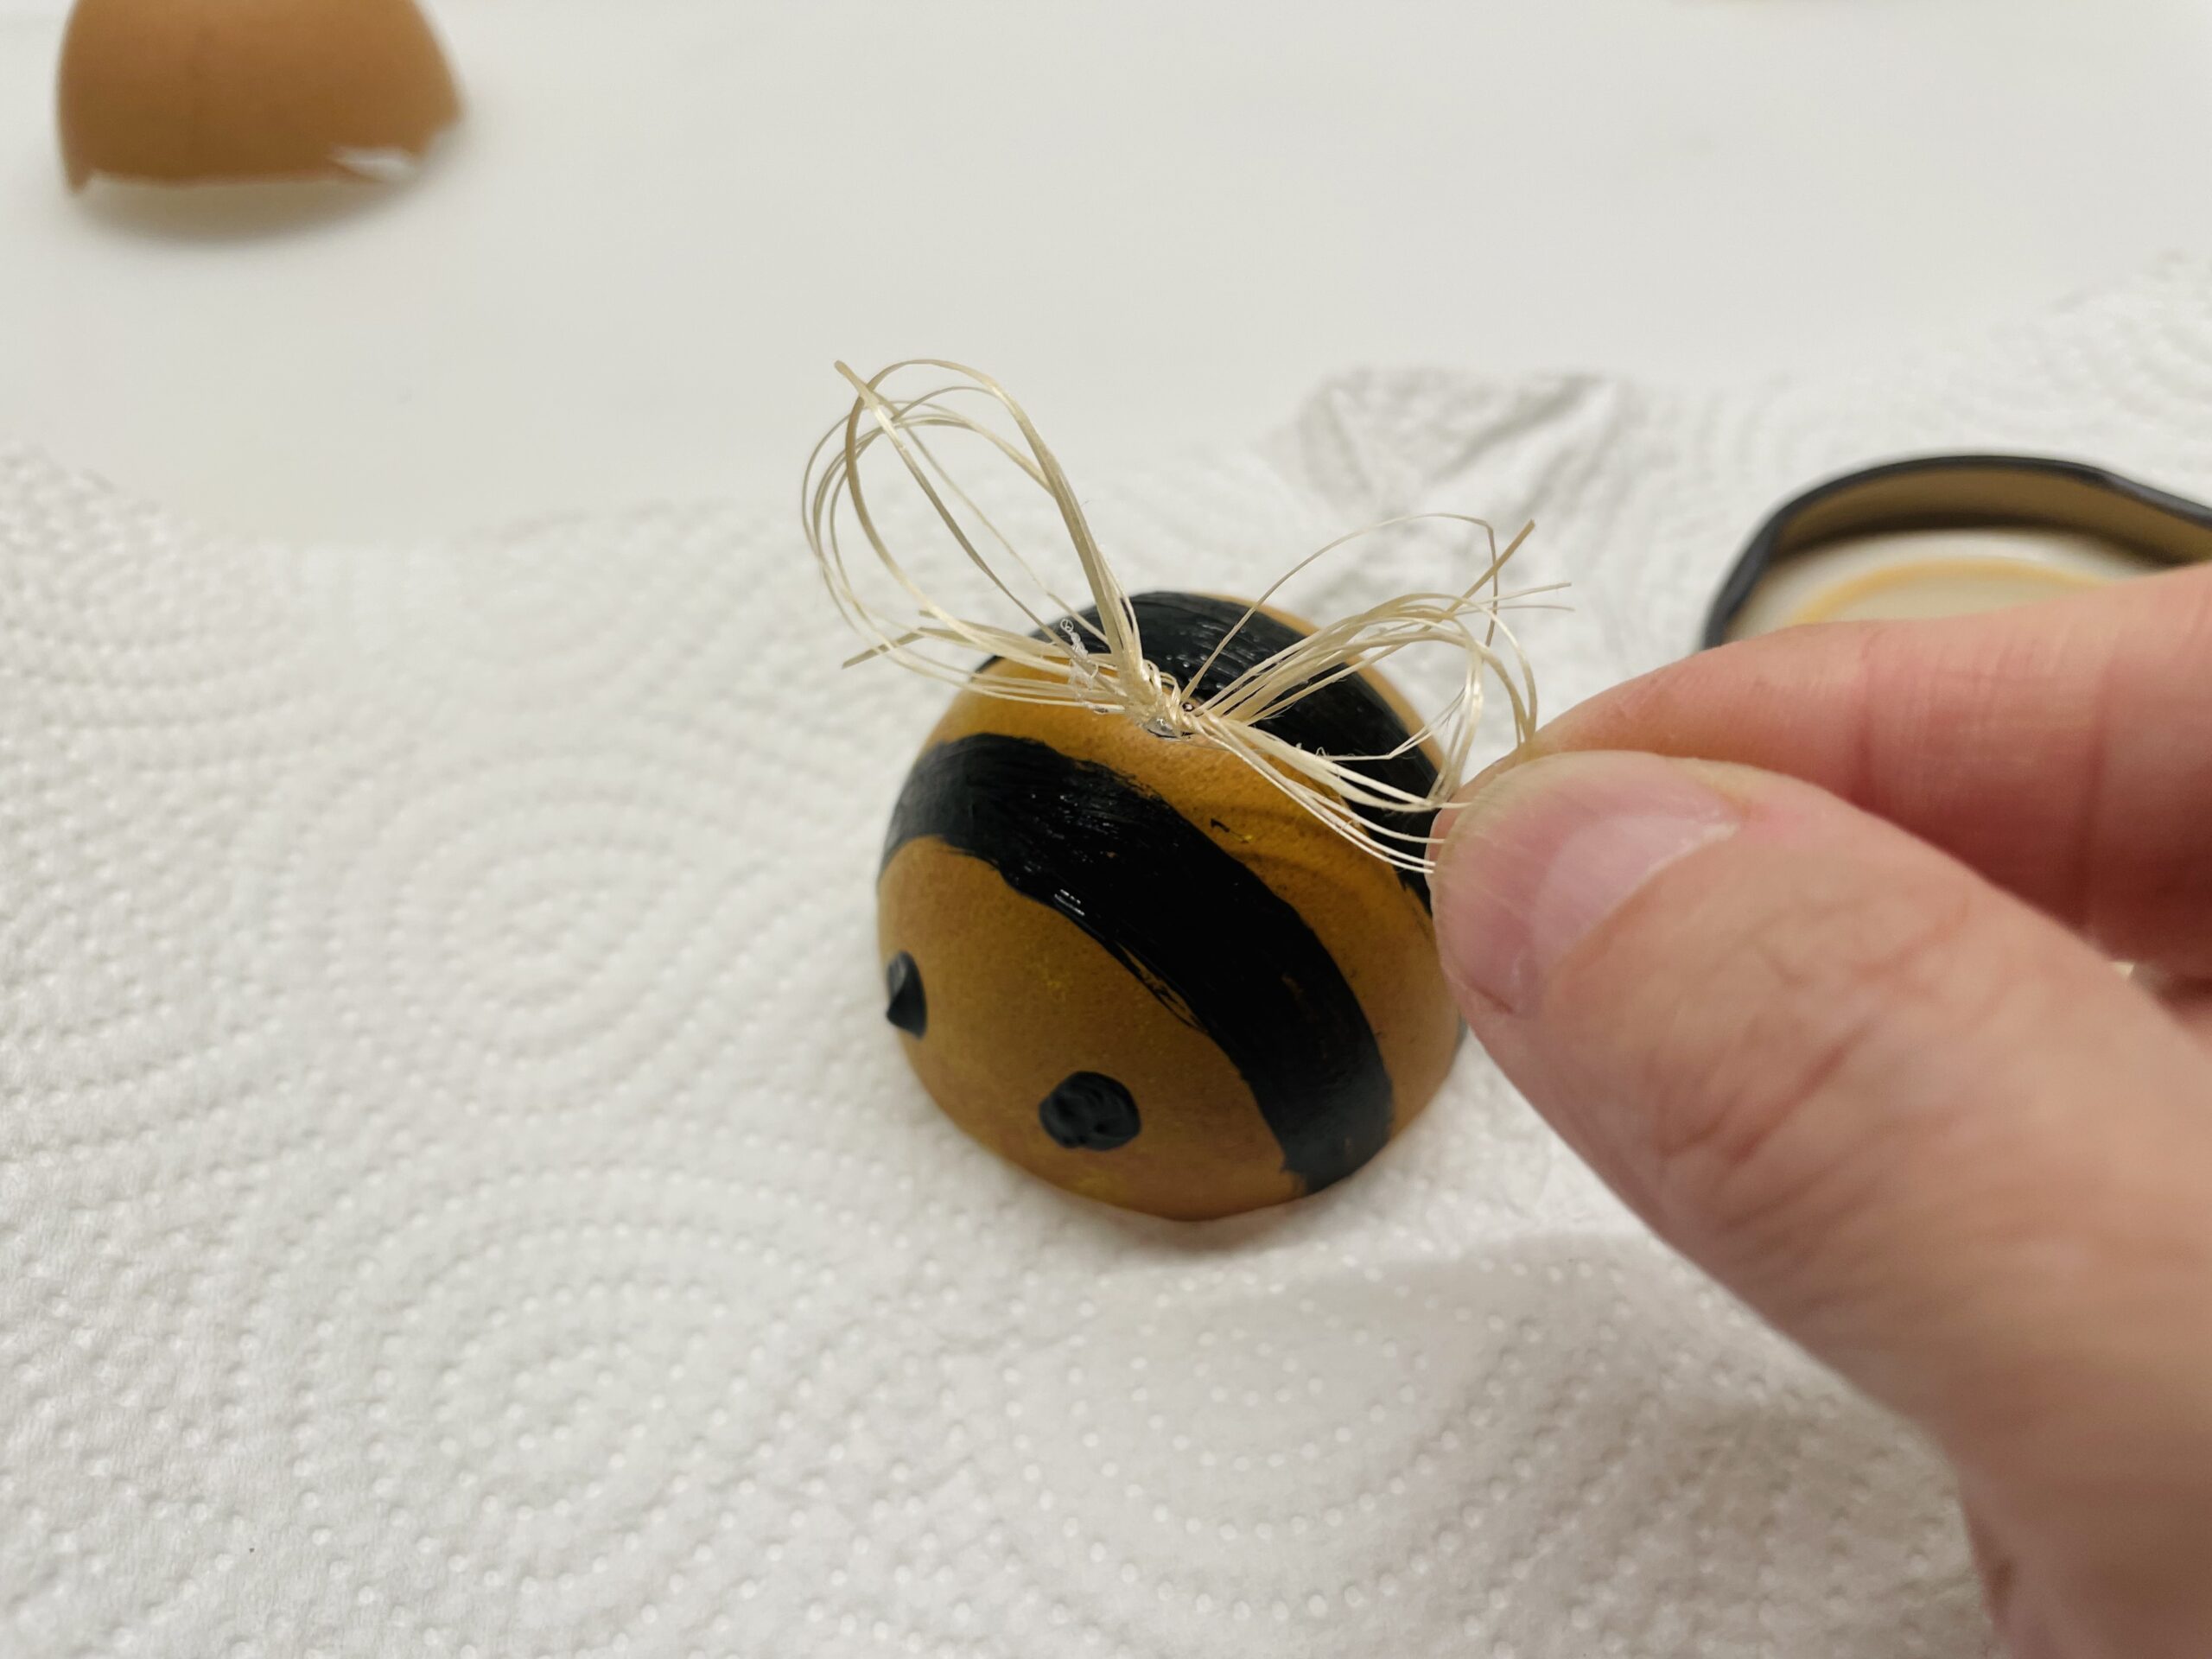
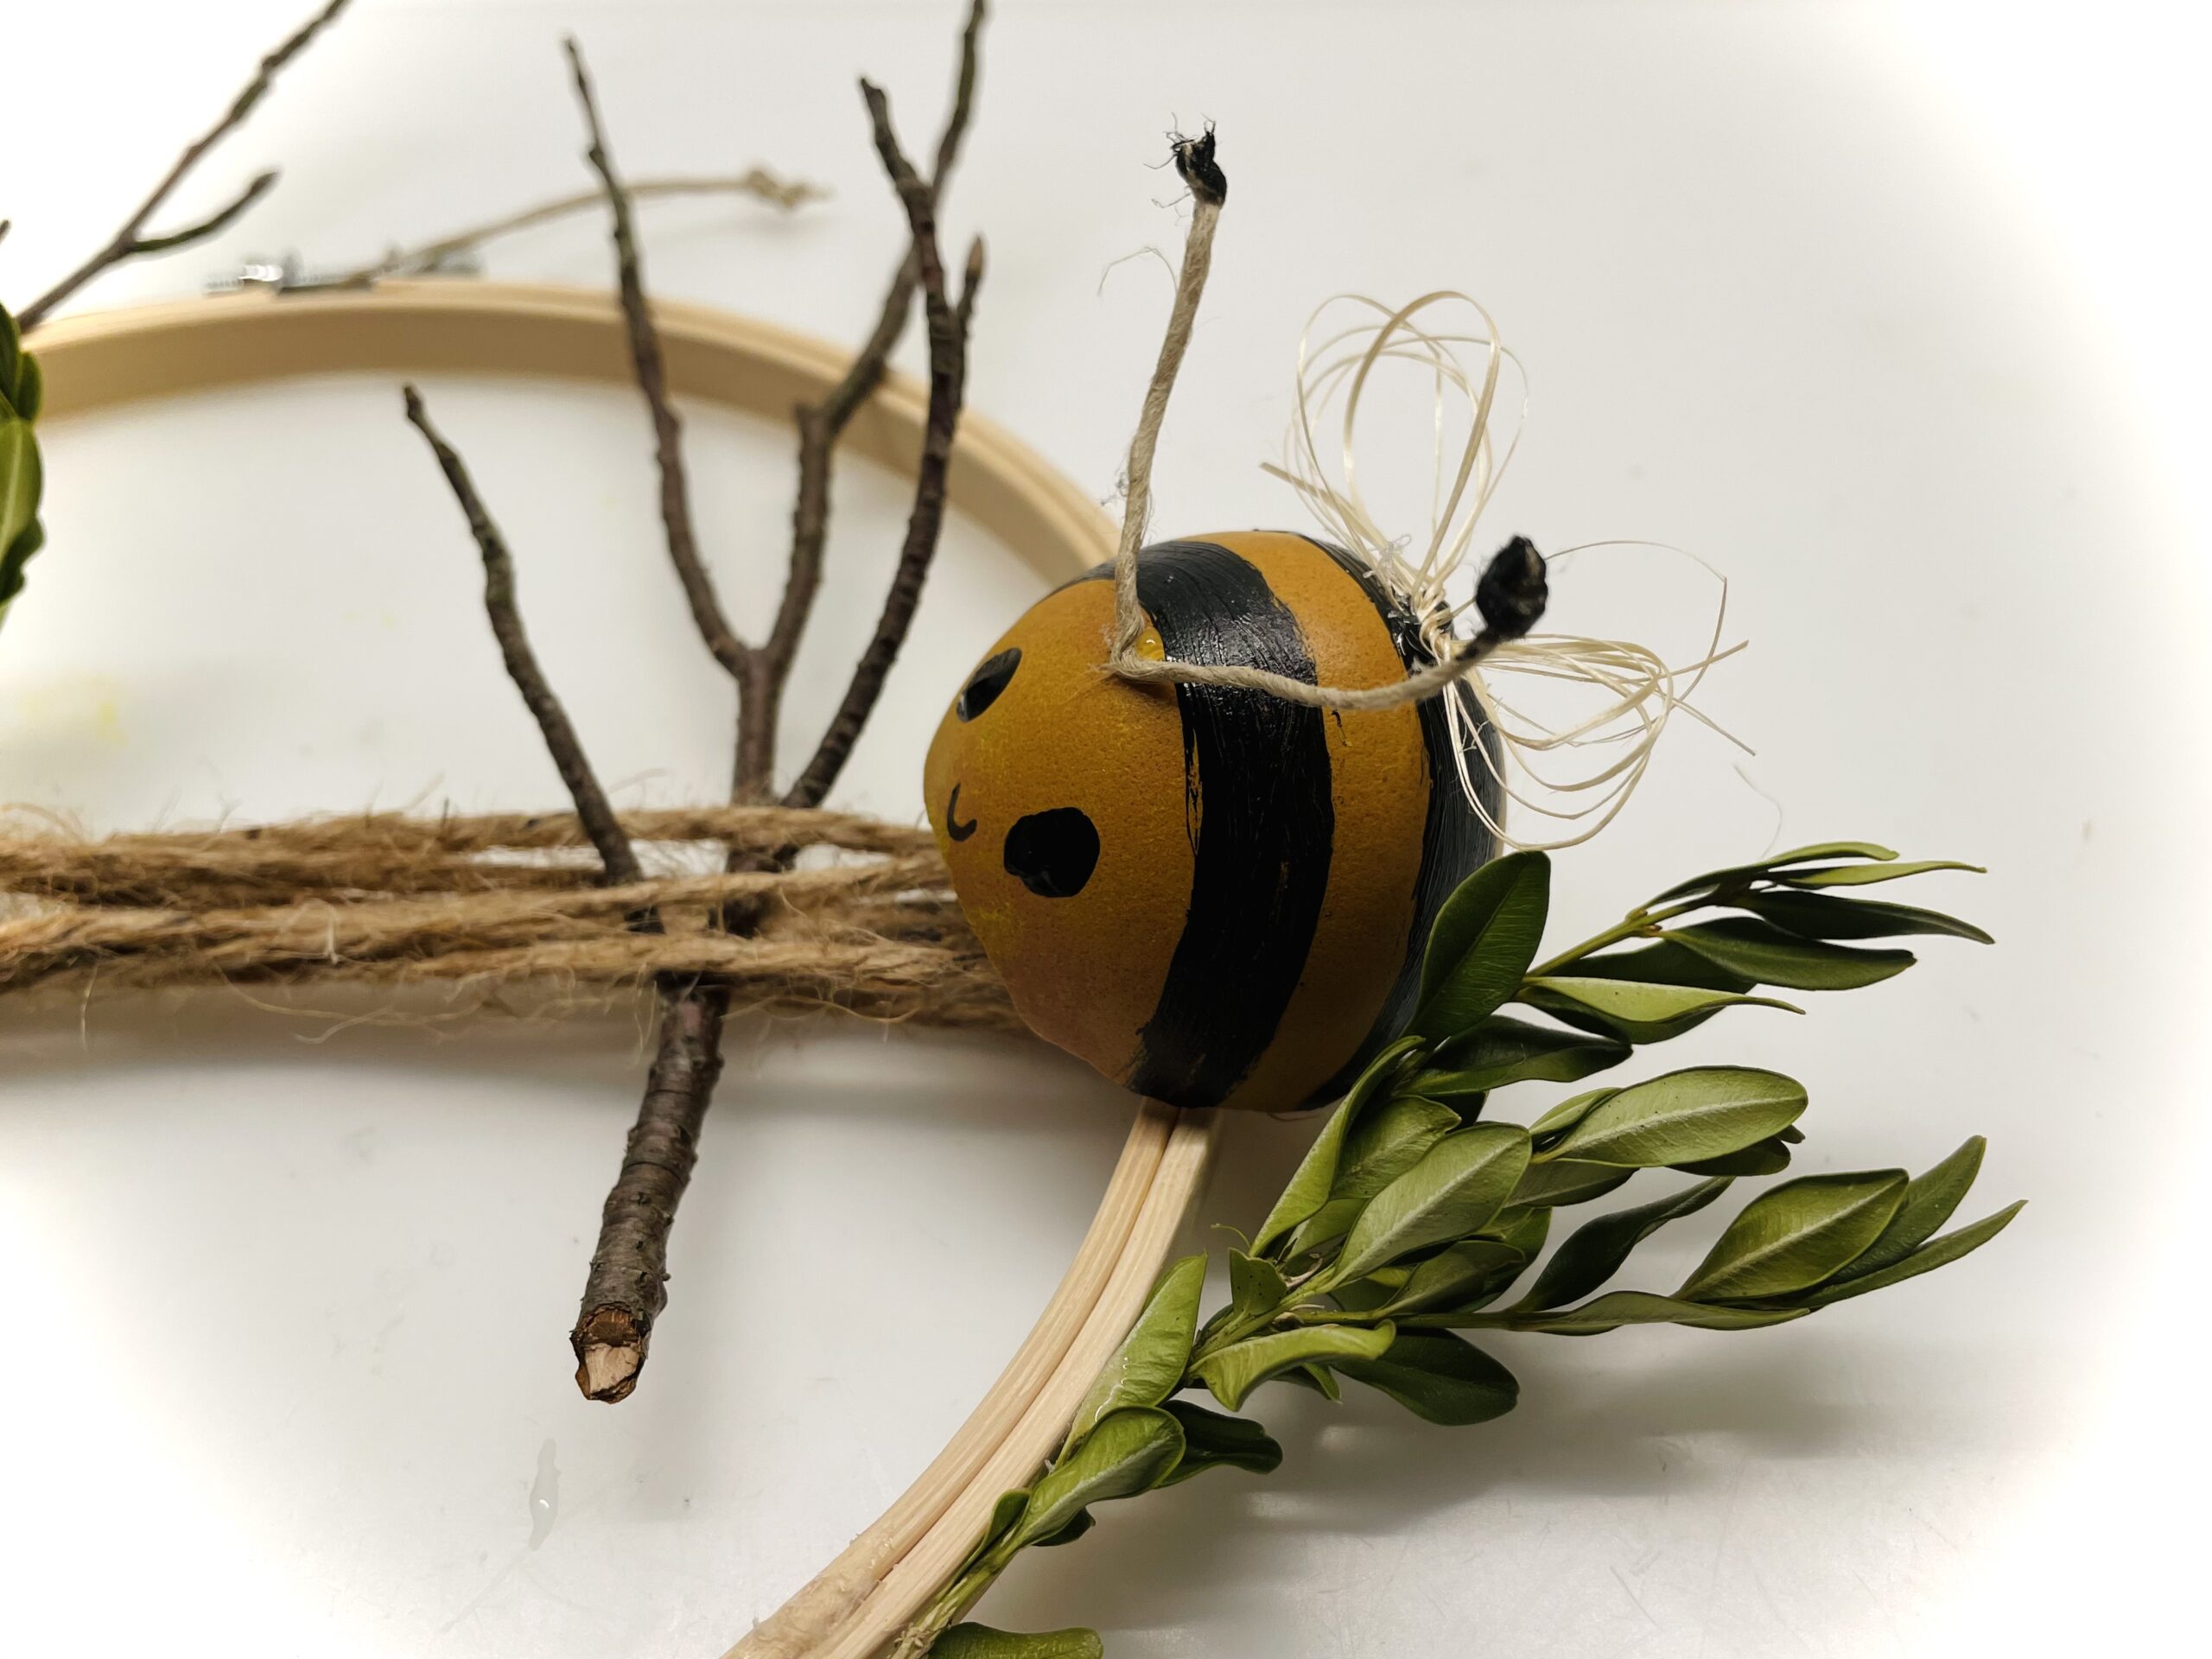
Now you put all the items together to create a bumblebee.
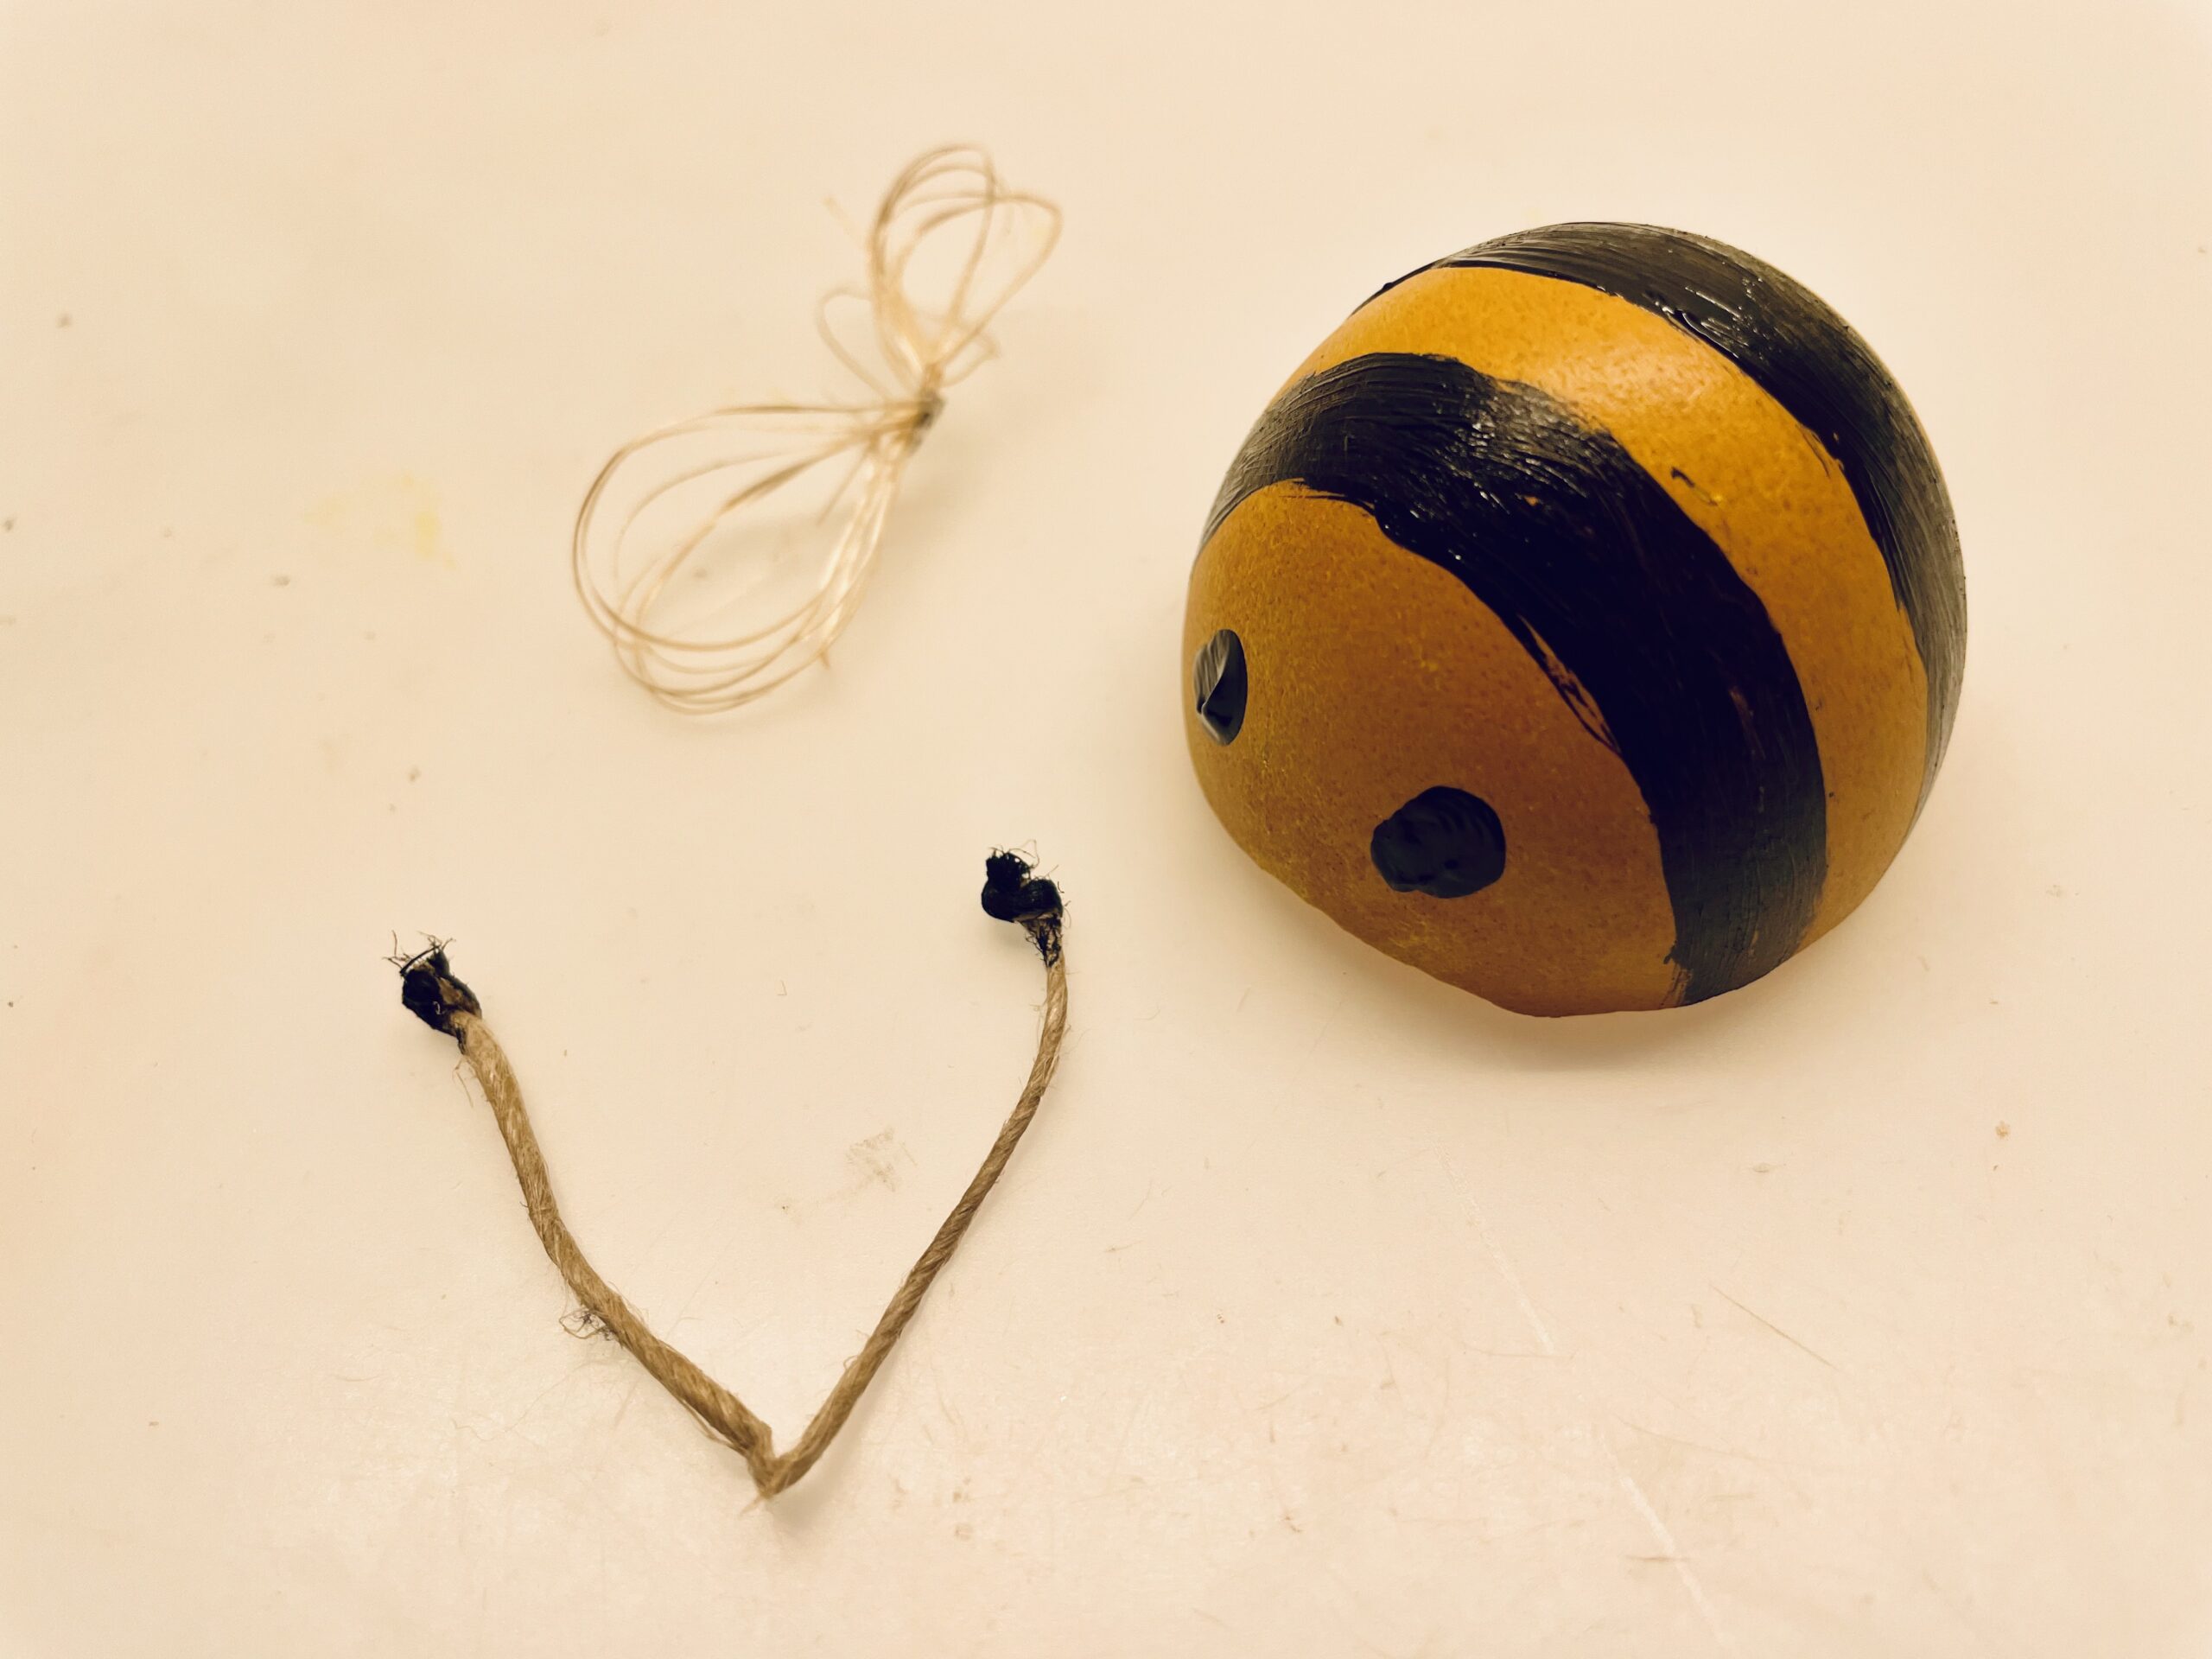
For this you place an adhesive point centrally on the eggshell and stick the wings on it. With a pen or brush you can press the wings very carefully.
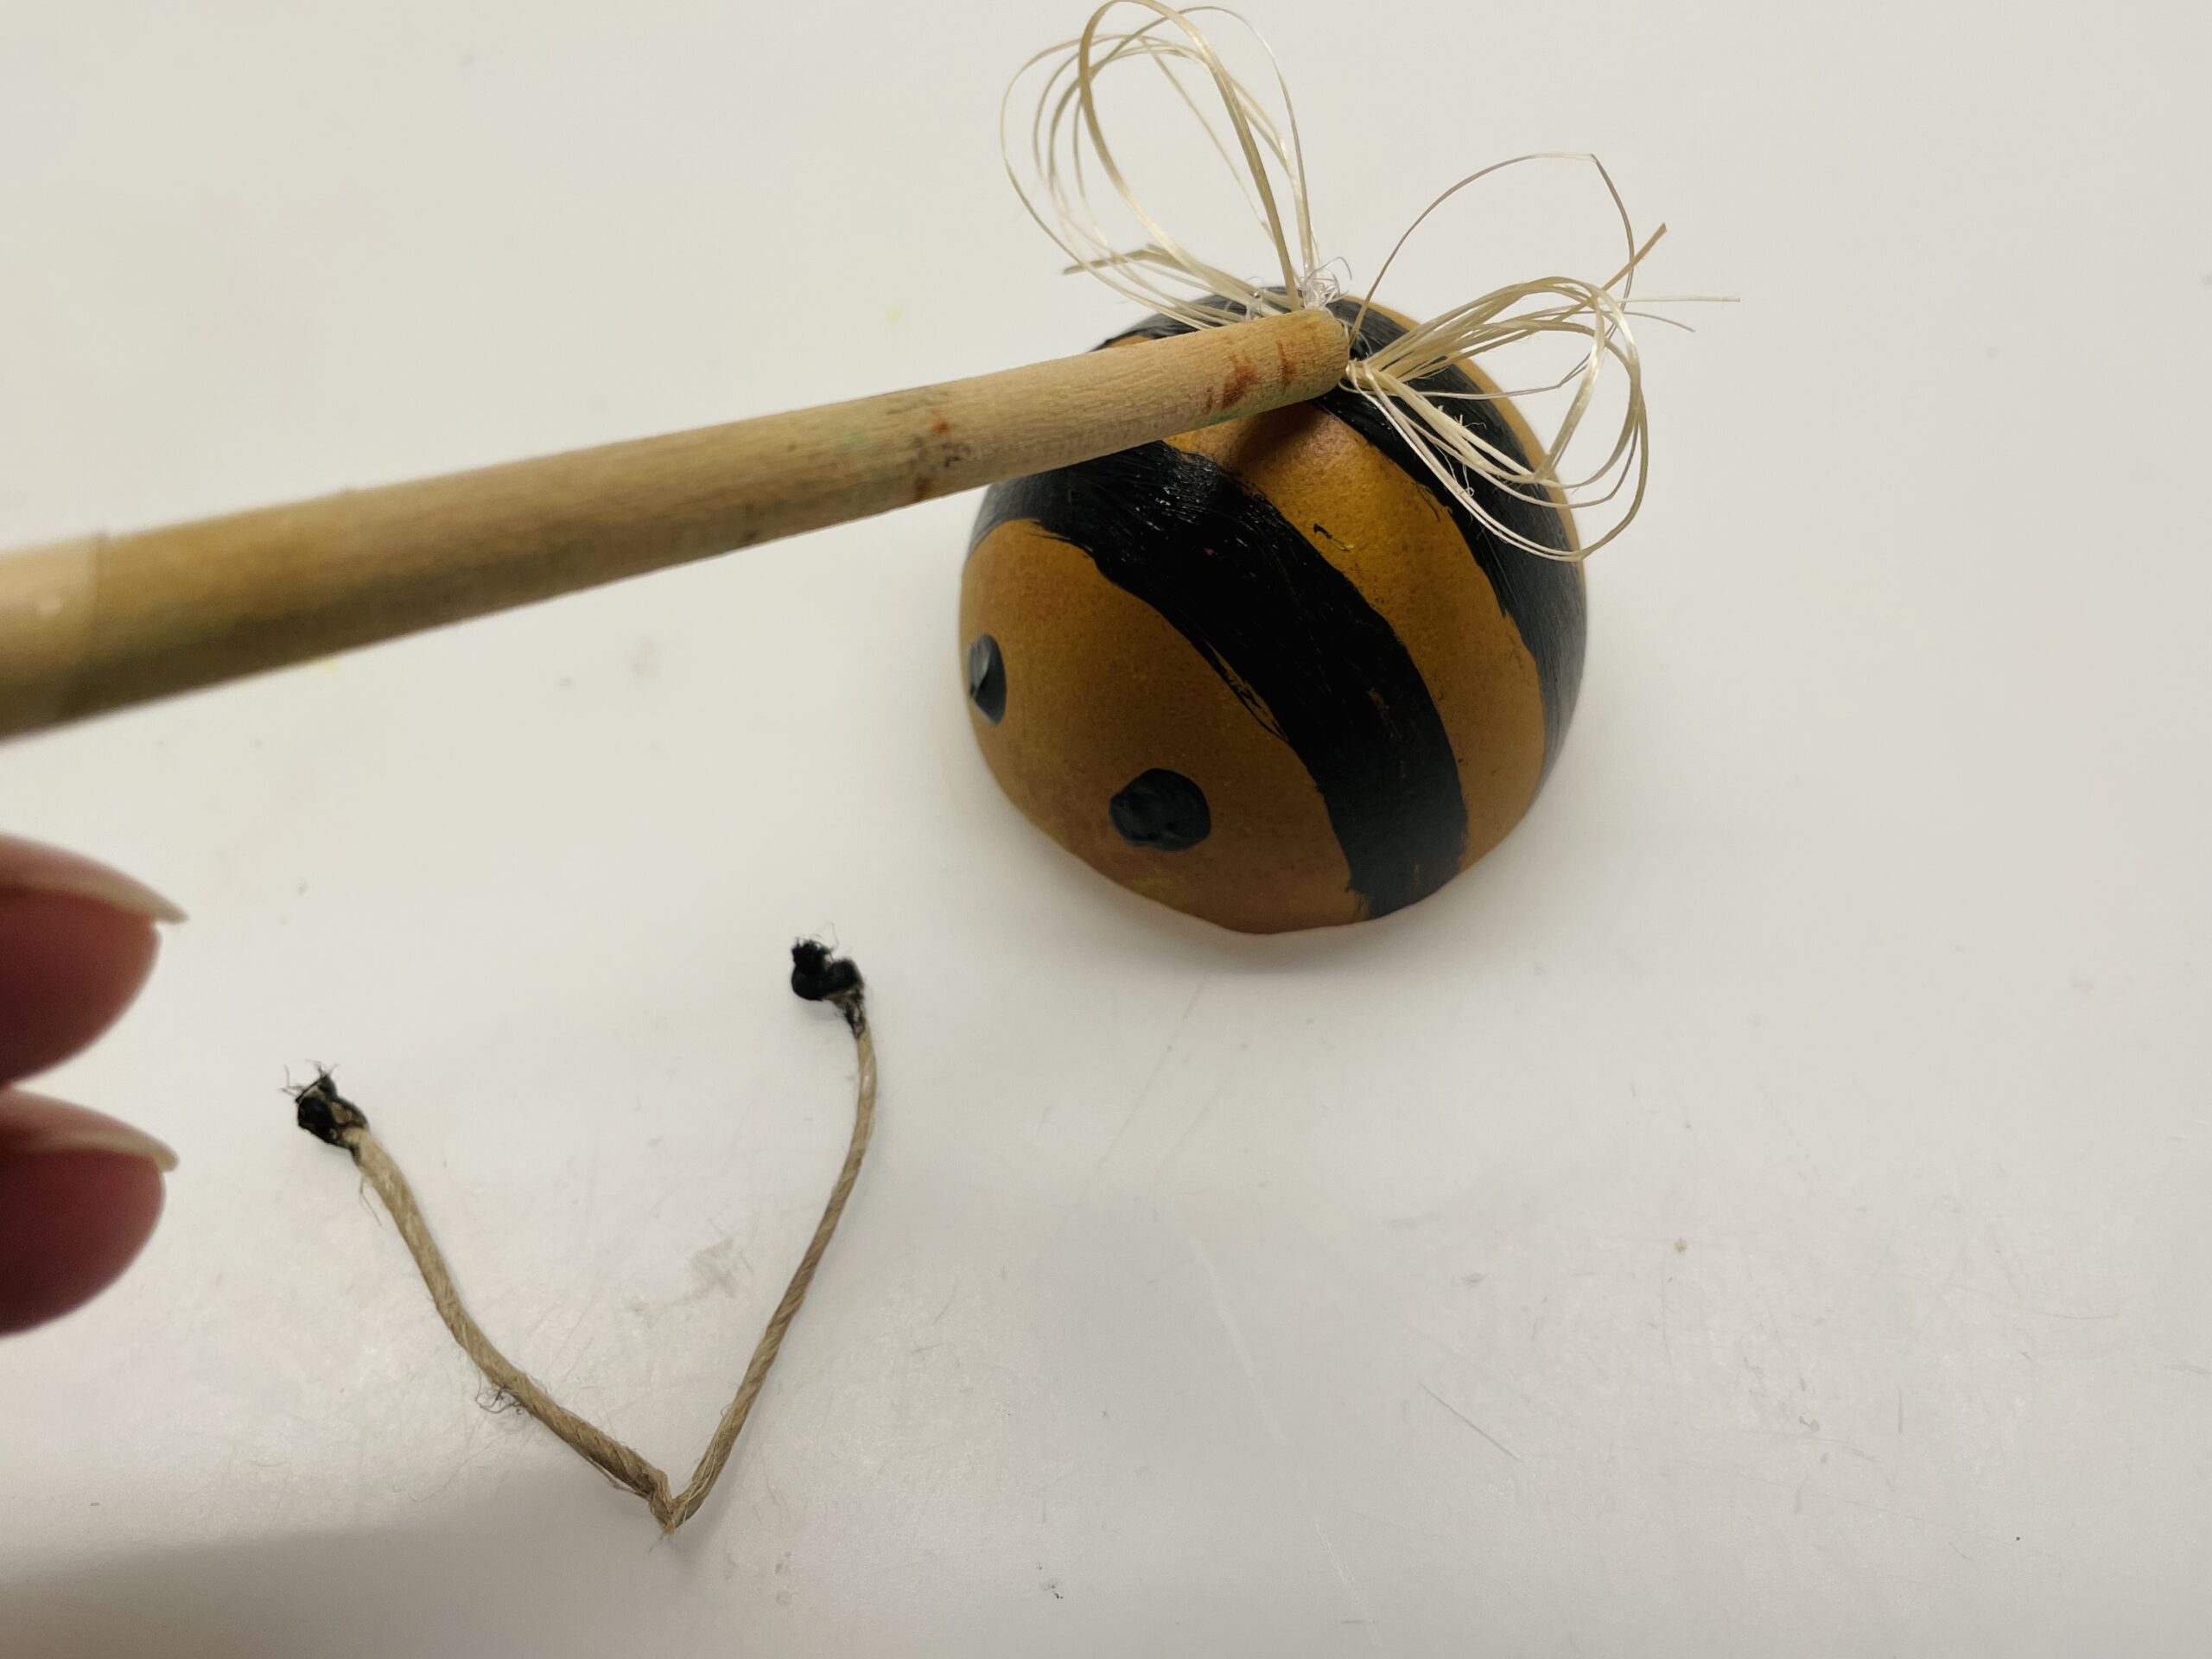
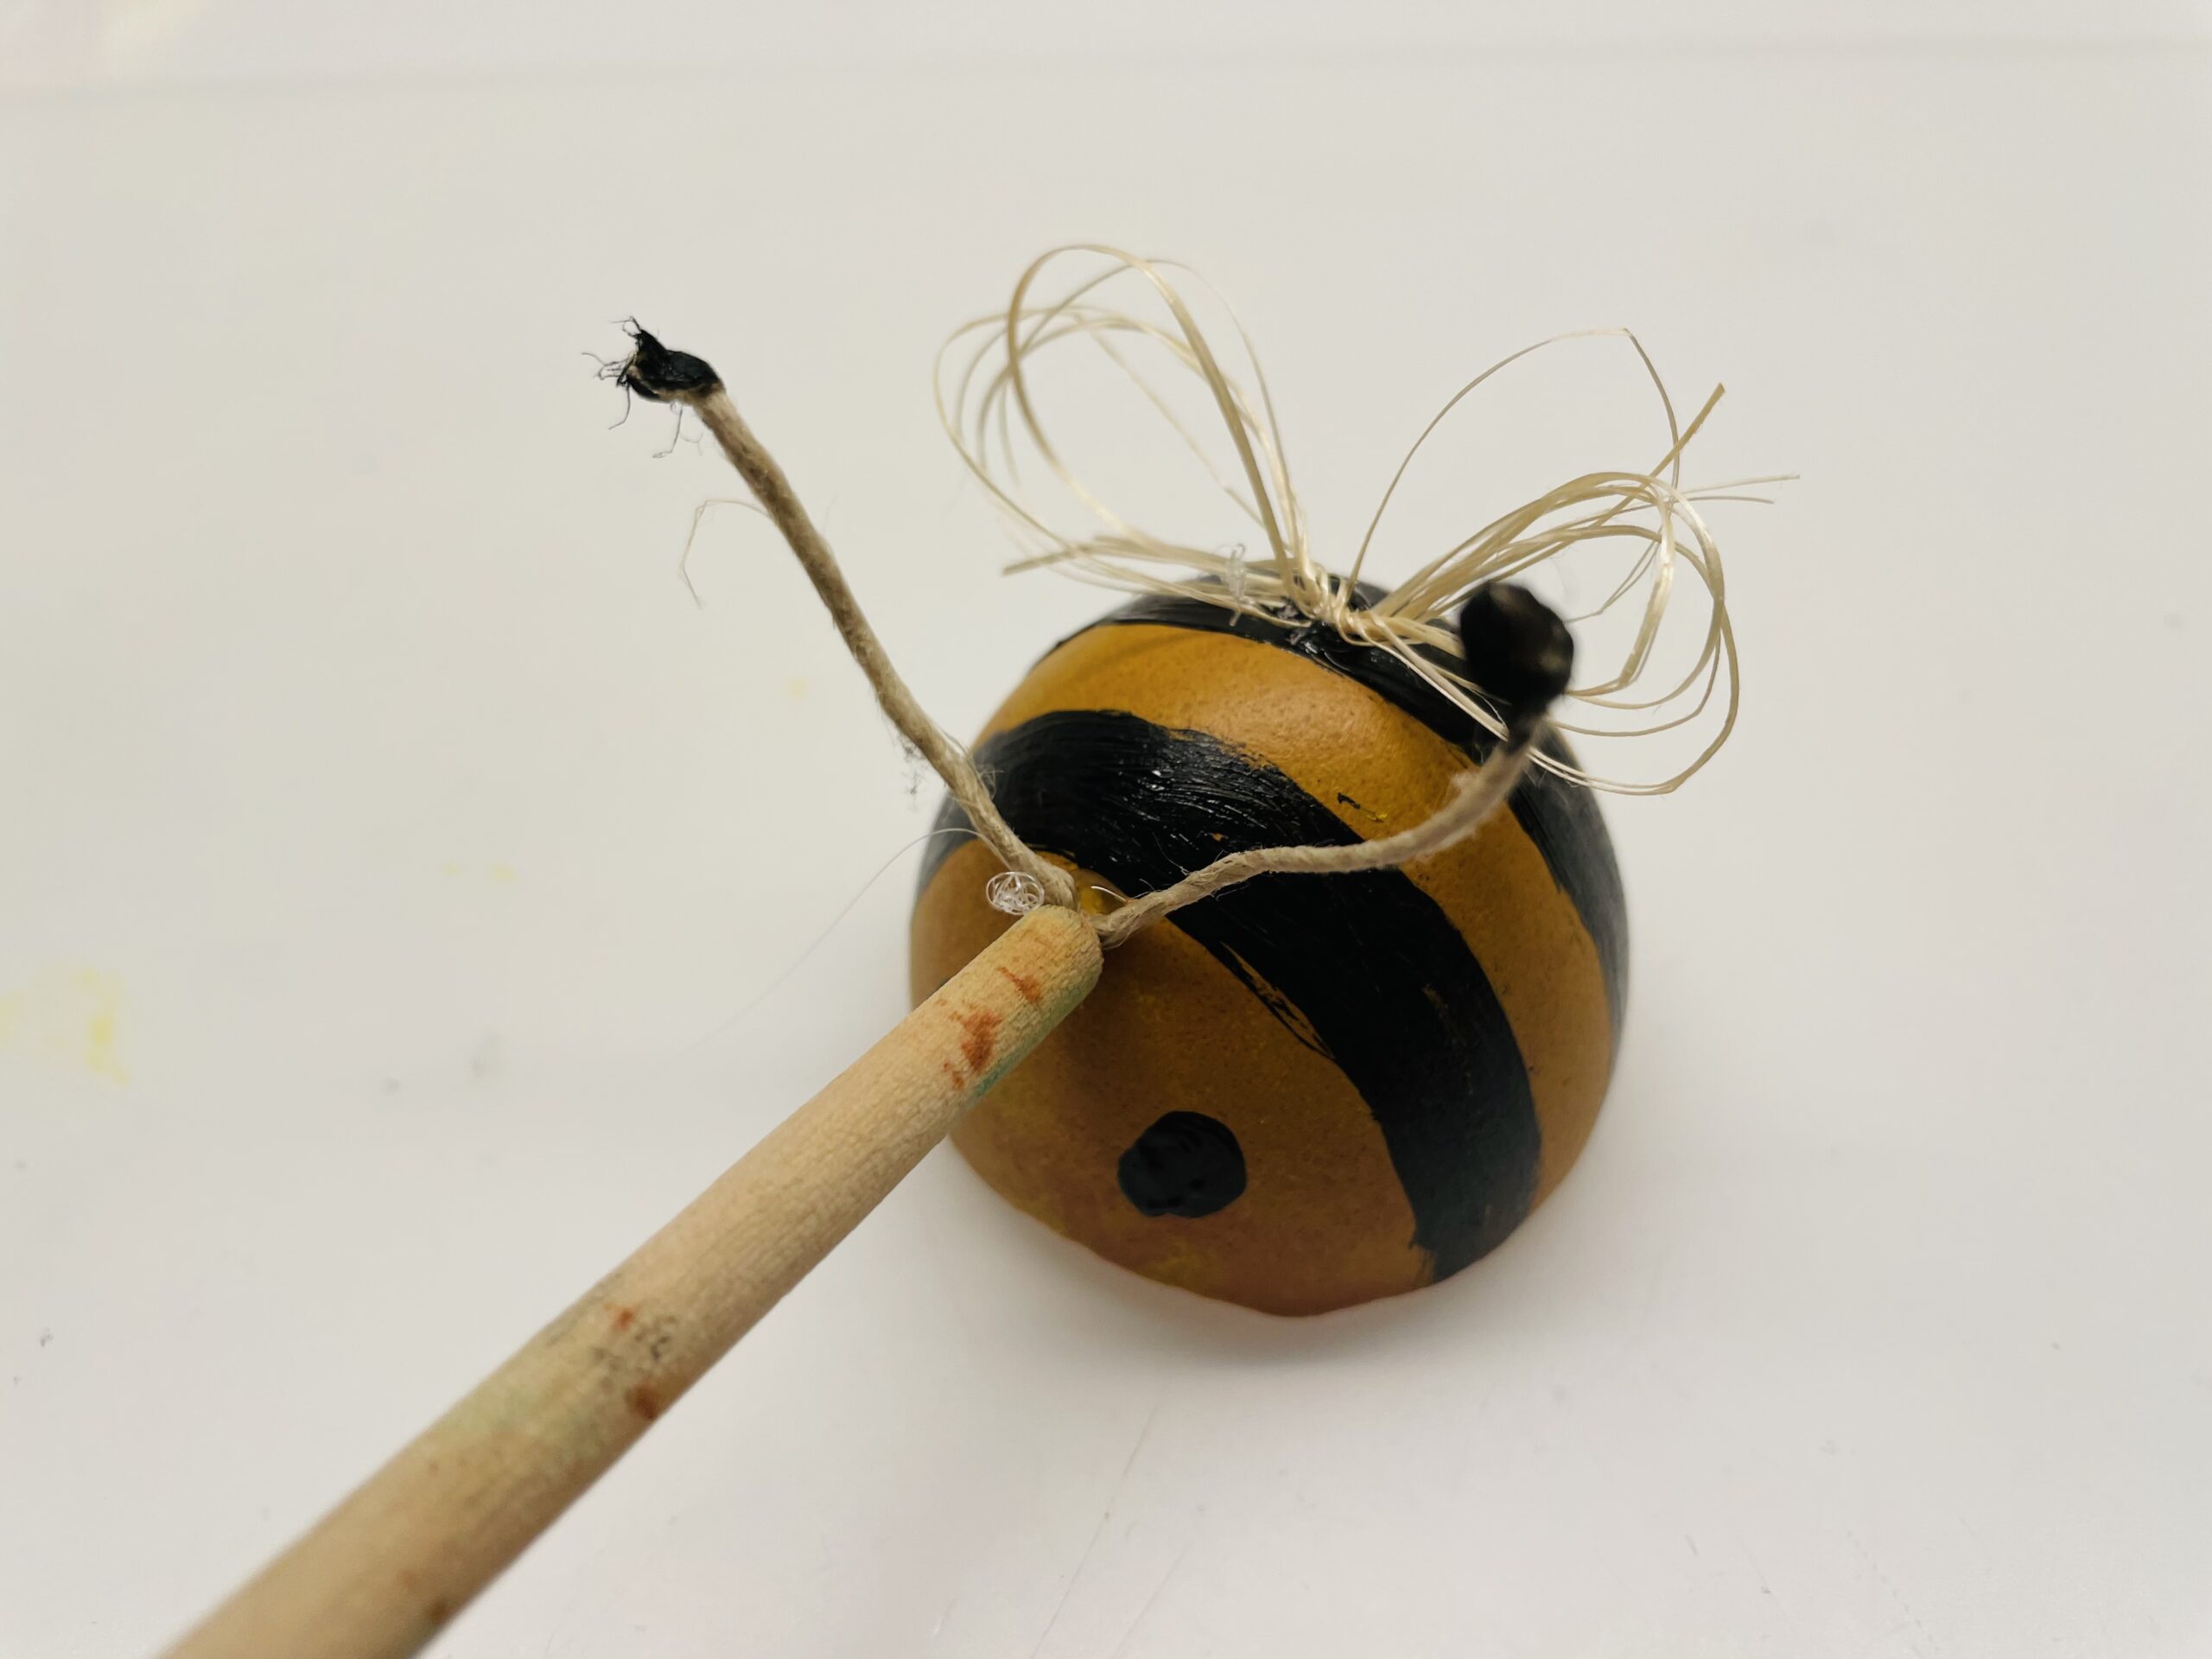
Then attach the probes with an adhesive point to the bumblebee's forehead.
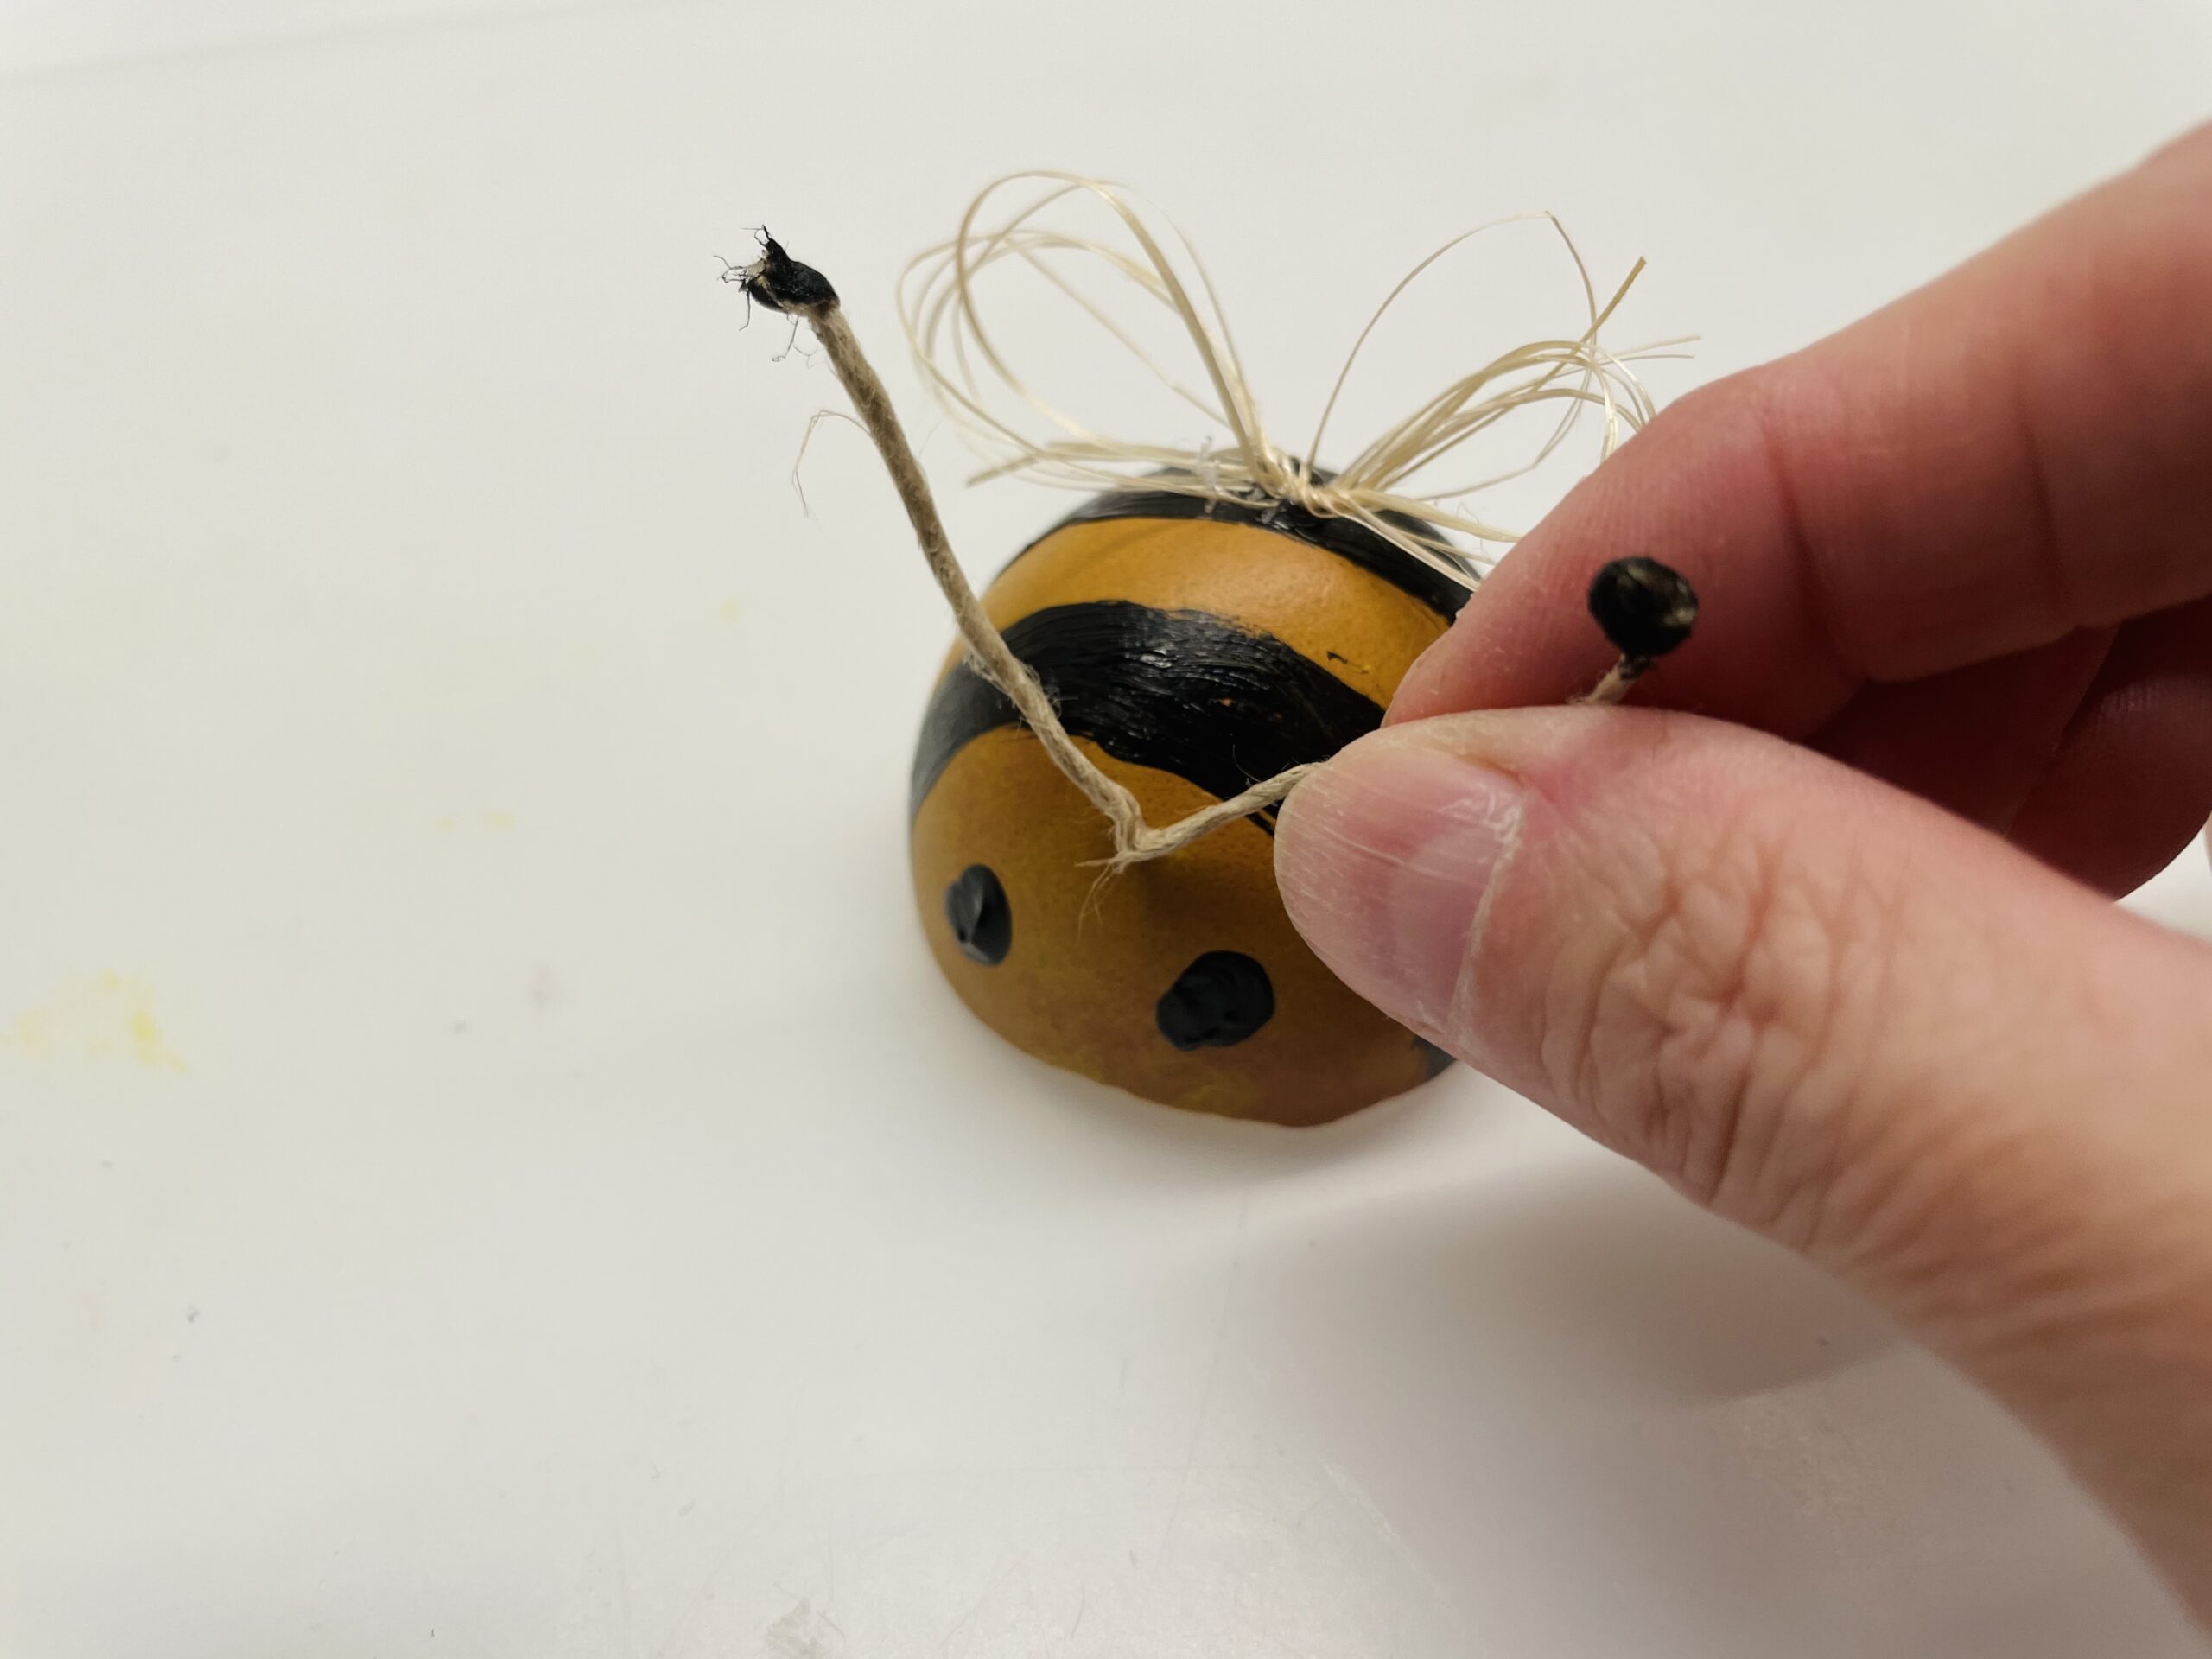
Here, too, you gently press the probes on the eggshell with a pen.
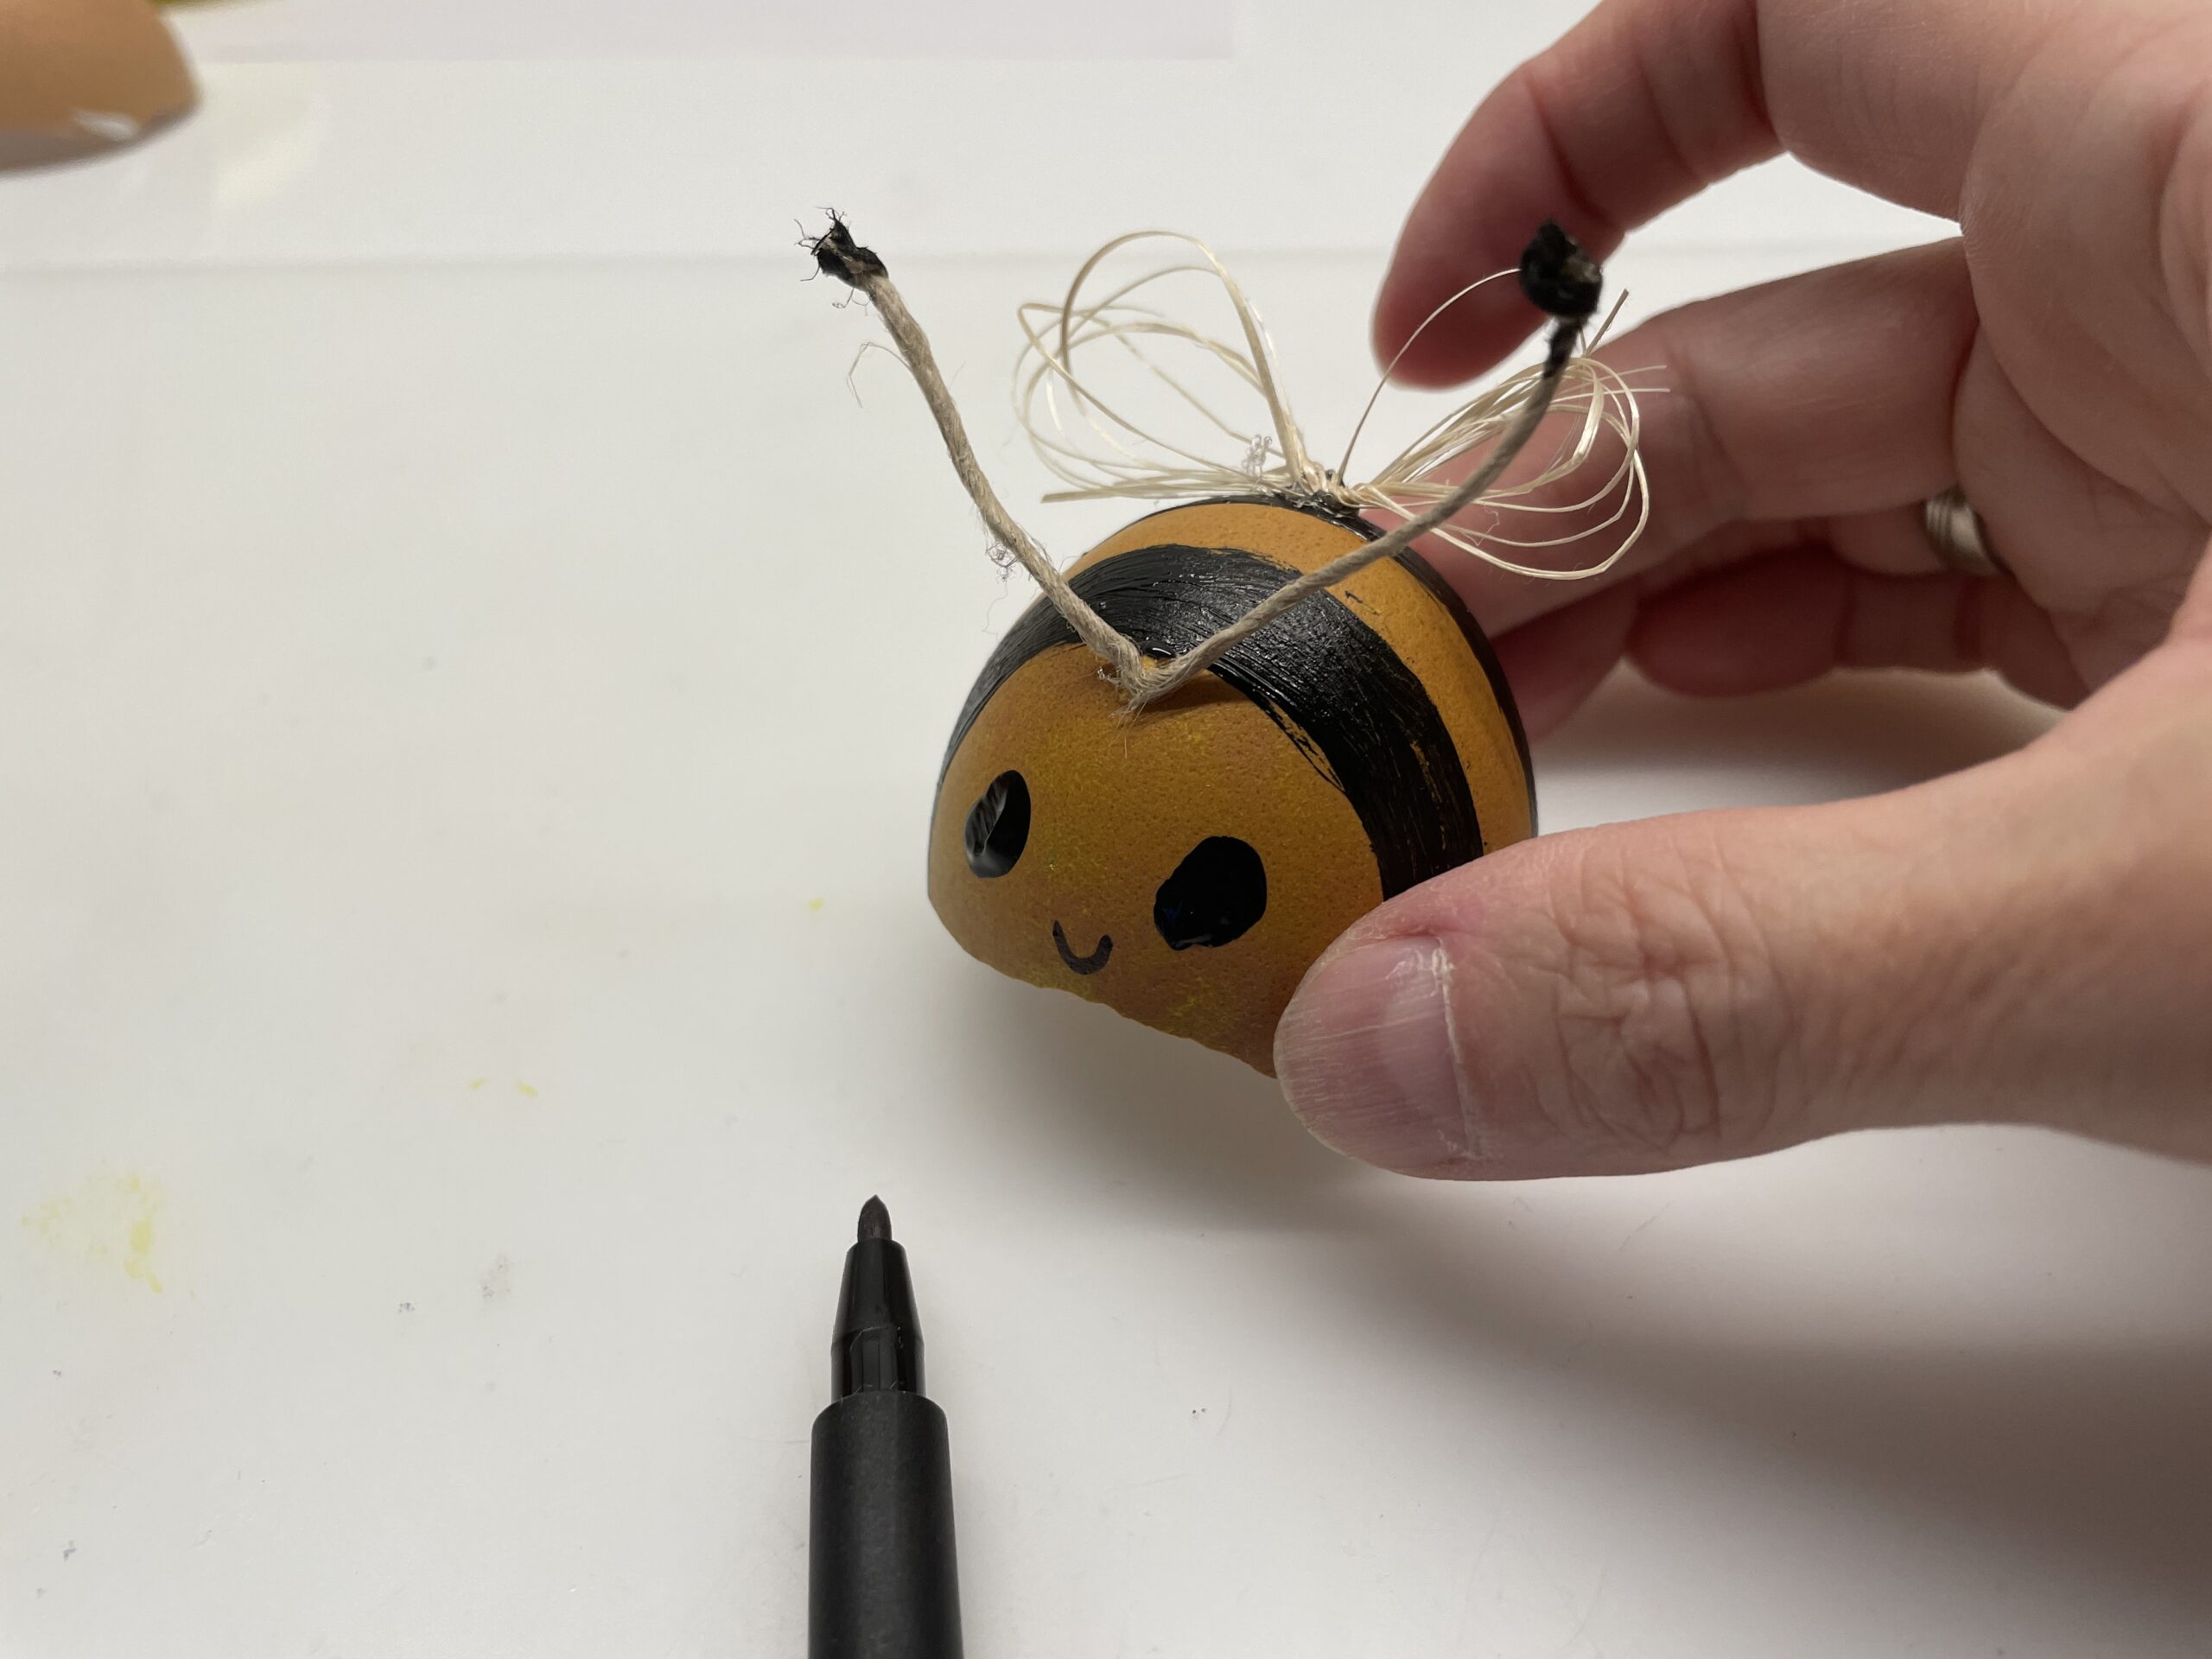
Who likes can paint another mouth with a black felt pen.
The homemade bumblebee is ready.
Attaches the bumblebee, for example, on a door wreath. This creates a beautiful summer decoration.
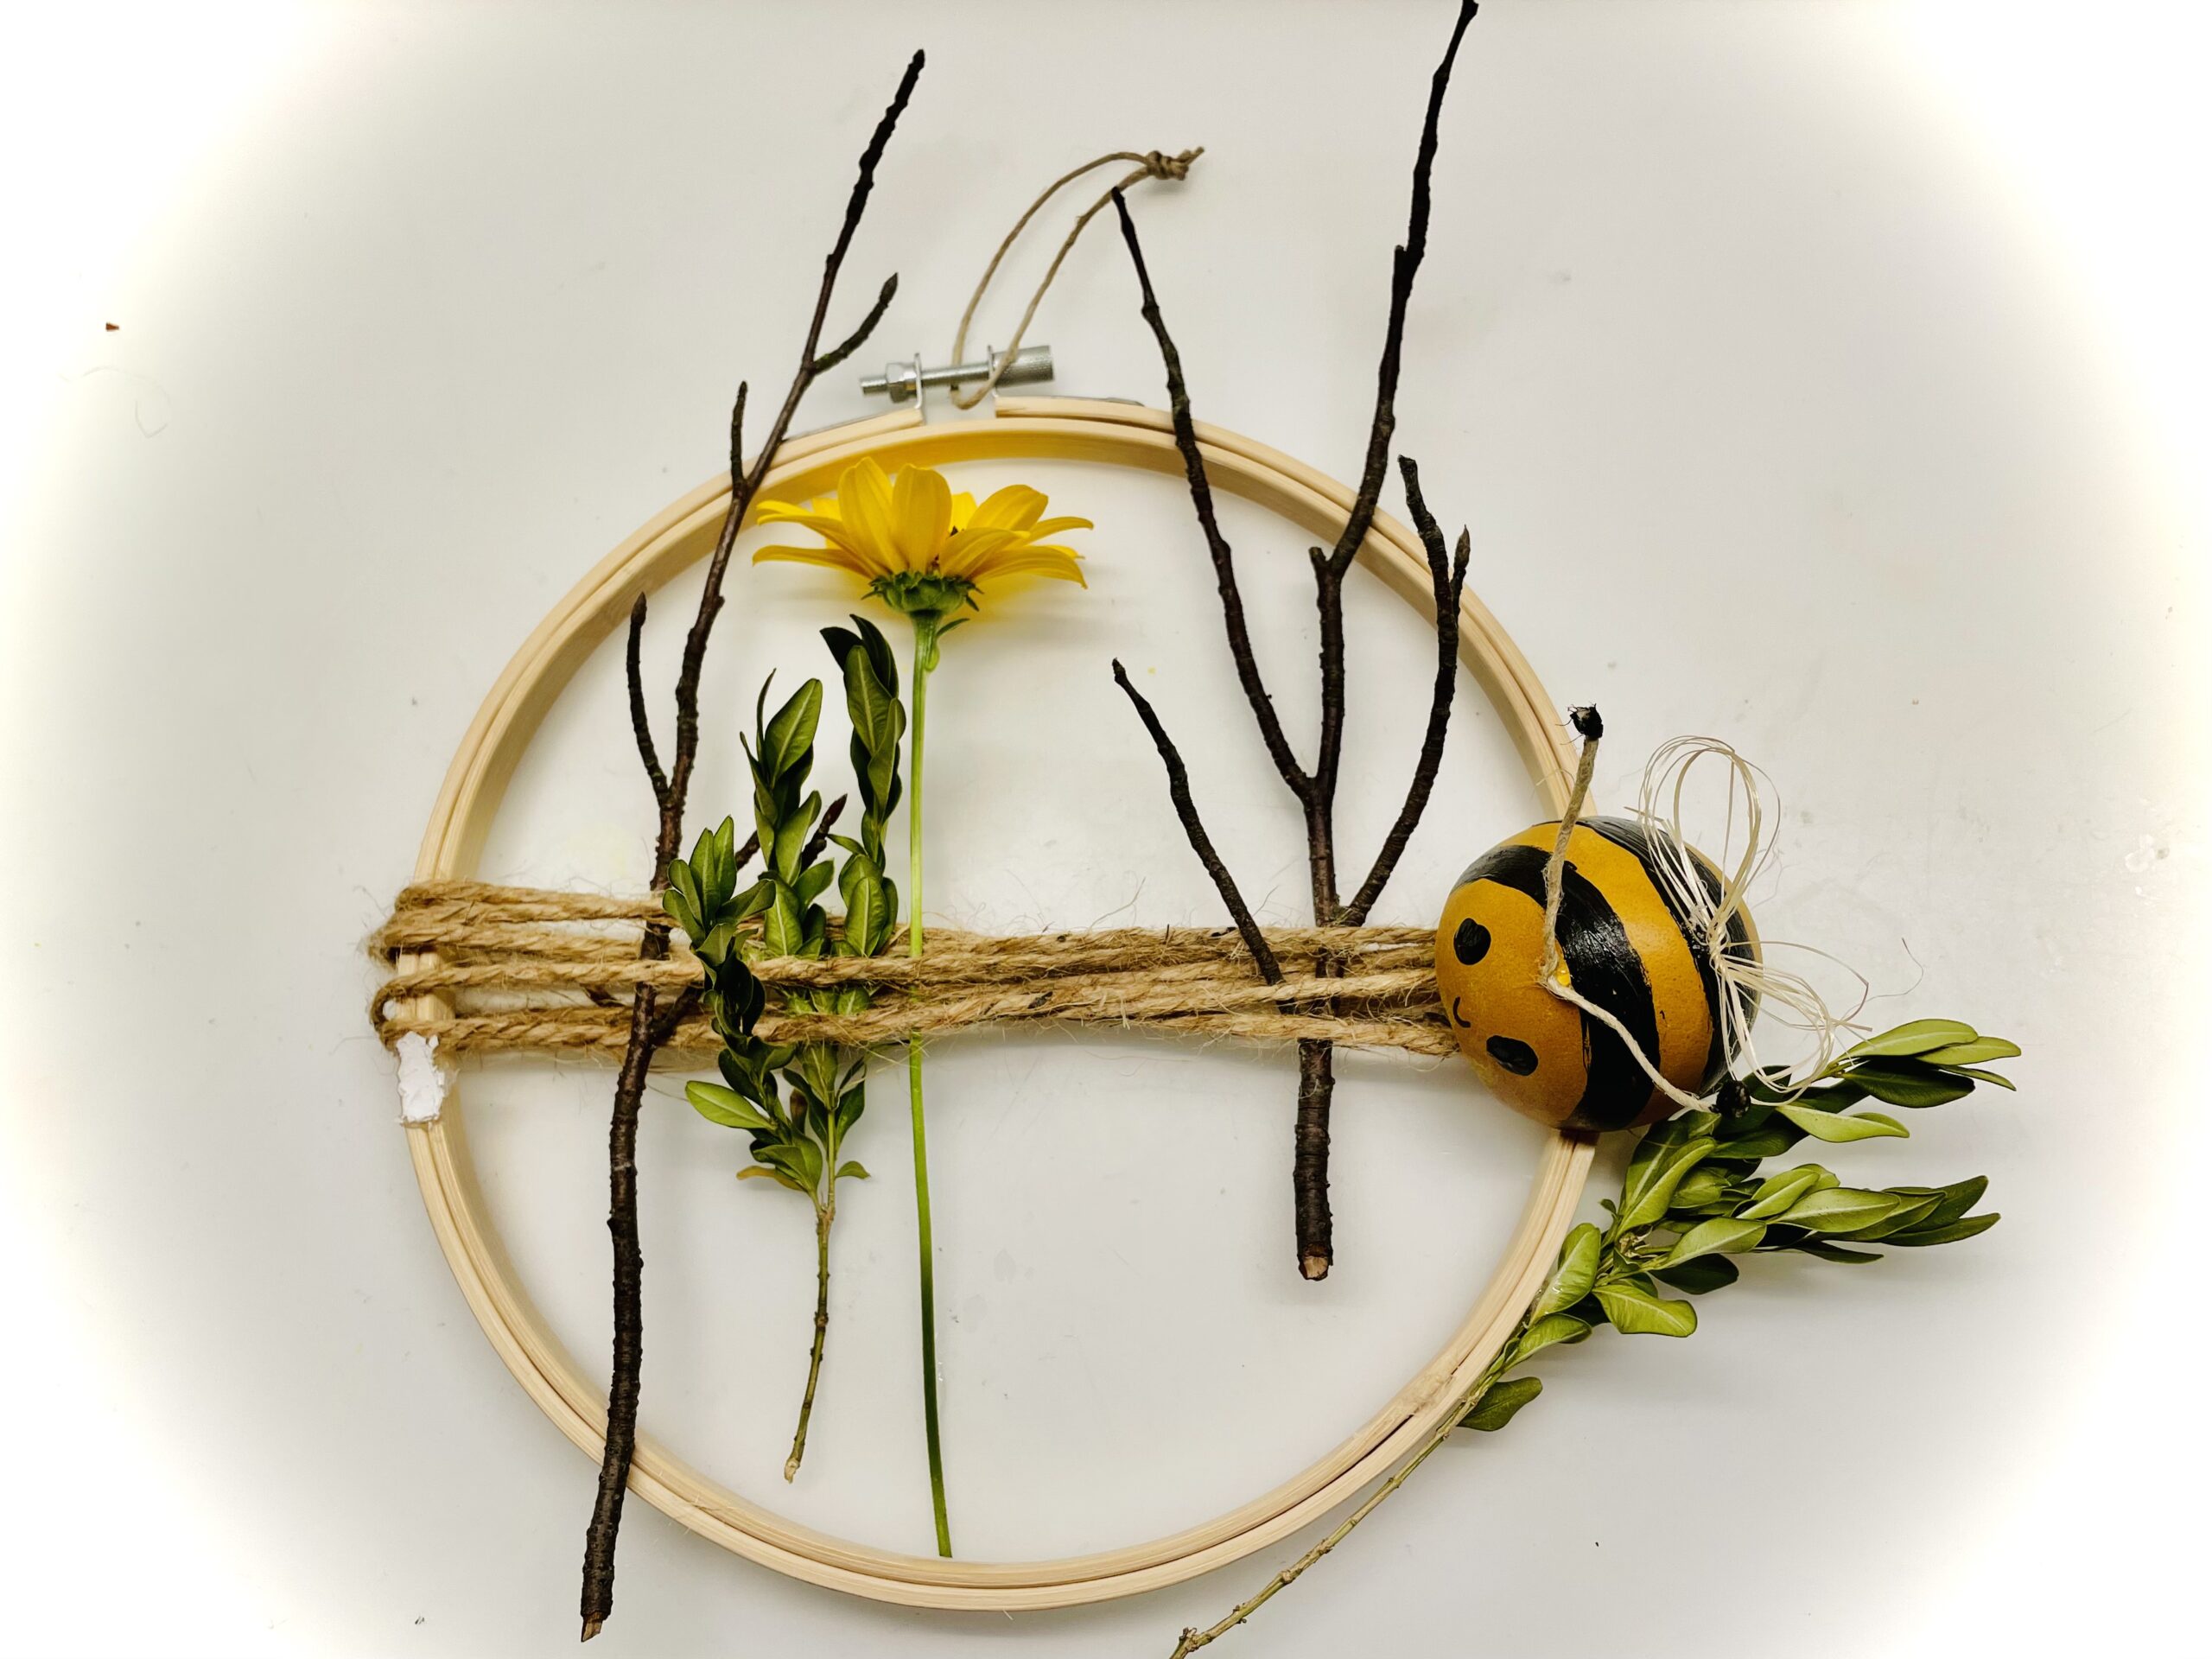
The bumblebee is also a popular highlight as a gift or as a table decoration.
Where do the bumblebees fly with you?
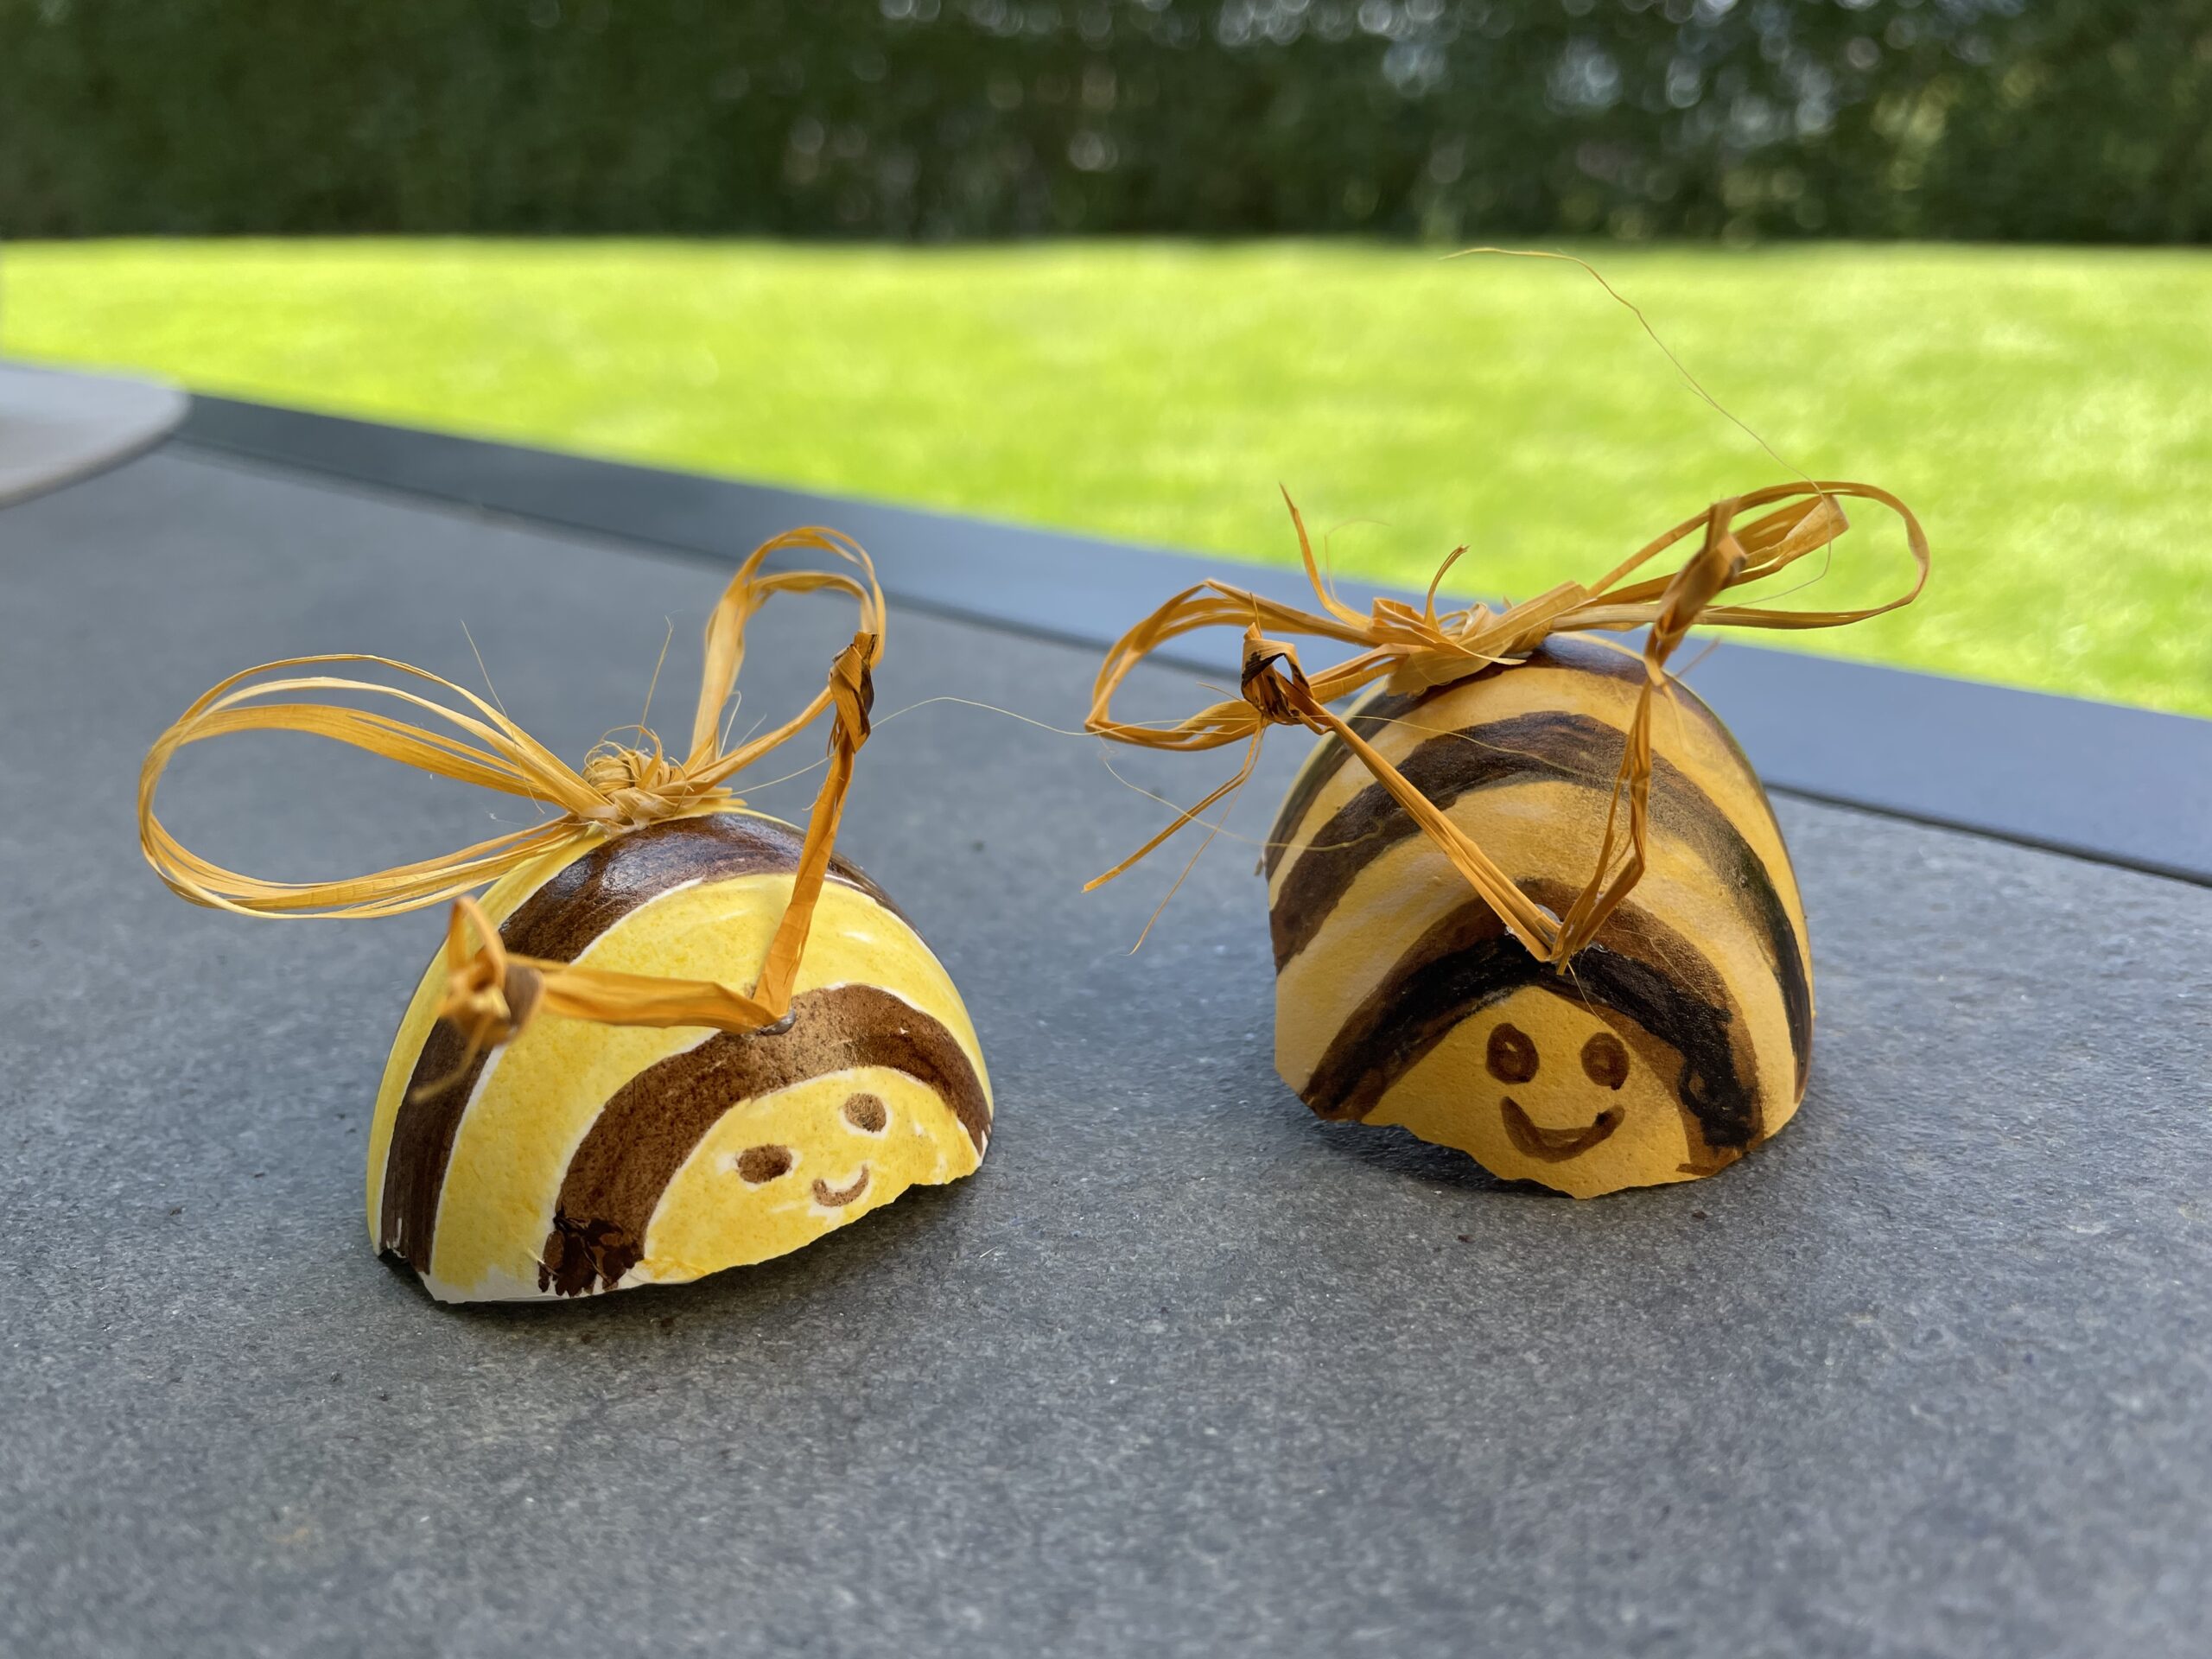
Stay creative and have fun doing crafts.
Materials
Directions
Wash out the eggshell skins, which are produced during cooking or baking, with water and let them dry. From this you can easily make a small thick bumblebee.
Place the craft pad and the eggshell with the open side on it. It becomes the body of the bumblebee.
Drape a small paint stick on a lower plate or a screw glass lid and prepare the cotton pad.
Then you dip the cotton pad in the color.
Now you gently pat the paint on the eggshell.
Don't miss a job.
Then let the paint dry on the eggshell.
Then you paint stripes and eyes with black paint and a brush.
Tip: alternatively, you paint the stripes and eyes with a felt pen.
Then let the paint dry.
You now make your wings out of thin sisal strings. Wrap some cords several times around a few fingers. Then you push the resulting ring off your fingers and squeeze it together.
Press the sisal ring flat and pinch it in the middle.
Then turn both sides in the opposite direction.
Turn until the loops that have been created hold on their own. These are the wings.
Now cut off the overhanging ends.
The wings are ready for the bumblebees.
Now you make the feelers for the bumblebees out of package scour. For this you first cut off approx. 7cm of the scour.
Then you put a knot at the beginning of the cord.
Pull the knot.
Then you cut off the overhanging villain at the beginning.
Now place a knot on the other side, tighten it and cut off the end piece after the knot.
From this one piece of the package line the two probes arise.
You now paint both nodules with black paint. Either with the brush and black paint or with a black felt pen.
After drying the paint you pinch the cord in the middle.
That's what the probes look like now.
Now you put all the items together to create a bumblebee.
For this you place an adhesive point centrally on the eggshell and stick the wings on it. With a pen or brush you can press the wings very carefully.
Then attach the probes with an adhesive point to the bumblebee's forehead.
Here, too, you gently press the probes on the eggshell with a pen.
Who likes can paint another mouth with a black felt pen.
The homemade bumblebee is ready.
Attaches the bumblebee, for example, on a door wreath. This creates a beautiful summer decoration.
The bumblebee is also a popular highlight as a gift or as a table decoration.
Where do the bumblebees fly with you?
Stay creative and have fun doing crafts.
Follow us on Facebook , Instagram and Pinterest
Don't miss any more adventures: Our bottle mail


