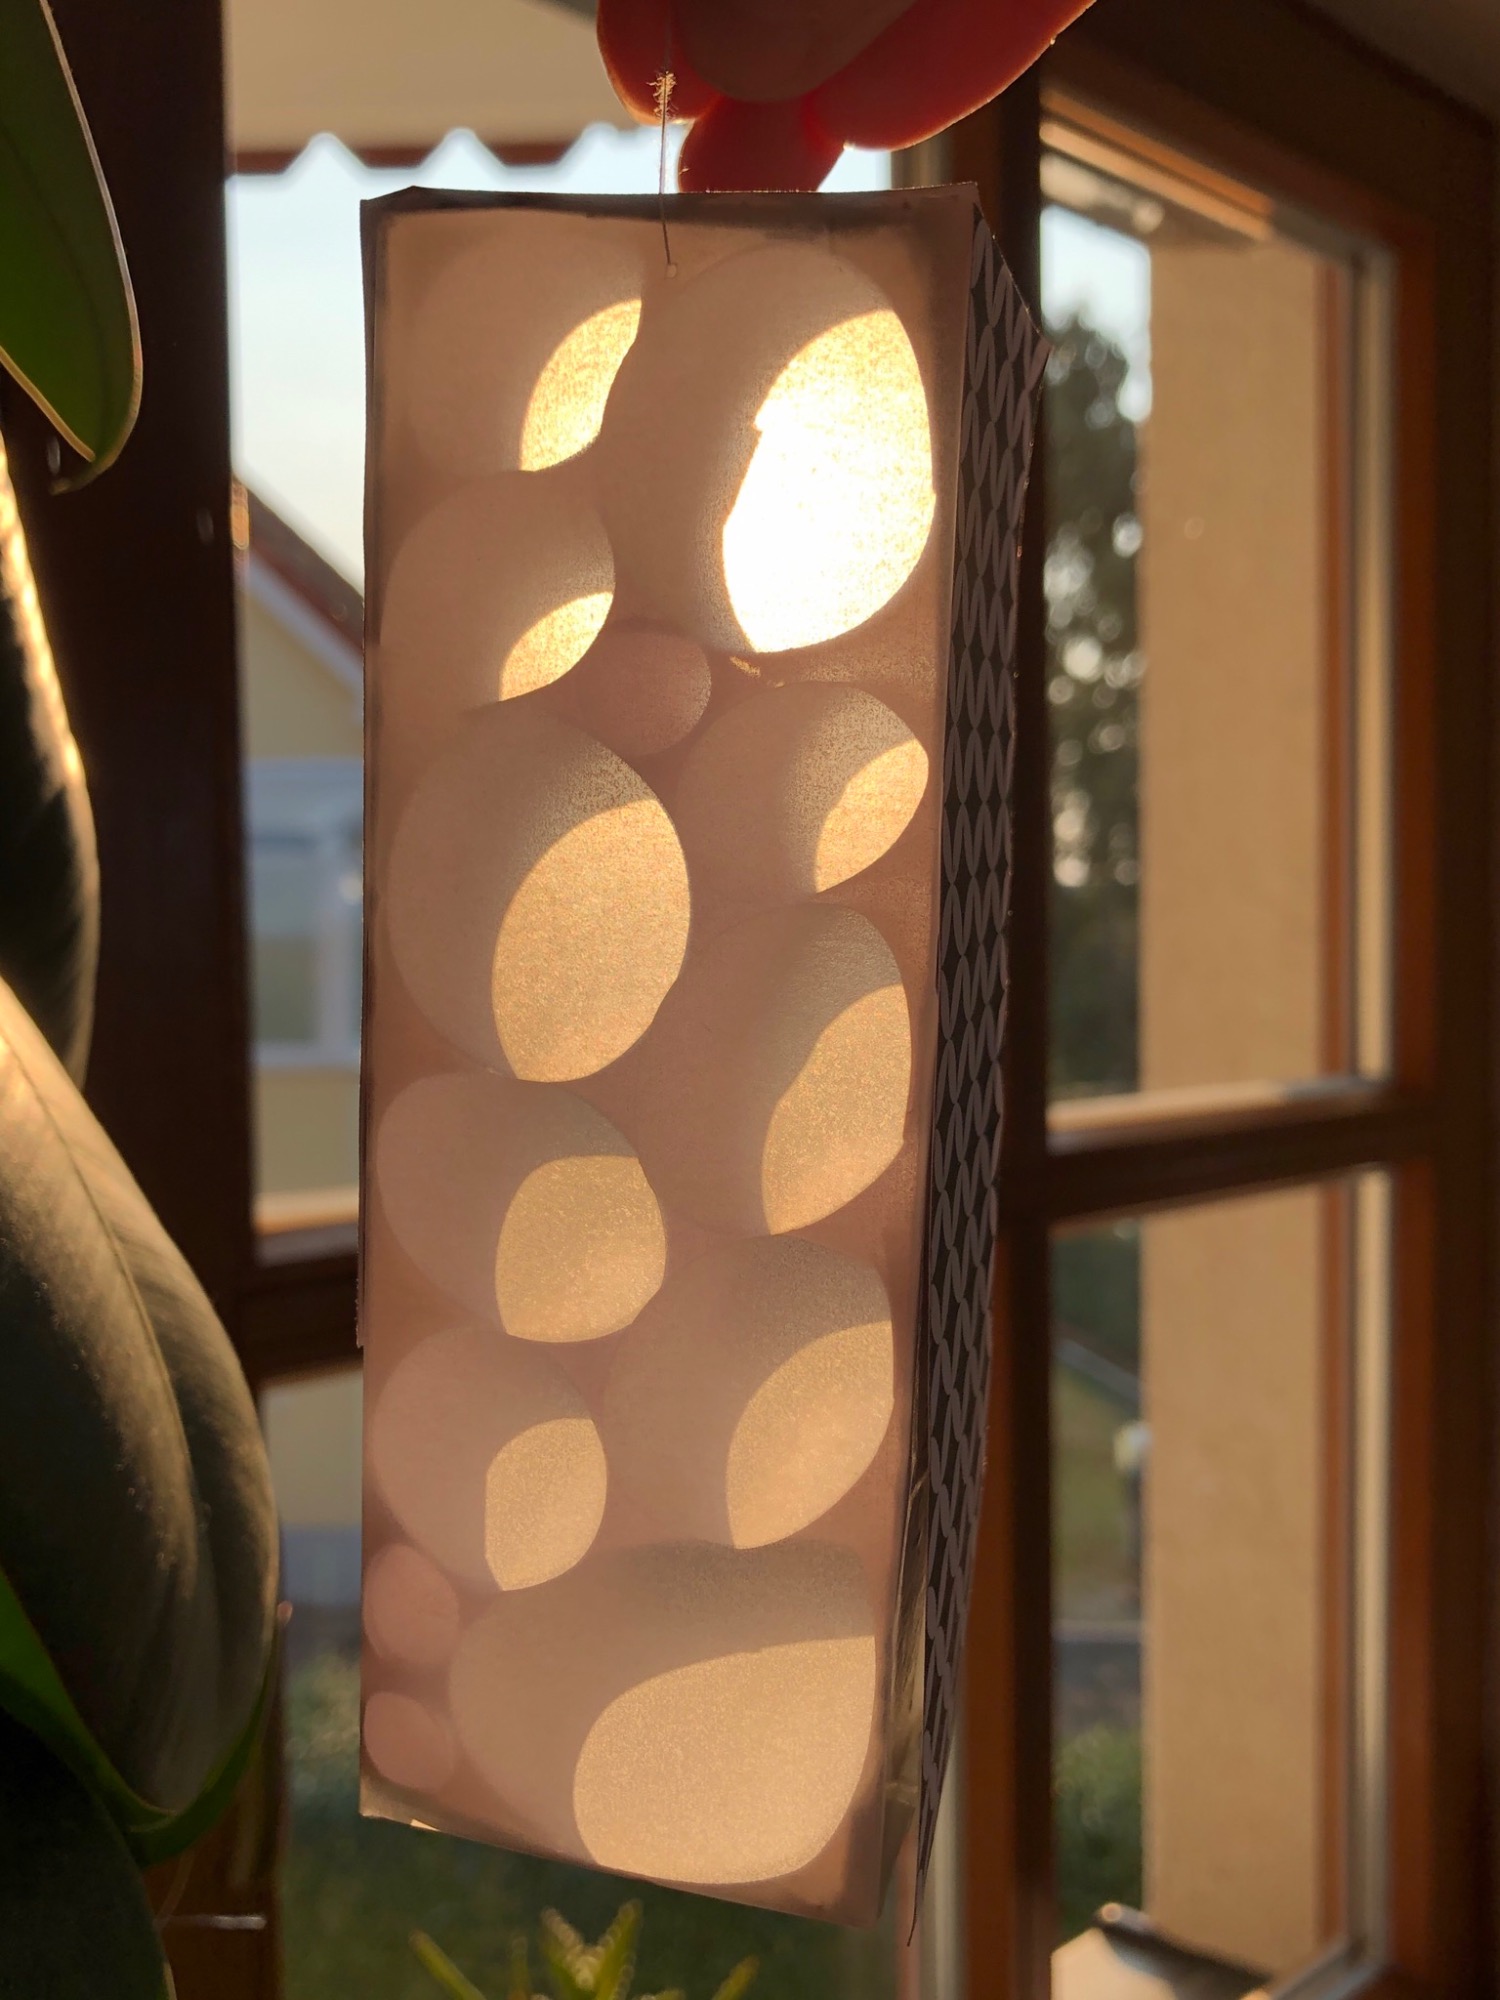
A simple but beautiful craft is this mobile. For this you need a narrow strip of an angular cardboard box, which you then fill with paper rings. Everything is then glued with transparent paper and the mobile is finished. By playing with the wind creates a great effect. Try it yourself!
Media Education for Kindergarten and Hort

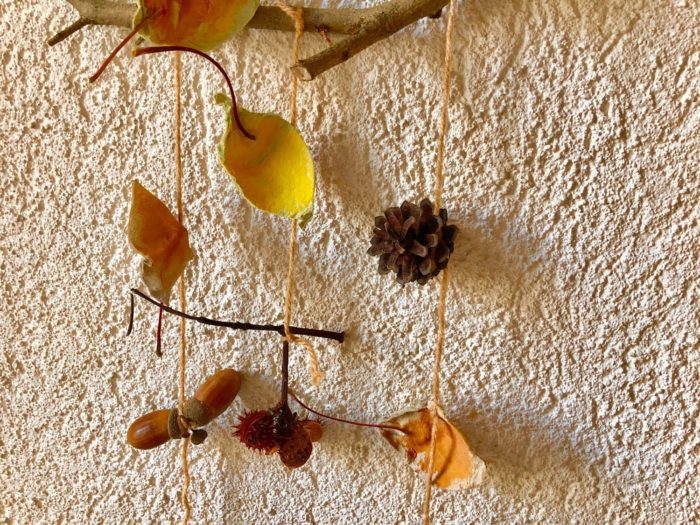
Relief in everyday life, targeted promotion of individual children, independent learning and - without any pre-knowledge already usable by the youngest!
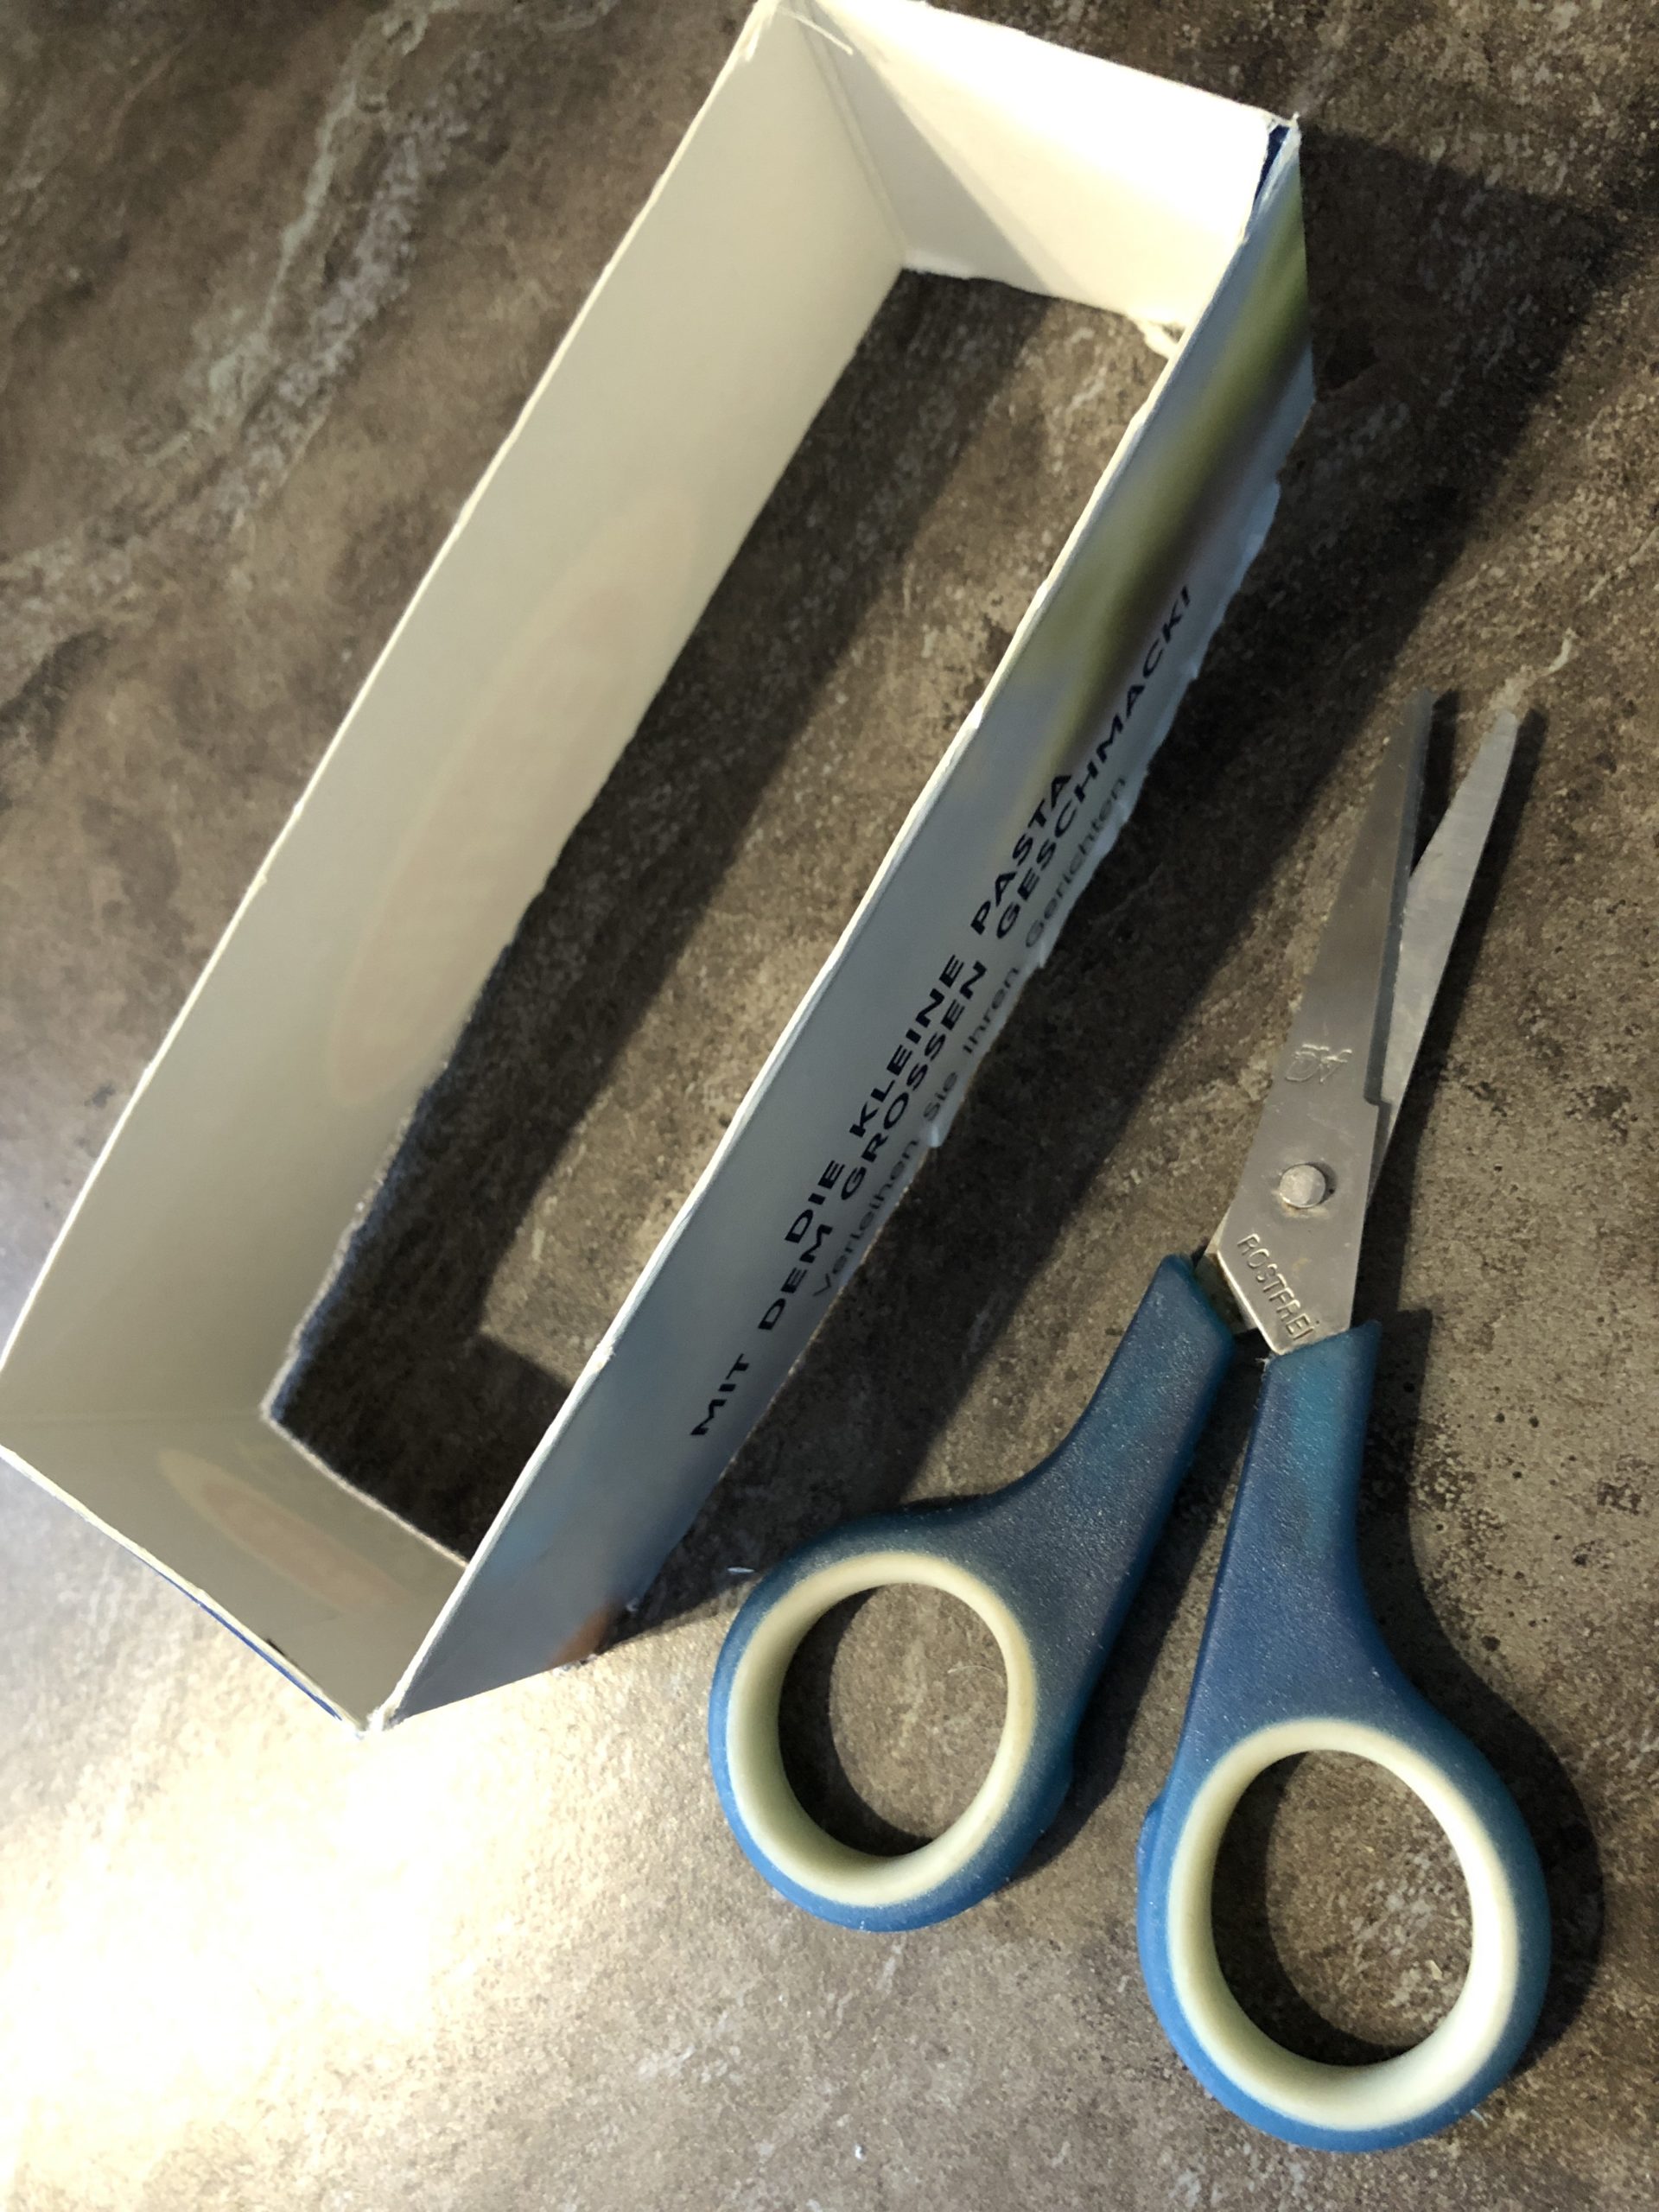
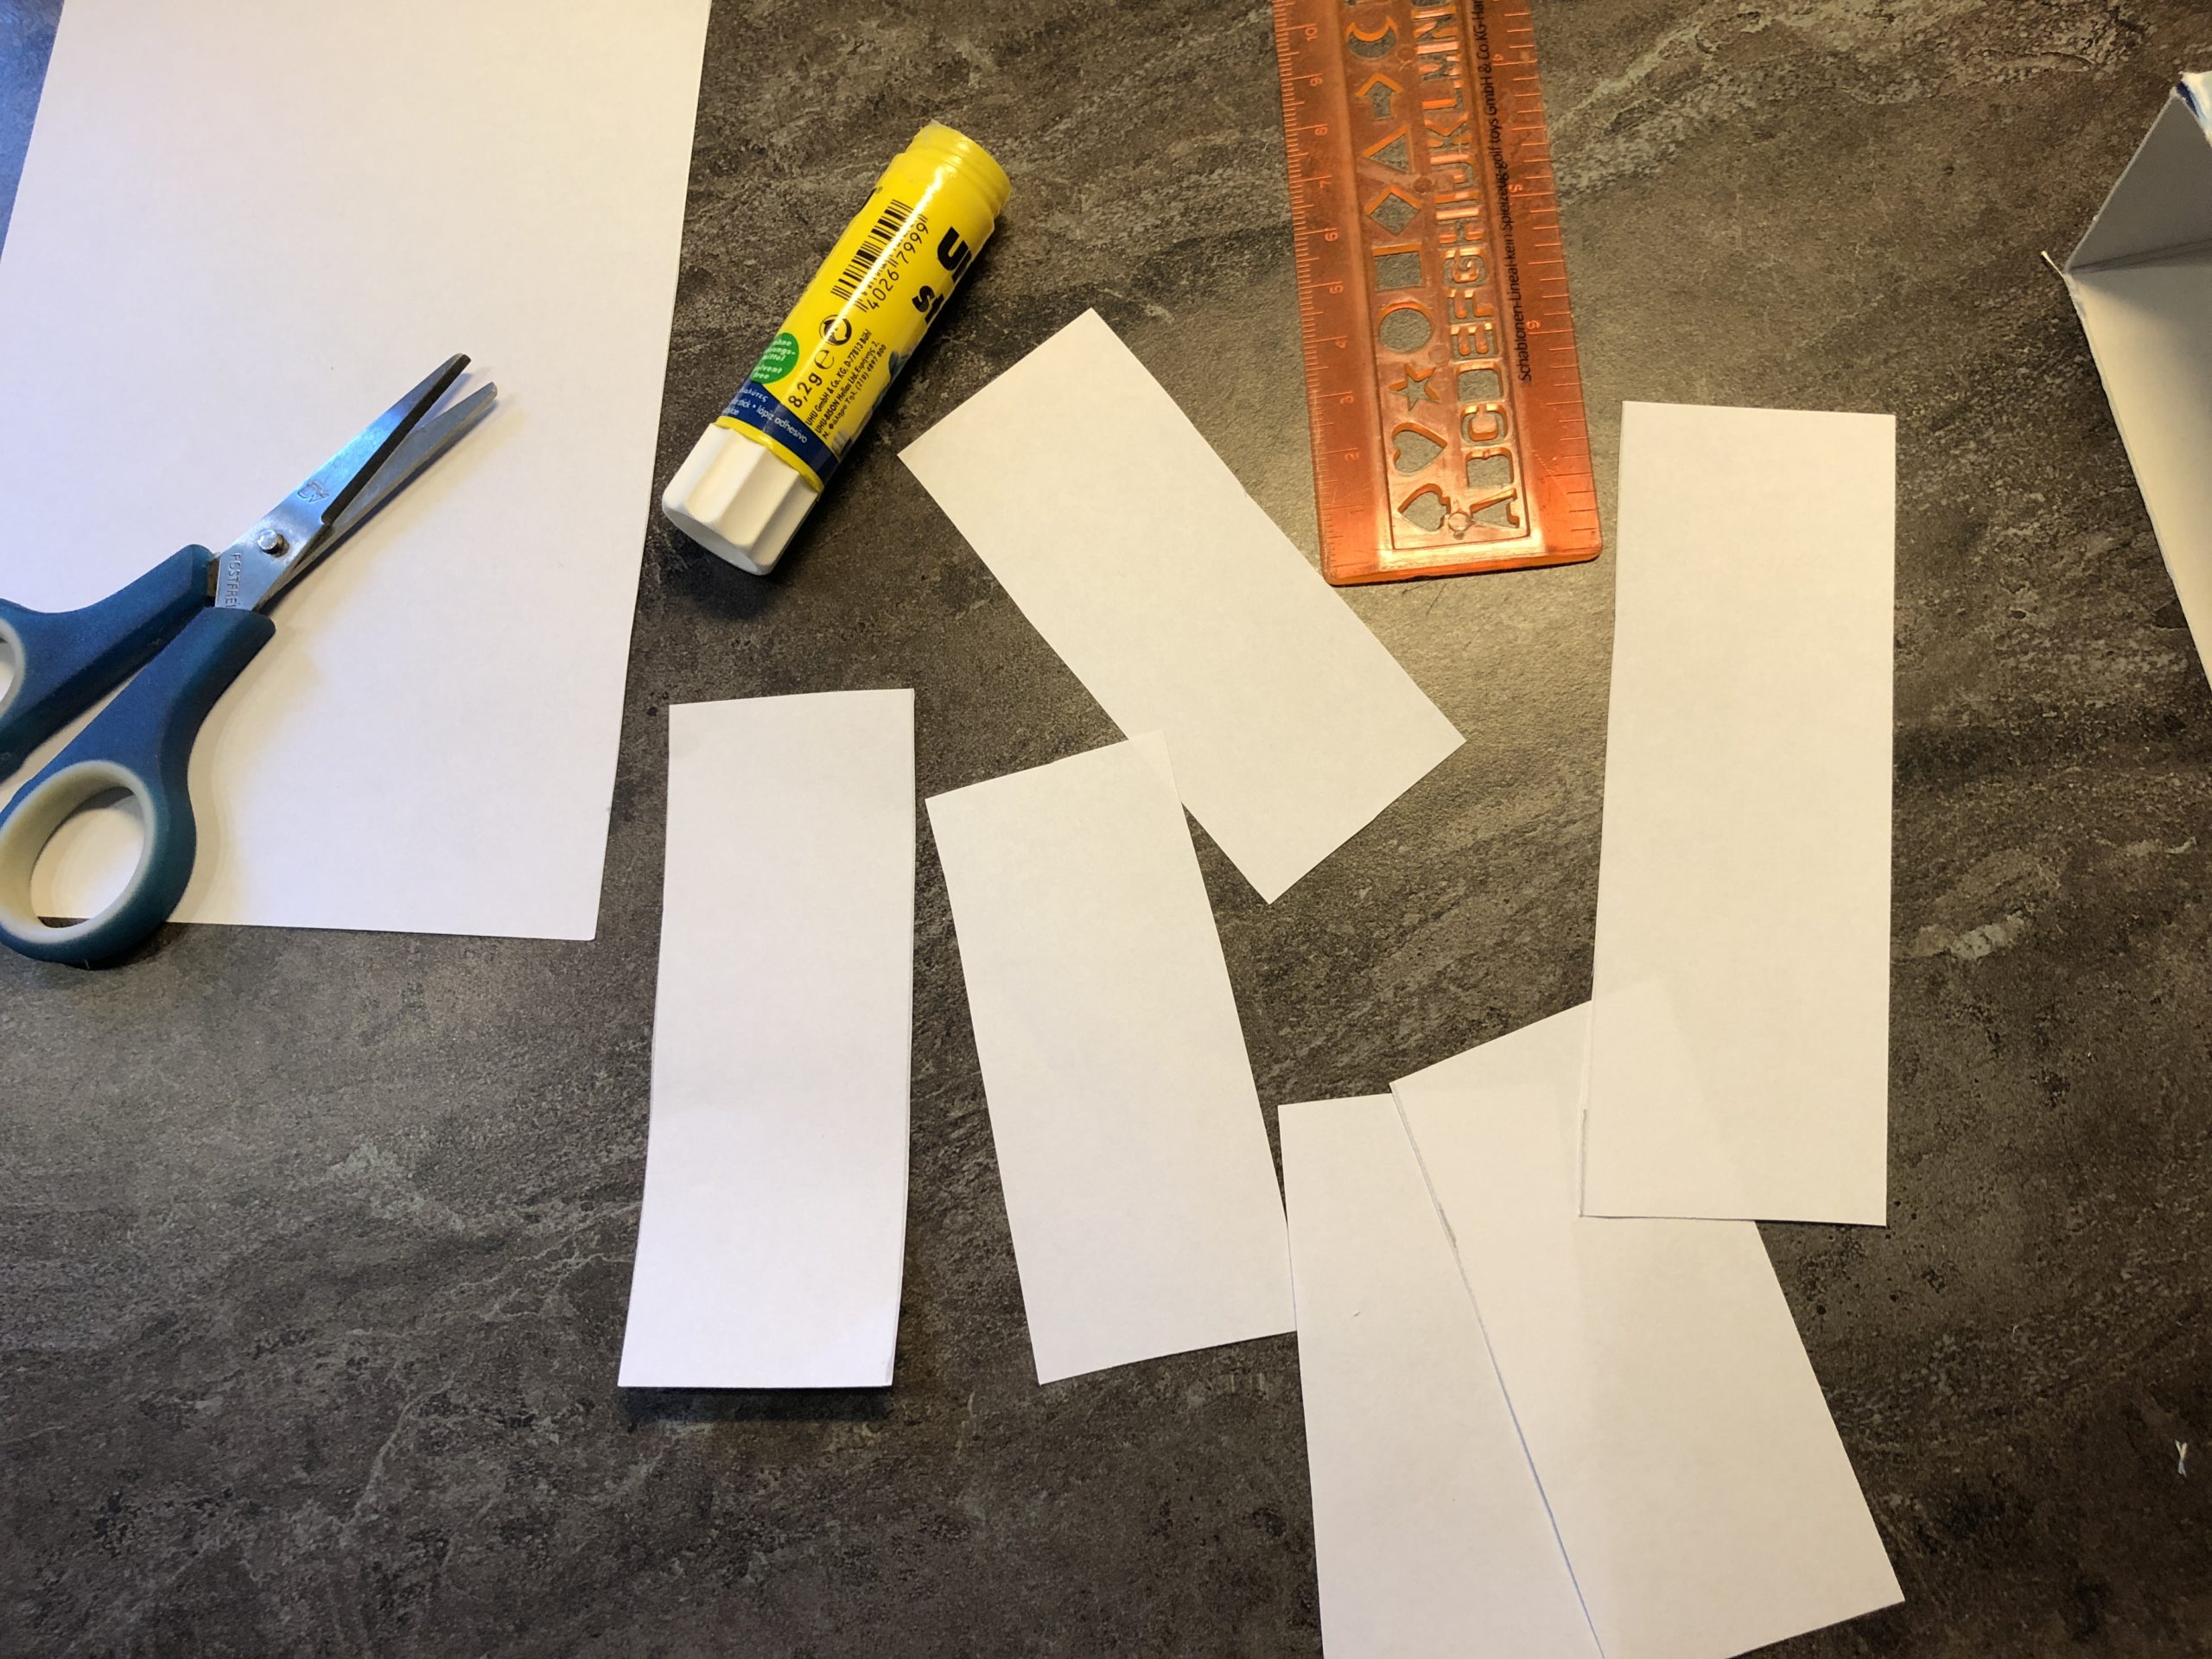
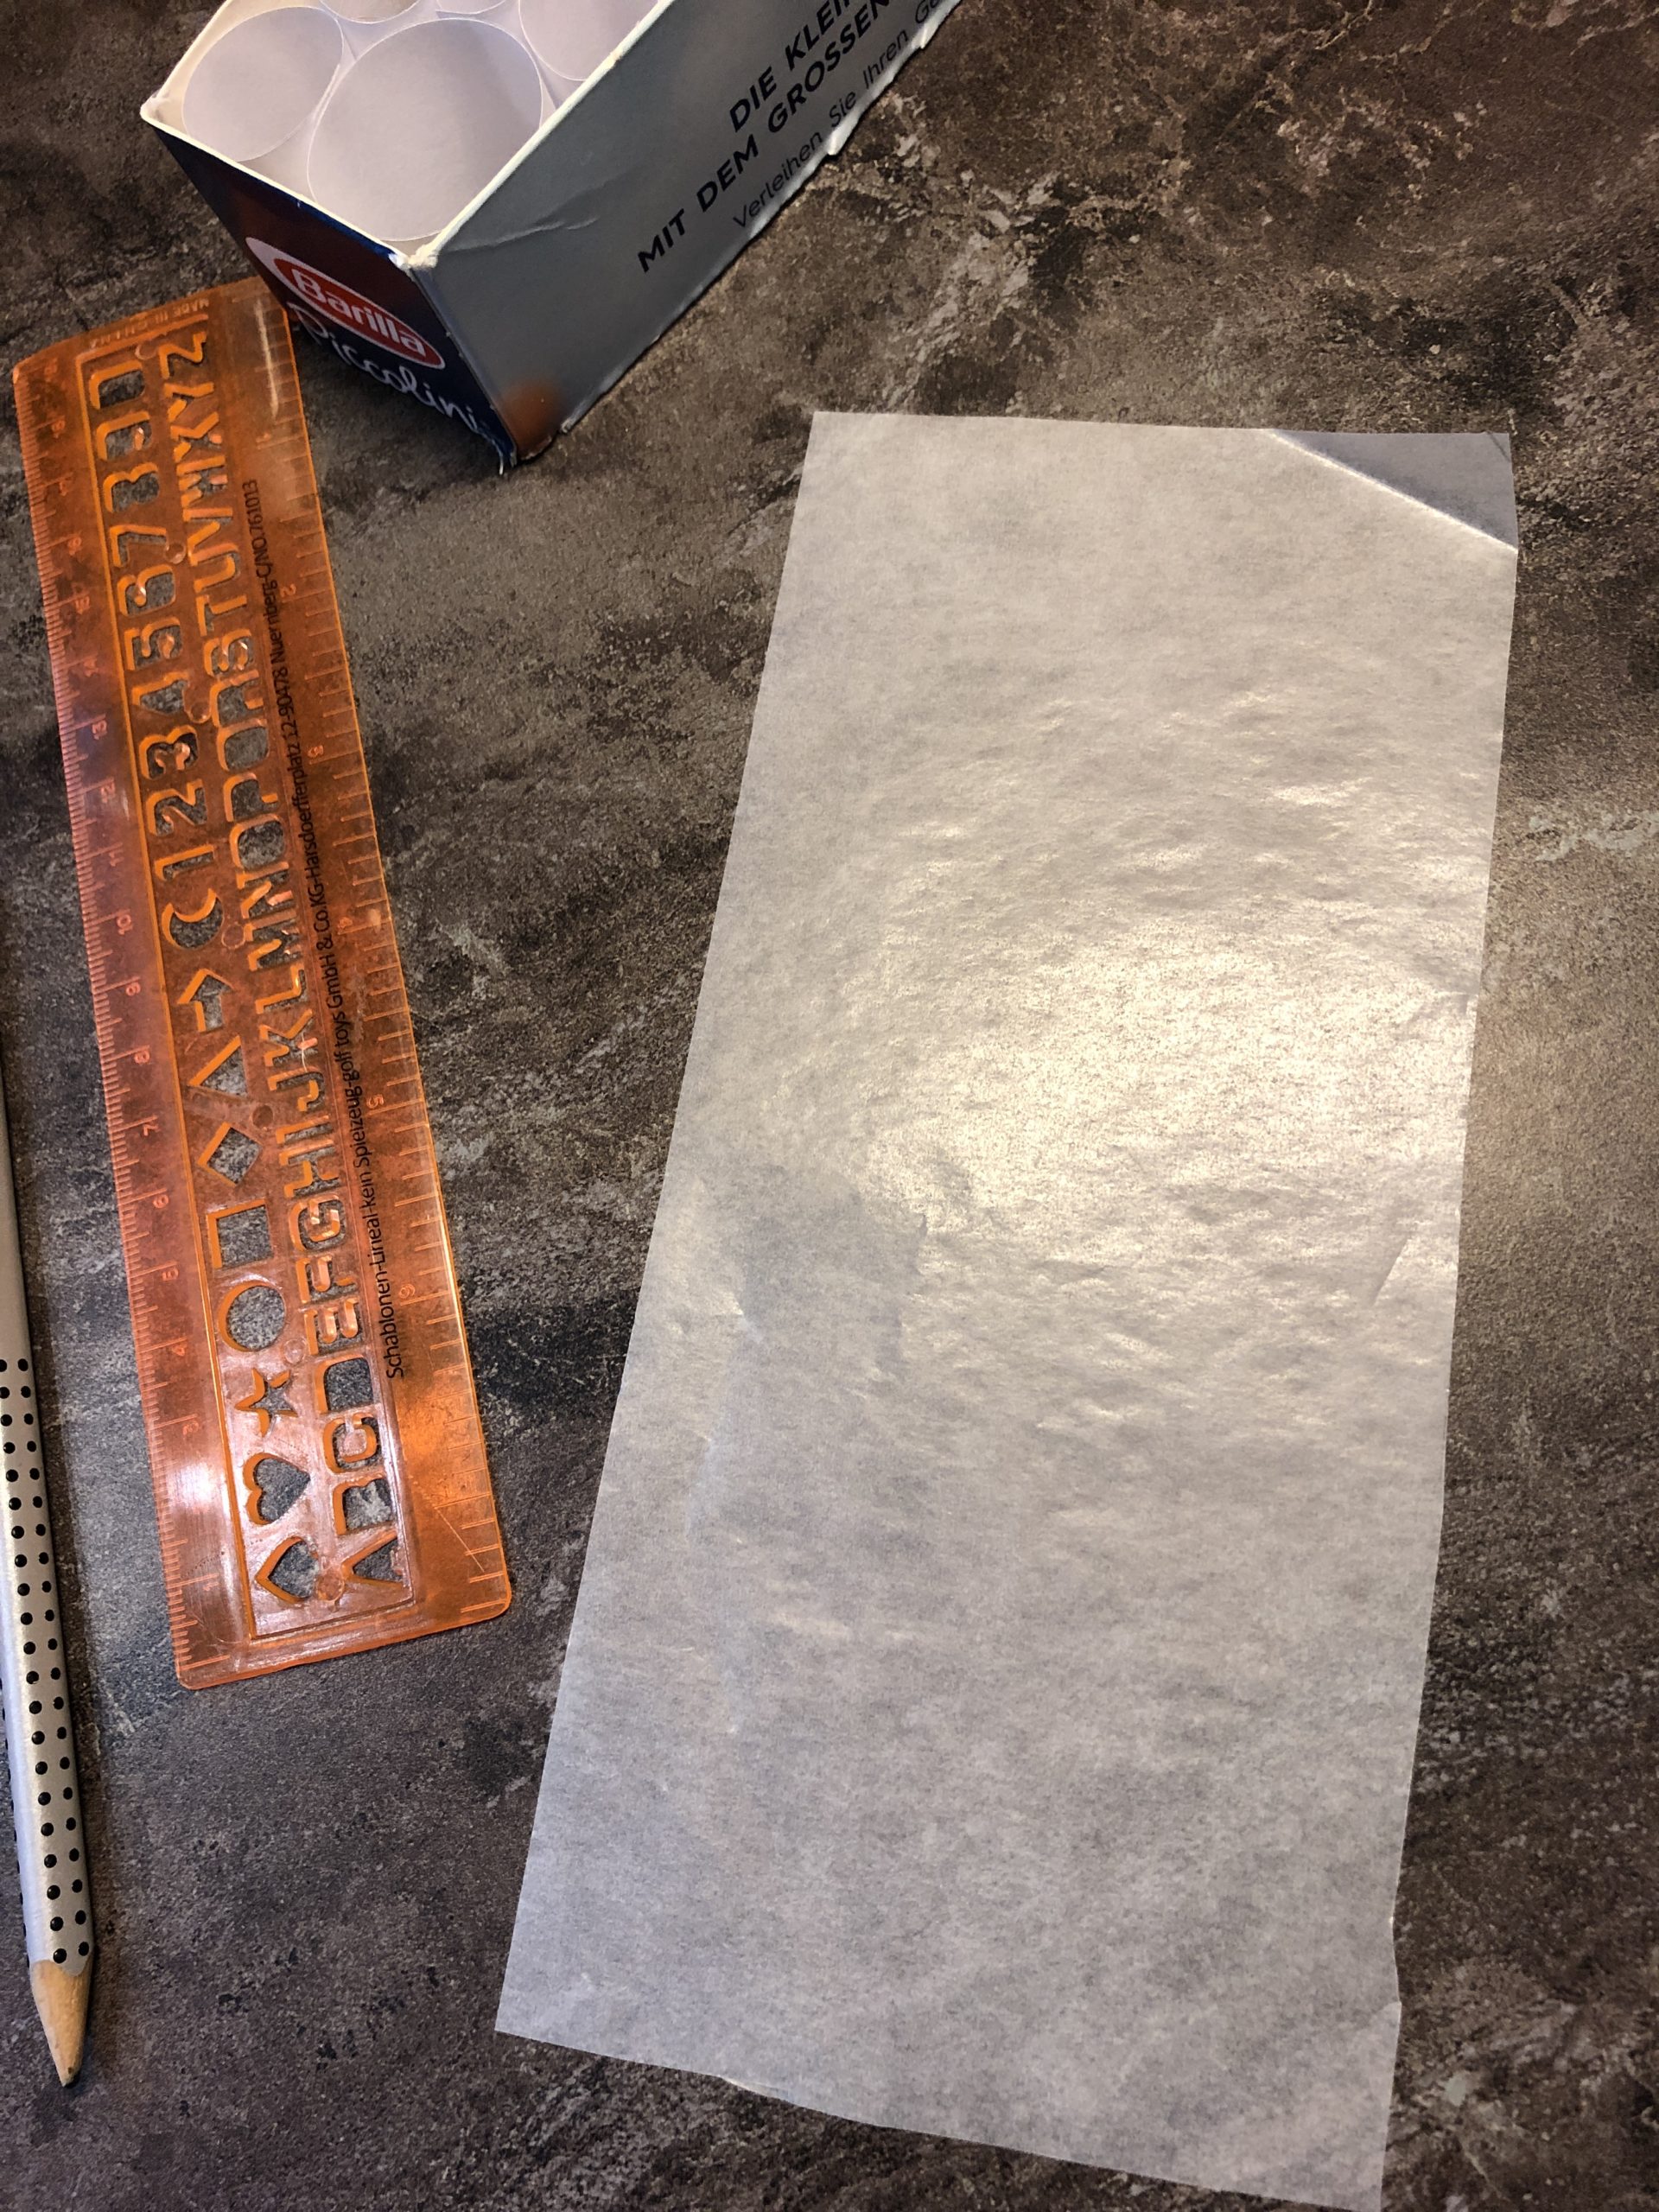
I took an empty noodle pack and cut off a 3 cm wide strip. We don't need a lid or bottom of the box.
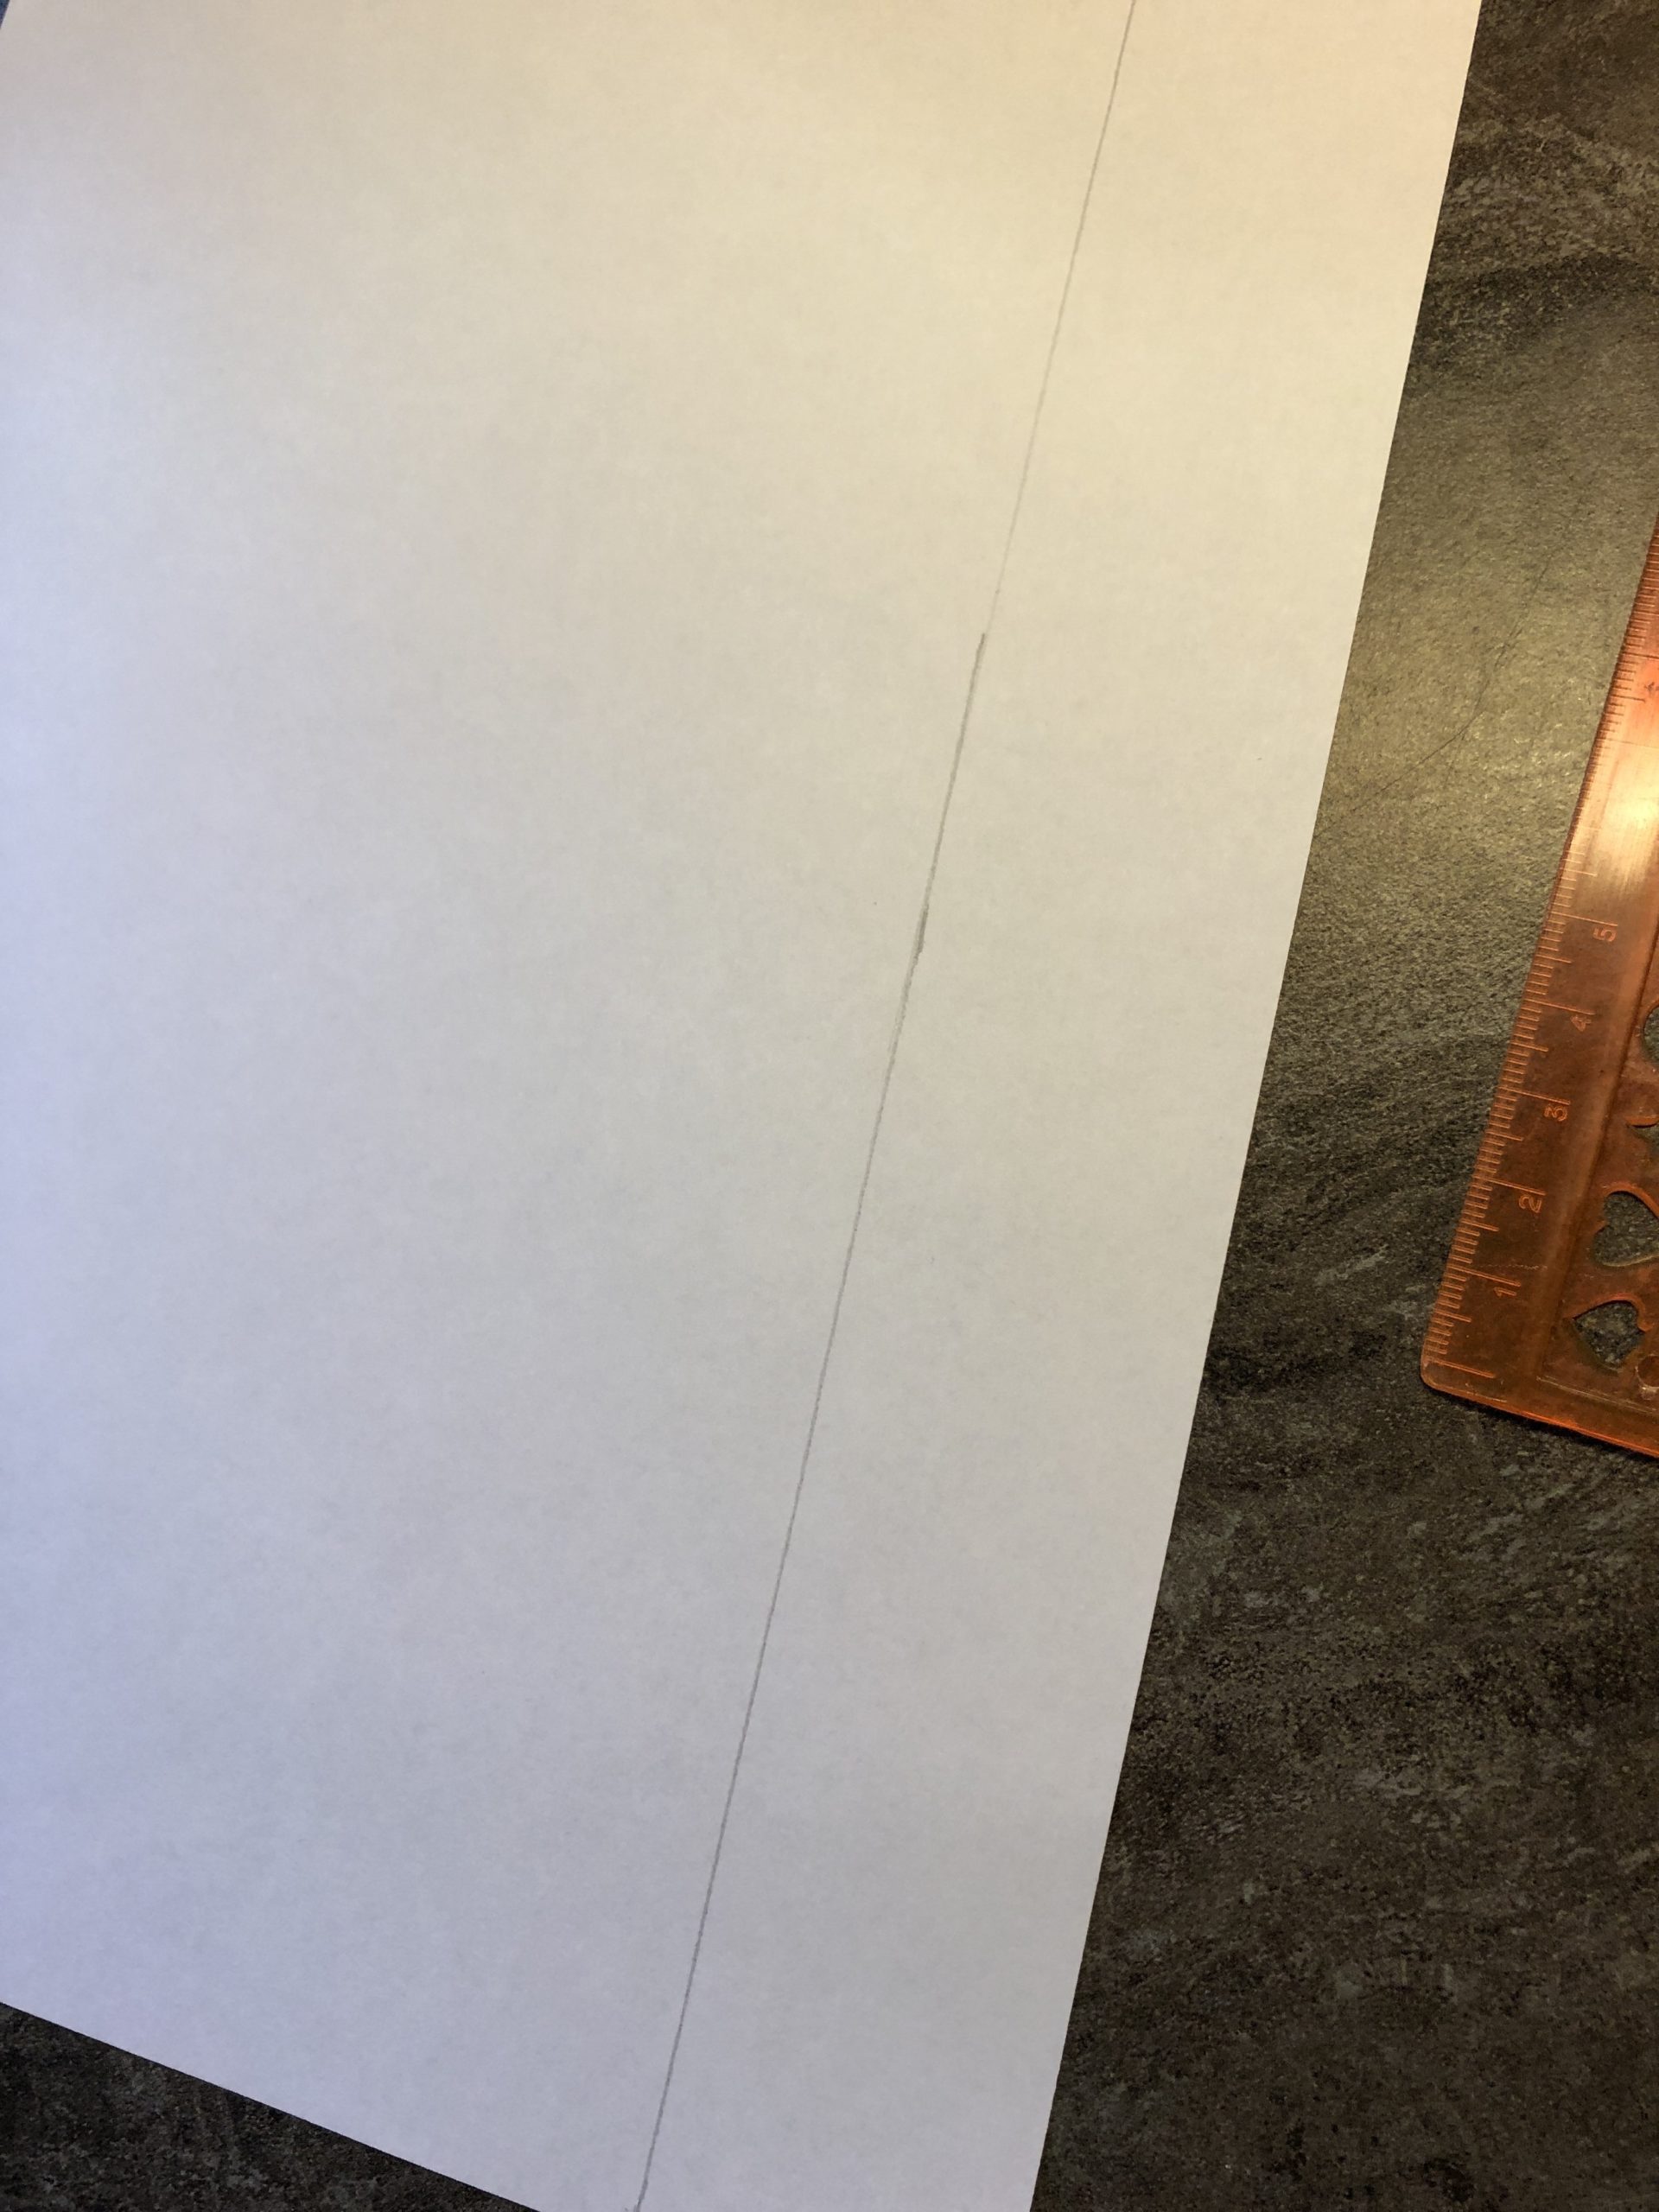
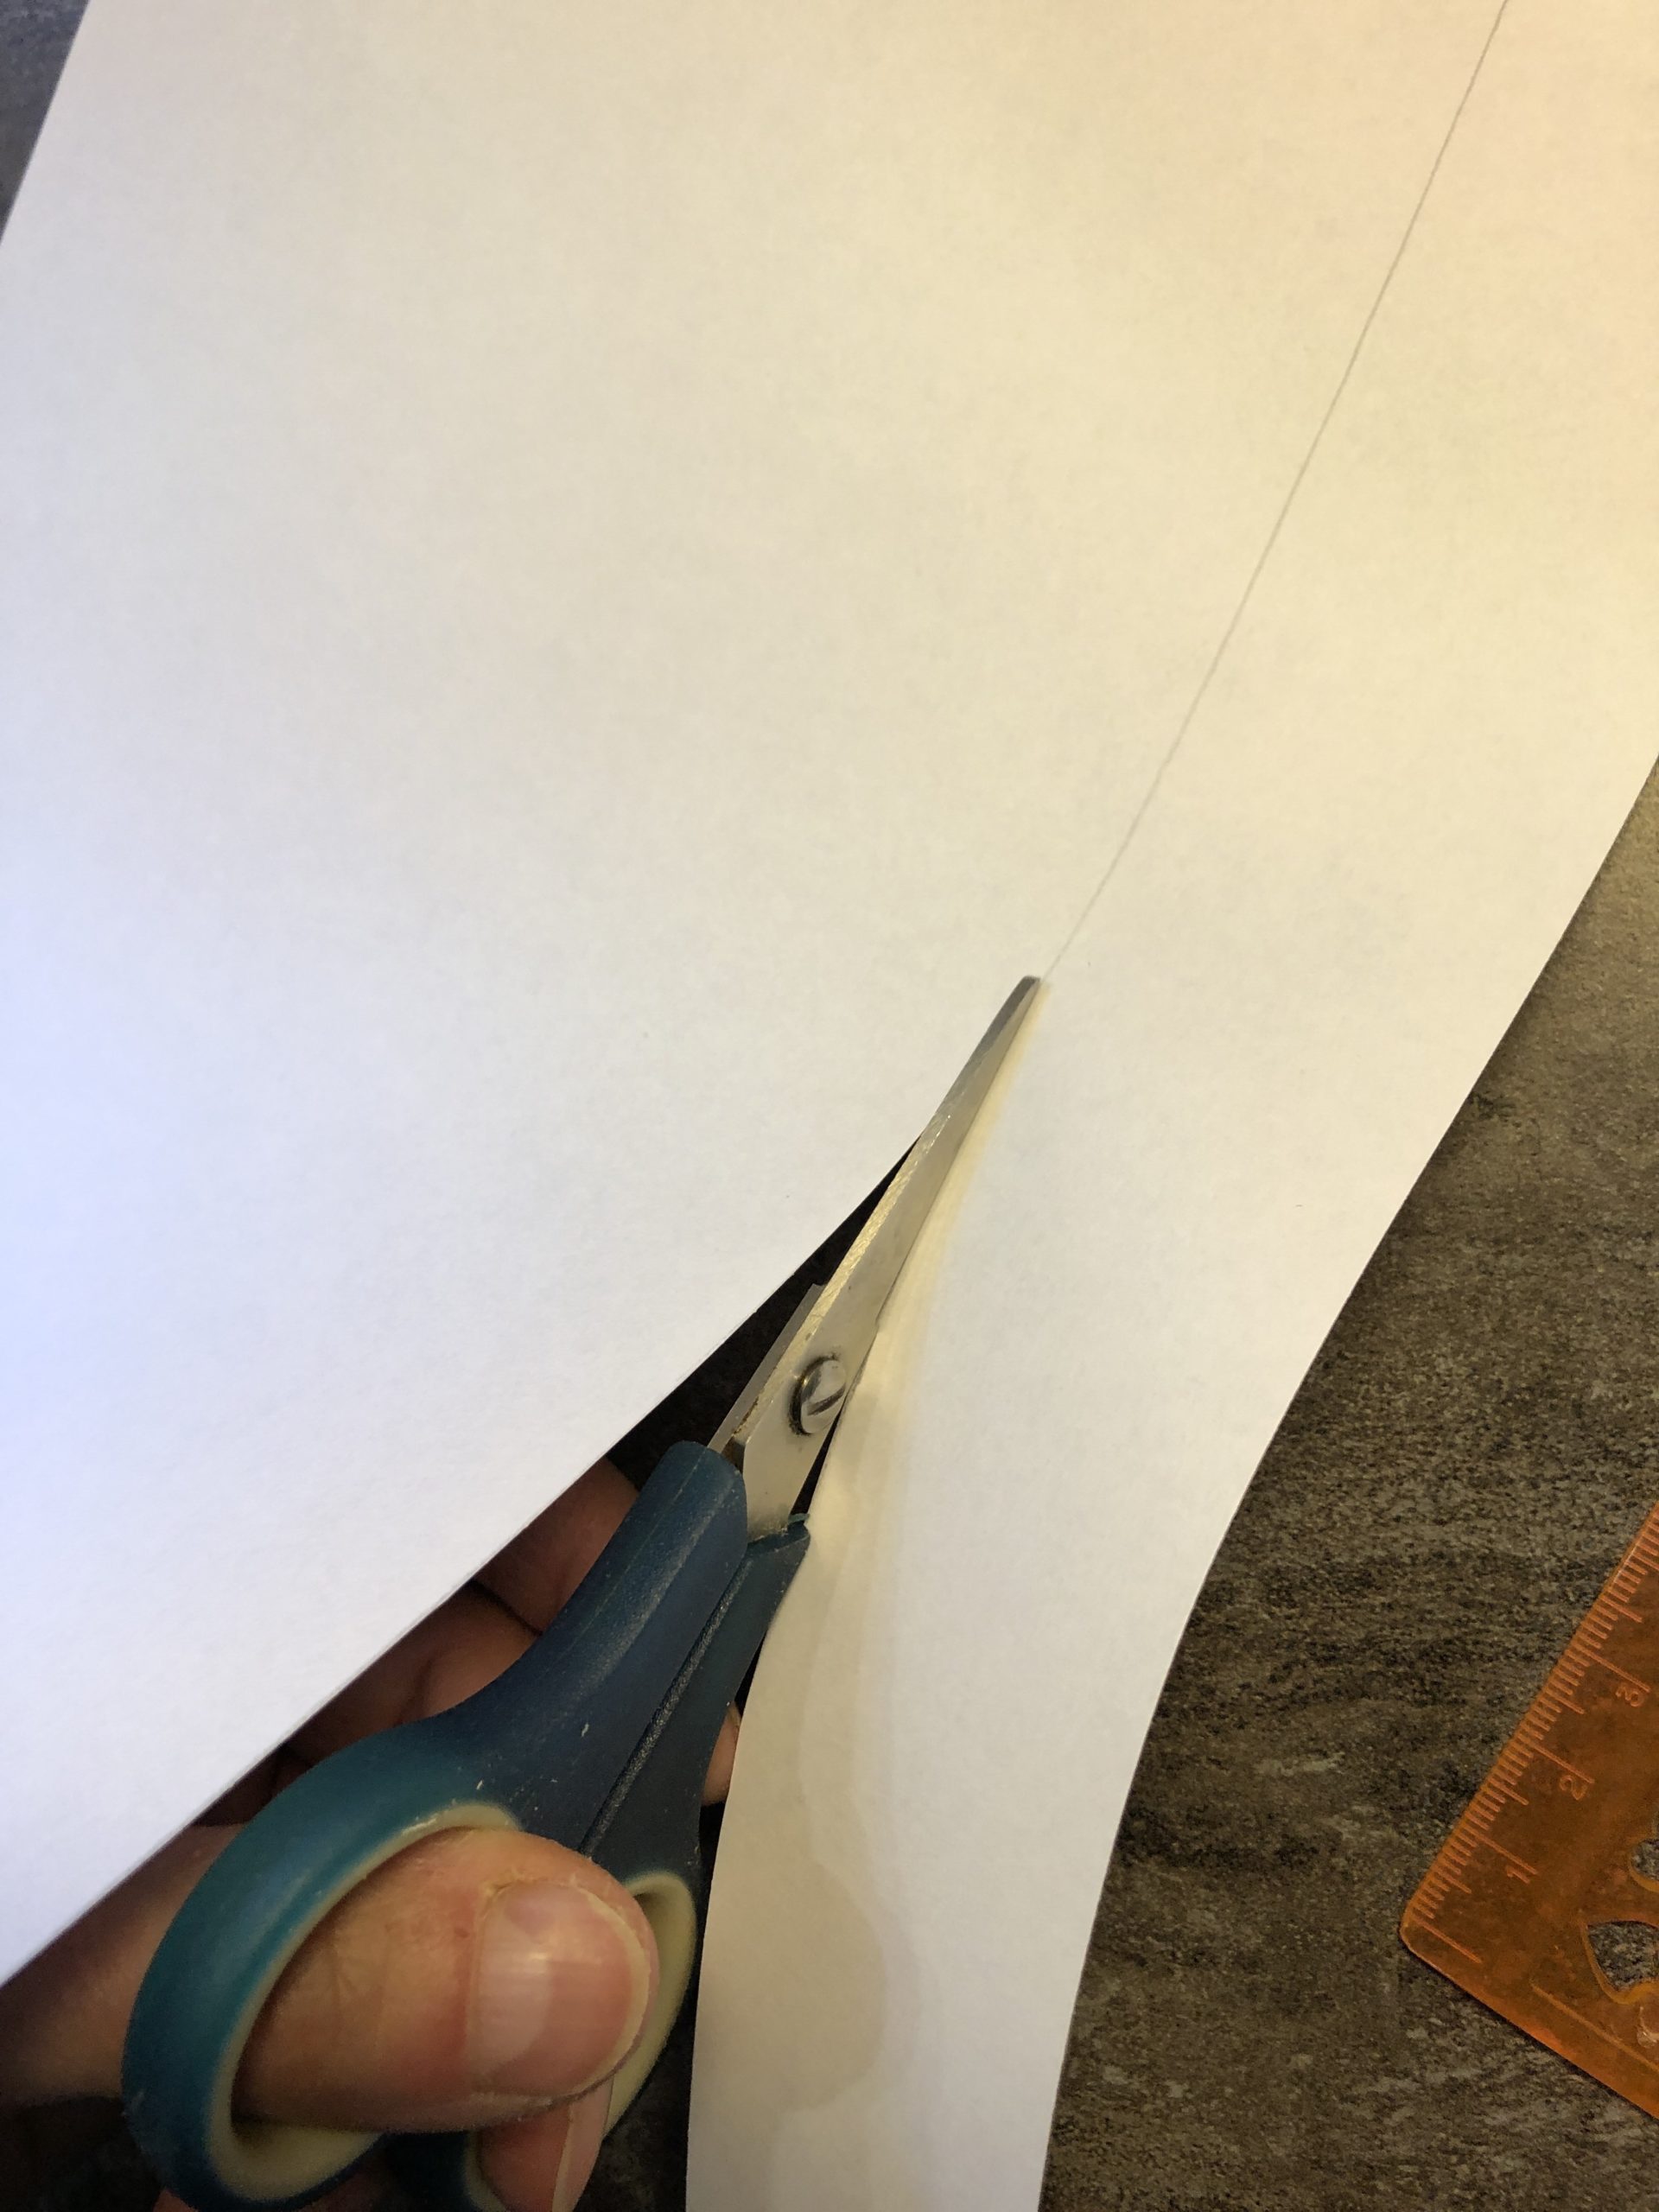
From the white typewriter paper stripes are now cut in the width of our box height -- with me therefore 3cm wide stripes.
Measure strips and cut them.
Cut off the cut strips for different lengths. Cut off the strips as desired, you don't have to measure anything here!
Each strip is now coated with the glue stick at one end and then glued to a ring.
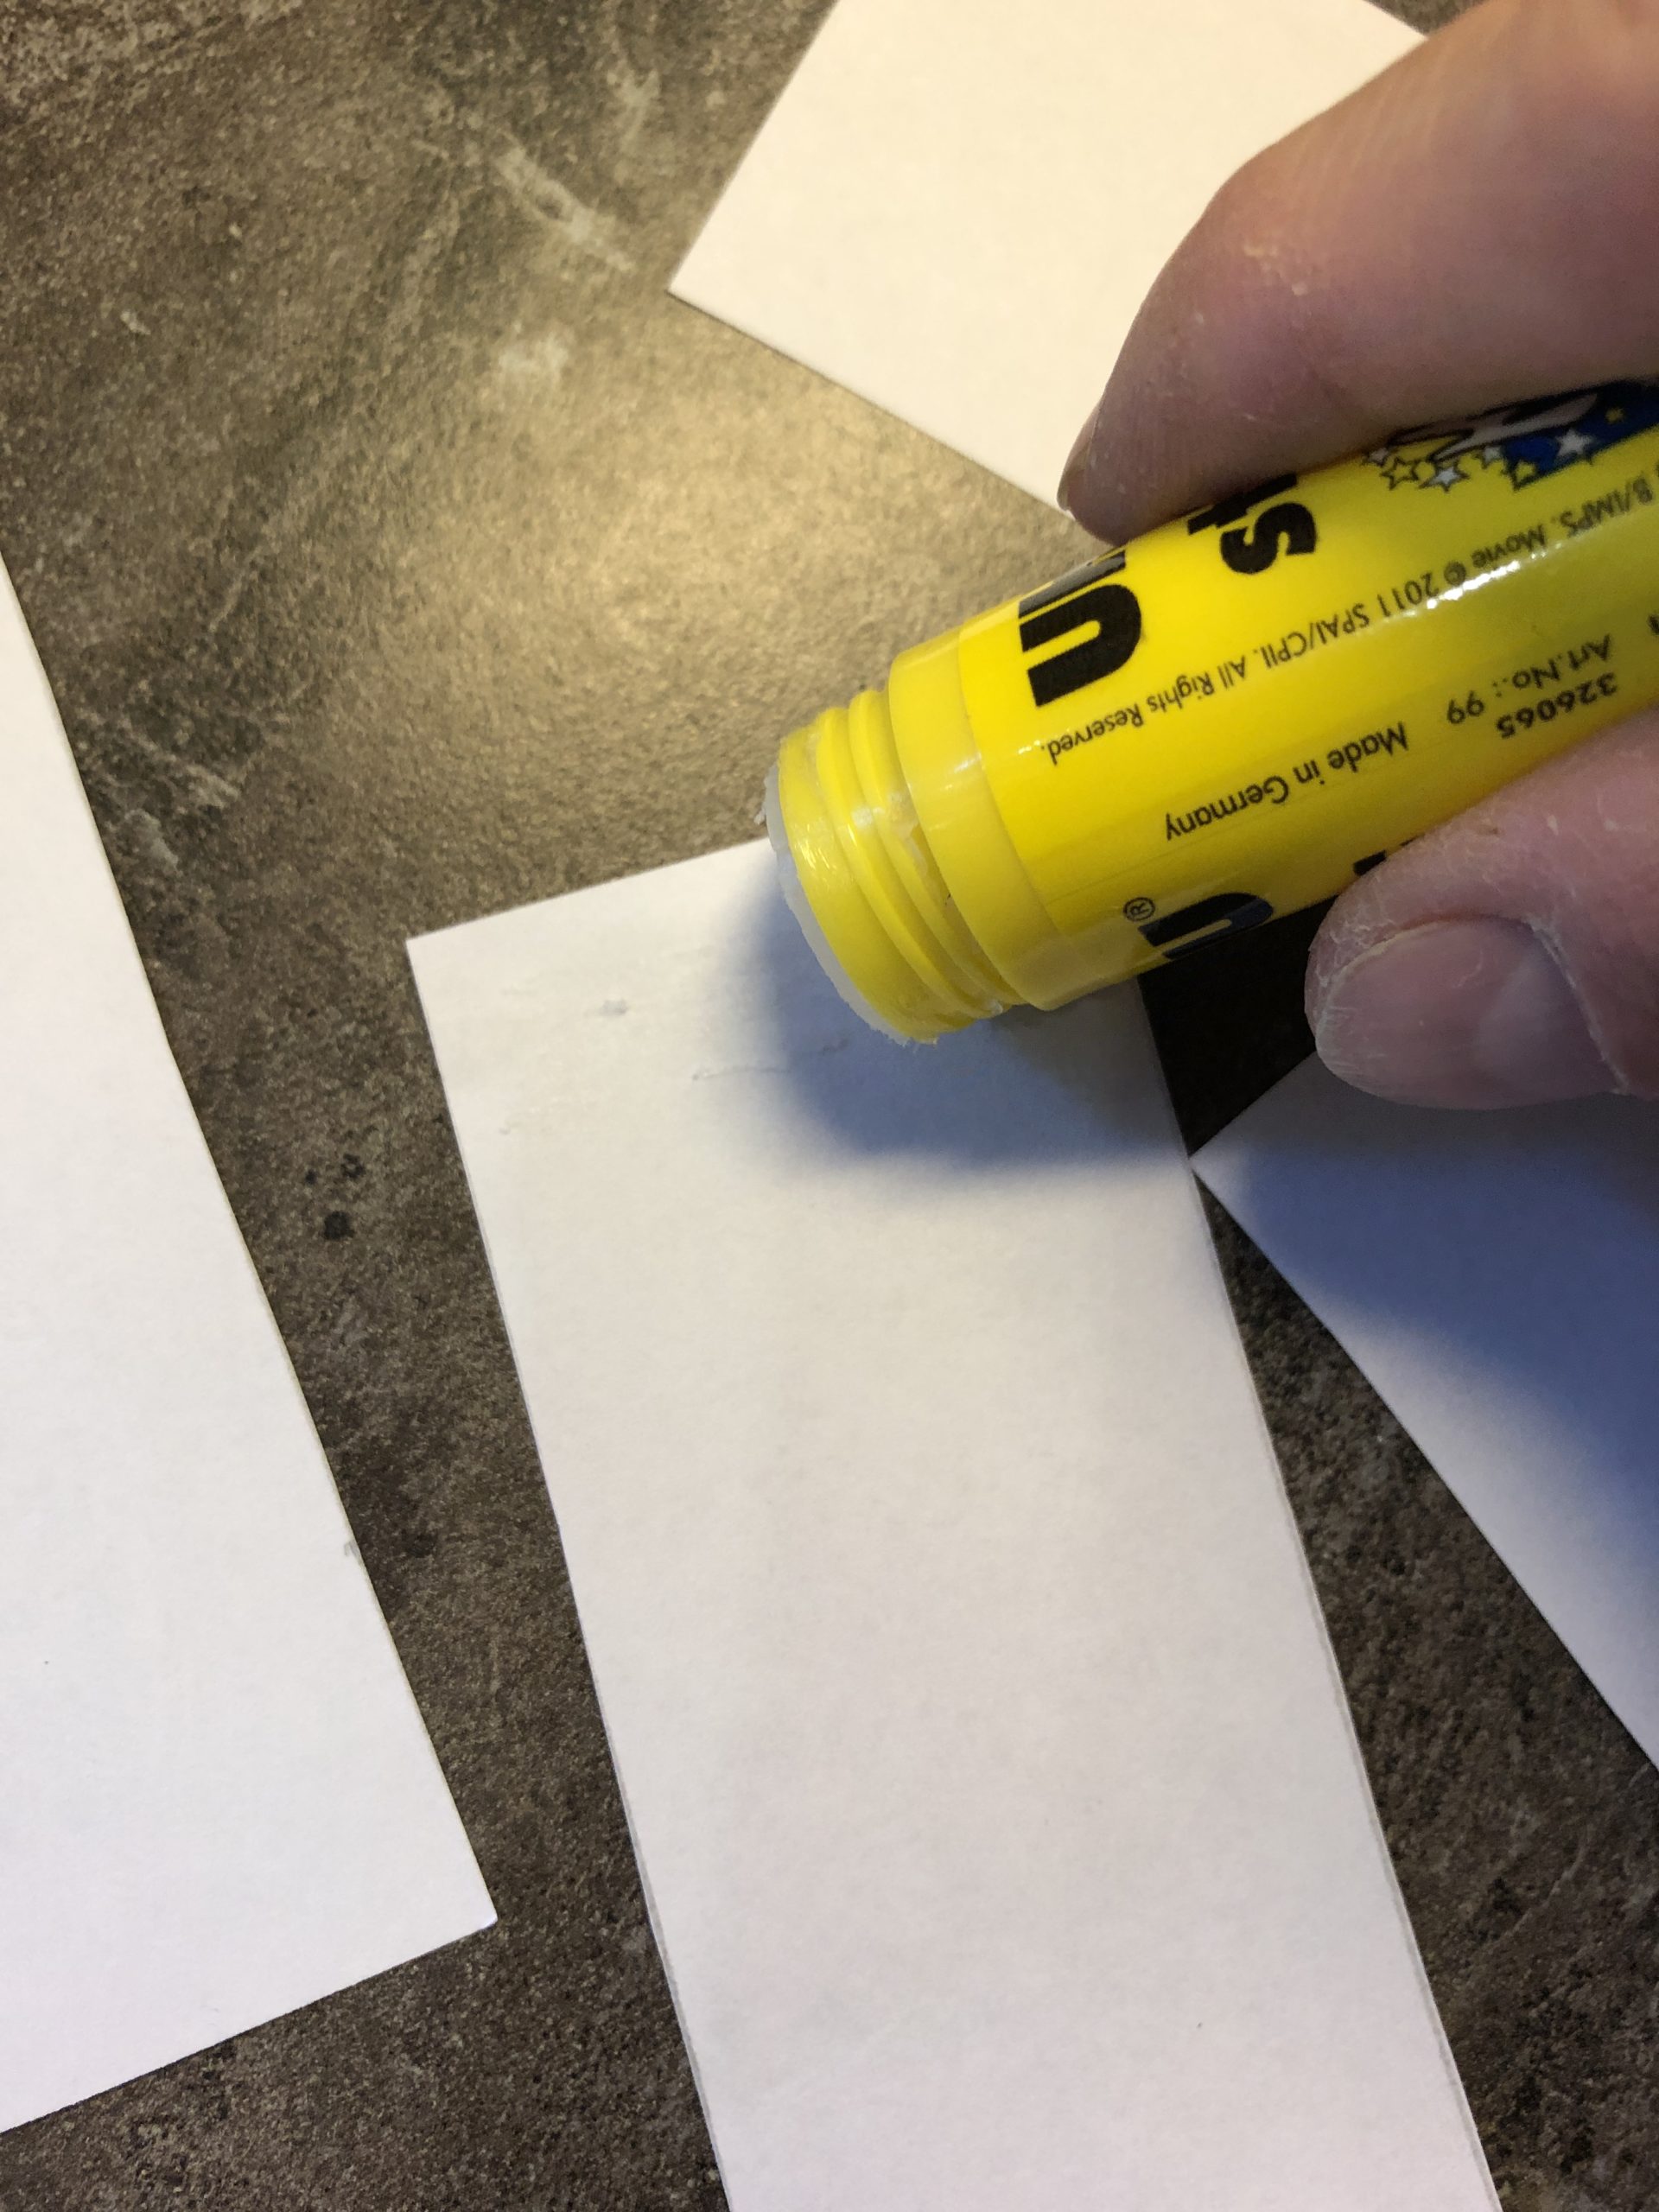
Press both ends on each other for that.

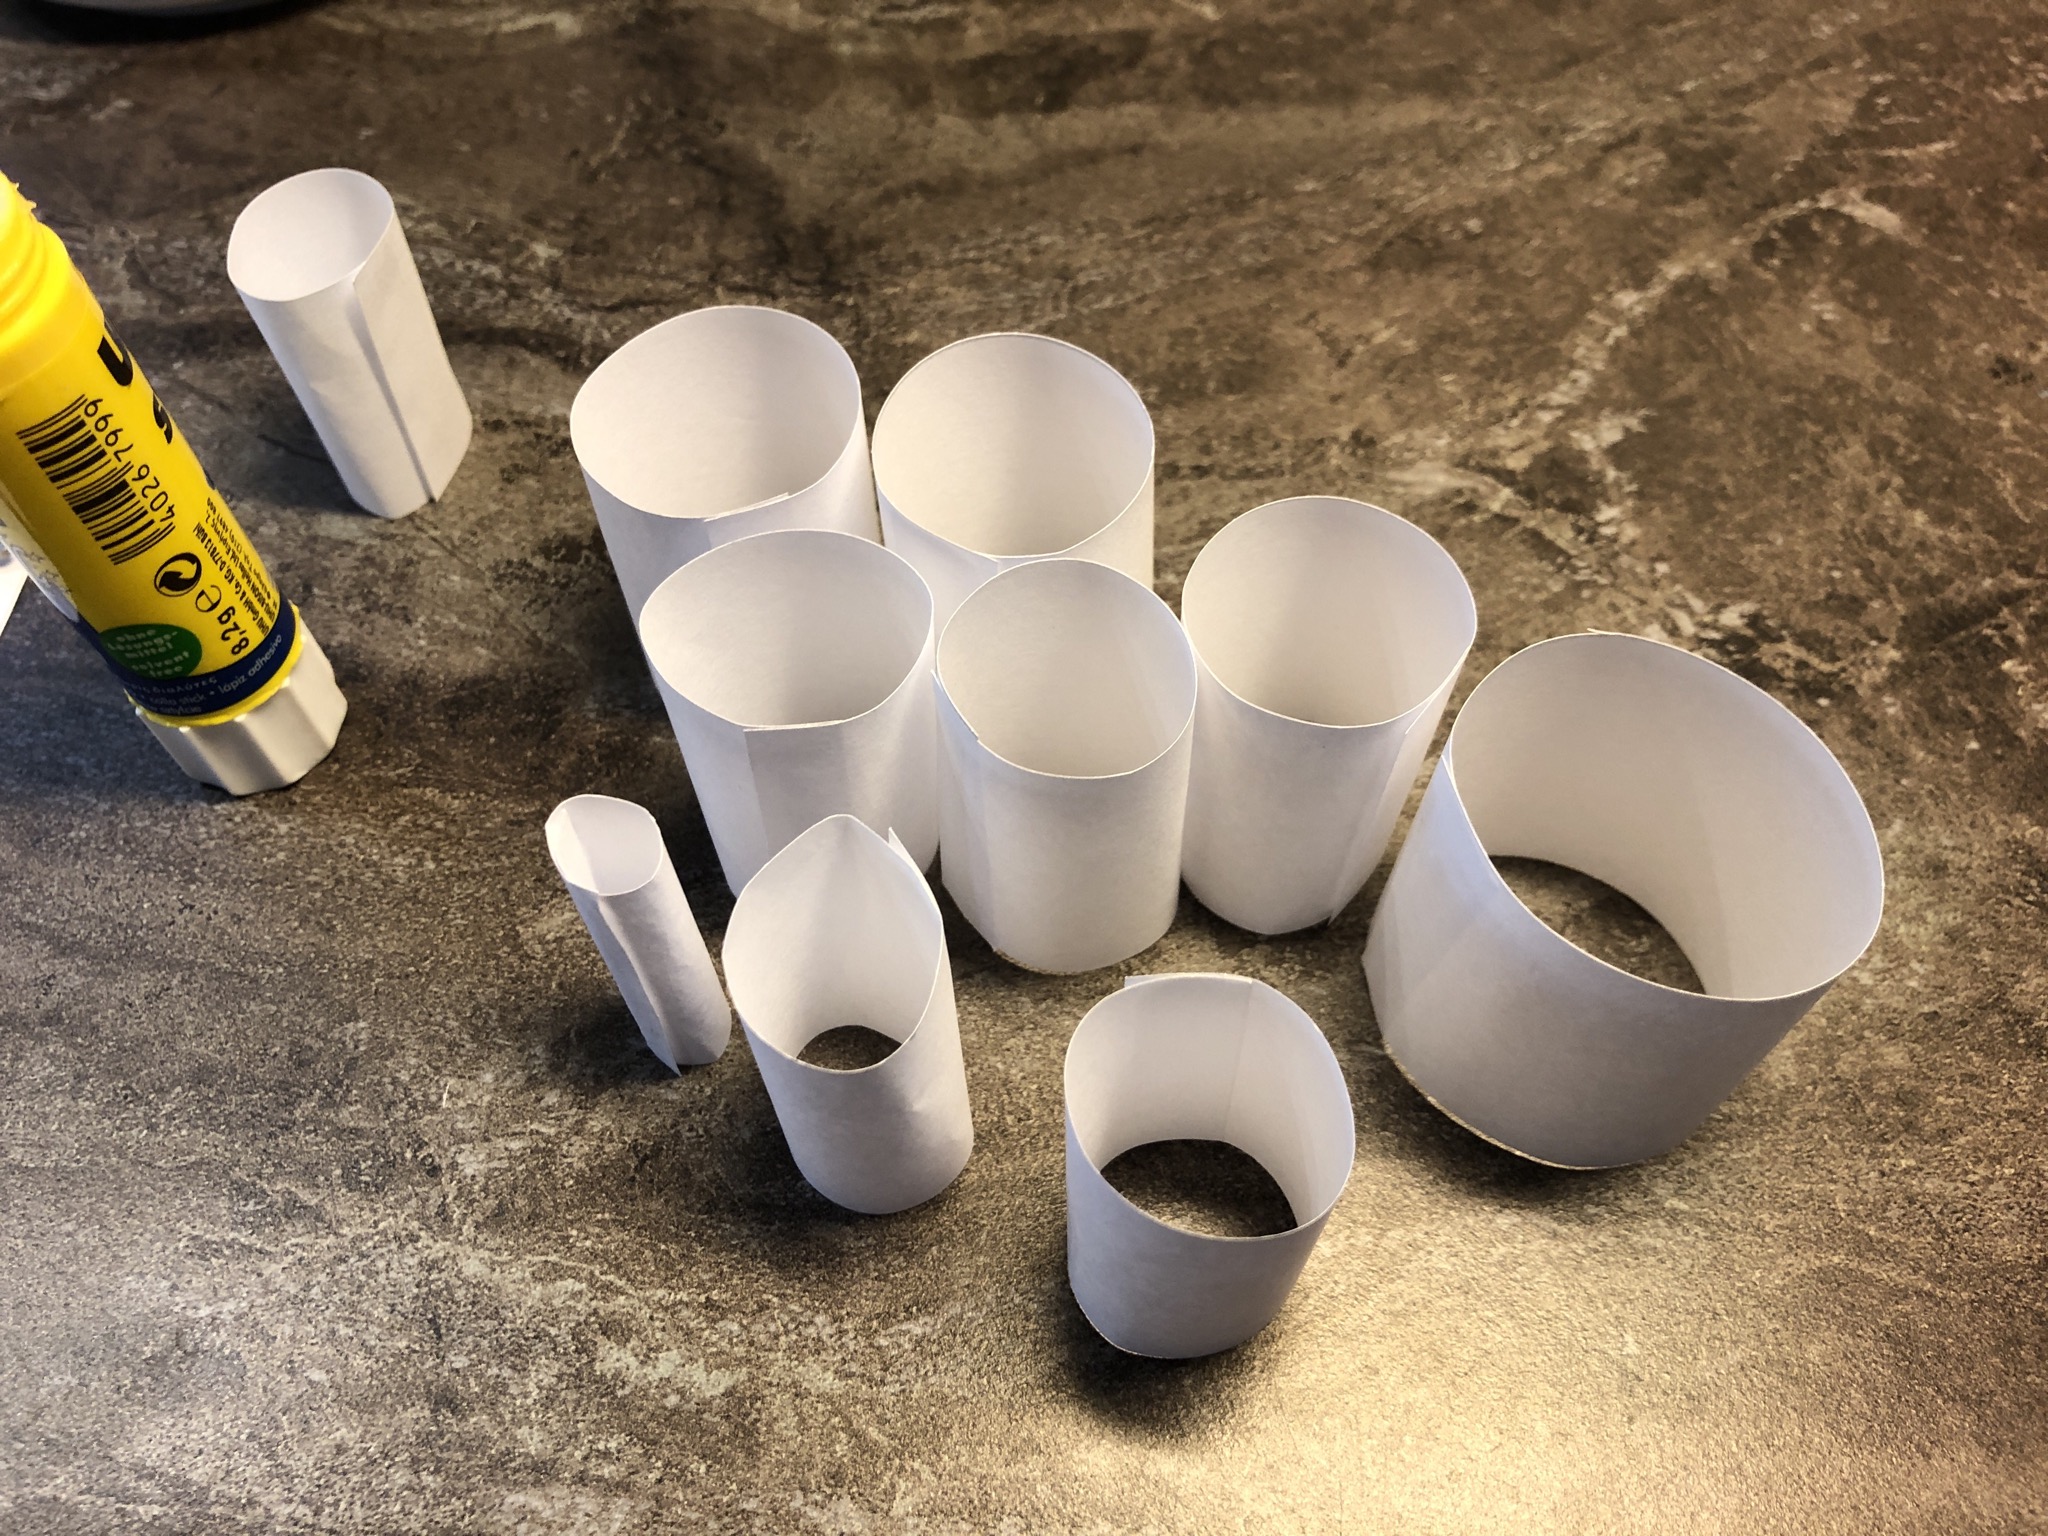
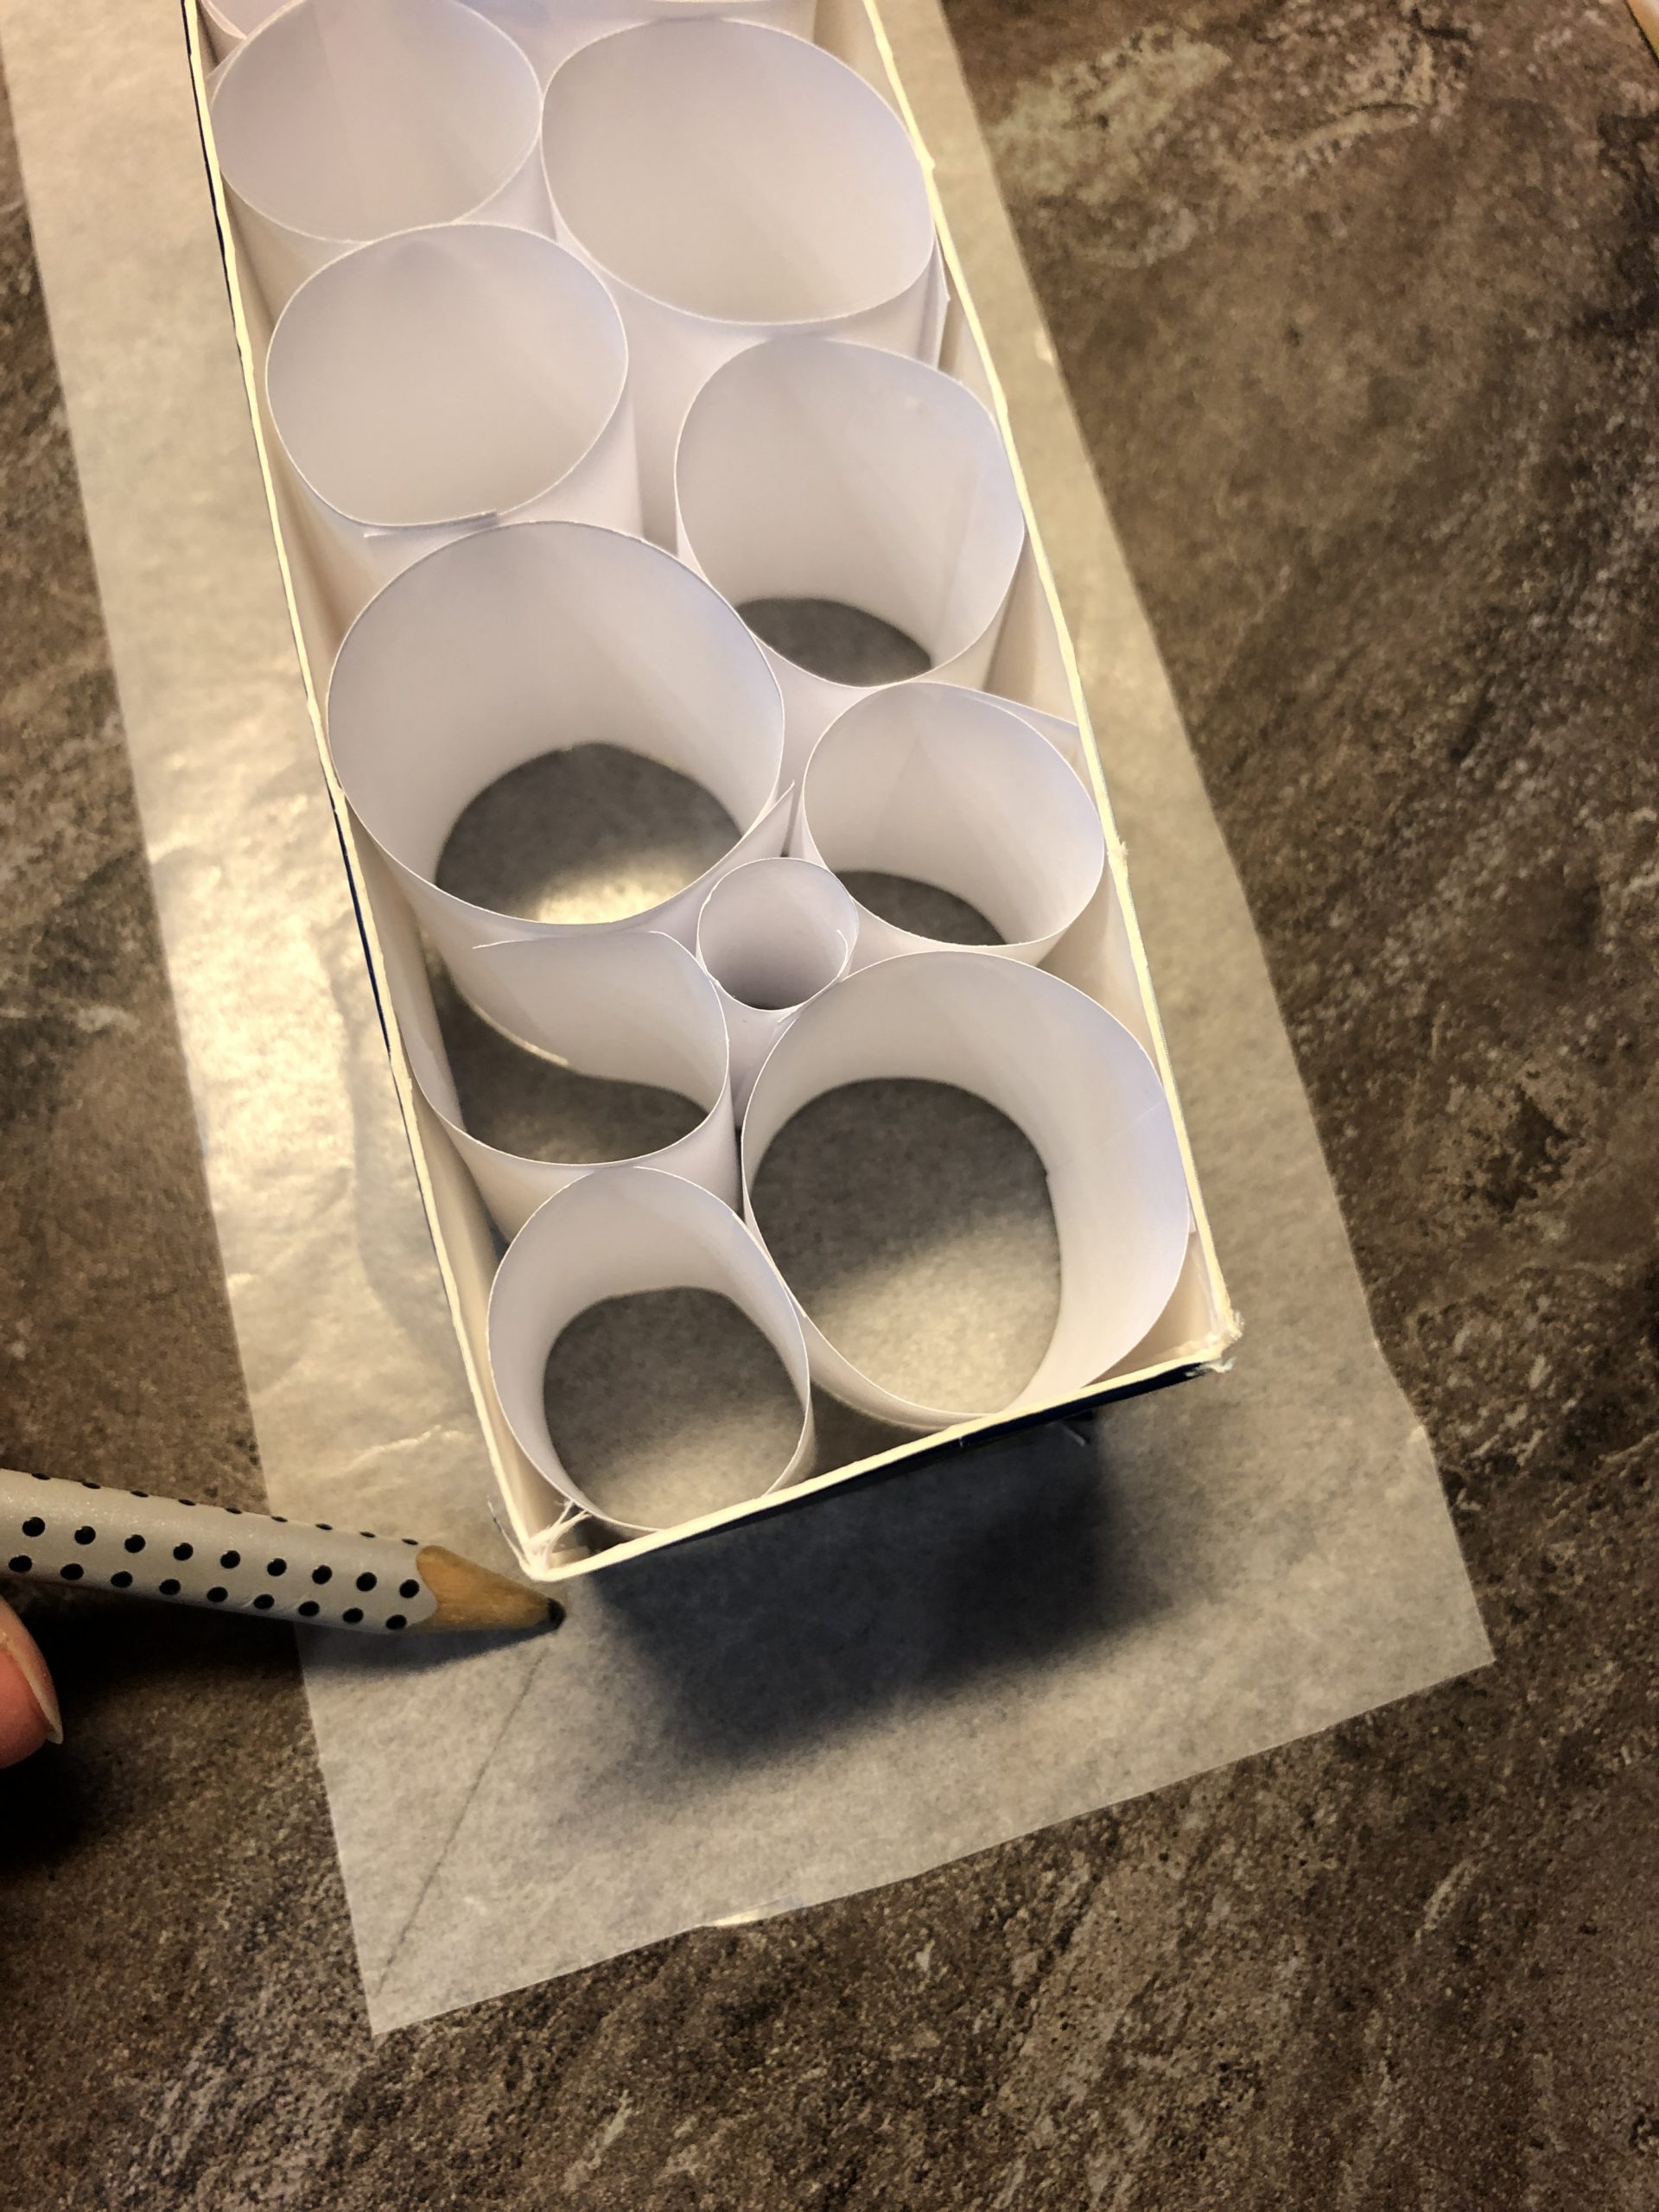
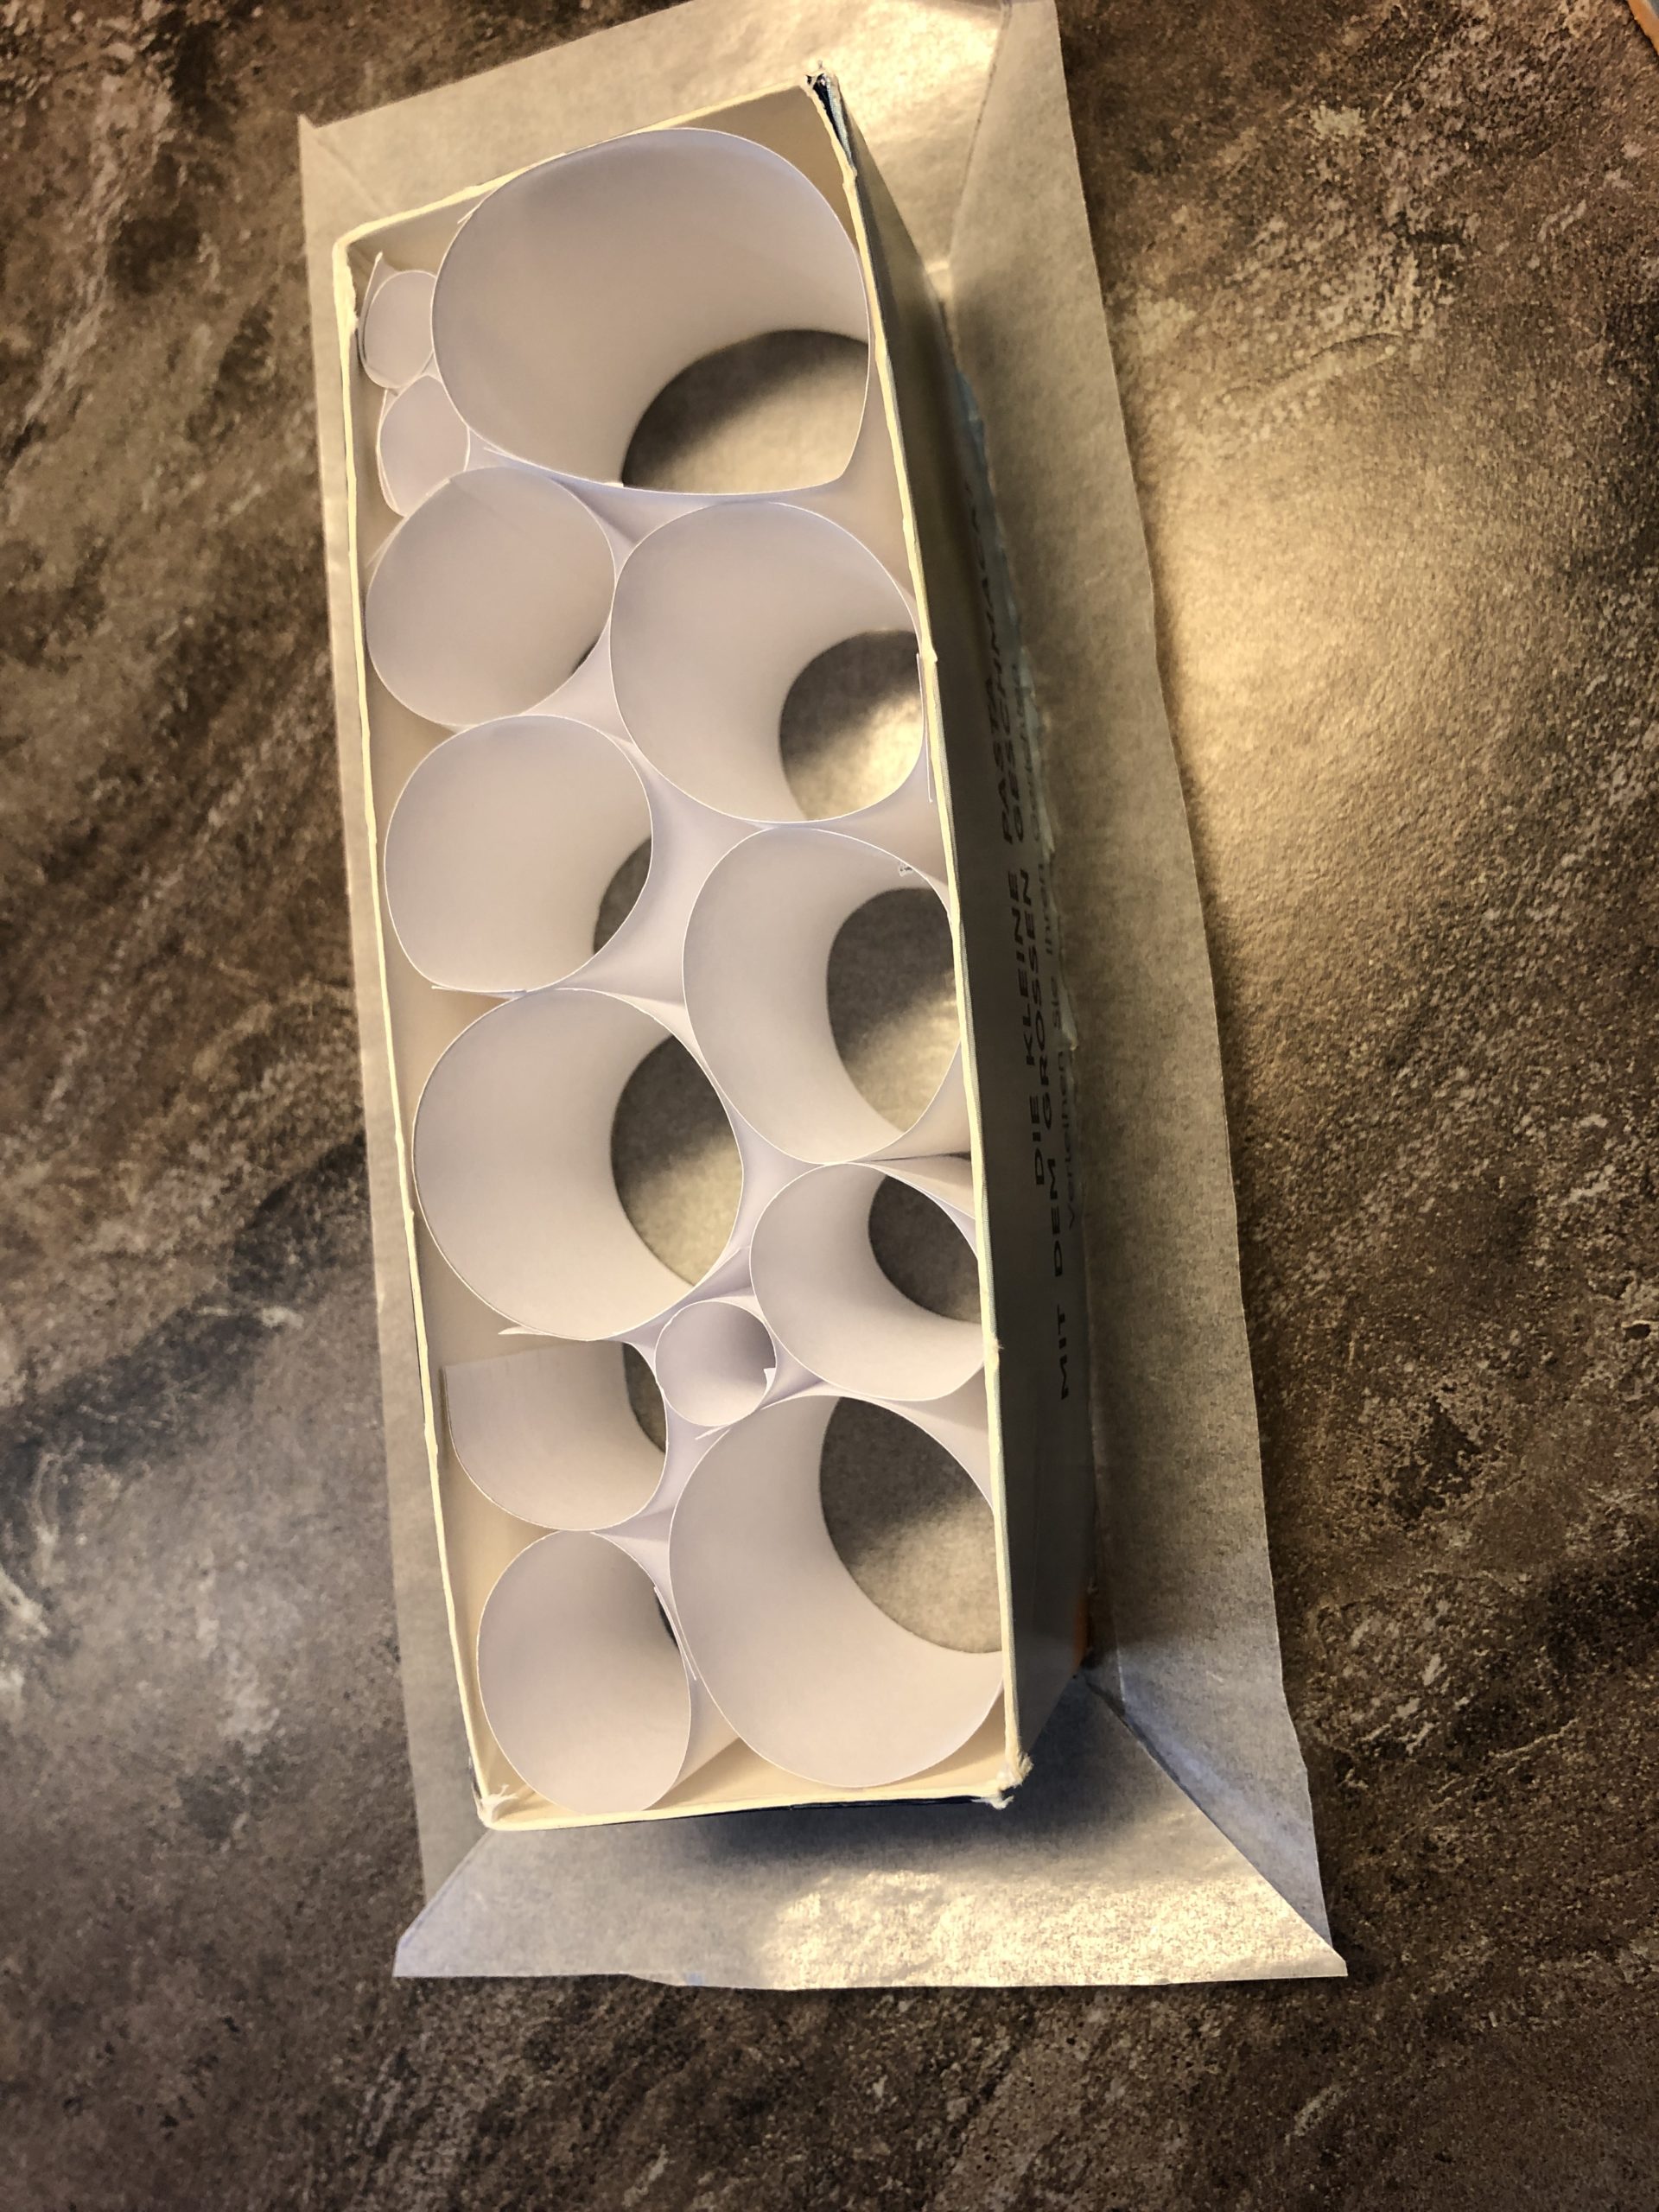
This creates different sizes of paper rings.

However, all rings are 3 cm high. Due to the different strip length the different diameters of the rings are created. (You absolutely need different ring sizes!)
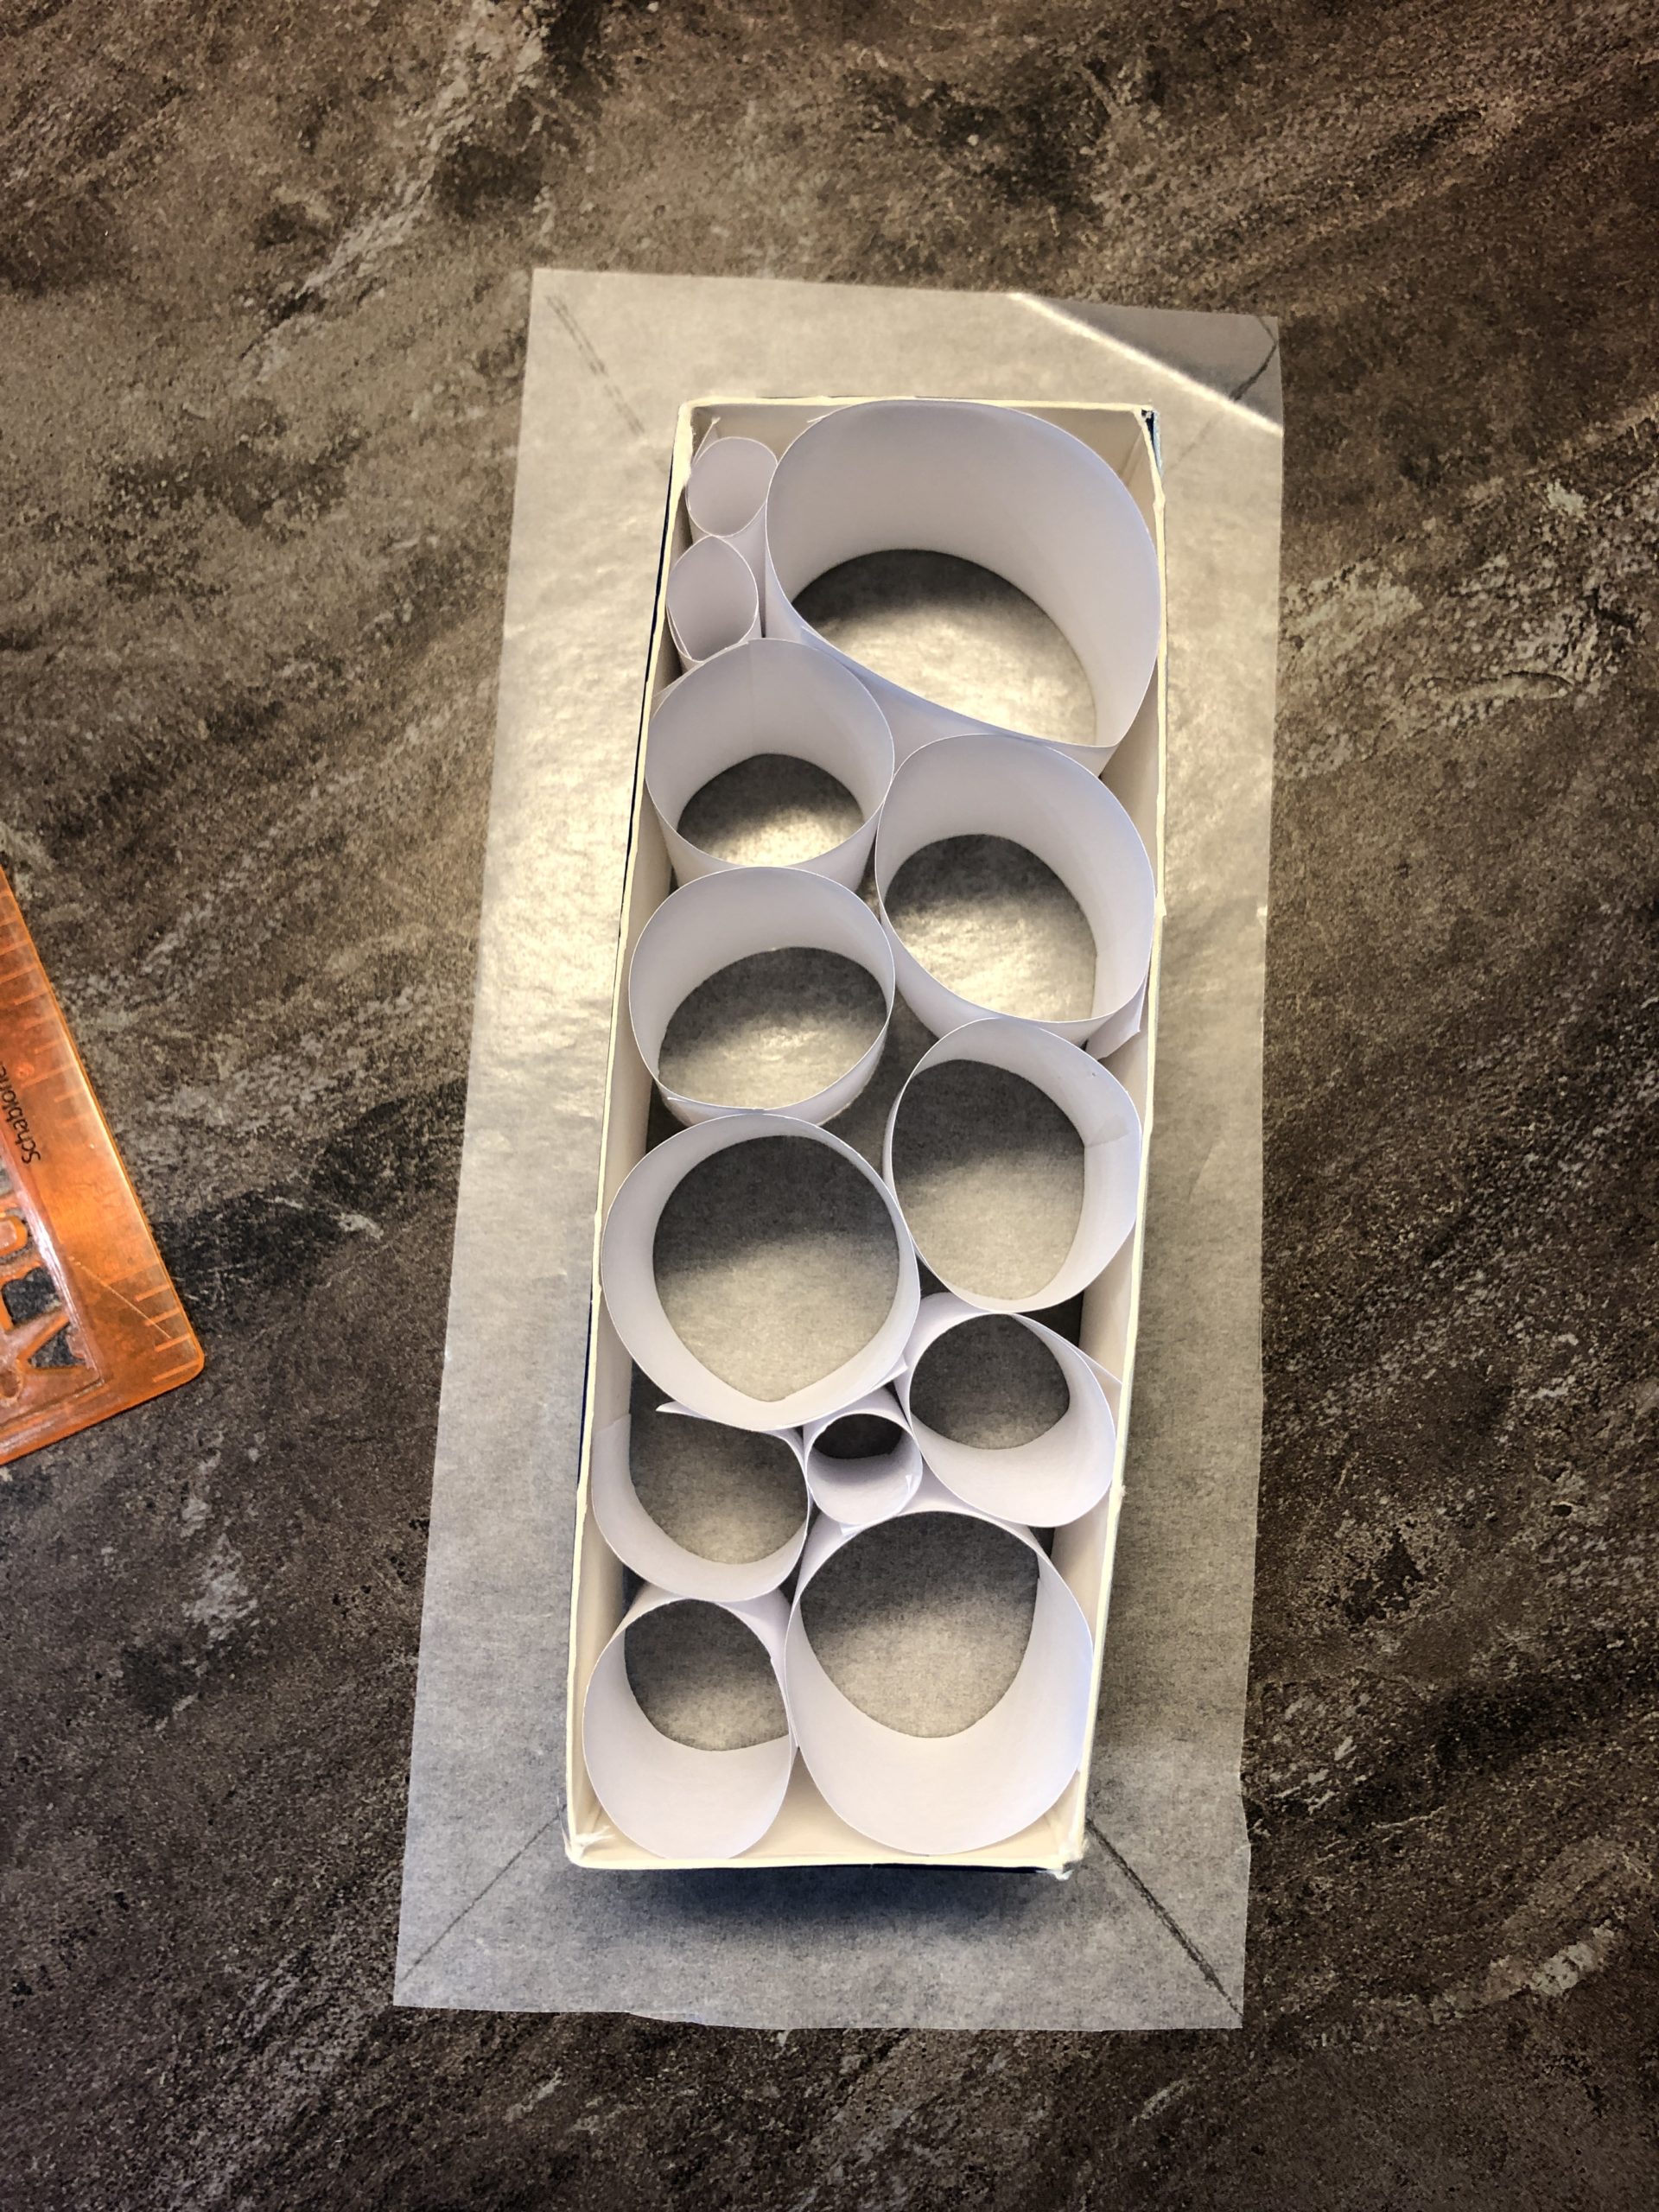
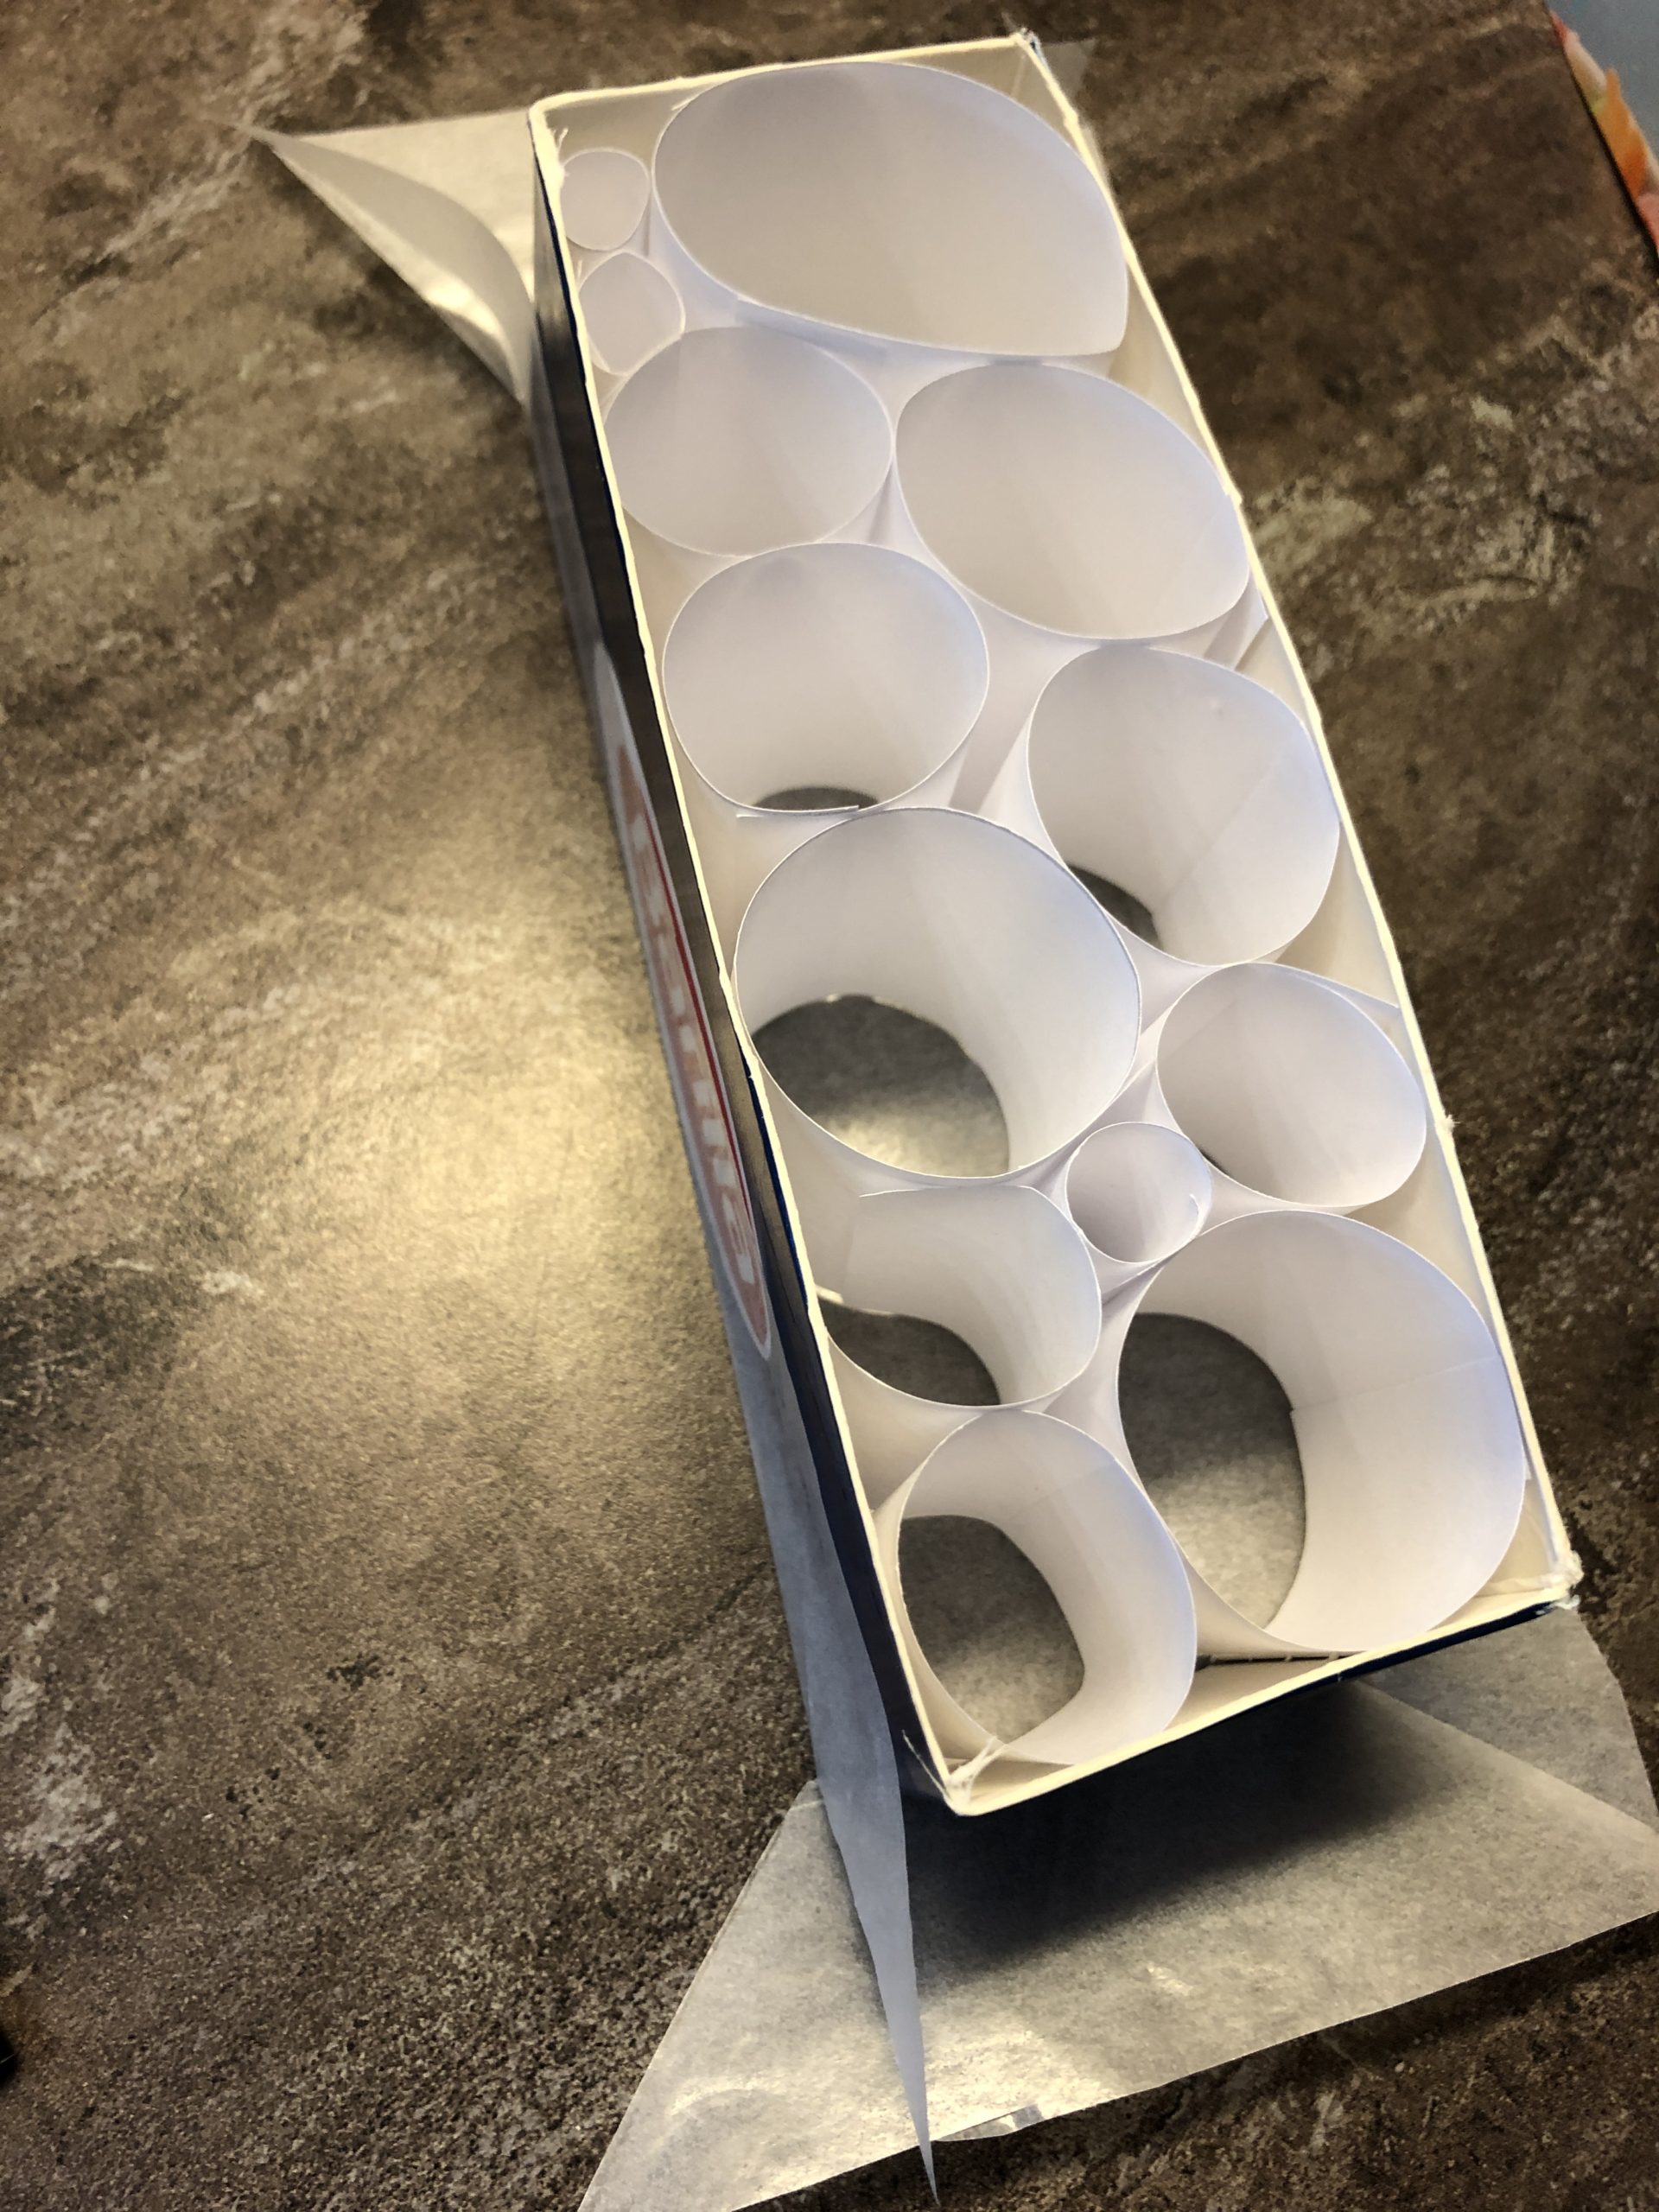
Now the rings are placed in the box frame.

Arrange the rings in such a way that they sit tight and do not slip any more. Maybe still make a few small rings and puzzle into the gaps.
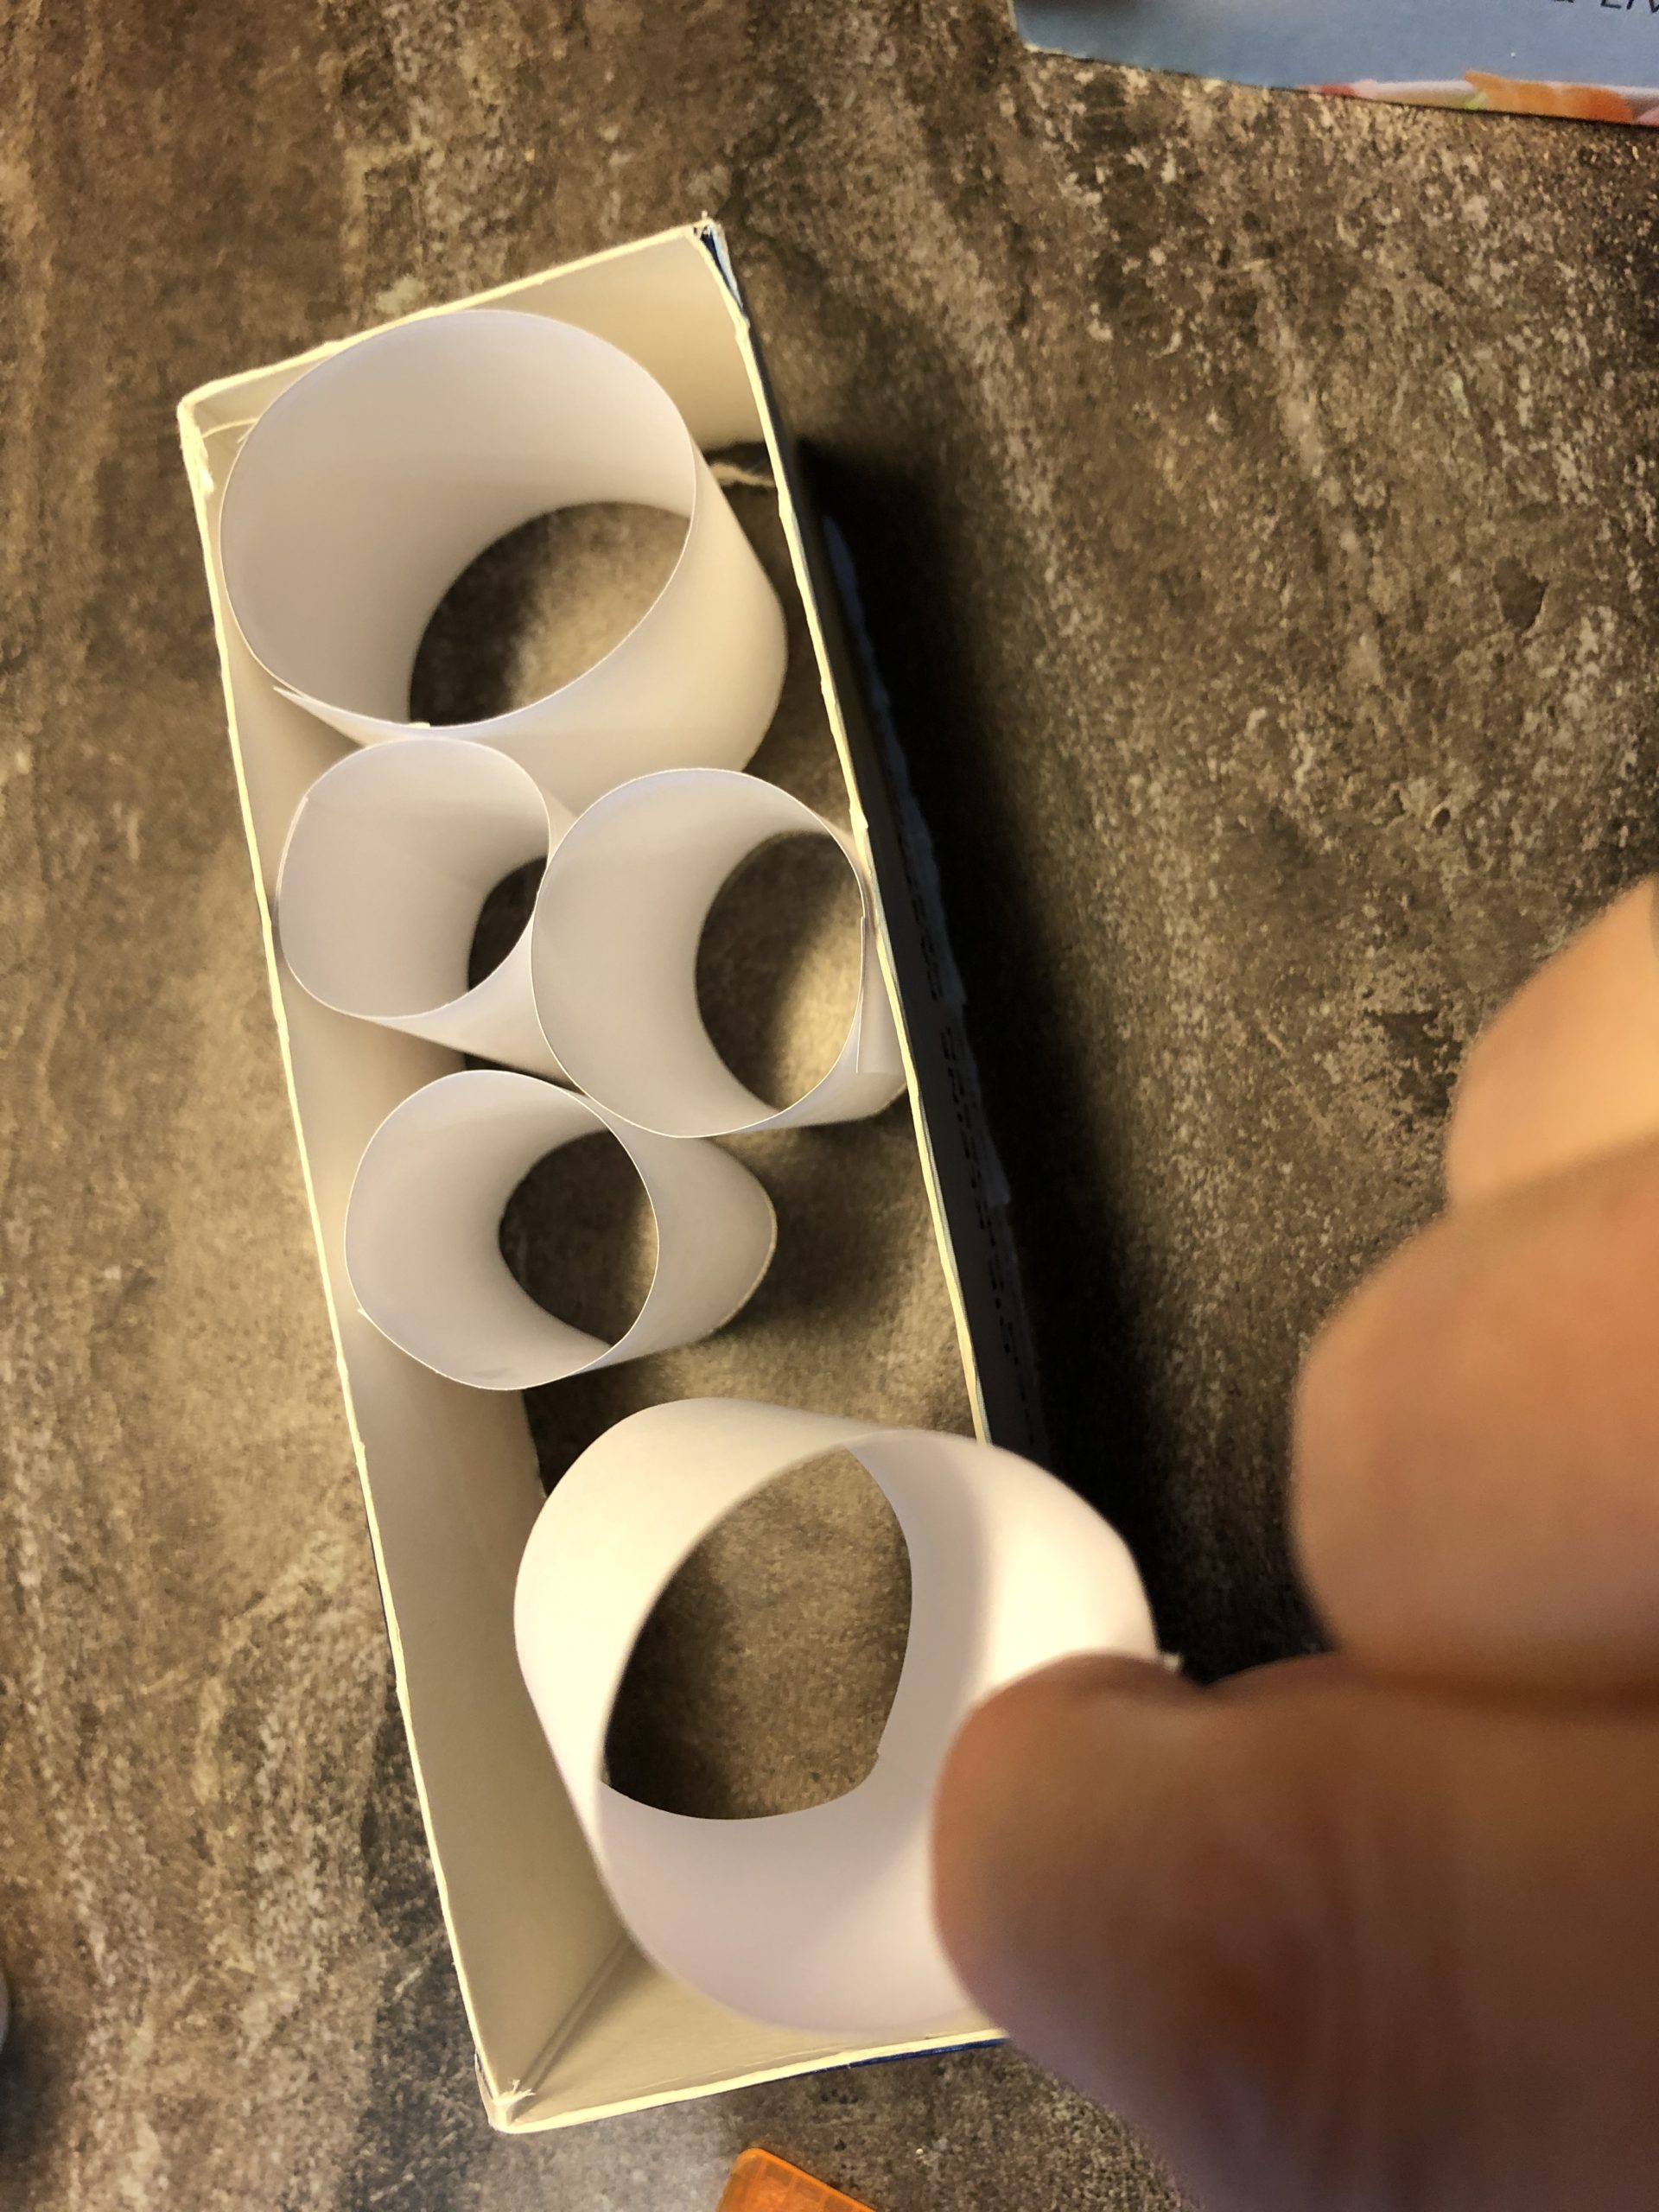
Let the rings all sit tight together.

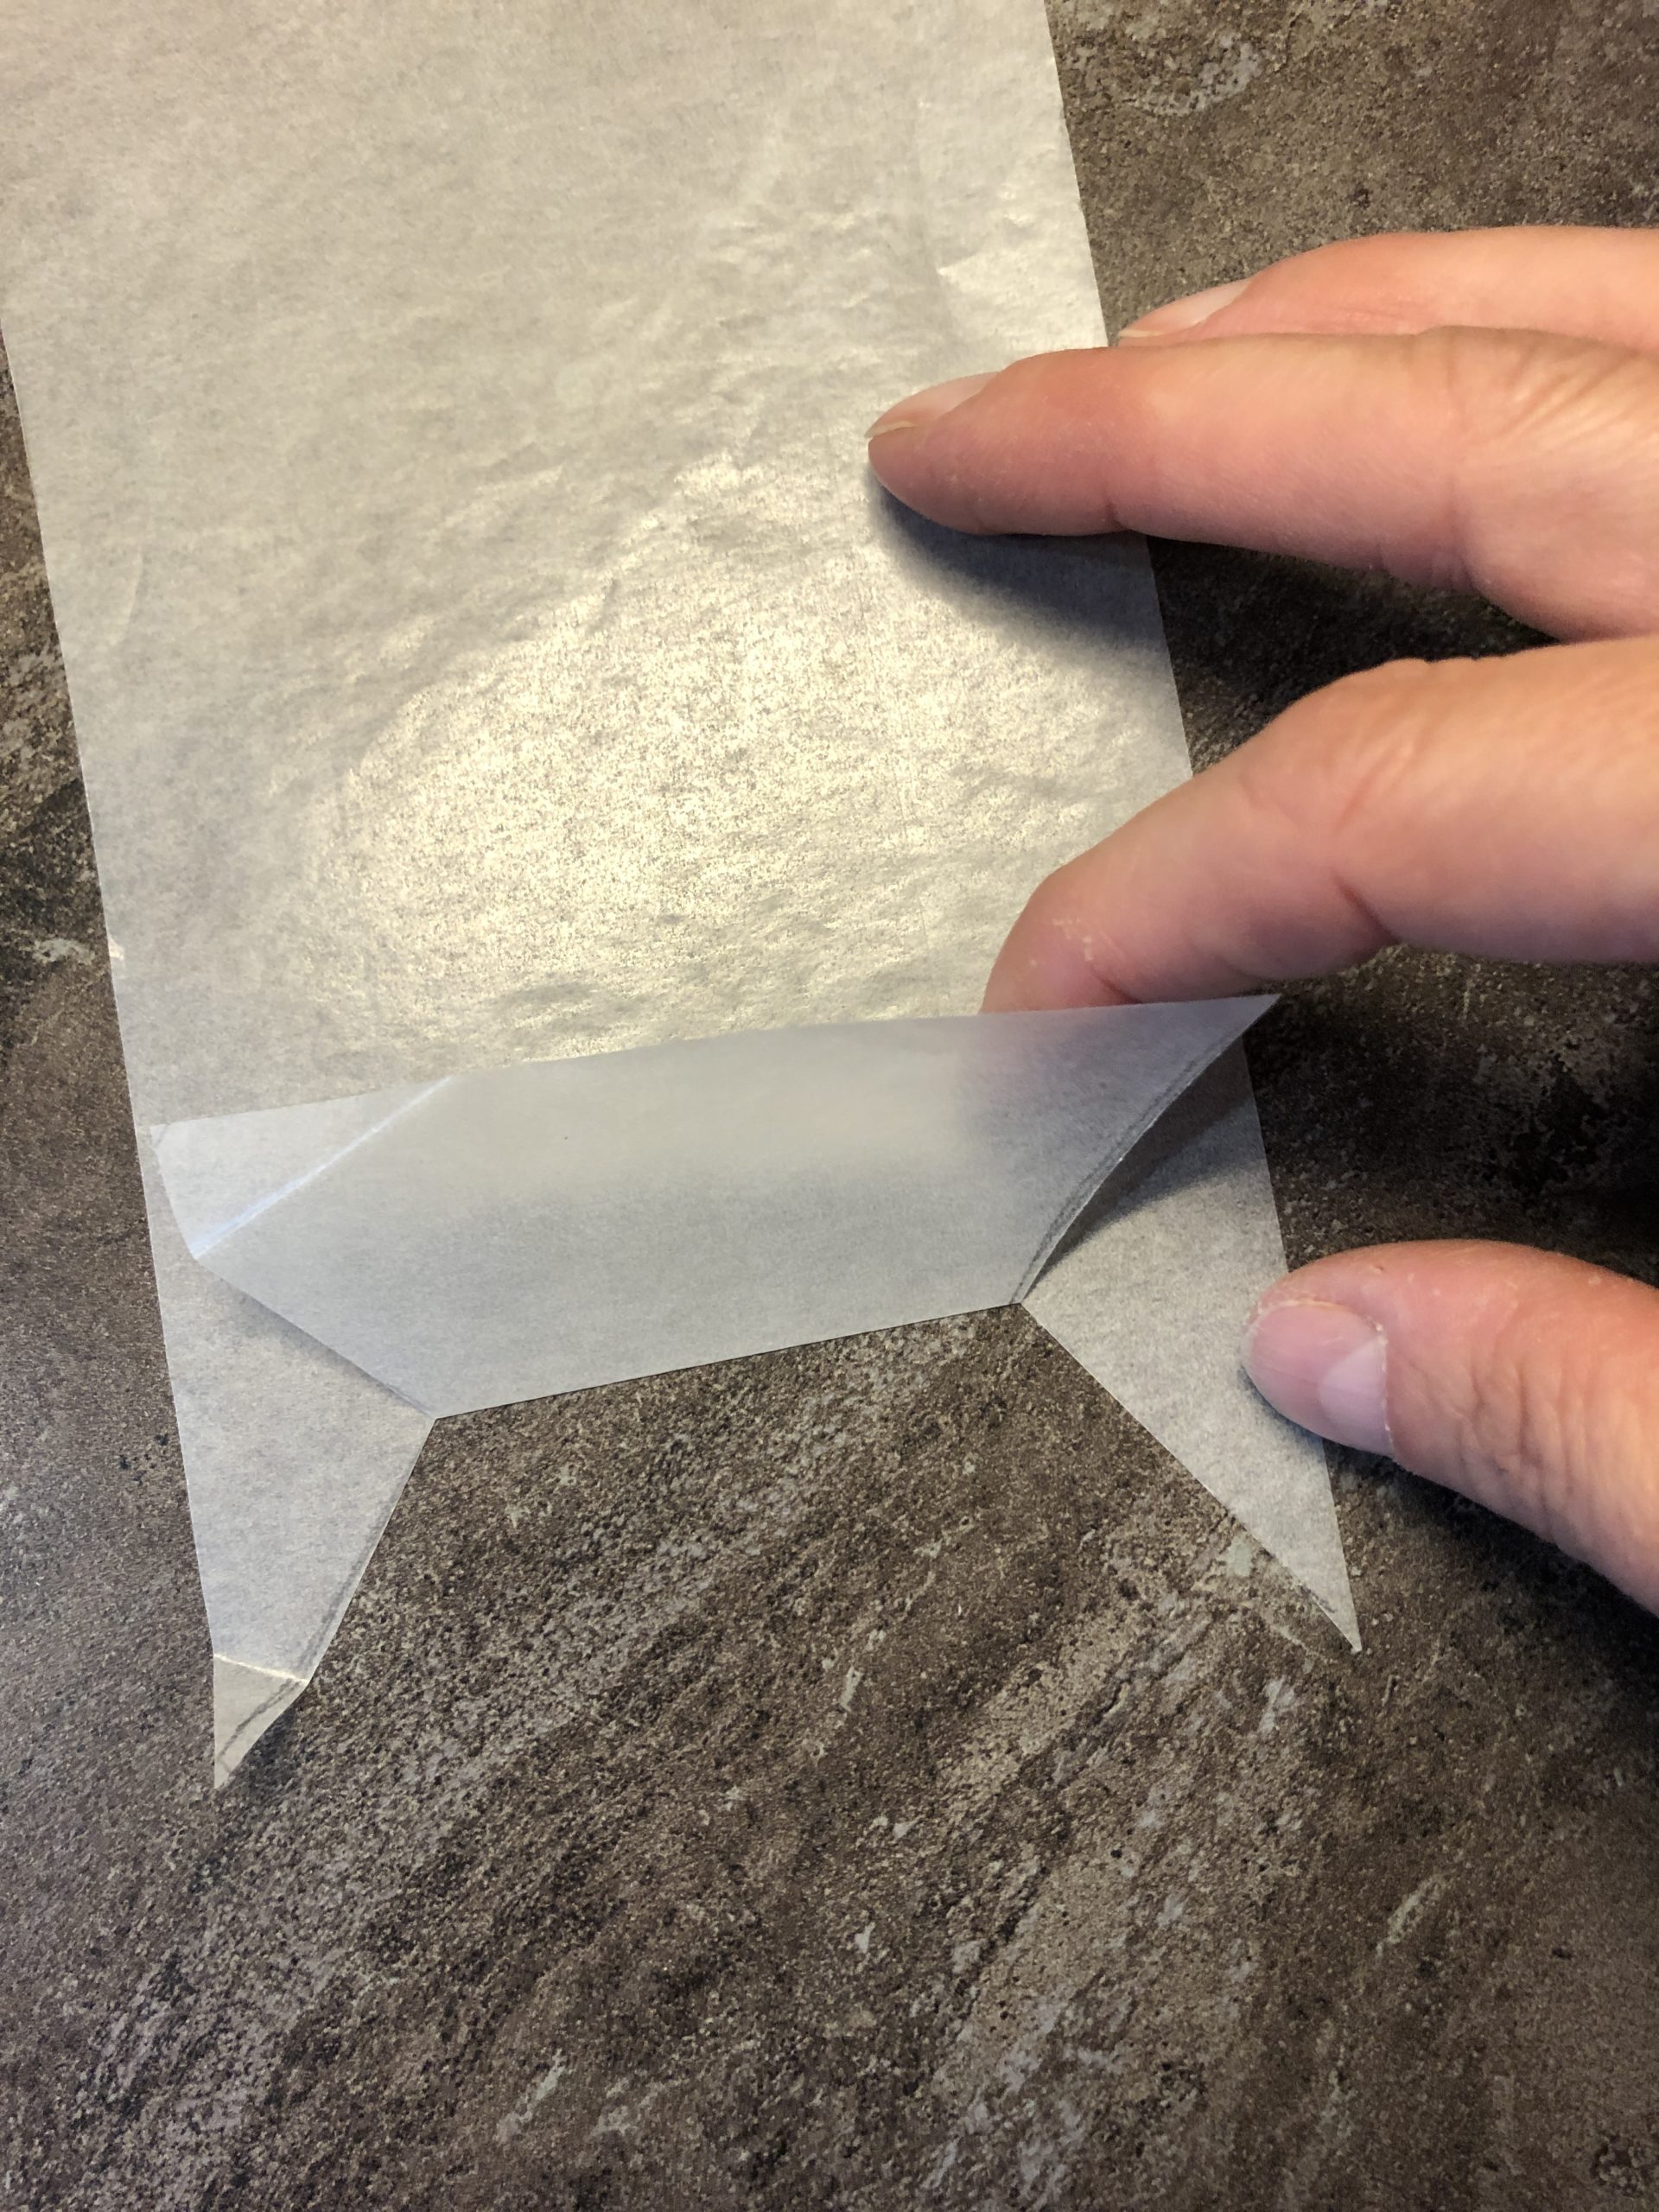
Cut the transparent paper slightly larger than the box frame.
Place the box frame in the middle of the transparent paper.

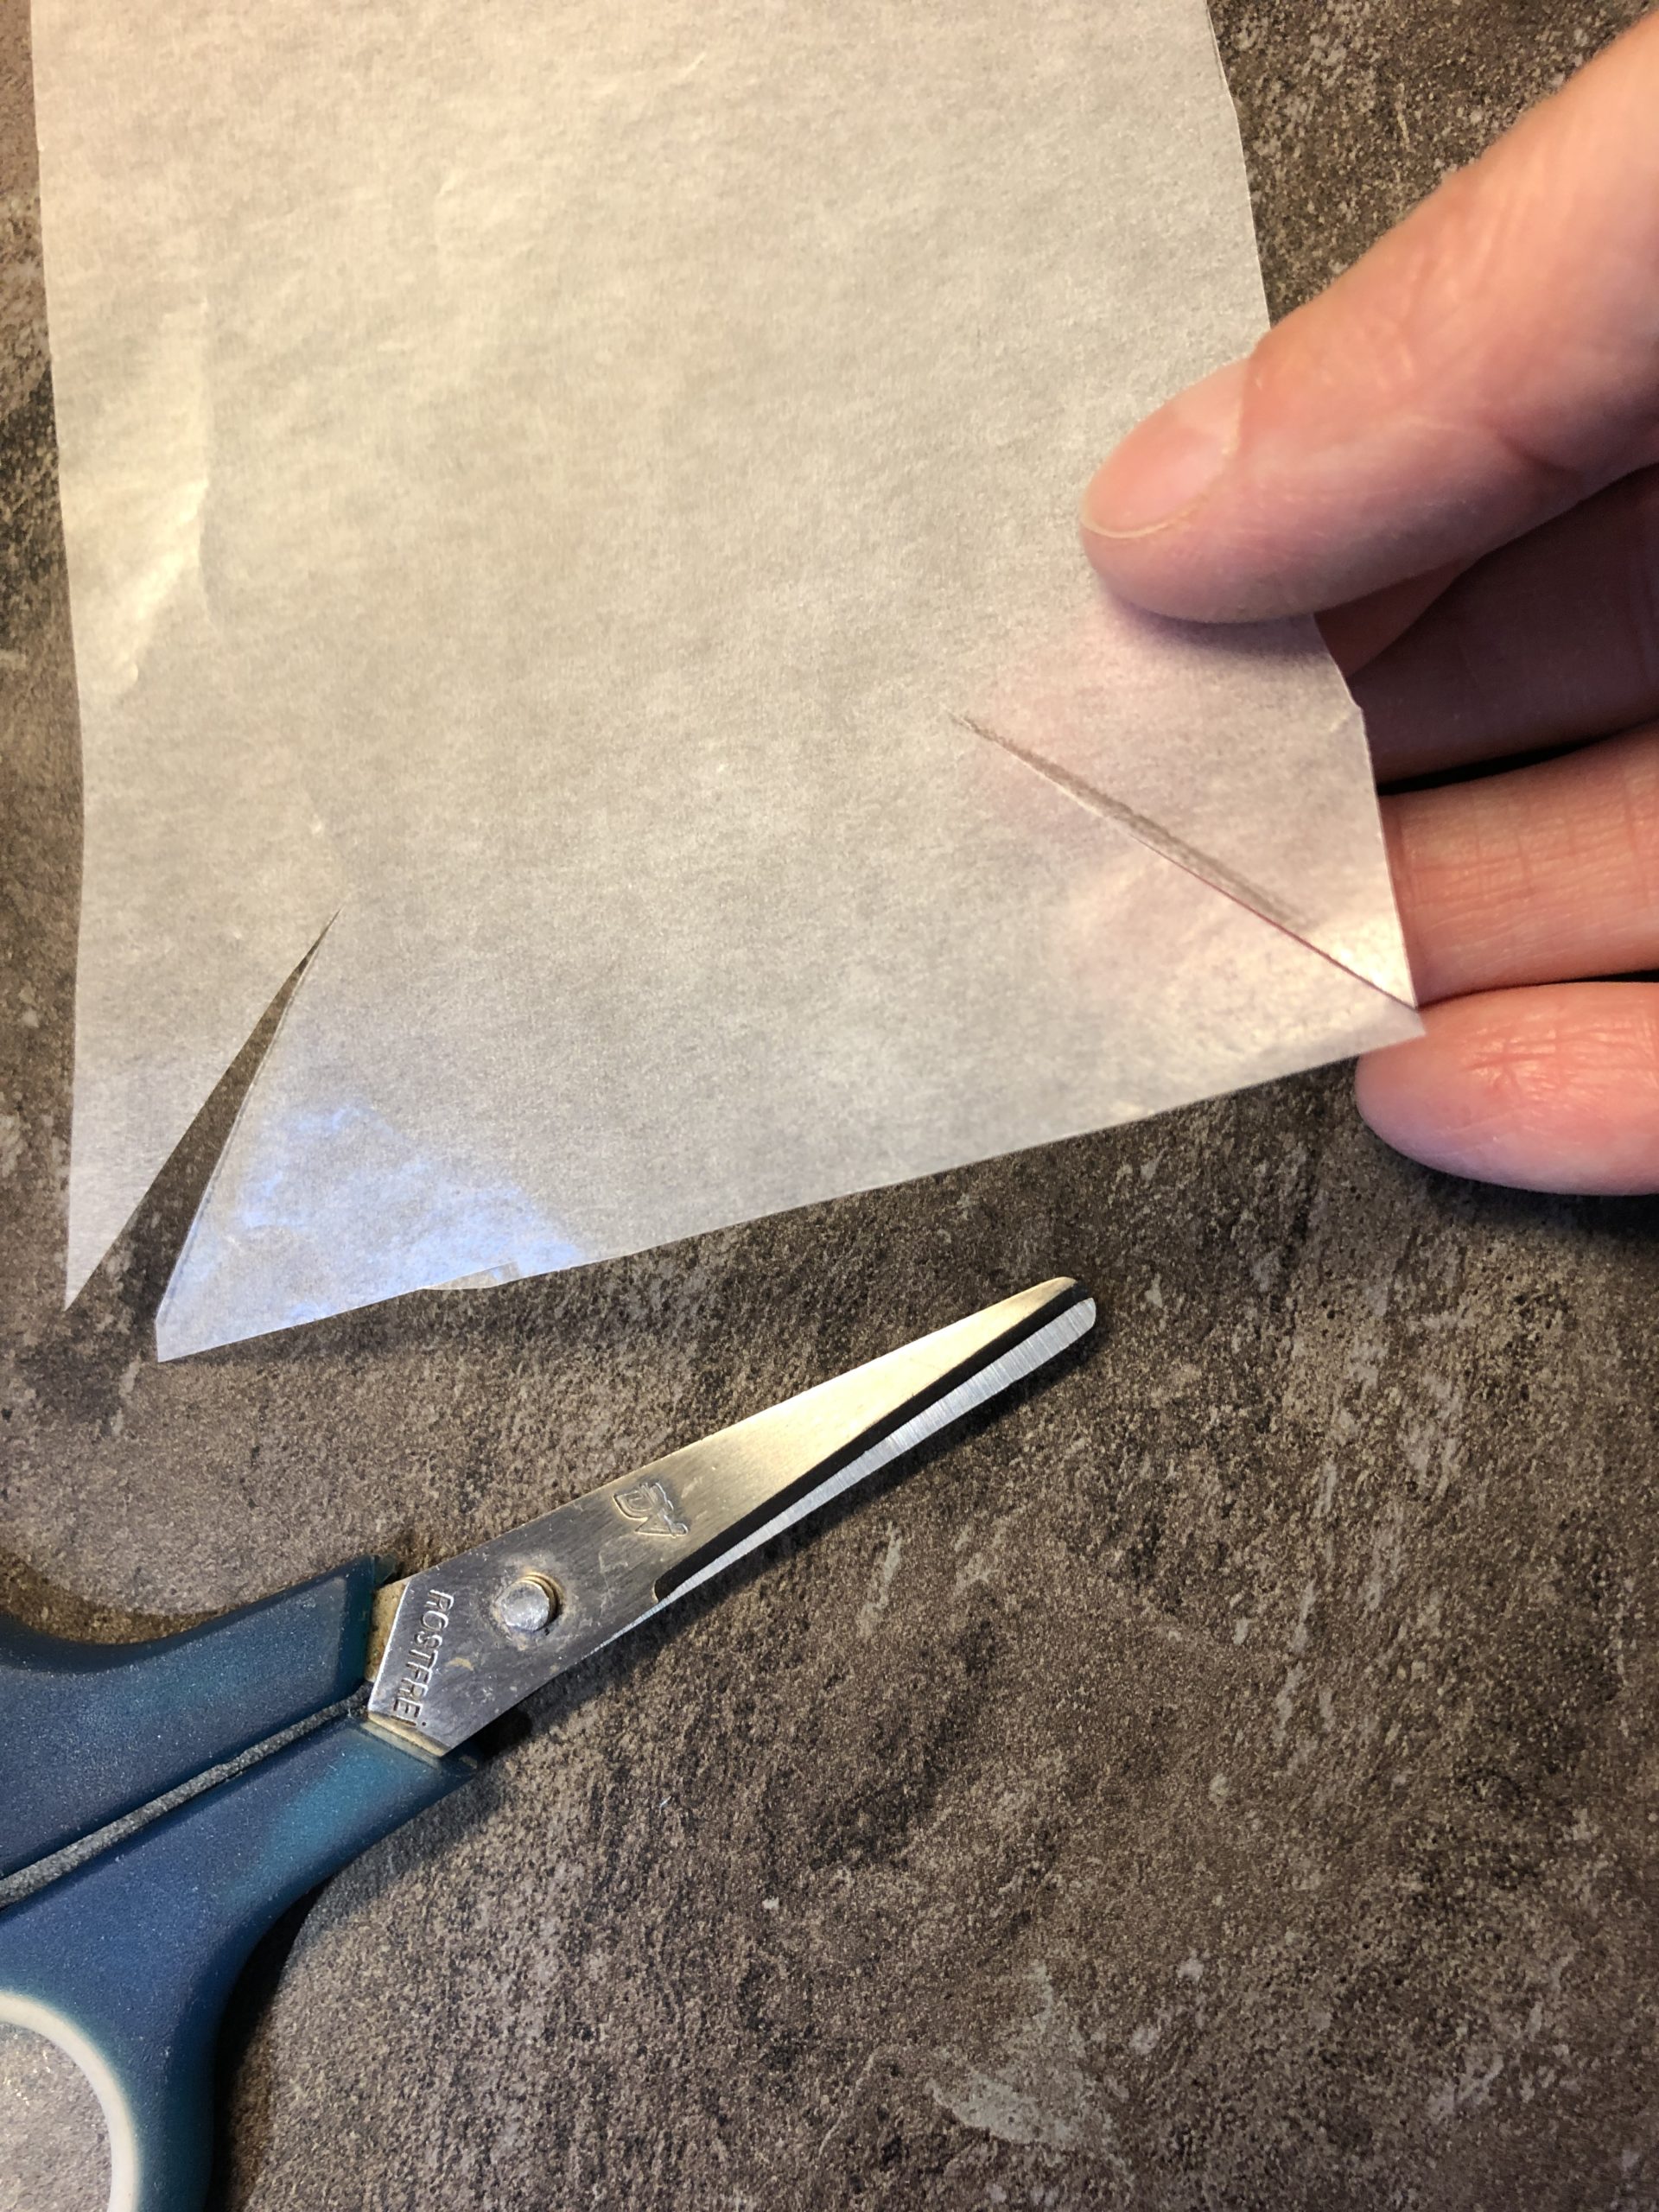
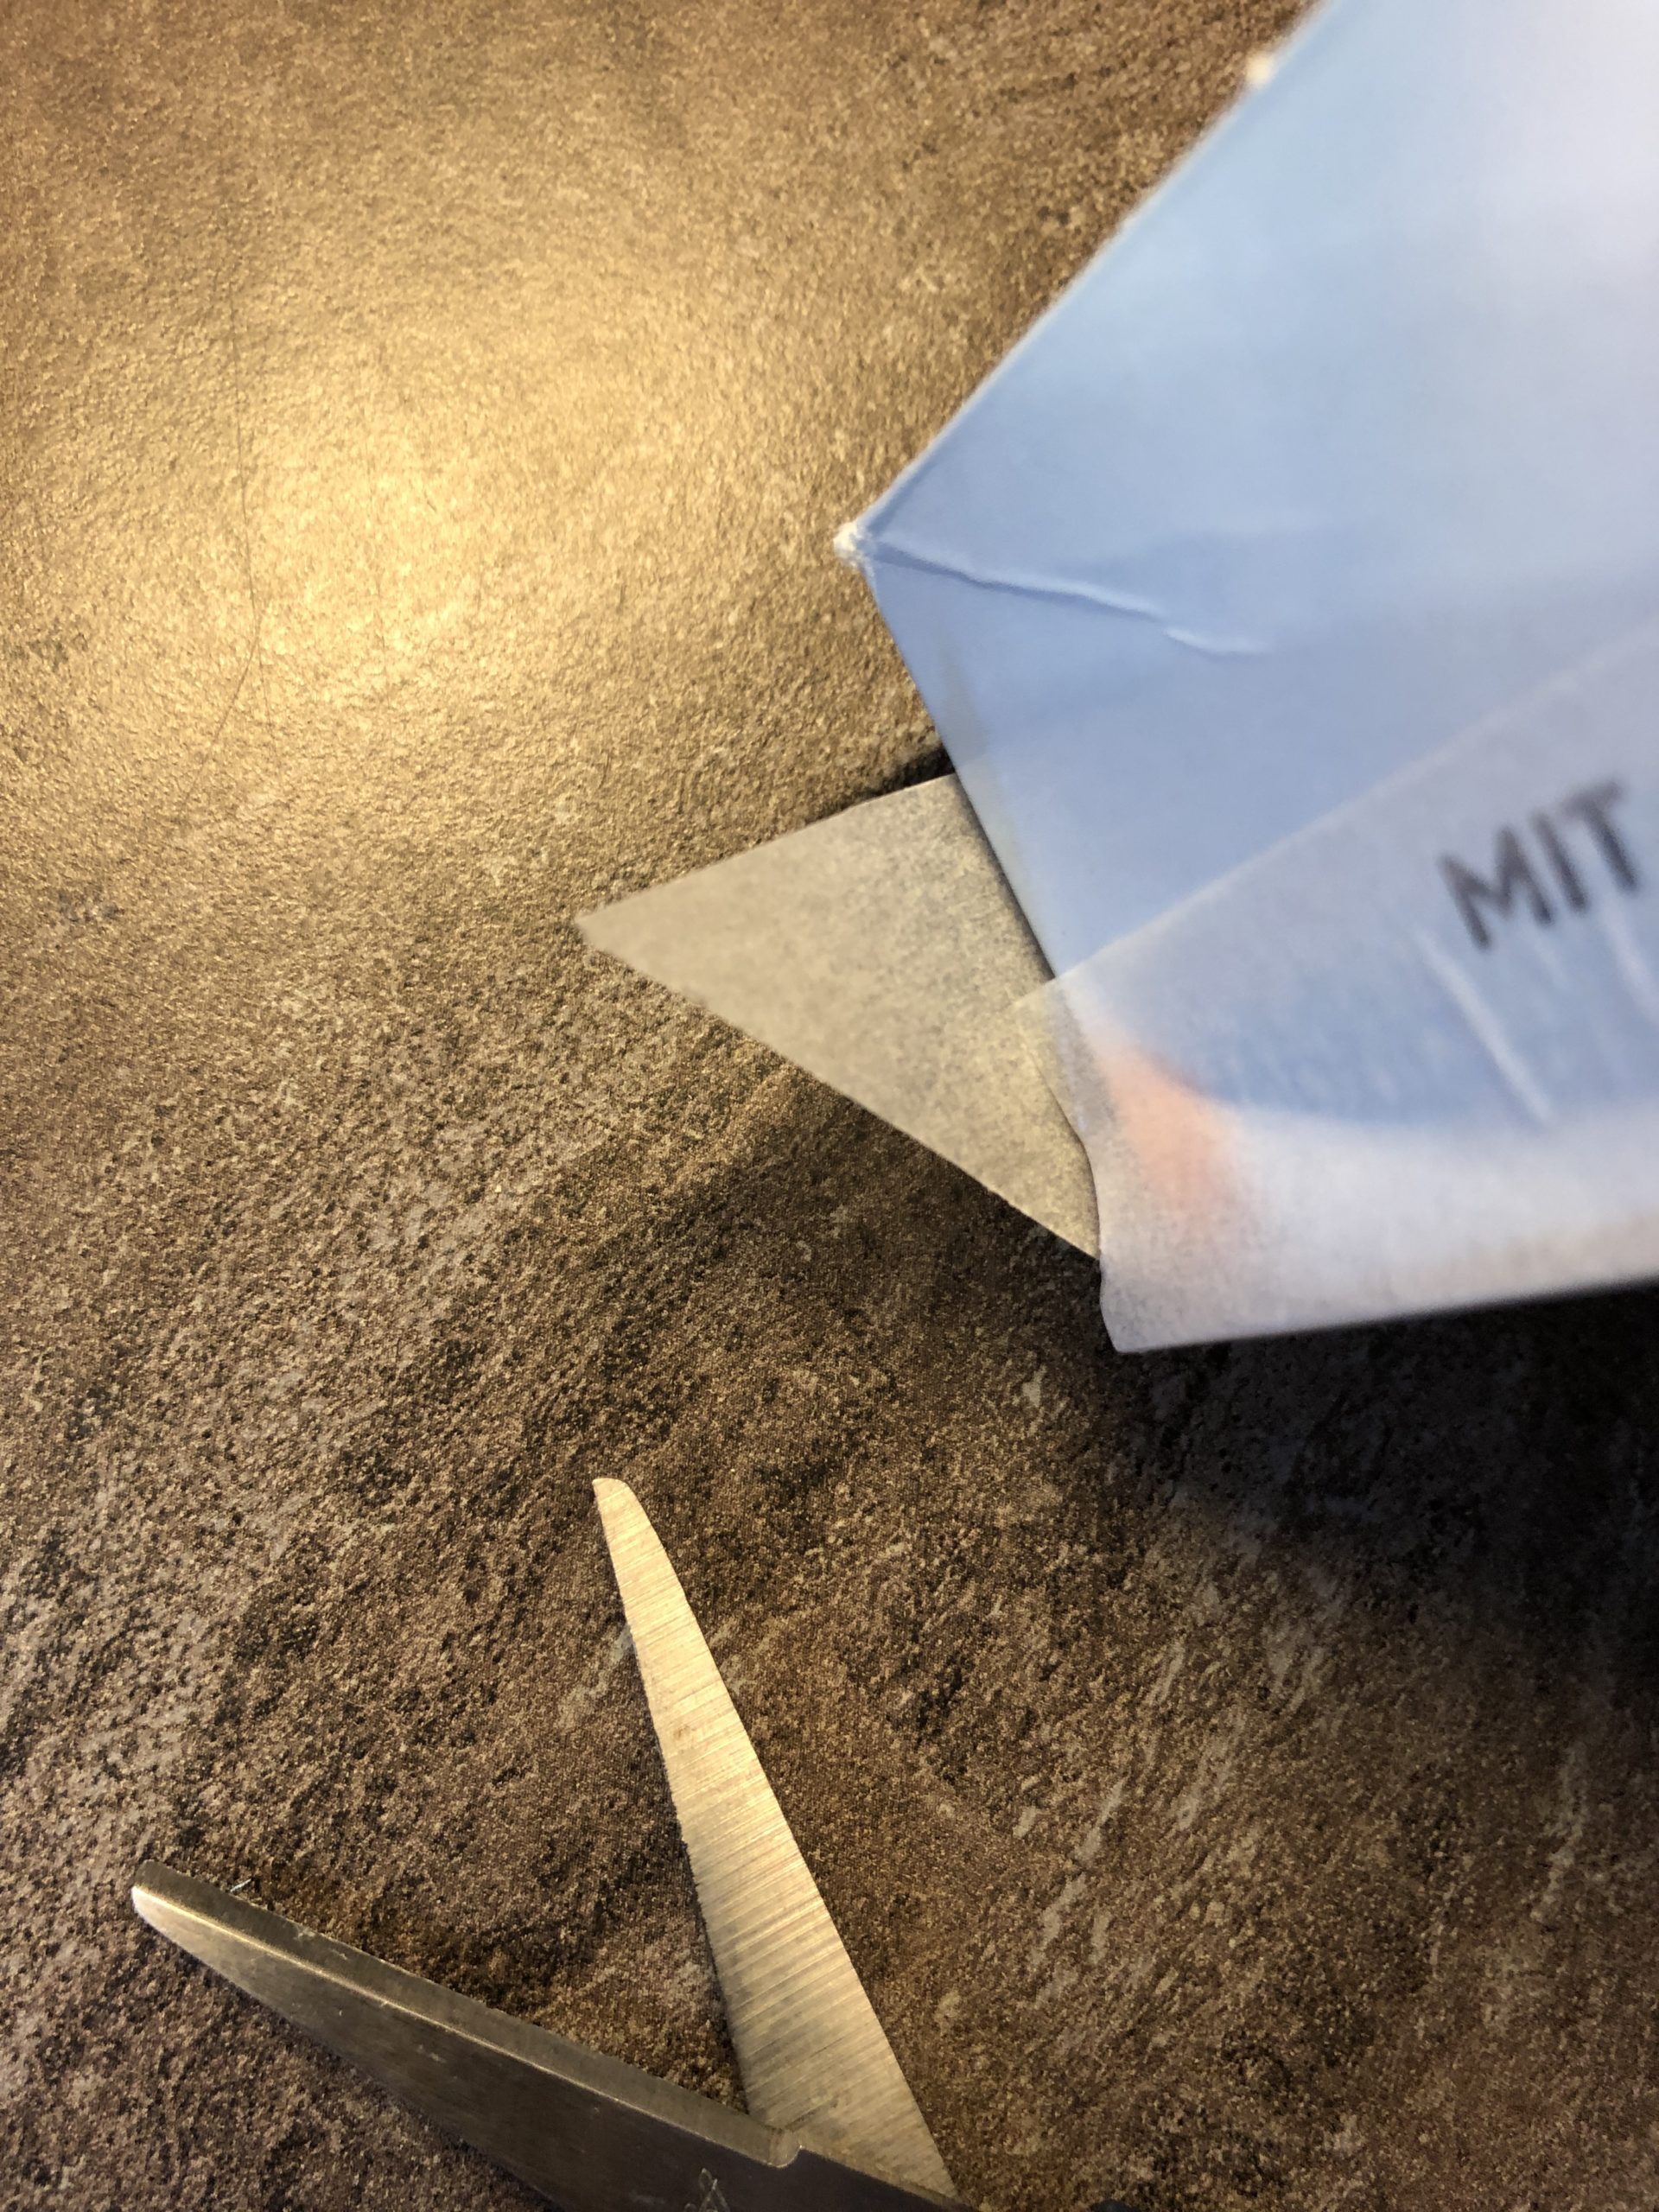
Draw a pencil stitch from the four corners to the outside.
Cut the strokes along.
Now the side parts are folded to the middle and then folded outwards again.
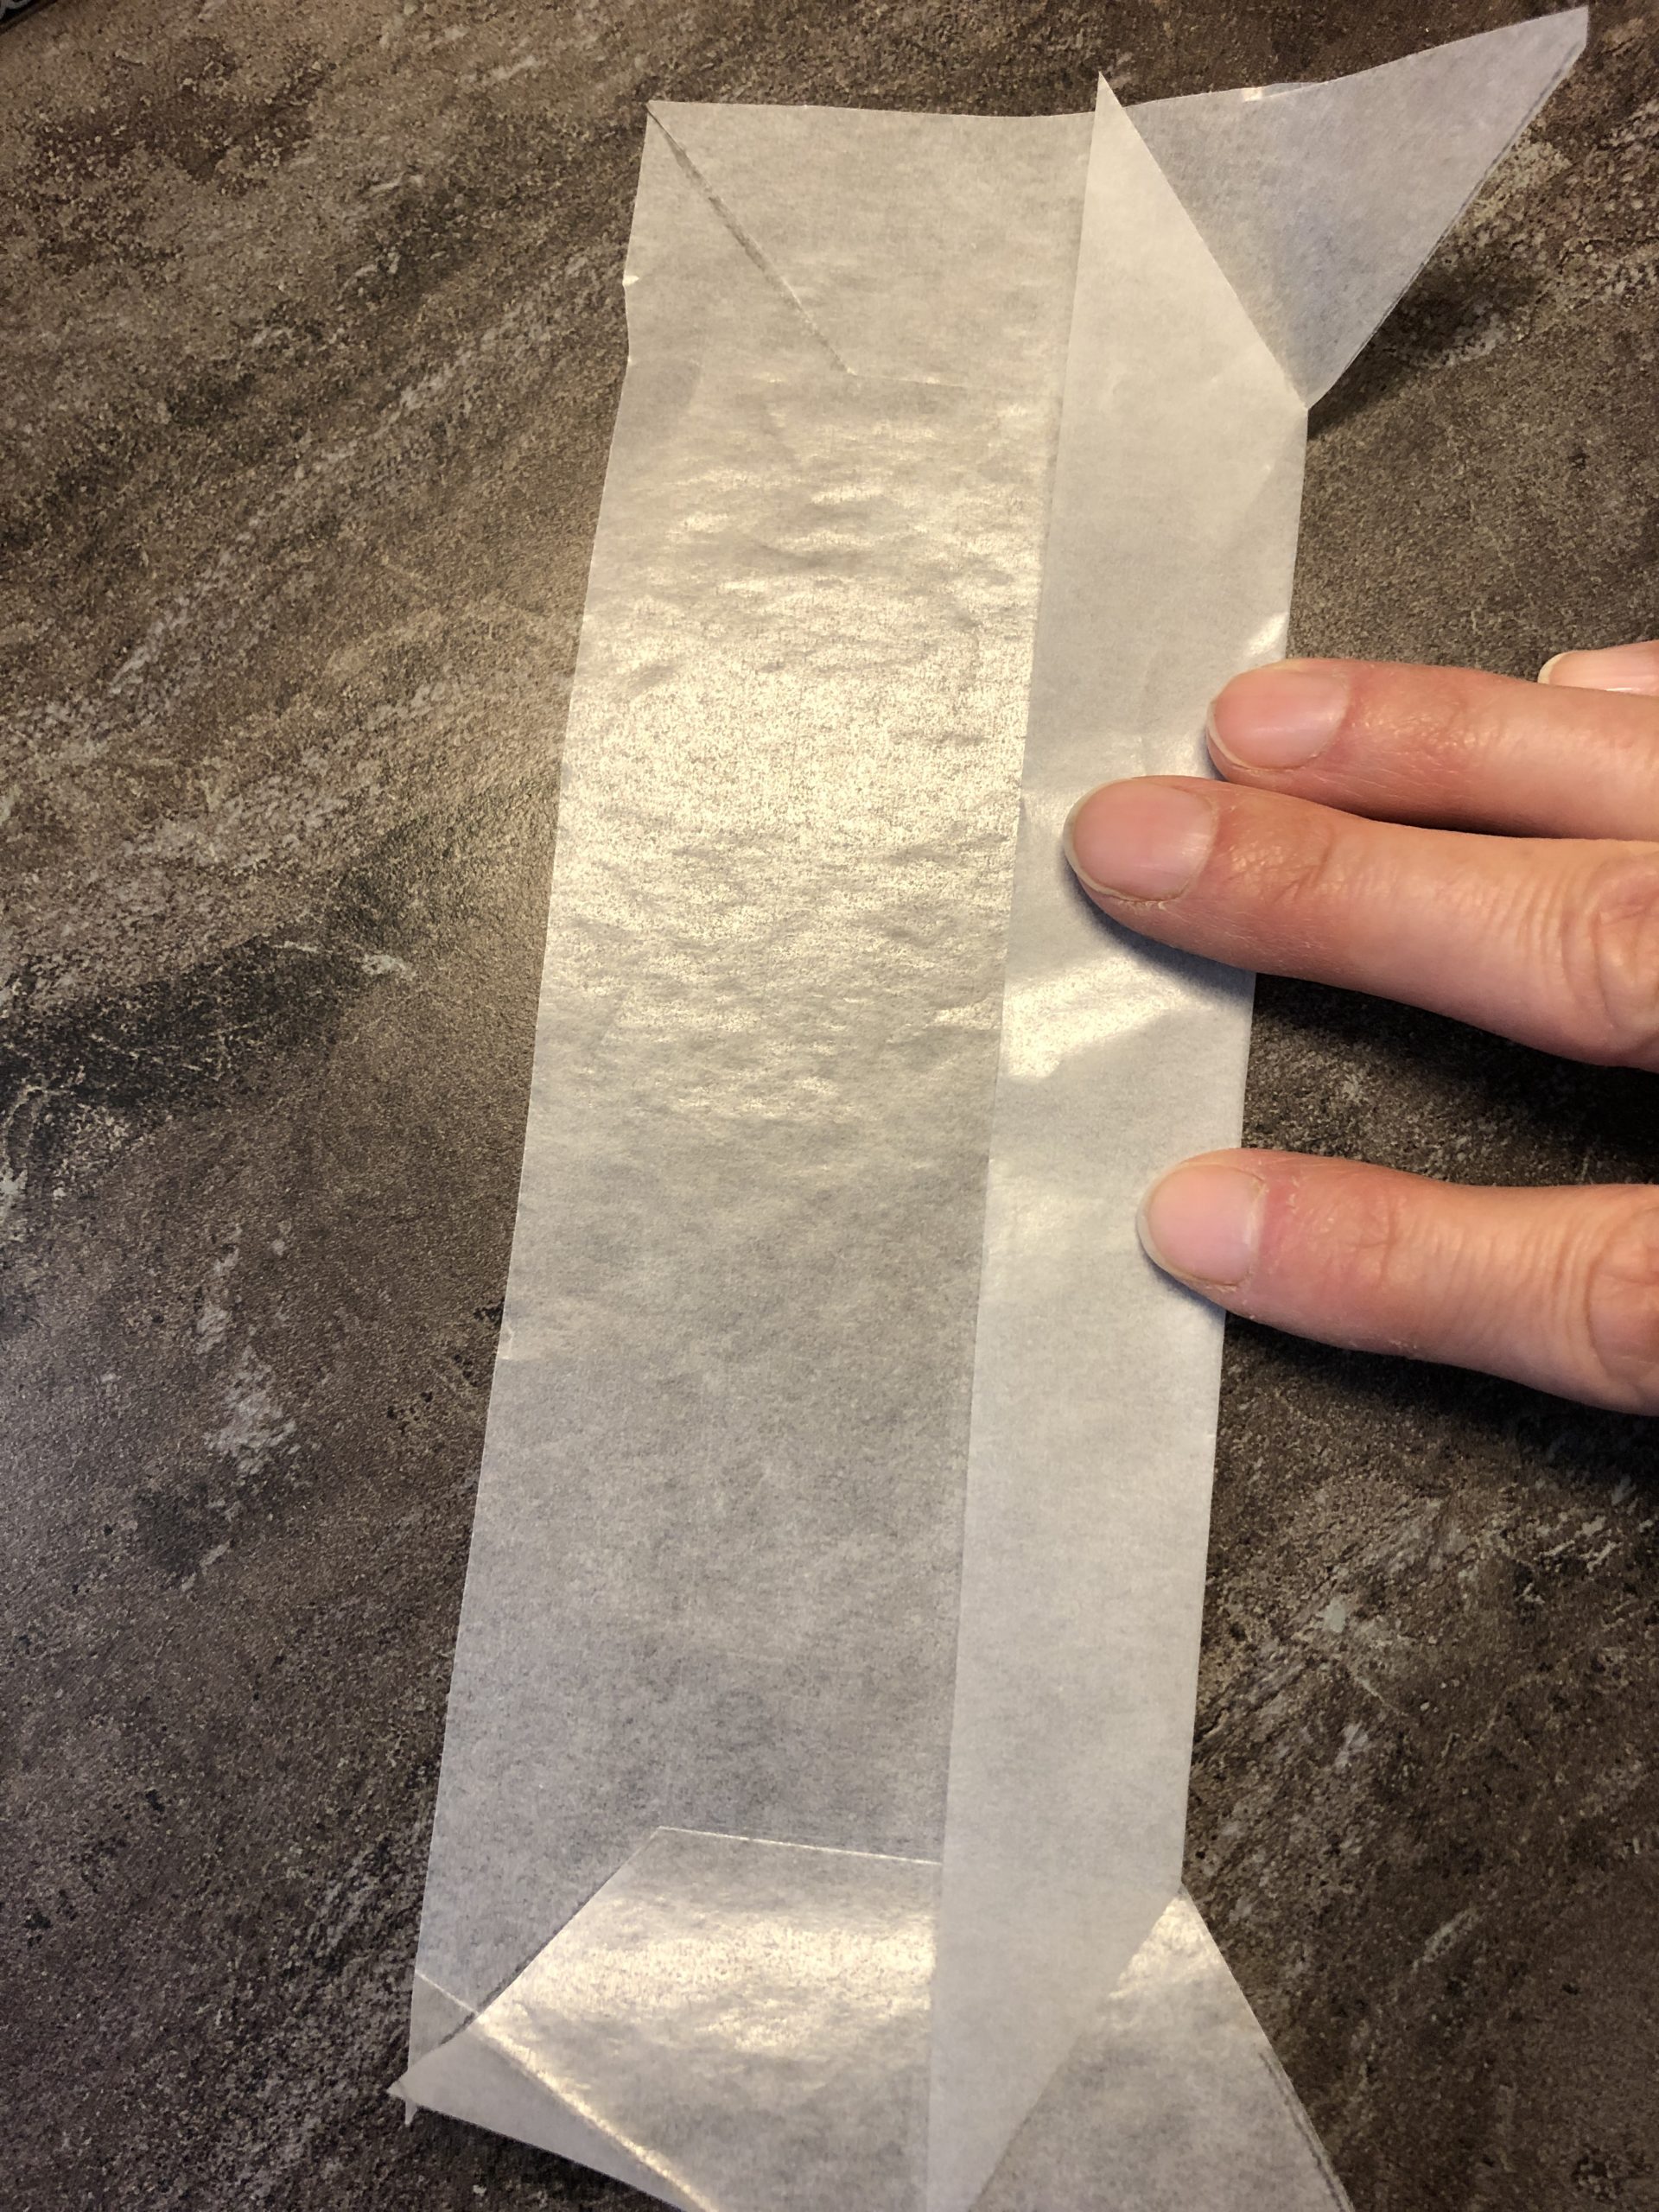
Now the box shape is pre-folded and the transparent paper can be easily attached to the frame.
Place box frames in the middle again.
Sprinkle the overhanging transparent paper with glue and press on the box.
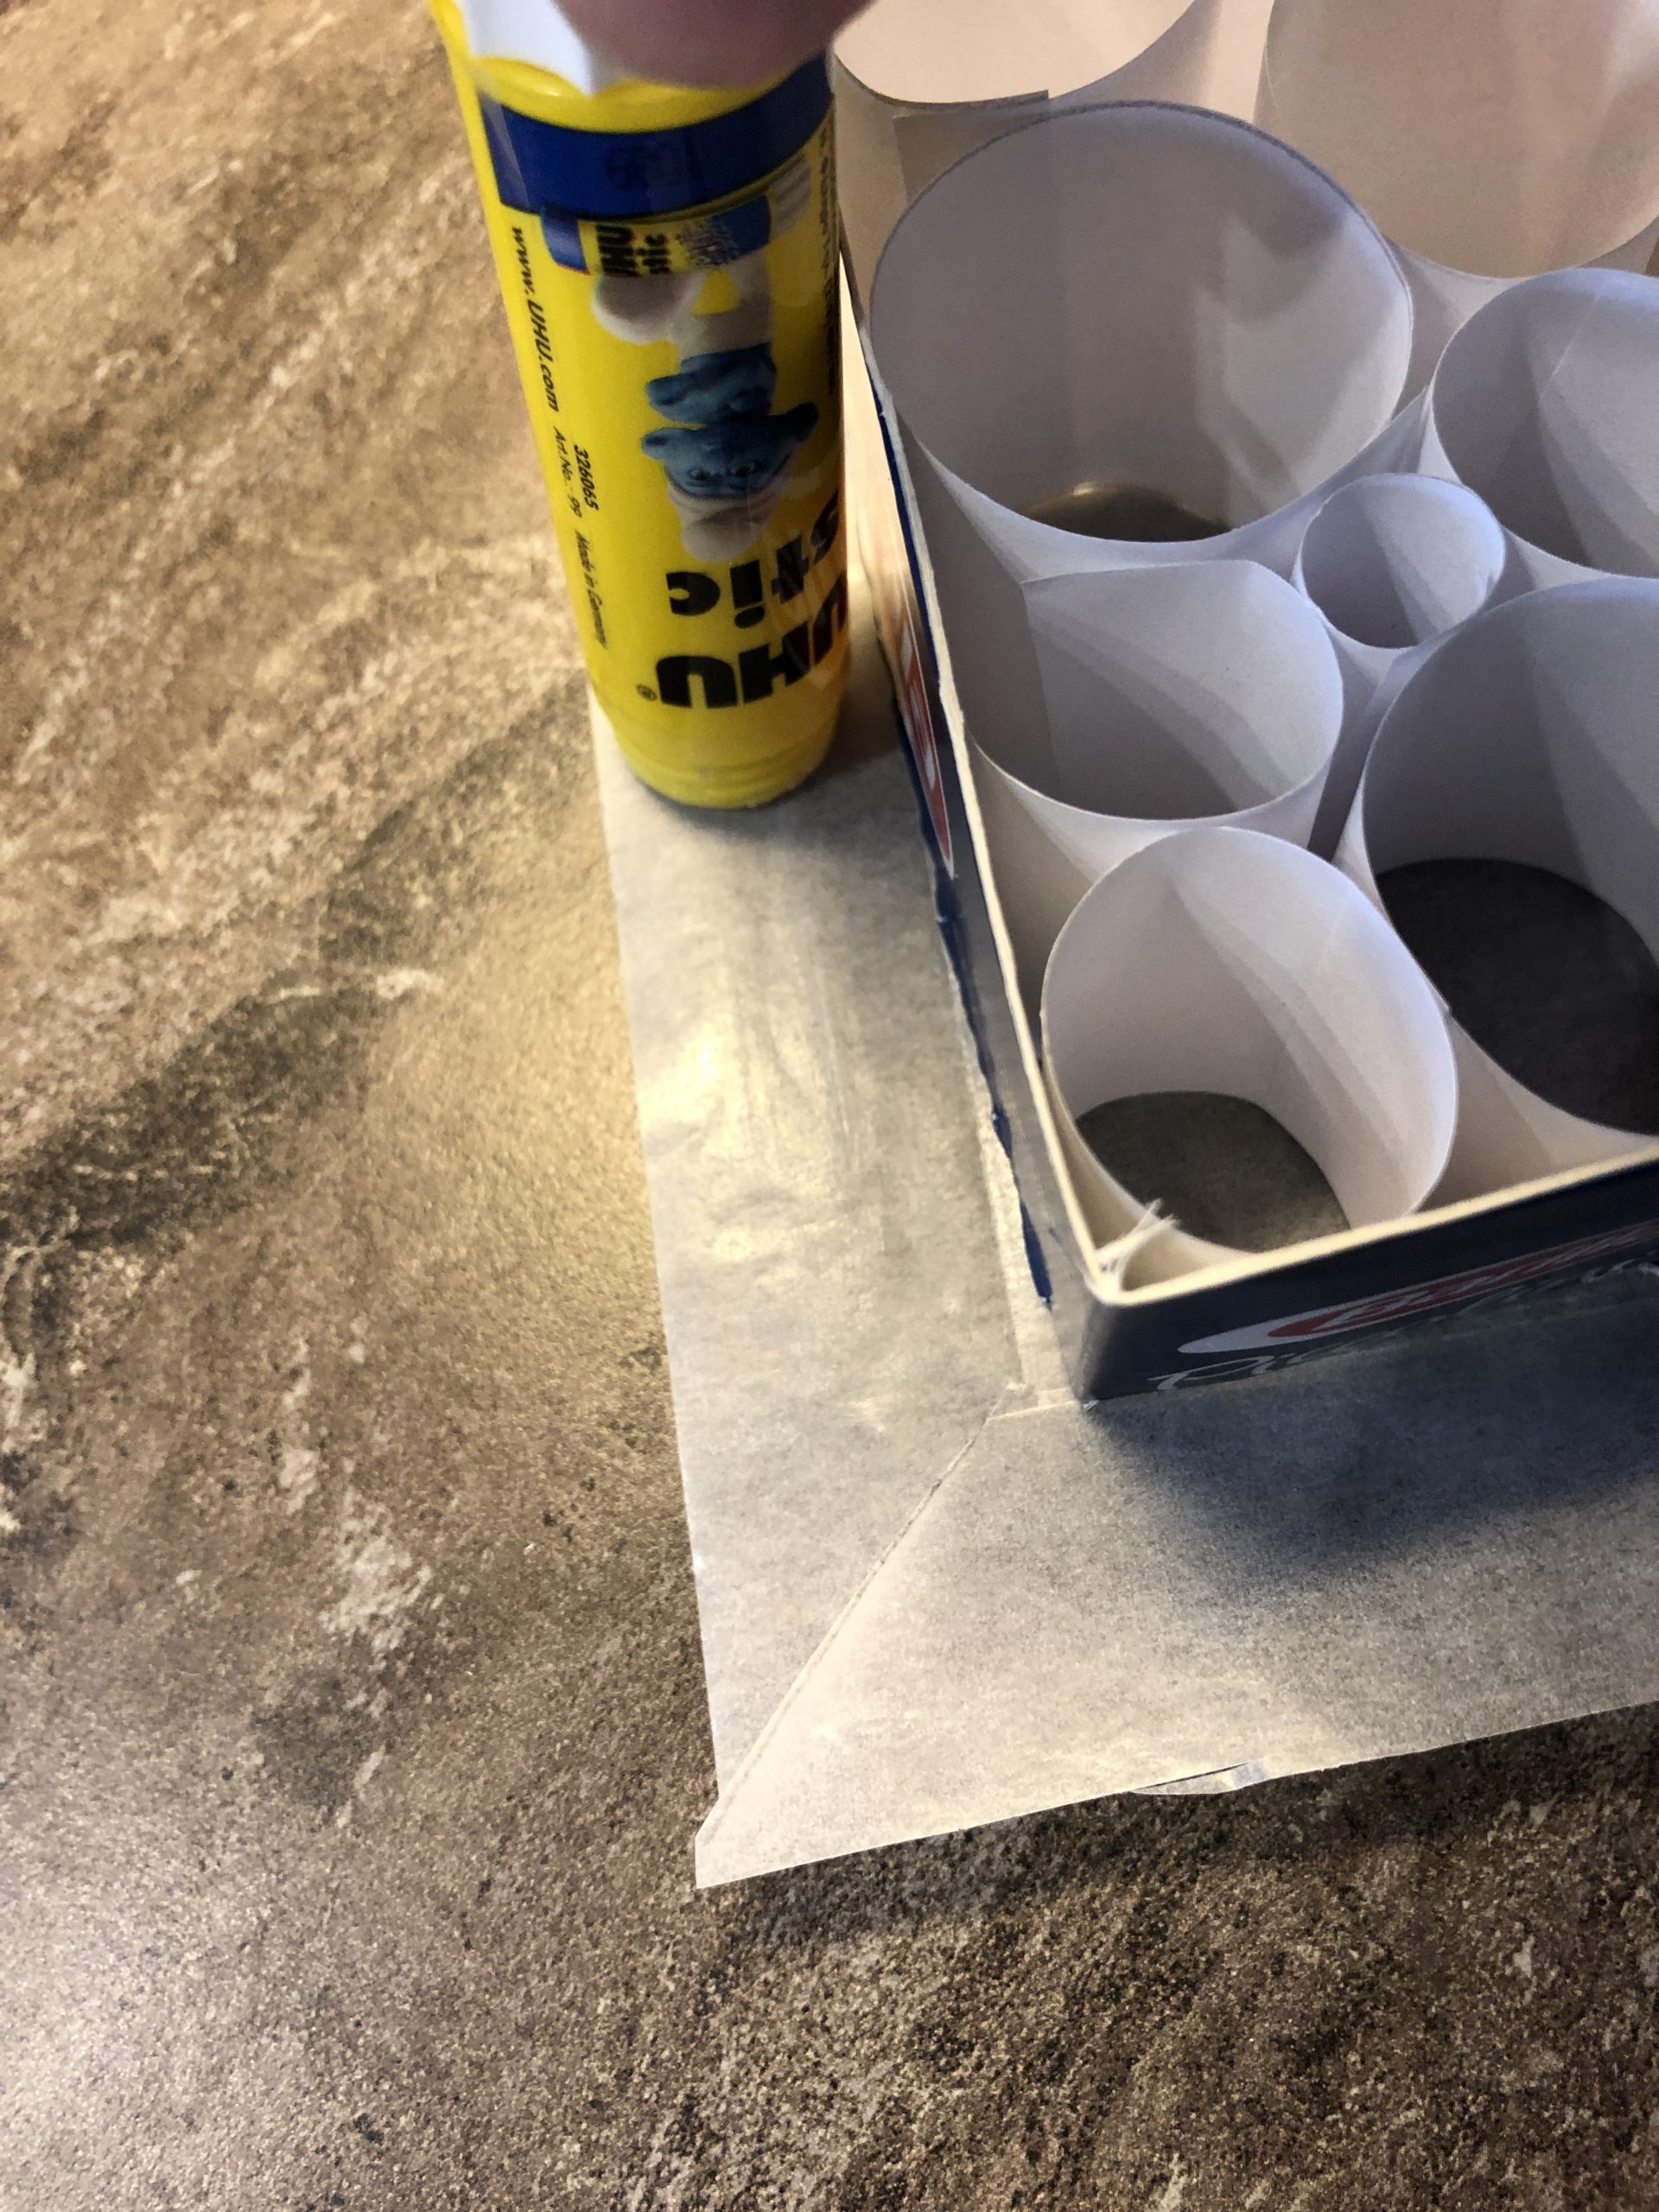
Cut off the overhanging corners with the scissors.
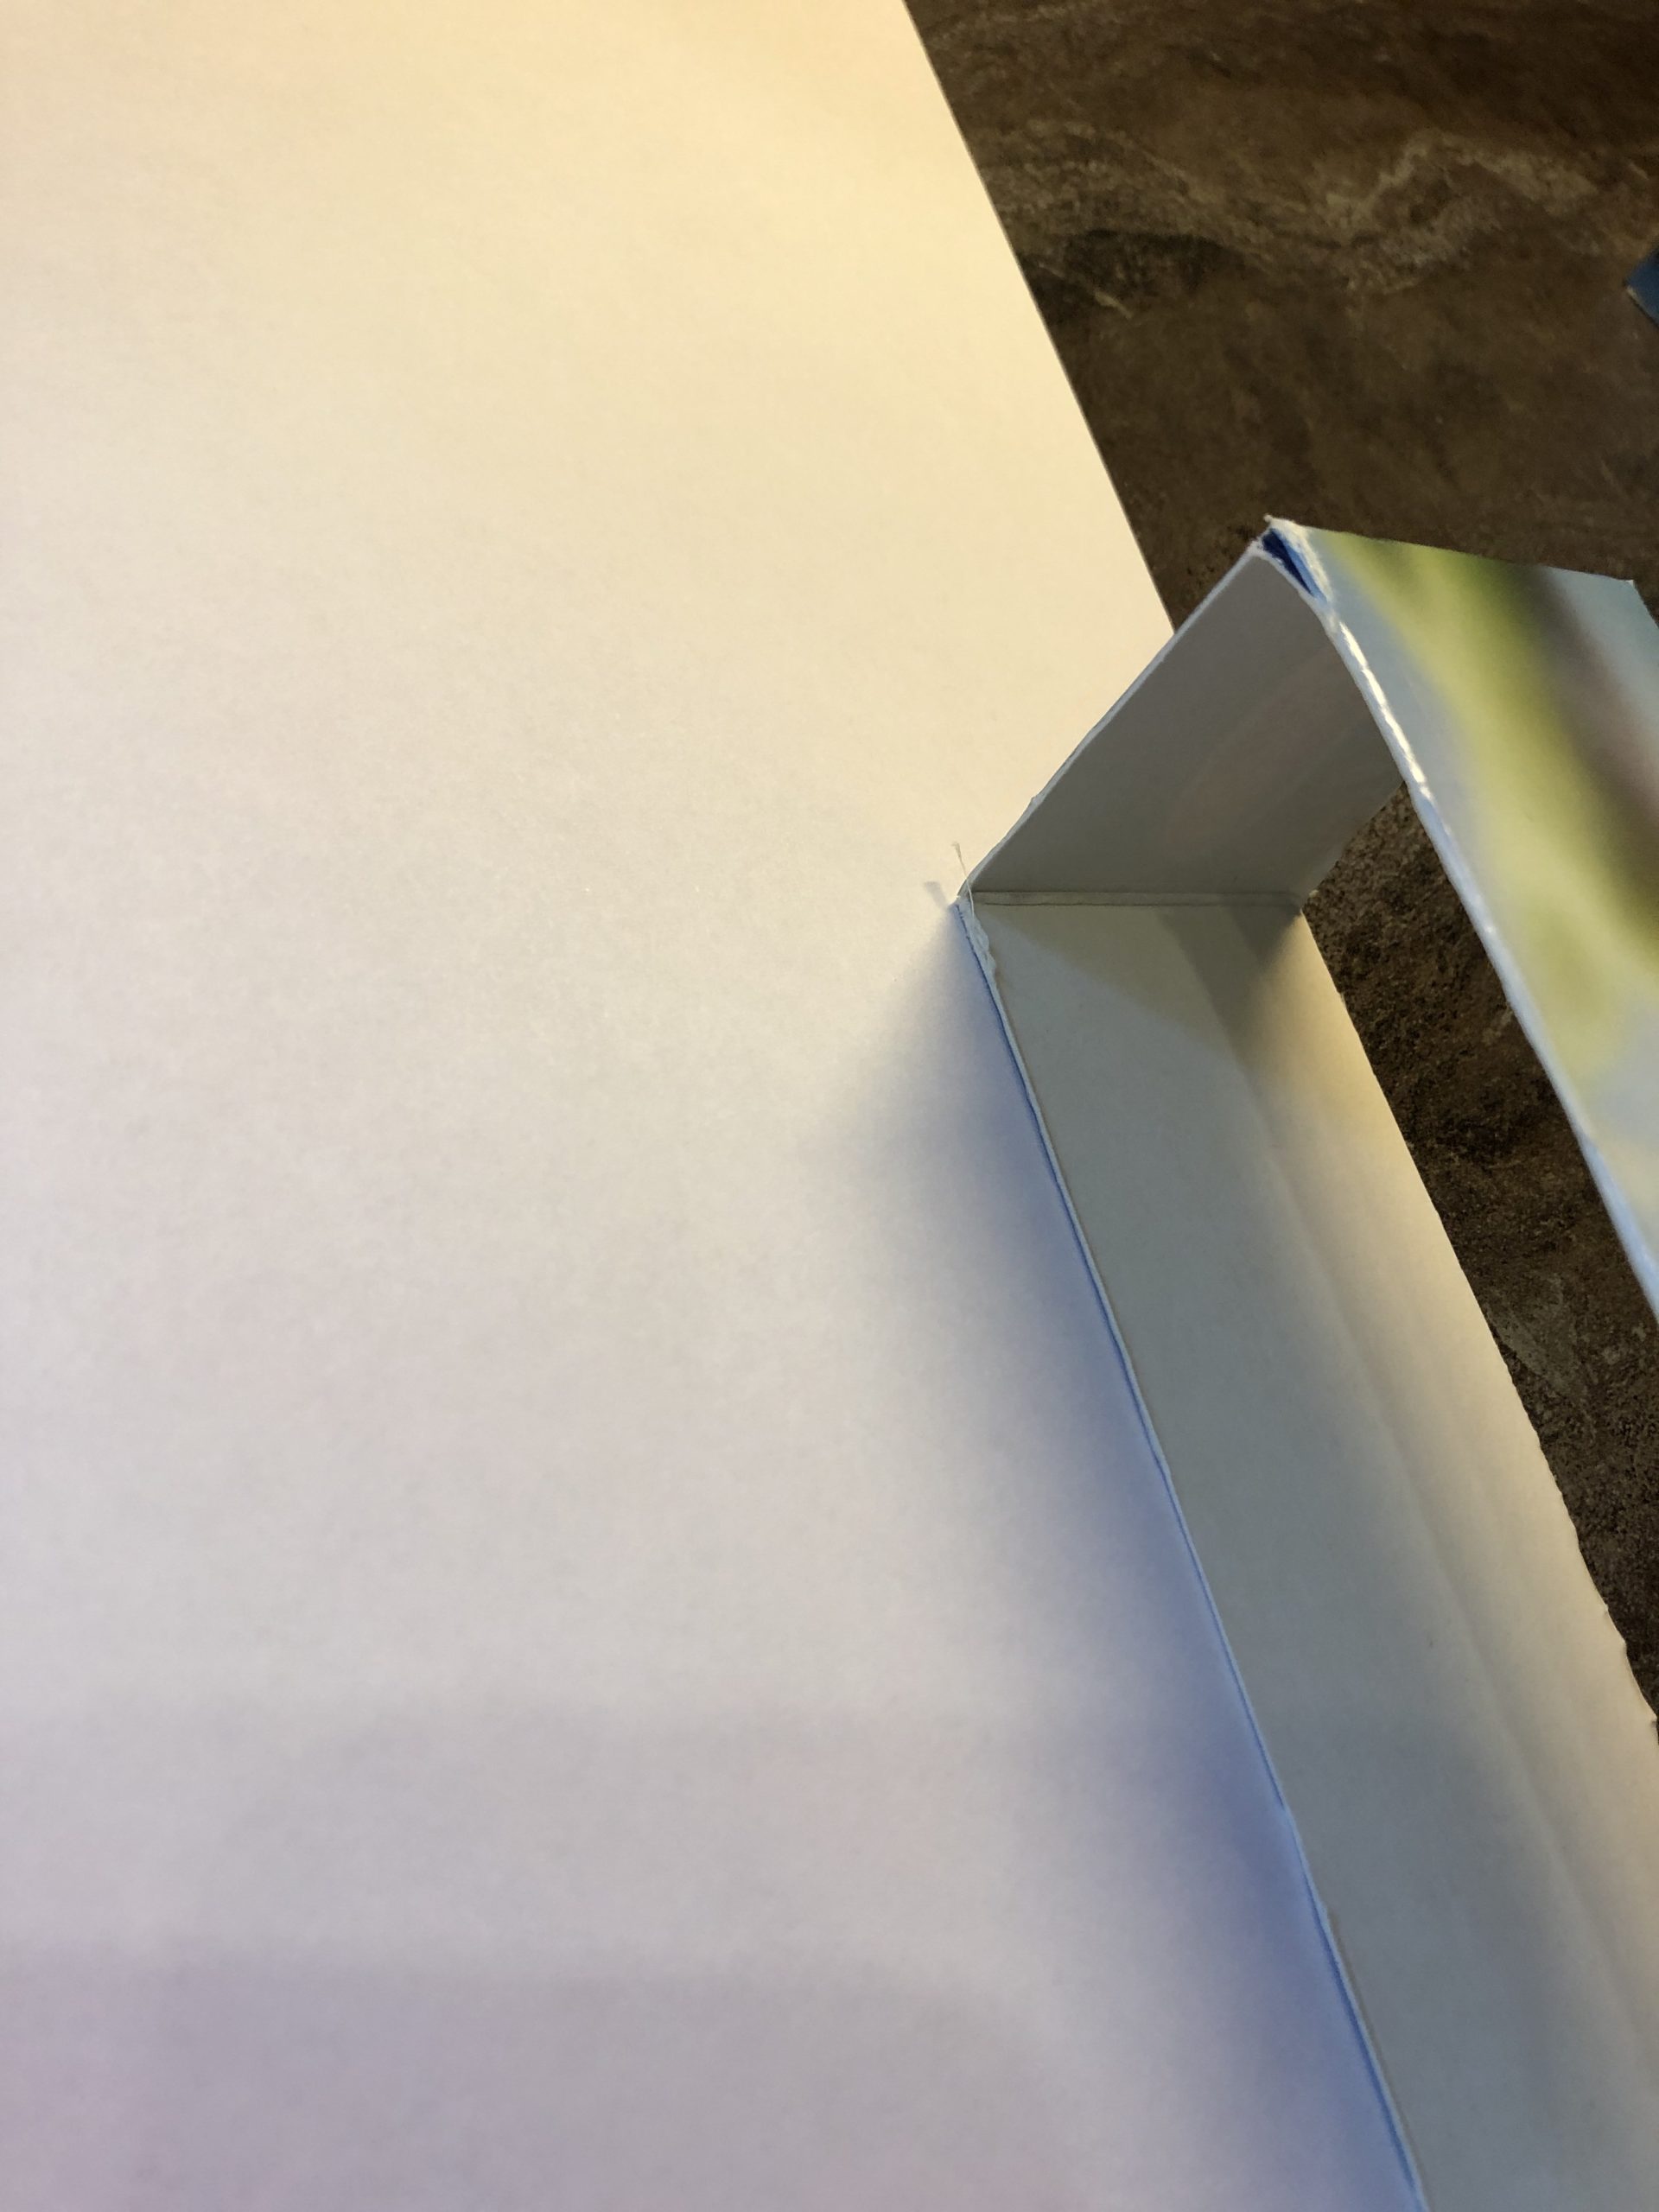
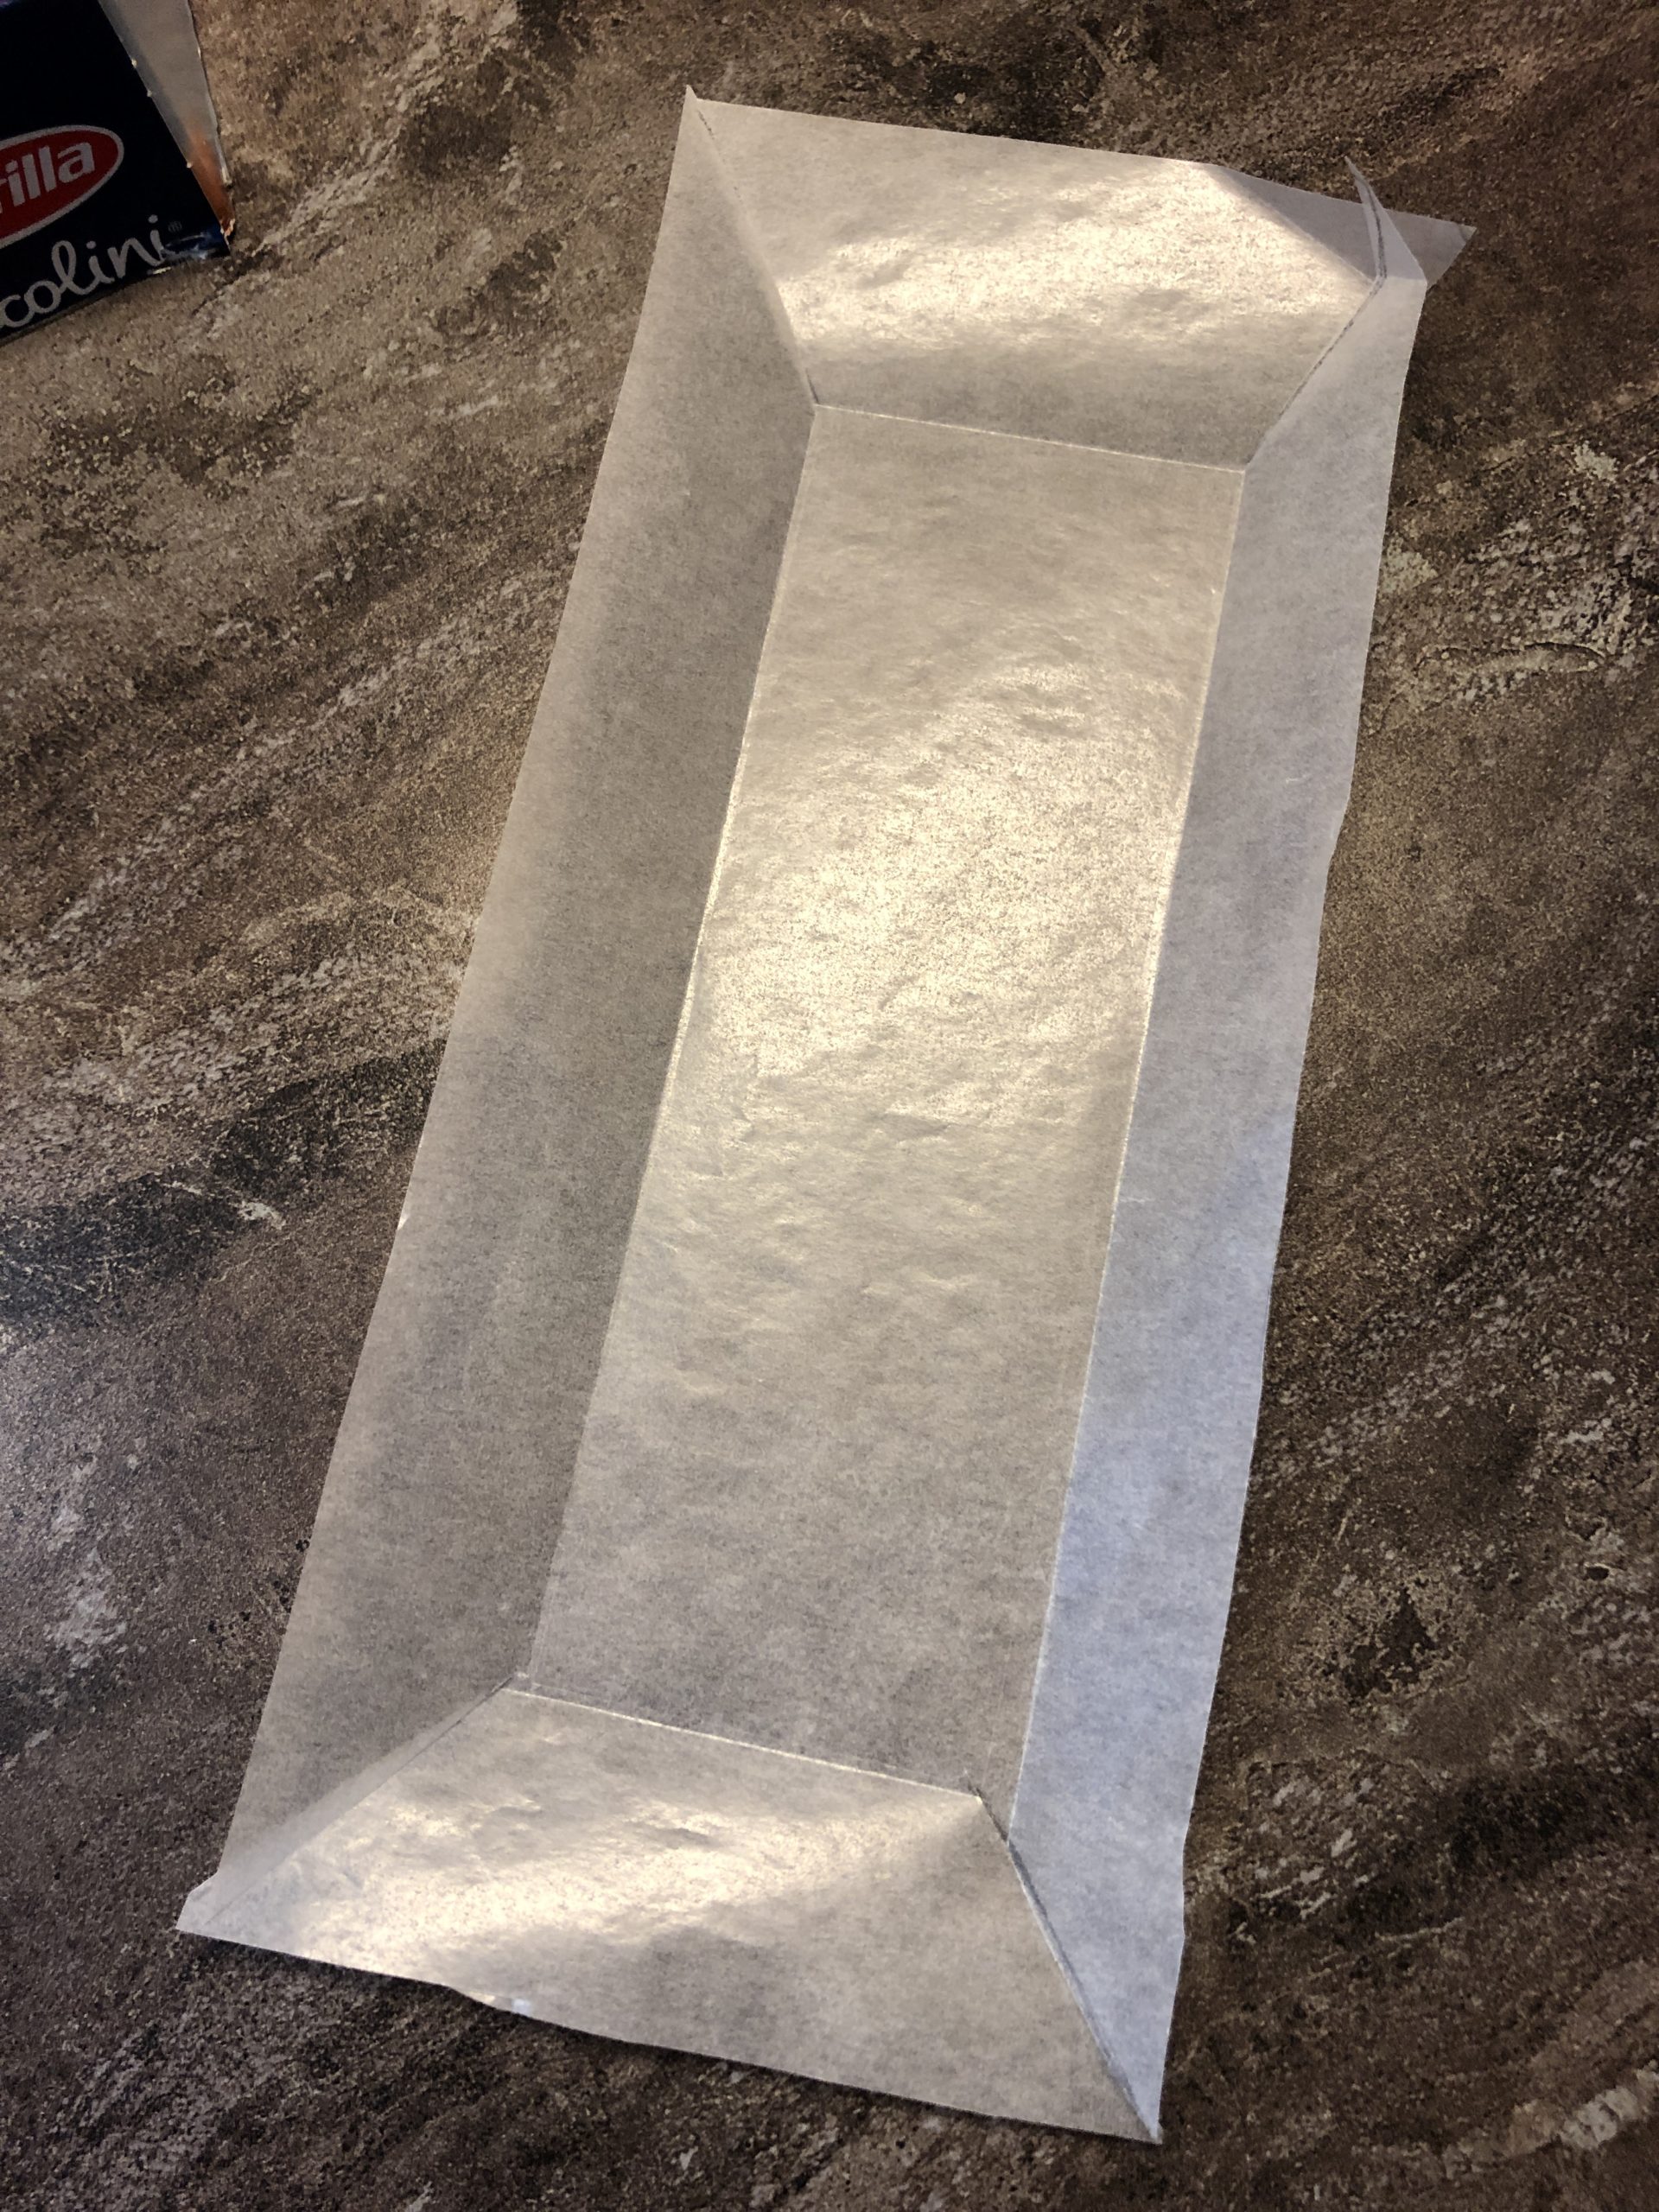
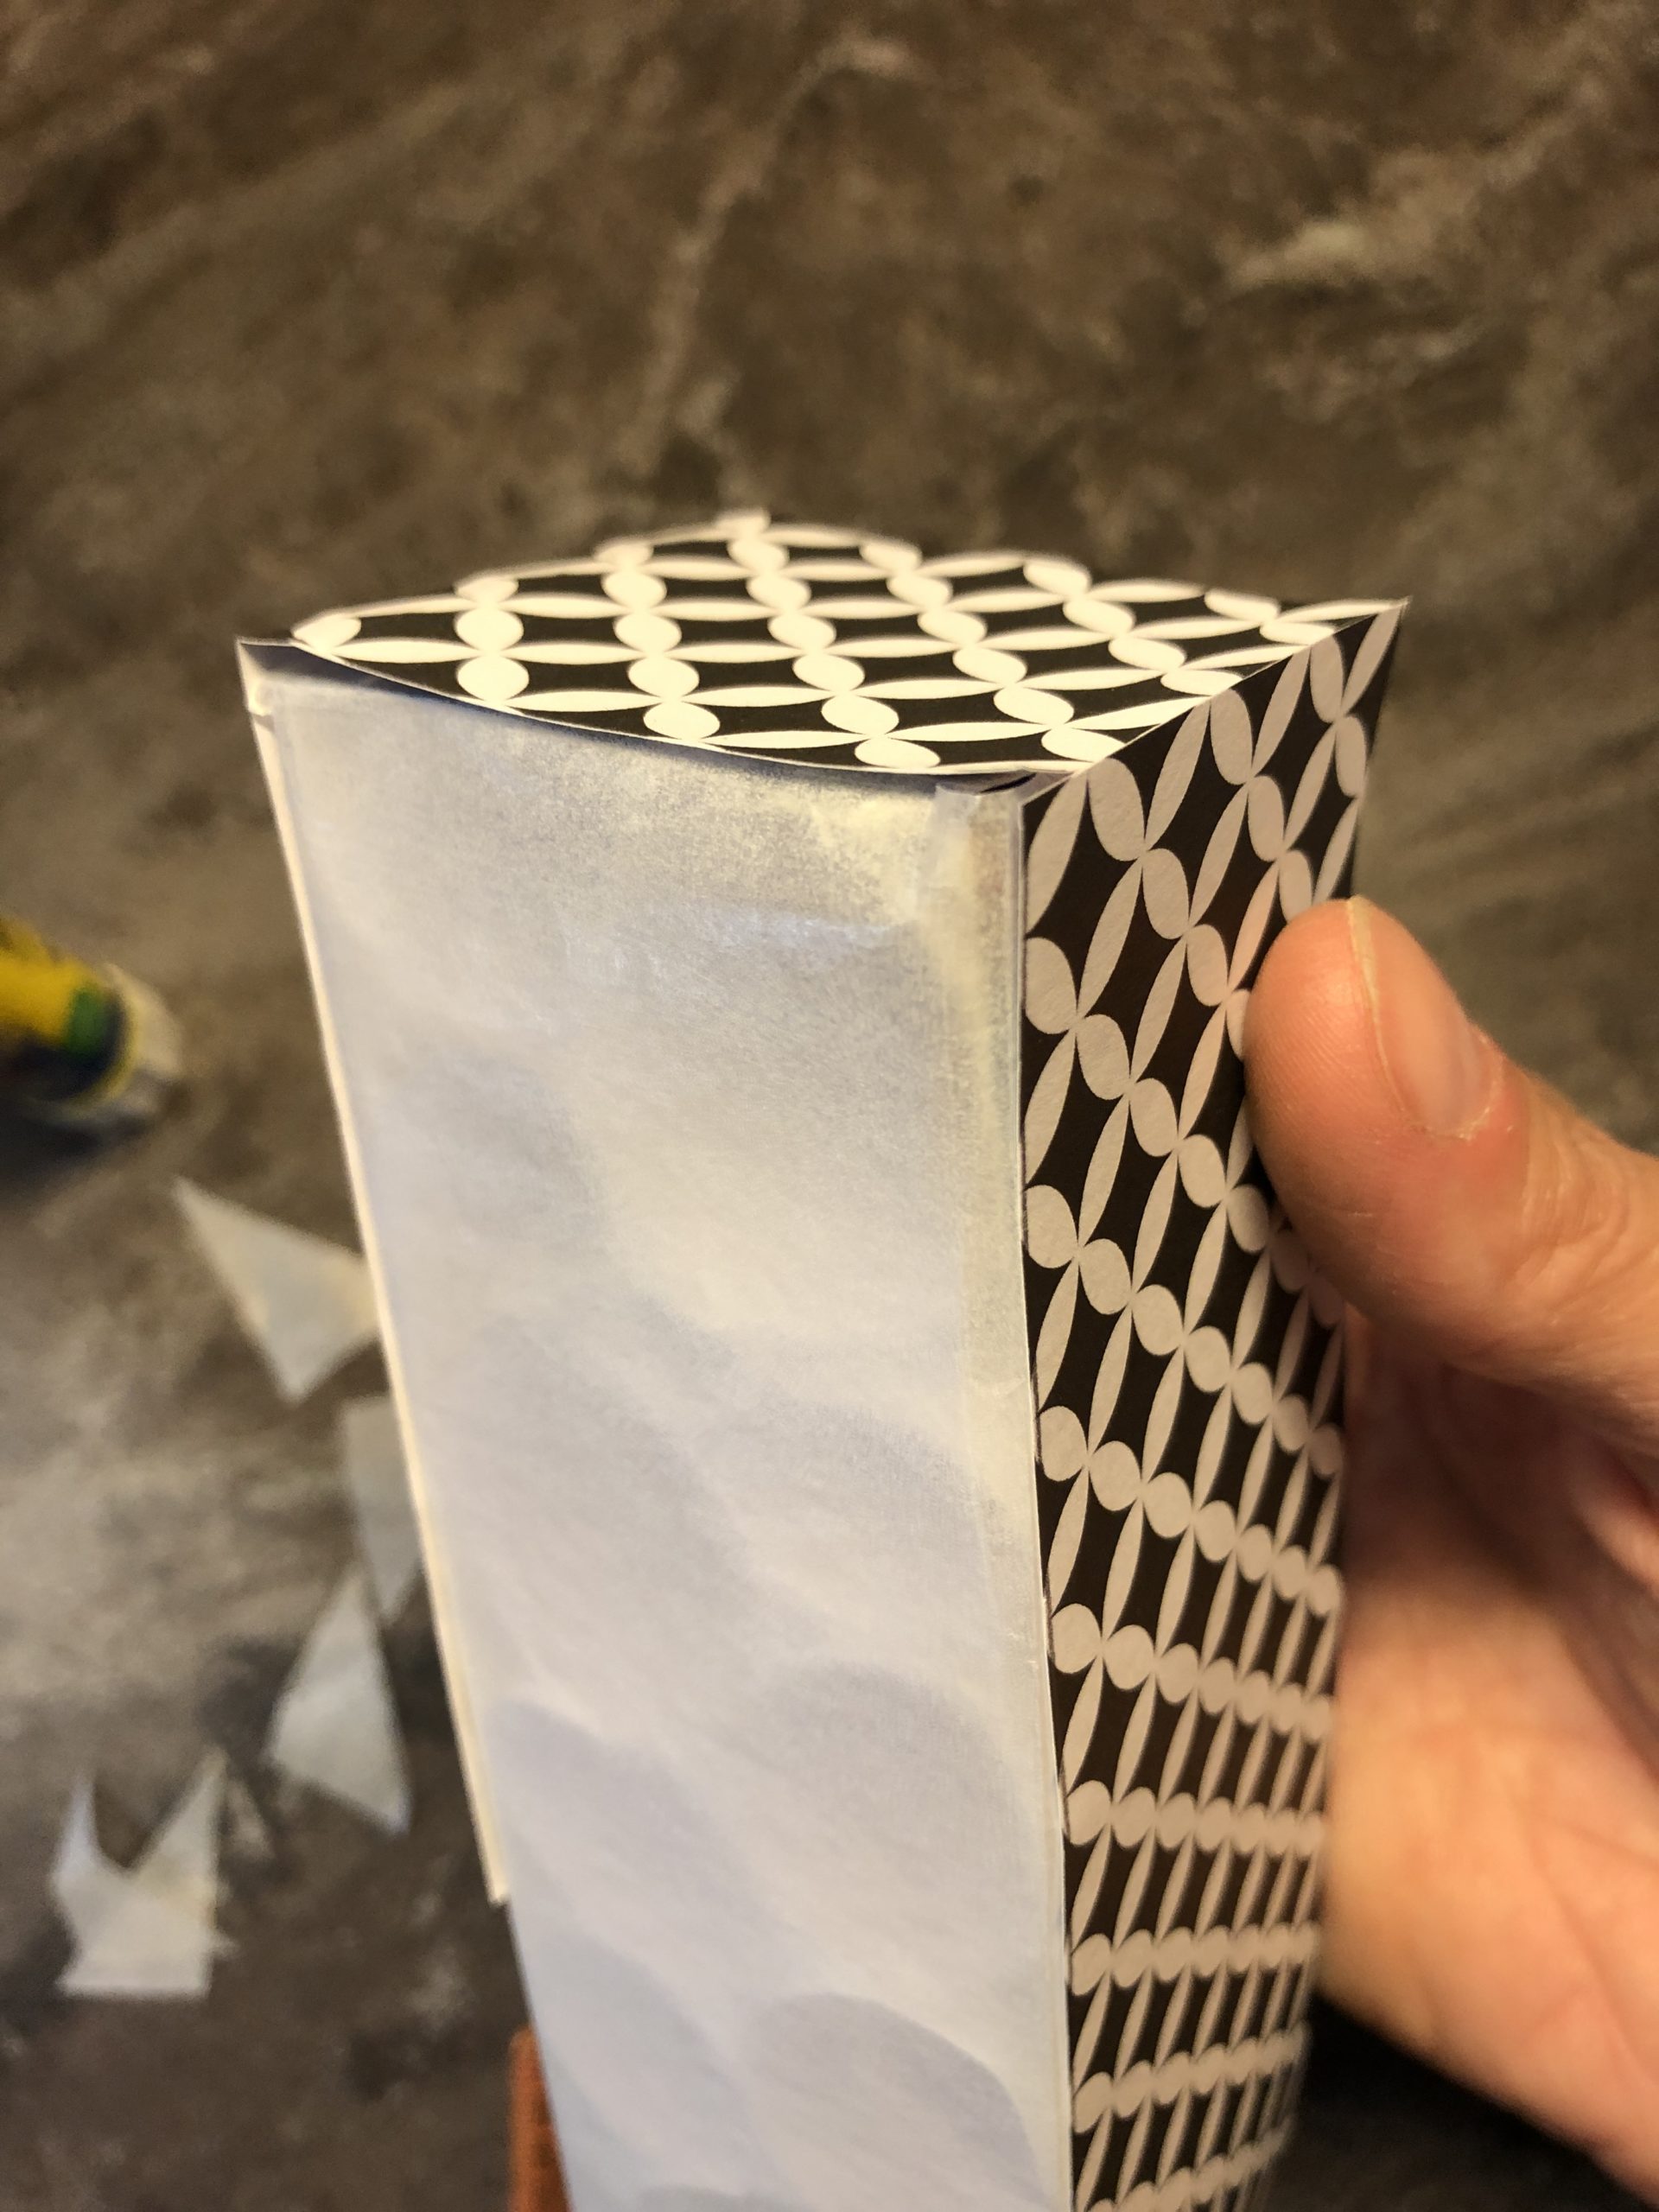
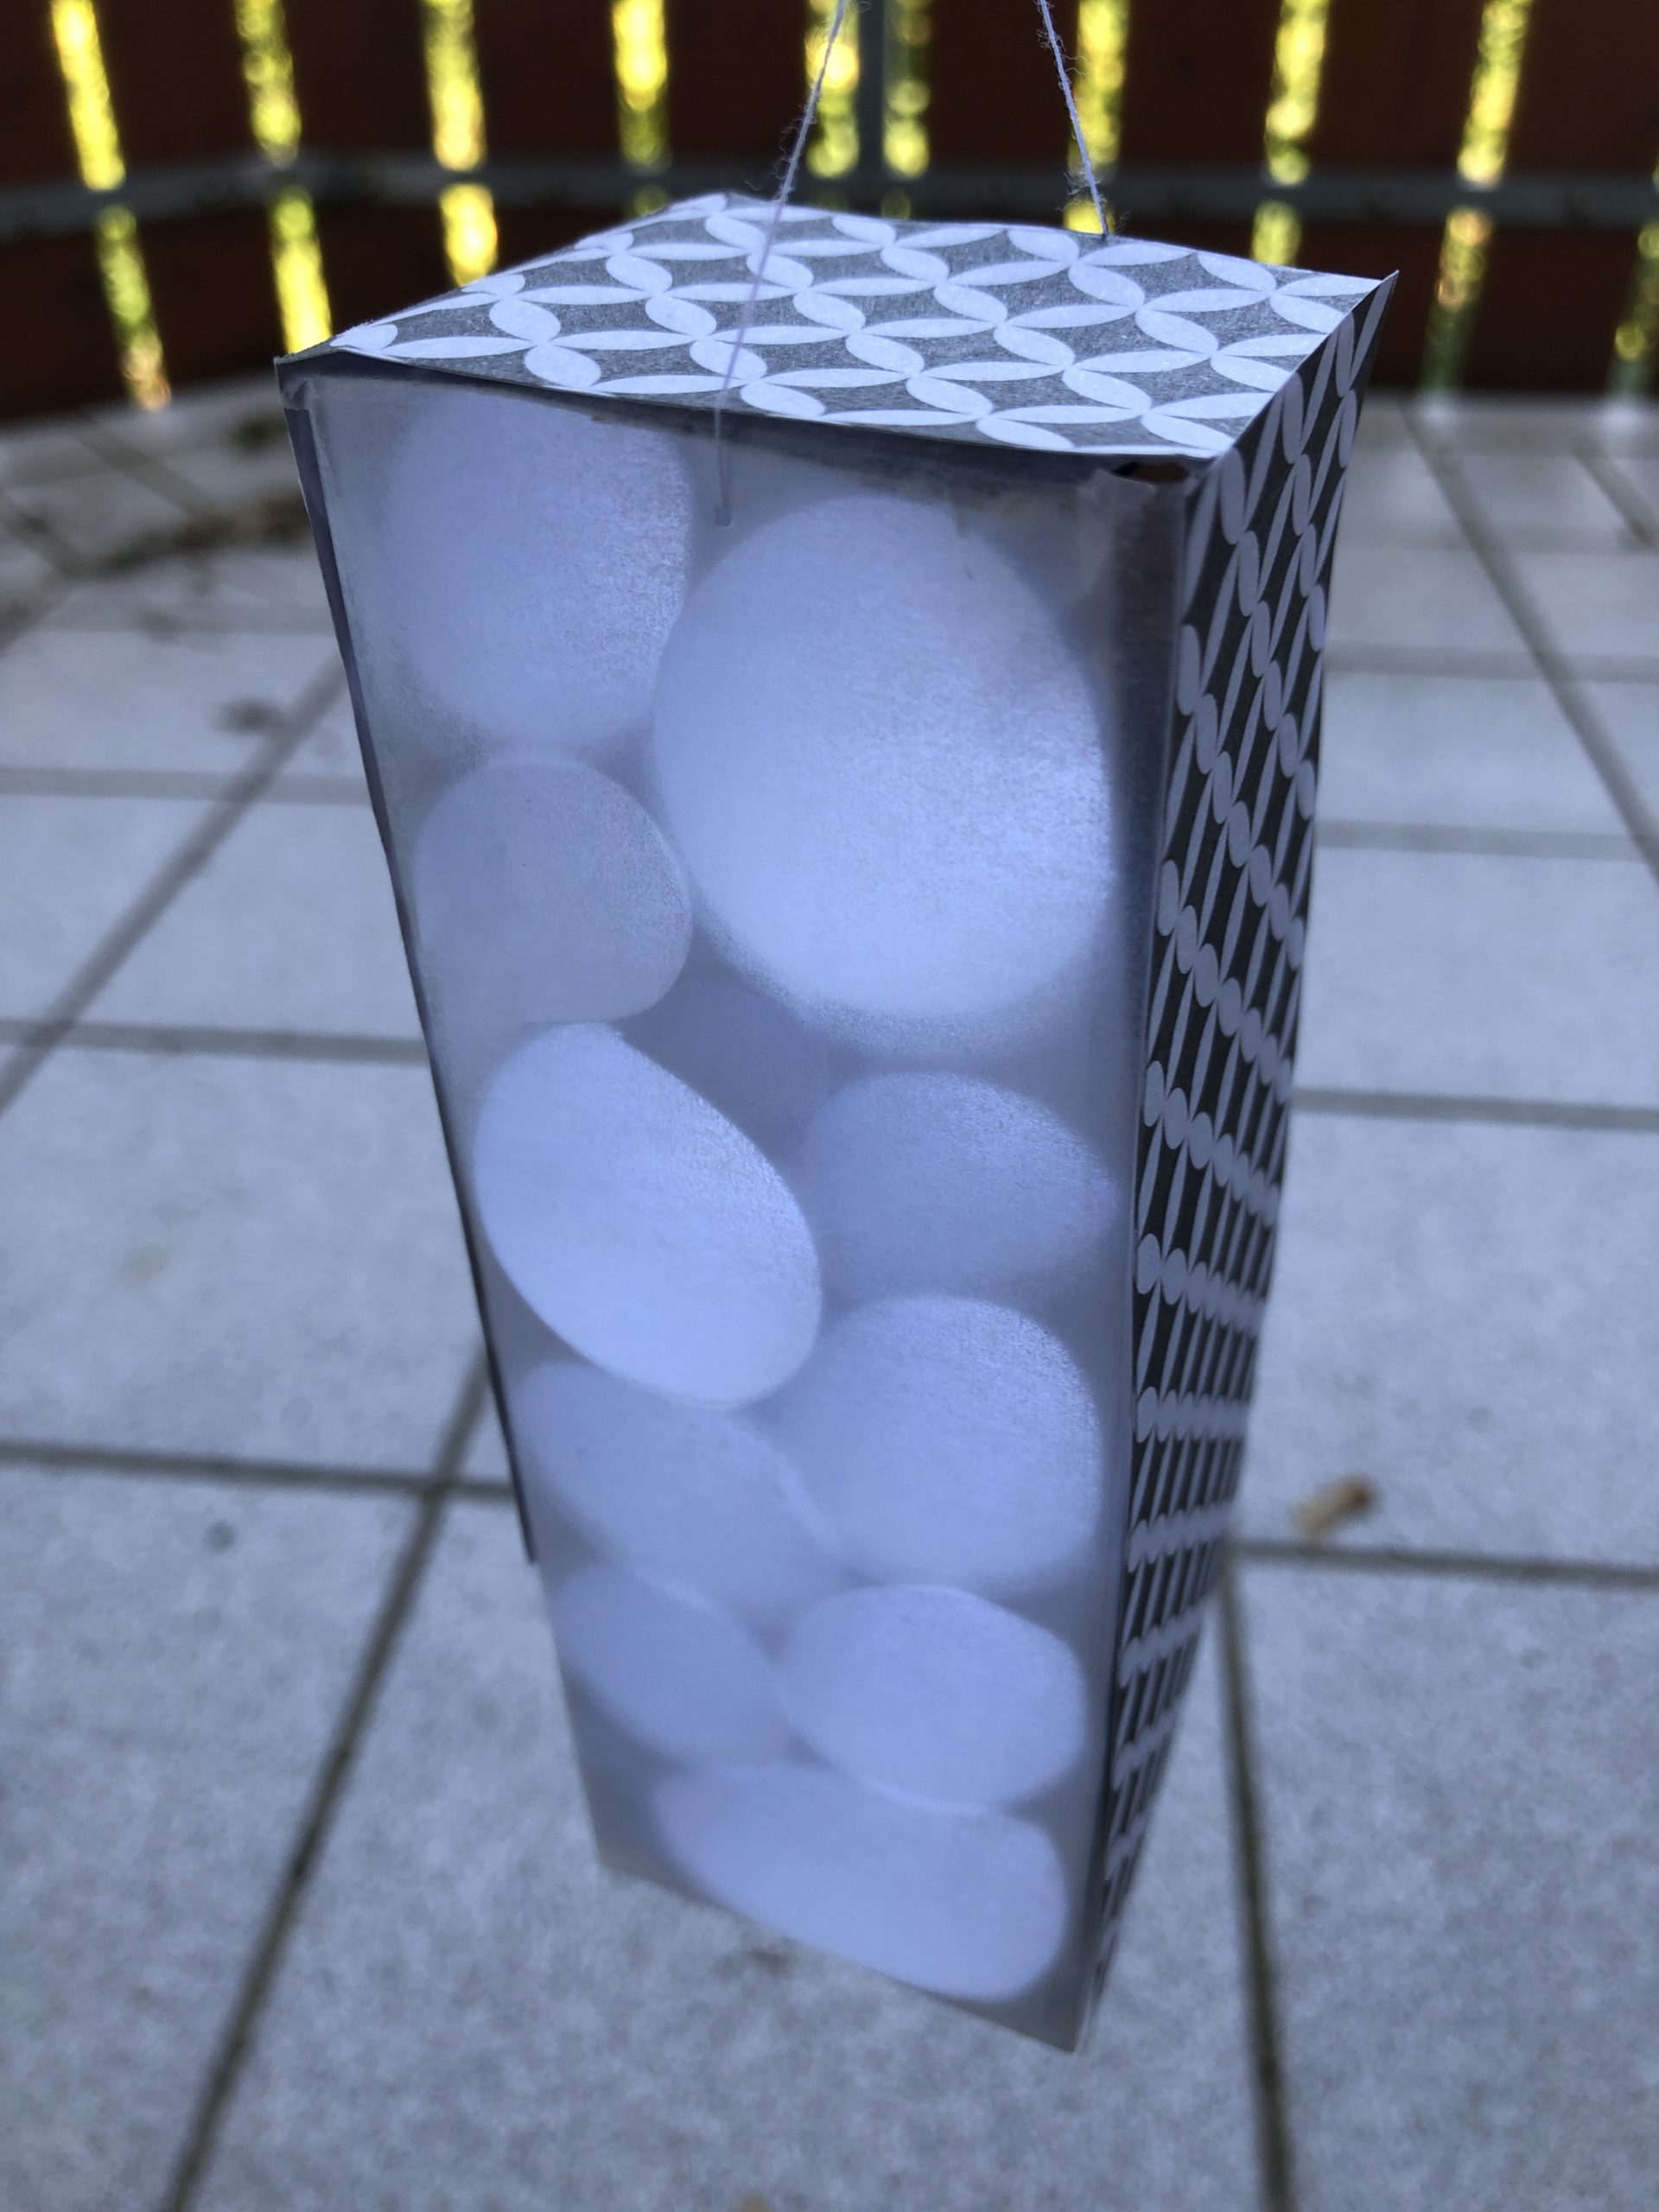
The box frame is ready.
The paper rings hold without glue by combining the different ring sizes.
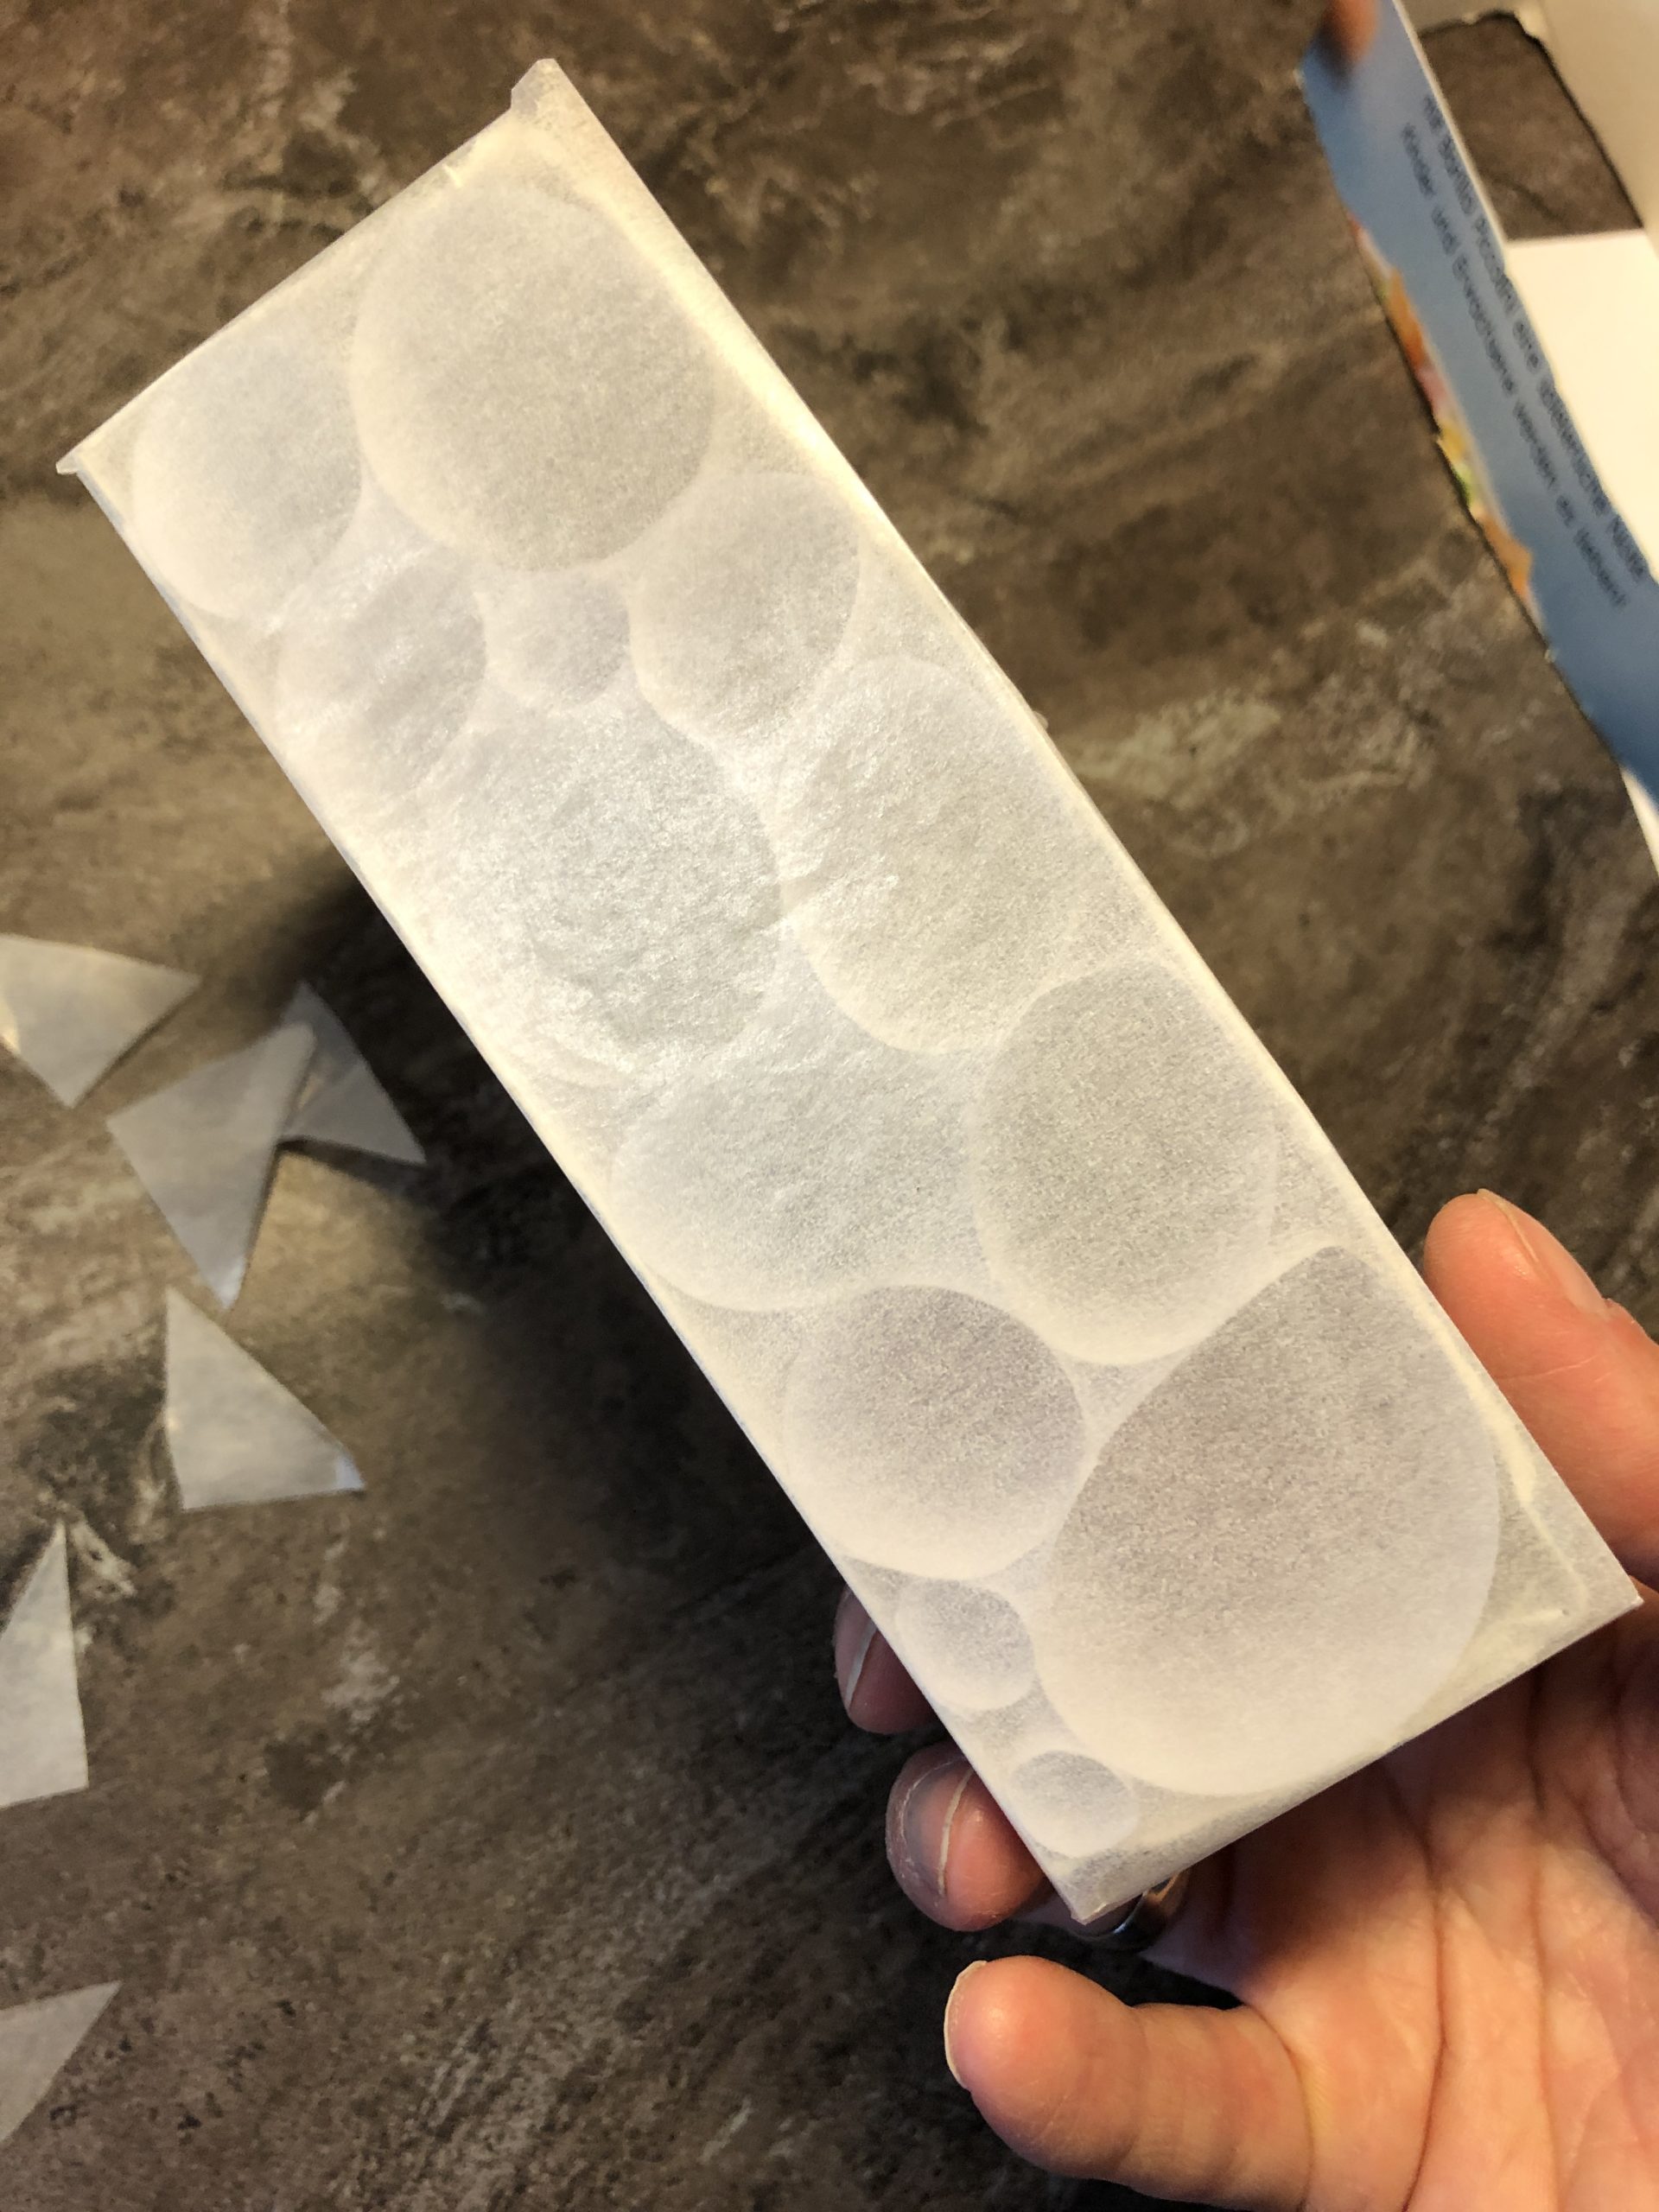
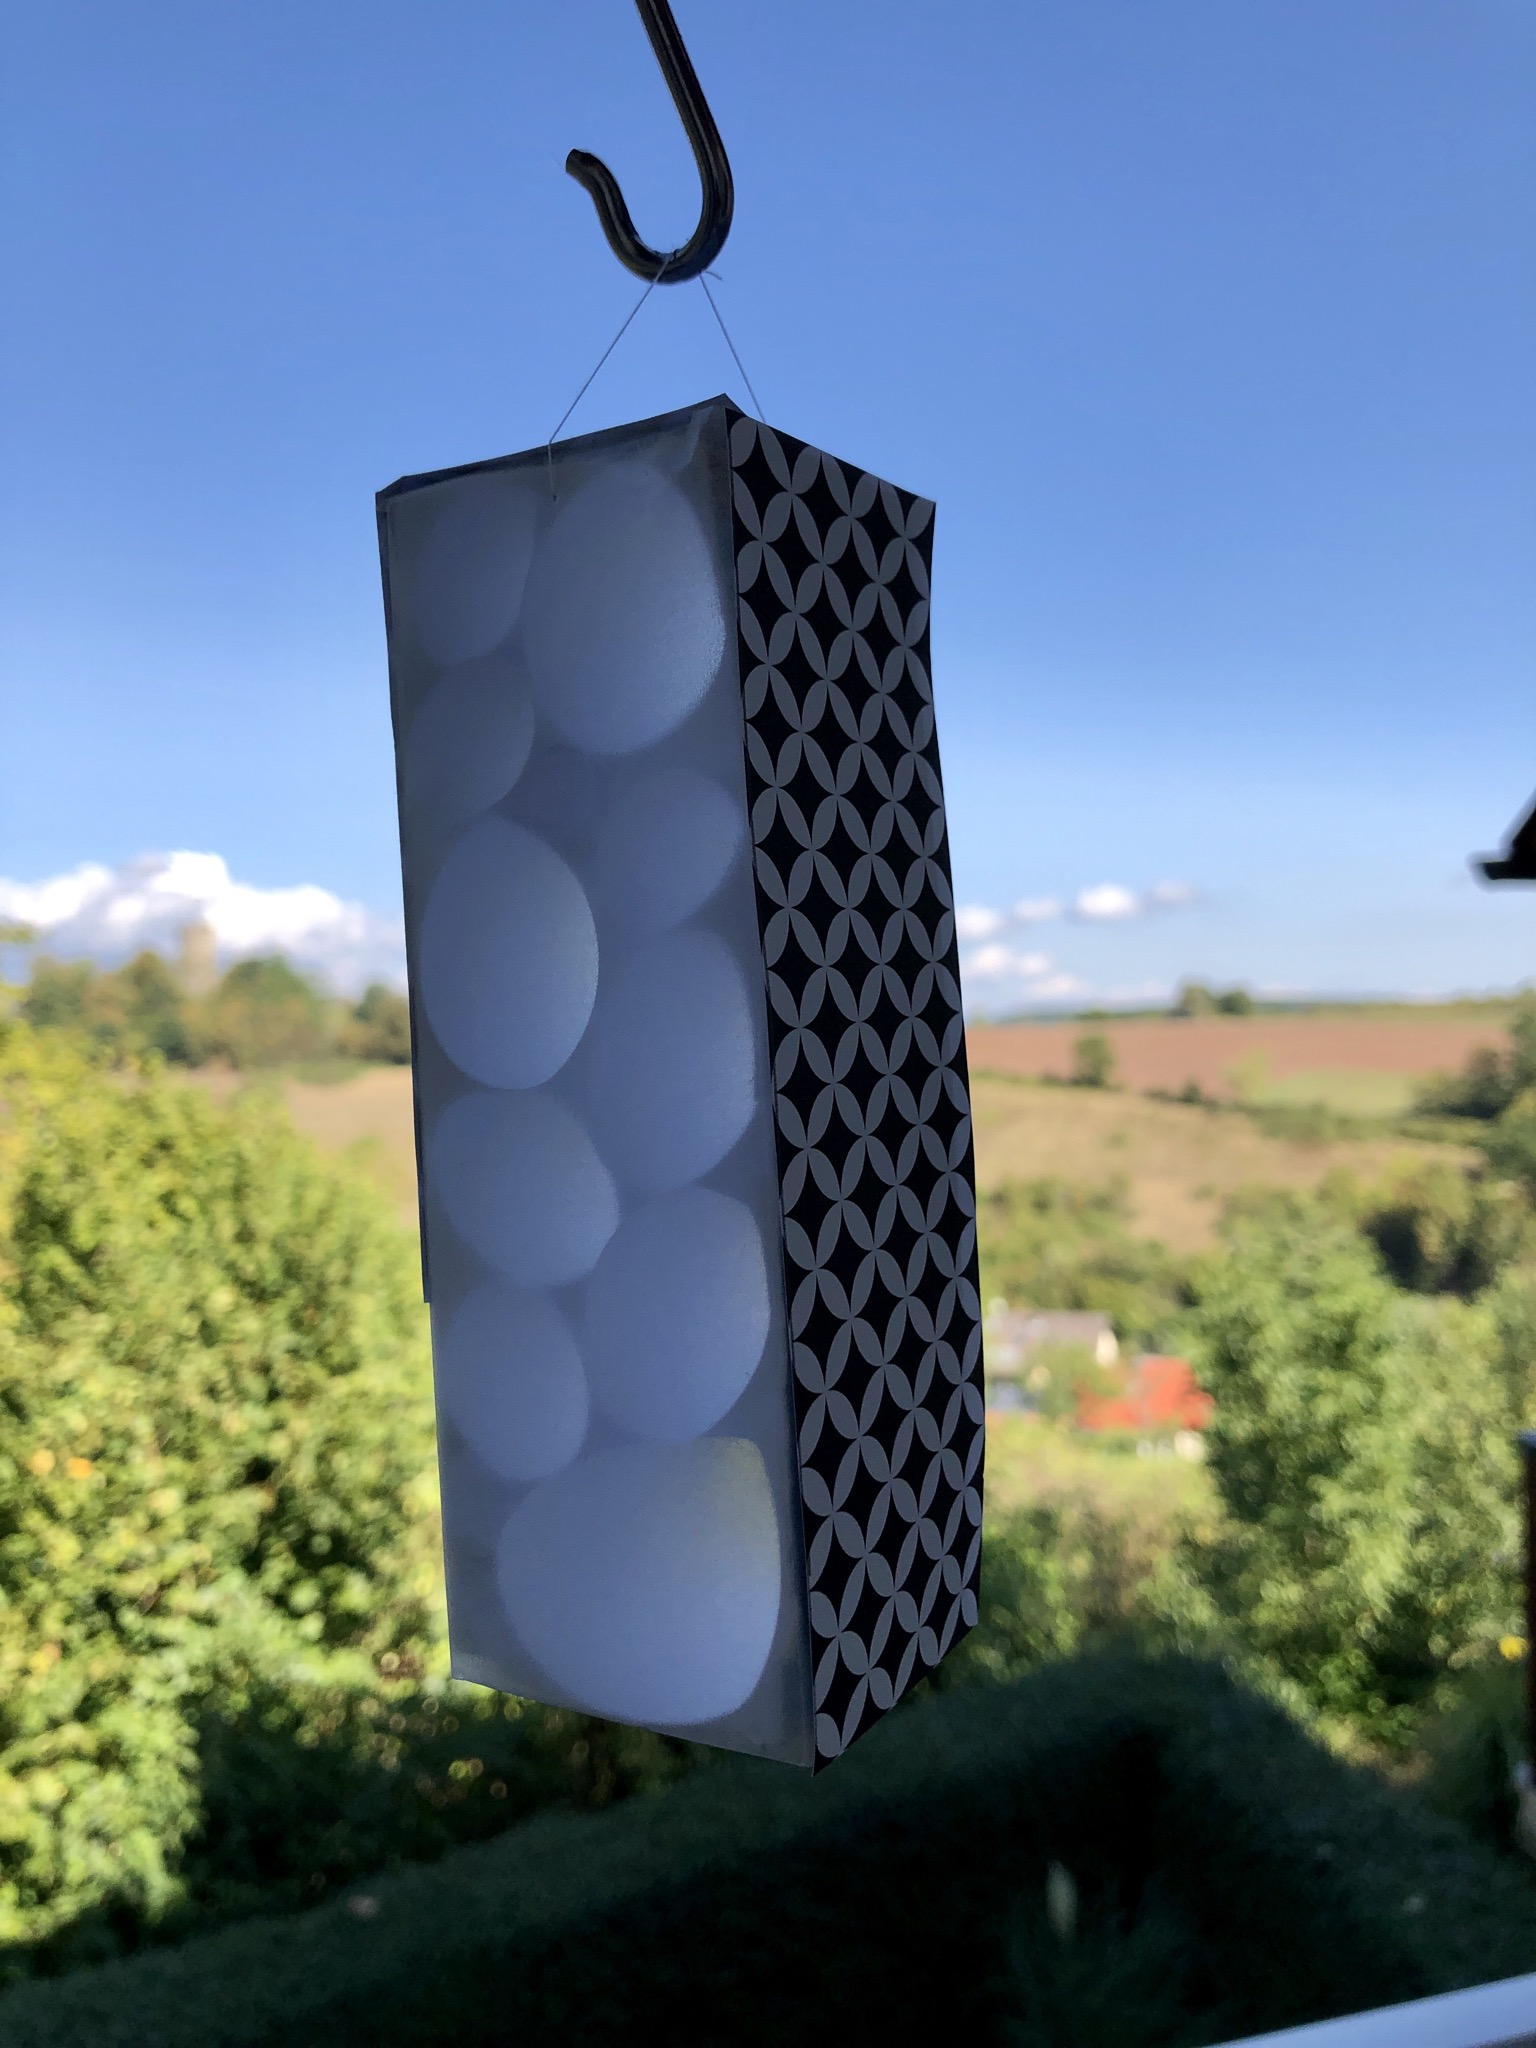
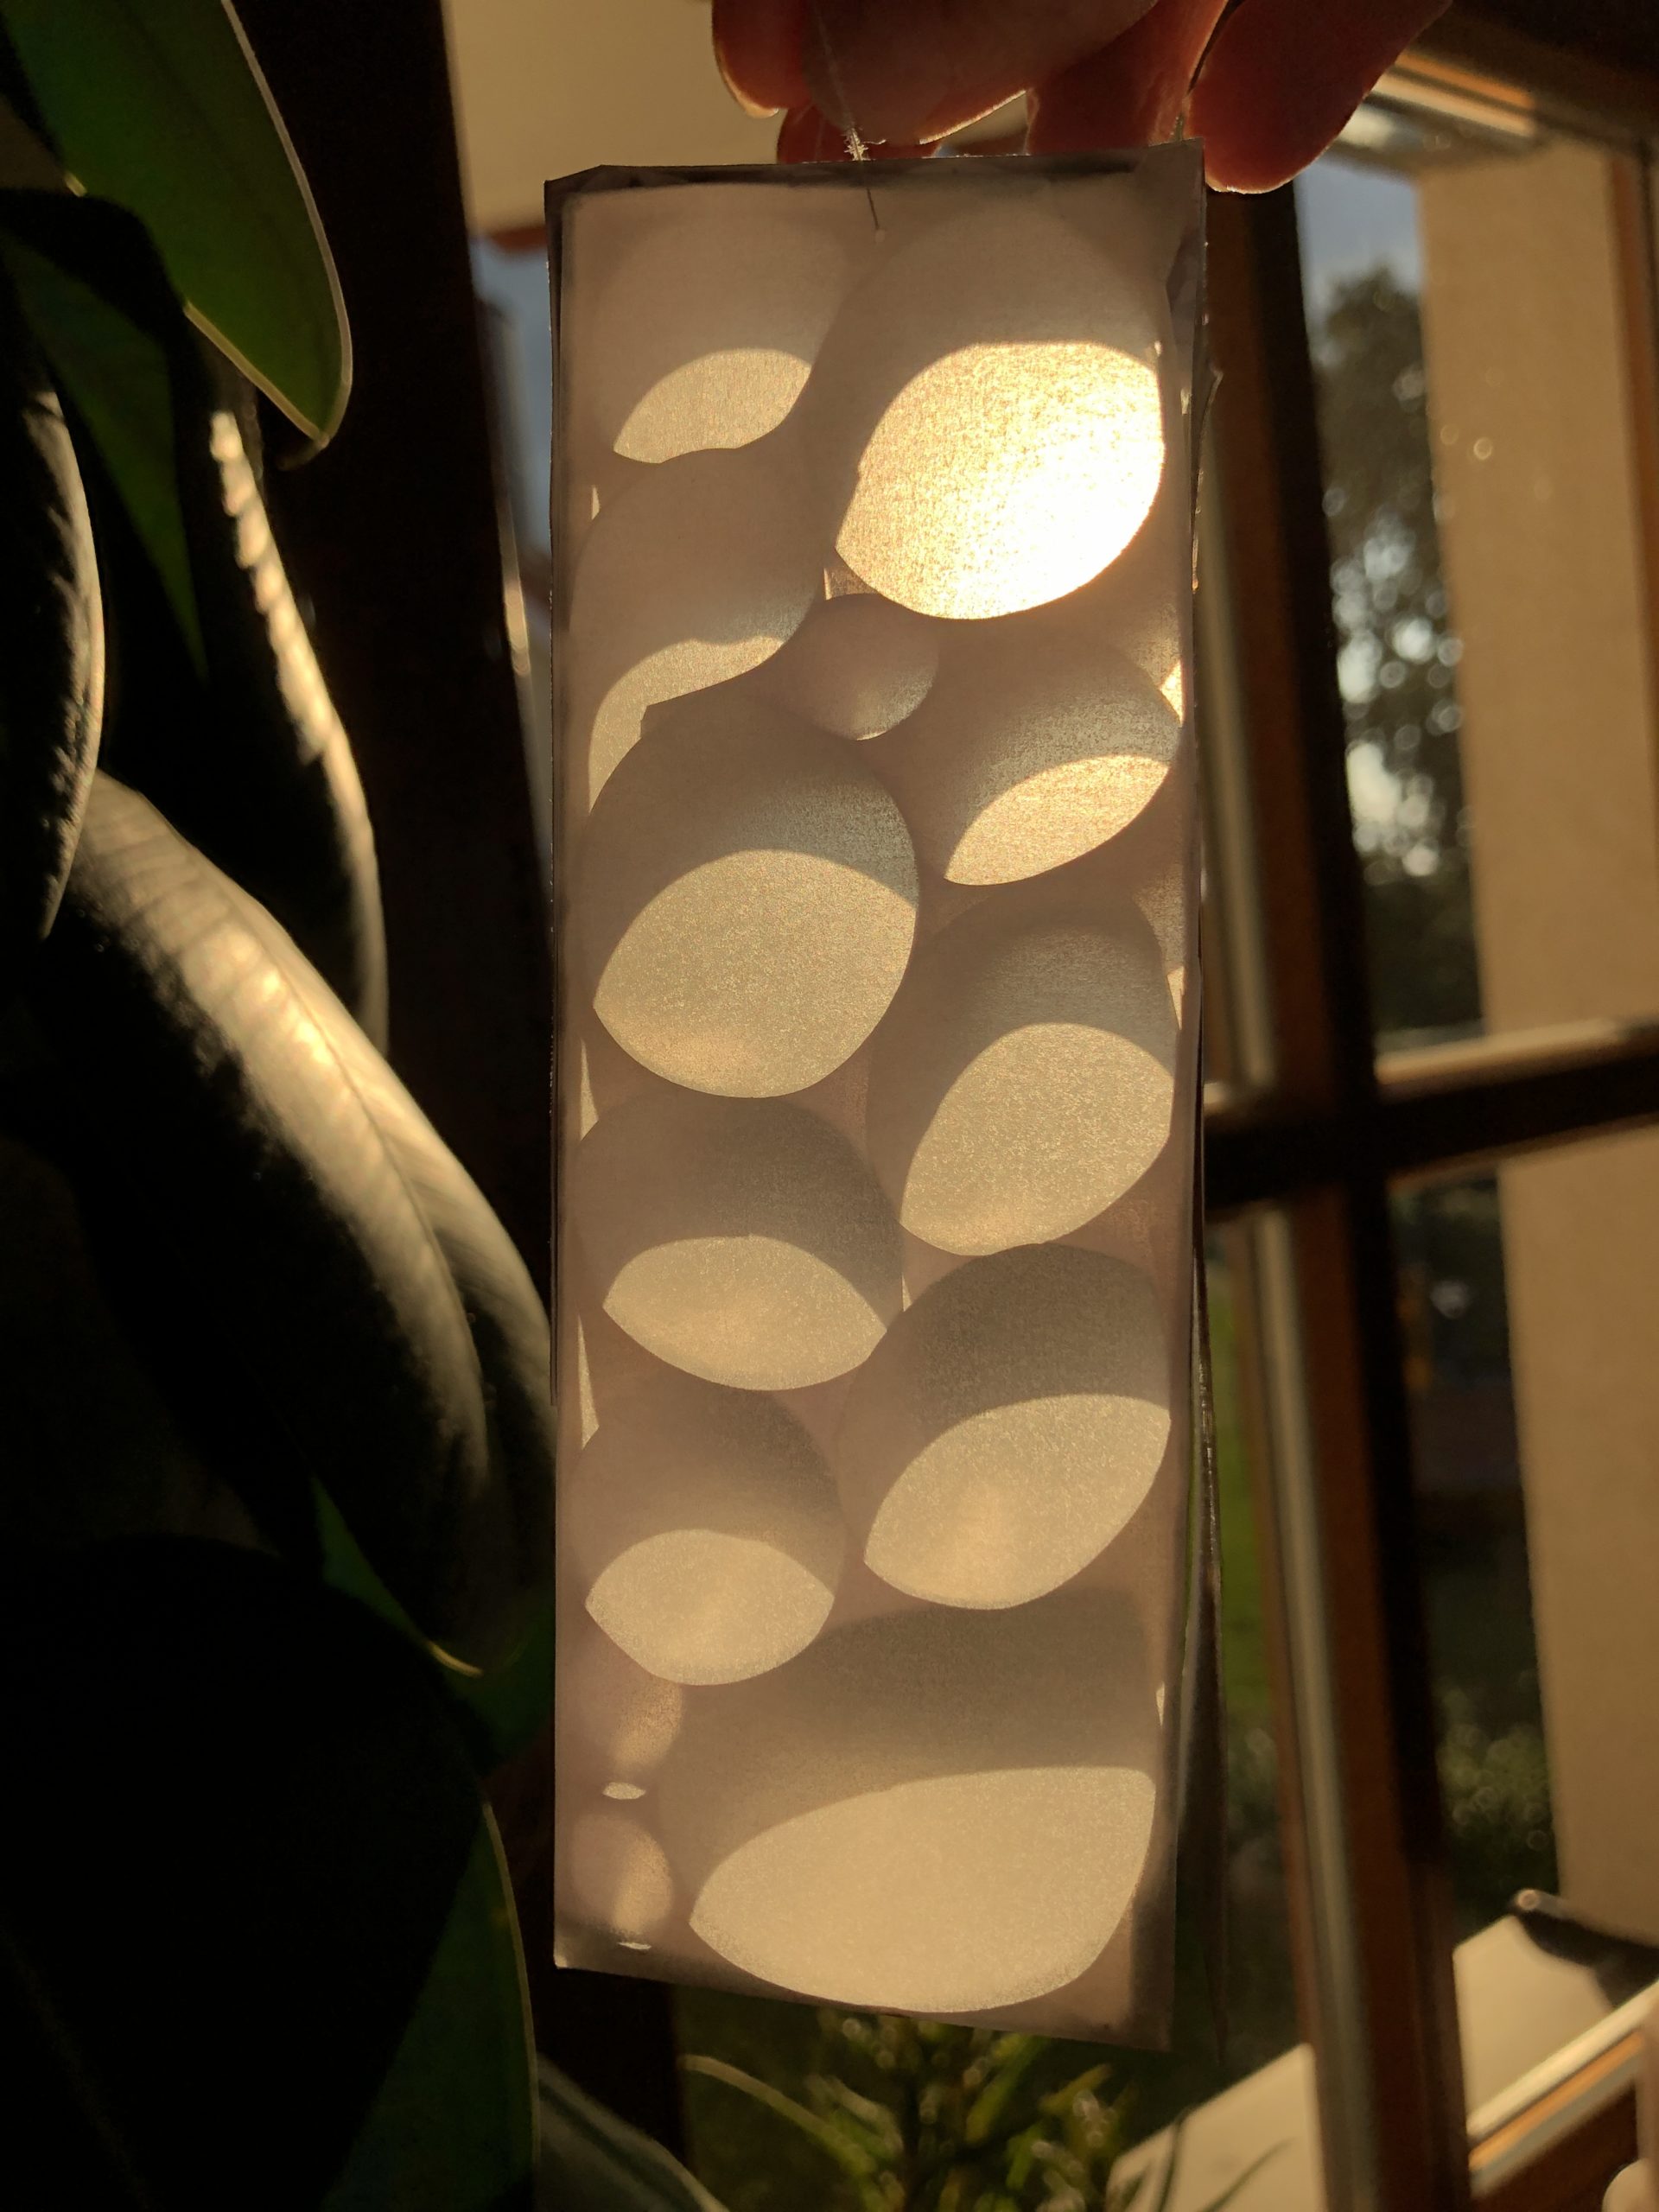
If you hold the frame against the light (e.g. at the window) a great effect is created!

To beautify the frame you can use either motif paper or a monochrome clay paper. You can cut this to your frame width (3 cm with me).
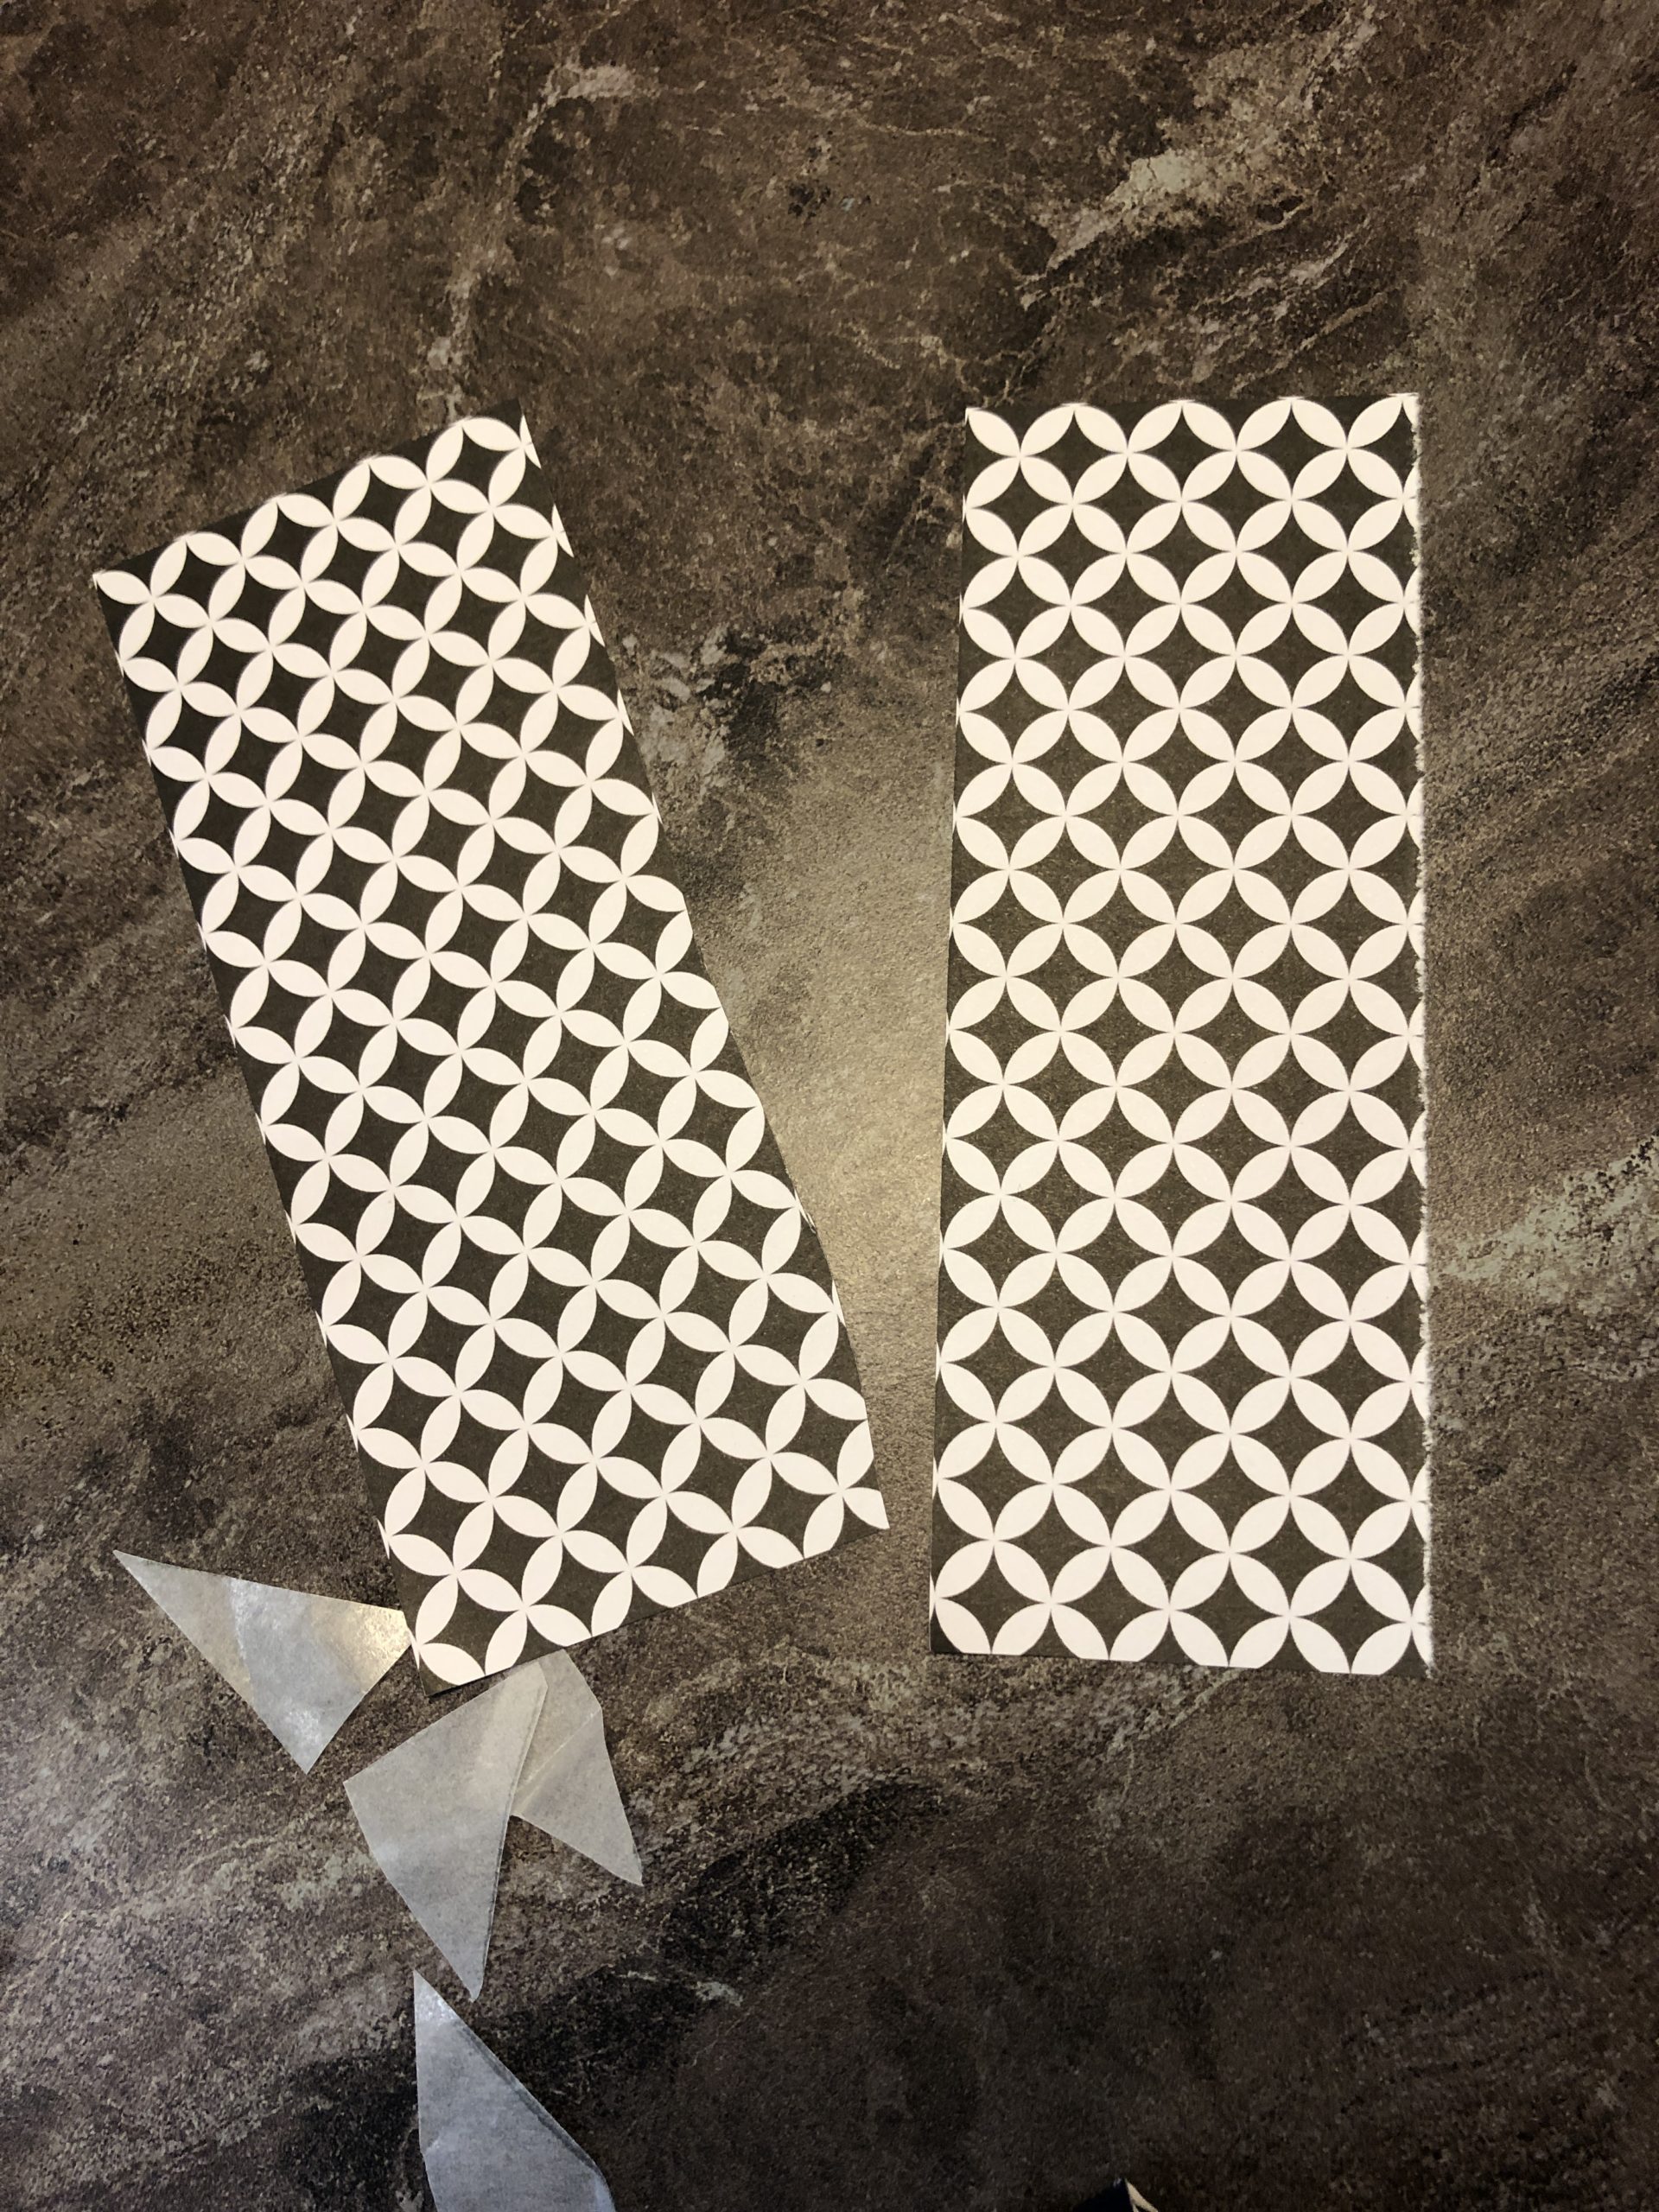
Take the dimensions of your box frame and transfer it to your motif paper strips.
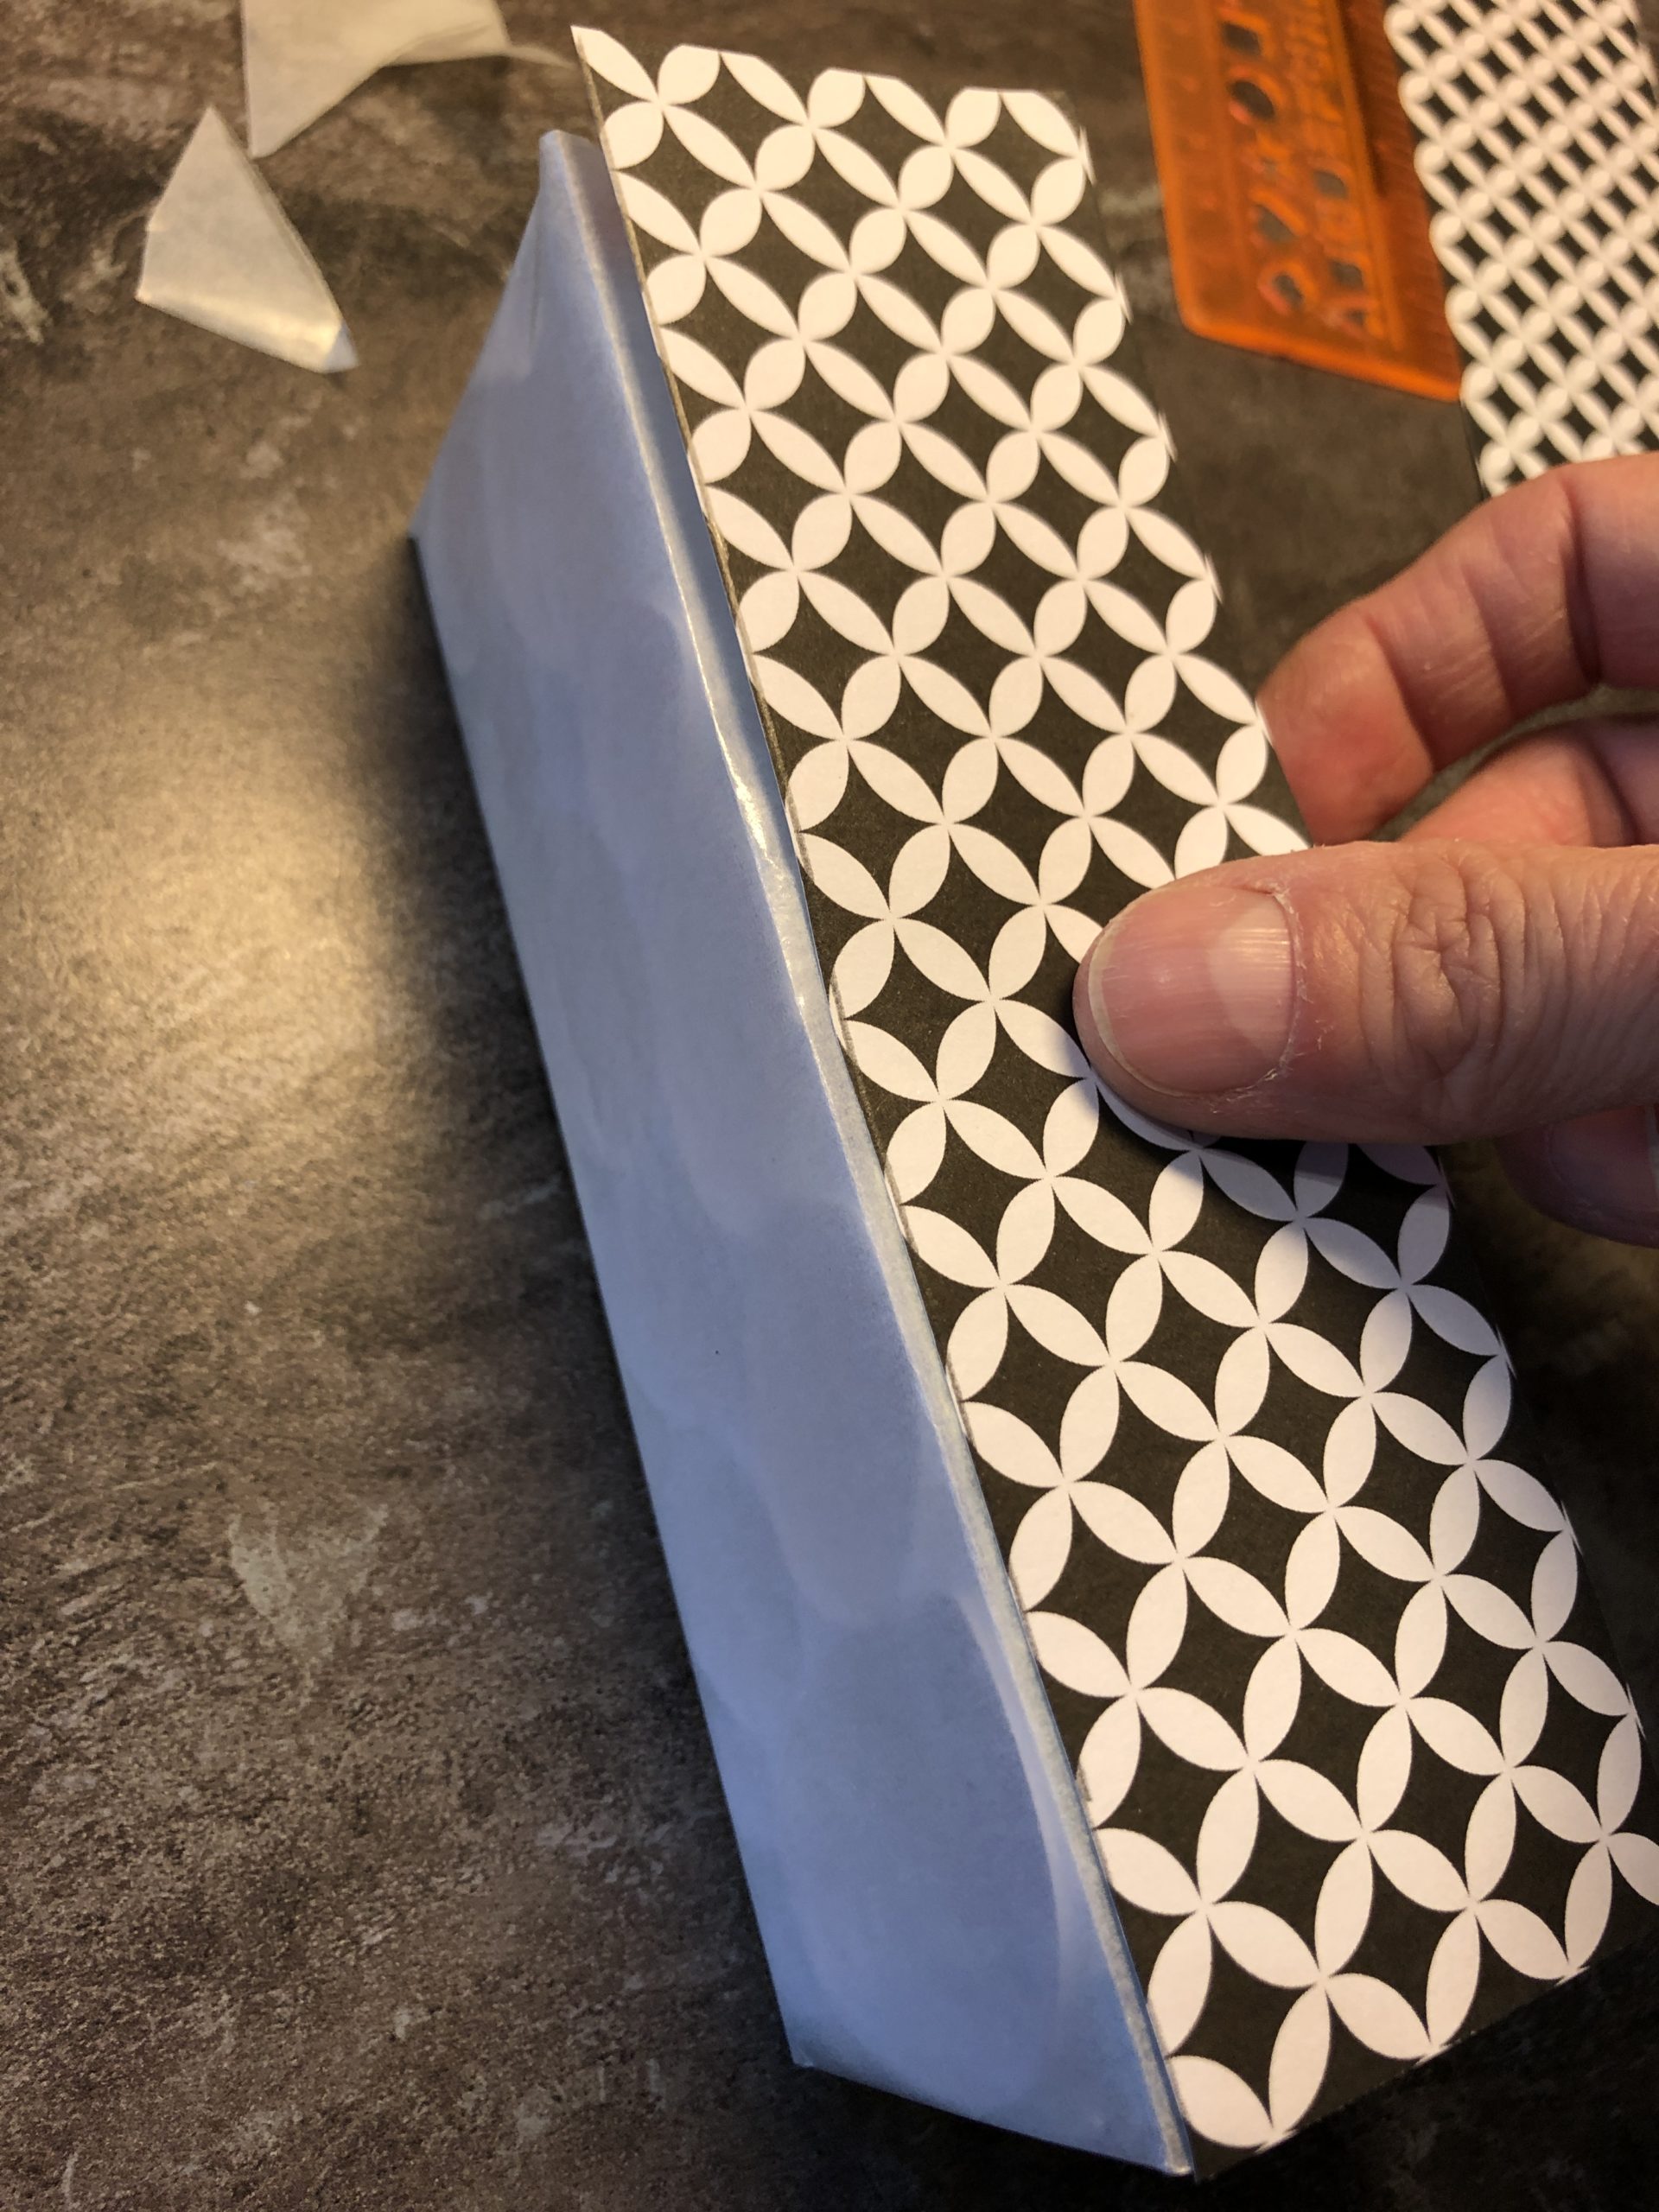
Then she sticks the motif paper around the frame.
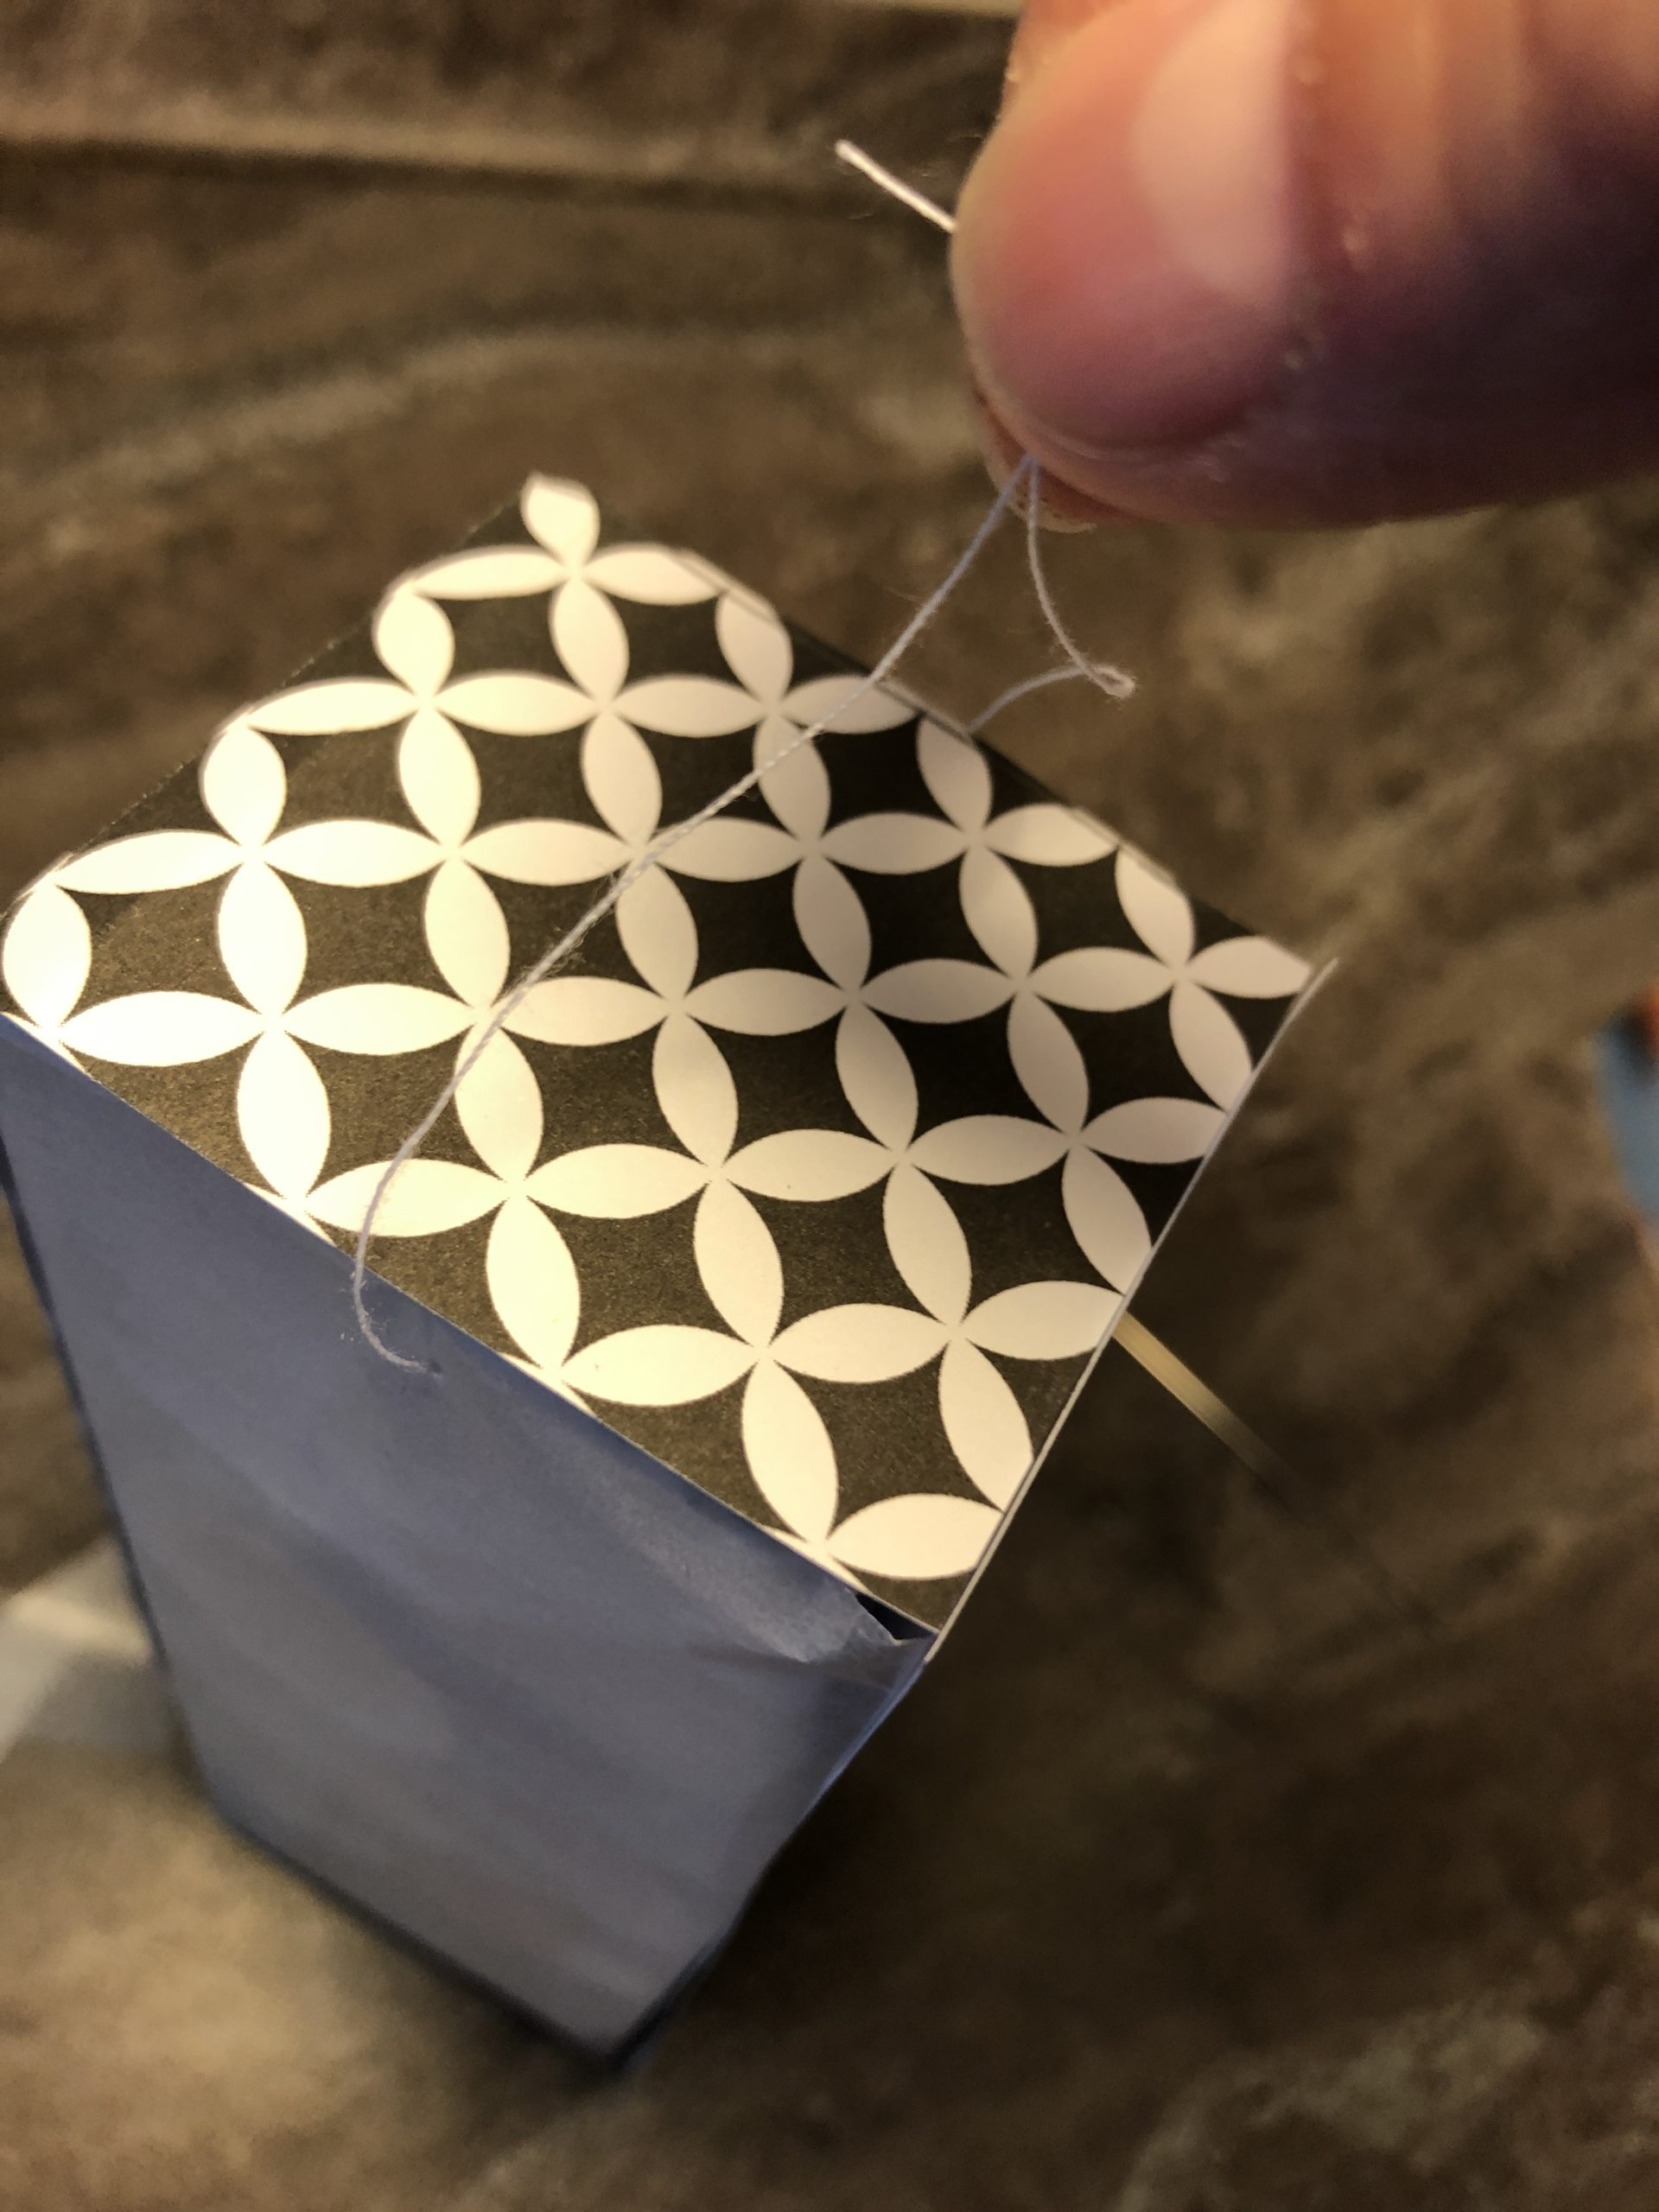
To hang up, put a thread through the transparent paper with the help of a needle at the top of the box. Then knot the two ends of the thread together.


Find a place by the window! It looks very nice when the frame moves in the wind...
...or when the evening sun shines through???
Have fun doing crafts.
Materials
Directions
I took an empty noodle pack and cut off a 3 cm wide strip. We don't need a lid or bottom of the box.
From the white typewriter paper stripes are now cut in the width of our box height -- with me therefore 3cm wide stripes.
Measure strips and cut them.
Cut off the cut strips for different lengths. Cut off the strips as desired, you don't have to measure anything here!
Each strip is now coated with the glue stick at one end and then glued to a ring.
Press both ends on each other for that.
This creates different sizes of paper rings.
However, all rings are 3 cm high. Due to the different strip length the different diameters of the rings are created. (You absolutely need different ring sizes!)
Now the rings are placed in the box frame.
Arrange the rings in such a way that they sit tight and do not slip any more. Maybe still make a few small rings and puzzle into the gaps.
Let the rings all sit tight together.
Cut the transparent paper slightly larger than the box frame.
Place the box frame in the middle of the transparent paper.
Draw a pencil stitch from the four corners to the outside.
Cut the strokes along.
Now the side parts are folded to the middle and then folded outwards again.
Now the box shape is pre-folded and the transparent paper can be easily attached to the frame.
Place box frames in the middle again.
Sprinkle the overhanging transparent paper with glue and press on the box.
Cut off the overhanging corners with the scissors.
The box frame is ready.
The paper rings hold without glue by combining the different ring sizes.
If you hold the frame against the light (e.g. at the window) a great effect is created!
To beautify the frame you can use either motif paper or a monochrome clay paper. You can cut this to your frame width (3 cm with me).
Take the dimensions of your box frame and transfer it to your motif paper strips.
Then she sticks the motif paper around the frame.
To hang up, put a thread through the transparent paper with the help of a needle at the top of the box. Then knot the two ends of the thread together.
Find a place by the window! It looks very nice when the frame moves in the wind...
...or when the evening sun shines through???
Have fun doing crafts.
Follow us on Facebook , Instagram and Pinterest
Don't miss any more adventures: Our bottle mail