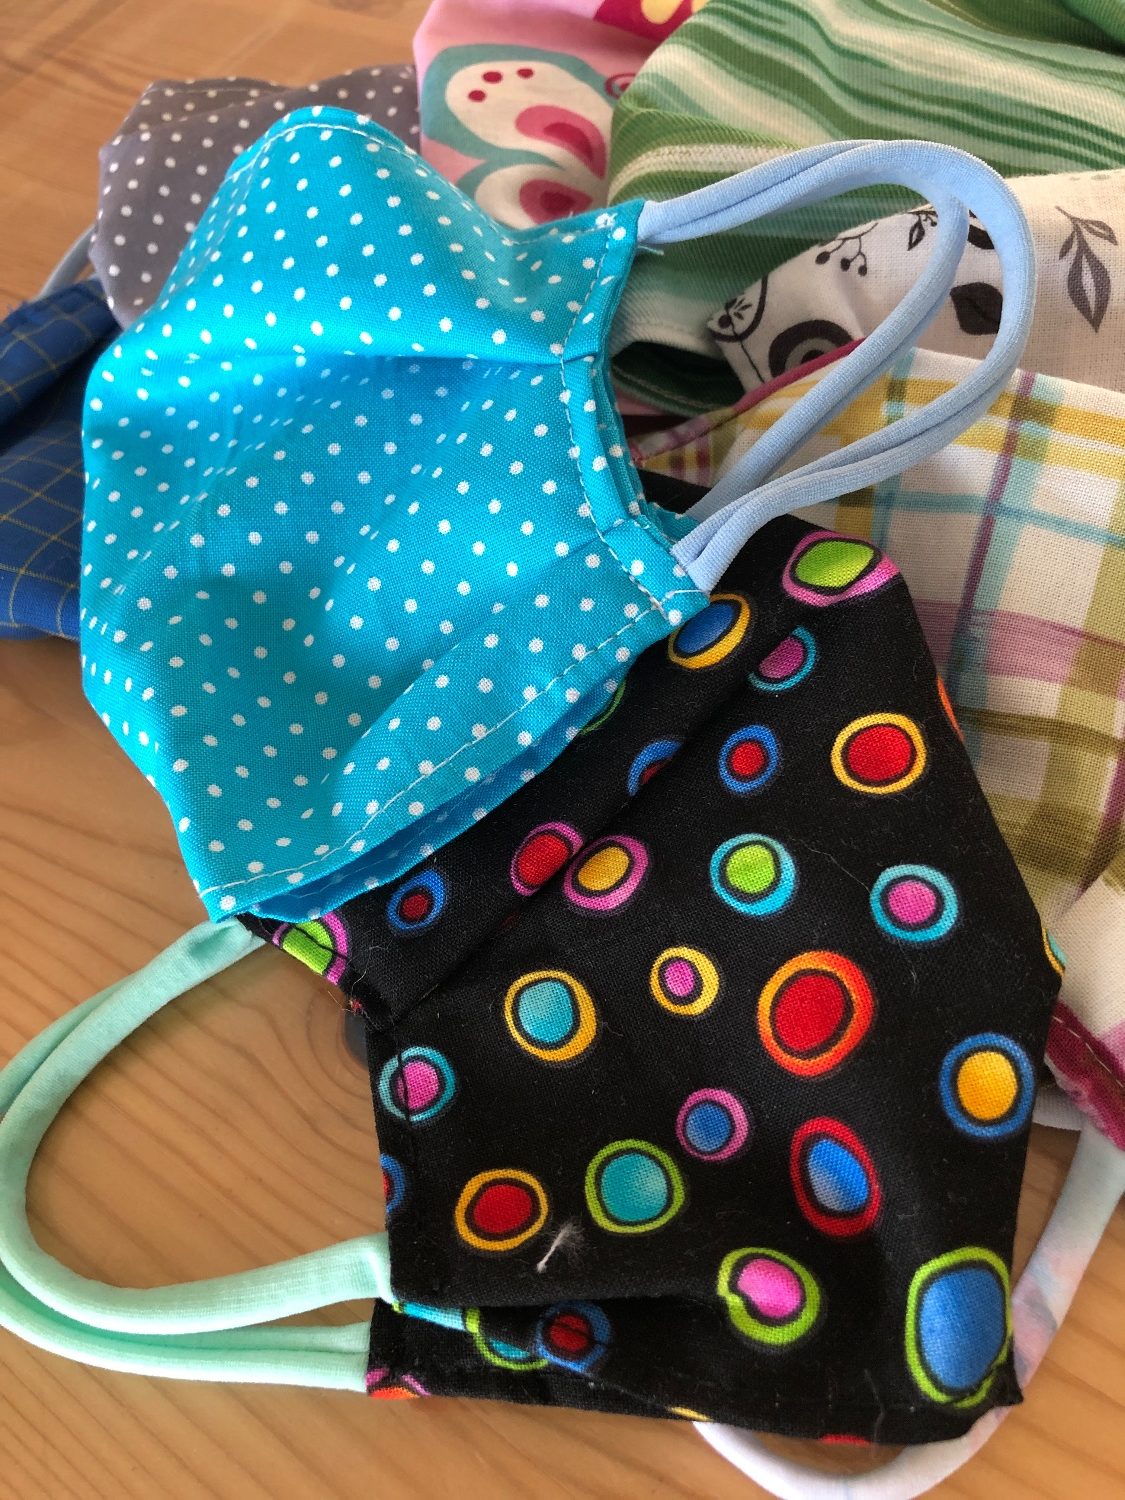
This mouthguard has a pleasant wearing comfort - and thanks to the soft rubber for kids a nice and colorful alternative!
Smaller children can only help to a limited extent, but by participating they may be able to better understand the current situation.
Media Education for Kindergarten and Hort

Relief in everyday life, targeted promotion of individual children, independent learning and - without any pre-knowledge already usable by the youngest!
Choose a soft wide hair rubber
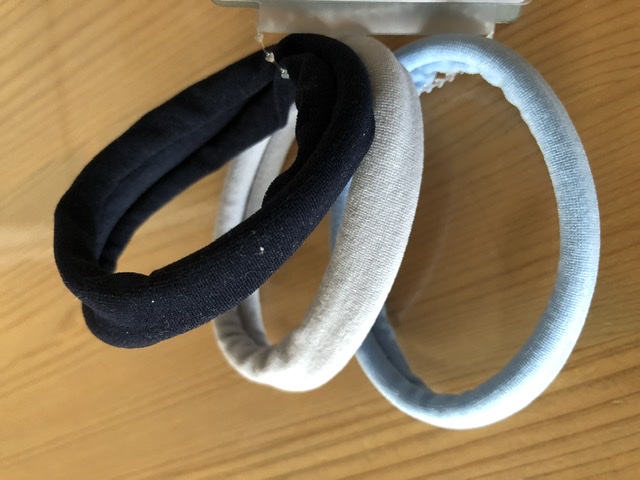
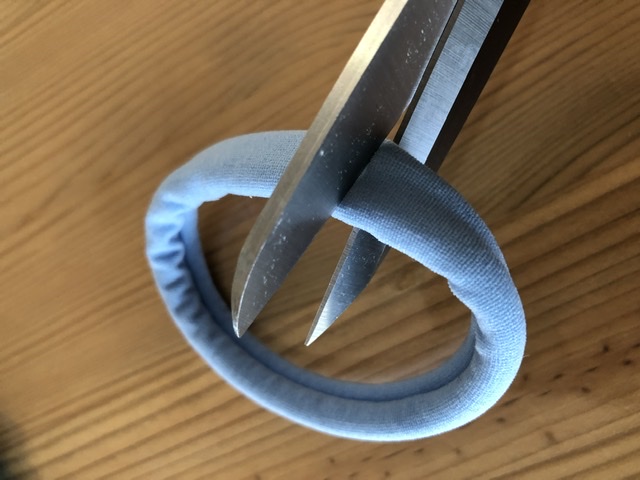
Cut the hair rubber apart
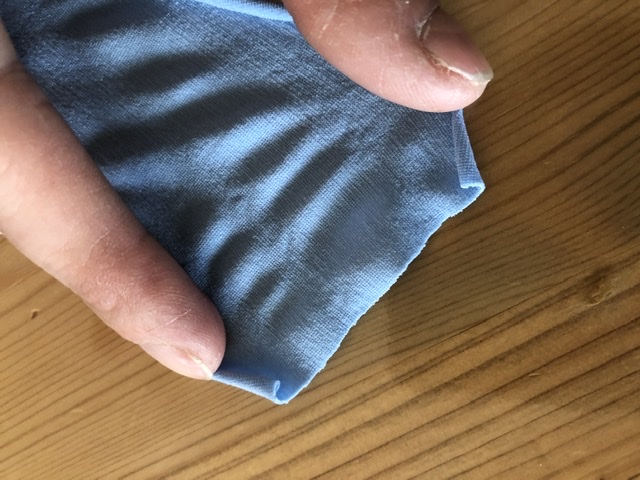
Roll the rubber strips apart in width
Cut into three equally wide strips of length
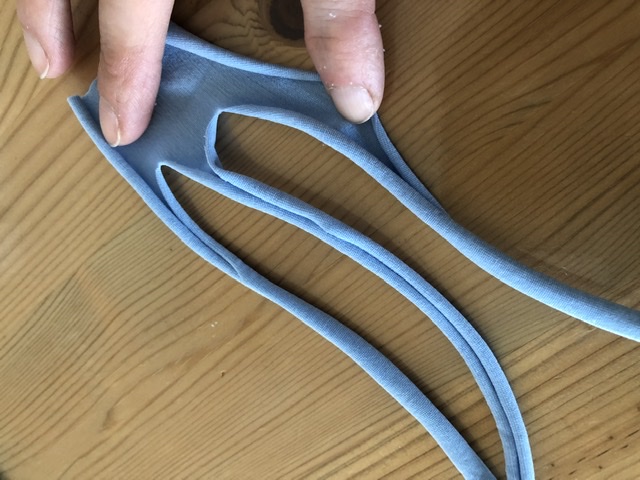
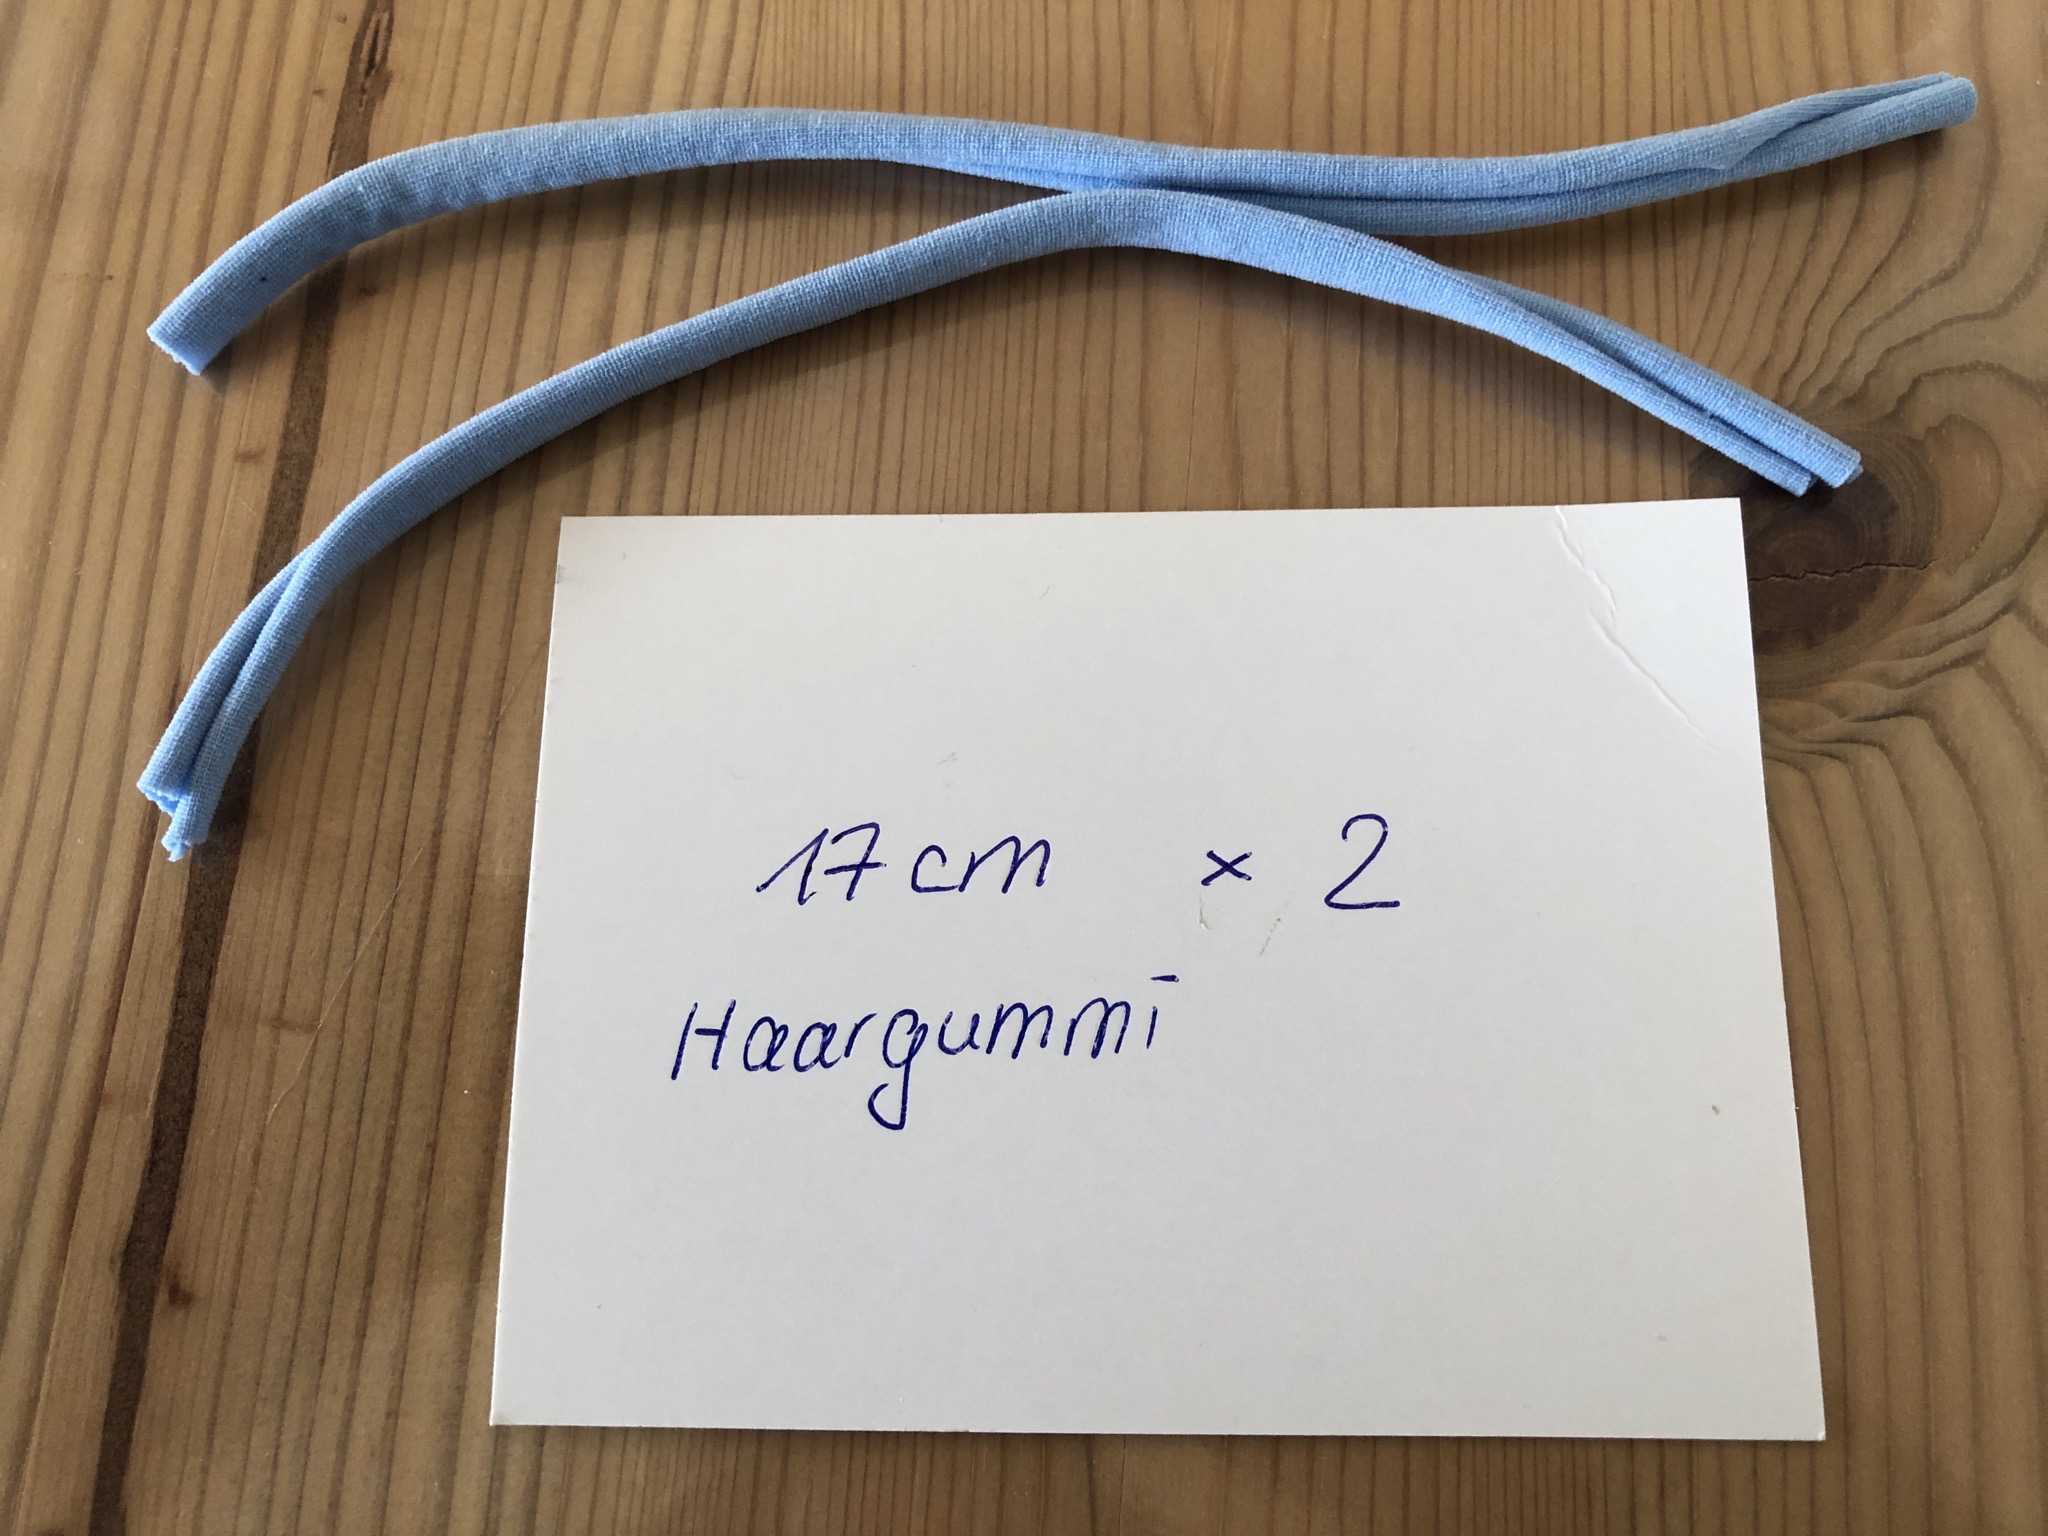
Two of the cut rubber strips are needed for a mouthguard!
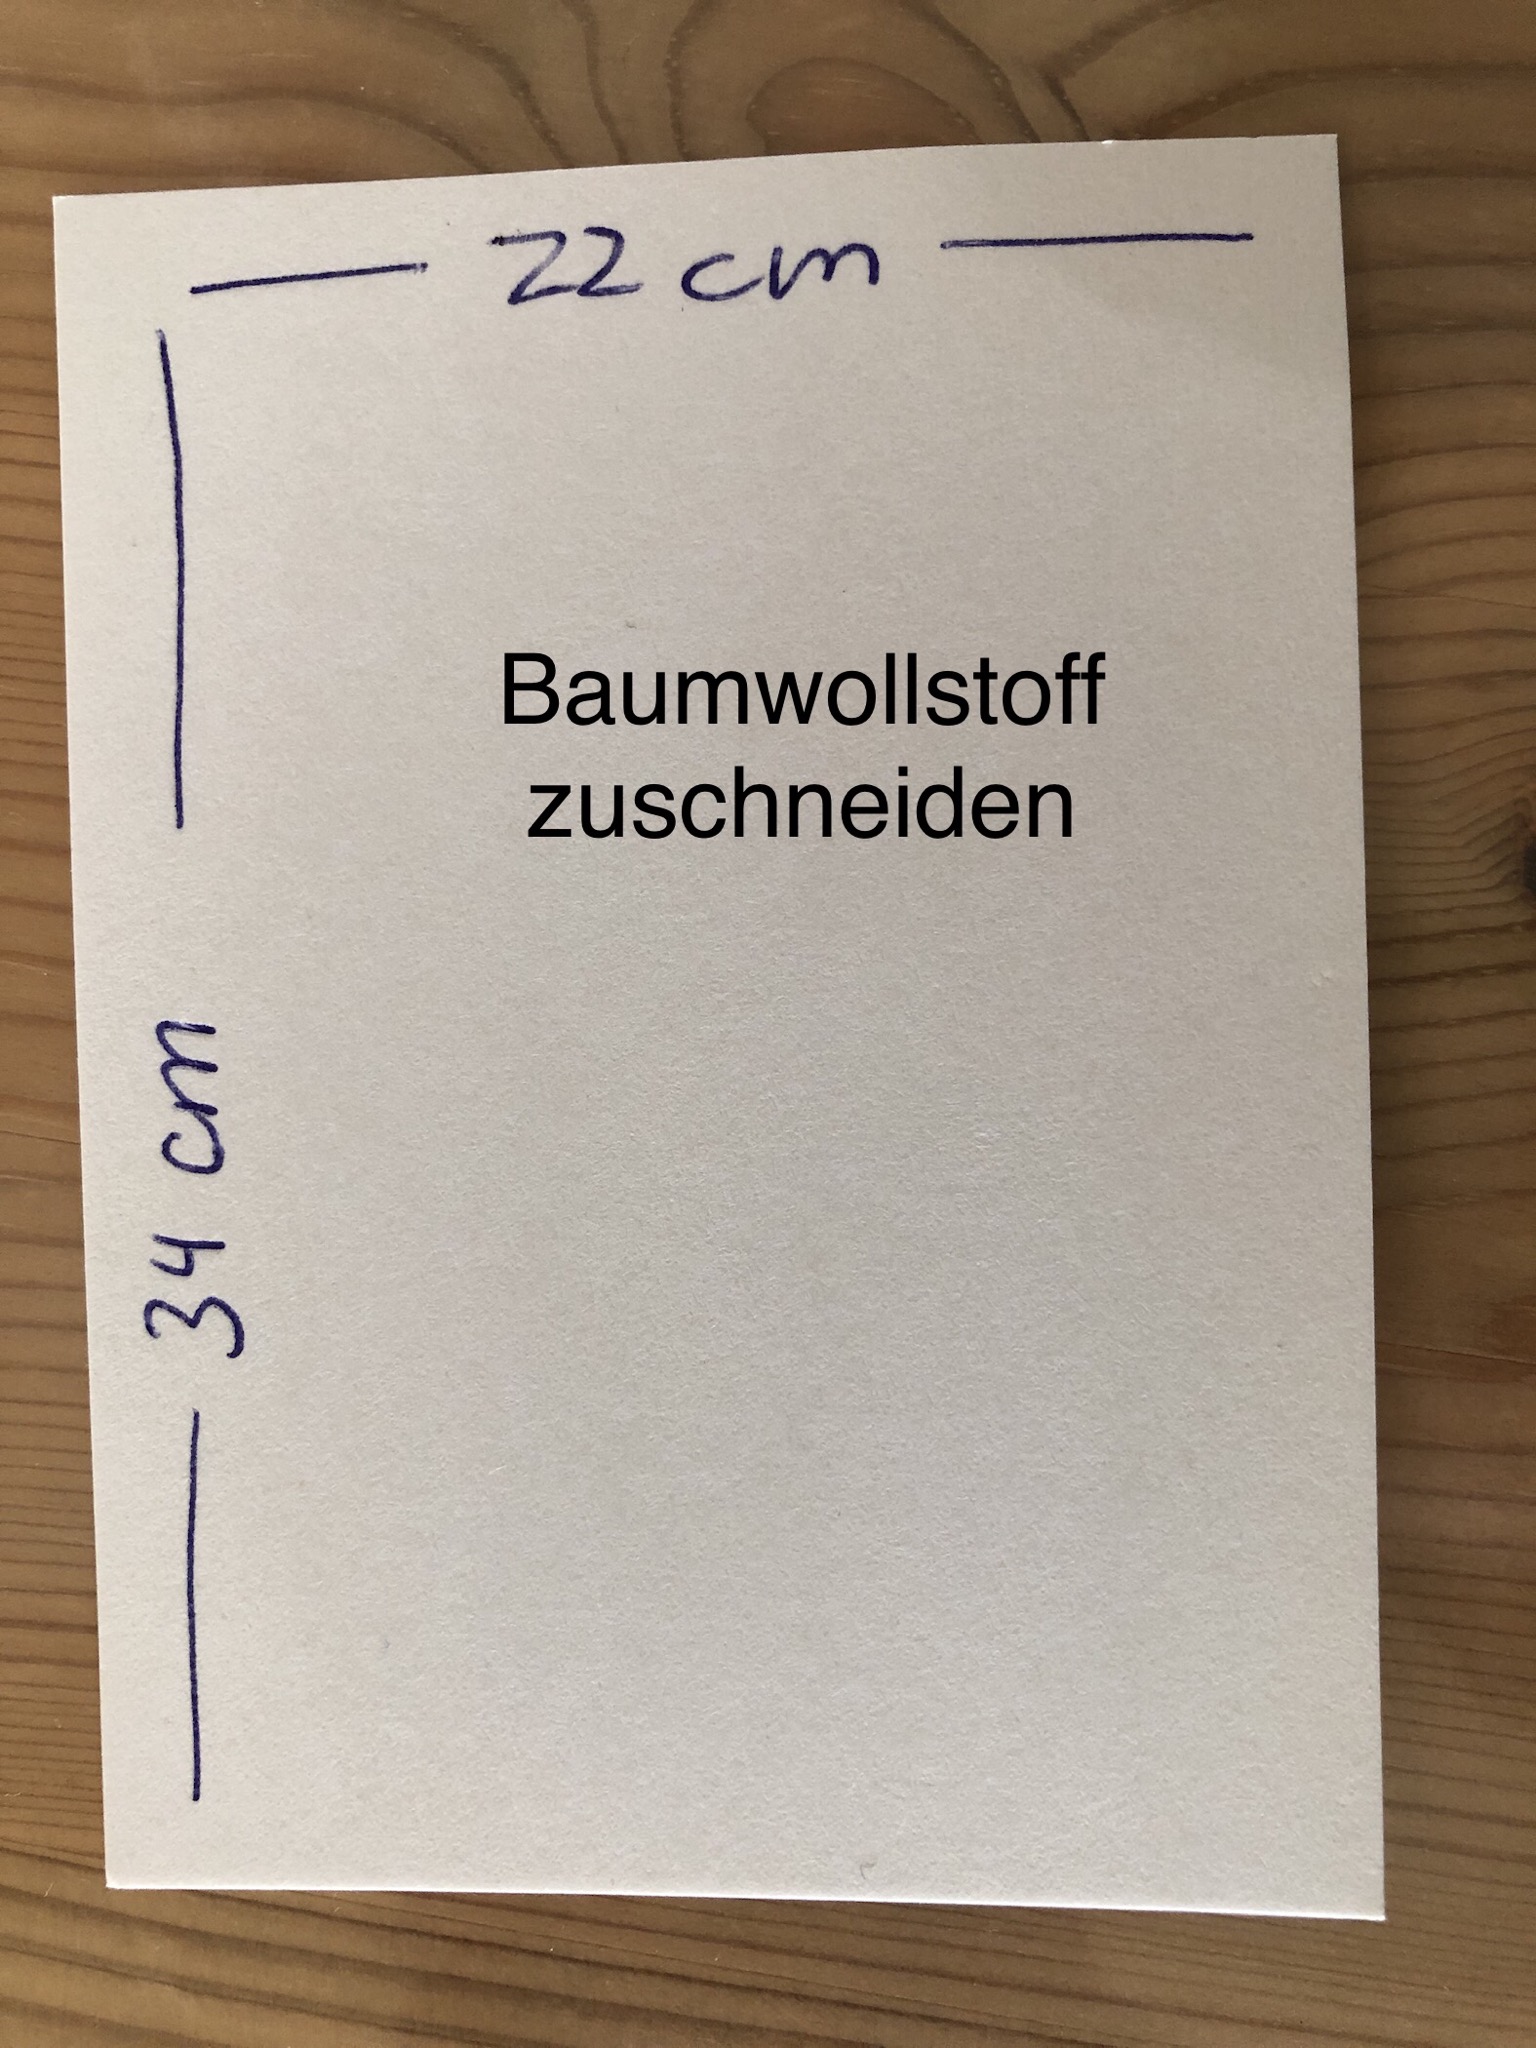
Cut cotton fabric. Children (children's garden age): 20 cm x 22 cm
Adults: 22 cm x 43 cm fabric
The long side is beaten up (beautiful side is inside!)
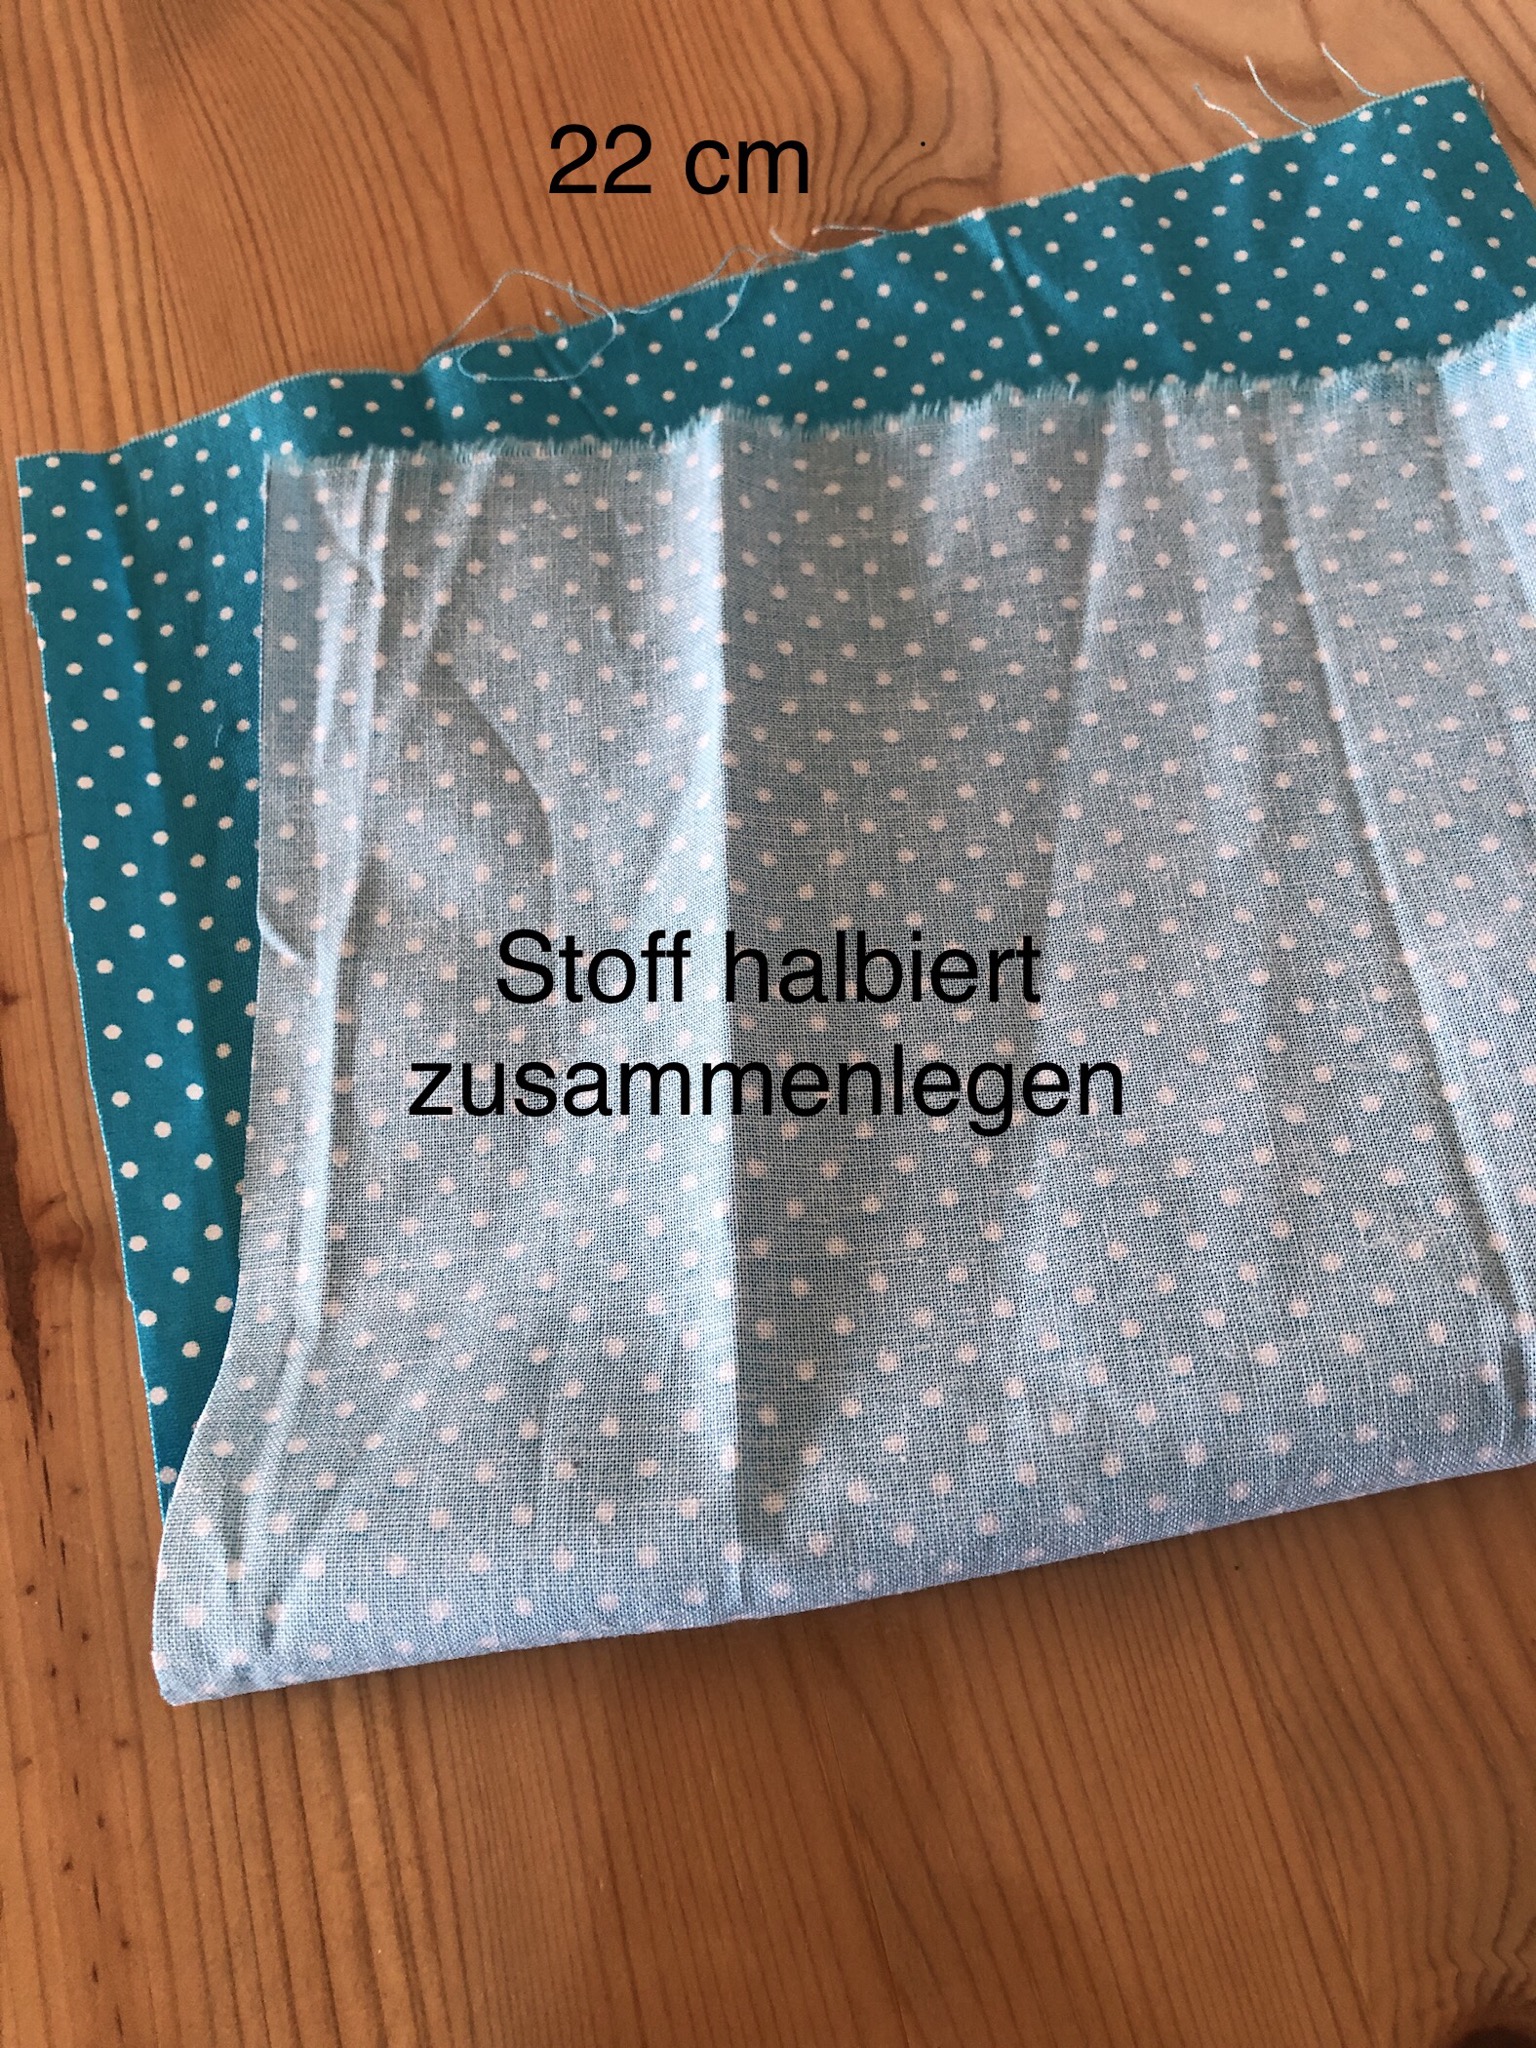
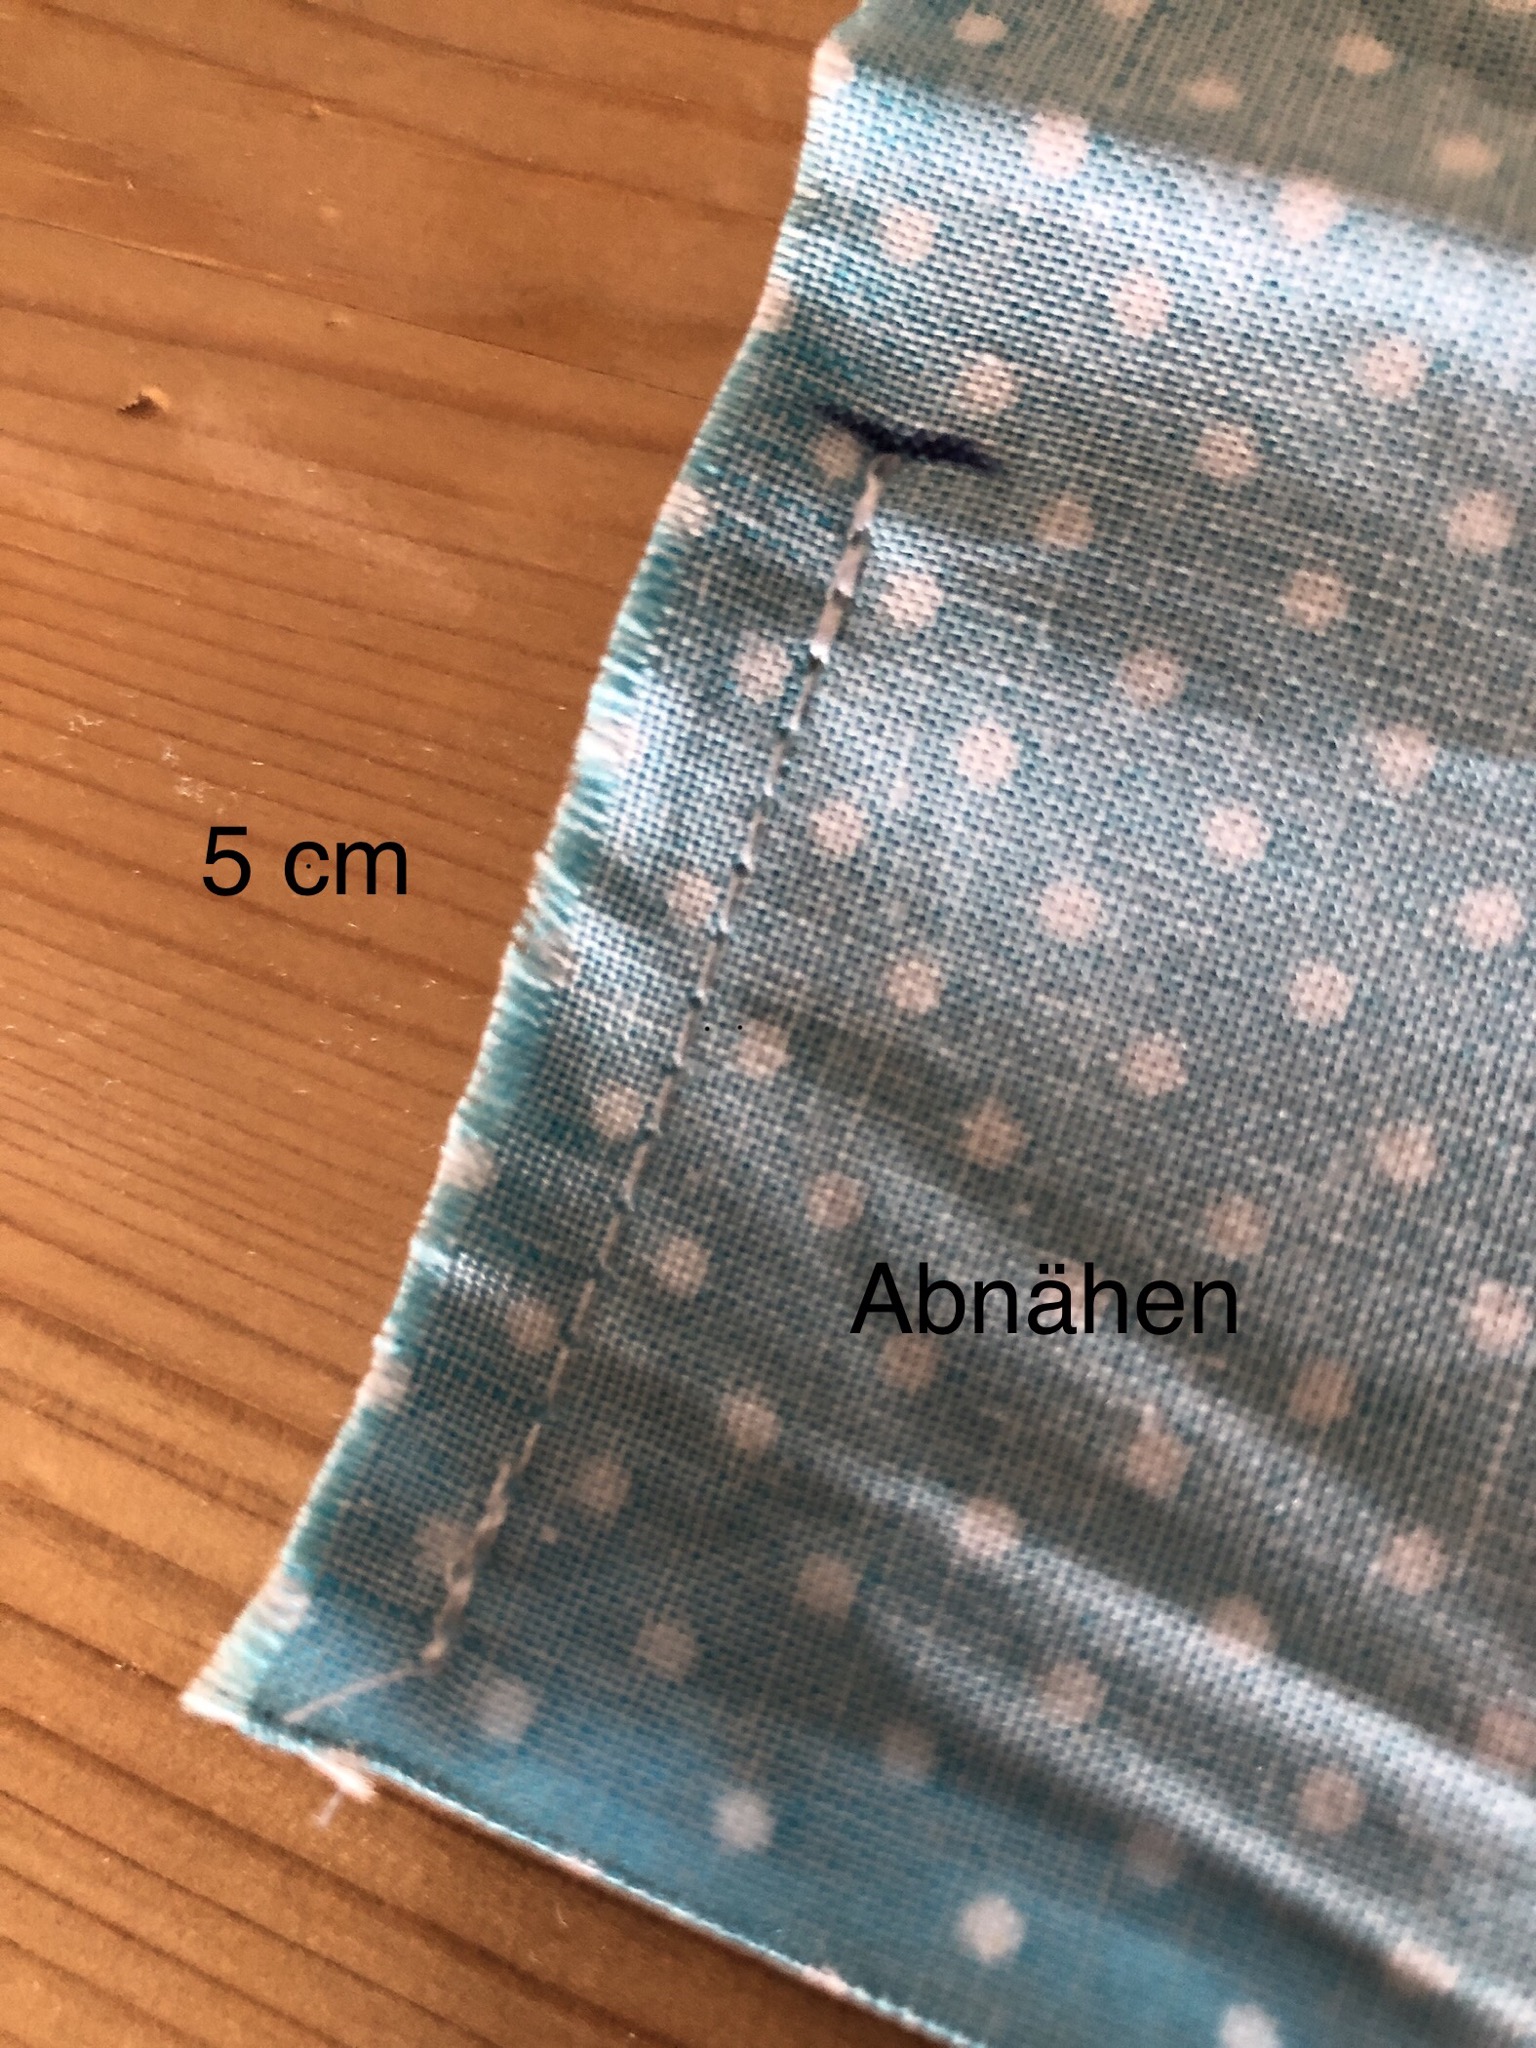
Fabric lies exactly on each other! From the outside, are marked 5 cm (mark!)

These are sewn from the outside with the sewing machine!
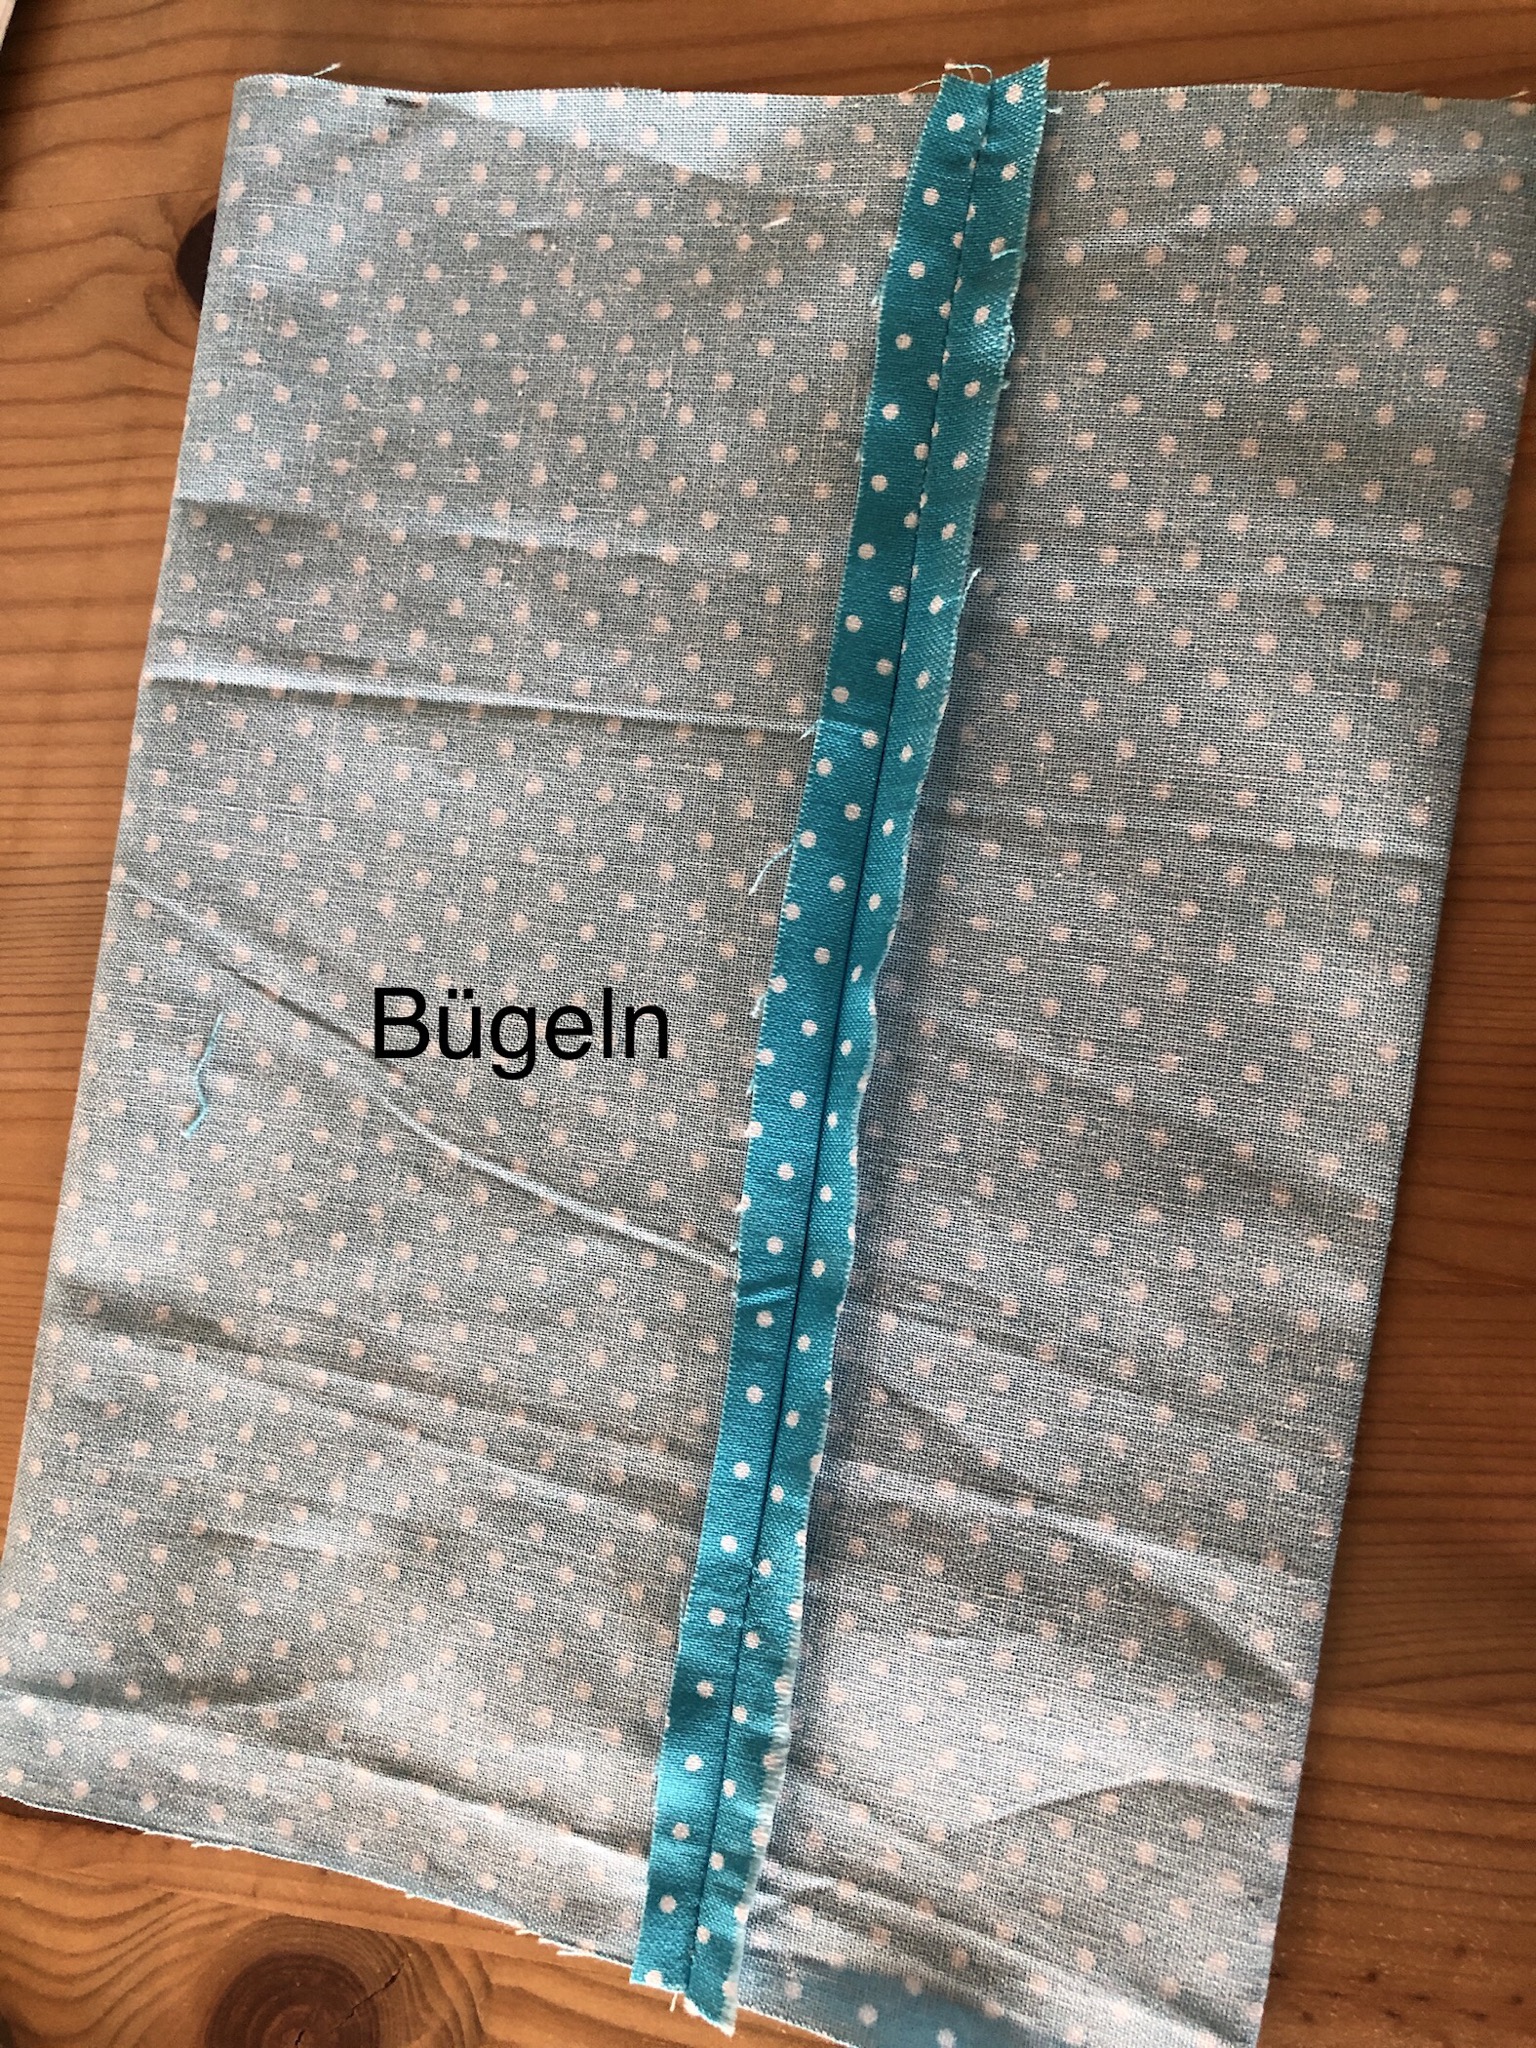
The sewn fold is now folded and ironed apart
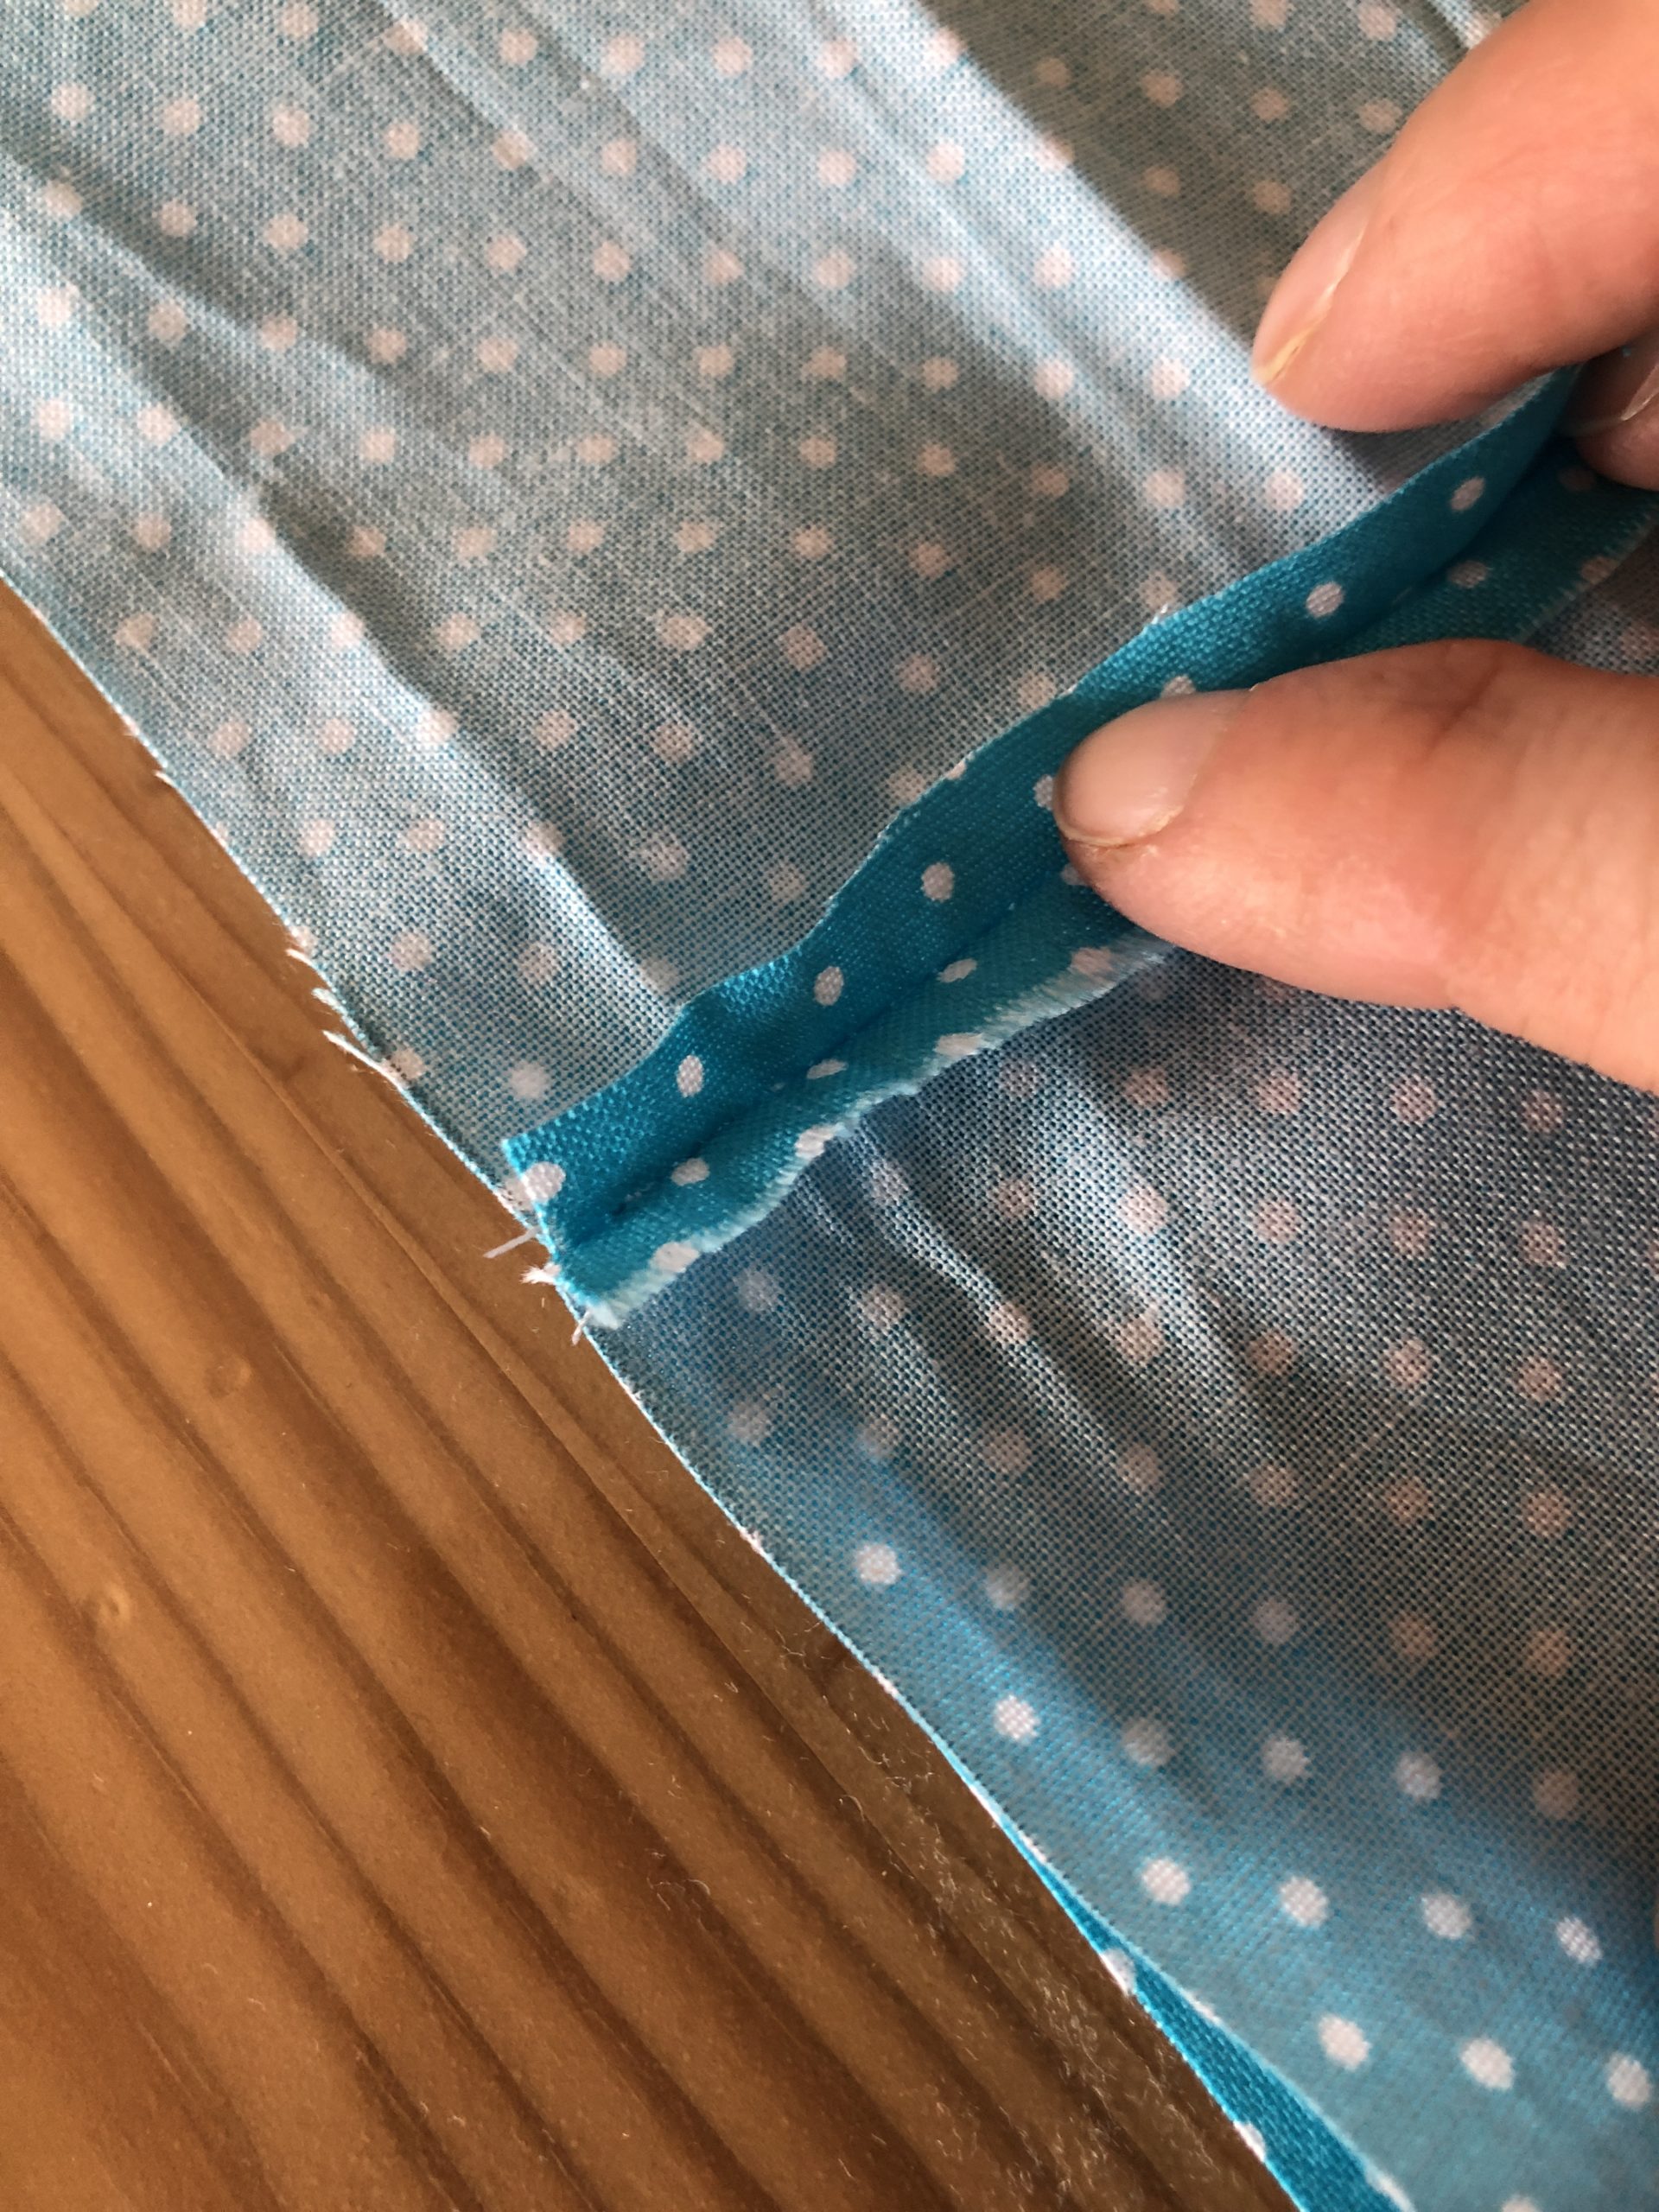
Ironed fold is not entirely in the middle
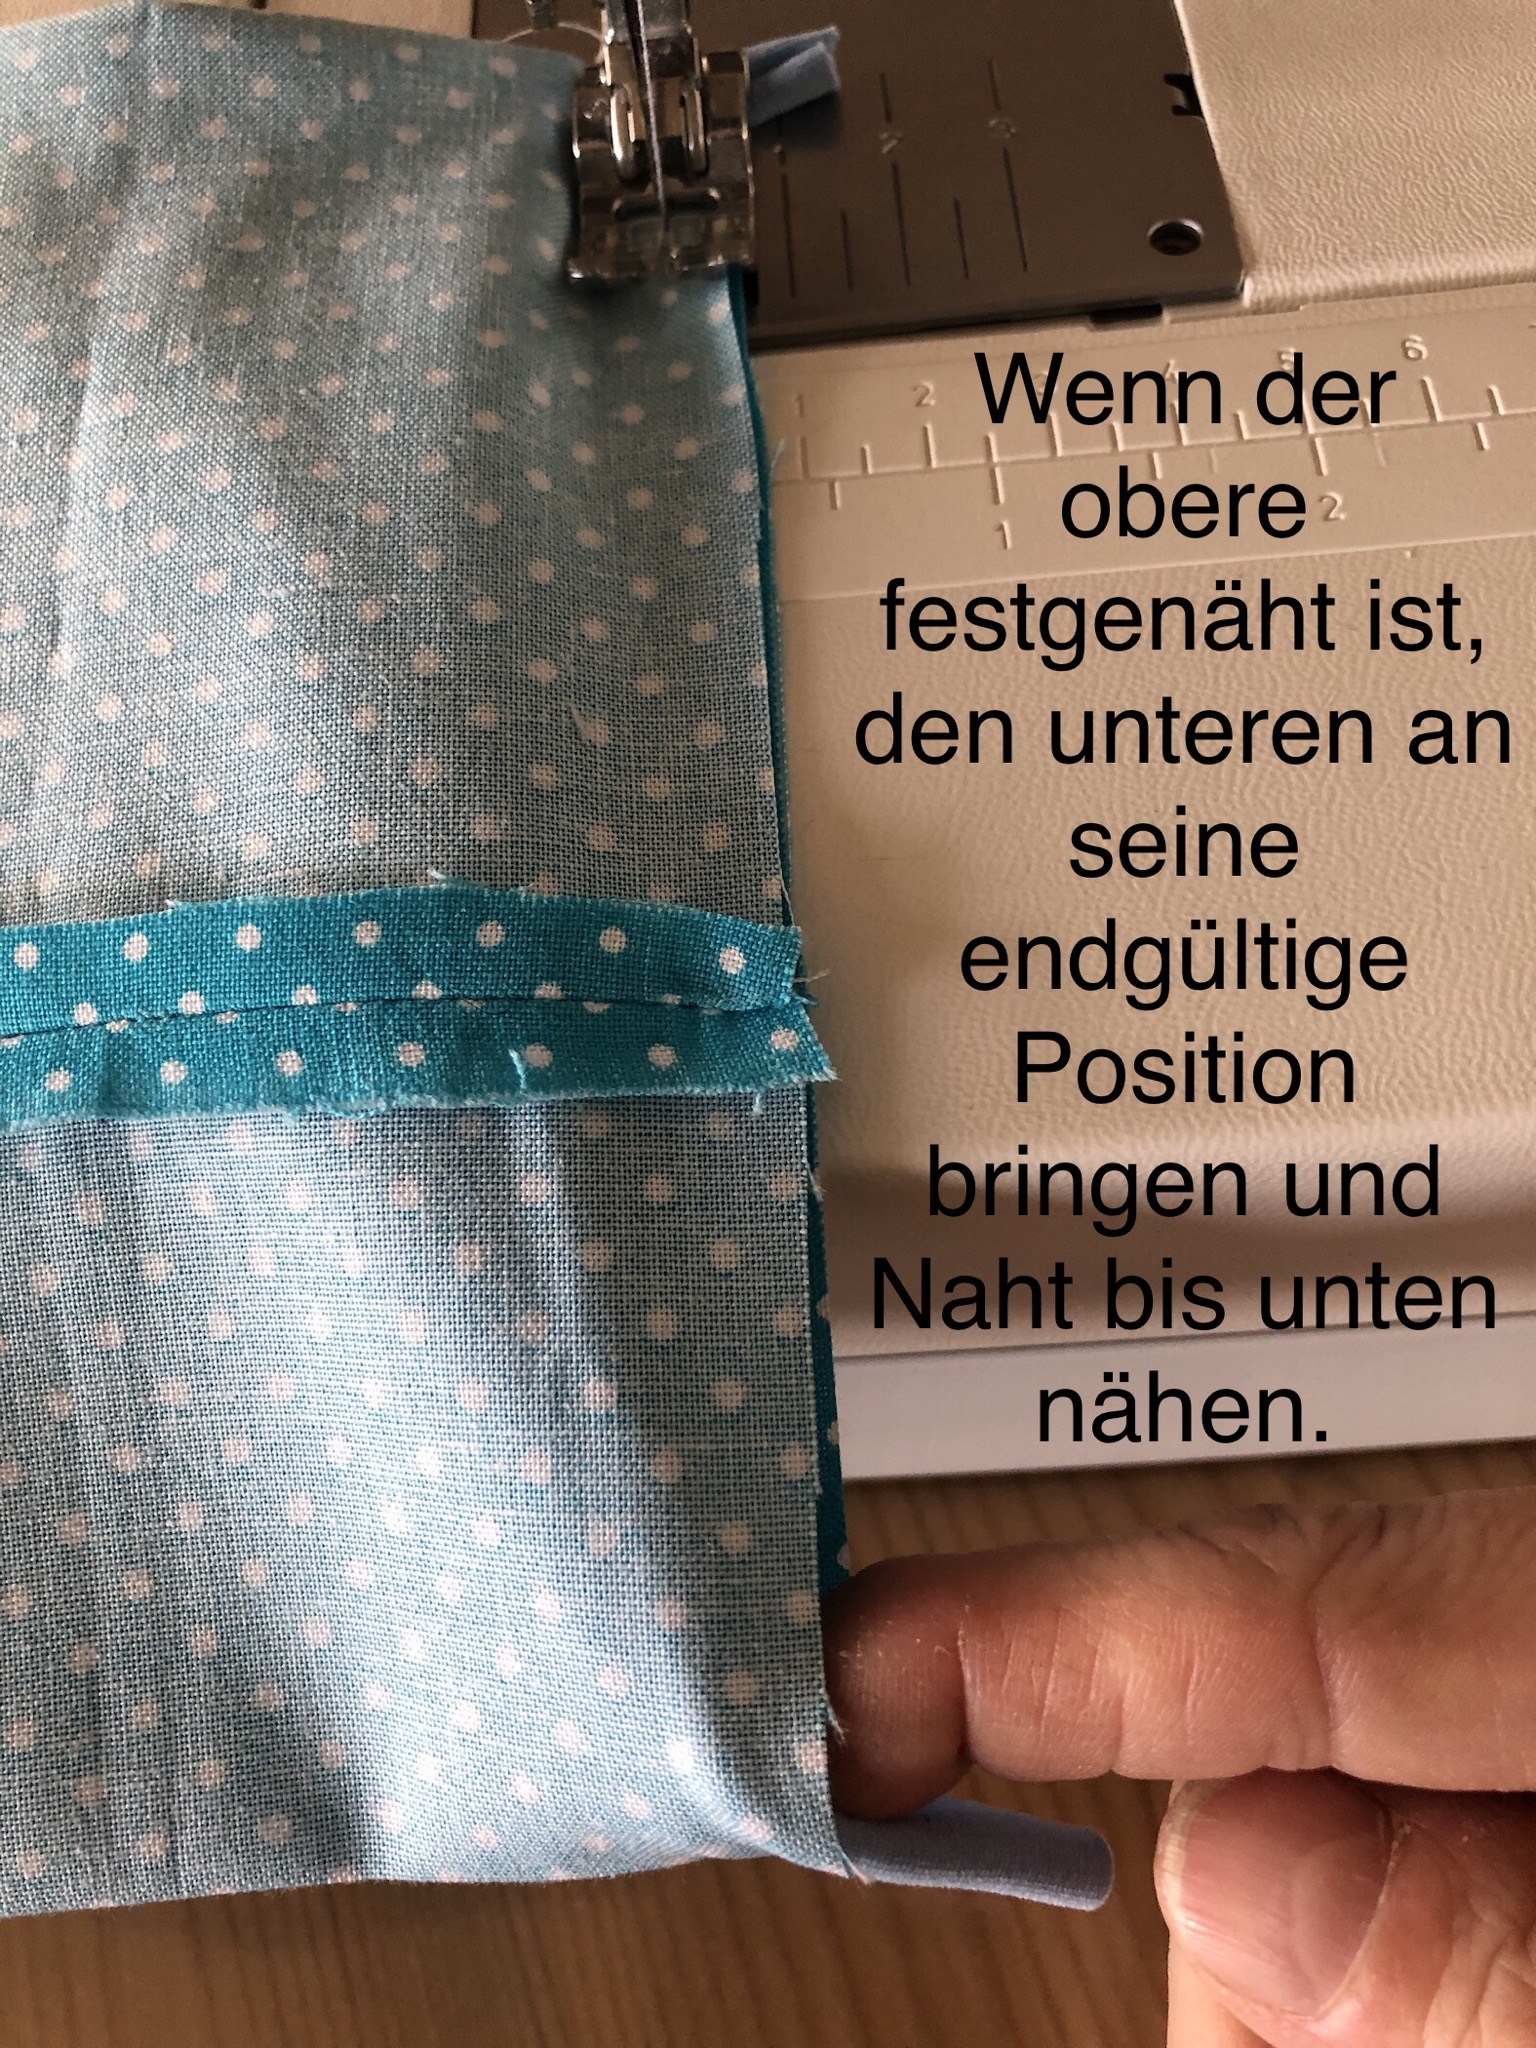
At the lateral opening the rubber is now inserted and sewn on
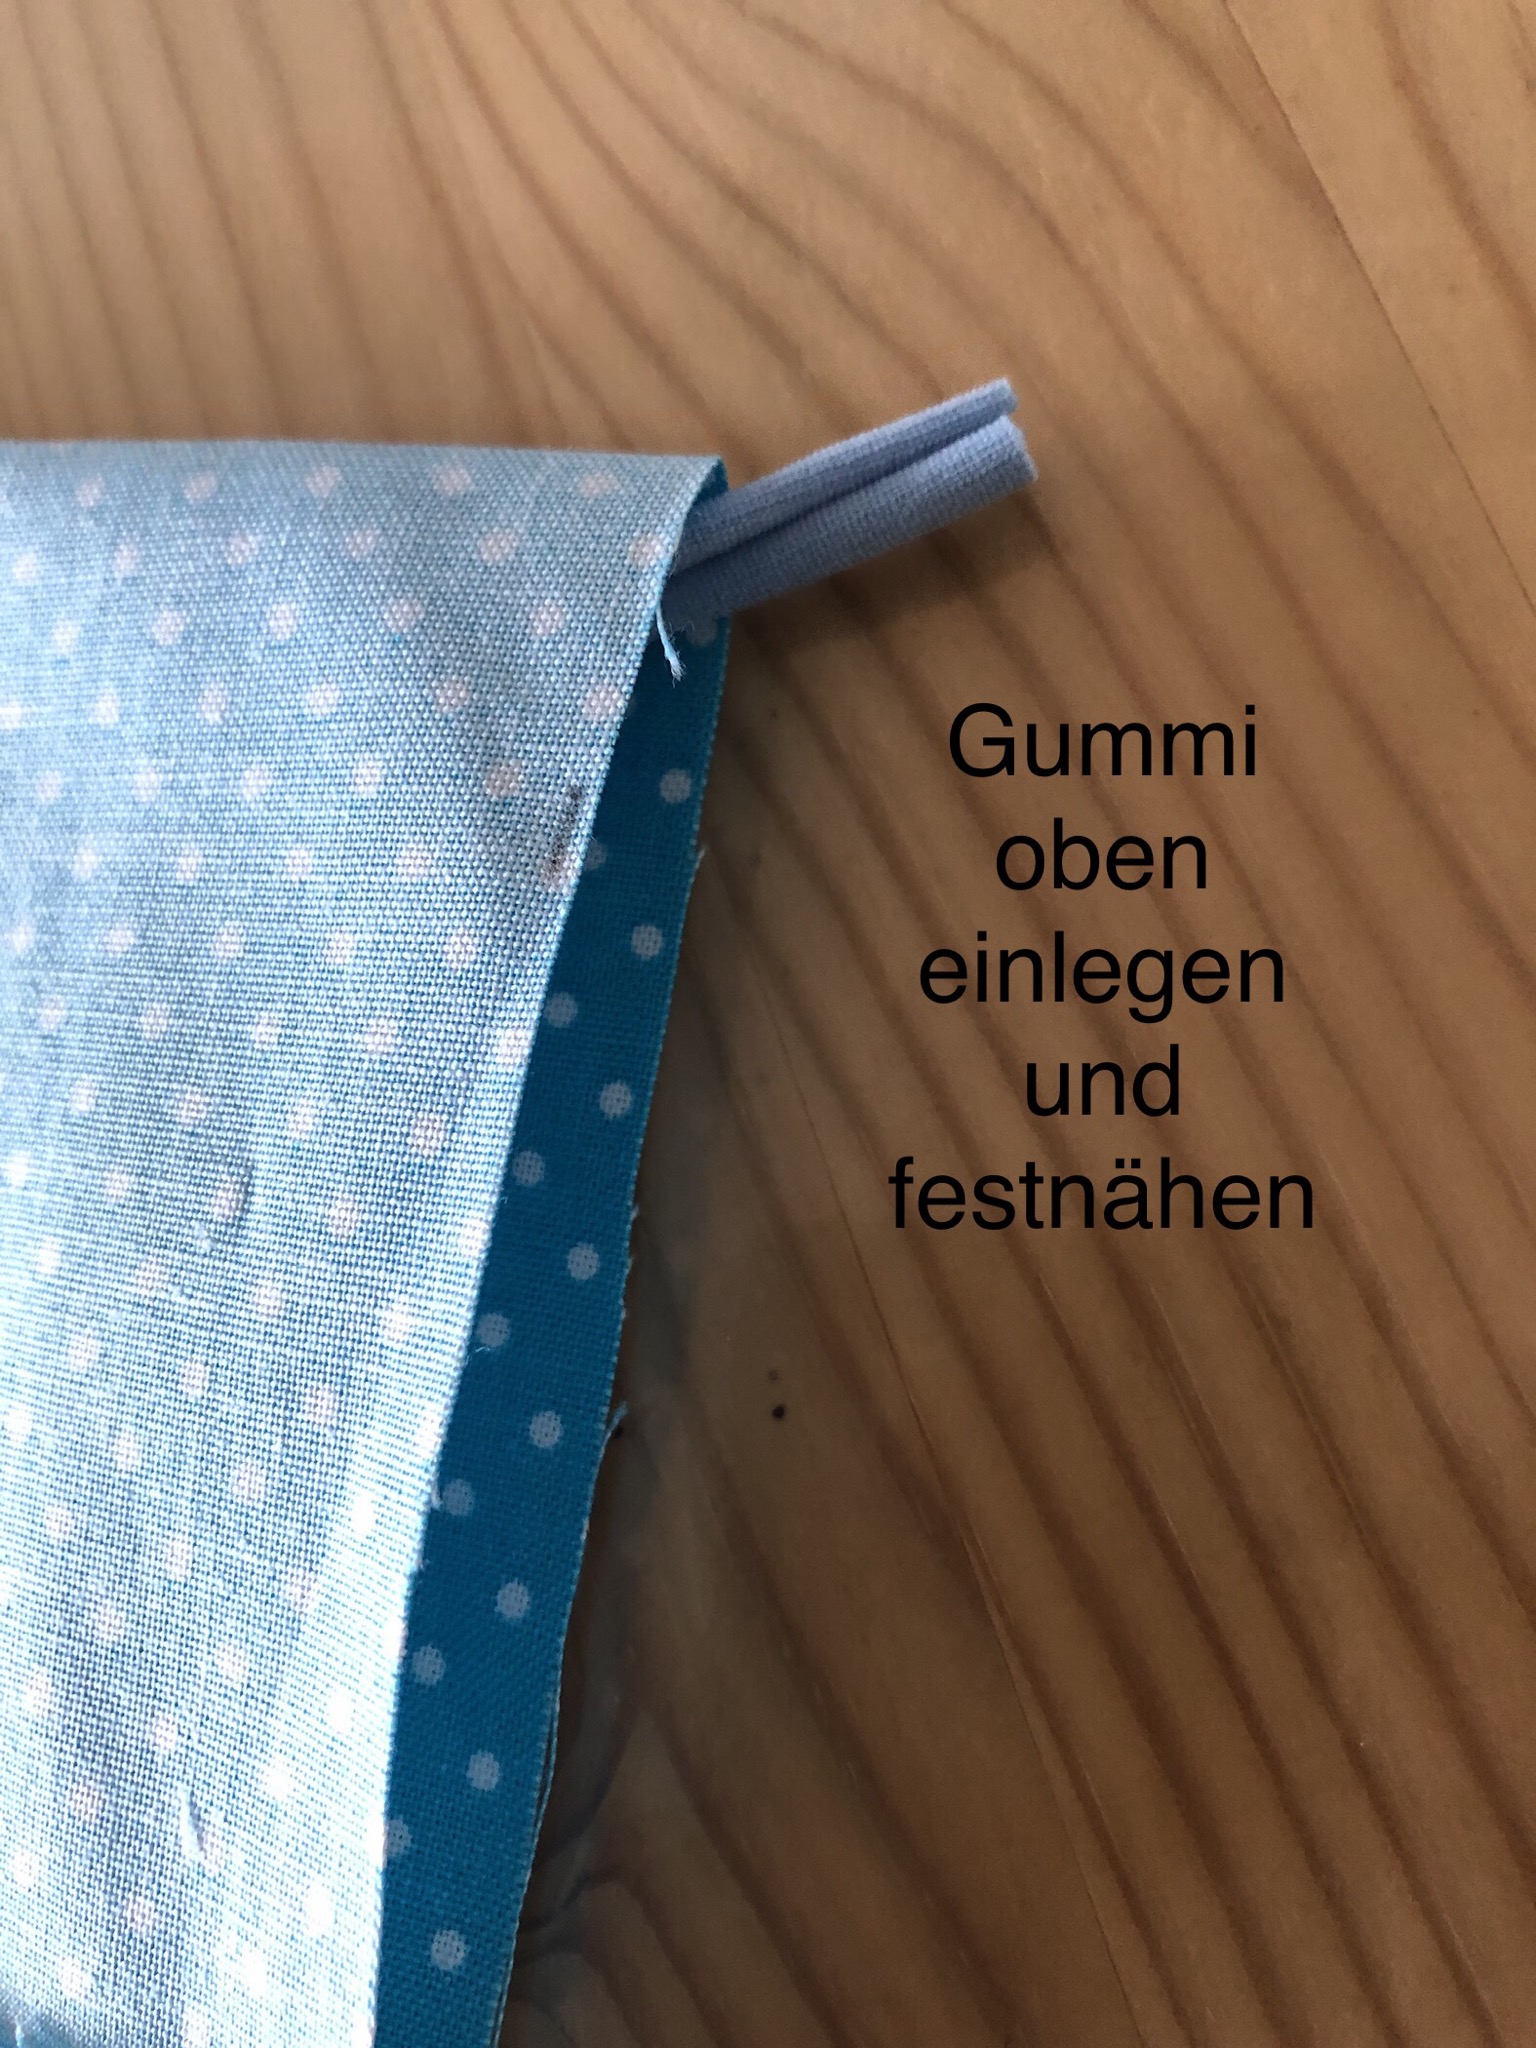
One rubber band is sewn on one side, the other on the other side (is something on "train" otherwise it is too loose behind the ears)
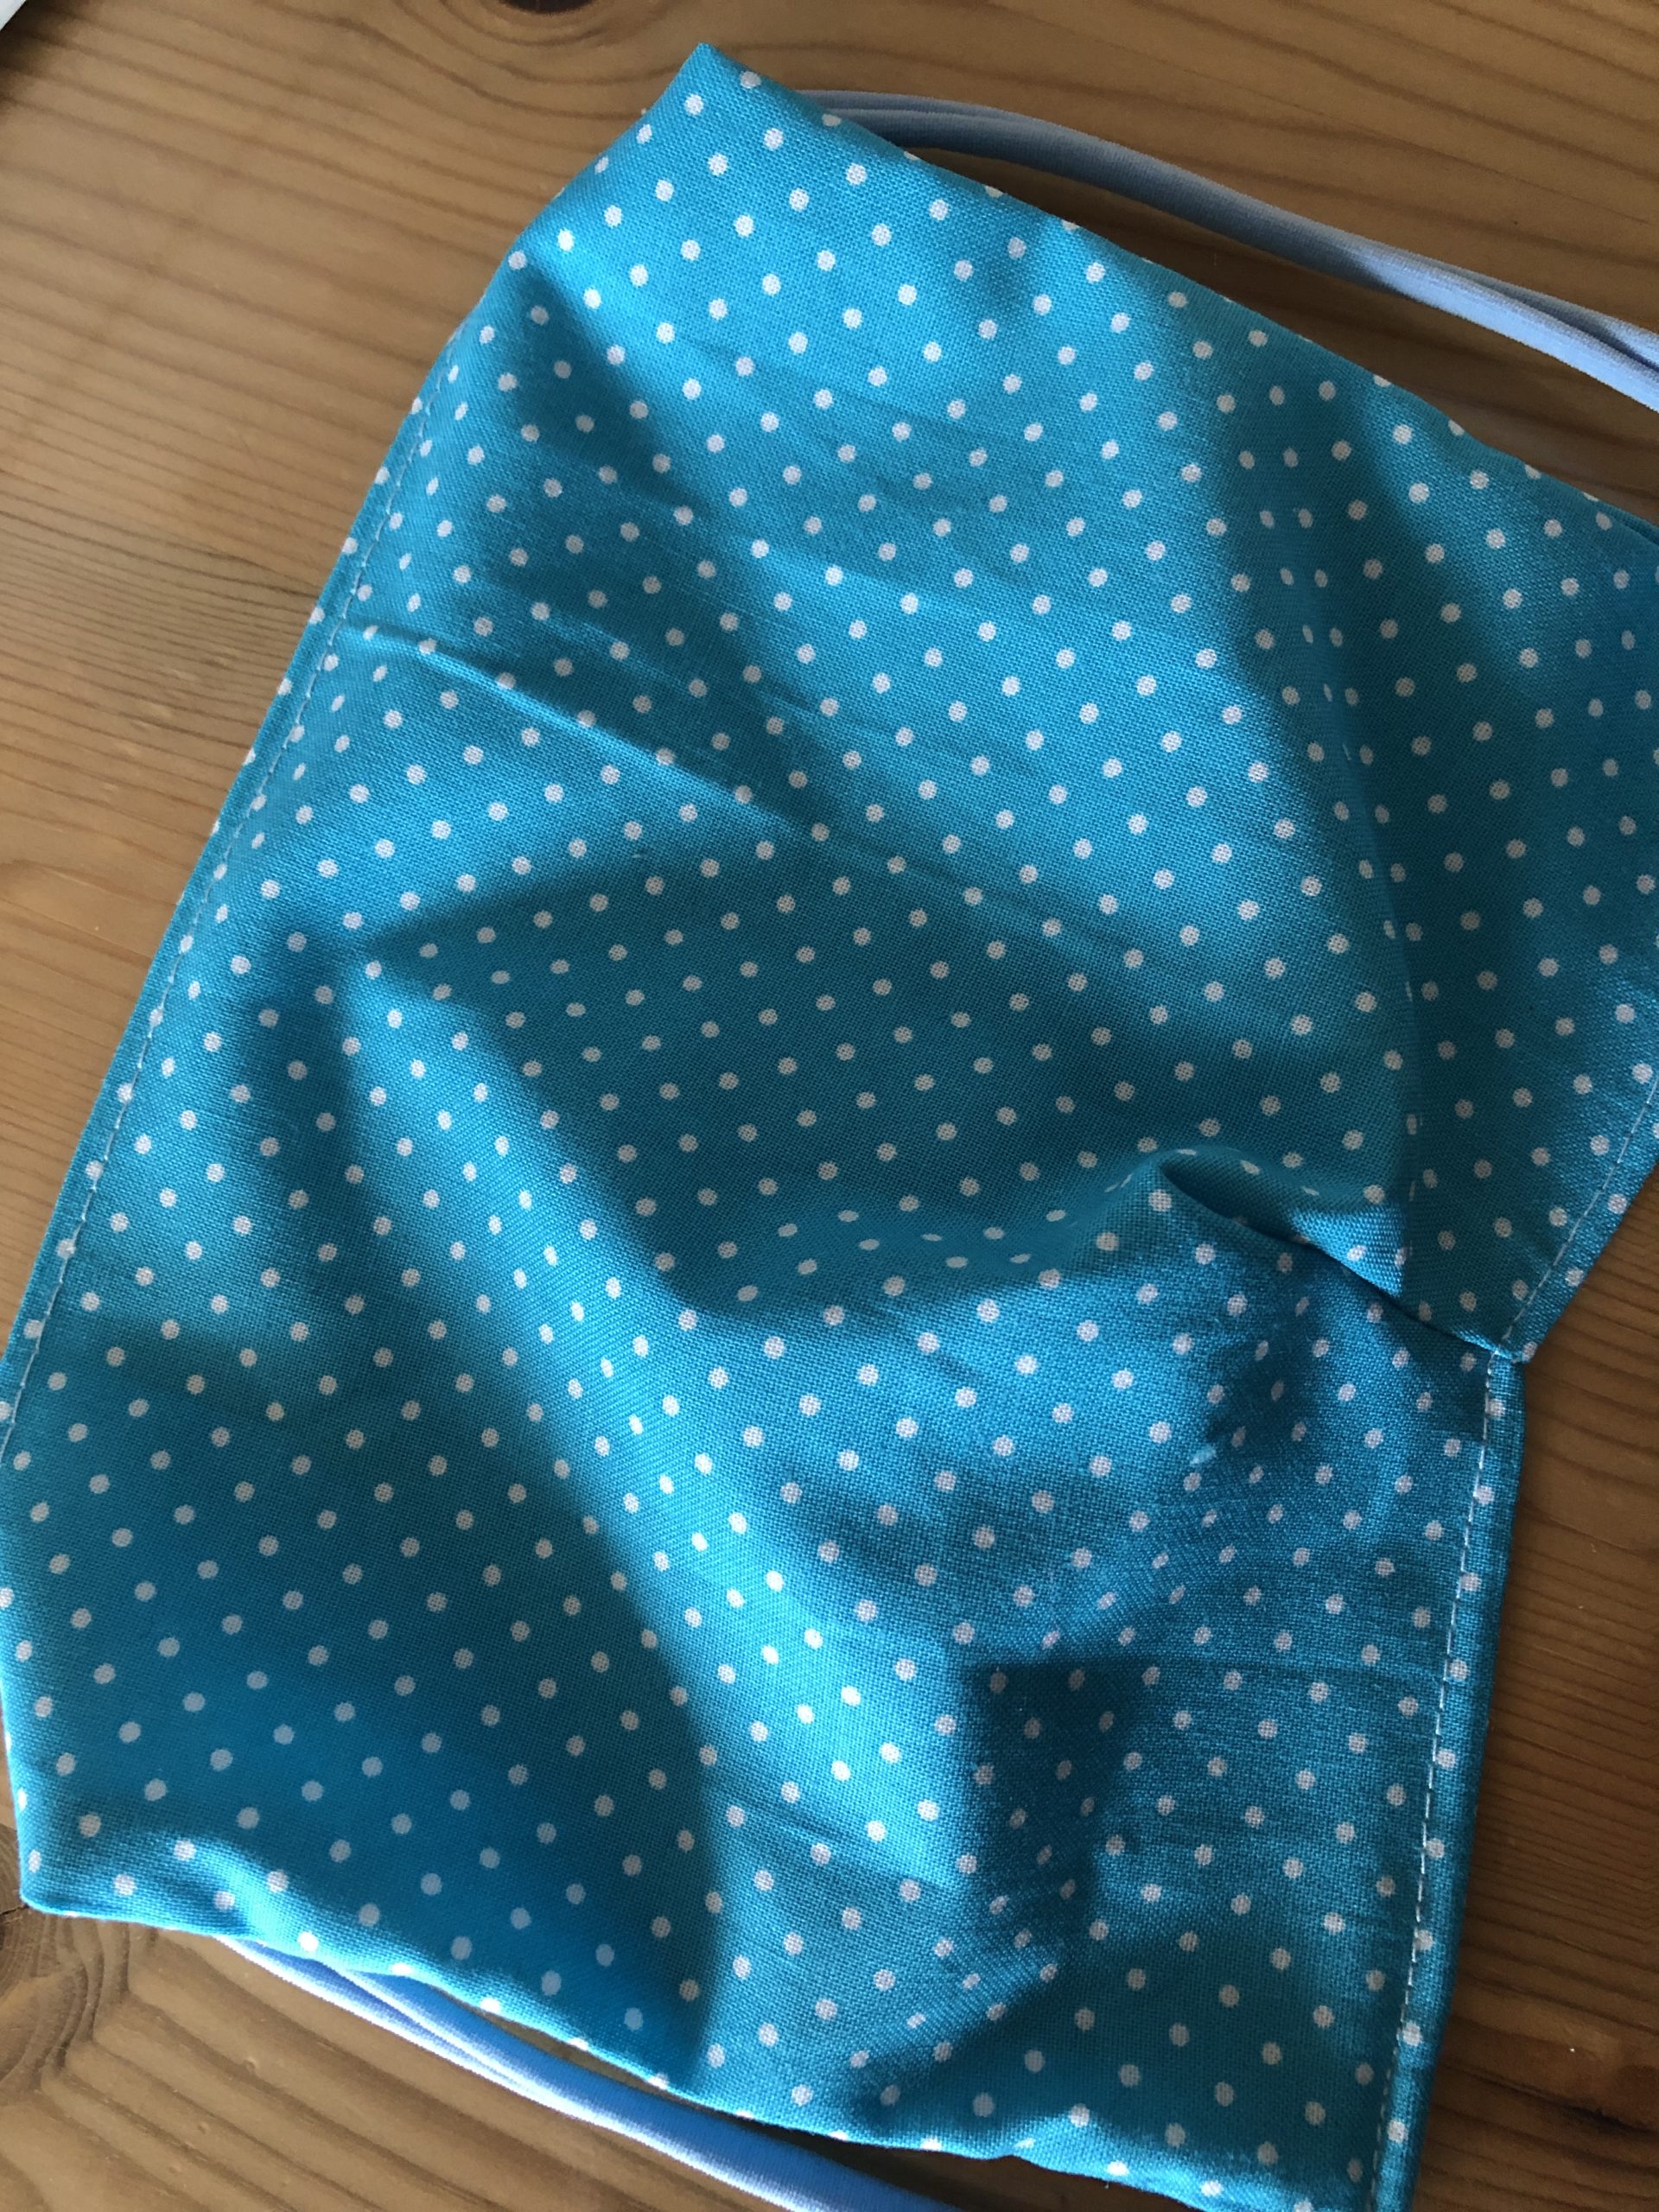
That's what a finished page looks like!
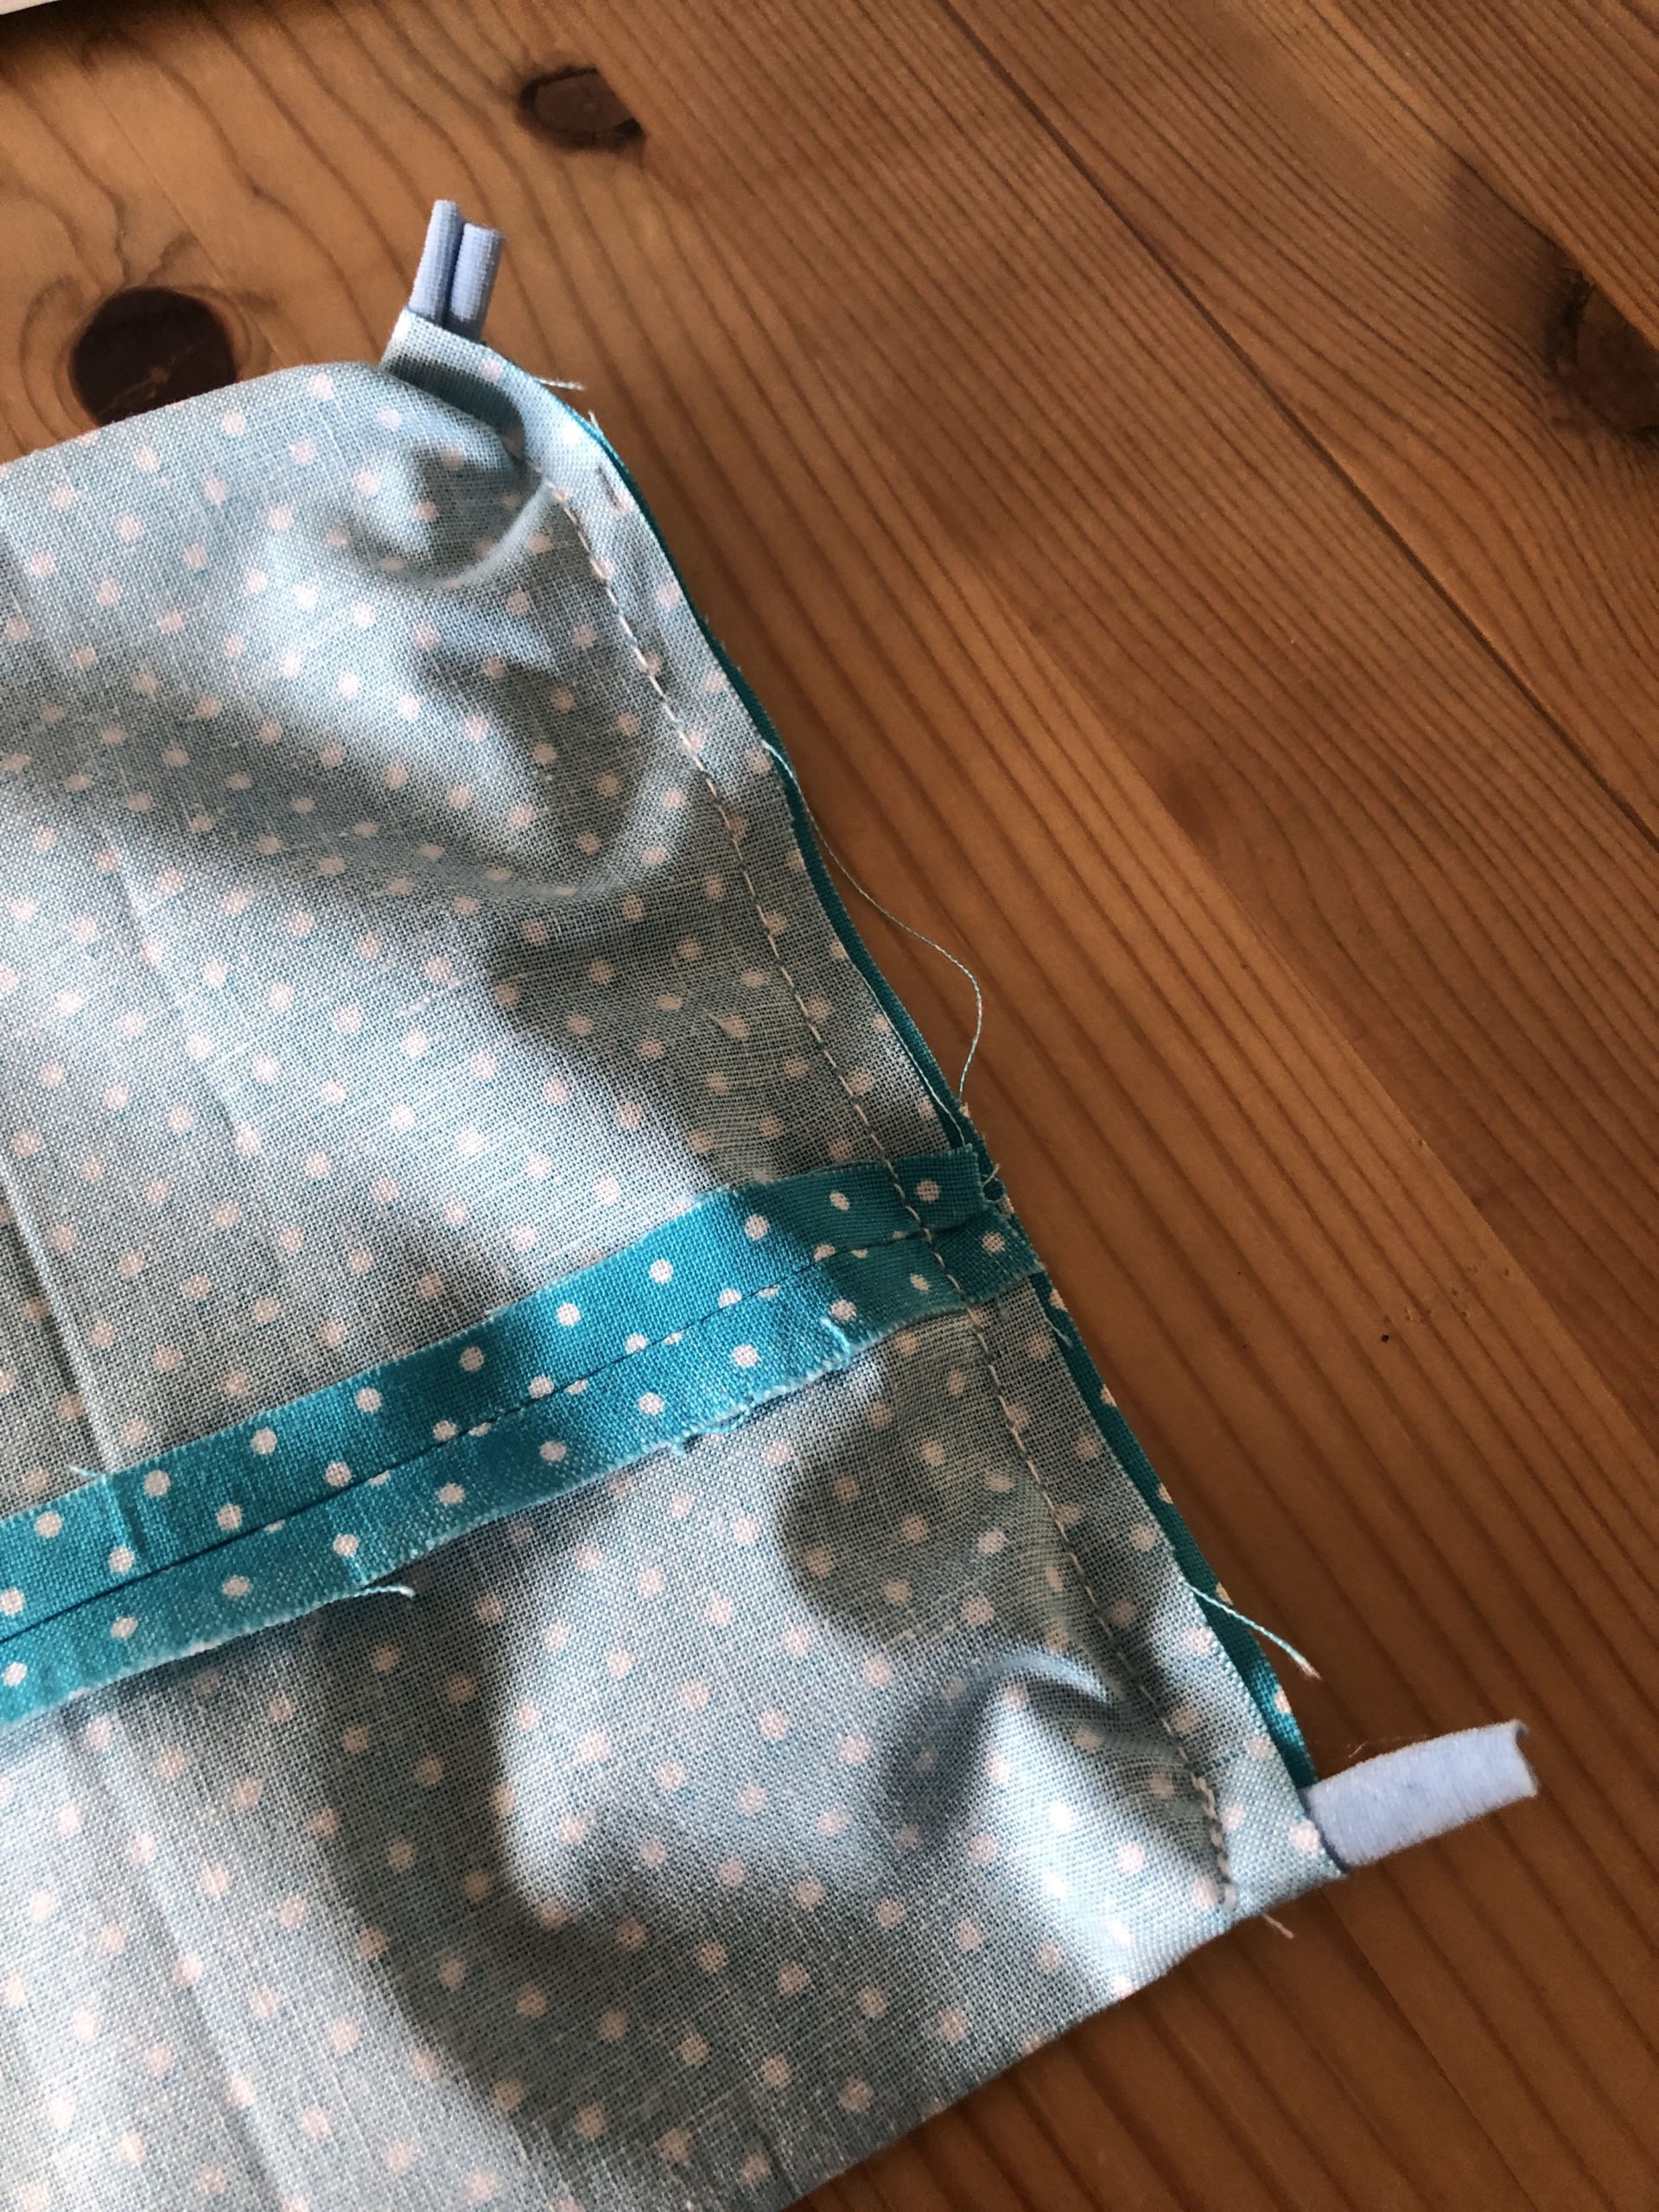
Sew other side the same way!
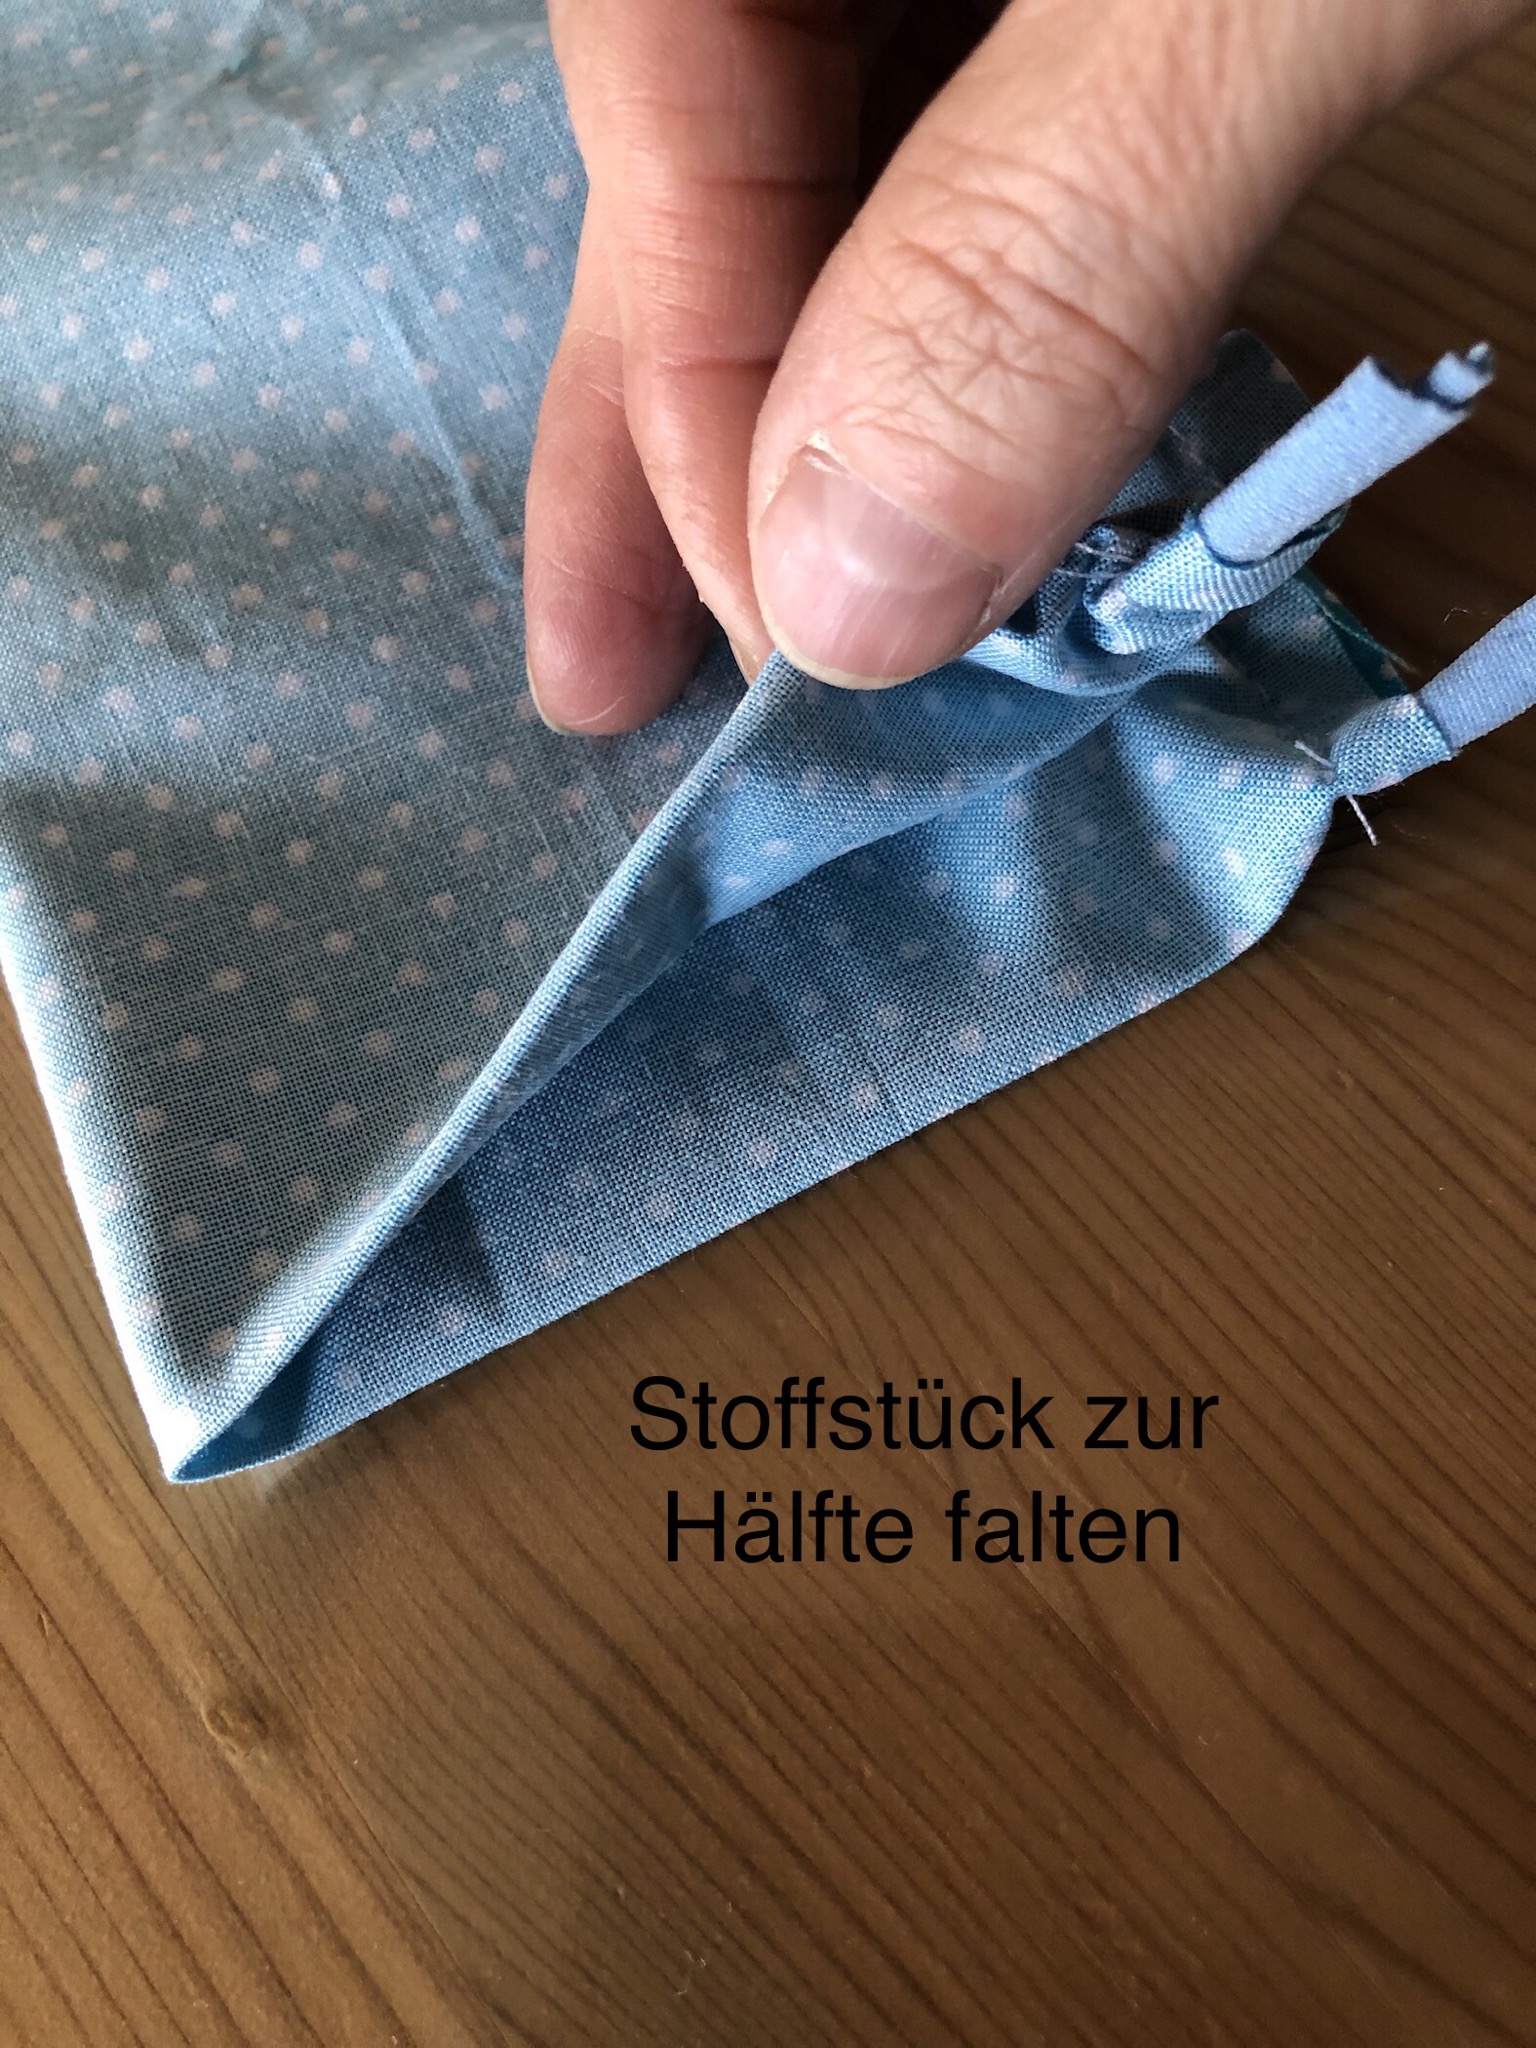
Draw closer! In addition, halve the piece of fabric
Mark: 1cm x 3 cm
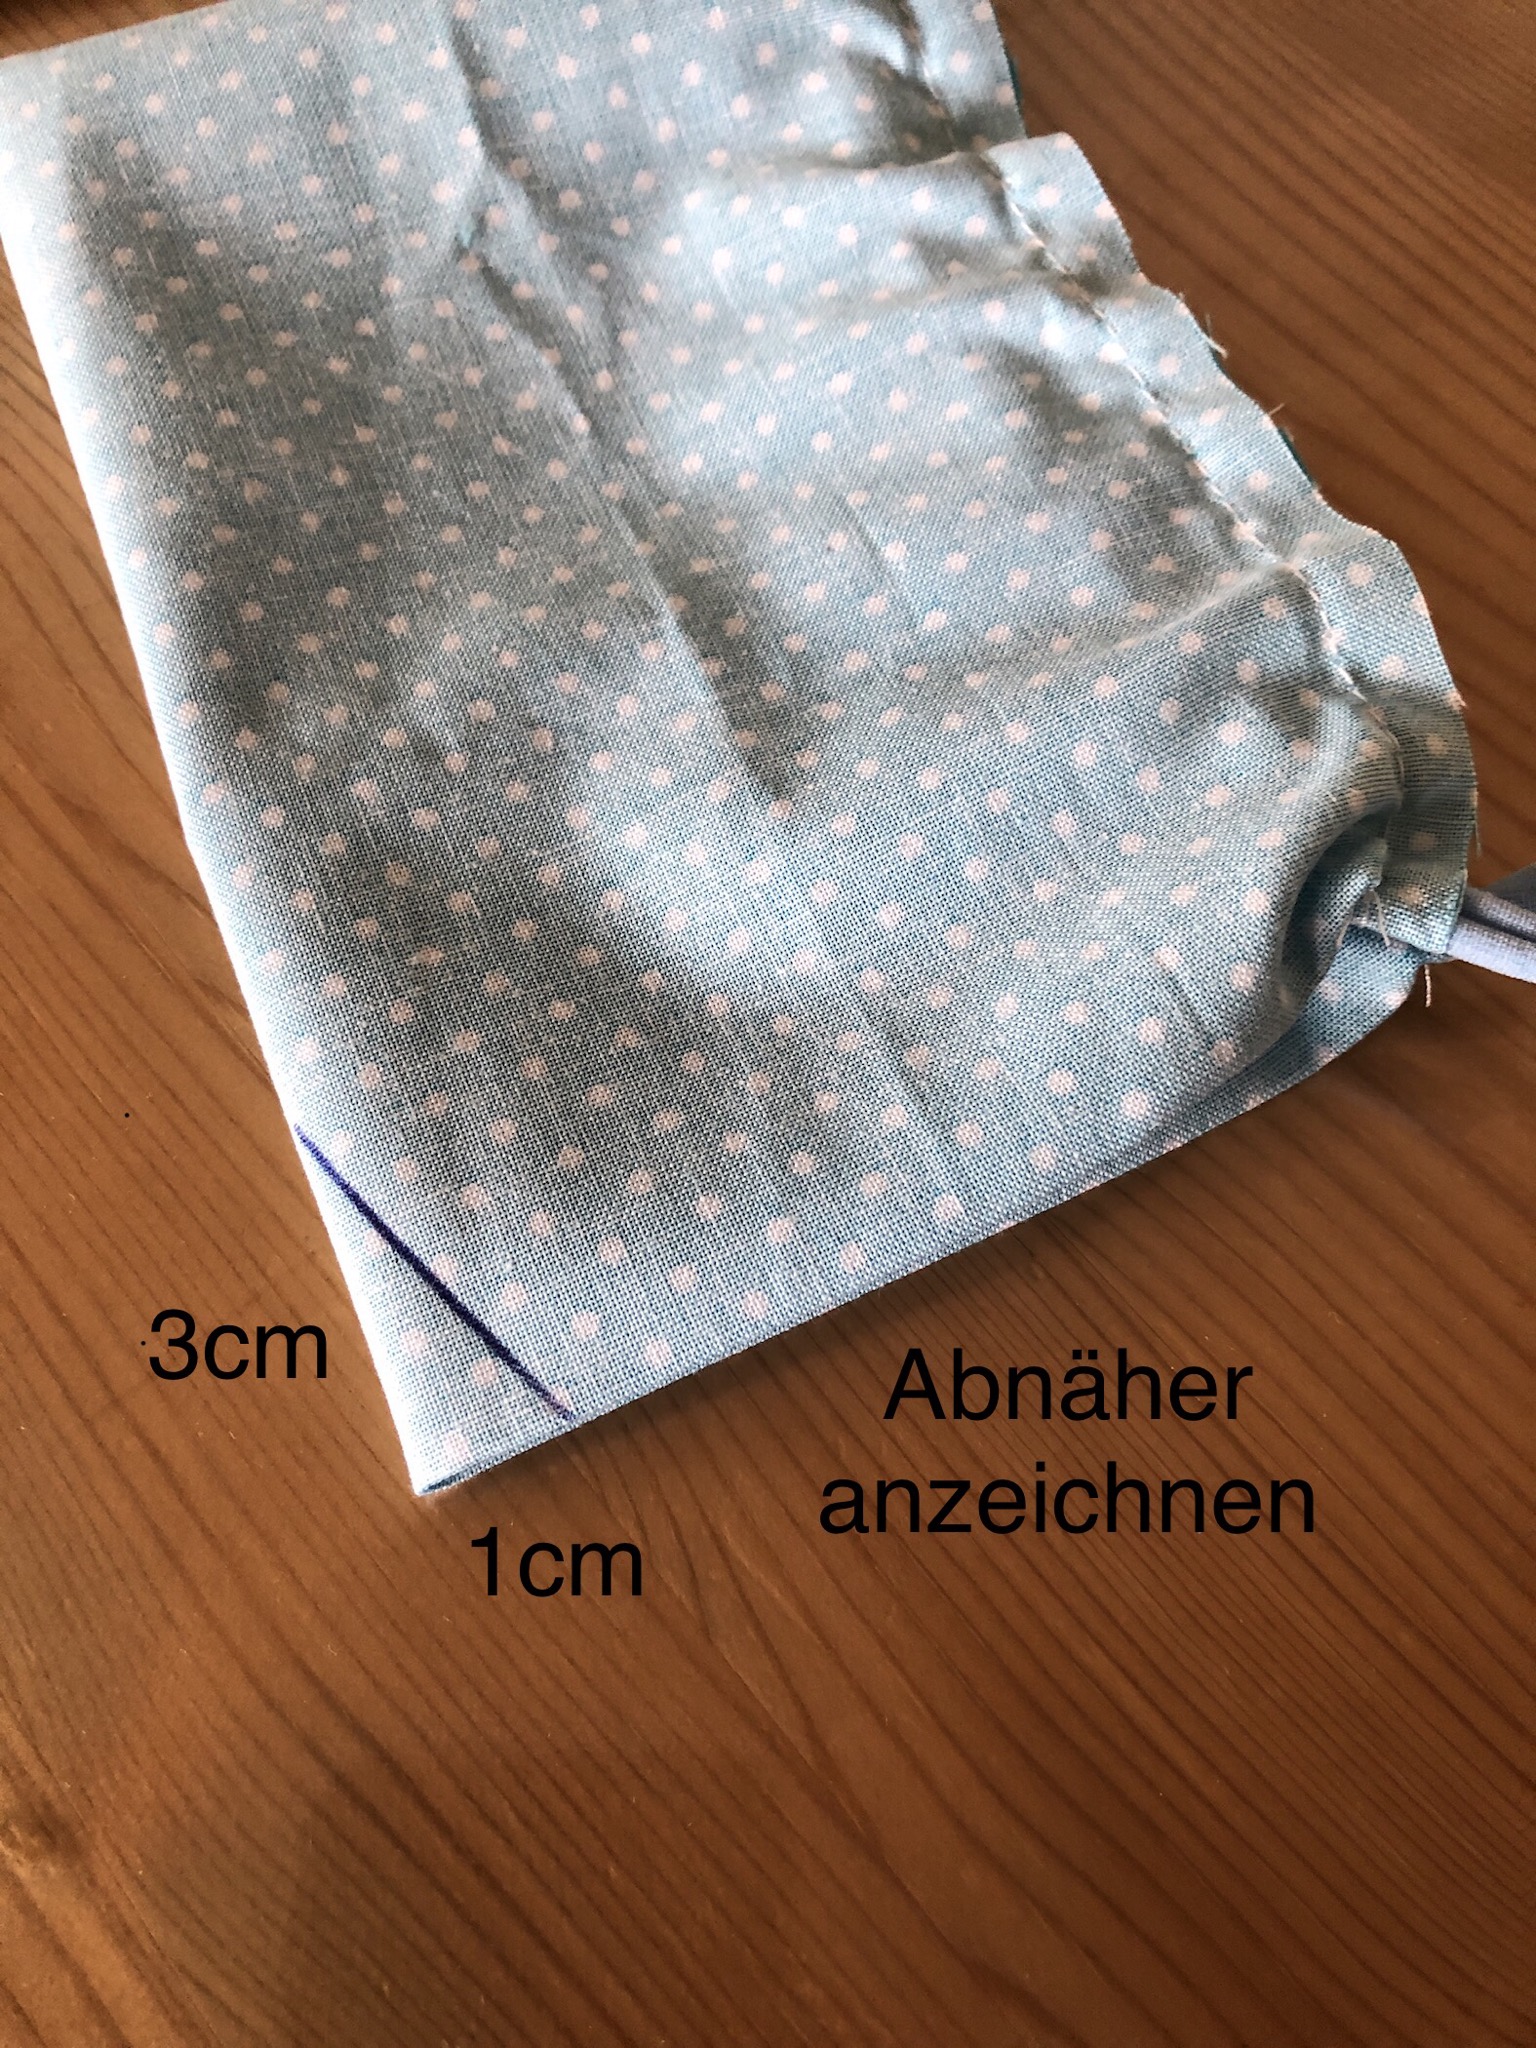
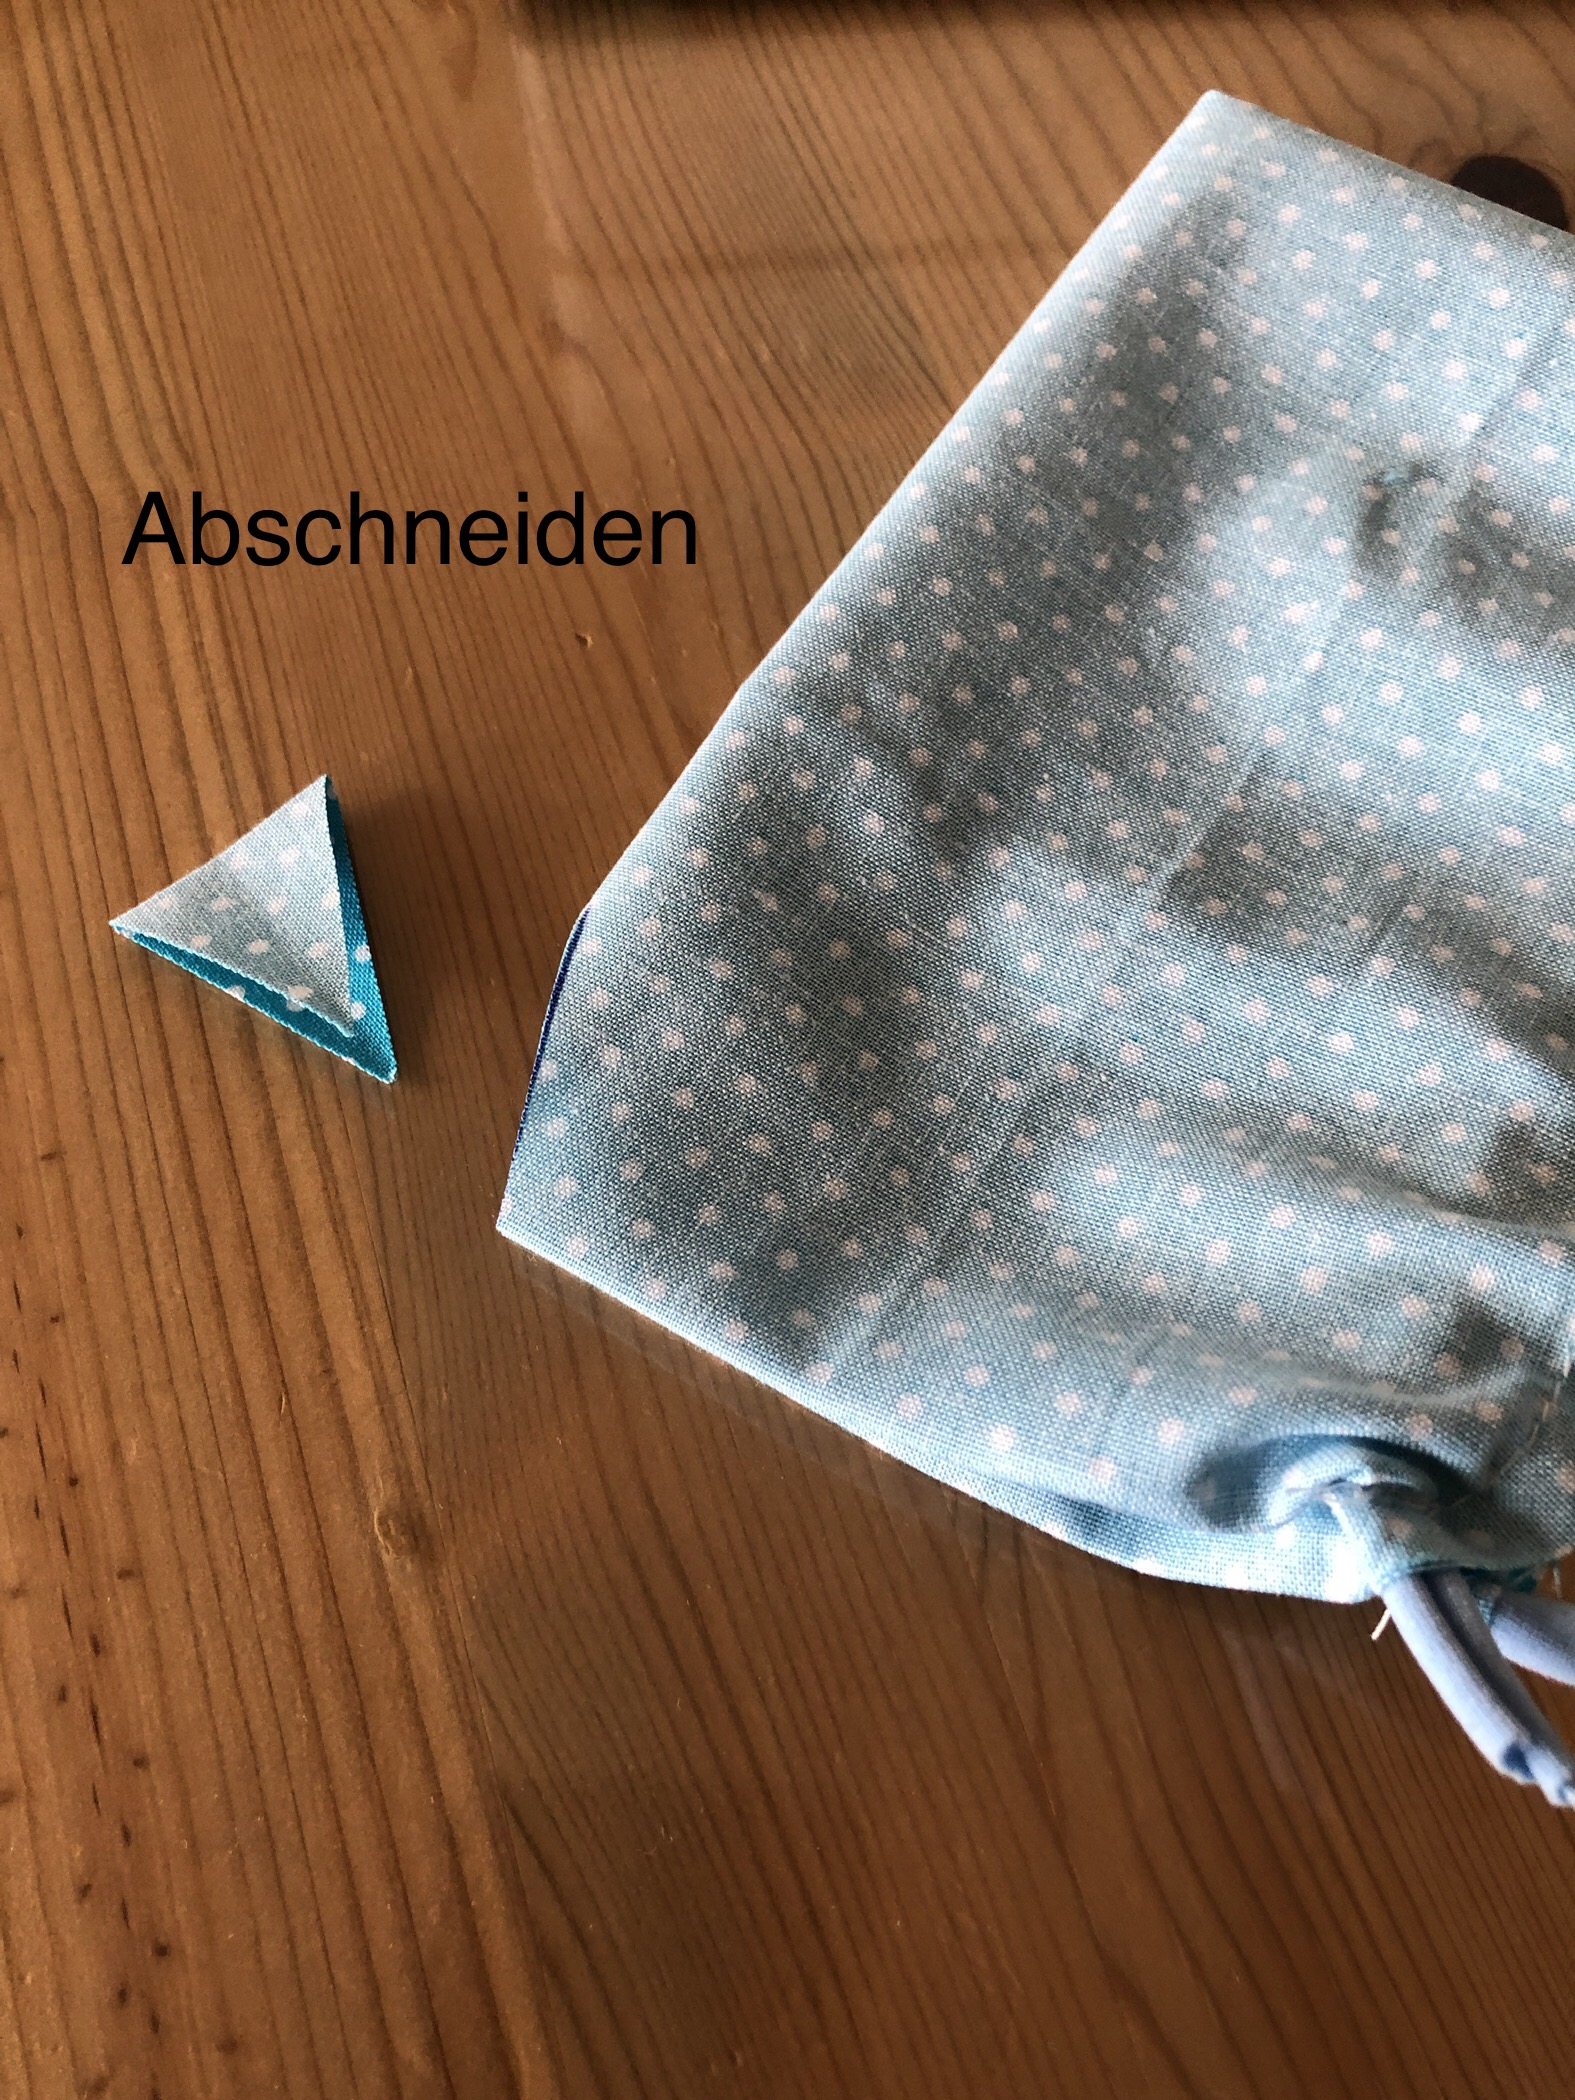
Cut fabric triangle
See picture

Pull fabric apart and put the edges across...
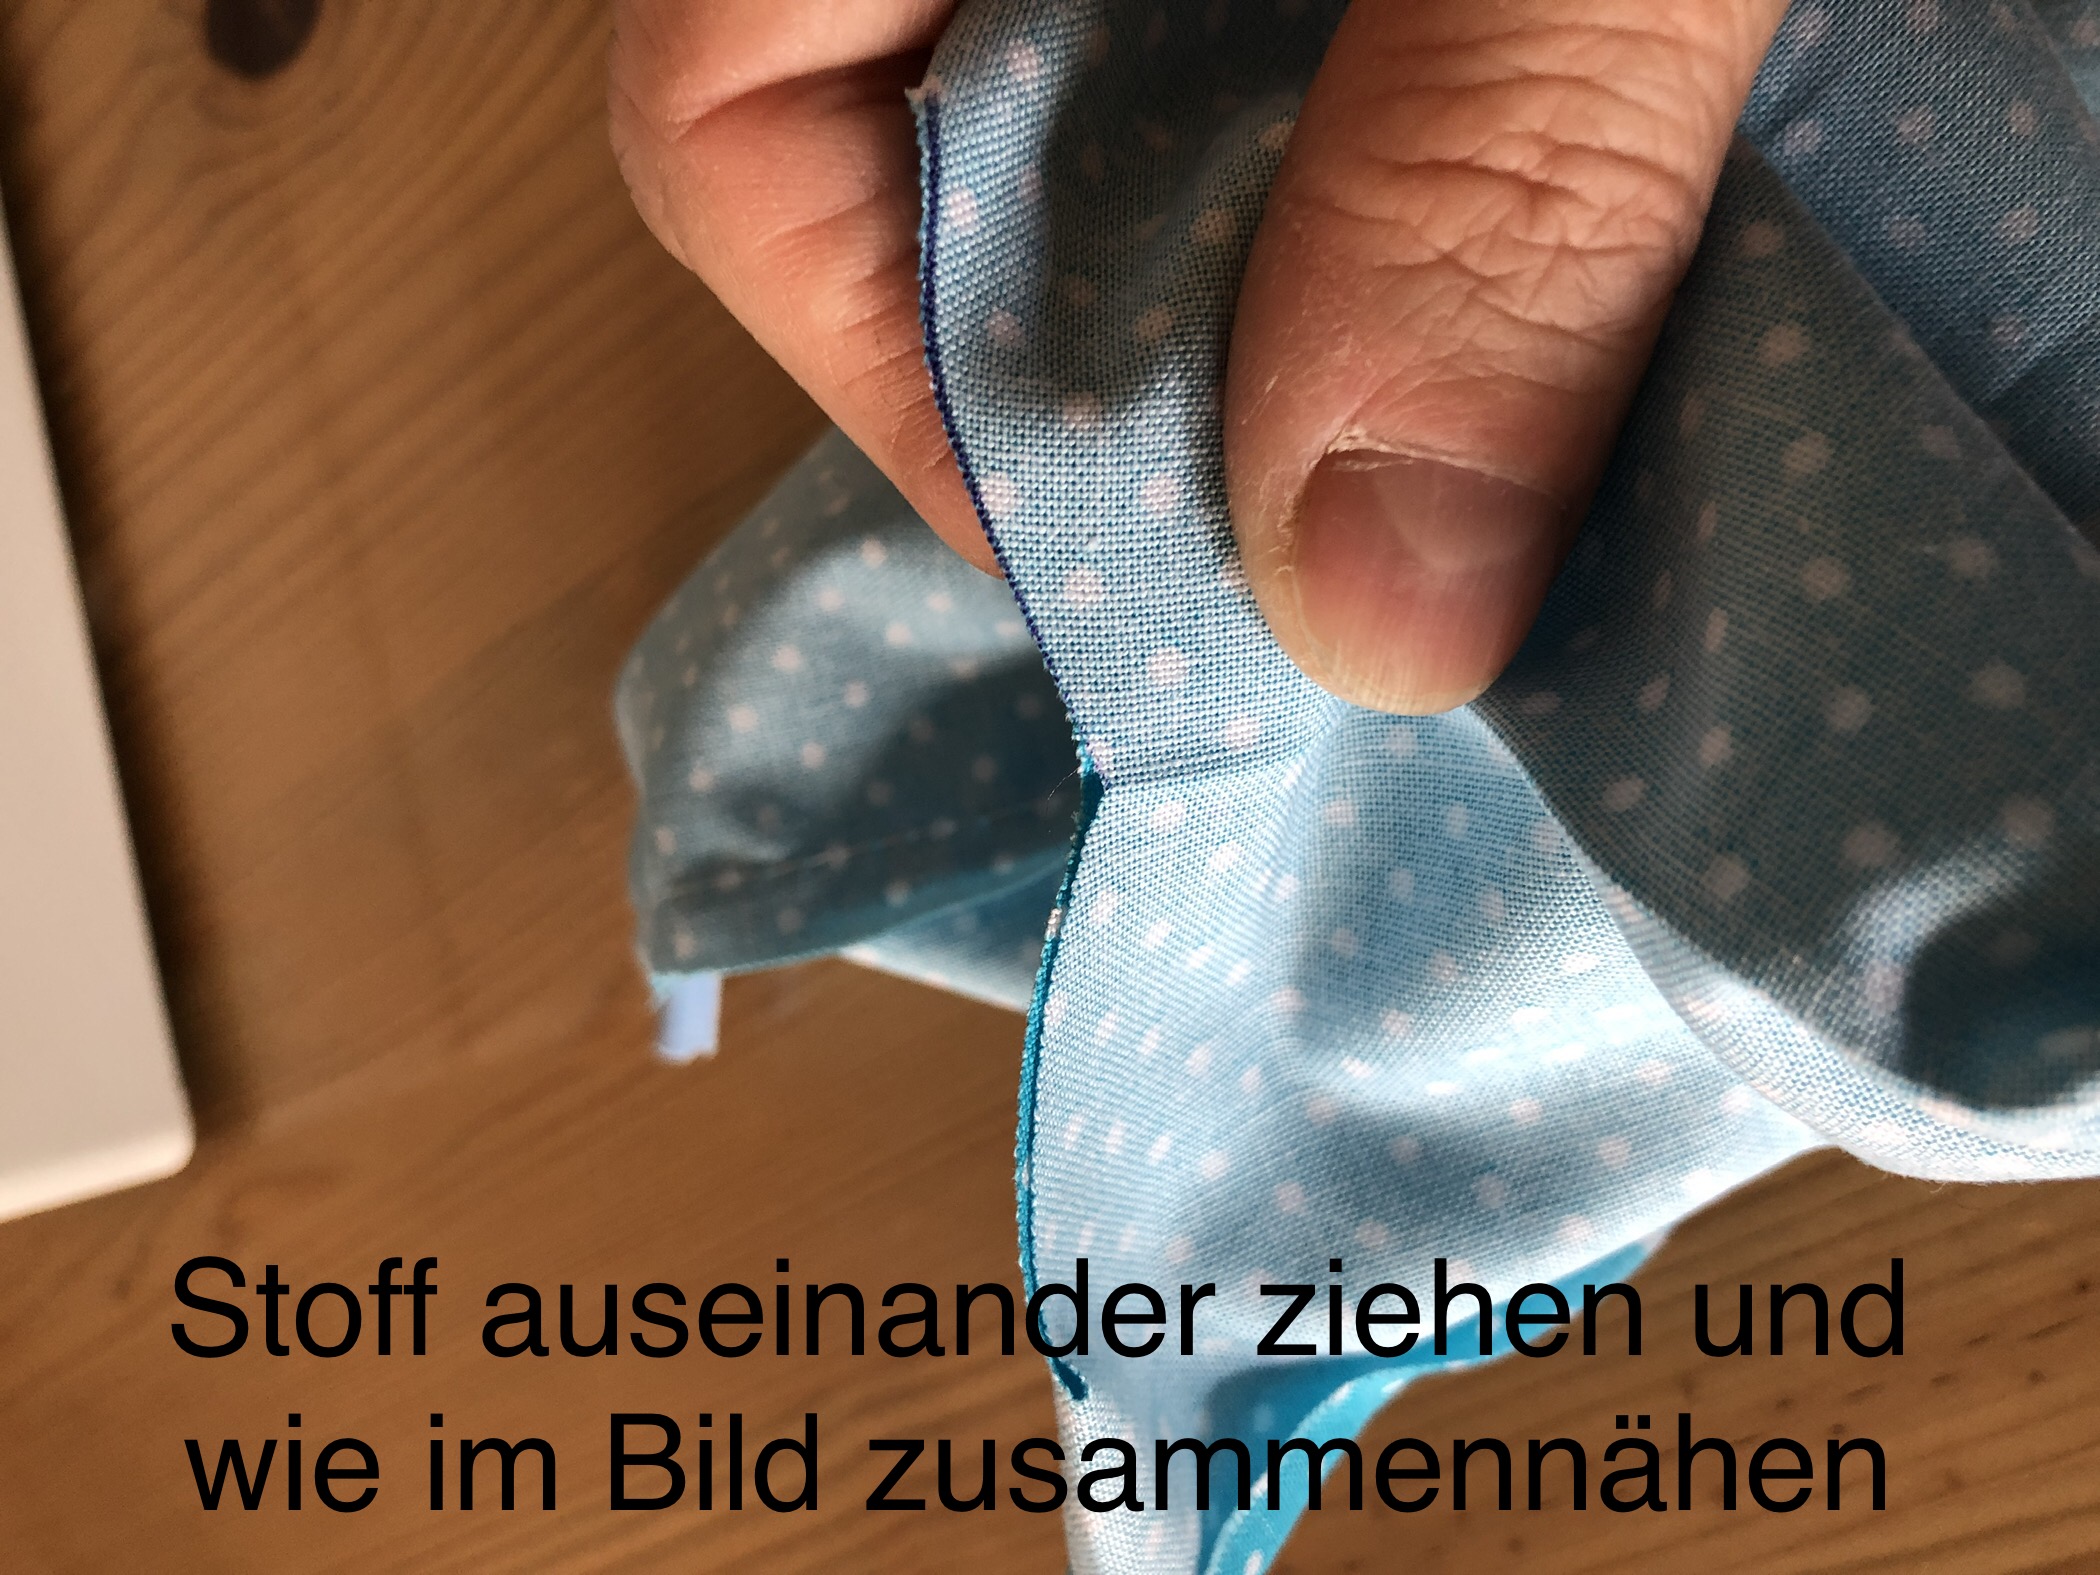
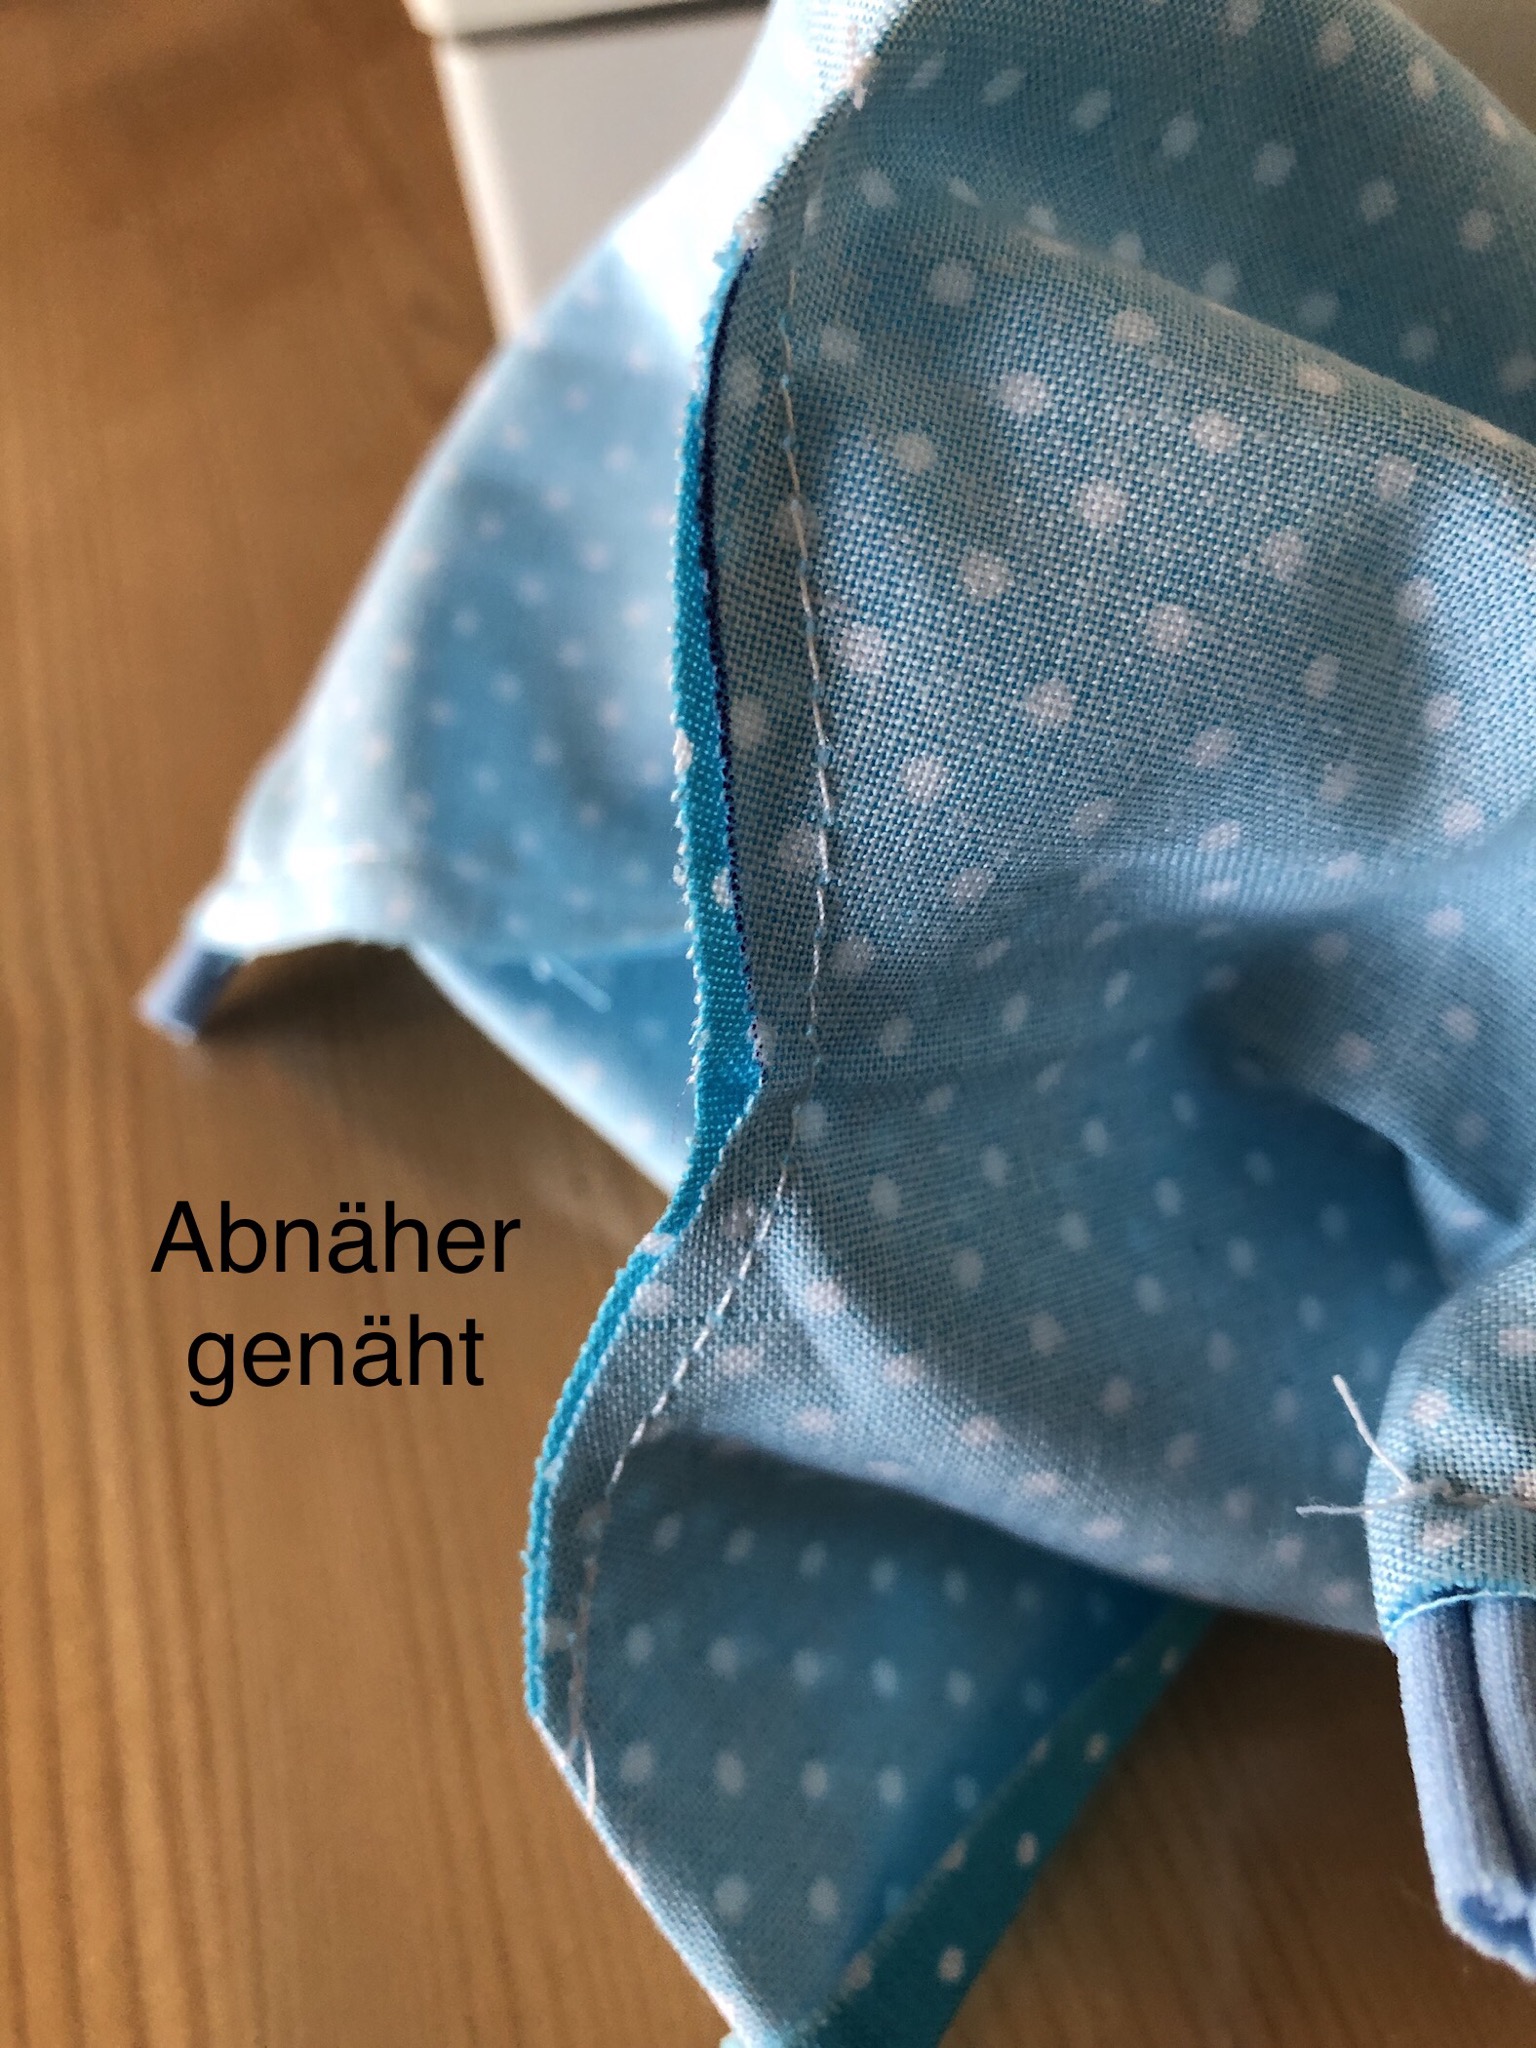
Sewing these together
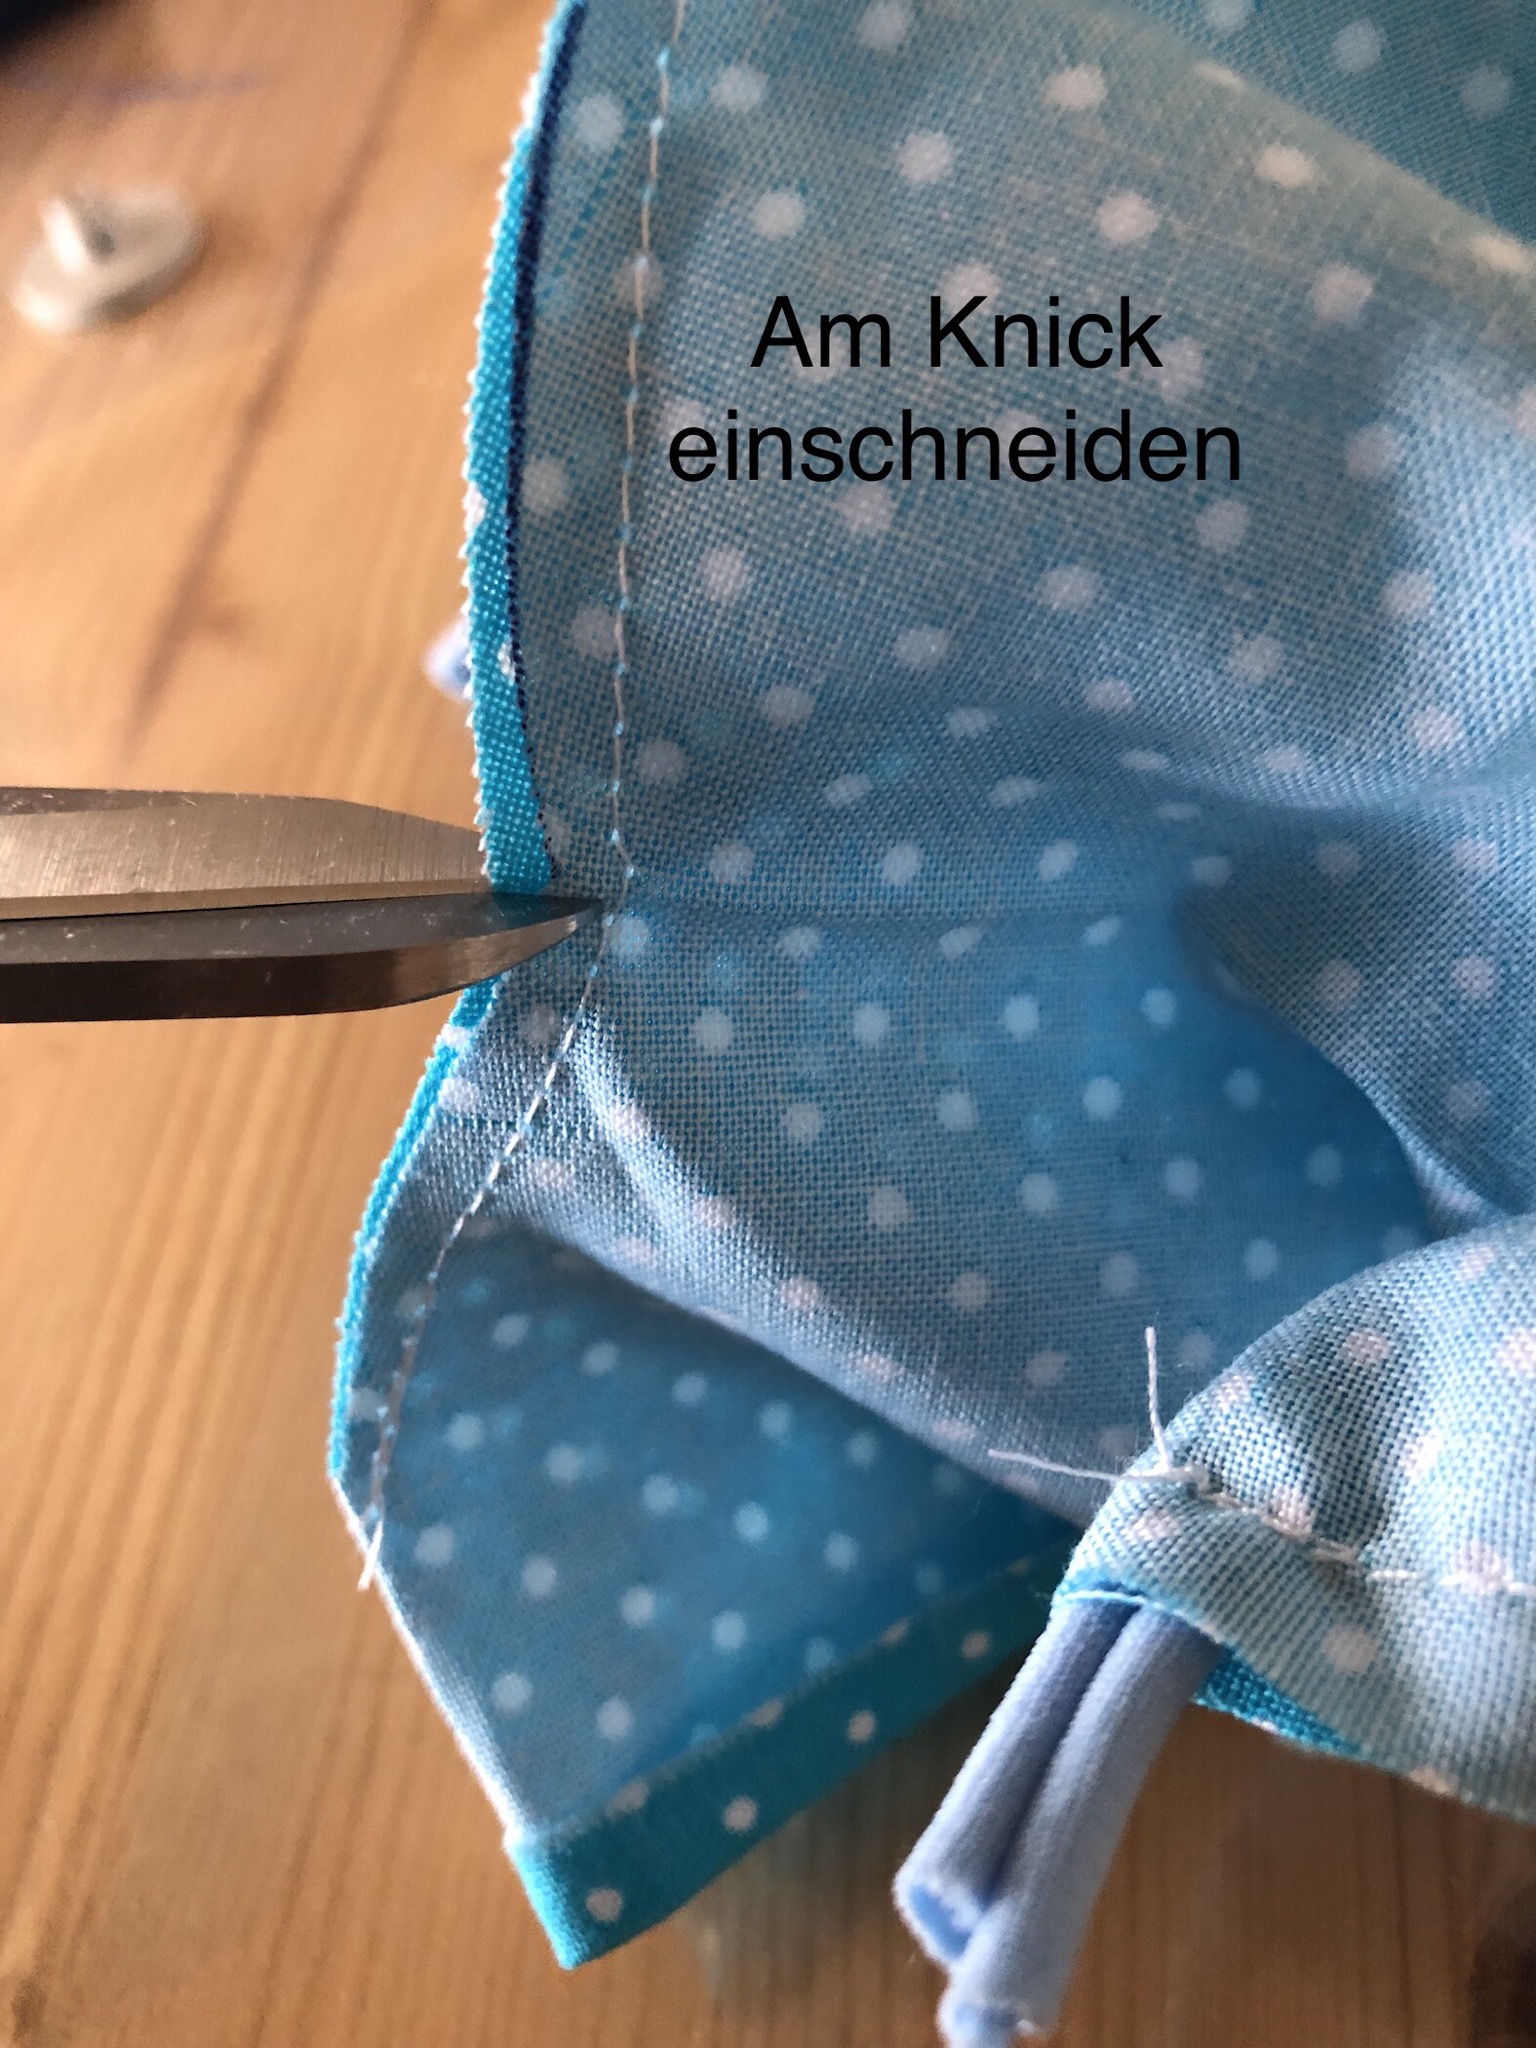
Cut minimally on the crease with the scissors
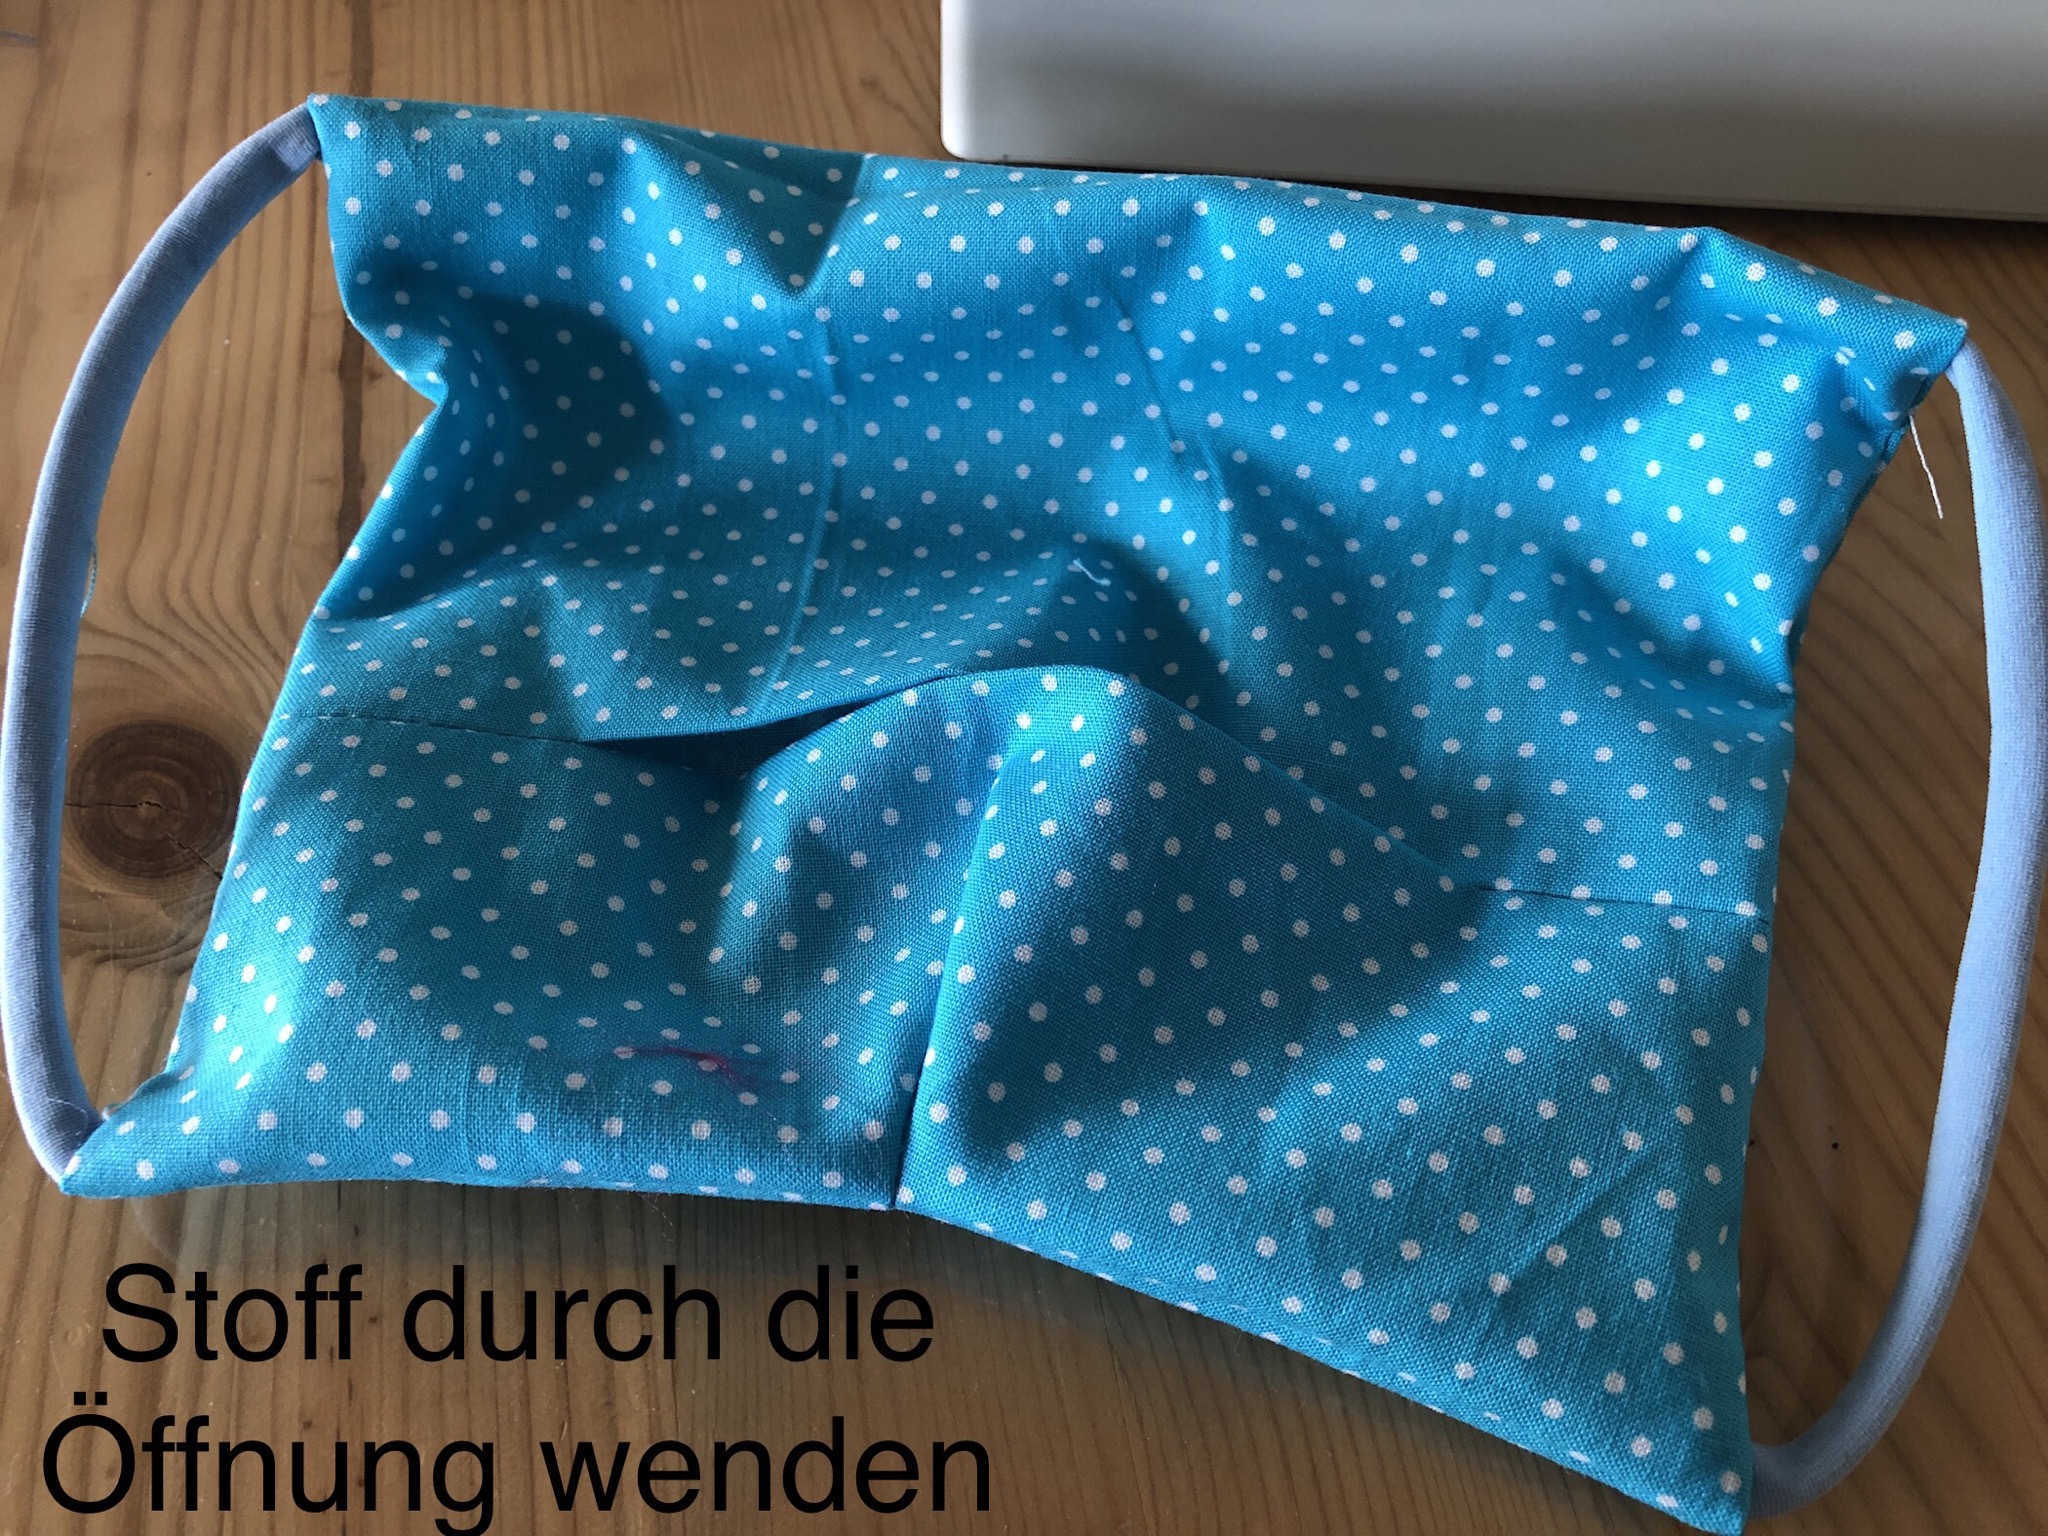
Turn the piece of fabric
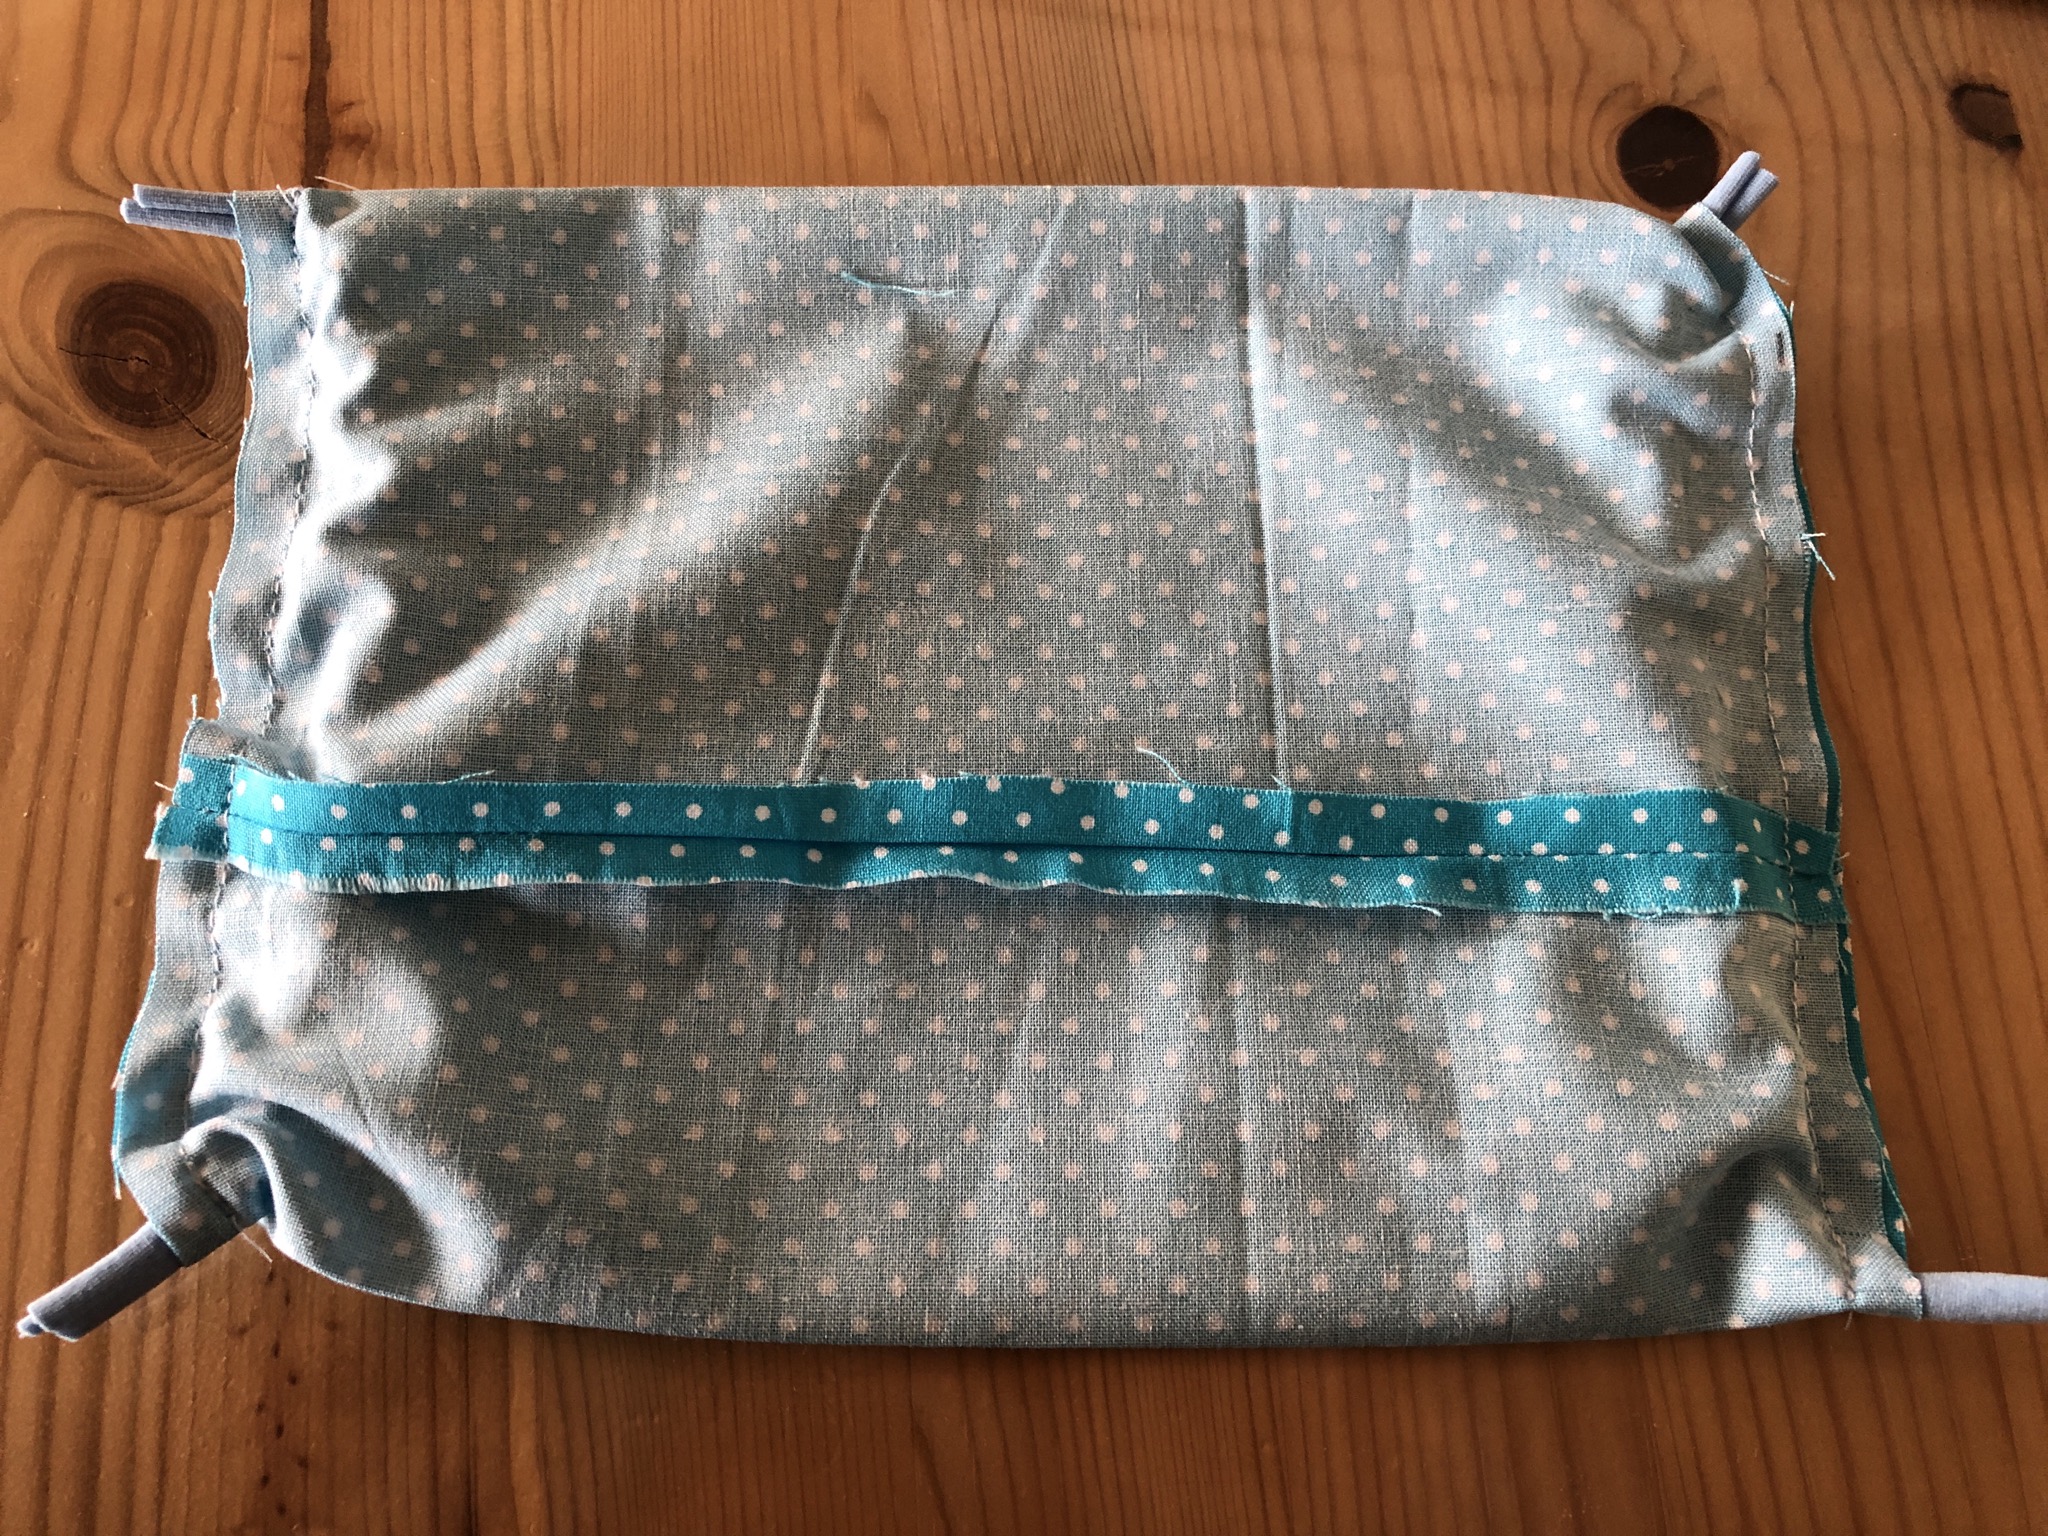
Top and bottom fractures are now sewn together (possibly iron again)


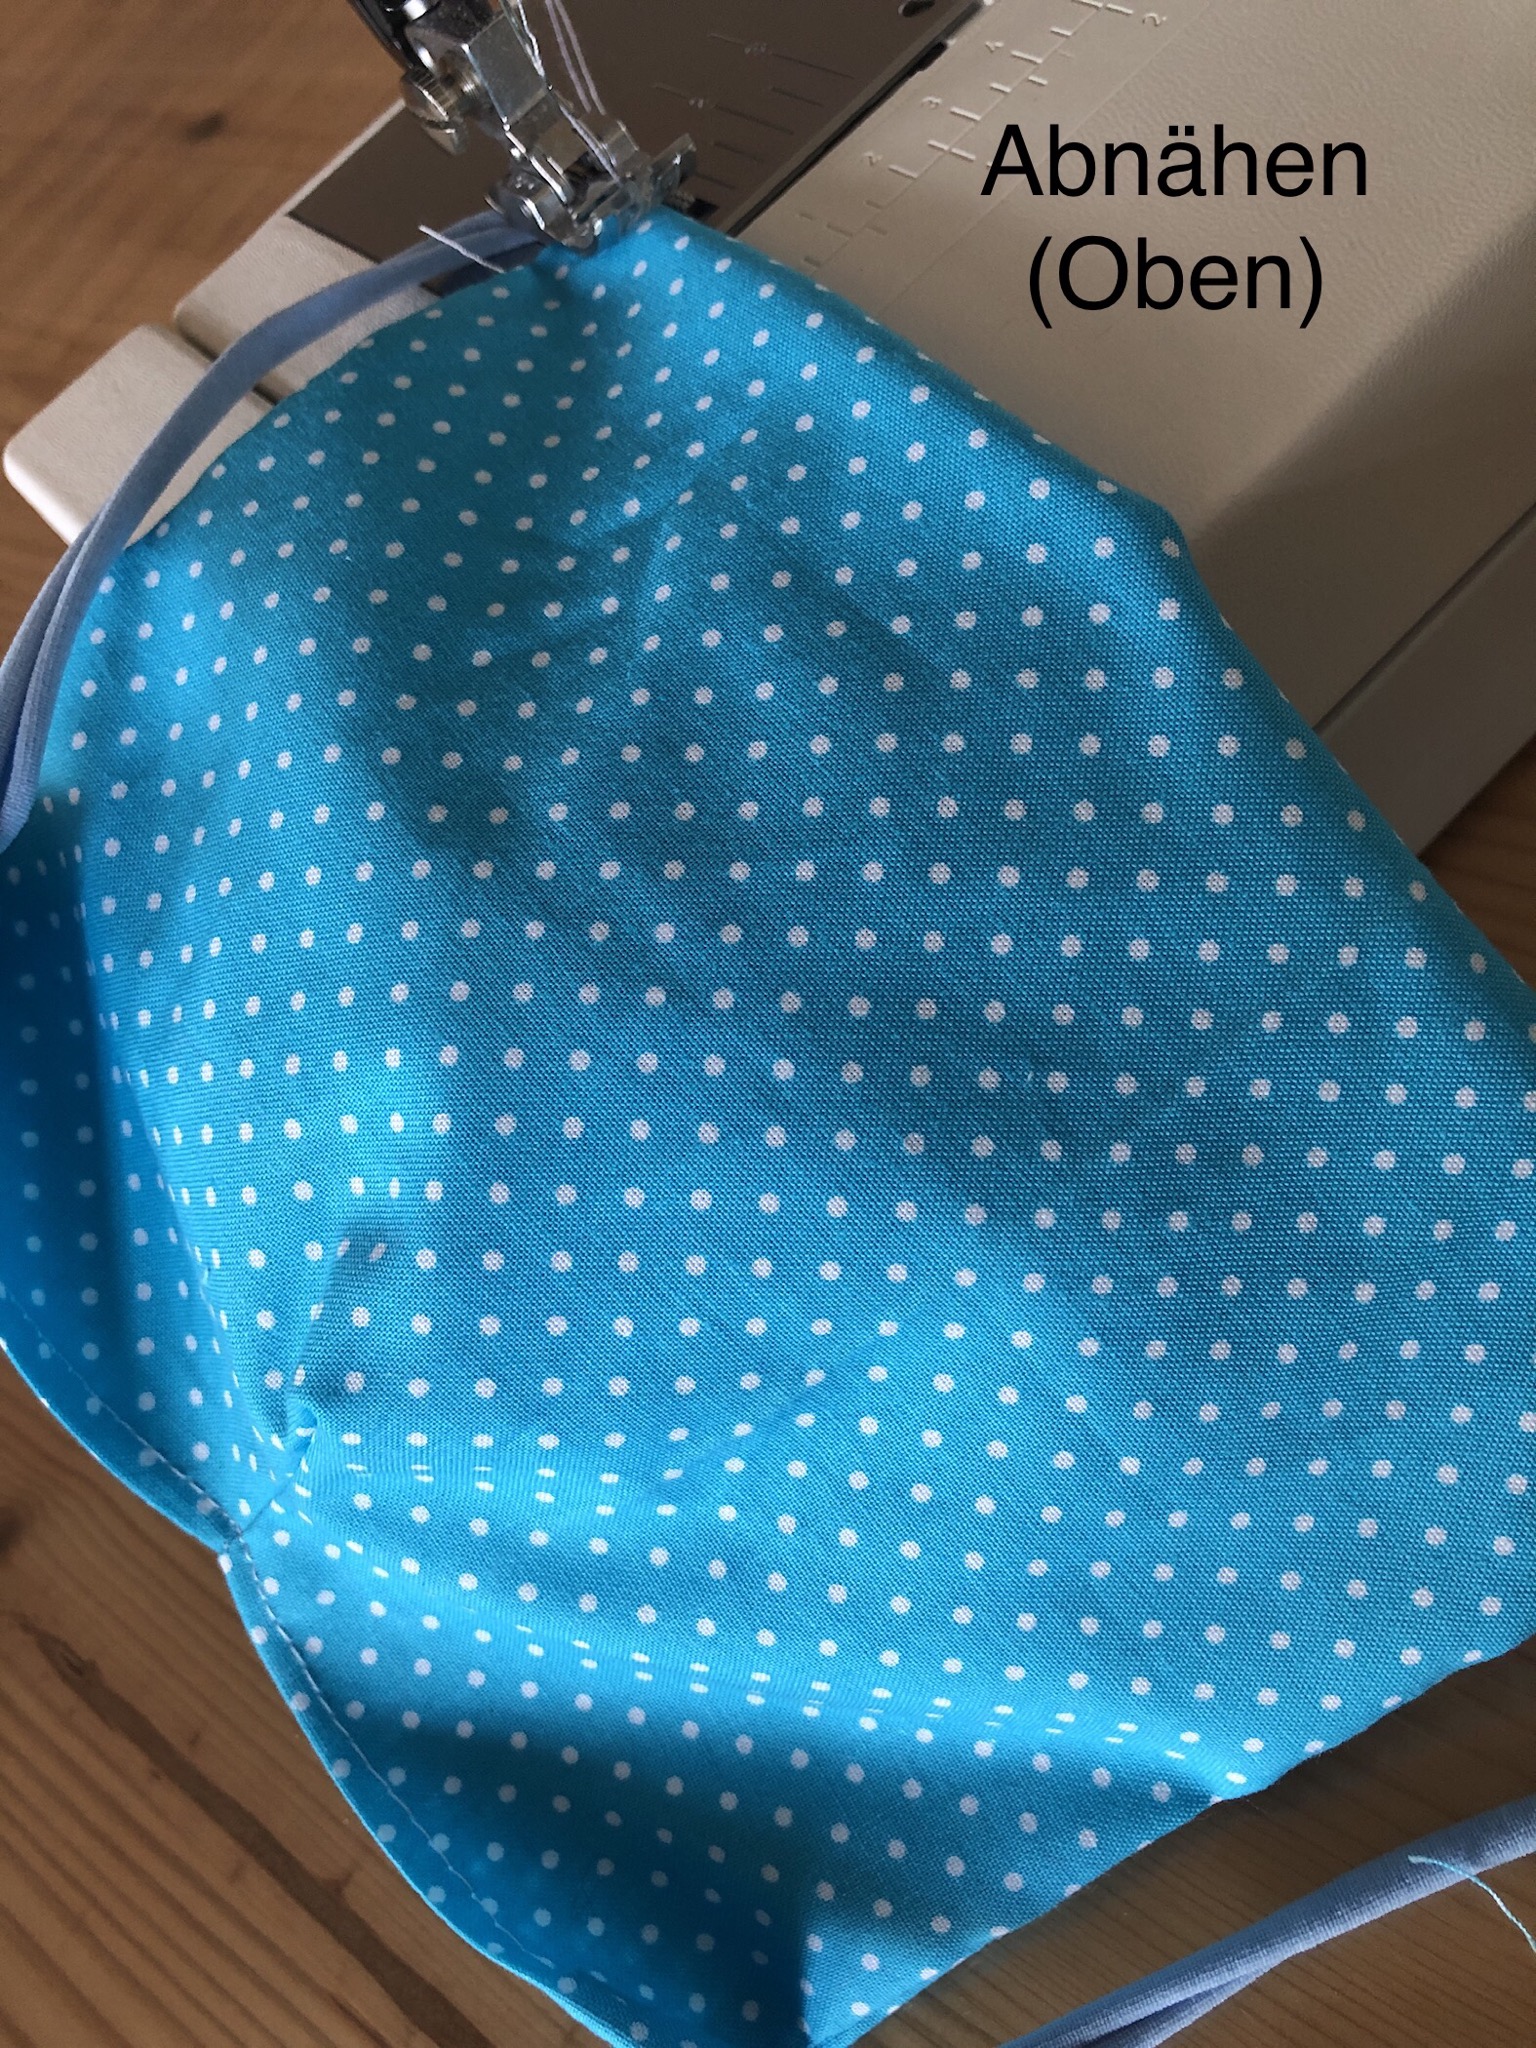
Up and down is now a clean seam
On the sides the mouthguard is still too wide, so we will make two folds to the left and right each and sew off. The upper double fold is about 2 cm wide
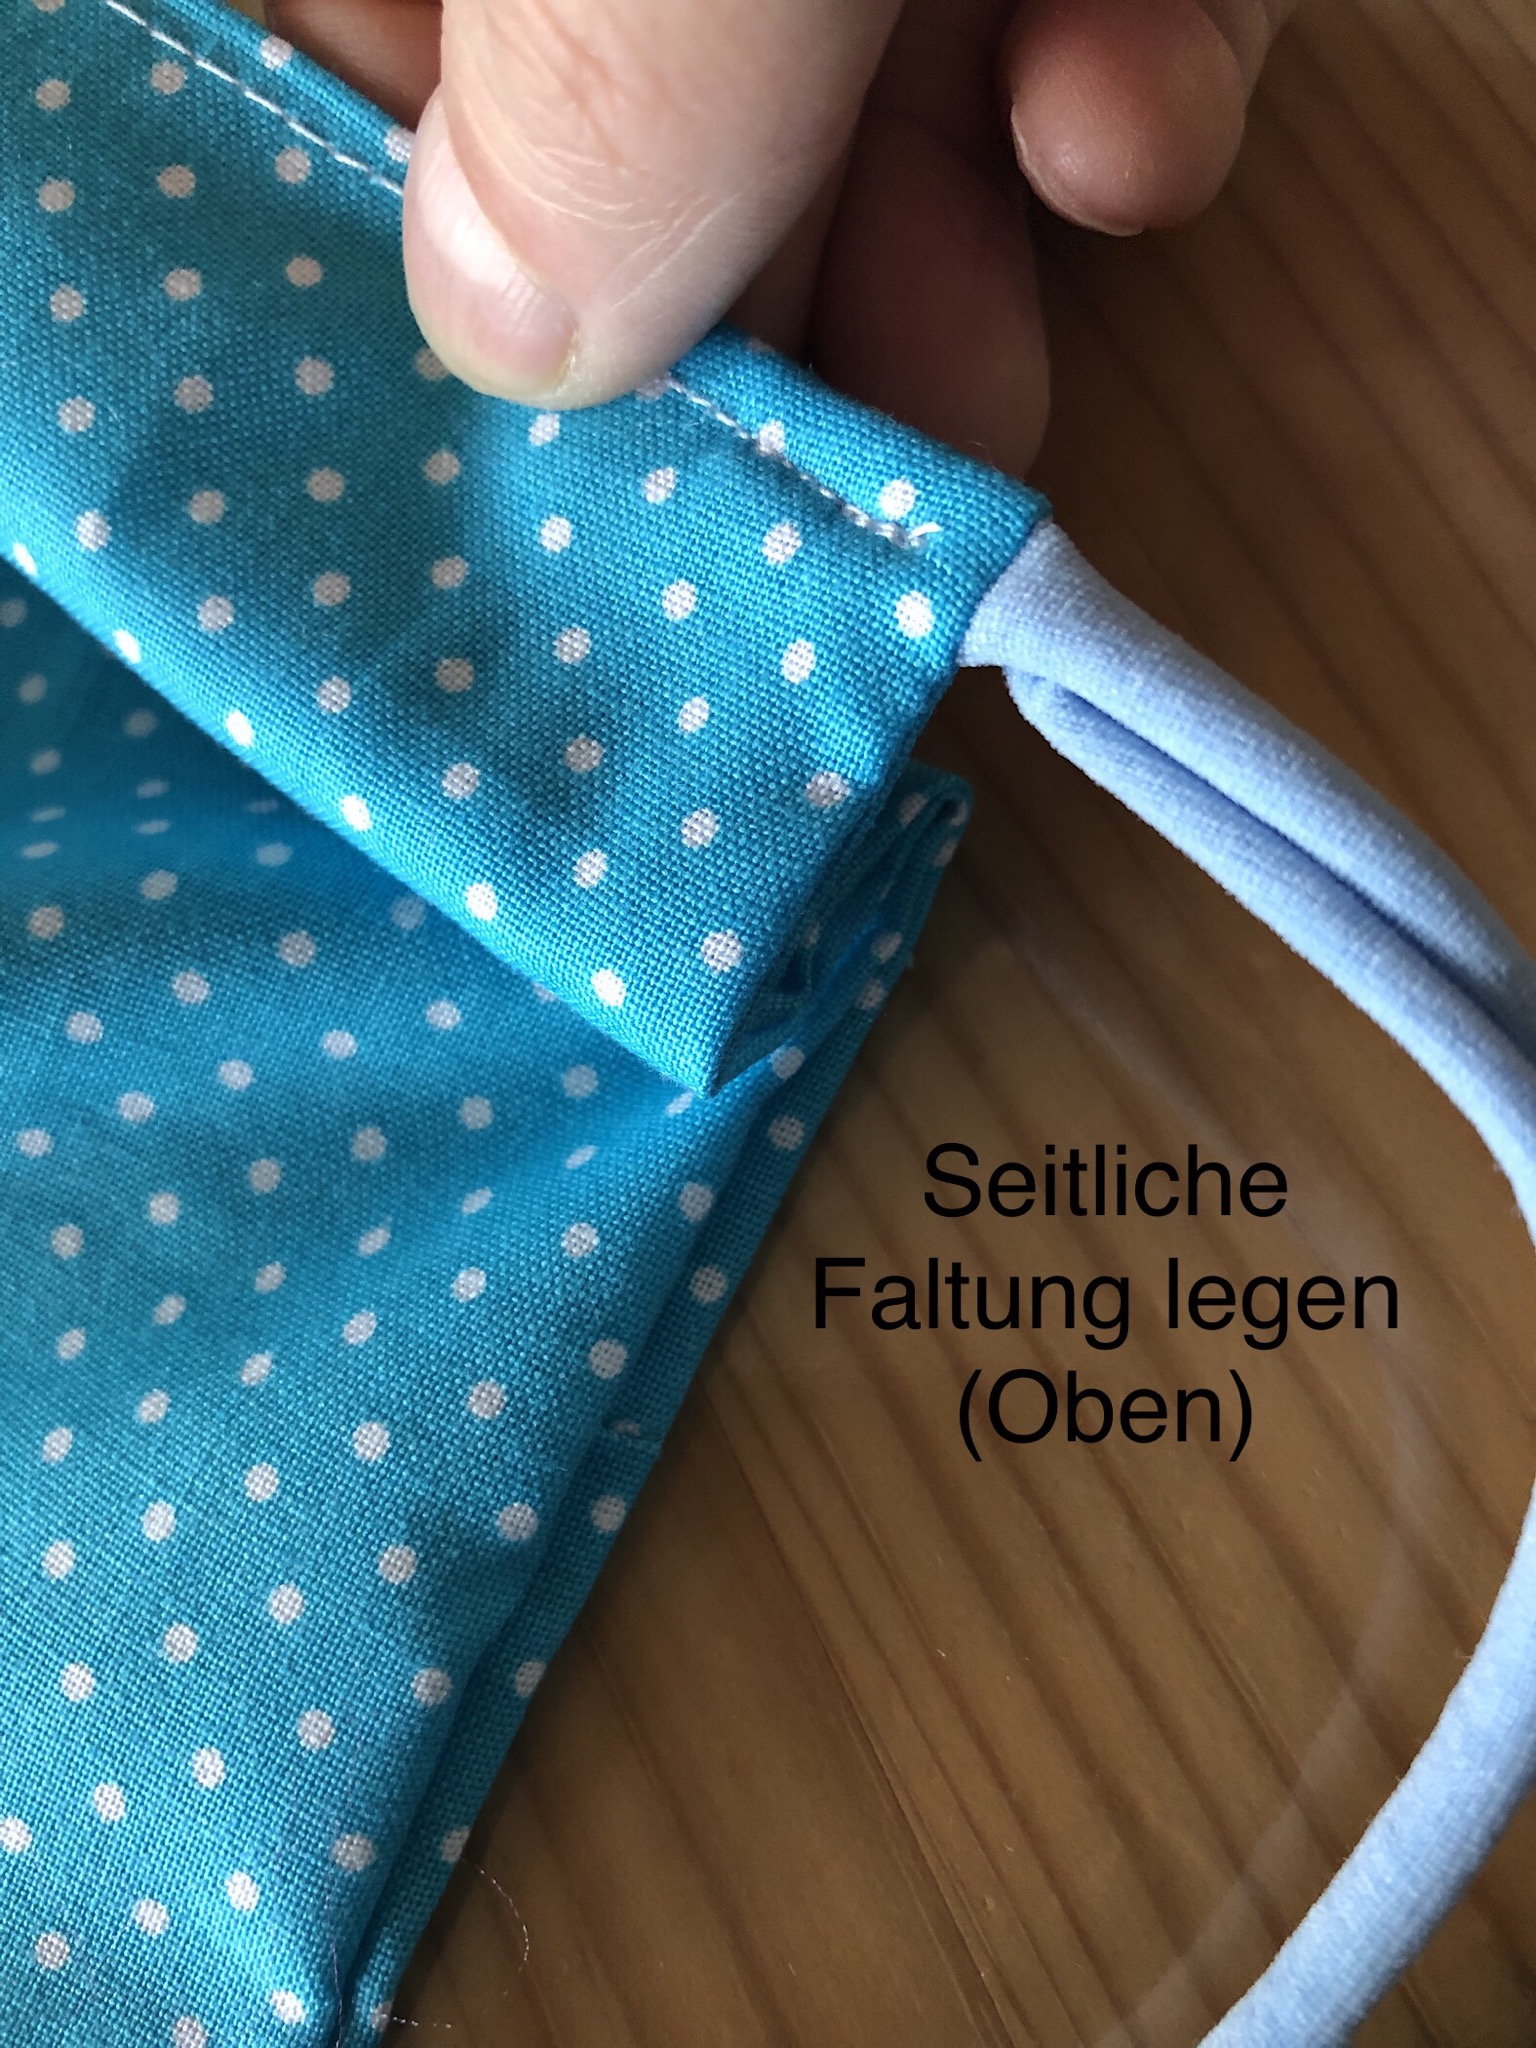
Fold and fasten fabric like in the picture
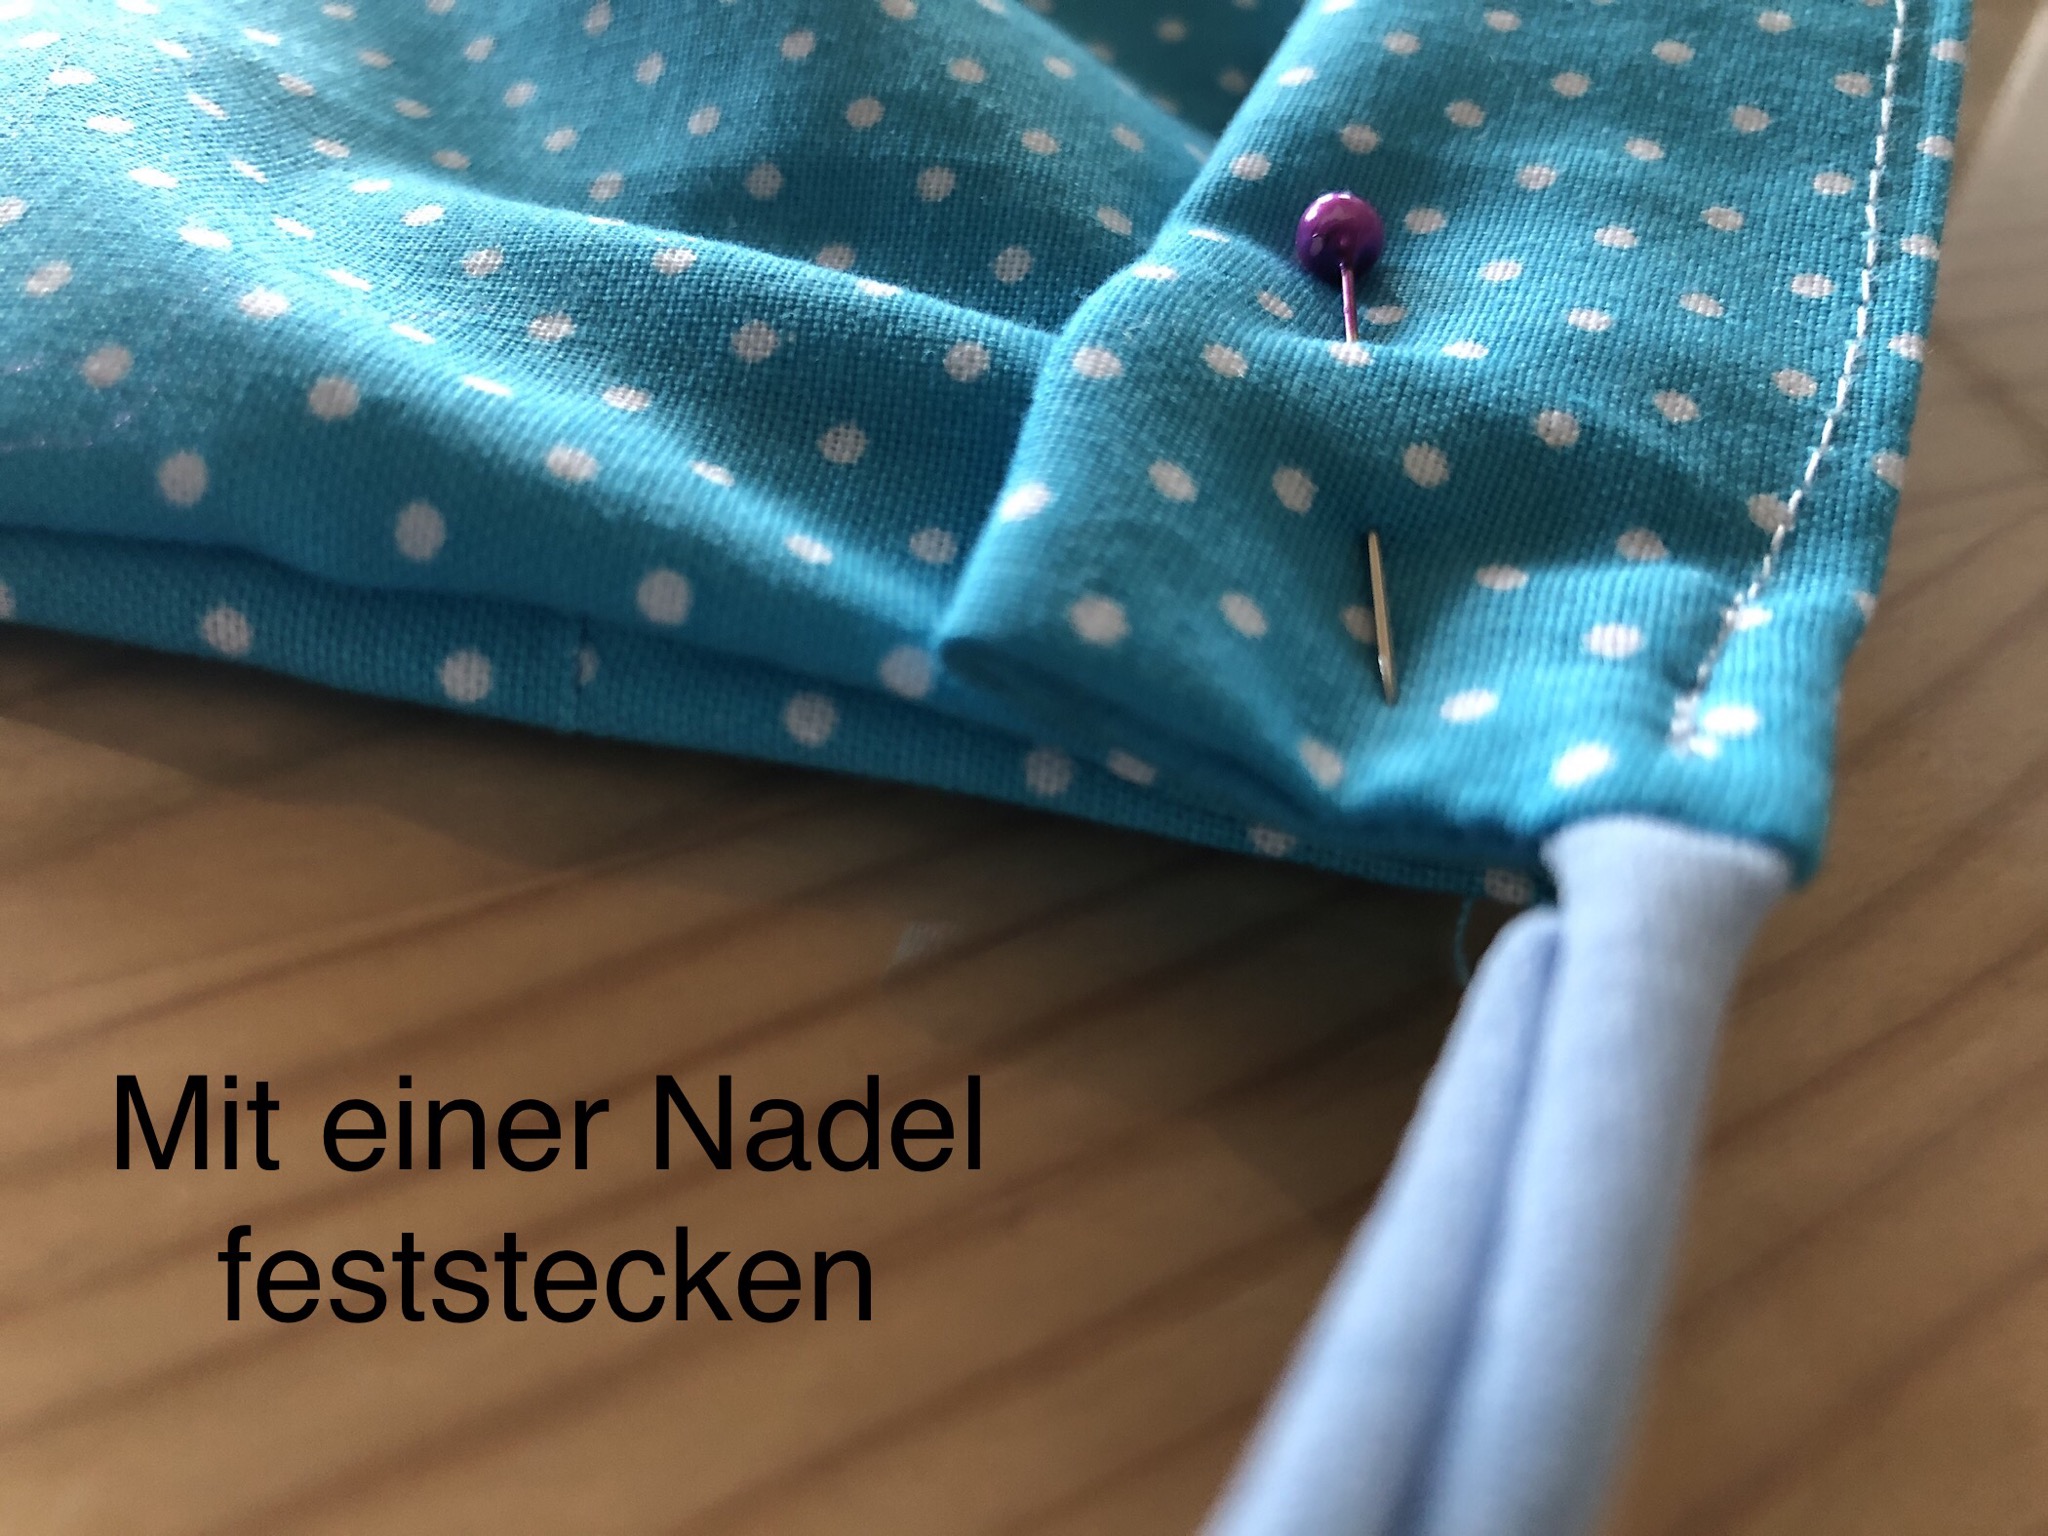
Down also but a little smaller

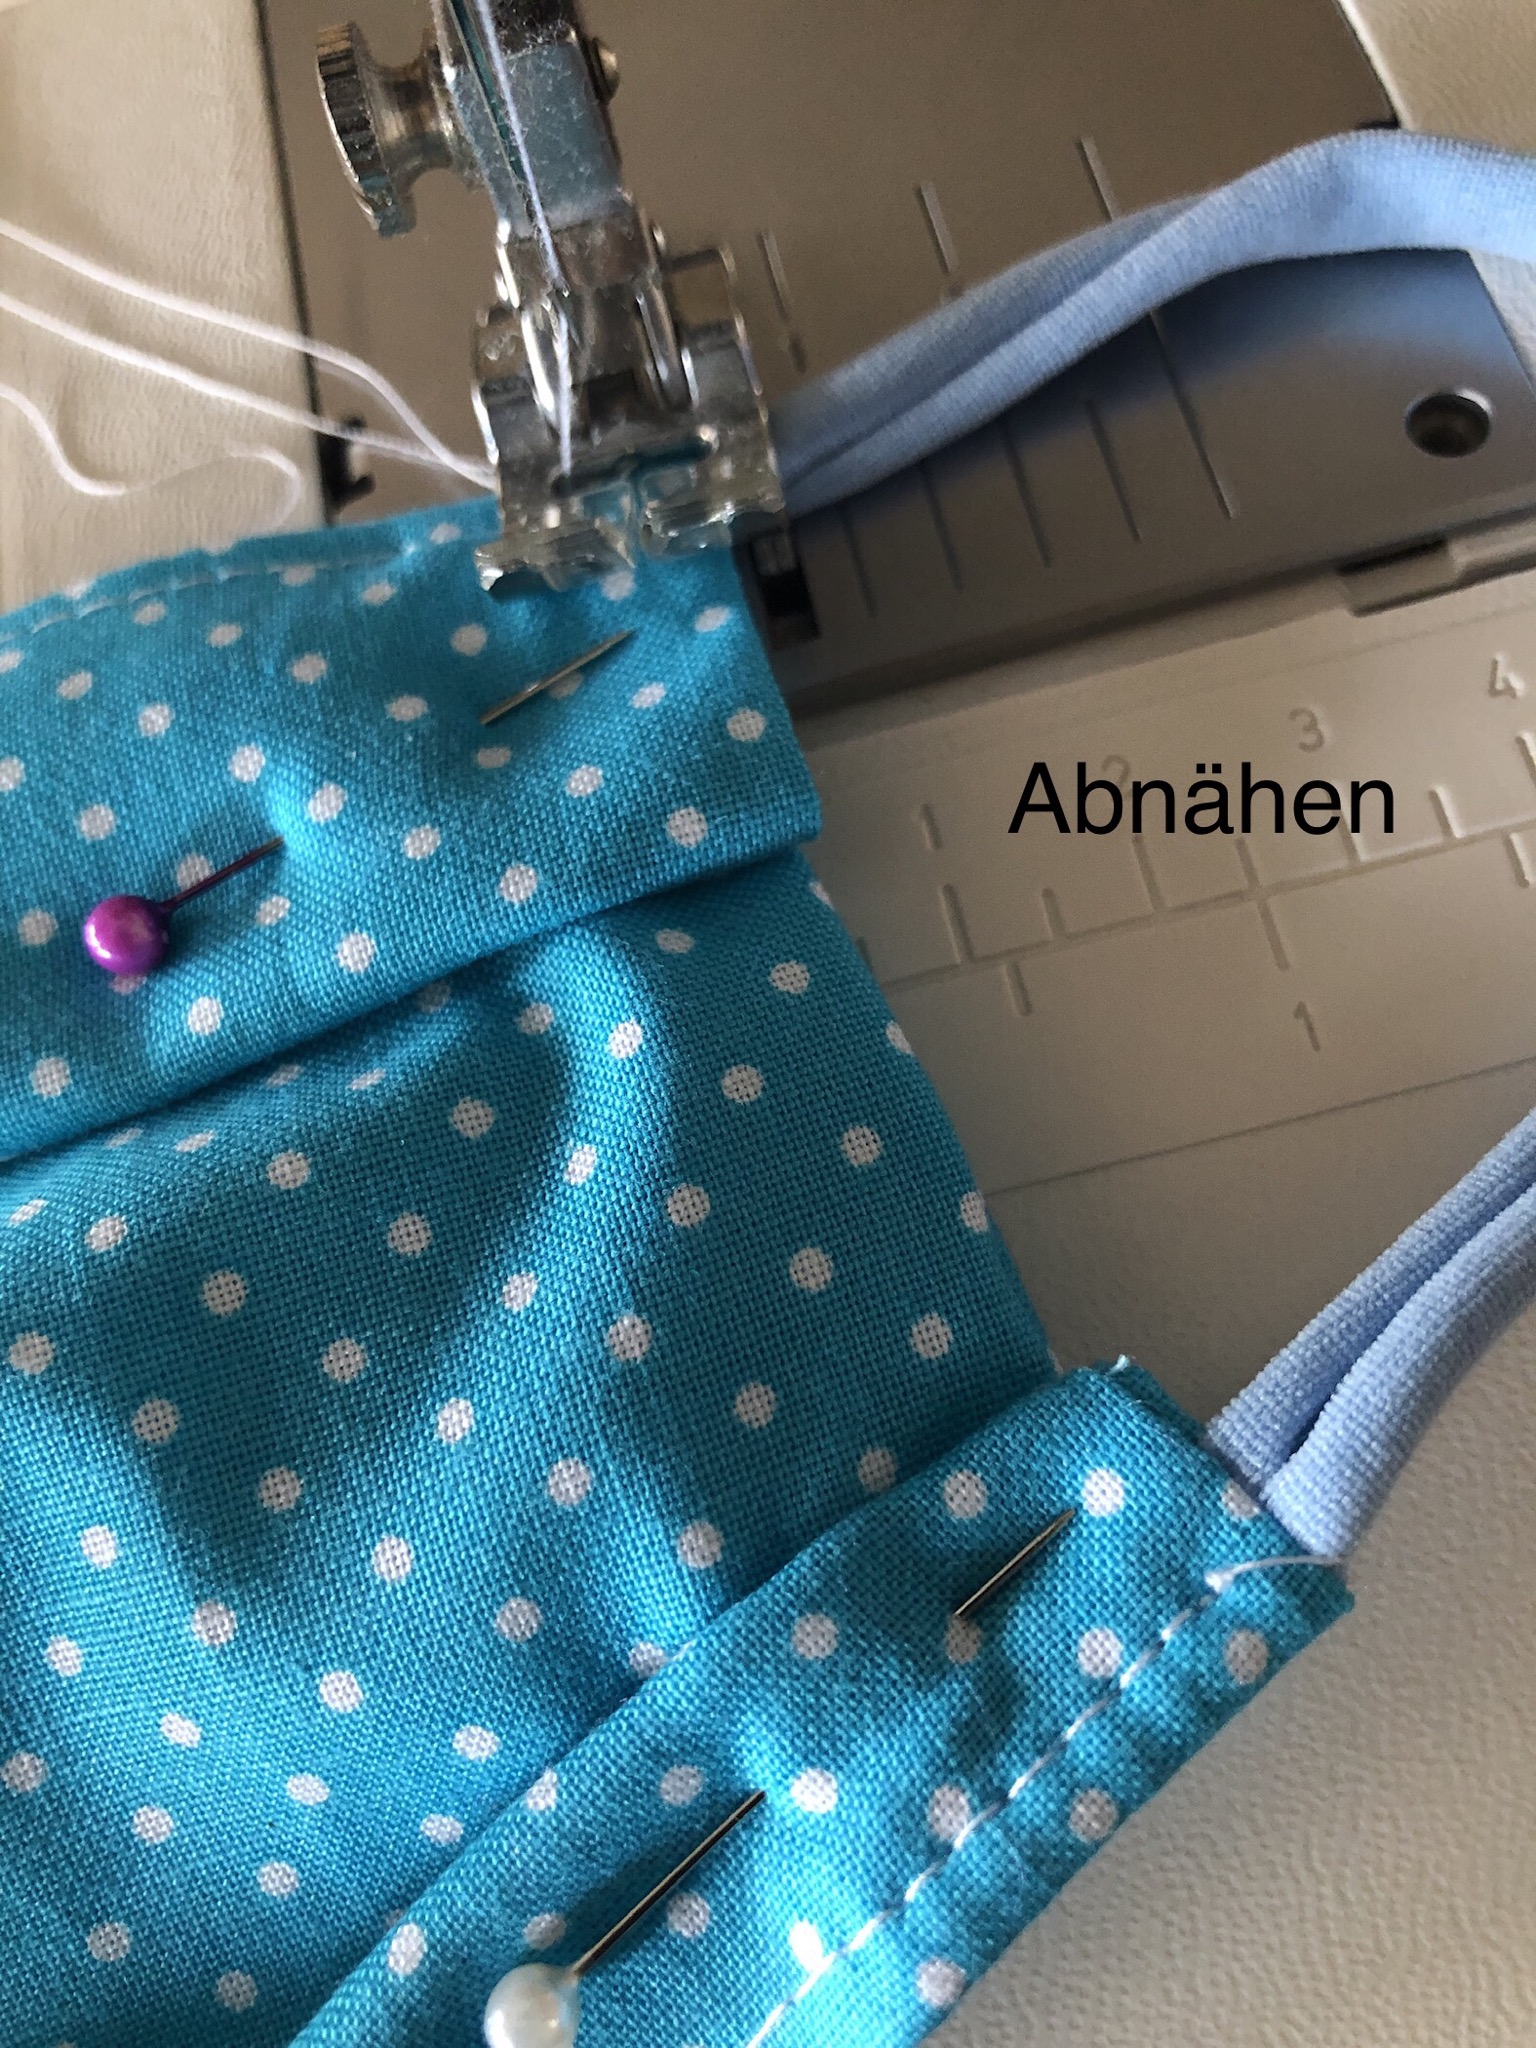
Overall, the lateral width of the mouthguard is brought to about 7 cm (can also be wider, but then on both sides)

Try the plugged-in before sewing and possibly re-adjust it again. The plugged-in can be slightly arched, then the mouthguard is better on. Only when it fits ready sew!
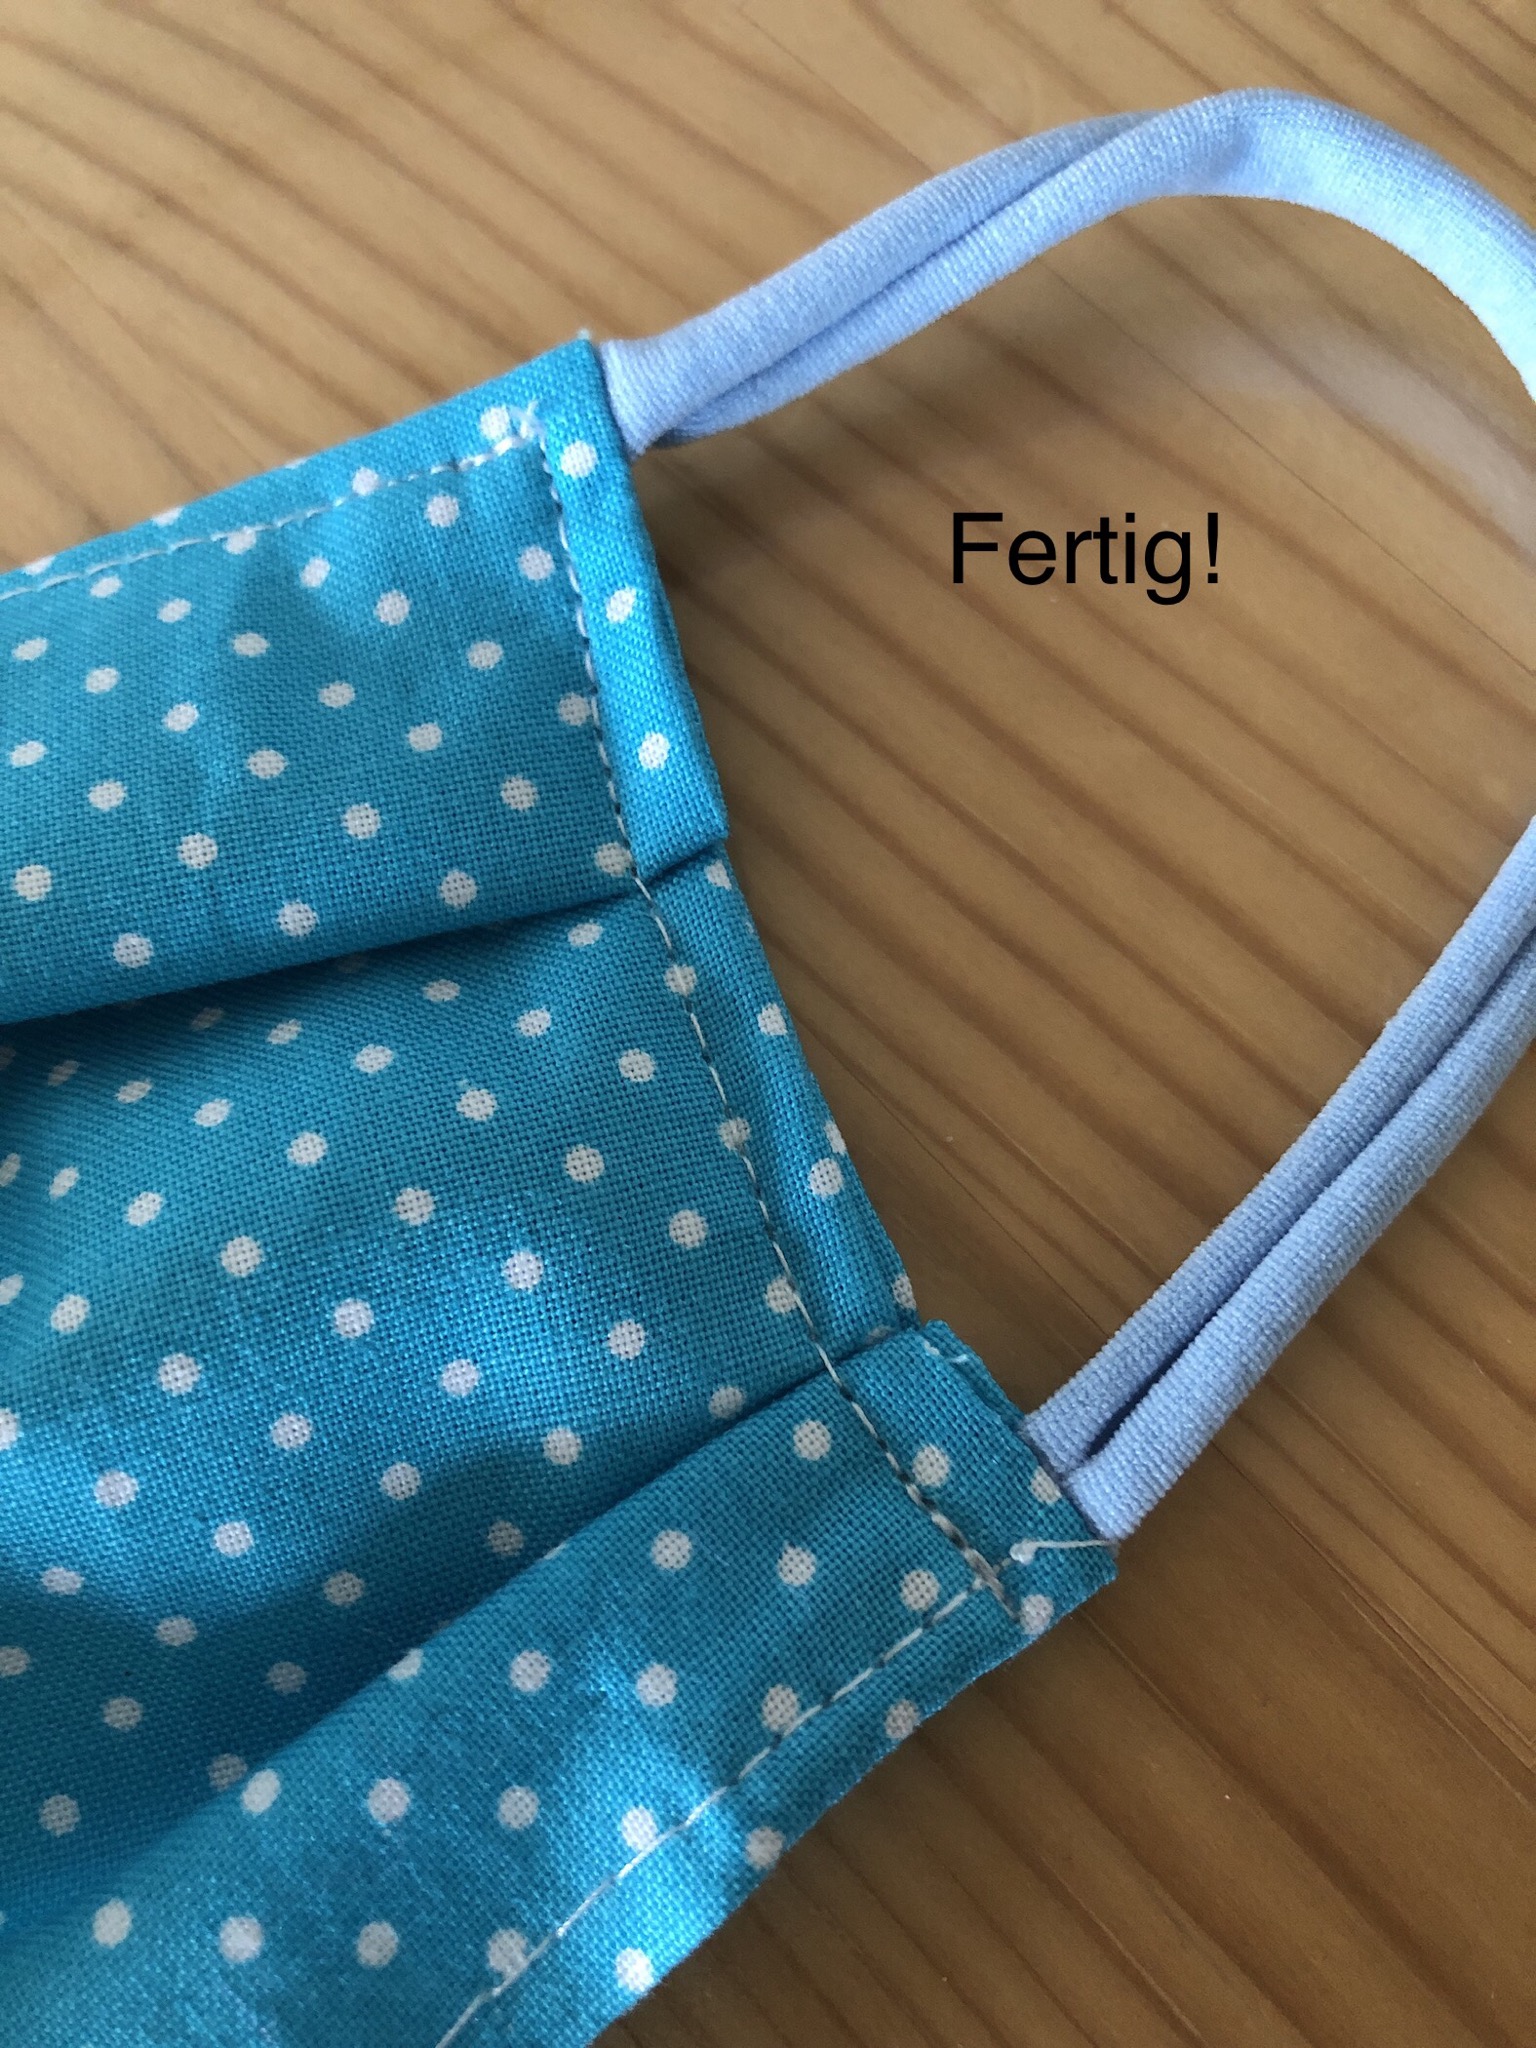
That's how it looks done! Repeat process on the other side.

So you can make many colorful mouthguards! Have fun imitating

Materials
Directions
Choose a soft wide hair rubber
Cut the hair rubber apart
Roll the rubber strips apart in width
Cut into three equally wide strips of length
Two of the cut rubber strips are needed for a mouthguard!
Cut cotton fabric. Children (children's garden age): 20 cm x 22 cm
Adults: 22 cm x 43 cm fabric
The long side is beaten up (beautiful side is inside!)
Fabric lies exactly on each other! From the outside, are marked 5 cm (mark!)
These are sewn from the outside with the sewing machine!
The sewn fold is now folded and ironed apart
Ironed fold is not entirely in the middle
At the lateral opening the rubber is now inserted and sewn on
One rubber band is sewn on one side, the other on the other side (is something on "train" otherwise it is too loose behind the ears)
That's what a finished page looks like!
Sew other side the same way!
Draw closer! In addition, halve the piece of fabric
Mark: 1cm x 3 cm
Cut fabric triangle
See picture
Pull fabric apart and put the edges across...
Sewing these together
Cut minimally on the crease with the scissors
Turn the piece of fabric
Top and bottom fractures are now sewn together (possibly iron again)
Up and down is now a clean seam
On the sides the mouthguard is still too wide, so we will make two folds to the left and right each and sew off. The upper double fold is about 2 cm wide
Fold and fasten fabric like in the picture
Down also but a little smaller
Overall, the lateral width of the mouthguard is brought to about 7 cm (can also be wider, but then on both sides)
Try the plugged-in before sewing and possibly re-adjust it again. The plugged-in can be slightly arched, then the mouthguard is better on. Only when it fits ready sew!
That's how it looks done! Repeat process on the other side.
So you can make many colorful mouthguards! Have fun imitating
Follow us on Facebook , Instagram and Pinterest
Don't miss any more adventures: Our bottle mail


Dear Katzi, dear adventure market team, thank you for this detailed guide. As an inexperienced seamstress I managed to sew the mouthguard for the children and for the rest of the family thanks to this guide. Also our smallest wanted a mouthguard and so I attach the picture of the mini version to you. Many dear greetings Ines, the mama of BaSo.
Dear Ines, you have succeeded very well in mini-mouth protection. The little one was certainly thrilled. Looks really professional and it is not possible to recognize that you are an untrained seamstress. Maybe a natural talent after all? But this guide is also great. Our thanks go to the discoverer Katzi! So detailed and beautifully illustrated, maybe it can only succeed.
Dear explorers and adventurers, so awesome this guide. I also have all sewn according to this guide. A big thank you!
Dear Jen, thank you very much for your feedback! It is very helpful for us to know what works for you or where you need additions. Warm, Elke from the adventure market.