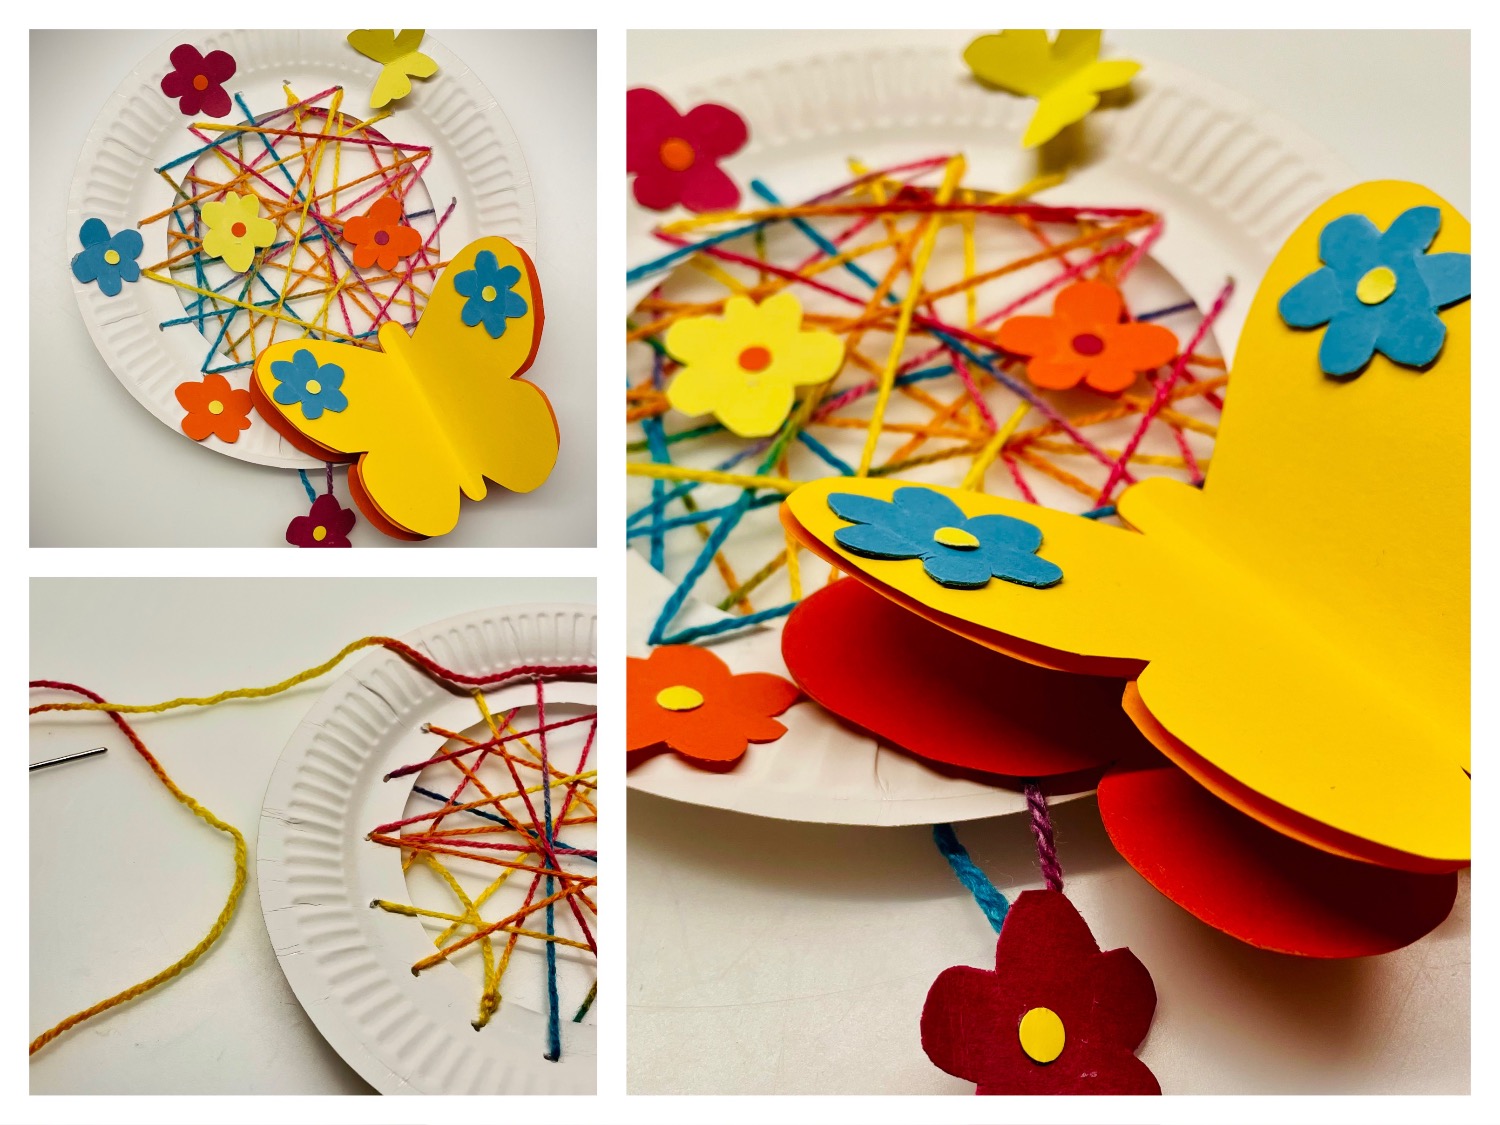
Flower Dream Catcher (3 variants)

AdventurerKatzi
Rating5.05.9 Thousand times & (2) DifficultyAdvanced

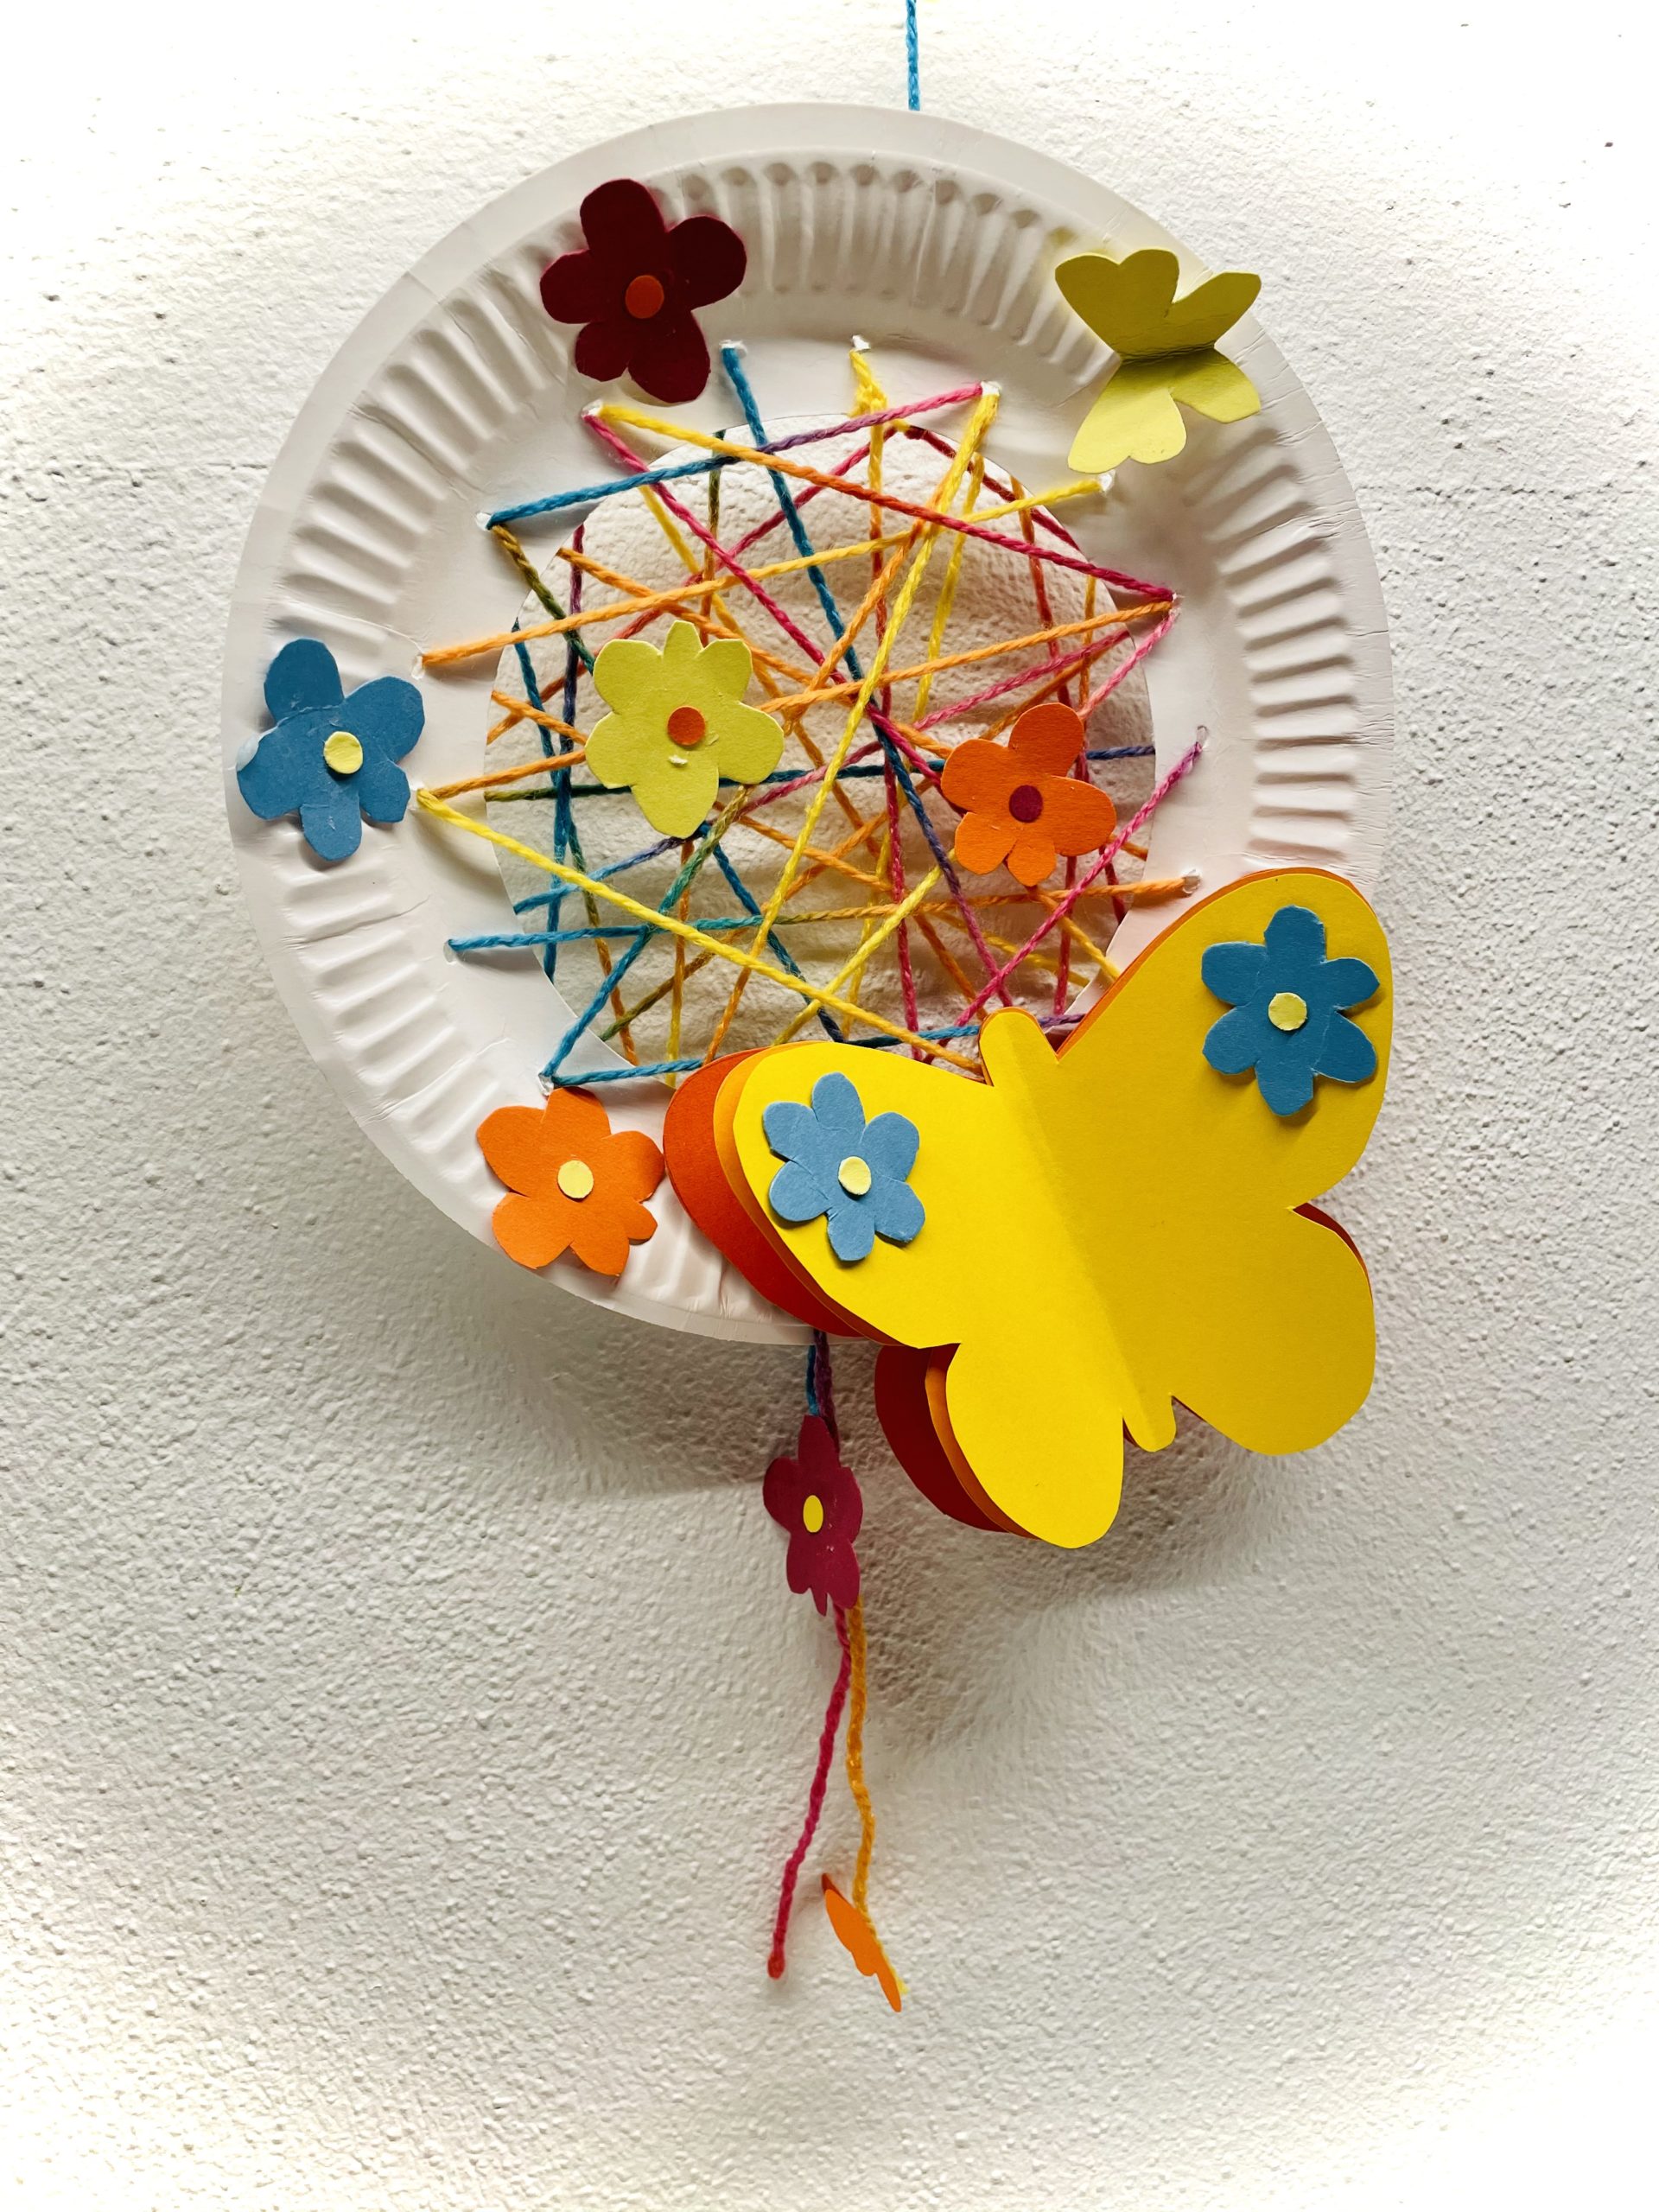
This is a spring or summer dream catcher that shines with the colorful, fresh colors. With small flowers and butterflies, the dream catcher becomes a real eye-catcher.
Have fun trying out.

Media Education for Kindergarten and Hort

Kind bastelt eine Rassel mit dem Navi
The Adventure Navi, the app for DIY projects, enables media education for the youngest.

Relief in everyday life, targeted promotion of individual children, independent learning and - without any pre-knowledge already usable by the youngest!


Titelbild zur Bastel- und DIY-Idee für Kinder '(625) Blumen-Traumfänger (3 Varianten)'
Material for1 Child
Prep Time10 min.Adv. Time40 min.Total Time50 min.
 1 Cardboard plates
 Wool colorful with colour gradient
 Coloured clay paper
 1 Pointy thick needleor punching pliers, punching pliers
 1 thick blunt needle
 1 Customs stockor ruler, measuring tape
 1 Pencil
 Builder's pad
All links marked with a shopping cart lead to Amazon - here we have selected products that we would order ourselves and in part also ordered. In a qualified purchase via the advertising link, we as Amazon partner receive a commission, for you there are no costs. You thus support our cost- and advertising banner-free, educational offer.
1

Put your craft material under and prepare your material.
First you need a small cardboard plate. This can be colored.
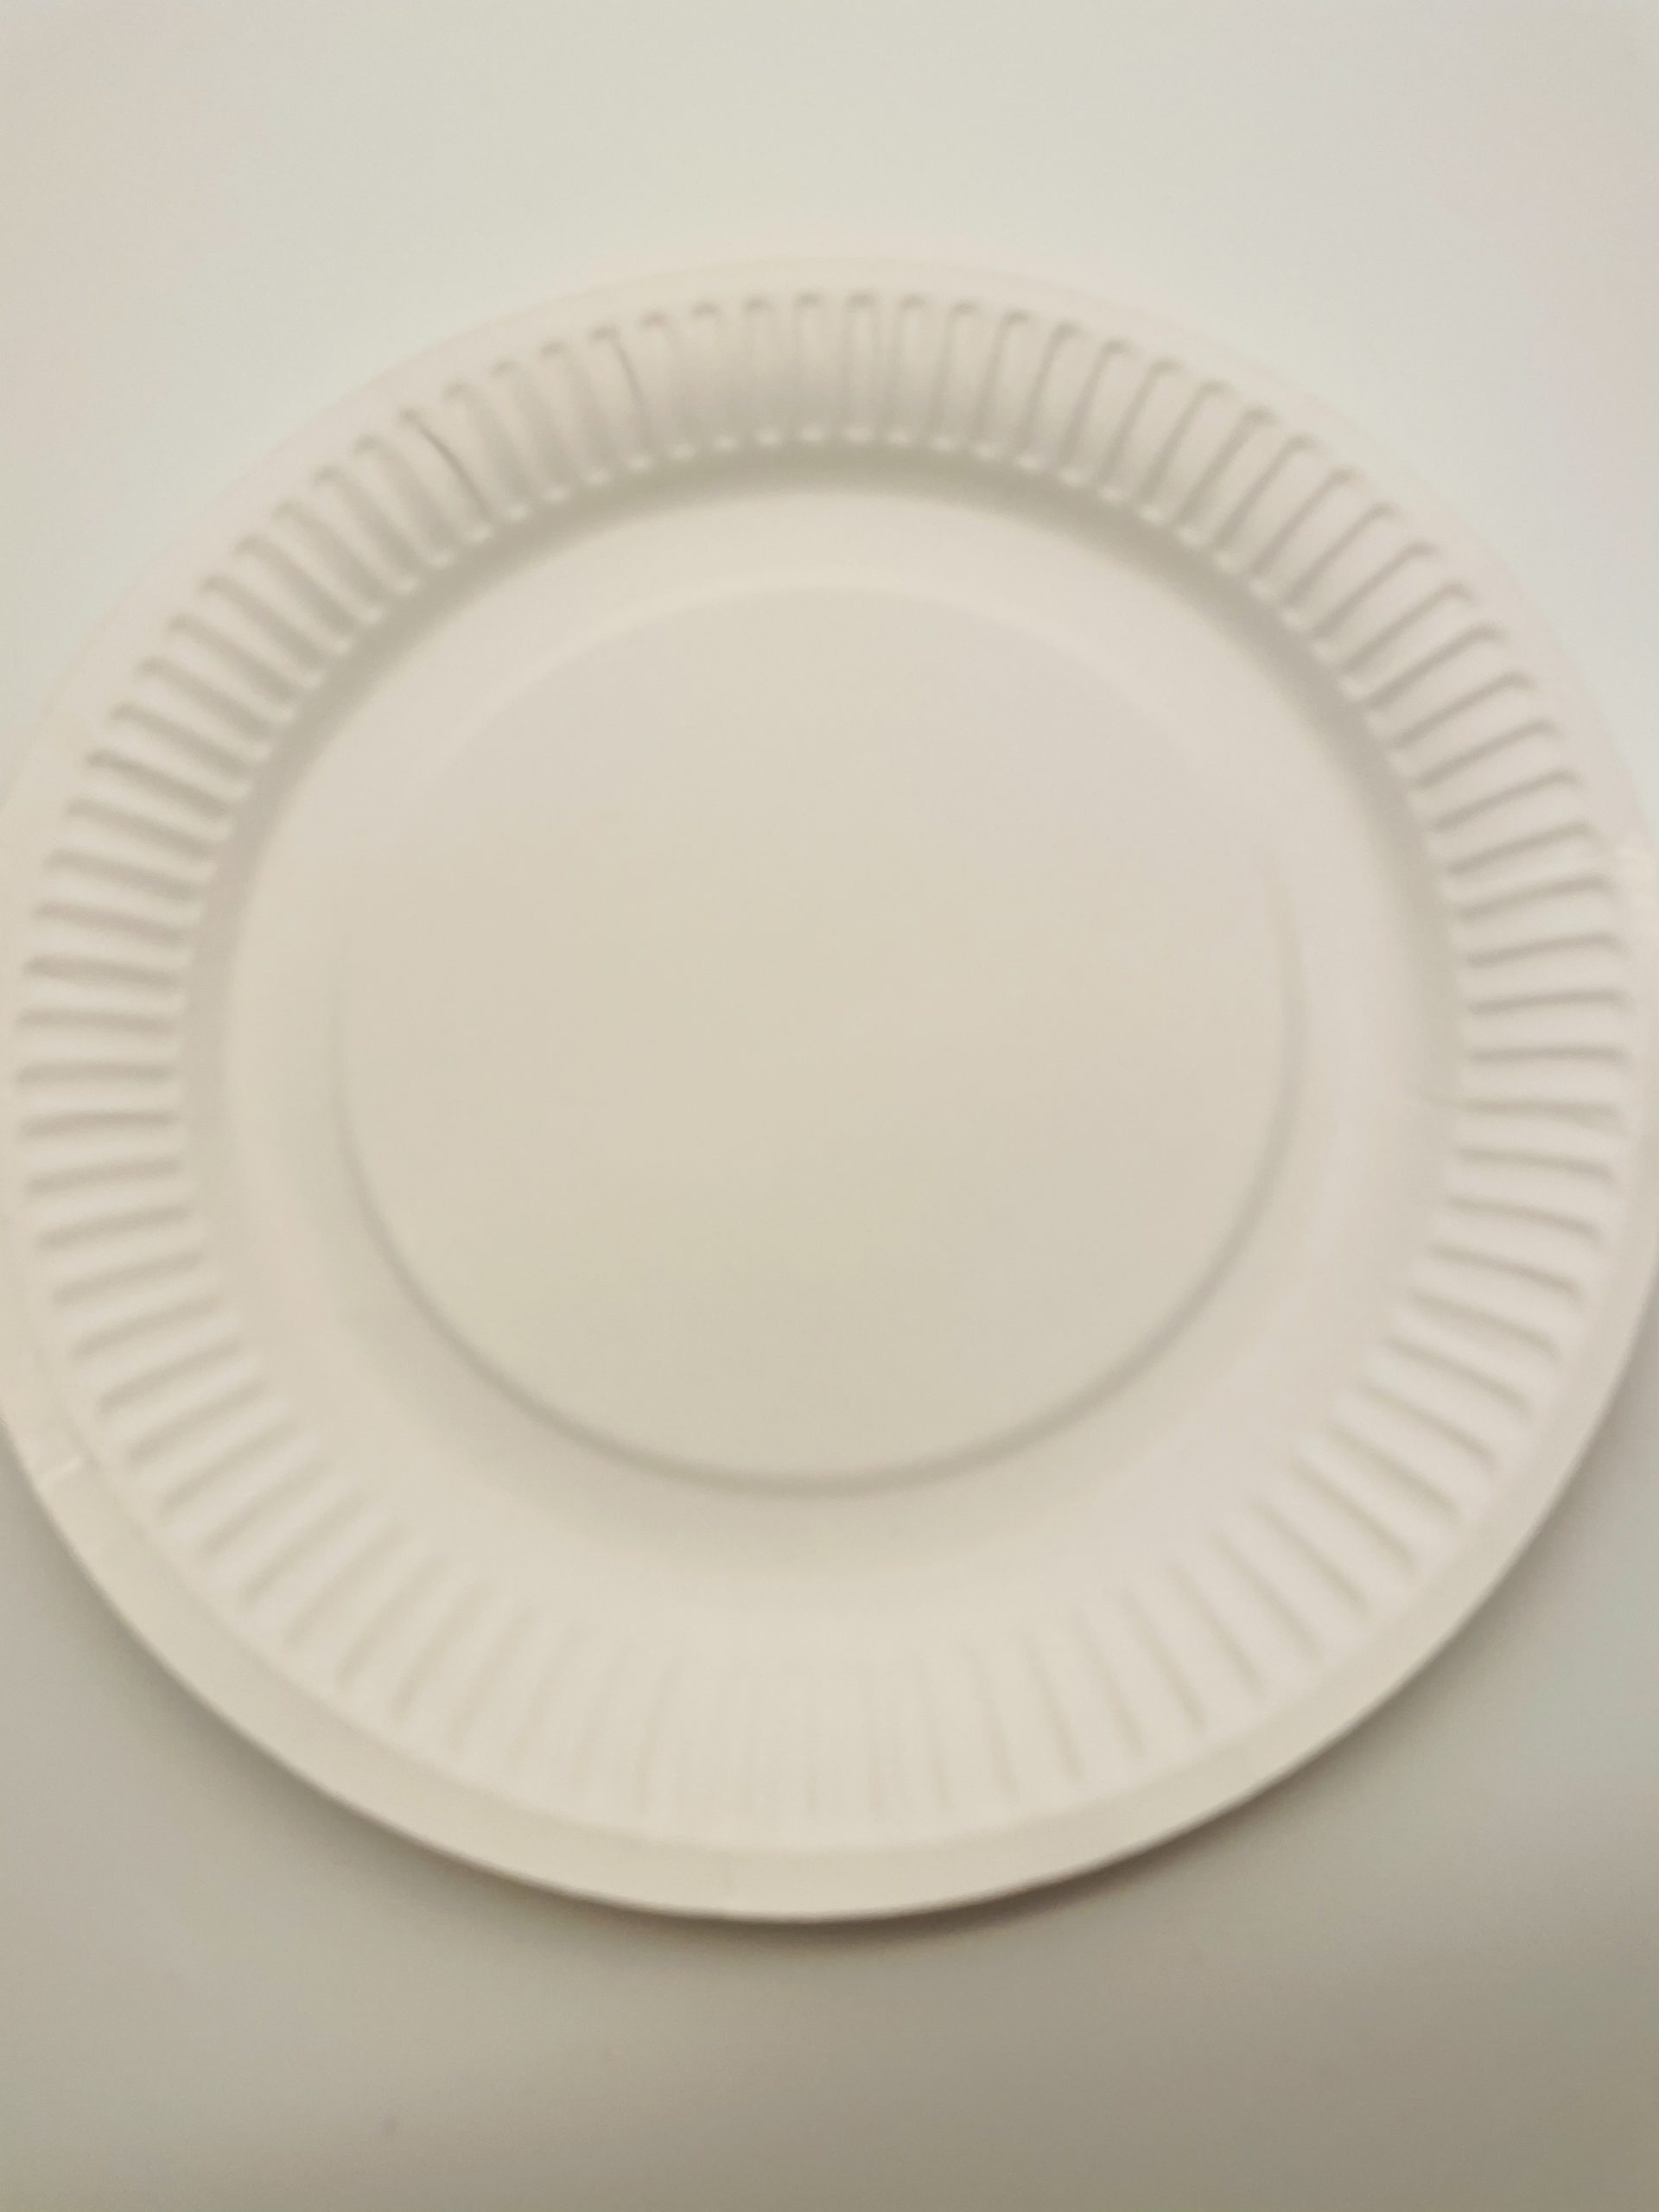
Bild zum Schritt 1 für das Bastel- und DIY-Abenteuer für Kinder: 'Legt eure Bastelunterlage unter und legt euer Material bereit. ...'

2

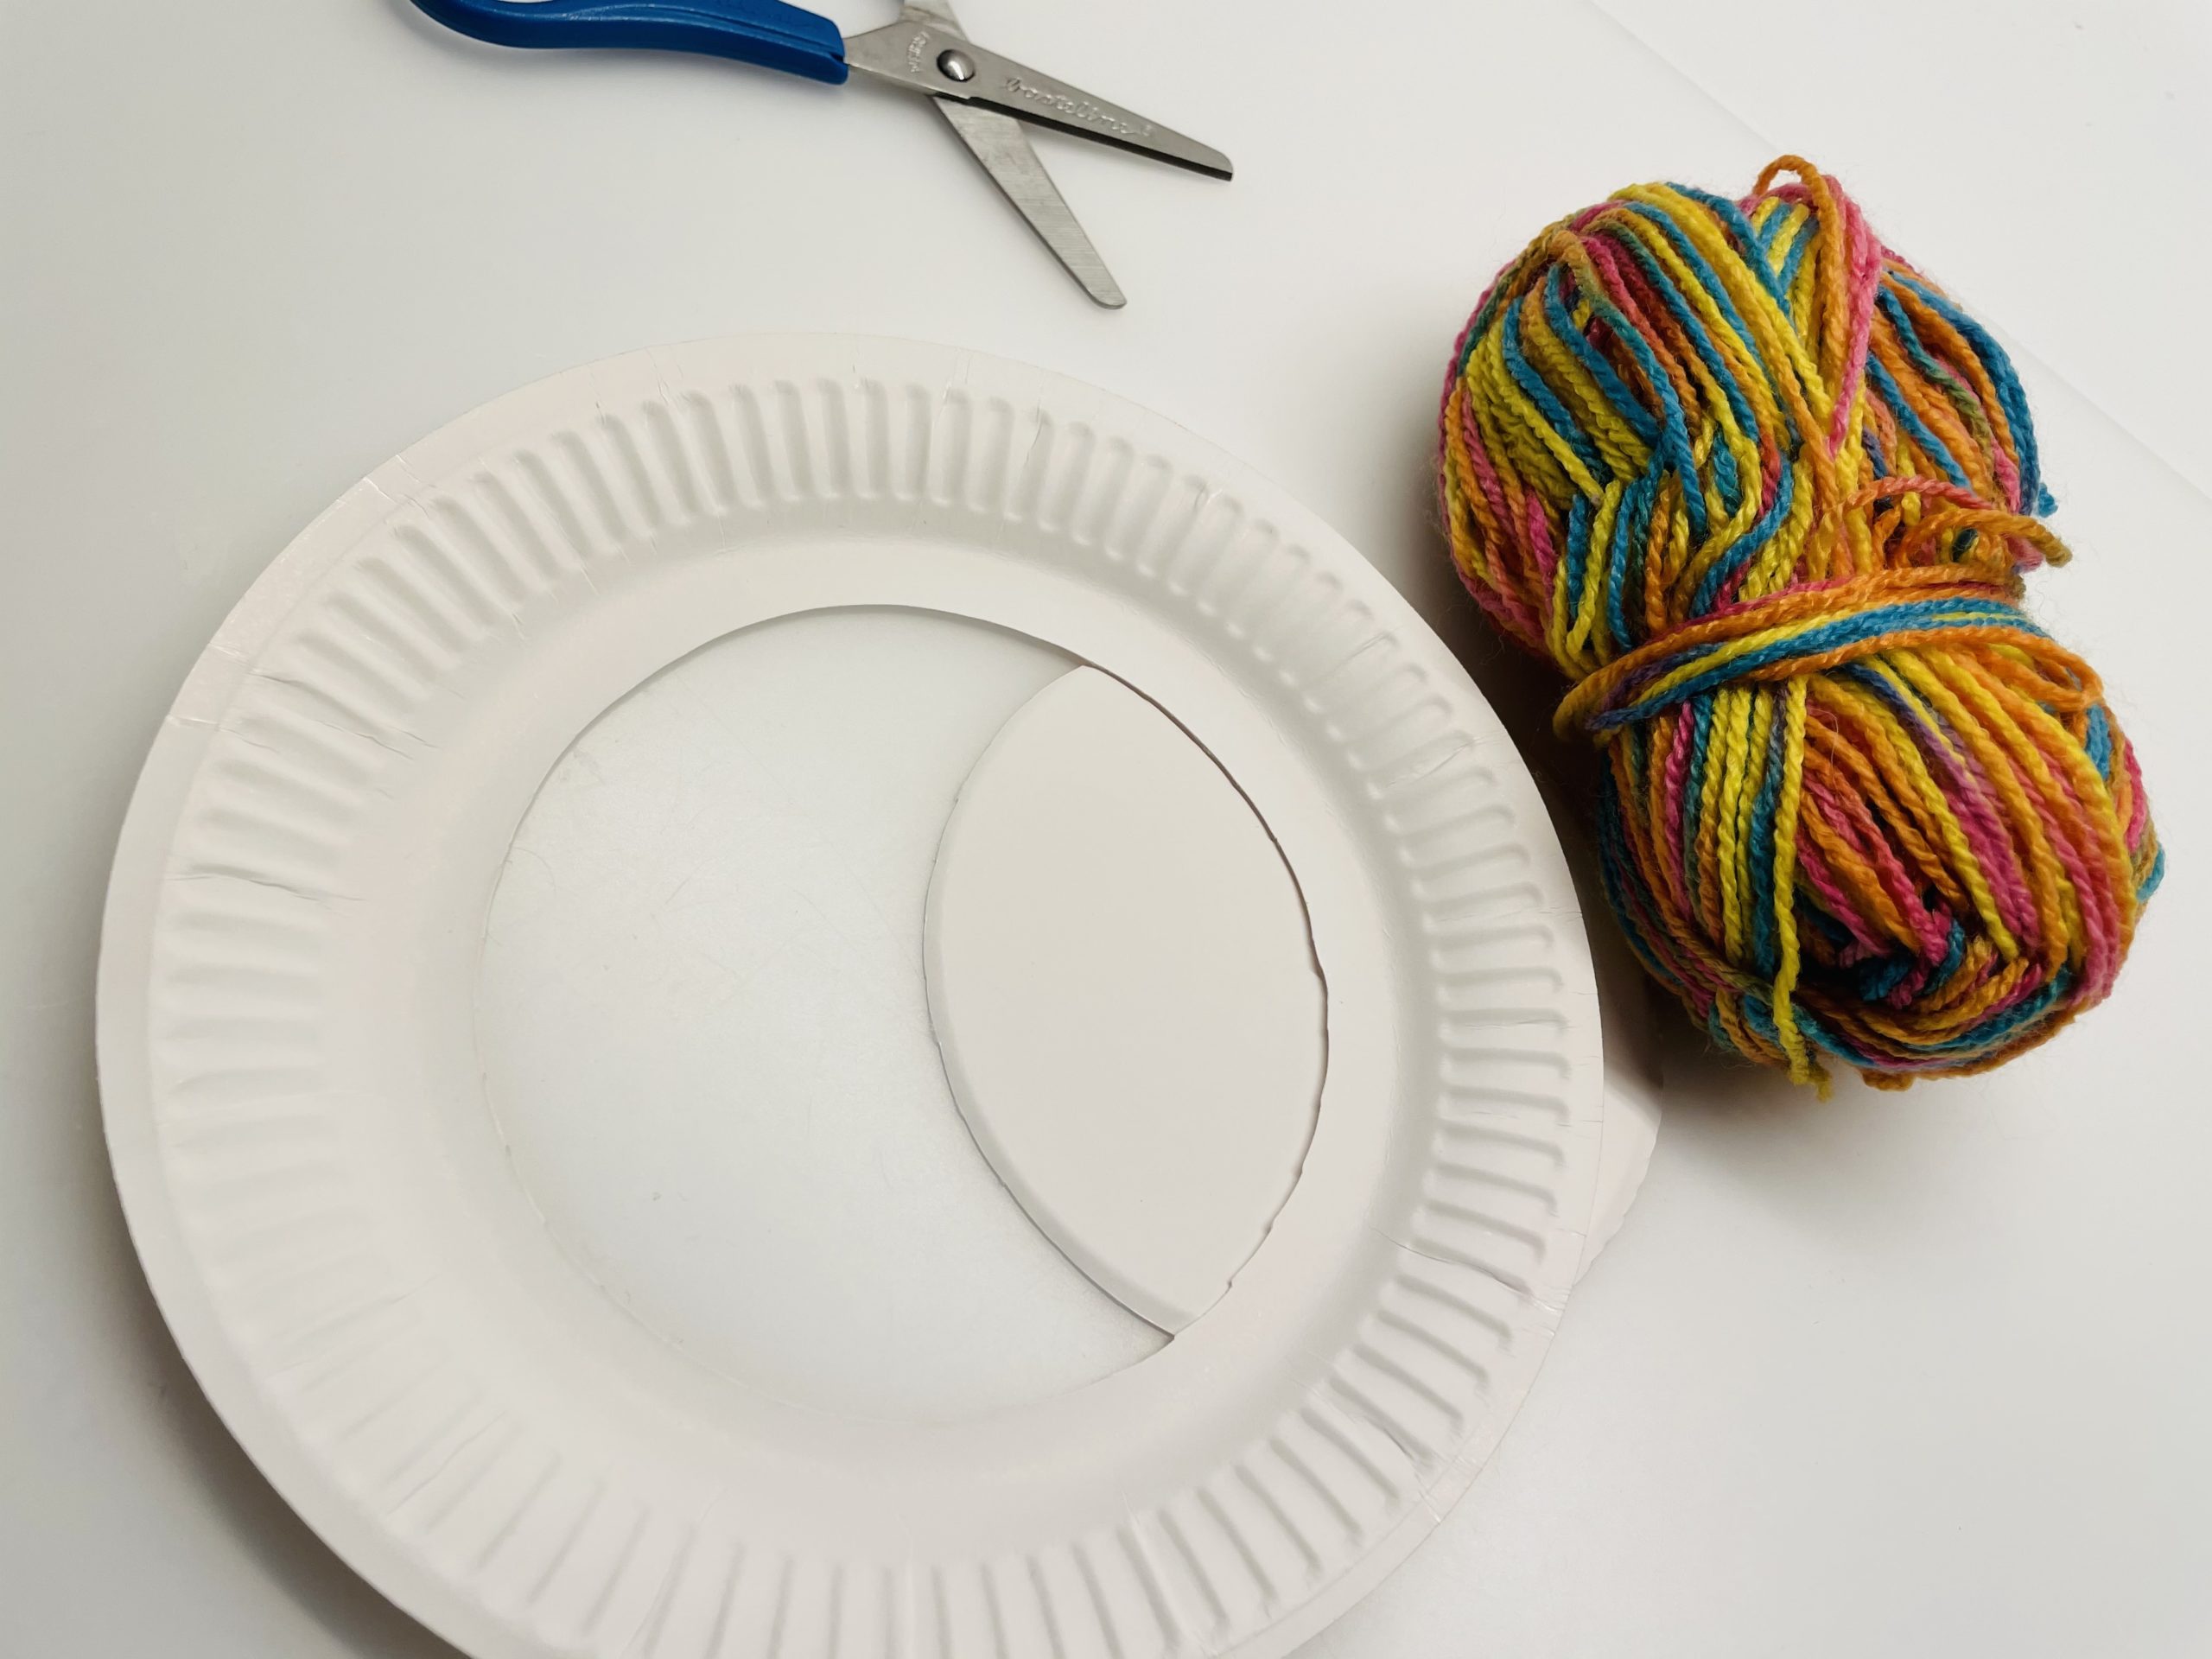
Now cut out a circle from the middle with the scissors.
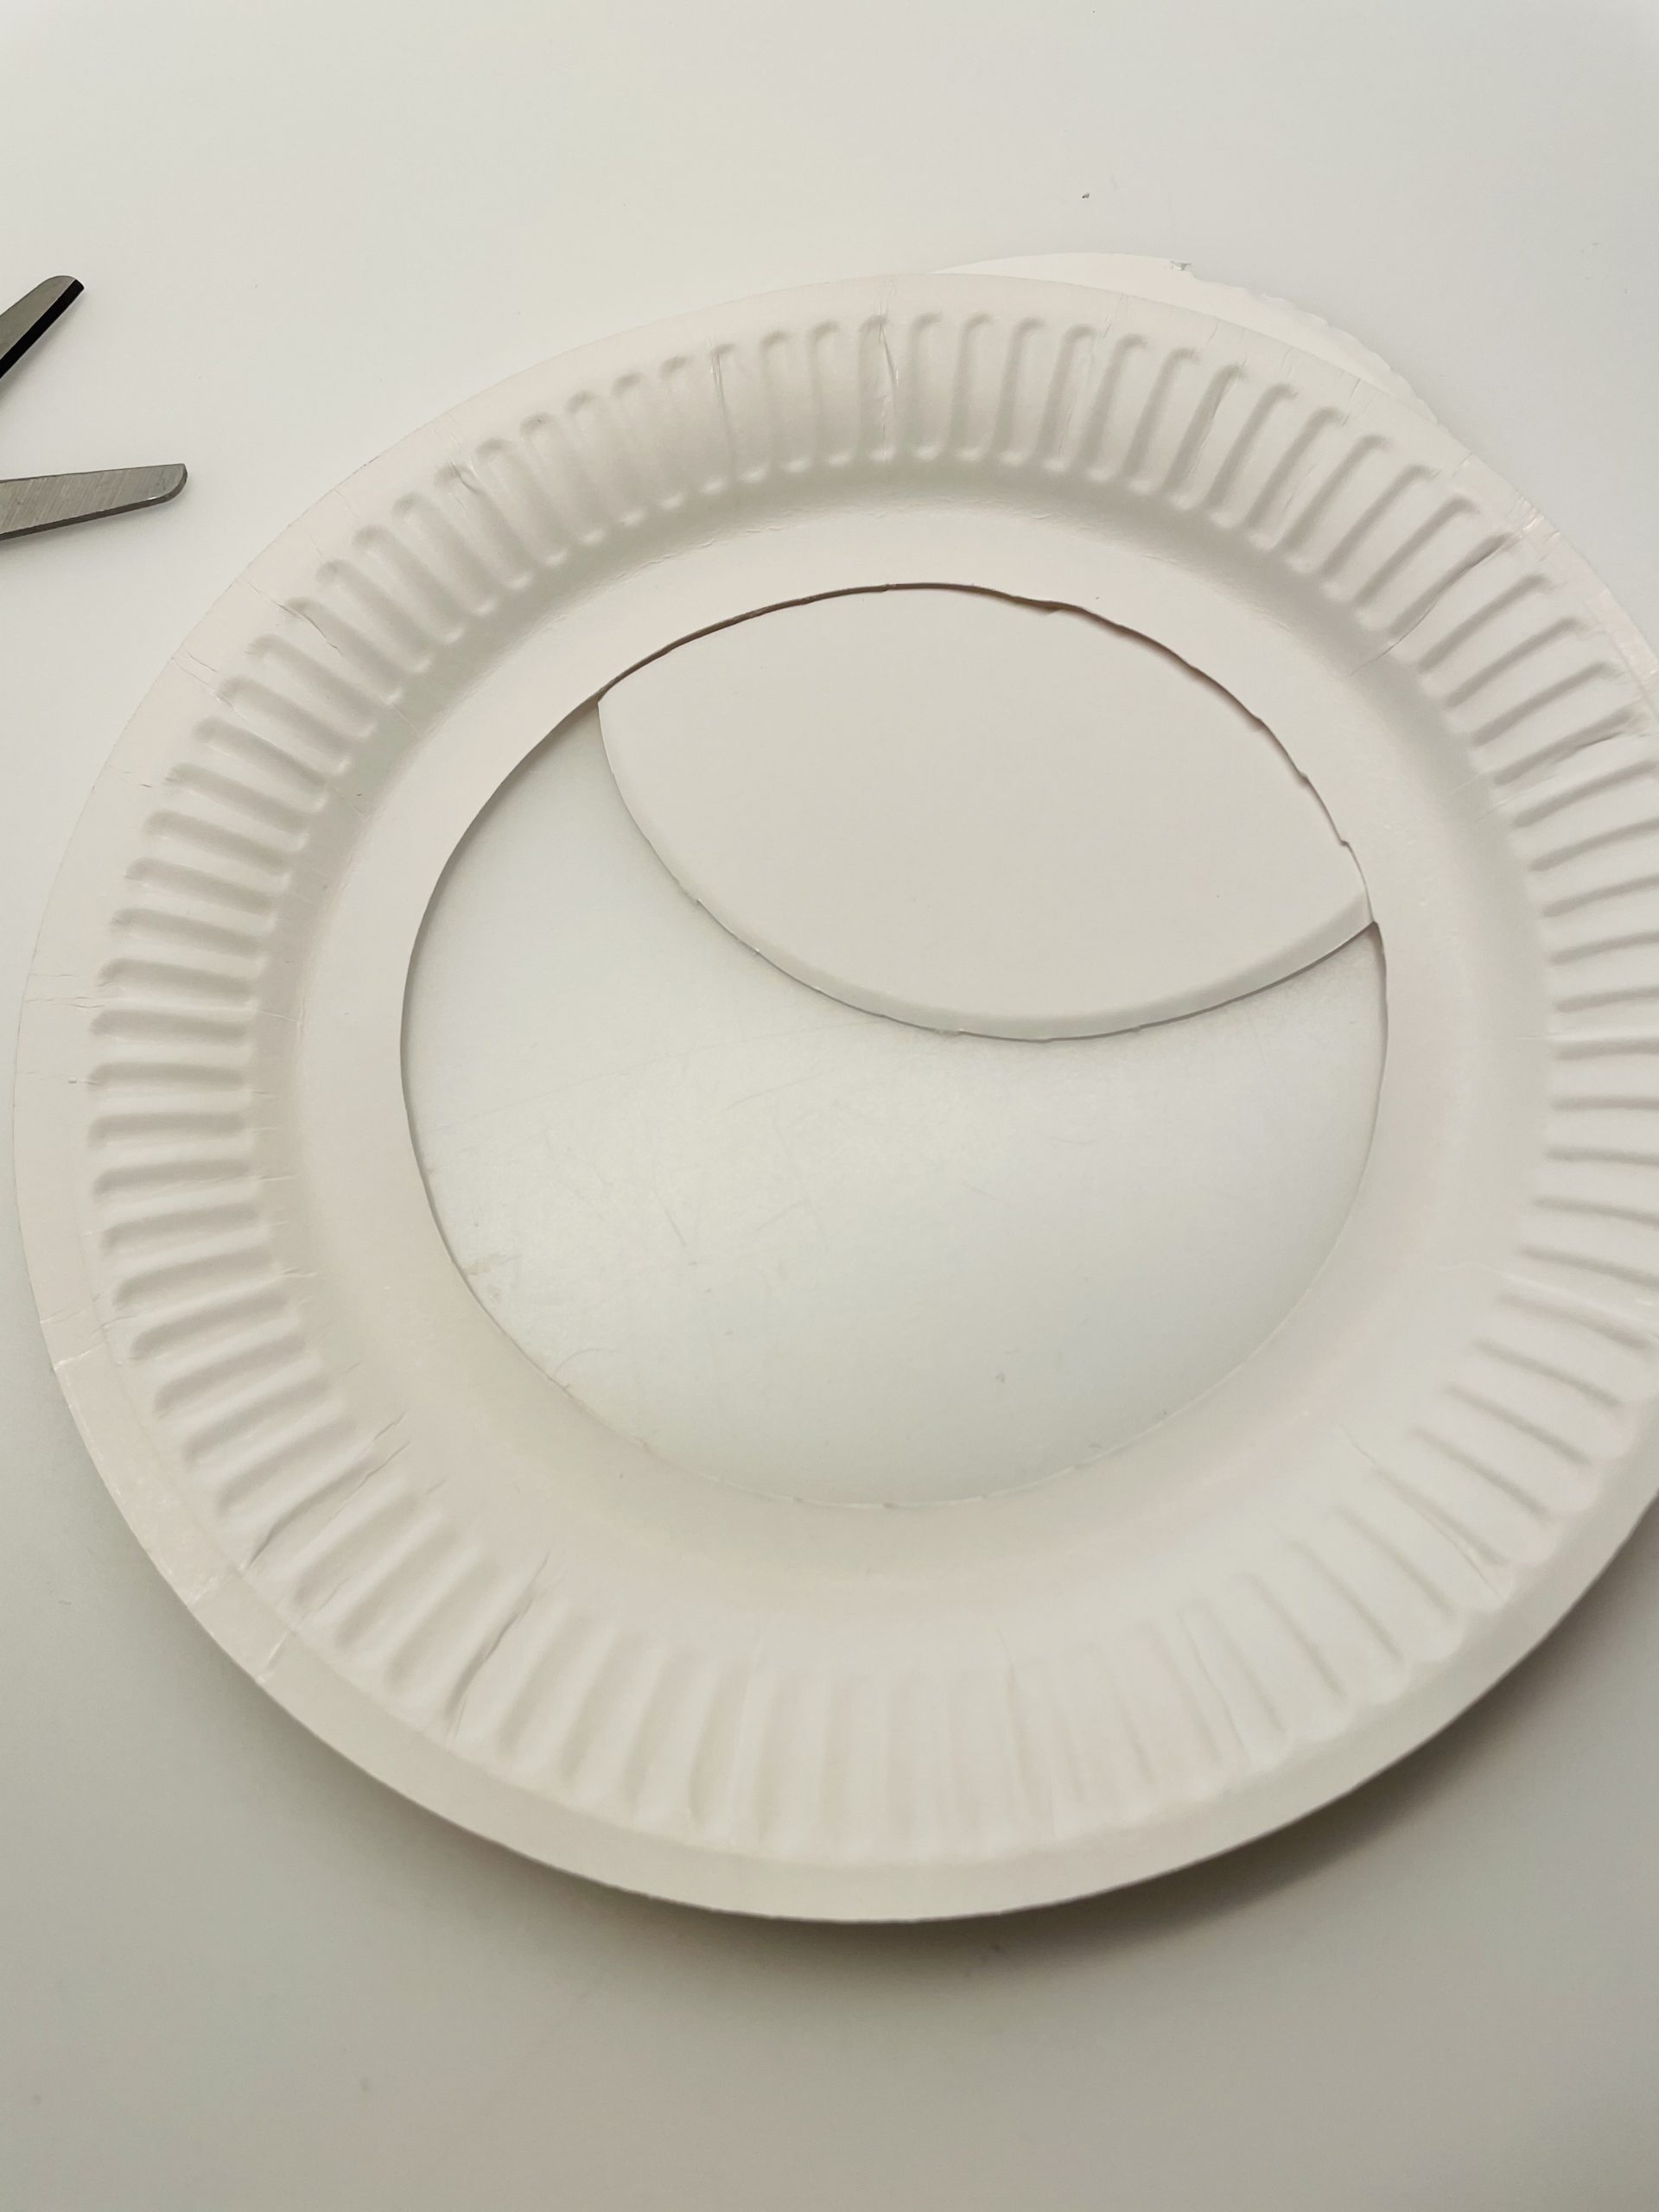
Bild zum Schritt 2 für das Bastel- und DIY-Abenteuer für Kinder: 'Schneidet nun aus der Mitte einen Kreis mit der Schere...'

3

Now hole the inner edge of your cardboard plate. For this purpose, punch around at even intervals either with a punch or a punch plier. If your plate is too small, then punch the holes with a needle.
Attention: Let us help you with this - risk of injury!

Bild zum Schritt 3 für das Bastel- und DIY-Abenteuer für Kinder: 'Locht nun den inneren Rand eures Papptellers. Locht dafür in...'

4

Now you need the wool.

Bild zum Schritt 4 für das Bastel- und DIY-Abenteuer für Kinder: 'Jetzt braucht ihr die Wolle.'

5

Cuts the thread to a length of 2 meters. Uses a measuring tape or an inch stick to measure it.
Then you thread the thread into a blunt thick needle.

Bild zum Schritt 5 für das Bastel- und DIY-Abenteuer für Kinder: 'Schneidet nun den Faden auf eine Länge von 2 Meter...'

6

Now you put the needle through any hole and pull the thread through to 10cm.

Bild zum Schritt 6 für das Bastel- und DIY-Abenteuer für Kinder: 'Jetzt steckt ihr die Nadel durch ein beliebiges Loch und...'

7

Knot the wool on the inside of the cardboard plate.

Bild zum Schritt 7 für das Bastel- und DIY-Abenteuer für Kinder: 'Verknotet die Wolle an der Innenseite des Papptellers.'

8

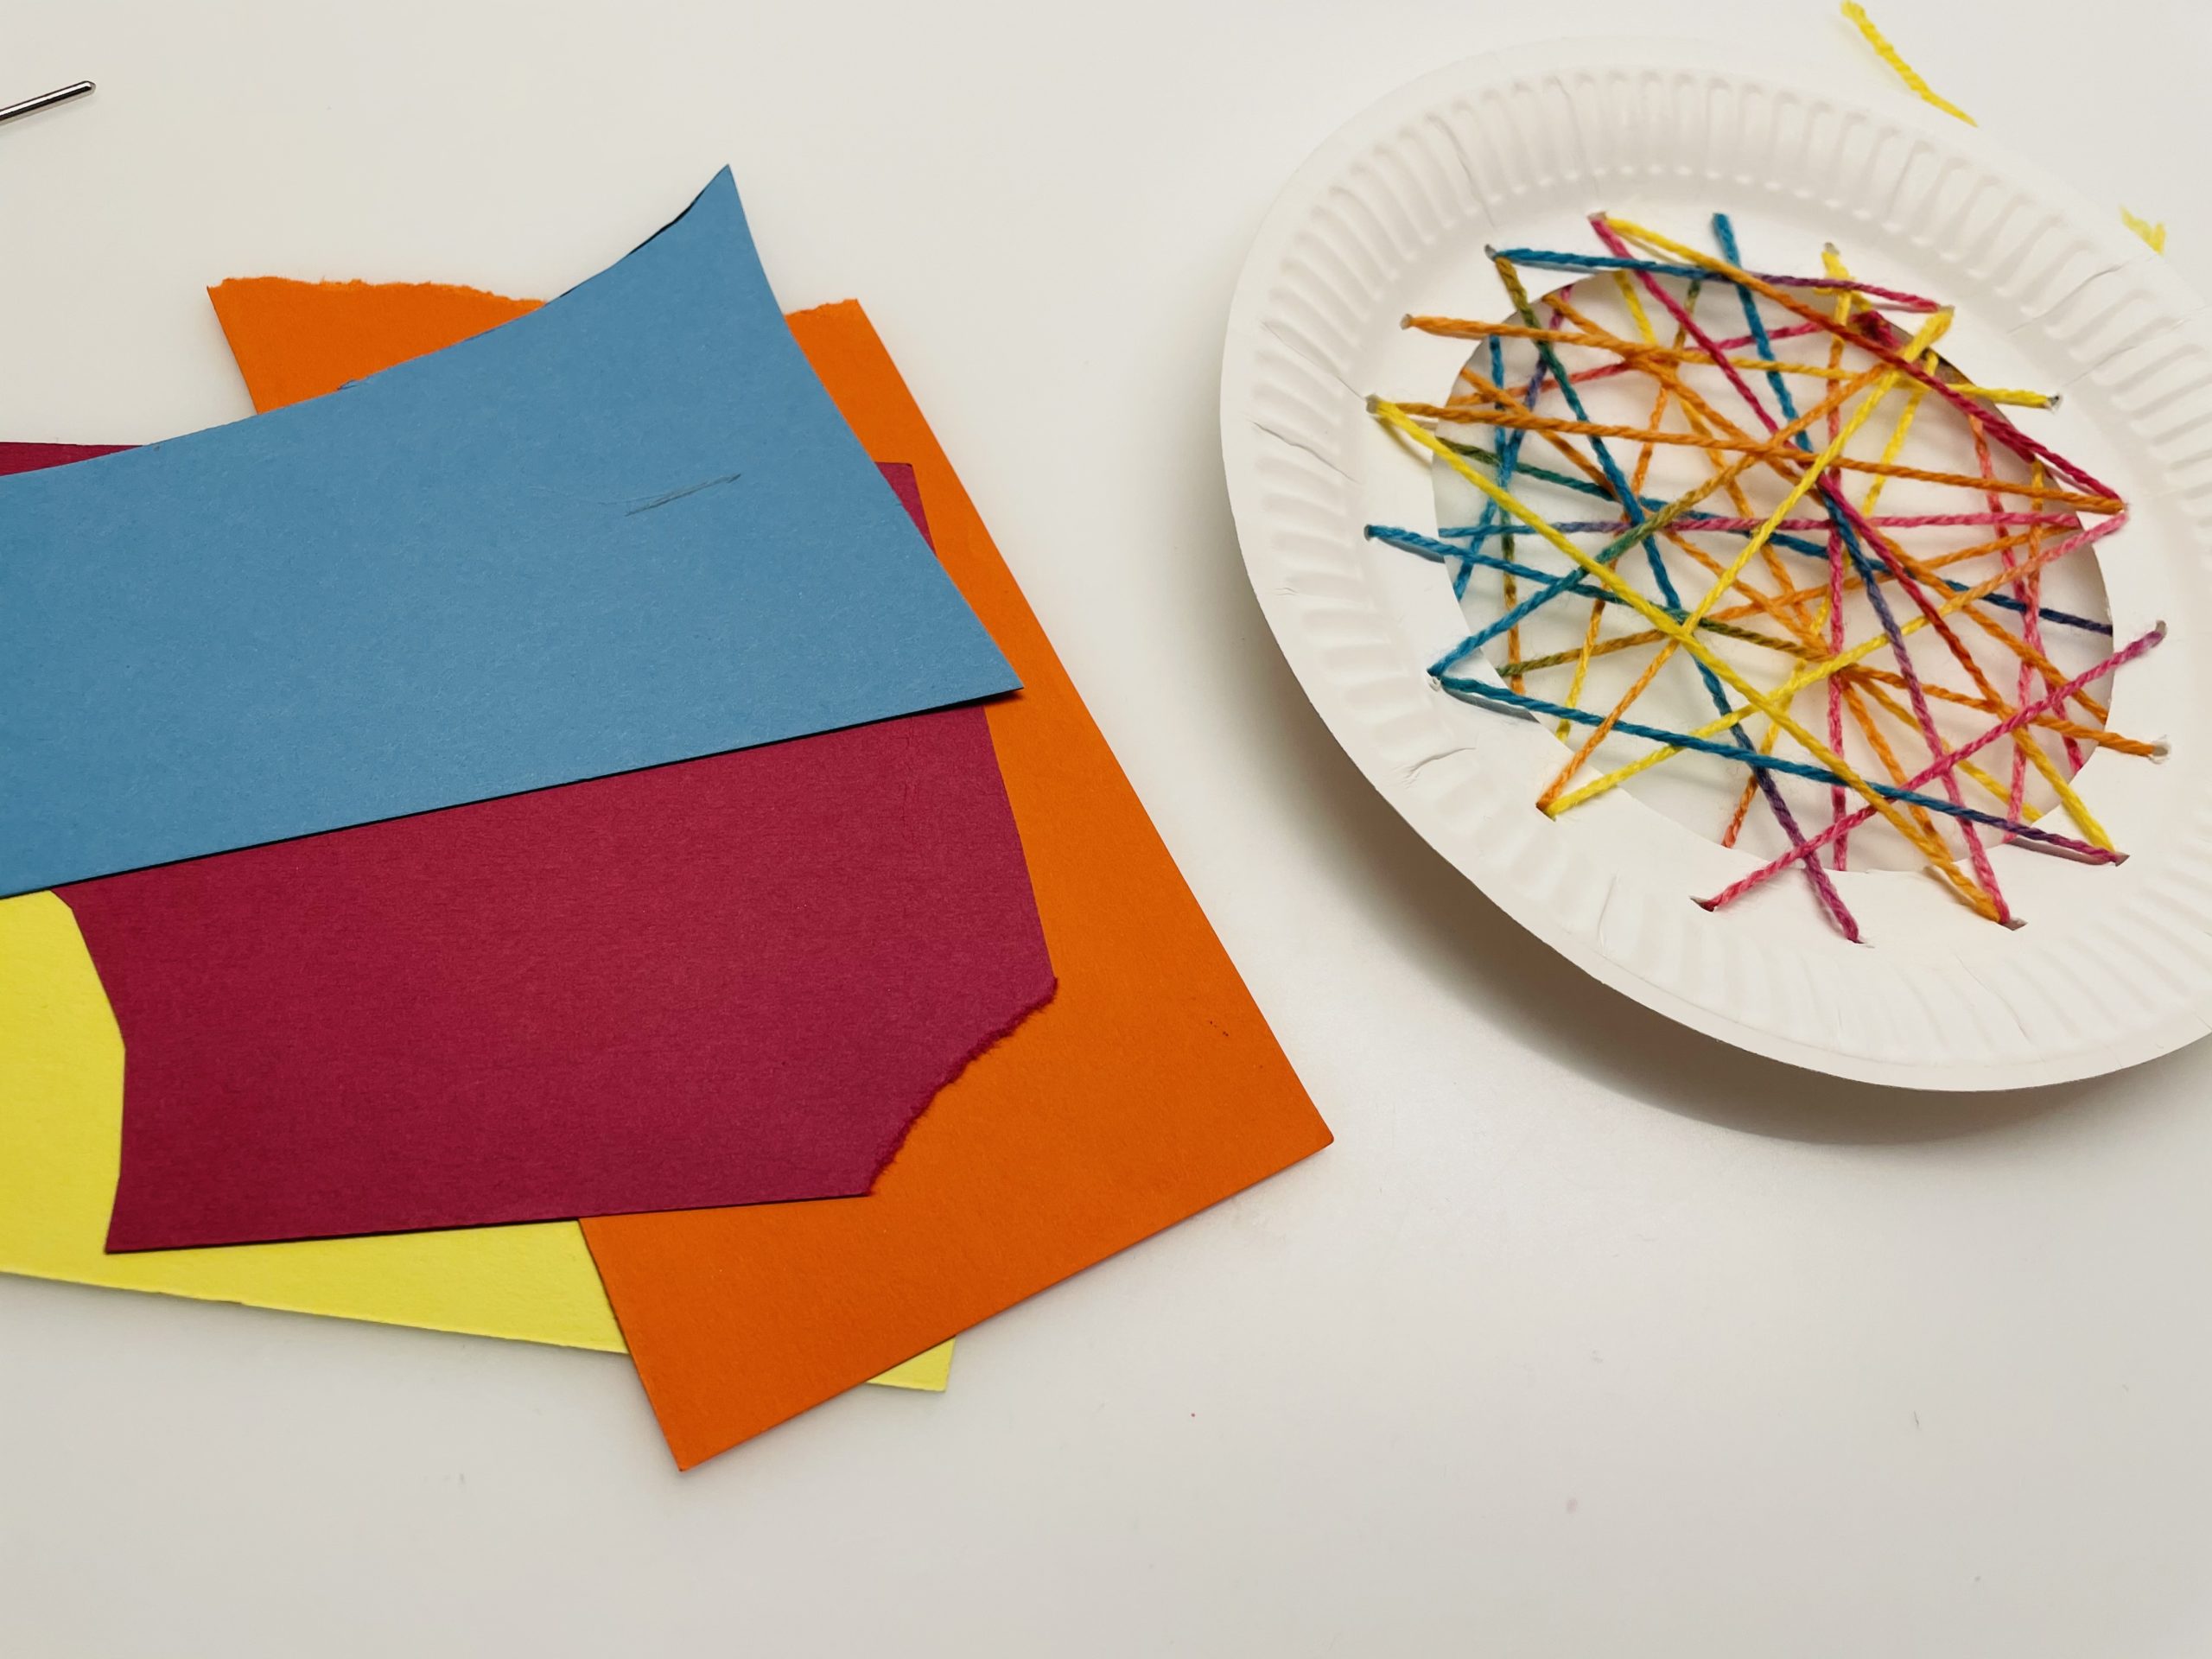
Now pierce into an opposite hole and tighten the thread. Now cross the threads at will through the individual holes until a net emerges from it.

Bild zum Schritt 8 für das Bastel- und DIY-Abenteuer für Kinder: 'Stecht nun in ein gegenüberliegendes Loch und zieht den Faden...'

9

Try to pull a thread in each hole at least once.

Bild zum Schritt 9 für das Bastel- und DIY-Abenteuer für Kinder: 'Versucht dabei in jedes Loch mindestens einmal einen Faden durchzuziehen.'

10

Finish your braid at the beginning of the thread and tie the beginning of the thread and the end of the thread together.

Bild zum Schritt 10 für das Bastel- und DIY-Abenteuer für Kinder: 'Beendet euer Geflecht am Fadenanfang und bindet Fadenanfang und das...'

11

Now tie a loop from the remaining thread to hang the dream catcher.

Bild zum Schritt 11 für das Bastel- und DIY-Abenteuer für Kinder: 'Bindet jetzt aus dem überbleibenden Faden eine Schlaufe zum Aufhängen...'

12

Now you need colored paper.

Bild zum Schritt 12 für das Bastel- und DIY-Abenteuer für Kinder: 'Nun braucht ihr farbiges Papier.'

13

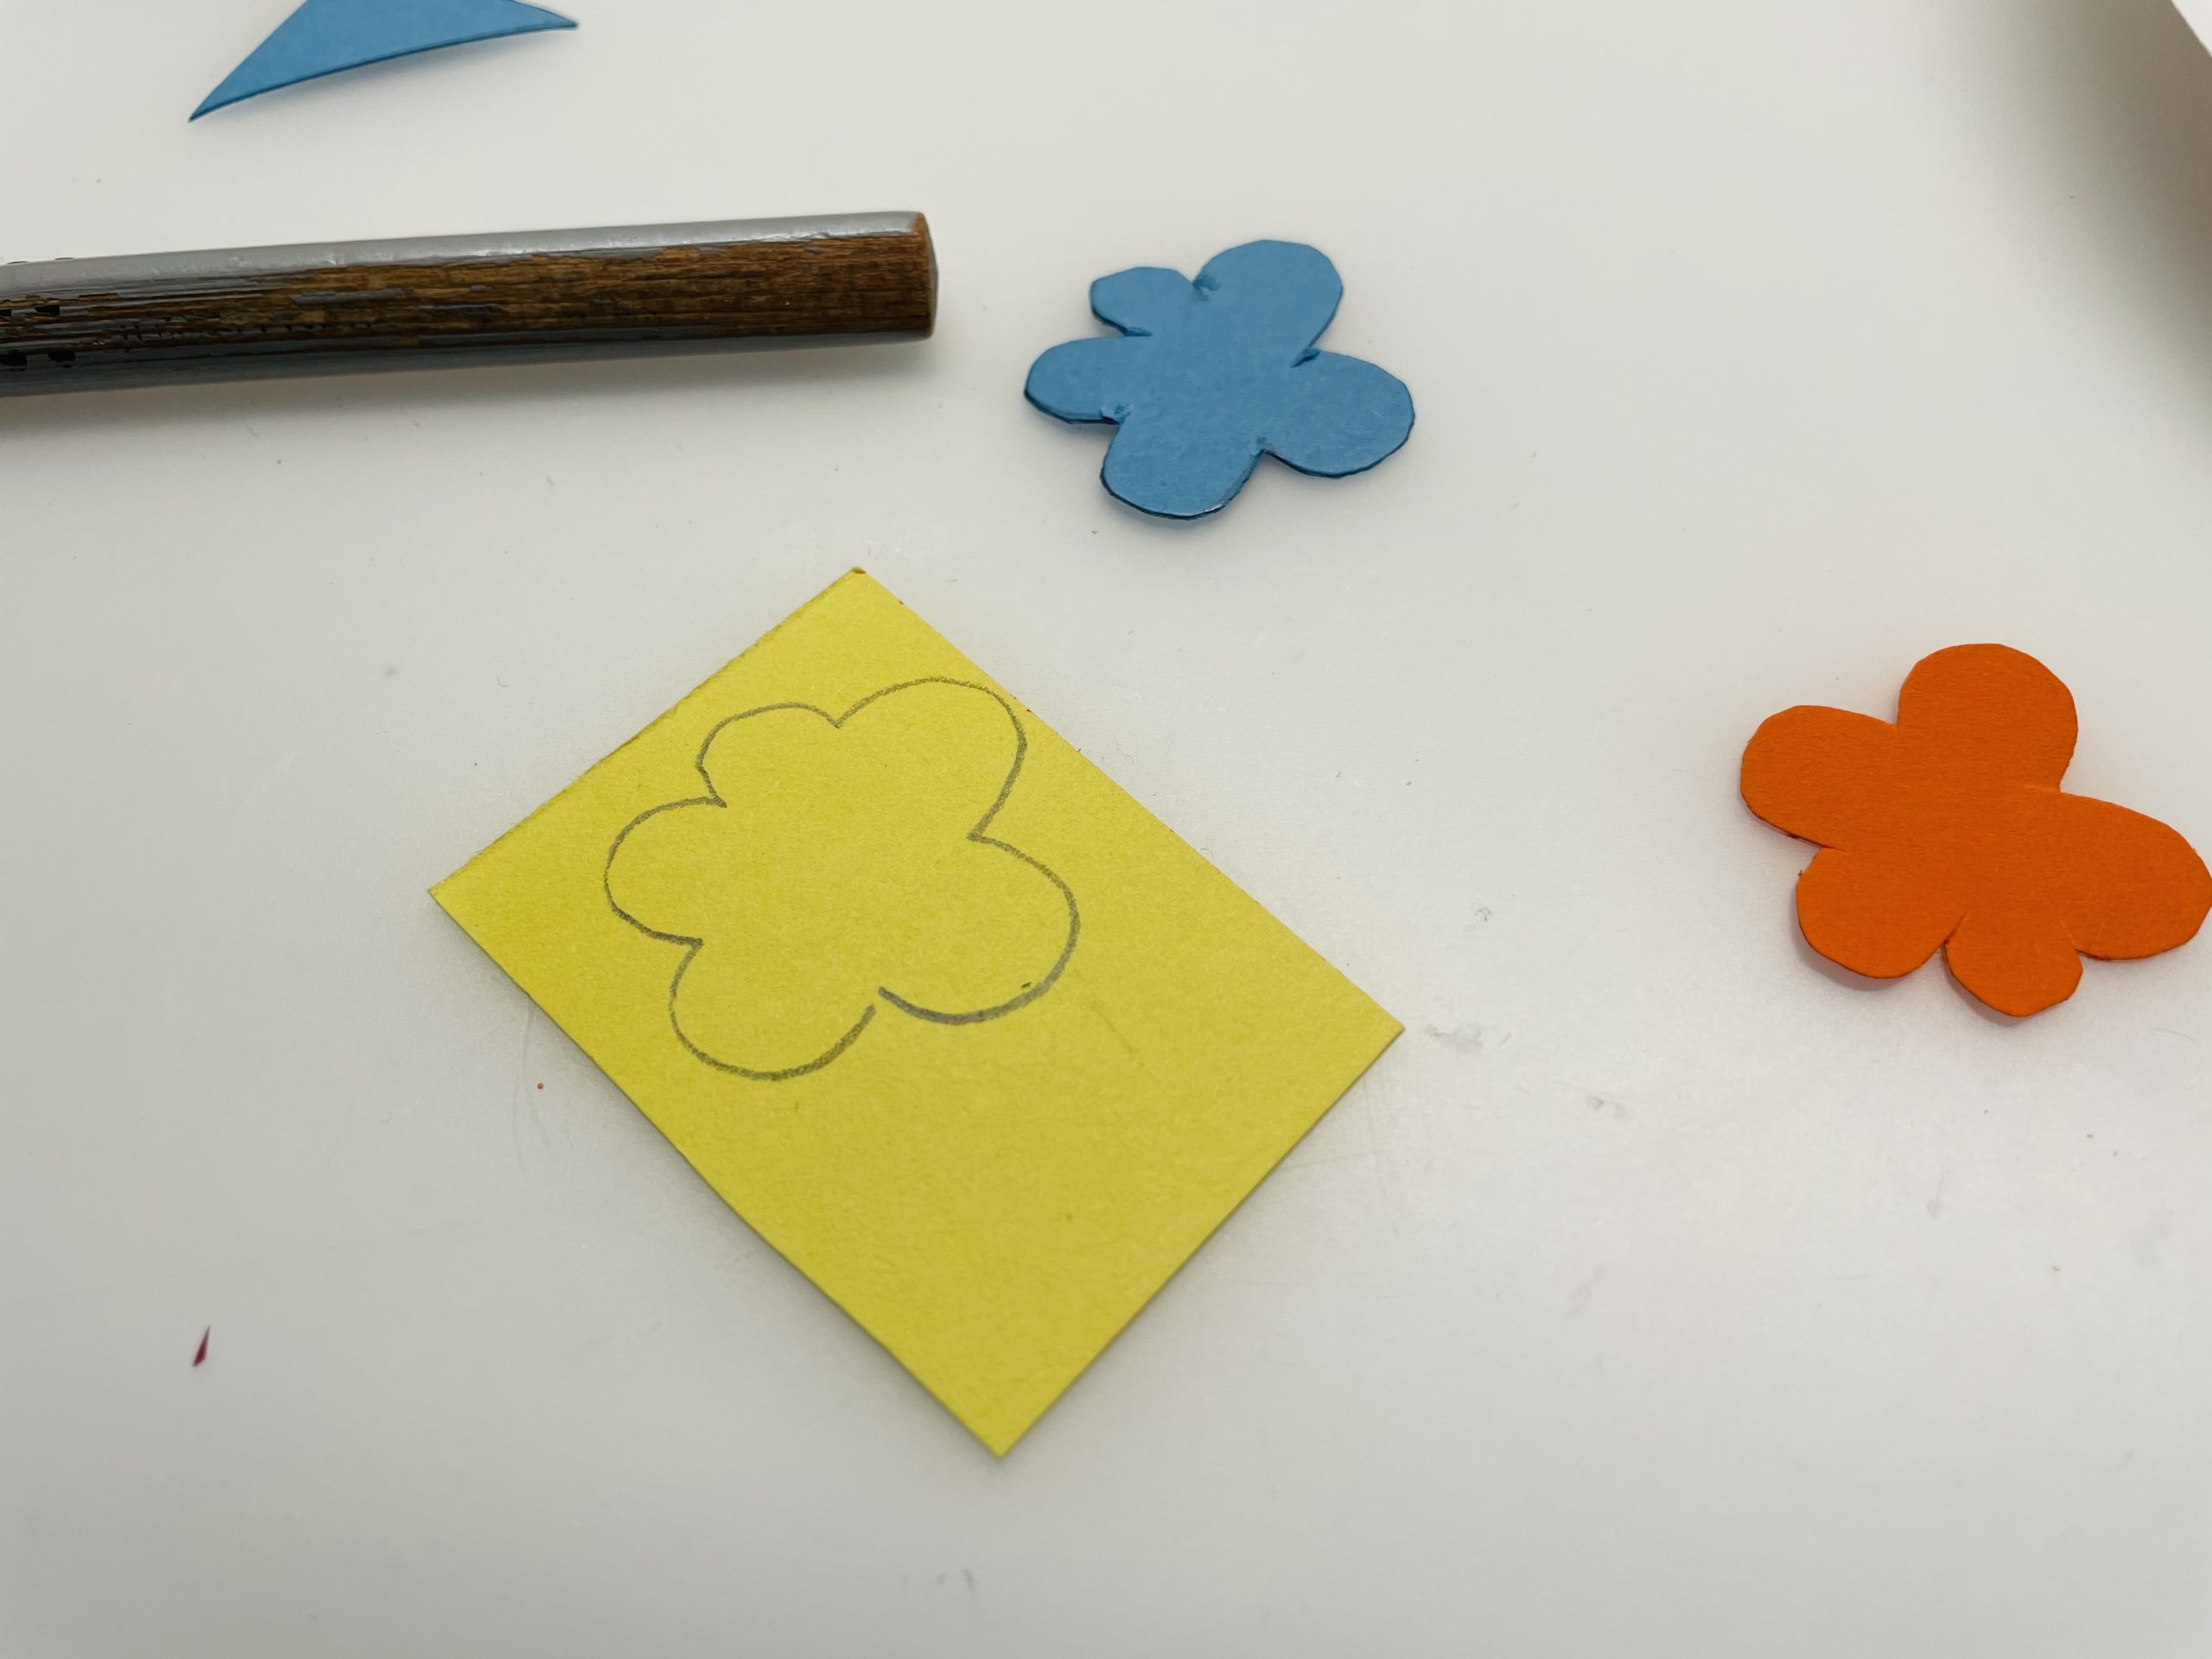
Now paint up small flowers and cut them out with scissors.

Bild zum Schritt 13 für das Bastel- und DIY-Abenteuer für Kinder: 'Malt euch darauf jetzt kleine Blumen auf und schneidet diese...'

14

2. Bild zum Schritt 13 für das Bastel- und DIY-Abenteuer für Kinder: 'Malt euch darauf jetzt kleine Blumen auf und schneidet diese...'

15

Then you make small butterflies. For this you fold a small paper half and then paint half a butterfly. Make sure that the body of the butterfly is at the paper break.

Bild zum Schritt 15 für das Bastel- und DIY-Abenteuer für Kinder: 'Dann bastelt ihr kleine Schmetterlinge. Dafür faltet ihr ein kleines...'

16

Cuts out some flowers and butterflies.

Bild zum Schritt 16 für das Bastel- und DIY-Abenteuer für Kinder: 'Schneidet einige Blumen und Schmetterlinge aus.'

17

Now you punch small circles from the colorful paper remains with the holer, which you stick in the middle of your flowers.

Bild zum Schritt 17 für das Bastel- und DIY-Abenteuer für Kinder: 'Jetzt locht ihr aus den bunten Papierresten mit dem Locher...'

18

Now stick a small circle to each flower.

Bild zum Schritt 18 für das Bastel- und DIY-Abenteuer für Kinder: 'Klebt nun einen kleinen Kreis auf jede Blüte.'

19

Now you order your flowers and butterflies on the thread net. Also shape the edge of the cardboard plate.

Bild zum Schritt 19 für das Bastel- und DIY-Abenteuer für Kinder: 'Jetzt ordnet ihr eure Blumen und Schmetterlinge auf den Fadennetz...'

20

Then stick to all flowers and butterflies.

Bild zum Schritt 20 für das Bastel- und DIY-Abenteuer für Kinder: 'Klebt anschließend alle Blumen und Schmetterlinge fest.'

21

At the bottom of the dream catcher you now tie another wool thread. Use an existing hole. Knead the thread and let the ends hang down.

Bild zum Schritt 21 für das Bastel- und DIY-Abenteuer für Kinder: 'Am unteren Rand des Traumfängers bindet ihr nun noch einen...'

22

Now glues a flower and/or a butterfly to these threads.

Bild zum Schritt 22 für das Bastel- und DIY-Abenteuer für Kinder: 'Klebt jetzt auch an diese Fäden eine Blume und/oder einen...'

23

The dream catcher is ready.

Other design ideas:
24

Folds a large butterfly (see Make a butterfly)

Bild zum Schritt 25 für das Bastel- und DIY-Abenteuer für Kinder: 'Faltet einen großen Schmetterling (siehe Schmetterling basteln)'

25

Stick it to the edge of the dream catcher (bottom left or right).

Bild zum Schritt 26 für das Bastel- und DIY-Abenteuer für Kinder: 'Klebt diesen am Rand des Traumfängers (unten links oder rechts)...'

26

Maybe embellish the butterfly with two more small flowers that stick to her wings.

Bild zum Schritt 27 für das Bastel- und DIY-Abenteuer für Kinder: 'Verschönert den Schmetterling eventuell noch mit zwei weiteren kleinen Blumen,...'

27

2. Bild zum Schritt 27 für das Bastel- und DIY-Abenteuer für Kinder: 'Verschönert den Schmetterling eventuell noch mit zwei weiteren kleinen Blumen,...'

Further idea with tulips:
28

For this you paint up grass. Paint up the grass in the zigzag, lay down a second paper and cut out the grass twice.

Bild zum Schritt 30 für das Bastel- und DIY-Abenteuer für Kinder: 'Hierfür malt ihr euch Gras auf. Malt im Zick-Zack das...'

29

Then here you cut out tulip blossoms.

Bild zum Schritt 31 für das Bastel- und DIY-Abenteuer für Kinder: 'Dann schneidet ihr hier Tulpenblüten aus.'

30

Now stick these together with the butterflies on the thread net. Here, too, shape the edge of the plate.

Bild zum Schritt 32 für das Bastel- und DIY-Abenteuer für Kinder: 'Klebt diese jetzt zusammen mit den Schmetterlingen auf das Fadennetz....'

31

Use your ideas creatively and use the material you have at home.

Bild zum Schritt 33 für das Bastel- und DIY-Abenteuer für Kinder: 'Setzt eure Ideen kreativ um und verwendet das Material, das...'

32

Enjoy your crafting!

Materials

 1 Cardboard plates
 Wool colorful with colour gradient
 Coloured clay paper
 1 Pointy thick needleor punching pliers, punching pliers
 1 thick blunt needle
 1 Customs stockor ruler, measuring tape
 1 Pencil
 Builder's pad
All links marked with a shopping cart lead to Amazon - here we have selected products that we would order ourselves and in part also ordered. In a qualified purchase via the advertising link, we as Amazon partner receive a commission, for you there are no costs. You thus support our cost- and advertising banner-free, educational offer.

Directions

1

Put your craft material under and prepare your material.
First you need a small cardboard plate. This can be colored.

Bild zum Schritt 1 für das Bastel- und DIY-Abenteuer für Kinder: 'Legt eure Bastelunterlage unter und legt euer Material bereit. ...'

2

Now cut out a circle from the middle with the scissors.

Bild zum Schritt 2 für das Bastel- und DIY-Abenteuer für Kinder: 'Schneidet nun aus der Mitte einen Kreis mit der Schere...'

3

Now hole the inner edge of your cardboard plate. For this purpose, punch around at even intervals either with a punch or a punch plier. If your plate is too small, then punch the holes with a needle.
Attention: Let us help you with this - risk of injury!
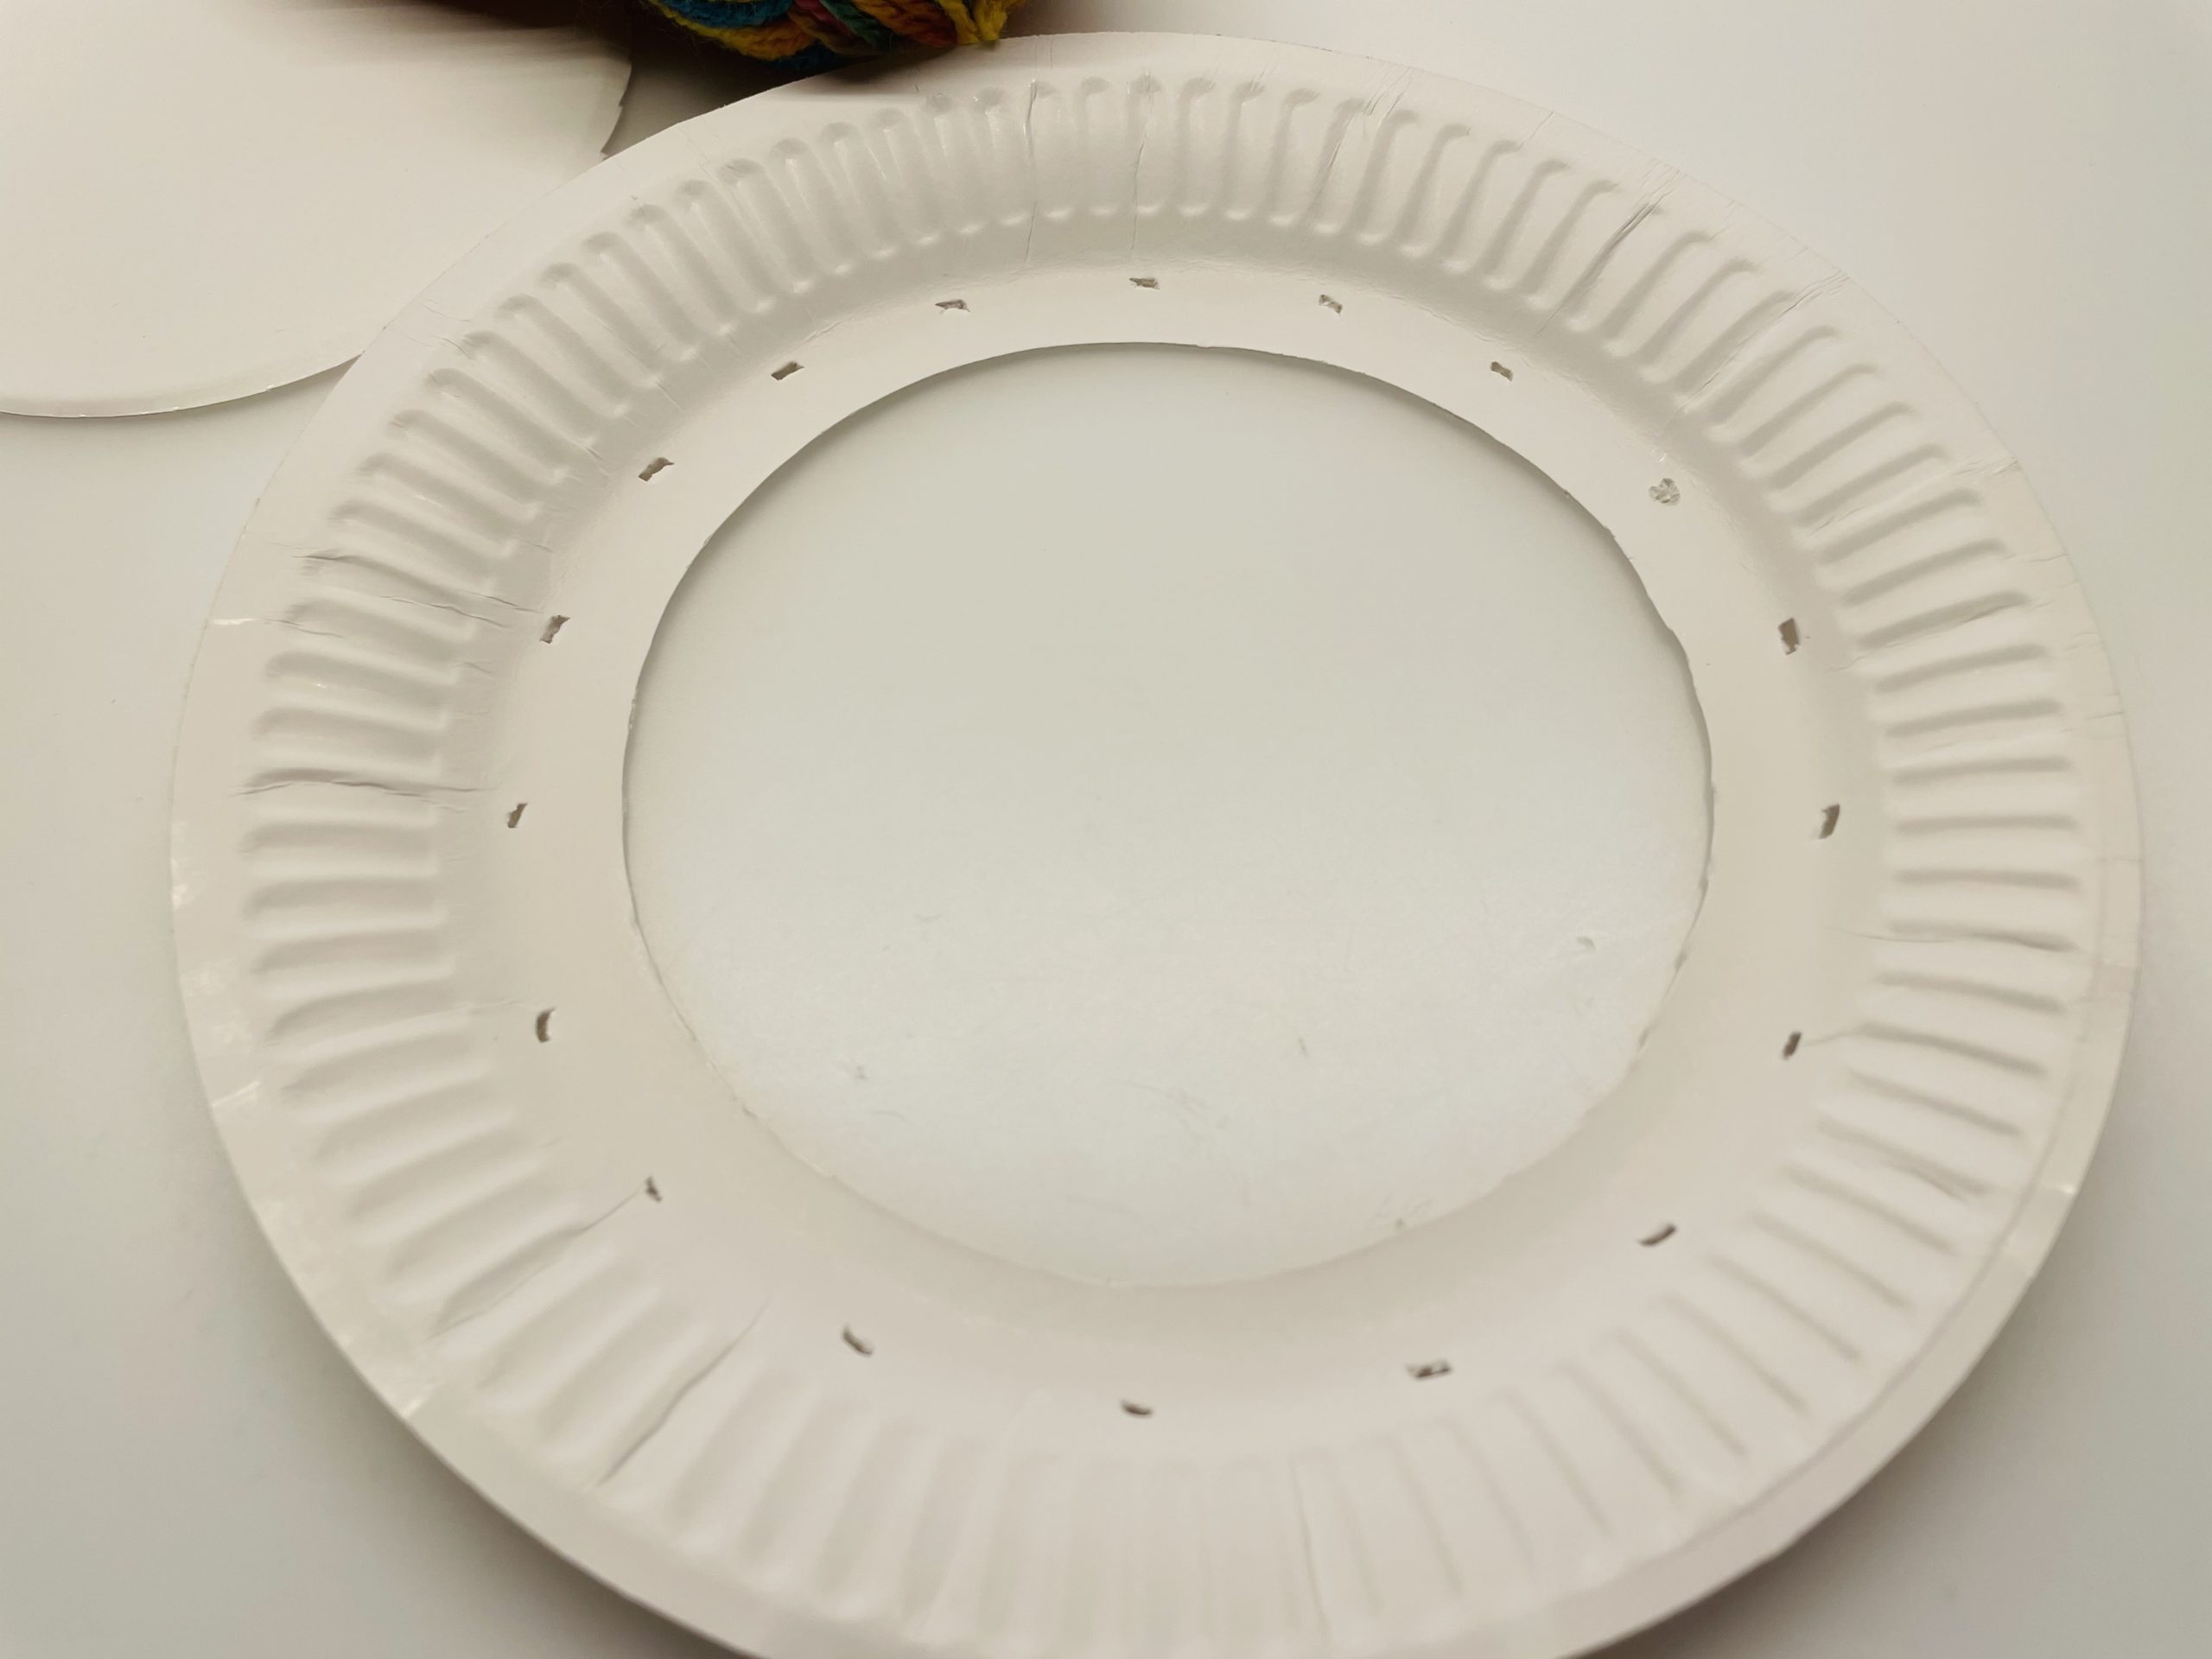
Bild zum Schritt 3 für das Bastel- und DIY-Abenteuer für Kinder: 'Locht nun den inneren Rand eures Papptellers. Locht dafür in...'

4

Now you need the wool.

Bild zum Schritt 4 für das Bastel- und DIY-Abenteuer für Kinder: 'Jetzt braucht ihr die Wolle.'

5

Cuts the thread to a length of 2 meters. Uses a measuring tape or an inch stick to measure it.
Then you thread the thread into a blunt thick needle.
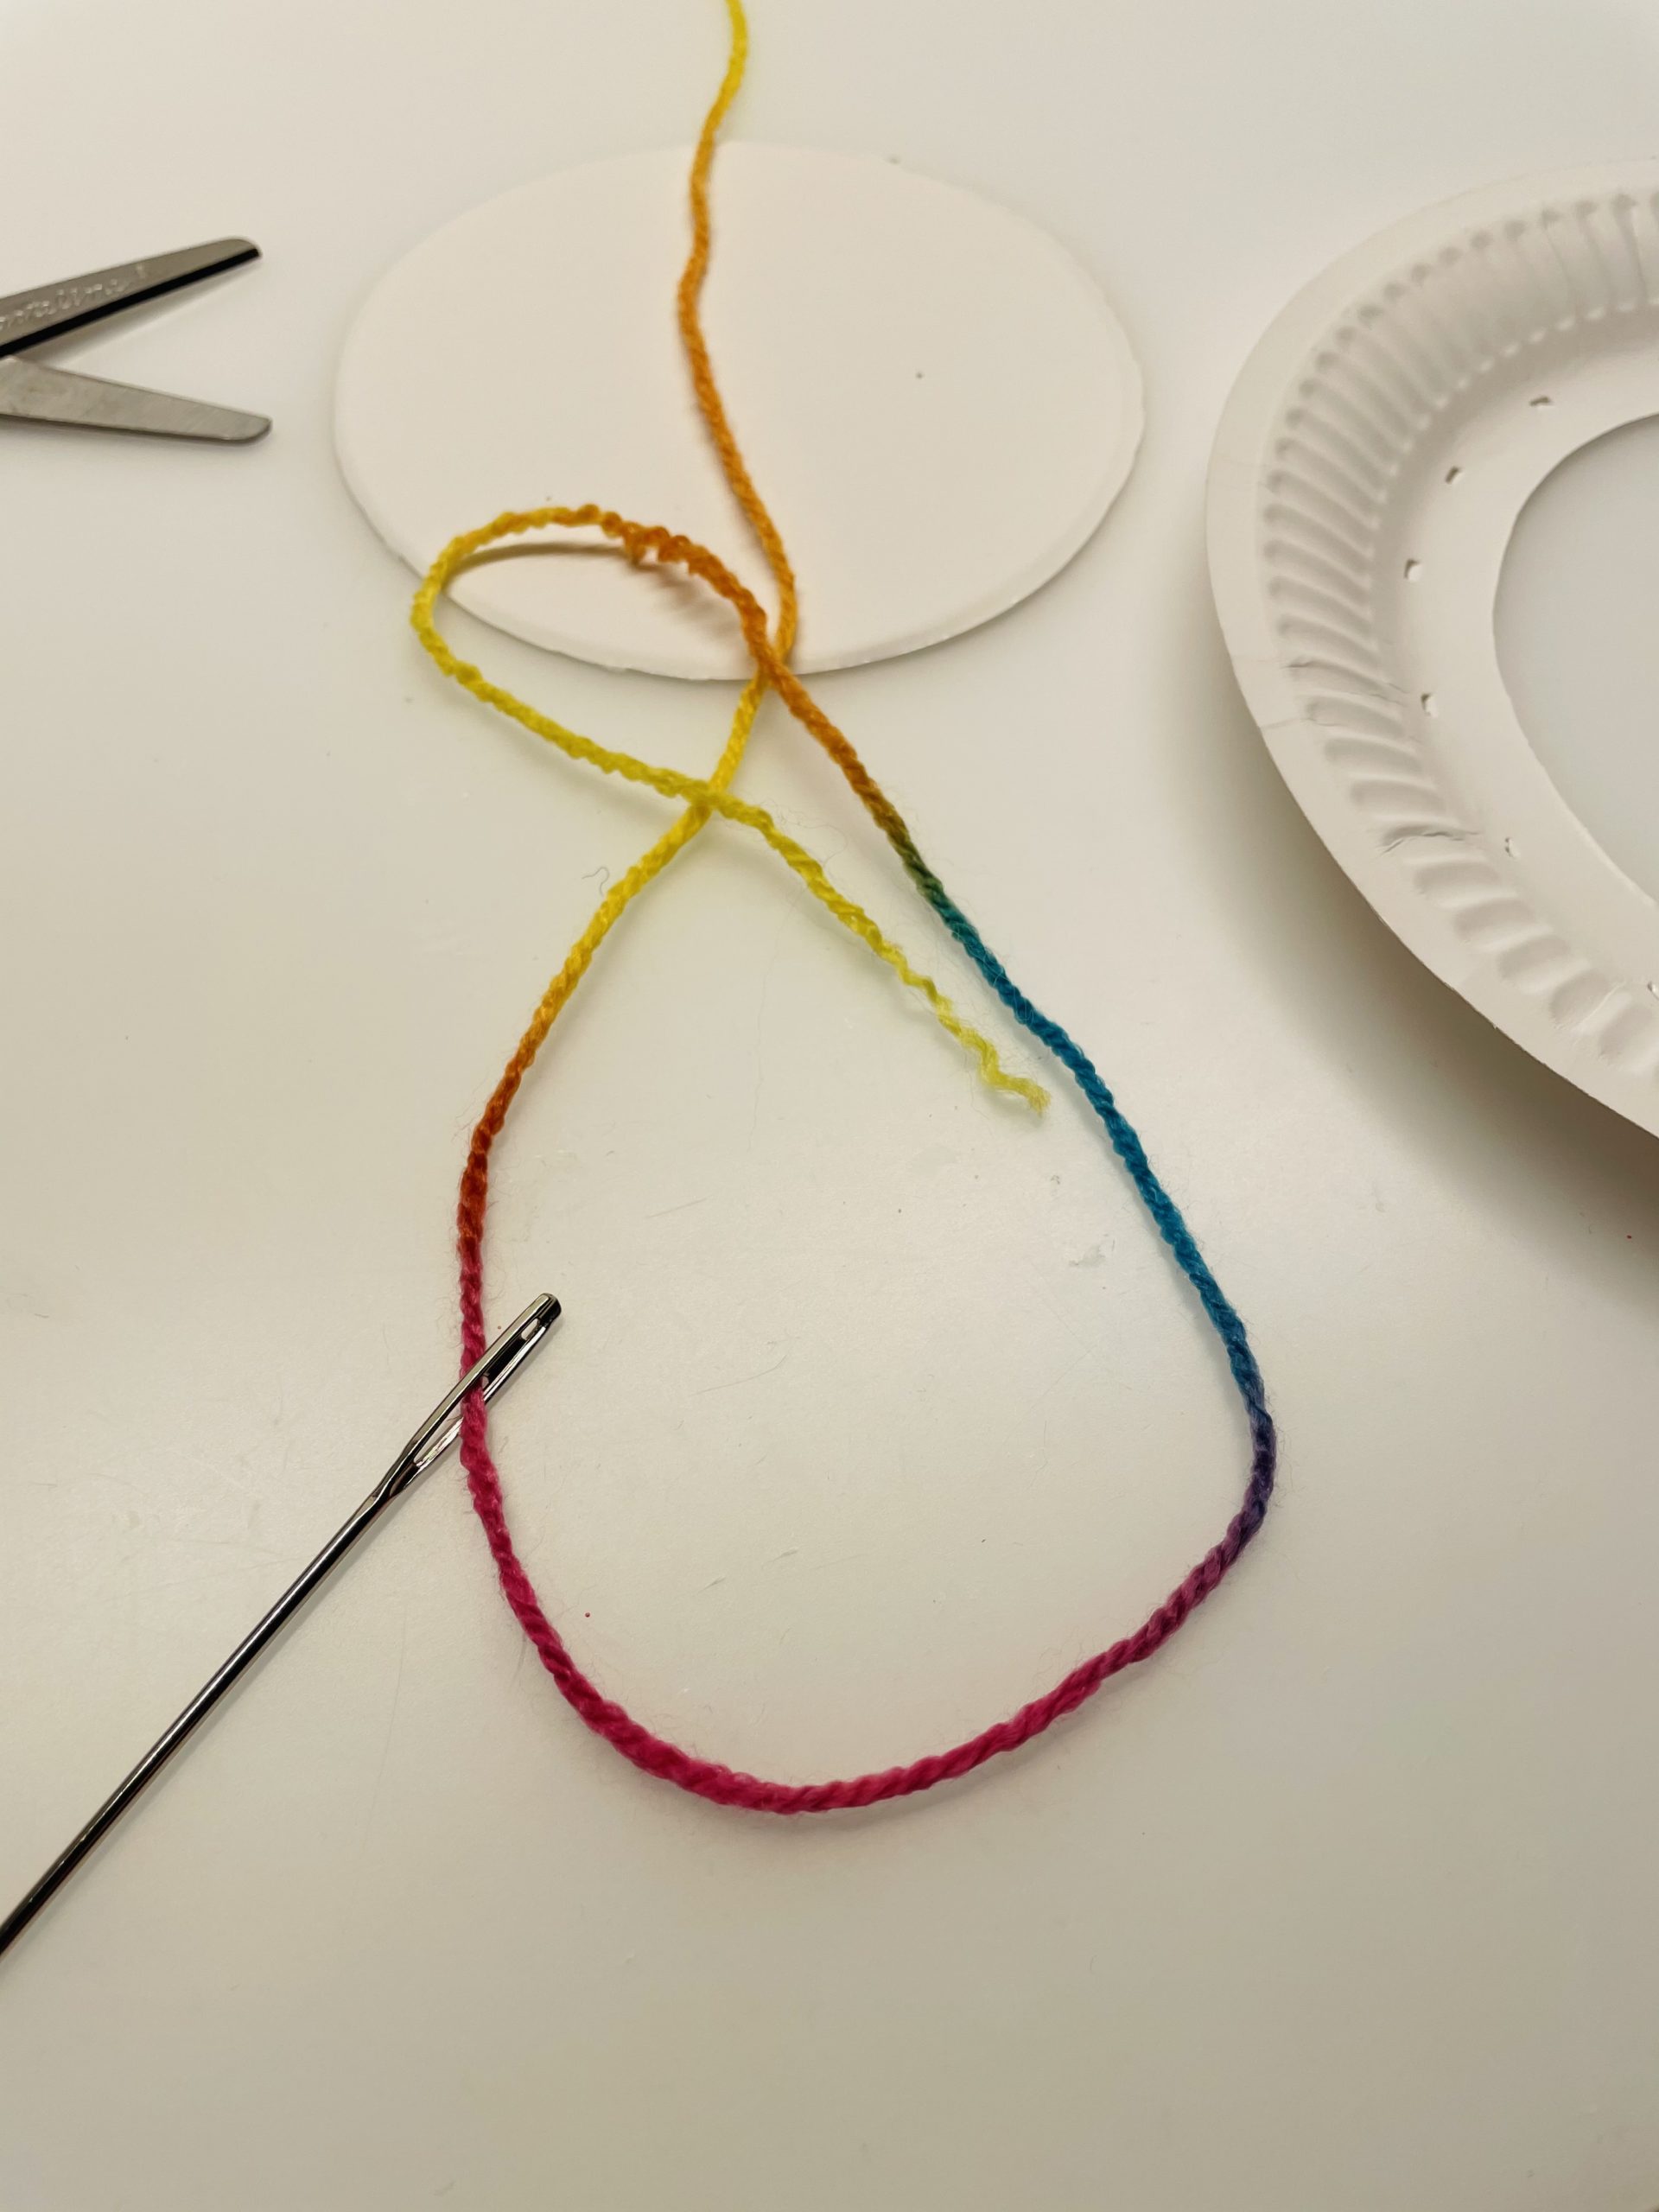
Bild zum Schritt 5 für das Bastel- und DIY-Abenteuer für Kinder: 'Schneidet nun den Faden auf eine Länge von 2 Meter...'

6

Now you put the needle through any hole and pull the thread through to 10cm.
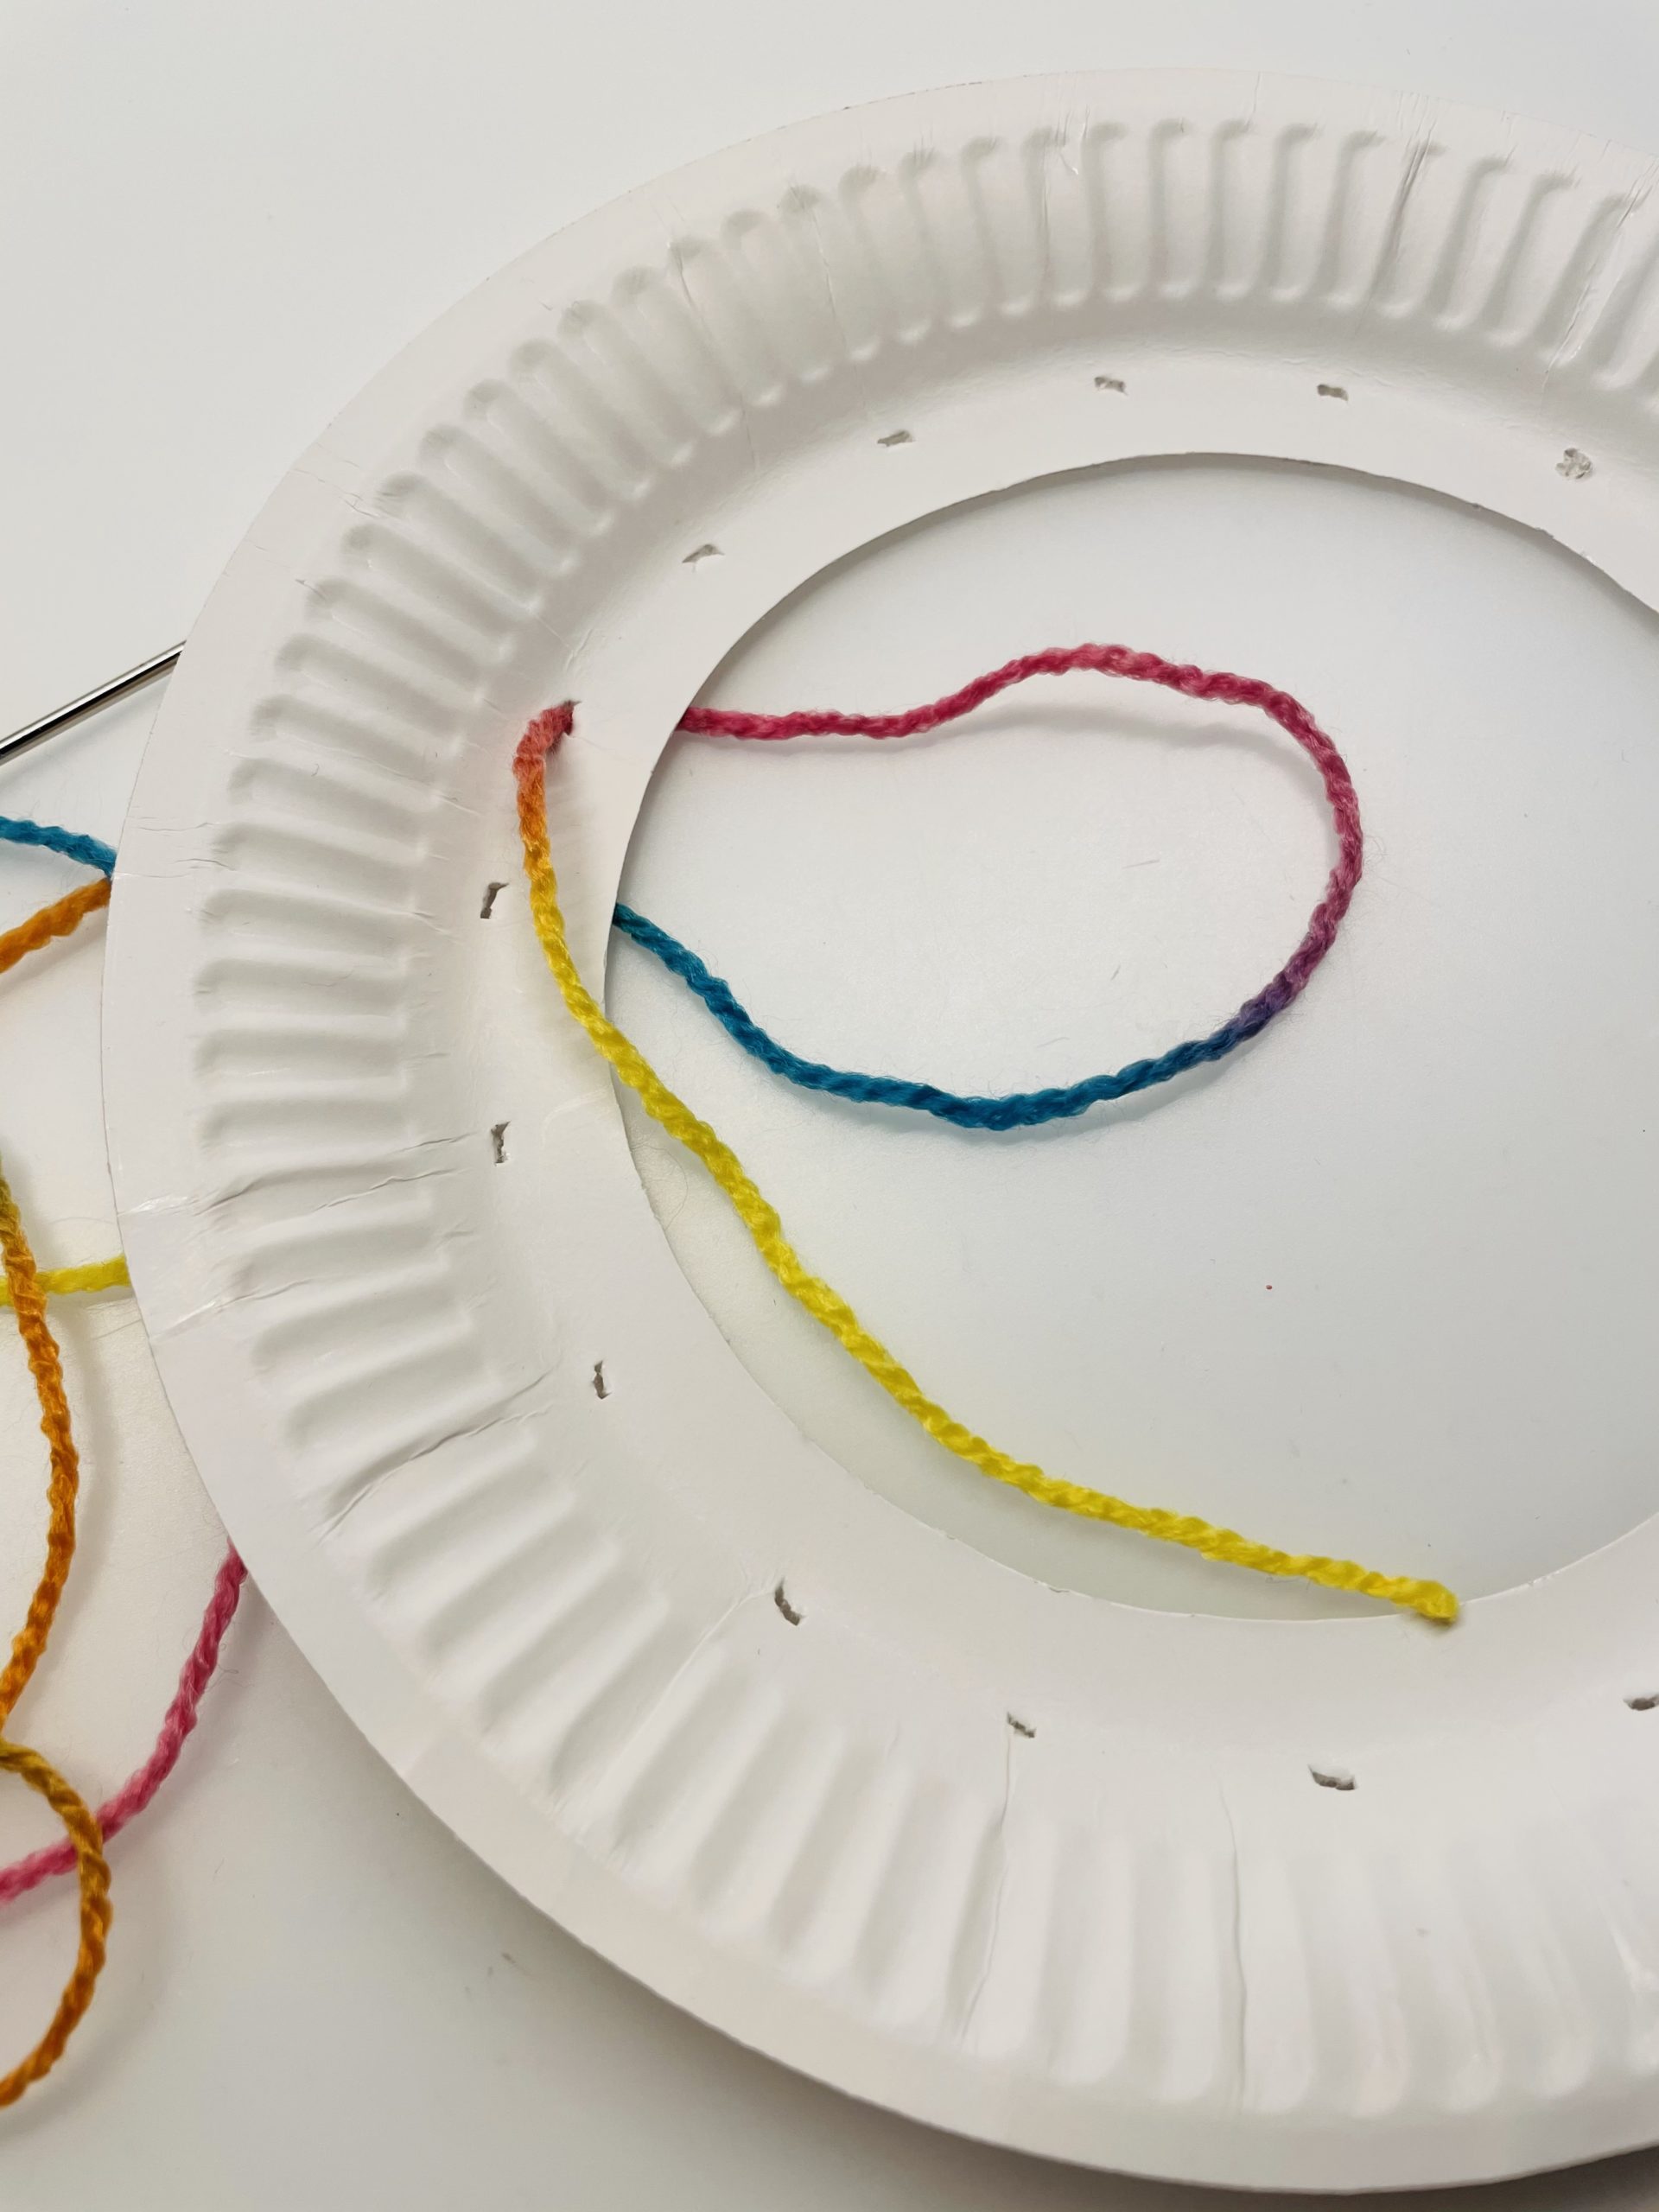
Bild zum Schritt 6 für das Bastel- und DIY-Abenteuer für Kinder: 'Jetzt steckt ihr die Nadel durch ein beliebiges Loch und...'

7

Knot the wool on the inside of the cardboard plate.

Bild zum Schritt 7 für das Bastel- und DIY-Abenteuer für Kinder: 'Verknotet die Wolle an der Innenseite des Papptellers.'

8

Now pierce into an opposite hole and tighten the thread. Now cross the threads at will through the individual holes until a net emerges from it.
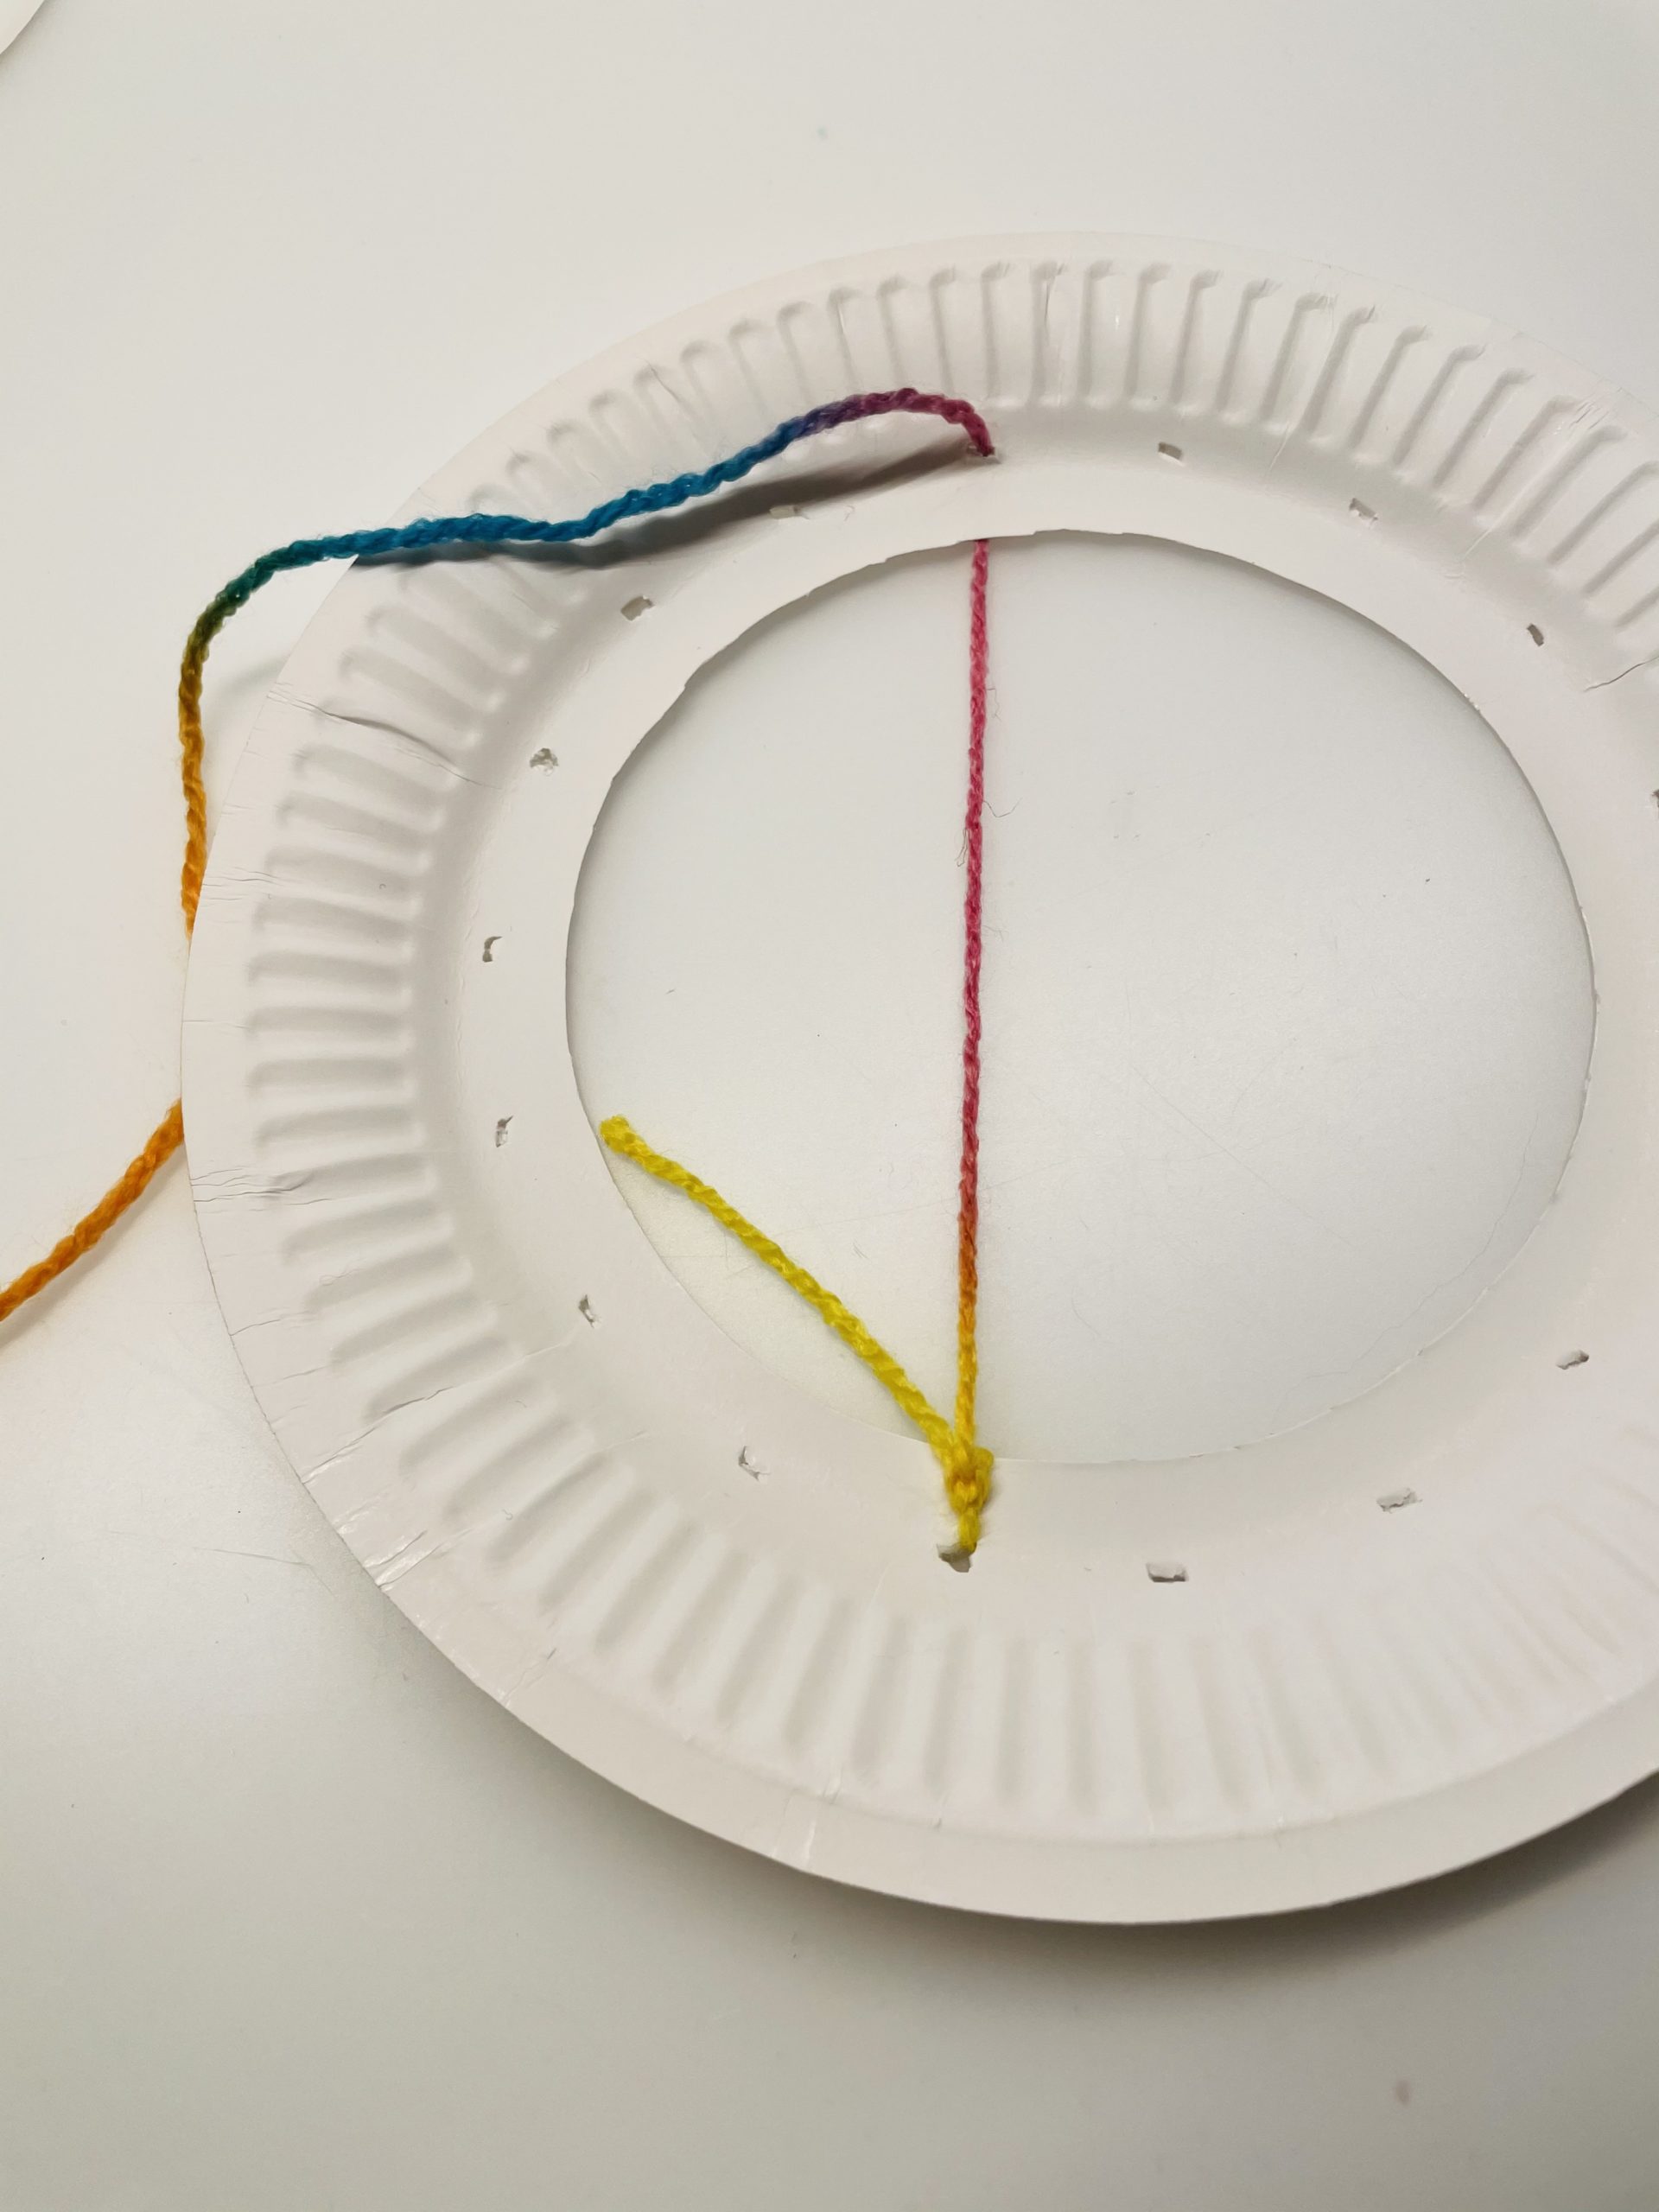
Bild zum Schritt 8 für das Bastel- und DIY-Abenteuer für Kinder: 'Stecht nun in ein gegenüberliegendes Loch und zieht den Faden...'

9

Try to pull a thread in each hole at least once.
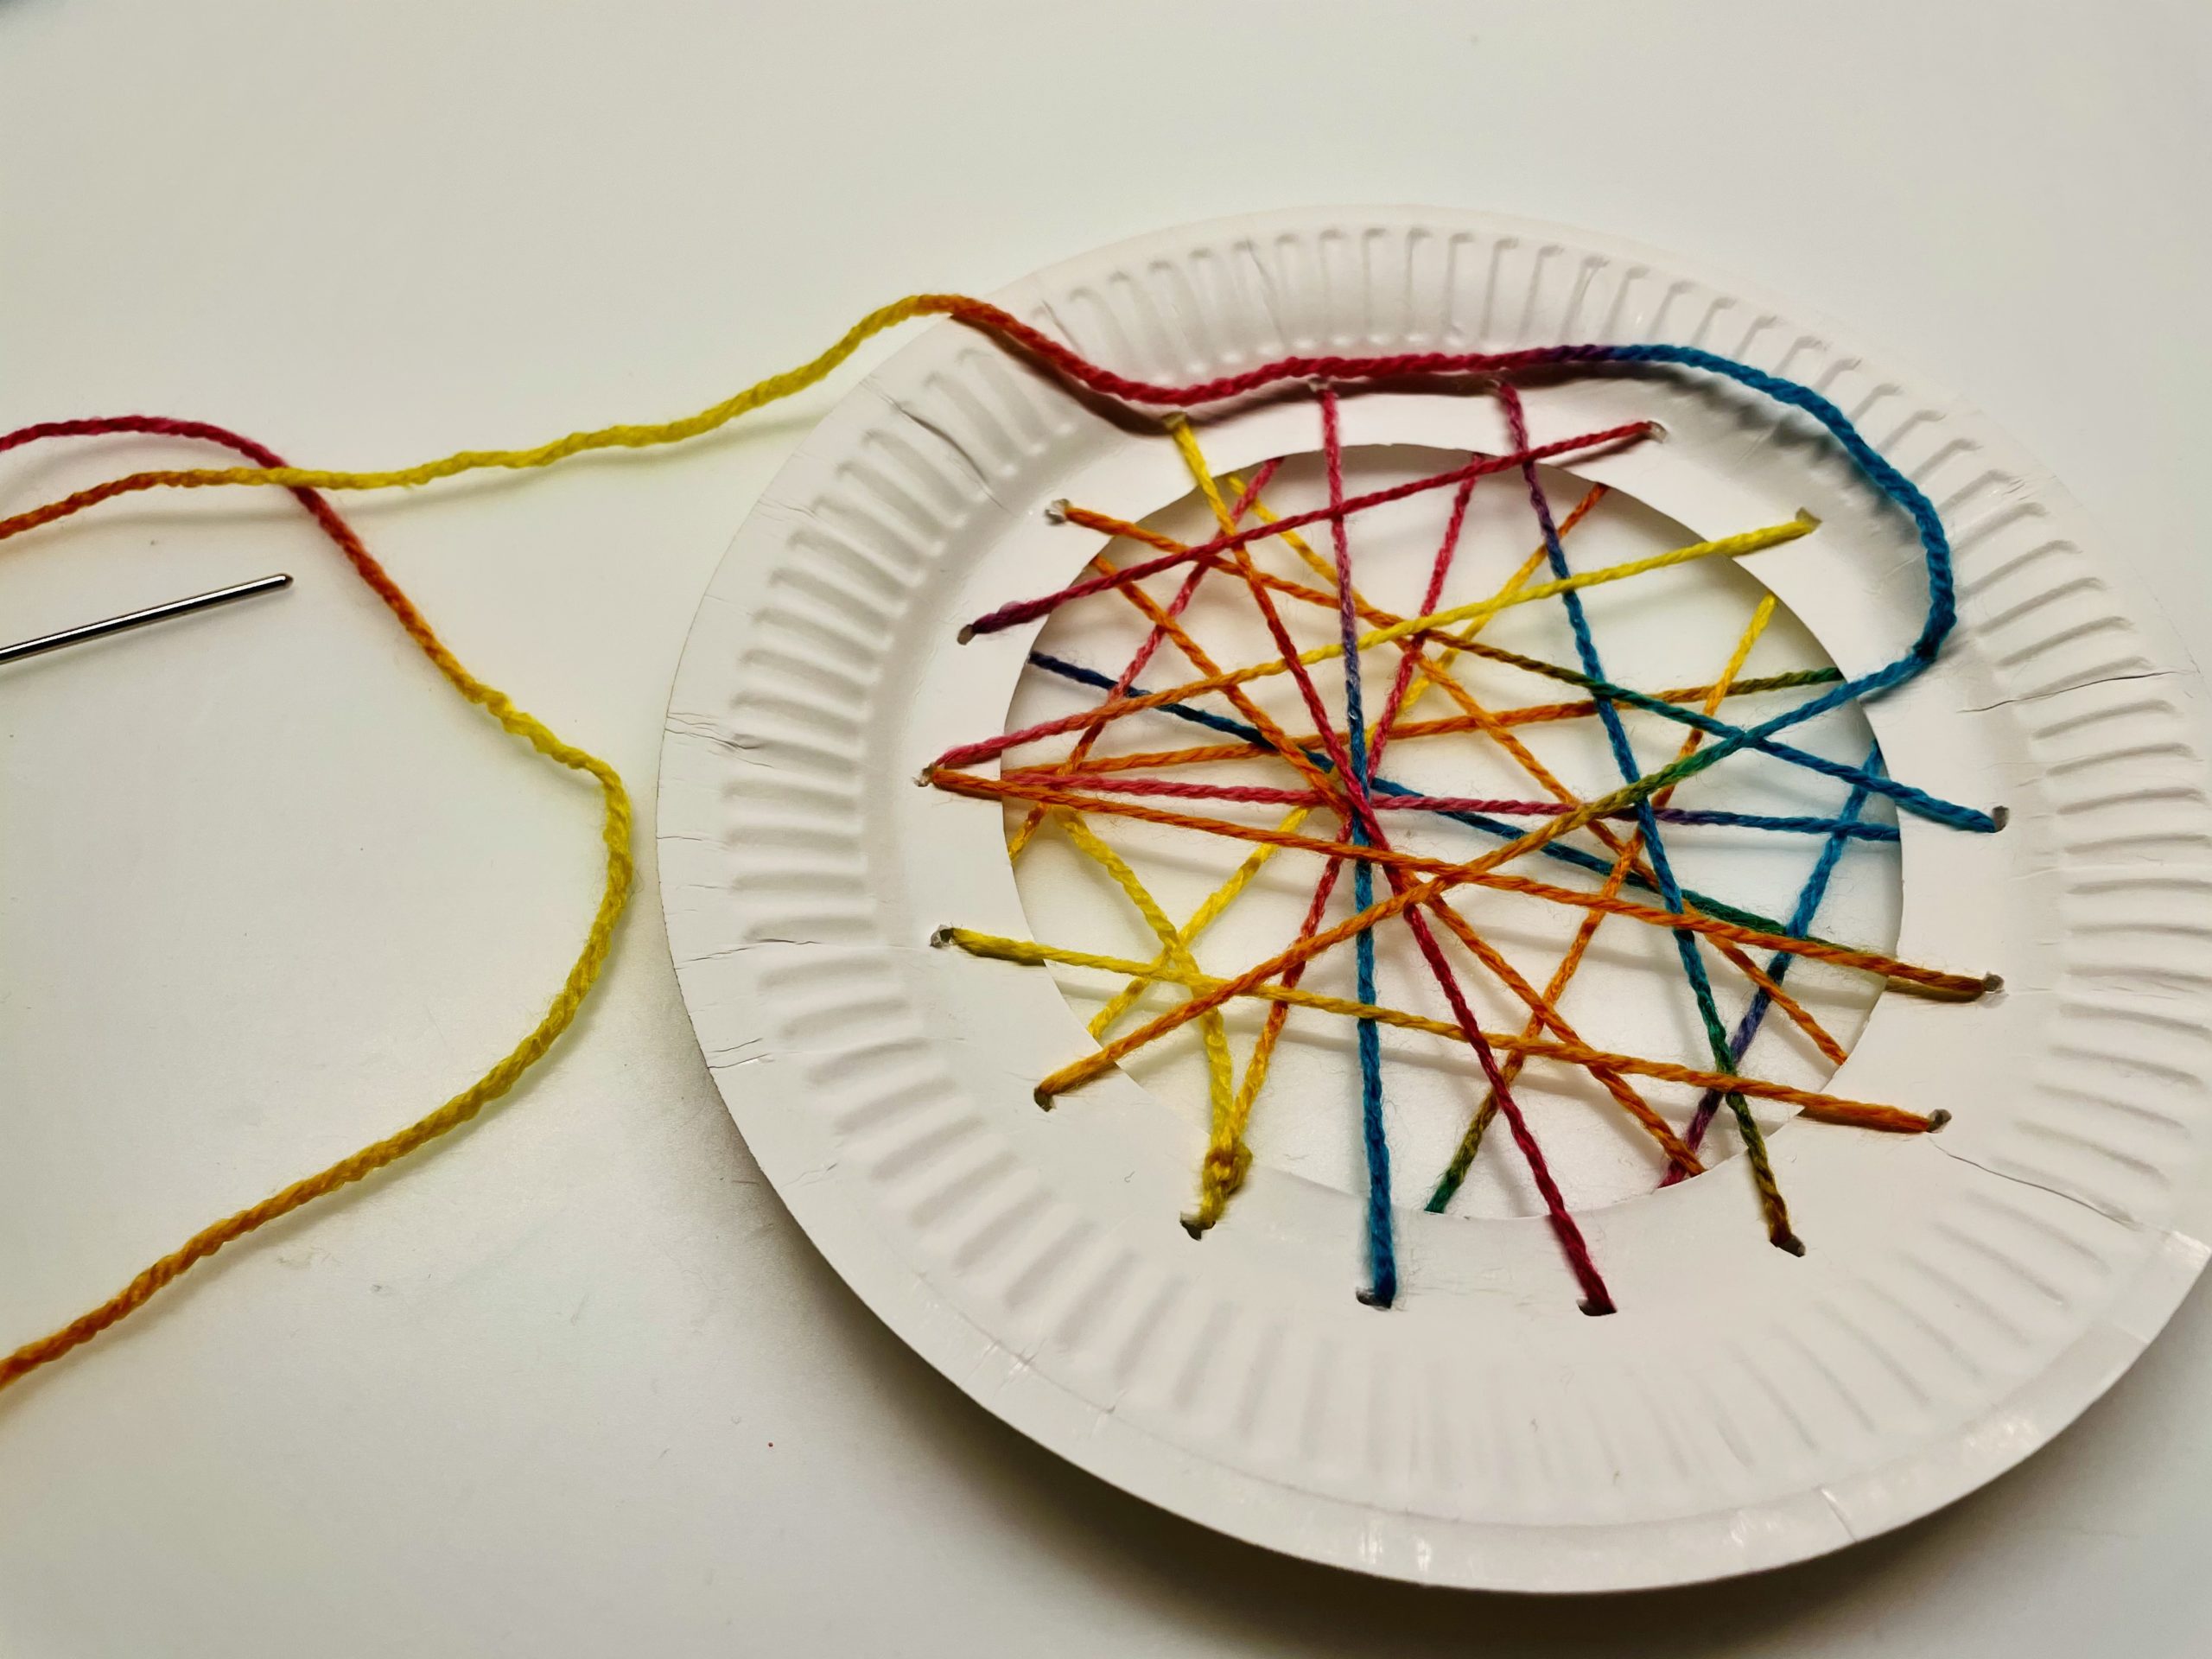
Bild zum Schritt 9 für das Bastel- und DIY-Abenteuer für Kinder: 'Versucht dabei in jedes Loch mindestens einmal einen Faden durchzuziehen.'

10

Finish your braid at the beginning of the thread and tie the beginning of the thread and the end of the thread together.
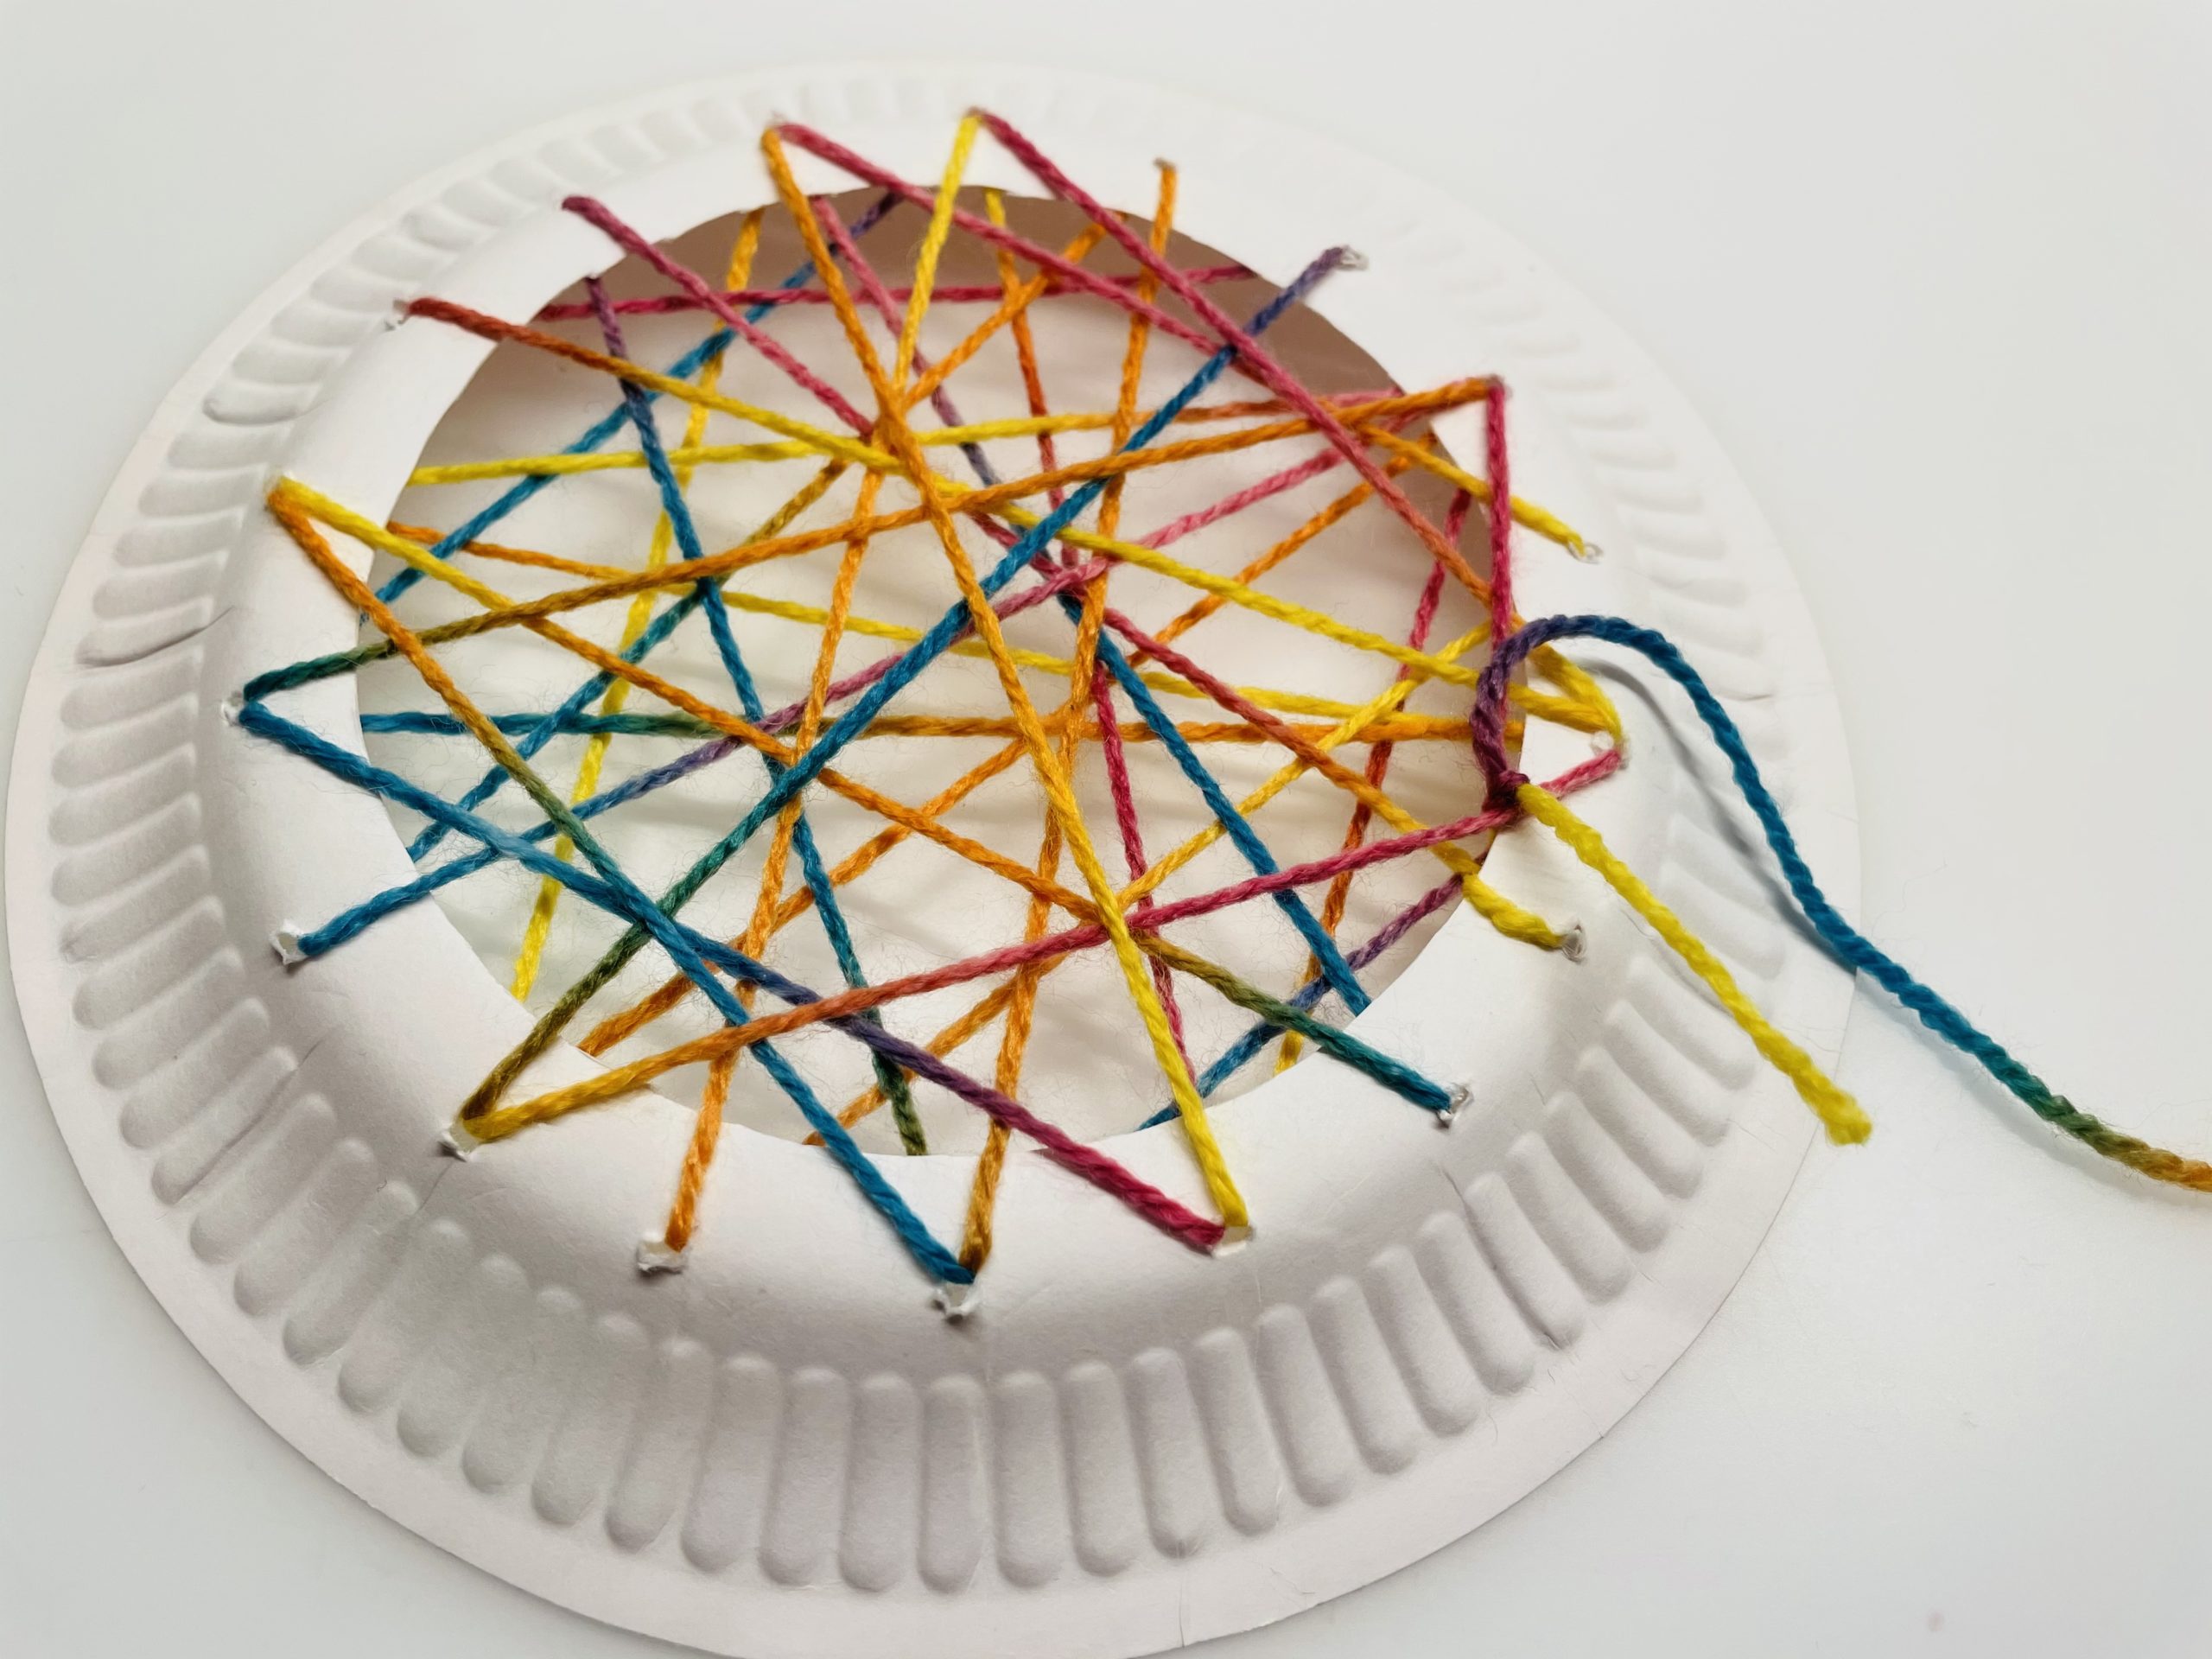
Bild zum Schritt 10 für das Bastel- und DIY-Abenteuer für Kinder: 'Beendet euer Geflecht am Fadenanfang und bindet Fadenanfang und das...'

11

Now tie a loop from the remaining thread to hang the dream catcher.
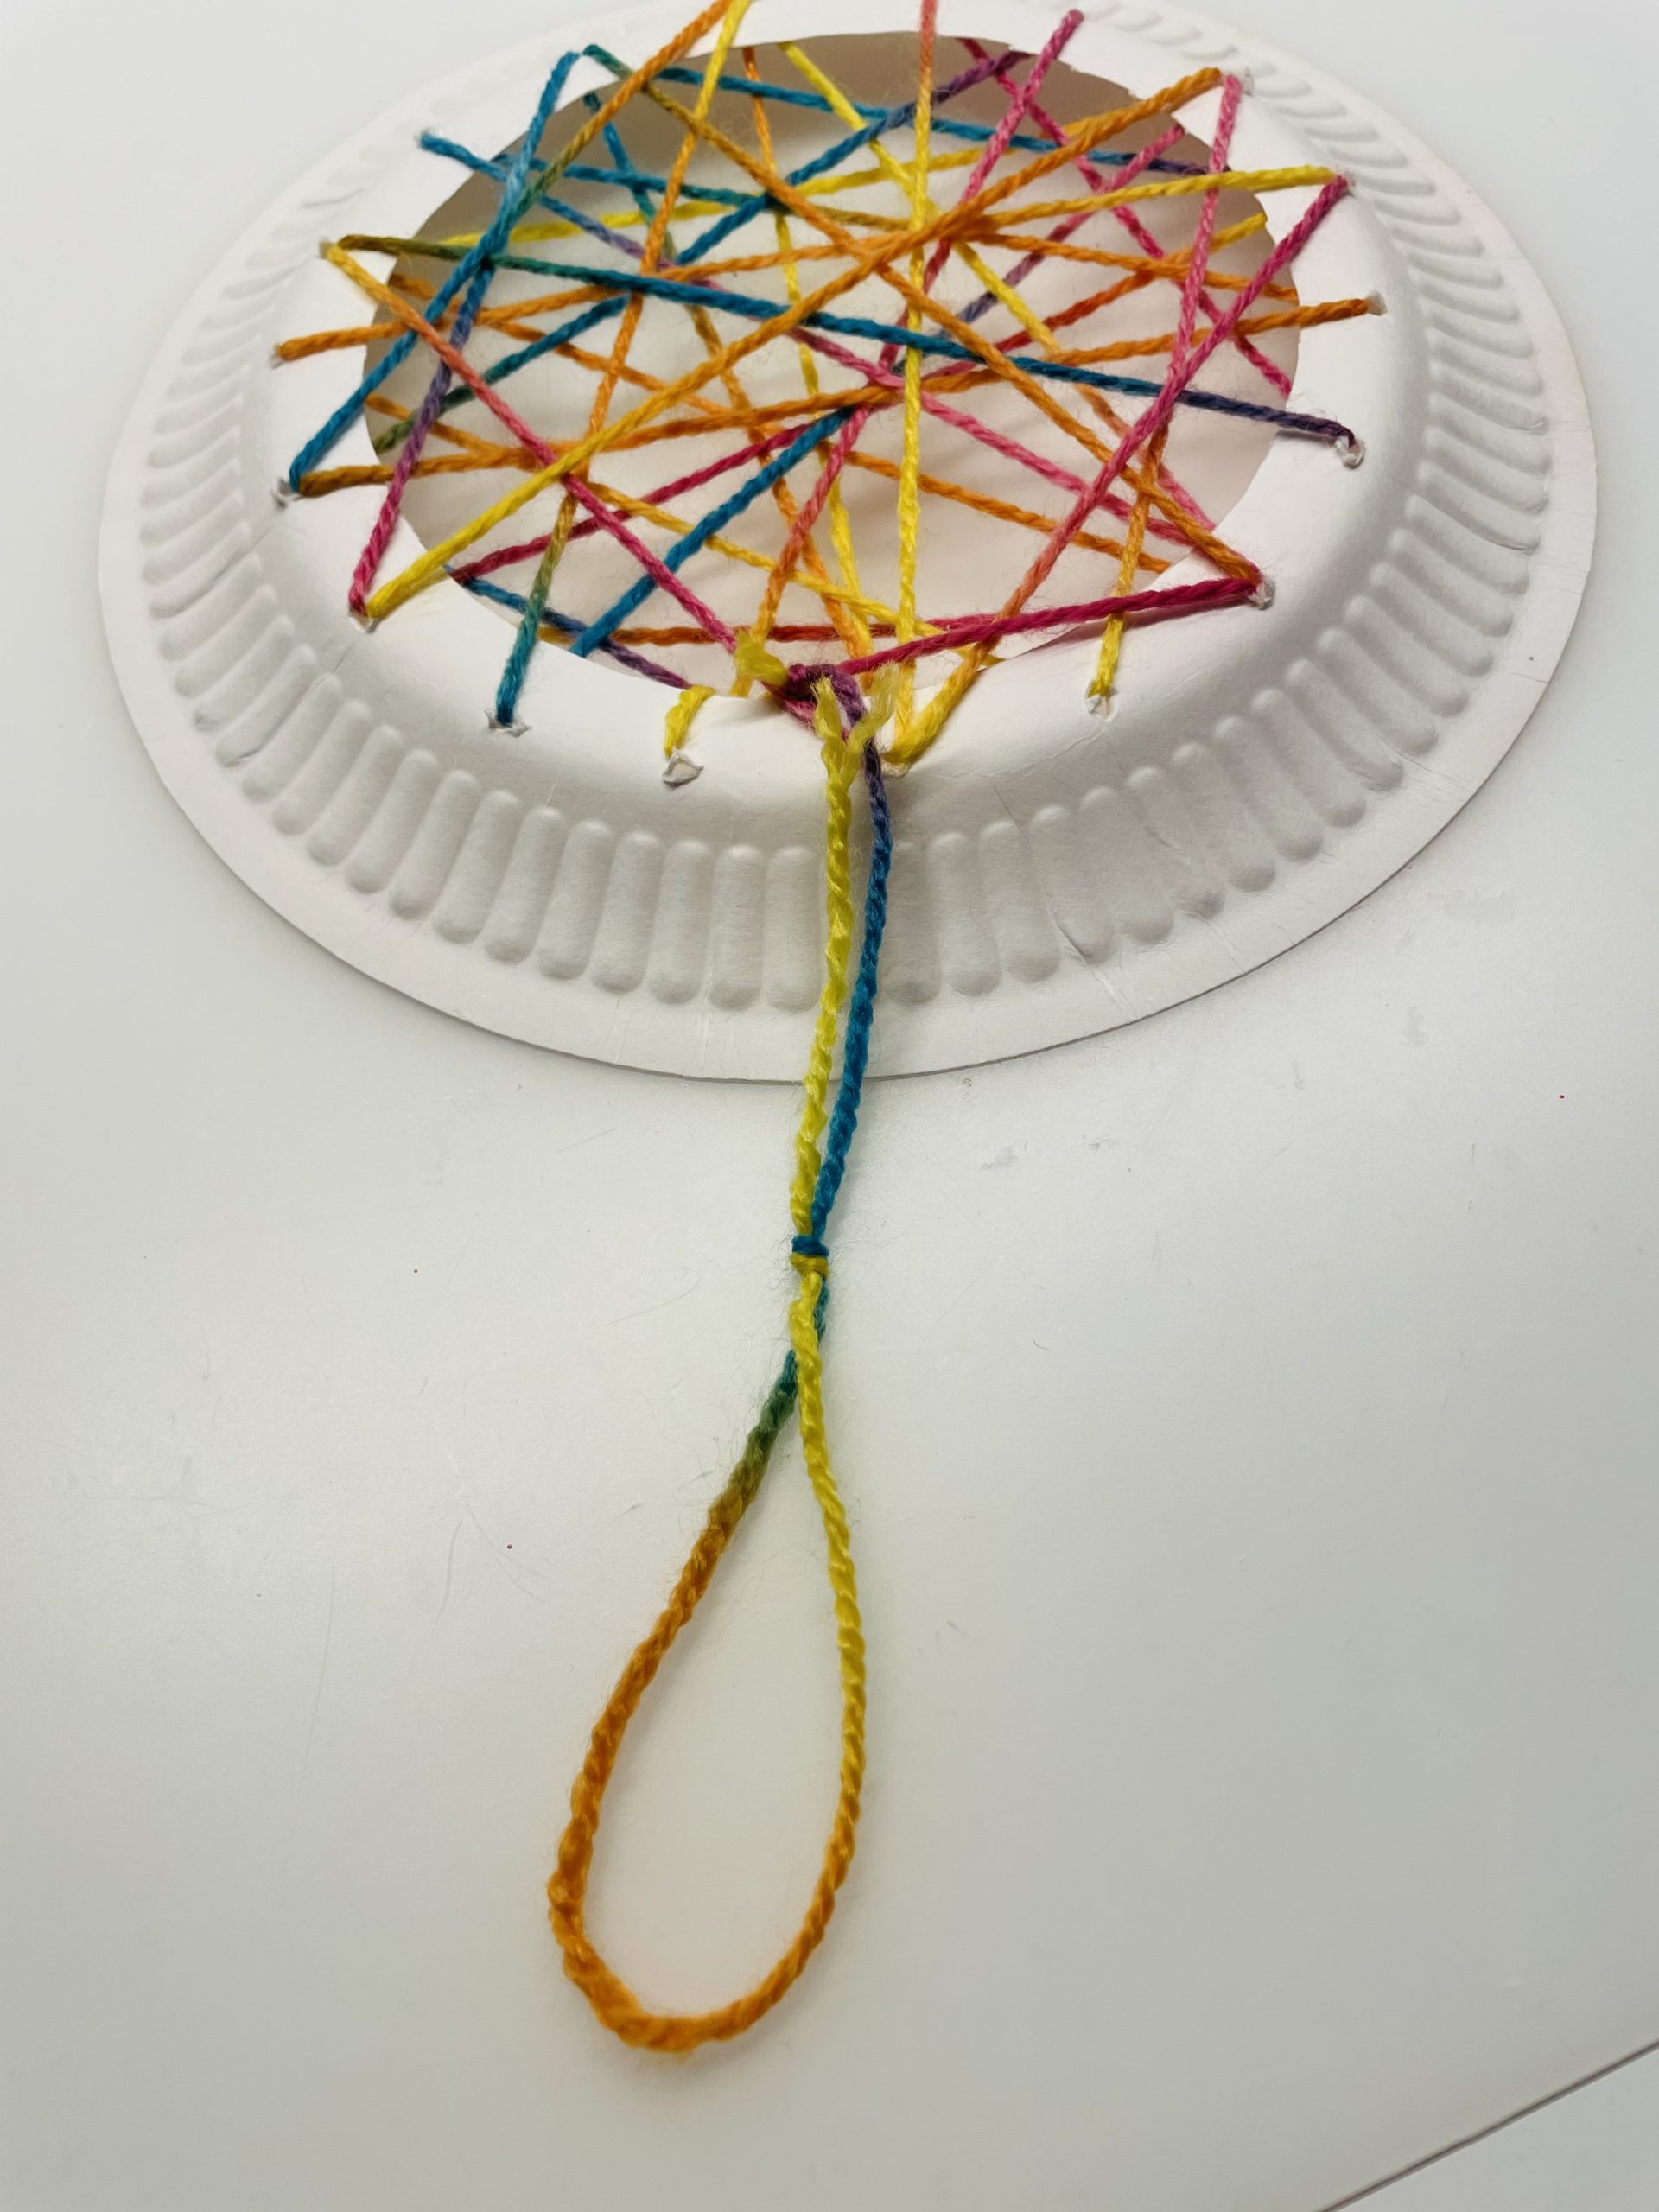
Bild zum Schritt 11 für das Bastel- und DIY-Abenteuer für Kinder: 'Bindet jetzt aus dem überbleibenden Faden eine Schlaufe zum Aufhängen...'

12

Now you need colored paper.

Bild zum Schritt 12 für das Bastel- und DIY-Abenteuer für Kinder: 'Nun braucht ihr farbiges Papier.'

13

Now paint up small flowers and cut them out with scissors.
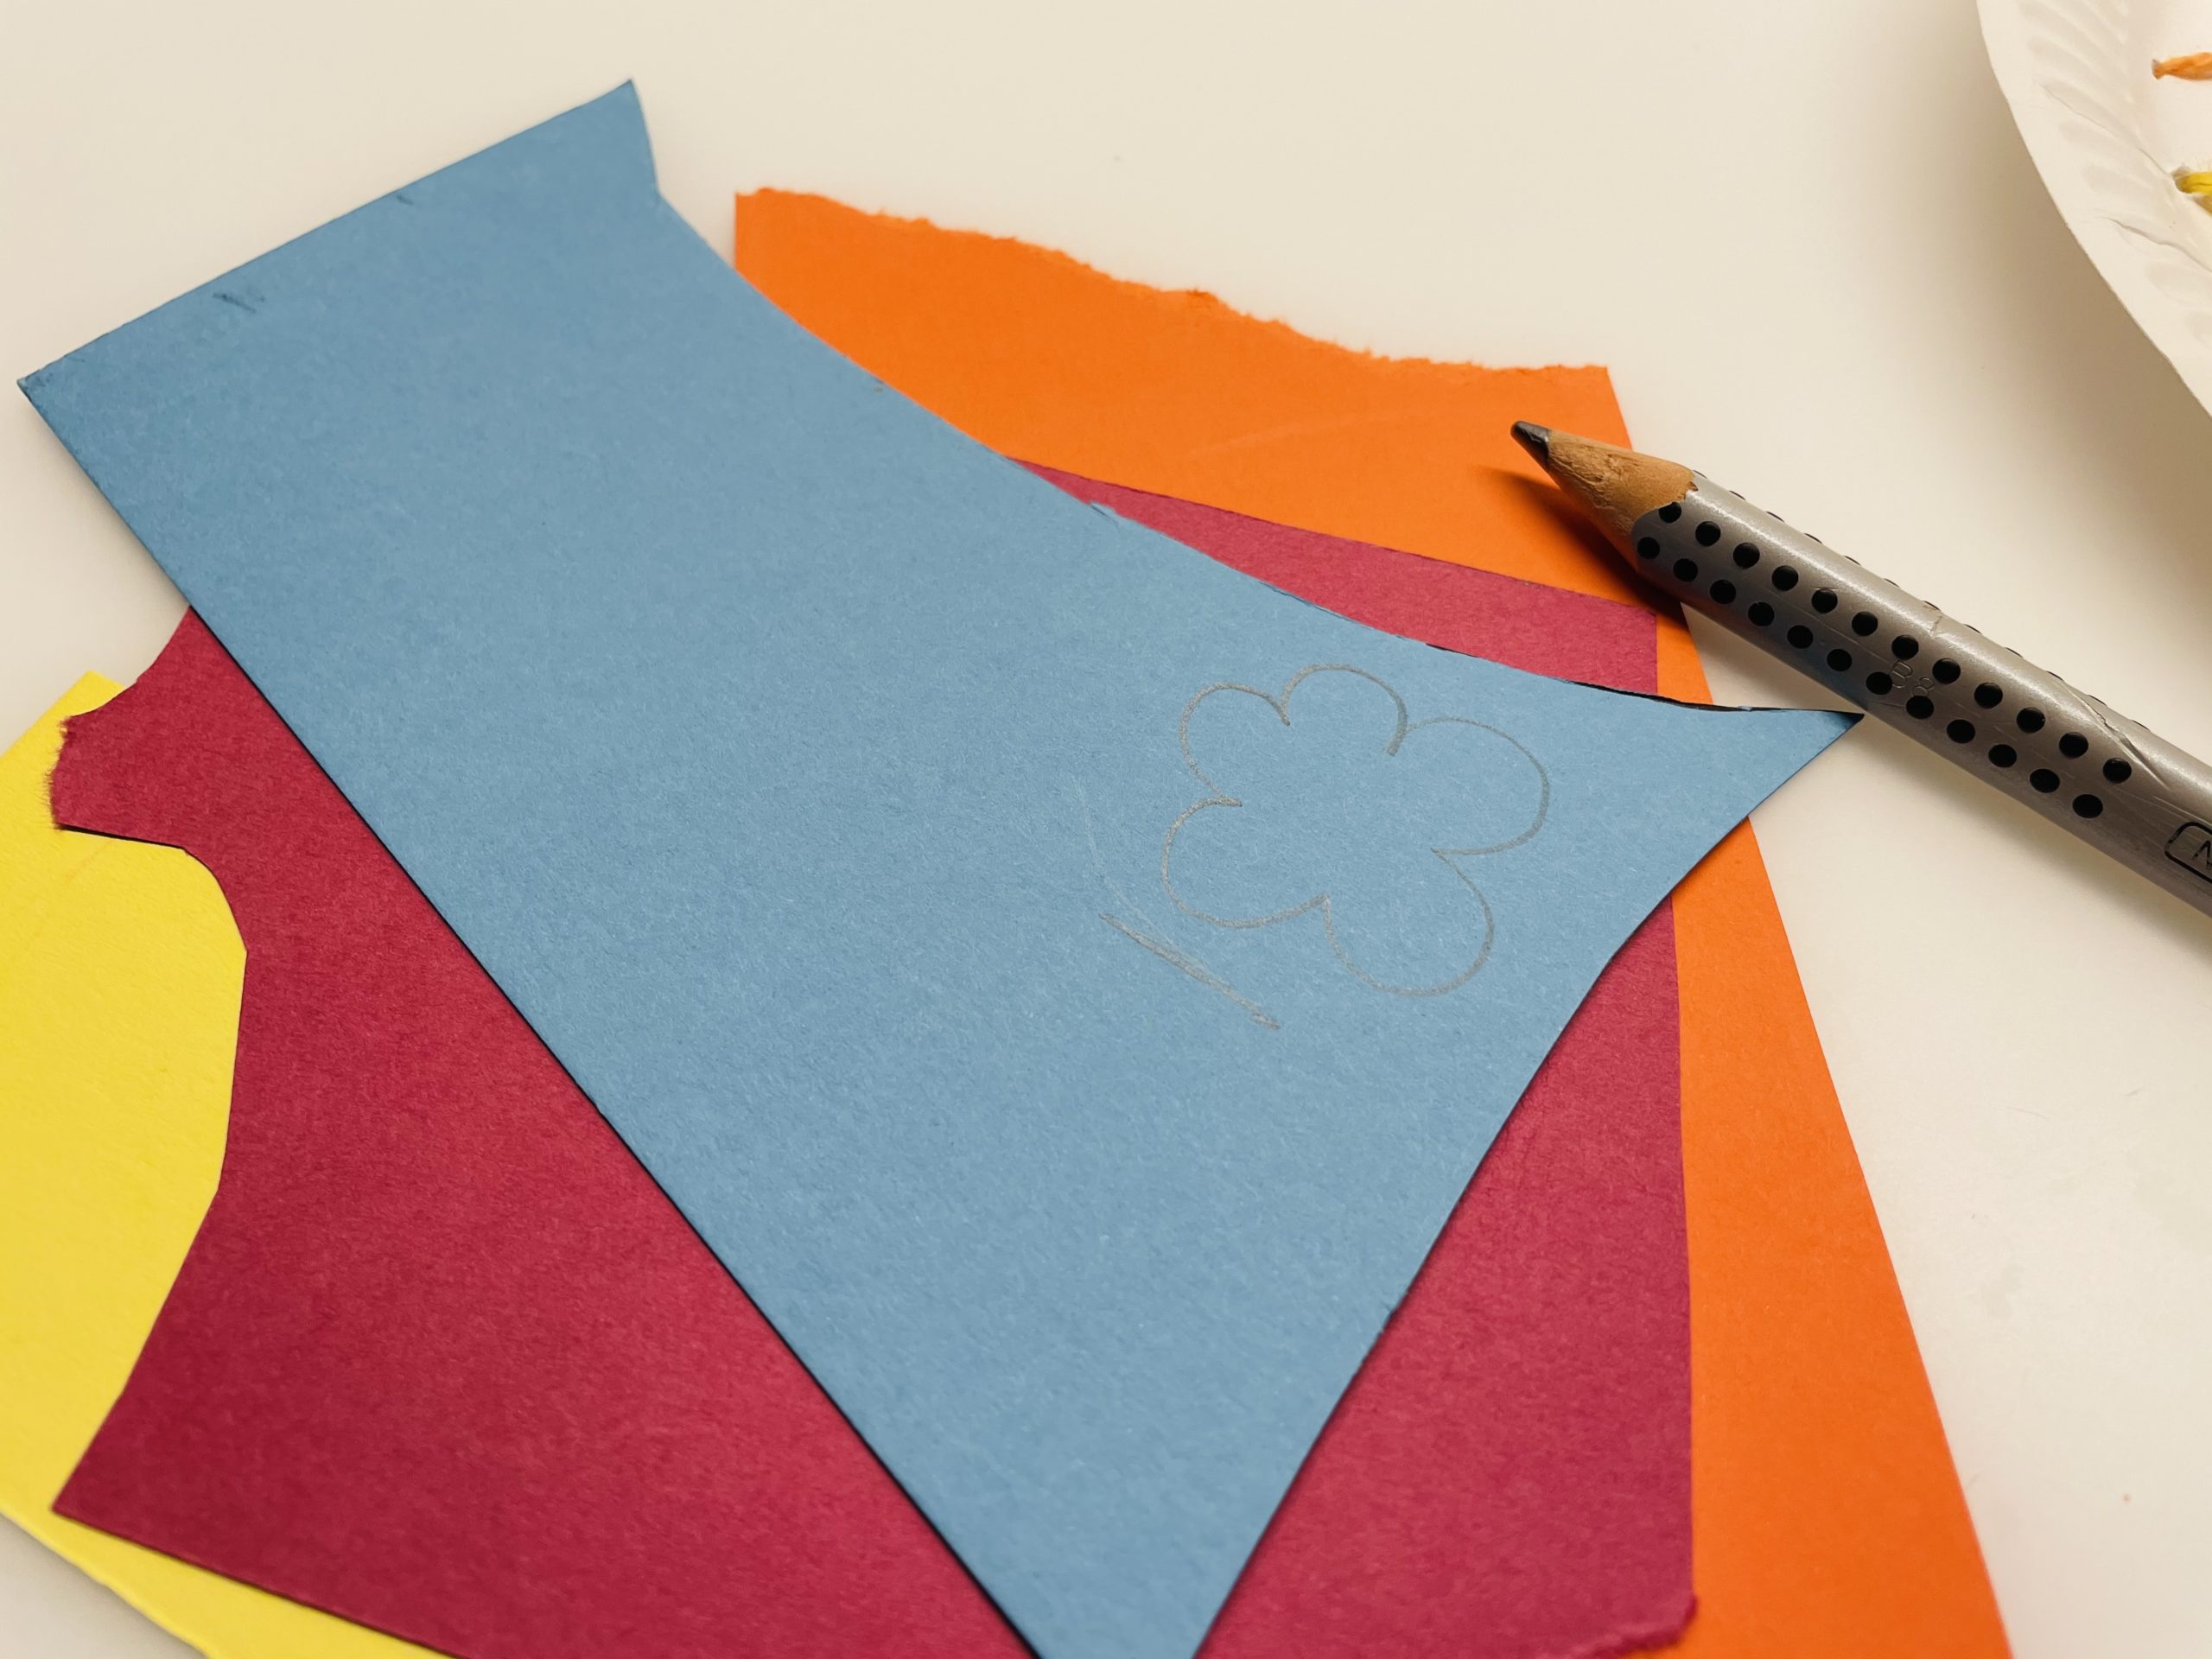
Bild zum Schritt 13 für das Bastel- und DIY-Abenteuer für Kinder: 'Malt euch darauf jetzt kleine Blumen auf und schneidet diese...'

14

2. Bild zum Schritt 13 für das Bastel- und DIY-Abenteuer für Kinder: 'Malt euch darauf jetzt kleine Blumen auf und schneidet diese...'

15

Then you make small butterflies. For this you fold a small paper half and then paint half a butterfly. Make sure that the body of the butterfly is at the paper break.
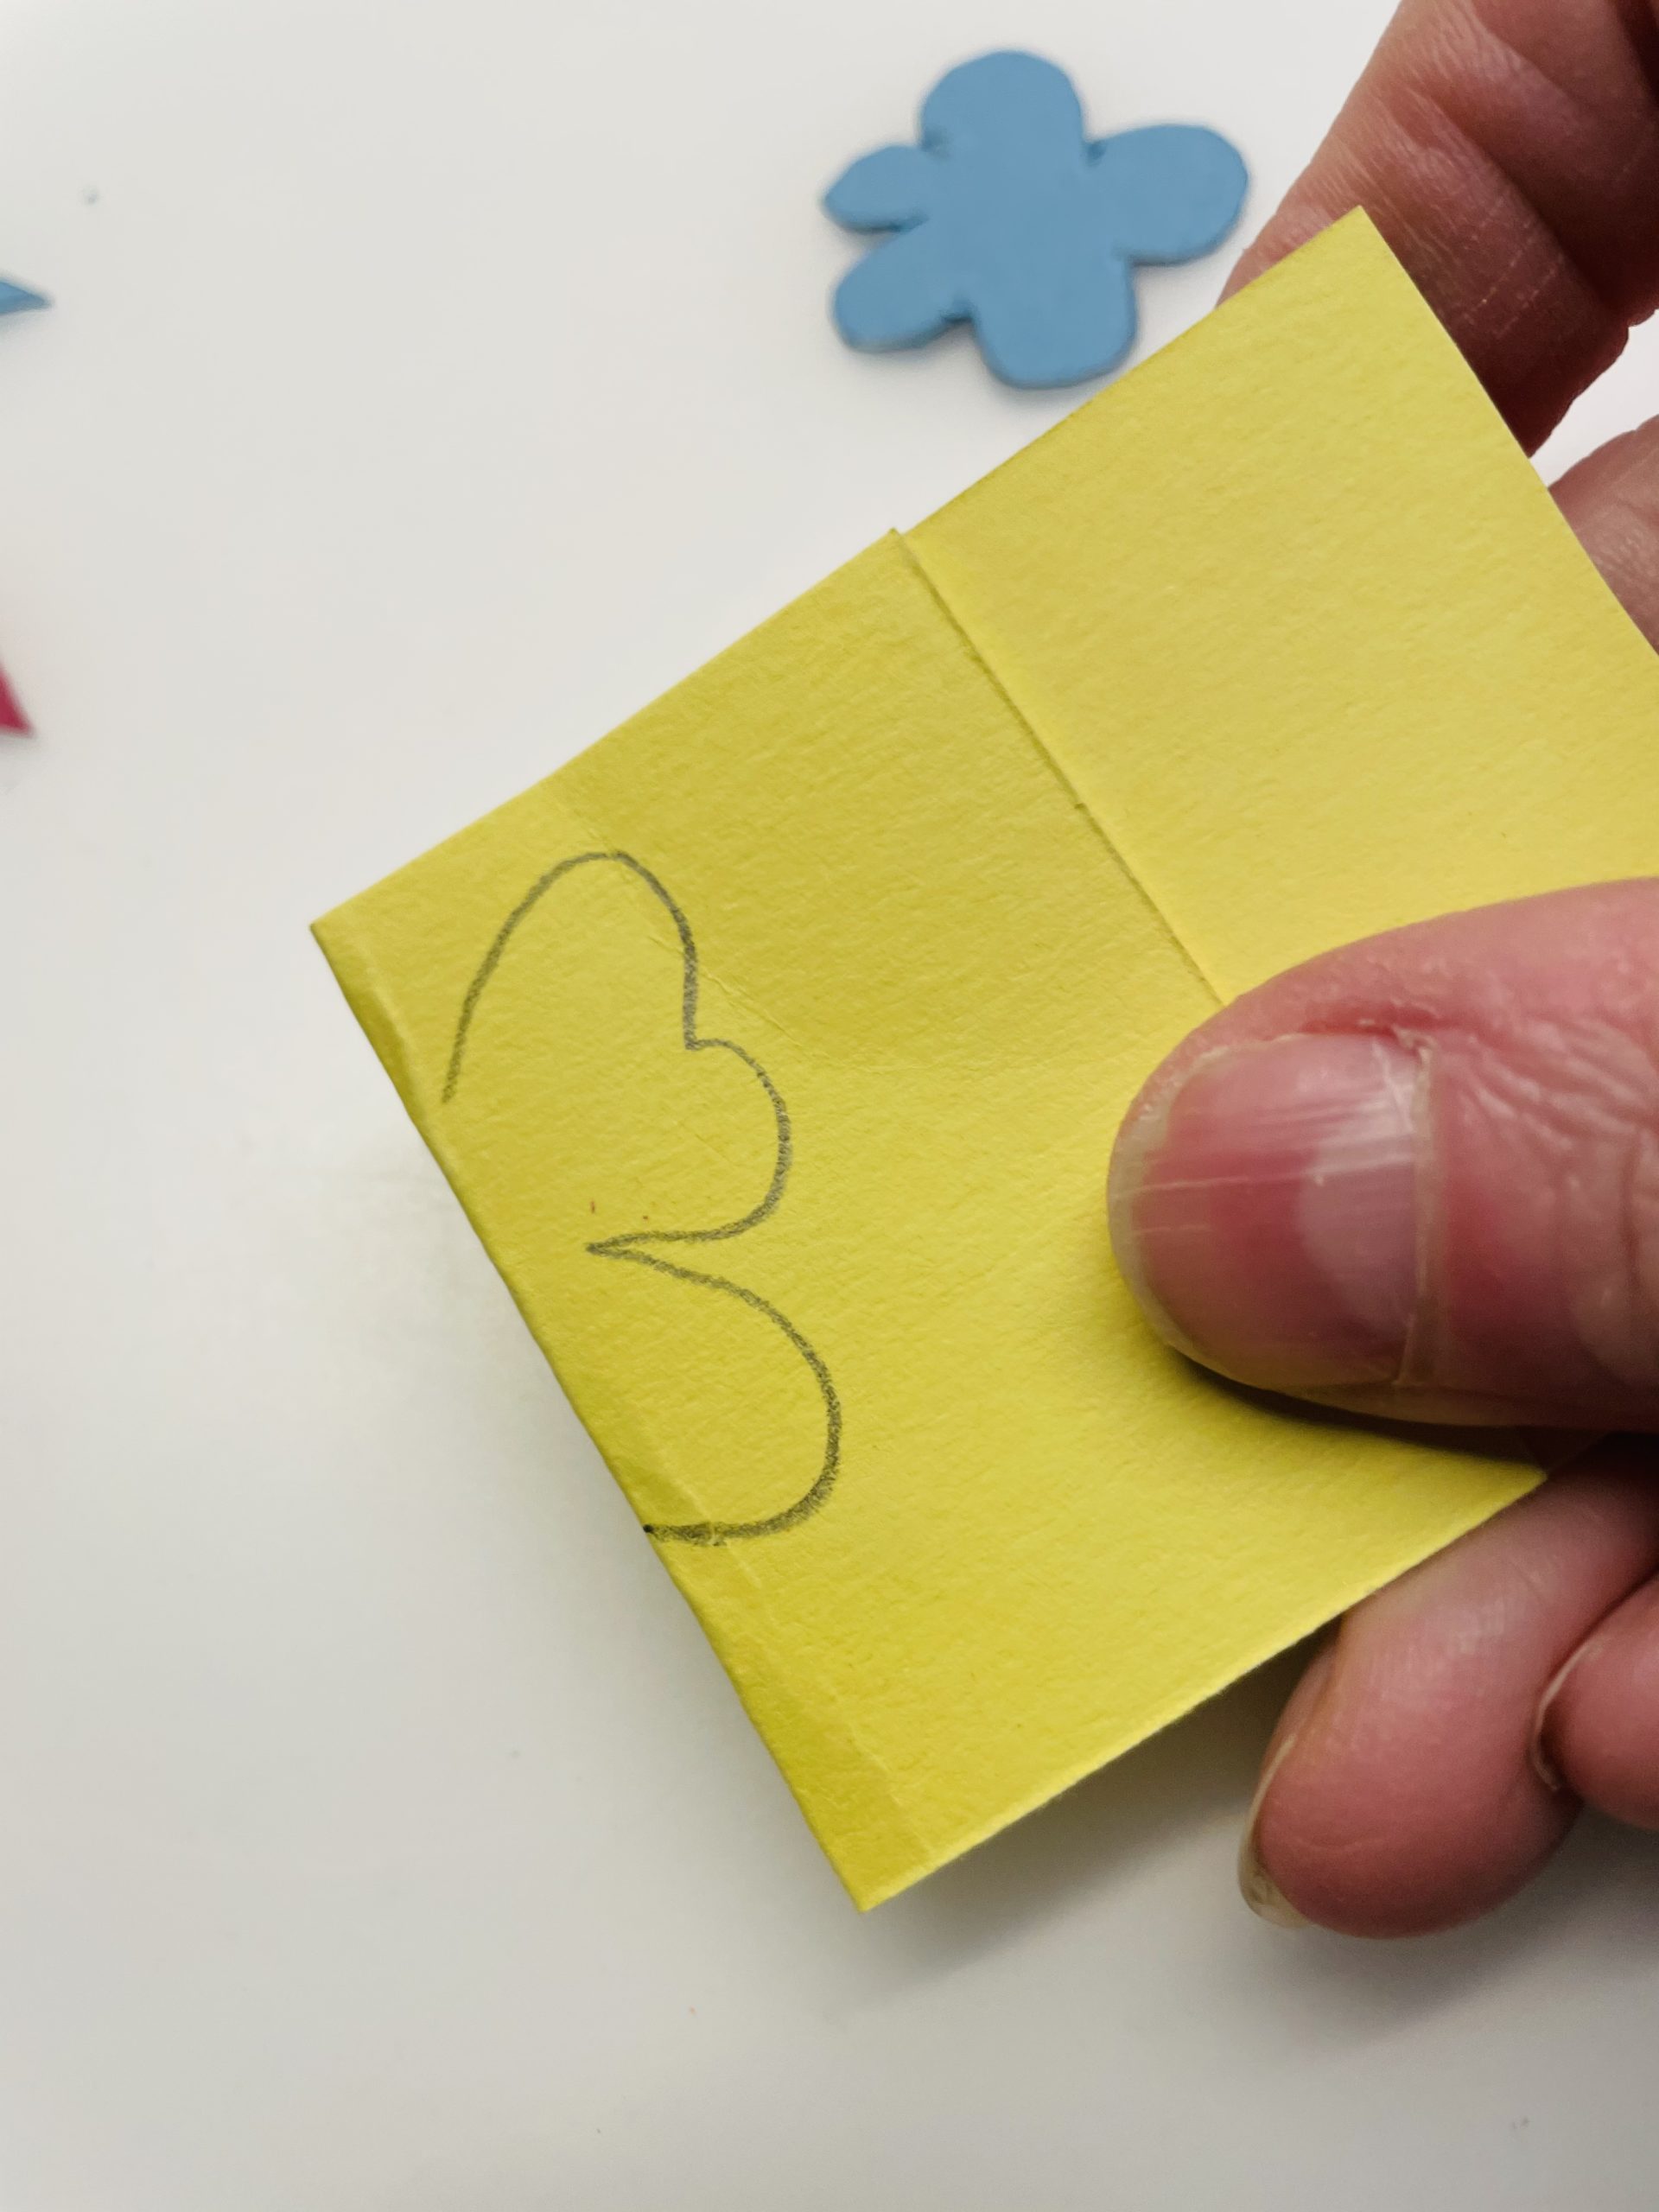
Bild zum Schritt 15 für das Bastel- und DIY-Abenteuer für Kinder: 'Dann bastelt ihr kleine Schmetterlinge. Dafür faltet ihr ein kleines...'

16

Cuts out some flowers and butterflies.
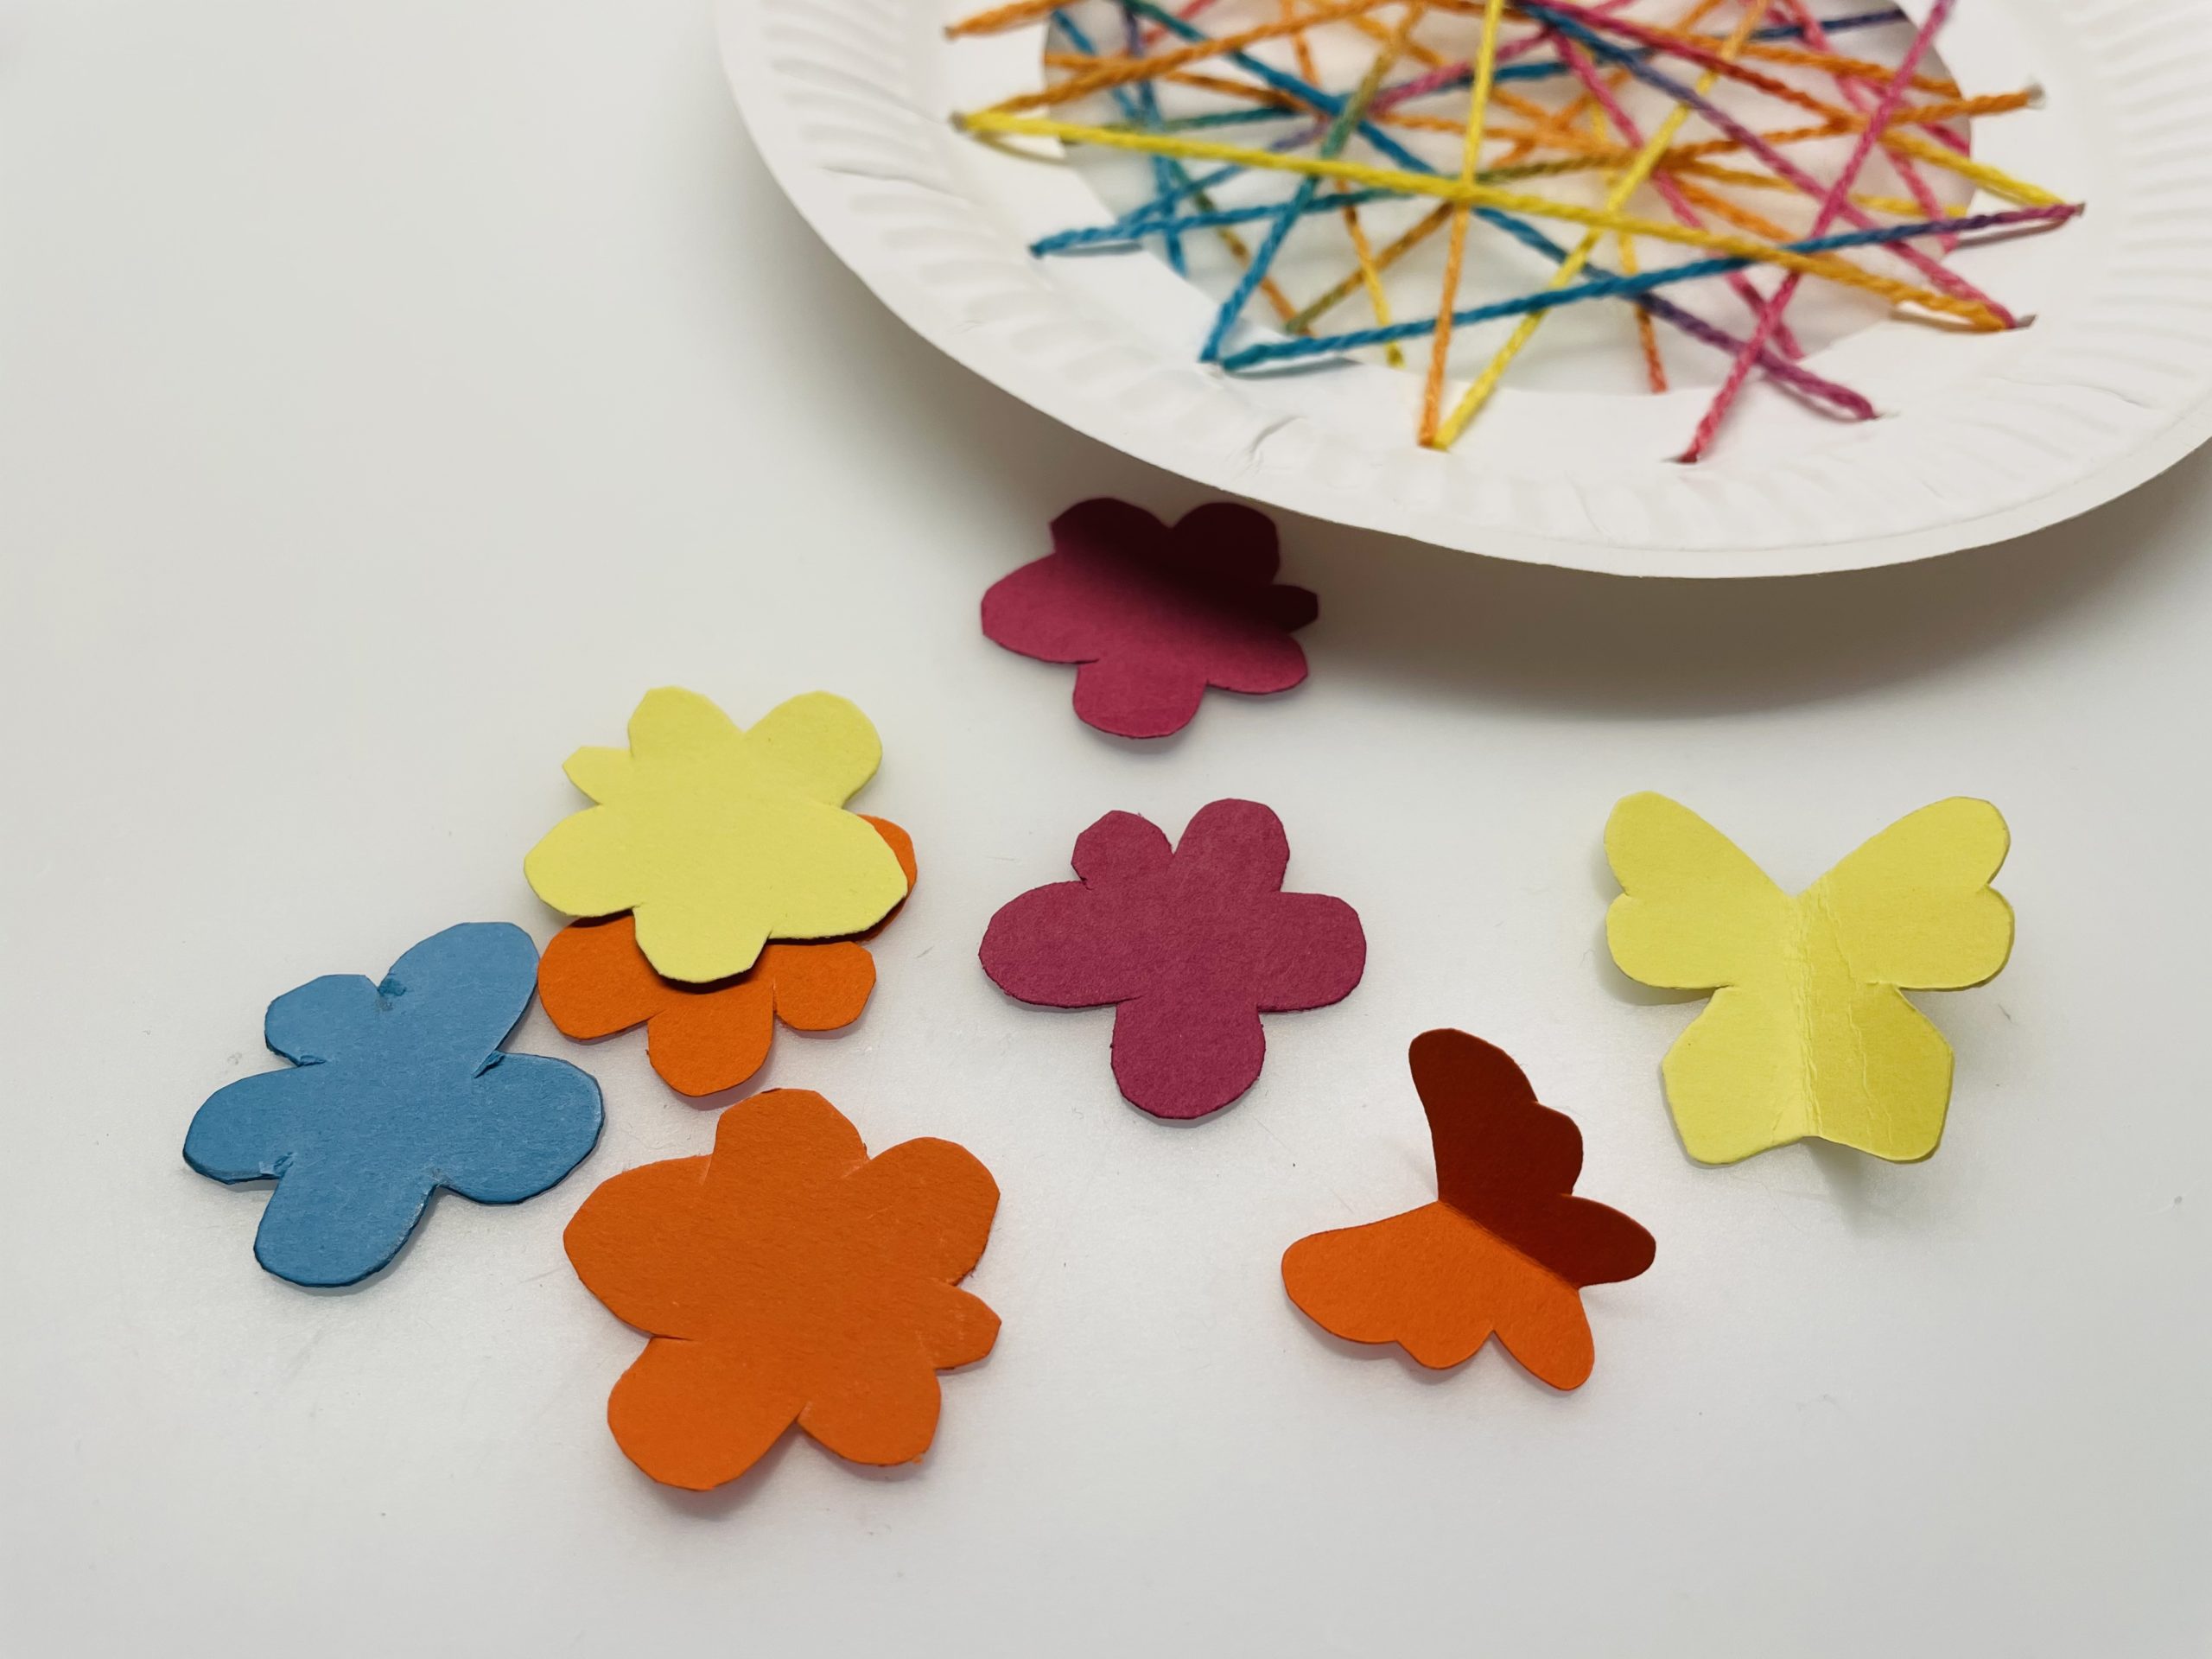
Bild zum Schritt 16 für das Bastel- und DIY-Abenteuer für Kinder: 'Schneidet einige Blumen und Schmetterlinge aus.'

17

Now you punch small circles from the colorful paper remains with the holer, which you stick in the middle of your flowers.
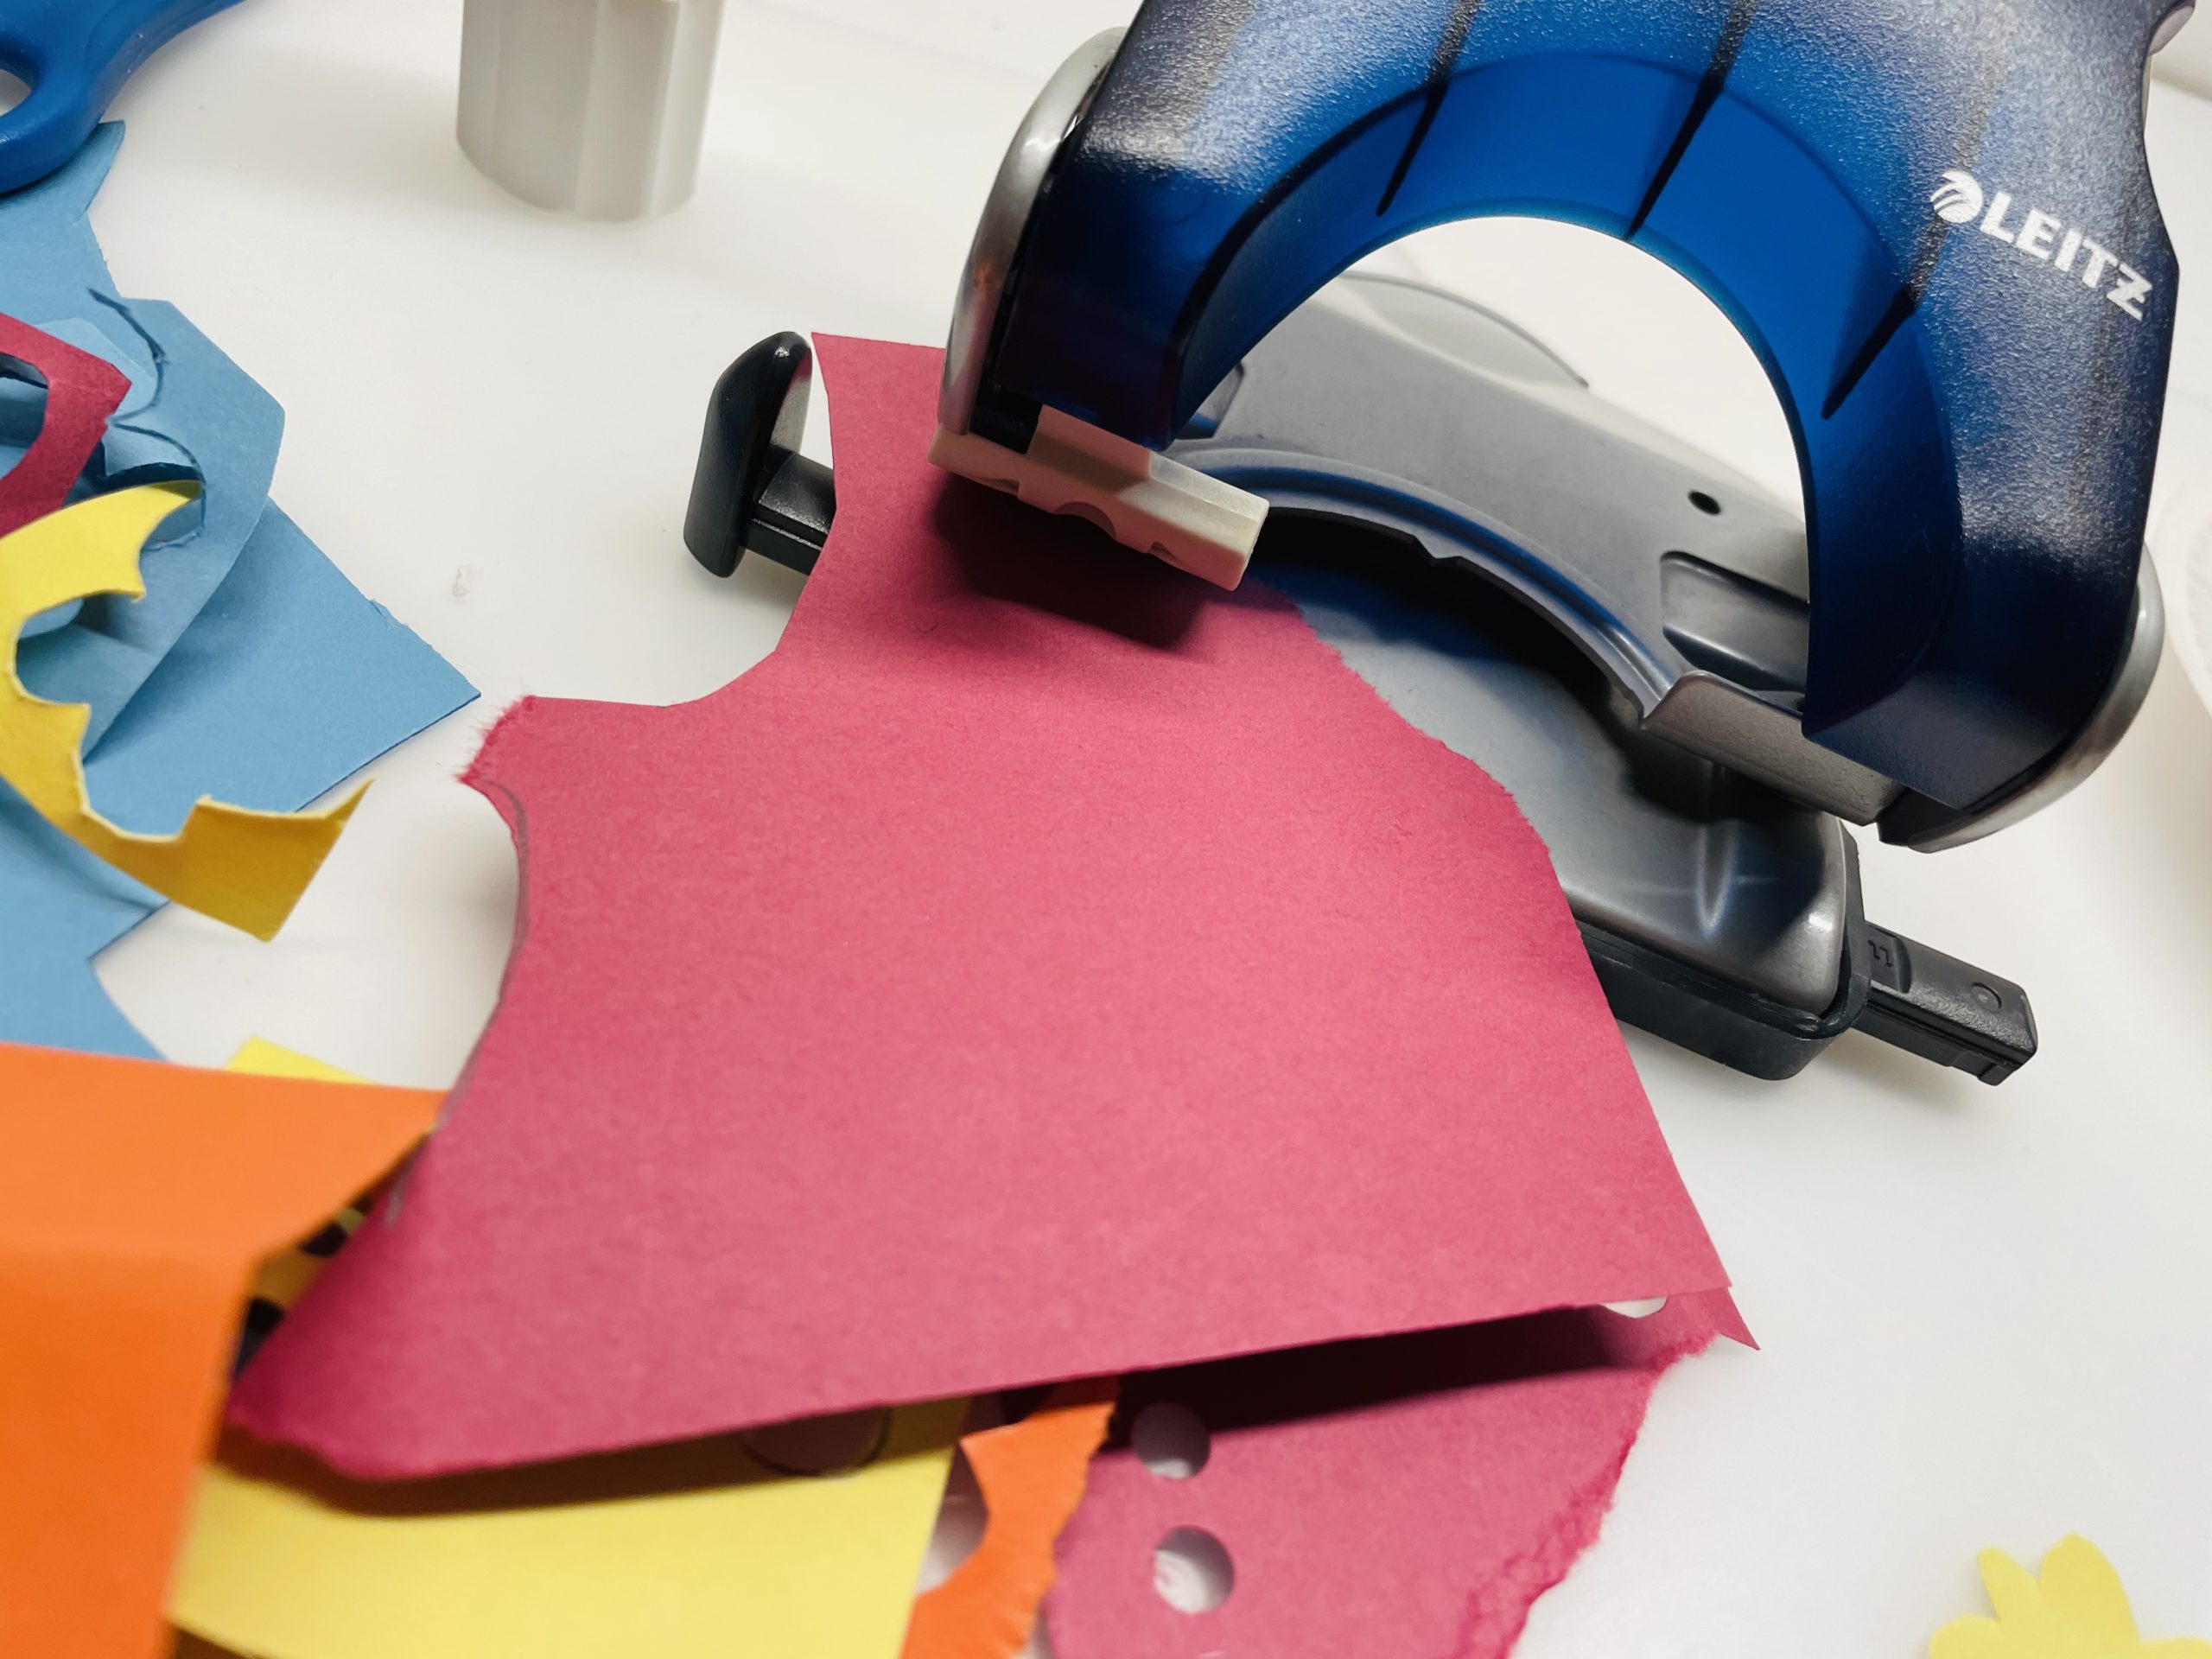
Bild zum Schritt 17 für das Bastel- und DIY-Abenteuer für Kinder: 'Jetzt locht ihr aus den bunten Papierresten mit dem Locher...'

18

Now stick a small circle to each flower.
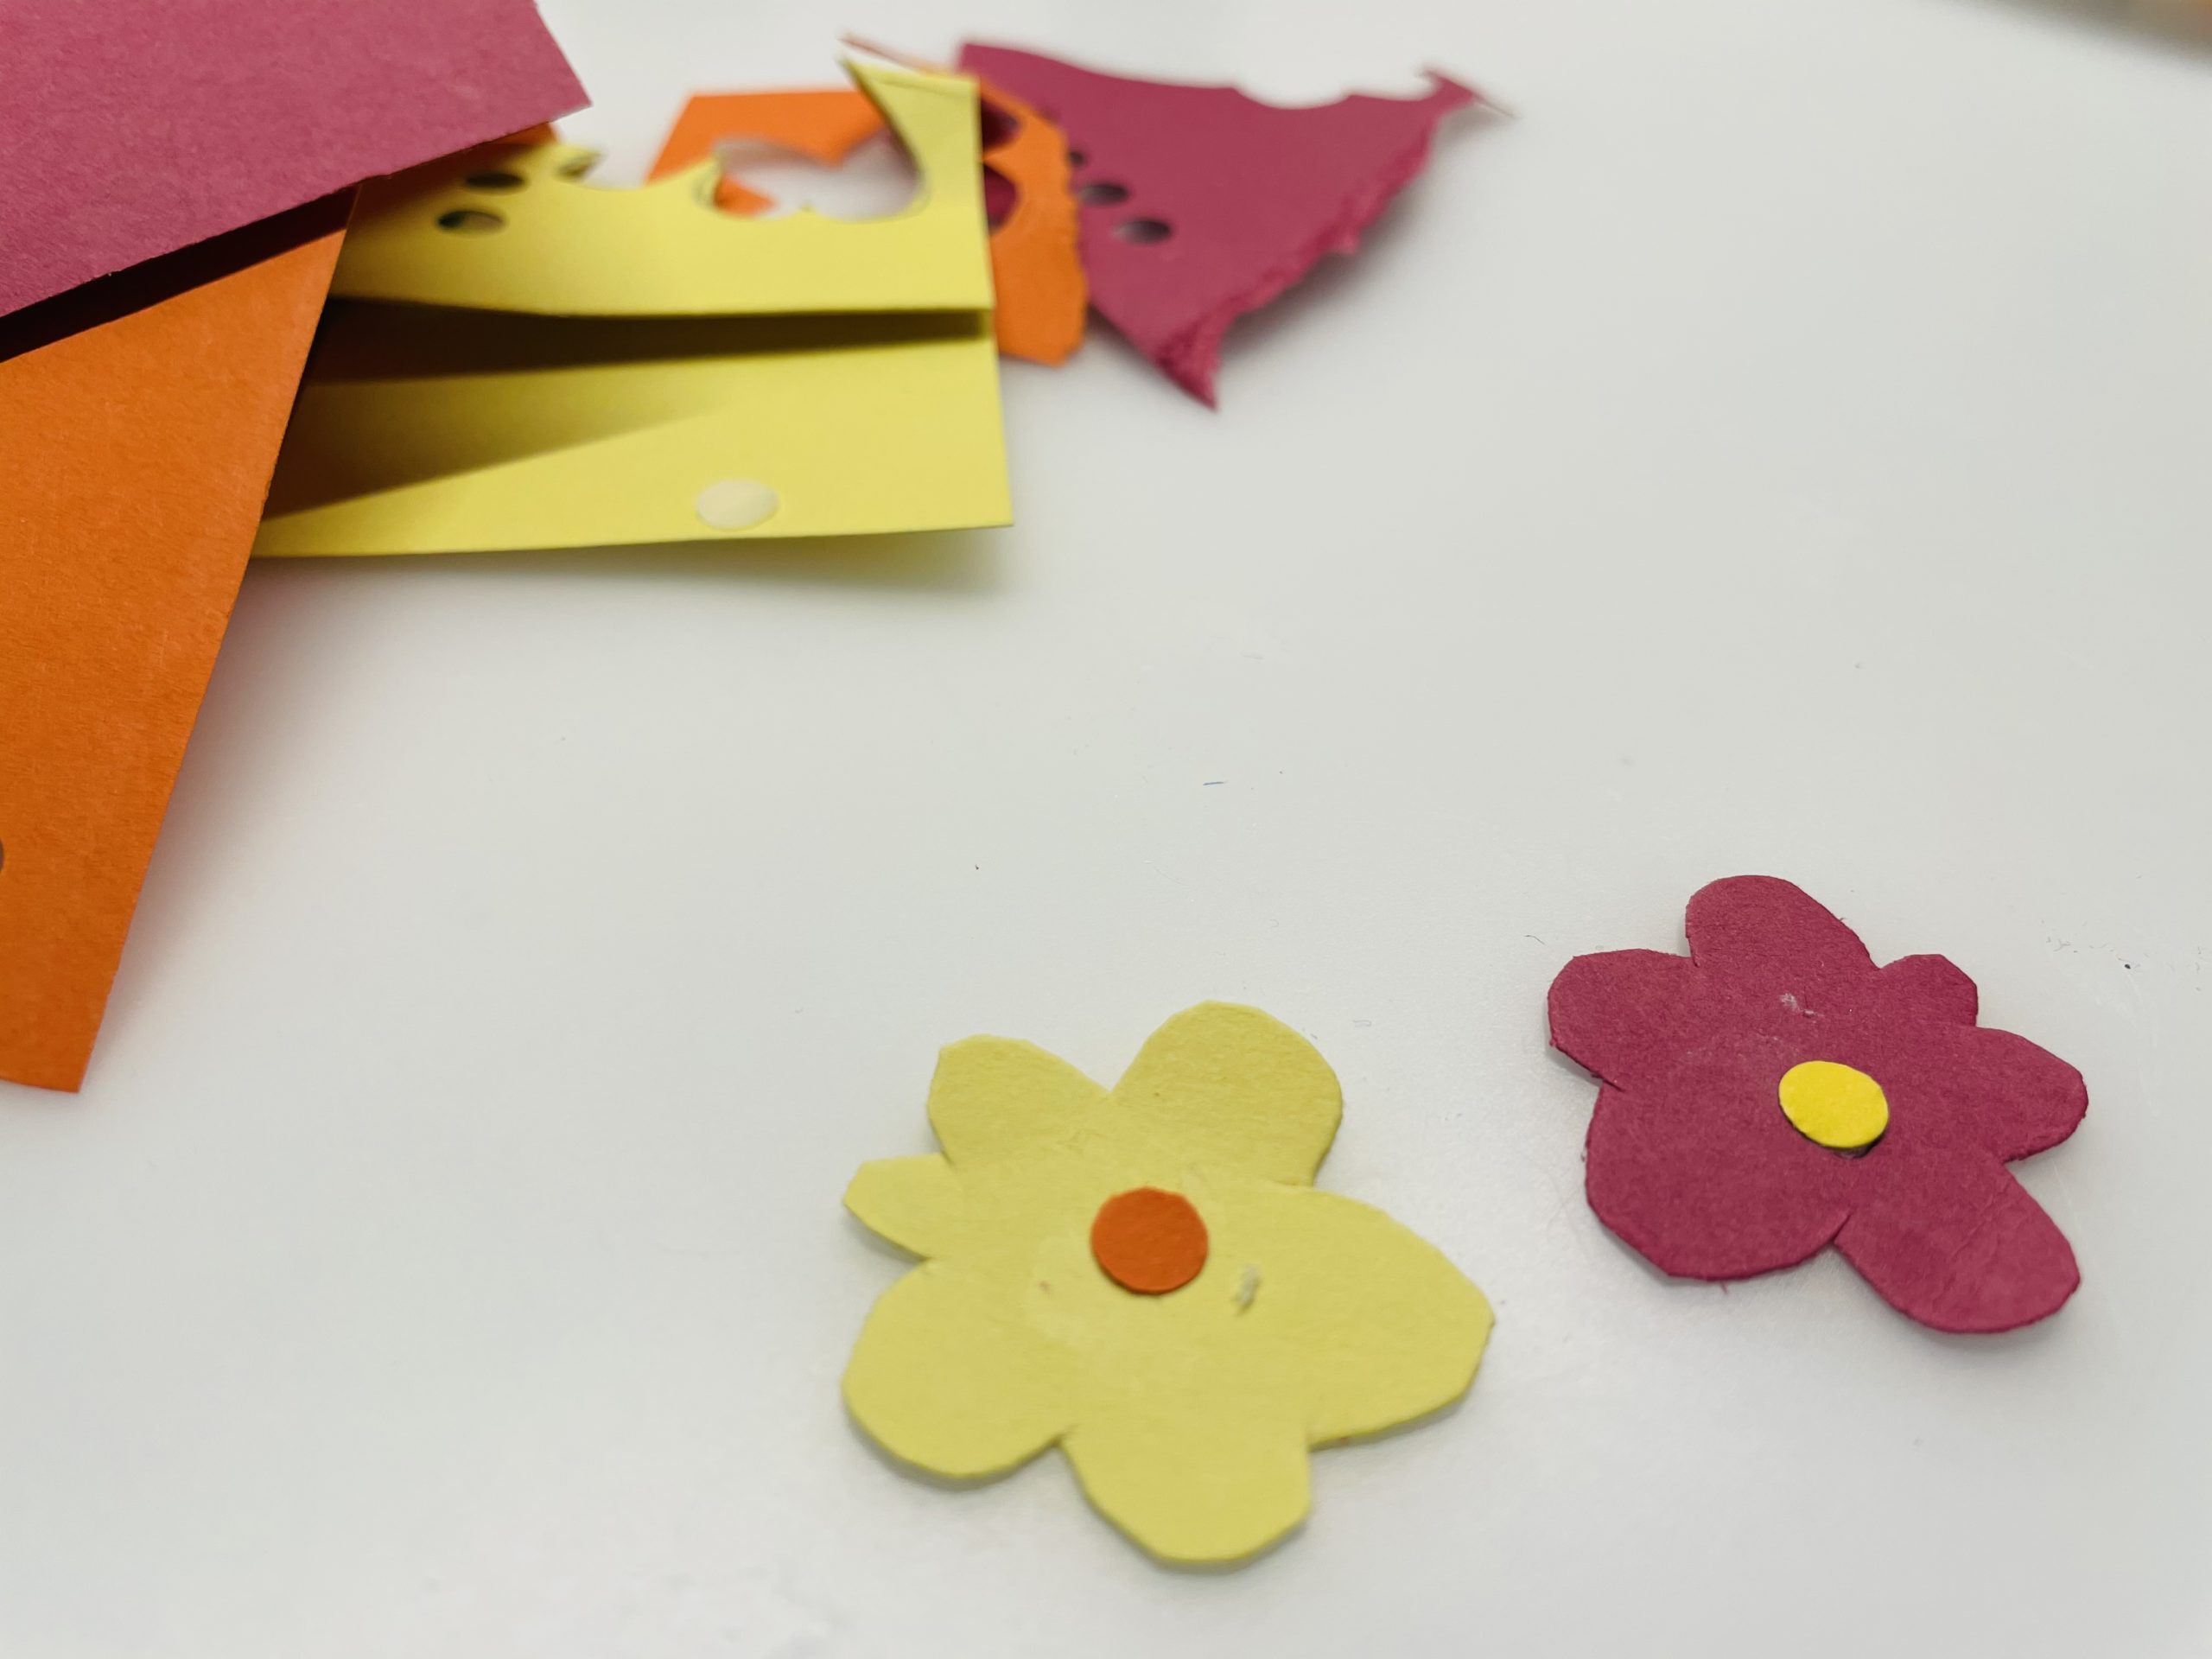
Bild zum Schritt 18 für das Bastel- und DIY-Abenteuer für Kinder: 'Klebt nun einen kleinen Kreis auf jede Blüte.'

19

Now you order your flowers and butterflies on the thread net. Also shape the edge of the cardboard plate.
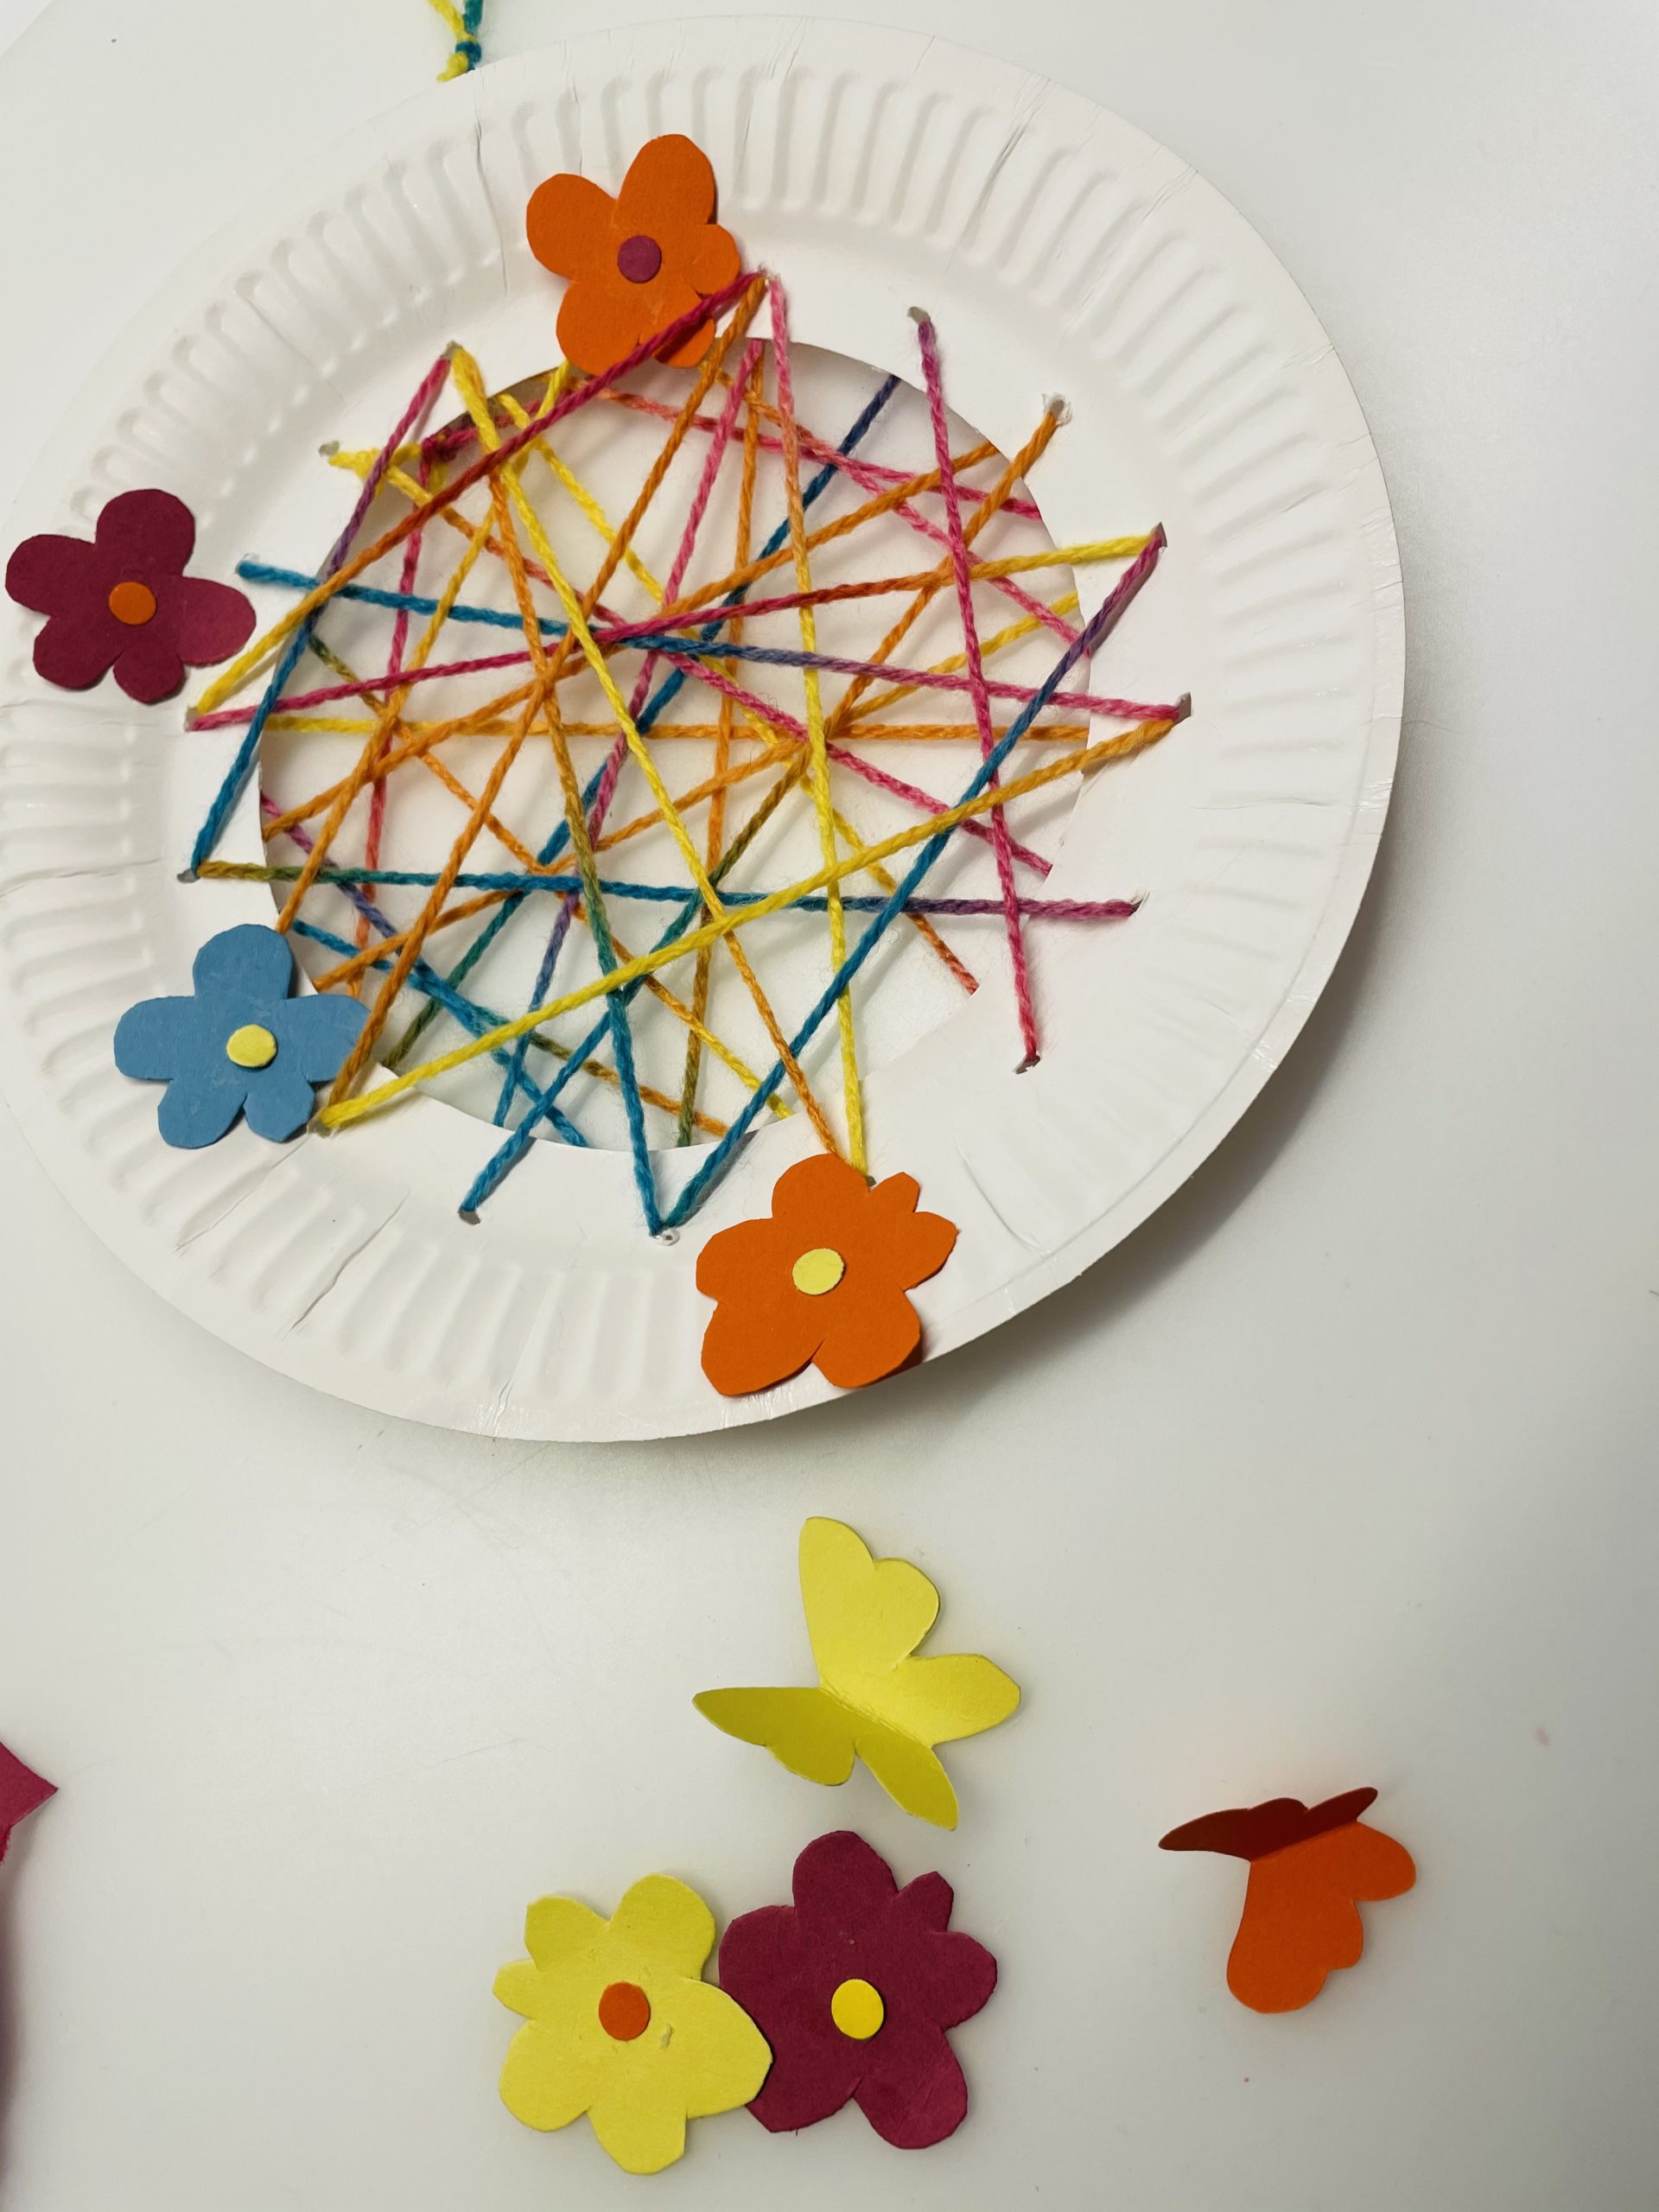
Bild zum Schritt 19 für das Bastel- und DIY-Abenteuer für Kinder: 'Jetzt ordnet ihr eure Blumen und Schmetterlinge auf den Fadennetz...'

20

Then stick to all flowers and butterflies.
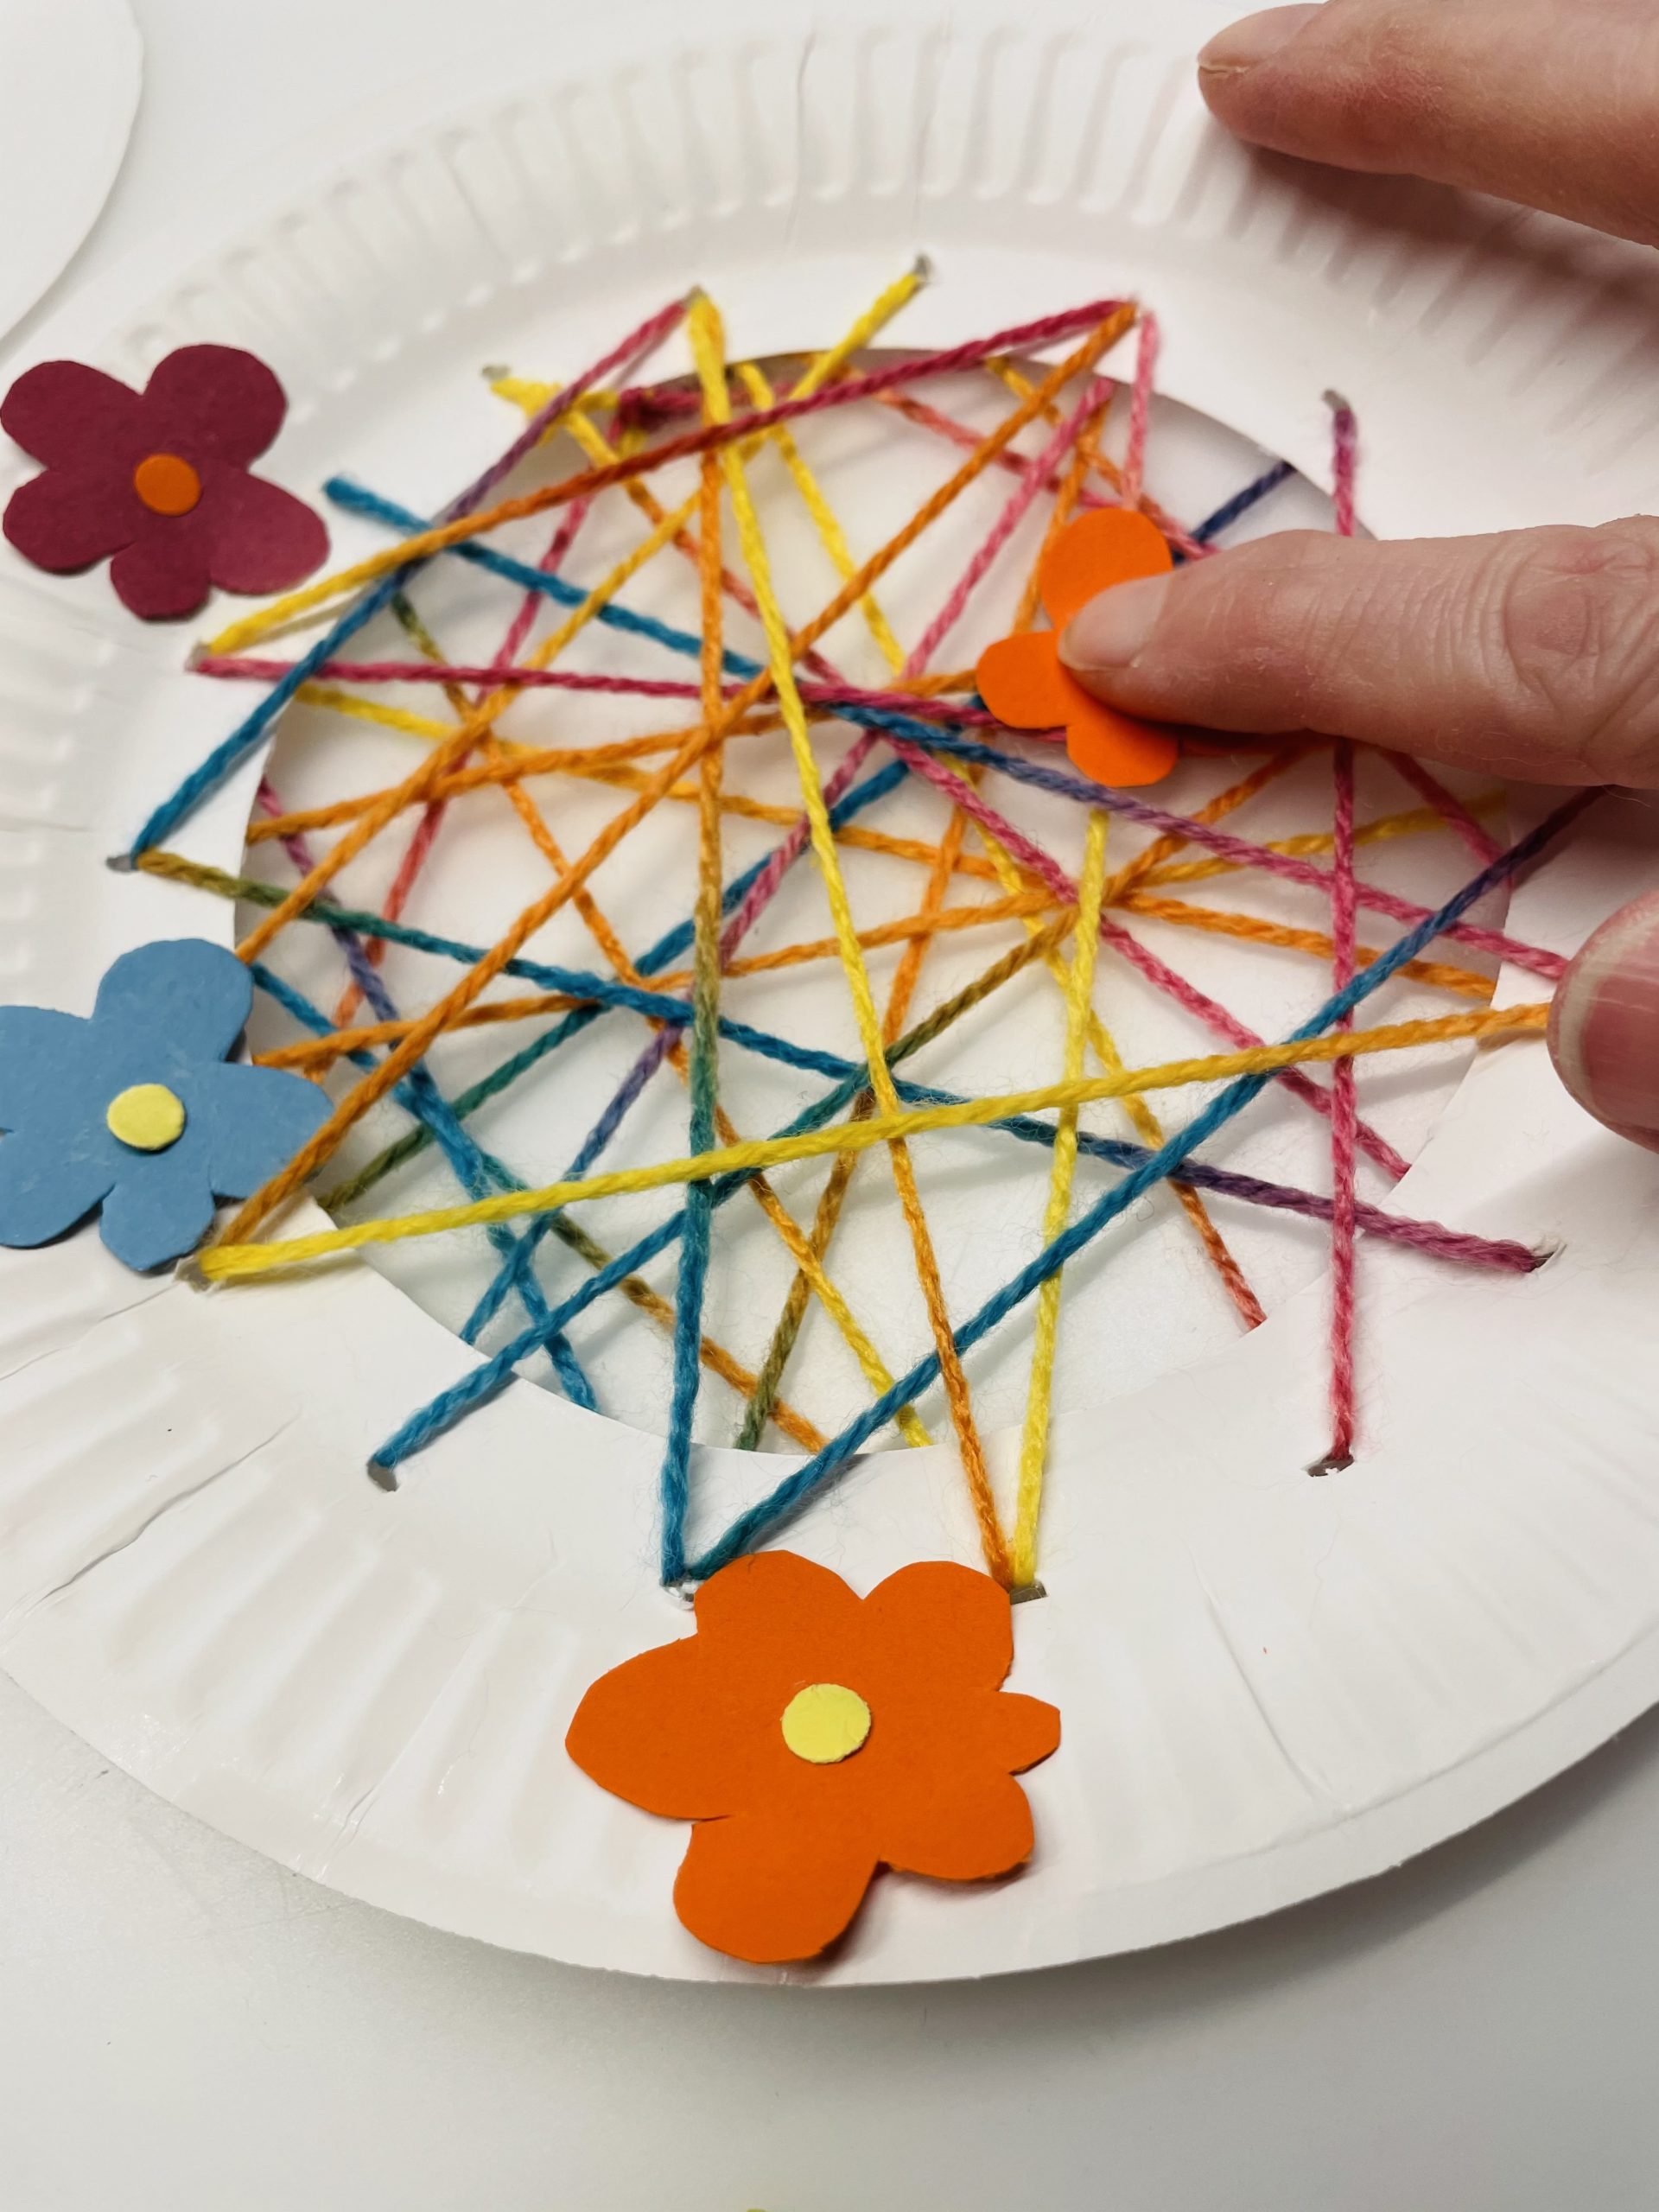
Bild zum Schritt 20 für das Bastel- und DIY-Abenteuer für Kinder: 'Klebt anschließend alle Blumen und Schmetterlinge fest.'

21

At the bottom of the dream catcher you now tie another wool thread. Use an existing hole. Knead the thread and let the ends hang down.
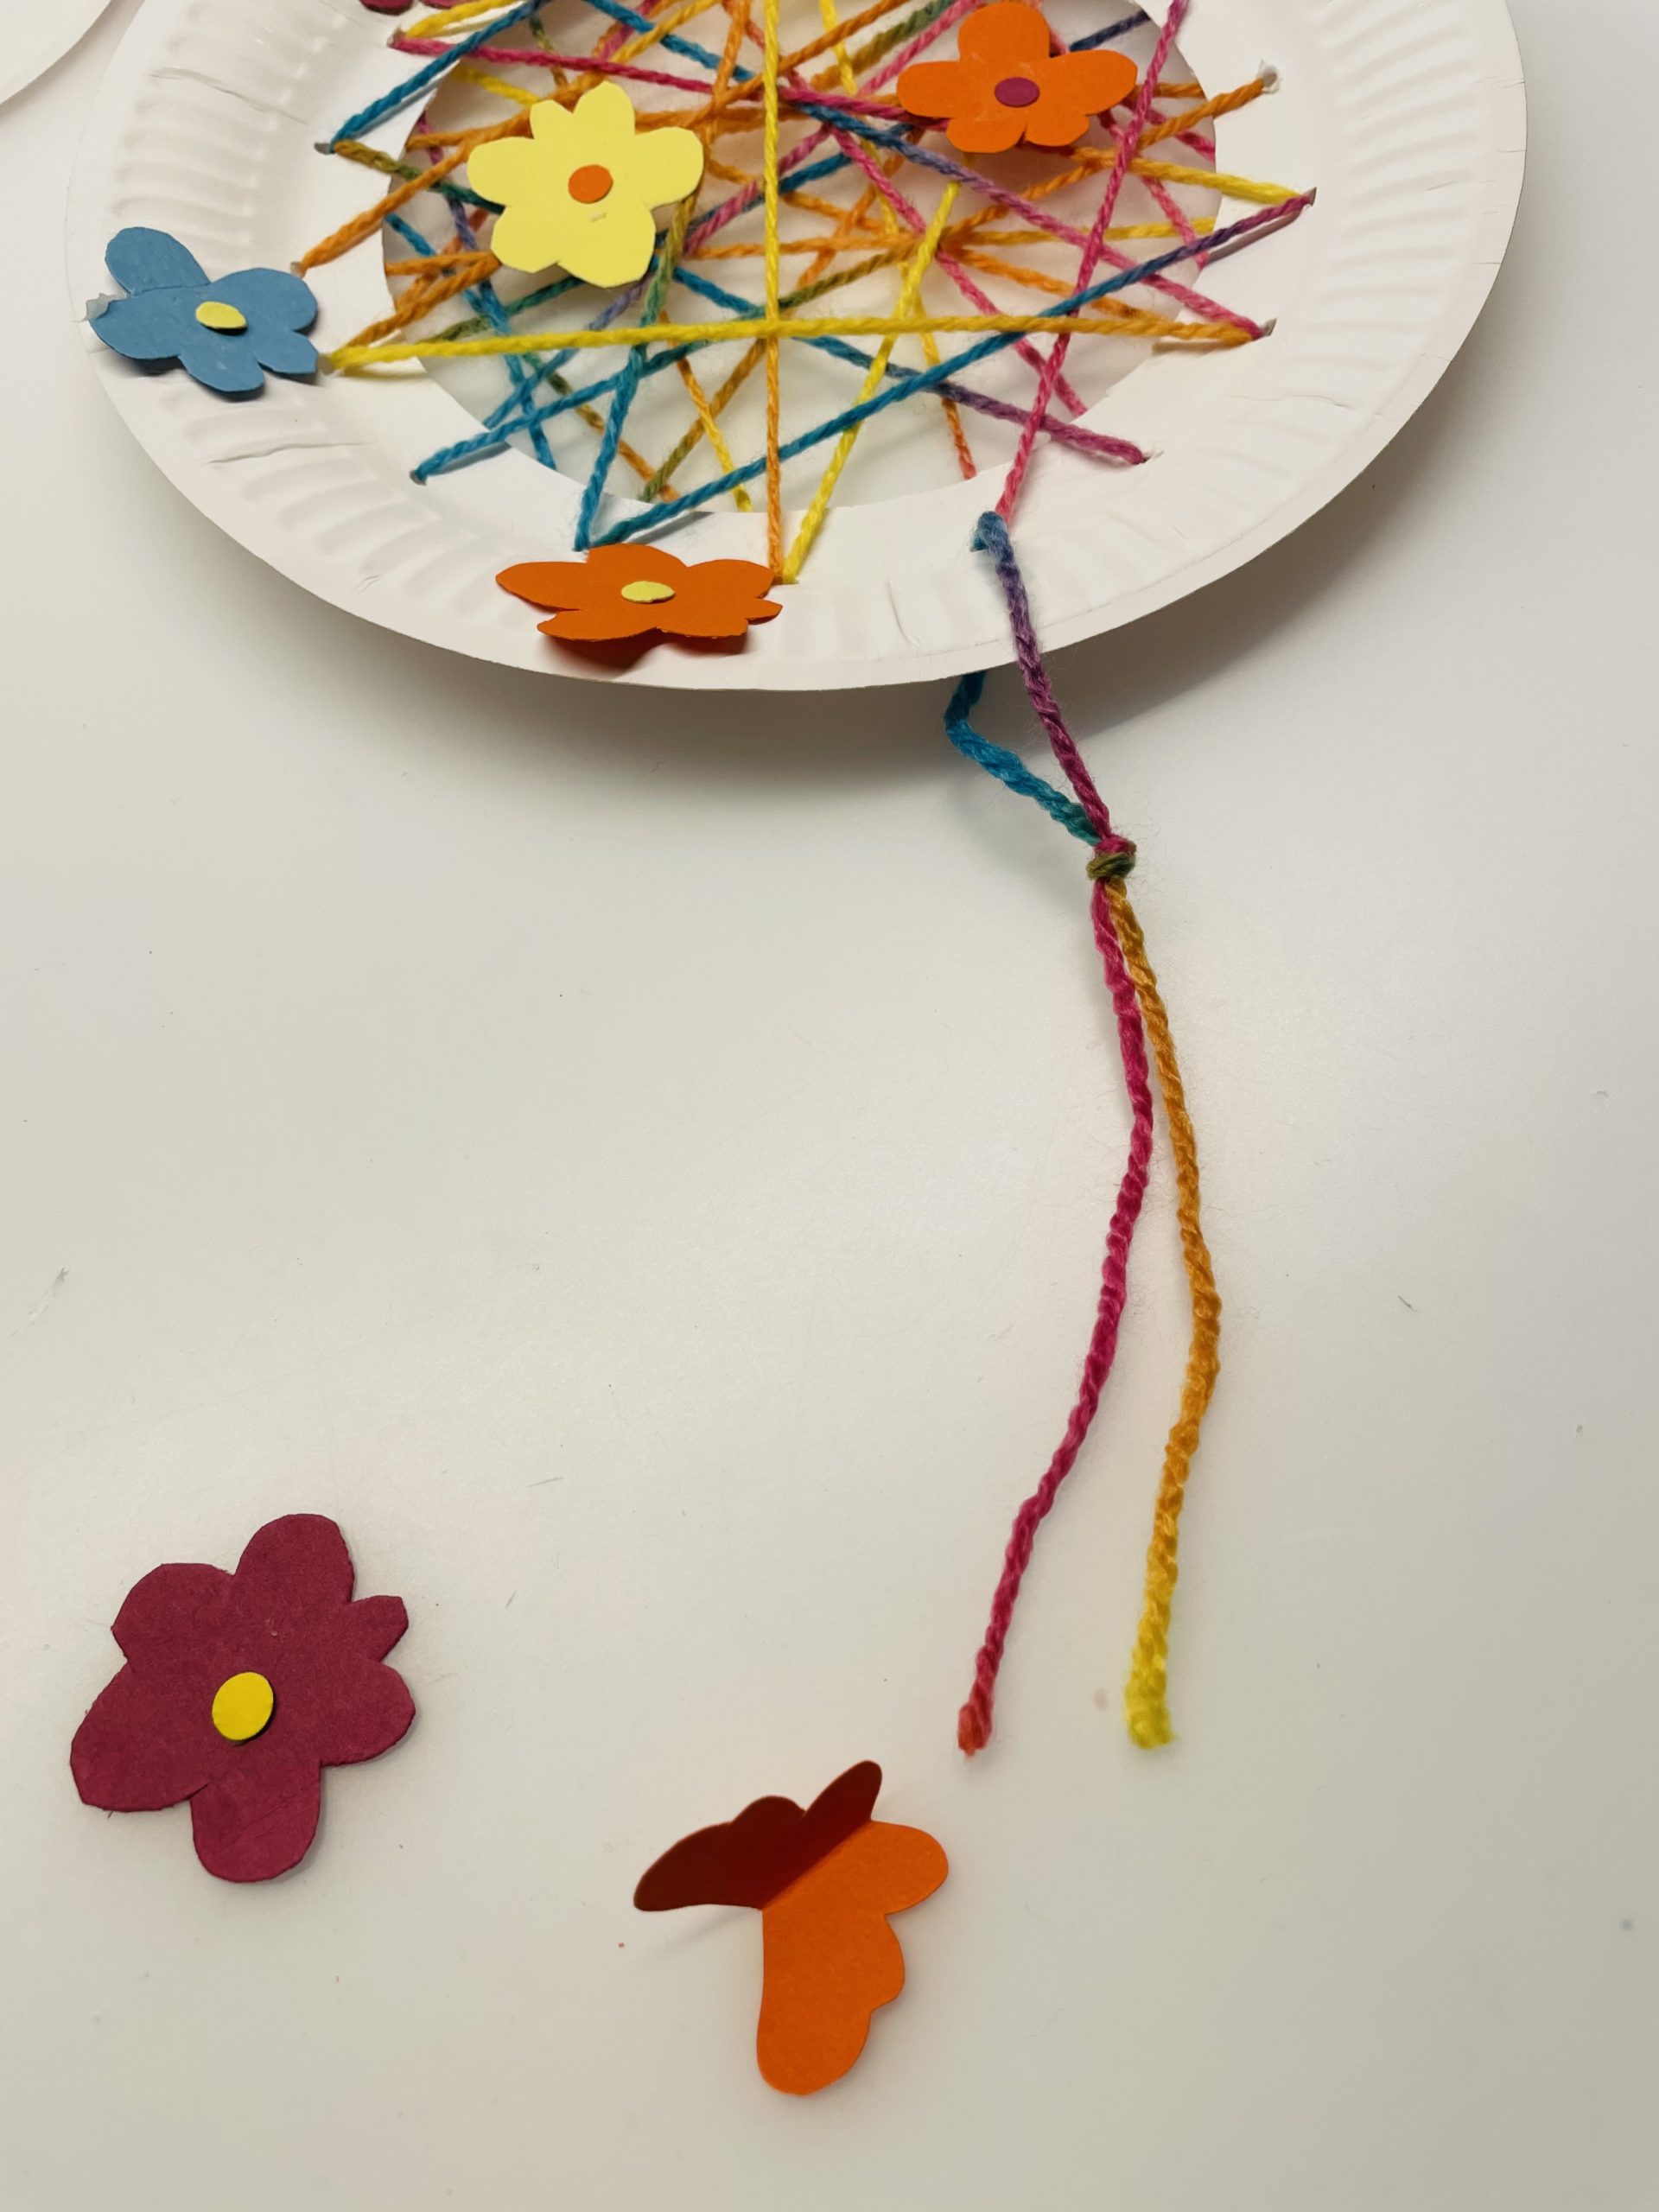
Bild zum Schritt 21 für das Bastel- und DIY-Abenteuer für Kinder: 'Am unteren Rand des Traumfängers bindet ihr nun noch einen...'

22

Now glues a flower and/or a butterfly to these threads.
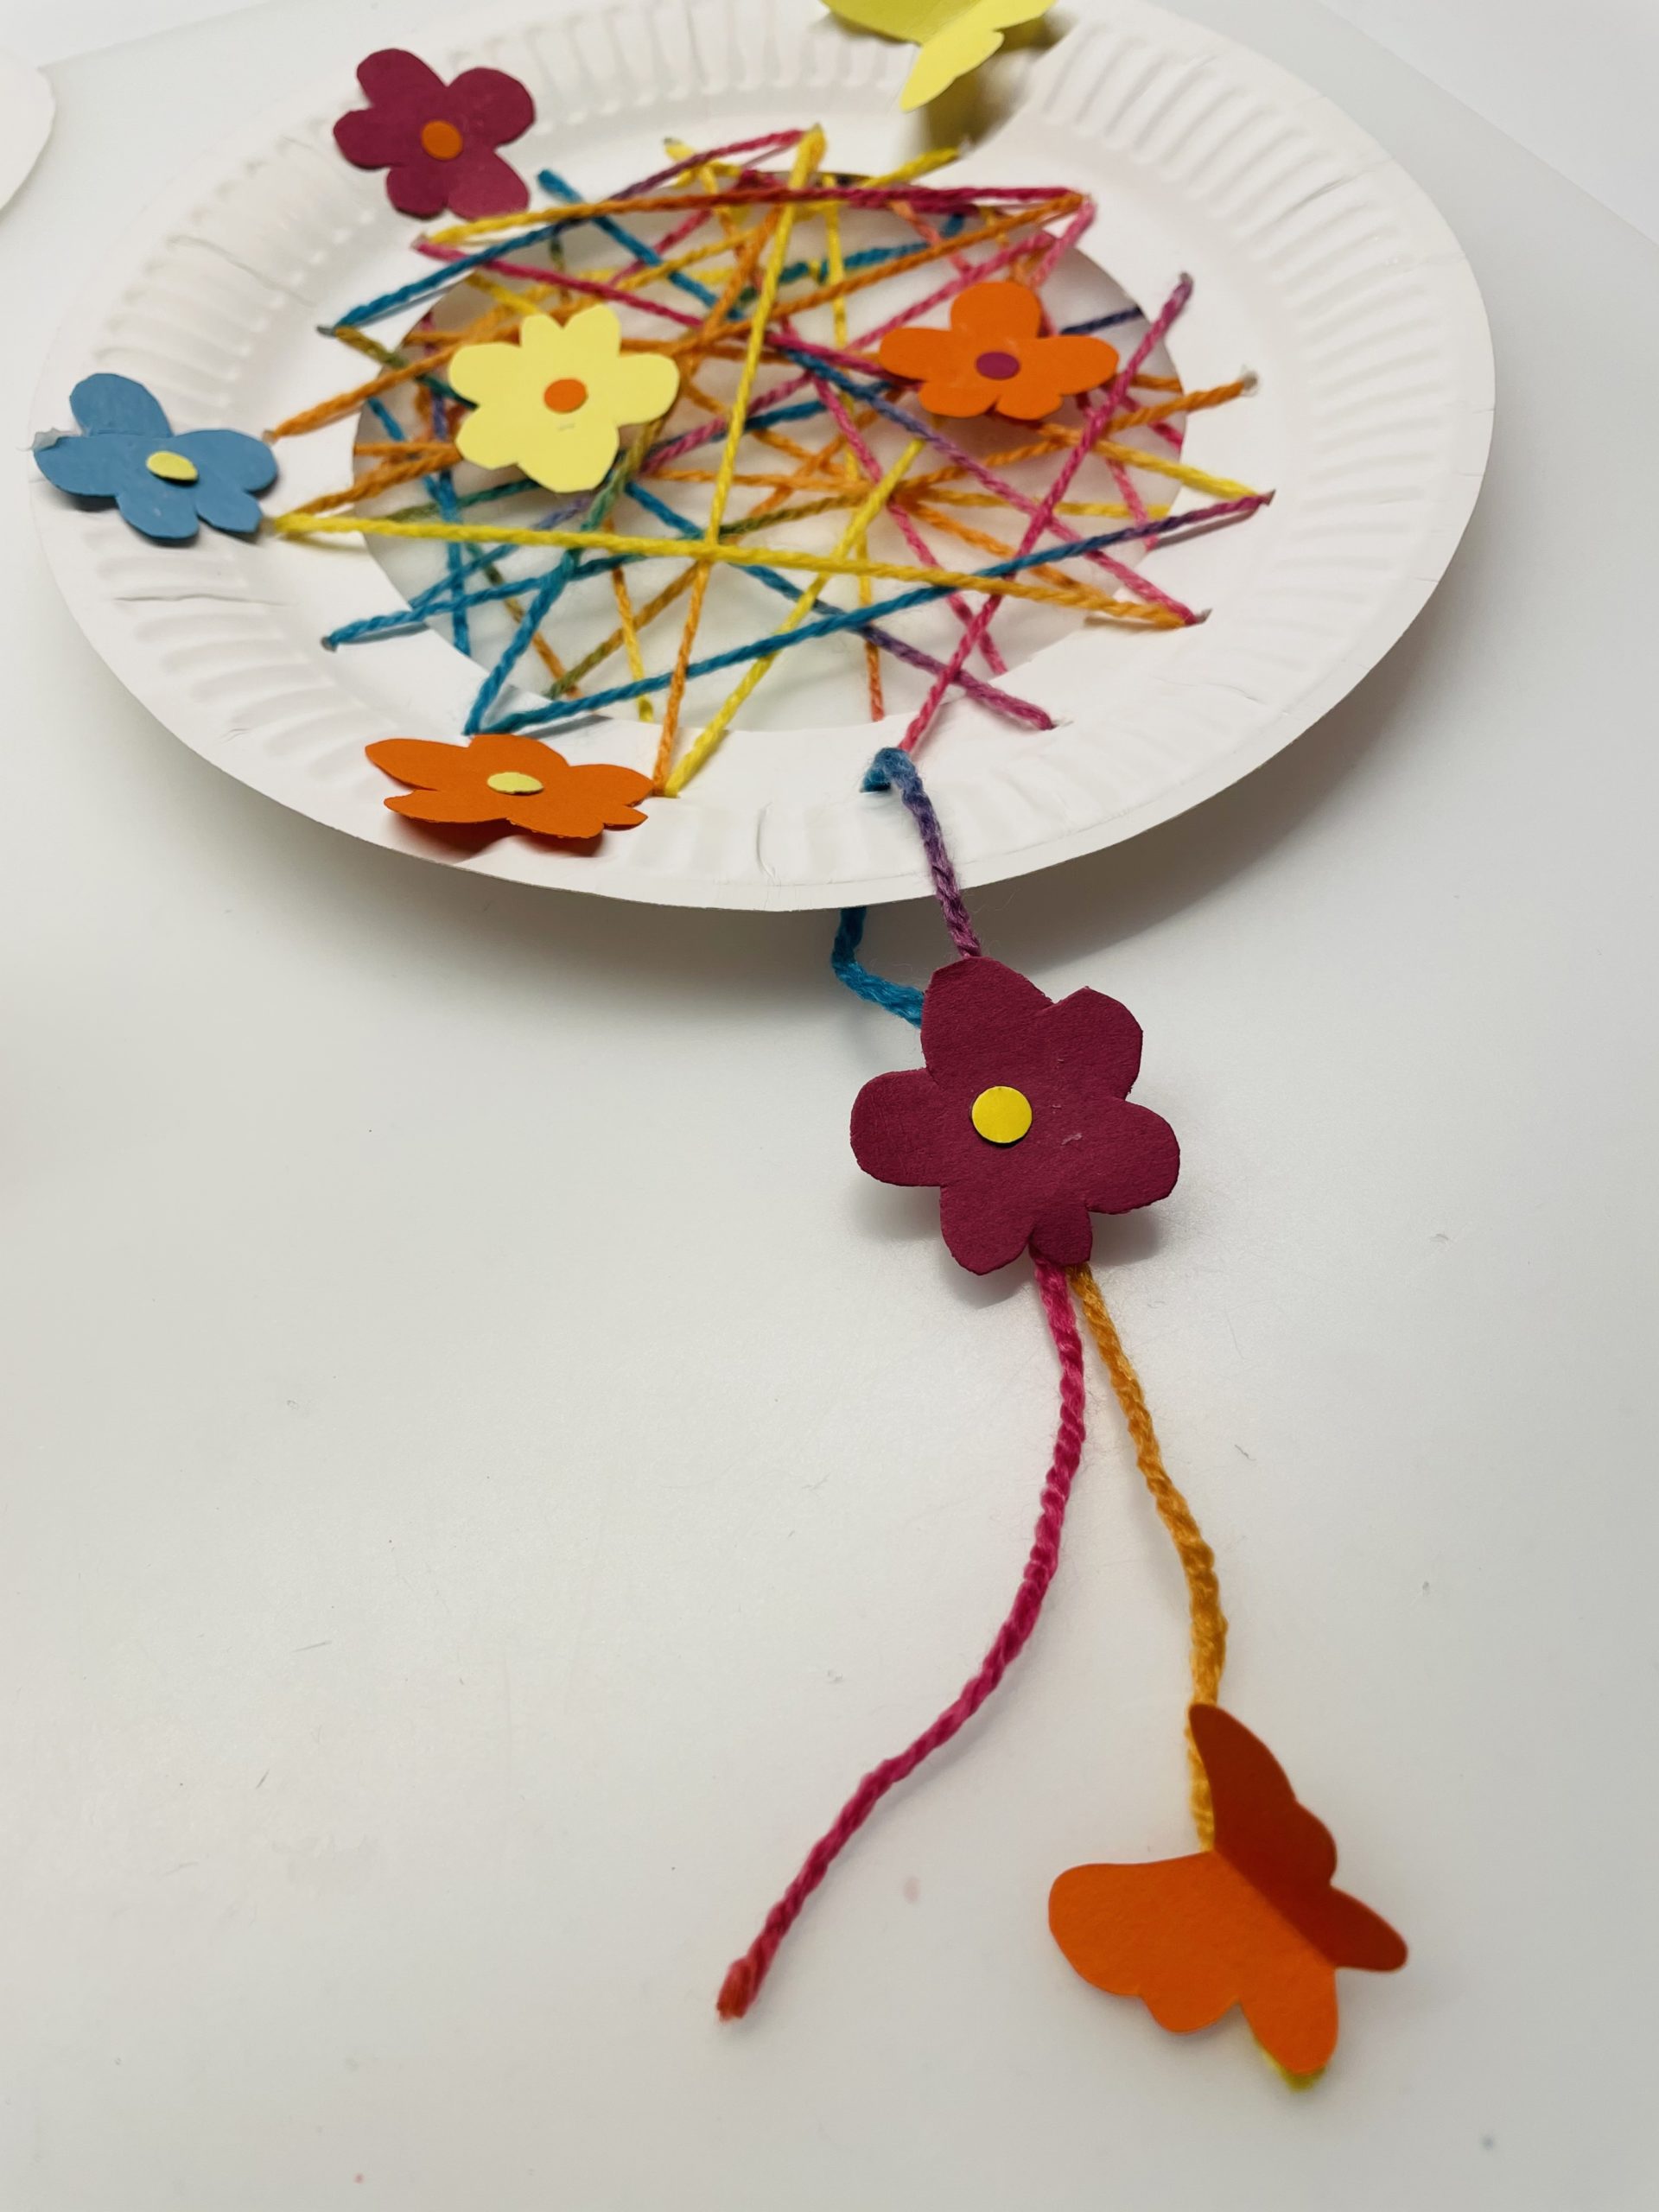
Bild zum Schritt 22 für das Bastel- und DIY-Abenteuer für Kinder: 'Klebt jetzt auch an diese Fäden eine Blume und/oder einen...'

23

The dream catcher is ready.

Other design ideas:
24

Folds a large butterfly (see Make a butterfly)

Bild zum Schritt 25 für das Bastel- und DIY-Abenteuer für Kinder: 'Faltet einen großen Schmetterling (siehe Schmetterling basteln)'

25

Stick it to the edge of the dream catcher (bottom left or right).
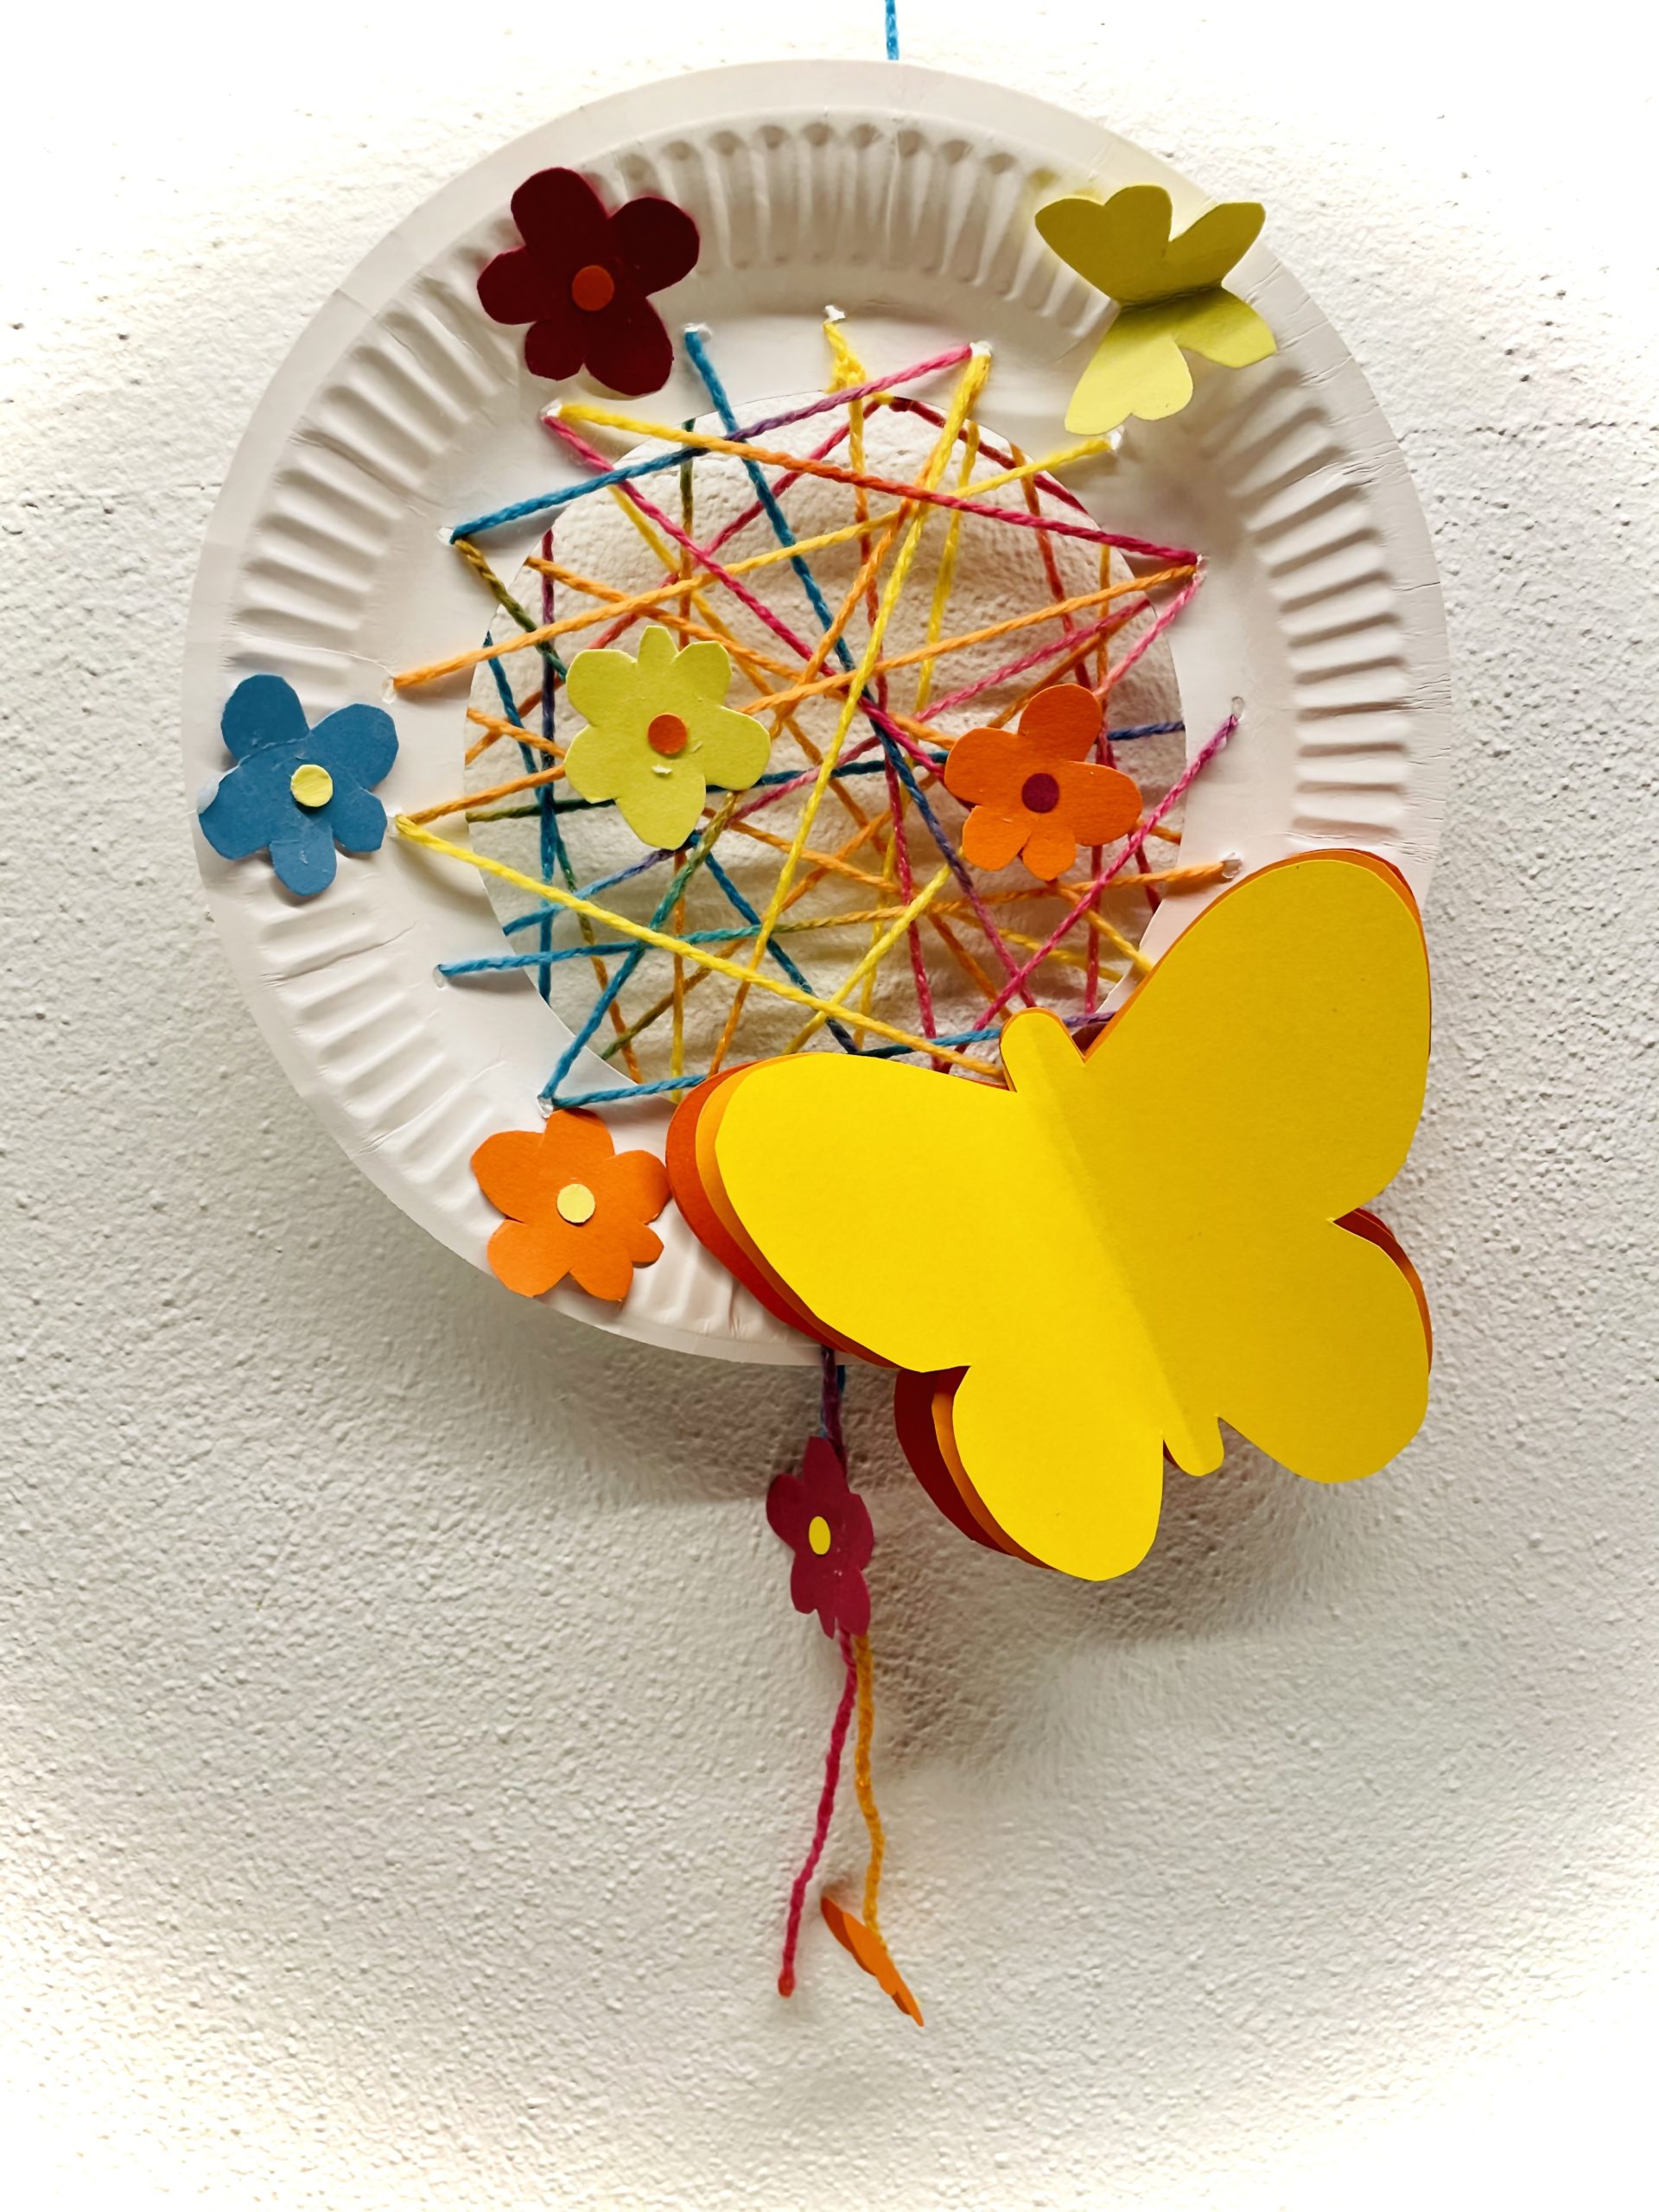
Bild zum Schritt 26 für das Bastel- und DIY-Abenteuer für Kinder: 'Klebt diesen am Rand des Traumfängers (unten links oder rechts)...'

26

Maybe embellish the butterfly with two more small flowers that stick to her wings.

Bild zum Schritt 27 für das Bastel- und DIY-Abenteuer für Kinder: 'Verschönert den Schmetterling eventuell noch mit zwei weiteren kleinen Blumen,...'

27

2. Bild zum Schritt 27 für das Bastel- und DIY-Abenteuer für Kinder: 'Verschönert den Schmetterling eventuell noch mit zwei weiteren kleinen Blumen,...'

Further idea with tulips:
28

For this you paint up grass. Paint up the grass in the zigzag, lay down a second paper and cut out the grass twice.
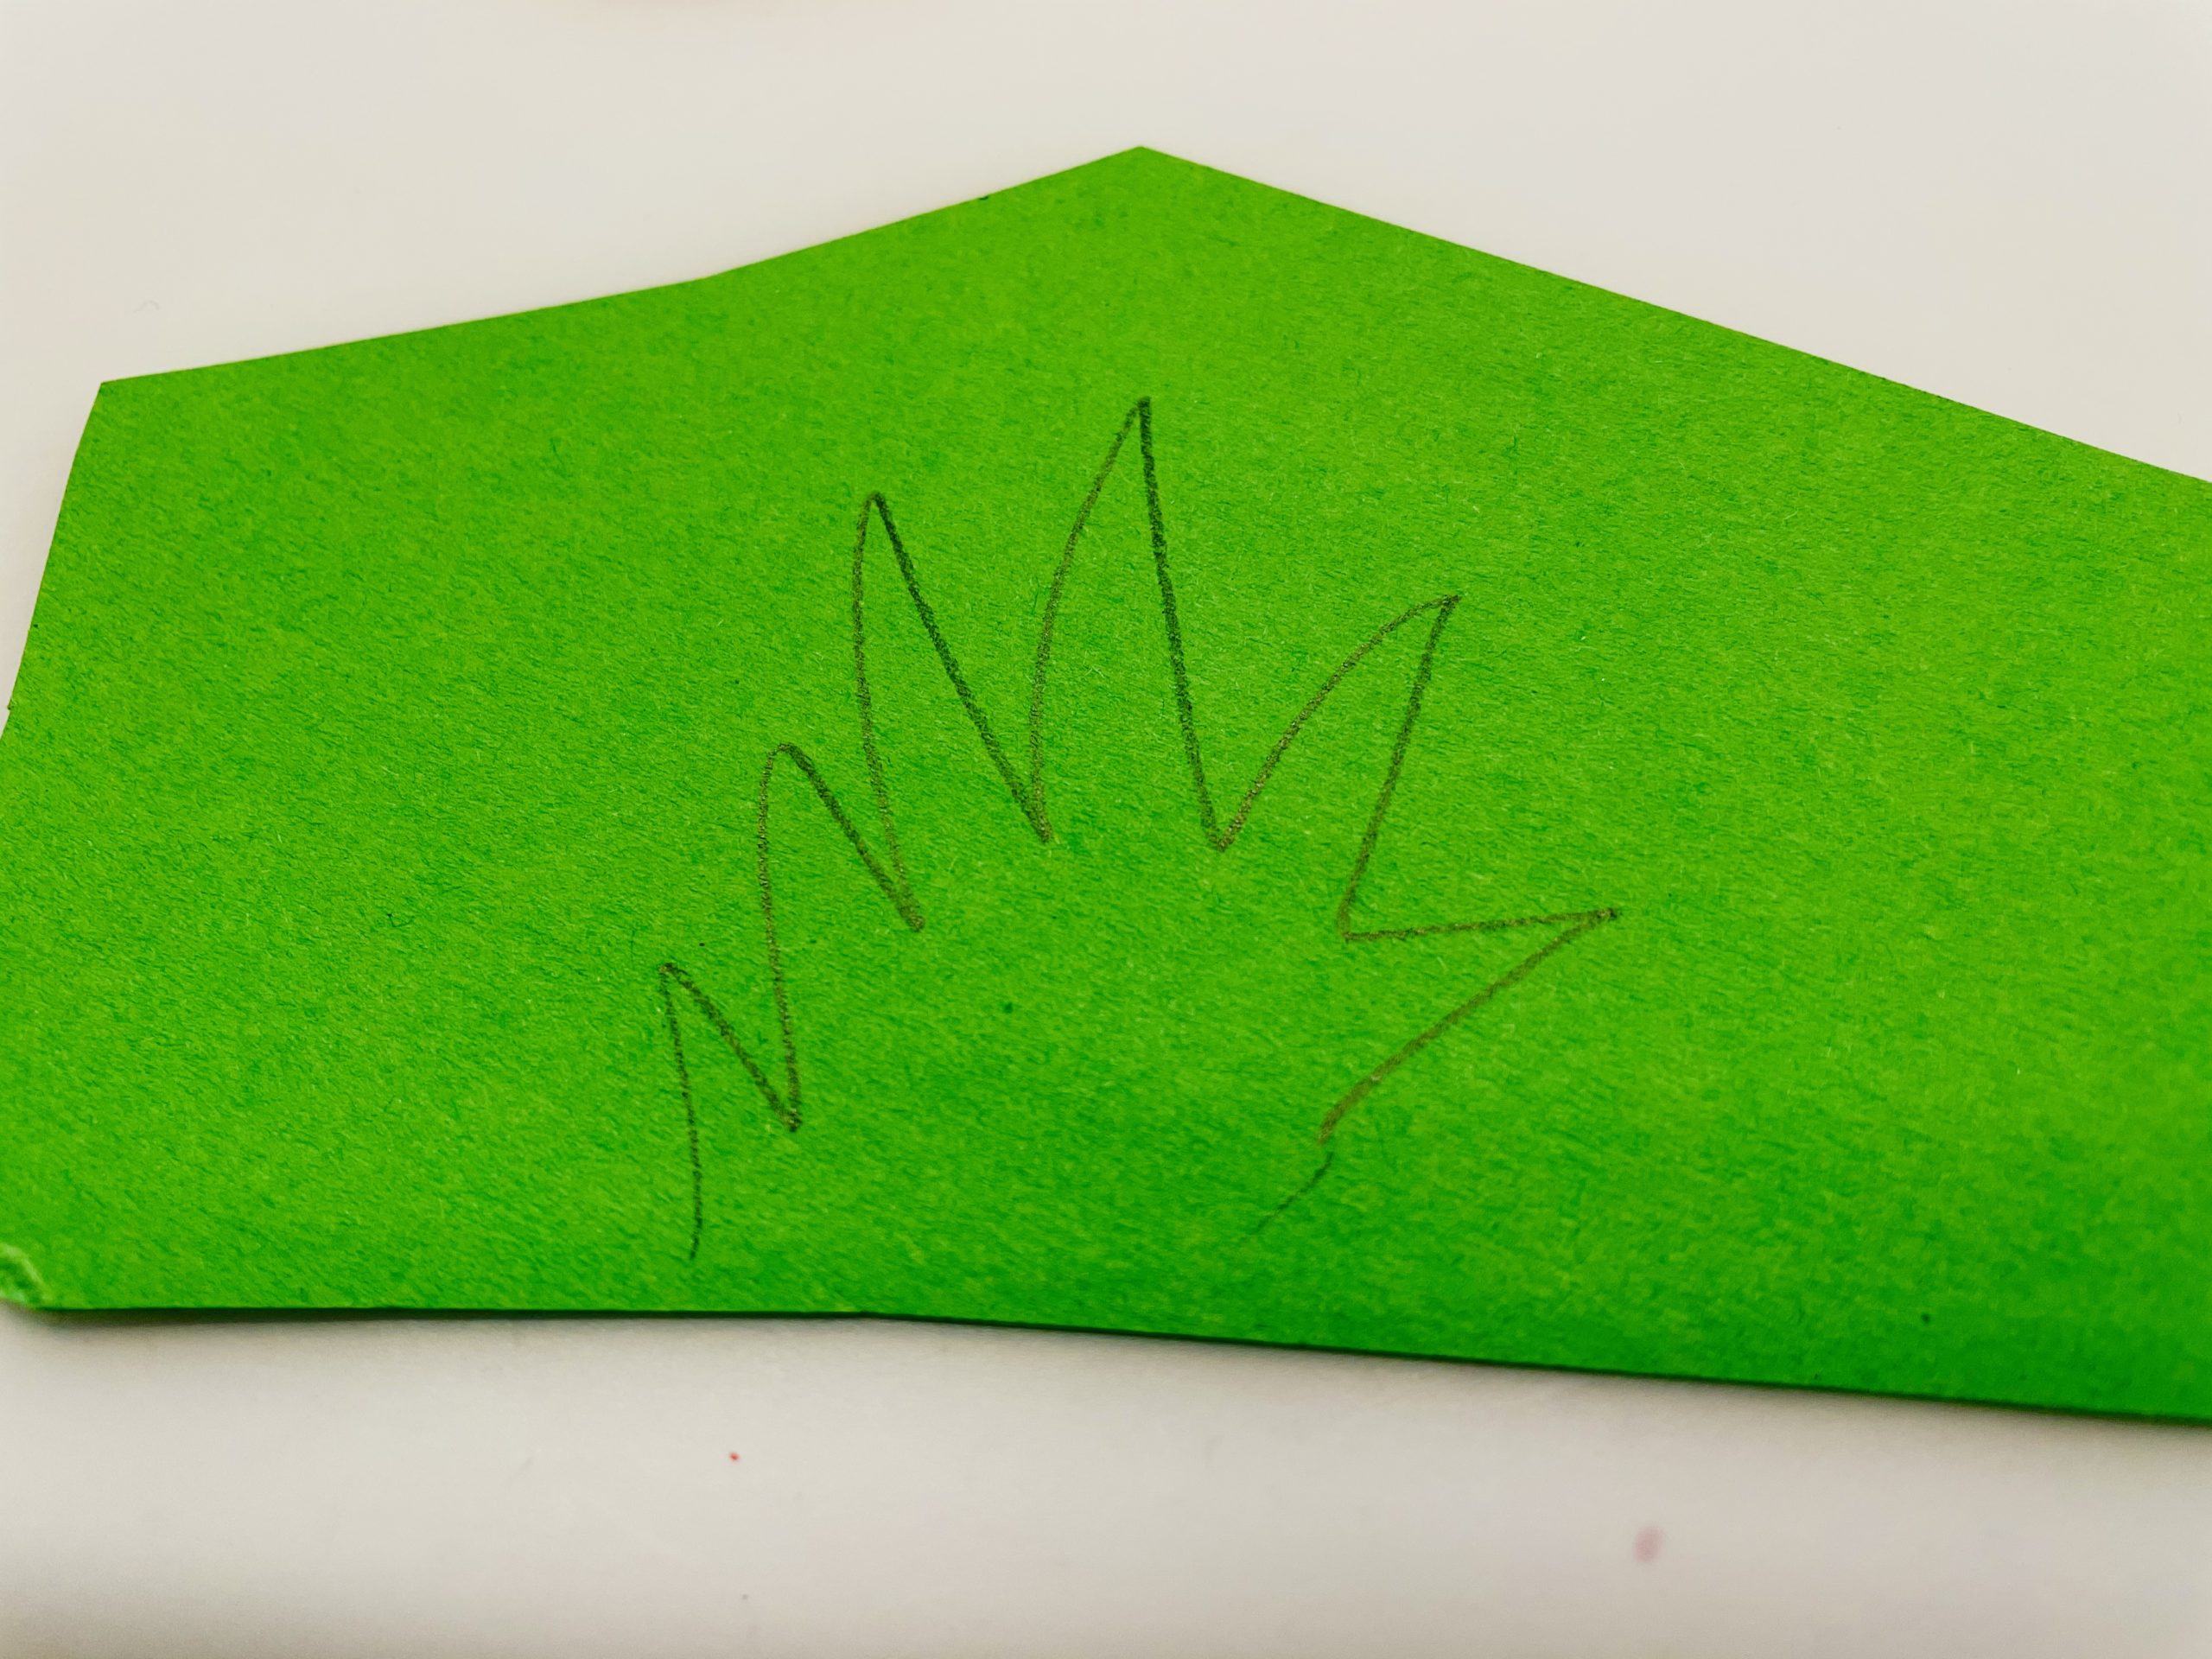
Bild zum Schritt 30 für das Bastel- und DIY-Abenteuer für Kinder: 'Hierfür malt ihr euch Gras auf. Malt im Zick-Zack das...'

29

Then here you cut out tulip blossoms.
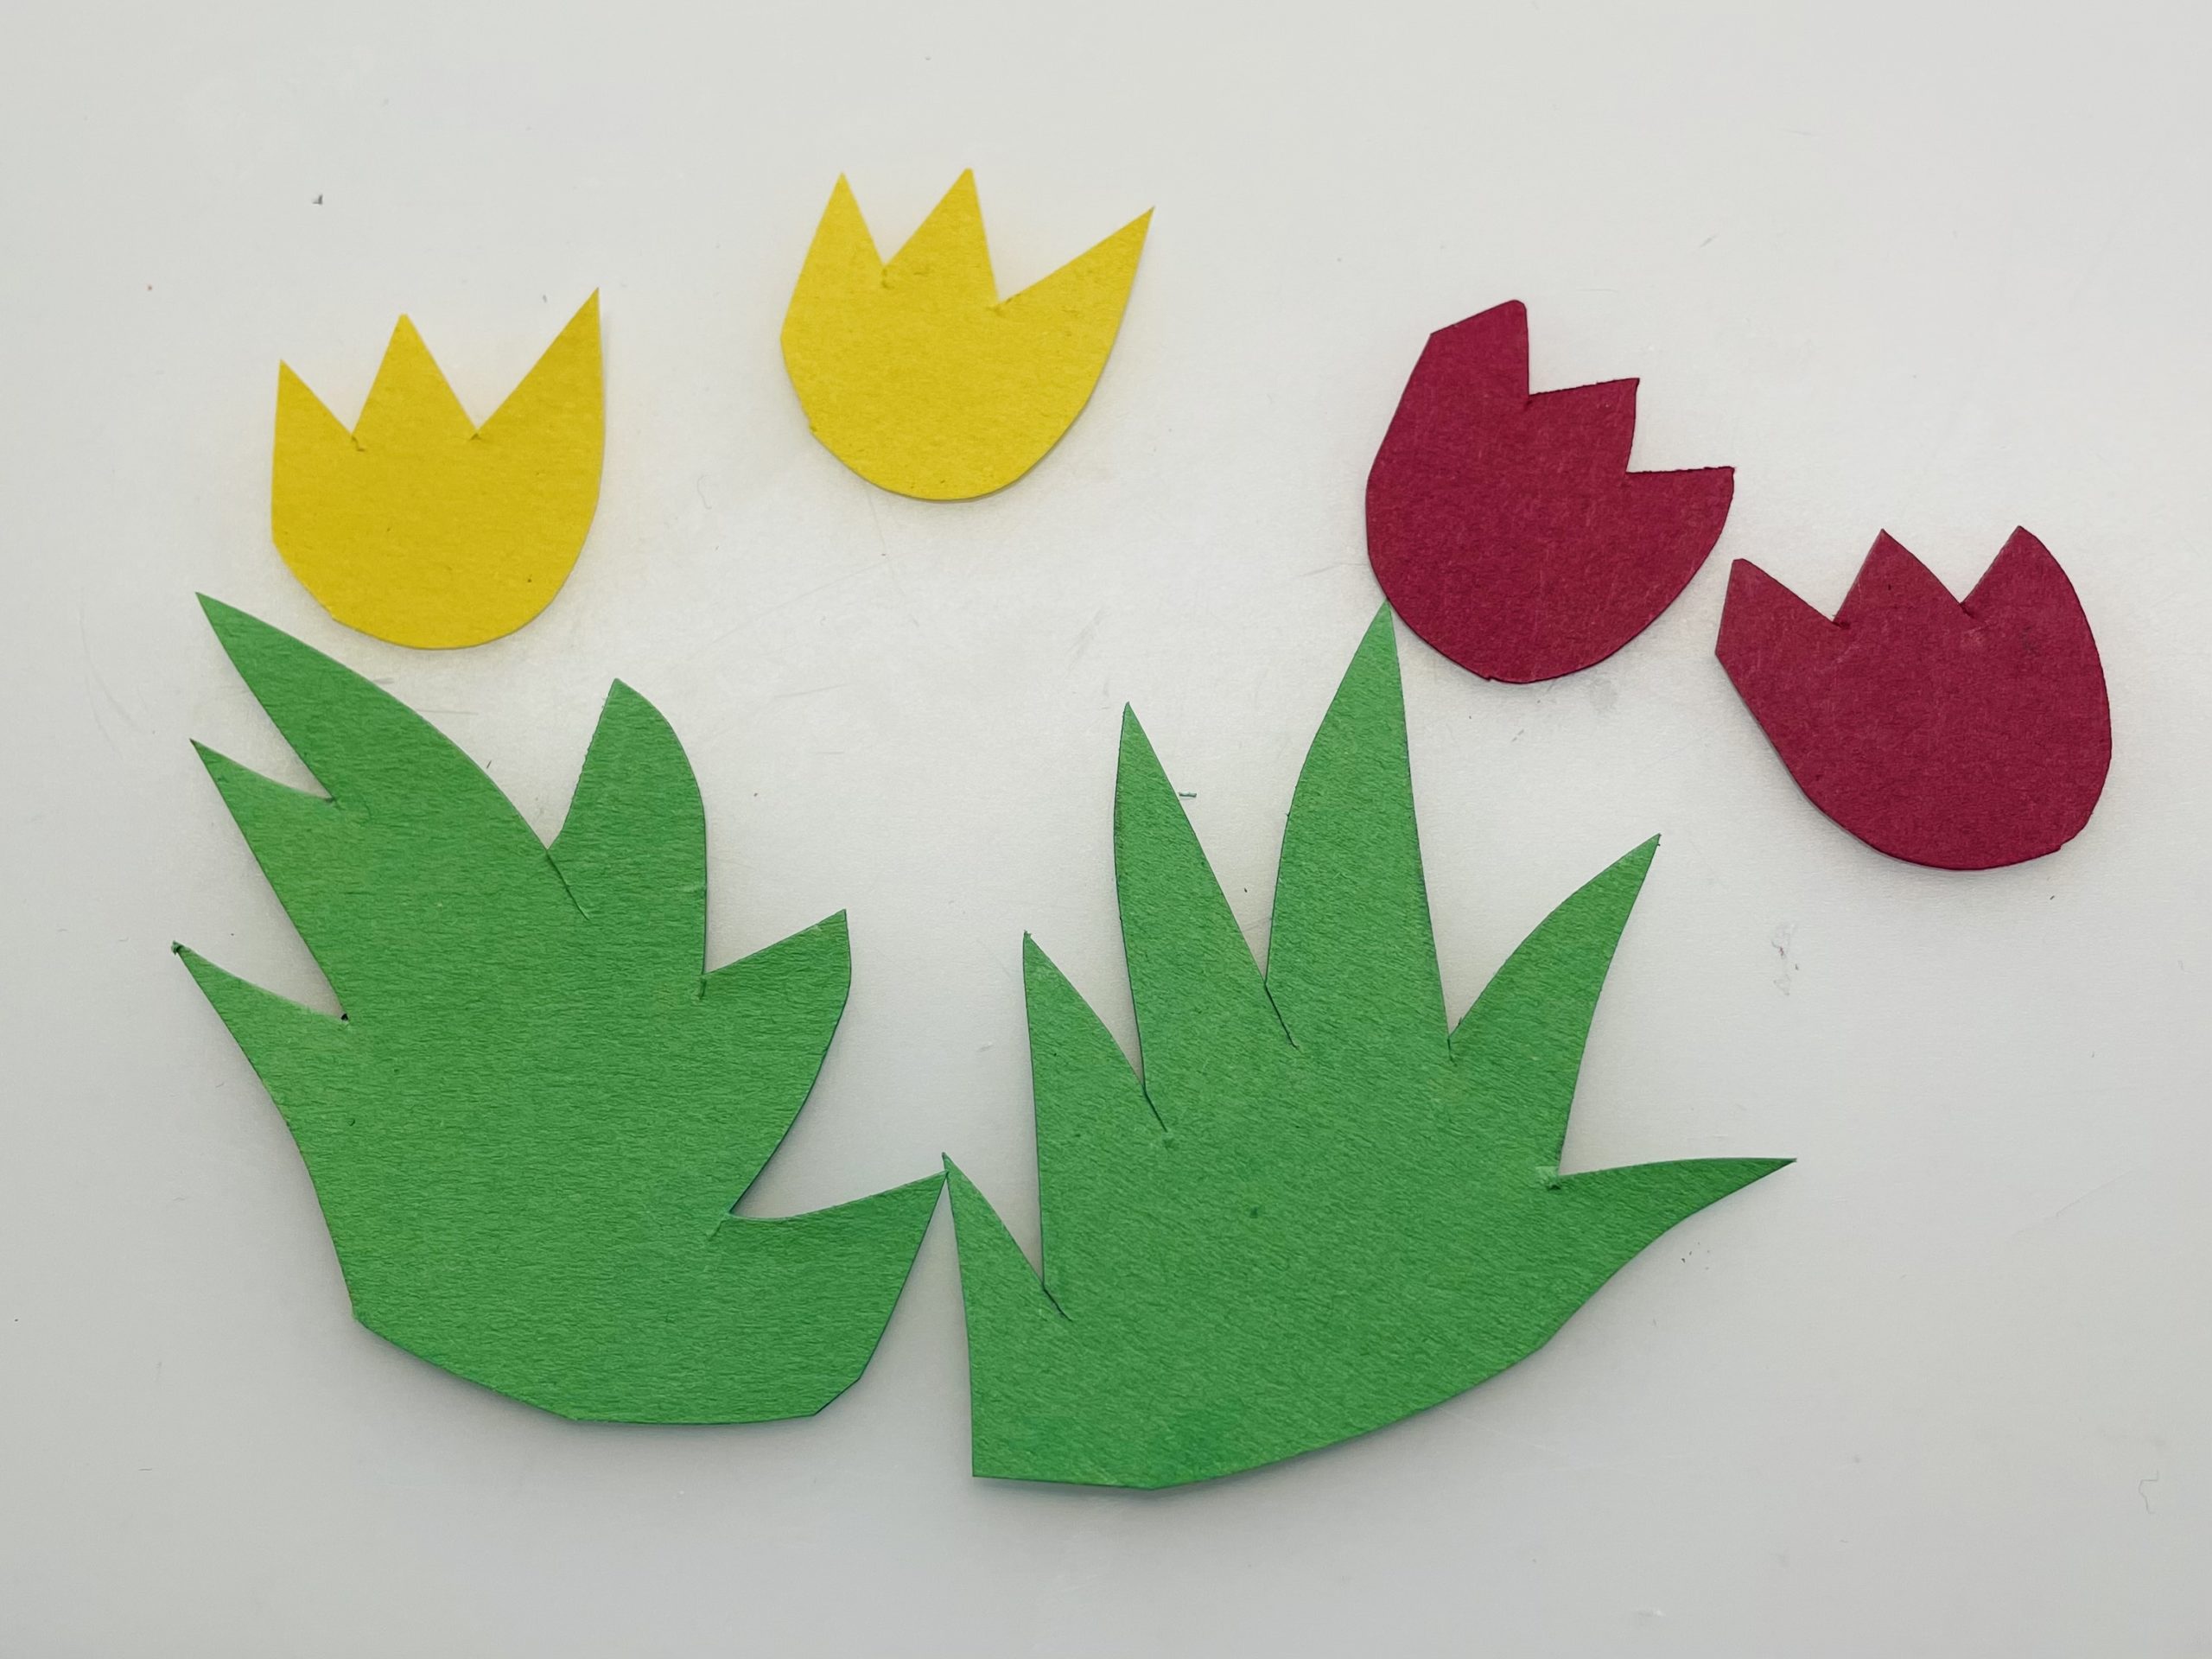
Bild zum Schritt 31 für das Bastel- und DIY-Abenteuer für Kinder: 'Dann schneidet ihr hier Tulpenblüten aus.'

30

Now stick these together with the butterflies on the thread net. Here, too, shape the edge of the plate.

Bild zum Schritt 32 für das Bastel- und DIY-Abenteuer für Kinder: 'Klebt diese jetzt zusammen mit den Schmetterlingen auf das Fadennetz....'

31

Use your ideas creatively and use the material you have at home.
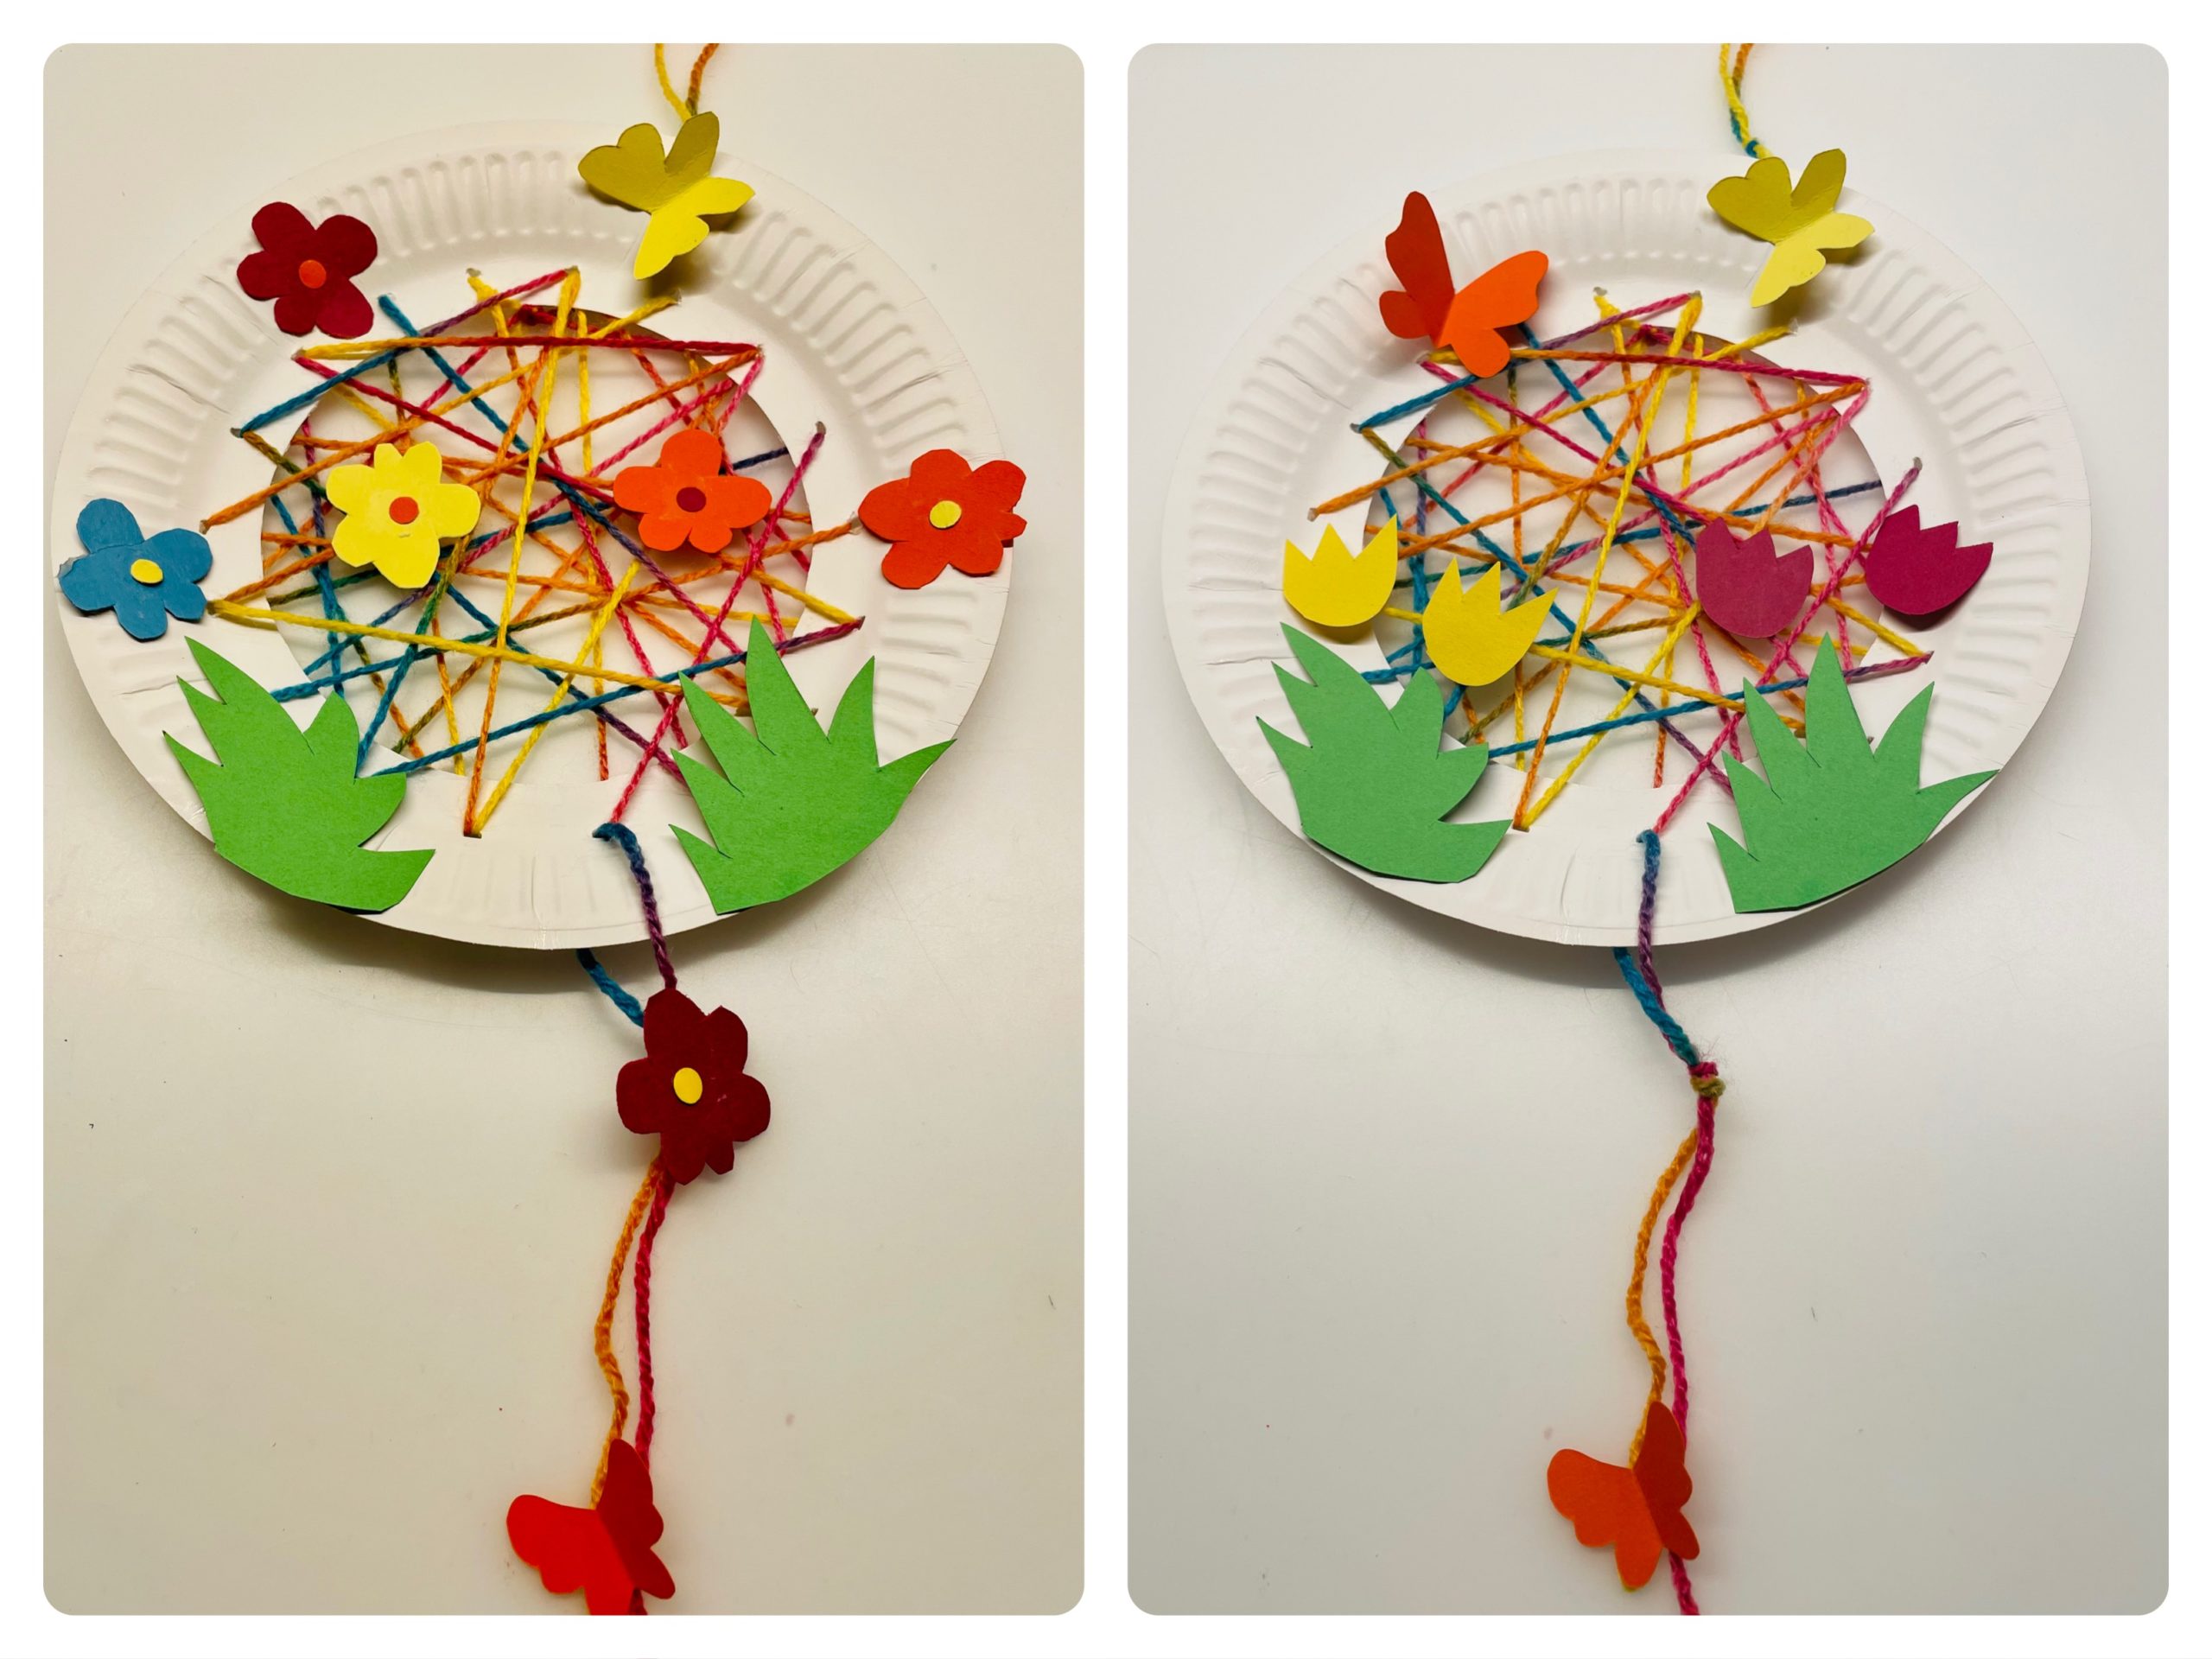
Bild zum Schritt 33 für das Bastel- und DIY-Abenteuer für Kinder: 'Setzt eure Ideen kreativ um und verwendet das Material, das...'

32

Enjoy your crafting!

Flower Dream Catcher (3 variants)

Follow us on Facebook , Instagram and Pinterest
Don't miss any more adventures: Our bottle mail

Leave a Reply

Your email address will not be published.

The maximum upload file size: 5 MB. You can upload: image, document. Drop file here