Apple lantern for crib children

AdventurerKatzi
Rating5.05.6 Thousand times & (1) DifficultyAdvanced

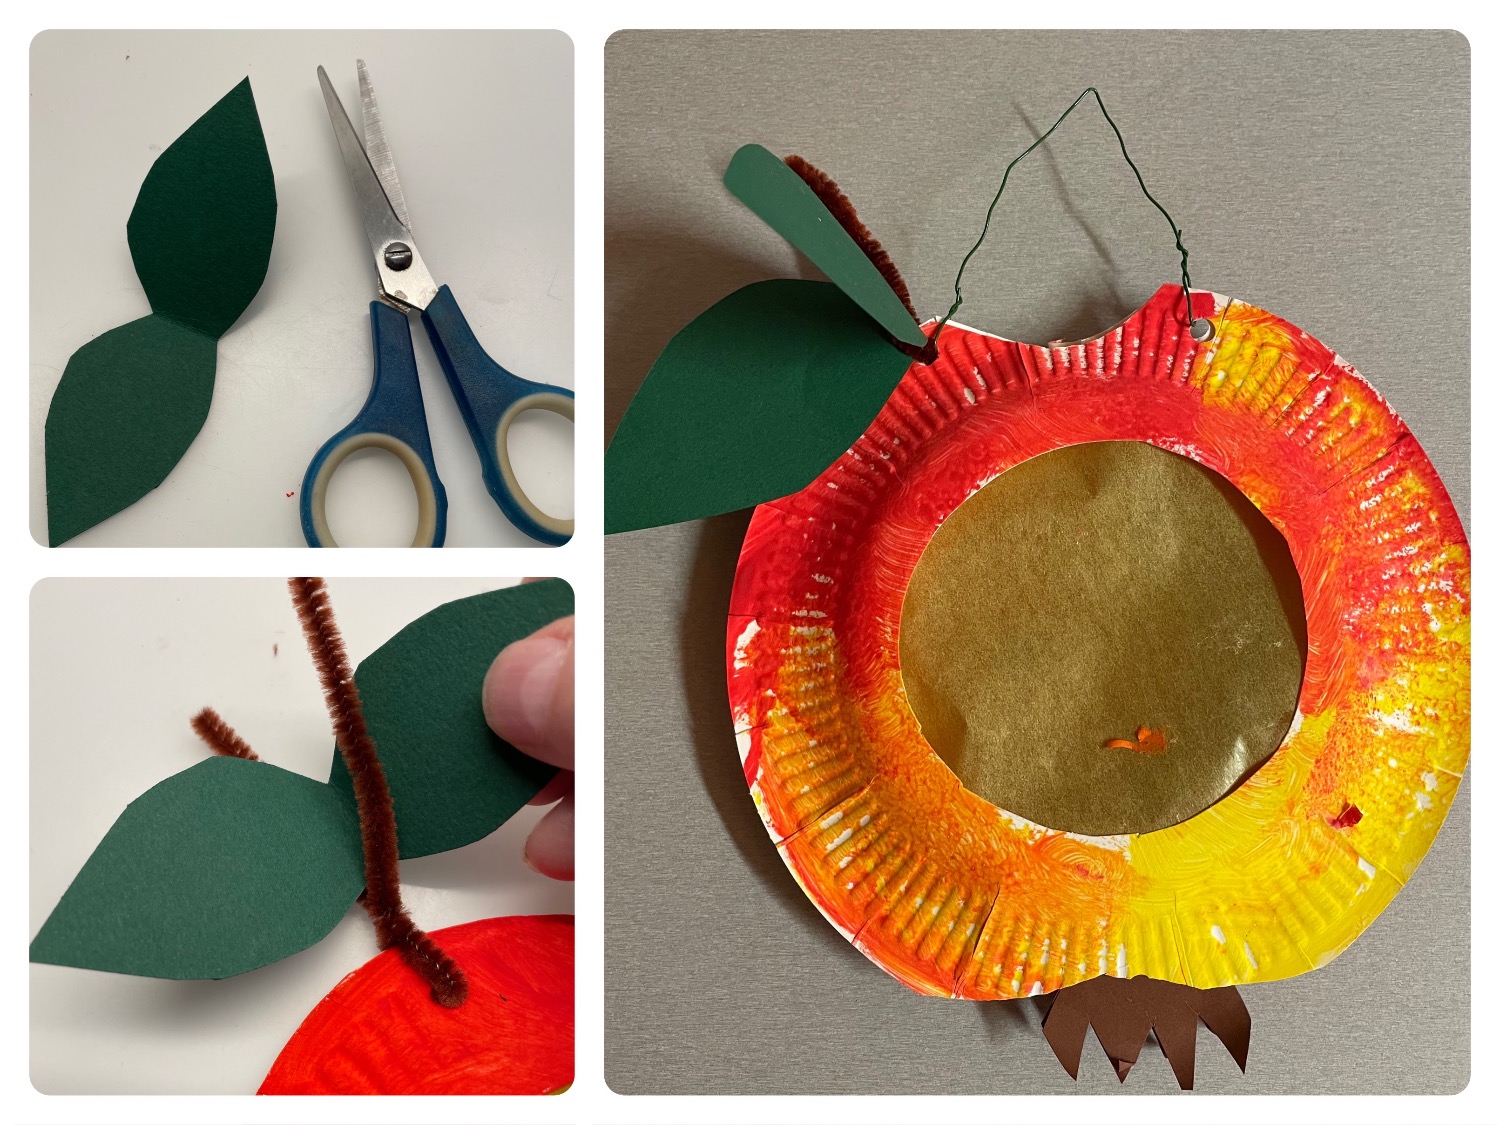
This lantern is made of a painted cardboard plate. It is small and handy and is ideal for a lantern move with crib children. The little ones can easily hold the lantern on the wire and carry it. By the way, the children get to know the components of an apple while crafting or solidify their knowledge. Step by step we show you how this apple lantern is created. Have fun!

Media Education for Kindergarten and Hort

Kind bastelt eine Rassel mit dem Navi
The Adventure Navi, the app for DIY projects, enables media education for the youngest.

Relief in everyday life, targeted promotion of individual children, independent learning and - without any pre-knowledge already usable by the youngest!


Titelbild zur Bastel- und DIY-Idee für Kinder '(856) Apfel-Laterne für Krippenkinder'
Material for1 Child
Prep Time5 min.Adv. Time40 min.Total Time45 min.
 1 Cardboard plate painted with water coloursred, orange, yellow
 1 Sponge
 1 Builder's pad
 1 Water bowl
 Kitchen crepe or newsprint
 1 Hole pliers
 1 Pipe cleaner brown
 Clay paper dark green and brown
 1 Pen
 Transparent paper available in red, yellow, orange
All links marked with a shopping cart lead to Amazon - here we have selected products that we would order ourselves and in part also ordered. In a qualified purchase via the advertising link, we as Amazon partner receive a commission, for you there are no costs. You thus support our cost- and advertising banner-free, educational offer.
1

First cut the floor out of both cardboard plates. Then paint the bottom side of the cardboard plates in different shades of red.

Tip: As an alternative to painting with the brush, you can apply the paint with a sponge. For this, you will find a damp sponge in a little water color. You will need to put a kitchen crepe or an old newspaper under it. So you can apply the paint well to the edge.
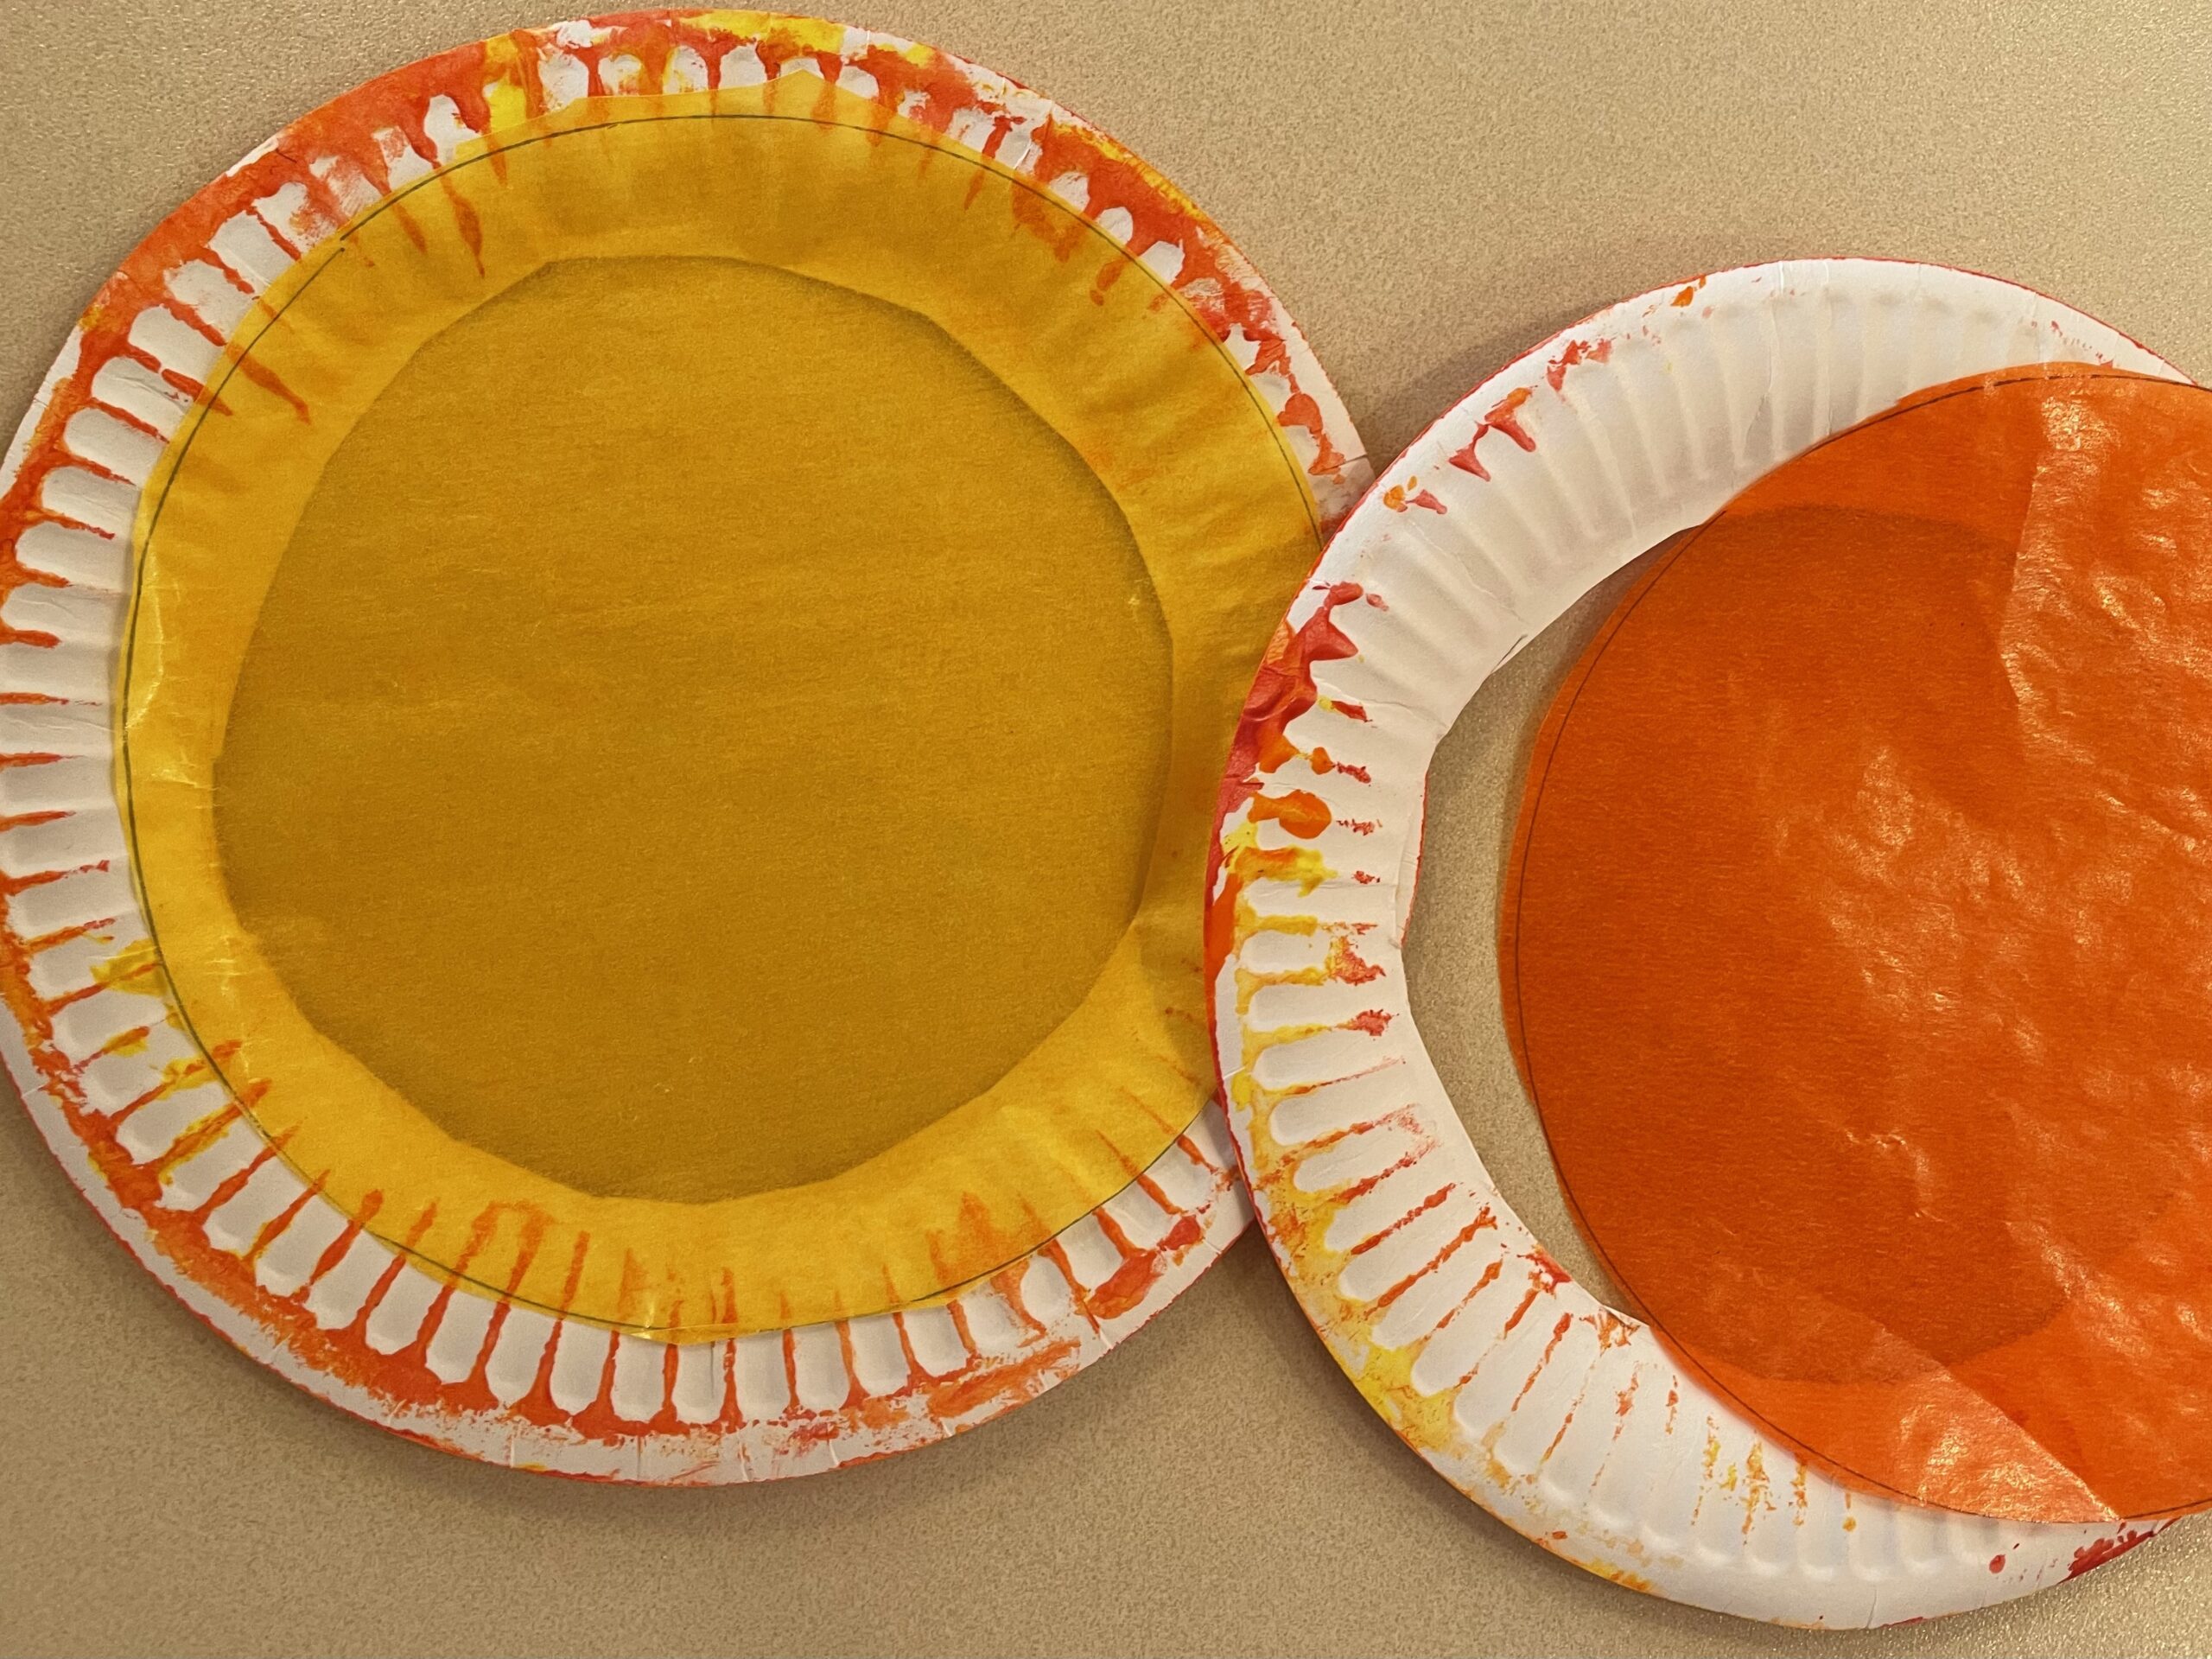
Bild zum Schritt 1 für das Bastel- und DIY-Abenteuer für Kinder: 'Schneidet zuerst den Boden aus beiden Pappteller heraus. Anschließend bemalt...'

2

Then let the paint dry.
While the paint dries, you cut out circles of transparent paper. Make sure that the circles are larger than the cut-out. Use a bowl or plate as a template.

3

Then you stick circles of transparent paper on the insides of the cardboard rings.

Bild zum Schritt 3 für das Bastel- und DIY-Abenteuer für Kinder: 'Anschließend klebt ihr auf die Innenseiten der Pappringe Kreise aus...'

4

Then glue the two cardboard rings together on the inside sides. Leave an opening about 10 cm in size at one point. Through this you can insert the light chain later.

5

For the stem you use half a brown pipe cleaner and a green paper.

Bild zum Schritt 5 für das Bastel- und DIY-Abenteuer für Kinder: 'Für den Stiel verwendet ihr die Hälfte eines braunen Pfeifenputzers...'

6

Fold the green paper half way.

Bild zum Schritt 6 für das Bastel- und DIY-Abenteuer für Kinder: 'Faltet das grüne Papier zur Hälfte.'

7

Then you paint the shape of a sheet on the paper. Paint the sheet from the fold and leave a wide opening on the folding edge.

Bild zum Schritt 7 für das Bastel- und DIY-Abenteuer für Kinder: 'Anschließend malt ihr die Form eines Blattes auf das Papier....'

8

Cuts out the leaf twice and folds it apart.

Bild zum Schritt 8 für das Bastel- und DIY-Abenteuer für Kinder: 'Schneidet das Blatt nun doppelt aus und klappt es auseinander.'

9

Now bend the pipe cleaner in the middle.

Bild zum Schritt 9 für das Bastel- und DIY-Abenteuer für Kinder: 'Biegt nun den Pfeifenputzer einmal in der Mitte.'

10

Then thread the pipe cleaner through the hole in the lantern until bend.

Bild zum Schritt 10 für das Bastel- und DIY-Abenteuer für Kinder: 'Anschließend fädelt ihr den Pfeifenputzer bis zur Biegung durch das...'

11

Now twist the ends of the pipe cleaner. So he can no longer slip out.

Bild zum Schritt 11 für das Bastel- und DIY-Abenteuer für Kinder: 'Verdreht jetzt die Enden des Pfeifenputzers. So kann dieser nicht...'

12

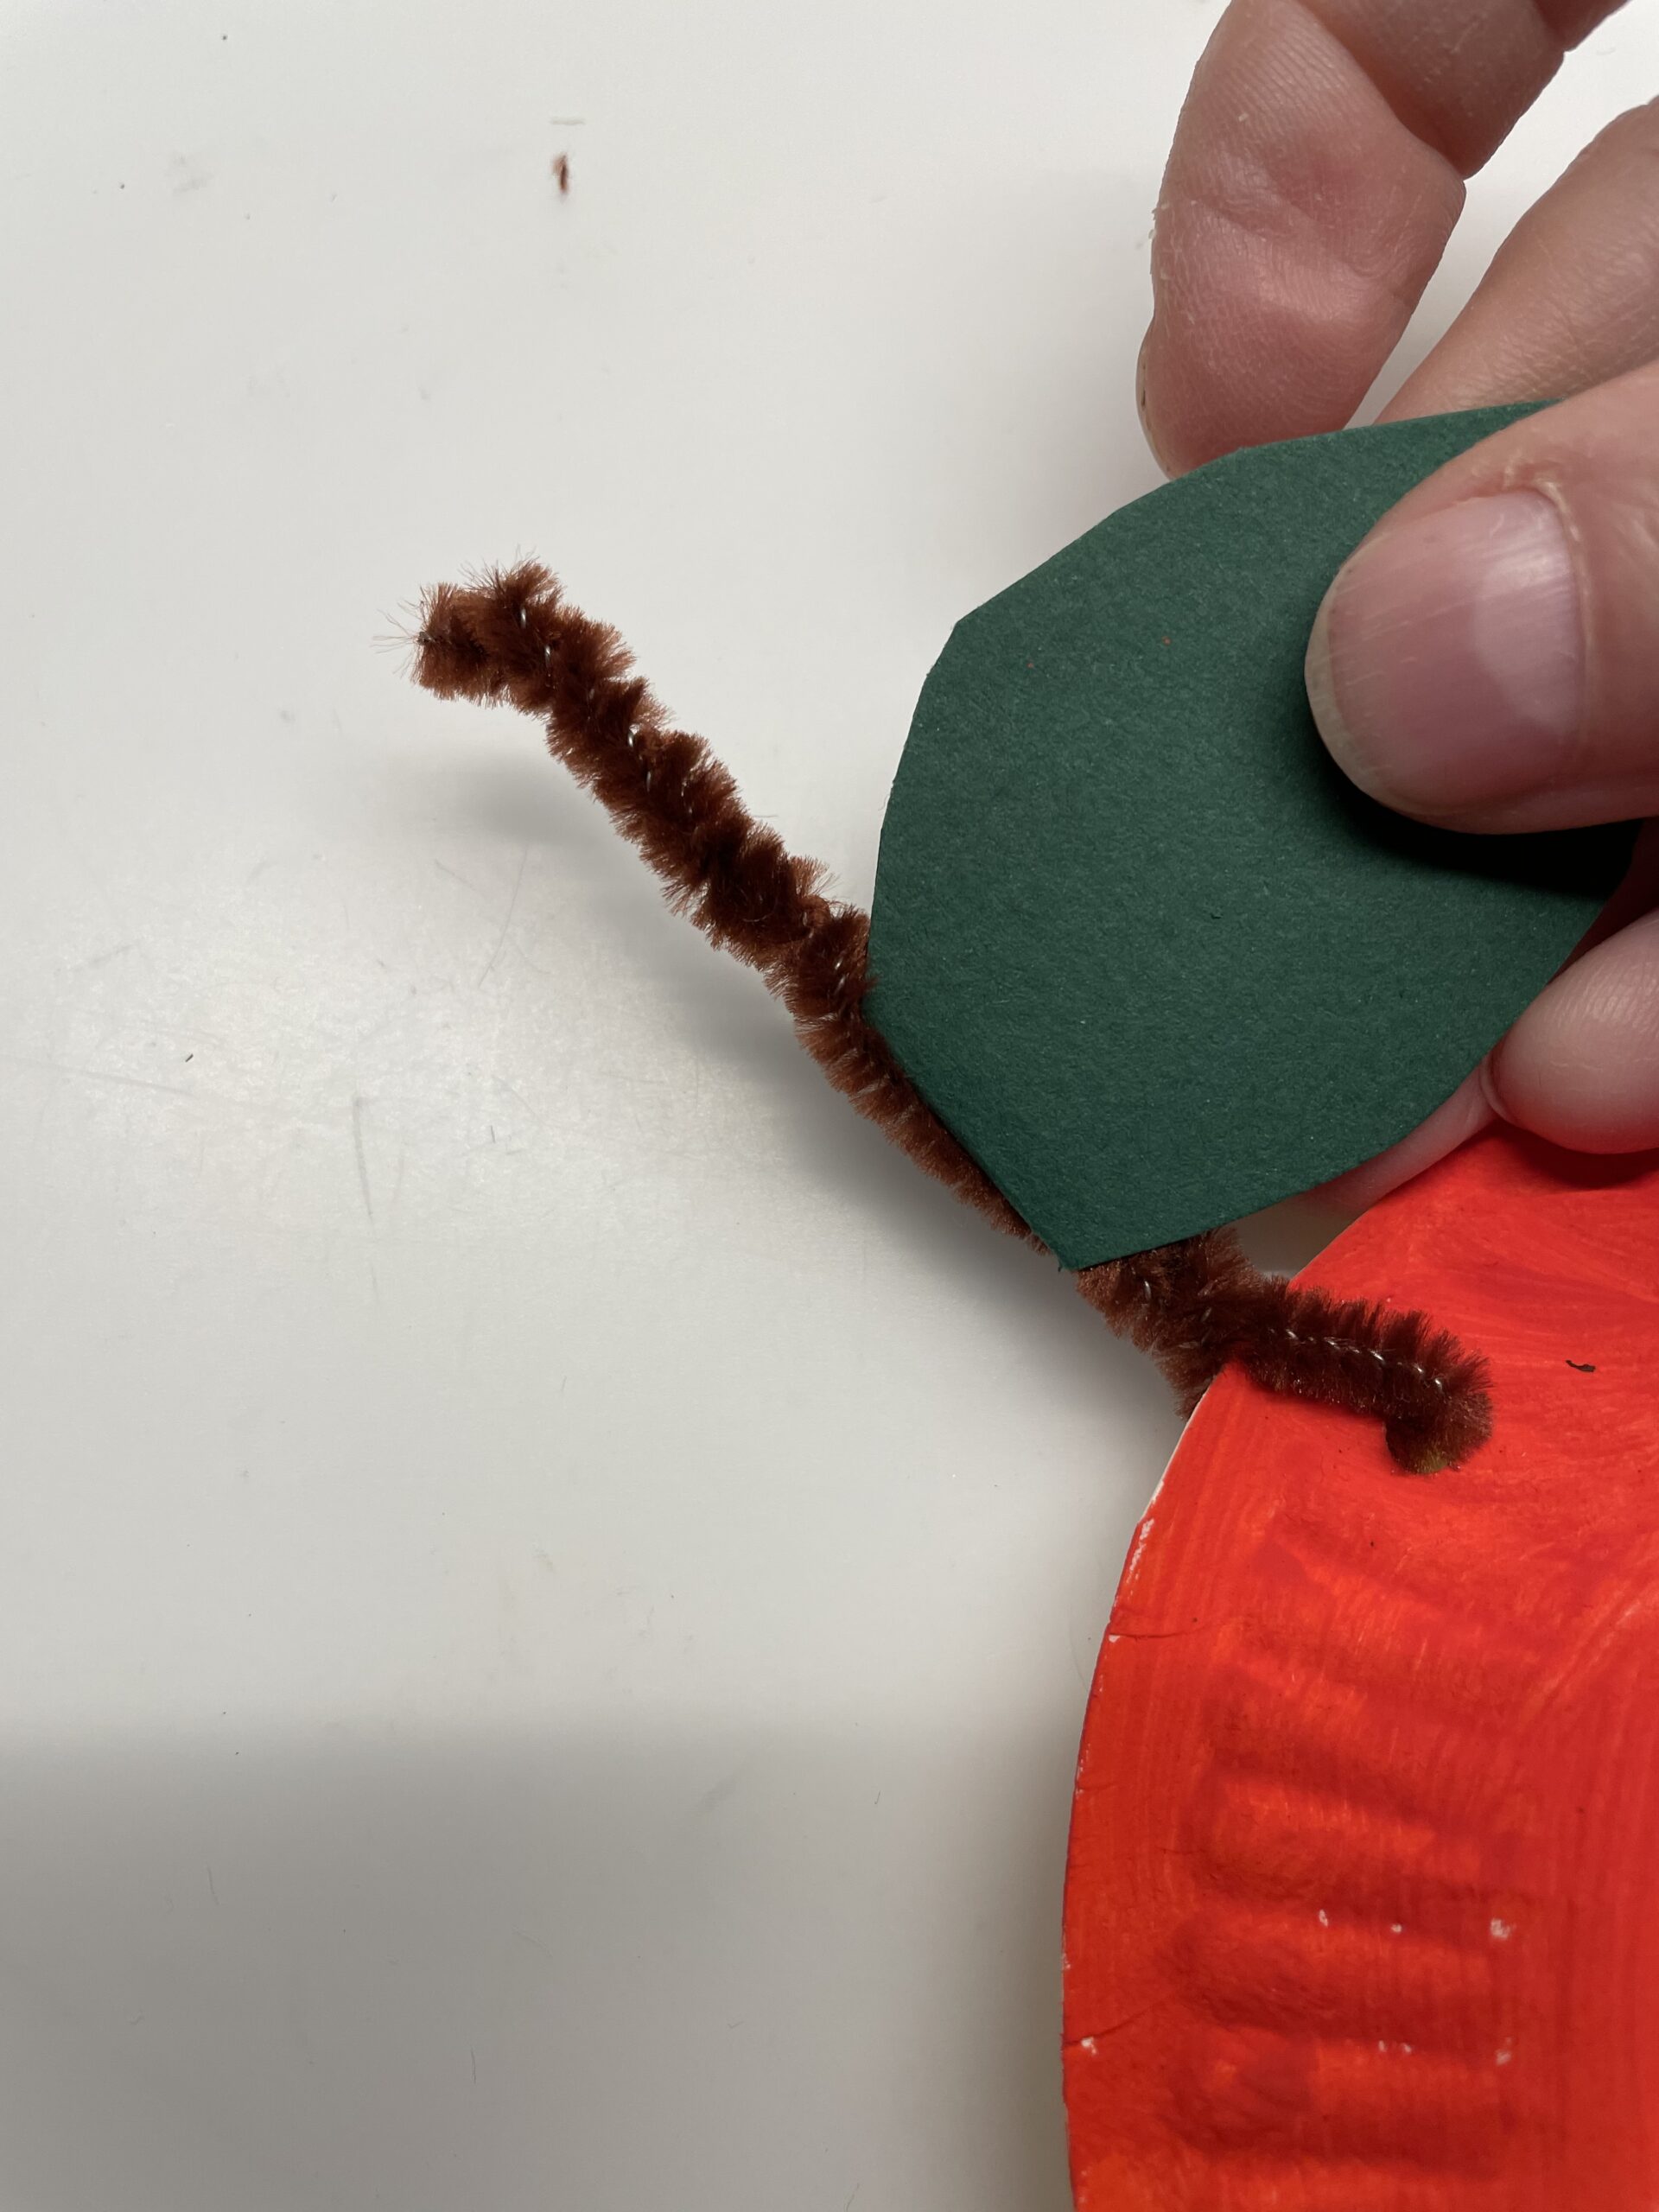
Then you push the leaf folded between the ends of the pipe cleaner.

Bild zum Schritt 12 für das Bastel- und DIY-Abenteuer für Kinder: 'Dann schiebt ihr das Blatt aufgefaltet zwischen die Enden des...'

13

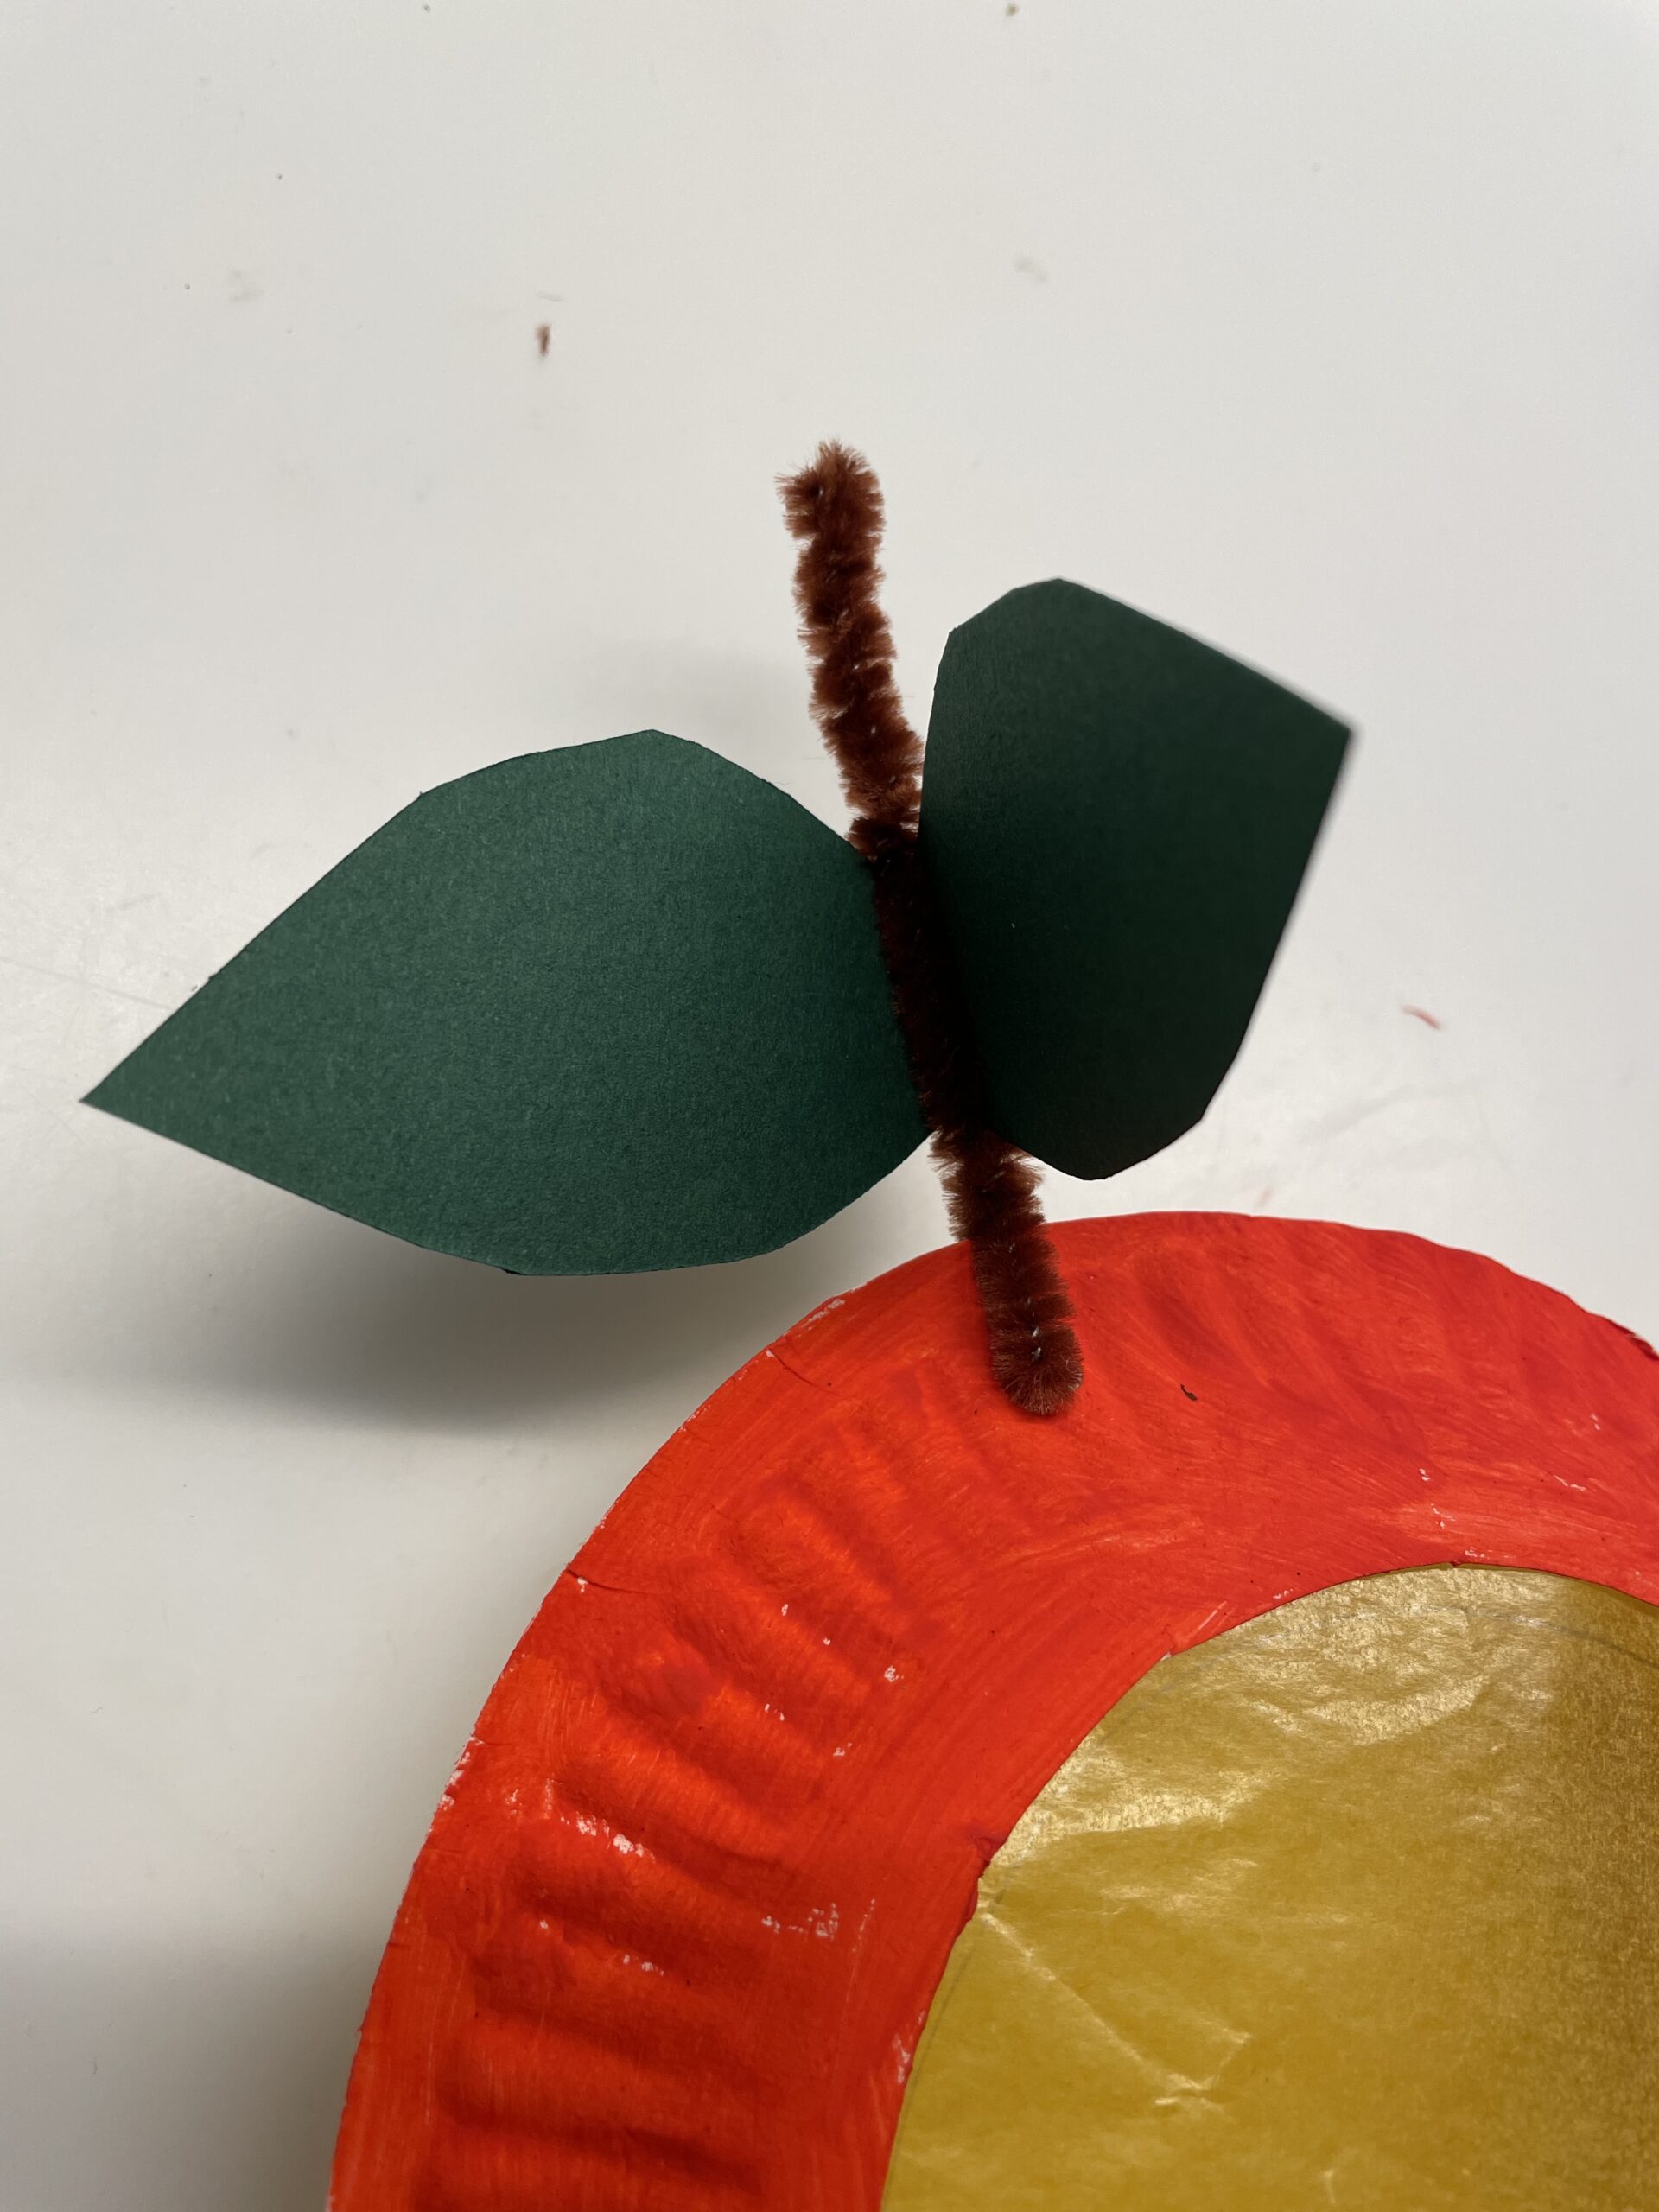
Push the leaf down and twist the ends of the pipe cleaner together. The leaves are now stuck.

Bild zum Schritt 13 für das Bastel- und DIY-Abenteuer für Kinder: 'Schiebt das Blatt nach unten und verdreht die Enden des...'

14

Now you twist the overhanging ends of the pipe cleaner together.

Bild zum Schritt 14 für das Bastel- und DIY-Abenteuer für Kinder: 'Die überstehenden Enden des Pfeifenputzers verdreht ihr nun miteinander.'

15

Make sure the ends don't pee.

Bild zum Schritt 15 für das Bastel- und DIY-Abenteuer für Kinder: 'Achtet darauf, dass die Enden nicht piksen.'

16

2. Bild zum Schritt 15 für das Bastel- und DIY-Abenteuer für Kinder: 'Achtet darauf, dass die Enden nicht piksen.'

17

Now you're making a flower of brown clay paper.

Bild zum Schritt 17 für das Bastel- und DIY-Abenteuer für Kinder: 'Jetzt bastelt ihr noch eine Blüte aus braunem Tonpapier. Malt...'

18

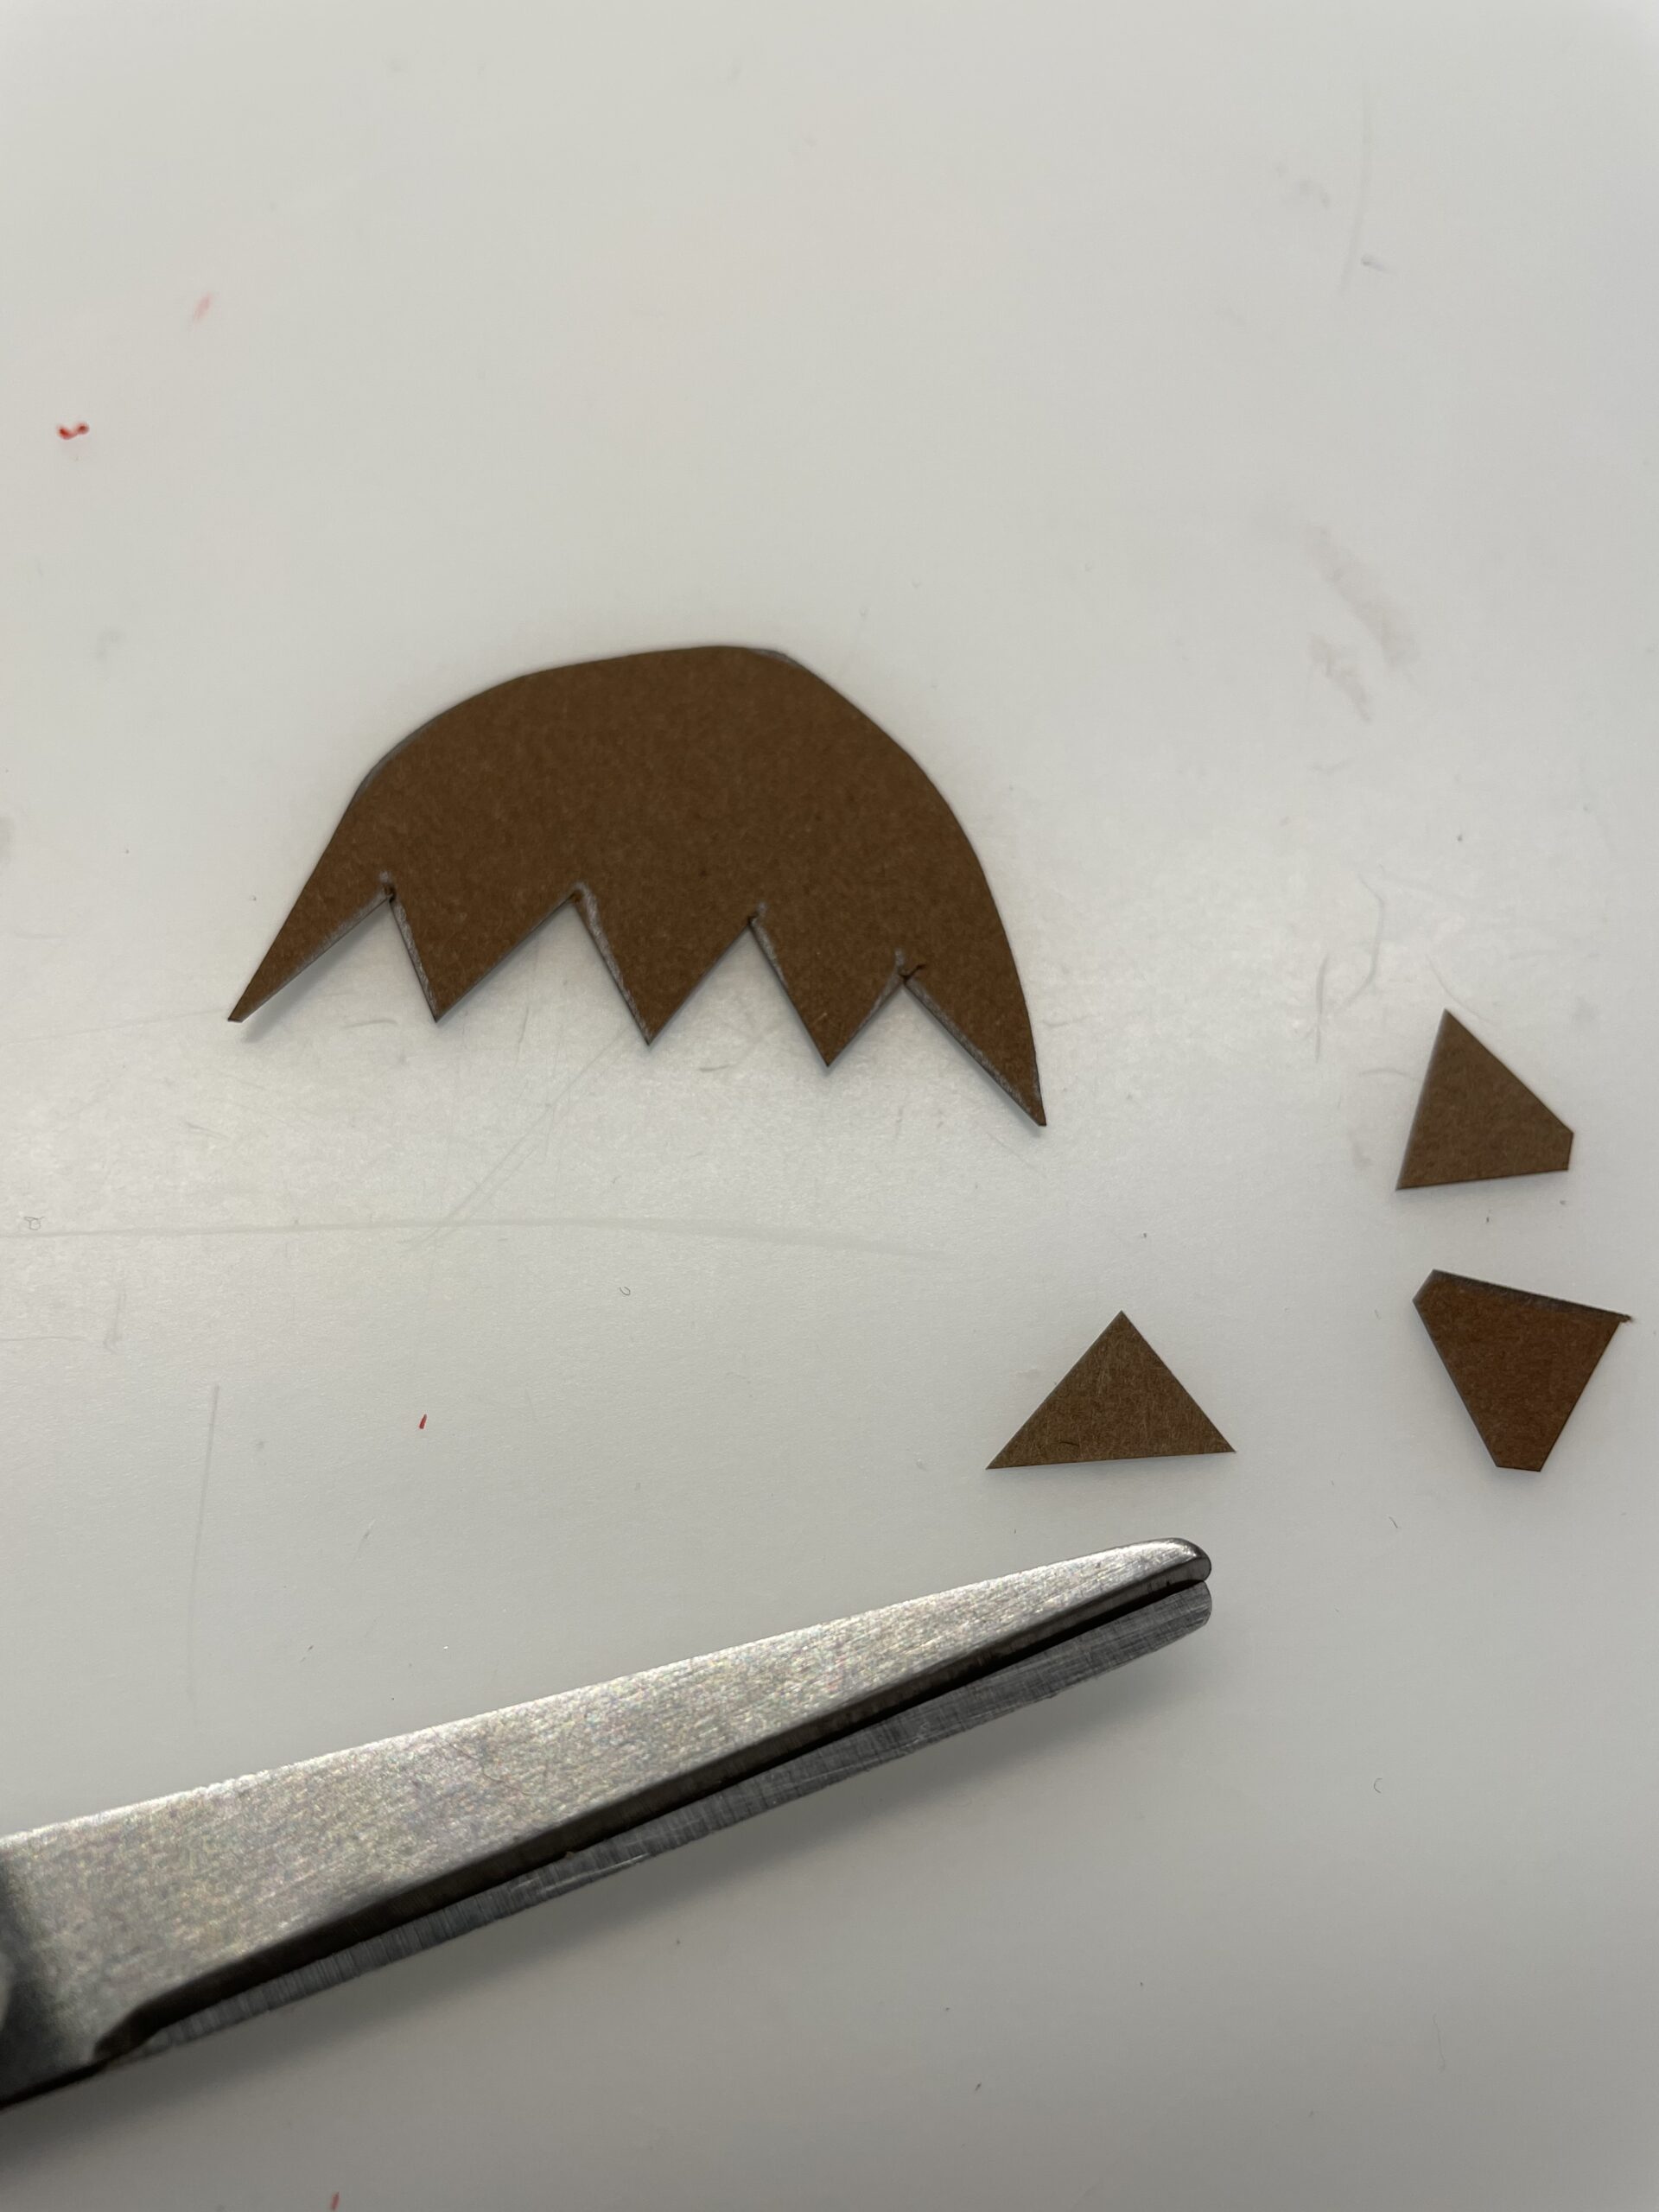
Then you paint a pointed pattern on the straight side. Inverted, the flower looks like a tulip.

Bild zum Schritt 18 für das Bastel- und DIY-Abenteuer für Kinder: 'Anschließend malt ihr an der geraden Seite ein Zackenmuster auf....'

19

Cut out the flower.

Bild zum Schritt 19 für das Bastel- und DIY-Abenteuer für Kinder: 'Schneidet die Blüte aus.'

20

Now you stick the flower between the two cardboard plates to the bottom of the apple.

Bild zum Schritt 20 für das Bastel- und DIY-Abenteuer für Kinder: 'Nun klebt ihr die Blüte zwischen die beiden Pappteller an...'

21

The apple is ready. Now you punch left and right or, depending on where the stalk is located, two holes in the upper side.

Bild zum Schritt 21 für das Bastel- und DIY-Abenteuer für Kinder: 'Fertig ist der Apfel. Jetzt locht ihr noch links und...'

22

The children can carry the lantern on the wire or use the wire to hang a lantern rod.

Bild zum Schritt 22 für das Bastel- und DIY-Abenteuer für Kinder: 'Fädelt dadurch einen Blumendraht und verdreht die Enden. Die Kinder...'

23

Have fun doing crafts!

Materials

 1 Cardboard plate painted with water coloursred, orange, yellow
 1 Sponge
 1 Builder's pad
 1 Water bowl
 Kitchen crepe or newsprint
 1 Hole pliers
 1 Pipe cleaner brown
 Clay paper dark green and brown
 1 Pen
 Transparent paper available in red, yellow, orange
All links marked with a shopping cart lead to Amazon - here we have selected products that we would order ourselves and in part also ordered. In a qualified purchase via the advertising link, we as Amazon partner receive a commission, for you there are no costs. You thus support our cost- and advertising banner-free, educational offer.

Directions

1

First cut the floor out of both cardboard plates. Then paint the bottom side of the cardboard plates in different shades of red.

Tip: As an alternative to painting with the brush, you can apply the paint with a sponge. For this, you will find a damp sponge in a little water color. You will need to put a kitchen crepe or an old newspaper under it. So you can apply the paint well to the edge.

Bild zum Schritt 1 für das Bastel- und DIY-Abenteuer für Kinder: 'Schneidet zuerst den Boden aus beiden Pappteller heraus. Anschließend bemalt...'

2

Then let the paint dry.
While the paint dries, you cut out circles of transparent paper. Make sure that the circles are larger than the cut-out. Use a bowl or plate as a template.

3

Then you stick circles of transparent paper on the insides of the cardboard rings.

Bild zum Schritt 3 für das Bastel- und DIY-Abenteuer für Kinder: 'Anschließend klebt ihr auf die Innenseiten der Pappringe Kreise aus...'

4

Then glue the two cardboard rings together on the inside sides. Leave an opening about 10 cm in size at one point. Through this you can insert the light chain later.

5

For the stem you use half a brown pipe cleaner and a green paper.
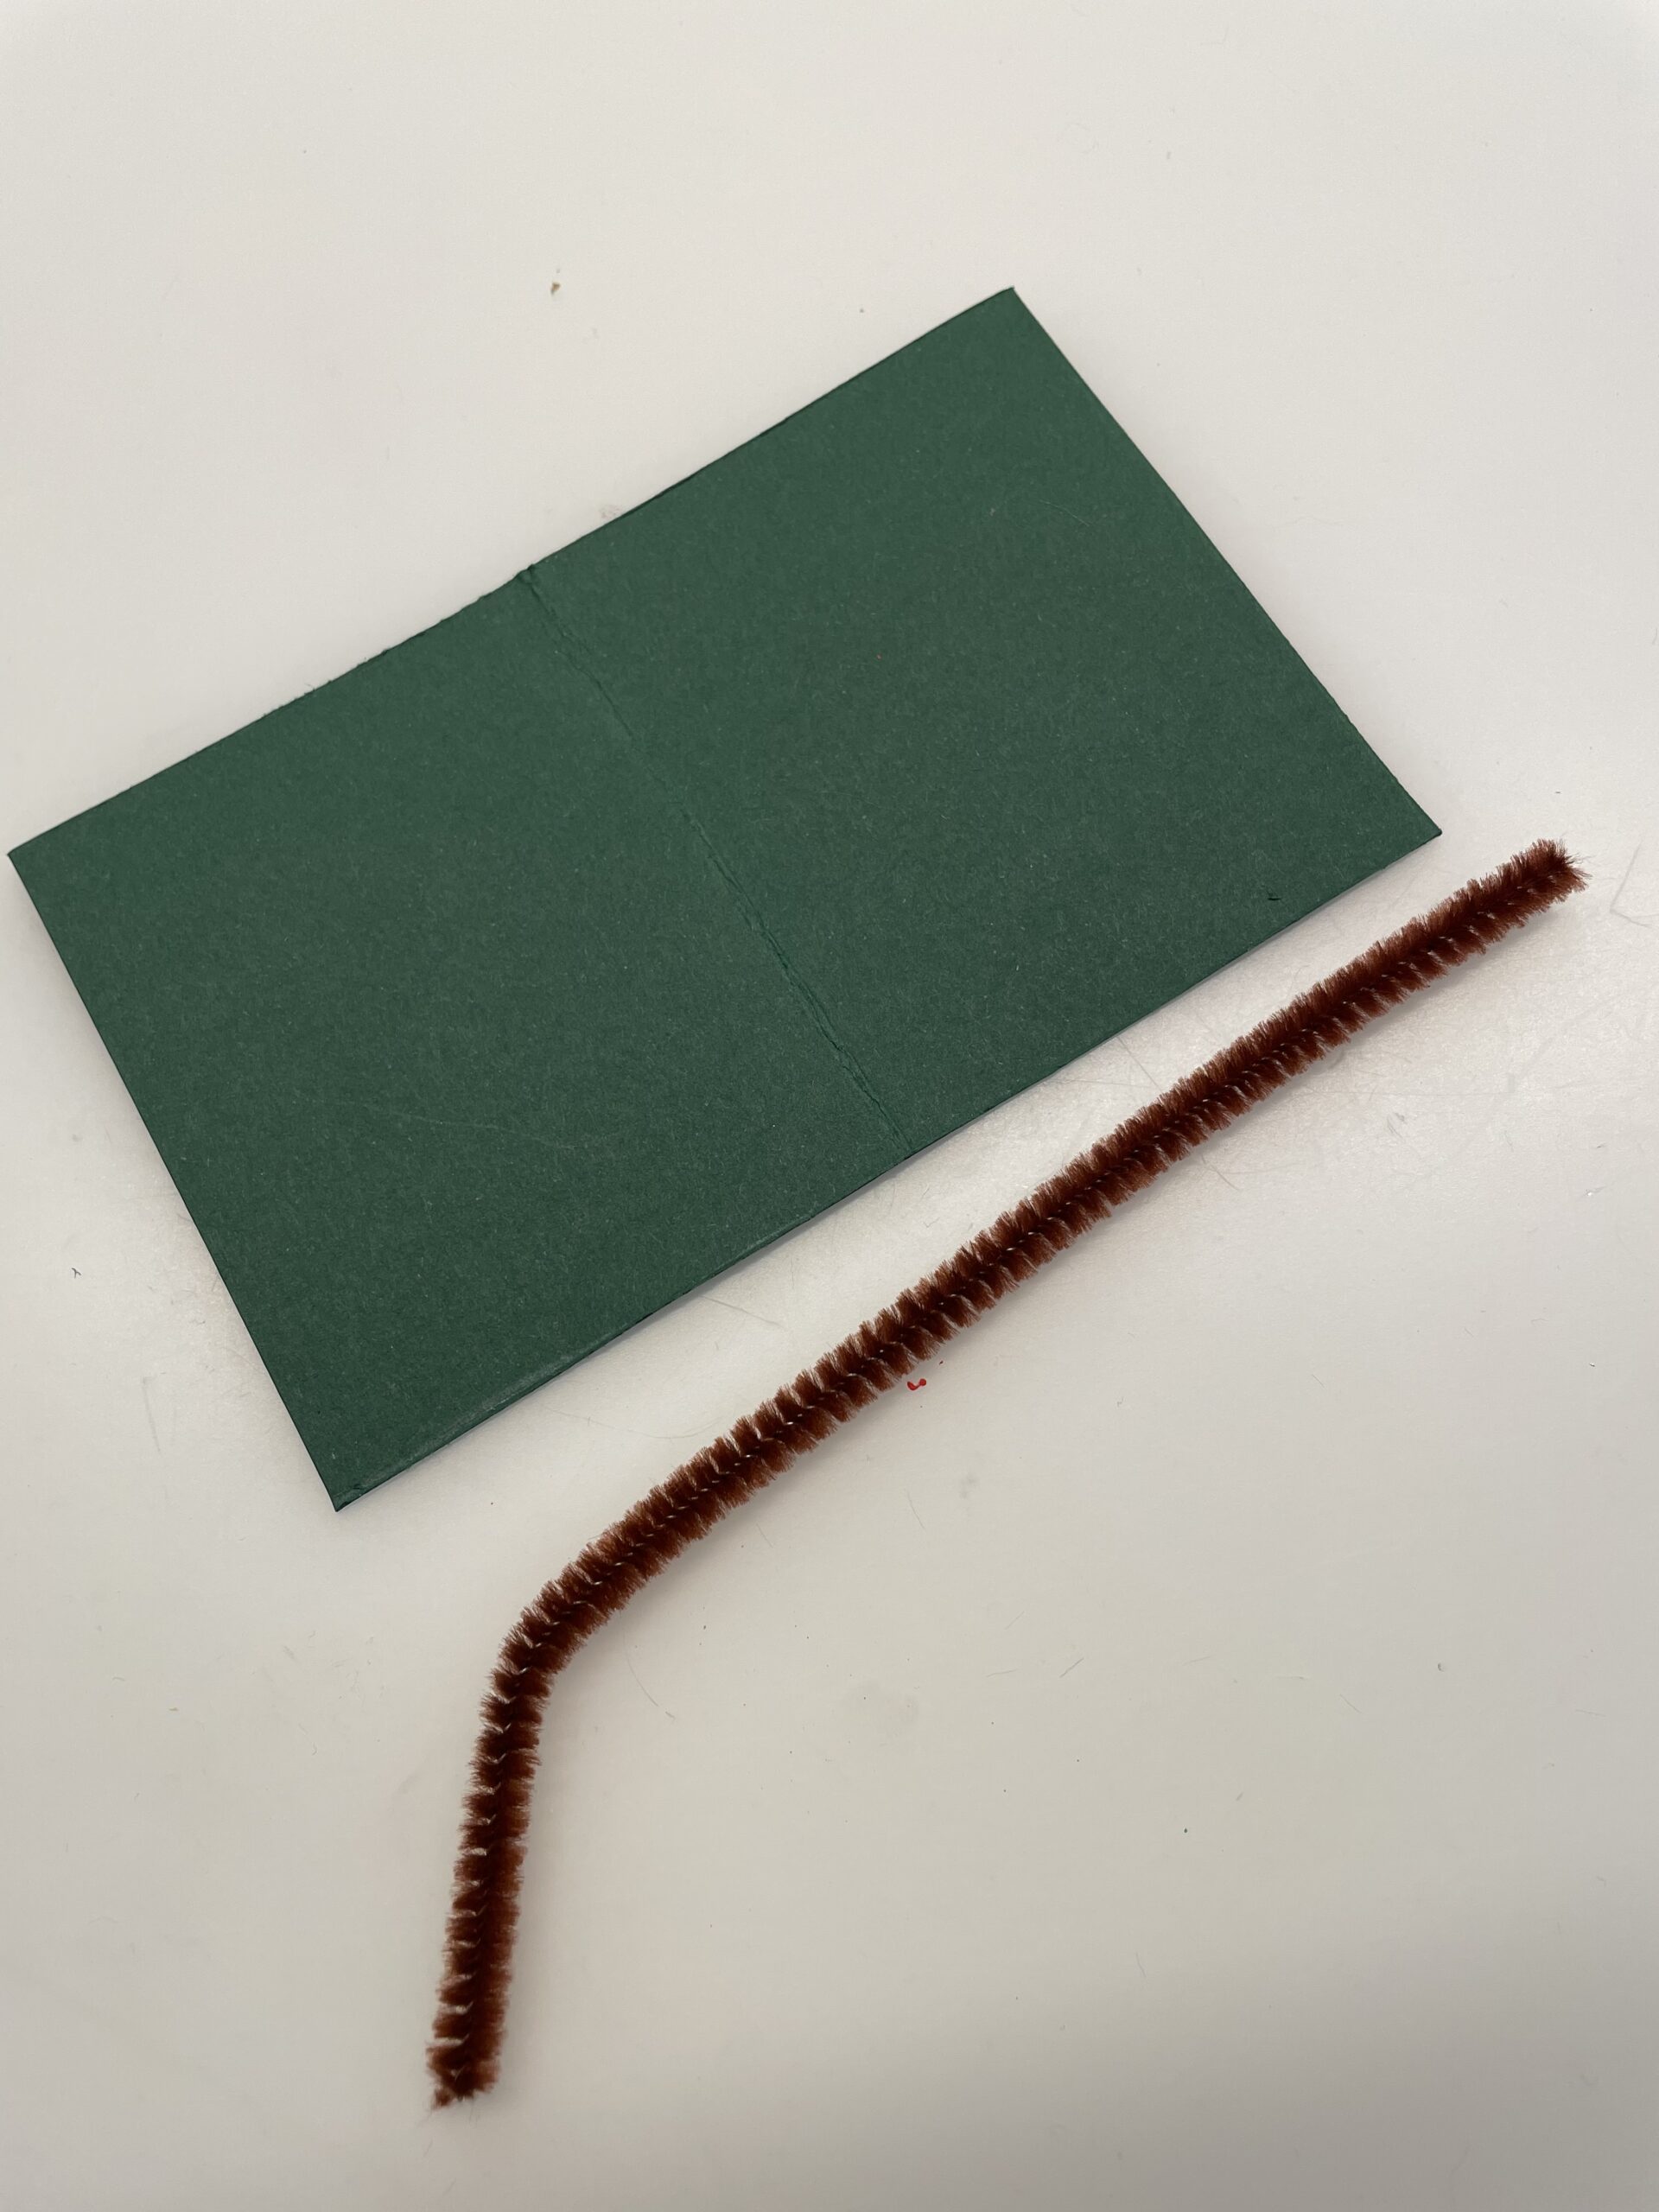
Bild zum Schritt 5 für das Bastel- und DIY-Abenteuer für Kinder: 'Für den Stiel verwendet ihr die Hälfte eines braunen Pfeifenputzers...'

6

Fold the green paper half way.

Bild zum Schritt 6 für das Bastel- und DIY-Abenteuer für Kinder: 'Faltet das grüne Papier zur Hälfte.'

7

Then you paint the shape of a sheet on the paper. Paint the sheet from the fold and leave a wide opening on the folding edge.
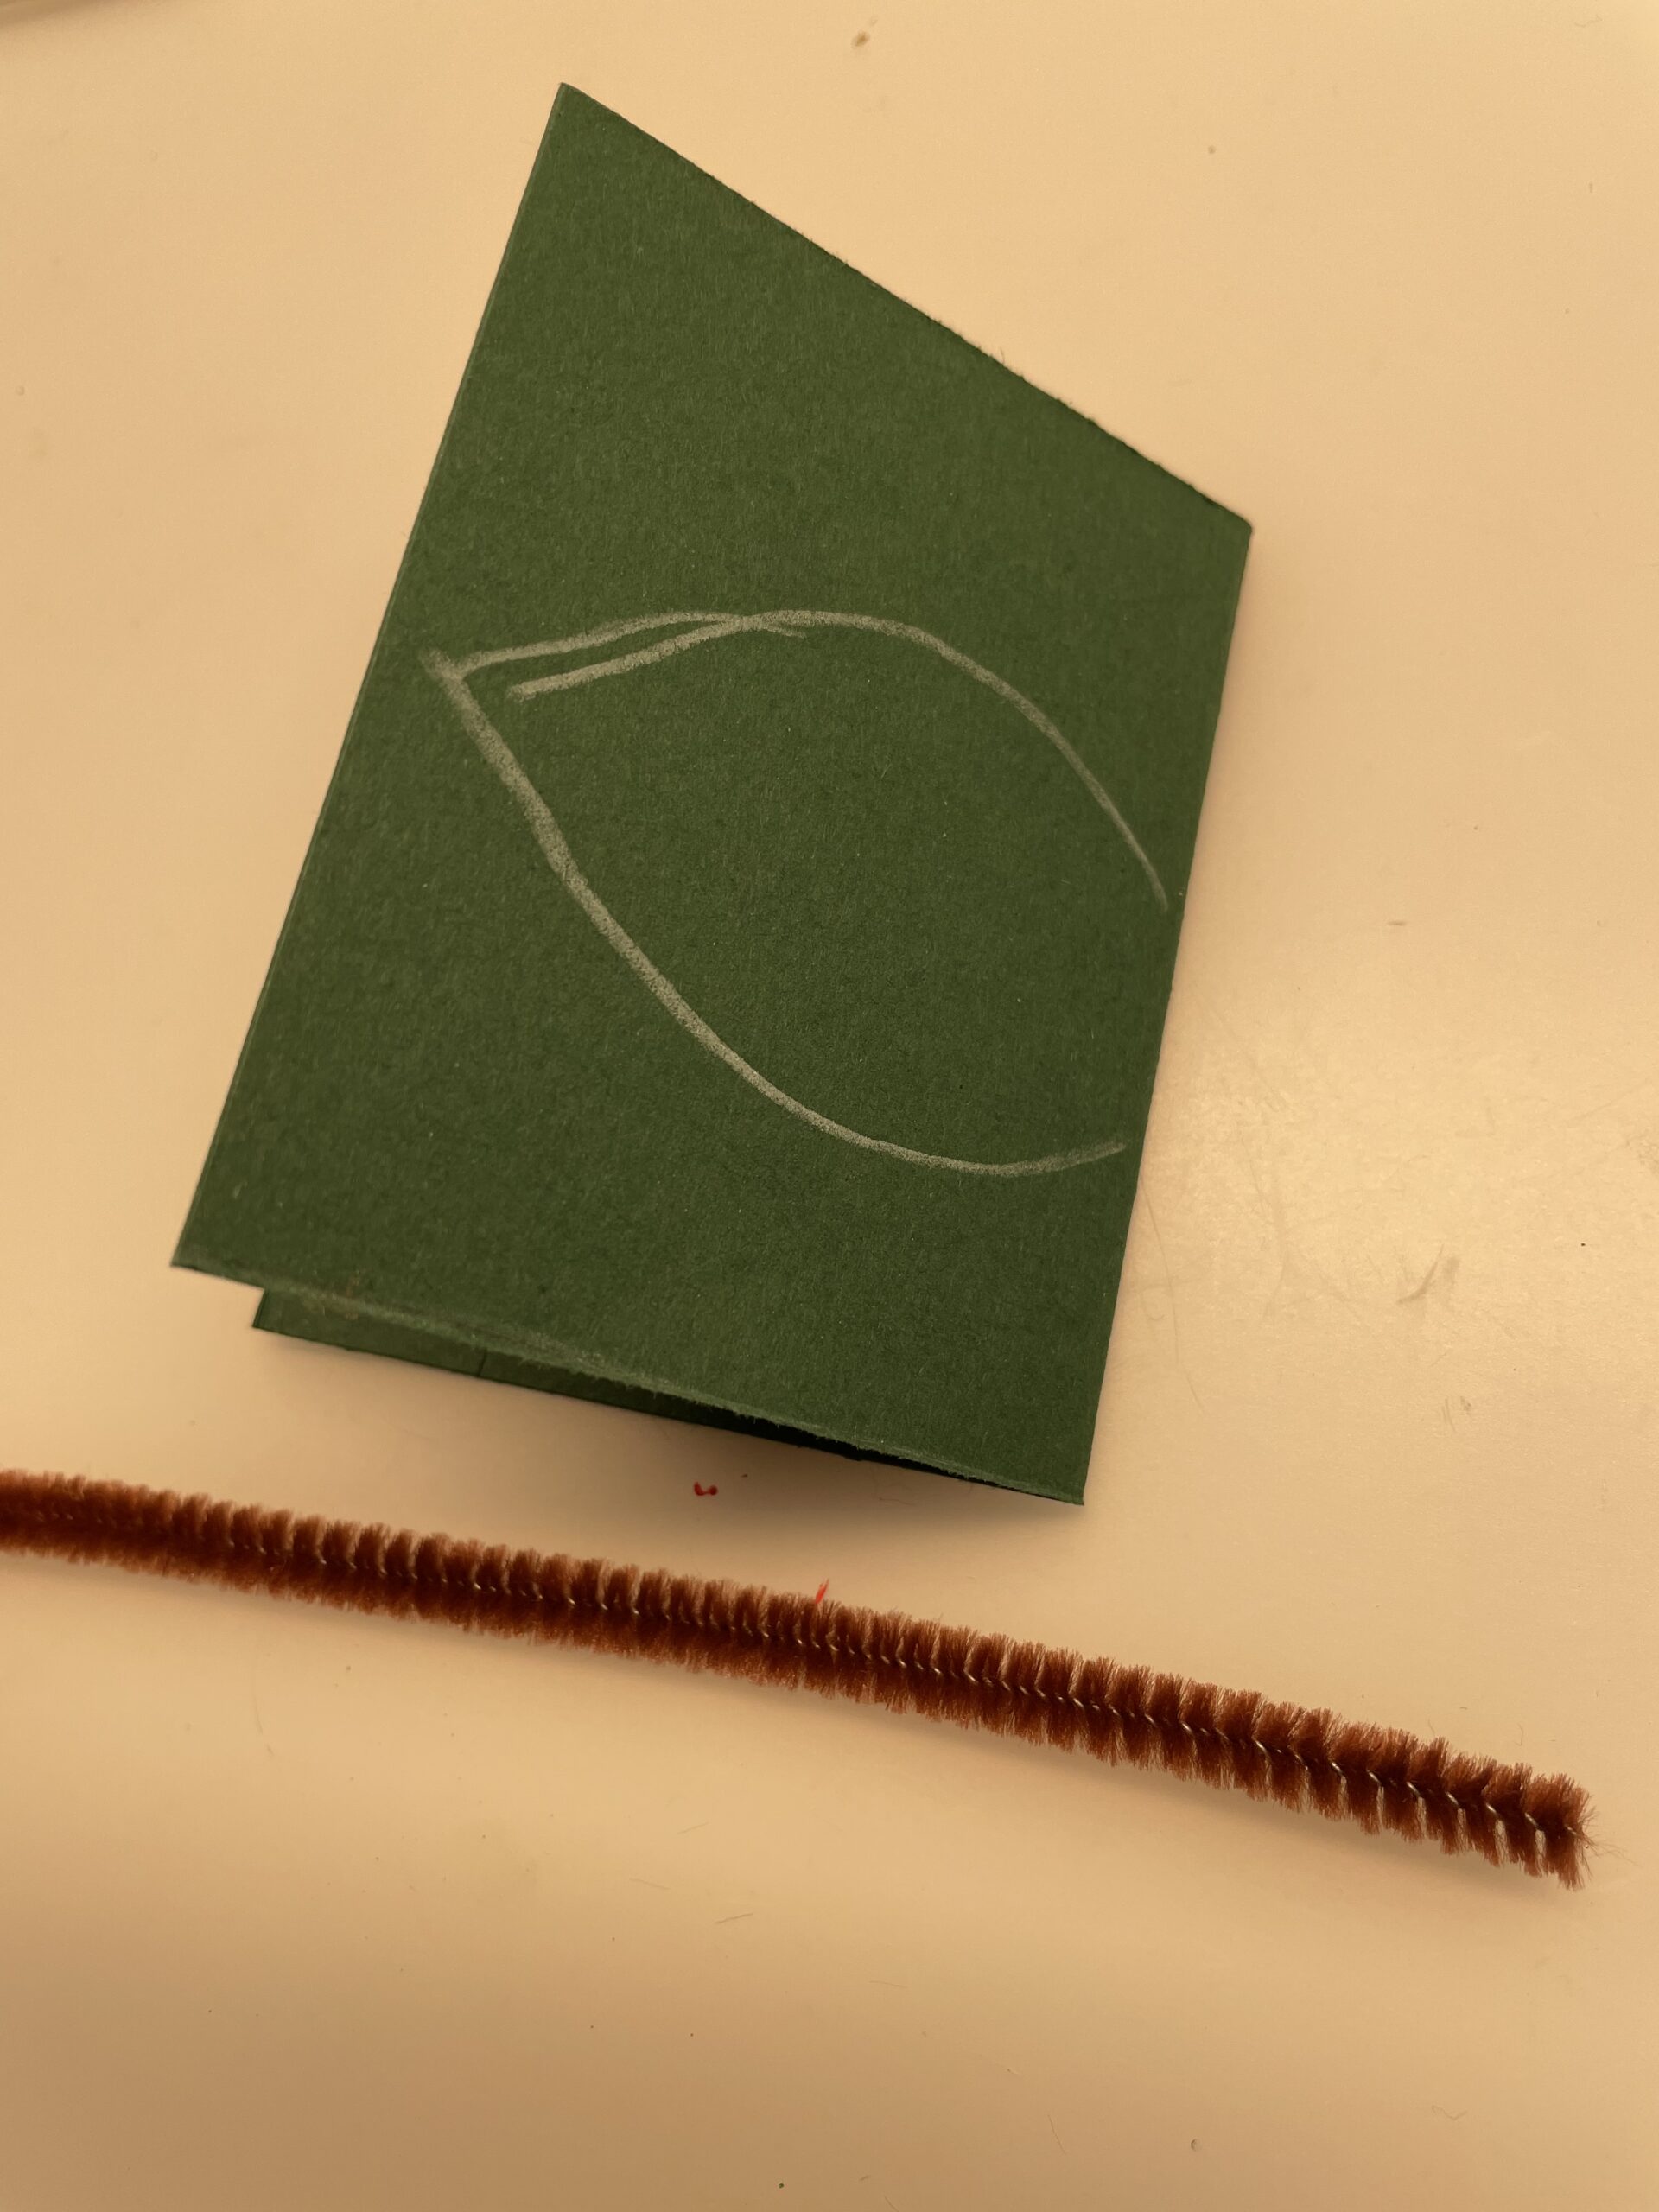
Bild zum Schritt 7 für das Bastel- und DIY-Abenteuer für Kinder: 'Anschließend malt ihr die Form eines Blattes auf das Papier....'

8

Cuts out the leaf twice and folds it apart.

Bild zum Schritt 8 für das Bastel- und DIY-Abenteuer für Kinder: 'Schneidet das Blatt nun doppelt aus und klappt es auseinander.'

9

Now bend the pipe cleaner in the middle.
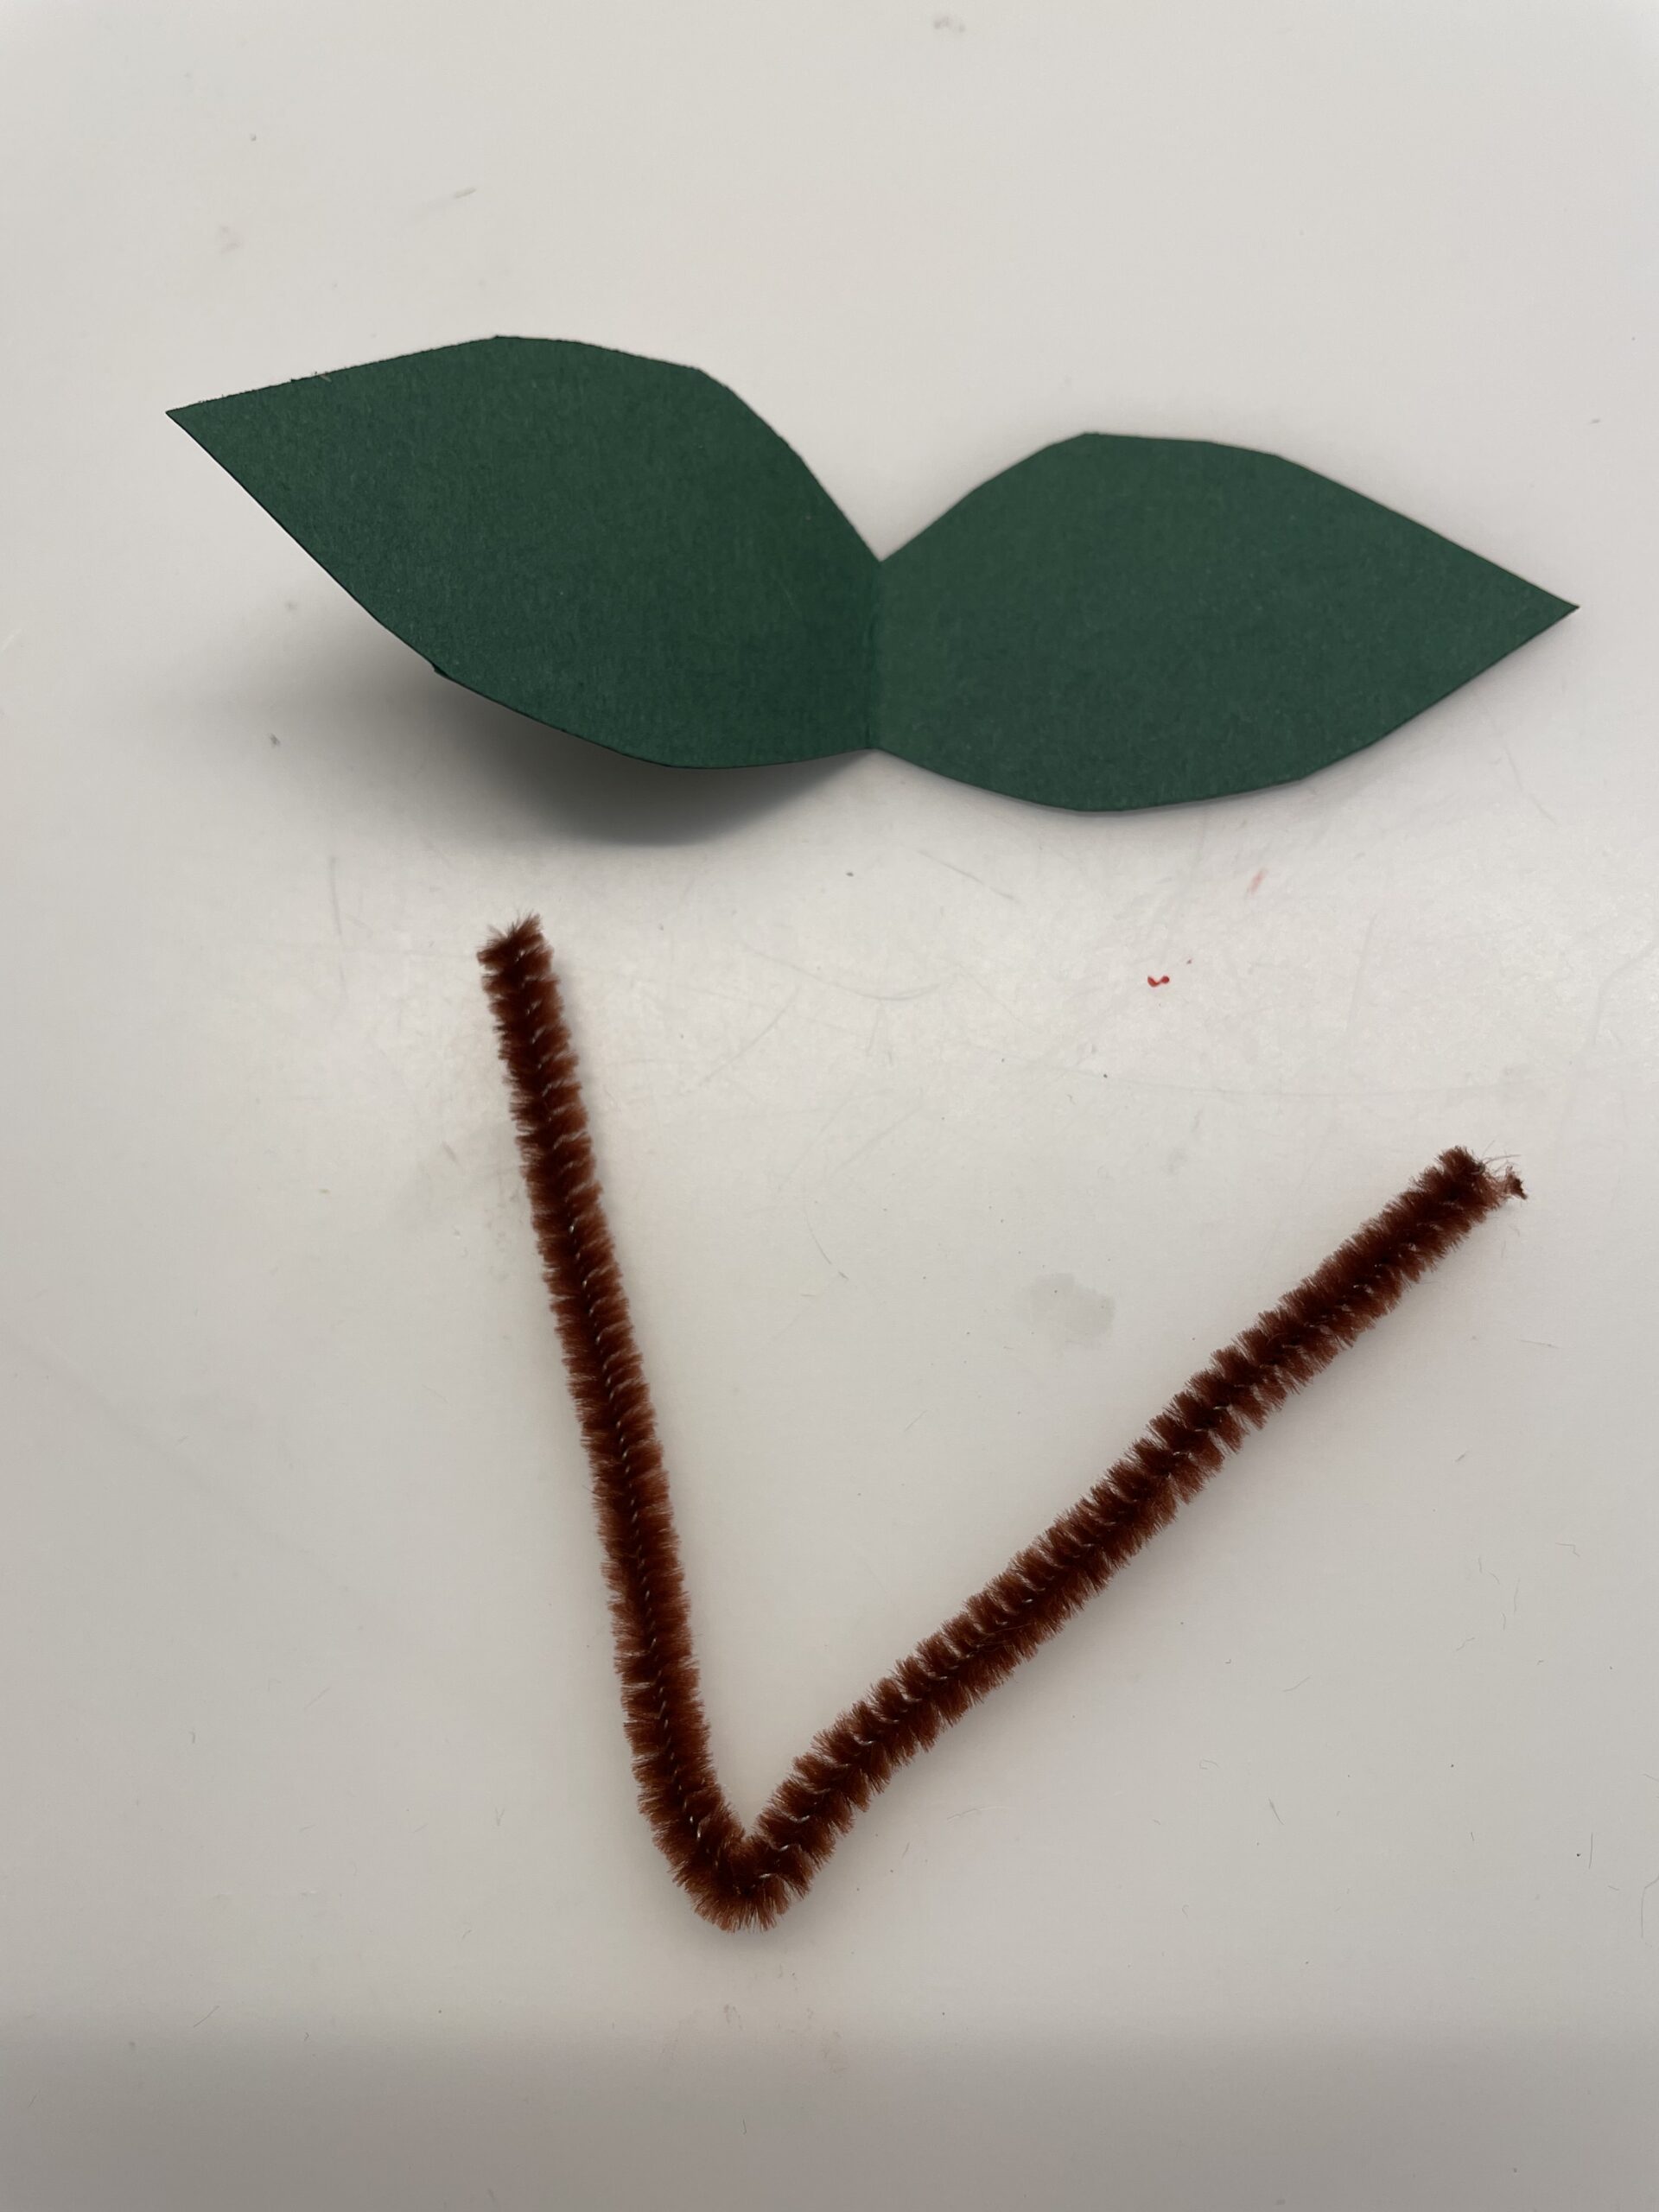
Bild zum Schritt 9 für das Bastel- und DIY-Abenteuer für Kinder: 'Biegt nun den Pfeifenputzer einmal in der Mitte.'

10

Then thread the pipe cleaner through the hole in the lantern until bend.
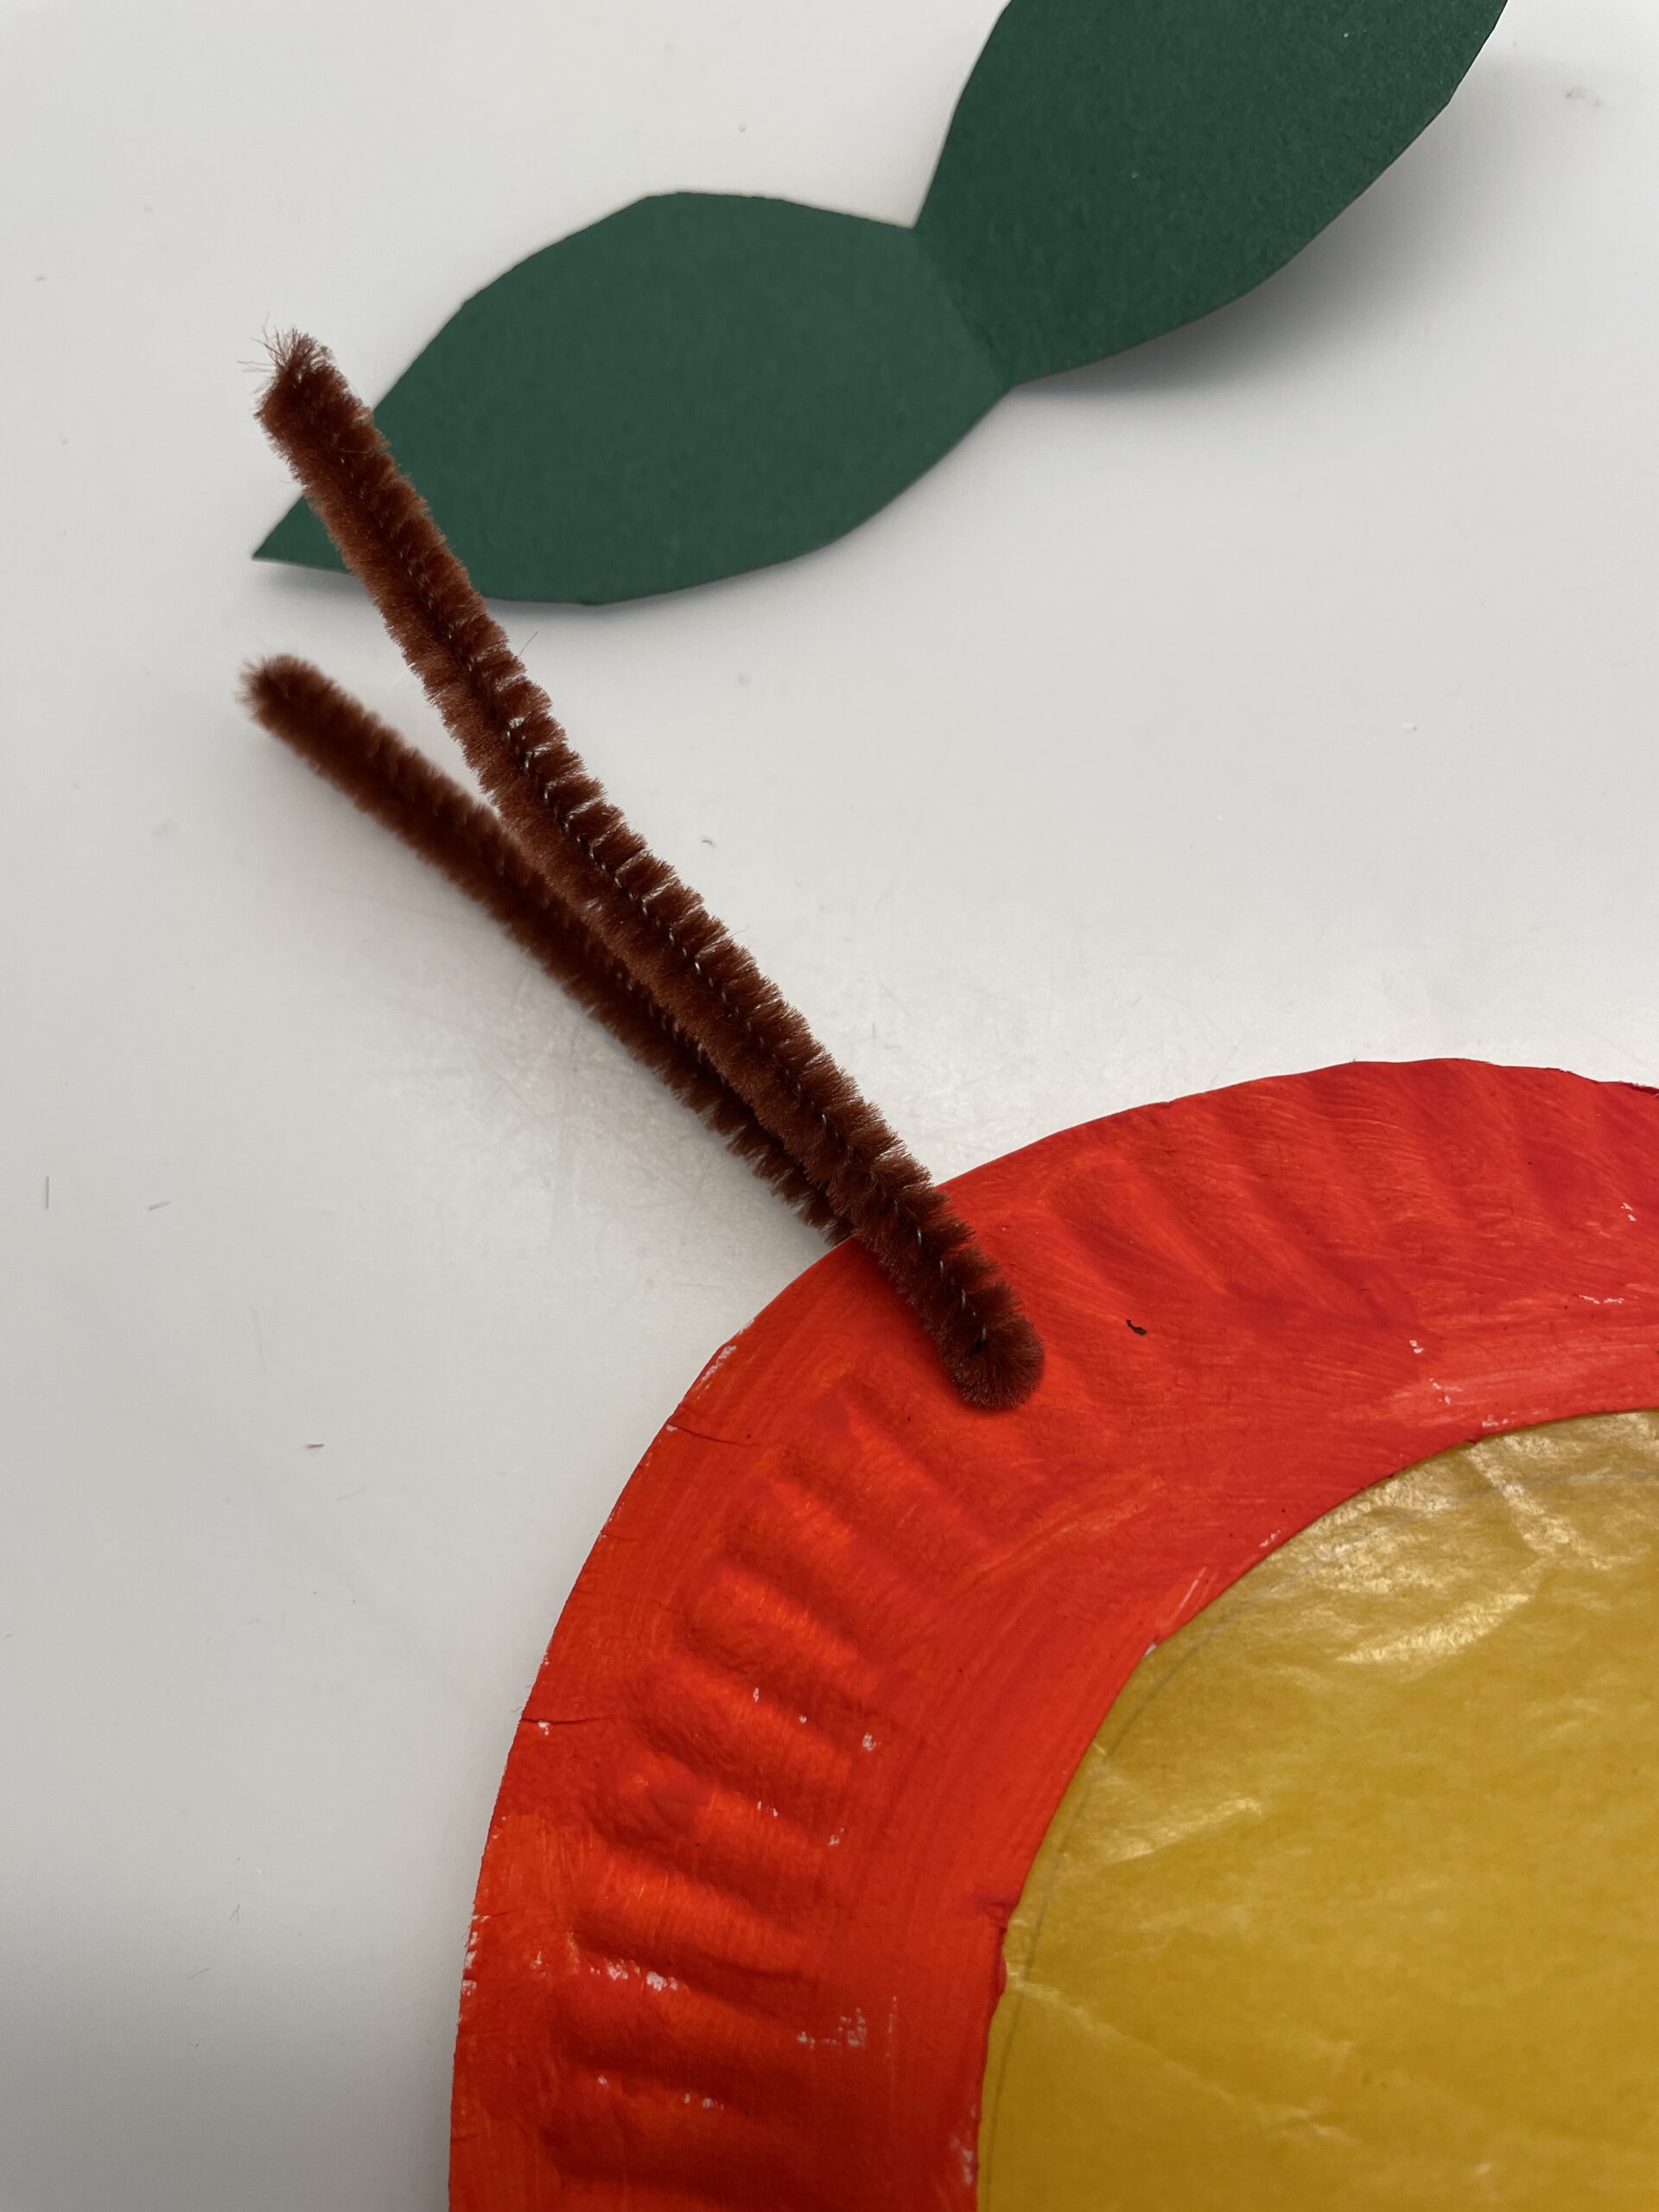
Bild zum Schritt 10 für das Bastel- und DIY-Abenteuer für Kinder: 'Anschließend fädelt ihr den Pfeifenputzer bis zur Biegung durch das...'

11

Now twist the ends of the pipe cleaner. So he can no longer slip out.
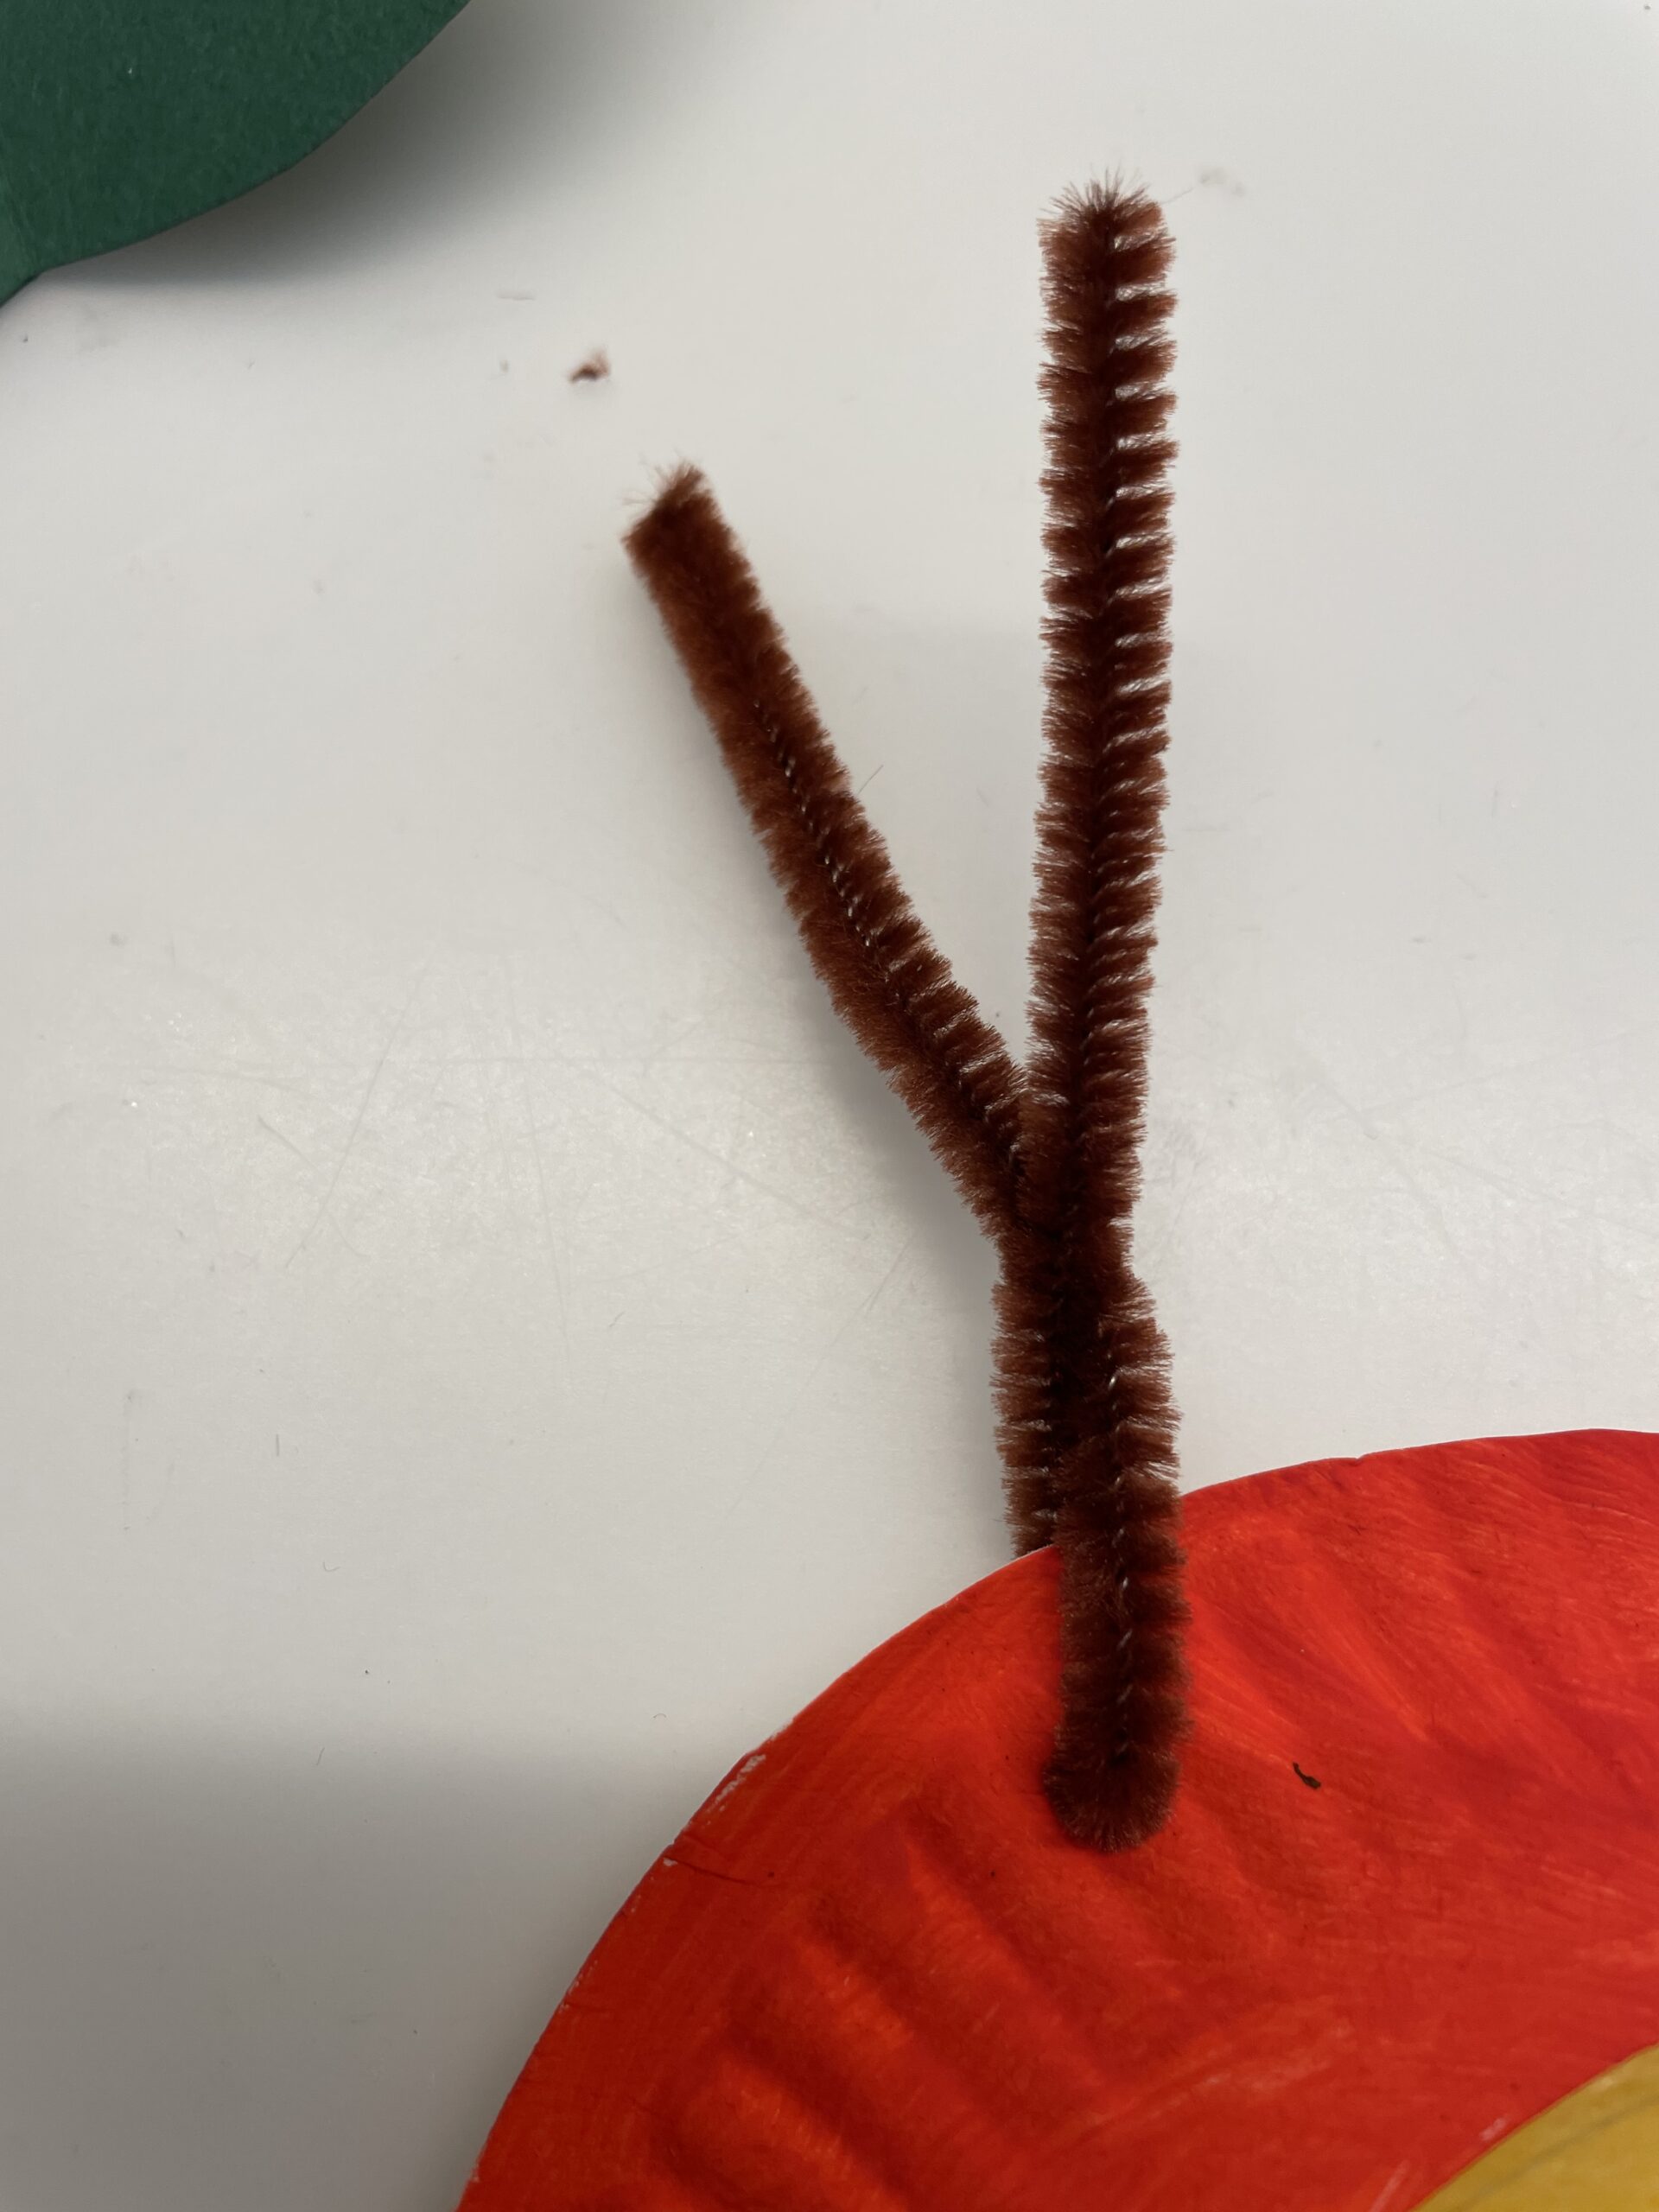
Bild zum Schritt 11 für das Bastel- und DIY-Abenteuer für Kinder: 'Verdreht jetzt die Enden des Pfeifenputzers. So kann dieser nicht...'

12

Then you push the leaf folded between the ends of the pipe cleaner.
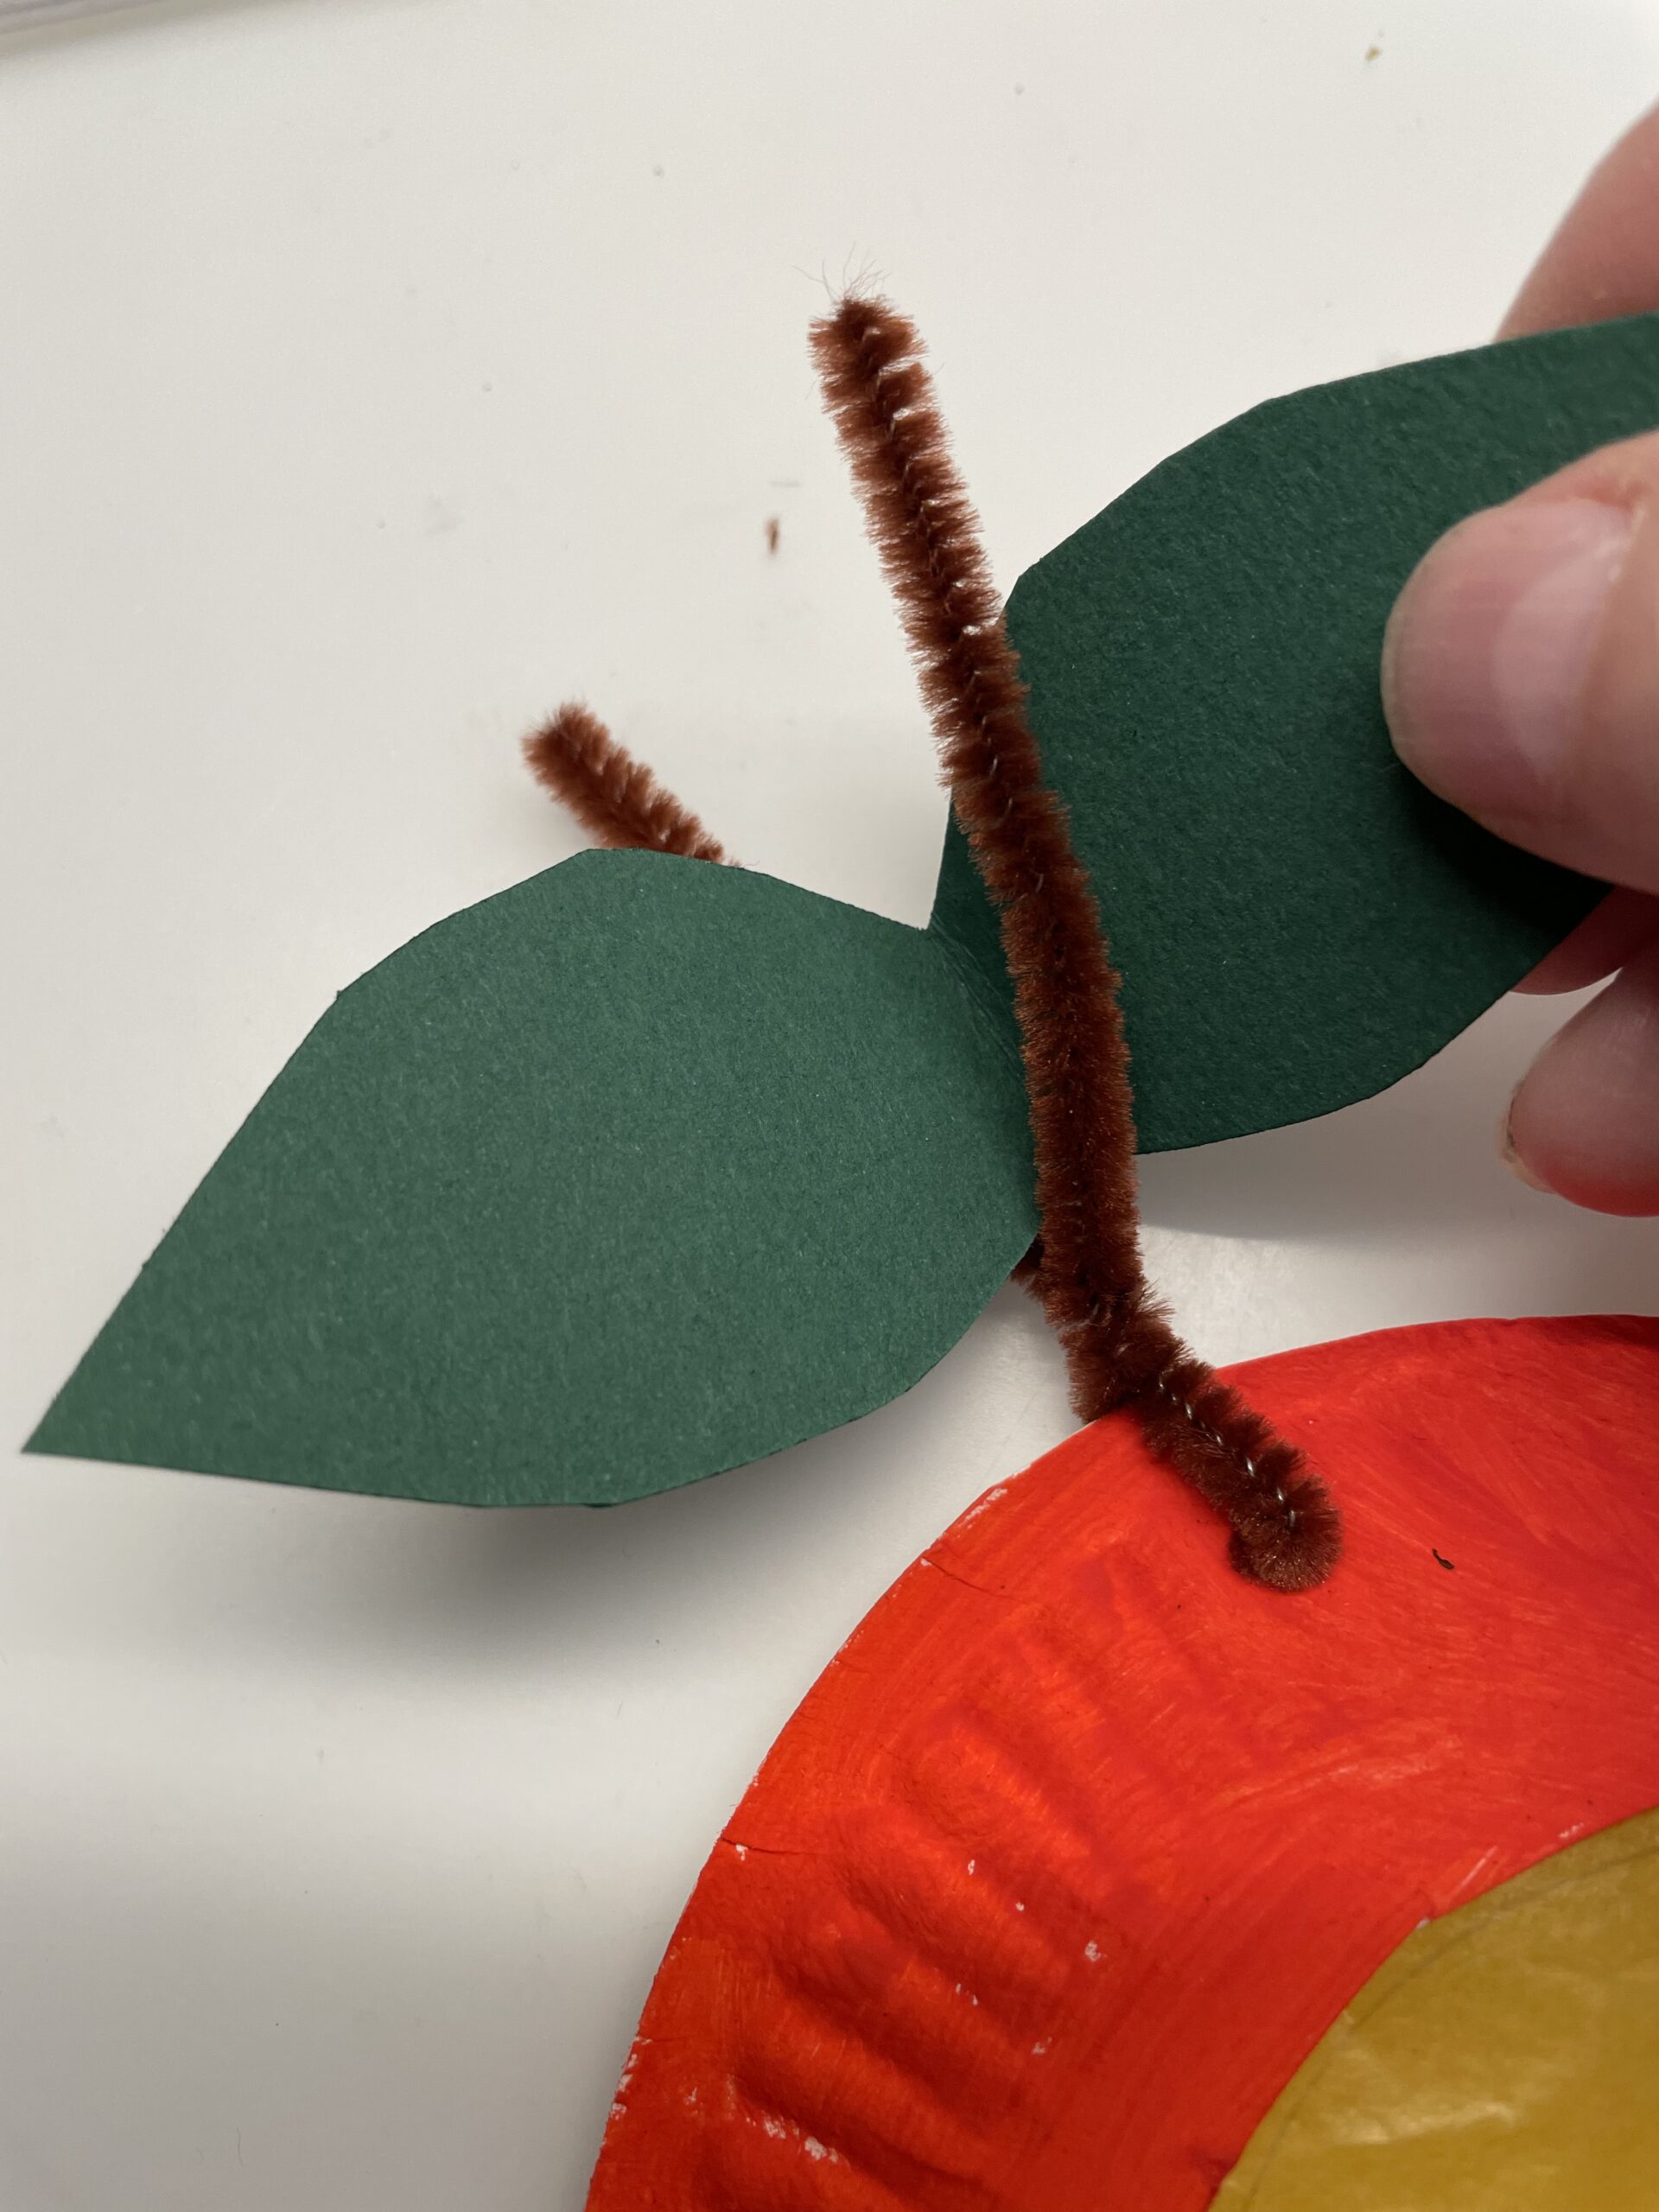
Bild zum Schritt 12 für das Bastel- und DIY-Abenteuer für Kinder: 'Dann schiebt ihr das Blatt aufgefaltet zwischen die Enden des...'

13

Push the leaf down and twist the ends of the pipe cleaner together. The leaves are now stuck.
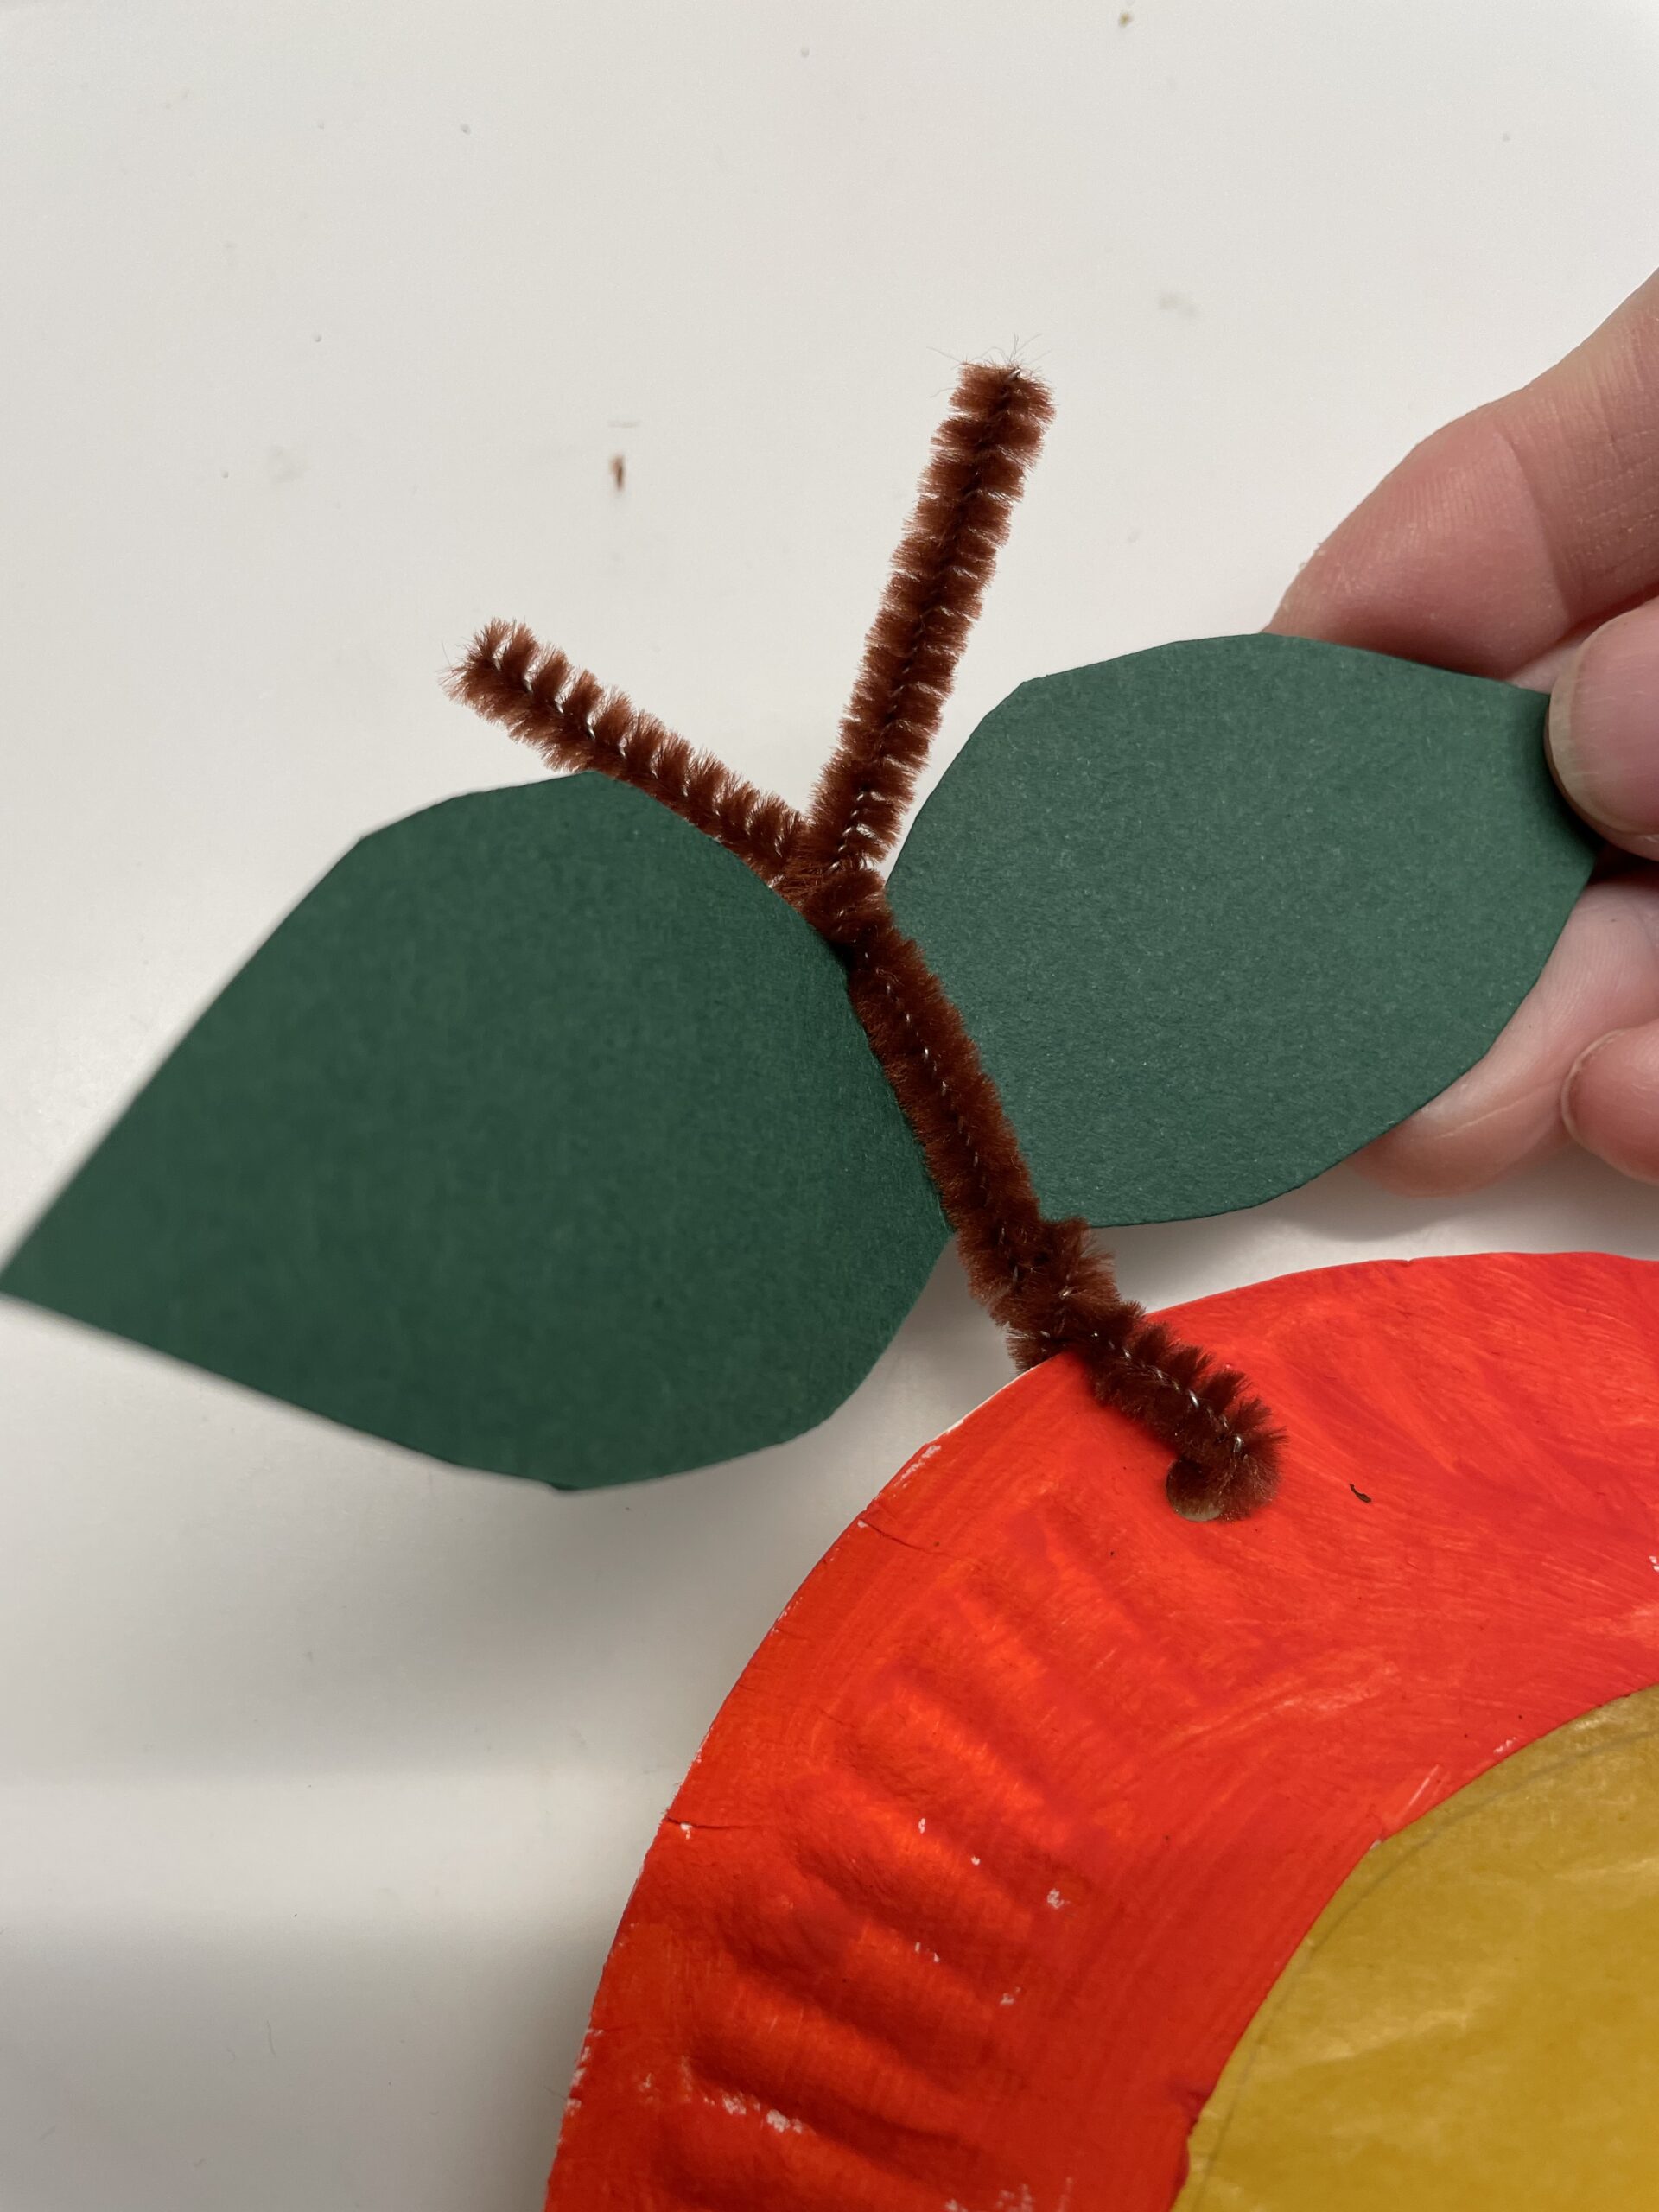
Bild zum Schritt 13 für das Bastel- und DIY-Abenteuer für Kinder: 'Schiebt das Blatt nach unten und verdreht die Enden des...'

14

Now you twist the overhanging ends of the pipe cleaner together.
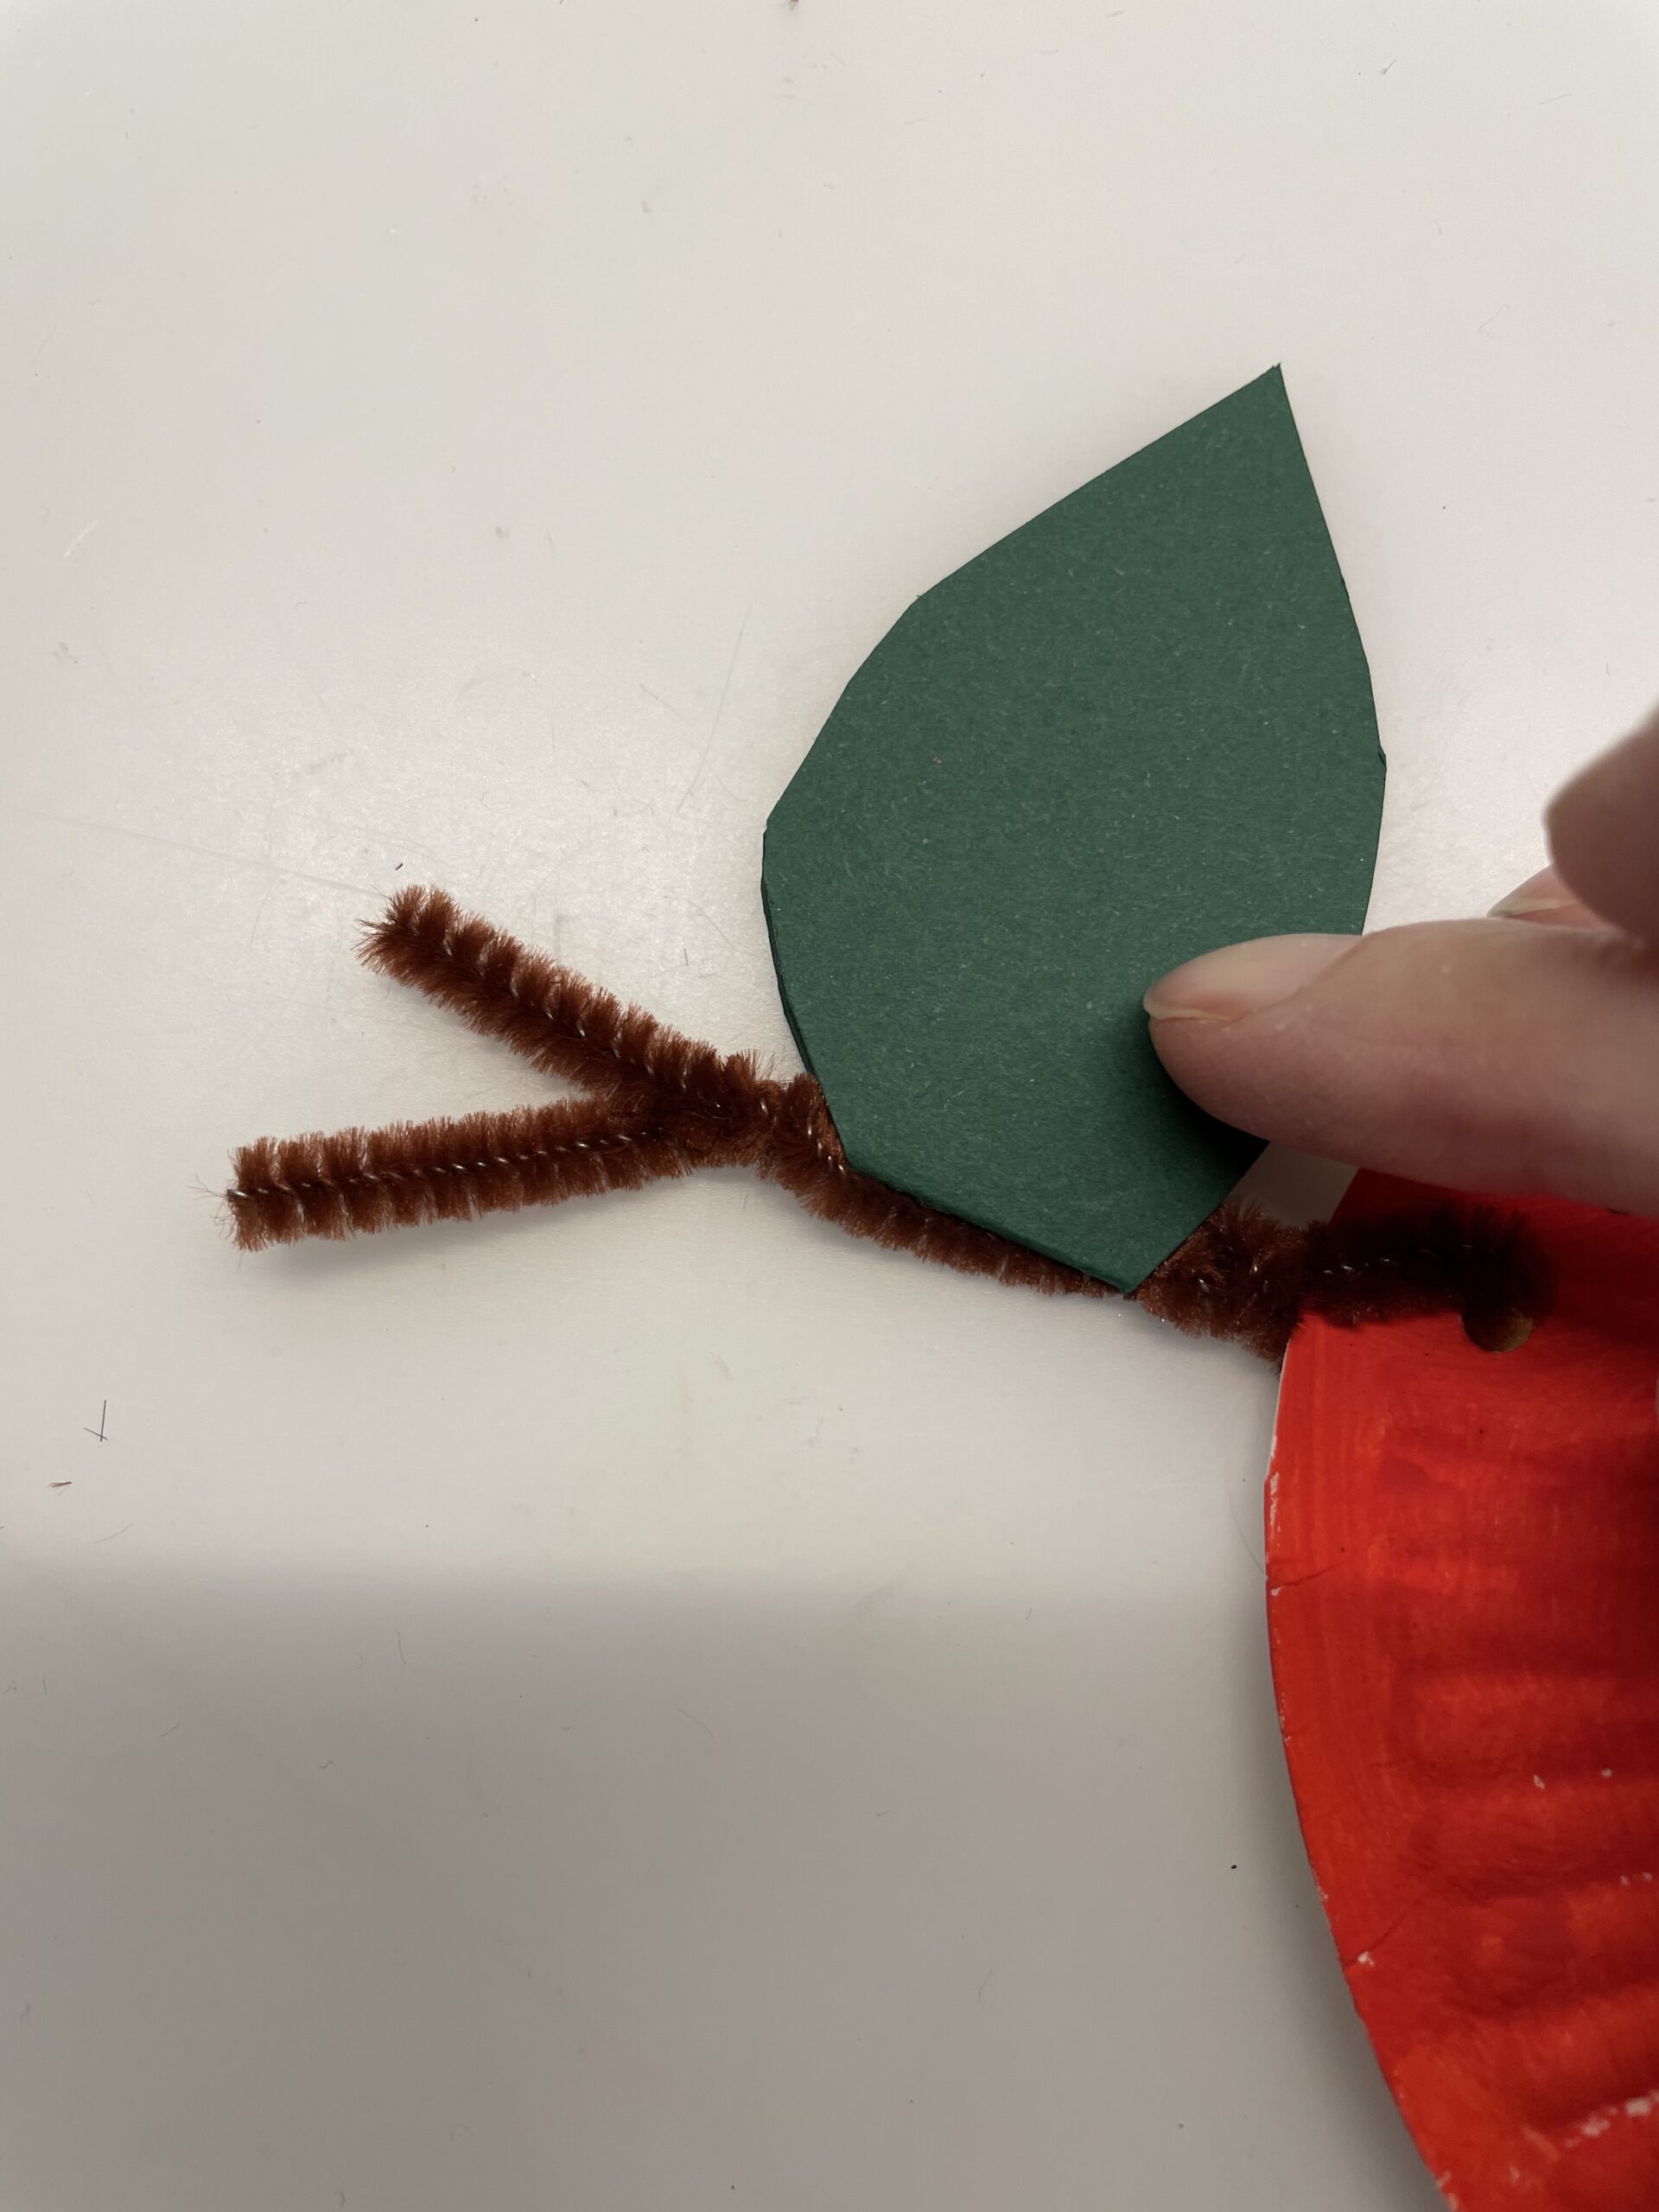
Bild zum Schritt 14 für das Bastel- und DIY-Abenteuer für Kinder: 'Die überstehenden Enden des Pfeifenputzers verdreht ihr nun miteinander.'

15

Make sure the ends don't pee.

Bild zum Schritt 15 für das Bastel- und DIY-Abenteuer für Kinder: 'Achtet darauf, dass die Enden nicht piksen.'

16

2. Bild zum Schritt 15 für das Bastel- und DIY-Abenteuer für Kinder: 'Achtet darauf, dass die Enden nicht piksen.'

17

Now you're making a flower of brown clay paper.
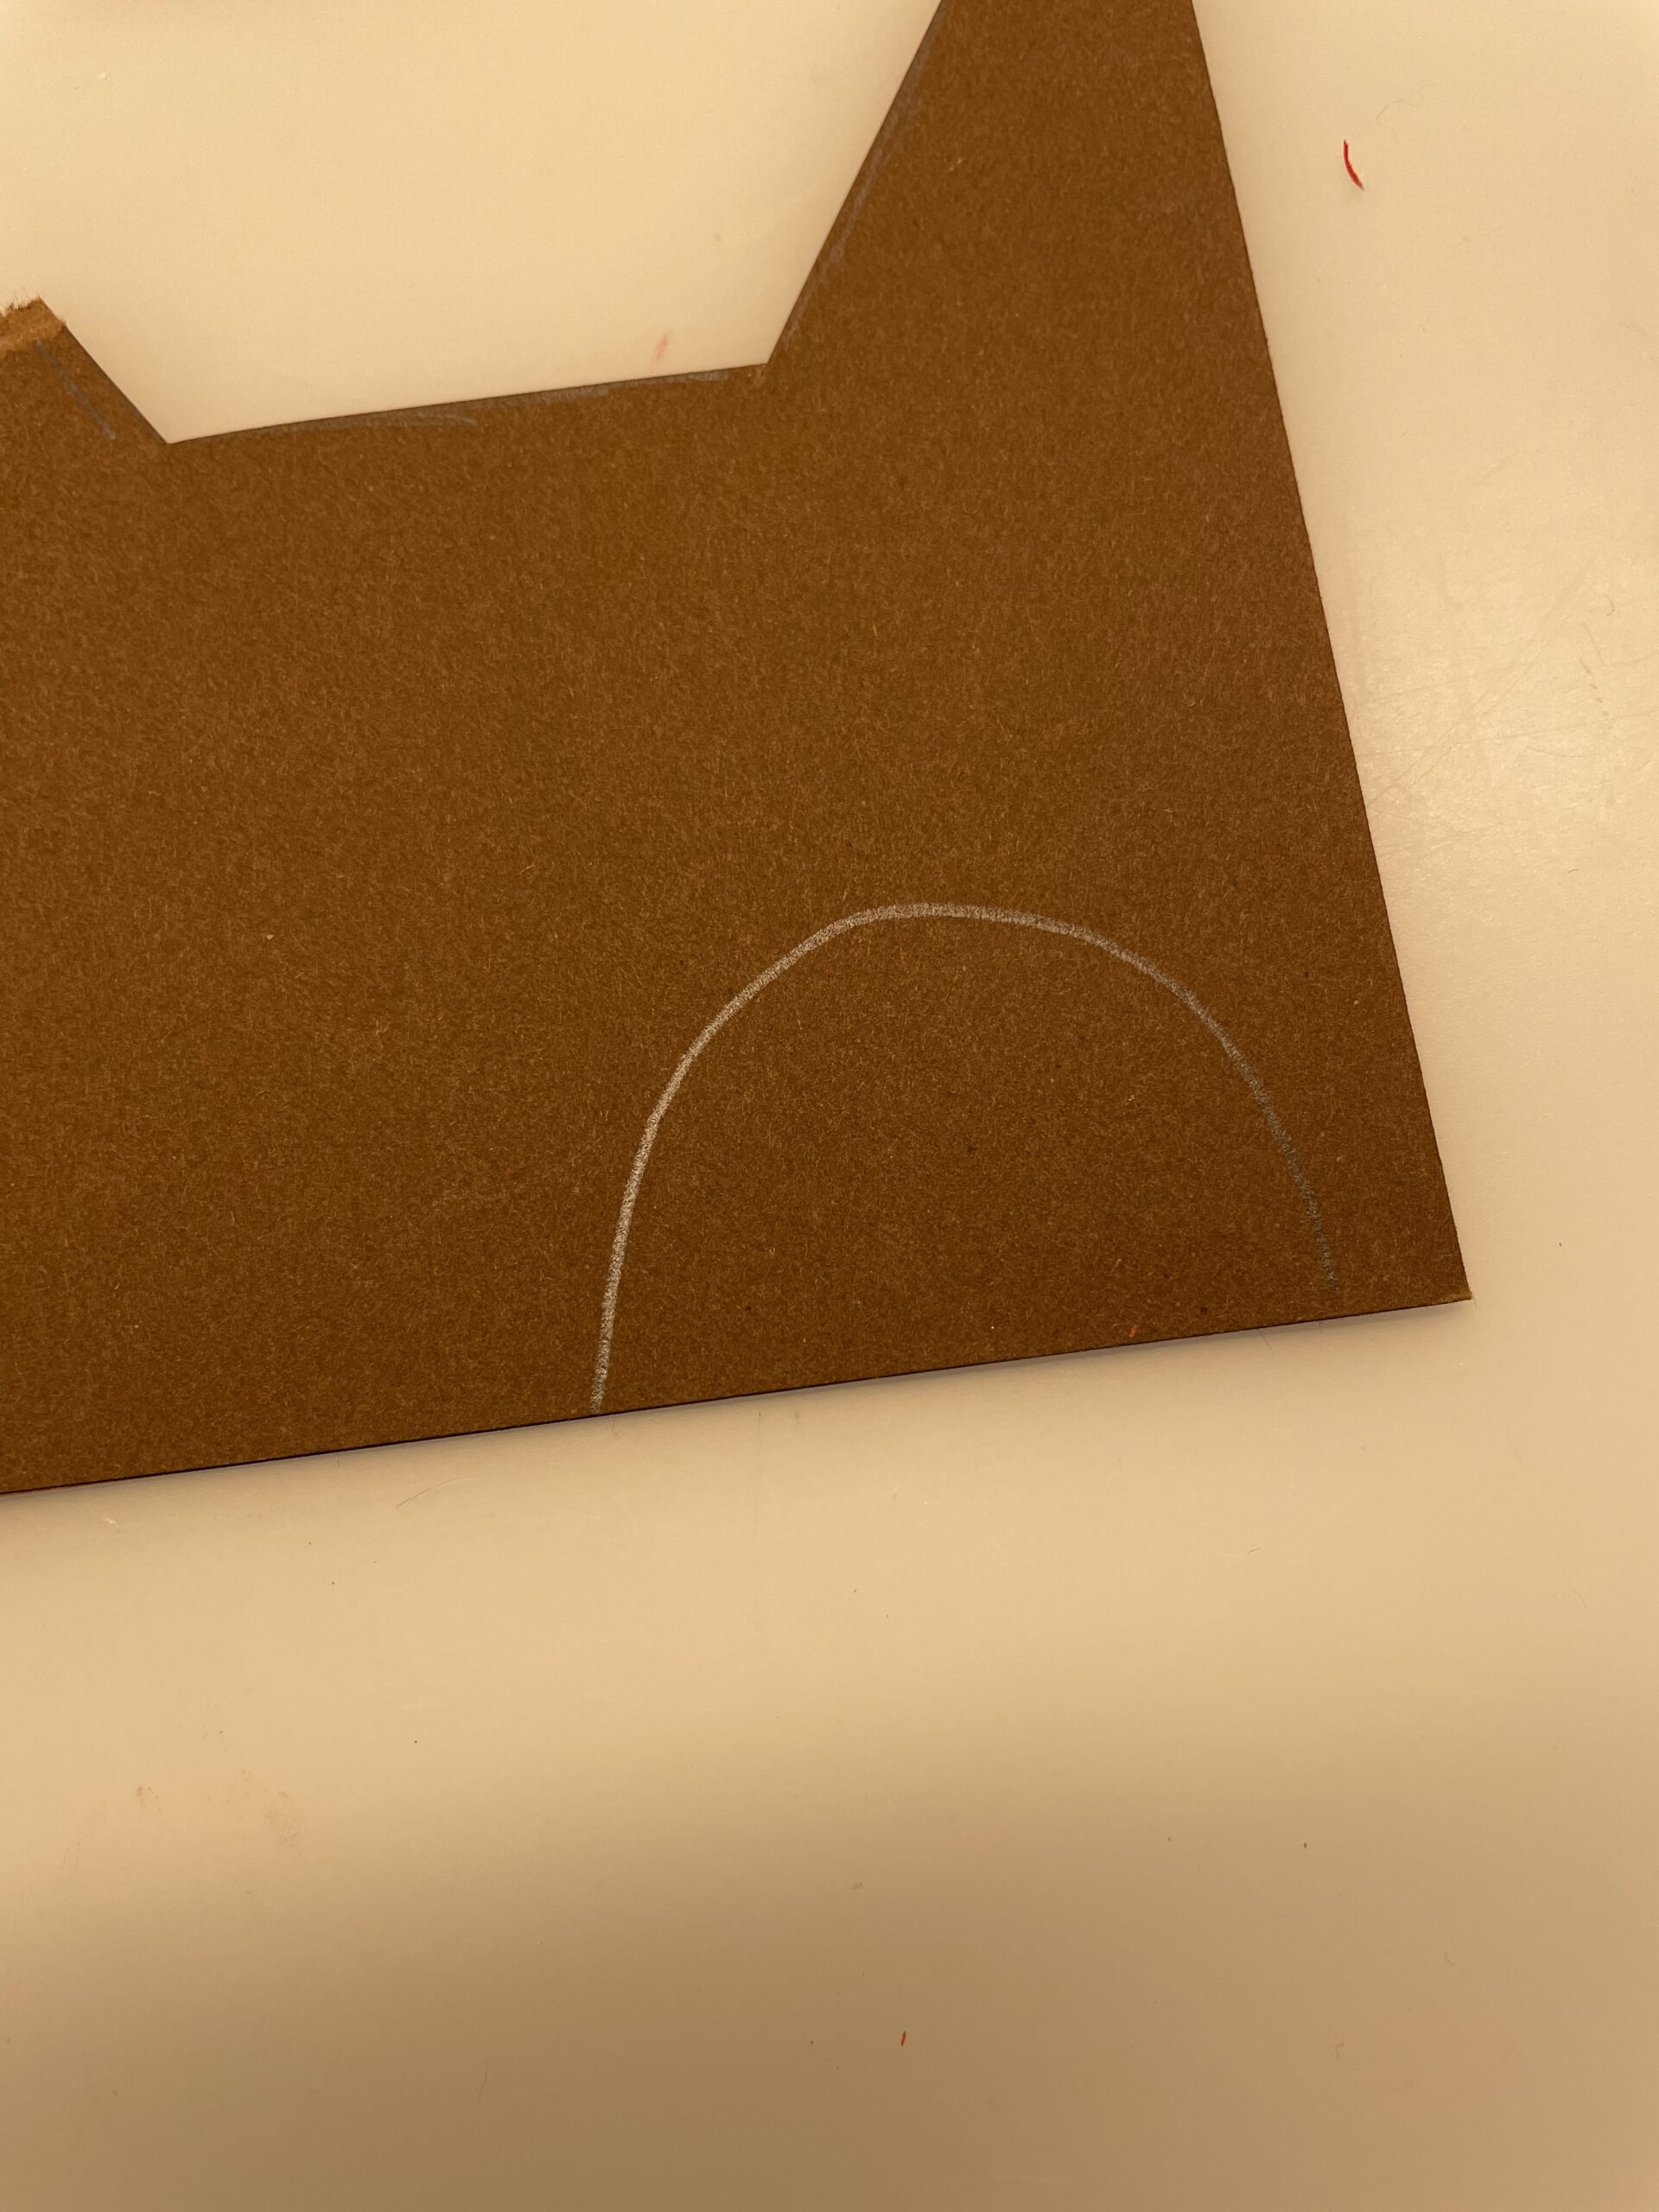
Bild zum Schritt 17 für das Bastel- und DIY-Abenteuer für Kinder: 'Jetzt bastelt ihr noch eine Blüte aus braunem Tonpapier. Malt...'

18

Then you paint a pointed pattern on the straight side. Inverted, the flower looks like a tulip.
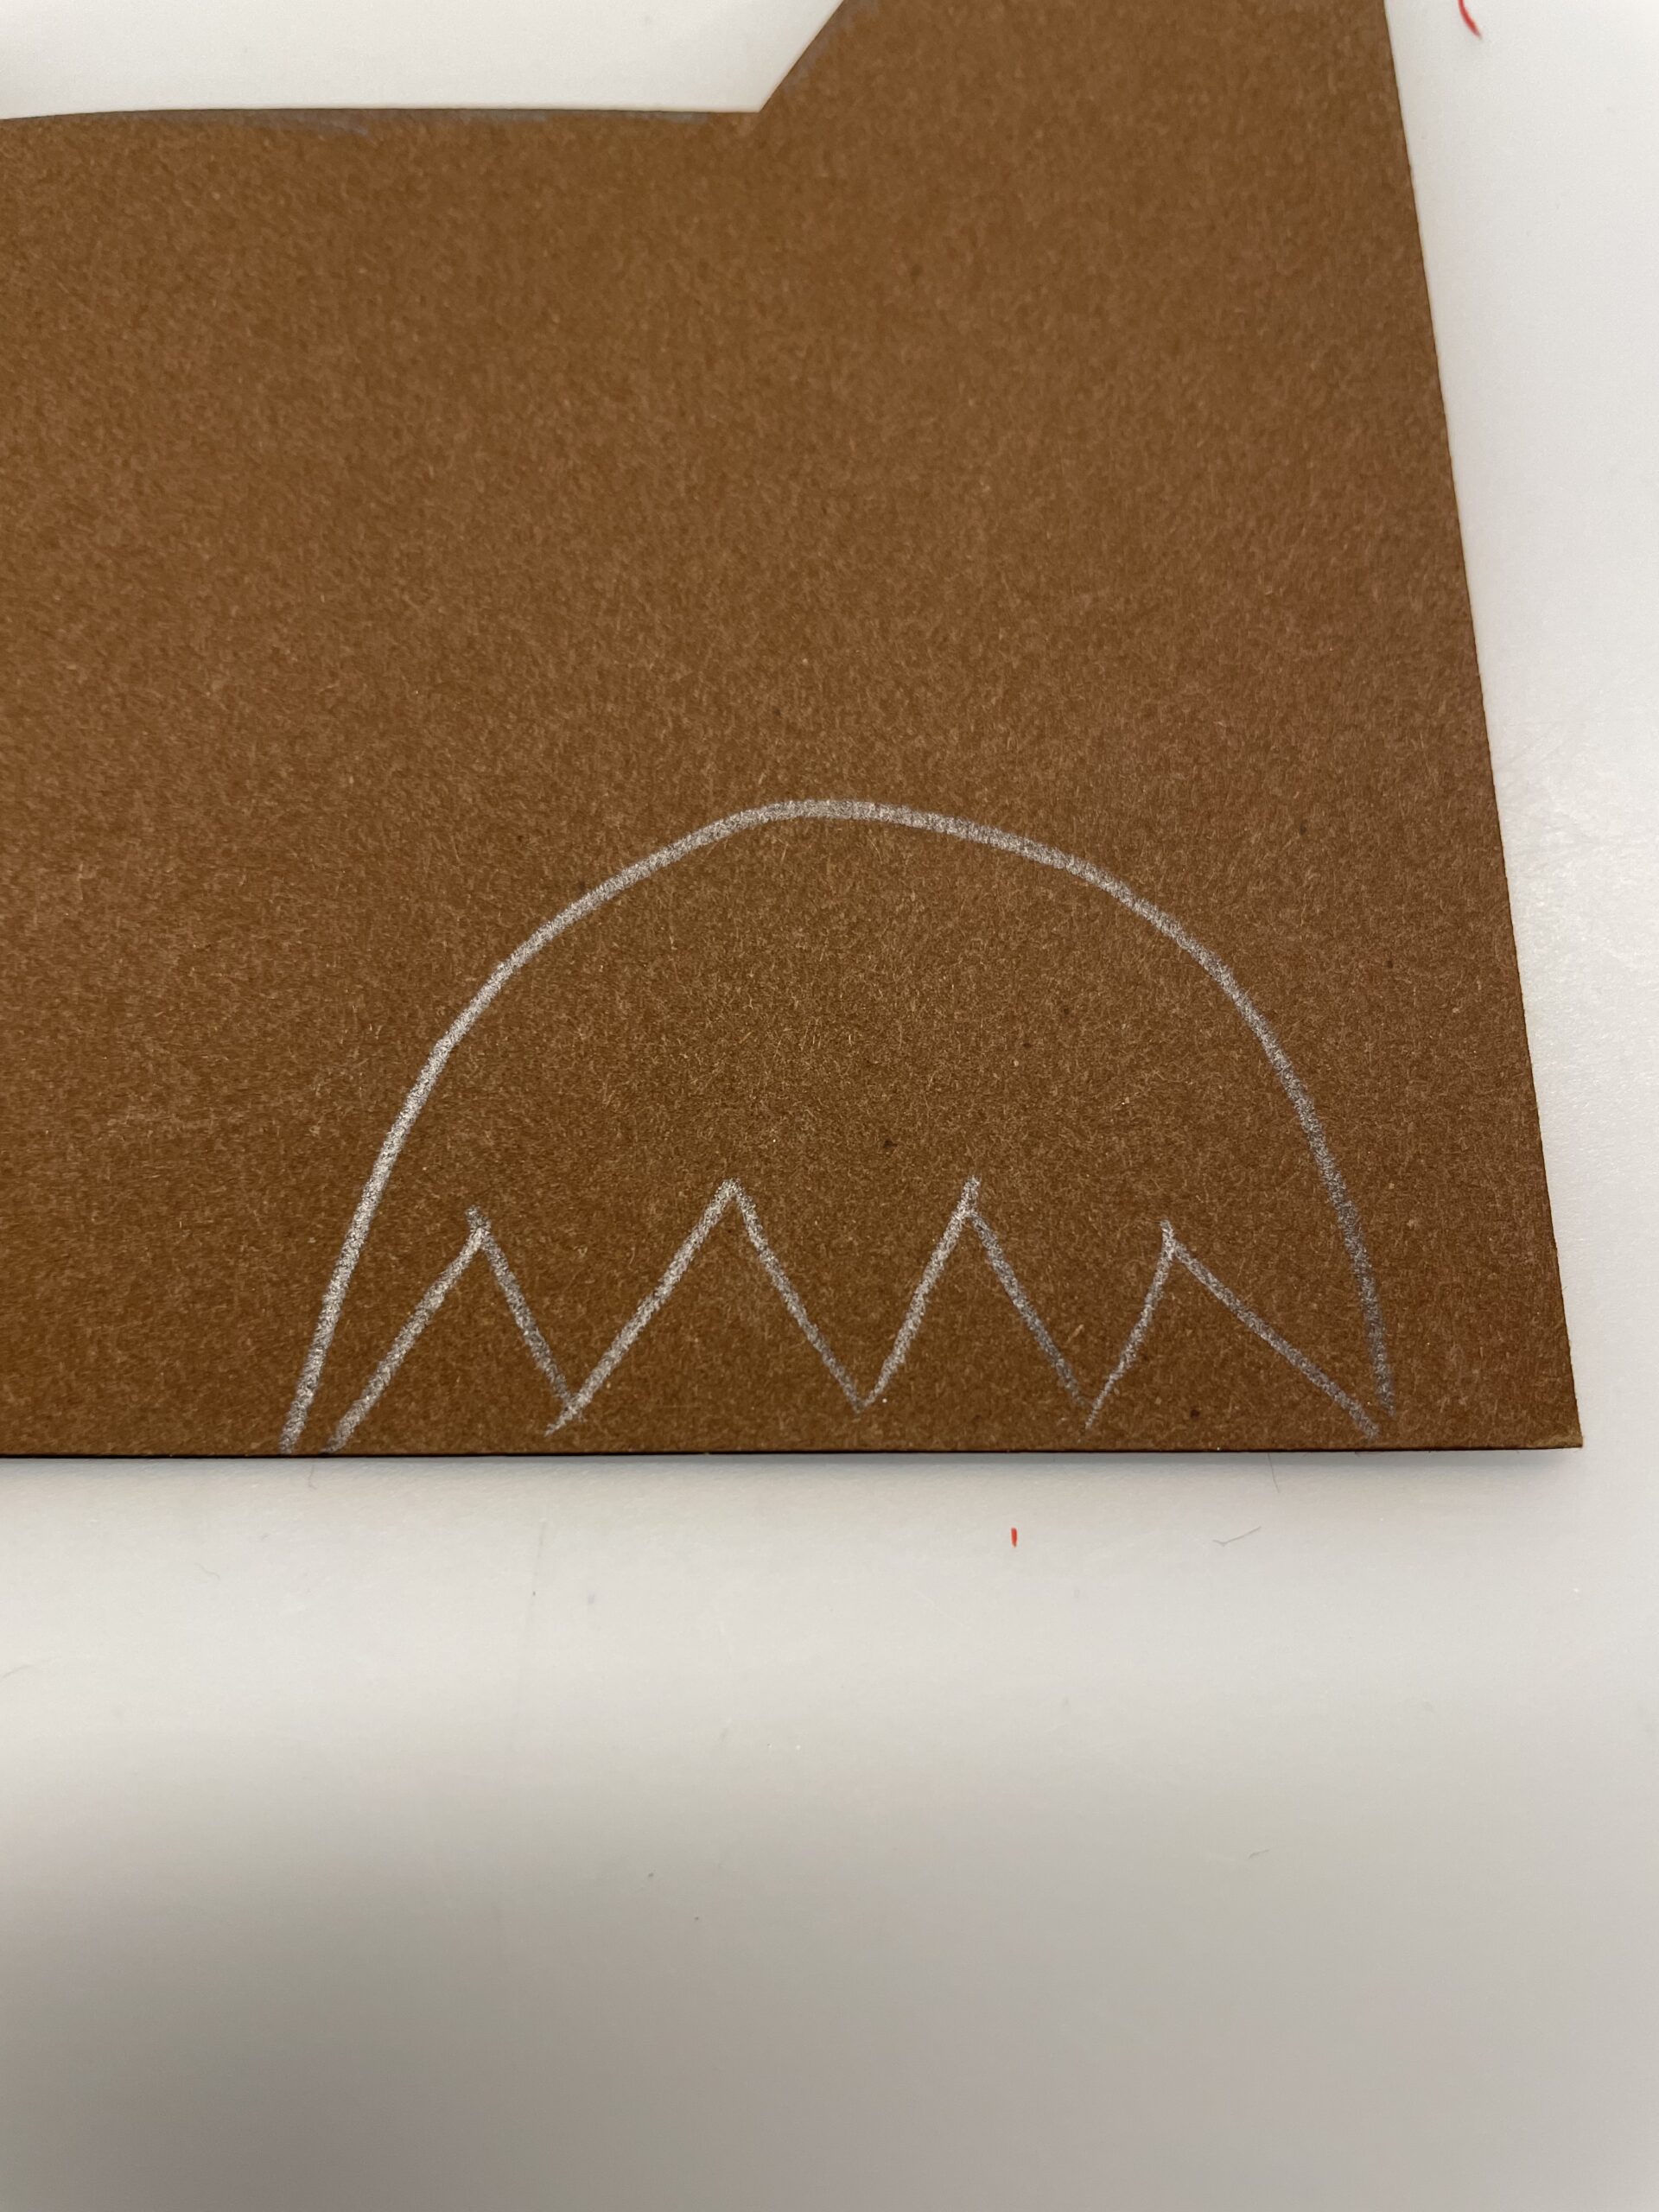
Bild zum Schritt 18 für das Bastel- und DIY-Abenteuer für Kinder: 'Anschließend malt ihr an der geraden Seite ein Zackenmuster auf....'

19

Cut out the flower.

Bild zum Schritt 19 für das Bastel- und DIY-Abenteuer für Kinder: 'Schneidet die Blüte aus.'

20

Now you stick the flower between the two cardboard plates to the bottom of the apple.
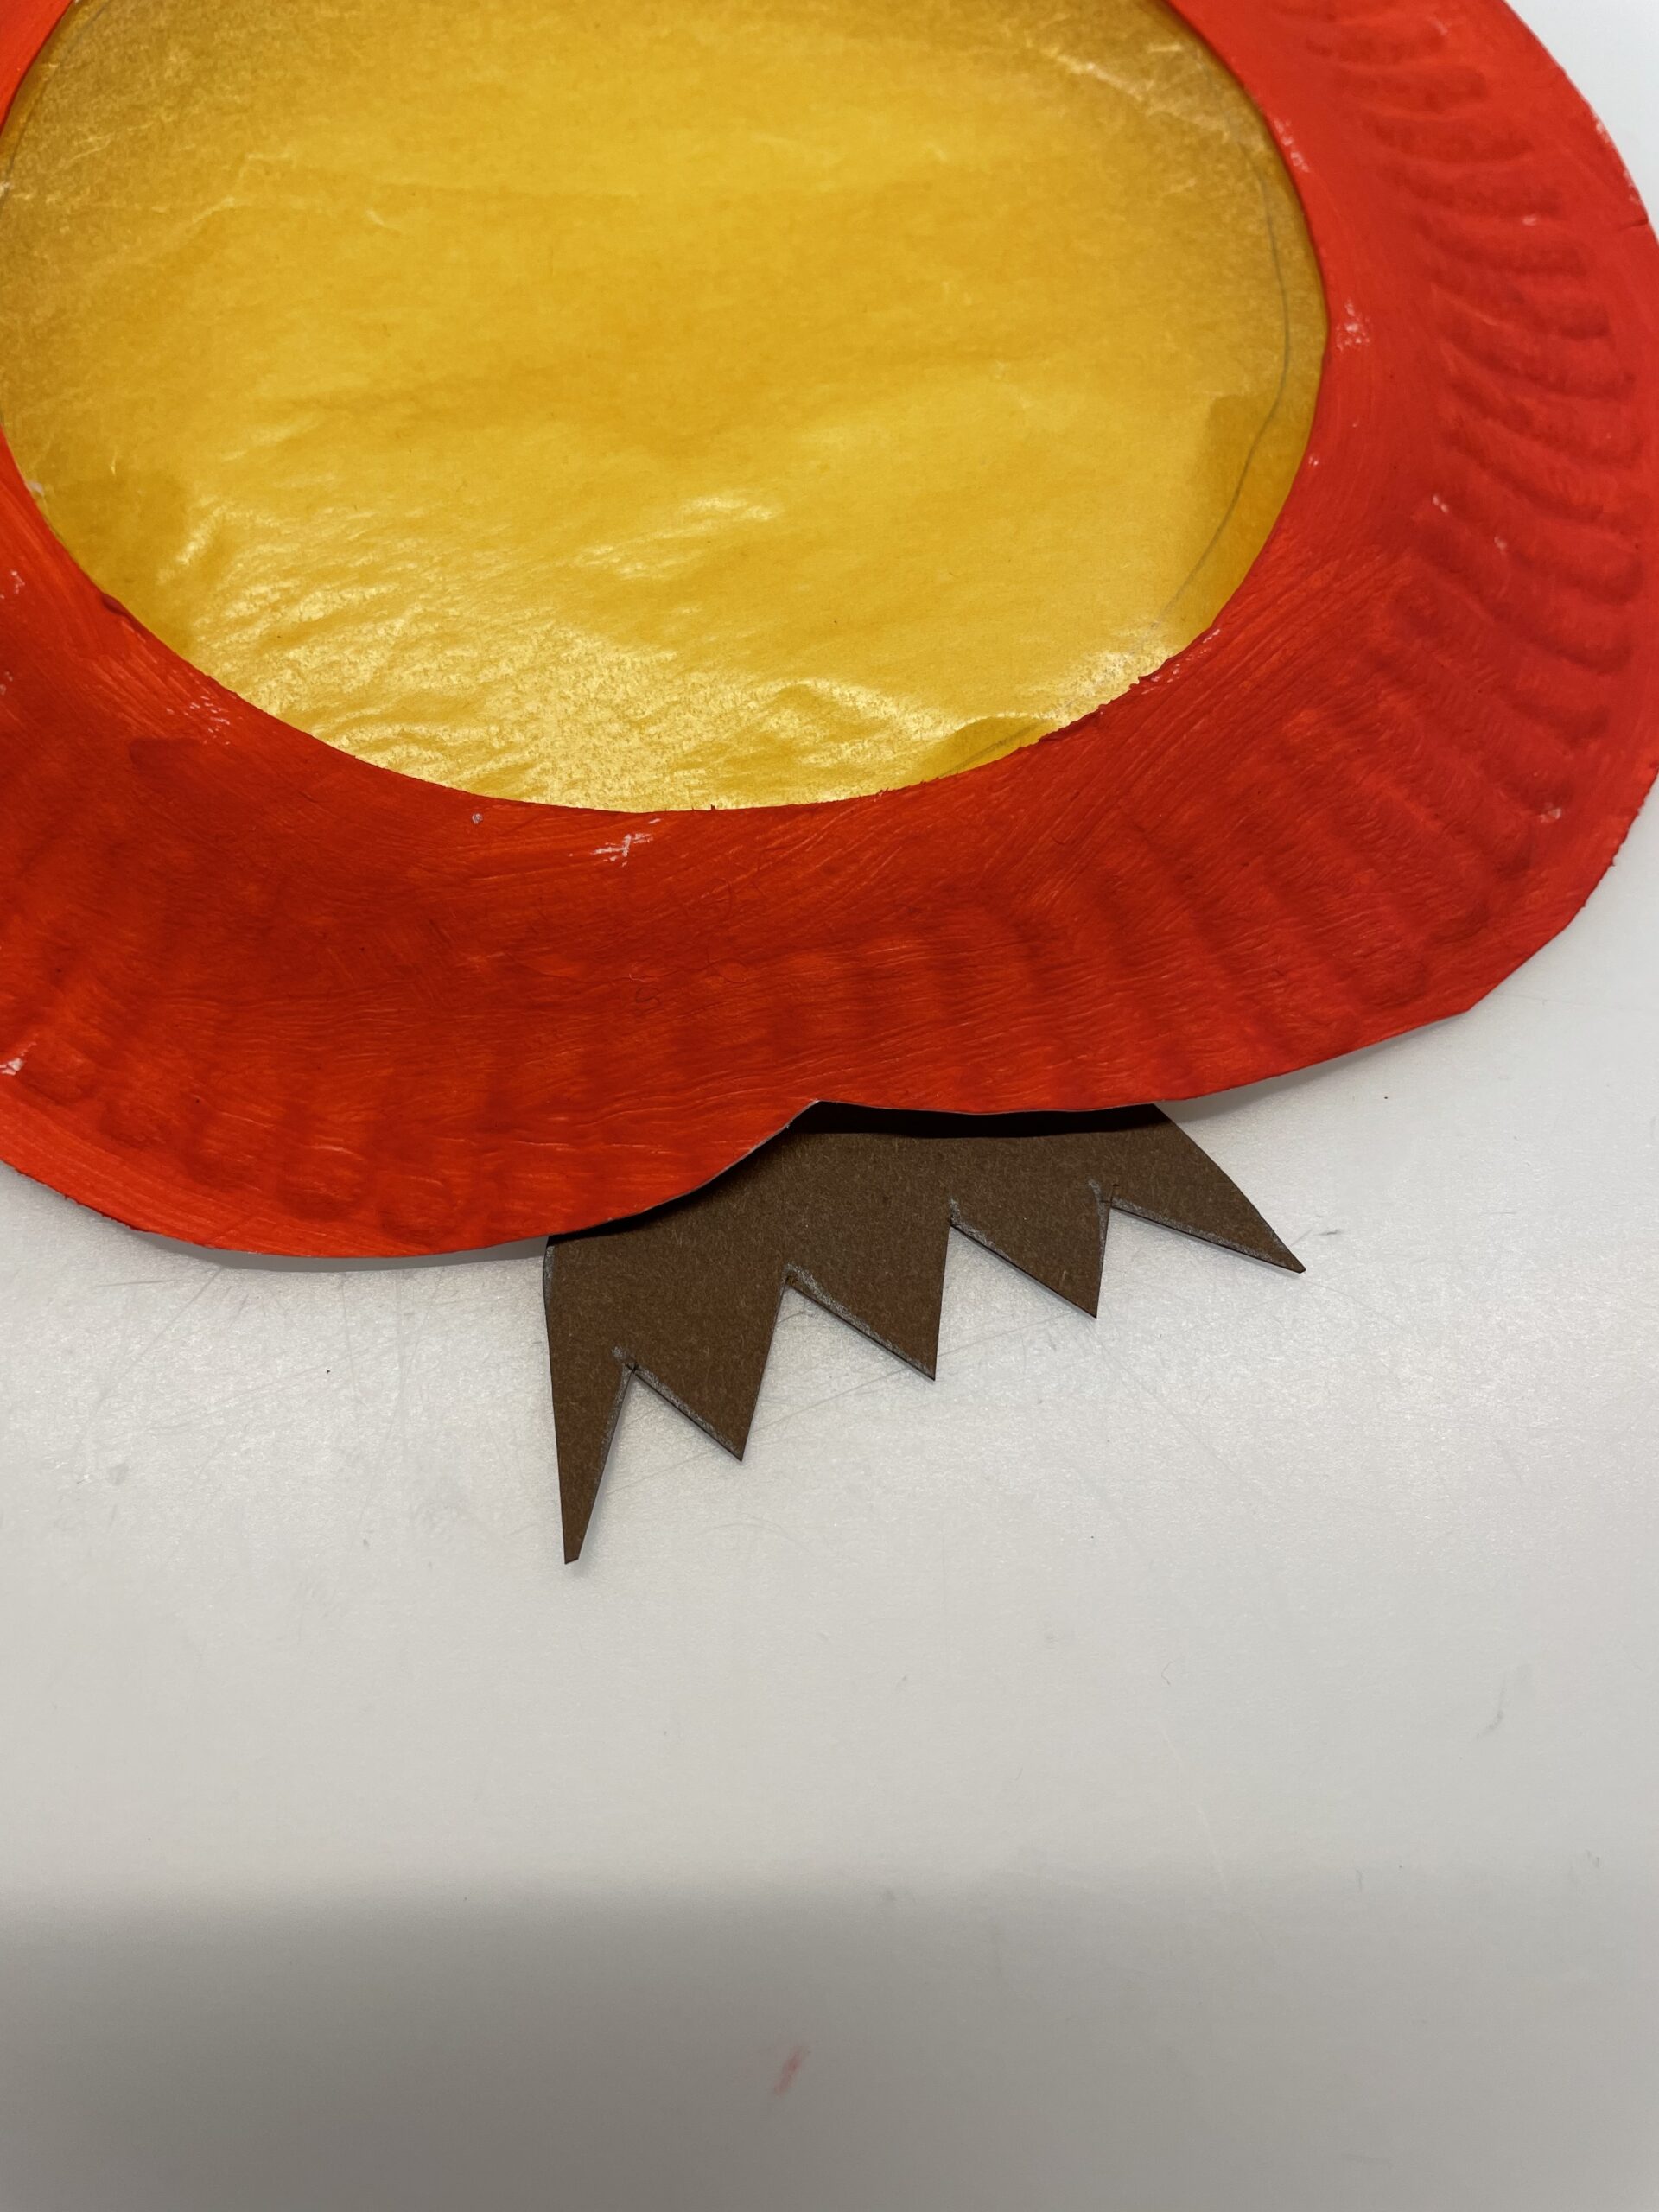
Bild zum Schritt 20 für das Bastel- und DIY-Abenteuer für Kinder: 'Nun klebt ihr die Blüte zwischen die beiden Pappteller an...'

21

The apple is ready. Now you punch left and right or, depending on where the stalk is located, two holes in the upper side.
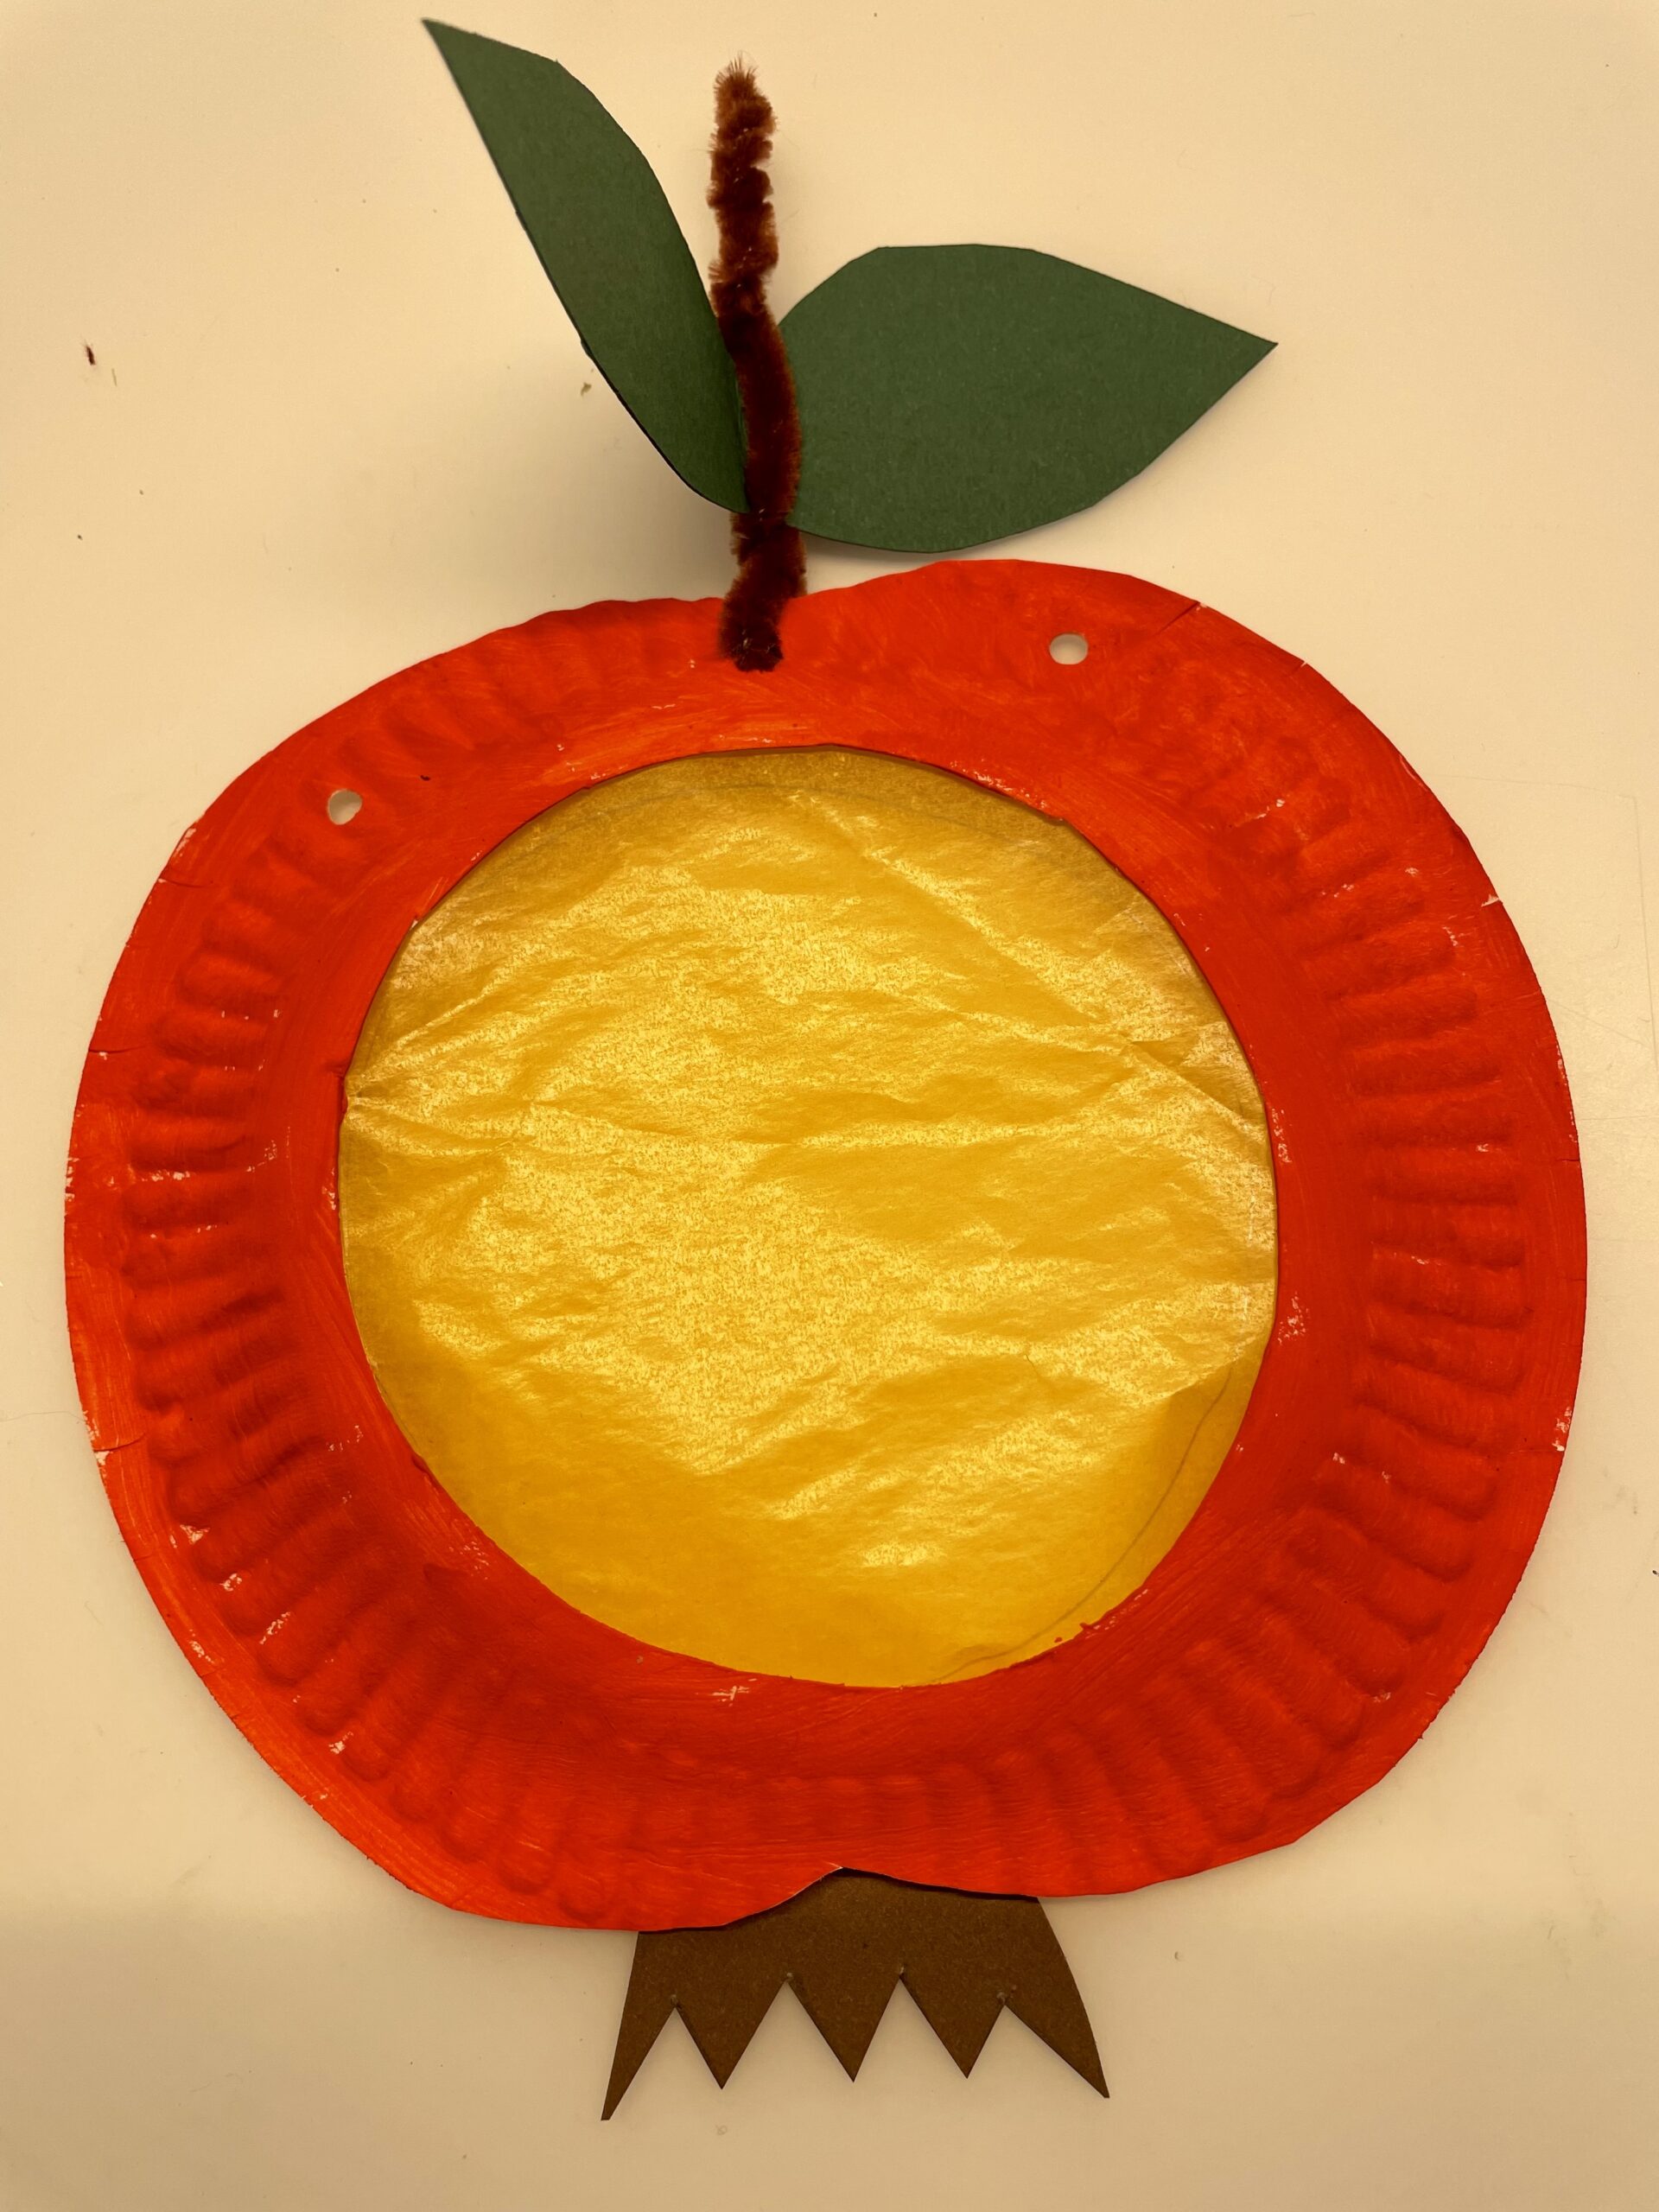
Bild zum Schritt 21 für das Bastel- und DIY-Abenteuer für Kinder: 'Fertig ist der Apfel. Jetzt locht ihr noch links und...'

22

The children can carry the lantern on the wire or use the wire to hang a lantern rod.
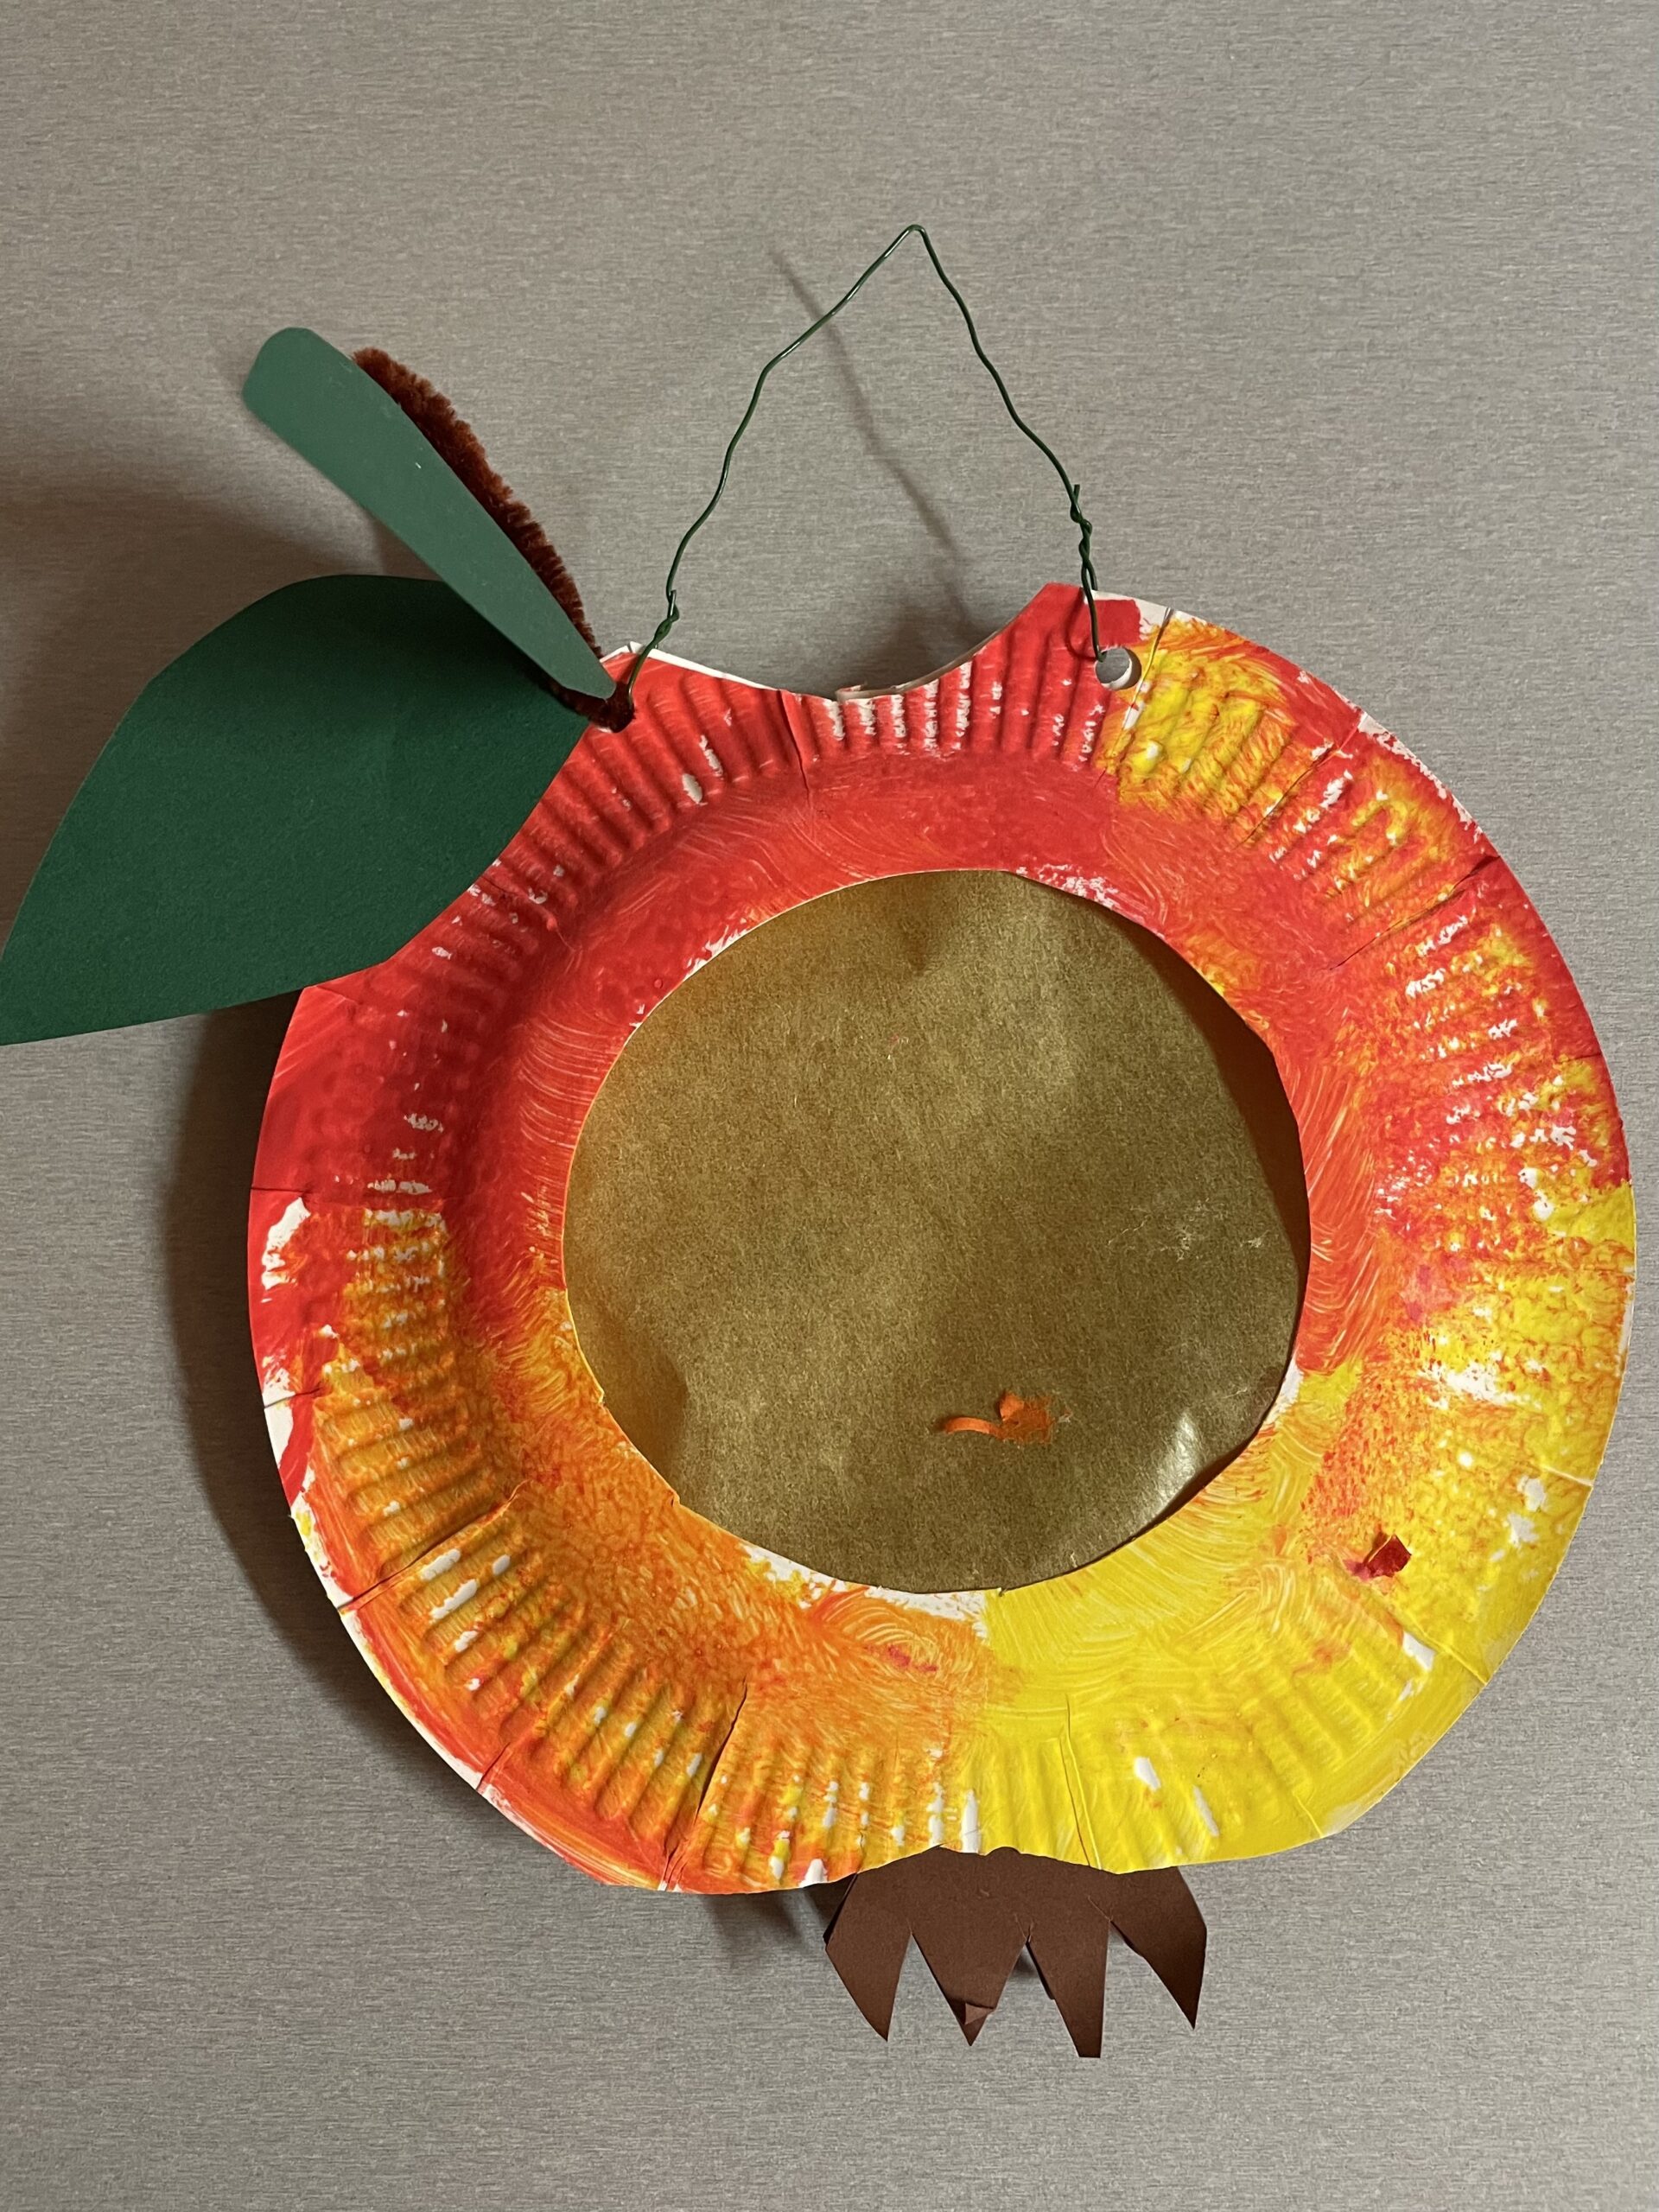
Bild zum Schritt 22 für das Bastel- und DIY-Abenteuer für Kinder: 'Fädelt dadurch einen Blumendraht und verdreht die Enden. Die Kinder...'

23

Have fun doing crafts!

Apple lantern for crib children

Follow us on Facebook , Instagram and Pinterest
Don't miss any more adventures: Our bottle mail

Leave a Reply

Your email address will not be published.

The maximum upload file size: 5 MB. You can upload: image, document. Drop file here