An enchanting idea that inspires children interested in craftsmanship. Dealing with saws, drilling machines and Schmirgelpapier becomes an exciting experience and ultimately creativity in the design is still needed.
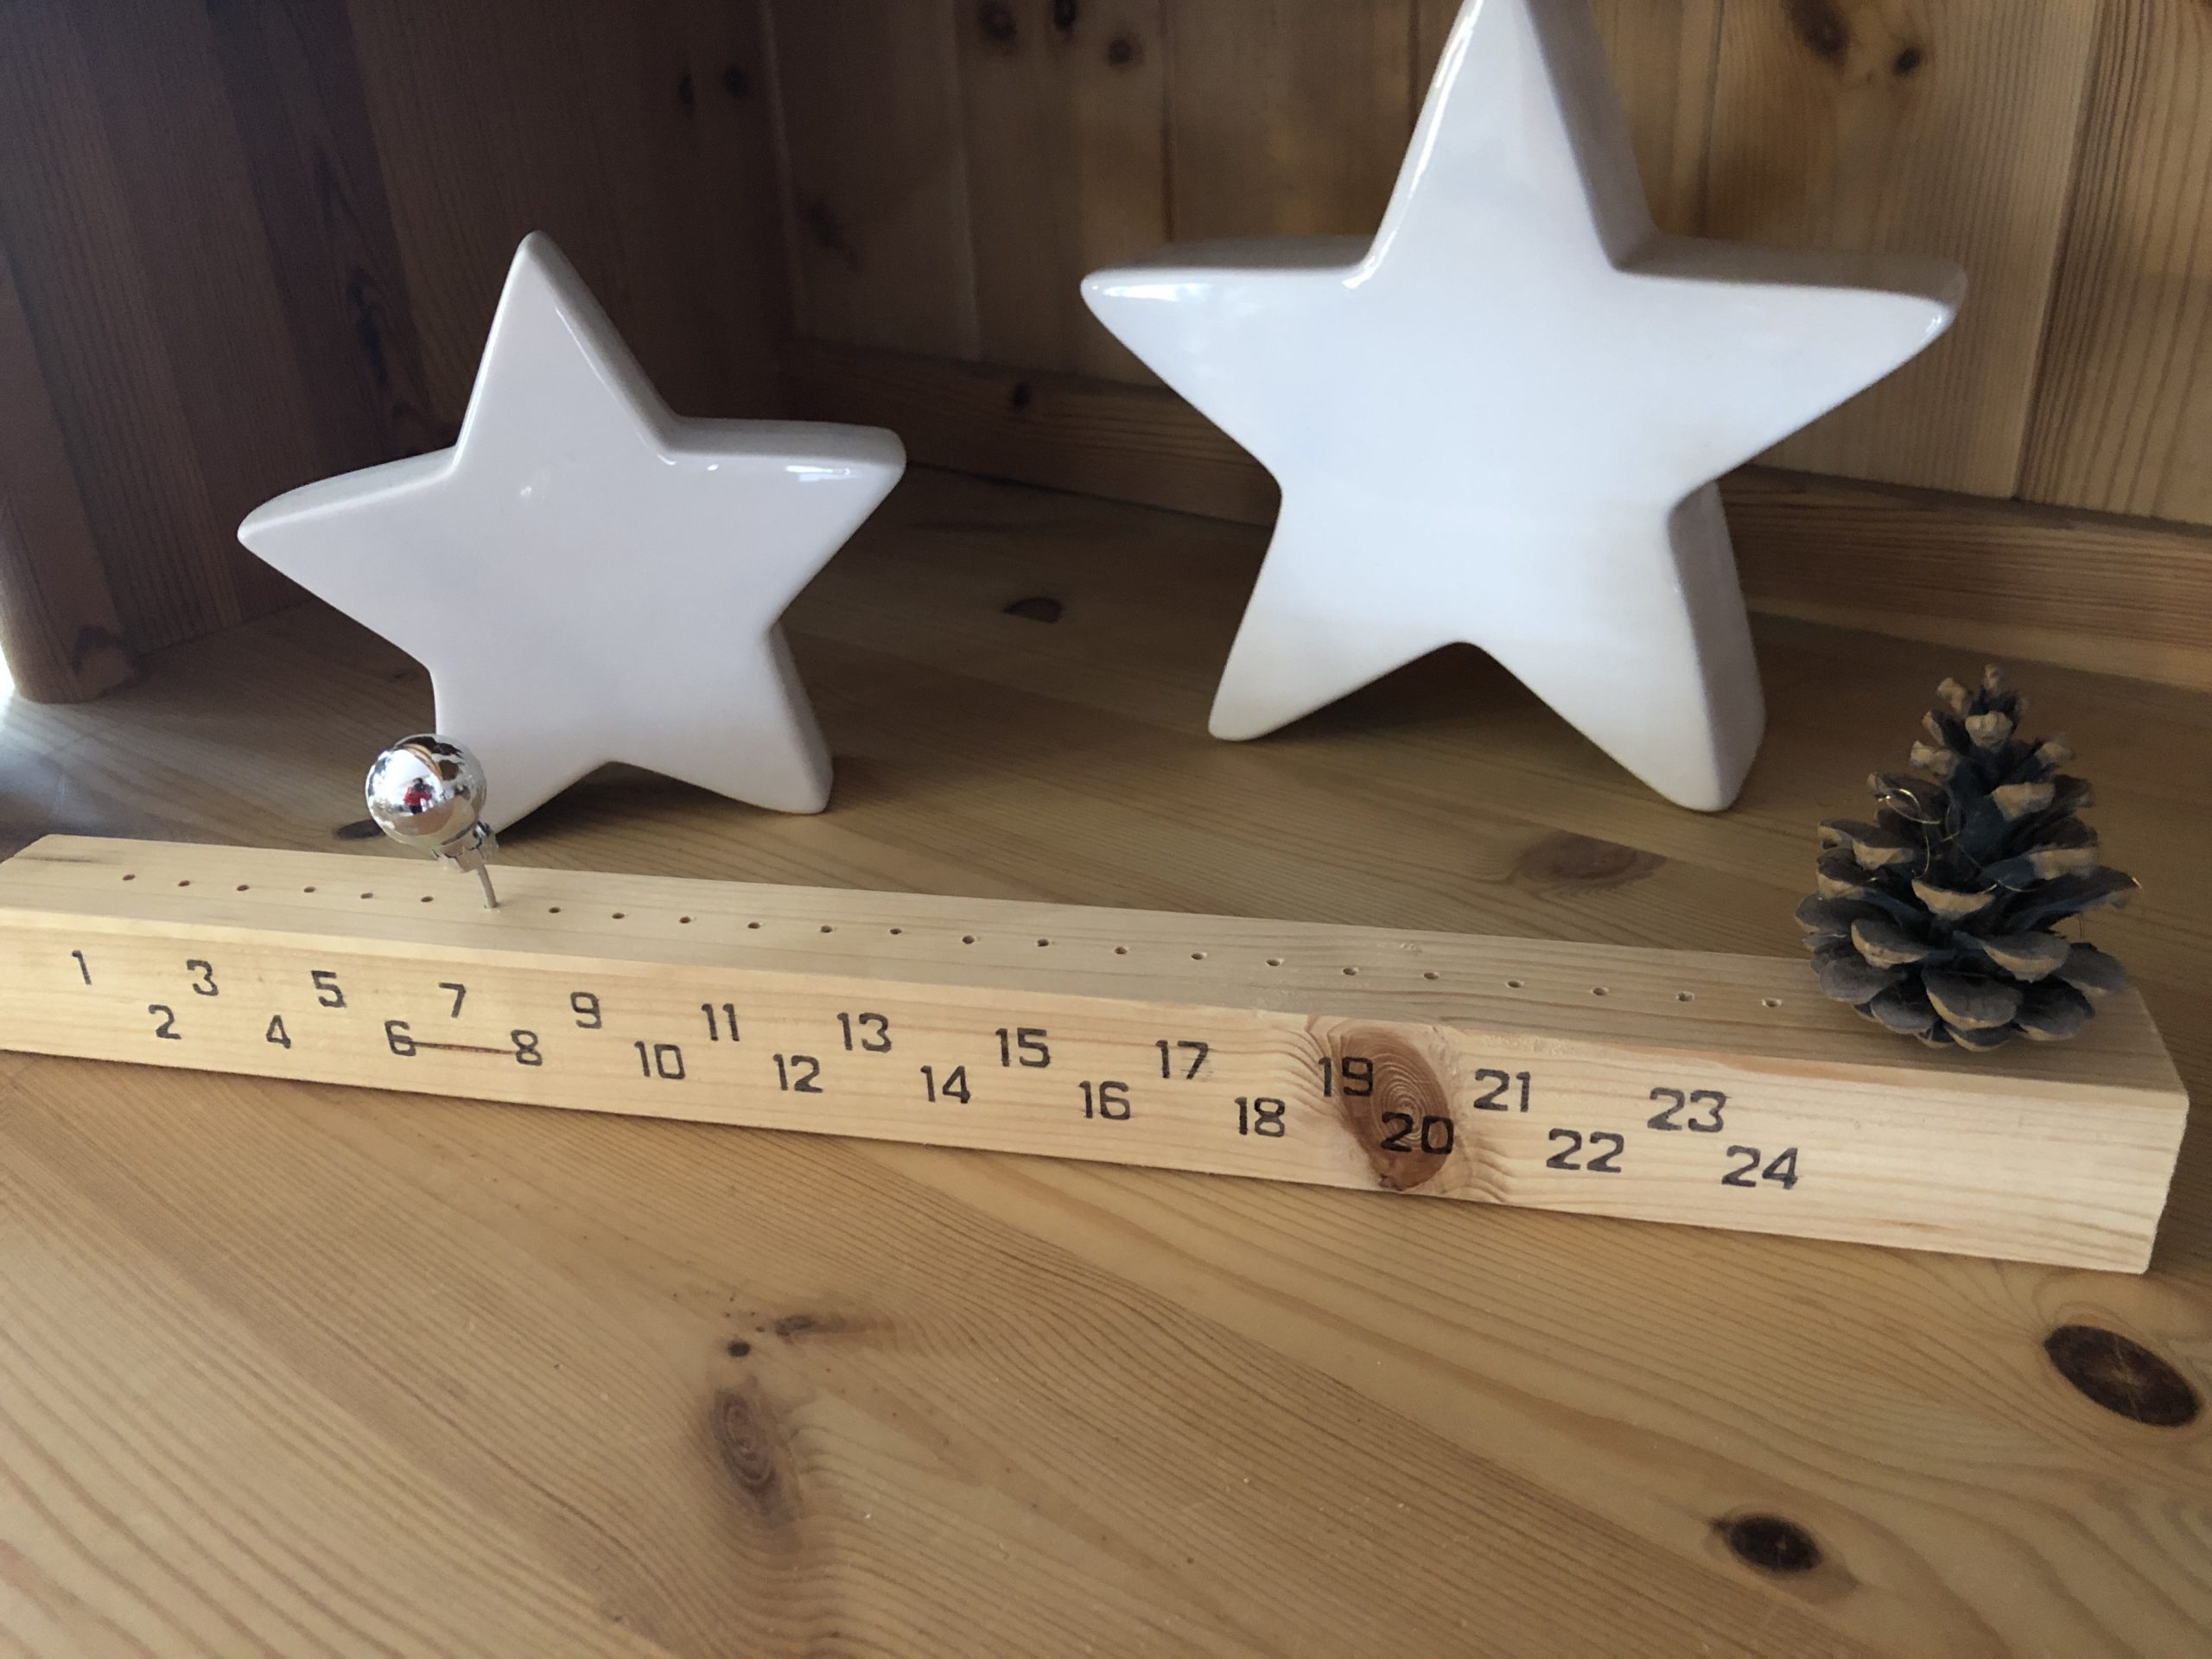
Other variants of a waiting bar for children I'll show you here (e.g. to be able to place the time until the birthday, at a football game or at a lantern party).
Children often cannot estimate times yet and often feel waiting times unbearably long. These waiting lines make the waiting times more vivid for the children - because every day the event comes a little closer.
Media Education for Kindergarten and Hort

Relief in everyday life, targeted promotion of individual children, independent learning and - without any pre-knowledge already usable by the youngest!

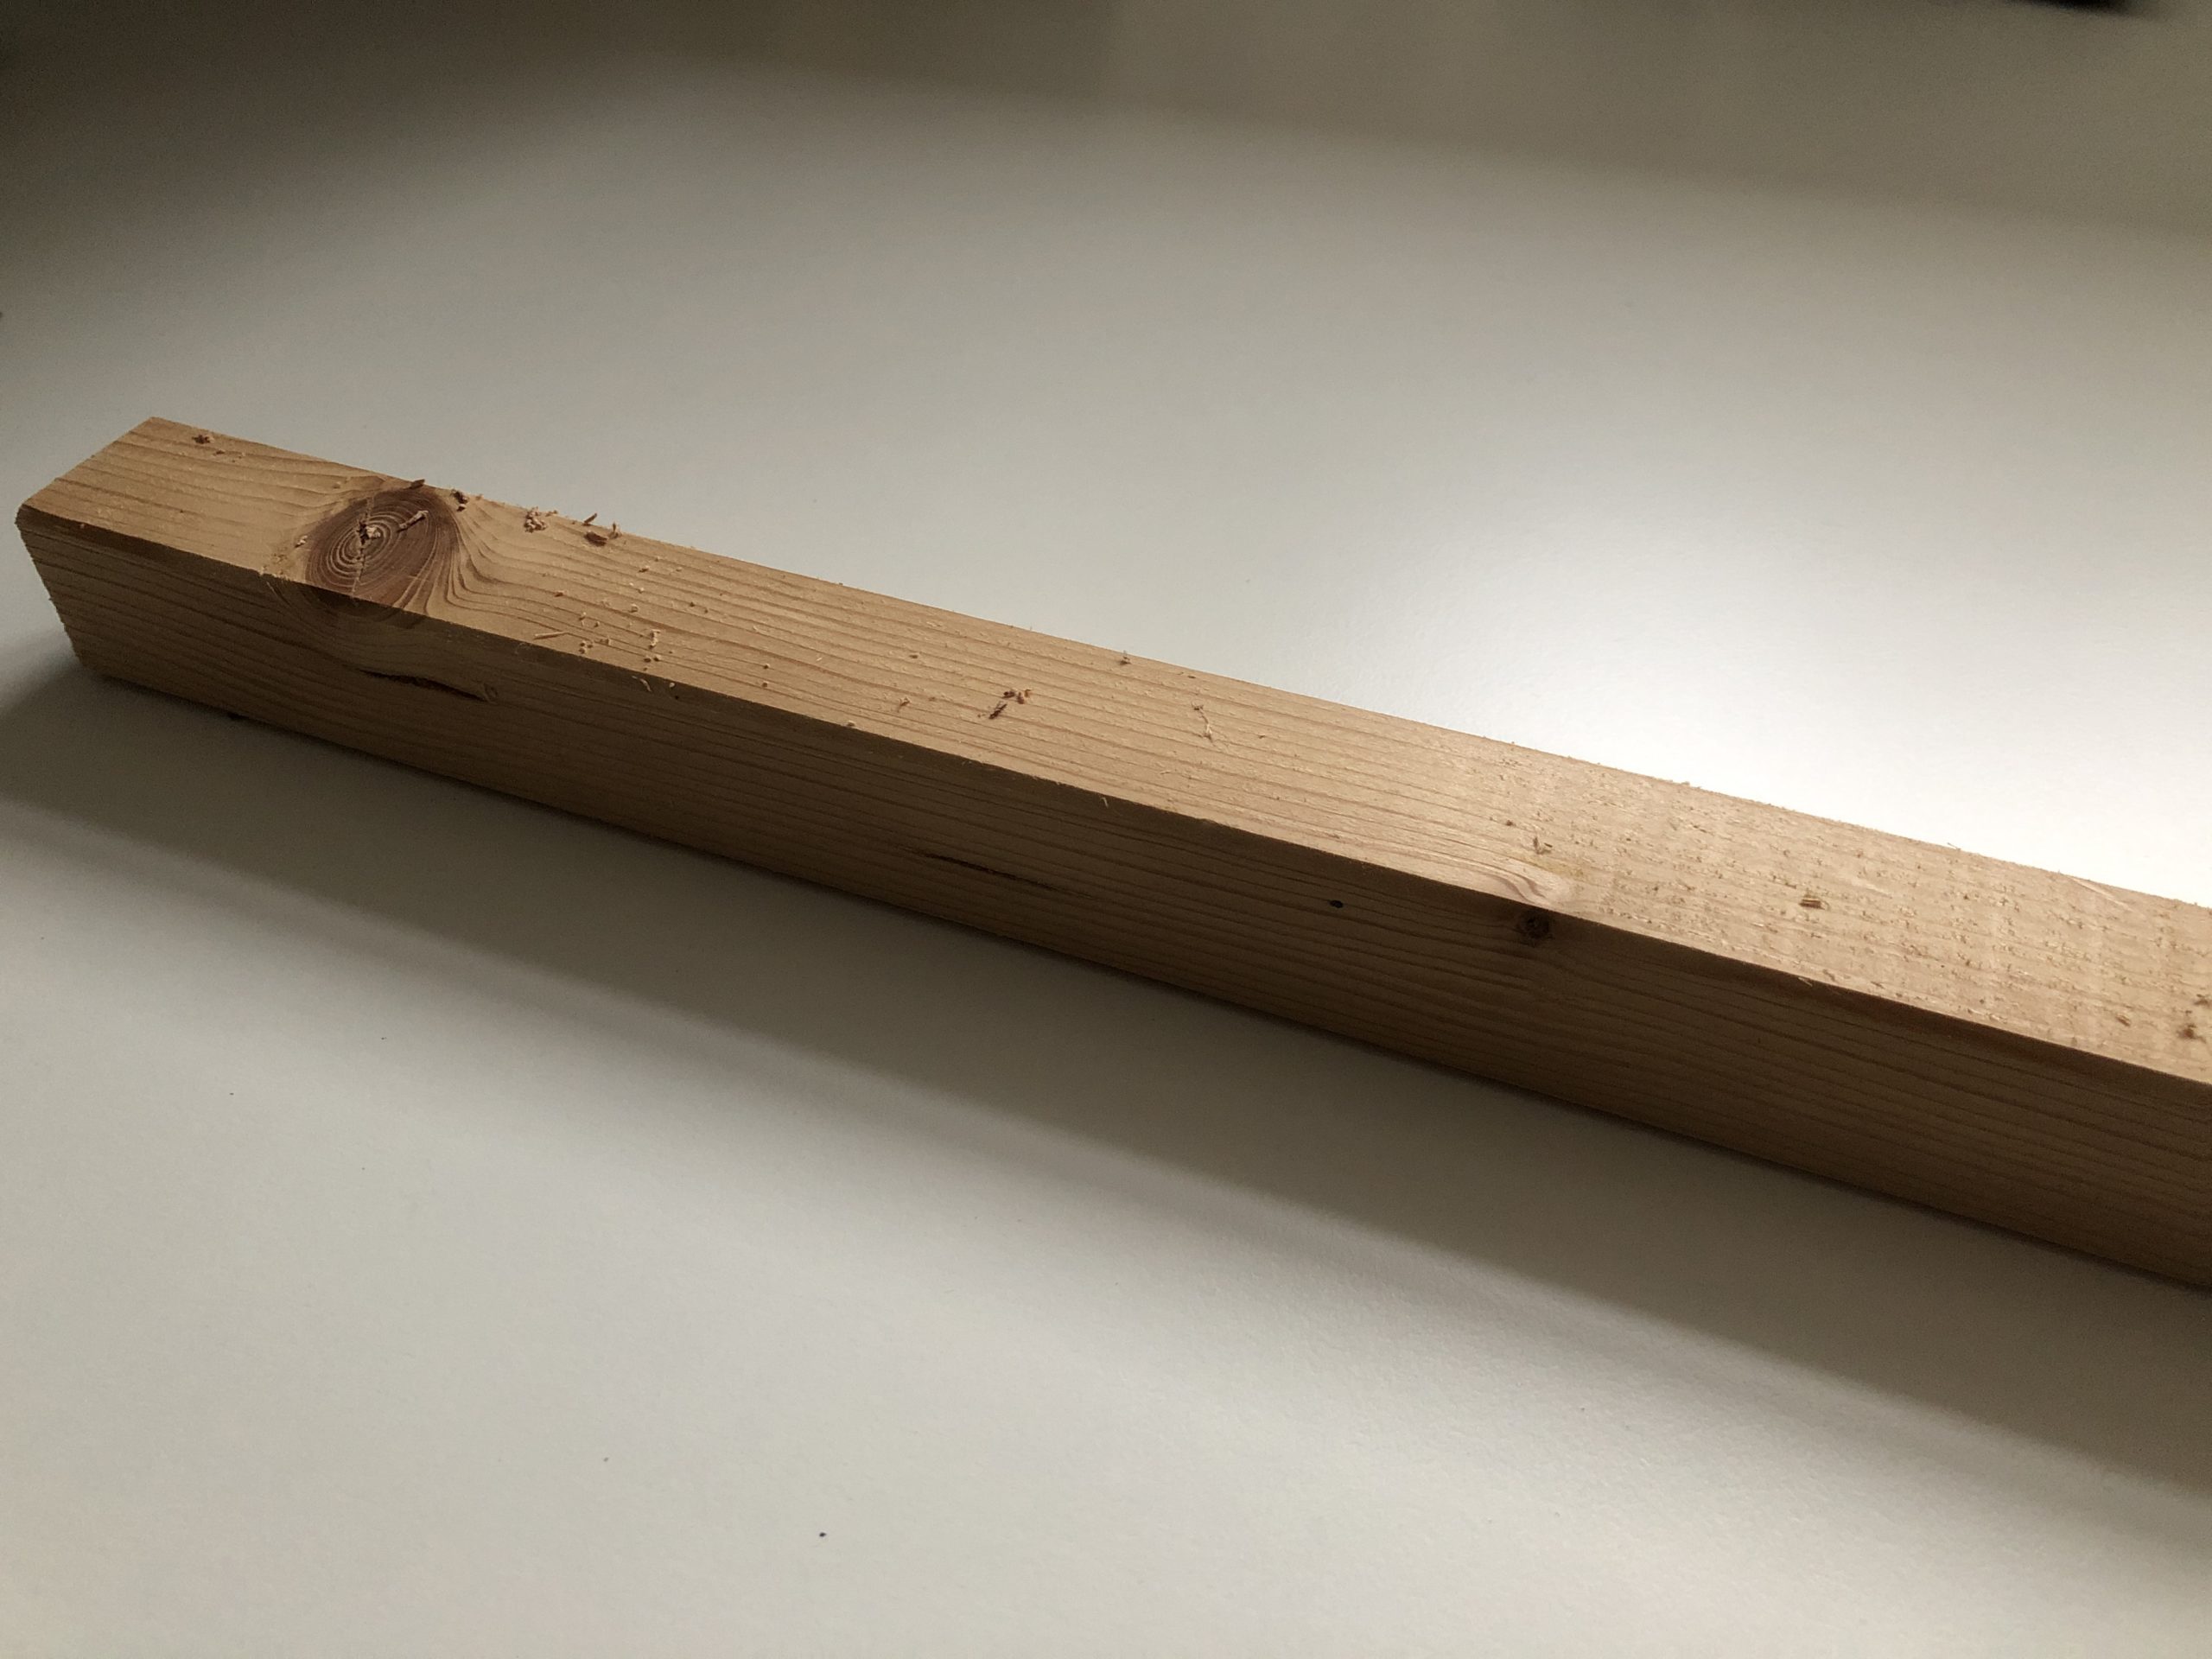
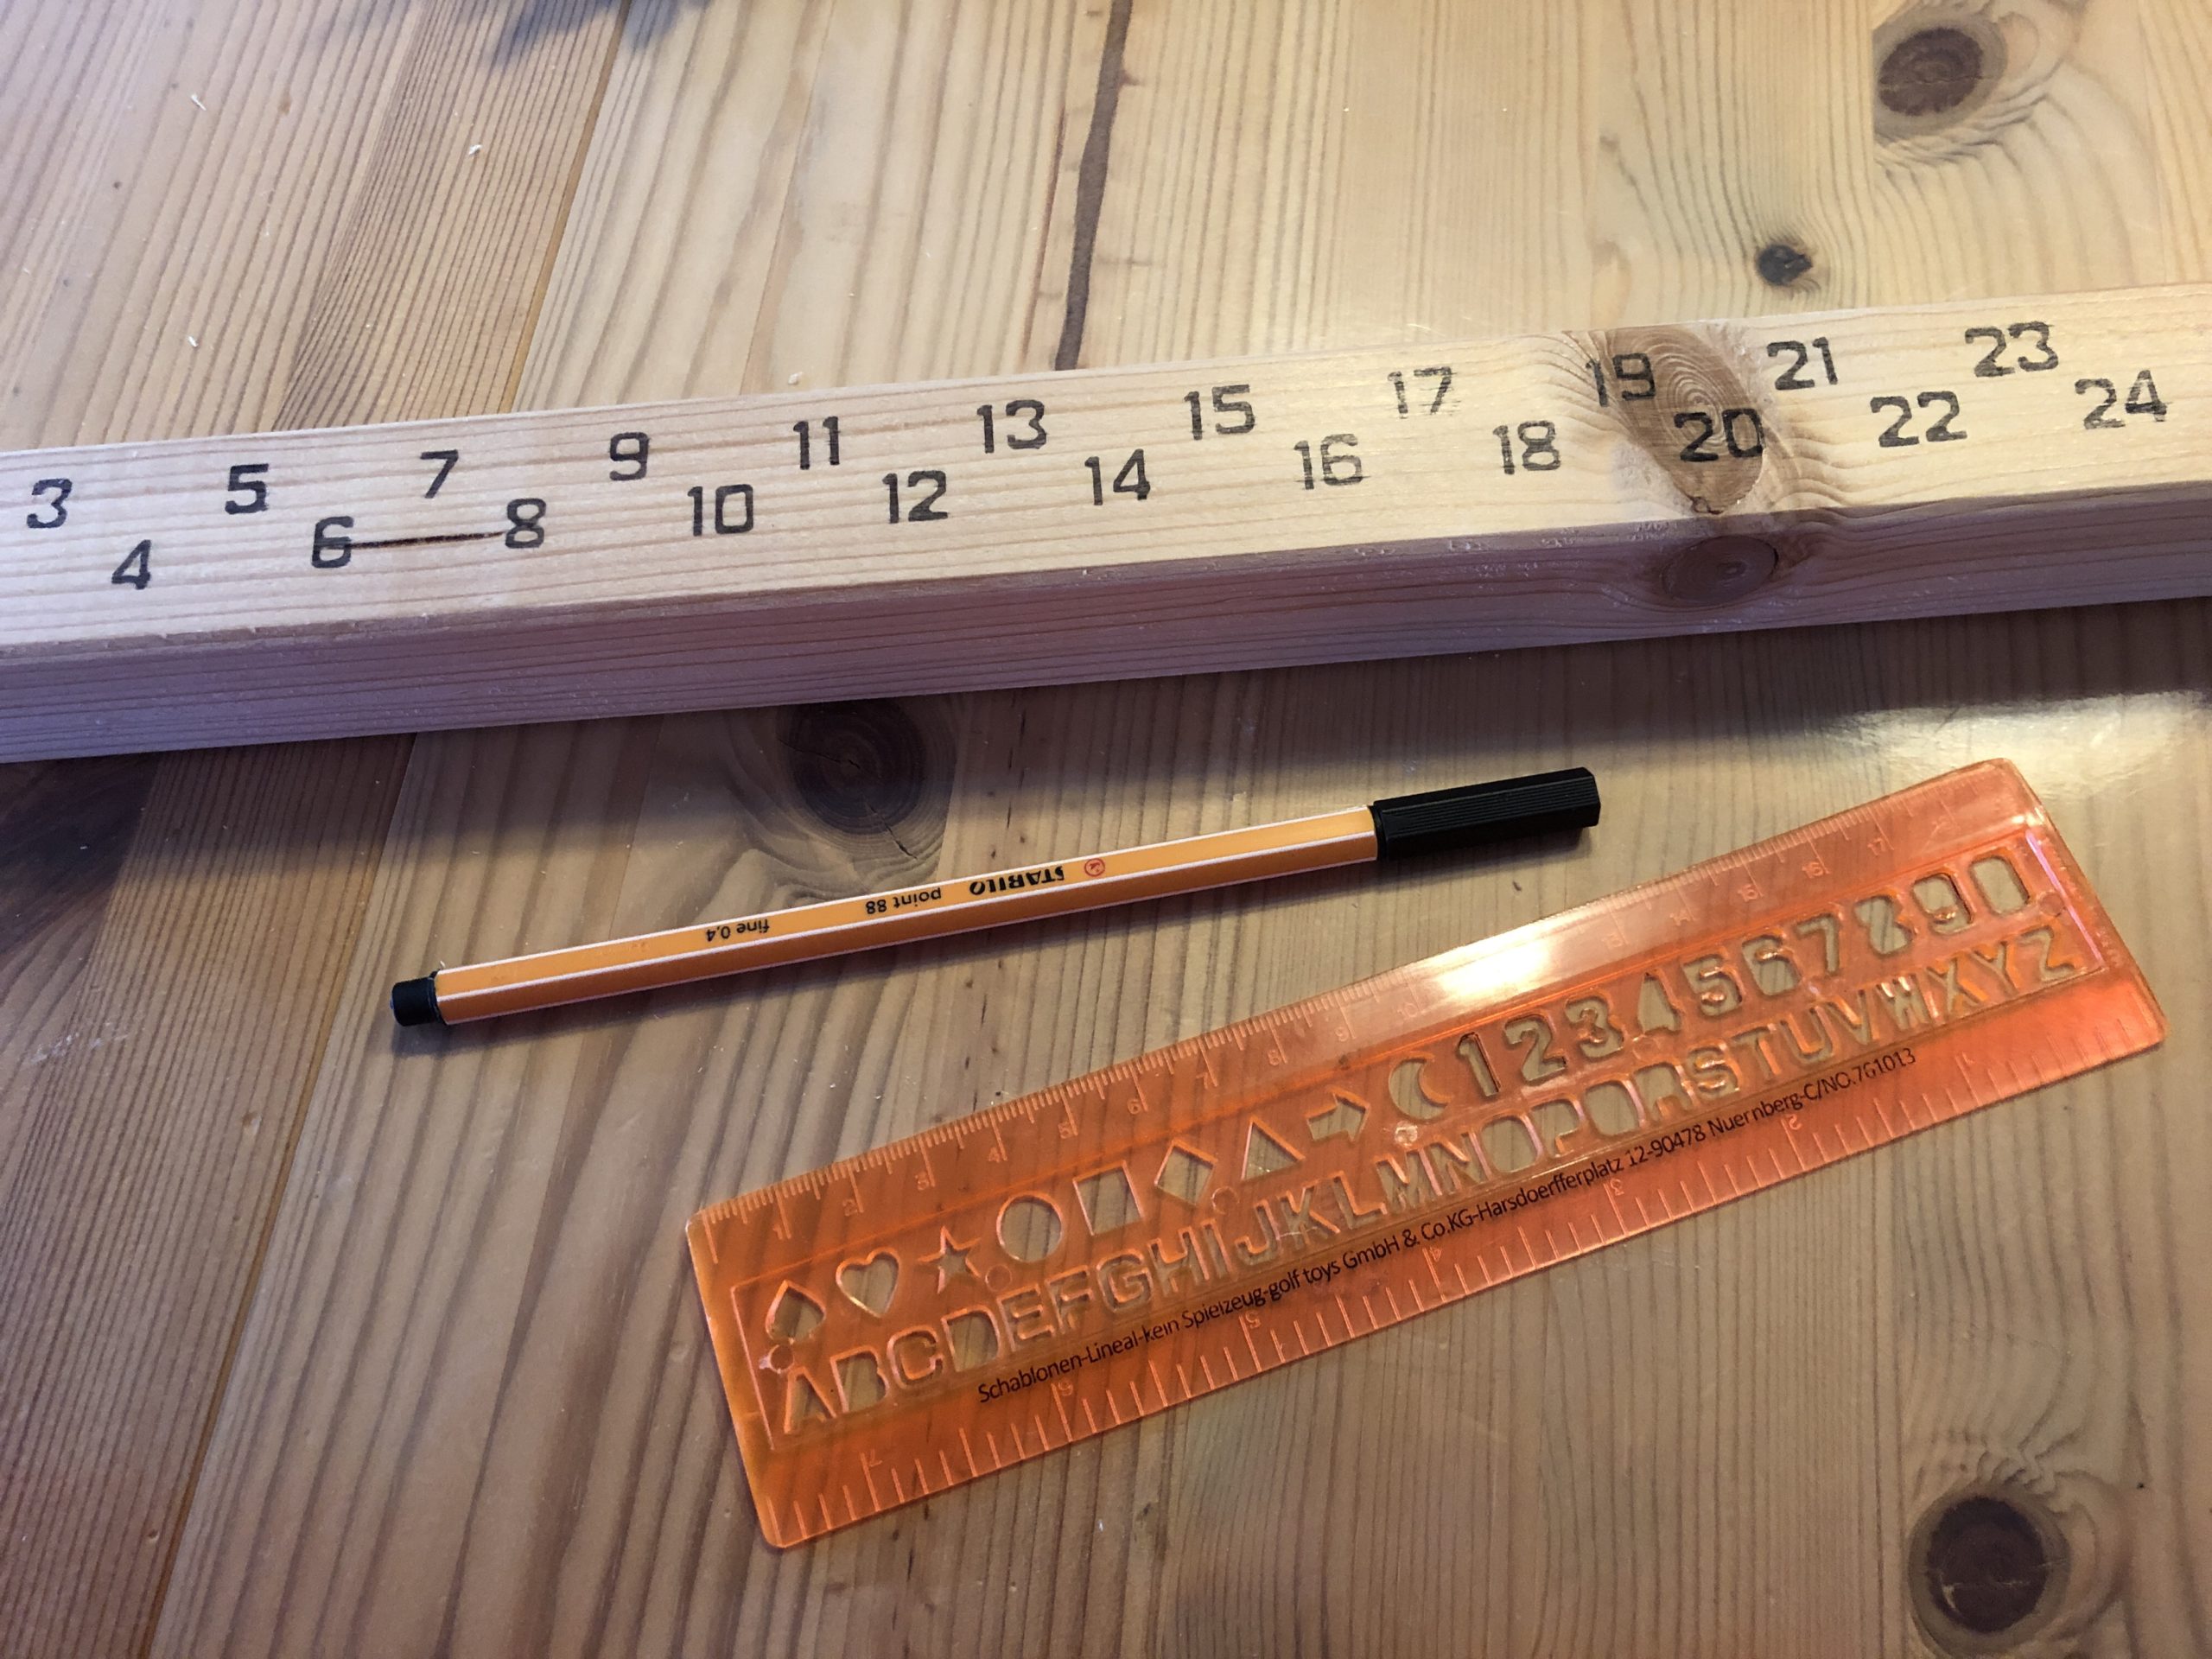
First select the edged wood in the strength you want.
I used a canopy with a diameter of 3cm x 3cm.
My wood is about 37cm long.
Now draw on the holes:
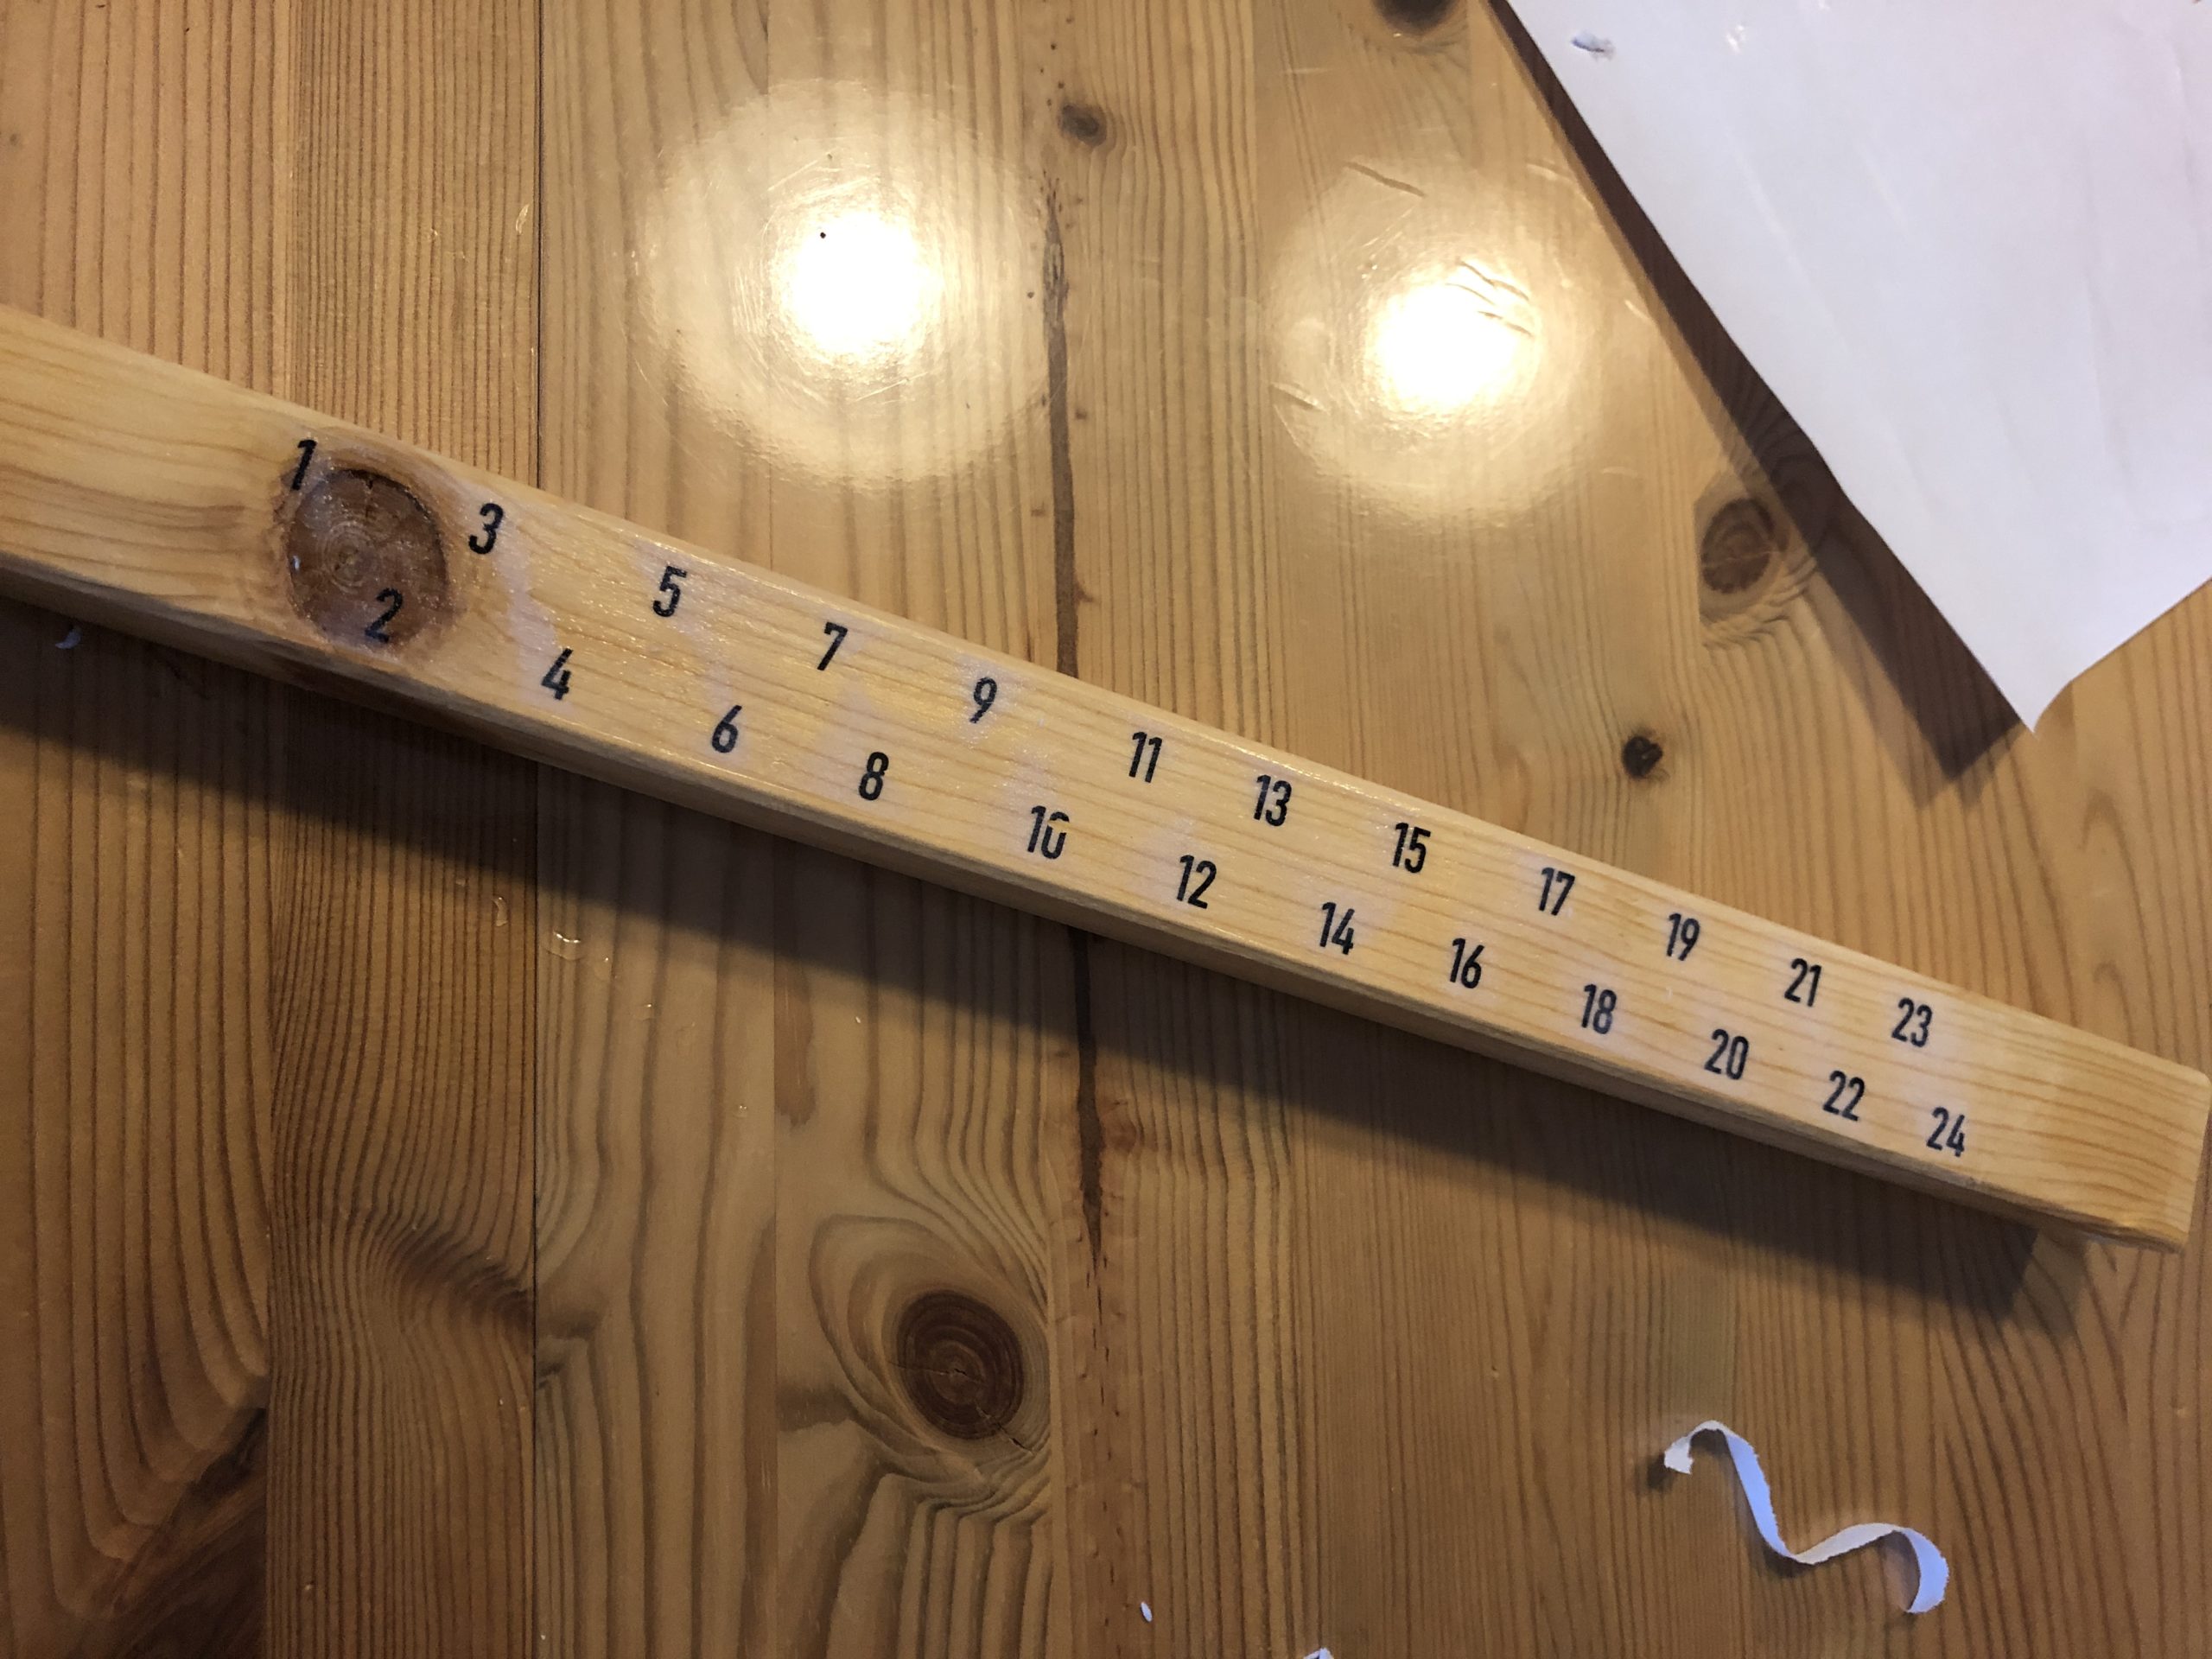
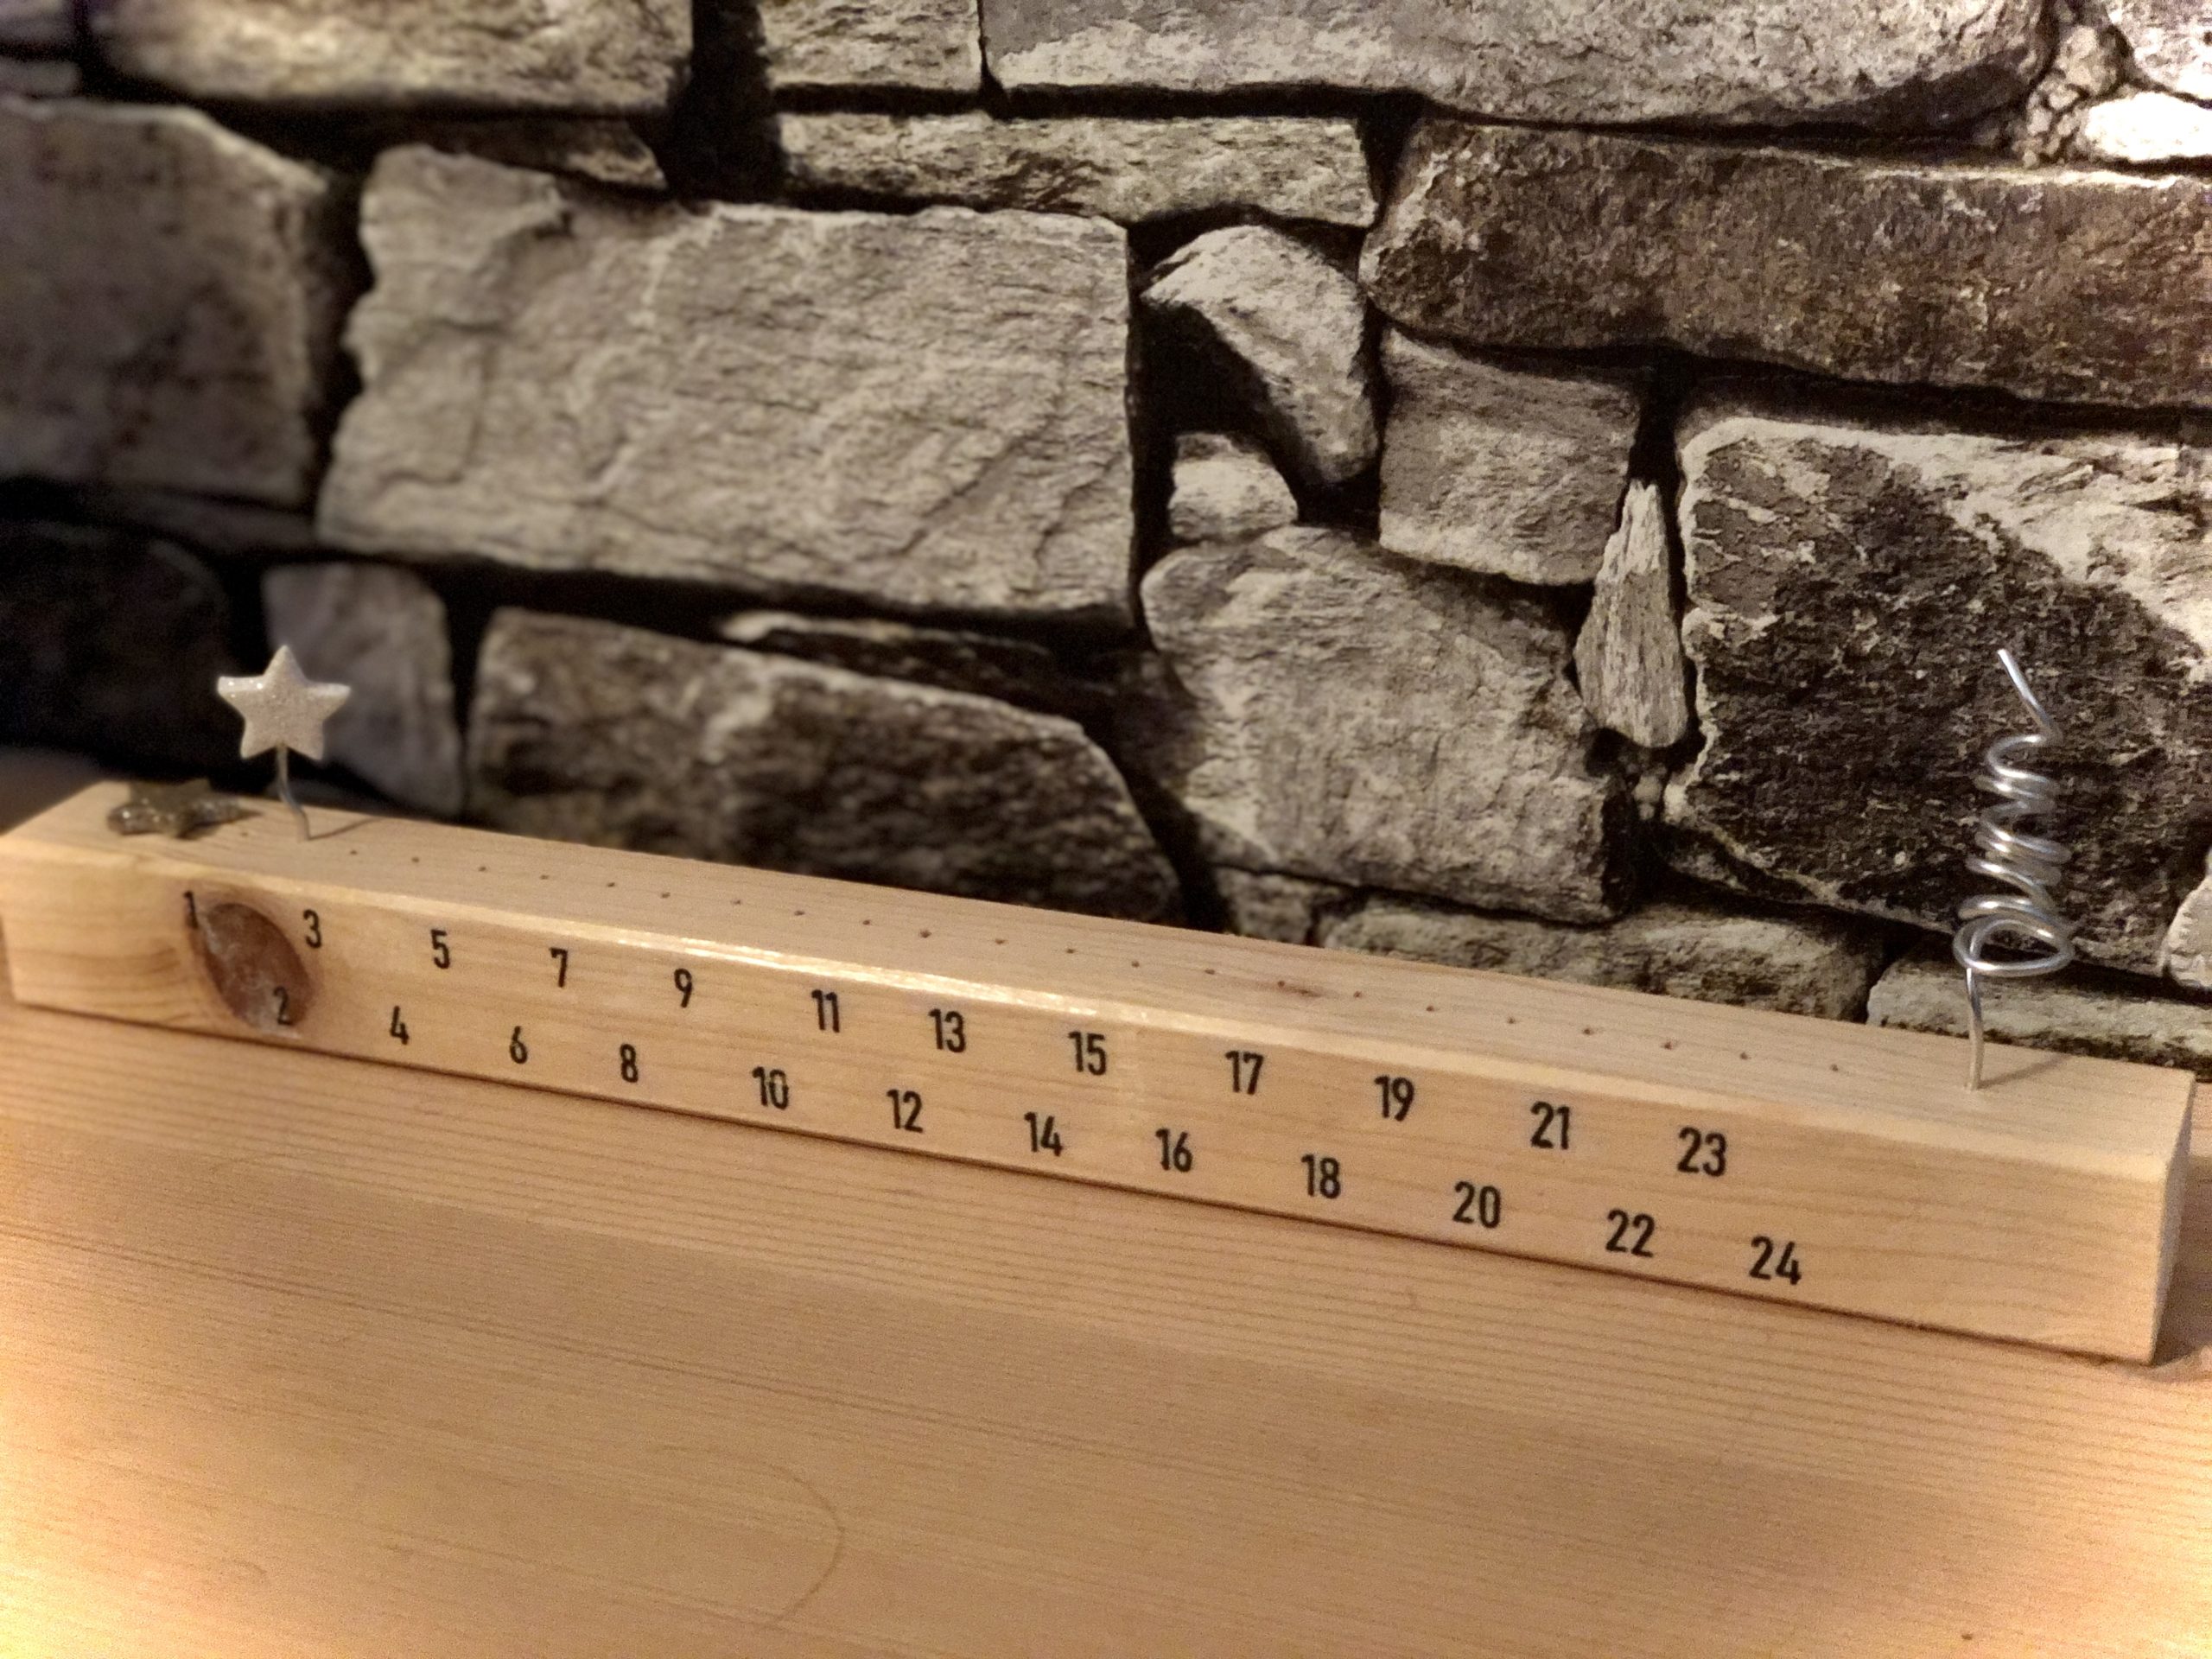
Start with marking the first hole about 3cm from the edge. (Photo: beginning of the bar!)
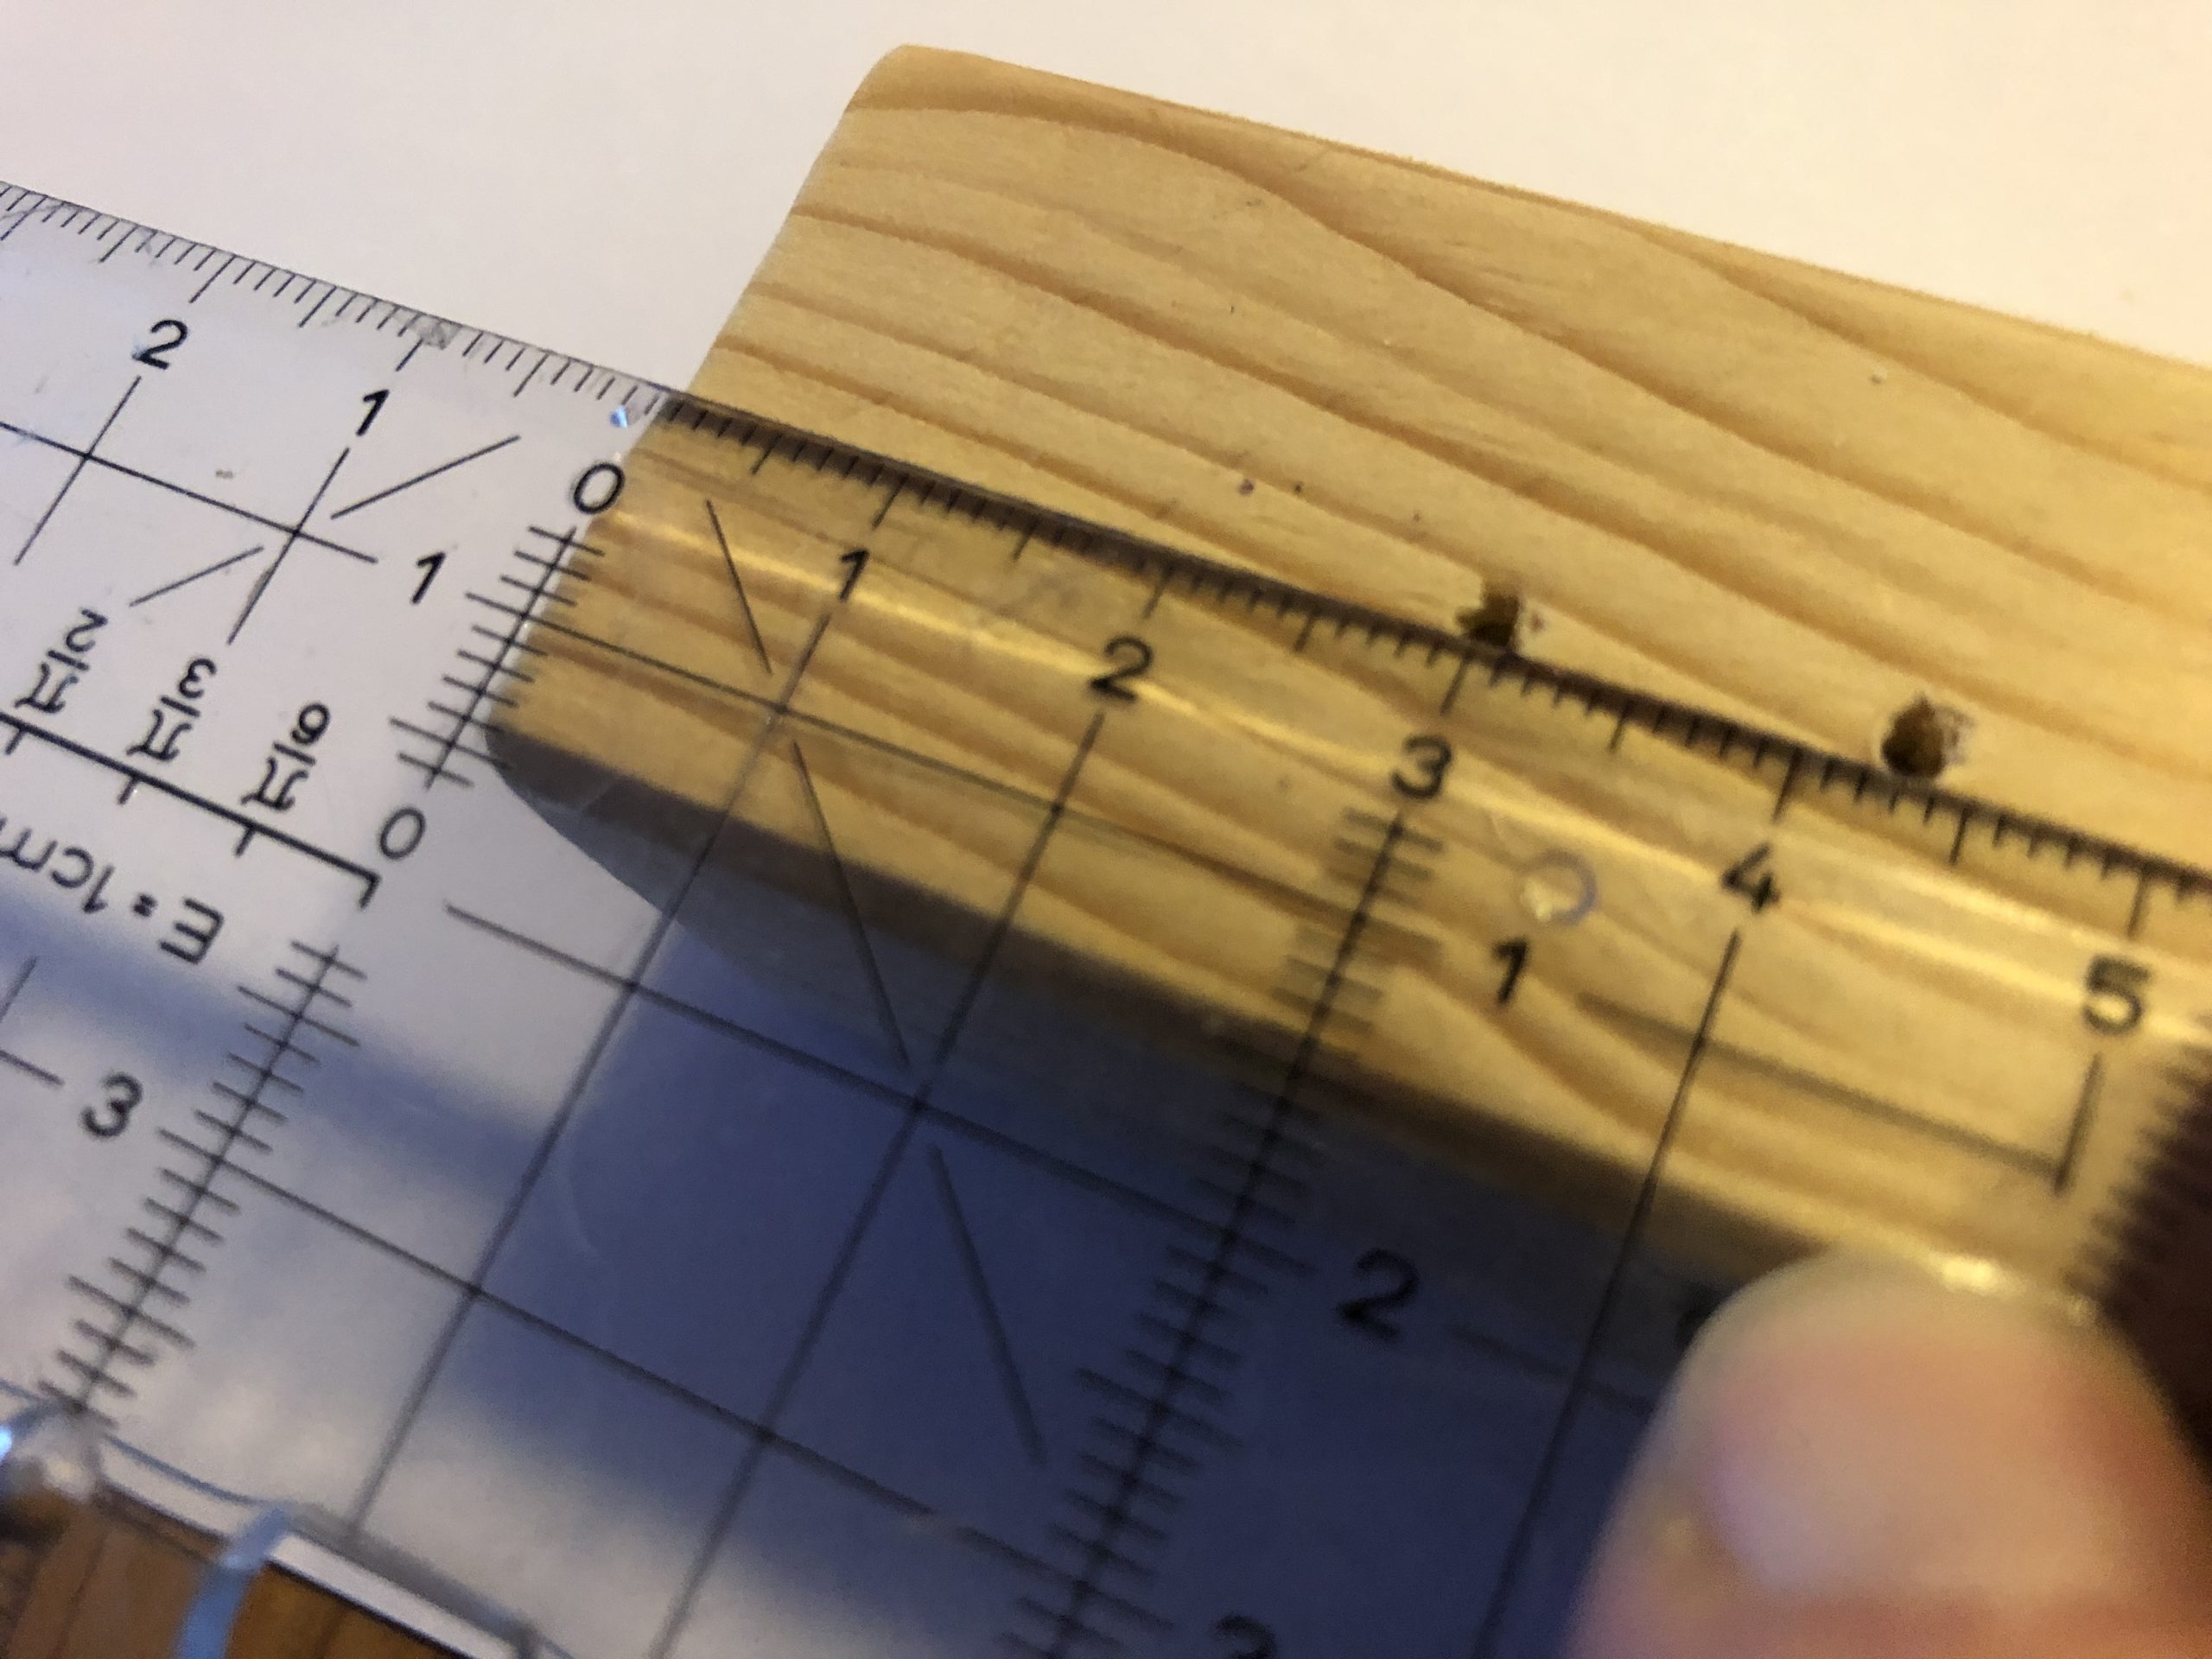
Then you draw all 24 holes. With me the distance between the holes is approx. 1.3 cm. I drilled the last hole with 2 cm distance.
The distance to the edge is 3cm on both sides.
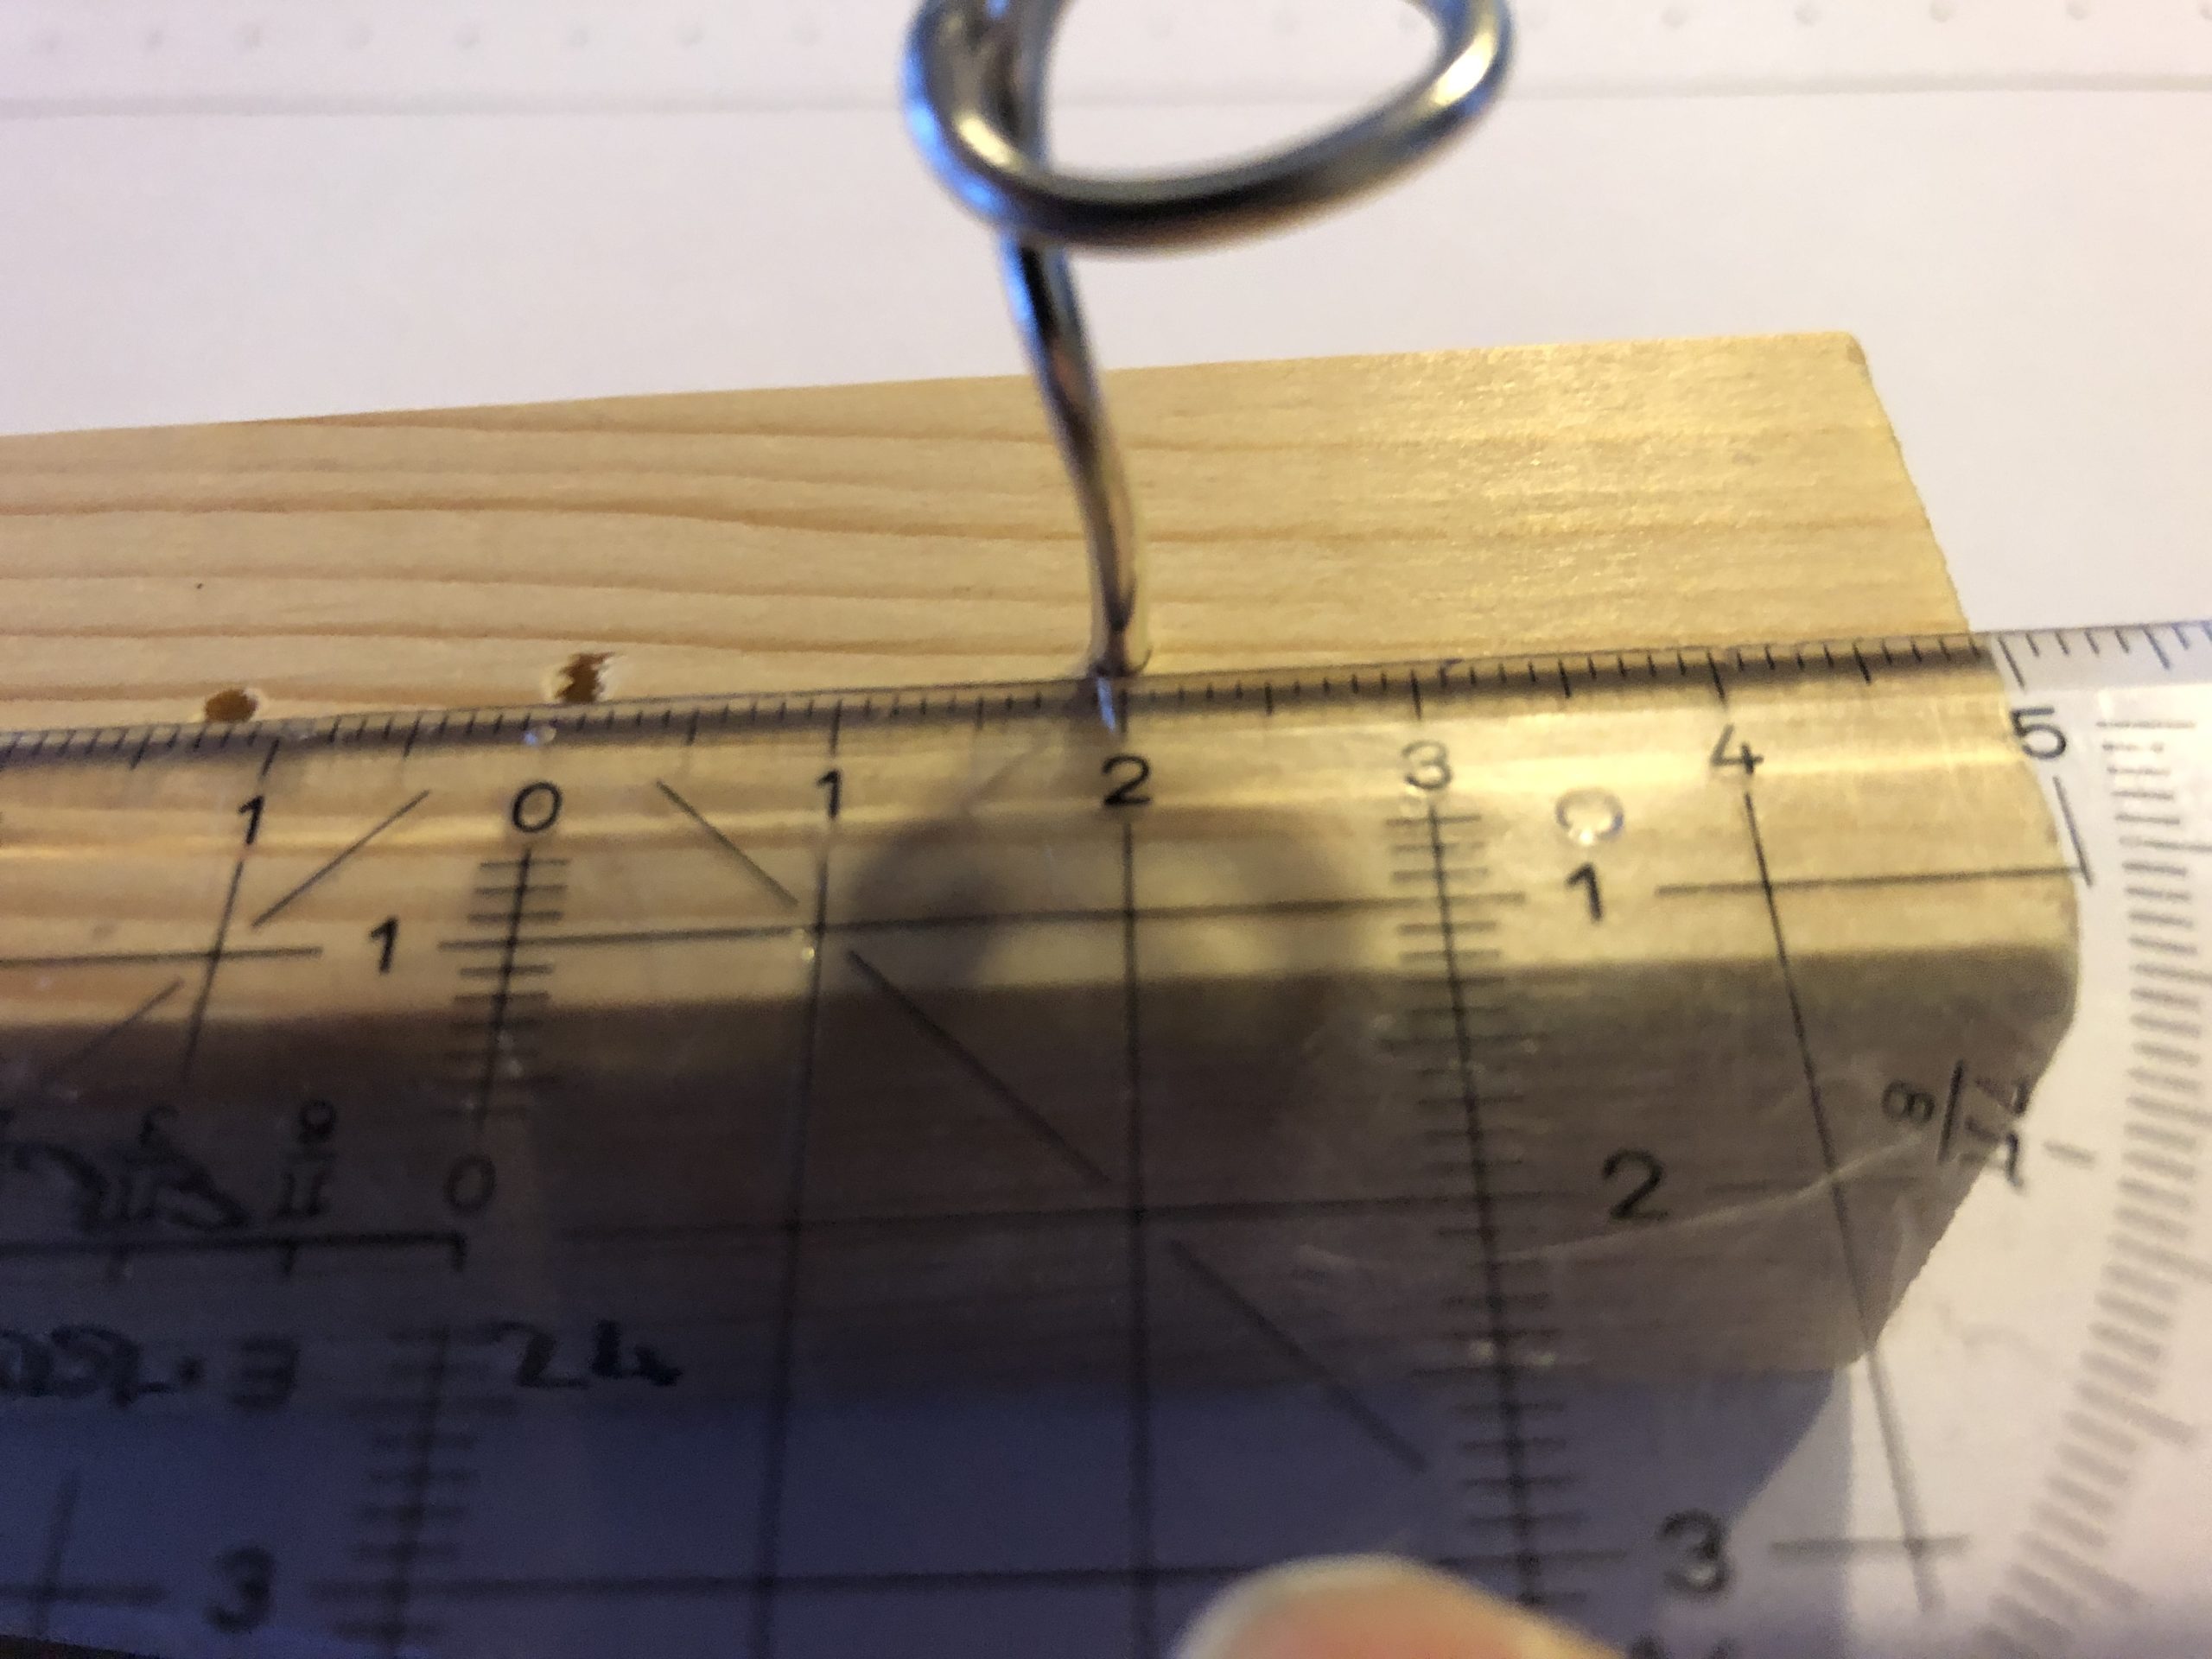
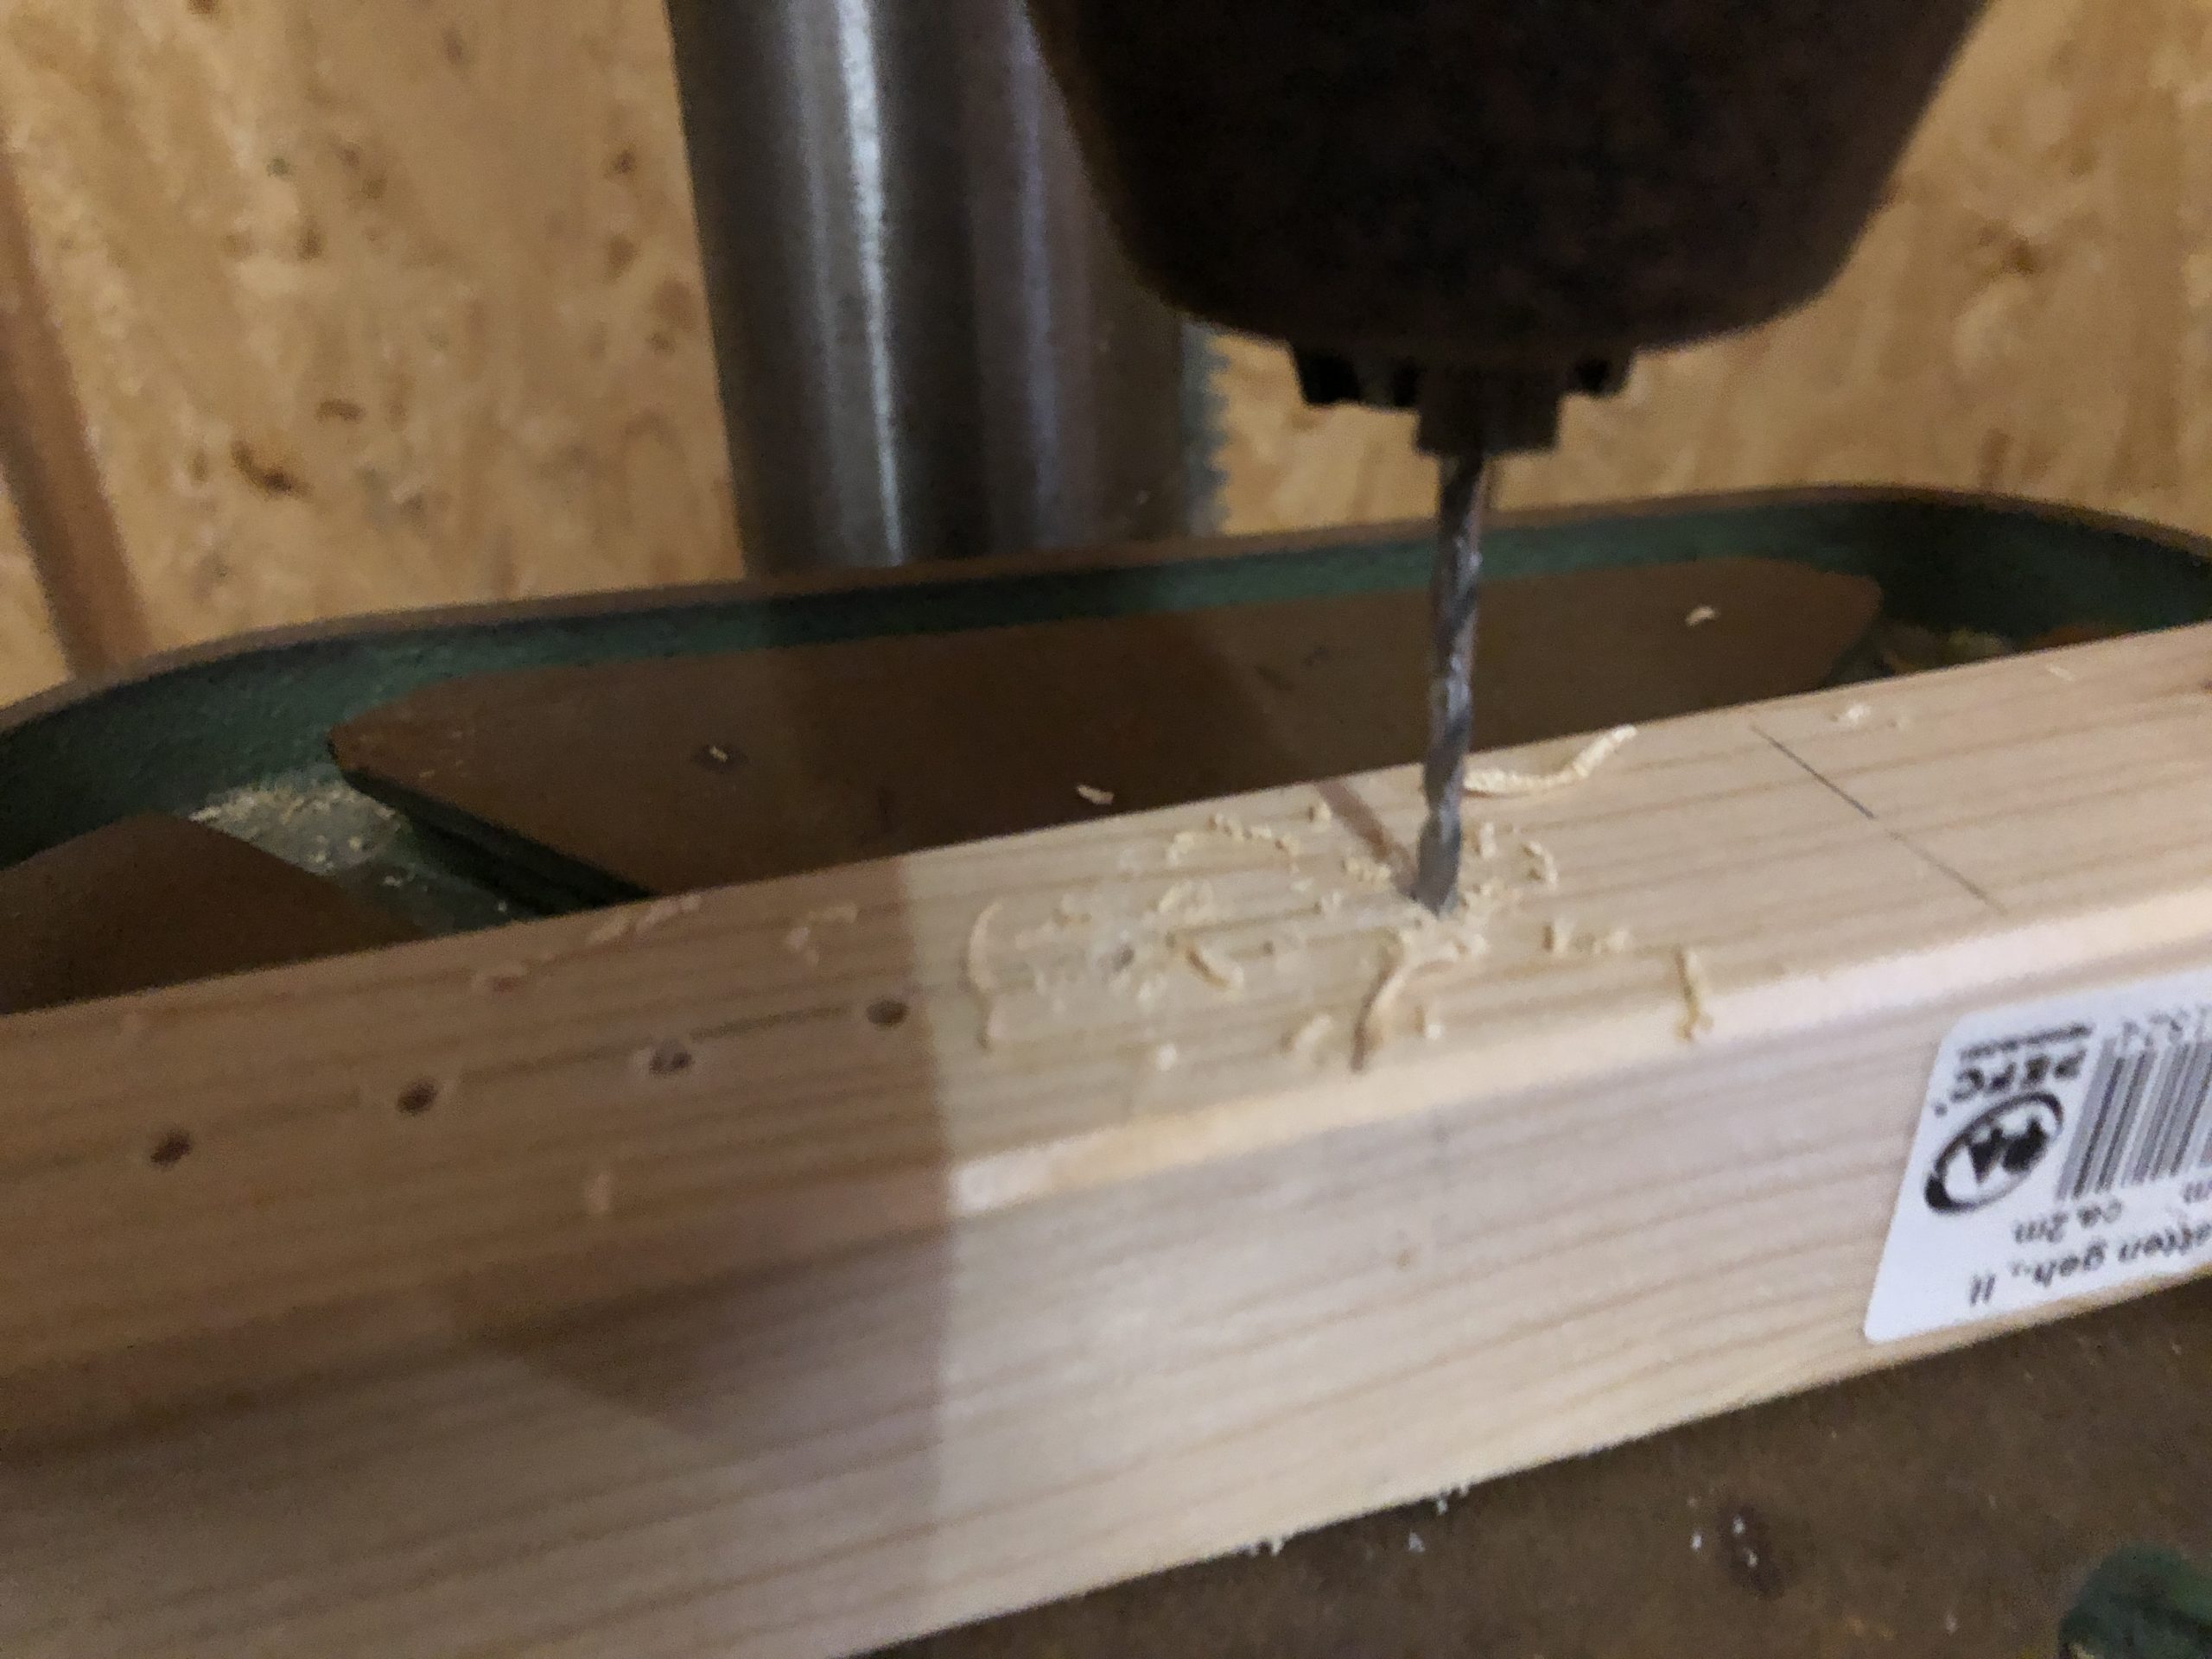
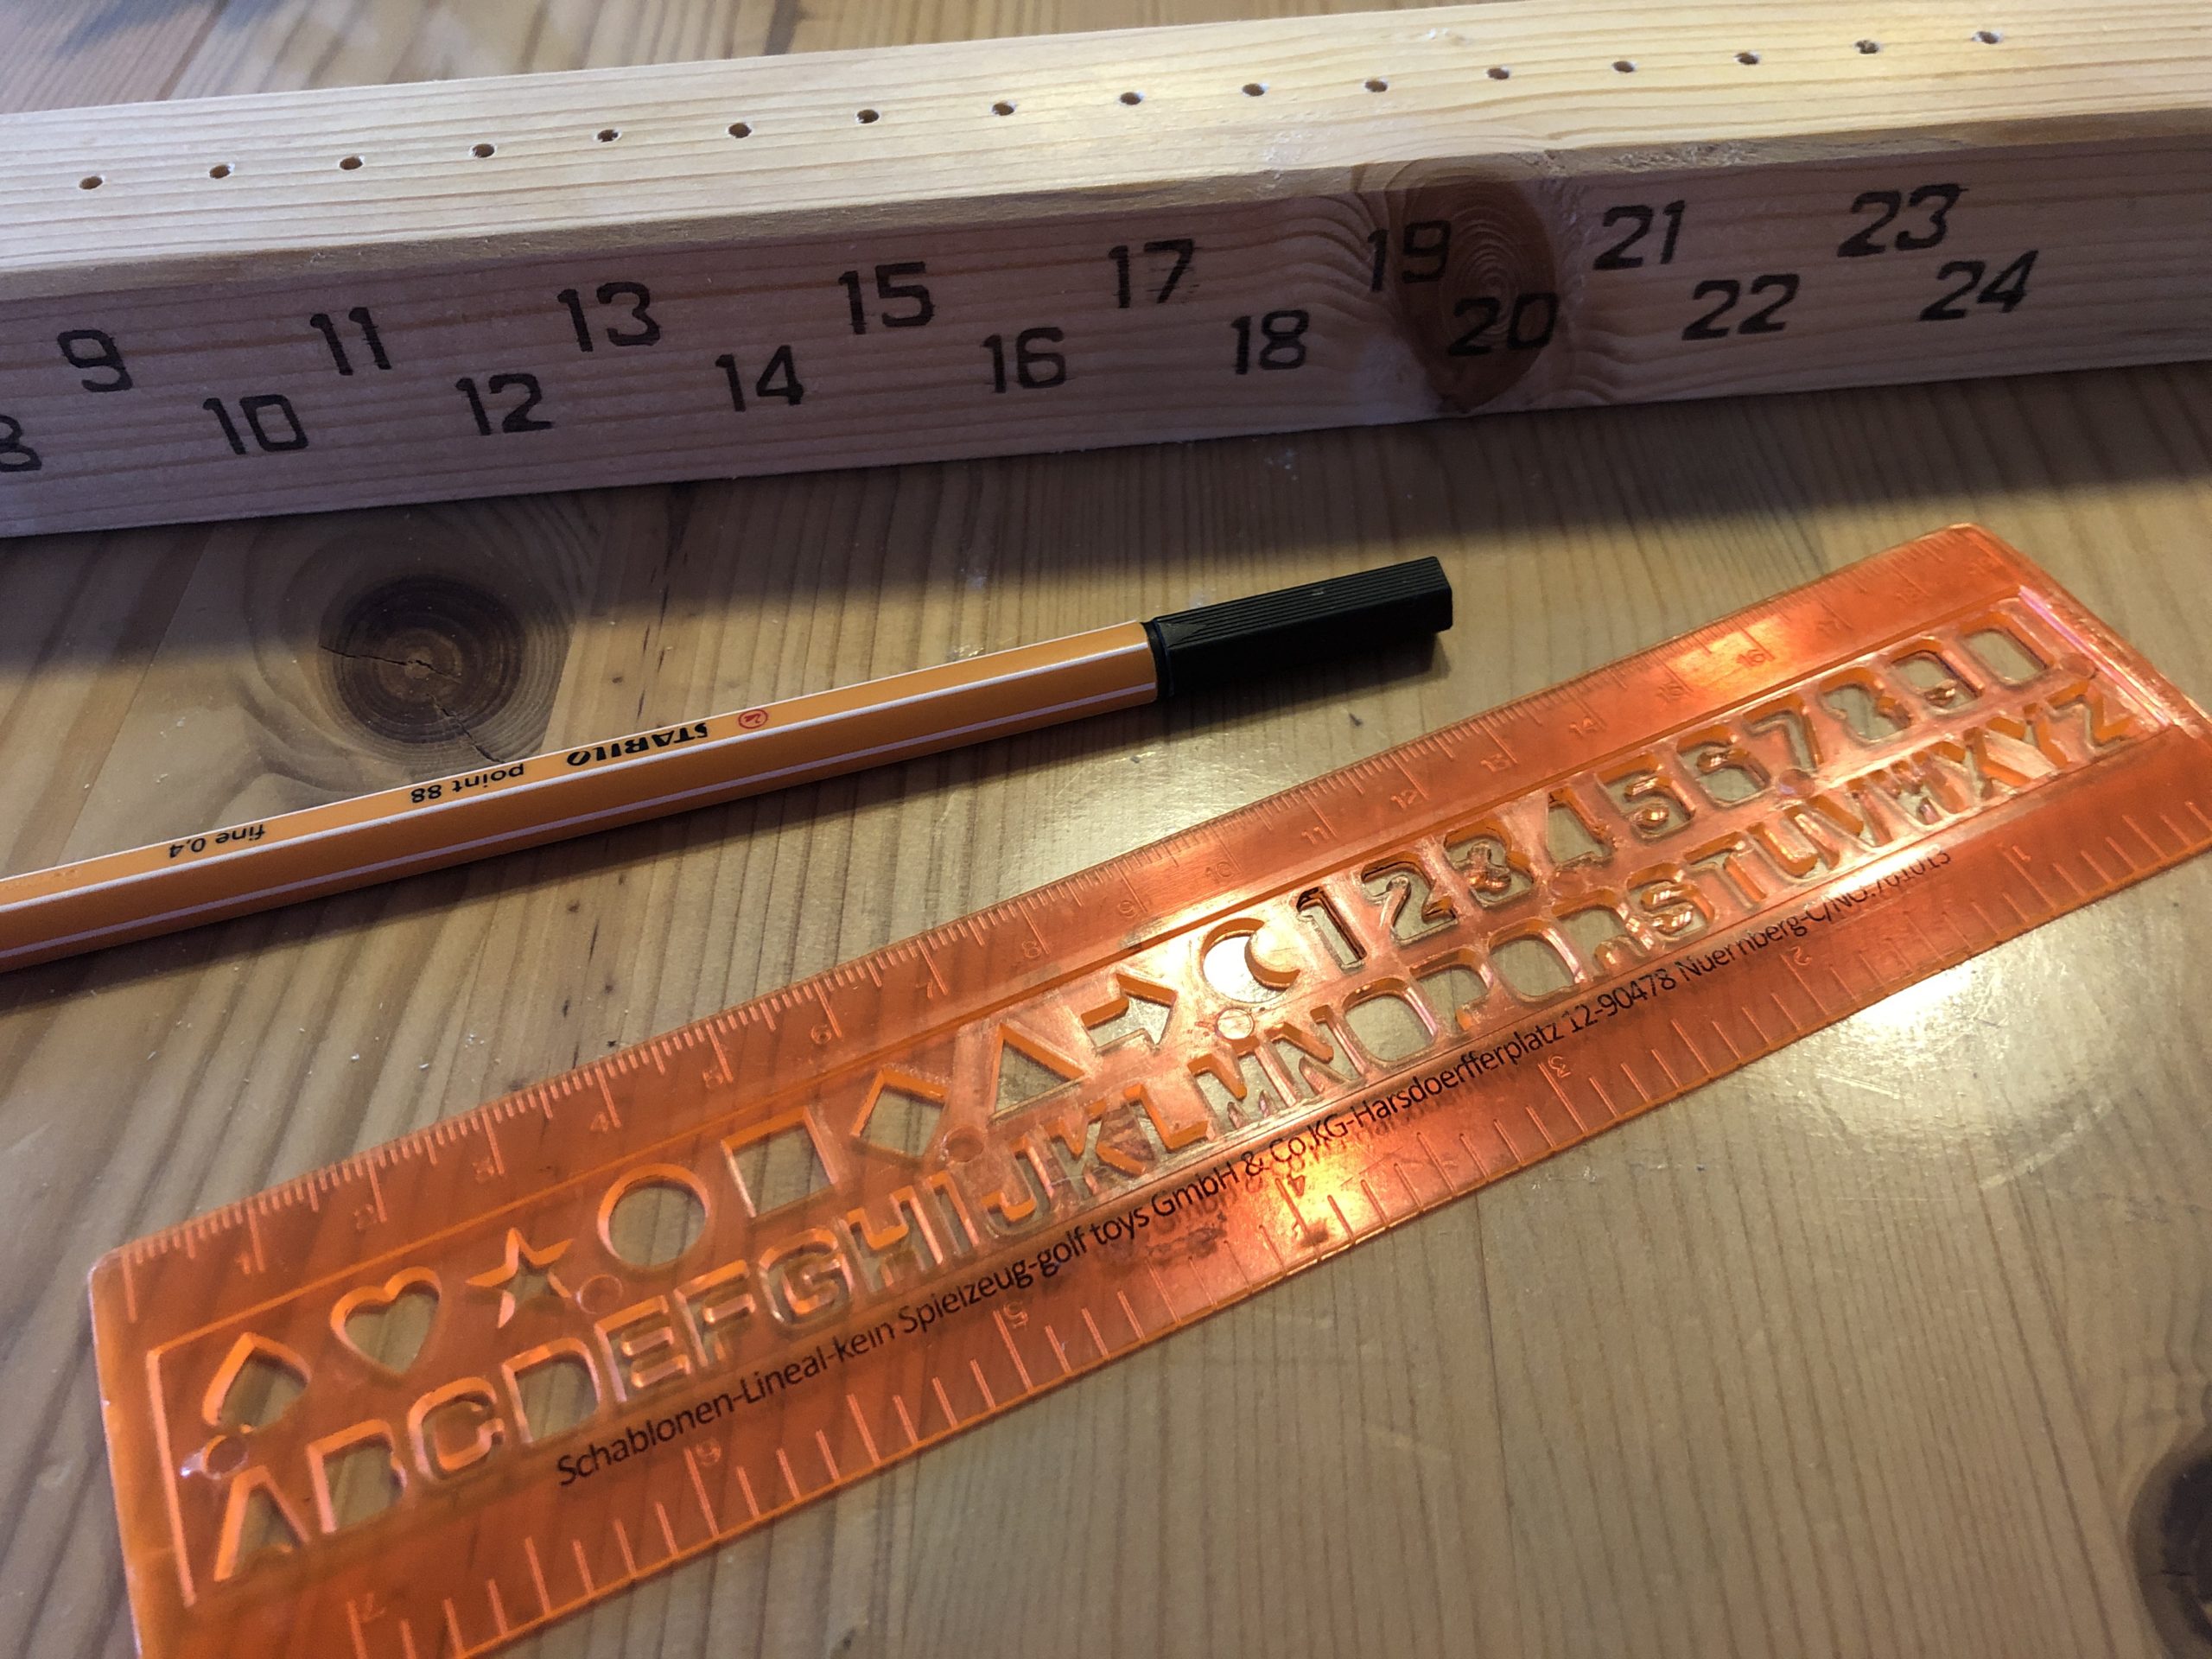
Now drill the holes into the middle of the bar. Drill all holes on a straight line.
Tip: With a stand drill you can drill exactly evenly deep holes, which all become straight.
You can also work with the cordless screwdriver and a wood drill.
When all holes are drilled, you erase the strokes from marking.

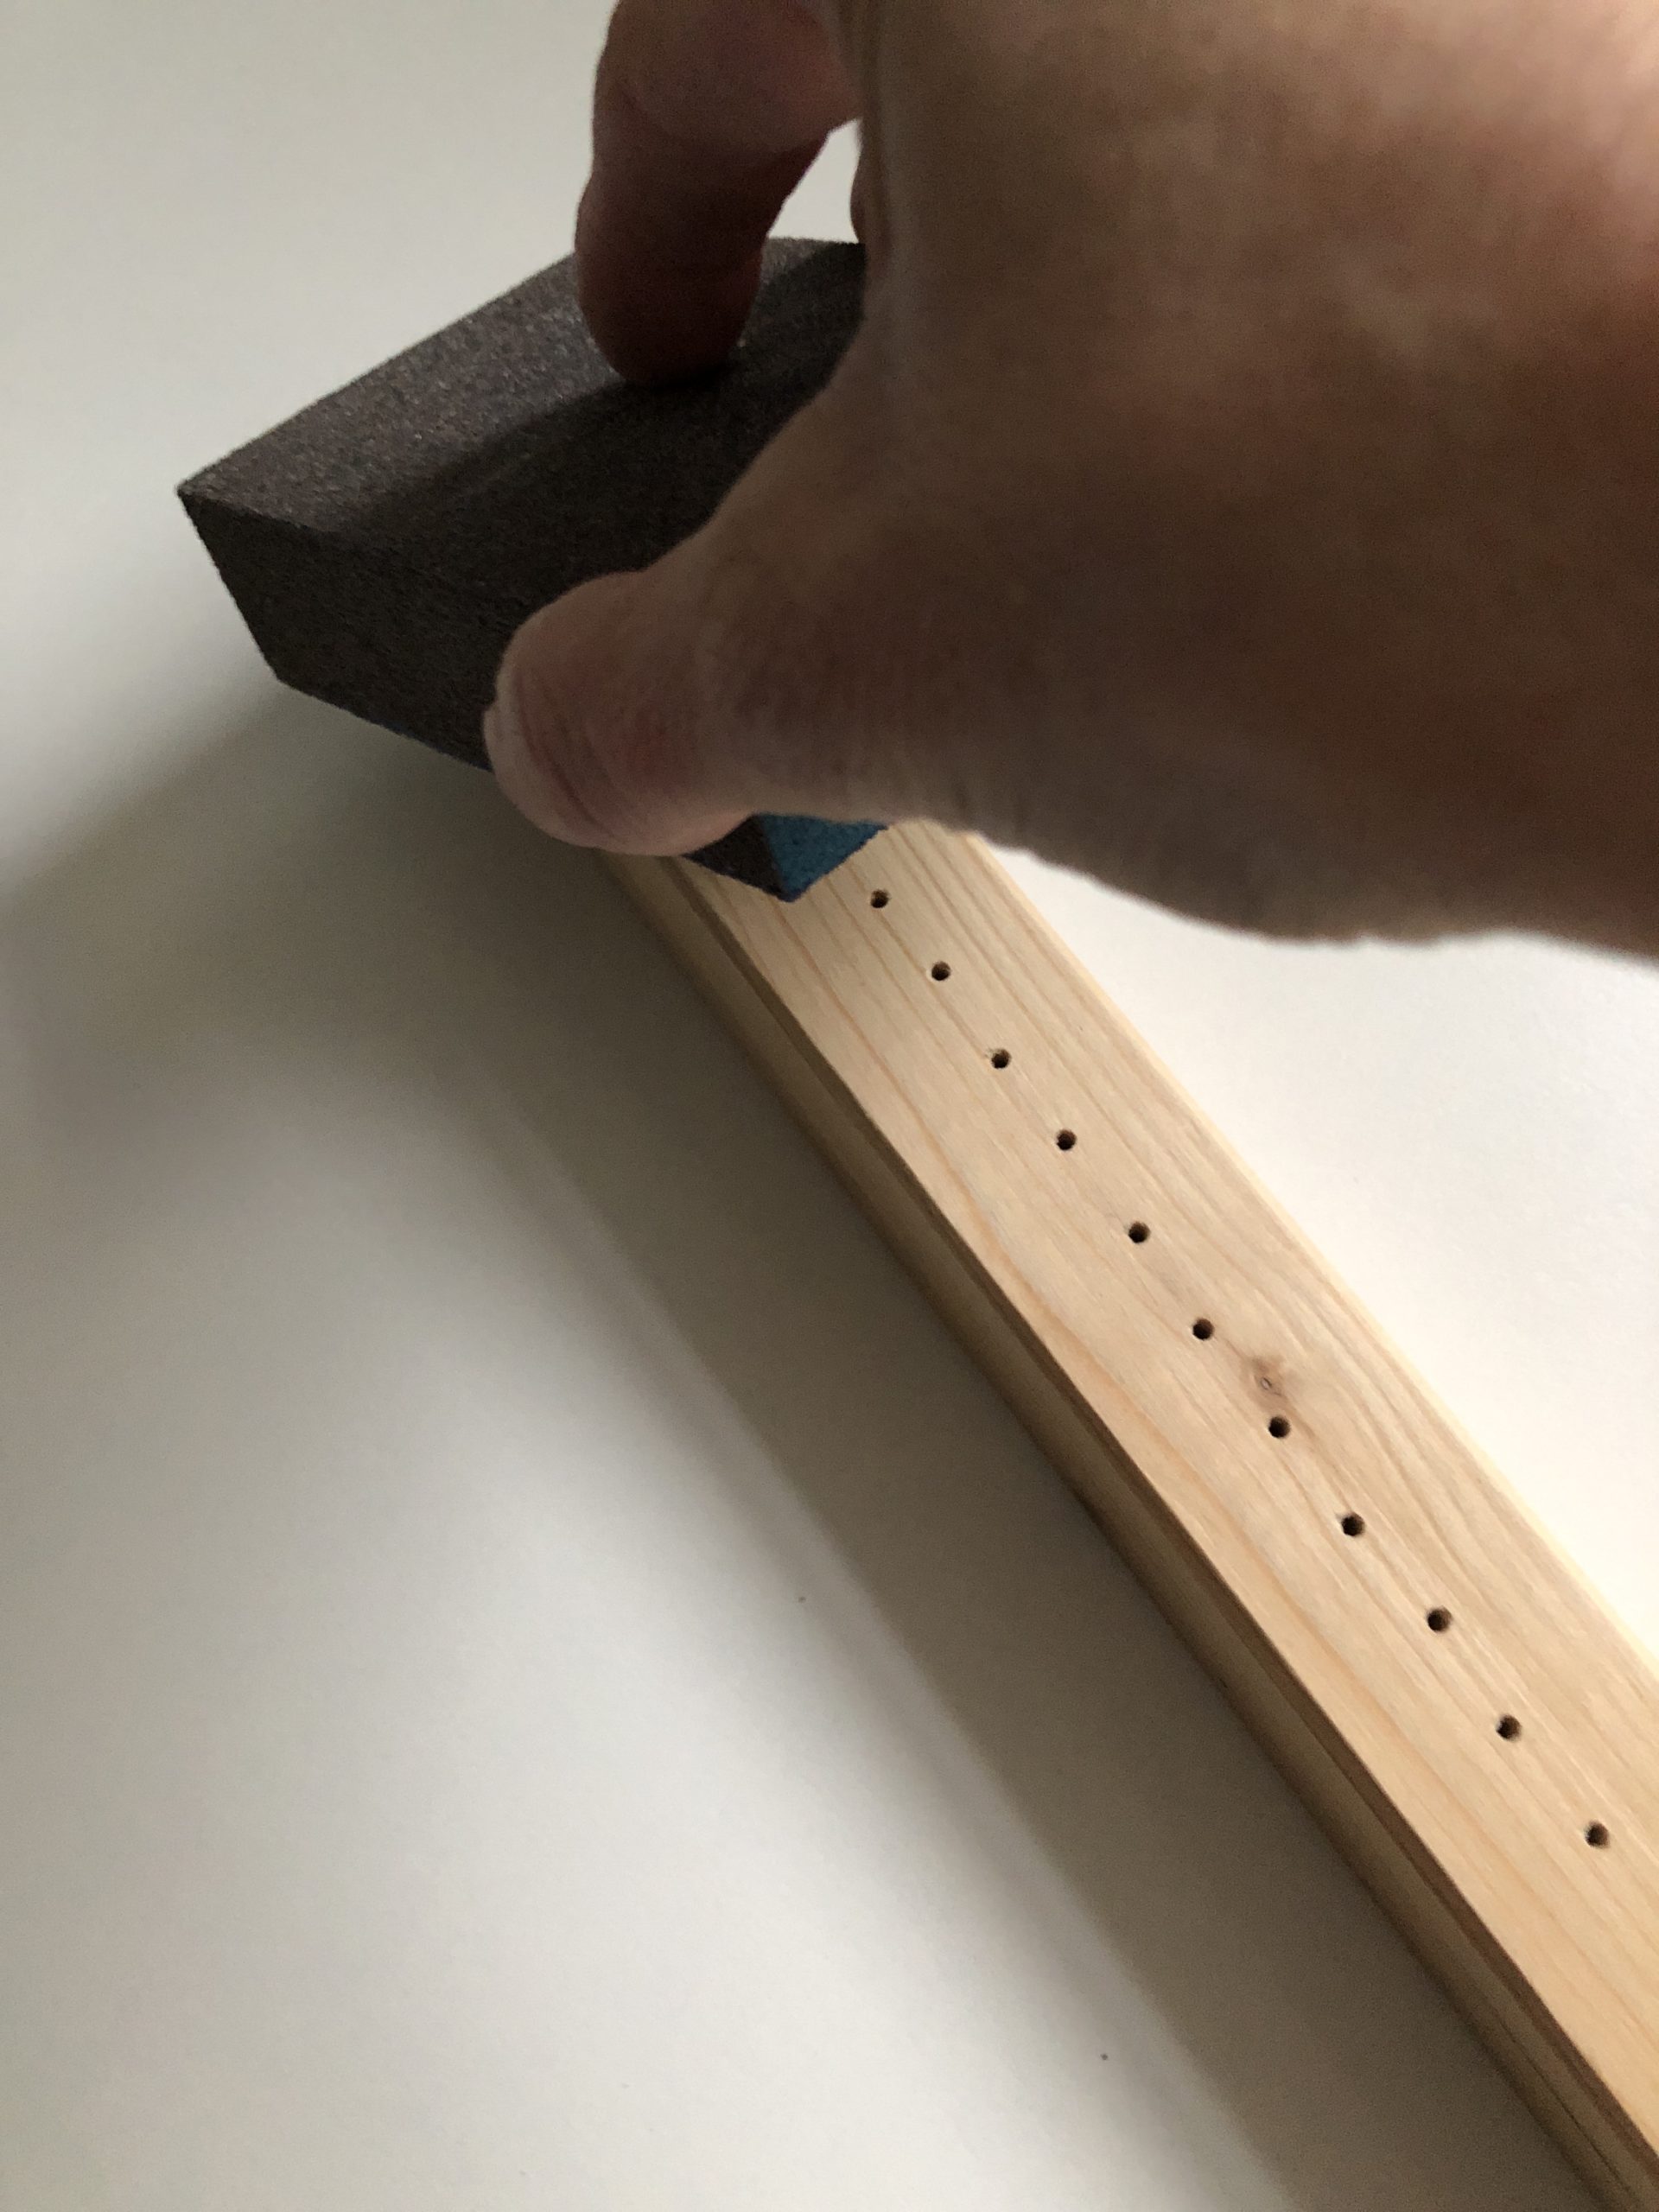
Now take a sandpaper and grind the wood smoothly.

Do not forget the edges of the wood. Always grind into the fiber direction of the wood, otherwise scratch your wood.
Then write the numbers on the bar.
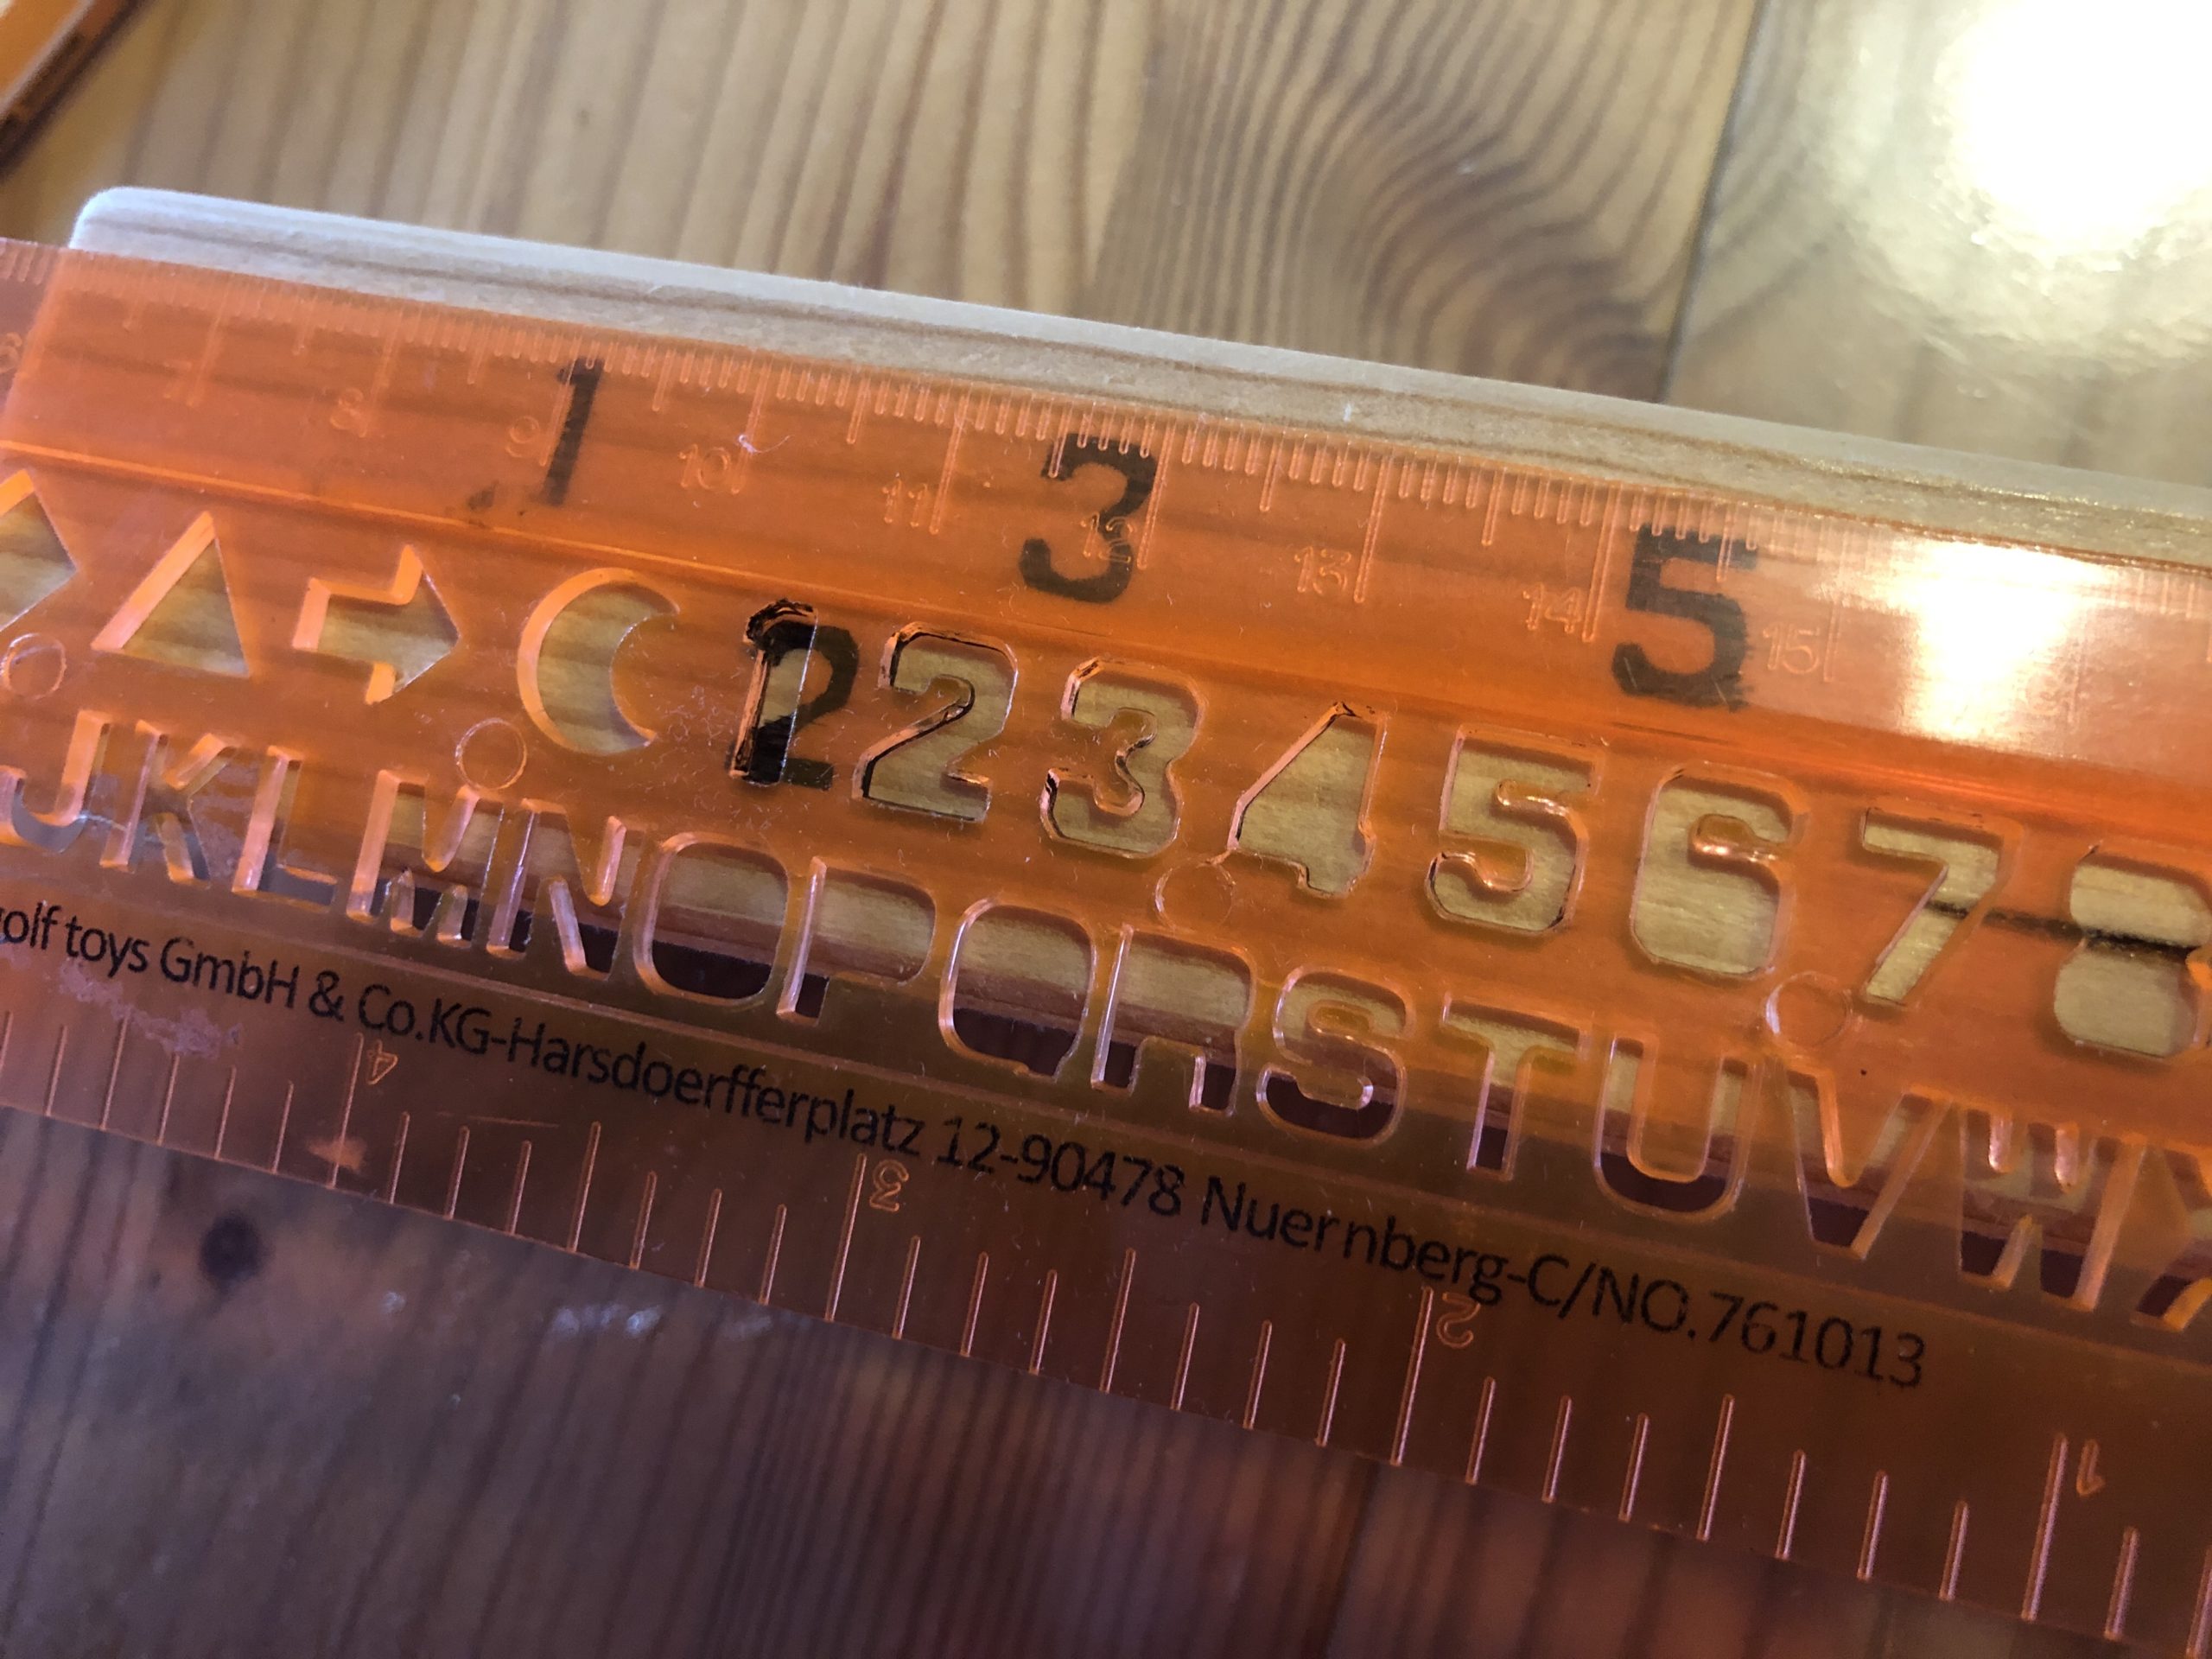
For painting you can also use a number template.
Make sure that the numbers are under the appropriate holes!
Tip: So that the numbers do not become too small, the numbers add in offset.
The bar is ready.
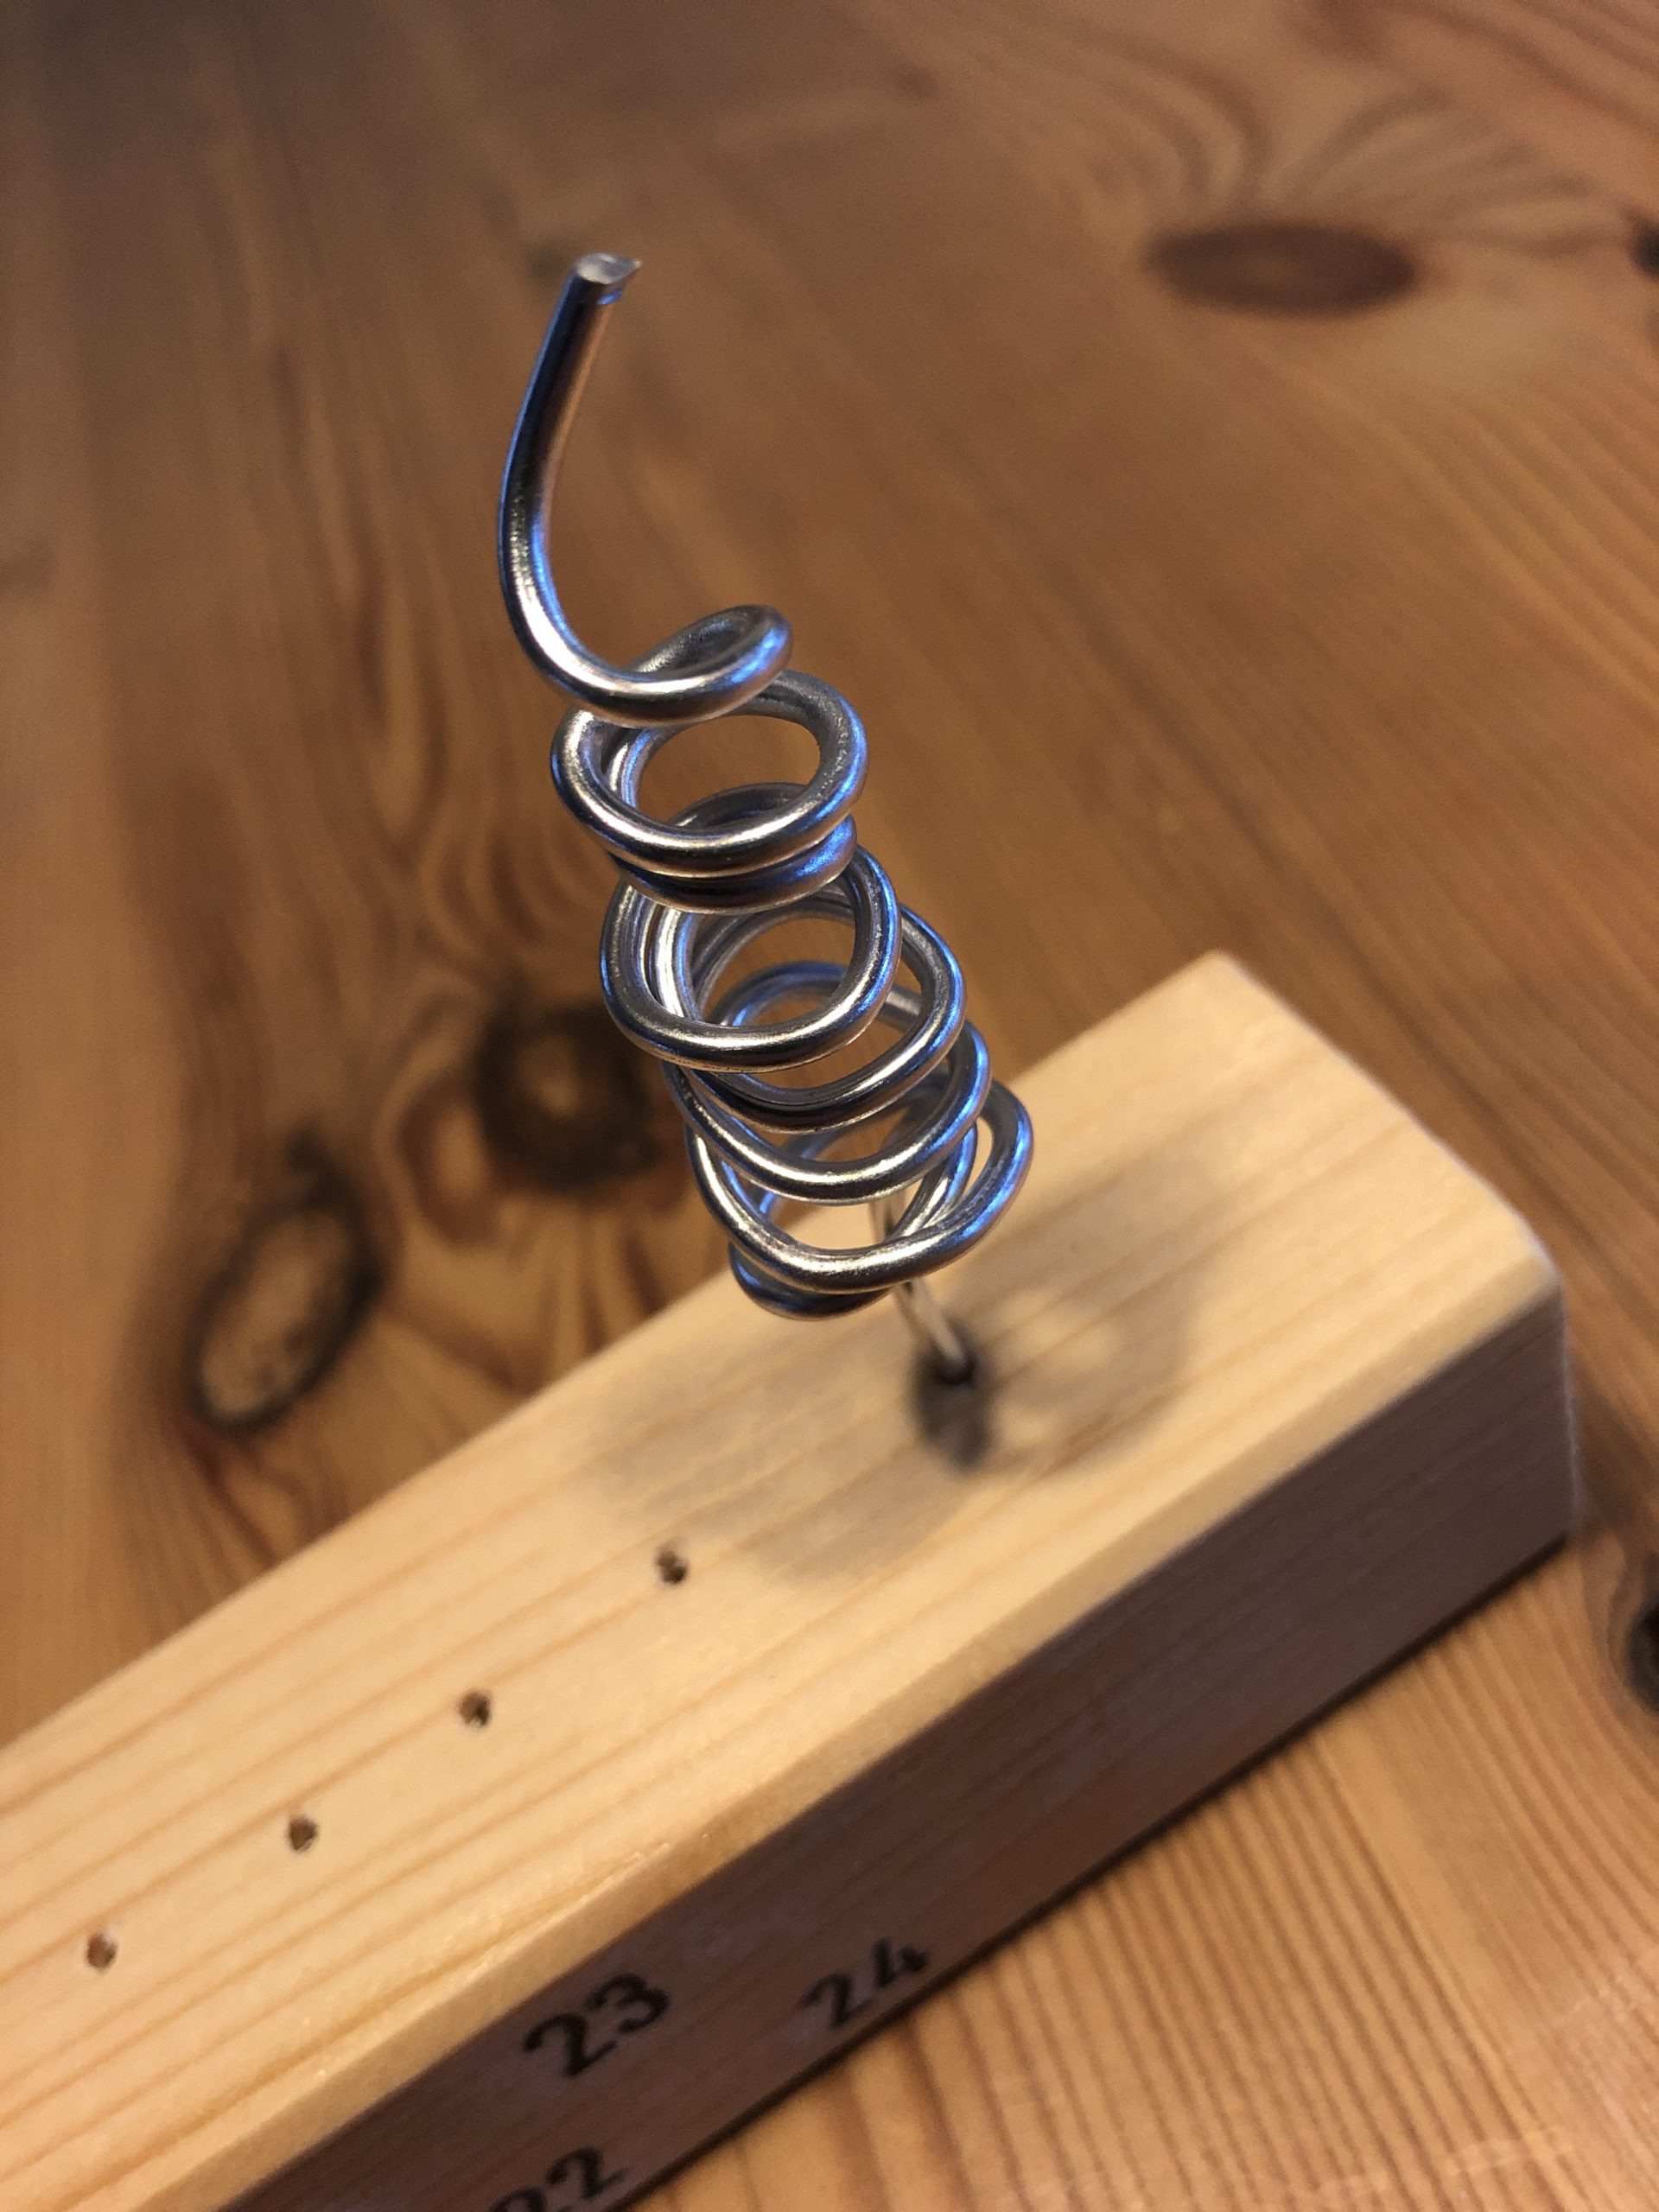
In the last hole (24) you now insert a fir tree. This you can bend e.g. out of wire.
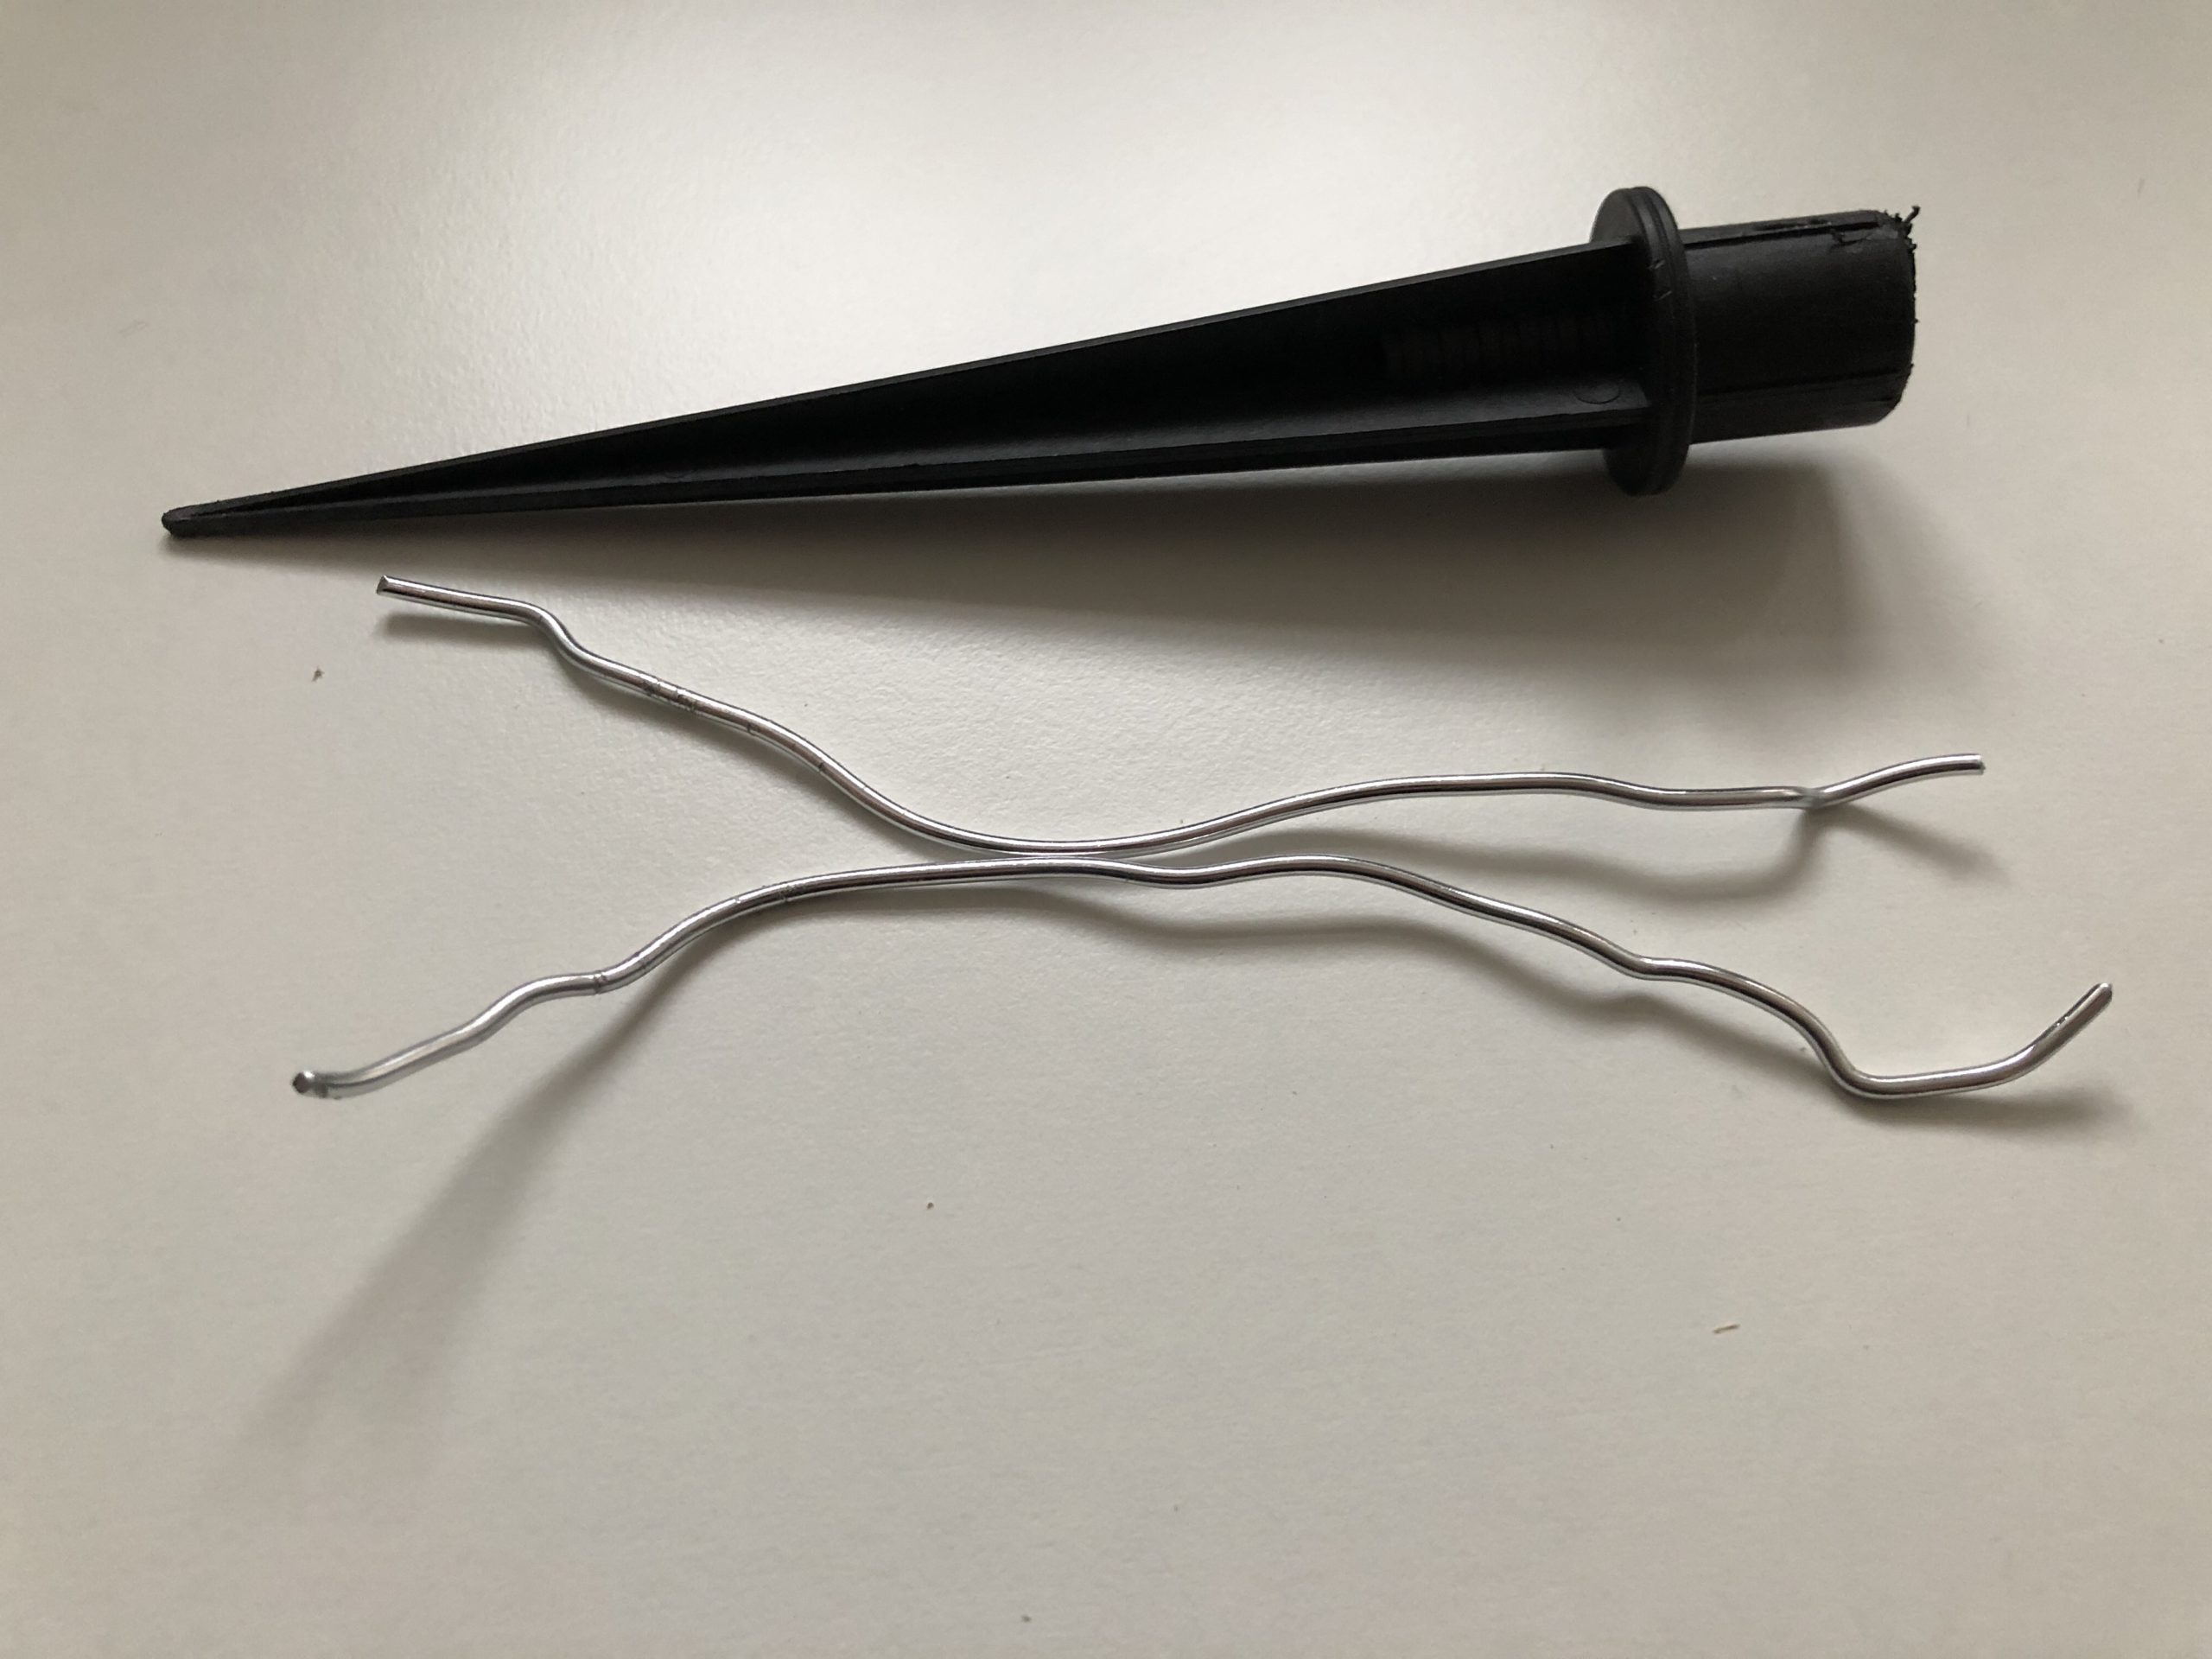
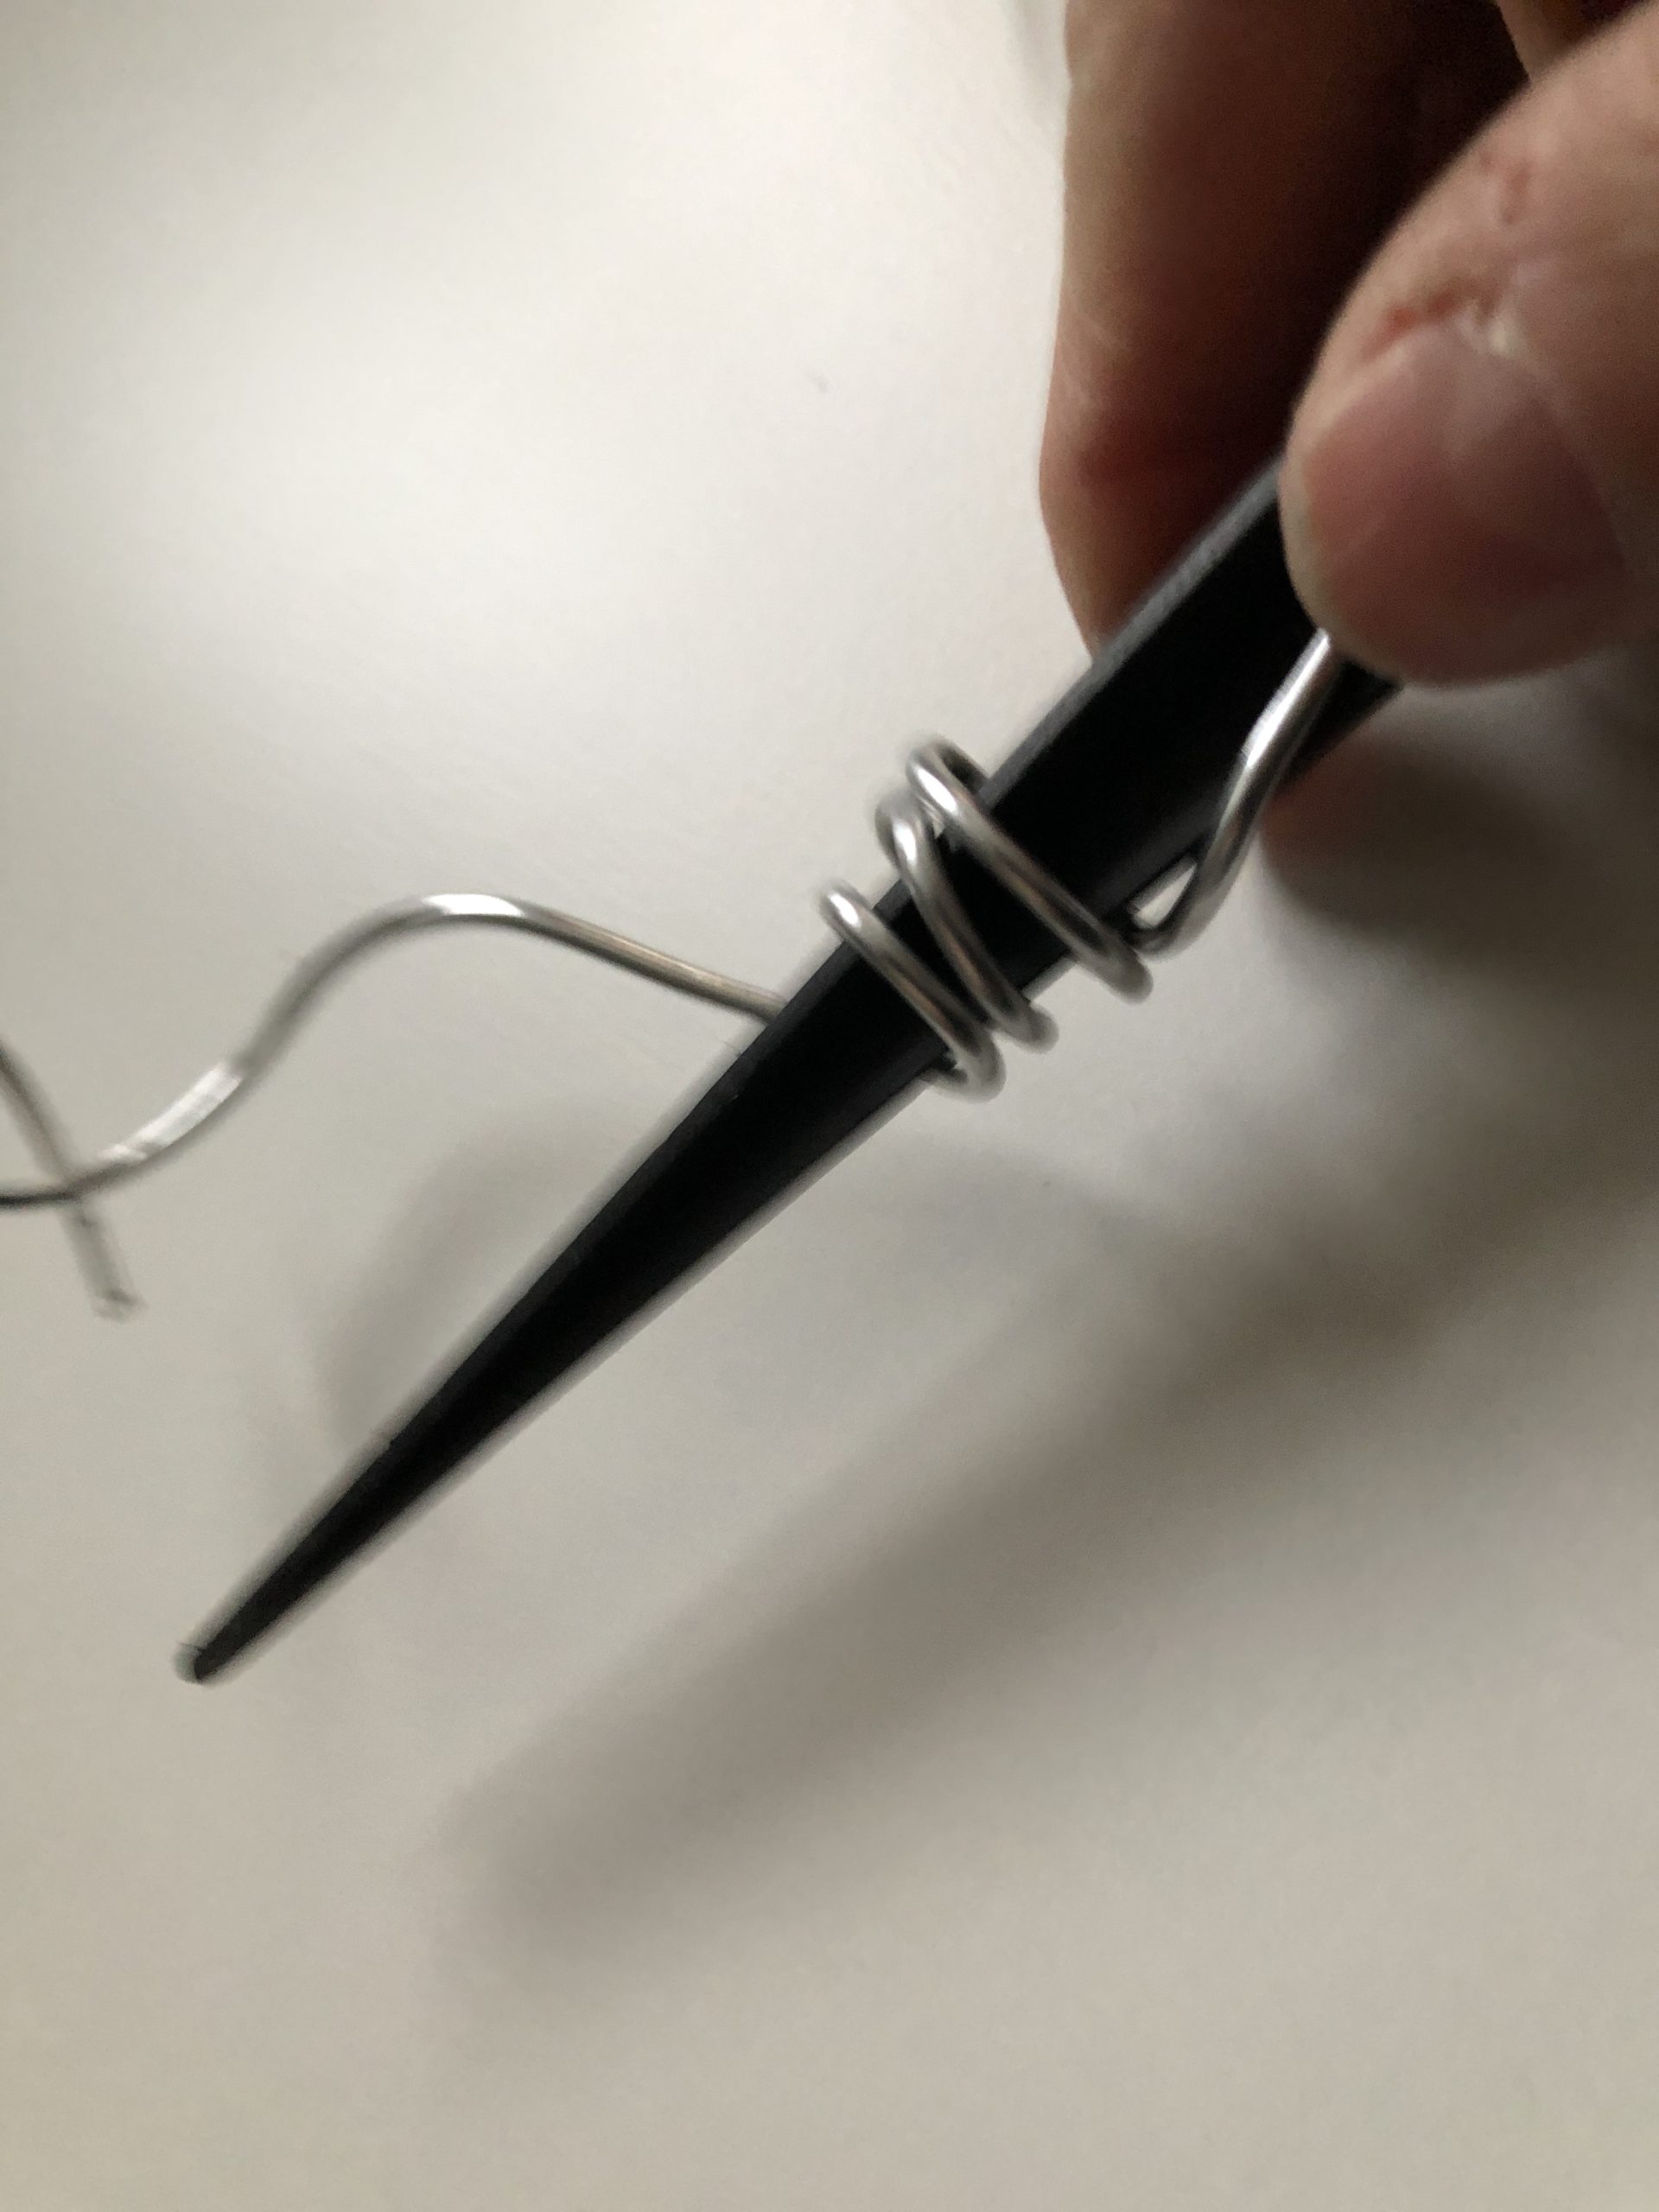
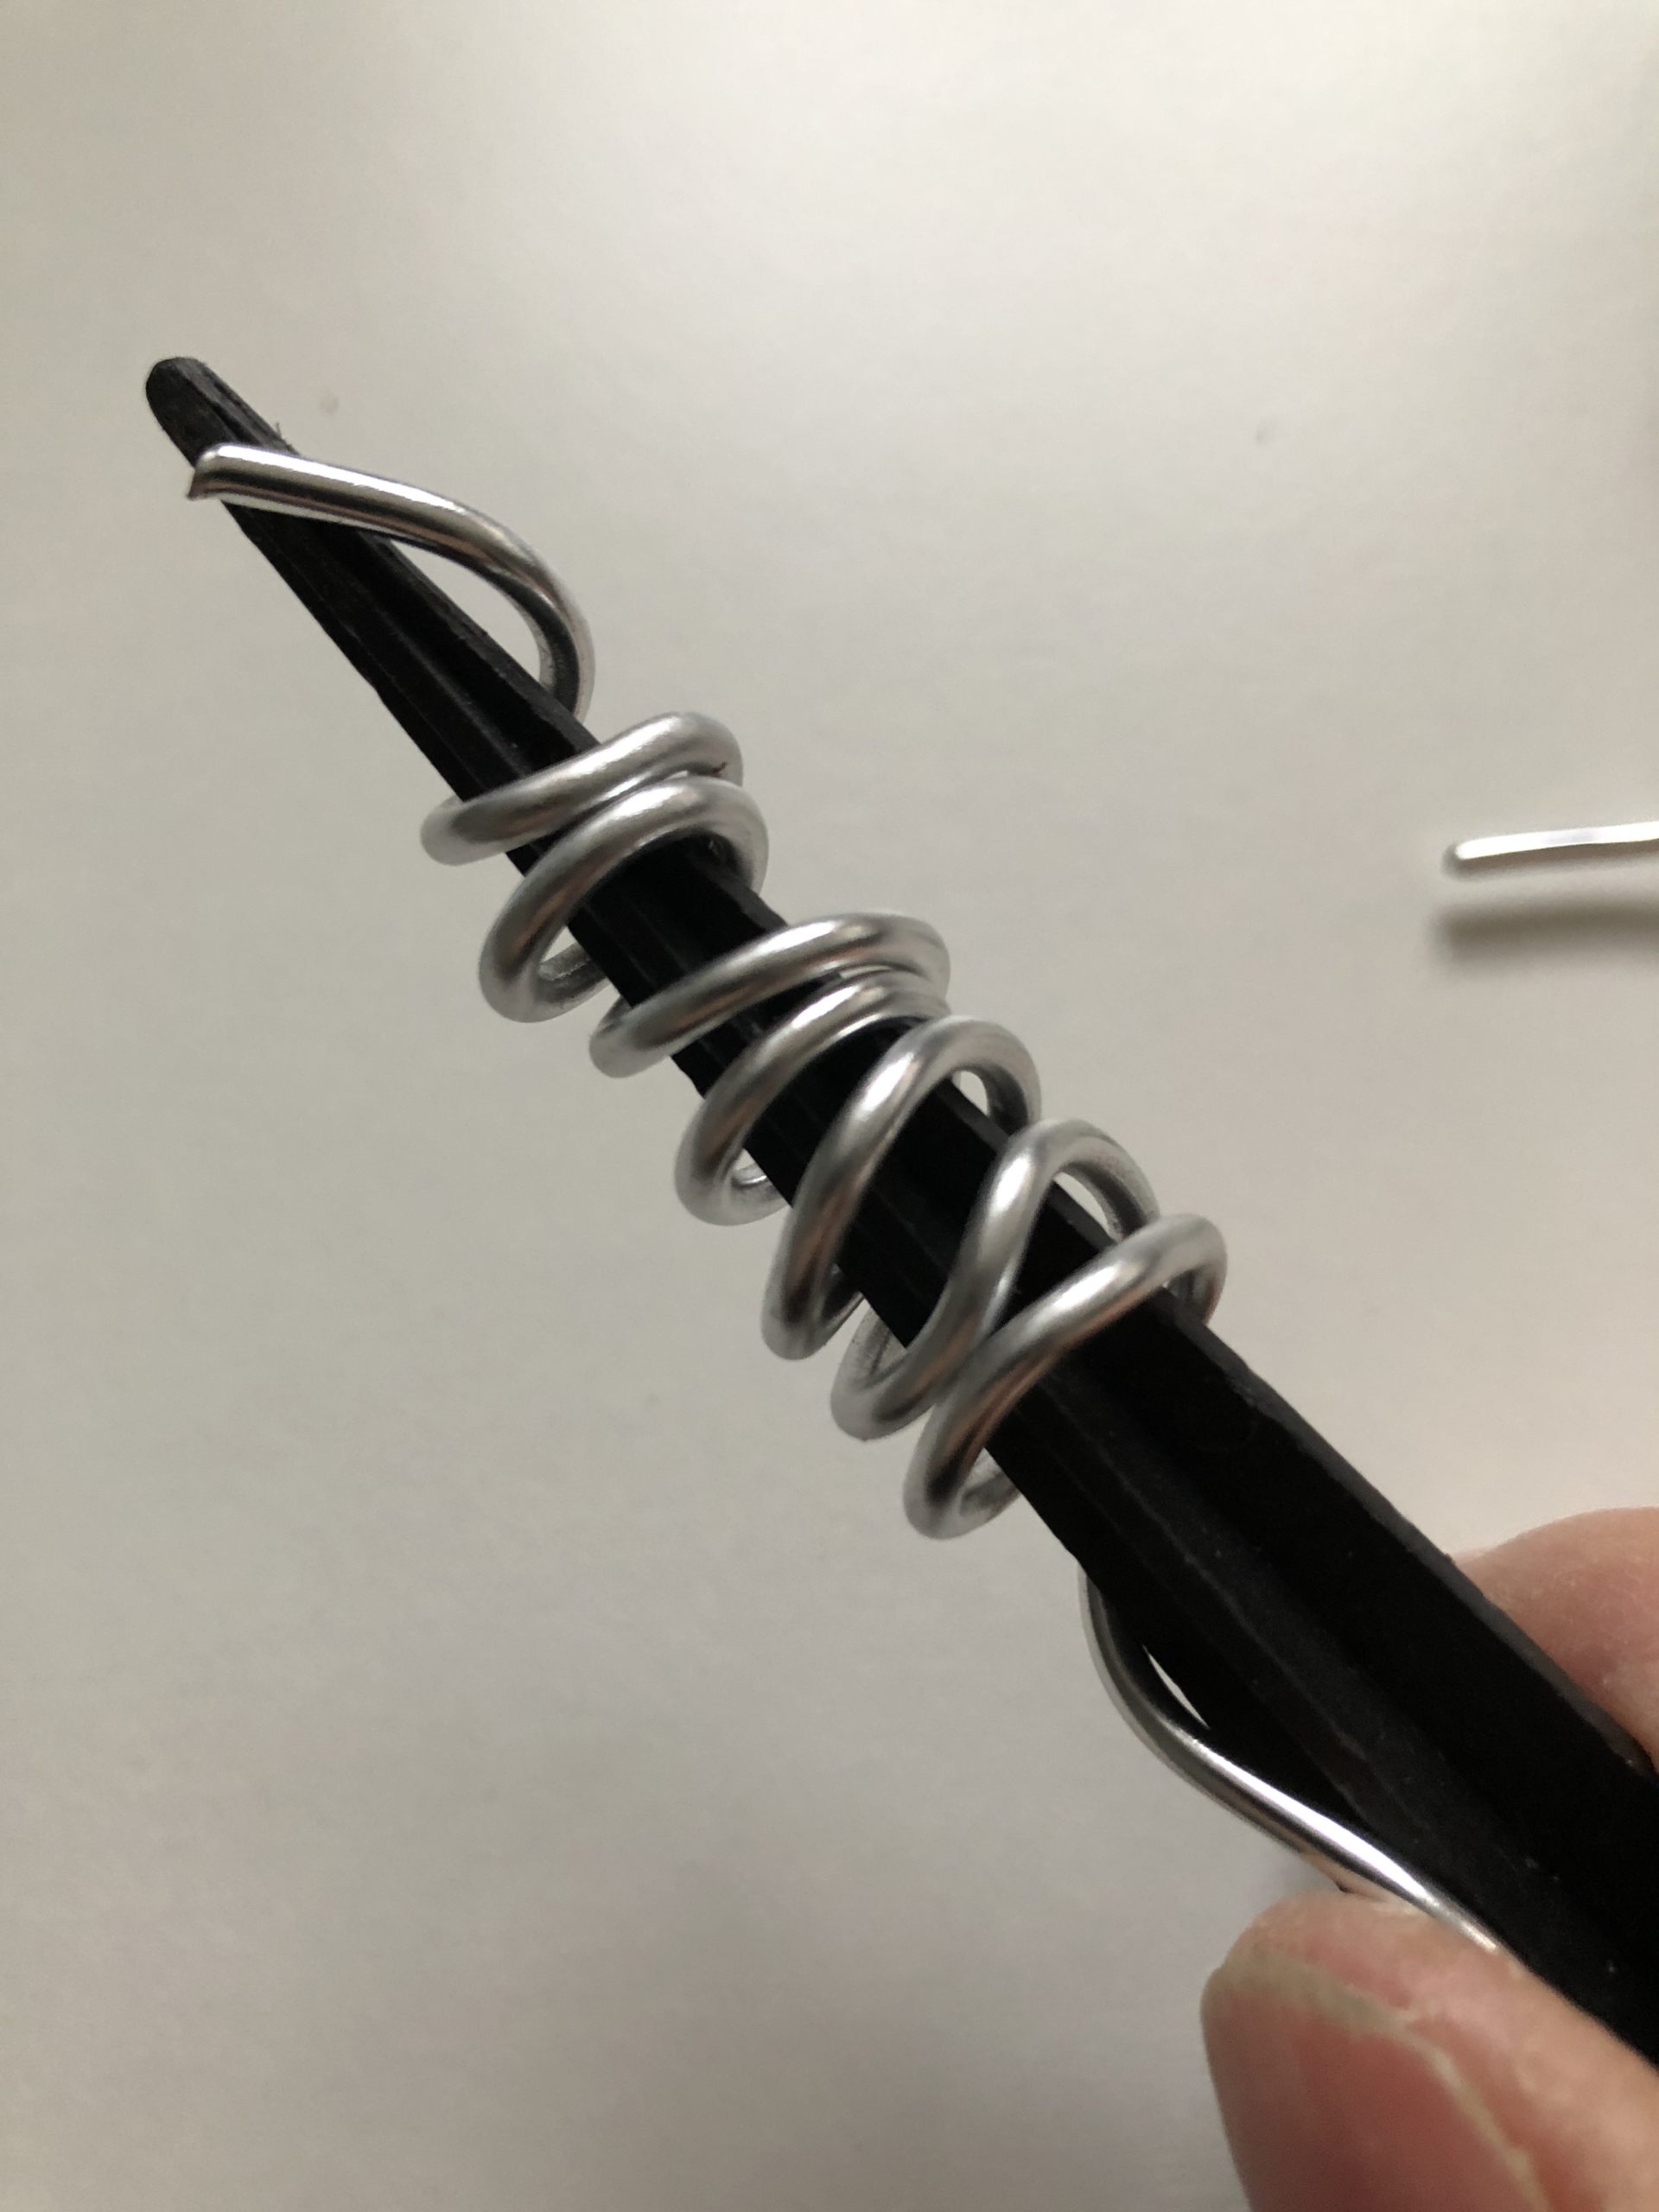
To do this, wrap the wire around a pointed object.
Cut off about 20-30cm of wire.
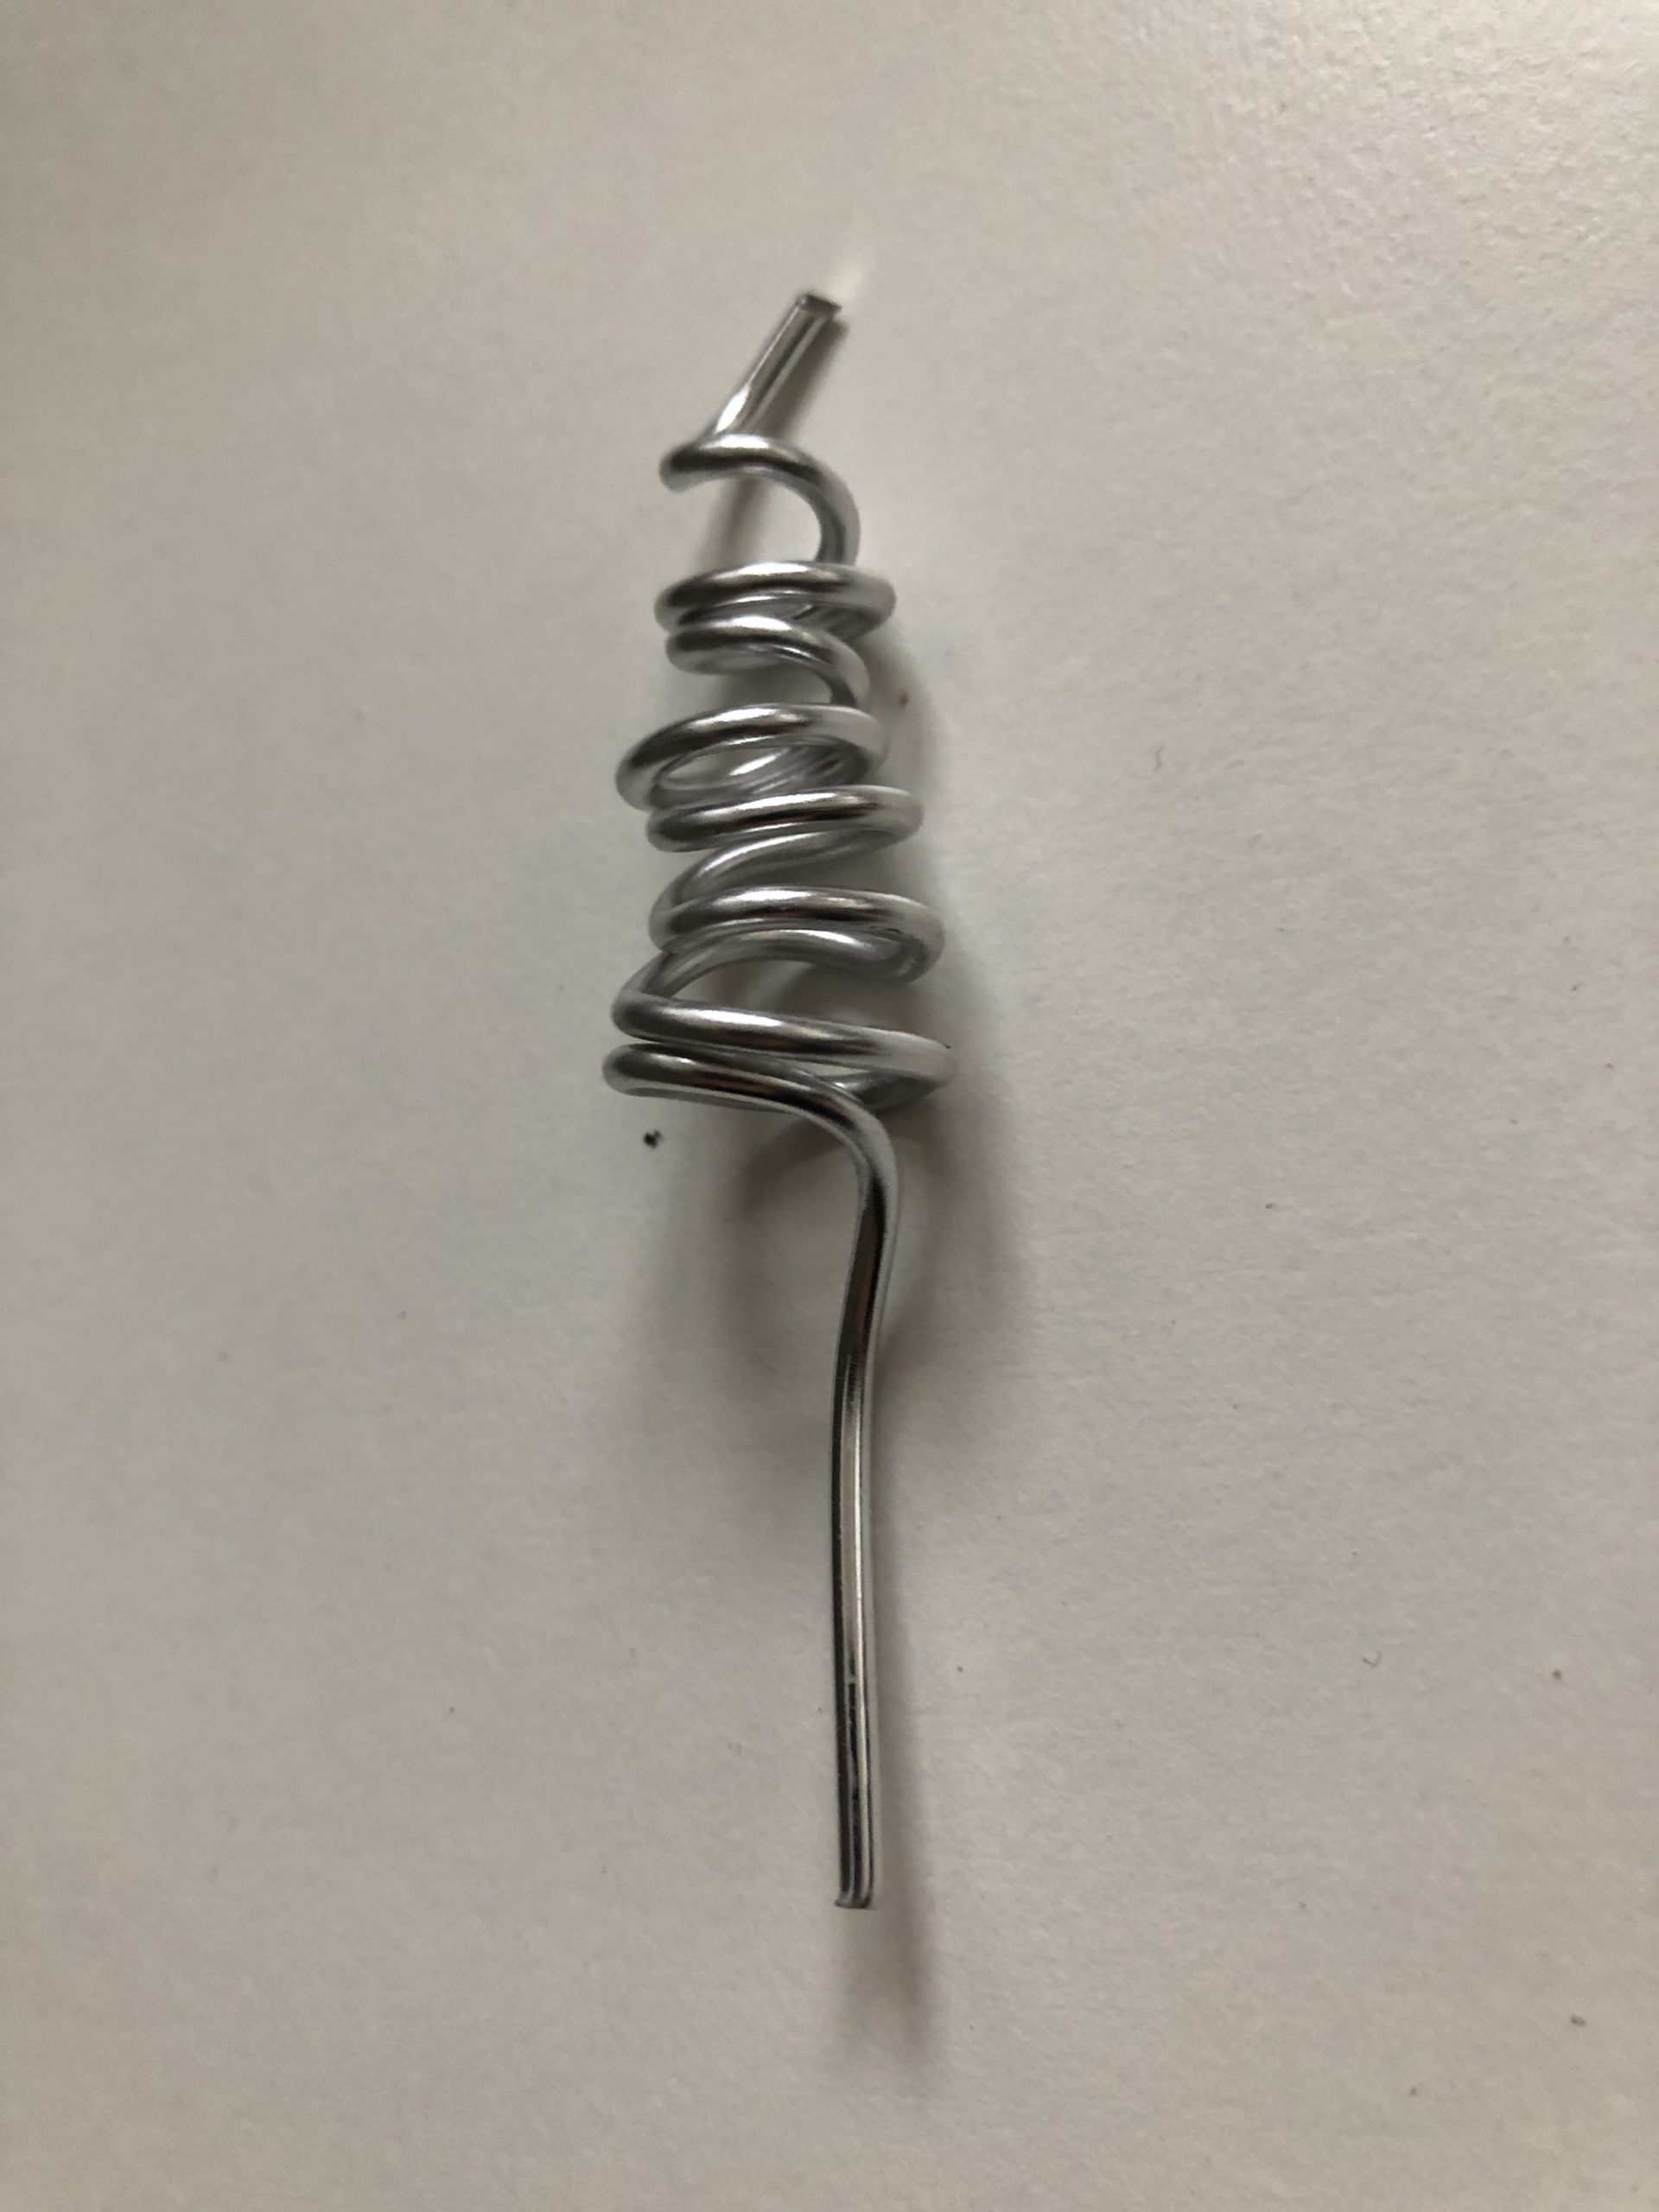
Start at the wide spot and wrap the wire upwards. Leave about 10cm of wire as trunk and to plug into the holes.
There's a fir tree ready.
Now put this little fir tree in the last hole.
At the beginning of the bar you can put a star on a wire and plug it into the first hole.
The waiting period until Christmas can already be observed.
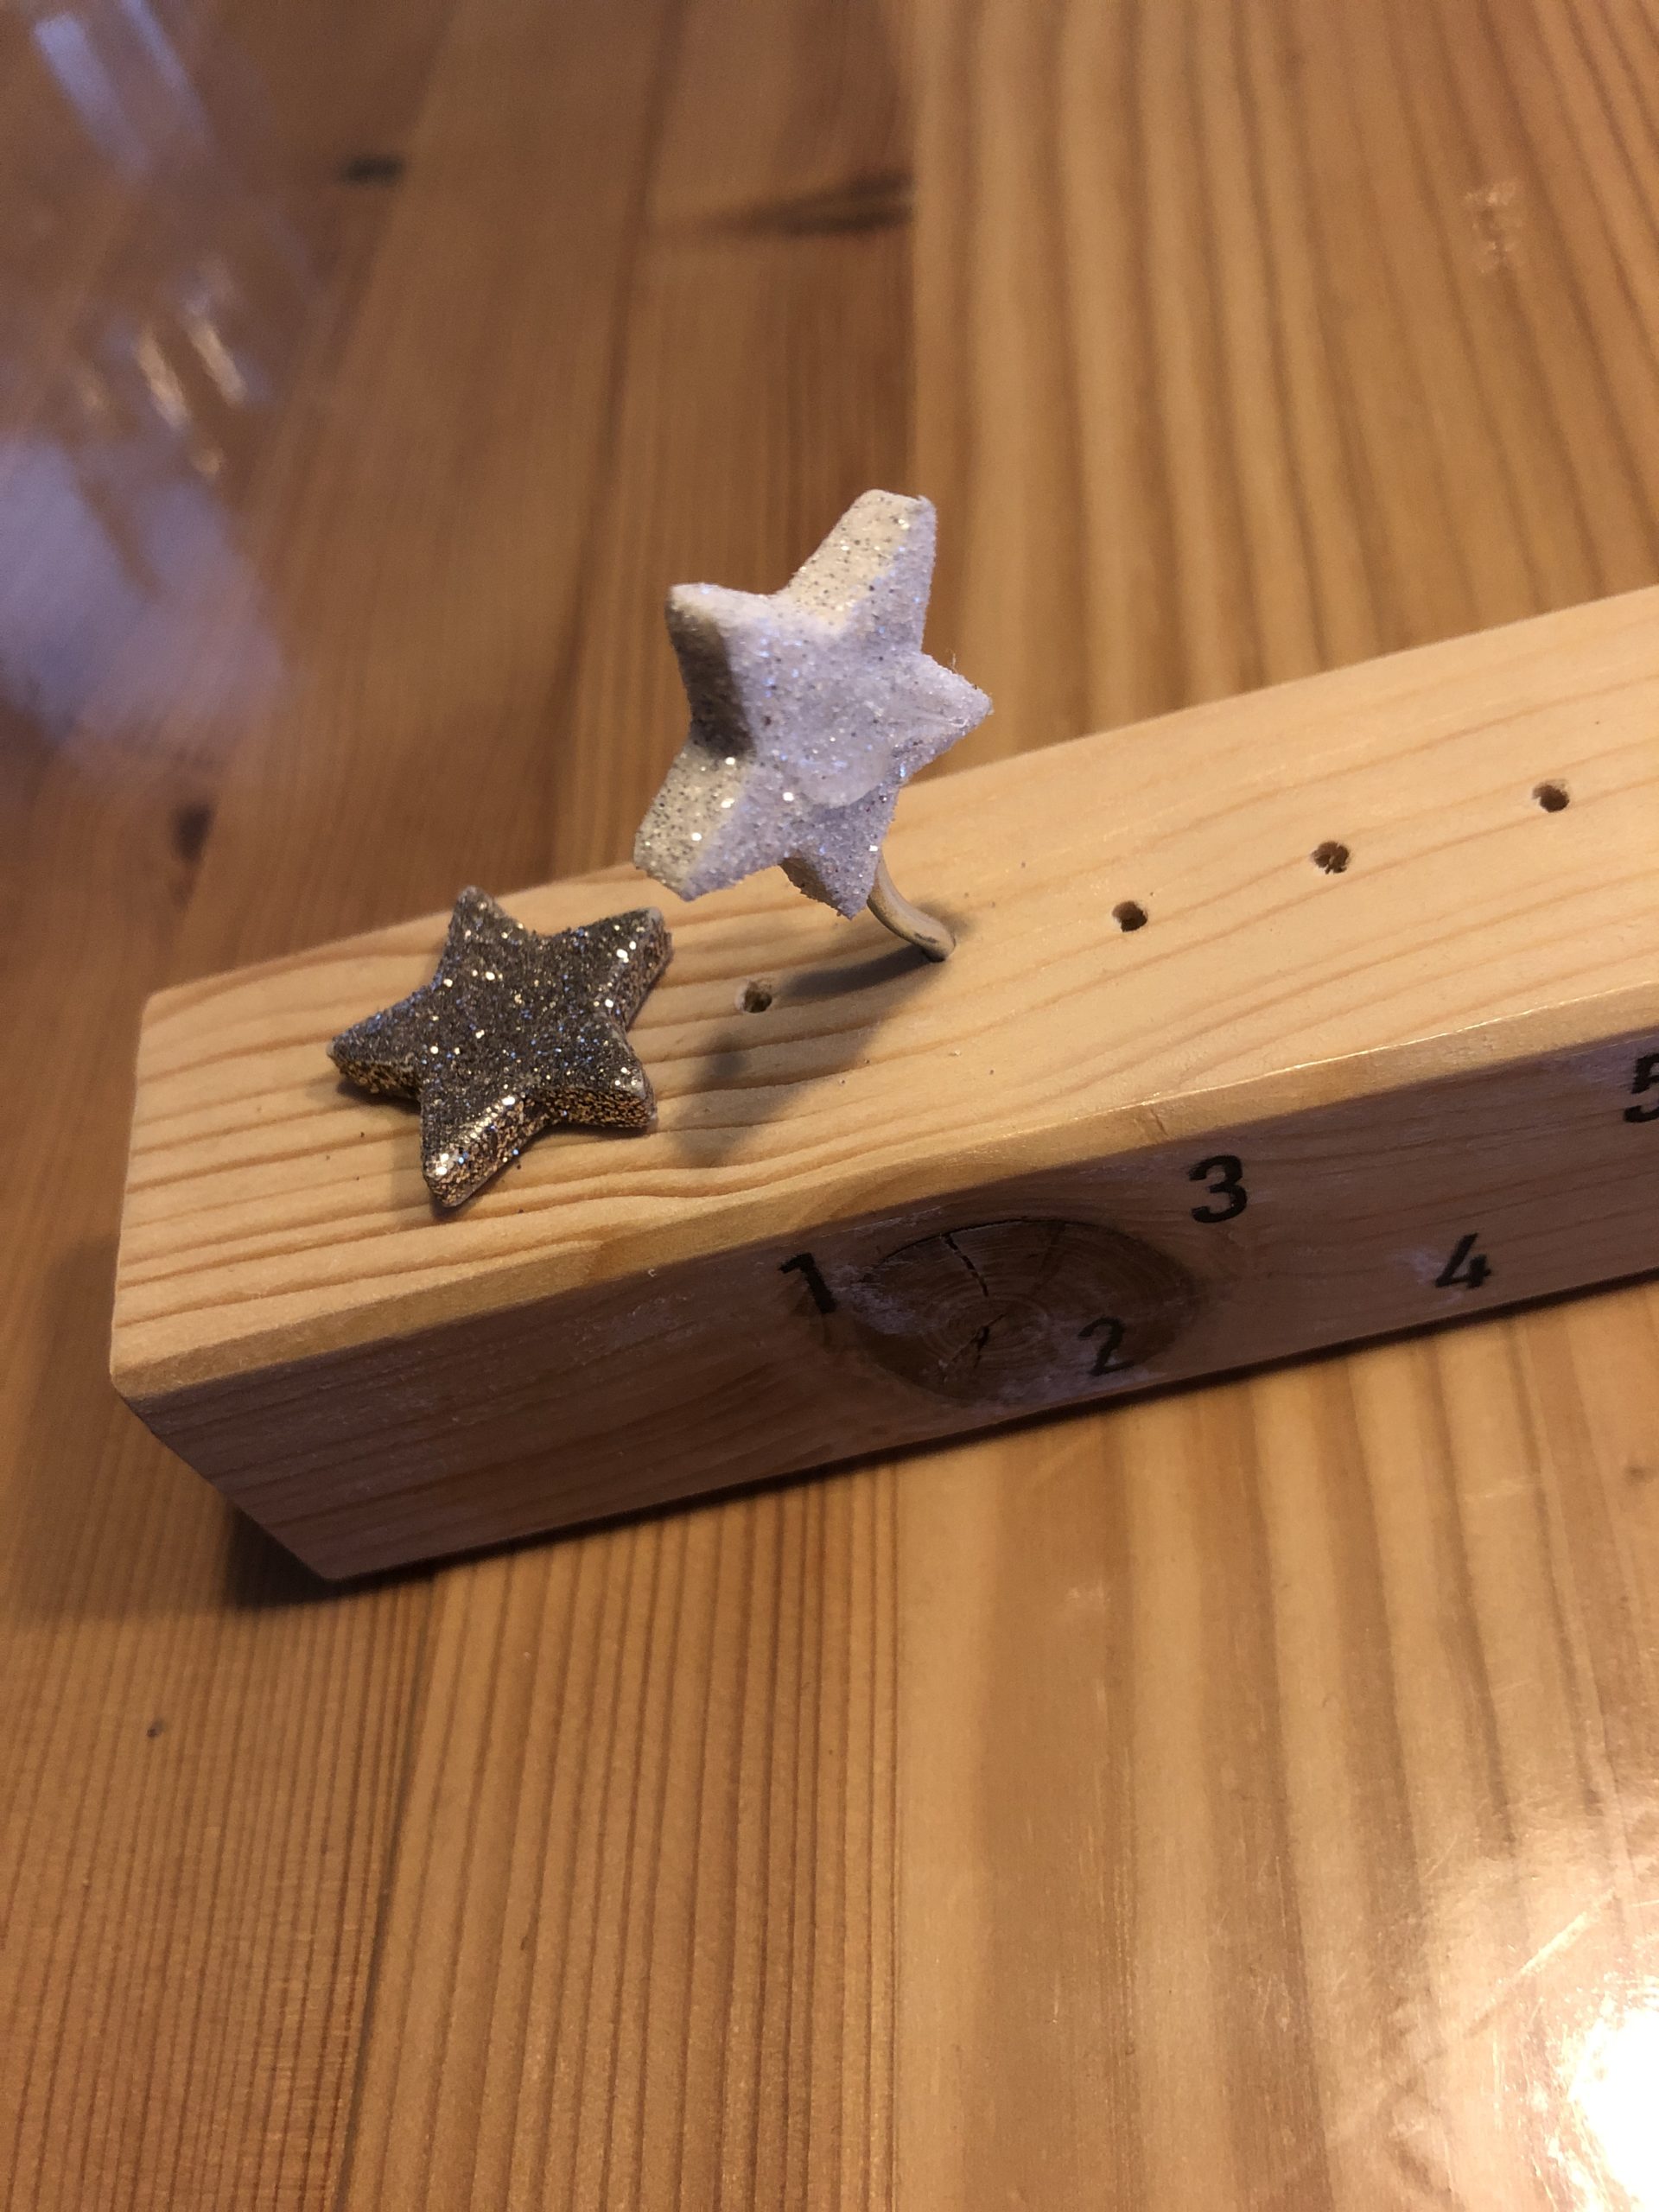
Find a nice place for this original Advent strip. Every day you can set your star a hole. When the star has arrived in the last hole, it is Holy Evening.

Have fun!
Here we wait for the Christ Child.

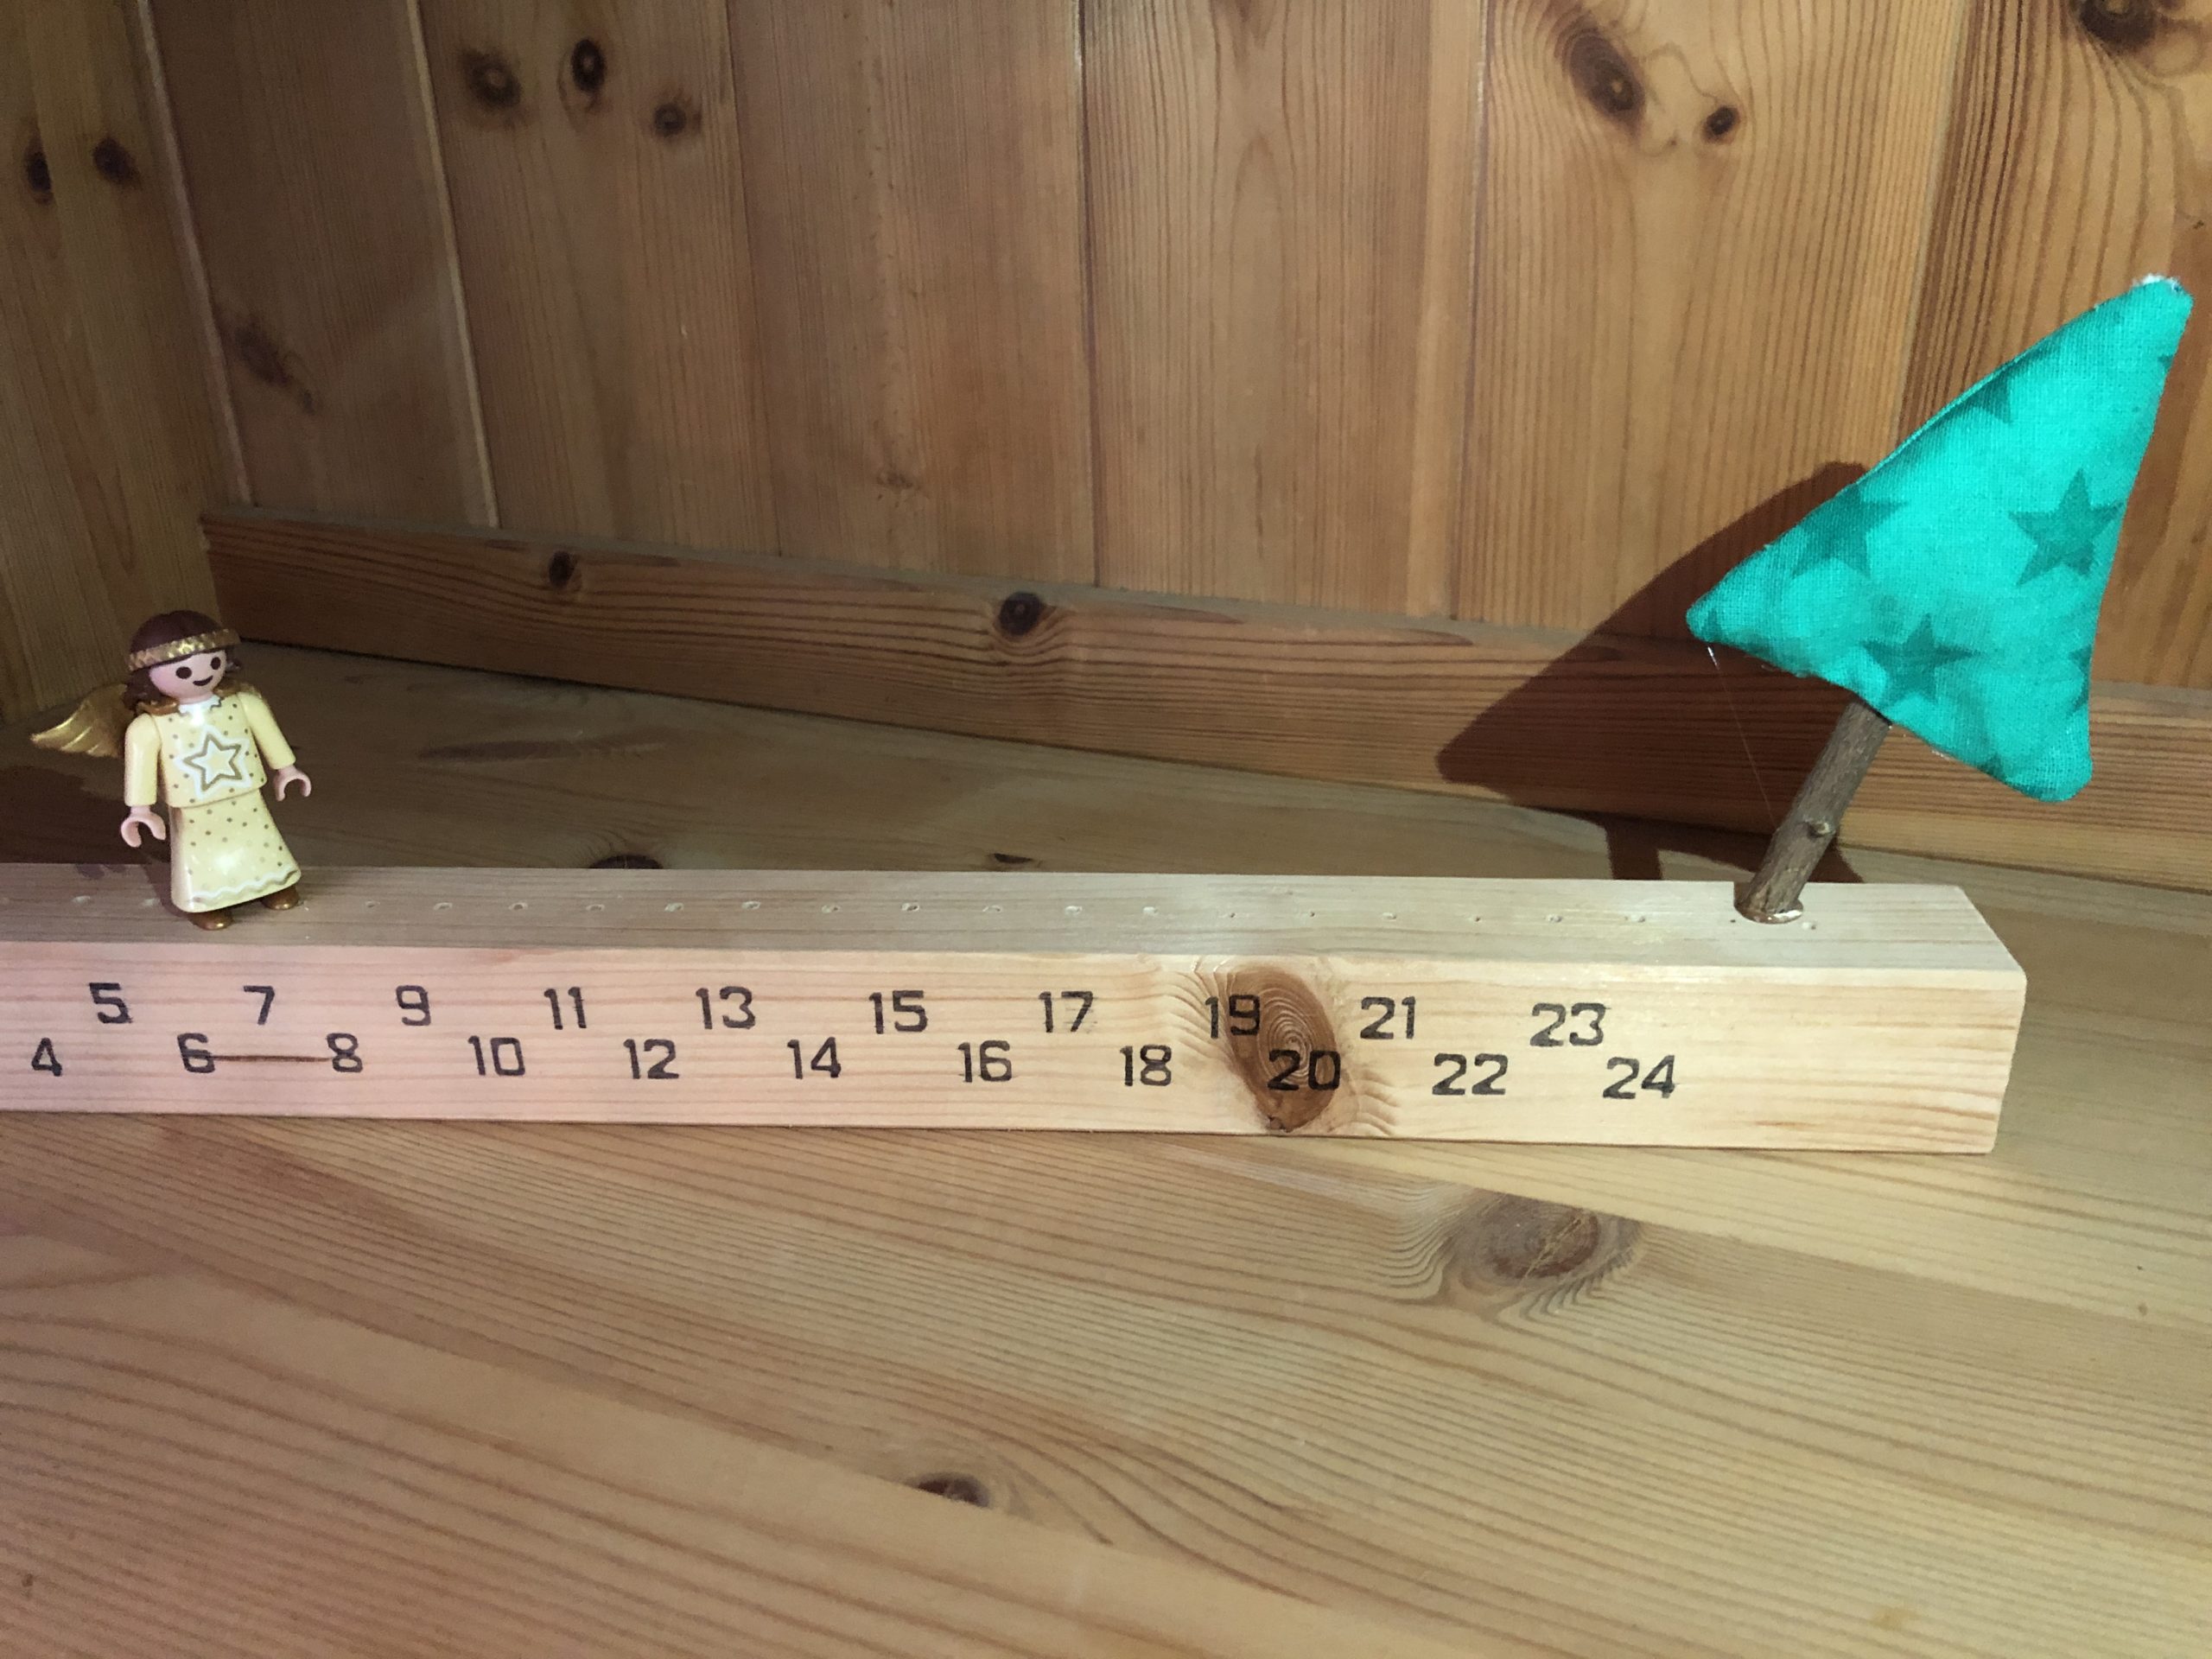
Here we wait until the tree can be decorated!

This bar is suitable for many occasions. Even if it does not cover a whole month. Children only slowly develop a time understanding. In the phase when waiting is so difficult, one month is hard to grasp. There are 24 days already very abstract.
Materials
Directions
First select the edged wood in the strength you want.
I used a canopy with a diameter of 3cm x 3cm.
My wood is about 37cm long.
Now draw on the holes:
Start with marking the first hole about 3cm from the edge. (Photo: beginning of the bar!)
Then you draw all 24 holes. With me the distance between the holes is approx. 1.3 cm. I drilled the last hole with 2 cm distance.
The distance to the edge is 3cm on both sides.
Now drill the holes into the middle of the bar. Drill all holes on a straight line.
Tip: With a stand drill you can drill exactly evenly deep holes, which all become straight.
You can also work with the cordless screwdriver and a wood drill.
When all holes are drilled, you erase the strokes from marking.
Now take a sandpaper and grind the wood smoothly.
Do not forget the edges of the wood. Always grind into the fiber direction of the wood, otherwise scratch your wood.
Then write the numbers on the bar.
For painting you can also use a number template.
Make sure that the numbers are under the appropriate holes!
Tip: So that the numbers do not become too small, the numbers add in offset.
The bar is ready.
In the last hole (24) you now insert a fir tree. This you can bend e.g. out of wire.
To do this, wrap the wire around a pointed object.
Cut off about 20-30cm of wire.
Start at the wide spot and wrap the wire upwards. Leave about 10cm of wire as trunk and to plug into the holes.
There's a fir tree ready.
Now put this little fir tree in the last hole.
At the beginning of the bar you can put a star on a wire and plug it into the first hole.
The waiting period until Christmas can already be observed.
Find a nice place for this original Advent strip. Every day you can set your star a hole. When the star has arrived in the last hole, it is Holy Evening.
Have fun!
Here we wait for the Christ Child.
Here we wait until the tree can be decorated!
This bar is suitable for many occasions. Even if it does not cover a whole month. Children only slowly develop a time understanding. In the phase when waiting is so difficult, one month is hard to grasp. There are 24 days already very abstract.
Follow us on Facebook , Instagram and Pinterest
Don't miss any more adventures: Our bottle mail