Wuschel - Pommel - Rabbittails homemade

AdventurerKatzi
Rating5.06.6 thousand times & (1) DifficultyIntermediate

This wuschel or pommel is suitable for many things. For example, you can use it as a rabbit tail or as an alternative to the larger pompons e.g. for a funny carnival face or for other crafts.
This pommel is made with a fork. This is quick and quick. Just wrap the forks thickly with wool and then tie them together. Then the sides are cut open and rounded. See for yourself!

Media Education for Kindergarten and Hort

Kind bastelt eine Rassel mit dem Navi
The Adventure Navi, the app for DIY projects, enables media education for the youngest.

Relief in everyday life, targeted promotion of individual children, independent learning and - without any pre-knowledge already usable by the youngest!
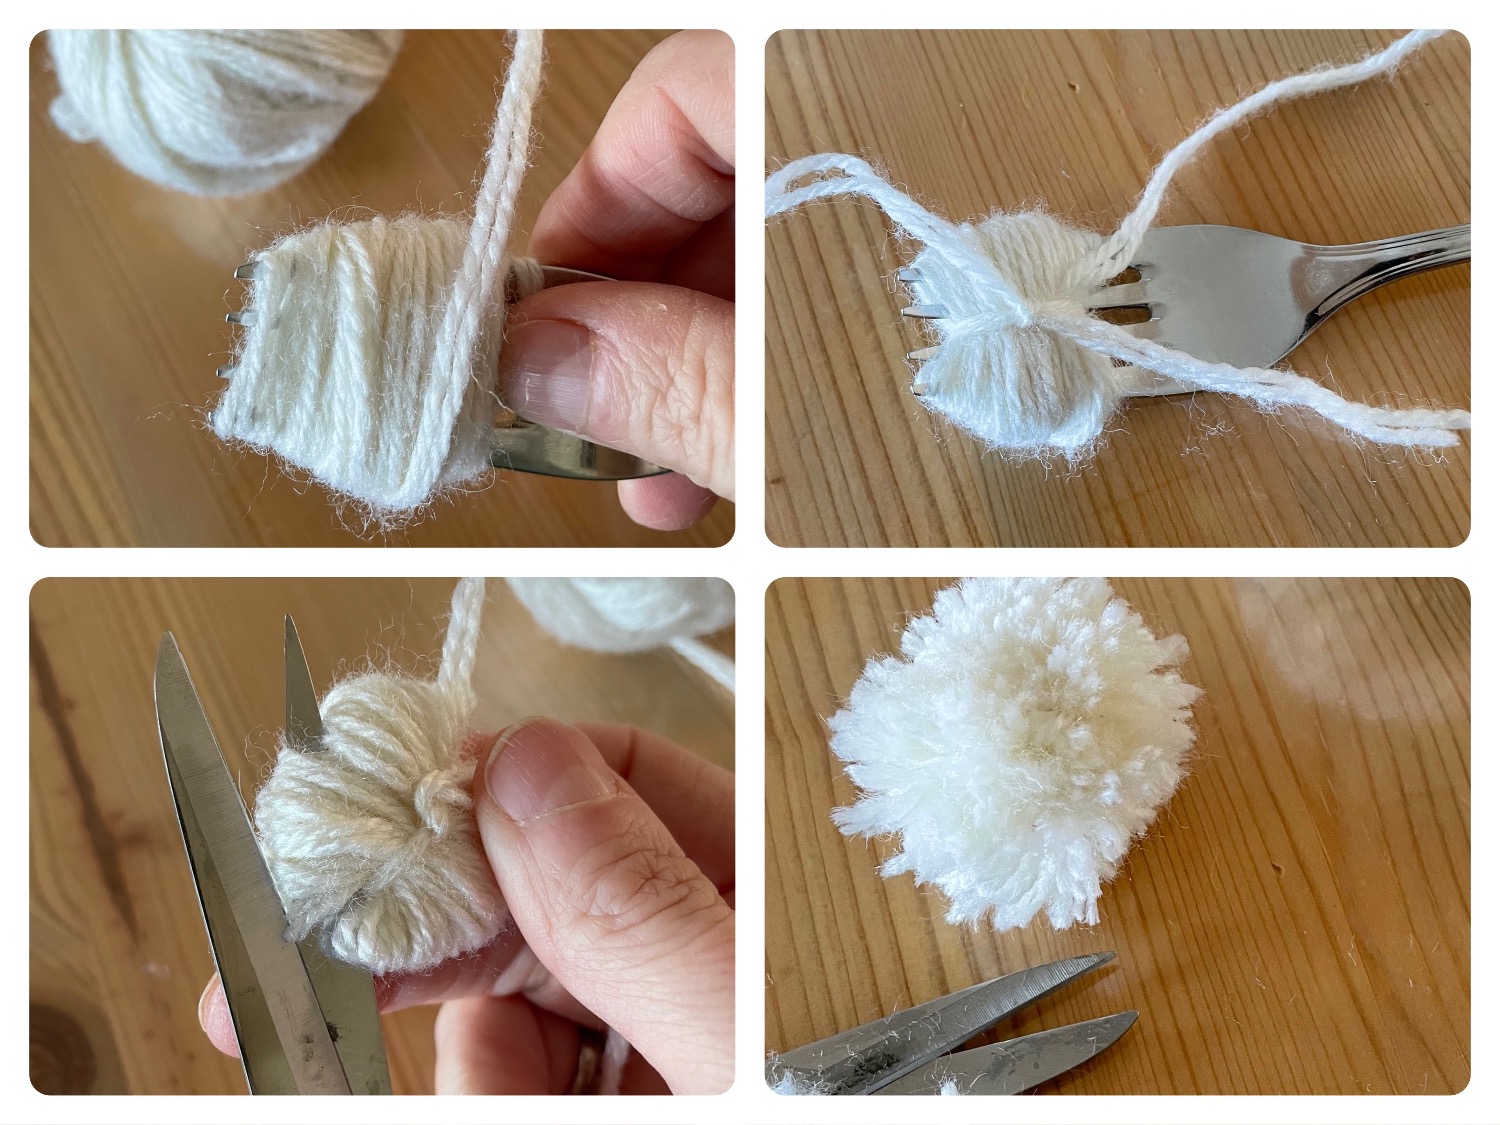


Titelbild zur Bastel- und DIY-Idee für Kinder '(646) Wuschel – Pommel – Hasenschwänzchen selbst gemacht'
Material for1 Child
Prep Time5 min.Adv. Time10 min.Total Time15 min.
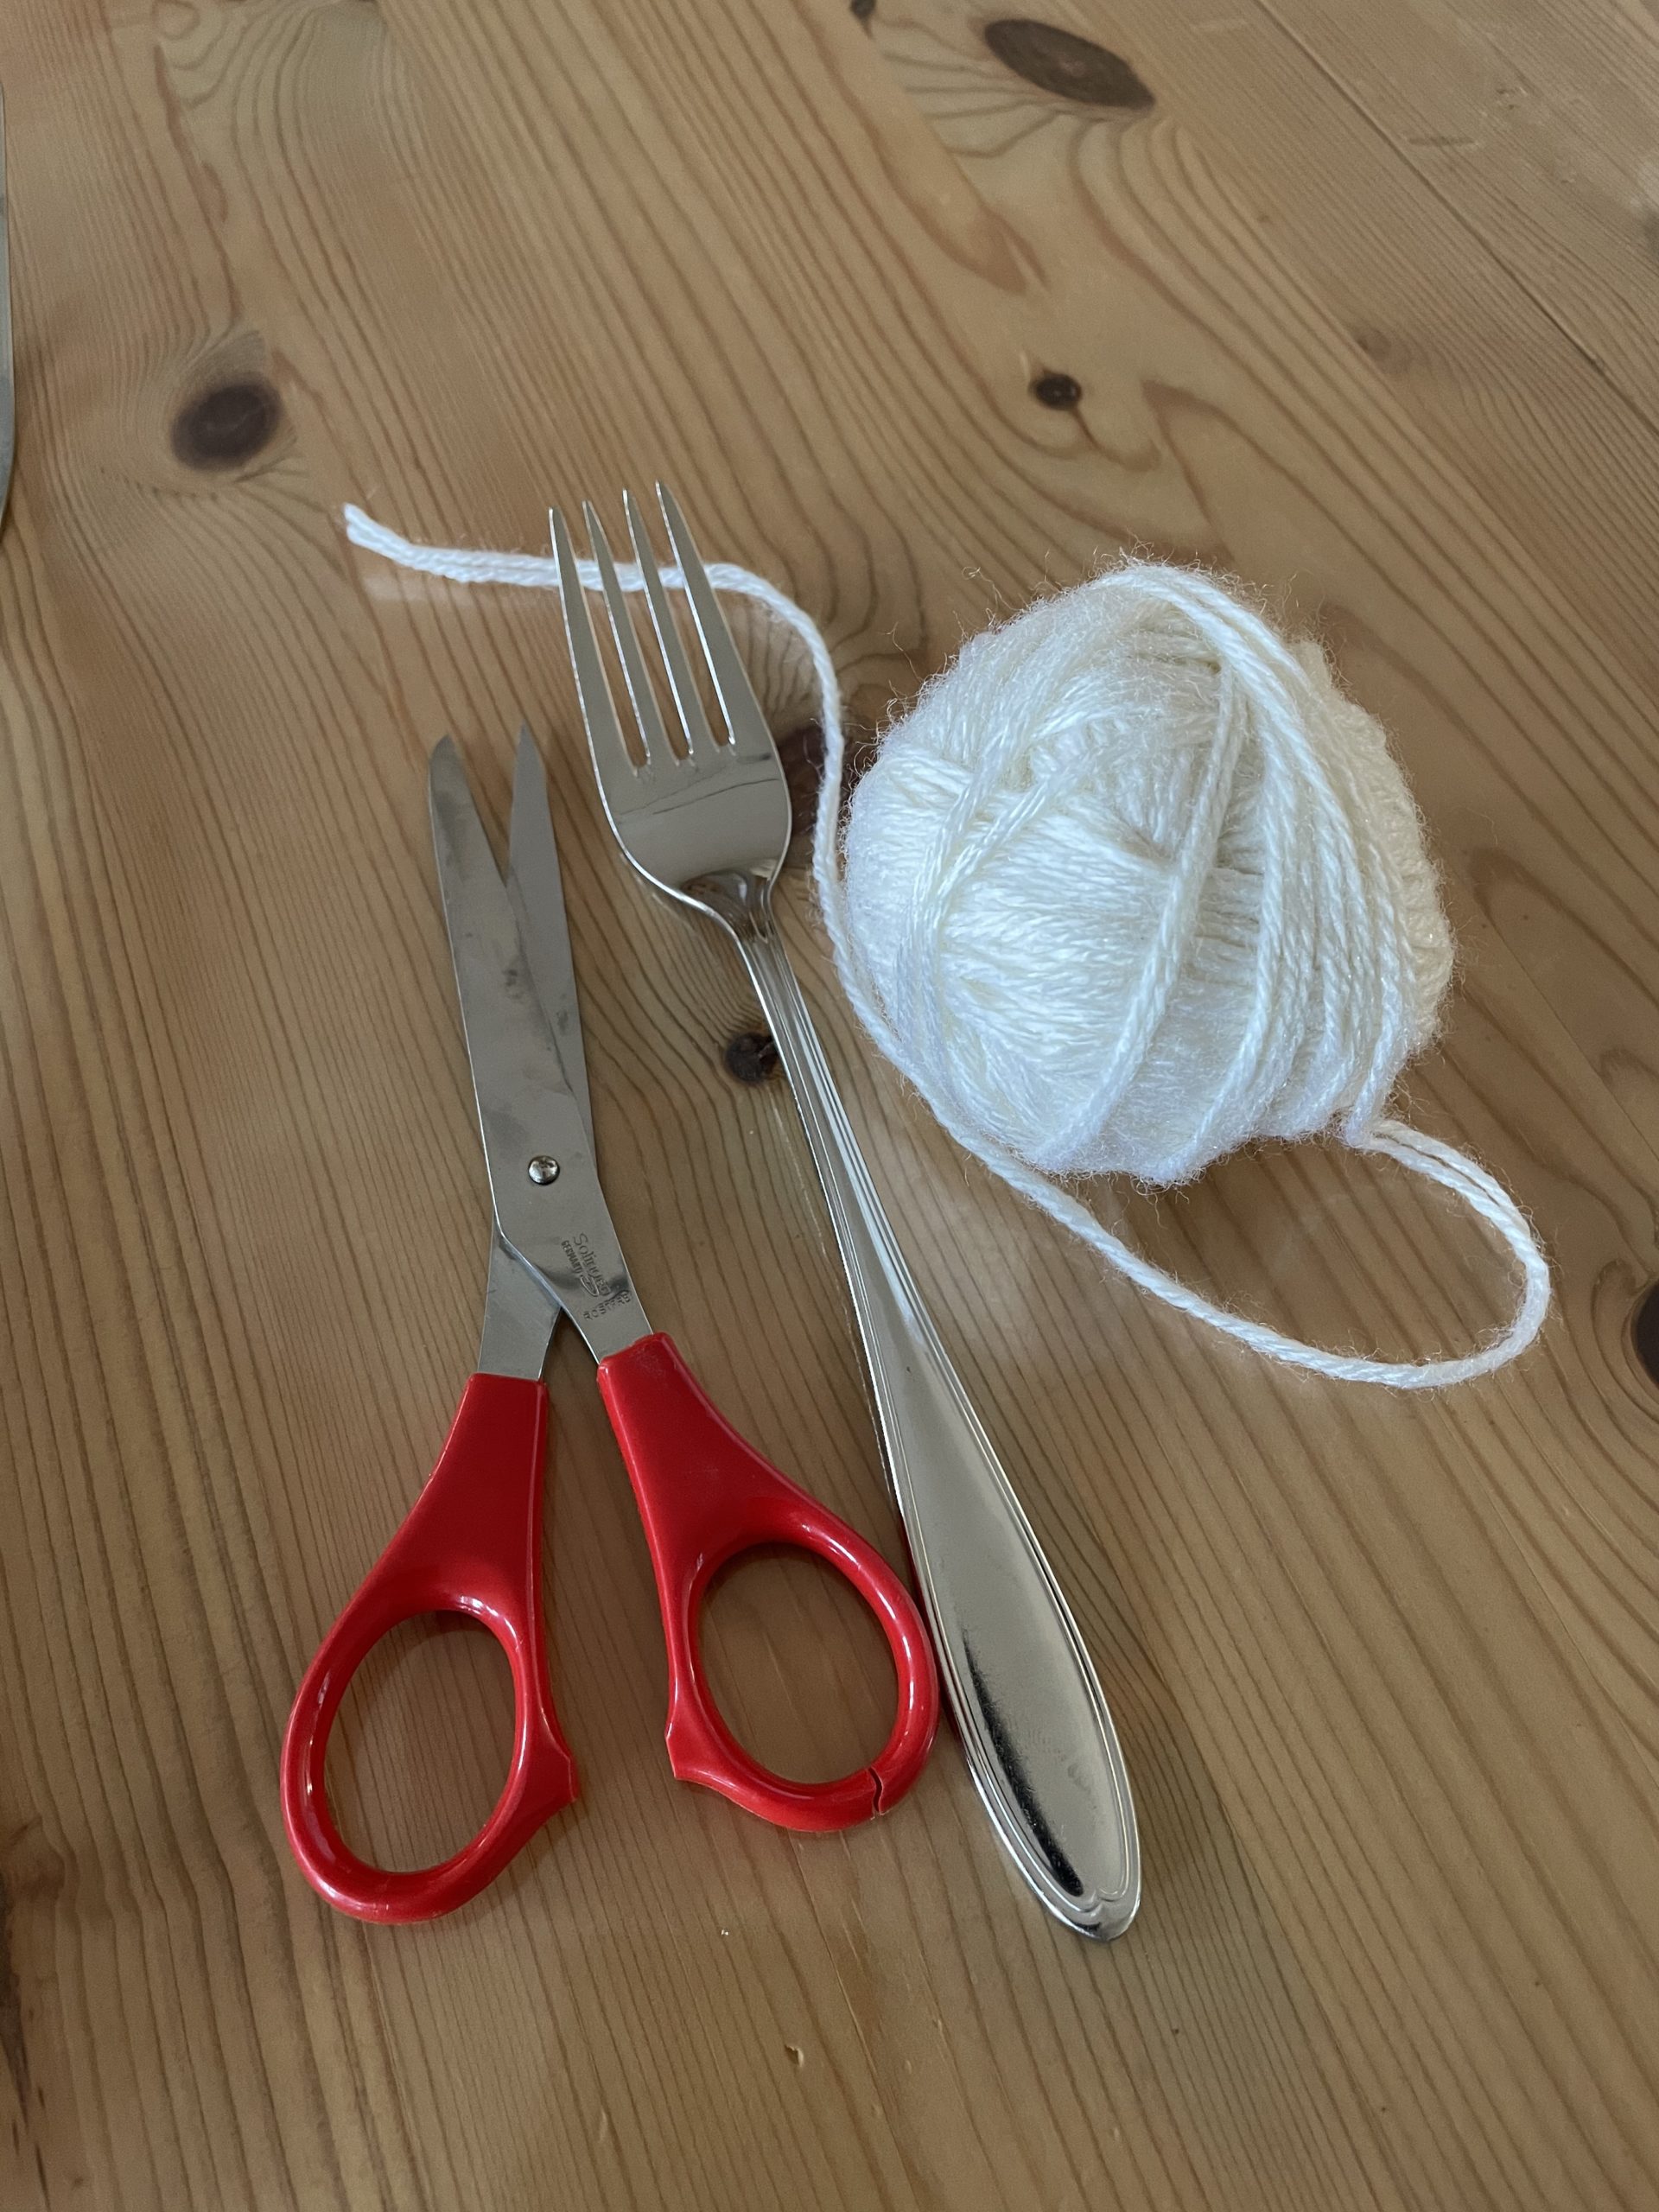
 1 Large fork
 Wool
All links marked with a shopping cart lead to Amazon - here we have selected products that we would order ourselves and in part also ordered. In a qualified purchase via the advertising link, we as Amazon partner receive a commission, for you there are no costs. You thus support our cost- and advertising banner-free, educational offer.
1

Get all the materials ready first.

Bild zum Schritt 1 für das Bastel- und DIY-Abenteuer für Kinder: 'Legt zuerst alle Materialien bereit.'

2

Then cut a piece of thread with 15cm to 20cm length. Then place the piece of thread between the middle tines of your fork.
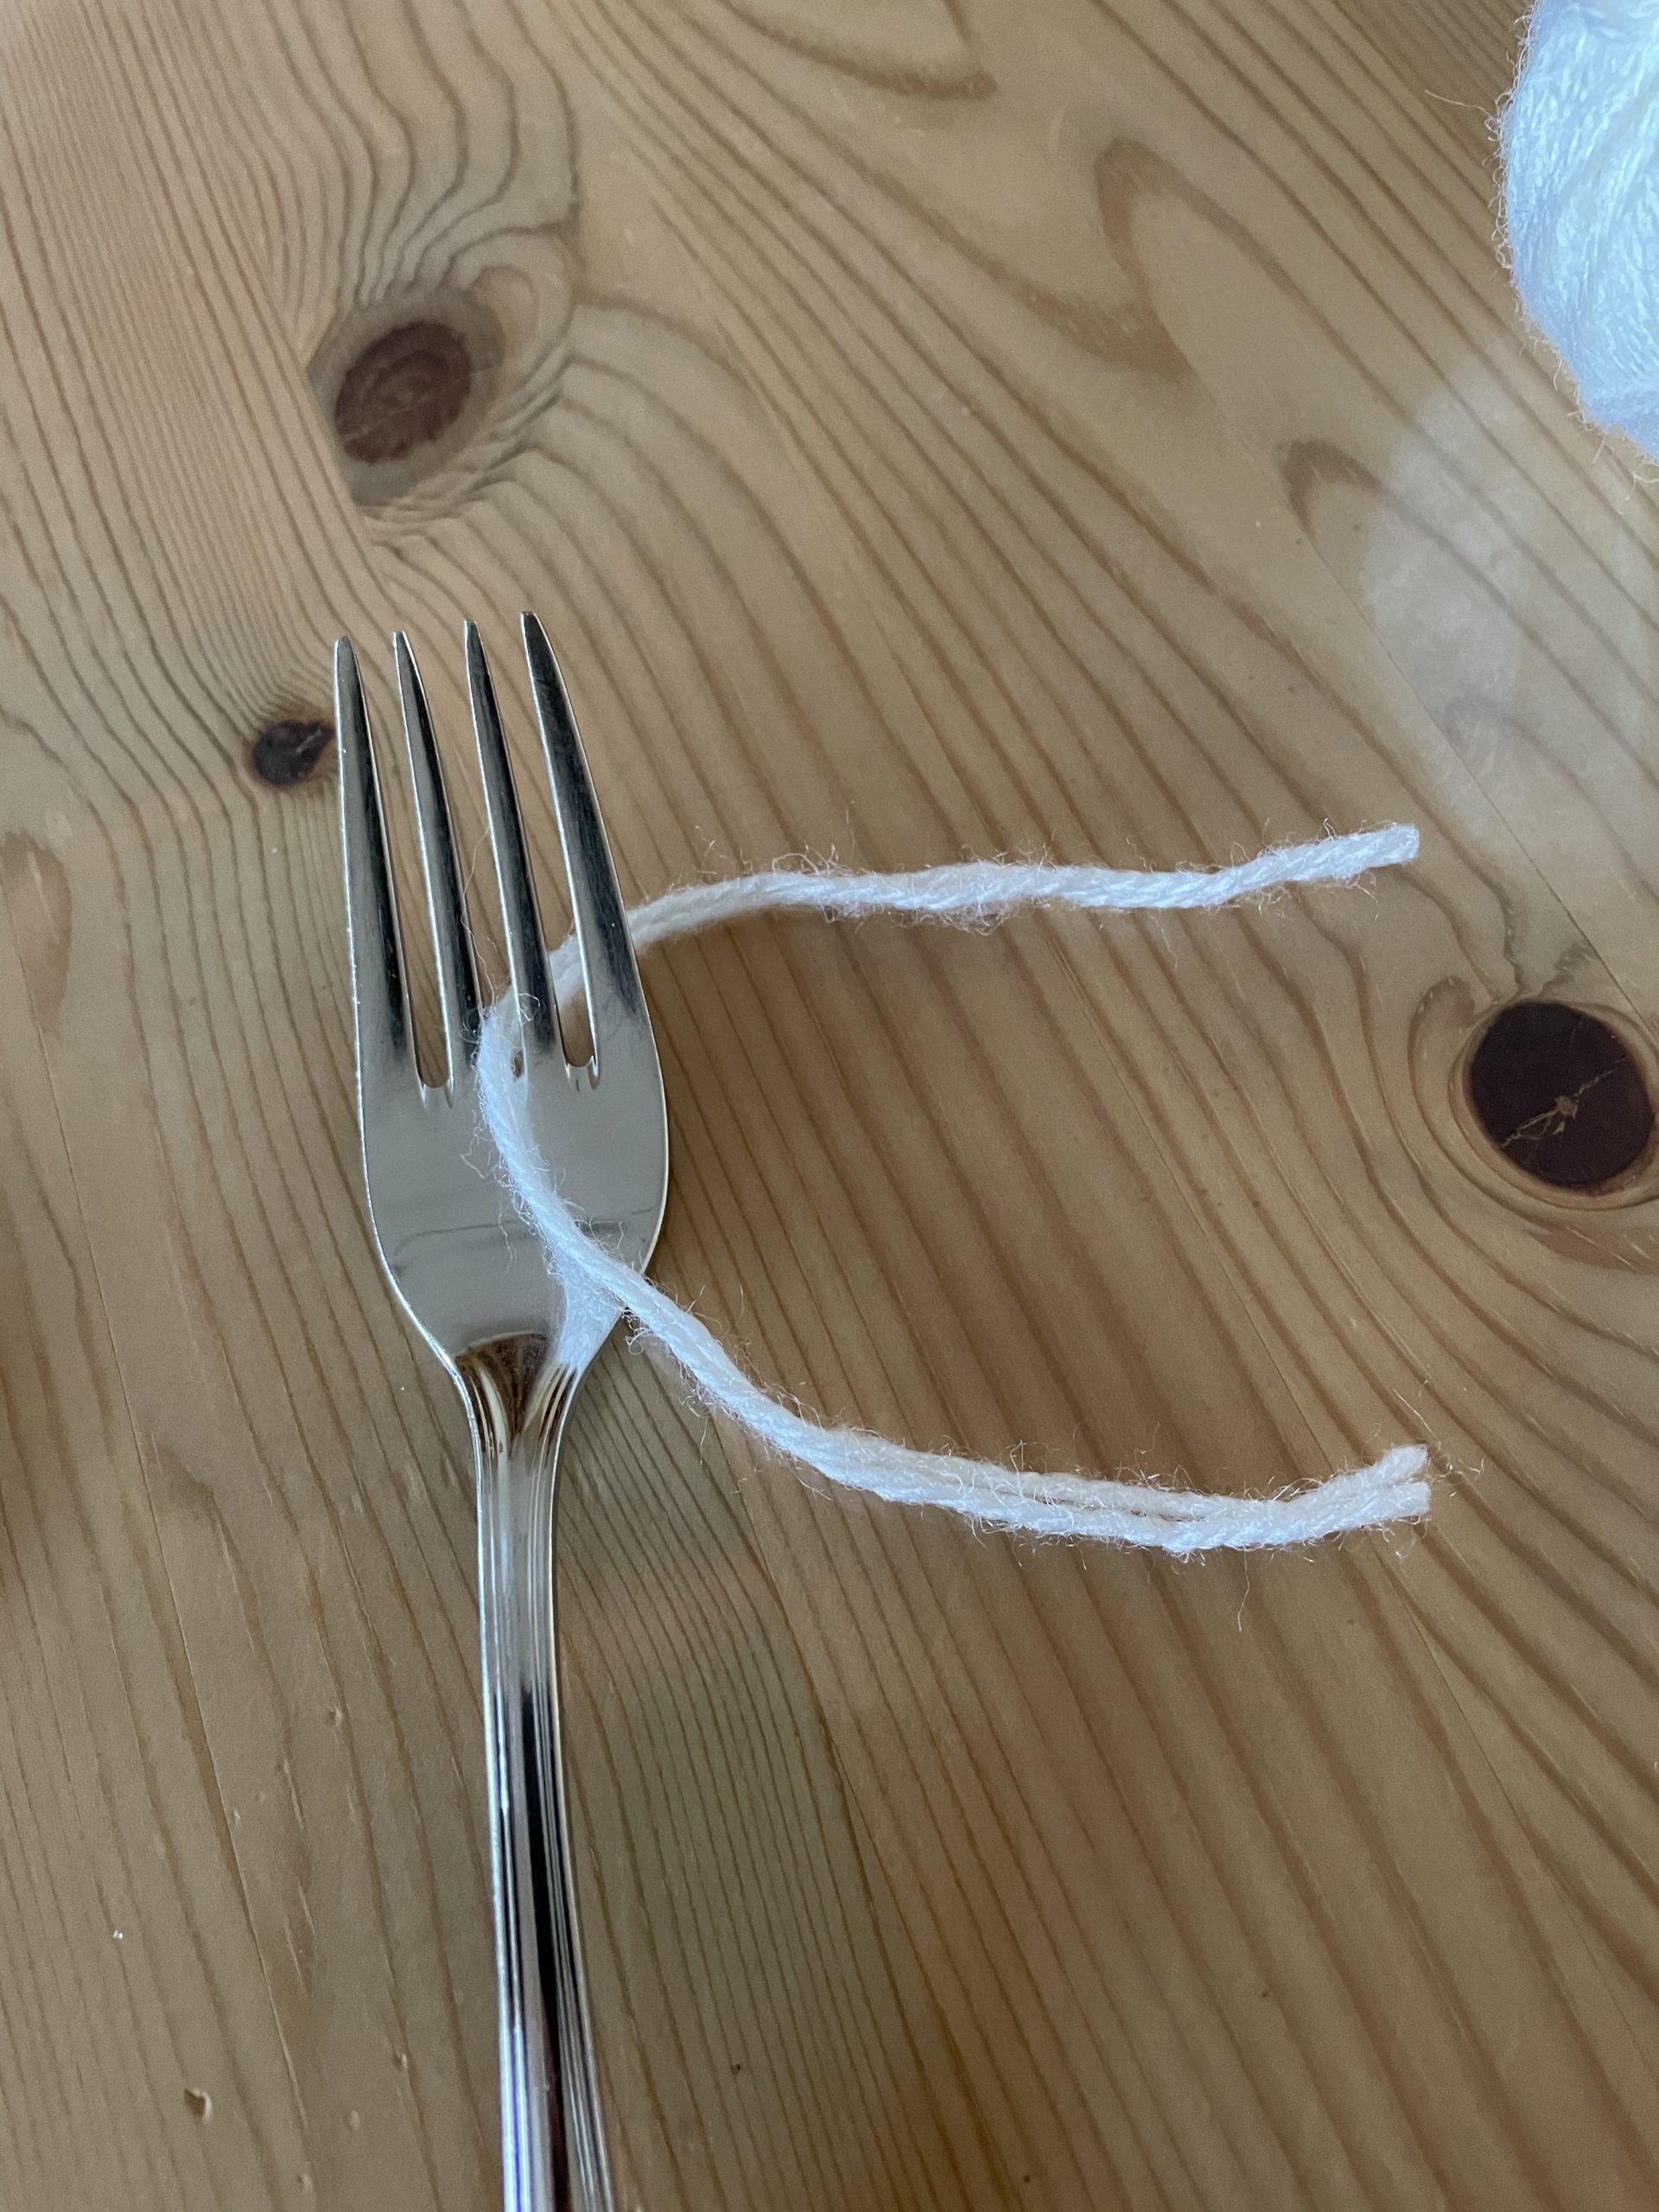
Bild zum Schritt 2 für das Bastel- und DIY-Abenteuer für Kinder: 'Dann schneidet ihr ein Stück Faden mit 15cm bis 20cm...'

3

Now you take a wool ball and place the thread beginning of the wool over the fork. First hold the initial piece with your thumb.

Bild zum Schritt 3 für das Bastel- und DIY-Abenteuer für Kinder: 'Nun nehmt ihr einen Wollknäuel und legt den Fadenanfang der...'

4

The short piece of thread first hangs over the tines.

Bild zum Schritt 4 für das Bastel- und DIY-Abenteuer für Kinder: 'Das kurze Fadenstück bleibt zunächst über den Zinken hängen.'

5

Start now thread to wrap the forks.

Bild zum Schritt 5 für das Bastel- und DIY-Abenteuer für Kinder: 'Beginnt nun Faden um die Gabelzinken zu wickeln.'

6

Wraps until a thick ball is formed.

Bild zum Schritt 6 für das Bastel- und DIY-Abenteuer für Kinder: 'Wickelt so lange bis ein dicker Knäuel entsteht.'

7

Now put the small piece of wool around the wrapped ball from the beginning.

Bild zum Schritt 7 für das Bastel- und DIY-Abenteuer für Kinder: 'Legt nun das kleine Stück Wolle vom Anfang um den...'

8

Then you make a fixed double knot over it.

Bild zum Schritt 8 für das Bastel- und DIY-Abenteuer für Kinder: 'Dann macht ihr einen festen doppelten Knoten darüber.'

9

Now push the knotted wool ball off the fork.

Bild zum Schritt 9 für das Bastel- und DIY-Abenteuer für Kinder: 'Schiebt nun das verknotete Wollknäuel von der Gabel.'

10

Now you cut the wool on the two closed sides with scissors. Make sure to cut through the thread that holds everything together not provided!

Bild zum Schritt 10 für das Bastel- und DIY-Abenteuer für Kinder: 'Jetzt schneidet ihr die Wolle an den beiden geschlossenen Seiten...'

11

Now the pommel is formed. The threads stand off.

Bild zum Schritt 11 für das Bastel- und DIY-Abenteuer für Kinder: 'Nun entsteht die Pommel. Die Fäden stehen ab.'

12

Finally, cut the pommel, pompon or wuschel round.

Bild zum Schritt 12 für das Bastel- und DIY-Abenteuer für Kinder: 'Schneidet abschließend die Pommel, den Pompon bzw. den Wuschel rund.'

13

Ready!

Bild zum Schritt 13 für das Bastel- und DIY-Abenteuer für Kinder: 'Fertig!'

Other offers with Wuschel:
14

Sews a small Easter bunny and uses the wuschel as a tail.
Sewing Easter Bunny

15

On the Easter Egg Box this pommel serves for the decoration of the Easter Bunny!
Make Easter Box

16

On the Easter bag the pommel adorns the Easter bunnies!
Make Easter Bag

17

Have fun!

Materials

 1 Large fork
 Wool
All links marked with a shopping cart lead to Amazon - here we have selected products that we would order ourselves and in part also ordered. In a qualified purchase via the advertising link, we as Amazon partner receive a commission, for you there are no costs. You thus support our cost- and advertising banner-free, educational offer.

Directions

1

Get all the materials ready first.

Bild zum Schritt 1 für das Bastel- und DIY-Abenteuer für Kinder: 'Legt zuerst alle Materialien bereit.'

2

Then cut a piece of thread with 15cm to 20cm length. Then place the piece of thread between the middle tines of your fork.

Bild zum Schritt 2 für das Bastel- und DIY-Abenteuer für Kinder: 'Dann schneidet ihr ein Stück Faden mit 15cm bis 20cm...'

3

Now you take a wool ball and place the thread beginning of the wool over the fork. First hold the initial piece with your thumb.
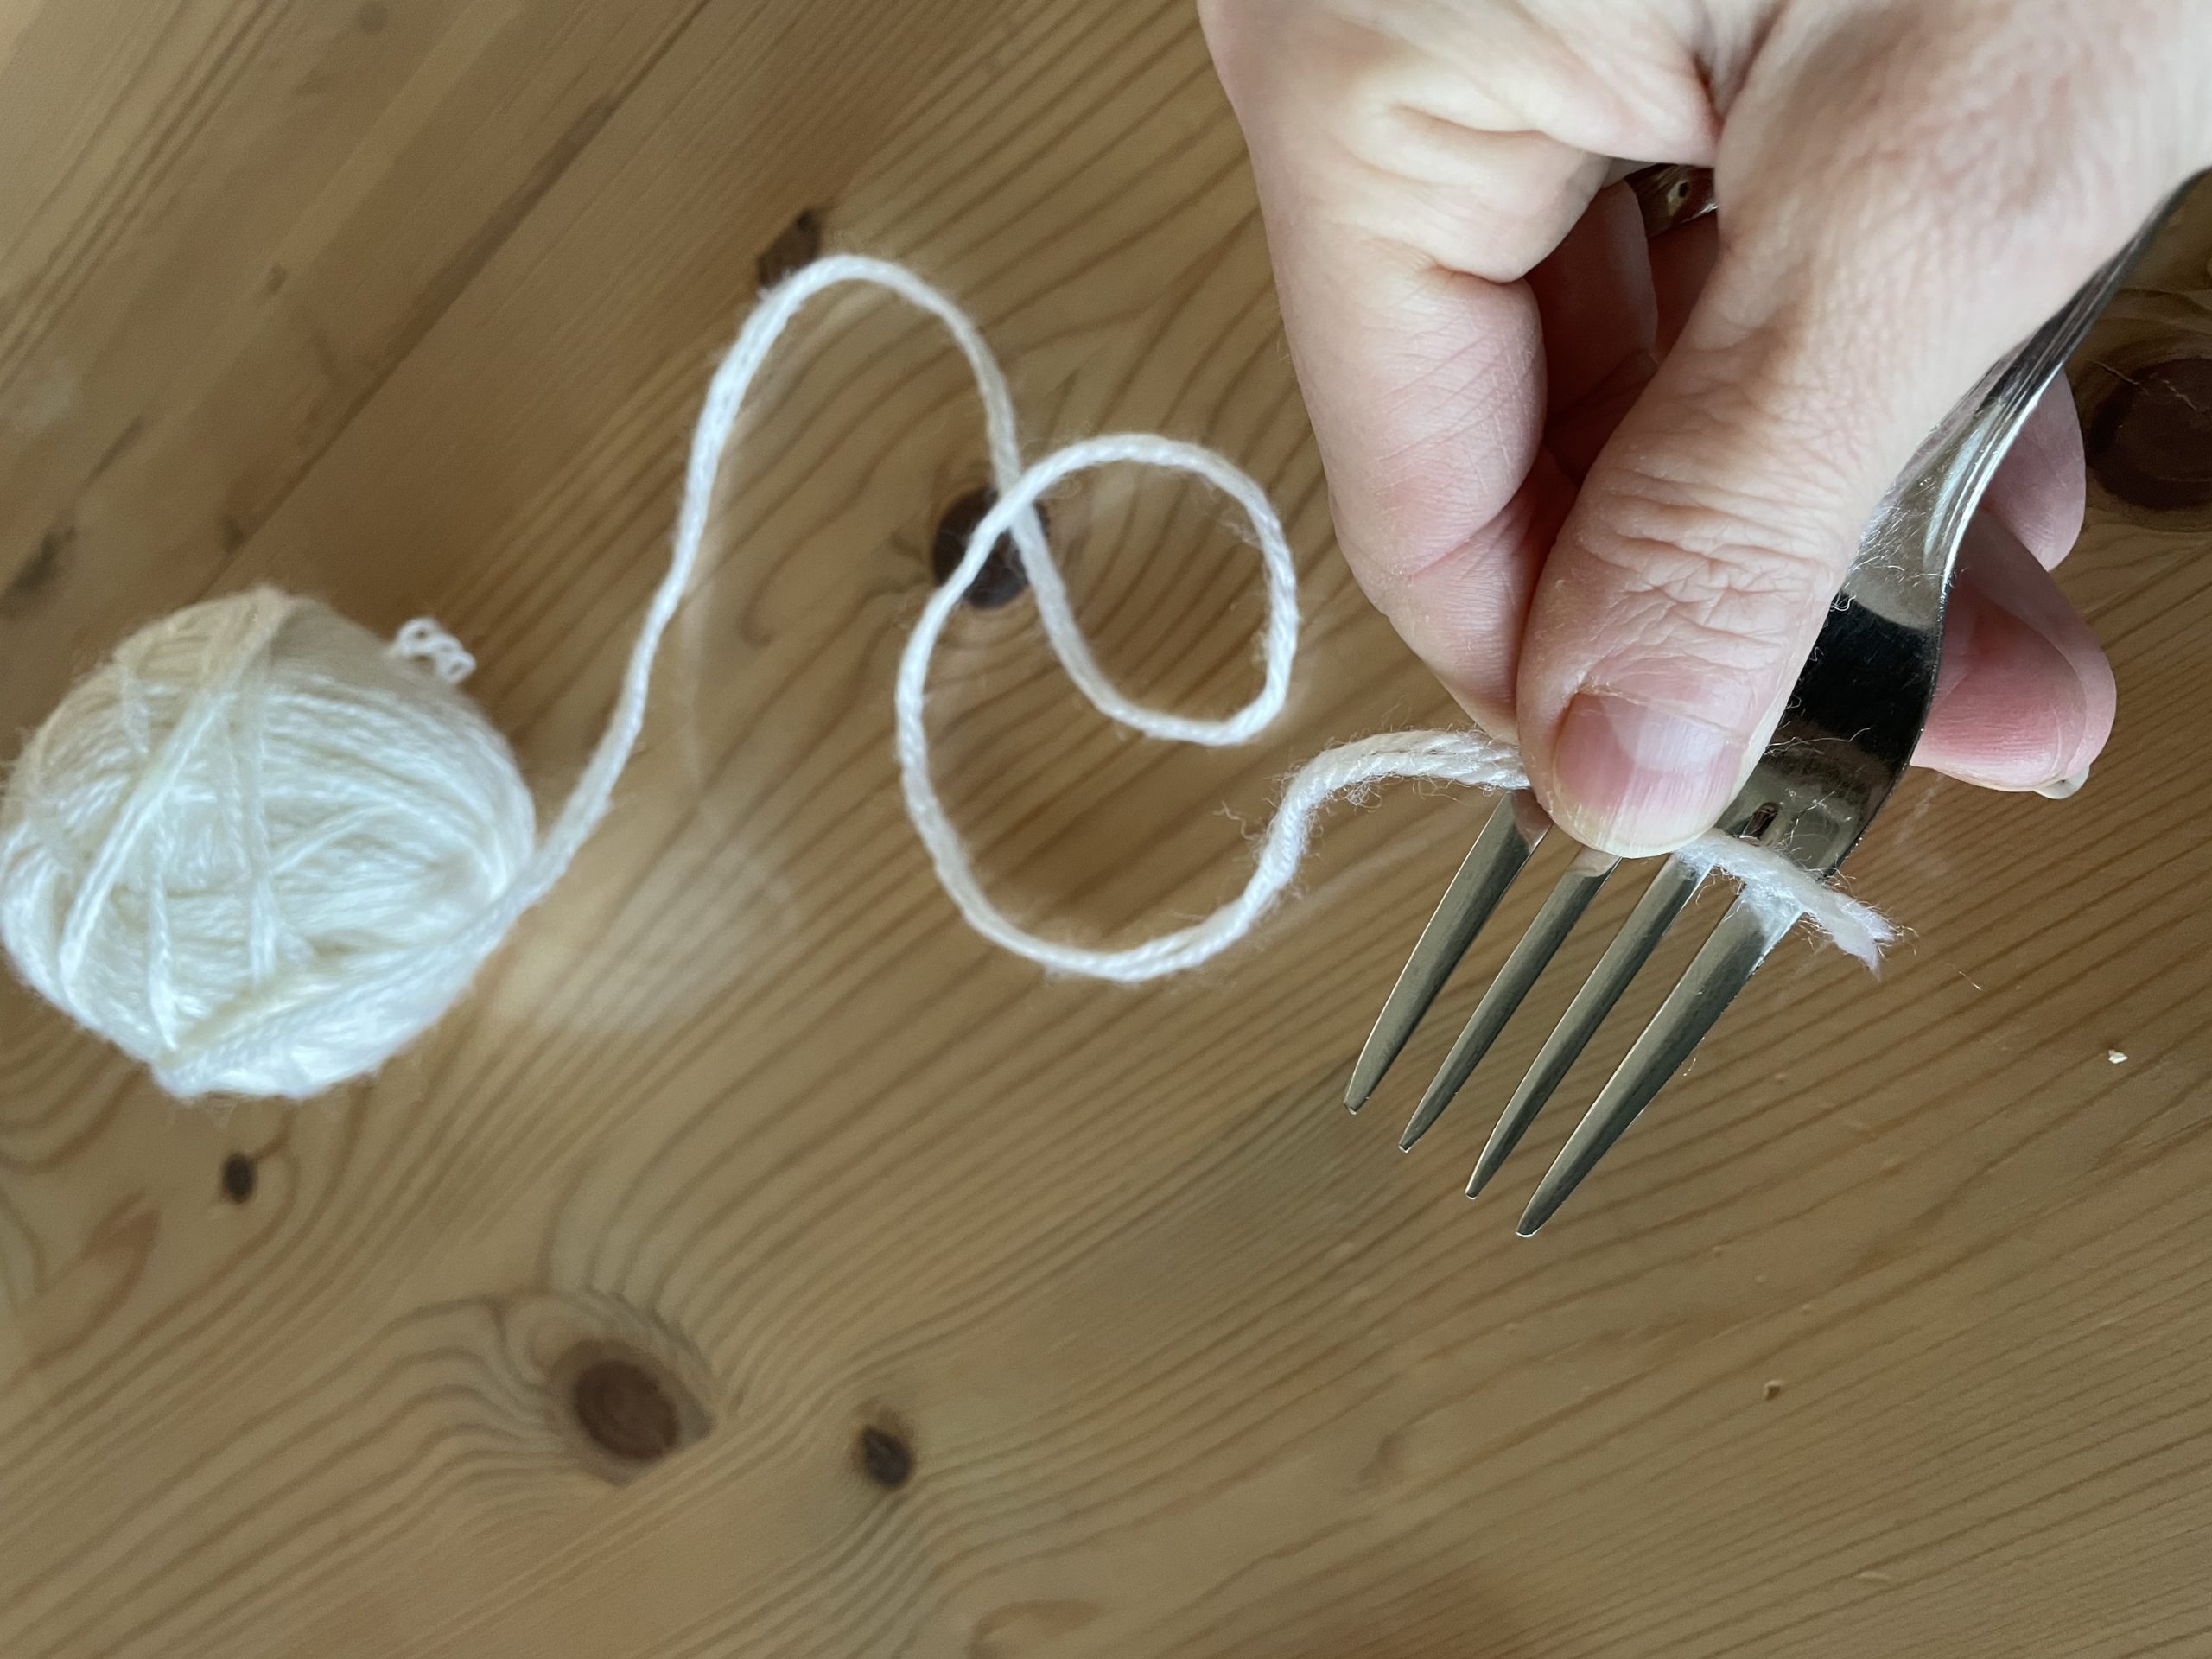
Bild zum Schritt 3 für das Bastel- und DIY-Abenteuer für Kinder: 'Nun nehmt ihr einen Wollknäuel und legt den Fadenanfang der...'

4

The short piece of thread first hangs over the tines.
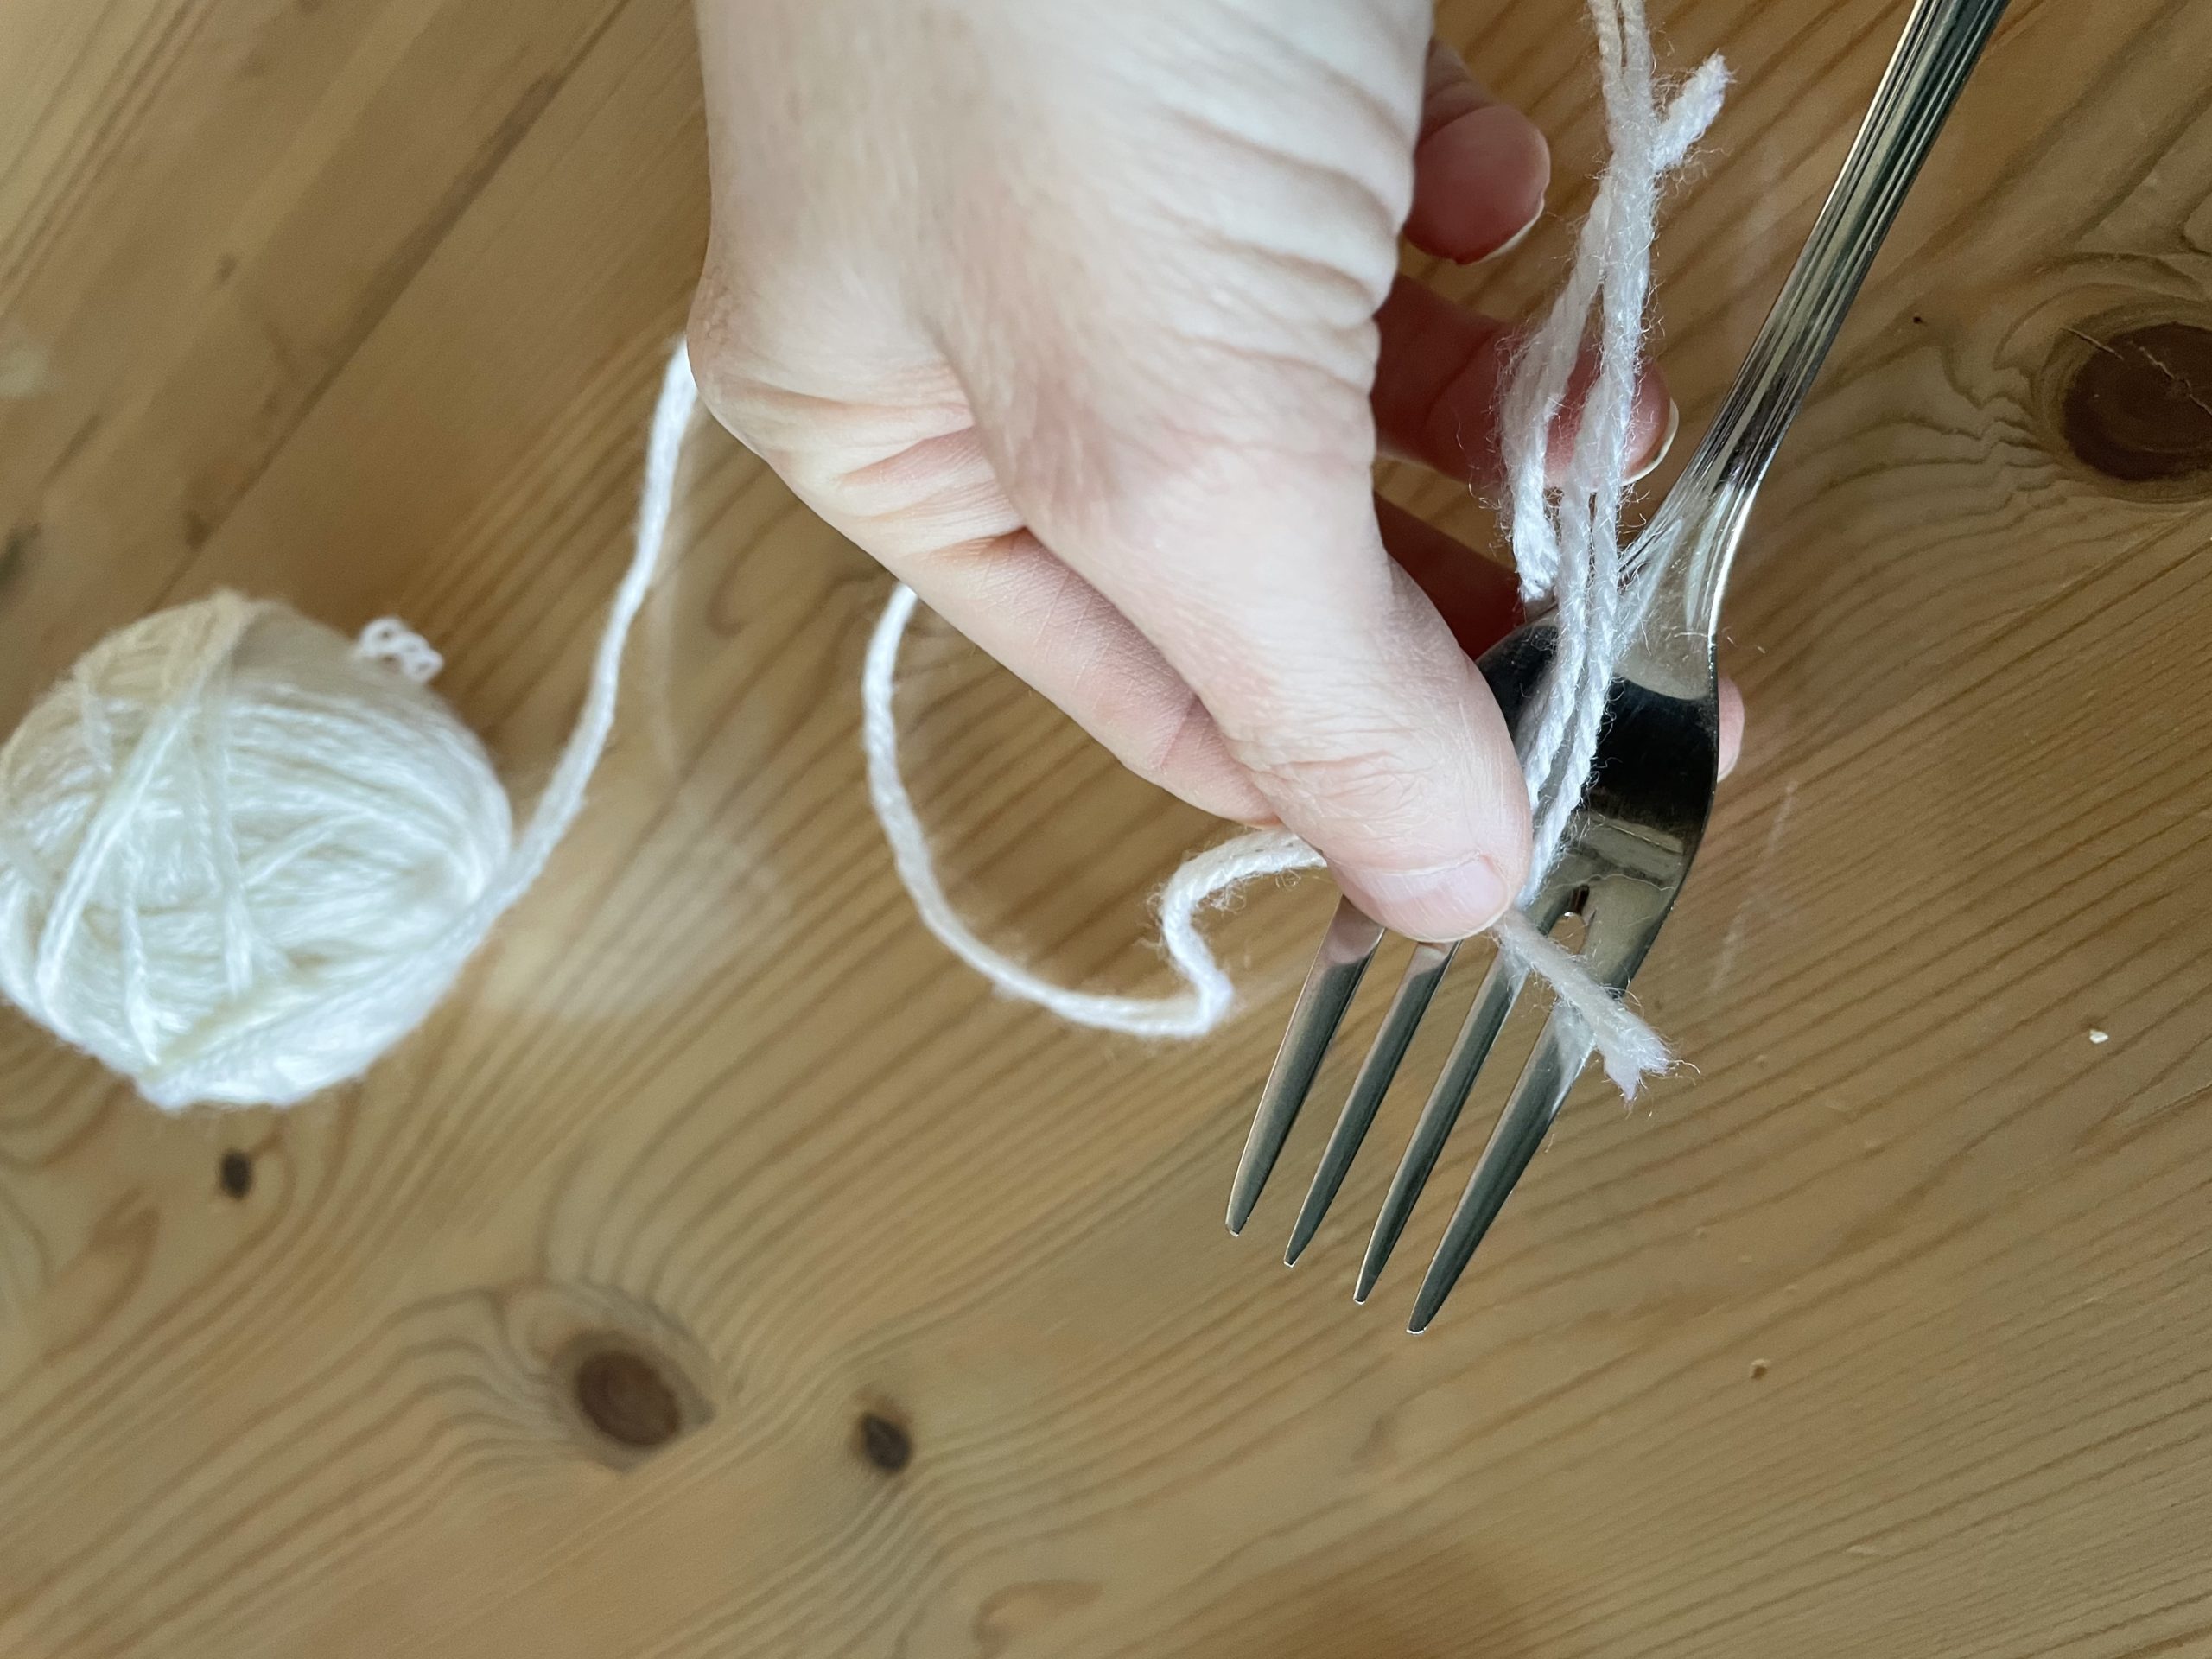
Bild zum Schritt 4 für das Bastel- und DIY-Abenteuer für Kinder: 'Das kurze Fadenstück bleibt zunächst über den Zinken hängen.'

5

Start now thread to wrap the forks.
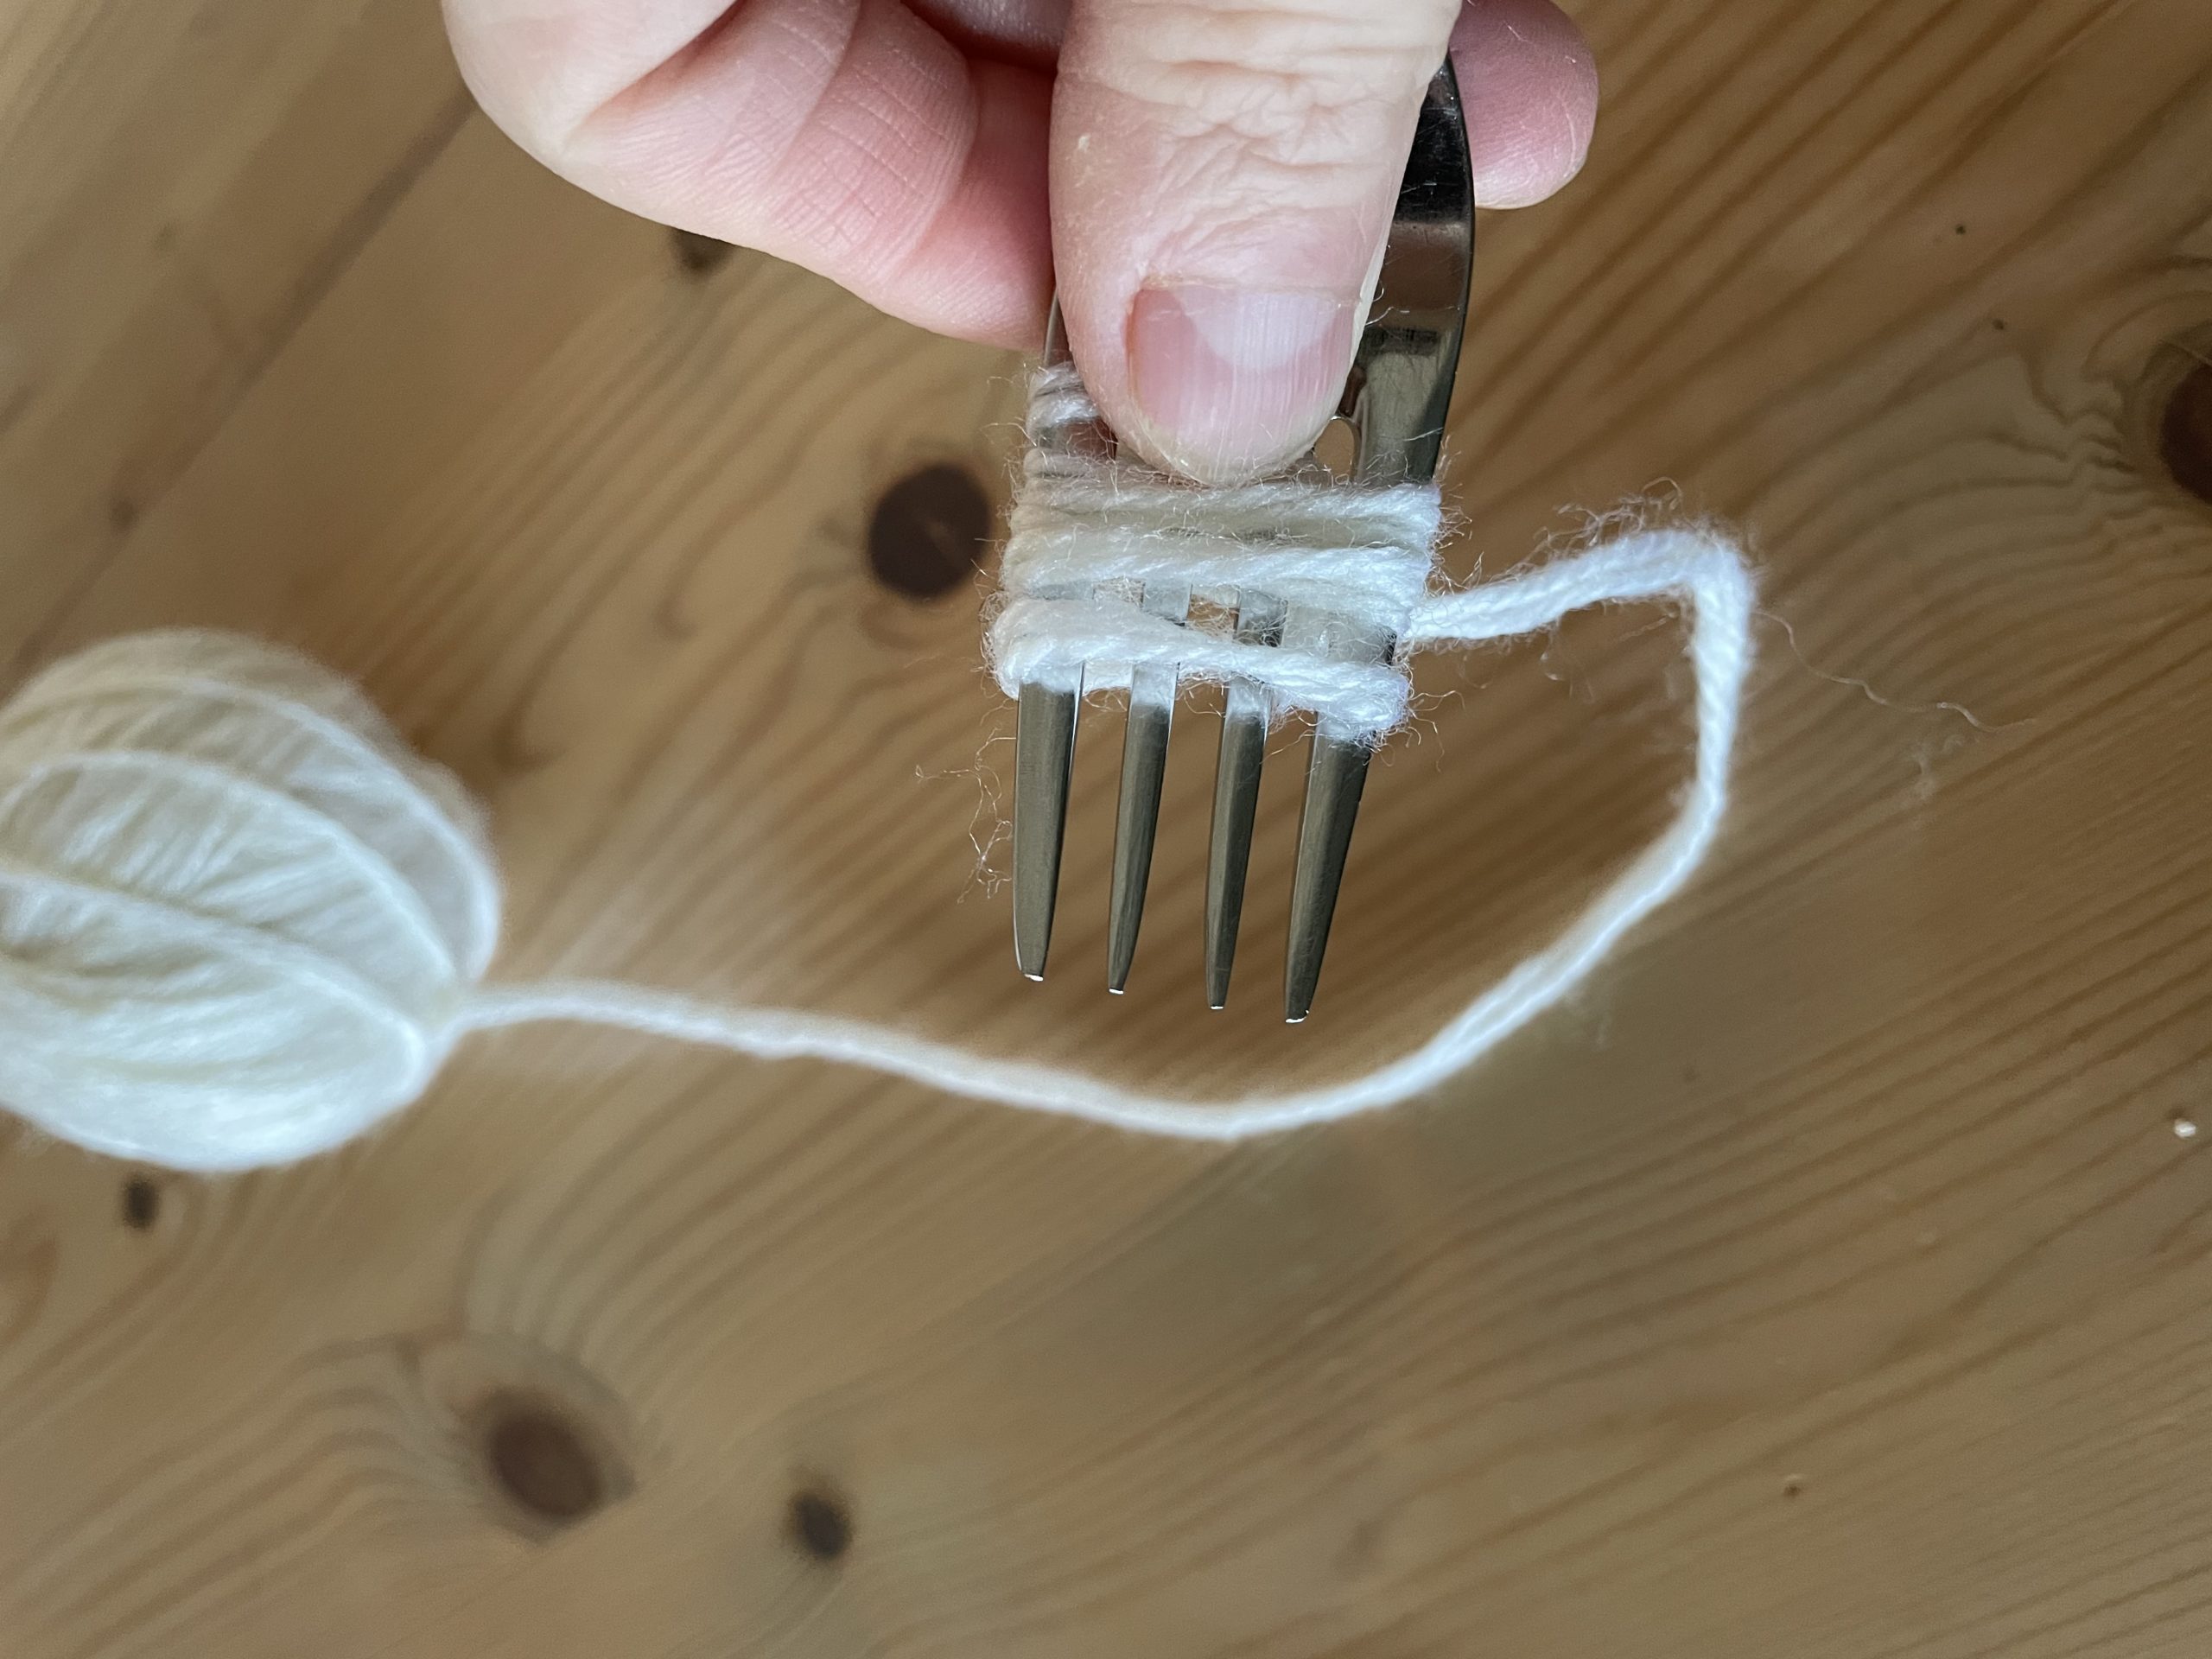
Bild zum Schritt 5 für das Bastel- und DIY-Abenteuer für Kinder: 'Beginnt nun Faden um die Gabelzinken zu wickeln.'

6

Wraps until a thick ball is formed.
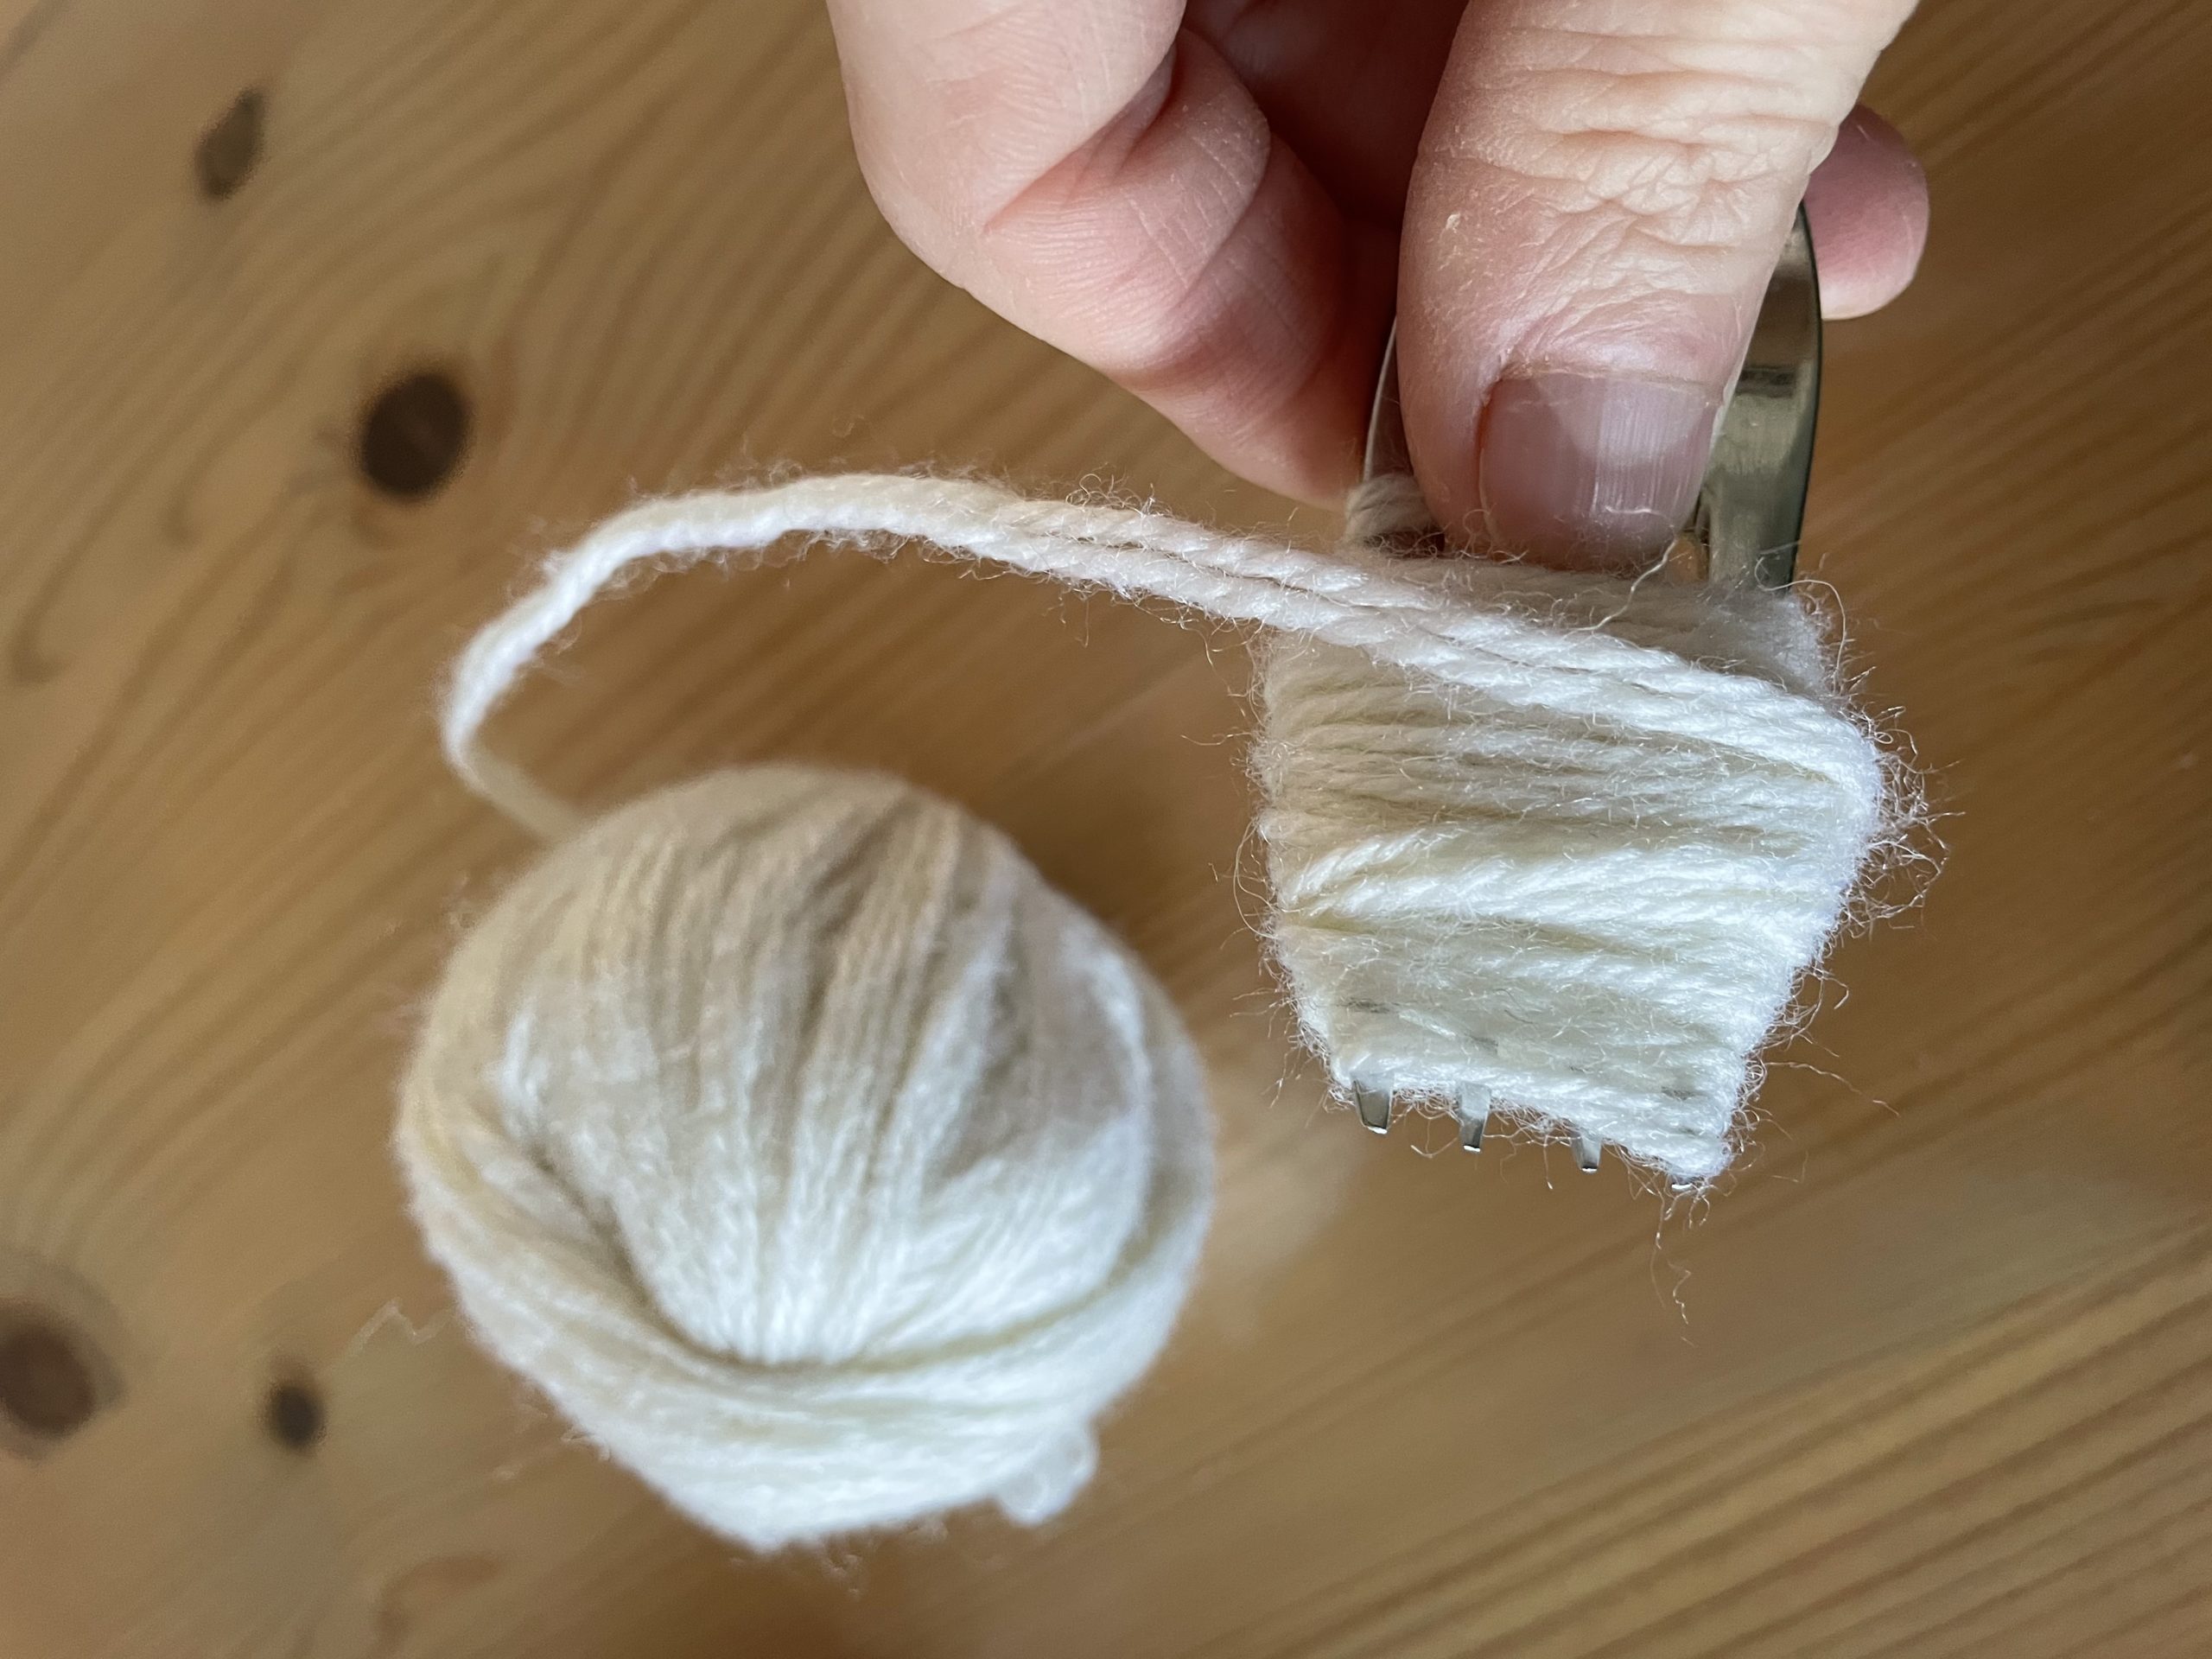
Bild zum Schritt 6 für das Bastel- und DIY-Abenteuer für Kinder: 'Wickelt so lange bis ein dicker Knäuel entsteht.'

7

Now put the small piece of wool around the wrapped ball from the beginning.
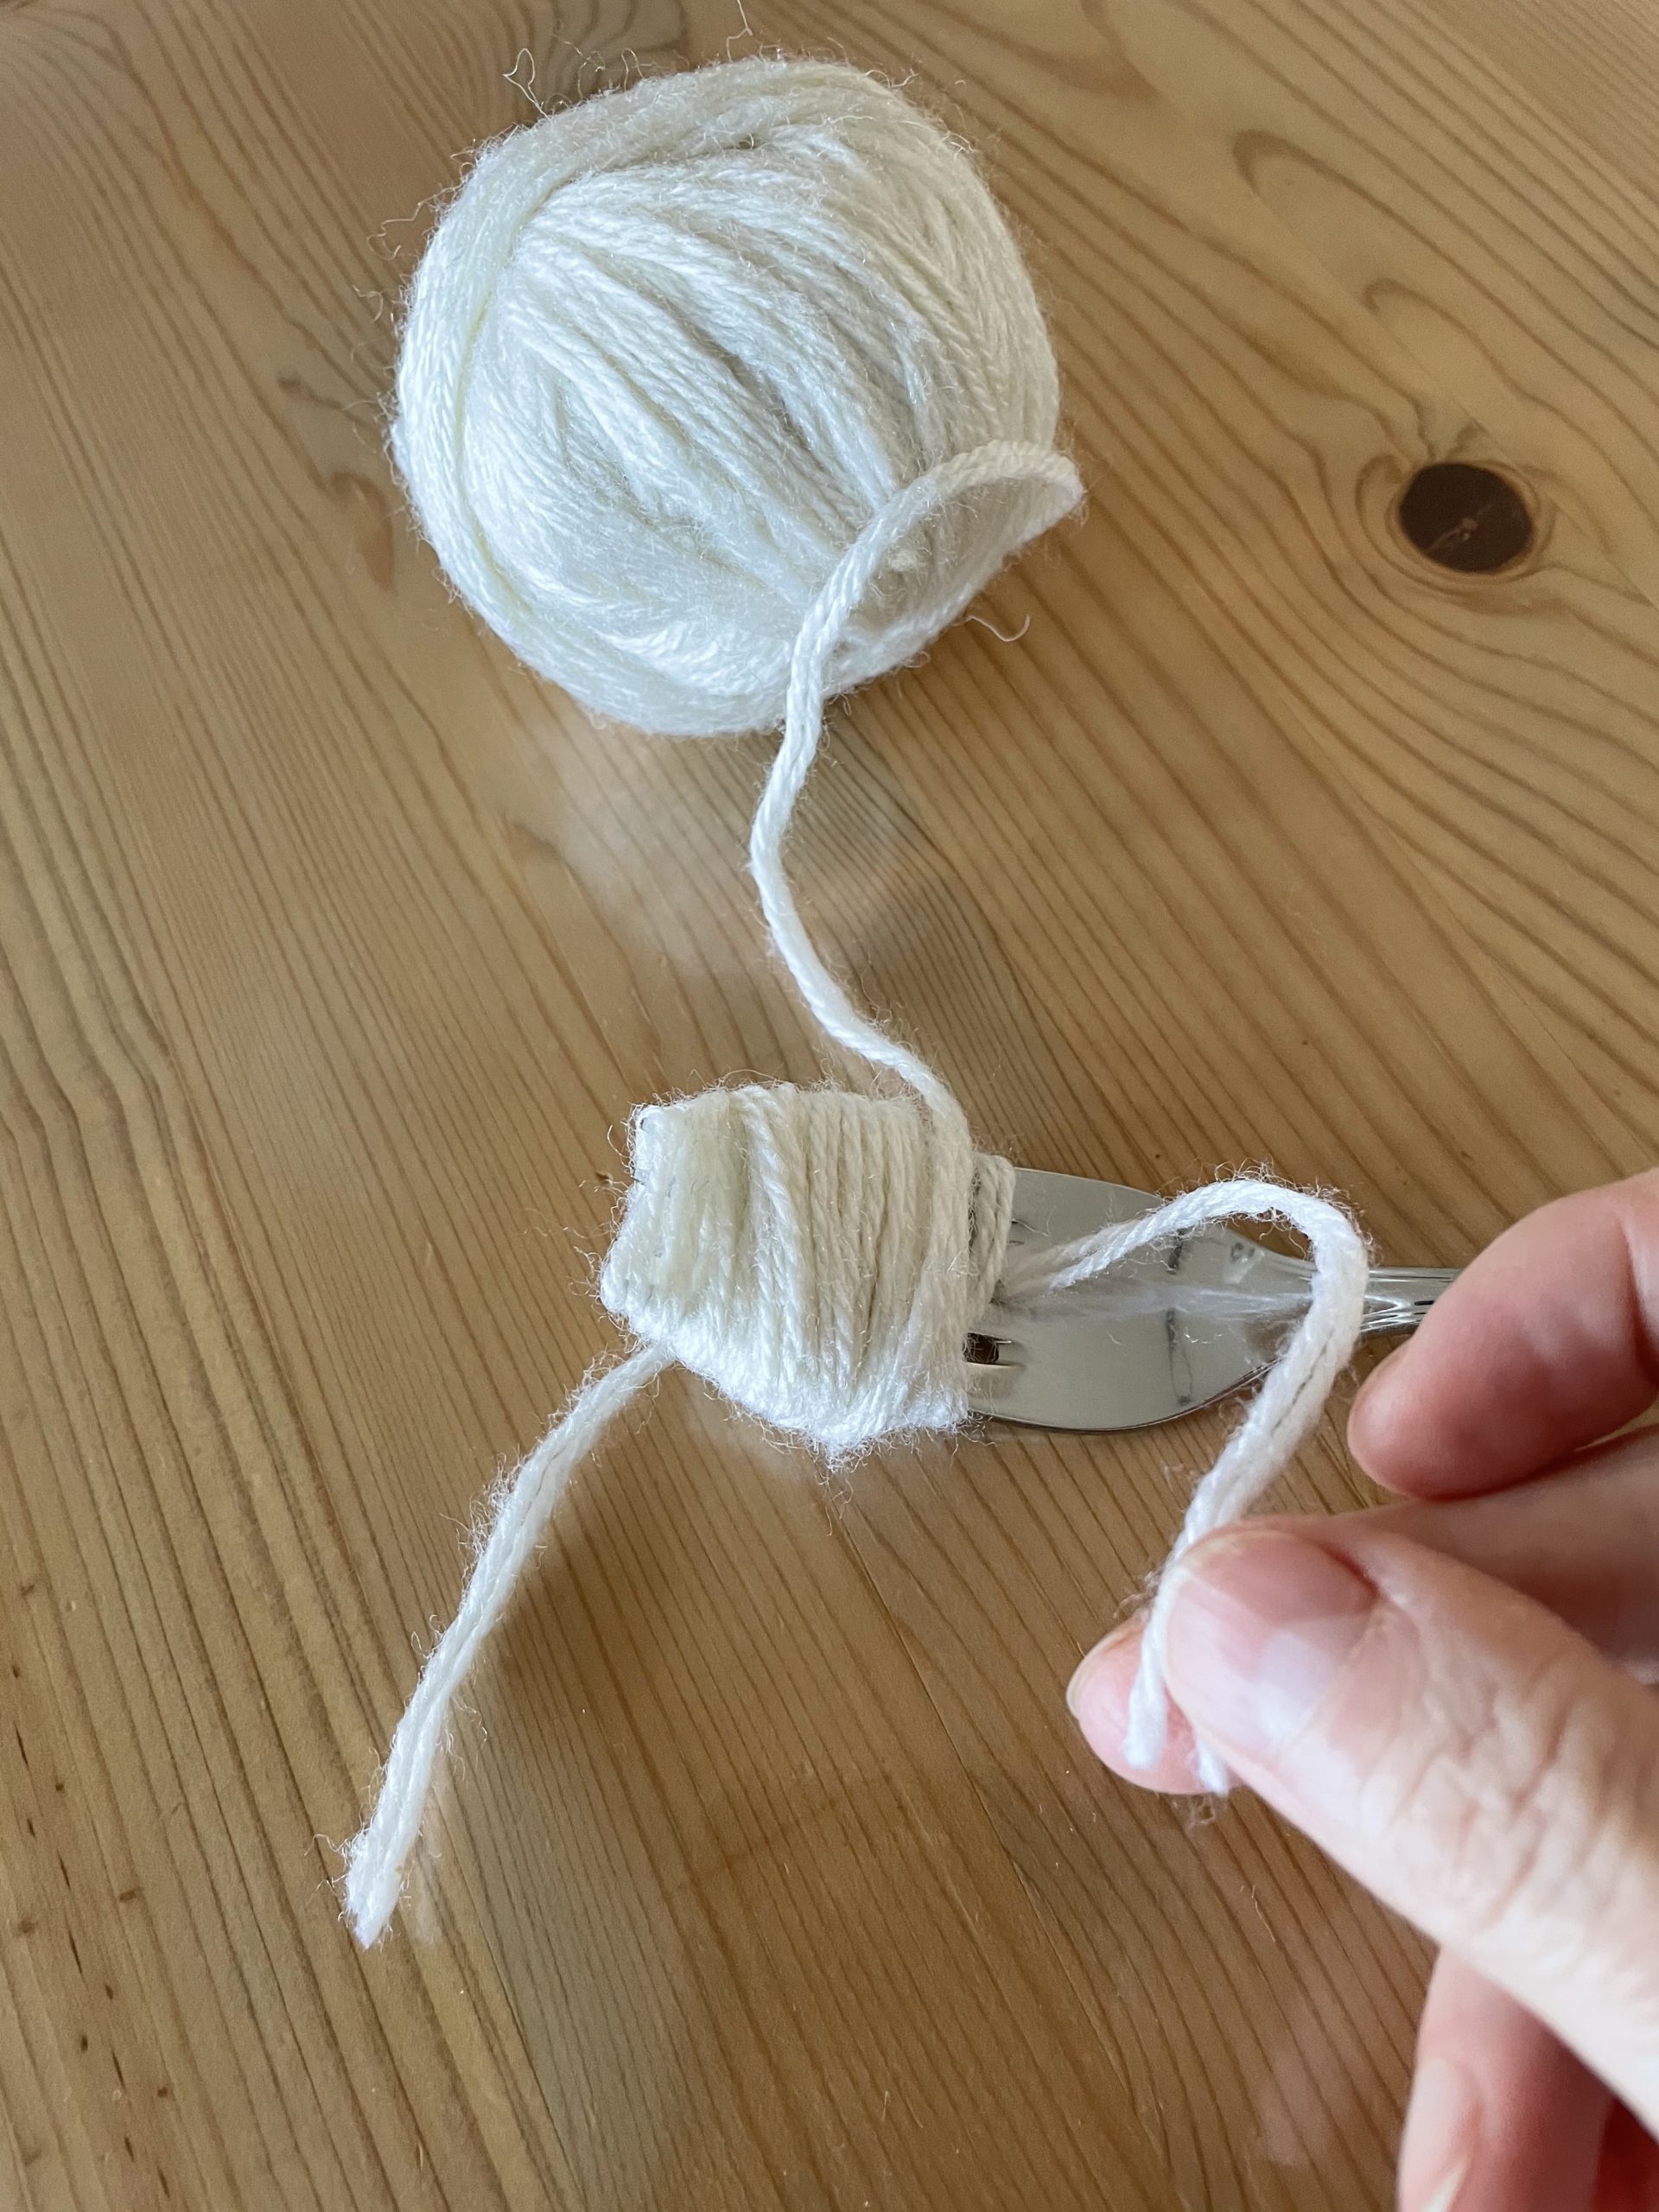
Bild zum Schritt 7 für das Bastel- und DIY-Abenteuer für Kinder: 'Legt nun das kleine Stück Wolle vom Anfang um den...'

8

Then you make a fixed double knot over it.
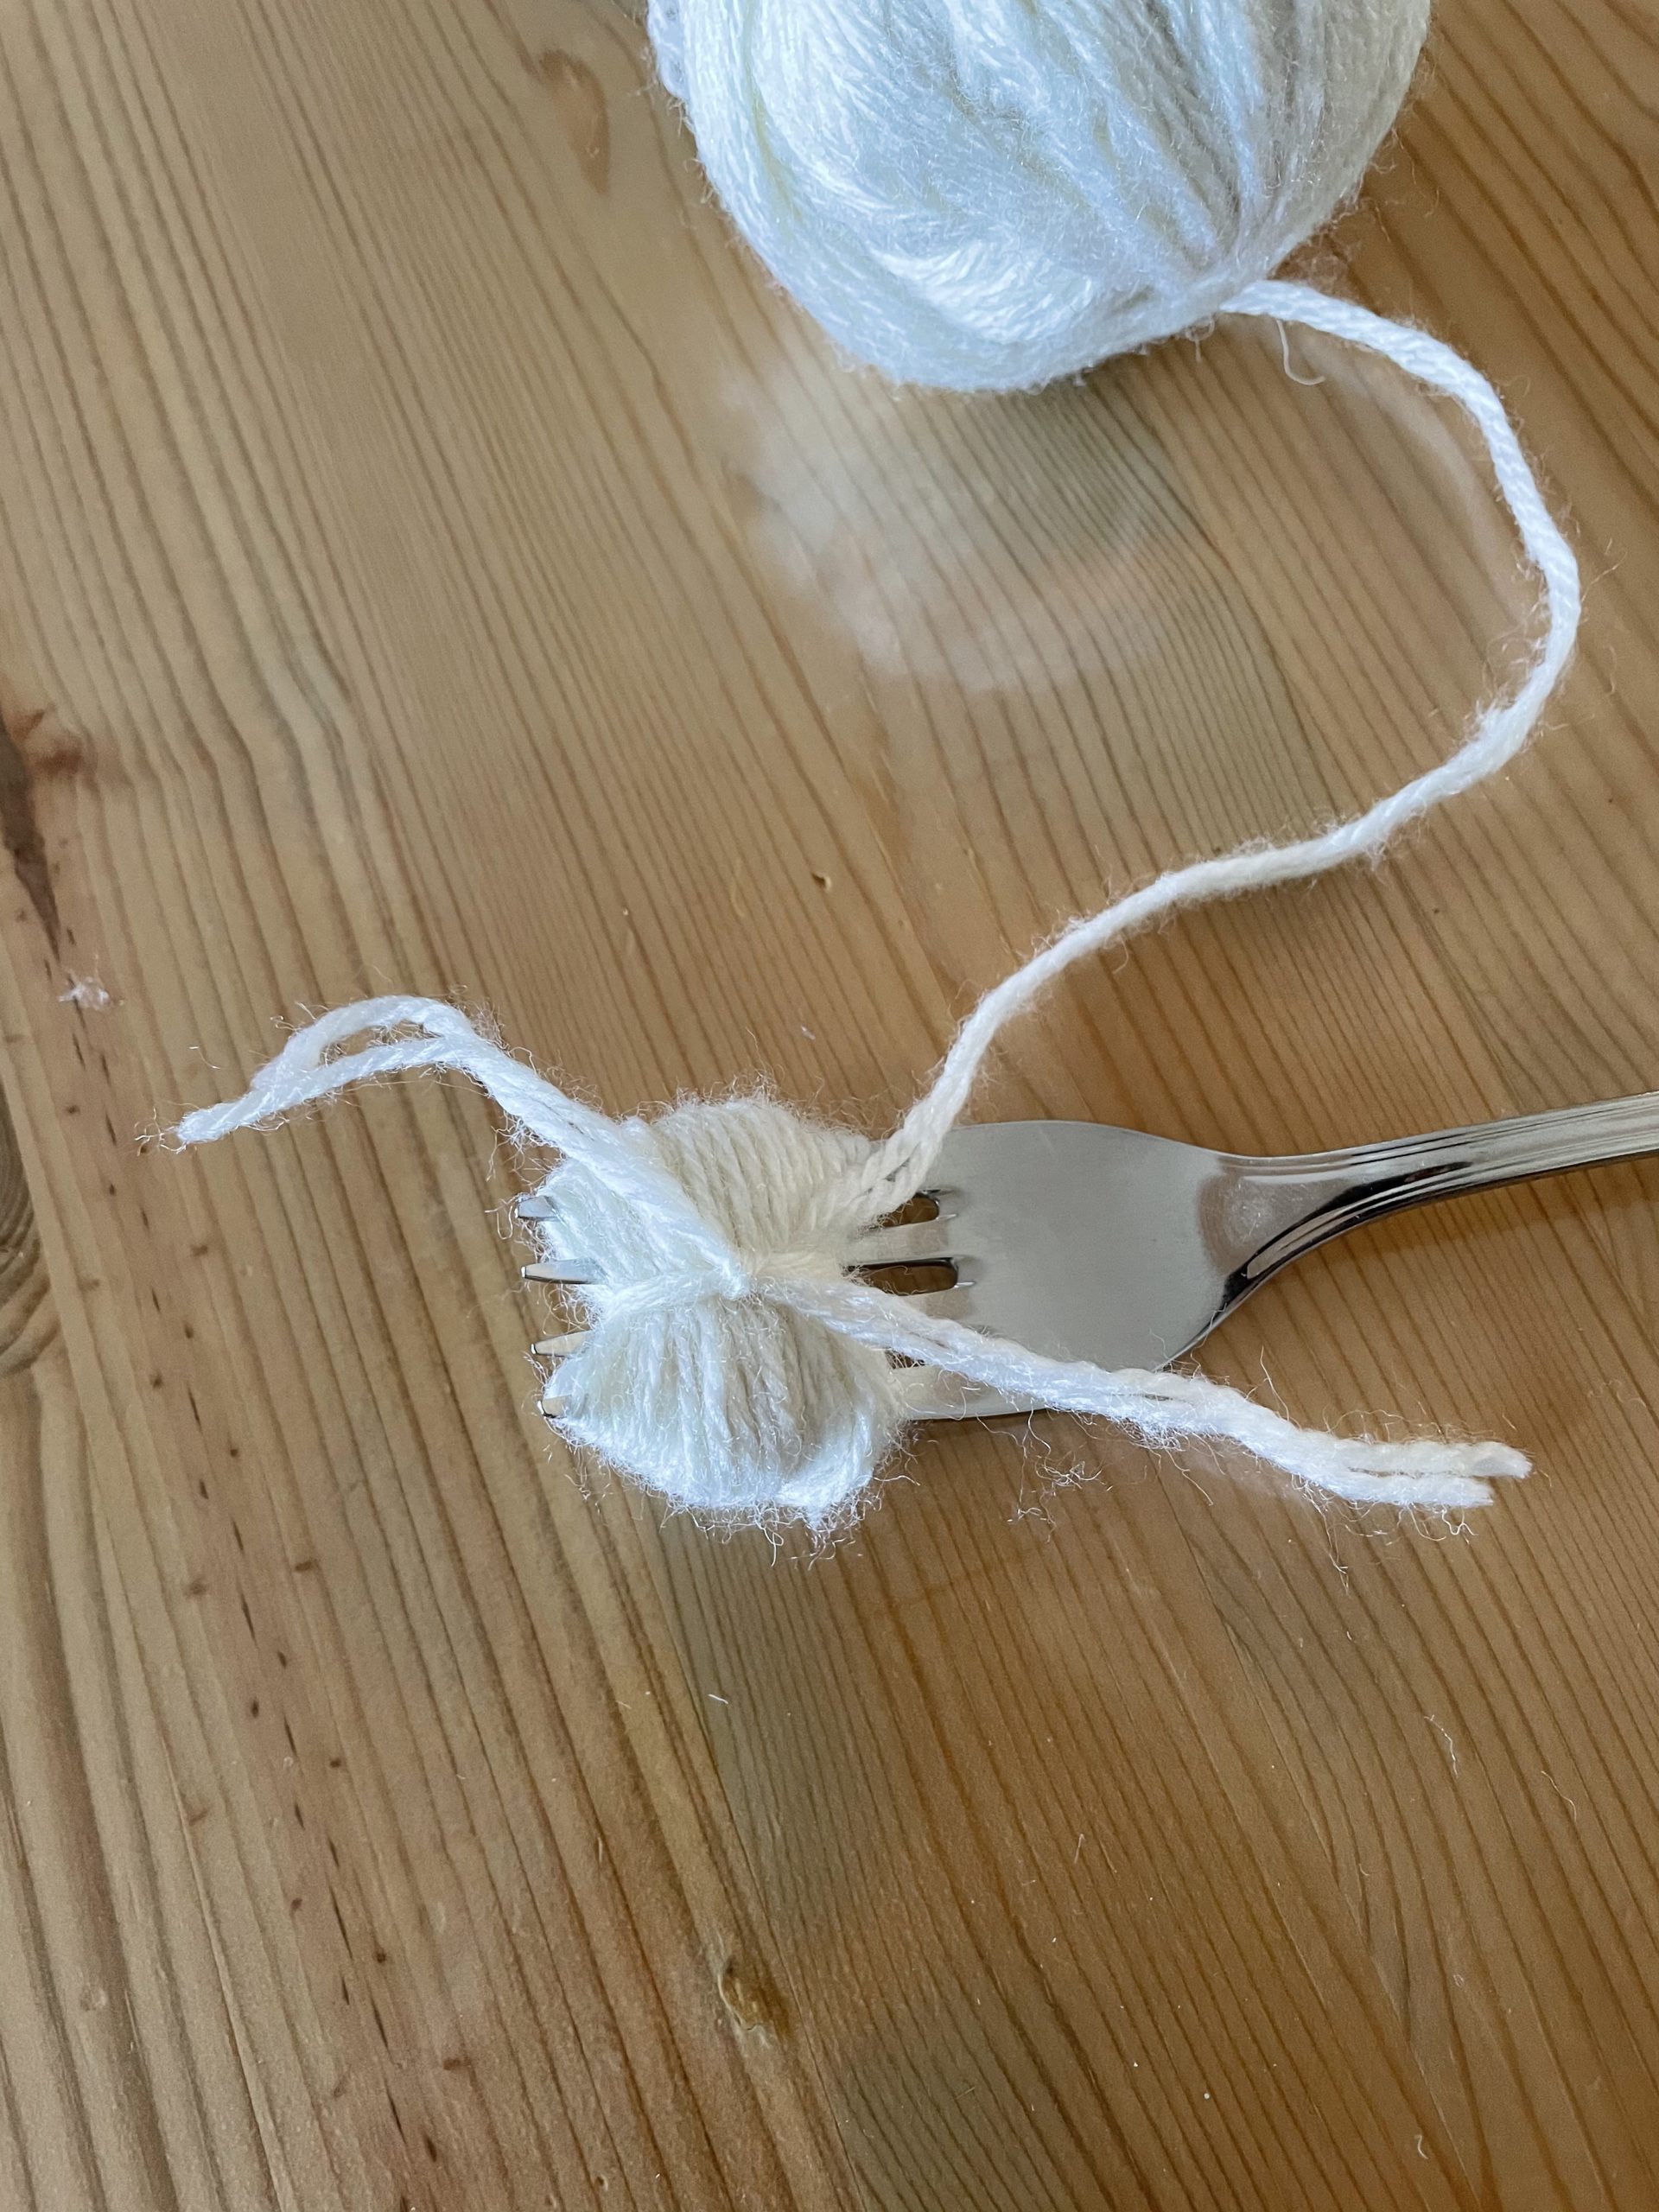
Bild zum Schritt 8 für das Bastel- und DIY-Abenteuer für Kinder: 'Dann macht ihr einen festen doppelten Knoten darüber.'

9

Now push the knotted wool ball off the fork.
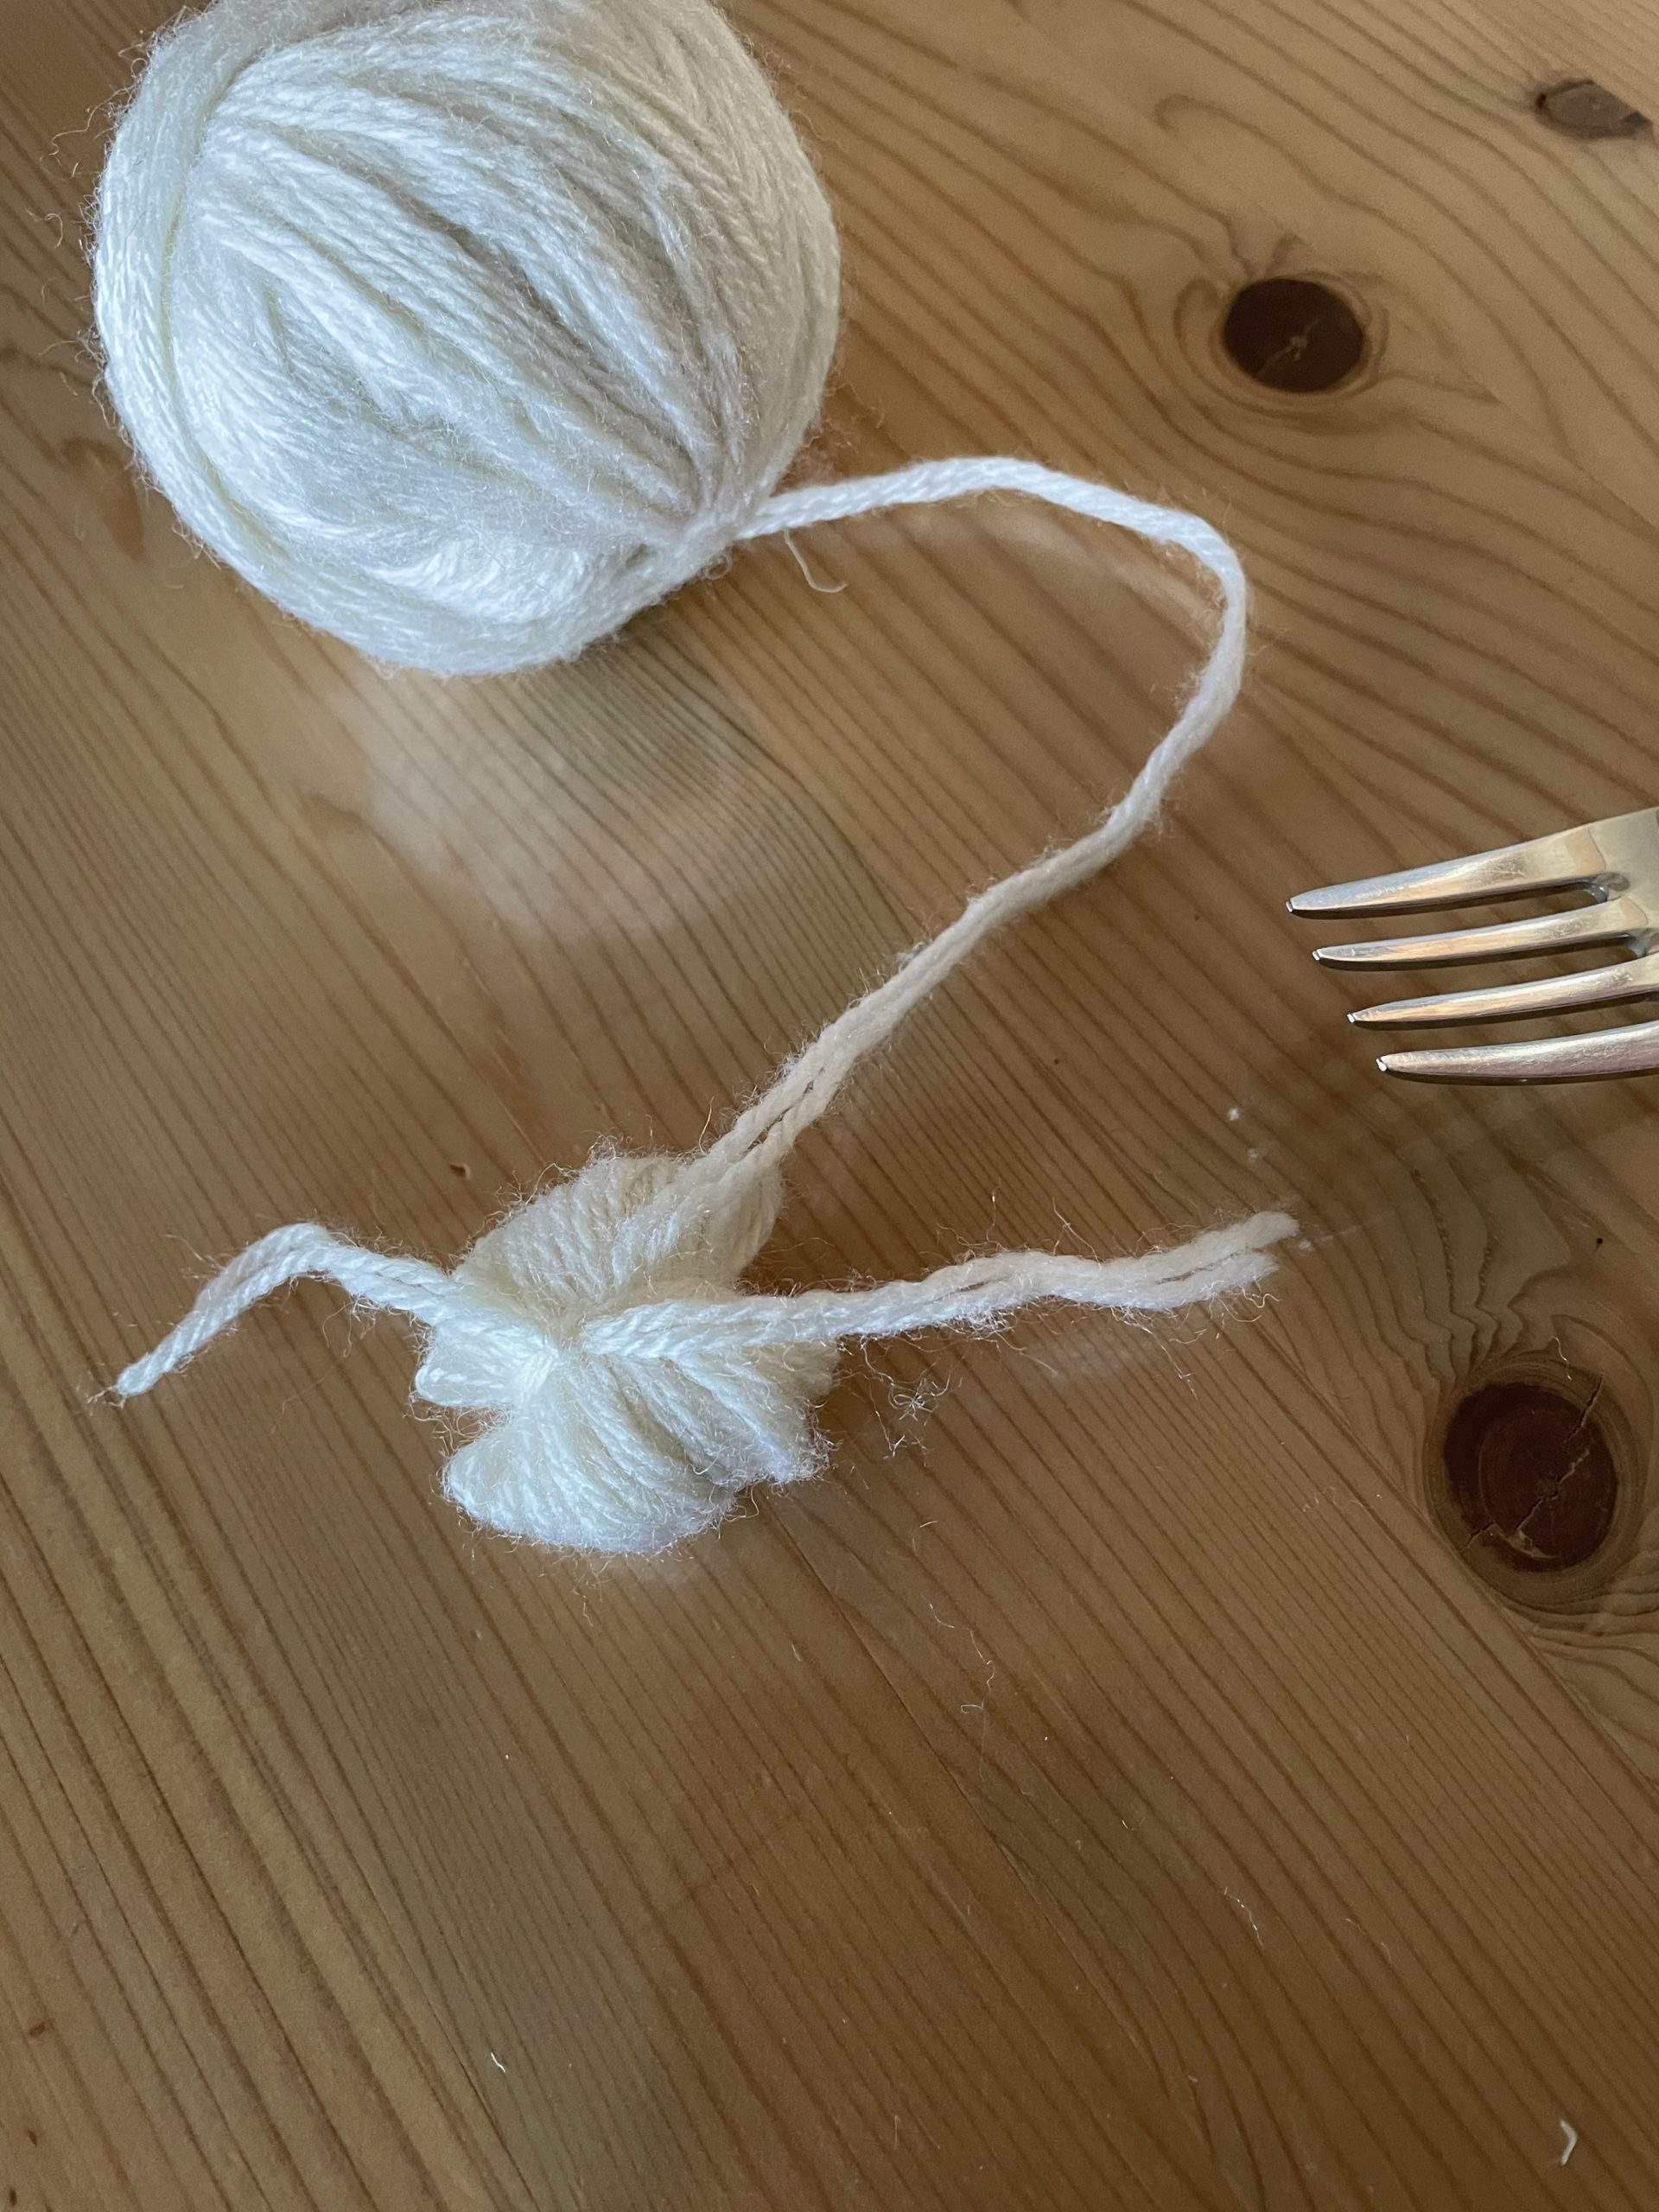
Bild zum Schritt 9 für das Bastel- und DIY-Abenteuer für Kinder: 'Schiebt nun das verknotete Wollknäuel von der Gabel.'

10

Now you cut the wool on the two closed sides with scissors. Make sure to cut through the thread that holds everything together not provided!
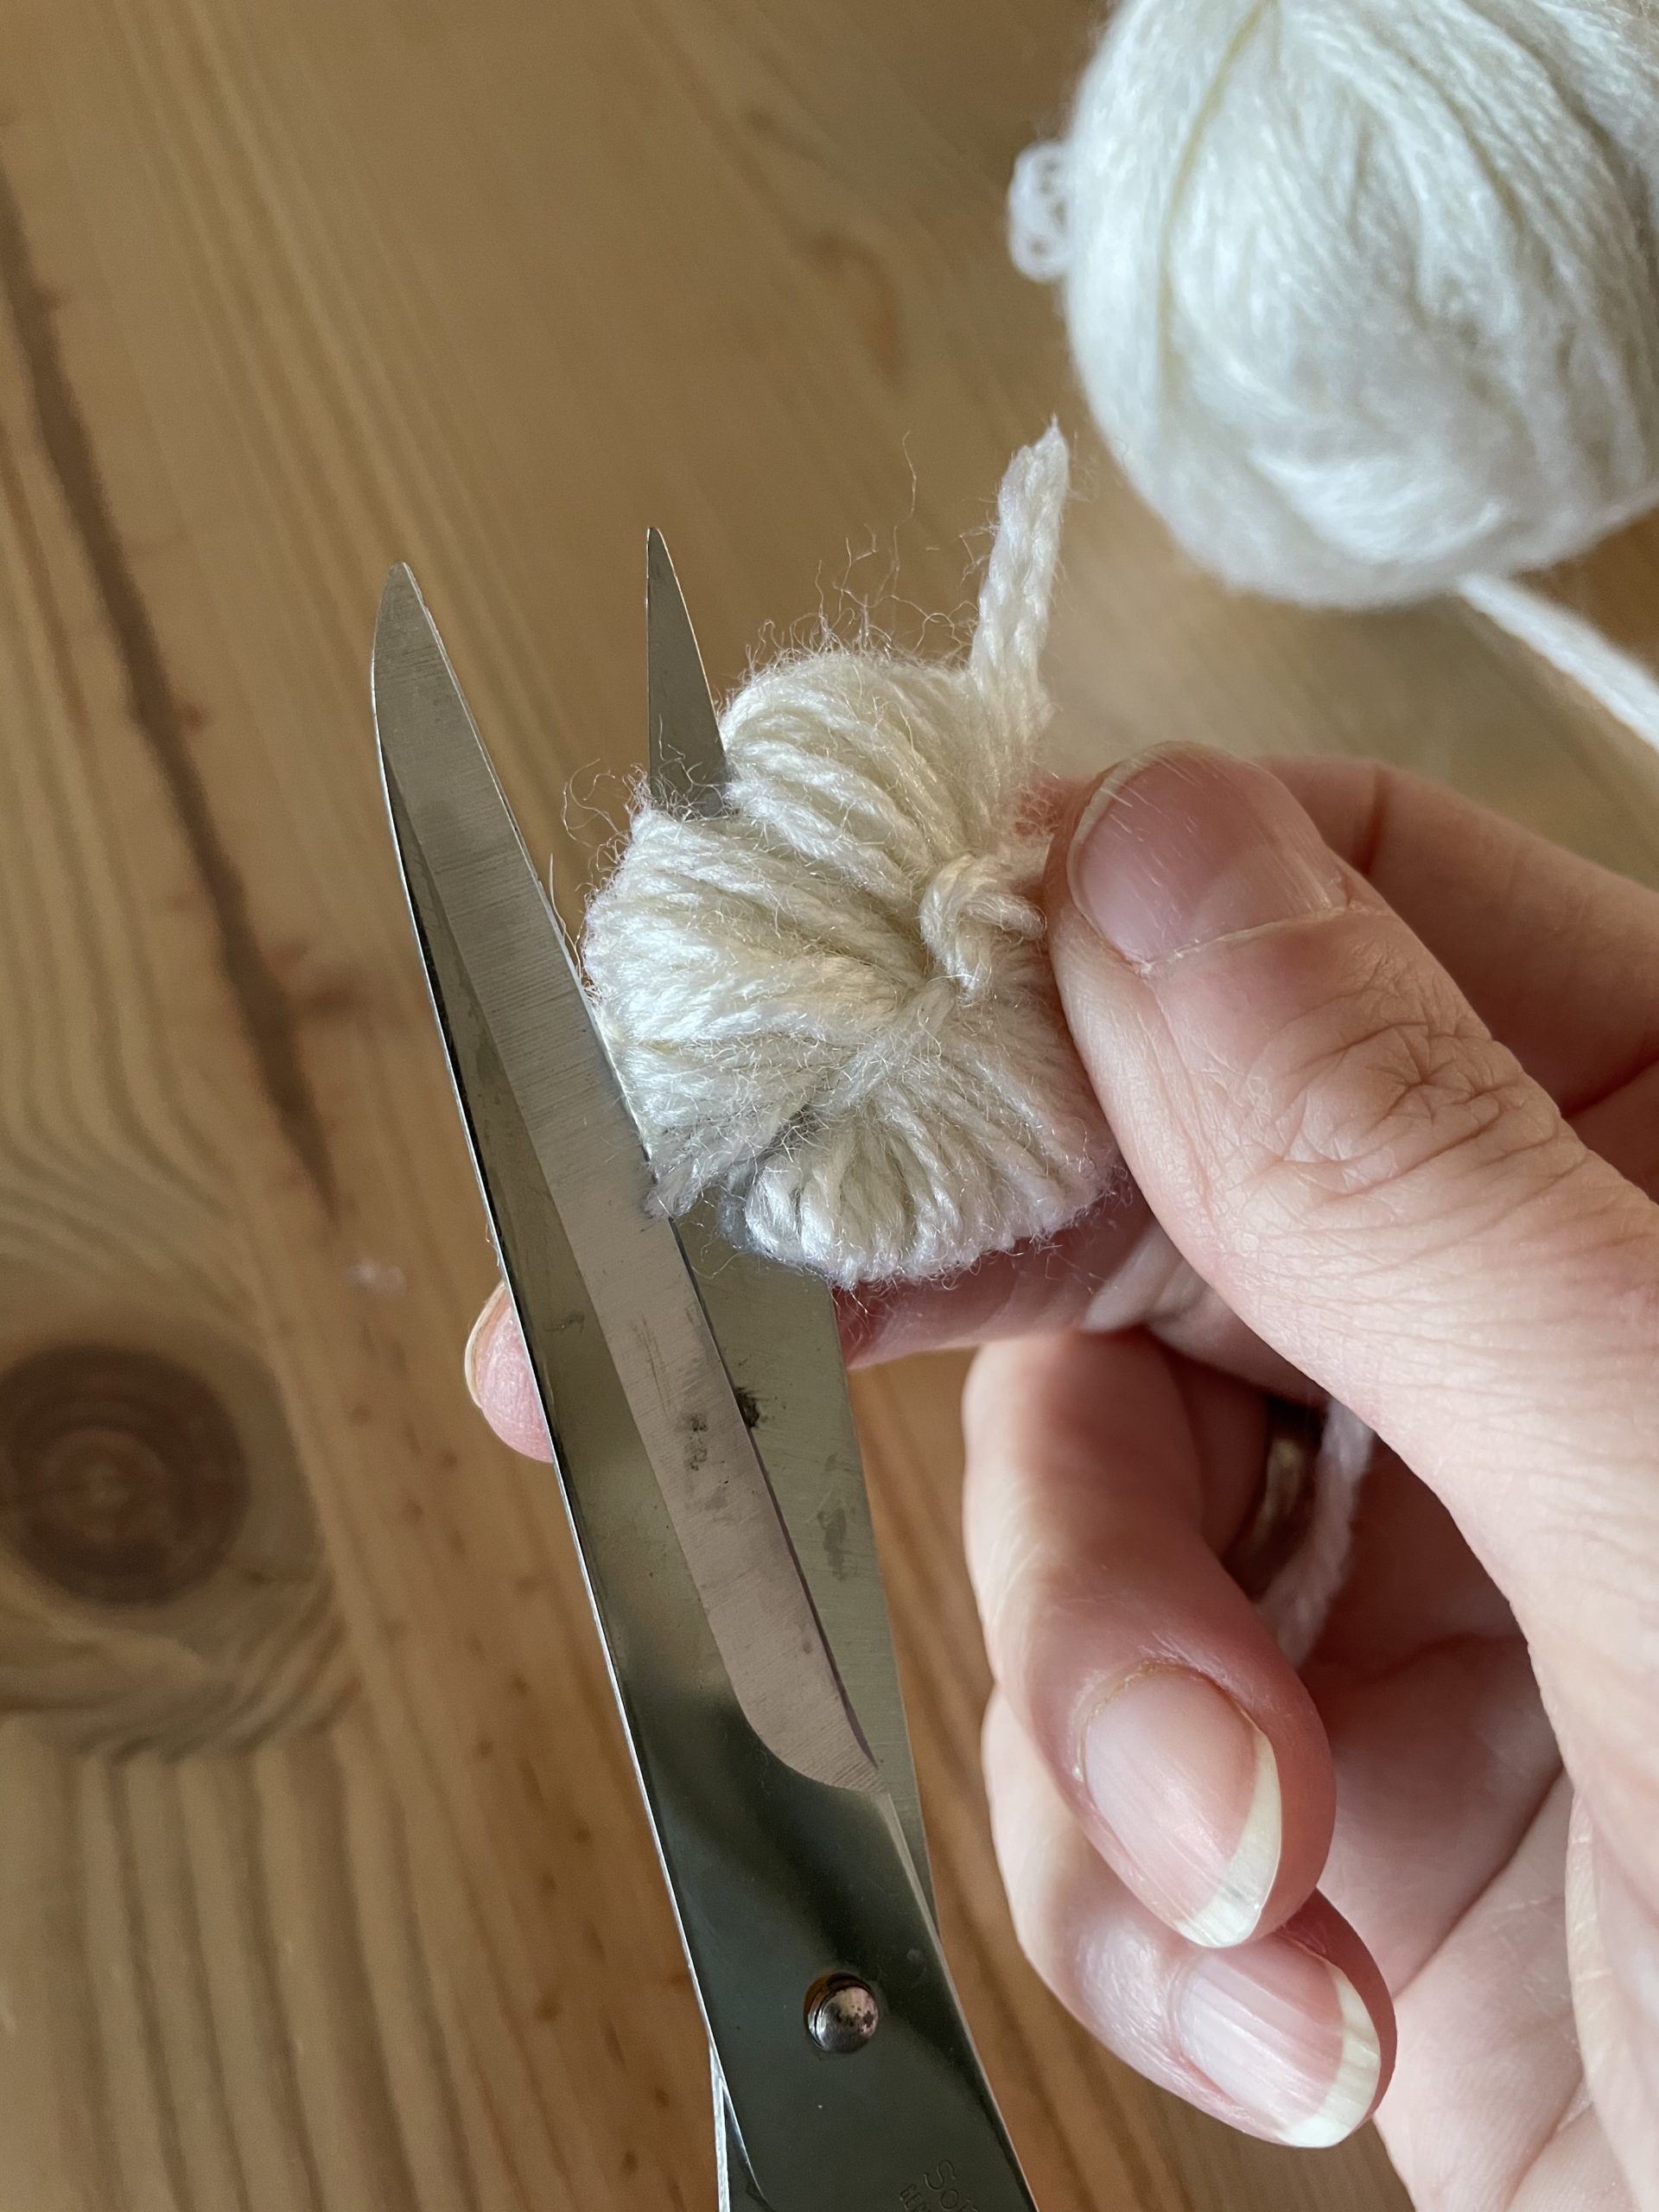
Bild zum Schritt 10 für das Bastel- und DIY-Abenteuer für Kinder: 'Jetzt schneidet ihr die Wolle an den beiden geschlossenen Seiten...'

11

Now the pommel is formed. The threads stand off.
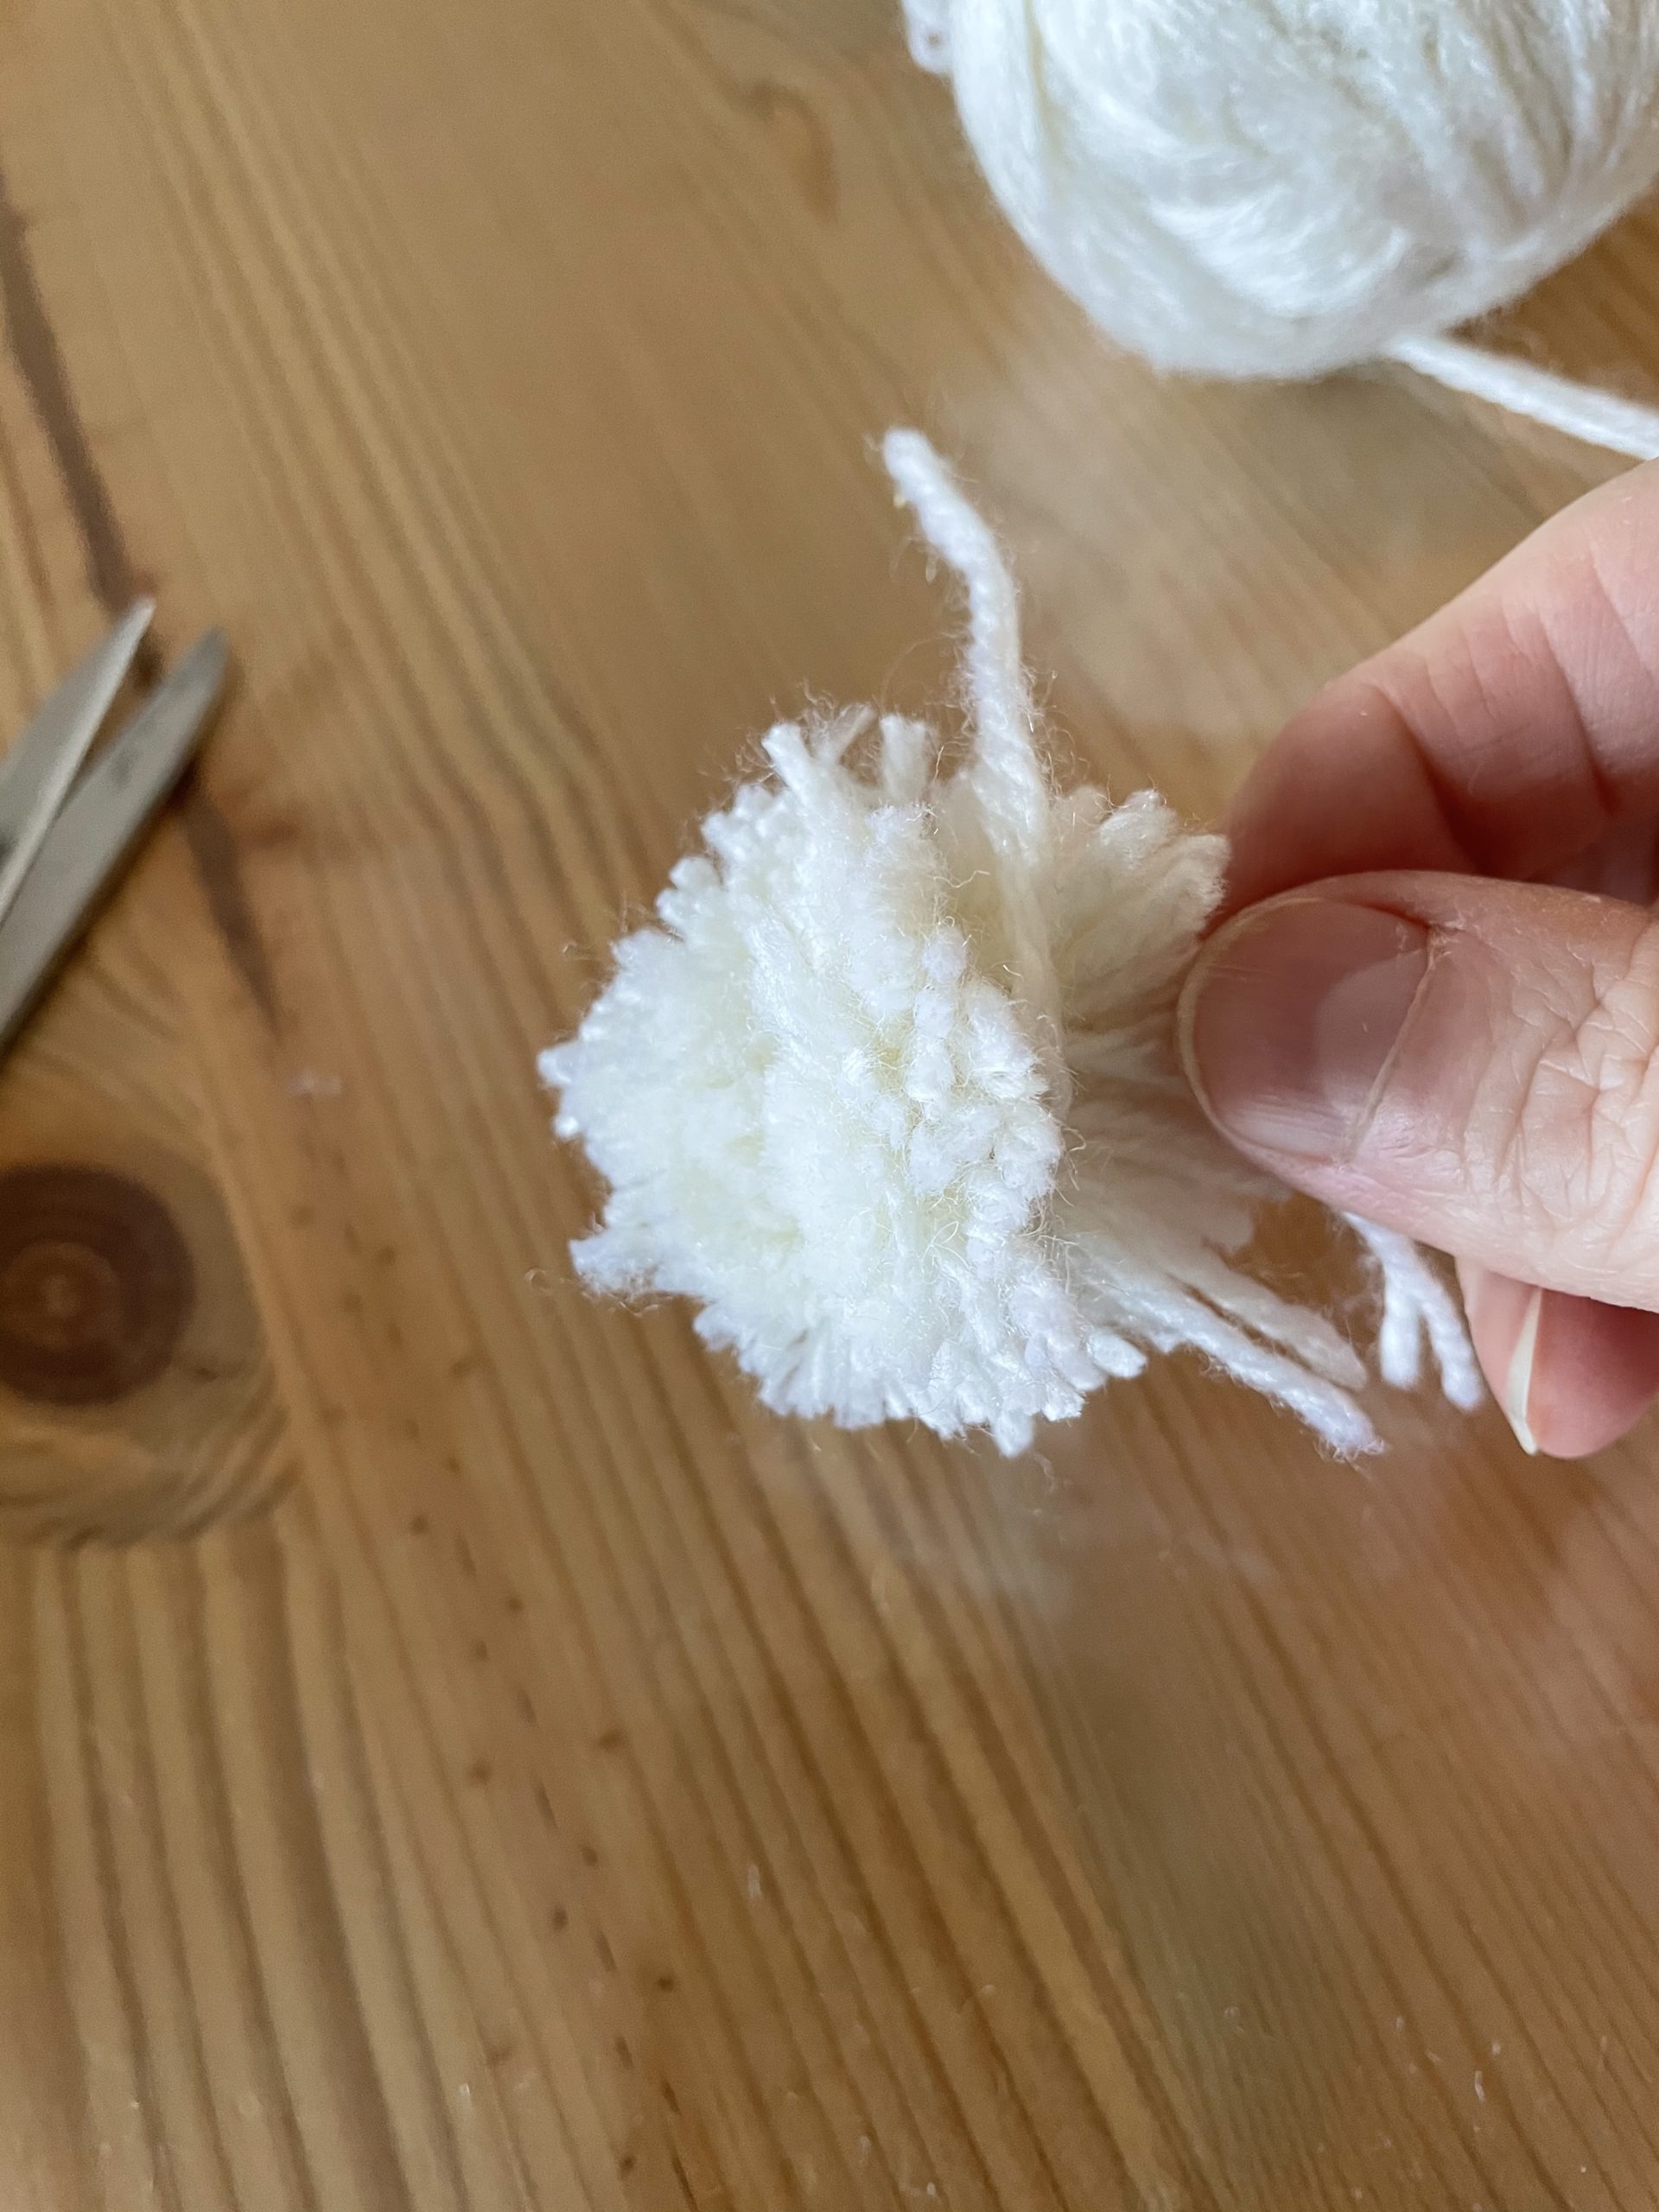
Bild zum Schritt 11 für das Bastel- und DIY-Abenteuer für Kinder: 'Nun entsteht die Pommel. Die Fäden stehen ab.'

12

Finally, cut the pommel, pompon or wuschel round.
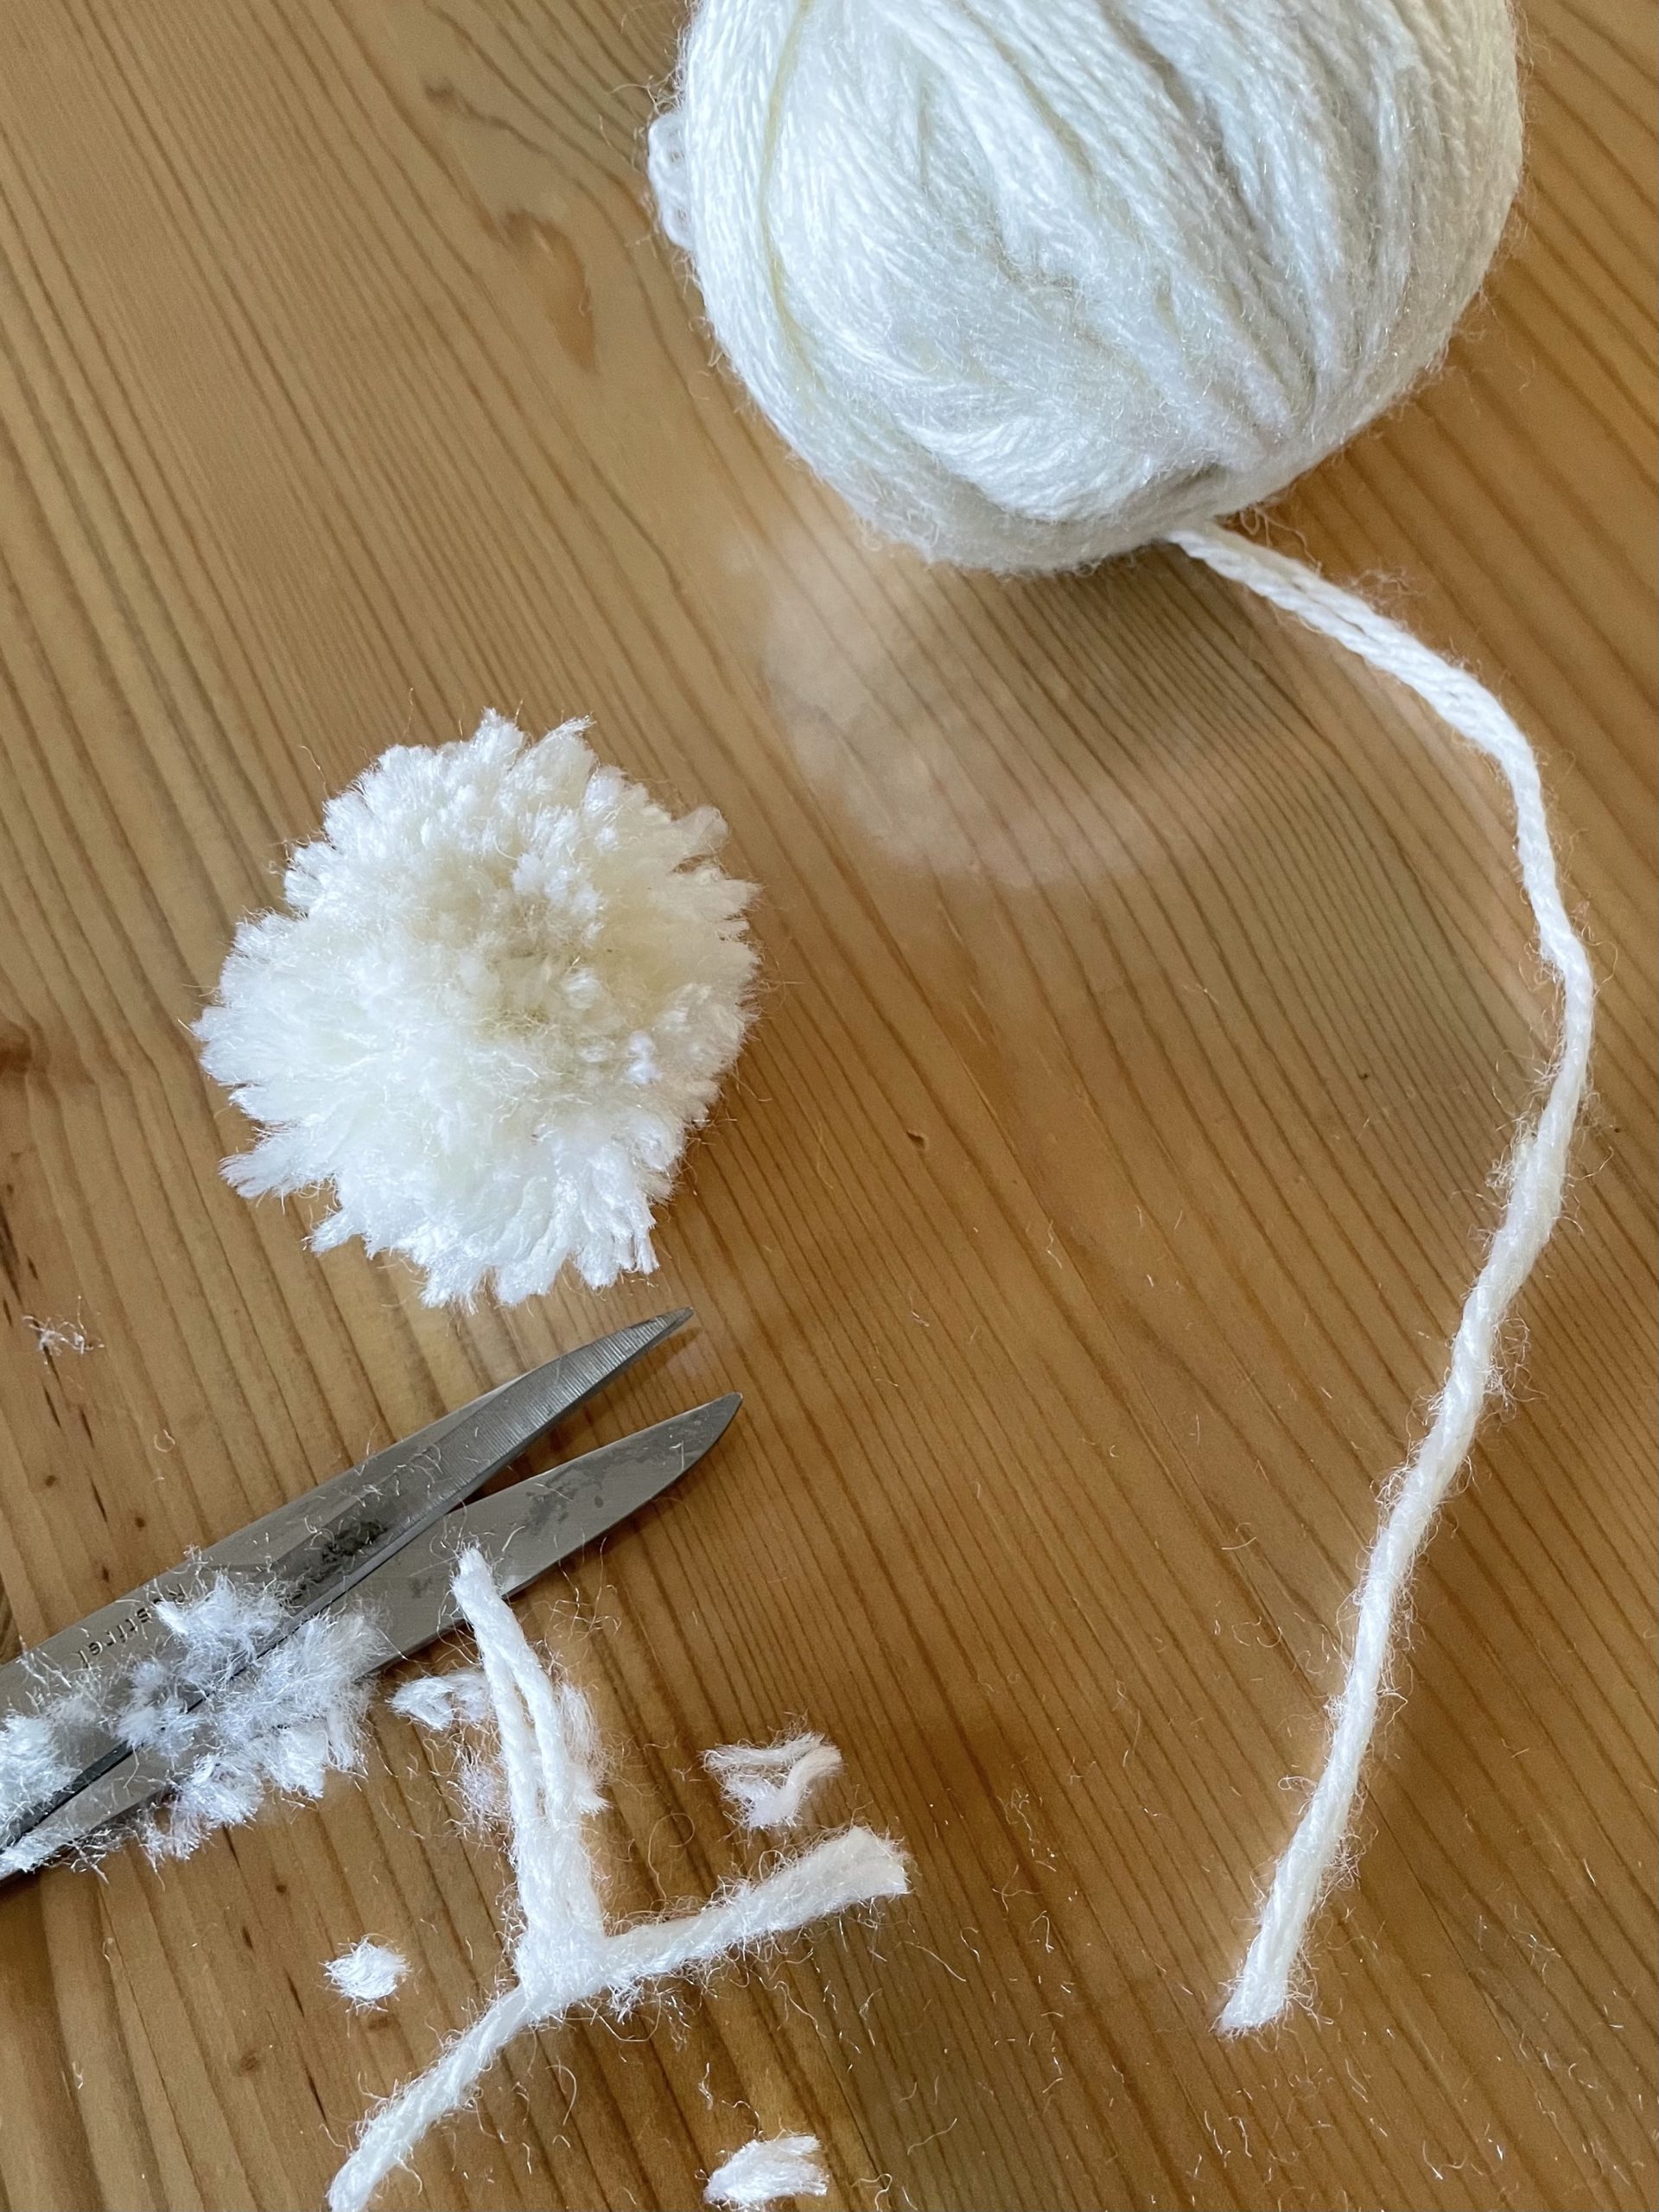
Bild zum Schritt 12 für das Bastel- und DIY-Abenteuer für Kinder: 'Schneidet abschließend die Pommel, den Pompon bzw. den Wuschel rund.'

13

Ready!

Bild zum Schritt 13 für das Bastel- und DIY-Abenteuer für Kinder: 'Fertig!'

Other offers with Wuschel:
14

Sews a small Easter bunny and uses the wuschel as a tail.
Sewing Easter Bunny

15

On the Easter Egg Box this pommel serves for the decoration of the Easter Bunny!
Make Easter Box

16

On the Easter bag the pommel adorns the Easter bunnies!
Make Easter Bag

17

Have fun!

Wuschel - Pommel - Rabbittails homemade

Follow us on Facebook , Instagram and Pinterest
Don't miss any more adventures: Our bottle mail

Leave a Reply

Your email address will not be published.

The maximum upload file size: 5 MB. You can upload: image, document. Drop file here