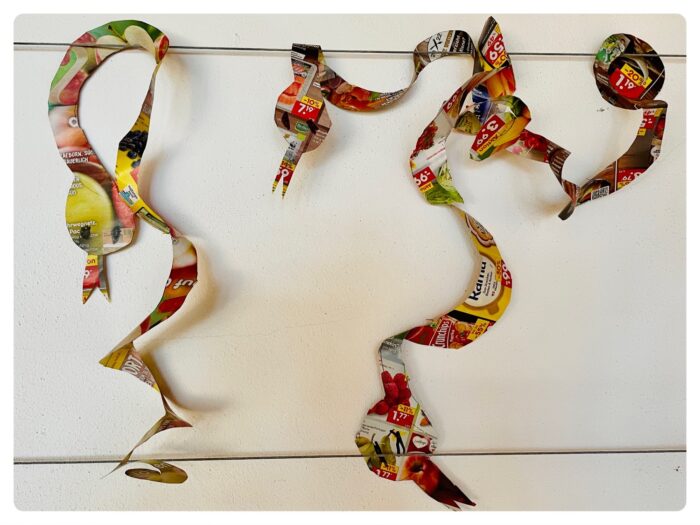
Wool snake

AdventurerKatzi
Rating0.01.0 thousand times & (0) DifficultyAdvanced

Makes a snake of wool leftovers, carnivals, birthdays or simply to play with them. It fascinates children to see how a thick cord emerges from the individual wool threads. Also the change of color in different wools is always wonderful. See how easy the implementation is. It doesn't need much tools either.

Media Education for Kindergarten and Hort

Kind bastelt eine Rassel mit dem Navi
The Adventure Navi, the app for DIY projects, enables media education for the youngest.

Relief in everyday life, targeted promotion of individual children, independent learning and - without any pre-knowledge already usable by the youngest!


Titelbild zur Bastel- und DIY-Idee für Kinder '(619) Wollschlange'
Material for1 Child
Prep Time5 min.Adv. Time20 min.Total Time25 min.
 1 Coloured woolas thick as possible
 1 Ruler
 1 Felt residues
 2 Wax eyes
 1 Glue
All links marked with a shopping cart lead to Amazon - here we have selected products that we would order ourselves and in part also ordered. In a qualified purchase via the advertising link, we as Amazon partner receive a commission, for you there are no costs. You thus support our cost- and advertising banner-free, educational offer.
1

Take off colorful wool as thick as possible and take off a thread. At least three times as long as your snake is about to become!
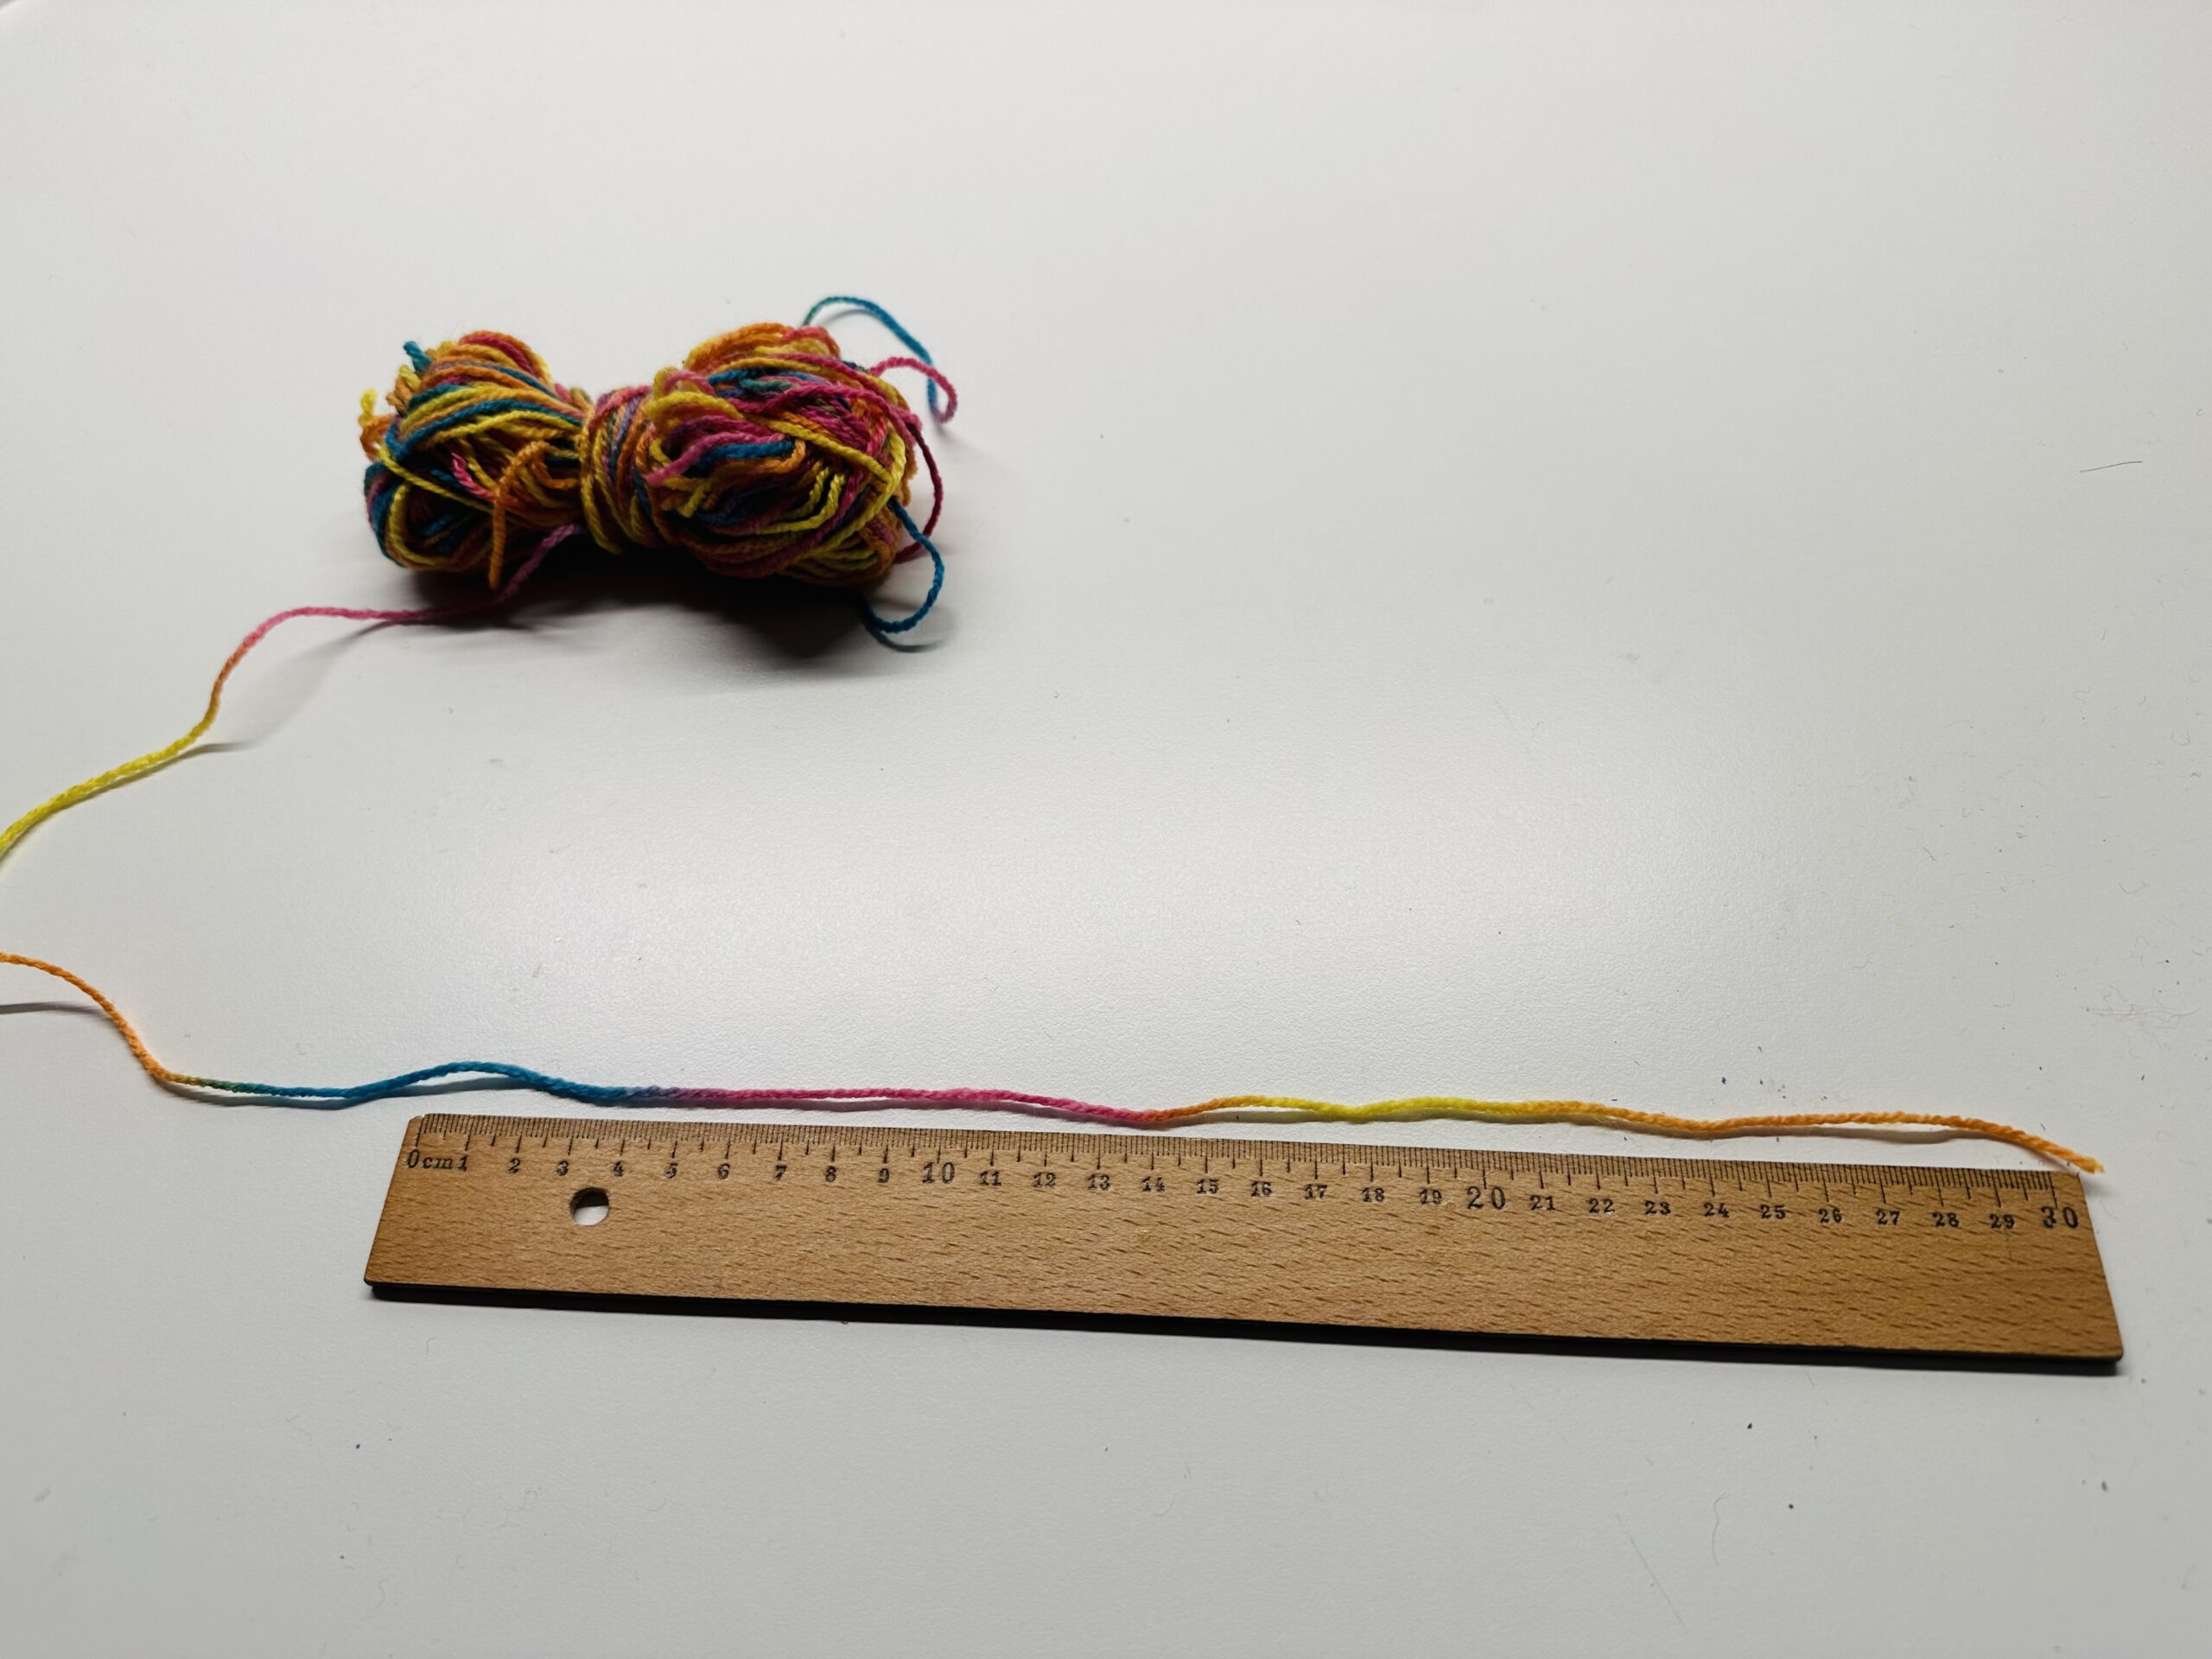
Bild zum Schritt 1 für das Bastel- und DIY-Abenteuer für Kinder: 'Nehmt bunte möglichst dicke Wolle und messt einen Faden ab....'

2

Measure at least 8-10 threads. If the wool is very thin you need more threads.
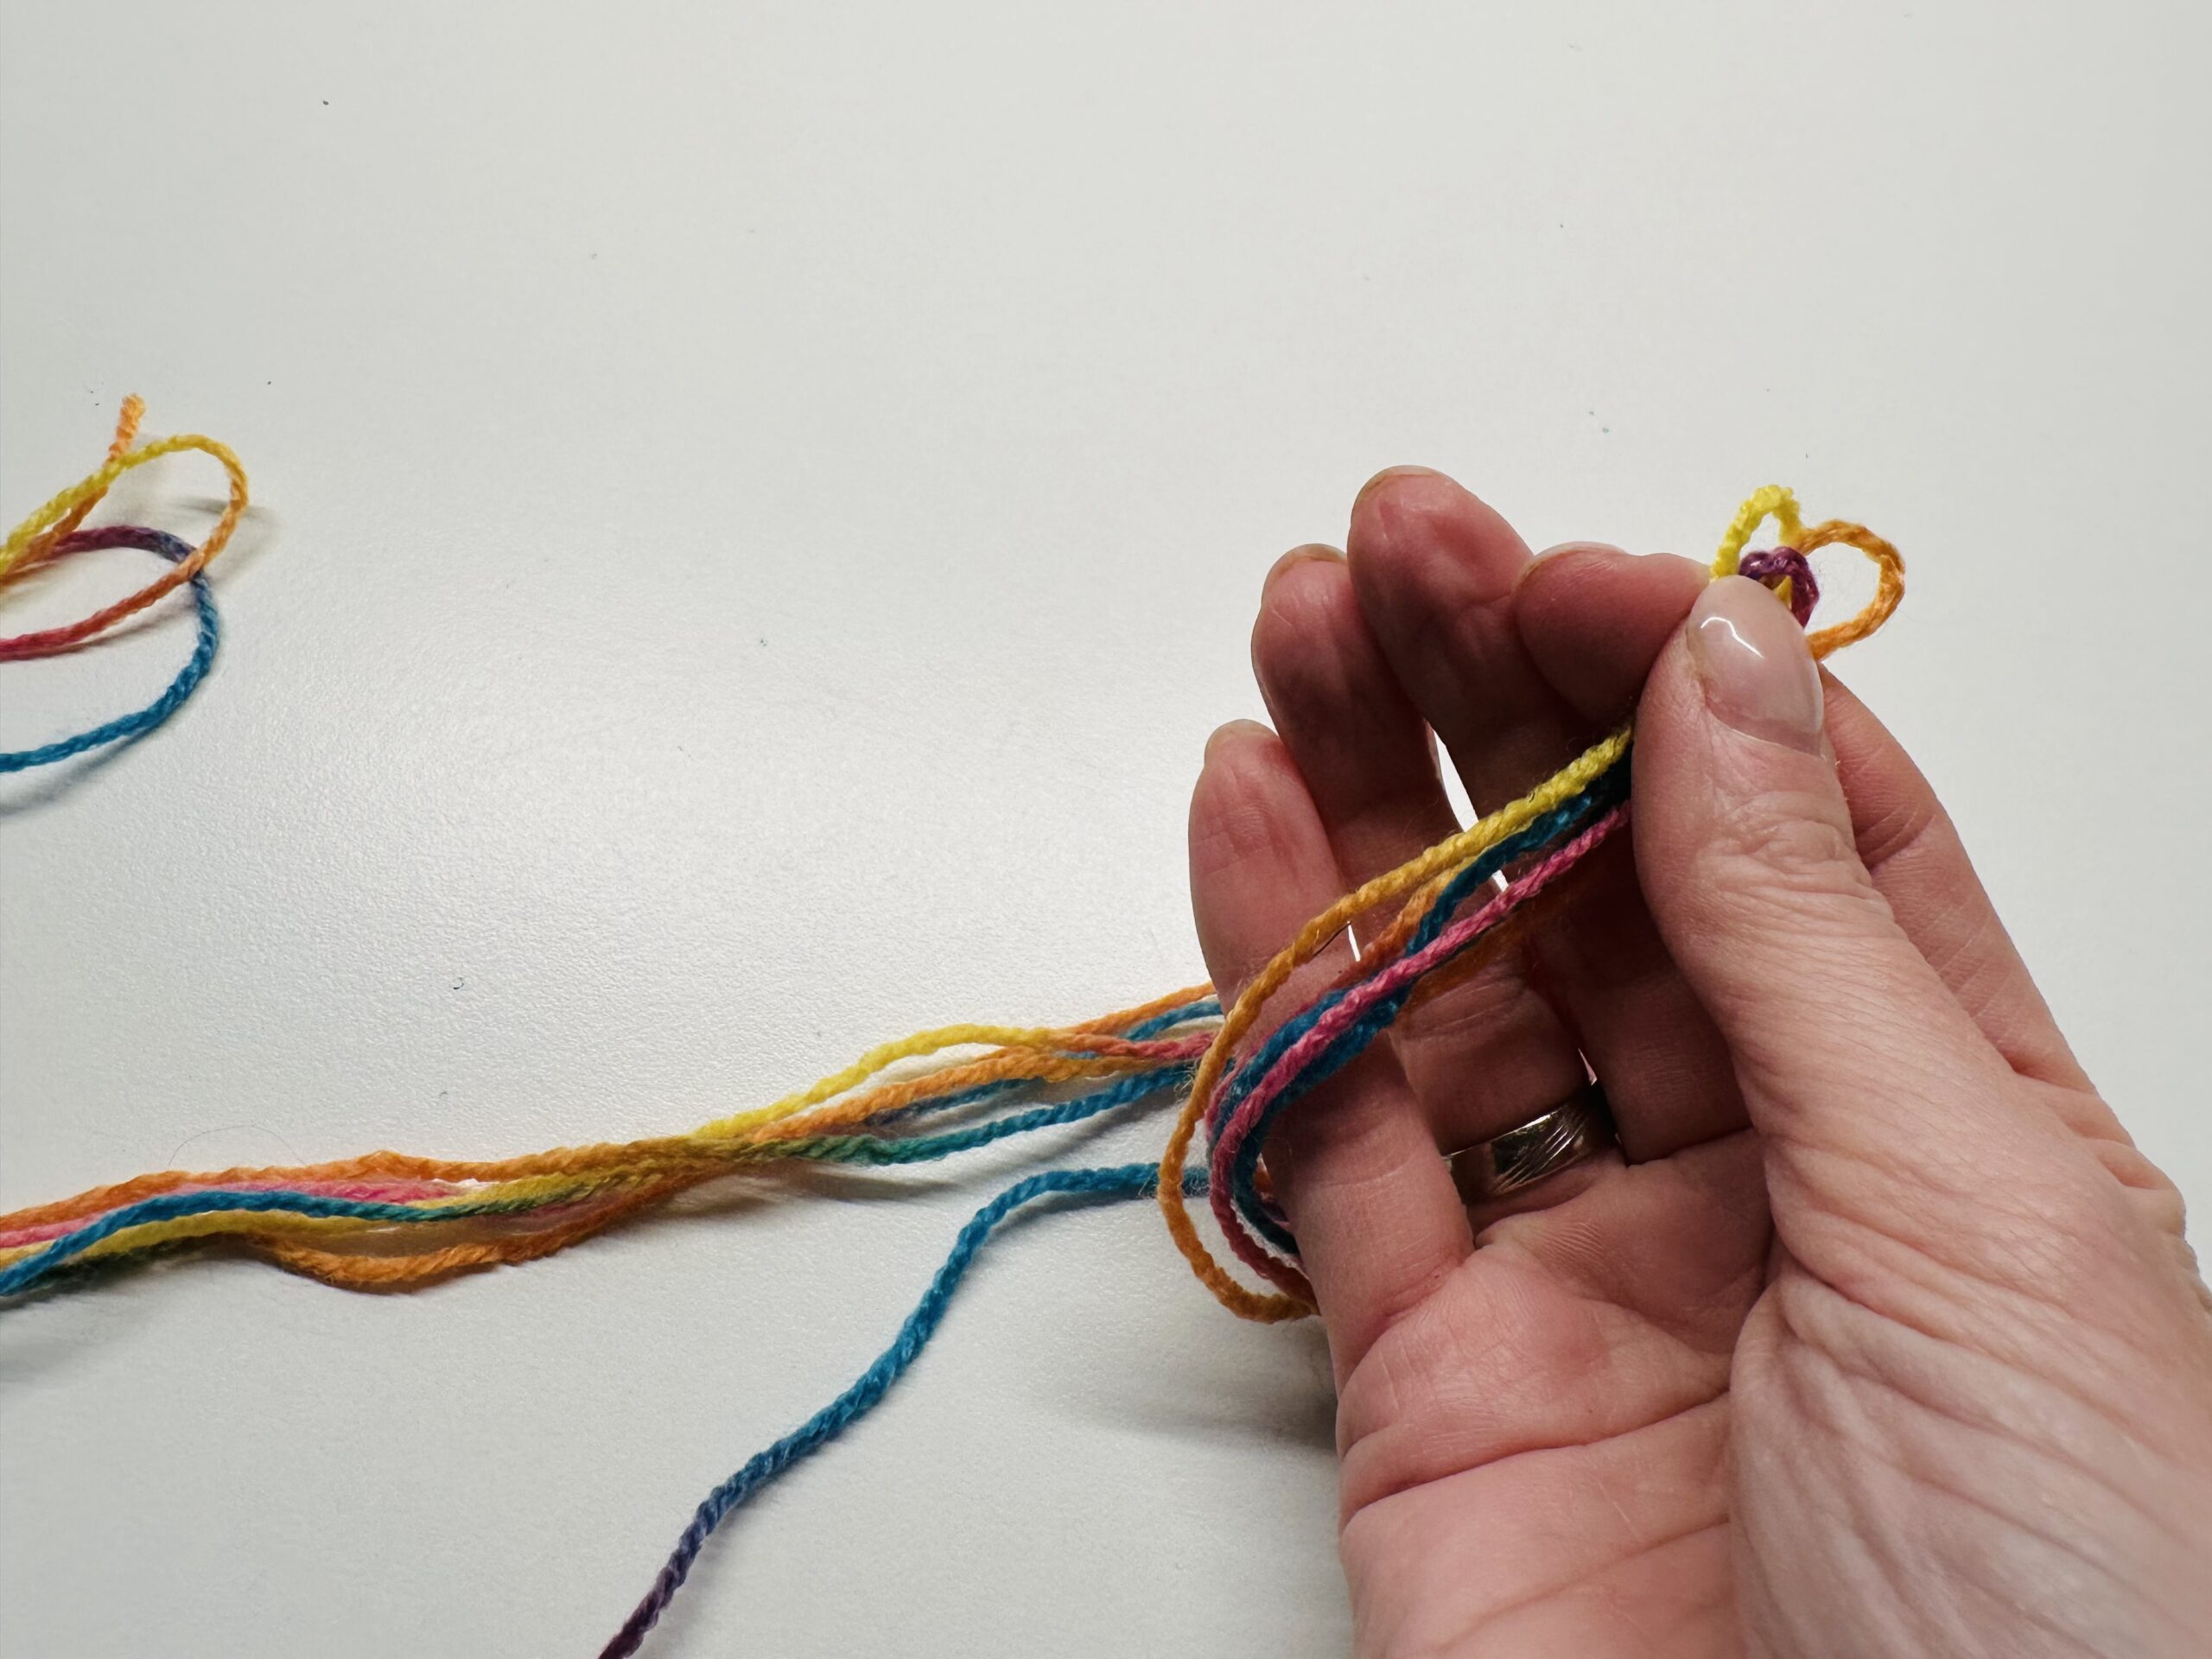
Bild zum Schritt 2 für das Bastel- und DIY-Abenteuer für Kinder: 'Messt mindestens 8-10 Fäden ab. Wenn die Wolle sehr dünn...'

3

The more threads, the thicker the snake.

Bild zum Schritt 3 für das Bastel- und DIY-Abenteuer für Kinder: 'Je mehr Fäden, desto dicker wird die Schlange.'

4

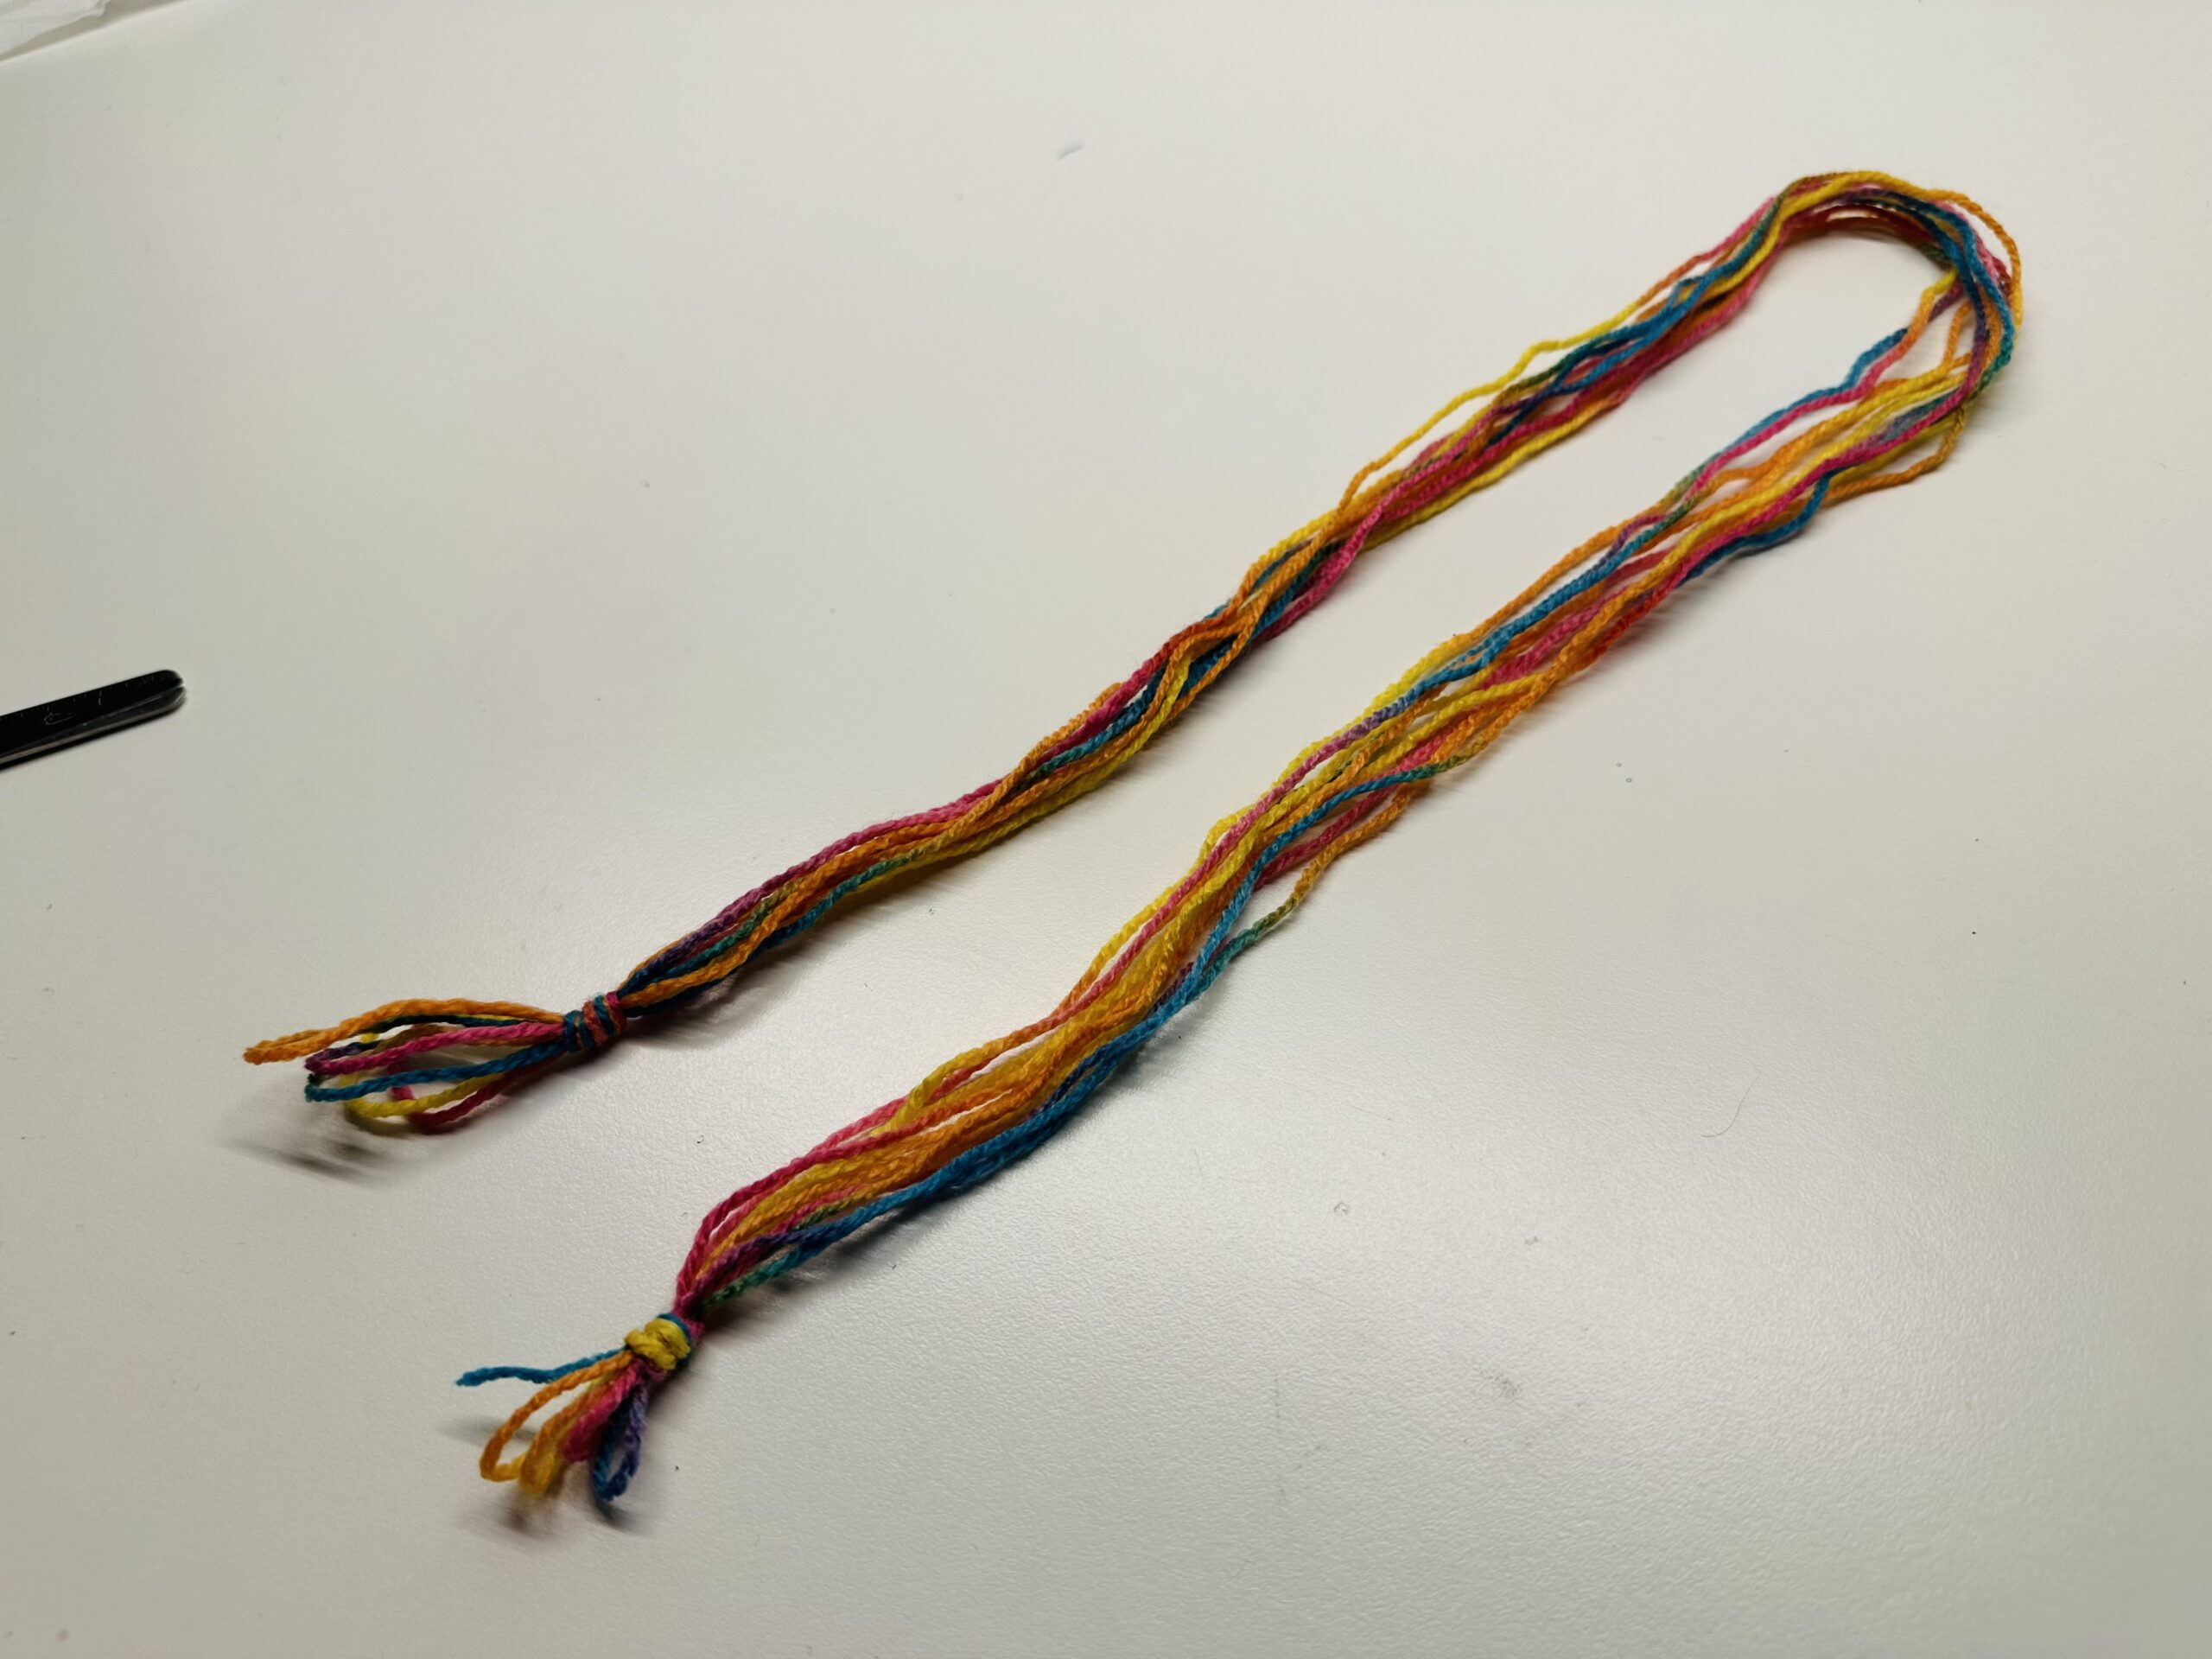
All the ends of the thread now lie on each other.

Bild zum Schritt 4 für das Bastel- und DIY-Abenteuer für Kinder: 'Alle Fadenenden liegen nun aufeinander.'

5

Make a knot at the end of all threads.

Bild zum Schritt 5 für das Bastel- und DIY-Abenteuer für Kinder: 'Macht einen Knoten am Ende aller Fäden.'

6

At the other end, too, you have to make a knot.

Bild zum Schritt 6 für das Bastel- und DIY-Abenteuer für Kinder: 'Auch am anderen Ende müsst ihr einen Knoten machen.'

7

That's what it looks like.

Bild zum Schritt 7 für das Bastel- und DIY-Abenteuer für Kinder: 'So sieht das dann aus.'

8

Hangs a thread end over a door handle or a hacking / cabinet button.

Bild zum Schritt 8 für das Bastel- und DIY-Abenteuer für Kinder: 'Hängt ein Fadenenden über einen Türgriff oder einen Hacken/ Schrankknopf.'

9

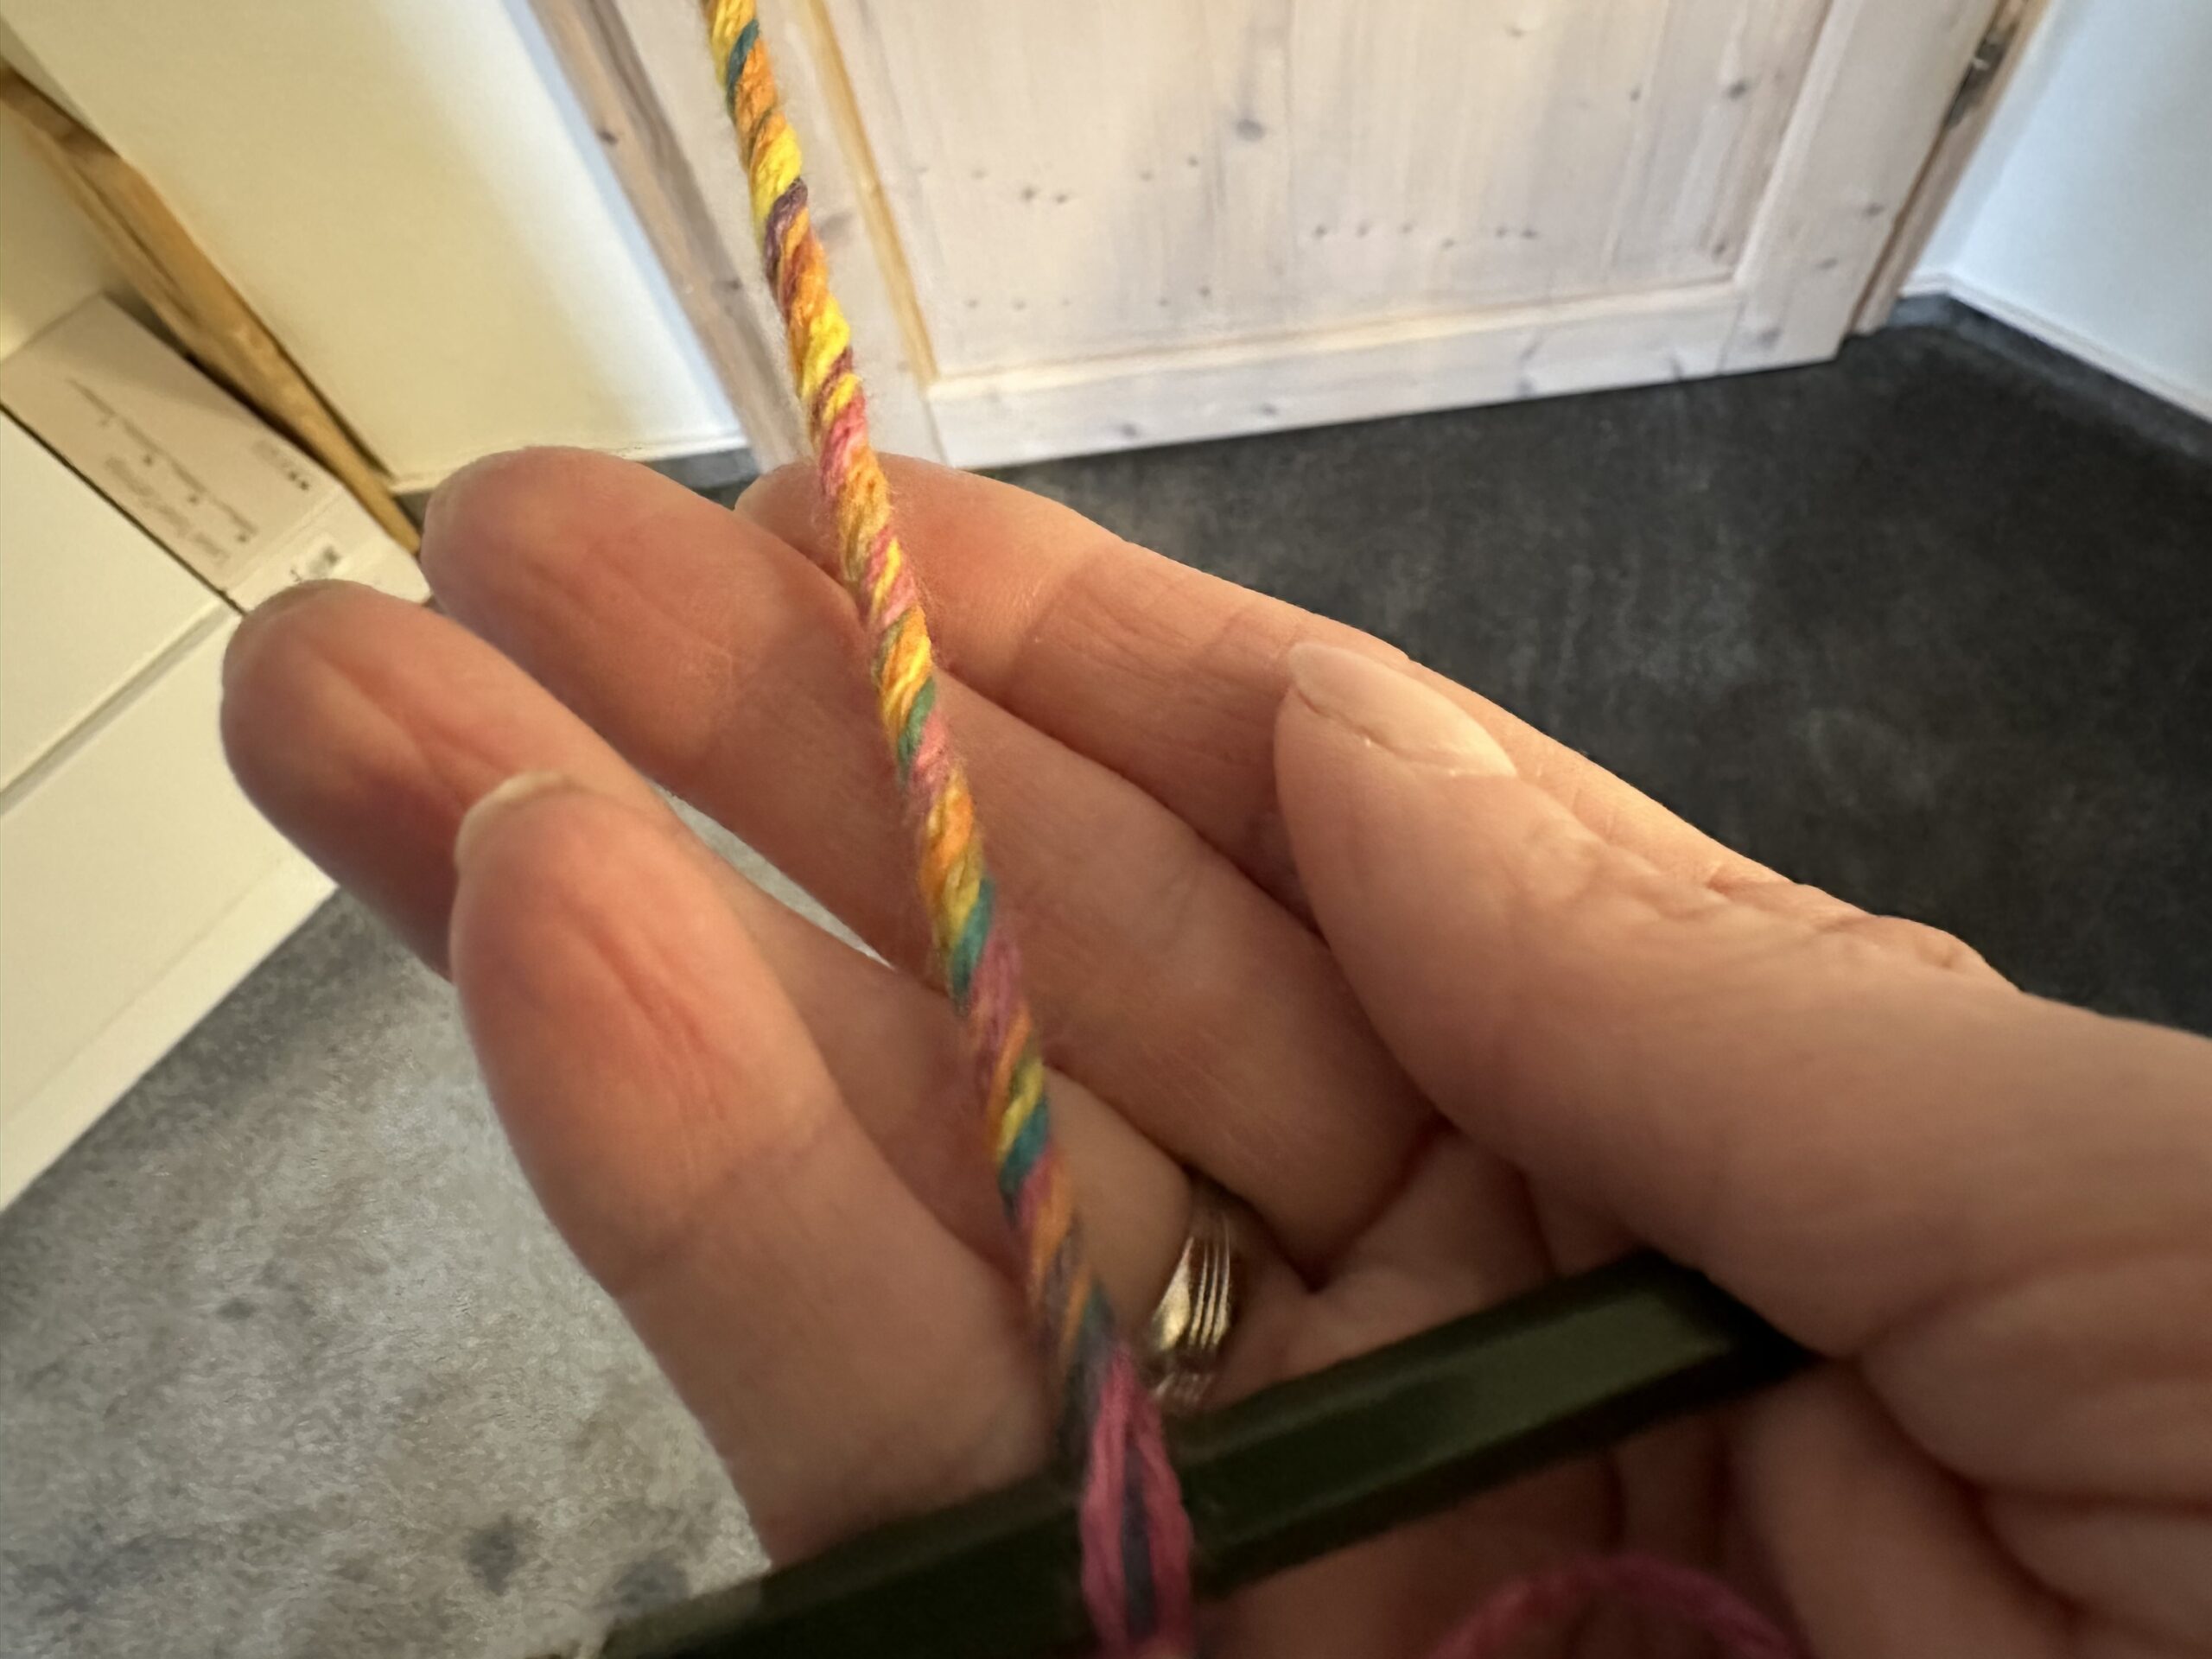
At the other end of the thread you have to keep the cords tight. Possibly put a pen through the loop.

Bild zum Schritt 9 für das Bastel- und DIY-Abenteuer für Kinder: 'Am anderen Fadenenden müsst ihr die Schnüre gut straff halten....'

10

Now the cord always turns in one direction, so a cord is created. Always hold the cord on tension.

Bild zum Schritt 10 für das Bastel- und DIY-Abenteuer für Kinder: 'Nun dreht die Schnüre immer in eine Richtung, so entsteht...'

11

Rotate the apron until they are well twisted.

Bild zum Schritt 11 für das Bastel- und DIY-Abenteuer für Kinder: 'Verdreht die Schüre so lange, bis sie gut verdreht sind.'

12

That's how tight the cord should be.

Bild zum Schritt 12 für das Bastel- und DIY-Abenteuer für Kinder: 'So fest soll die Kordel gedreht sein.'

13

The cord looks like this.

Bild zum Schritt 13 für das Bastel- und DIY-Abenteuer für Kinder: 'Die Kordel sieht dann so aus.'

14

Keep the ends still on tension! Let us help you with this! For two it's easier. Hold the middle of the scoundrel and place both ends on each other. All the aprons are still tense!

Bild zum Schritt 14 für das Bastel- und DIY-Abenteuer für Kinder: 'Haltet die Enden immer noch auf Spannung! Lasst euch hierbei...'

15

Now let go of the middle. Both threads roll together and twist together.

Bild zum Schritt 15 für das Bastel- und DIY-Abenteuer für Kinder: 'Lasst nun die Mitte los. Beide Fäden rollen sich zusammen...'

16

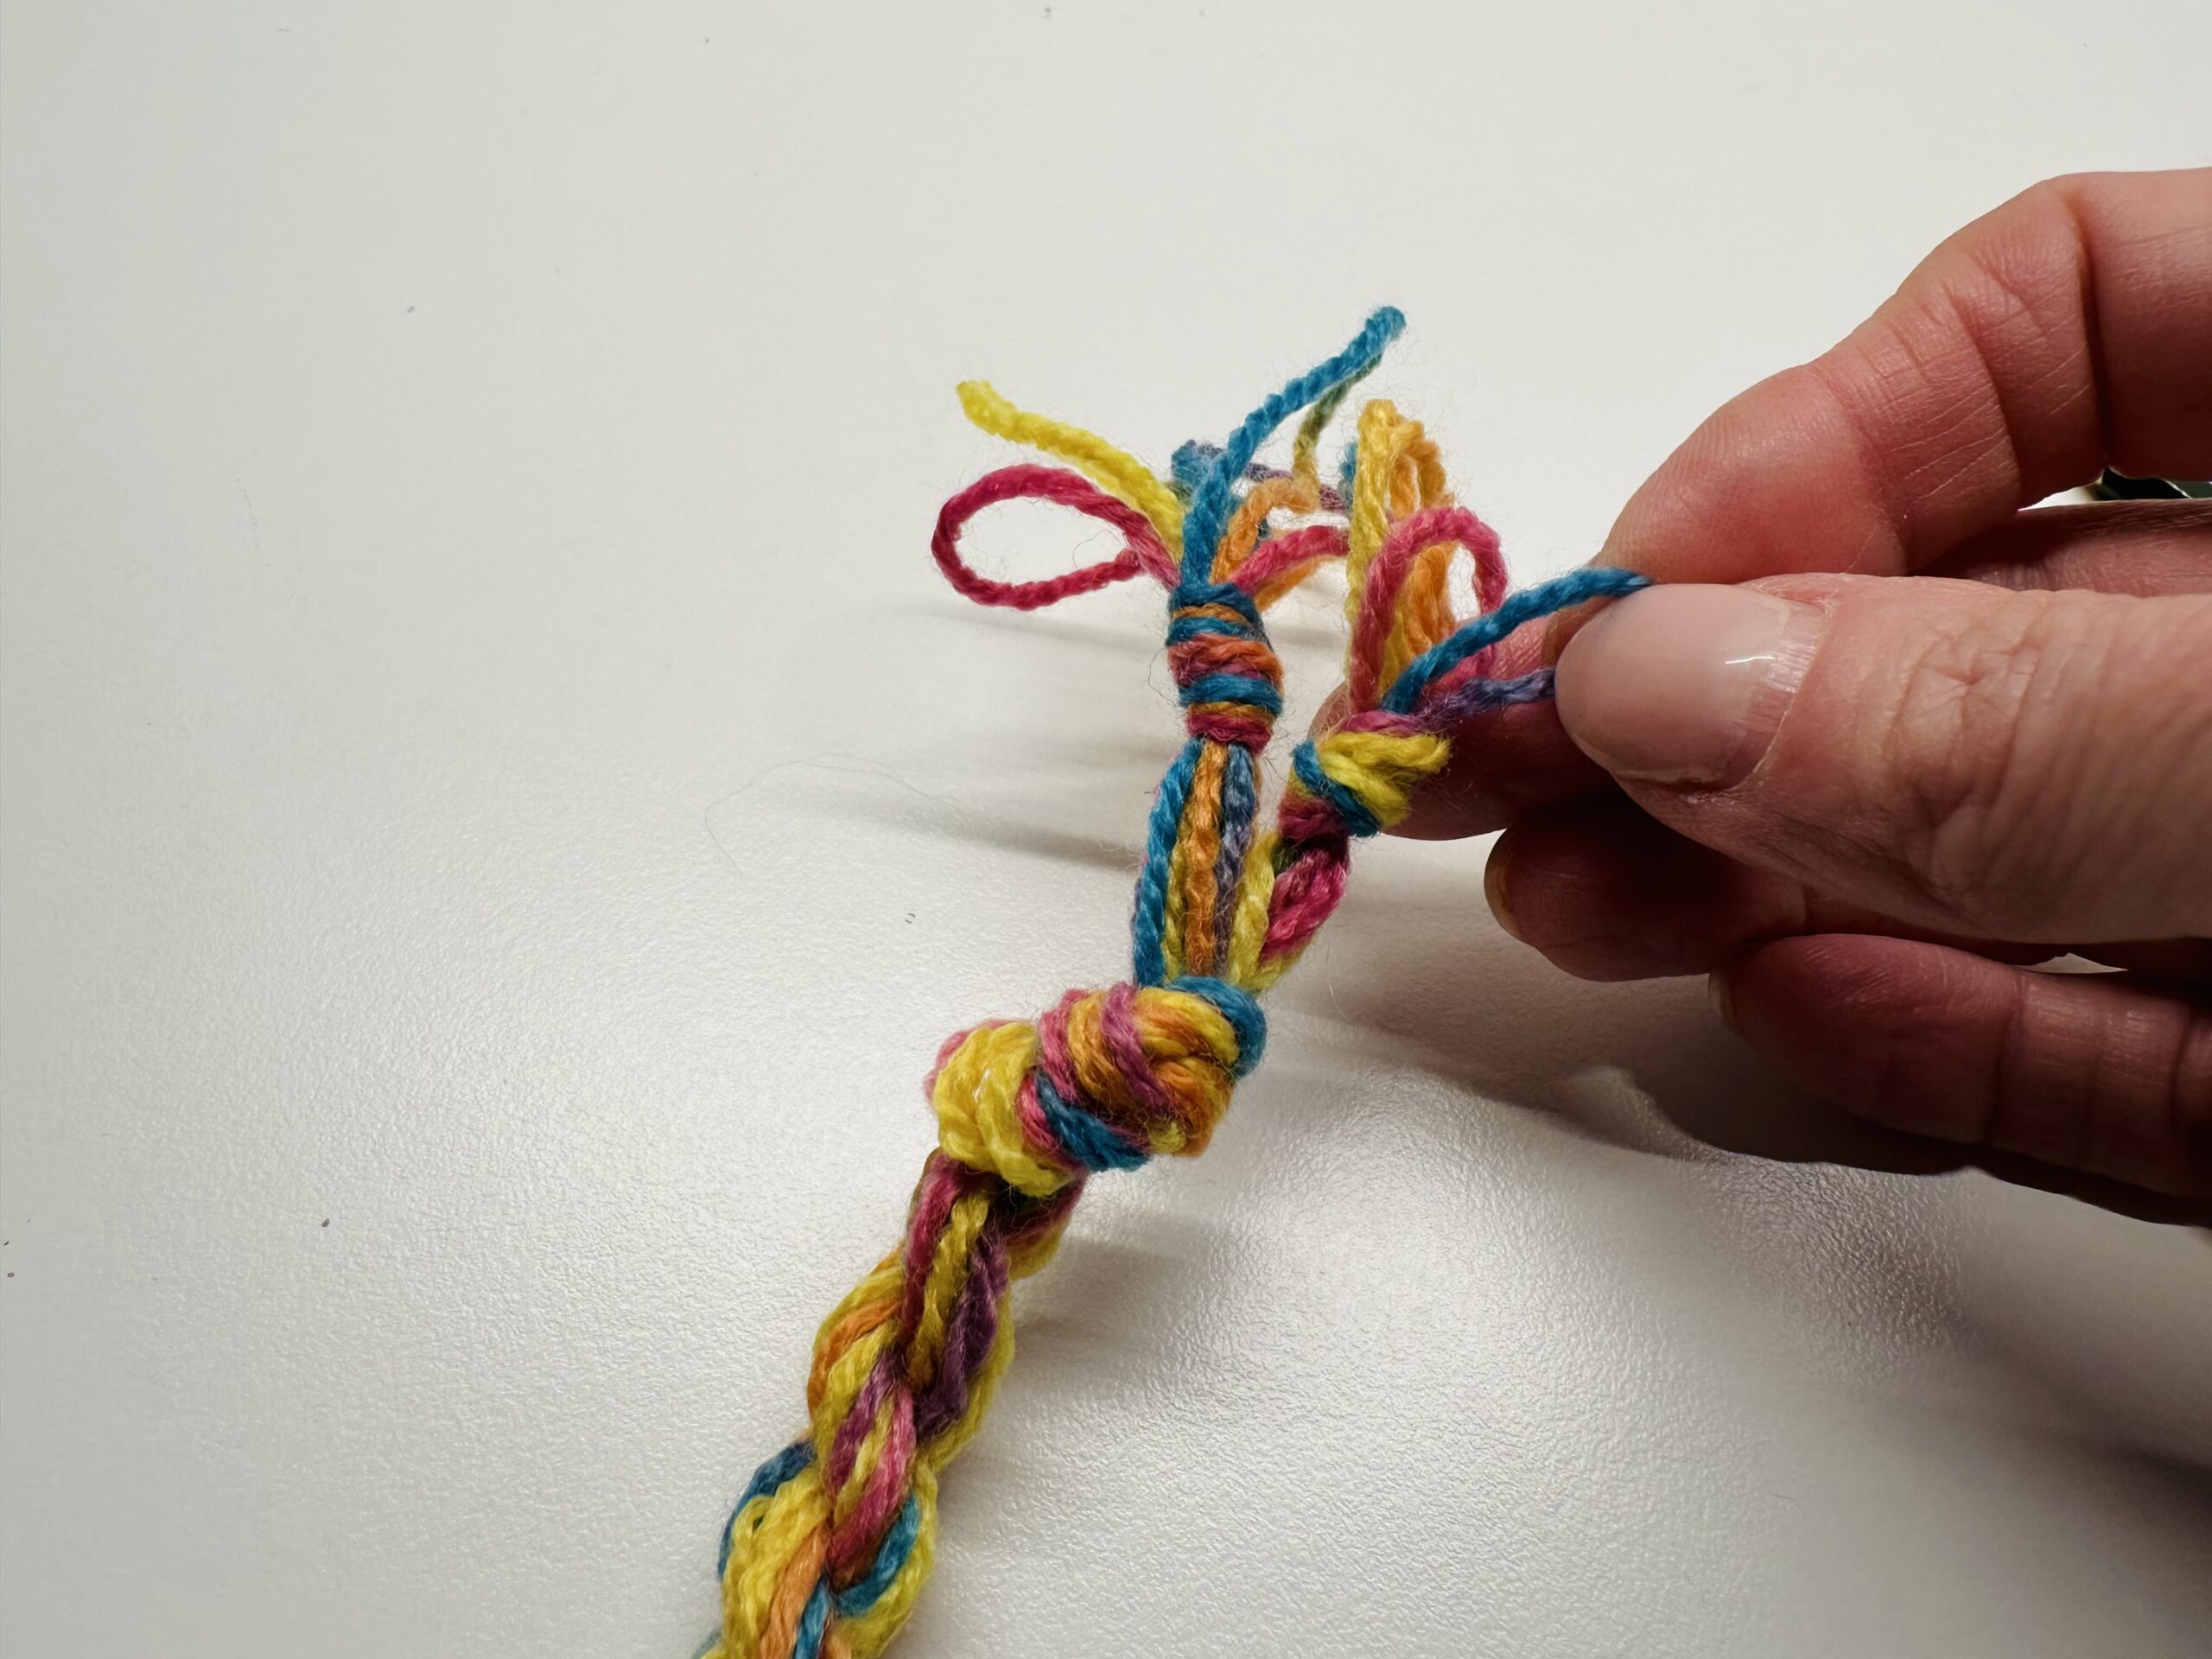
The two aprons twist to a thick cord. Hold both ends still well! Strip the cord that it is evenly twisted.

Bild zum Schritt 16 für das Bastel- und DIY-Abenteuer für Kinder: 'Die beiden Schüre verdrillern zu einem dicken Kordel. Haltet beide...'

17

Then tie both ends together again with a common knot. Only then can you let go of the ends. Now the cord is finished.

Bild zum Schritt 17 für das Bastel- und DIY-Abenteuer für Kinder: 'Bindet dann beide Enden nochmals mit einem gemeinsamen Knoten zusammen....'

18

For the head of the snake a tongue and eyes are missing. Cut off a strip of felt as a tongue. It should have a little more than twice the length of your finished tongue.

Bild zum Schritt 18 für das Bastel- und DIY-Abenteuer für Kinder: 'Für den Kopf der Schlange fehlt noch eine Zunge und...'

19

Put the strip through the front part of your snake (where the thread has been placed in half!) Push it halfway through and glue the felt ends to each other.
Cut the tongue with the scissors, for example, to Spitz or a tatter in it, so you get a split tongue.

Bild zum Schritt 19 für das Bastel- und DIY-Abenteuer für Kinder: 'Steckt den Streifen durch das vordere Teil eurer Schlange (dort...'

20

Stick two wobble eyes on the head of the snake.

Bild zum Schritt 20 für das Bastel- und DIY-Abenteuer für Kinder: 'Klebt zwei Wackelaugen auf den Kopf der Schlange.'

21

You can cut off the cock of the snake in French or...

Bild zum Schritt 21 für das Bastel- und DIY-Abenteuer für Kinder: 'Den Schwanz der Schlange könnt ihr franzig  abschneiden oder...'

22

You can also leave the nodules.

Bild zum Schritt 22 für das Bastel- und DIY-Abenteuer für Kinder: 'Ihr  könnt auch die Knöten lassen.'

23

Your snake is ready.

Bild zum Schritt 23 für das Bastel- und DIY-Abenteuer für Kinder: 'Fertig ist eure Schlange.'

Materials

 1 Coloured woolas thick as possible
 1 Ruler
 1 Felt residues
 2 Wax eyes
 1 Glue
All links marked with a shopping cart lead to Amazon - here we have selected products that we would order ourselves and in part also ordered. In a qualified purchase via the advertising link, we as Amazon partner receive a commission, for you there are no costs. You thus support our cost- and advertising banner-free, educational offer.

Directions

1

Take off colorful wool as thick as possible and take off a thread. At least three times as long as your snake is about to become!

Bild zum Schritt 1 für das Bastel- und DIY-Abenteuer für Kinder: 'Nehmt bunte möglichst dicke Wolle und messt einen Faden ab....'

2

Measure at least 8-10 threads. If the wool is very thin you need more threads.

Bild zum Schritt 2 für das Bastel- und DIY-Abenteuer für Kinder: 'Messt mindestens 8-10 Fäden ab. Wenn die Wolle sehr dünn...'

3

The more threads, the thicker the snake.
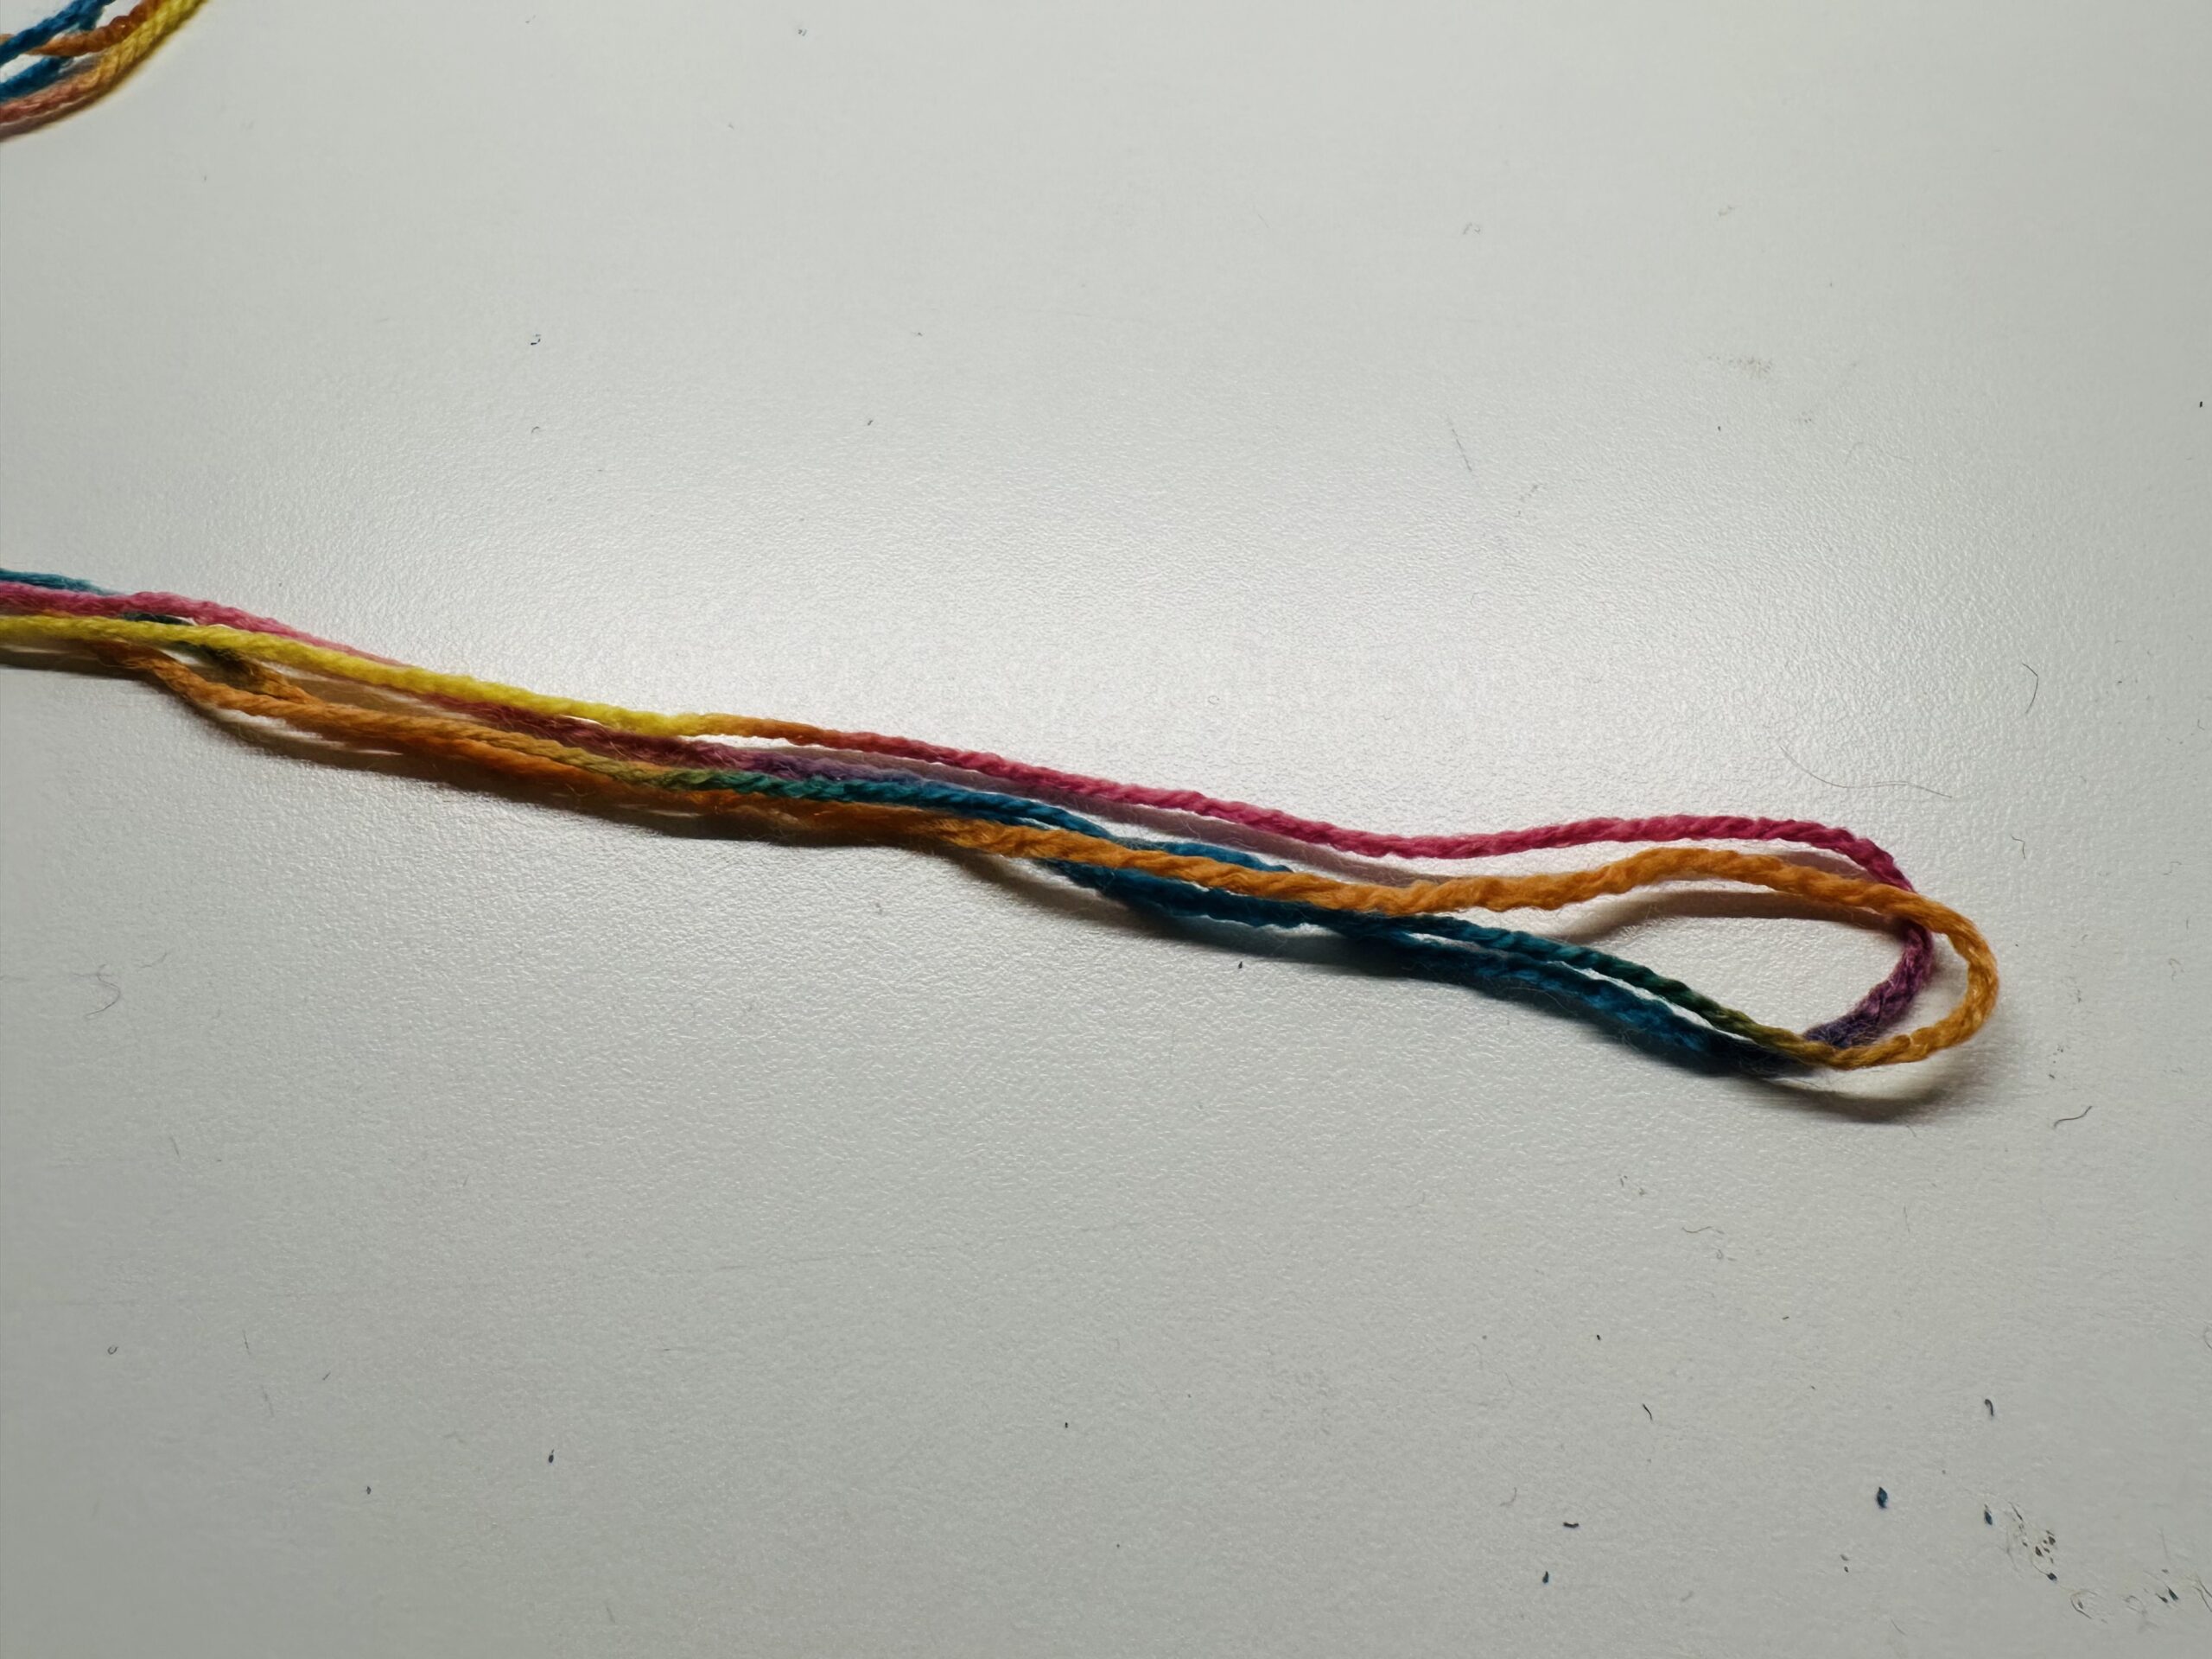
Bild zum Schritt 3 für das Bastel- und DIY-Abenteuer für Kinder: 'Je mehr Fäden, desto dicker wird die Schlange.'

4

All the ends of the thread now lie on each other.
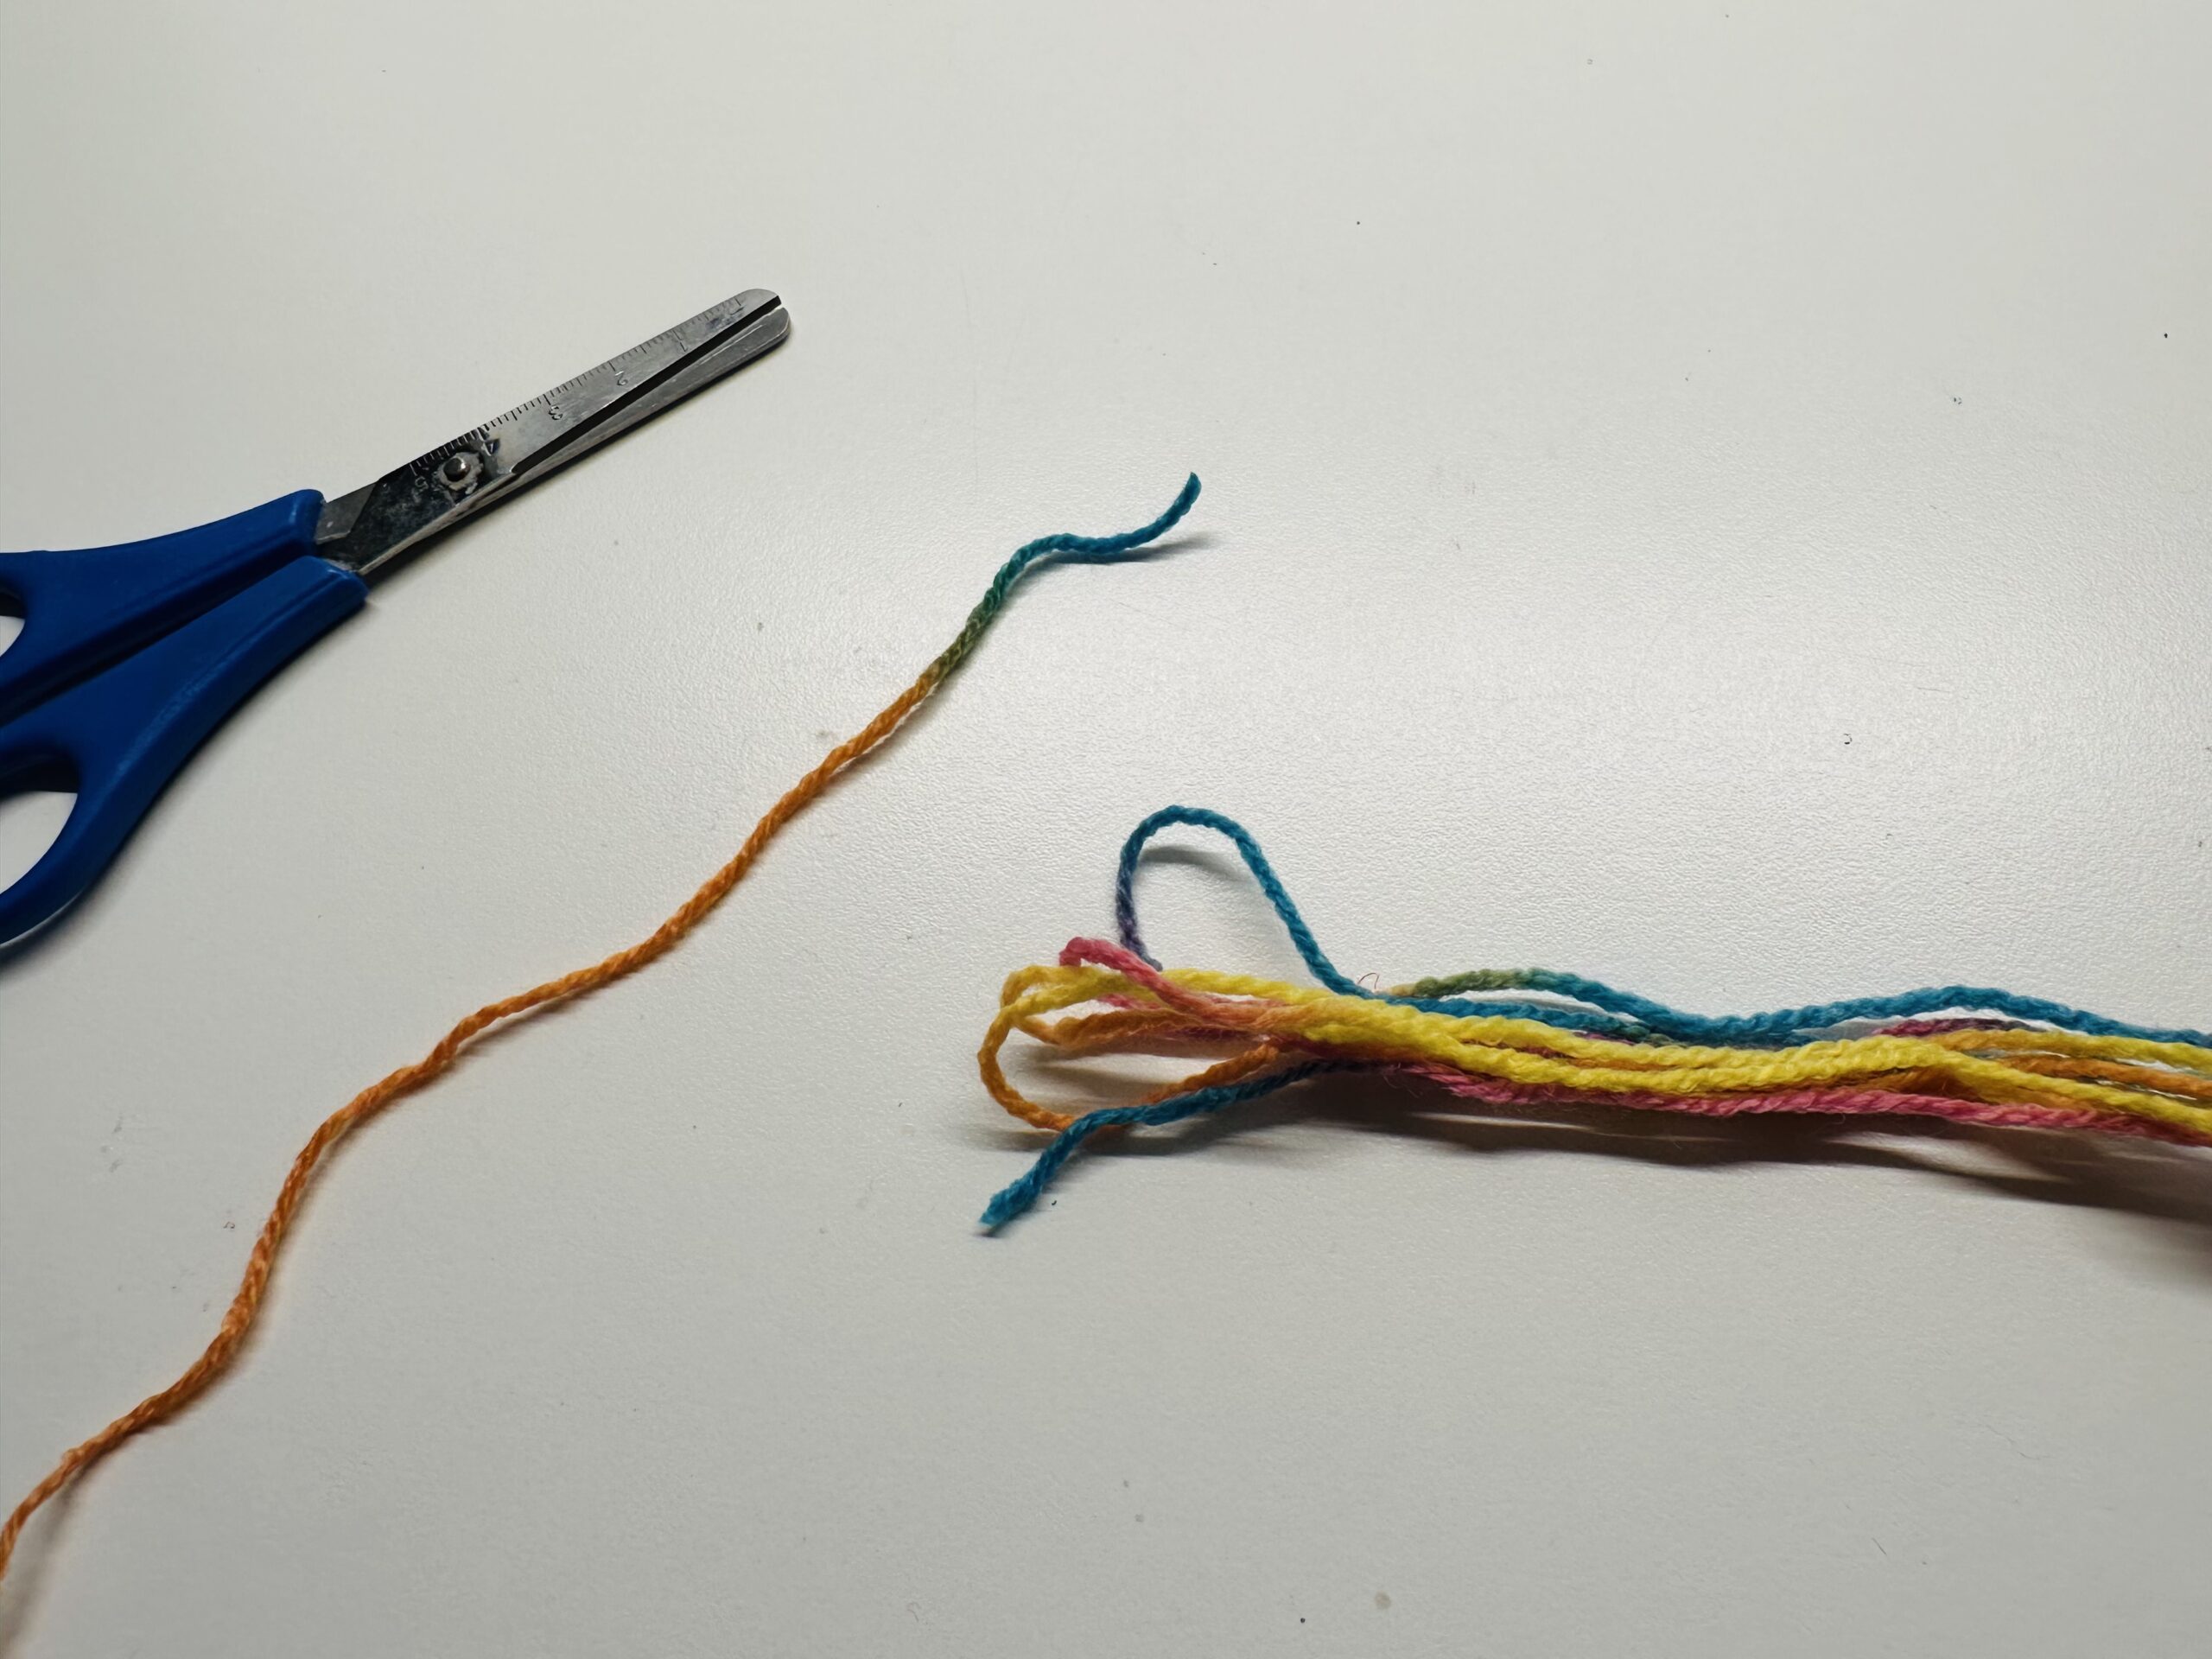
Bild zum Schritt 4 für das Bastel- und DIY-Abenteuer für Kinder: 'Alle Fadenenden liegen nun aufeinander.'

5

Make a knot at the end of all threads.
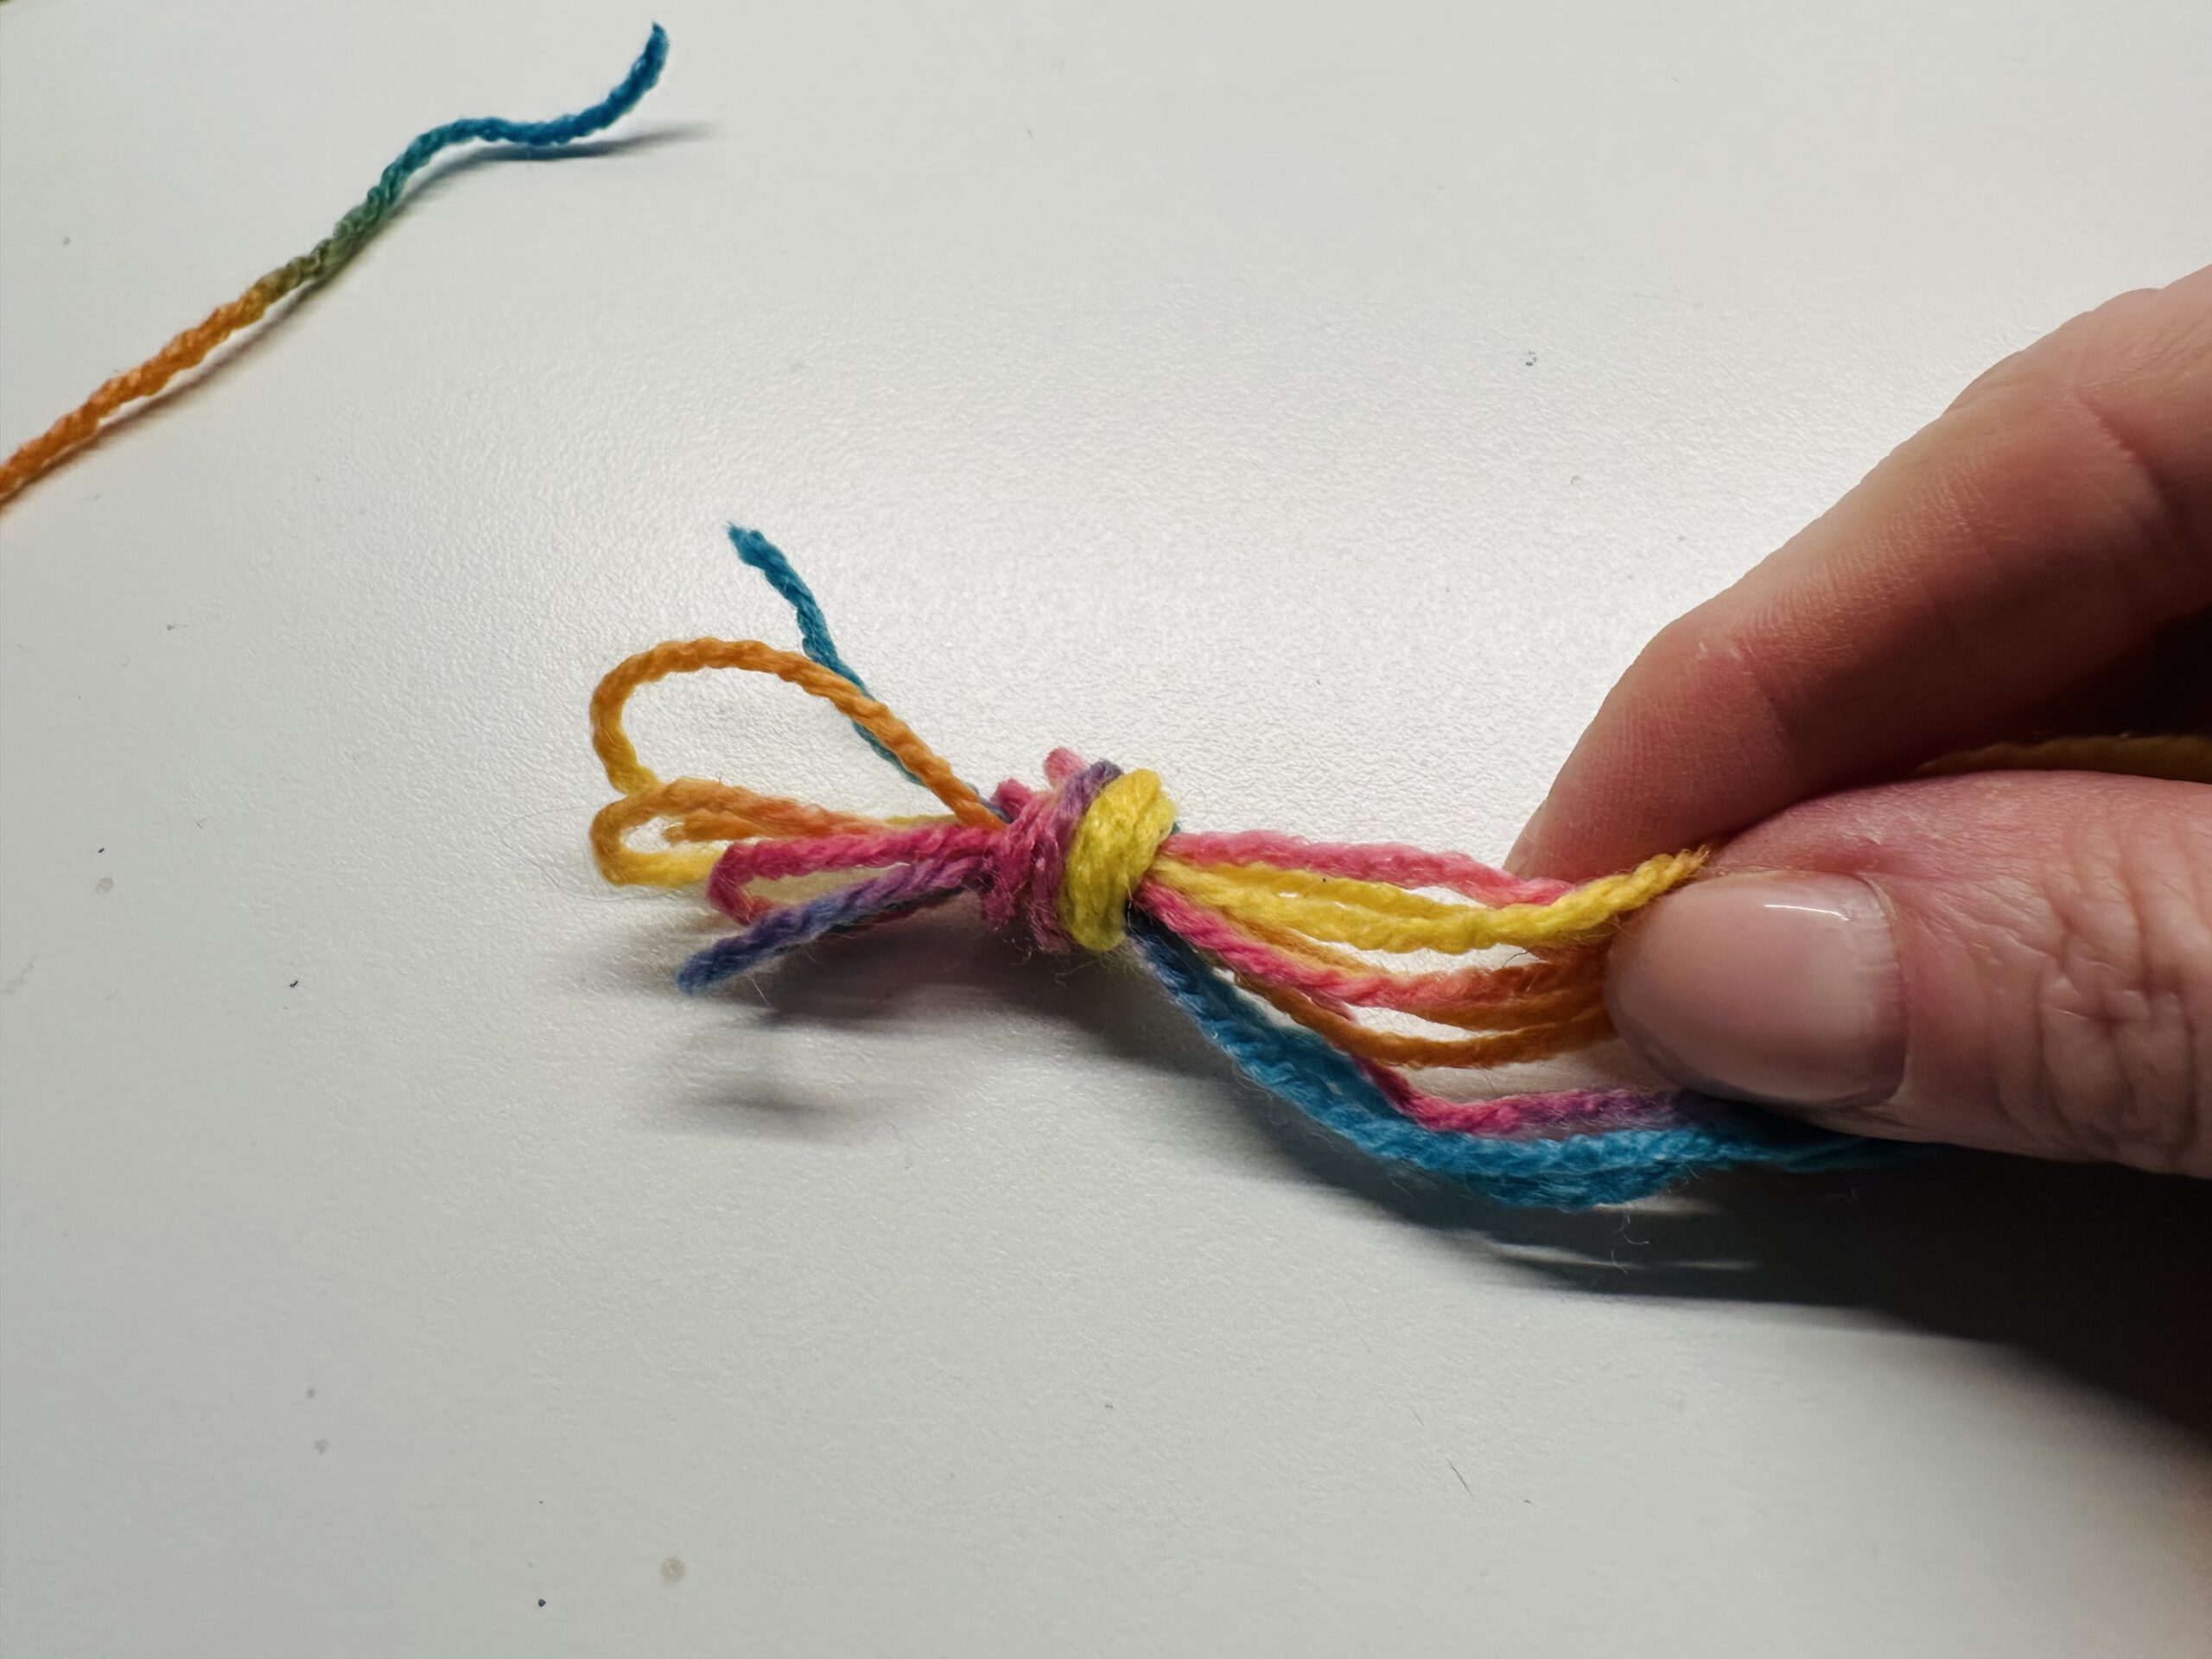
Bild zum Schritt 5 für das Bastel- und DIY-Abenteuer für Kinder: 'Macht einen Knoten am Ende aller Fäden.'

6

At the other end, too, you have to make a knot.
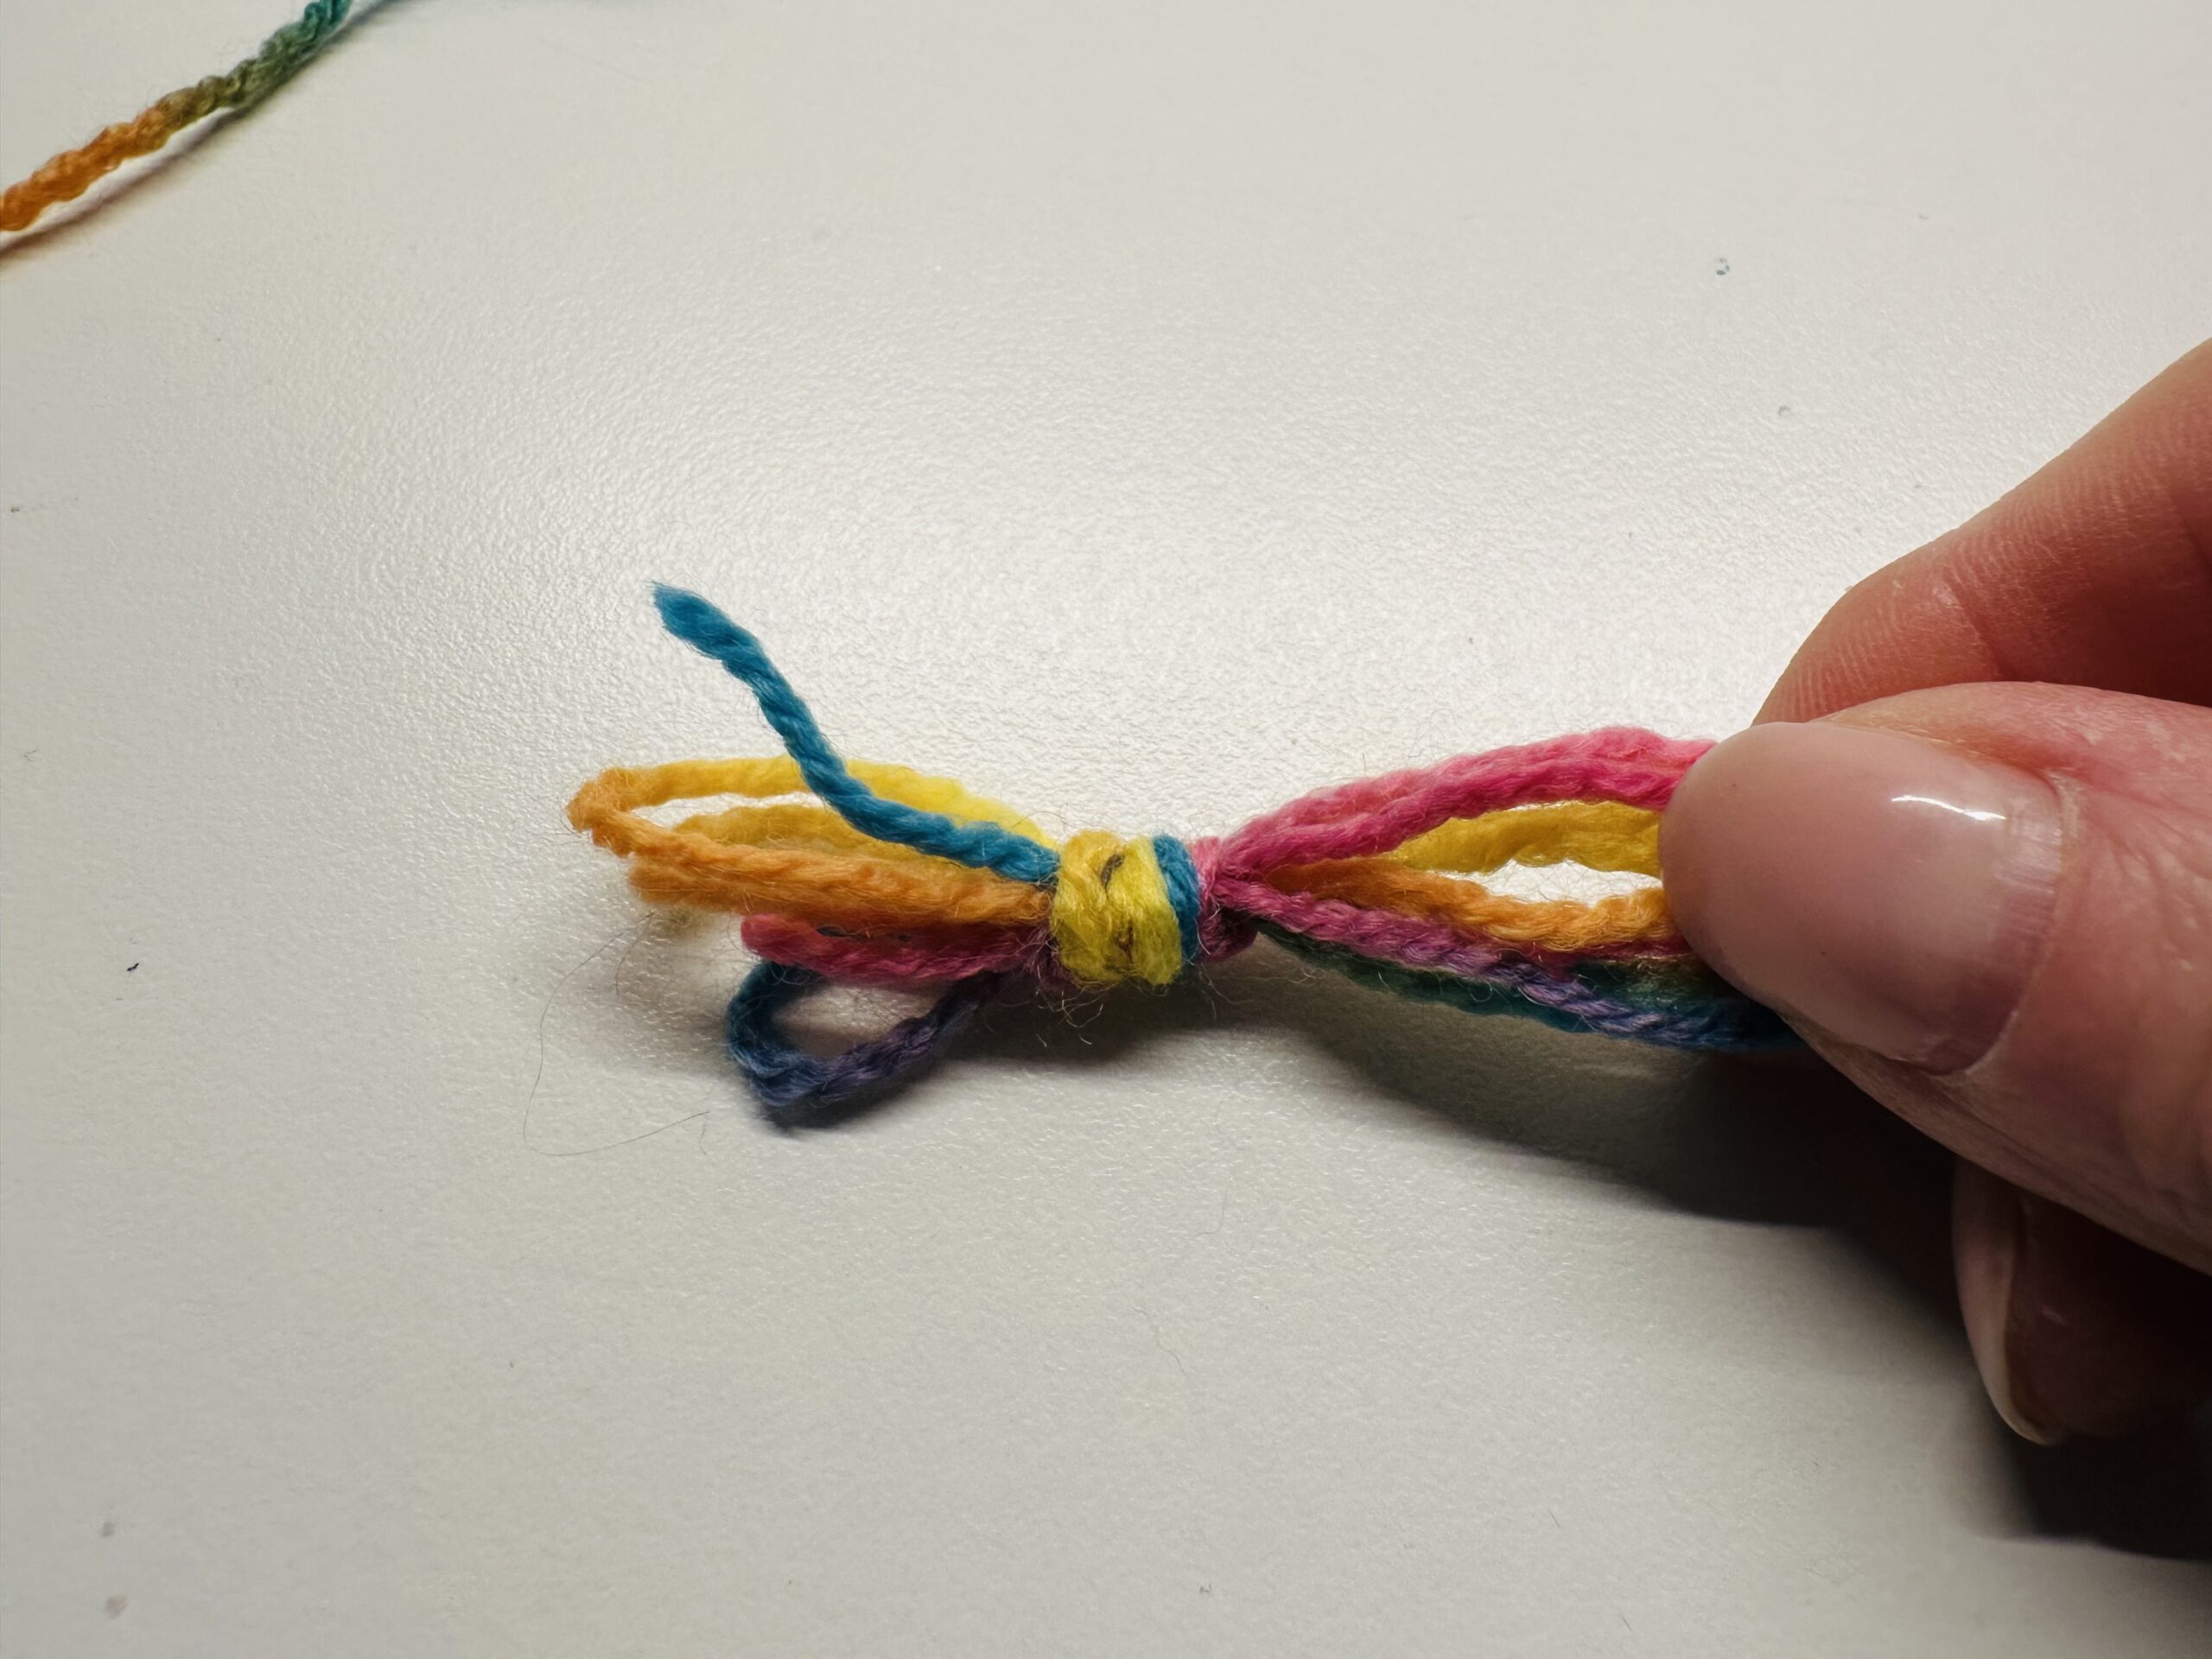
Bild zum Schritt 6 für das Bastel- und DIY-Abenteuer für Kinder: 'Auch am anderen Ende müsst ihr einen Knoten machen.'

7

That's what it looks like.

Bild zum Schritt 7 für das Bastel- und DIY-Abenteuer für Kinder: 'So sieht das dann aus.'

8

Hangs a thread end over a door handle or a hacking / cabinet button.
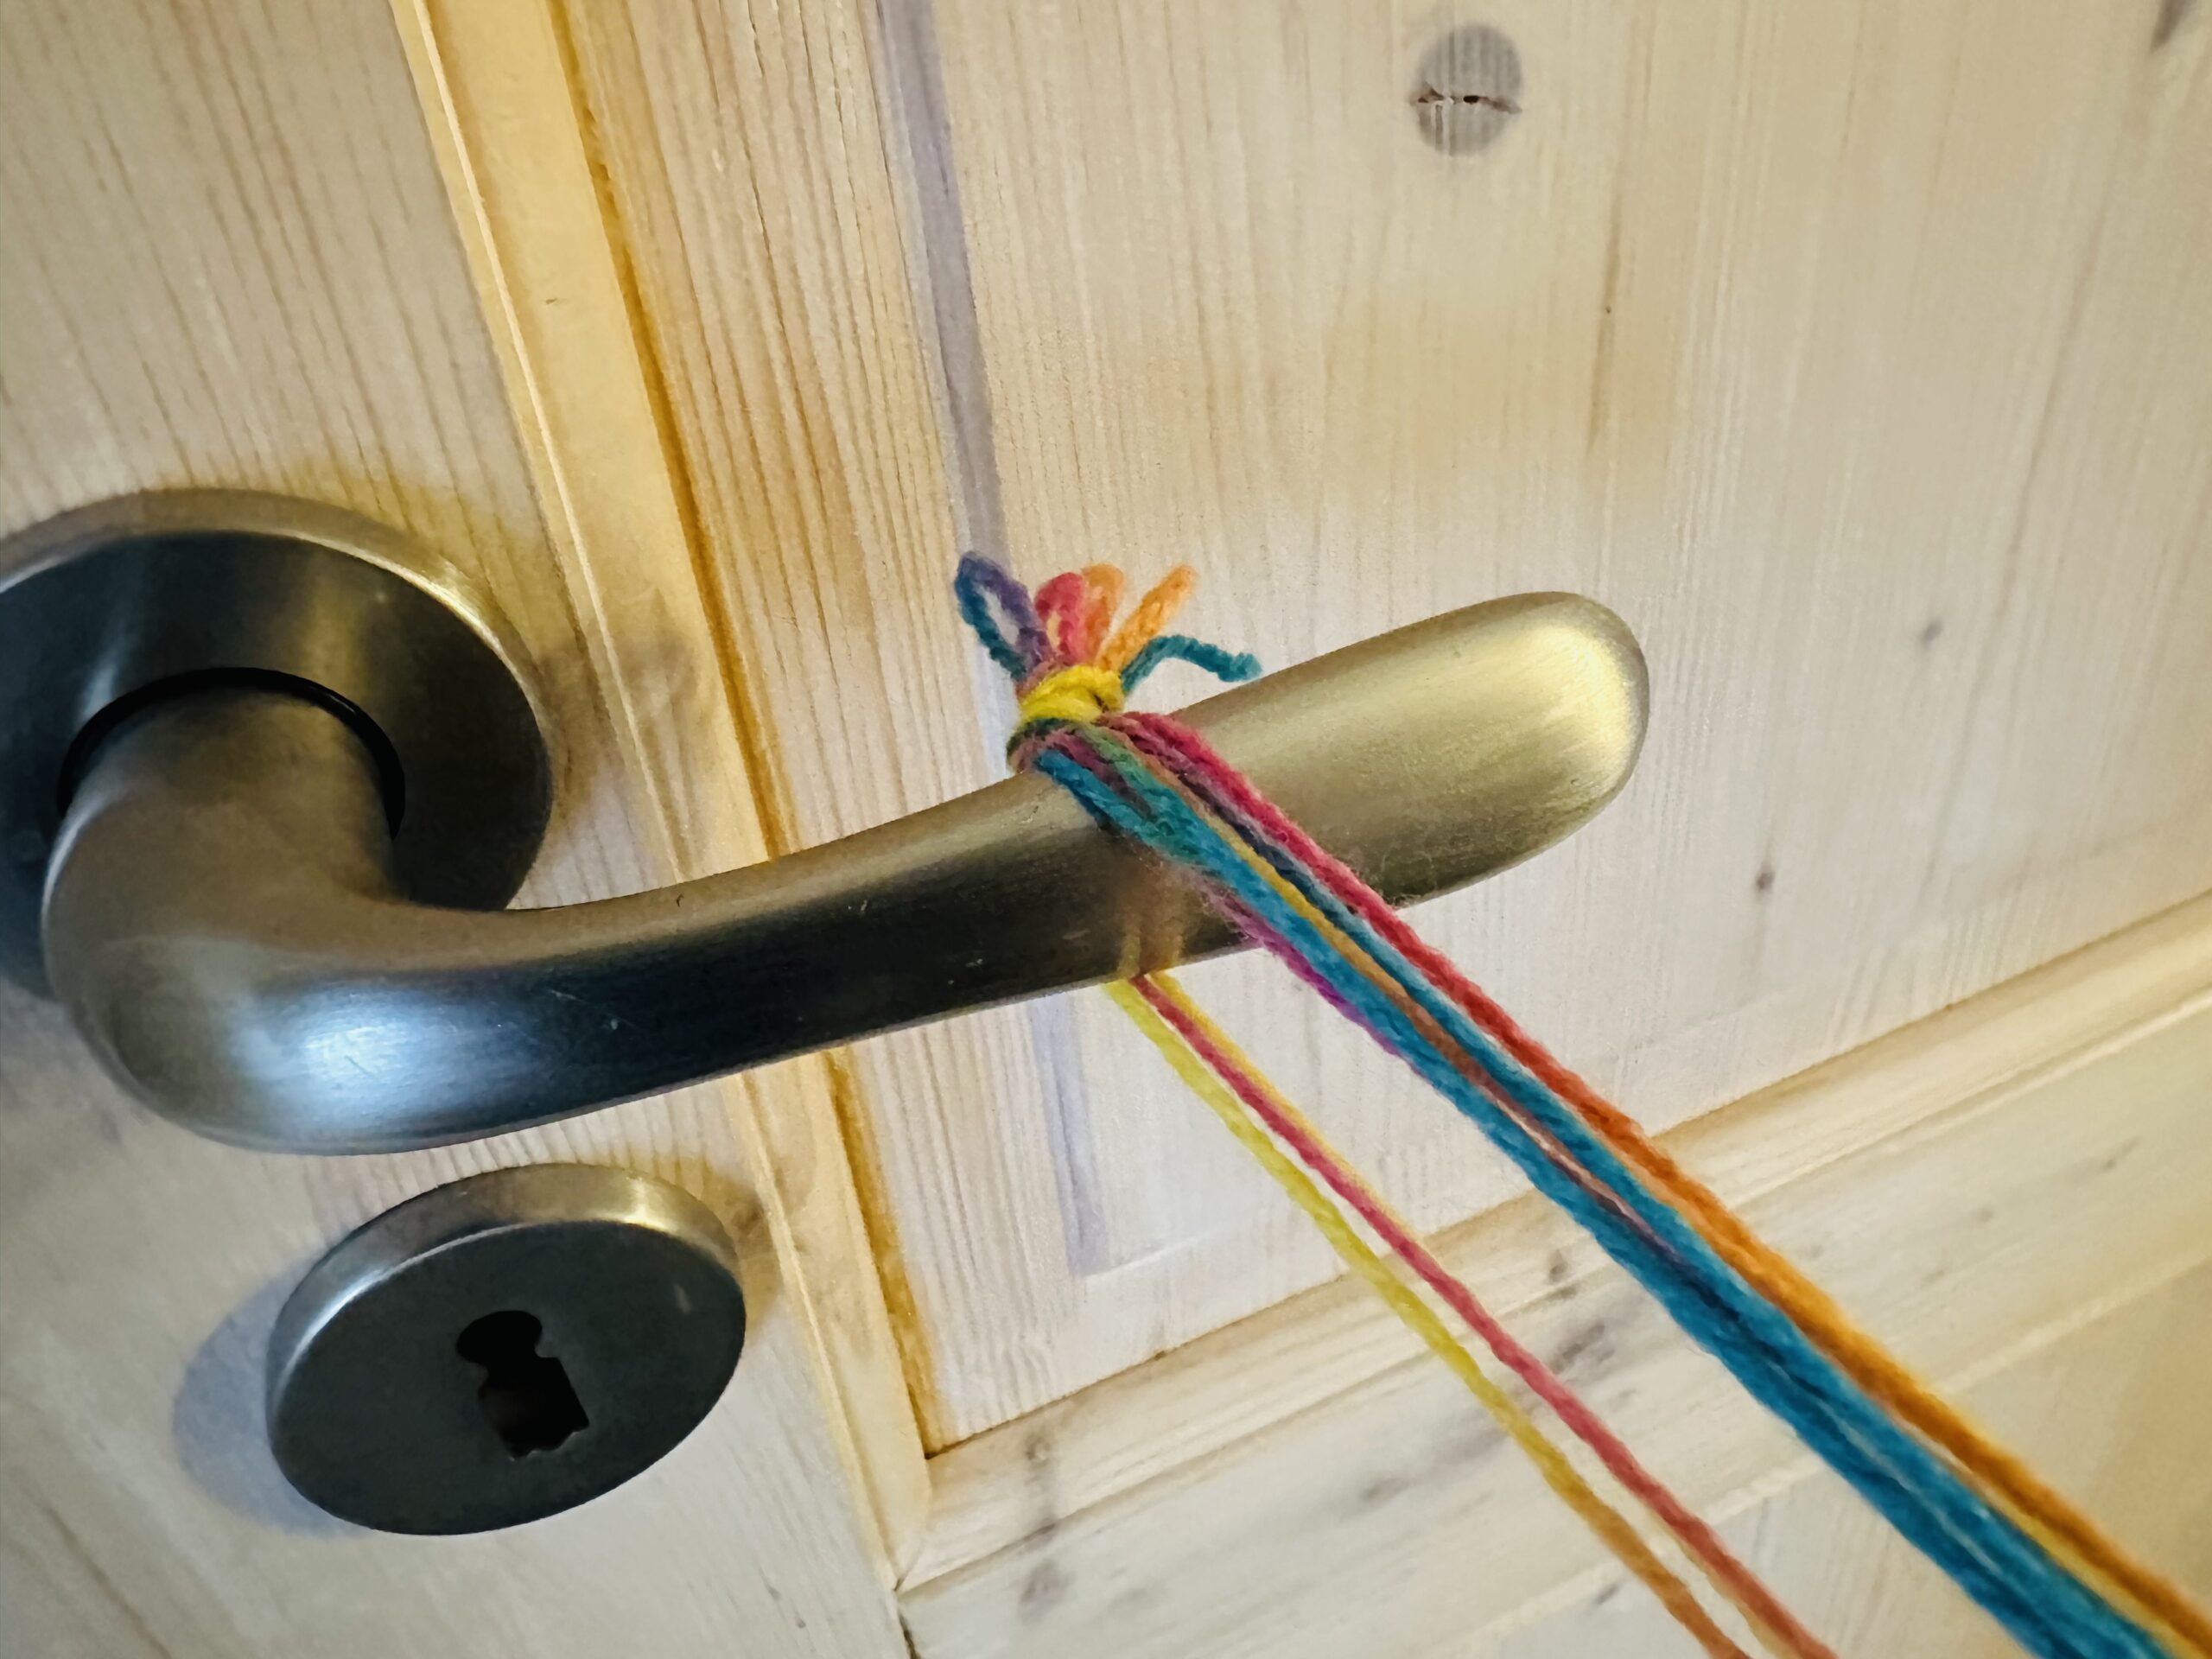
Bild zum Schritt 8 für das Bastel- und DIY-Abenteuer für Kinder: 'Hängt ein Fadenenden über einen Türgriff oder einen Hacken/ Schrankknopf.'

9

At the other end of the thread you have to keep the cords tight. Possibly put a pen through the loop.
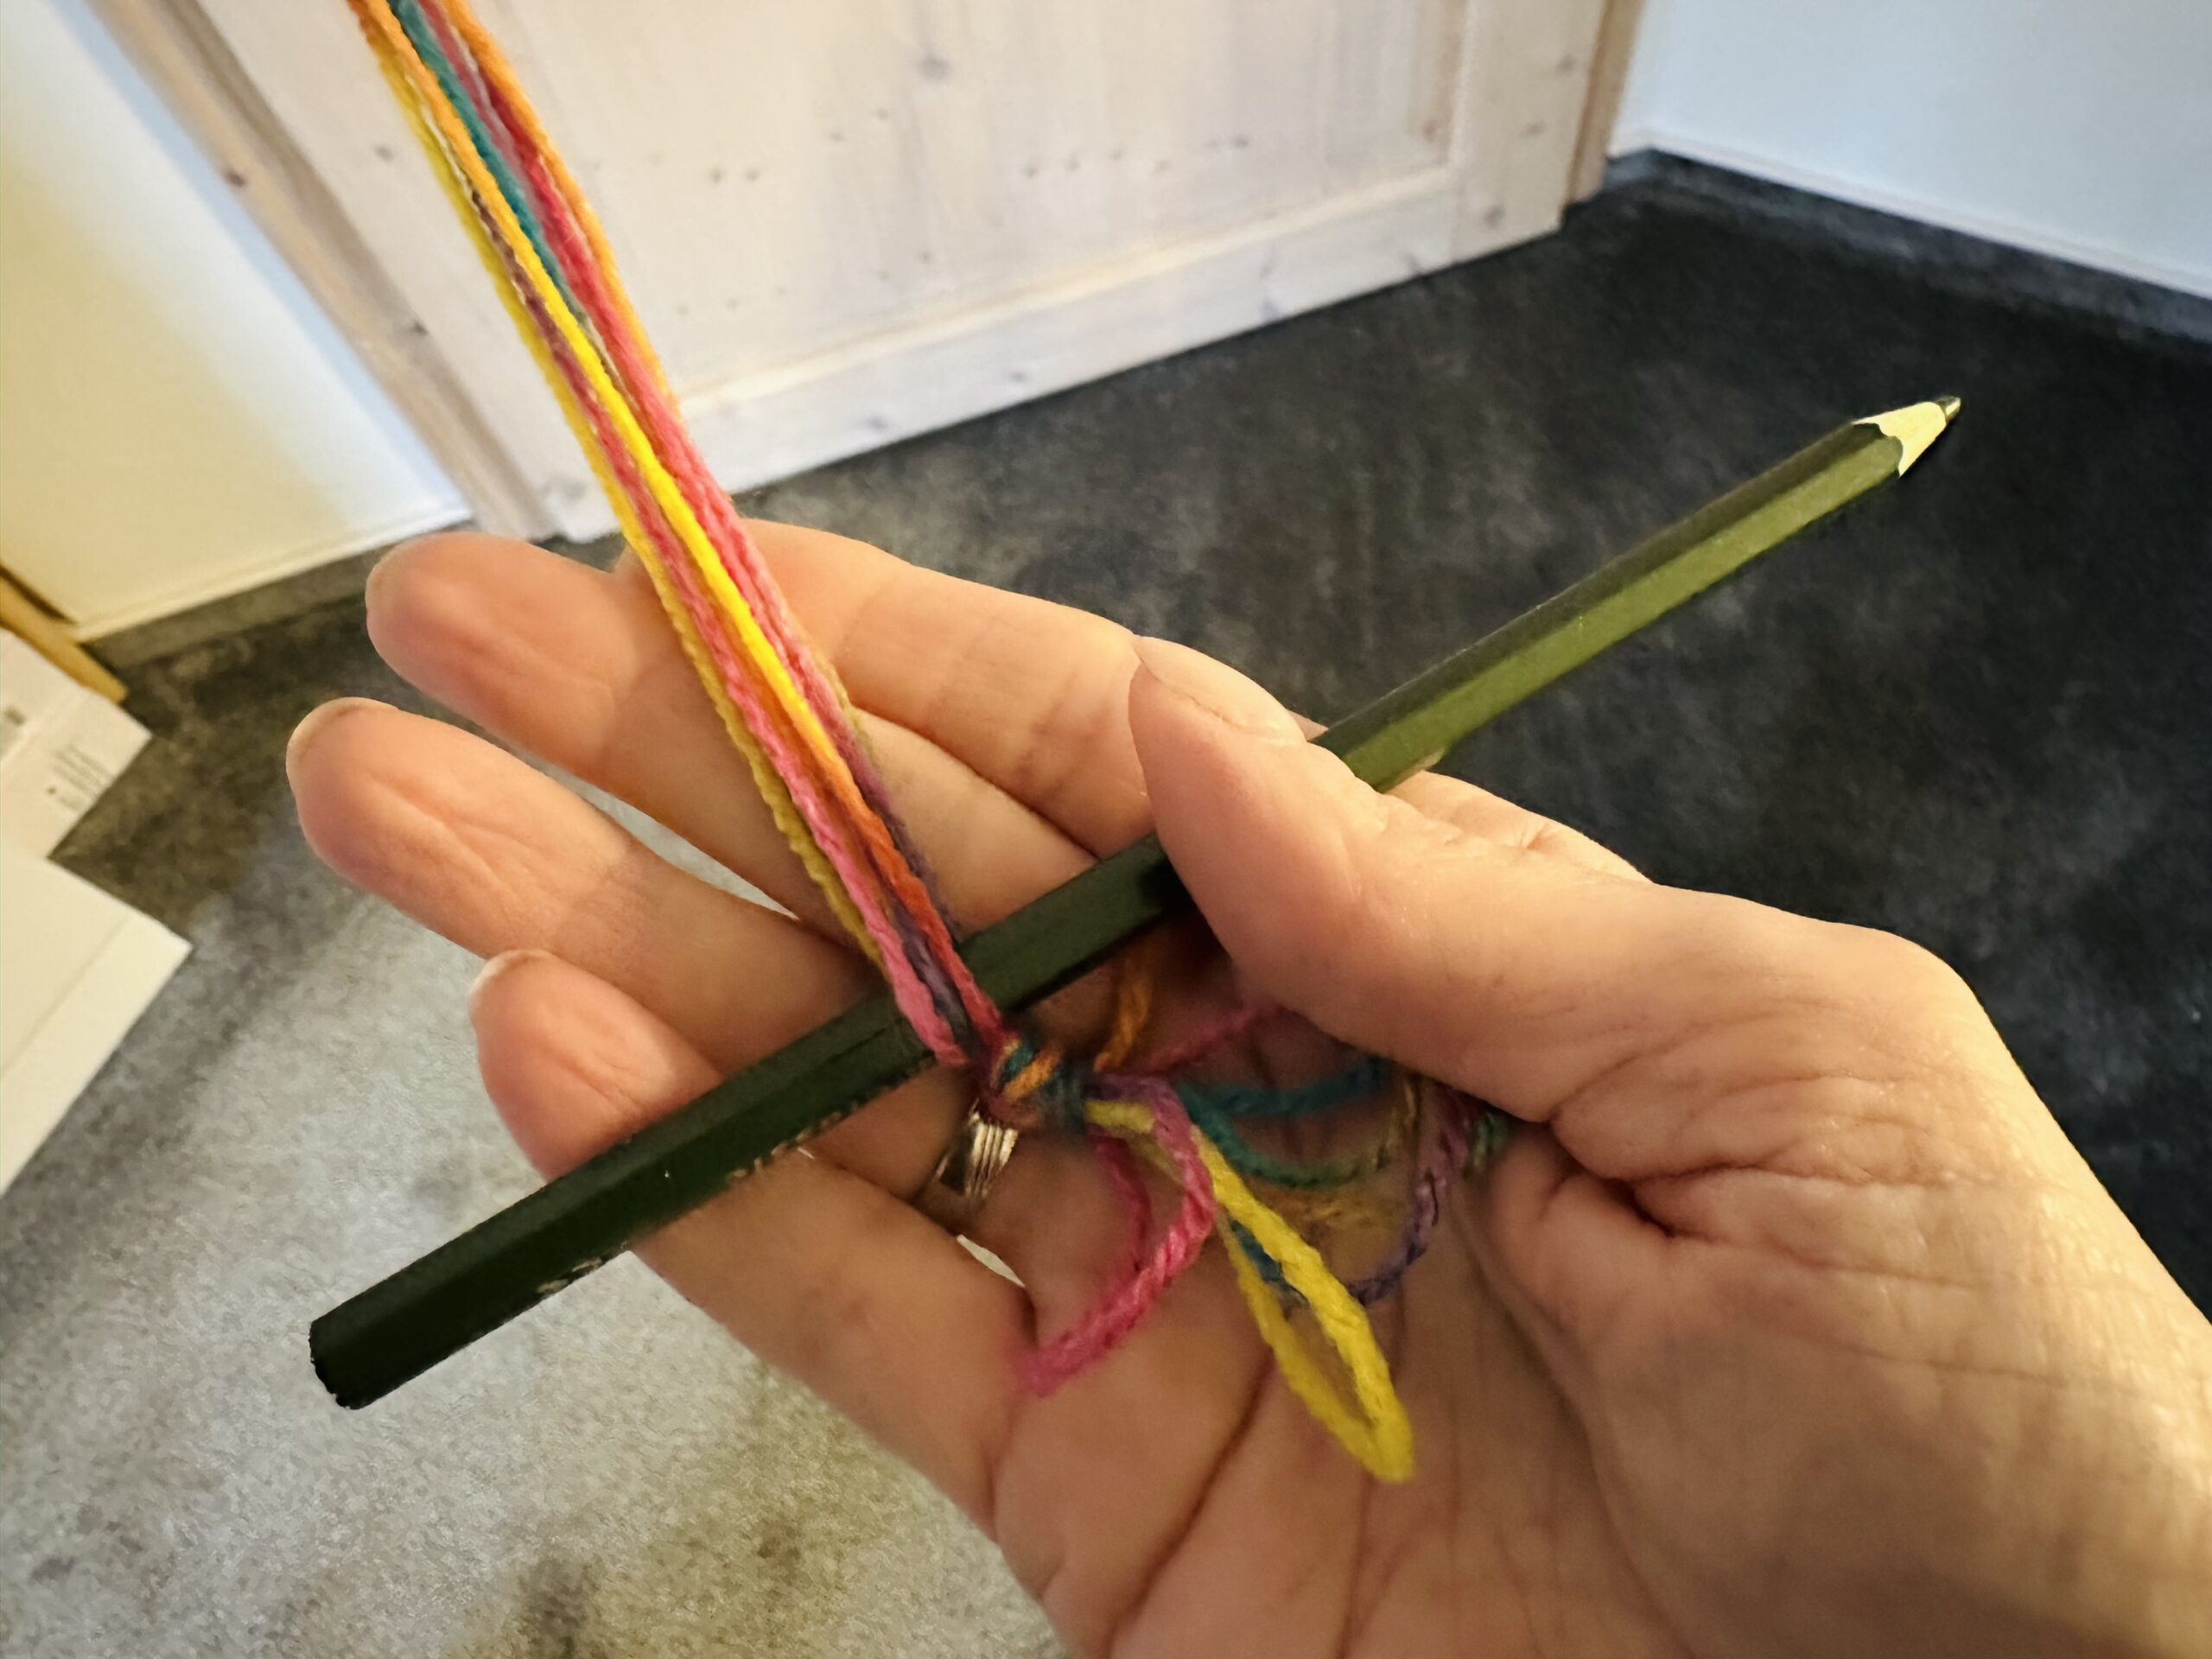
Bild zum Schritt 9 für das Bastel- und DIY-Abenteuer für Kinder: 'Am anderen Fadenenden müsst ihr die Schnüre gut straff halten....'

10

Now the cord always turns in one direction, so a cord is created. Always hold the cord on tension.
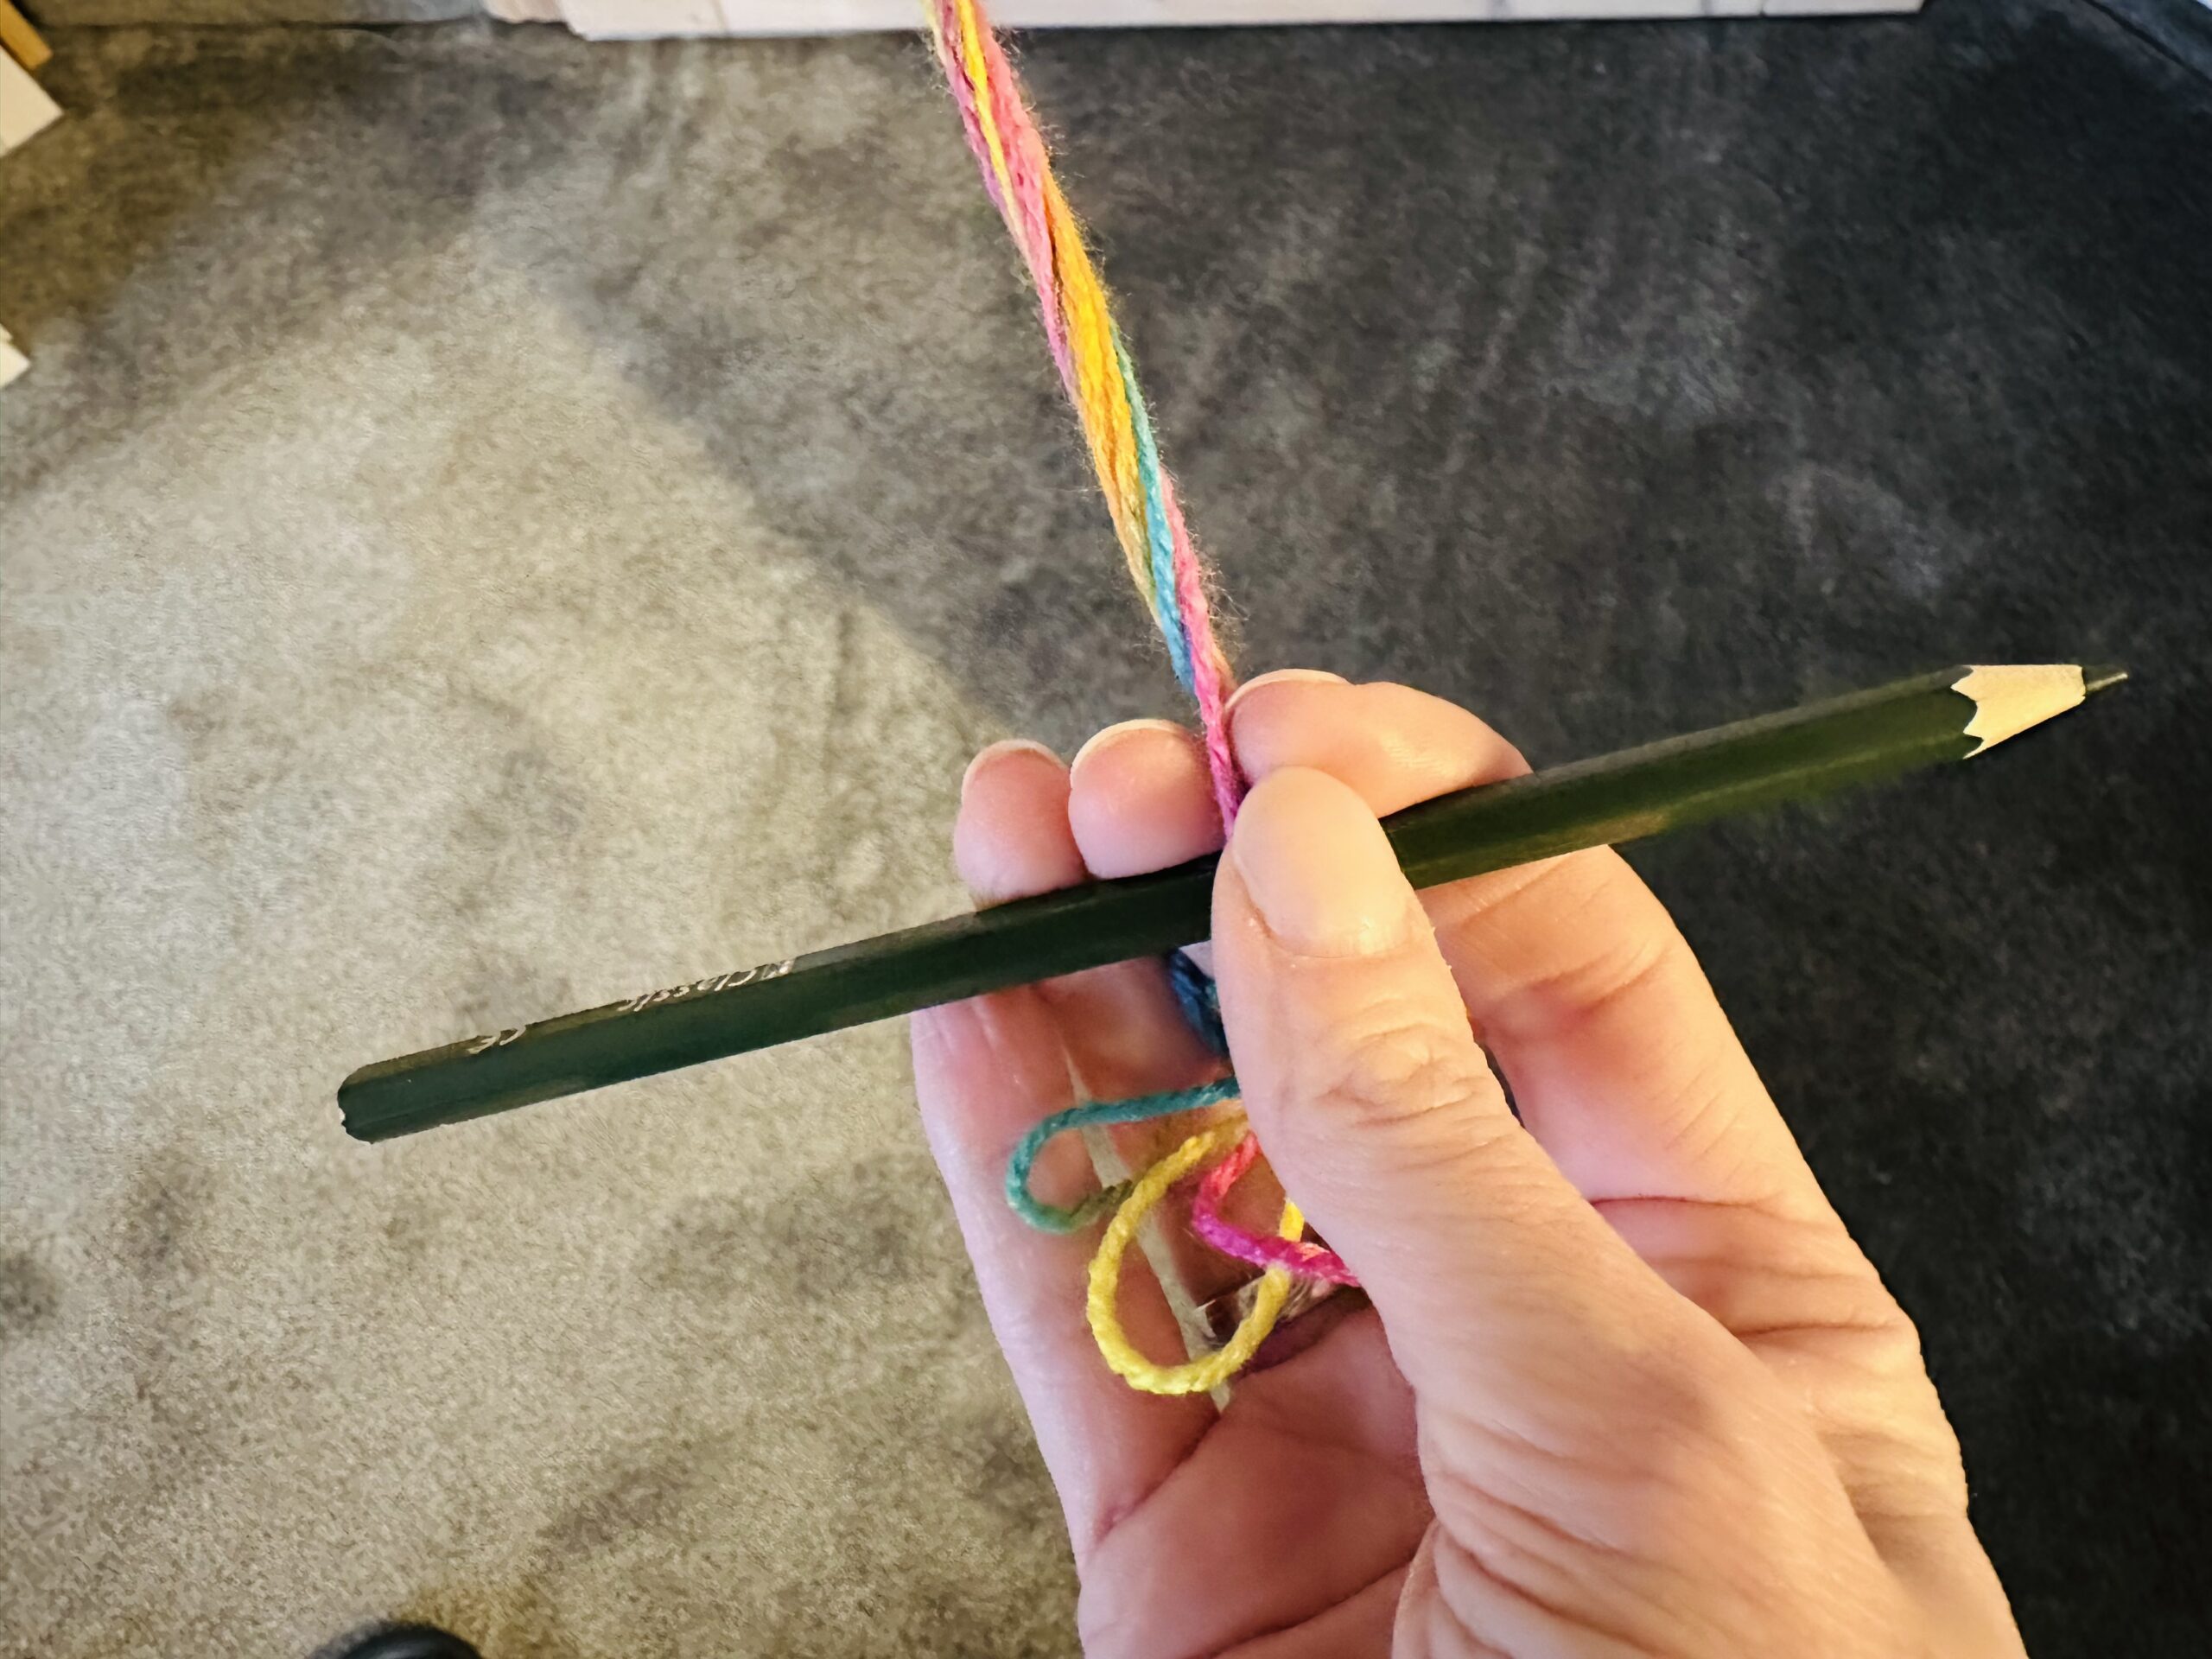
Bild zum Schritt 10 für das Bastel- und DIY-Abenteuer für Kinder: 'Nun dreht die Schnüre immer in eine Richtung, so entsteht...'

11

Rotate the apron until they are well twisted.
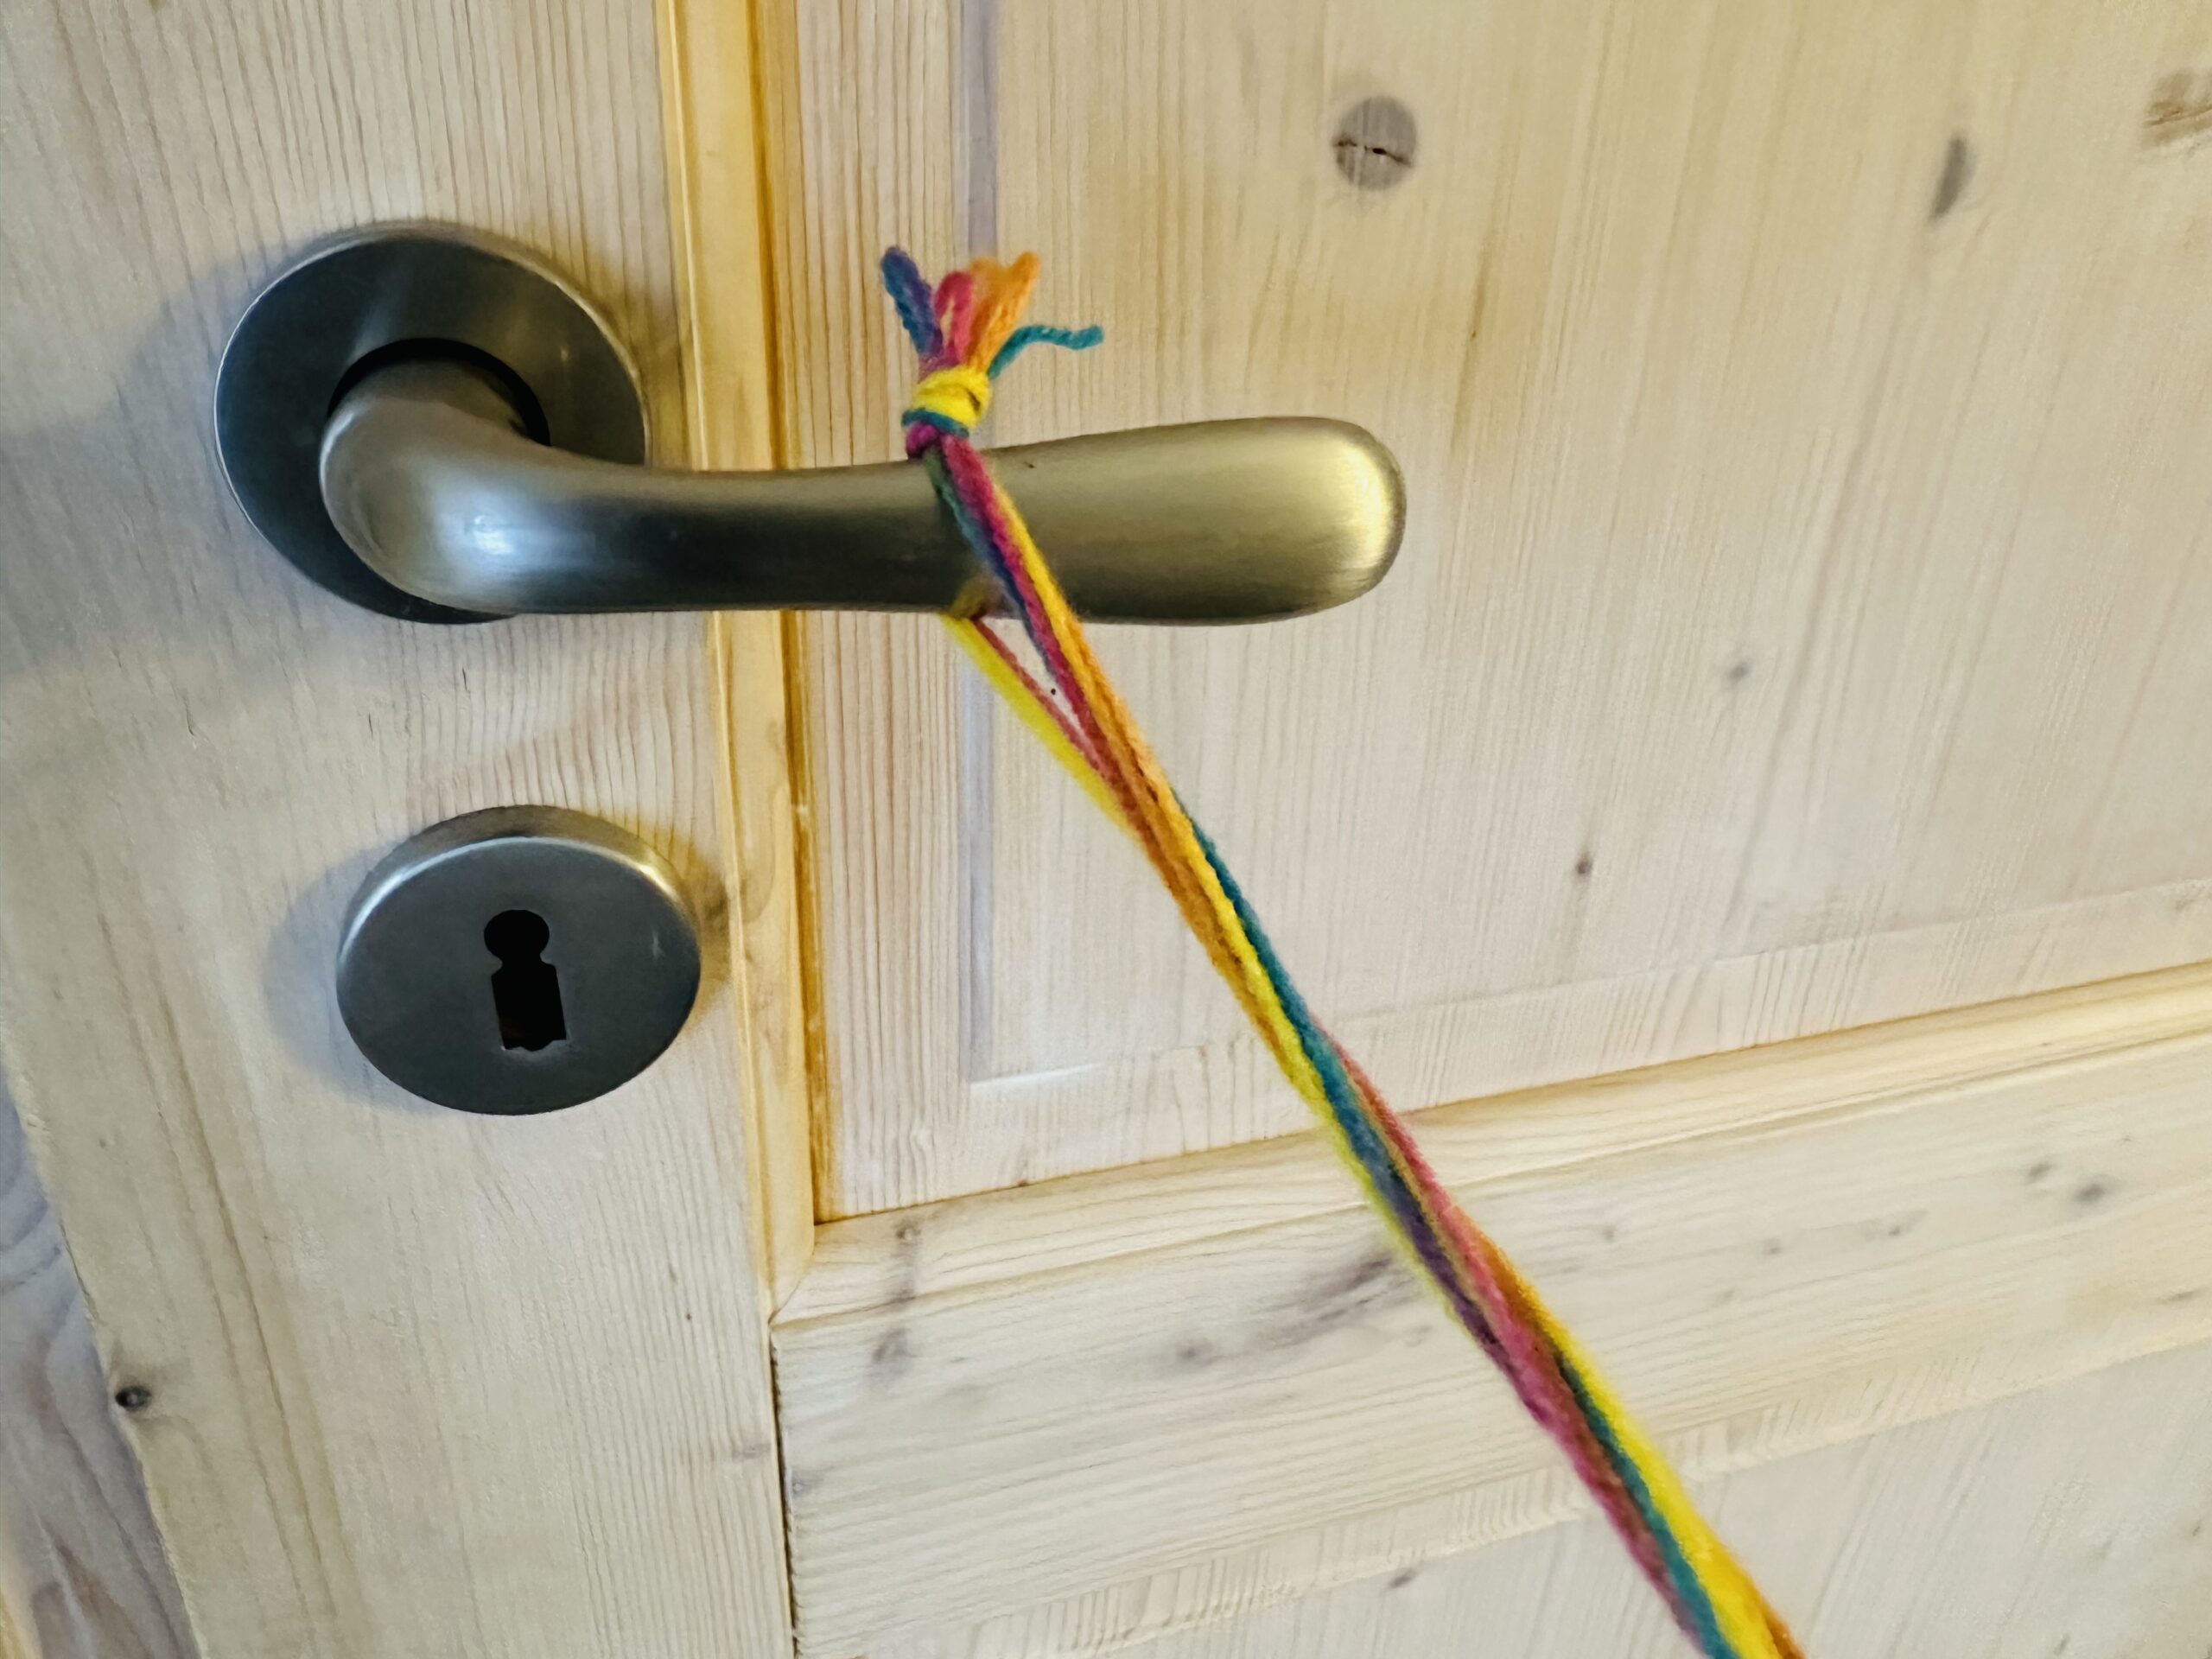
Bild zum Schritt 11 für das Bastel- und DIY-Abenteuer für Kinder: 'Verdreht die Schüre so lange, bis sie gut verdreht sind.'

12

That's how tight the cord should be.
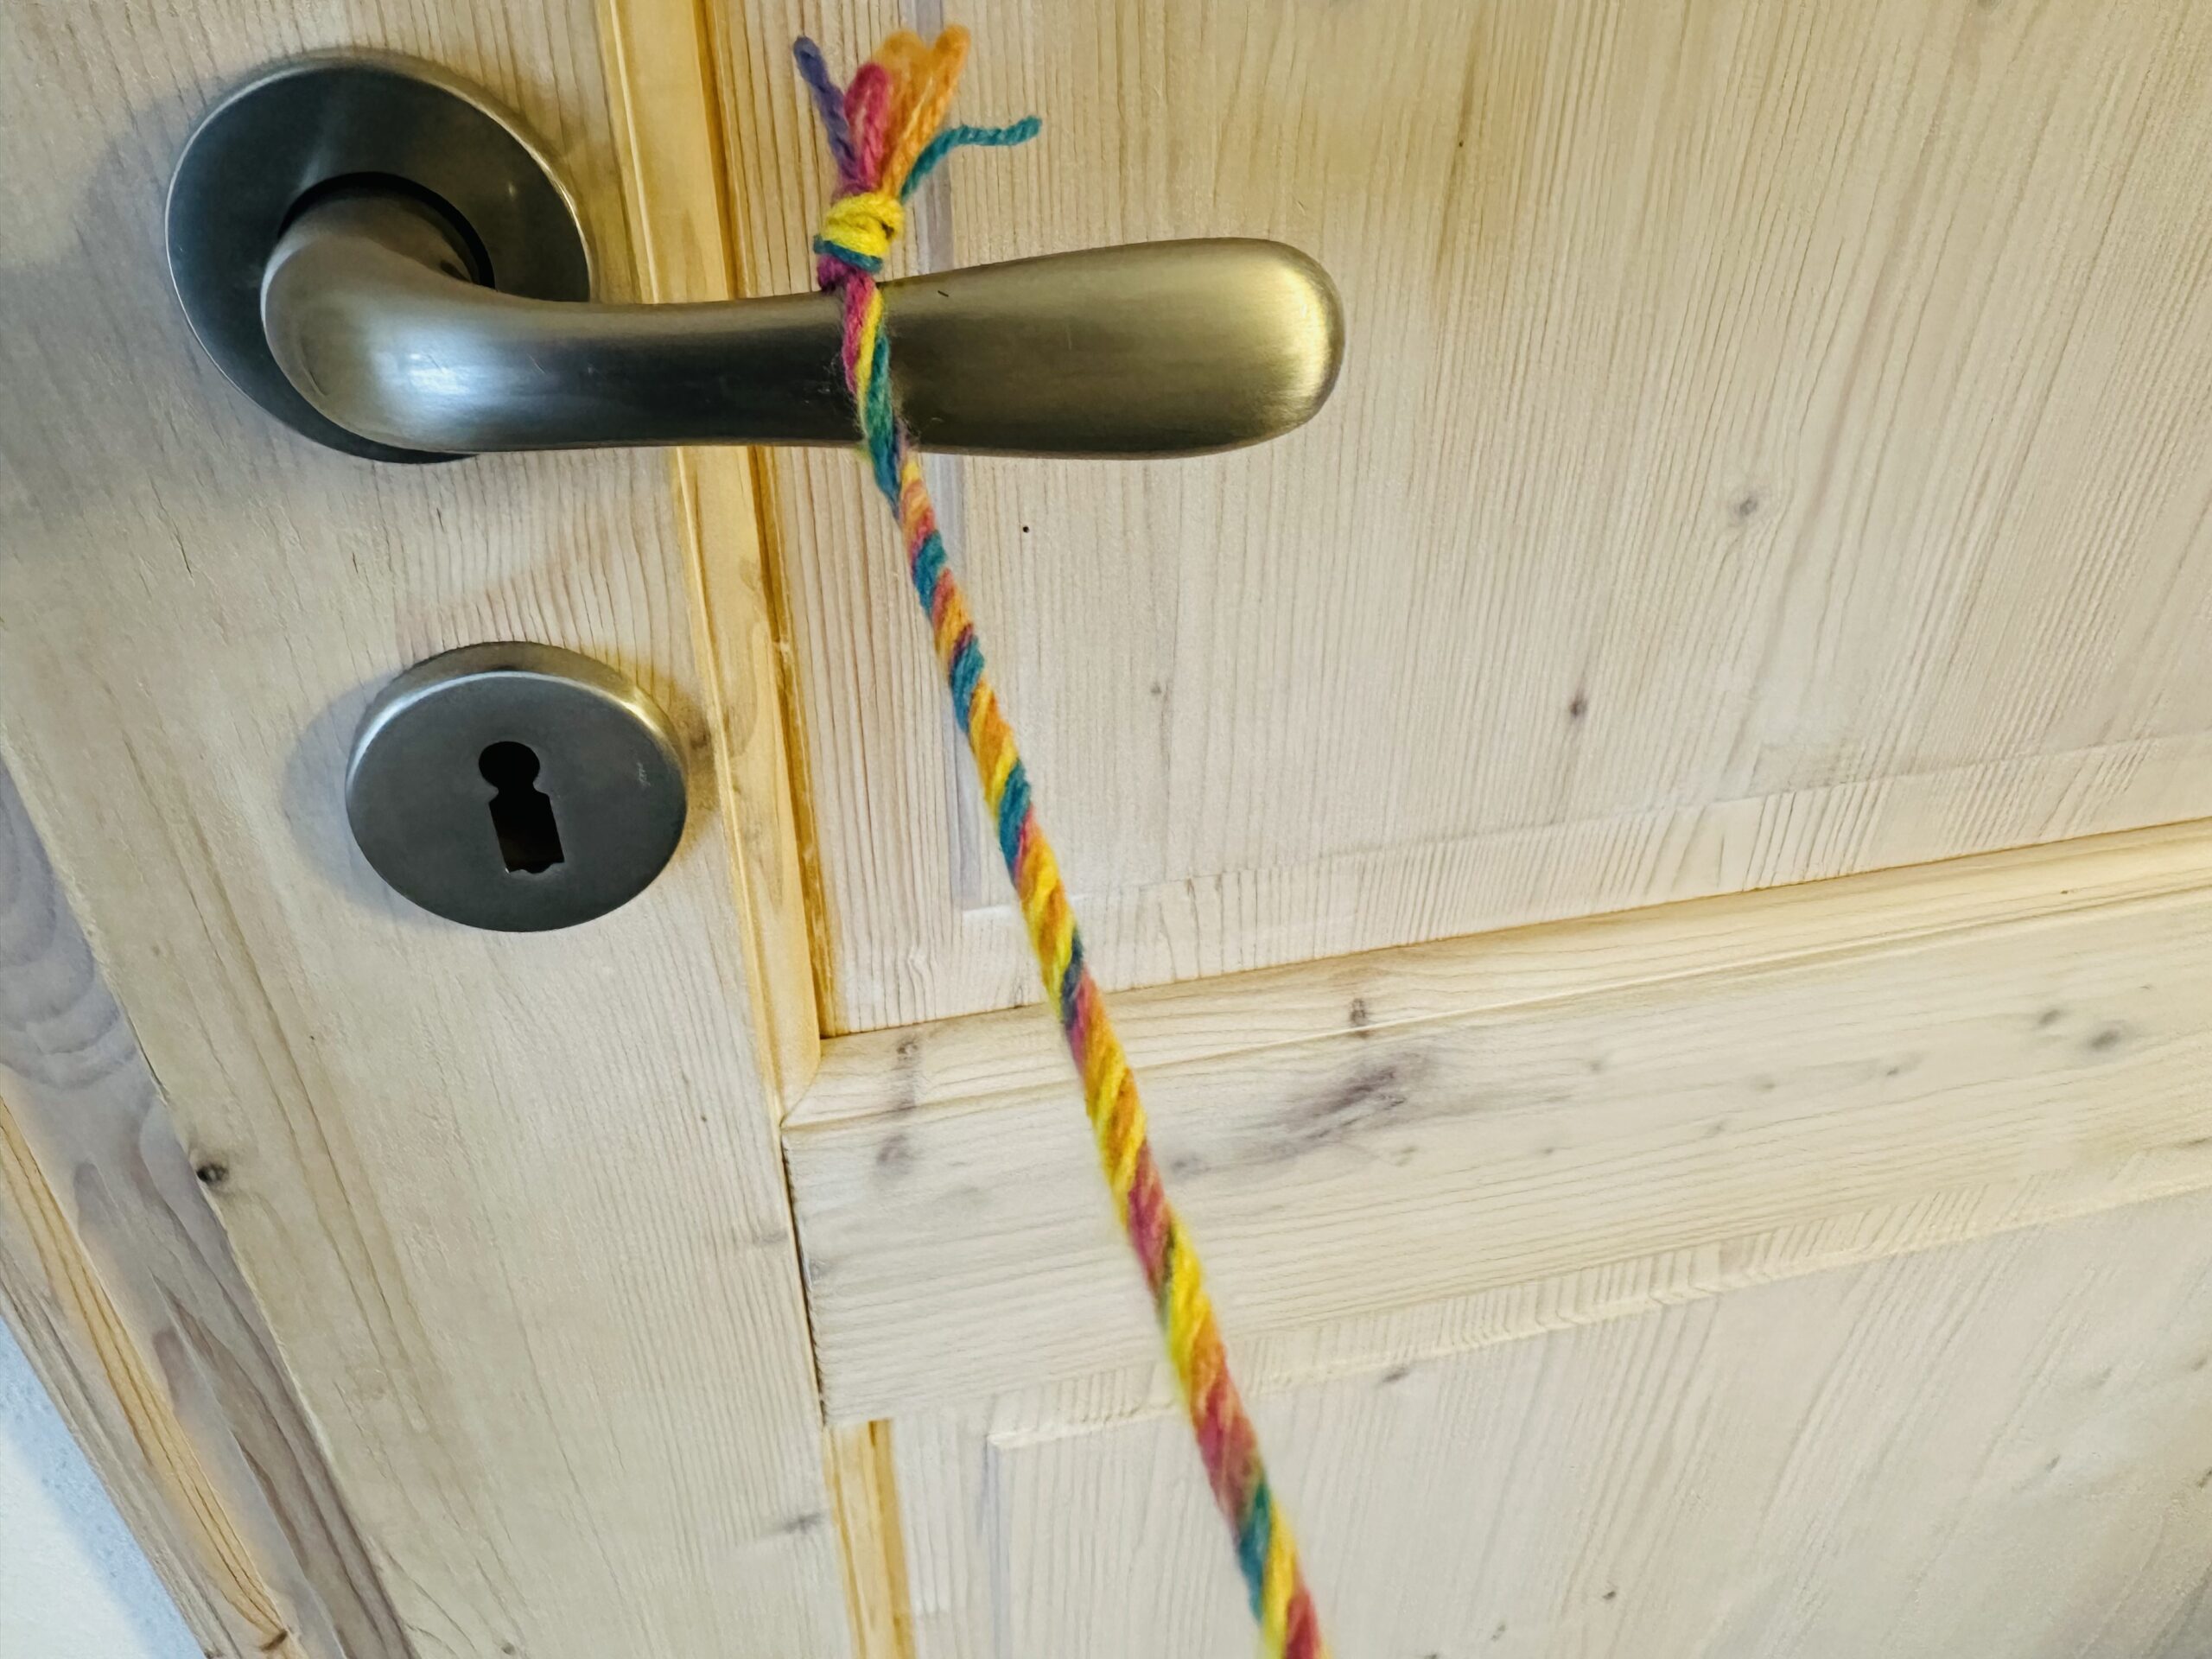
Bild zum Schritt 12 für das Bastel- und DIY-Abenteuer für Kinder: 'So fest soll die Kordel gedreht sein.'

13

The cord looks like this.

Bild zum Schritt 13 für das Bastel- und DIY-Abenteuer für Kinder: 'Die Kordel sieht dann so aus.'

14

Keep the ends still on tension! Let us help you with this! For two it's easier. Hold the middle of the scoundrel and place both ends on each other. All the aprons are still tense!
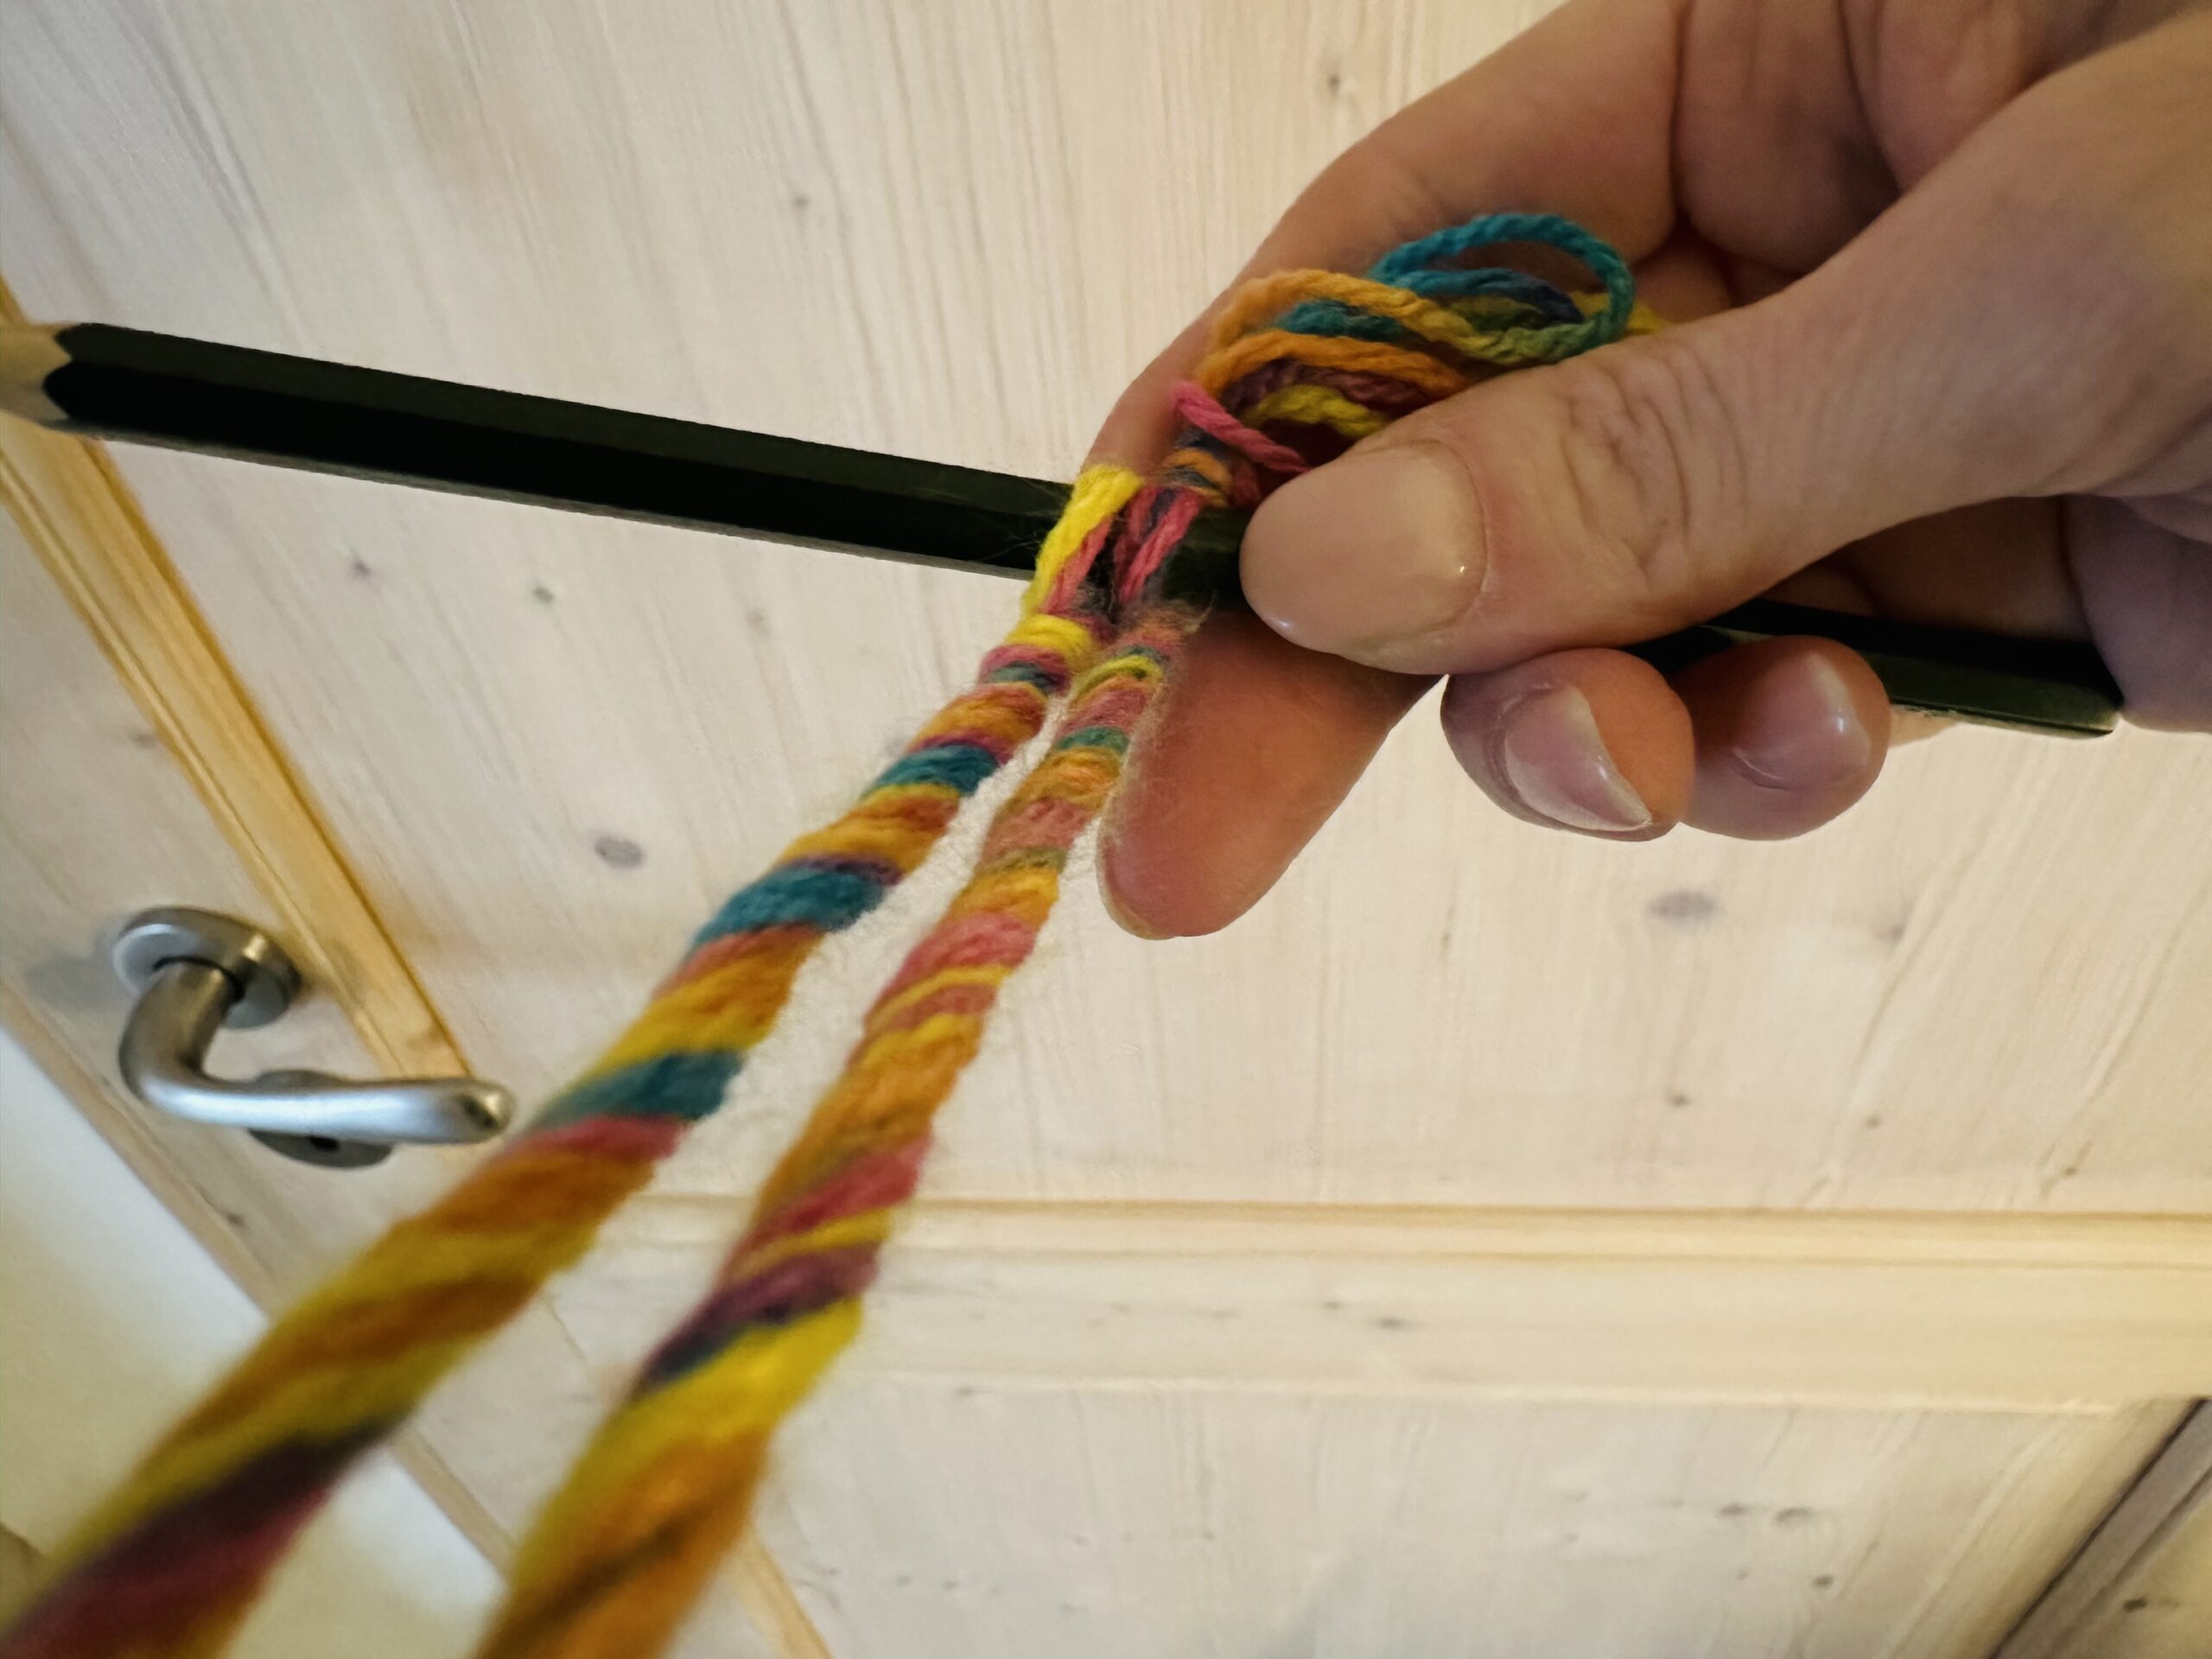
Bild zum Schritt 14 für das Bastel- und DIY-Abenteuer für Kinder: 'Haltet die Enden immer noch auf Spannung! Lasst euch hierbei...'

15

Now let go of the middle. Both threads roll together and twist together.
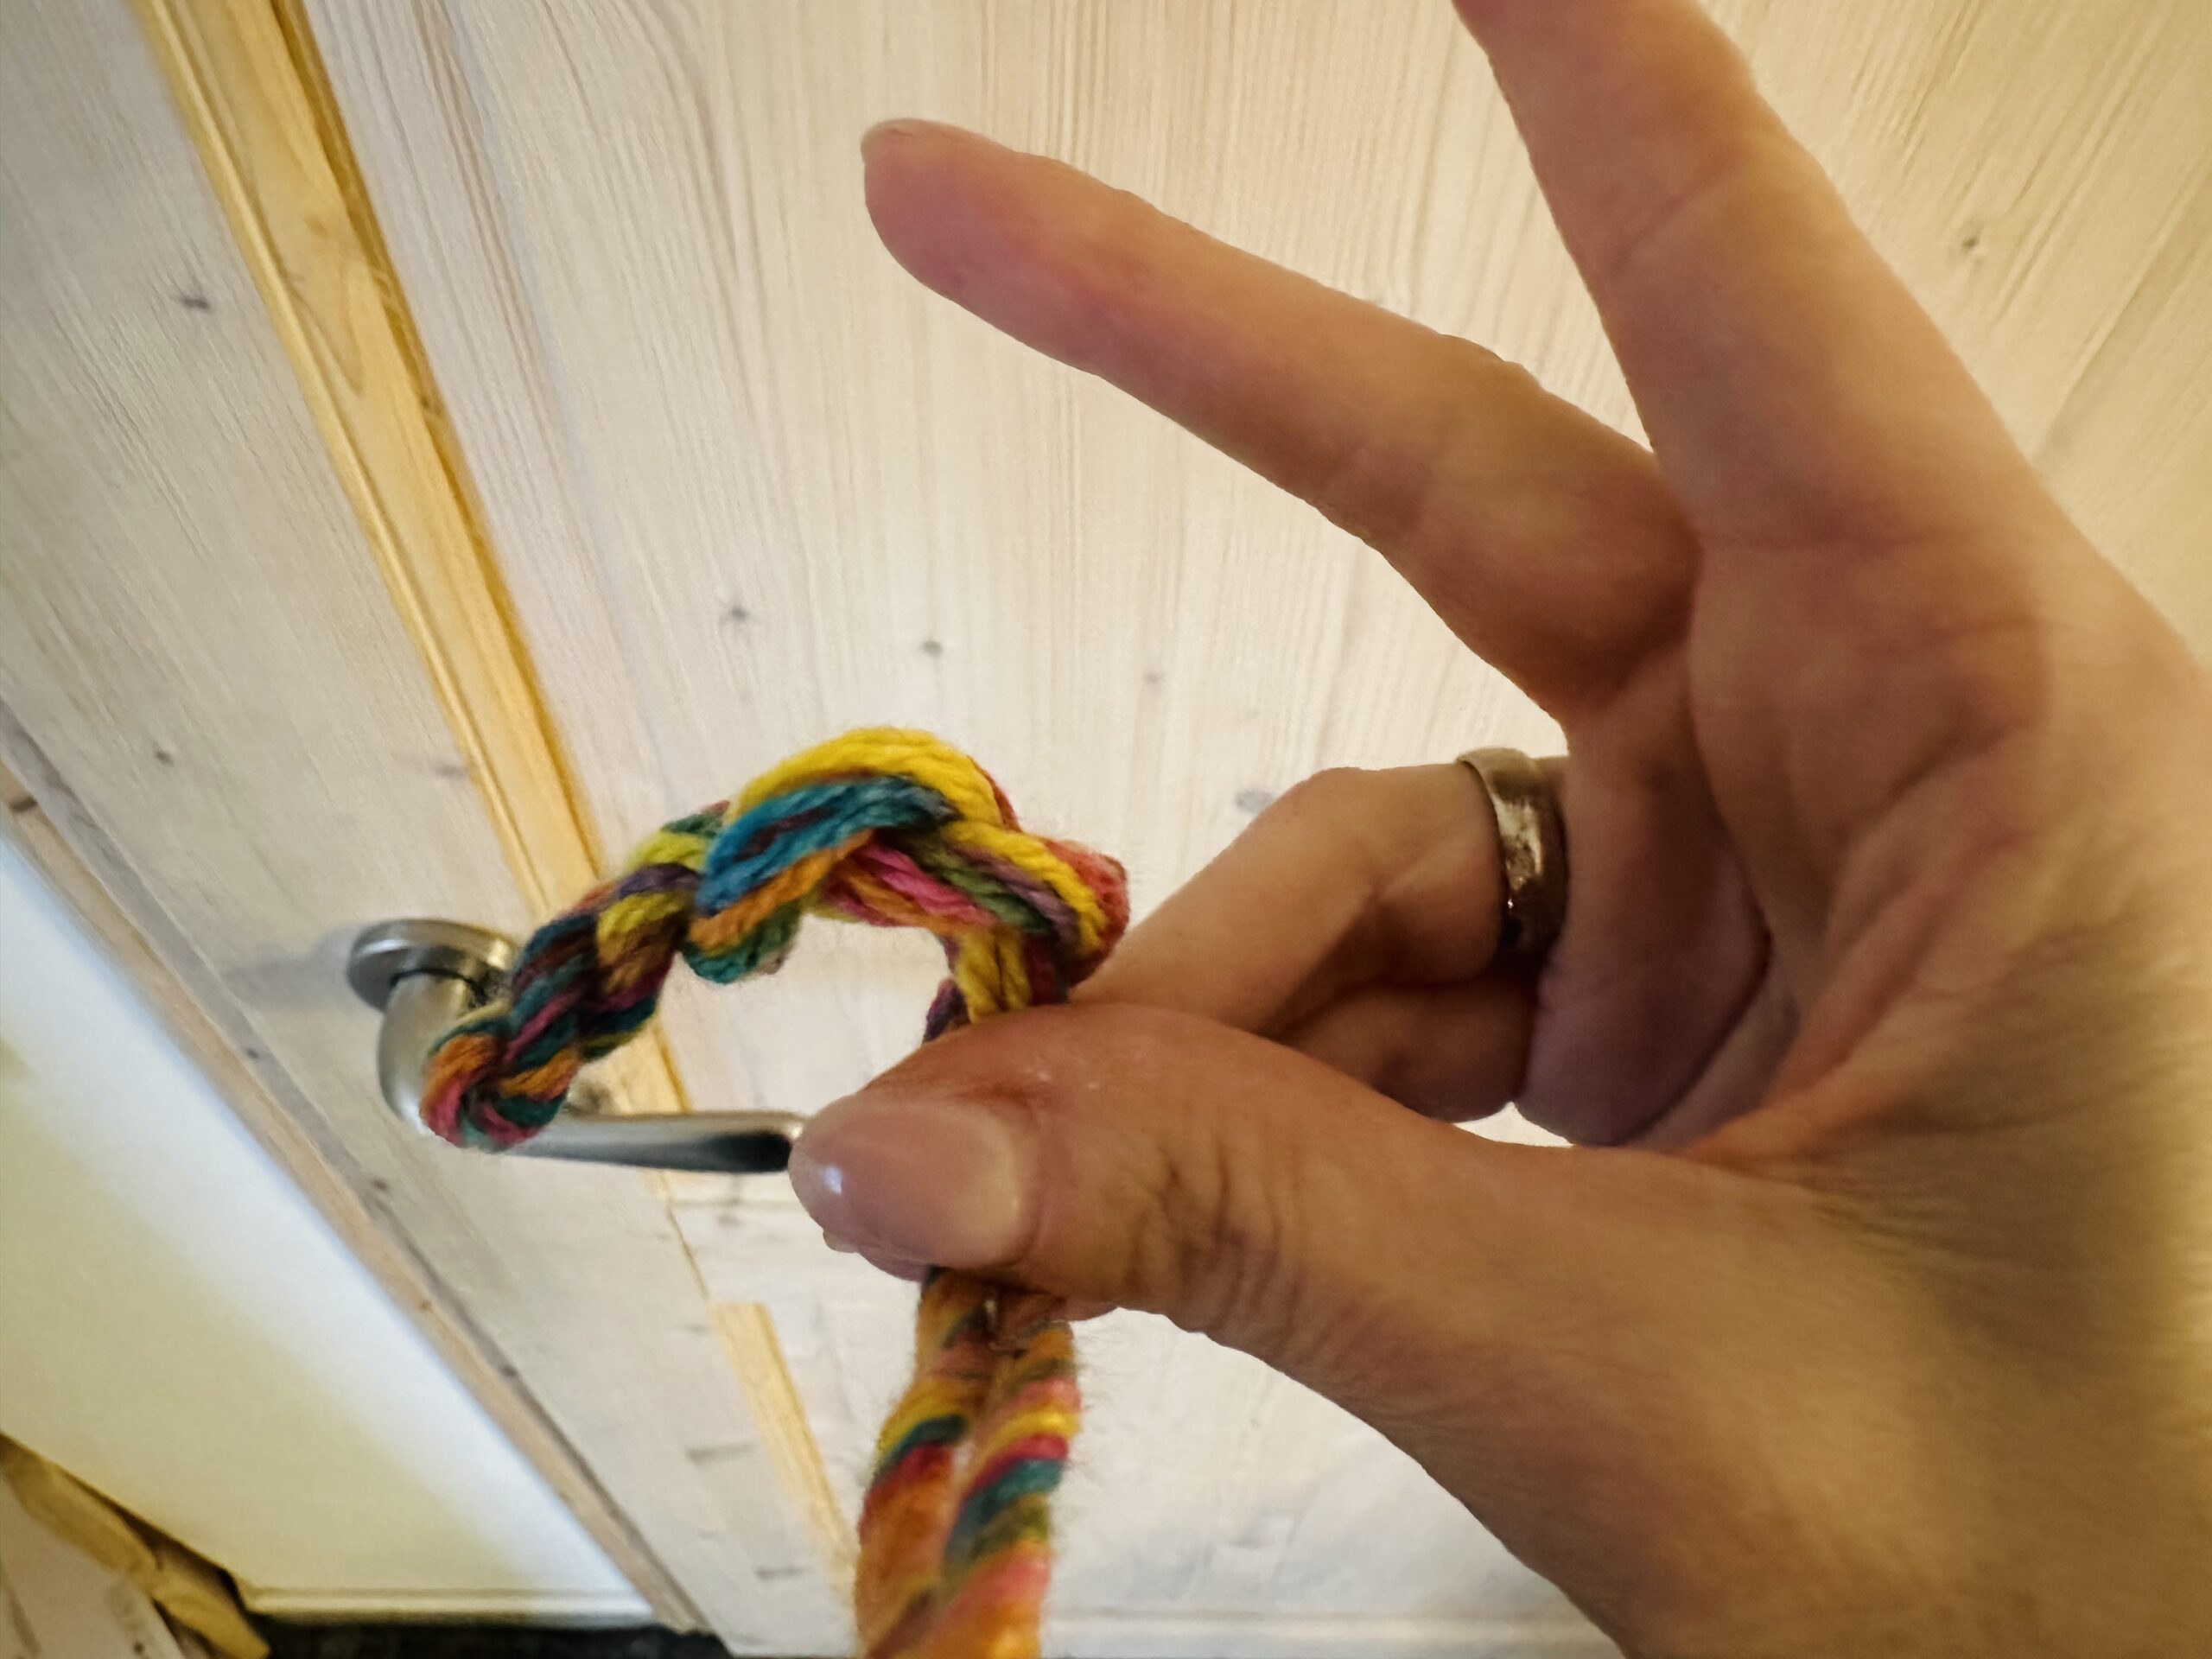
Bild zum Schritt 15 für das Bastel- und DIY-Abenteuer für Kinder: 'Lasst nun die Mitte los. Beide Fäden rollen sich zusammen...'

16

The two aprons twist to a thick cord. Hold both ends still well! Strip the cord that it is evenly twisted.
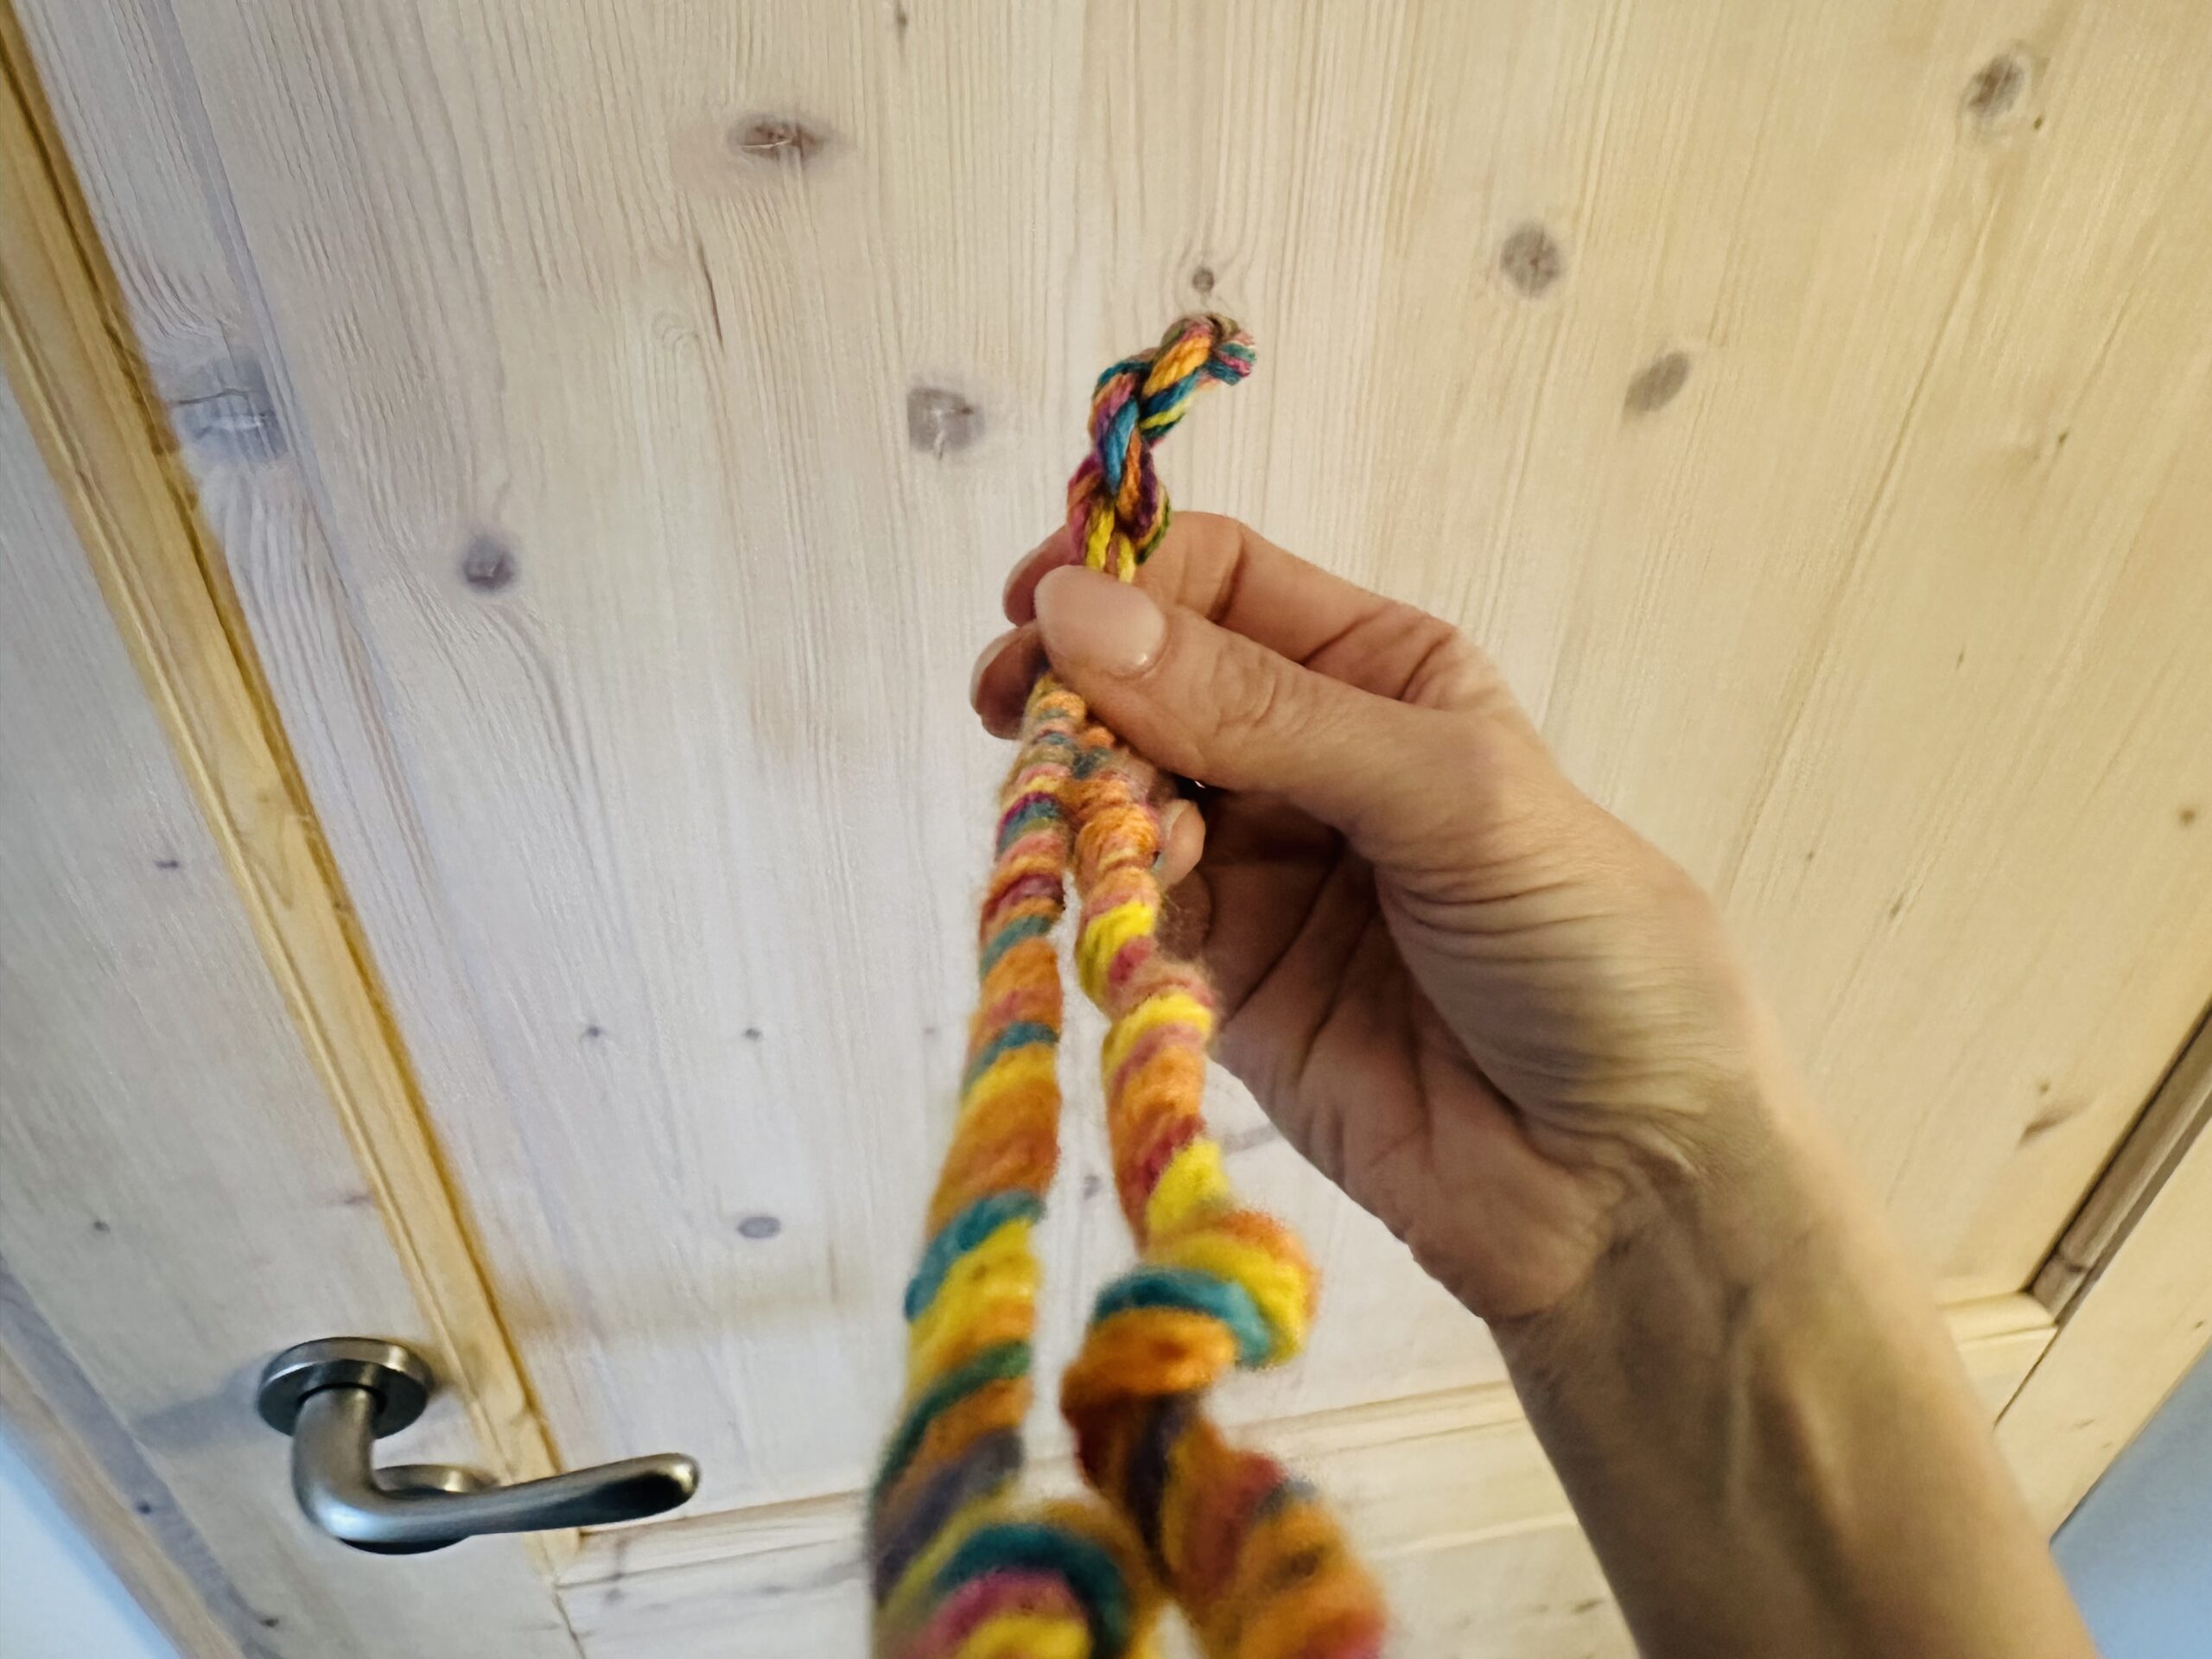
Bild zum Schritt 16 für das Bastel- und DIY-Abenteuer für Kinder: 'Die beiden Schüre verdrillern zu einem dicken Kordel. Haltet beide...'

17

Then tie both ends together again with a common knot. Only then can you let go of the ends. Now the cord is finished.
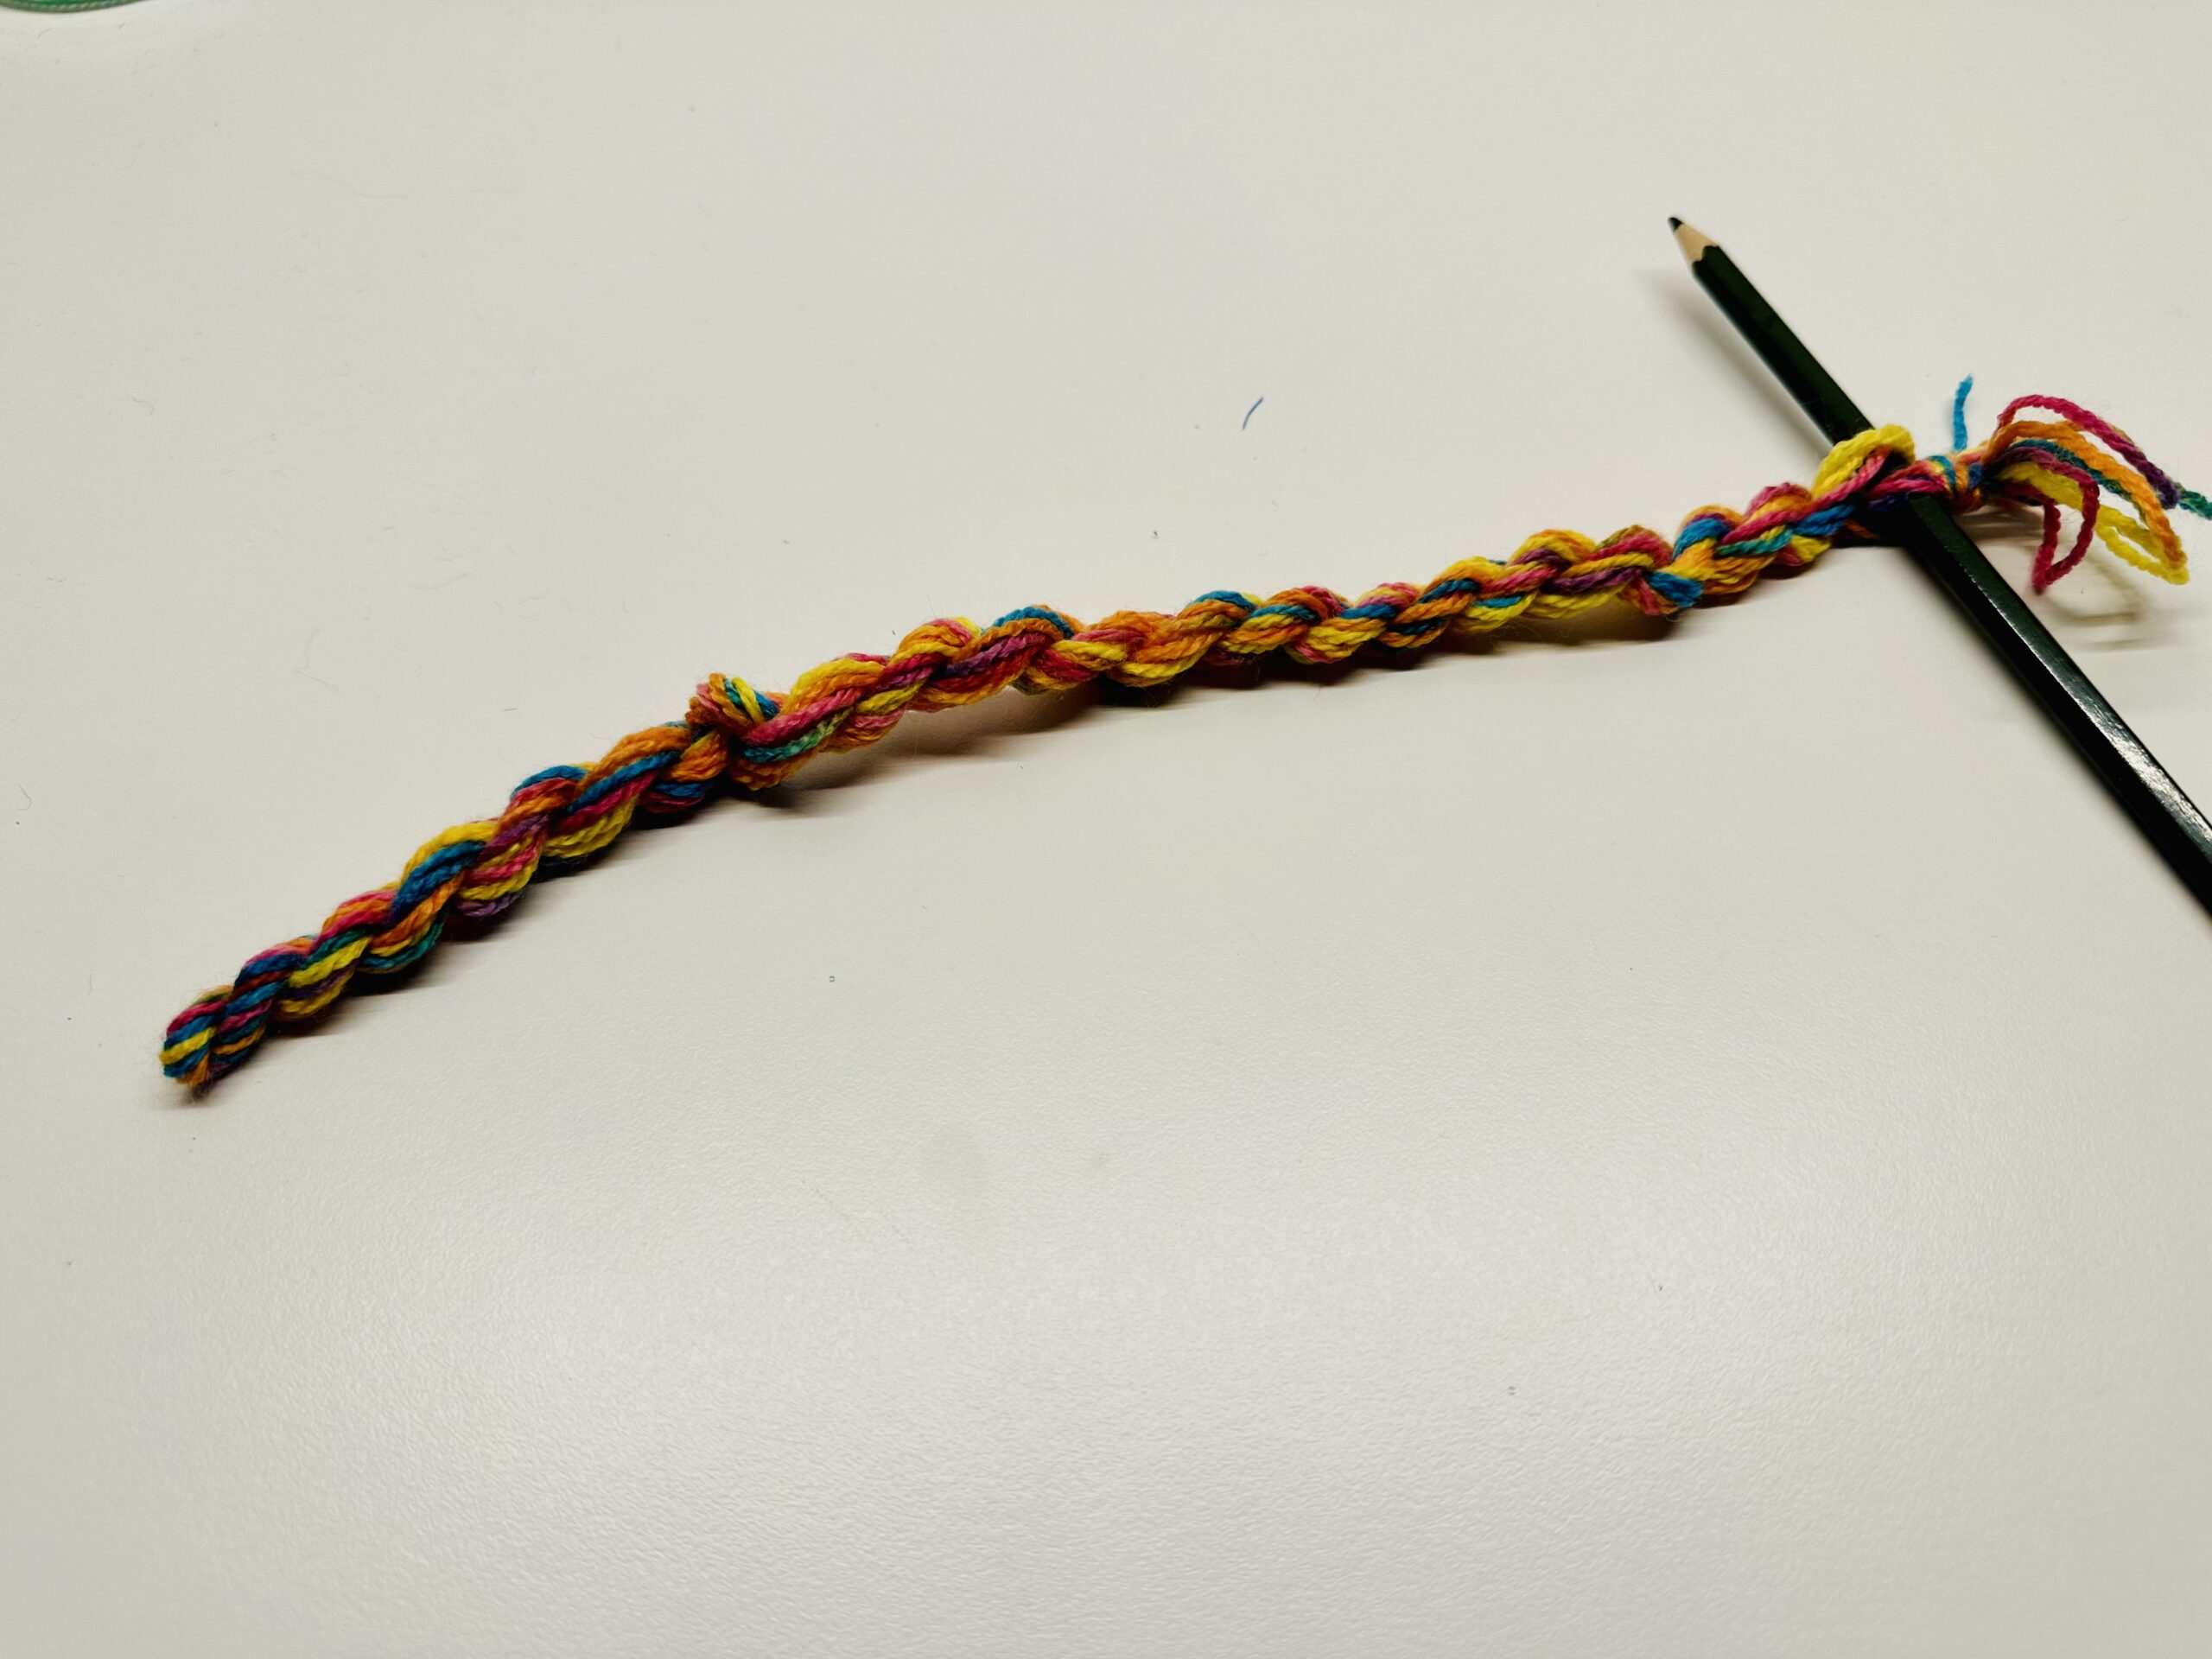
Bild zum Schritt 17 für das Bastel- und DIY-Abenteuer für Kinder: 'Bindet dann beide Enden nochmals mit einem gemeinsamen Knoten zusammen....'

18

For the head of the snake a tongue and eyes are missing. Cut off a strip of felt as a tongue. It should have a little more than twice the length of your finished tongue.
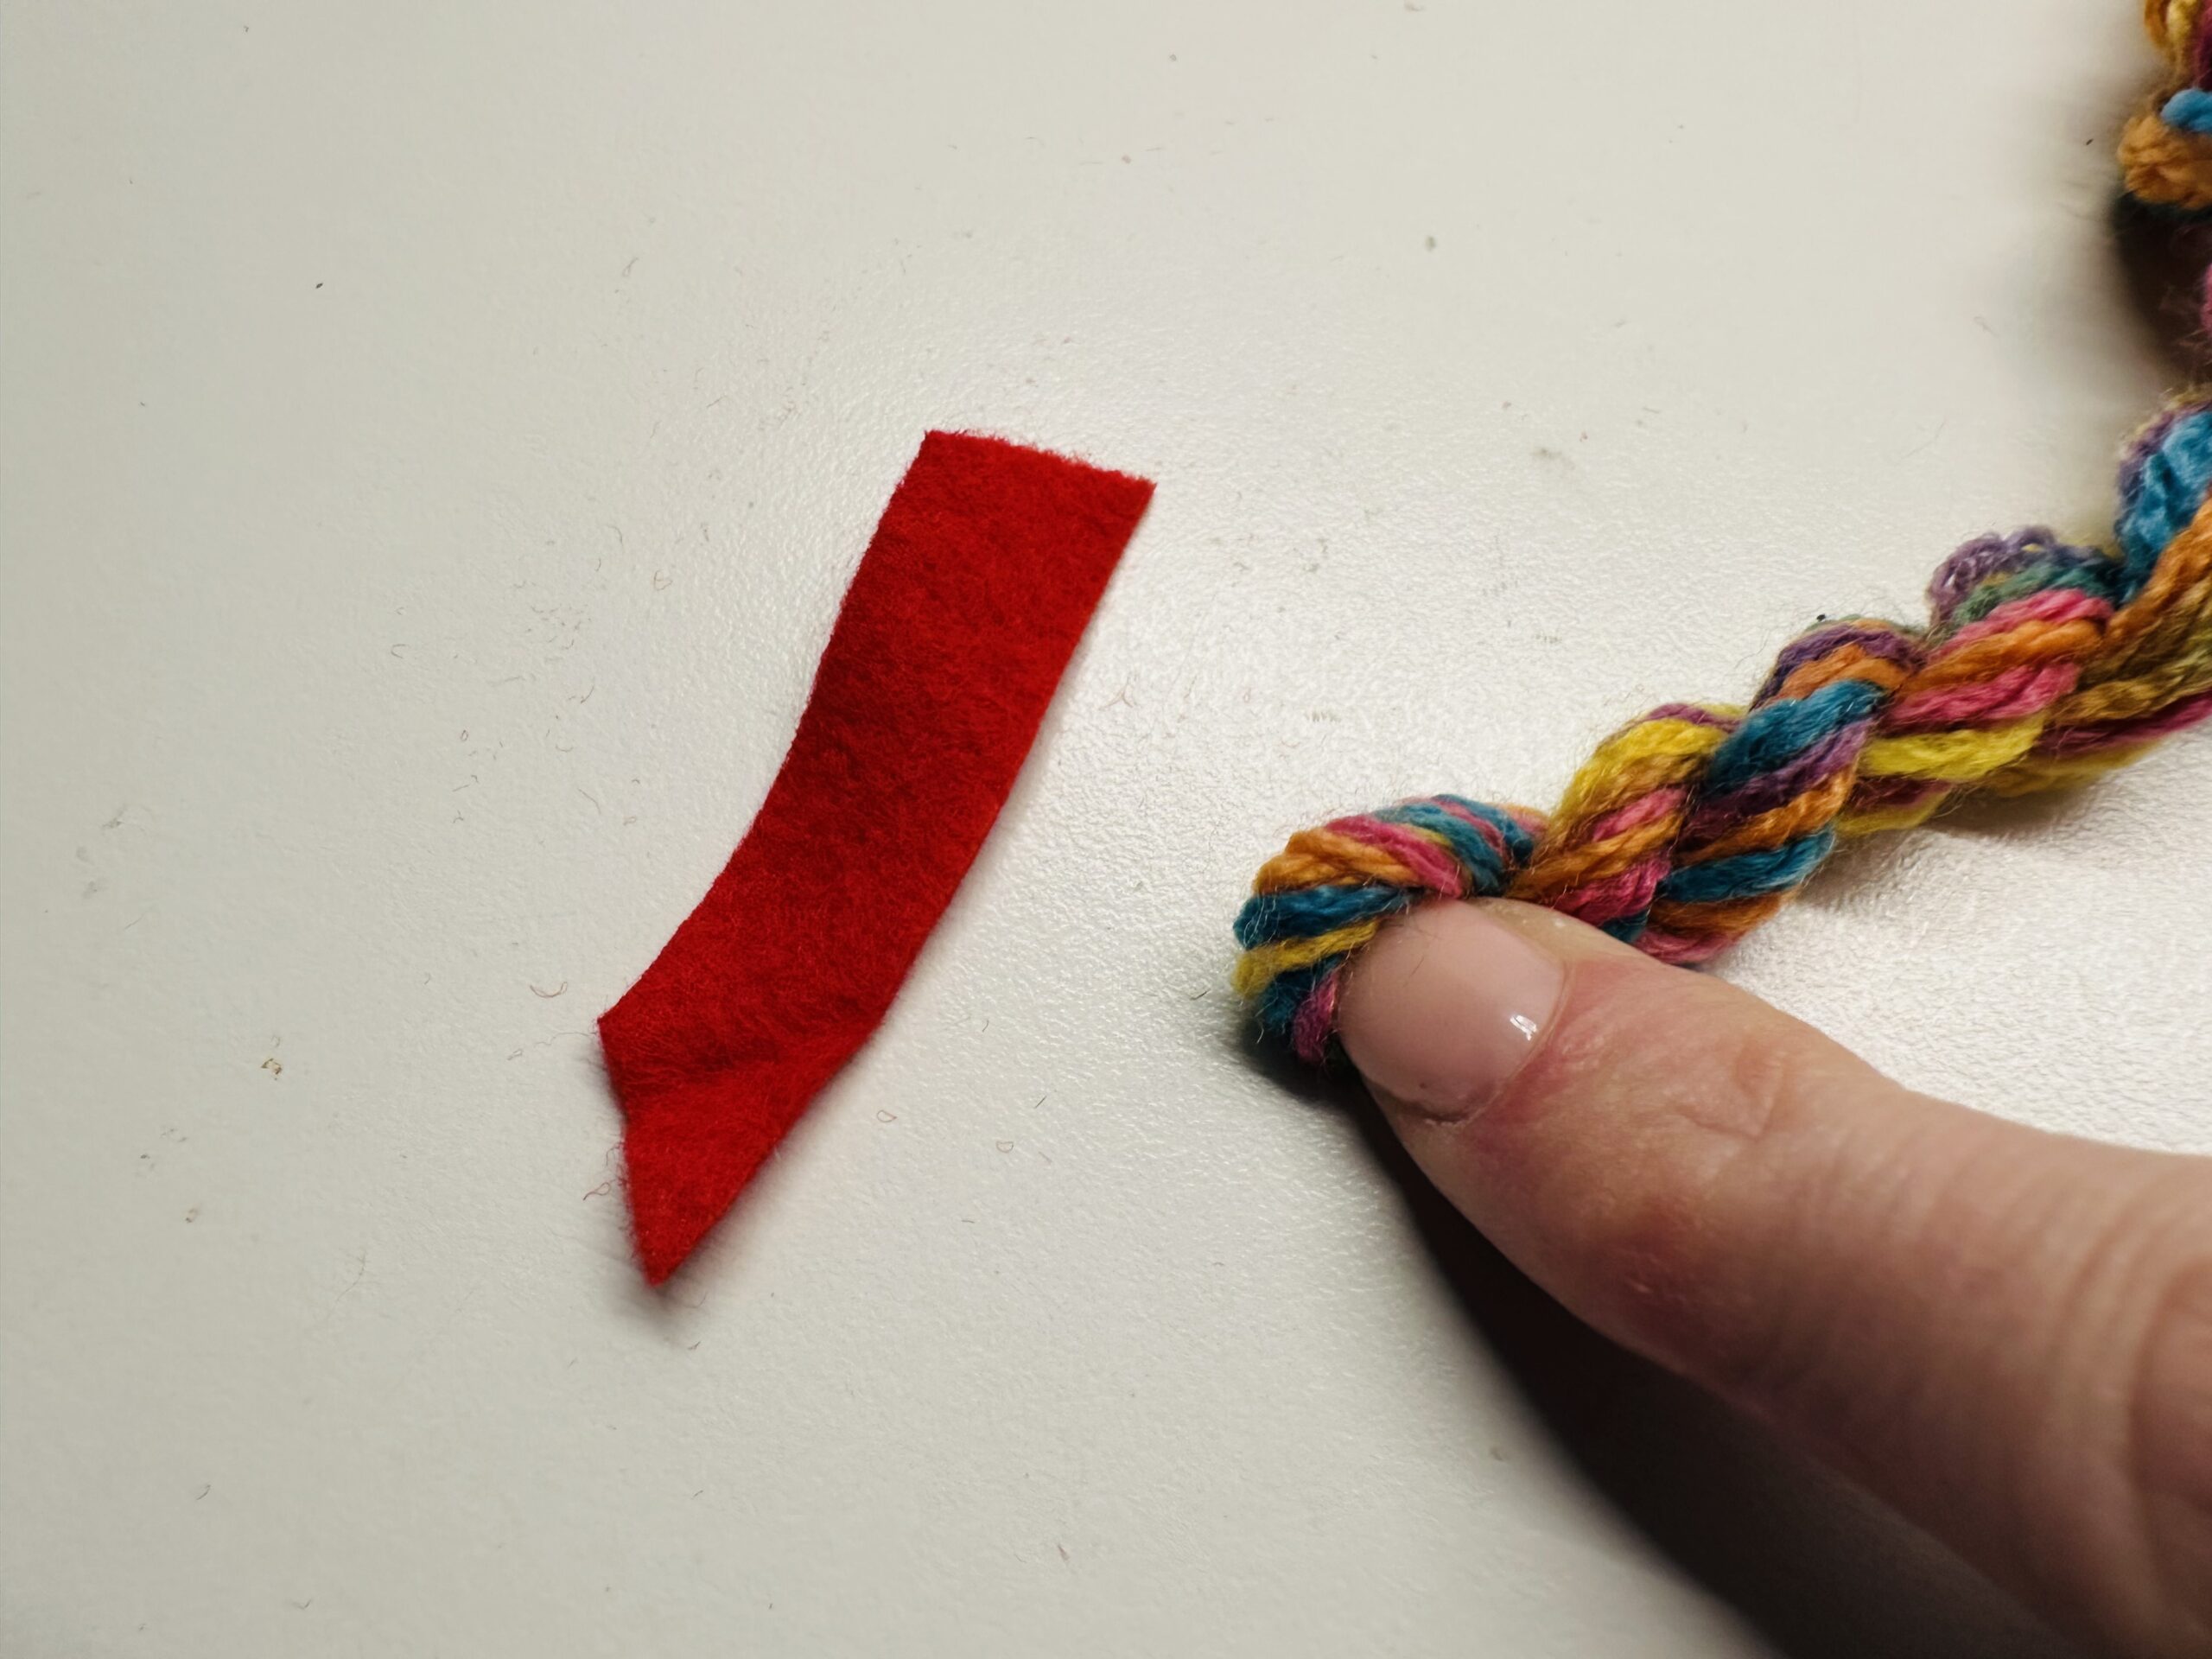
Bild zum Schritt 18 für das Bastel- und DIY-Abenteuer für Kinder: 'Für den Kopf der Schlange fehlt noch eine Zunge und...'

19

Put the strip through the front part of your snake (where the thread has been placed in half!) Push it halfway through and glue the felt ends to each other.
Cut the tongue with the scissors, for example, to Spitz or a tatter in it, so you get a split tongue.
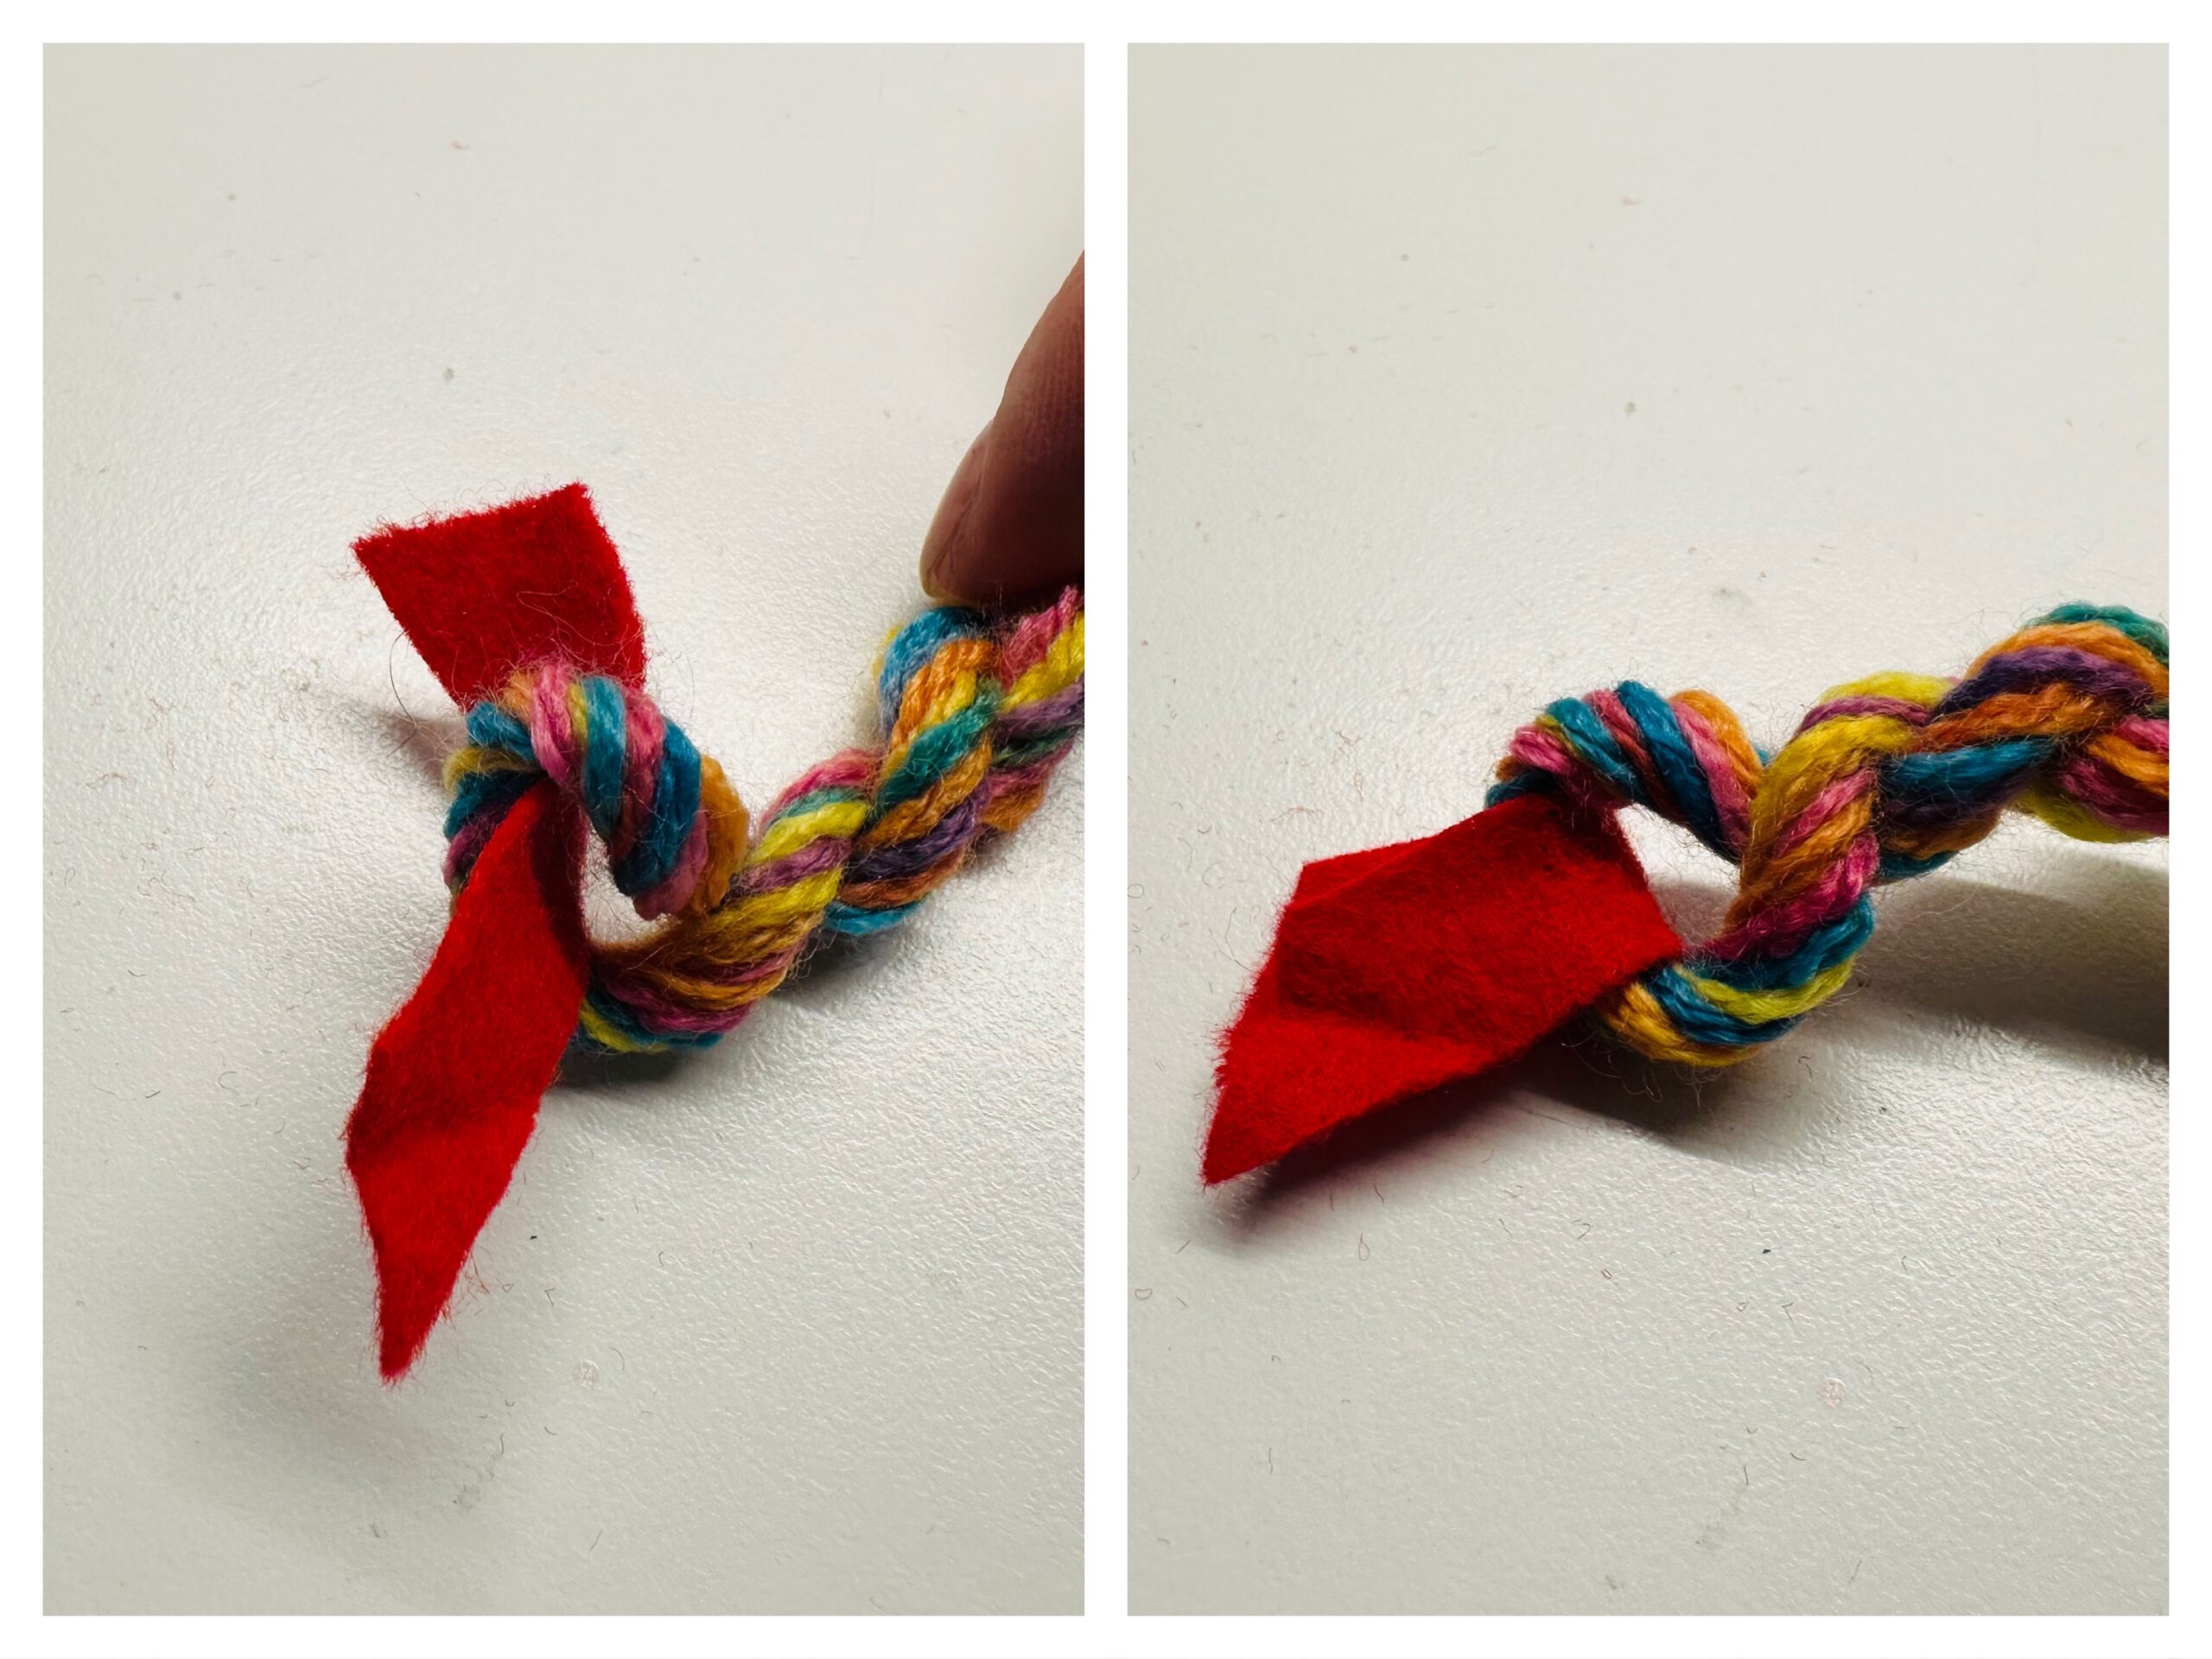
Bild zum Schritt 19 für das Bastel- und DIY-Abenteuer für Kinder: 'Steckt den Streifen durch das vordere Teil eurer Schlange (dort...'

20

Stick two wobble eyes on the head of the snake.

Bild zum Schritt 20 für das Bastel- und DIY-Abenteuer für Kinder: 'Klebt zwei Wackelaugen auf den Kopf der Schlange.'

21

You can cut off the cock of the snake in French or...
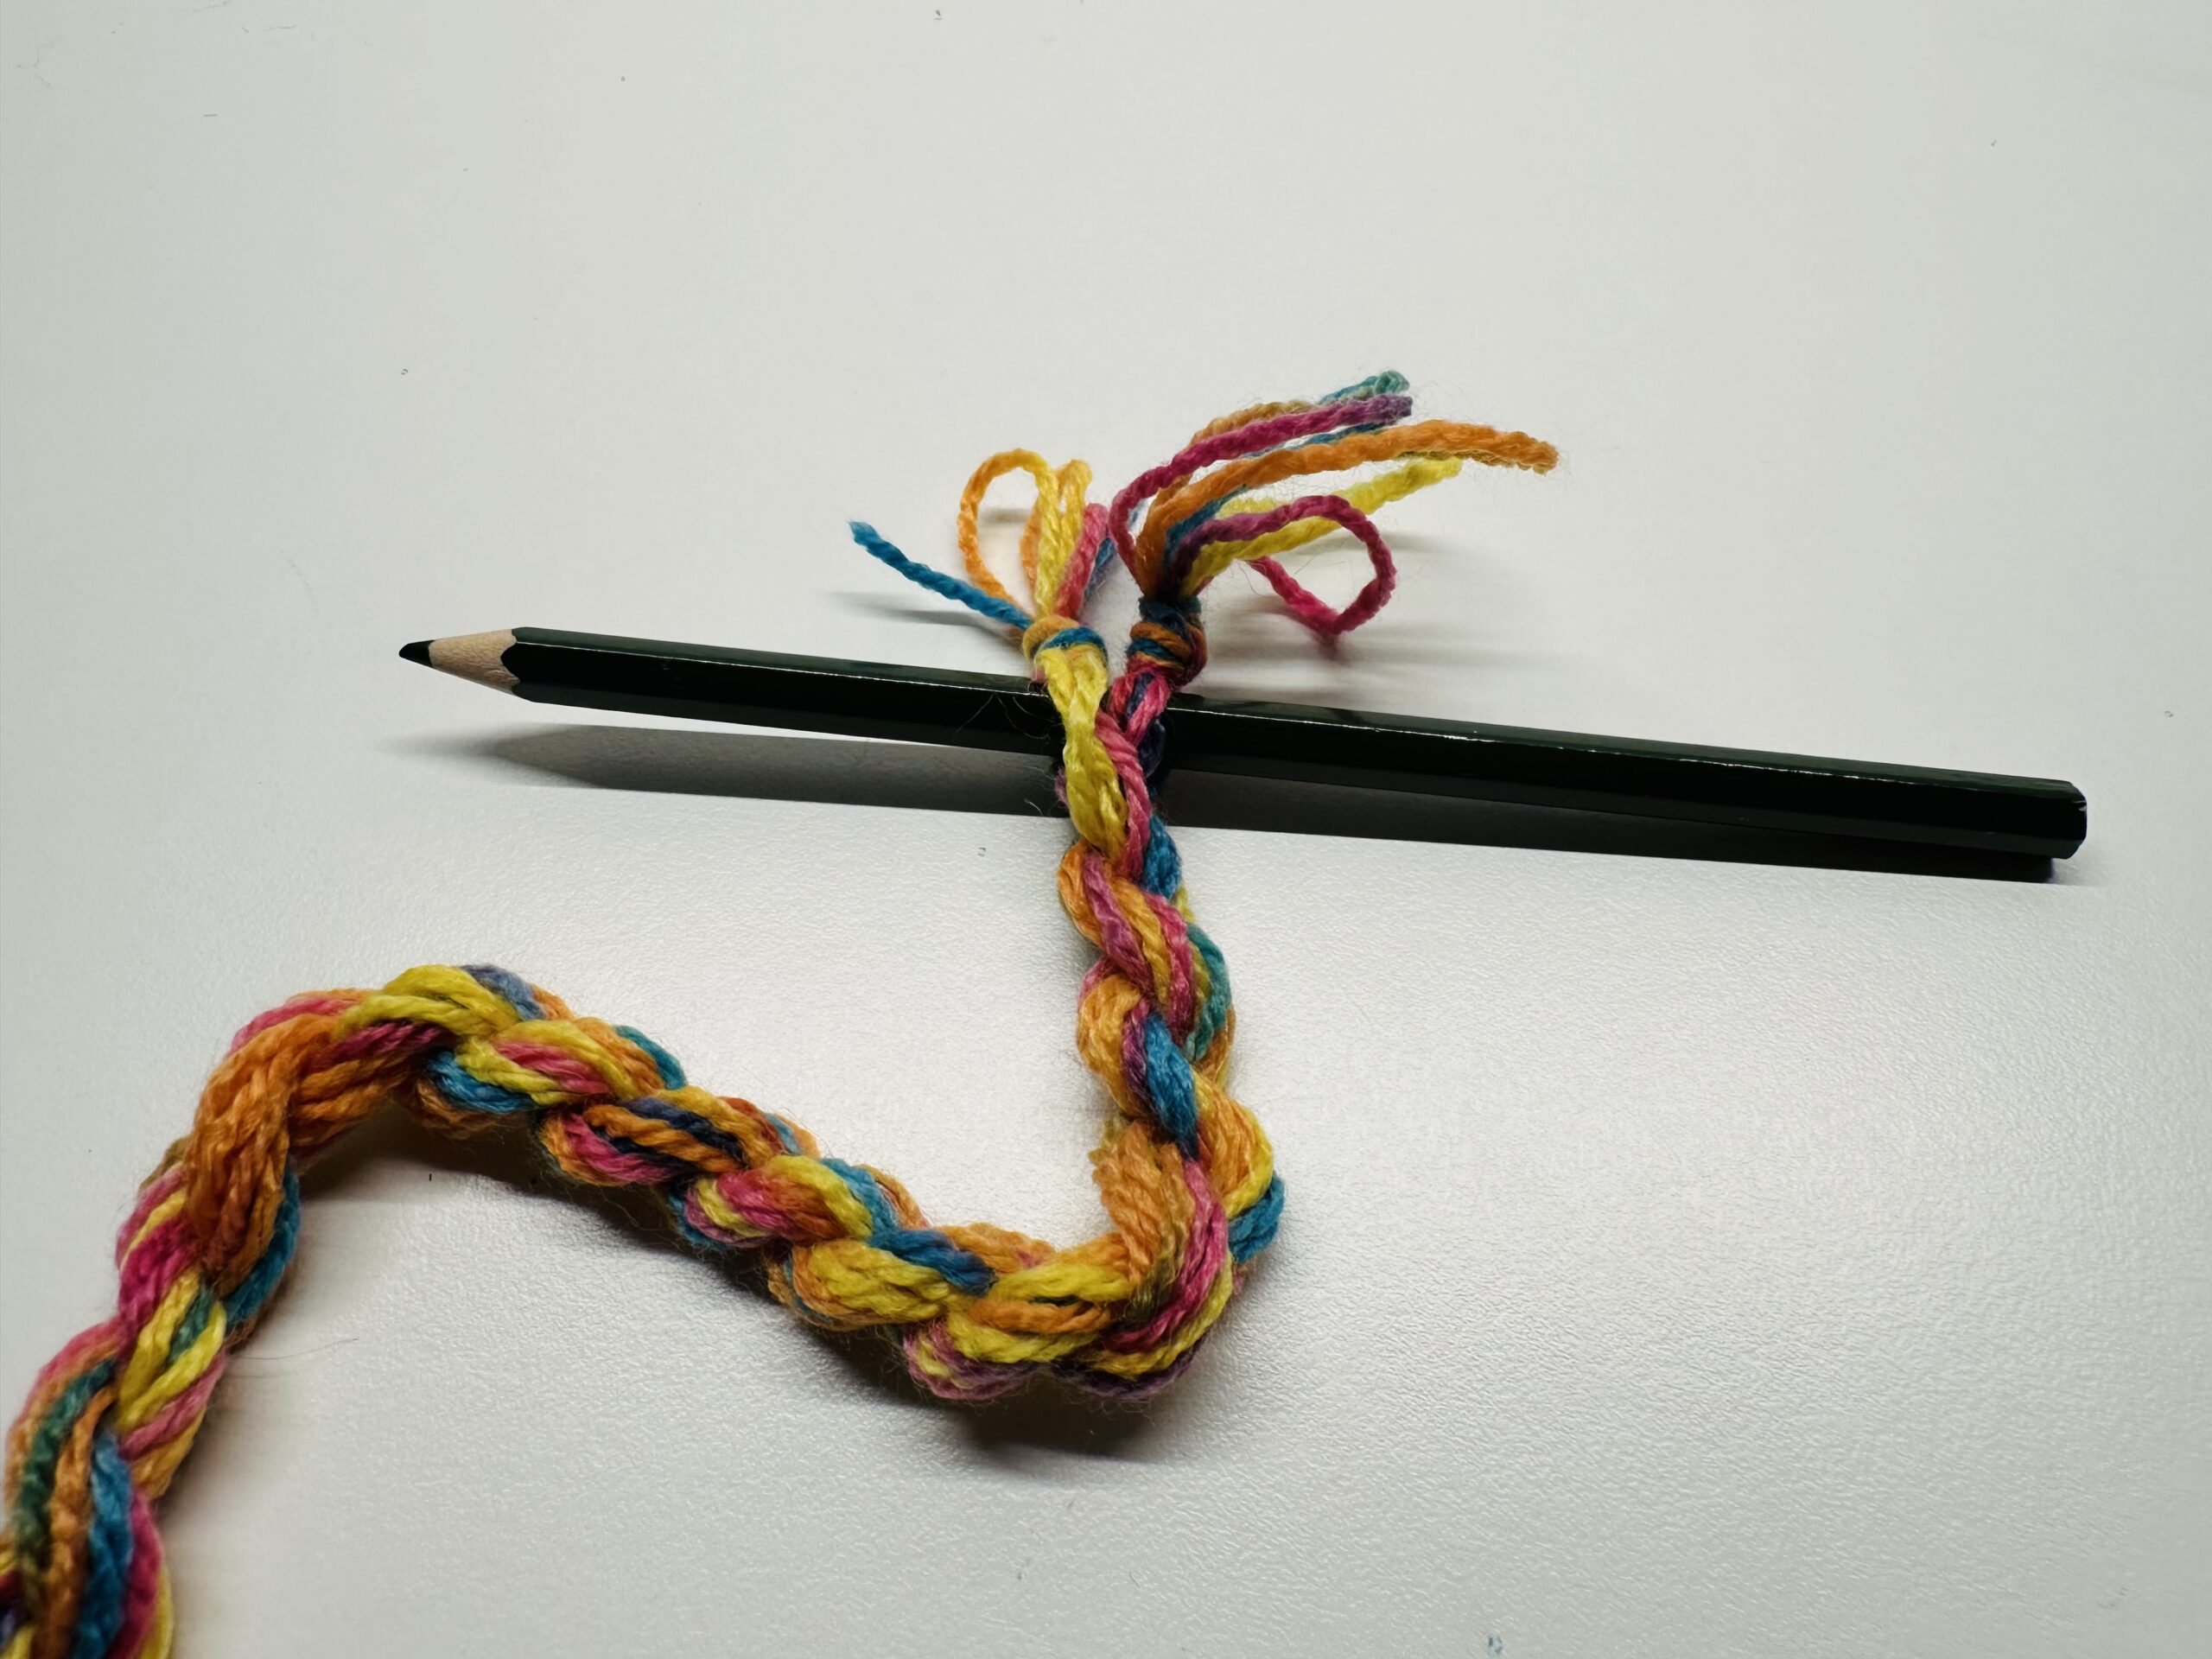
Bild zum Schritt 21 für das Bastel- und DIY-Abenteuer für Kinder: 'Den Schwanz der Schlange könnt ihr franzig  abschneiden oder...'

22

You can also leave the nodules.

Bild zum Schritt 22 für das Bastel- und DIY-Abenteuer für Kinder: 'Ihr  könnt auch die Knöten lassen.'

23

Your snake is ready.

Bild zum Schritt 23 für das Bastel- und DIY-Abenteuer für Kinder: 'Fertig ist eure Schlange.'

Wool snake

Follow us on Facebook , Instagram and Pinterest
Don't miss any more adventures: Our bottle mail

Leave a Reply

Your email address will not be published.

The maximum upload file size: 5 MB. You can upload: image, document. Drop file here