You're dealing with the subject of weather? Then you've probably already asked yourself, "Is there a weather frog?" Here's one for you! And how you can make it yourself, we'll show you step by step.
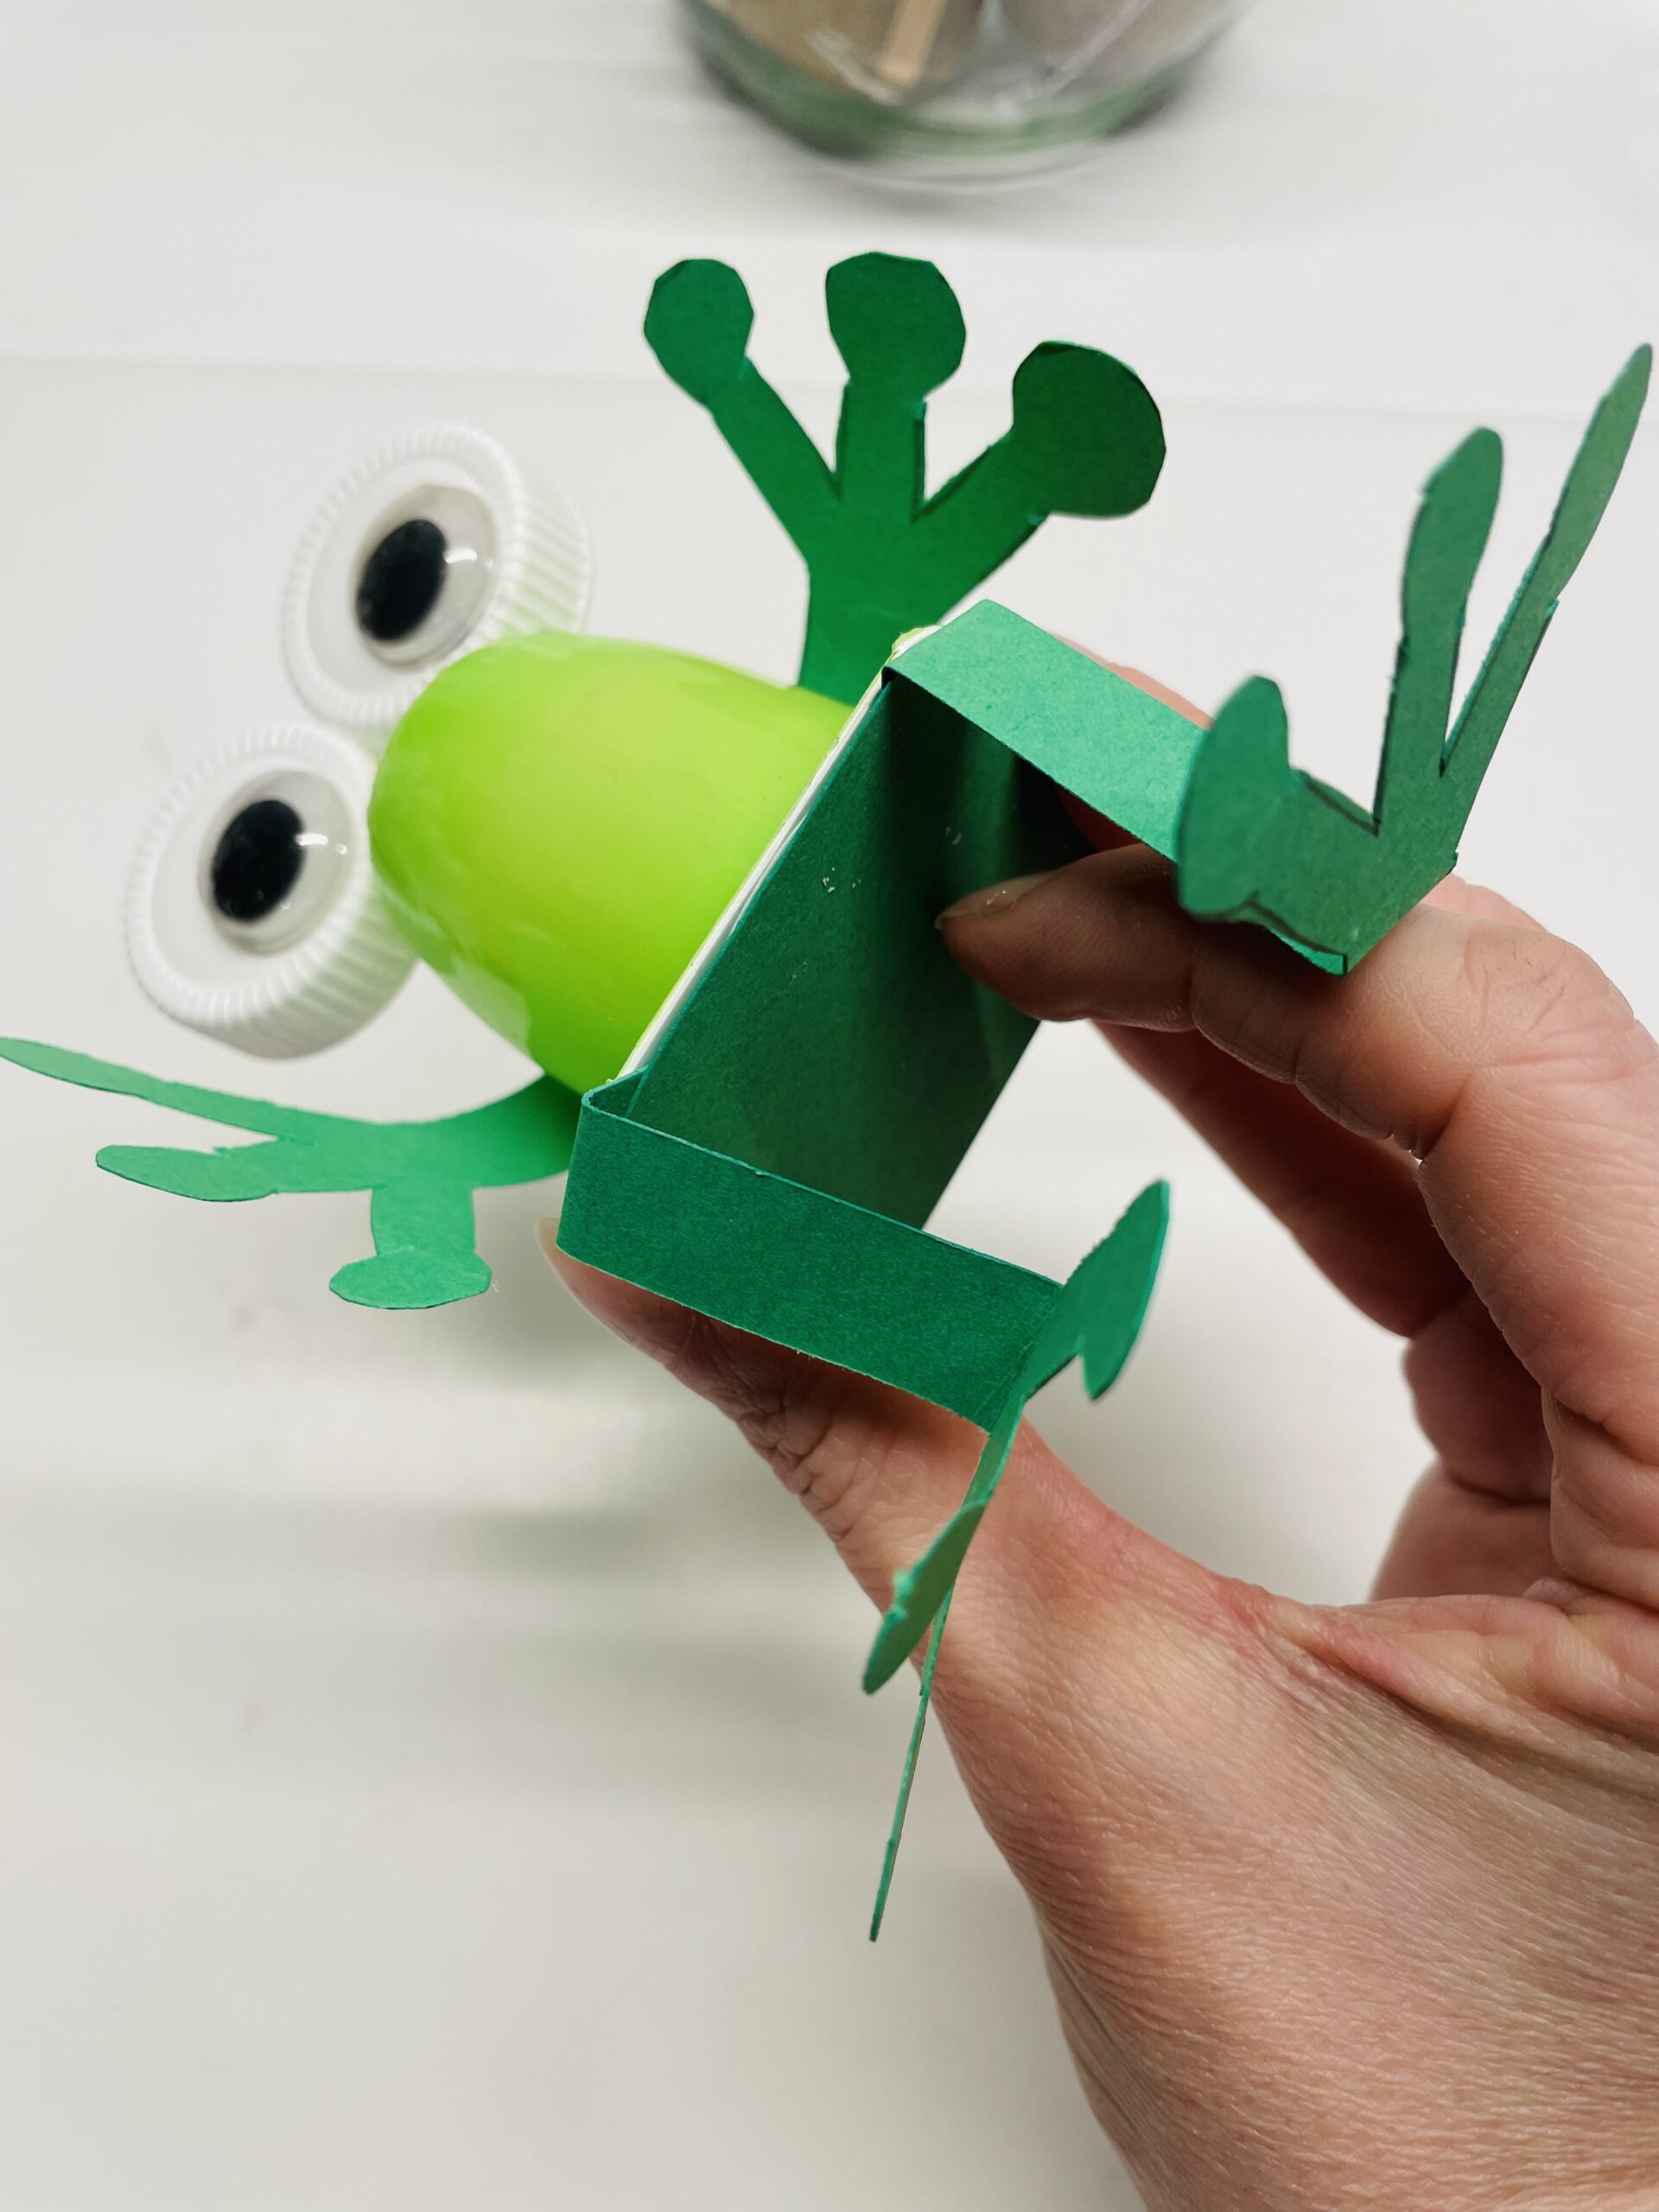
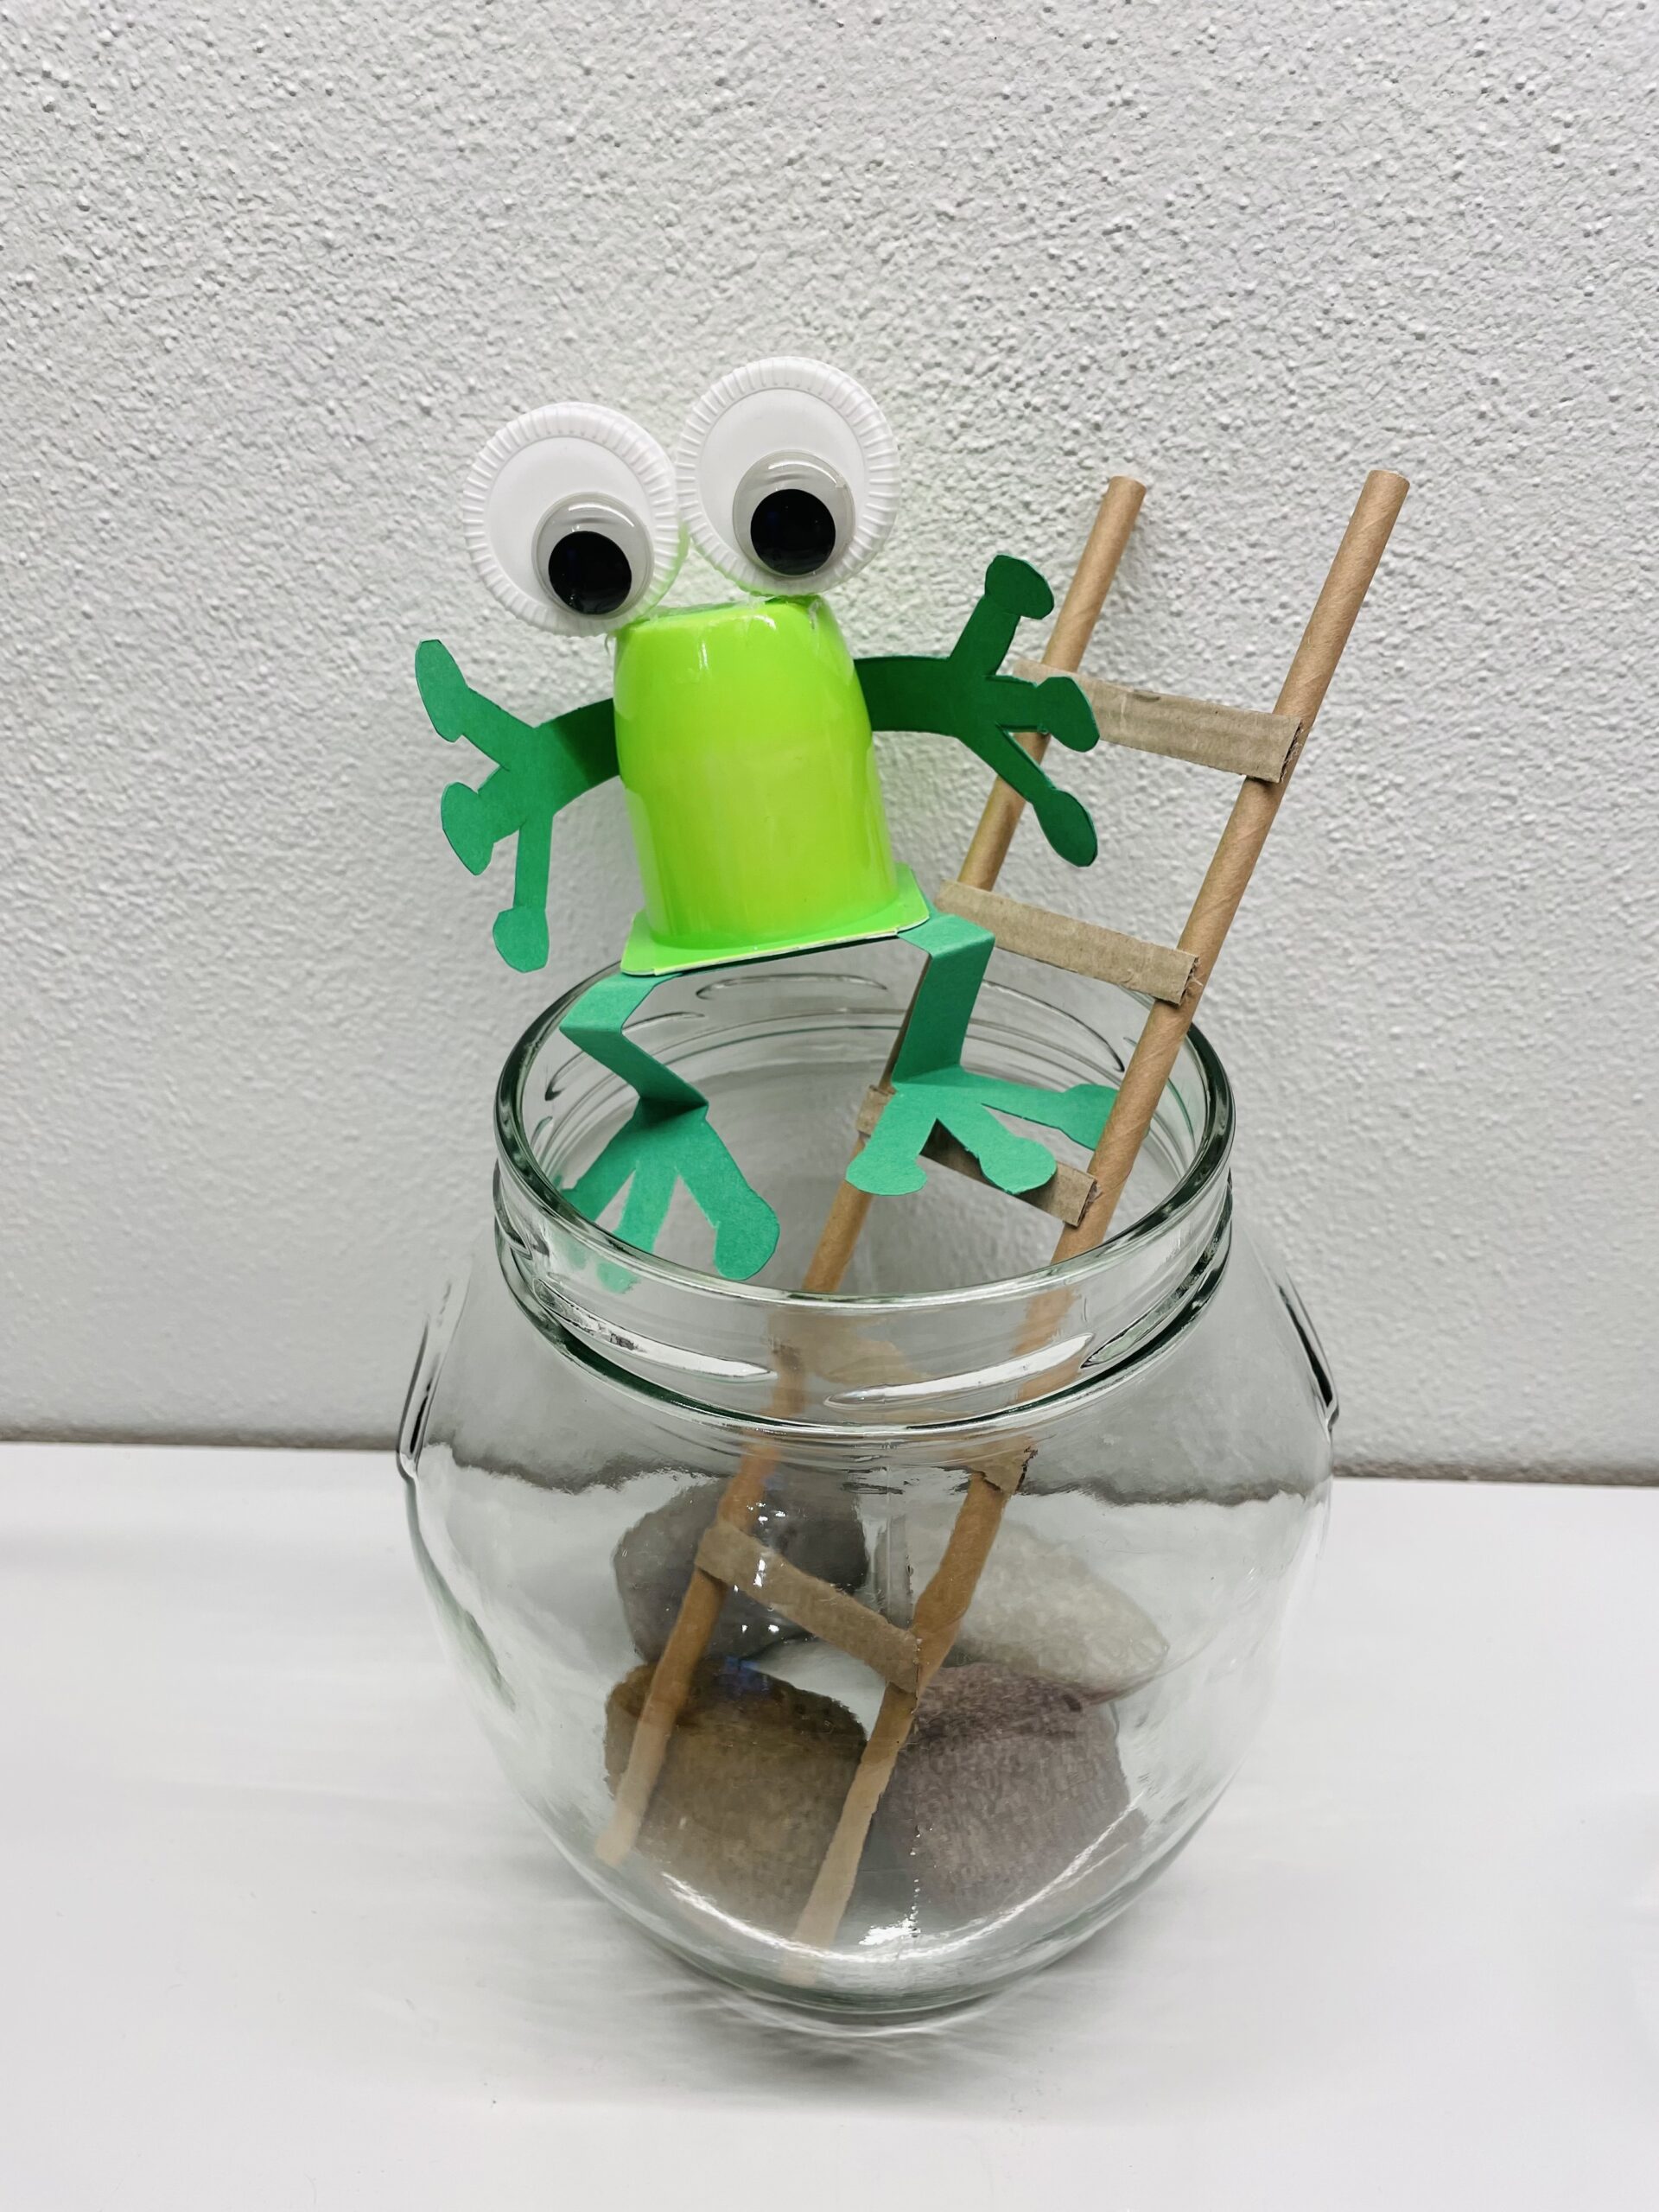
Find a large bulbous glass (or a wake-up glass) and a large round of stones. Then you make a ladder that you put into the glass. Then you put the frog on it. We made it out of a yoghurt cup. But maybe you also have a plush frog at home that you want to use. Have fun and stay creative!
Media Education for Kindergarten and Hort

Relief in everyday life, targeted promotion of individual children, independent learning and - without any pre-knowledge already usable by the youngest!
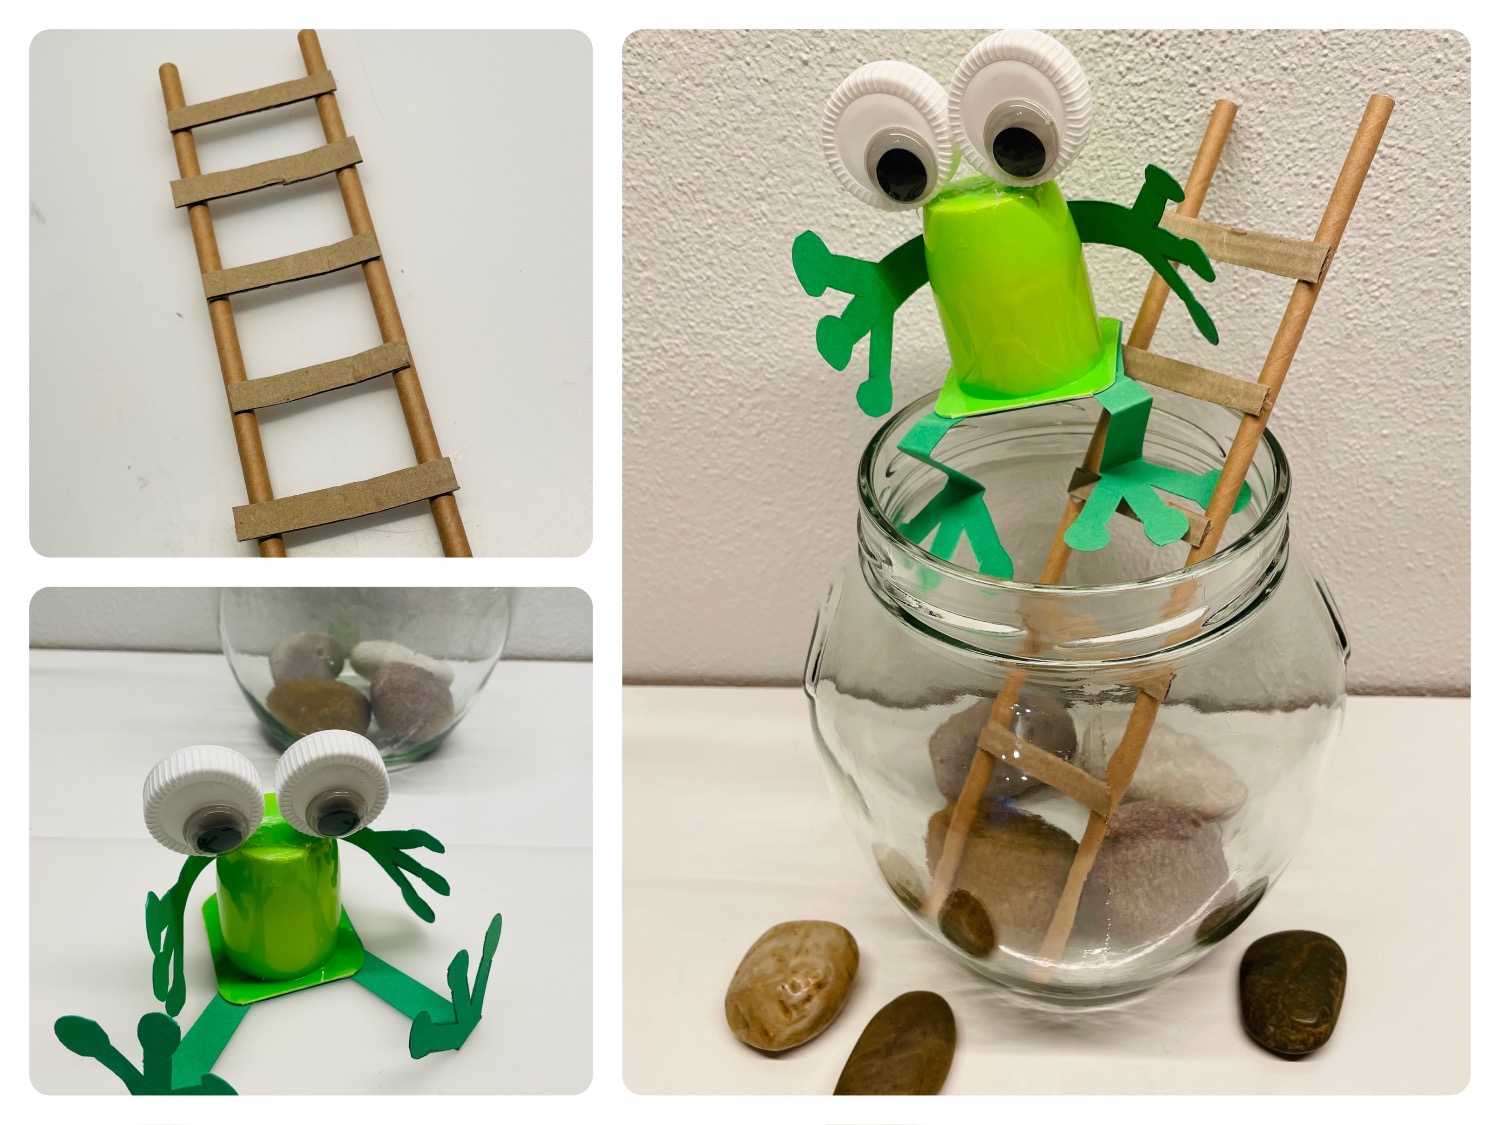
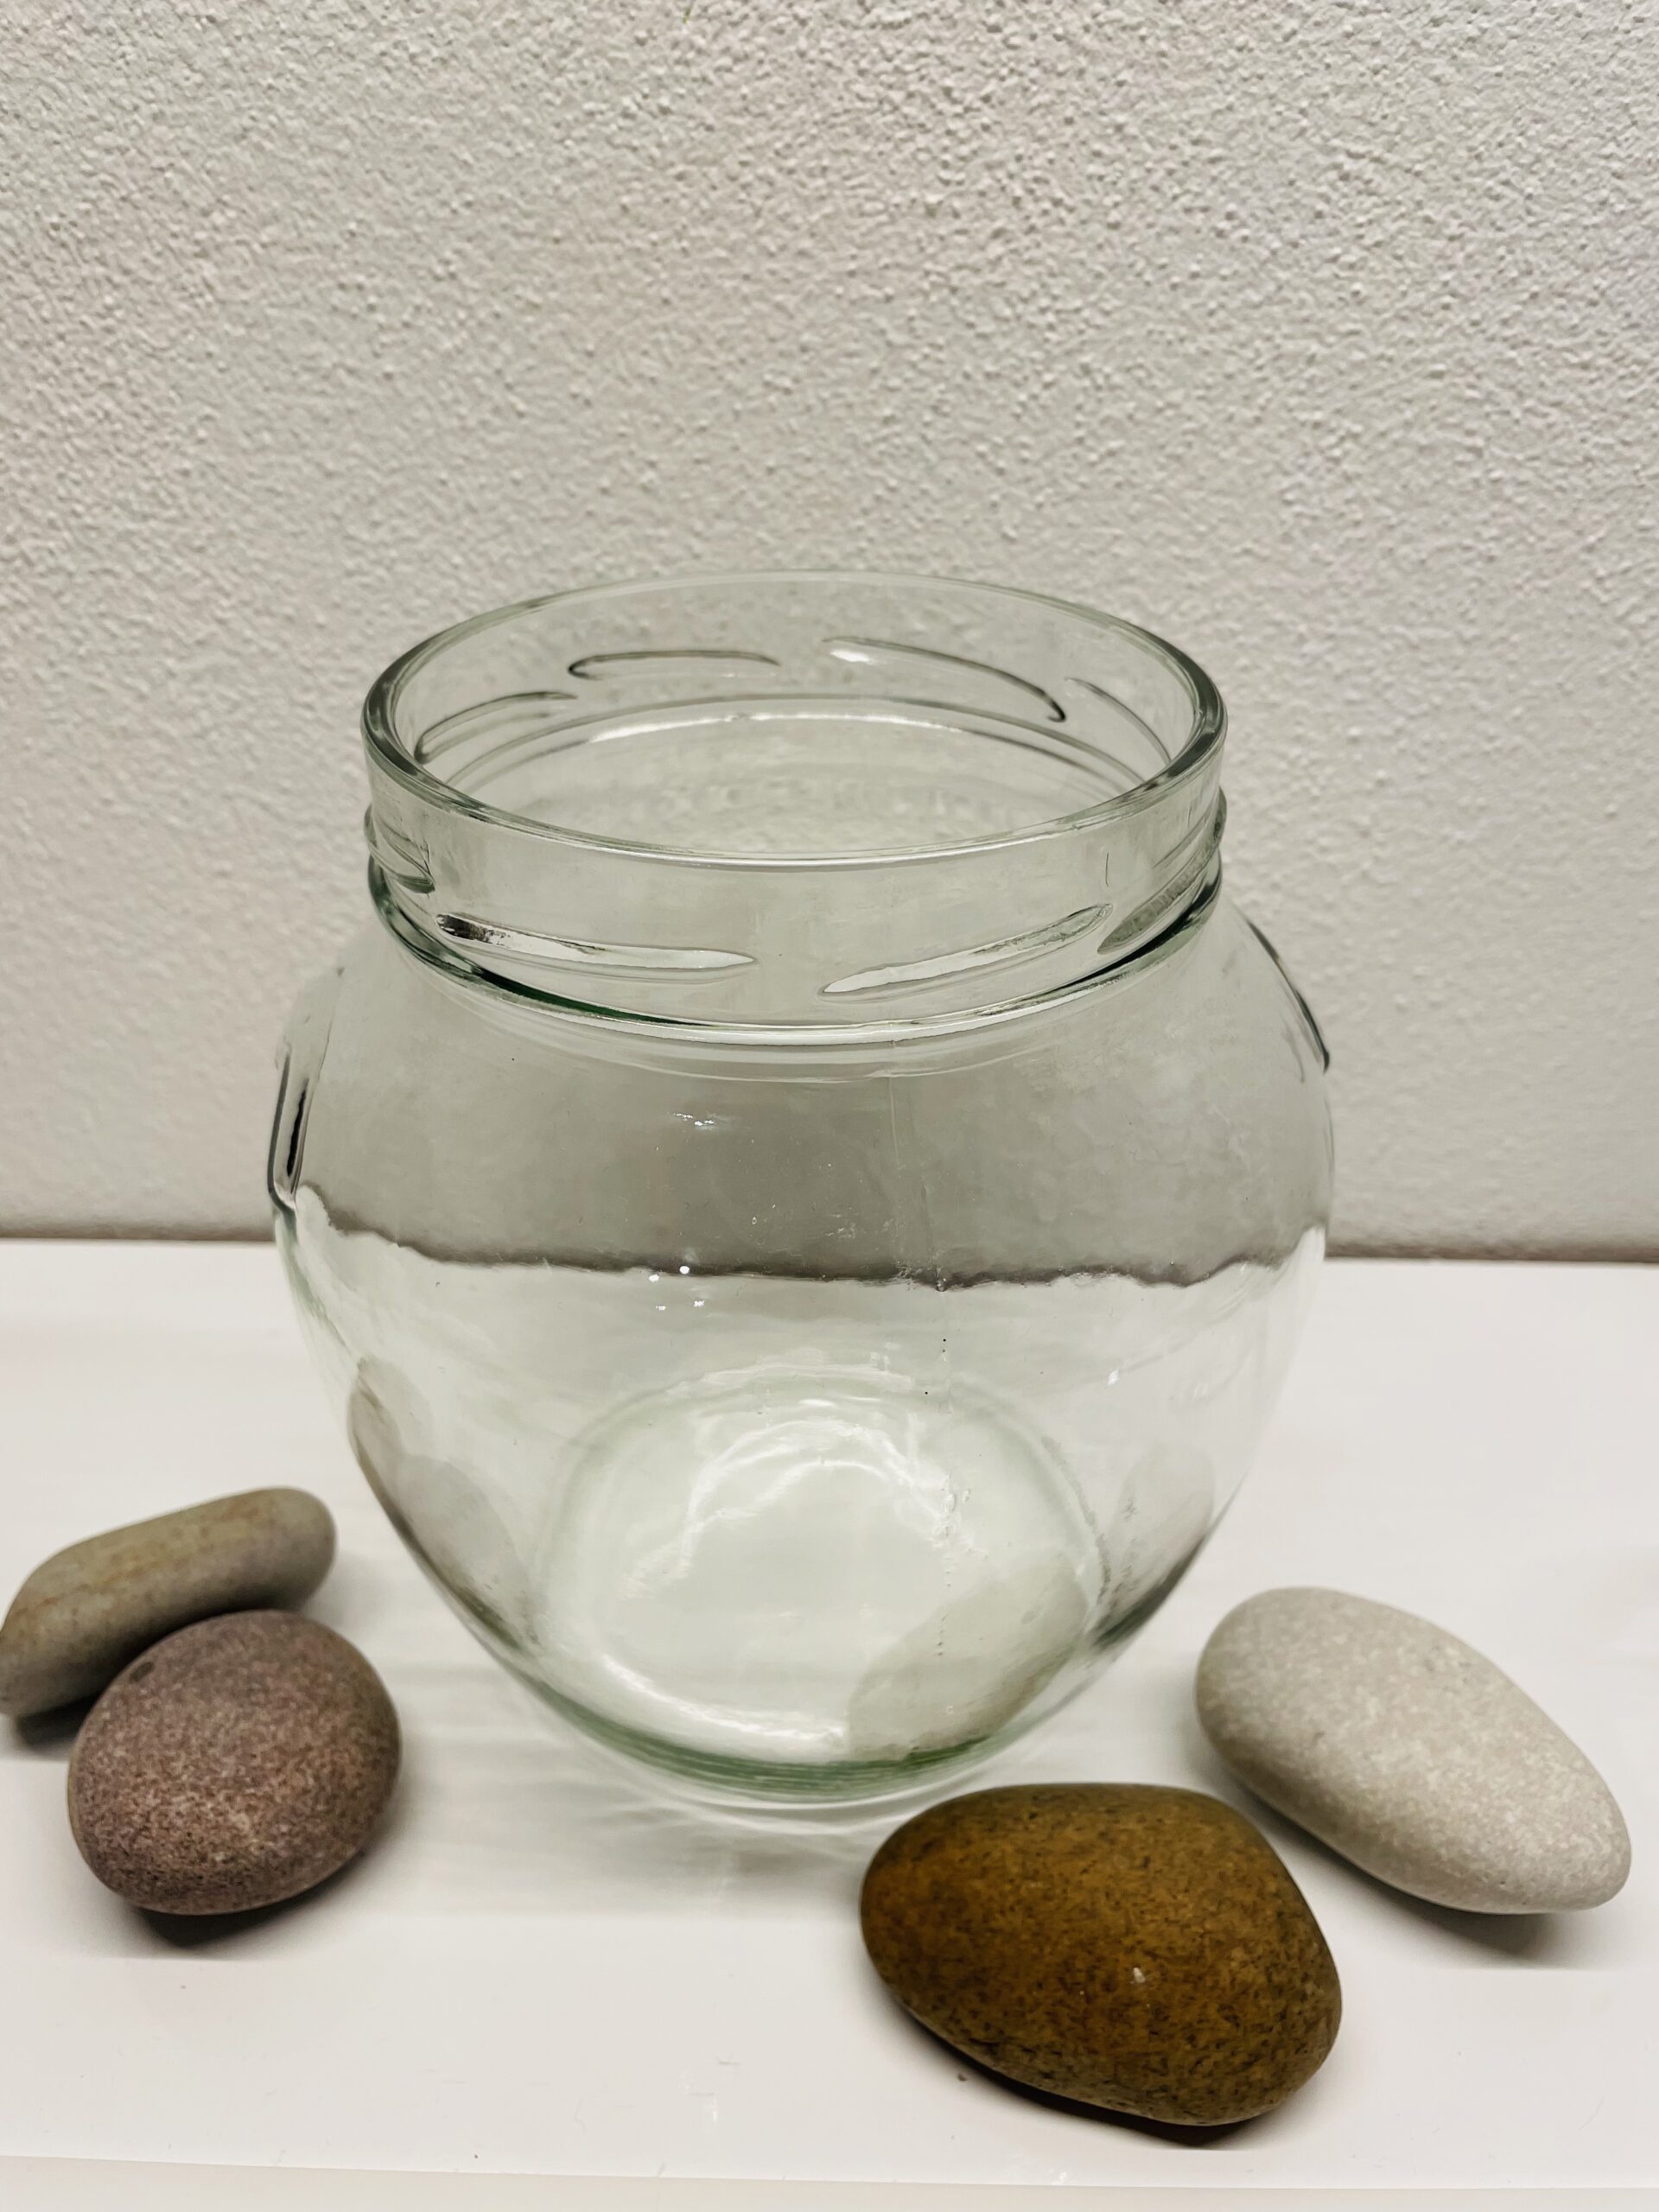
Get the glass and the stones ready first.
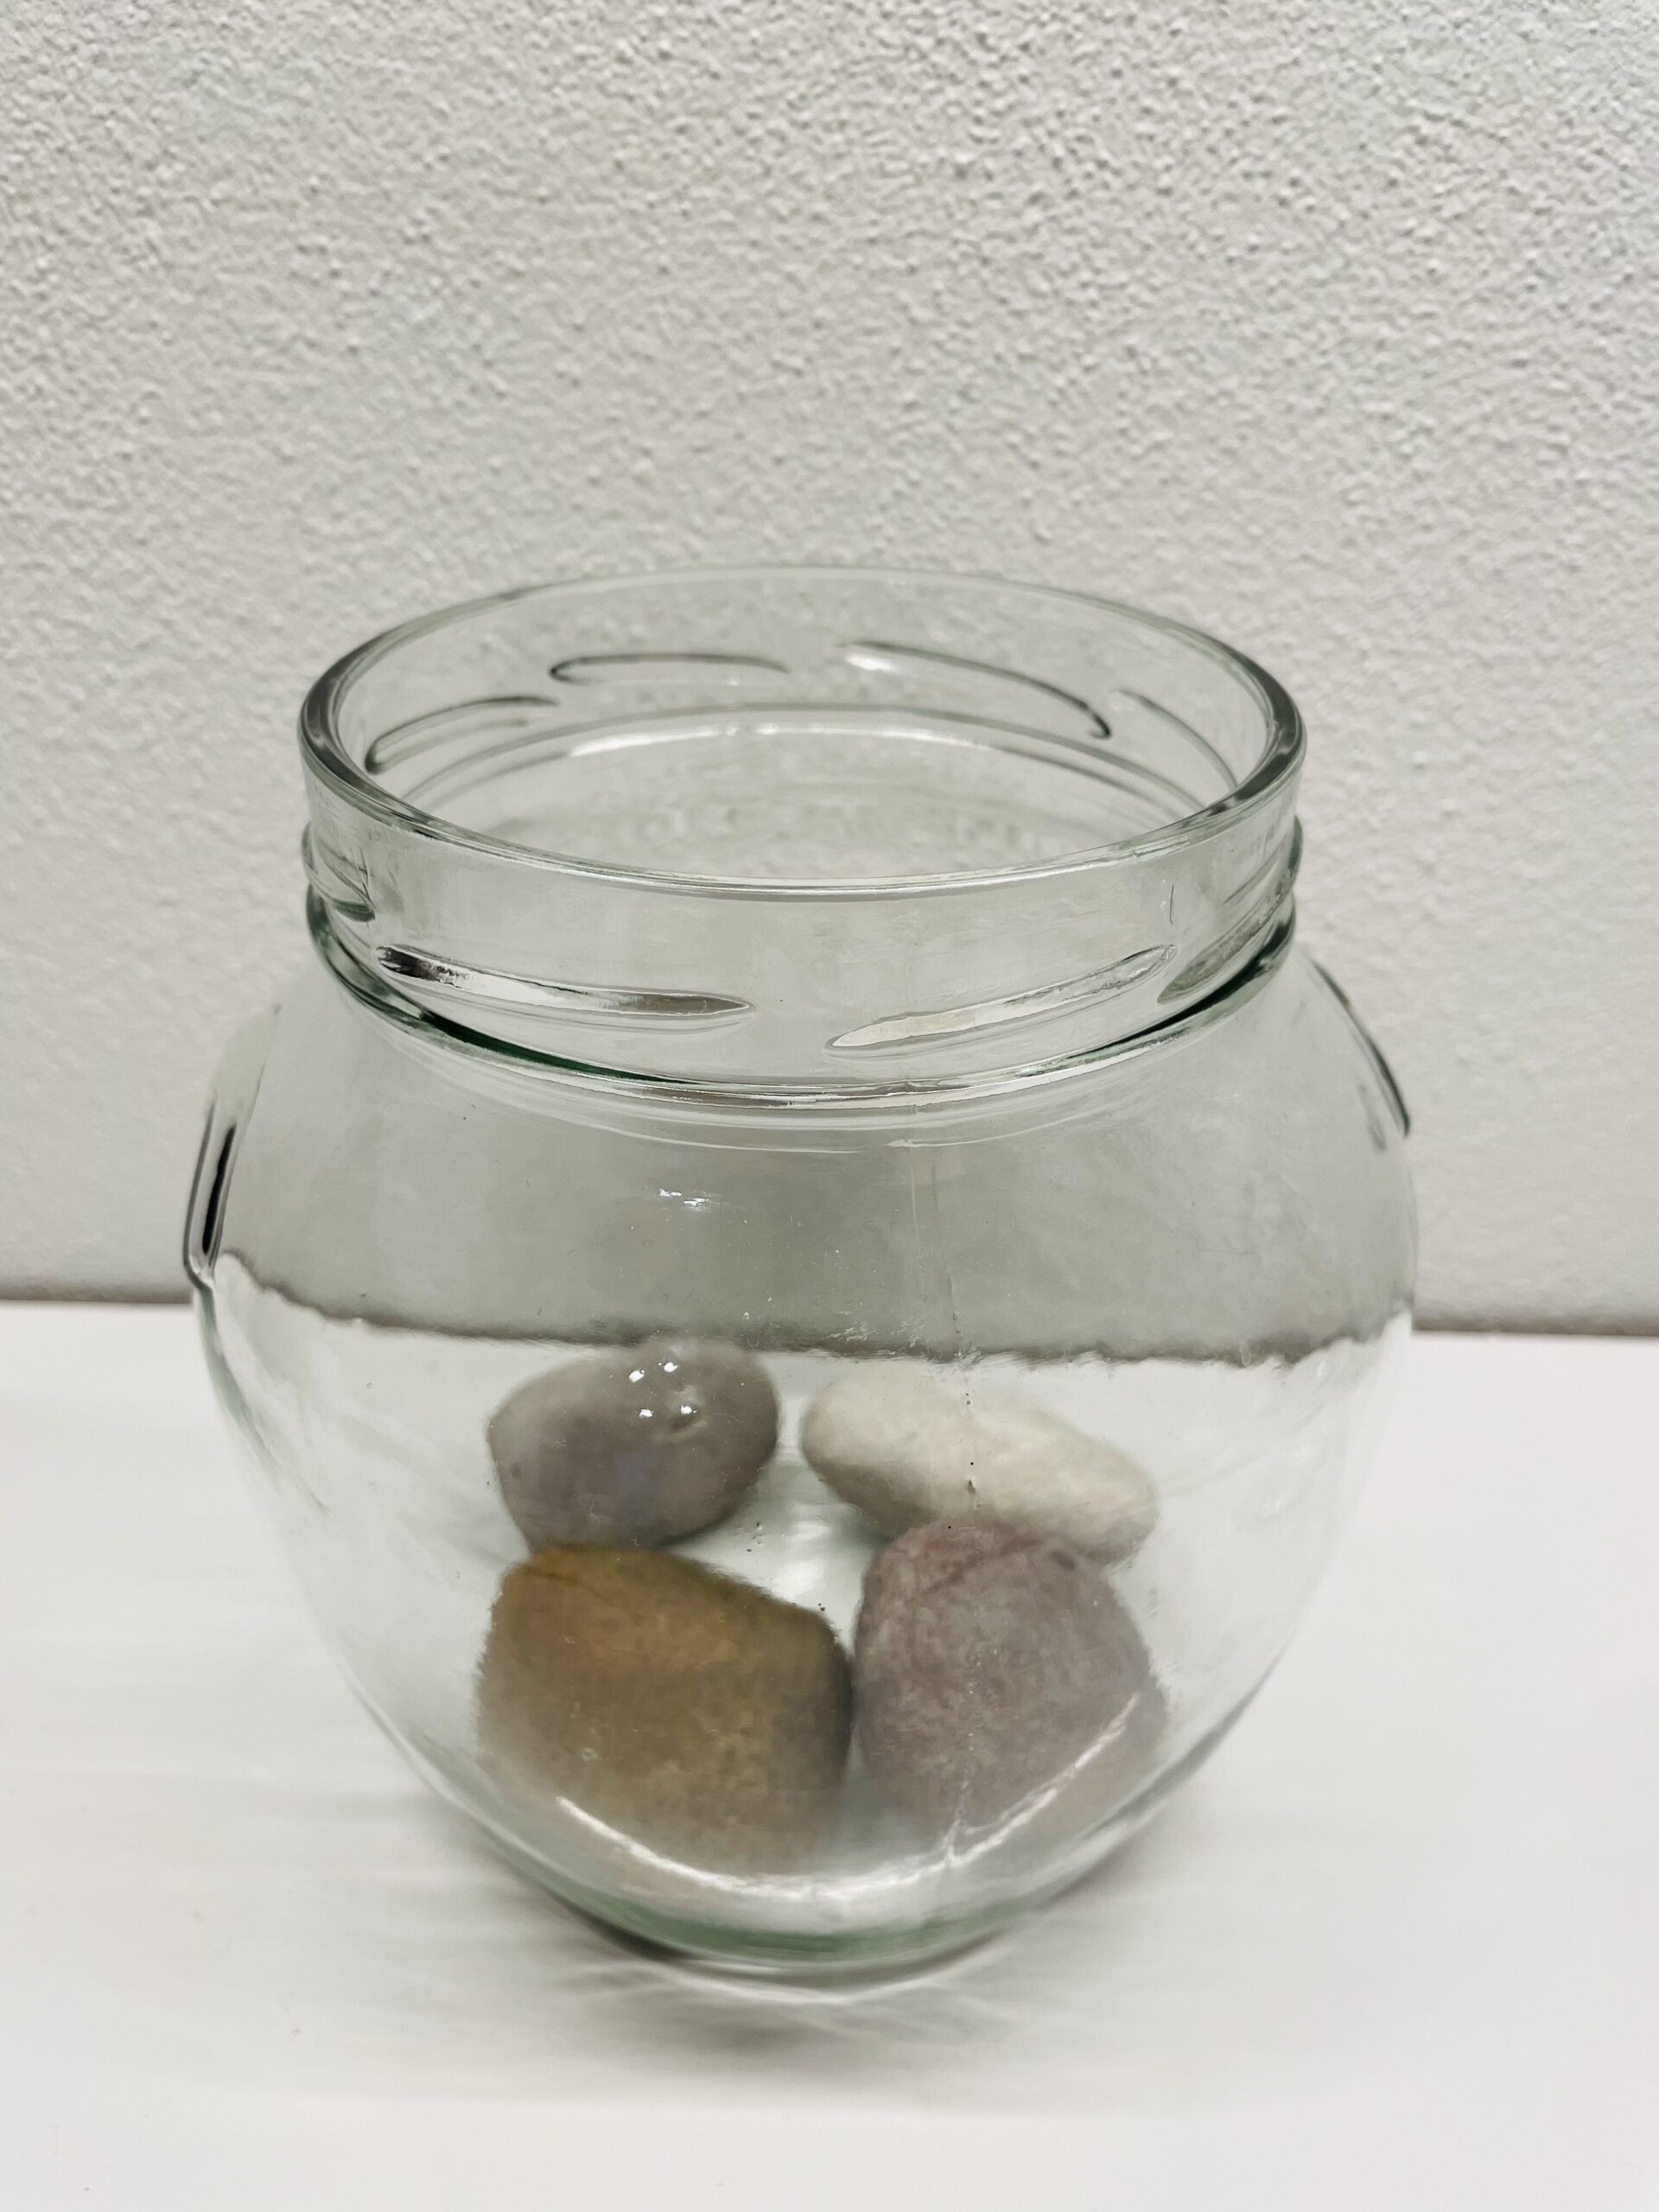
Then carefully put the clean stones in the glass.
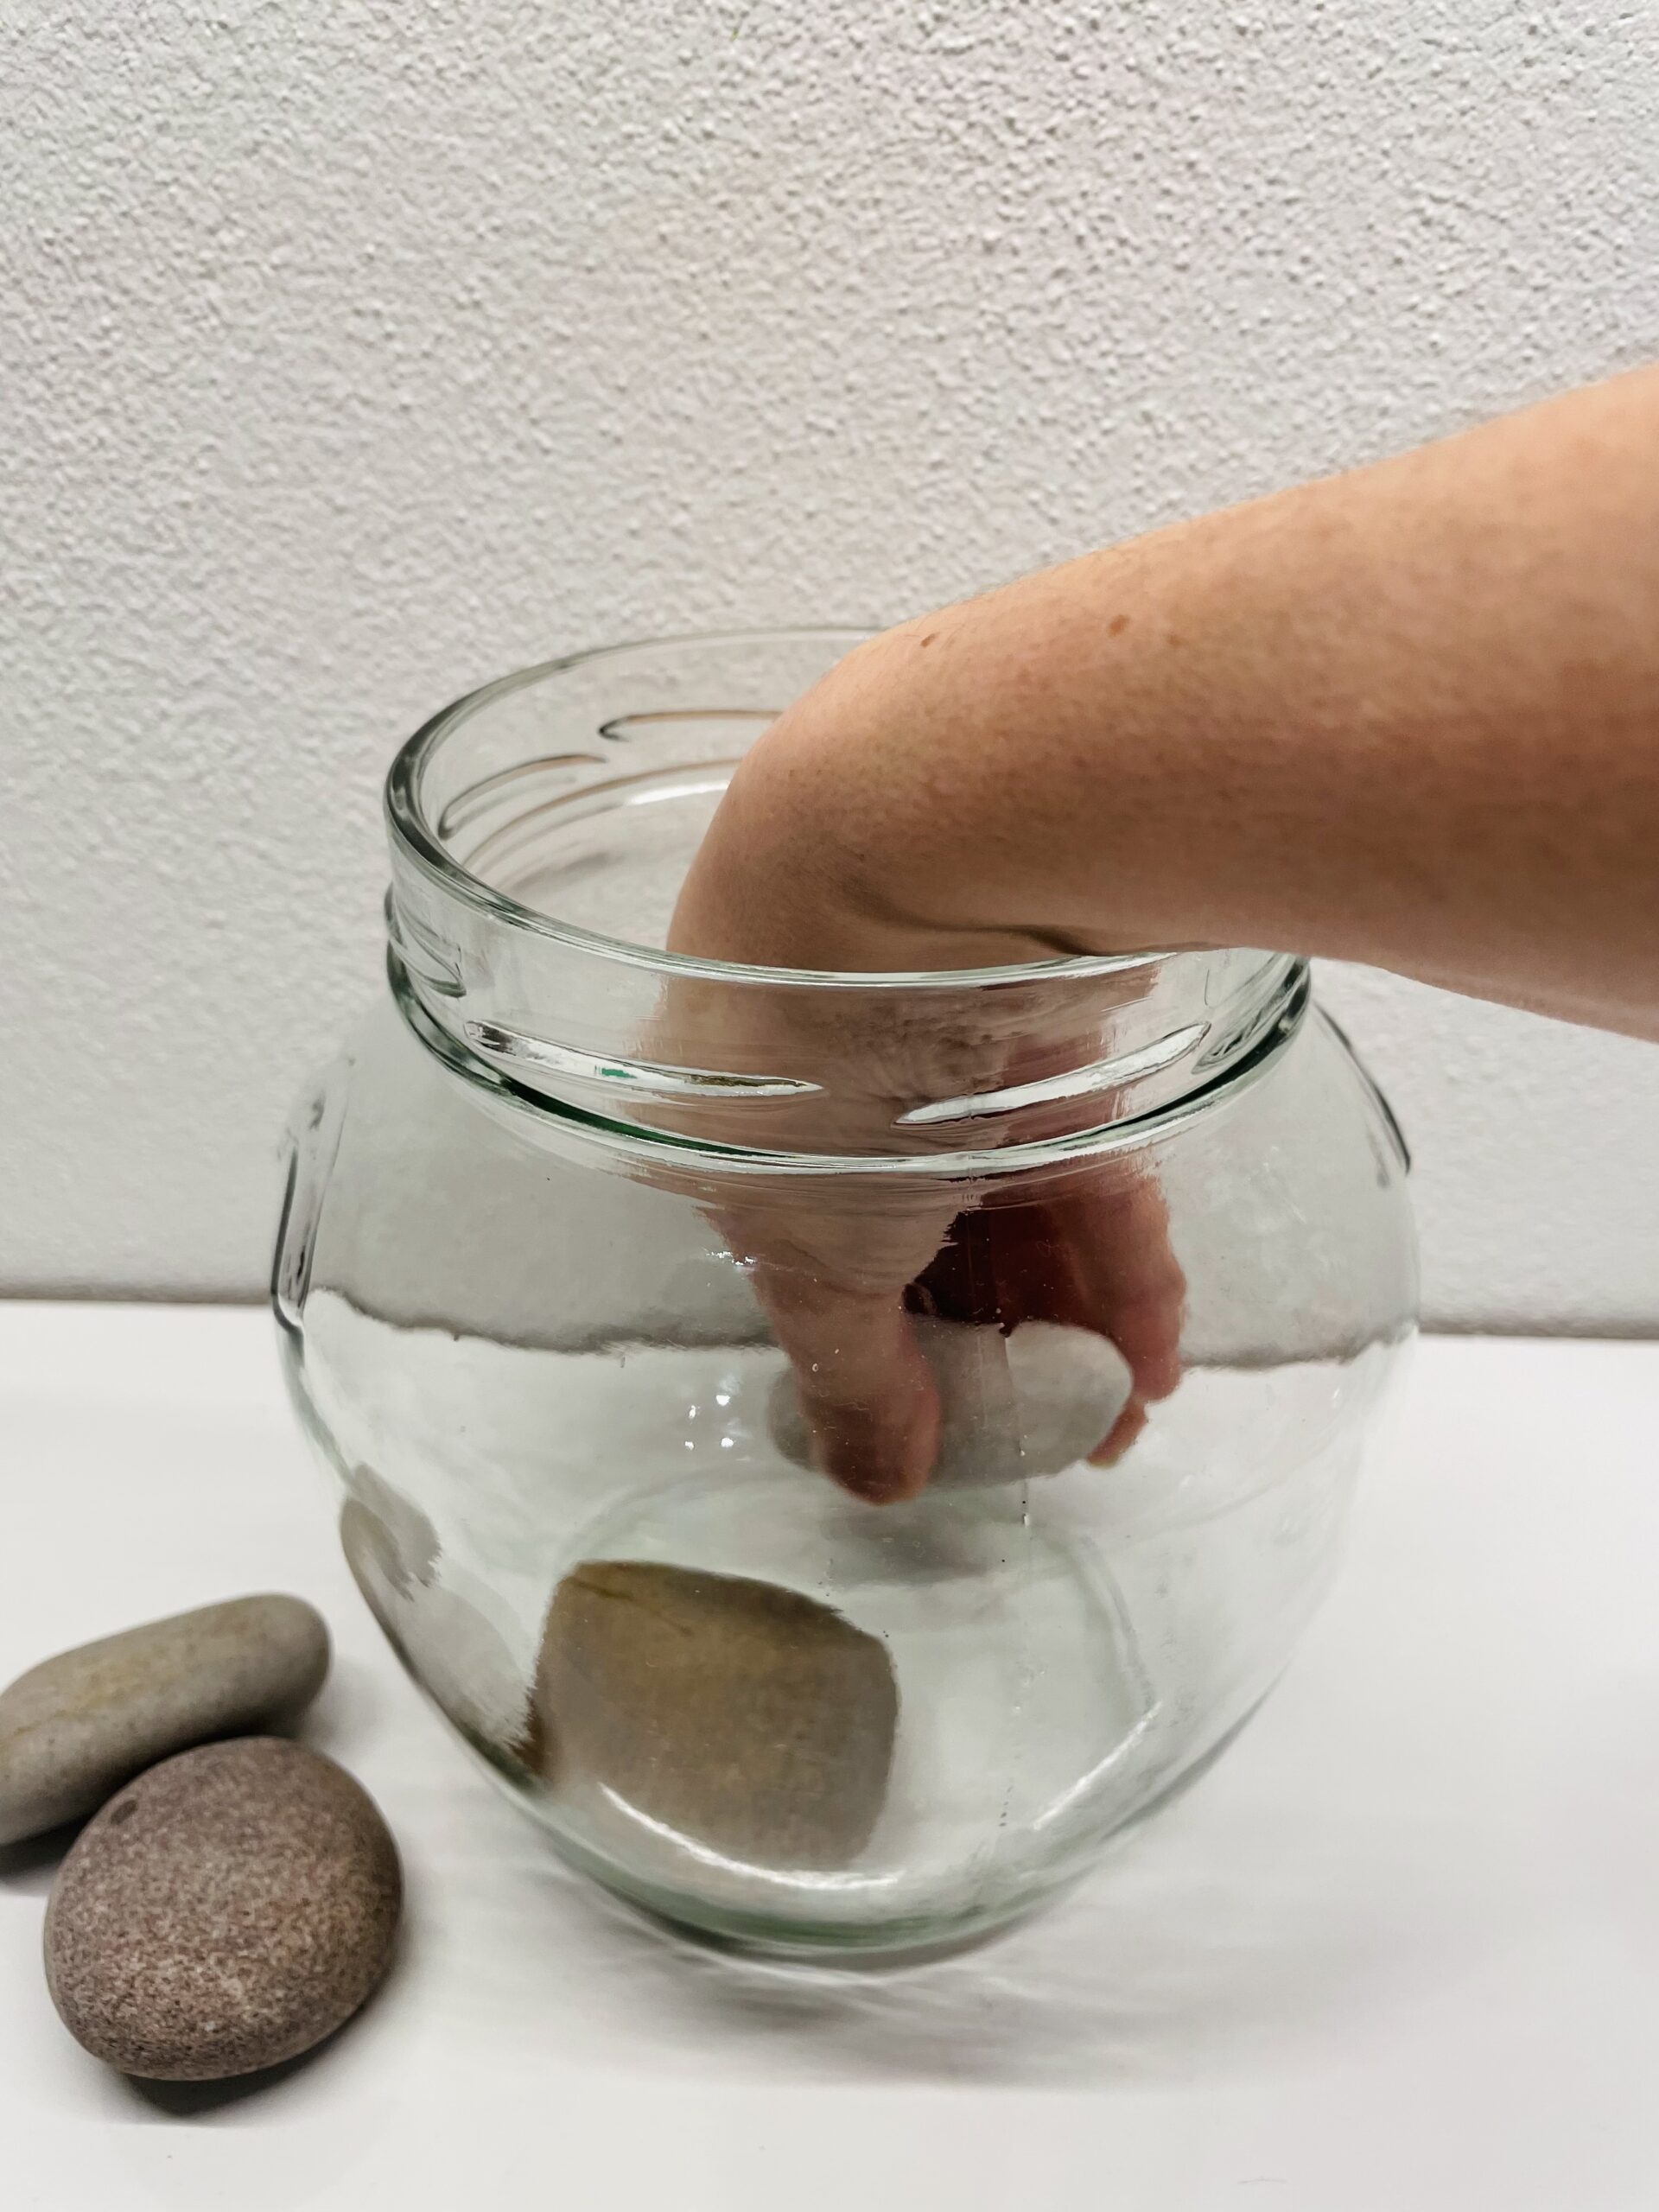
Some stones are enough for this. It doesn't have to be covered with the whole floor.
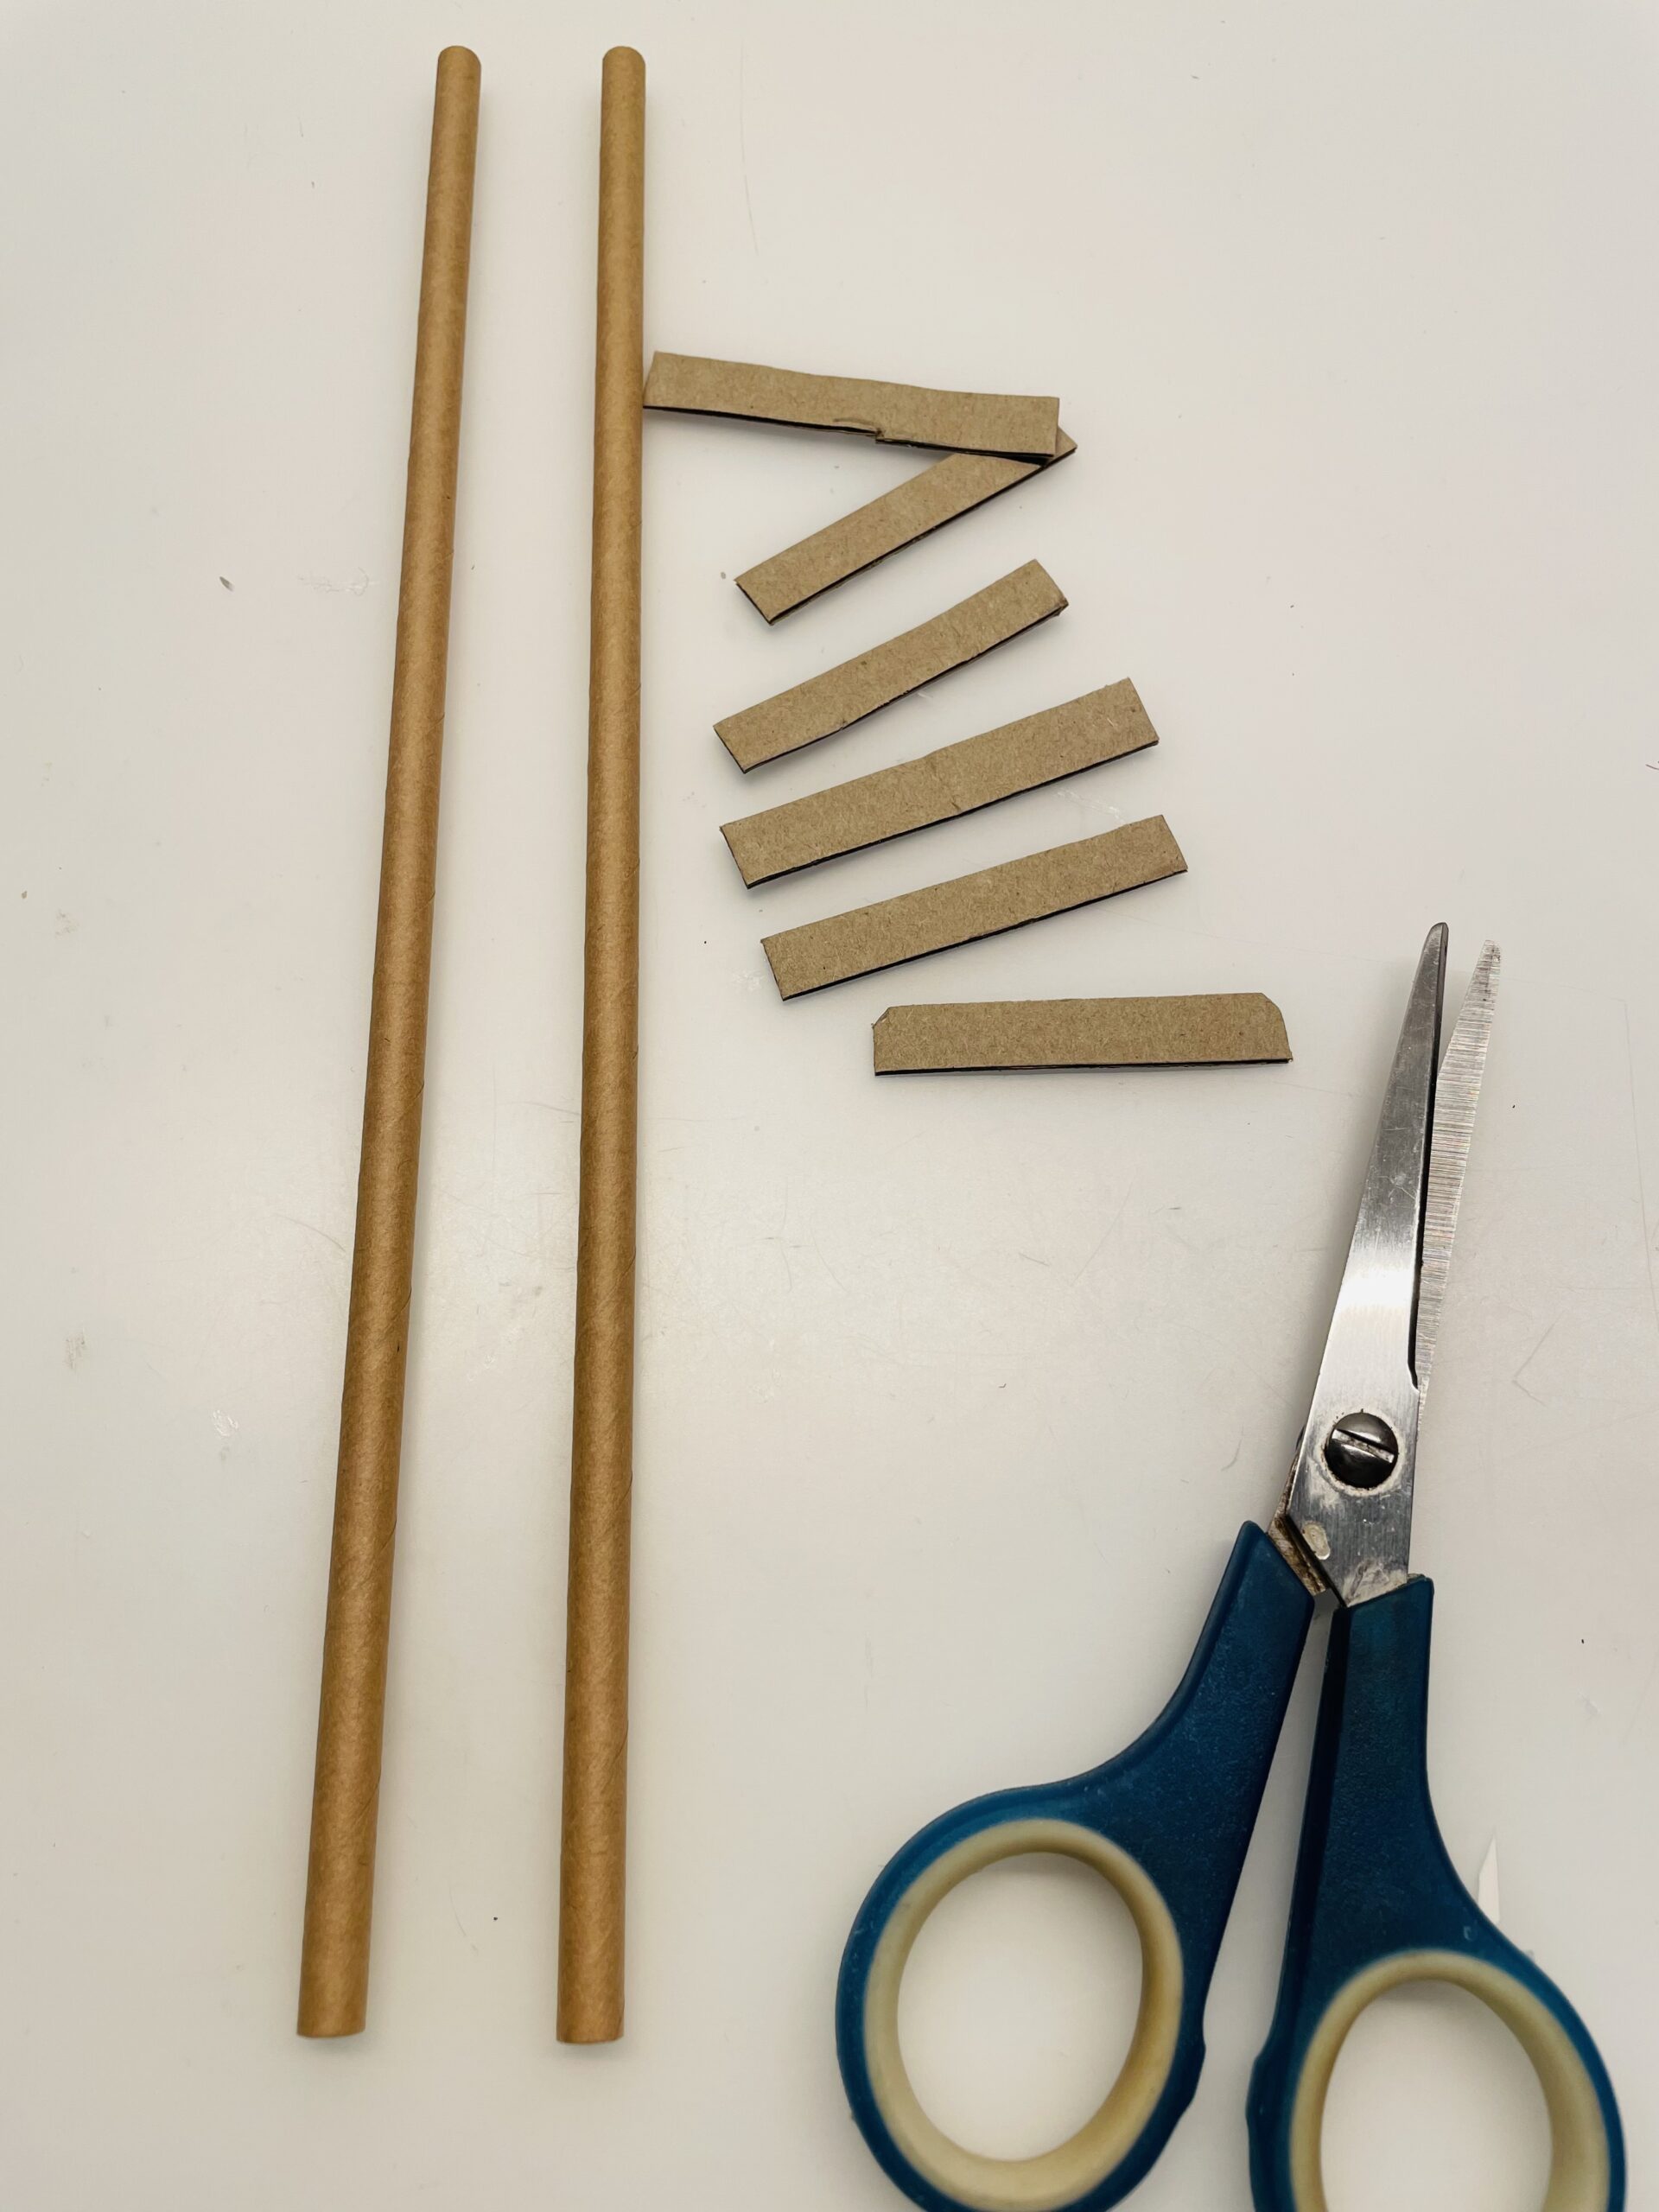
Then you make a small ladder out of 2 paper straws and a strip of cardboard. The length of straws is a good measure for this. Cut 6 strips out of the cardboard with a length of 5cm and a width of 0.5cm.
Then put on the straws at a distance of 5cm and fasten these short crossbars to the straws.

Spreads the short cardboard strips evenly and leaves some space below and above.
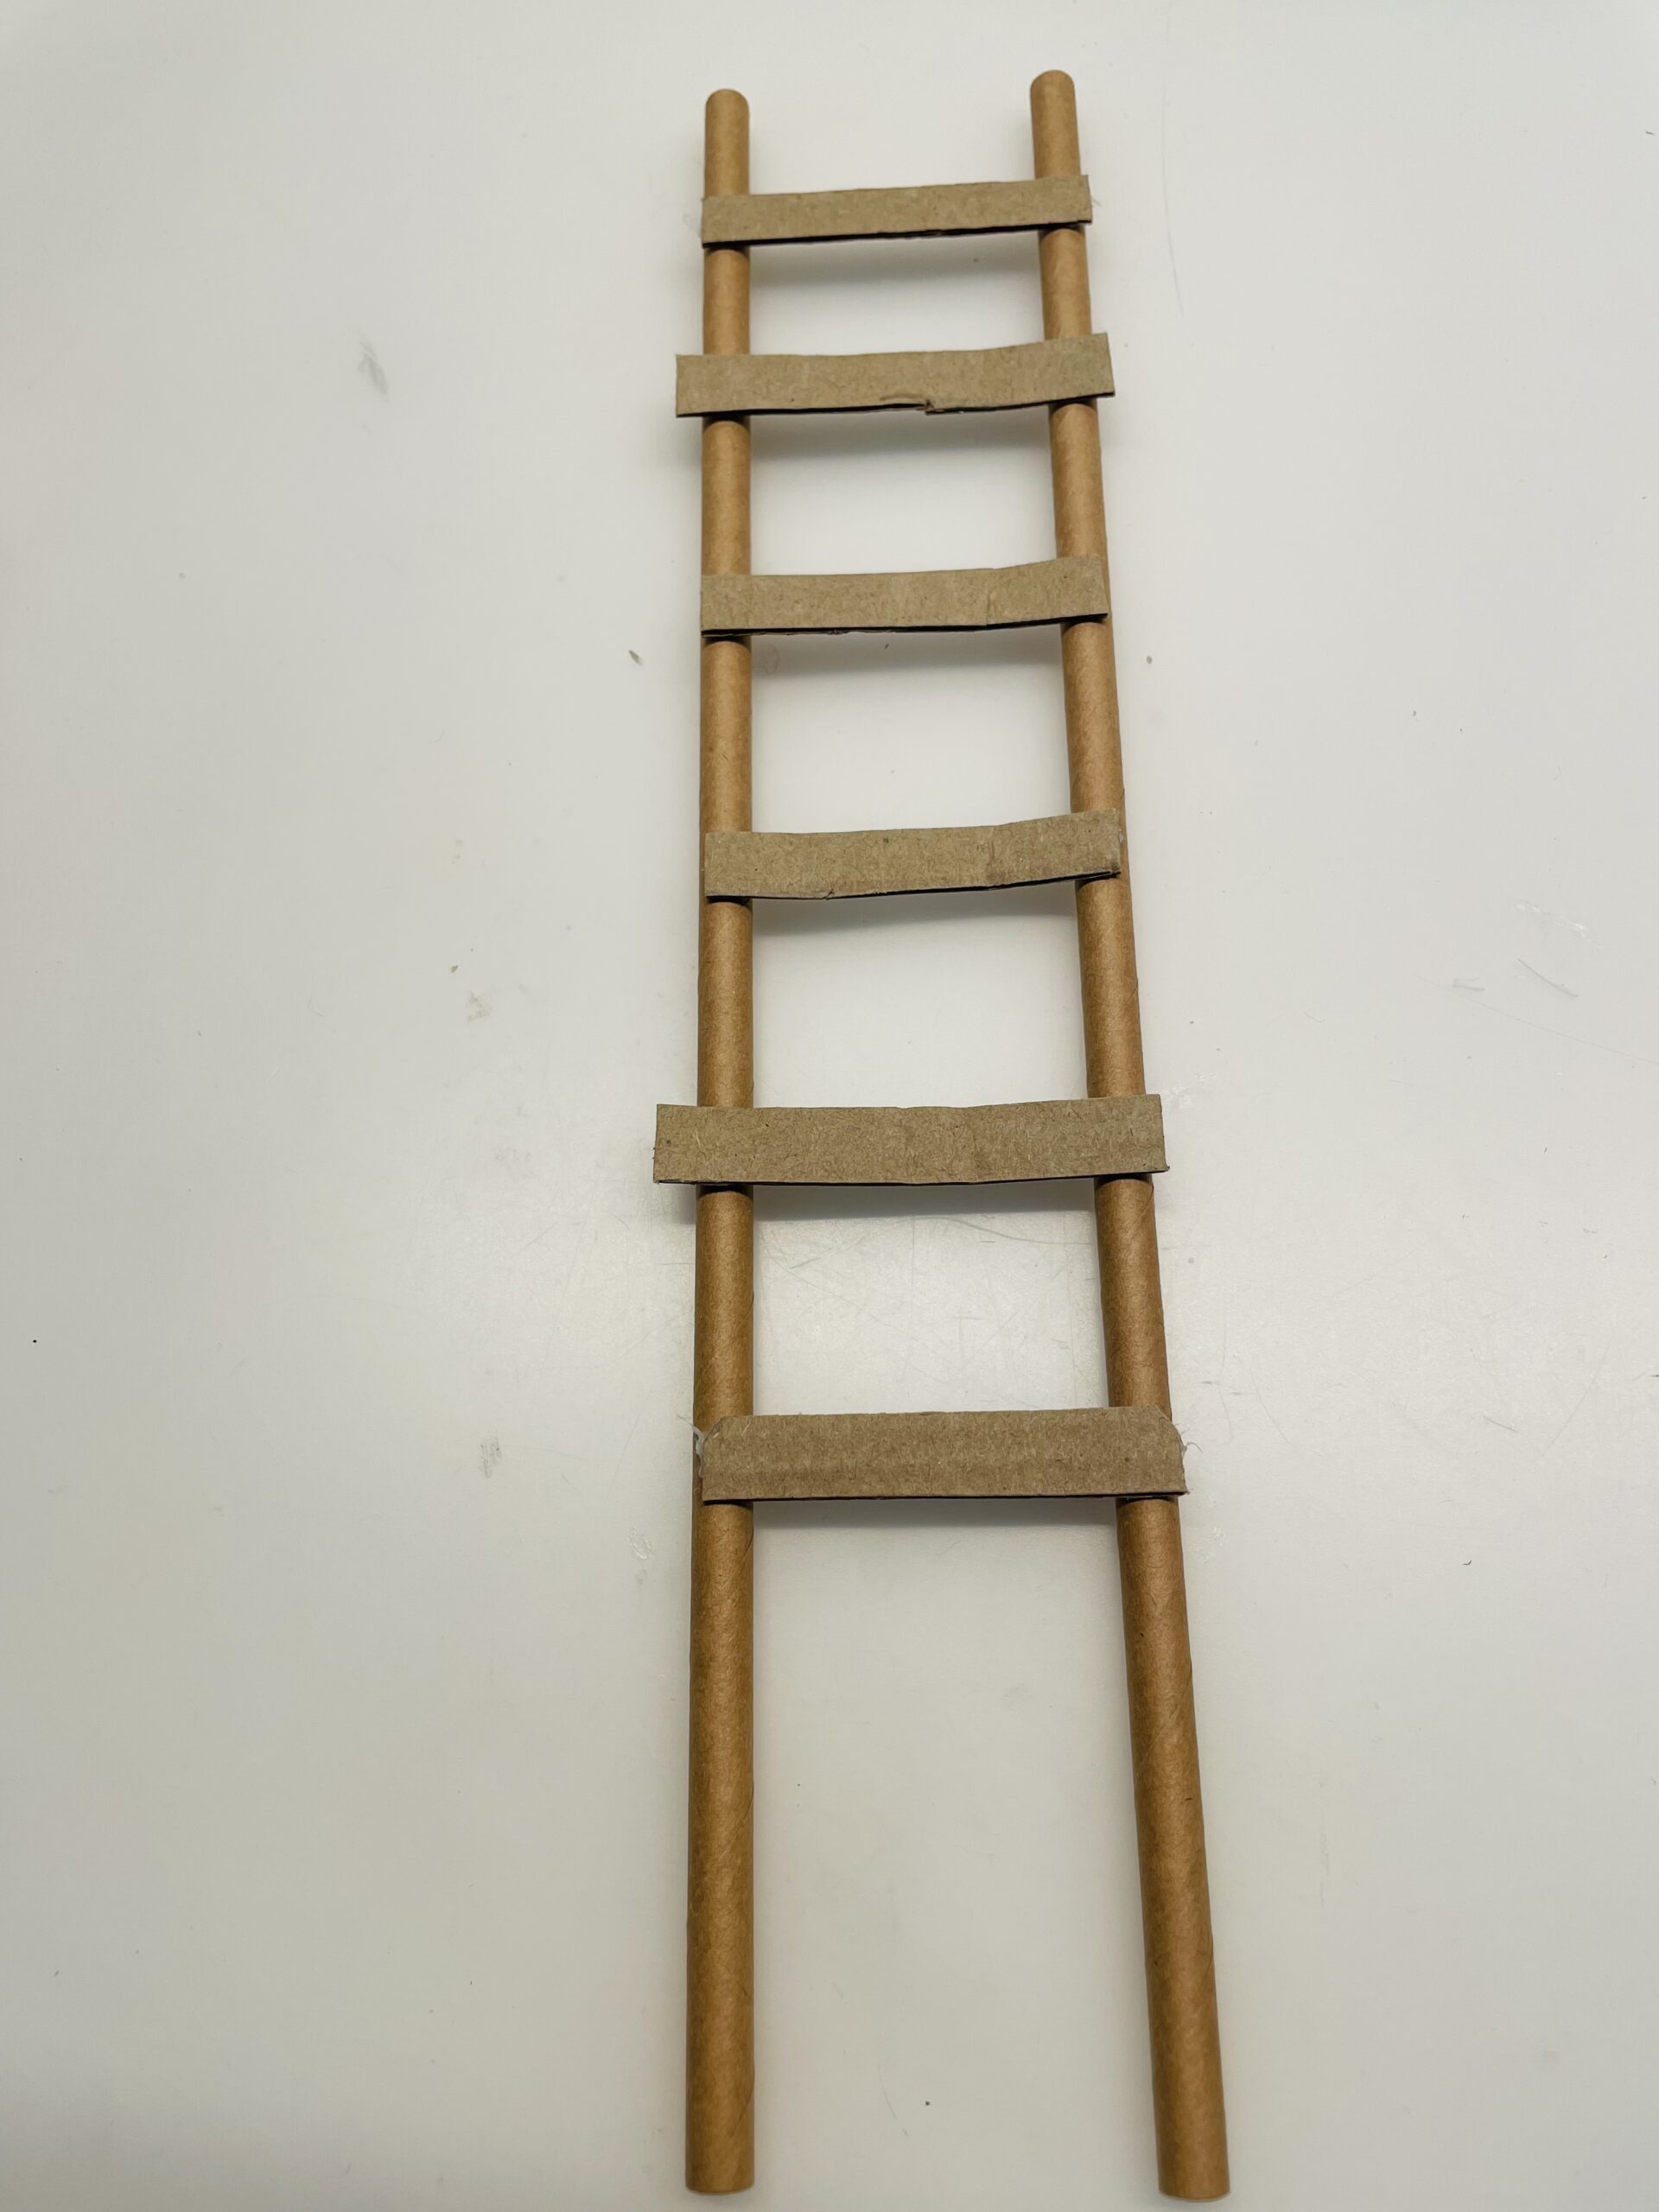
This creates a ladder, which is placed in the glass after a short drying.
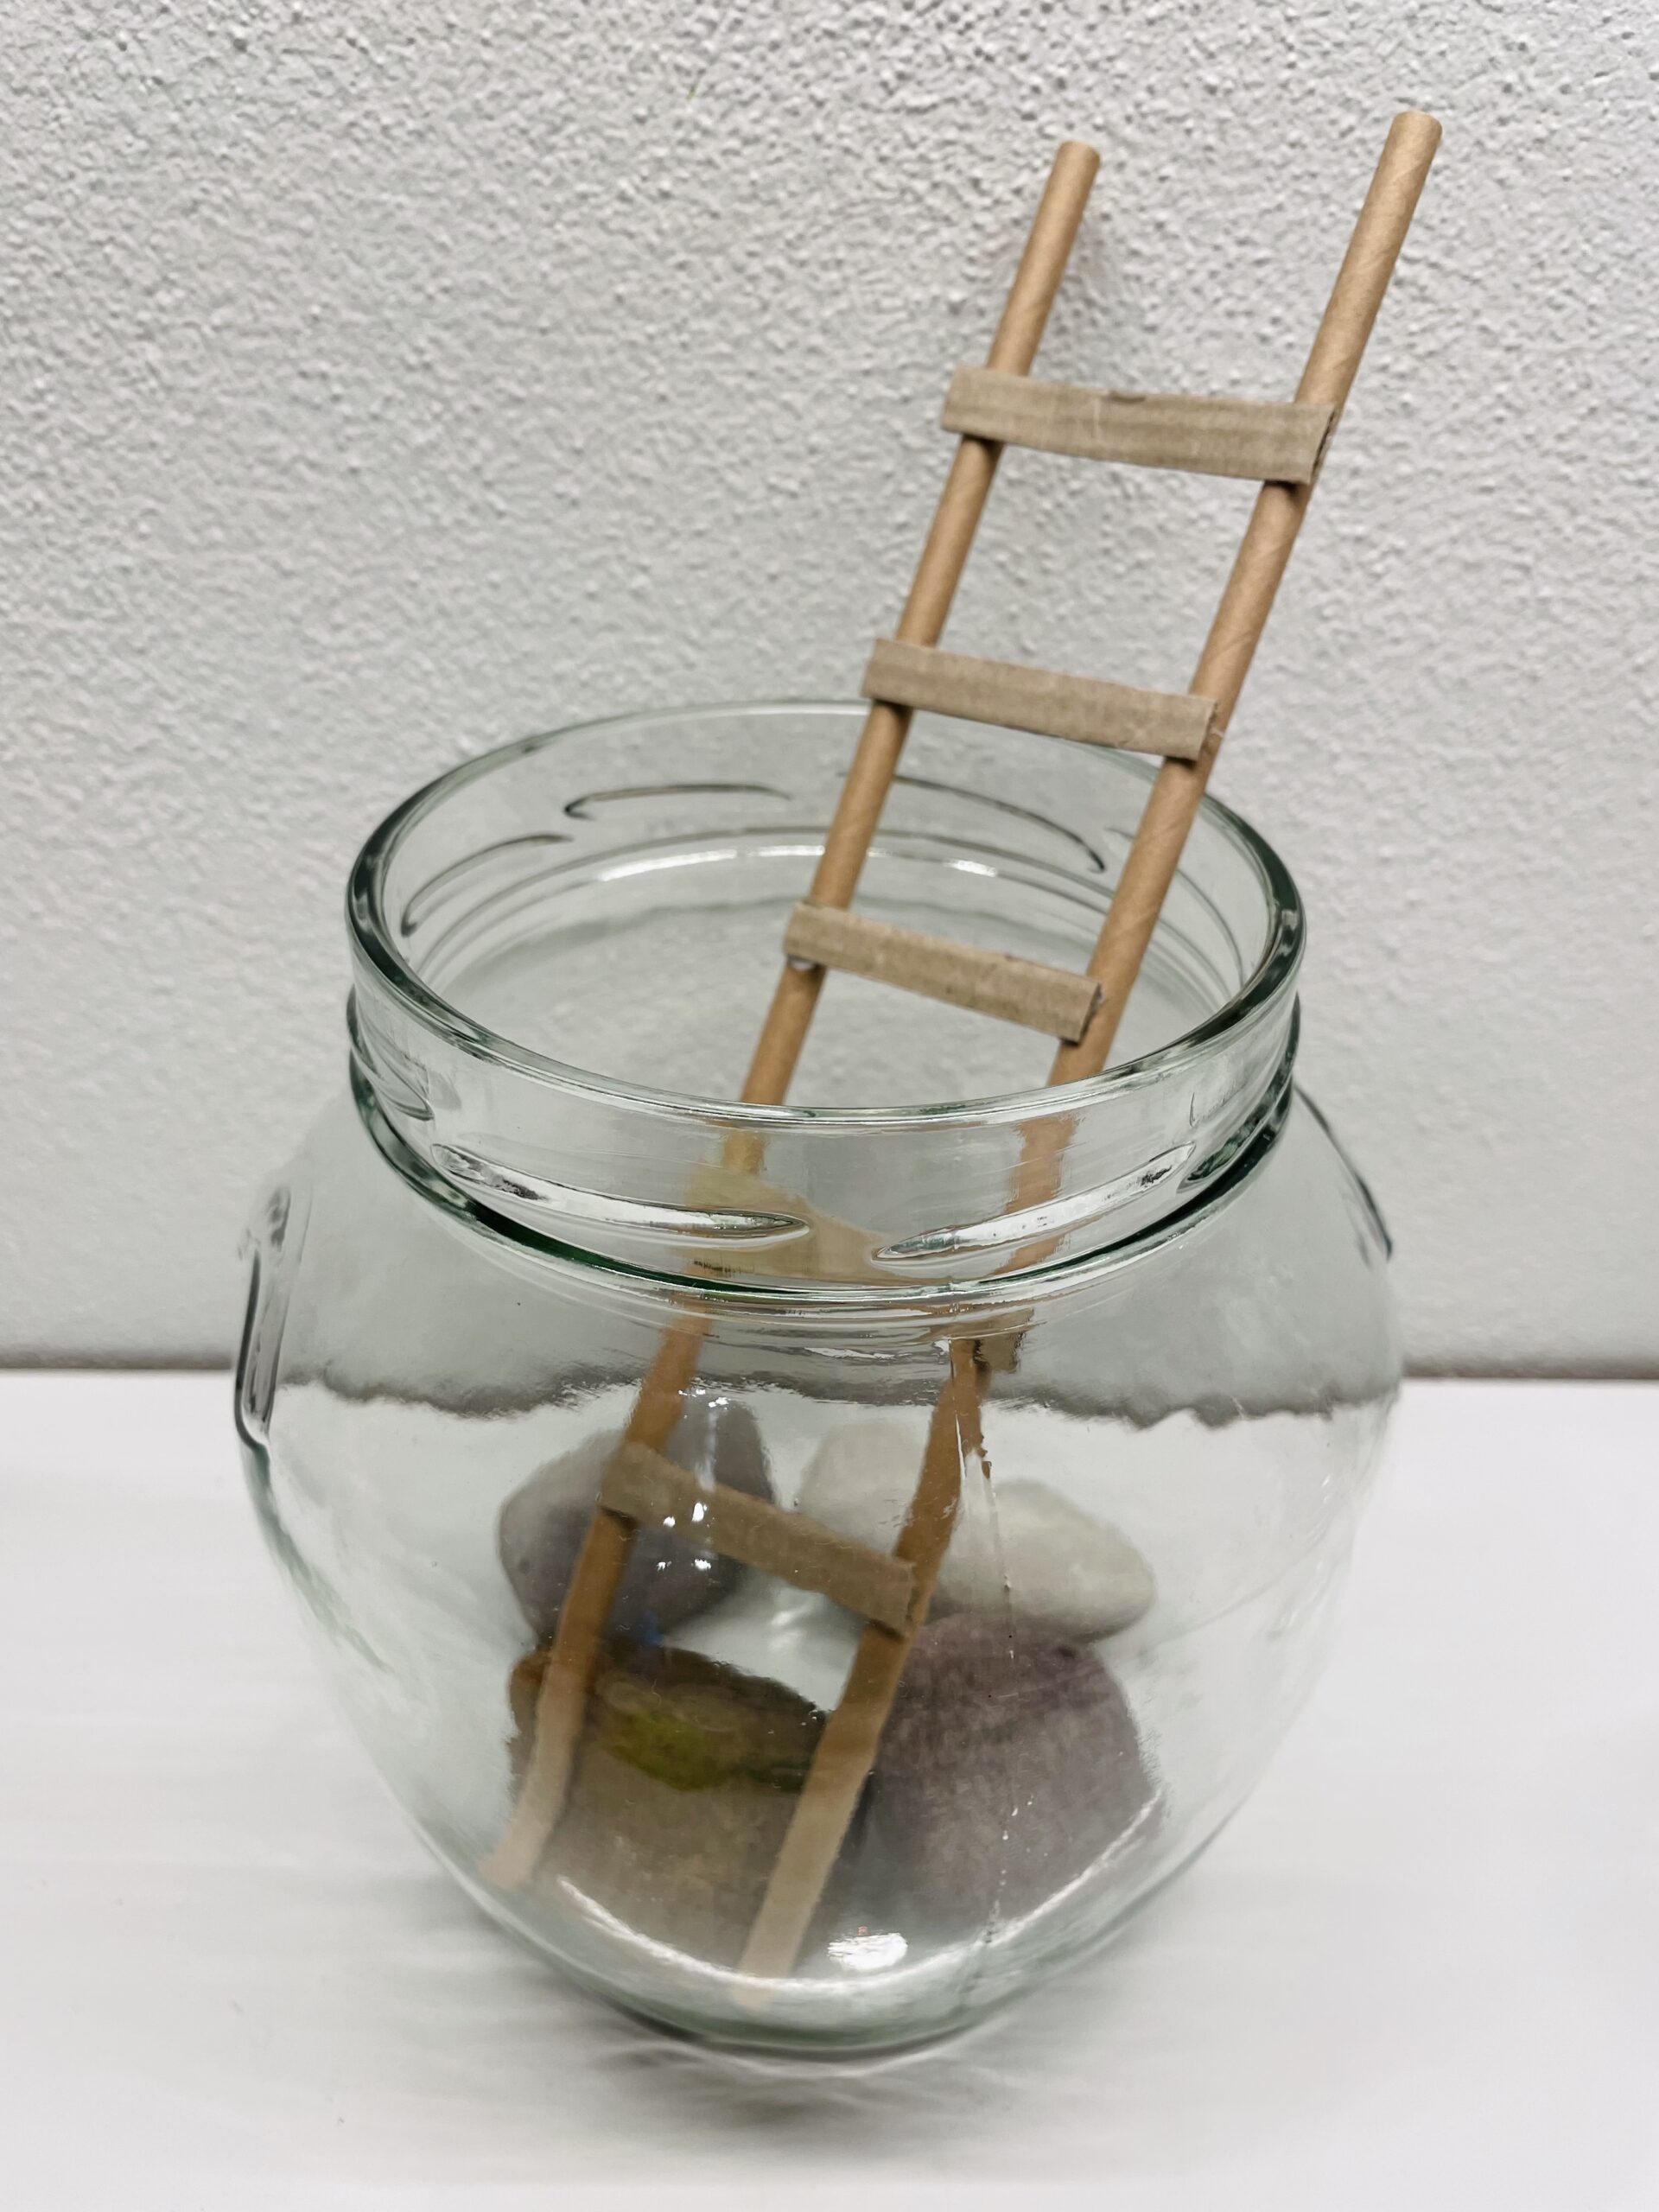
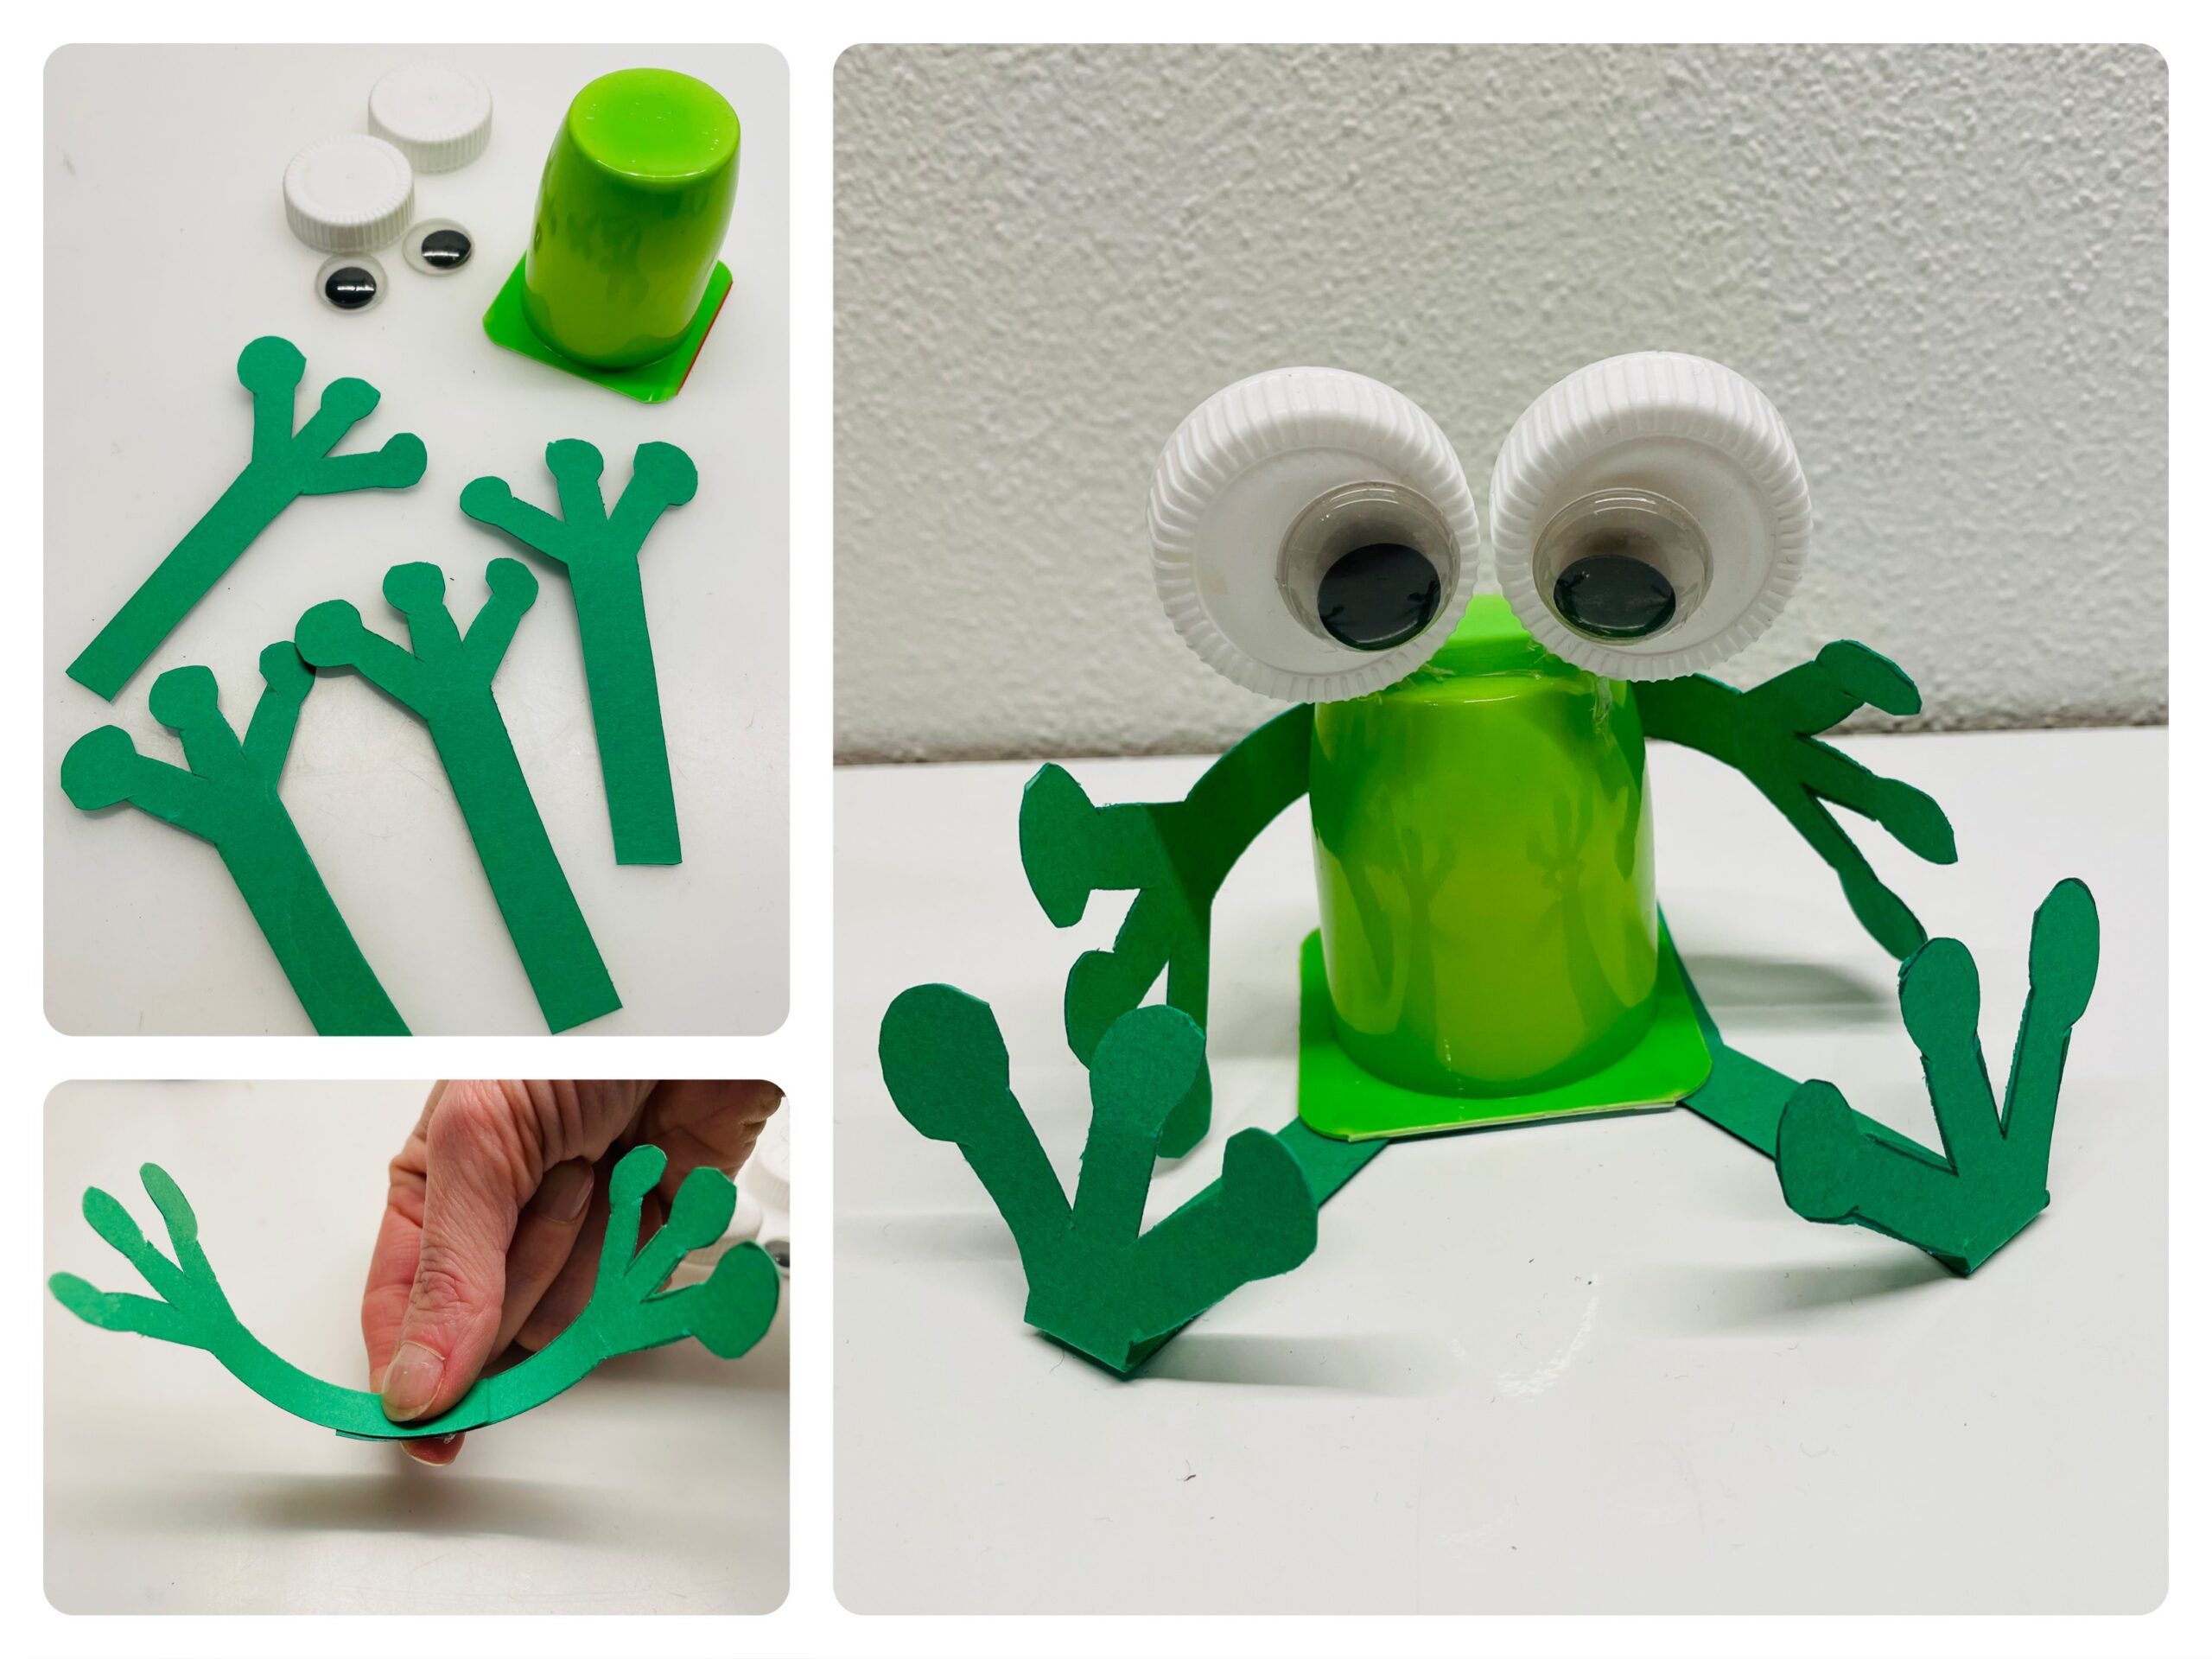
Knock over the frog's legs so he can sit on the edge of the glass.
Finally put the frog on the glass edge.
Your weather frog is ready.
Have fun doing crafts and playing.
Materials
Directions
Get the glass and the stones ready first.
Then carefully put the clean stones in the glass.
Some stones are enough for this. It doesn't have to be covered with the whole floor.
Then you make a small ladder out of 2 paper straws and a strip of cardboard. The length of straws is a good measure for this. Cut 6 strips out of the cardboard with a length of 5cm and a width of 0.5cm.
Then put on the straws at a distance of 5cm and fasten these short crossbars to the straws.
Spreads the short cardboard strips evenly and leaves some space below and above.
This creates a ladder, which is placed in the glass after a short drying.
Knock over the frog's legs so he can sit on the edge of the glass.
Finally put the frog on the glass edge.
Your weather frog is ready.
Have fun doing crafts and playing.
Follow us on Facebook , Instagram and Pinterest
Don't miss any more adventures: Our bottle mail