 AdventurerThe
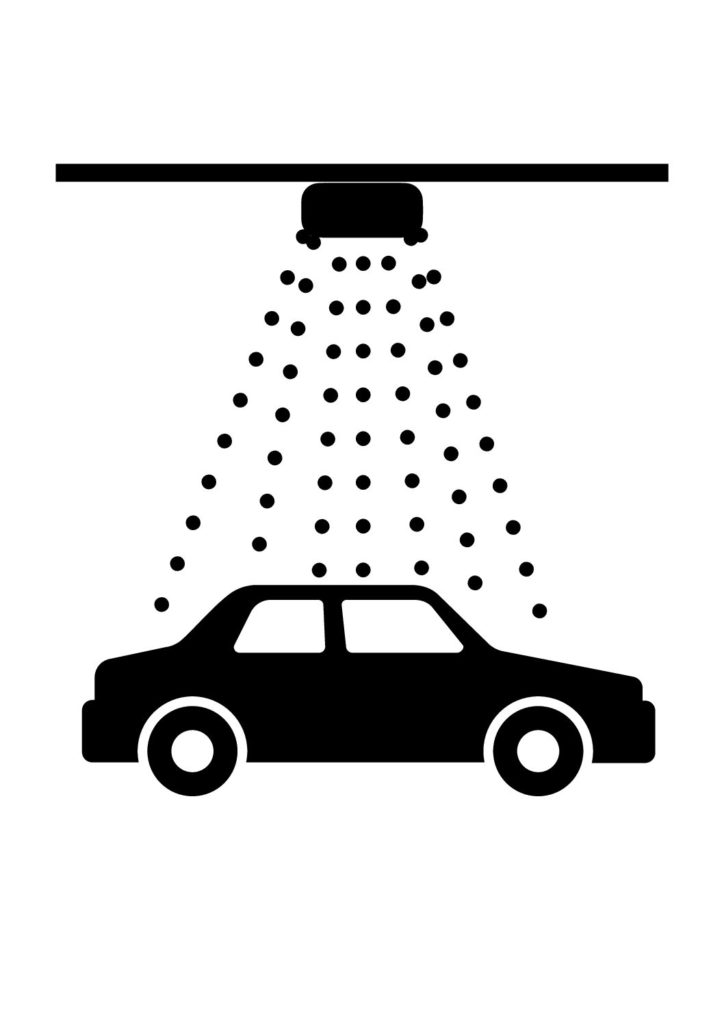
Today, we're building a washing line for your cars, vehicles, Bobby cars, tricycles, wheels, bicycles, Kettcars or whatever kind of cars you have, everything can be washed here. We're building the washing line for the cars as a course to drive through. Let's get inspired.
Media Education for Kindergarten and Hort

Relief in everyday life, targeted promotion of individual children, independent learning and - without any pre-knowledge already usable by the youngest!
Find material together.
Screw two long roof slats each with a short roof slat. The children can help with this. Especially if you have a small battery screwdriver.
Tip: Many DIY stores also lend equipment.
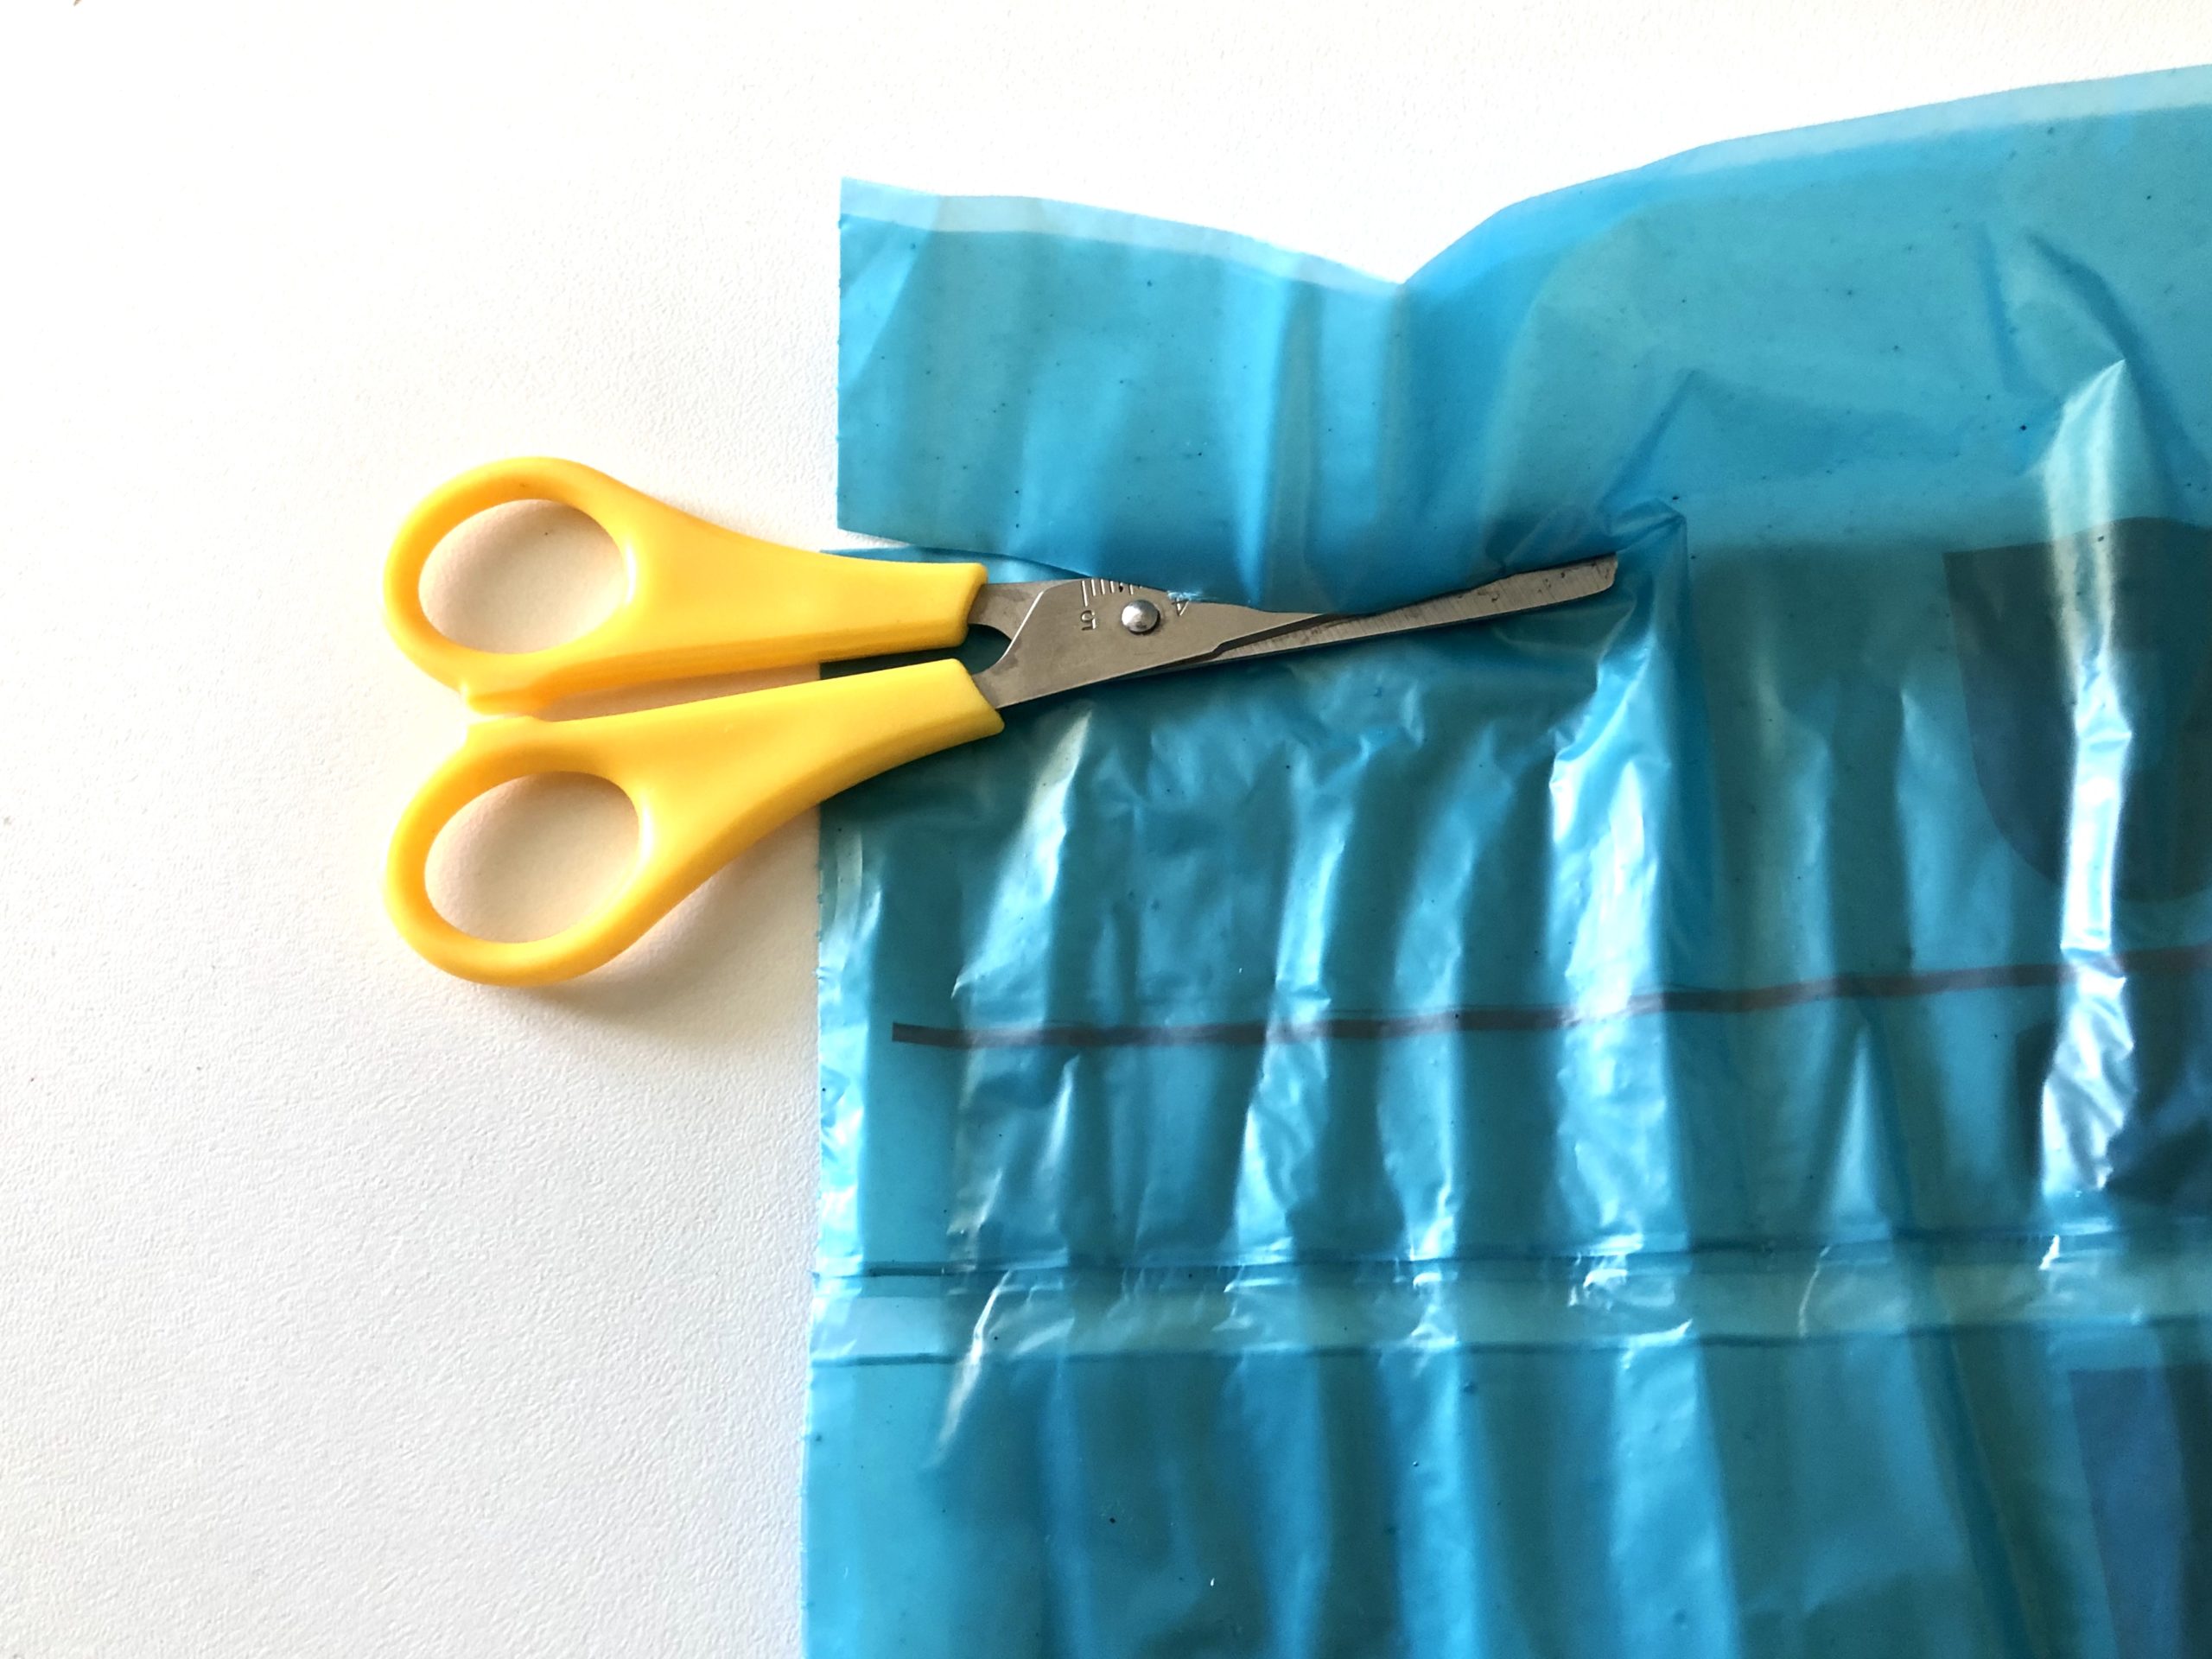
Then cut the blue garbage bags into thin strips. These don't have to be straight.
The strips stick to her with the adhesive film e.g. gaffa tape on the short side of a roof bar.
Then you thread the thread (length about 1.5m) through the needle. At the end of the thread you make a knot. Then you thread a sponge. Then you hold a little distance, make a knot and thread the next sponge. Then you hold a little distance again and make a knot again.
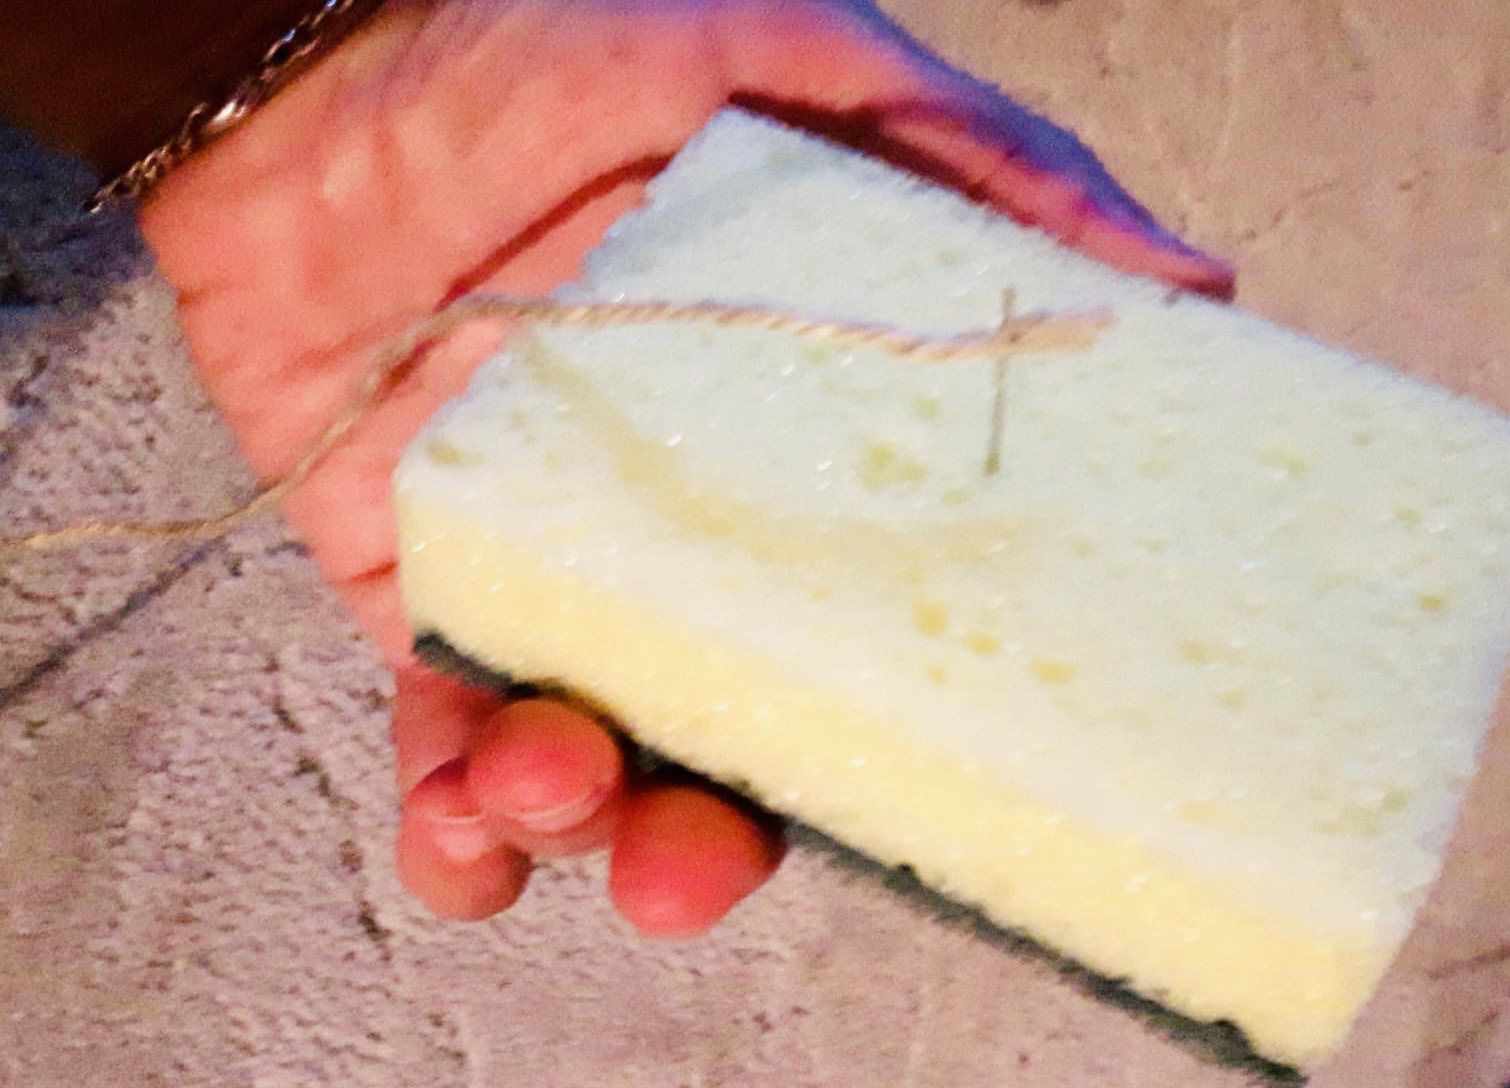
We have spread the sponges over three threads, i.e. repeats the threading of the sponges.
Then attach them to the wood between the blue garbage bags strips with adhesive tape.
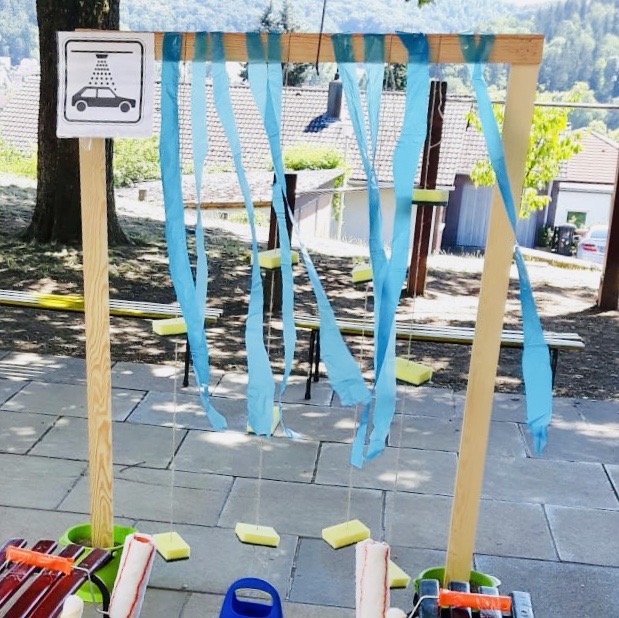
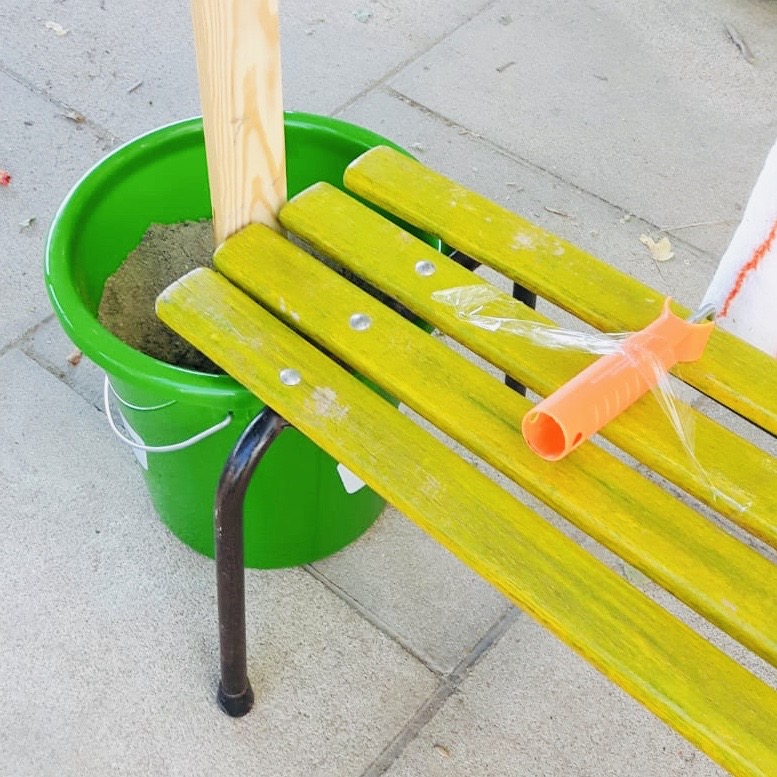
Now you put this construction in two buckets filled with sand.

Now you can put the sign on.
You can simply print this or paint it yourself.
Just like the first wooden construction, here you screw two long roof slats with a short roof slat.
Then put some lenses in two balloons. This works very well with a small funnel. Put the funnel in the opening and then fill the lenses. Then blow up the balloon. Then tie the balloons together and tie a thread to hang up. The thread should be about 40-50 cm long.
The next two balloons fill you with some rice. Then you blow up the balloons and knot them and tie a thread to them.
Put a little bell in a balloon and tie it to her.
You can fill the last balloon with some water and then inflate.
Attention: should it be too cool, then fill the balloon with rice or lentils and dispense with the water fun!

These balloons - now sound balloons - tie you to the upper side of the wooden construction.
Now you put this wooden construction in two buckets filled with sand.
We have put this construction in addition to the first one, because we do not have so much space in the length. You can also put it in a row.
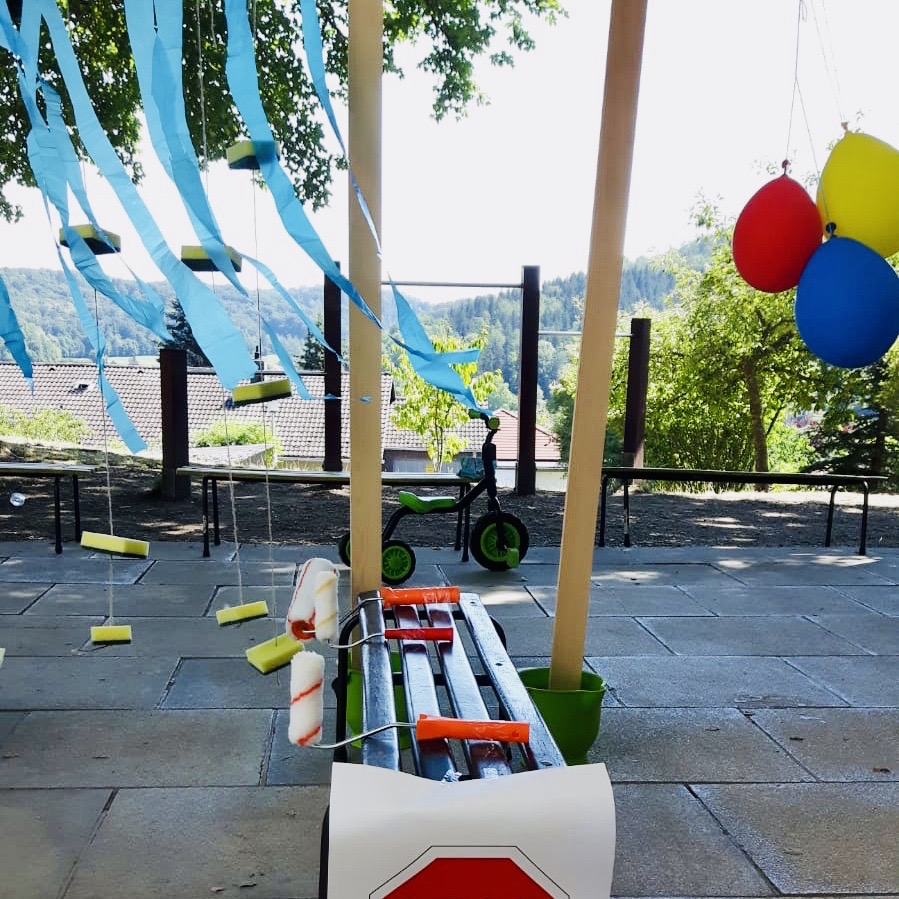
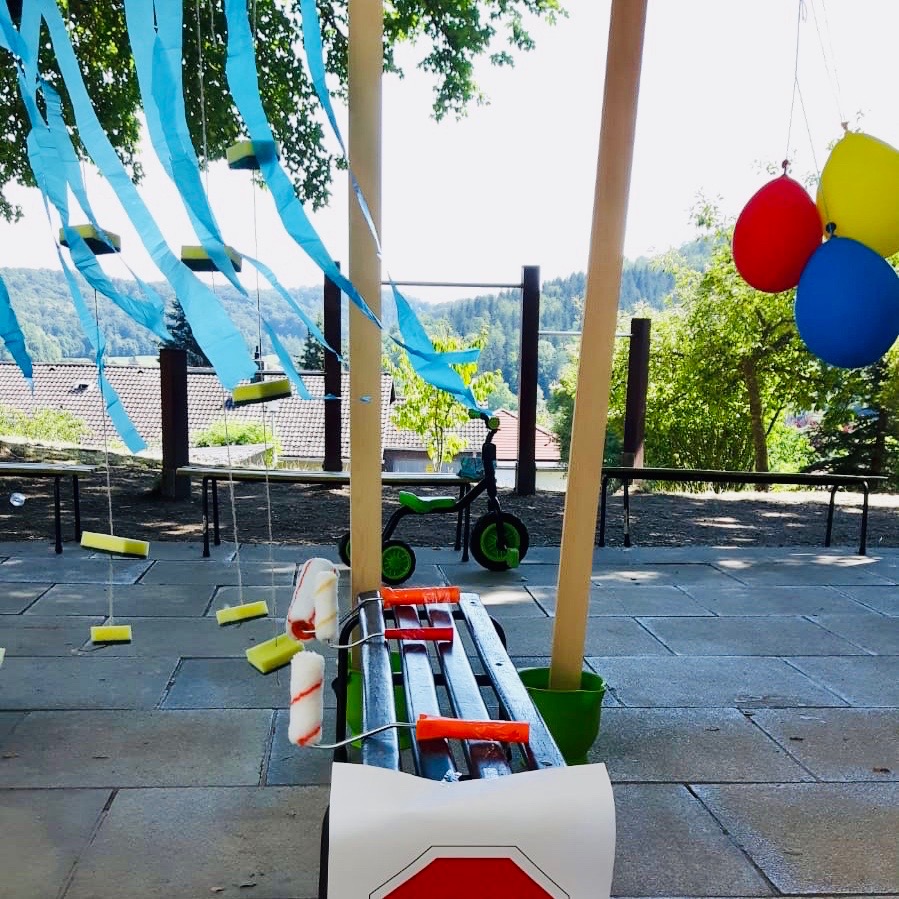
On two small benches we fixed on each bench 3 paint rolls with tape.
The benches represent her left and right in front of the wooden construction. They symbolize the process of soaping in the car washing and represent the entrance to the wash road.
That's why a stop sign is attached at the beginning. This indicates that there is a stop here before the vehicle goes into the wash road.
You can print the sign or paint it yourself.

The wash road is ready!
If you like, you can still use ropes and lay a road.
Have fun playing!

Tip: This course is a first idea. Children often develop further ideas in play, then adjust the course or build additional elements. This is valuable and promotes creativity.
Materials
Directions
Find material together.
Screw two long roof slats each with a short roof slat. The children can help with this. Especially if you have a small battery screwdriver.
Tip: Many DIY stores also lend equipment.
Then cut the blue garbage bags into thin strips. These don't have to be straight.
The strips stick to her with the adhesive film e.g. gaffa tape on the short side of a roof bar.
Then you thread the thread (length about 1.5m) through the needle. At the end of the thread you make a knot. Then you thread a sponge. Then you hold a little distance, make a knot and thread the next sponge. Then you hold a little distance again and make a knot again.
We have spread the sponges over three threads, i.e. repeats the threading of the sponges.
Then attach them to the wood between the blue garbage bags strips with adhesive tape.
Now you put this construction in two buckets filled with sand.
Now you can put the sign on.
You can simply print this or paint it yourself.
Just like the first wooden construction, here you screw two long roof slats with a short roof slat.
Then put some lenses in two balloons. This works very well with a small funnel. Put the funnel in the opening and then fill the lenses. Then blow up the balloon. Then tie the balloons together and tie a thread to hang up. The thread should be about 40-50 cm long.
The next two balloons fill you with some rice. Then you blow up the balloons and knot them and tie a thread to them.
Put a little bell in a balloon and tie it to her.
You can fill the last balloon with some water and then inflate.
Attention: should it be too cool, then fill the balloon with rice or lentils and dispense with the water fun!
These balloons - now sound balloons - tie you to the upper side of the wooden construction.
Now you put this wooden construction in two buckets filled with sand.
We have put this construction in addition to the first one, because we do not have so much space in the length. You can also put it in a row.
On two small benches we fixed on each bench 3 paint rolls with tape.
The benches represent her left and right in front of the wooden construction. They symbolize the process of soaping in the car washing and represent the entrance to the wash road.
That's why a stop sign is attached at the beginning. This indicates that there is a stop here before the vehicle goes into the wash road.
You can print the sign or paint it yourself.
The wash road is ready!
If you like, you can still use ropes and lay a road.
Have fun playing!
Tip: This course is a first idea. Children often develop further ideas in play, then adjust the course or build additional elements. This is valuable and promotes creativity.
Follow us on Facebook , Instagram and Pinterest
Don't miss any more adventures: Our bottle mail


We are totally thrilled. This adventure along with the construction of the gas station arrived great at our guys! Absolute recommendation?
We are very happy! Thanks to Jen for the great offer! Warm, Elke from the adventure market