These transparent paper flowers are ideal for the window. By sticking several paper circles on top of each other, these simple flowers look very noble. Try it out yourself.
Ideal for spring or summer!
Media Education for Kindergarten and Hort

Relief in everyday life, targeted promotion of individual children, independent learning and - without any pre-knowledge already usable by the youngest!
First, put out your craft file.
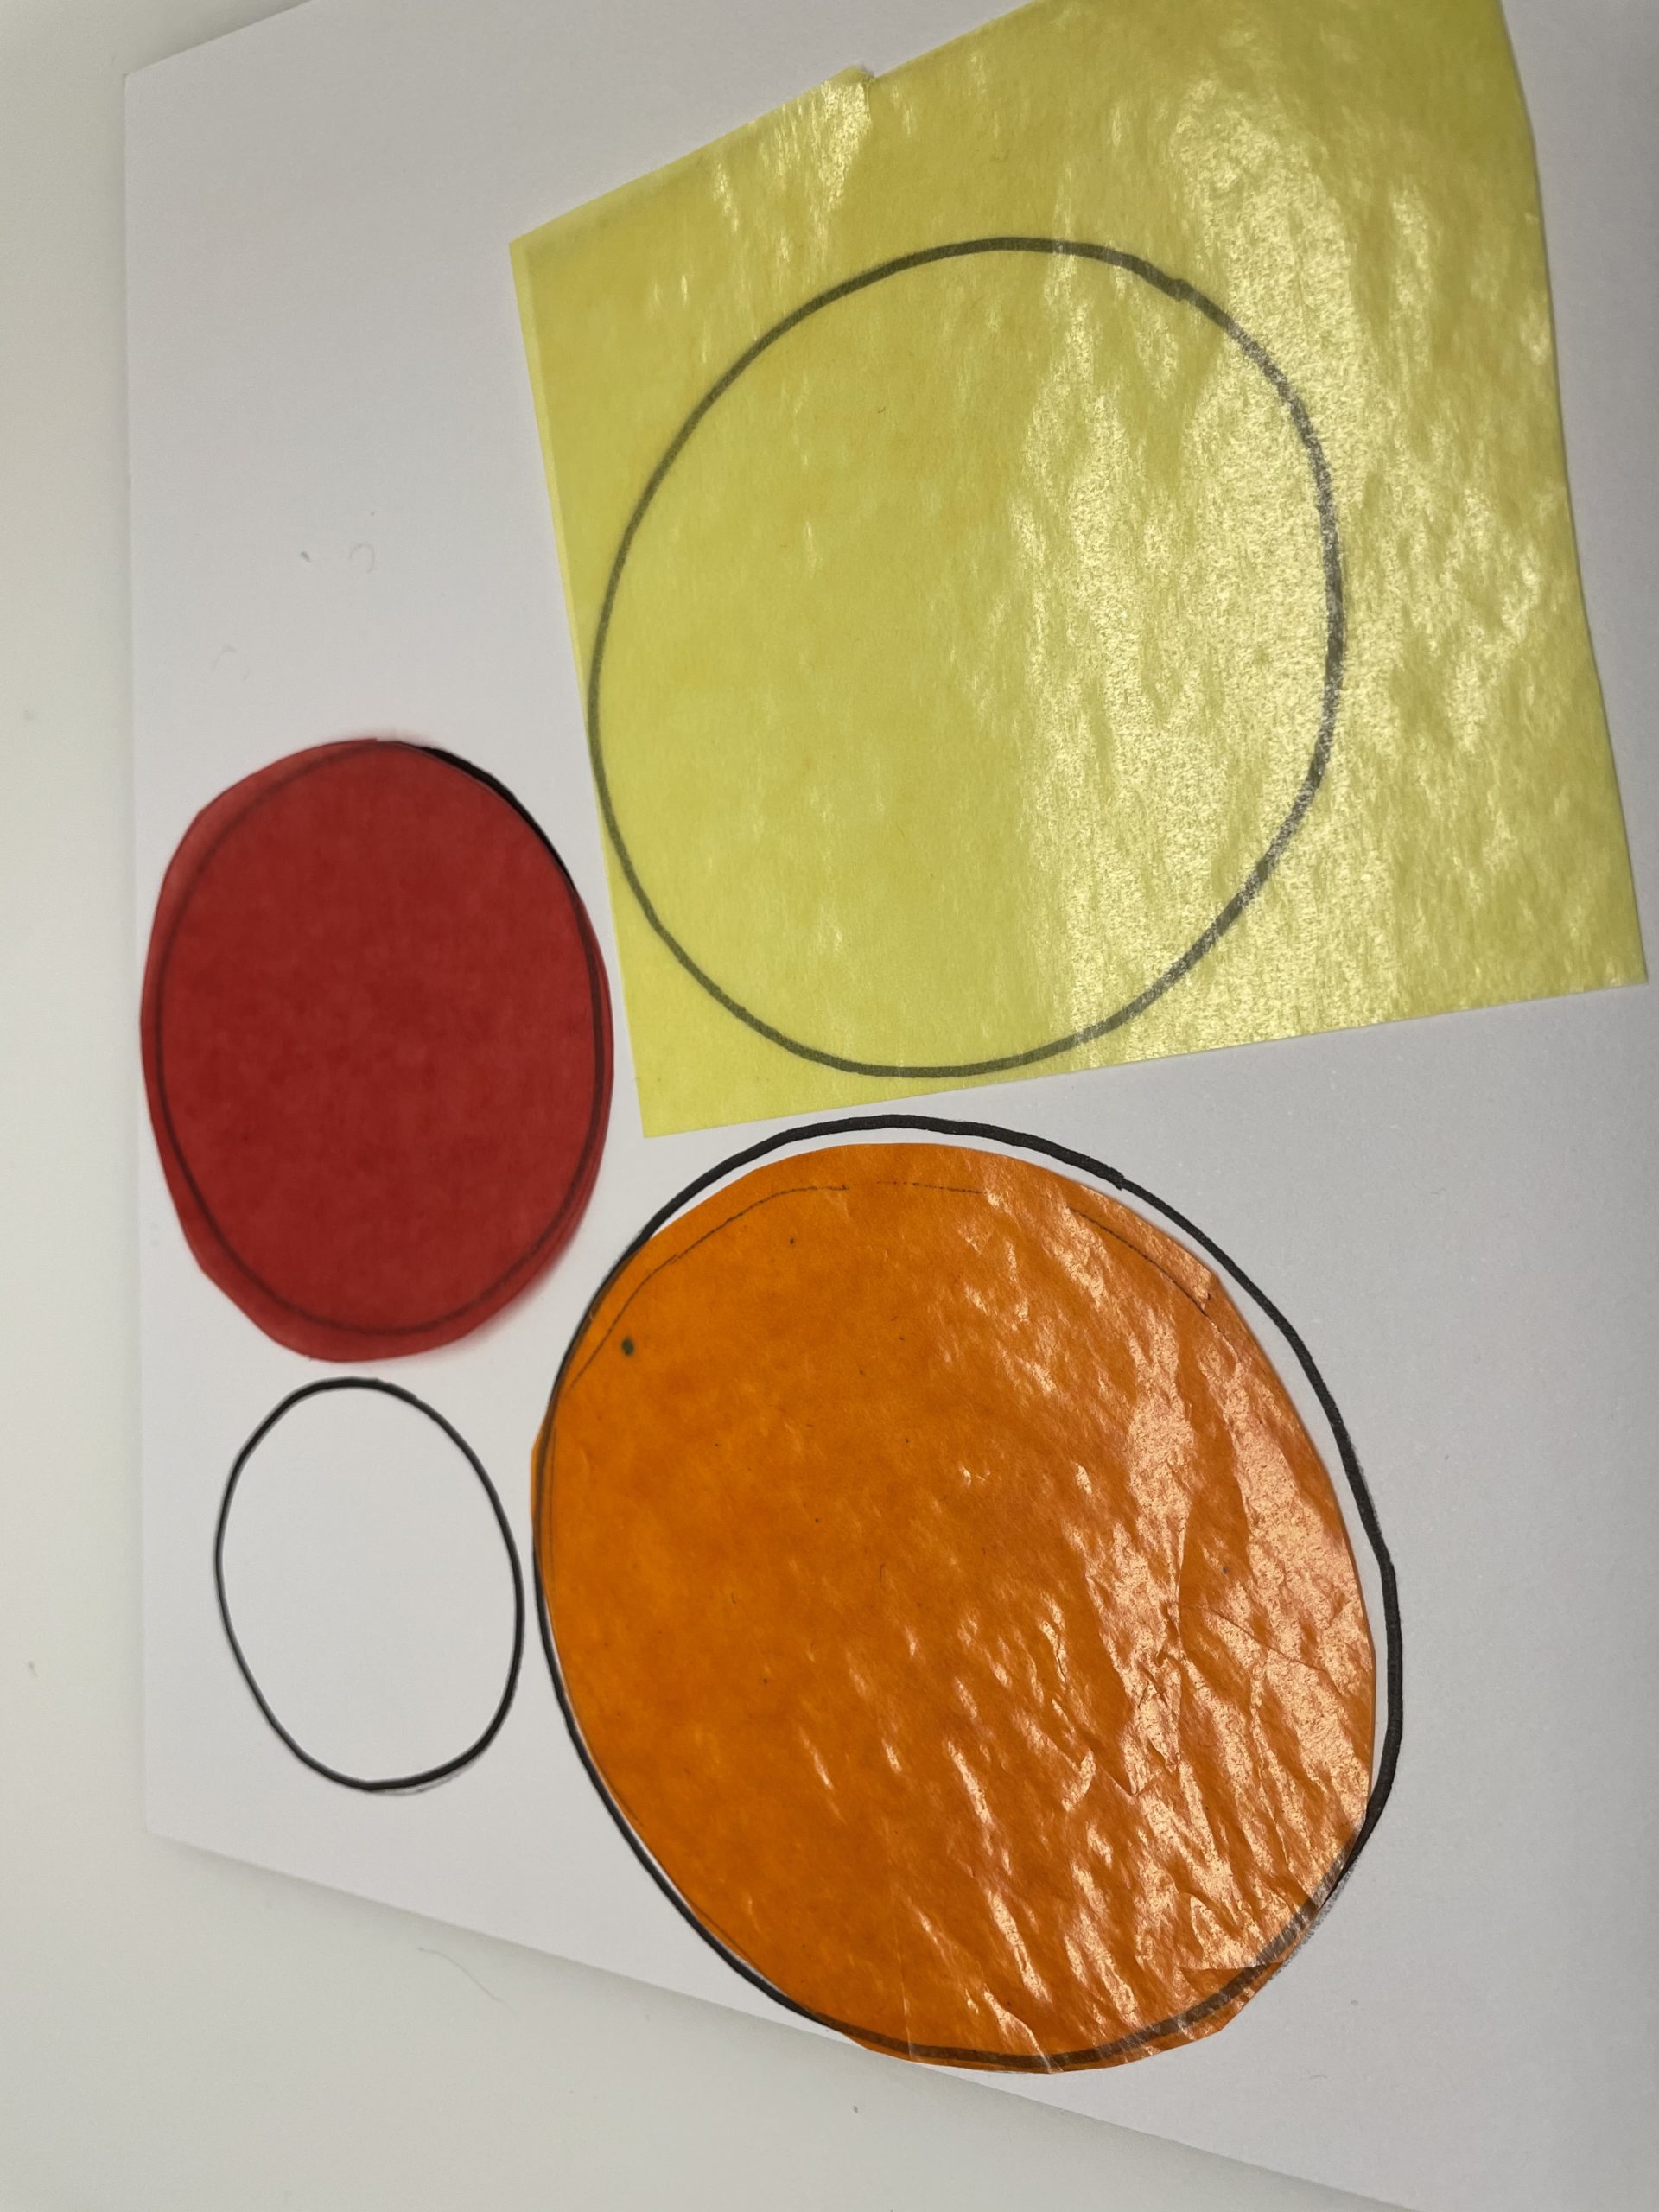
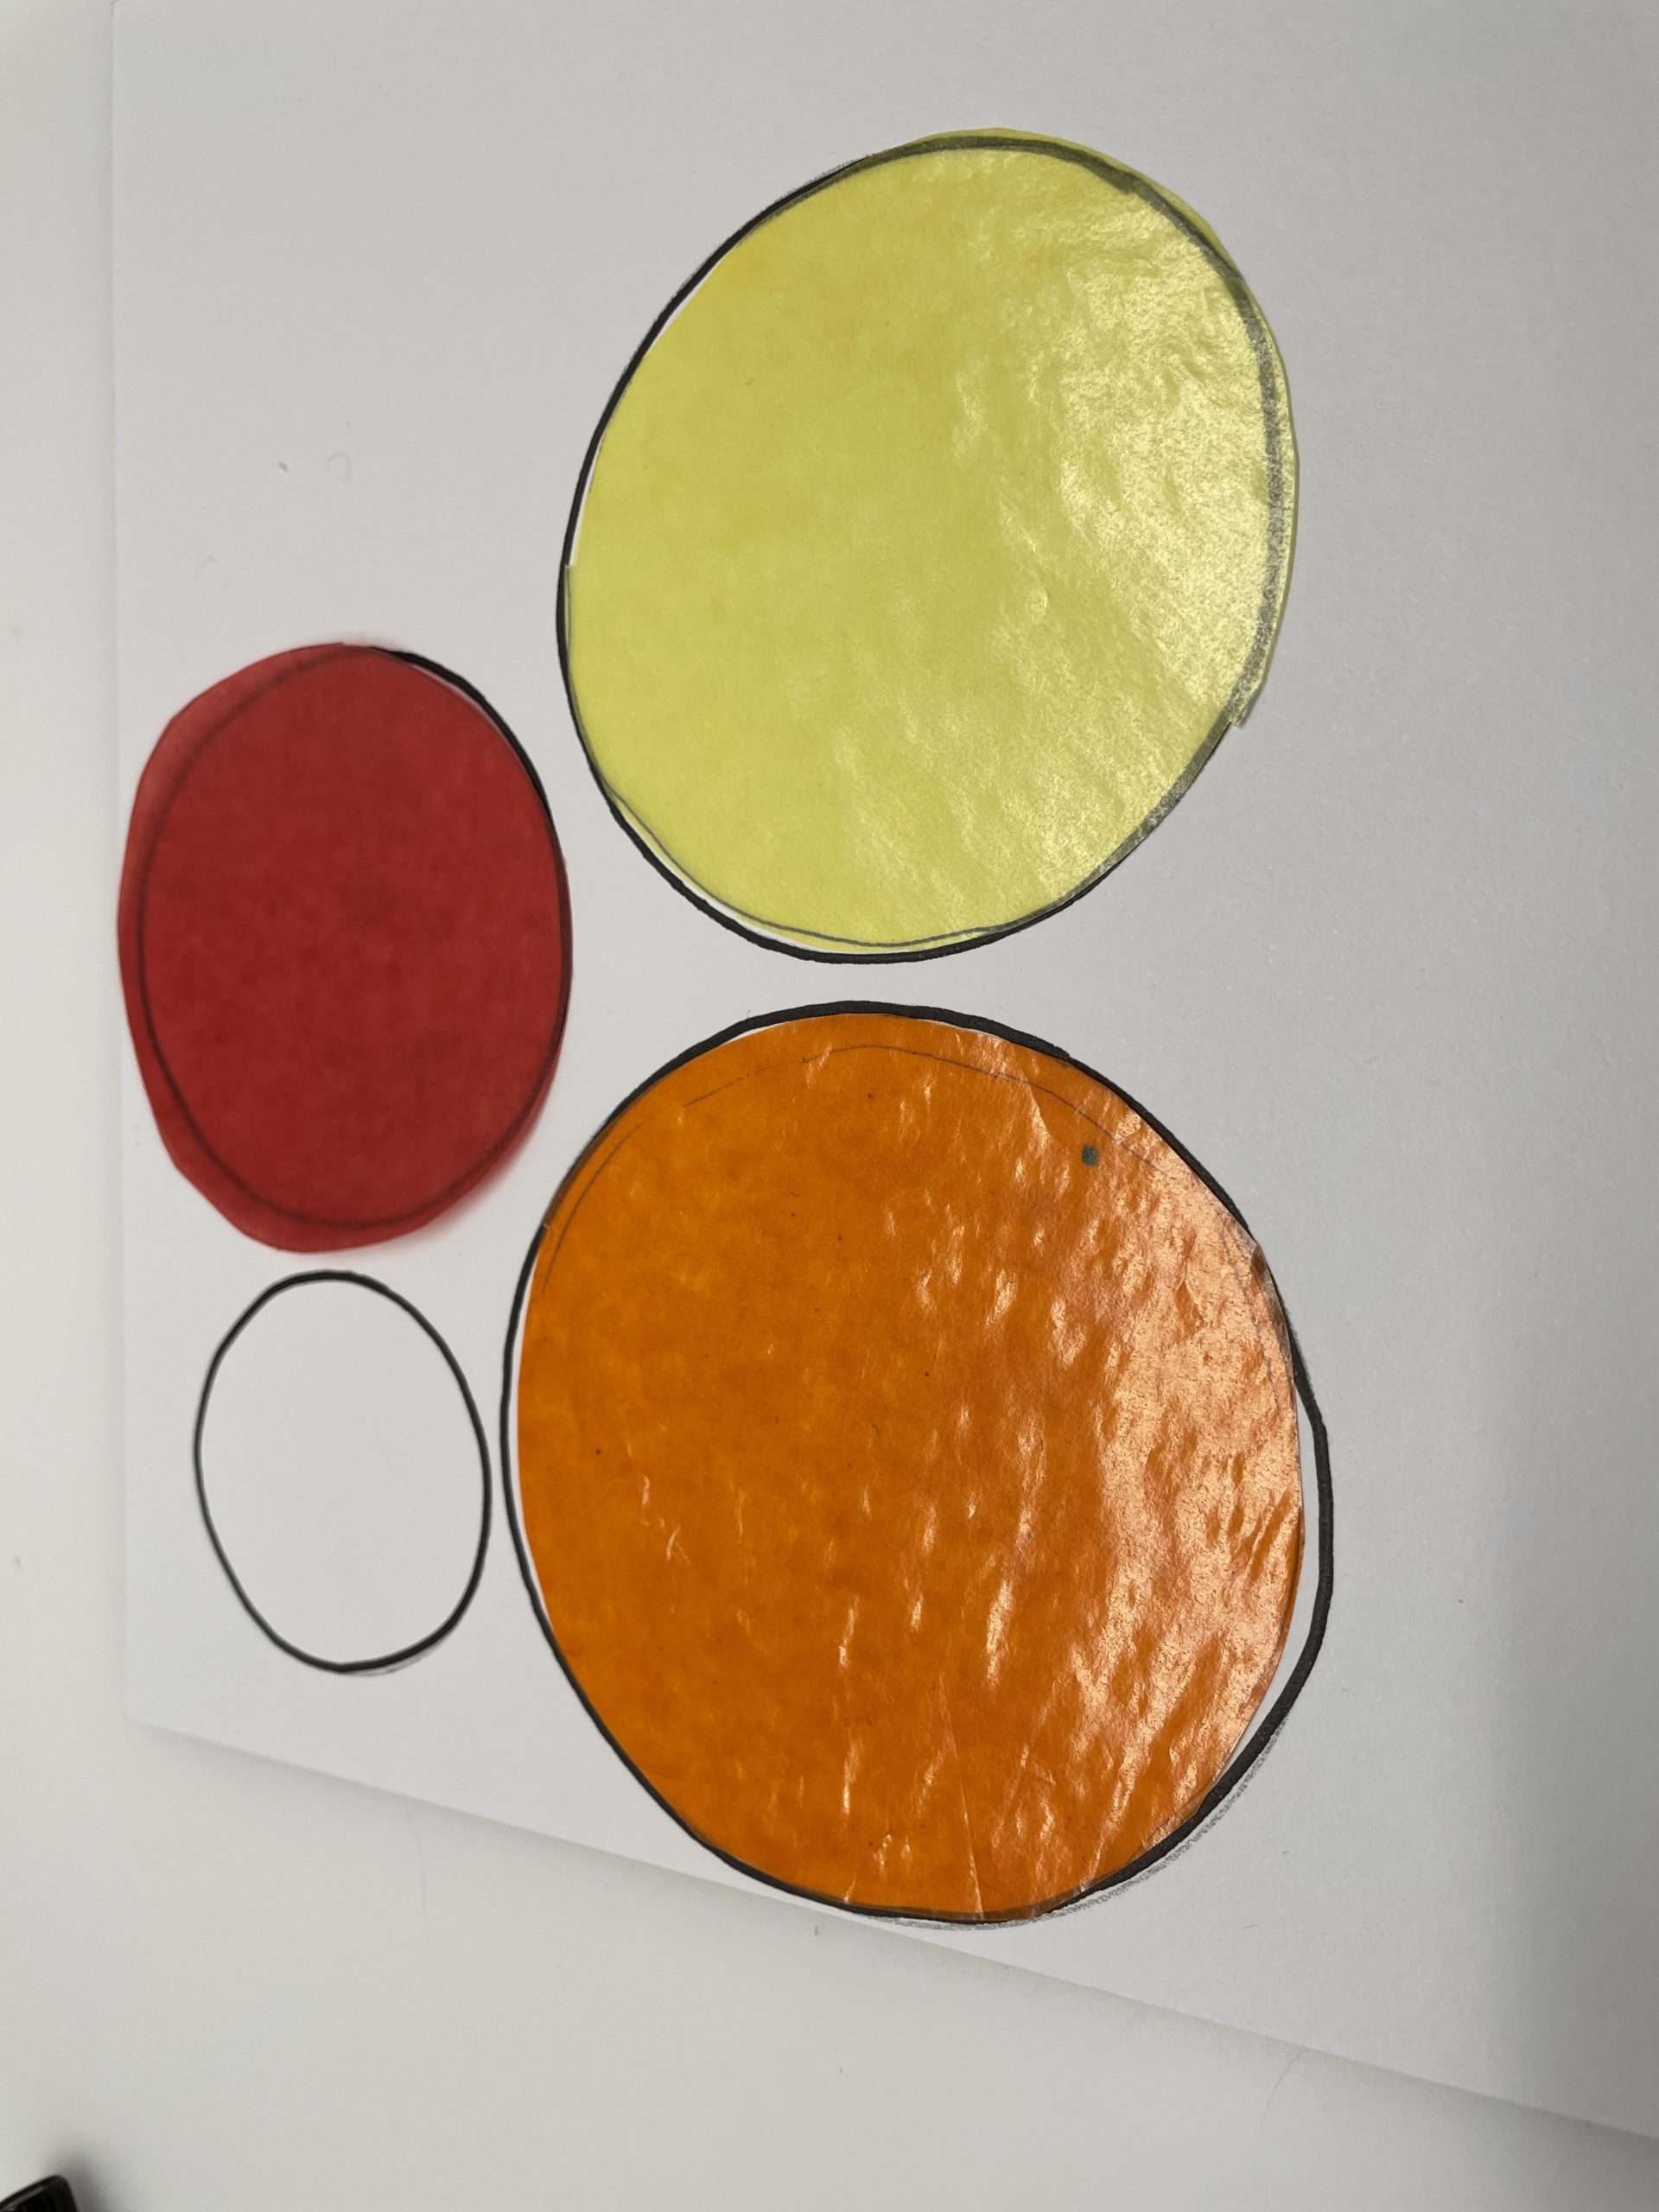
Then you need 3-4 circles in different sizes. Either you use a template or you paint the different circles freely.
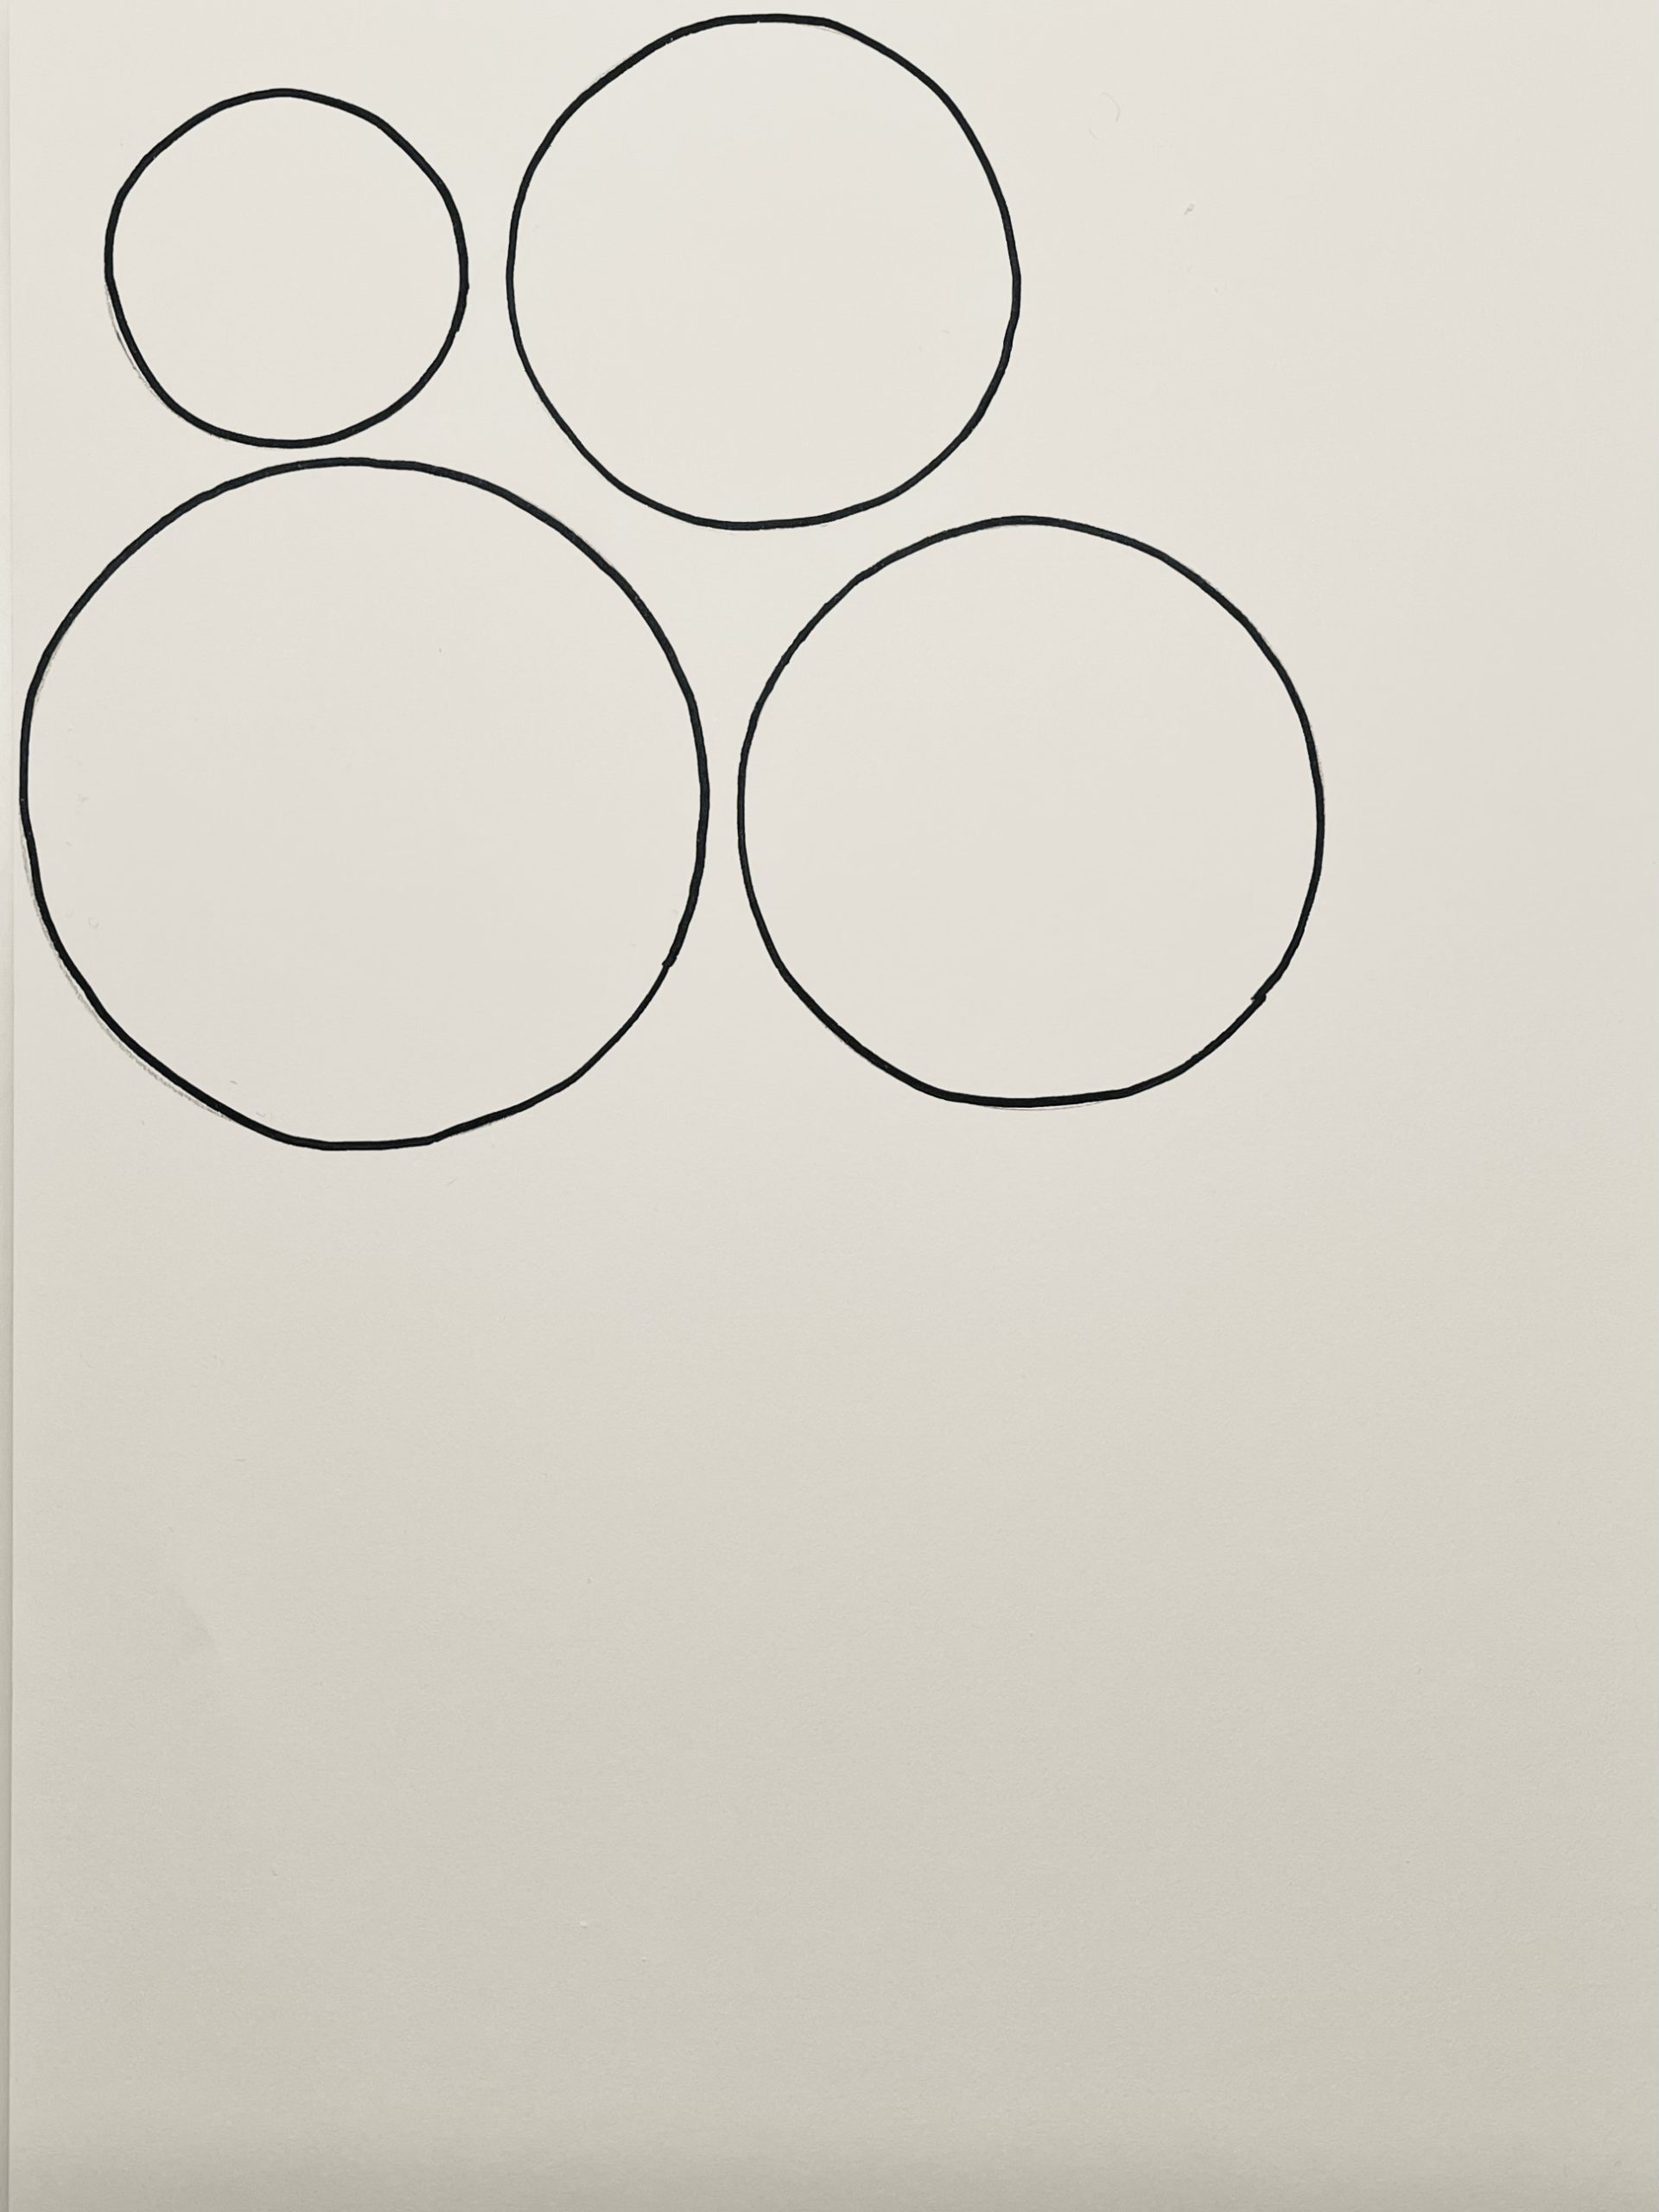
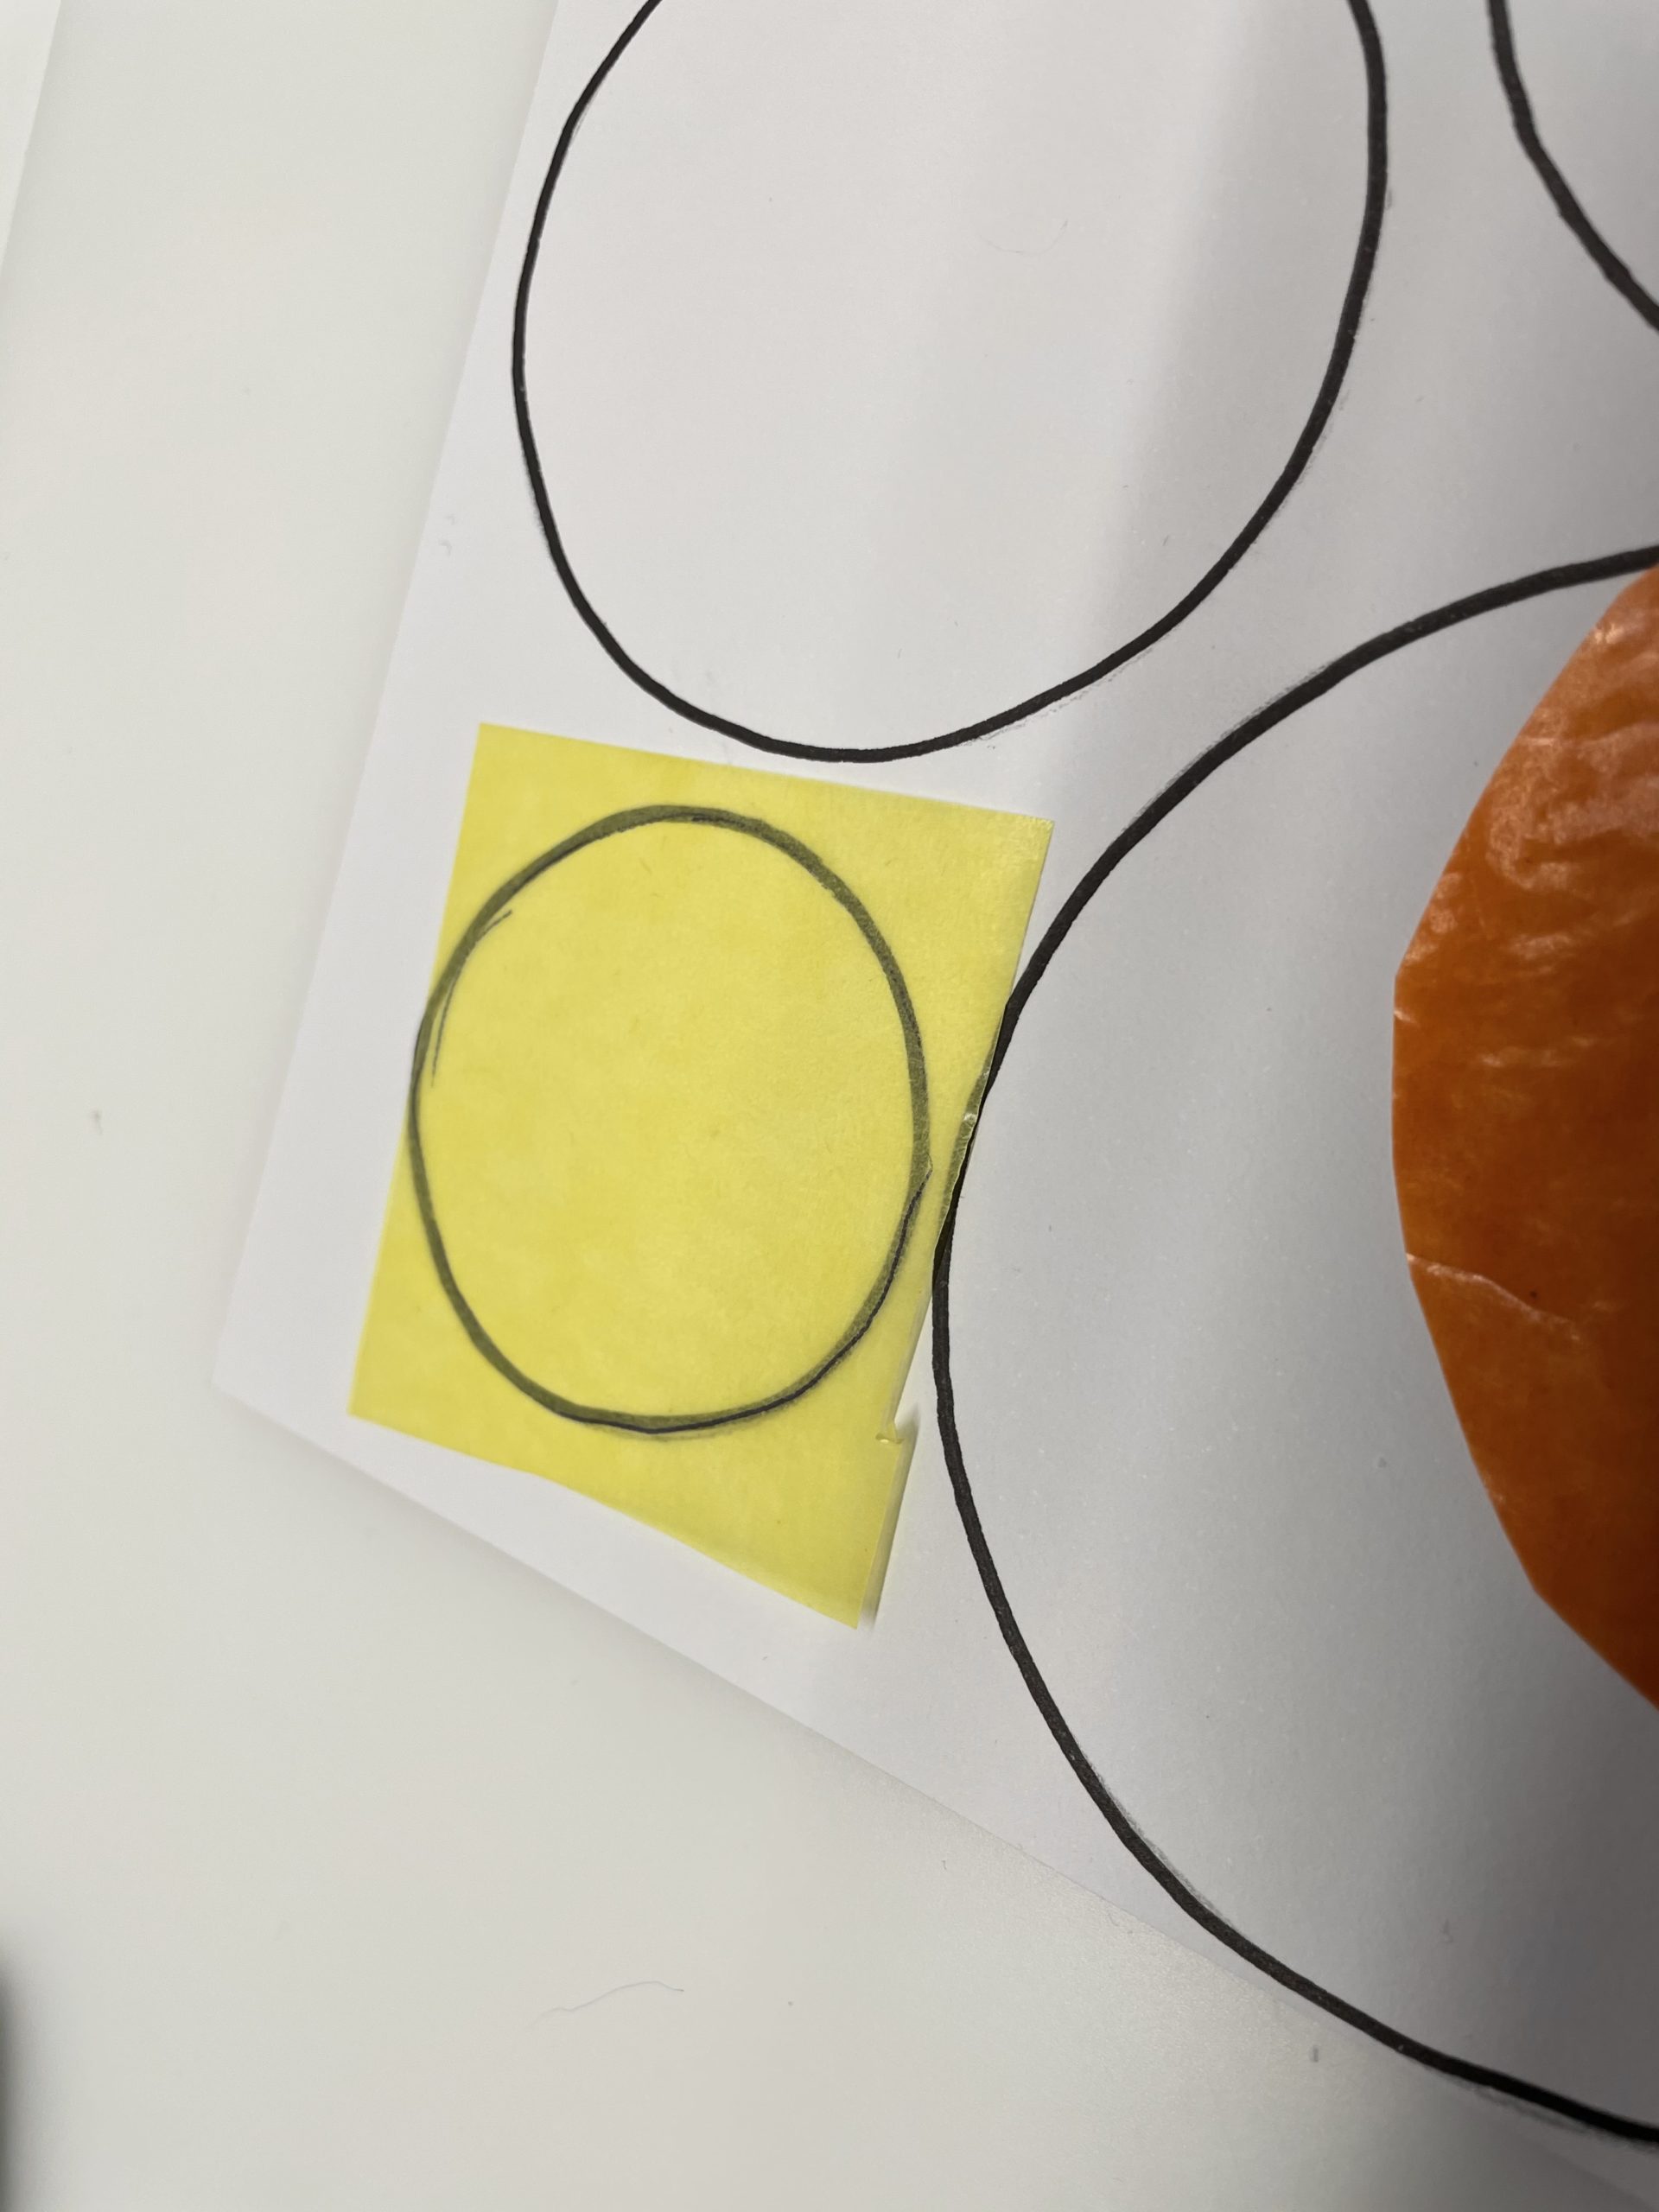
With the template, this is quite simple: place the transparent paper on the template and border the circle. Cut it out.
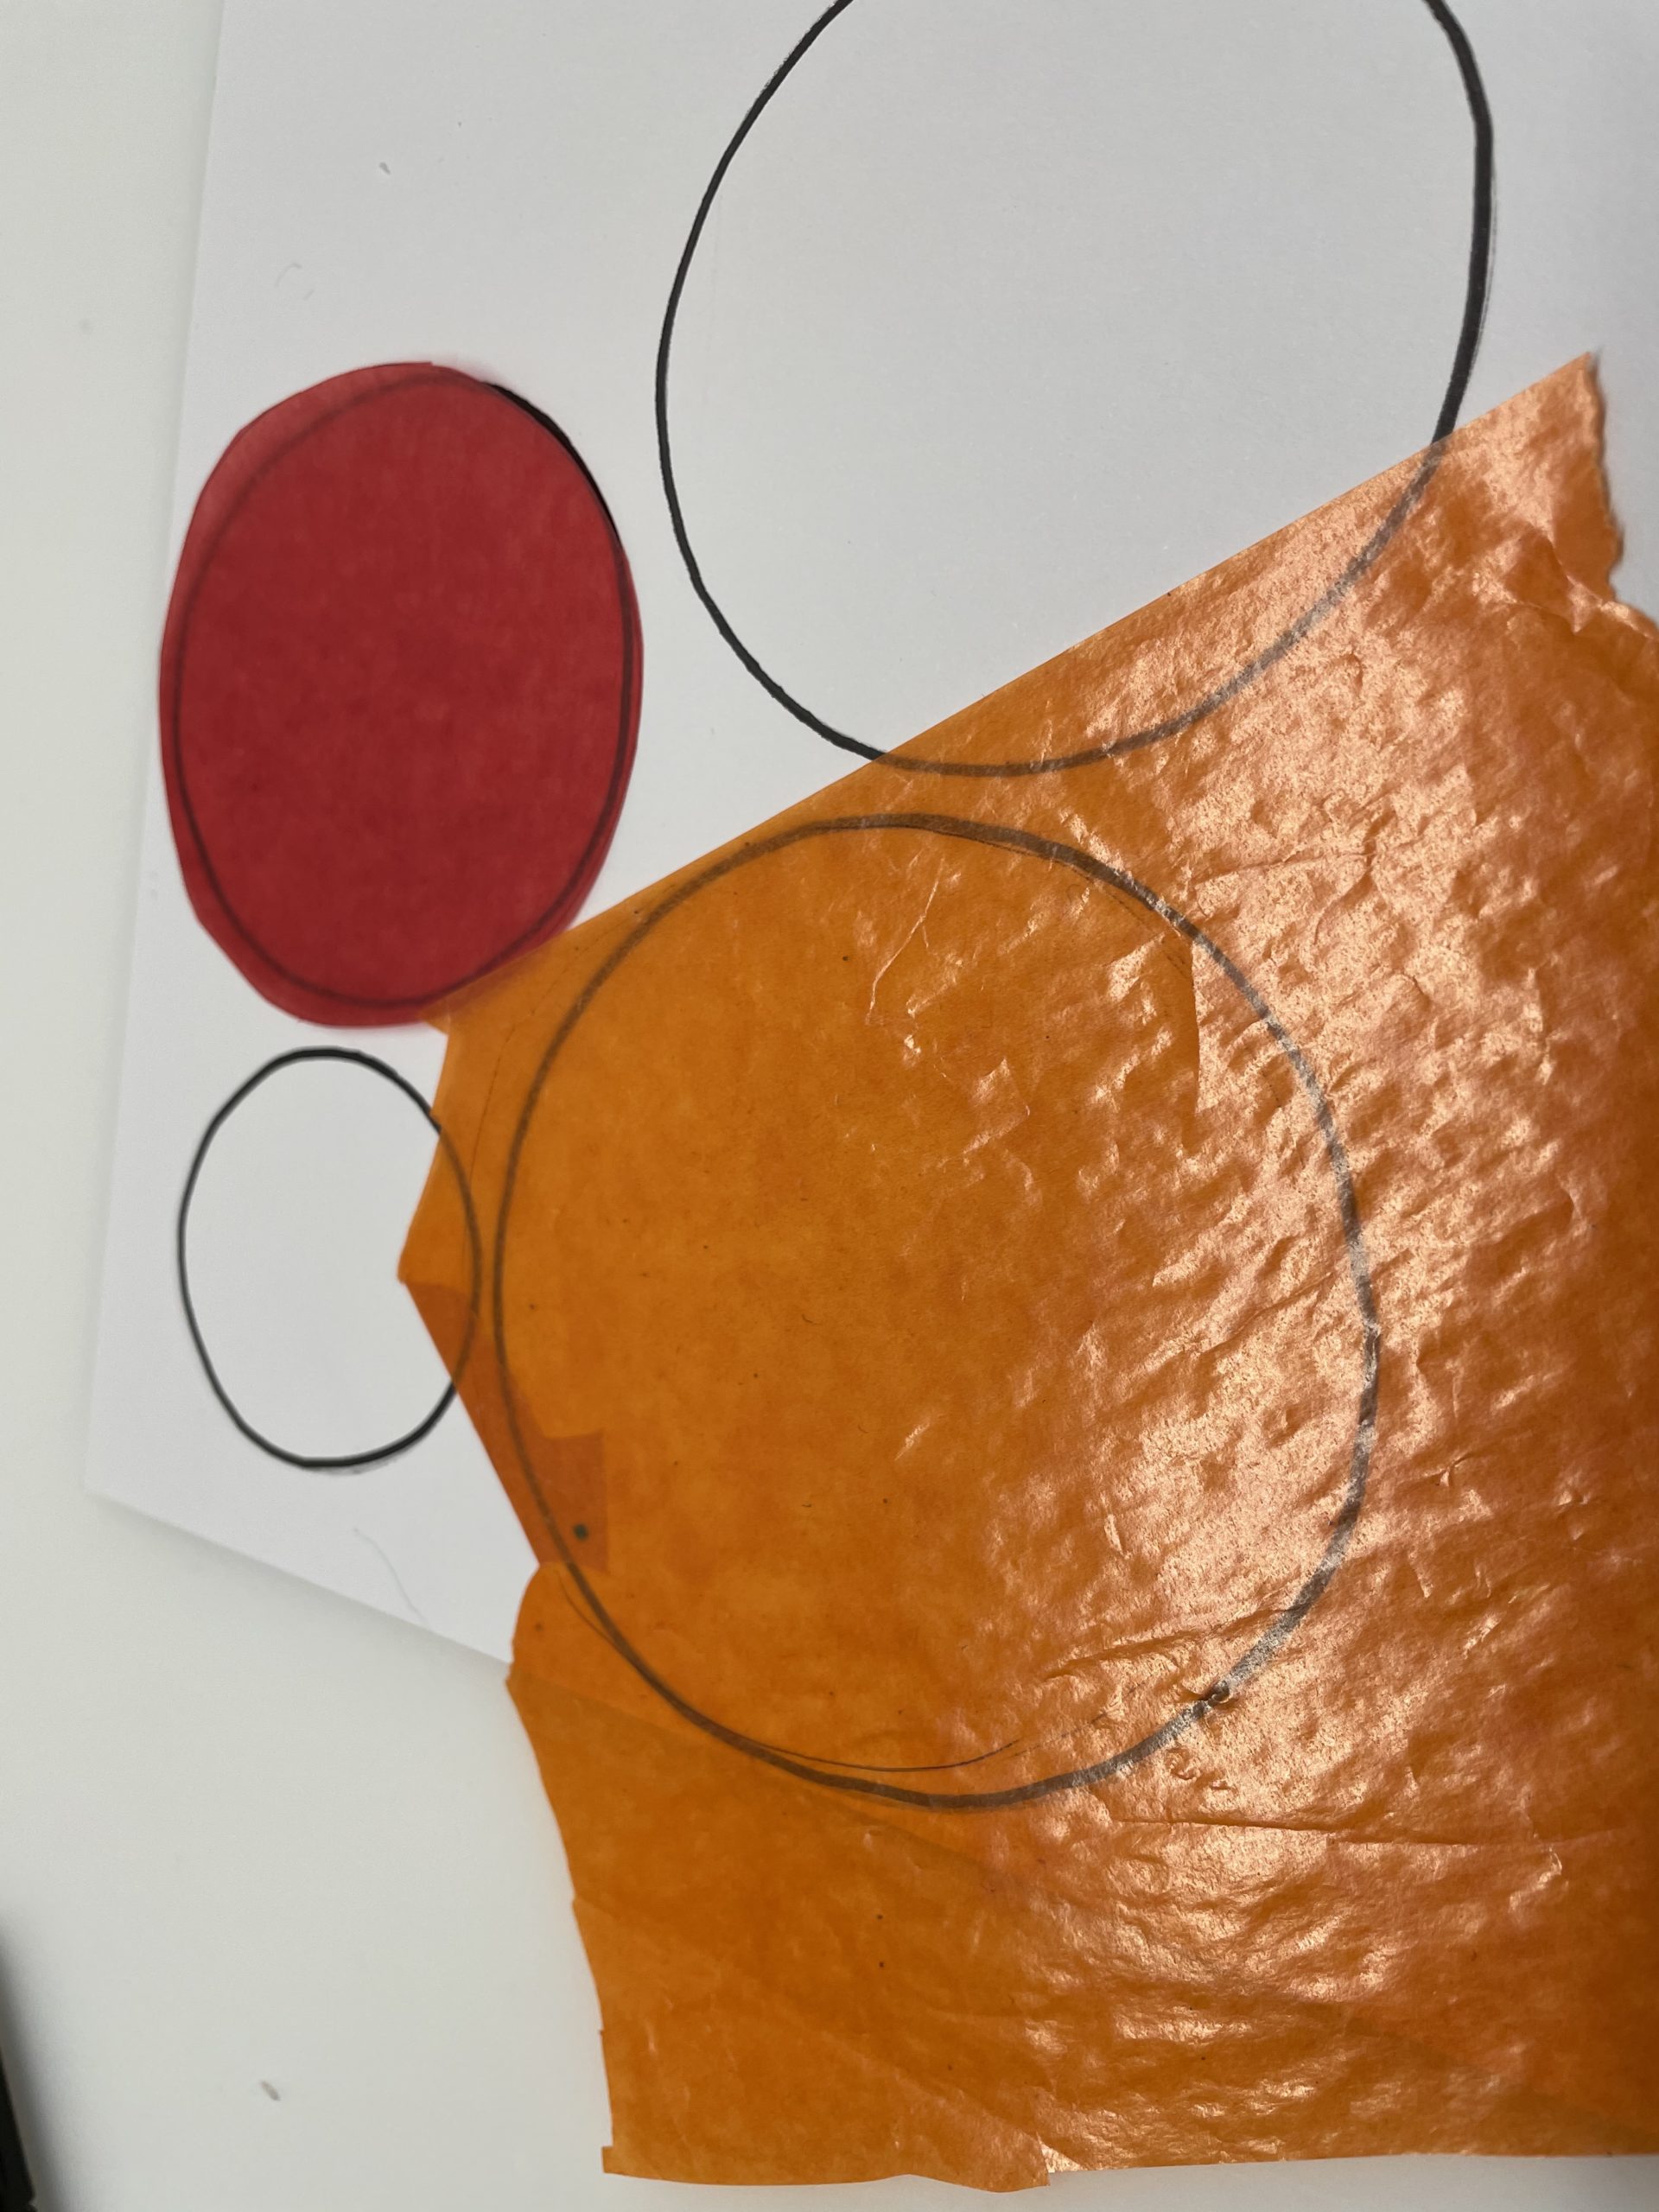
That's how you travel with every circle size.
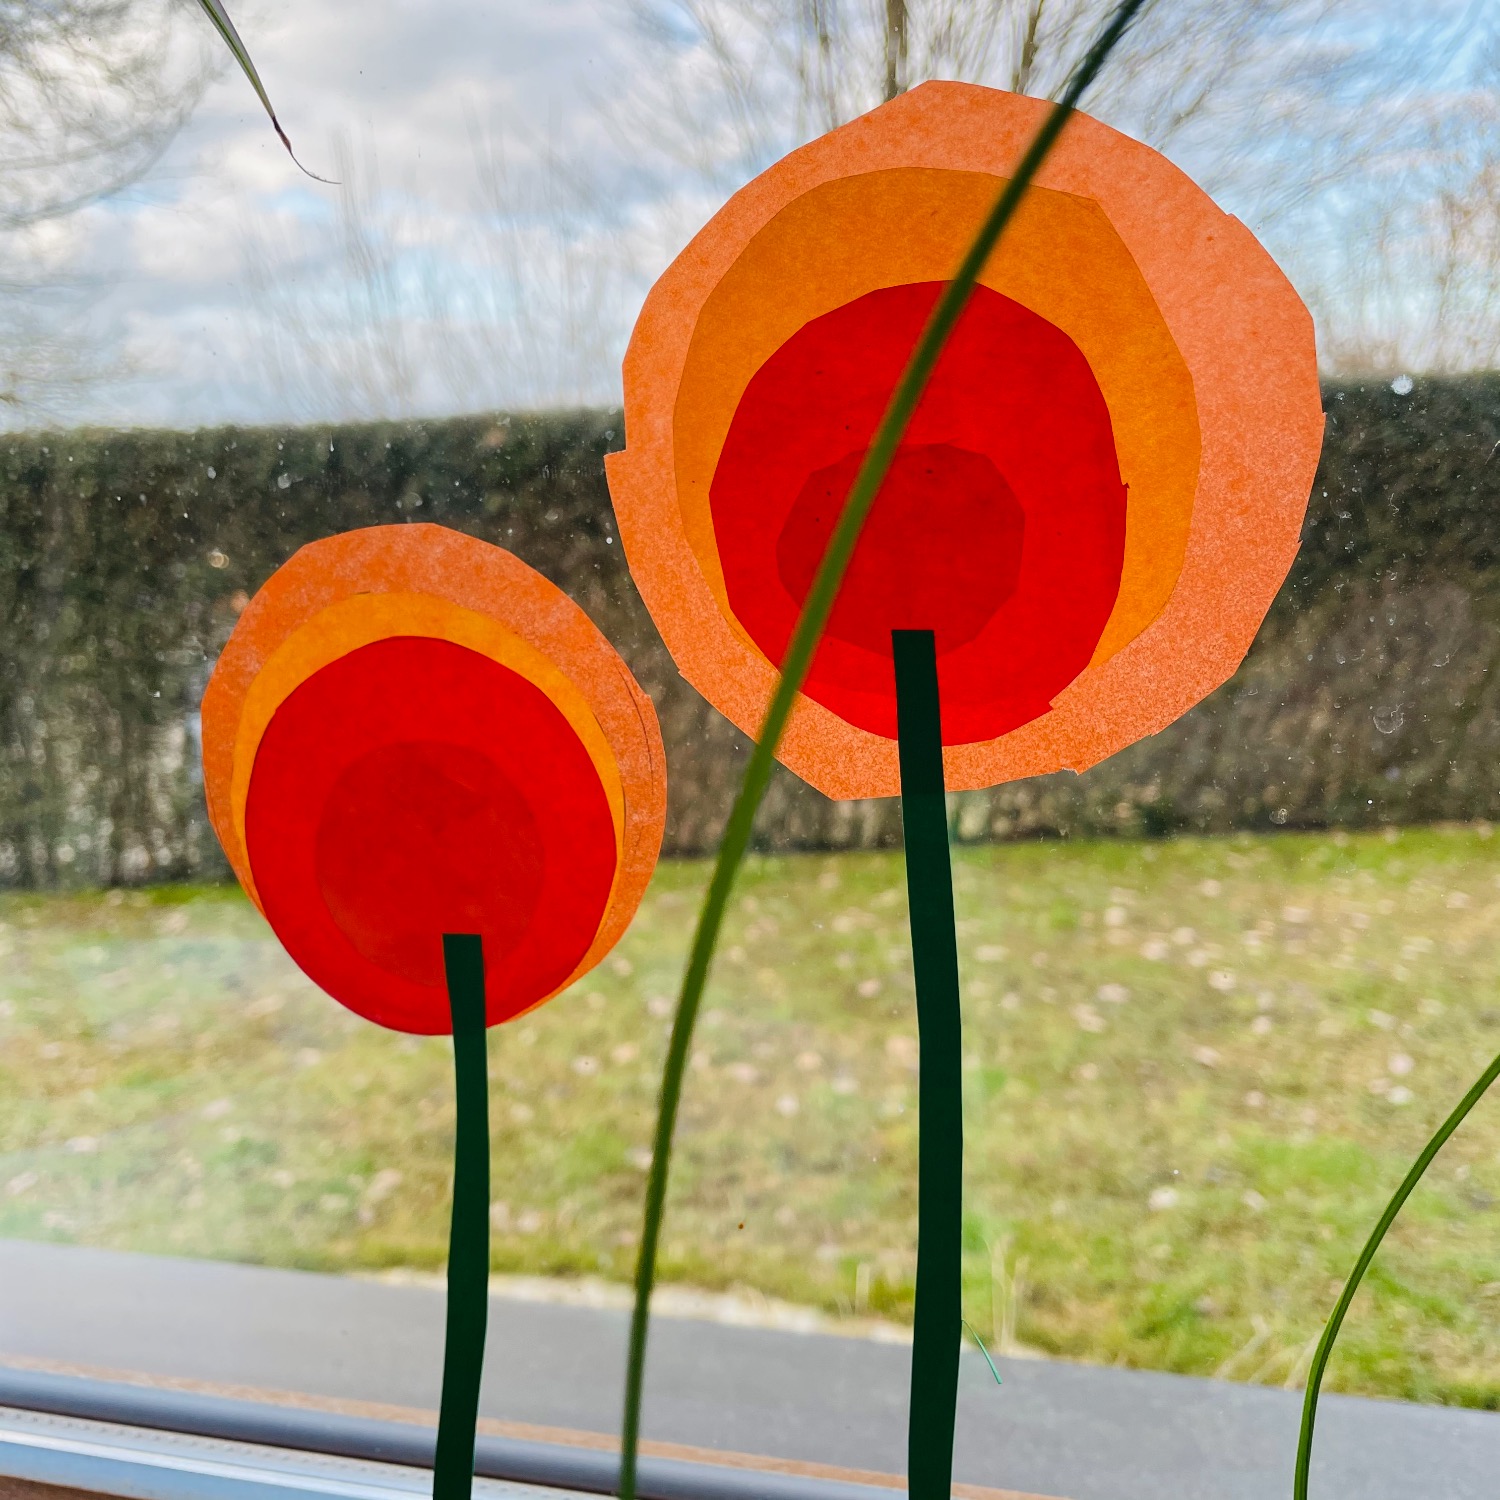
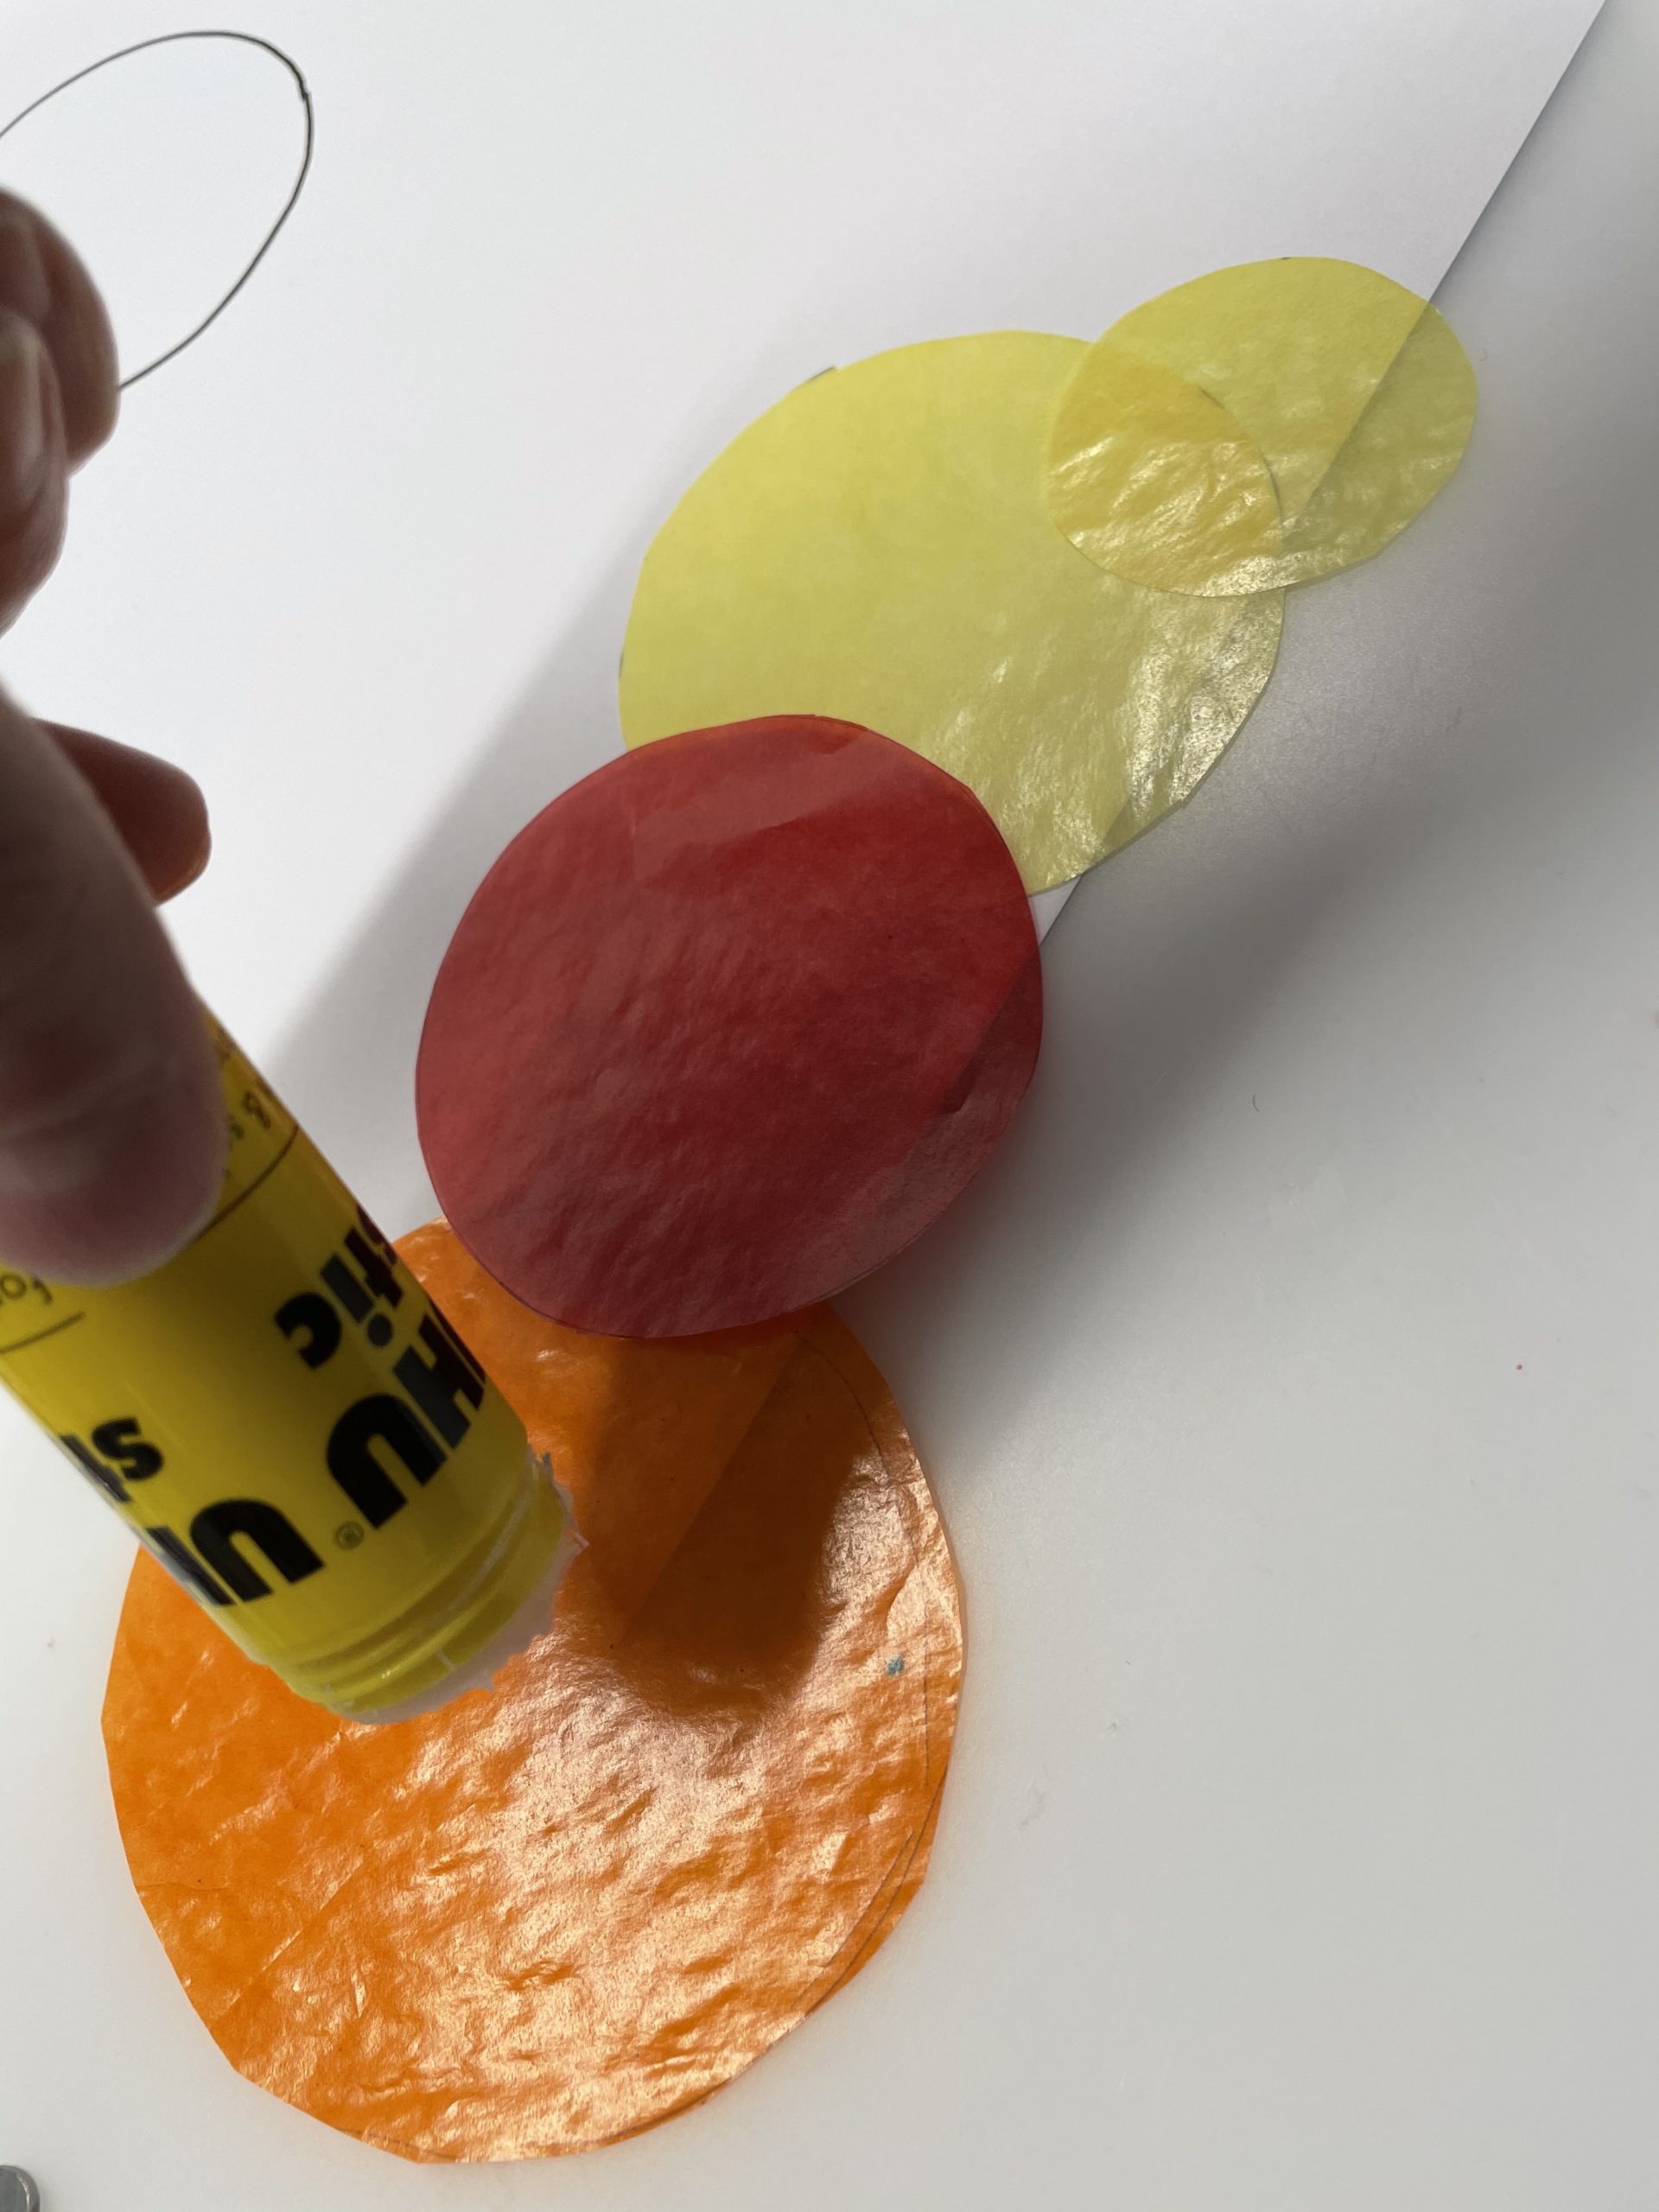
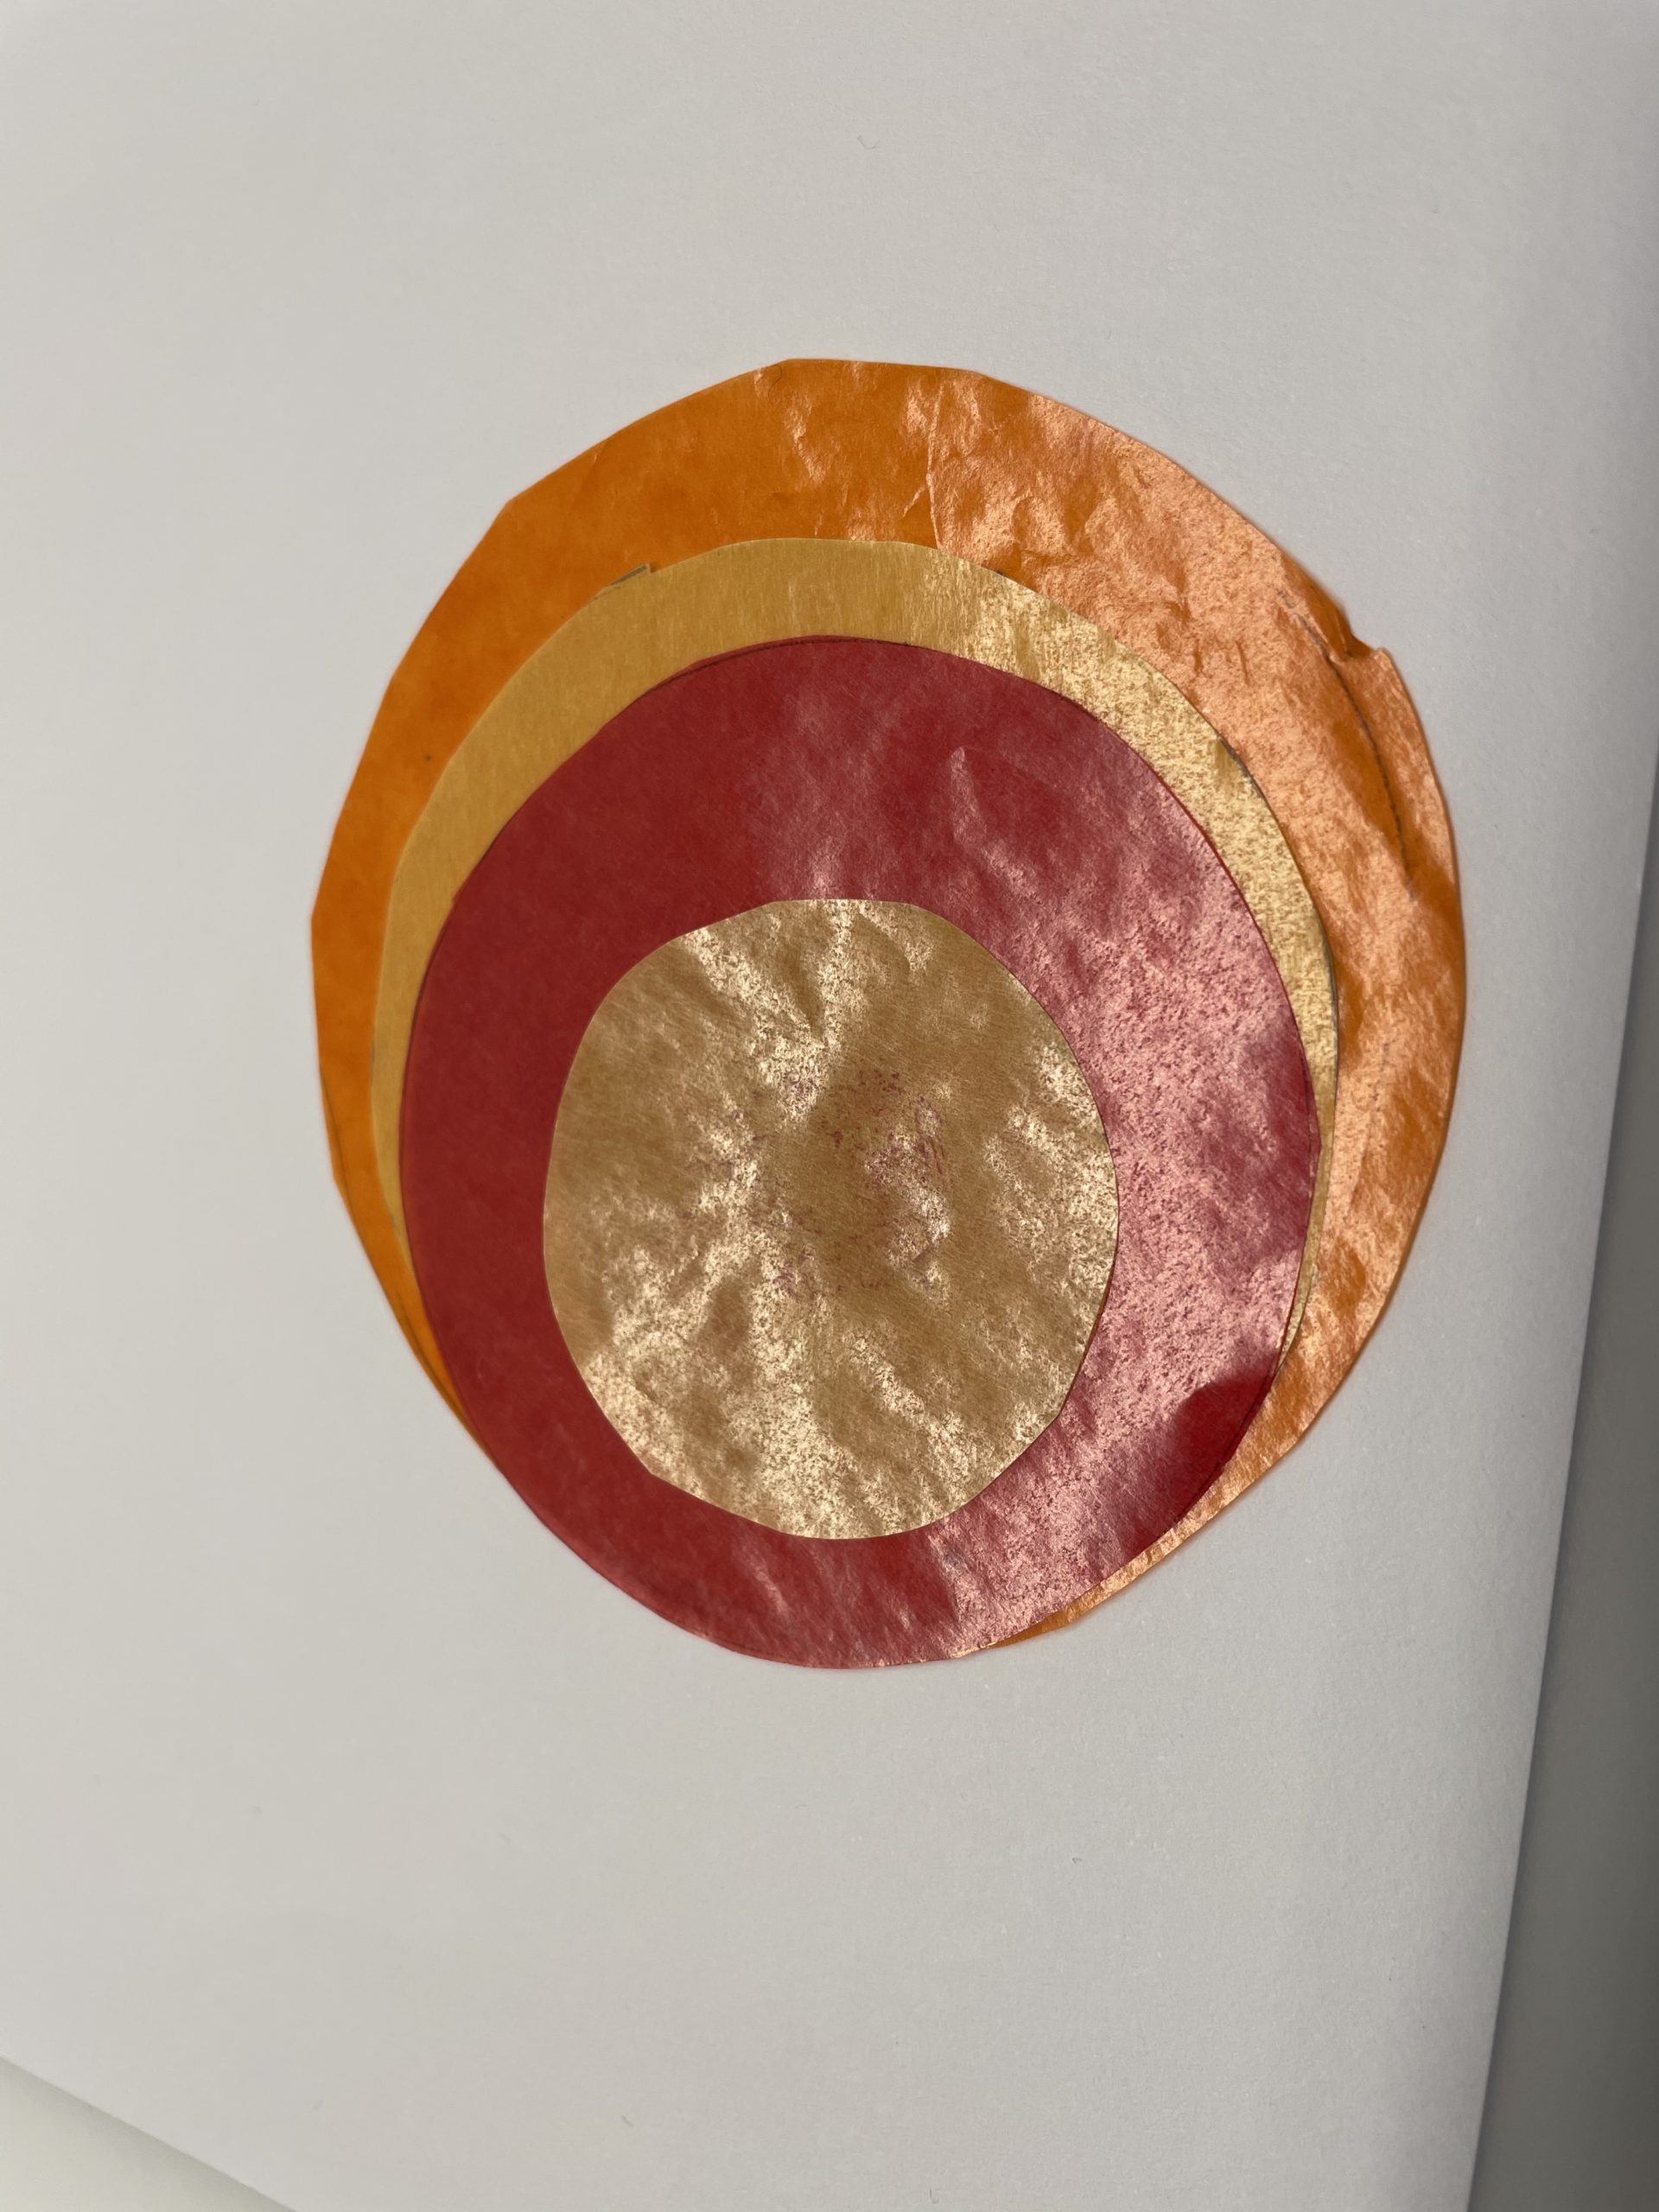
Now you stick the four circles of size to each other. The largest circle is always down.
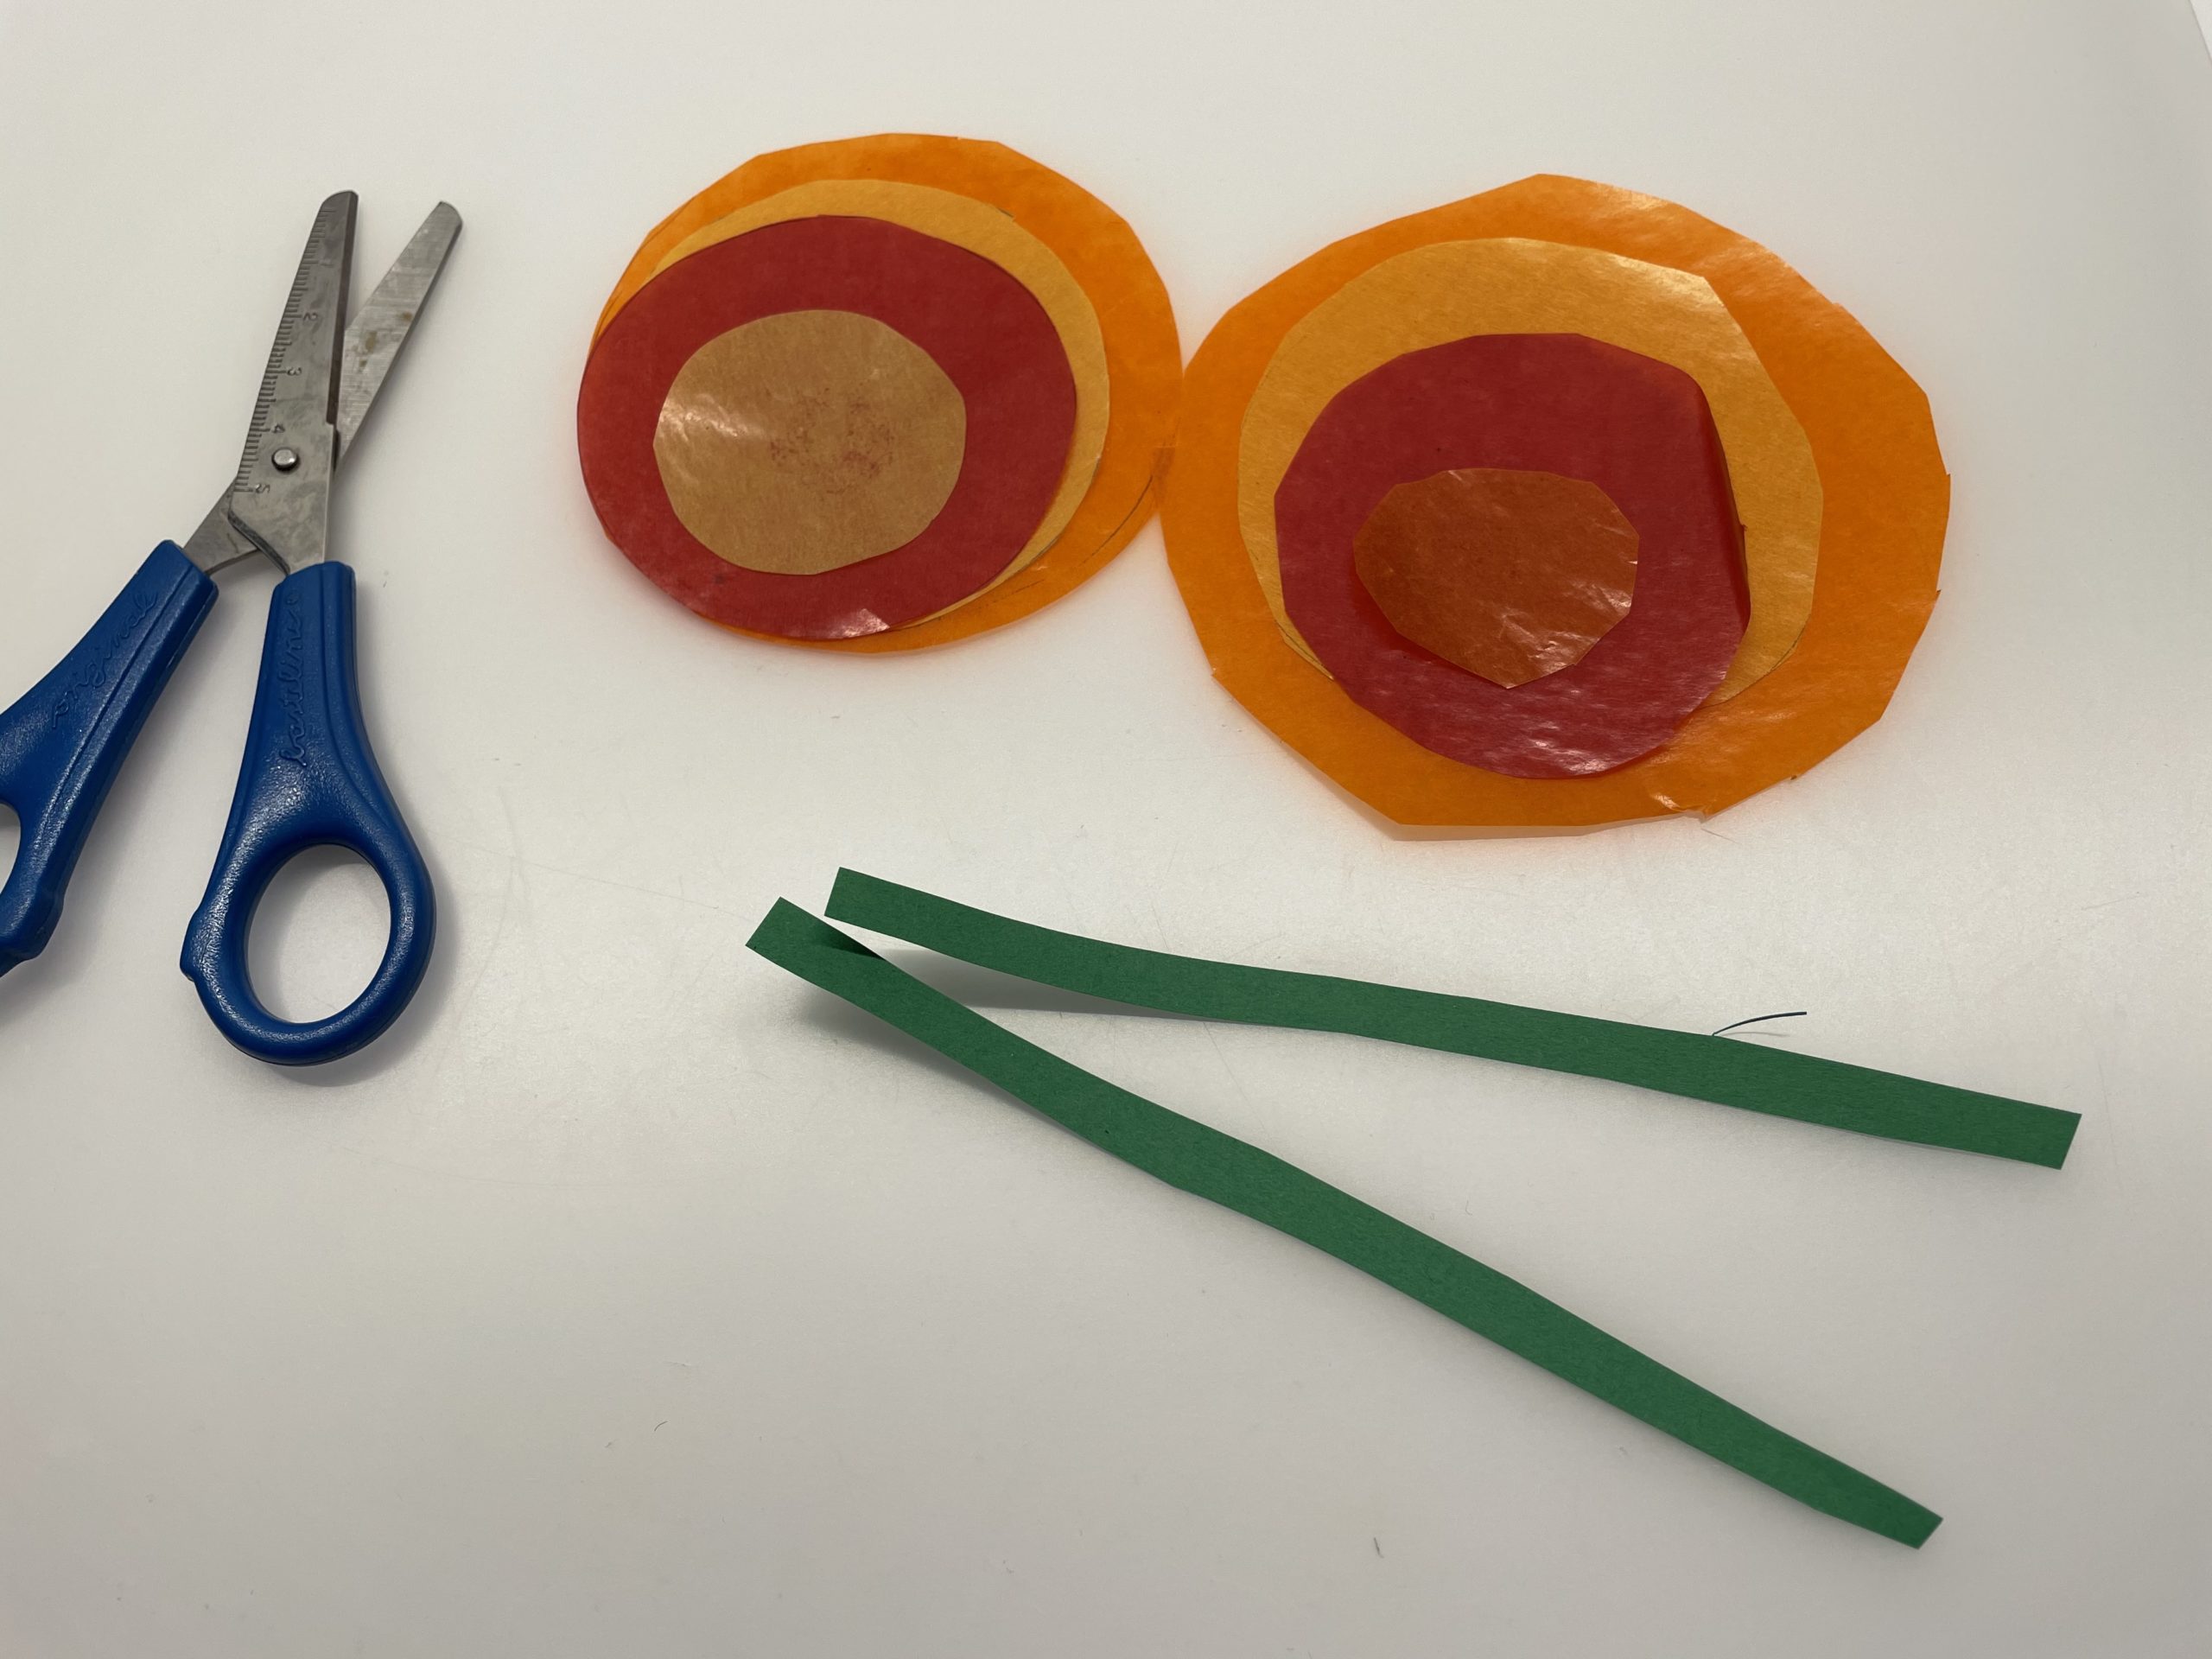
Then cut a narrow green strip of clay paper. This becomes a stalk.
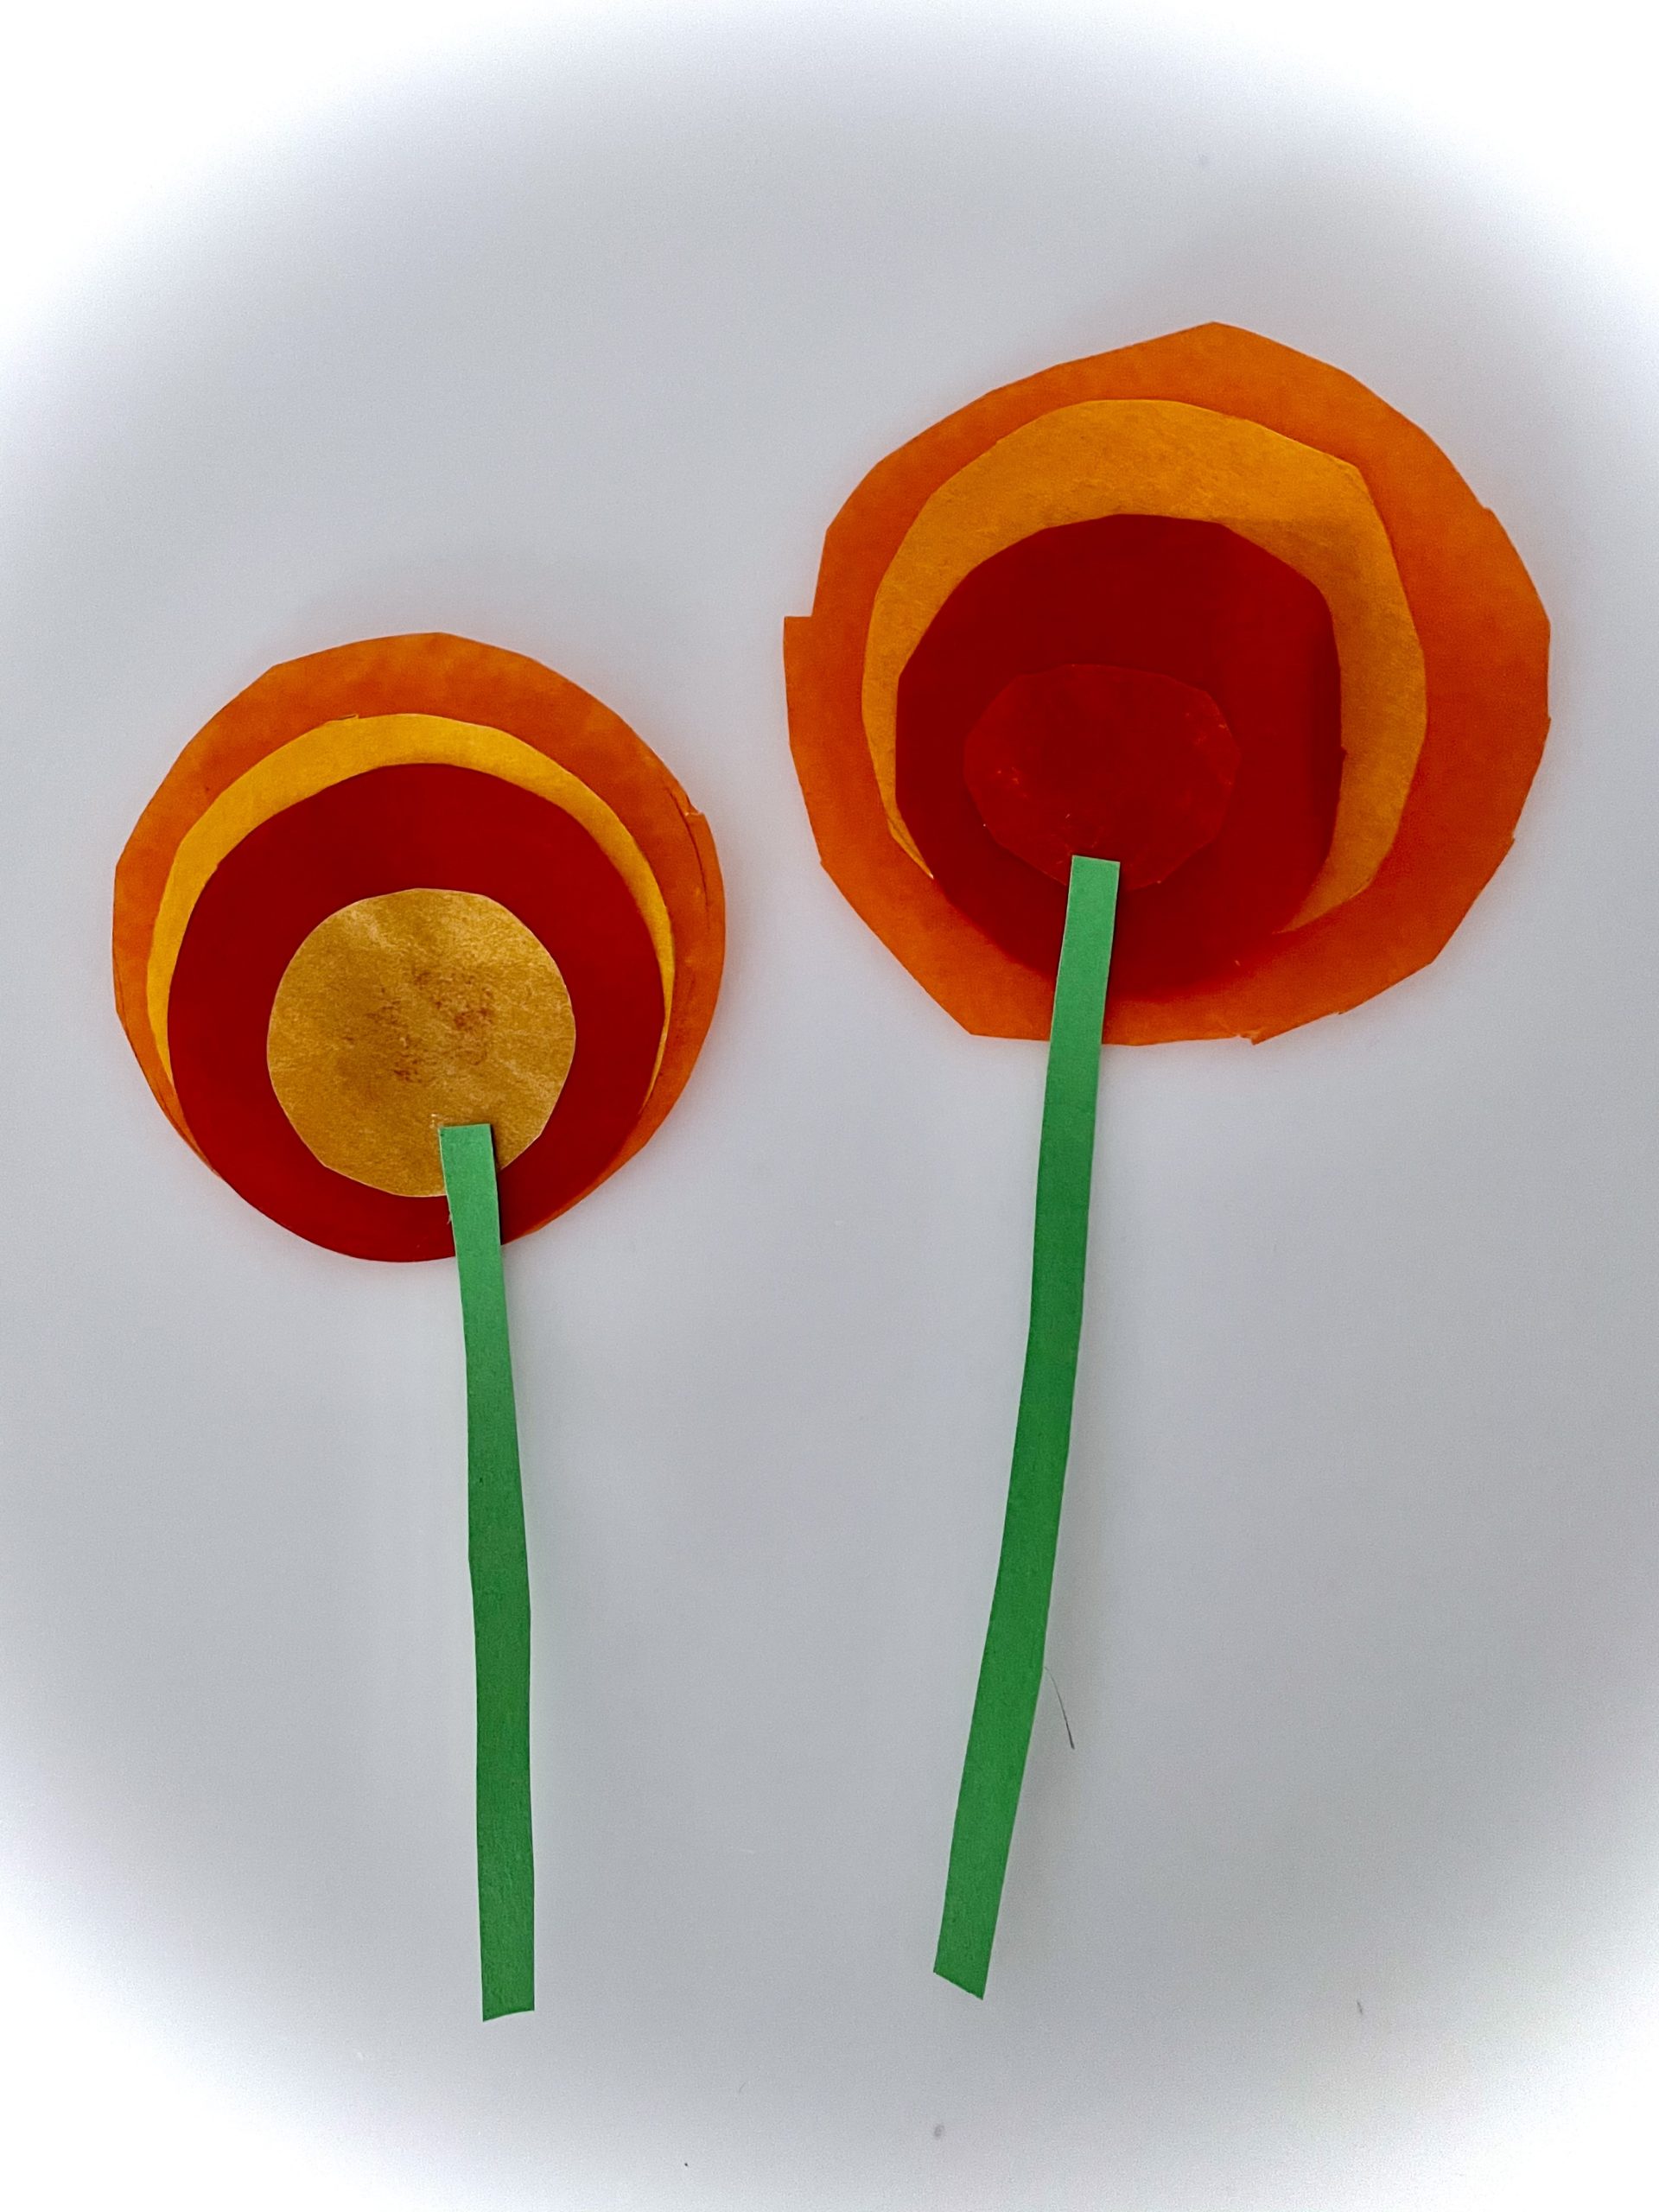
Stick this to the circles. Your flower is ready.
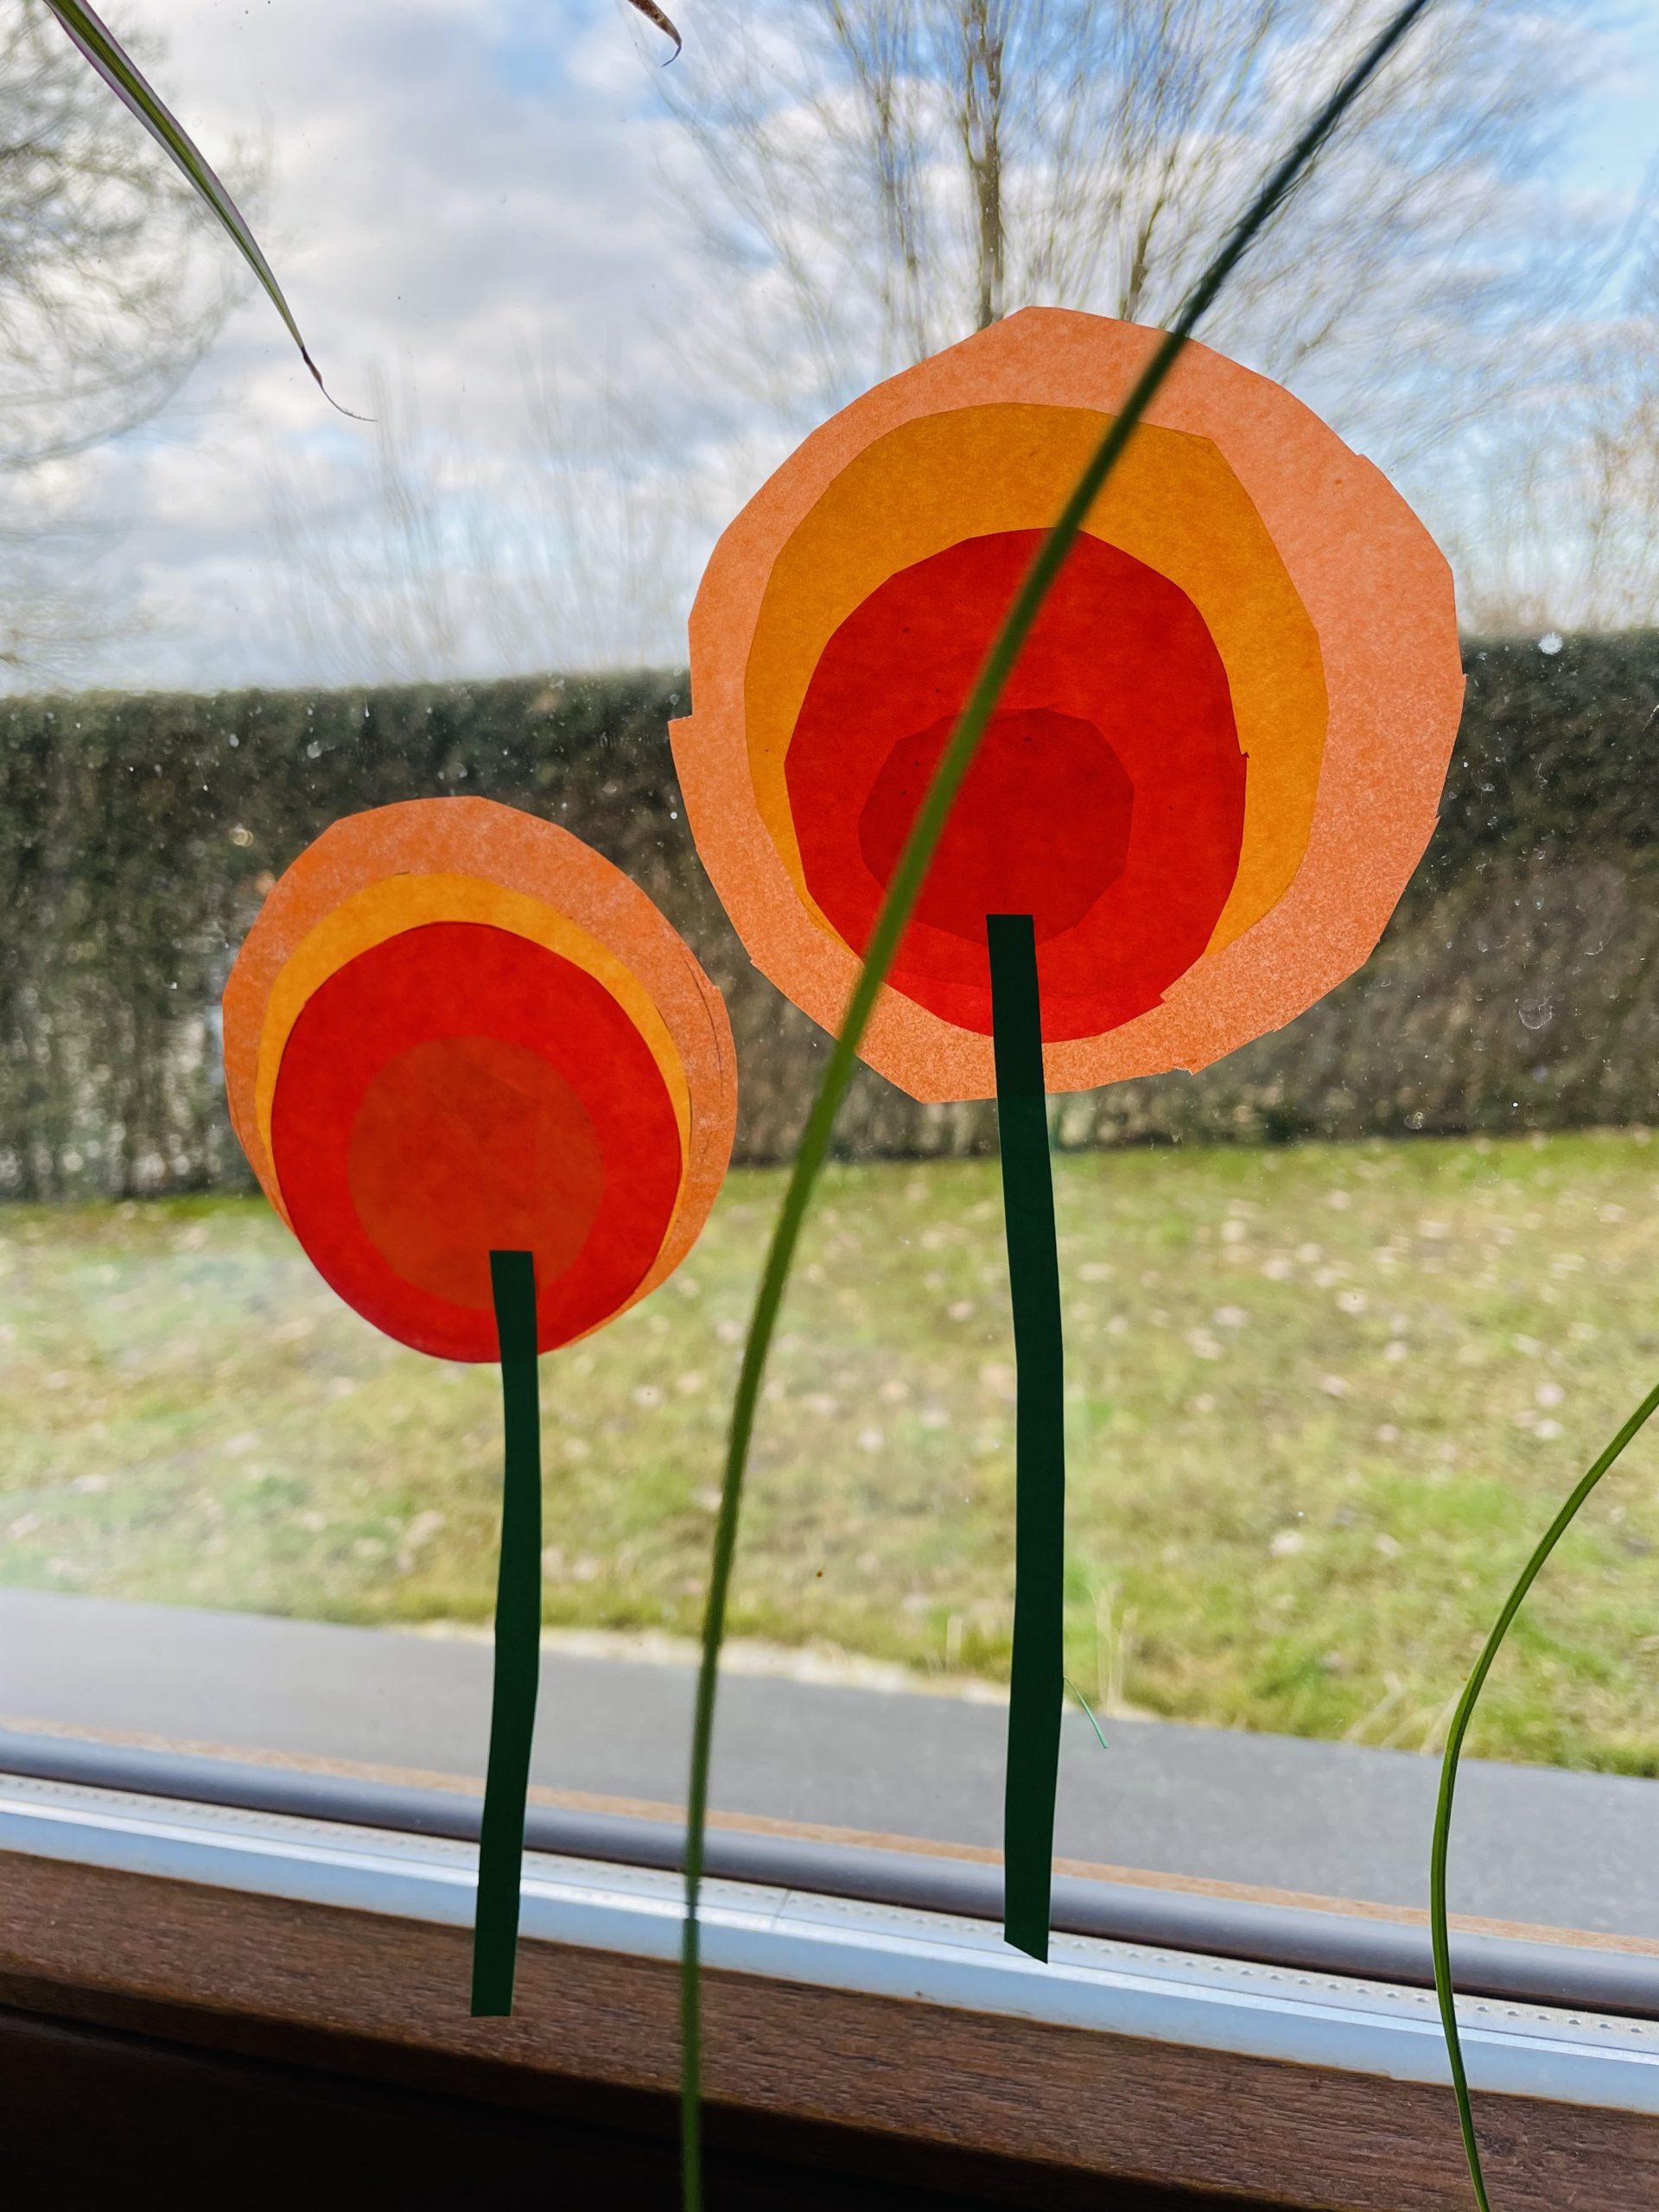
For example, glue it to the window in different lengths and sizes.
Have fun!

Materials
Directions
First, put out your craft file.
Then you need 3-4 circles in different sizes. Either you use a template or you paint the different circles freely.
With the template, this is quite simple: place the transparent paper on the template and border the circle. Cut it out.
That's how you travel with every circle size.
Now you stick the four circles of size to each other. The largest circle is always down.
Then cut a narrow green strip of clay paper. This becomes a stalk.
Stick this to the circles. Your flower is ready.
For example, glue it to the window in different lengths and sizes.
Have fun!
Follow us on Facebook , Instagram and Pinterest
Don't miss any more adventures: Our bottle mail