This candle serves as room decoration and can be hanged freely. It rotates in the wind and thus has a very plastic effect.
The use of the sewing machine is always something special for children and smaller children are already enjoying watching. See here what to do and make it your project.
Media Education for Kindergarten and Hort

Relief in everyday life, targeted promotion of individual children, independent learning and - without any pre-knowledge already usable by the youngest!
You don't need the sewing machine at the beginning.
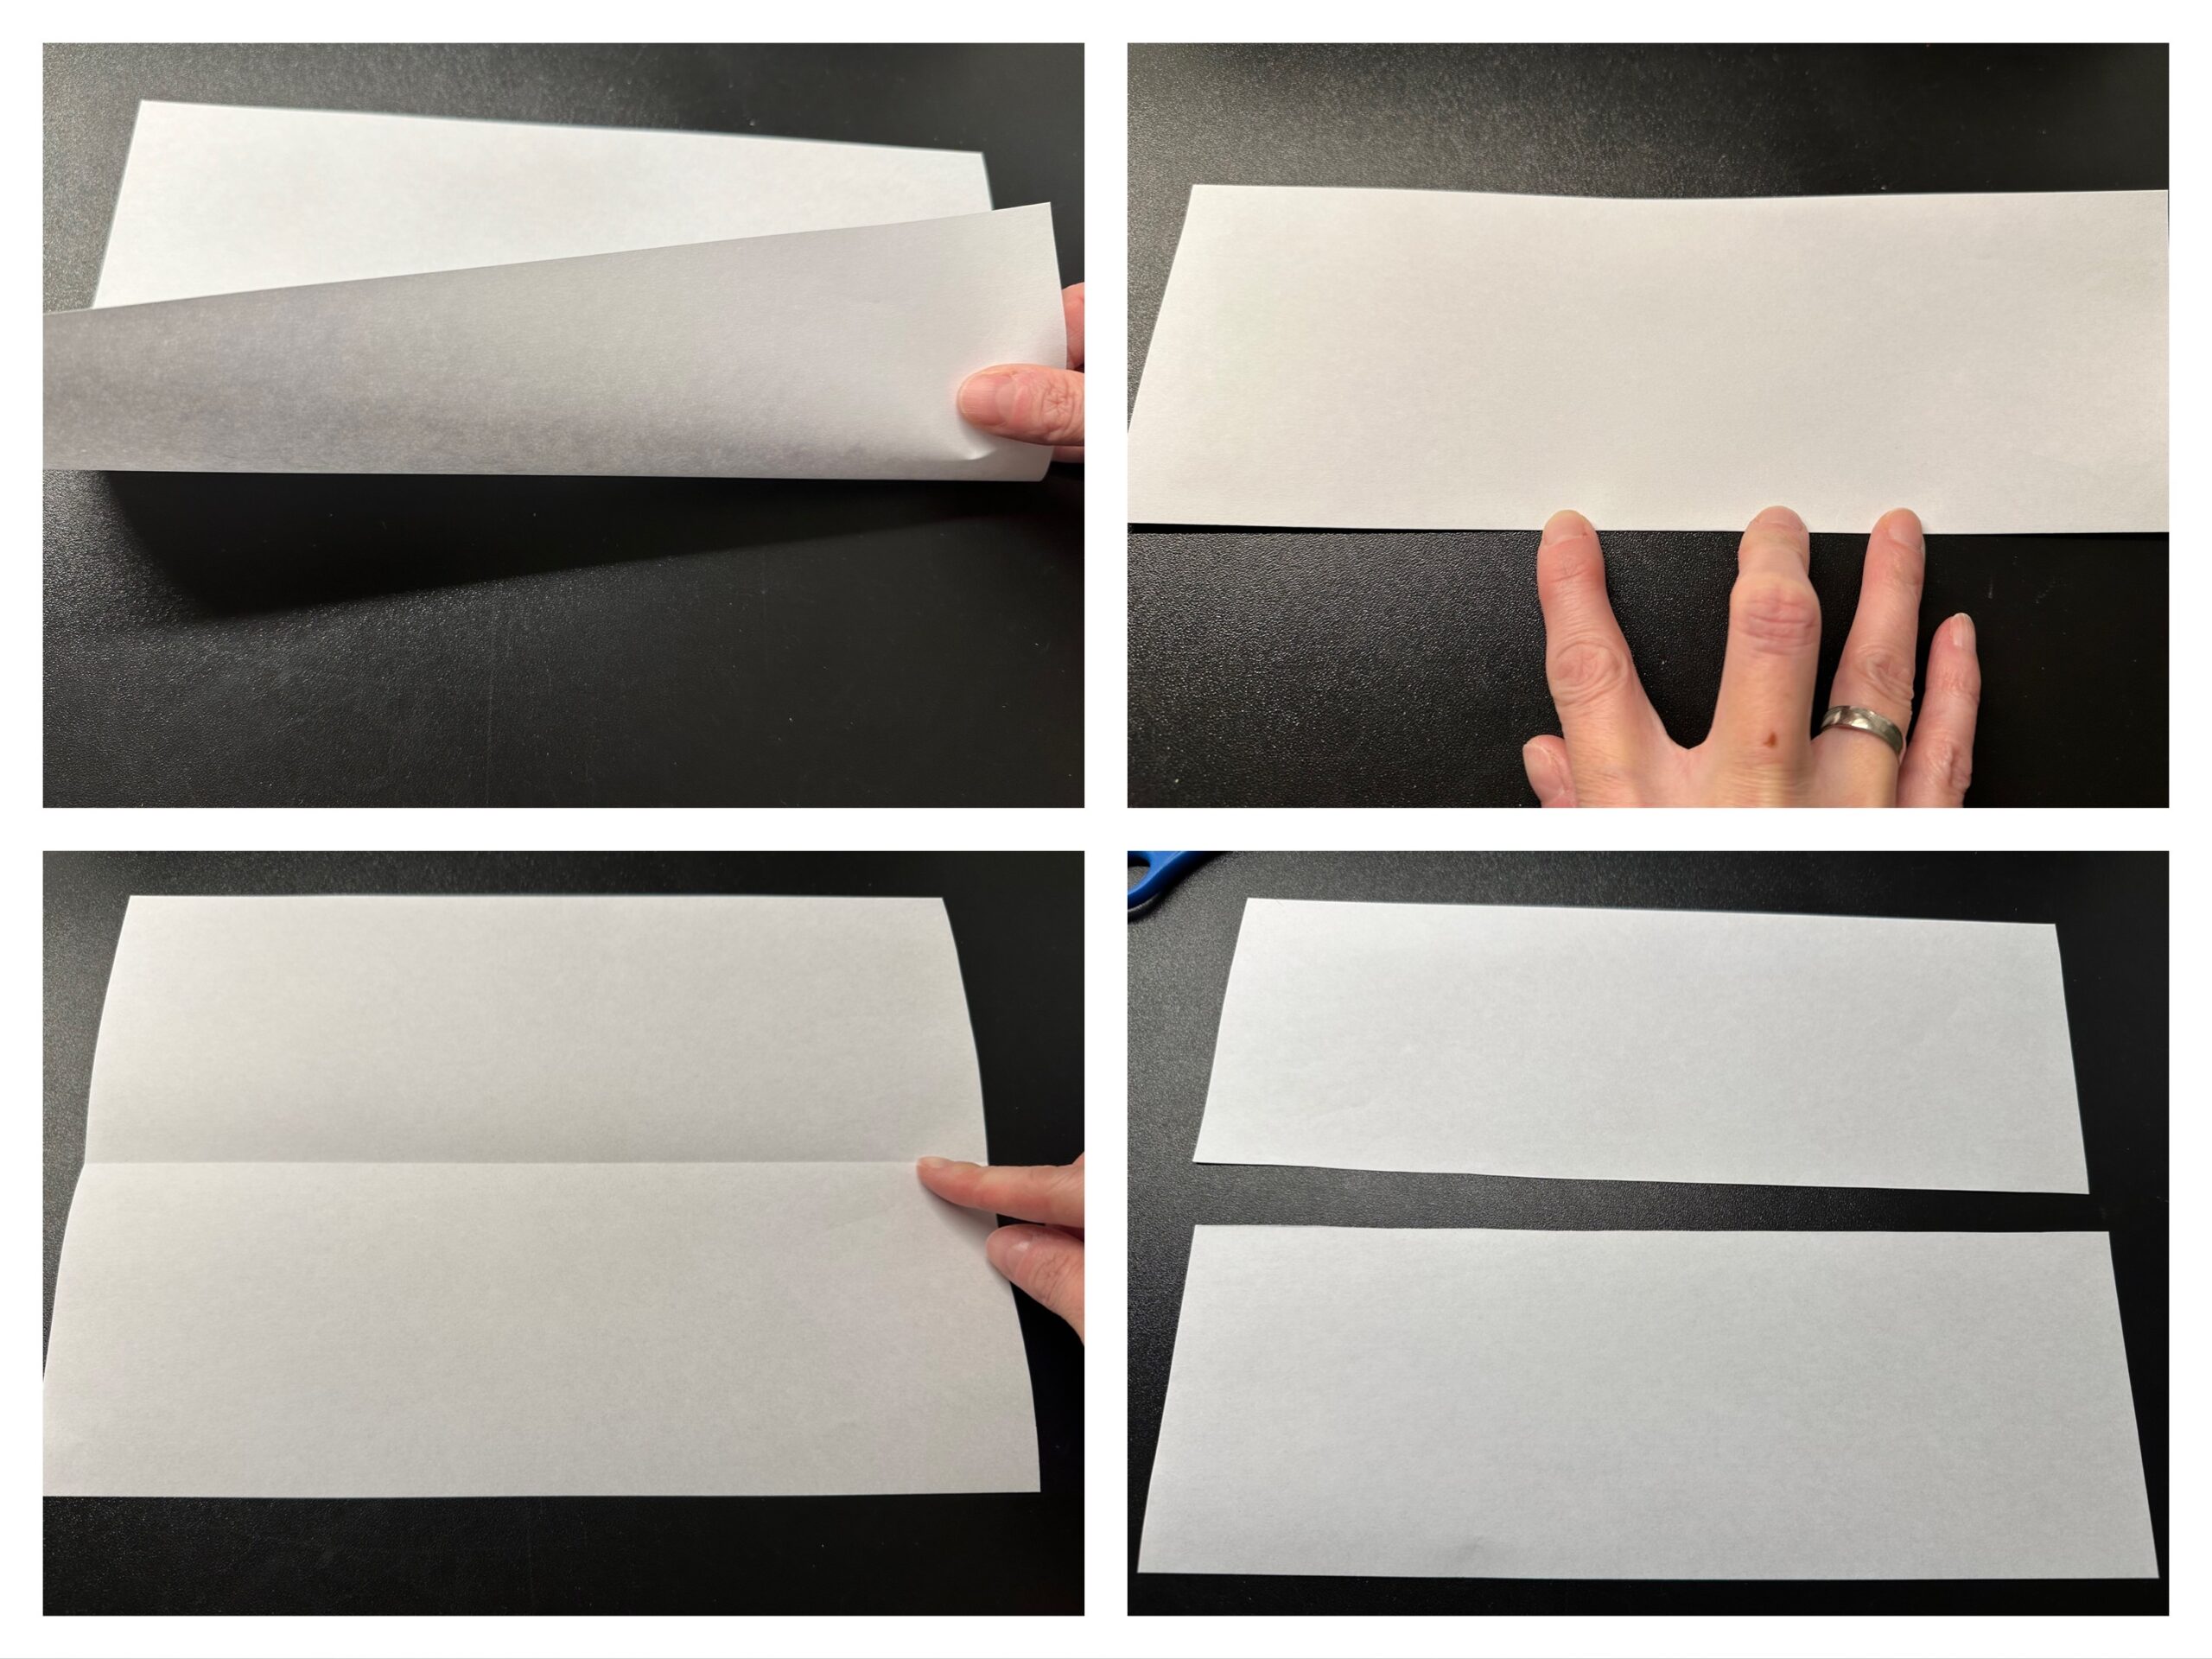
Start with the DIN A4 sheet.
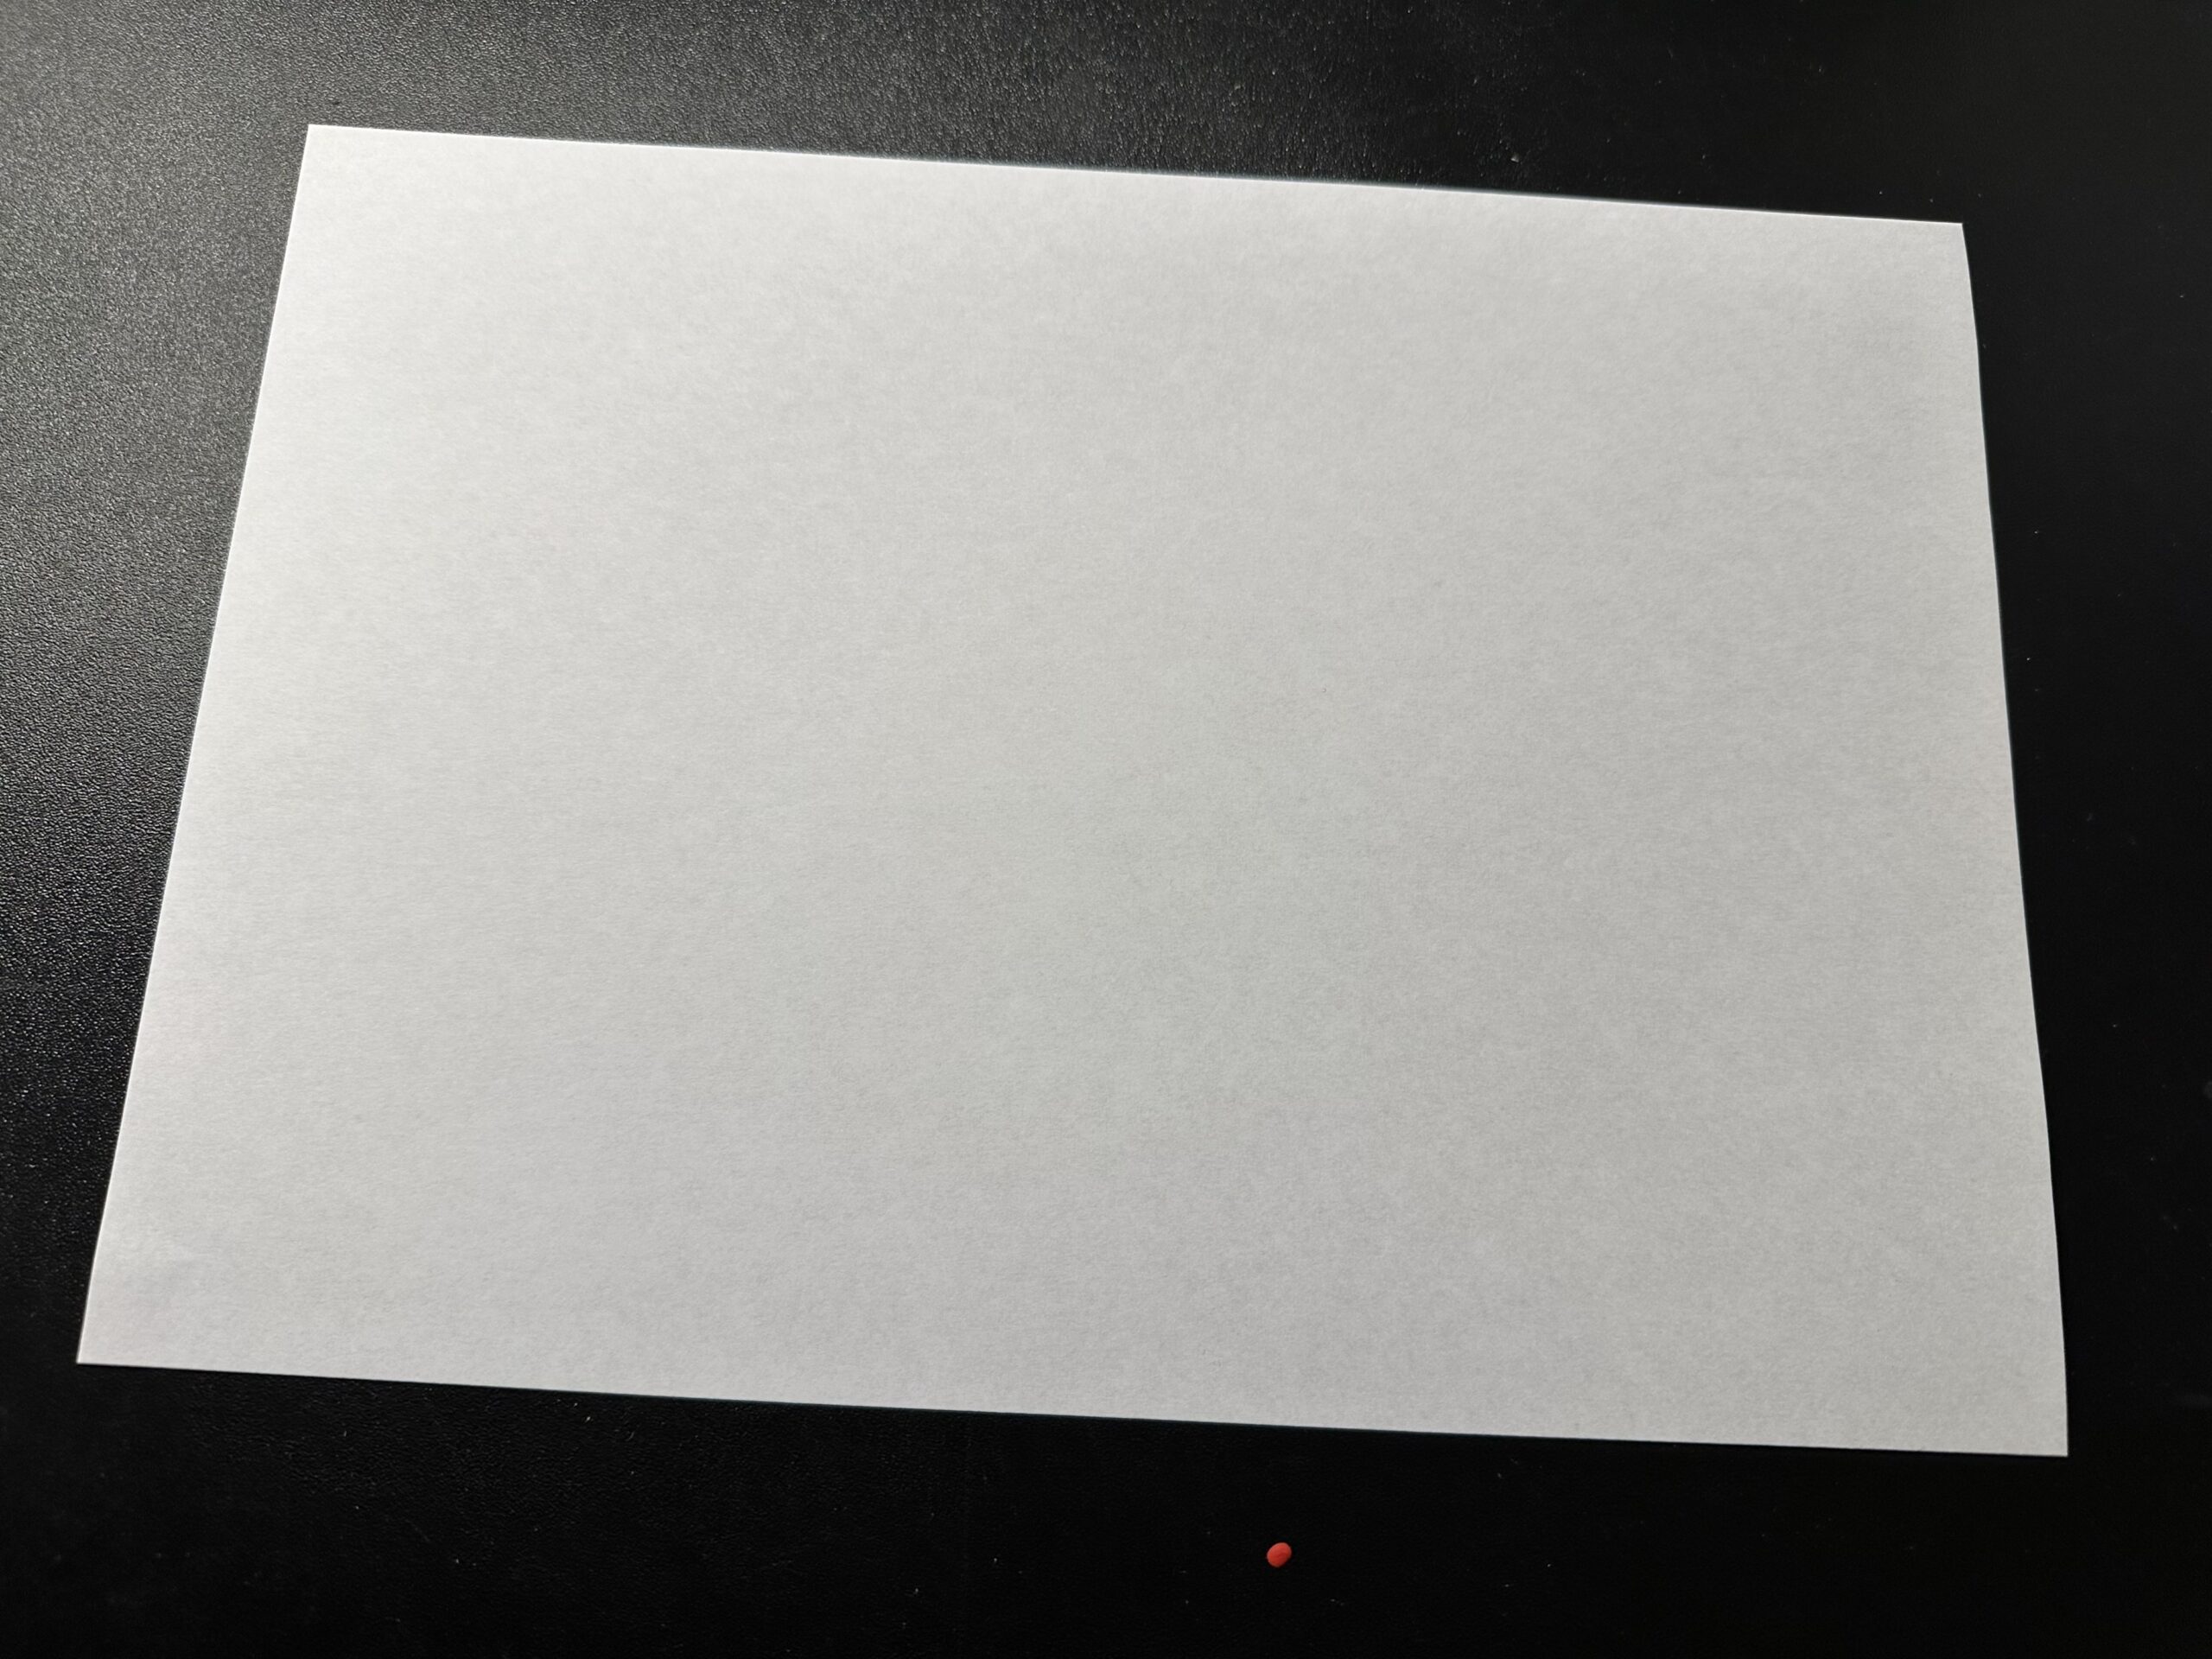
Put the sheet across in front of you. Fold the bottom long edge upwards onto the opposite side. Gently strike the break. Then close the paper again. Cut the paper along the break.
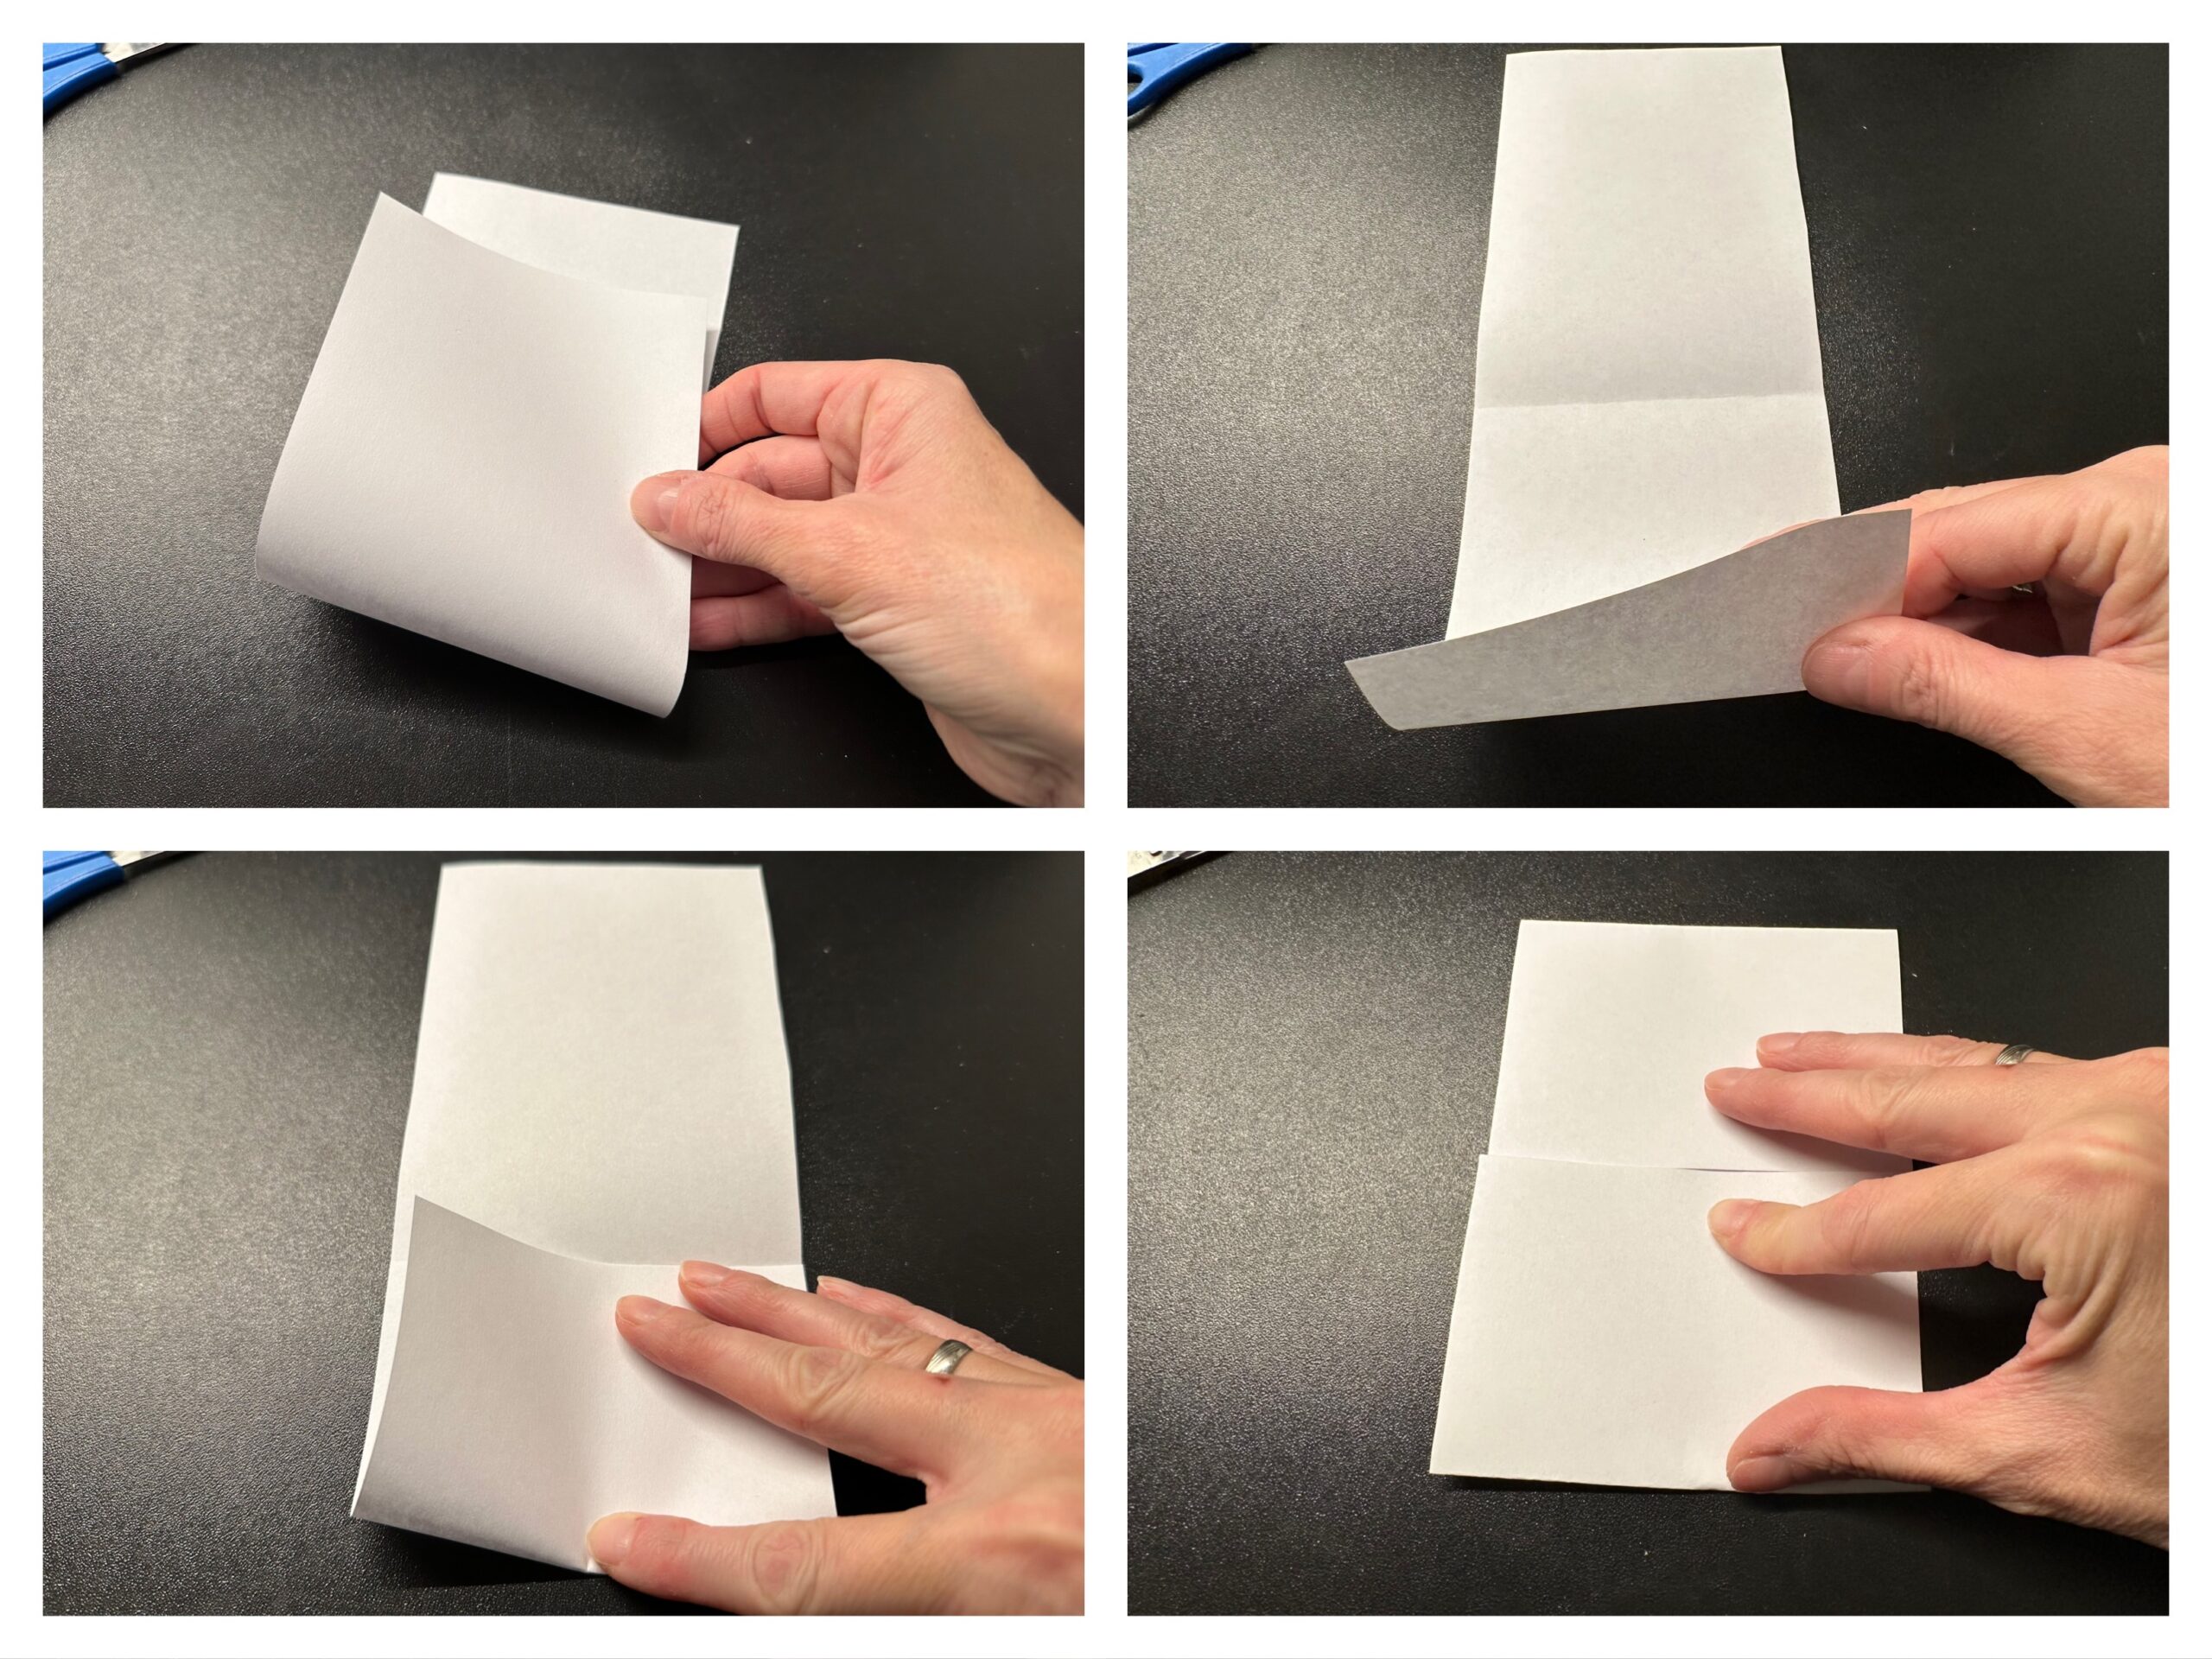
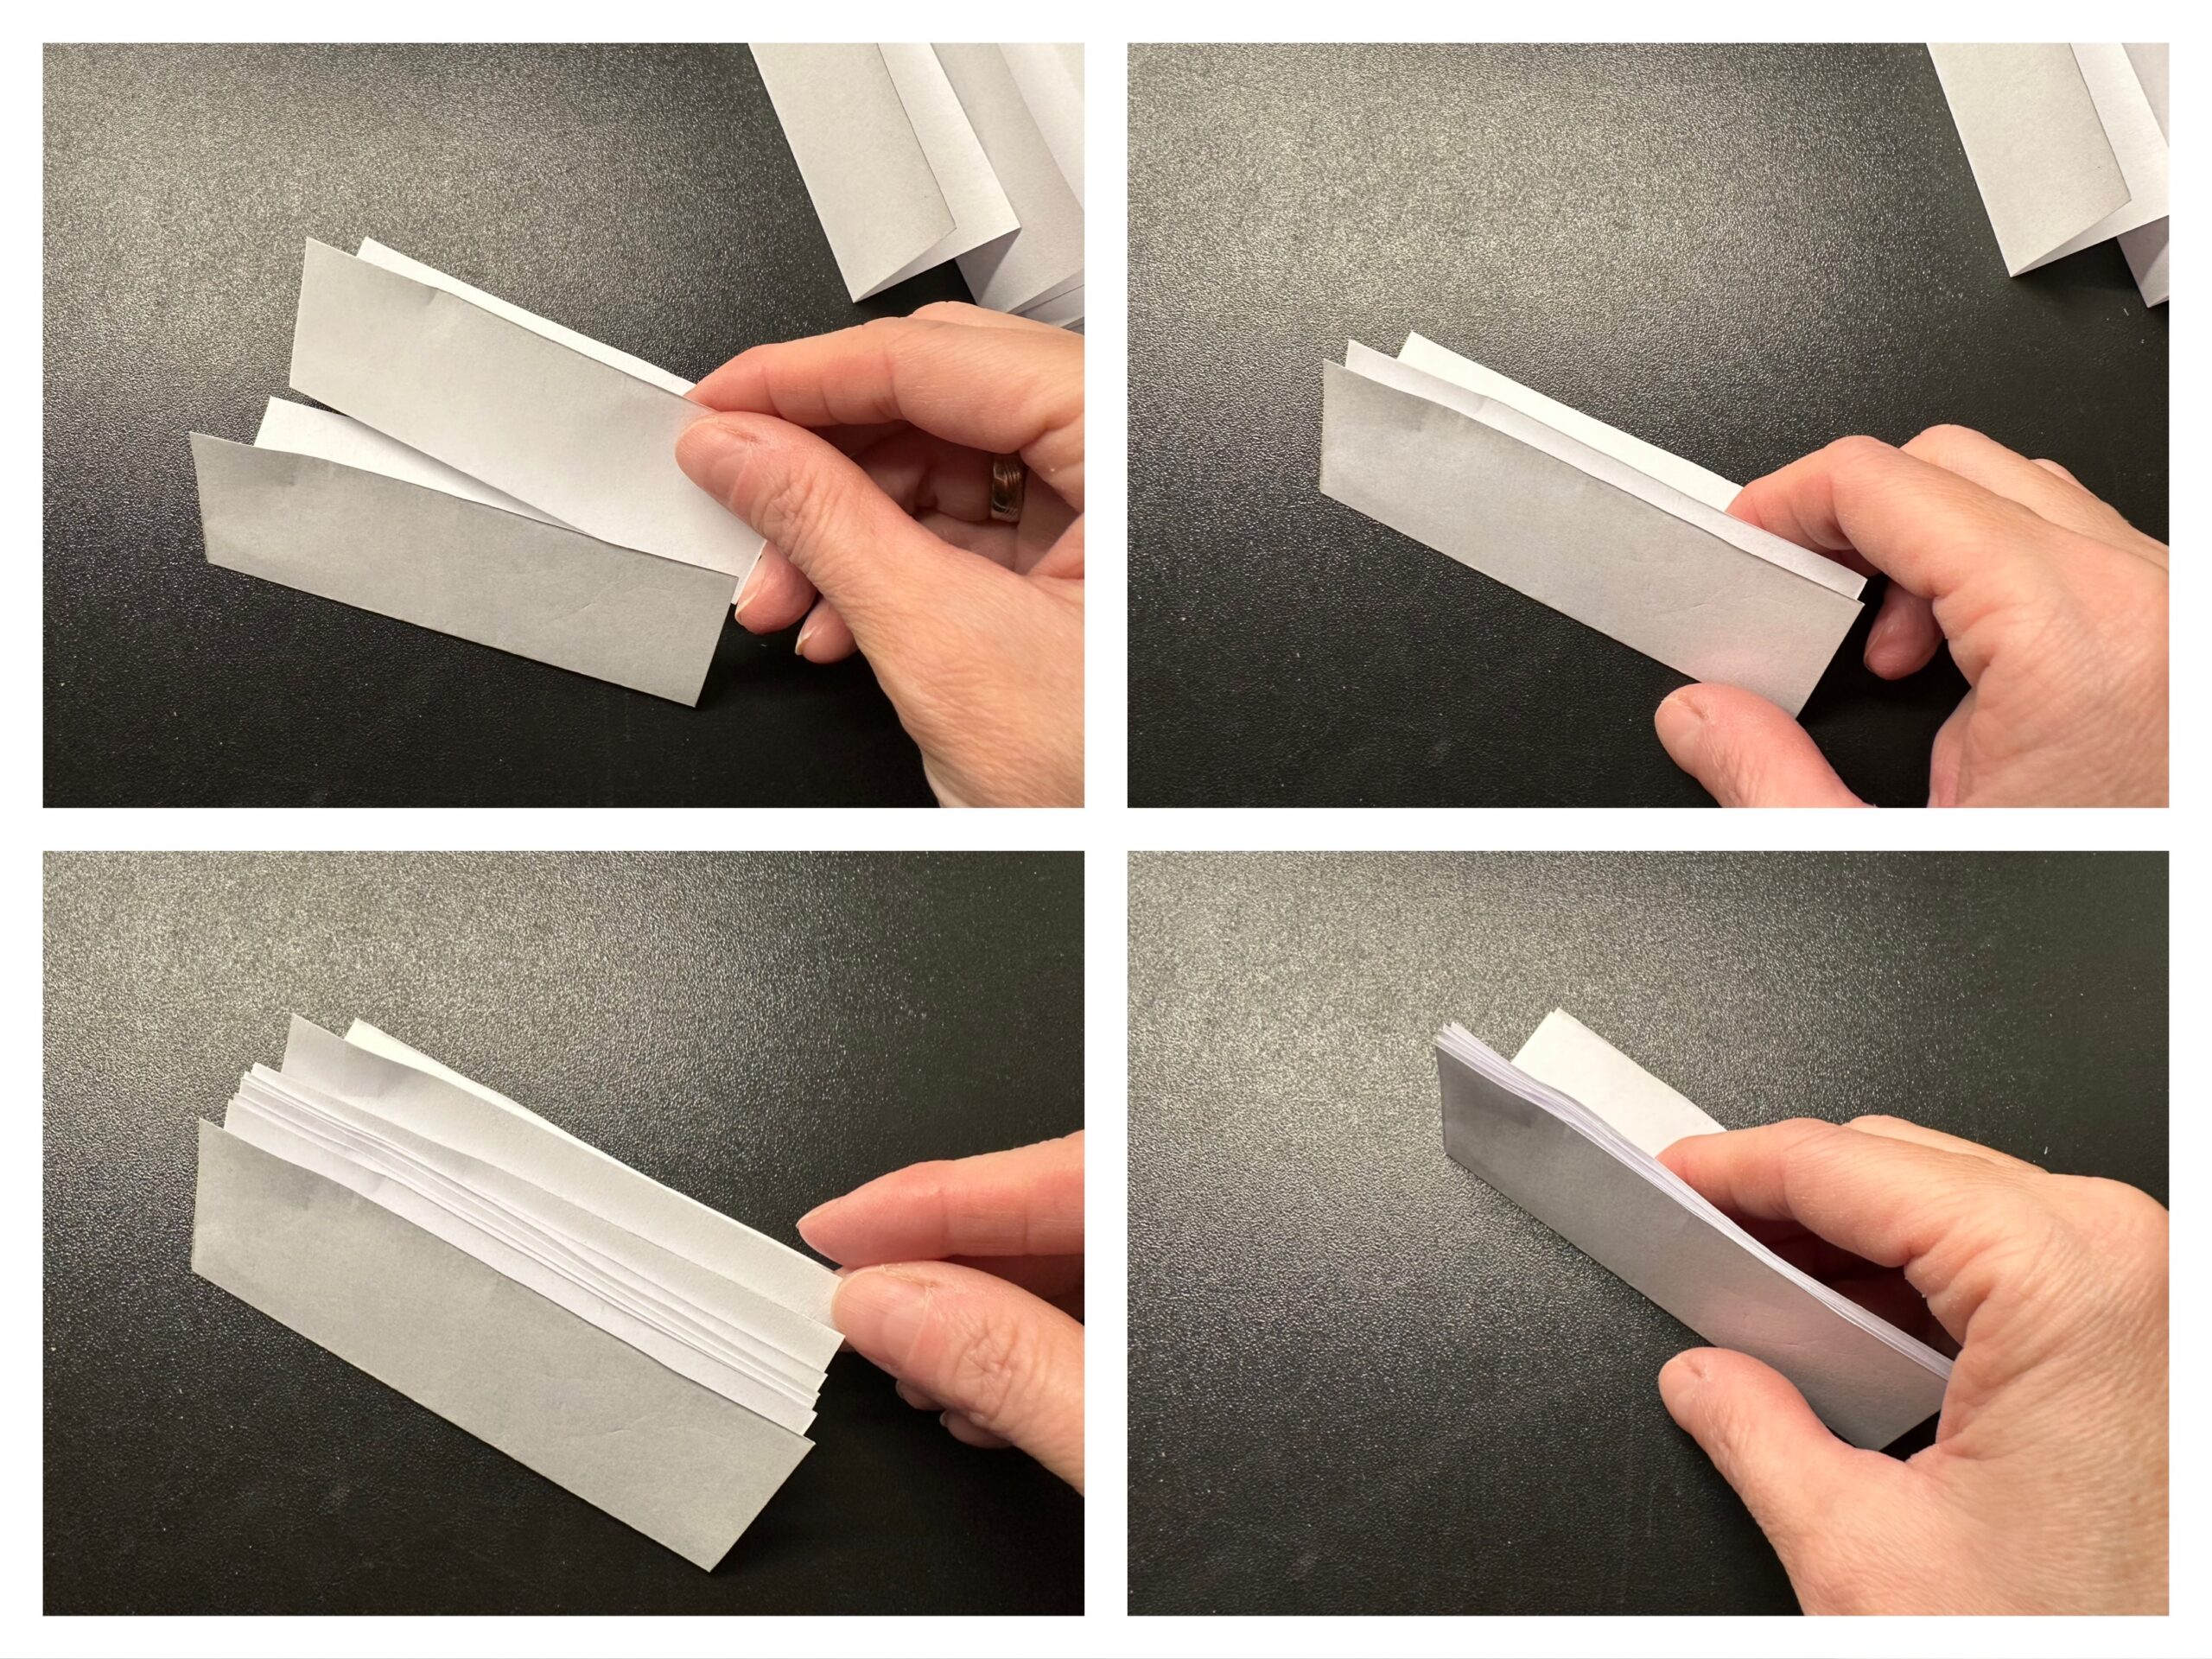
Put a strip of paper up in front of you. Fold the lower edge of the paper upwards. Gently strike the break. Fold the sheet apart again. The break now shows you the middle. Fold the short sides from both sides to the middle line and stroke the breaks smoothly.
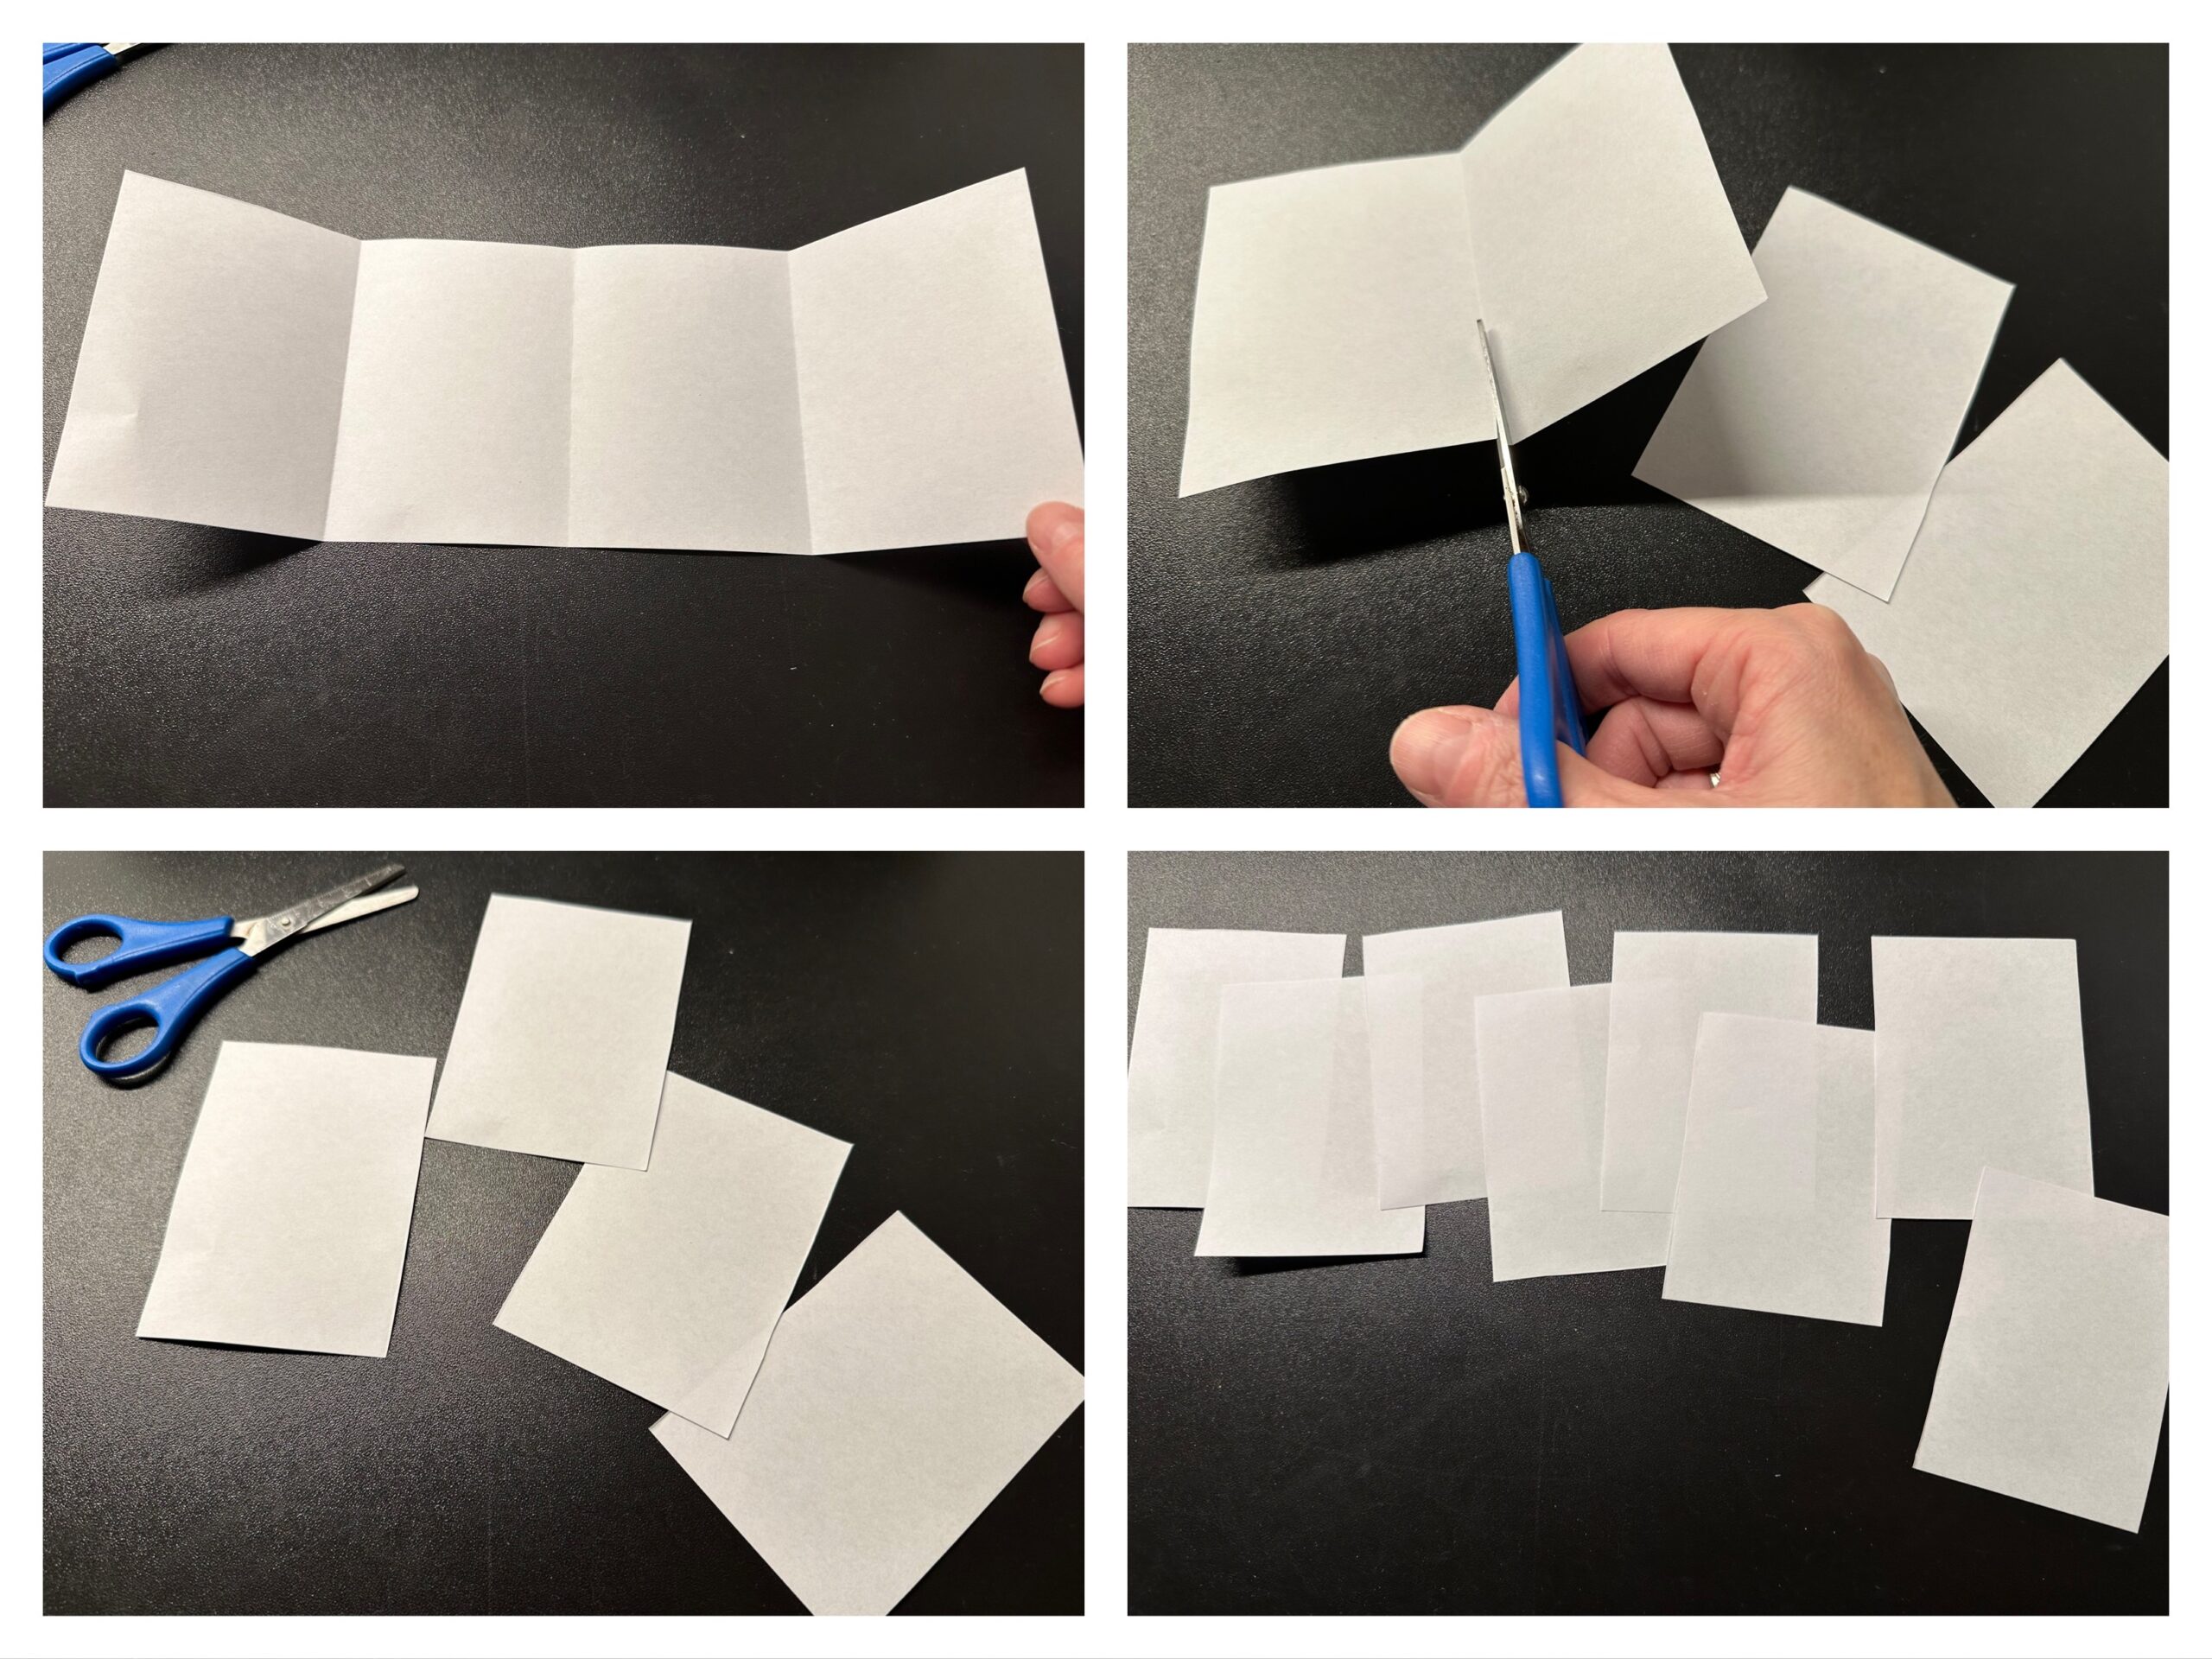
Now fold all folds apart again. Now you can cut the clearly visible fracture lines apart with the scissors.
Do the same with the second strip of paper.
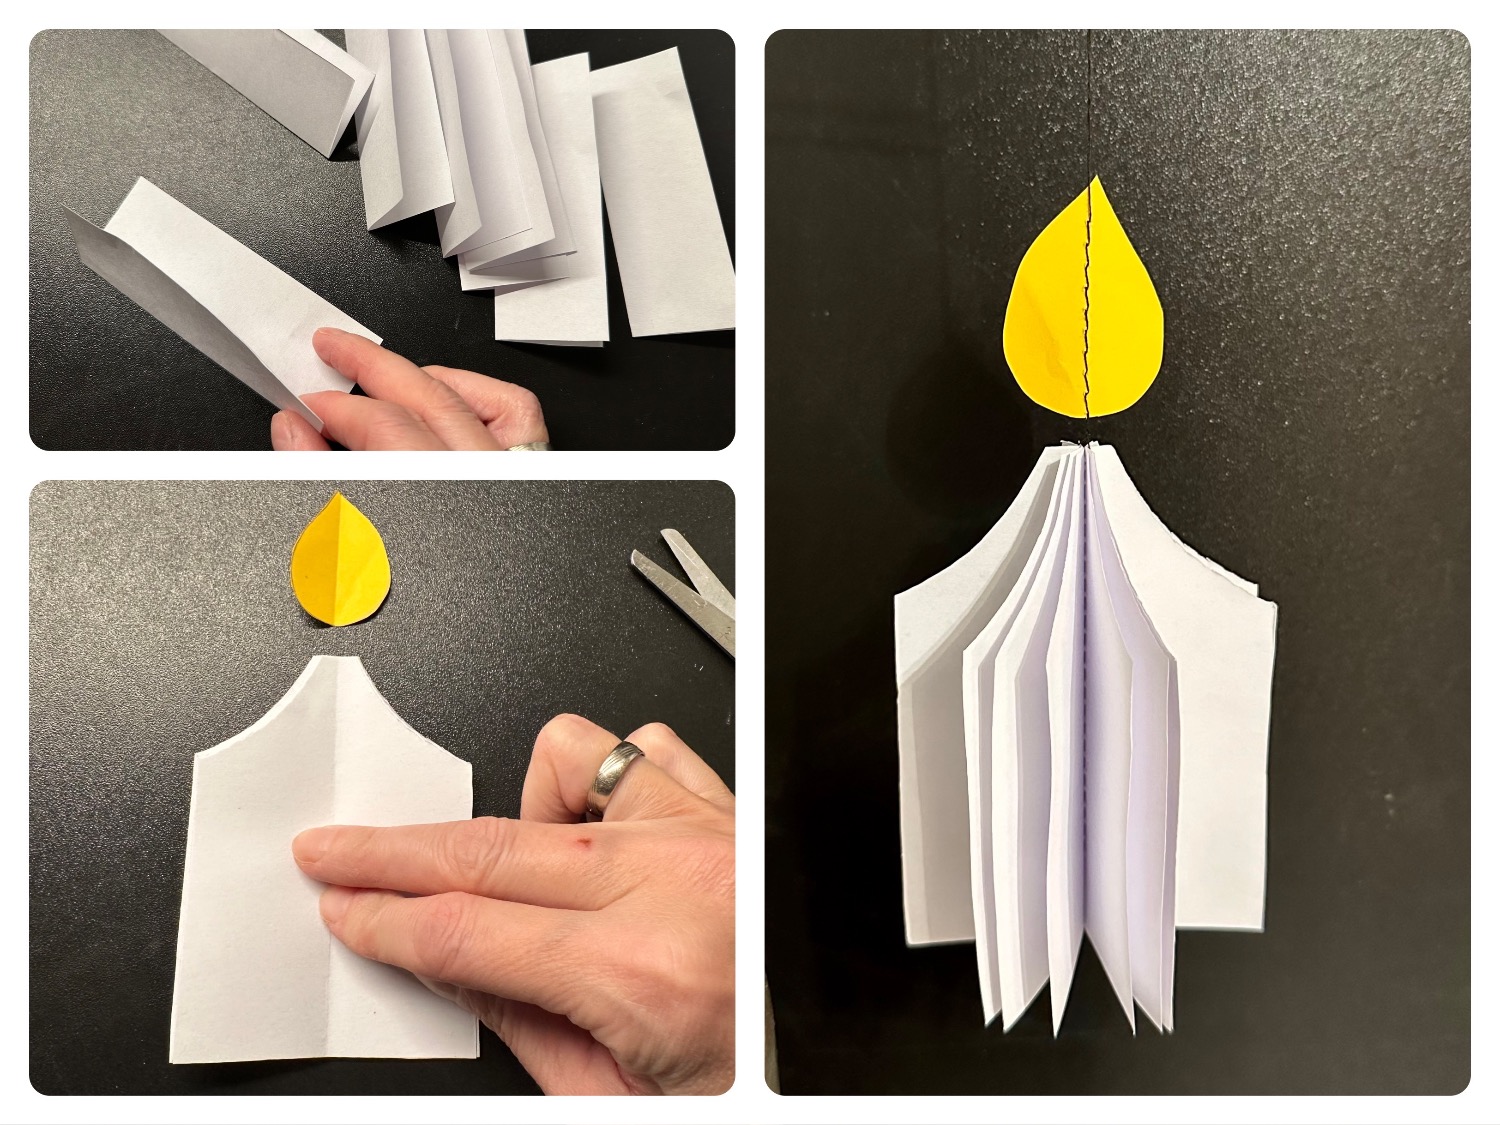
Place a small leaf in front of you and fold the lower edge onto the upper edge. Repeat with all the leaves.
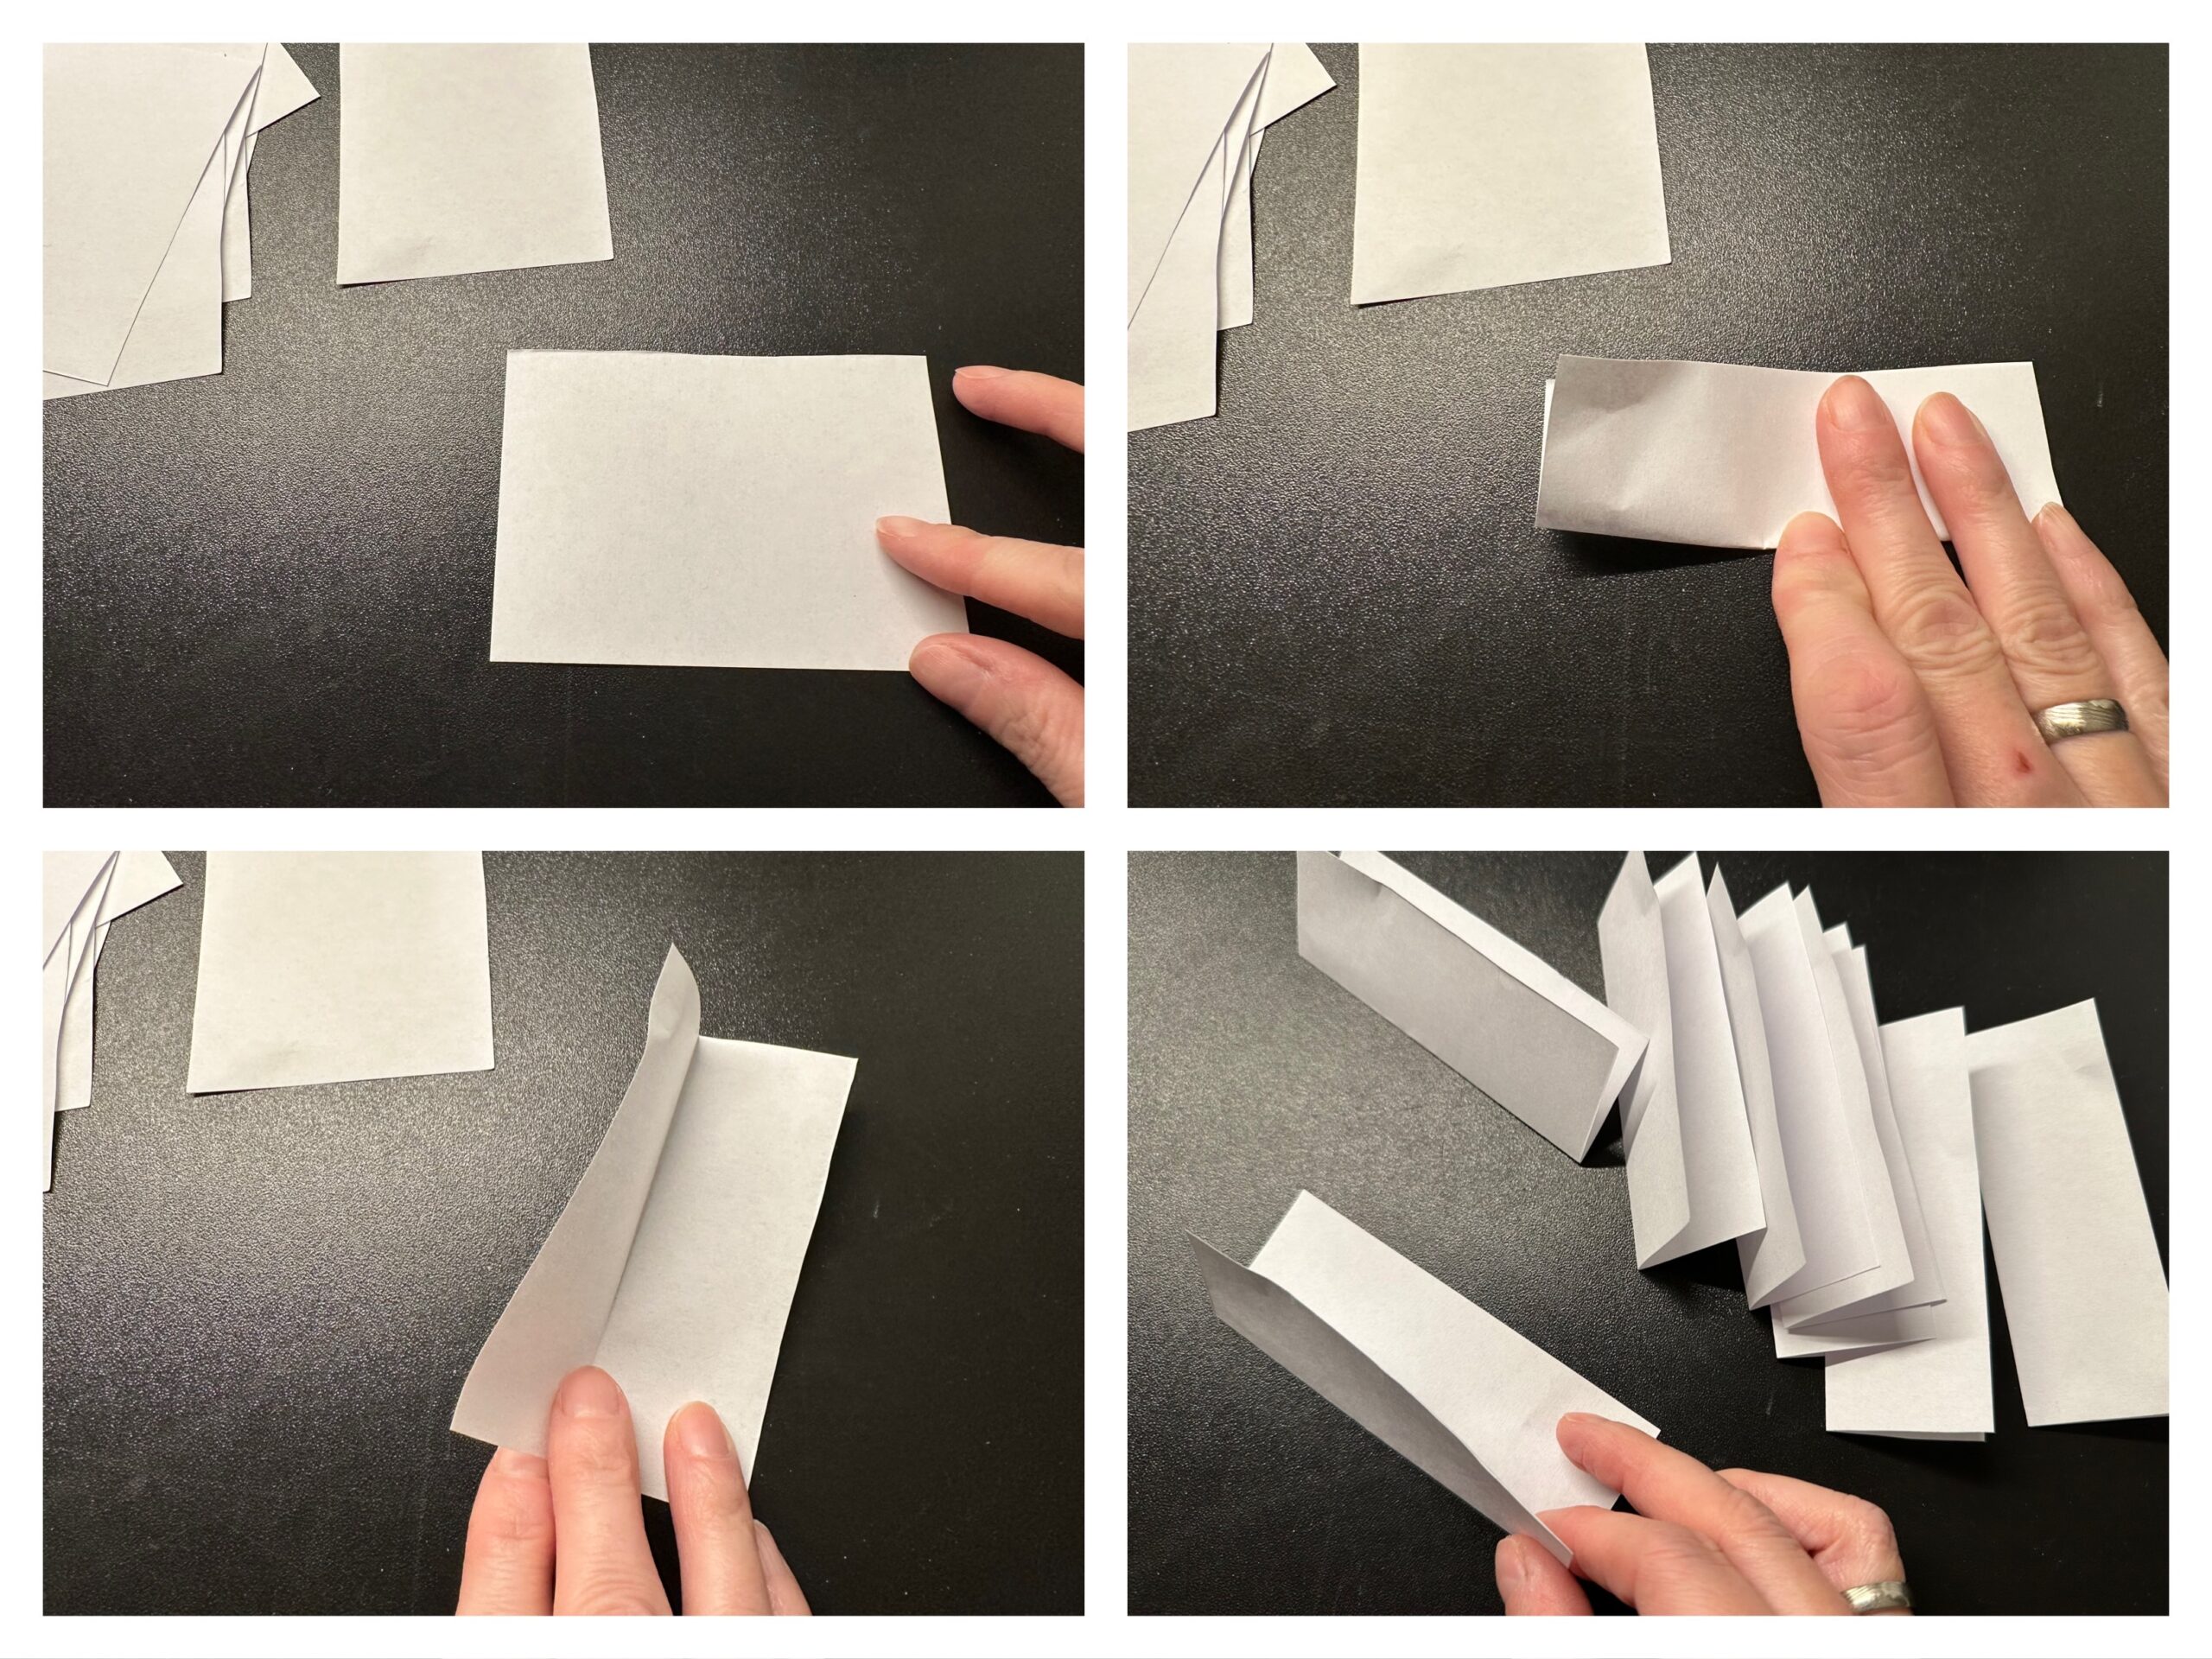
Now put the folded leaves together. Make sure that they lie exactly in each other.
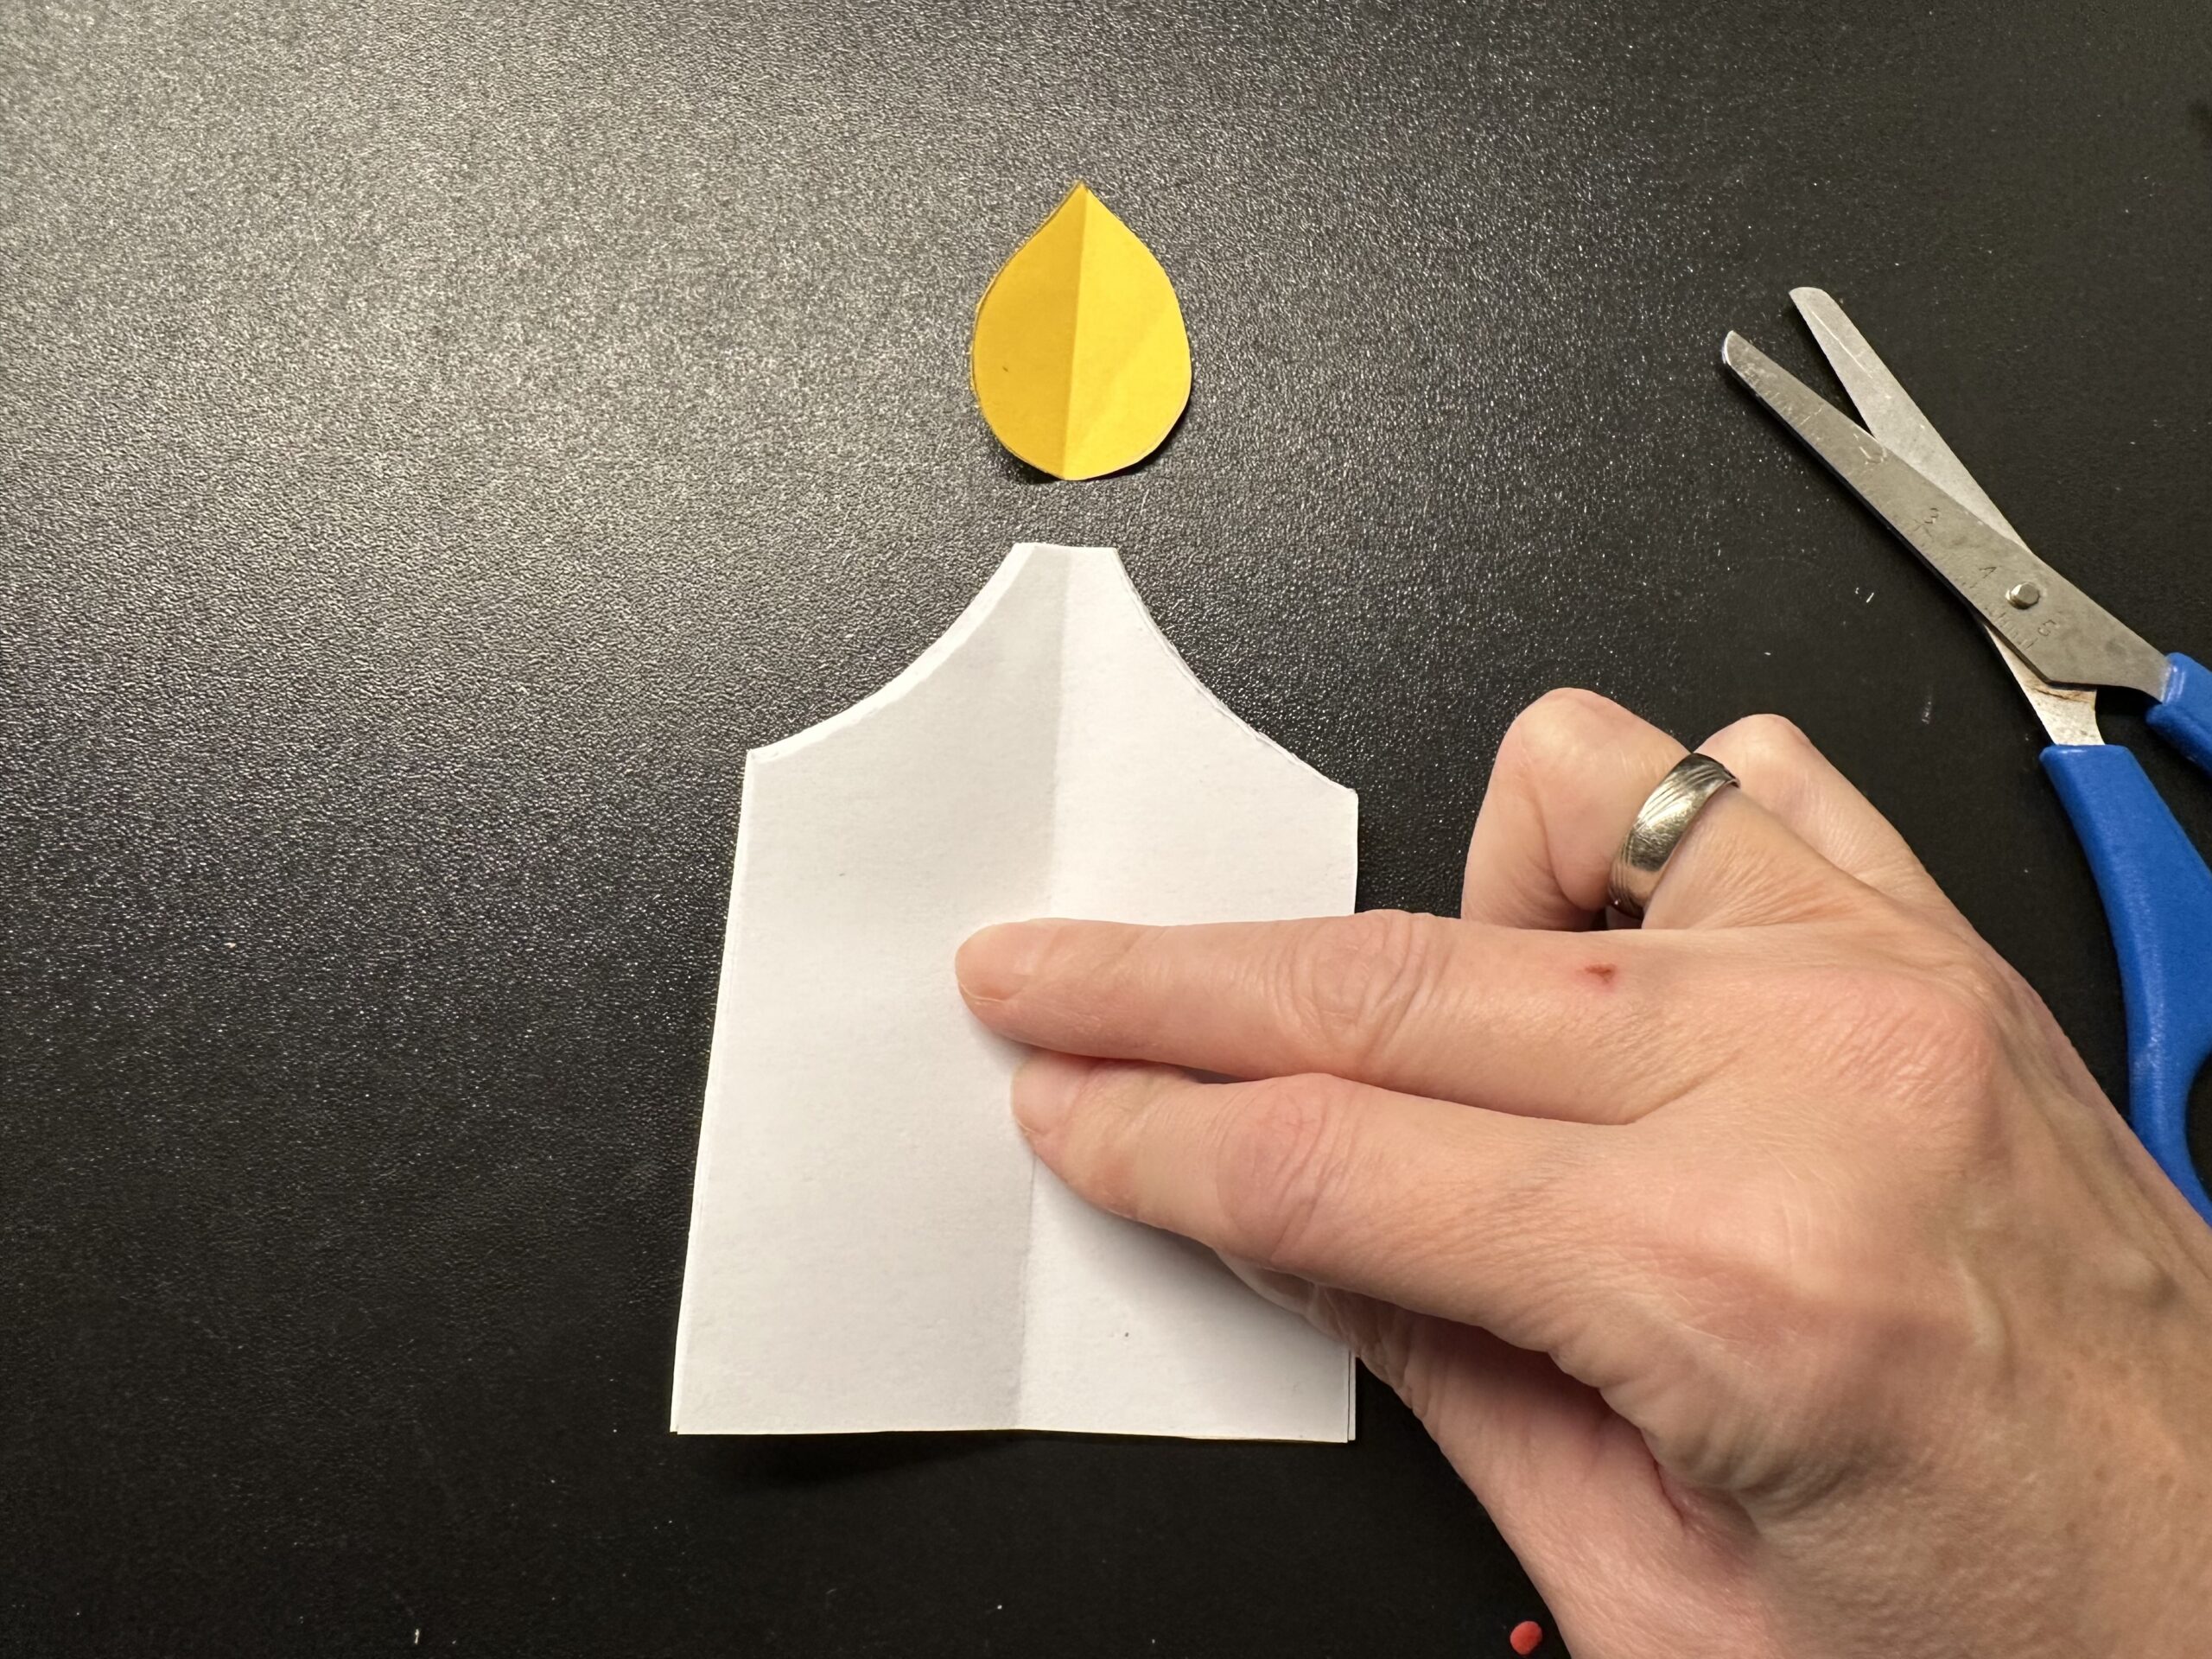
Hold on to the leaves that they do not slip. Put the leaves folded in front of you. Male with a pen a curved slant to the upper end of the "candle". The place, other is the fracture, is the highest point of the candle. Cut off the slant.

Paint a flame on yellow clay paper. It has the shape of a drop. Cut it out. Fold the flame half so that the folding break goes through the tip. Gently strike the fracture and flap the flame again.
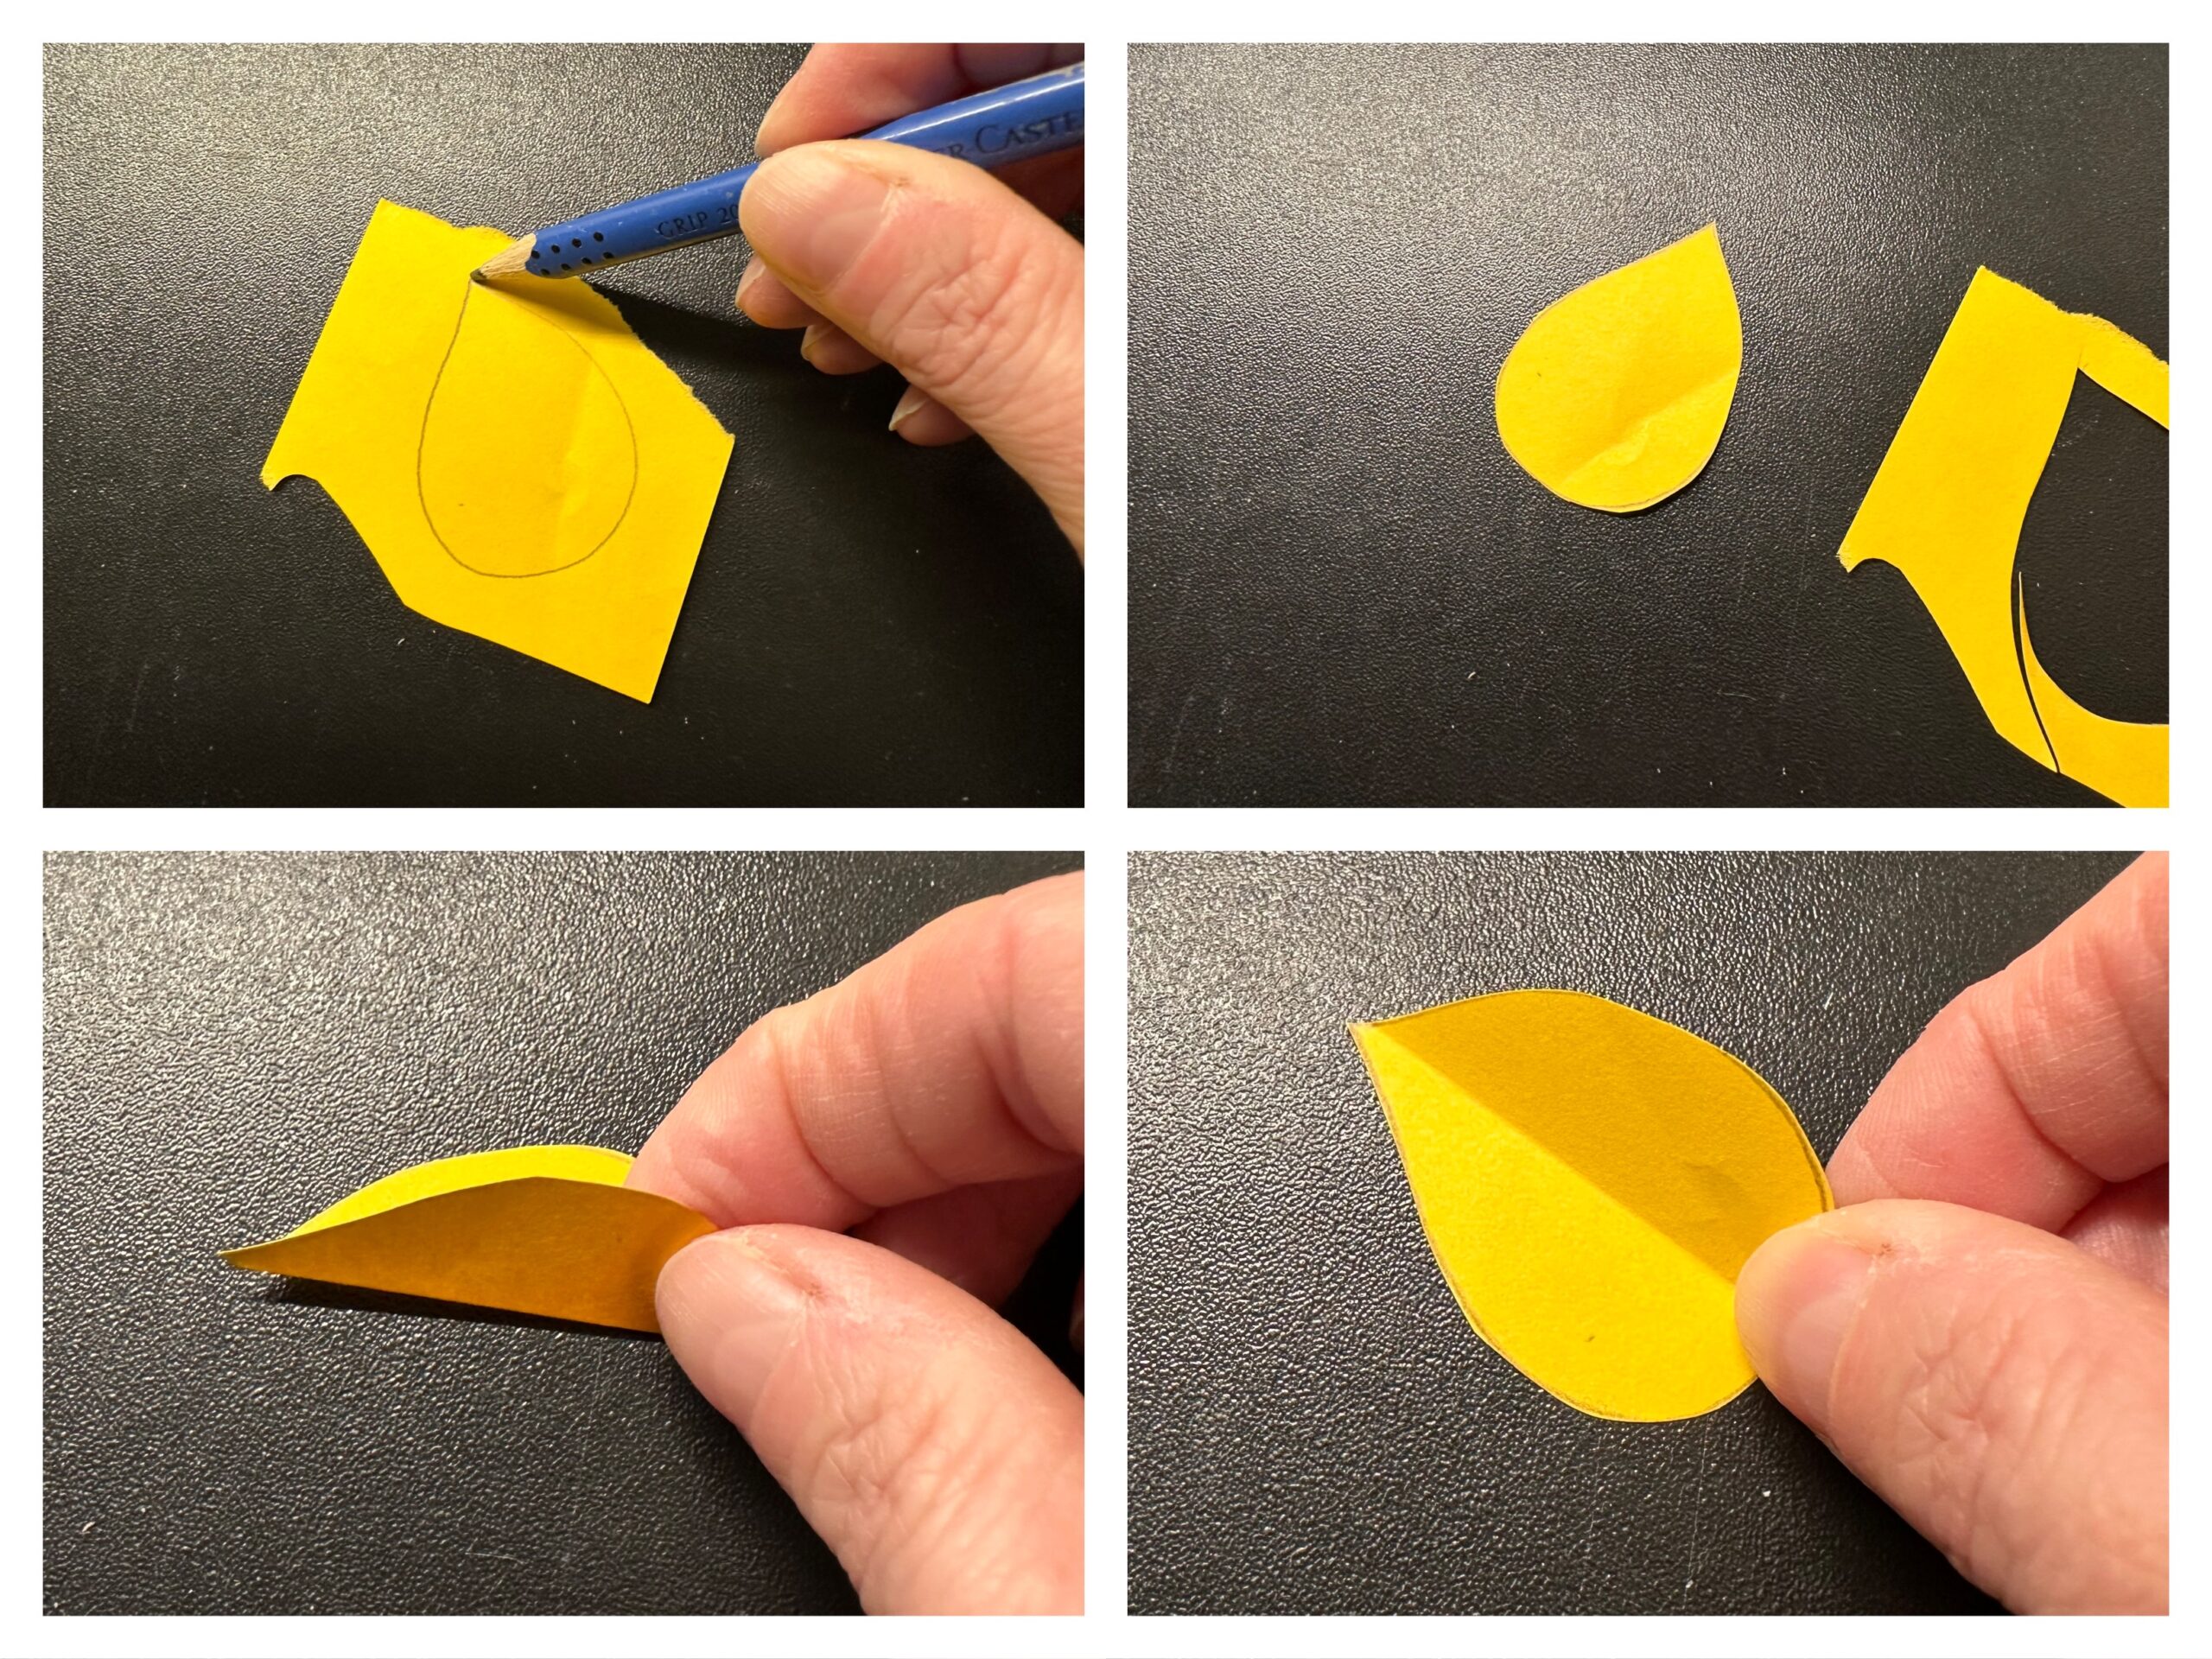
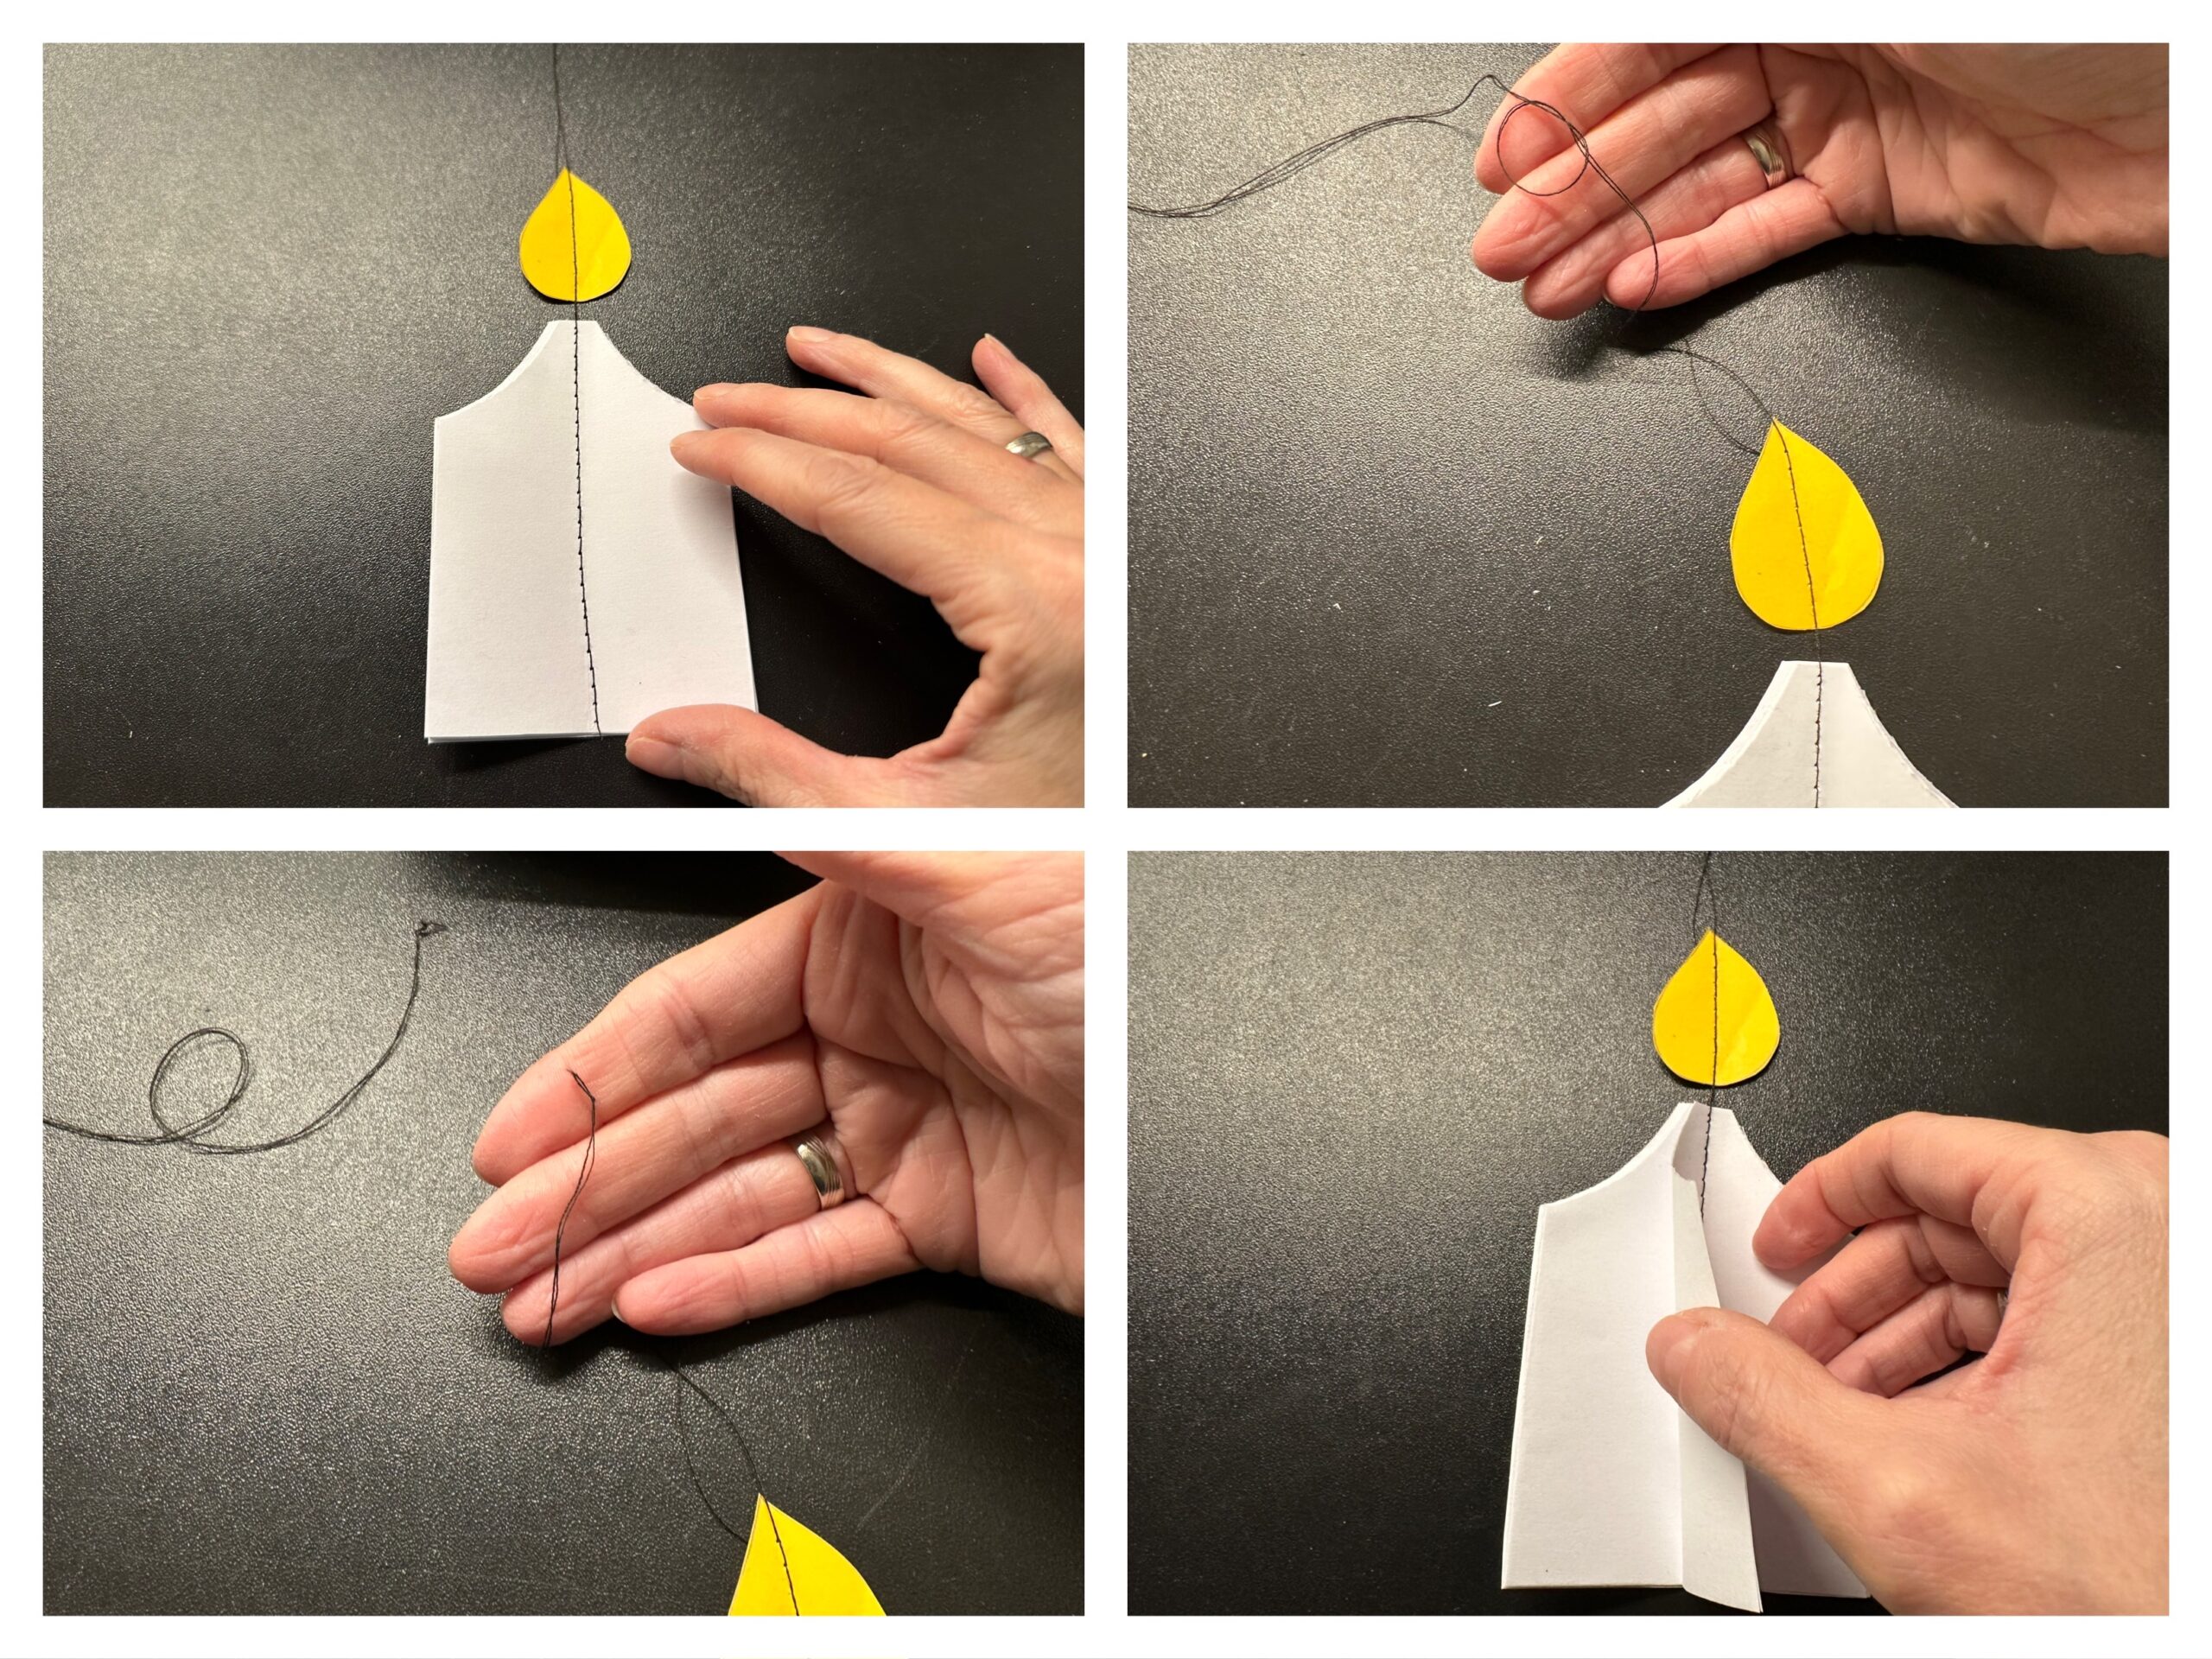
The flame sits above the candle. That's what the candle should look like later.
Place a straight stitch (stitch length: 4) and put the flame first on the sewing machine. The tip points upwards. Closeness over the flame directly on the fracture line. As soon as you have sewn over the flame, push the leaf bump of the candle under the sewing feet. Closeness immediately further over the candle and also here directly on the folding line.
At the end of the paper, you can continue sewing a few stitches before cutting off the thread.
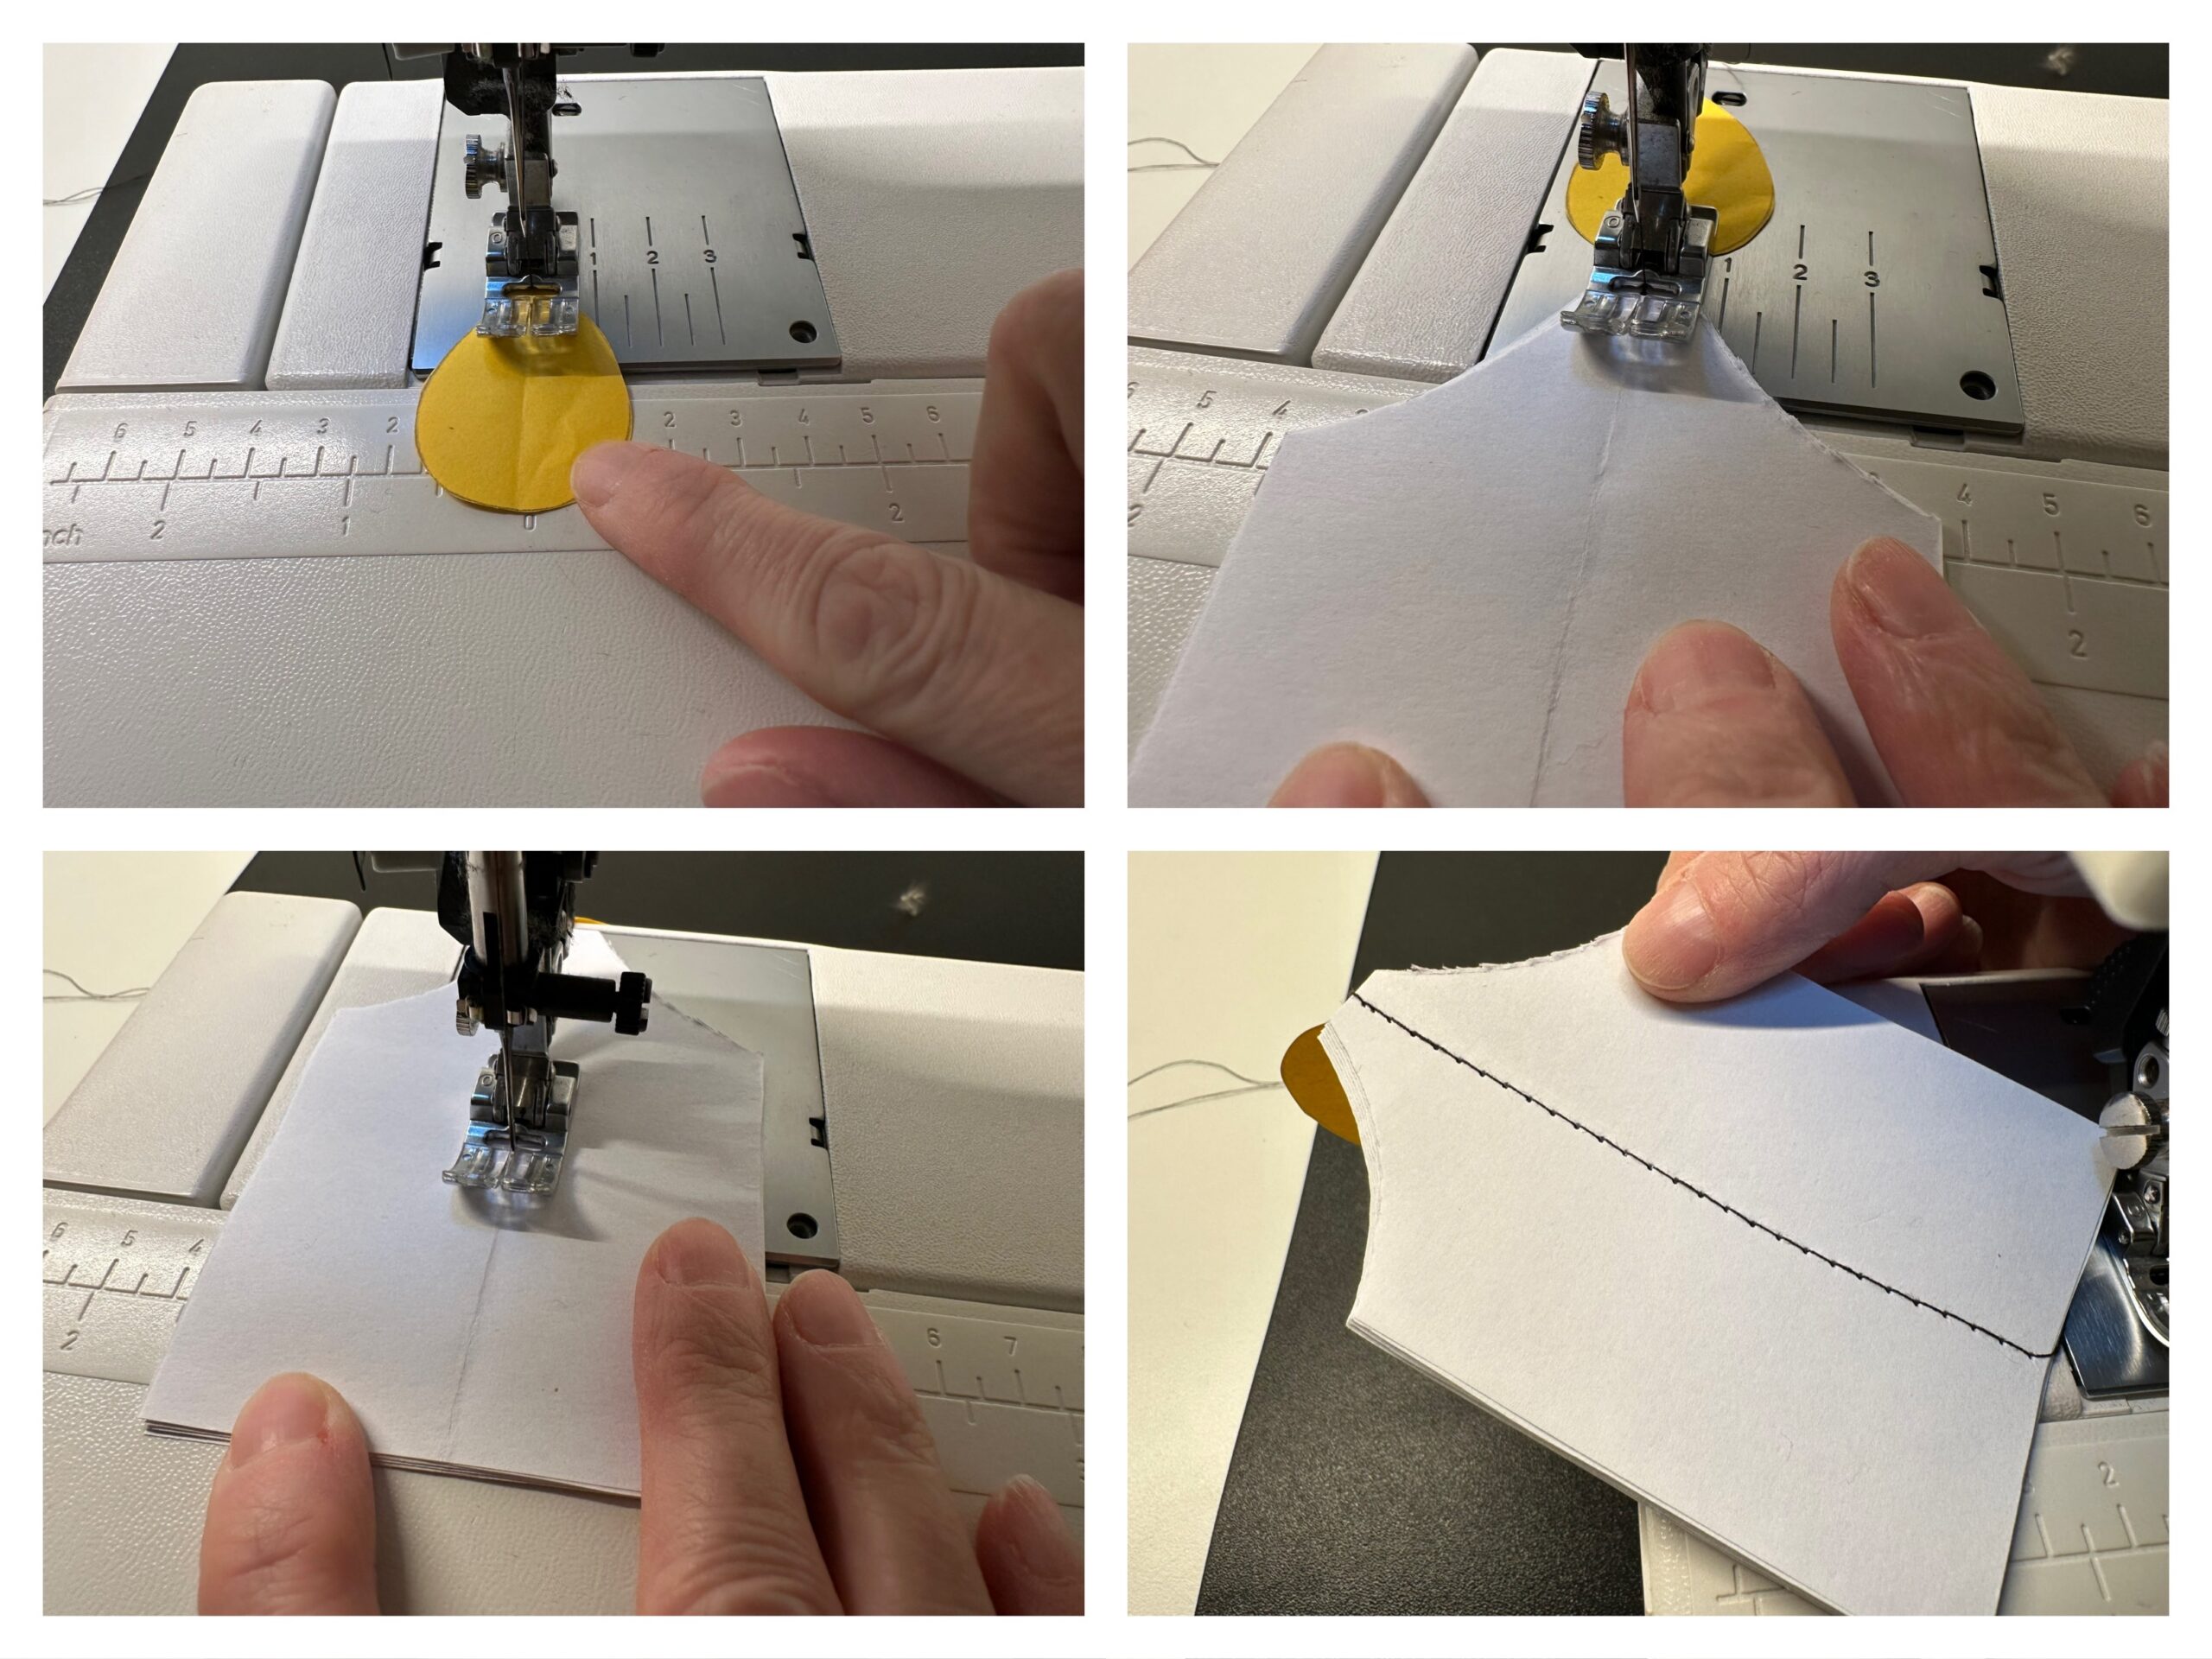
The flame now hangs with a thread connected to the candle. The long thread above can be used as a suspension. Make a knot with the two threads, then you get a loop to hang up.
Fold the leaves of the candle apart and bend them so that they stand fan-shaped.
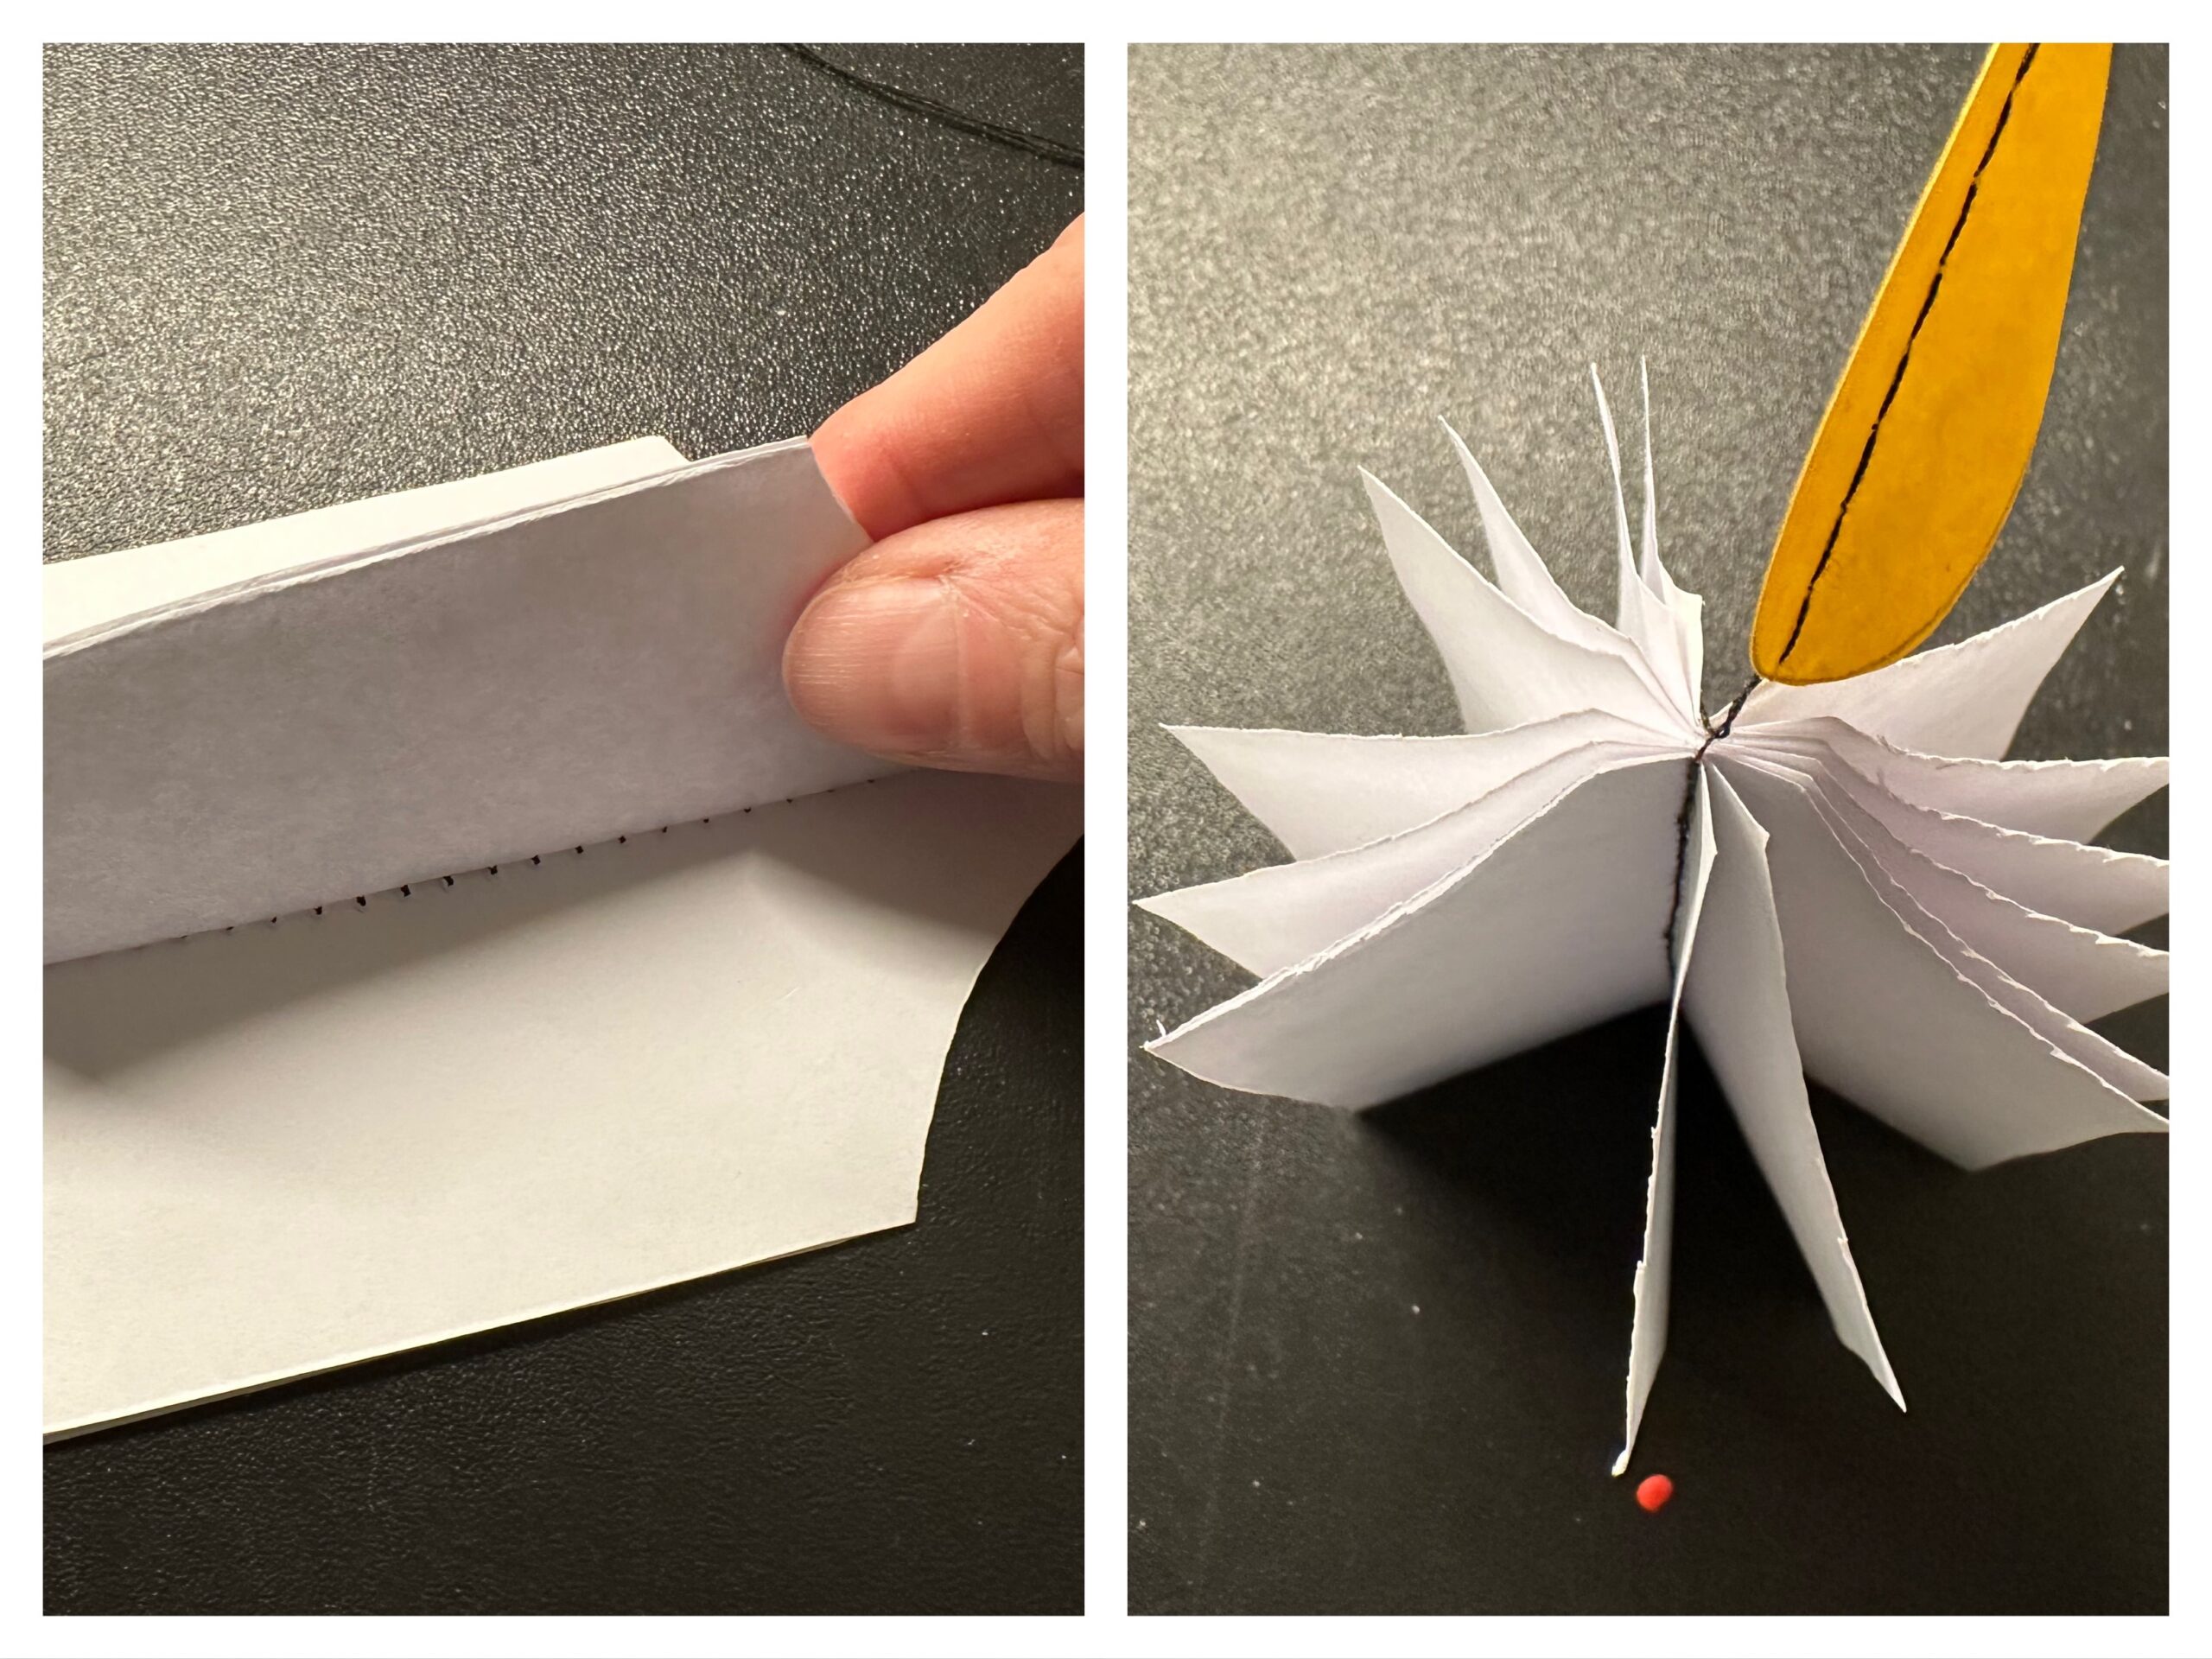
Hang the candle on a branch. In the wind, it can turn.

Have fun doing crafts.
Materials
Directions
You don't need the sewing machine at the beginning.
Start with the DIN A4 sheet.
Put the sheet across in front of you. Fold the bottom long edge upwards onto the opposite side. Gently strike the break. Then close the paper again. Cut the paper along the break.
Put a strip of paper up in front of you. Fold the lower edge of the paper upwards. Gently strike the break. Fold the sheet apart again. The break now shows you the middle. Fold the short sides from both sides to the middle line and stroke the breaks smoothly.
Now fold all folds apart again. Now you can cut the clearly visible fracture lines apart with the scissors.
Do the same with the second strip of paper.
Place a small leaf in front of you and fold the lower edge onto the upper edge. Repeat with all the leaves.
Now put the folded leaves together. Make sure that they lie exactly in each other.
Hold on to the leaves that they do not slip. Put the leaves folded in front of you. Male with a pen a curved slant to the upper end of the "candle". The place, other is the fracture, is the highest point of the candle. Cut off the slant.
Paint a flame on yellow clay paper. It has the shape of a drop. Cut it out. Fold the flame half so that the folding break goes through the tip. Gently strike the fracture and flap the flame again.
The flame sits above the candle. That's what the candle should look like later.
Place a straight stitch (stitch length: 4) and put the flame first on the sewing machine. The tip points upwards. Closeness over the flame directly on the fracture line. As soon as you have sewn over the flame, push the leaf bump of the candle under the sewing feet. Closeness immediately further over the candle and also here directly on the folding line.
At the end of the paper, you can continue sewing a few stitches before cutting off the thread.
The flame now hangs with a thread connected to the candle. The long thread above can be used as a suspension. Make a knot with the two threads, then you get a loop to hang up.
Fold the leaves of the candle apart and bend them so that they stand fan-shaped.
Hang the candle on a branch. In the wind, it can turn.
Have fun doing crafts.
Follow us on Facebook , Instagram and Pinterest
Don't miss any more adventures: Our bottle mail