Star with wool

AdventurerKatzi
Rating0.02.3 thousand times & (0) DifficultyAdvanced

This star is cut out of a thin cardboard box and wrapped in yellow wool. Even small children can help with this work, here only the star has to be kept supportive.
You can see how simple this crafting is, explained step by step here.
School children can also record their individual star freely and thus receive unique items. Wrapped with white wool, the star also looks very noble. Try it out.

Media Education for Kindergarten and Hort

Kind bastelt eine Rassel mit dem Navi
The Adventure Navi, the app for DIY projects, enables media education for the youngest.

Relief in everyday life, targeted promotion of individual children, independent learning and - without any pre-knowledge already usable by the youngest!
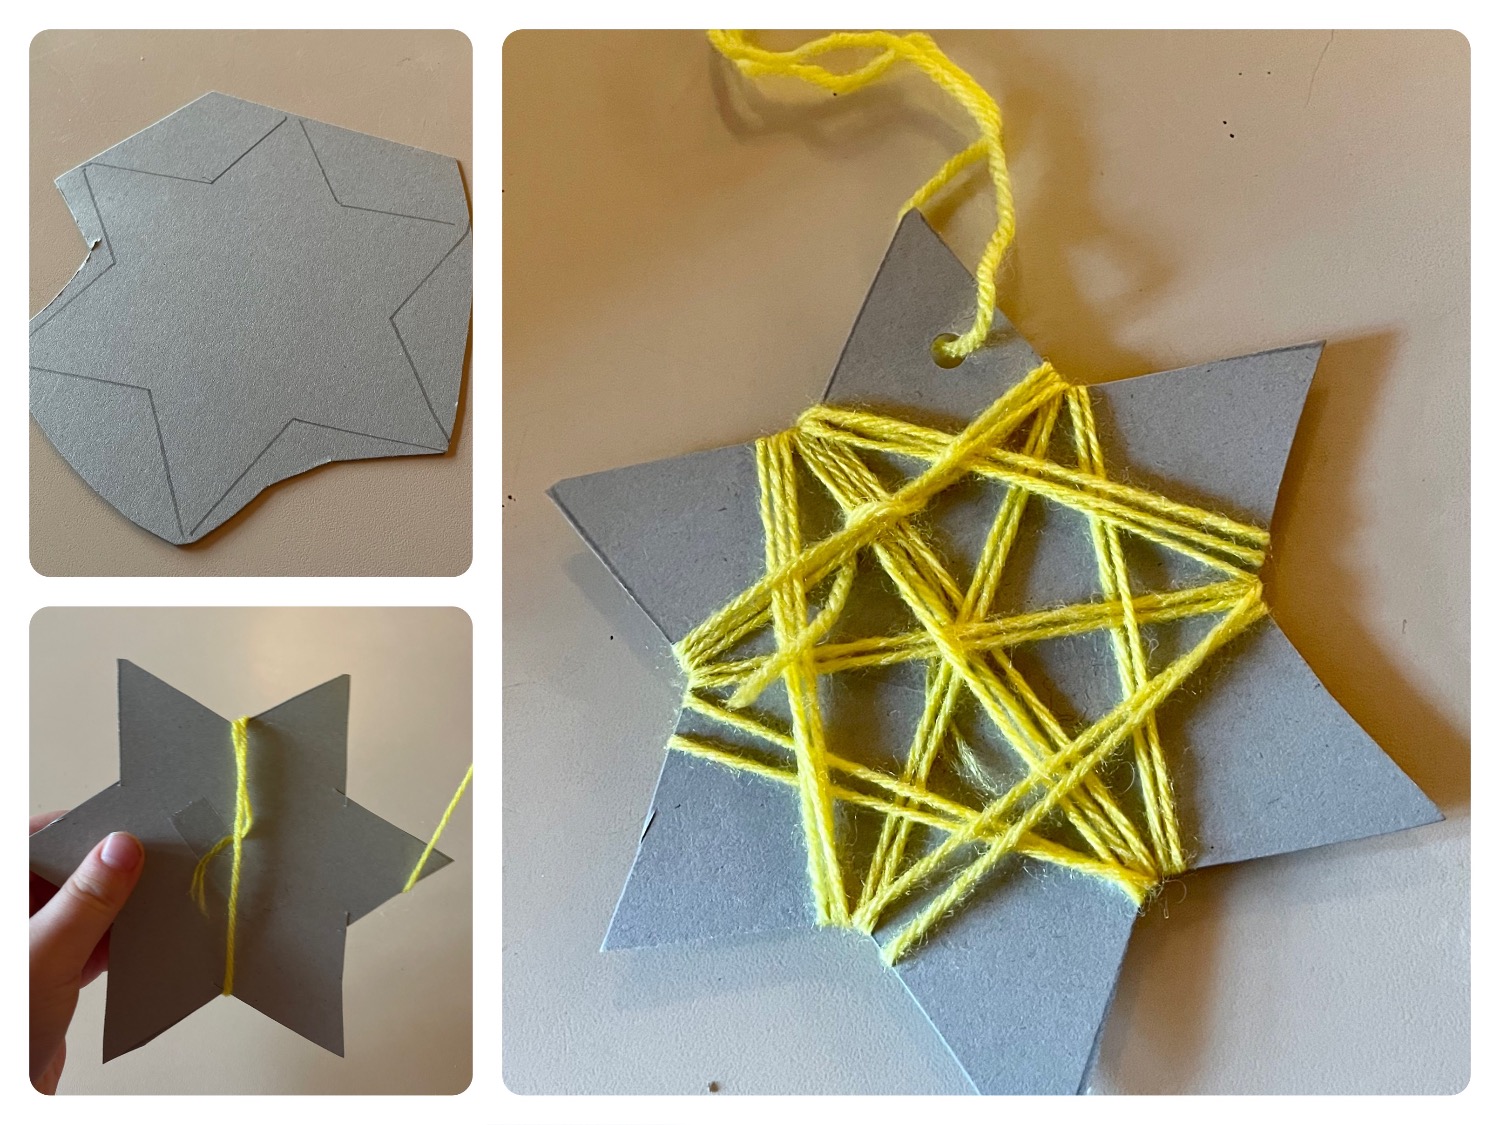


Titelbild zur Bastel- und DIY-Idee für Kinder '(912) Stern mit Wolle'
Material for1 Child
Prep Time5 min.Adv. Time20 min.Total Time25 min.
 1 Cardboard
 1 Wool yellow
 1 Pen
 1 Perforator
 1 Adhesive strips Or glue pen
 1 Builder's pad
All links marked with a shopping cart lead to Amazon - here we have selected products that we would order ourselves and in part also ordered. In a qualified purchase via the advertising link, we as Amazon partner receive a commission, for you there are no costs. You thus support our cost- and advertising banner-free, educational offer.
1

Get all the materials and put a craft pad on the table.
Use a cardboard box for the star, which you can also cut (alternatively: photo box).

2

Paint up a star. Here it doesn't matter if the star has 5 or 6 points. You can also use a star as a template and repaint it.
Cuts out the star roughly with the scissors. Then always cut out each jig individually from the outside to the inside.
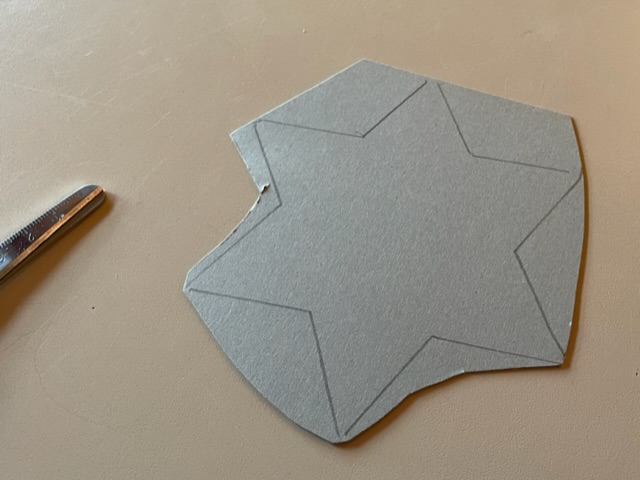
Bild zum Schritt 2 für das Bastel- und DIY-Abenteuer für Kinder: 'Malt einen Stern auf. Hier ist es egal ob der...'

3

Take yellow wool and glue the beginning of the thread with an adhesive strip on the star. There is no front and back here, because each side looks pretty by wrapping with wool.
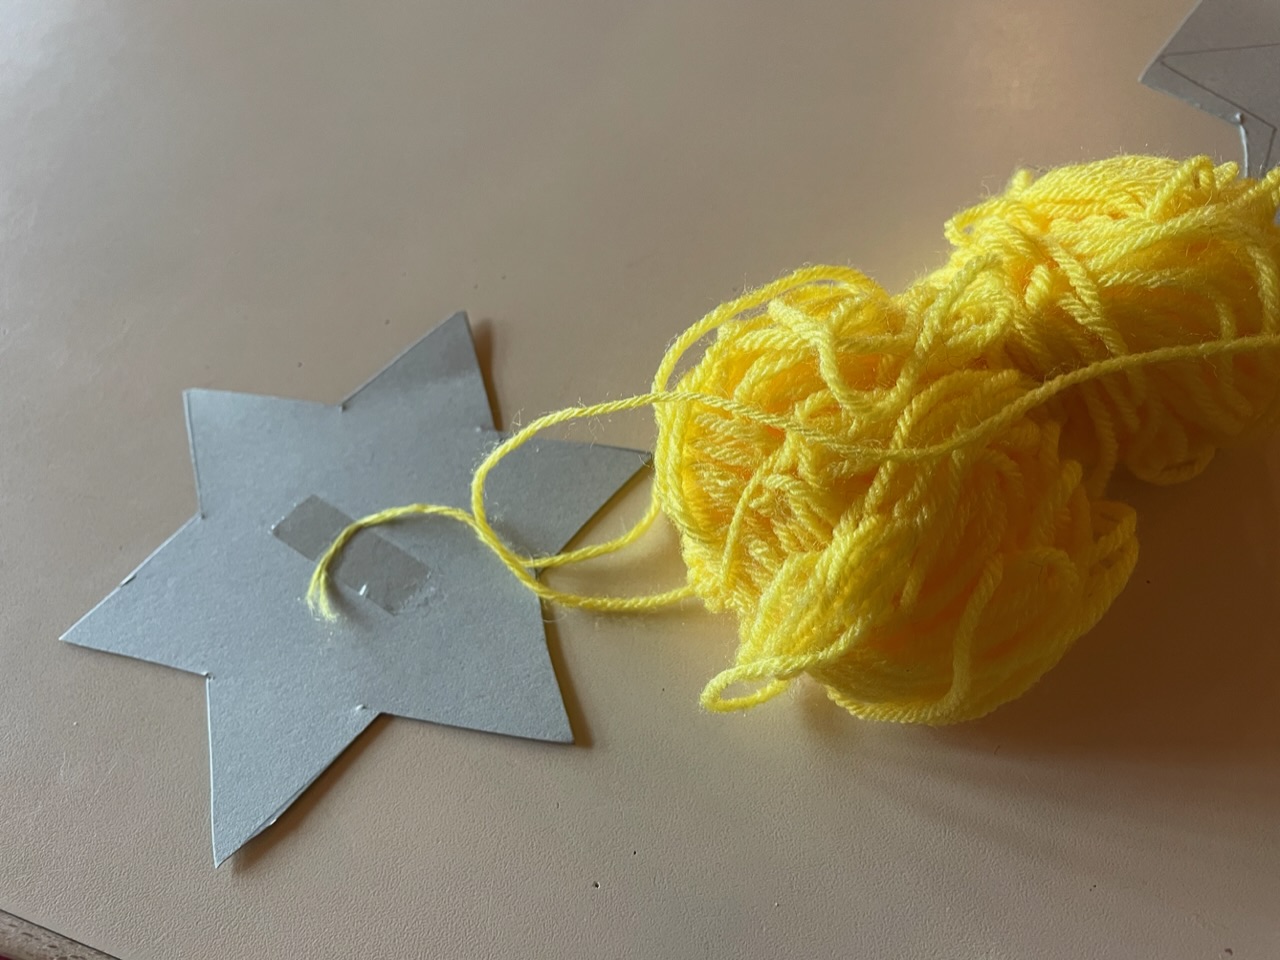
Bild zum Schritt 3 für das Bastel- und DIY-Abenteuer für Kinder: 'Nehmt gelbe Wolle und klebt den Fadenanfang mit einem Klebestreifen...'

4

If the wool ball is held loosely in the hand, the thread can always be drawn well.

Bild zum Schritt 4 für das Bastel- und DIY-Abenteuer für Kinder: 'Haltet den Wollknäuel locker in der Hand so lässt sich...'

5

Between the points the threads will lie and always be wrapped opposite.

Bild zum Schritt 5 für das Bastel- und DIY-Abenteuer für Kinder: 'Zwischen den Zacken werden die Fäden liegen und immer nach...'

6

There is no wrap guide here. Wrap crisscross until you like the result. Cut off the thread and place the end under another thread.

Bild zum Schritt 6 für das Bastel- und DIY-Abenteuer für Kinder: 'Hier gibt es keine Wickelanleitung. Wickelt kreuz und quer, bis...'

7

Take a puncher and put a hole in the middle of a jig.

Bild zum Schritt 7 für das Bastel- und DIY-Abenteuer für Kinder: 'Nehmt einen Locher und macht in  eine Zacke mittig...'

8

In the hole a thread is threaded to hang.

Bild zum Schritt 8 für das Bastel- und DIY-Abenteuer für Kinder: 'In das Loch wird ein Faden zum Aufhängen durchgefädelt.'

9

Cuts a piece of thread about 30cm long. (As a measure you can also measure the length from your elbow to the fingertips or with a ruler). The thread is inserted through the hole and pulled through to half.

Bild zum Schritt 9 für das Bastel- und DIY-Abenteuer für Kinder: 'Schneidet ein Stück Faden ca. 30cm lang ab. (Als Maß...'

10

Knot the ends of the thread together.

Bild zum Schritt 10 für das Bastel- und DIY-Abenteuer für Kinder: 'Verknotet  die Fadenenden miteinander.'

11

The star is ready.
You can hang him on a branch or a tree.

Bild zum Schritt 11 für das Bastel- und DIY-Abenteuer für Kinder: 'Fertig ist der Stern.   Ihr könnt ihn an...'

12

Have fun.

Materials

 1 Cardboard
 1 Wool yellow
 1 Pen
 1 Perforator
 1 Adhesive strips Or glue pen
 1 Builder's pad
All links marked with a shopping cart lead to Amazon - here we have selected products that we would order ourselves and in part also ordered. In a qualified purchase via the advertising link, we as Amazon partner receive a commission, for you there are no costs. You thus support our cost- and advertising banner-free, educational offer.

Directions

1

Get all the materials and put a craft pad on the table.
Use a cardboard box for the star, which you can also cut (alternatively: photo box).

2

Paint up a star. Here it doesn't matter if the star has 5 or 6 points. You can also use a star as a template and repaint it.
Cuts out the star roughly with the scissors. Then always cut out each jig individually from the outside to the inside.

Bild zum Schritt 2 für das Bastel- und DIY-Abenteuer für Kinder: 'Malt einen Stern auf. Hier ist es egal ob der...'

3

Take yellow wool and glue the beginning of the thread with an adhesive strip on the star. There is no front and back here, because each side looks pretty by wrapping with wool.

Bild zum Schritt 3 für das Bastel- und DIY-Abenteuer für Kinder: 'Nehmt gelbe Wolle und klebt den Fadenanfang mit einem Klebestreifen...'

4

If the wool ball is held loosely in the hand, the thread can always be drawn well.
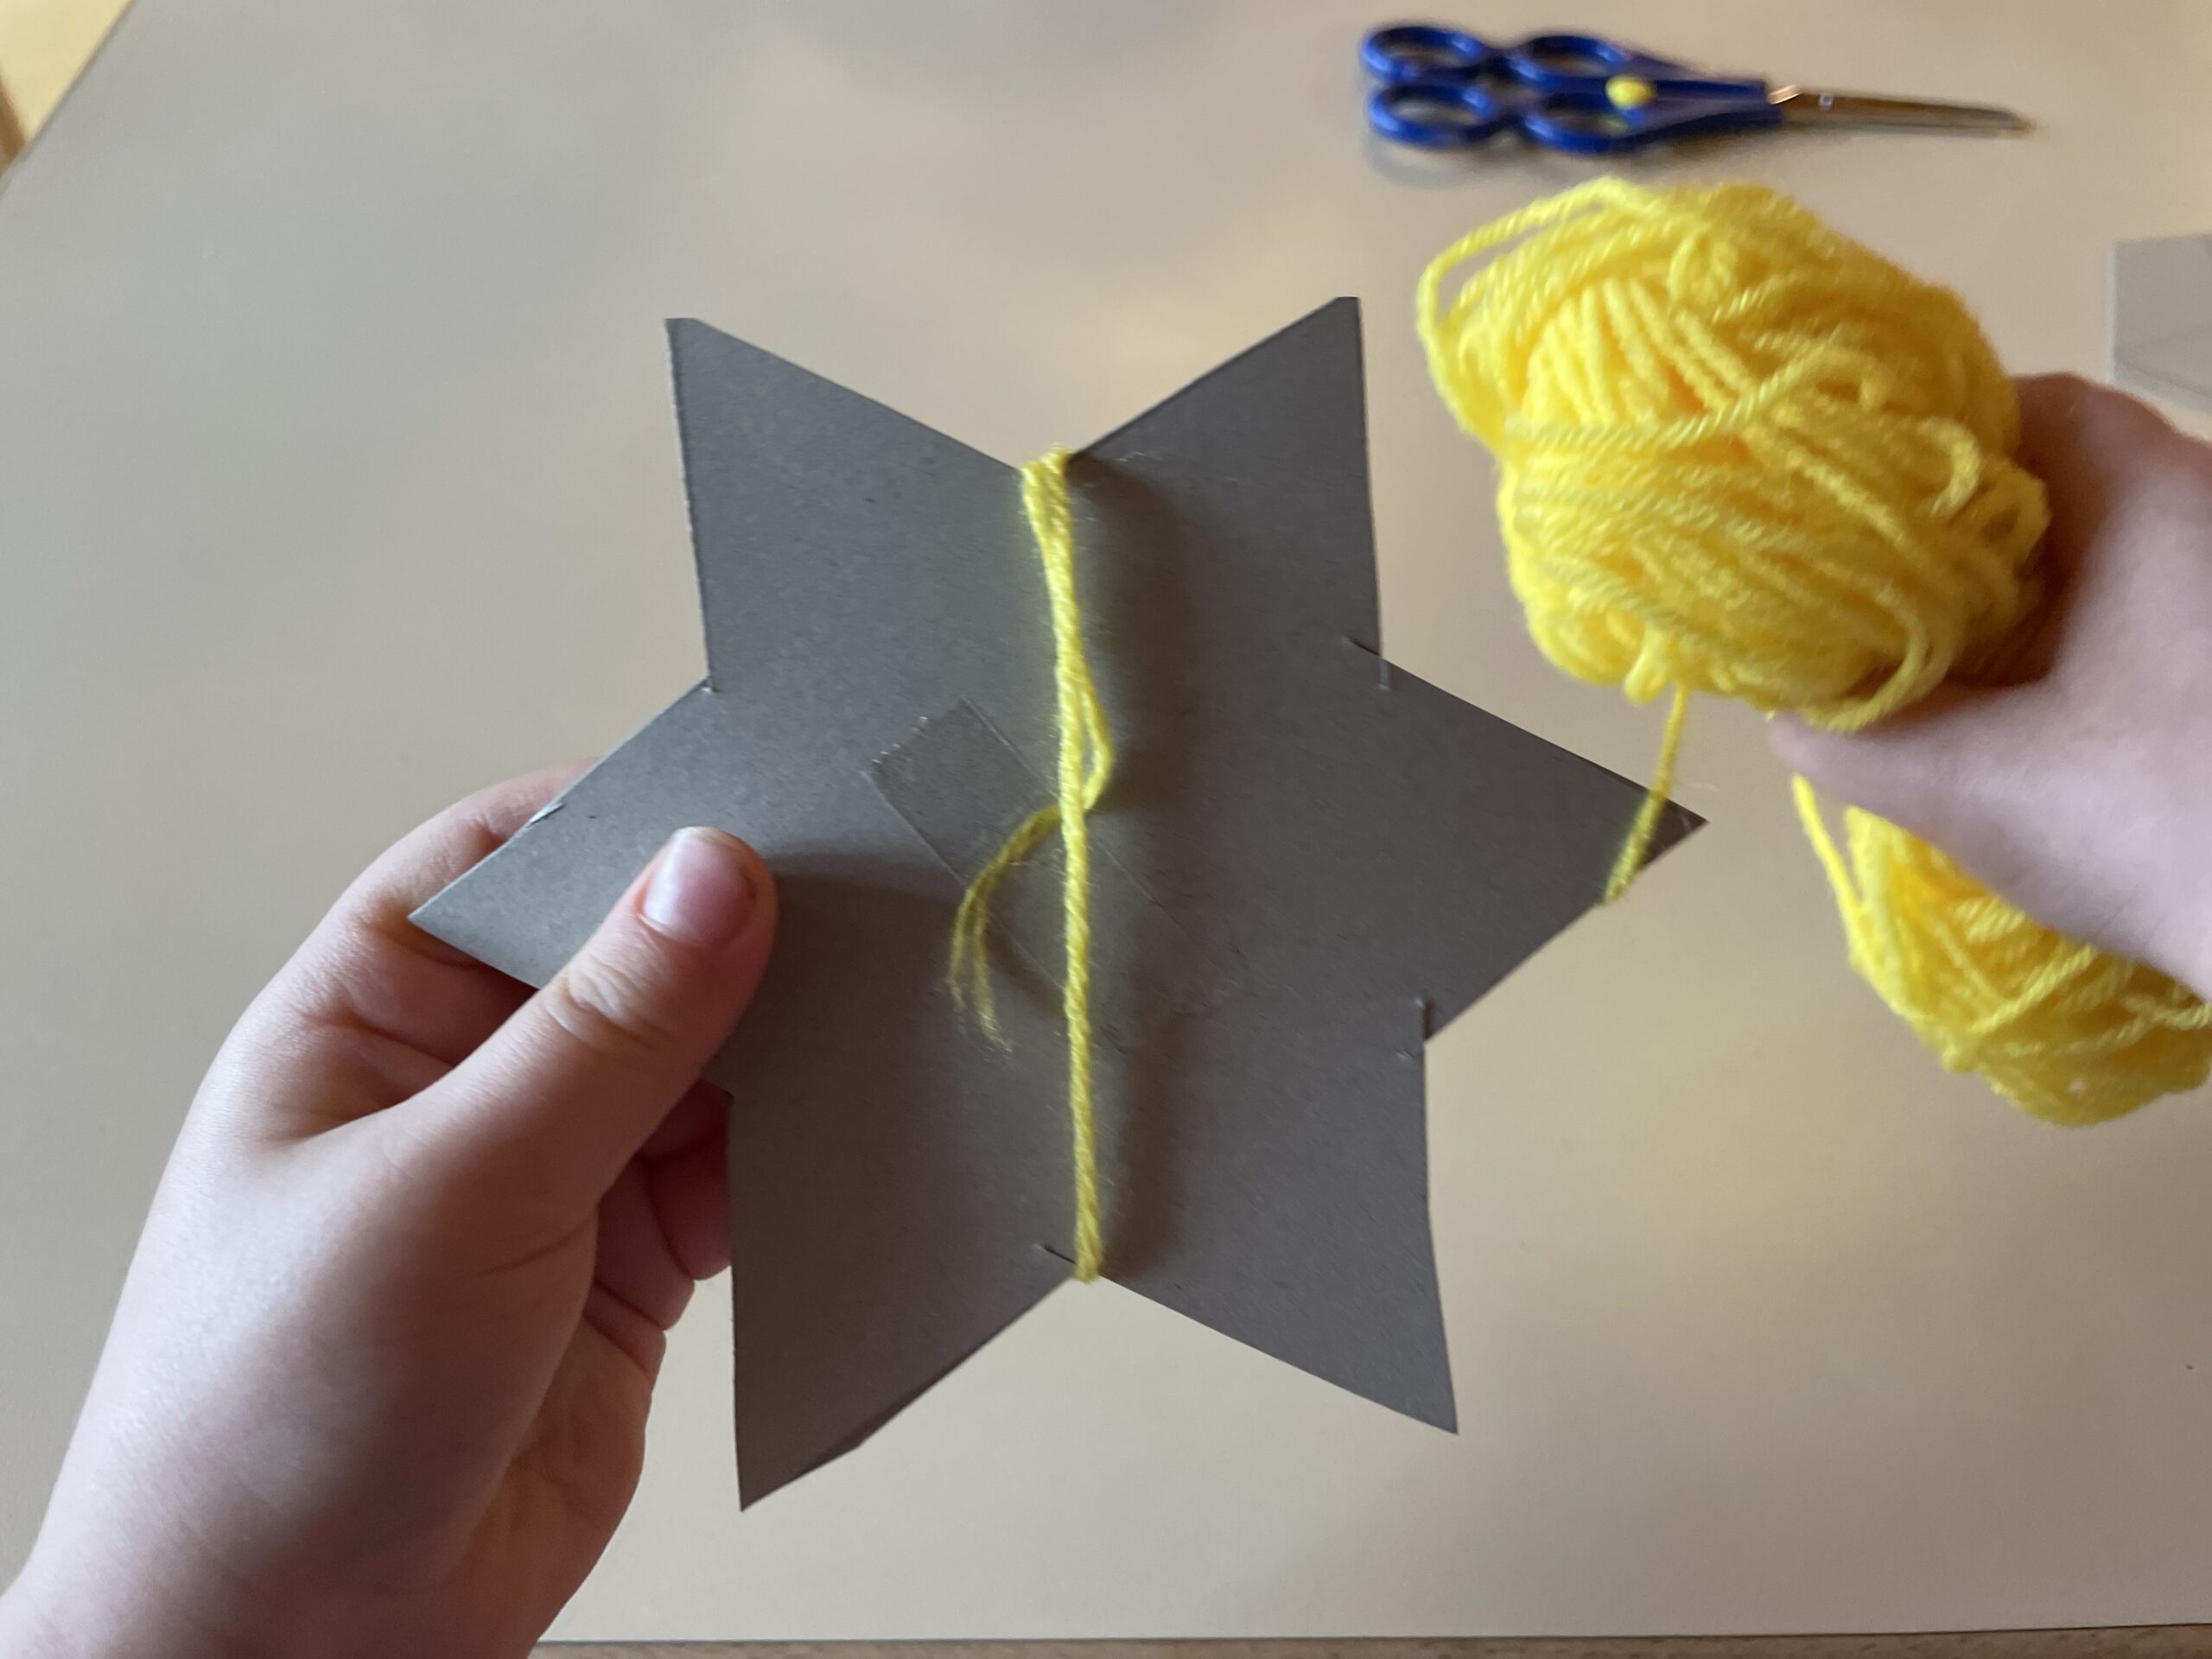
Bild zum Schritt 4 für das Bastel- und DIY-Abenteuer für Kinder: 'Haltet den Wollknäuel locker in der Hand so lässt sich...'

5

Between the points the threads will lie and always be wrapped opposite.
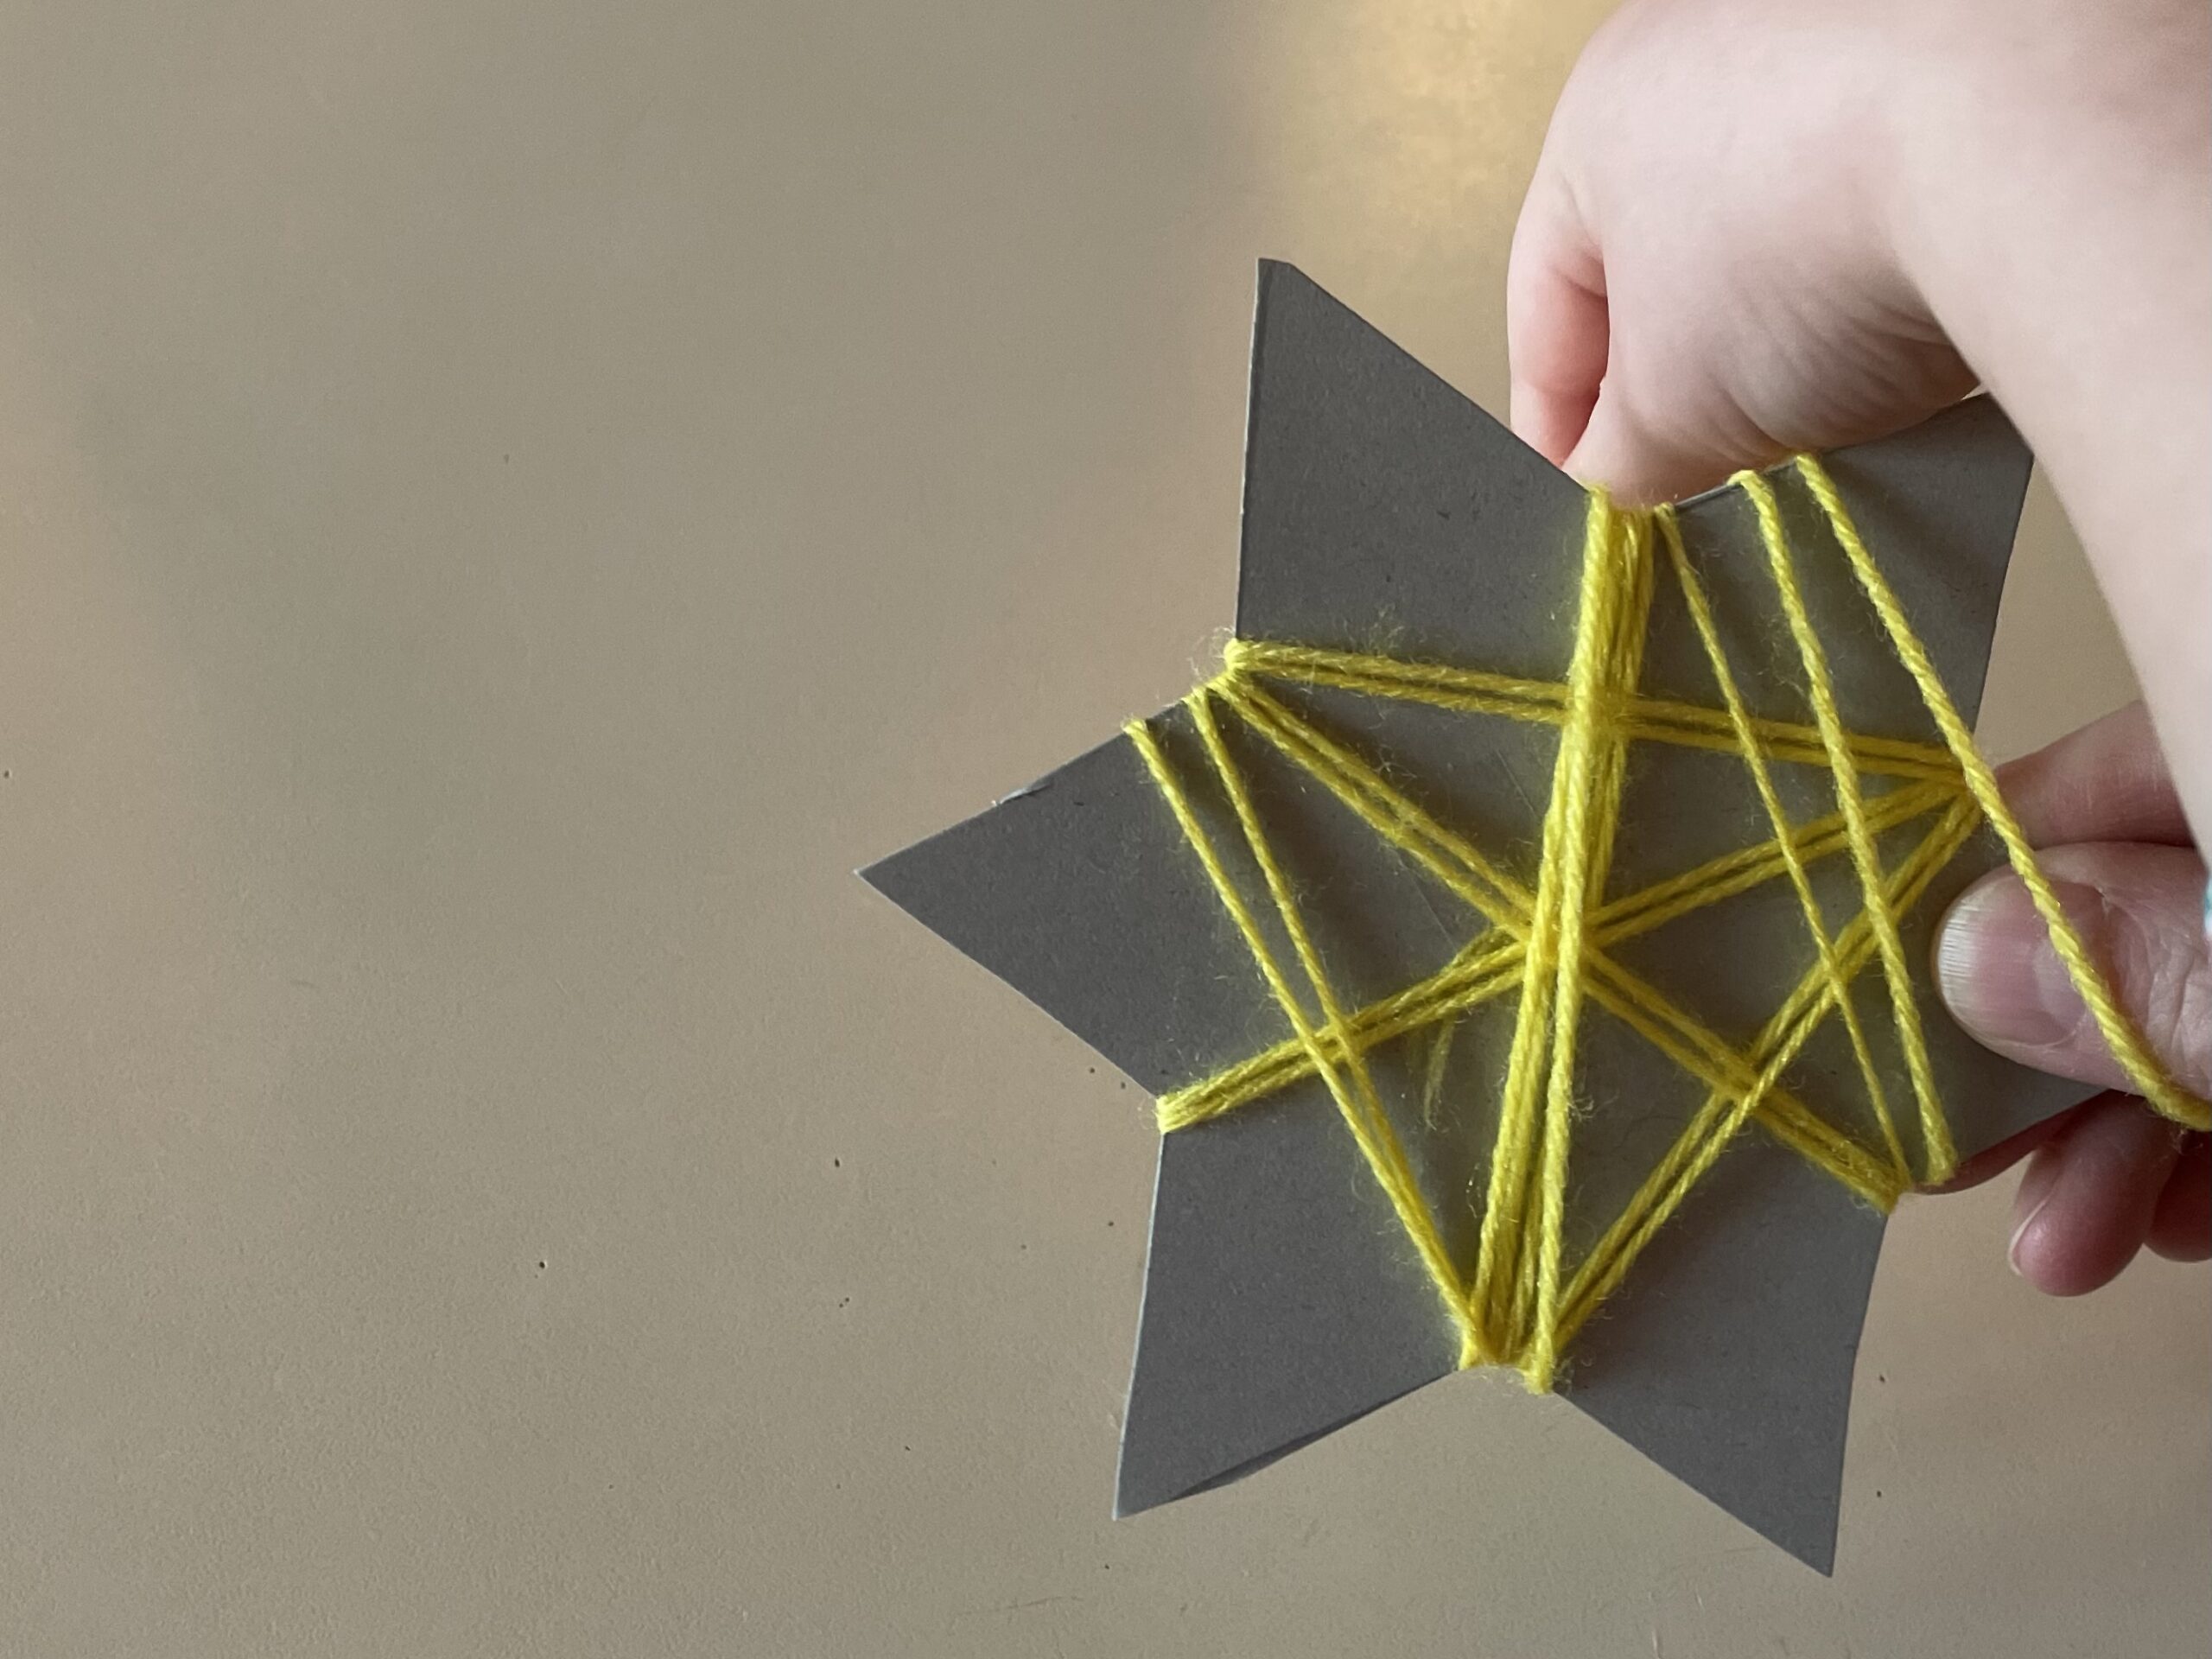
Bild zum Schritt 5 für das Bastel- und DIY-Abenteuer für Kinder: 'Zwischen den Zacken werden die Fäden liegen und immer nach...'

6

There is no wrap guide here. Wrap crisscross until you like the result. Cut off the thread and place the end under another thread.
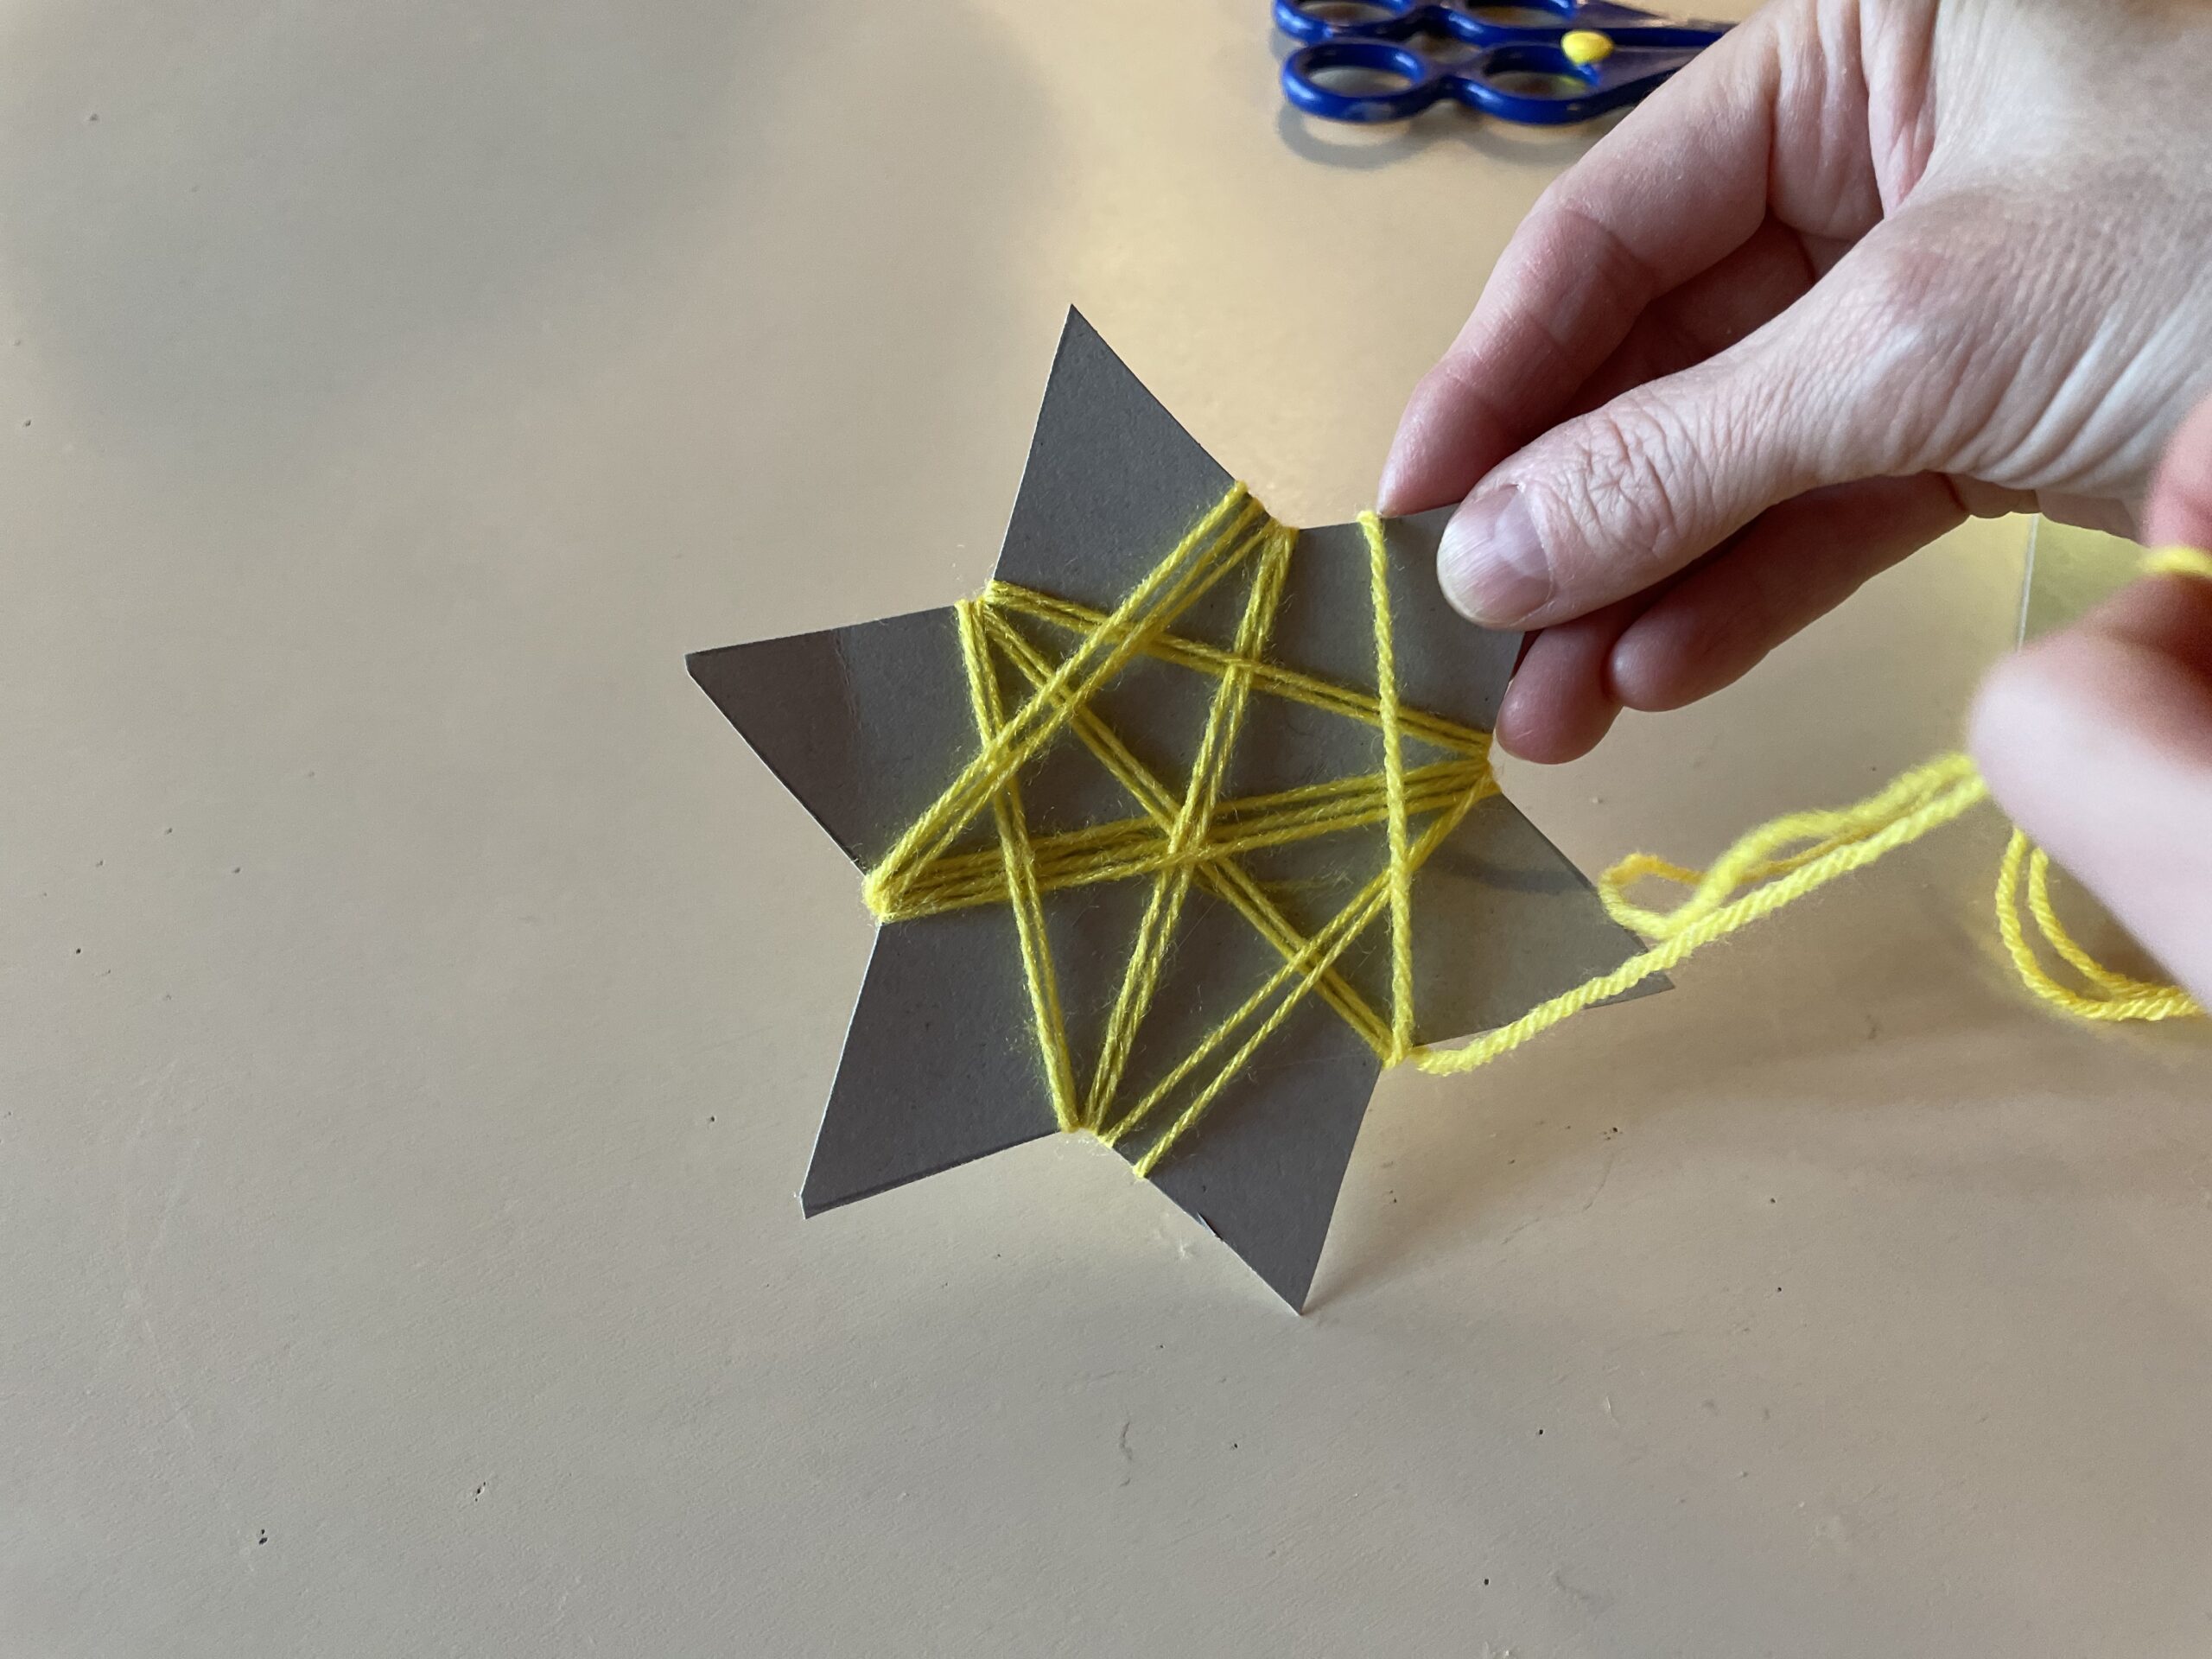
Bild zum Schritt 6 für das Bastel- und DIY-Abenteuer für Kinder: 'Hier gibt es keine Wickelanleitung. Wickelt kreuz und quer, bis...'

7

Take a puncher and put a hole in the middle of a jig.
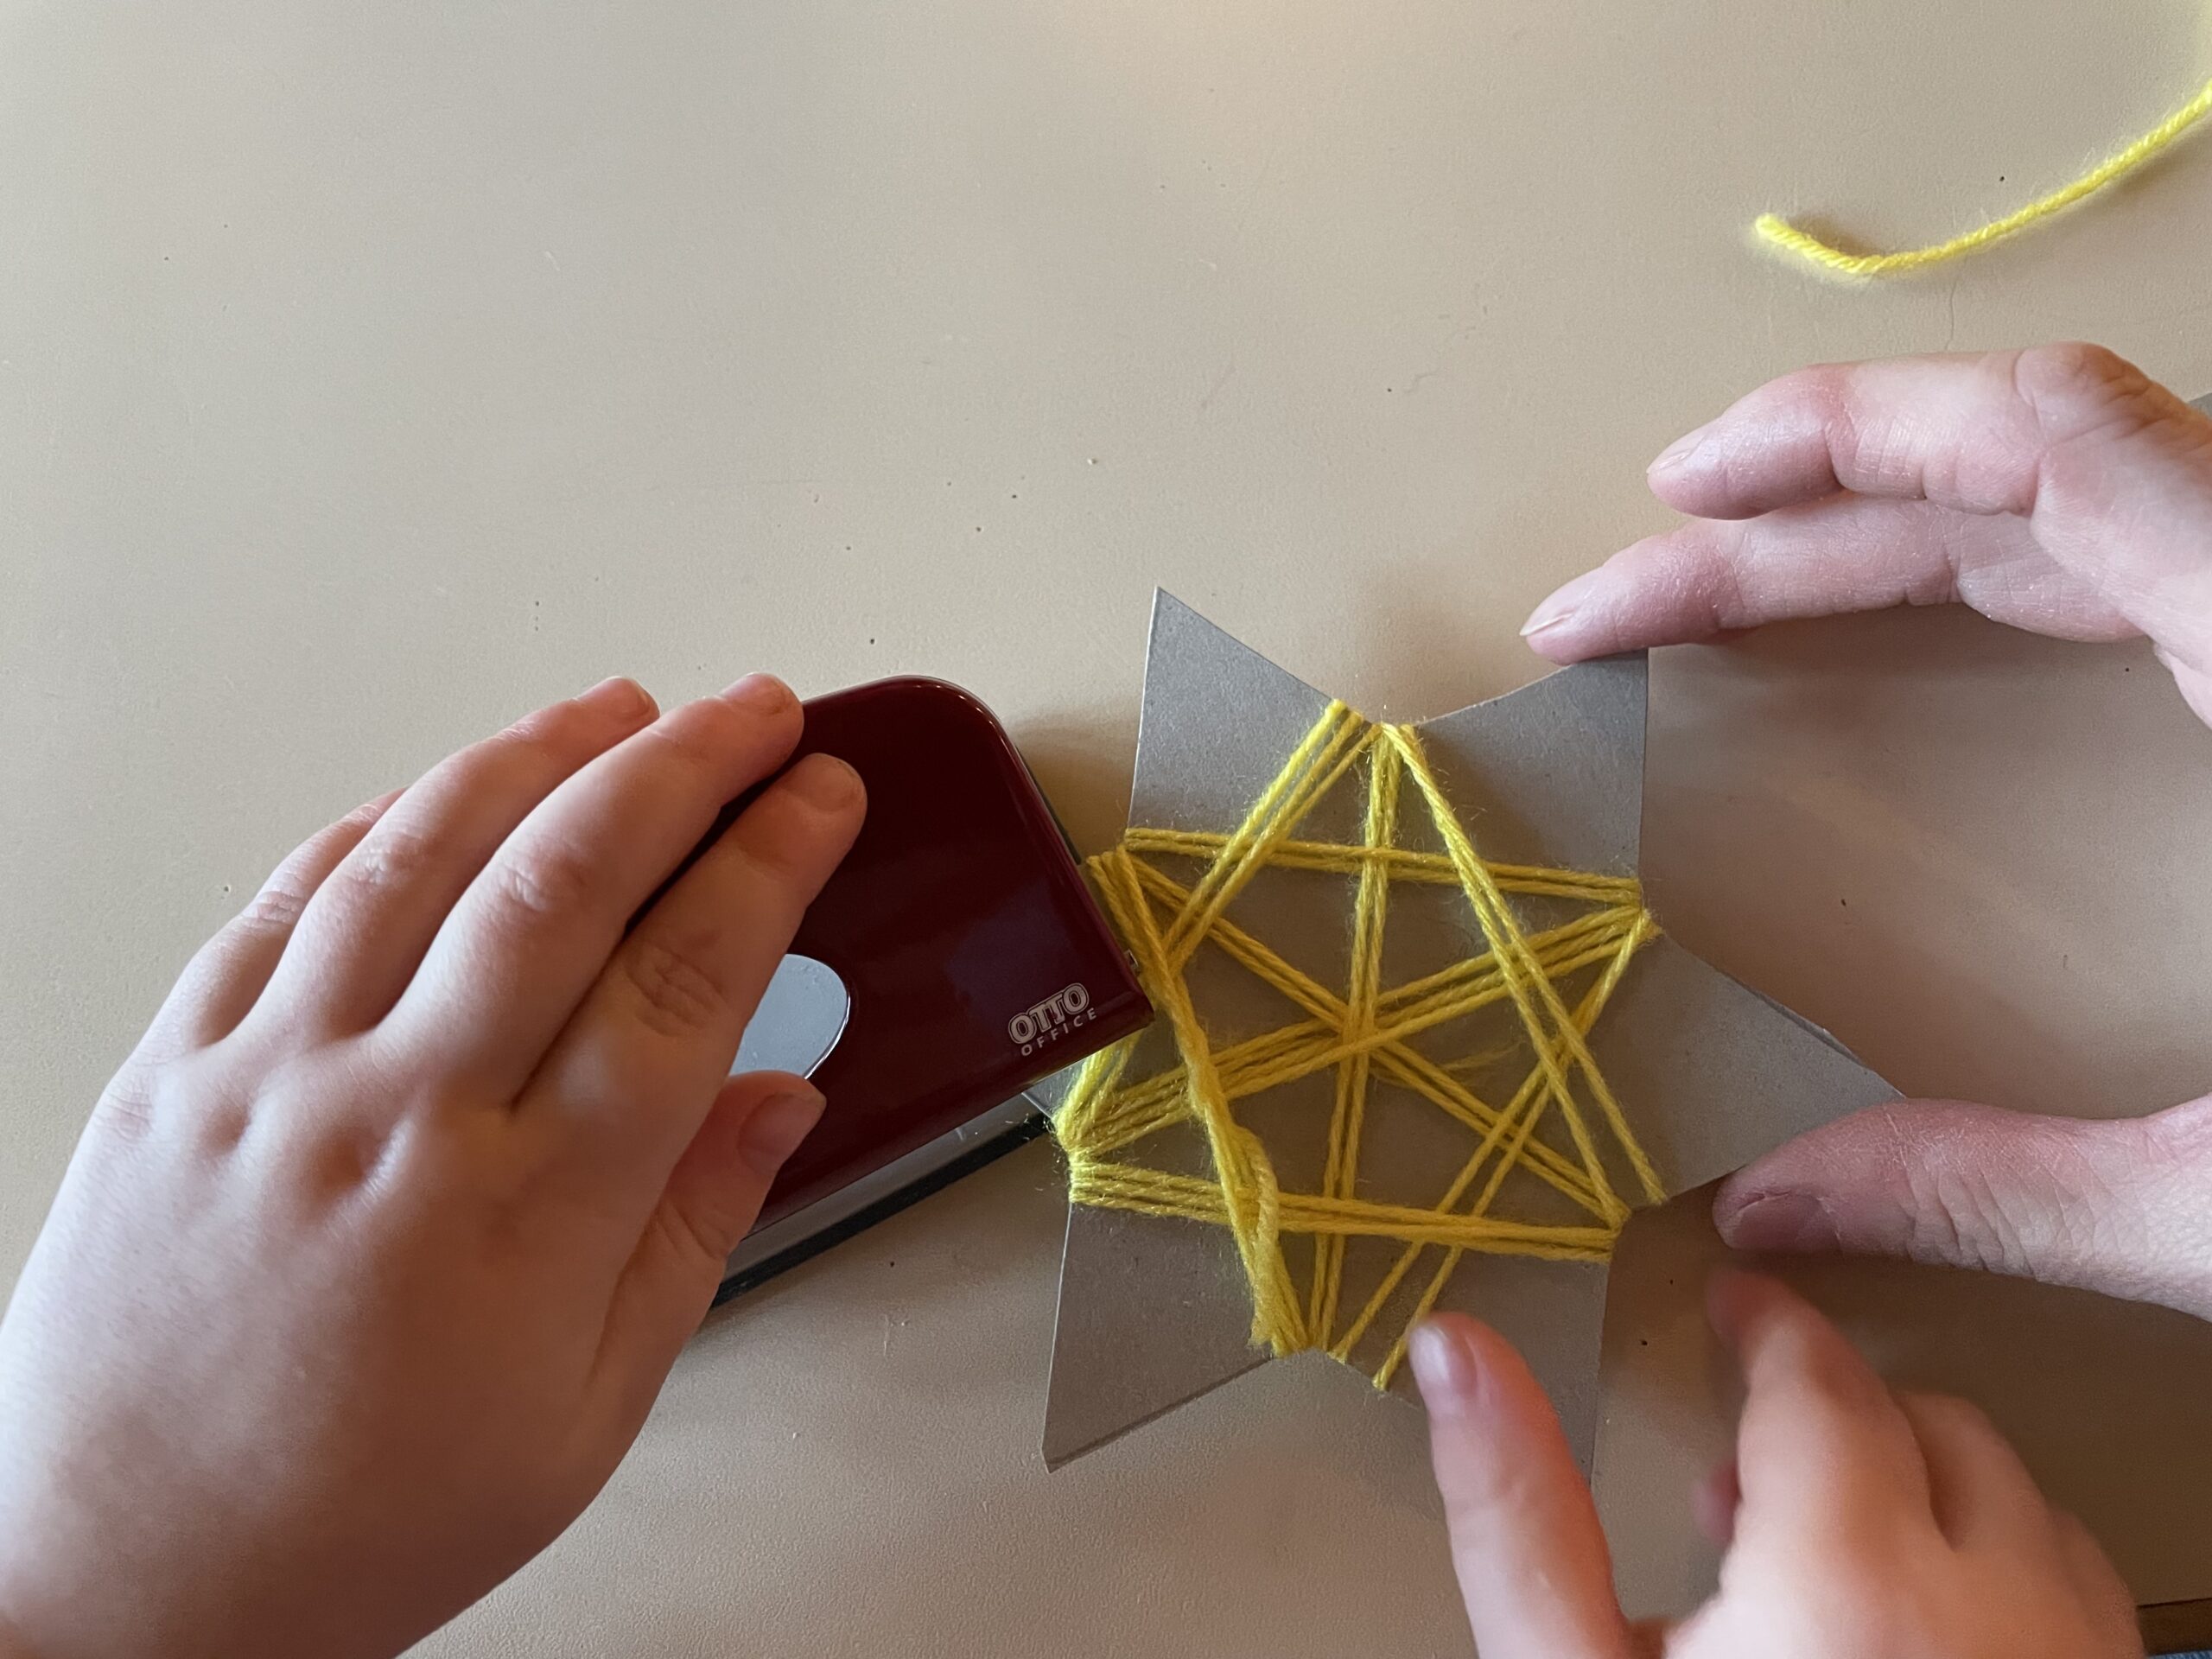
Bild zum Schritt 7 für das Bastel- und DIY-Abenteuer für Kinder: 'Nehmt einen Locher und macht in  eine Zacke mittig...'

8

In the hole a thread is threaded to hang.
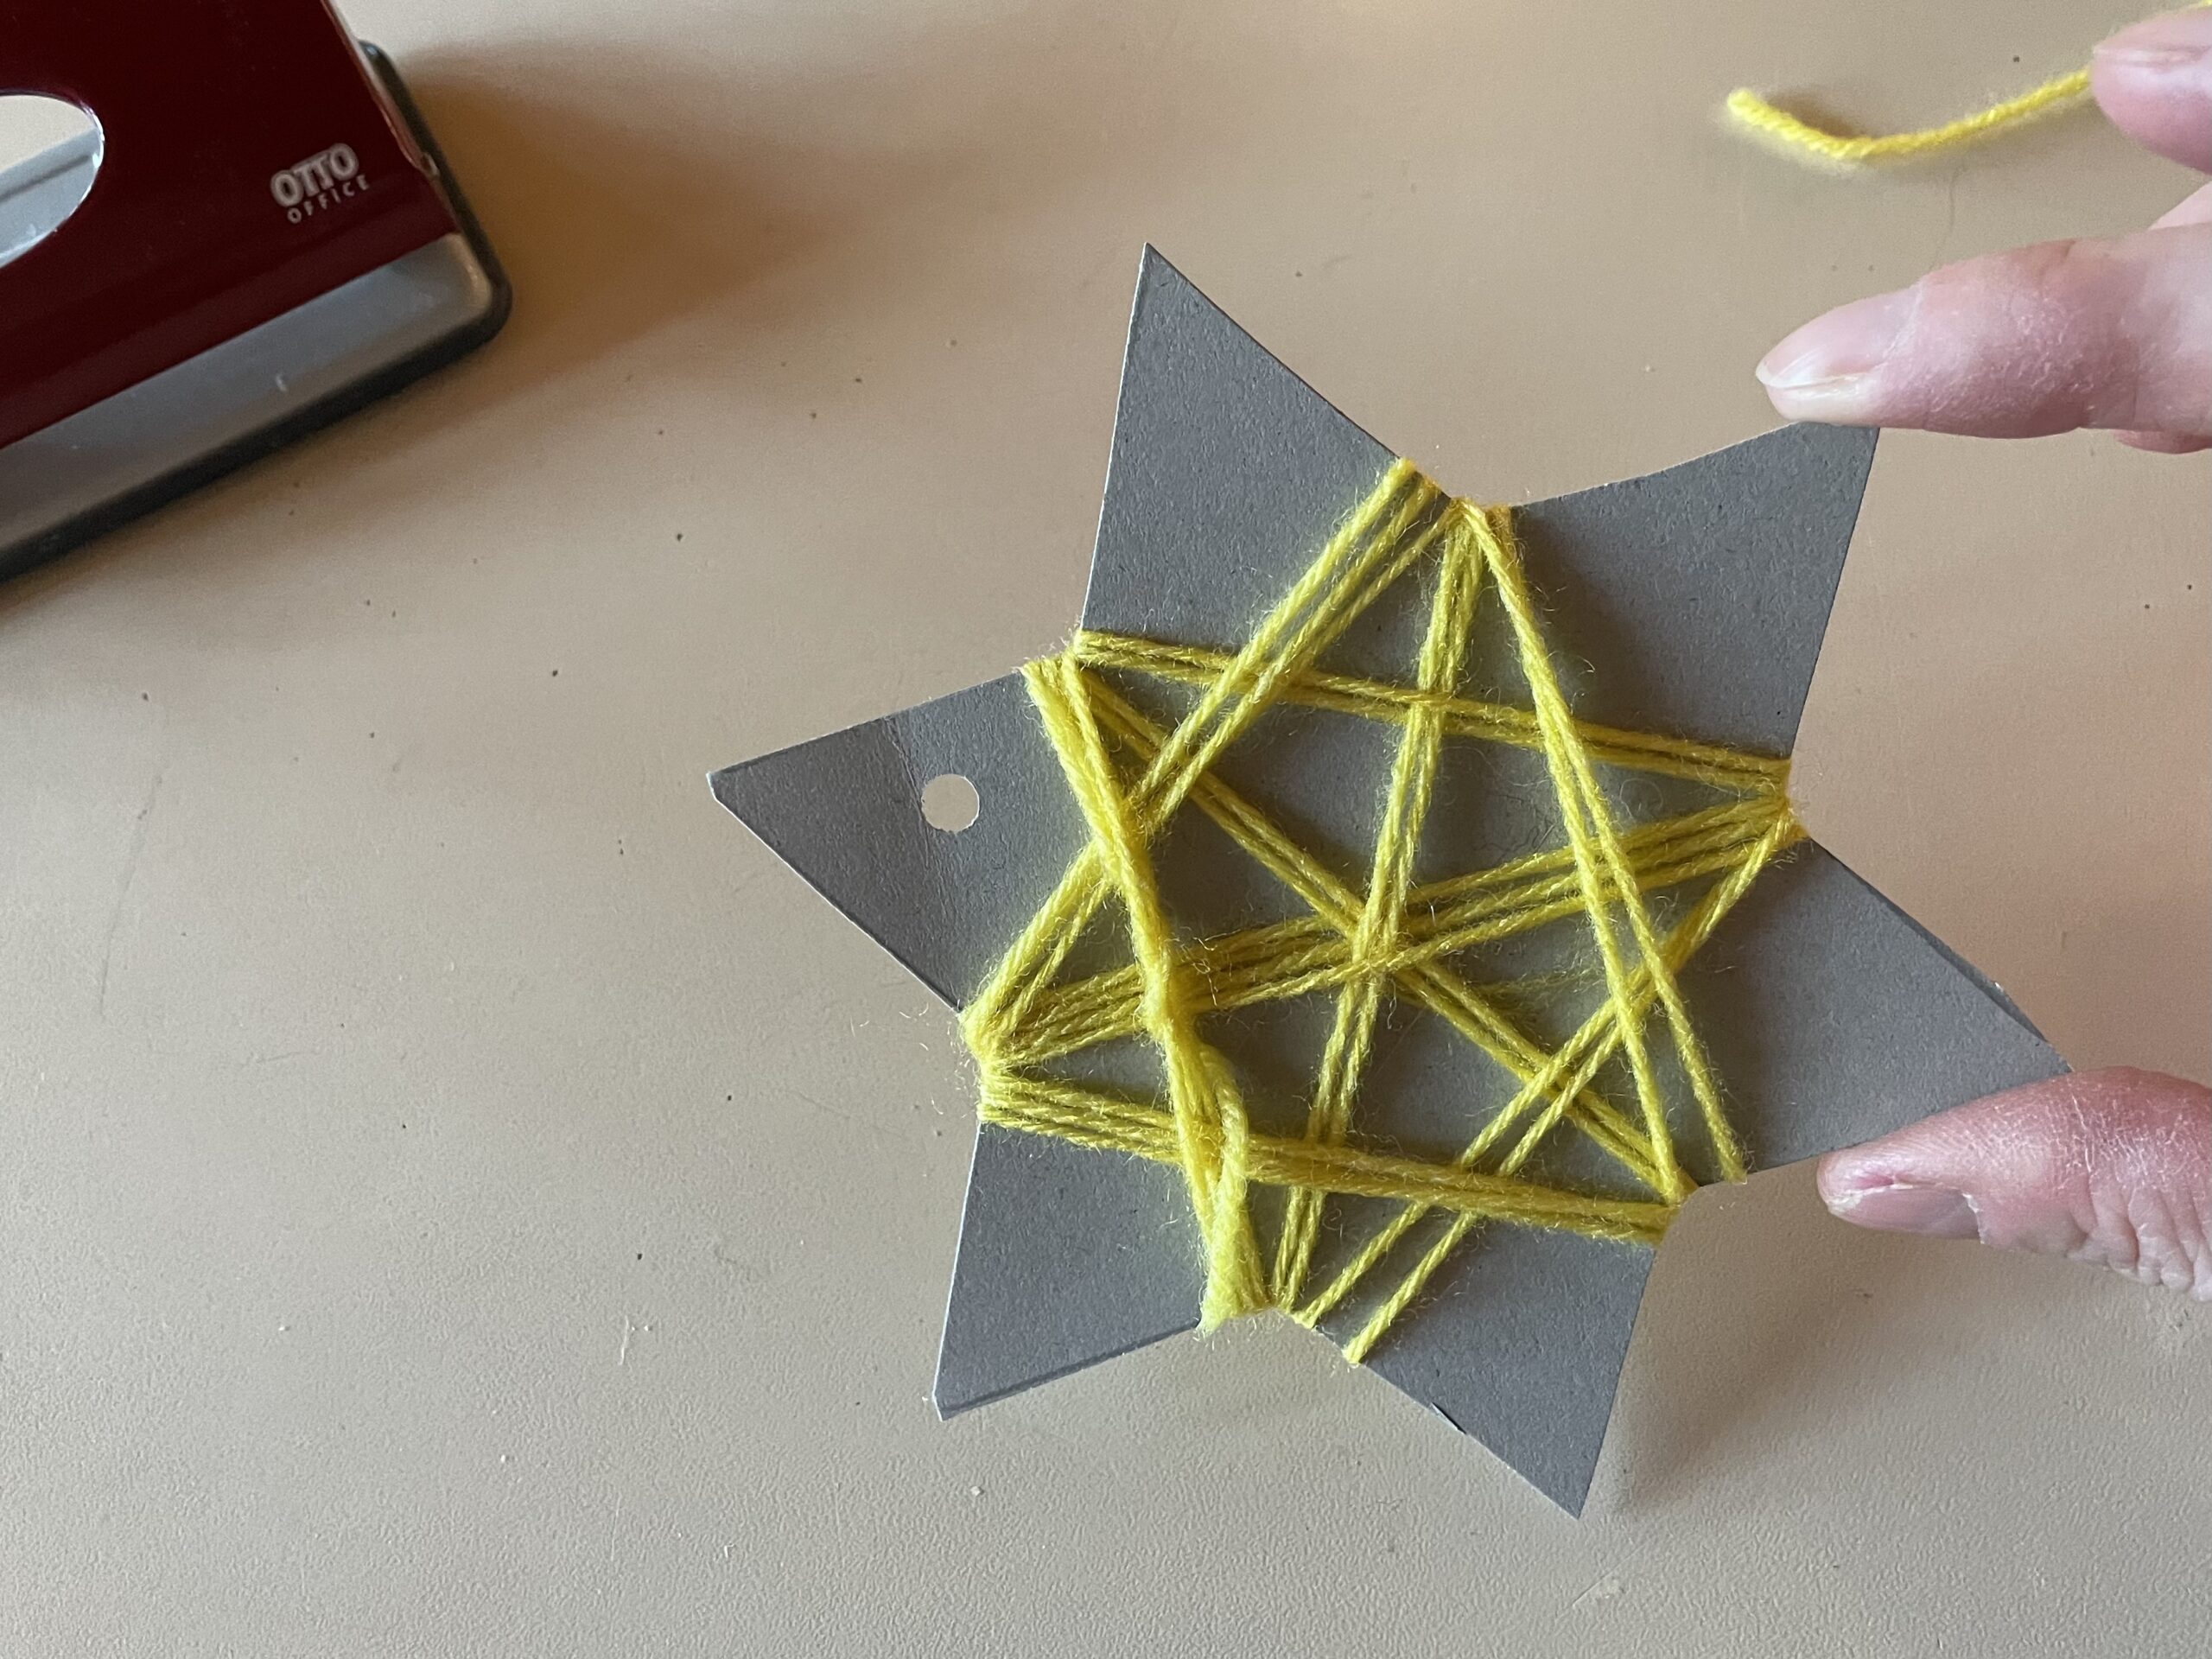
Bild zum Schritt 8 für das Bastel- und DIY-Abenteuer für Kinder: 'In das Loch wird ein Faden zum Aufhängen durchgefädelt.'

9

Cuts a piece of thread about 30cm long. (As a measure you can also measure the length from your elbow to the fingertips or with a ruler). The thread is inserted through the hole and pulled through to half.
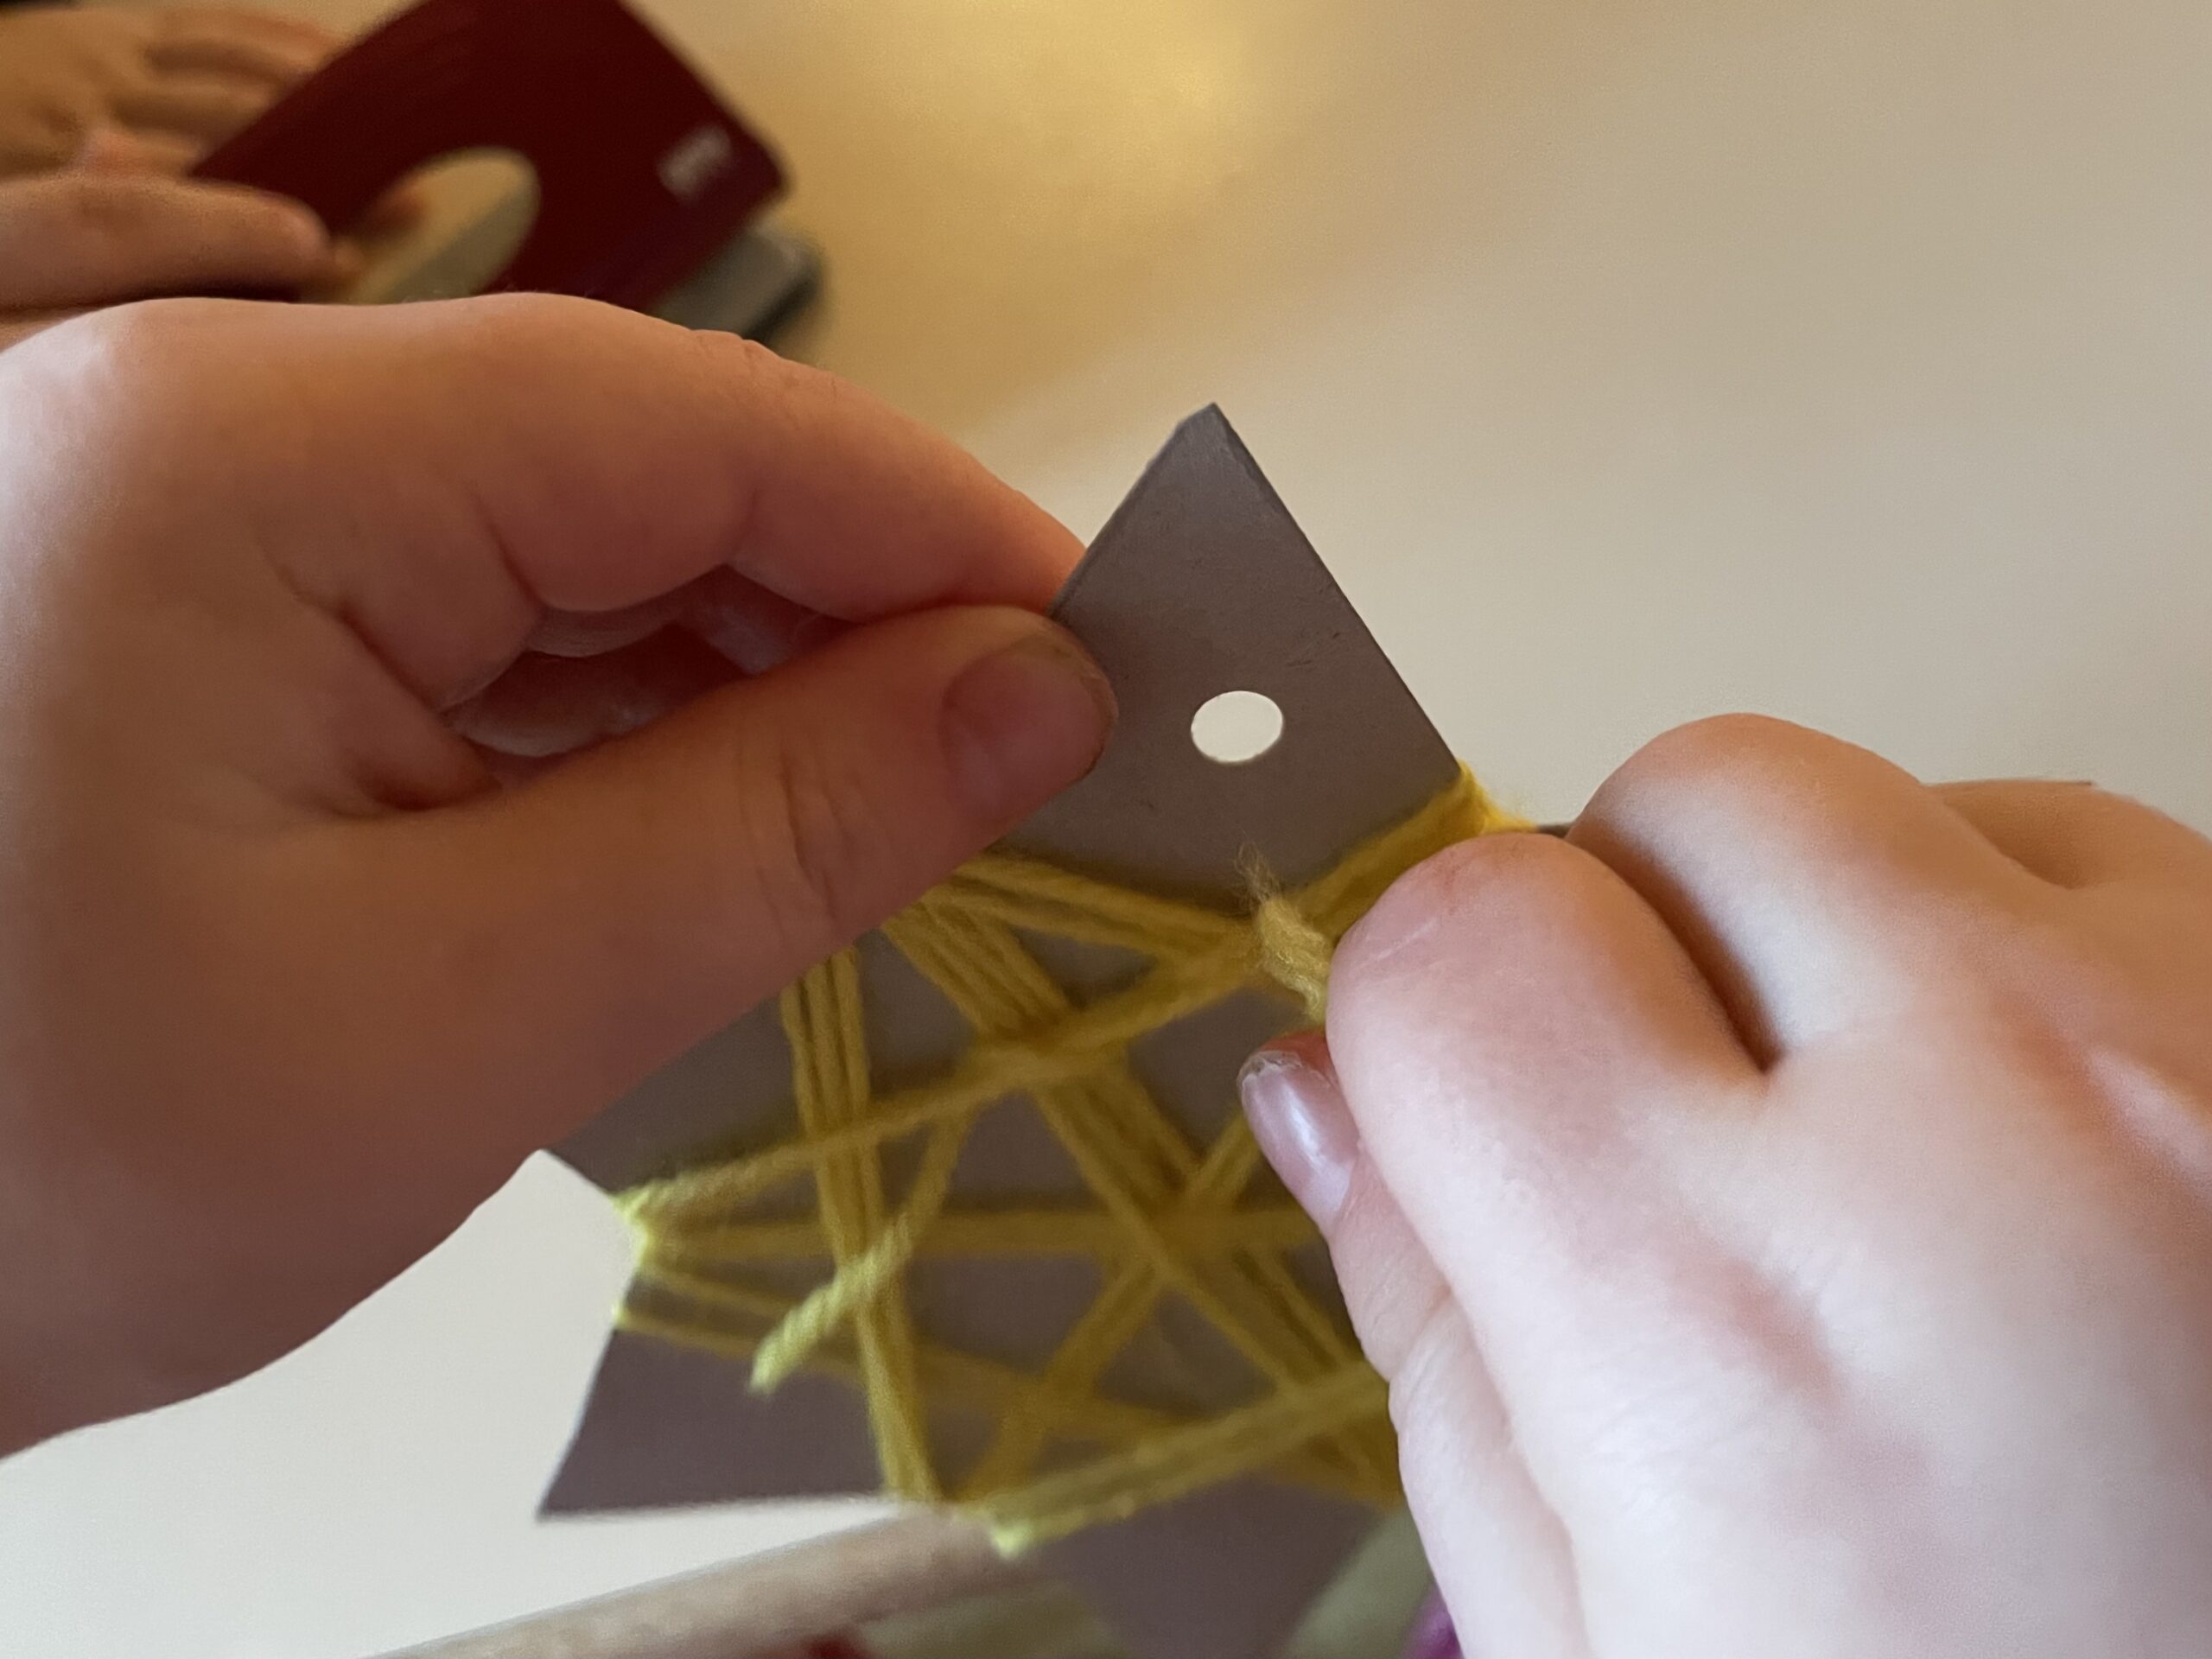
Bild zum Schritt 9 für das Bastel- und DIY-Abenteuer für Kinder: 'Schneidet ein Stück Faden ca. 30cm lang ab. (Als Maß...'

10

Knot the ends of the thread together.
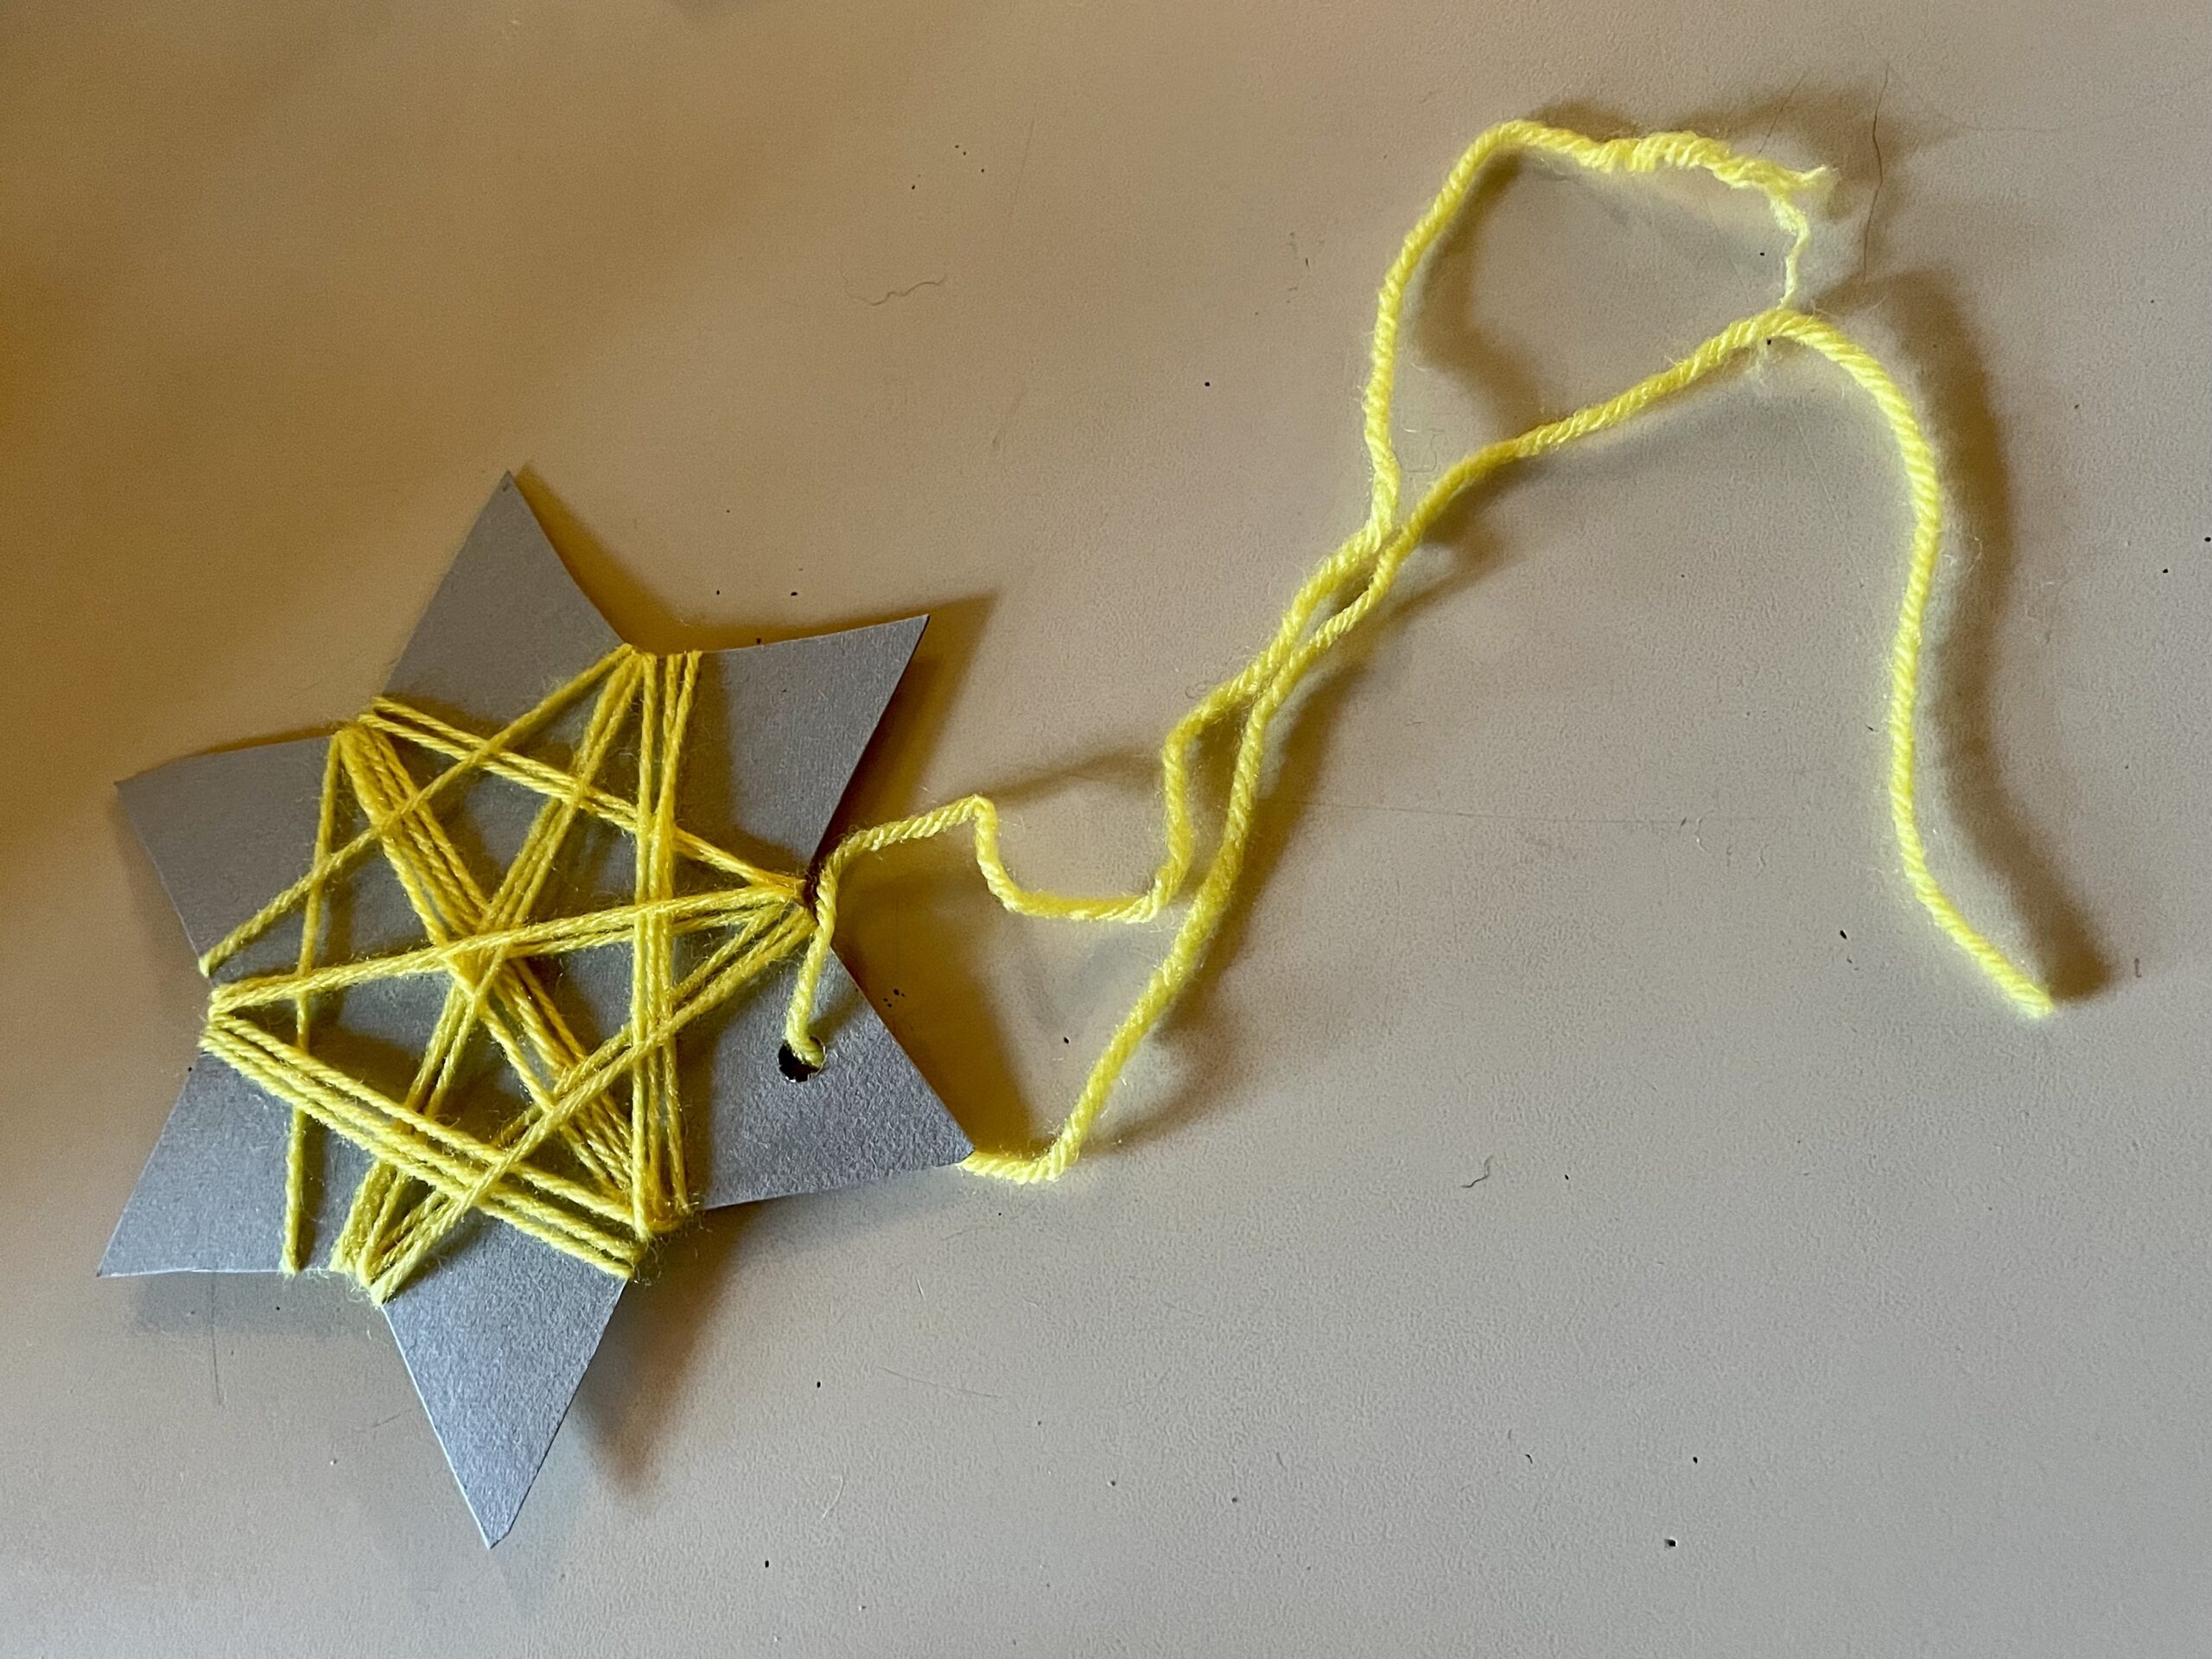
Bild zum Schritt 10 für das Bastel- und DIY-Abenteuer für Kinder: 'Verknotet  die Fadenenden miteinander.'

11

The star is ready.
You can hang him on a branch or a tree.
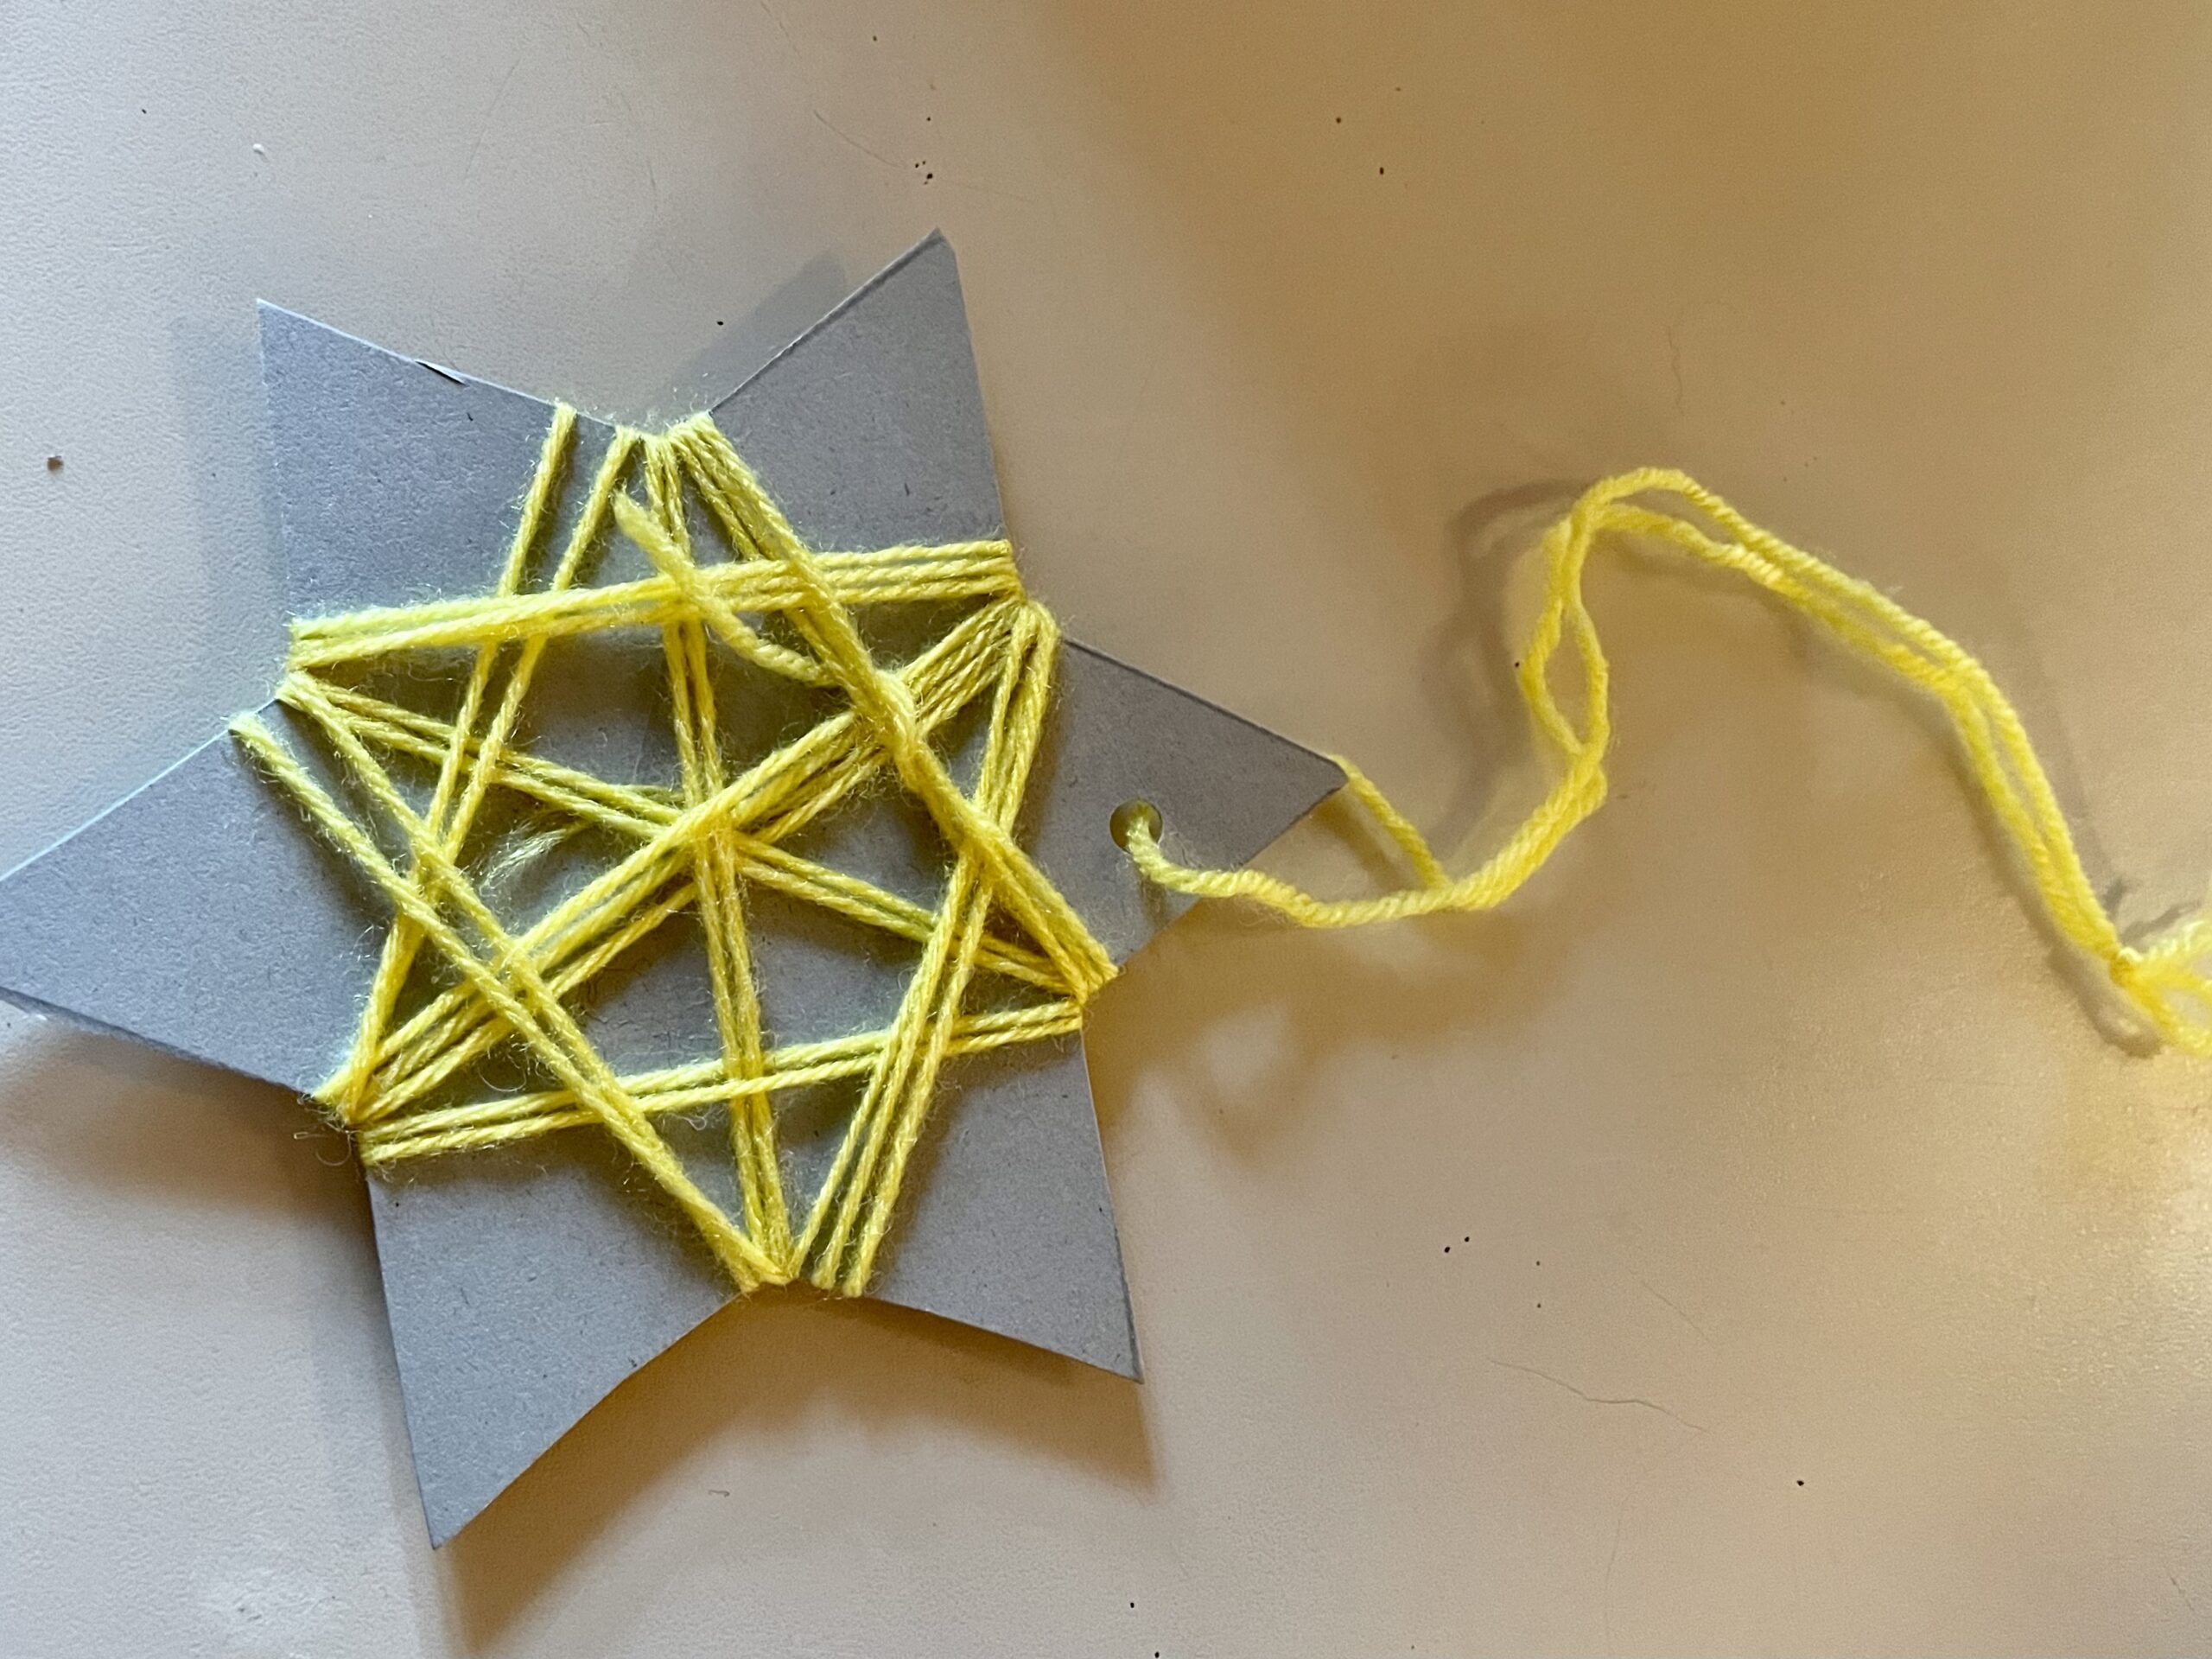
Bild zum Schritt 11 für das Bastel- und DIY-Abenteuer für Kinder: 'Fertig ist der Stern.   Ihr könnt ihn an...'

12

Have fun.

Star with wool

Follow us on Facebook , Instagram and Pinterest
Don't miss any more adventures: Our bottle mail

Leave a Reply

Your email address will not be published.

The maximum upload file size: 5 MB. You can upload: image, document. Drop file here