Pendant of clay/modelling mass (pearls, buttons, houses)

AdventurerKatzi
Rating0.04.1 Thousand times & (0) DifficultyAdvanced

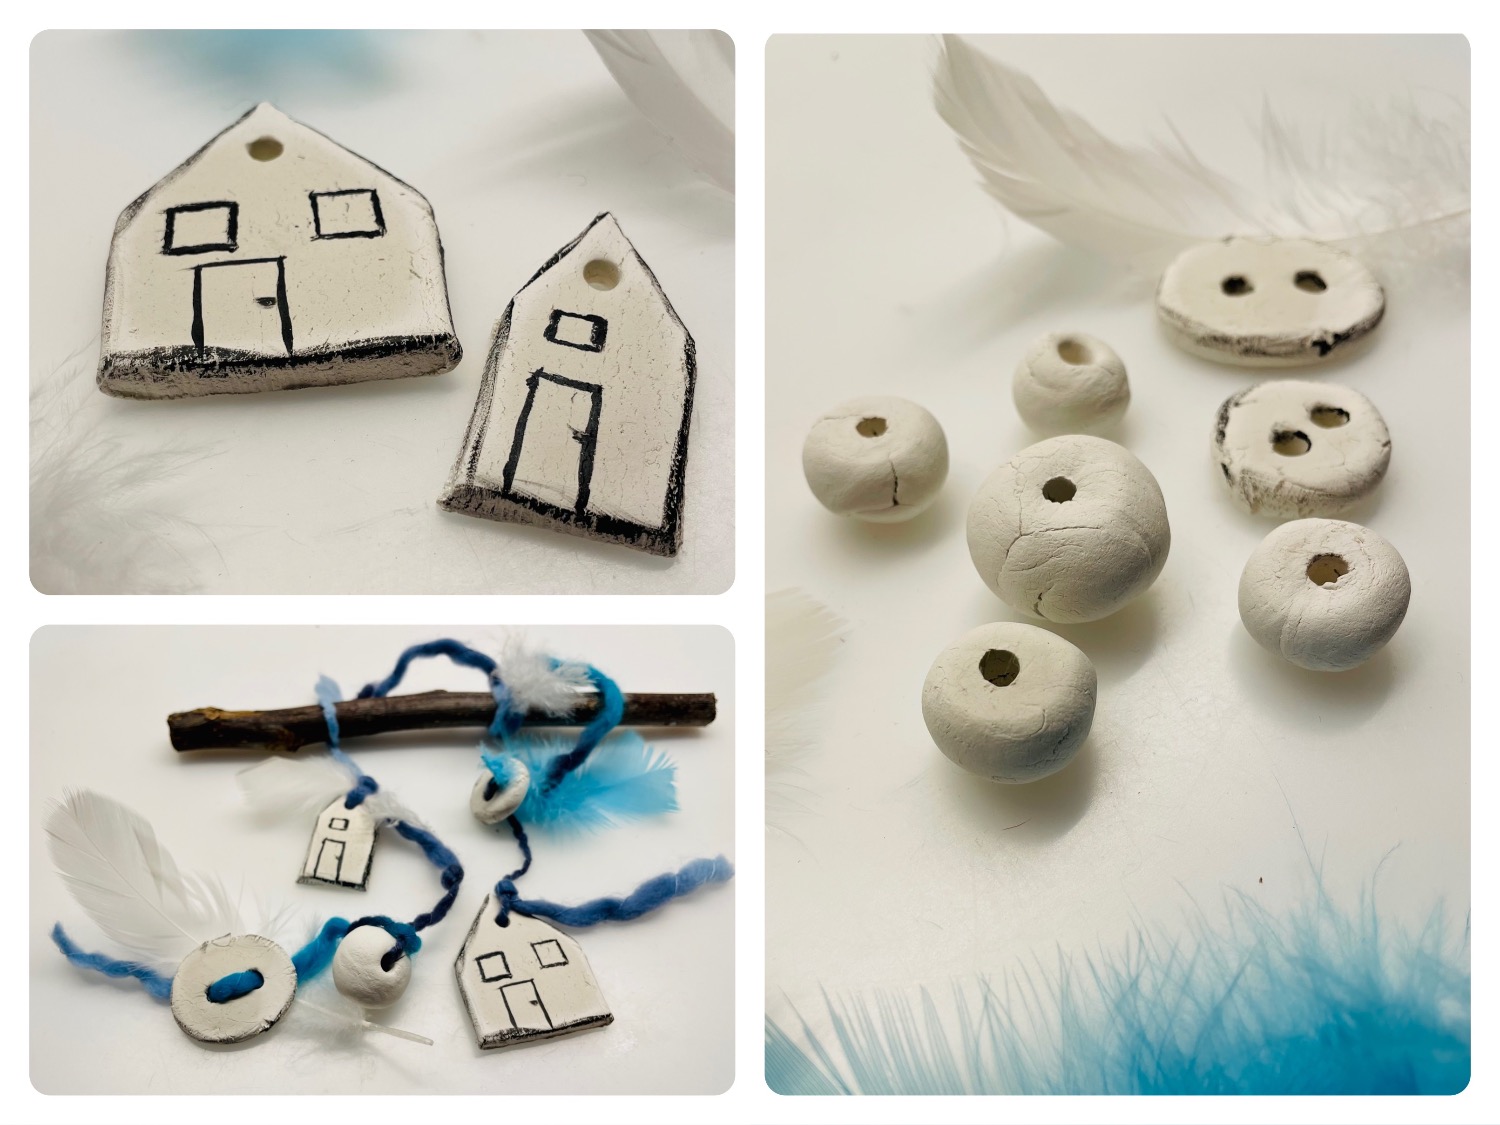
These little pendants are a nice occupation for children and an alternative to playing with dough. The work with self-drying clay/modelling clay is suitable for creating beautiful things even without a kiln. With this adventure you can deal with several children of different ages or with different interests. Everyone can become active here according to his imagination and his skill.

Media Education for Kindergarten and Hort

Kind bastelt eine Rassel mit dem Navi
The Adventure Navi, the app for DIY projects, enables media education for the youngest.

Relief in everyday life, targeted promotion of individual children, independent learning and - without any pre-knowledge already usable by the youngest!


Titelbild zur Bastel- und DIY-Idee für Kinder '(978) Anhänger aus Ton/Modelliermasse (Perlen, Knöpfe, Häuser)'
Material for1 Child
Prep Time10 min.Adv. Time35 min.Total Time45 min.
 Self-drying clay
 1 Freezer bagsZip bag
 1 Pasta wood
 1 Children's knives Rounded knife
 2 Plastic straws thinPlease, no glass or stainless steel tubes!
 1 Baking paper or Butterbread paper
 1 Tray or sheet metal, wooden board
 1 Felt pen
 1 Builder's pad or place set washable
 1 Paint coats
 1 Rinse cloths moist
All links marked with a shopping cart lead to Amazon - here we have selected products that we would order ourselves and in part also ordered. In a qualified purchase via the advertising link, we as Amazon partner receive a commission, for you there are no costs. You thus support our cost- and advertising banner-free, educational offer.
1

First prepare a tray with baking paper and prepare a freezer bag on your craft pad on the table.
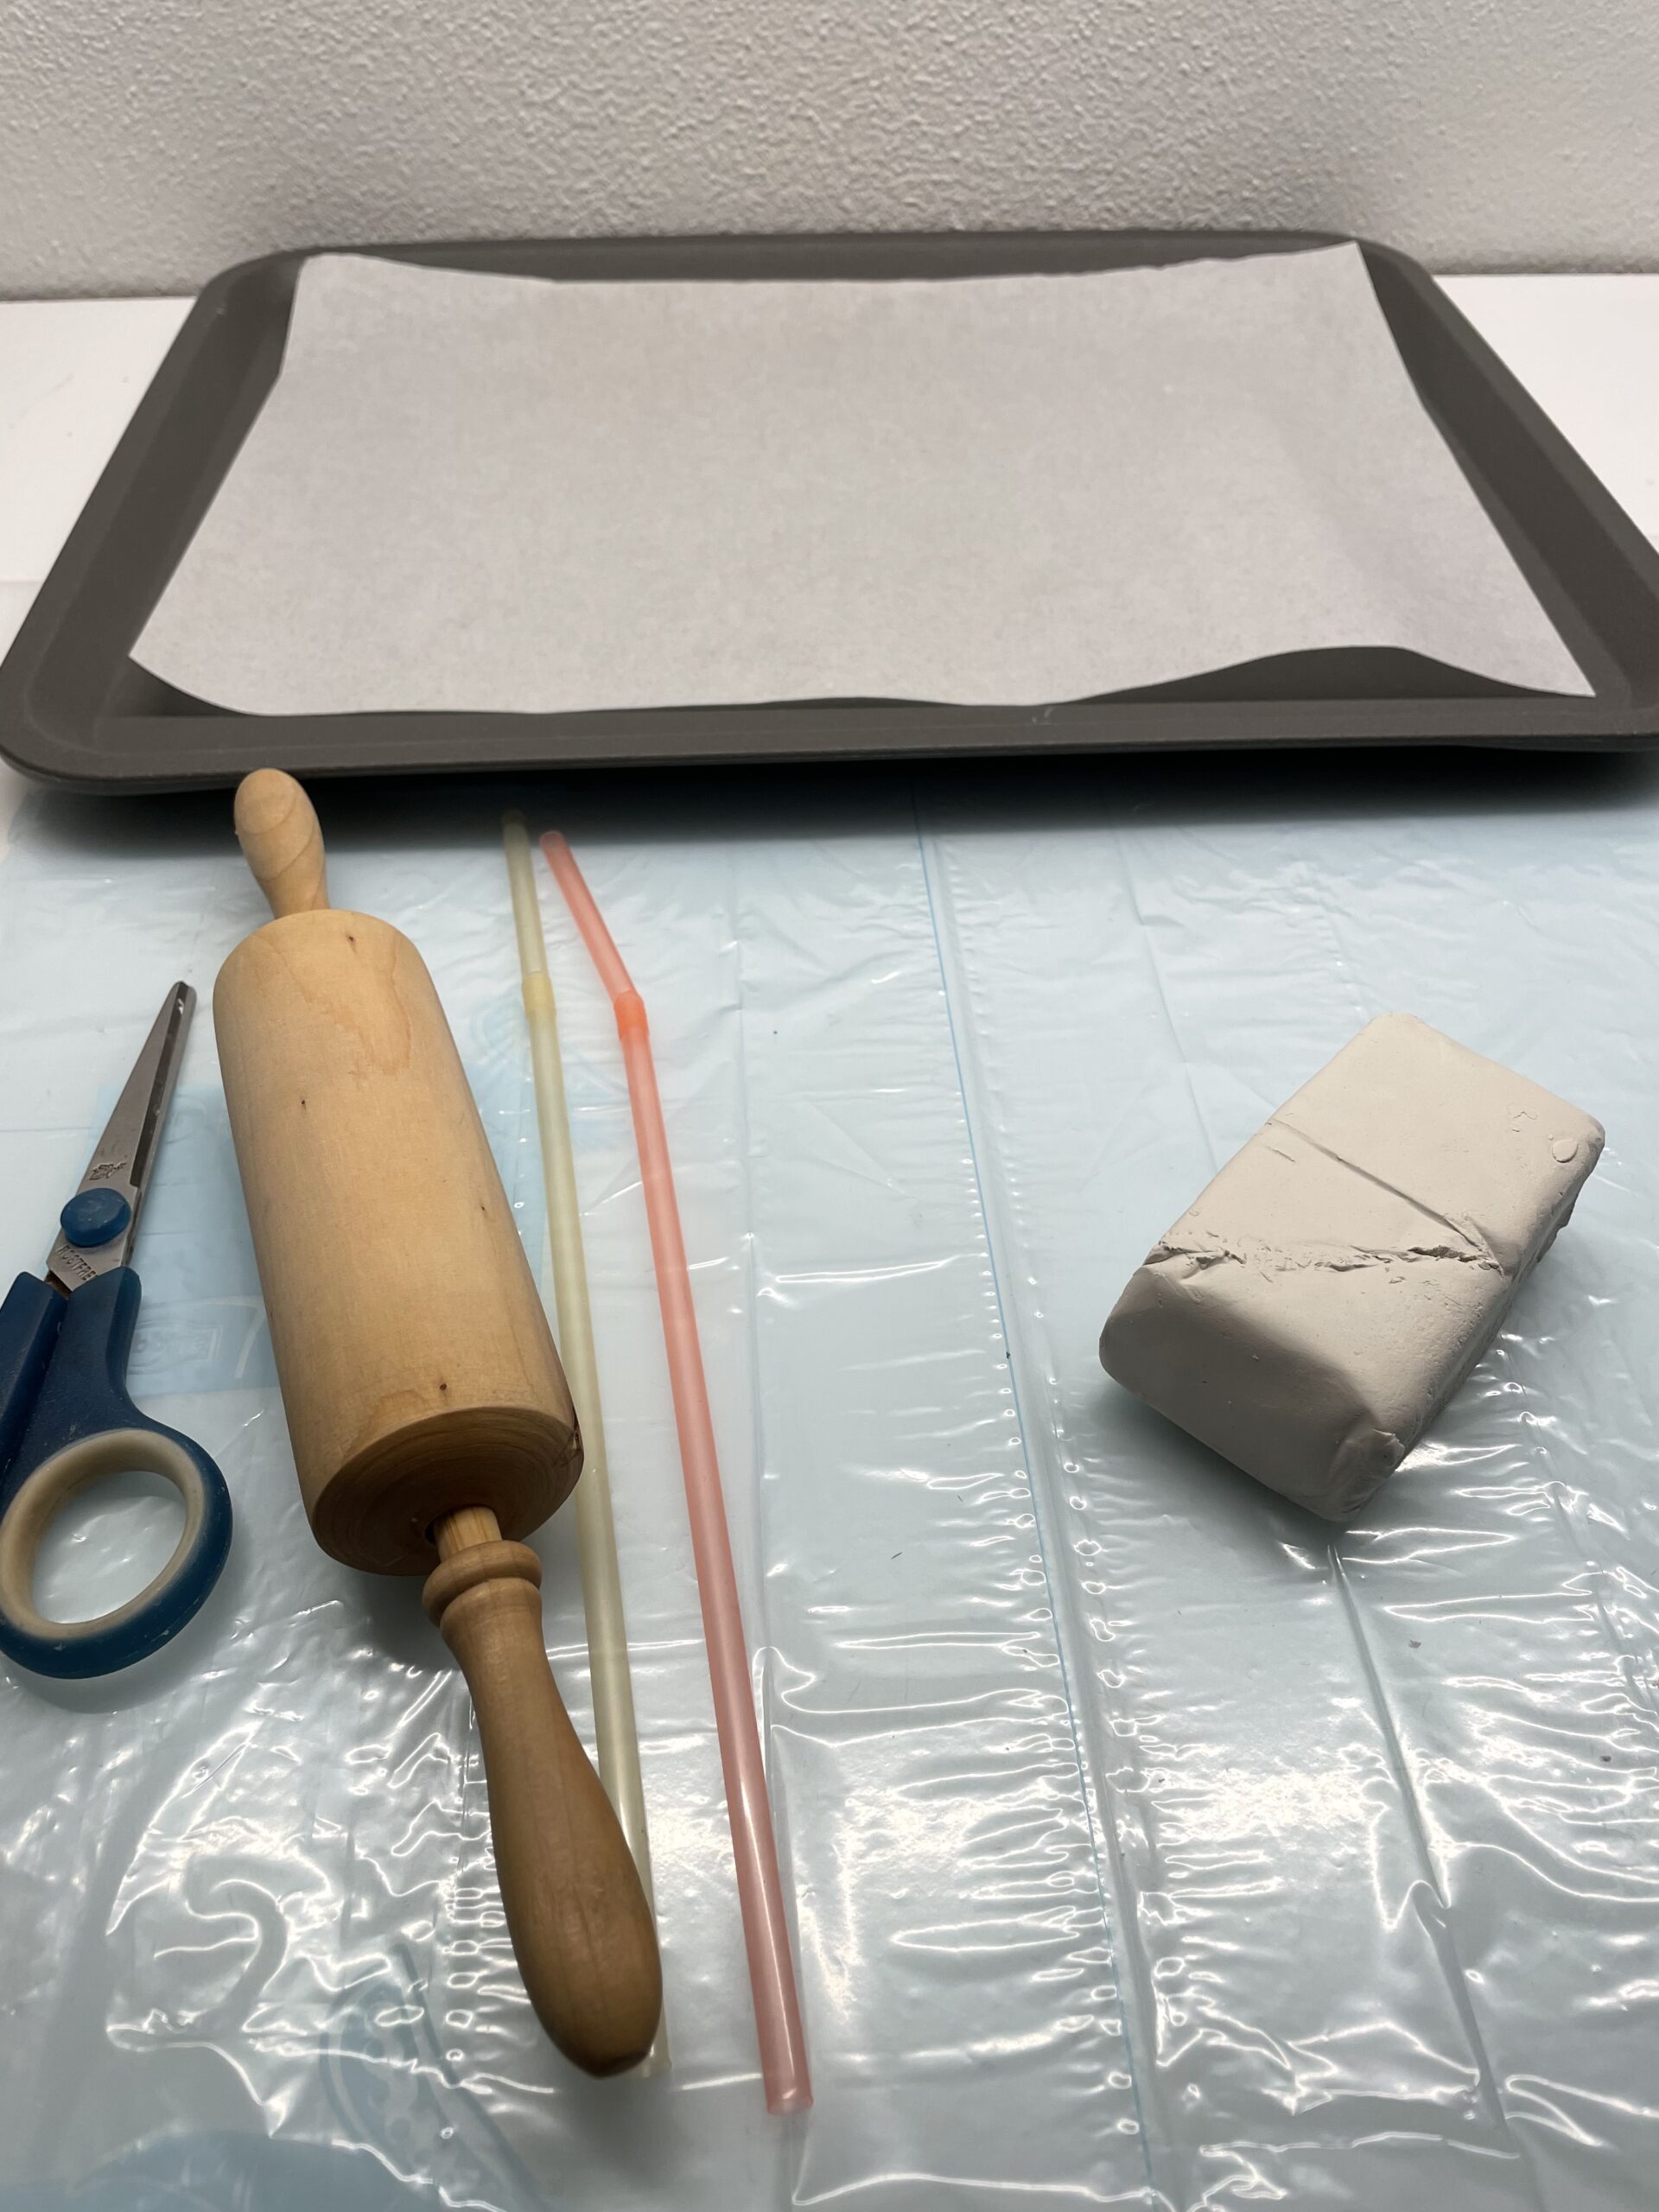
Bild zum Schritt 1 für das Bastel- und DIY-Abenteuer für Kinder: 'Legt zuerst ein Tablett mit Backpapier bereit und bereitet einen...'

2

Then you put a blunt rounded knife (e.g. children's knife), a plastic straw, a scissors and if possible a small noodle wood.
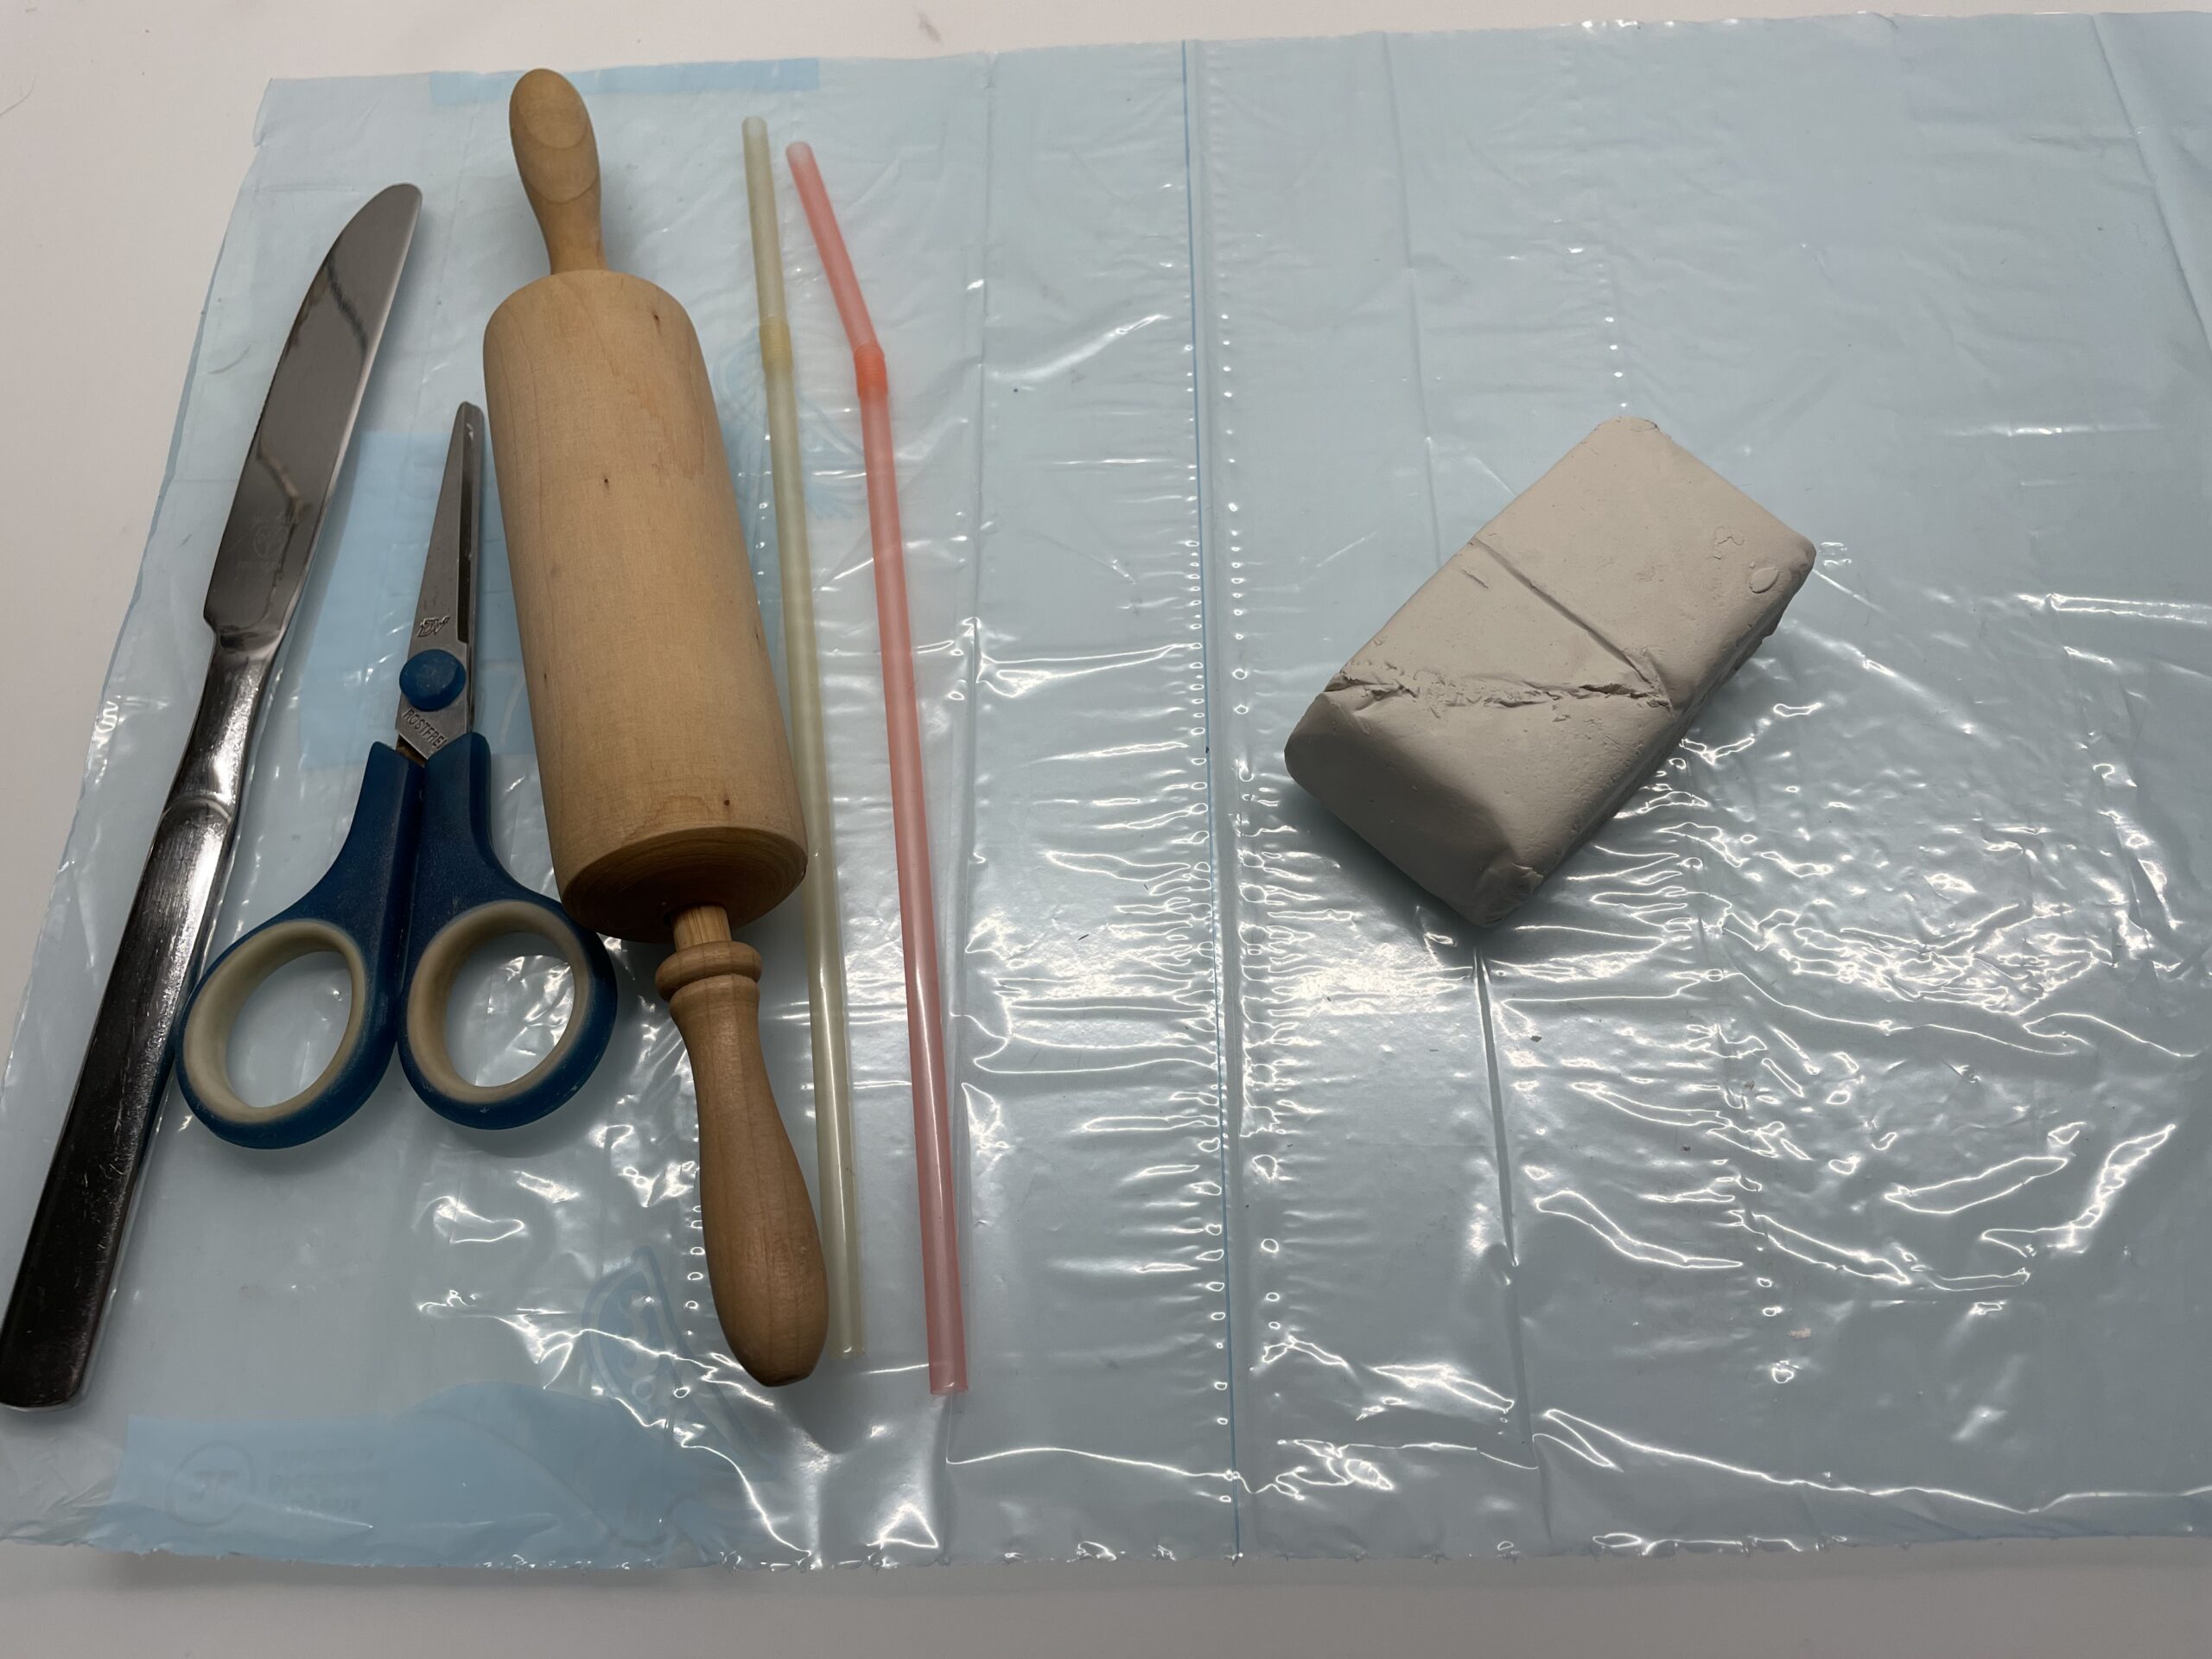
Bild zum Schritt 2 für das Bastel- und DIY-Abenteuer für Kinder: 'Dann legt ihr ein stumpfes abgerundetes Messer (z.B. Kindermesser), einen...'

Beading
3

Now cut off a piece of clay with the knife and cut small pieces from it in the size of 1cm x 1cm. Now you put the clay in your palm and the other hand over it. Then you roll a ball by circling your hands against each other.

Bild zum Schritt 4 für das Bastel- und DIY-Abenteuer für Kinder: 'Schneidet jetzt ein Stück von der Tonmasse mit dem Messer...'

4

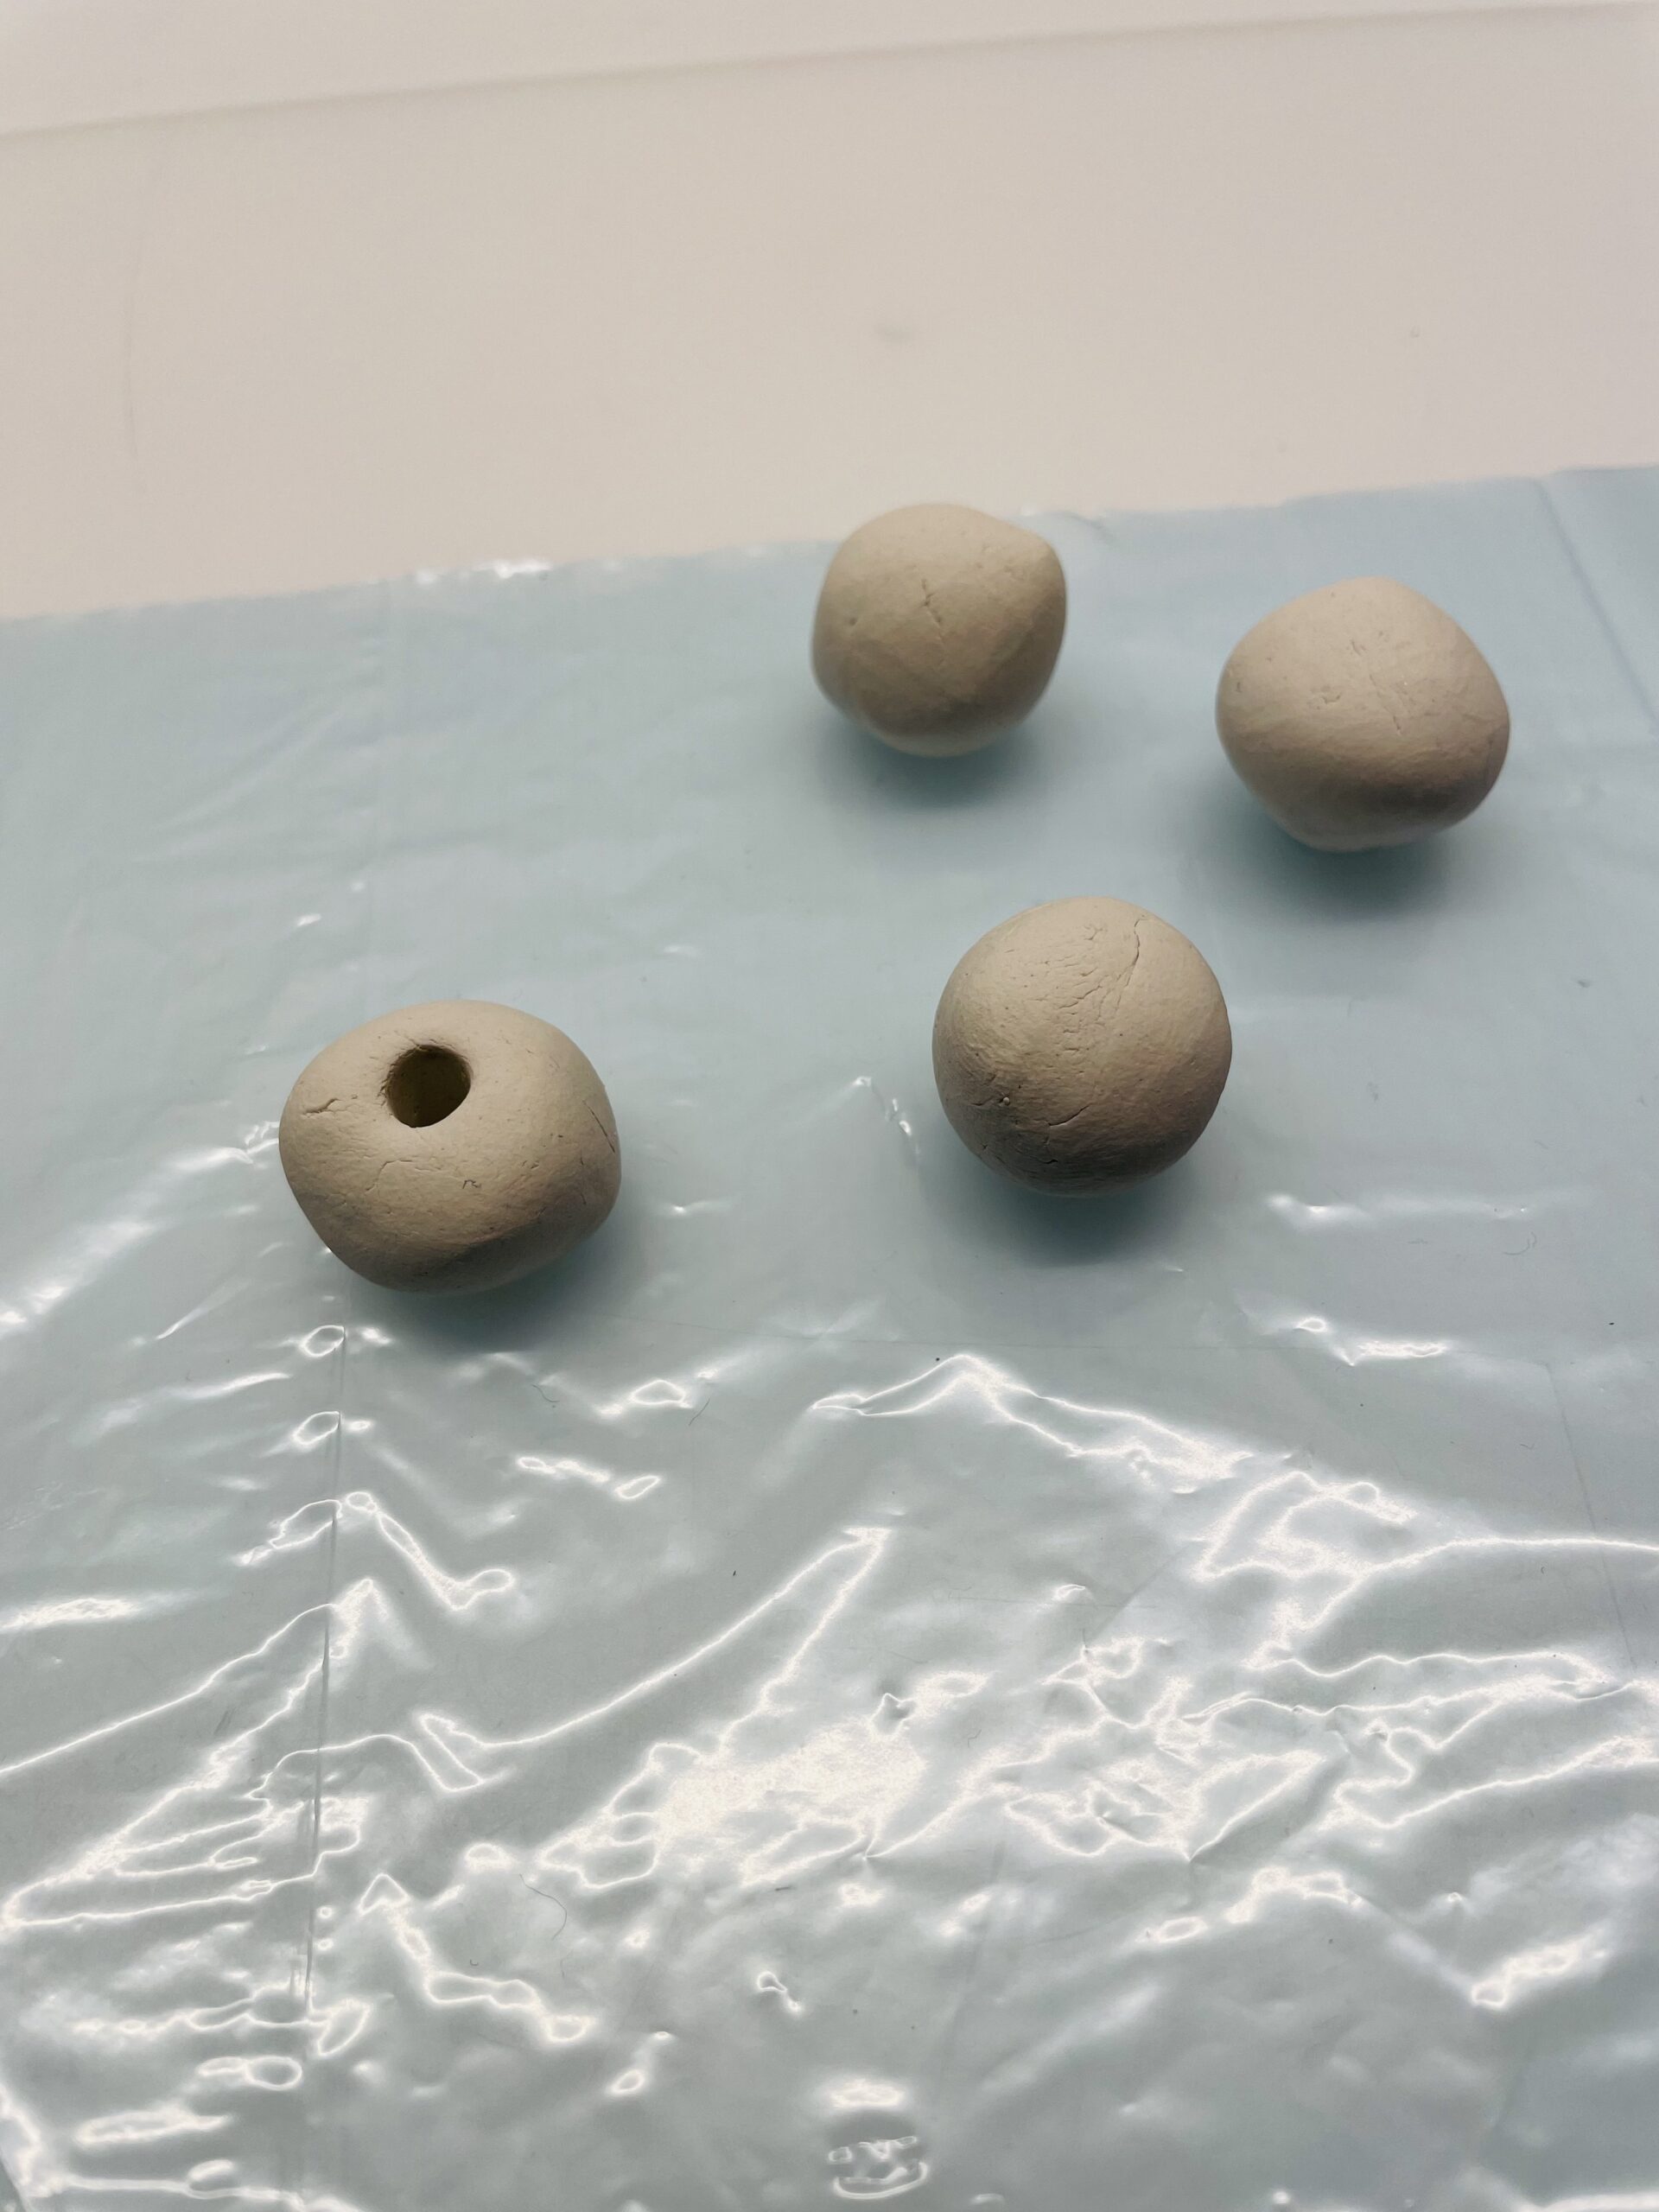
Then place the ball on the craft pad and punch a hole through the middle of the bead with the straw. Gently turn the straw and make sure not to squeeze the ball together. If the straw touches the base, take the ball up and push the straw completely through it. Then pull it out again.

Bild zum Schritt 5 für das Bastel- und DIY-Abenteuer für Kinder: 'Anschließend legt ihr die Kugel auf die Bastelunterlage und stecht...'

5

Put the bead to dry.

Bild zum Schritt 6 für das Bastel- und DIY-Abenteuer für Kinder: 'Legt die Perle zum Trocknen.'

Make buttons
6

For the buttons you first form a ball out of the clay (see making beads).

Bild zum Schritt 8 für das Bastel- und DIY-Abenteuer für Kinder: 'Für die Knöpfe formt ihr zuerst eine Kugel aus der...'

7

Then you press the ball onto the base and press it flat with the back of your hand or with your fingers. A circle is created. Don't make the button too thin, otherwise the tone breaks.

Bild zum Schritt 9 für das Bastel- und DIY-Abenteuer für Kinder: 'Die Kugel drückt ihr dann auf die Unterlage und drückt...'

8

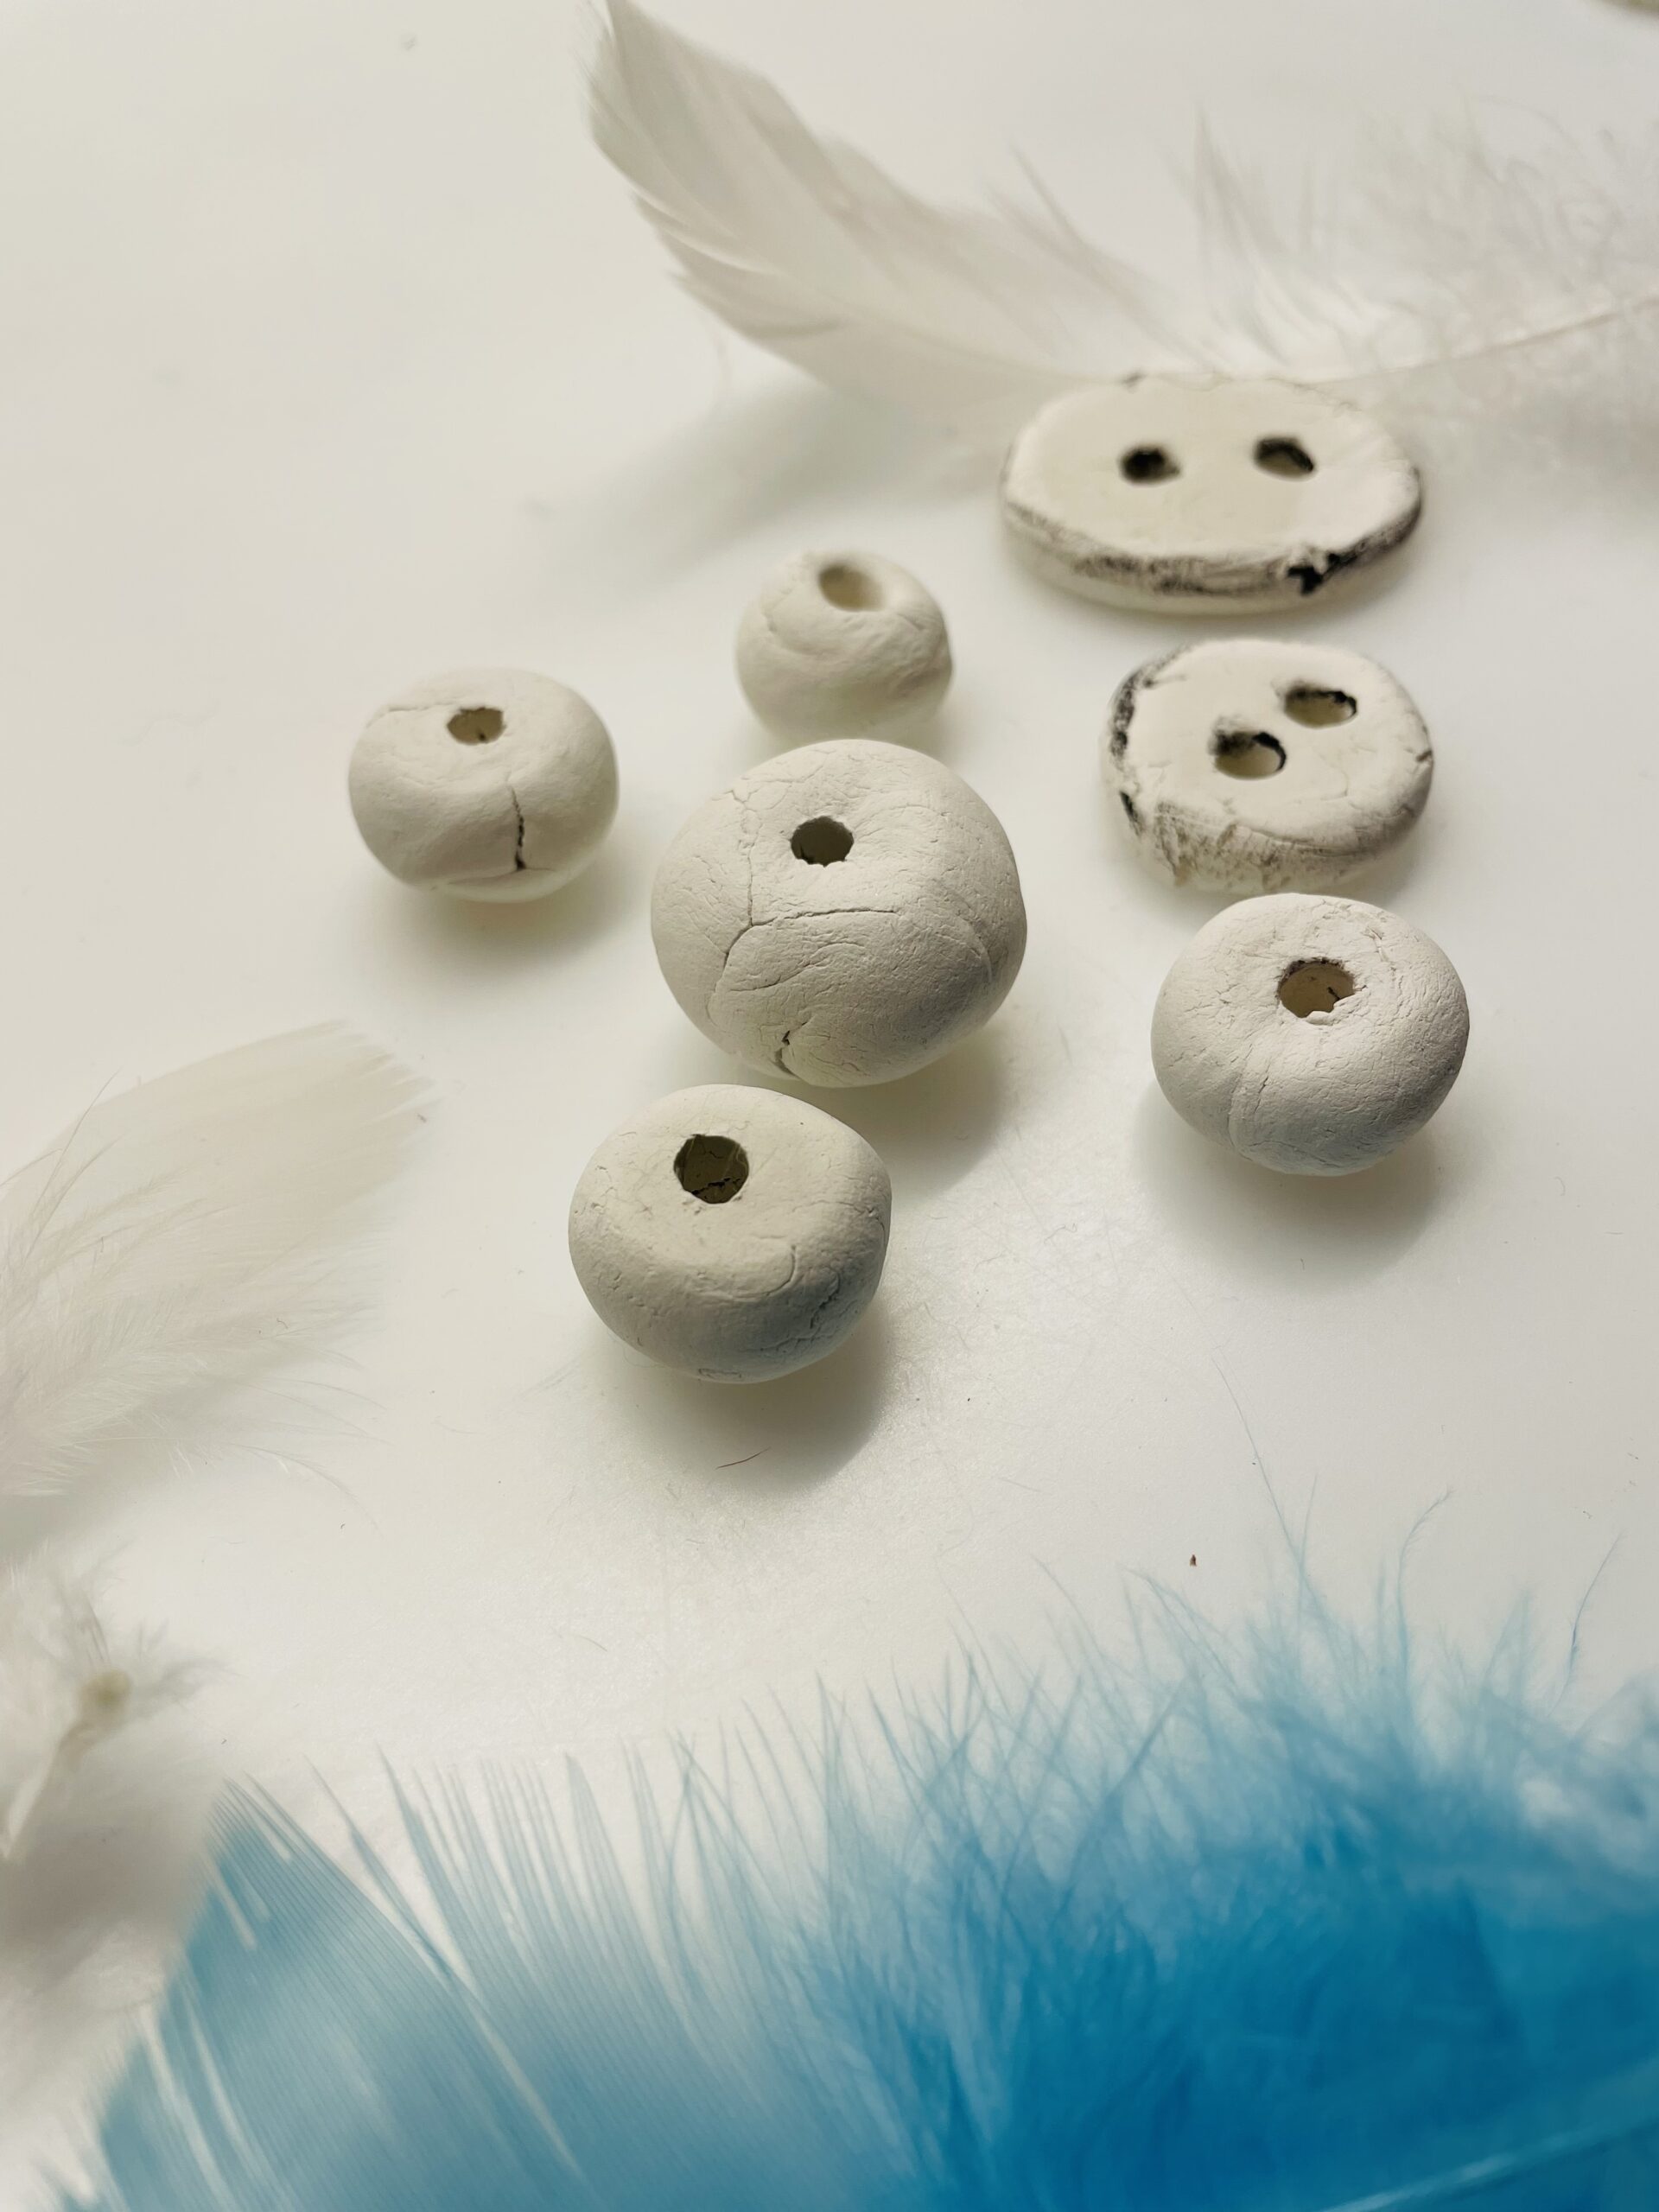
Now you cut out two adjacent holes with the straw.
Tip: Season the straw as soon as there is too much clay in the straw.

Bild zum Schritt 10 für das Bastel- und DIY-Abenteuer für Kinder: 'Jetzt stecht ihr zwei nebeneinander liegende Löcher mit dem Strohhalm...'

9

If both holes are pierced, then check whether both holes are well punctured on the back.

Bild zum Schritt 11 für das Bastel- und DIY-Abenteuer für Kinder: 'Sind beide Löcher durchstochen, dann kontrolliert ob beide Löcher auch...'

10

Also place the buttons to dry.

Bild zum Schritt 12 für das Bastel- und DIY-Abenteuer für Kinder: 'Legt die Knöpfe ebenfalls zum Trocknen.'

Building houses
11

For the houses you cut off an approx. 1cm thick piece of clay mass and put it on the base. Then you put a freezer bag over it and roll out the clay mass with the noodle wood about 0.5 cm thick.

Bild zum Schritt 14 für das Bastel- und DIY-Abenteuer für Kinder: 'Für die Häuser schneidet ihr ein ca. 1cm dickes Stück...'

12

Then take off the freezer bag and use a knife to cut out the outline of a house.

Bild zum Schritt 15 für das Bastel- und DIY-Abenteuer für Kinder: 'Anschließend nehmt ihr den Gefrierbeutel ab und schneidet mit einem...'

13

Then you stab a hole in the roof with the straw. Raise the house carefully and check if the hole on the back is well pierced.
Then you put the house to dry.

Bild zum Schritt 16 für das Bastel- und DIY-Abenteuer für Kinder: 'Anschließend stecht ihr mit dem Strohhalm ein Loch in das...'

14

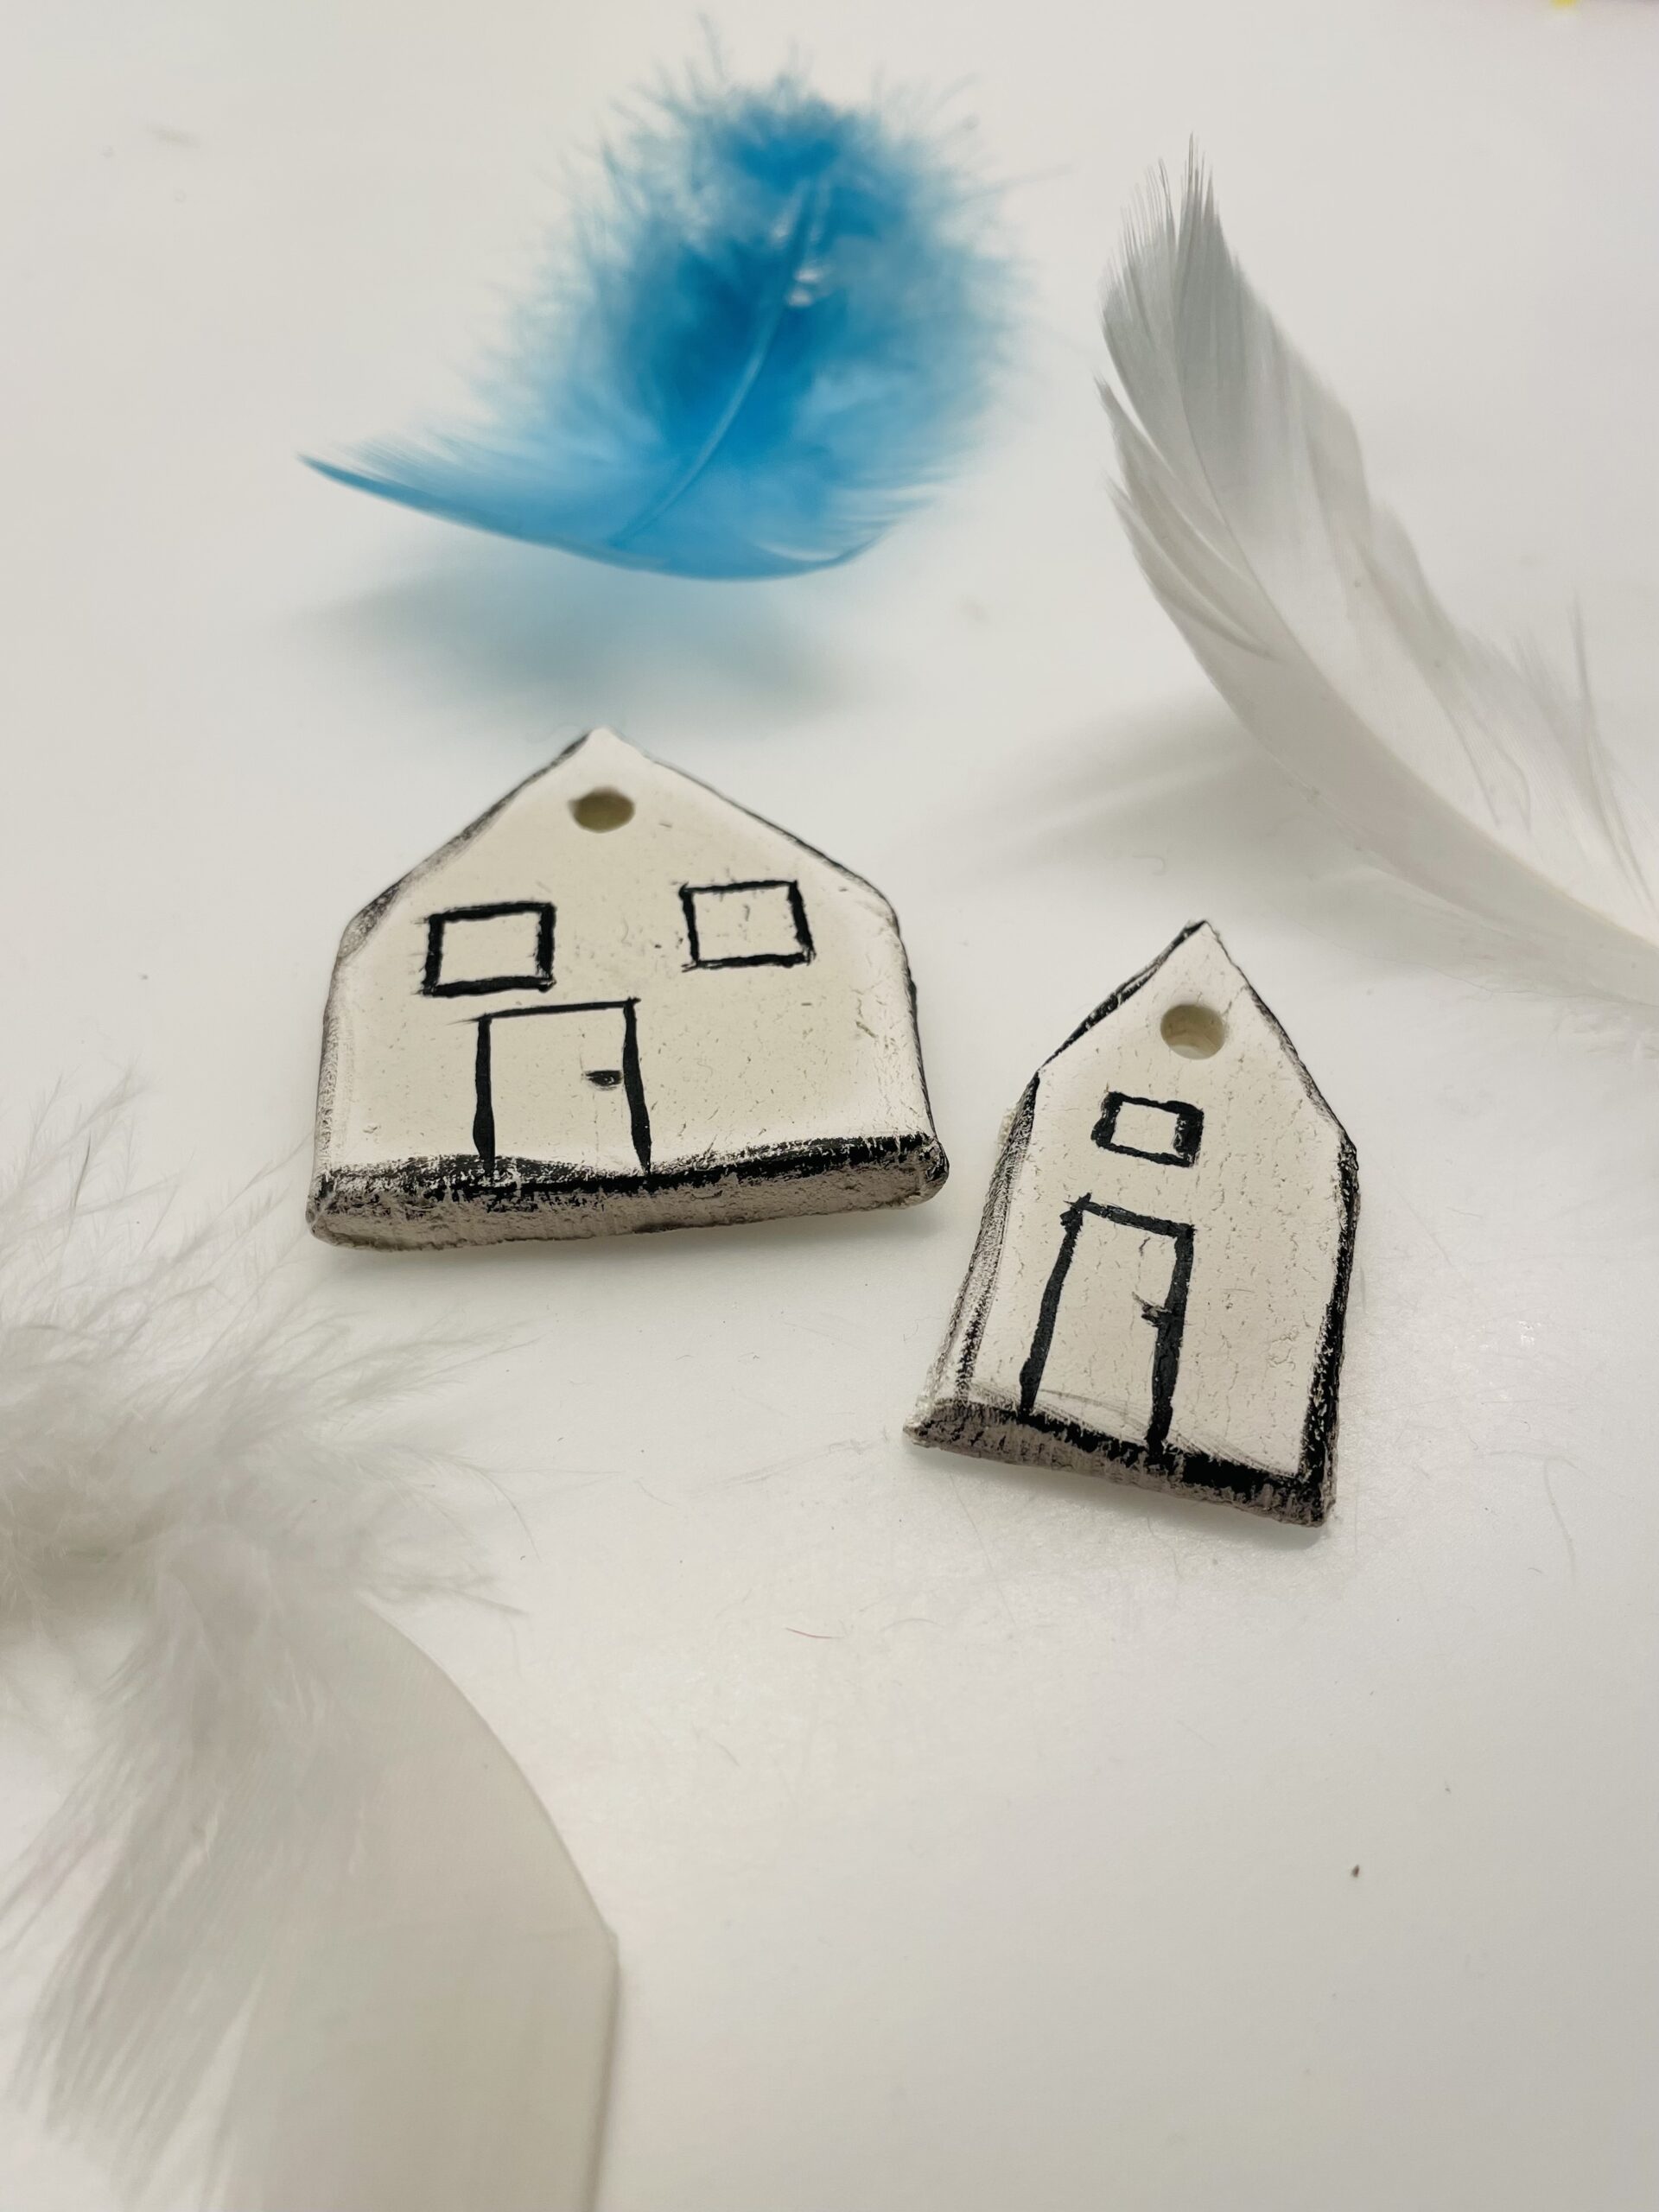
After drying you paint windows and doors on the houses with a felt pen. The edges of the clay houses can also paint in contrast.

Bild zum Schritt 17 für das Bastel- und DIY-Abenteuer für Kinder: 'Nach dem Trocknen malt ihr mit einem Filzstift Fenster und...'

15

The houses are ready.

Bild zum Schritt 18 für das Bastel- und DIY-Abenteuer für Kinder: 'Fertig sind die Häuser.'

Ideas for designing
16

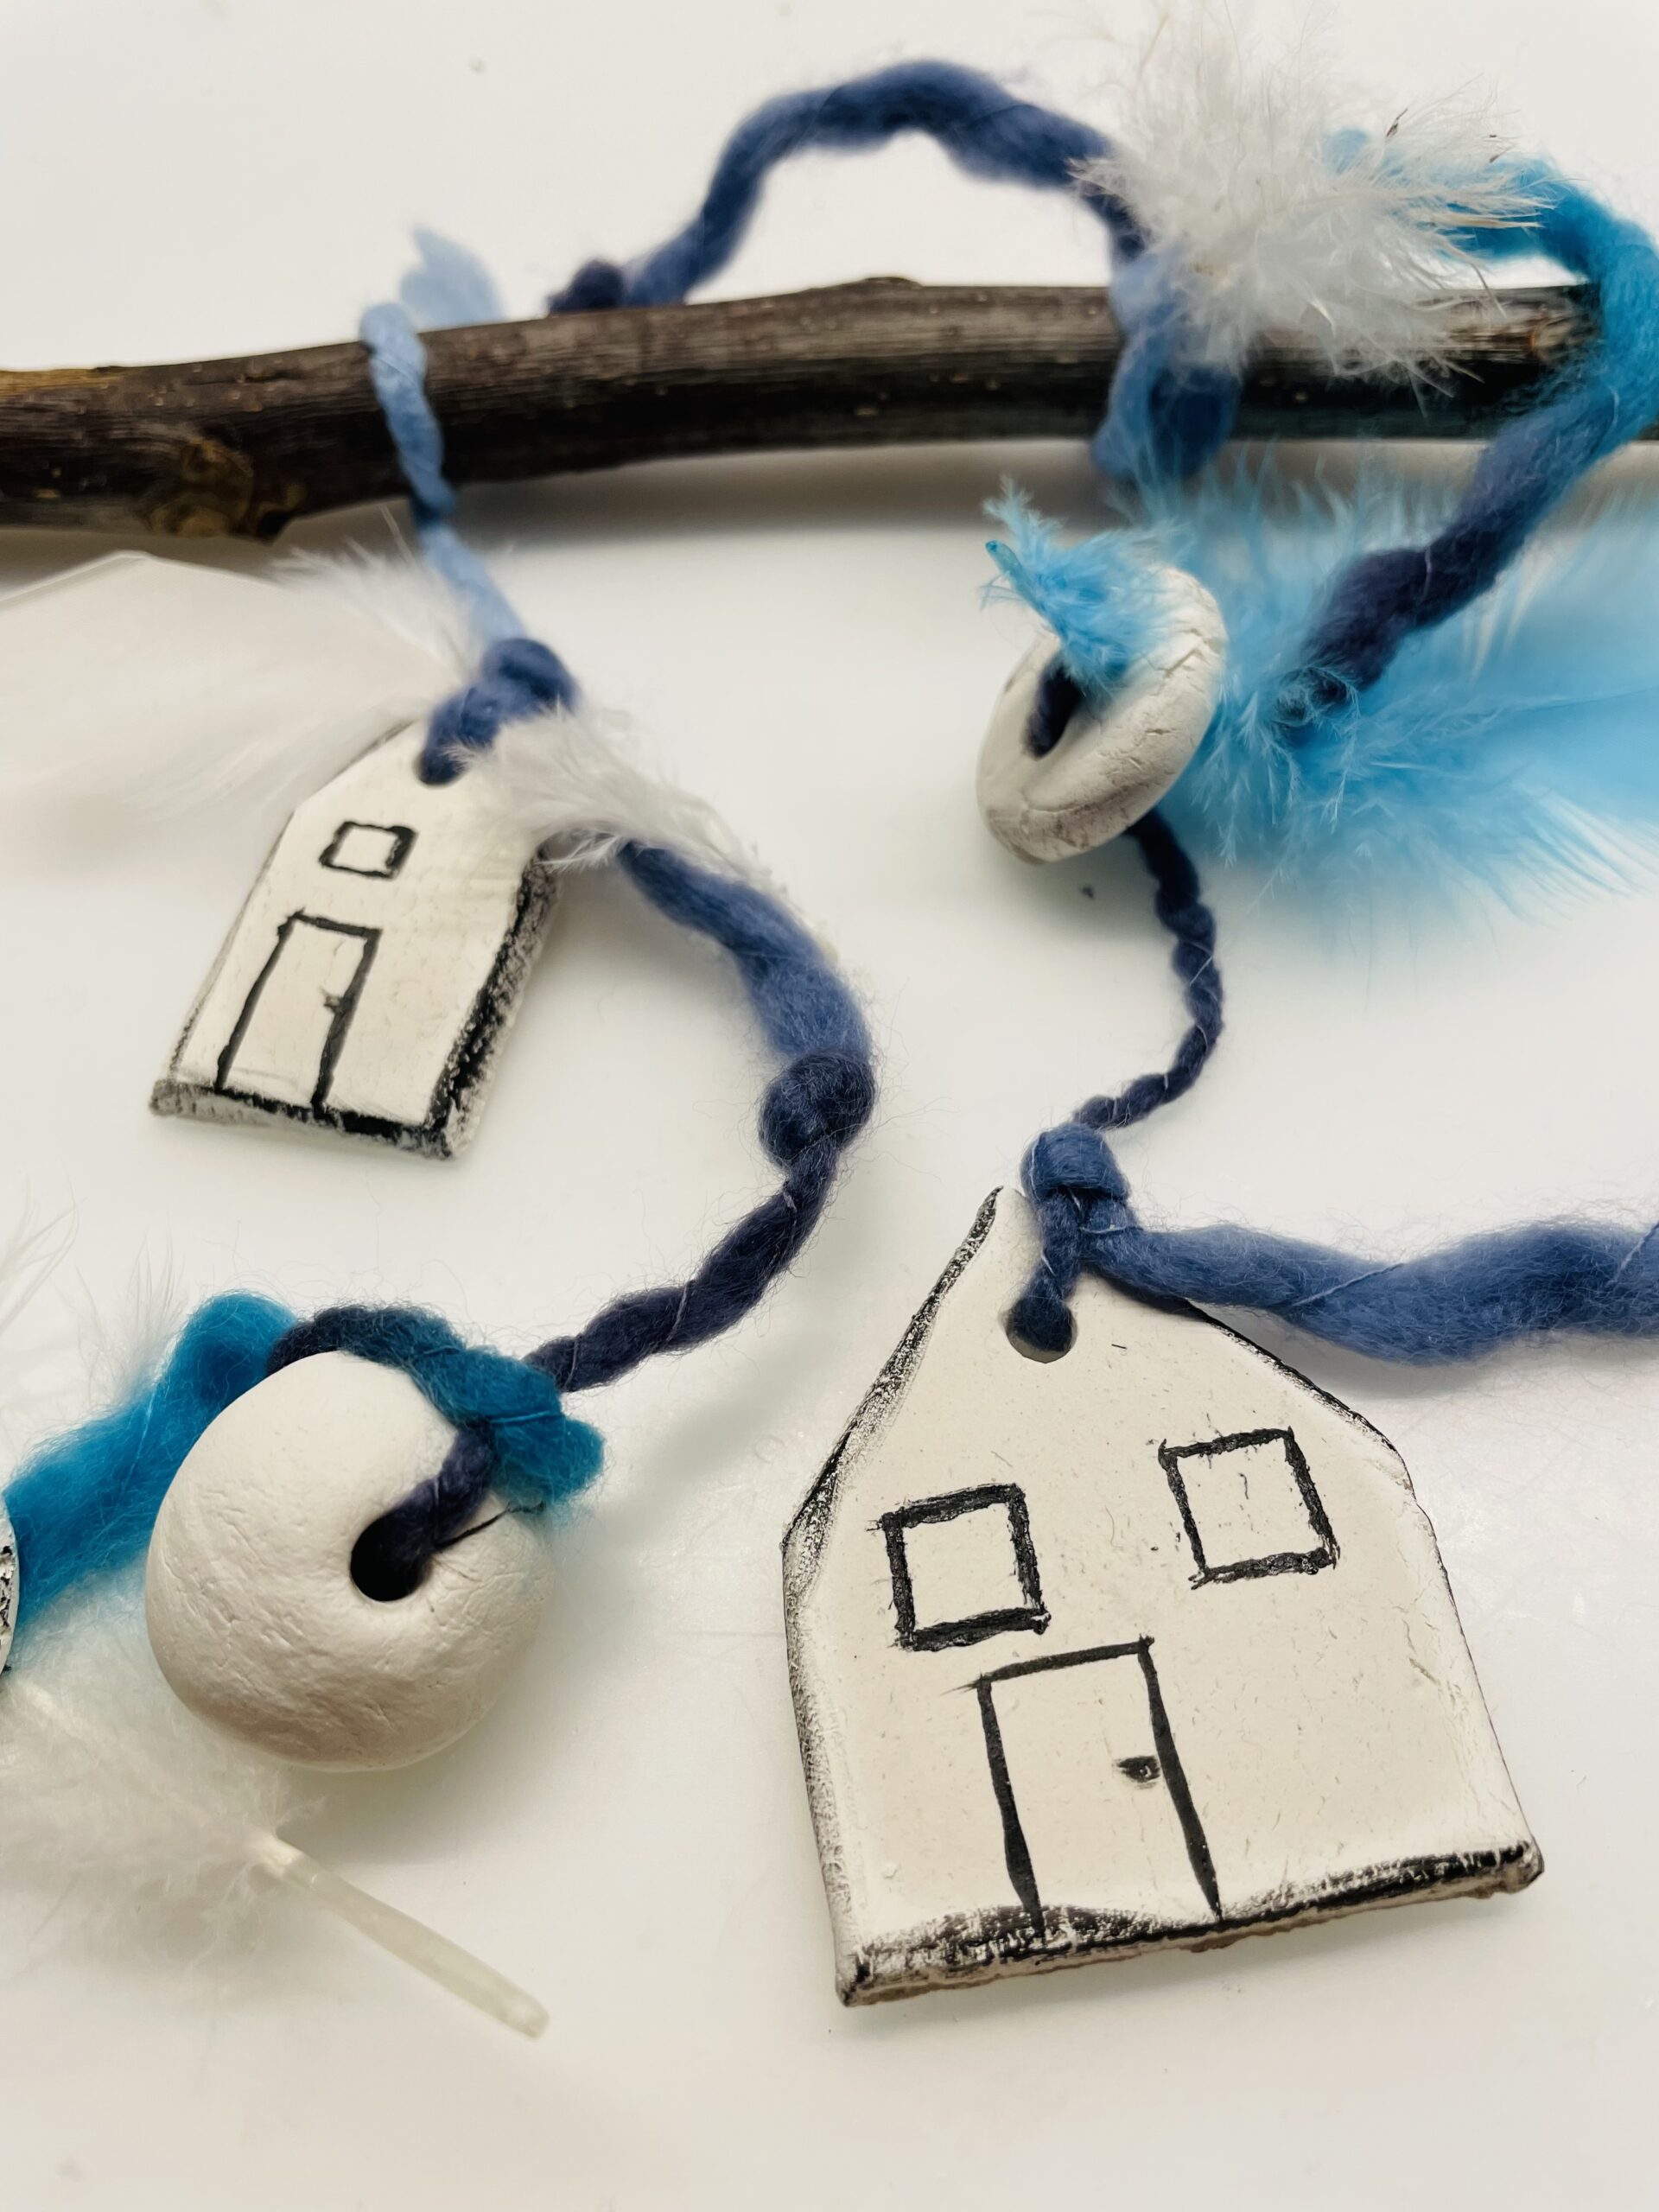
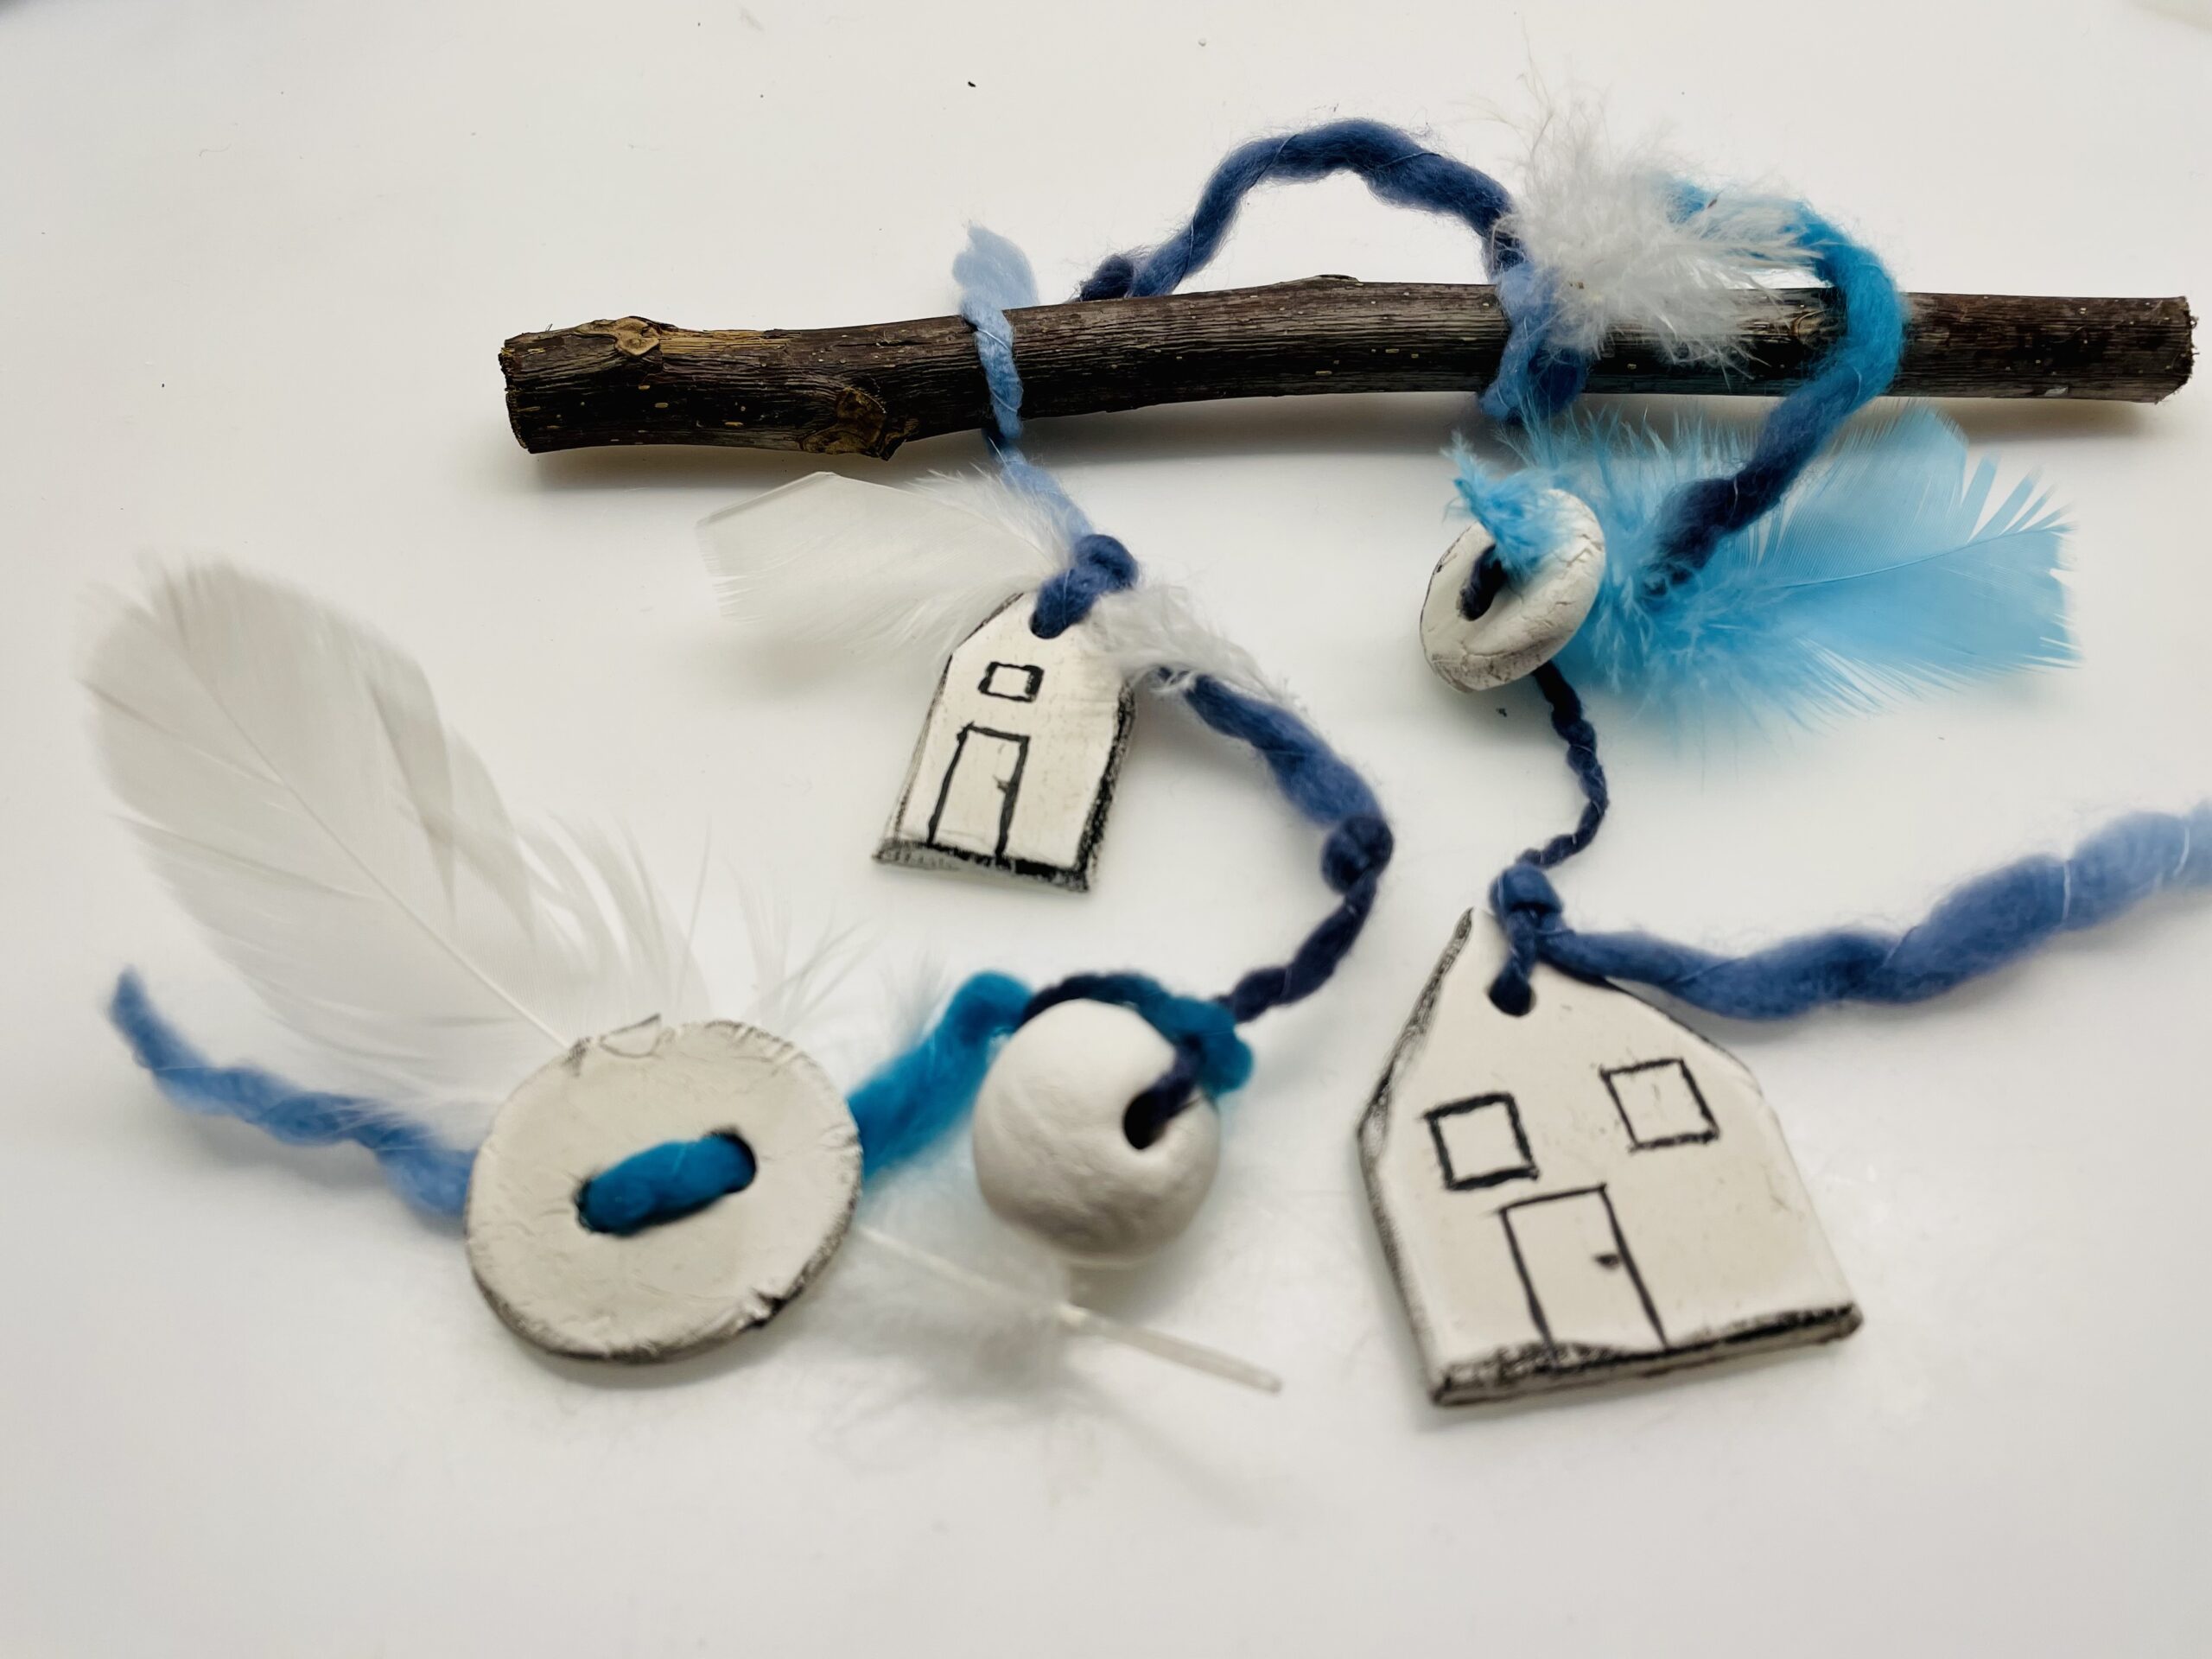
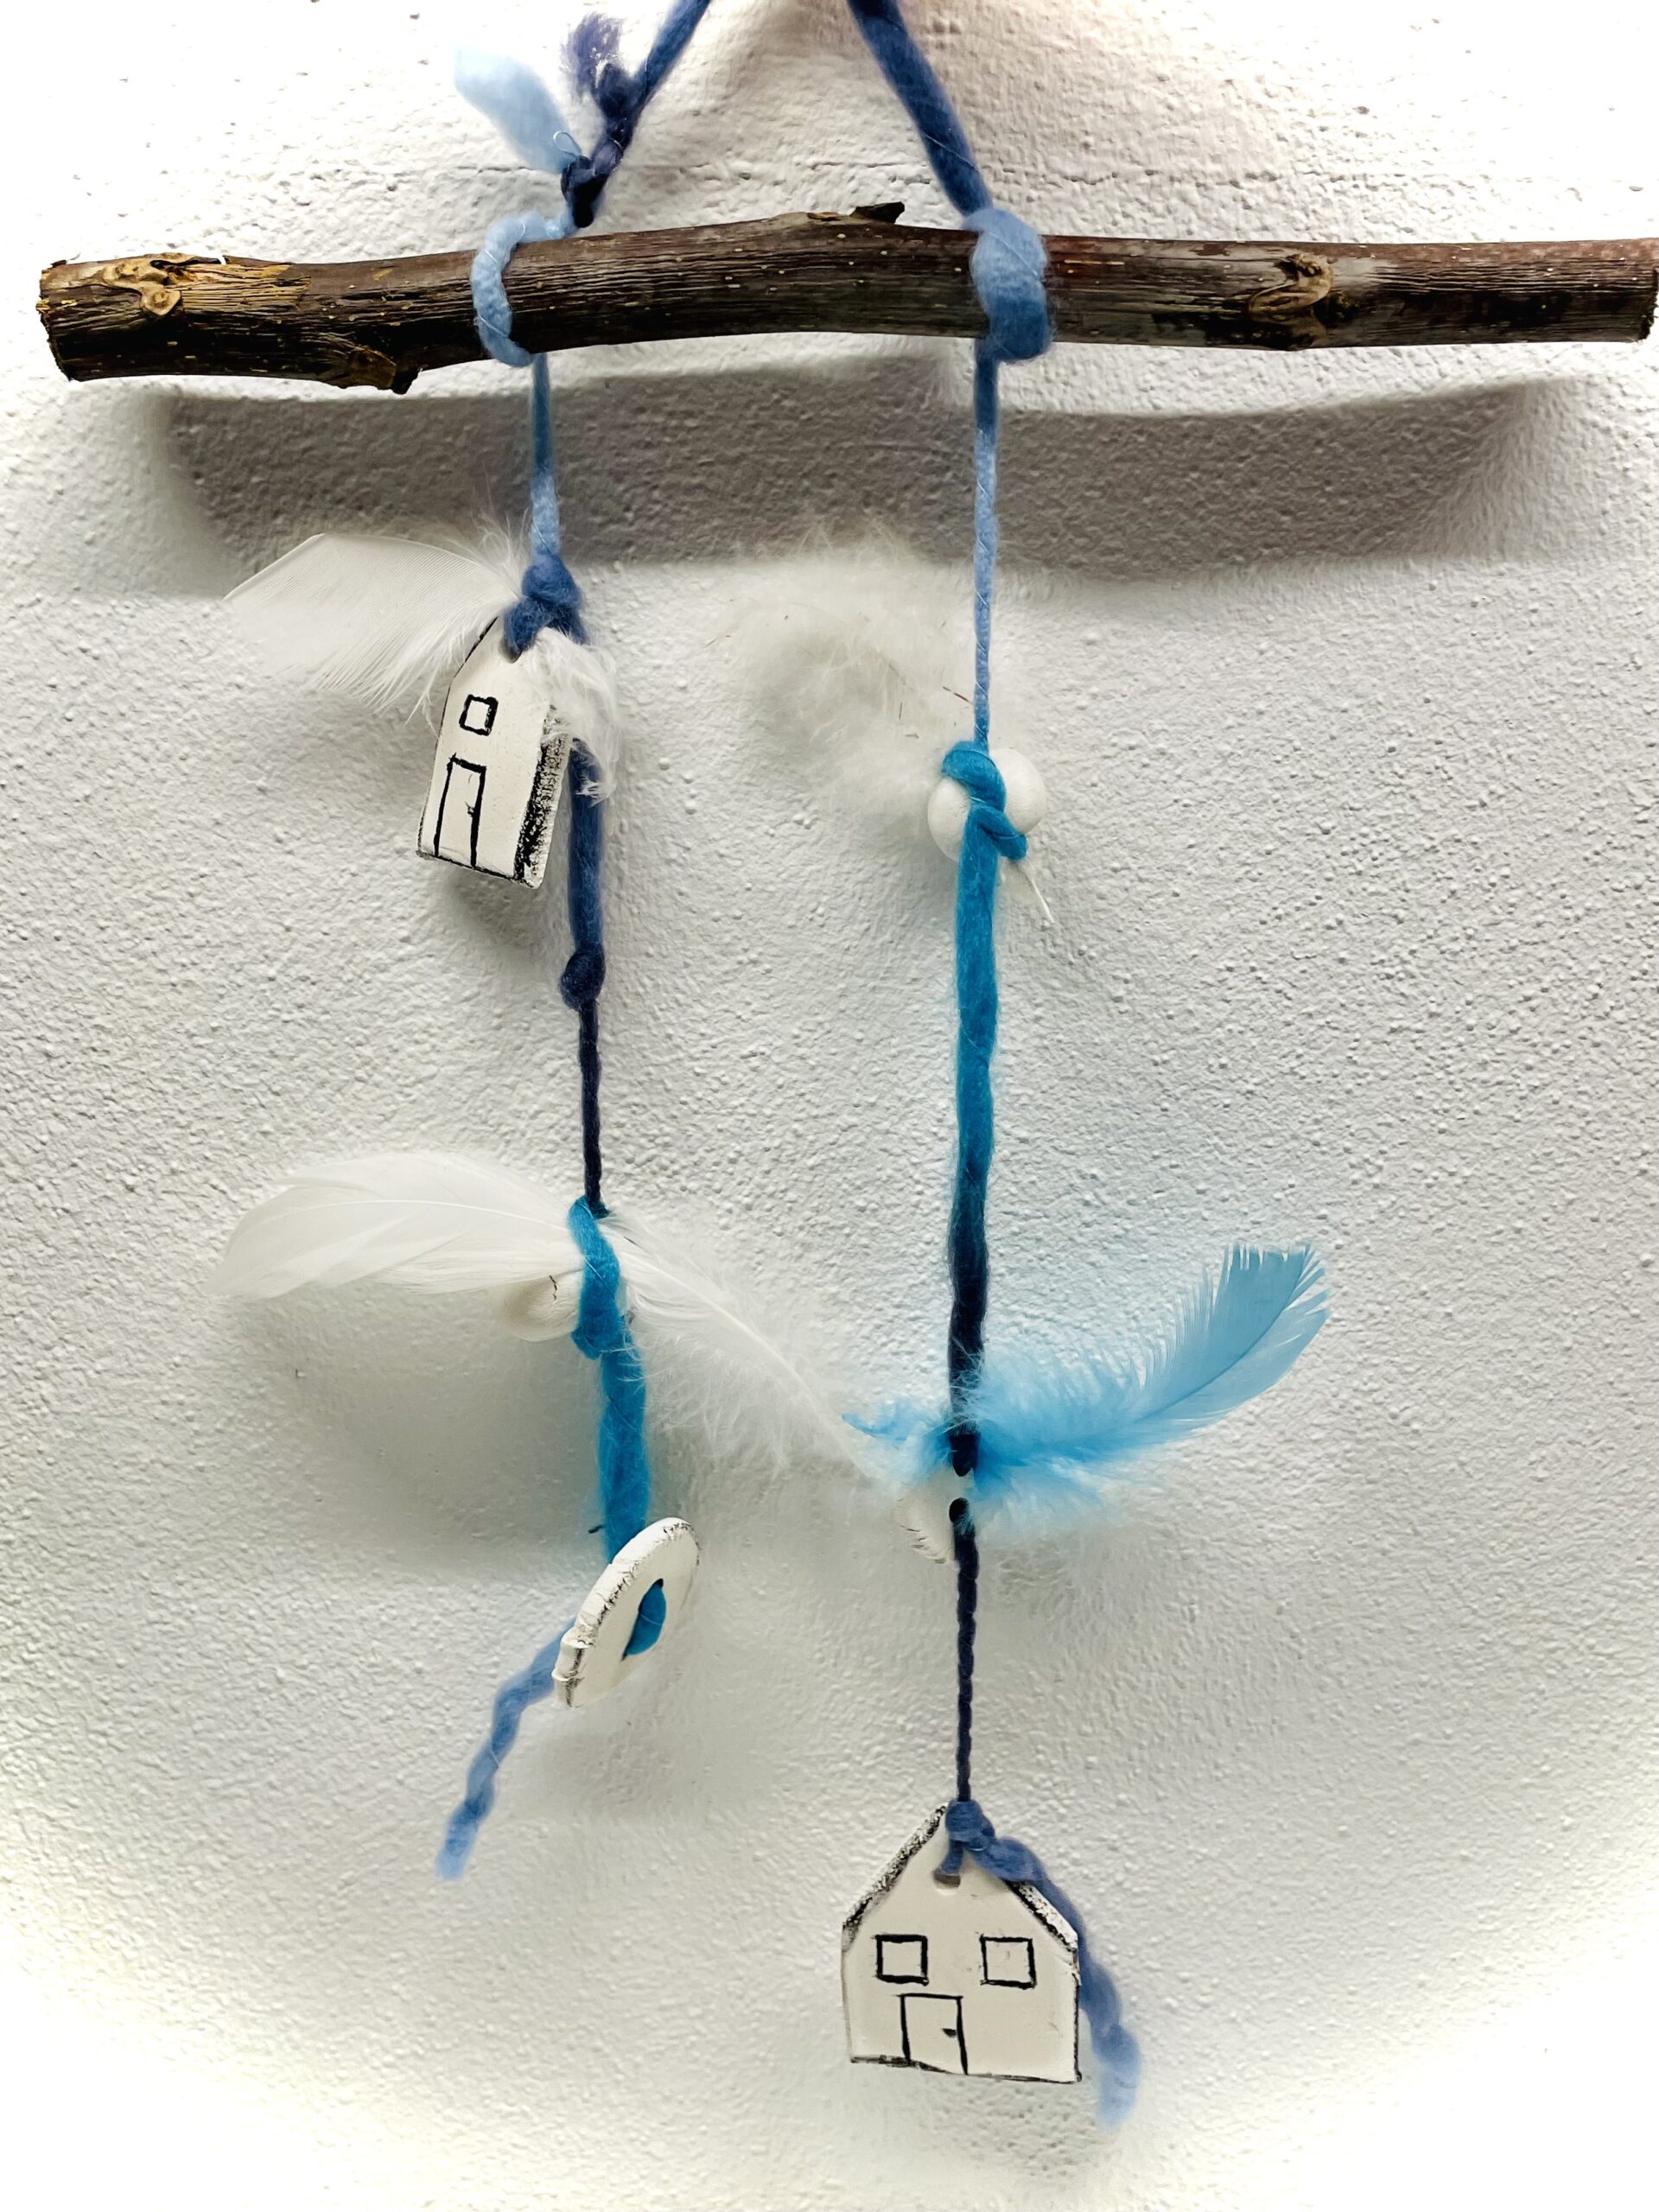
If all parts are well dried, then a mobile or dream catcher, a gift pendant or other decoration is made from it.

Bild zum Schritt 20 für das Bastel- und DIY-Abenteuer für Kinder: 'Sind alle Teile gut getrocknet, dann bastelt daraus ein Mobile...'

17

Have fun and let yourself be inspired!

Bild zum Schritt 21 für das Bastel- und DIY-Abenteuer für Kinder: 'Viel Spaß und lasst euch inspirieren!'

18

2. Bild zum Schritt 21 für das Bastel- und DIY-Abenteuer für Kinder: 'Viel Spaß und lasst euch inspirieren!'

19

3. Bild zum Schritt 22 für das Bastel- und DIY-Abenteuer für Kinder: 'Viel Spaß und lasst euch inspirieren!'

20

4. Bild zum Schritt 23 für das Bastel- und DIY-Abenteuer für Kinder: 'Viel Spaß und lasst euch inspirieren!'

Materials

 Self-drying clay
 1 Freezer bagsZip bag
 1 Pasta wood
 1 Children's knives Rounded knife
 2 Plastic straws thinPlease, no glass or stainless steel tubes!
 1 Baking paper or Butterbread paper
 1 Tray or sheet metal, wooden board
 1 Felt pen
 1 Builder's pad or place set washable
 1 Paint coats
 1 Rinse cloths moist
All links marked with a shopping cart lead to Amazon - here we have selected products that we would order ourselves and in part also ordered. In a qualified purchase via the advertising link, we as Amazon partner receive a commission, for you there are no costs. You thus support our cost- and advertising banner-free, educational offer.

Directions

1

First prepare a tray with baking paper and prepare a freezer bag on your craft pad on the table.

Bild zum Schritt 1 für das Bastel- und DIY-Abenteuer für Kinder: 'Legt zuerst ein Tablett mit Backpapier bereit und bereitet einen...'

2

Then you put a blunt rounded knife (e.g. children's knife), a plastic straw, a scissors and if possible a small noodle wood.

Bild zum Schritt 2 für das Bastel- und DIY-Abenteuer für Kinder: 'Dann legt ihr ein stumpfes abgerundetes Messer (z.B. Kindermesser), einen...'

Beading
3

Now cut off a piece of clay with the knife and cut small pieces from it in the size of 1cm x 1cm. Now you put the clay in your palm and the other hand over it. Then you roll a ball by circling your hands against each other.
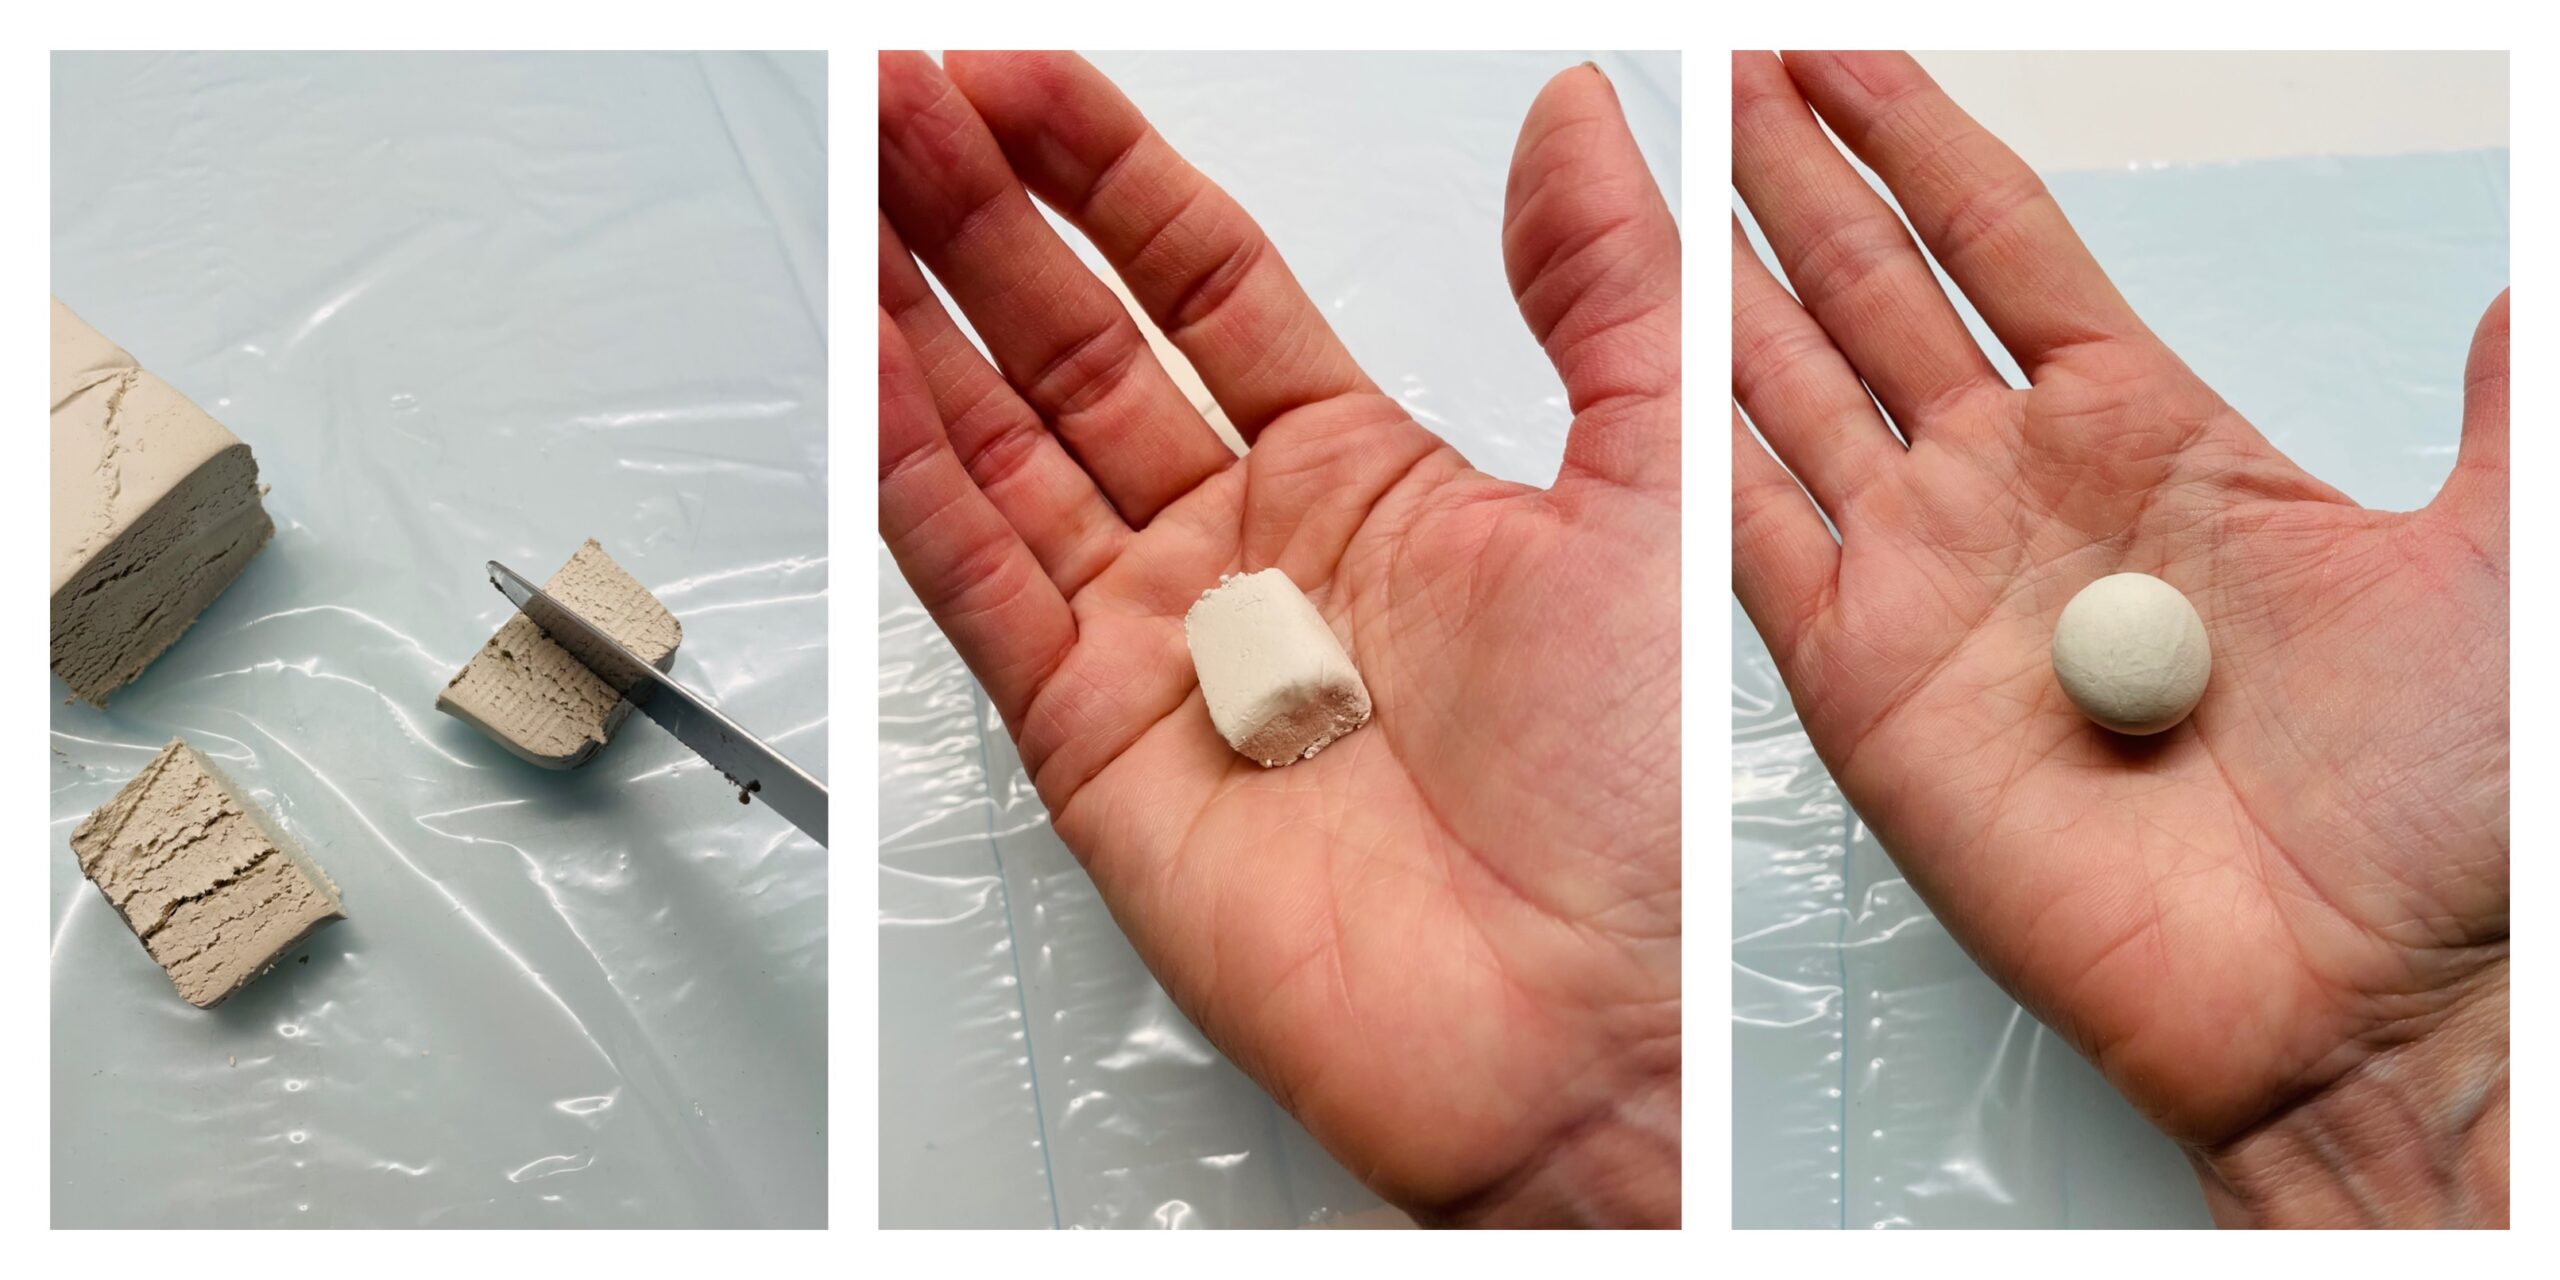
Bild zum Schritt 4 für das Bastel- und DIY-Abenteuer für Kinder: 'Schneidet jetzt ein Stück von der Tonmasse mit dem Messer...'

4

Then place the ball on the craft pad and punch a hole through the middle of the bead with the straw. Gently turn the straw and make sure not to squeeze the ball together. If the straw touches the base, take the ball up and push the straw completely through it. Then pull it out again.
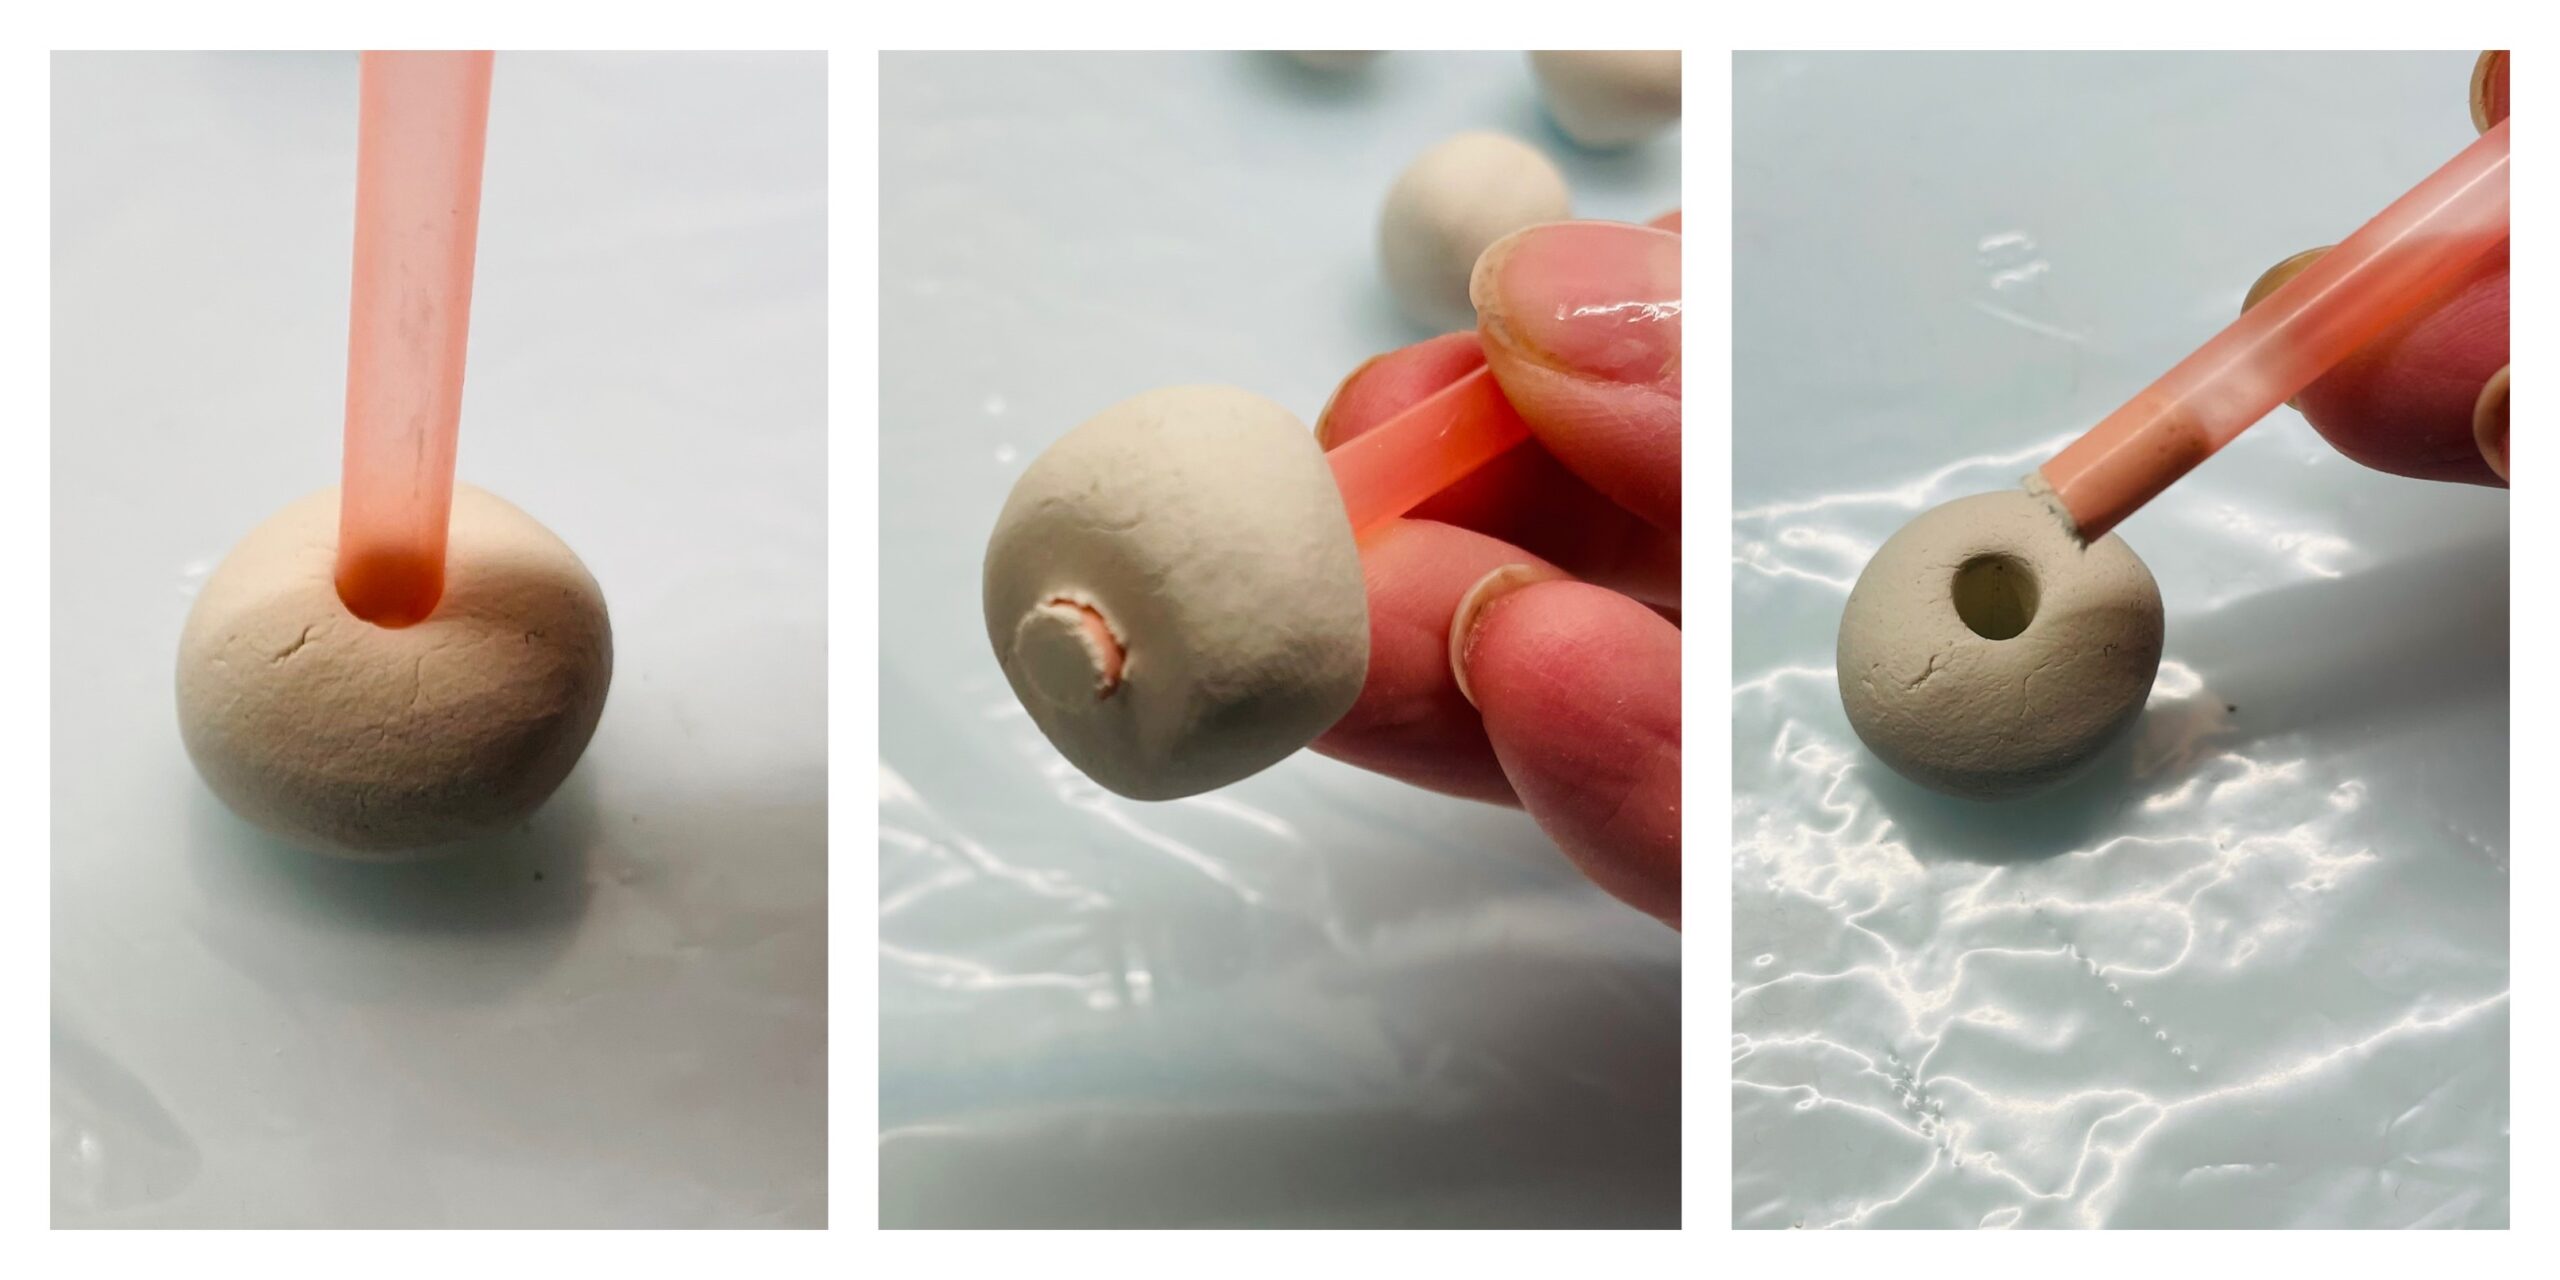
Bild zum Schritt 5 für das Bastel- und DIY-Abenteuer für Kinder: 'Anschließend legt ihr die Kugel auf die Bastelunterlage und stecht...'

5

Put the bead to dry.

Bild zum Schritt 6 für das Bastel- und DIY-Abenteuer für Kinder: 'Legt die Perle zum Trocknen.'

Make buttons
6

For the buttons you first form a ball out of the clay (see making beads).
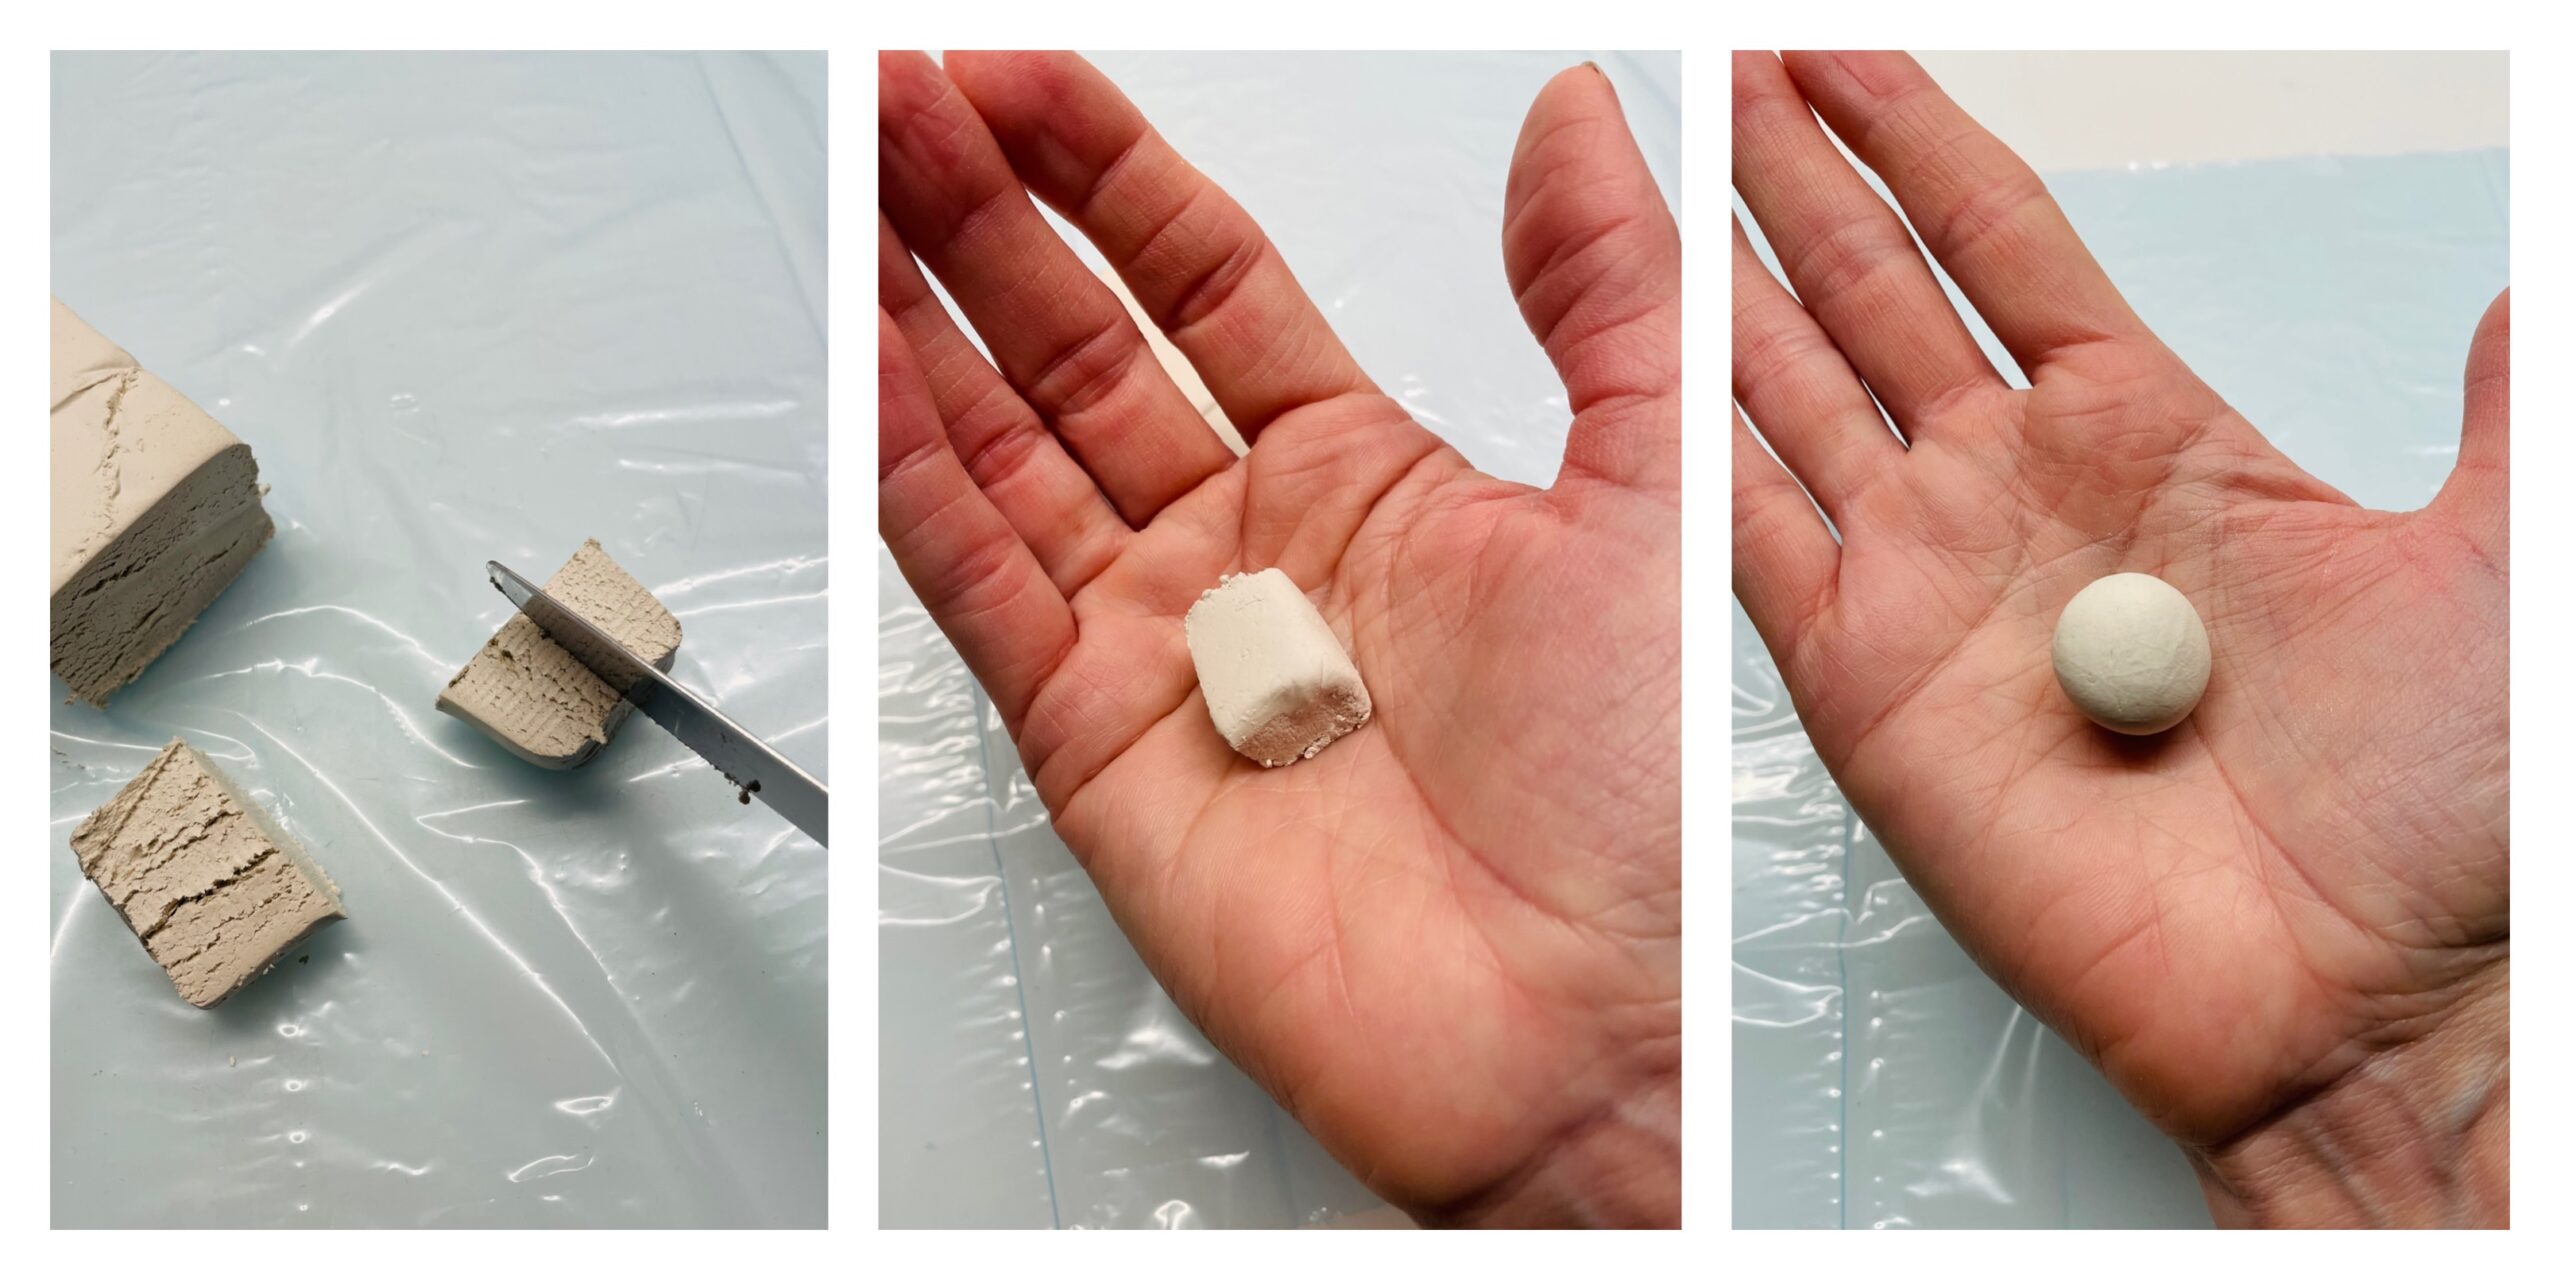
Bild zum Schritt 8 für das Bastel- und DIY-Abenteuer für Kinder: 'Für die Knöpfe formt ihr zuerst eine Kugel aus der...'

7

Then you press the ball onto the base and press it flat with the back of your hand or with your fingers. A circle is created. Don't make the button too thin, otherwise the tone breaks.

Bild zum Schritt 9 für das Bastel- und DIY-Abenteuer für Kinder: 'Die Kugel drückt ihr dann auf die Unterlage und drückt...'

8

Now you cut out two adjacent holes with the straw.
Tip: Season the straw as soon as there is too much clay in the straw.
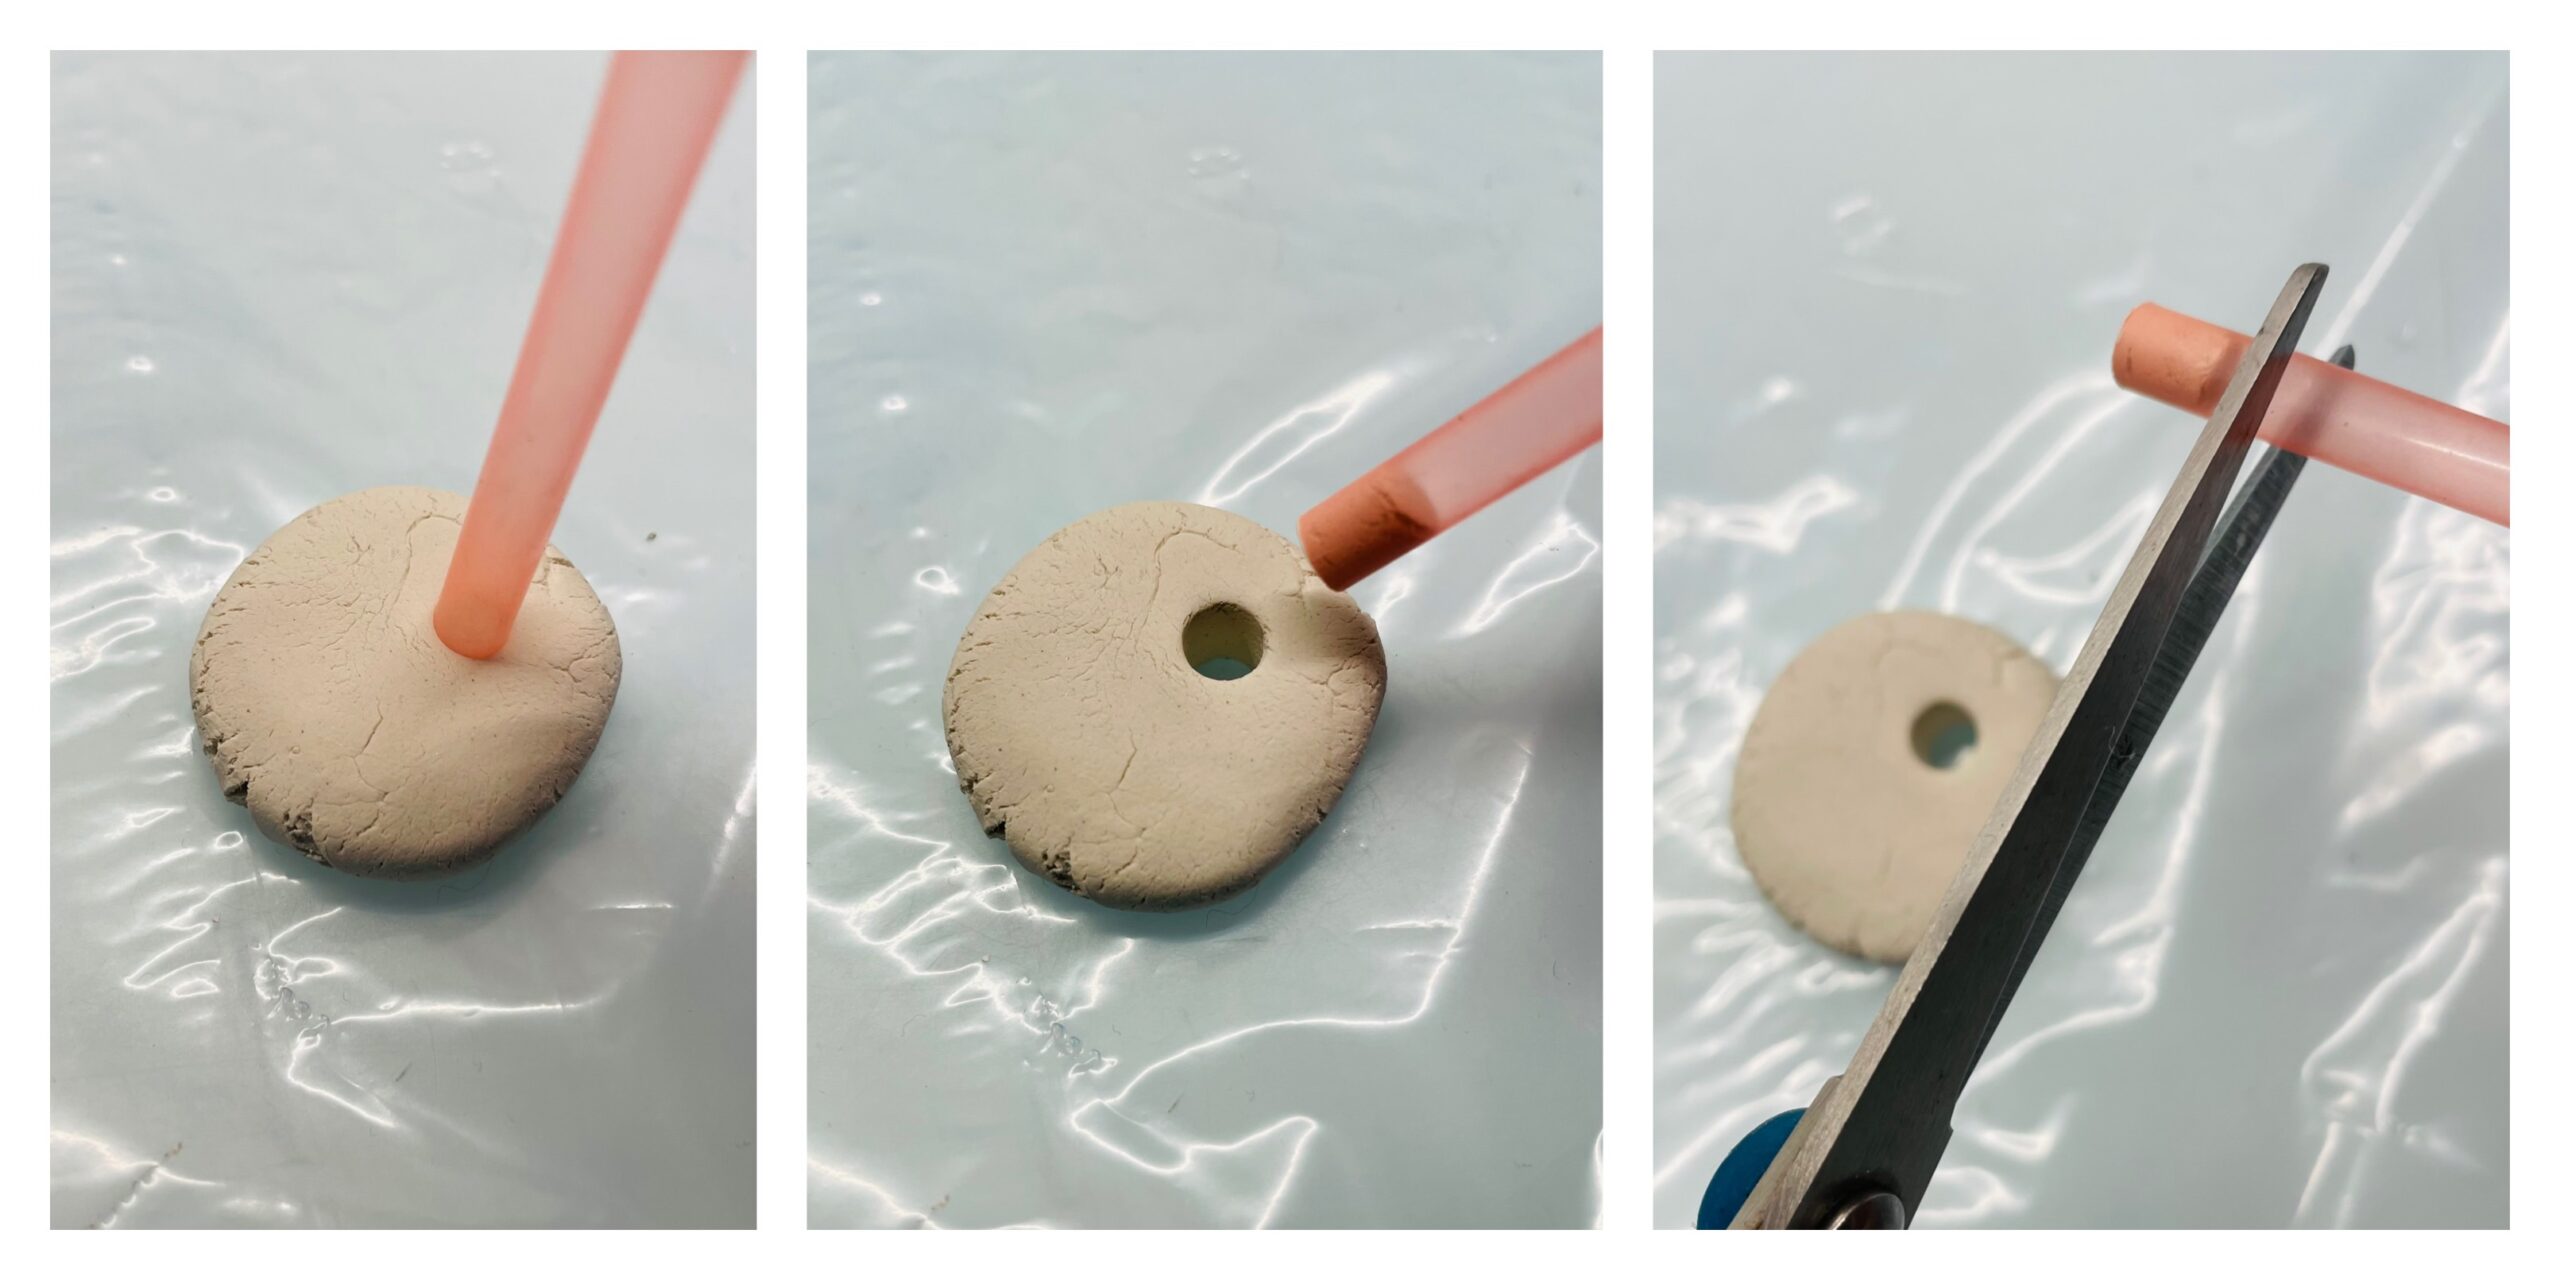
Bild zum Schritt 10 für das Bastel- und DIY-Abenteuer für Kinder: 'Jetzt stecht ihr zwei nebeneinander liegende Löcher mit dem Strohhalm...'

9

If both holes are pierced, then check whether both holes are well punctured on the back.
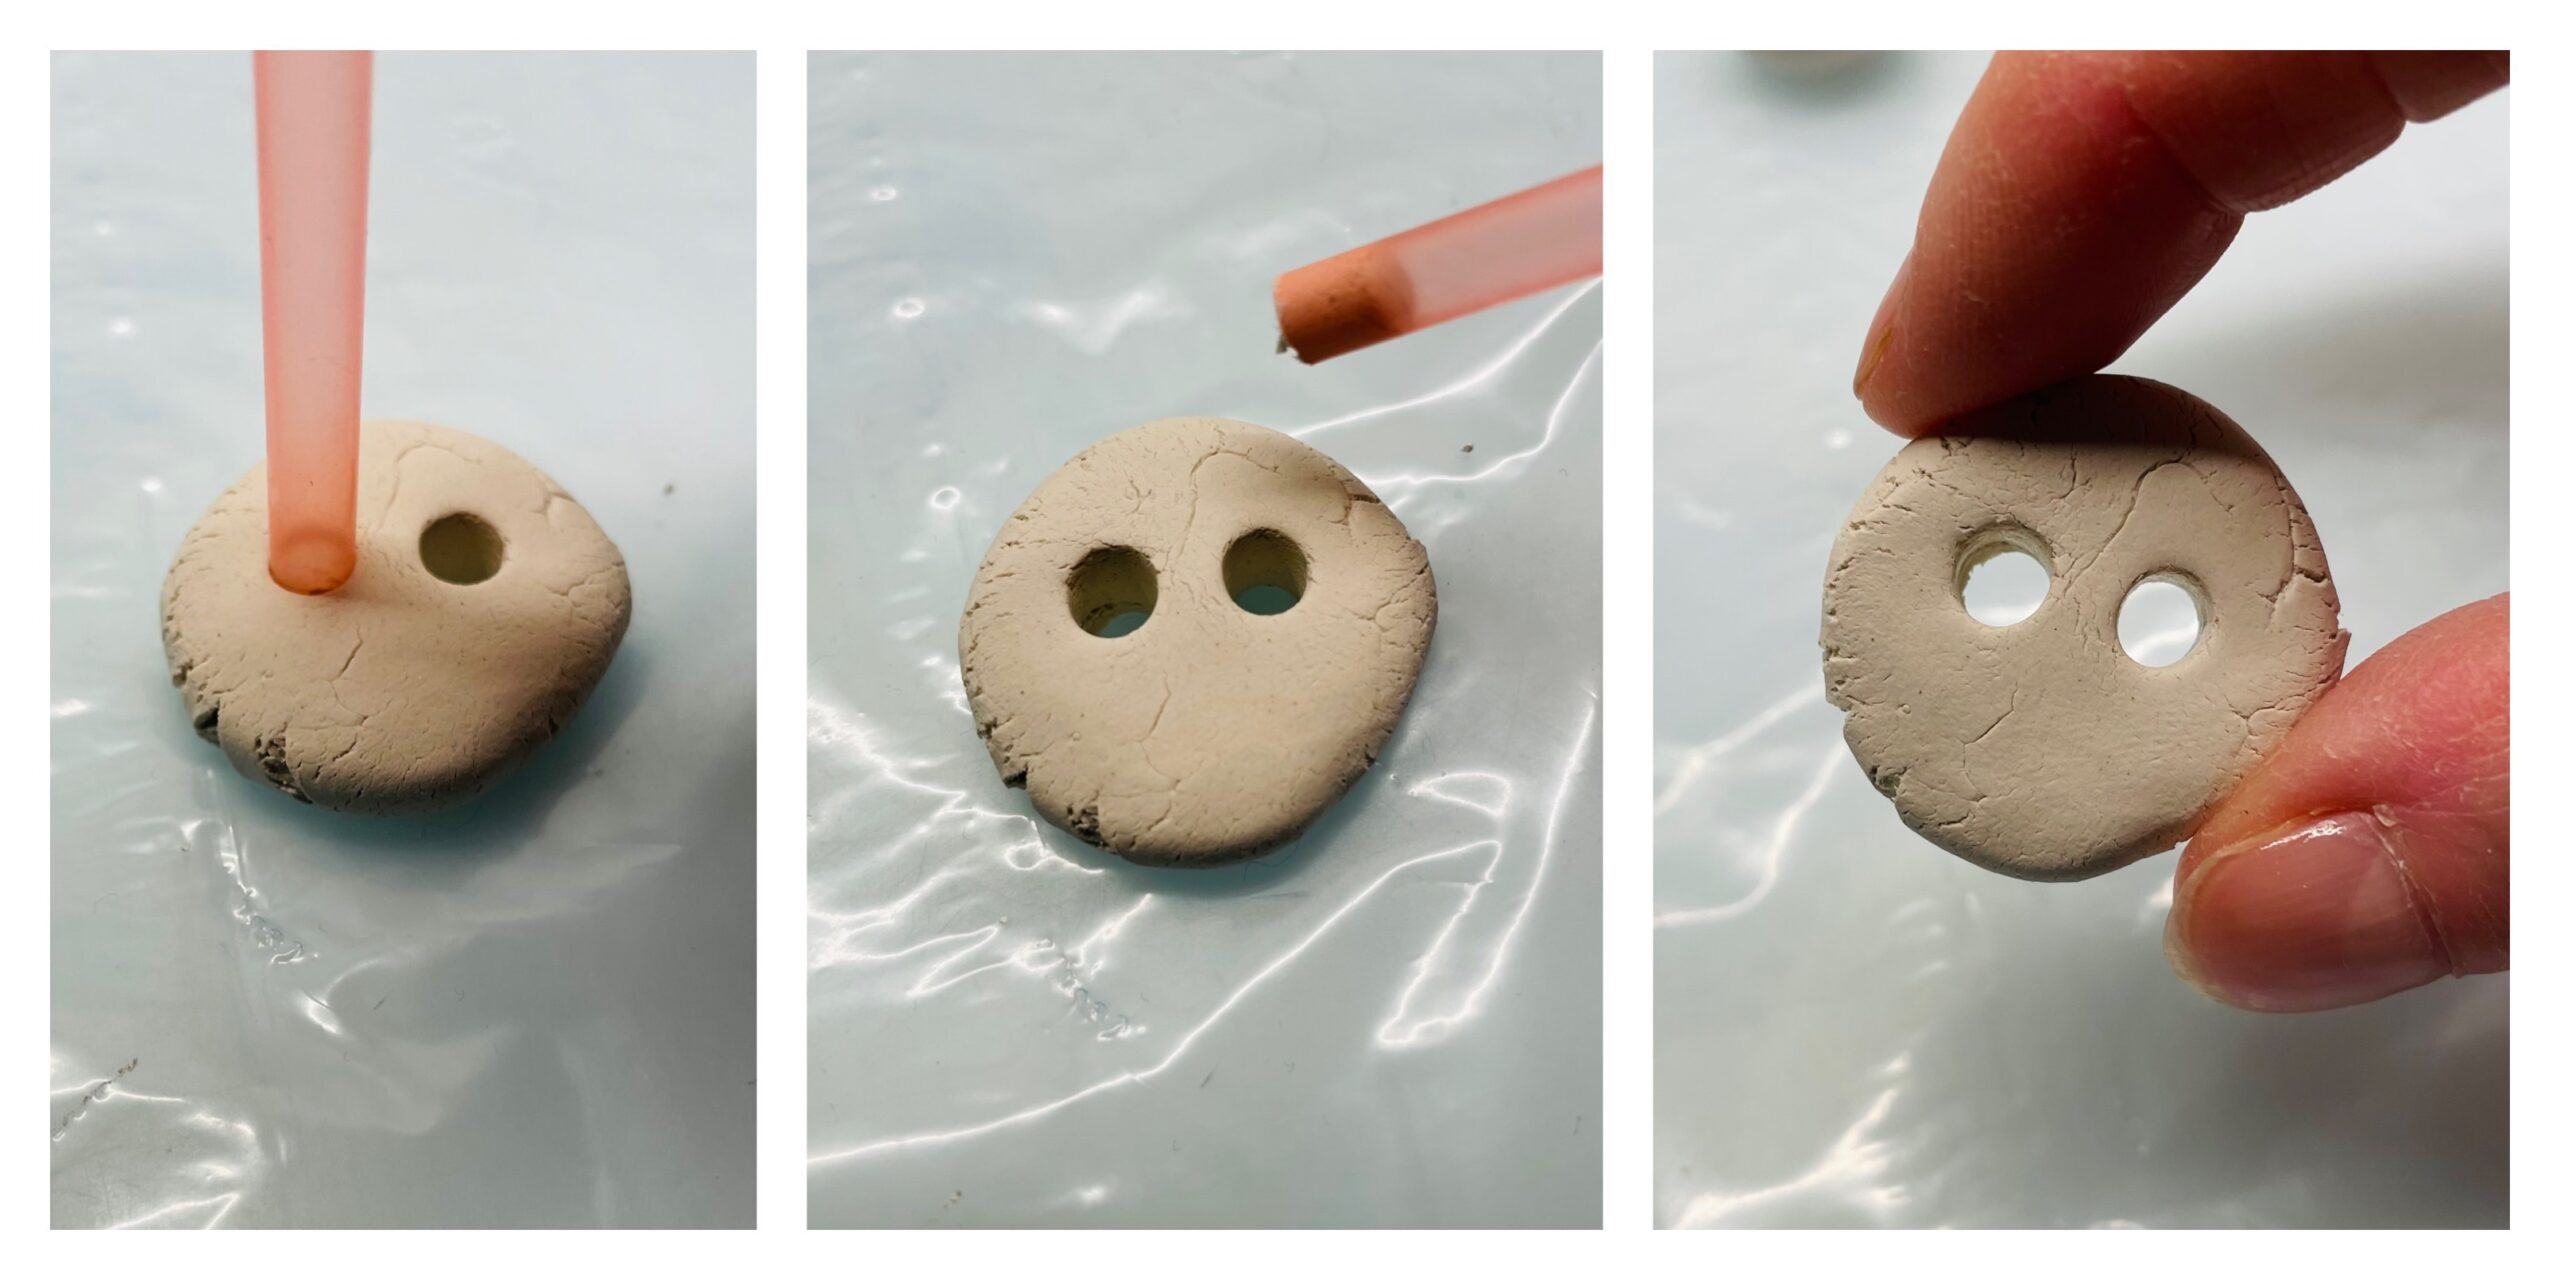
Bild zum Schritt 11 für das Bastel- und DIY-Abenteuer für Kinder: 'Sind beide Löcher durchstochen, dann kontrolliert ob beide Löcher auch...'

10

Also place the buttons to dry.

Bild zum Schritt 12 für das Bastel- und DIY-Abenteuer für Kinder: 'Legt die Knöpfe ebenfalls zum Trocknen.'

Building houses
11

For the houses you cut off an approx. 1cm thick piece of clay mass and put it on the base. Then you put a freezer bag over it and roll out the clay mass with the noodle wood about 0.5 cm thick.
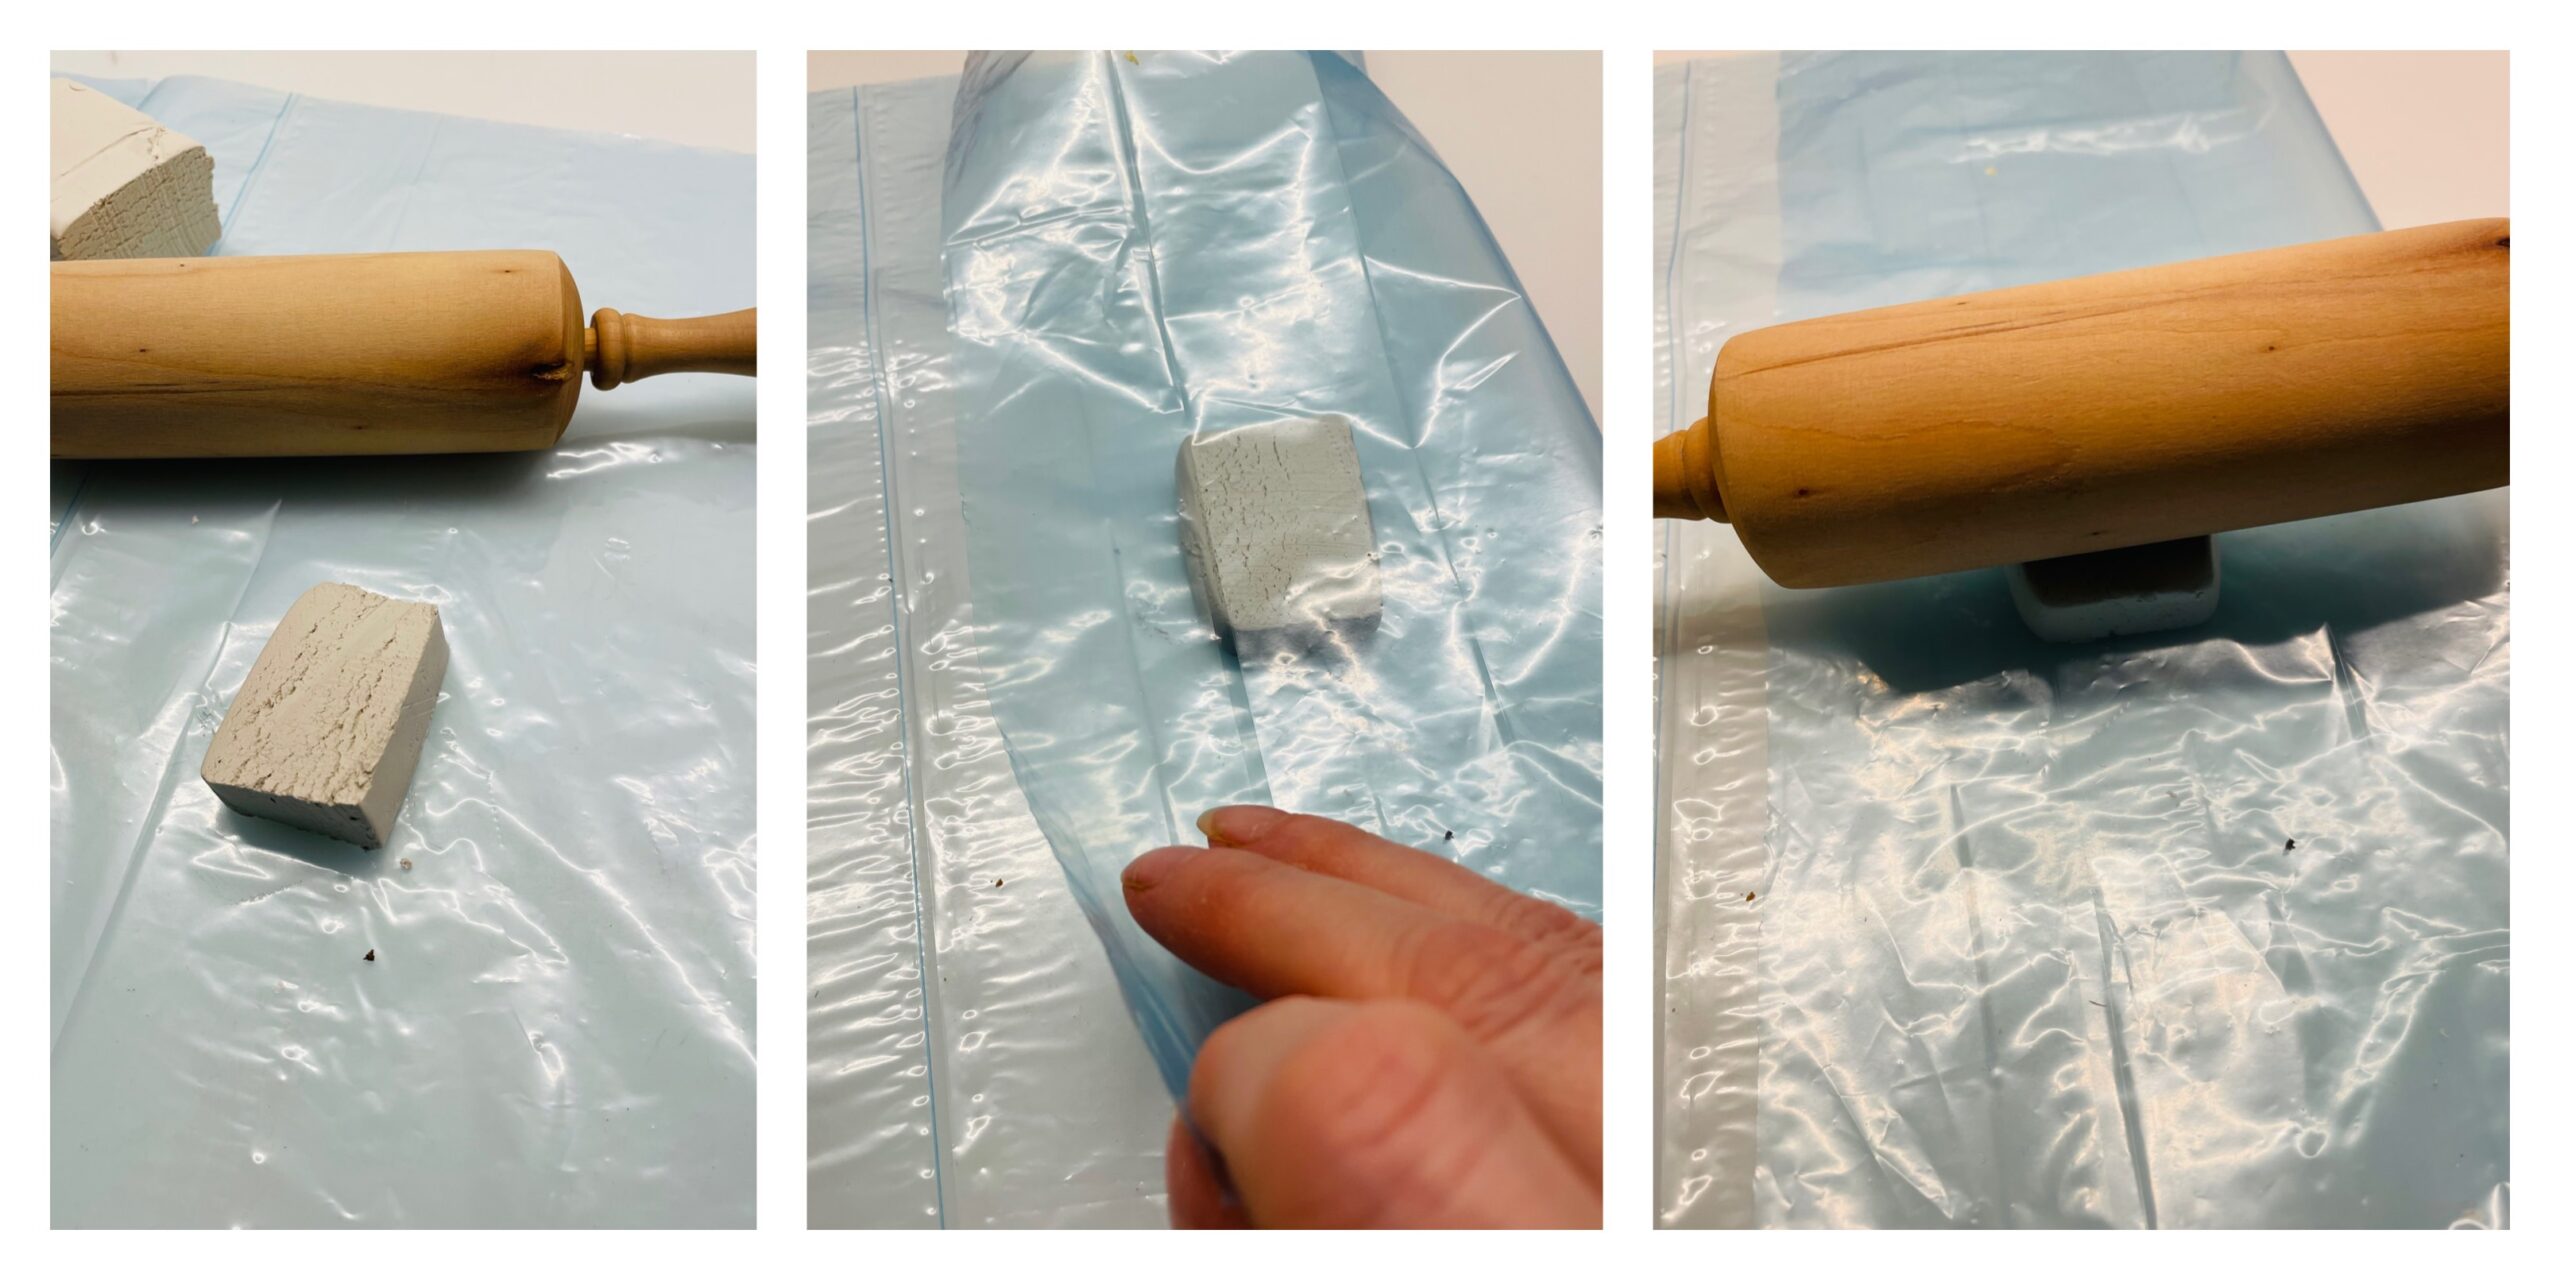
Bild zum Schritt 14 für das Bastel- und DIY-Abenteuer für Kinder: 'Für die Häuser schneidet ihr ein ca. 1cm dickes Stück...'

12

Then take off the freezer bag and use a knife to cut out the outline of a house.
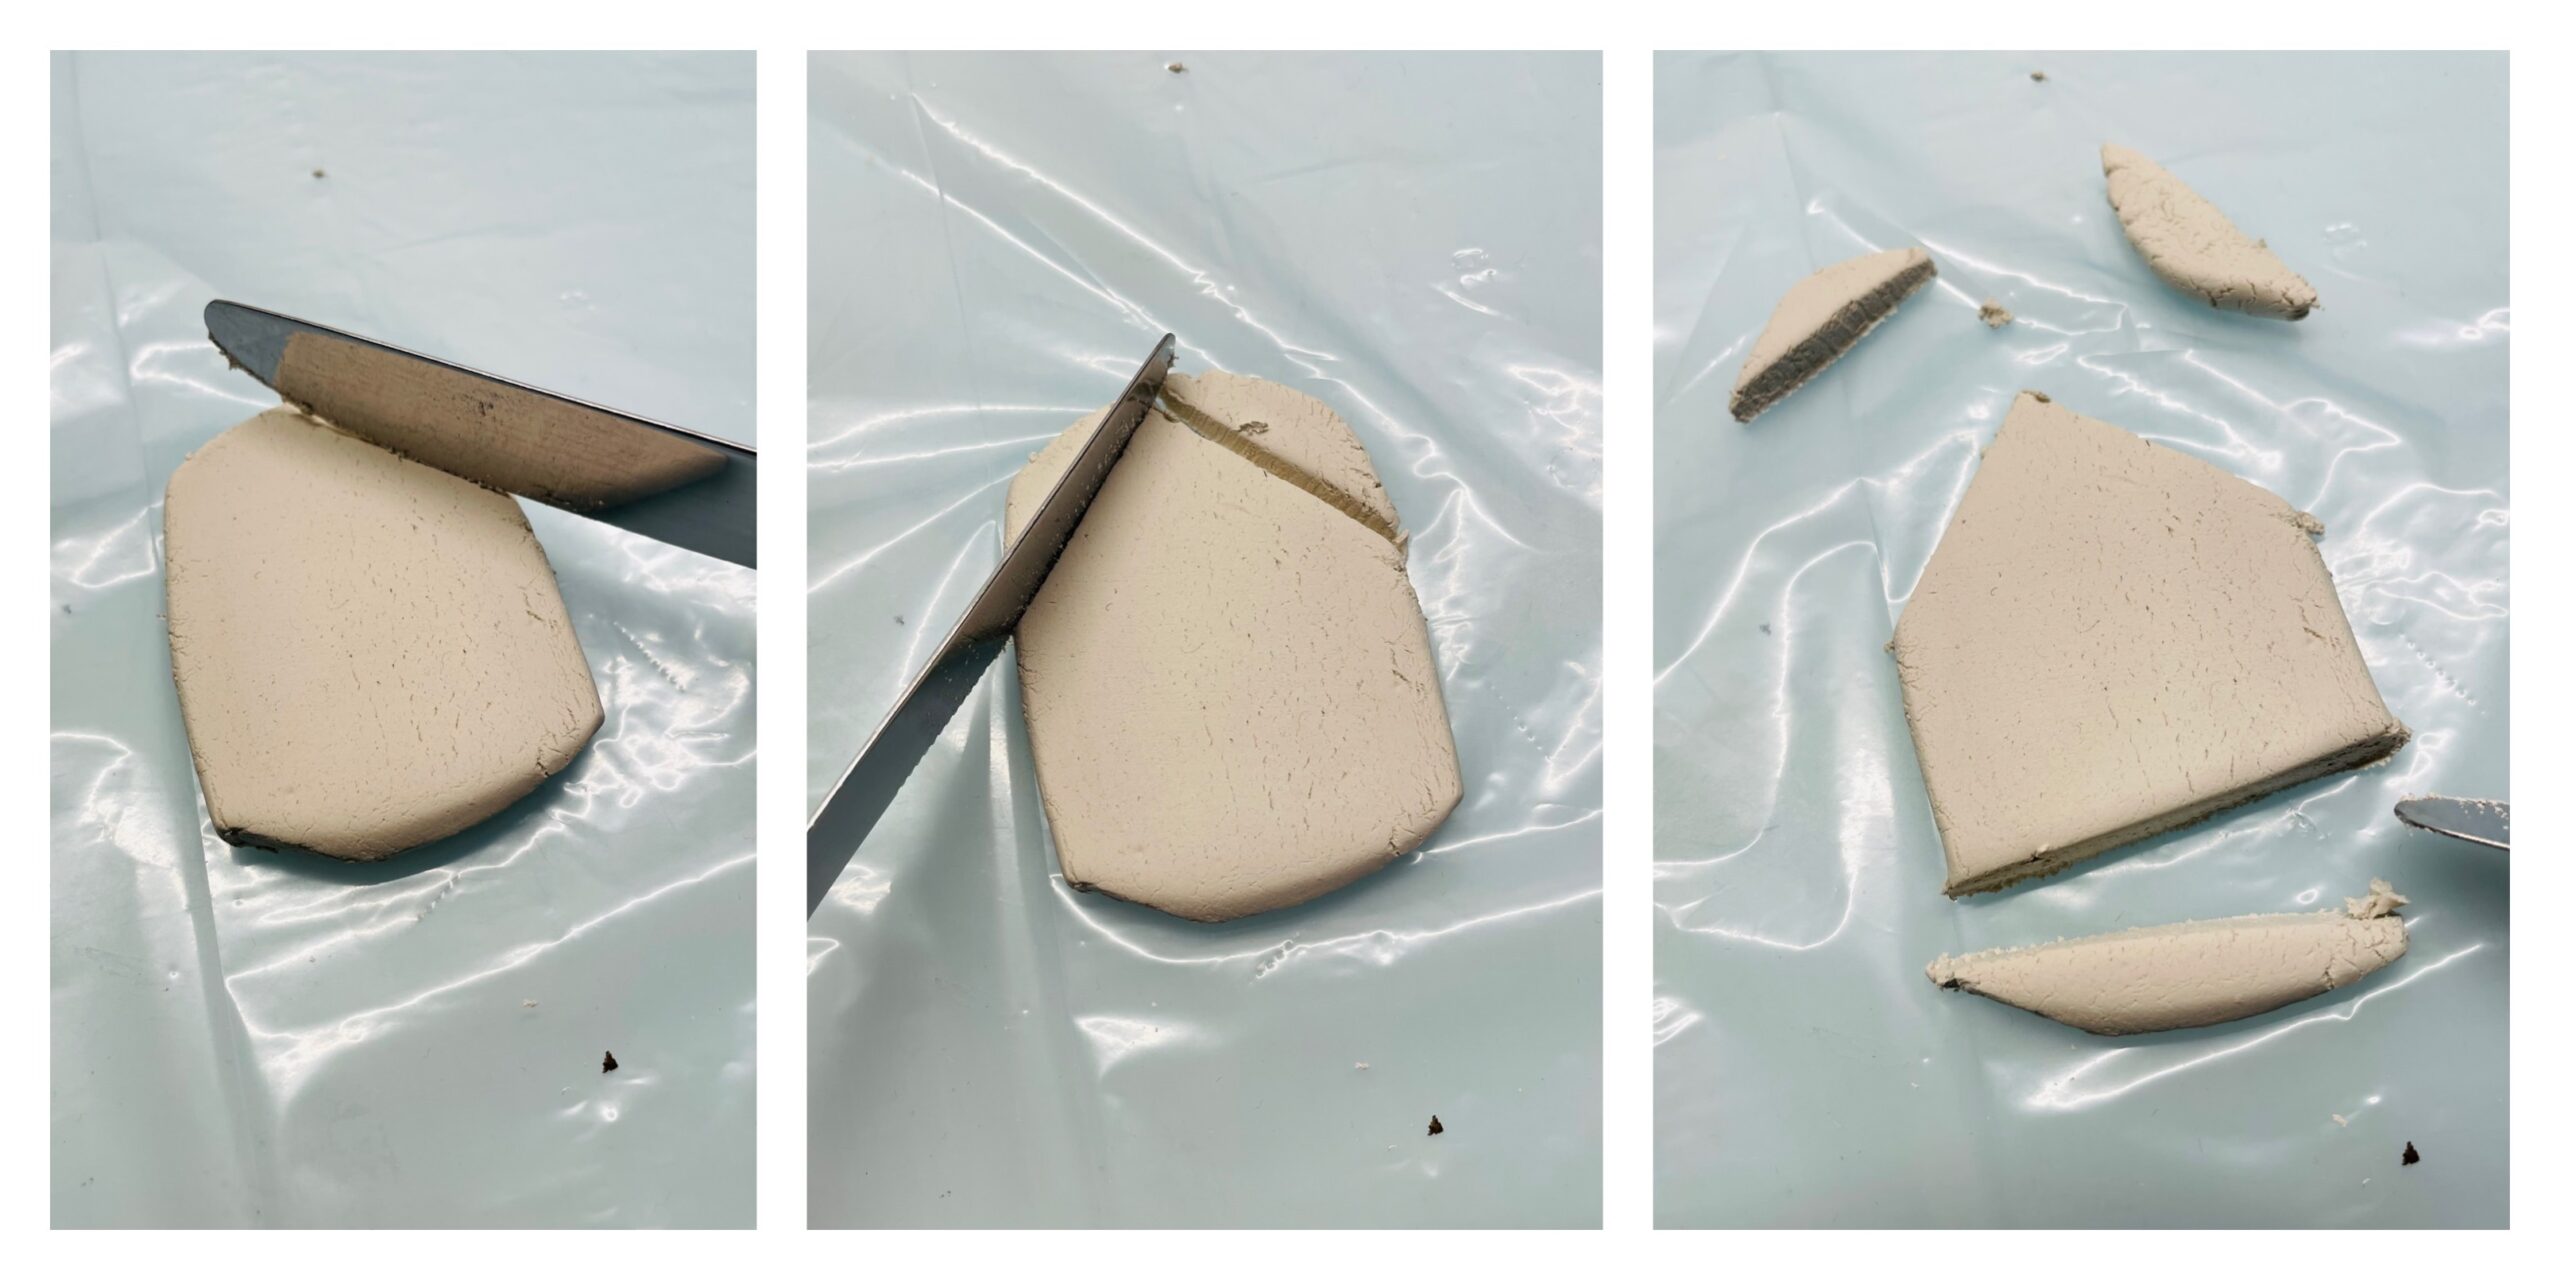
Bild zum Schritt 15 für das Bastel- und DIY-Abenteuer für Kinder: 'Anschließend nehmt ihr den Gefrierbeutel ab und schneidet mit einem...'

13

Then you stab a hole in the roof with the straw. Raise the house carefully and check if the hole on the back is well pierced.
Then you put the house to dry.
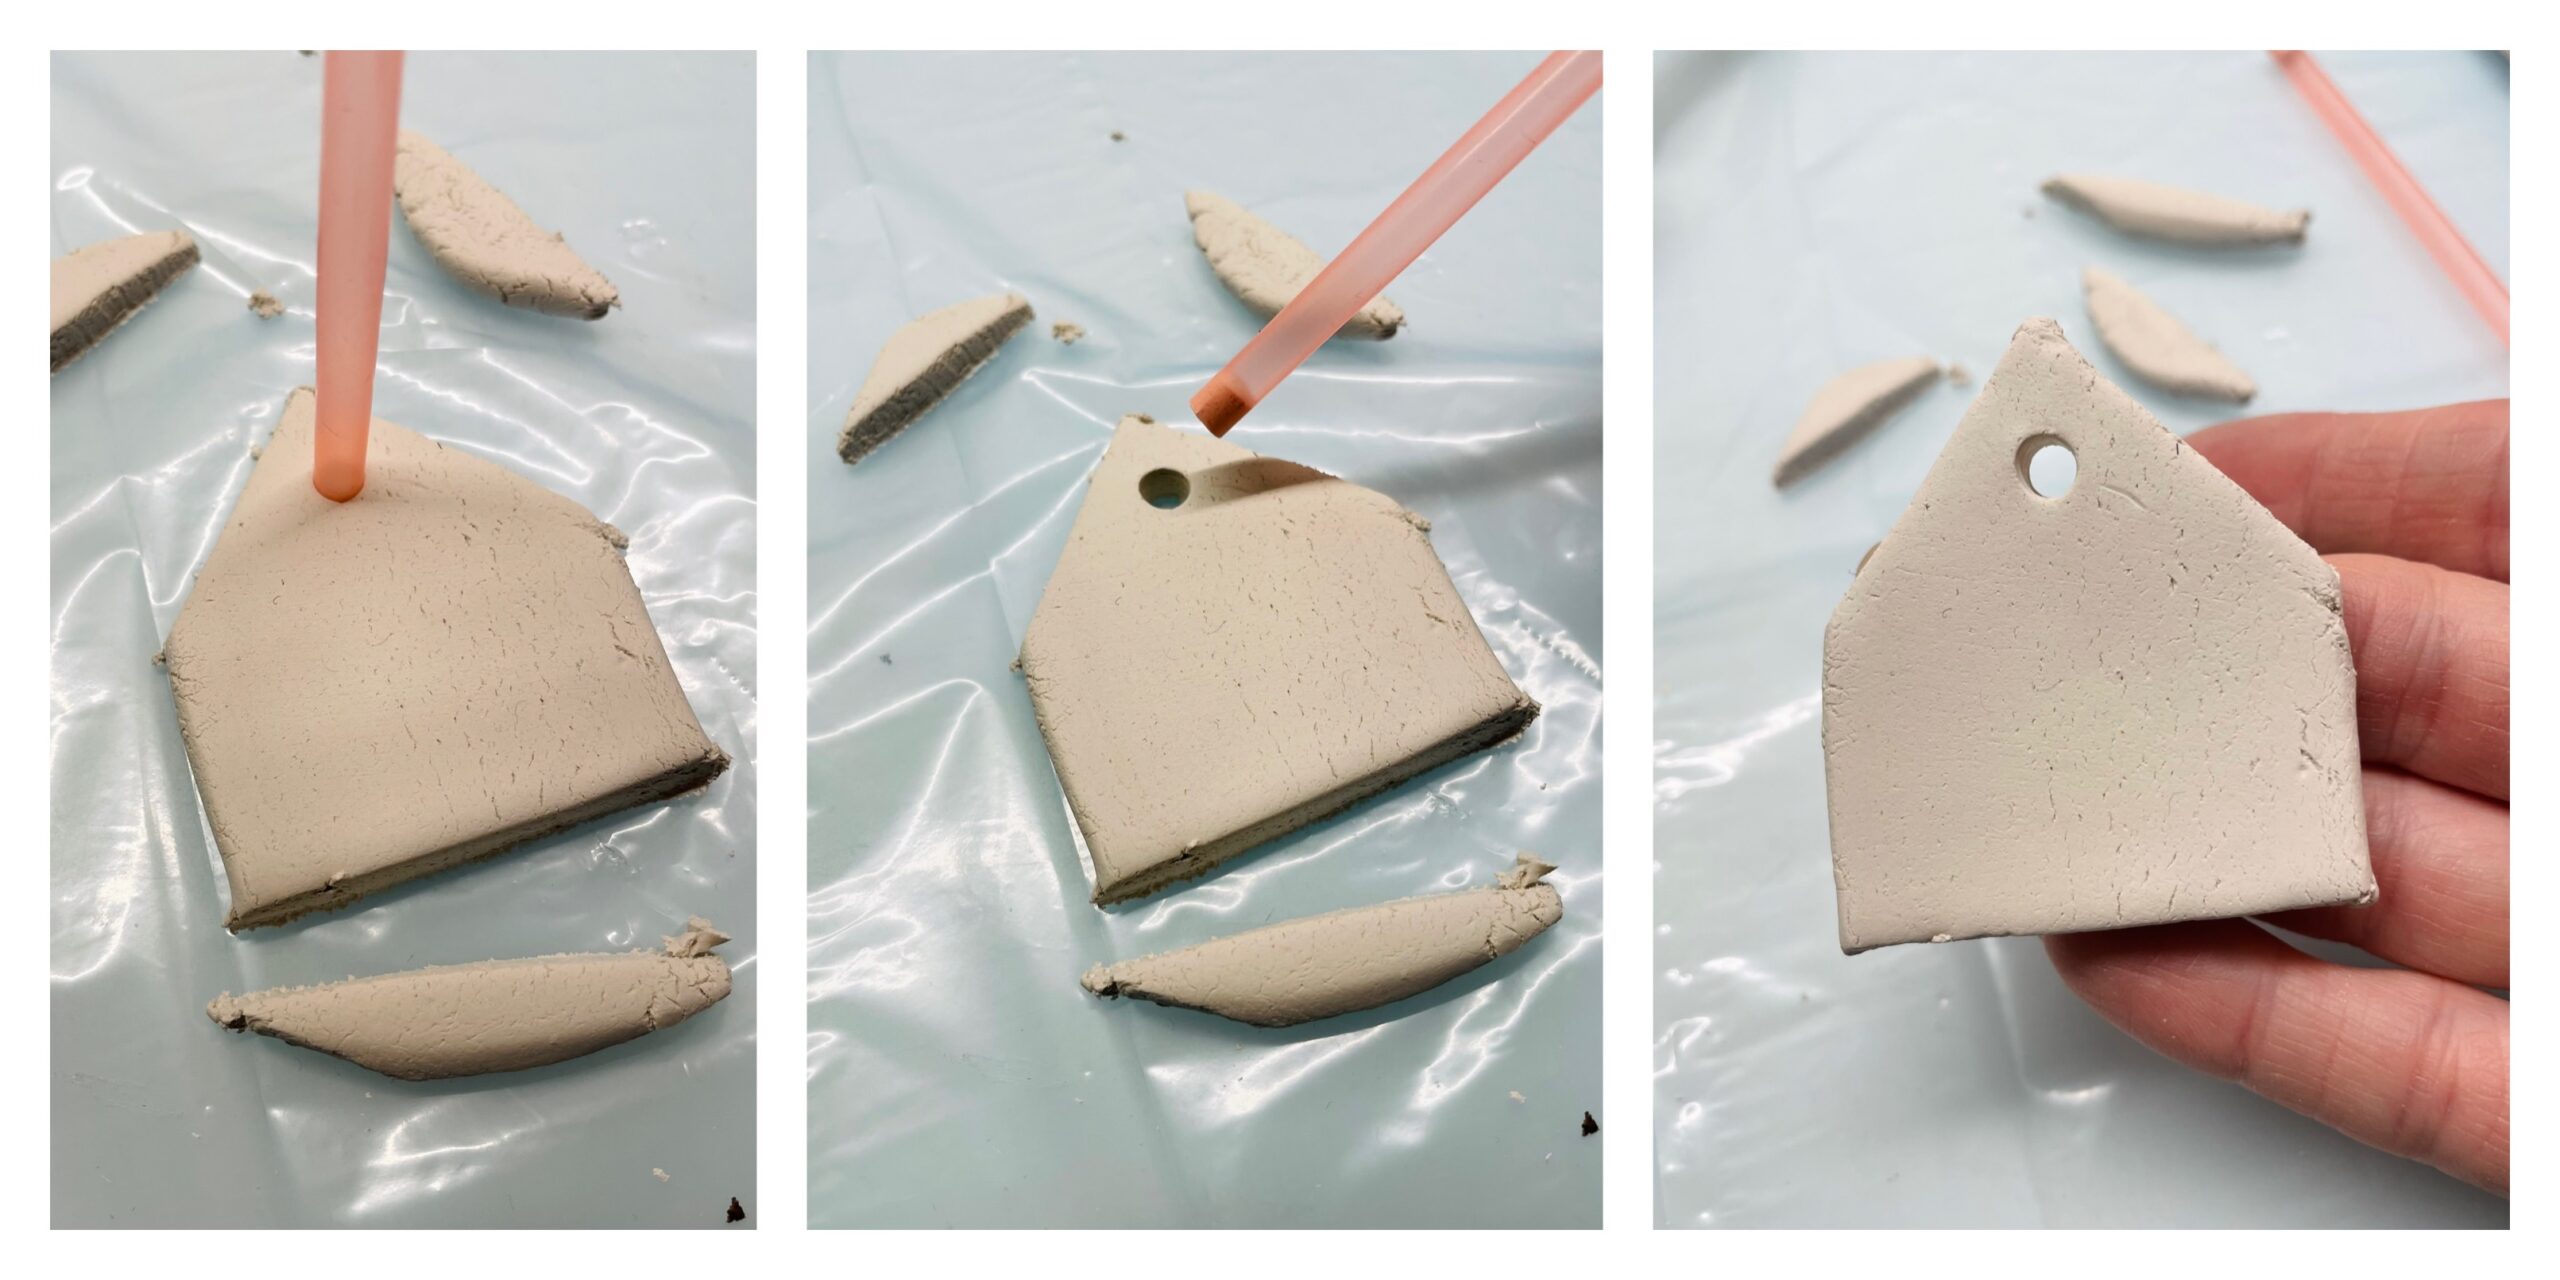
Bild zum Schritt 16 für das Bastel- und DIY-Abenteuer für Kinder: 'Anschließend stecht ihr mit dem Strohhalm ein Loch in das...'

14

After drying you paint windows and doors on the houses with a felt pen. The edges of the clay houses can also paint in contrast.
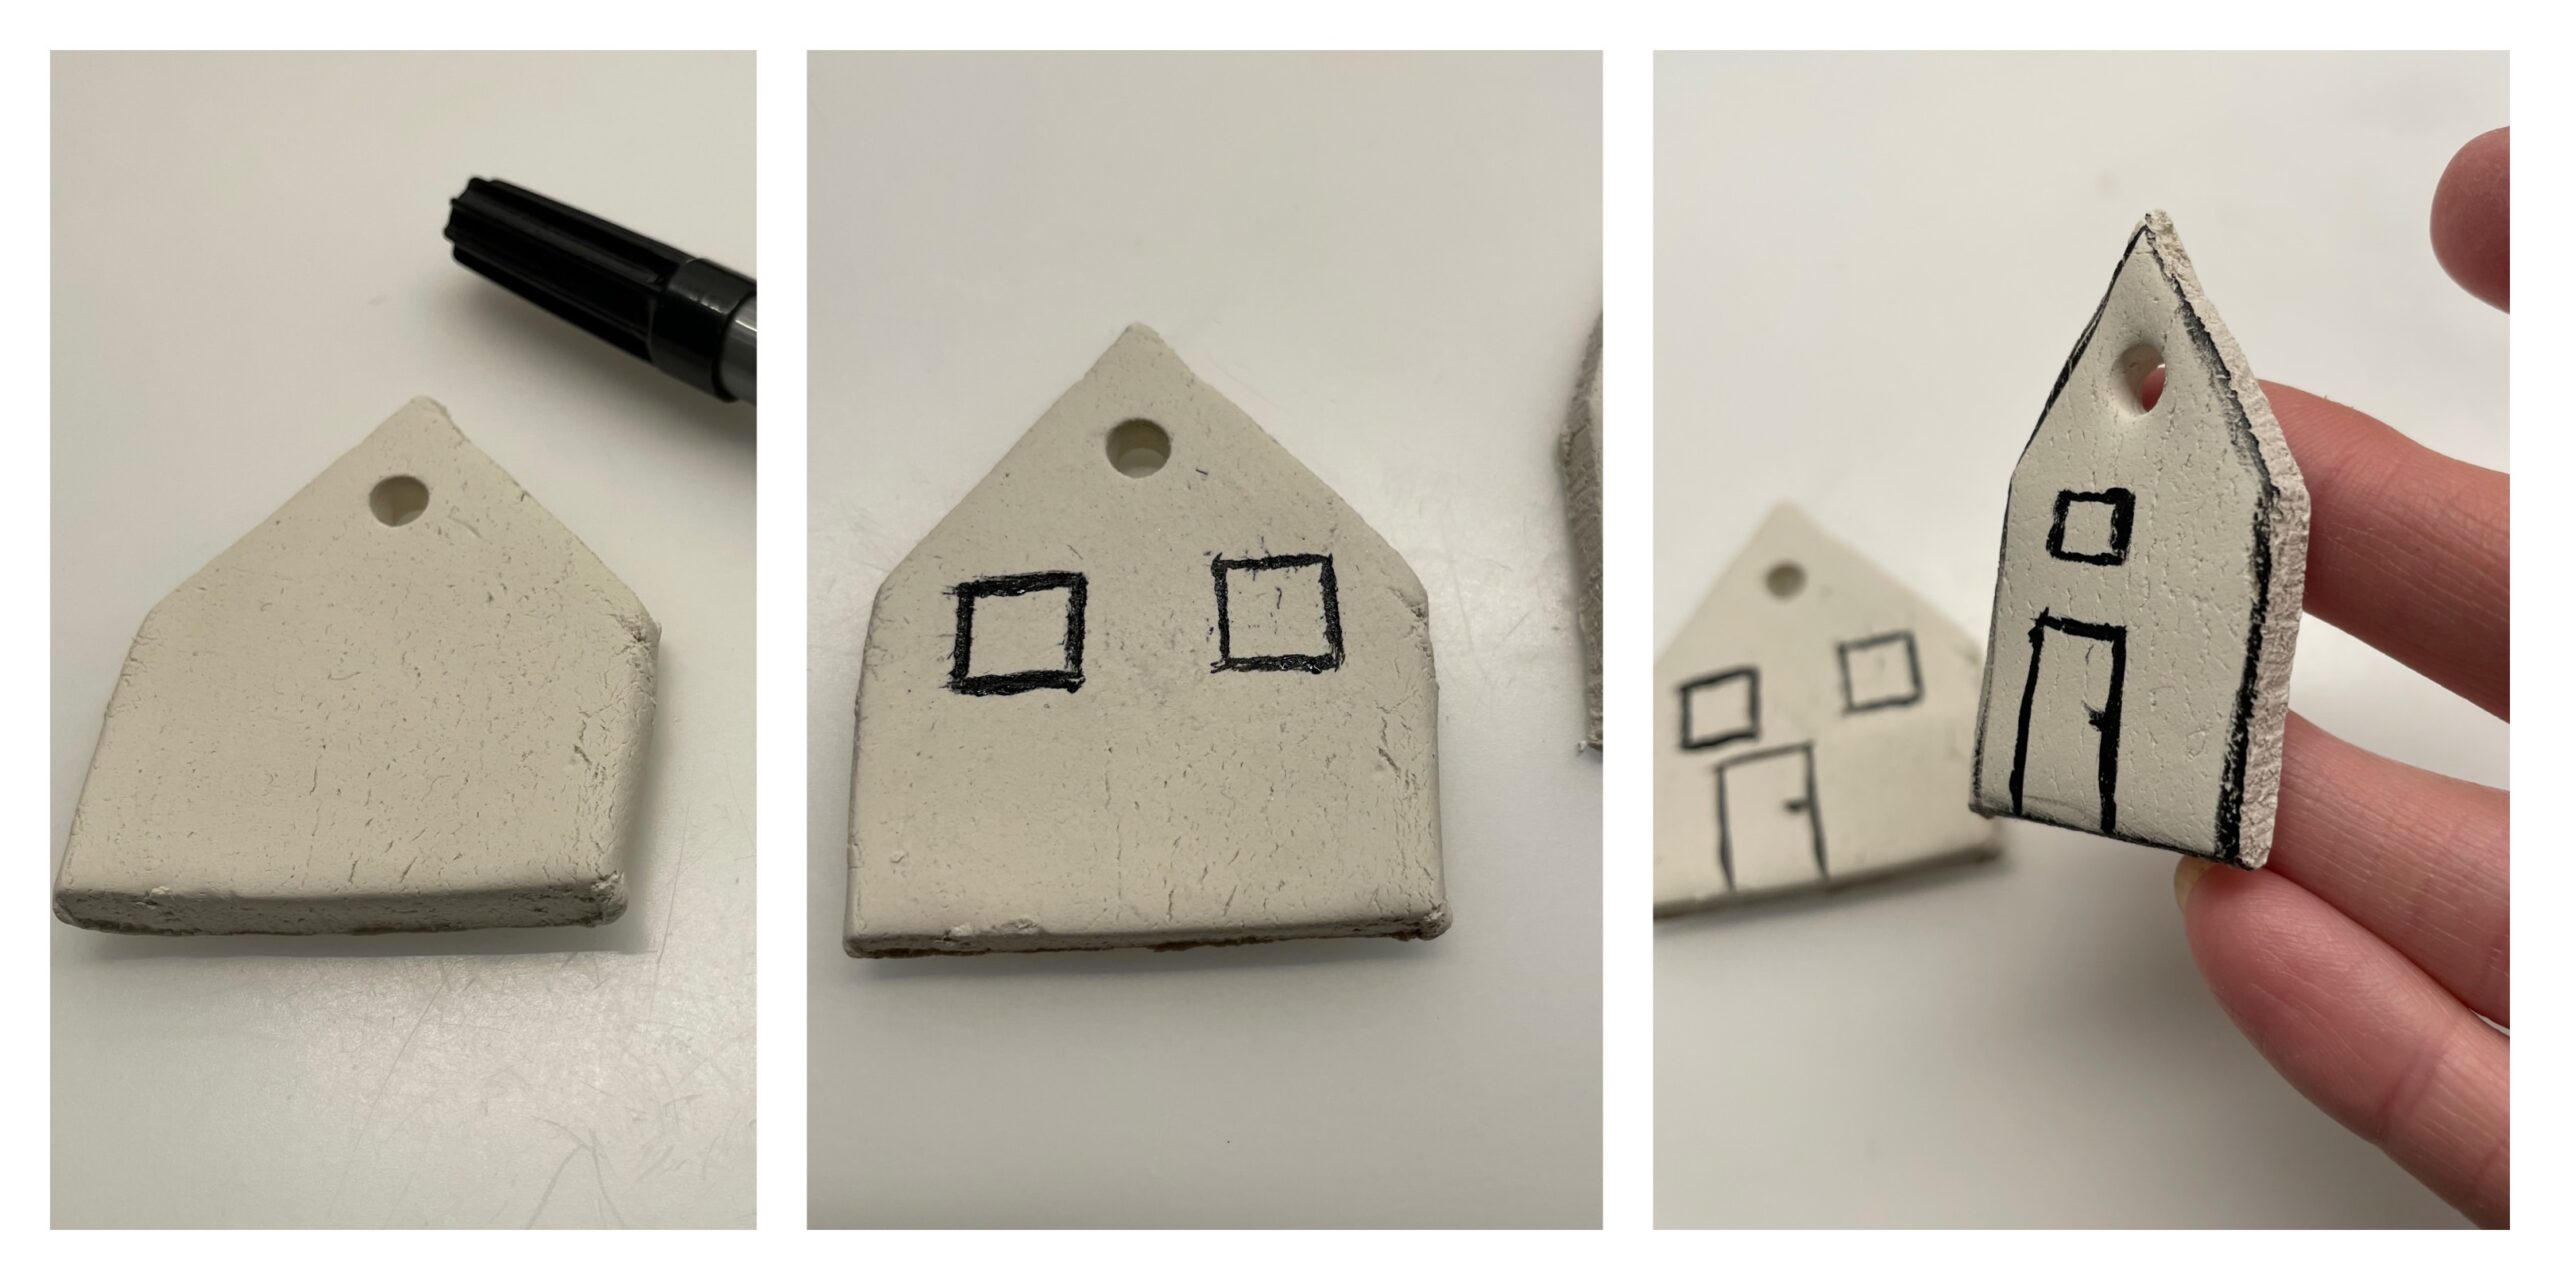
Bild zum Schritt 17 für das Bastel- und DIY-Abenteuer für Kinder: 'Nach dem Trocknen malt ihr mit einem Filzstift Fenster und...'

15

The houses are ready.

Bild zum Schritt 18 für das Bastel- und DIY-Abenteuer für Kinder: 'Fertig sind die Häuser.'

Ideas for designing
16

If all parts are well dried, then a mobile or dream catcher, a gift pendant or other decoration is made from it.
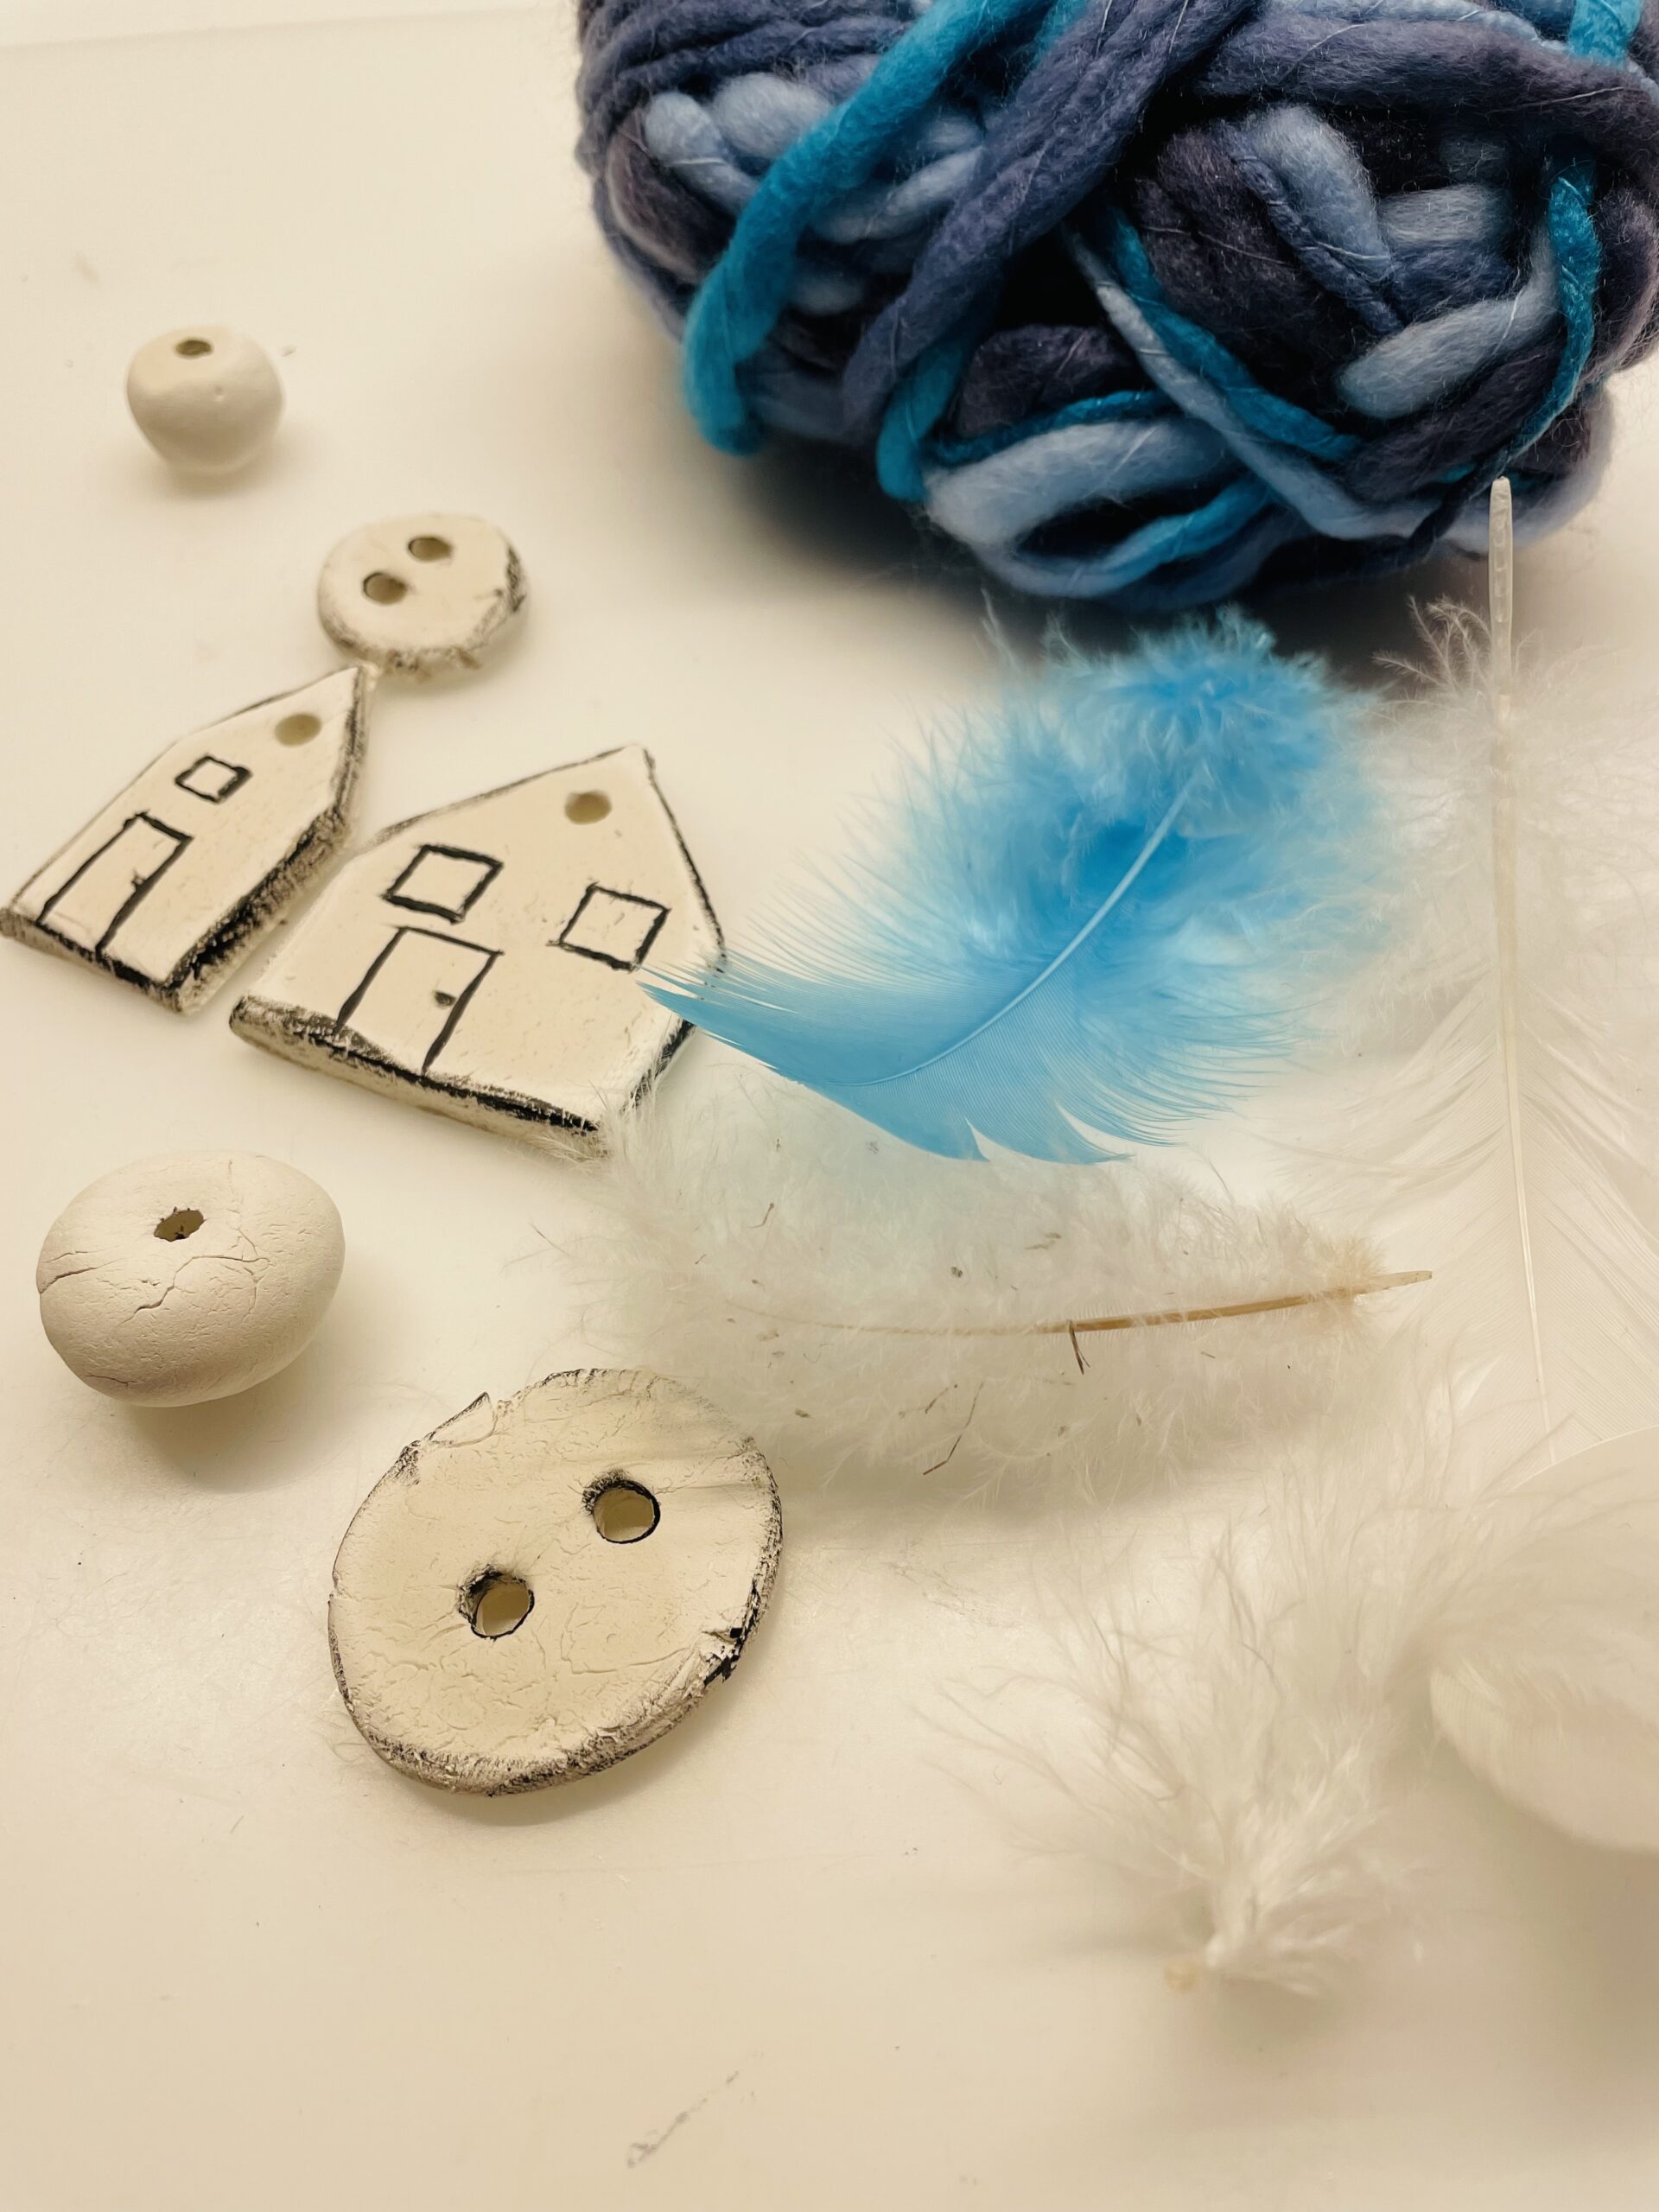
Bild zum Schritt 20 für das Bastel- und DIY-Abenteuer für Kinder: 'Sind alle Teile gut getrocknet, dann bastelt daraus ein Mobile...'

17

Have fun and let yourself be inspired!
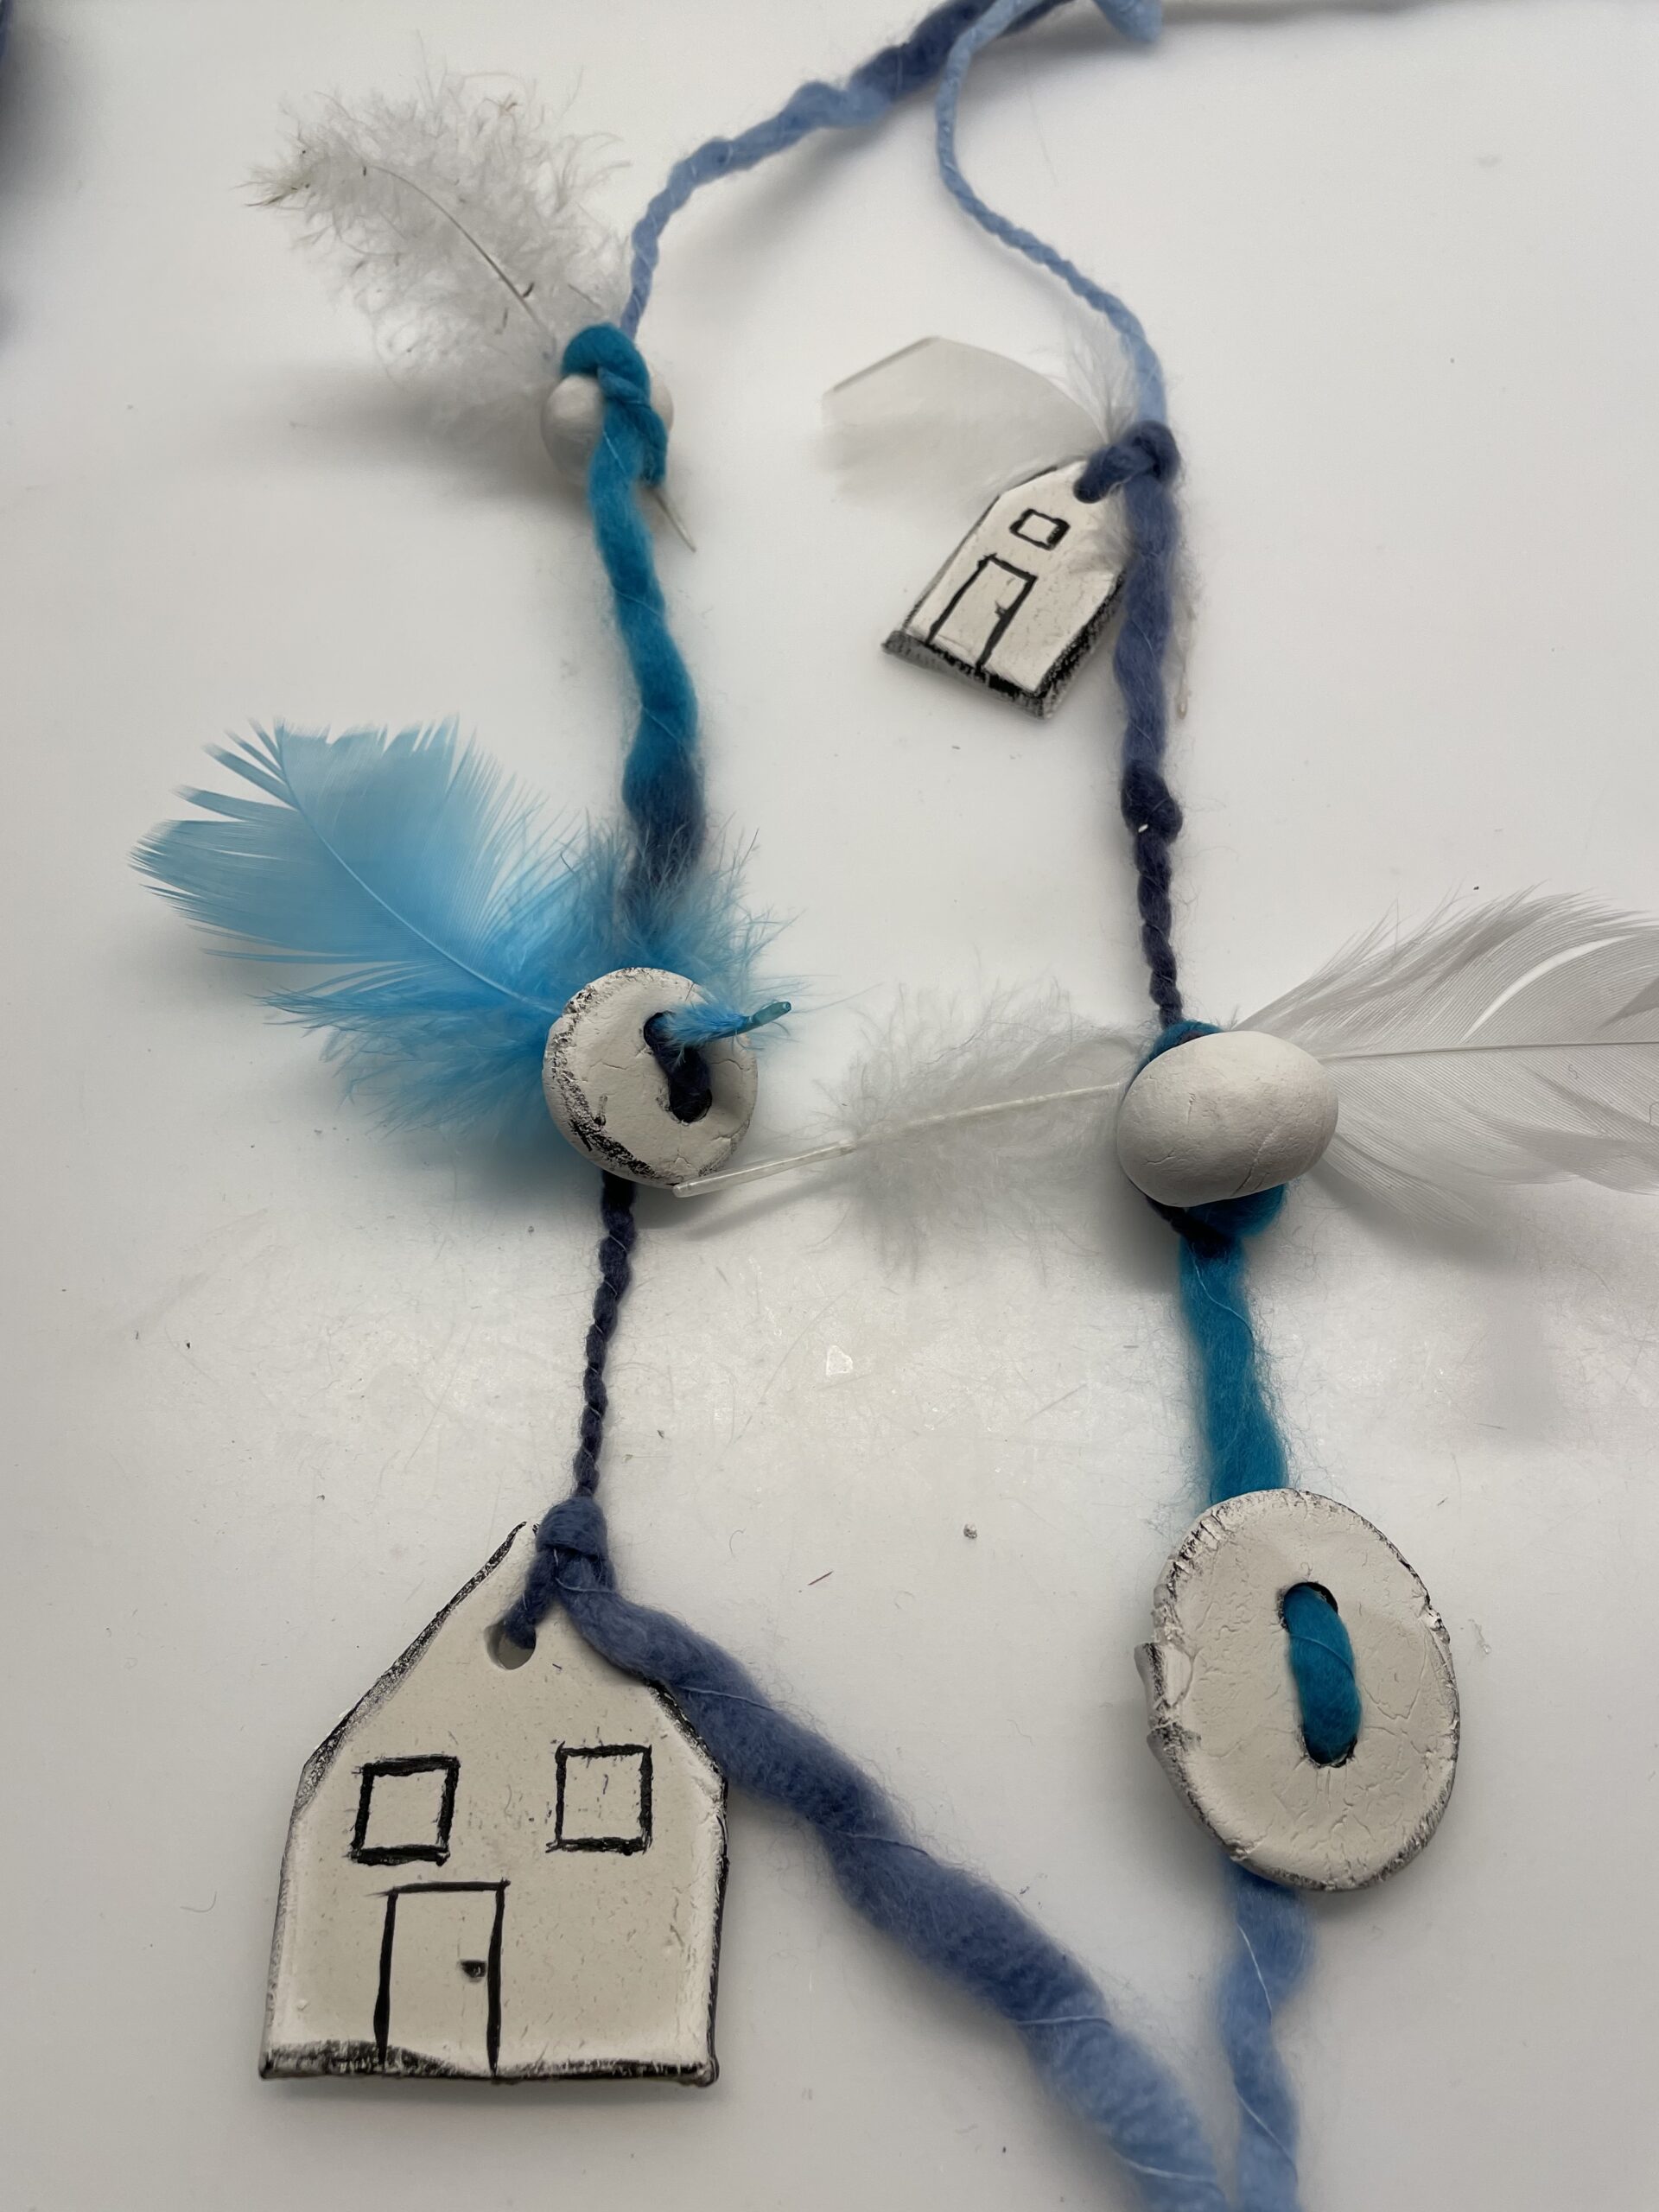
Bild zum Schritt 21 für das Bastel- und DIY-Abenteuer für Kinder: 'Viel Spaß und lasst euch inspirieren!'

18

2. Bild zum Schritt 21 für das Bastel- und DIY-Abenteuer für Kinder: 'Viel Spaß und lasst euch inspirieren!'

19

3. Bild zum Schritt 22 für das Bastel- und DIY-Abenteuer für Kinder: 'Viel Spaß und lasst euch inspirieren!'

20

4. Bild zum Schritt 23 für das Bastel- und DIY-Abenteuer für Kinder: 'Viel Spaß und lasst euch inspirieren!'

Pendant of clay/modelling mass (pearls, buttons, houses)

Follow us on Facebook , Instagram and Pinterest
Don't miss any more adventures: Our bottle mail

Leave a Reply

Your email address will not be published.

The maximum upload file size: 5 MB. You can upload: image, document. Drop file here