Make pork from paper strips

AdventurerKatzi
Rating5.05.6 Thousand times & (1) DifficultyAdvanced

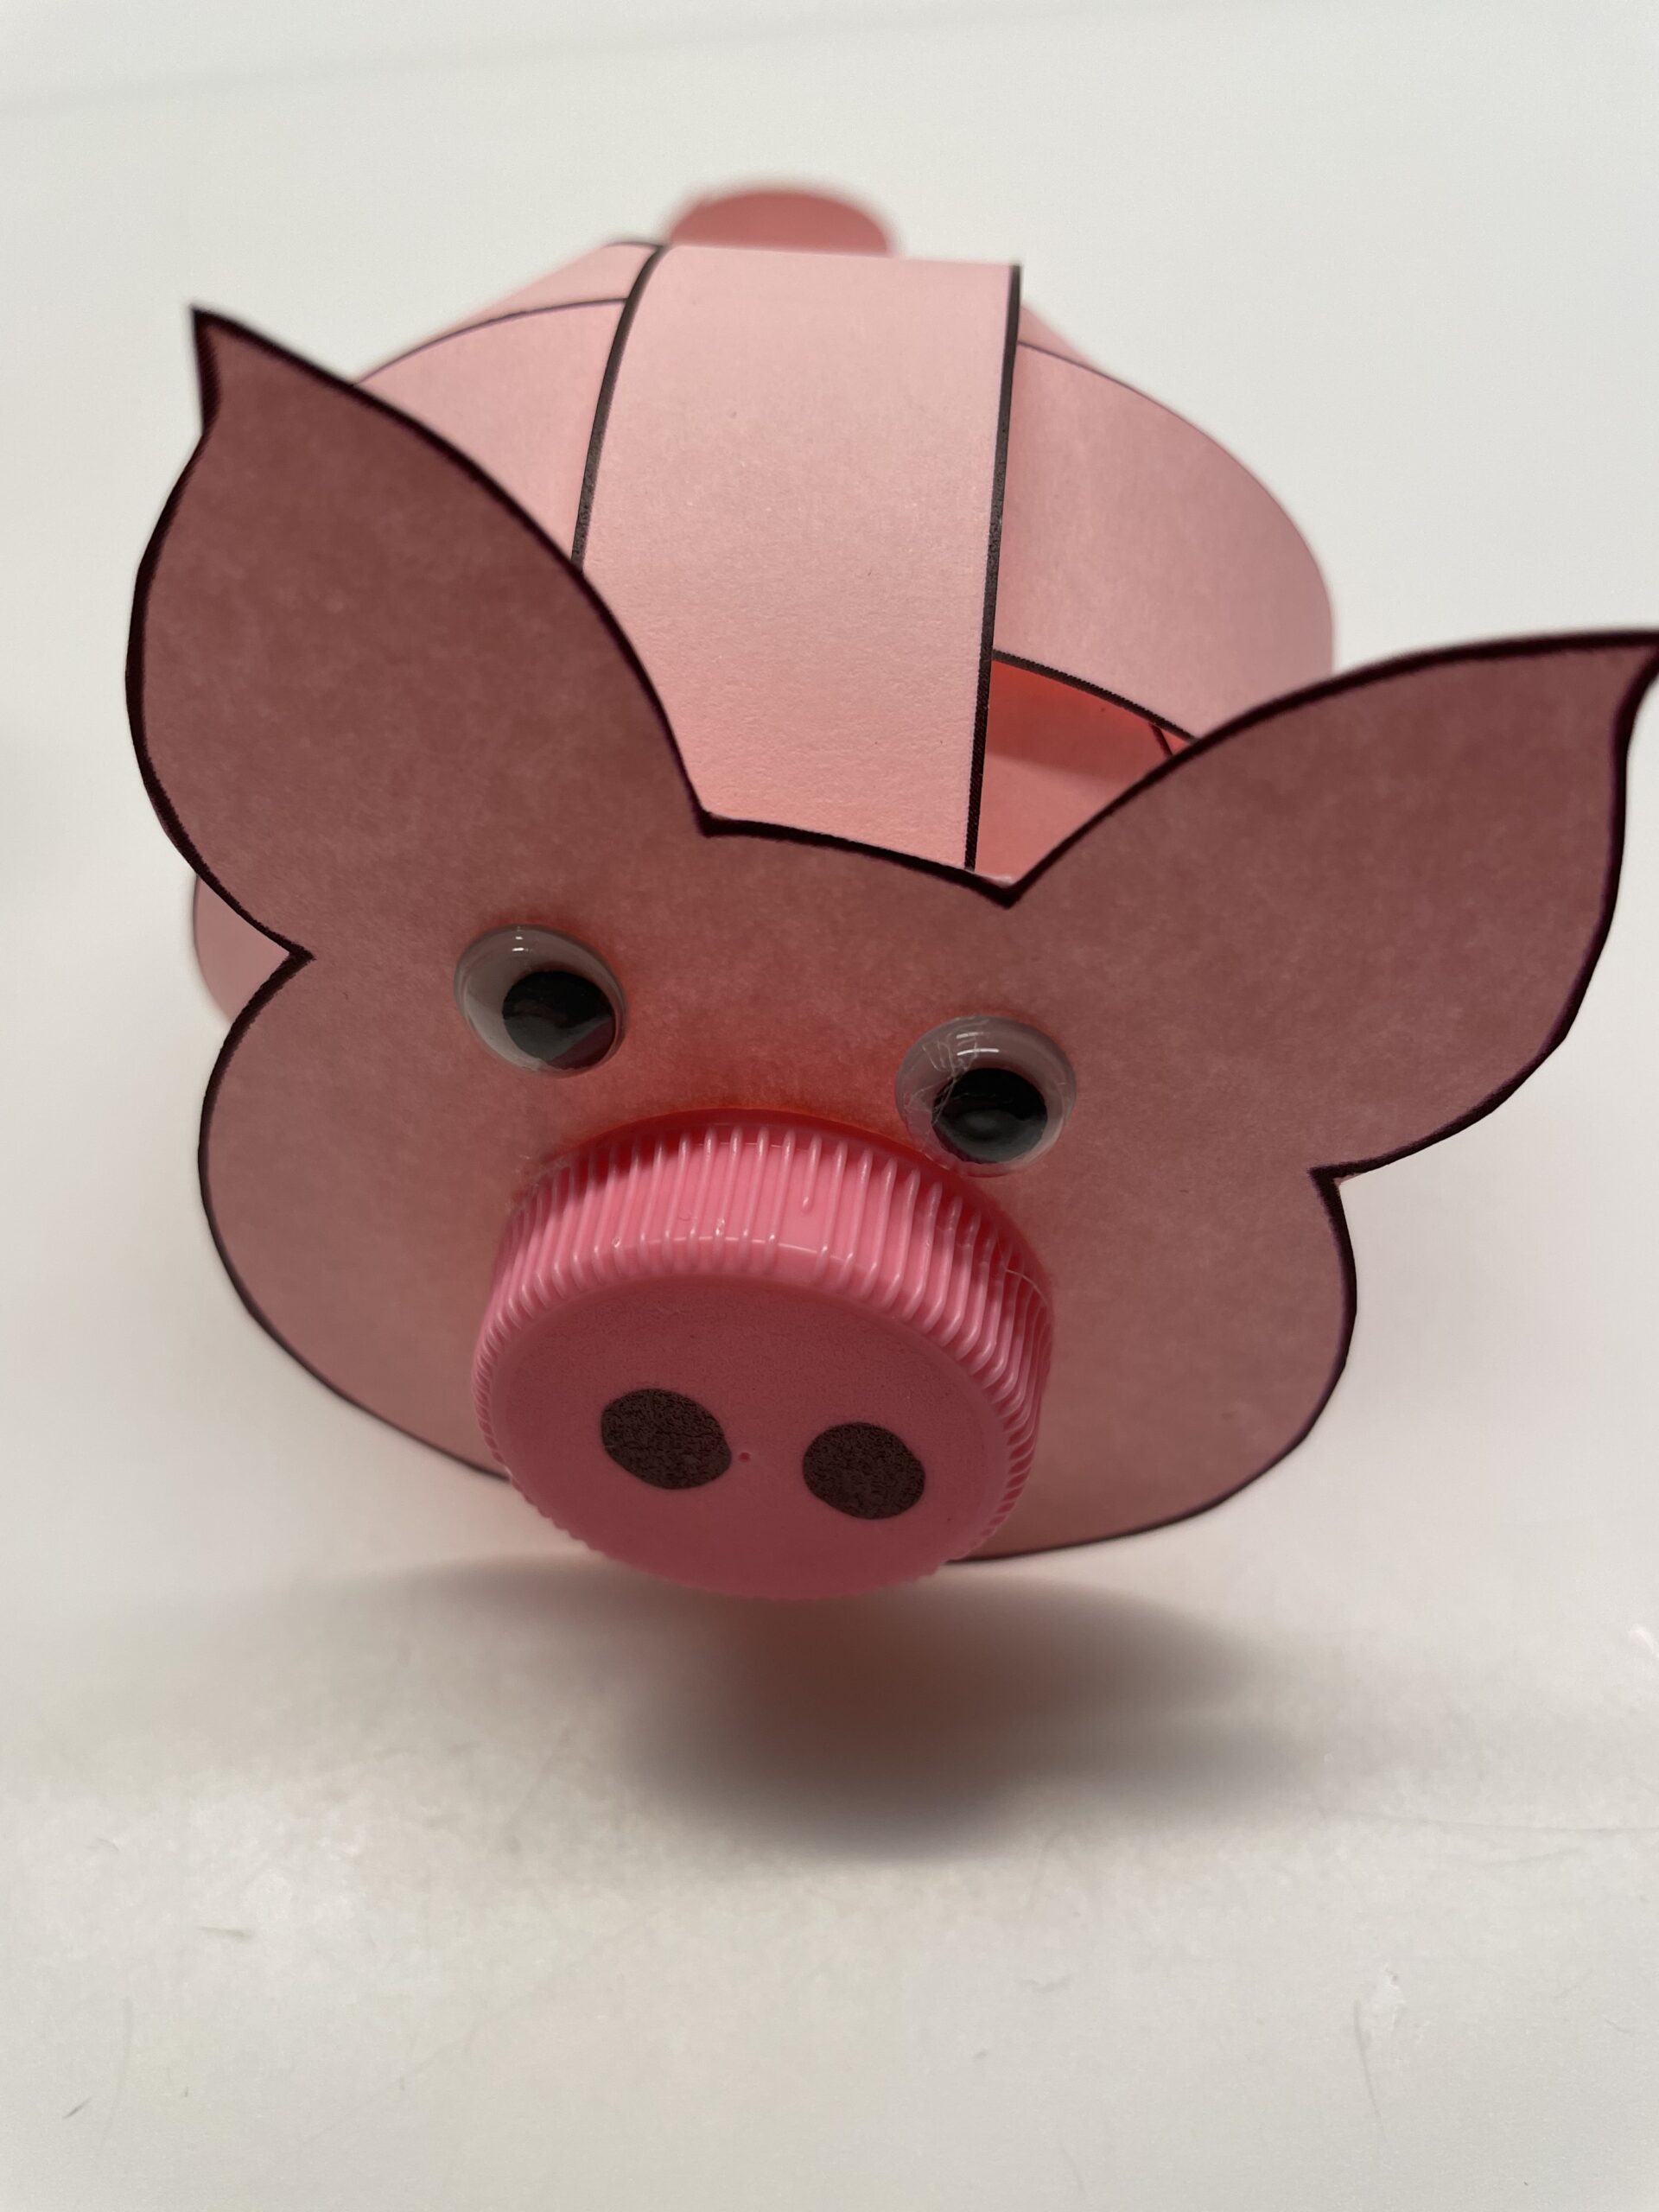
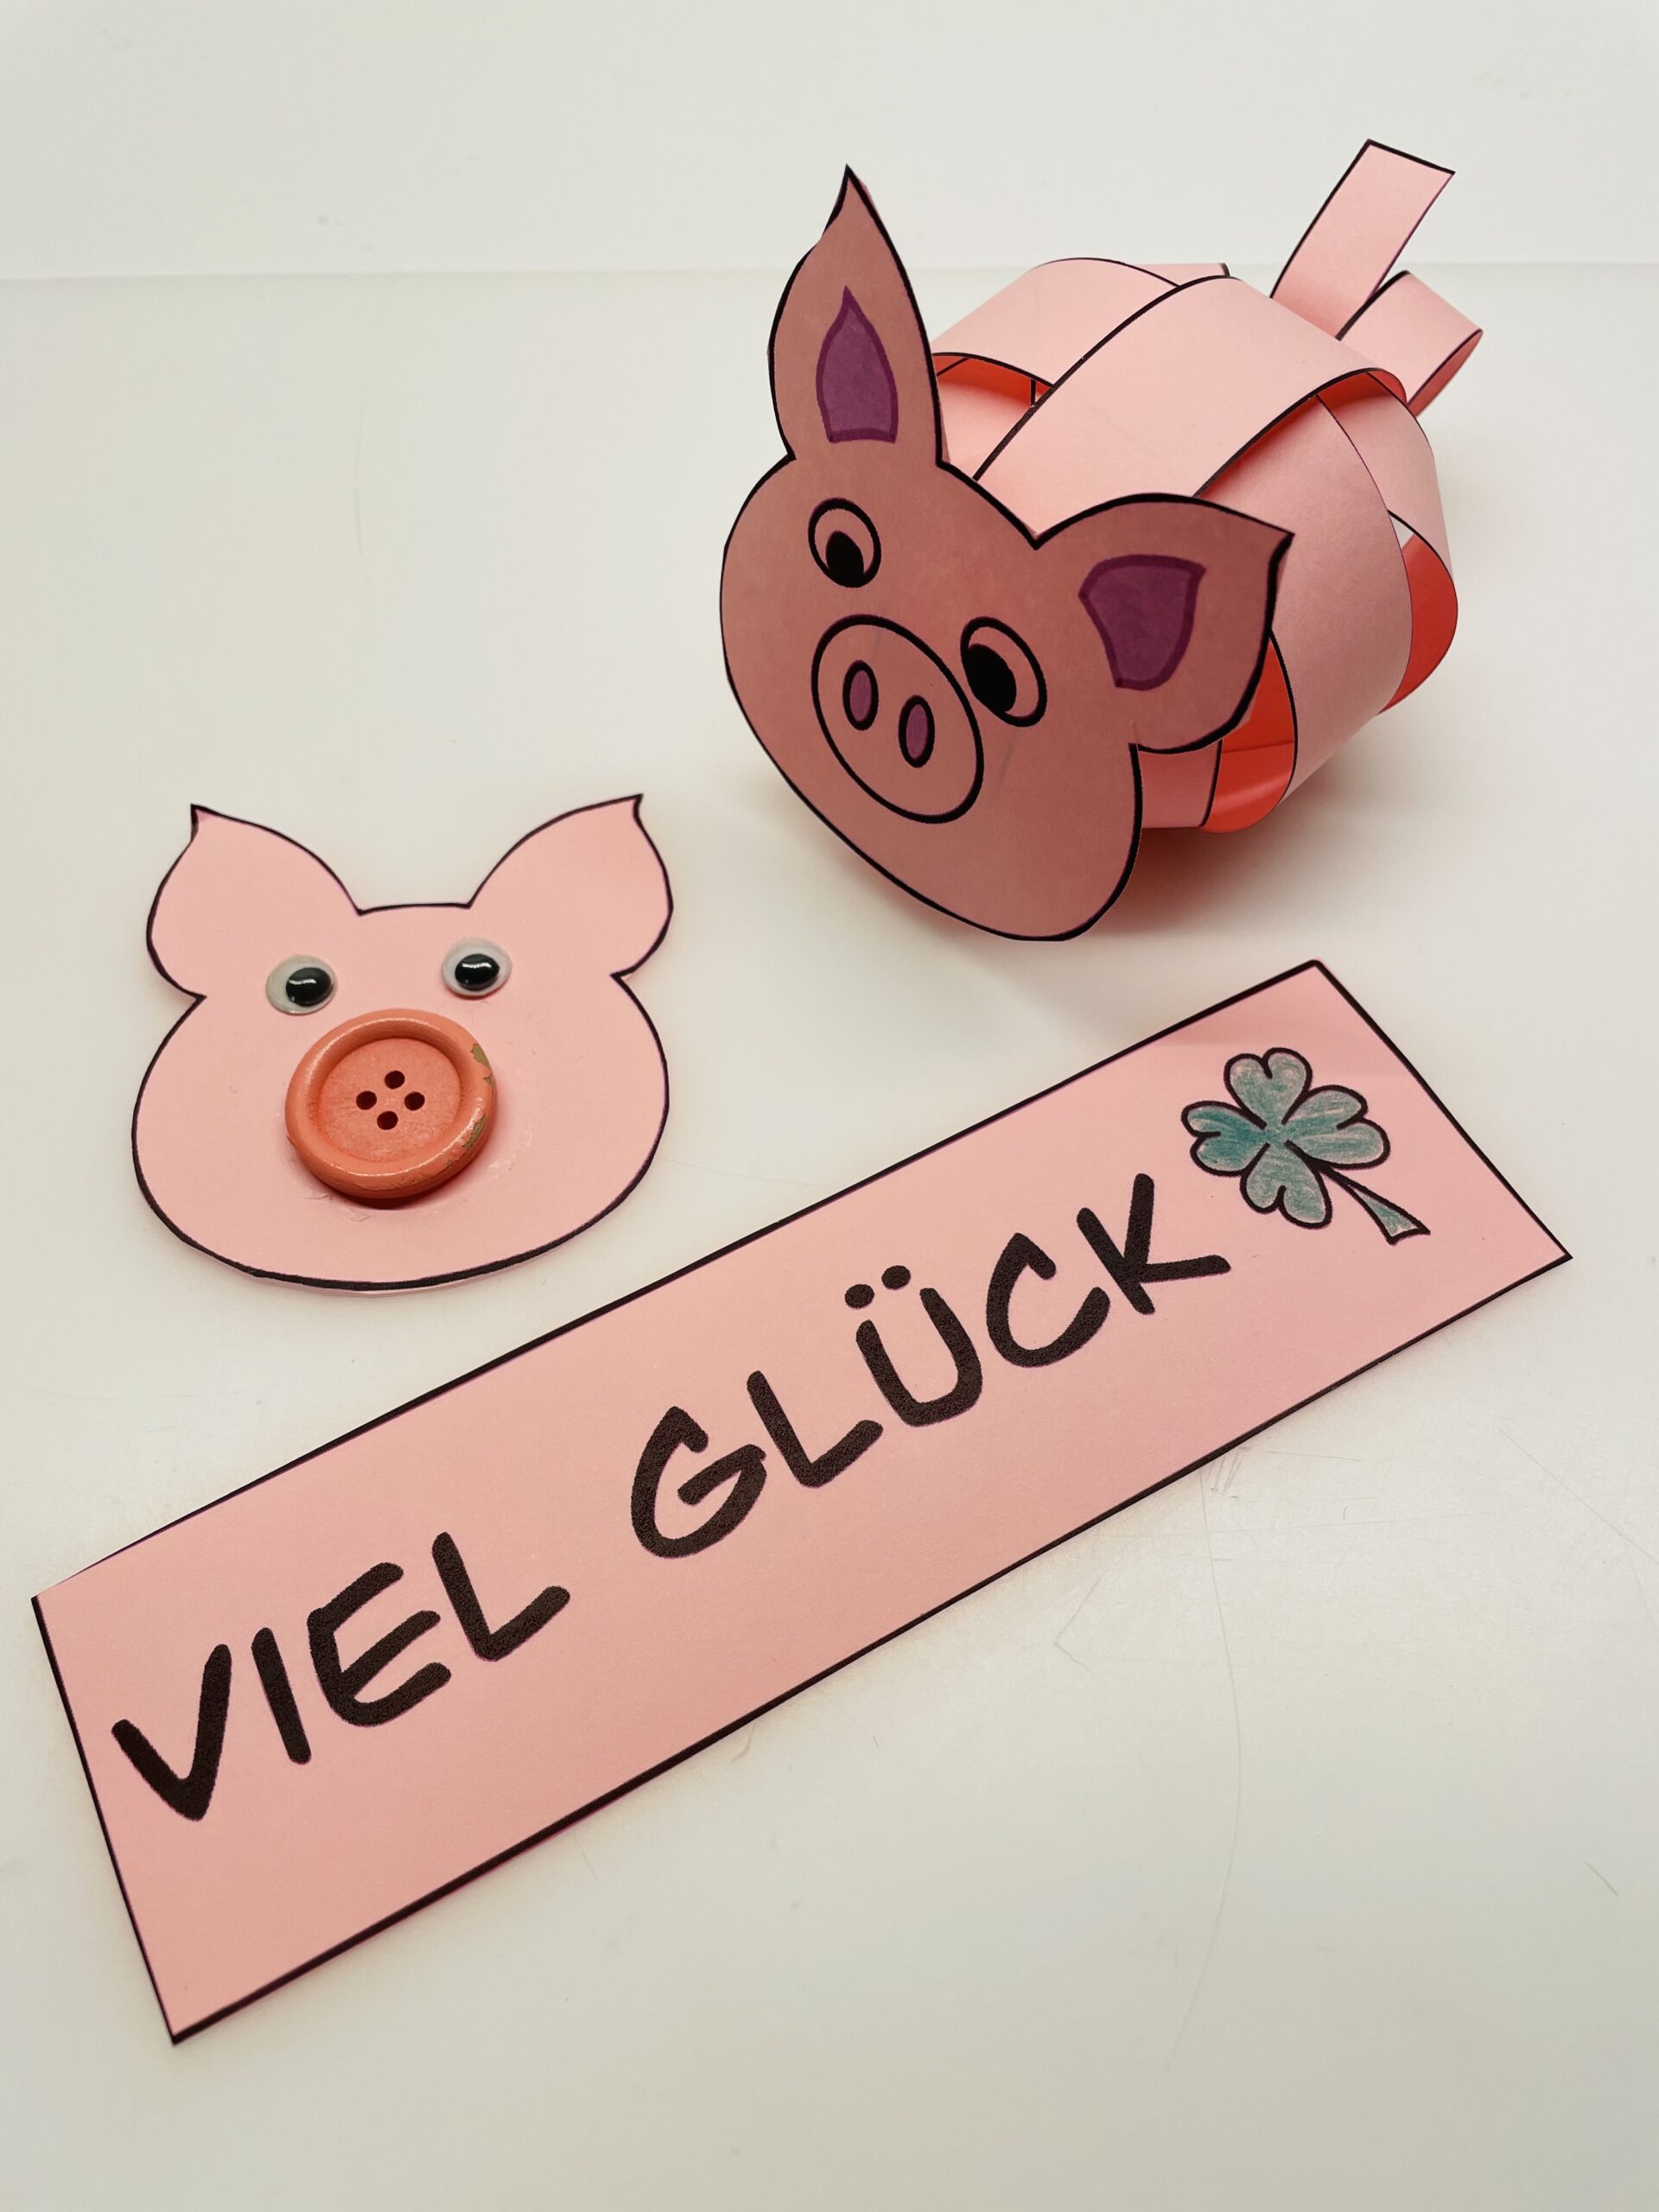
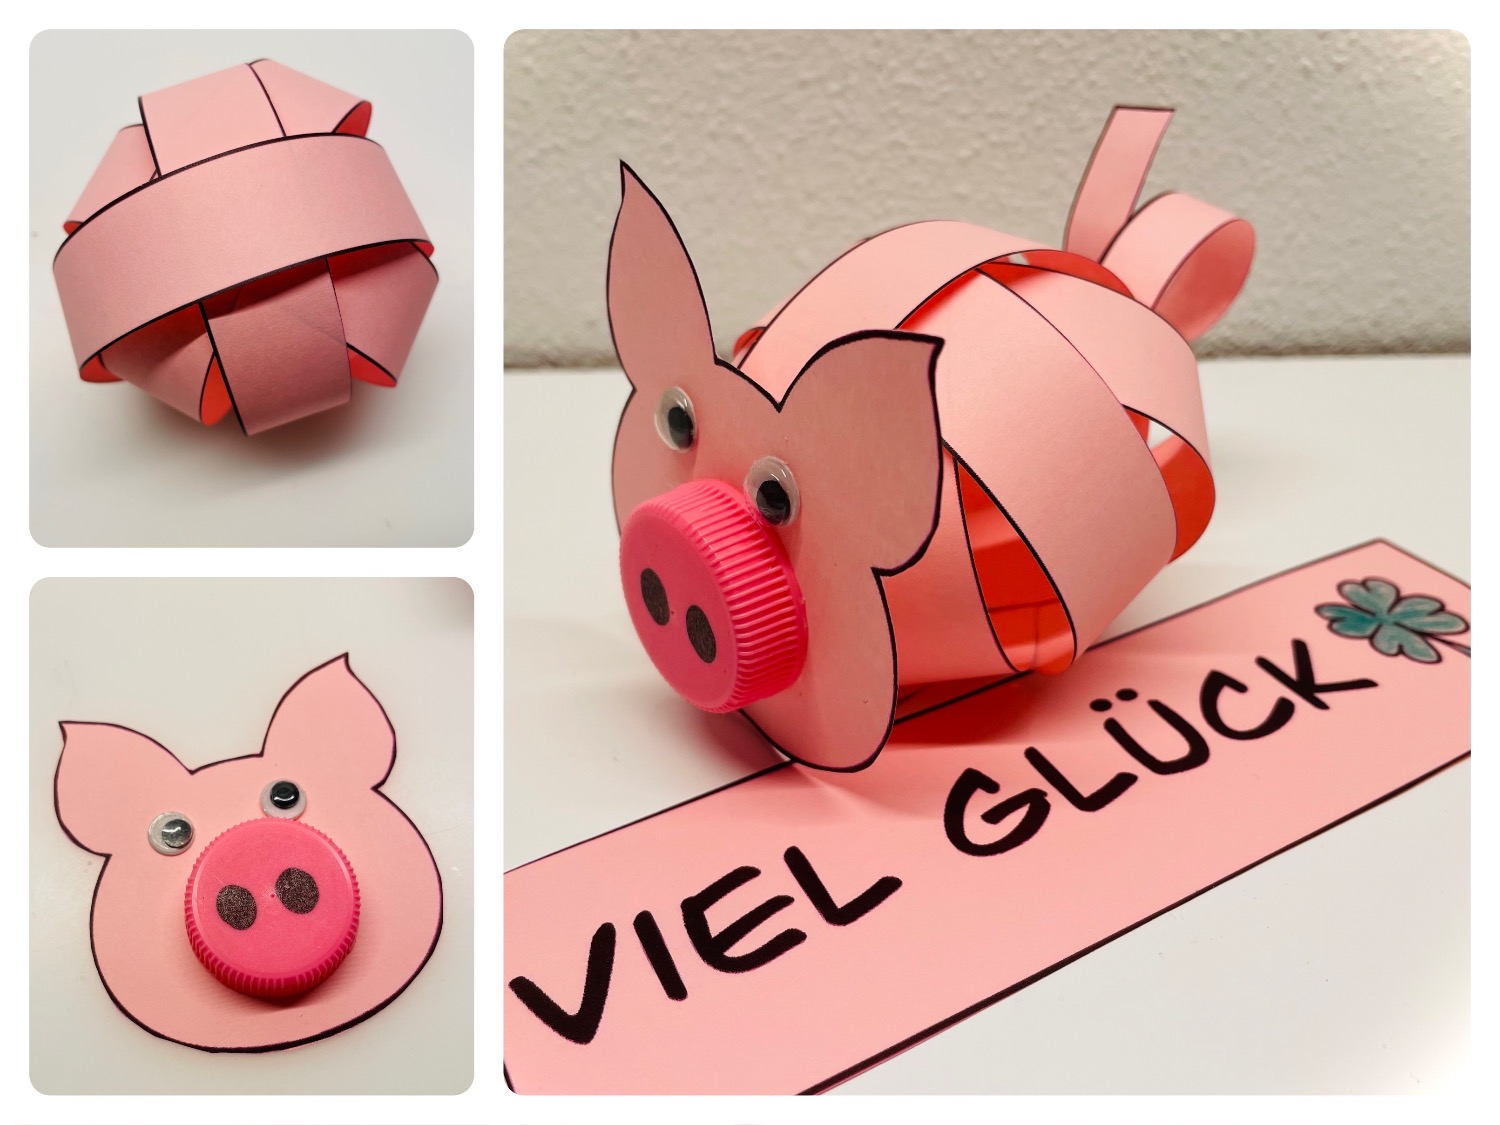
A pig or lucky pig for the new year, birthday or anniversary. It is crafted from four paper strips which are glued to rings and then put into each other. The ringtail is a narrow strip of paper that, pulled over a pen, rolls together. You can make the head freely or you use the attached template. As additional material you need two wobble eyes and a pink button or the screw cap of a bottle.
You will find the detailed instructions afterwards! Good luck!

Media Education for Kindergarten and Hort

Kind bastelt eine Rassel mit dem Navi
The Adventure Navi, the app for DIY projects, enables media education for the youngest.

Relief in everyday life, targeted promotion of individual children, independent learning and - without any pre-knowledge already usable by the youngest!


Titelbild zur Bastel- und DIY-Idee für Kinder '(941) Schwein aus Papierstreifen basteln'
Material for1 Child
Prep Time5 min.Adv. Time30 min.Total Time35 min.
 1 Pink copy paper
 1 possible template for printing
 2 Wax eyes
 1 Pink button or screw cap
 1 Felt pen black
 possible ruler
 1 Colour pencil green
 1 Builder's pad
All links marked with a shopping cart lead to Amazon - here we have selected products that we would order ourselves and in part also ordered. In a qualified purchase via the advertising link, we as Amazon partner receive a commission, for you there are no costs. You thus support our cost- and advertising banner-free, educational offer.
1

You can print the craft template (see below) or paint four stripes on a pink paper with the dimensions 2cm x 21cm (DIN A4 landscape format). Use a ruler for this.
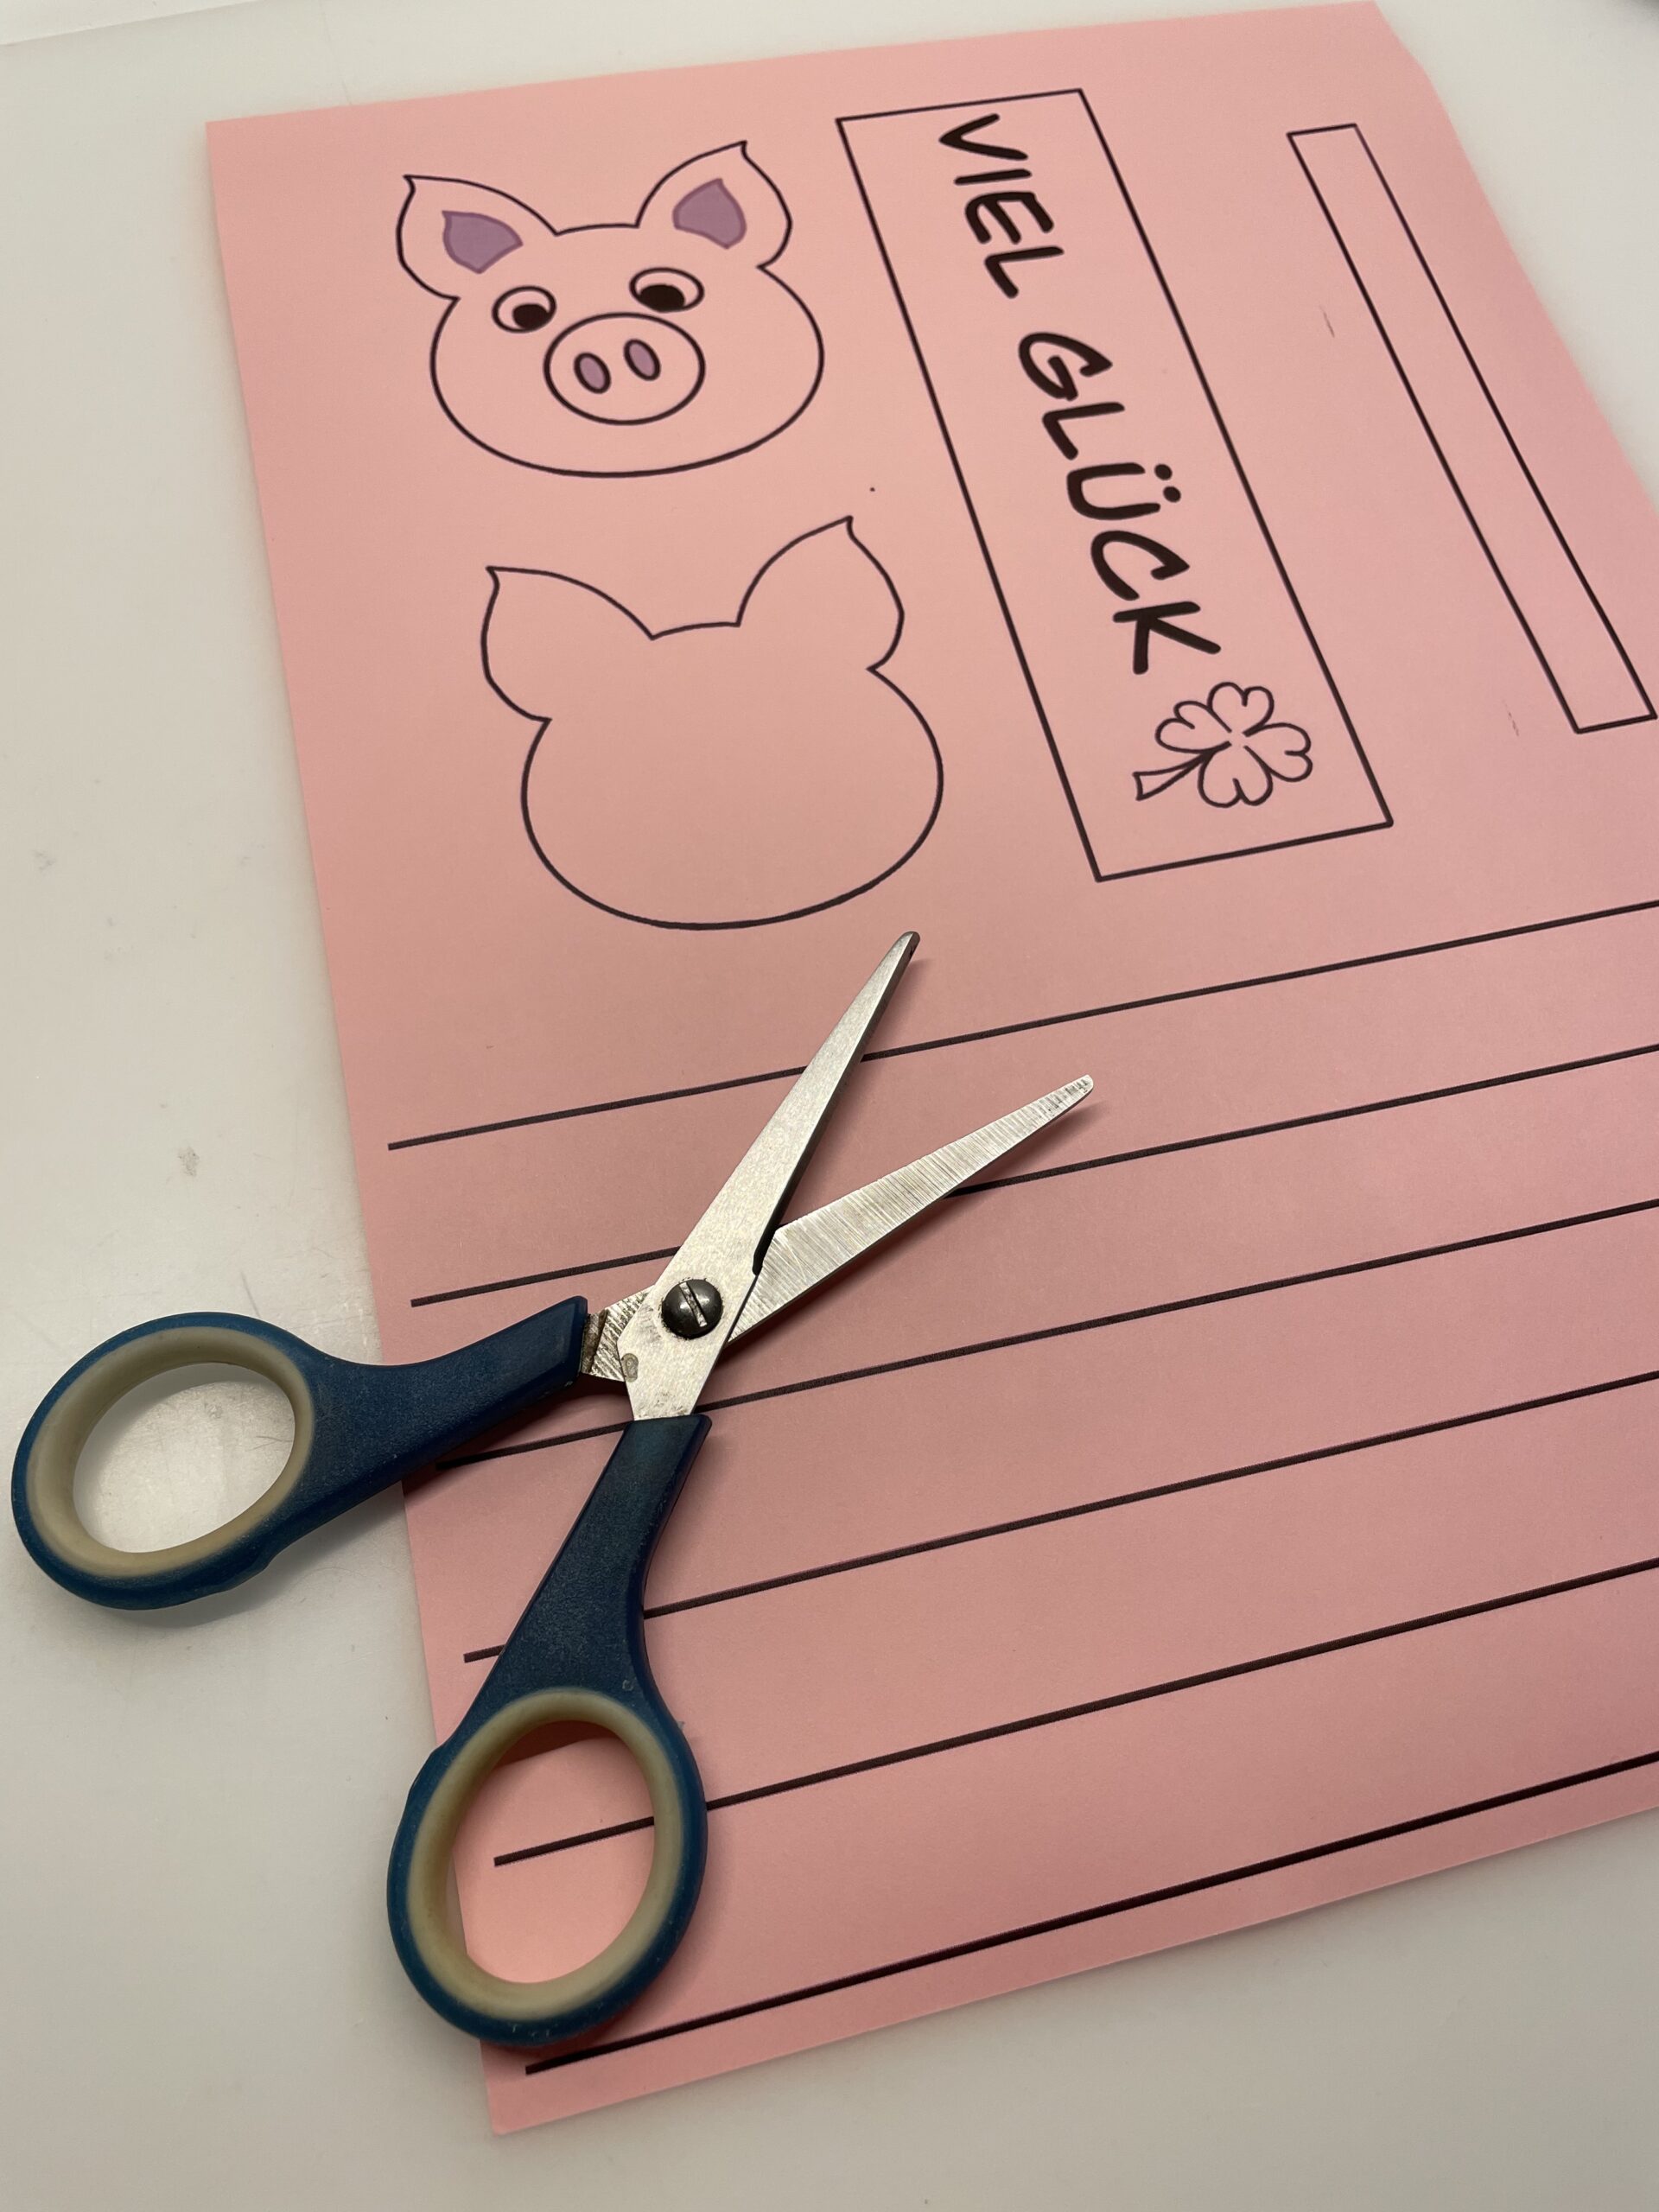
Bild zum Schritt 1 für das Bastel- und DIY-Abenteuer für Kinder: 'Ihr könnt die Bastelvorlage ausdrucken (siehe unten) oder ihr malt...'

2

Then you first cut the four long stripes for your stomach.
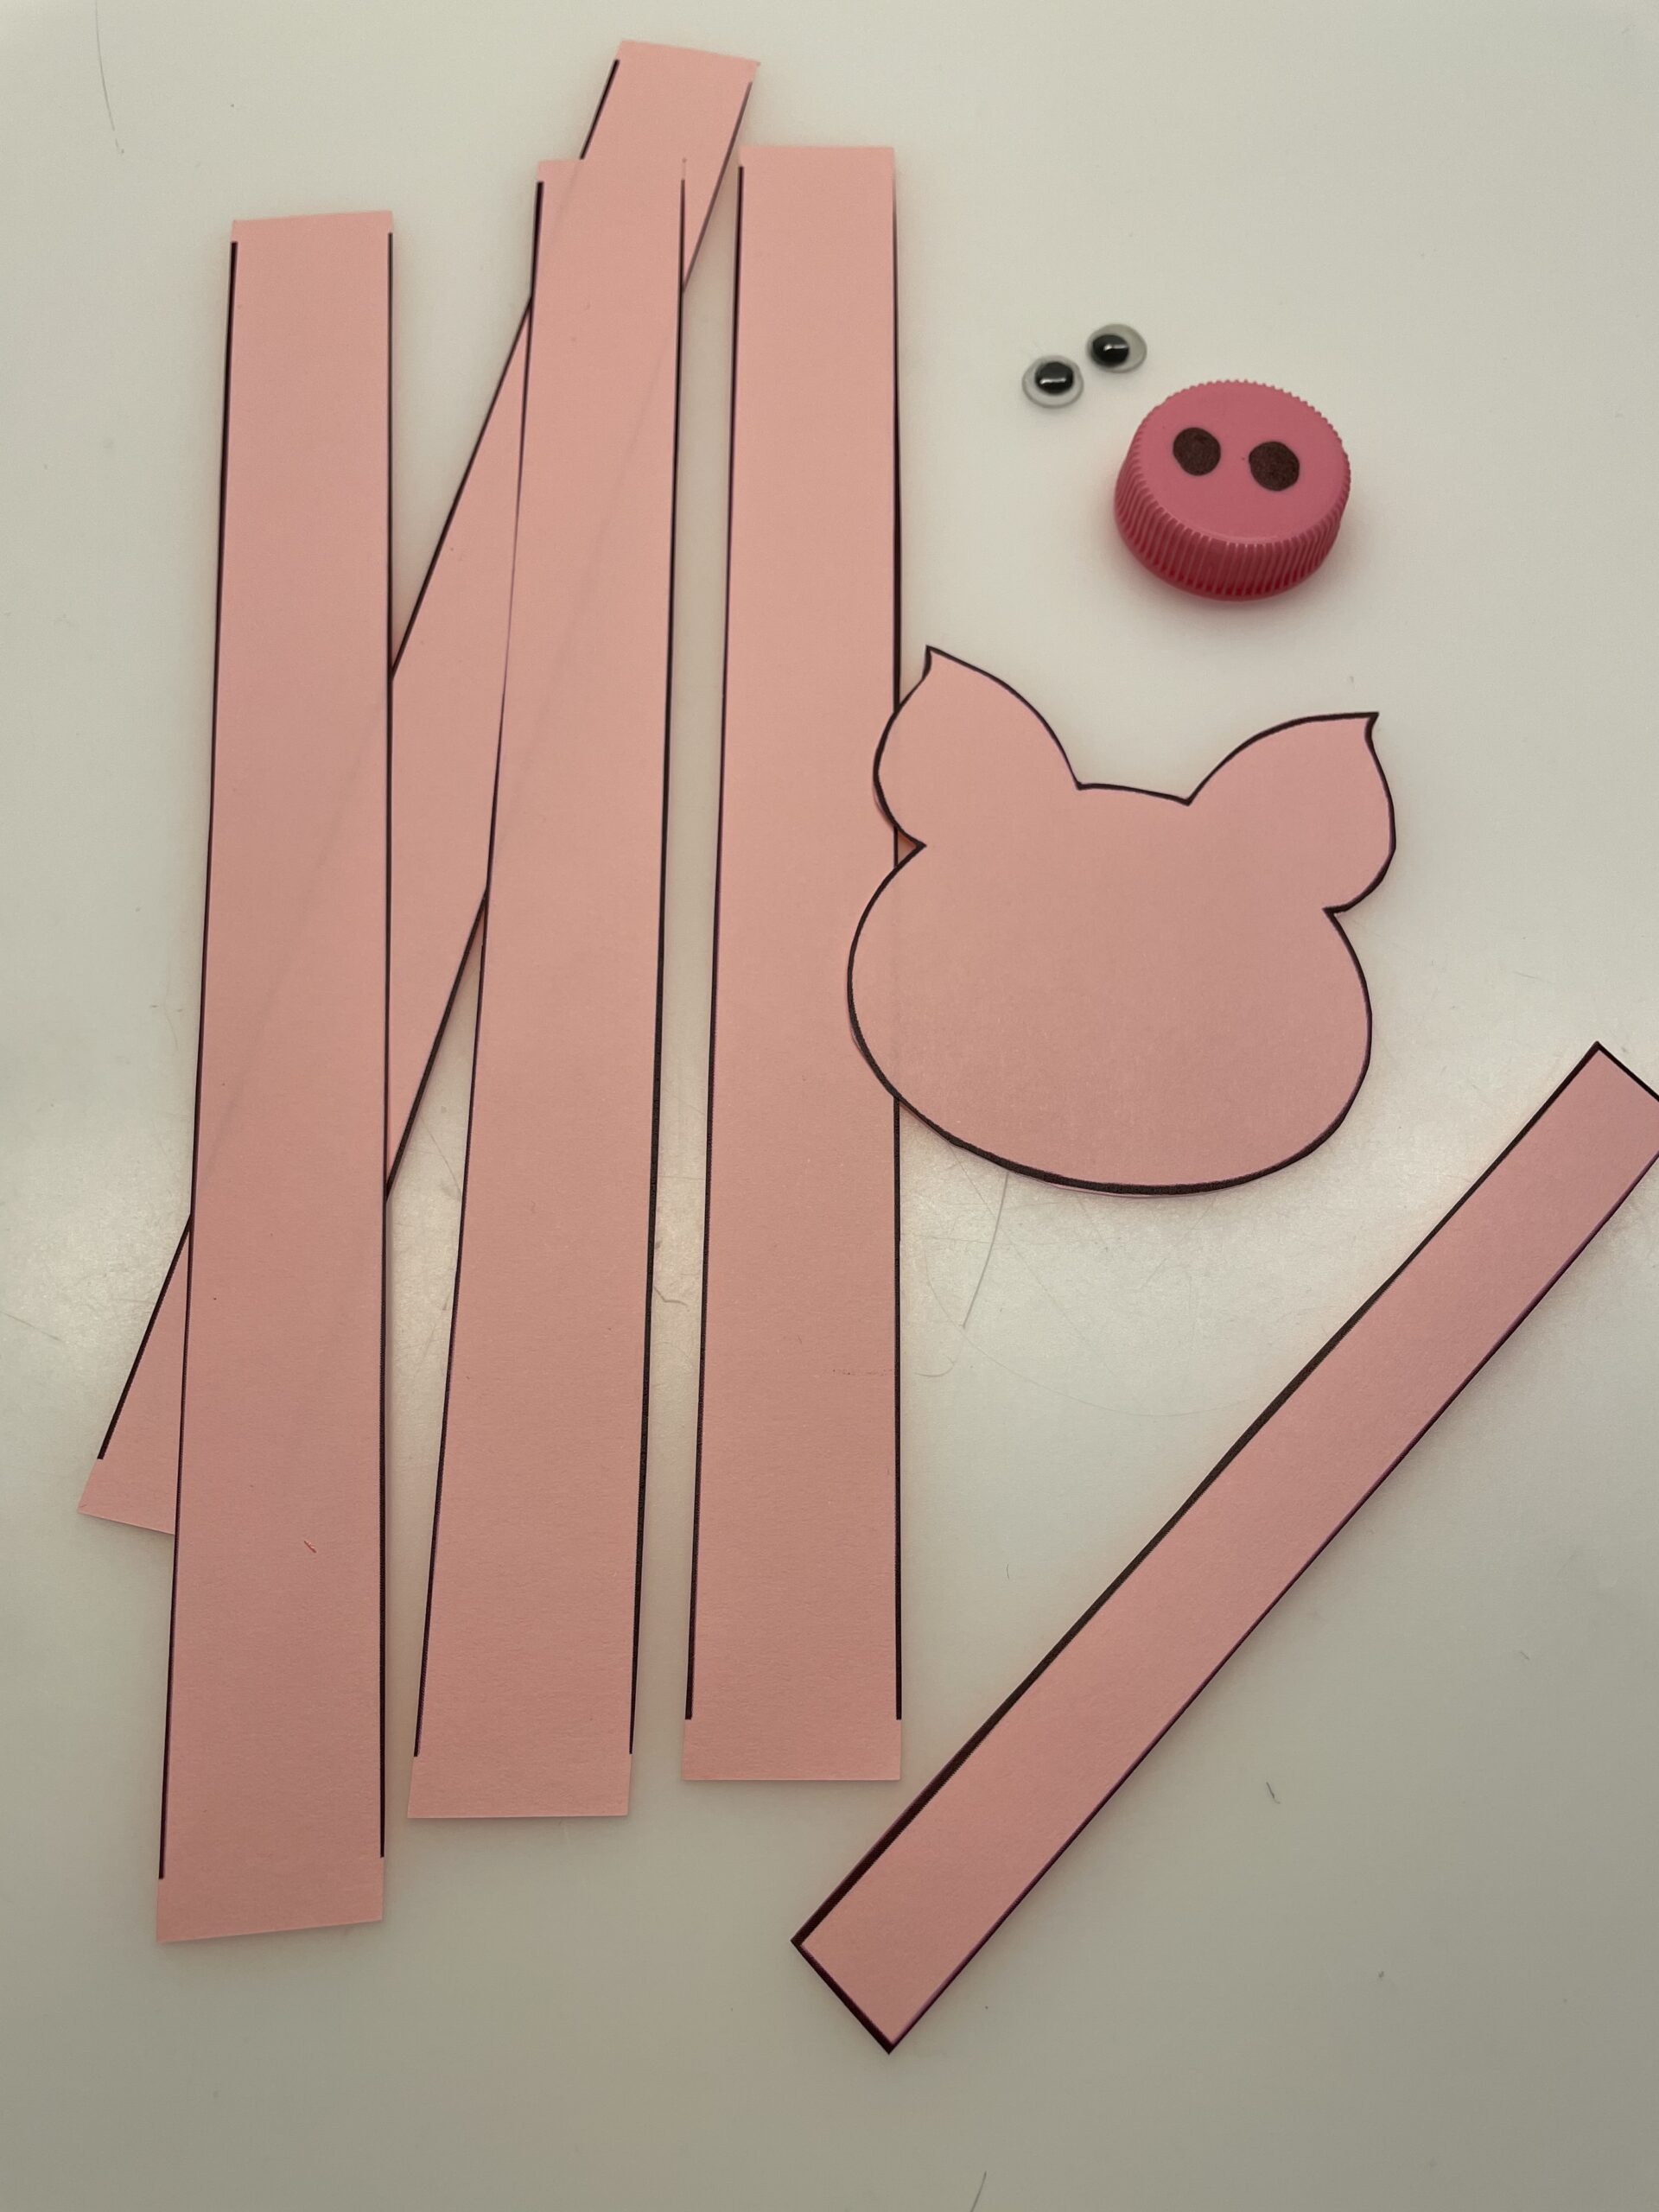
Bild zum Schritt 2 für das Bastel- und DIY-Abenteuer für Kinder: 'Dann schneidet ihr euch zuerst die vier langen Streifen für...'

Make the pig's belly
3

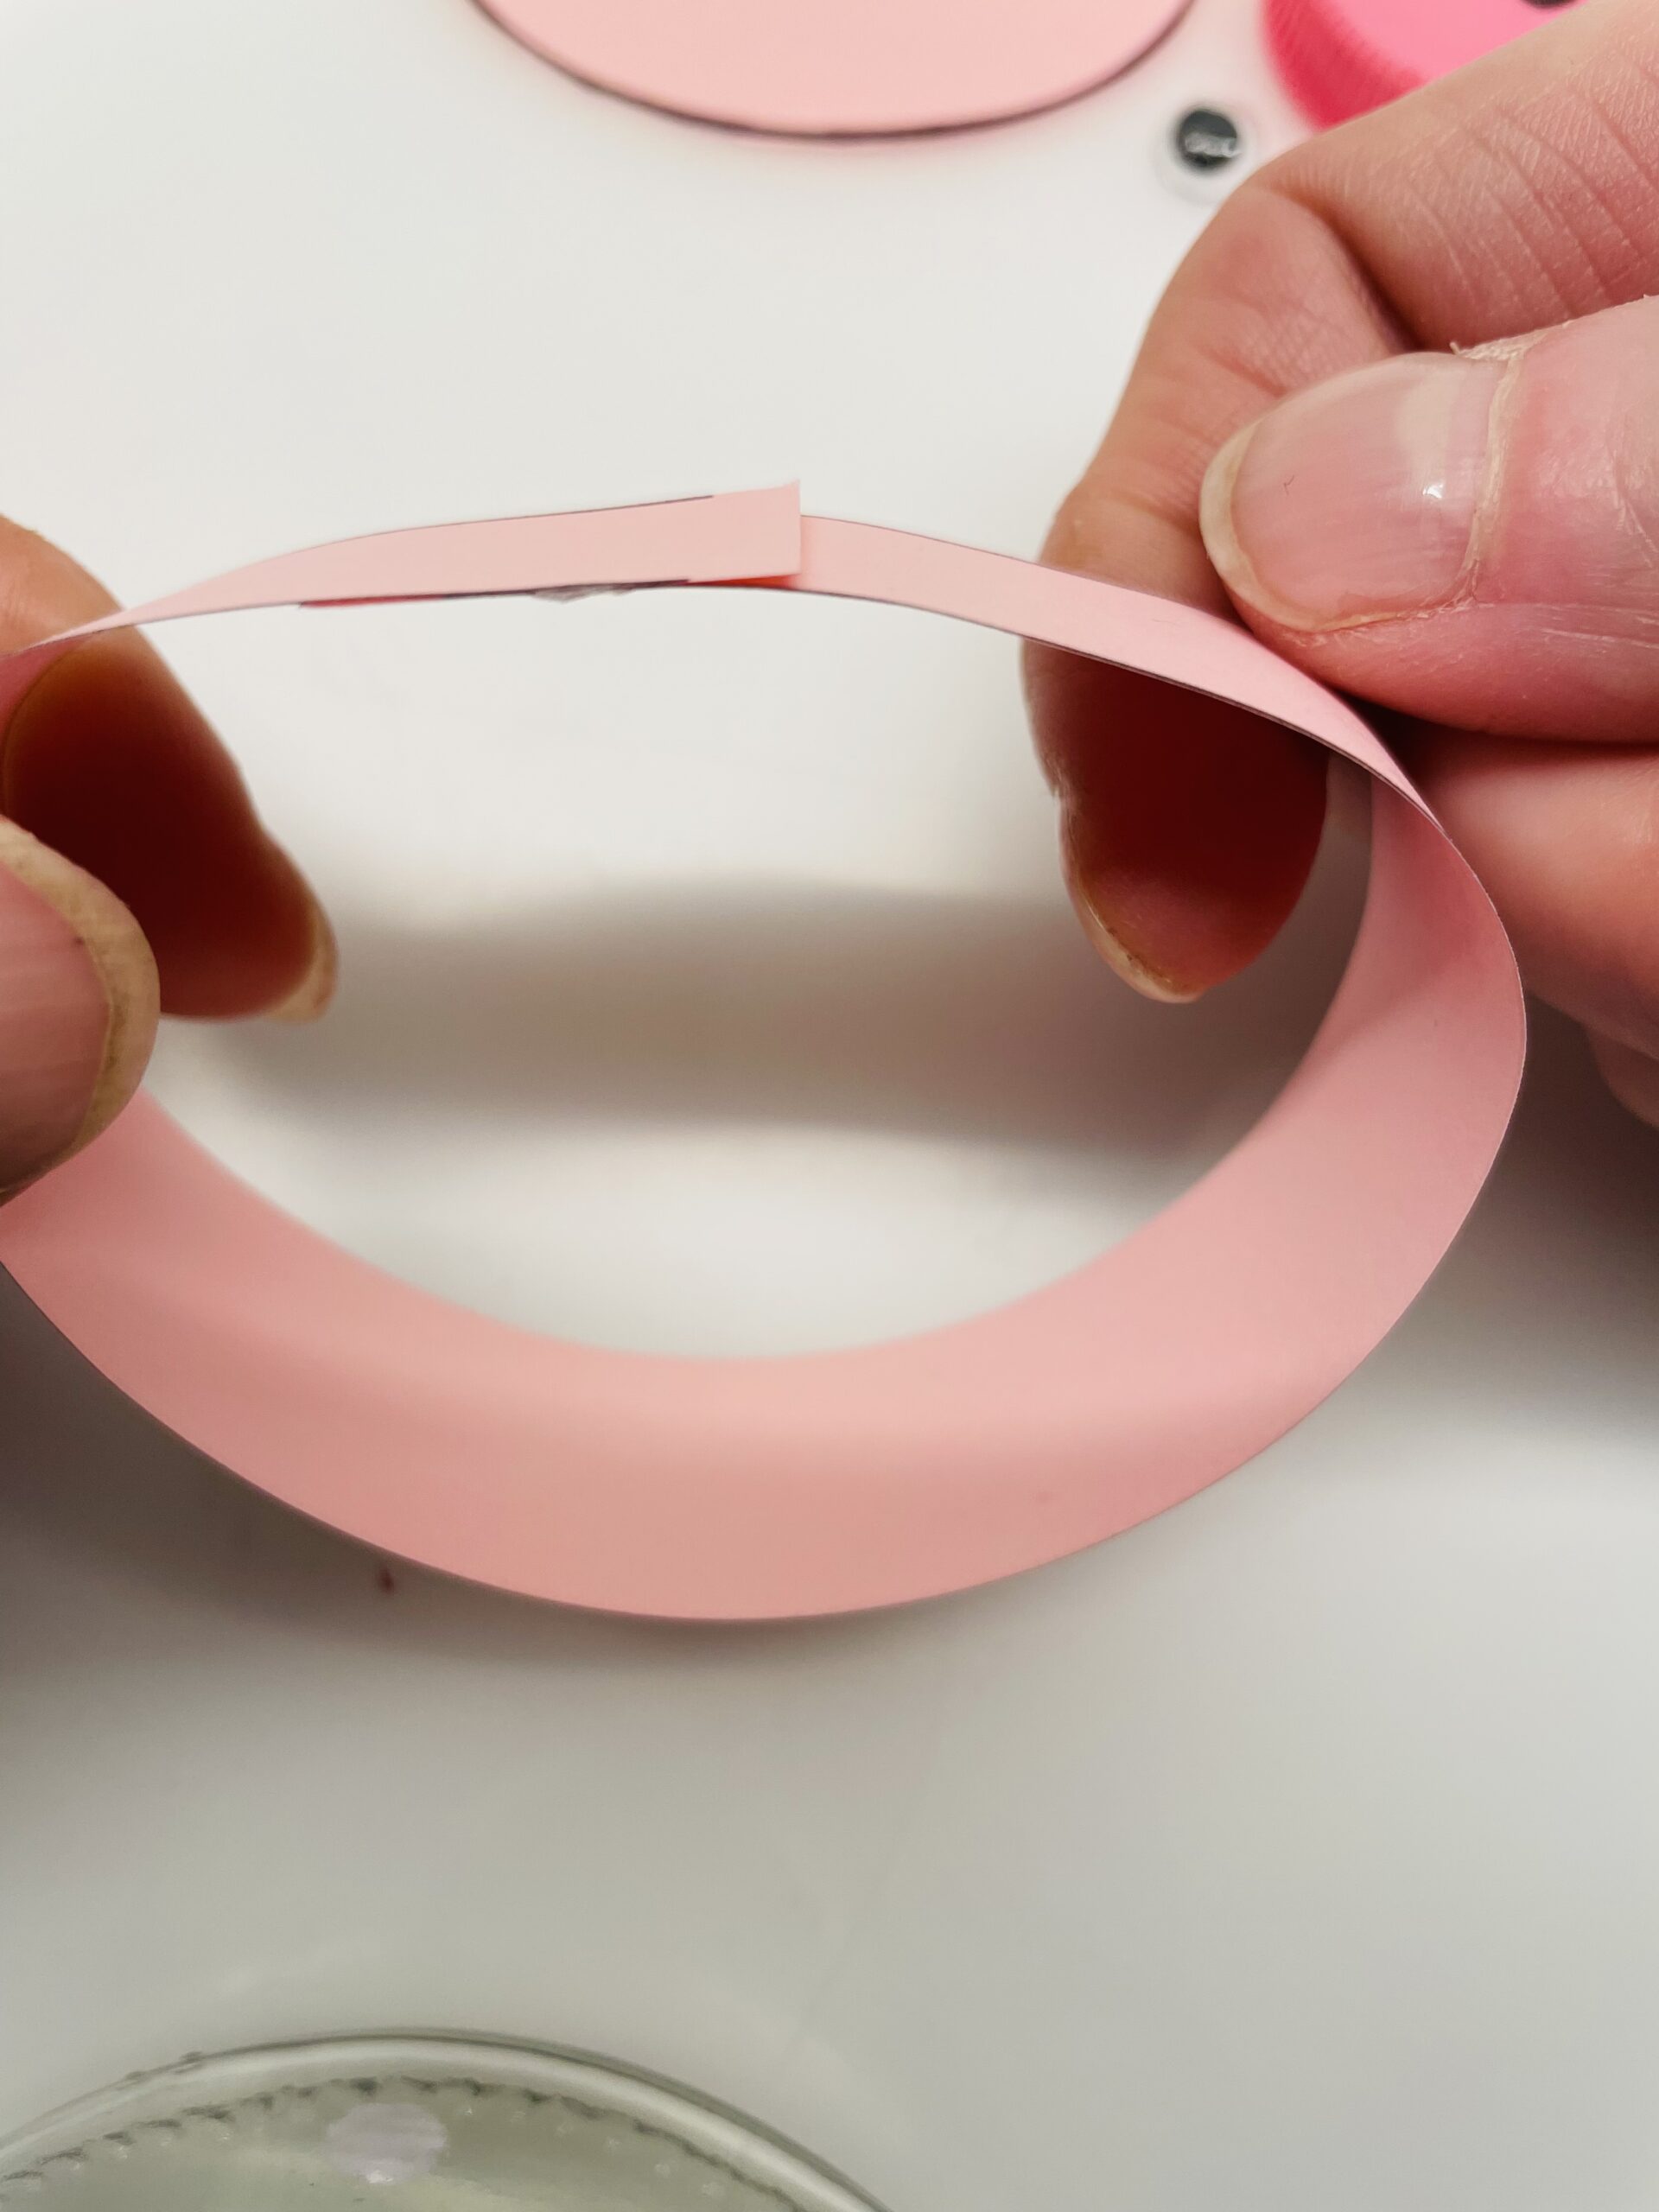
Now you stick each strip together to form a ring. The two strip ends overlap about 1 centimetre.

Bild zum Schritt 4 für das Bastel- und DIY-Abenteuer für Kinder: 'Jetzt klebt ihr jeden Streifen zu einem Ring zusammen. Dabei...'

4

Passes one end with the glue stick and glues the other end over it.

Bild zum Schritt 5 für das Bastel- und DIY-Abenteuer für Kinder: 'Betreicht das eine Ende mit dem Klebestift und klebt das...'

5

2. Bild zum Schritt 5 für das Bastel- und DIY-Abenteuer für Kinder: 'Betreicht das eine Ende mit dem Klebestift und klebt das...'

6

Repeats the process on all four stripes.

Bild zum Schritt 7 für das Bastel- und DIY-Abenteuer für Kinder: 'Wiederholt den Vorgang bei allen vier Streifen.'

7

Now you put two rings in each other. Make sure that the connecting points are on top. Strike in the connecting point of the lower ring with glue and stick the connecting point of the upper ring to it.

Bild zum Schritt 8 für das Bastel- und DIY-Abenteuer für Kinder: 'Jetzt steckt ihr zwei Ringe ineinander. Achtet darauf, dass die...'

8

Press the two paper rings firmly together at the glue point.

Bild zum Schritt 9 für das Bastel- und DIY-Abenteuer für Kinder: 'Drückt die beiden Papierringe an der Klebestelle fest zusammen.'

9

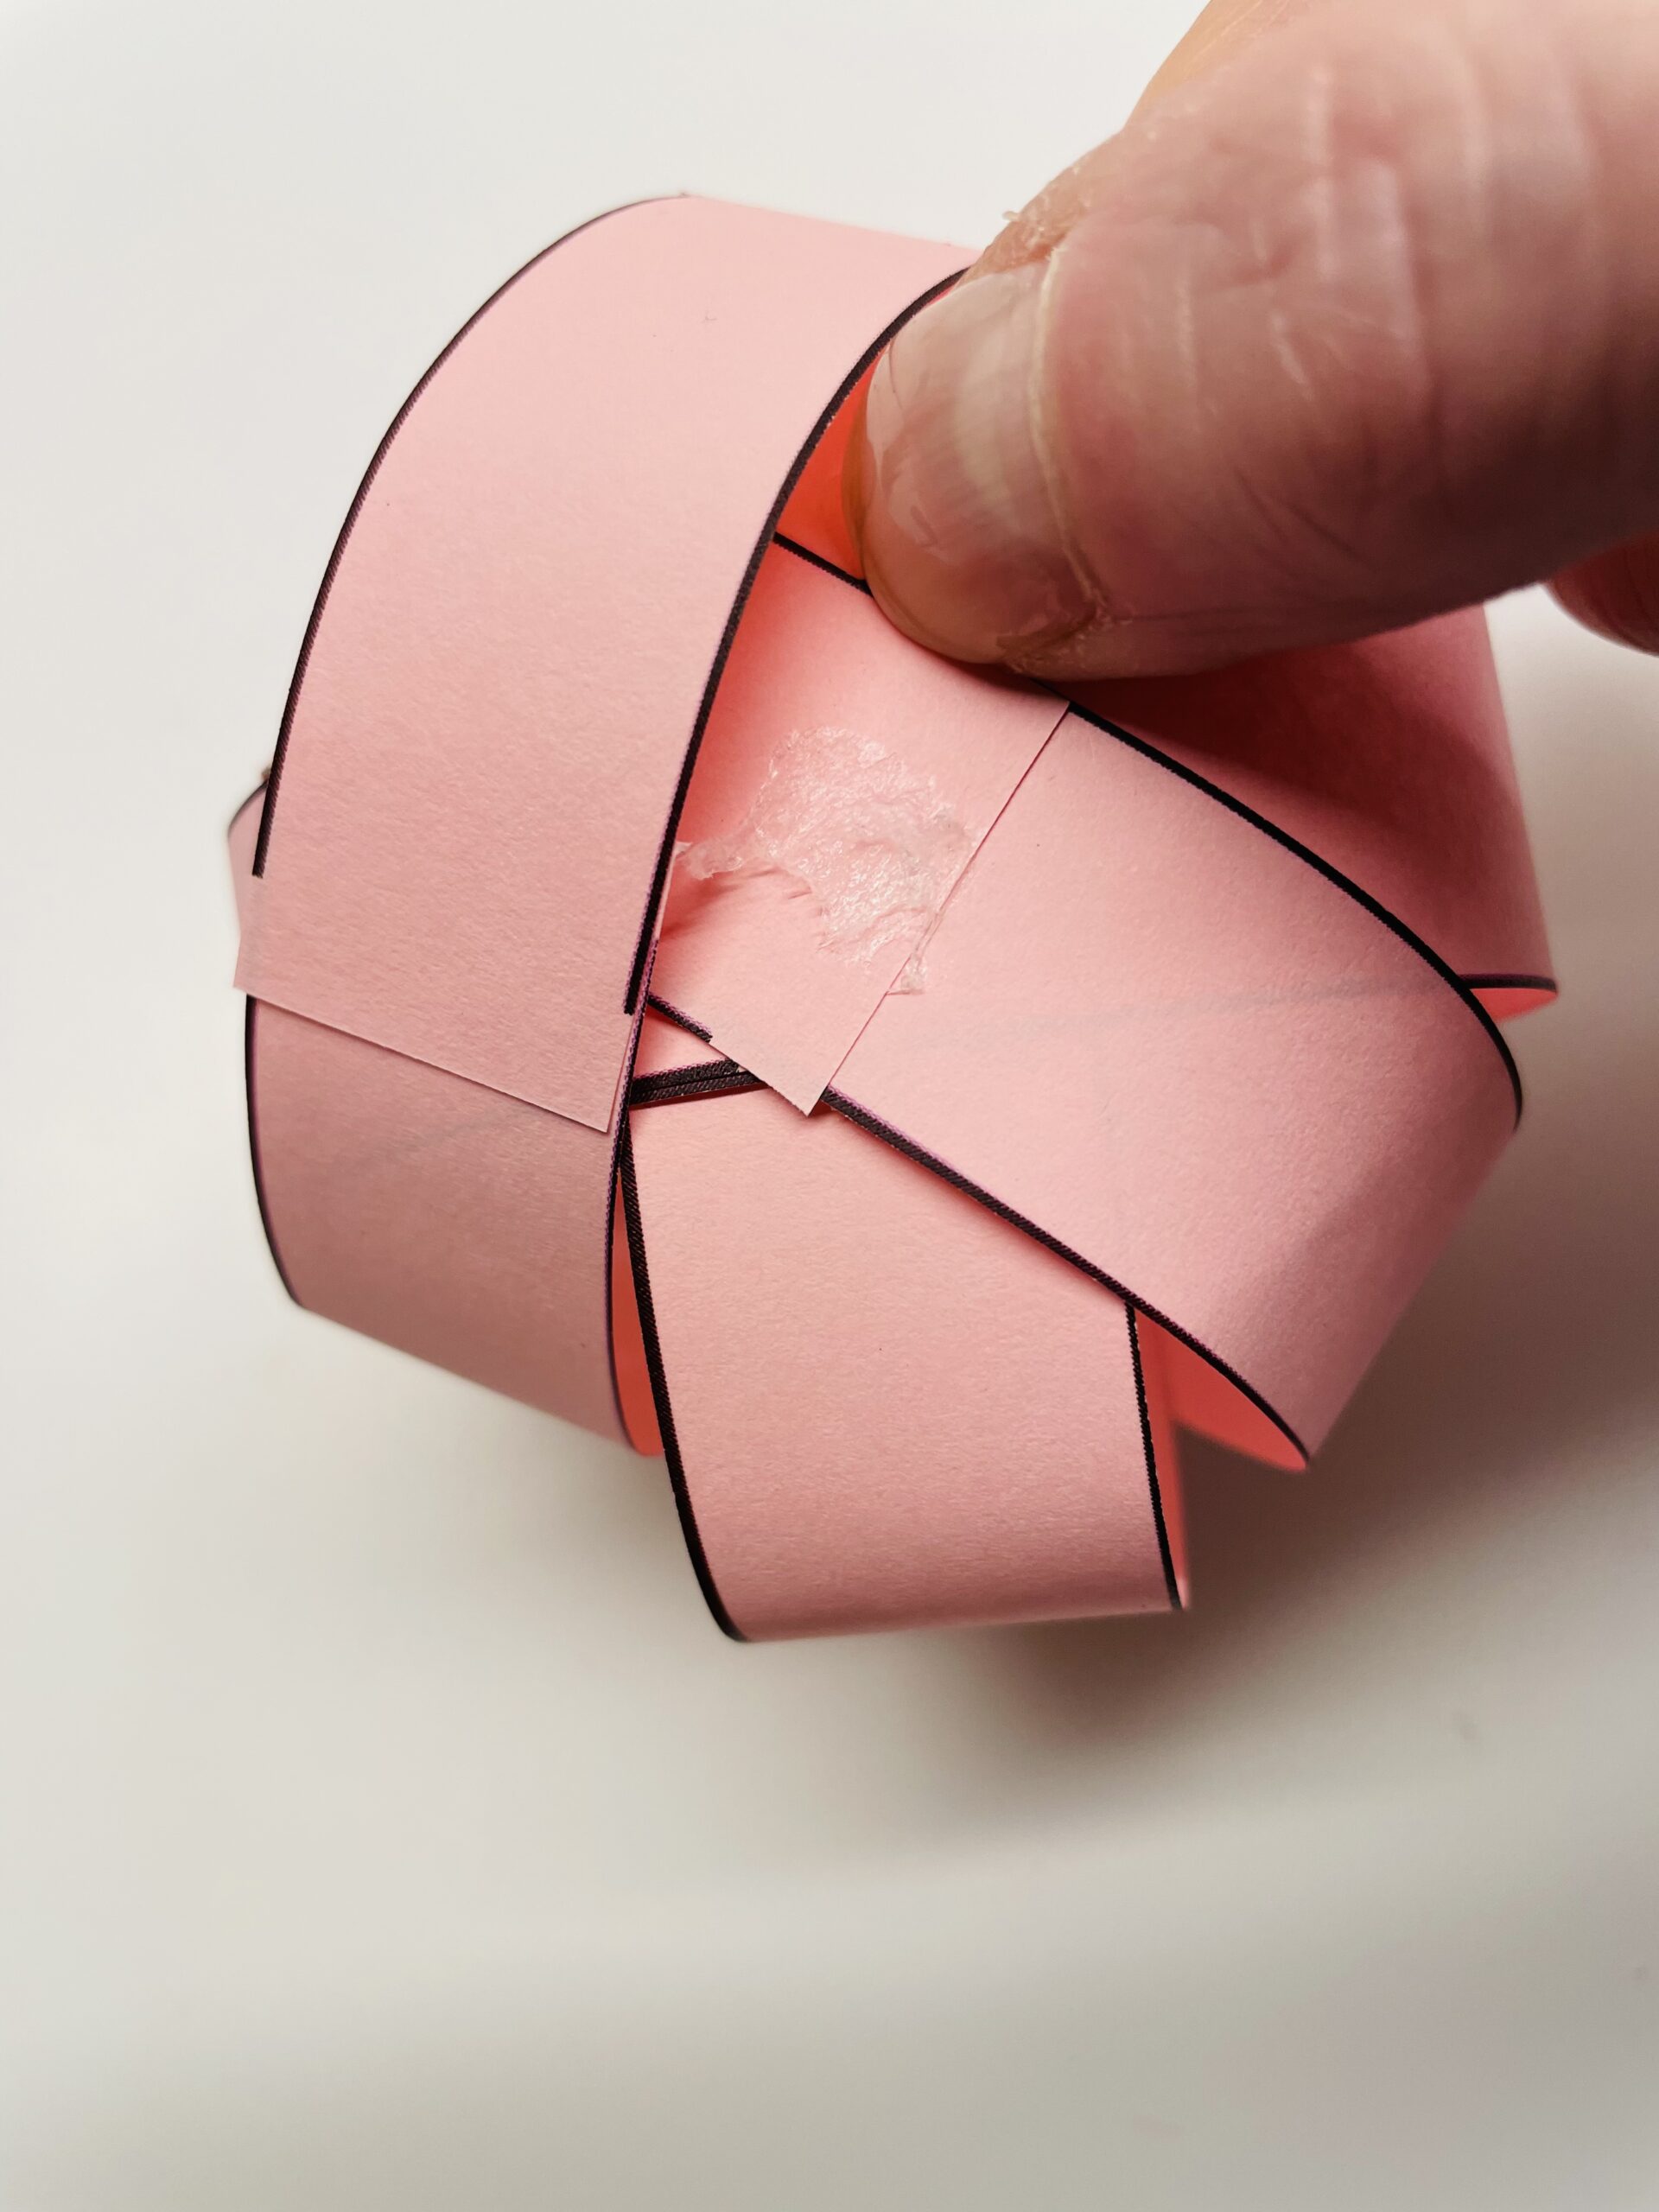
Now you put some glue on the resulting cross and push another paper ring diagonally over it.

Bild zum Schritt 10 für das Bastel- und DIY-Abenteuer für Kinder: 'Jetzt tupft ihr etwas Kleber auf das entstandene Kreuz und...'

10

Press the sticky spot again firmly.

Bild zum Schritt 11 für das Bastel- und DIY-Abenteuer für Kinder: 'Drückt die Klebestelle erneut fest zusammen.'

11

After that you put some glue on the paper cross again and strip the last paper ring diagonally over it.

Bild zum Schritt 12 für das Bastel- und DIY-Abenteuer für Kinder: 'Danach streicht ihr wieder etwas Kleber auf das Papierkreuz und...'

12

2. Bild zum Schritt 12 für das Bastel- und DIY-Abenteuer für Kinder: 'Danach streicht ihr wieder etwas Kleber auf das Papierkreuz und...'

13

Gently tighten the rings so that you don't flatten the body.

Bild zum Schritt 14 für das Bastel- und DIY-Abenteuer für Kinder: 'Drückt die Ringe vorsichtig fest, so dass ihr den Körper...'

14

Now you turn the body around so that the interfaces point downwards.

Bild zum Schritt 15 für das Bastel- und DIY-Abenteuer für Kinder: 'Jetzt dreht ihr den Körper um, so dass die Schnittstellen...'

Ring-tailed
15

Cuts a pink paper strip with the dimensions: 12cm x 1cm or you use the short paper strip from the template.

Bild zum Schritt 17 für das Bastel- und DIY-Abenteuer für Kinder: 'Schneidet für den Ringelschwanz einen rosafarbenen Papierstreifen mit den Maßen:...'

16

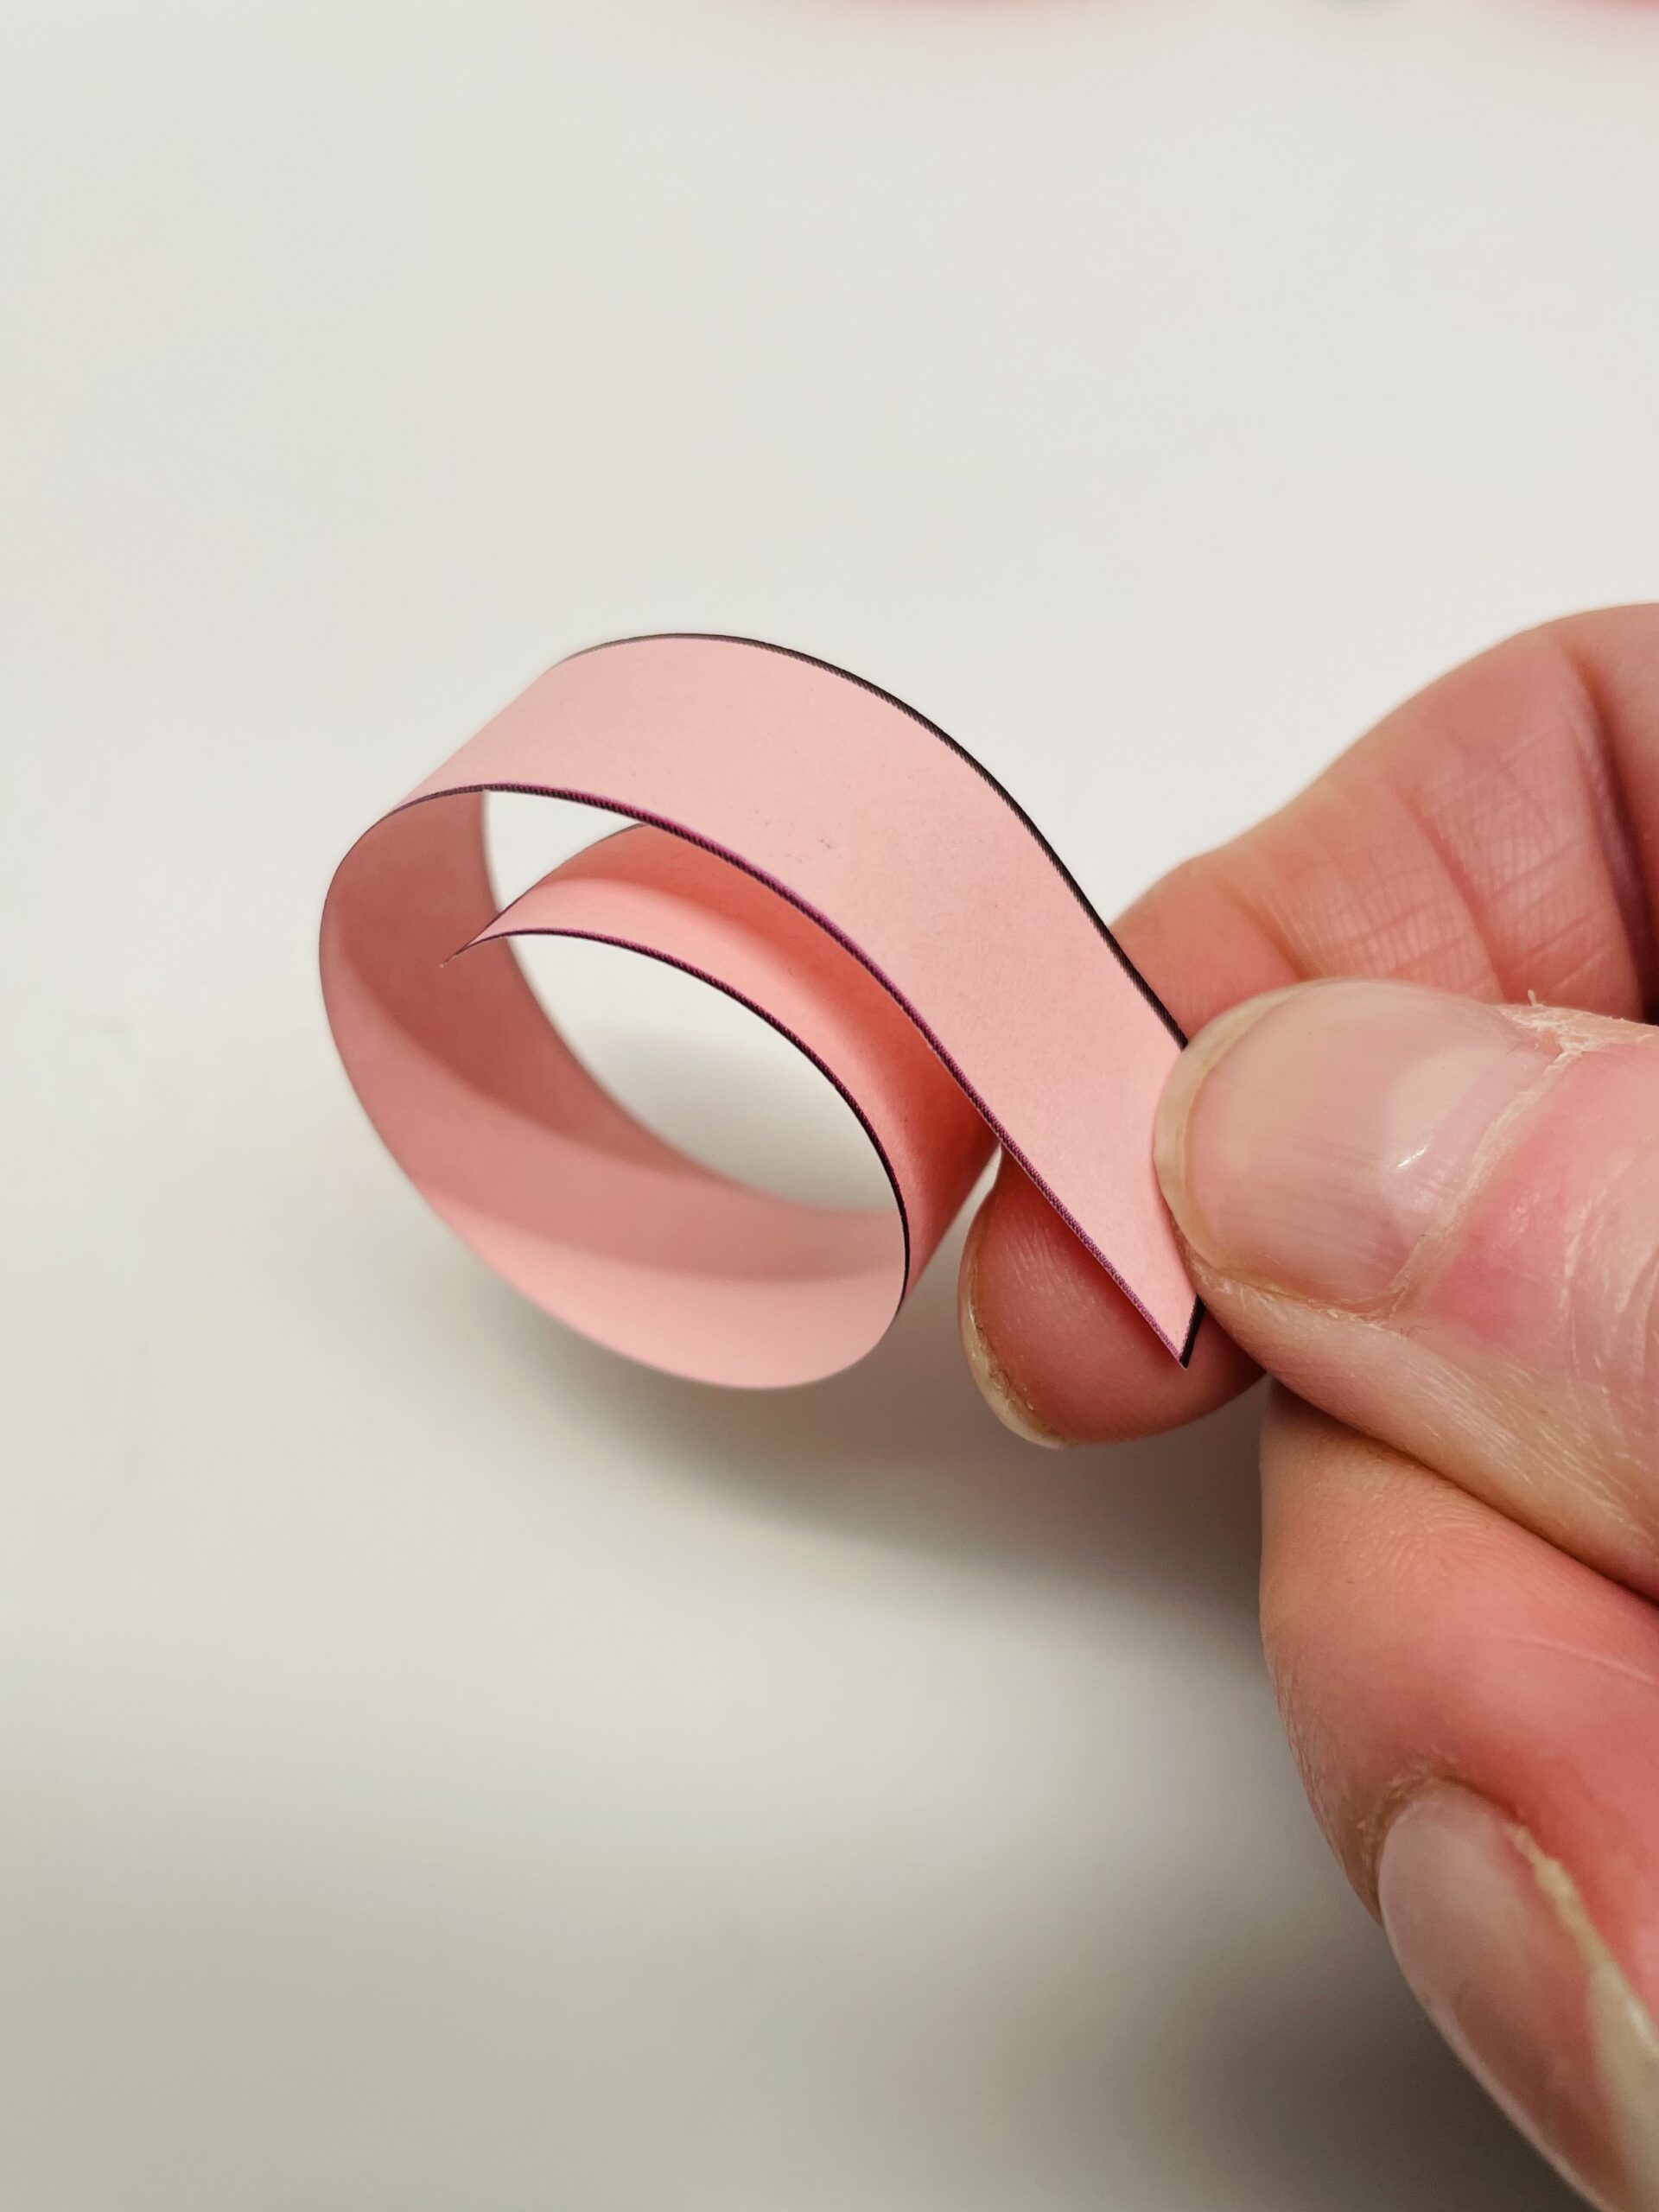
Now hold the paper strip with your thumb on the pen.

Bild zum Schritt 18 für das Bastel- und DIY-Abenteuer für Kinder: 'Nun haltet ihr den Papierstreifen mit dem Daumen auf den...'

17

With the other hand, you slowly pull the paper strip over the pen.
By pressing the thumb, the paper strip is pulled over the edge of the pen and the paper rolls easily.

Bild zum Schritt 19 für das Bastel- und DIY-Abenteuer für Kinder: 'Mit der anderen Hand zieht ihr langsam an dem Papierstreifen...'

18

You can also pull the paper strip over the pen several times. Then the paper rings in more forcefully. Make sure that the direction of pull is always the same.

Bild zum Schritt 20 für das Bastel- und DIY-Abenteuer für Kinder: 'Ihr könnt den Papierstreifen auch mehrmals über den Stift ziehen....'

19

The wrestling tail is ready!

Bild zum Schritt 21 für das Bastel- und DIY-Abenteuer für Kinder: 'Fertig ist der Ringelschwanz!'

Make a pig's head
20

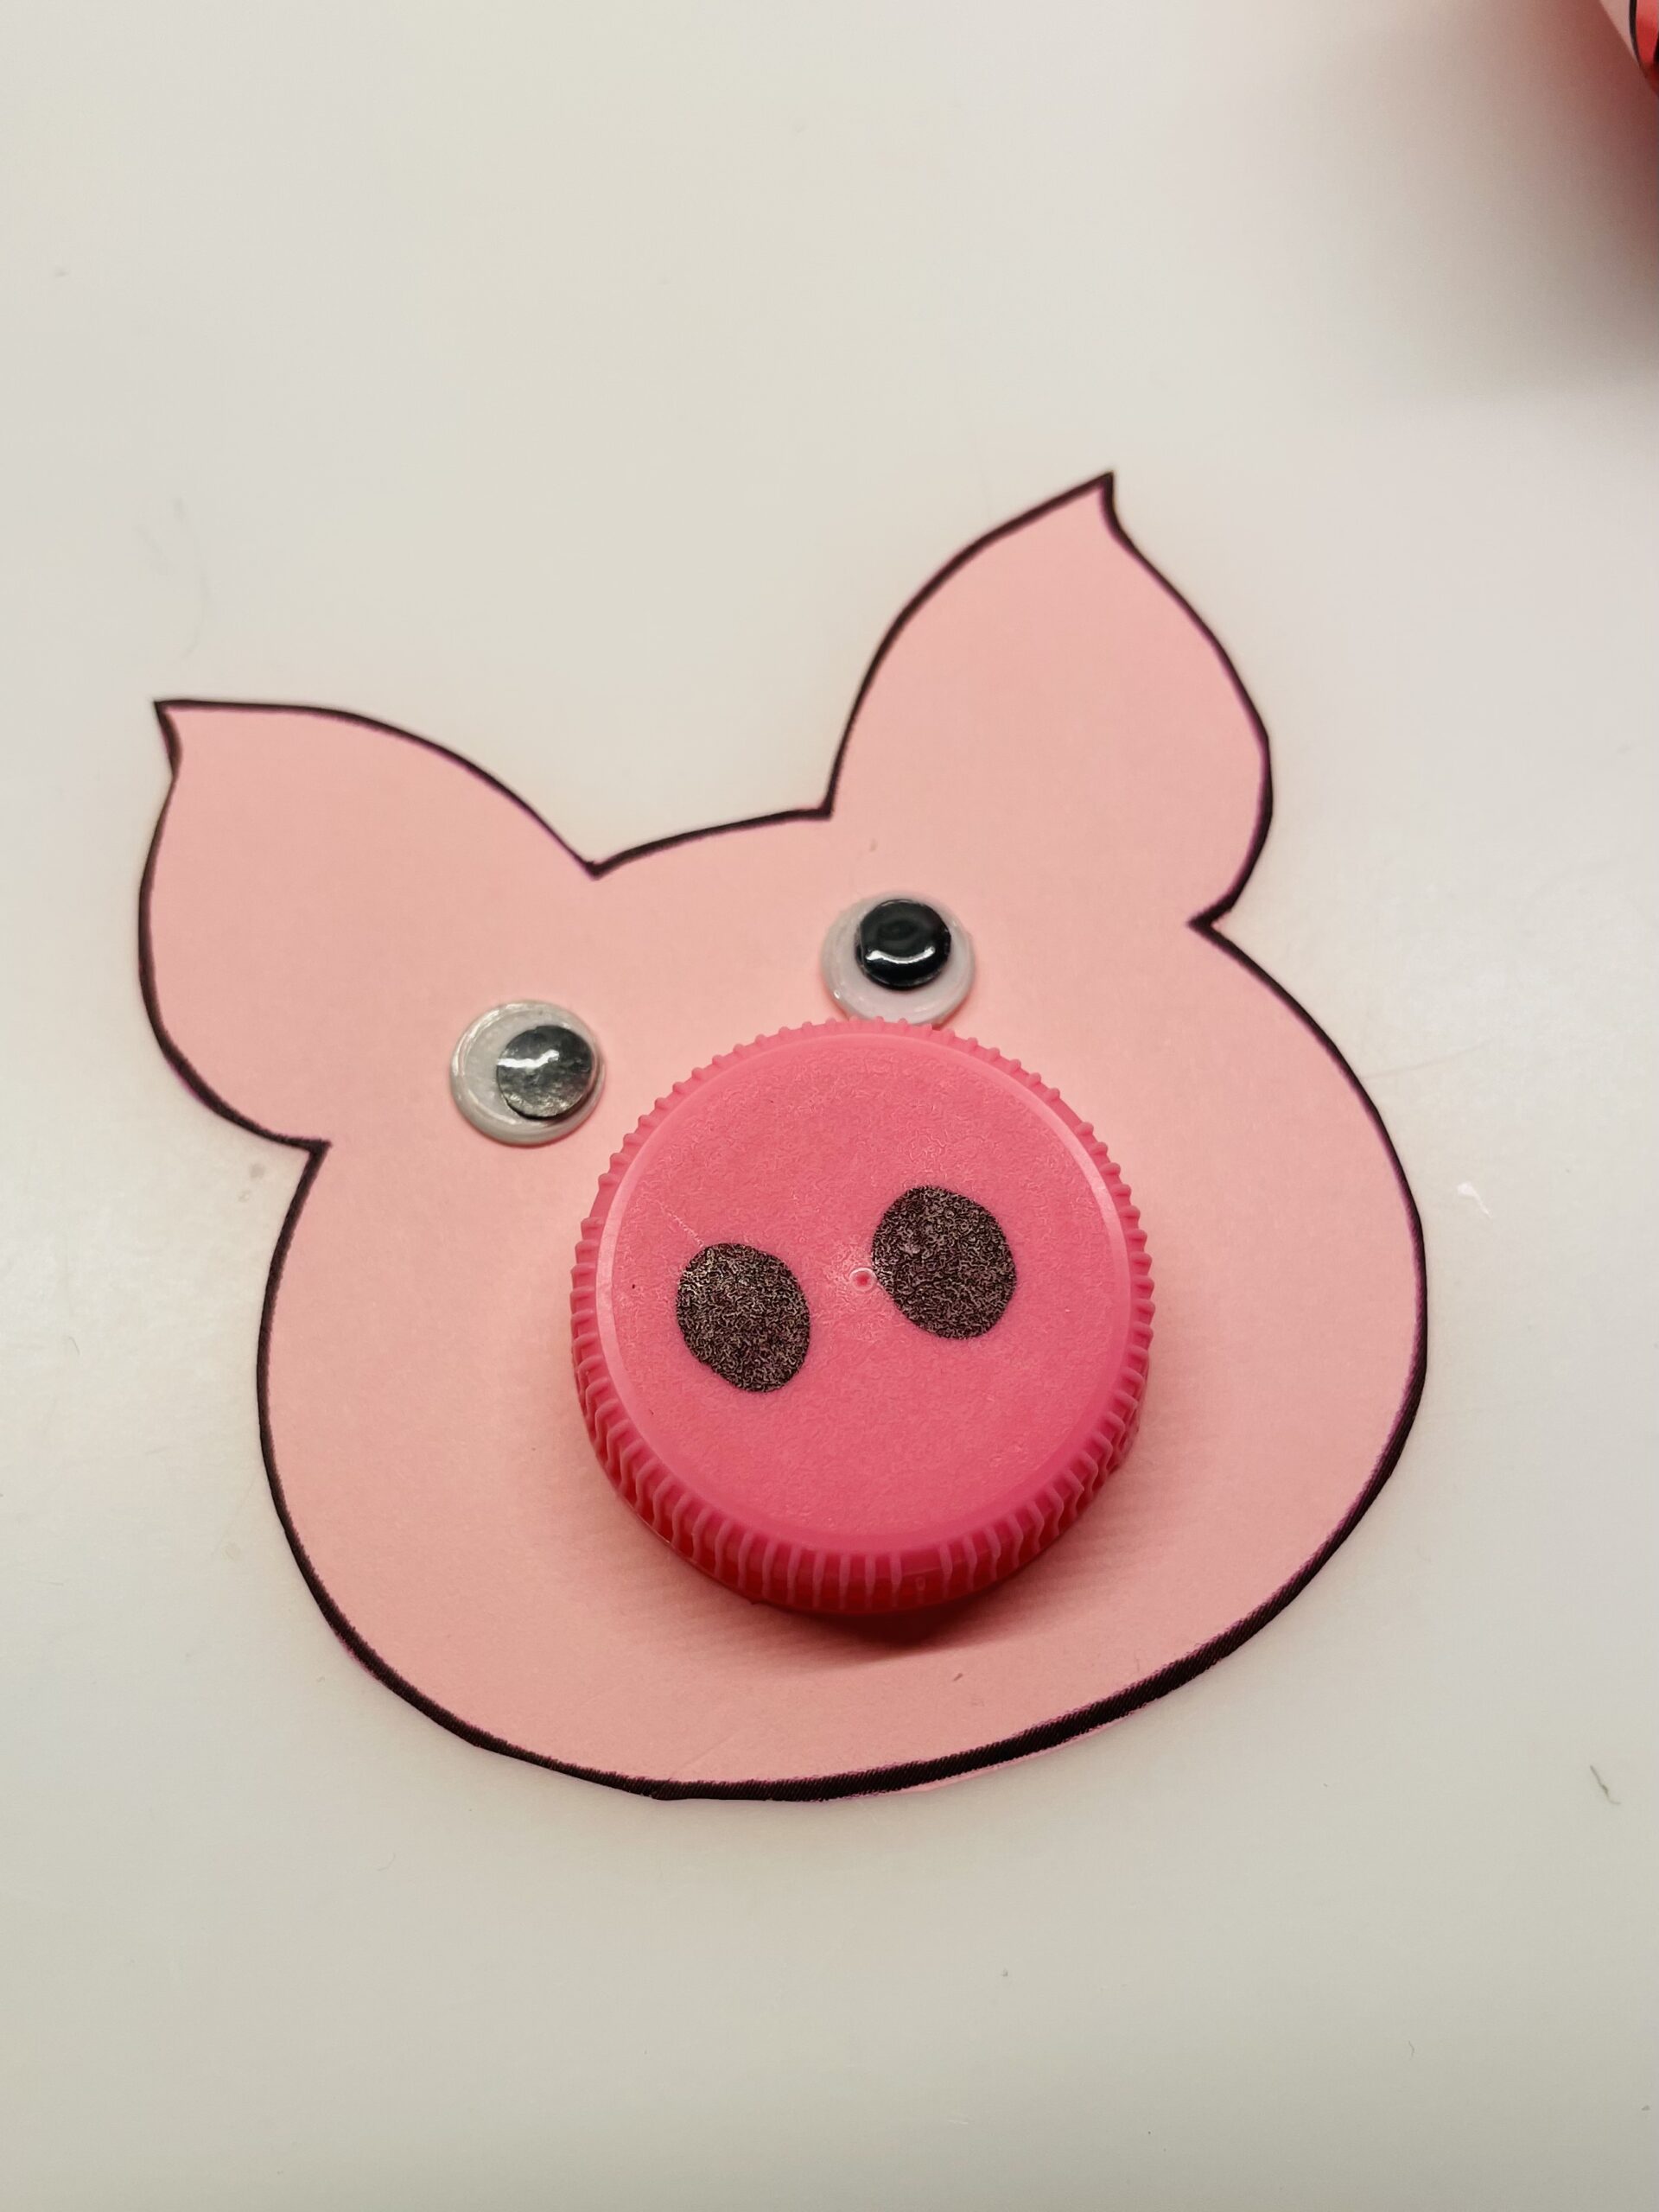
Now paint up a pig's head and cut it out or use the template.
After that you paint your eyes and the trunk on it.
Alternatively, her two wobble eyes and a pink button stick to it.

Bild zum Schritt 23 für das Bastel- und DIY-Abenteuer für Kinder: 'Malt euch nun einen Schweinekopf auf und schneidet diesen aus...'

21

With a screw cap you paint the nostrils with a black felt pen.

Bild zum Schritt 24 für das Bastel- und DIY-Abenteuer für Kinder: 'Bei einem Schraubverschluss malt ihr die Nasenlöcher mit einem schwarzen...'

22

2. Bild zum Schritt 24 für das Bastel- und DIY-Abenteuer für Kinder: 'Bei einem Schraubverschluss malt ihr die Nasenlöcher mit einem schwarzen...'

Glue the pig together
23

Now glue her head to the outer paper ring of the body. Fix the head with an adhesive point.

Bild zum Schritt 27 für das Bastel- und DIY-Abenteuer für Kinder: 'Jetzt klebt ihr den Kopf an den äußeren Papierring des...'

24

2. Bild zum Schritt 27 für das Bastel- und DIY-Abenteuer für Kinder: 'Jetzt klebt ihr den Kopf an den äußeren Papierring des...'

25

Then her wrestling tail sticks to the opposite side. In addition, the striped end of the wrestling tail with glue.

Bild zum Schritt 29 für das Bastel- und DIY-Abenteuer für Kinder: 'Danach klebt ihr Ringelschwanz an der gegenüberliegenden Seite fest. Bestreicht...'

26

The pig is ready!

Bild zum Schritt 30 für das Bastel- und DIY-Abenteuer für Kinder: 'Fertig ist das Schwein!'

" Good luck " craft card
27

Use the accompanying template or create a card for yourself and add it to it.

Bild zum Schritt 32 für das Bastel- und DIY-Abenteuer für Kinder: 'Verwendet die beigefügte Vorlage oder bastelt euch selbst eine Karte...'

28

Your lucky bastard is ready.

Bild zum Schritt 33 für das Bastel- und DIY-Abenteuer für Kinder: 'Fertig ist euer Glücksschwein.'

29

2. Bild zum Schritt 33 für das Bastel- und DIY-Abenteuer für Kinder: 'Fertig ist euer Glücksschwein.'

Printable template
30

Template for printing on a pink copy paper.
Tip: Alternatively, you paint the pig pink.

Bild zum Schritt 36 für das Bastel- und DIY-Abenteuer für Kinder: 'Vorlage zum Ausdrucken auf ein rosafarbenes Kopierpapier.  Tipp: Alternativ...'

31

Have fun in crafts and luck-schenken!

Materials

 1 Pink copy paper
 1 possible template for printing
 2 Wax eyes
 1 Pink button or screw cap
 1 Felt pen black
 possible ruler
 1 Colour pencil green
 1 Builder's pad
All links marked with a shopping cart lead to Amazon - here we have selected products that we would order ourselves and in part also ordered. In a qualified purchase via the advertising link, we as Amazon partner receive a commission, for you there are no costs. You thus support our cost- and advertising banner-free, educational offer.

Directions

1

You can print the craft template (see below) or paint four stripes on a pink paper with the dimensions 2cm x 21cm (DIN A4 landscape format). Use a ruler for this.

Bild zum Schritt 1 für das Bastel- und DIY-Abenteuer für Kinder: 'Ihr könnt die Bastelvorlage ausdrucken (siehe unten) oder ihr malt...'

2

Then you first cut the four long stripes for your stomach.

Bild zum Schritt 2 für das Bastel- und DIY-Abenteuer für Kinder: 'Dann schneidet ihr euch zuerst die vier langen Streifen für...'

Make the pig's belly
3

Now you stick each strip together to form a ring. The two strip ends overlap about 1 centimetre.
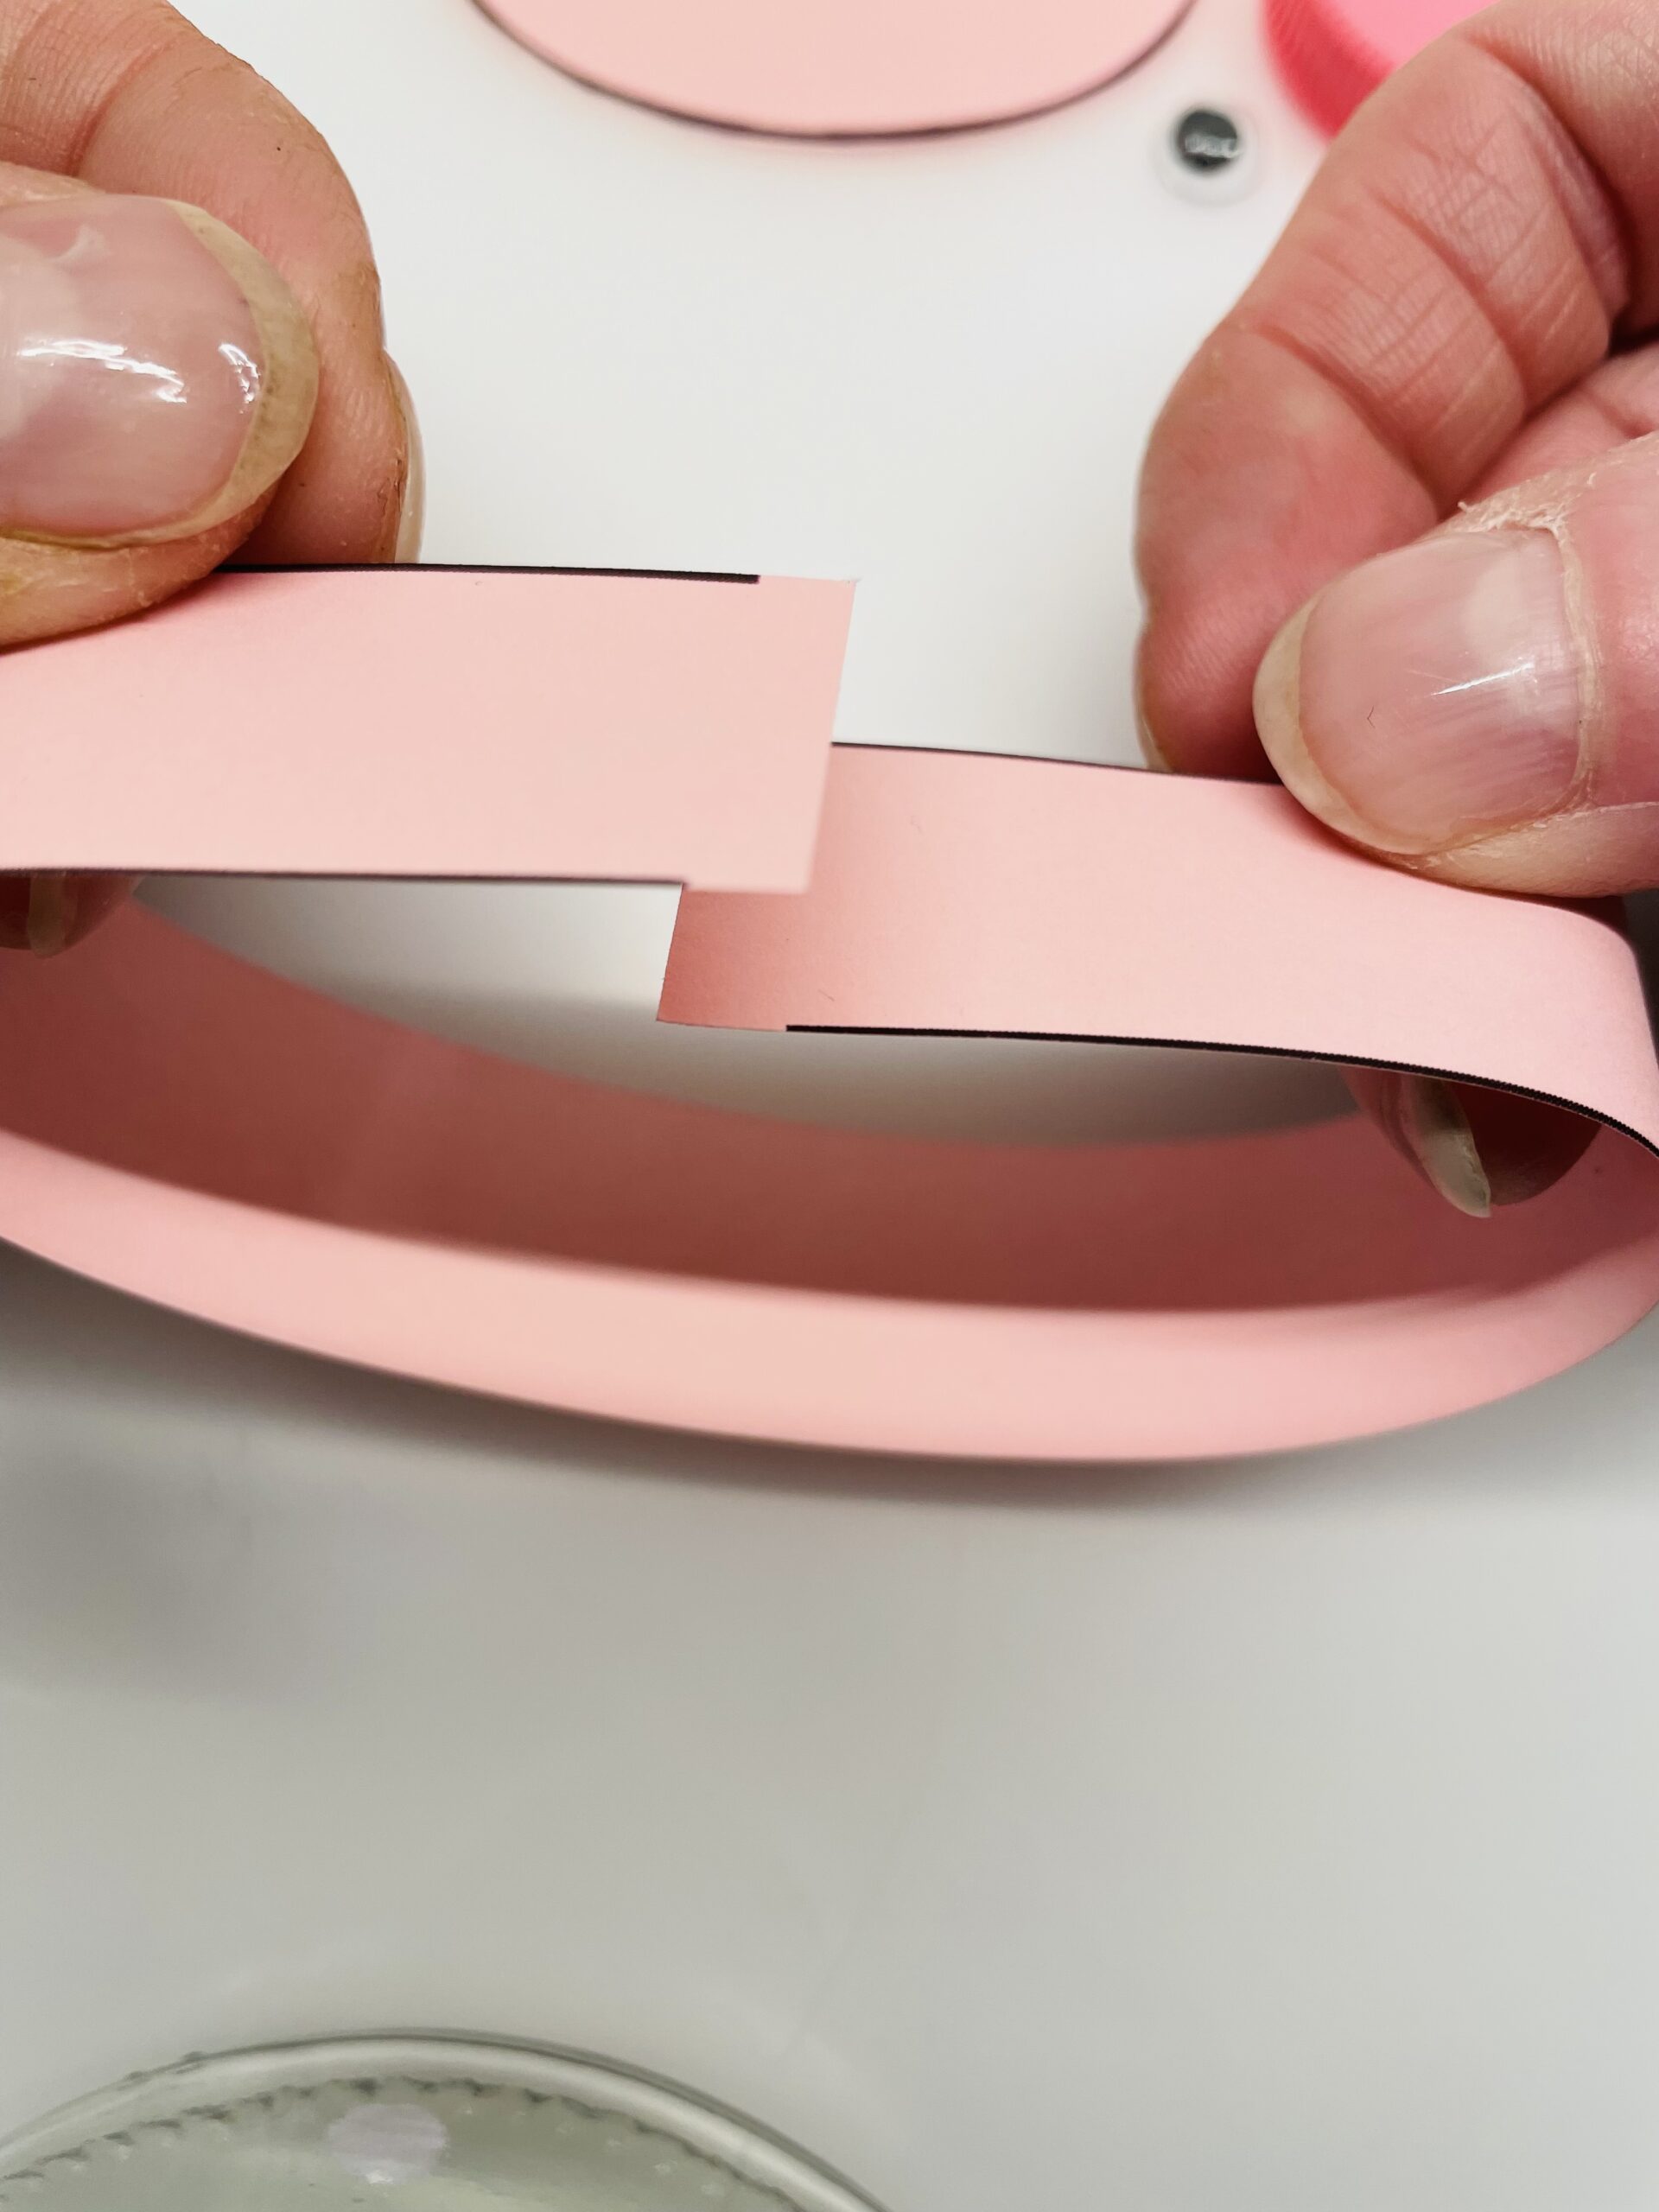
Bild zum Schritt 4 für das Bastel- und DIY-Abenteuer für Kinder: 'Jetzt klebt ihr jeden Streifen zu einem Ring zusammen. Dabei...'

4

Passes one end with the glue stick and glues the other end over it.
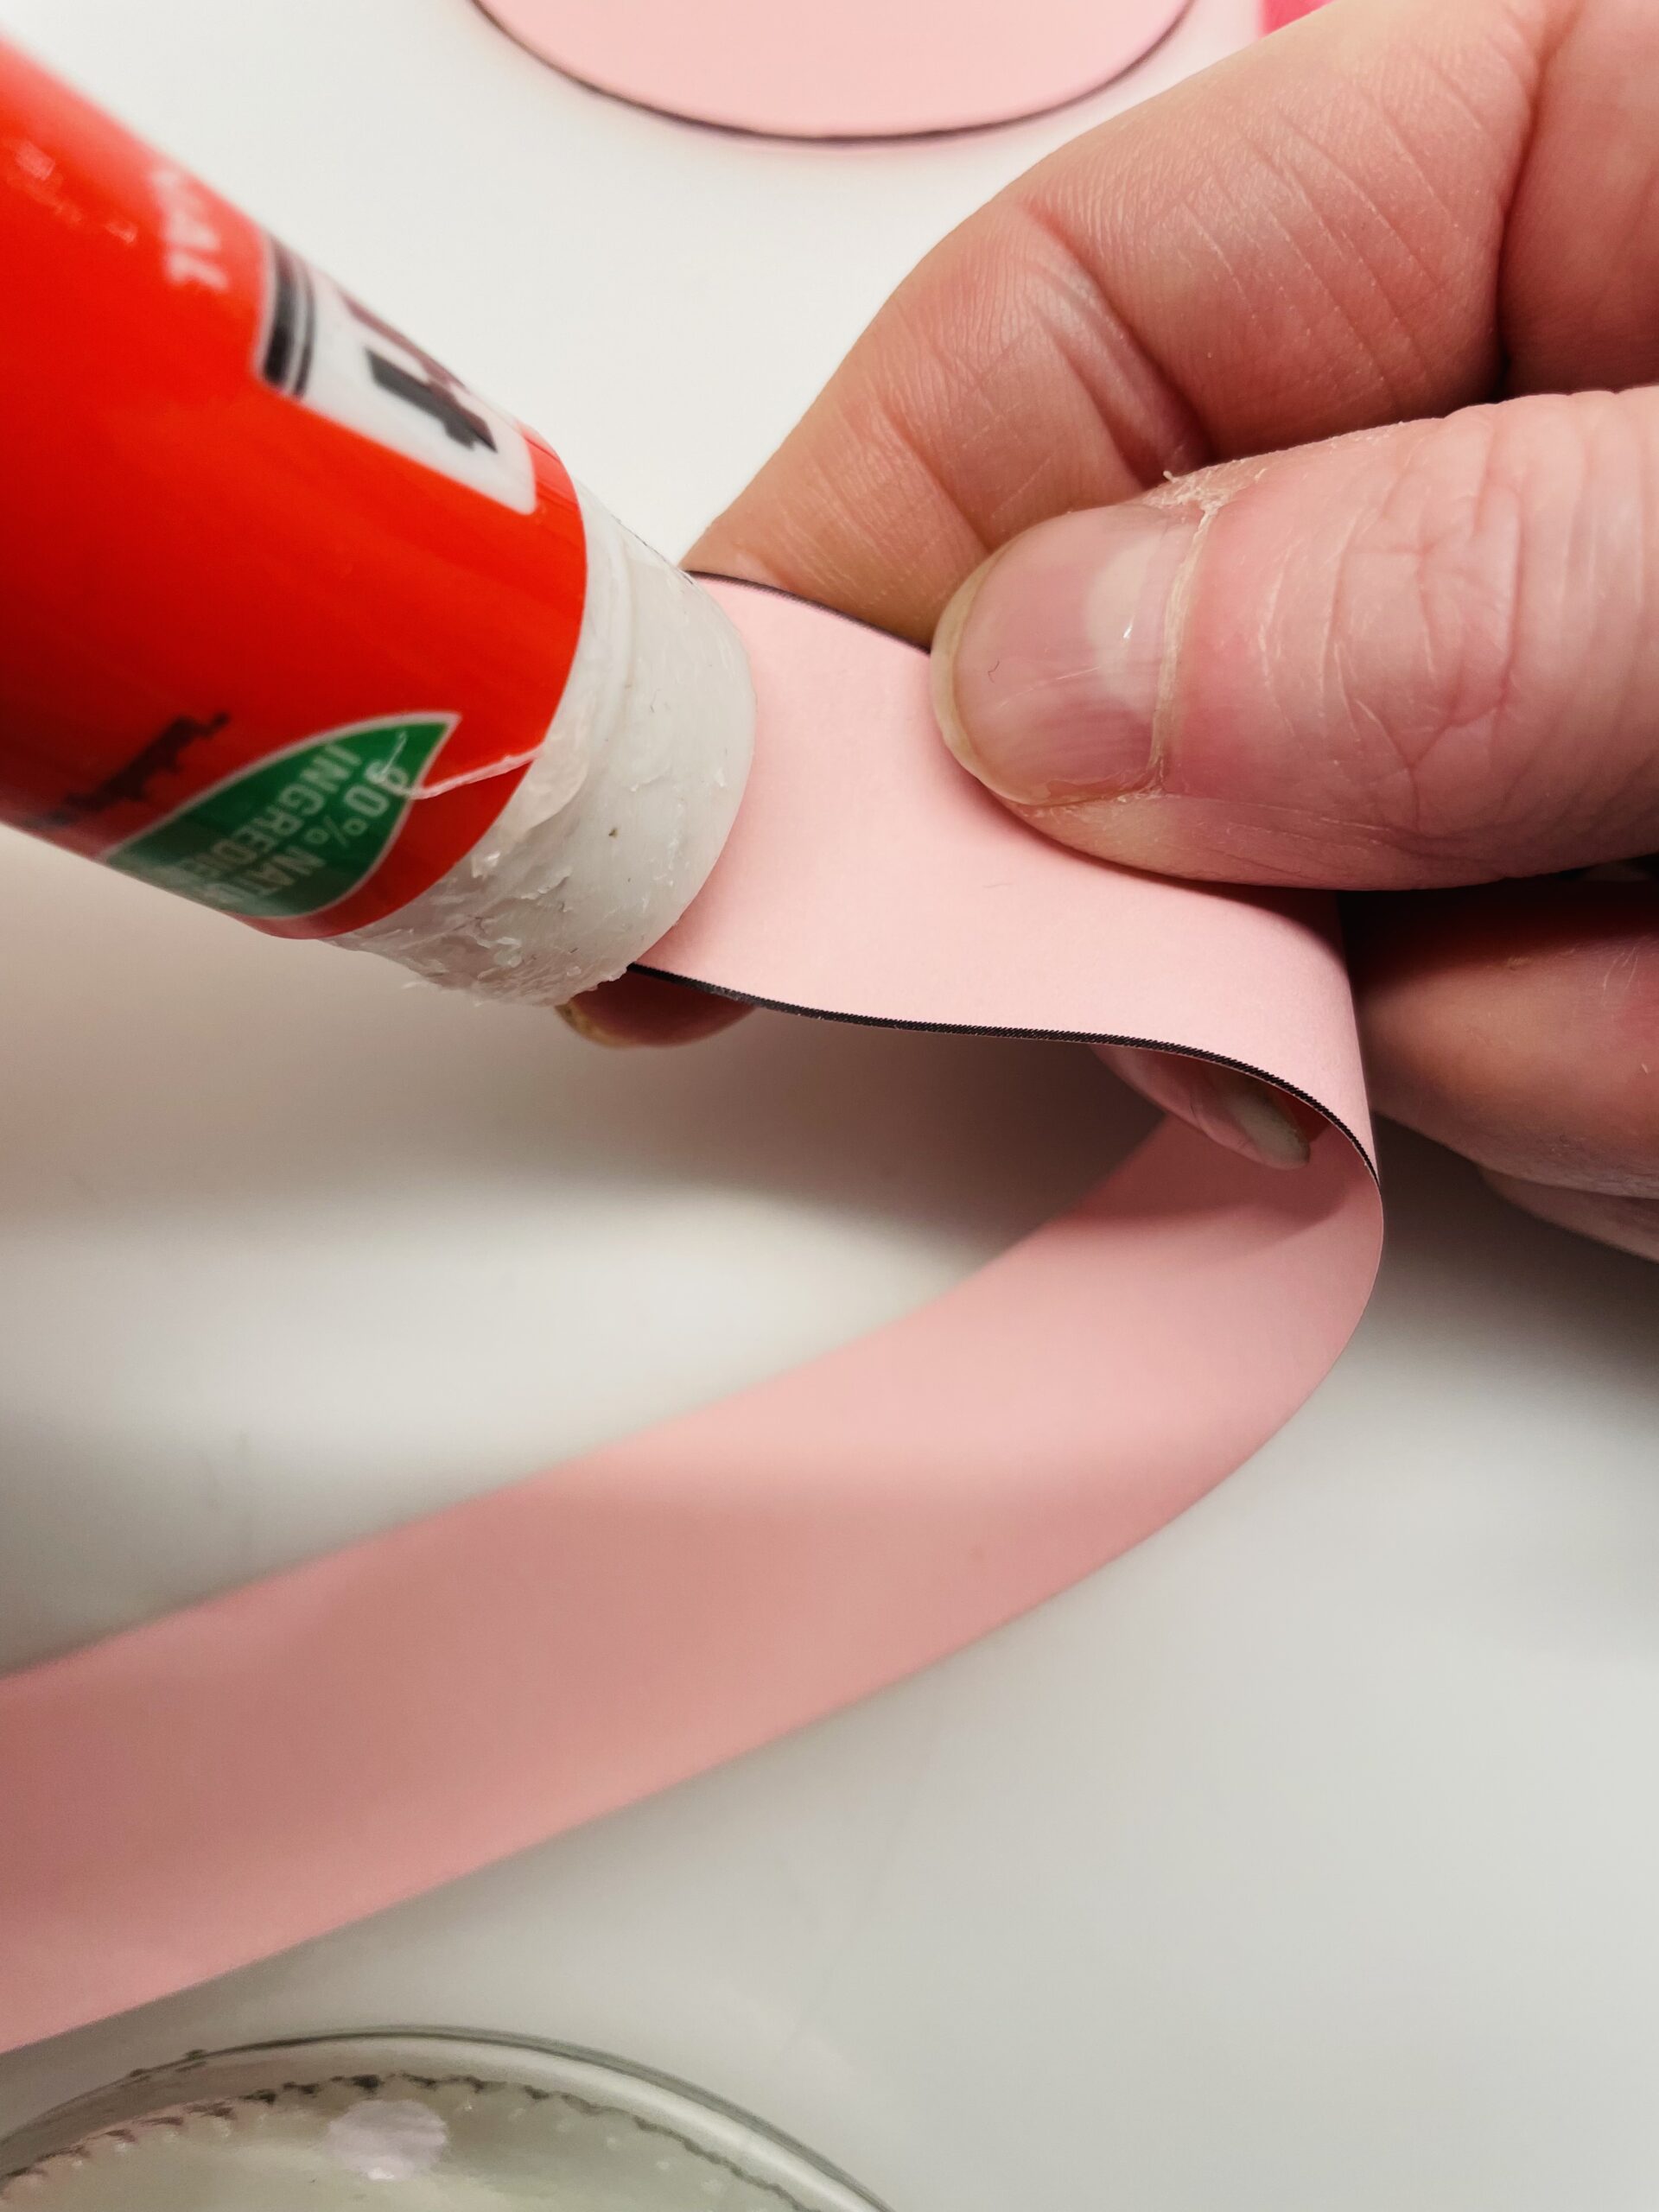
Bild zum Schritt 5 für das Bastel- und DIY-Abenteuer für Kinder: 'Betreicht das eine Ende mit dem Klebestift und klebt das...'

5

2. Bild zum Schritt 5 für das Bastel- und DIY-Abenteuer für Kinder: 'Betreicht das eine Ende mit dem Klebestift und klebt das...'

6

Repeats the process on all four stripes.
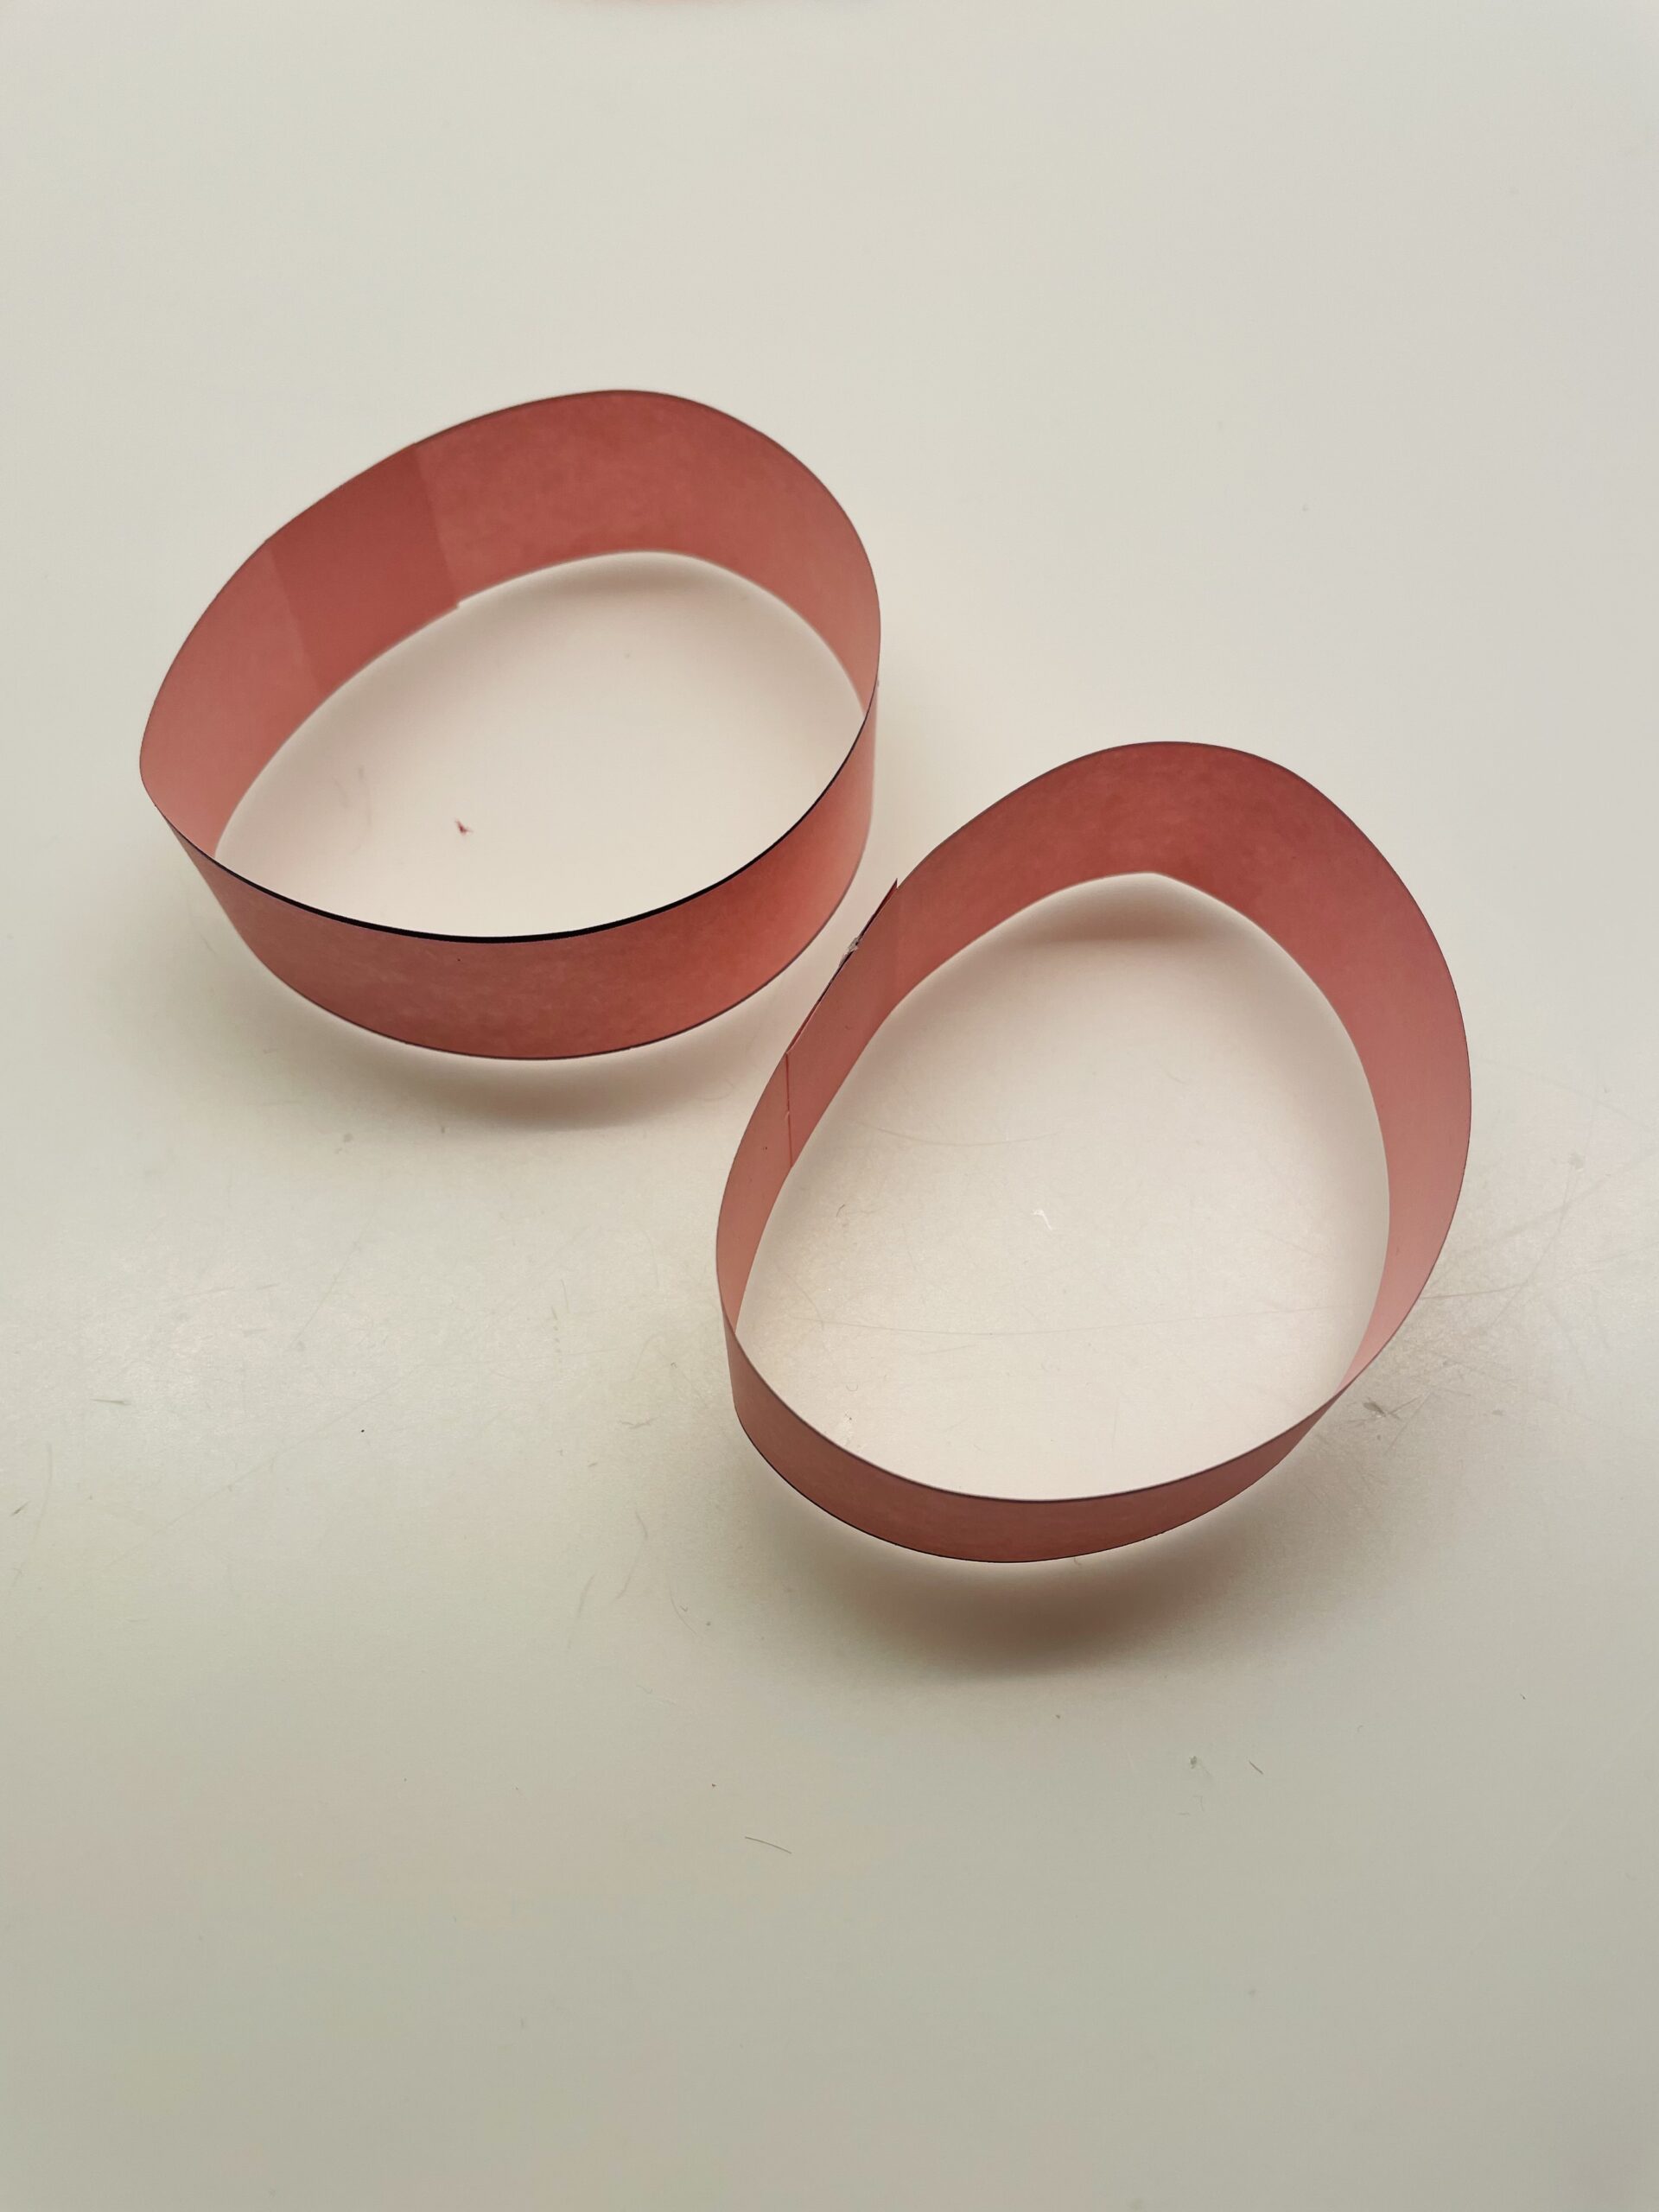
Bild zum Schritt 7 für das Bastel- und DIY-Abenteuer für Kinder: 'Wiederholt den Vorgang bei allen vier Streifen.'

7

Now you put two rings in each other. Make sure that the connecting points are on top. Strike in the connecting point of the lower ring with glue and stick the connecting point of the upper ring to it.
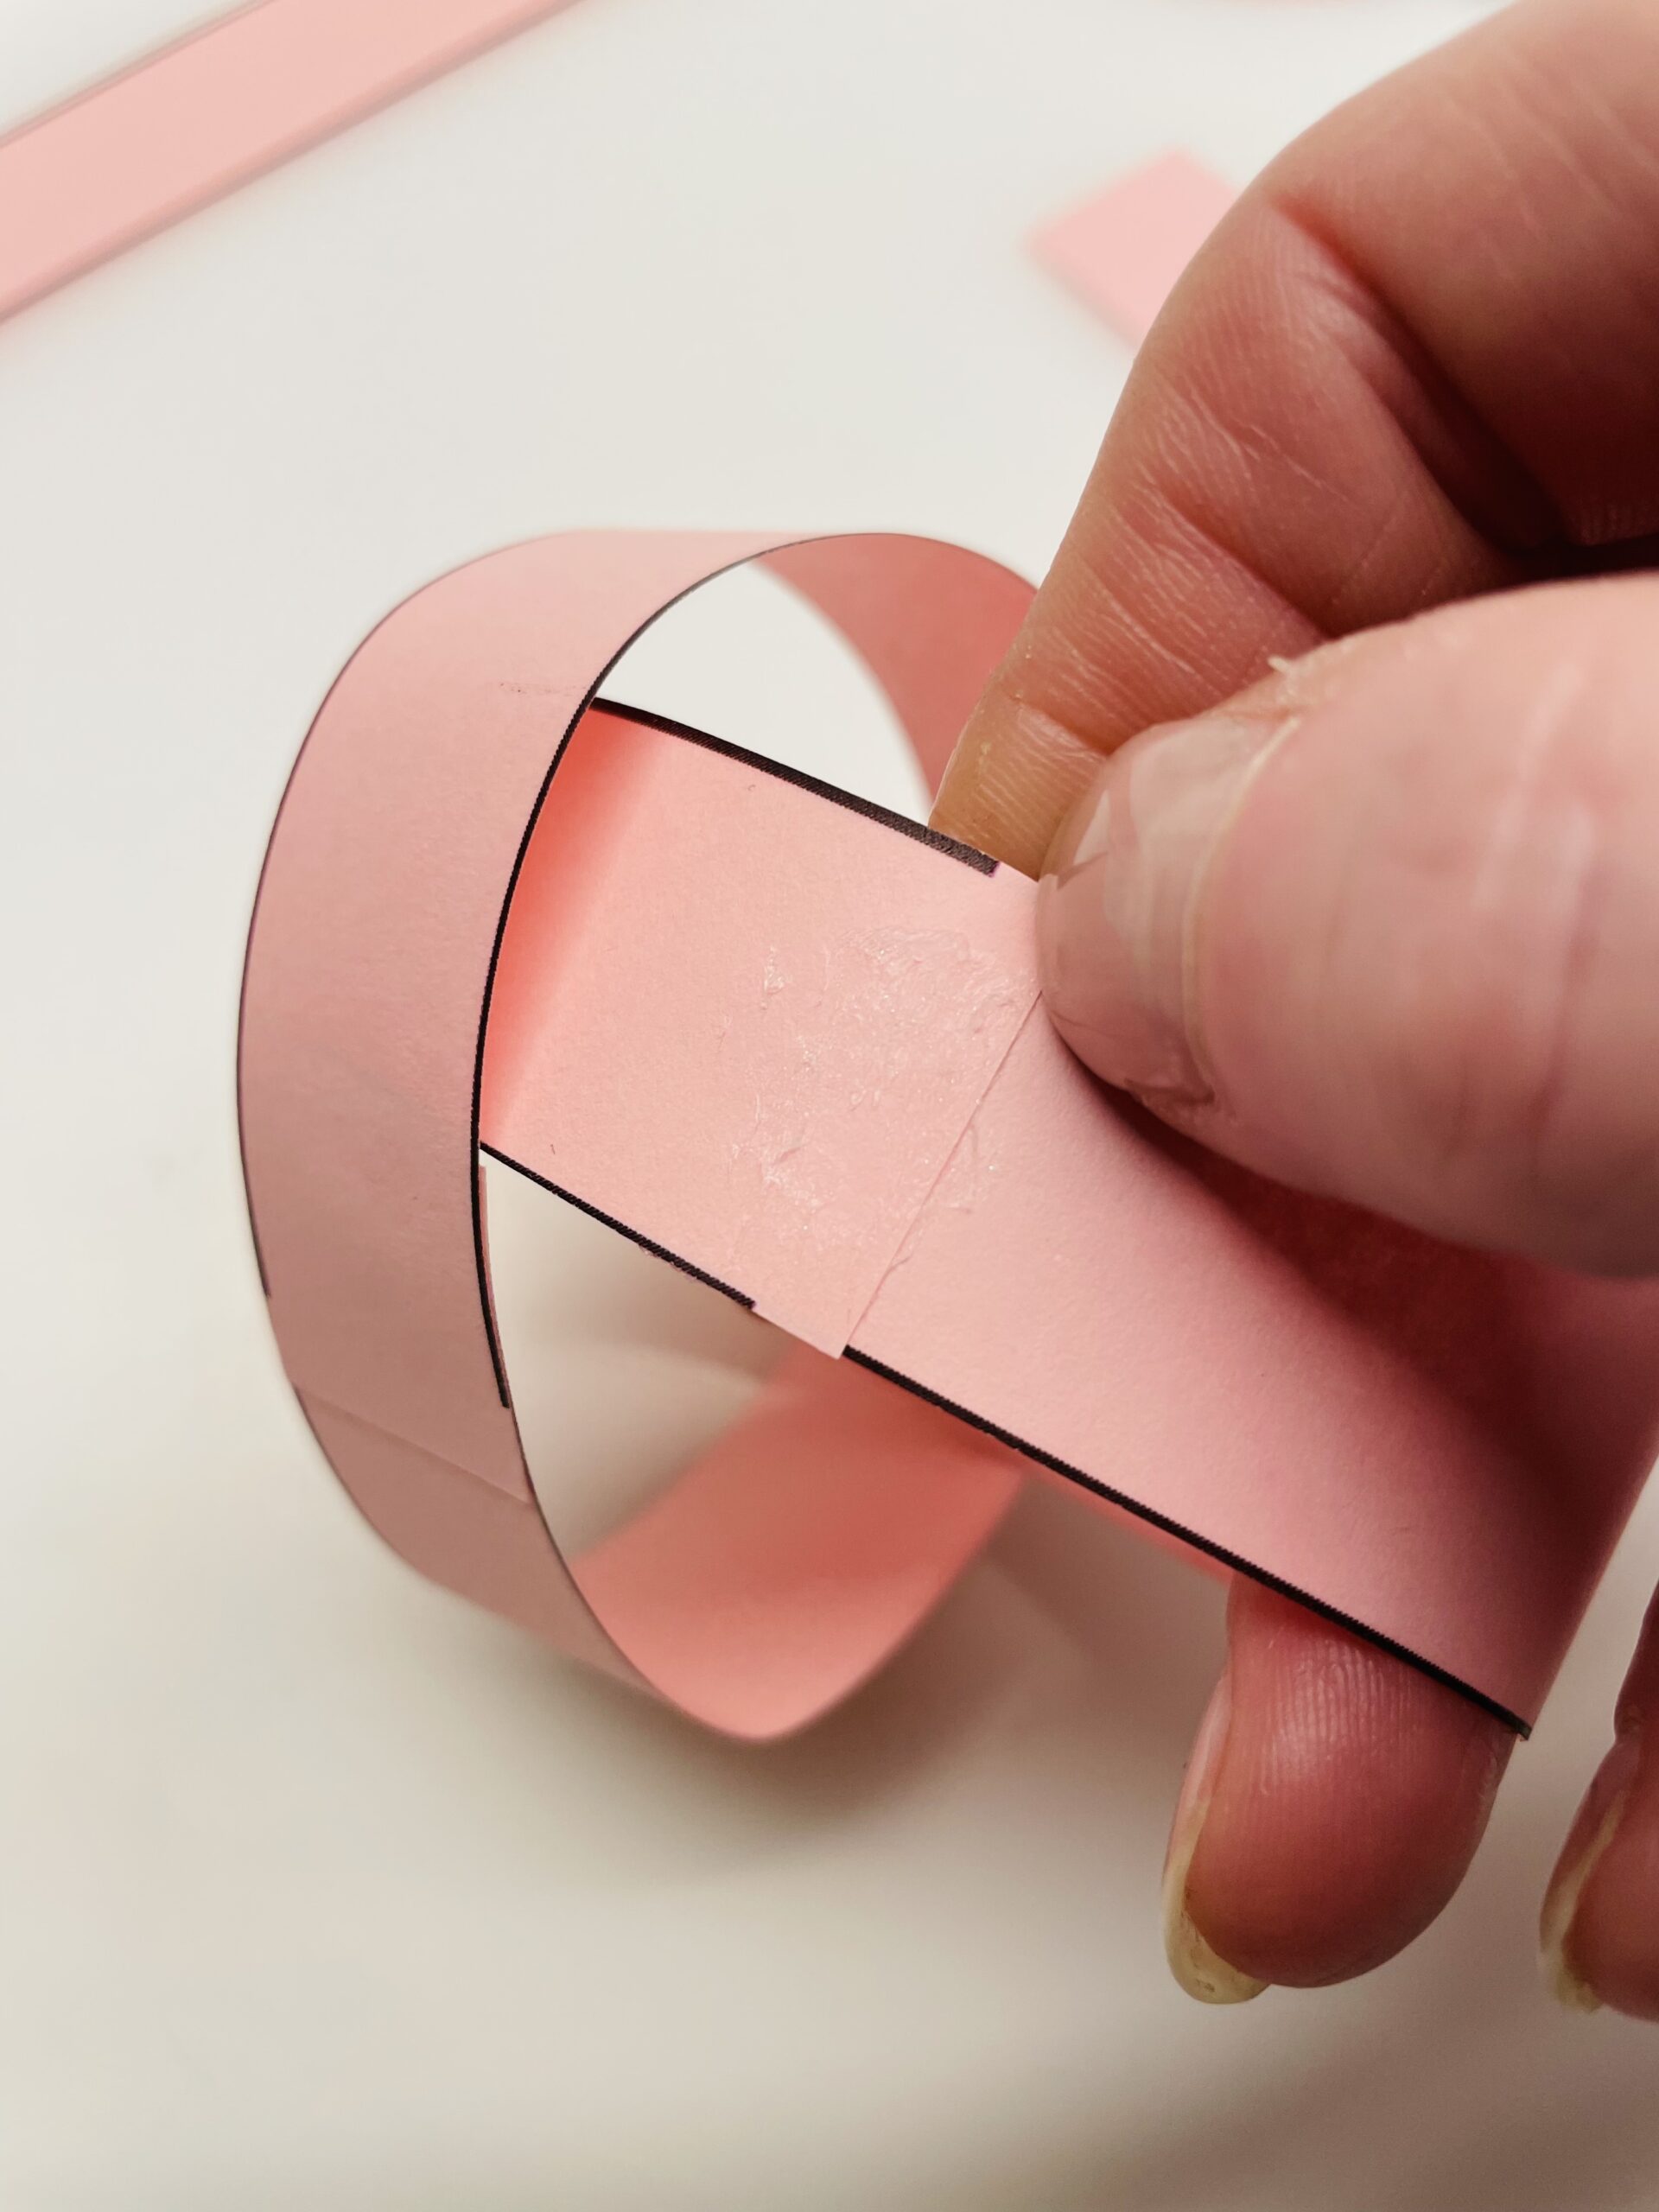
Bild zum Schritt 8 für das Bastel- und DIY-Abenteuer für Kinder: 'Jetzt steckt ihr zwei Ringe ineinander. Achtet darauf, dass die...'

8

Press the two paper rings firmly together at the glue point.
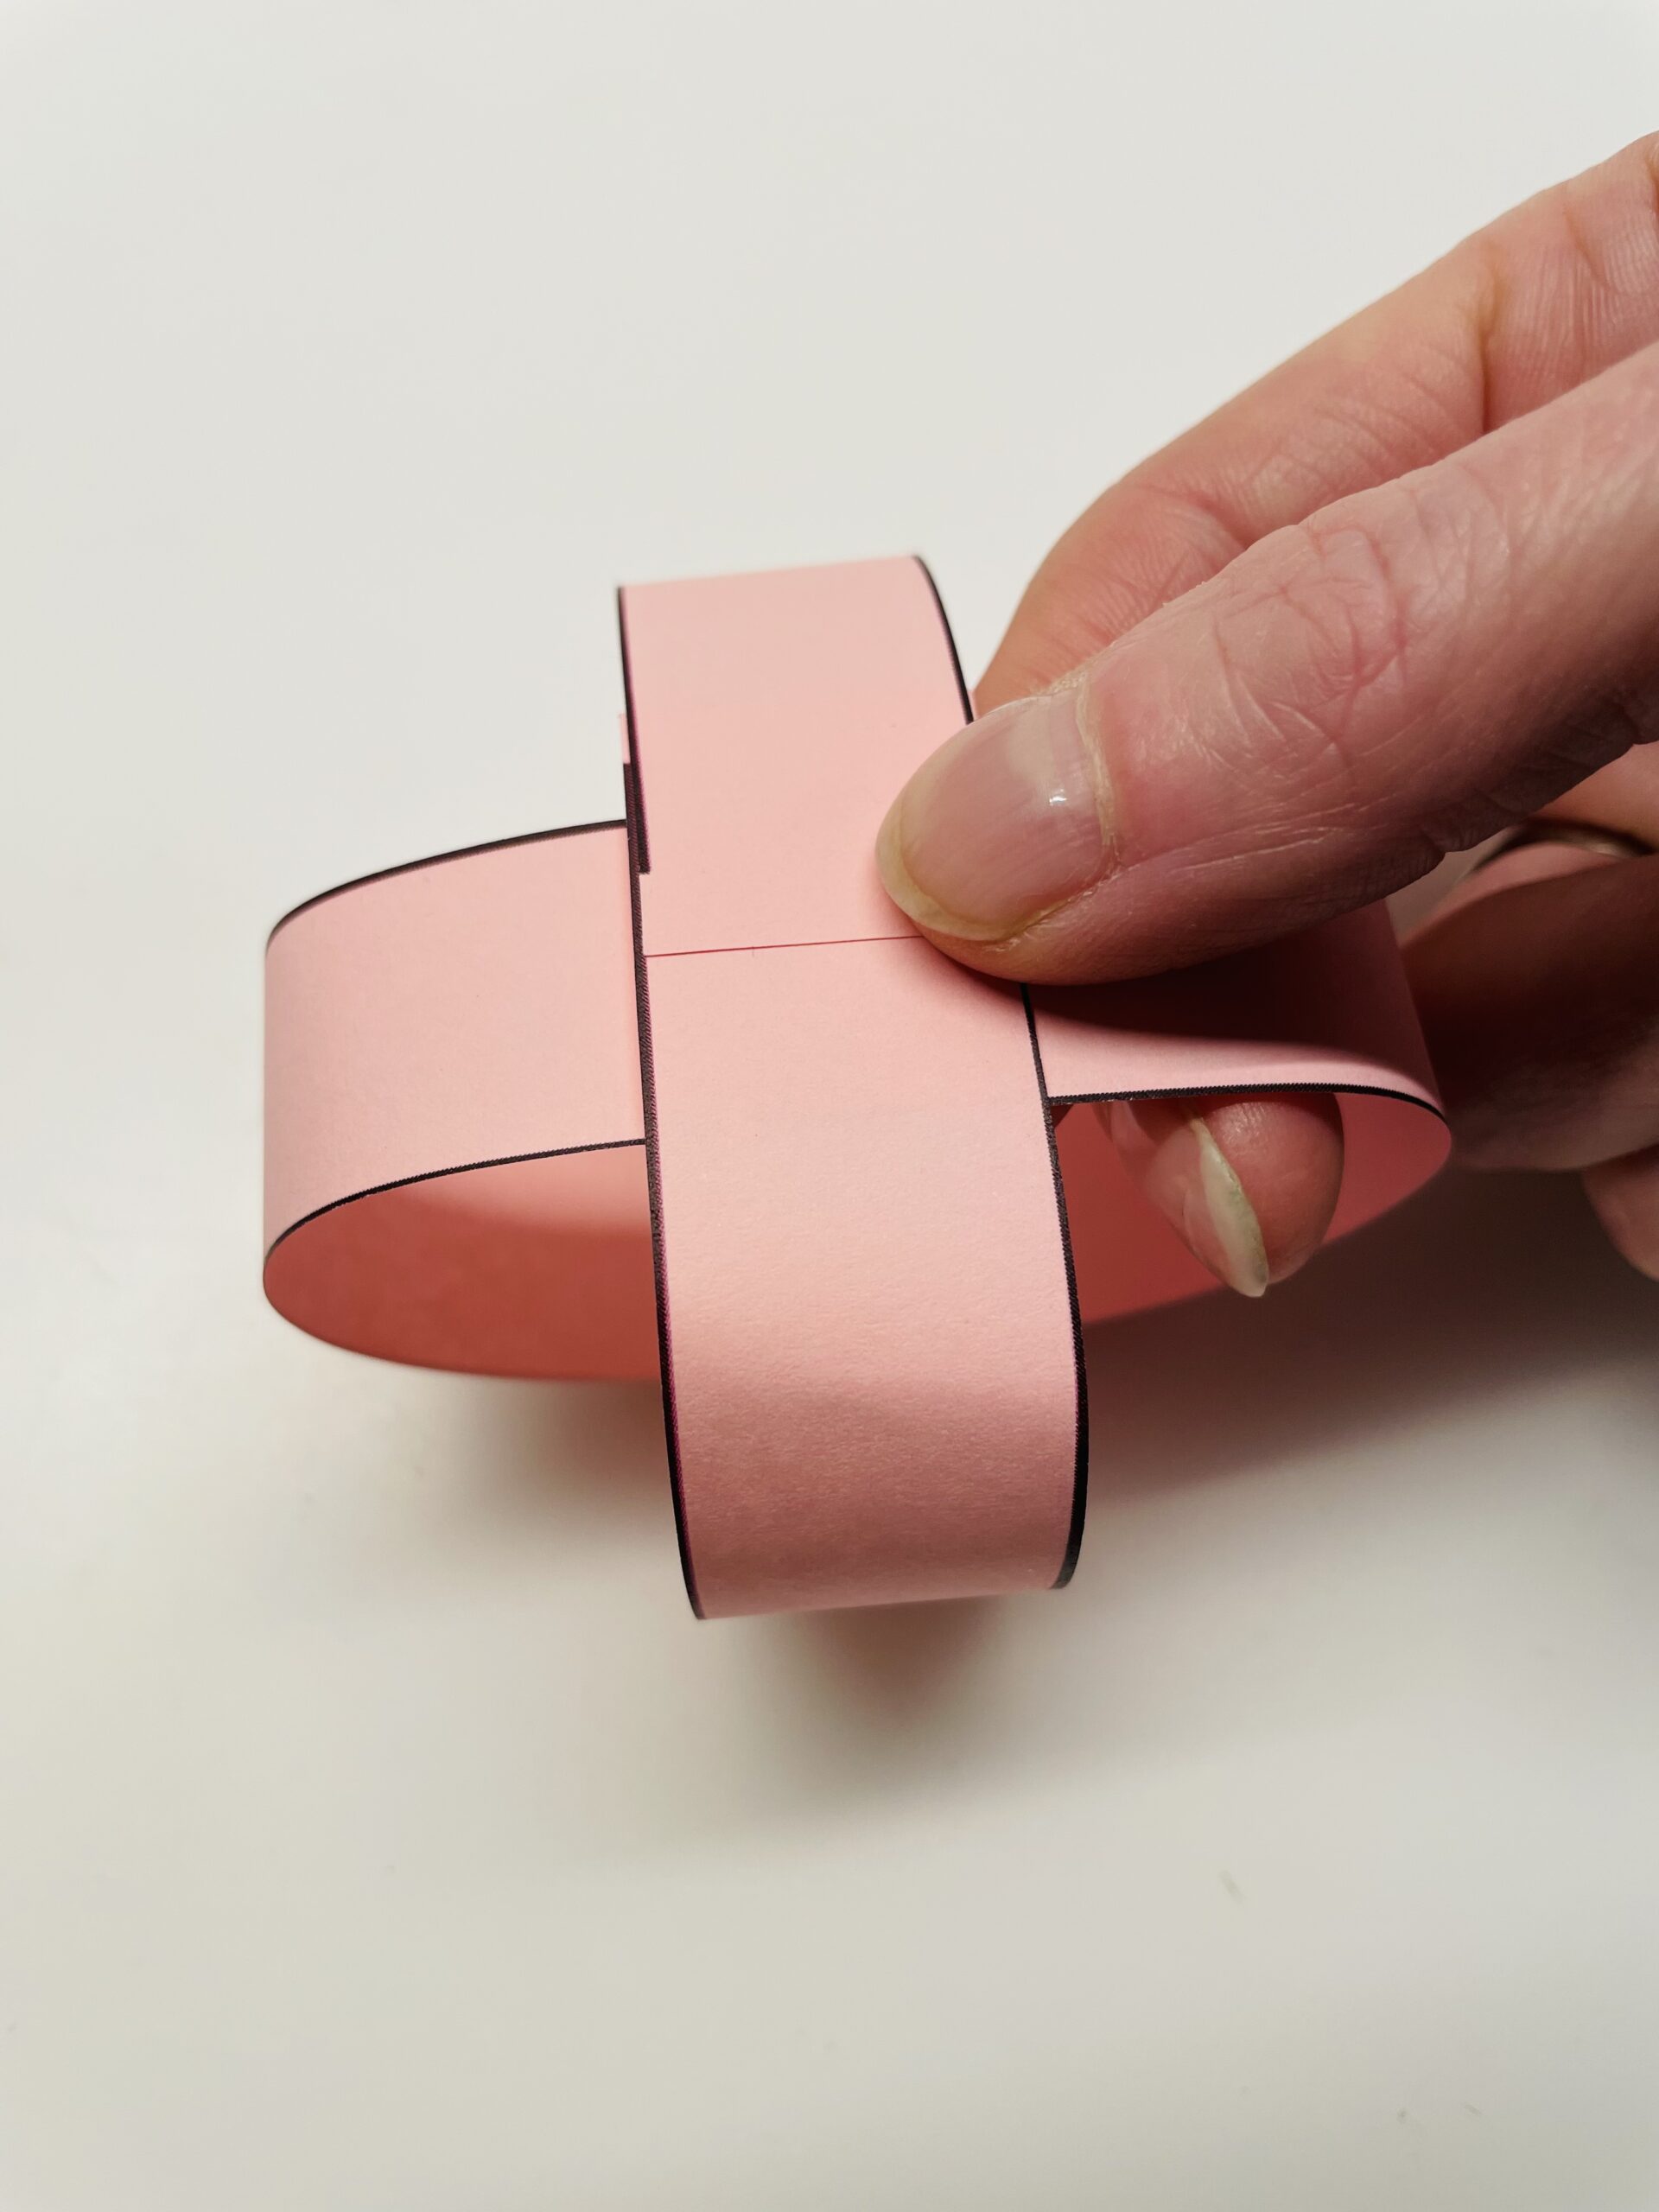
Bild zum Schritt 9 für das Bastel- und DIY-Abenteuer für Kinder: 'Drückt die beiden Papierringe an der Klebestelle fest zusammen.'

9

Now you put some glue on the resulting cross and push another paper ring diagonally over it.
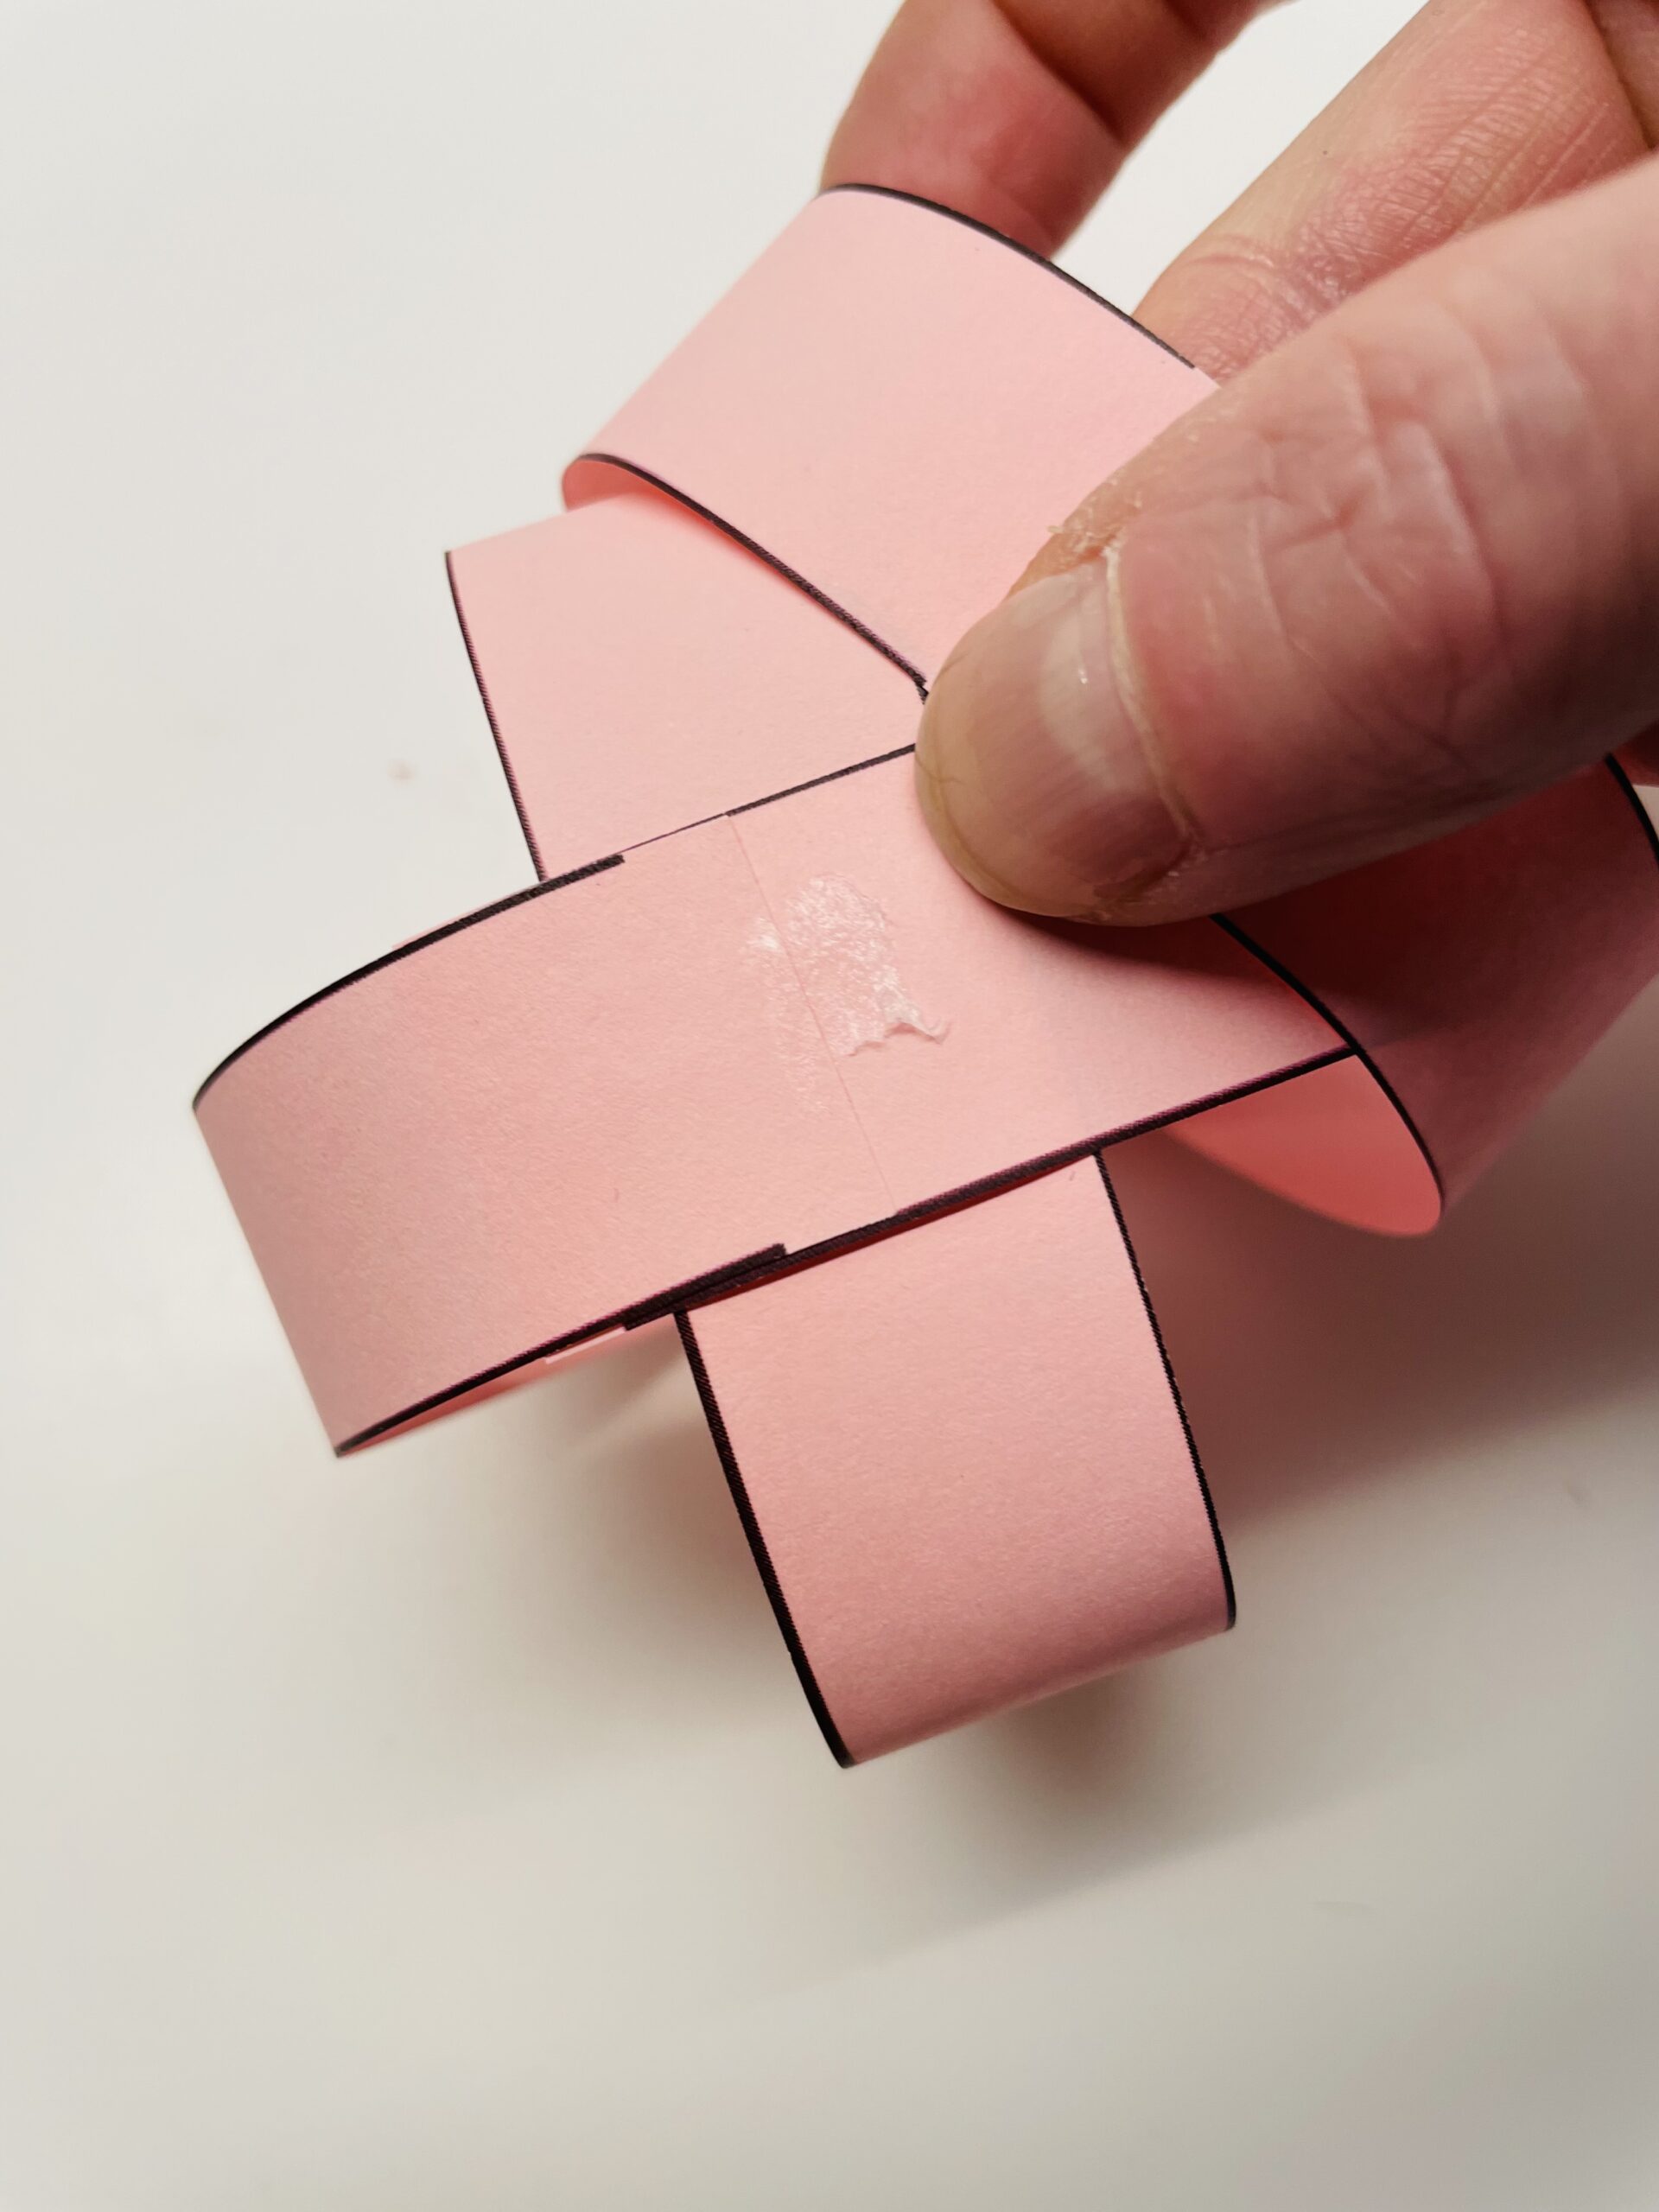
Bild zum Schritt 10 für das Bastel- und DIY-Abenteuer für Kinder: 'Jetzt tupft ihr etwas Kleber auf das entstandene Kreuz und...'

10

Press the sticky spot again firmly.

Bild zum Schritt 11 für das Bastel- und DIY-Abenteuer für Kinder: 'Drückt die Klebestelle erneut fest zusammen.'

11

After that you put some glue on the paper cross again and strip the last paper ring diagonally over it.
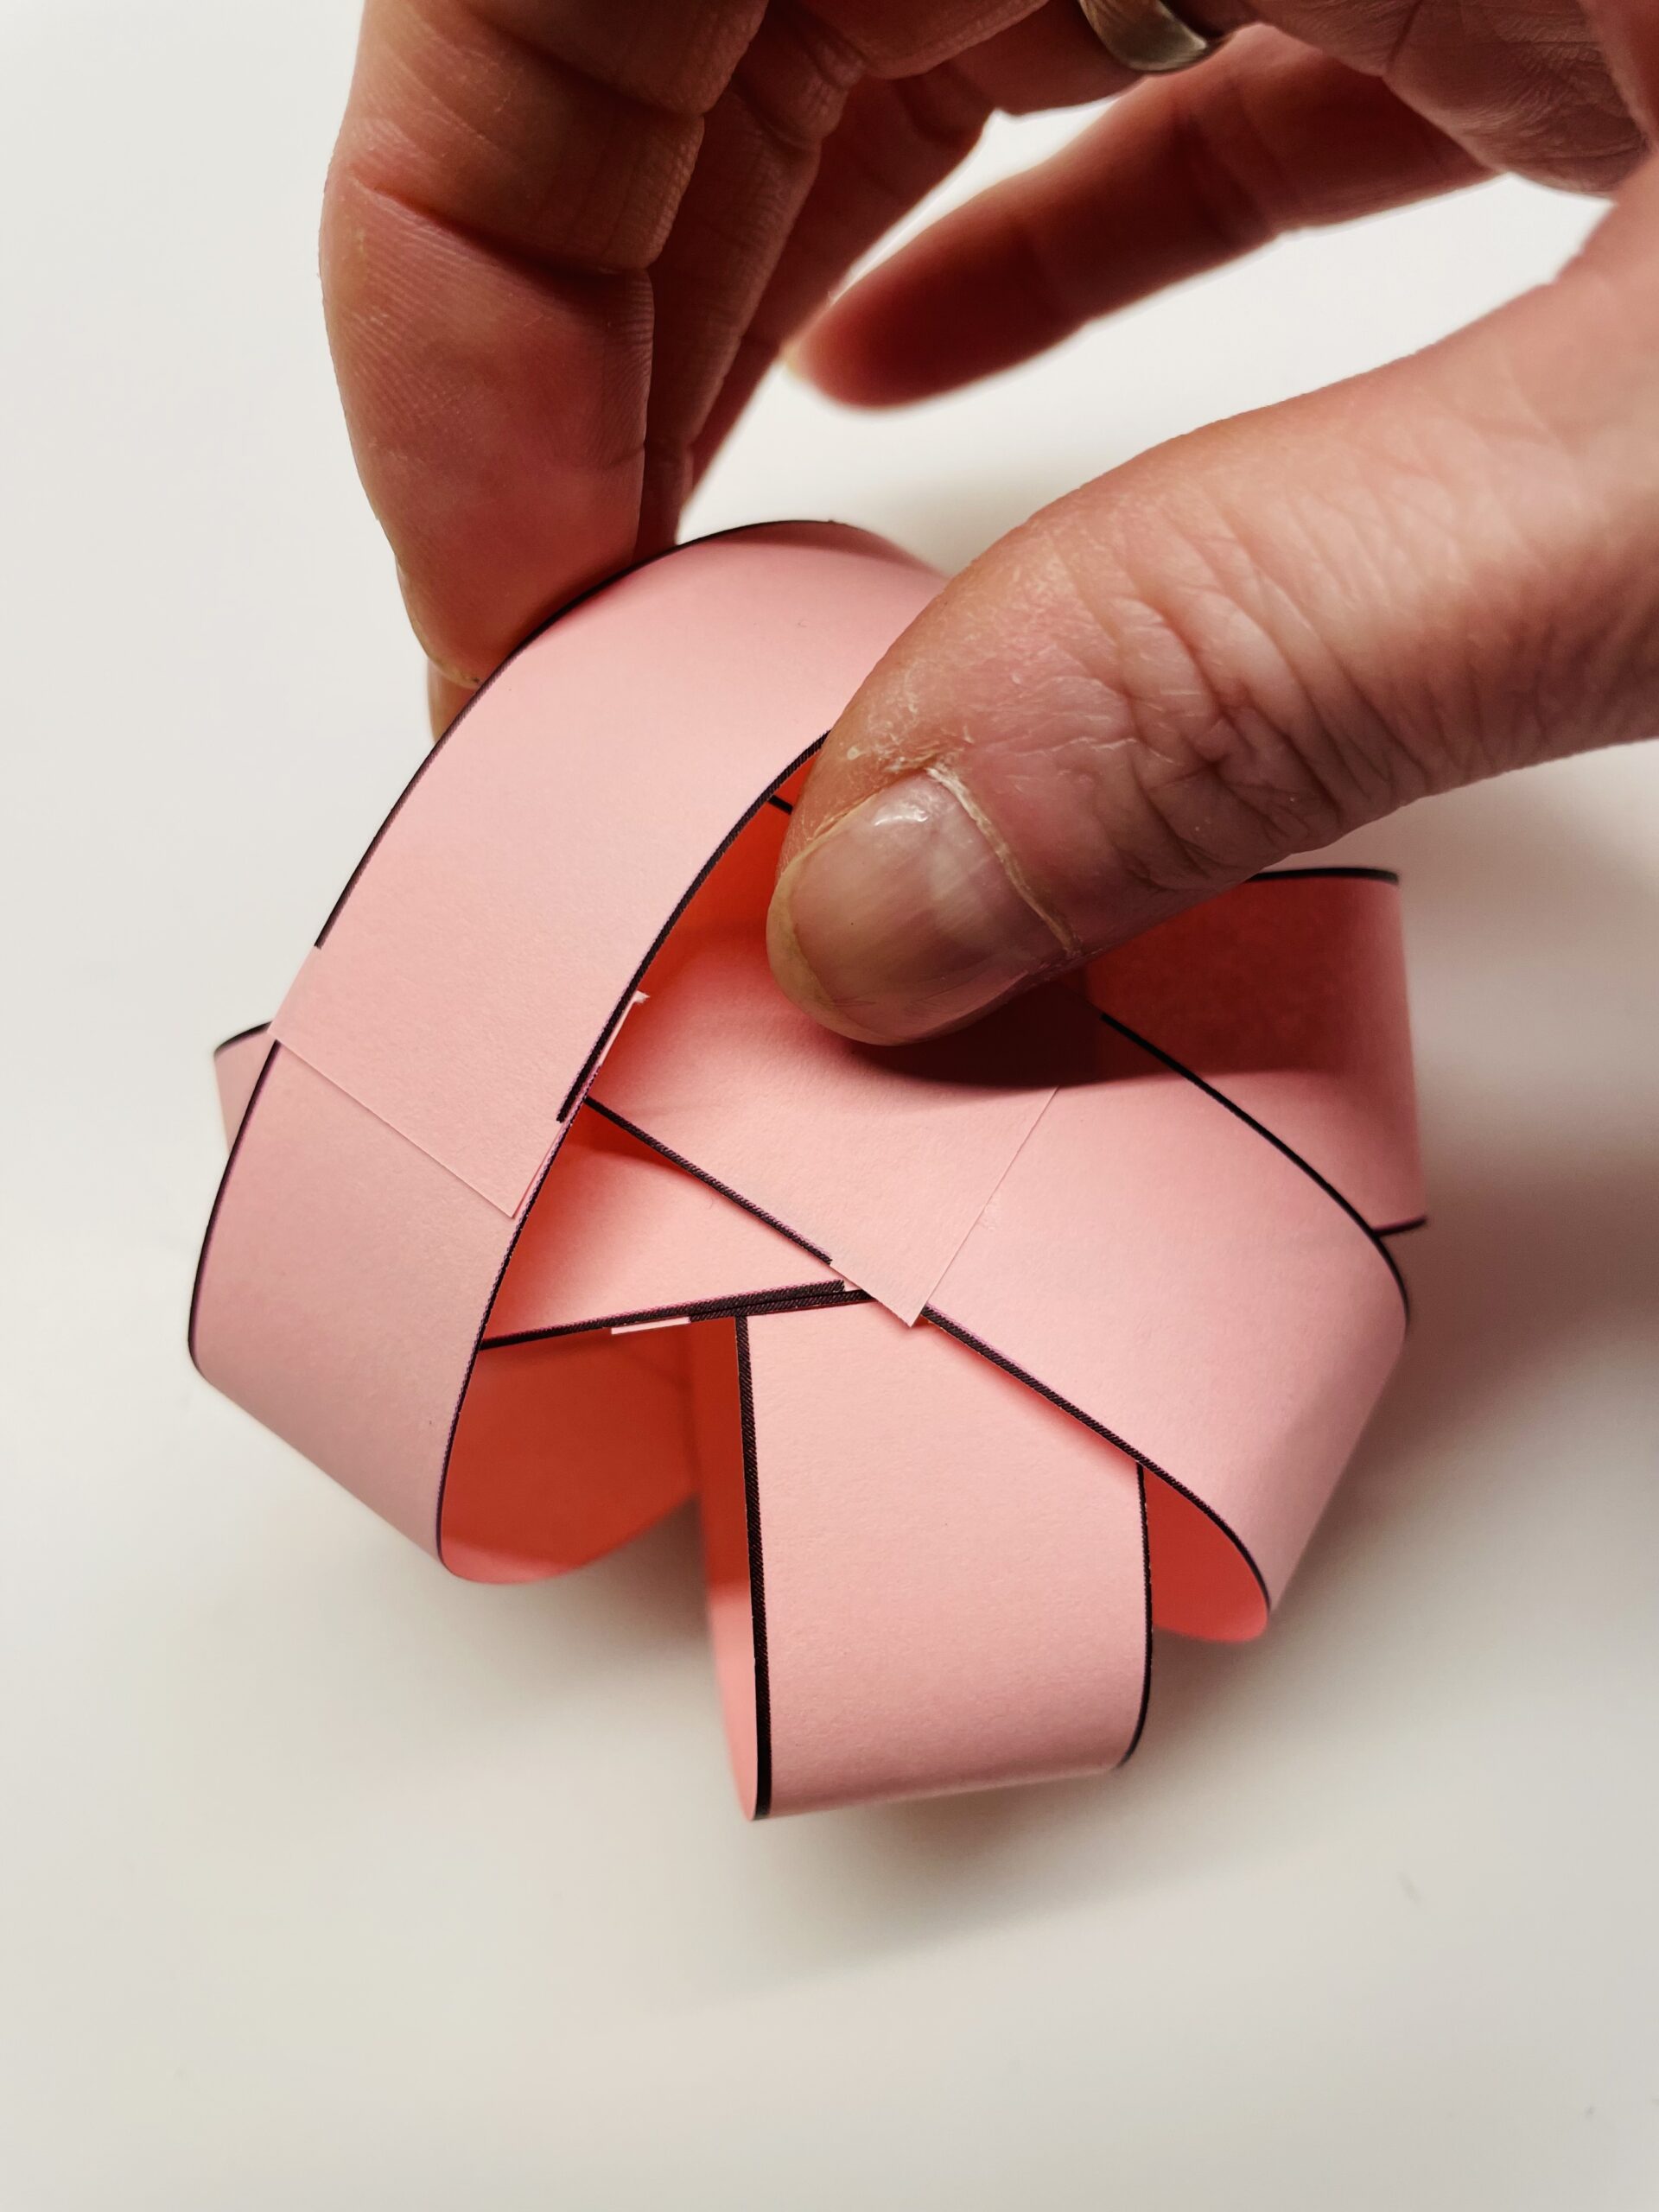
Bild zum Schritt 12 für das Bastel- und DIY-Abenteuer für Kinder: 'Danach streicht ihr wieder etwas Kleber auf das Papierkreuz und...'

12

2. Bild zum Schritt 12 für das Bastel- und DIY-Abenteuer für Kinder: 'Danach streicht ihr wieder etwas Kleber auf das Papierkreuz und...'

13

Gently tighten the rings so that you don't flatten the body.
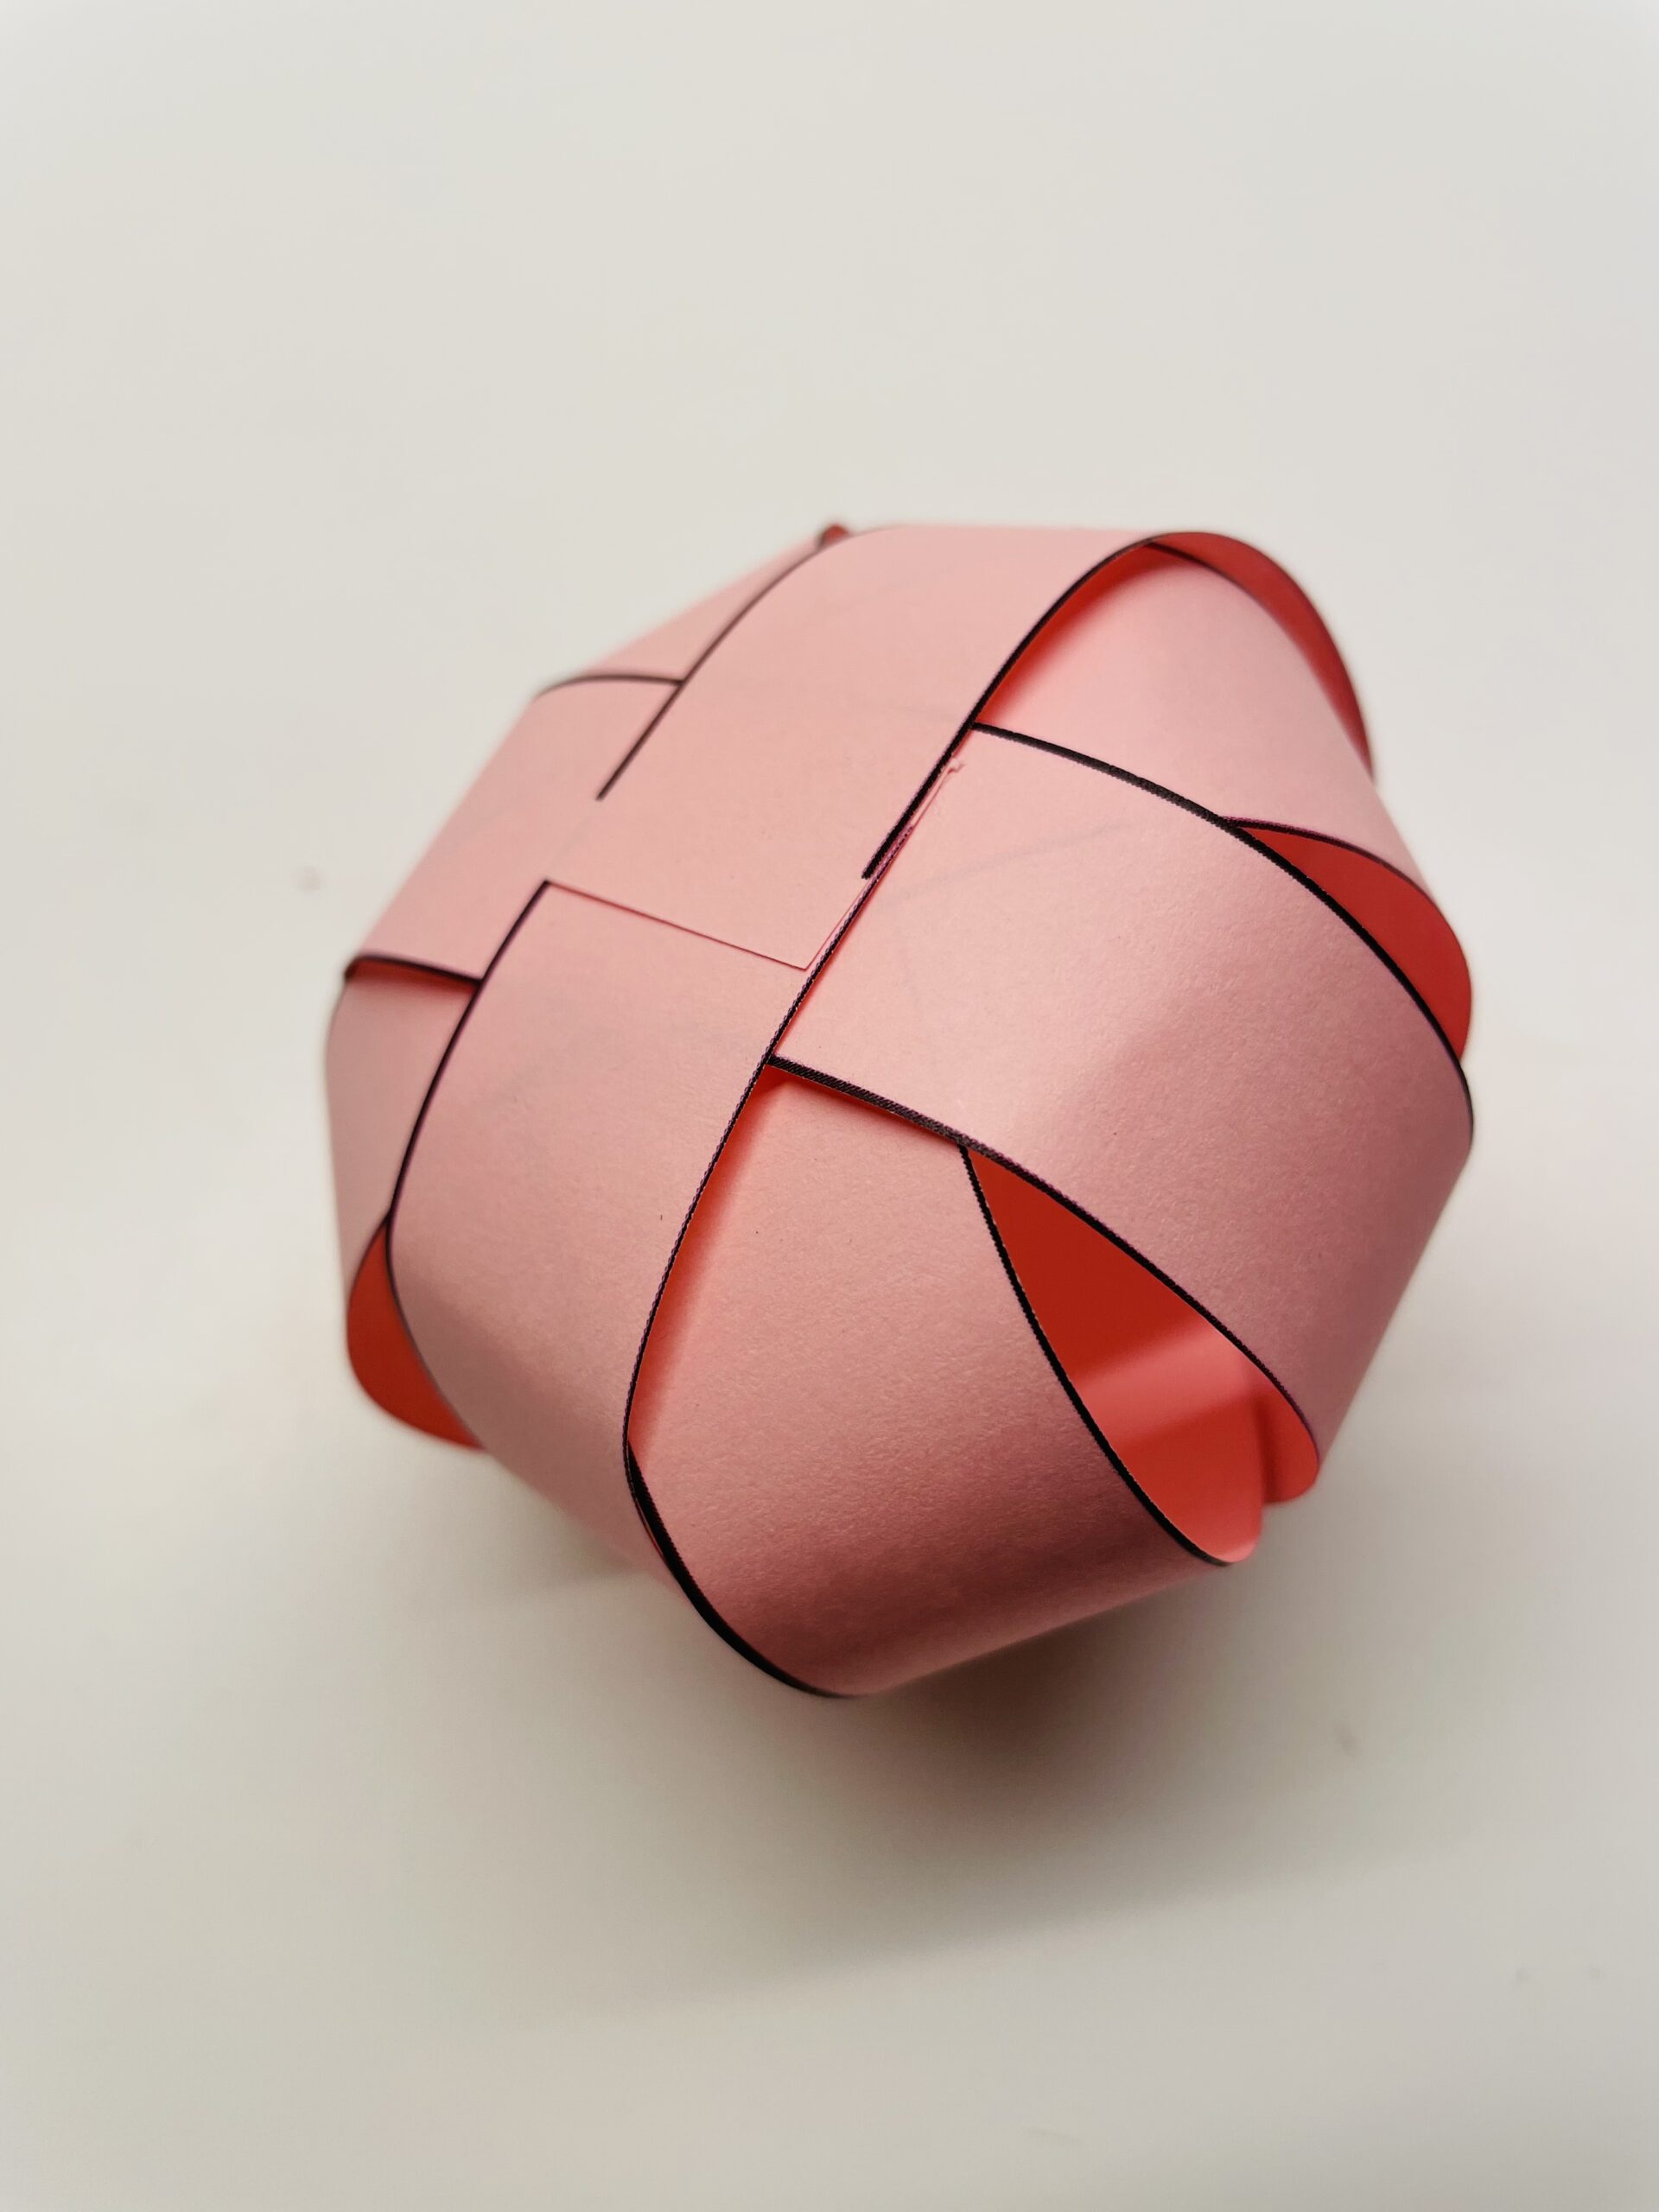
Bild zum Schritt 14 für das Bastel- und DIY-Abenteuer für Kinder: 'Drückt die Ringe vorsichtig fest, so dass ihr den Körper...'

14

Now you turn the body around so that the interfaces point downwards.

Bild zum Schritt 15 für das Bastel- und DIY-Abenteuer für Kinder: 'Jetzt dreht ihr den Körper um, so dass die Schnittstellen...'

Ring-tailed
15

Cuts a pink paper strip with the dimensions: 12cm x 1cm or you use the short paper strip from the template.
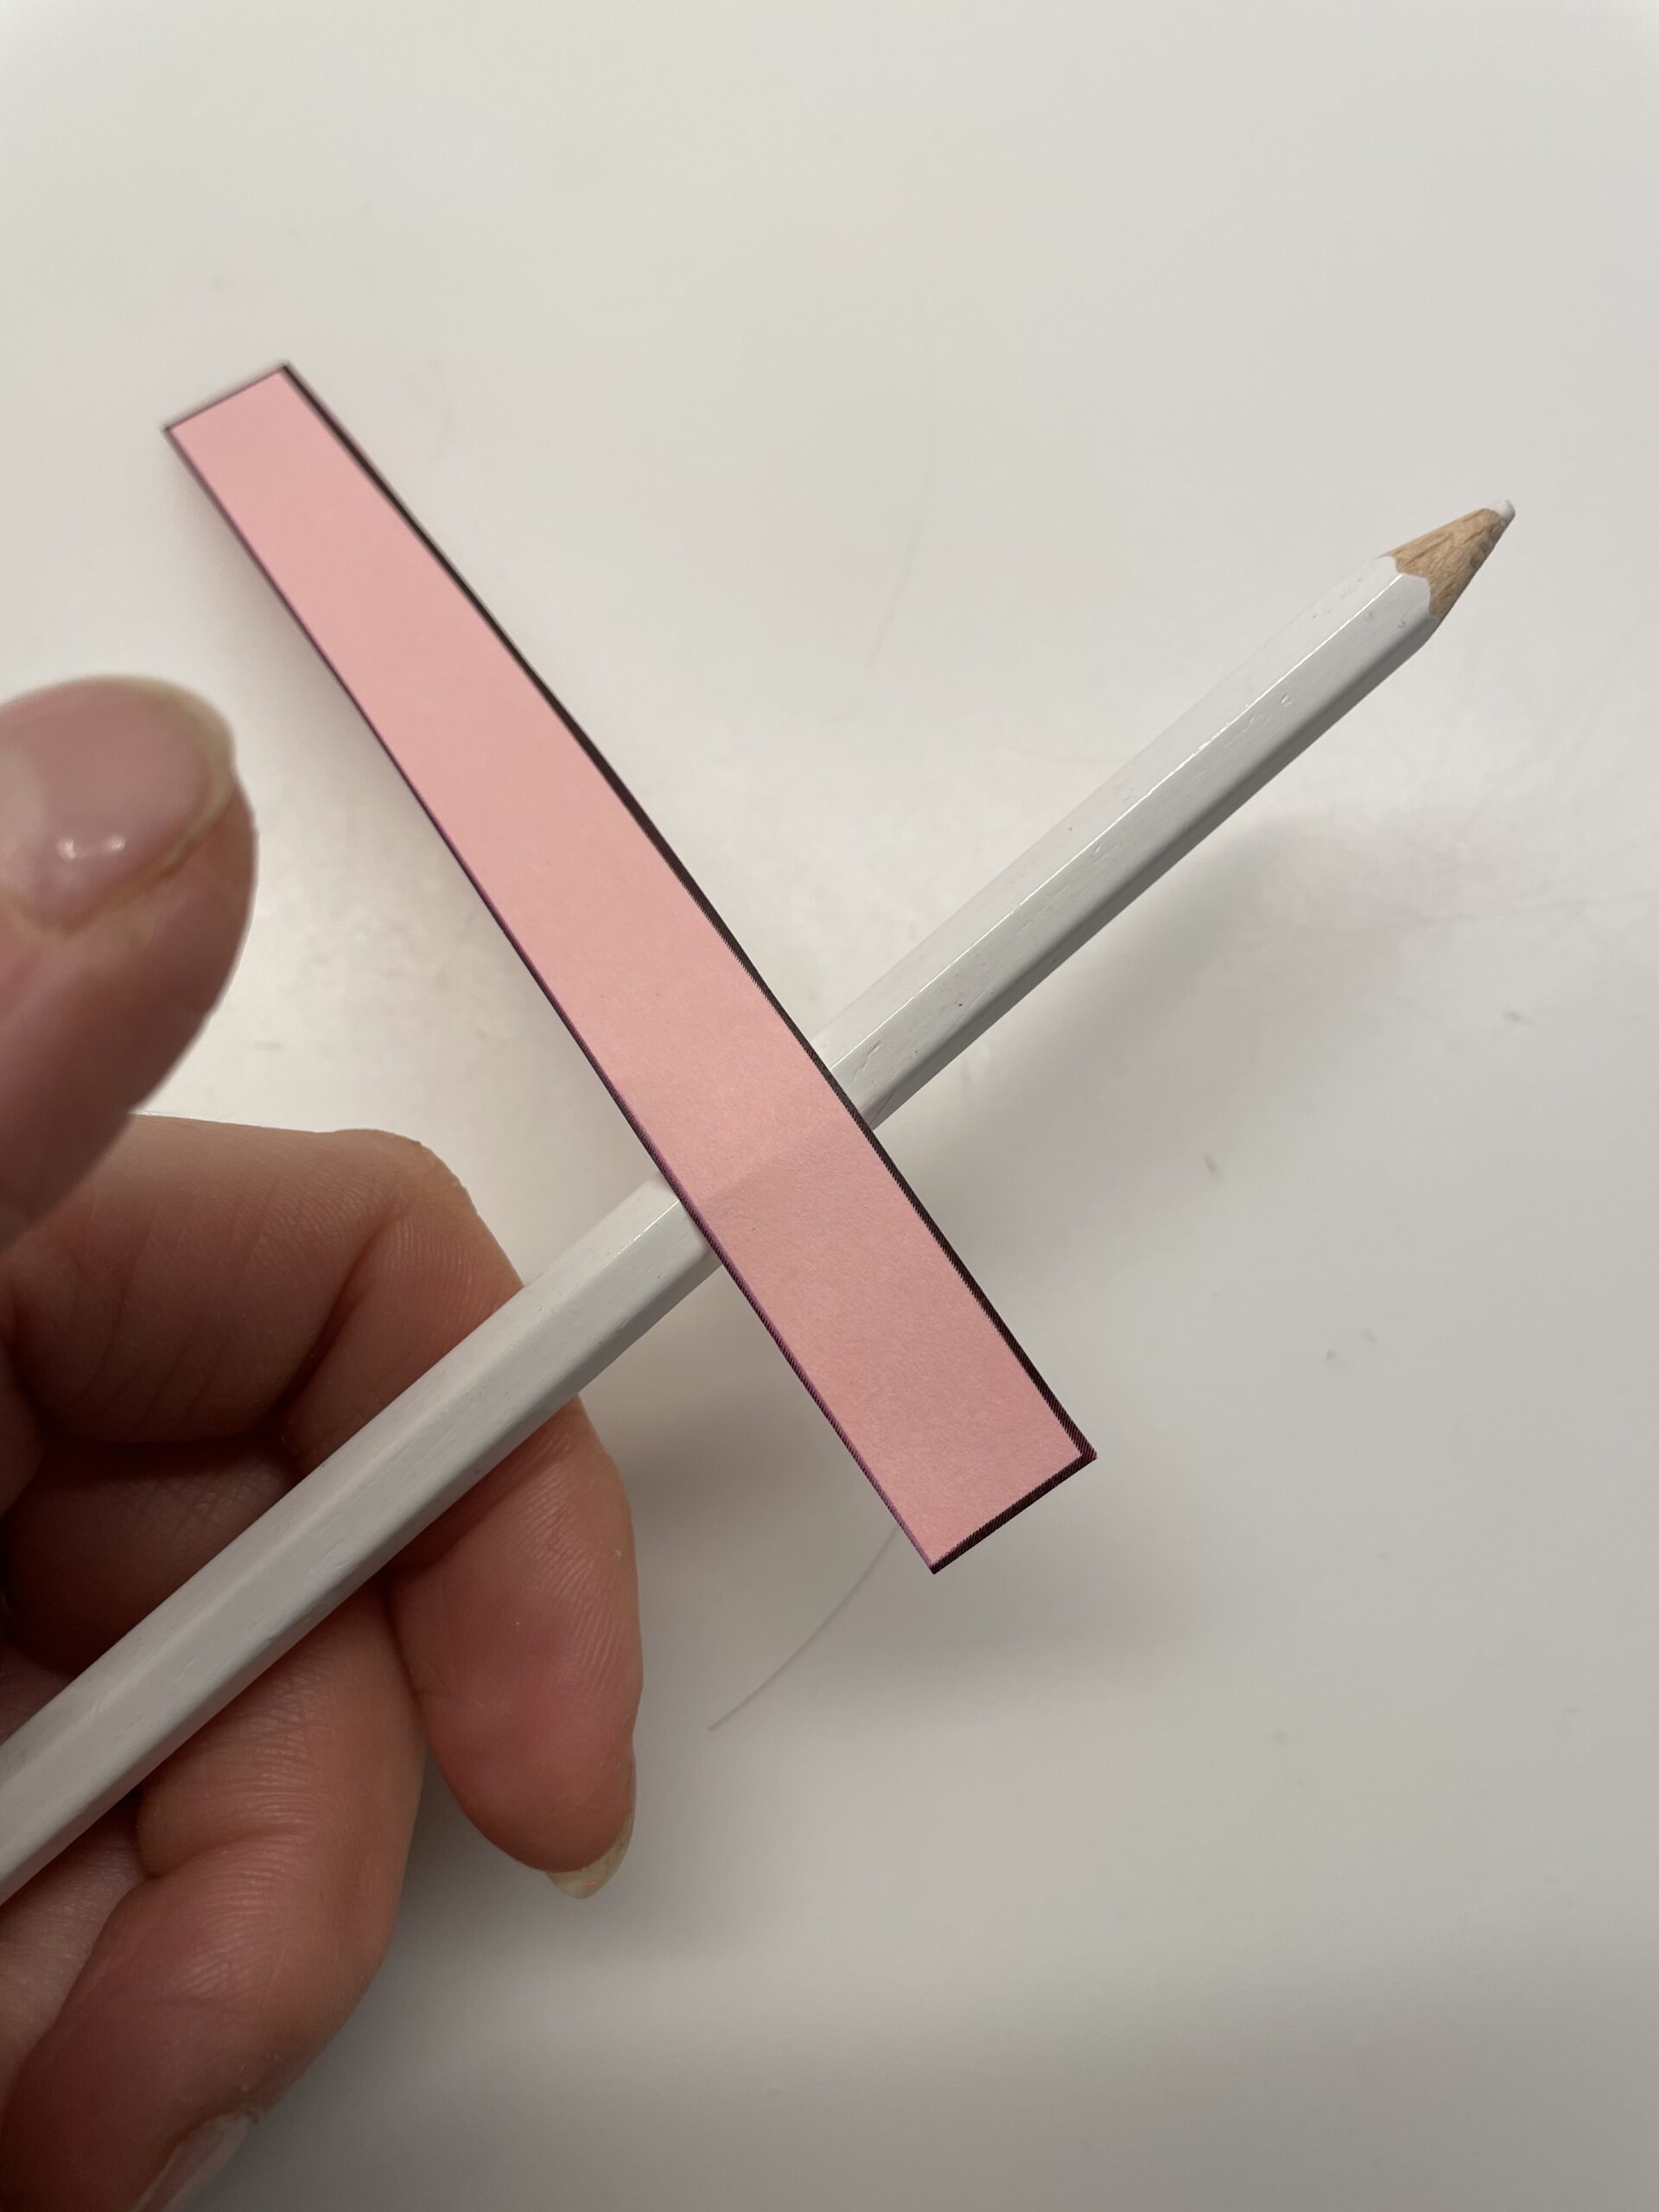
Bild zum Schritt 17 für das Bastel- und DIY-Abenteuer für Kinder: 'Schneidet für den Ringelschwanz einen rosafarbenen Papierstreifen mit den Maßen:...'

16

Now hold the paper strip with your thumb on the pen.
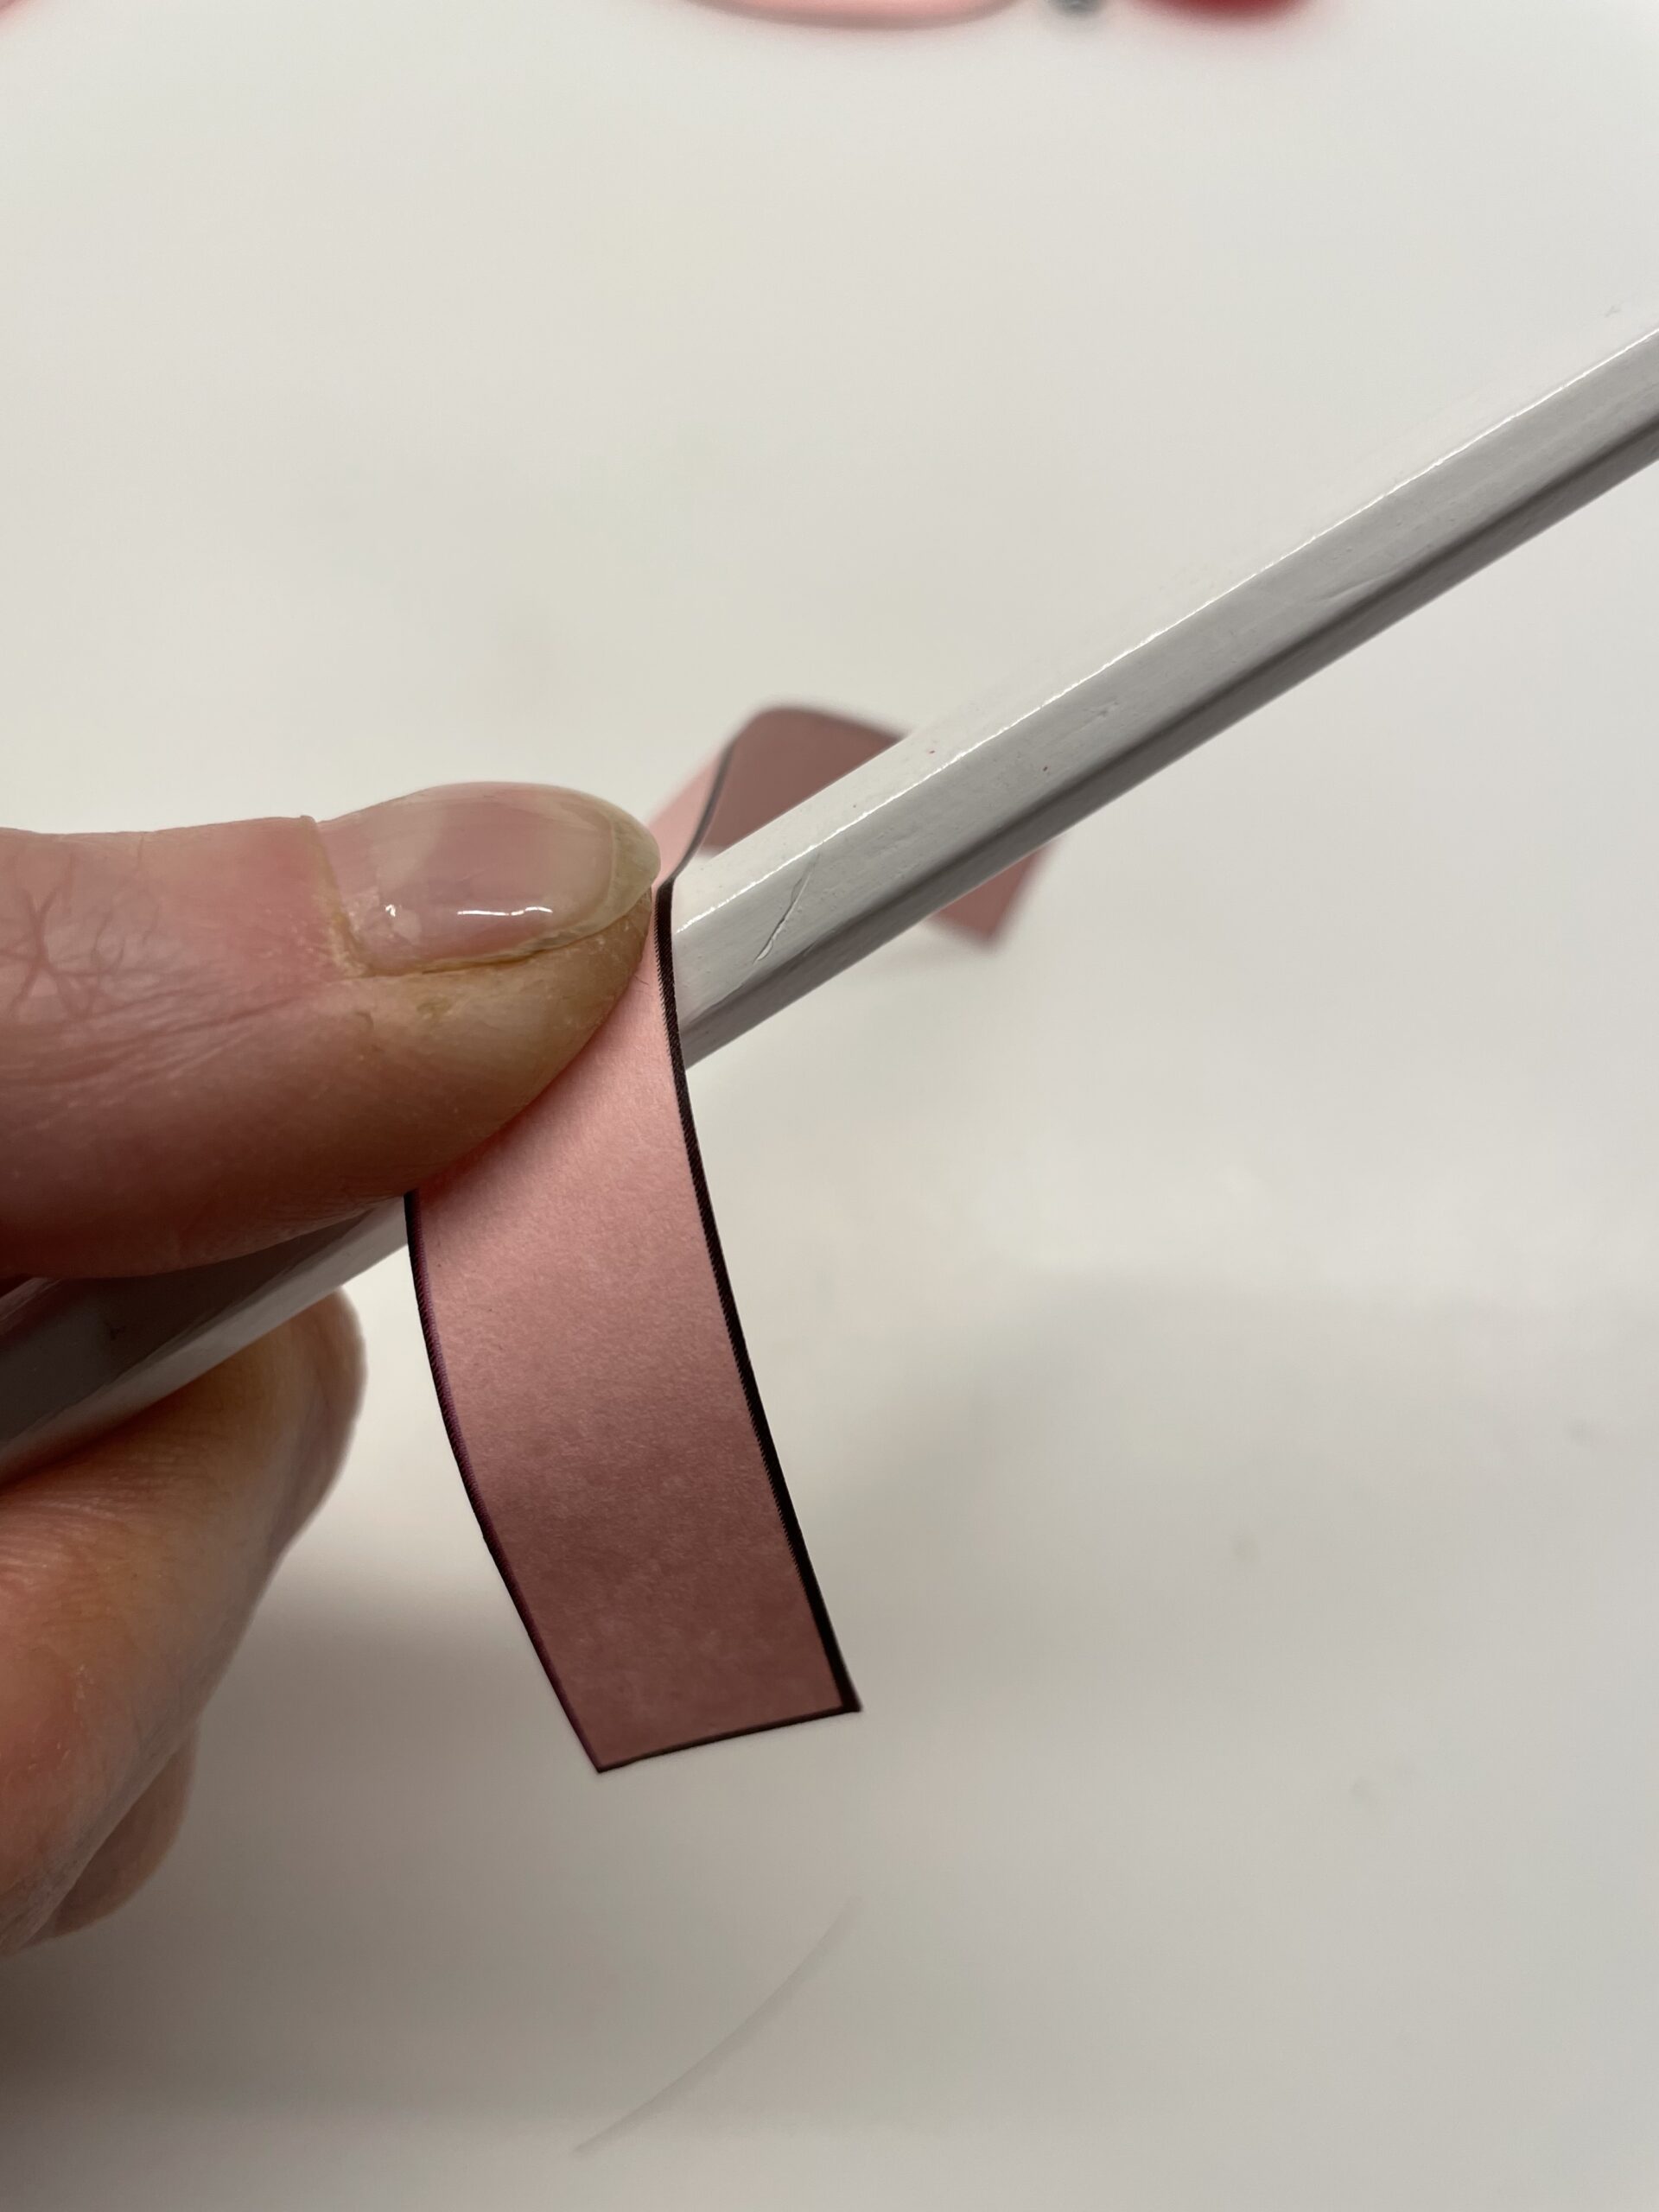
Bild zum Schritt 18 für das Bastel- und DIY-Abenteuer für Kinder: 'Nun haltet ihr den Papierstreifen mit dem Daumen auf den...'

17

With the other hand, you slowly pull the paper strip over the pen.
By pressing the thumb, the paper strip is pulled over the edge of the pen and the paper rolls easily.
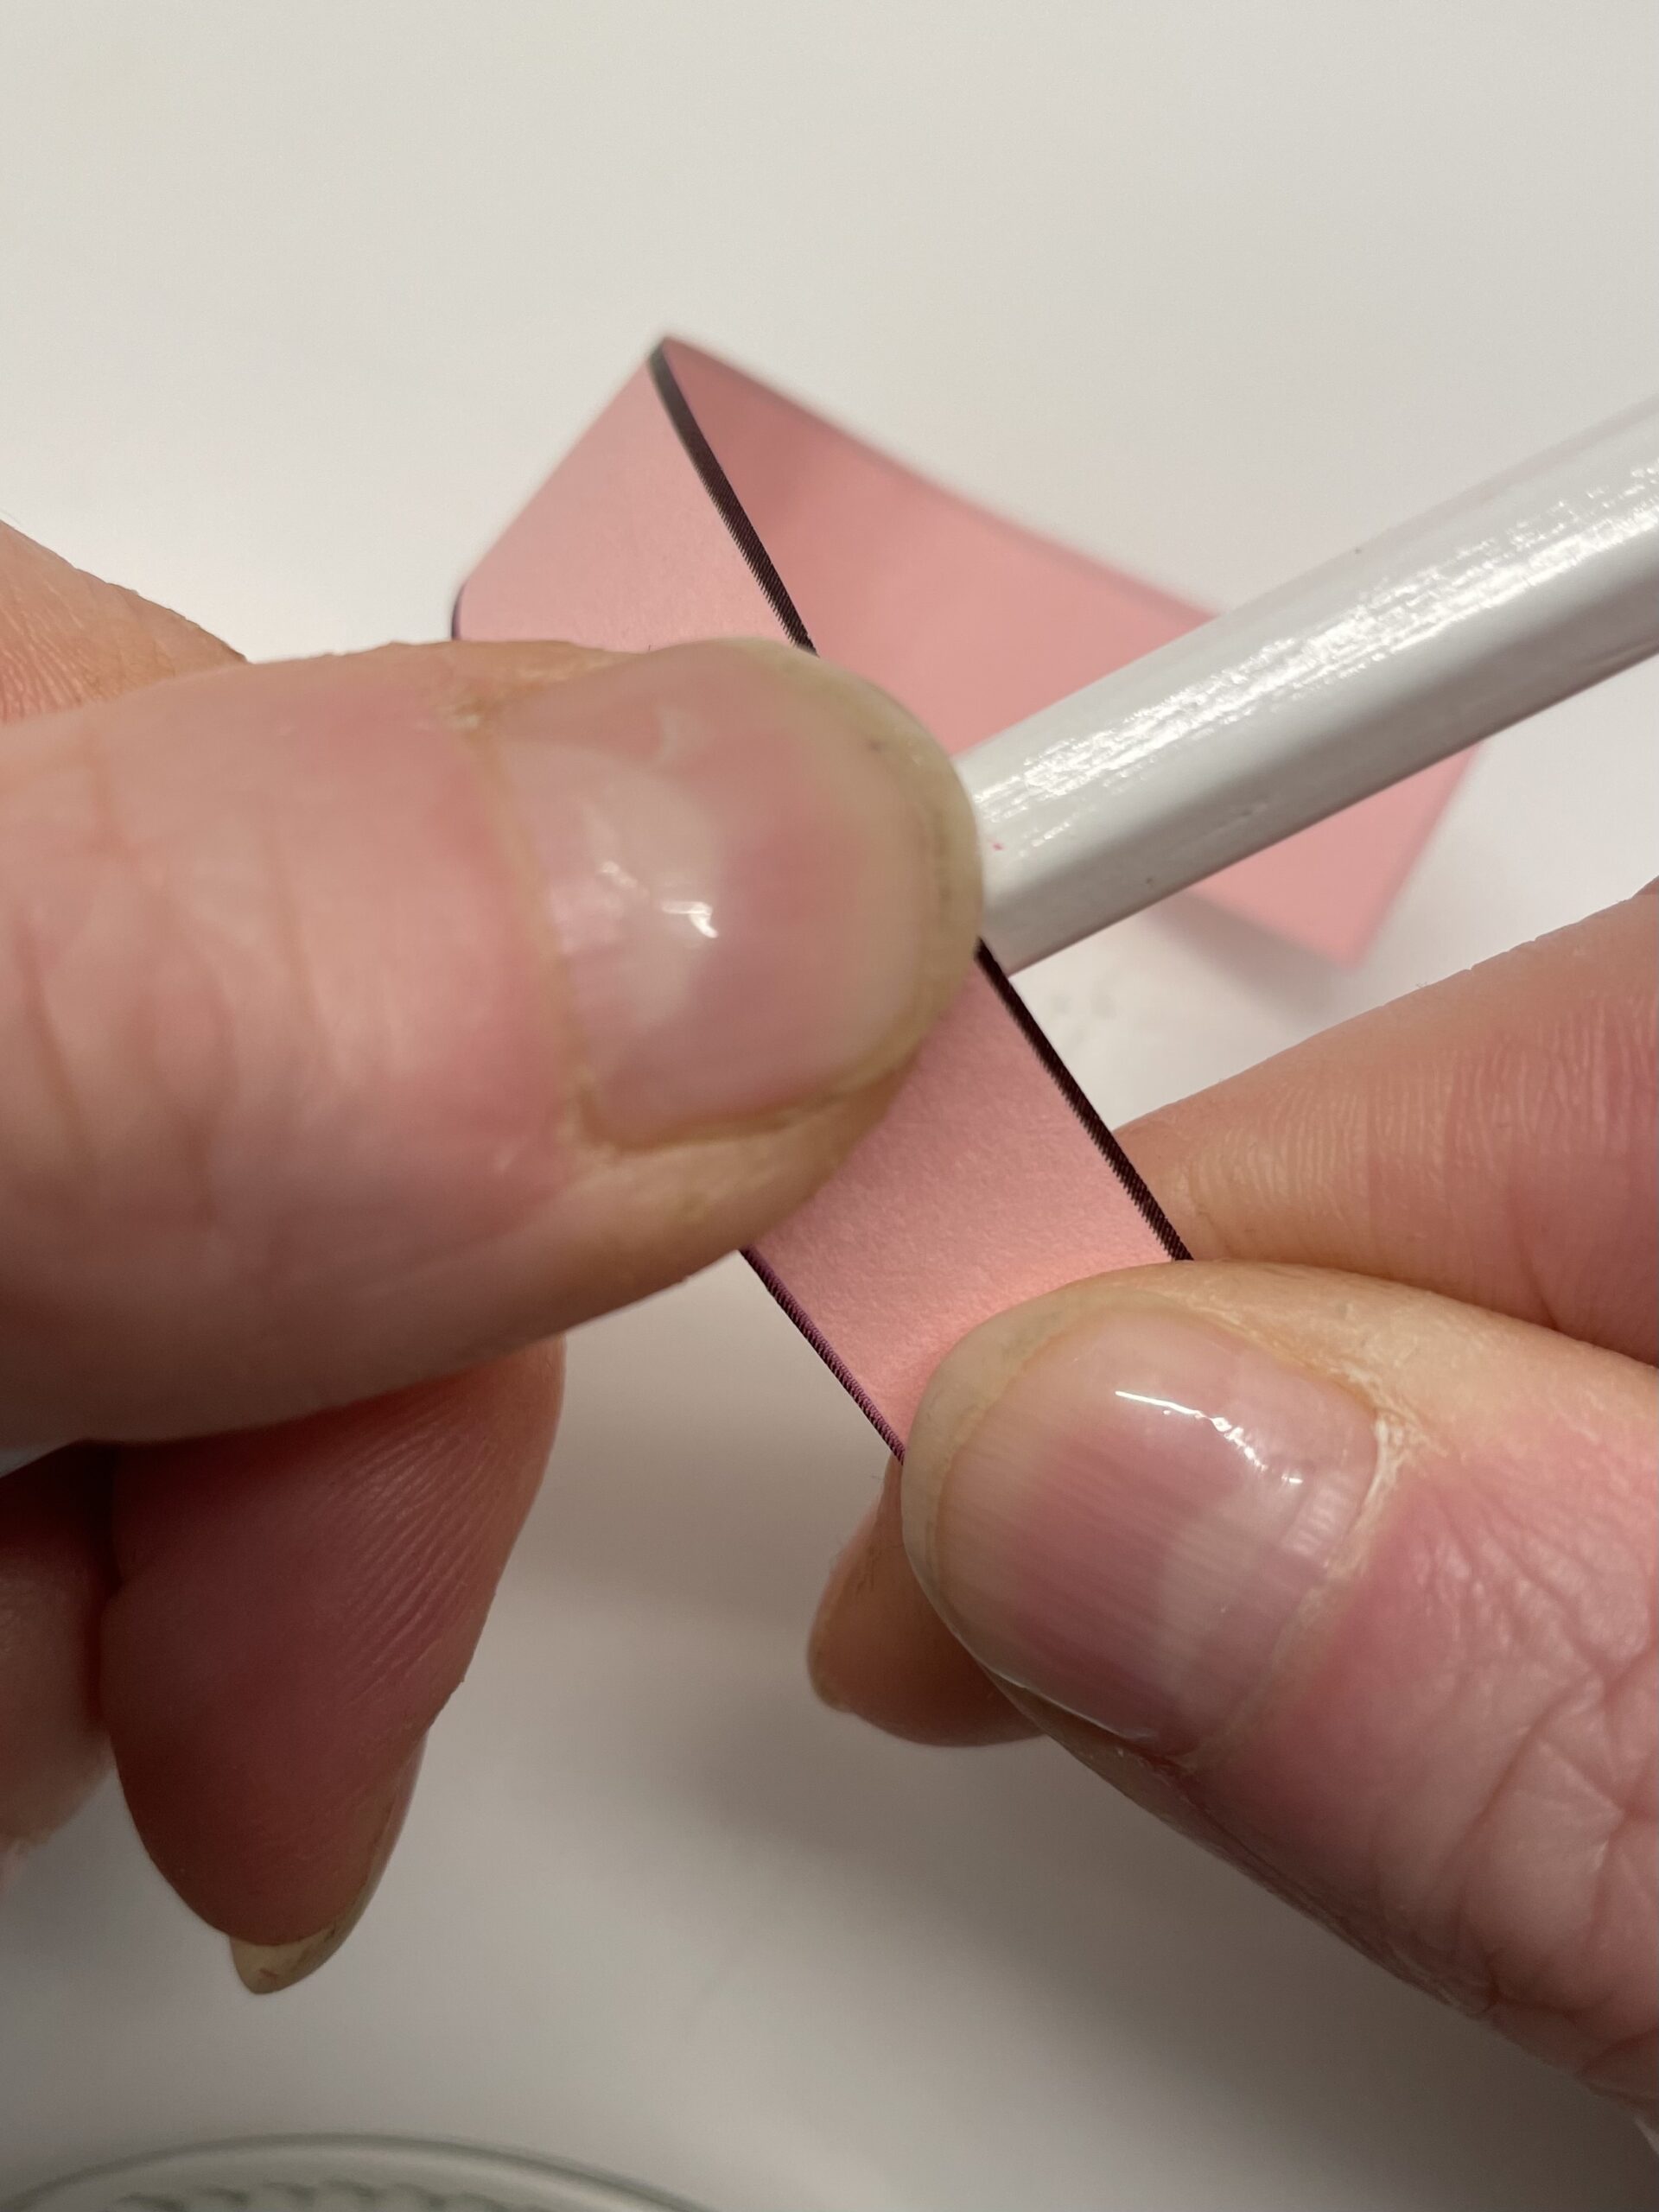
Bild zum Schritt 19 für das Bastel- und DIY-Abenteuer für Kinder: 'Mit der anderen Hand zieht ihr langsam an dem Papierstreifen...'

18

You can also pull the paper strip over the pen several times. Then the paper rings in more forcefully. Make sure that the direction of pull is always the same.
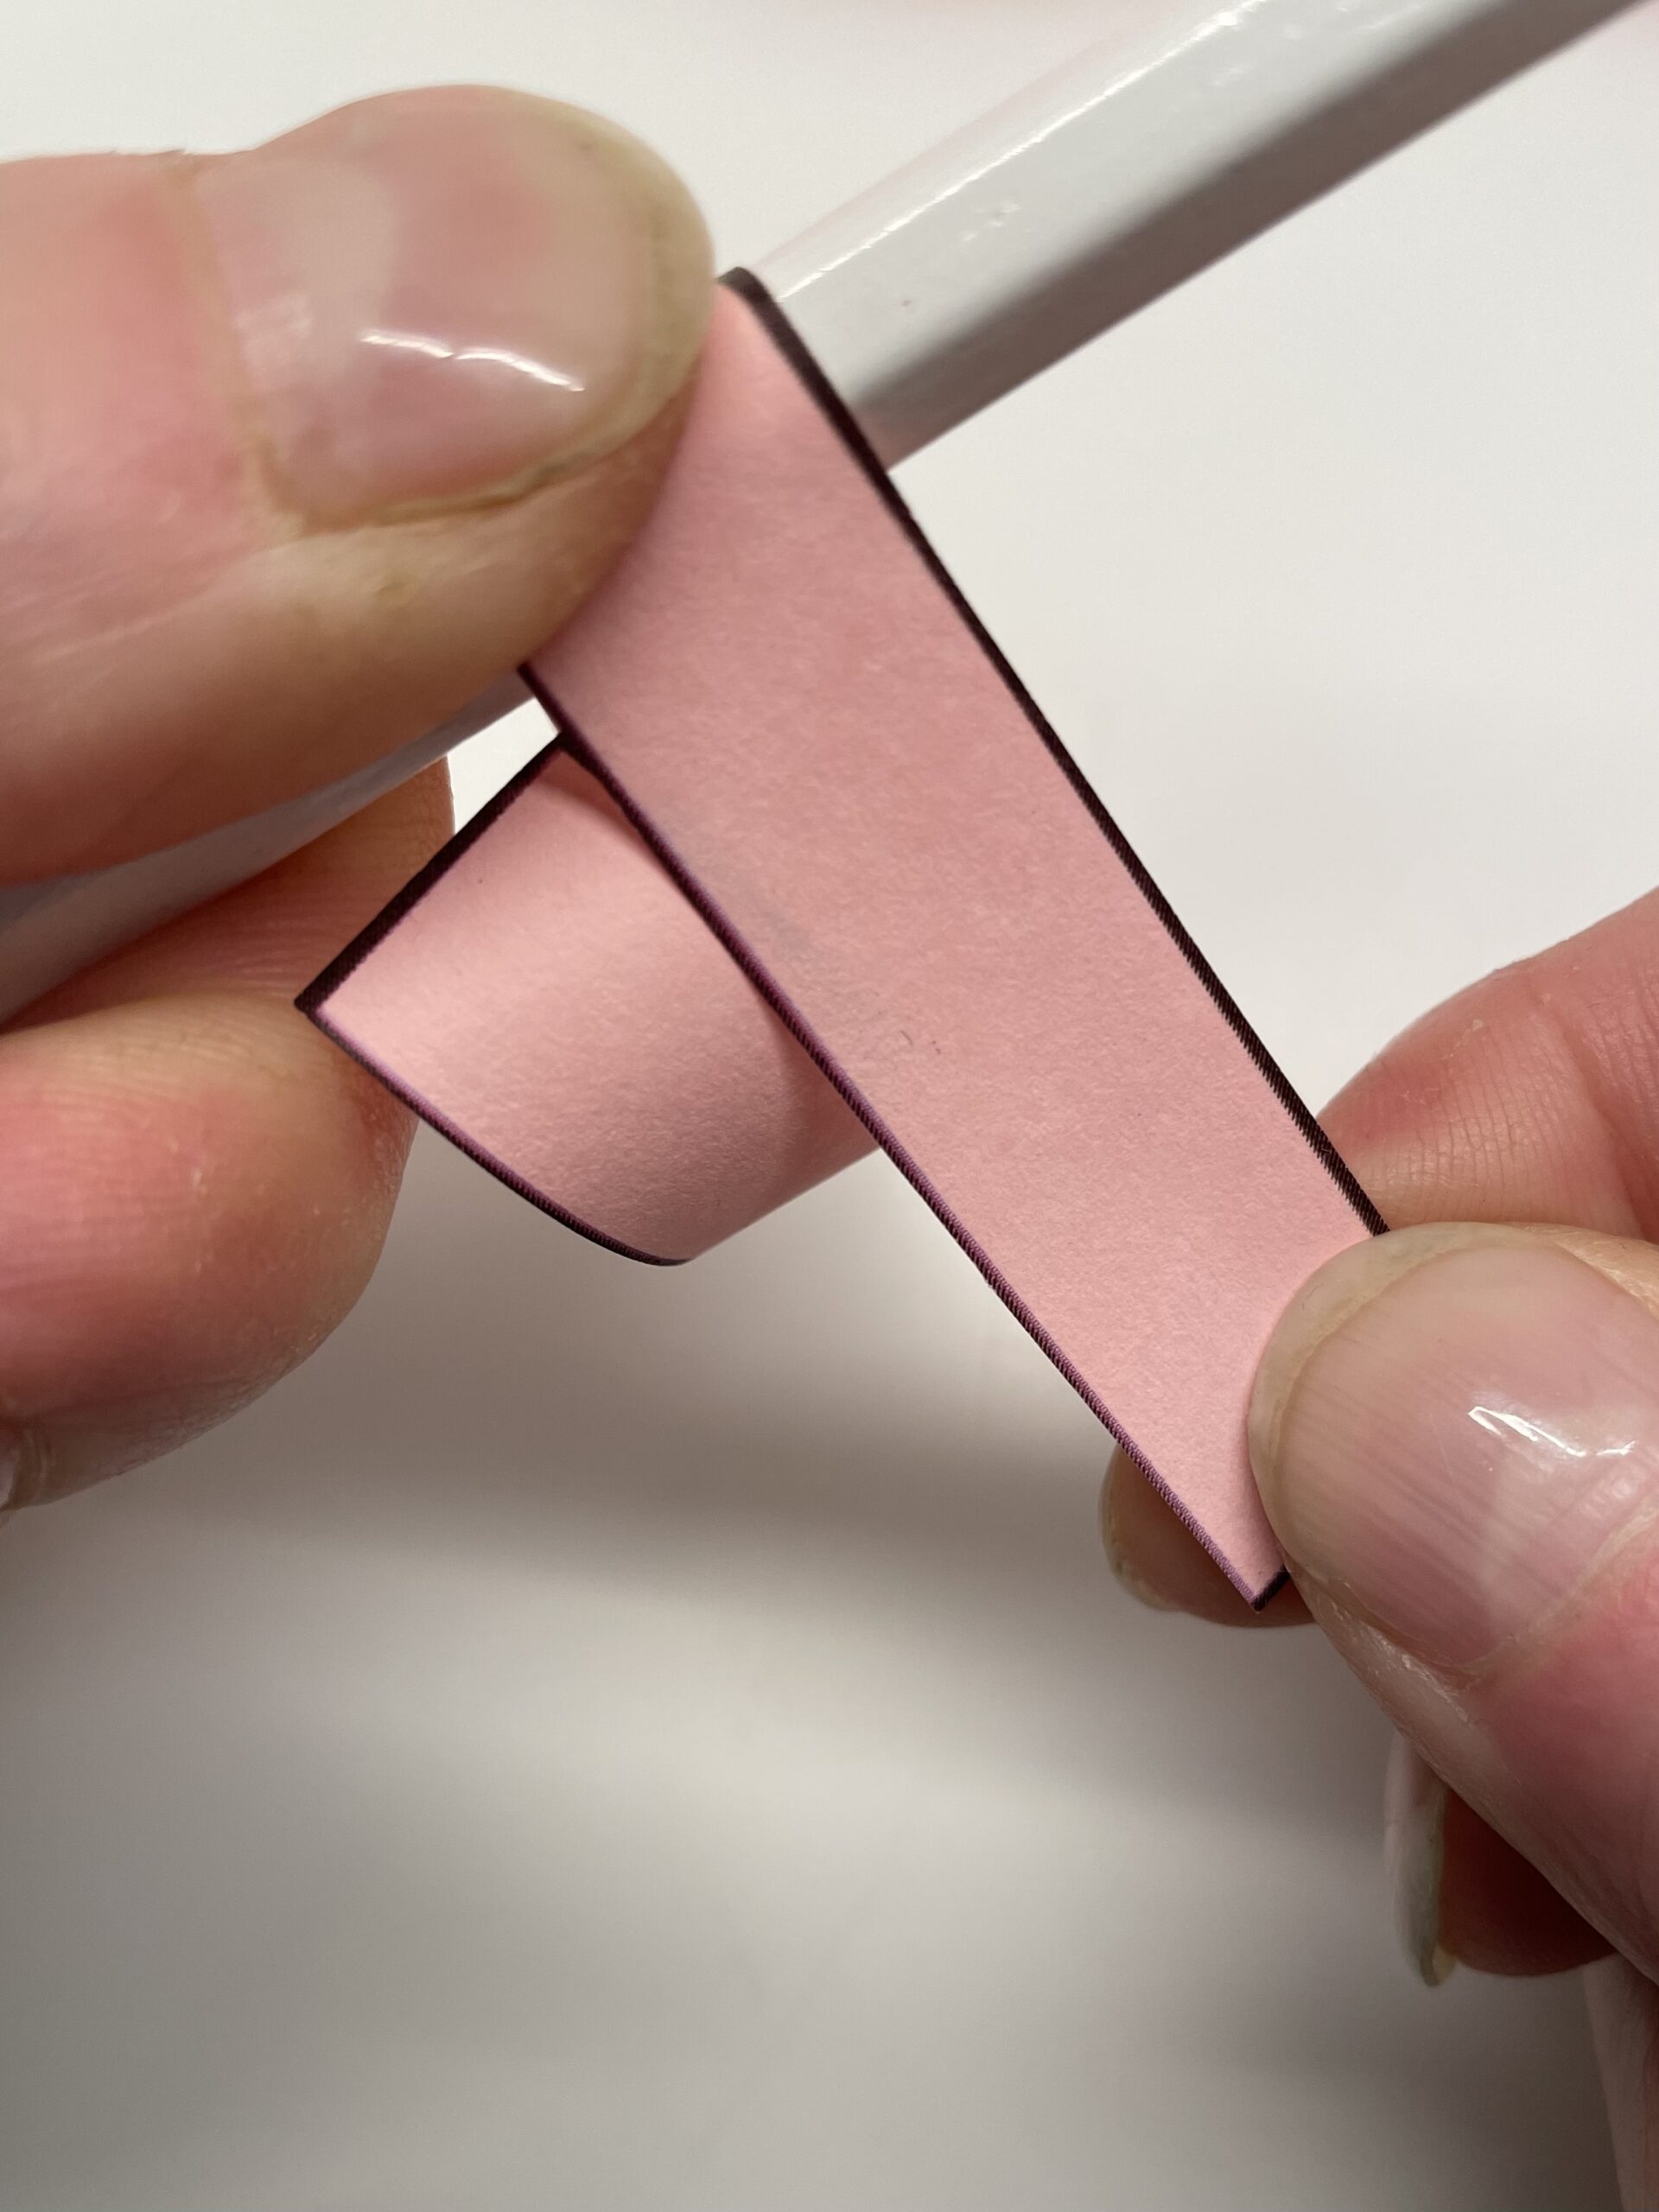
Bild zum Schritt 20 für das Bastel- und DIY-Abenteuer für Kinder: 'Ihr könnt den Papierstreifen auch mehrmals über den Stift ziehen....'

19

The wrestling tail is ready!

Bild zum Schritt 21 für das Bastel- und DIY-Abenteuer für Kinder: 'Fertig ist der Ringelschwanz!'

Make a pig's head
20

Now paint up a pig's head and cut it out or use the template.
After that you paint your eyes and the trunk on it.
Alternatively, her two wobble eyes and a pink button stick to it.
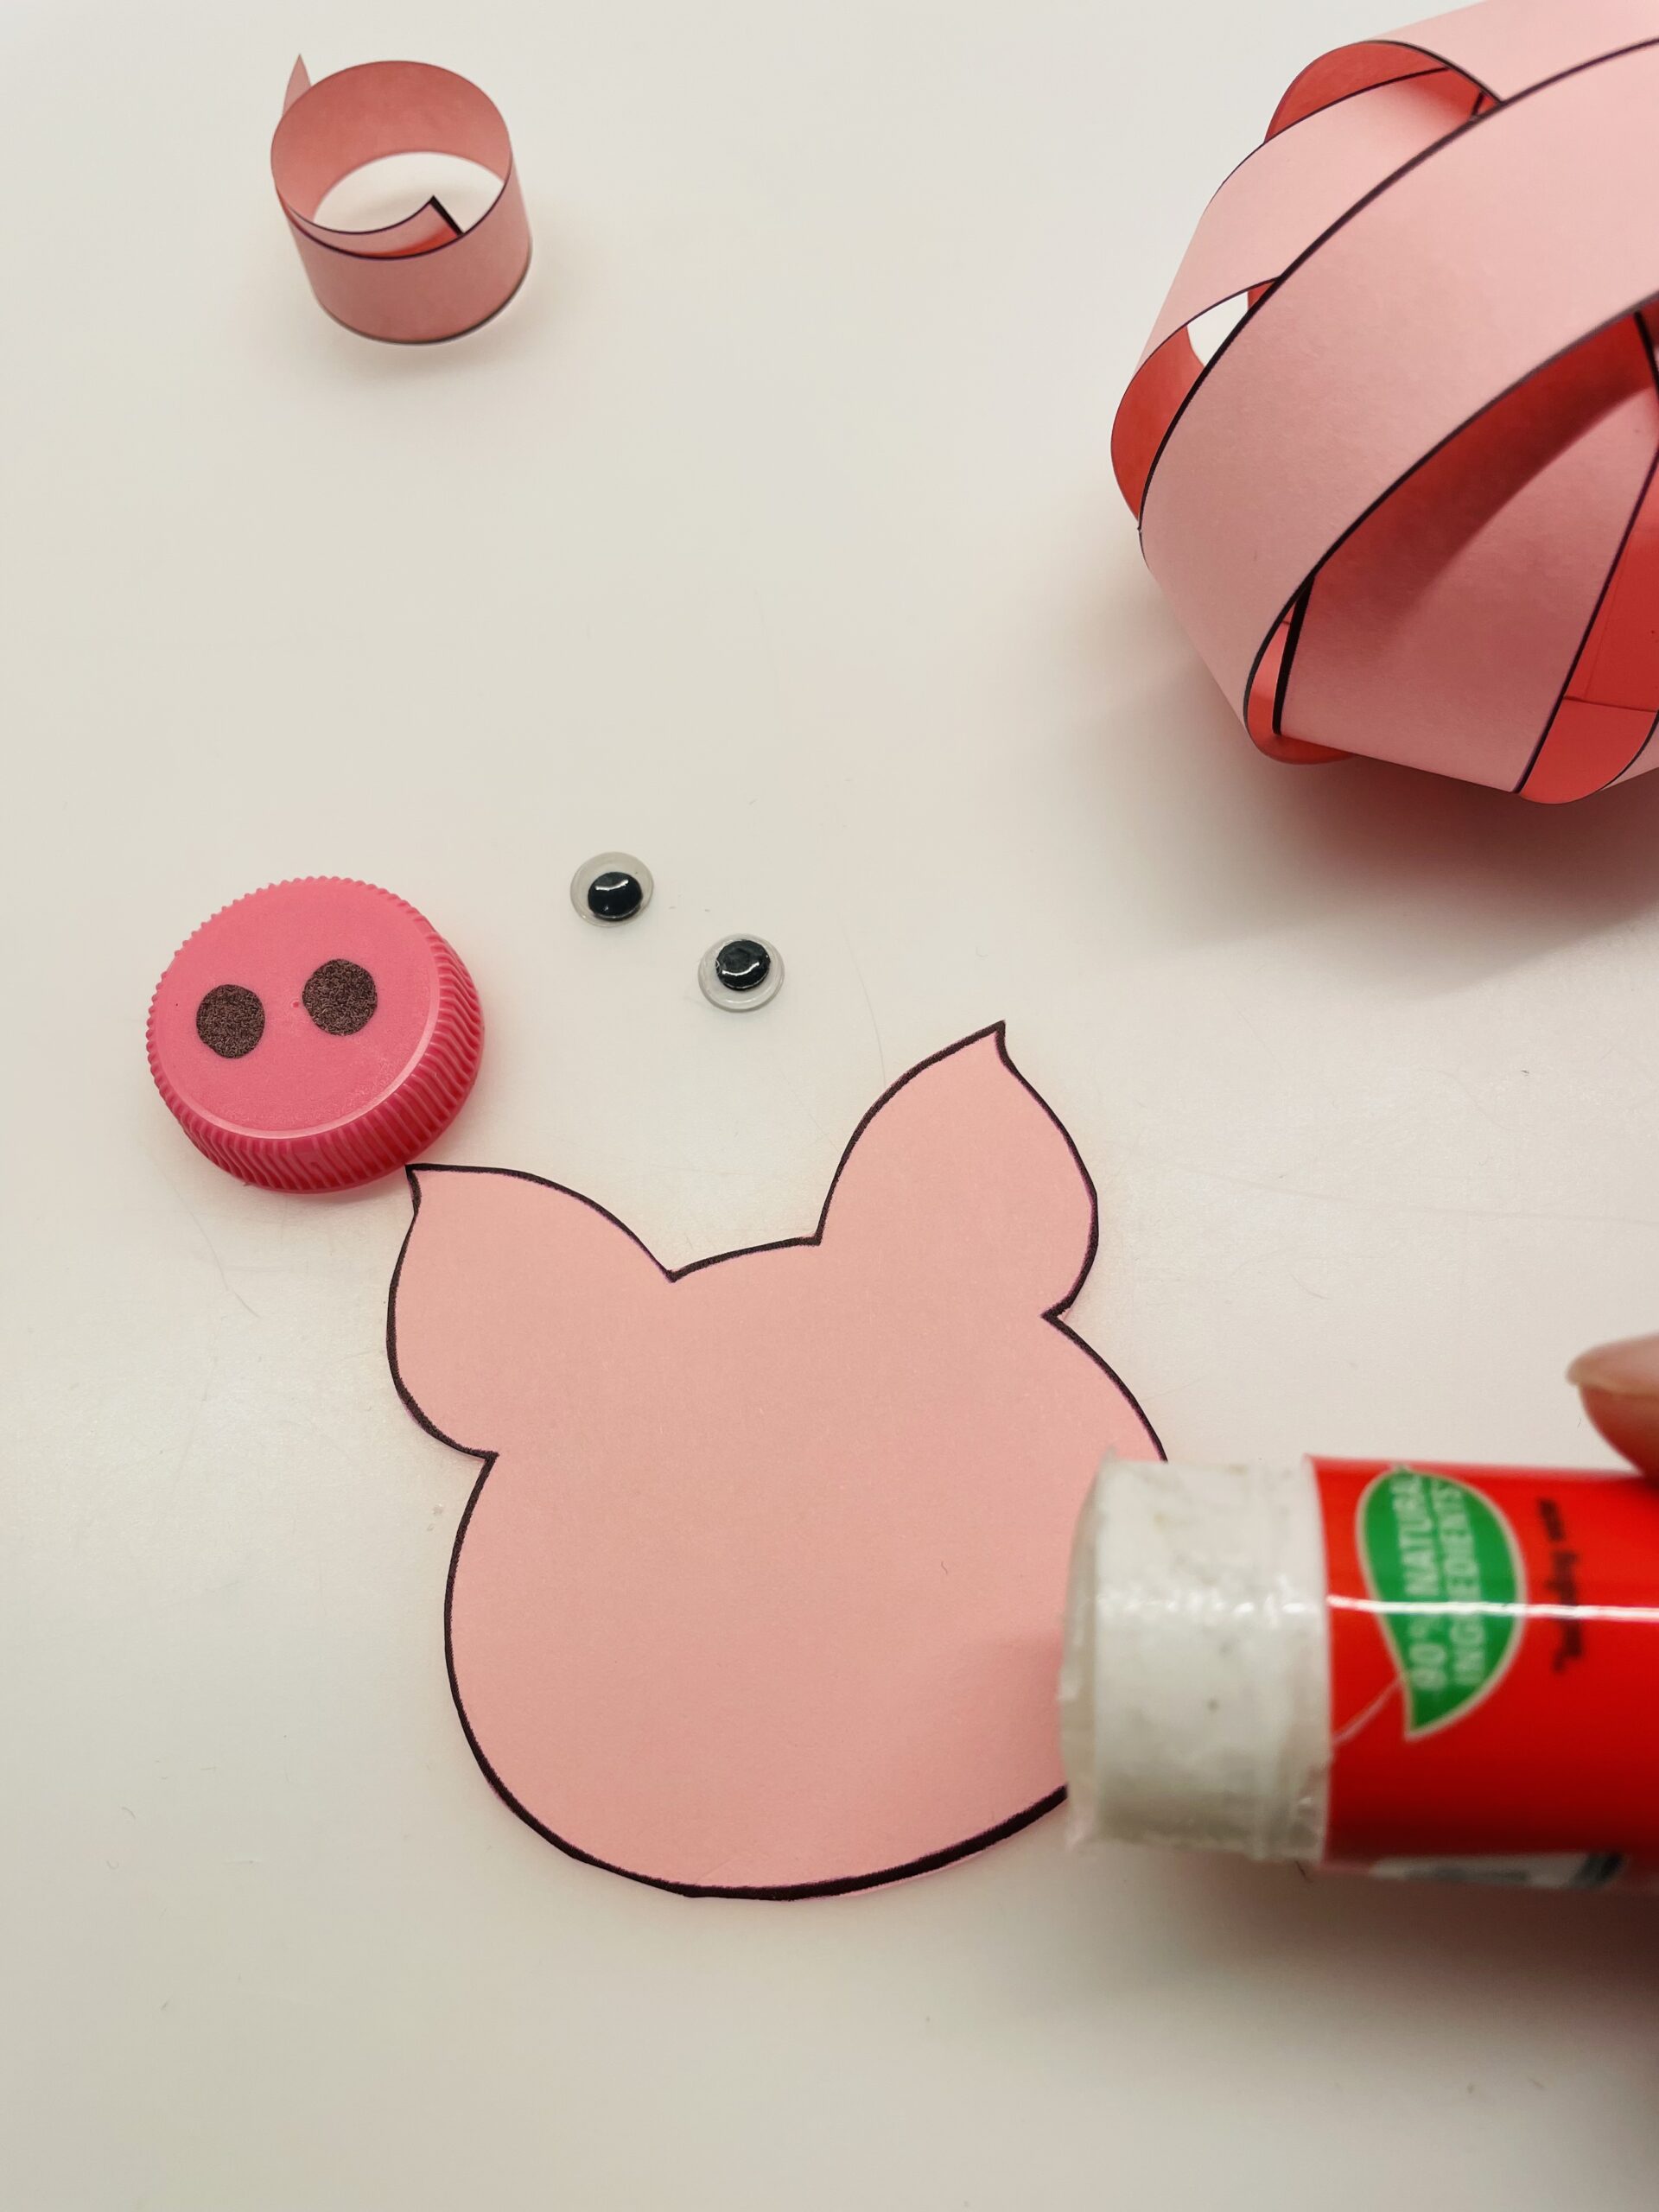
Bild zum Schritt 23 für das Bastel- und DIY-Abenteuer für Kinder: 'Malt euch nun einen Schweinekopf auf und schneidet diesen aus...'

21

With a screw cap you paint the nostrils with a black felt pen.
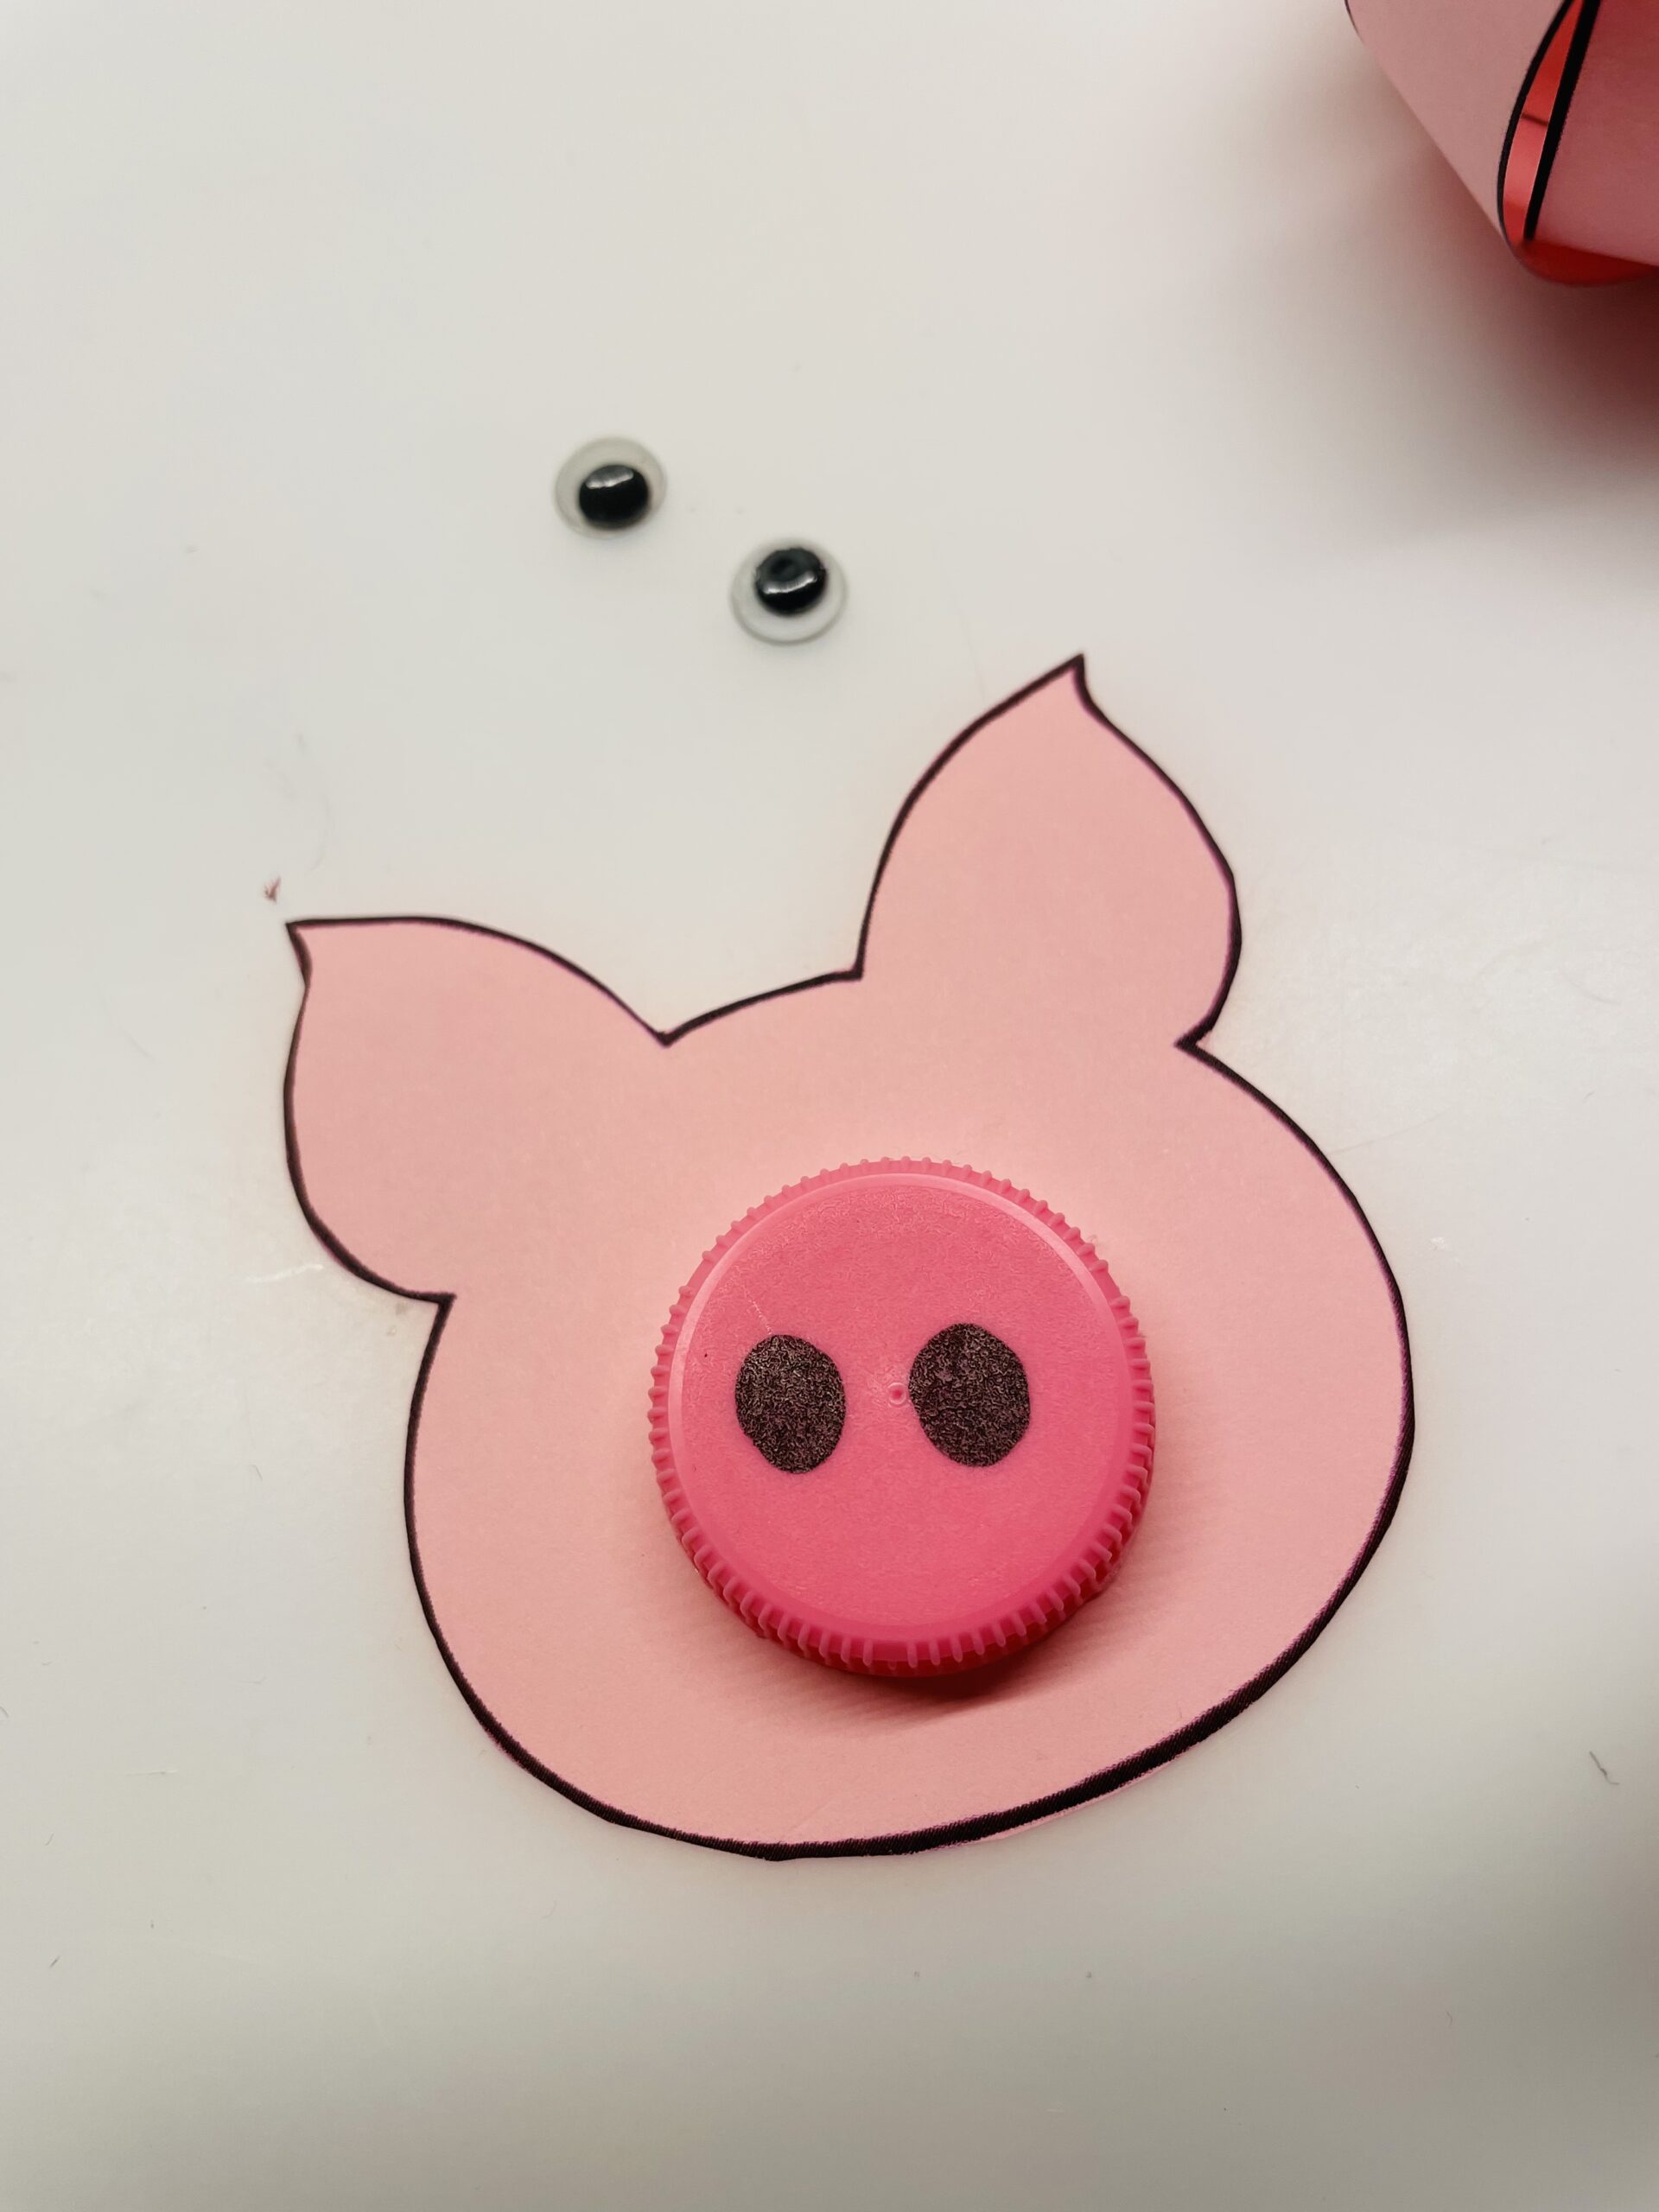
Bild zum Schritt 24 für das Bastel- und DIY-Abenteuer für Kinder: 'Bei einem Schraubverschluss malt ihr die Nasenlöcher mit einem schwarzen...'

22

2. Bild zum Schritt 24 für das Bastel- und DIY-Abenteuer für Kinder: 'Bei einem Schraubverschluss malt ihr die Nasenlöcher mit einem schwarzen...'

Glue the pig together
23

Now glue her head to the outer paper ring of the body. Fix the head with an adhesive point.
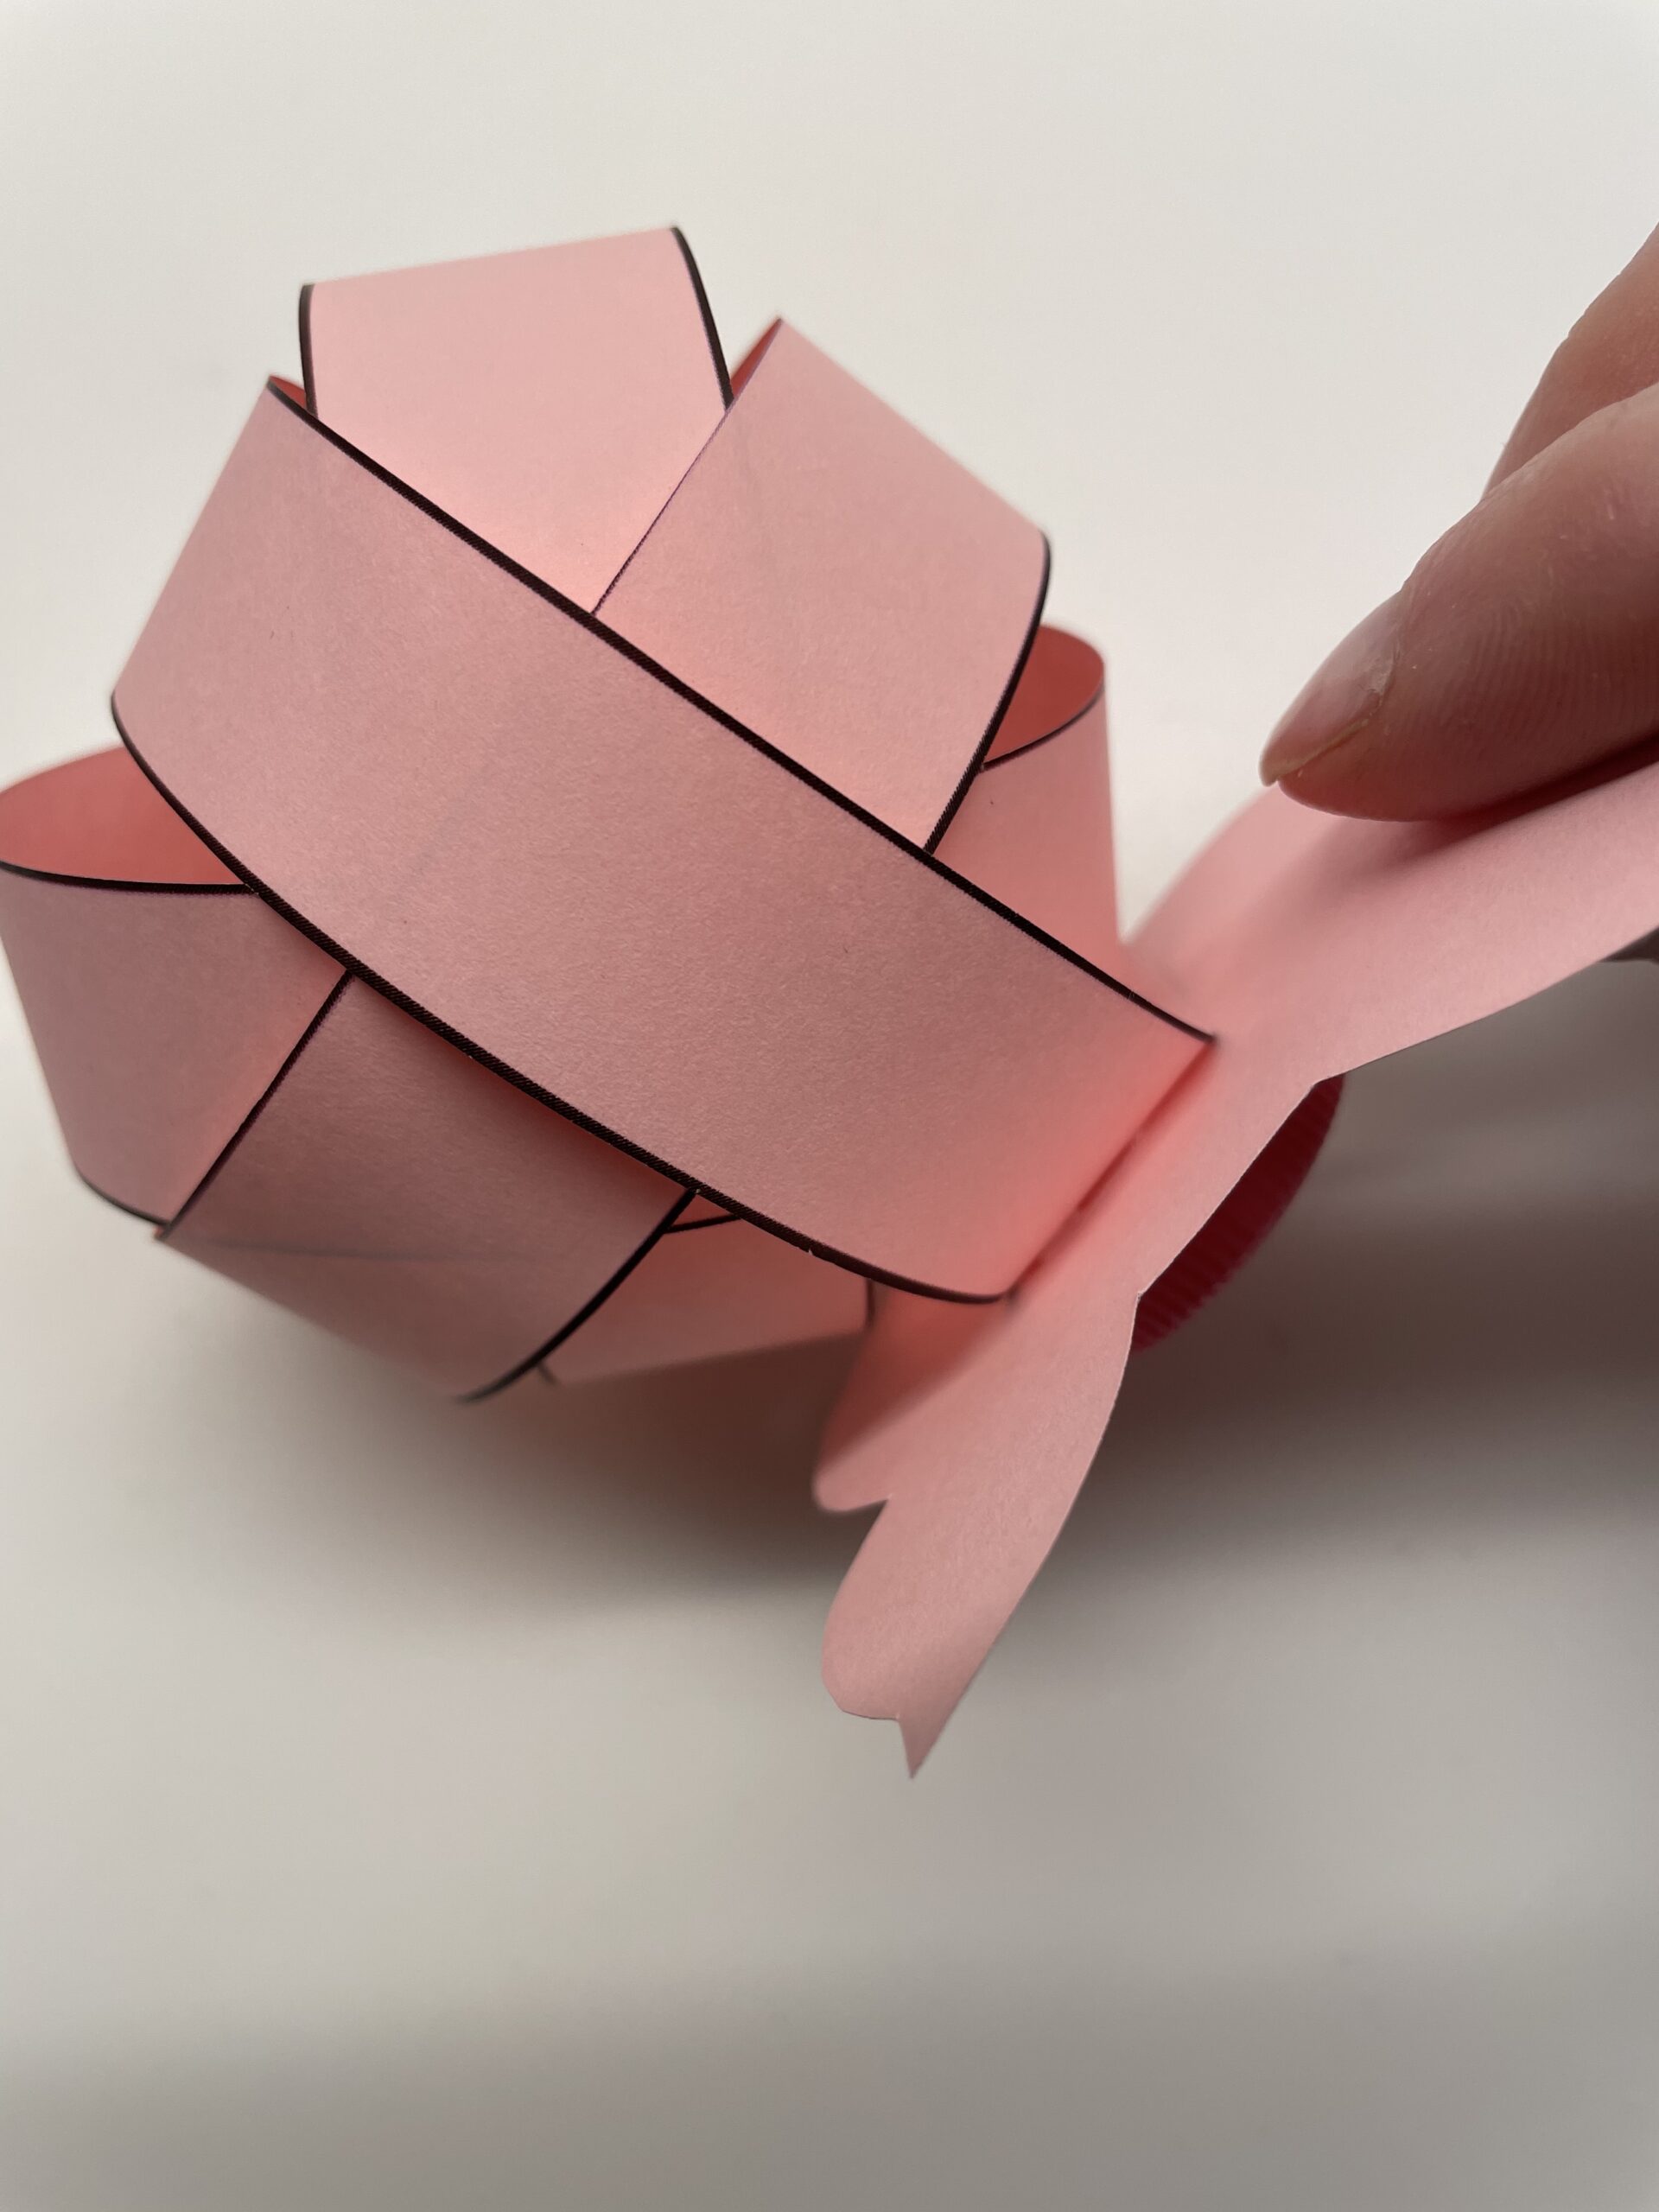
Bild zum Schritt 27 für das Bastel- und DIY-Abenteuer für Kinder: 'Jetzt klebt ihr den Kopf an den äußeren Papierring des...'

24

2. Bild zum Schritt 27 für das Bastel- und DIY-Abenteuer für Kinder: 'Jetzt klebt ihr den Kopf an den äußeren Papierring des...'

25

Then her wrestling tail sticks to the opposite side. In addition, the striped end of the wrestling tail with glue.
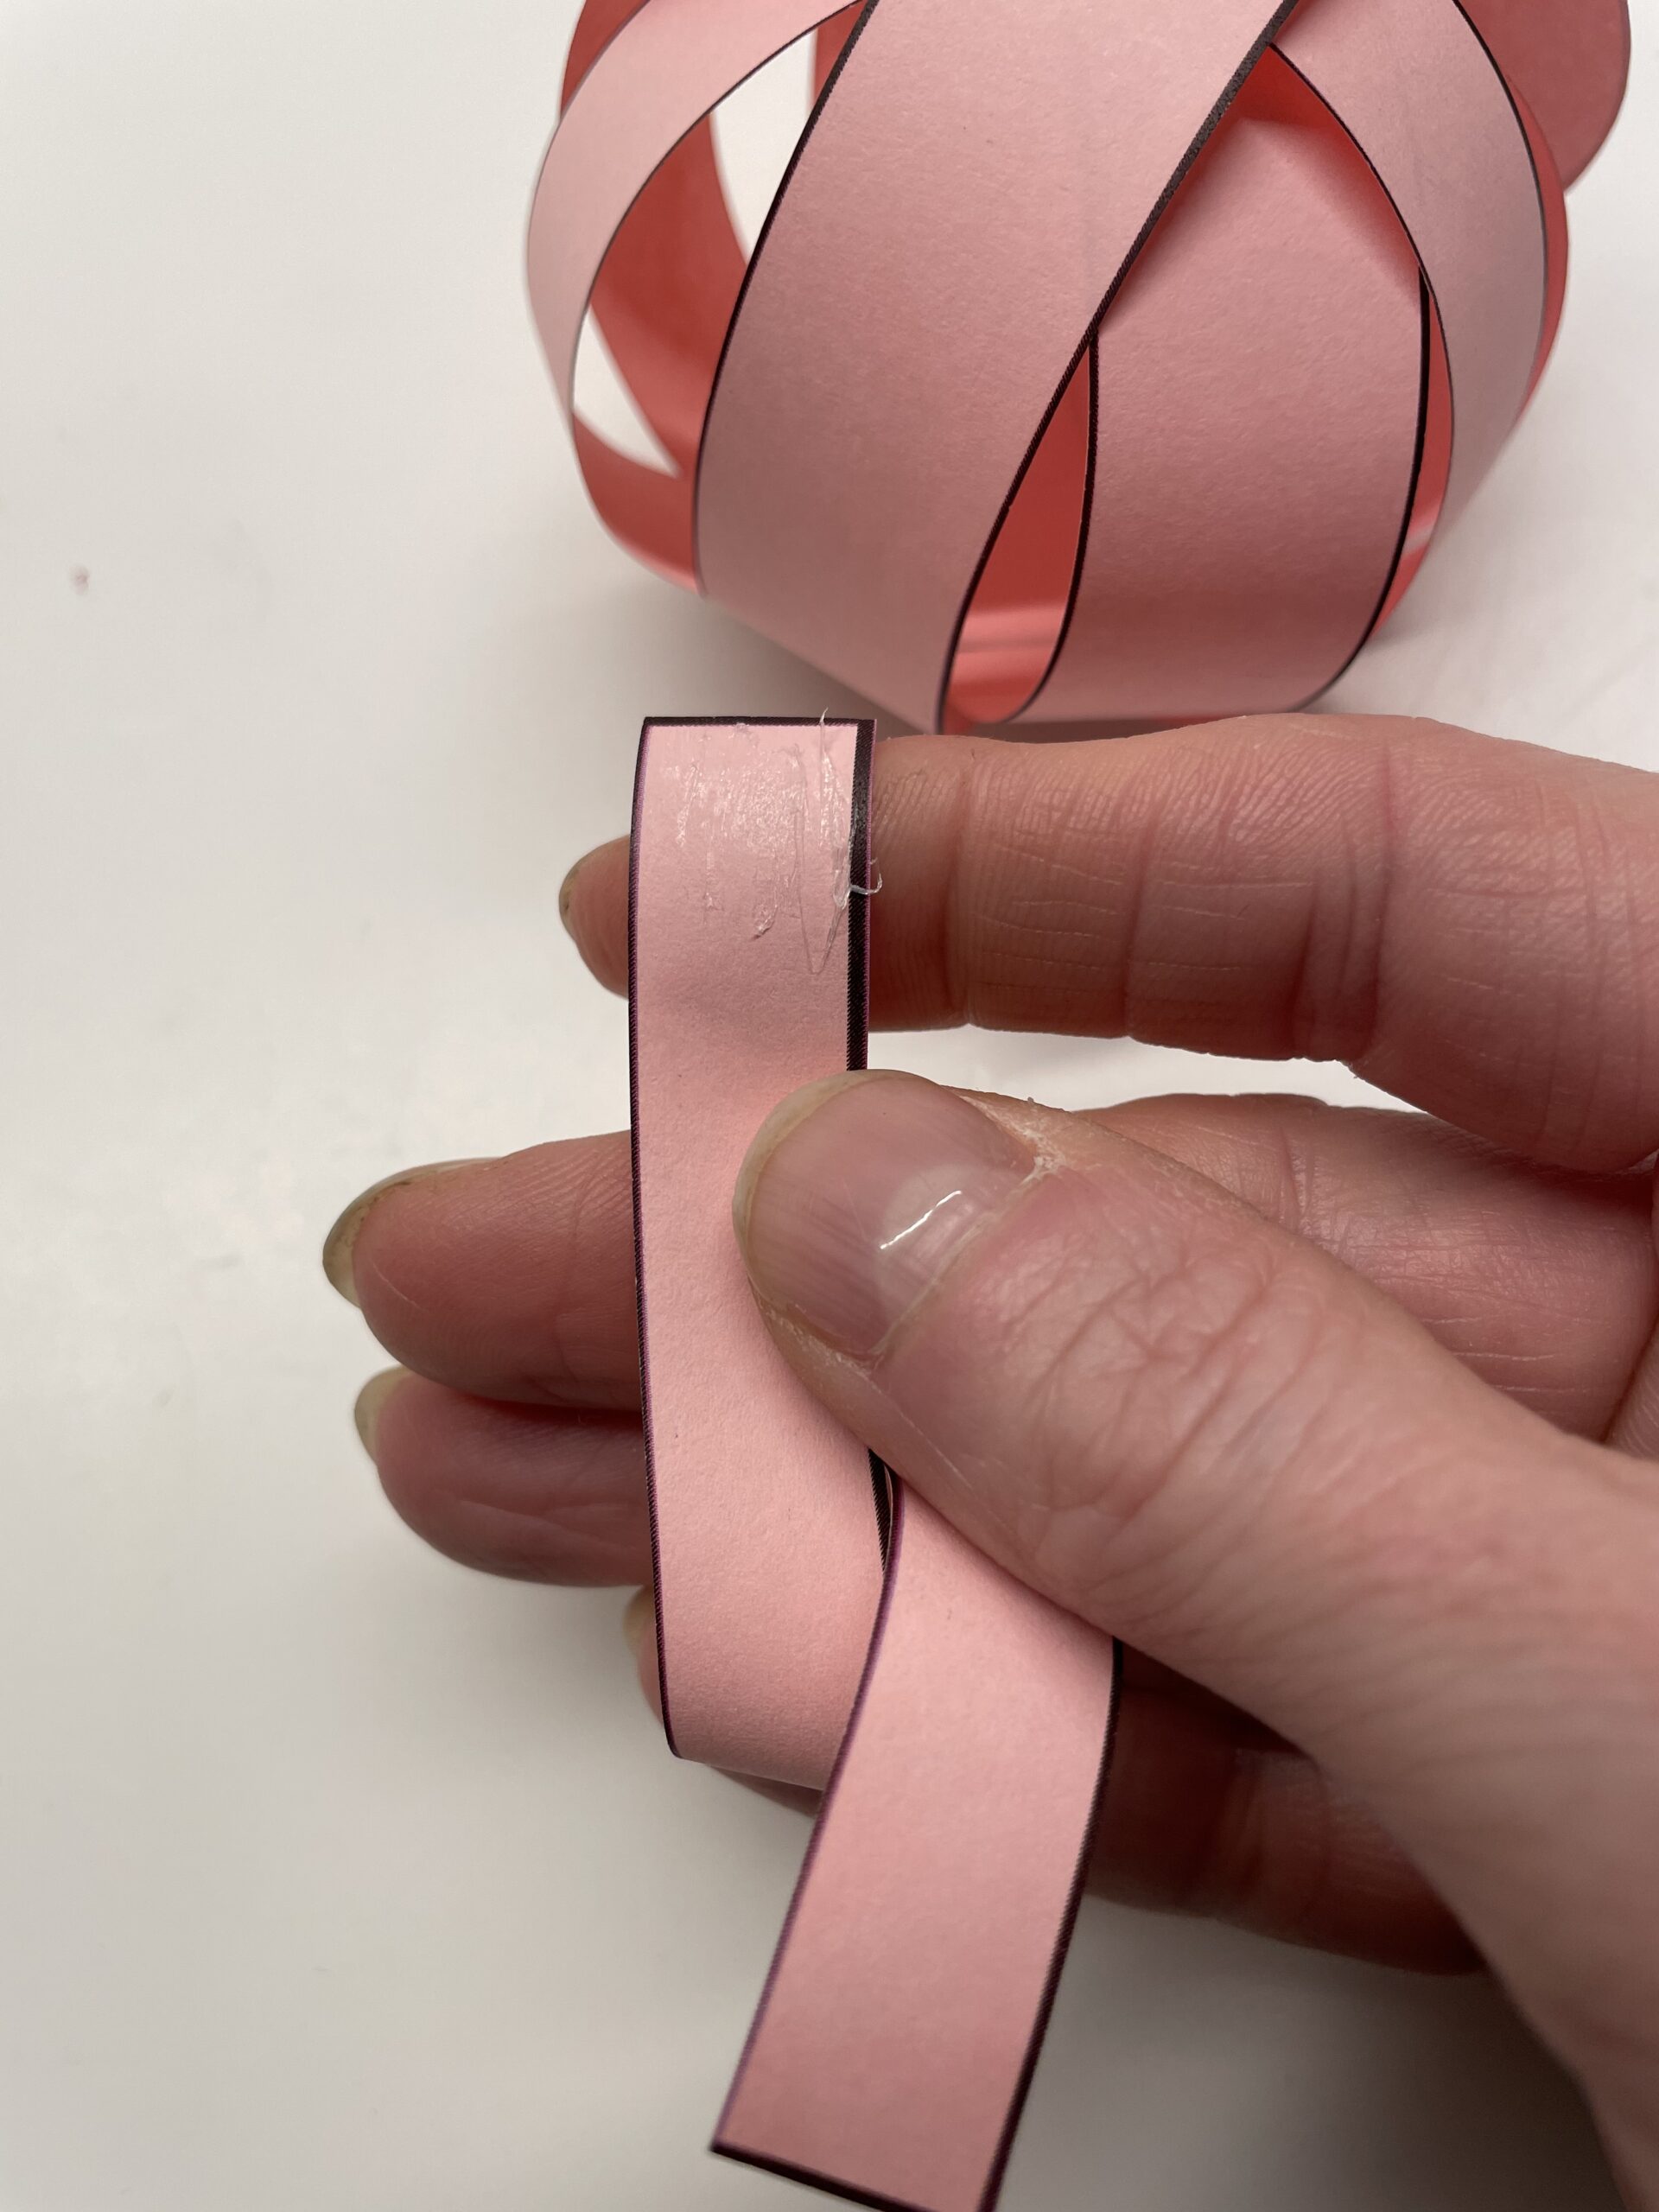
Bild zum Schritt 29 für das Bastel- und DIY-Abenteuer für Kinder: 'Danach klebt ihr Ringelschwanz an der gegenüberliegenden Seite fest. Bestreicht...'

26

The pig is ready!

Bild zum Schritt 30 für das Bastel- und DIY-Abenteuer für Kinder: 'Fertig ist das Schwein!'

" Good luck " craft card
27

Use the accompanying template or create a card for yourself and add it to it.
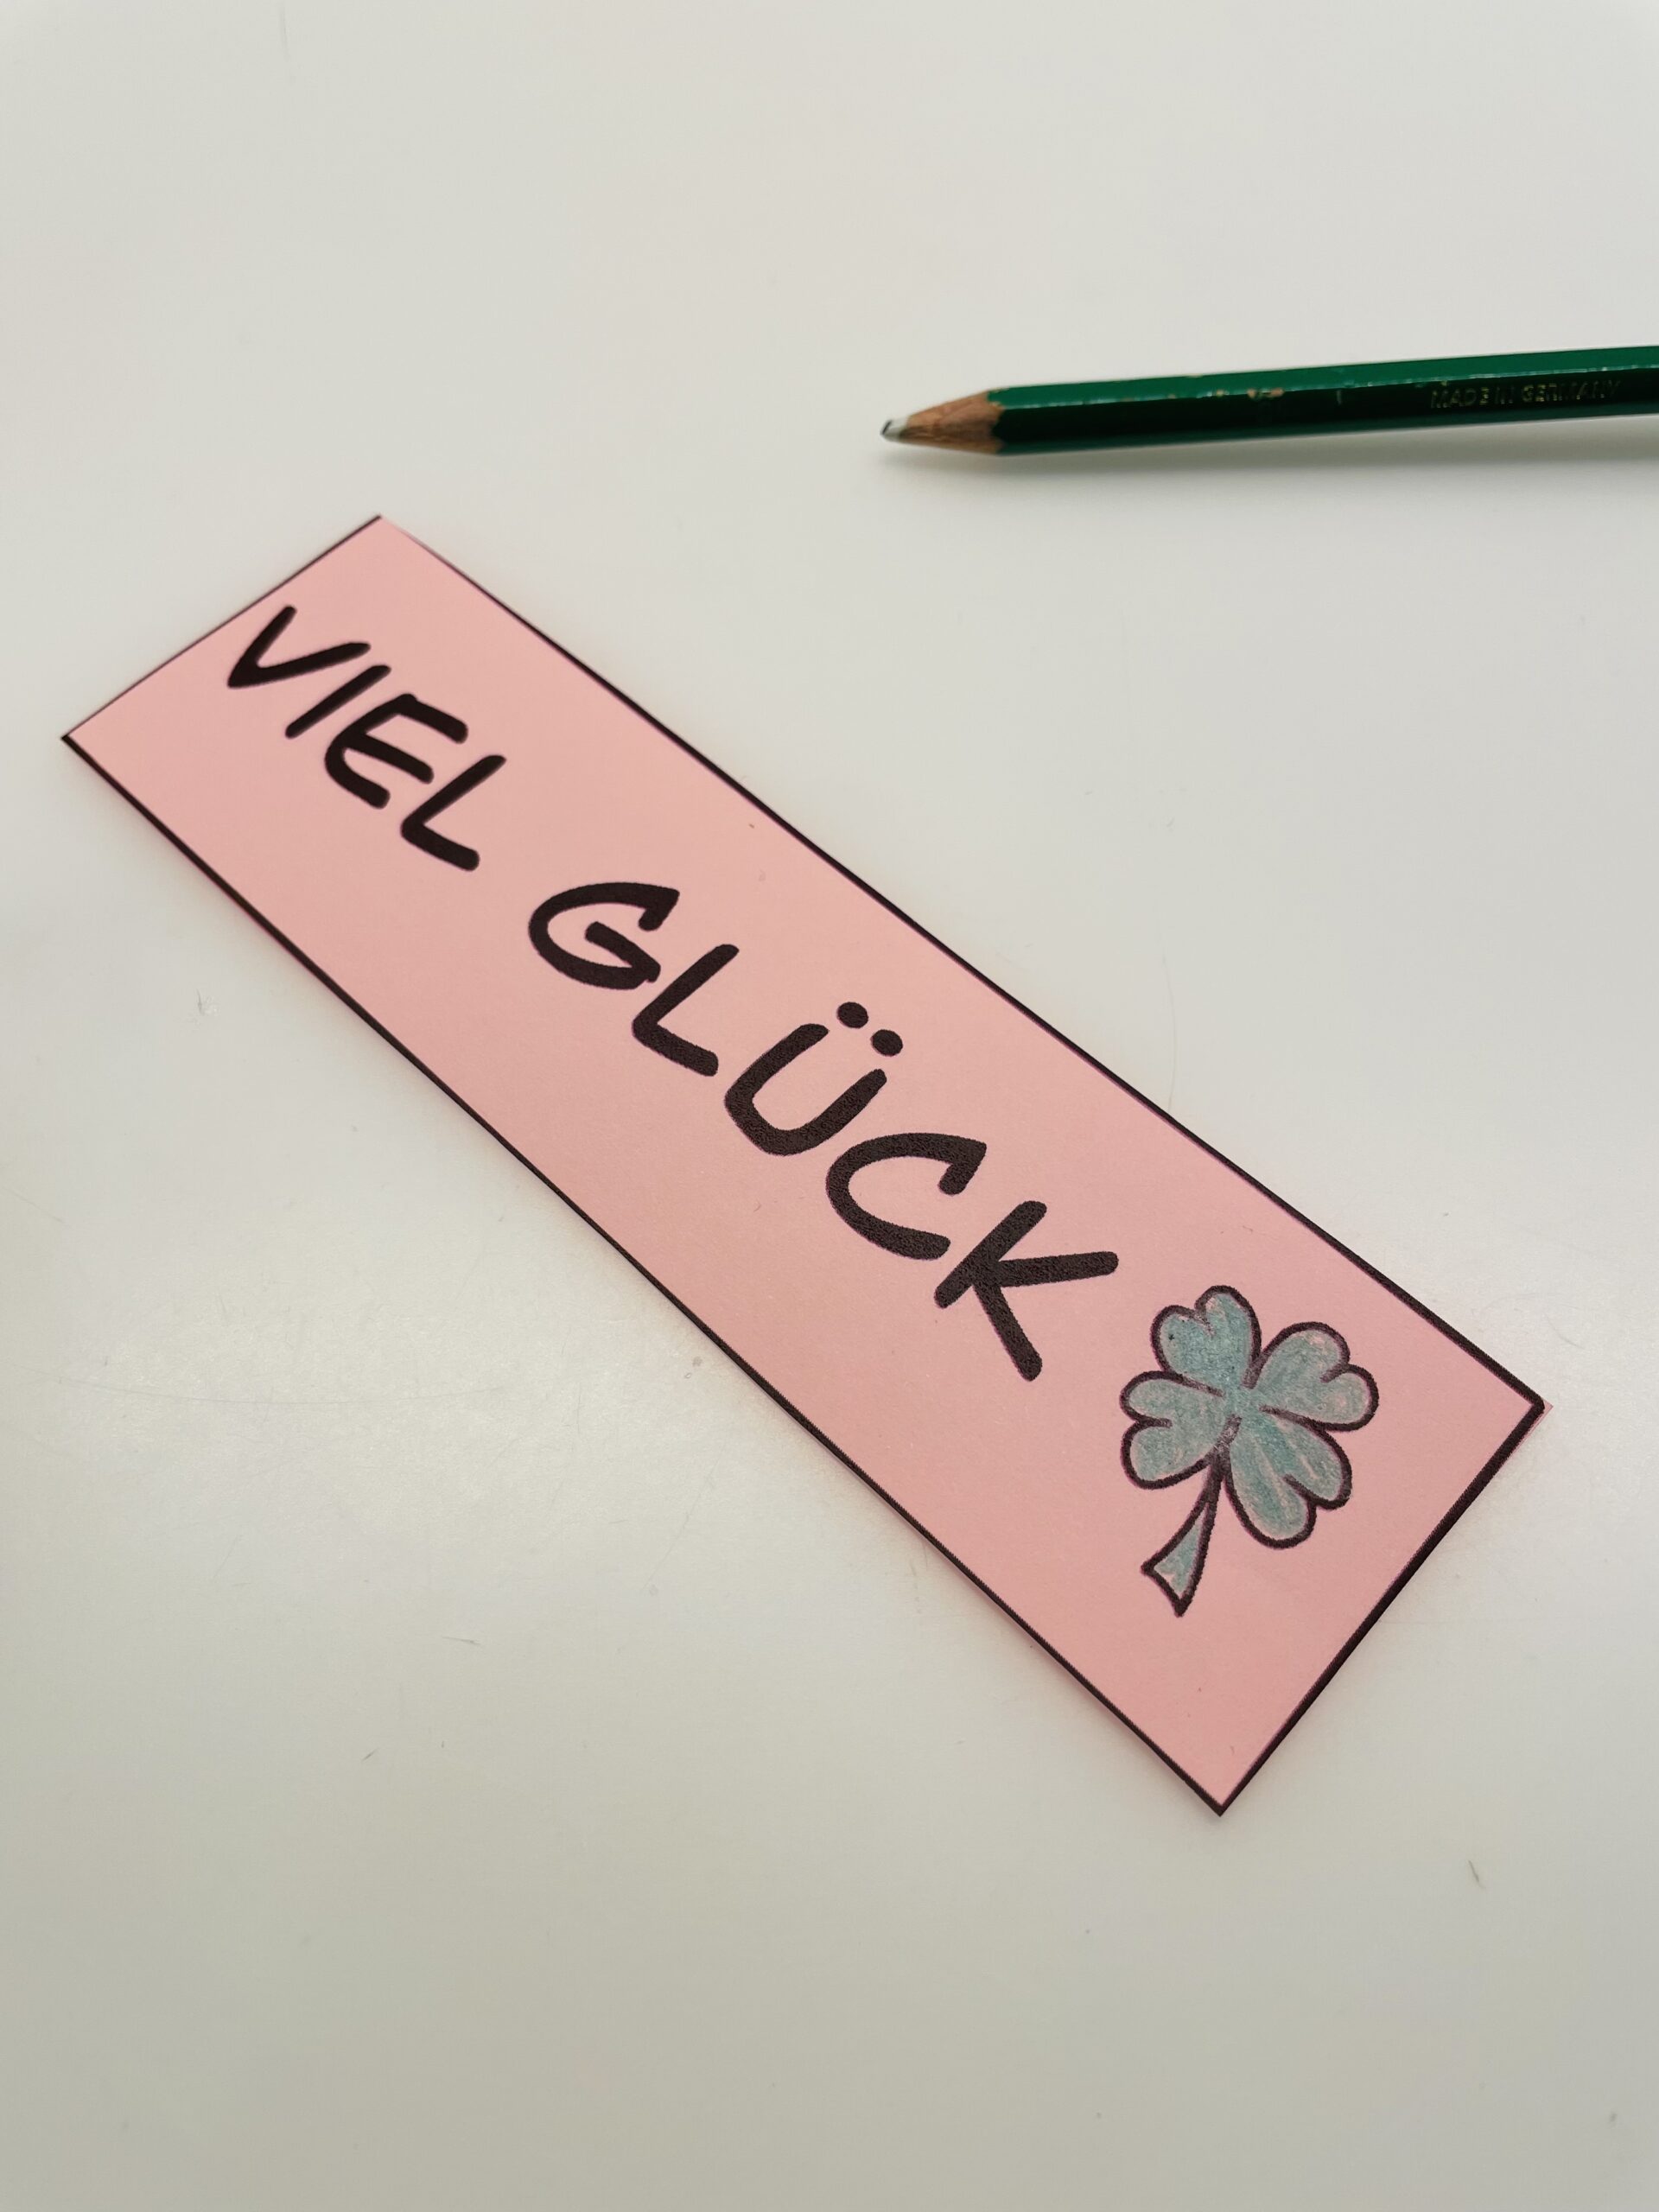
Bild zum Schritt 32 für das Bastel- und DIY-Abenteuer für Kinder: 'Verwendet die beigefügte Vorlage oder bastelt euch selbst eine Karte...'

28

Your lucky bastard is ready.

Bild zum Schritt 33 für das Bastel- und DIY-Abenteuer für Kinder: 'Fertig ist euer Glücksschwein.'

29

2. Bild zum Schritt 33 für das Bastel- und DIY-Abenteuer für Kinder: 'Fertig ist euer Glücksschwein.'

Printable template
30

Template for printing on a pink copy paper.
Tip: Alternatively, you paint the pig pink.
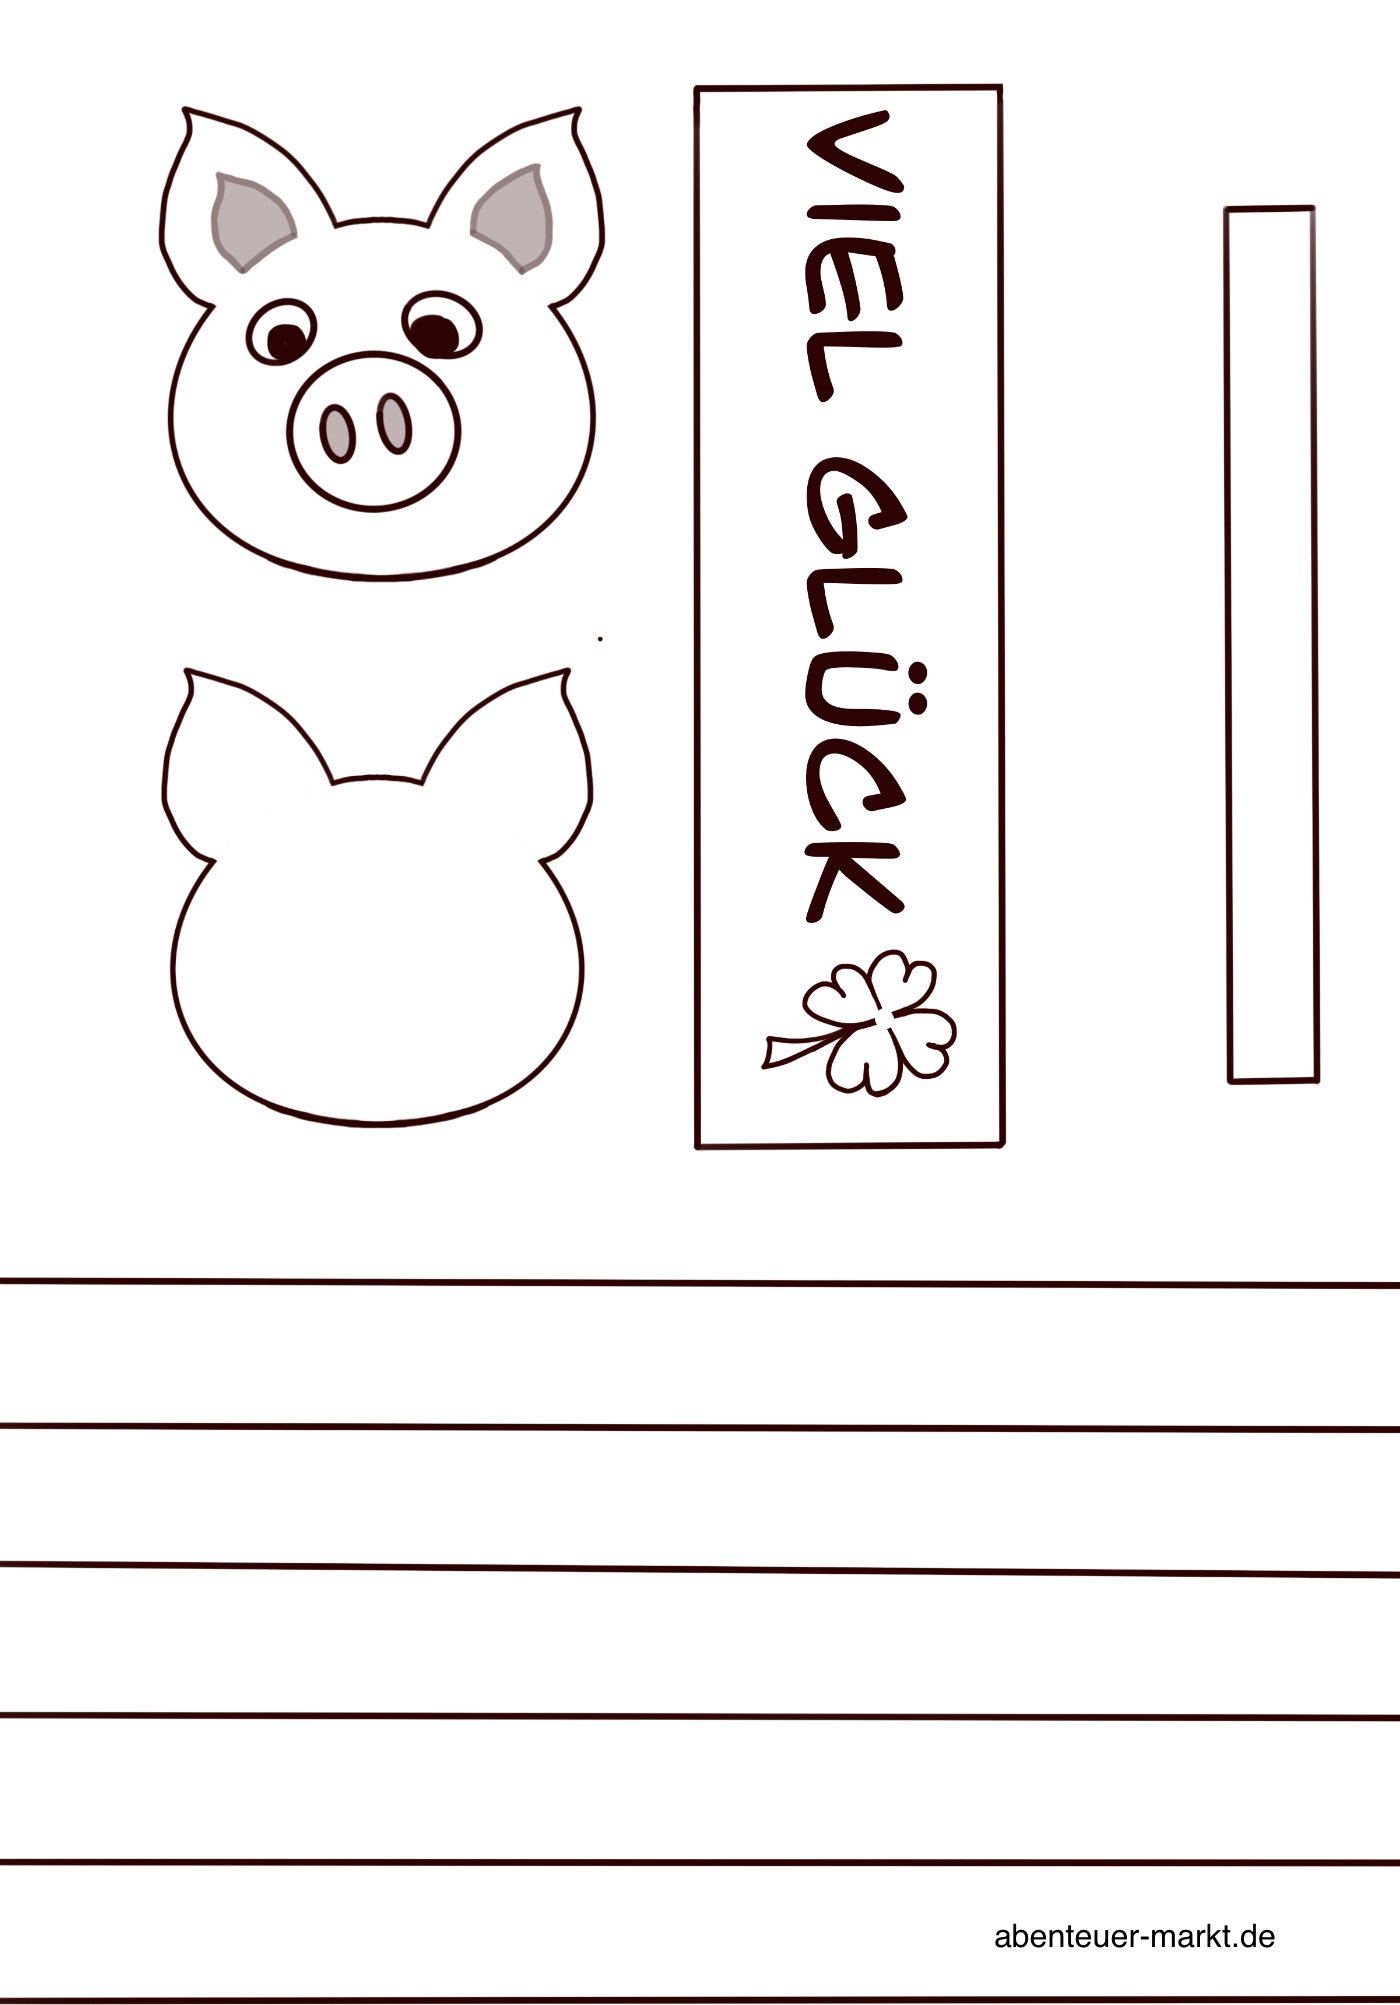
Bild zum Schritt 36 für das Bastel- und DIY-Abenteuer für Kinder: 'Vorlage zum Ausdrucken auf ein rosafarbenes Kopierpapier.  Tipp: Alternativ...'

31

Have fun in crafts and luck-schenken!

Make pork from paper strips

Follow us on Facebook , Instagram and Pinterest
Don't miss any more adventures: Our bottle mail

Leave a Reply

Your email address will not be published.

The maximum upload file size: 5 MB. You can upload: image, document. Drop file here