Snowman of paper strip (with template)

AdventurerKatzi
Rating4.04.3 Thousand times & (1) DifficultyAdvanced

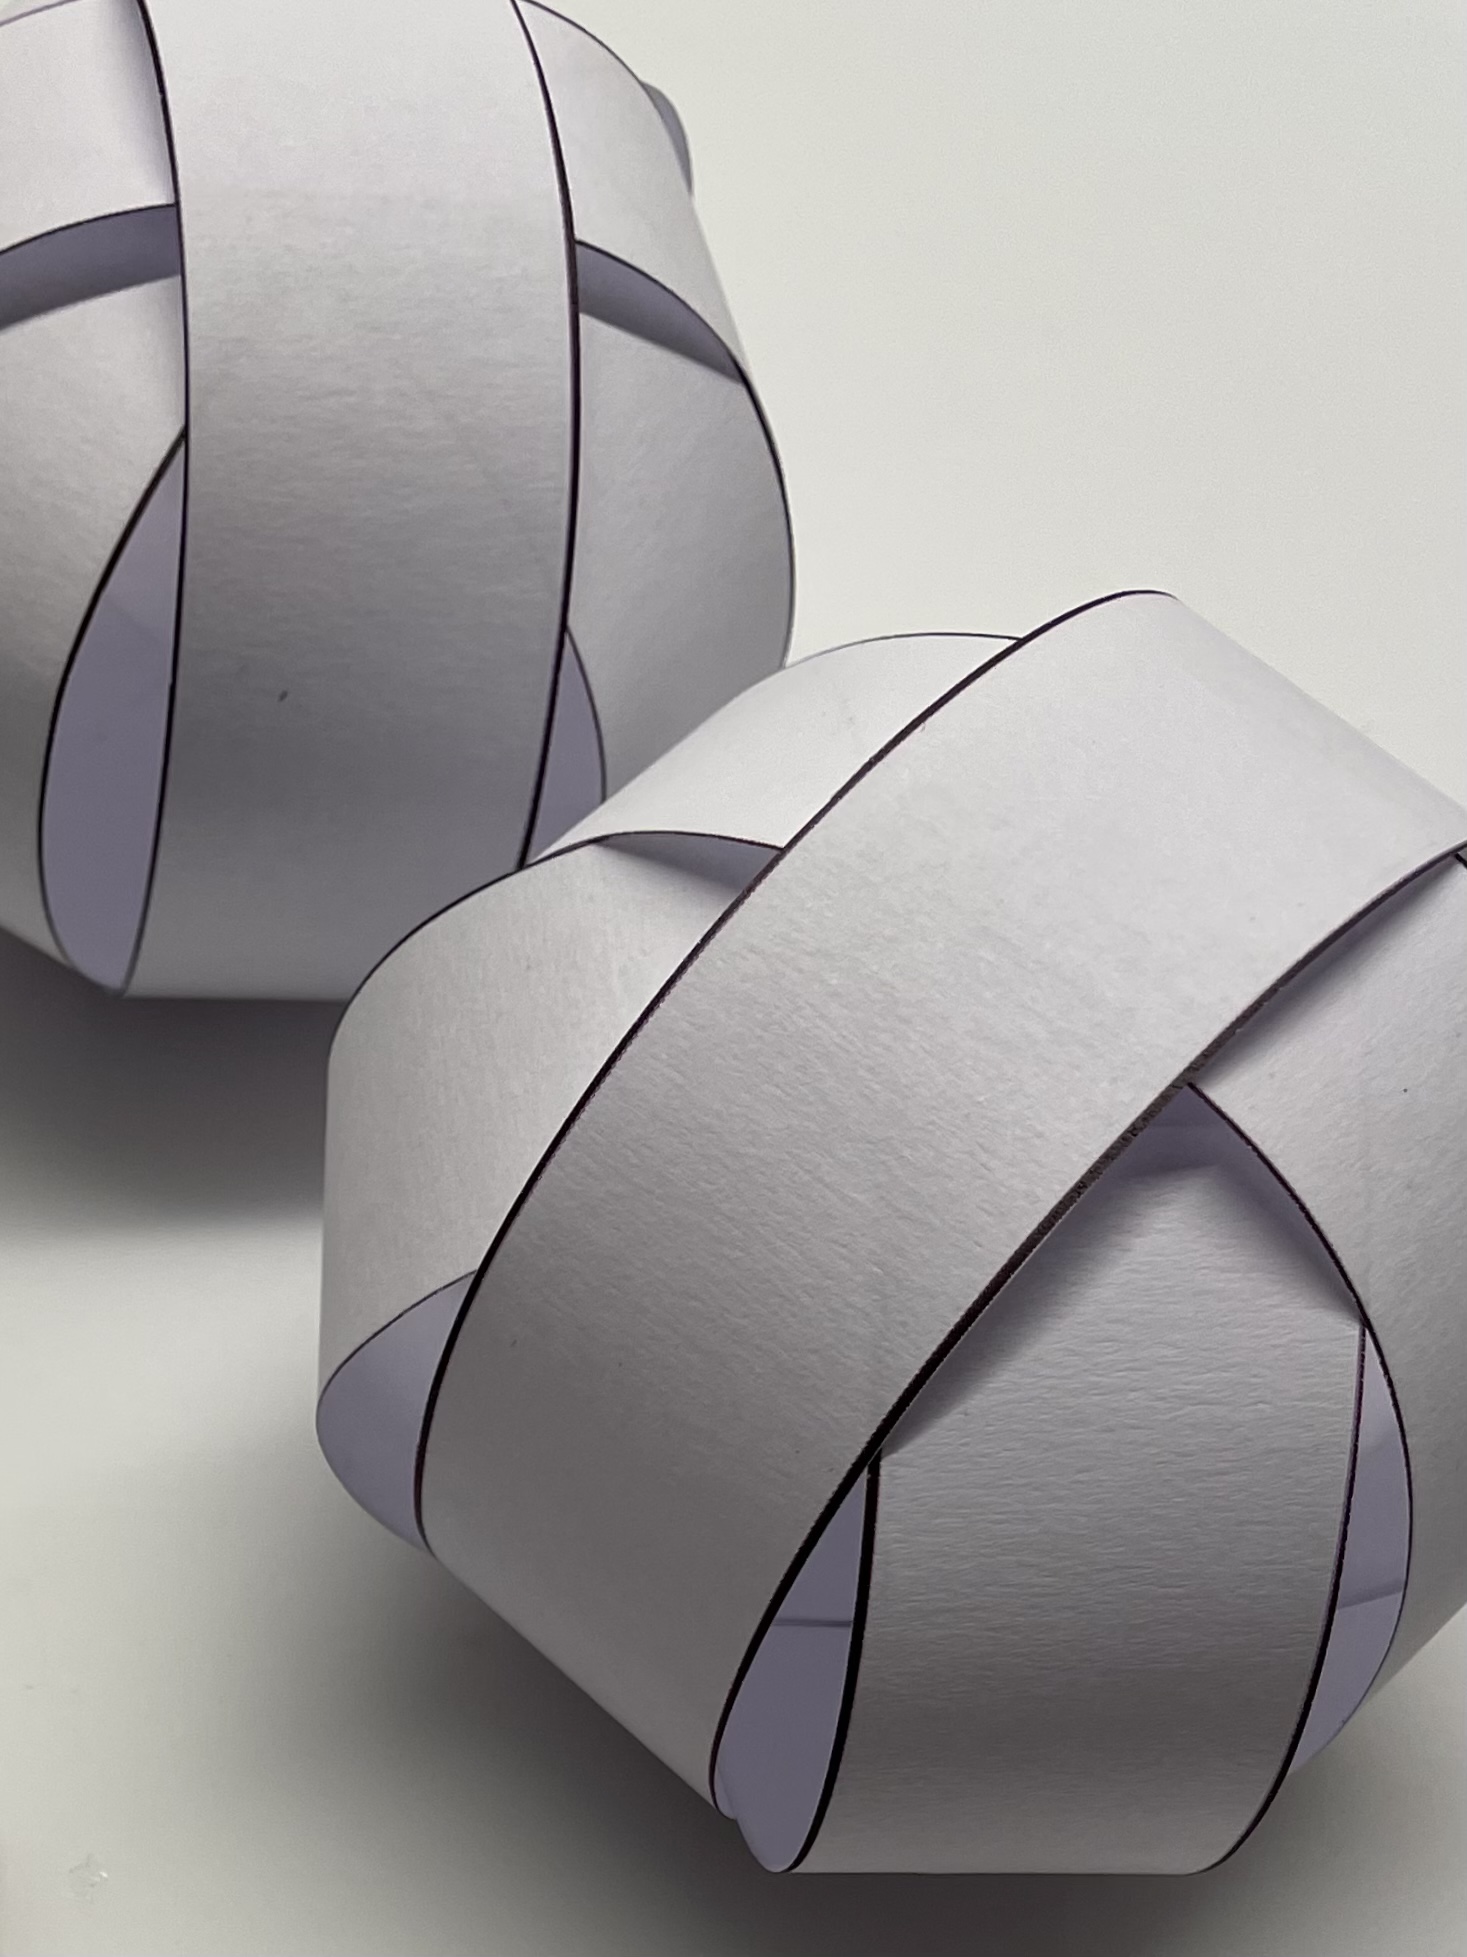
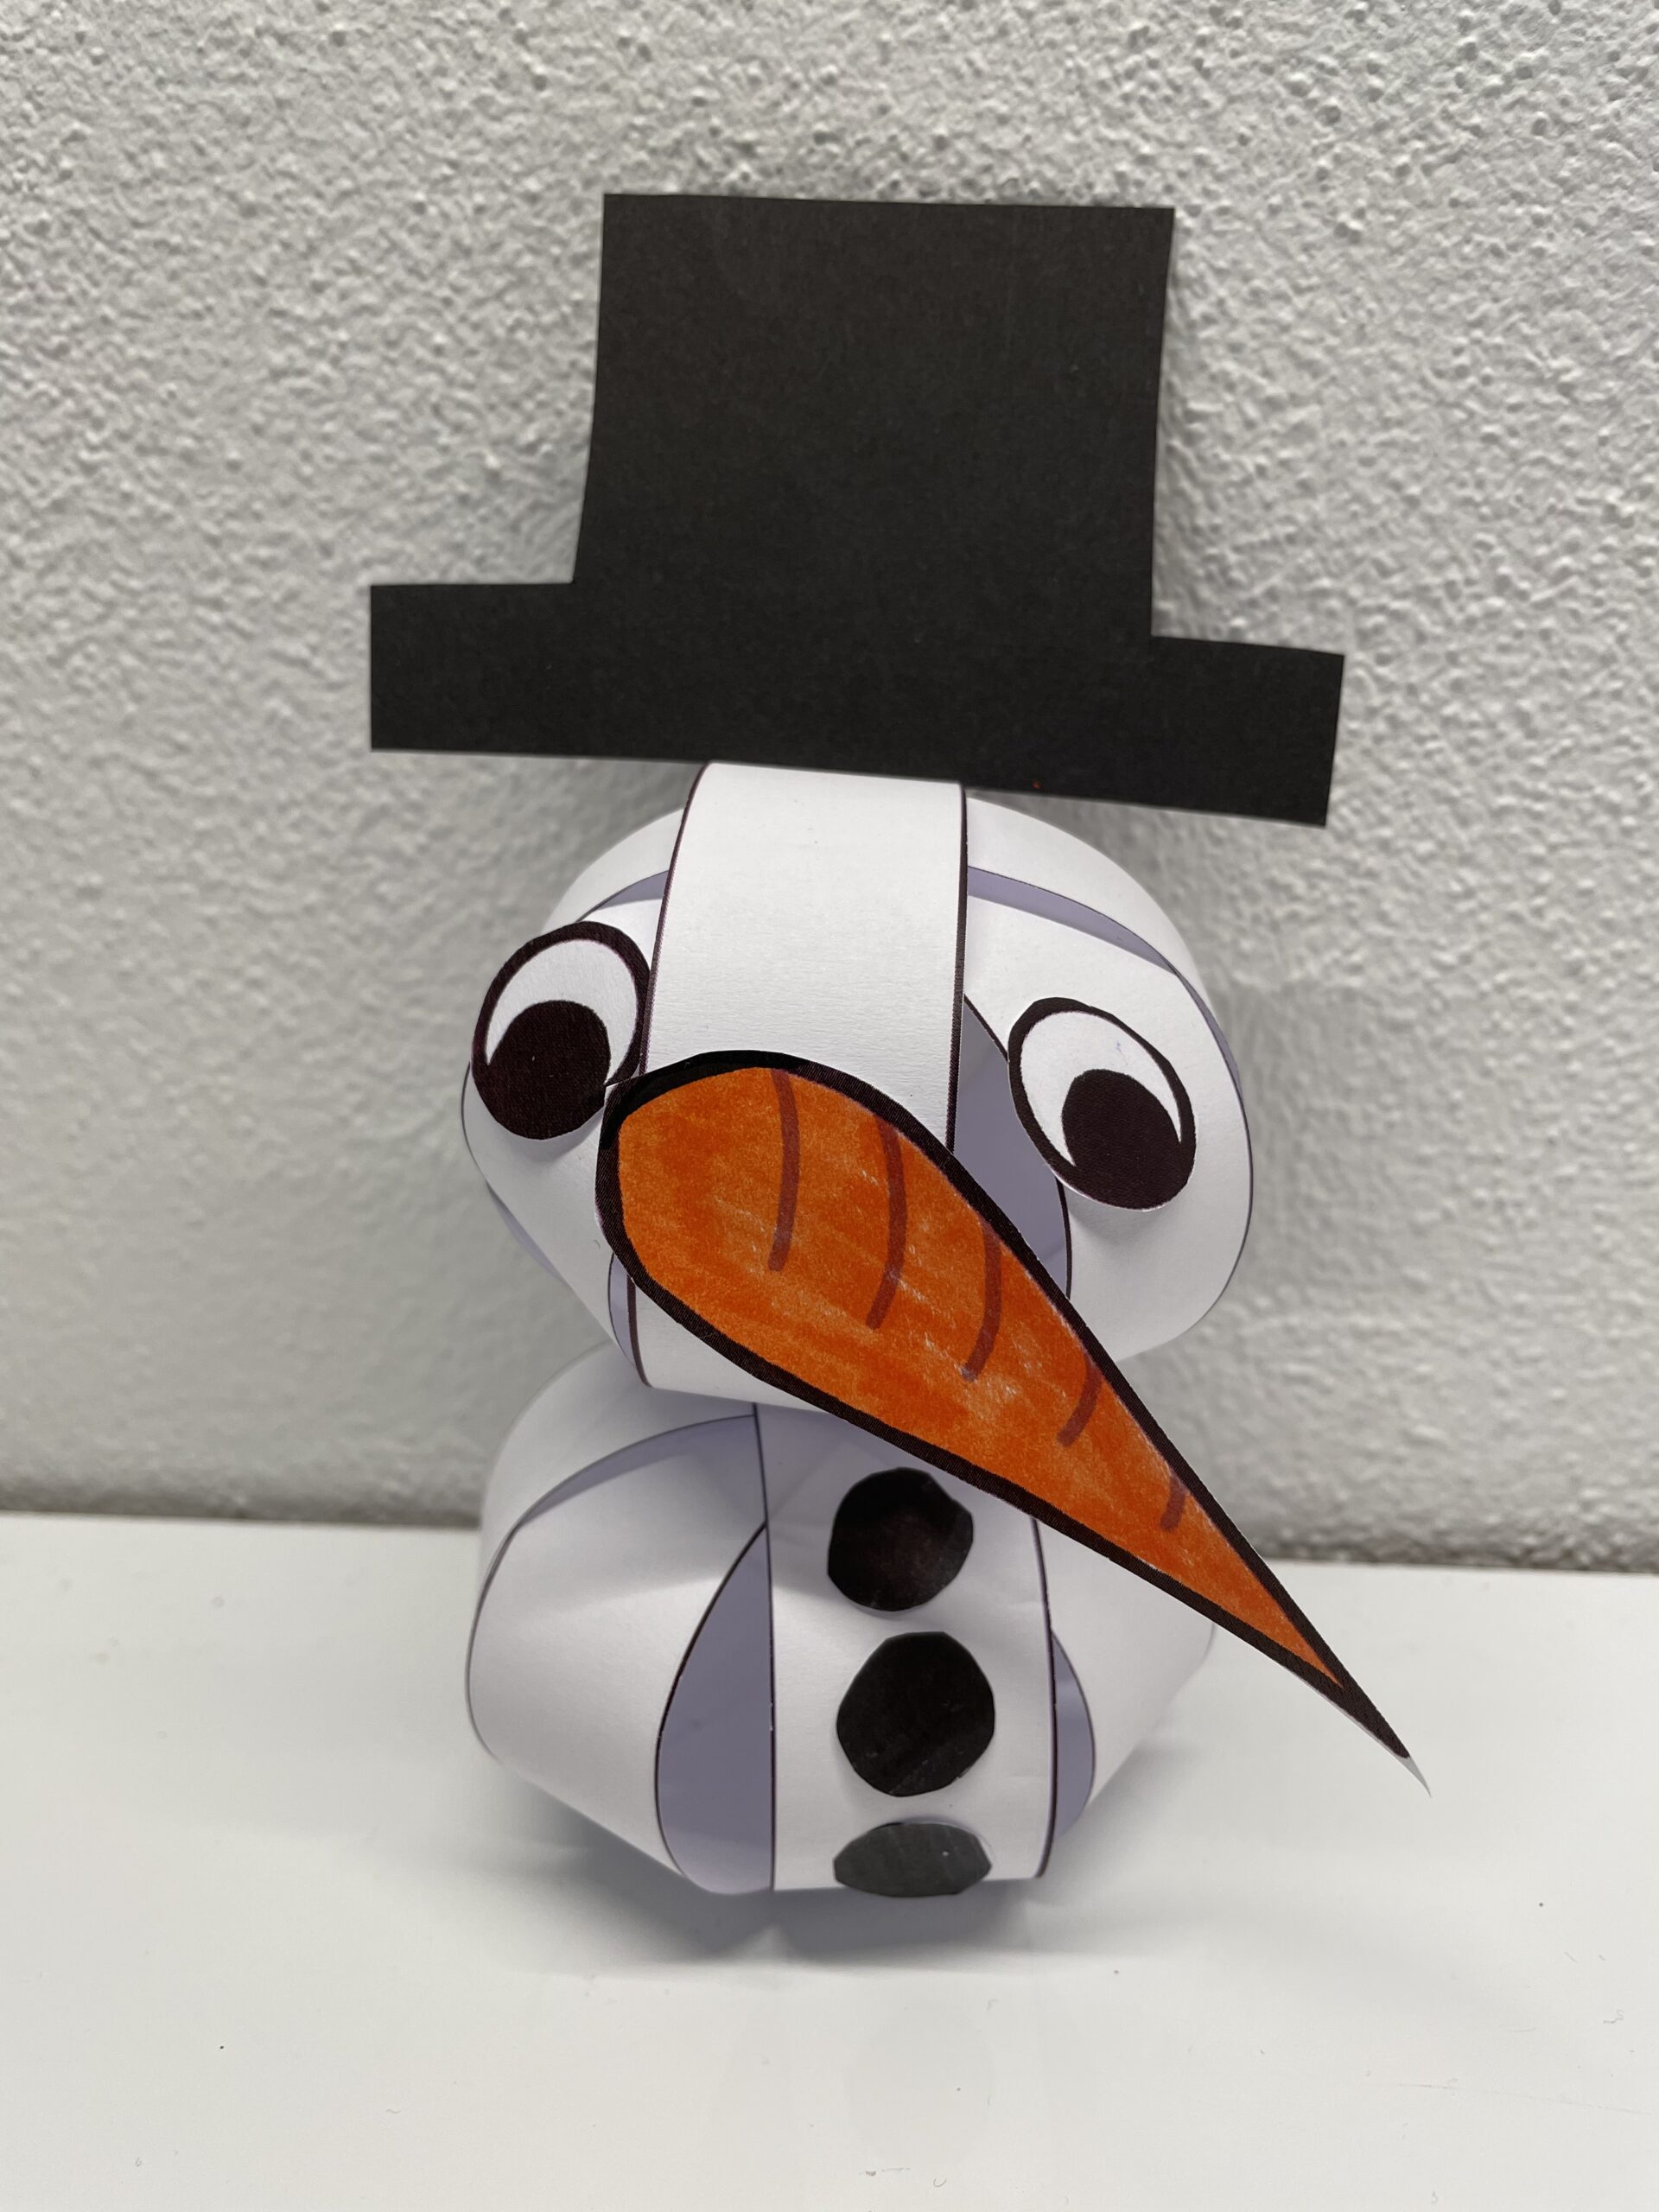
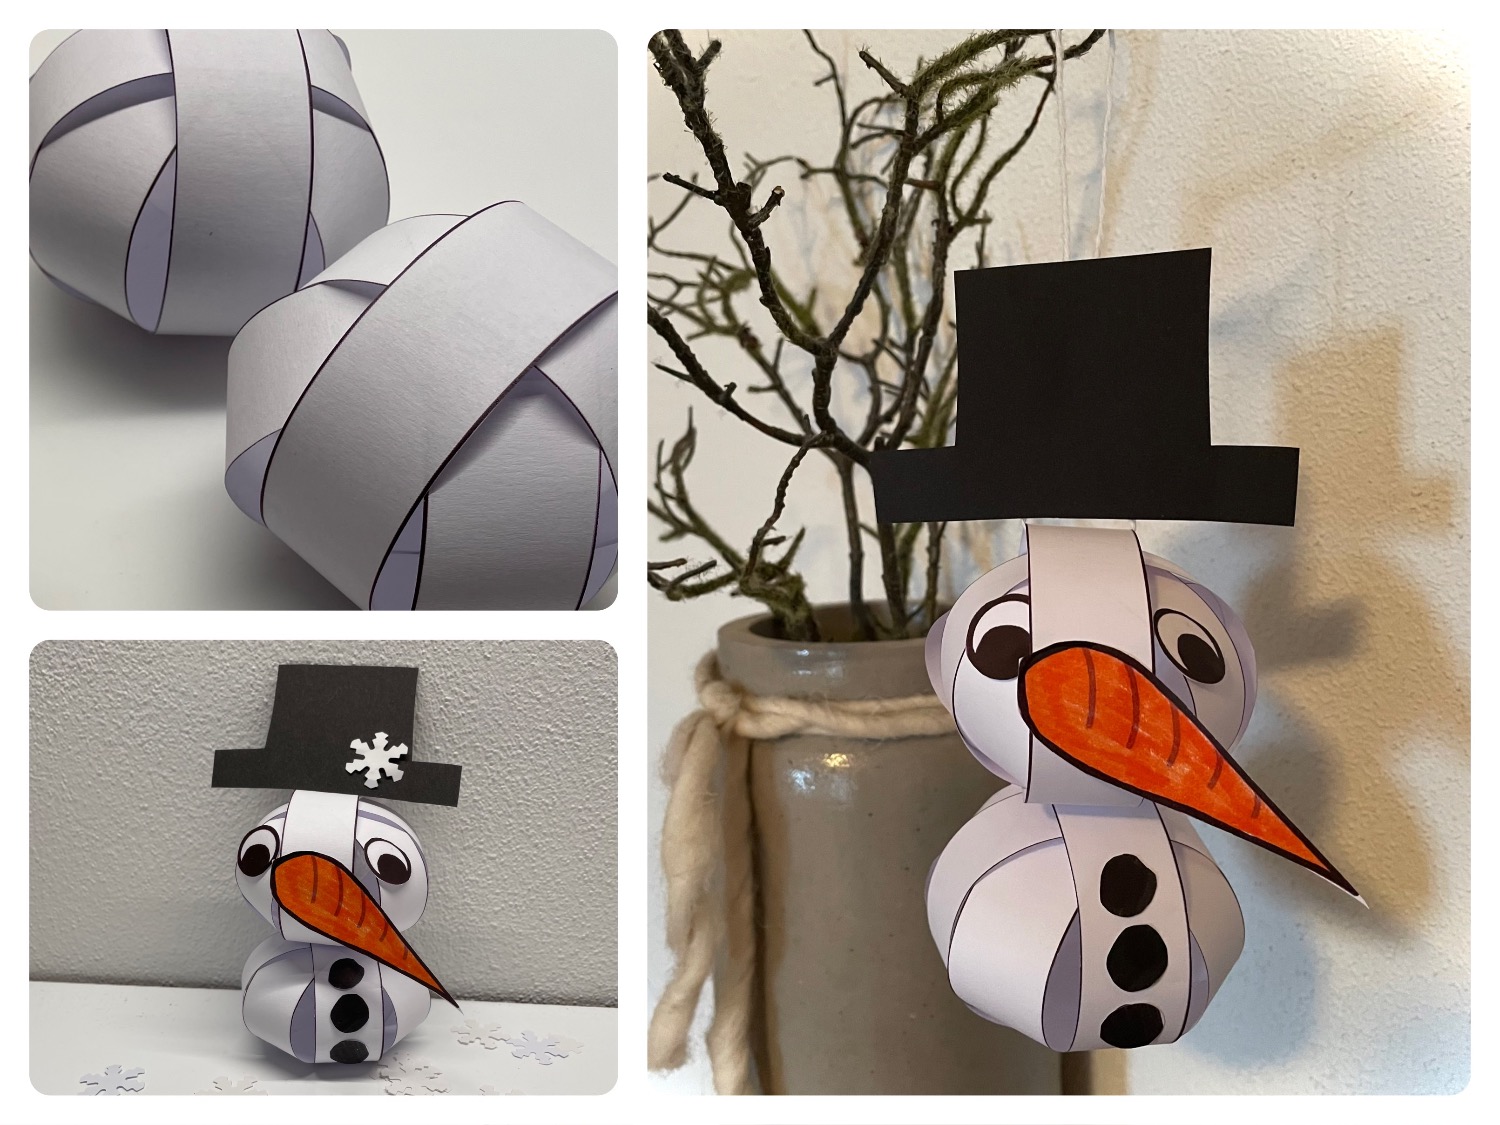
This little snowman is a craft action for experienced hobbyists. Here, finger skills are needed, especially when sticking together the snowman balls. Because from 8 equal-length strips of paper these two snowballs arise. Nose, eyes and buttons as well as the hat can be painted freely and cut out or use the attached template.
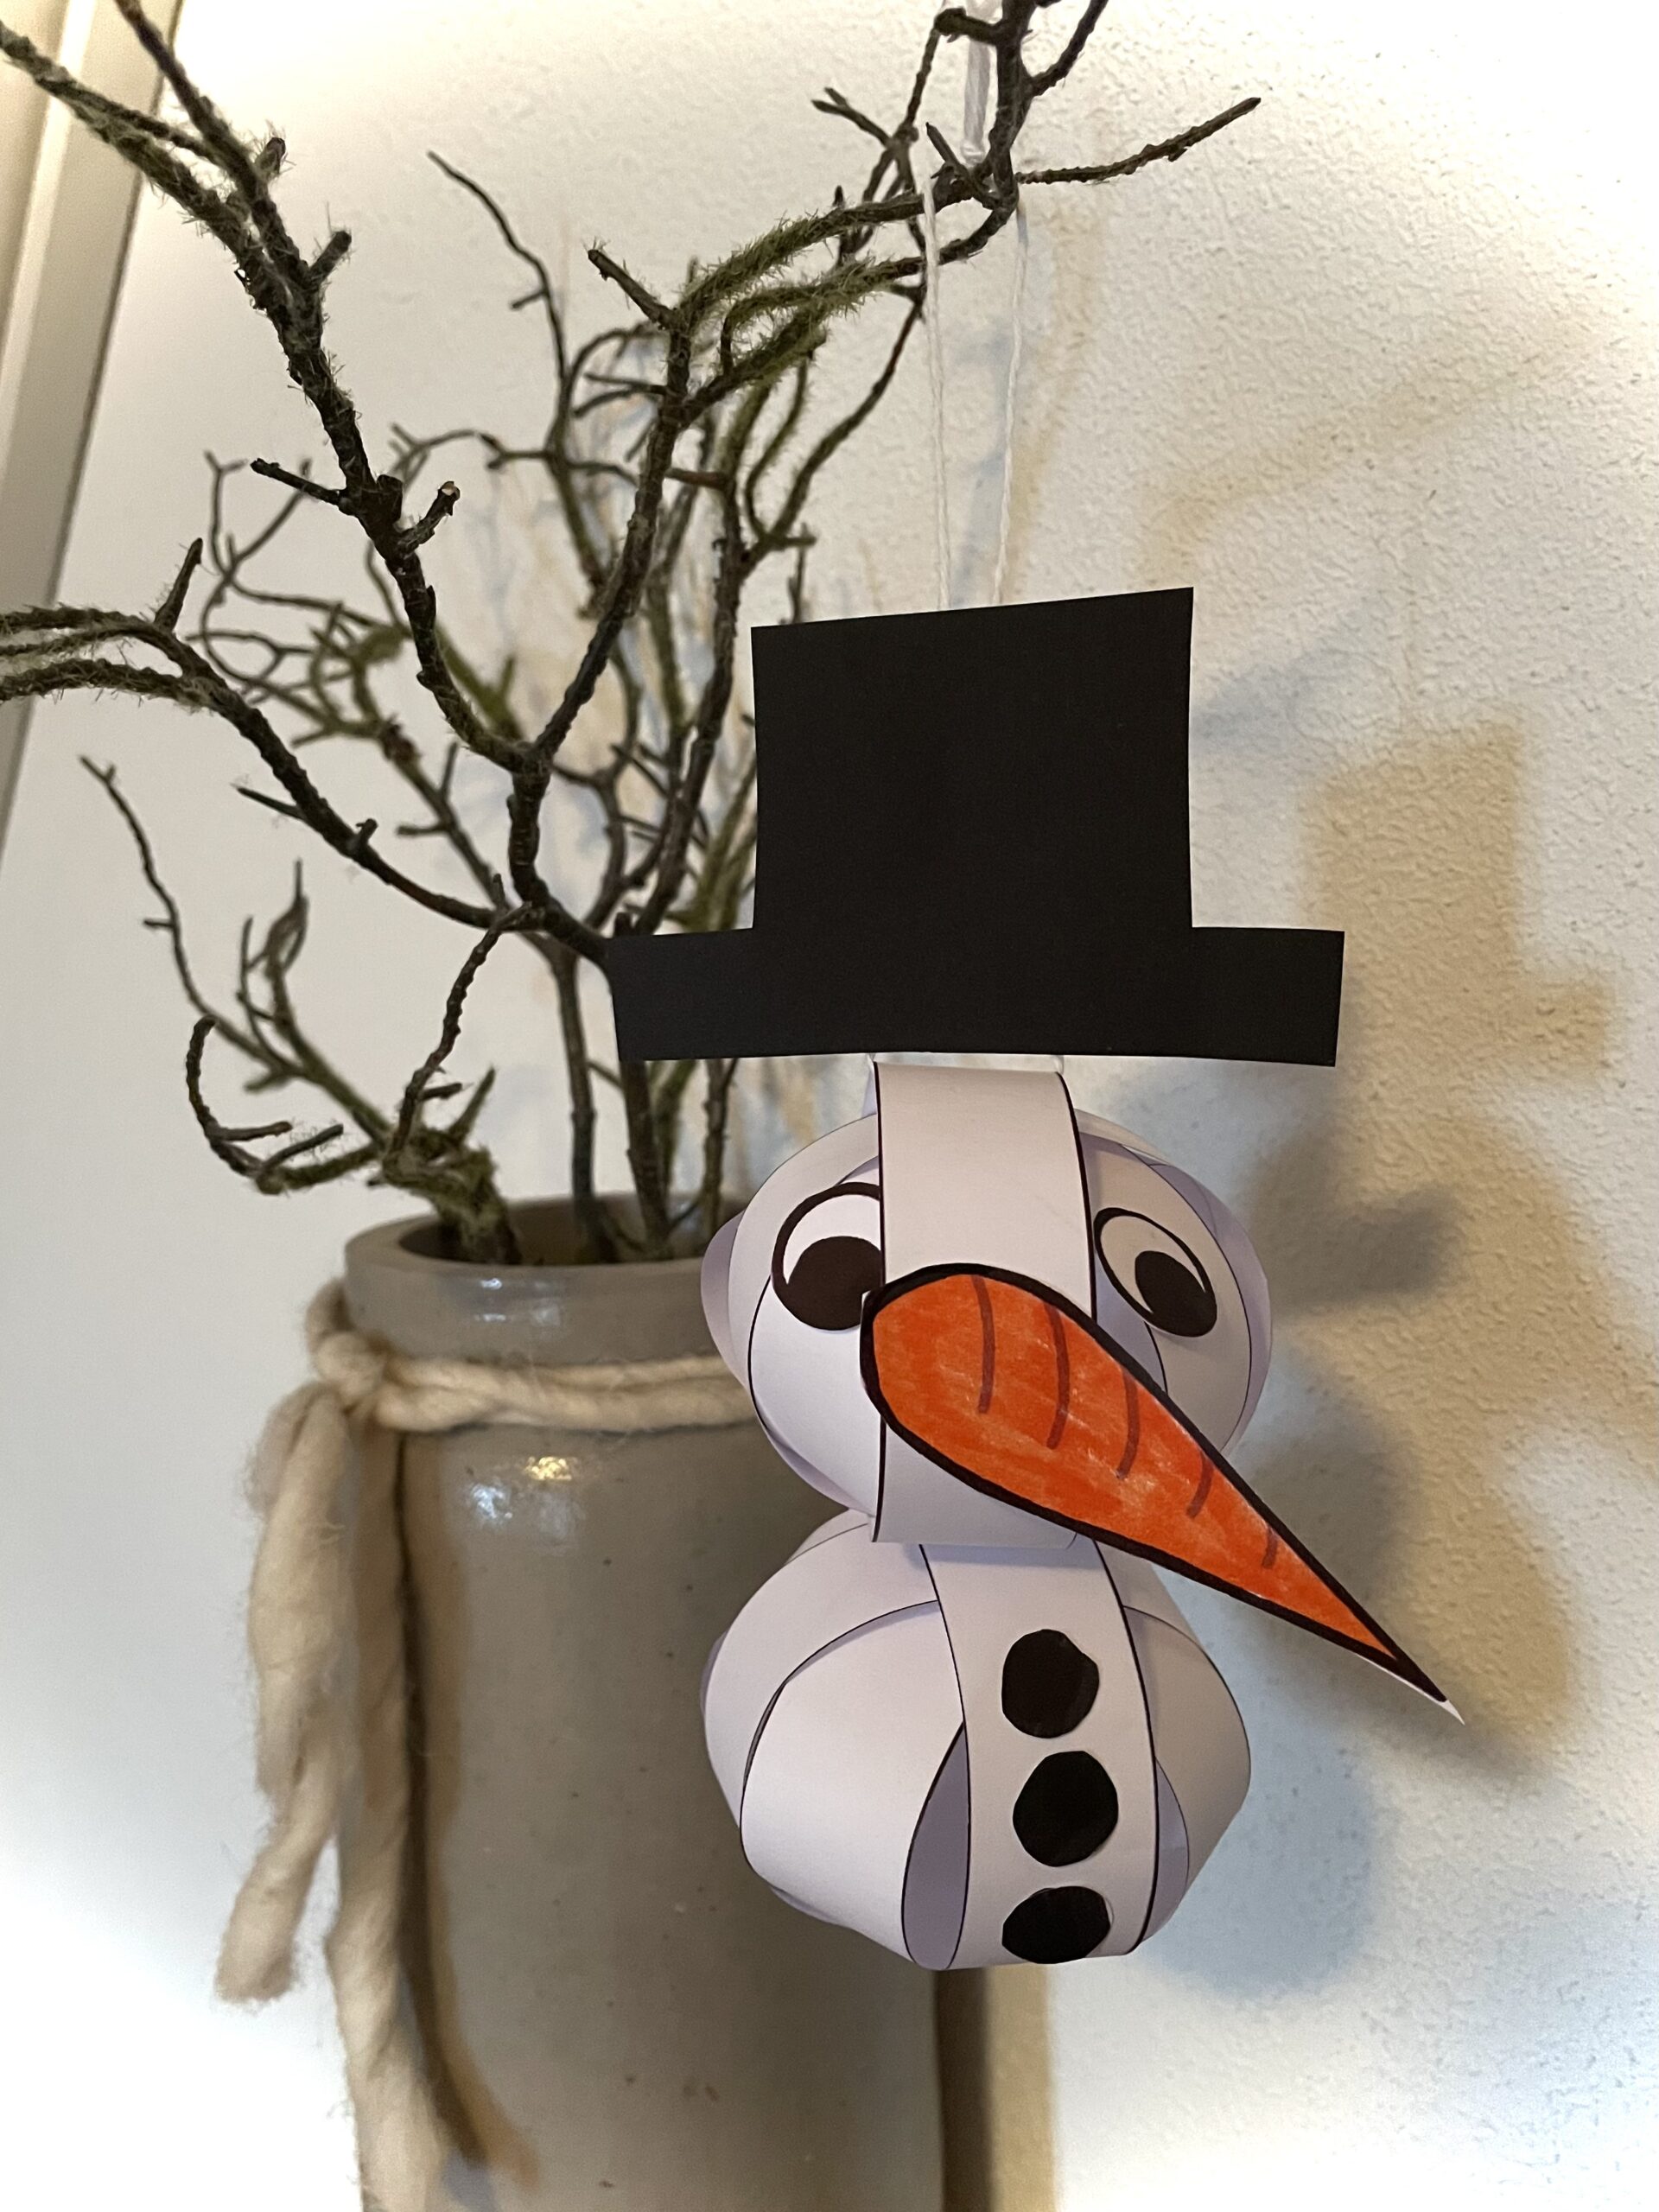
With a thread that is threaded through the top ball, the snowman can even be hung up.
Have fun trying it out!

Media Education for Kindergarten and Hort

Kind bastelt eine Rassel mit dem Navi
The Adventure Navi, the app for DIY projects, enables media education for the youngest.

Relief in everyday life, targeted promotion of individual children, independent learning and - without any pre-knowledge already usable by the youngest!


Titelbild zur Bastel- und DIY-Idee für Kinder '(940) Schneemann aus Papierstreifen (mit Vorlage)'
Material for1 Child
Prep Time5 min.Adv. Time30 min.Total Time35 min.
 Template
 1 White paper DIN A4 copy paper
 1 Photo box blackpossible residual piece
 1 Pen orange
 1 Pen black
 1 Needle blunt and thick
 1 White woolabout 30 cm long
 1 Ruler you should not use the template
 1 Builder's pad
All links marked with a shopping cart lead to Amazon - here we have selected products that we would order ourselves and in part also ordered. In a qualified purchase via the advertising link, we as Amazon partner receive a commission, for you there are no costs. You thus support our cost- and advertising banner-free, educational offer.
Crafting of snowballs
1

Print the template on a white copy pier (see below) or paint 8 strips with the dimensions 2cm x 21cm (DIN A4 landscape format). Use a long ruler for this.
Then cut the 8 strips.
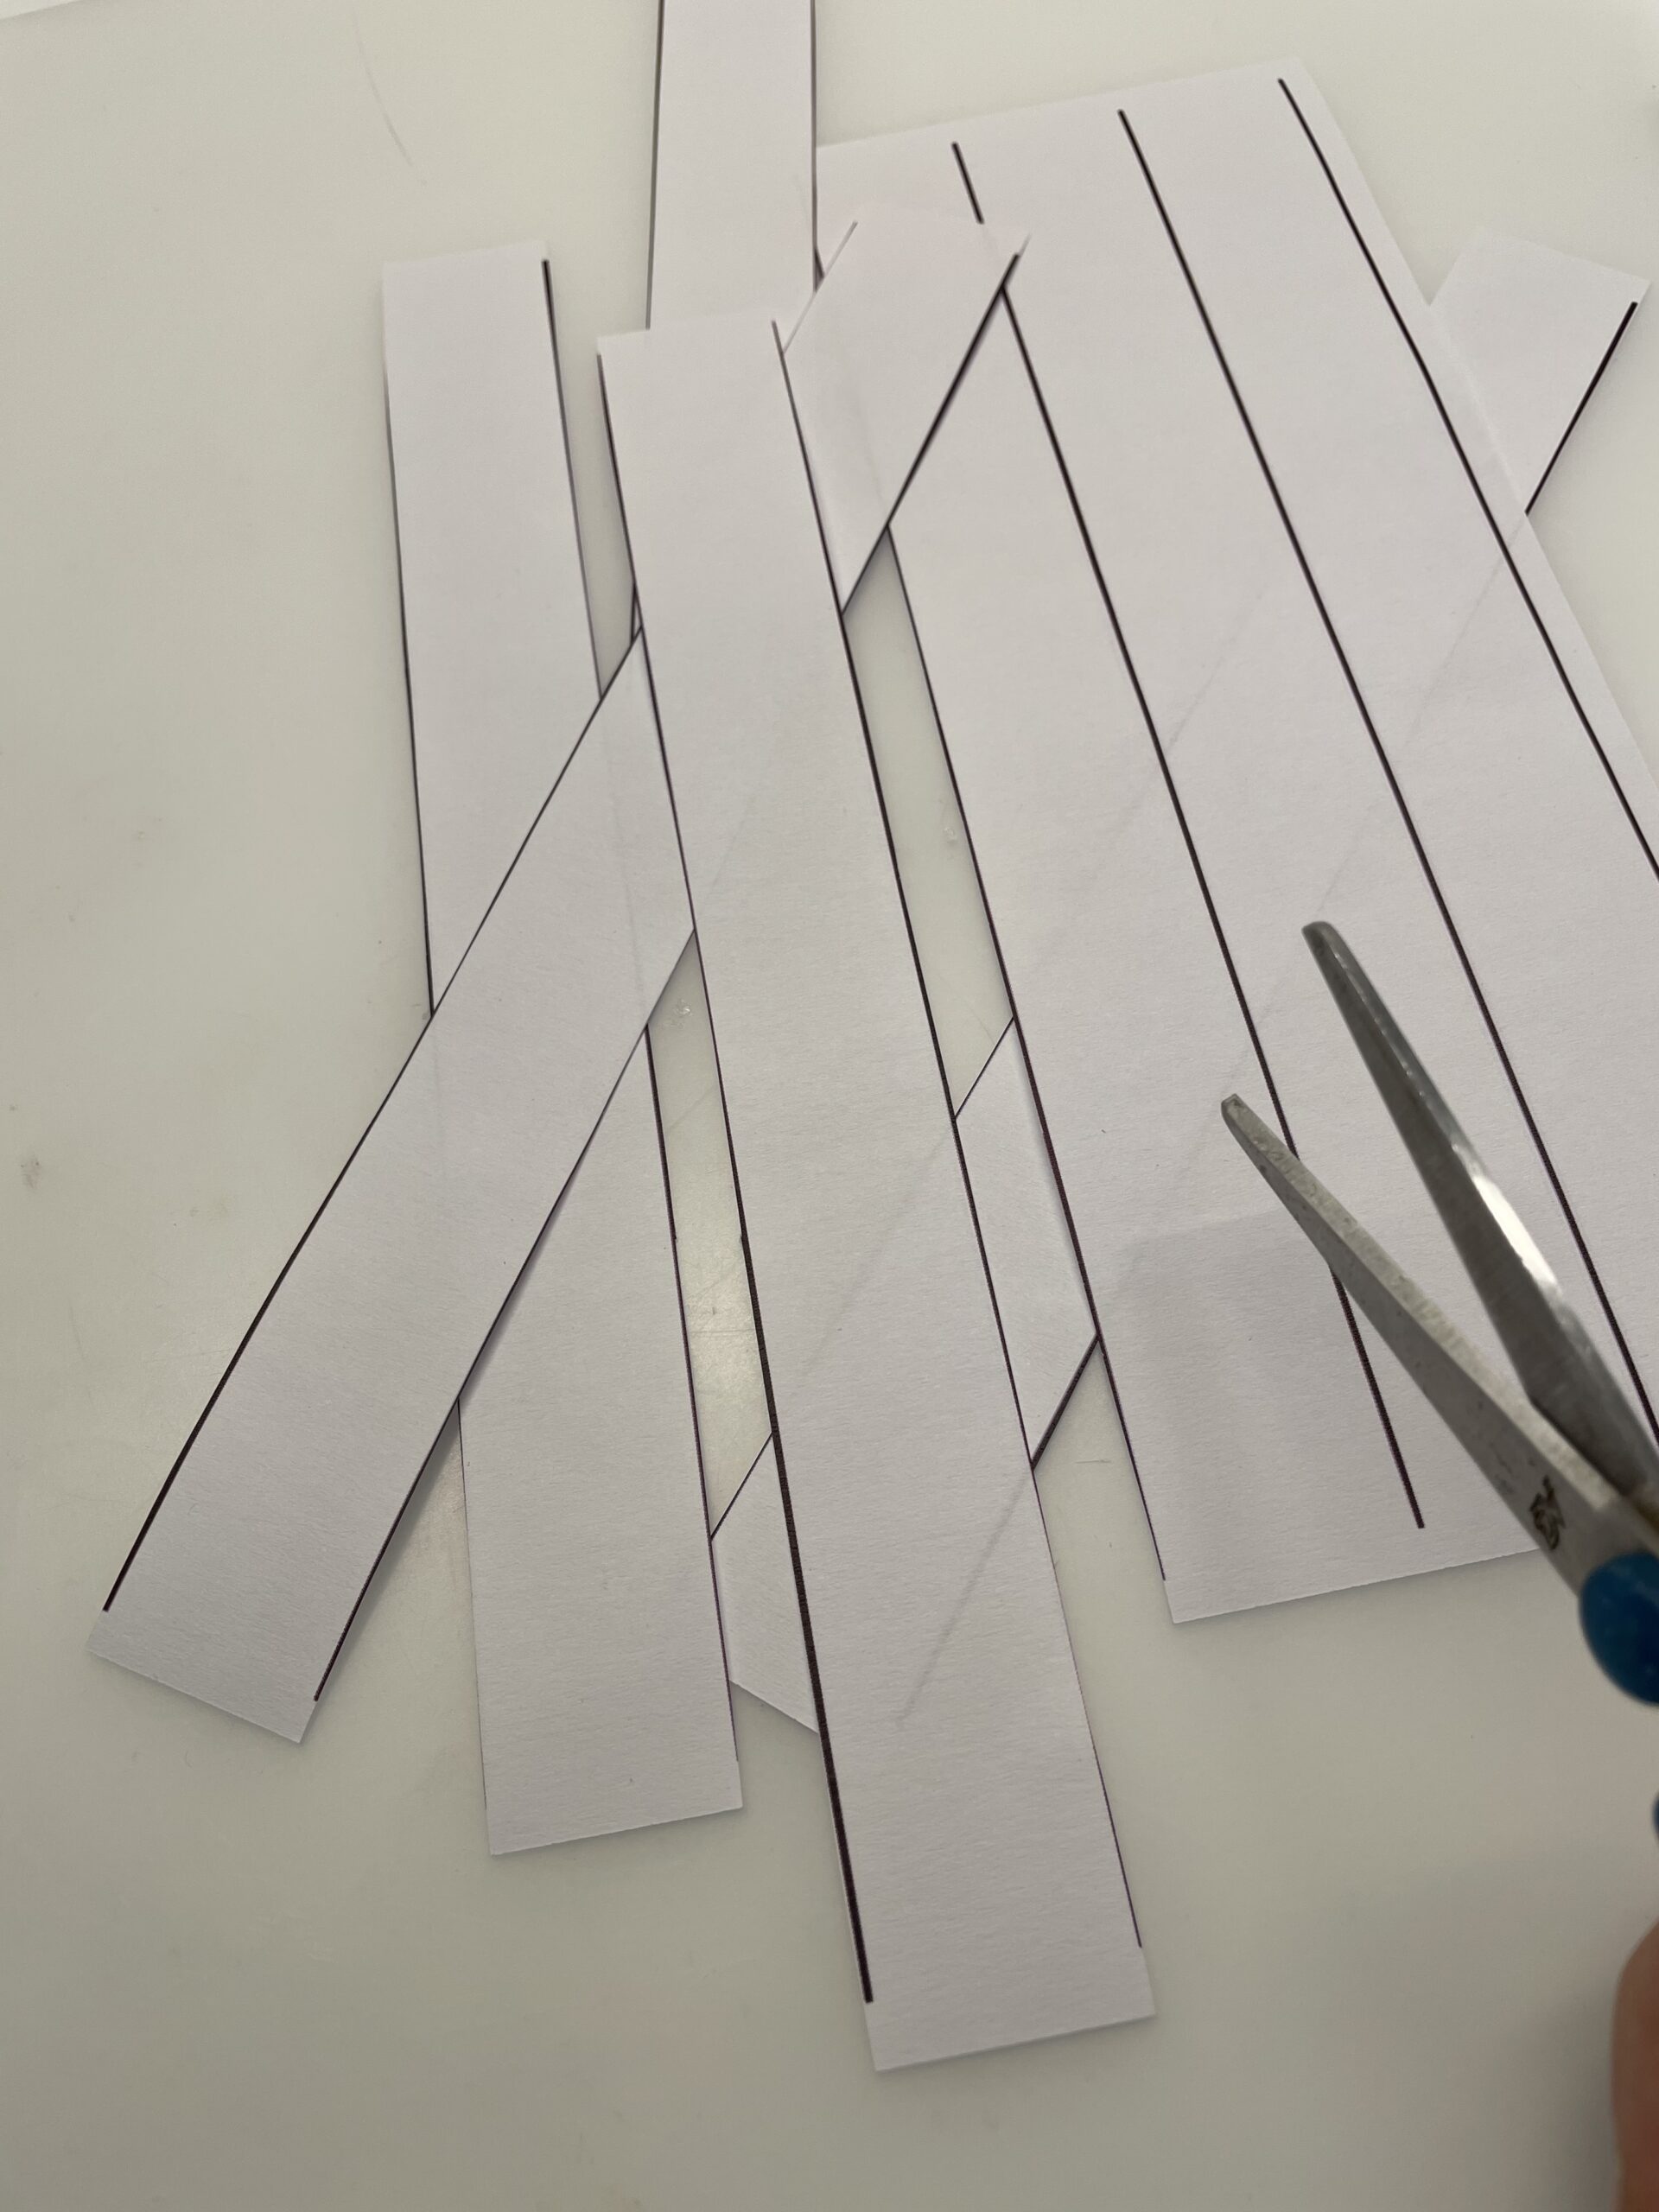
Bild zum Schritt 2 für das Bastel- und DIY-Abenteuer für Kinder: 'Druckt euch die Vorlage auf ein weißes Kopierpier aus (siehe...'

2

Now you stick each strip together to form a paper ring.
To do this, you put some glue on one side of the strip. In the template on the gray spot at the beginning of the strip.
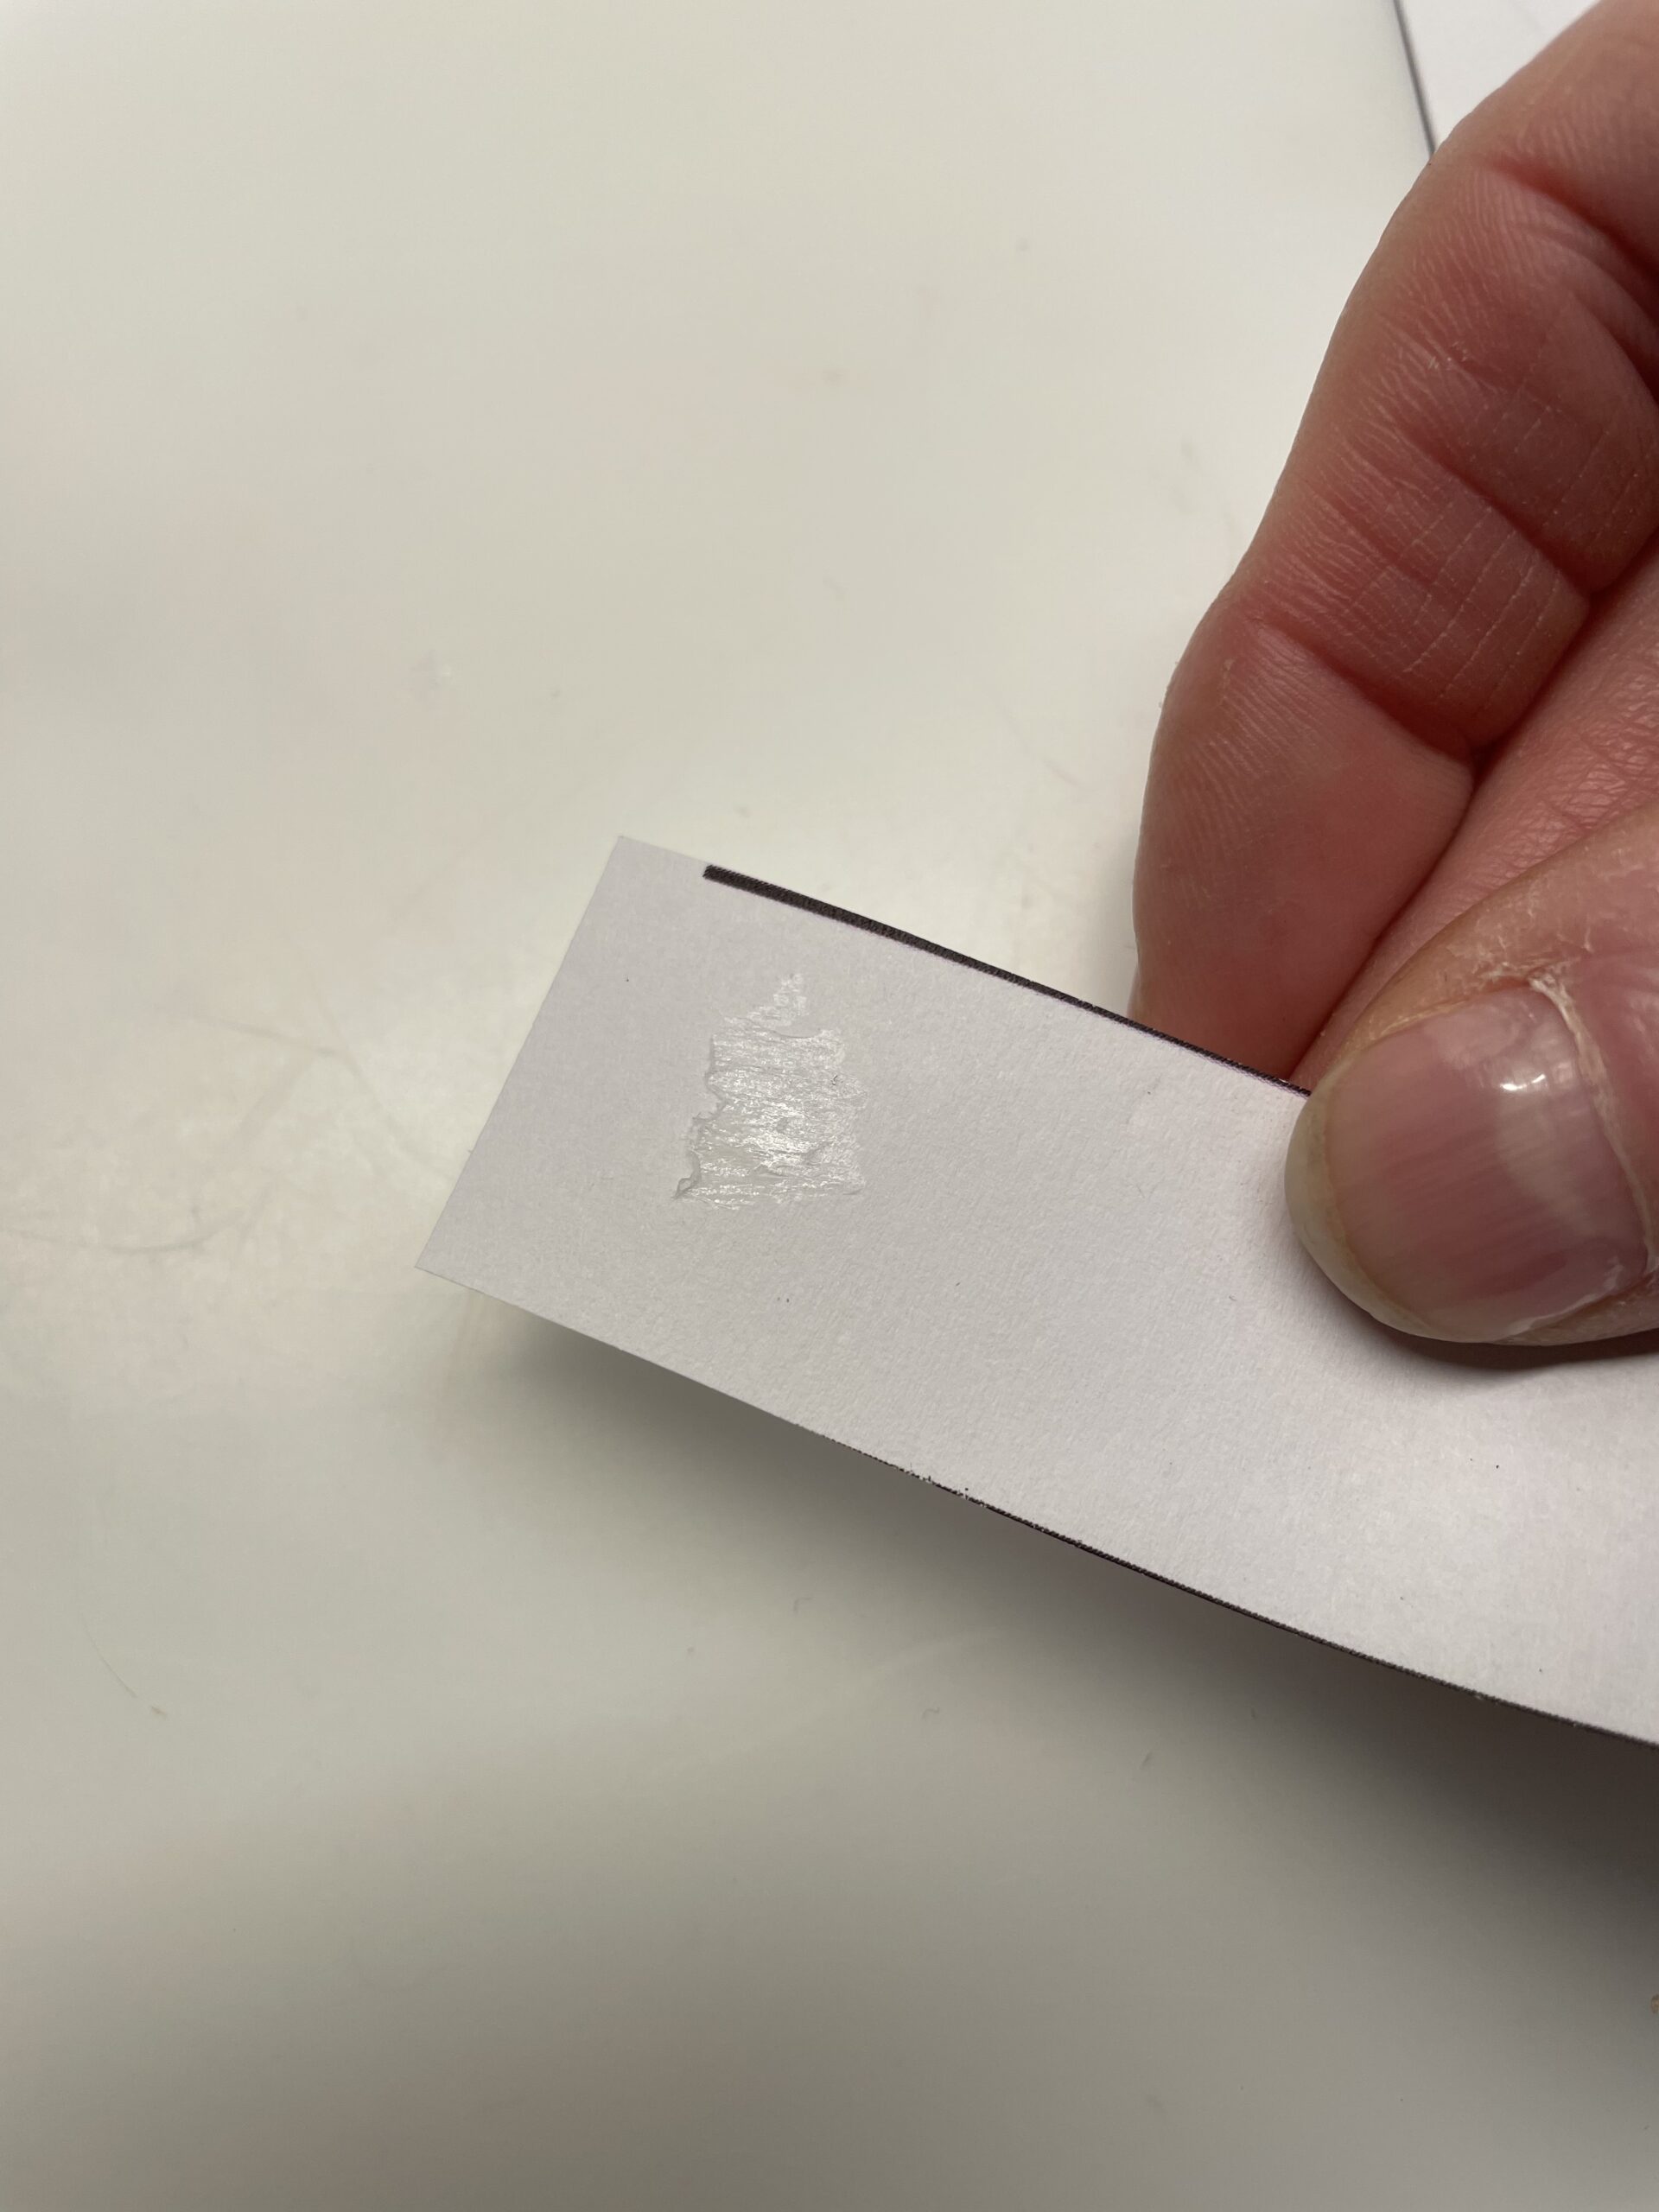
Bild zum Schritt 3 für das Bastel- und DIY-Abenteuer für Kinder: 'Jetzt klebt ihr jedem Streifen zu einem Papierring zusammen. ...'

3

Then bend the paper to a ring and glue the ends of the strip together about 1cm overlapping.

Bild zum Schritt 4 für das Bastel- und DIY-Abenteuer für Kinder: 'Anschließend biegt ihr das Papier zu einem Ring und klebt...'

4

Repeats the process first with 4 stripes.

Bild zum Schritt 5 für das Bastel- und DIY-Abenteuer für Kinder: 'Wiederholt den Vorgang zunächst bei 4 Streifen.'

5

The first snow globe is formed from these four paper rings.

Bild zum Schritt 6 für das Bastel- und DIY-Abenteuer für Kinder: 'Aus diesen vier Papierringen entsteht die erste Schneekugel.'

6

Now put two rings crossed into each other.

Bild zum Schritt 7 für das Bastel- und DIY-Abenteuer für Kinder: 'Steckt dafür jetzt zwei Ringe gekreuzt ineinander.'

7

Then glue the two rings together at the two interfaces.

Bild zum Schritt 8 für das Bastel- und DIY-Abenteuer für Kinder: 'Dann klebt ihr die beiden Ringe an den beiden Schnittstellen...'

8

For this, you place the 2nd ring over the 1st ring and squeeze the resulting paper cross tightly together. The interface lies above!

Bild zum Schritt 9 für das Bastel- und DIY-Abenteuer für Kinder: 'Dafür steckt ihr den 2. Ring über den 1. Ring...'

9

Now you put your glue on the paper cross and slide the 3rd ring diagonally over the paper cross.

Bild zum Schritt 10 für das Bastel- und DIY-Abenteuer für Kinder: 'Nun streicht ihr Kleber auf das Papierkreuz und schiebt den...'

10

Press the glue marks together again.

Bild zum Schritt 11 für das Bastel- und DIY-Abenteuer für Kinder: 'Drück auch hier die Klebestellen wieder fest zusammen.'

11

Now you put glue again in the middle of the paper cross.

Bild zum Schritt 12 für das Bastel- und DIY-Abenteuer für Kinder: 'Jetzt tragt ihr in die Mitte des Papierkreuzes erneut Kleber...'

12

Then you push the 4th ring diagonally over it. Gently press the last ring and make sure not to flatten the resulting snow globe.

Bild zum Schritt 13 für das Bastel- und DIY-Abenteuer für Kinder: 'Danach schiebt ihr den 4. Ring diagonal darüber. Drückt den...'

13

Then you rotate the ball so that the interfaces point downwards.

Bild zum Schritt 14 für das Bastel- und DIY-Abenteuer für Kinder: 'Anschließend dreht ihr die Kugel so, dass die Schnittstellen nach...'

14

Now form and glue the last four strips into rings.

Bild zum Schritt 15 für das Bastel- und DIY-Abenteuer für Kinder: 'Jetzt formt und klebt ihr die letzten vier Streifen zu...'

15

After that, you put them together and stick them together to form a snow globe.

Bild zum Schritt 16 für das Bastel- und DIY-Abenteuer für Kinder: 'Danach steckt und klebt ihr auch diese zu einer Schneekugel...'

16

Two snowballs are ready.

Bild zum Schritt 17 für das Bastel- und DIY-Abenteuer für Kinder: 'Fertig sind zwei Schneekugeln.'

Crafting of face and hat
17

For face and hat you can use the template or you can paint it freely.
You can record the carrot and paint it orange or paint it on orange paper and cut it out.

Bild zum Schritt 19 für das Bastel- und DIY-Abenteuer für Kinder: 'Für Gesicht und Hut könnt ihr die Vorlage verwenden oder...'

18

Transfer the template for the hat to a black clay paper or draw it on yourself and cut it out.

Bild zum Schritt 20 für das Bastel- und DIY-Abenteuer für Kinder: 'Übertragt die Vorlage für den Hut auf ein schwarzes Tonpapier...'

19

Then you paint three small circles for the buttons and cut them out.

Bild zum Schritt 21 für das Bastel- und DIY-Abenteuer für Kinder: 'Anschließend malt ihr drei kleine Kreise für die Knöpfe auf...'

20

Now you stick your face on one snow globe and the buttons on the other. Make sure that the balls lie down with the interfaces.

Bild zum Schritt 22 für das Bastel- und DIY-Abenteuer für Kinder: 'Jetzt klebt ihr an eine Schneekugel das Gesicht auf und...'

21

Then you put both snowballs together. For this you reach into the paper ring with one or two fingers. So you avoid that flat pressing the balls when glued together.

Bild zum Schritt 23 für das Bastel- und DIY-Abenteuer für Kinder: 'Anschließend setzt ihr beide Schneekugeln aufeinander. Dafür greift ihr in...'

22

Now stroke some glue onto the lower snowball and press the upper one on it.

Bild zum Schritt 24 für das Bastel- und DIY-Abenteuer für Kinder: 'Streicht nun etwas Kleber auf den unteren Schneeball und drückt...'

23

Make sure that the nose and buttons lie on top of each other. With the thumb and index finger of one hand you hold both balls together briefly.

Bild zum Schritt 25 für das Bastel- und DIY-Abenteuer für Kinder: 'Achtet darauf, dass die Nase und die Knöpfe übereinander liegen....'

24

Now cut off a piece of thread (about 30 cm) and thread it through the top paper ring and knot both ends together.

Bild zum Schritt 26 für das Bastel- und DIY-Abenteuer für Kinder: 'Jetzt schneidet ihr ein Stück Faden ab (ca. 30 cm)....'

25

Then attach the hat to the threads with an adhesive tape.

Bild zum Schritt 27 für das Bastel- und DIY-Abenteuer für Kinder: 'Danach befestigt ihr den Hut mit einem Klebestreifen an den...'

26

The snowman is ready.

Bild zum Schritt 28 für das Bastel- und DIY-Abenteuer für Kinder: 'Fertig ist der Schneemann.'

27

Finally, find a place to hang up.

Bild zum Schritt 29 für das Bastel- und DIY-Abenteuer für Kinder: 'Sucht euch abschließend noch einen Platz zum Aufhängen.'

28

2. Bild zum Schritt 29 für das Bastel- und DIY-Abenteuer für Kinder: 'Sucht euch abschließend noch einen Platz zum Aufhängen.'

Template
29

Print the template on a white copy paper and cut the pieces with the scissors.

Bild zum Schritt 32 für das Bastel- und DIY-Abenteuer für Kinder: 'Druckt euch die Vorlage auf einem weißen Kopierpapier aus und...'

30

Have fun trying it out!

Materials

 Template
 1 White paper DIN A4 copy paper
 1 Photo box blackpossible residual piece
 1 Pen orange
 1 Pen black
 1 Needle blunt and thick
 1 White woolabout 30 cm long
 1 Ruler you should not use the template
 1 Builder's pad
All links marked with a shopping cart lead to Amazon - here we have selected products that we would order ourselves and in part also ordered. In a qualified purchase via the advertising link, we as Amazon partner receive a commission, for you there are no costs. You thus support our cost- and advertising banner-free, educational offer.

Directions

Crafting of snowballs
1

Print the template on a white copy pier (see below) or paint 8 strips with the dimensions 2cm x 21cm (DIN A4 landscape format). Use a long ruler for this.
Then cut the 8 strips.

Bild zum Schritt 2 für das Bastel- und DIY-Abenteuer für Kinder: 'Druckt euch die Vorlage auf ein weißes Kopierpier aus (siehe...'

2

Now you stick each strip together to form a paper ring.
To do this, you put some glue on one side of the strip. In the template on the gray spot at the beginning of the strip.

Bild zum Schritt 3 für das Bastel- und DIY-Abenteuer für Kinder: 'Jetzt klebt ihr jedem Streifen zu einem Papierring zusammen. ...'

3

Then bend the paper to a ring and glue the ends of the strip together about 1cm overlapping.
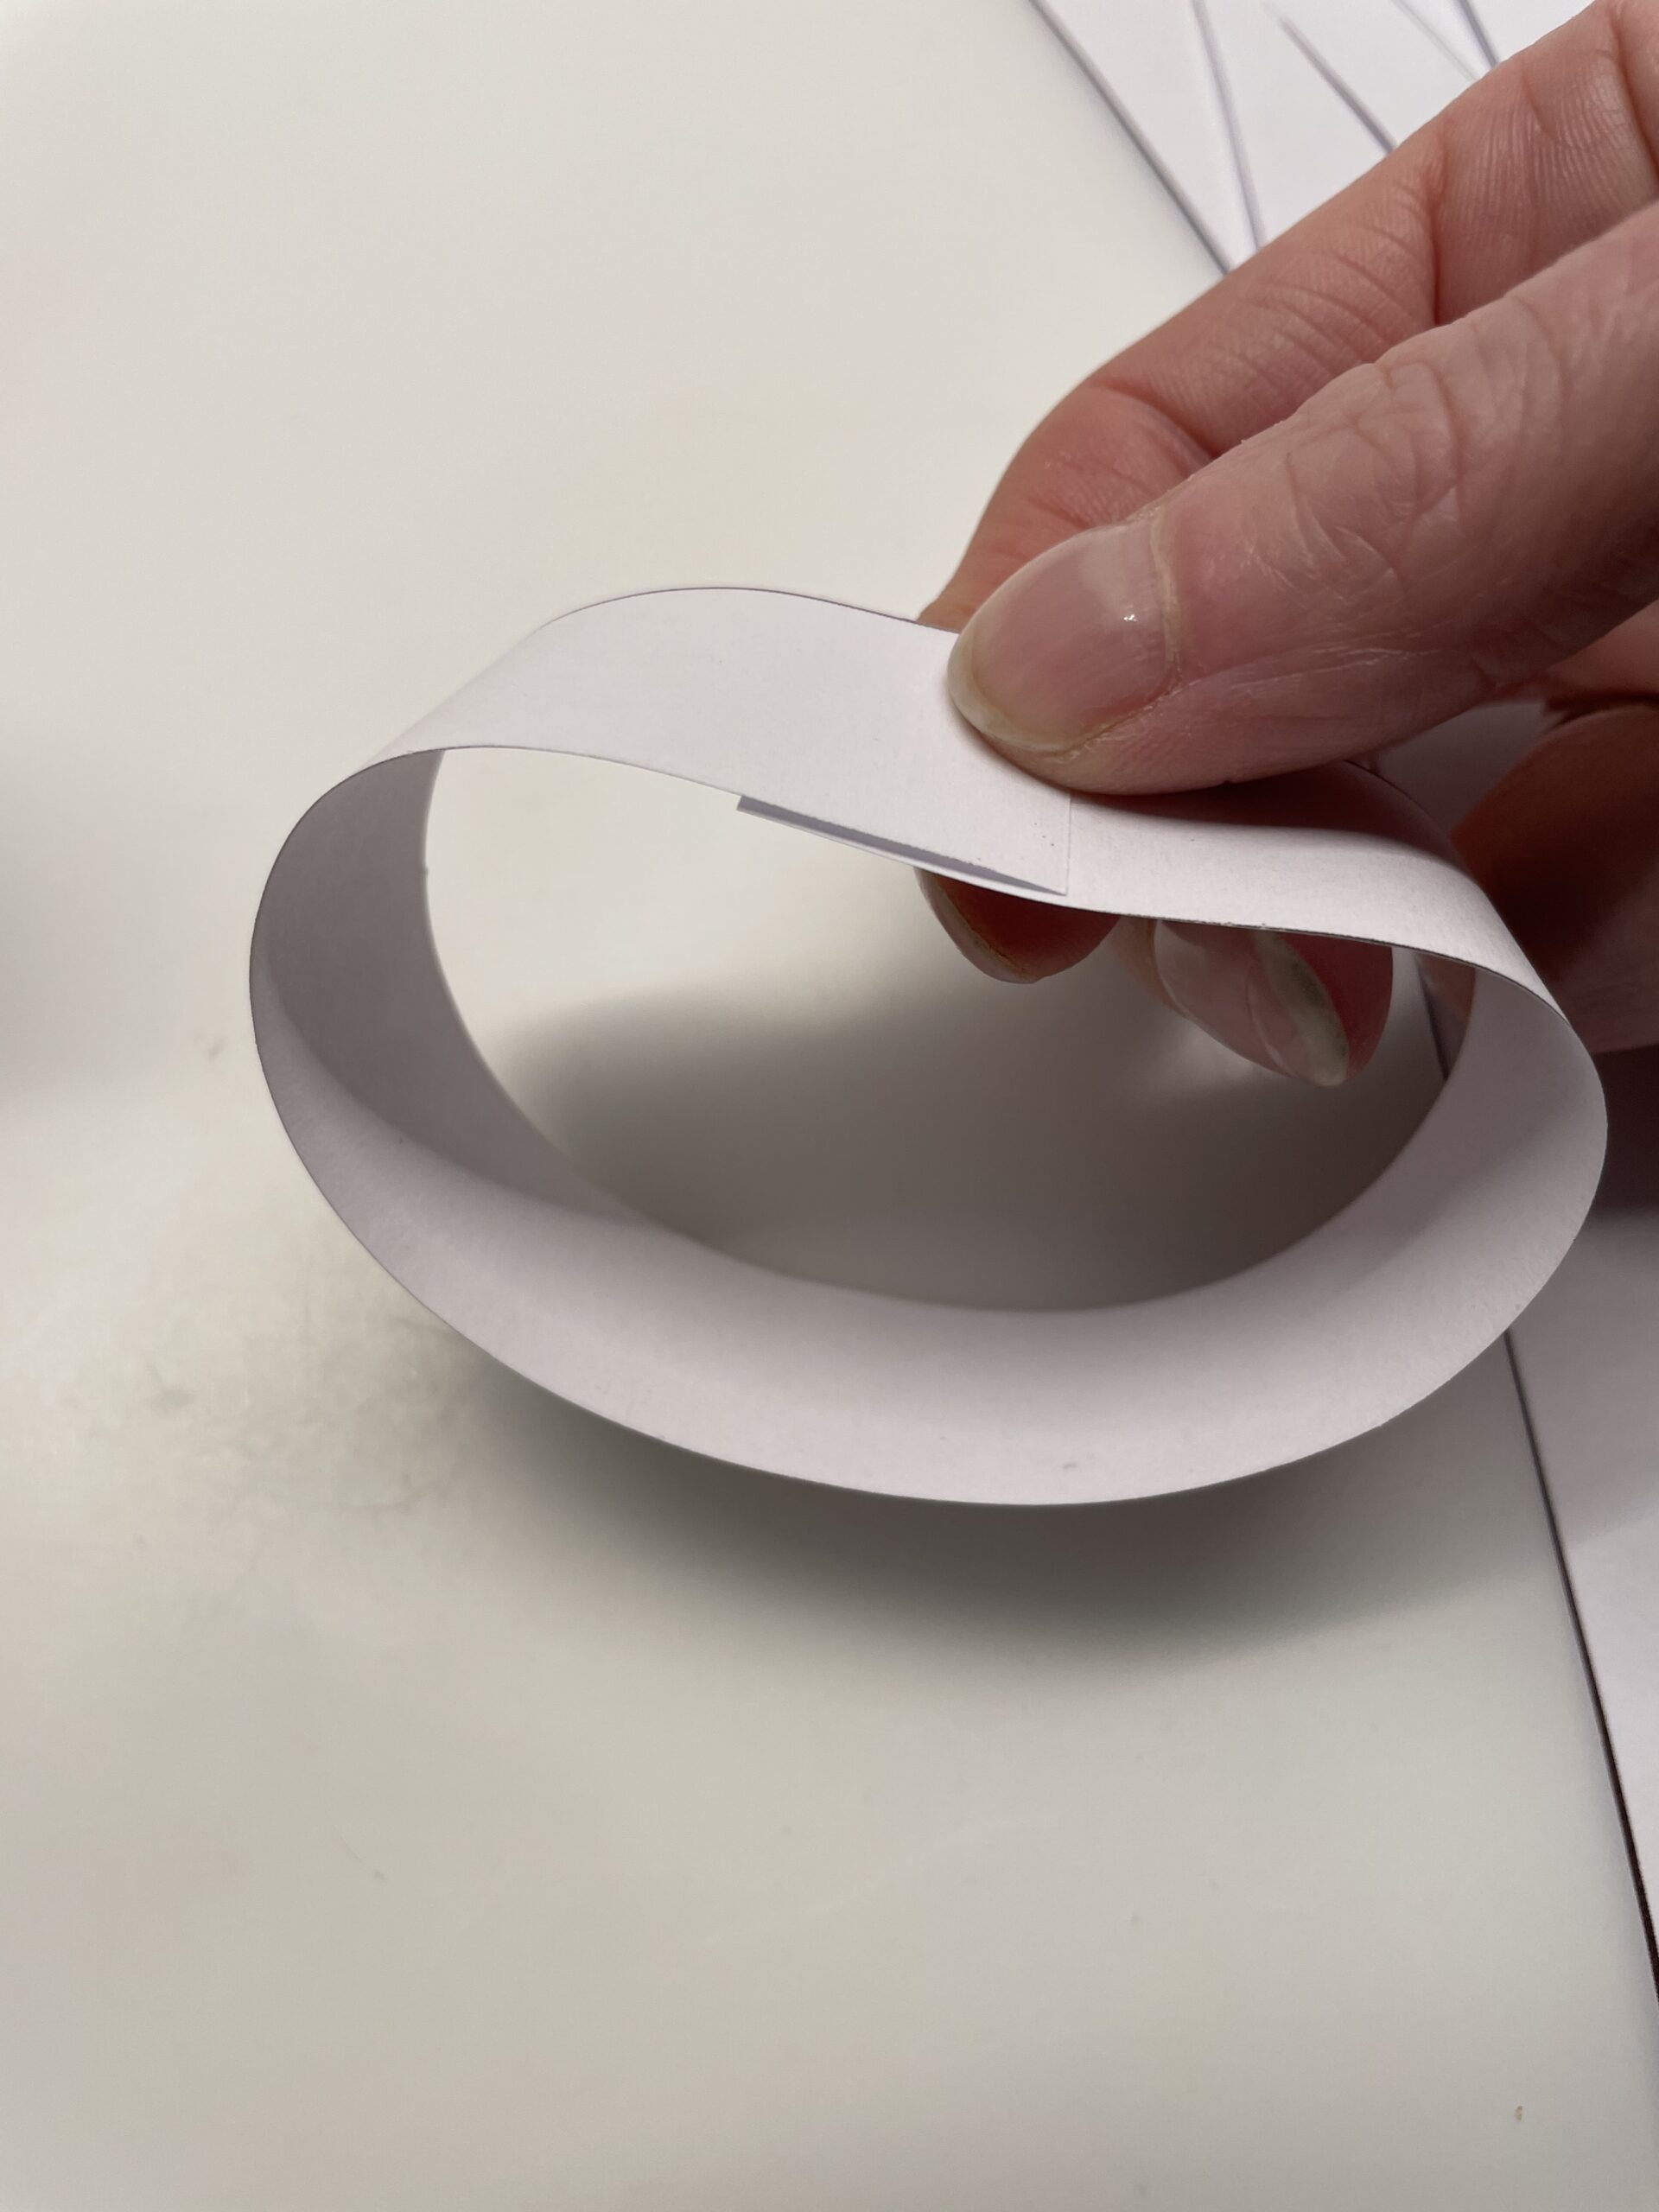
Bild zum Schritt 4 für das Bastel- und DIY-Abenteuer für Kinder: 'Anschließend biegt ihr das Papier zu einem Ring und klebt...'

4

Repeats the process first with 4 stripes.
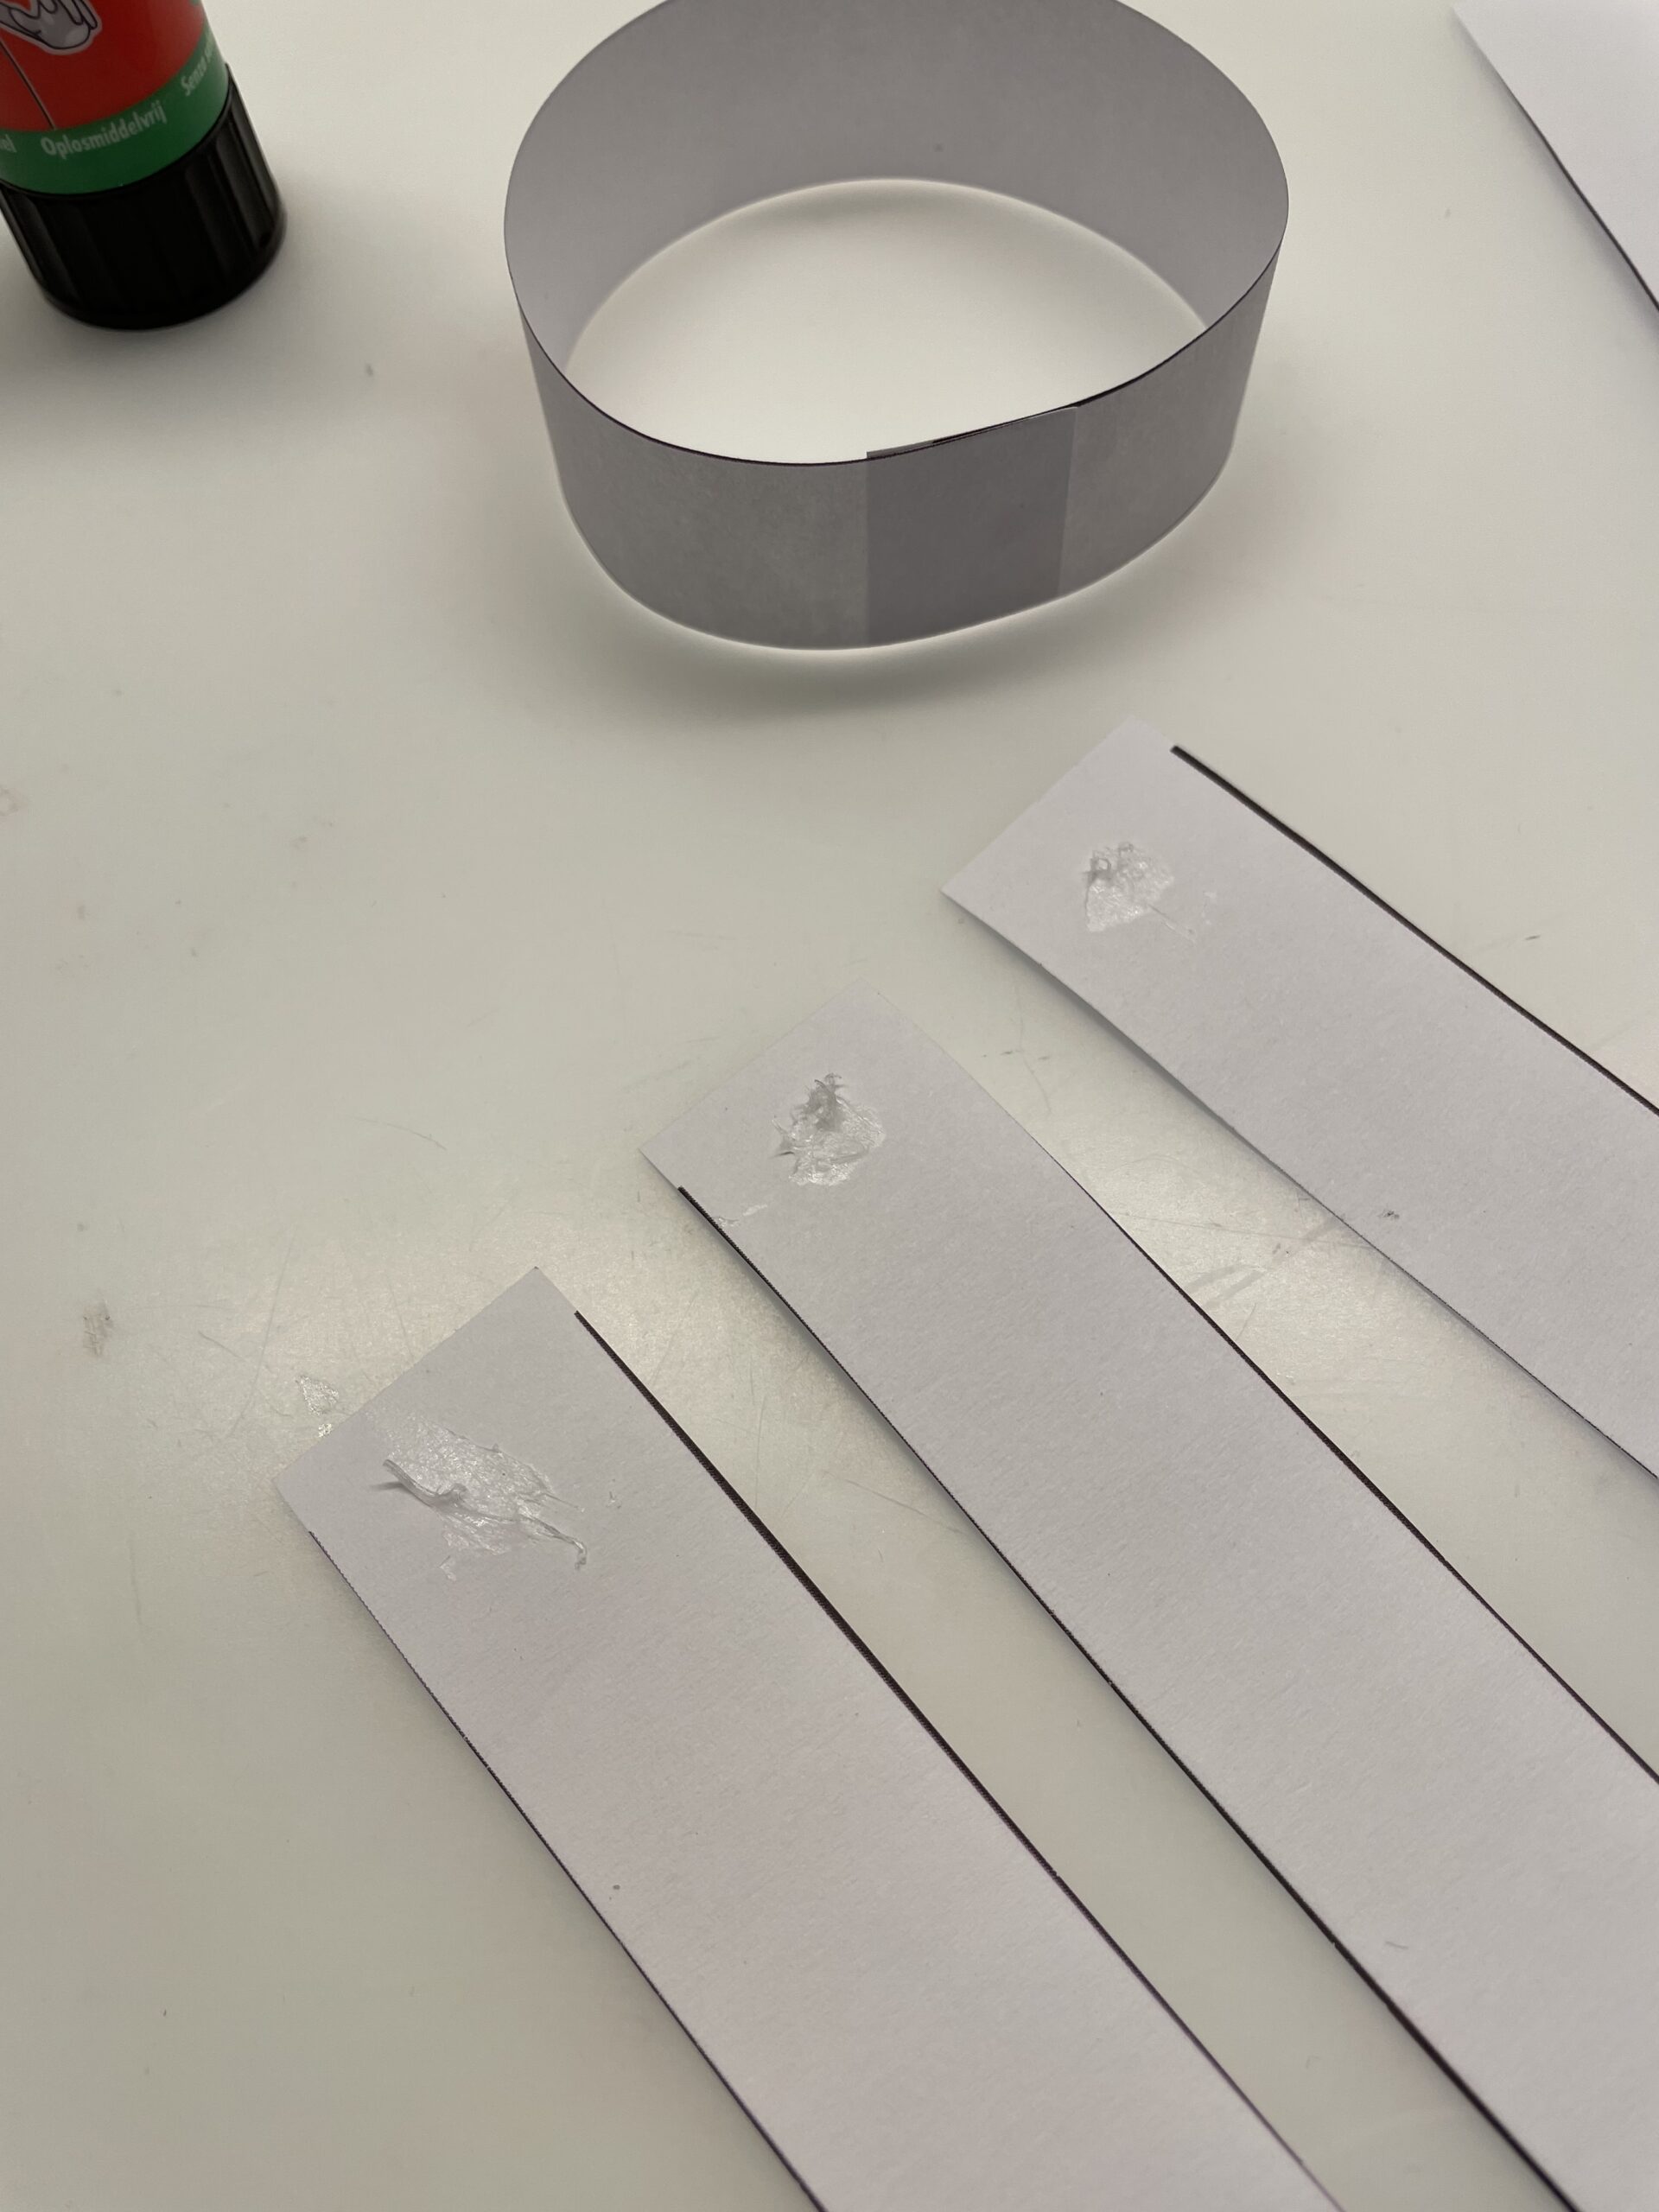
Bild zum Schritt 5 für das Bastel- und DIY-Abenteuer für Kinder: 'Wiederholt den Vorgang zunächst bei 4 Streifen.'

5

The first snow globe is formed from these four paper rings.
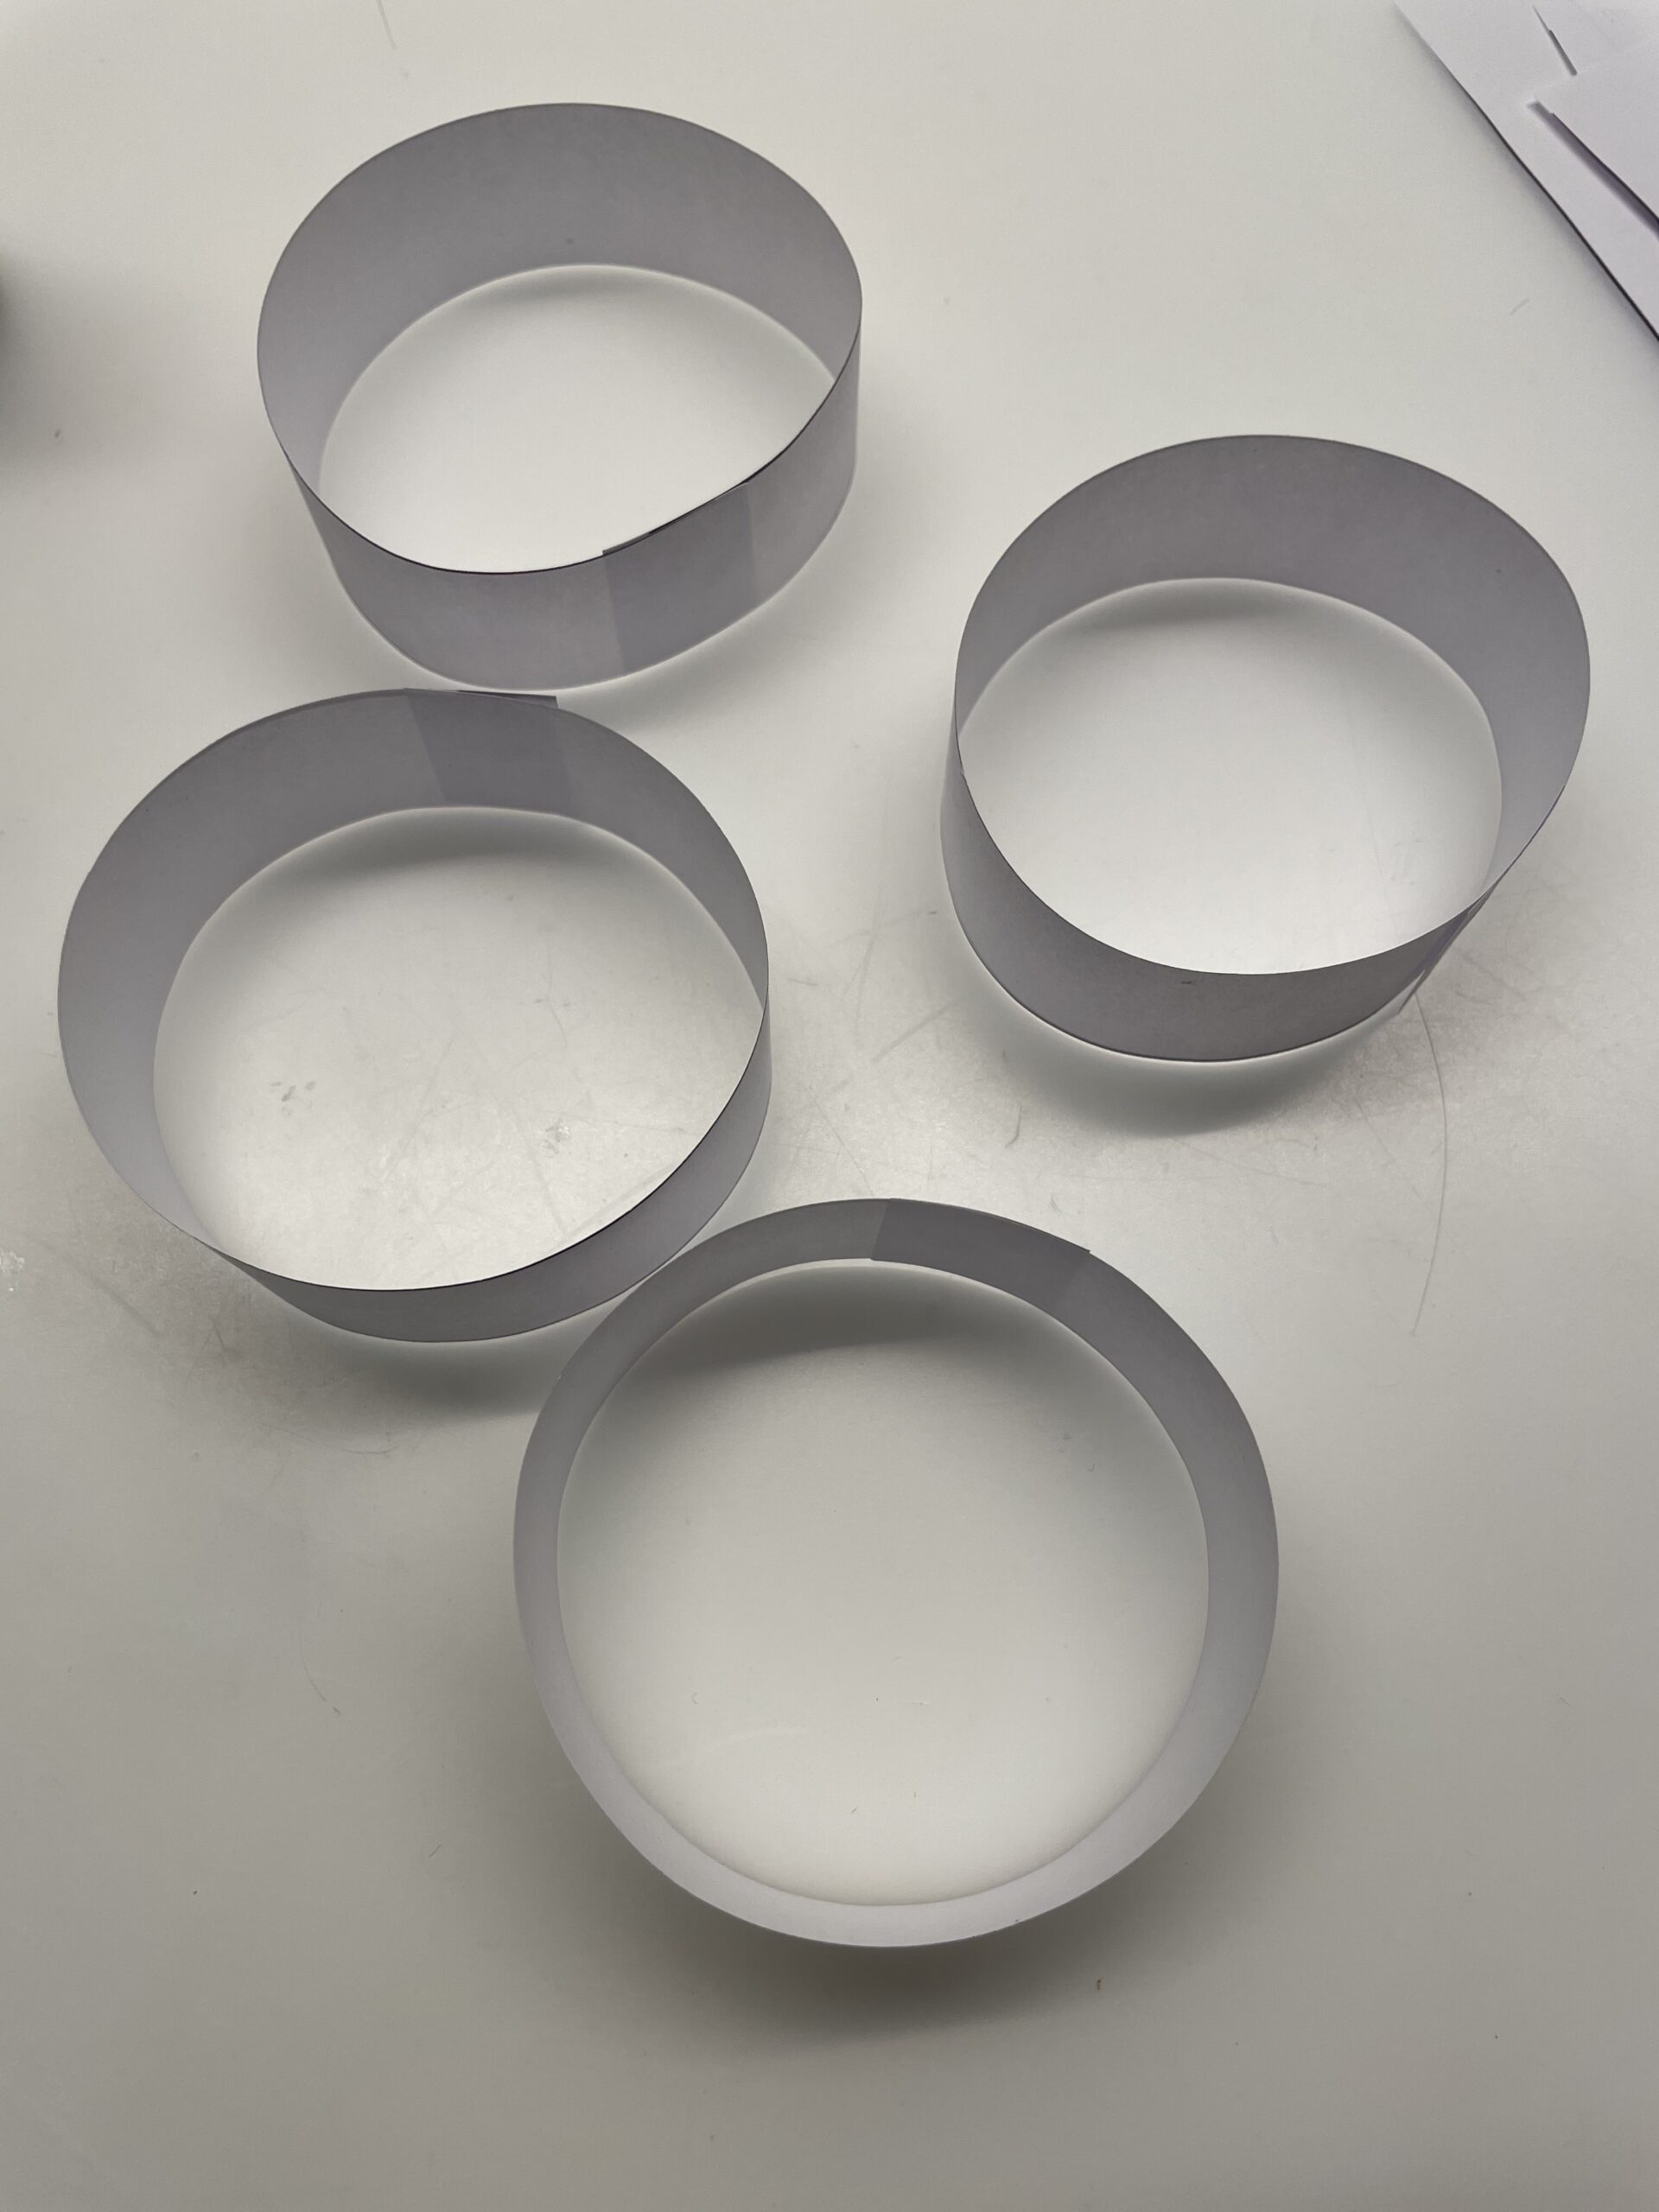
Bild zum Schritt 6 für das Bastel- und DIY-Abenteuer für Kinder: 'Aus diesen vier Papierringen entsteht die erste Schneekugel.'

6

Now put two rings crossed into each other.
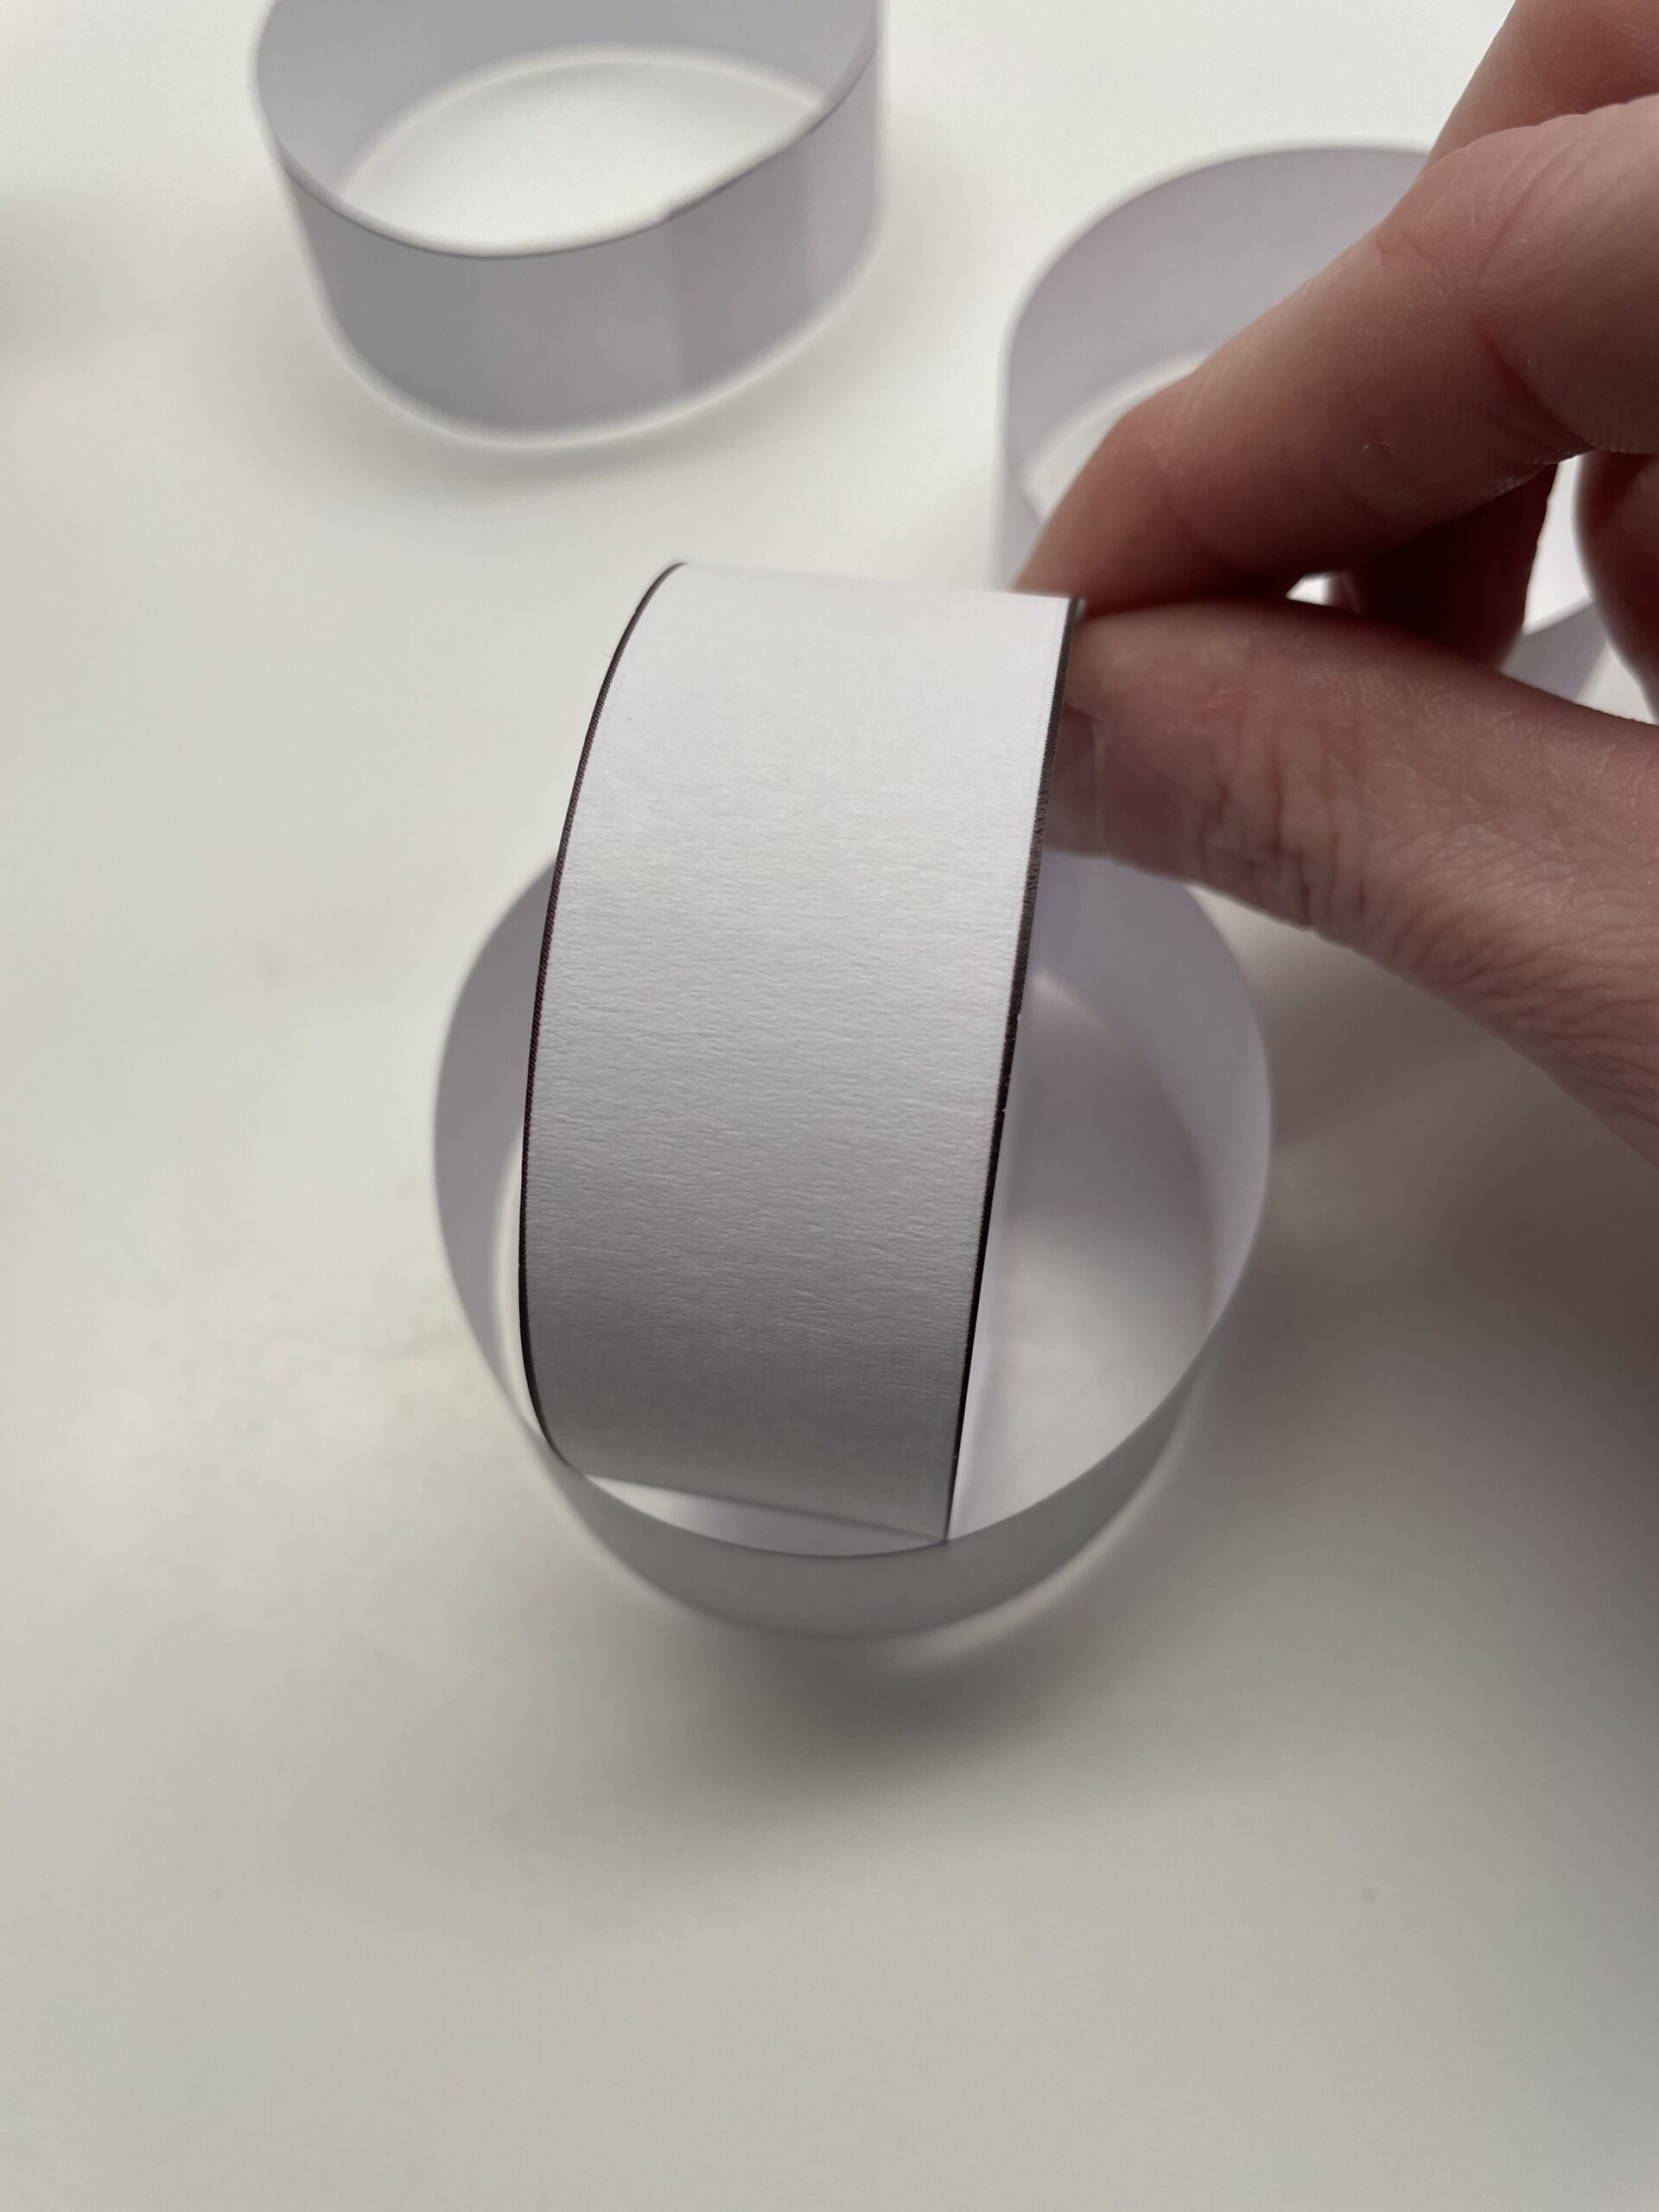
Bild zum Schritt 7 für das Bastel- und DIY-Abenteuer für Kinder: 'Steckt dafür jetzt zwei Ringe gekreuzt ineinander.'

7

Then glue the two rings together at the two interfaces.
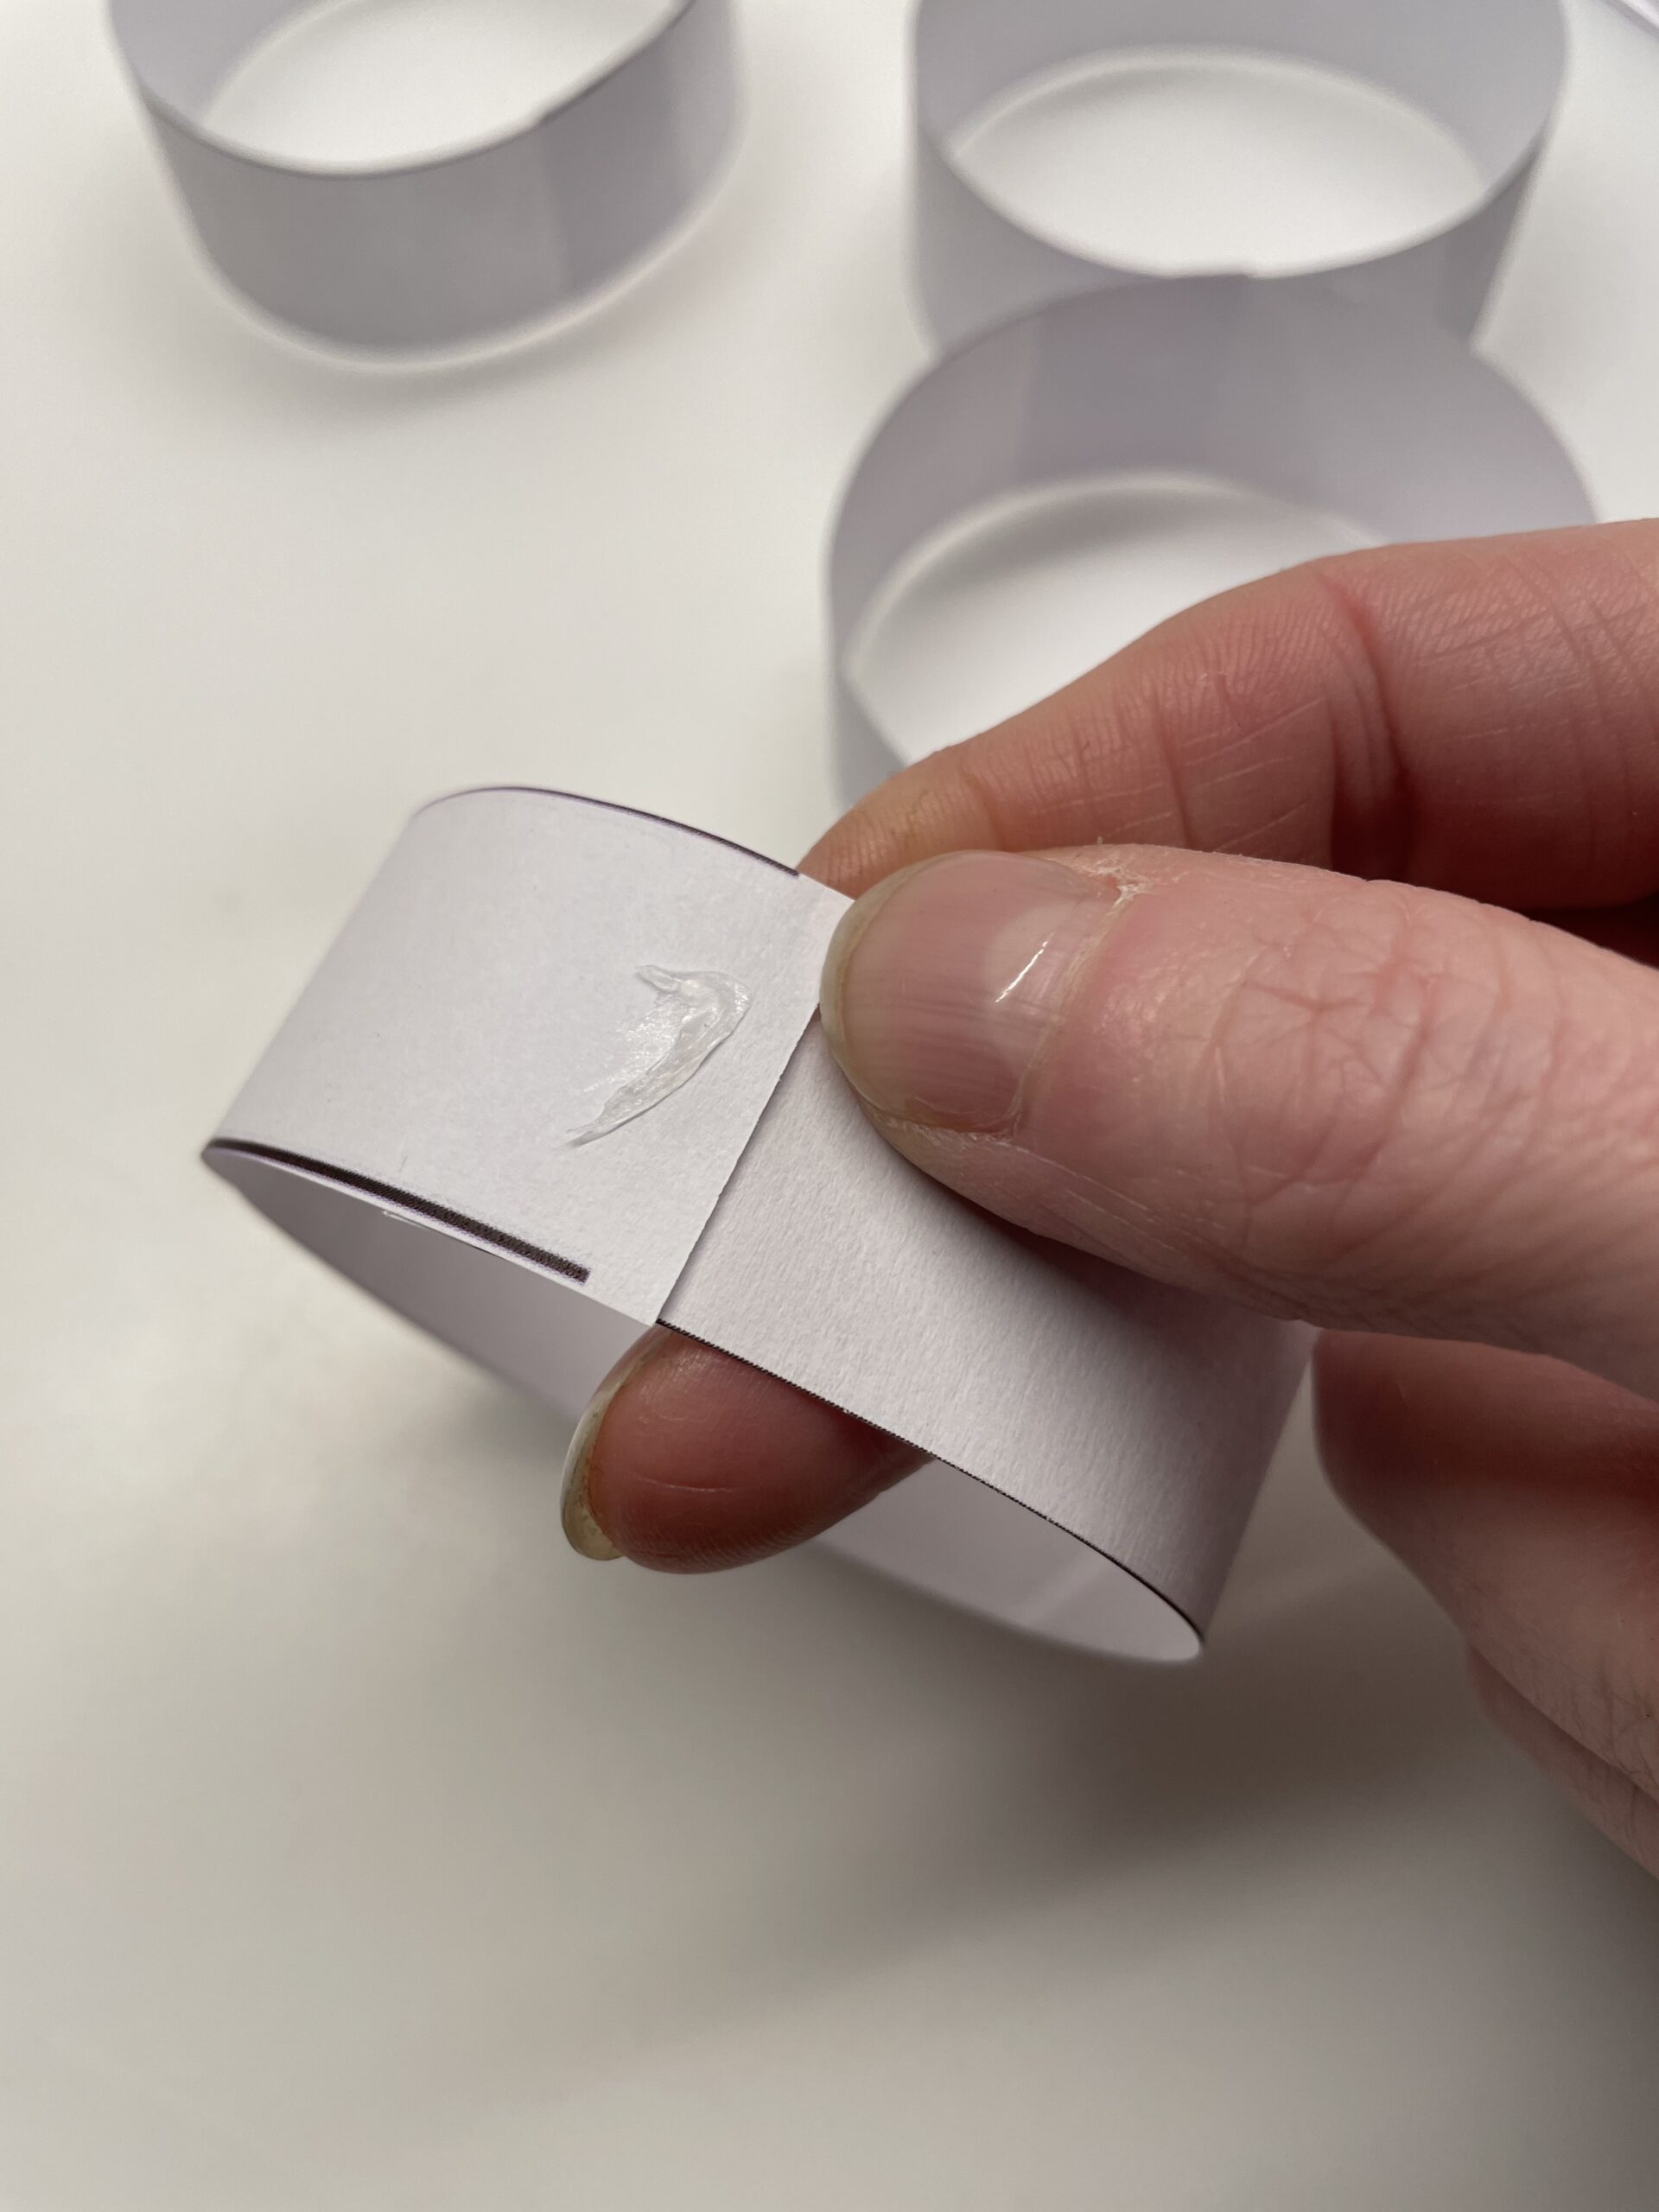
Bild zum Schritt 8 für das Bastel- und DIY-Abenteuer für Kinder: 'Dann klebt ihr die beiden Ringe an den beiden Schnittstellen...'

8

For this, you place the 2nd ring over the 1st ring and squeeze the resulting paper cross tightly together. The interface lies above!
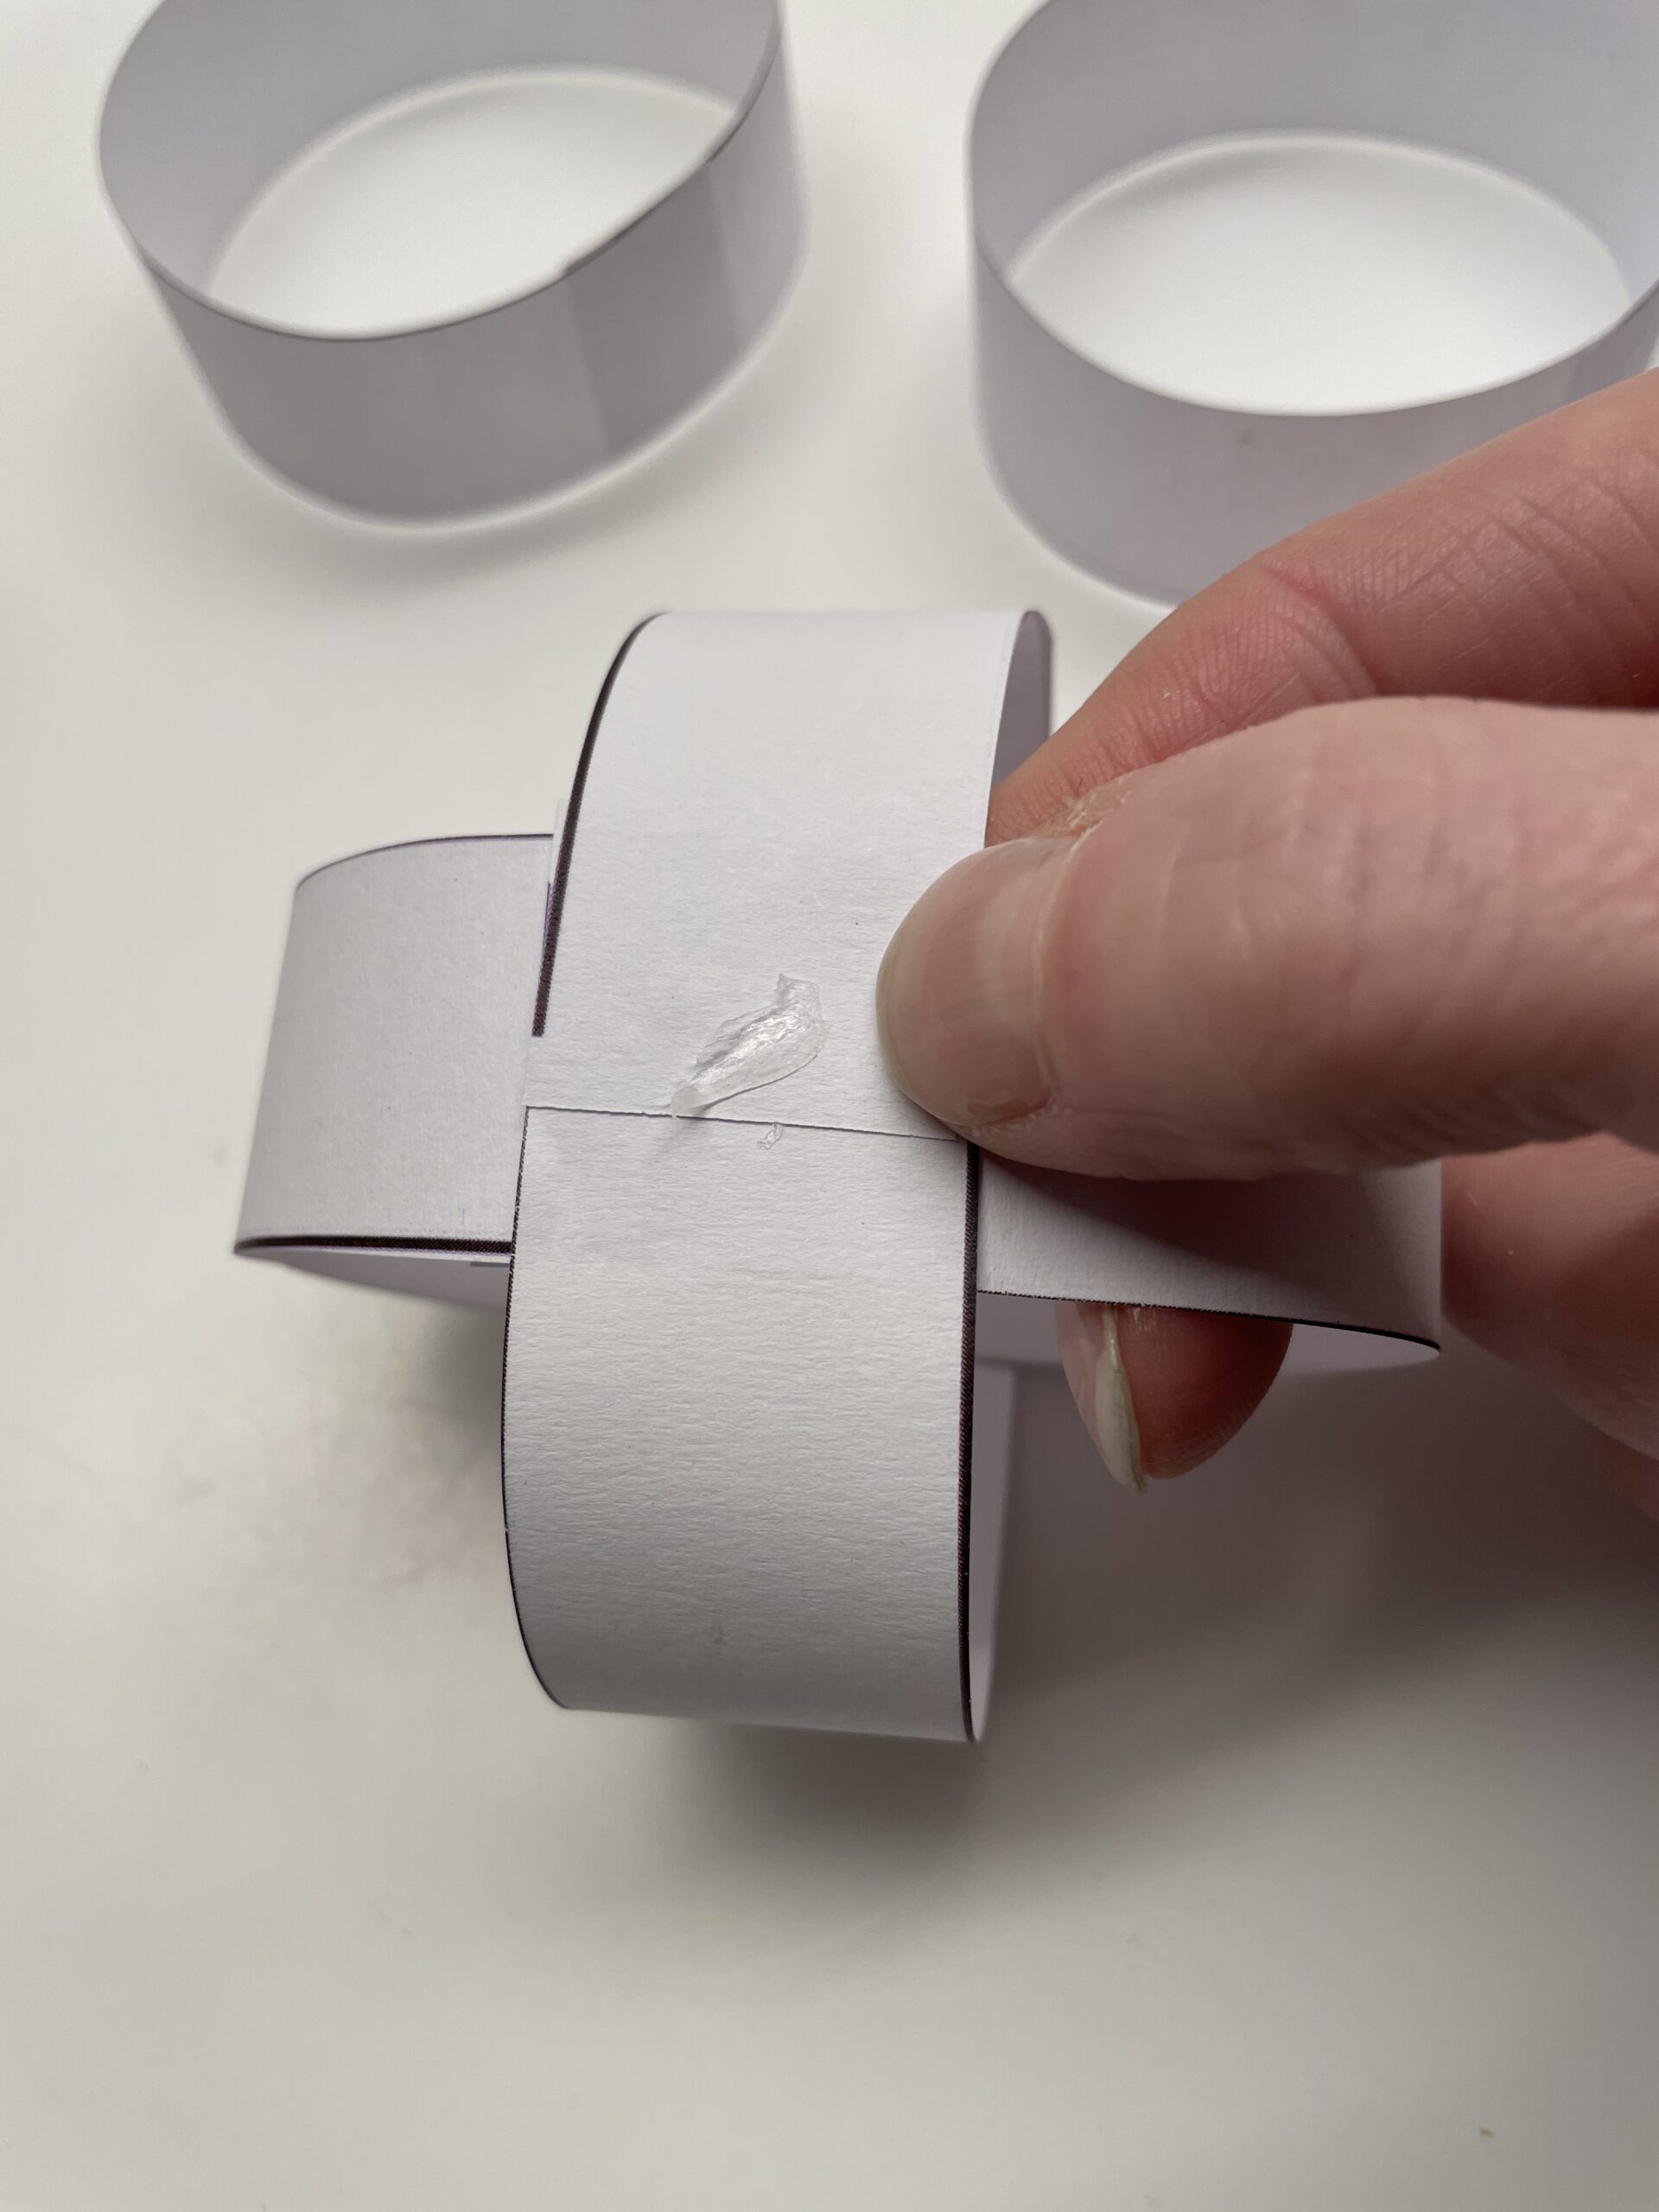
Bild zum Schritt 9 für das Bastel- und DIY-Abenteuer für Kinder: 'Dafür steckt ihr den 2. Ring über den 1. Ring...'

9

Now you put your glue on the paper cross and slide the 3rd ring diagonally over the paper cross.
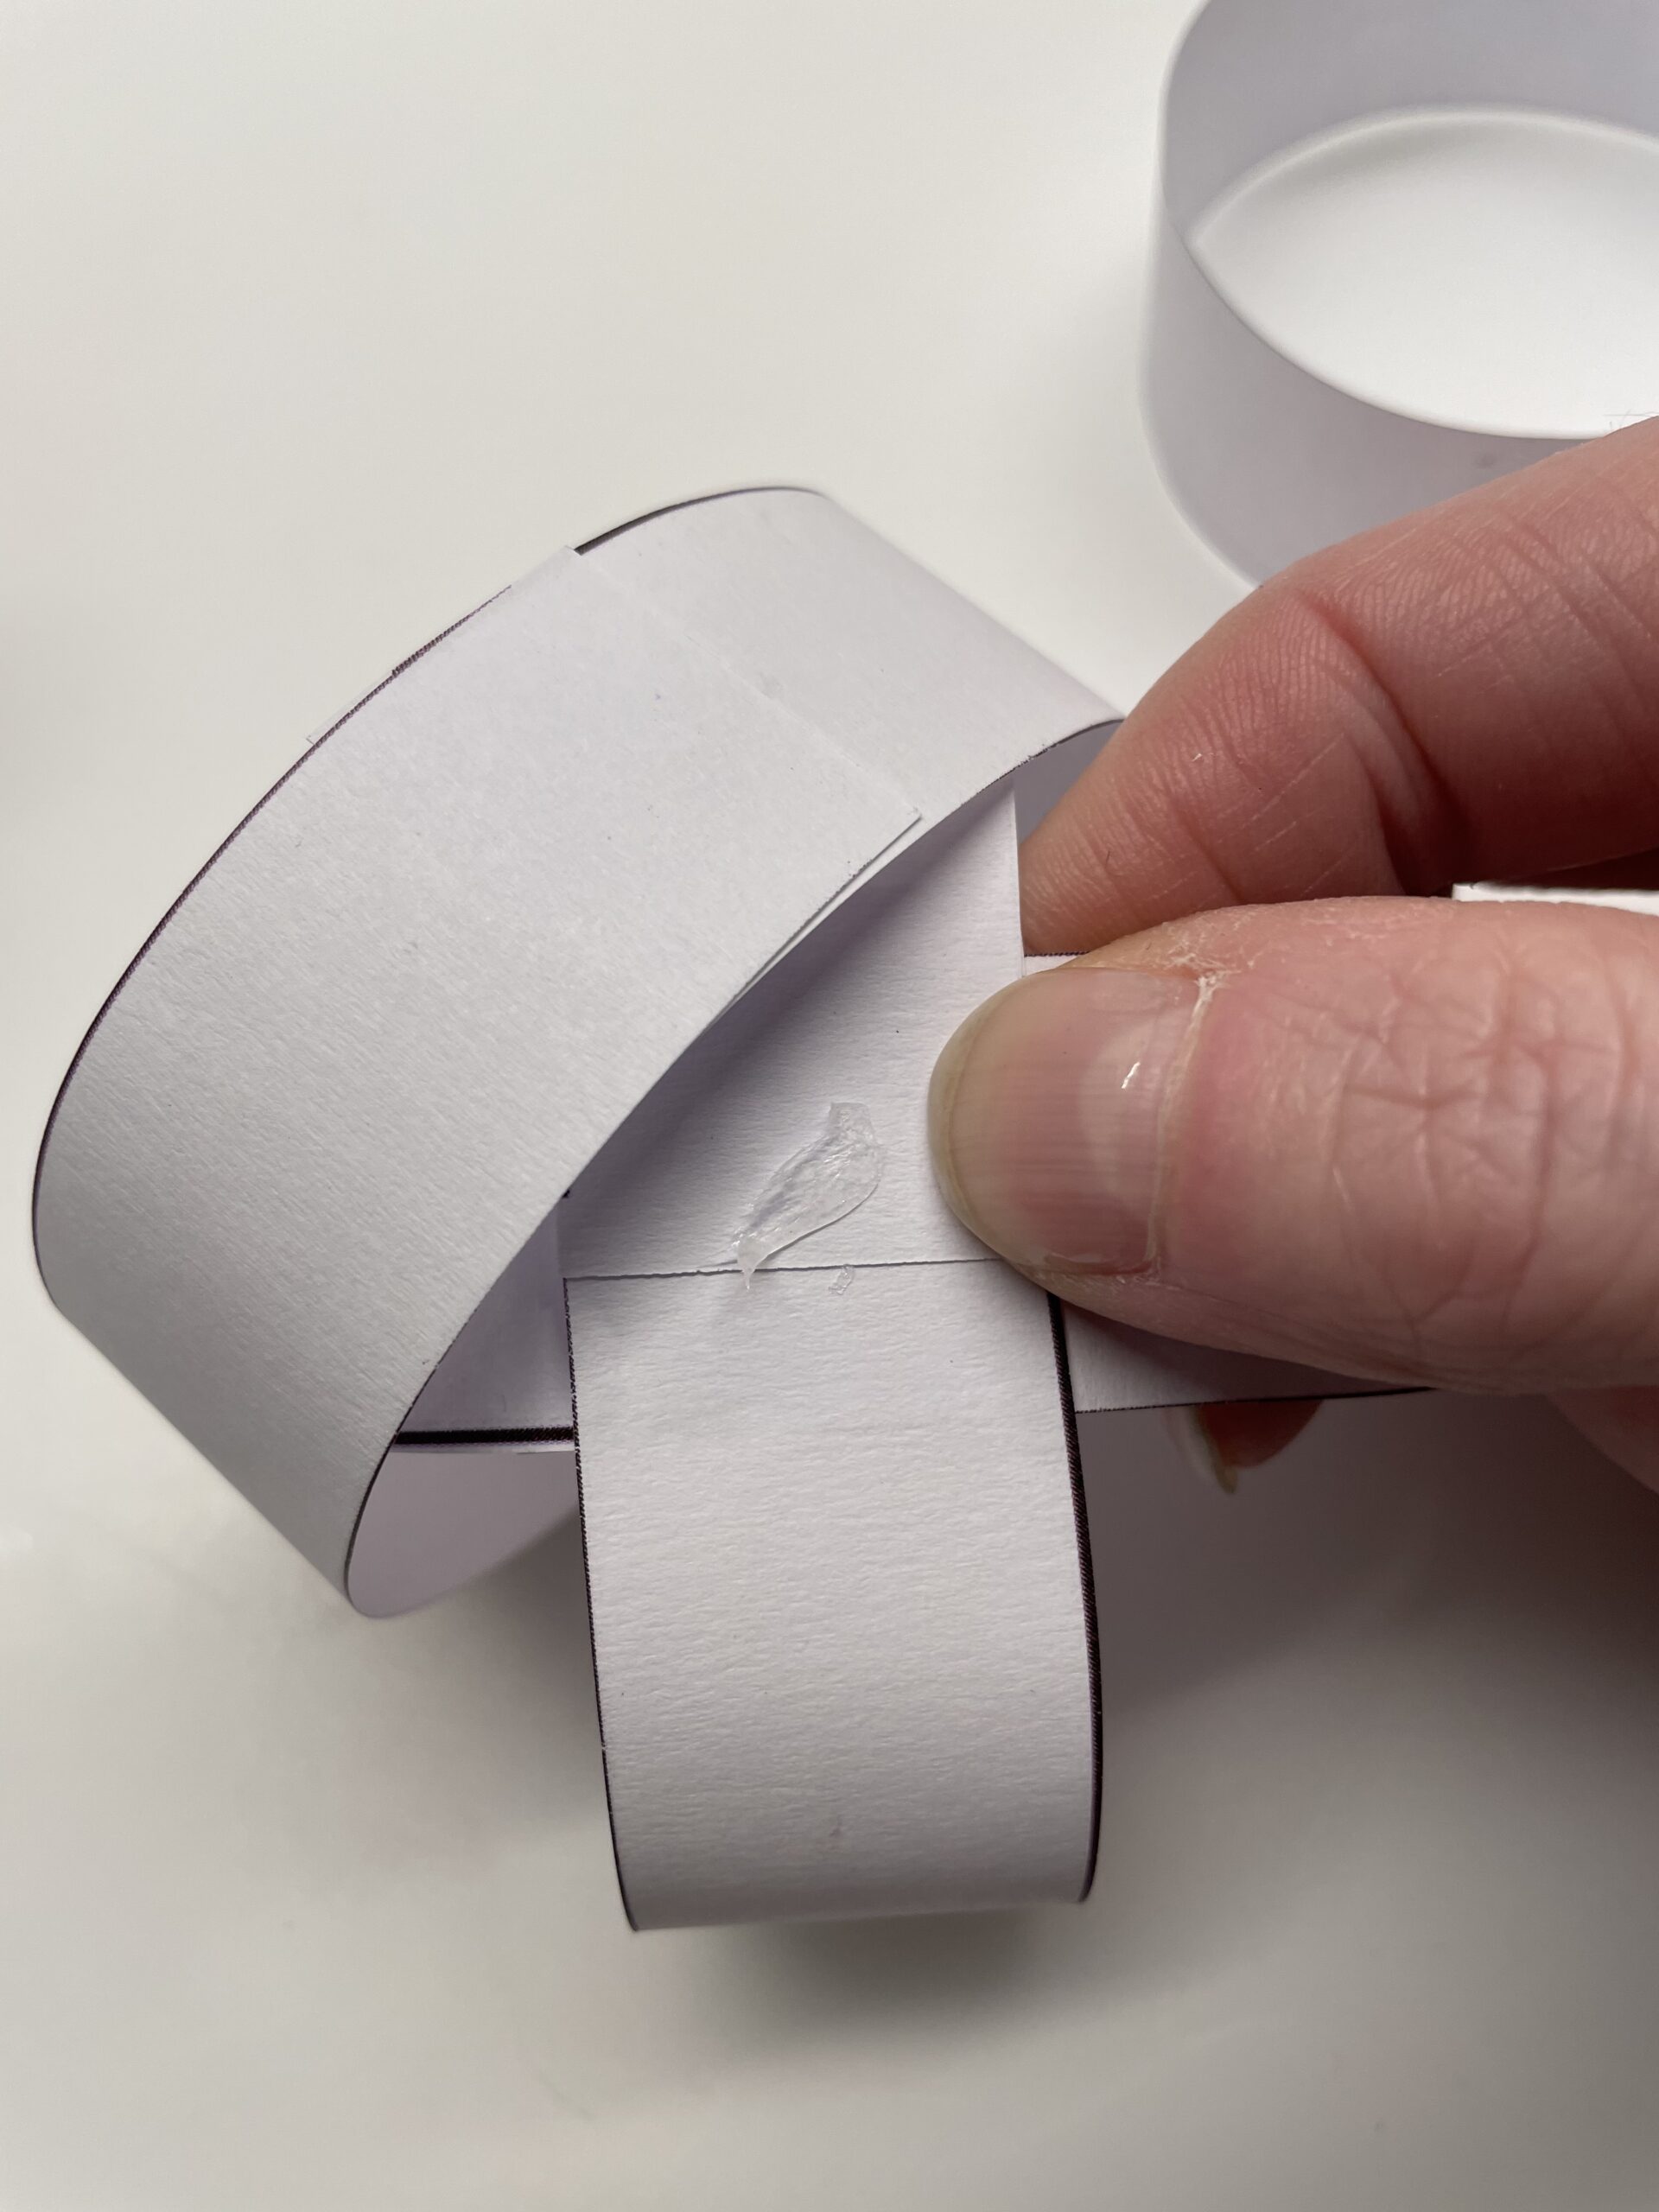
Bild zum Schritt 10 für das Bastel- und DIY-Abenteuer für Kinder: 'Nun streicht ihr Kleber auf das Papierkreuz und schiebt den...'

10

Press the glue marks together again.
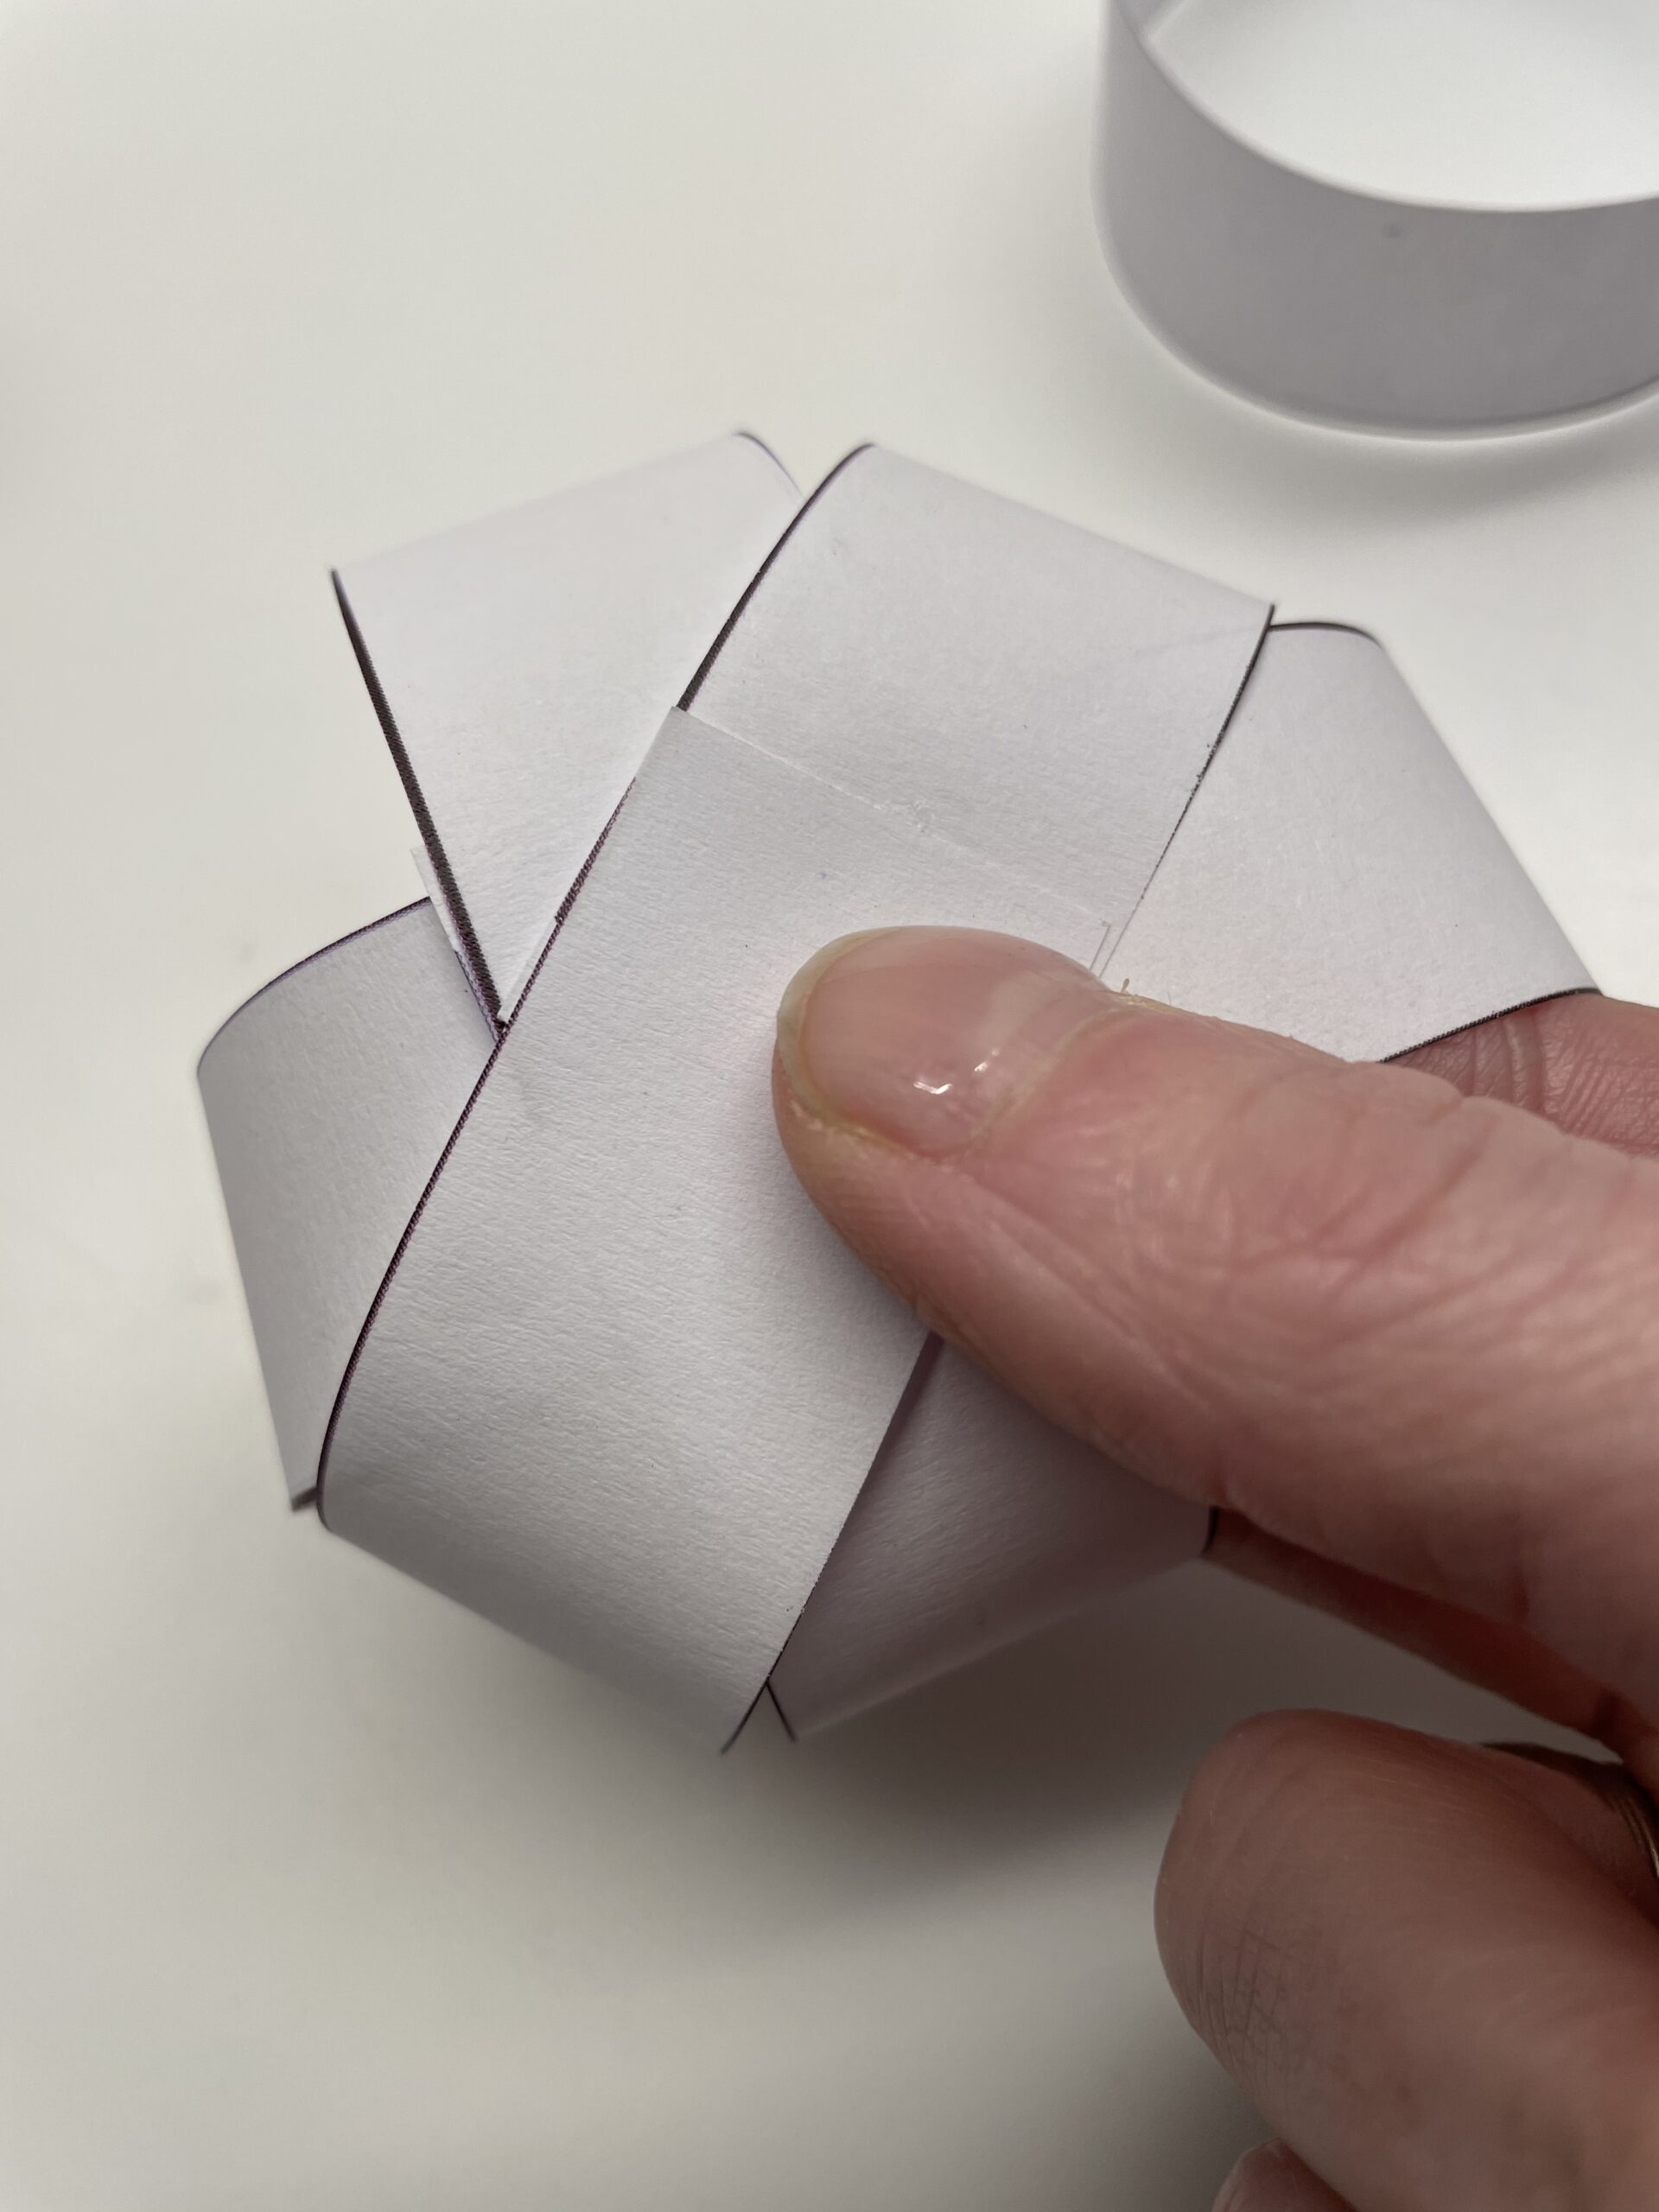
Bild zum Schritt 11 für das Bastel- und DIY-Abenteuer für Kinder: 'Drück auch hier die Klebestellen wieder fest zusammen.'

11

Now you put glue again in the middle of the paper cross.
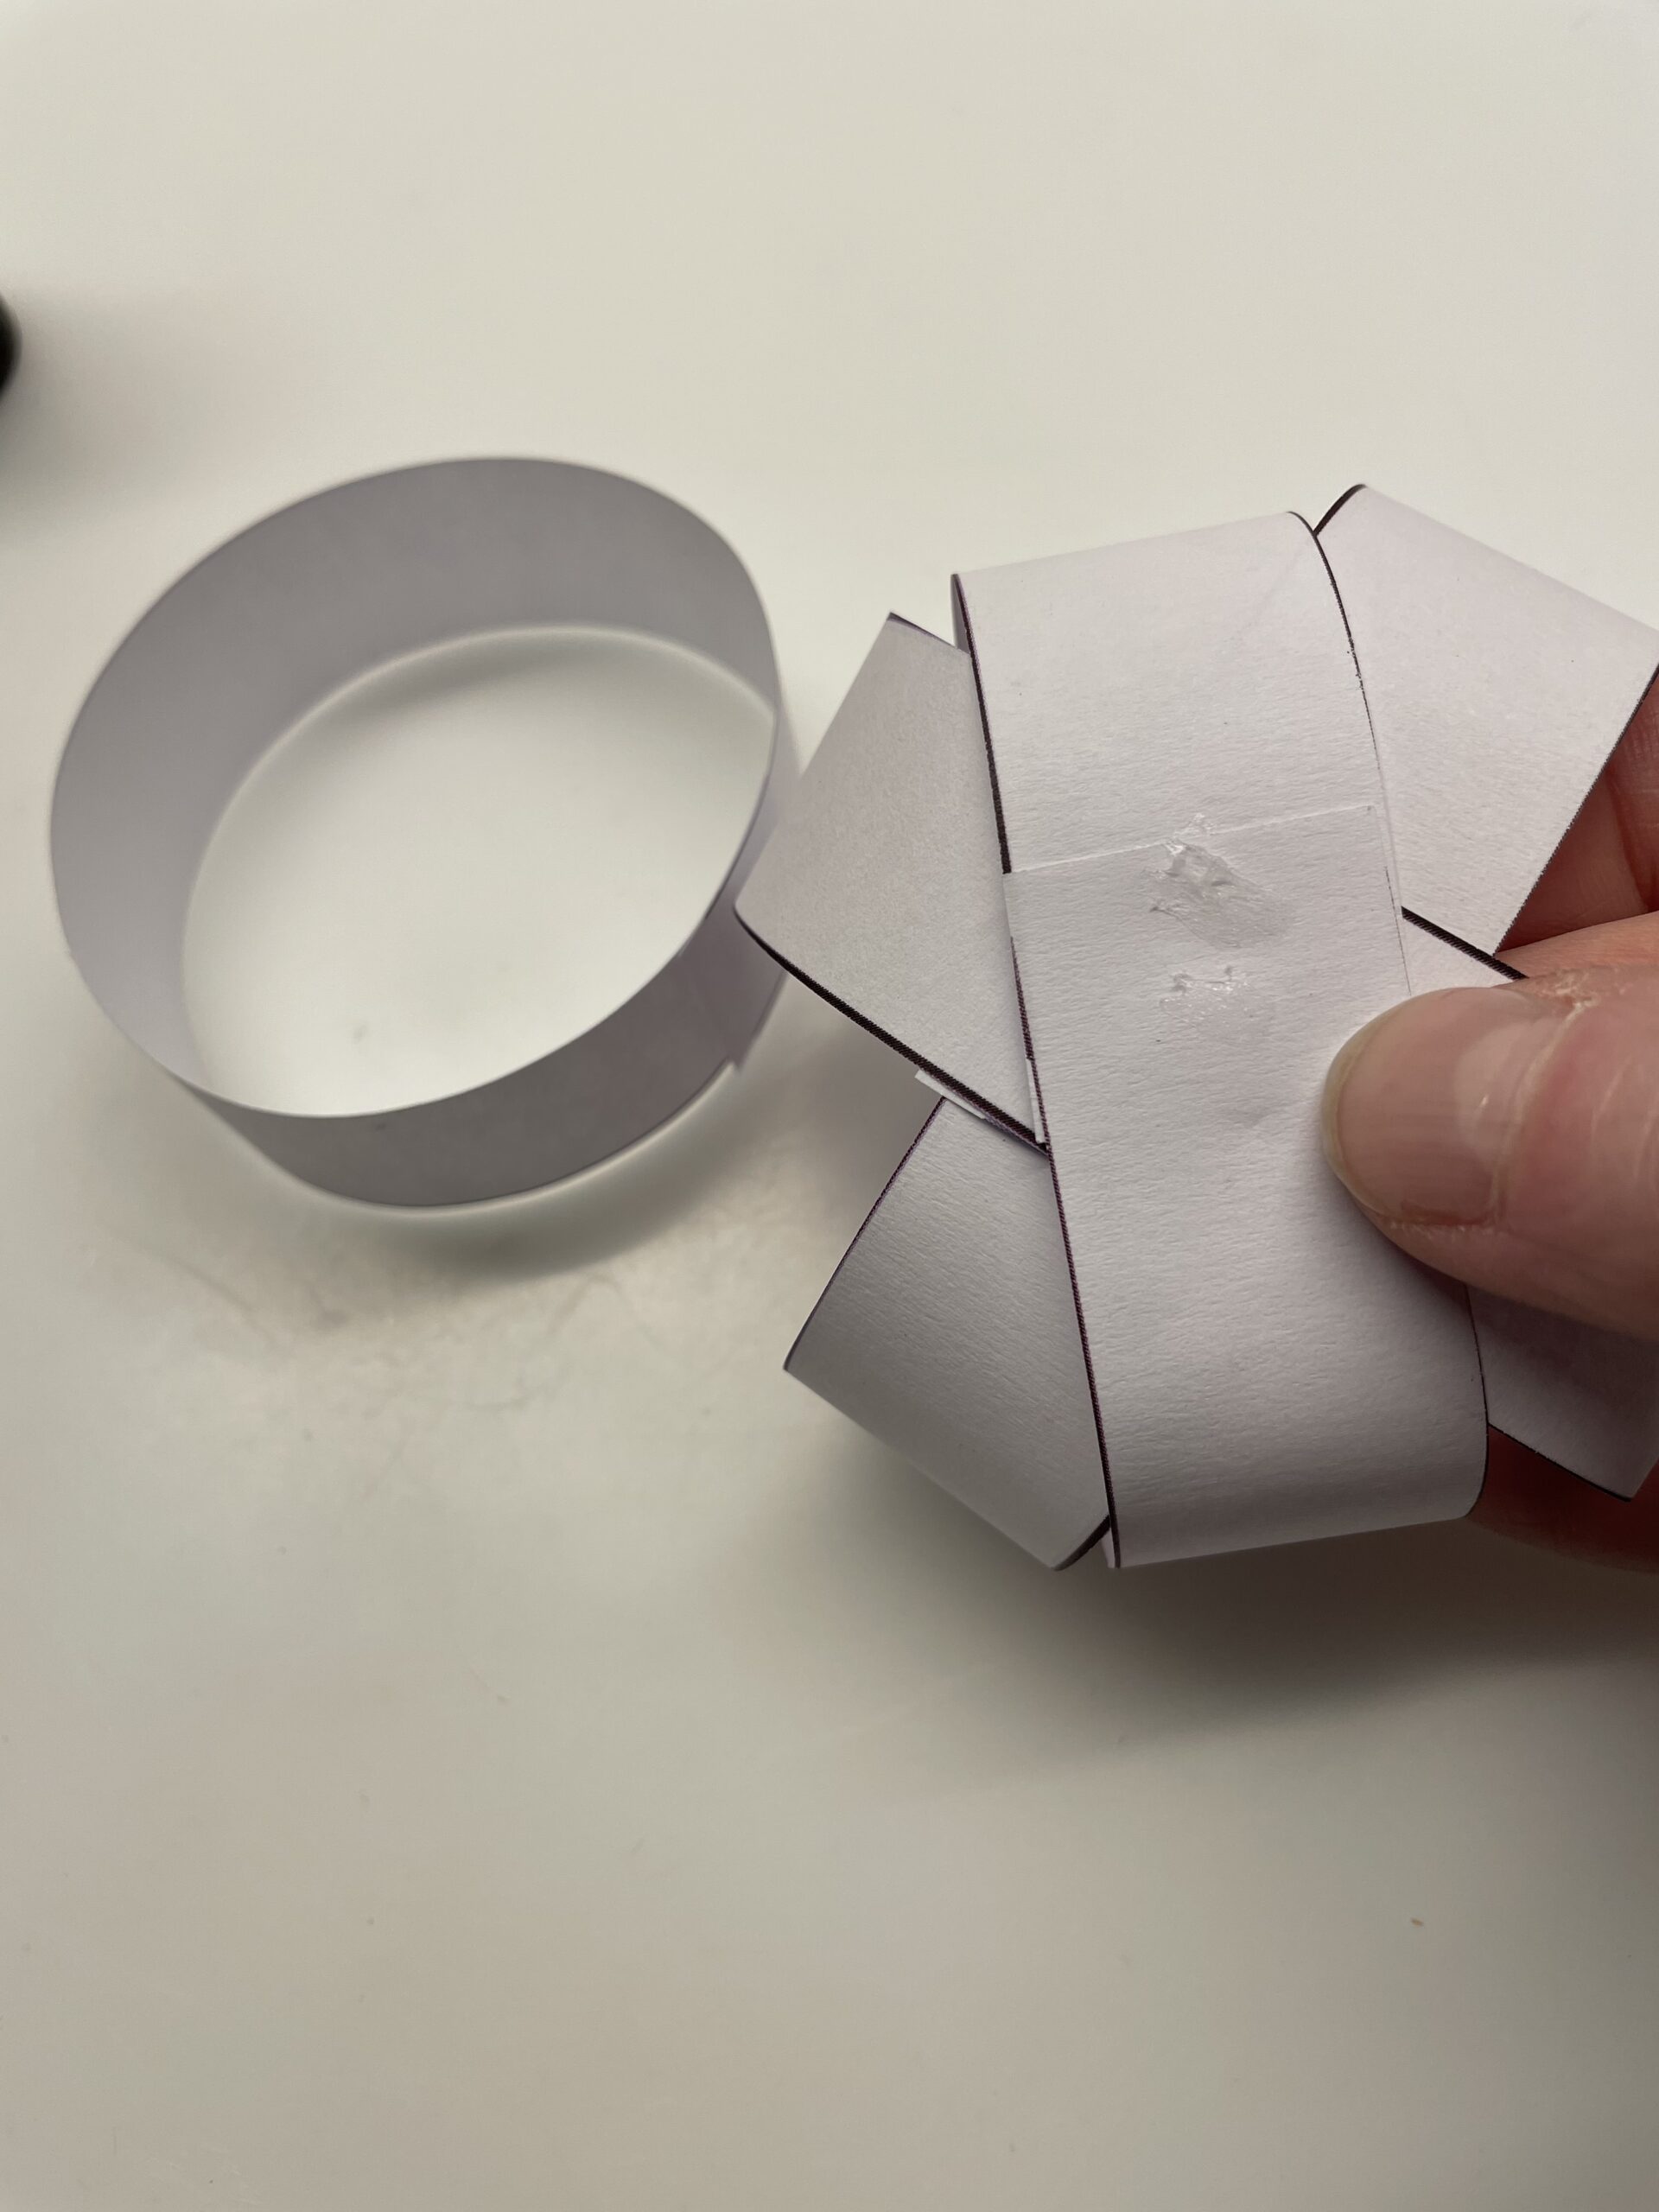
Bild zum Schritt 12 für das Bastel- und DIY-Abenteuer für Kinder: 'Jetzt tragt ihr in die Mitte des Papierkreuzes erneut Kleber...'

12

Then you push the 4th ring diagonally over it. Gently press the last ring and make sure not to flatten the resulting snow globe.
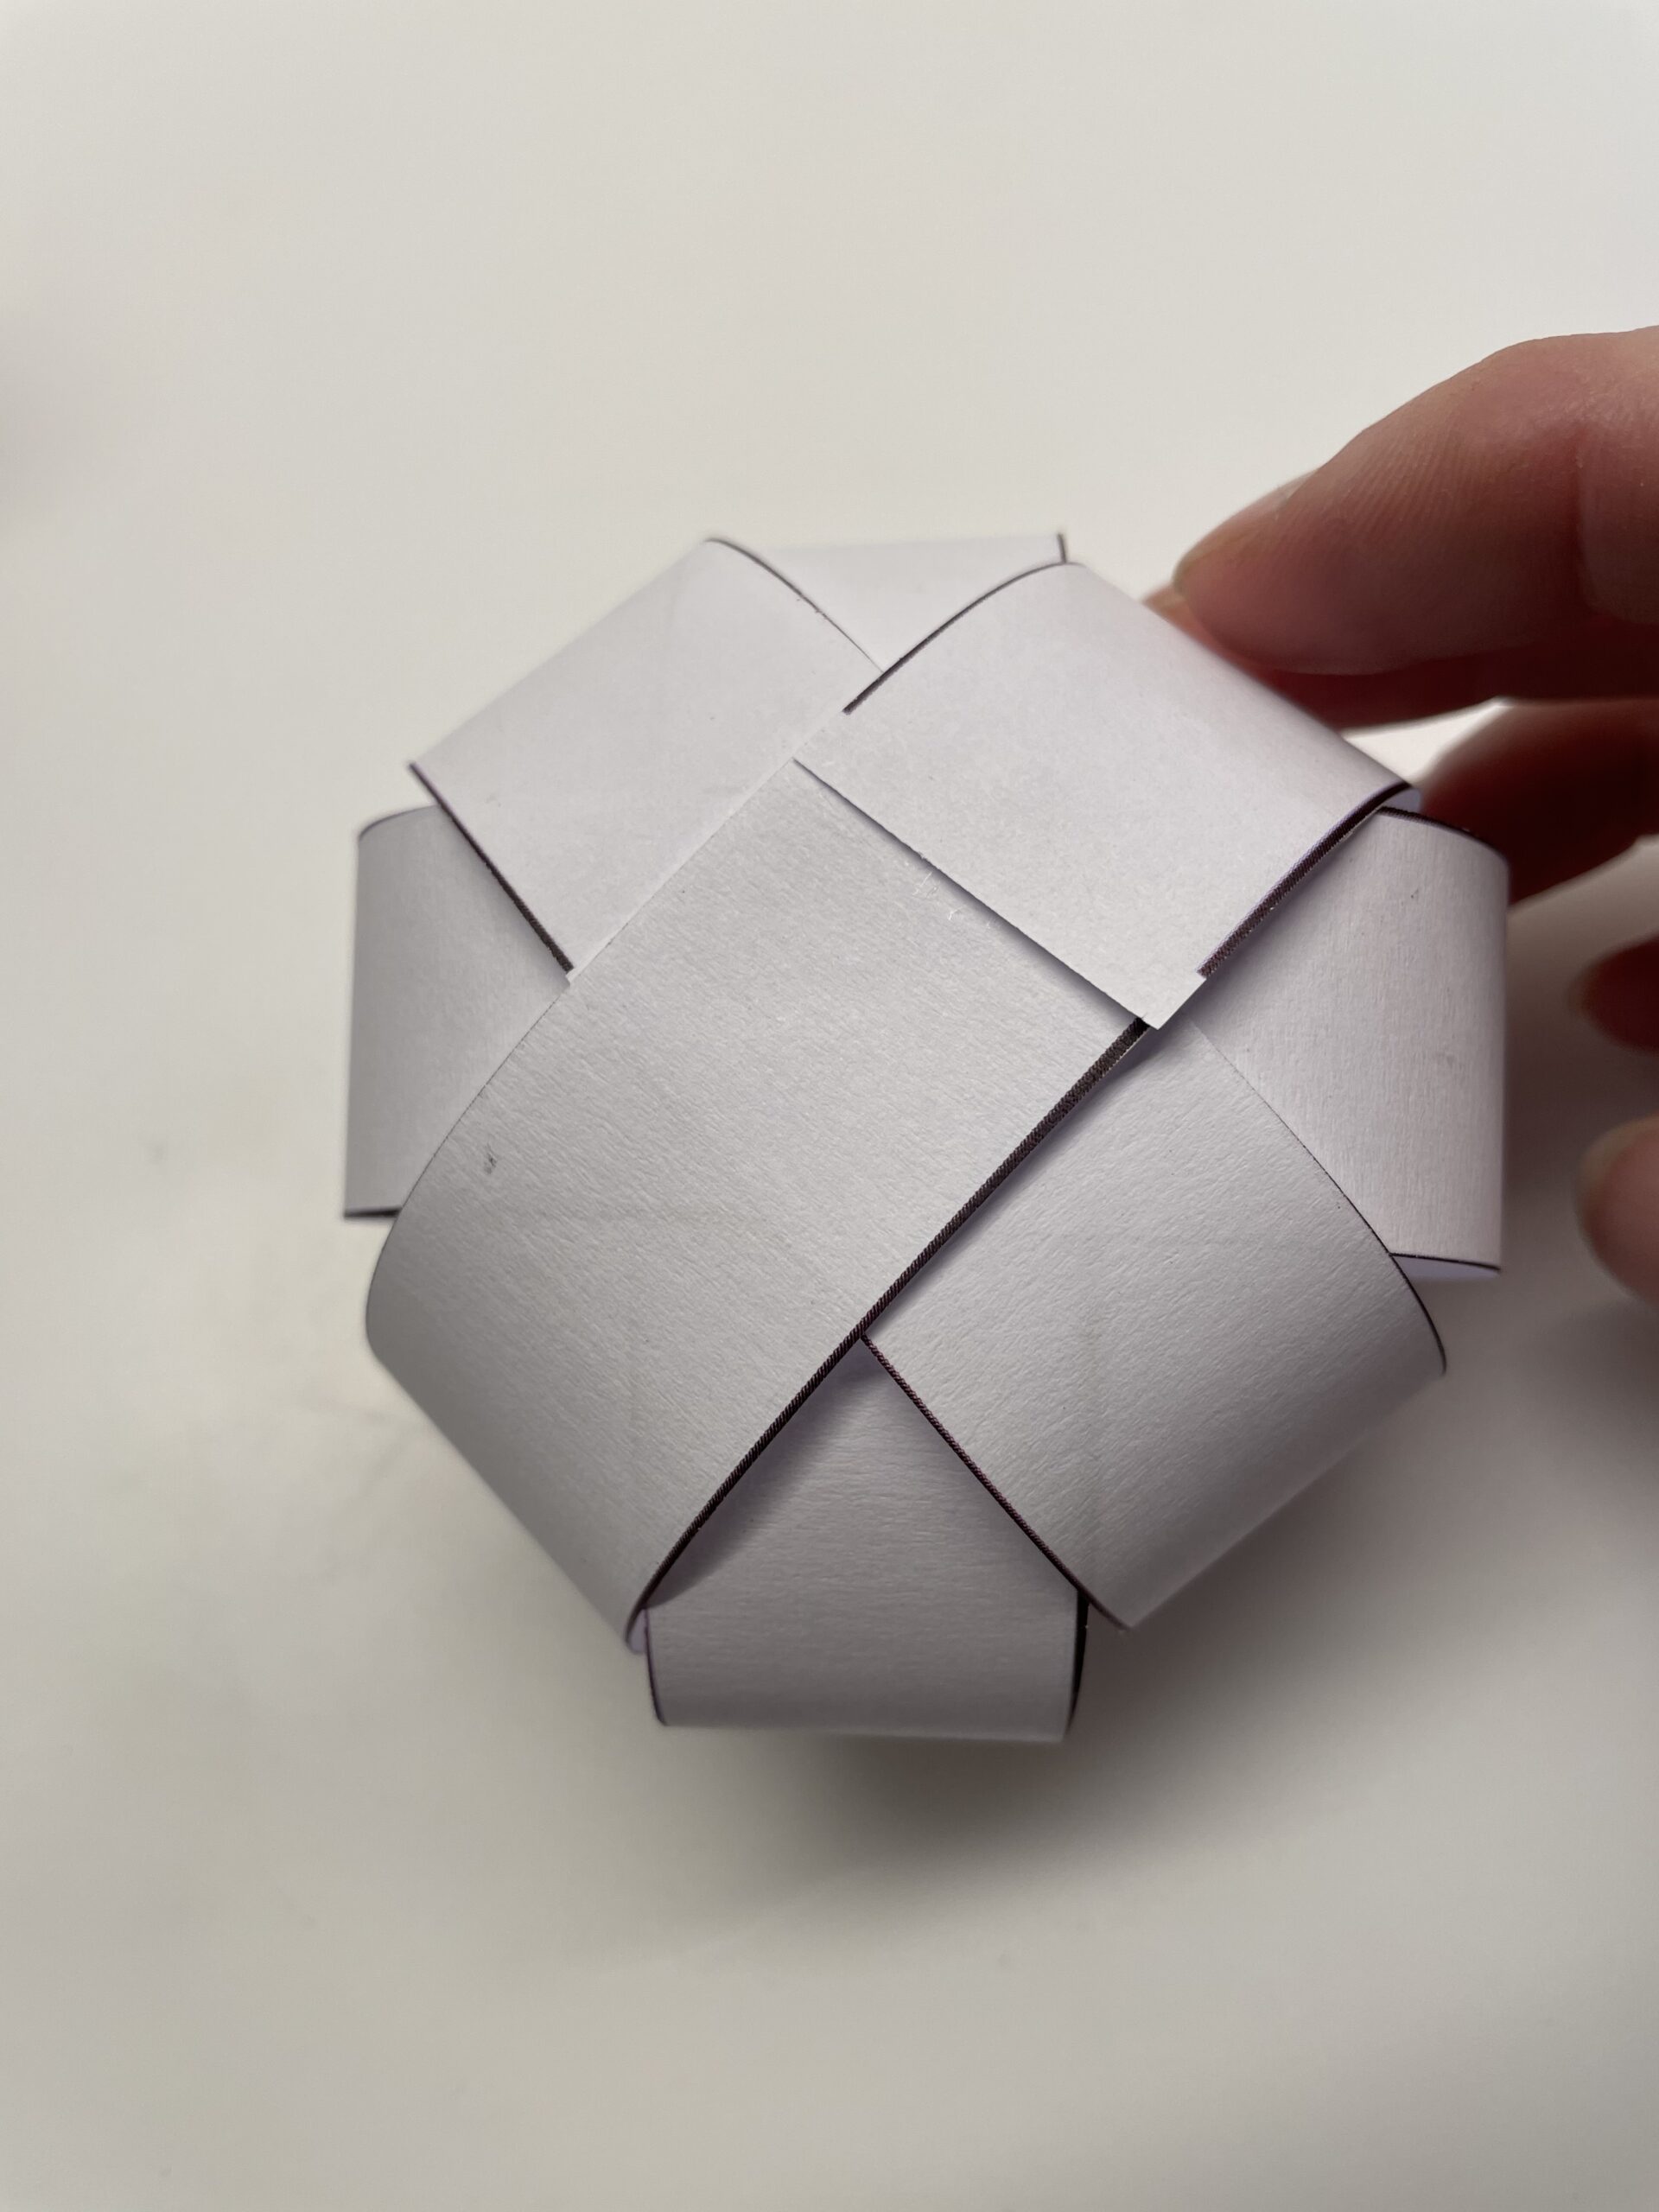
Bild zum Schritt 13 für das Bastel- und DIY-Abenteuer für Kinder: 'Danach schiebt ihr den 4. Ring diagonal darüber. Drückt den...'

13

Then you rotate the ball so that the interfaces point downwards.
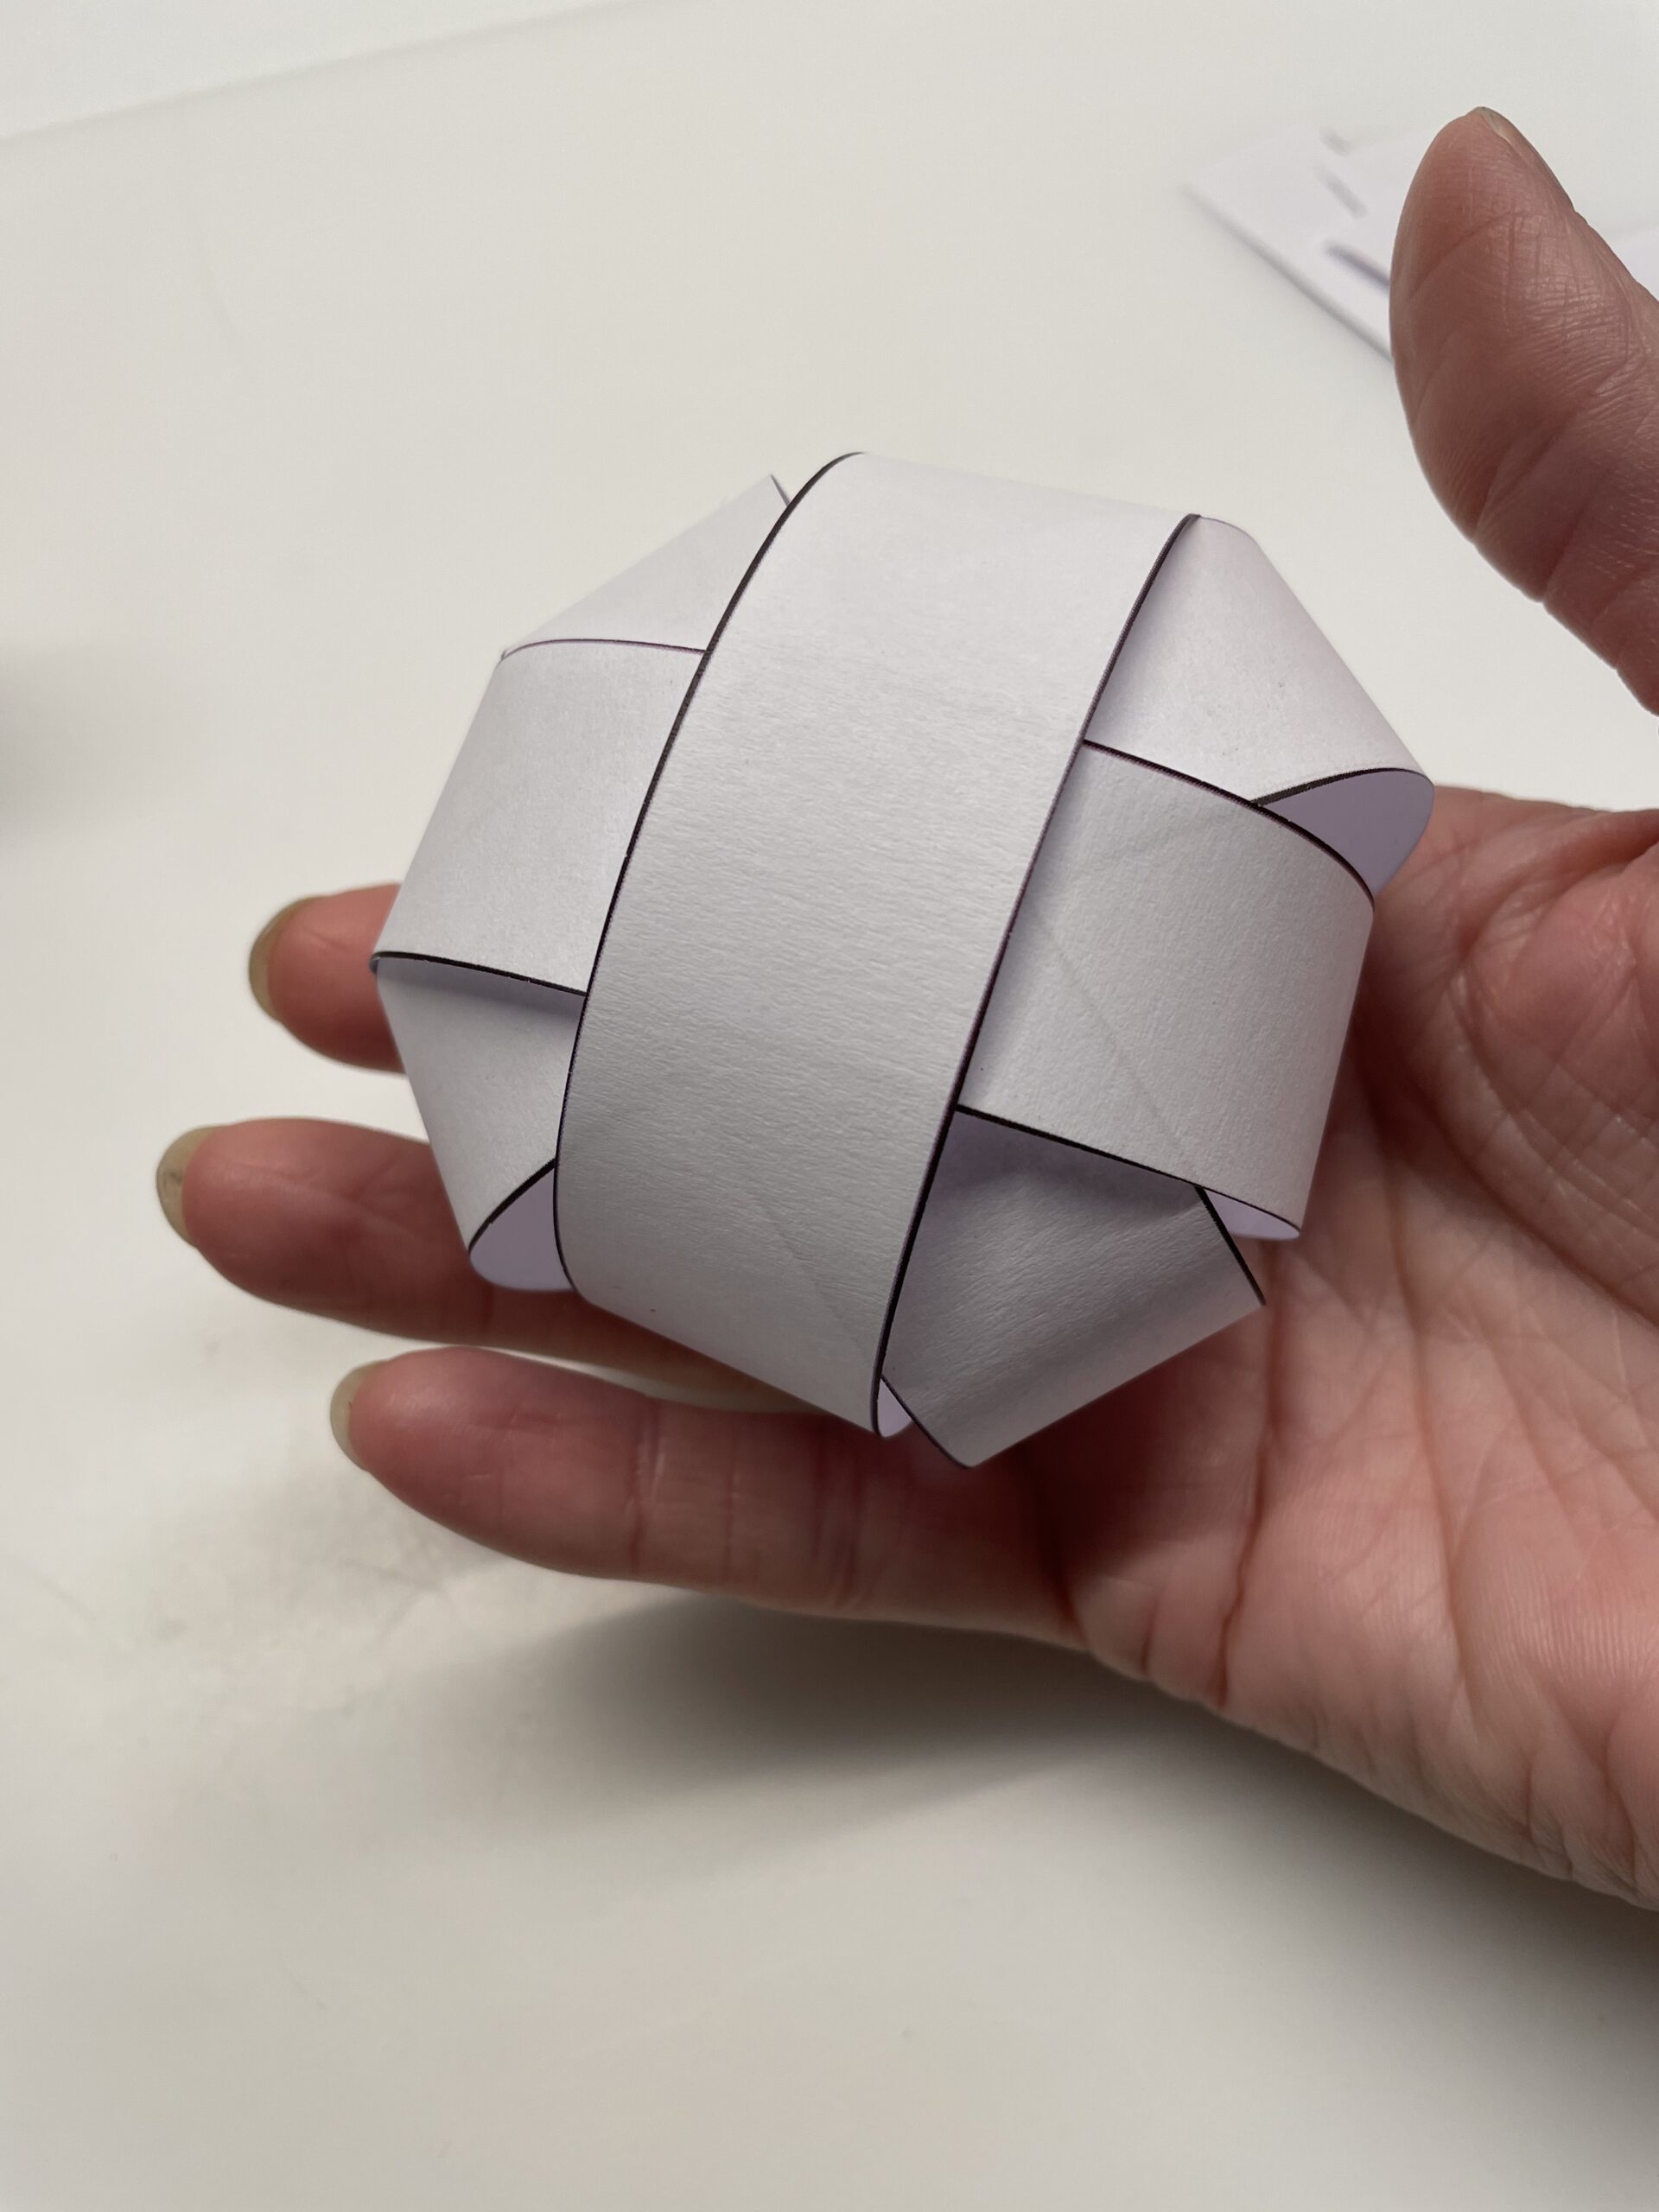
Bild zum Schritt 14 für das Bastel- und DIY-Abenteuer für Kinder: 'Anschließend dreht ihr die Kugel so, dass die Schnittstellen nach...'

14

Now form and glue the last four strips into rings.
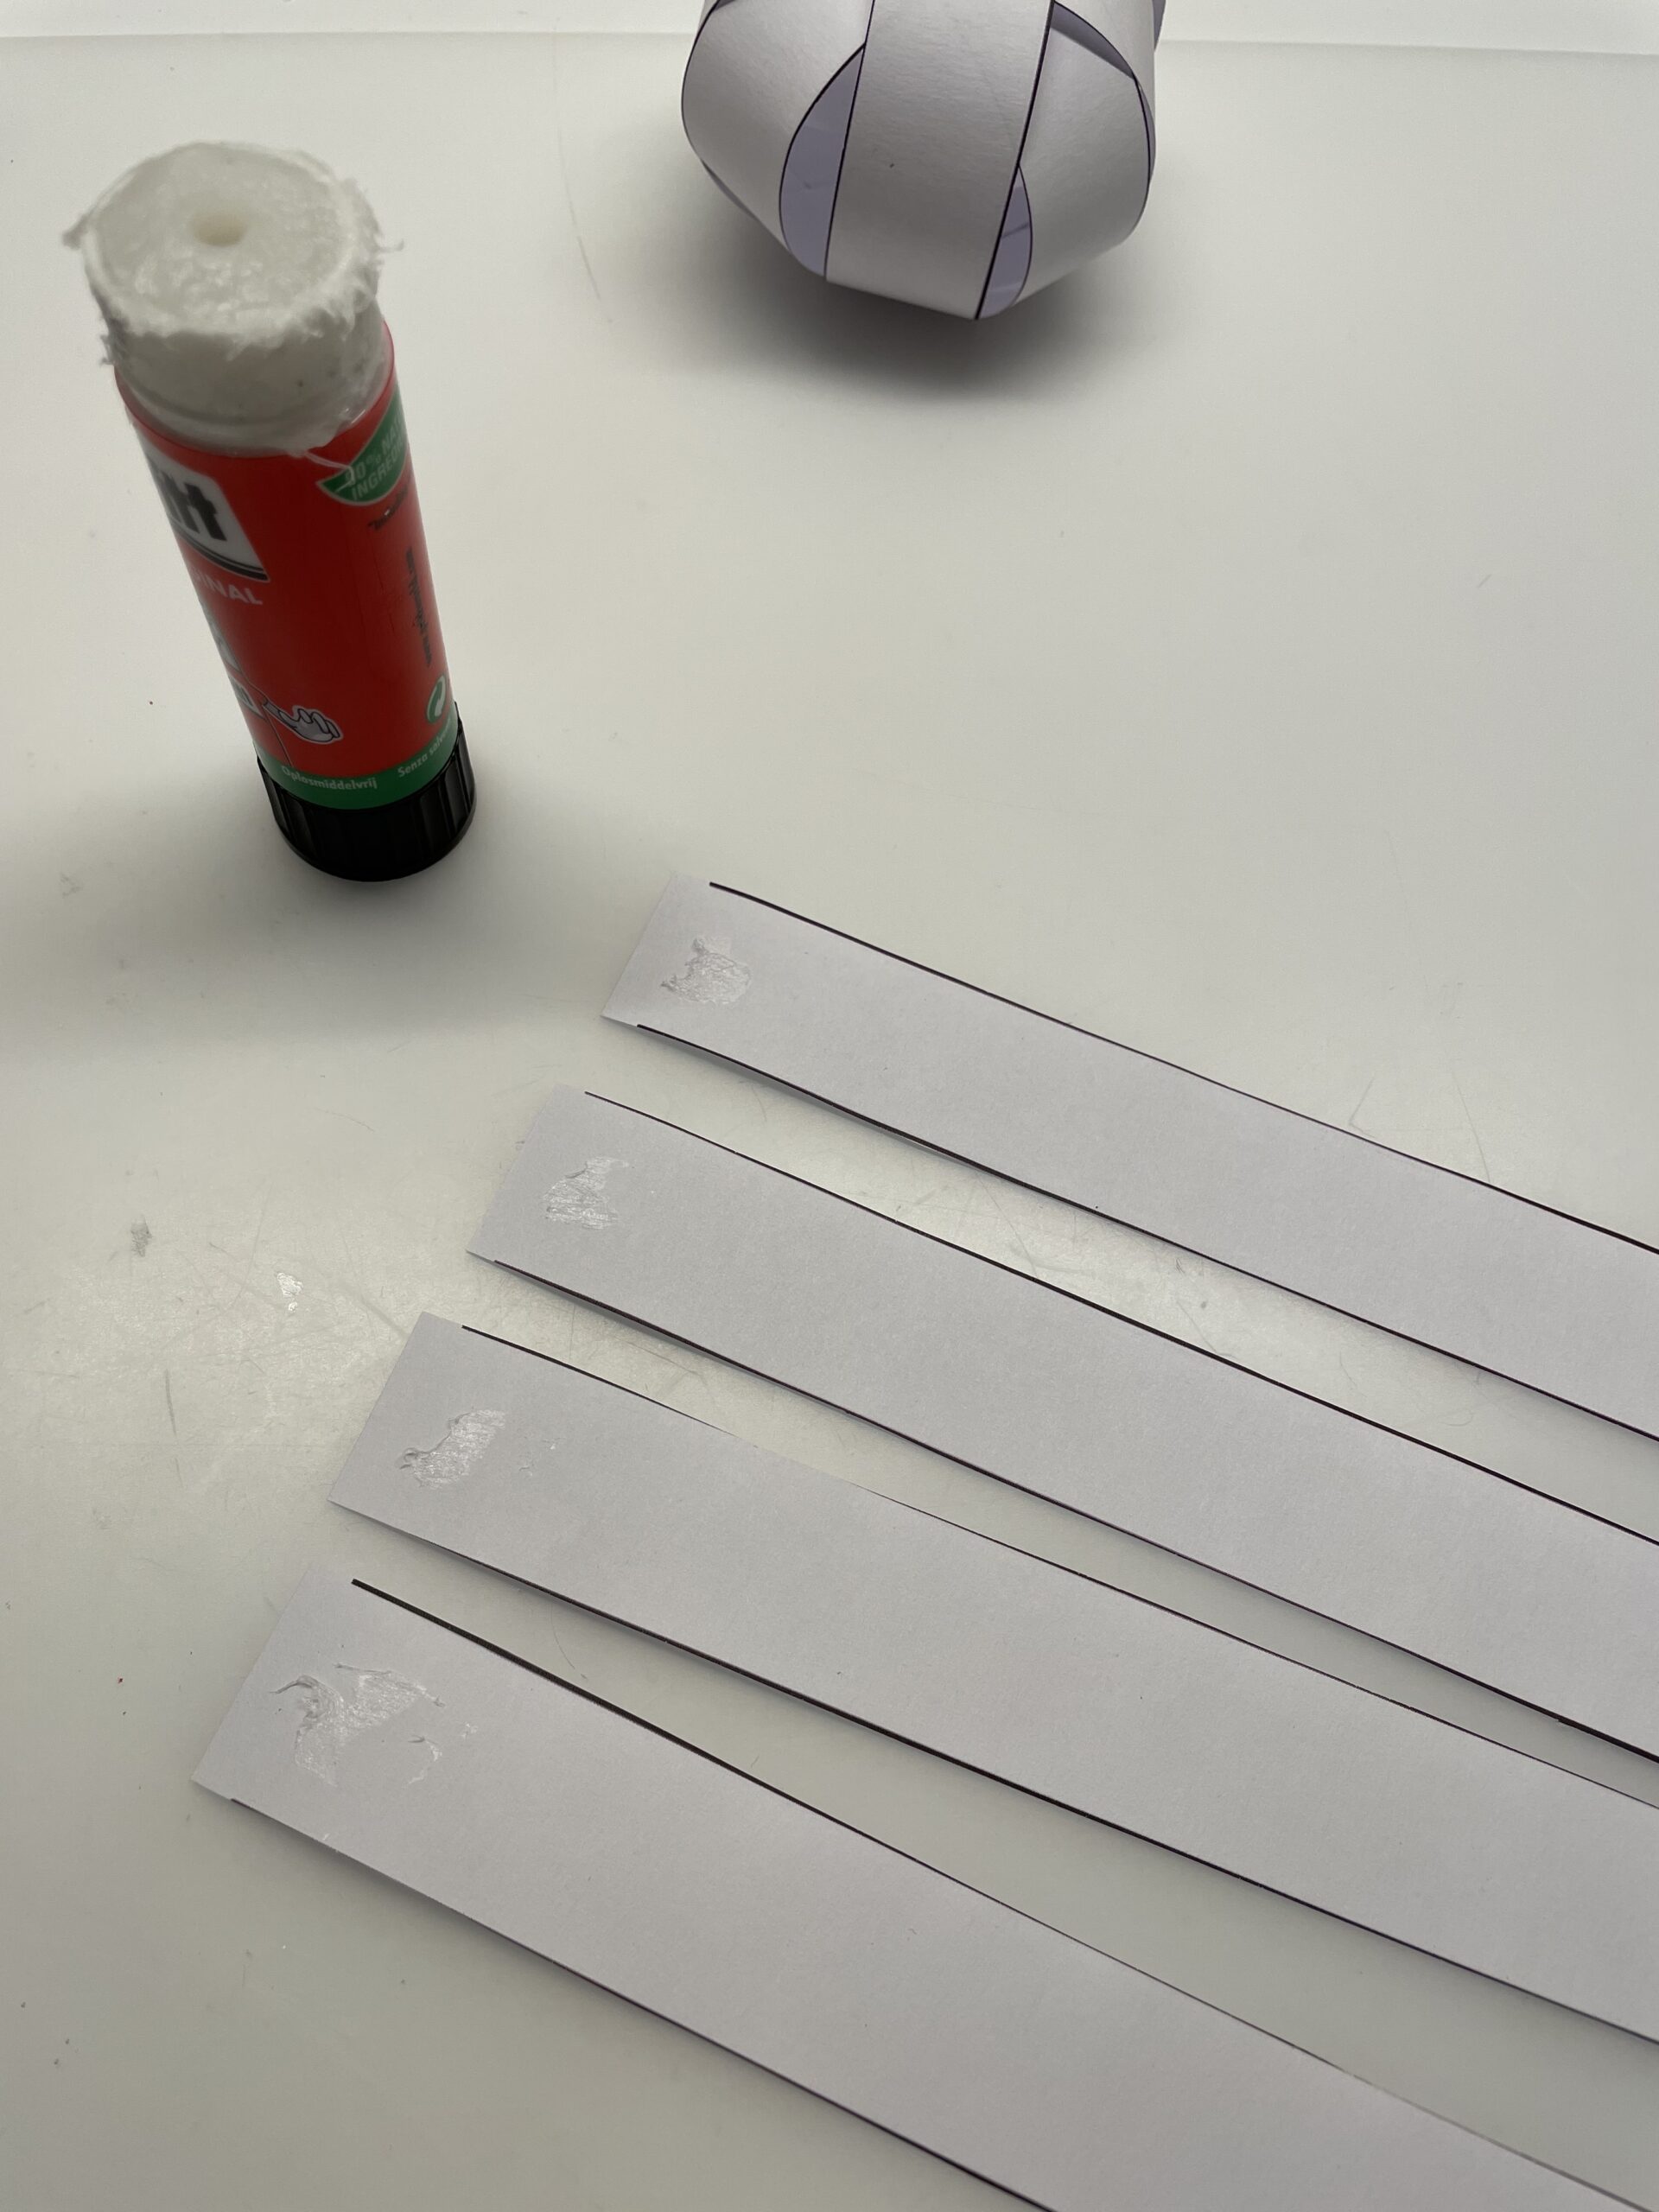
Bild zum Schritt 15 für das Bastel- und DIY-Abenteuer für Kinder: 'Jetzt formt und klebt ihr die letzten vier Streifen zu...'

15

After that, you put them together and stick them together to form a snow globe.
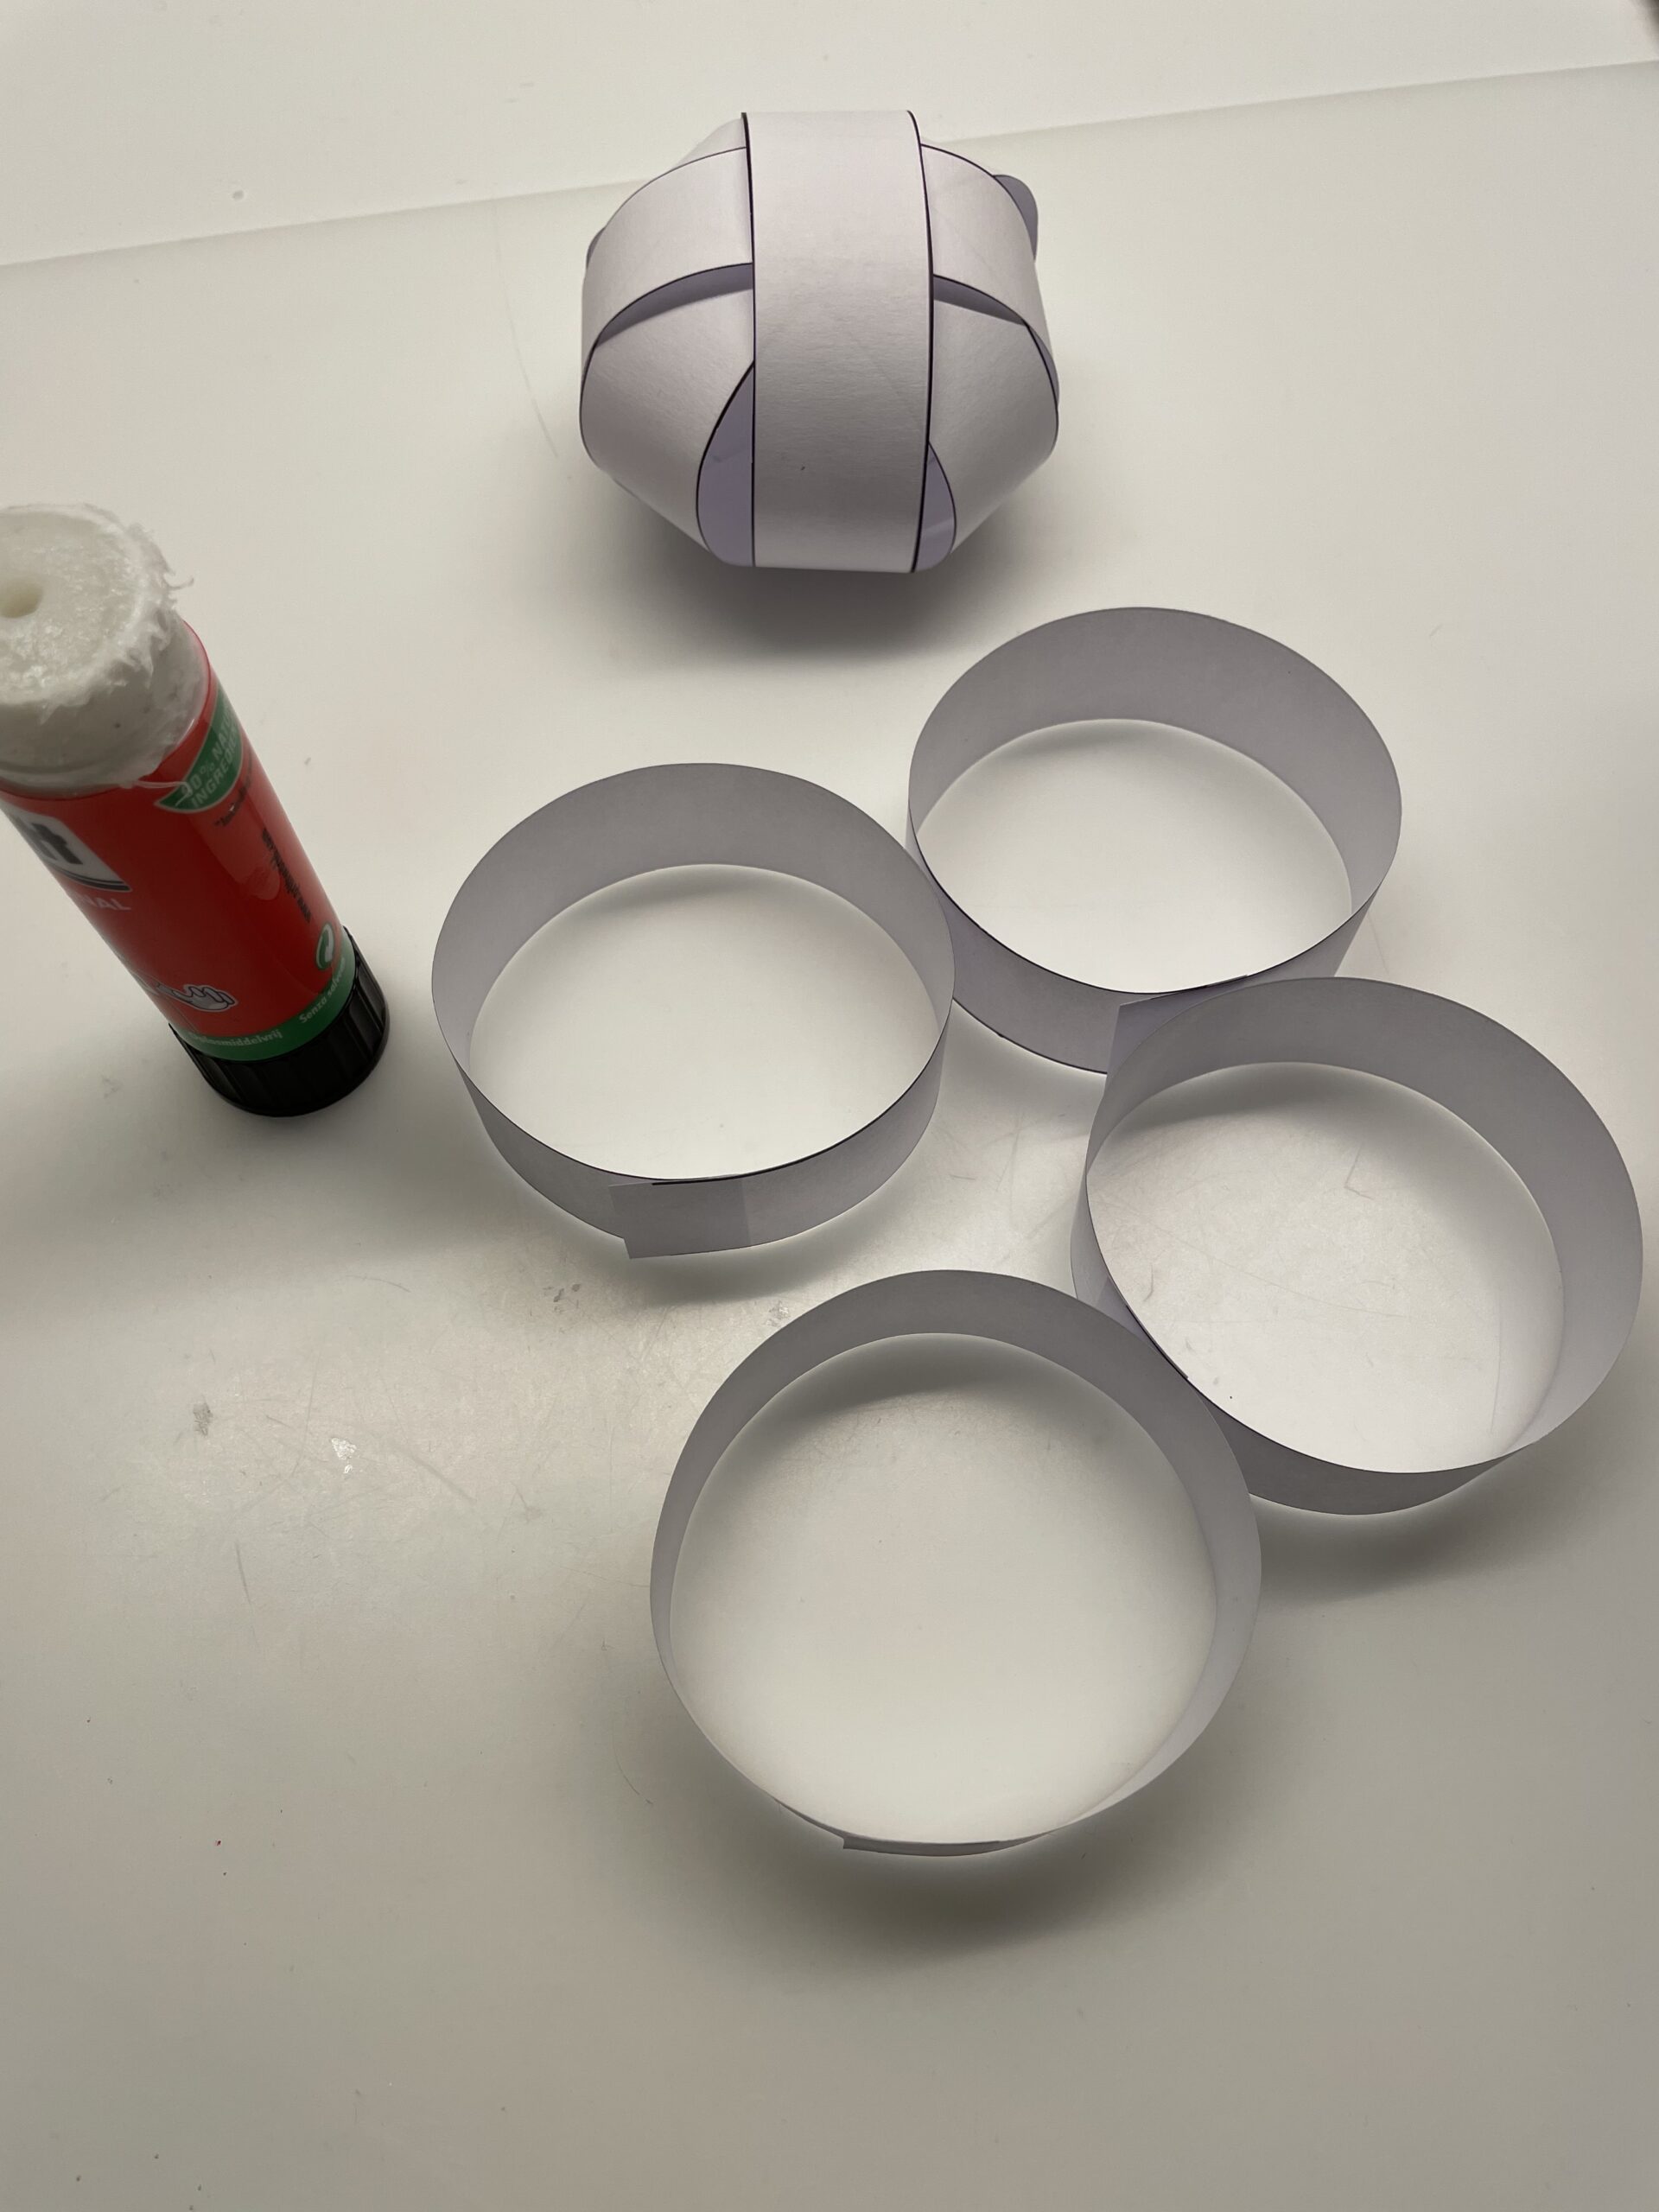
Bild zum Schritt 16 für das Bastel- und DIY-Abenteuer für Kinder: 'Danach steckt und klebt ihr auch diese zu einer Schneekugel...'

16

Two snowballs are ready.

Bild zum Schritt 17 für das Bastel- und DIY-Abenteuer für Kinder: 'Fertig sind zwei Schneekugeln.'

Crafting of face and hat
17

For face and hat you can use the template or you can paint it freely.
You can record the carrot and paint it orange or paint it on orange paper and cut it out.
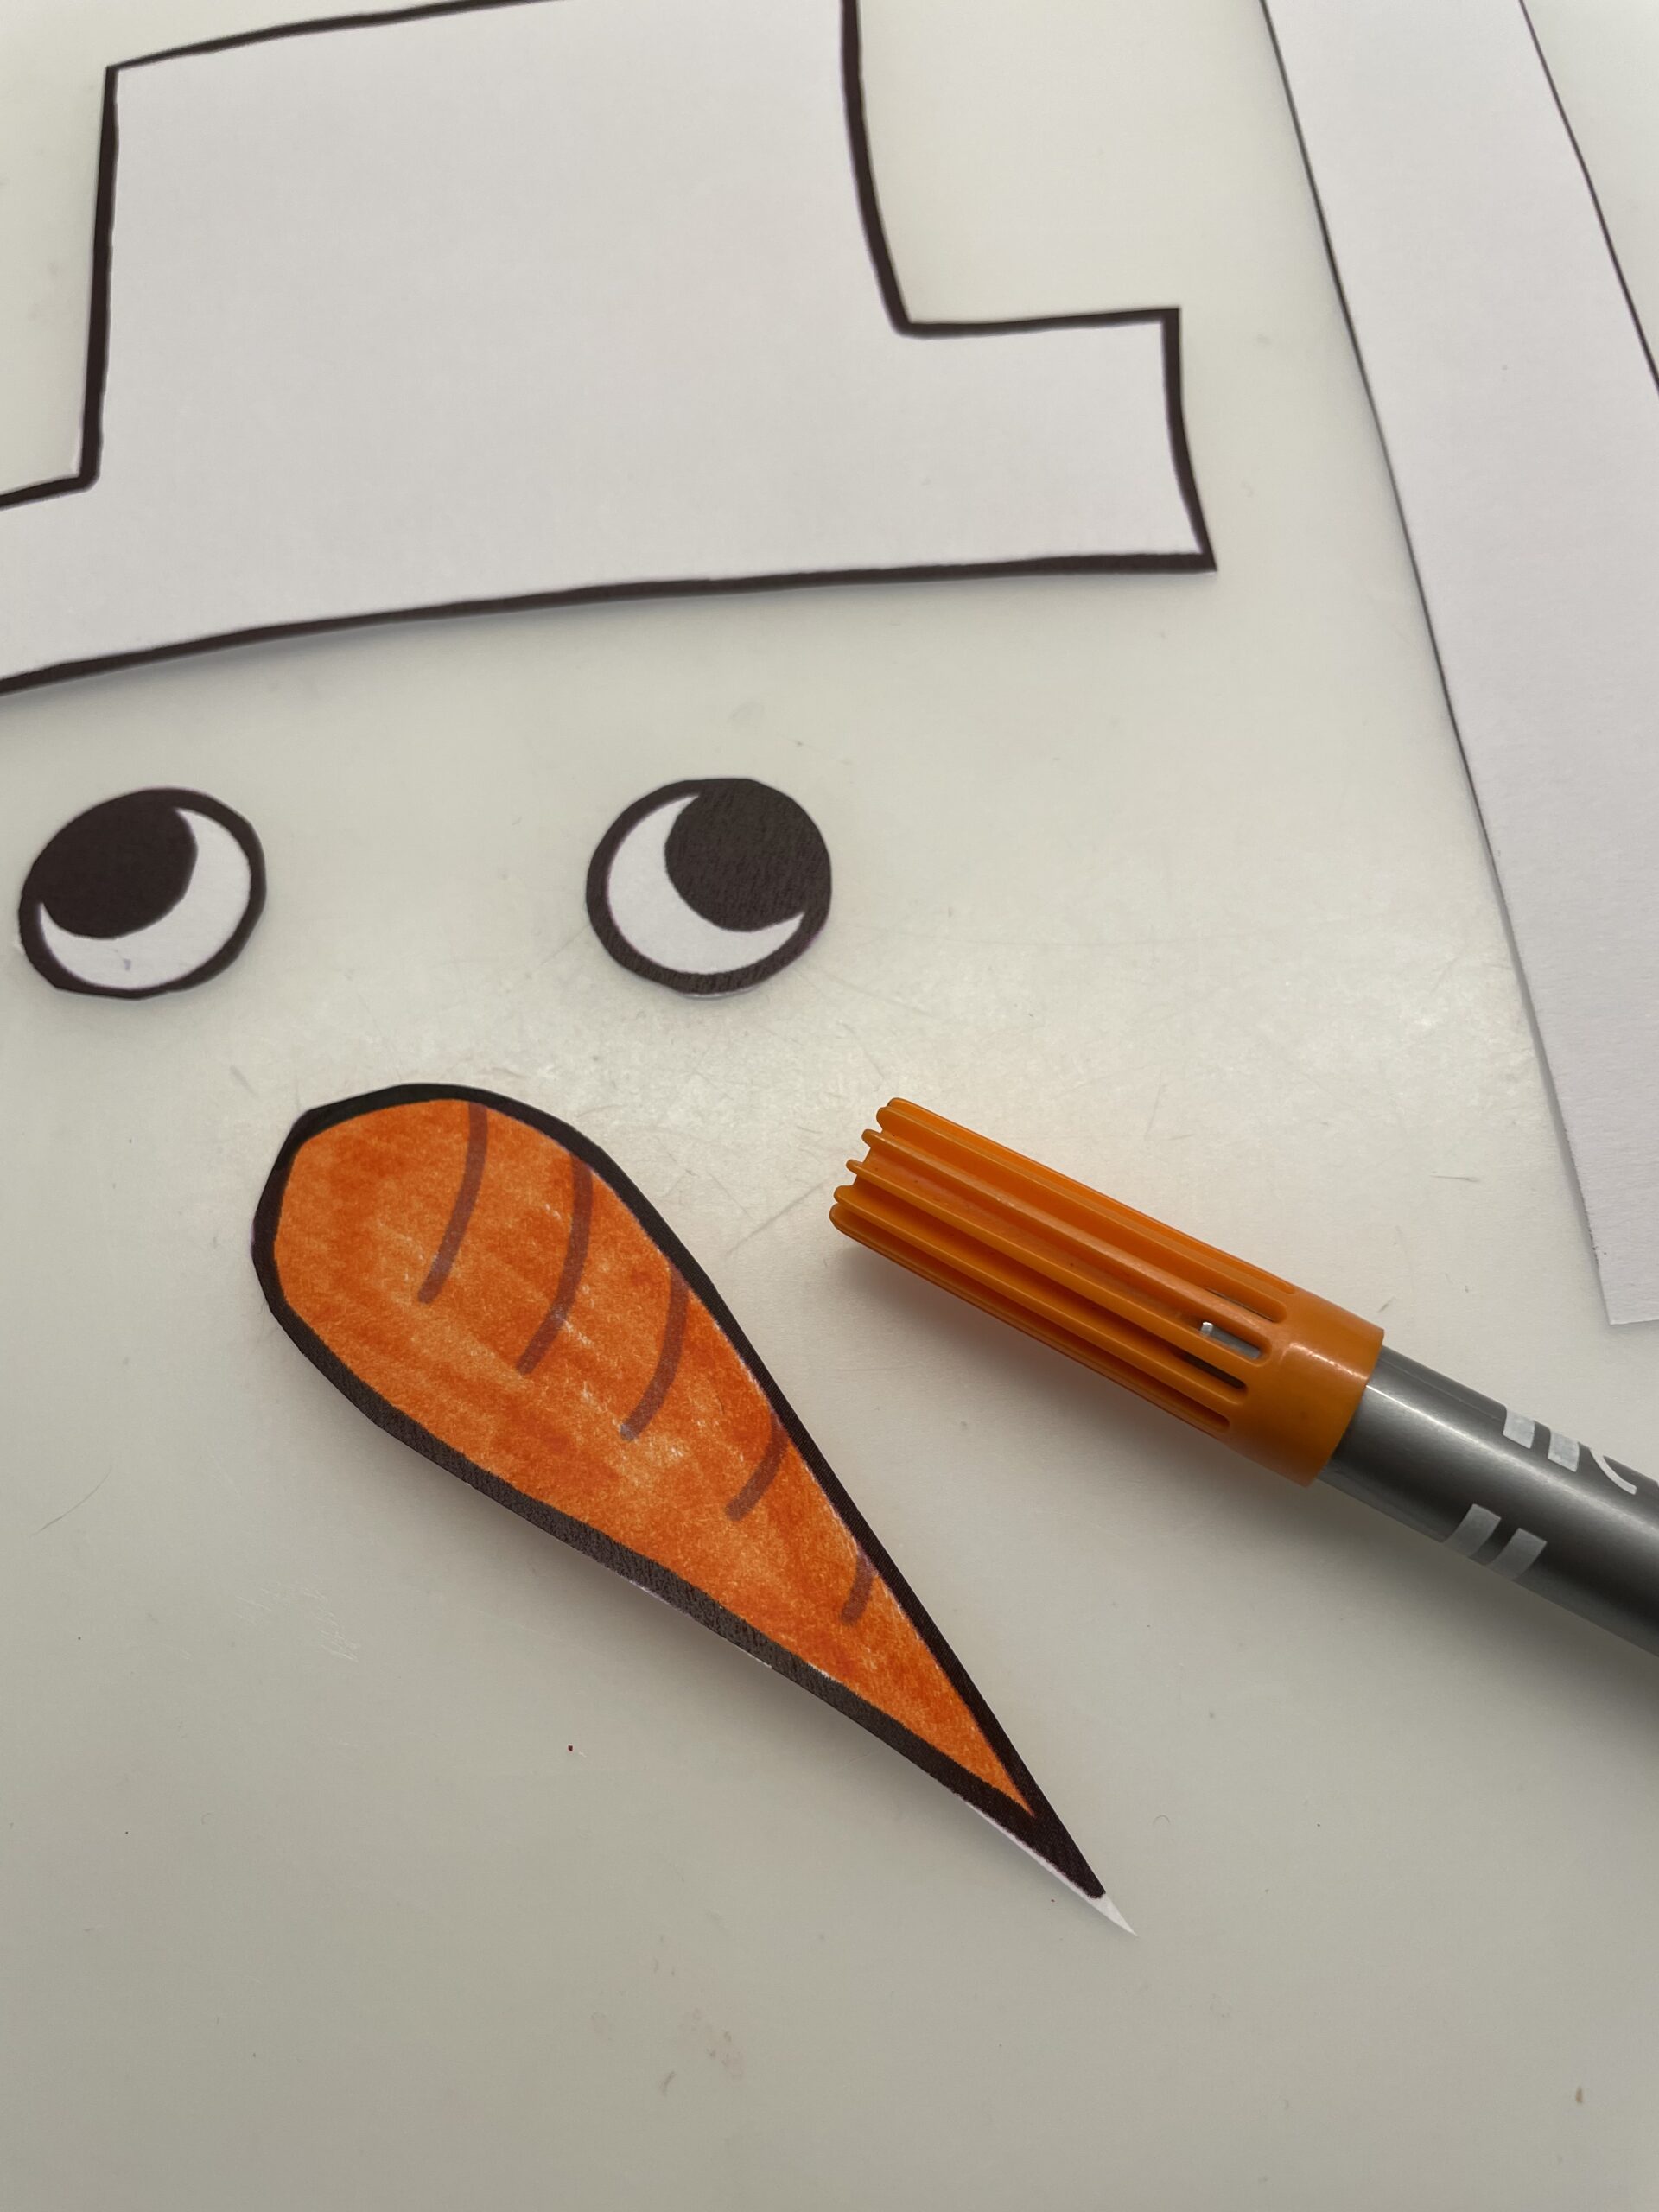
Bild zum Schritt 19 für das Bastel- und DIY-Abenteuer für Kinder: 'Für Gesicht und Hut könnt ihr die Vorlage verwenden oder...'

18

Transfer the template for the hat to a black clay paper or draw it on yourself and cut it out.
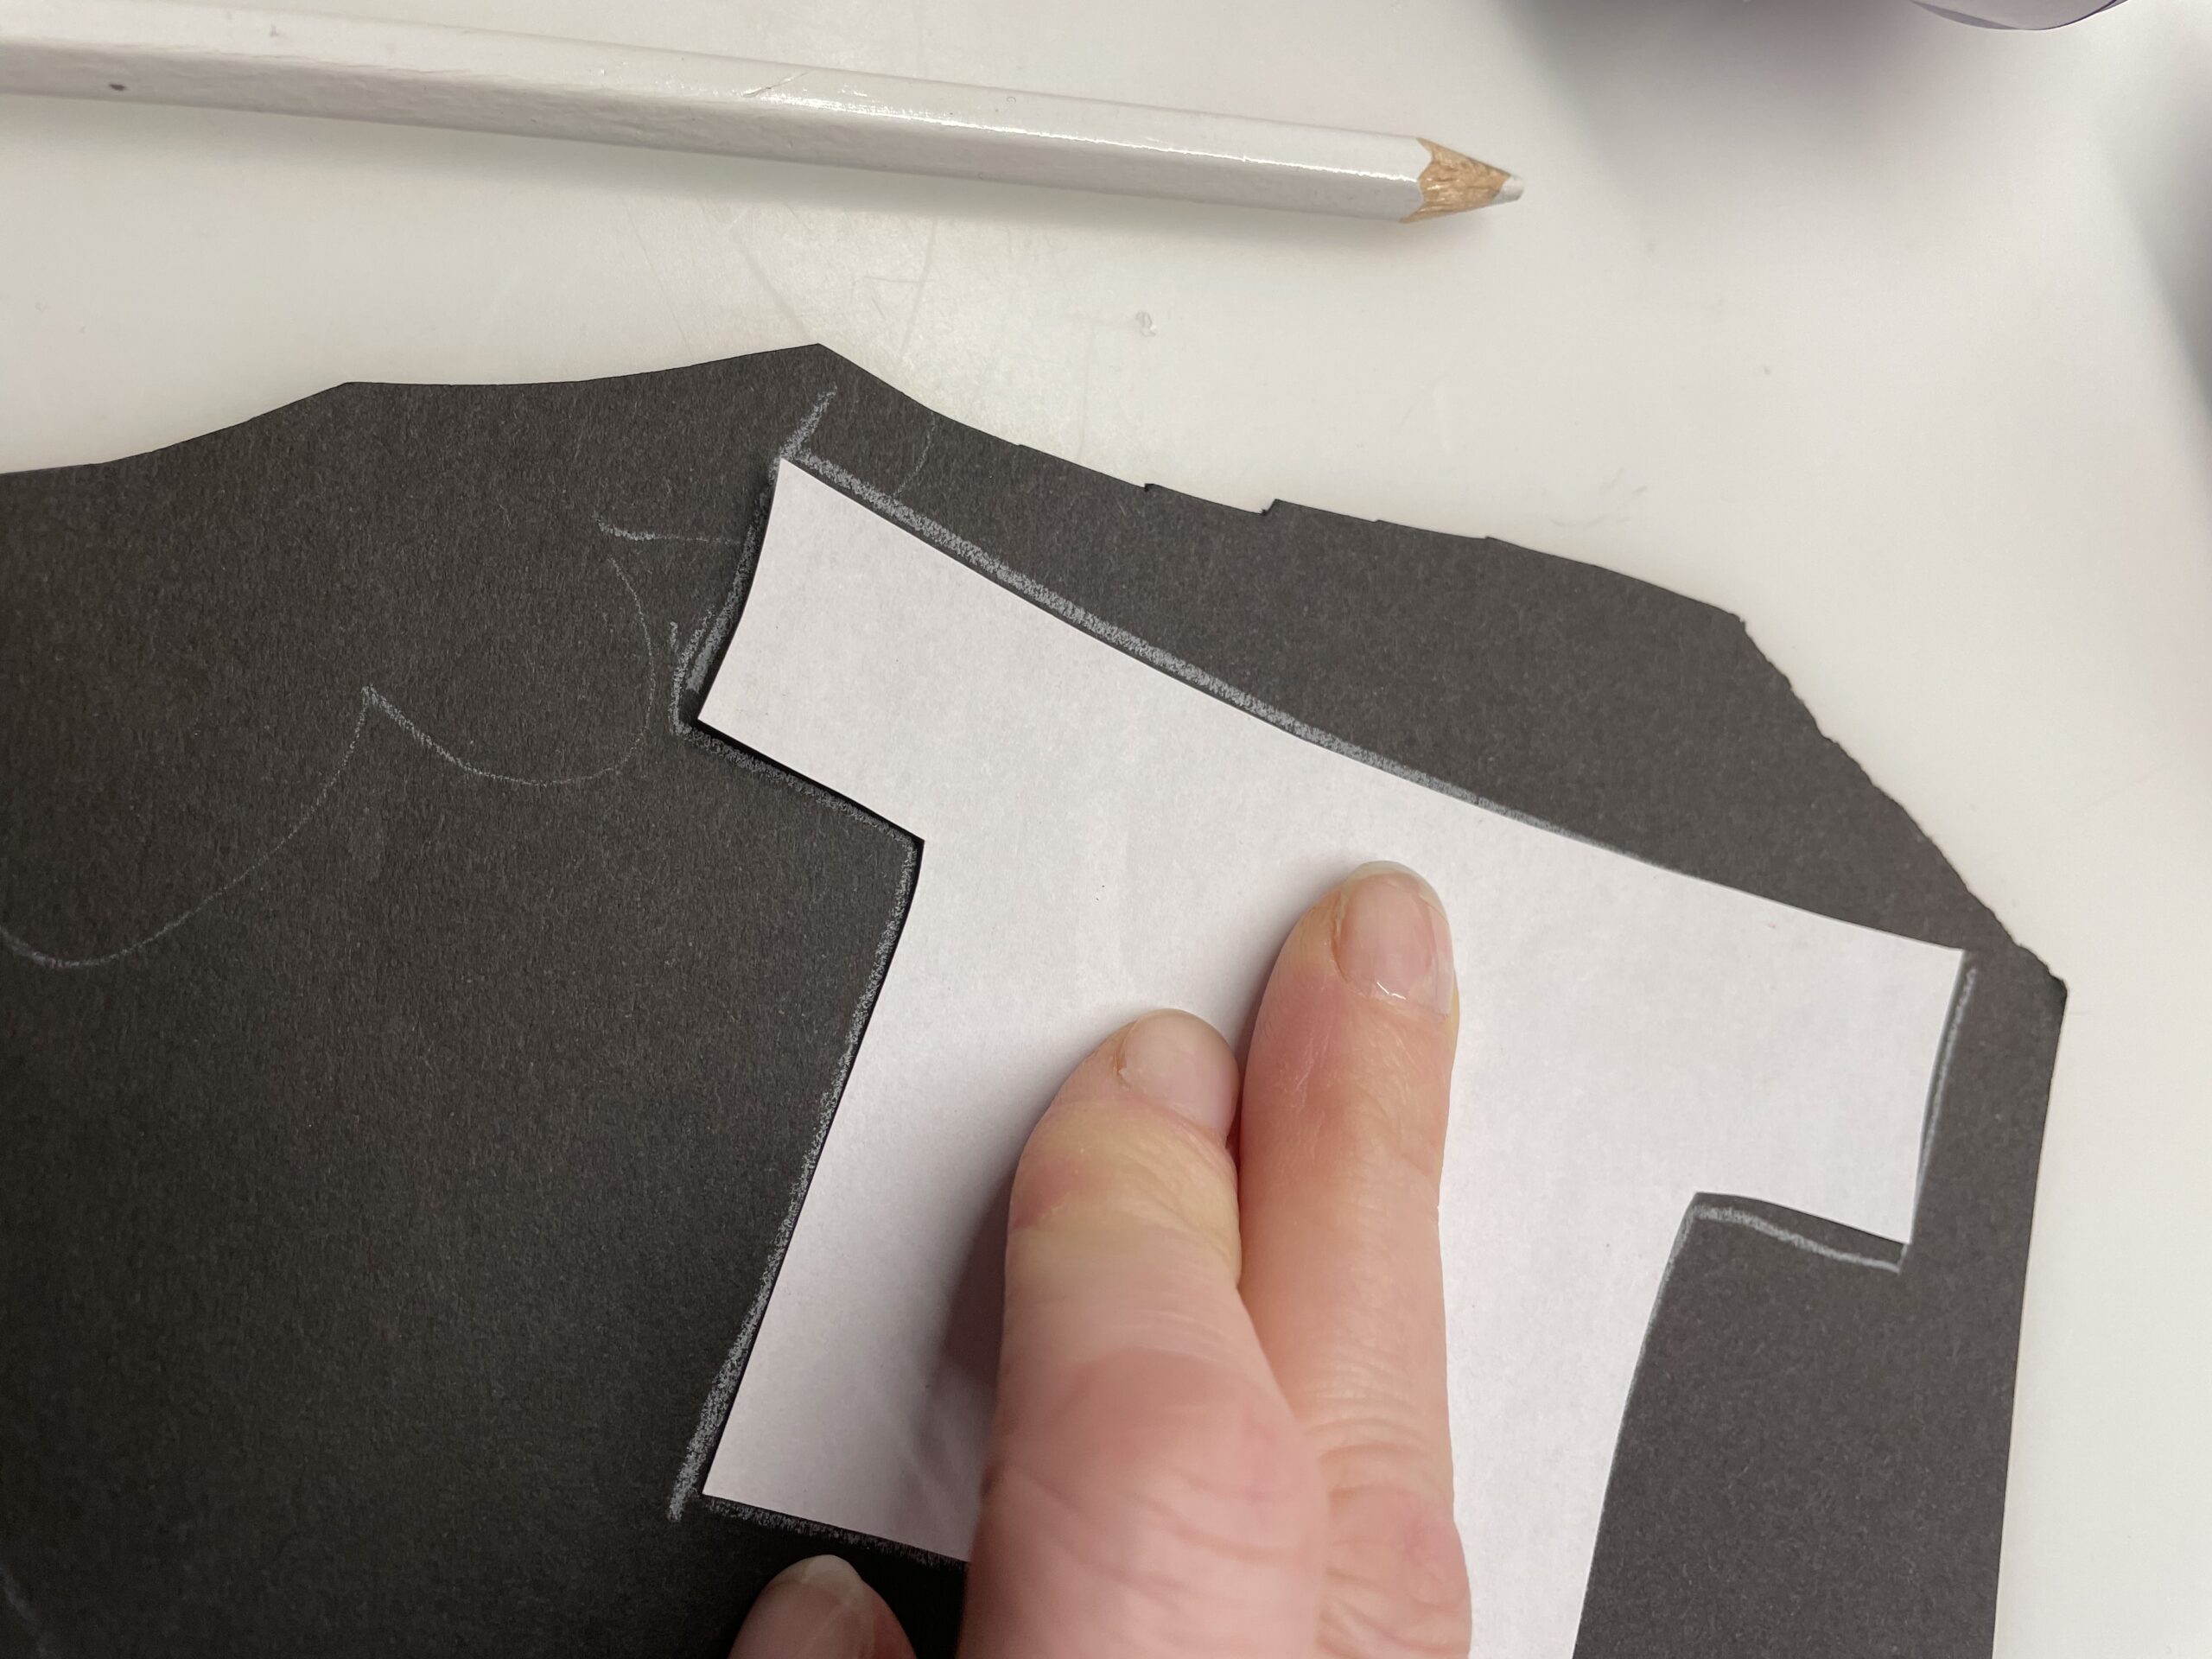
Bild zum Schritt 20 für das Bastel- und DIY-Abenteuer für Kinder: 'Übertragt die Vorlage für den Hut auf ein schwarzes Tonpapier...'

19

Then you paint three small circles for the buttons and cut them out.
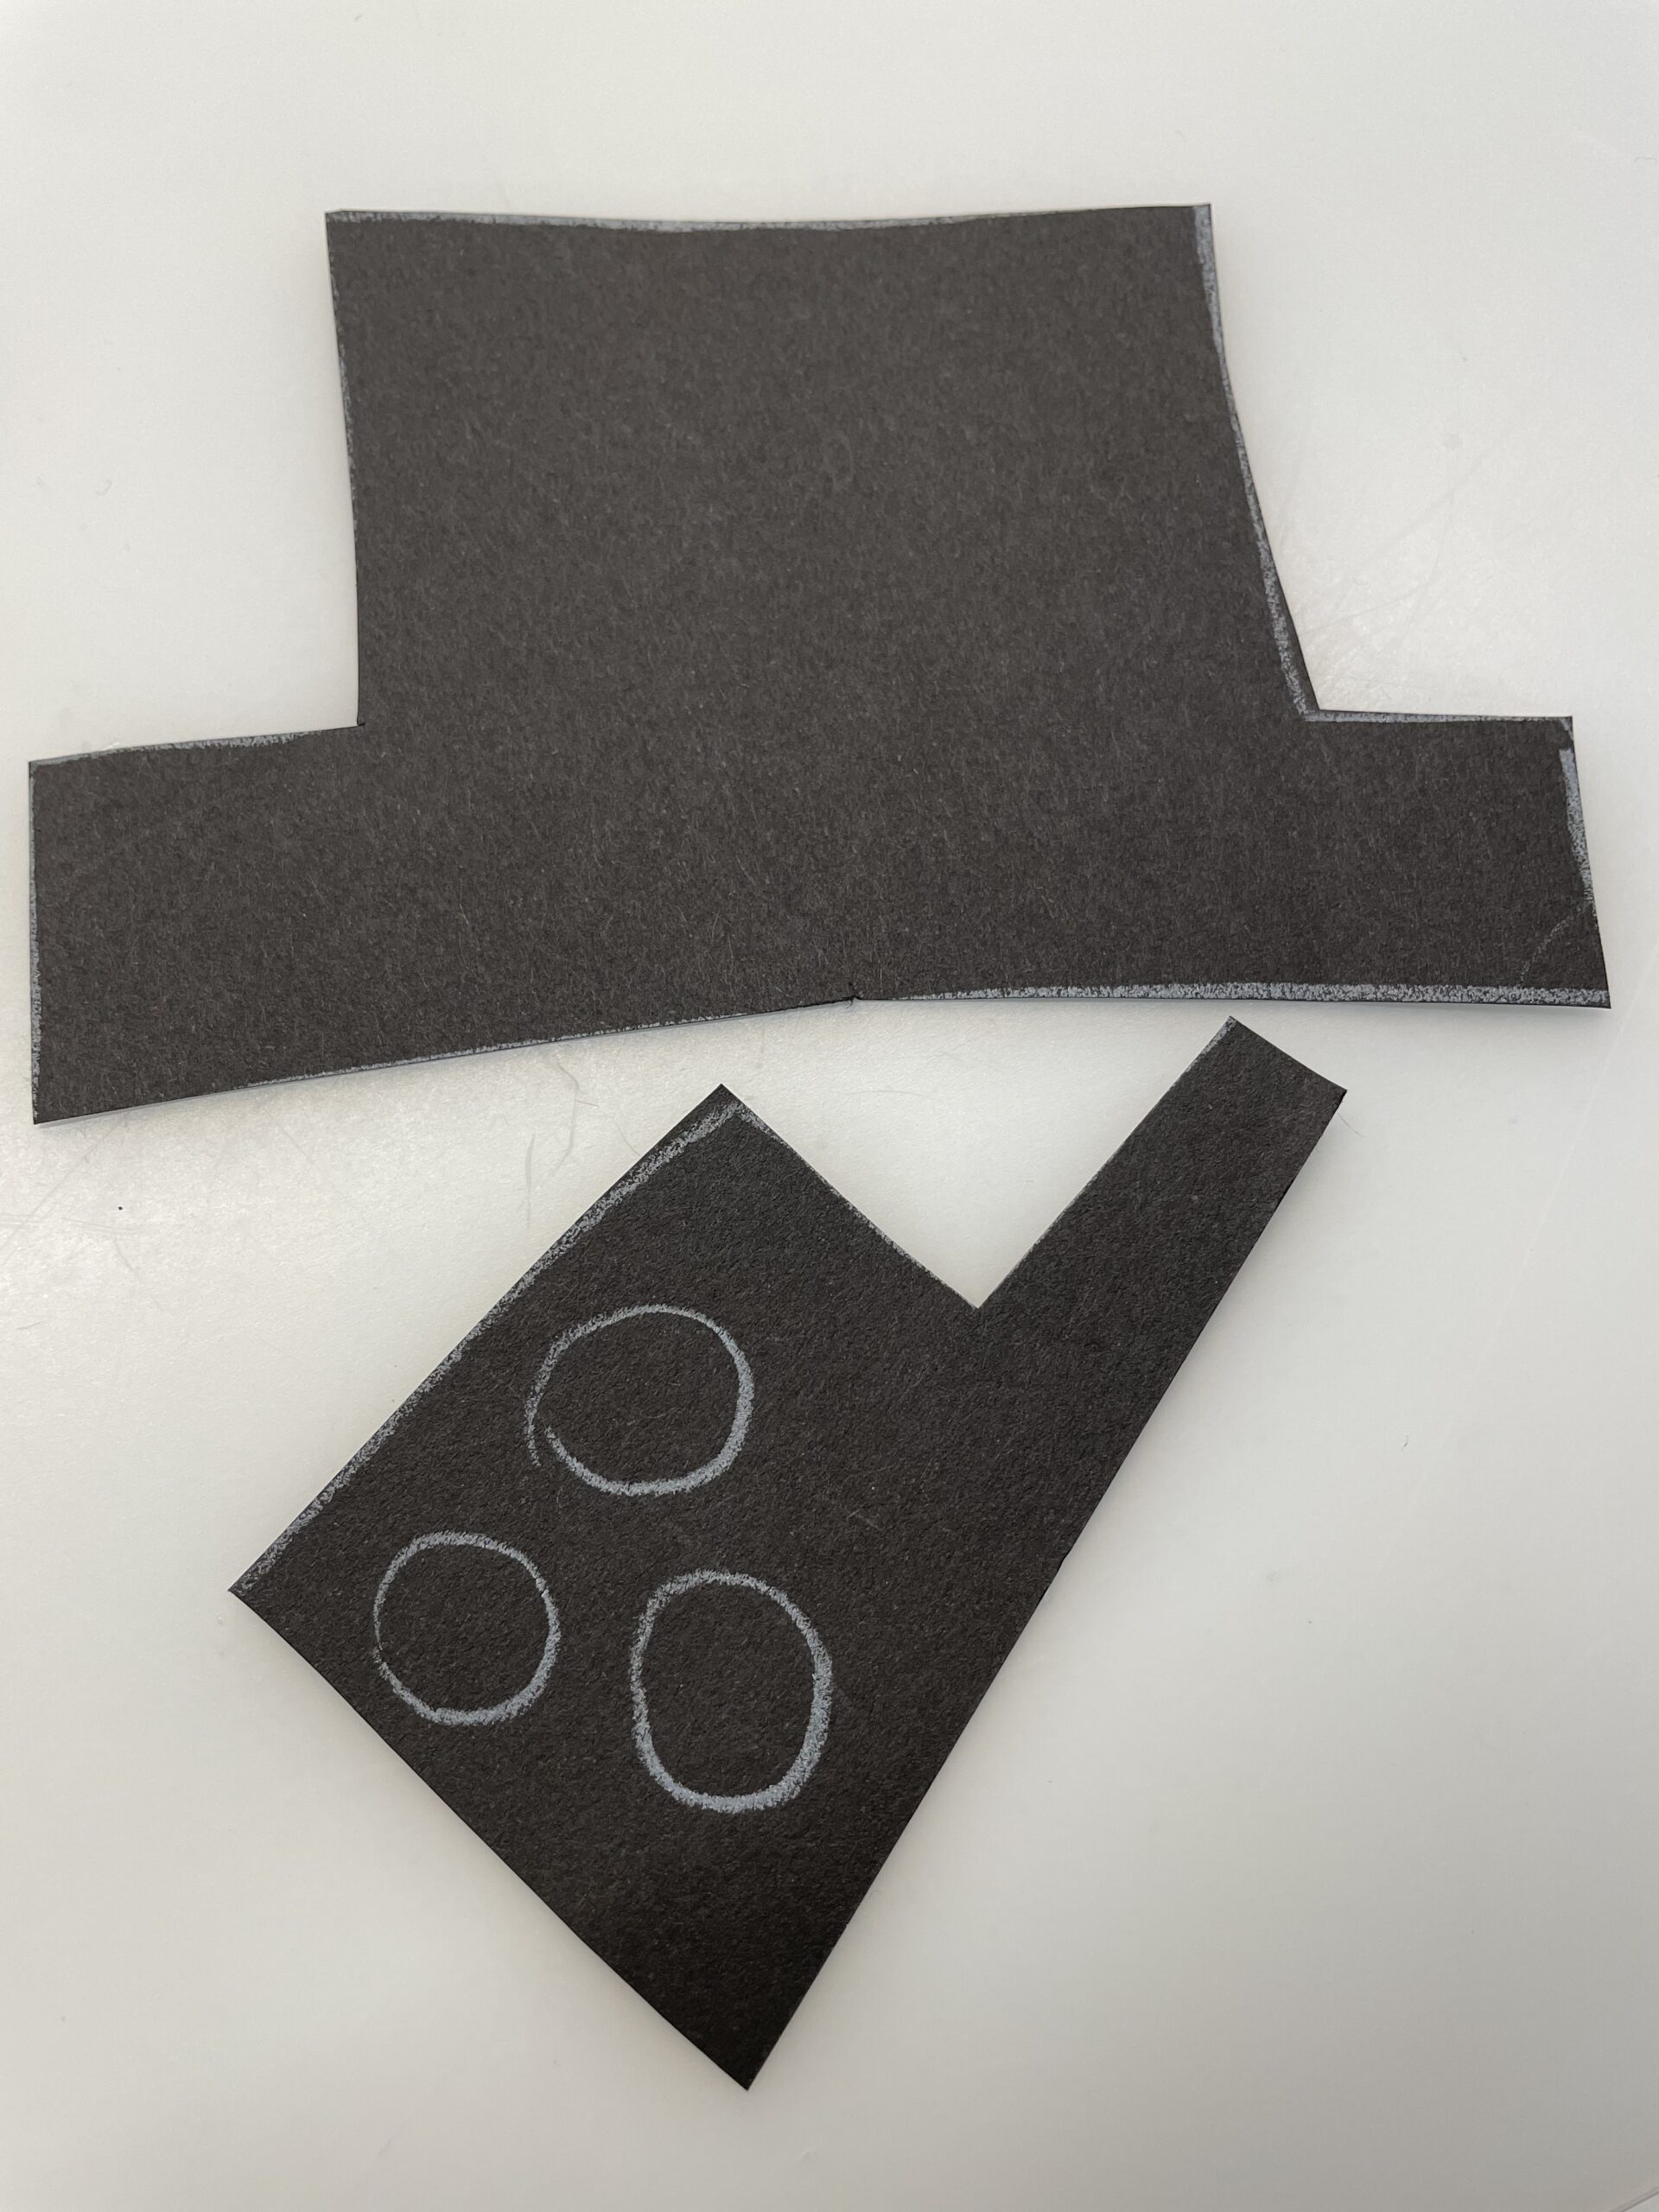
Bild zum Schritt 21 für das Bastel- und DIY-Abenteuer für Kinder: 'Anschließend malt ihr drei kleine Kreise für die Knöpfe auf...'

20

Now you stick your face on one snow globe and the buttons on the other. Make sure that the balls lie down with the interfaces.
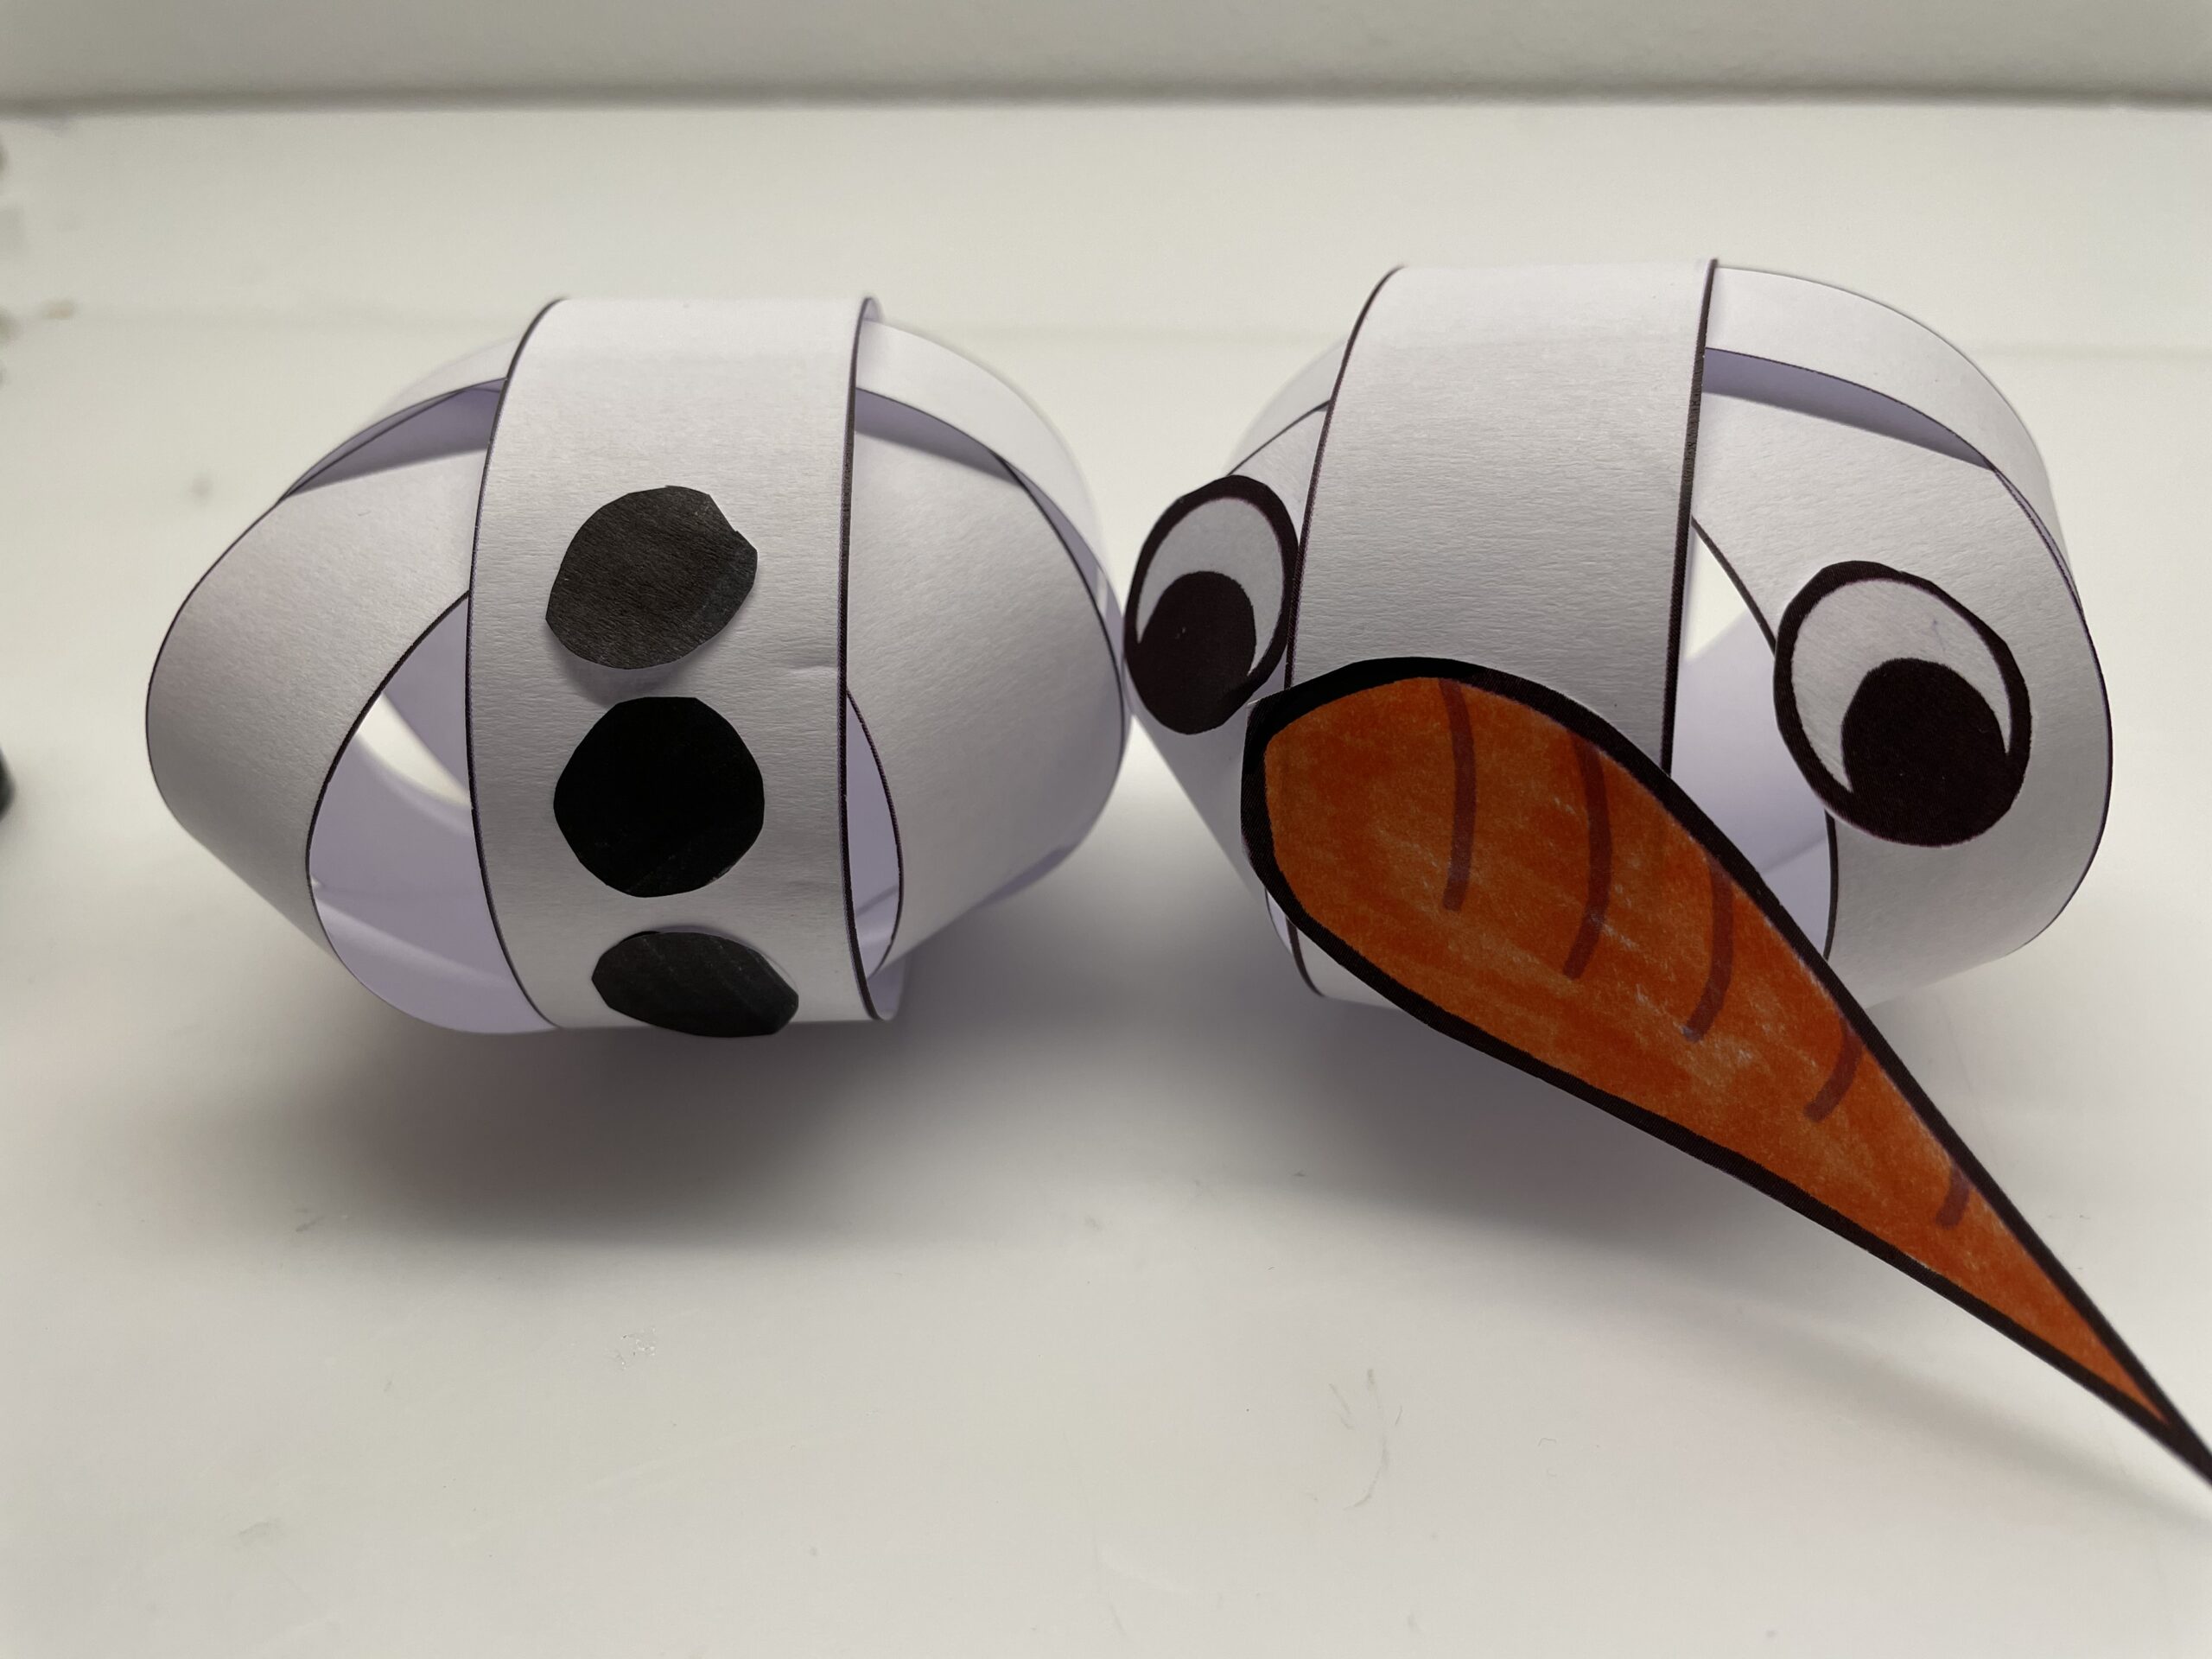
Bild zum Schritt 22 für das Bastel- und DIY-Abenteuer für Kinder: 'Jetzt klebt ihr an eine Schneekugel das Gesicht auf und...'

21

Then you put both snowballs together. For this you reach into the paper ring with one or two fingers. So you avoid that flat pressing the balls when glued together.
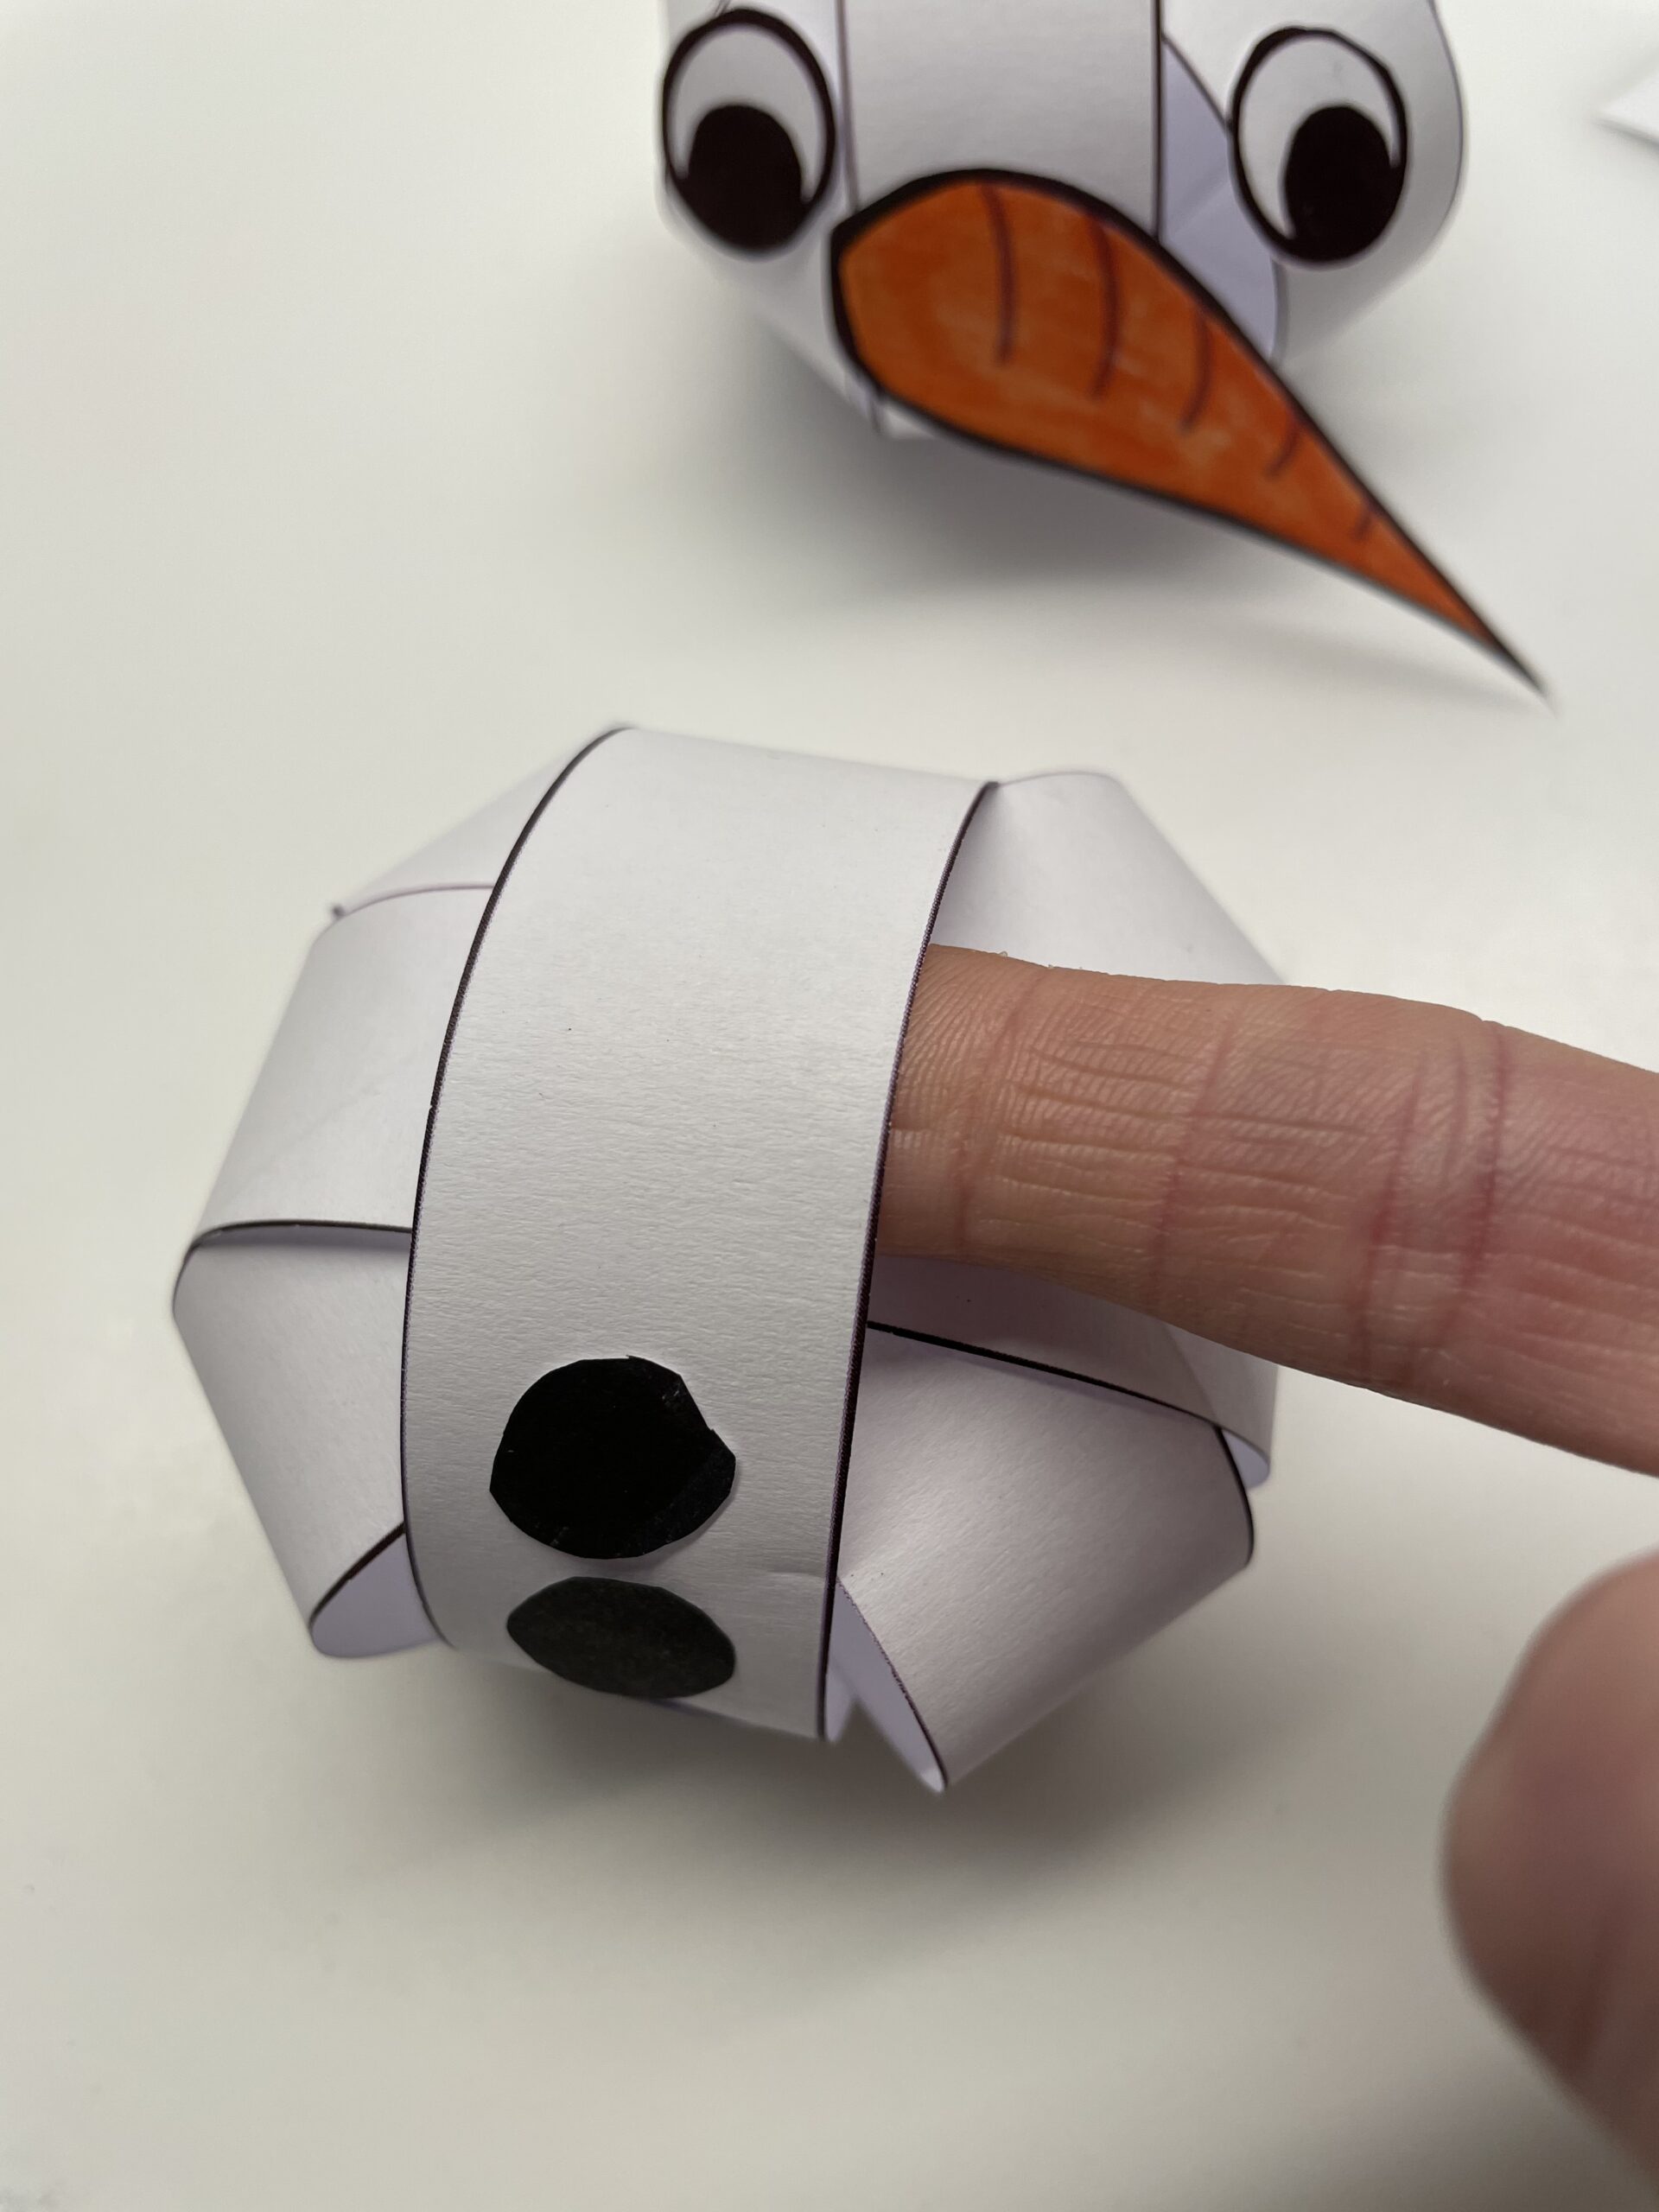
Bild zum Schritt 23 für das Bastel- und DIY-Abenteuer für Kinder: 'Anschließend setzt ihr beide Schneekugeln aufeinander. Dafür greift ihr in...'

22

Now stroke some glue onto the lower snowball and press the upper one on it.
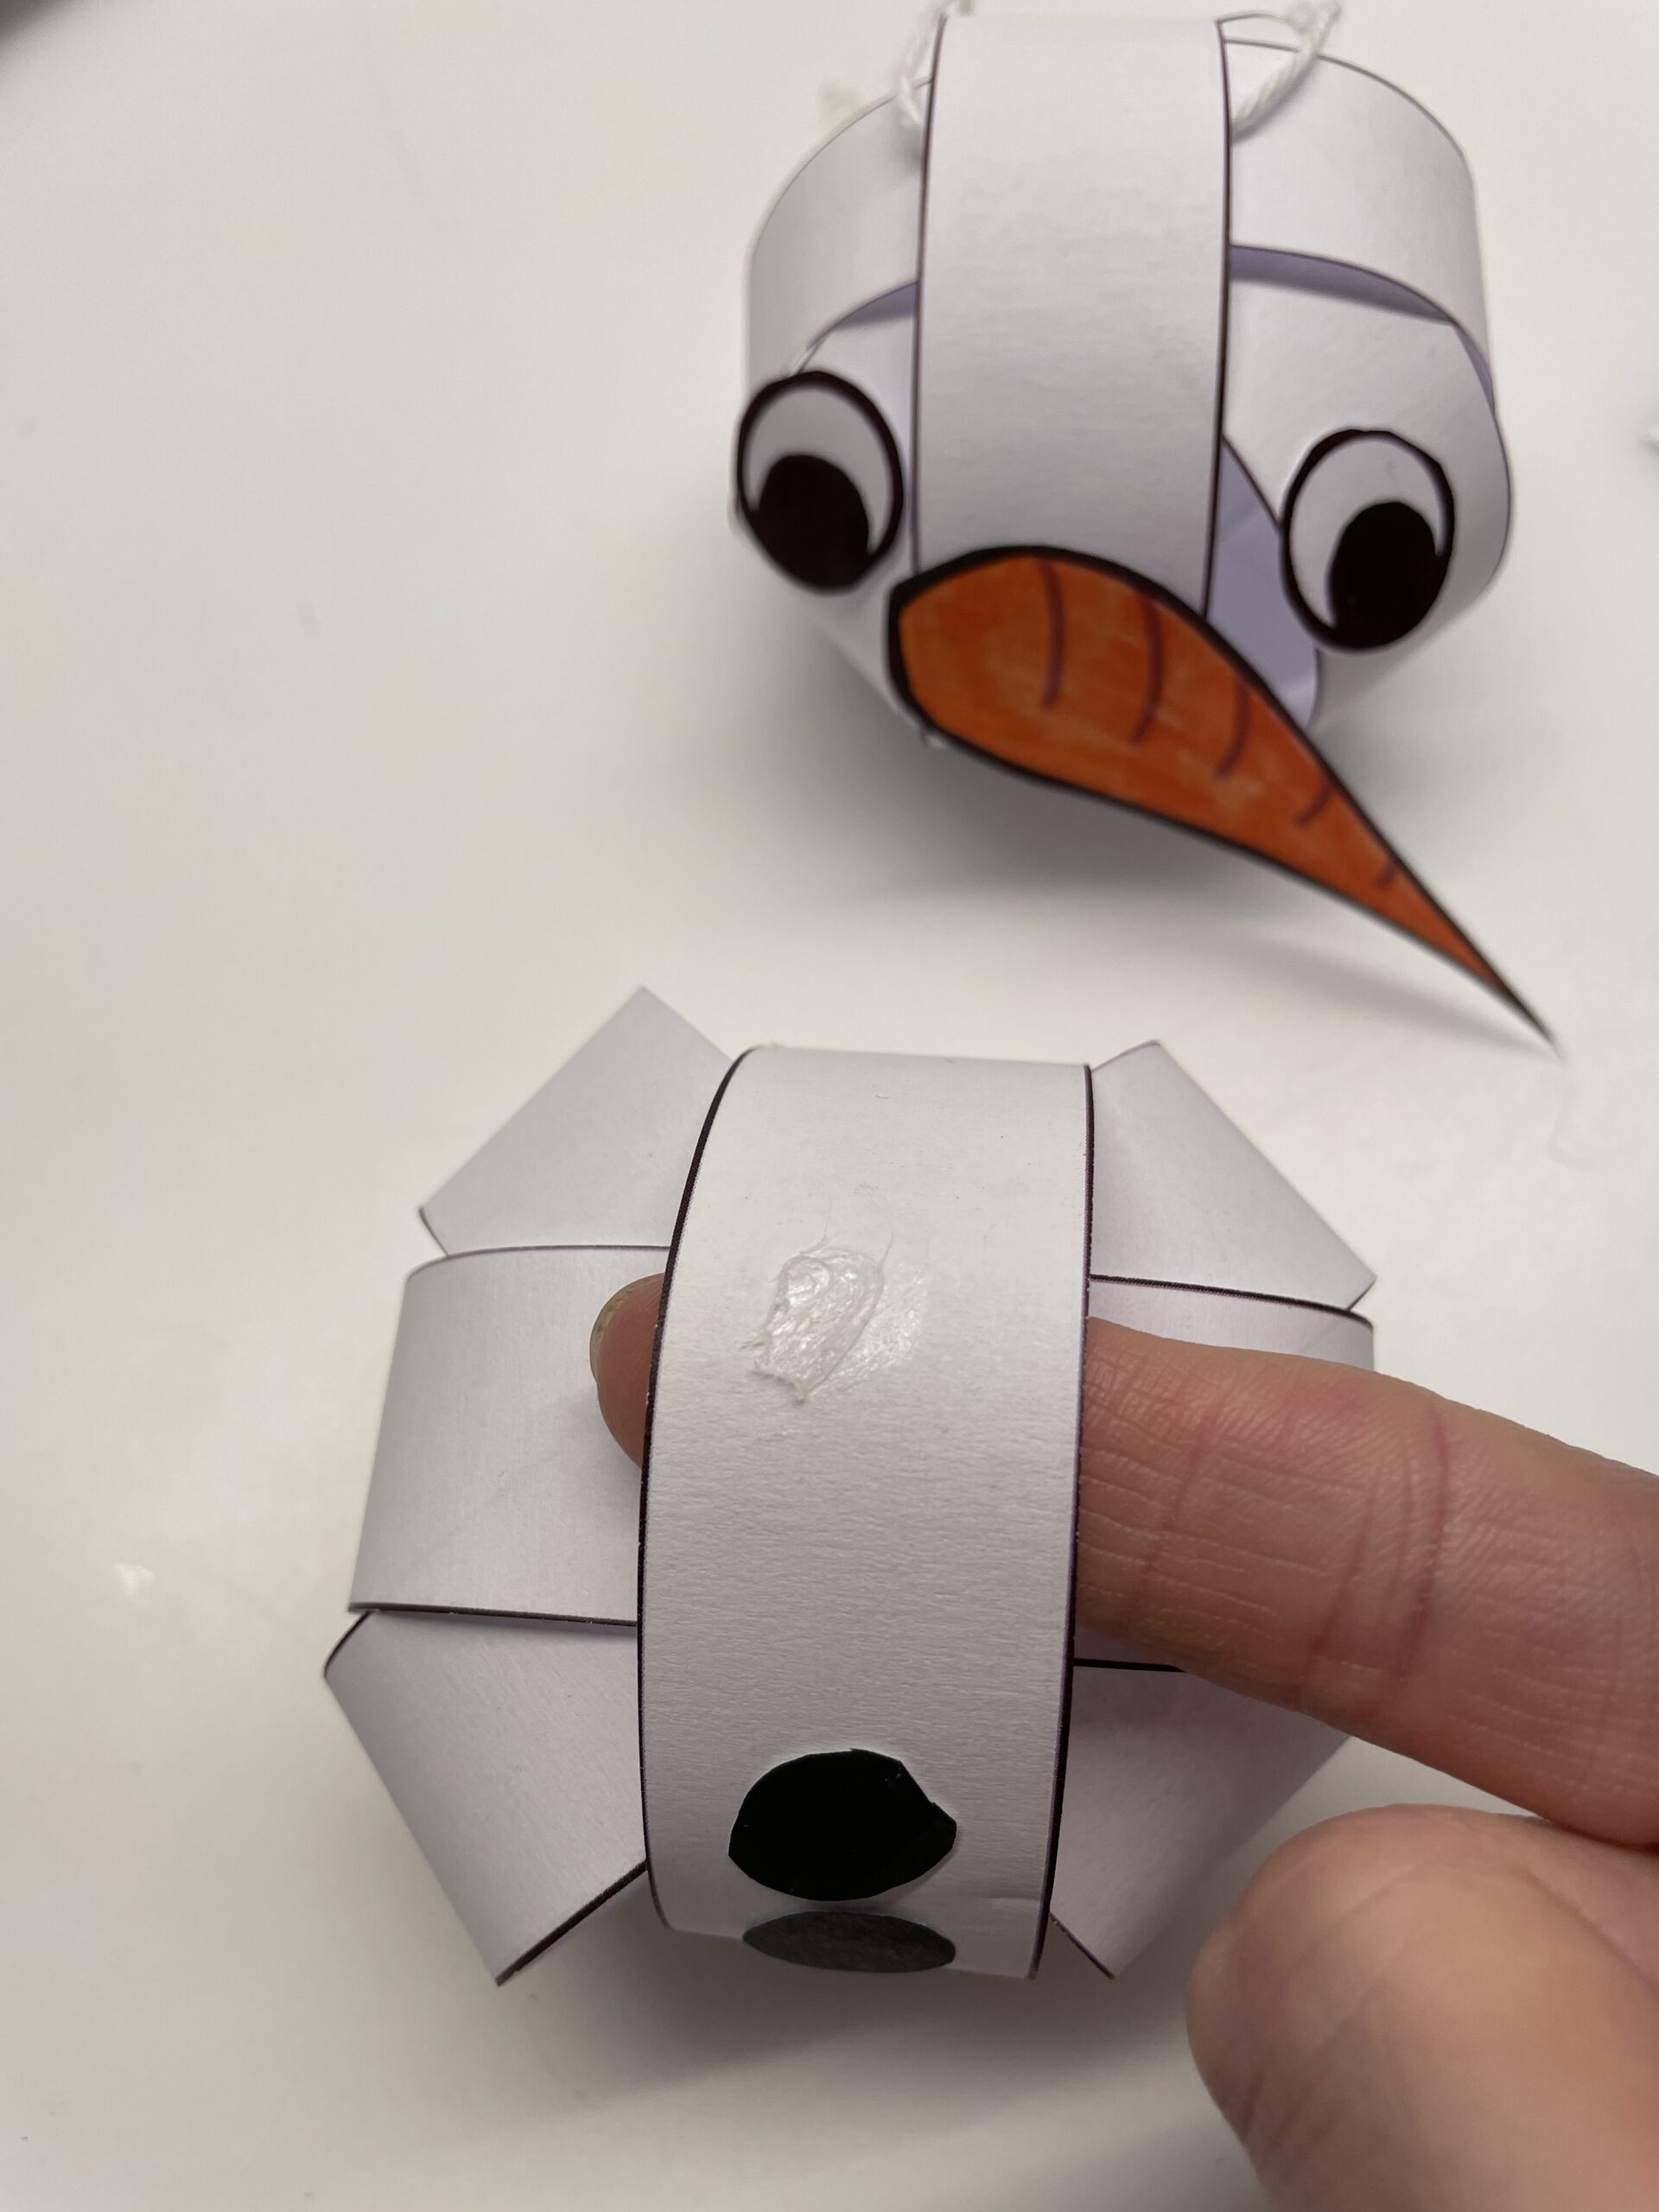
Bild zum Schritt 24 für das Bastel- und DIY-Abenteuer für Kinder: 'Streicht nun etwas Kleber auf den unteren Schneeball und drückt...'

23

Make sure that the nose and buttons lie on top of each other. With the thumb and index finger of one hand you hold both balls together briefly.
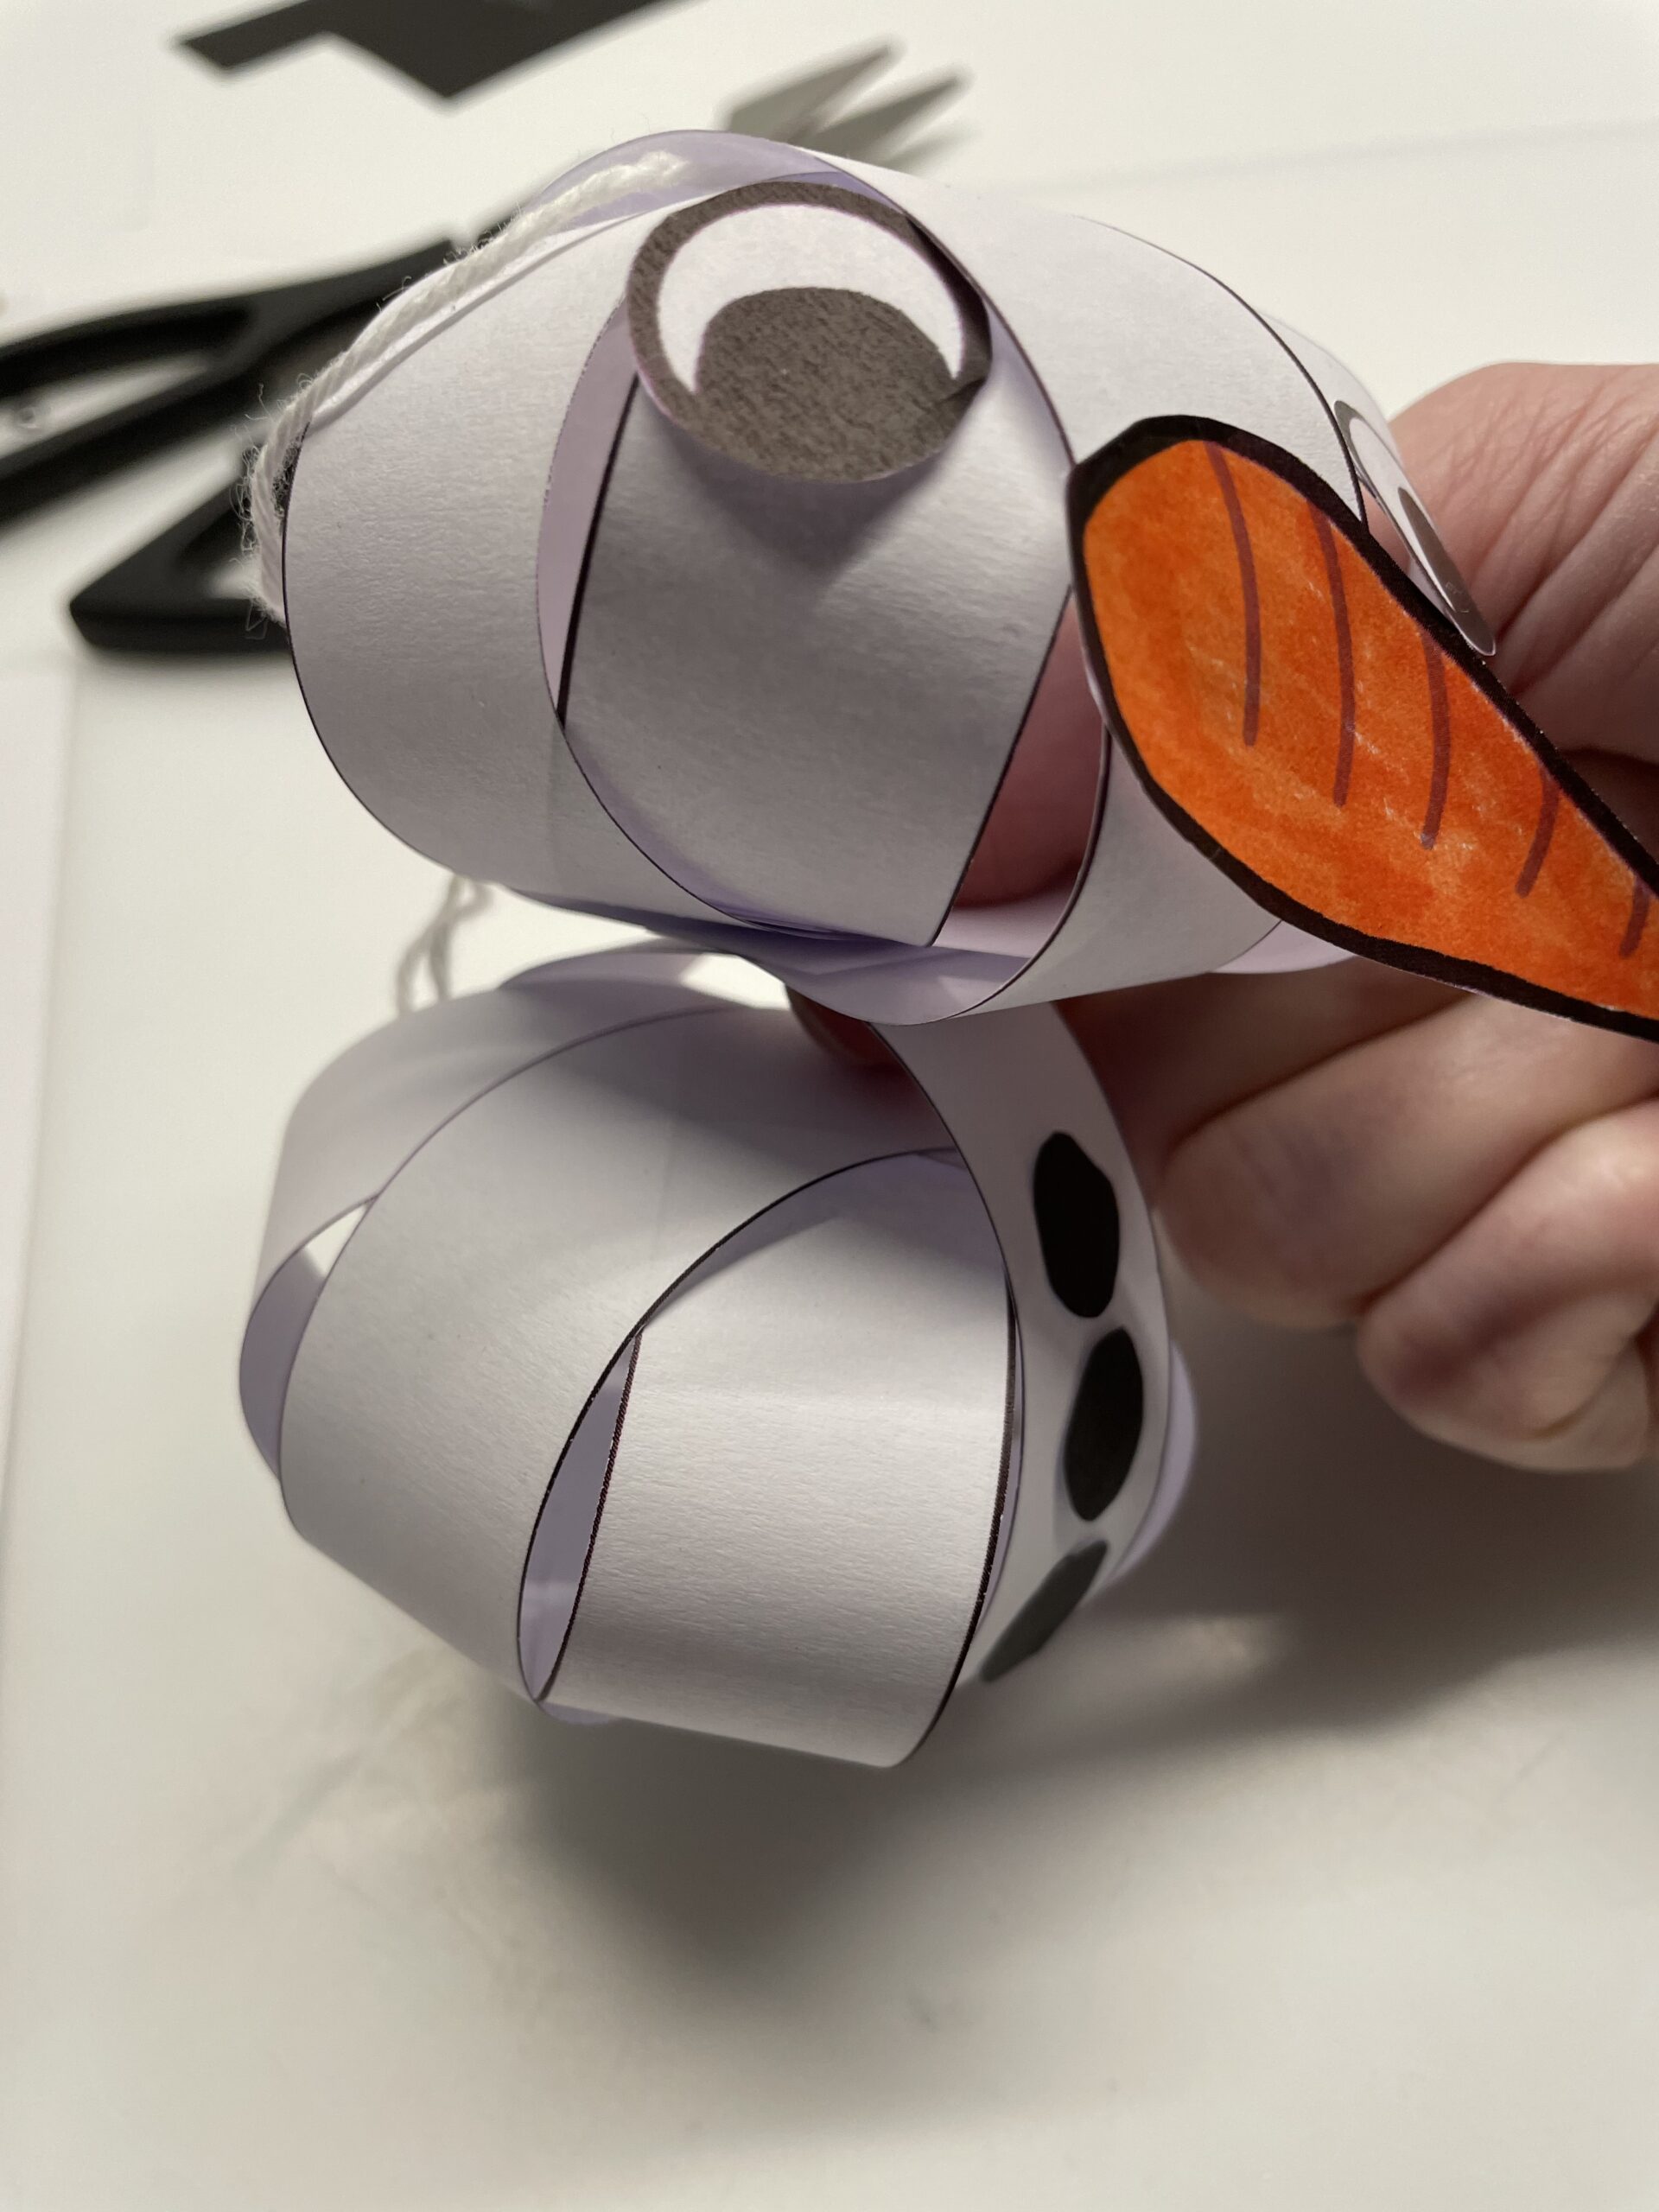
Bild zum Schritt 25 für das Bastel- und DIY-Abenteuer für Kinder: 'Achtet darauf, dass die Nase und die Knöpfe übereinander liegen....'

24

Now cut off a piece of thread (about 30 cm) and thread it through the top paper ring and knot both ends together.
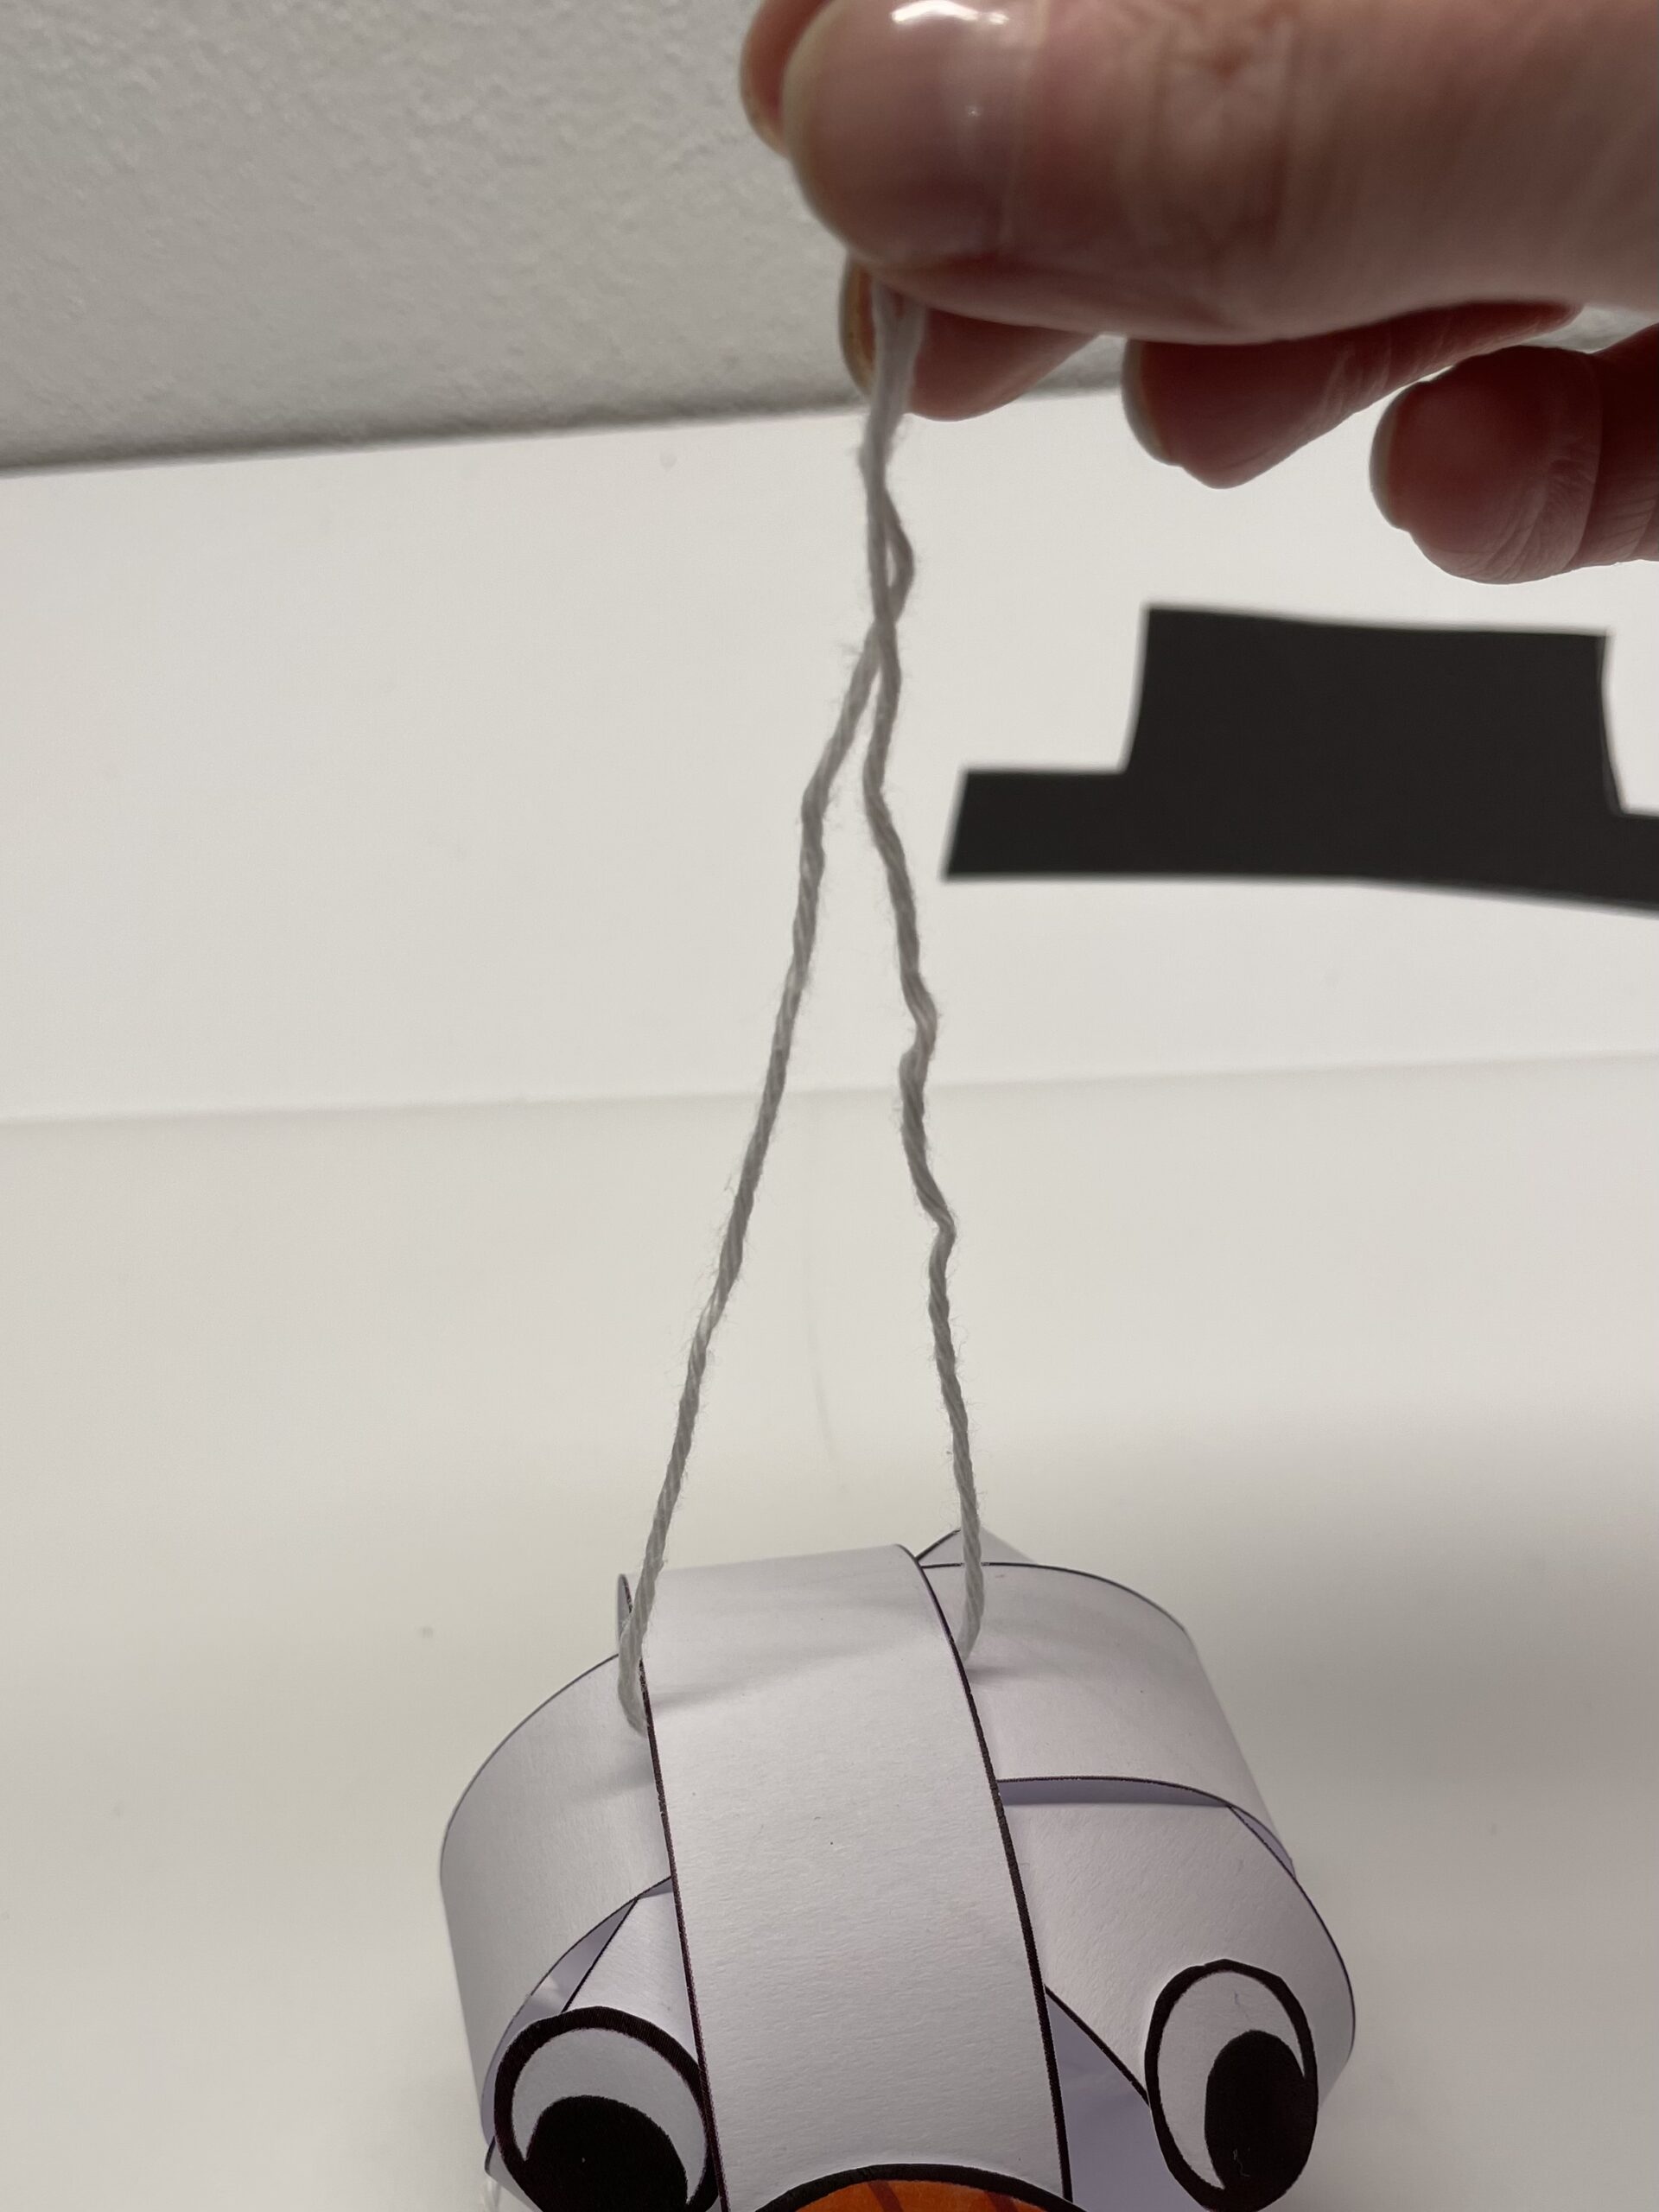
Bild zum Schritt 26 für das Bastel- und DIY-Abenteuer für Kinder: 'Jetzt schneidet ihr ein Stück Faden ab (ca. 30 cm)....'

25

Then attach the hat to the threads with an adhesive tape.
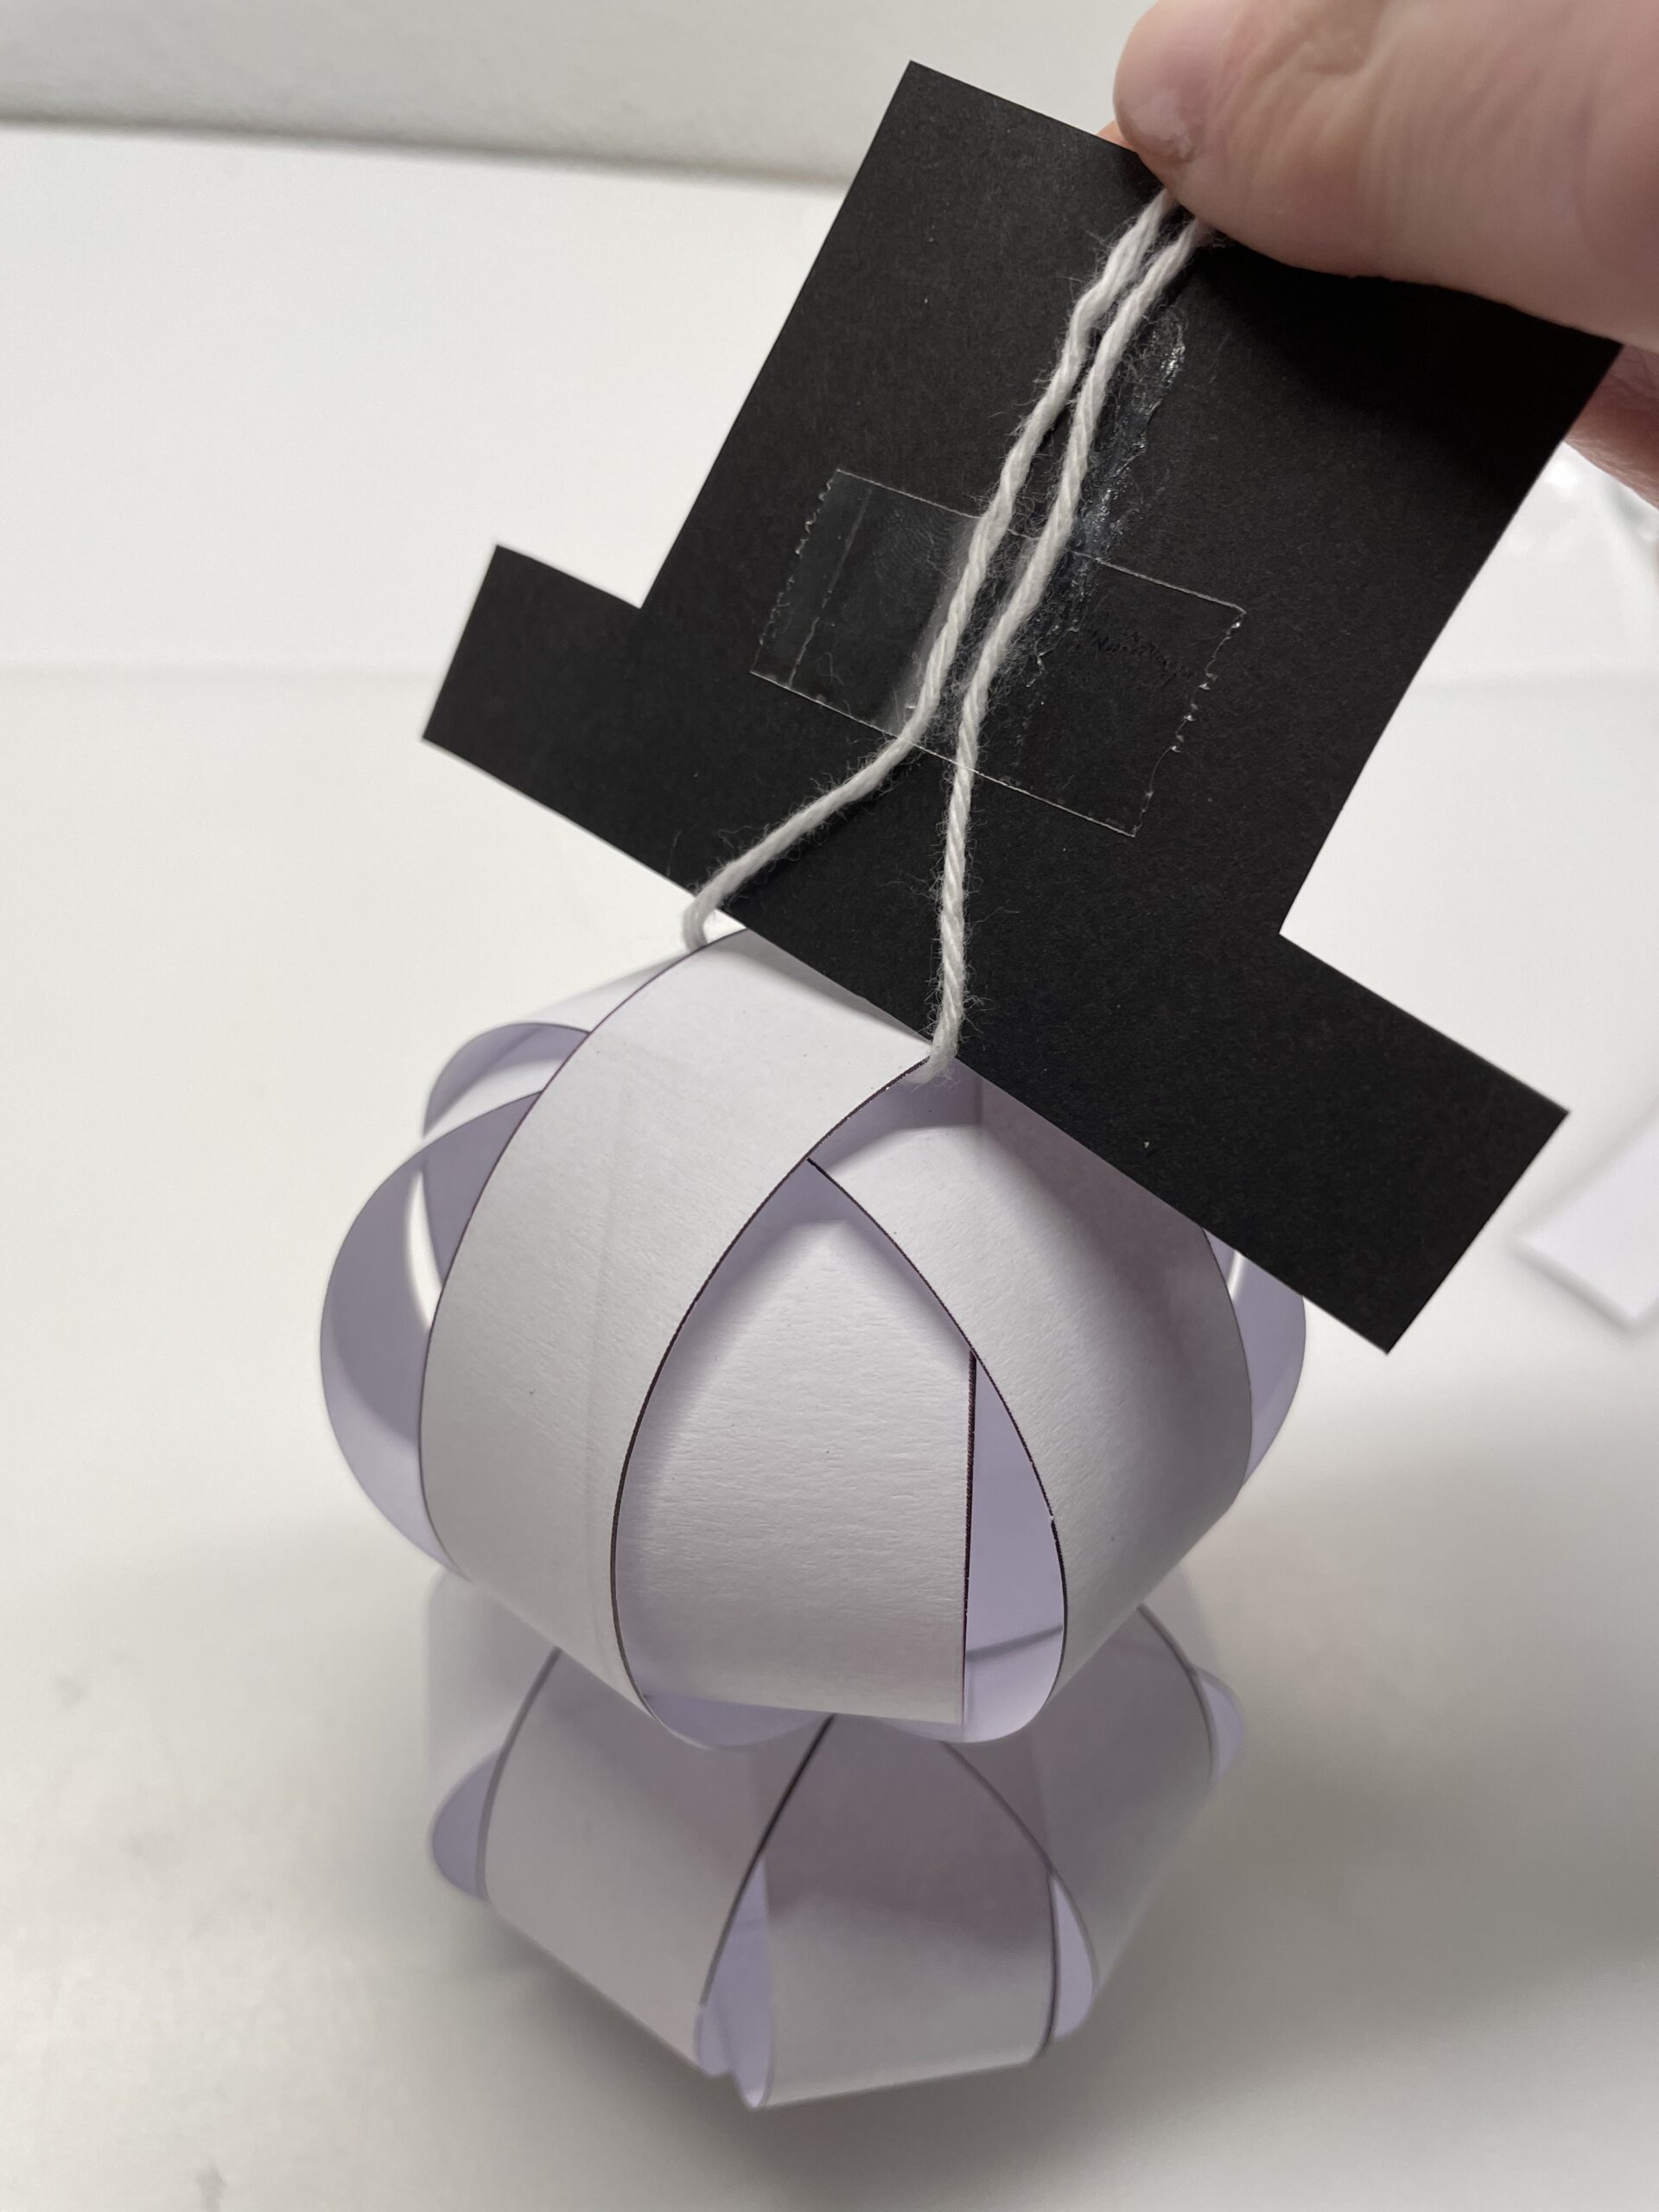
Bild zum Schritt 27 für das Bastel- und DIY-Abenteuer für Kinder: 'Danach befestigt ihr den Hut mit einem Klebestreifen an den...'

26

The snowman is ready.

Bild zum Schritt 28 für das Bastel- und DIY-Abenteuer für Kinder: 'Fertig ist der Schneemann.'

27

Finally, find a place to hang up.
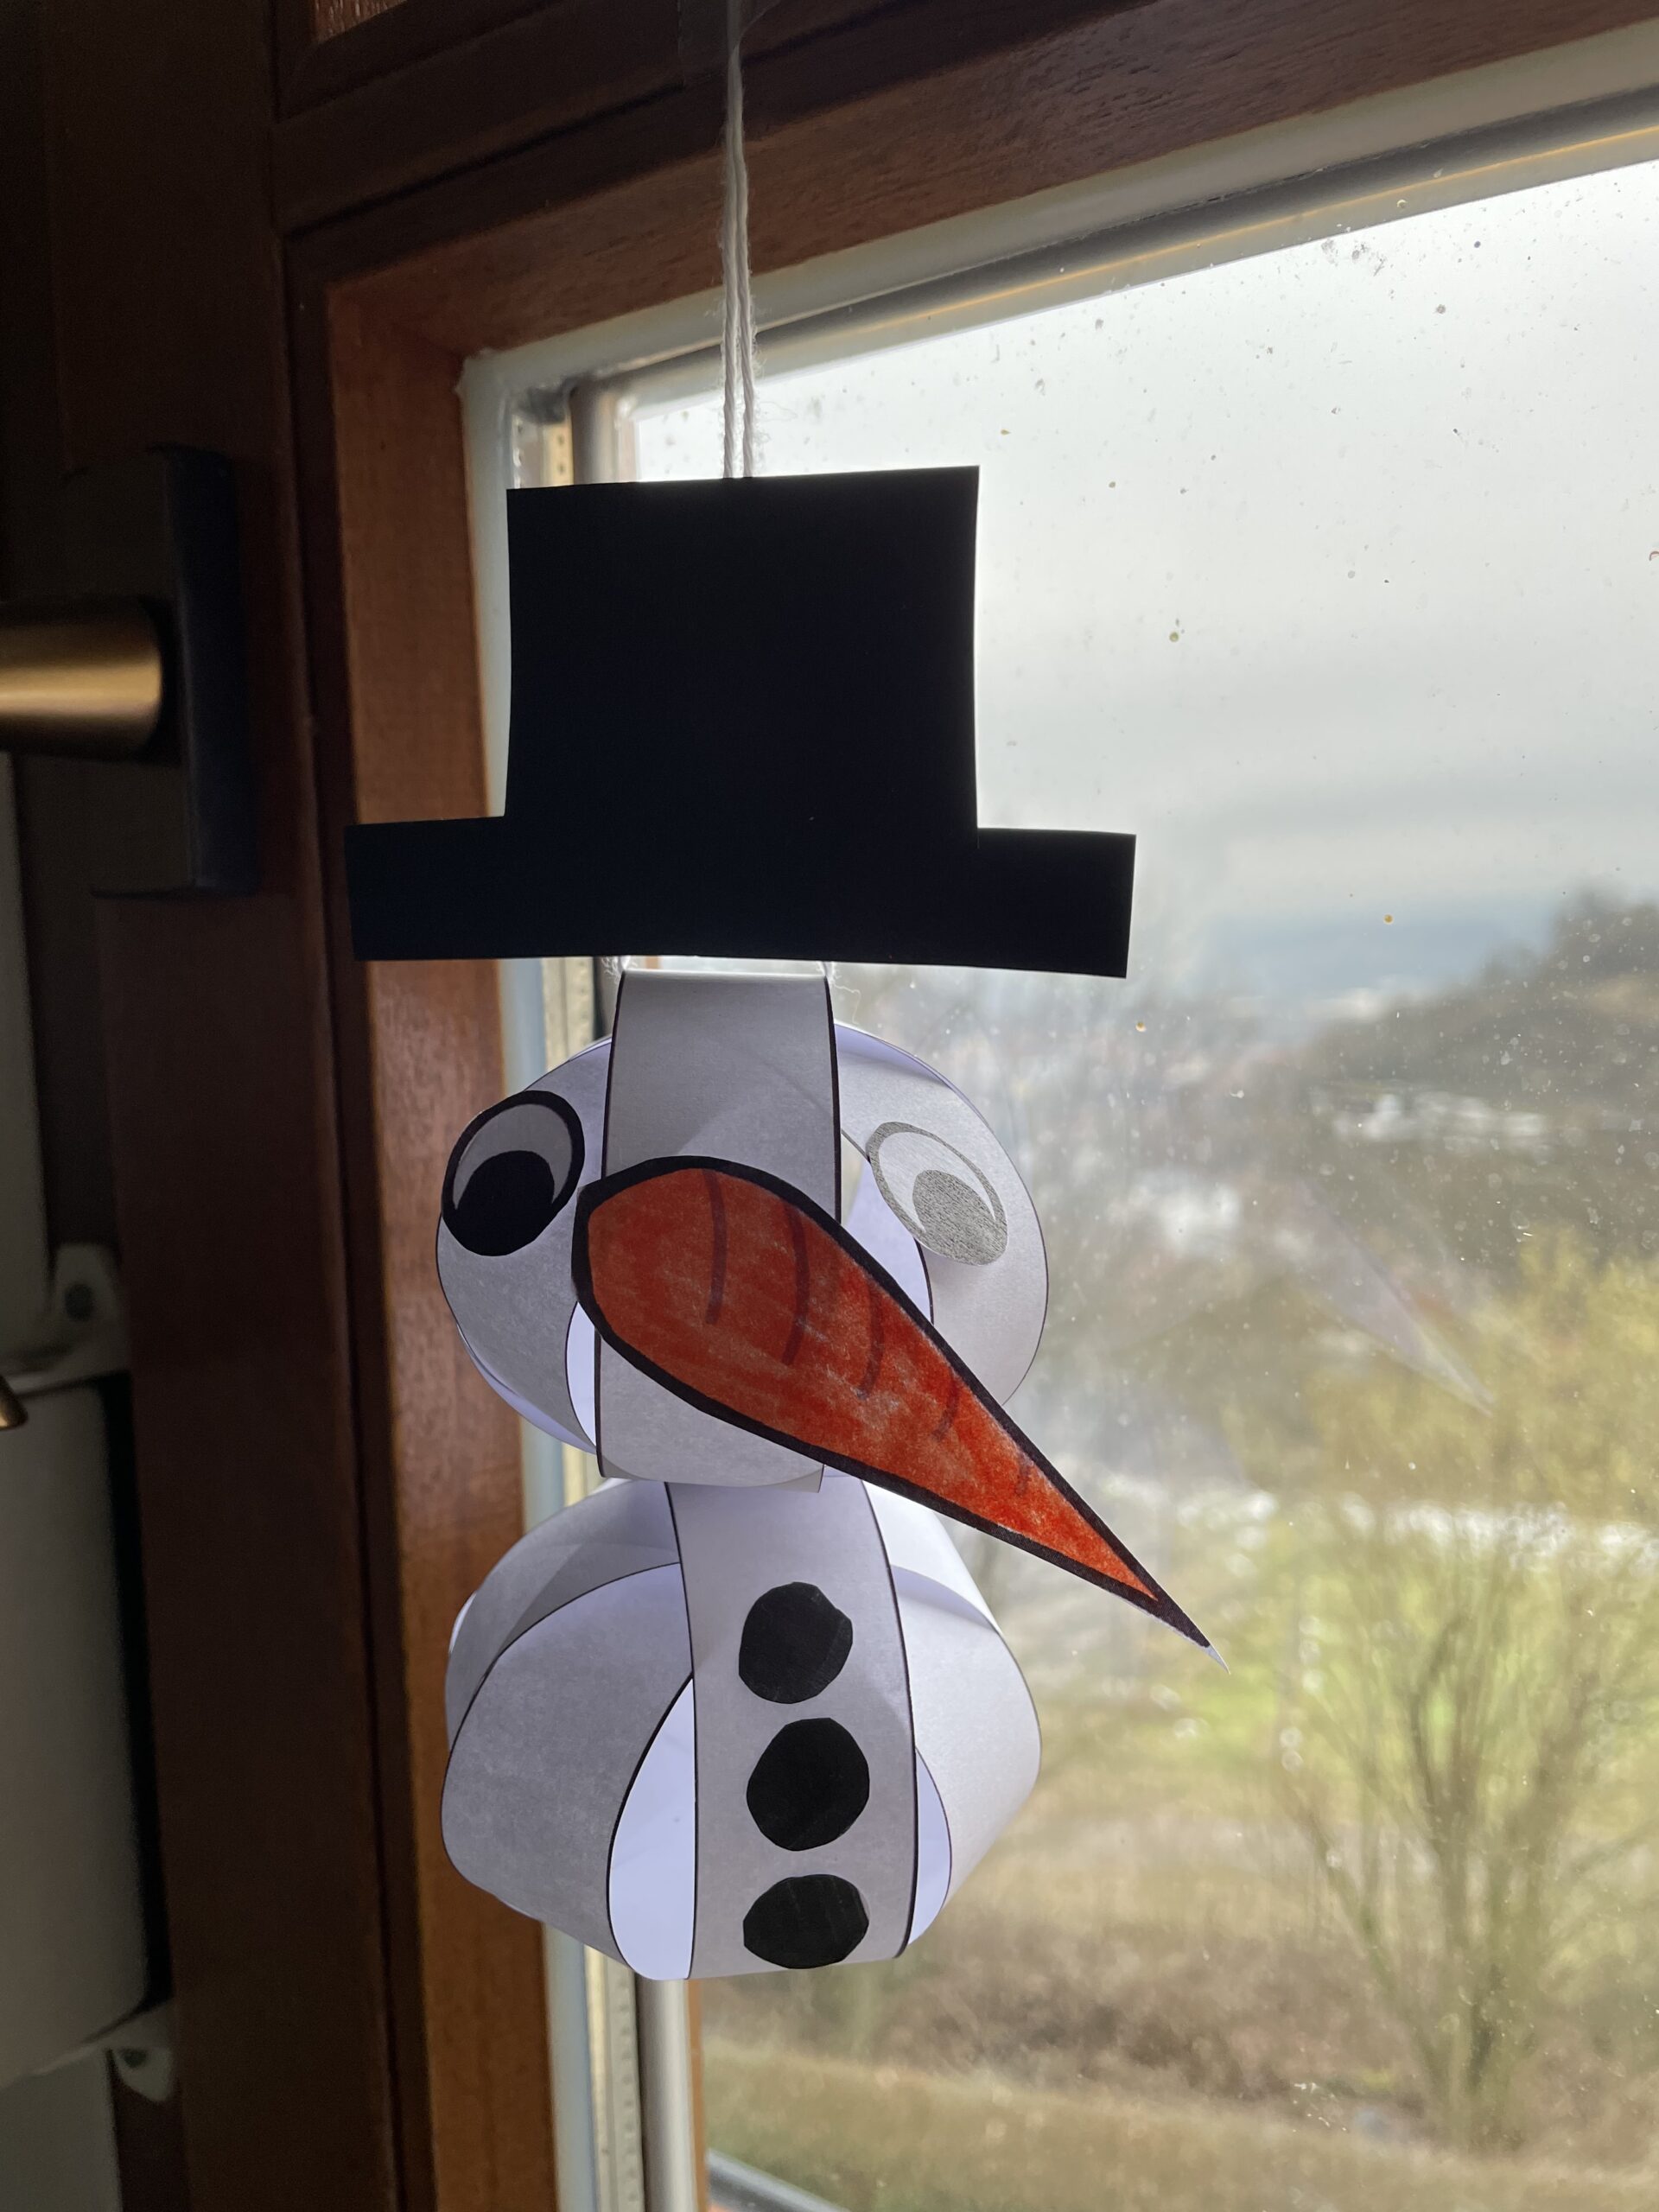
Bild zum Schritt 29 für das Bastel- und DIY-Abenteuer für Kinder: 'Sucht euch abschließend noch einen Platz zum Aufhängen.'

28

2. Bild zum Schritt 29 für das Bastel- und DIY-Abenteuer für Kinder: 'Sucht euch abschließend noch einen Platz zum Aufhängen.'

Template
29

Print the template on a white copy paper and cut the pieces with the scissors.
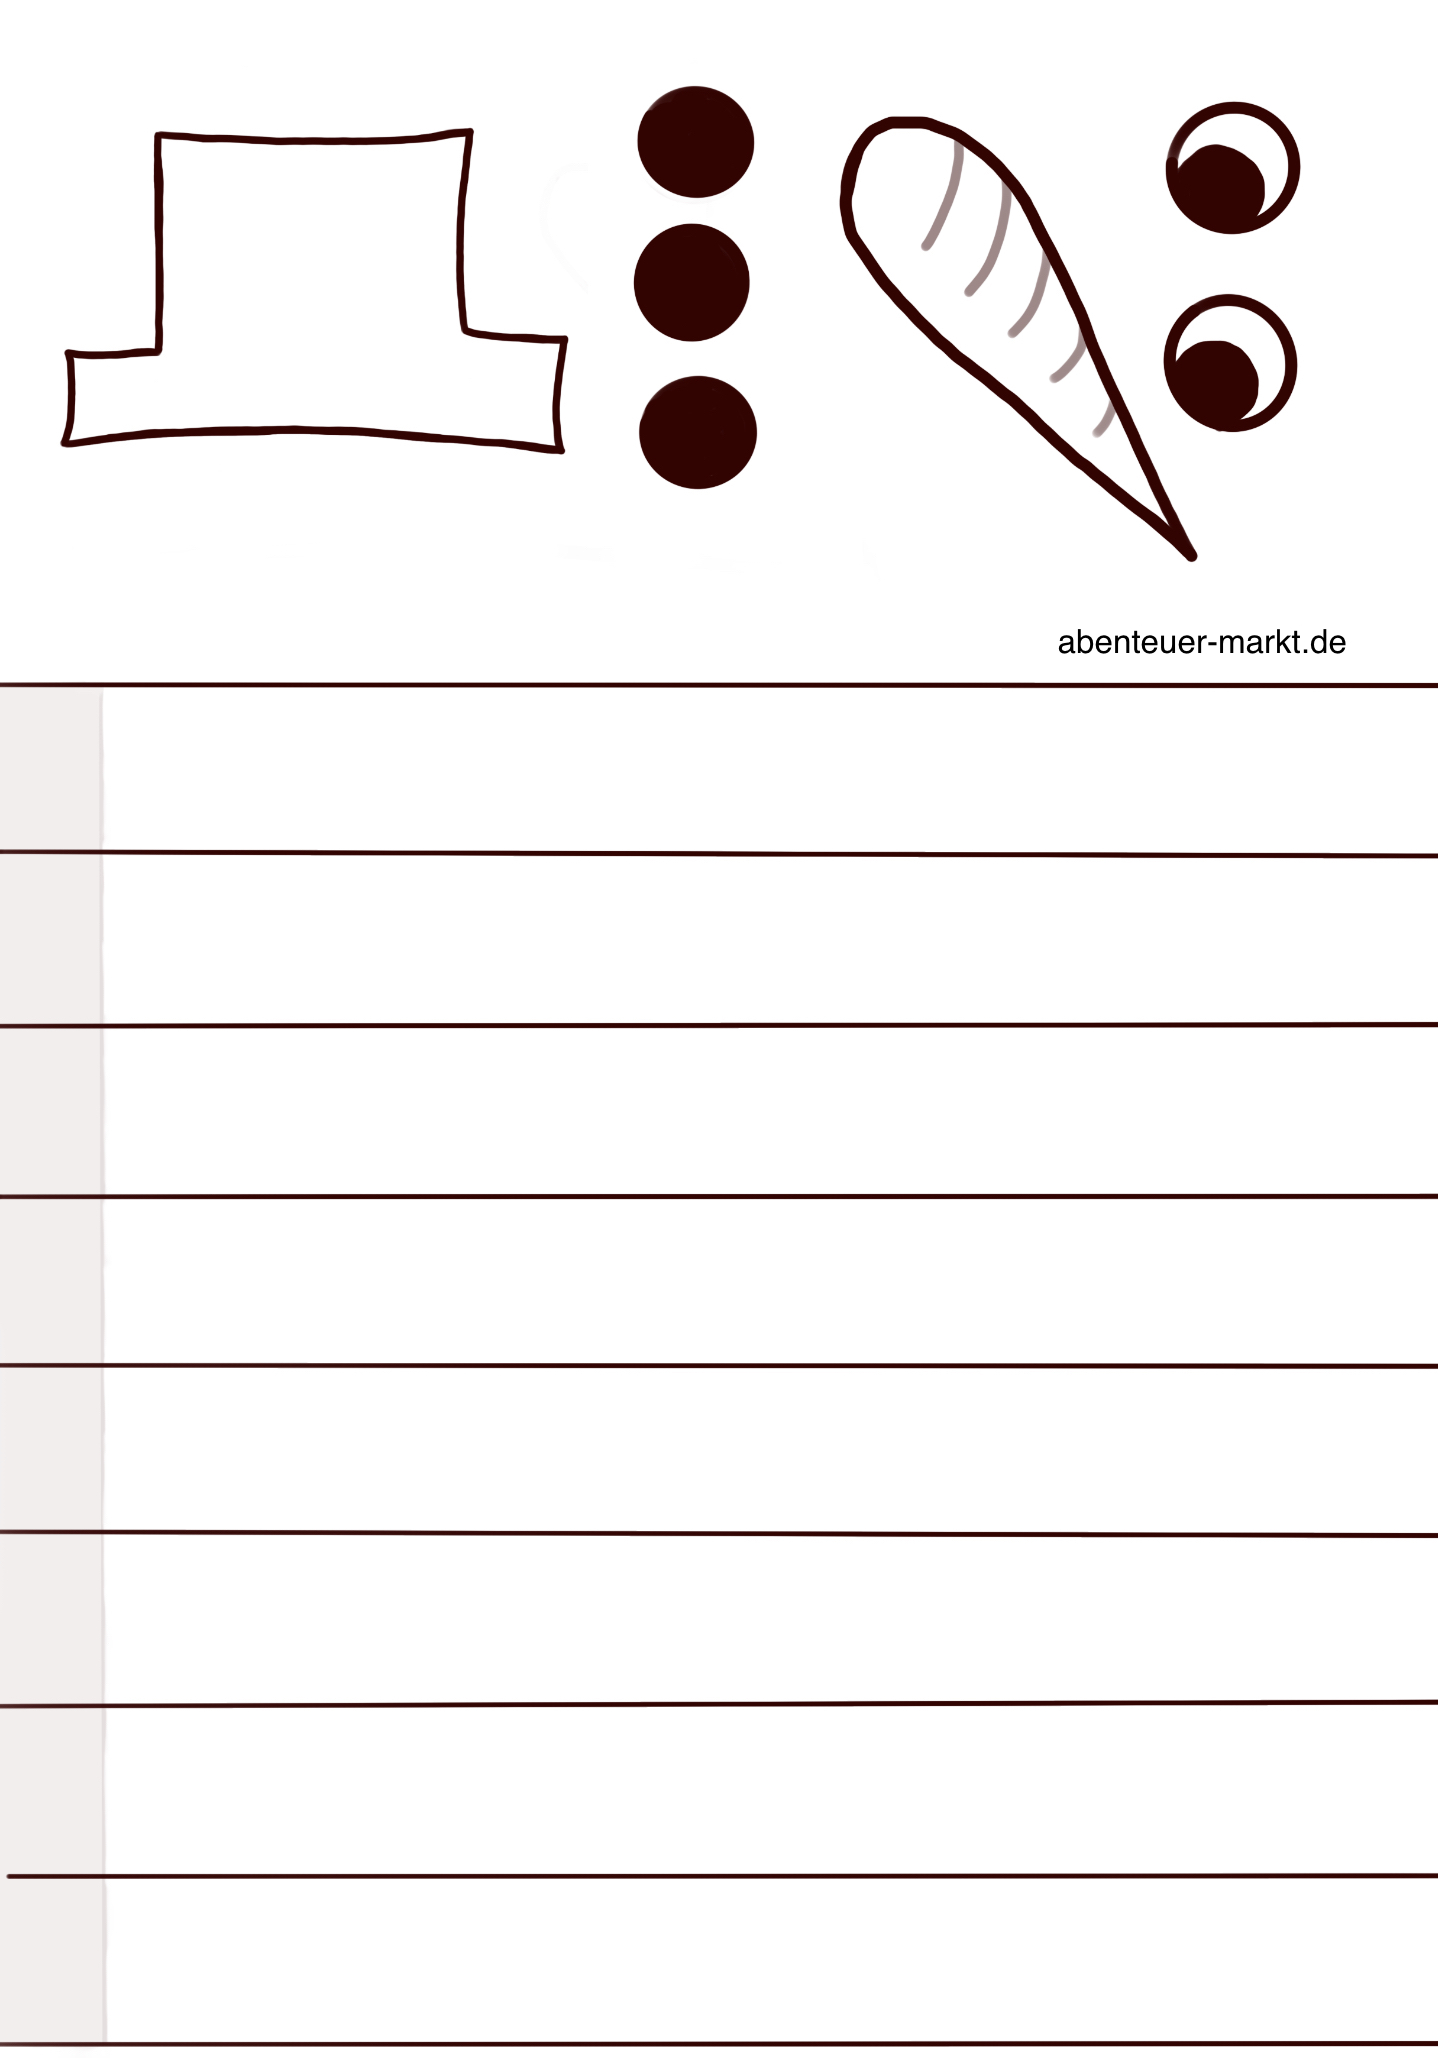
Bild zum Schritt 32 für das Bastel- und DIY-Abenteuer für Kinder: 'Druckt euch die Vorlage auf einem weißen Kopierpapier aus und...'

30

Have fun trying it out!

Snowman of paper strip (with template)

Follow us on Facebook , Instagram and Pinterest
Don't miss any more adventures: Our bottle mail

Leave a Reply

Your email address will not be published.

The maximum upload file size: 5 MB. You can upload: image, document. Drop file here