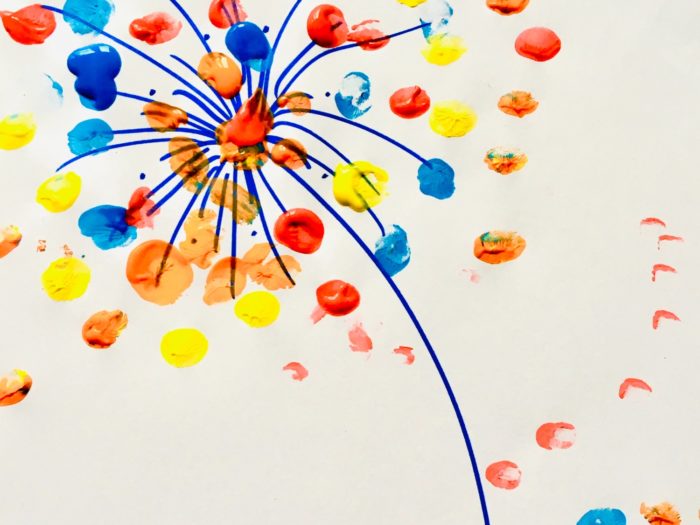
The first flowers in spring are the snowdrops. They encourage the flowers to make.
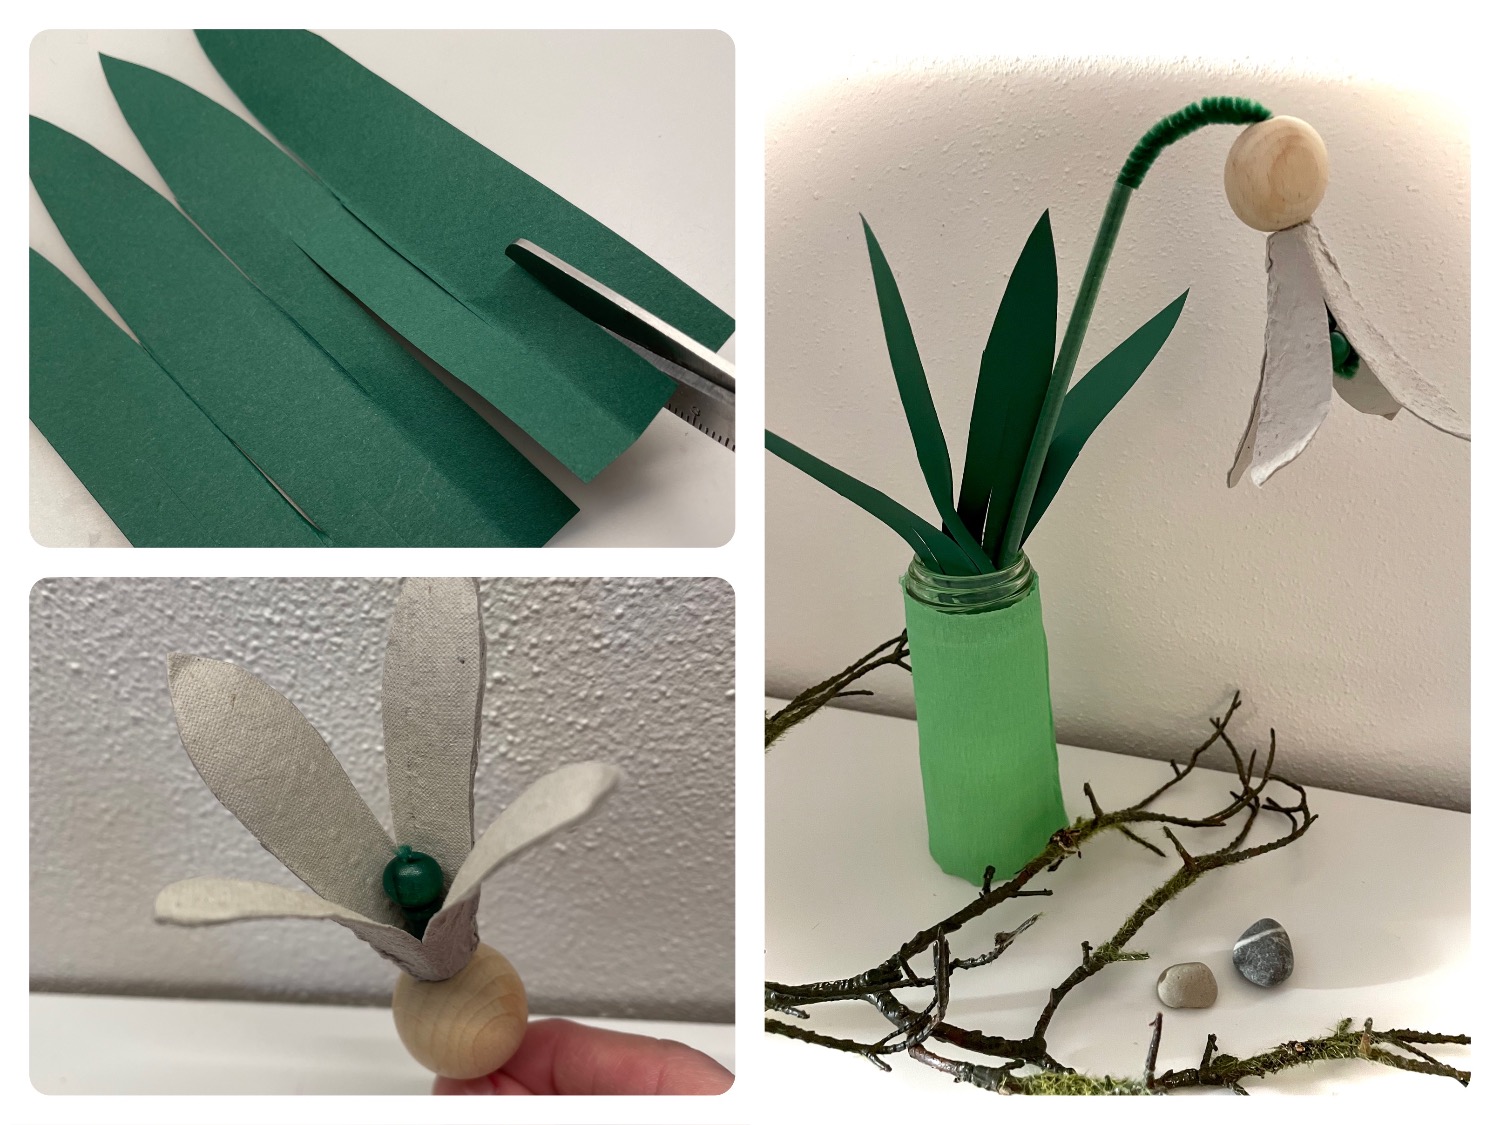
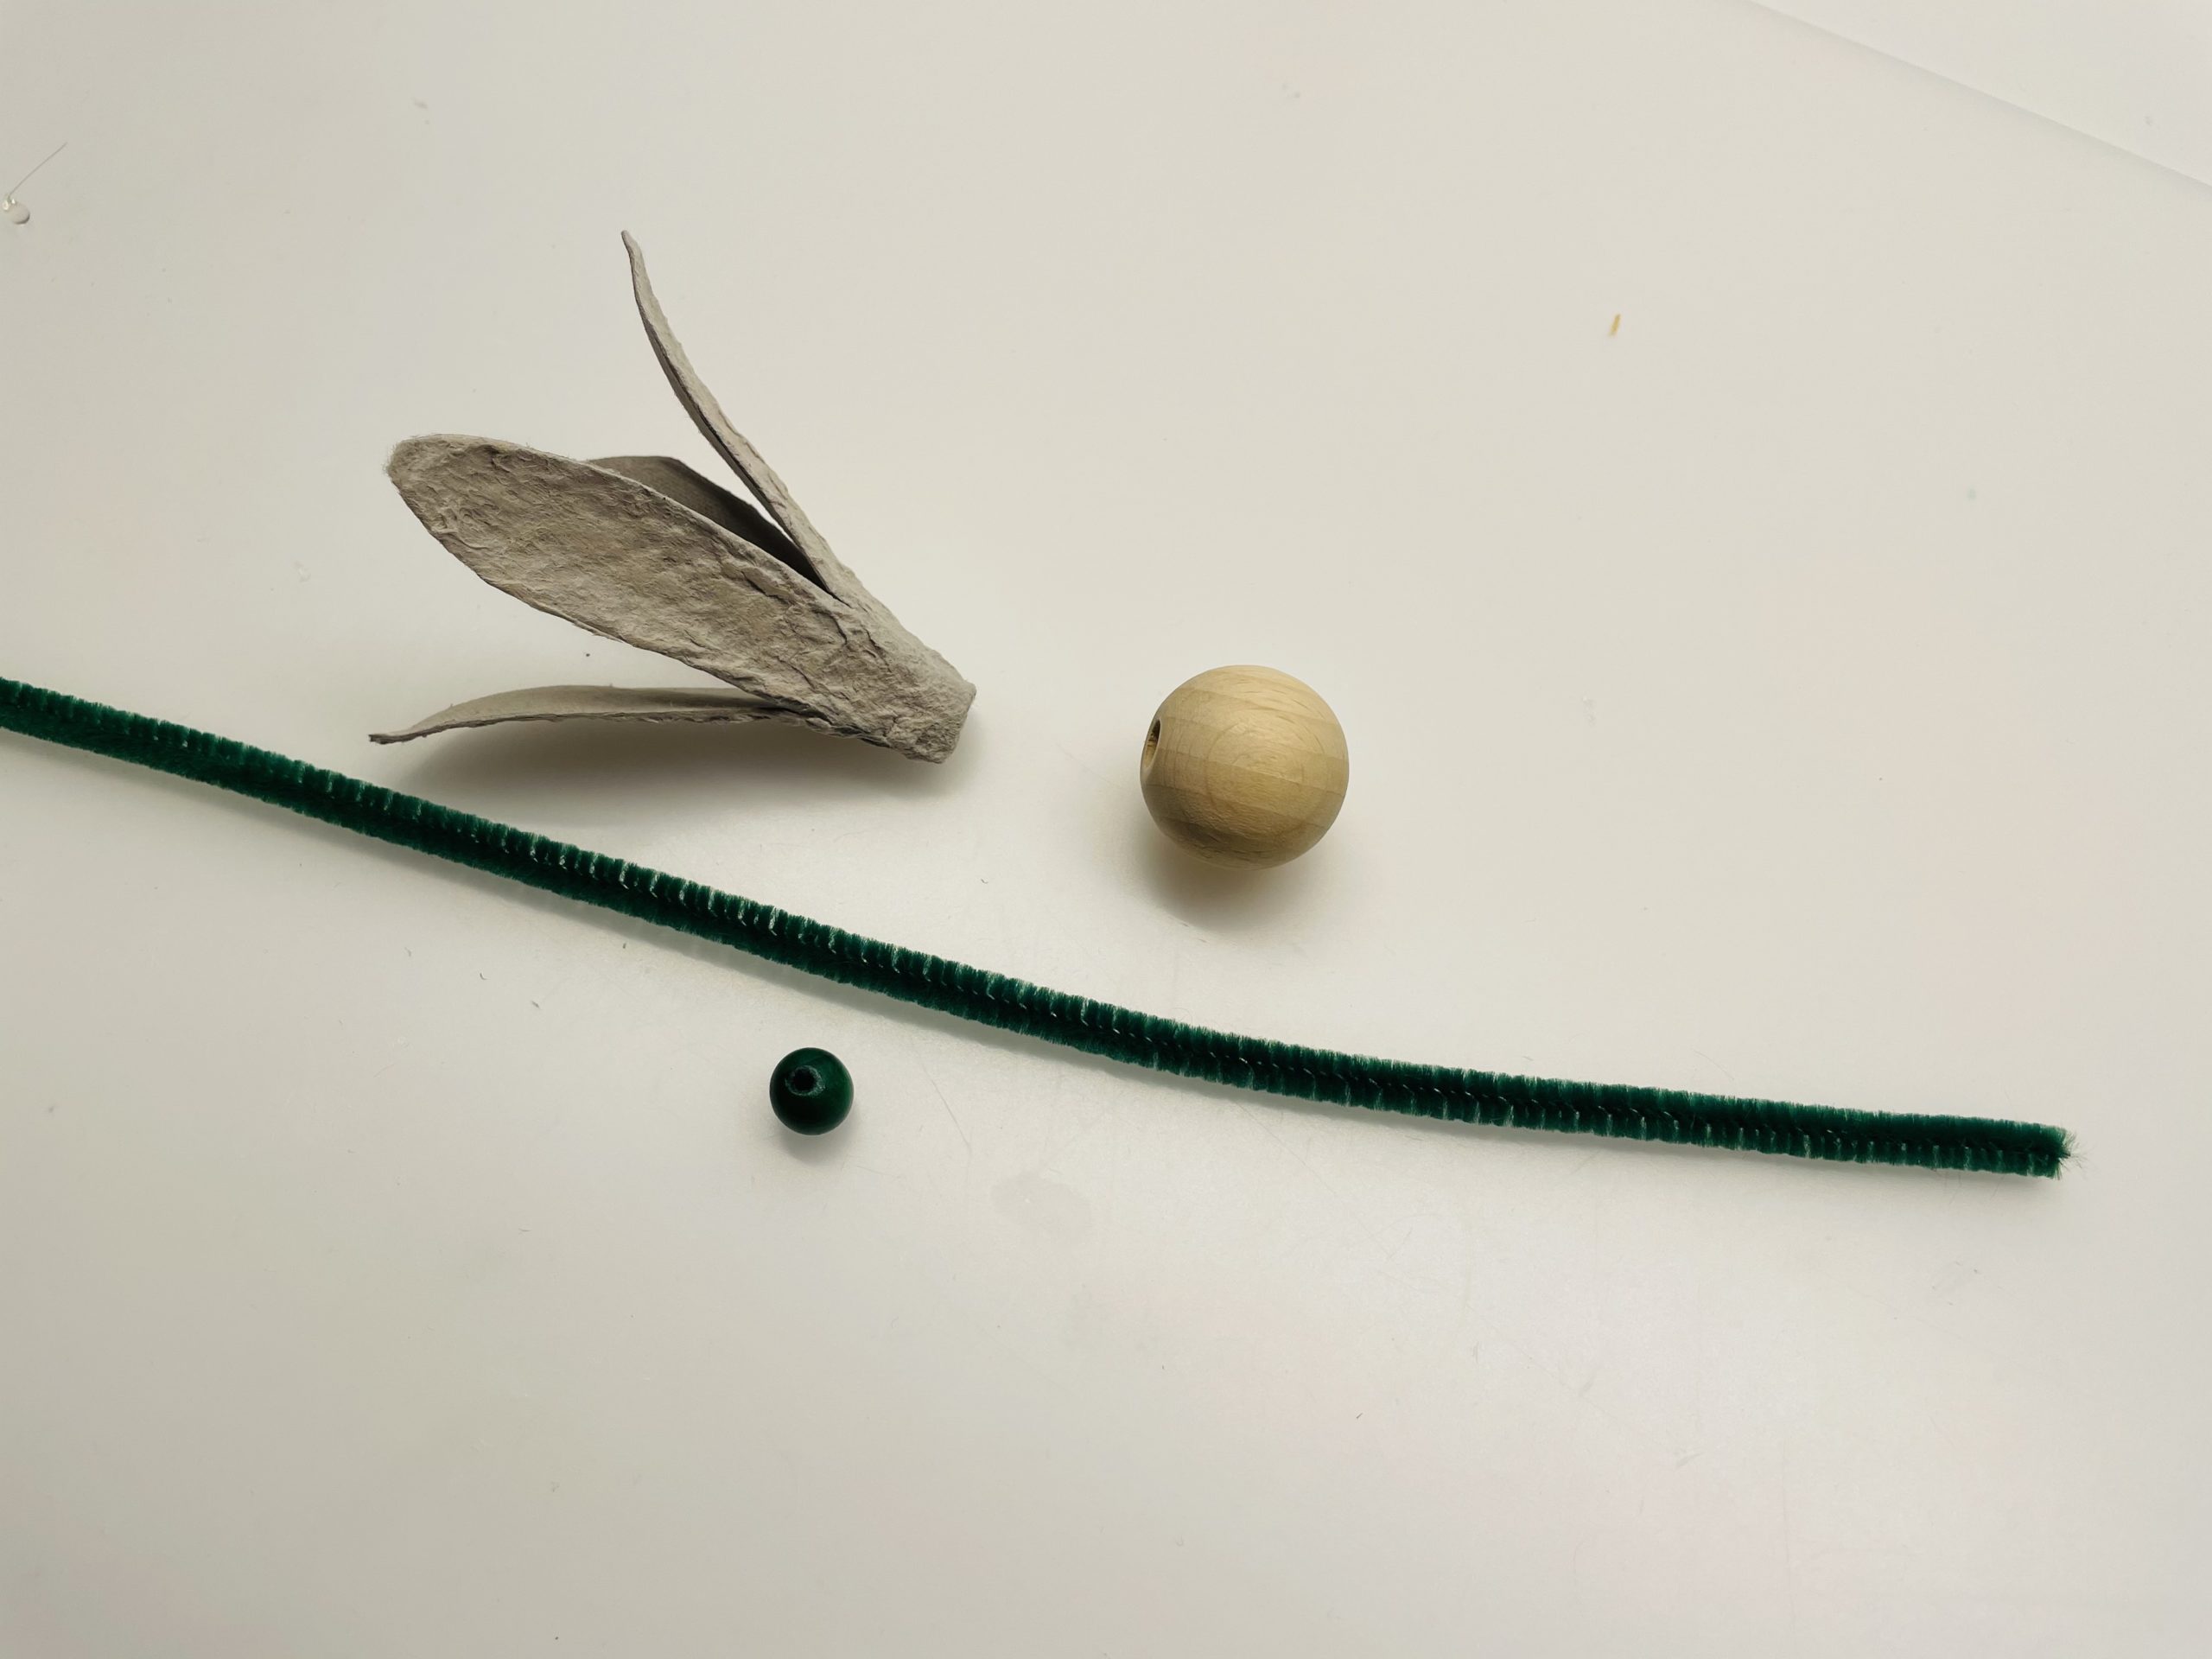
An egg box is used here for the flower cup of the snowdrop. In addition, you need a large wooden bead and a small green bead, a pipe cleaner wire, a green straw and a dark green photo box. You can find a detailed guide here.
Media Education for Kindergarten and Hort

Relief in everyday life, targeted promotion of individual children, independent learning and - without any pre-knowledge already usable by the youngest!
Put out your craft material and pick up your materials.
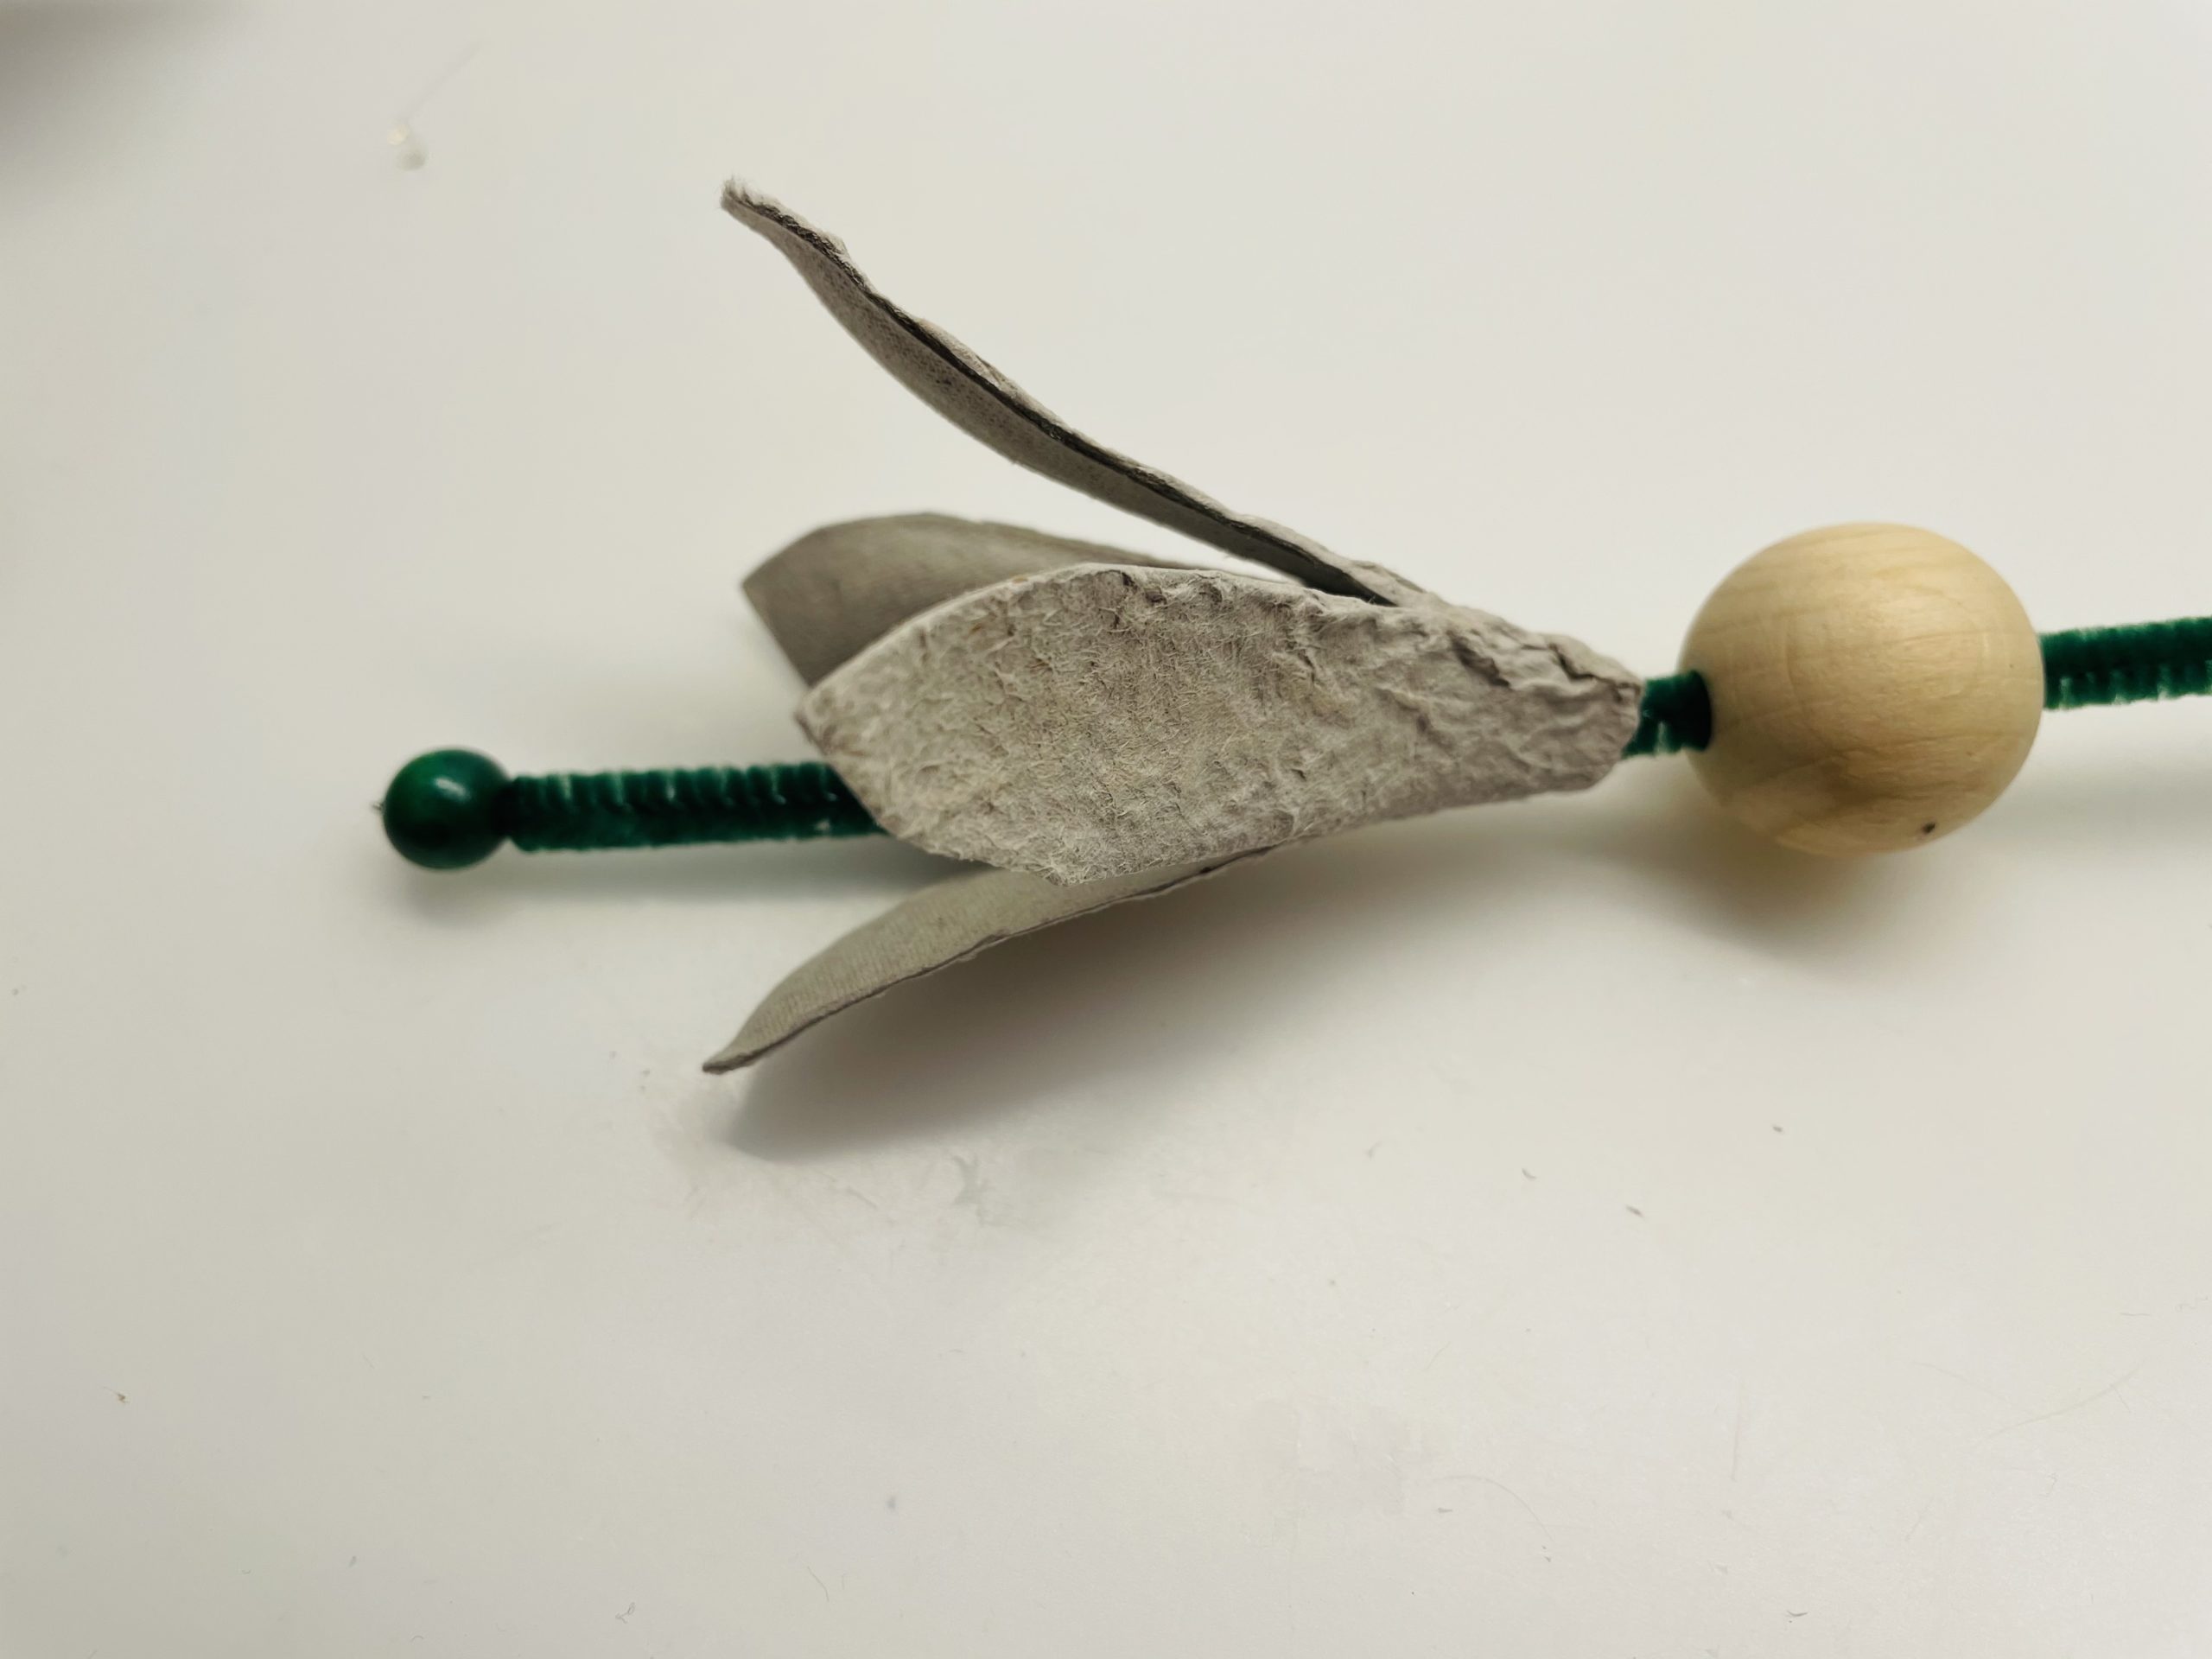
Then you first separate a tip from an egg box.
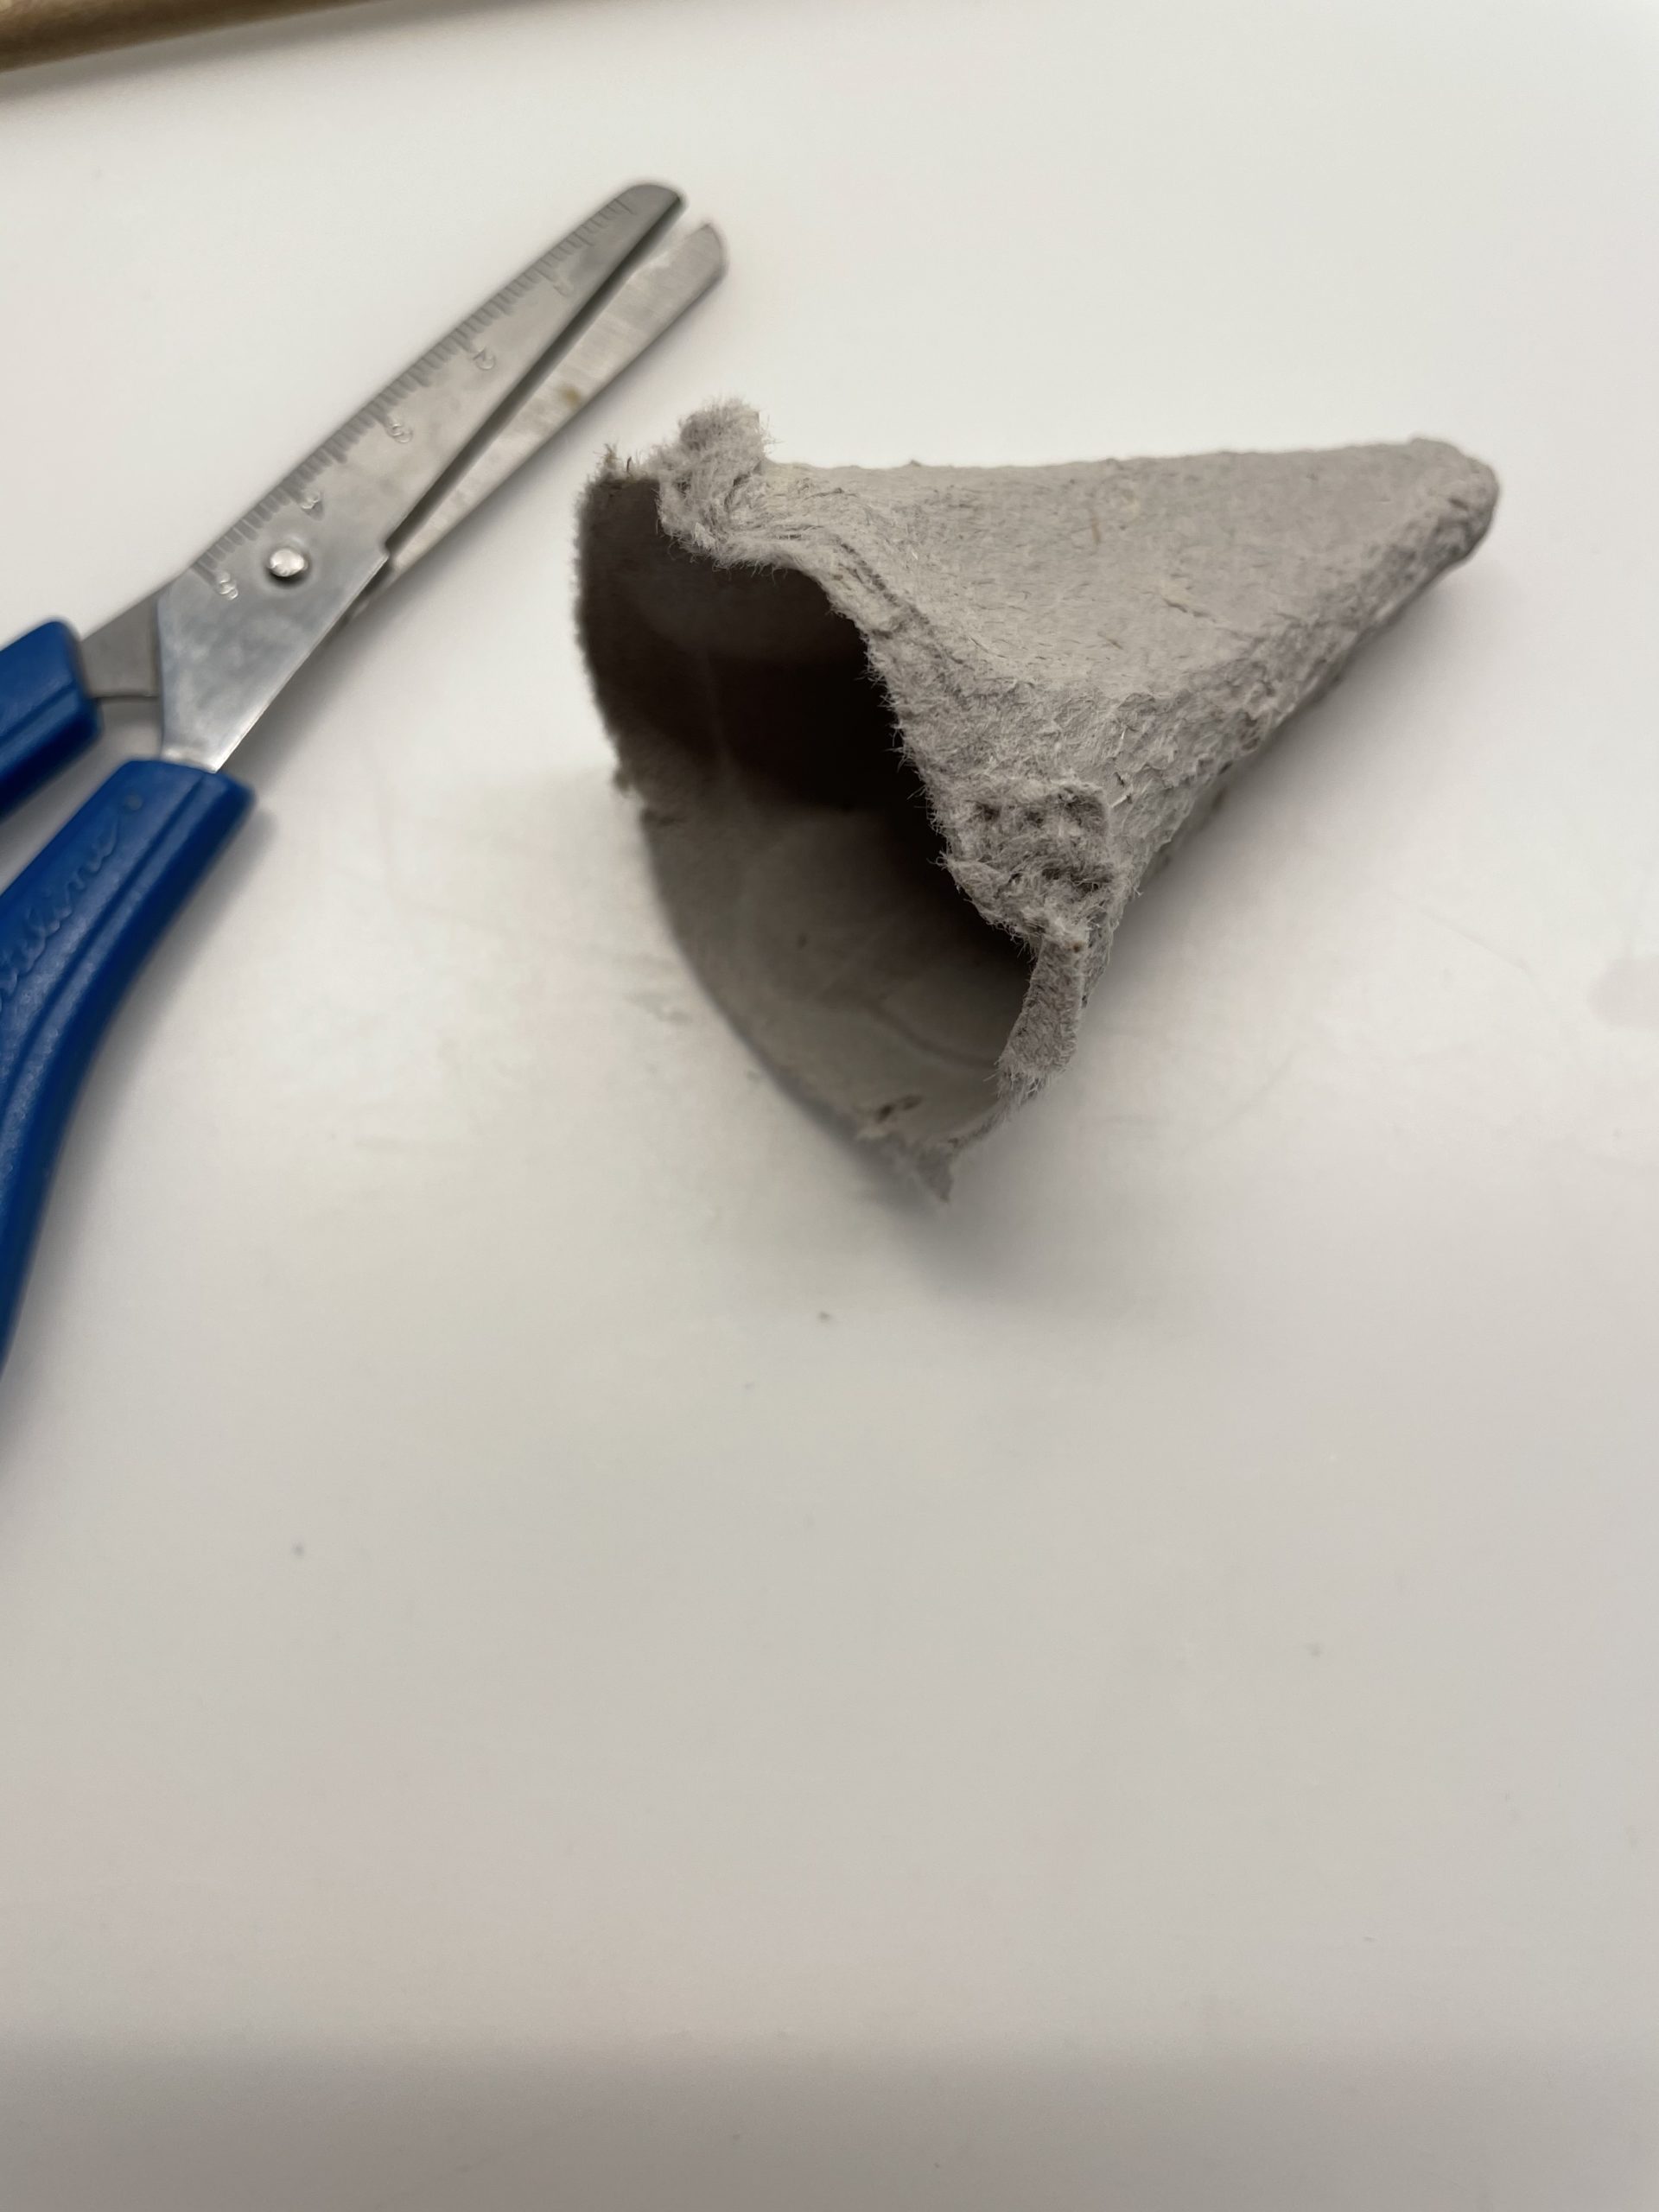
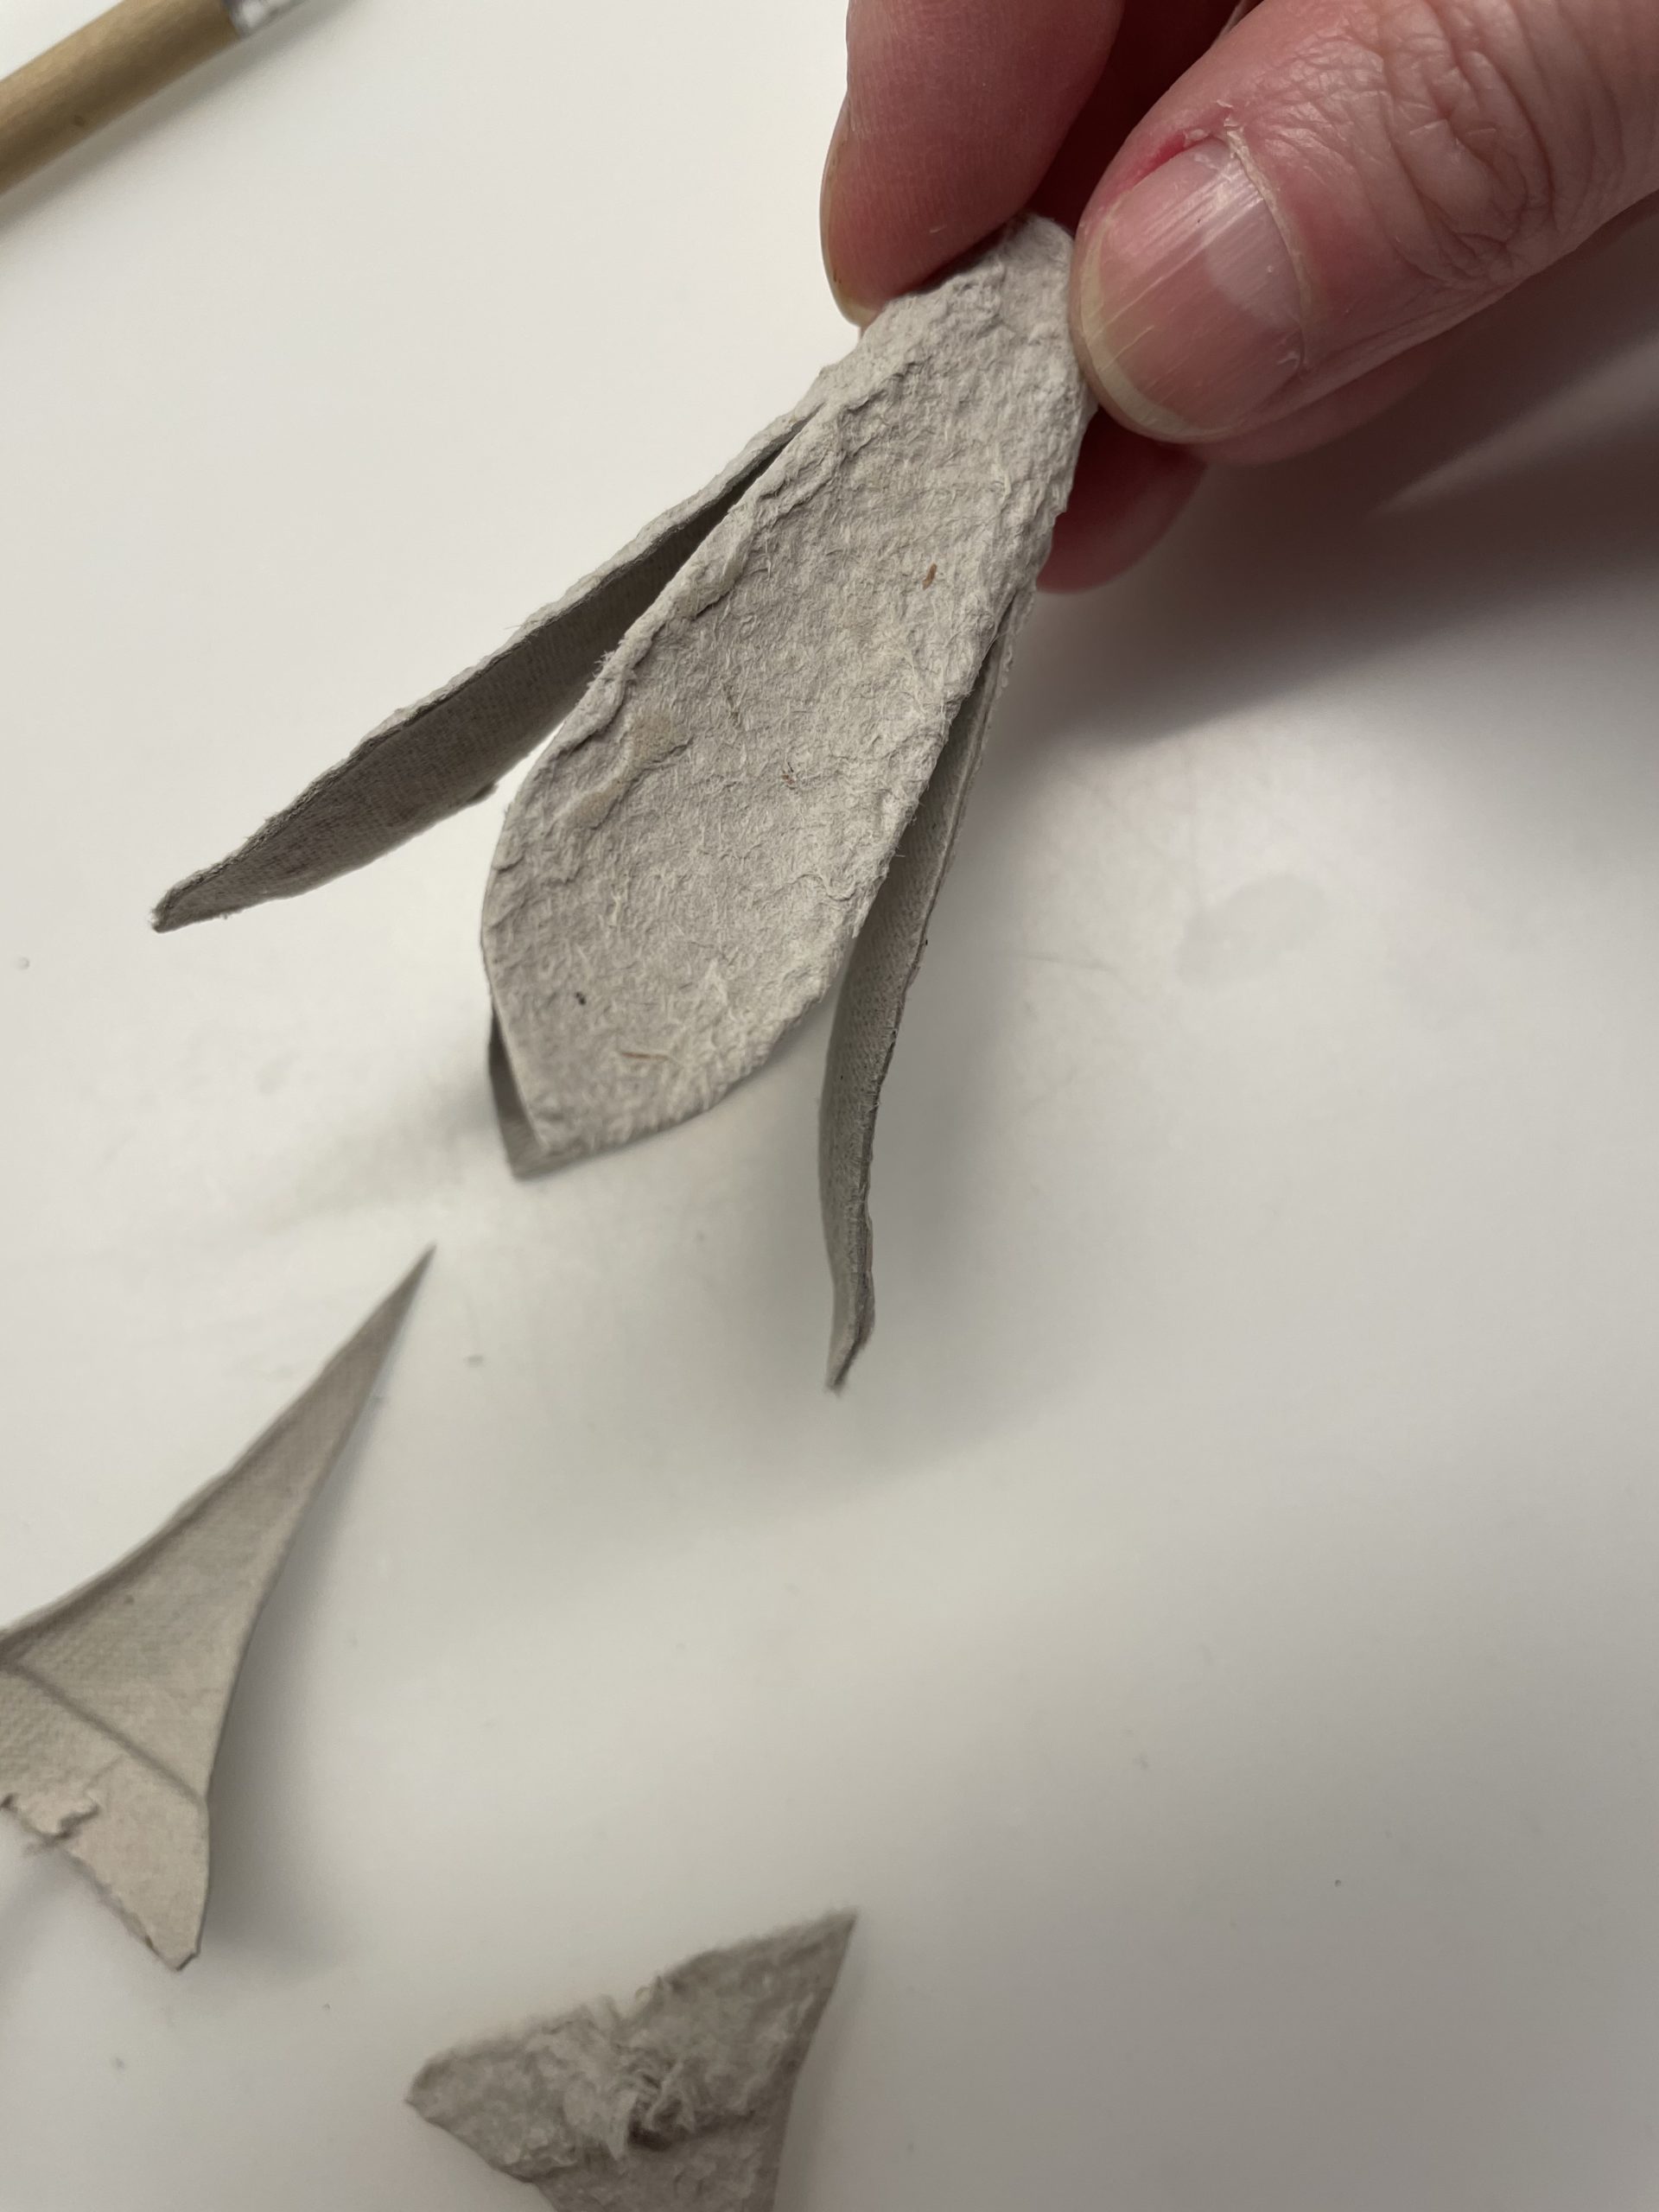
Cuts the flowers with the scissors.
For this you cut out small triangles from the top. See the picture!
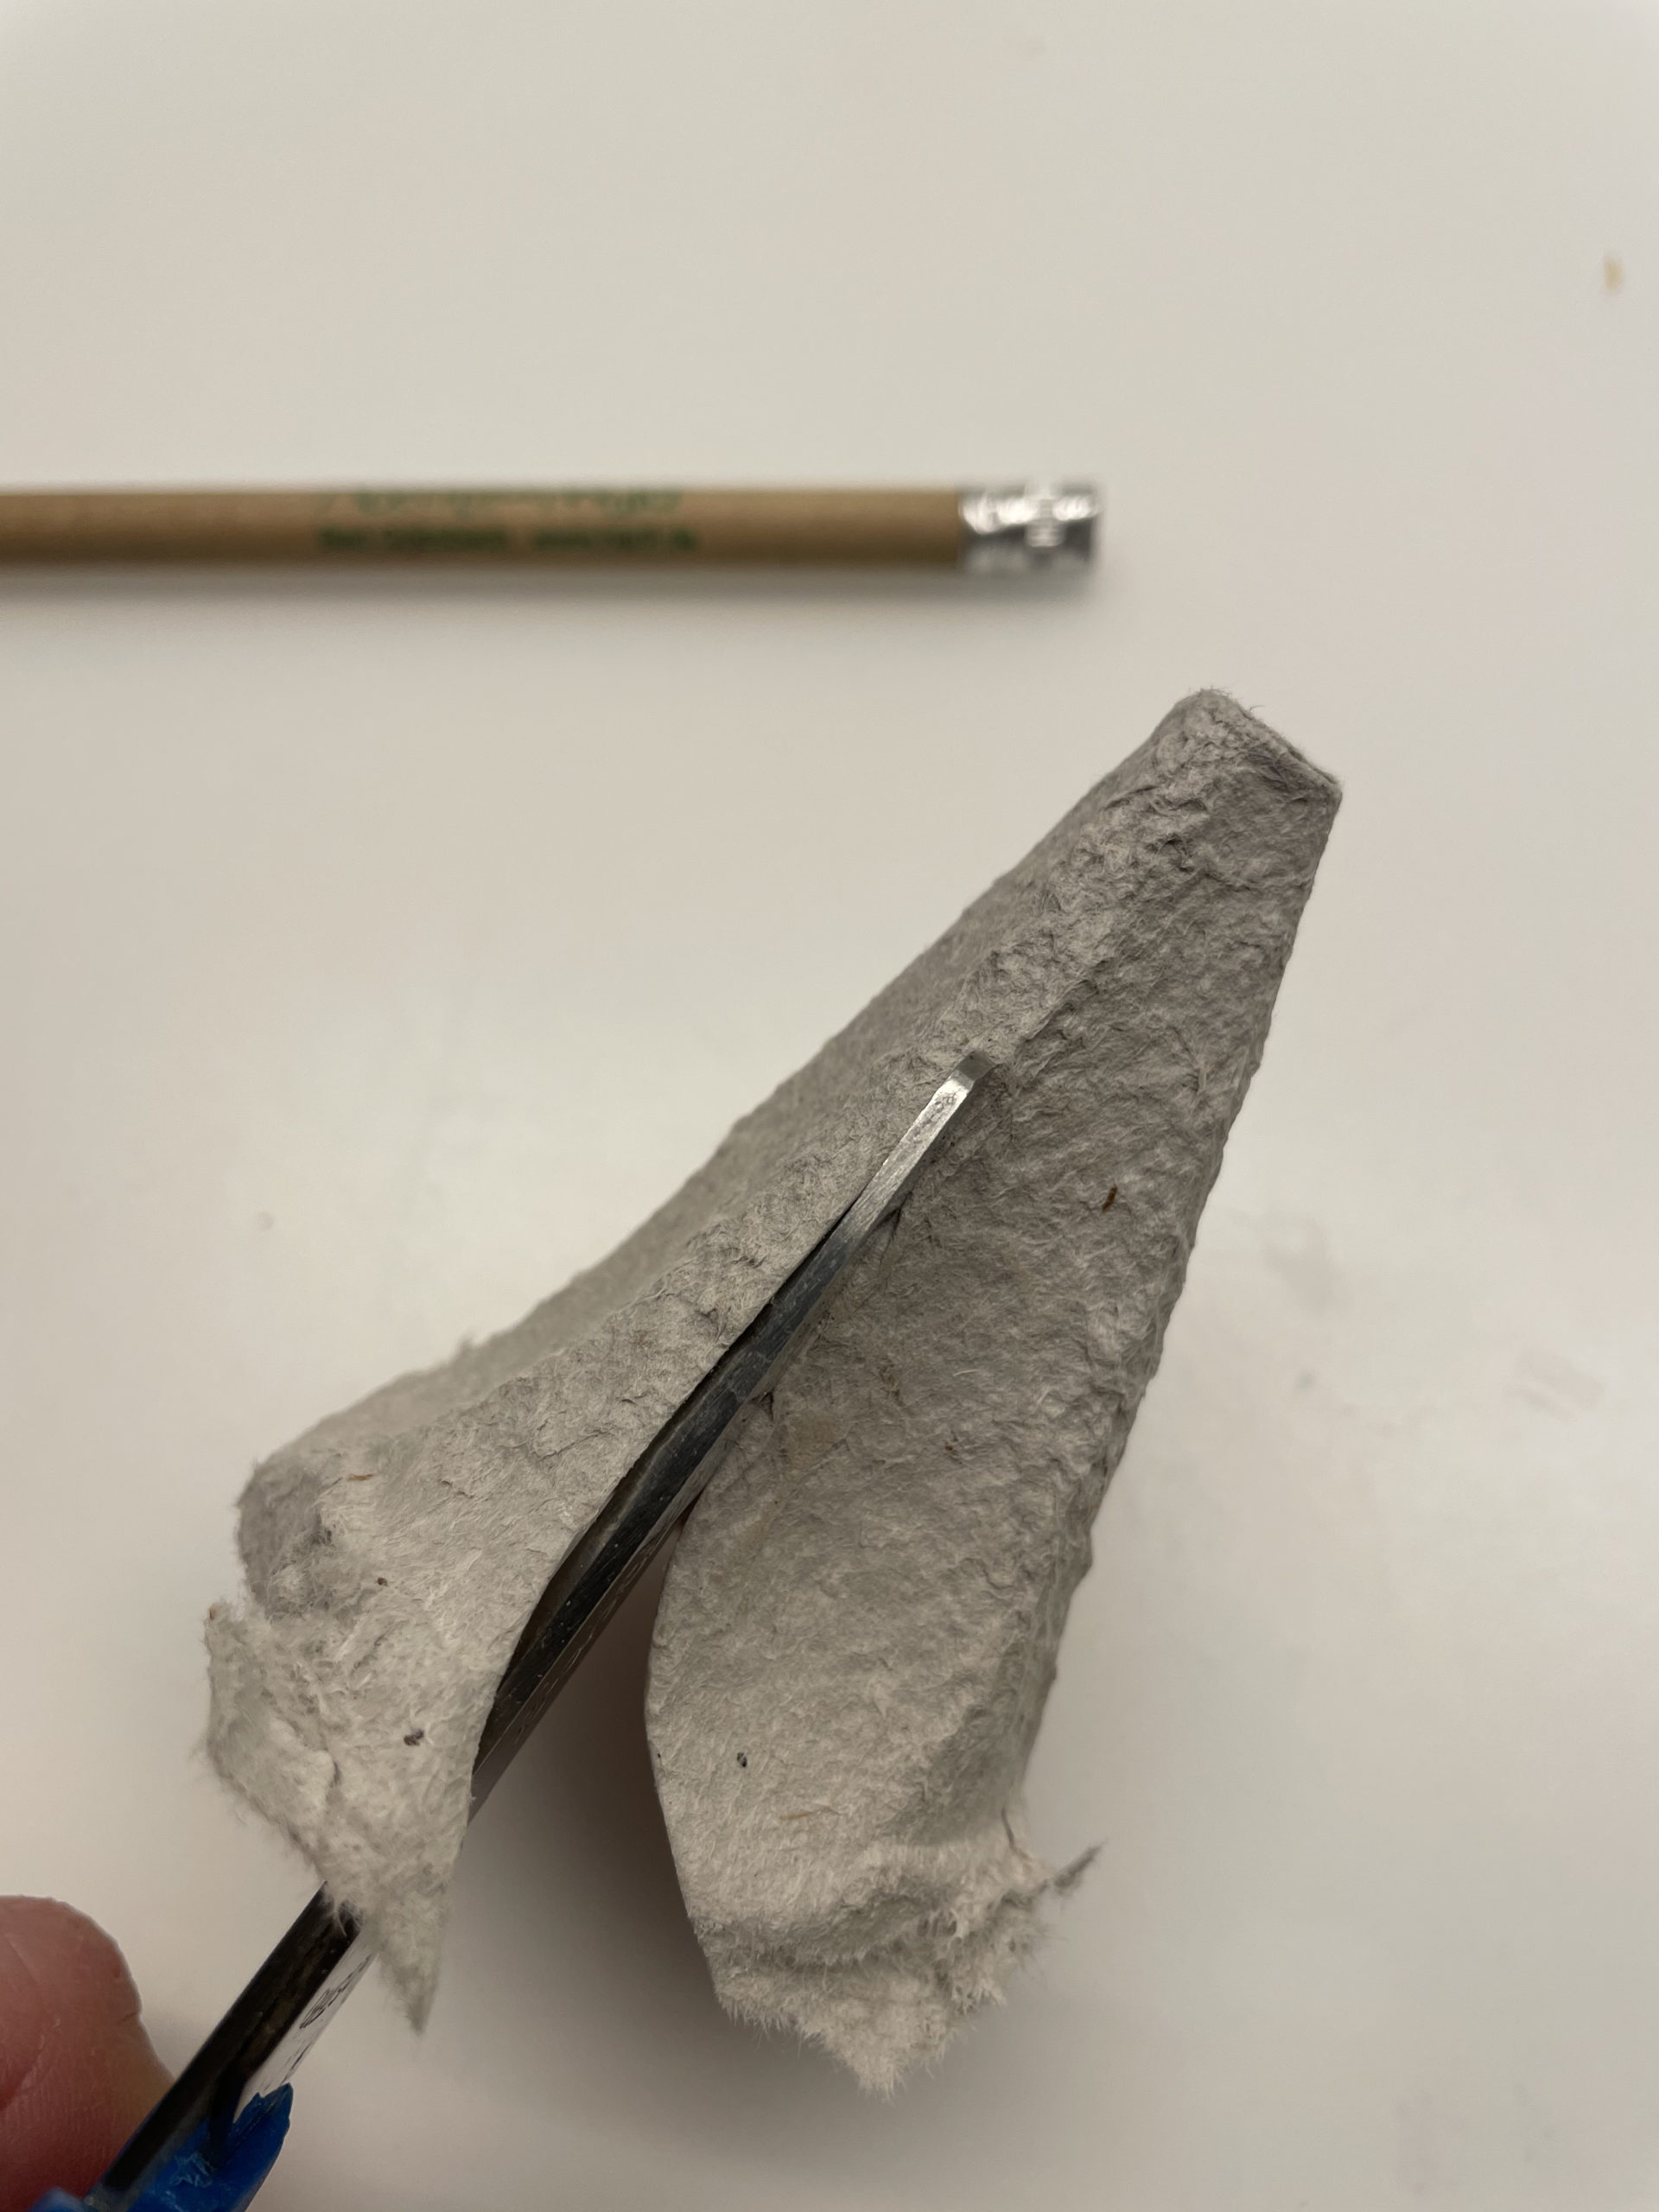
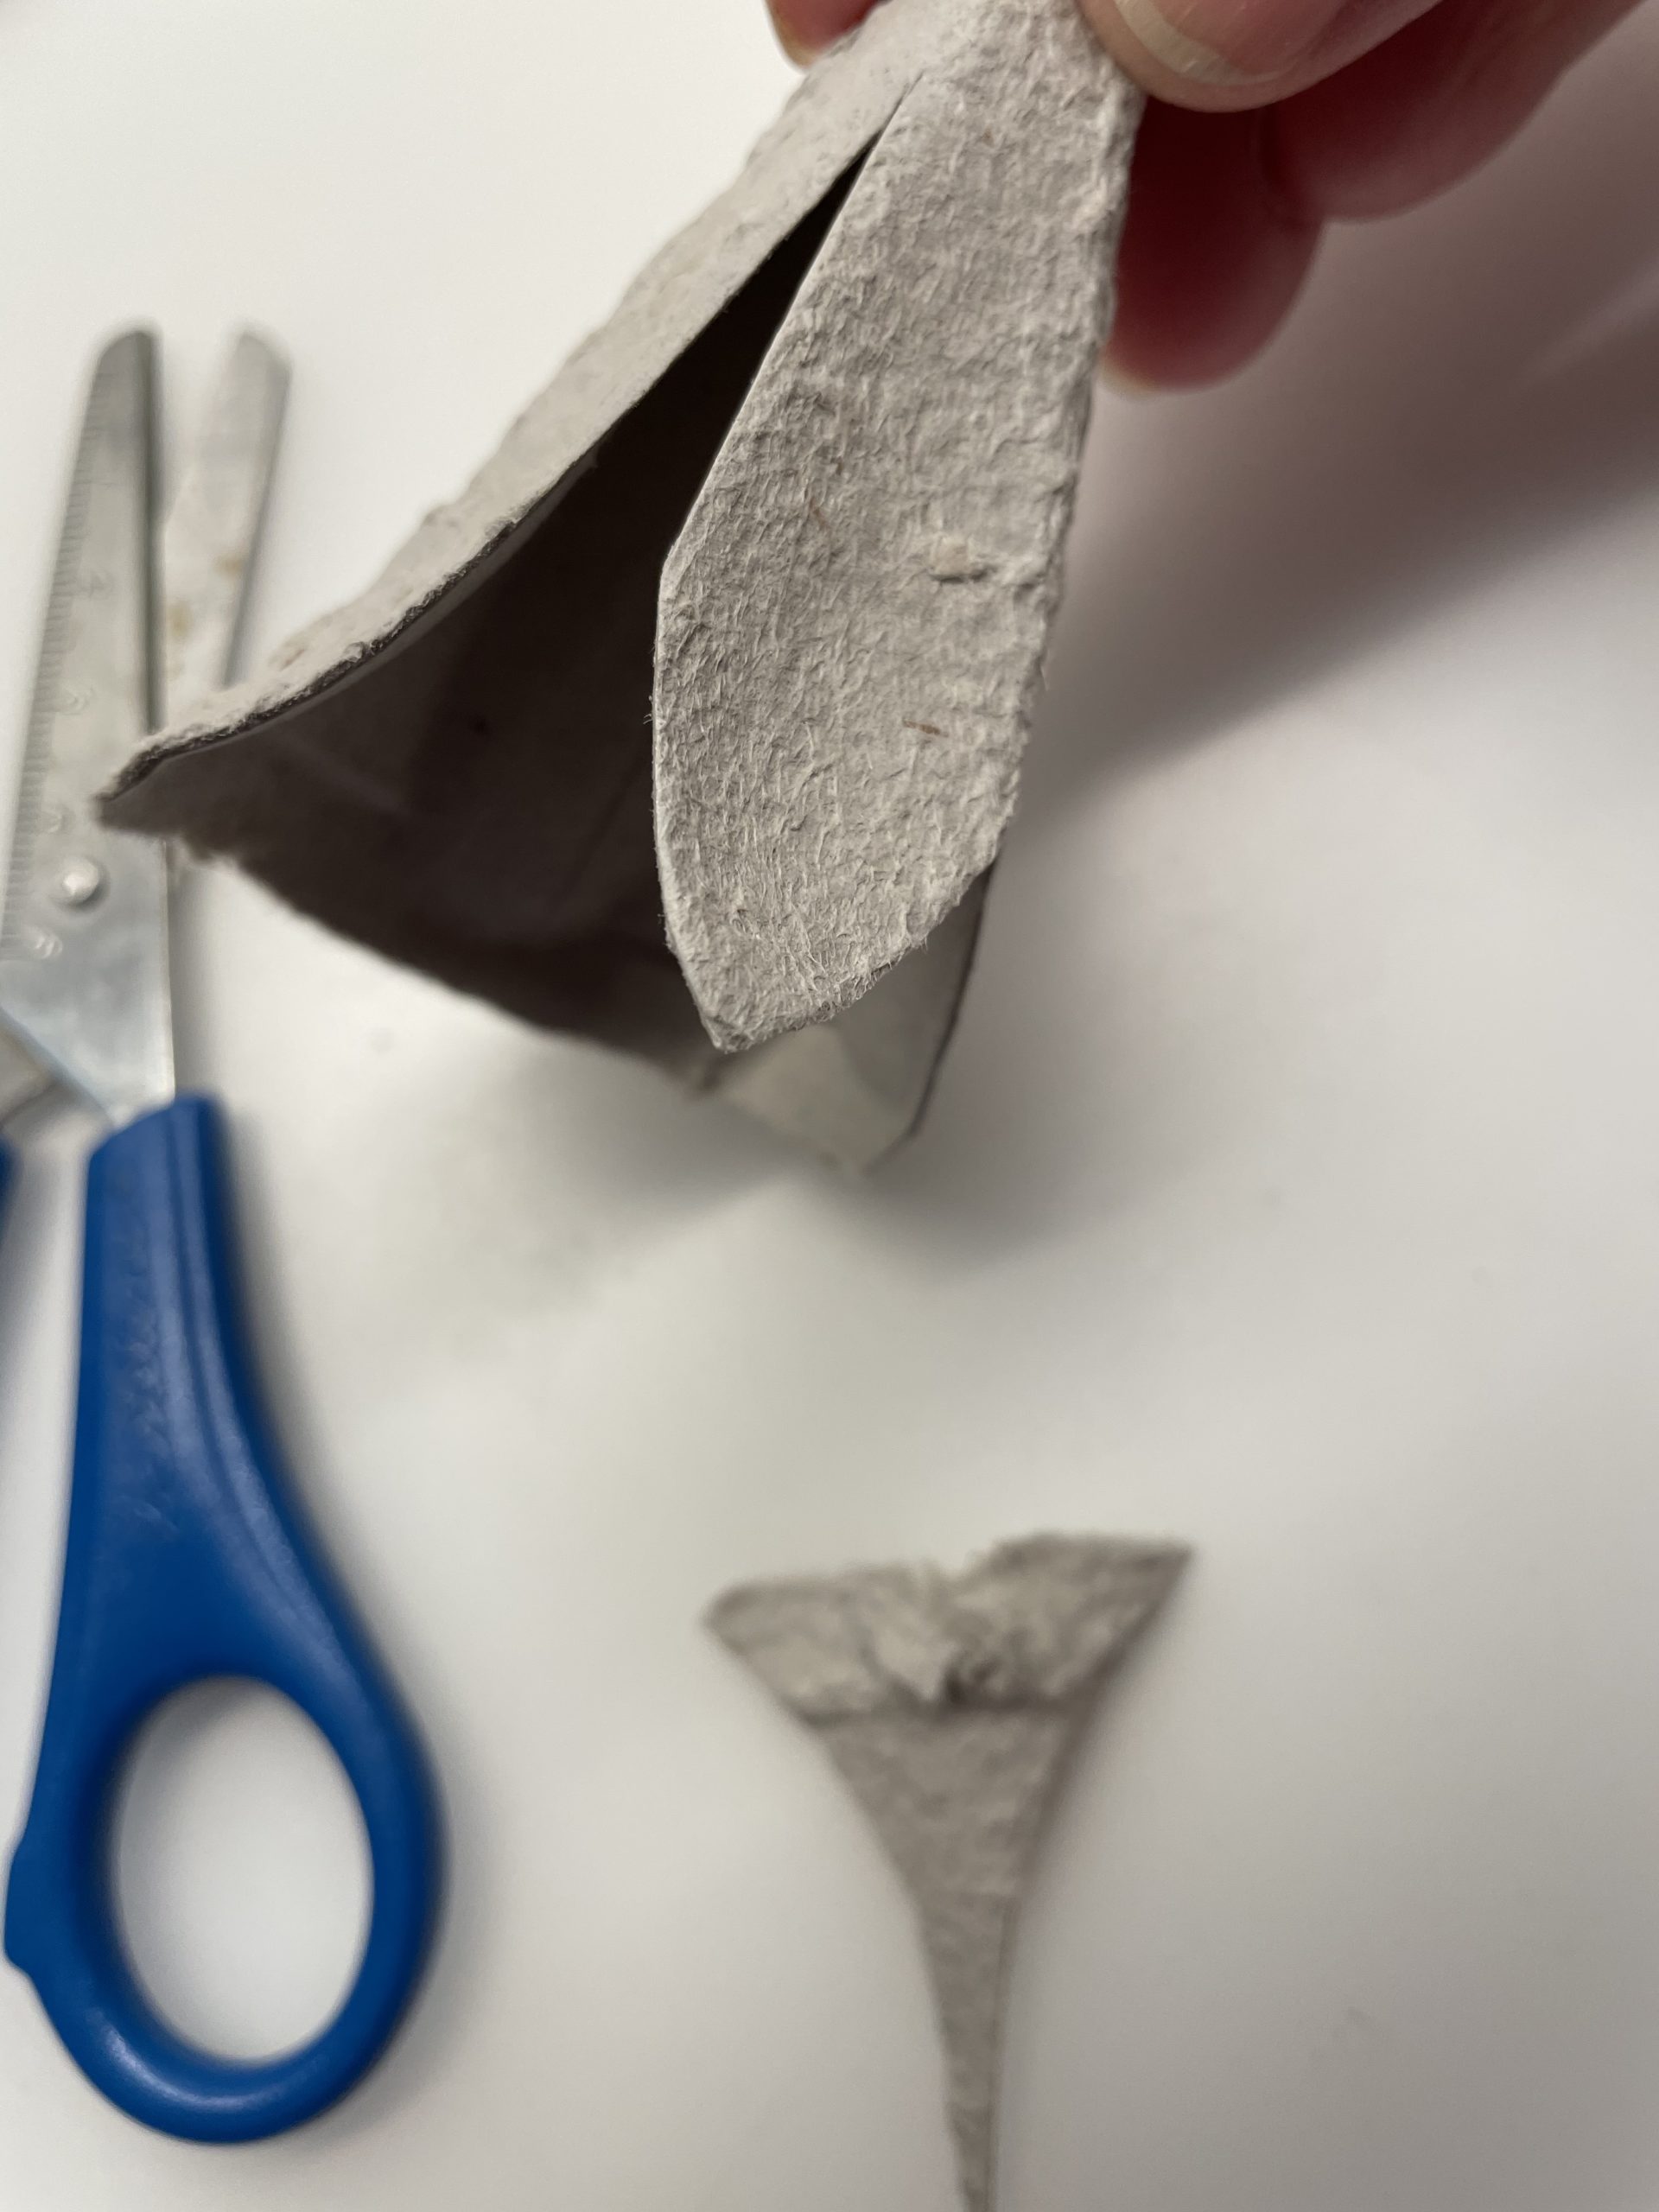
This is how four petals are created.
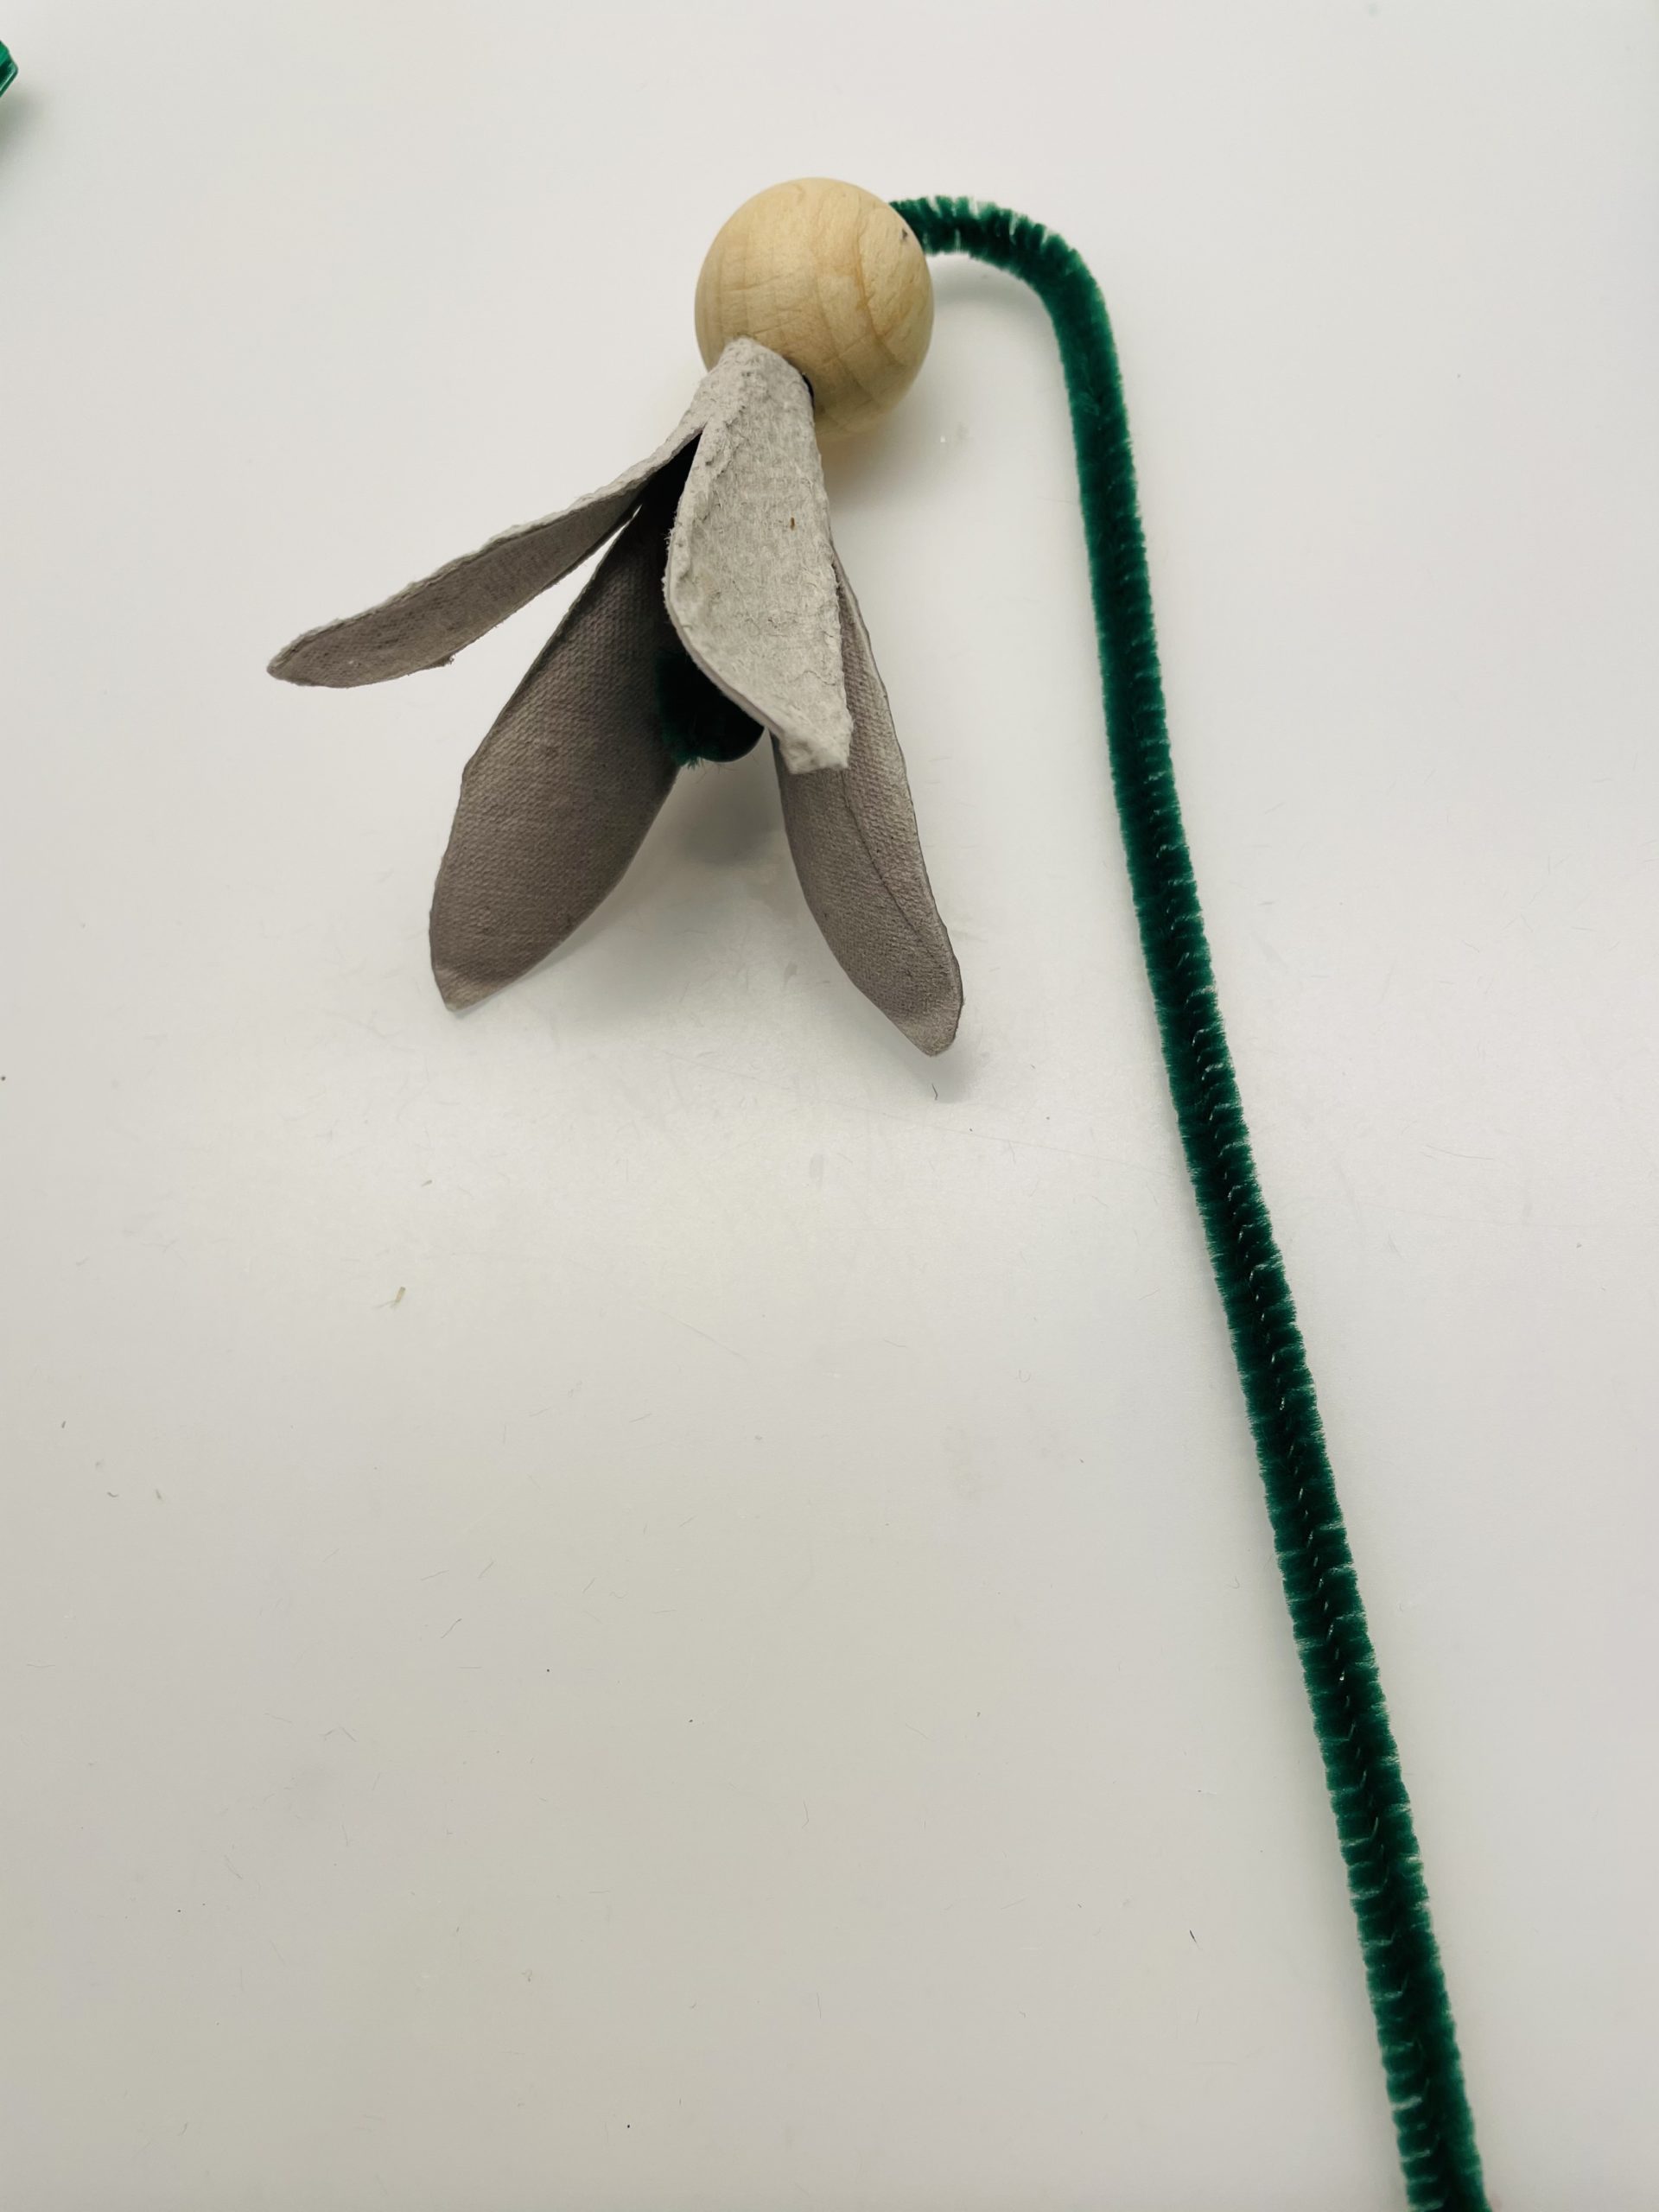
Now you need the pipe cleaner and the beads.
Now push the pipe cleaner through the tip of the egg box flower.
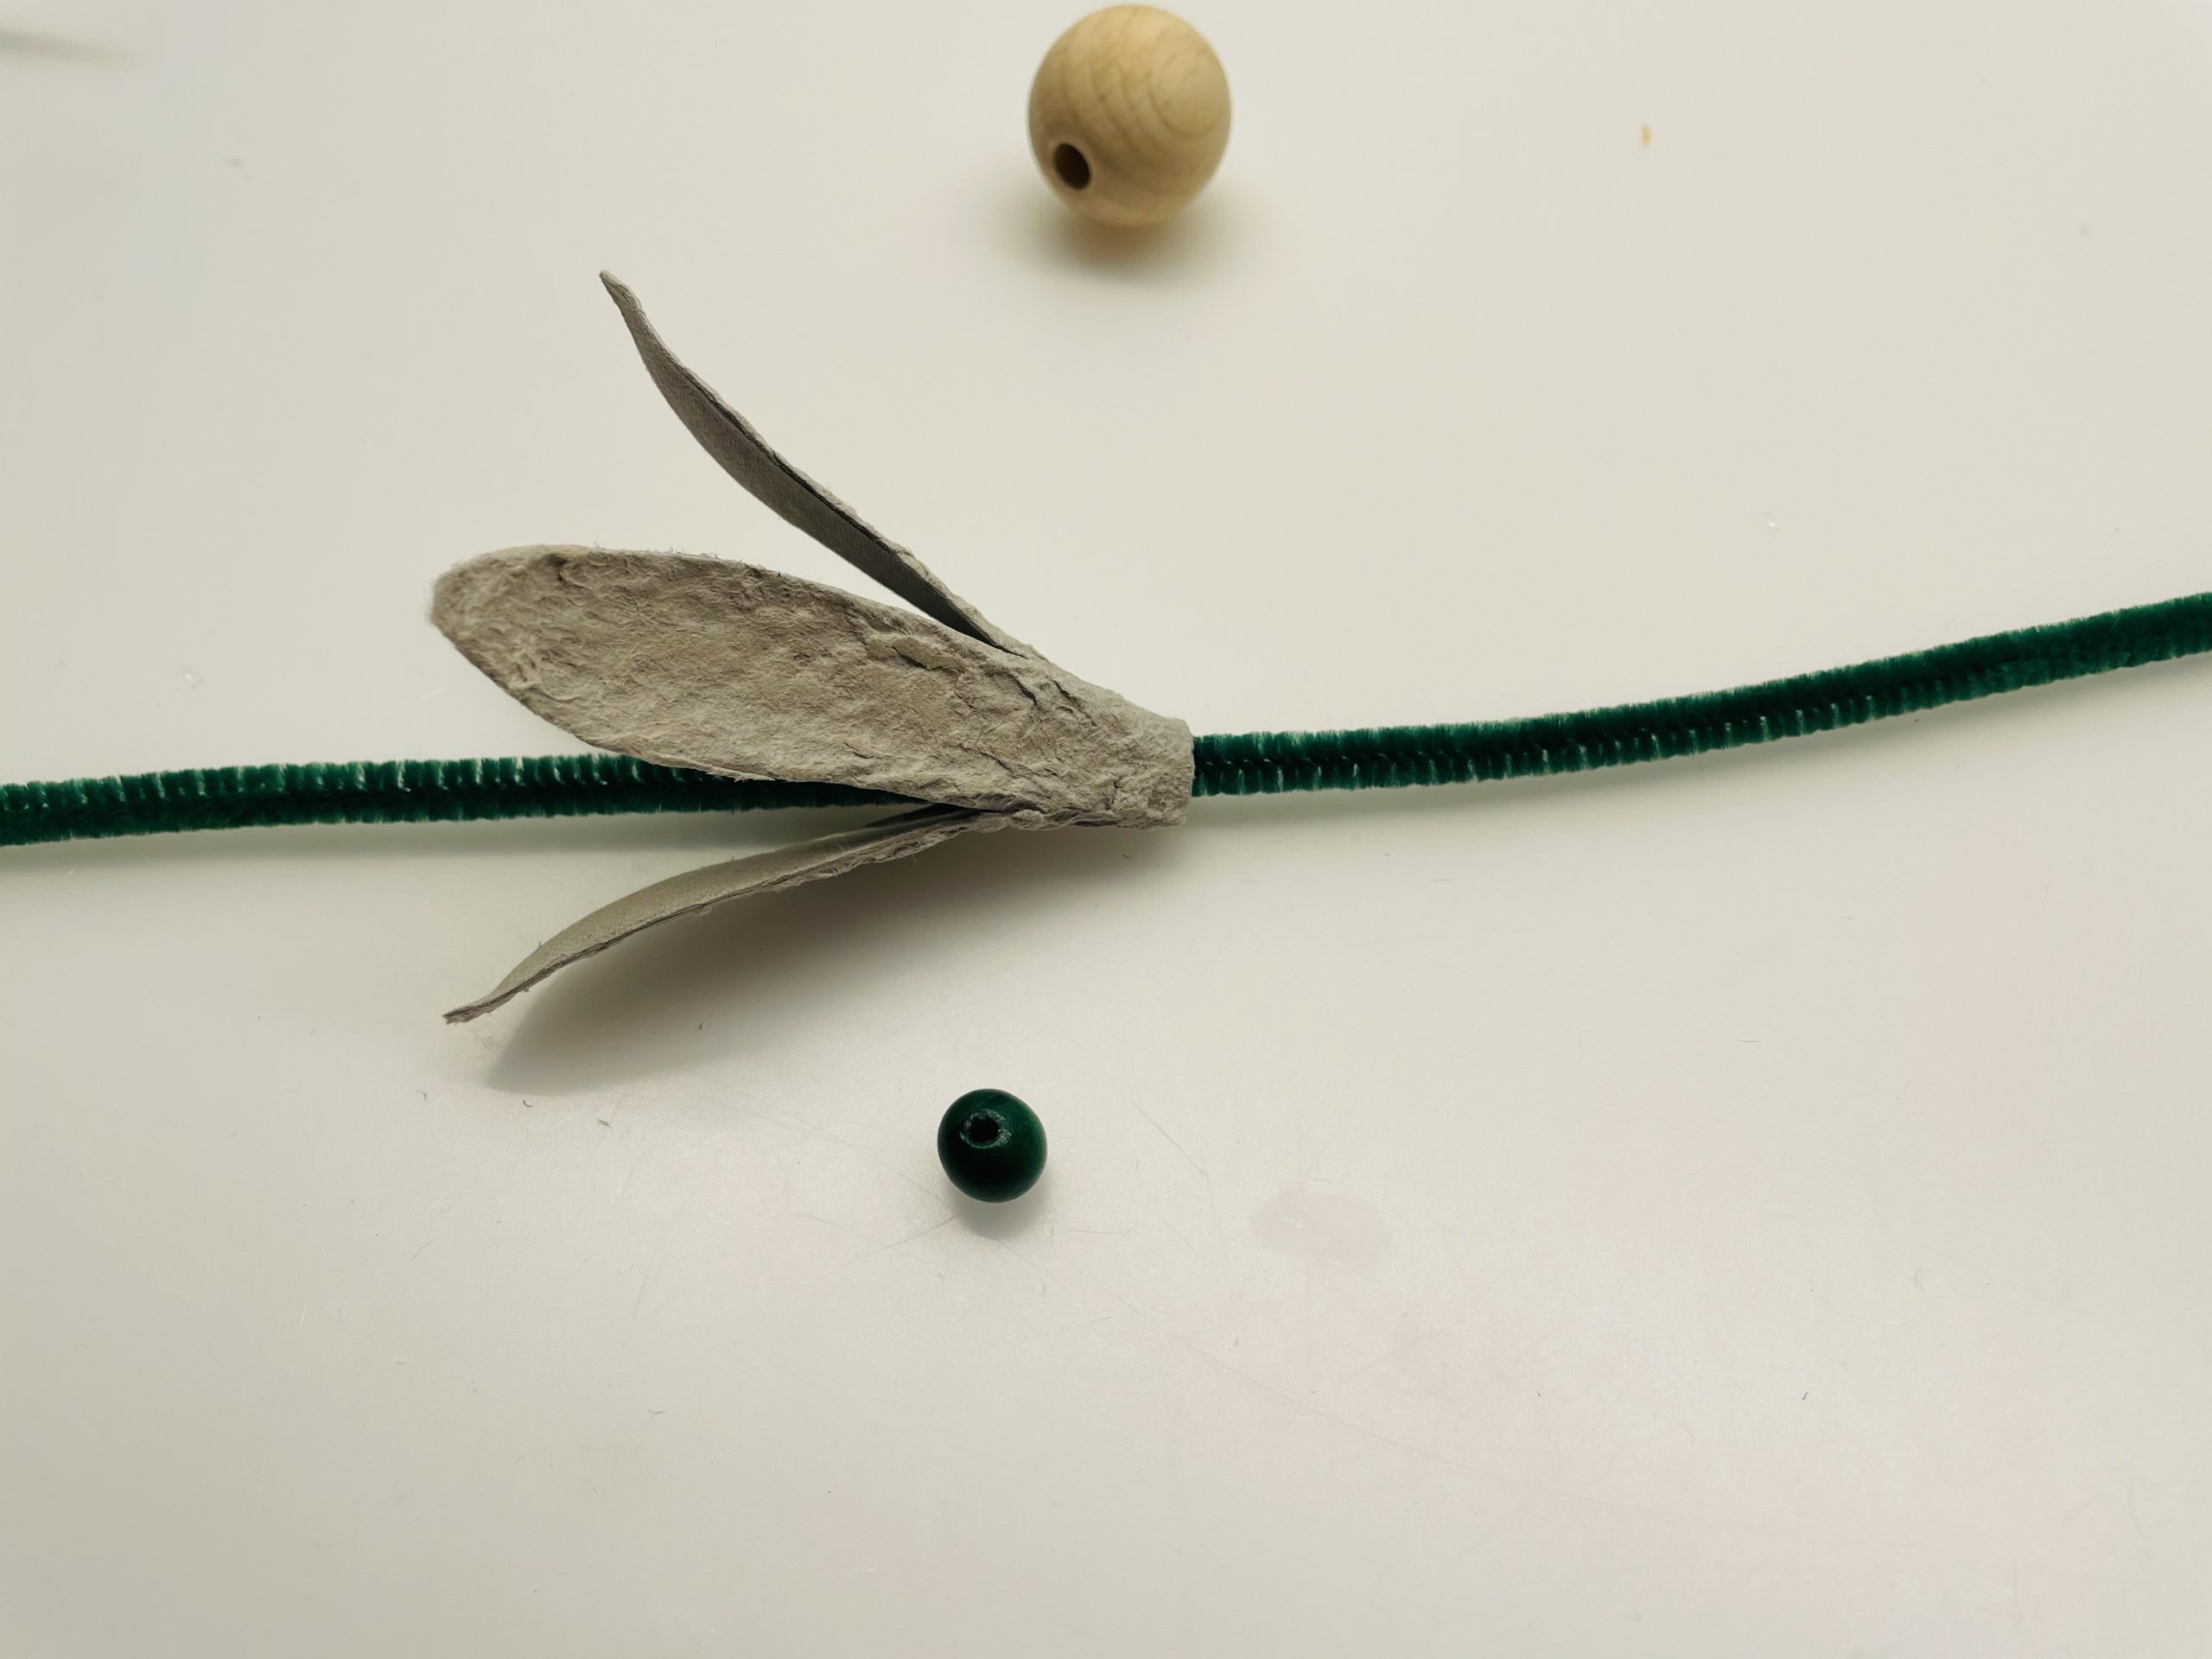
Then you will thread the beads onto the pipe cleaner.
Now push all the pearls to their place. The green pearl is deep in the flower cup.
So that the pearl does not slip out, the pipe cleaner bends in something.
Then you push the wooden ball to the top of the flower cup. Then stick the wooden ball with a small spot hot glue.
Attention when handling the hot glue - risk of injury!

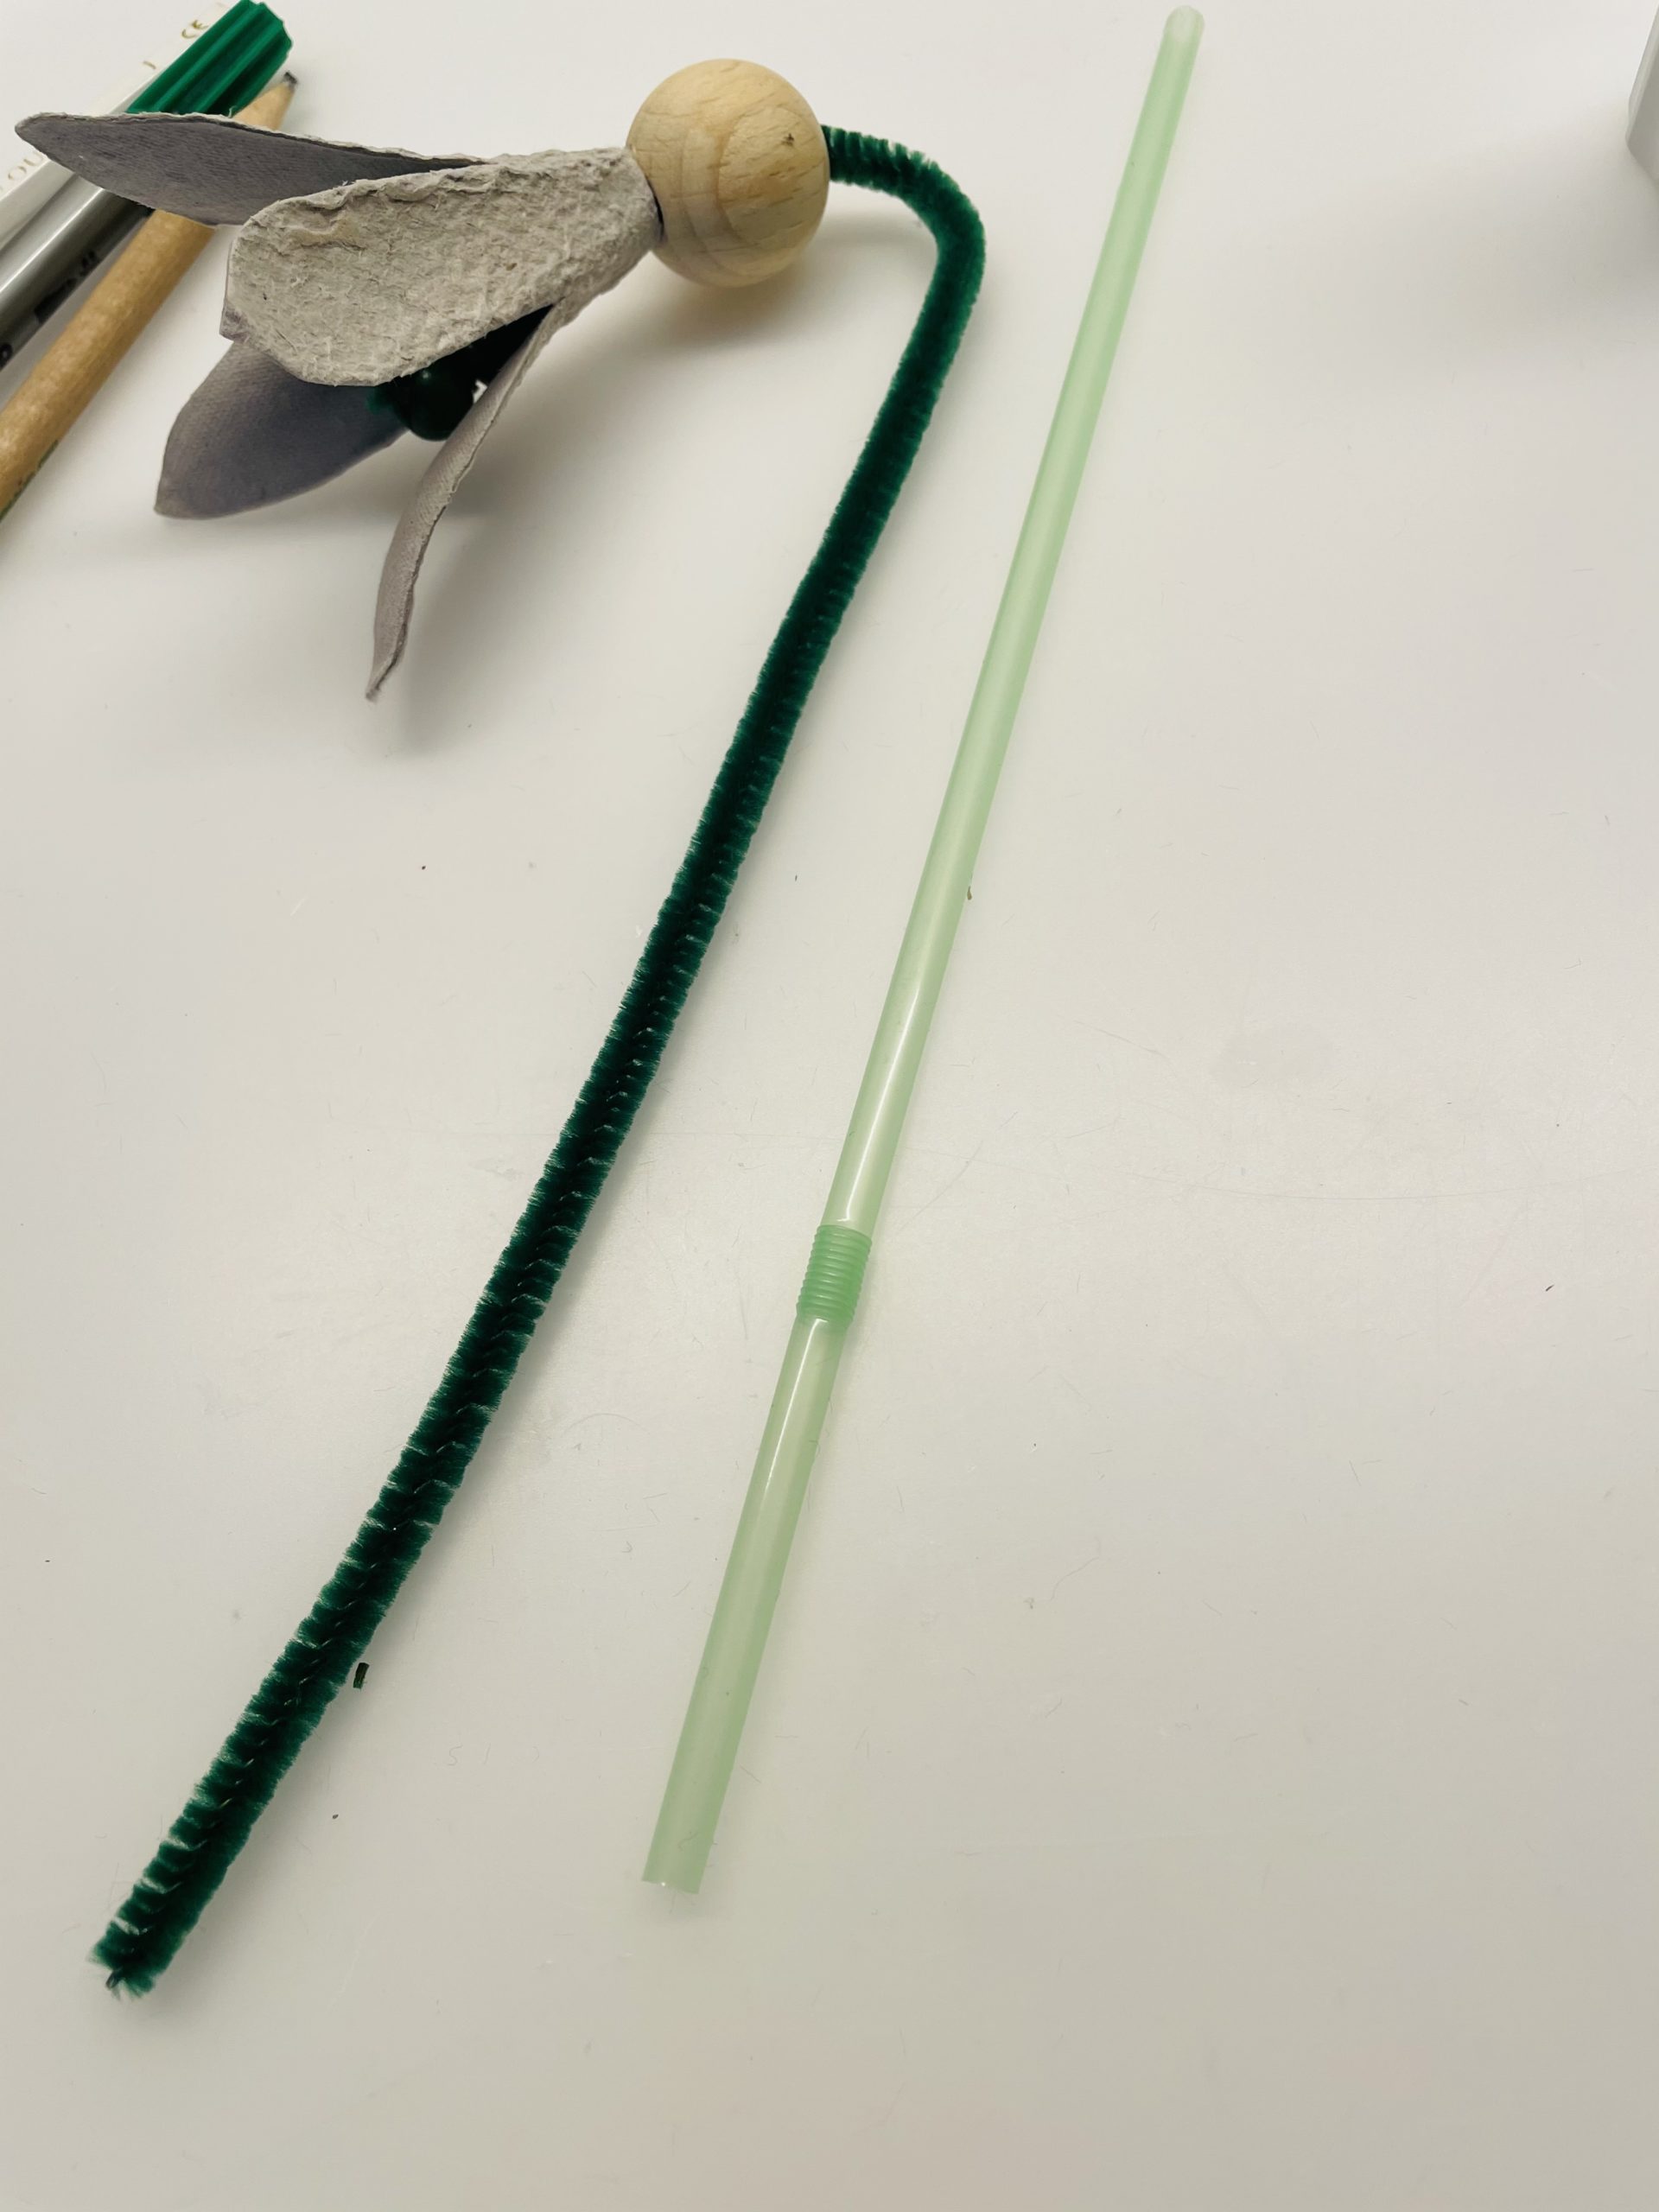
Now bend down the pipe cleaner in a narrow bow.
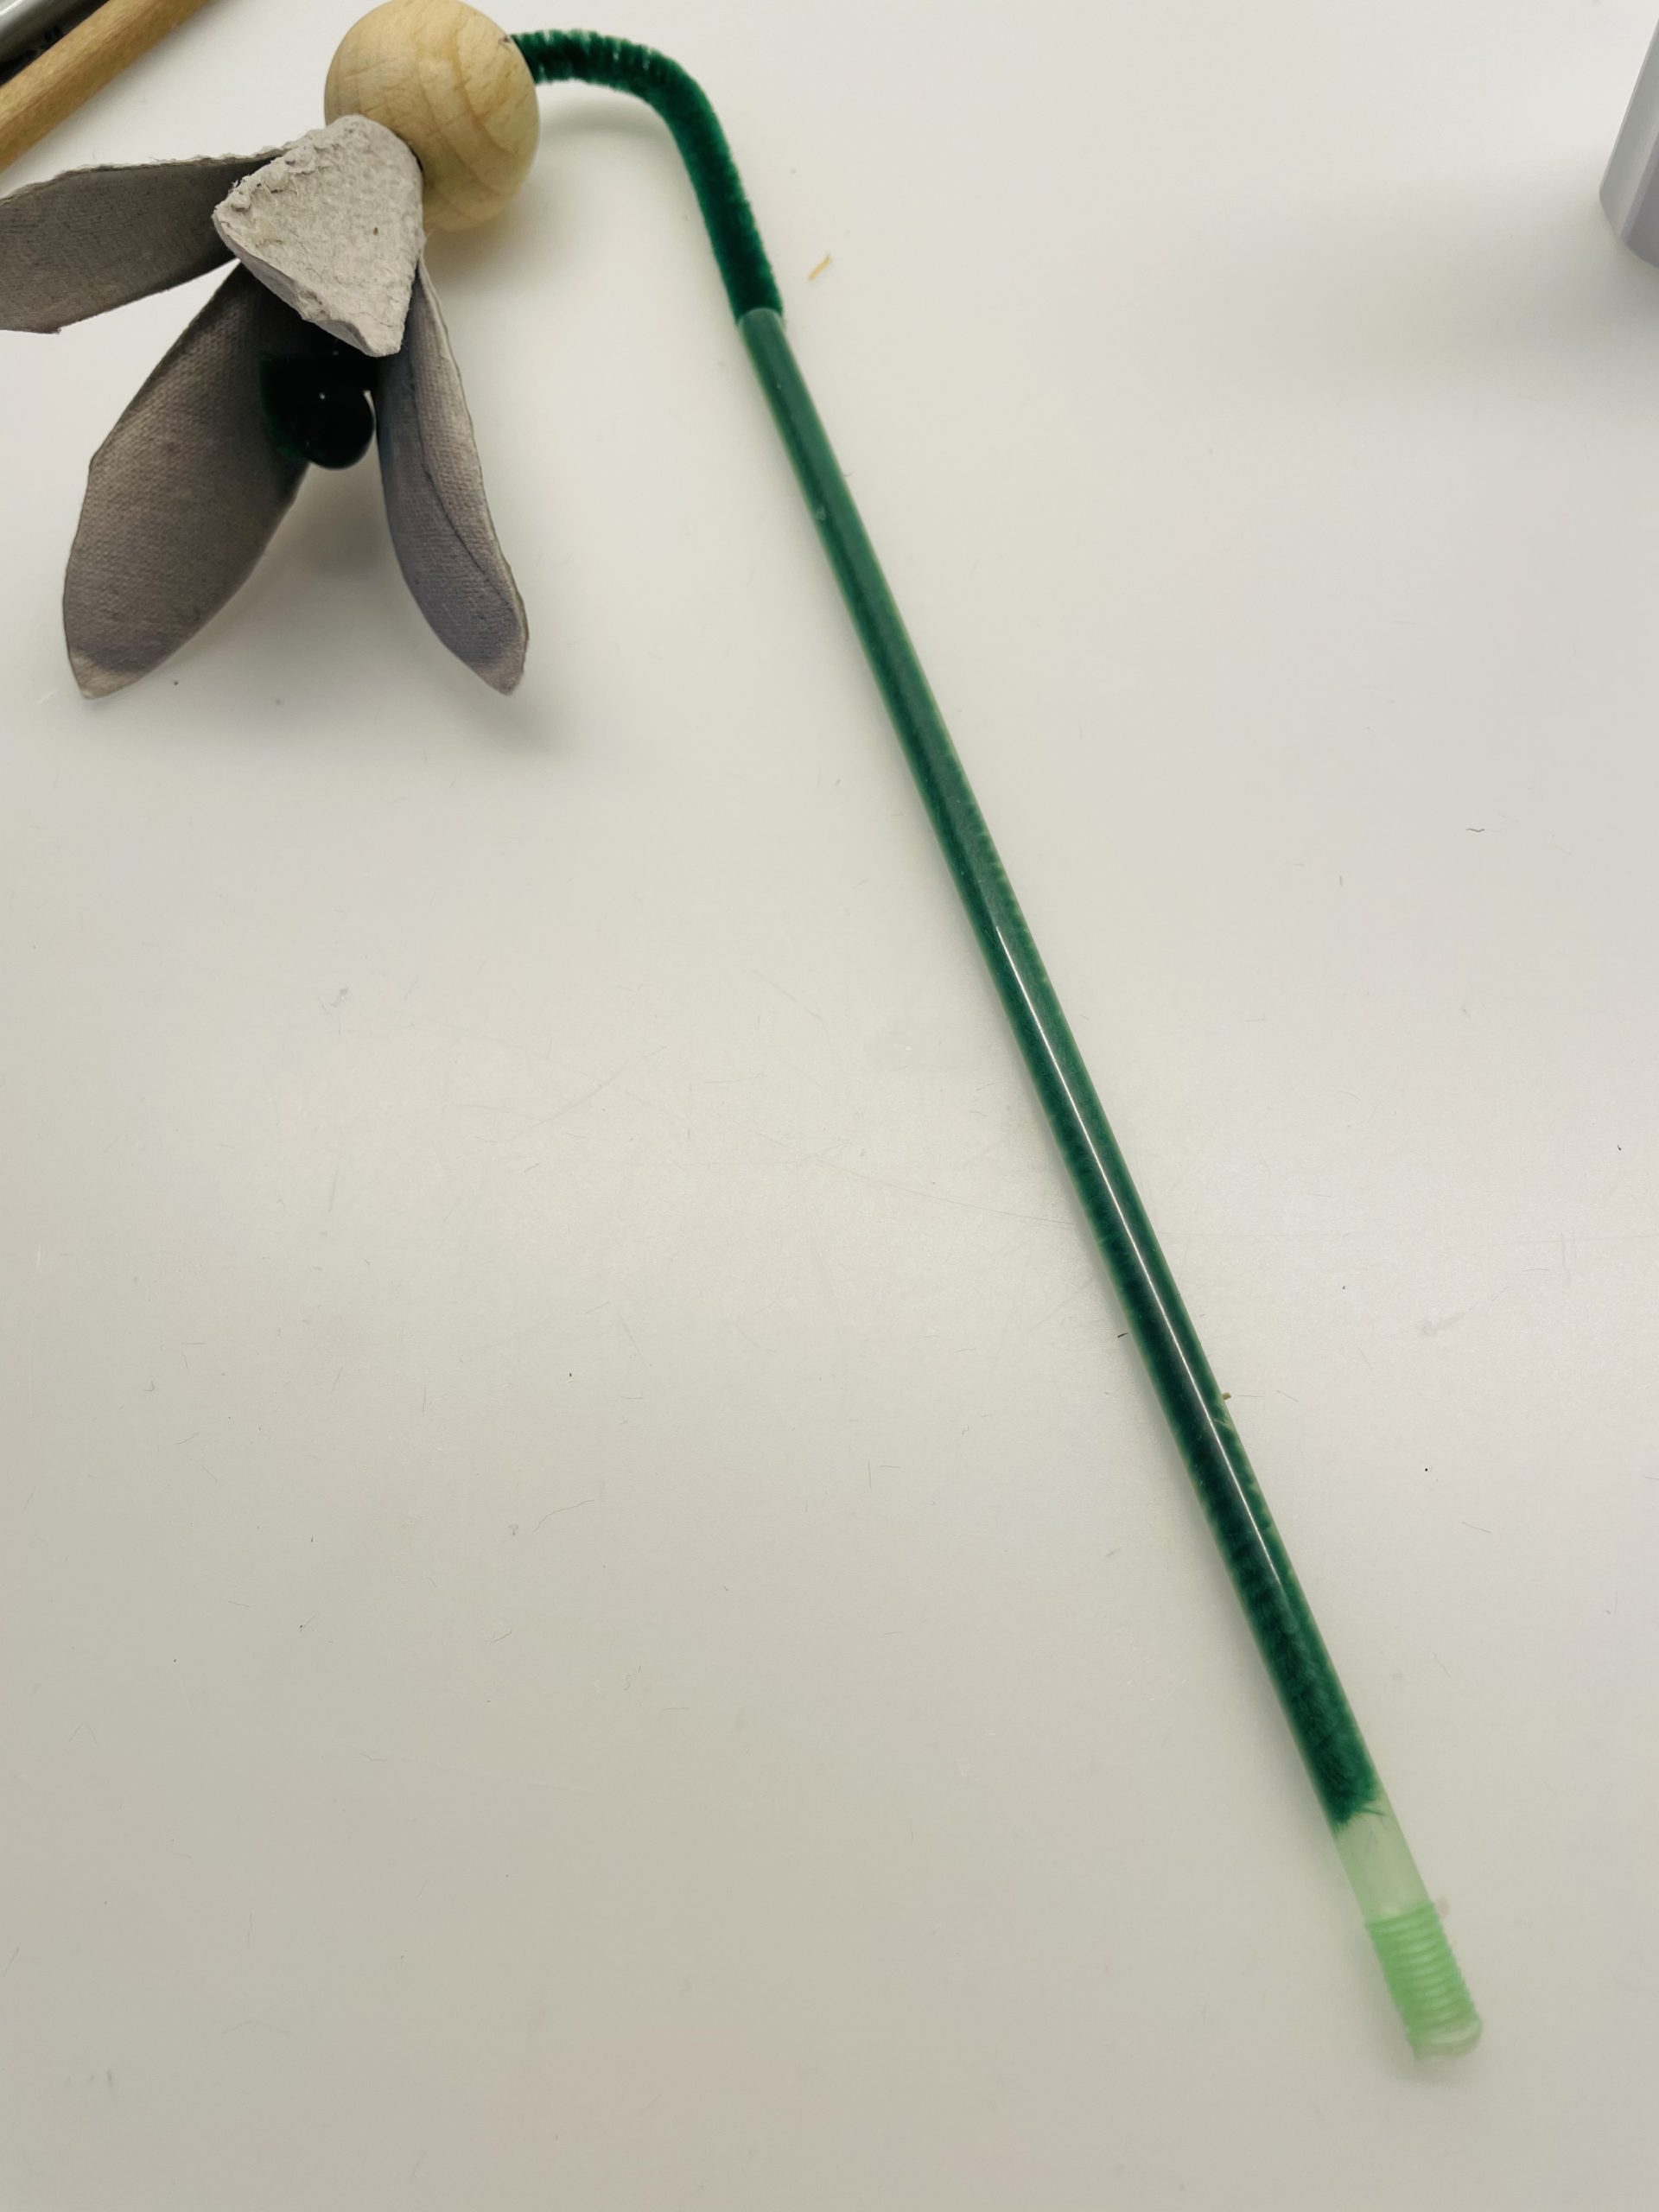
Now you put the straw palm over the pipe cleaner.
The straw thus gives stability to the pipe cleaner. Then, season the pipe cleaner or straw, so that both are the same in length.
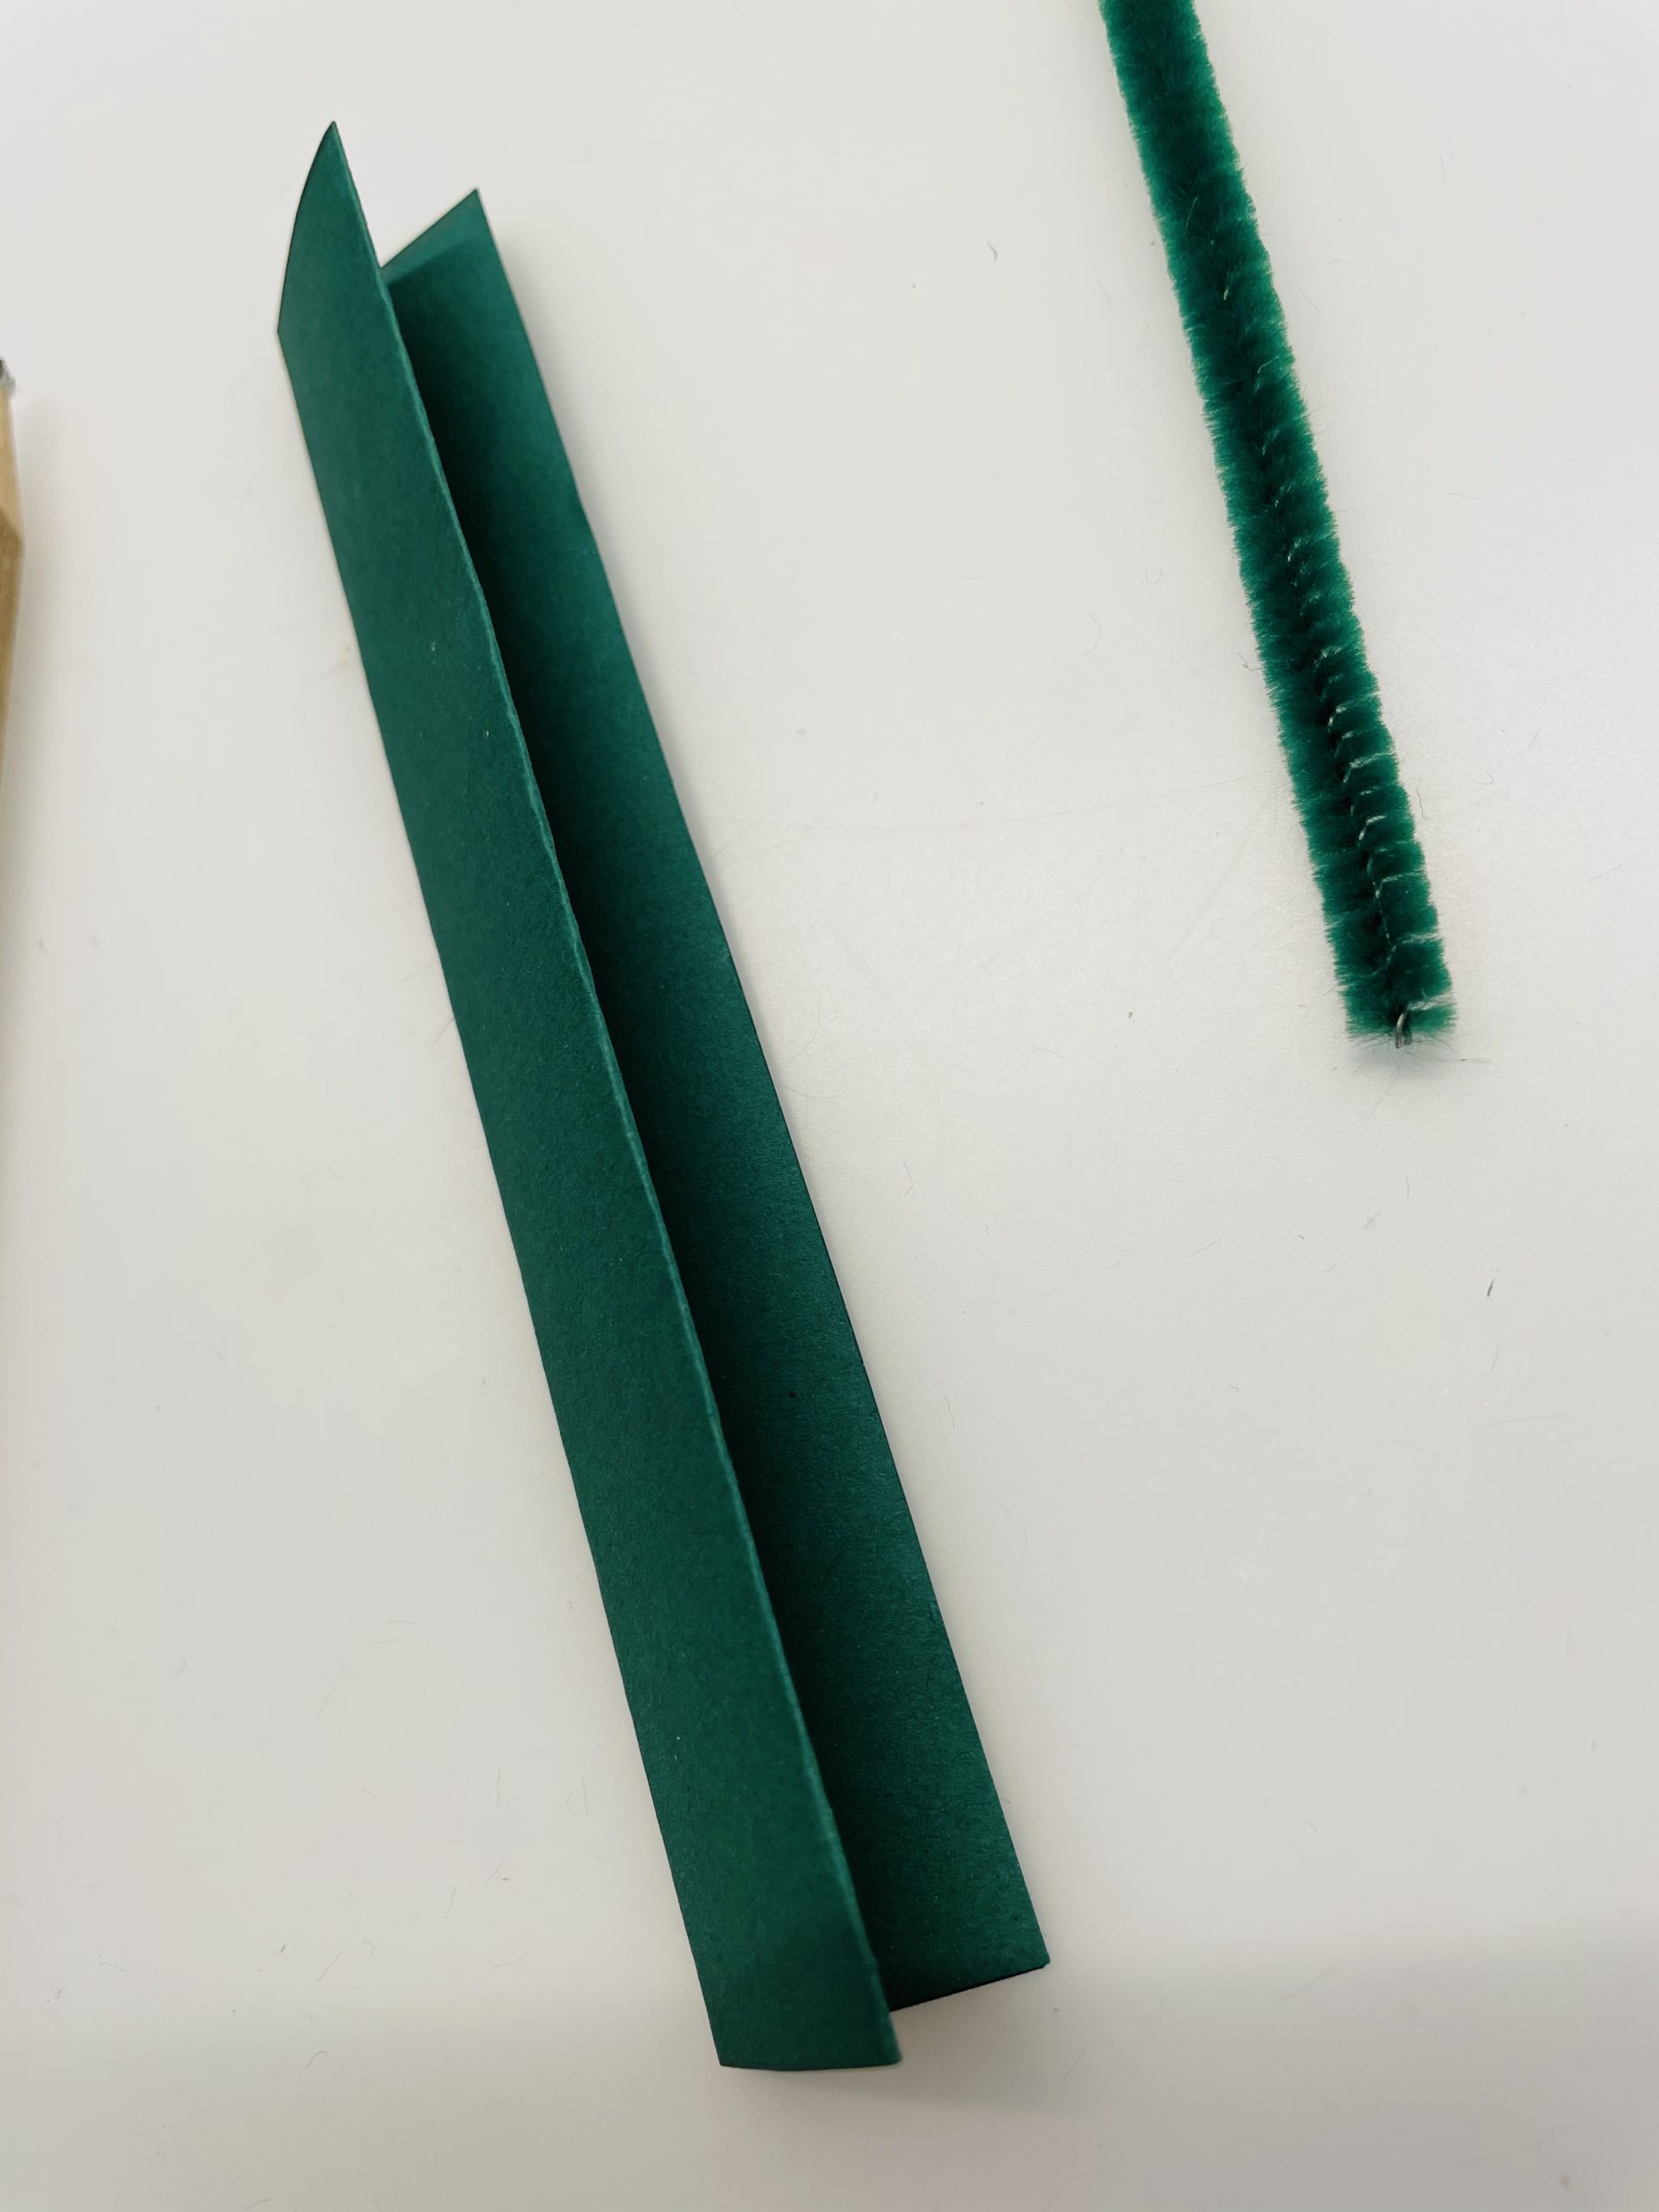
Now you cut the green photo box to the dimensions 15cm x 10cm.
Then fold the carton twice to half, so that you get a long thin stripe (length: 15cm).
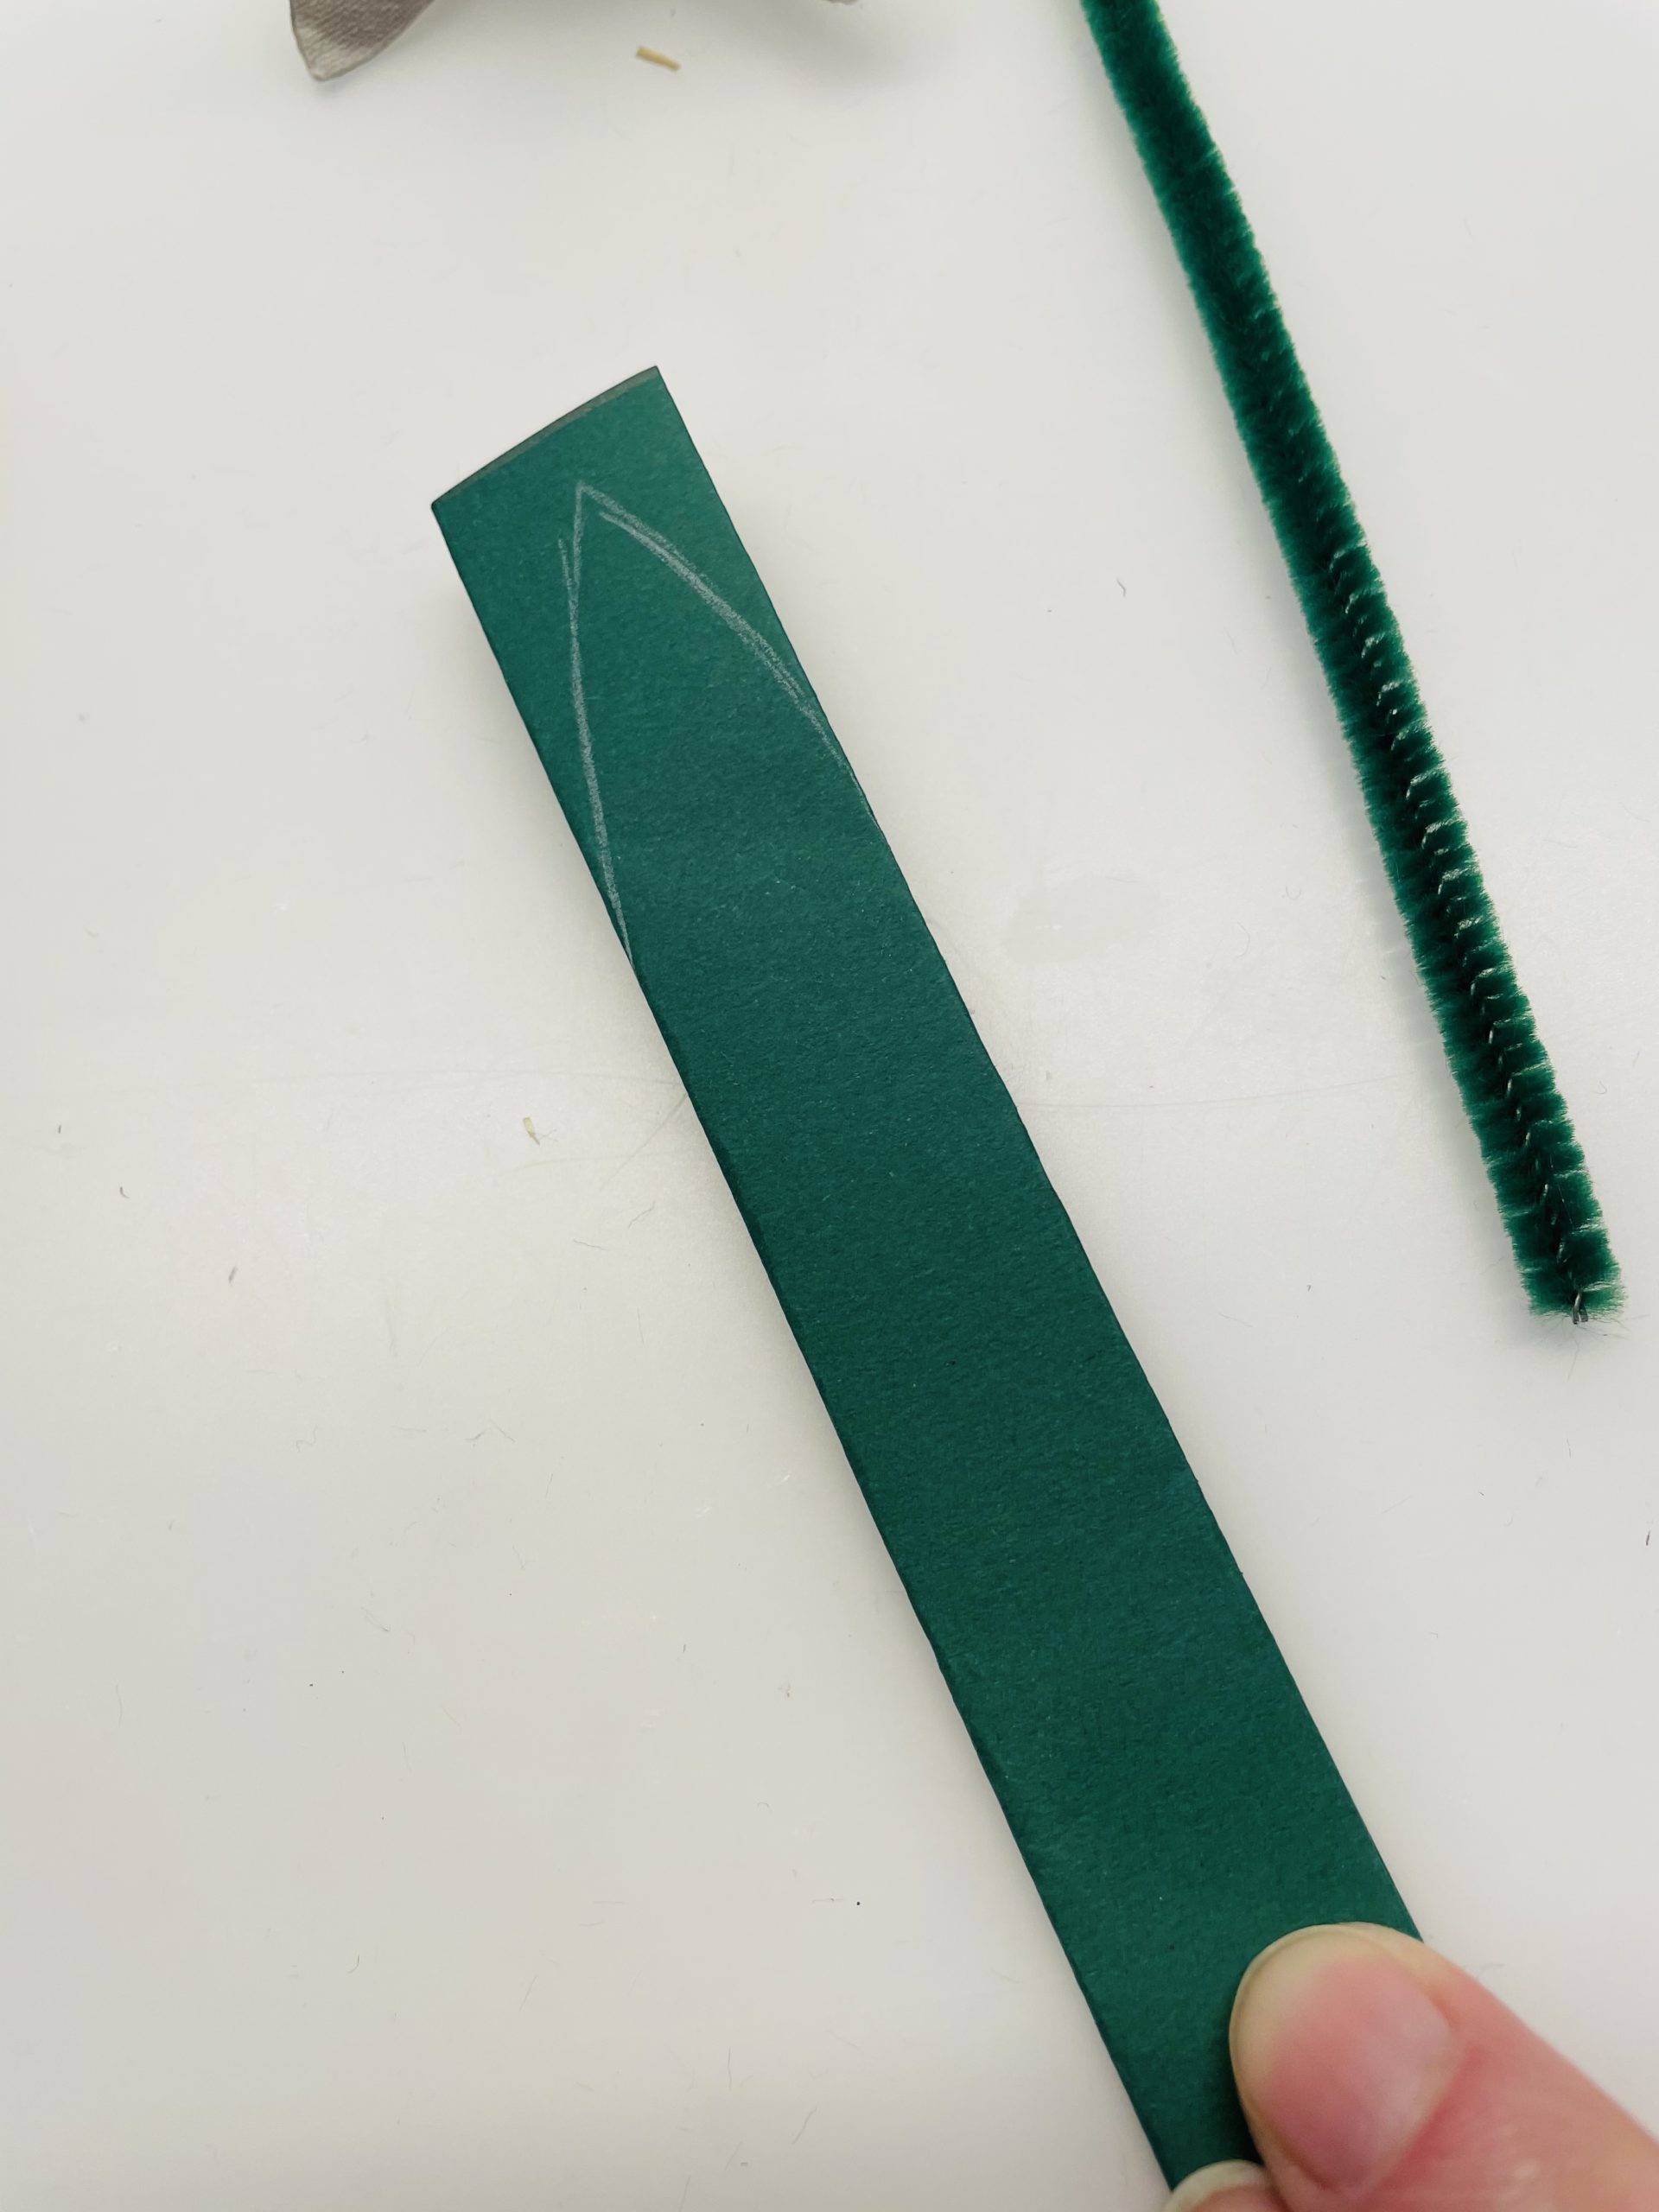
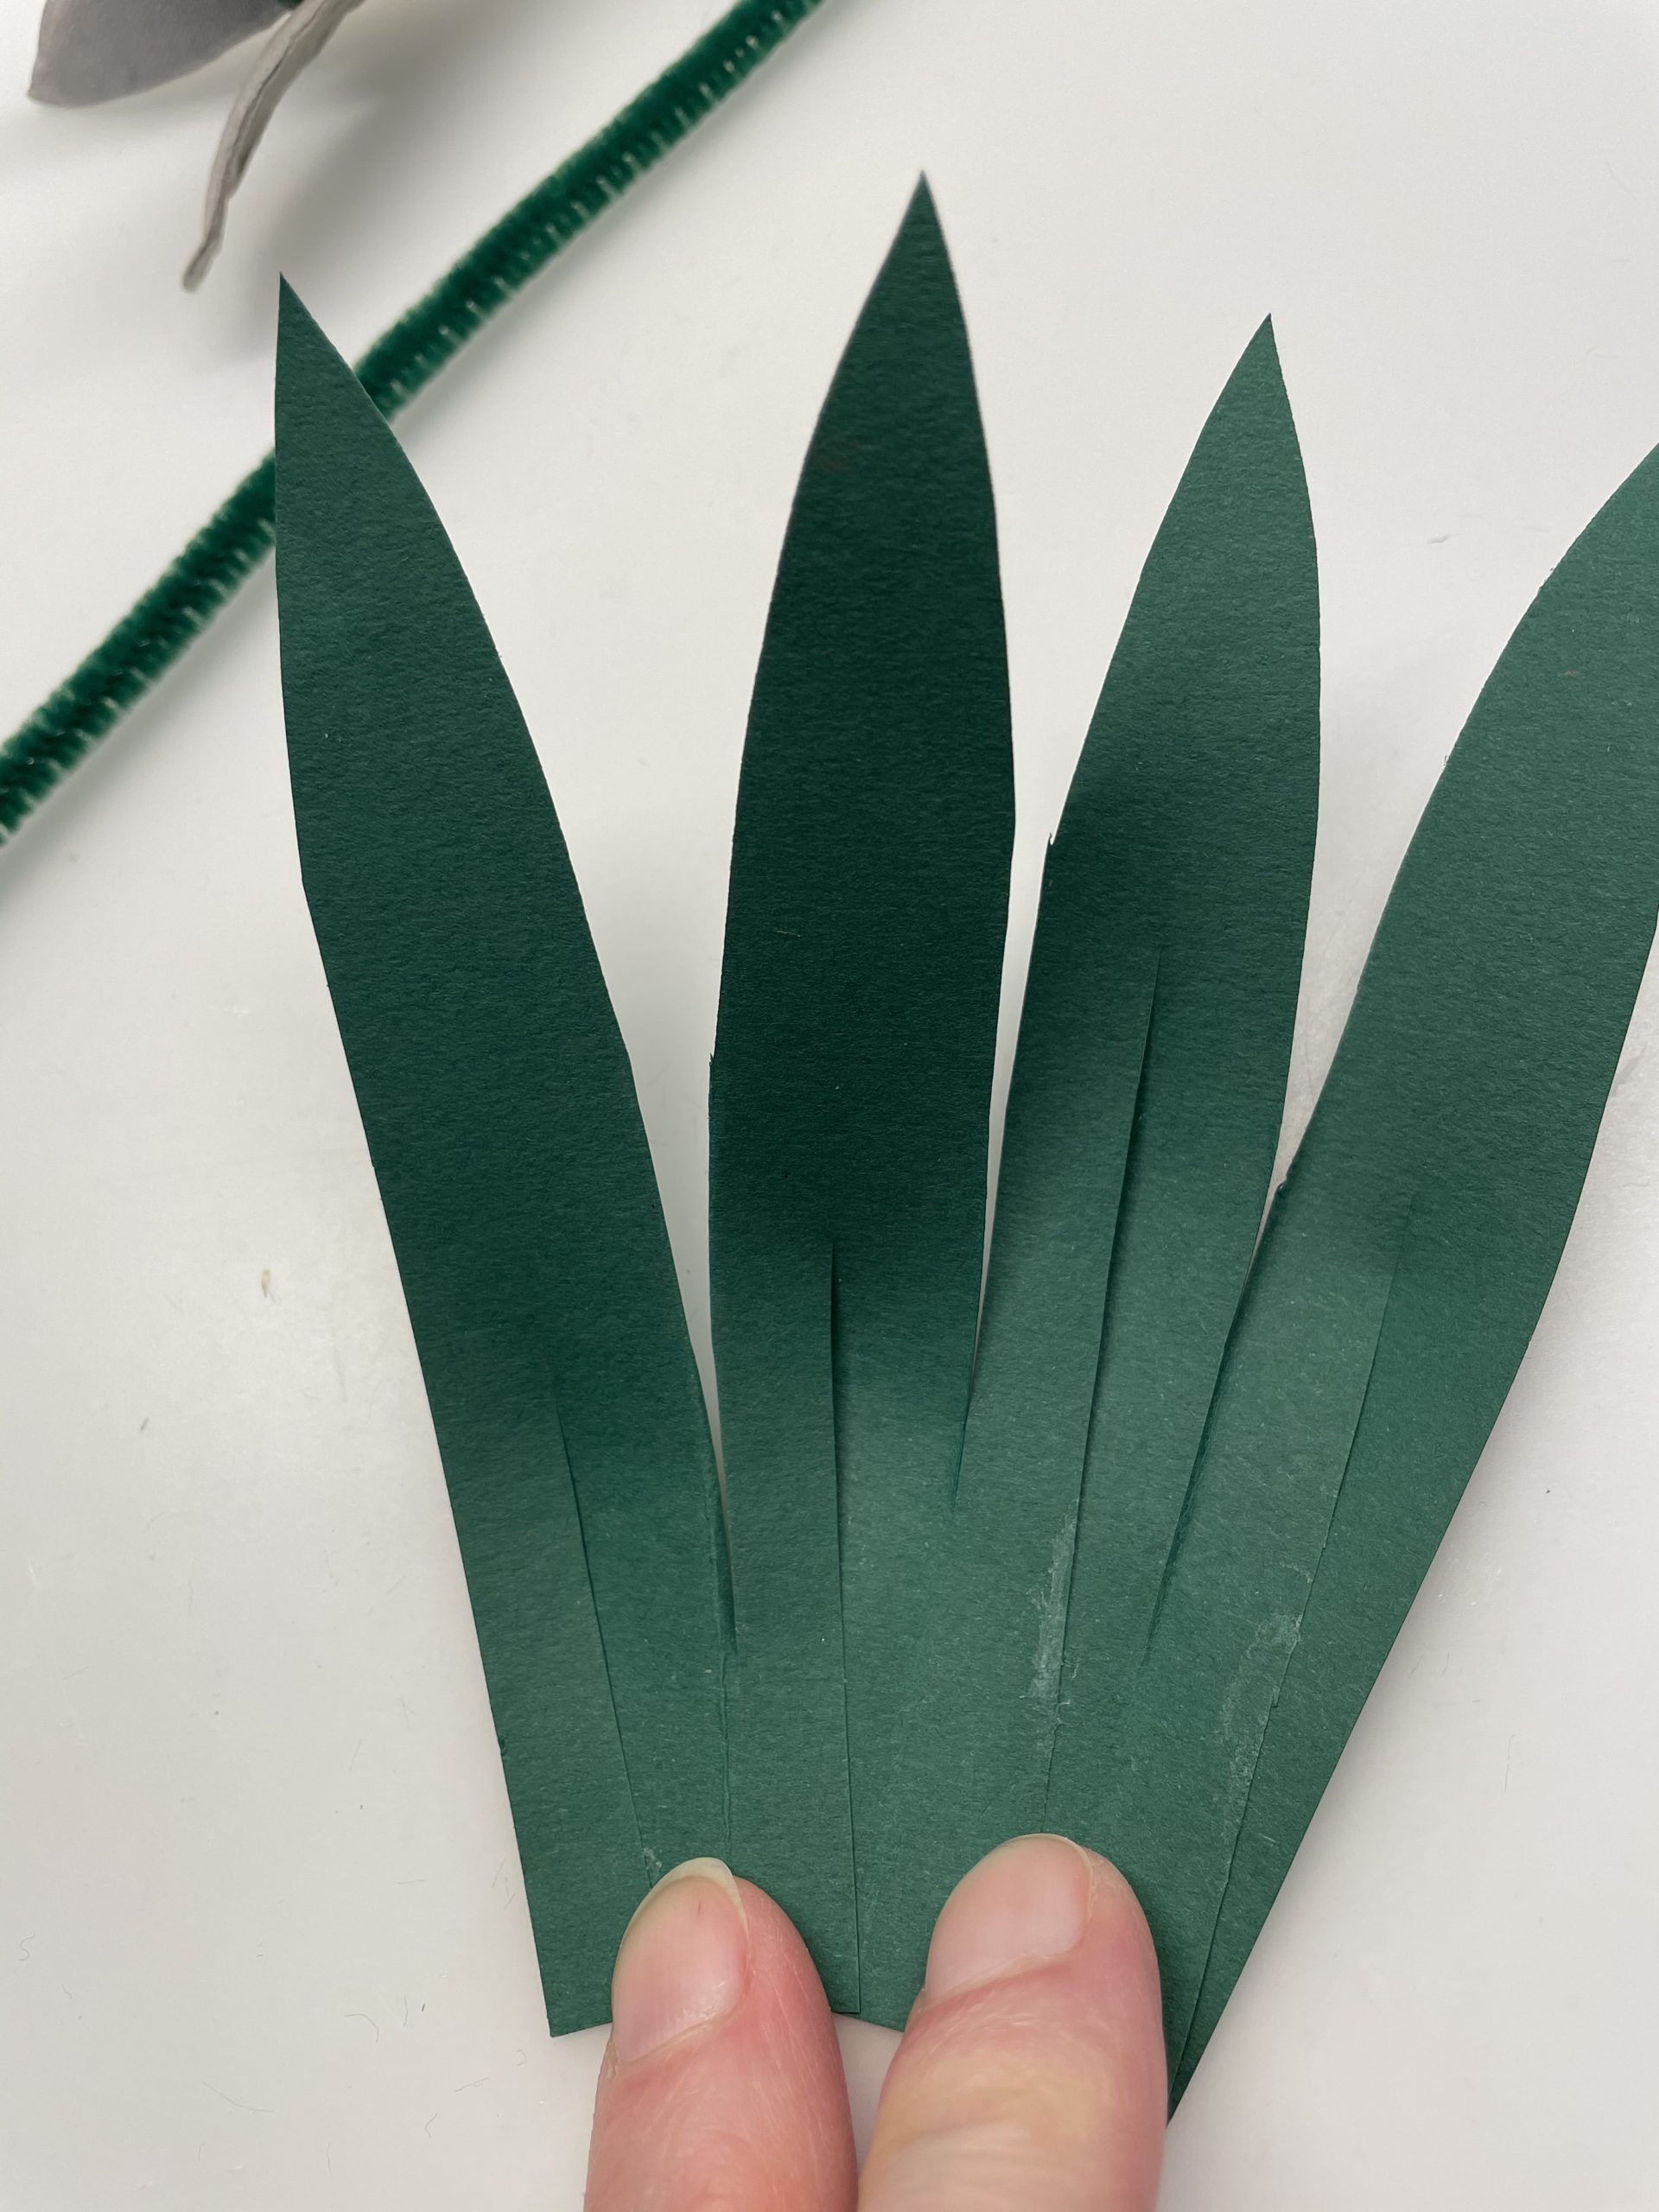
Now paint on the top a long elongated leaf and cut it out.
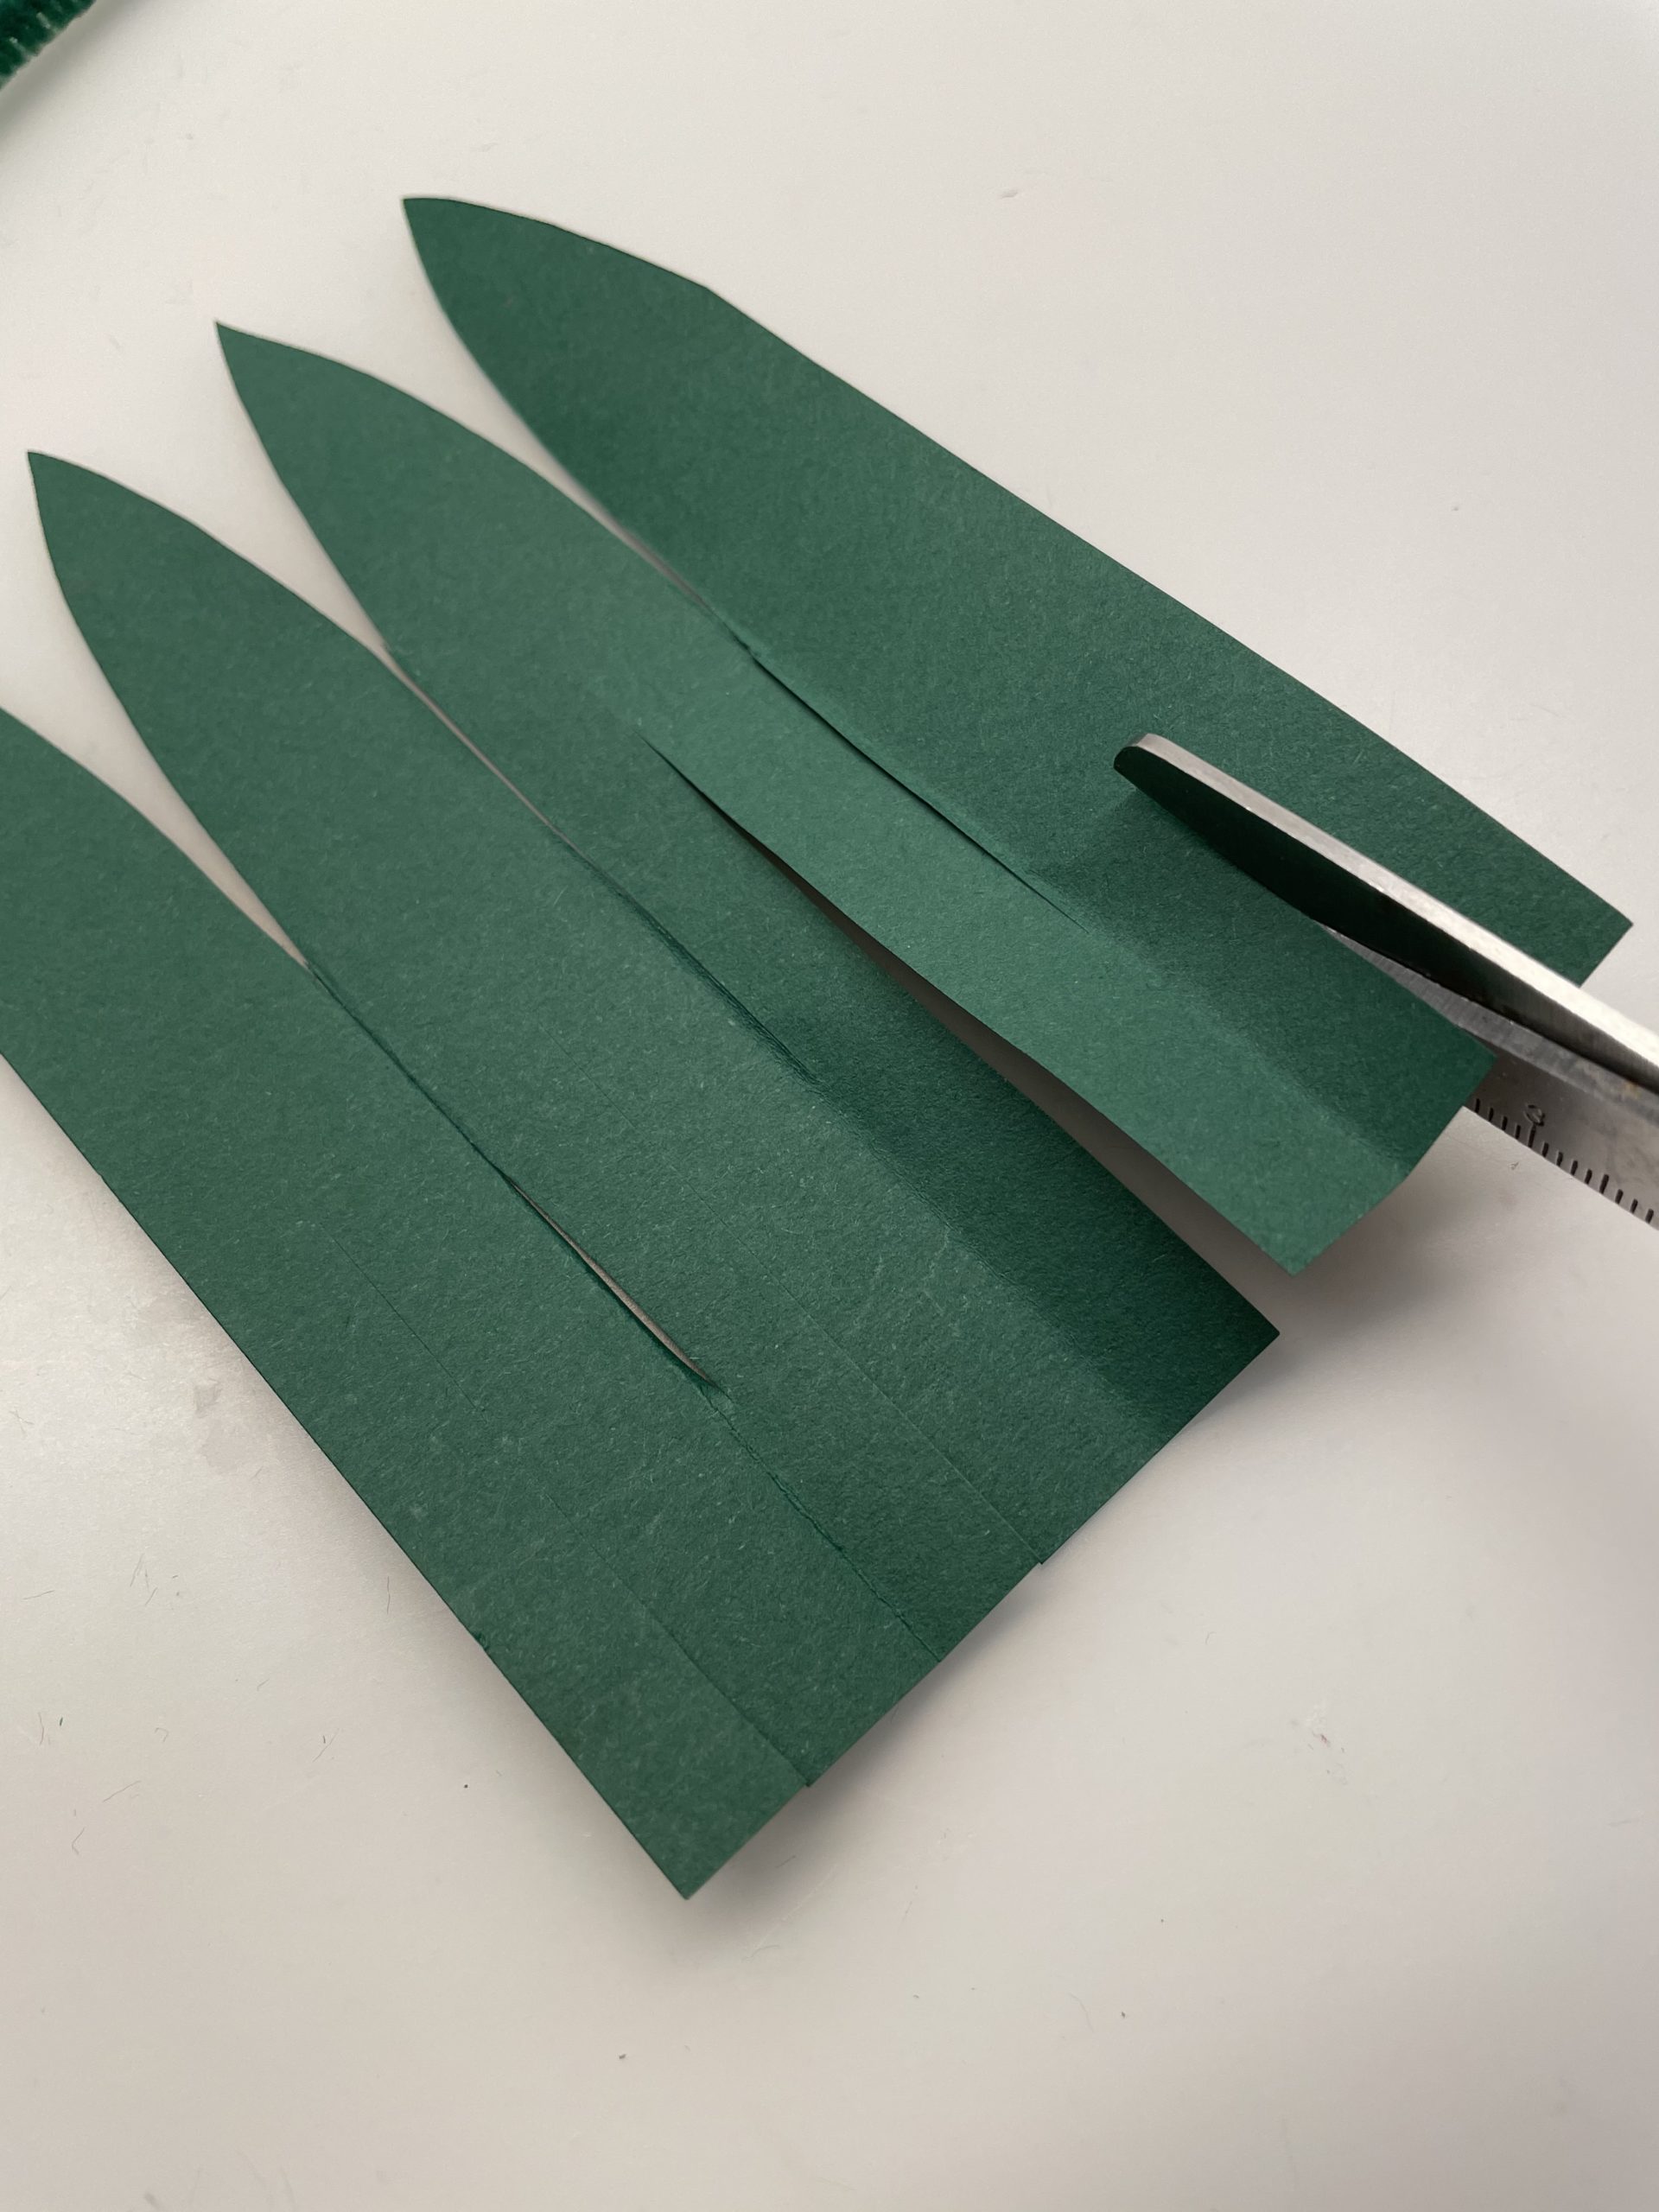
After that, you'll fold the cut sheet apart.
Now you cut every single batt from below about 5 cm.
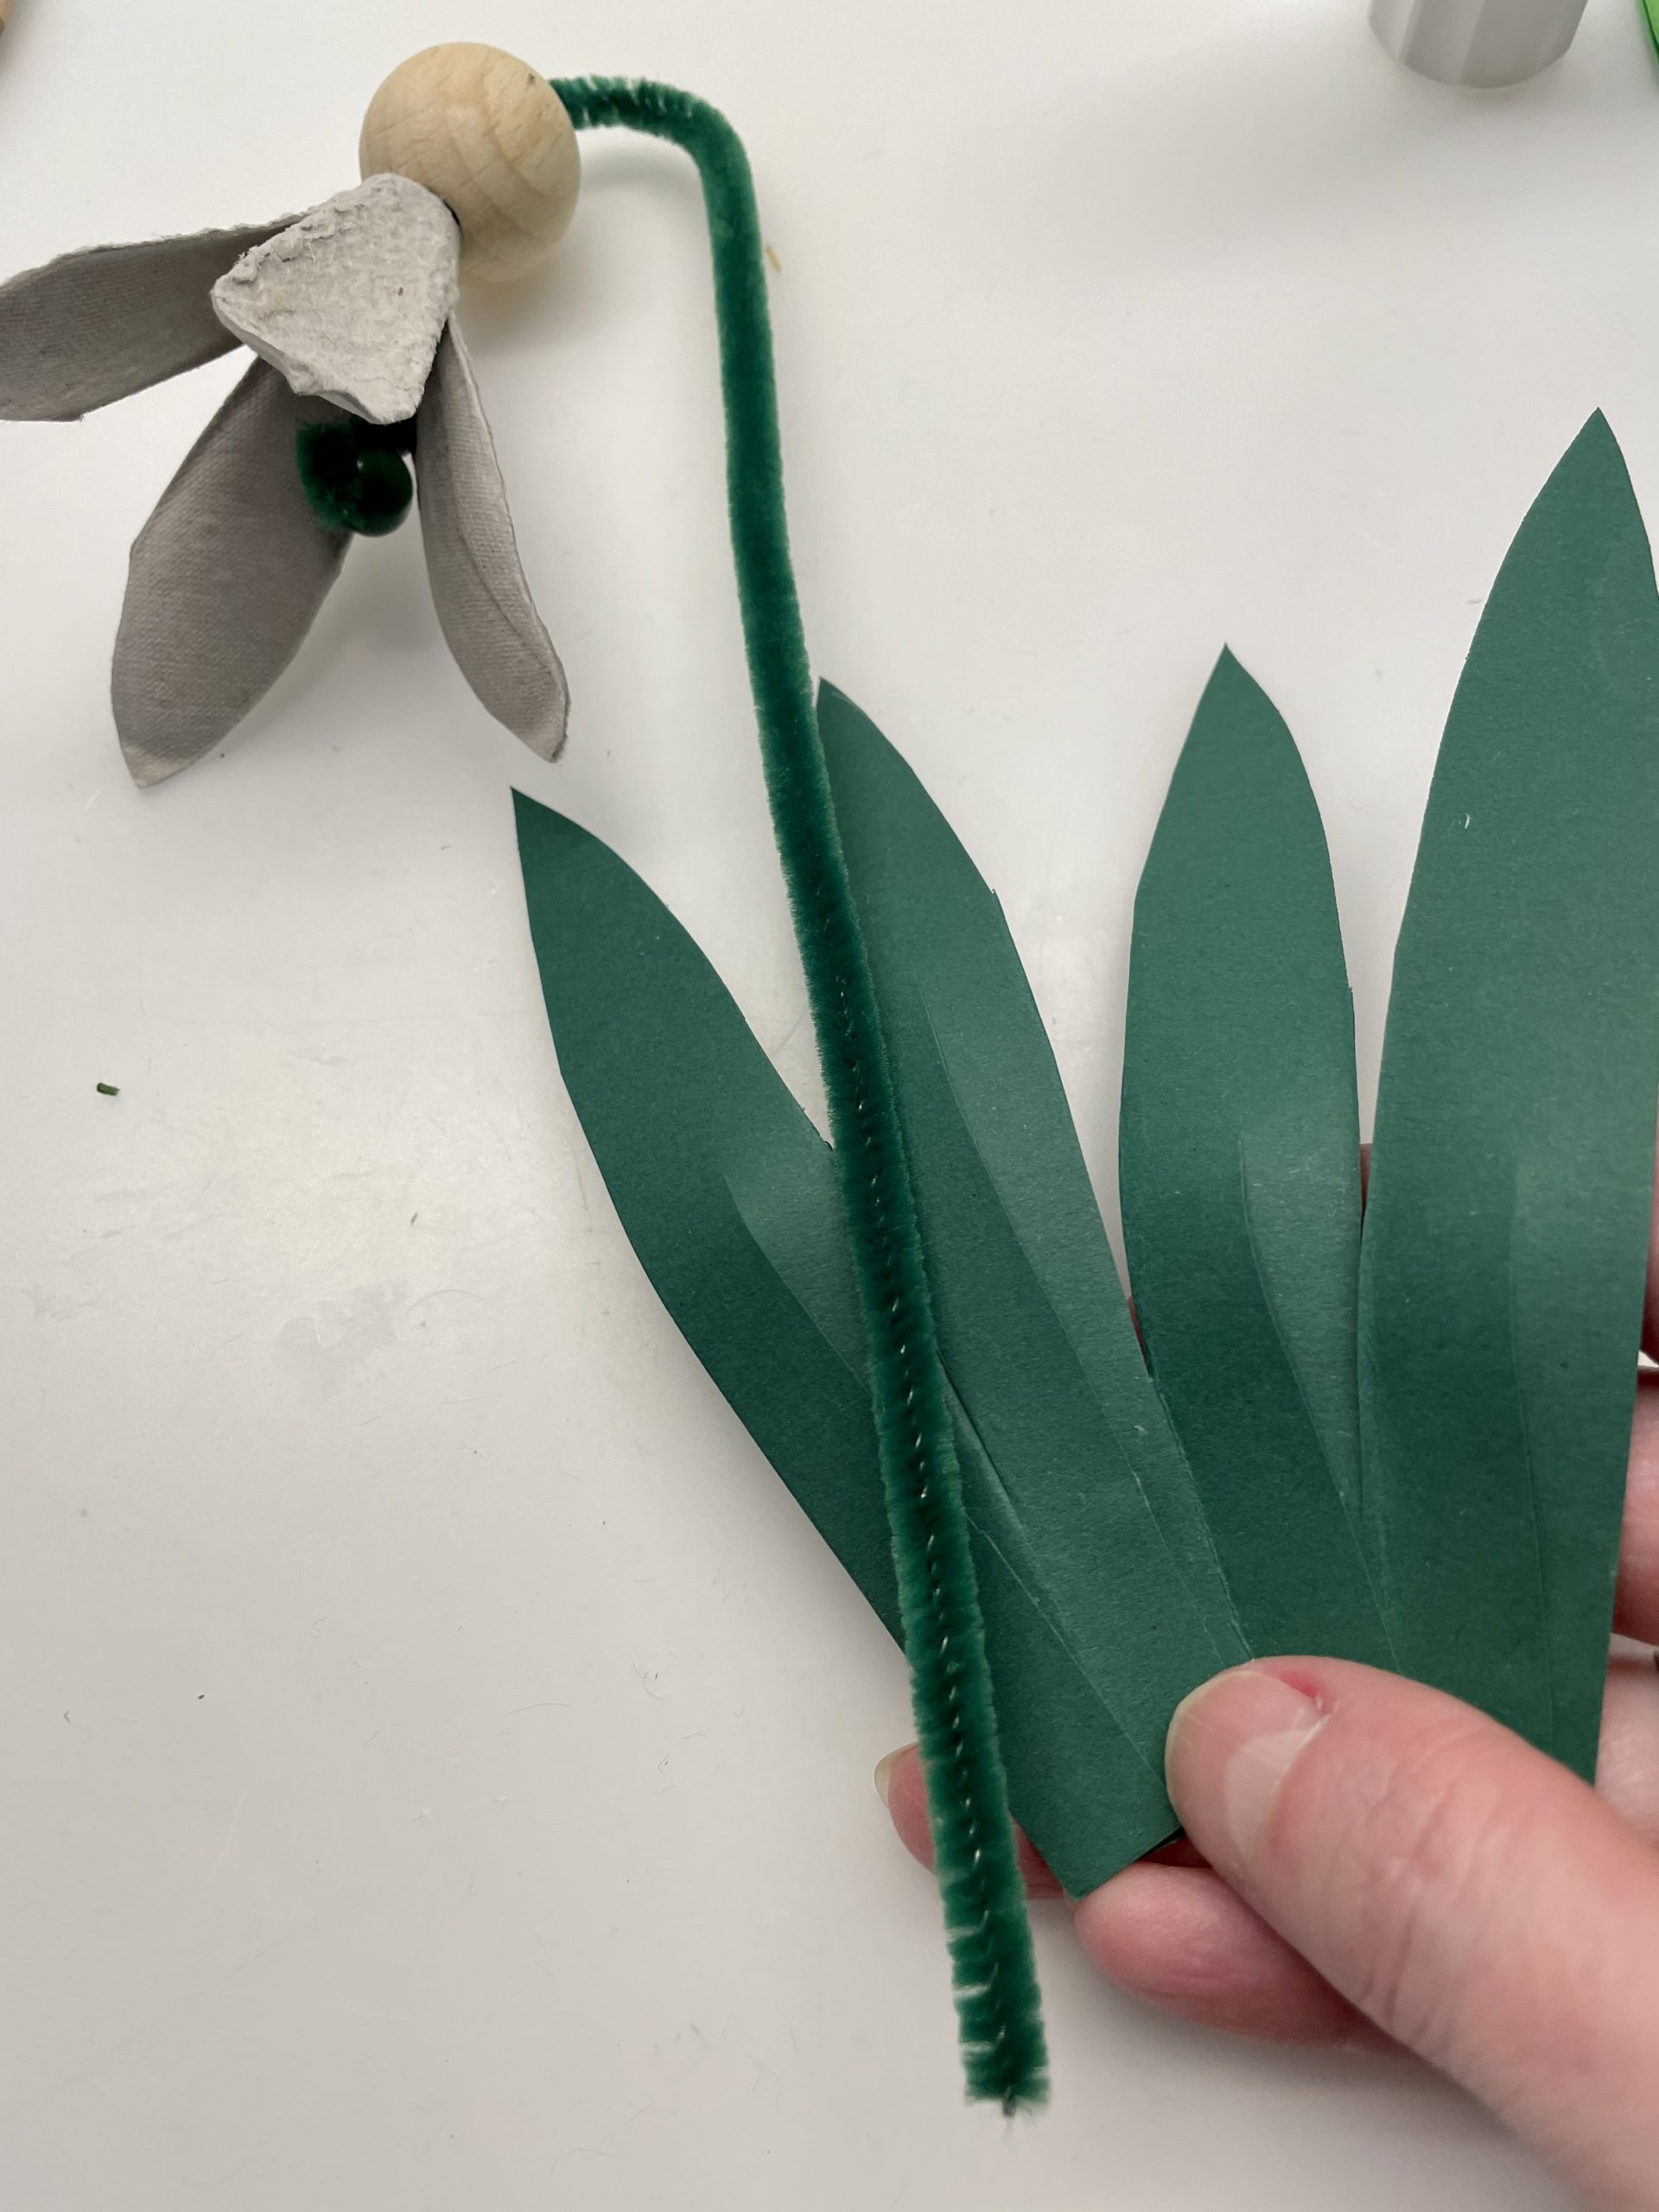
Now you stick the two stripes of each leaf slightly on top of each other.
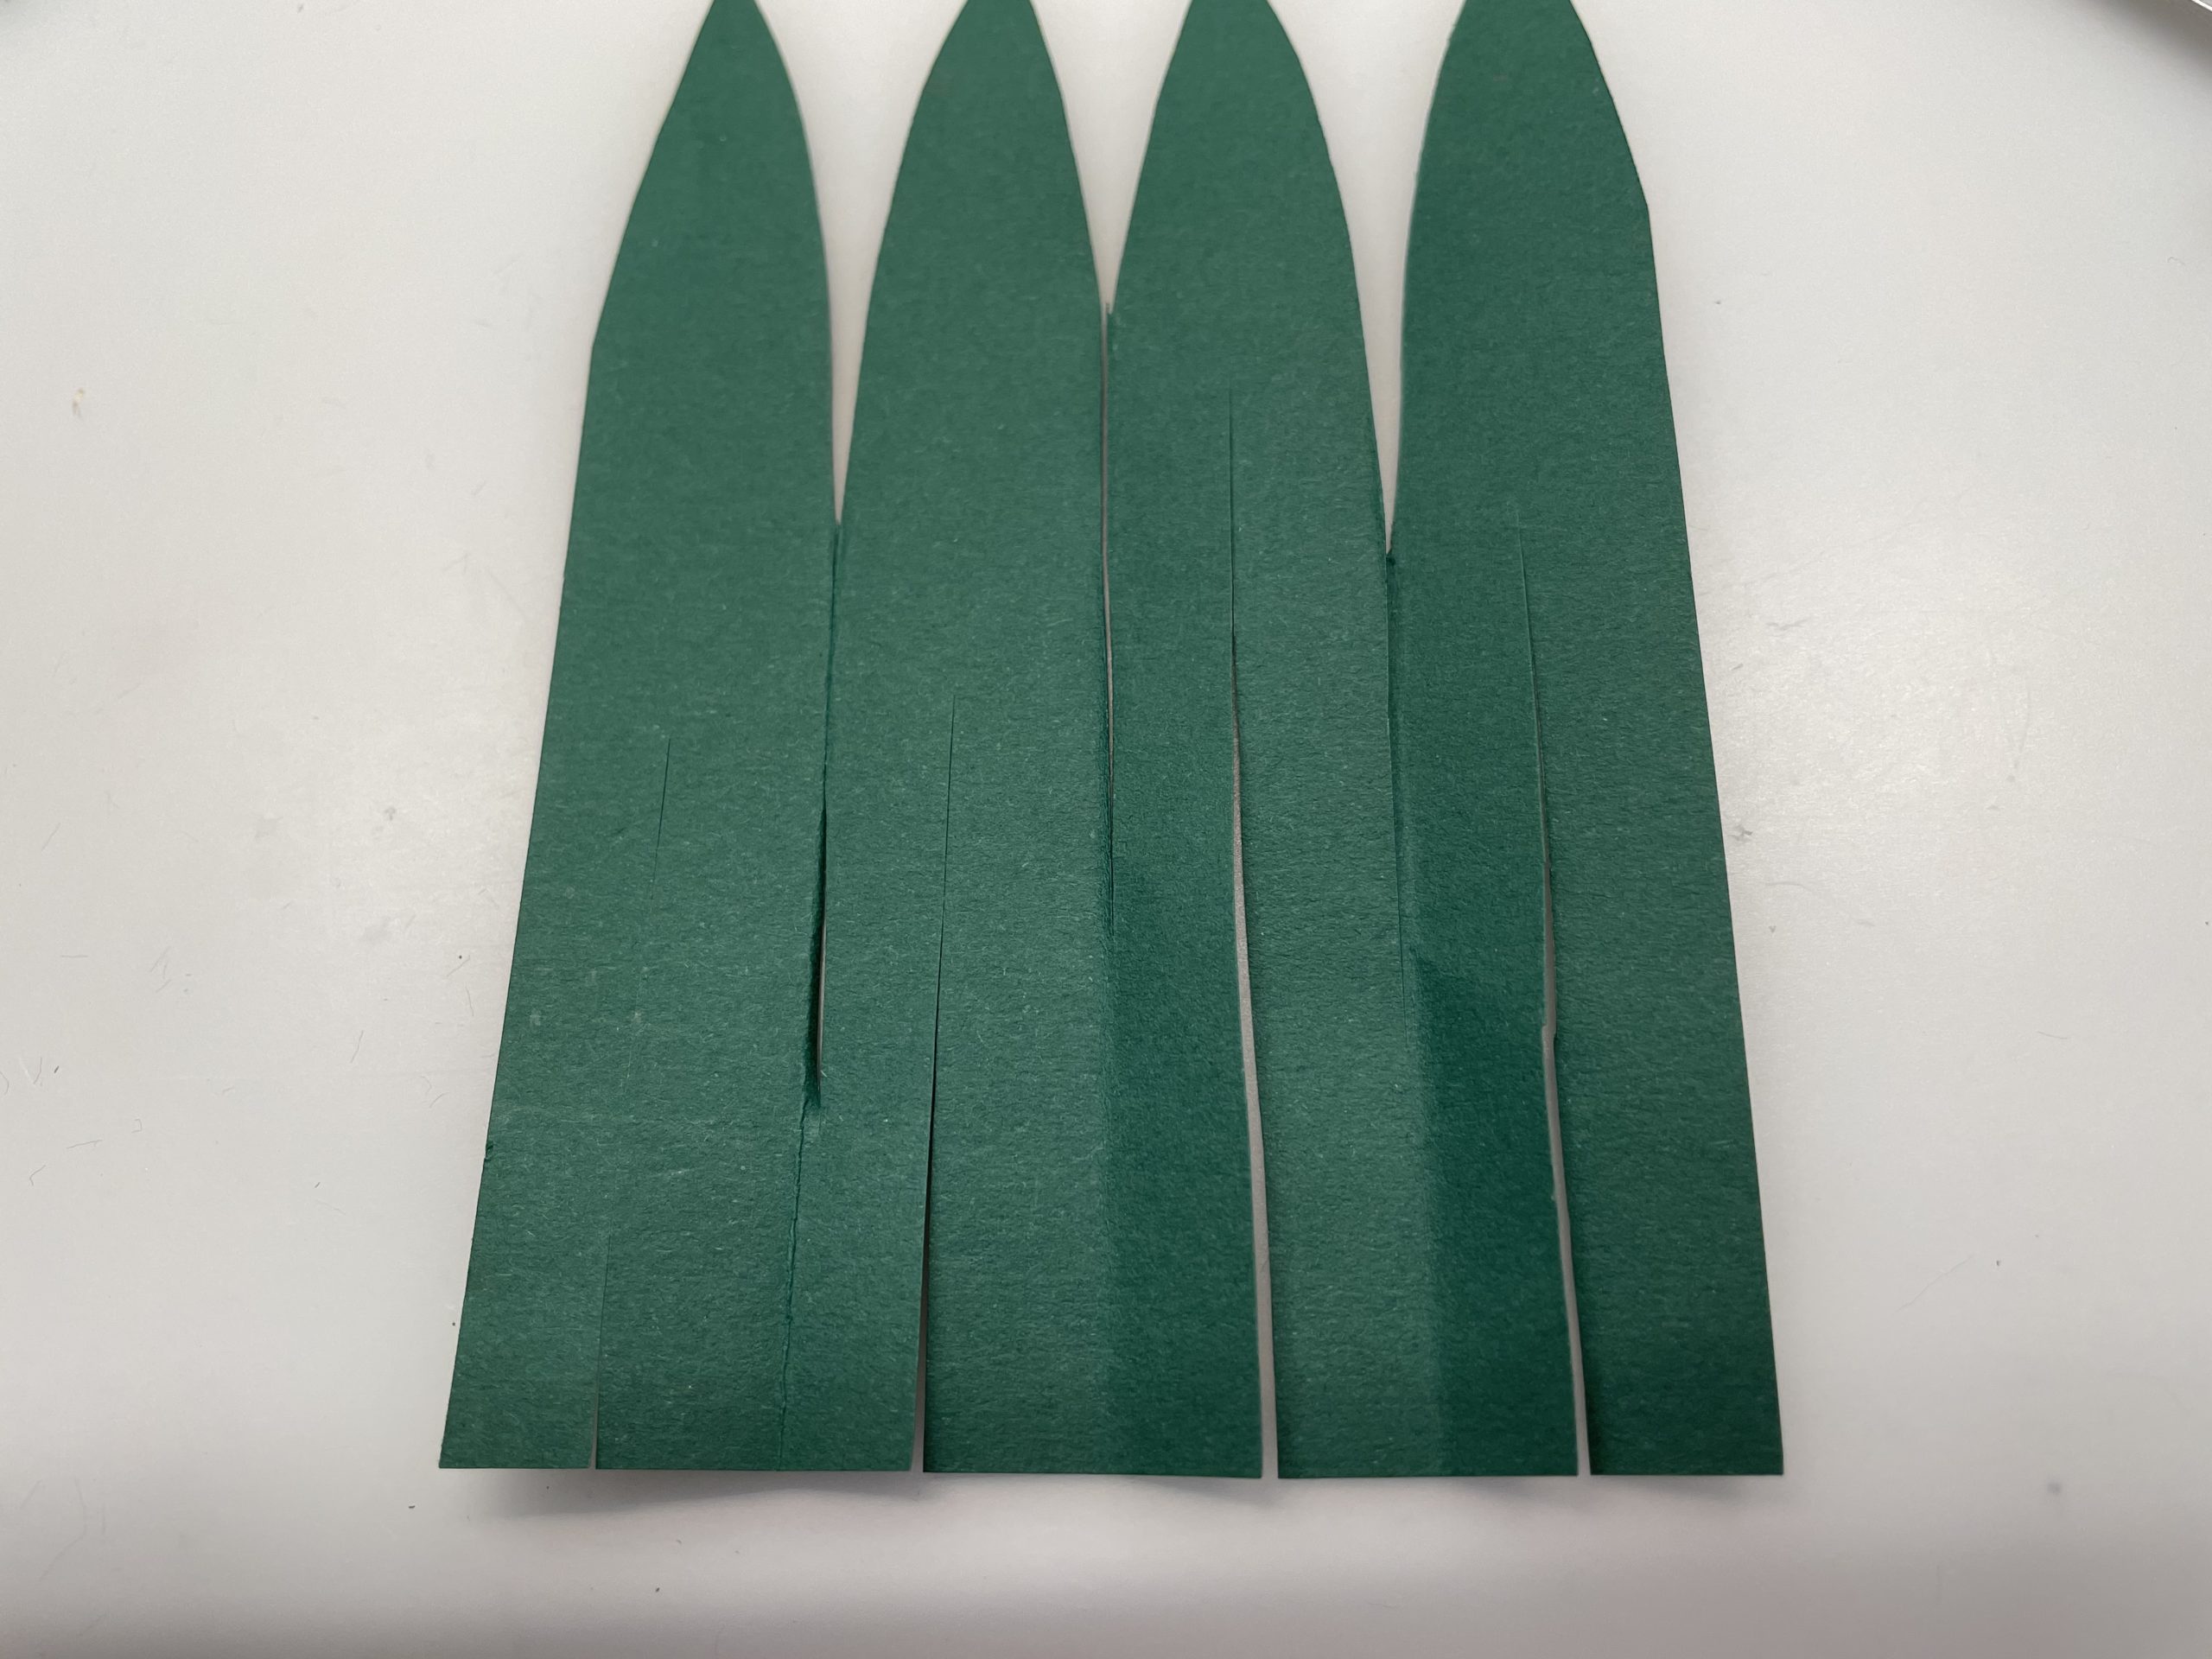
This creates plastic leaves.
This glues her now around the stalk of the snowdrop
In a small vase, the snowdrop looks particularly beautiful!

Try the crafting of snowdrops and get the spring into your house!
Have fun with it!
Materials
Directions
Put out your craft material and pick up your materials.
Then you first separate a tip from an egg box.
Cuts the flowers with the scissors.
For this you cut out small triangles from the top. See the picture!
This is how four petals are created.
Now you need the pipe cleaner and the beads.
Now push the pipe cleaner through the tip of the egg box flower.
Then you will thread the beads onto the pipe cleaner.
Now push all the pearls to their place. The green pearl is deep in the flower cup.
So that the pearl does not slip out, the pipe cleaner bends in something.
Then you push the wooden ball to the top of the flower cup. Then stick the wooden ball with a small spot hot glue.
Attention when handling the hot glue - risk of injury!
Now bend down the pipe cleaner in a narrow bow.
Now you put the straw palm over the pipe cleaner.
The straw thus gives stability to the pipe cleaner. Then, season the pipe cleaner or straw, so that both are the same in length.
Now you cut the green photo box to the dimensions 15cm x 10cm.
Then fold the carton twice to half, so that you get a long thin stripe (length: 15cm).
Now paint on the top a long elongated leaf and cut it out.
After that, you'll fold the cut sheet apart.
Now you cut every single batt from below about 5 cm.
Now you stick the two stripes of each leaf slightly on top of each other.
This creates plastic leaves.
This glues her now around the stalk of the snowdrop
In a small vase, the snowdrop looks particularly beautiful!
Try the crafting of snowdrops and get the spring into your house!
Have fun with it!
Follow us on Facebook , Instagram and Pinterest
Don't miss any more adventures: Our bottle mail