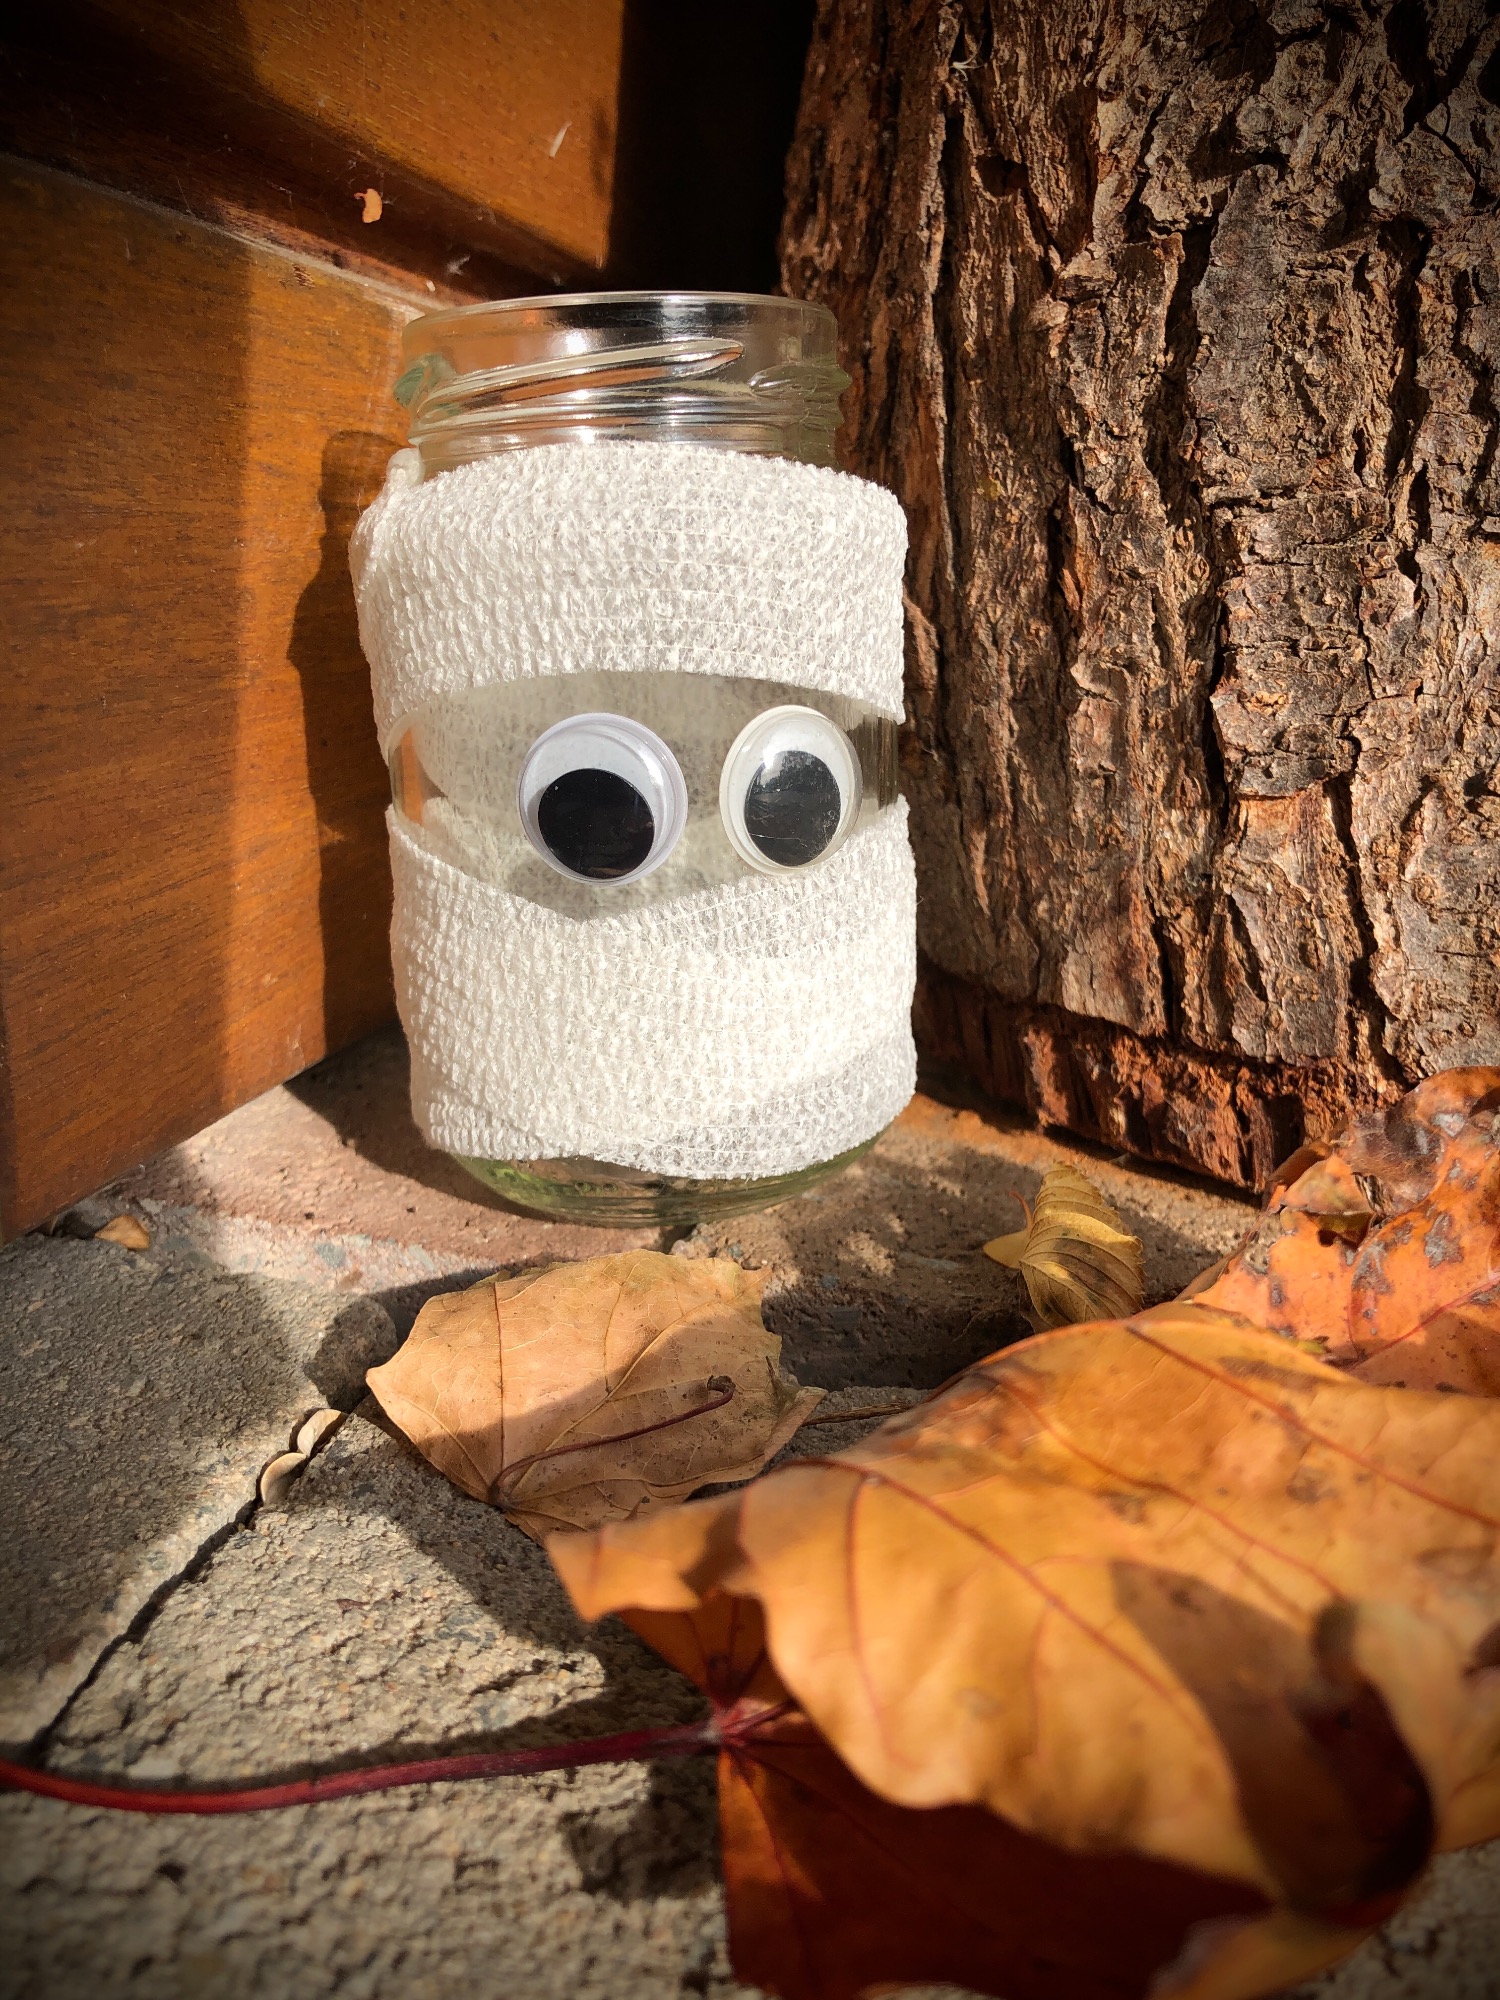
With an empty masonry glass, self-adhesive gauze bandage and two wobble eyes, mummie glasses can be quickly produced as table lamps or for Halloween.
Media Education for Kindergarten and Hort

Relief in everyday life, targeted promotion of individual children, independent learning and - without any pre-knowledge already usable by the youngest!
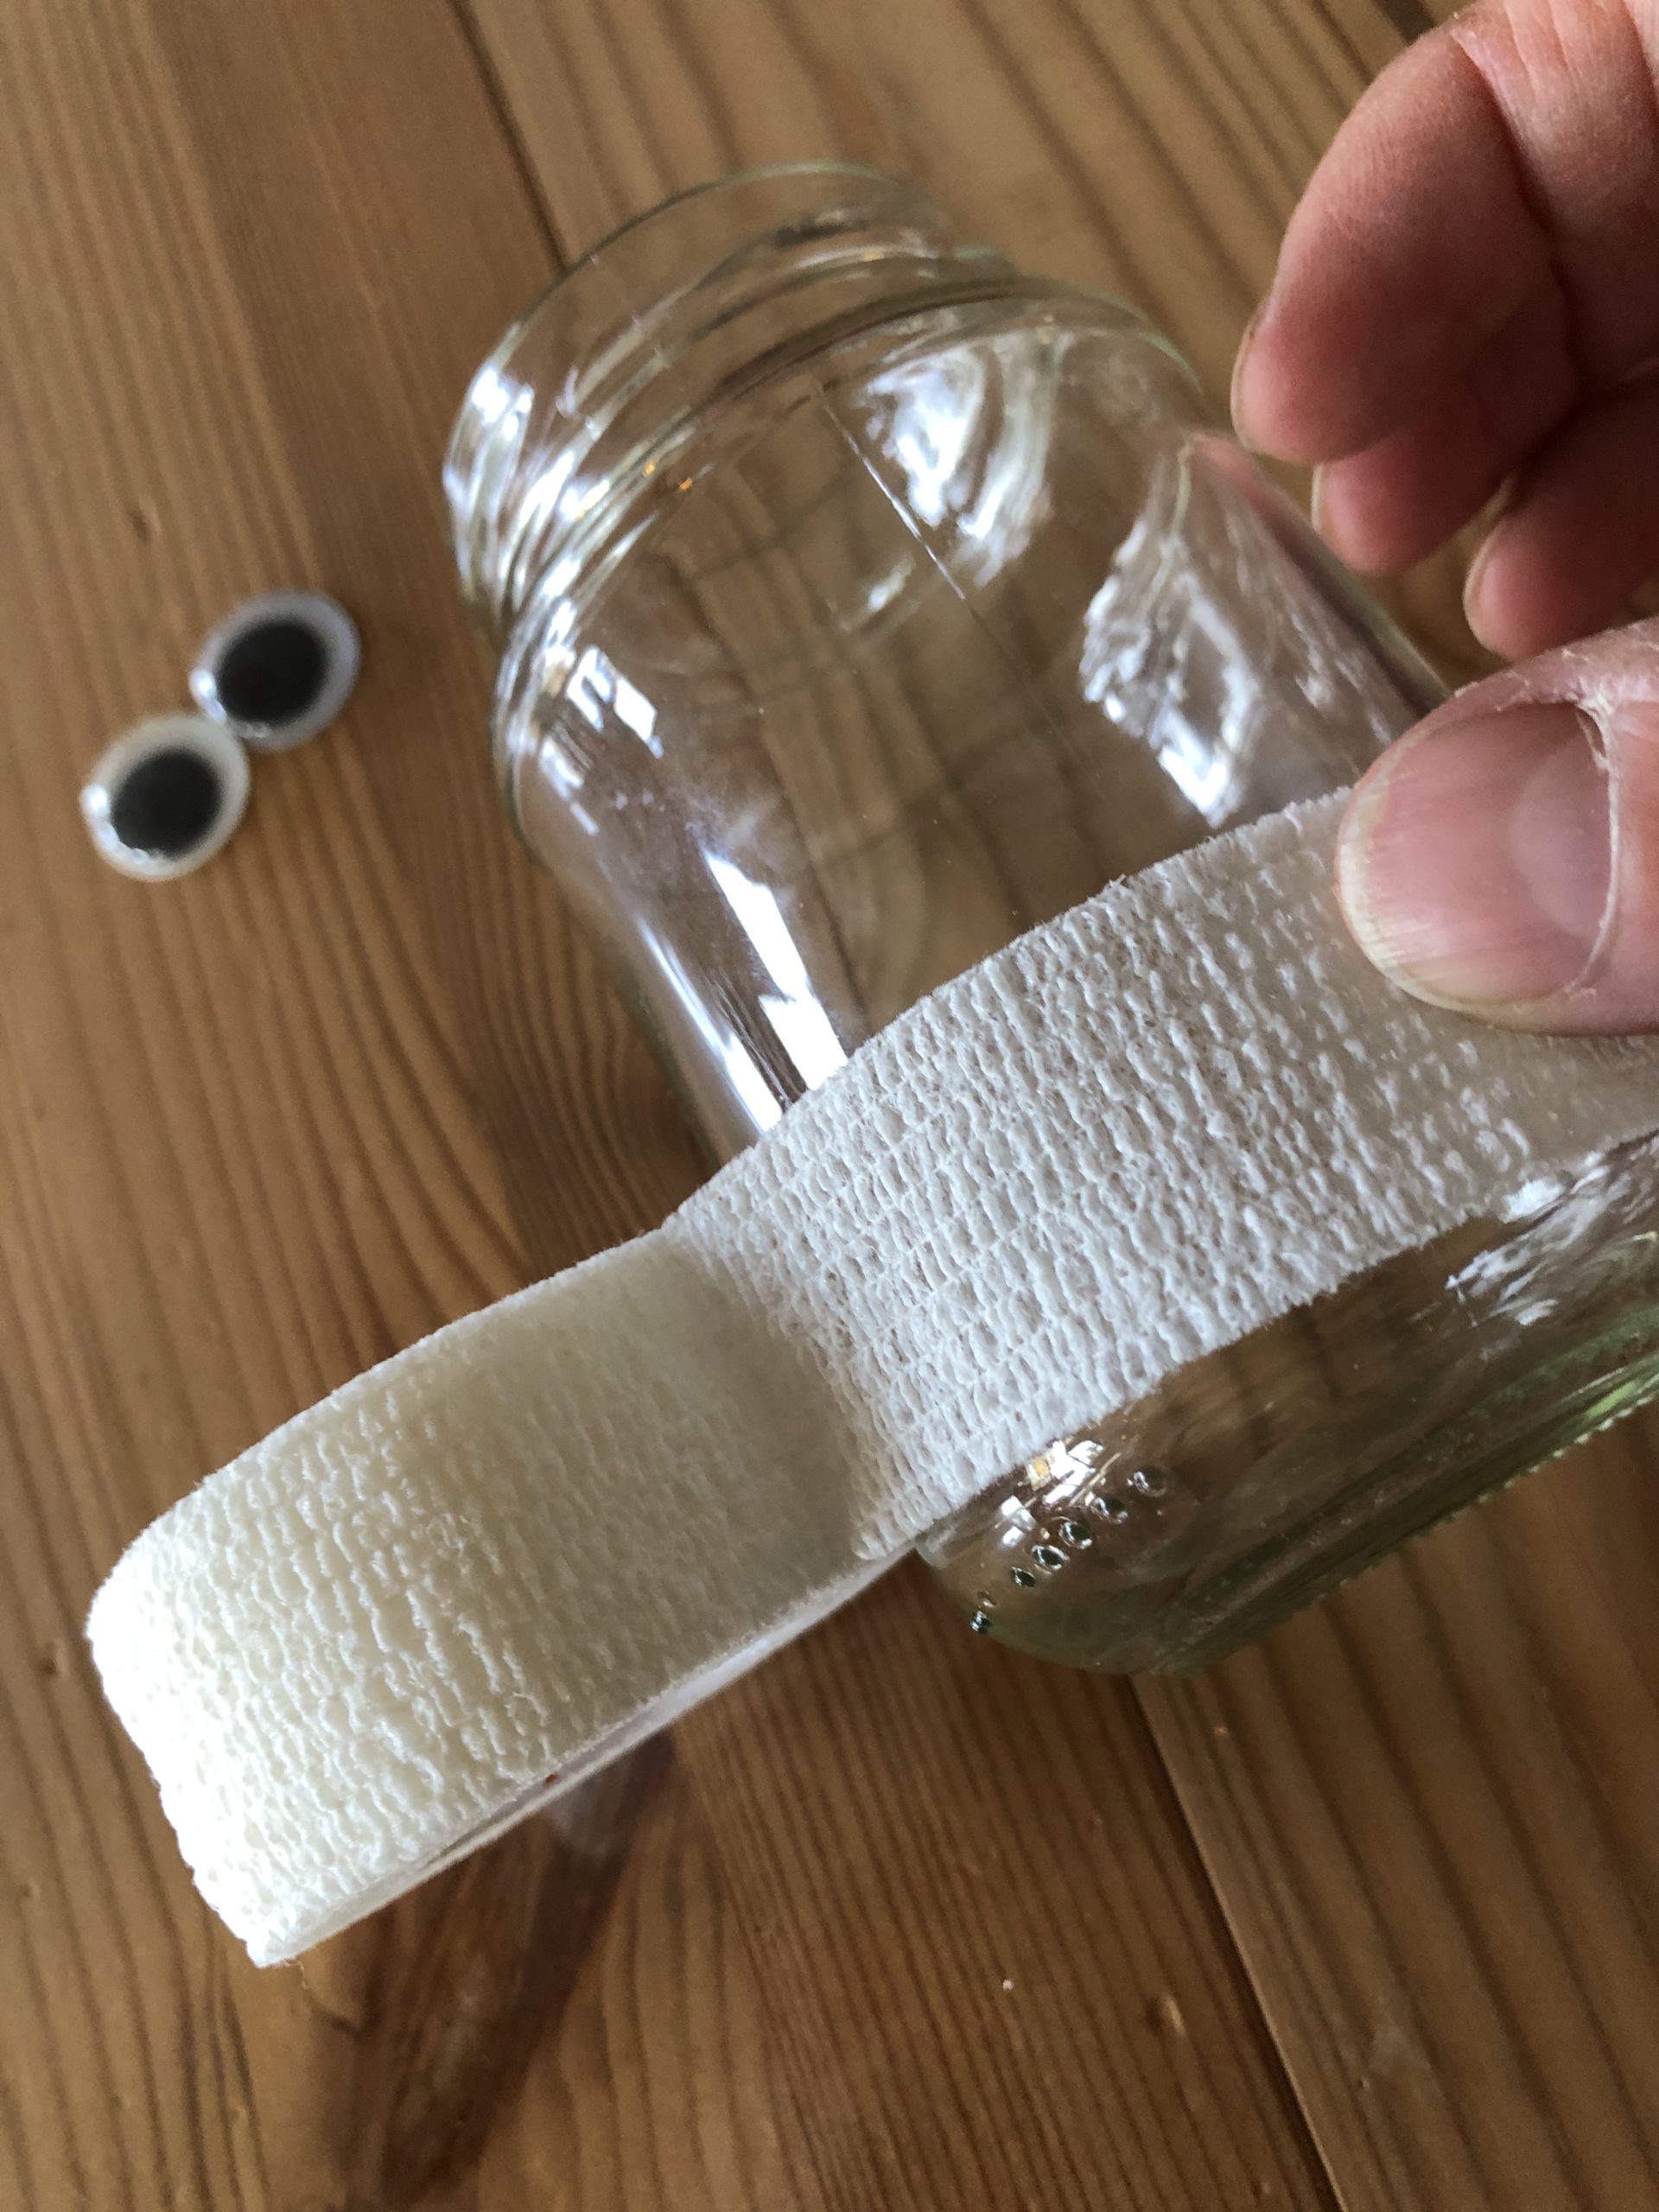
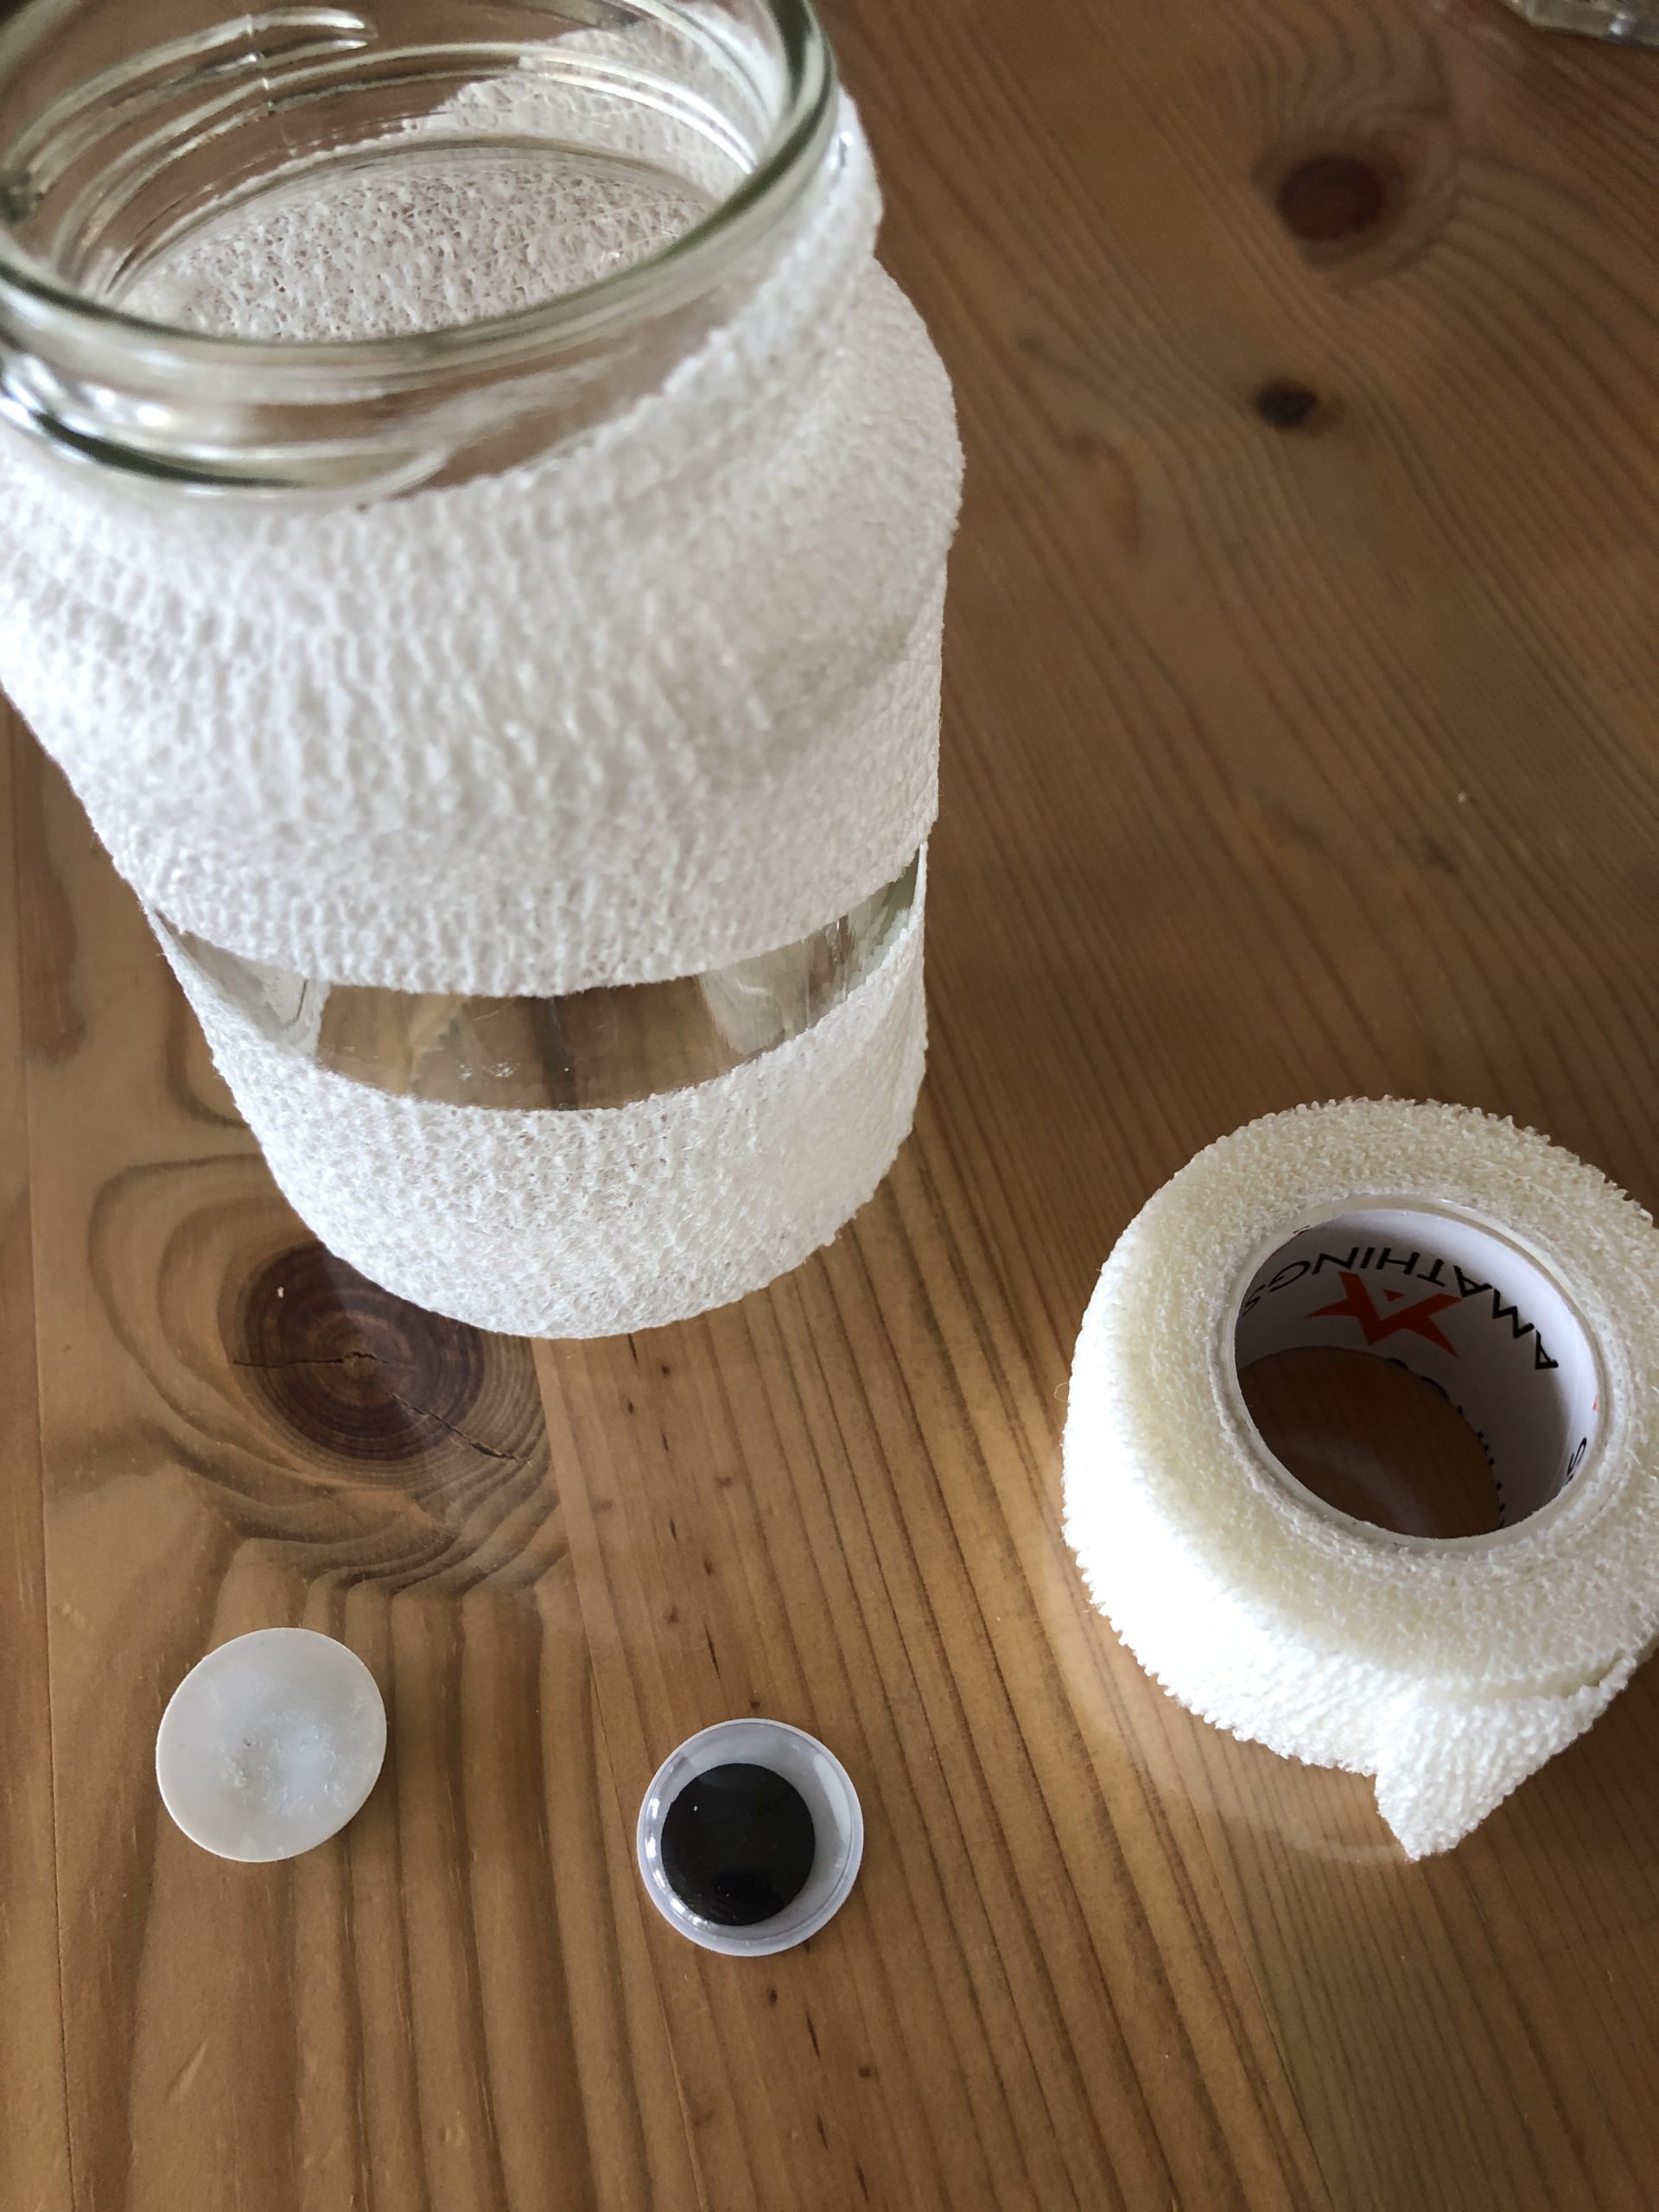
Provide all materials.

Wrap the adhesive bandage around the glass. You can leave gaps. A larger gap is used for the eyes!
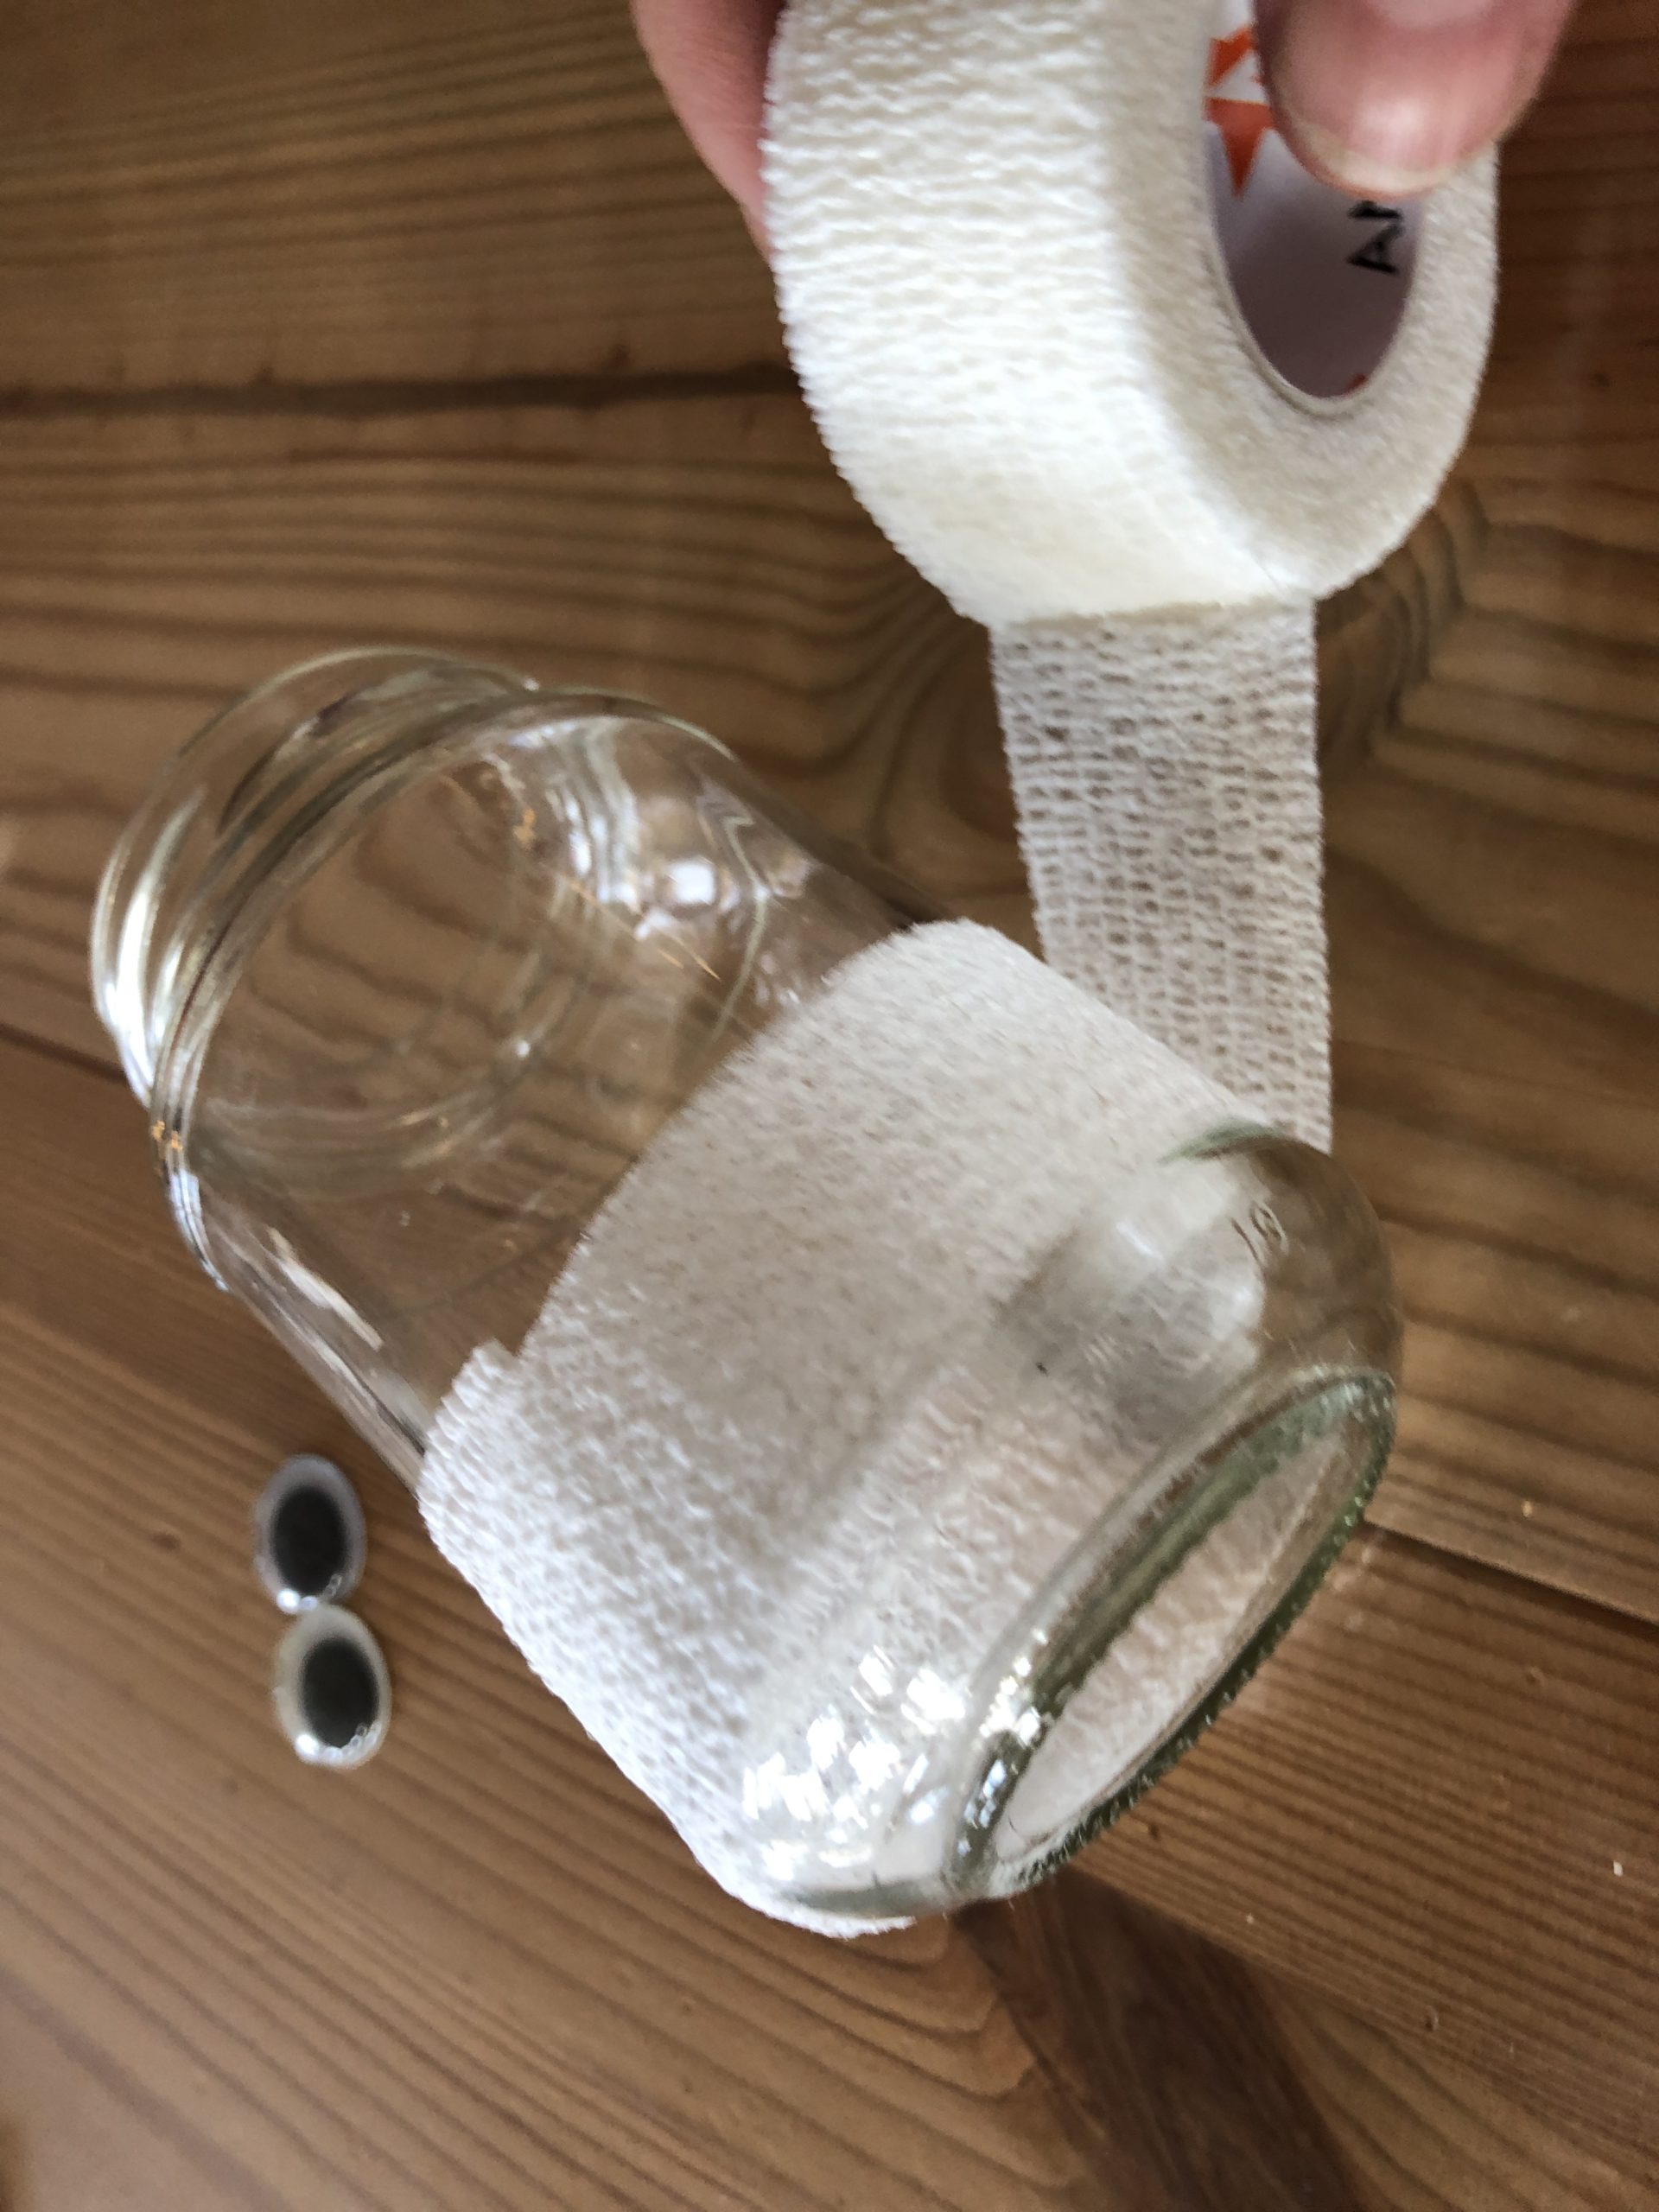
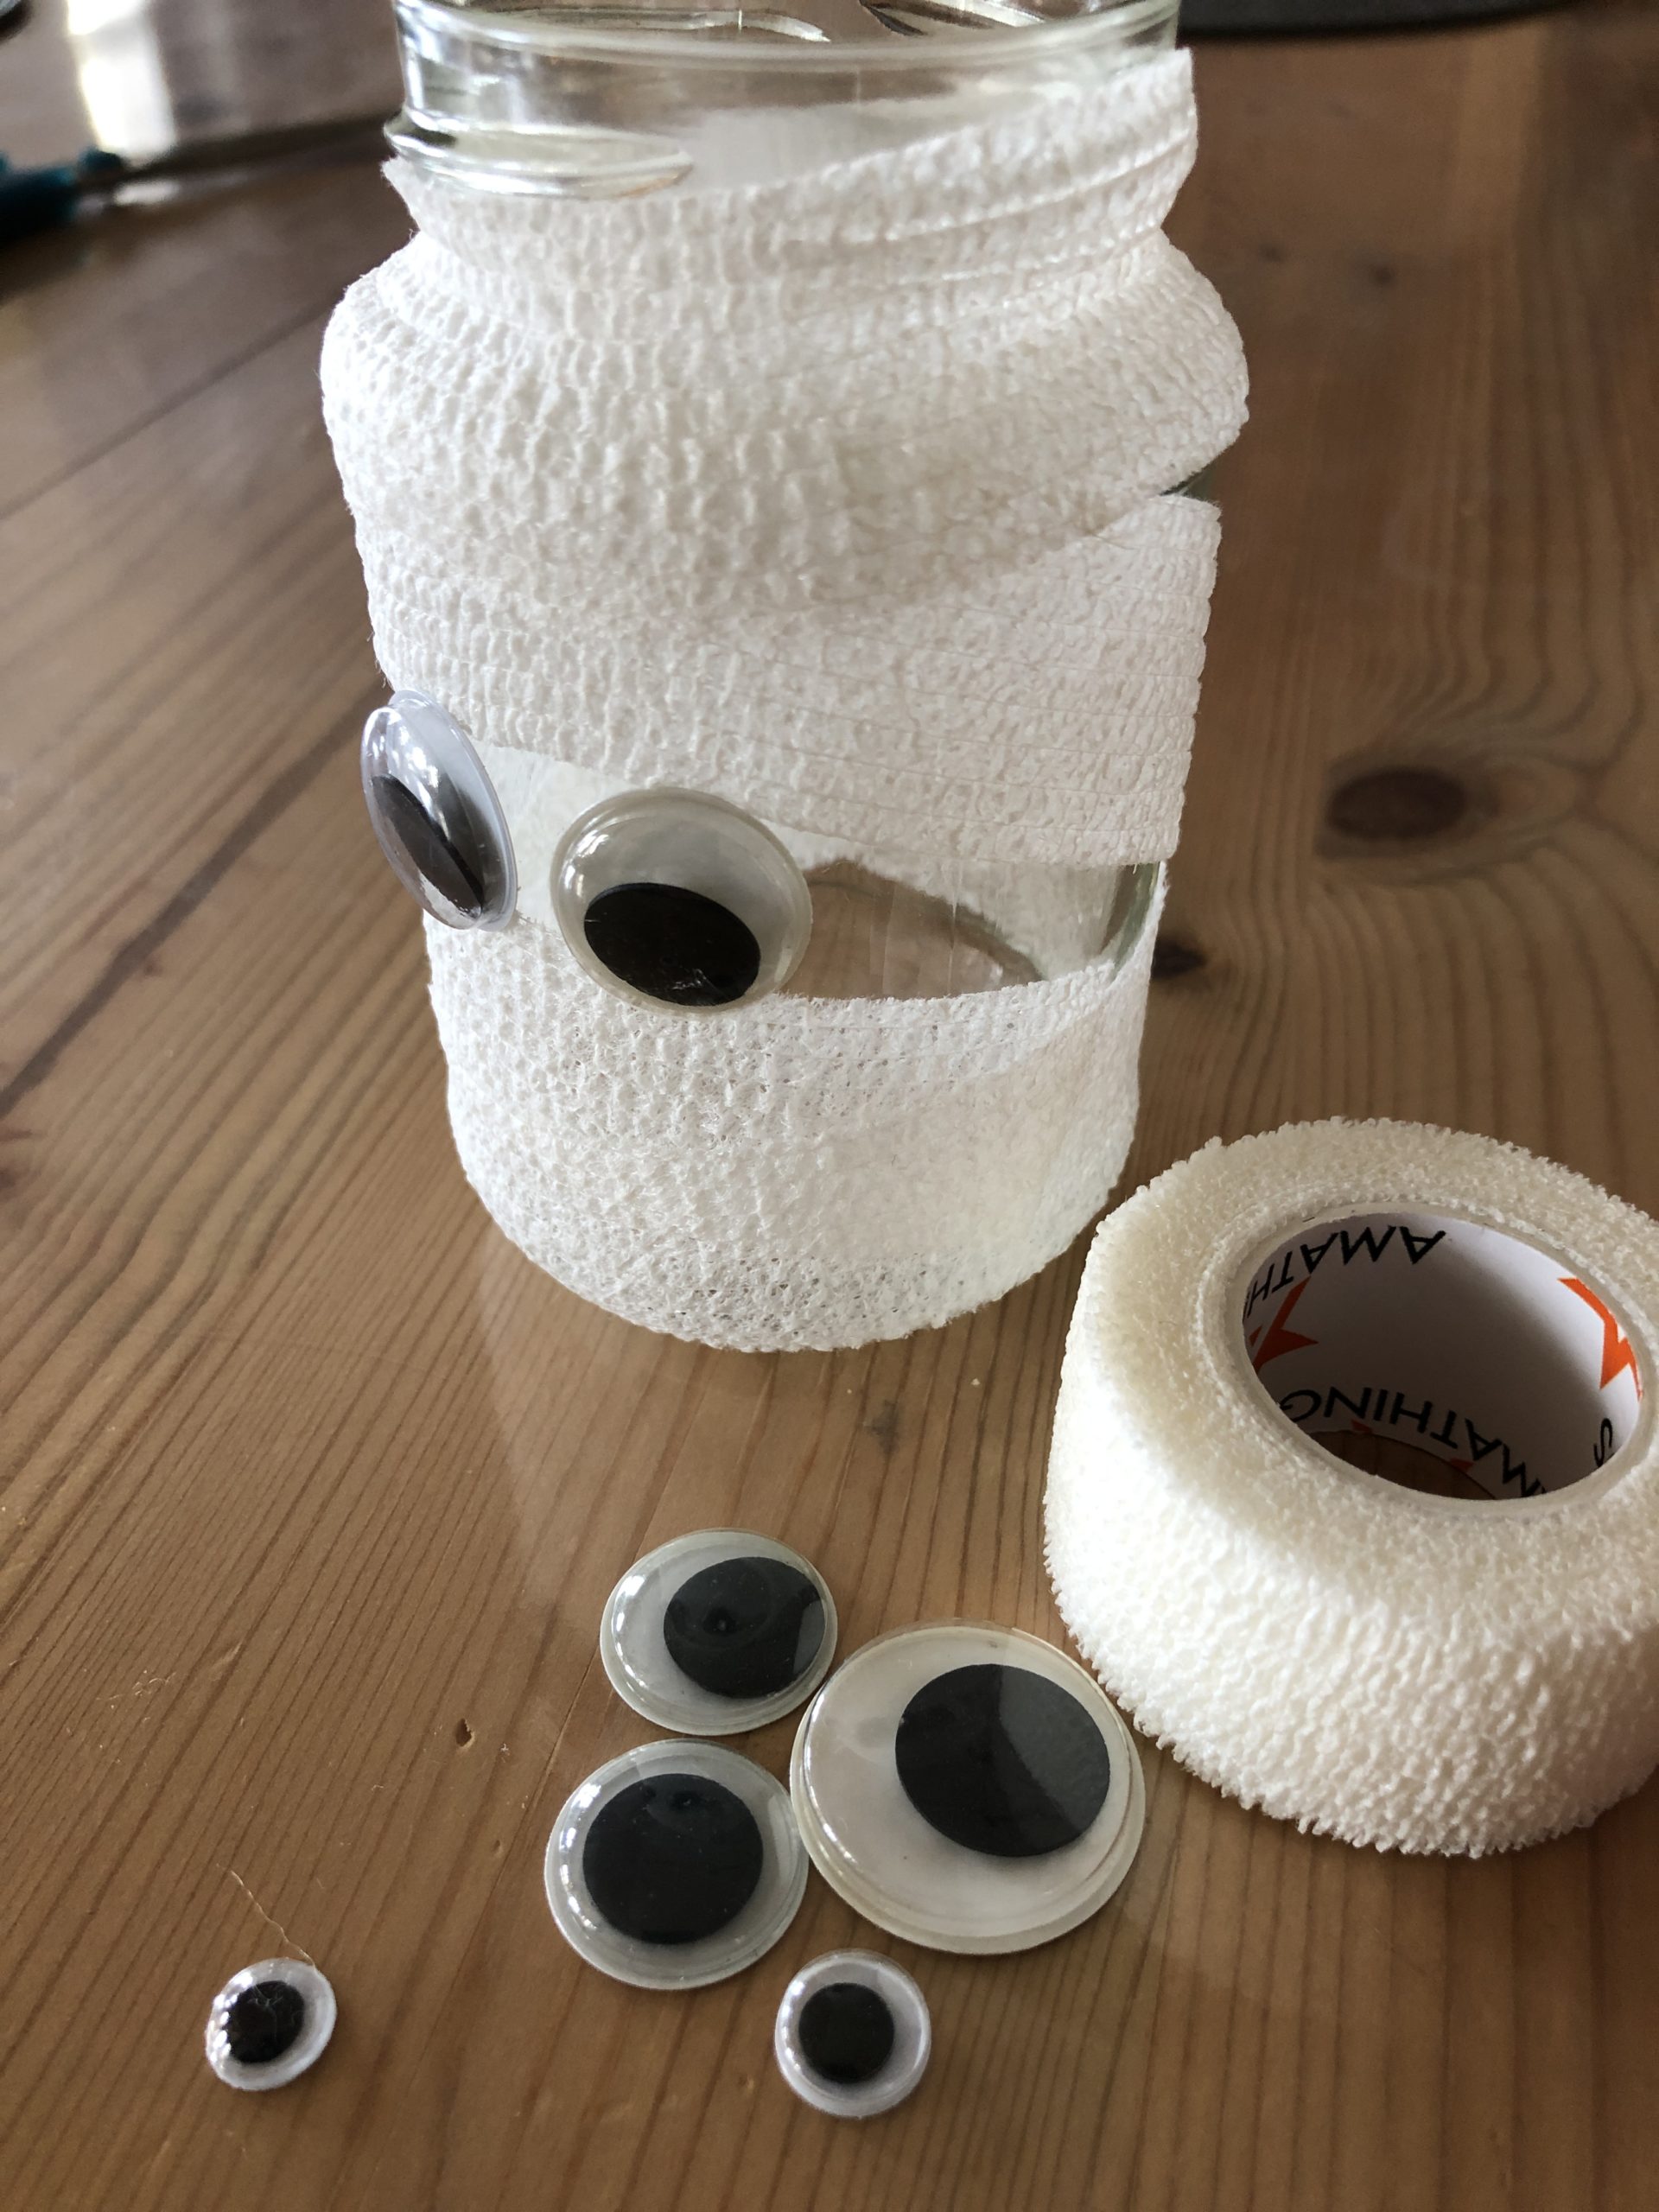
If the glass is wrapped, you can cut off the bandage. Press the tailpiece on the glass.
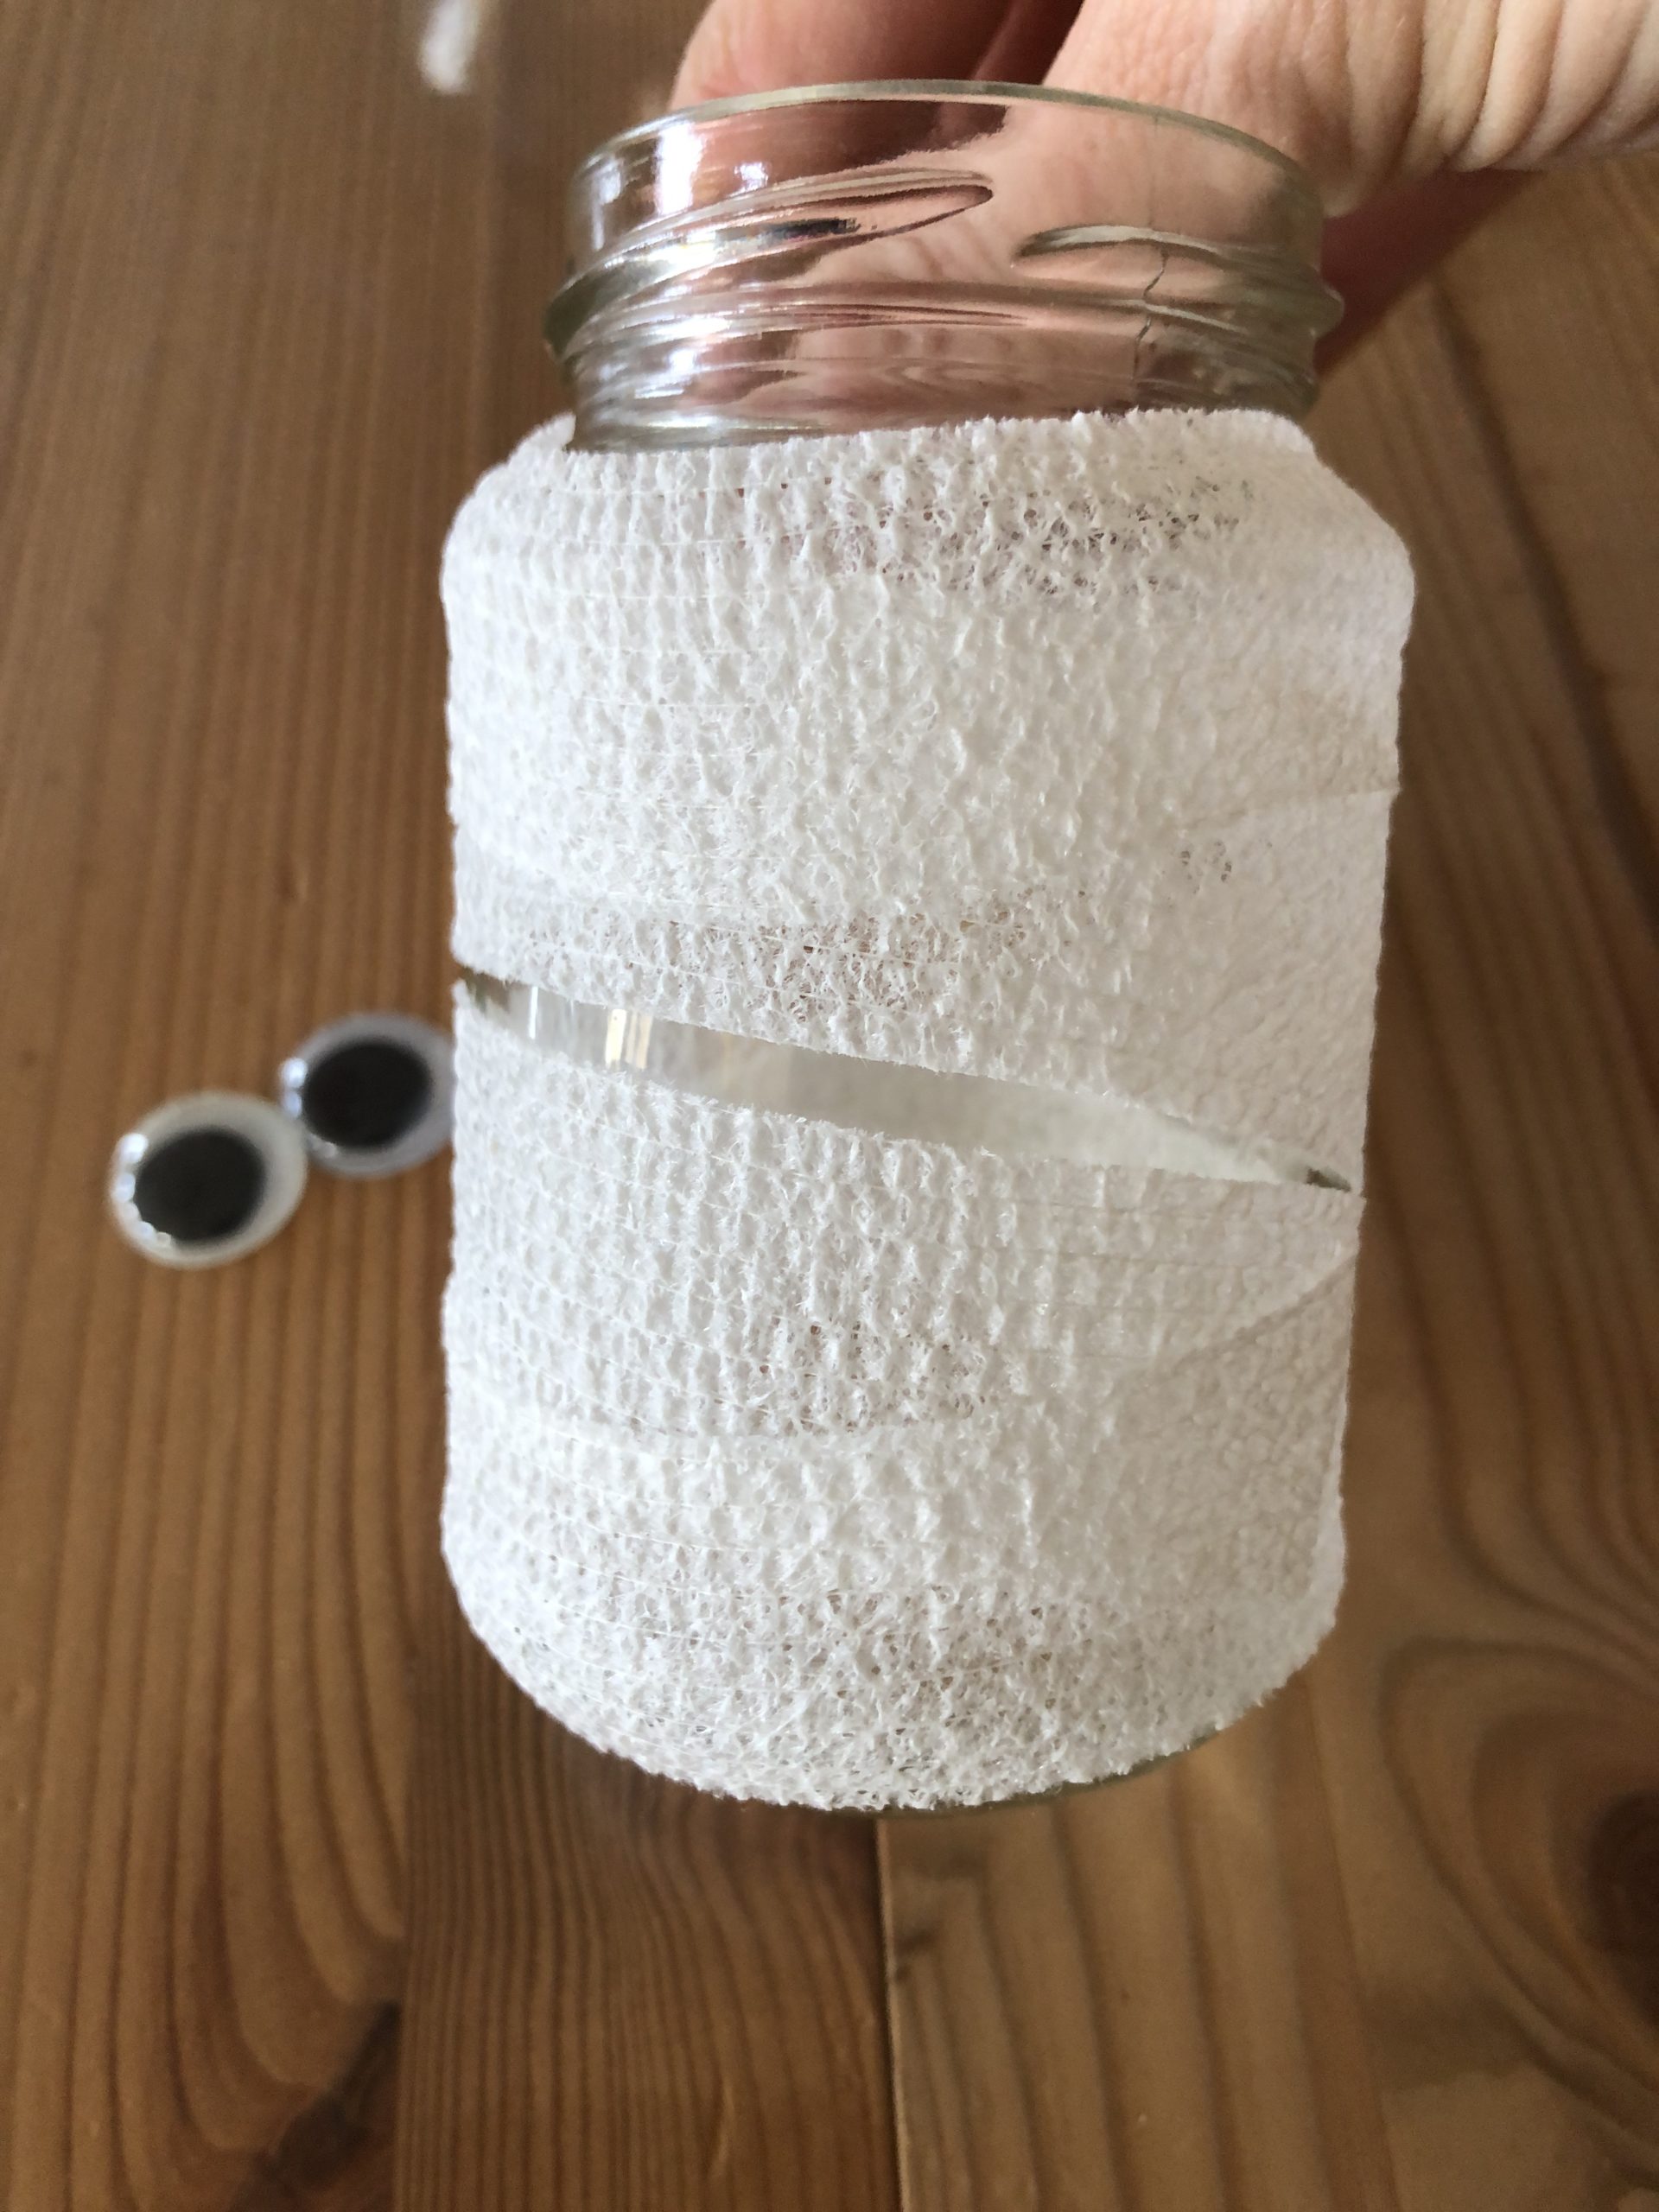
Attach two wobble eyes in a large gap.
For this you use the hot glue. Attention when handling the hot glue - risk of injury!
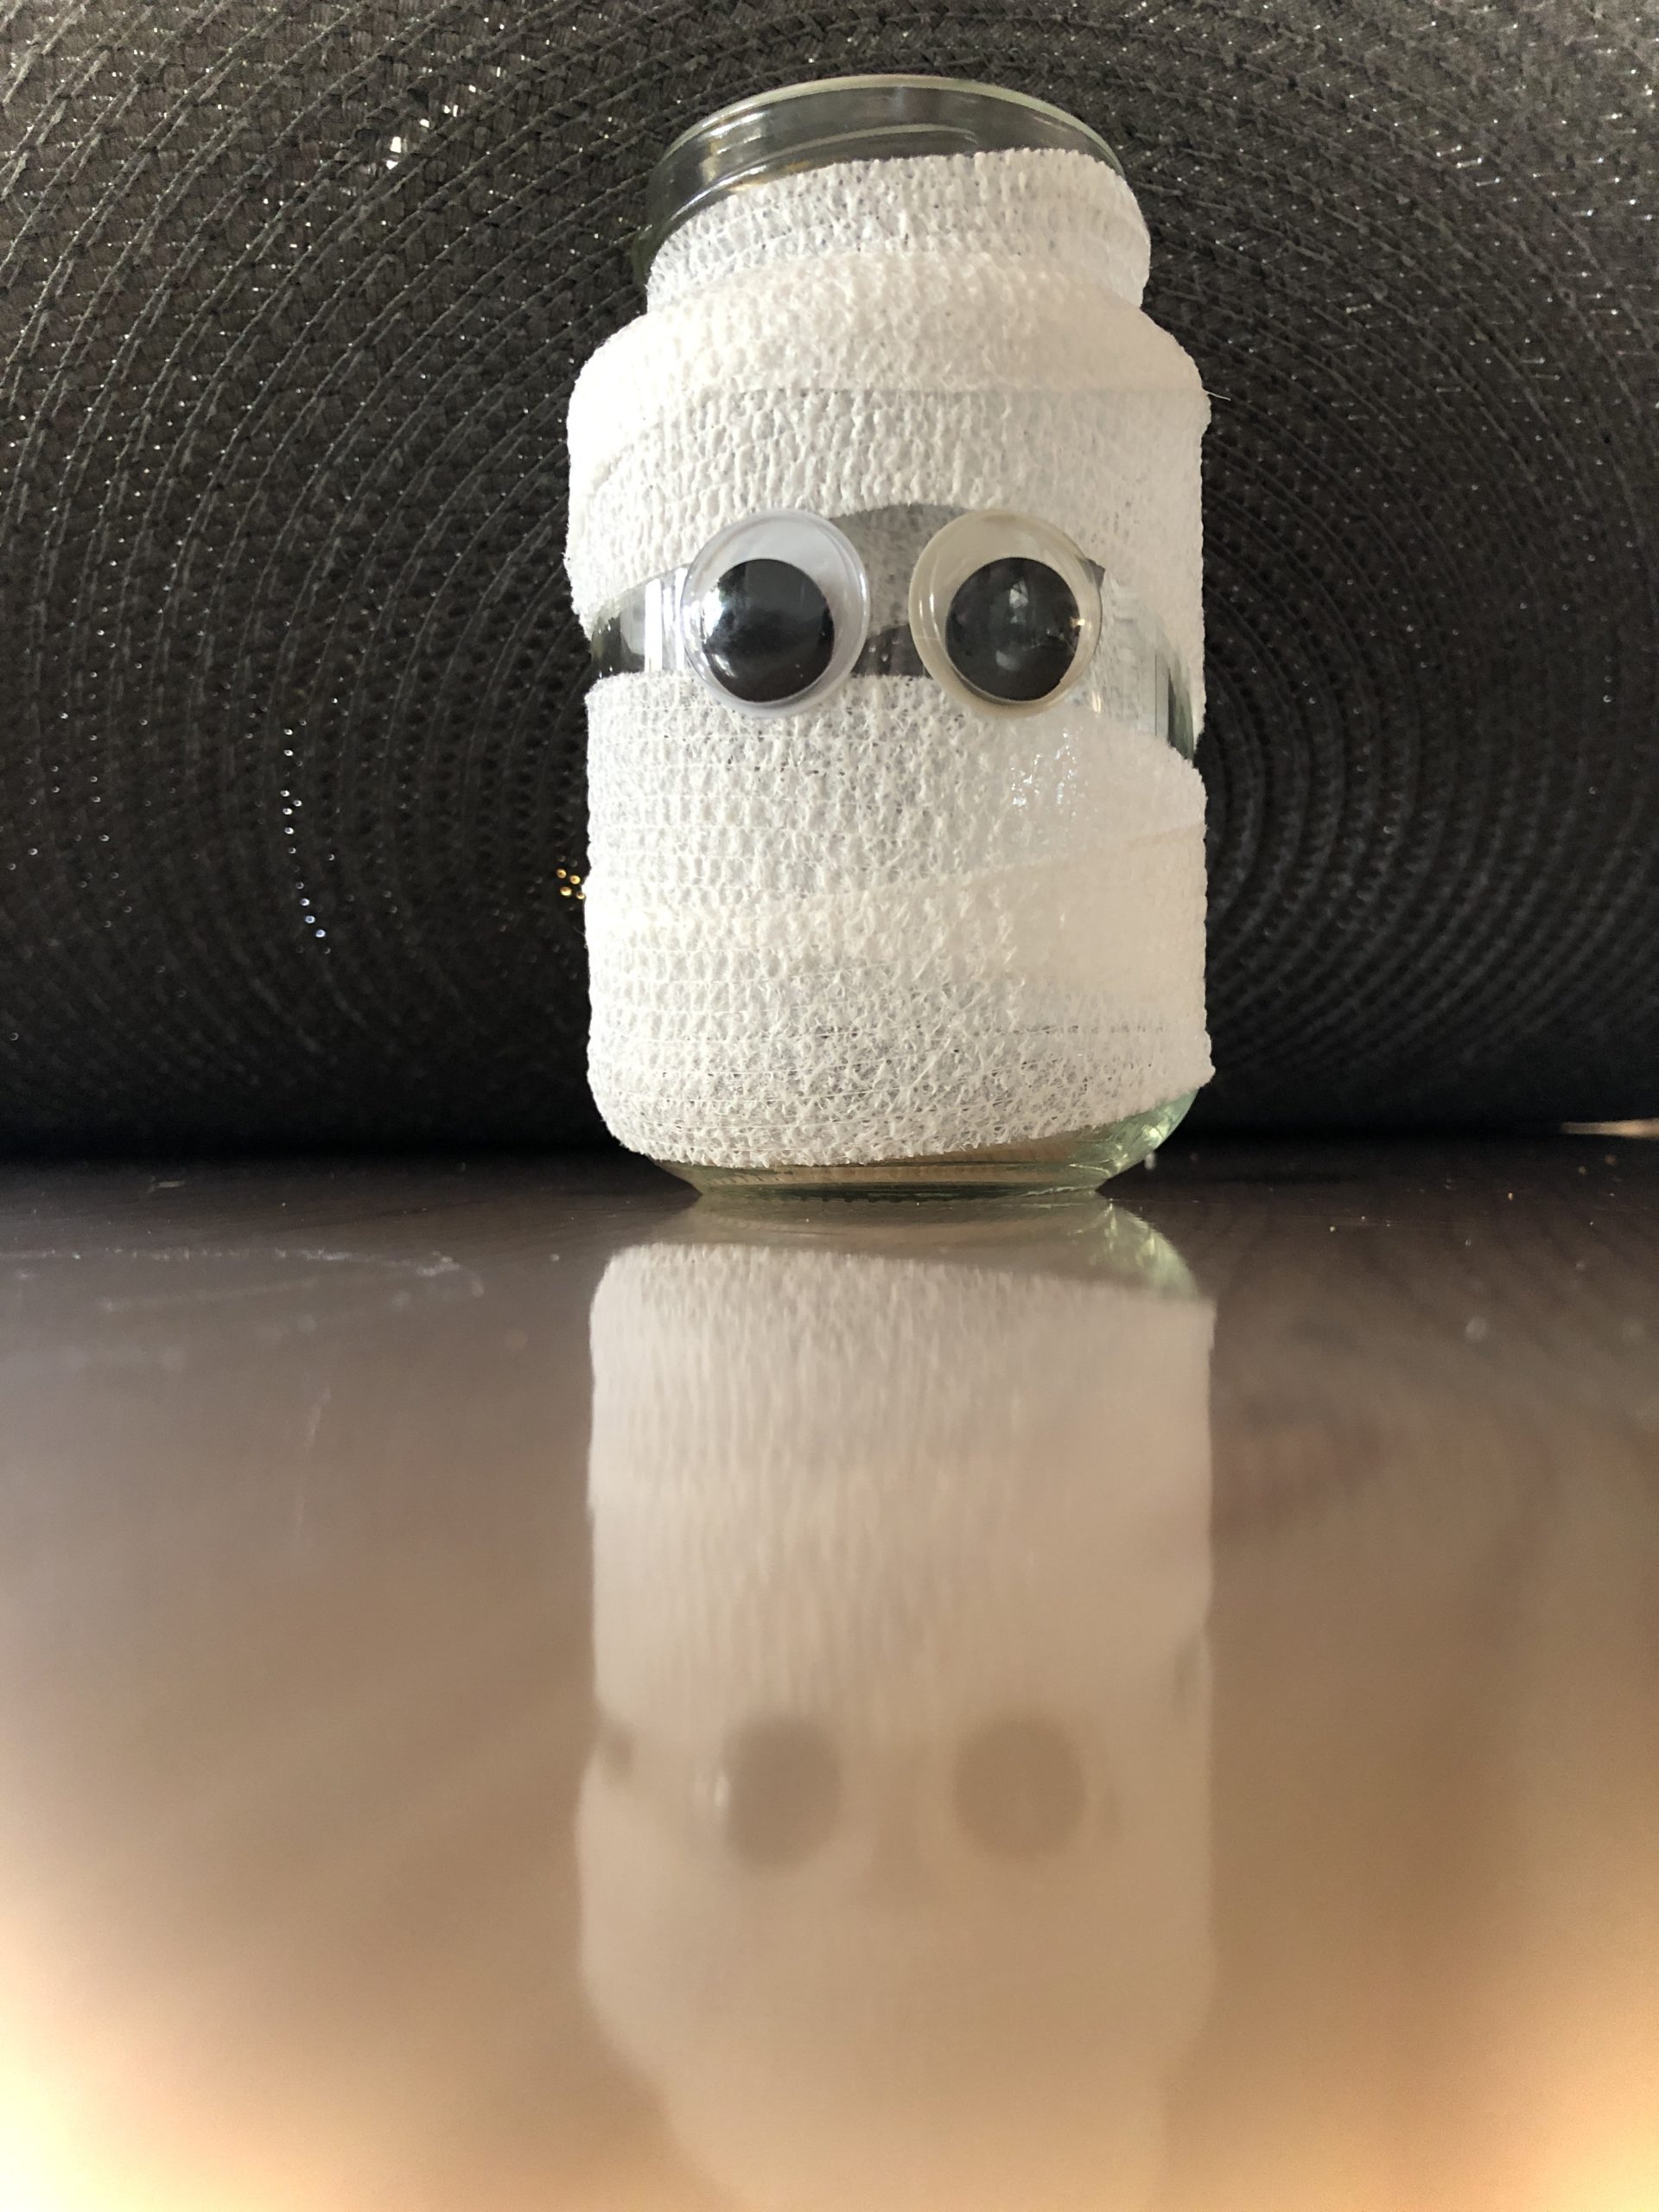
The mummy glass is ready!
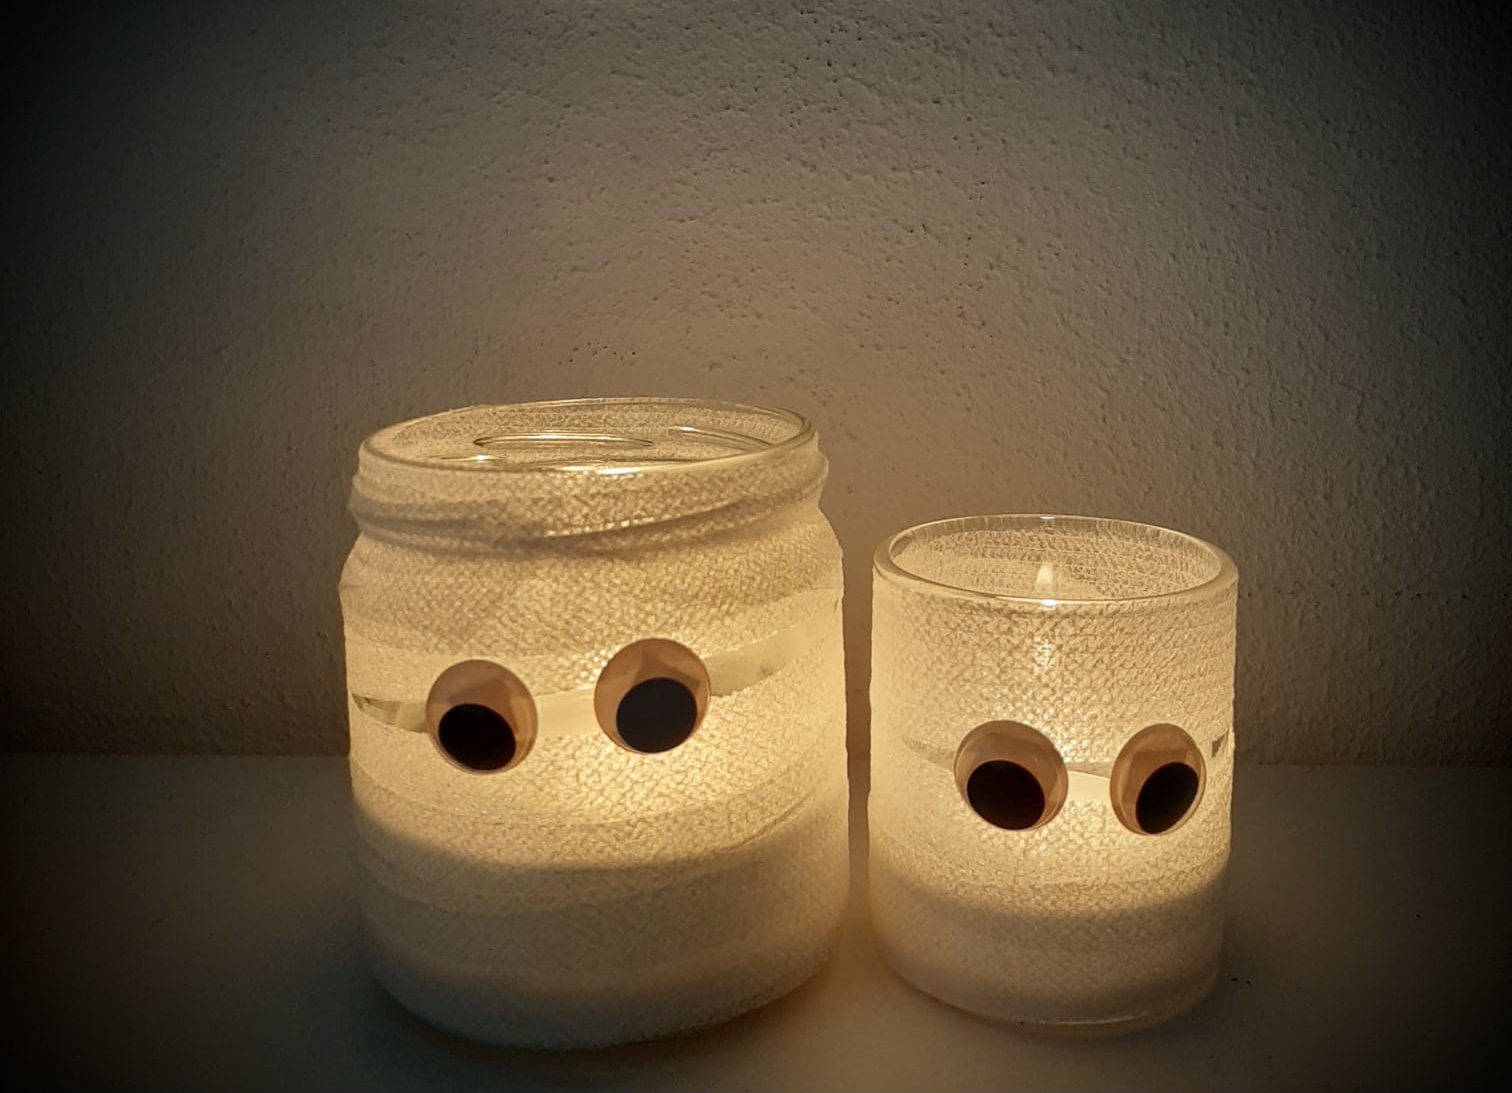
Put another tea light in it and your mummy will shine in the dark!
Have fun trying it out!
Materials
Directions
Provide all materials.
Wrap the adhesive bandage around the glass. You can leave gaps. A larger gap is used for the eyes!
If the glass is wrapped, you can cut off the bandage. Press the tailpiece on the glass.
Attach two wobble eyes in a large gap.
For this you use the hot glue. Attention when handling the hot glue - risk of injury!
The mummy glass is ready!
Put another tea light in it and your mummy will shine in the dark!
Have fun trying it out!
Follow us on Facebook , Instagram and Pinterest
Don't miss any more adventures: Our bottle mail


Such a beautiful simple idea!
Thank you
Dear Sanne, looks wonderful. Thank you for the feedback! Warm, Elke from the adventure market