This mobile is a nice threading exercise for children. The rigid wire can be easily stuck through the holes of beads and buttons. The wire allows small children to attach objects to each other and thus to design a mobile. How this works is described here step by step vividly.
This small craft shop is also suitable for a children's birthday party or as a small gift.
Media Education for Kindergarten and Hort

Relief in everyday life, targeted promotion of individual children, independent learning and - without any pre-knowledge already usable by the youngest!

Get all the materials ready first.

Now cut off the wire in the length of about 40cm.

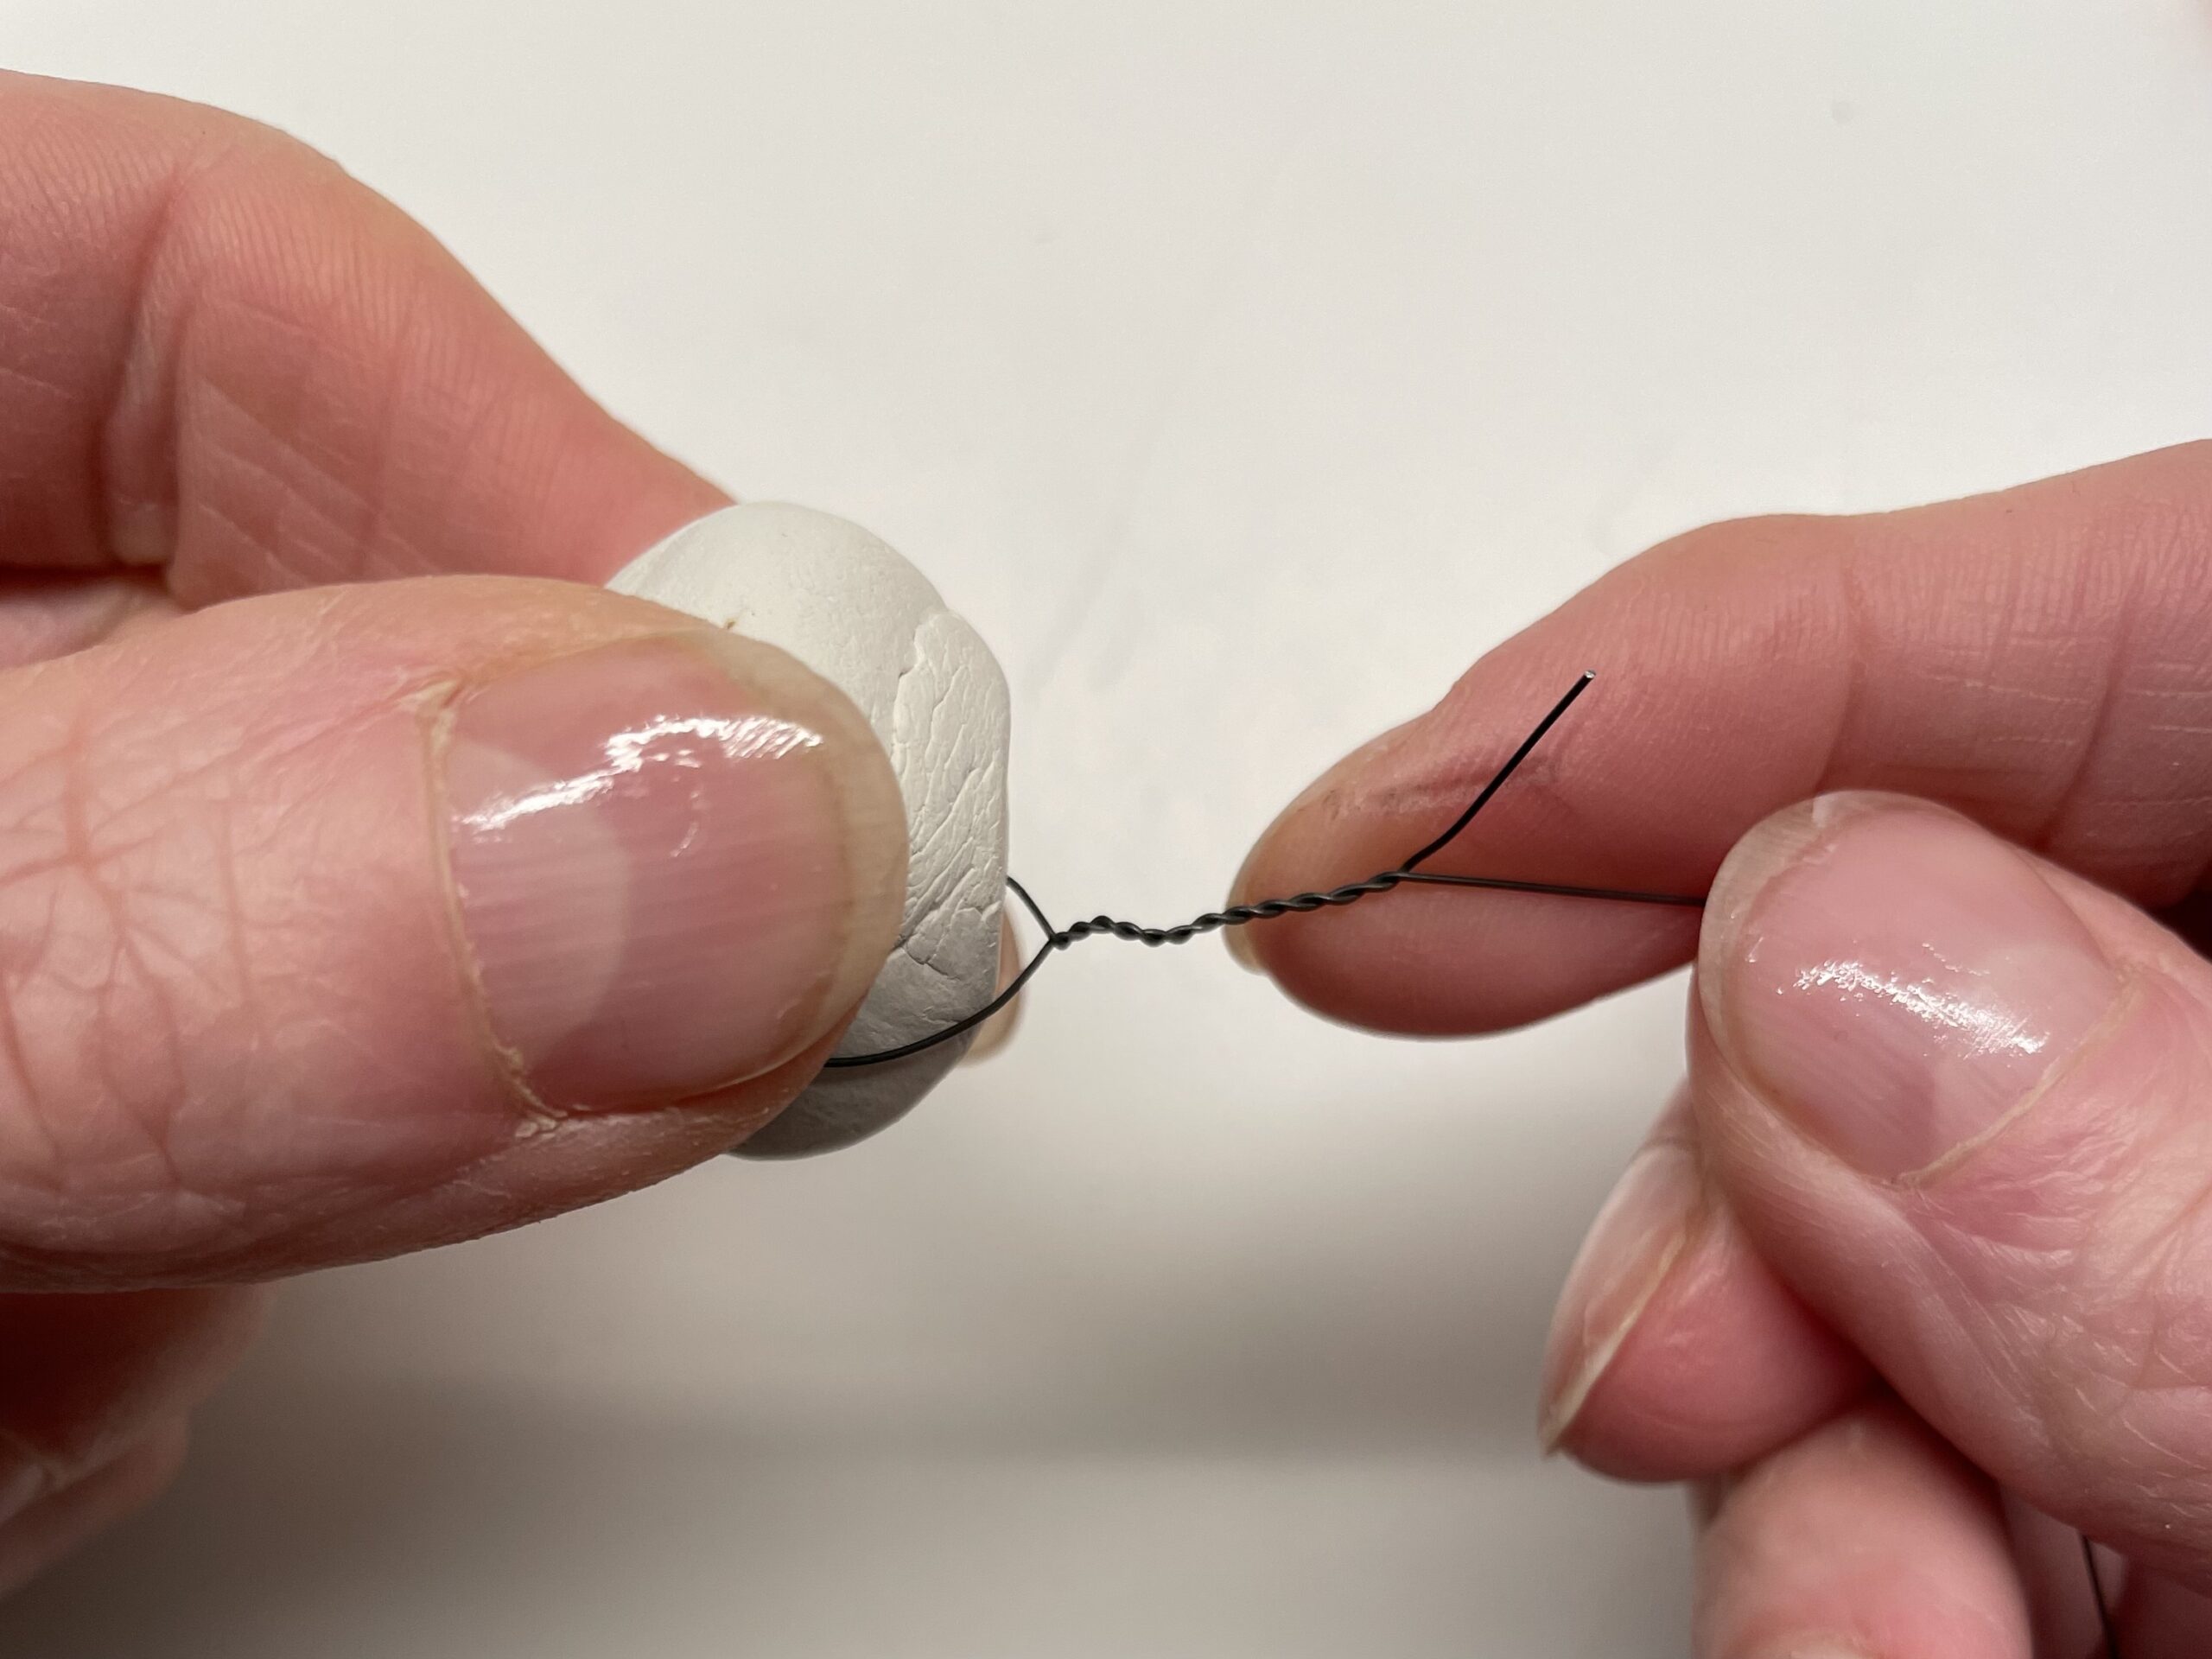
Now thread up the first bead. Let about 3 cm of wire look out at the end. Then bend the wire around the bead upwards and hold both wires with one hand. With the other hand you turn the bead. Thus the wire twists and holds the bead.
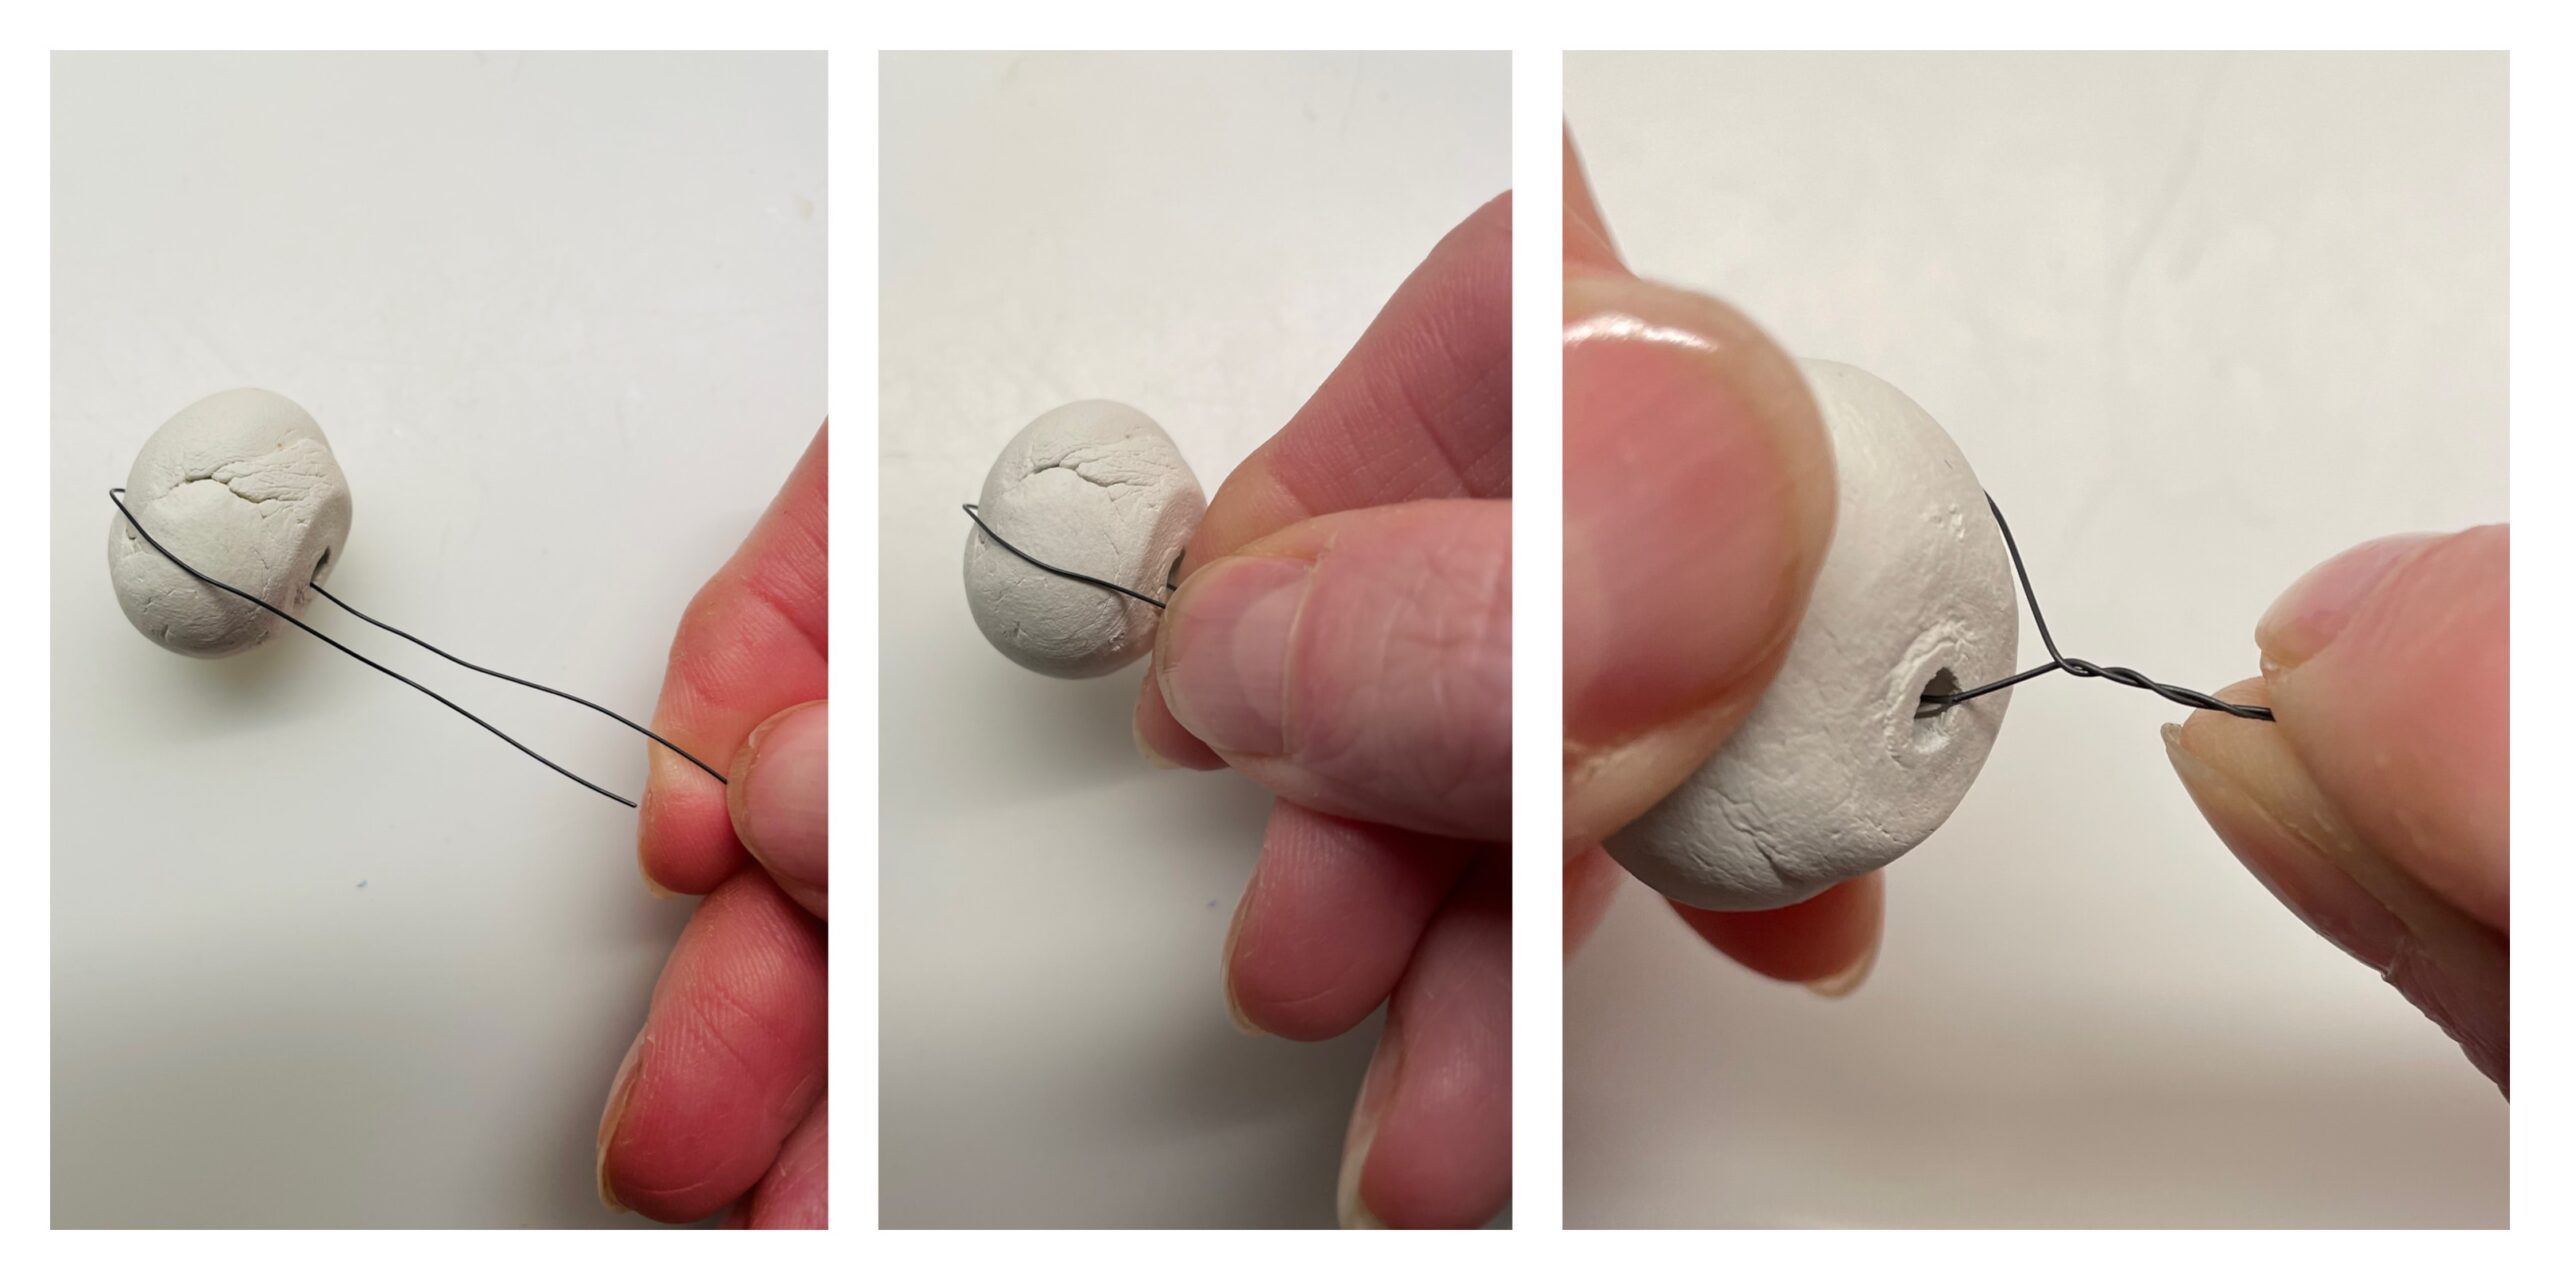
You twist the overhanging end of the wire, so that no one gets hurt on a standing wire. So go on with all the pearls.
Now you thread up a button, for example. For this you put the wire through a buttonhole and push the button so close to the already threaded bead that both lie about 8cm apart. Then you thread the wire back through a second buttonhole again. This creates a loop of wire, which you now tighten.

This is how you attach all the buttons.
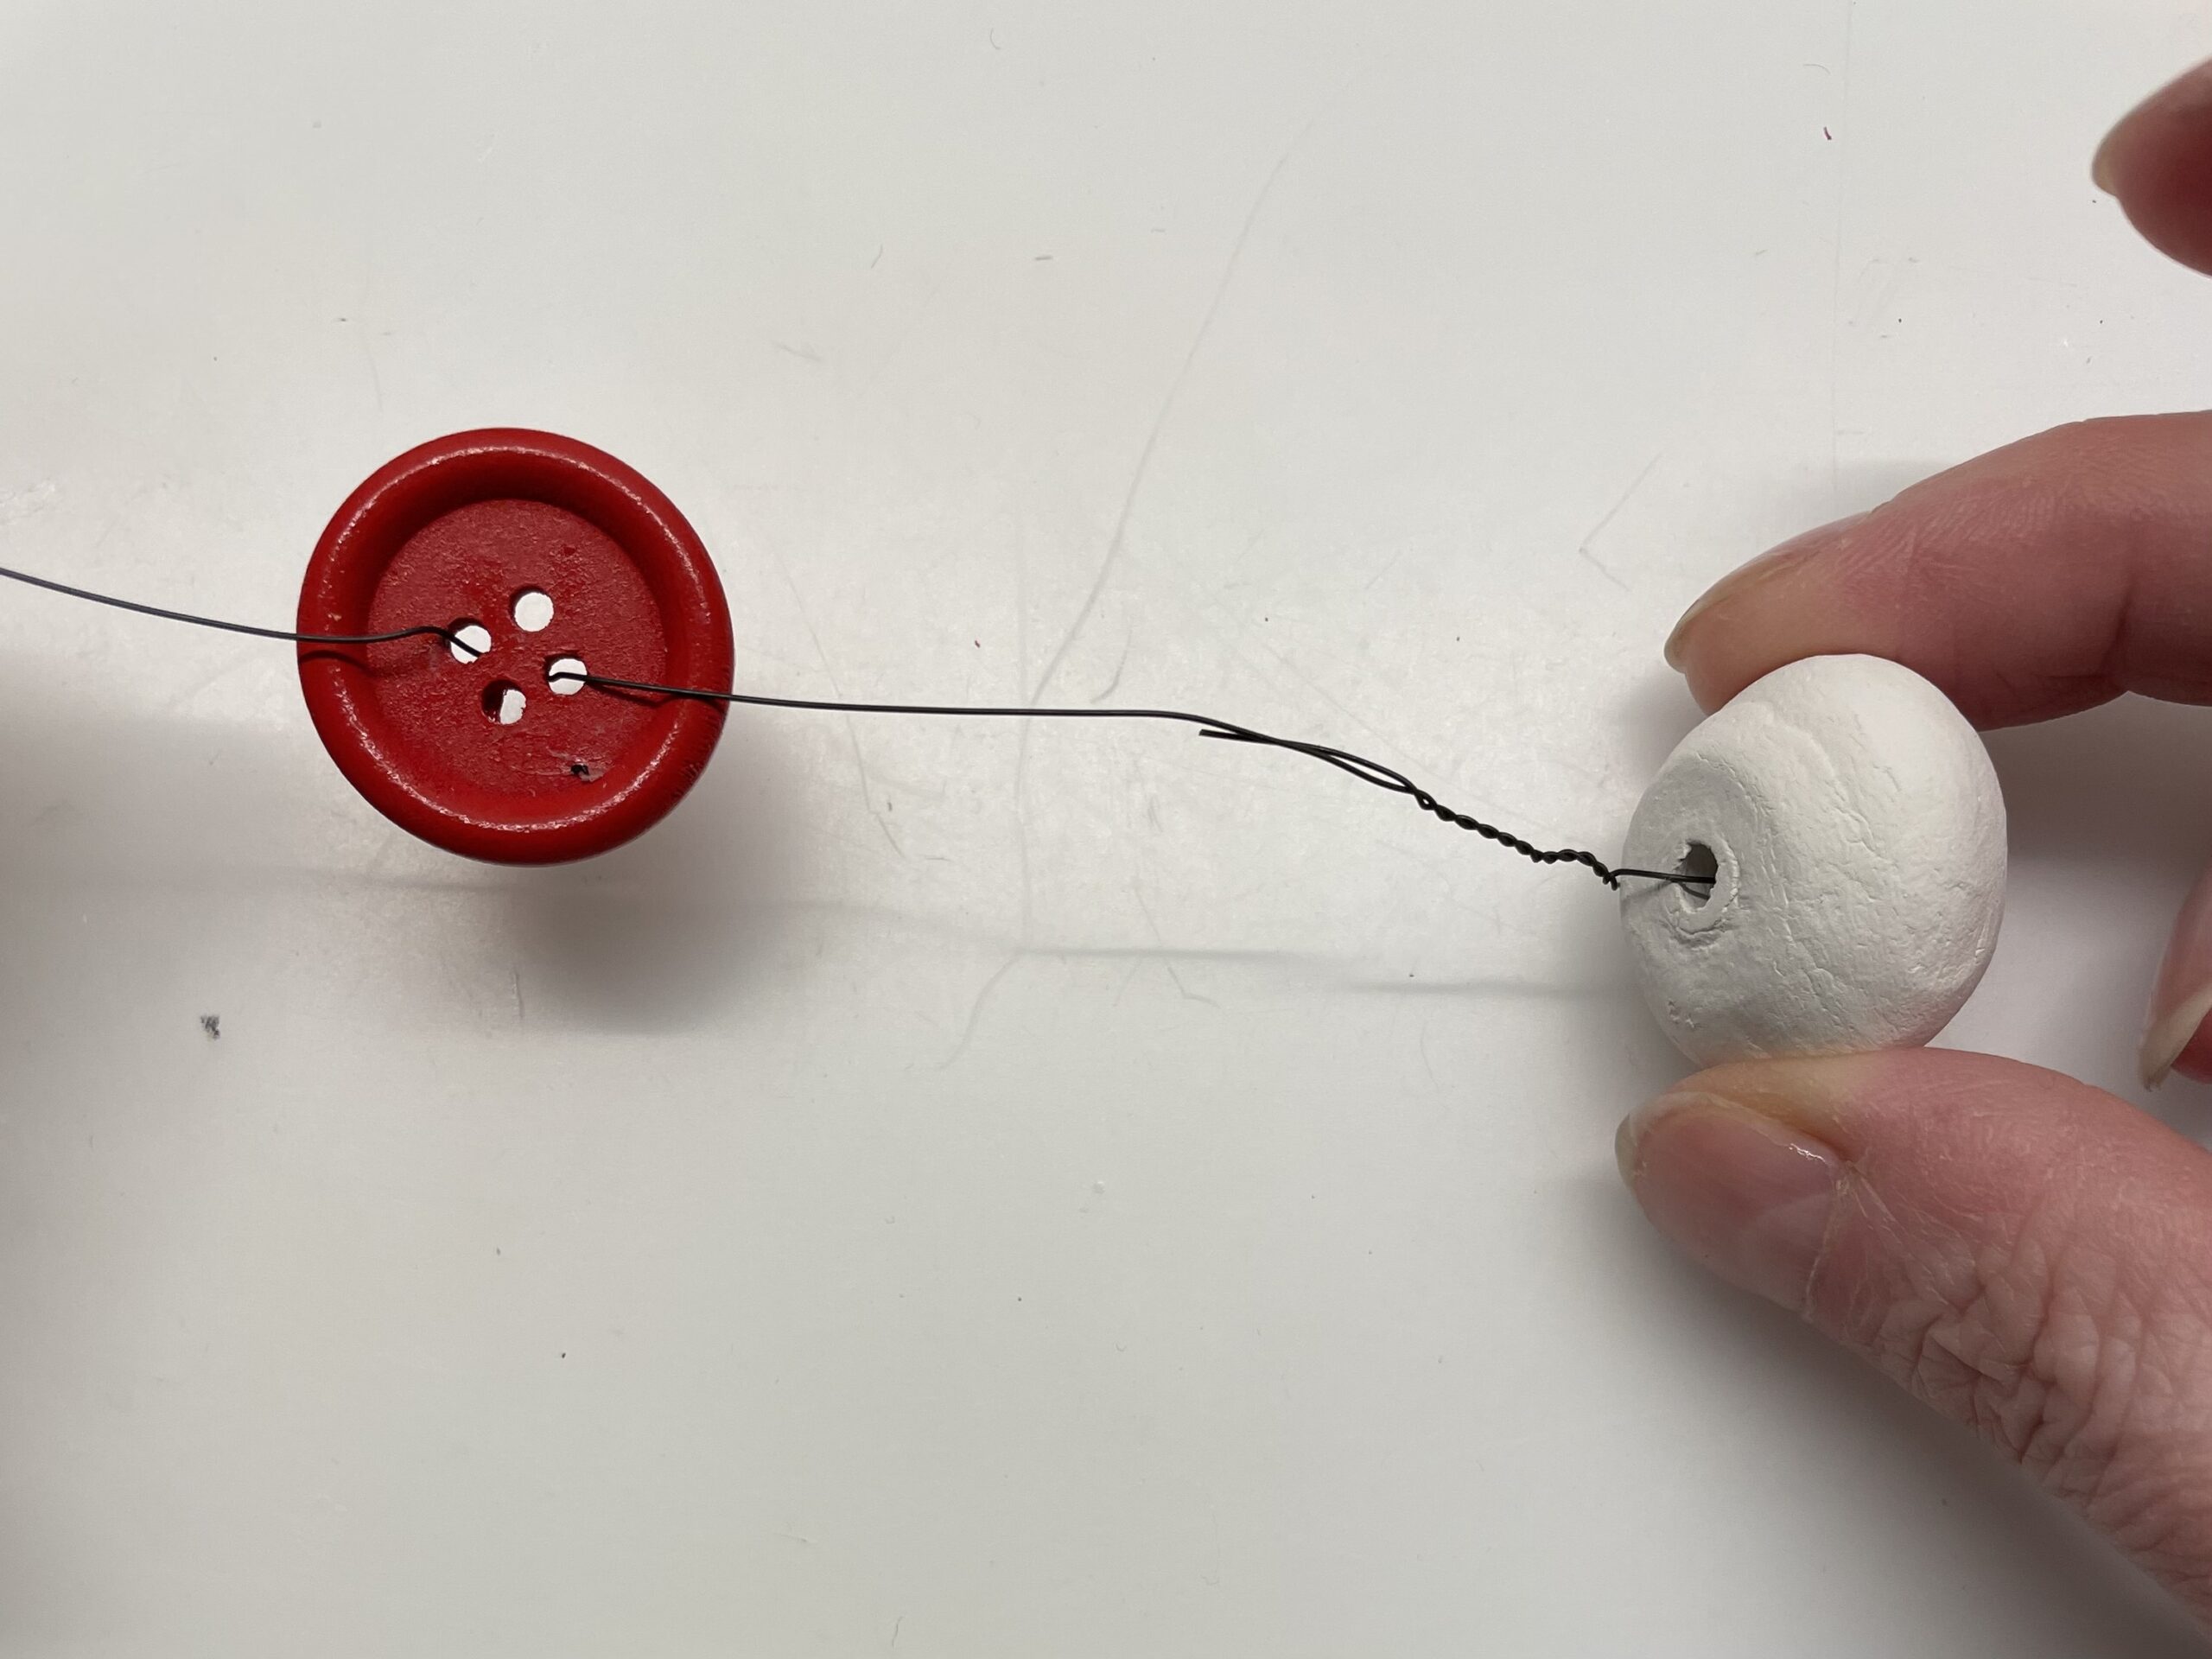
Then you thread up another bead, which you also fix with a loop by pulling the wire twice in a row through the hole in the bead.

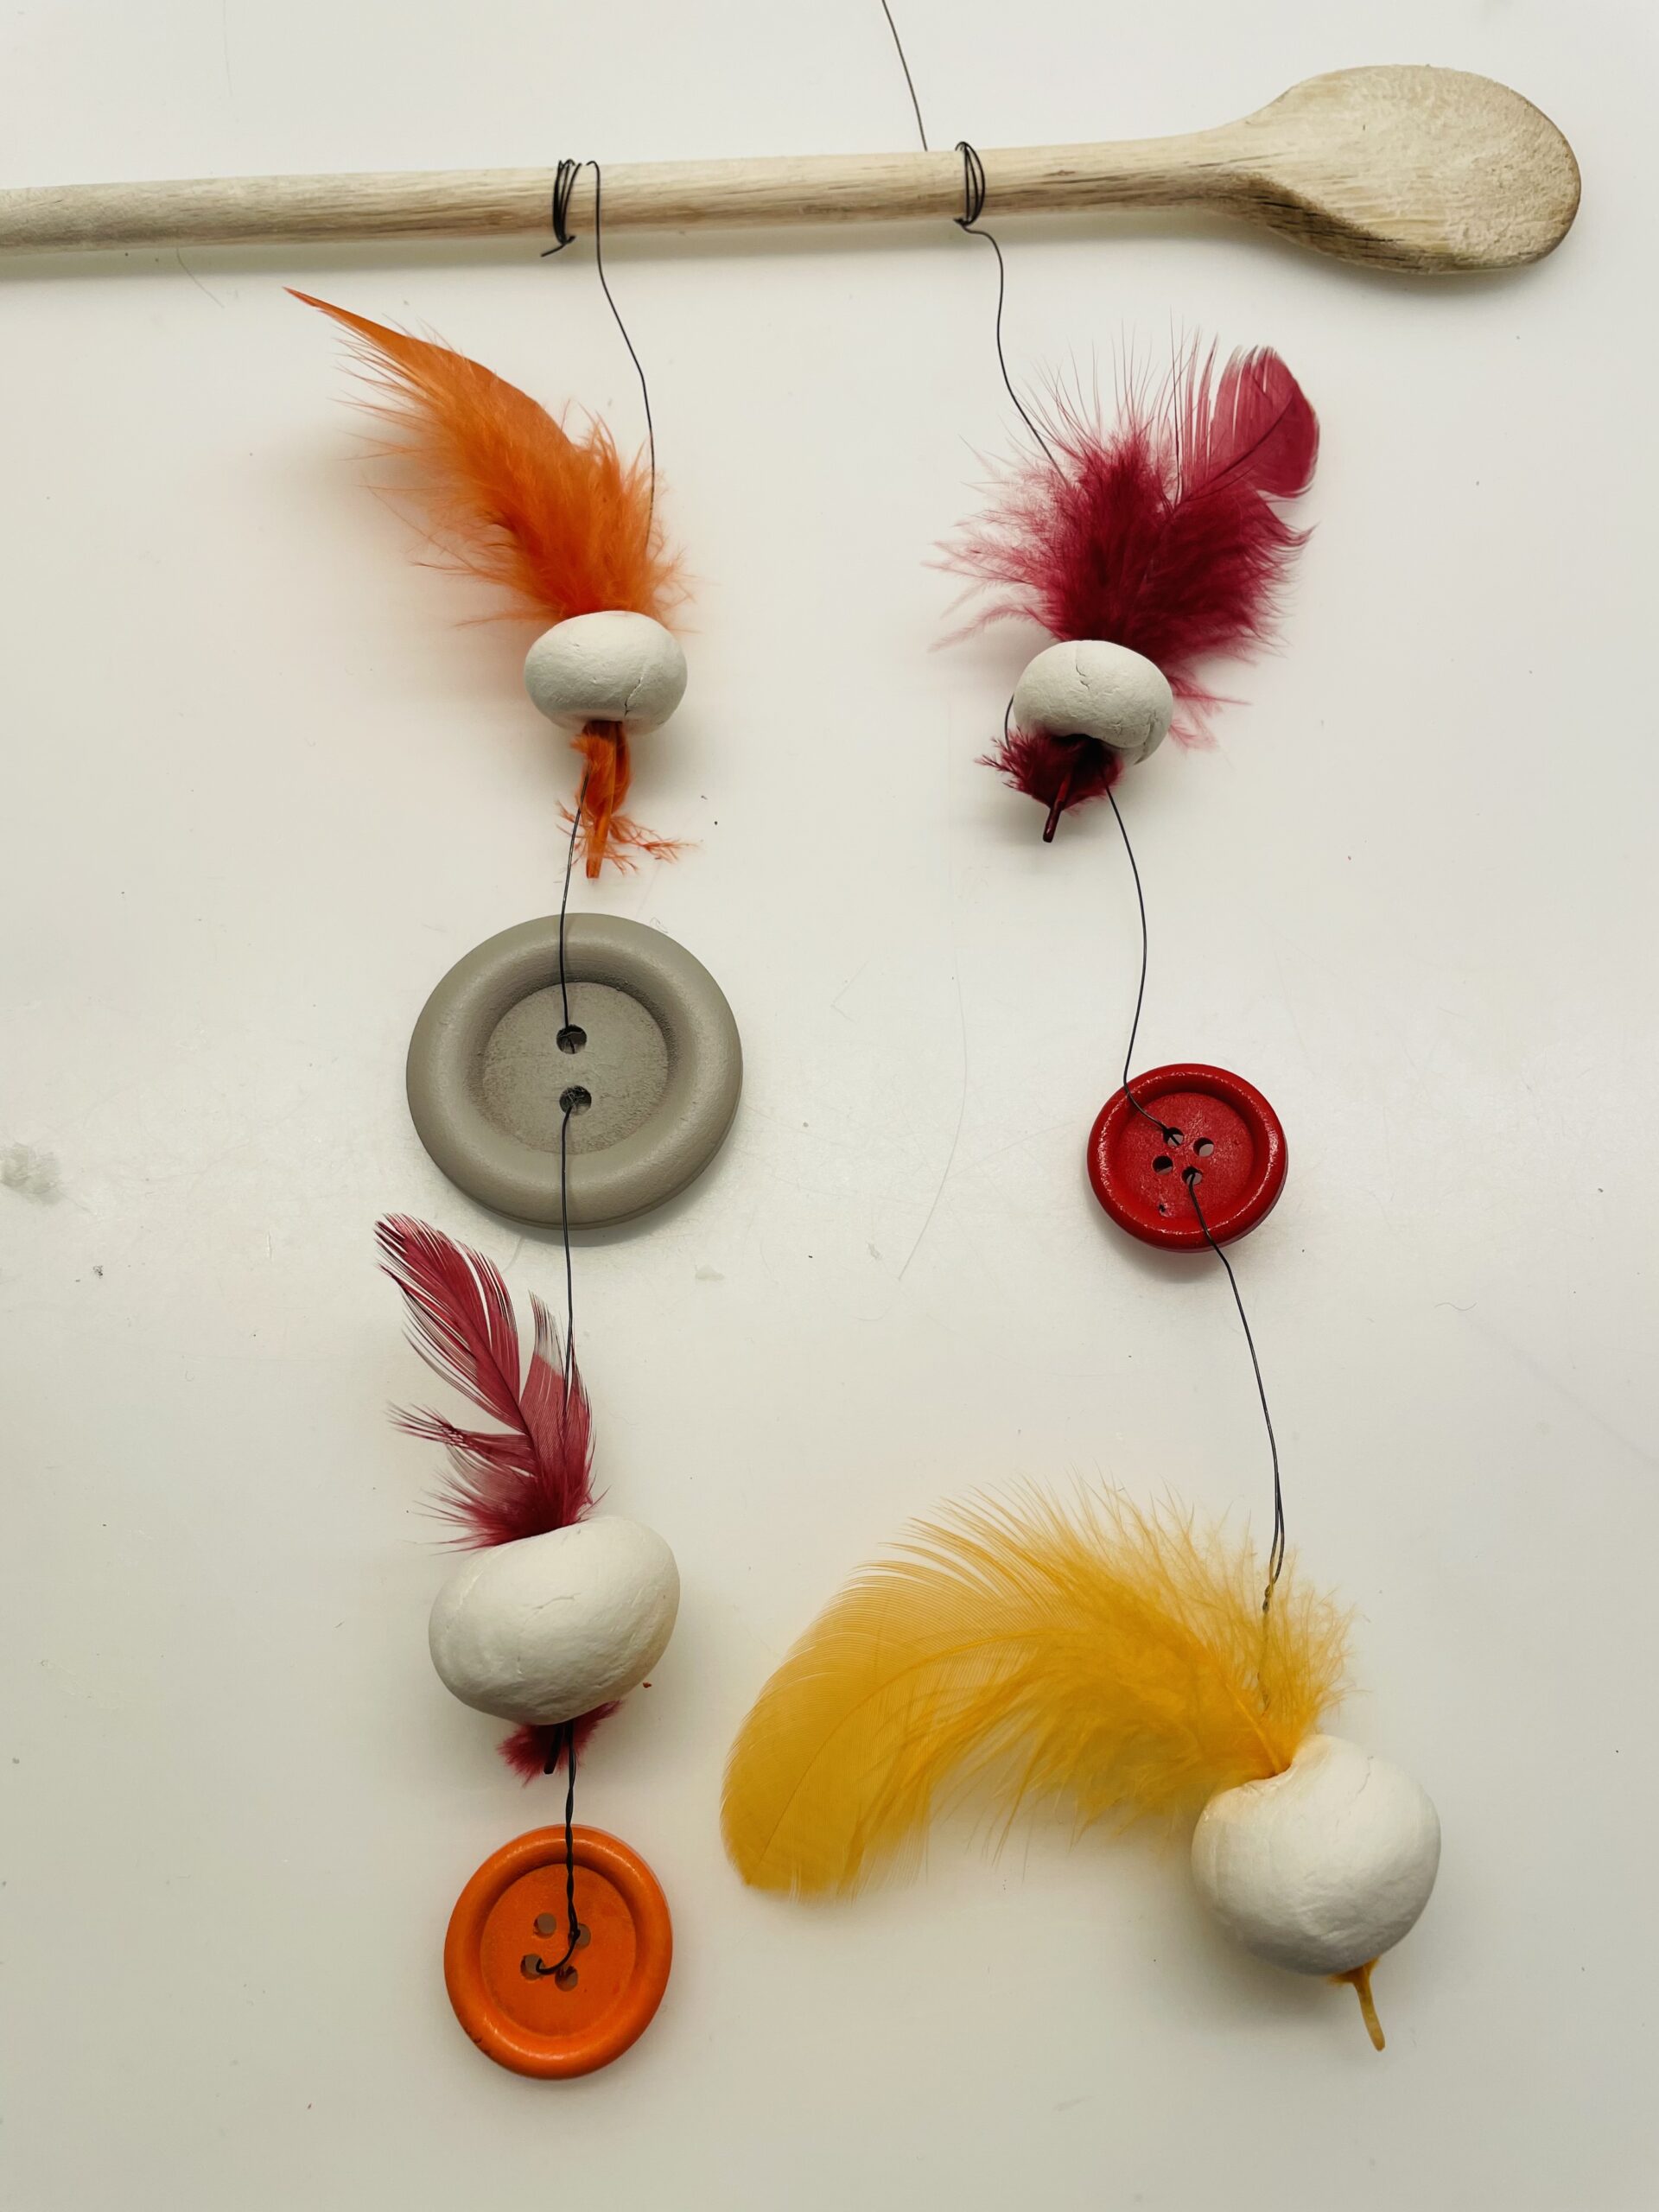
Embellish your mobile e.g. with feathers. You put these in the holes of the beads. No glue is necessary for this.

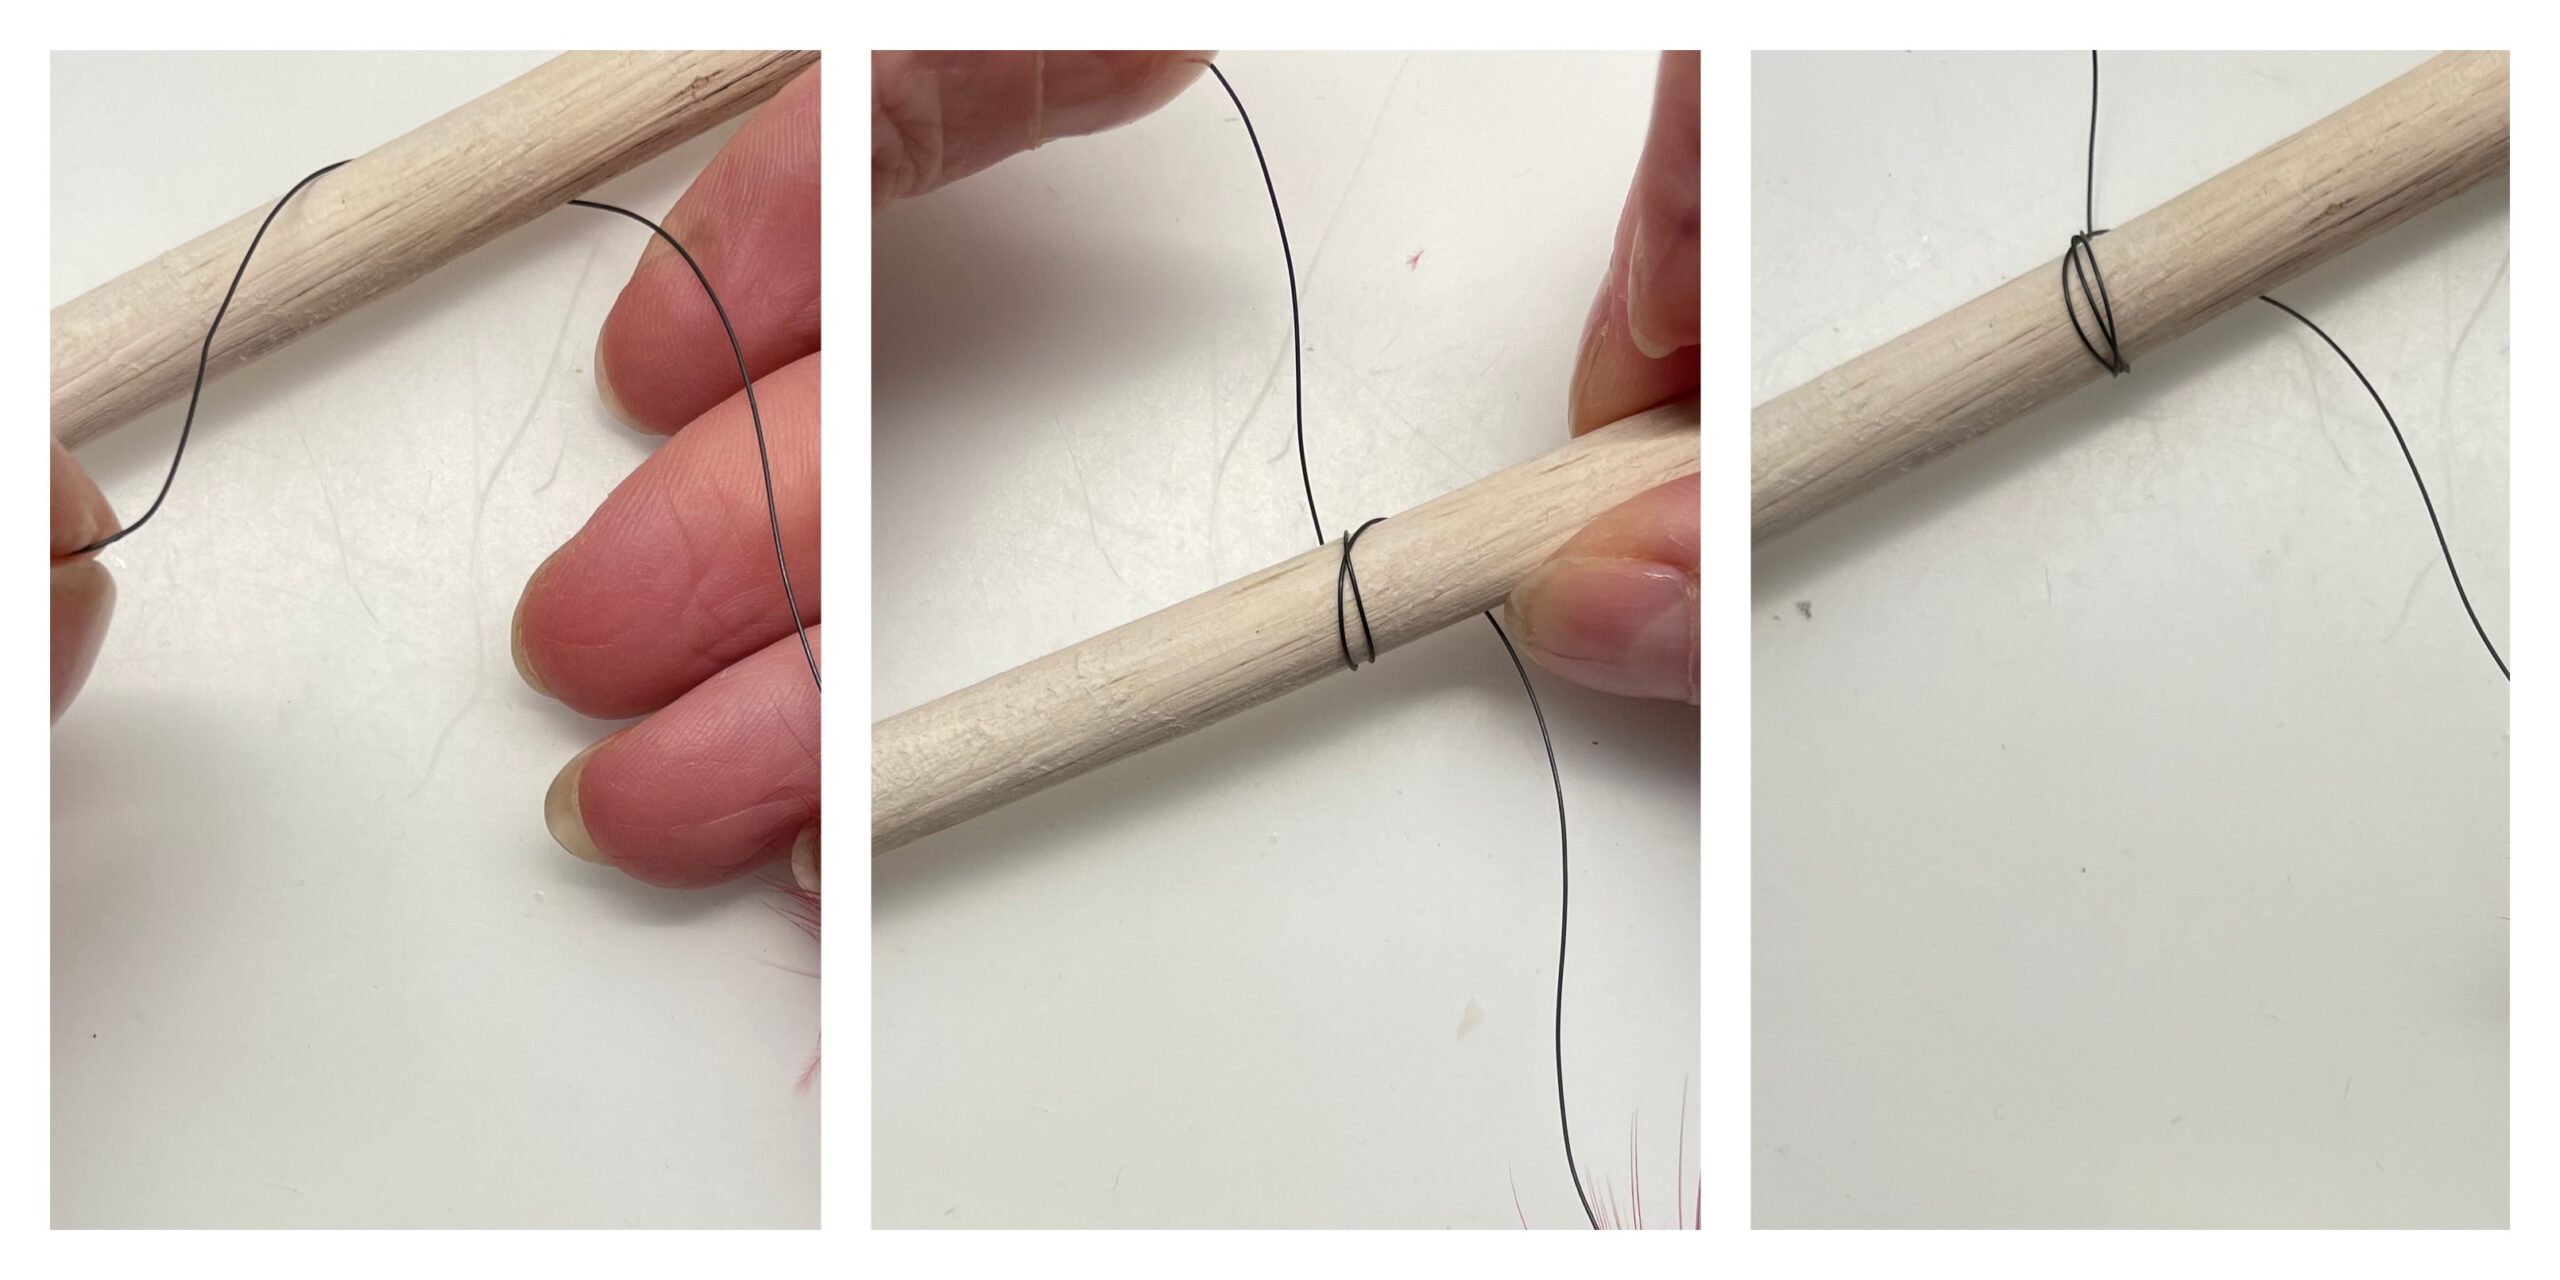
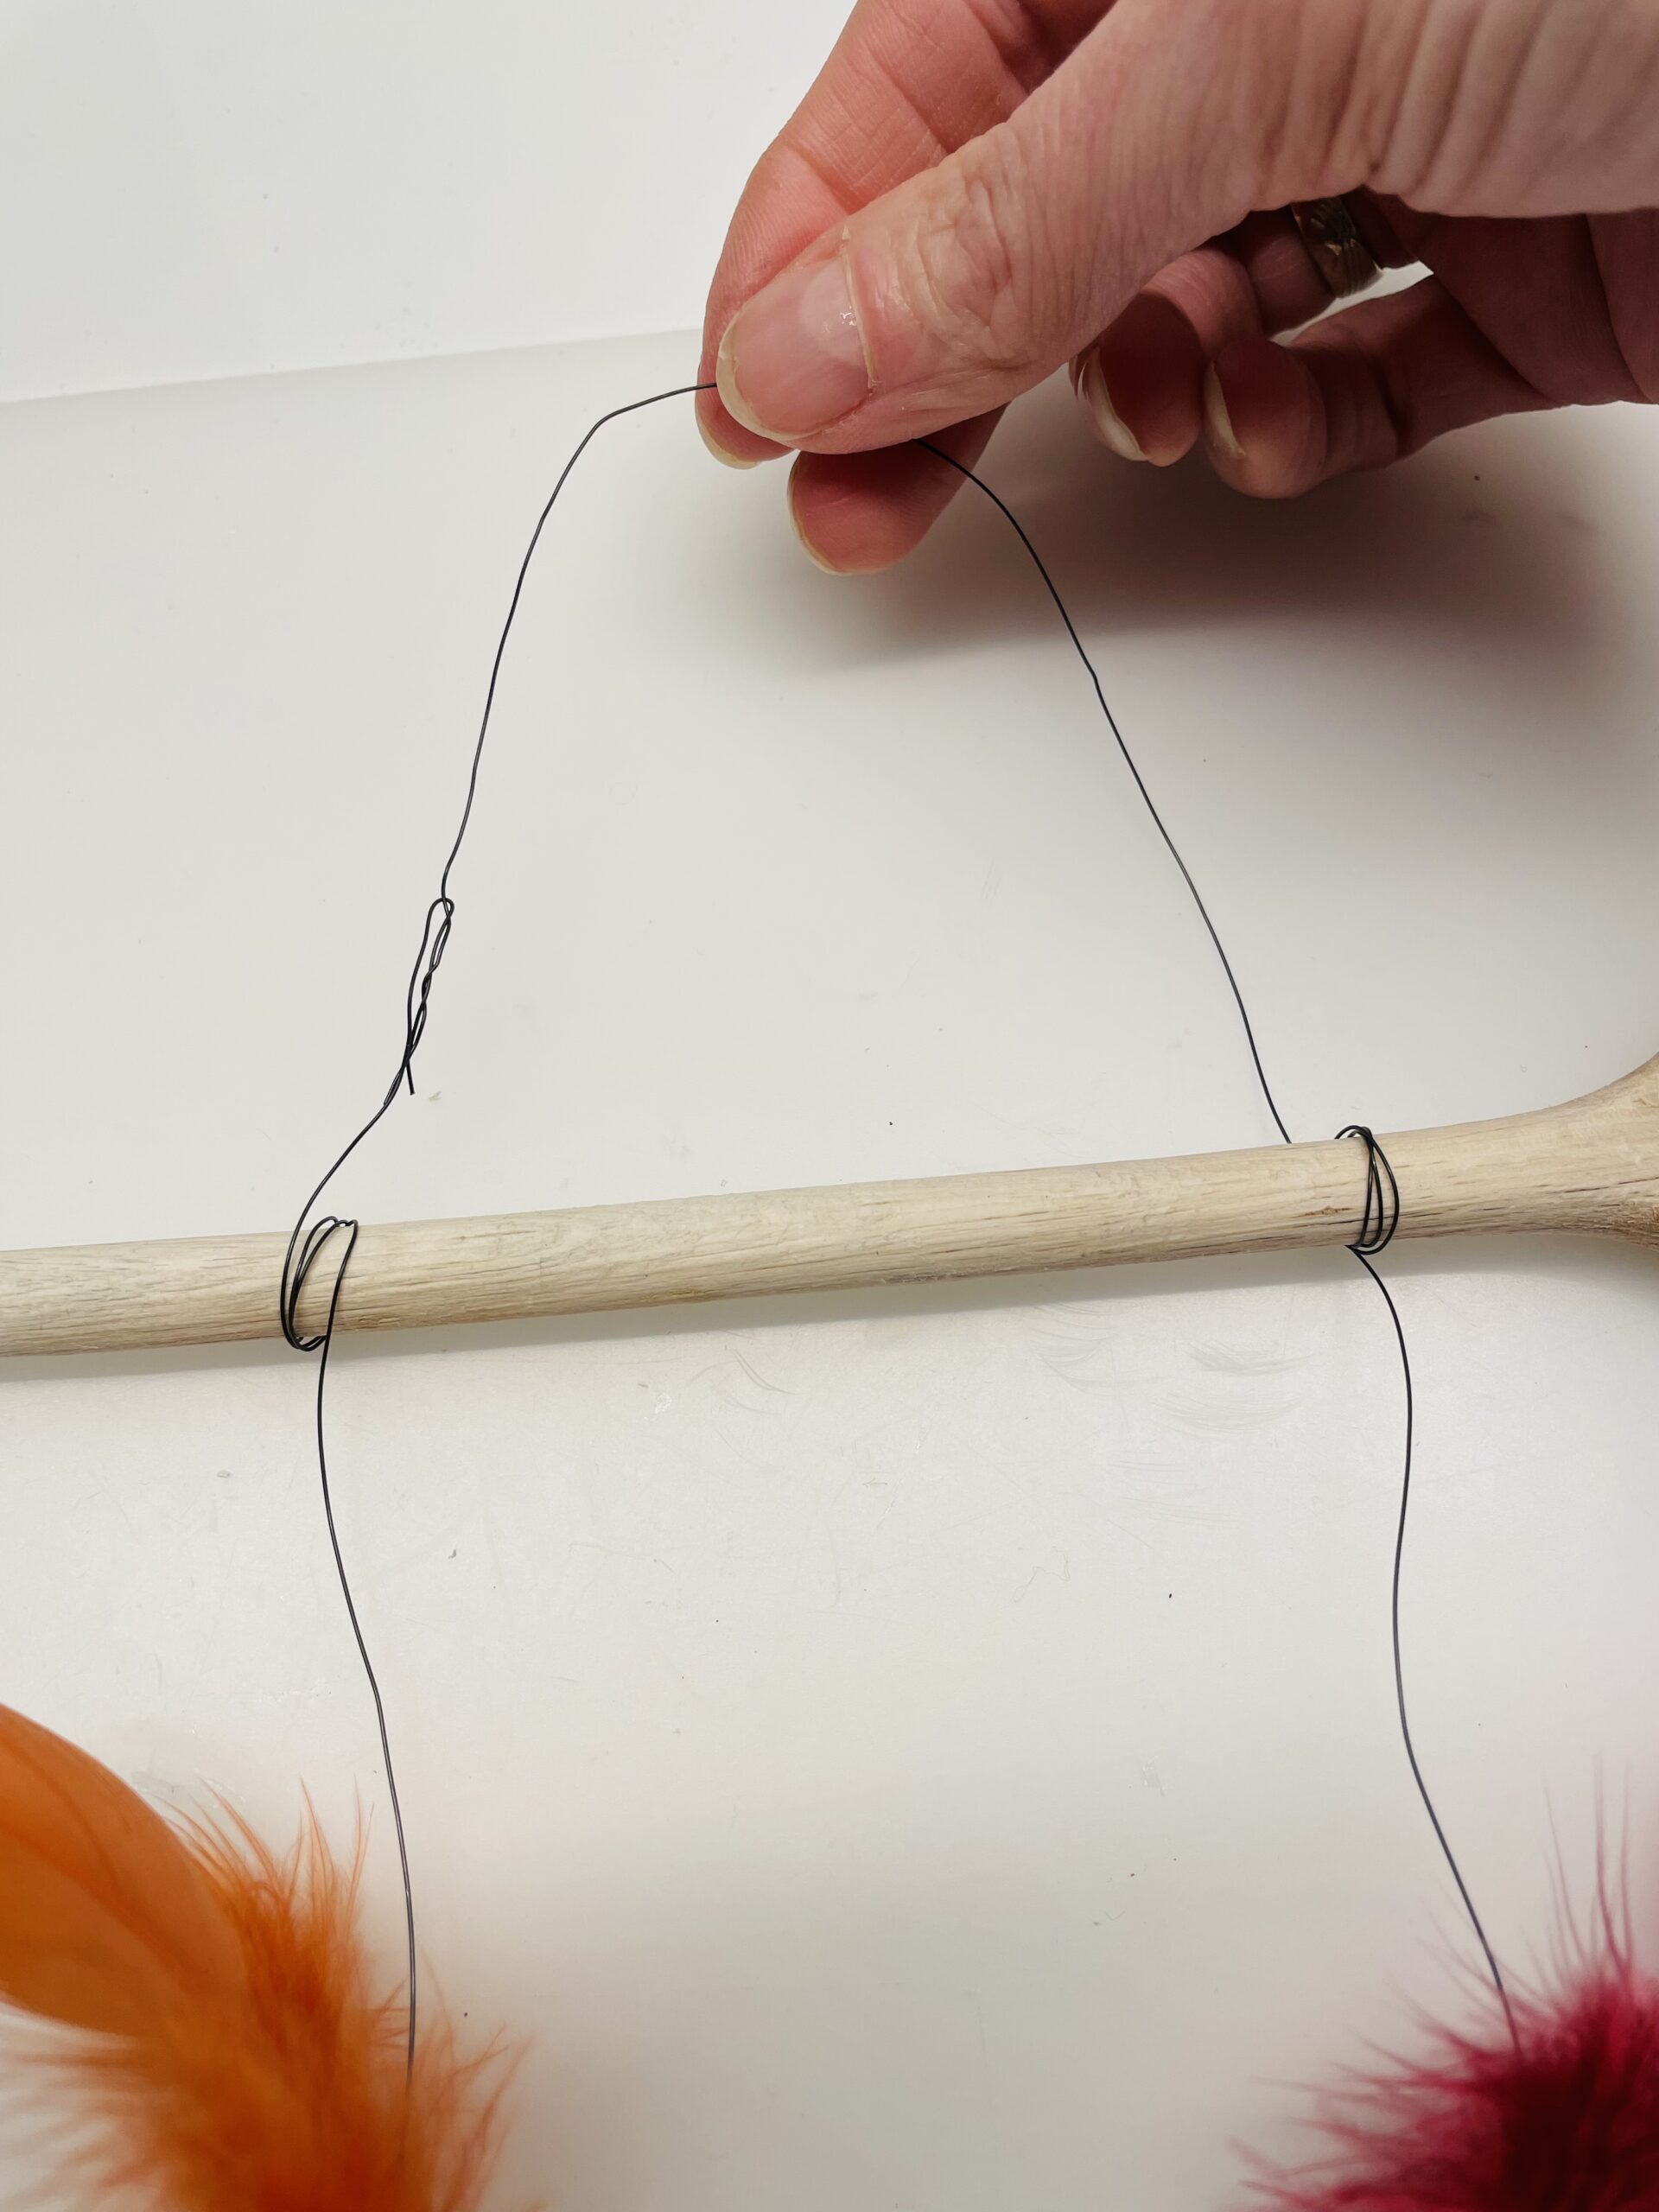
Then tie the wire with beads, feathers and buttons to a spoon. To do this, wrap the wooden stick several times with the wire.
Design several strands with beads, buttons and feathers in different lengths and attach them to the wooden stick.

Two wires now form a suspension.
Put the ends of the two wires on top of each other and twist them together.
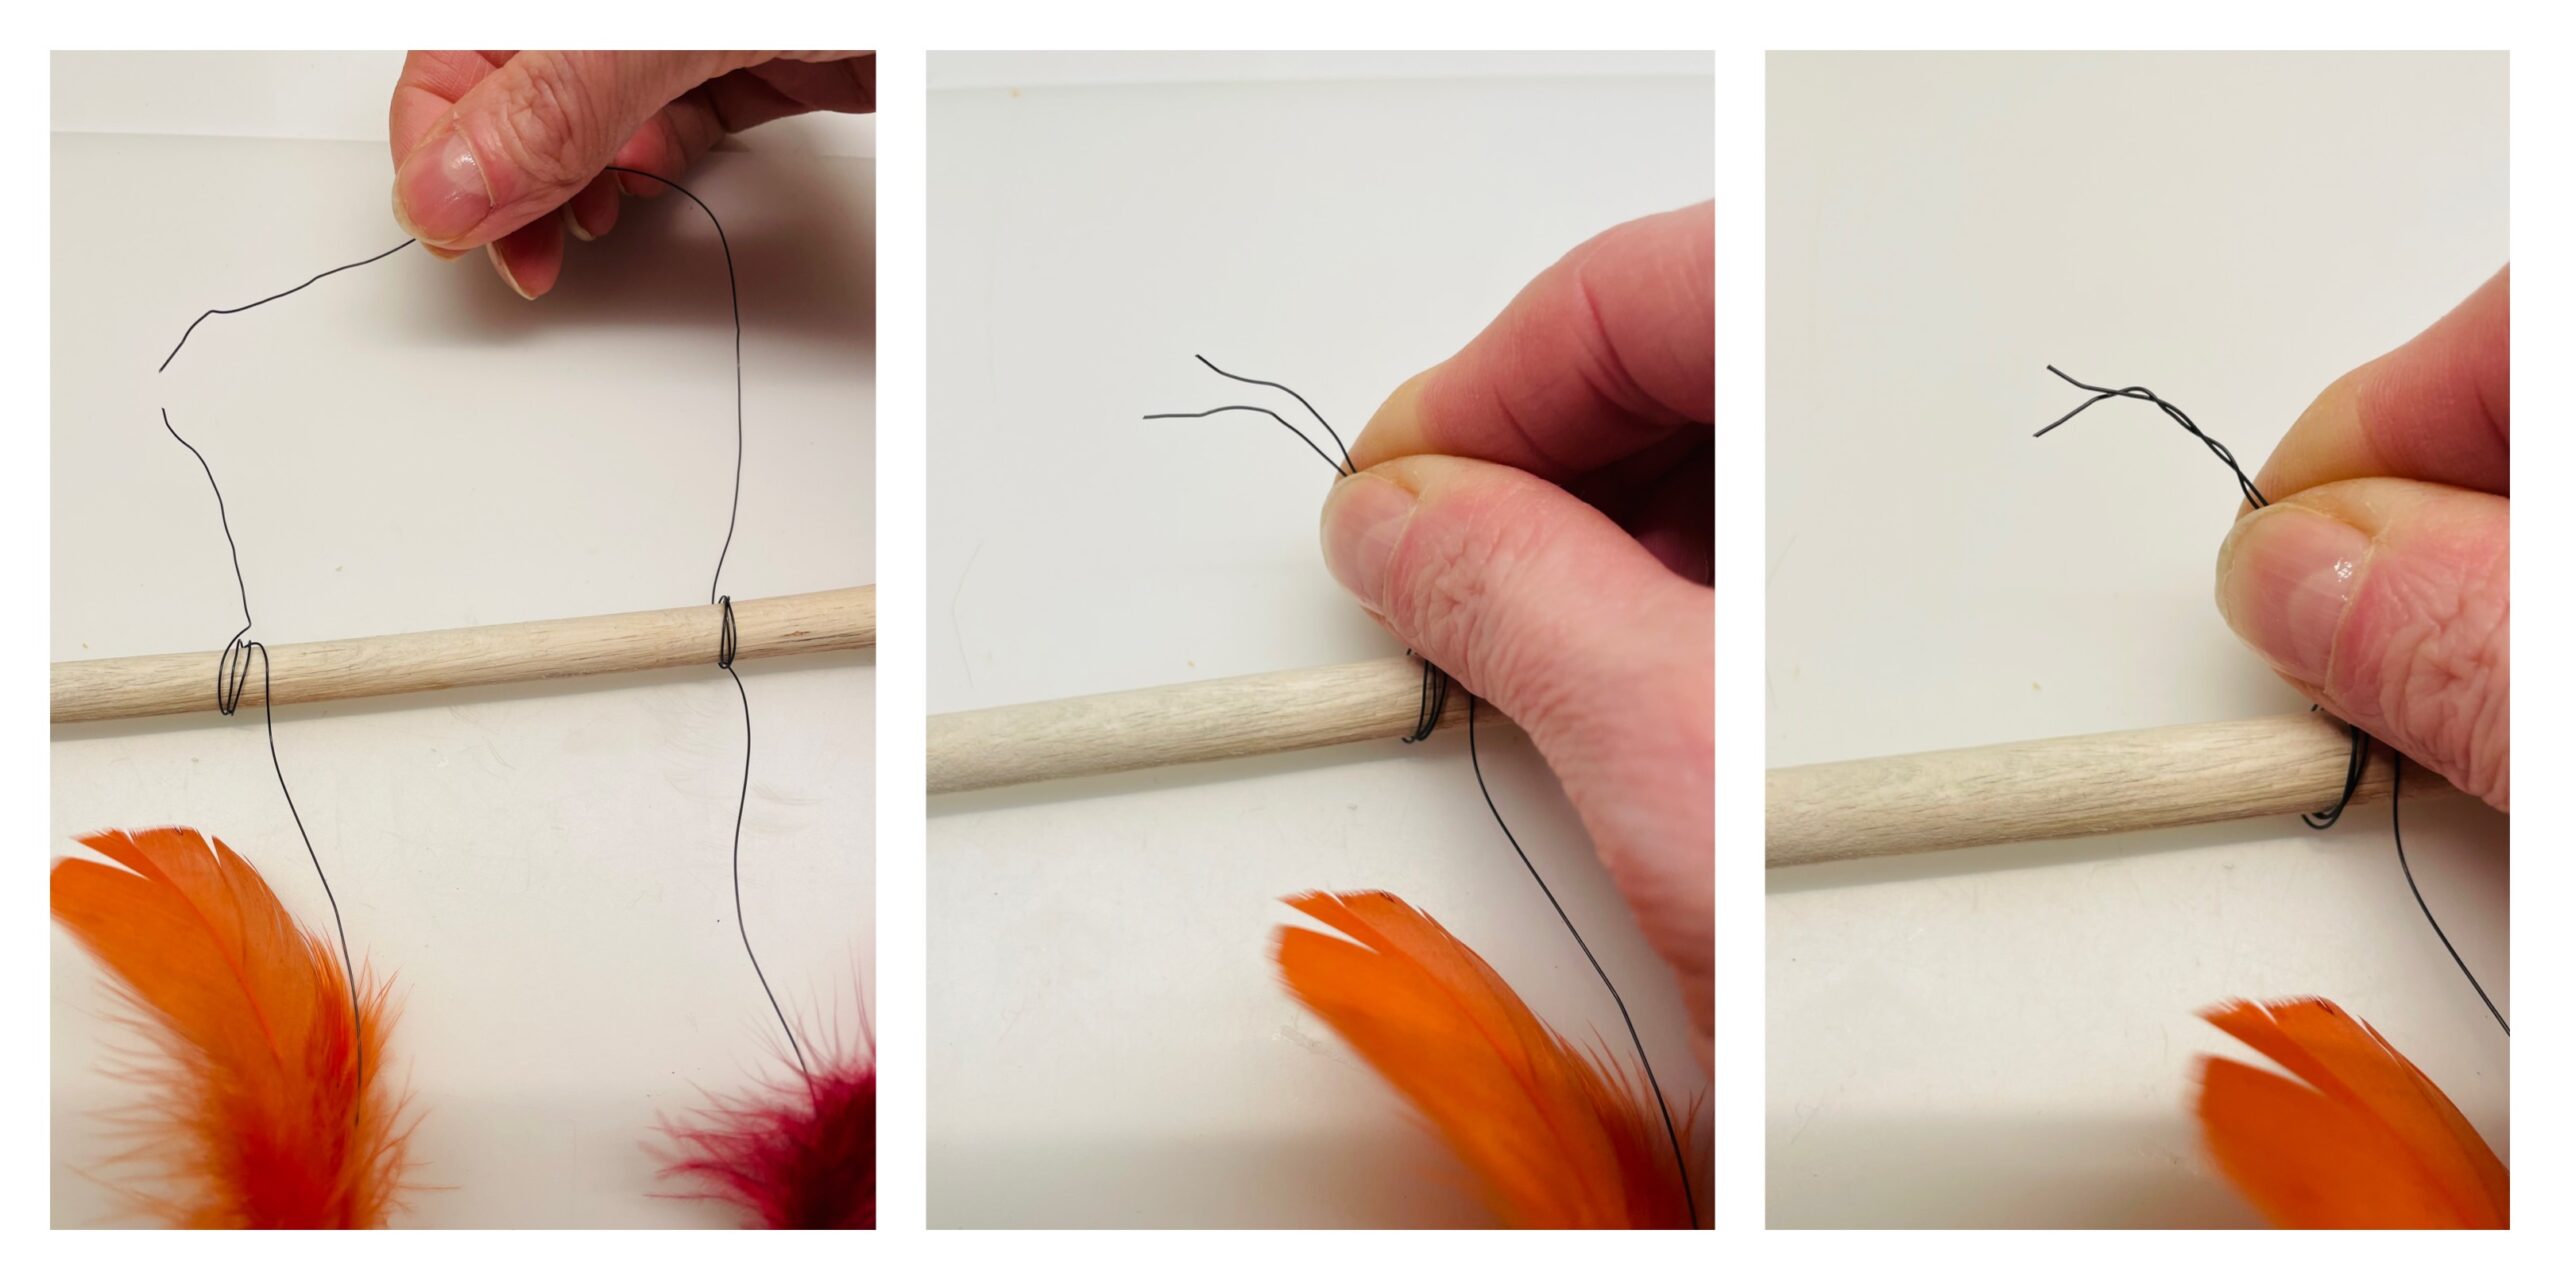
Then you bend the twisted piece of wire straight.
Finished is a beautiful mobile.

Have fun threading and designing!
Materials
Directions
Get all the materials ready first.
Now cut off the wire in the length of about 40cm.
Now thread up the first bead. Let about 3 cm of wire look out at the end. Then bend the wire around the bead upwards and hold both wires with one hand. With the other hand you turn the bead. Thus the wire twists and holds the bead.
You twist the overhanging end of the wire, so that no one gets hurt on a standing wire. So go on with all the pearls.
Now you thread up a button, for example. For this you put the wire through a buttonhole and push the button so close to the already threaded bead that both lie about 8cm apart. Then you thread the wire back through a second buttonhole again. This creates a loop of wire, which you now tighten.
This is how you attach all the buttons.
Then you thread up another bead, which you also fix with a loop by pulling the wire twice in a row through the hole in the bead.
Embellish your mobile e.g. with feathers. You put these in the holes of the beads. No glue is necessary for this.
Then tie the wire with beads, feathers and buttons to a spoon. To do this, wrap the wooden stick several times with the wire.
Design several strands with beads, buttons and feathers in different lengths and attach them to the wooden stick.
Two wires now form a suspension.
Put the ends of the two wires on top of each other and twist them together.
Then you bend the twisted piece of wire straight.
Finished is a beautiful mobile.
Have fun threading and designing!
Follow us on Facebook , Instagram and Pinterest
Don't miss any more adventures: Our bottle mail