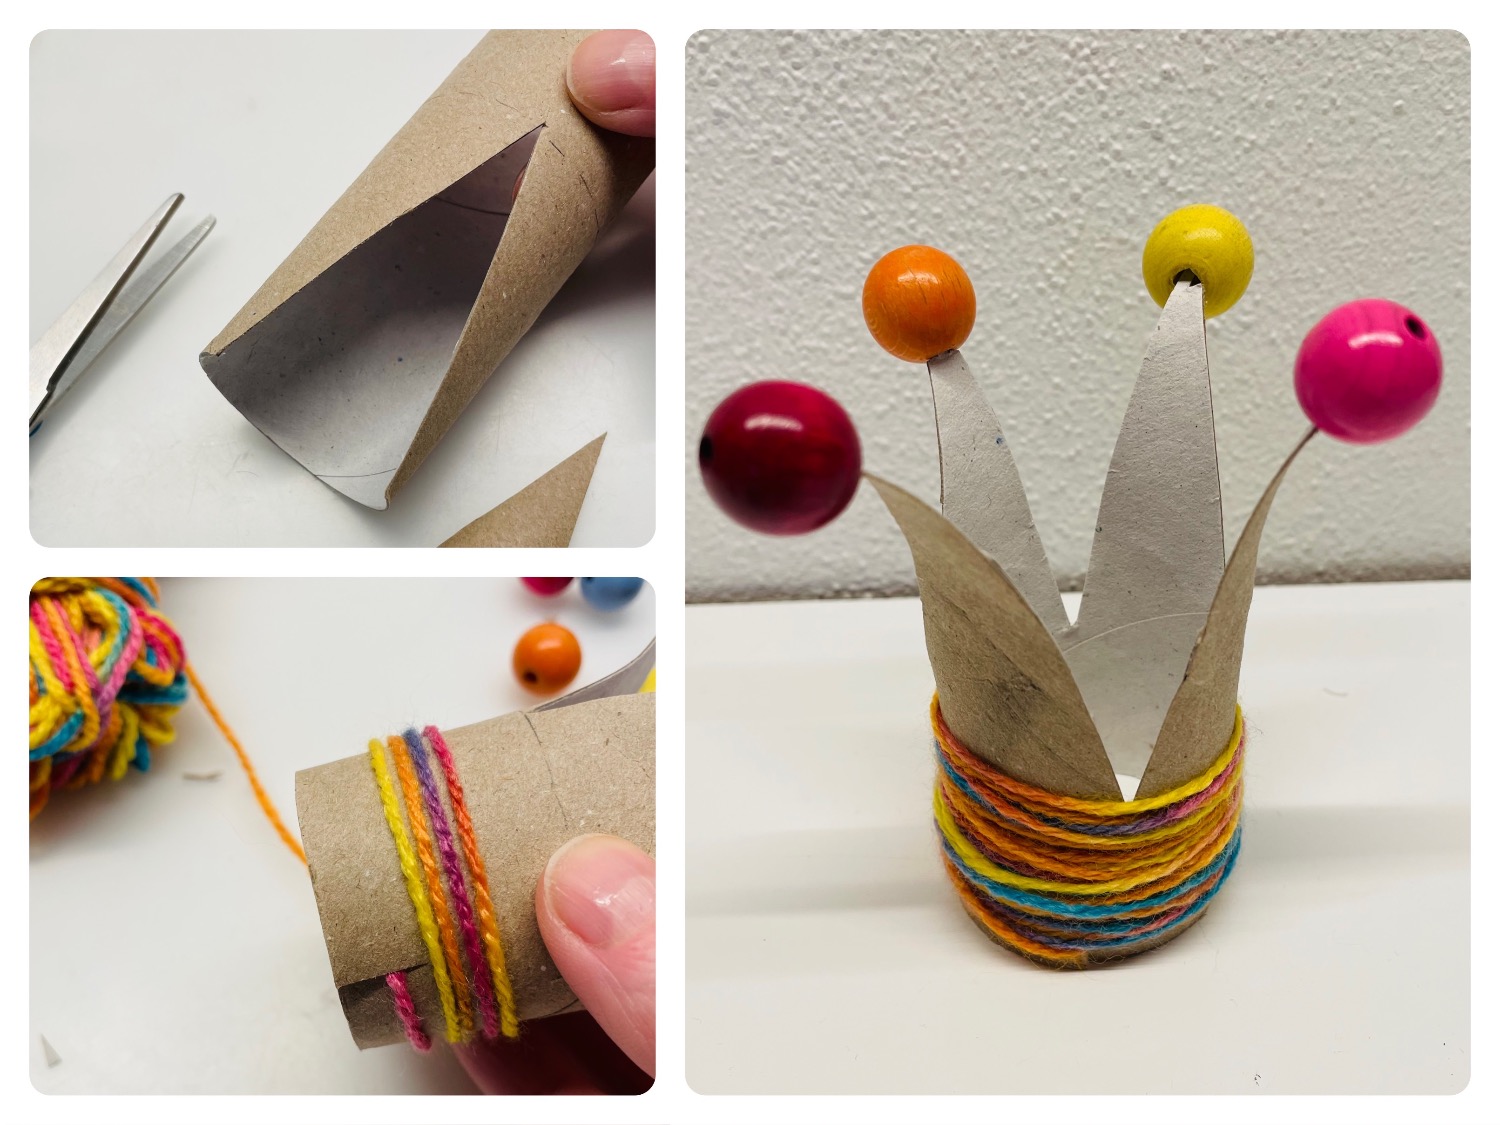
This crown is made of a cardboard roll with colorful wool and coloured pearls.
For this you cut into the cardboard roll tacks and bend them slightly outwards over a pen. After that you wrap the bottom of the crown with coloured wool. Tip: Cut a small piece into the cardboard roll with the scissors, then hold the wool without glue and the wrapping is easier.
At the end you can put colorful beads on the tips of the cones. You can fix them with a glue point. A nice table decoration is ready for the next princess party. Have fun trying out!
Media Education for Kindergarten and Hort

Relief in everyday life, targeted promotion of individual children, independent learning and - without any pre-knowledge already usable by the youngest!
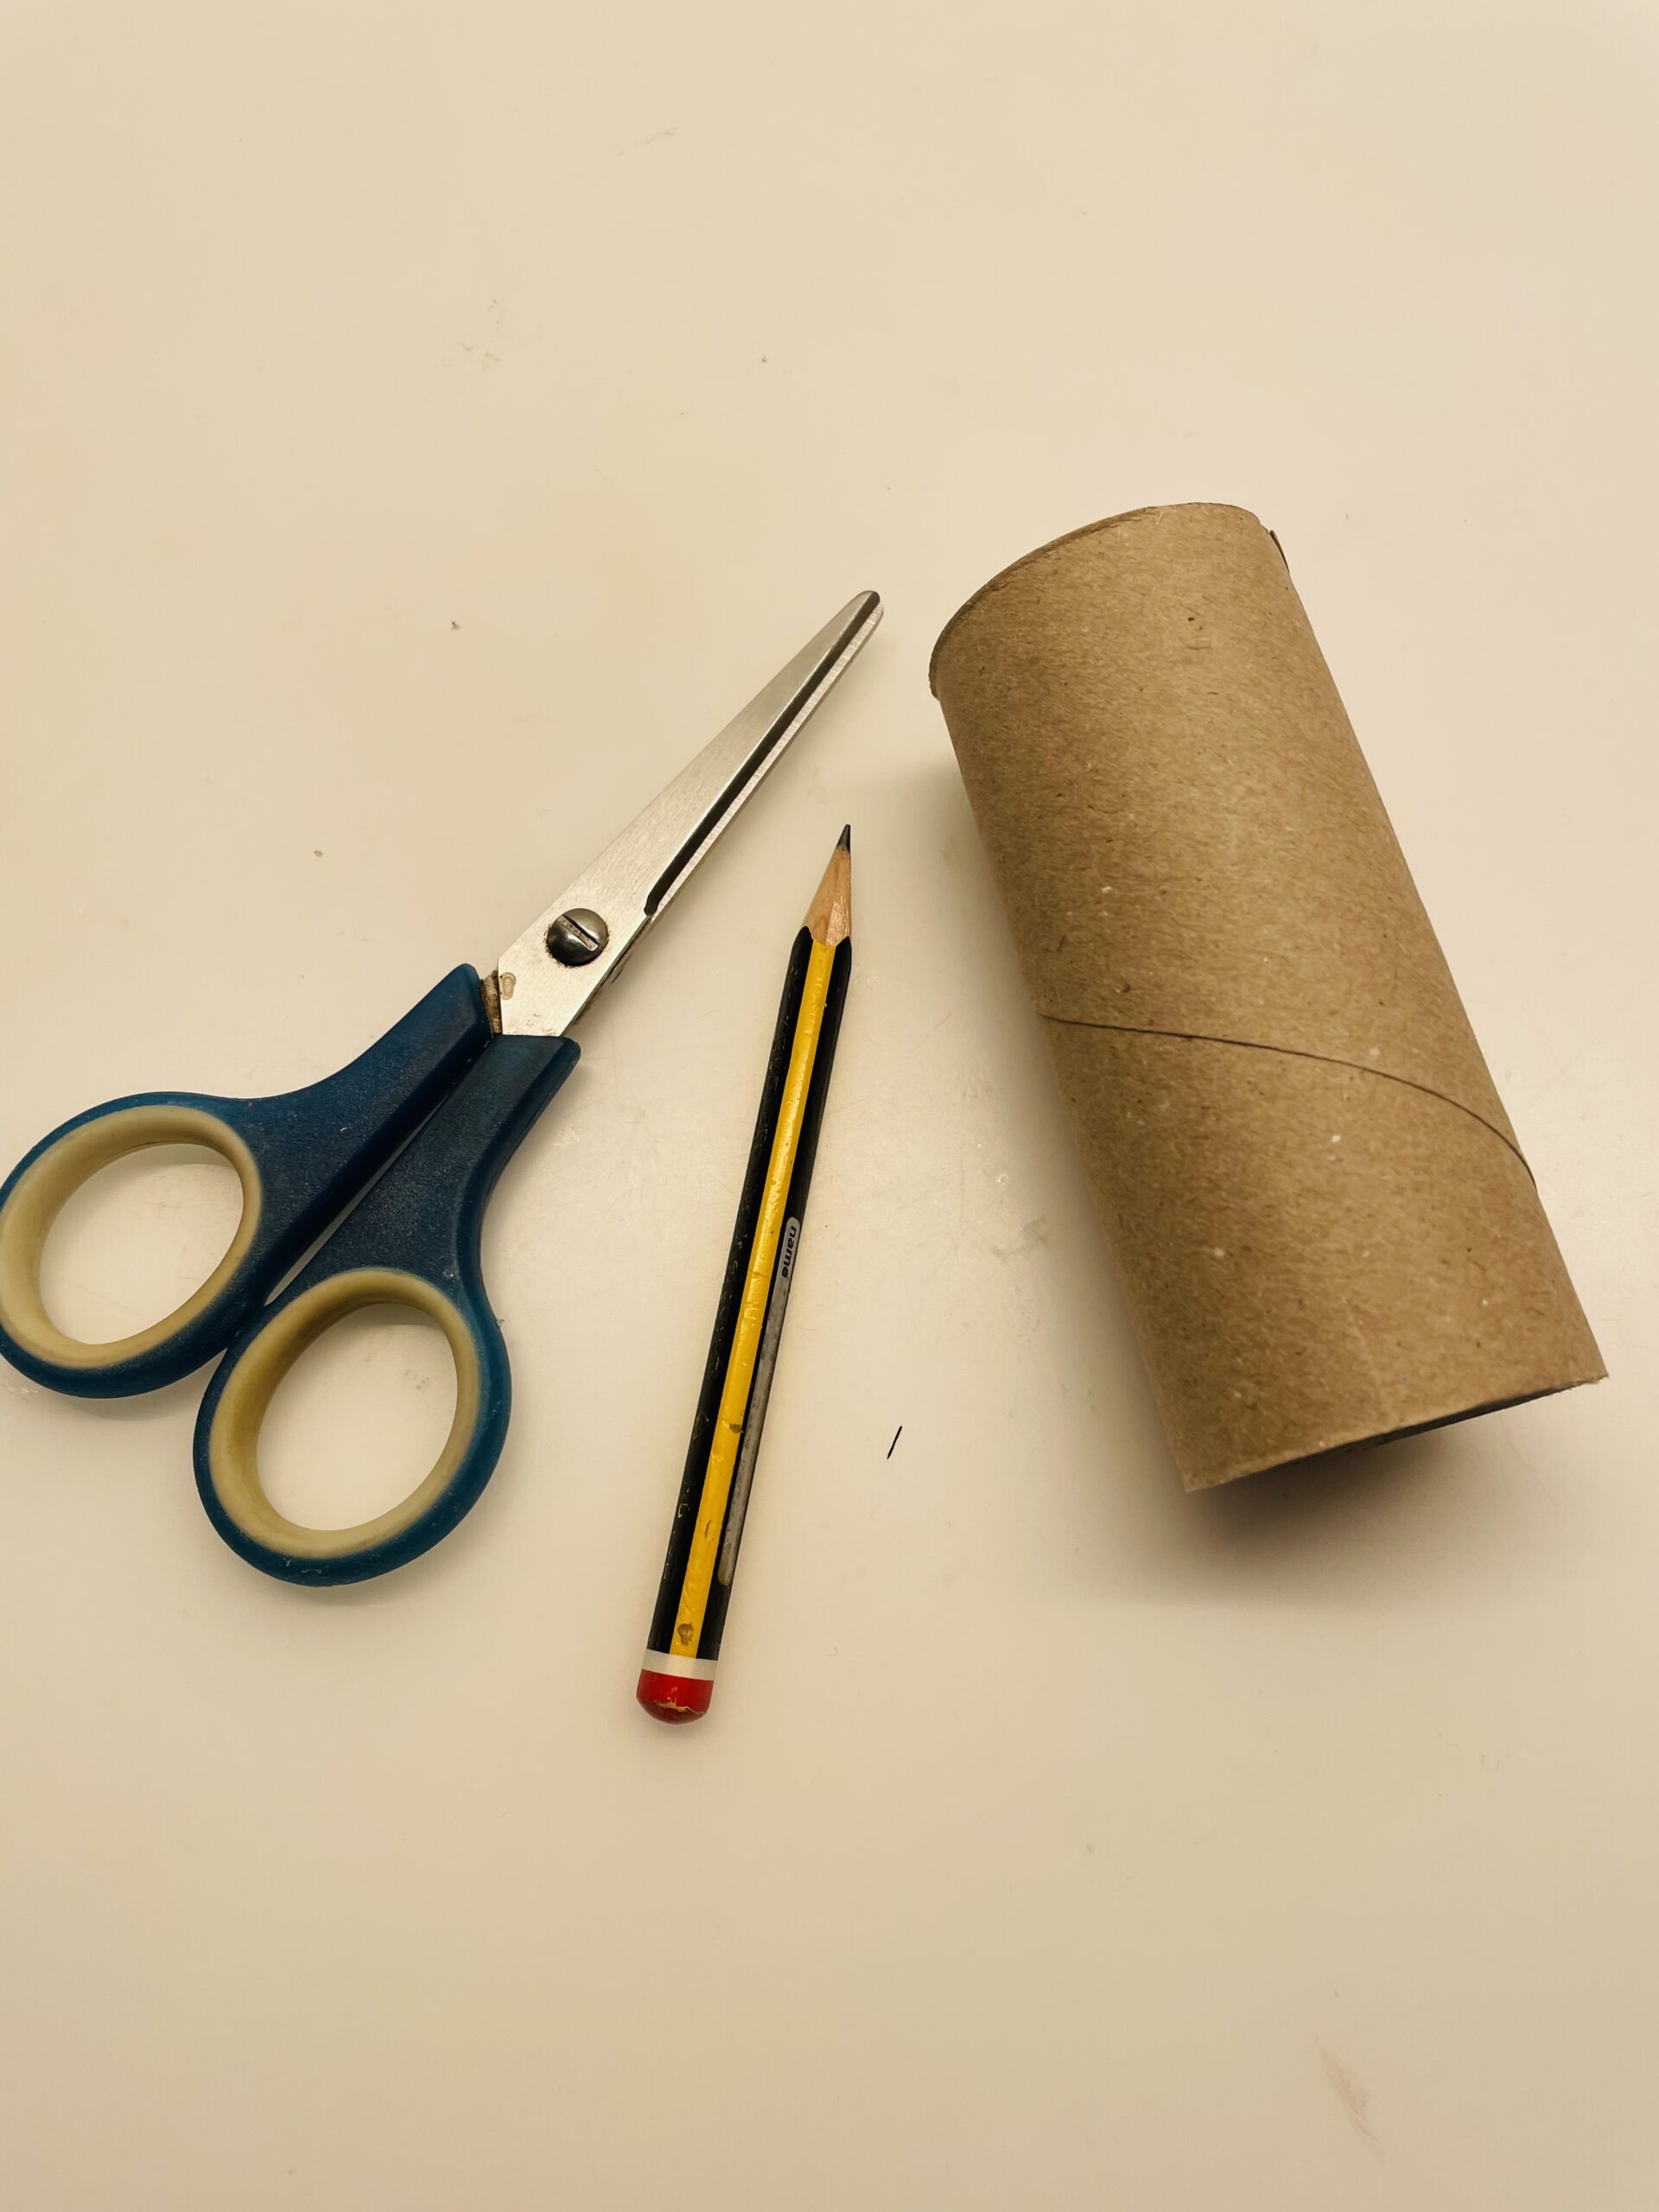
First, prepare a cardboard roll.
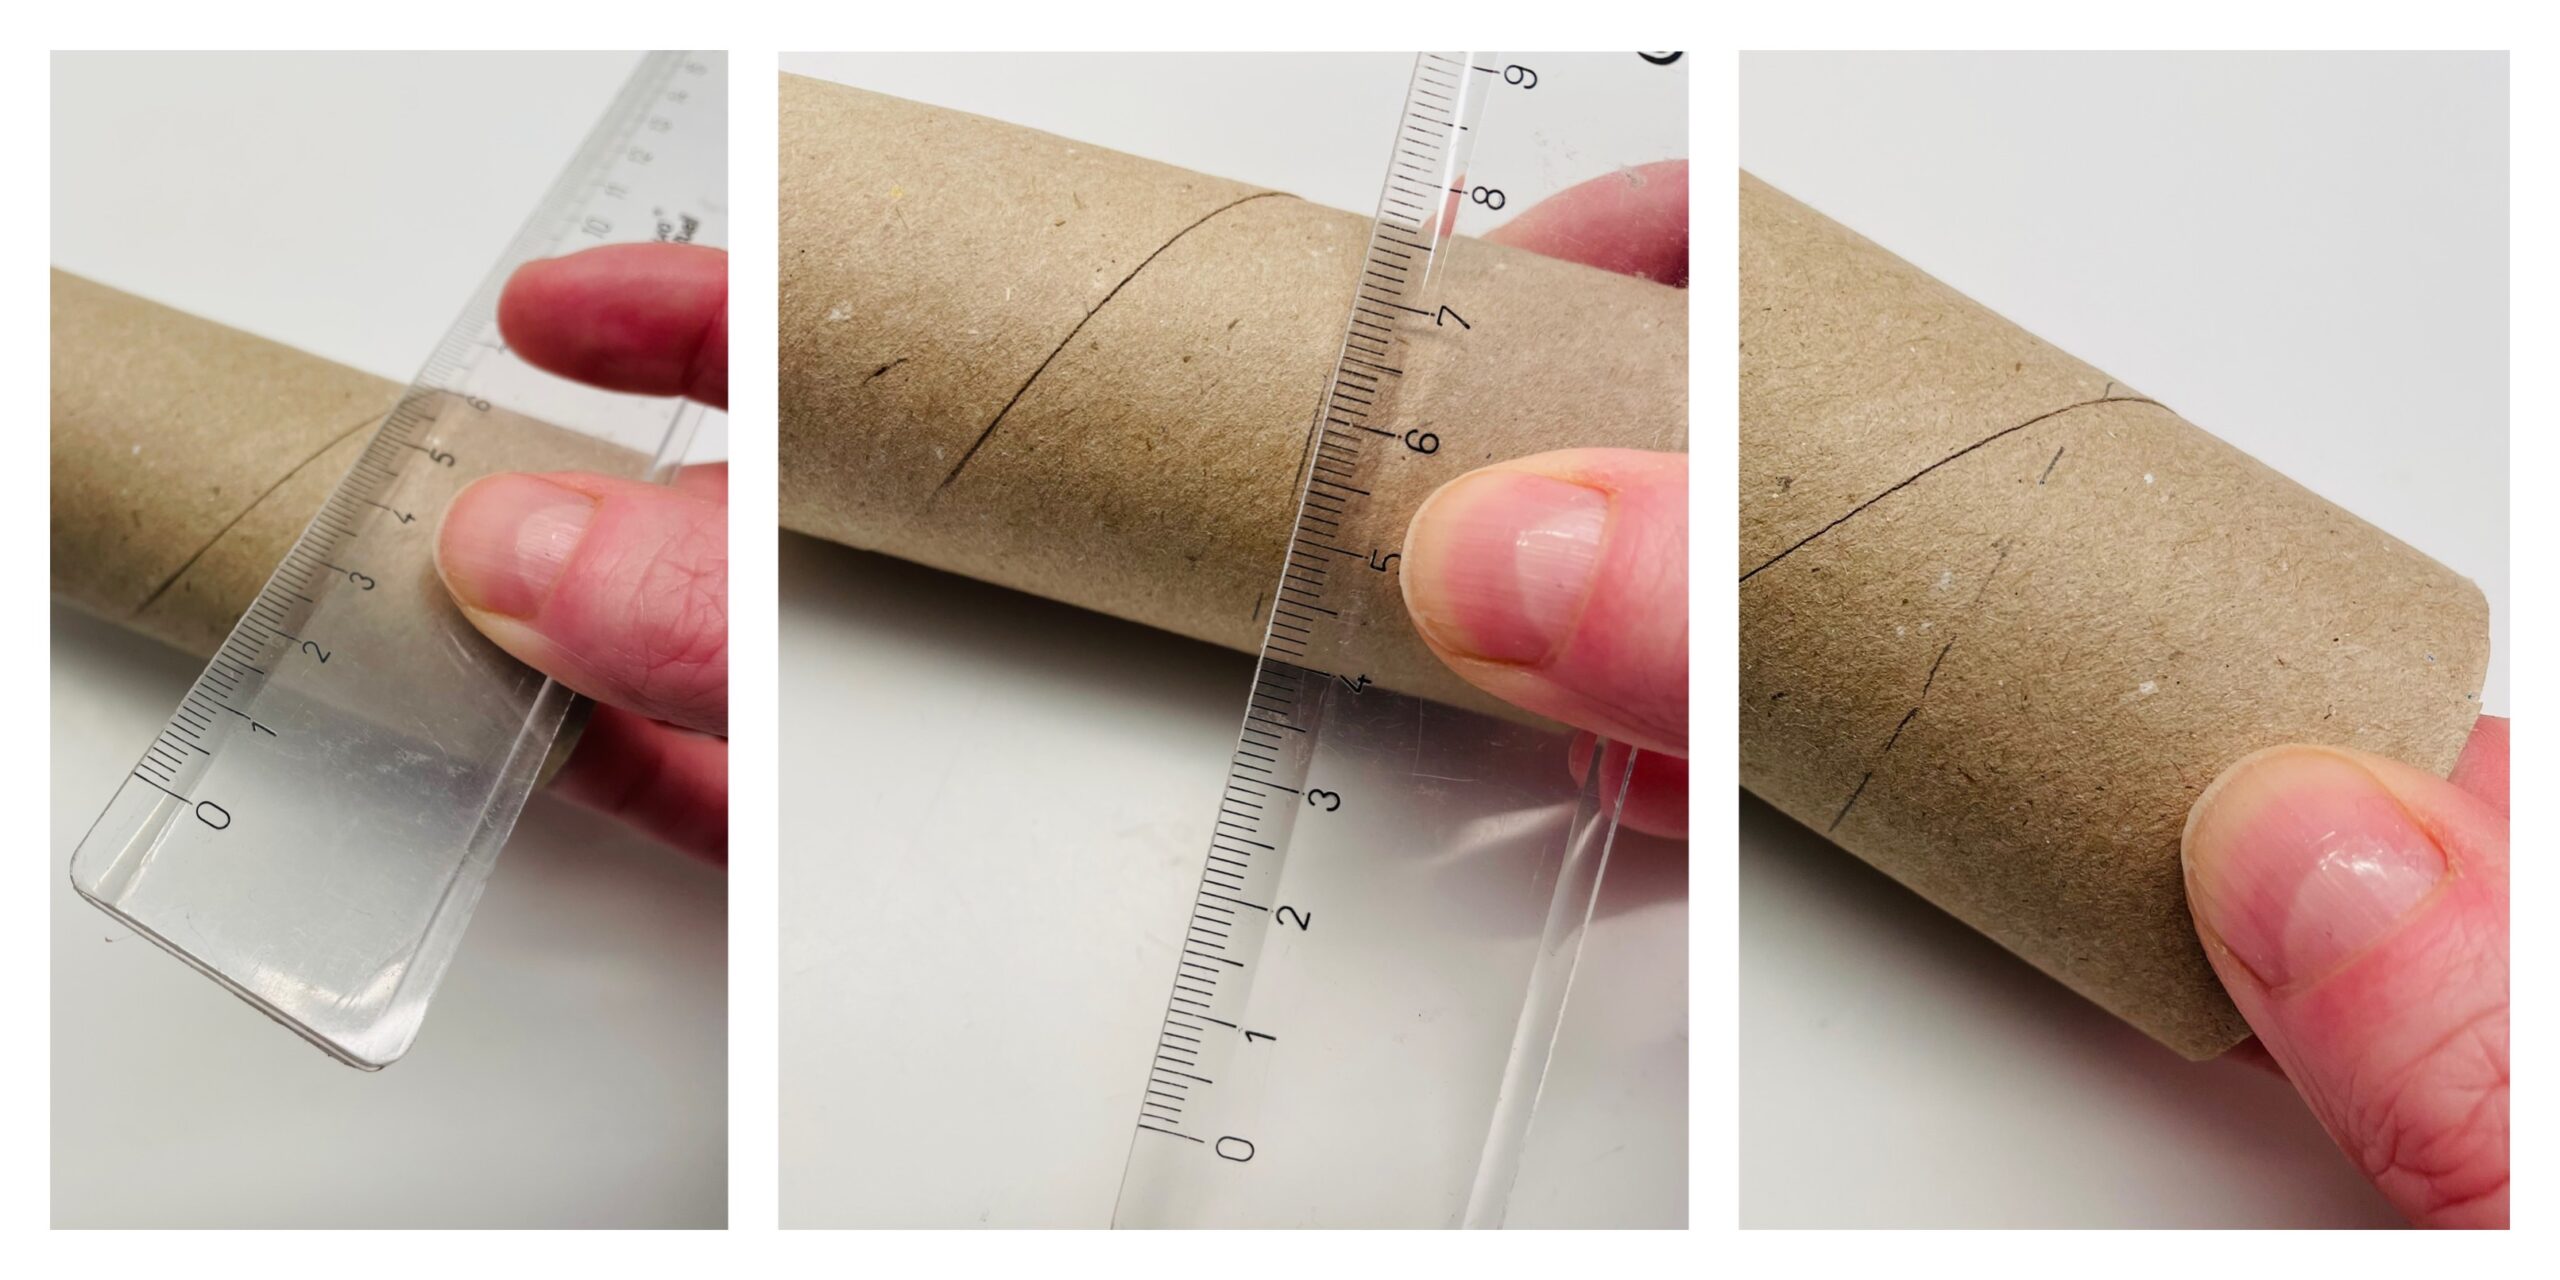
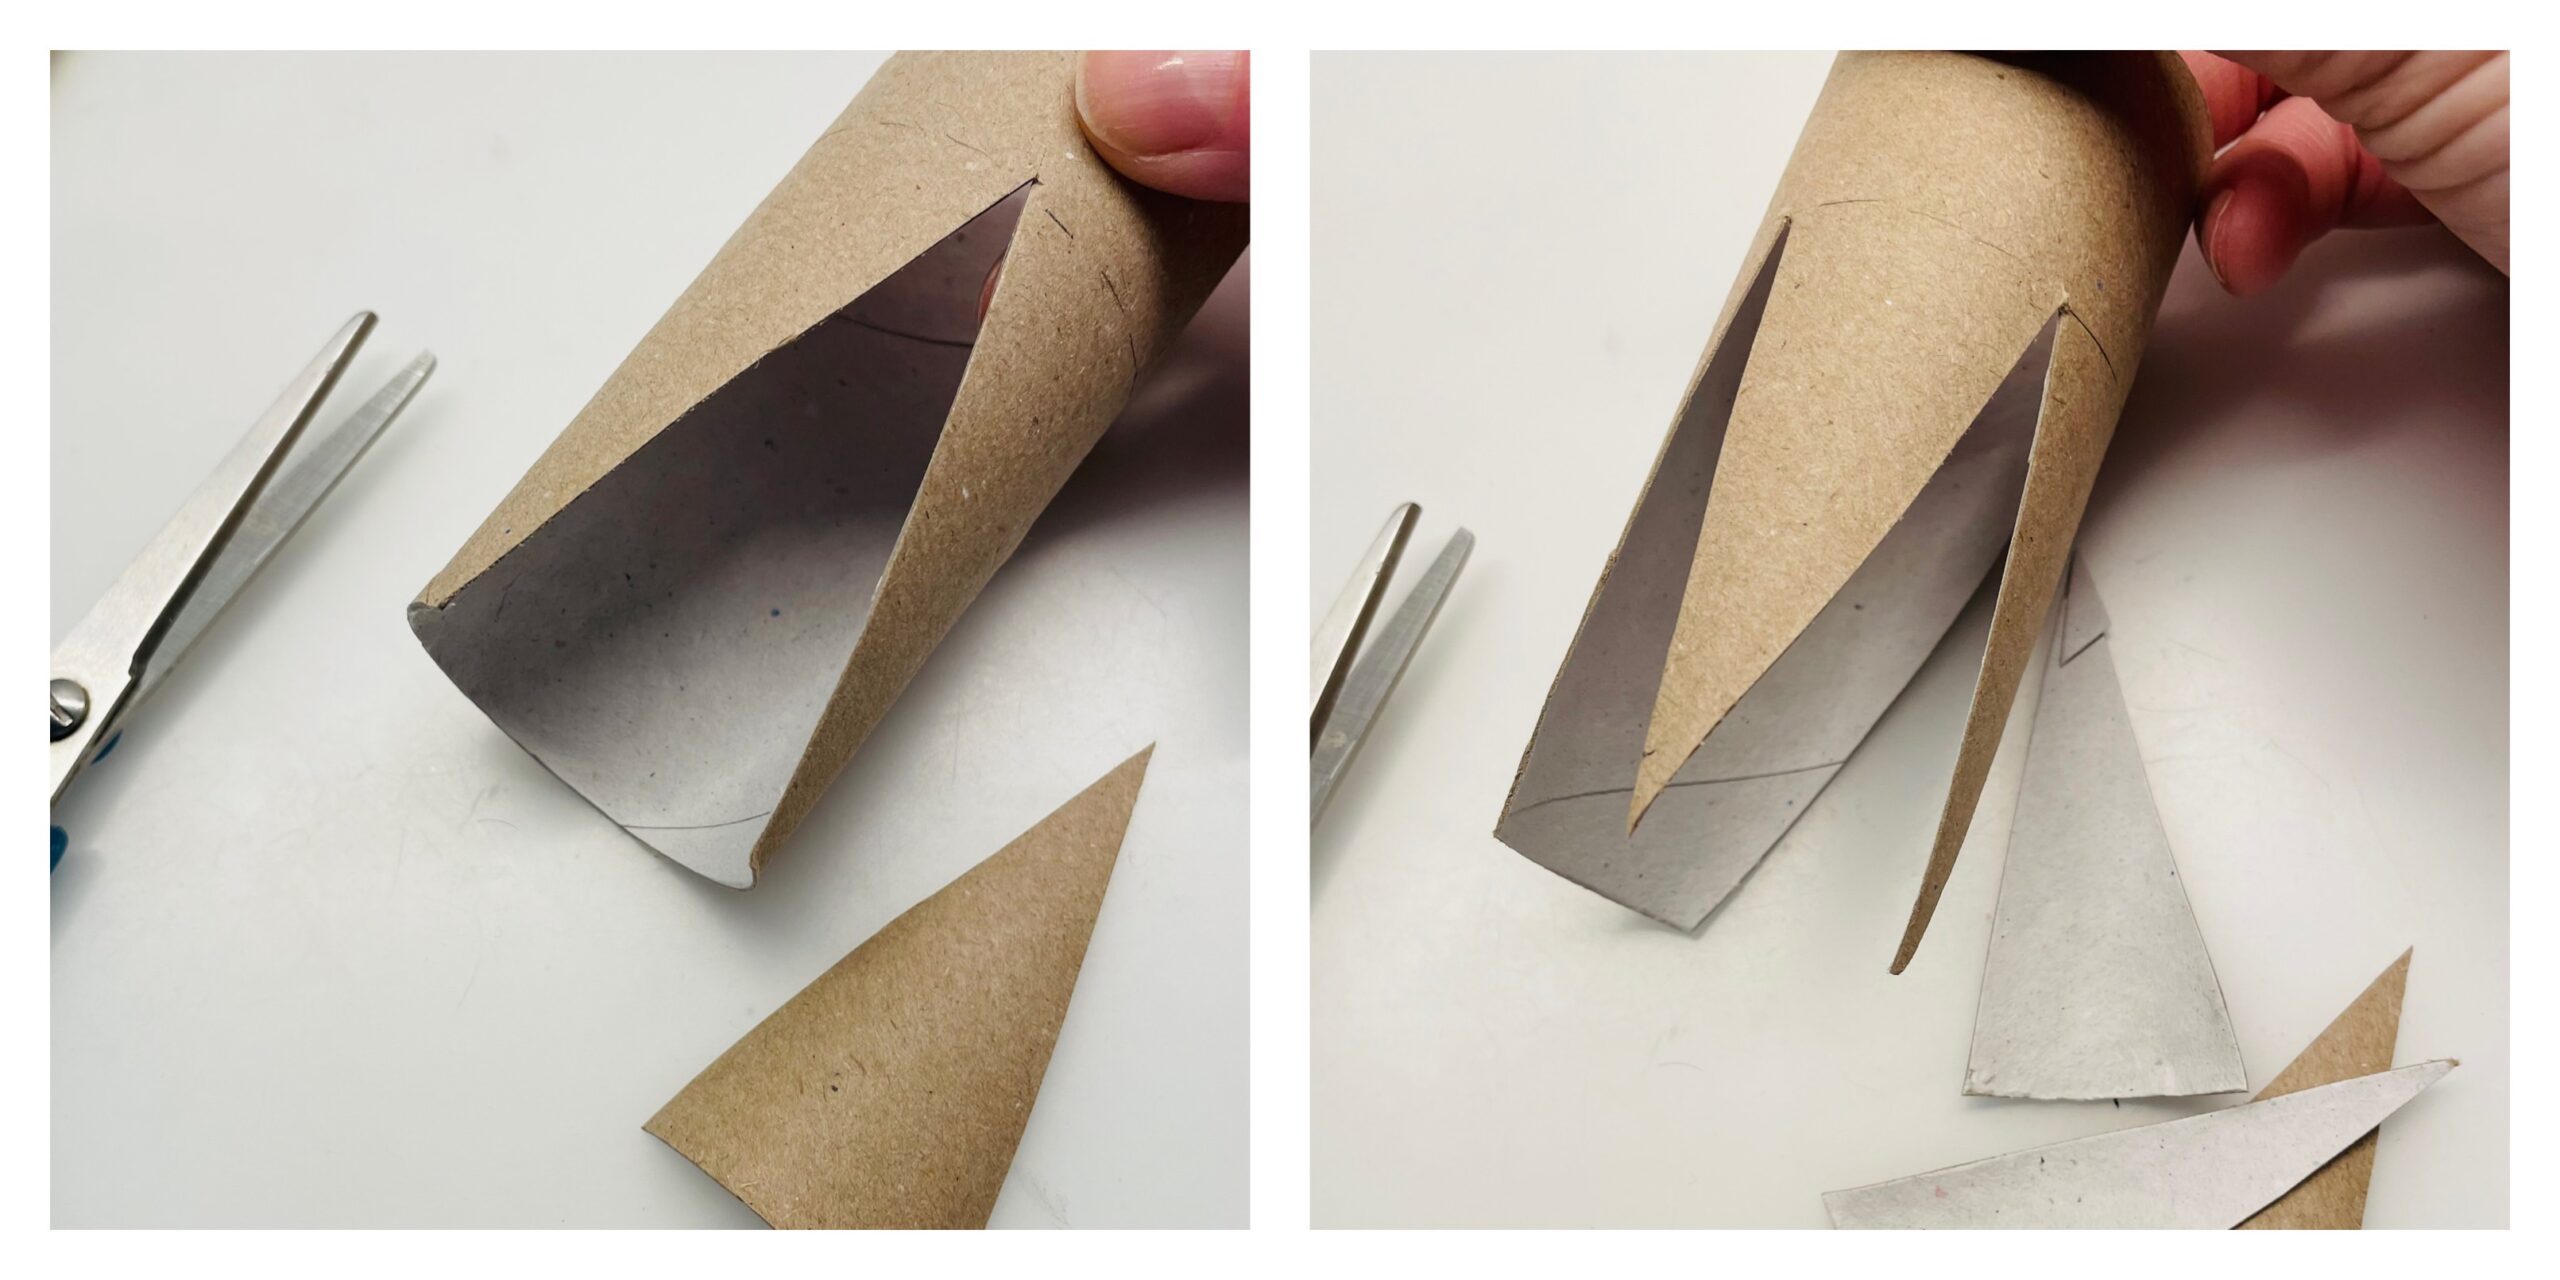
Now you draw a line with a ruler at the bottom around the cardboard roll. This line serves as a marker for the length of the points. So you know how far the points can go down.
Then you cut diagonally from the top down to the marking, so the points are created. At the last point, make sure that it sits in the middle as possible.
Tip: You can also draw the points with a pencil and then cut them out!
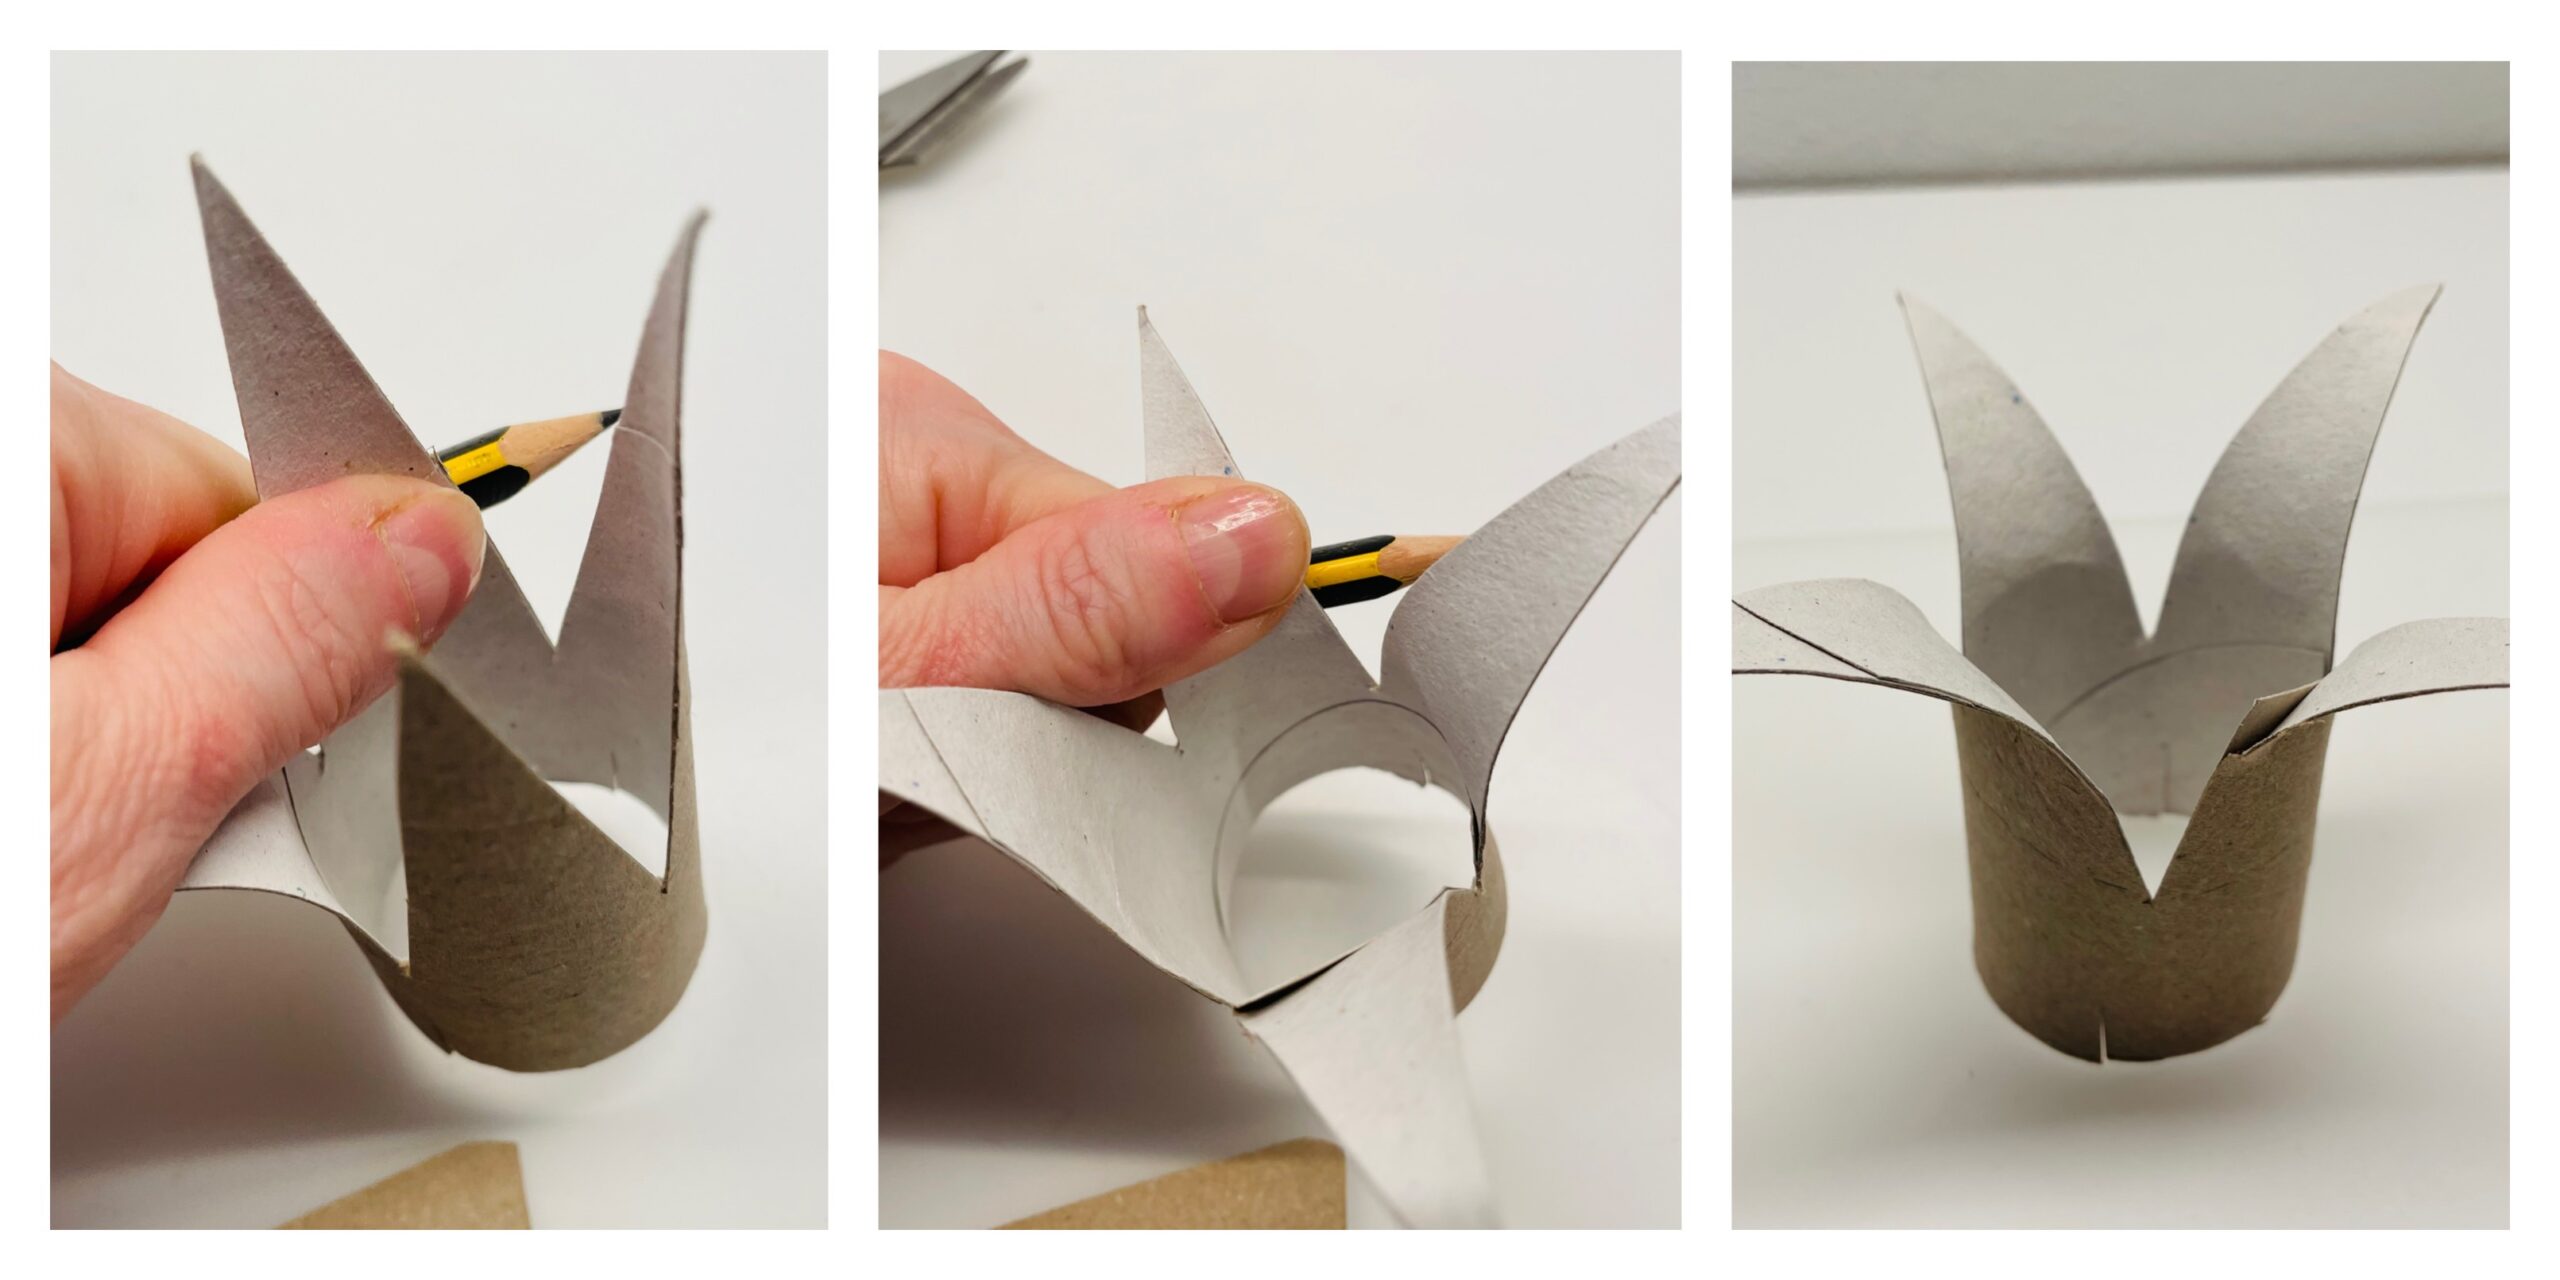
Now you bend each point slightly outwards with a pen. For this, you pull the cardboard over the edge of the pen.
Then cut the cardboard roll from below a small piece. Then clamp the wool into this incision and wrap the lower part of the cardboard roll with it.
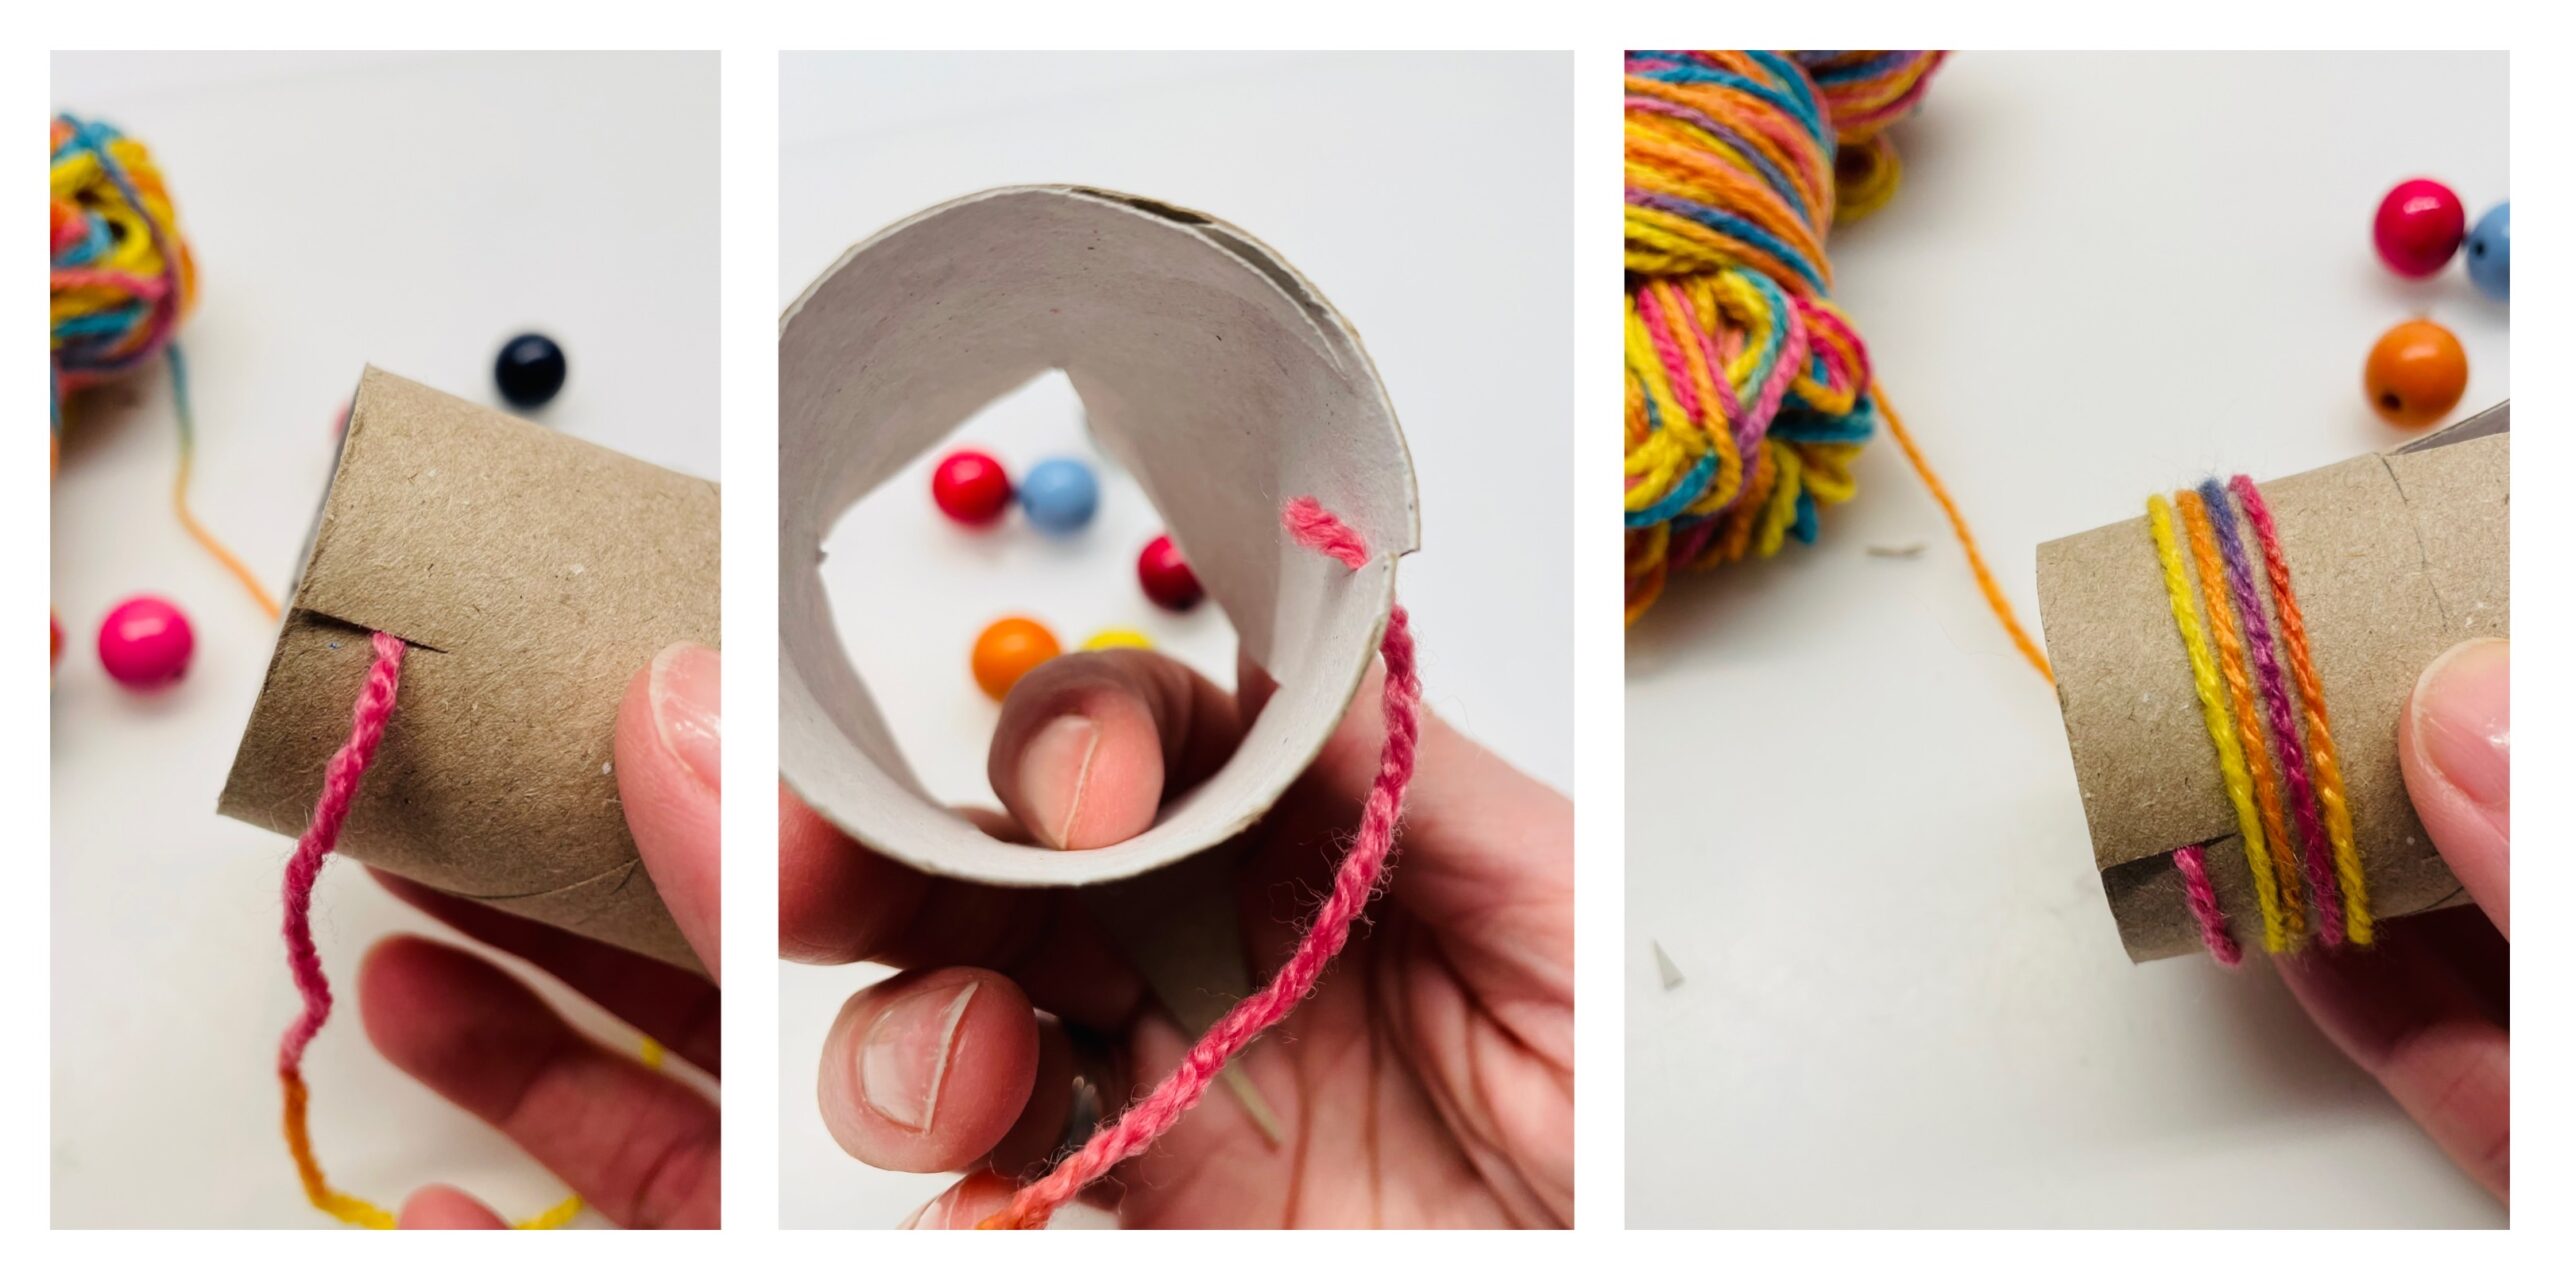
Before you cut off the thread, put it in the existing incisions. Then cut off the wool.

Now you put colorful pearls on the tips of the points. For this, press together the tips slightly and put some glue into the hole of the pearl before you put them on the top.
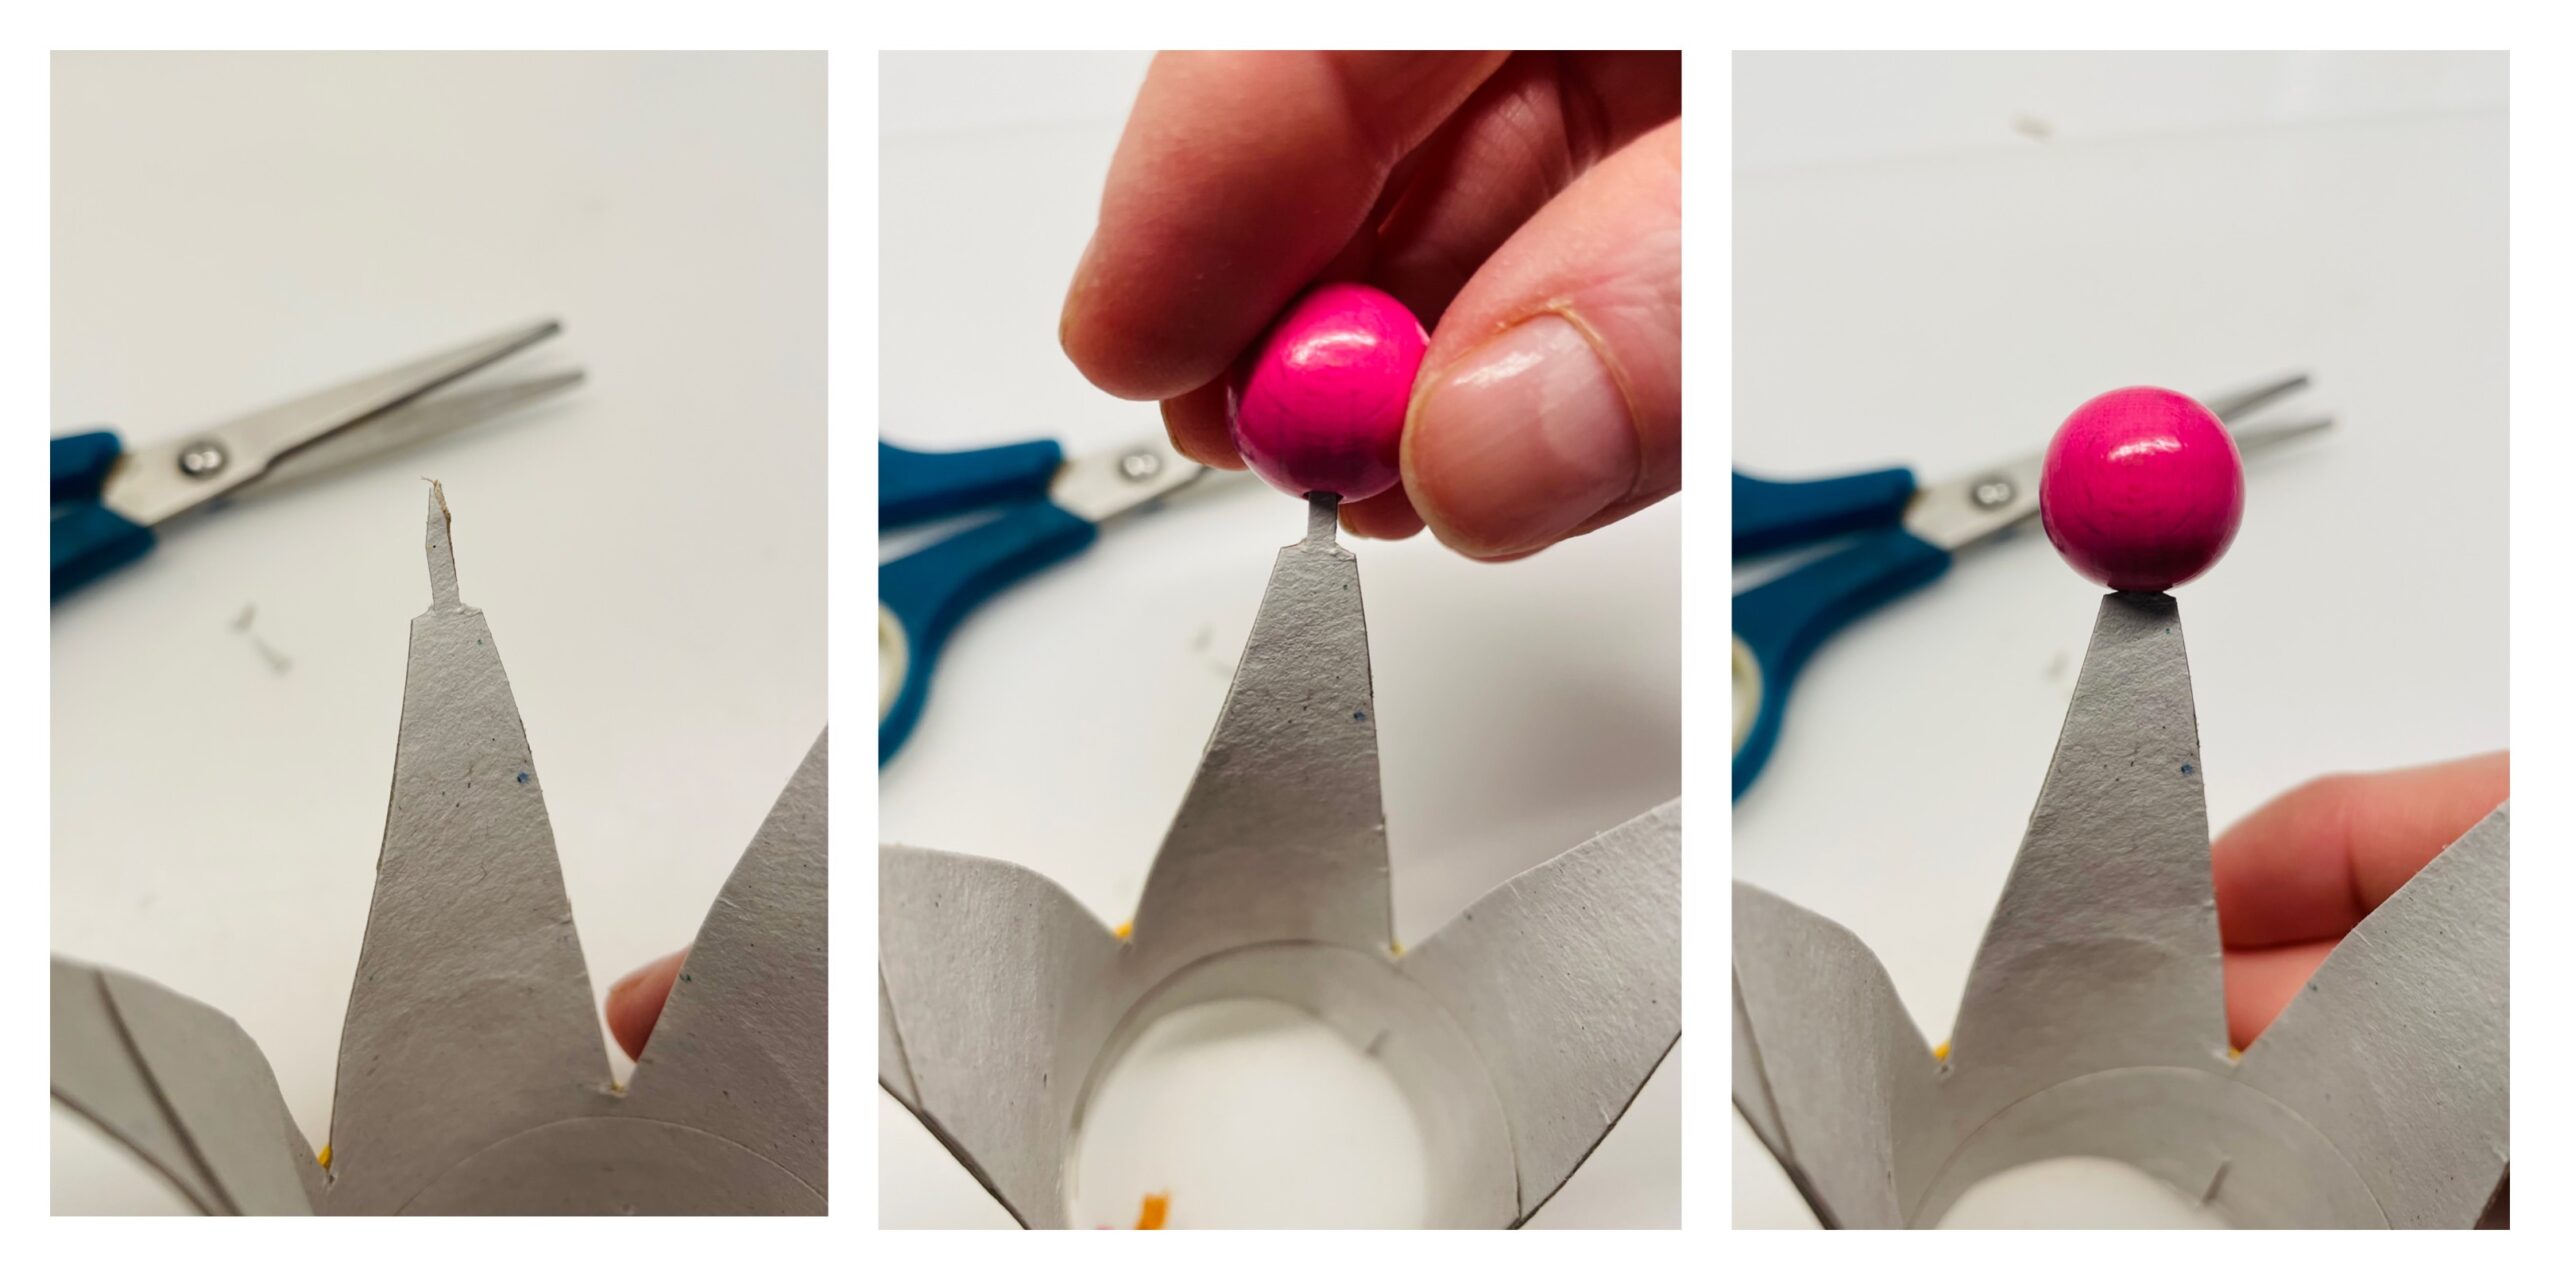
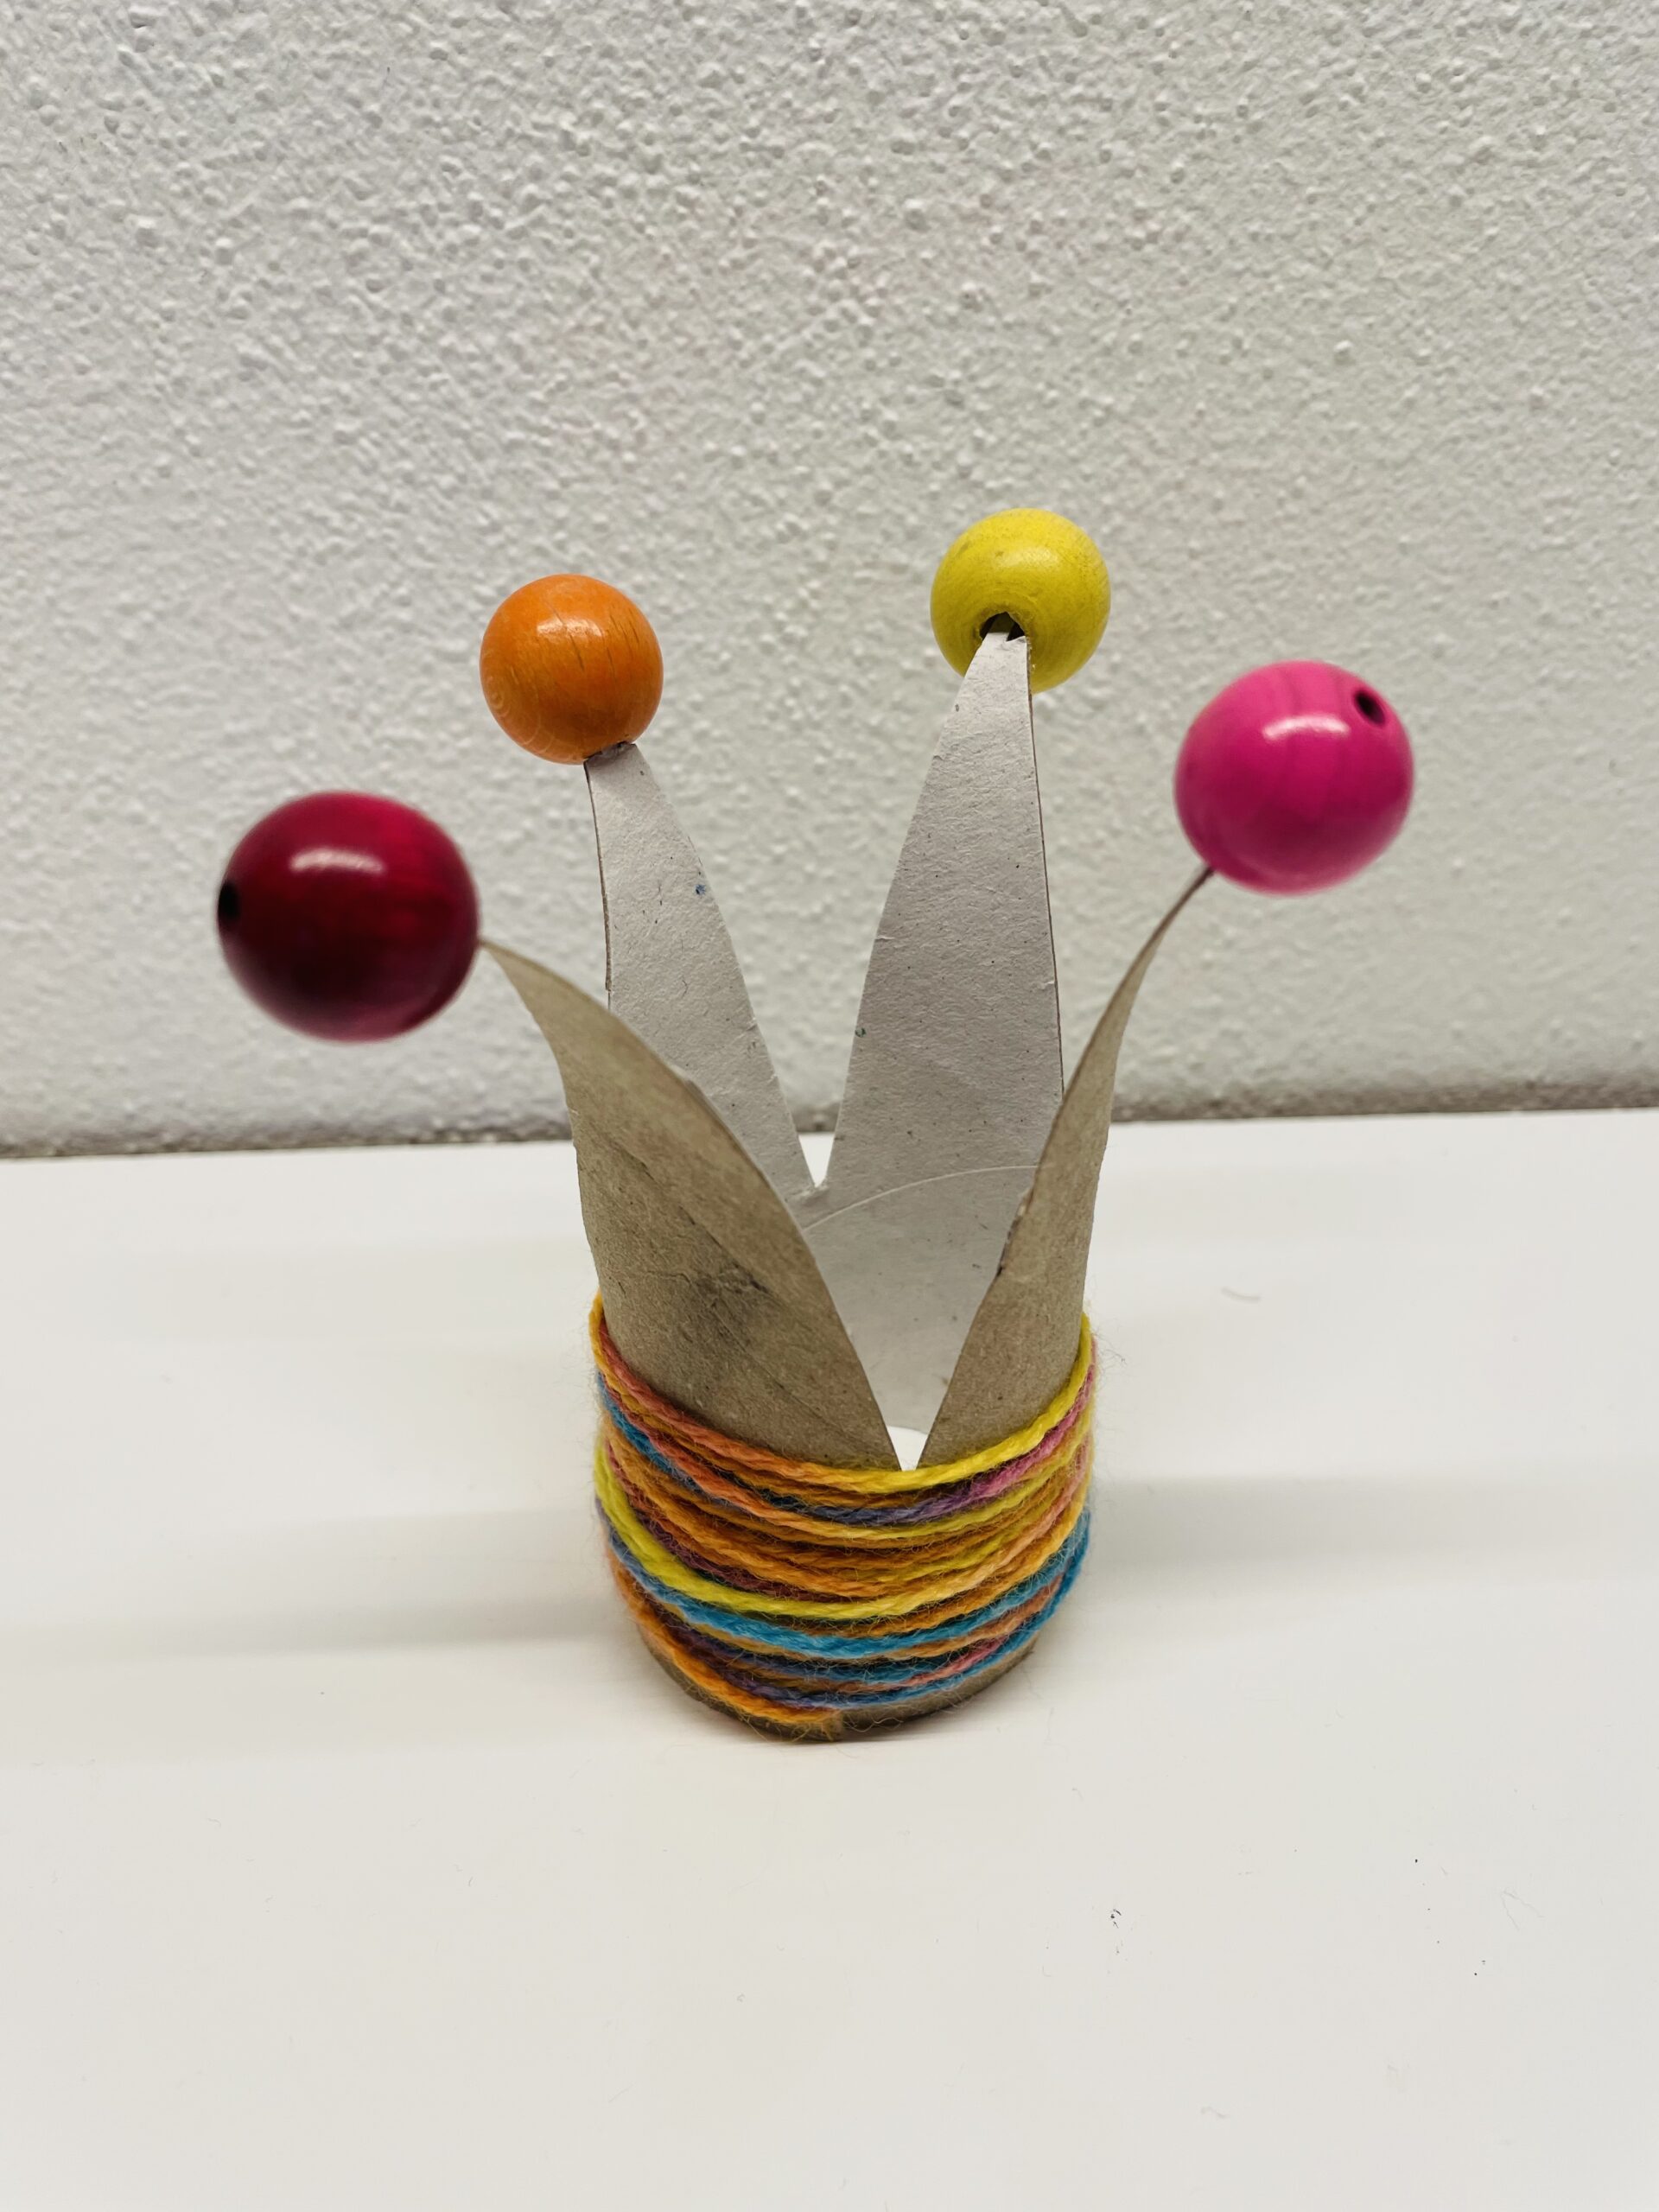
The cardboard-rolling crown is ready.
Decorates the crown from a cardboard roll e.g. on a birthday table.
Have fun doing crafts and celebrating!
Materials
Directions
First, prepare a cardboard roll.
Now you draw a line with a ruler at the bottom around the cardboard roll. This line serves as a marker for the length of the points. So you know how far the points can go down.
Then you cut diagonally from the top down to the marking, so the points are created. At the last point, make sure that it sits in the middle as possible.
Tip: You can also draw the points with a pencil and then cut them out!
Now you bend each point slightly outwards with a pen. For this, you pull the cardboard over the edge of the pen.
Then cut the cardboard roll from below a small piece. Then clamp the wool into this incision and wrap the lower part of the cardboard roll with it.
Before you cut off the thread, put it in the existing incisions. Then cut off the wool.
Now you put colorful pearls on the tips of the points. For this, press together the tips slightly and put some glue into the hole of the pearl before you put them on the top.
The cardboard-rolling crown is ready.
Decorates the crown from a cardboard roll e.g. on a birthday table.
Have fun doing crafts and celebrating!
Follow us on Facebook , Instagram and Pinterest
Don't miss any more adventures: Our bottle mail