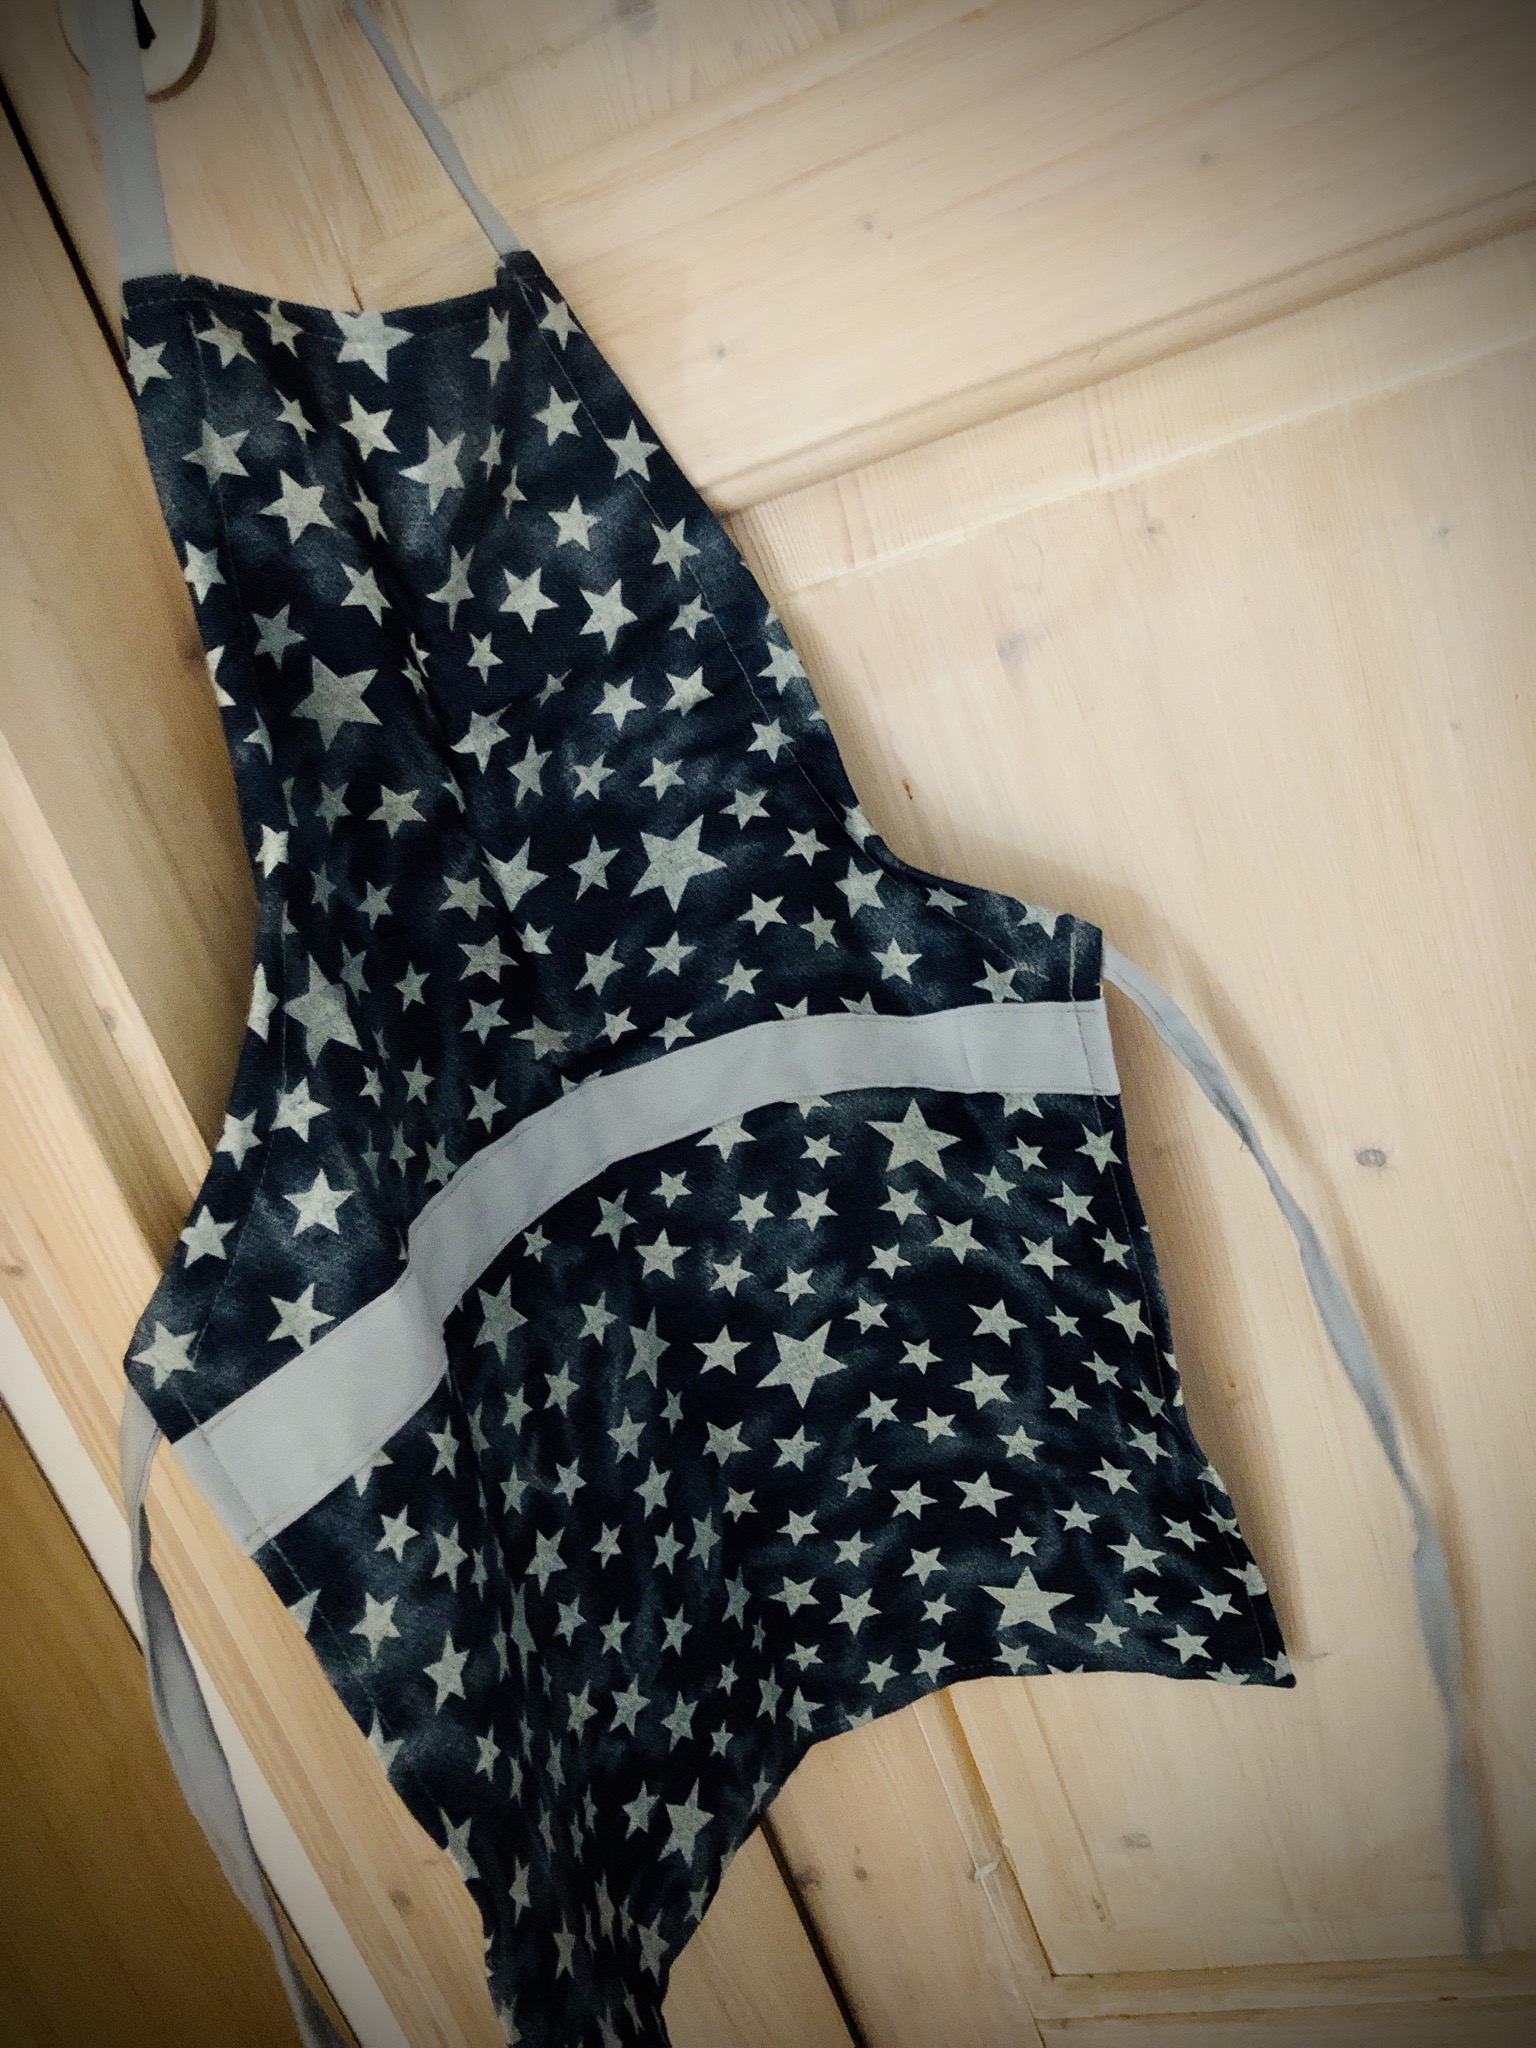
Sew children's apron

AdventurerKatzi
Rating5.09.4 thousand times & (3) DifficultyAdvanced

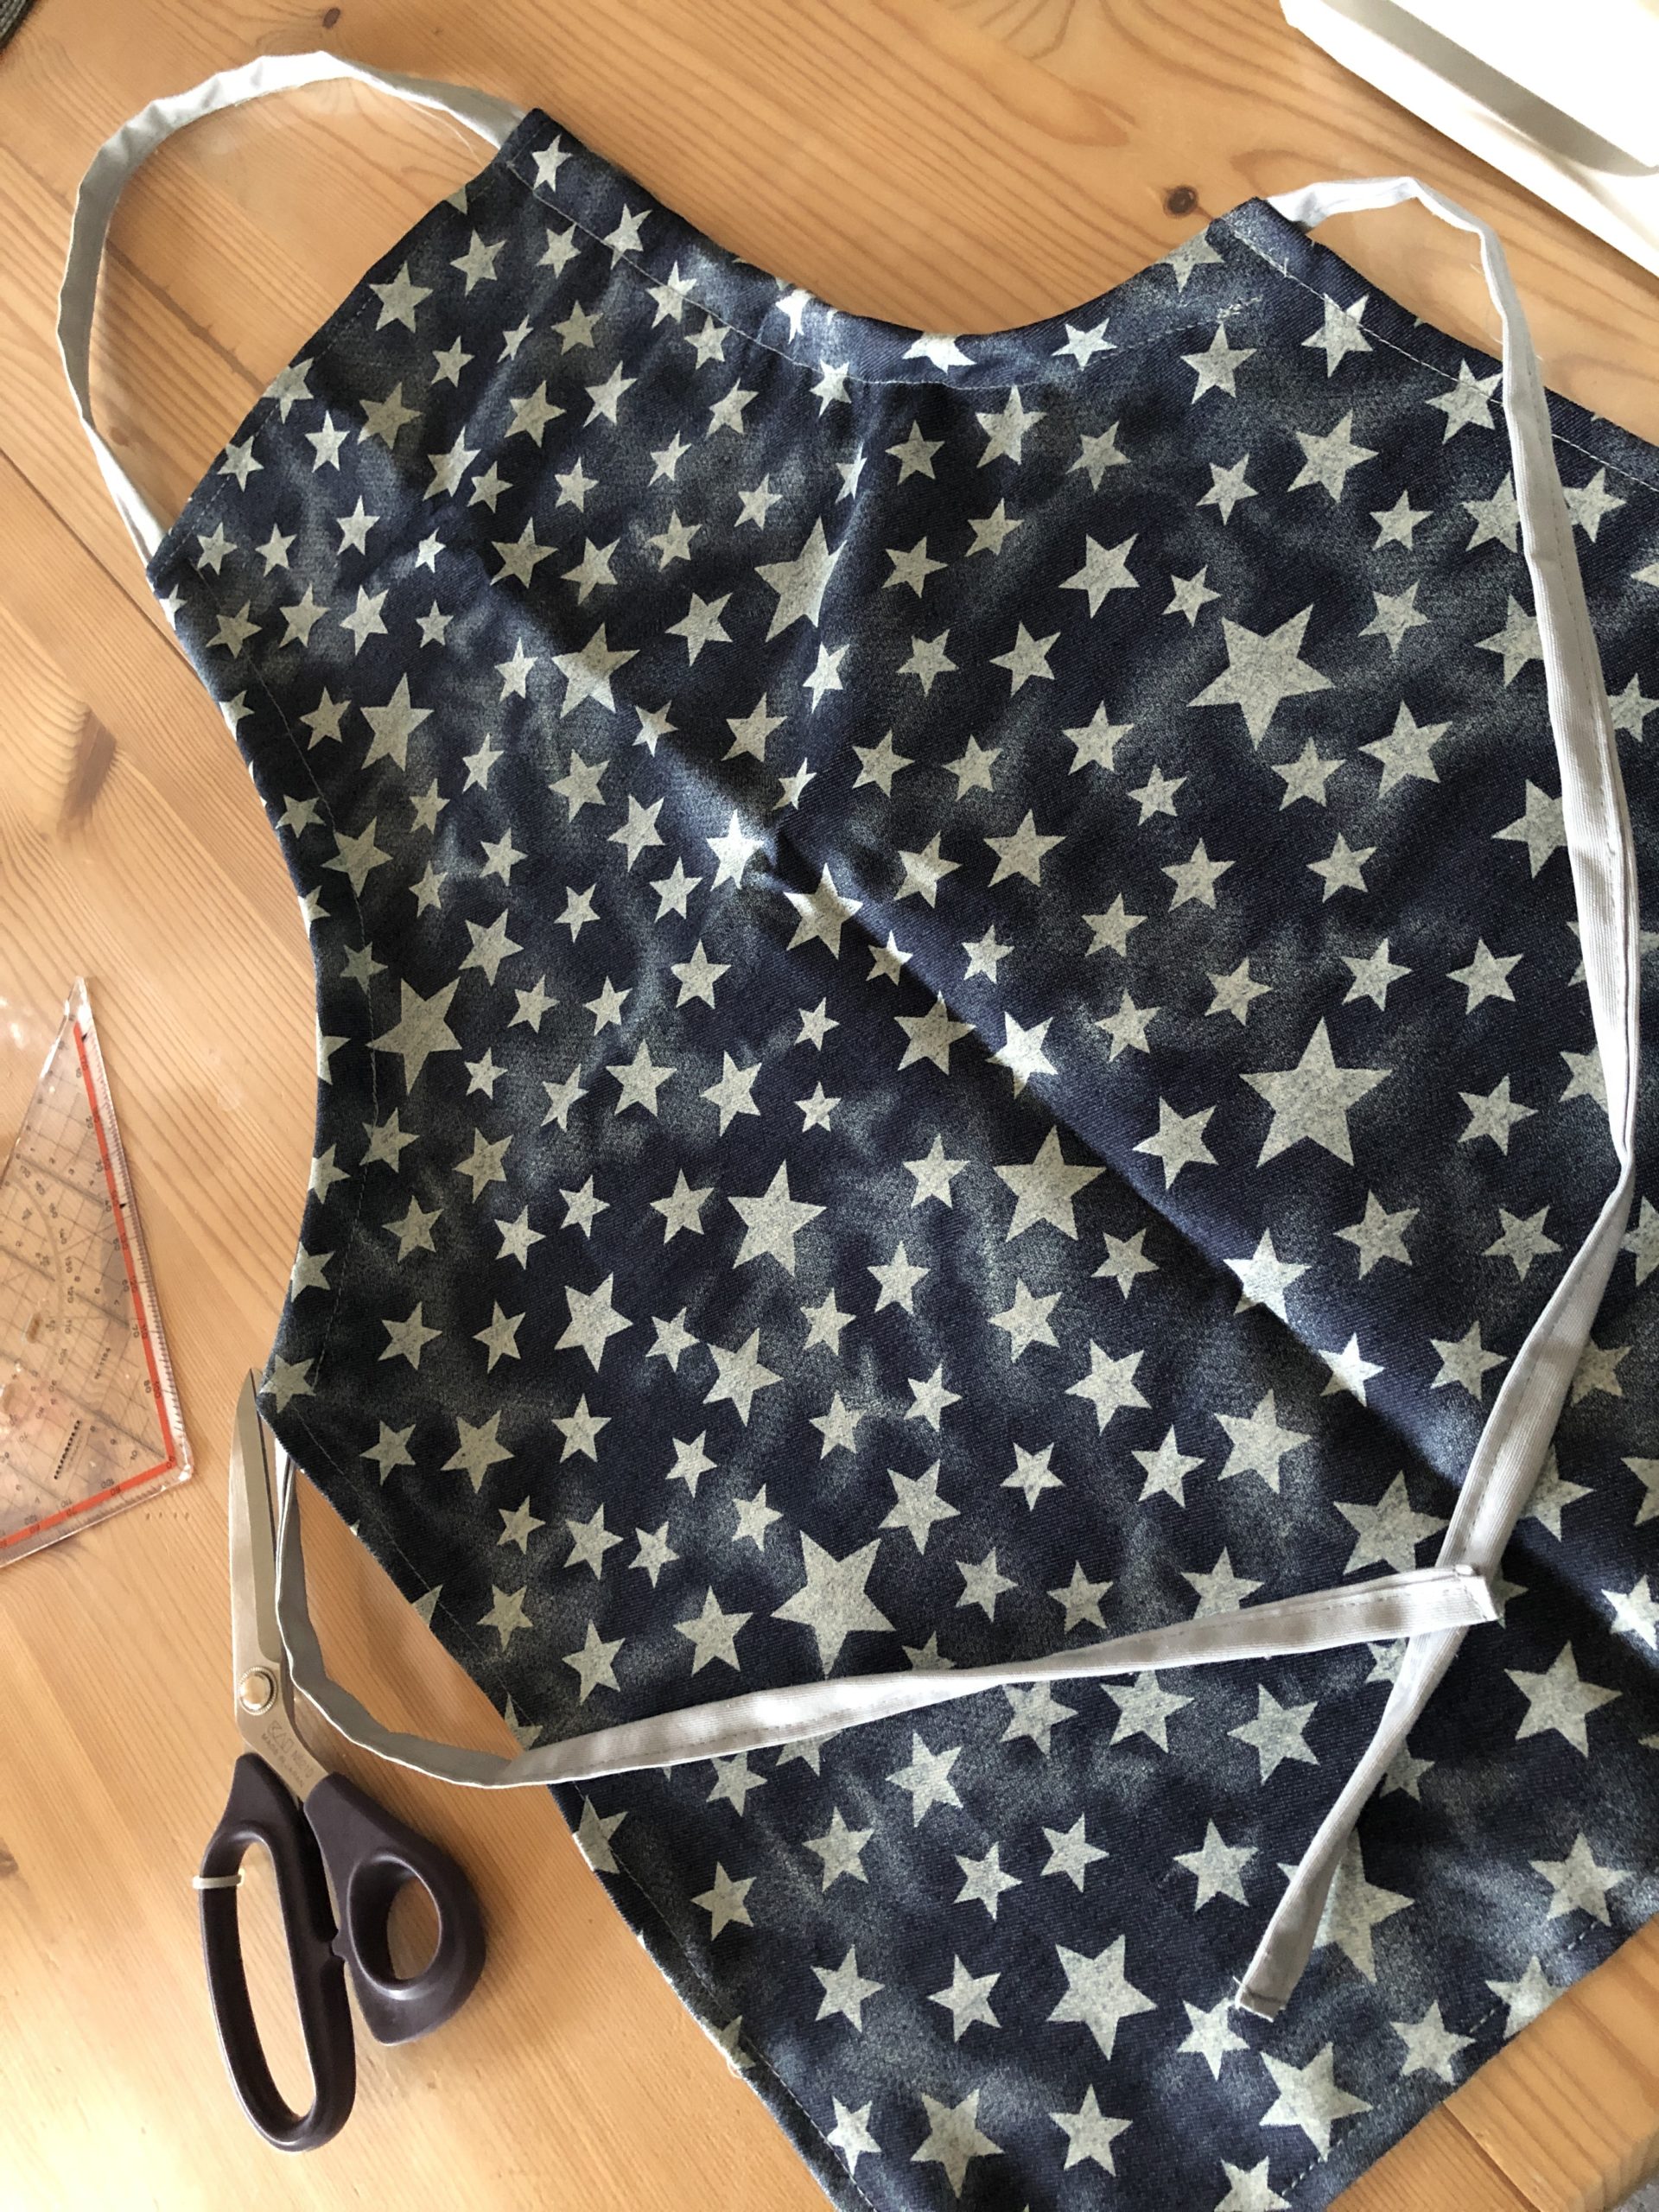
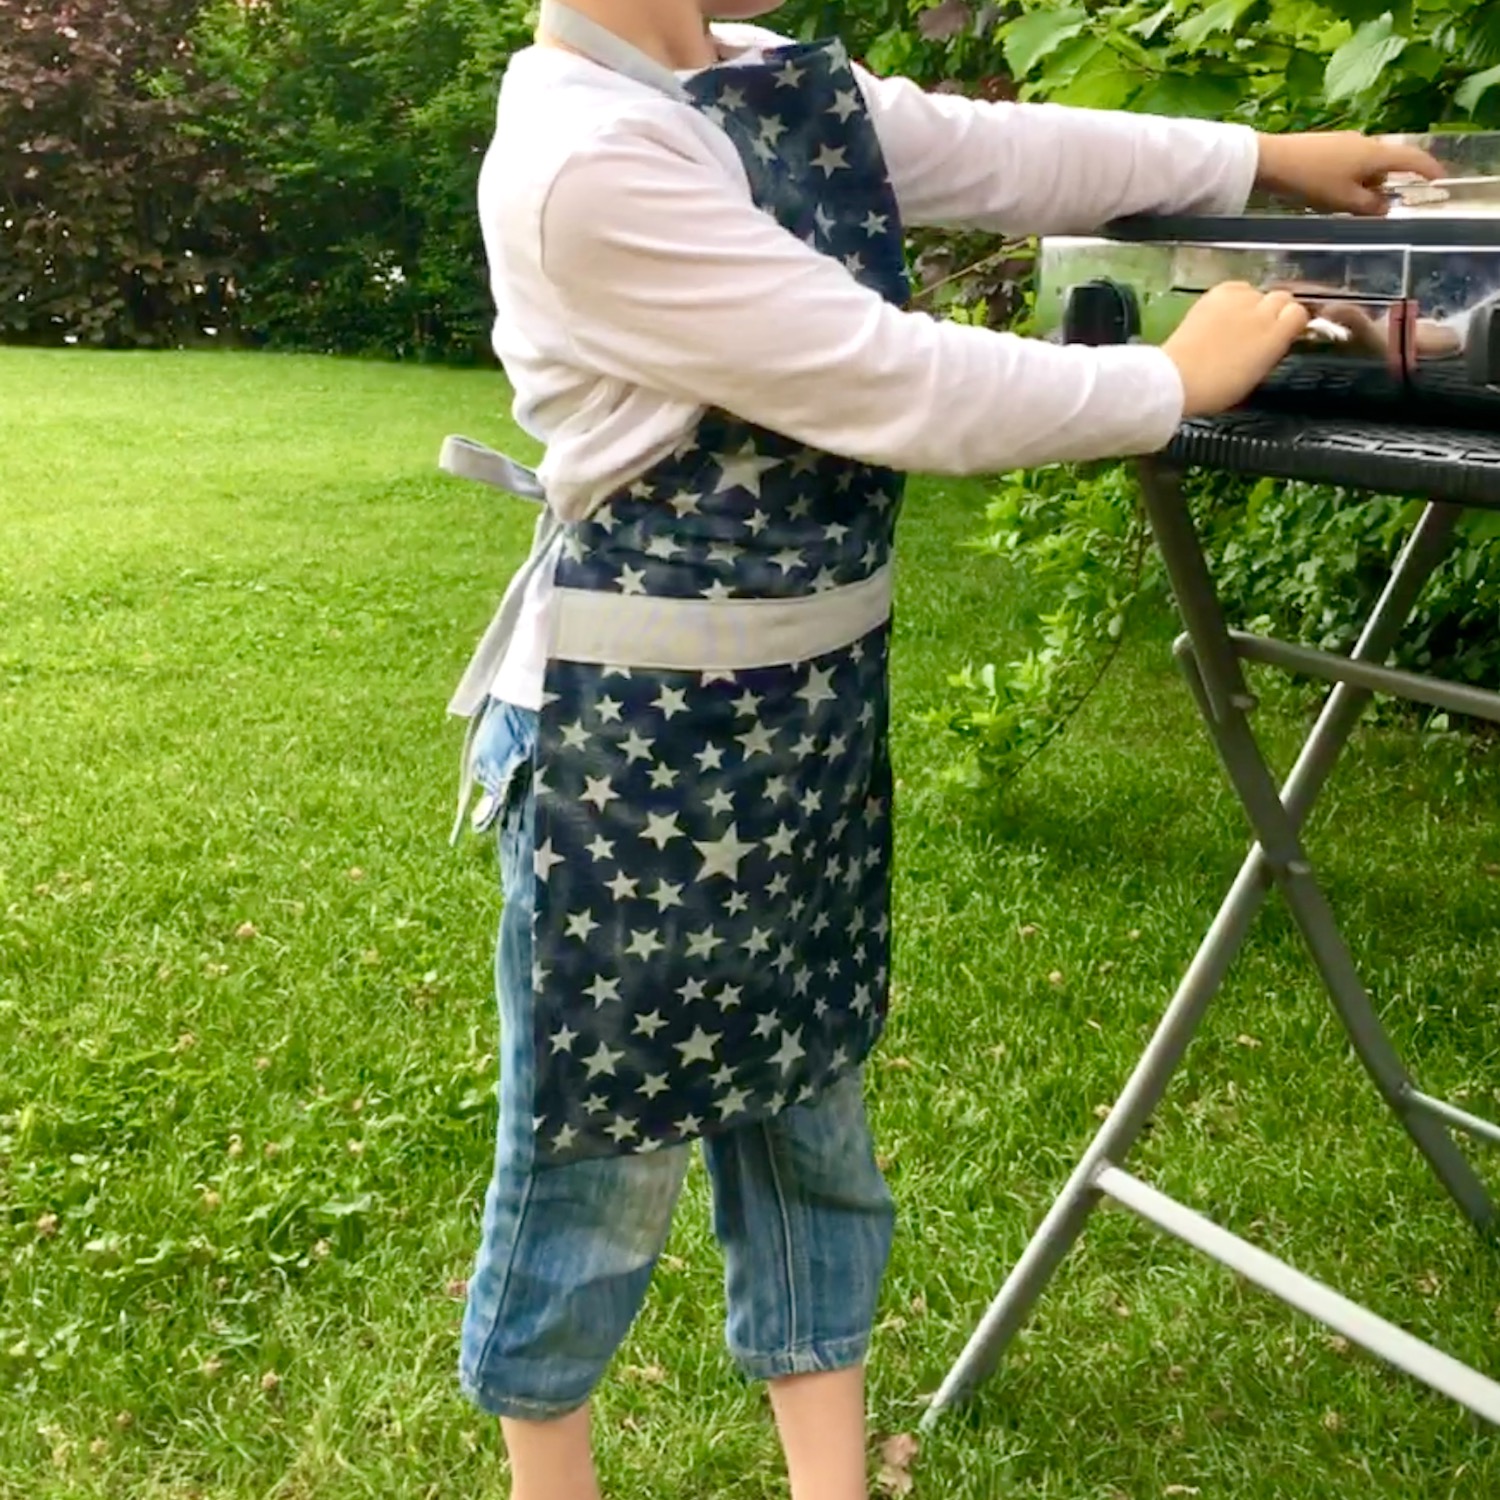
Especially when helping in the kitchen, children want to look like the big cooks or bakers. That's why I have a great star-cooking cook apron for you today!
In a separate offer, there is the suitable Cooking cap! Just look inside...
The size is suitable for children from about 4-7 years.

Media Education for Kindergarten and Hort

Kind bastelt eine Rassel mit dem Navi
The Adventure Navi, the app for DIY projects, enables media education for the youngest.

Relief in everyday life, targeted promotion of individual children, independent learning and - without any pre-knowledge already usable by the youngest!


Titelbild zur Bastel- und DIY-Idee für Kinder '(229) Kinder-Kochschürze nähen'
Material for1 Child
Prep Time10 min.Adv. Time30 min.Total Time40 min.
 2 Applicable Substances
  Cut Pattern
 1 Fabric shears + paper shears
 Pins and pins
 1 Pen
 1 Ruler
 1 Sewing machine
 Thread
Substance sizes:
 Apron fabric (stars): 46 cm x 60 cm46 cm x 60 cm
 Volume: 110 cm x 4.50 cm
 Volume: 55 cm x 4.50 cm
 Band: 50 cm x 7,50 cm
1

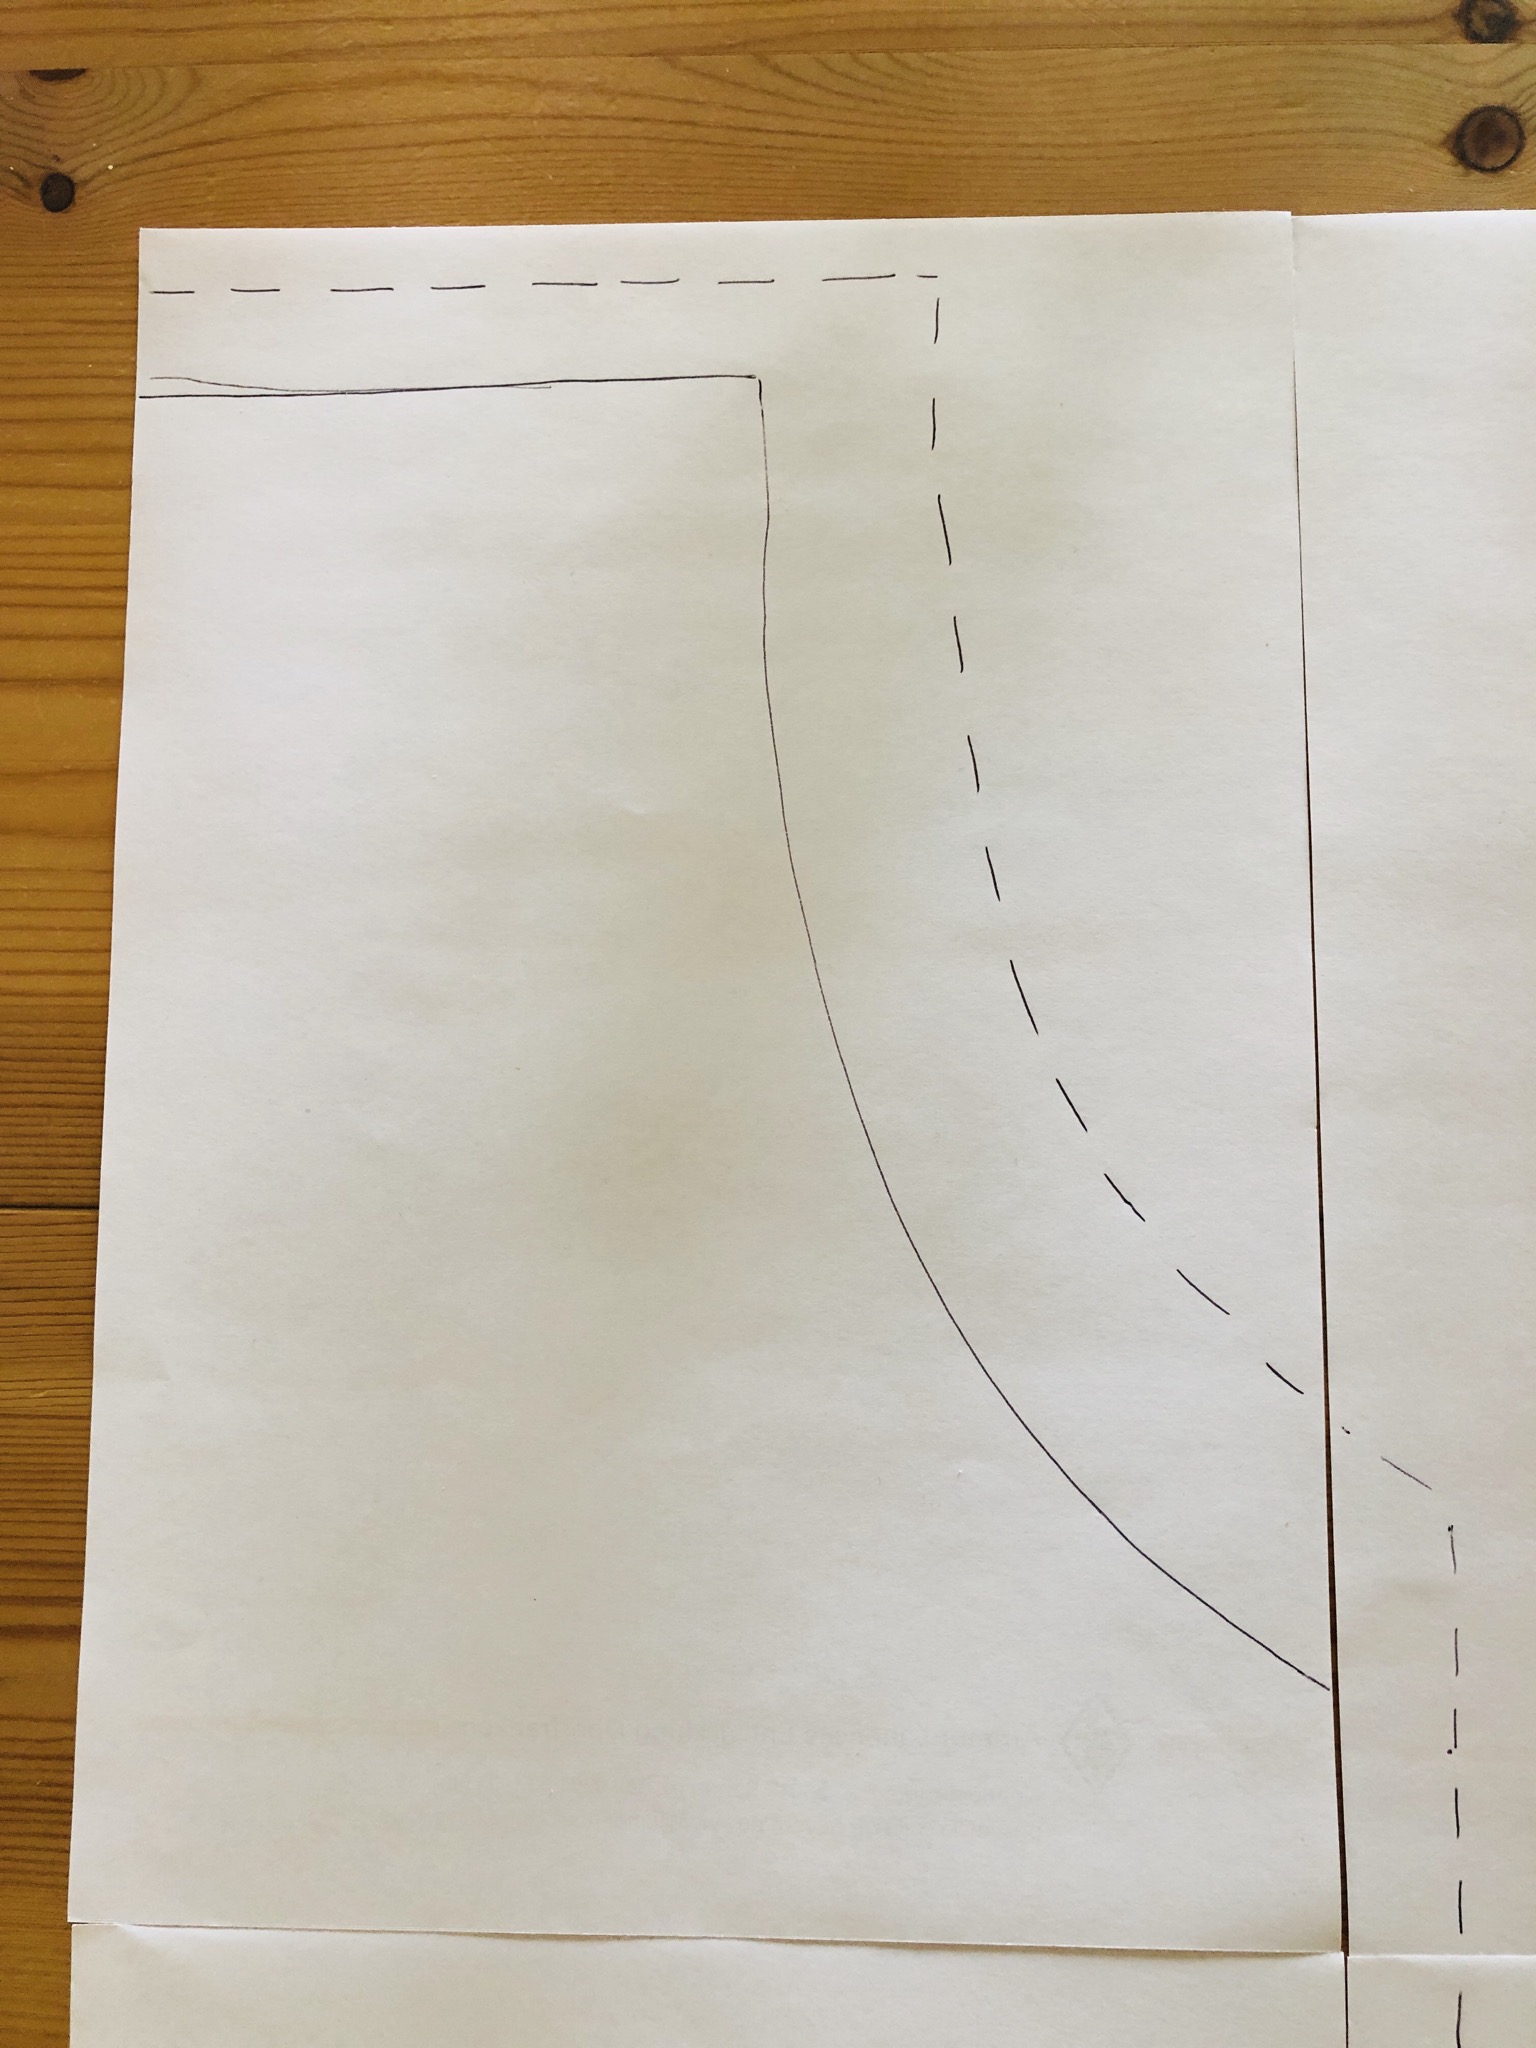
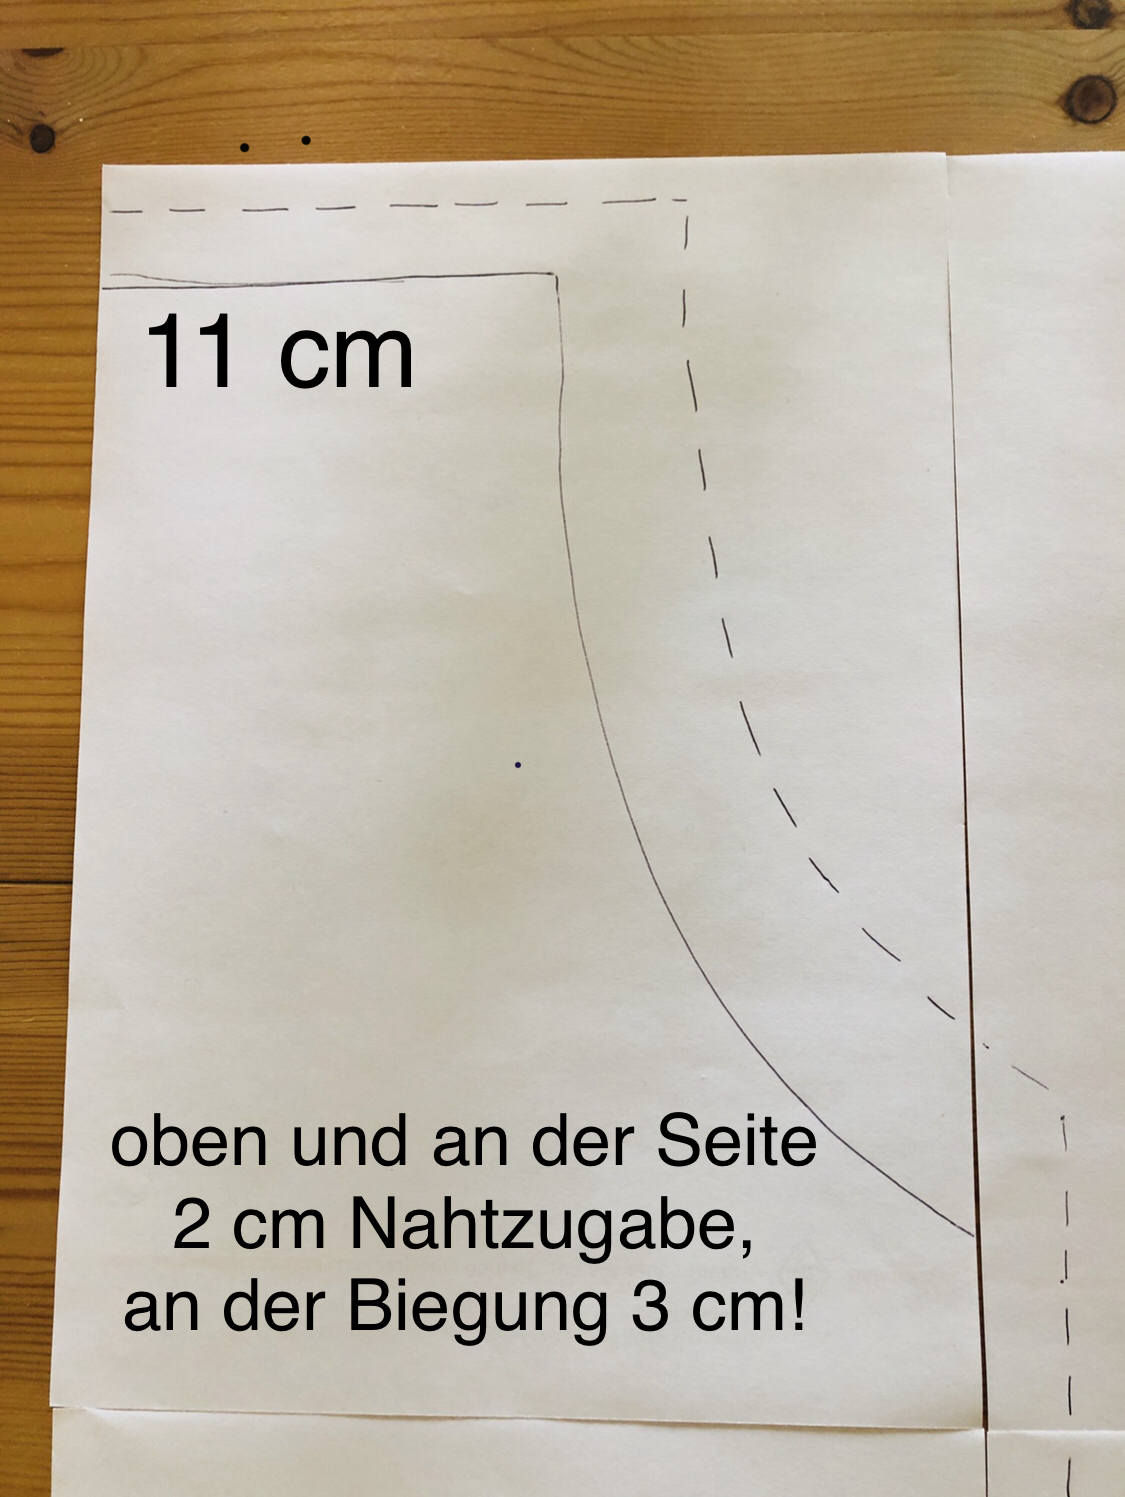
Template: with four DIN A4 sheets simply transferred. See template.
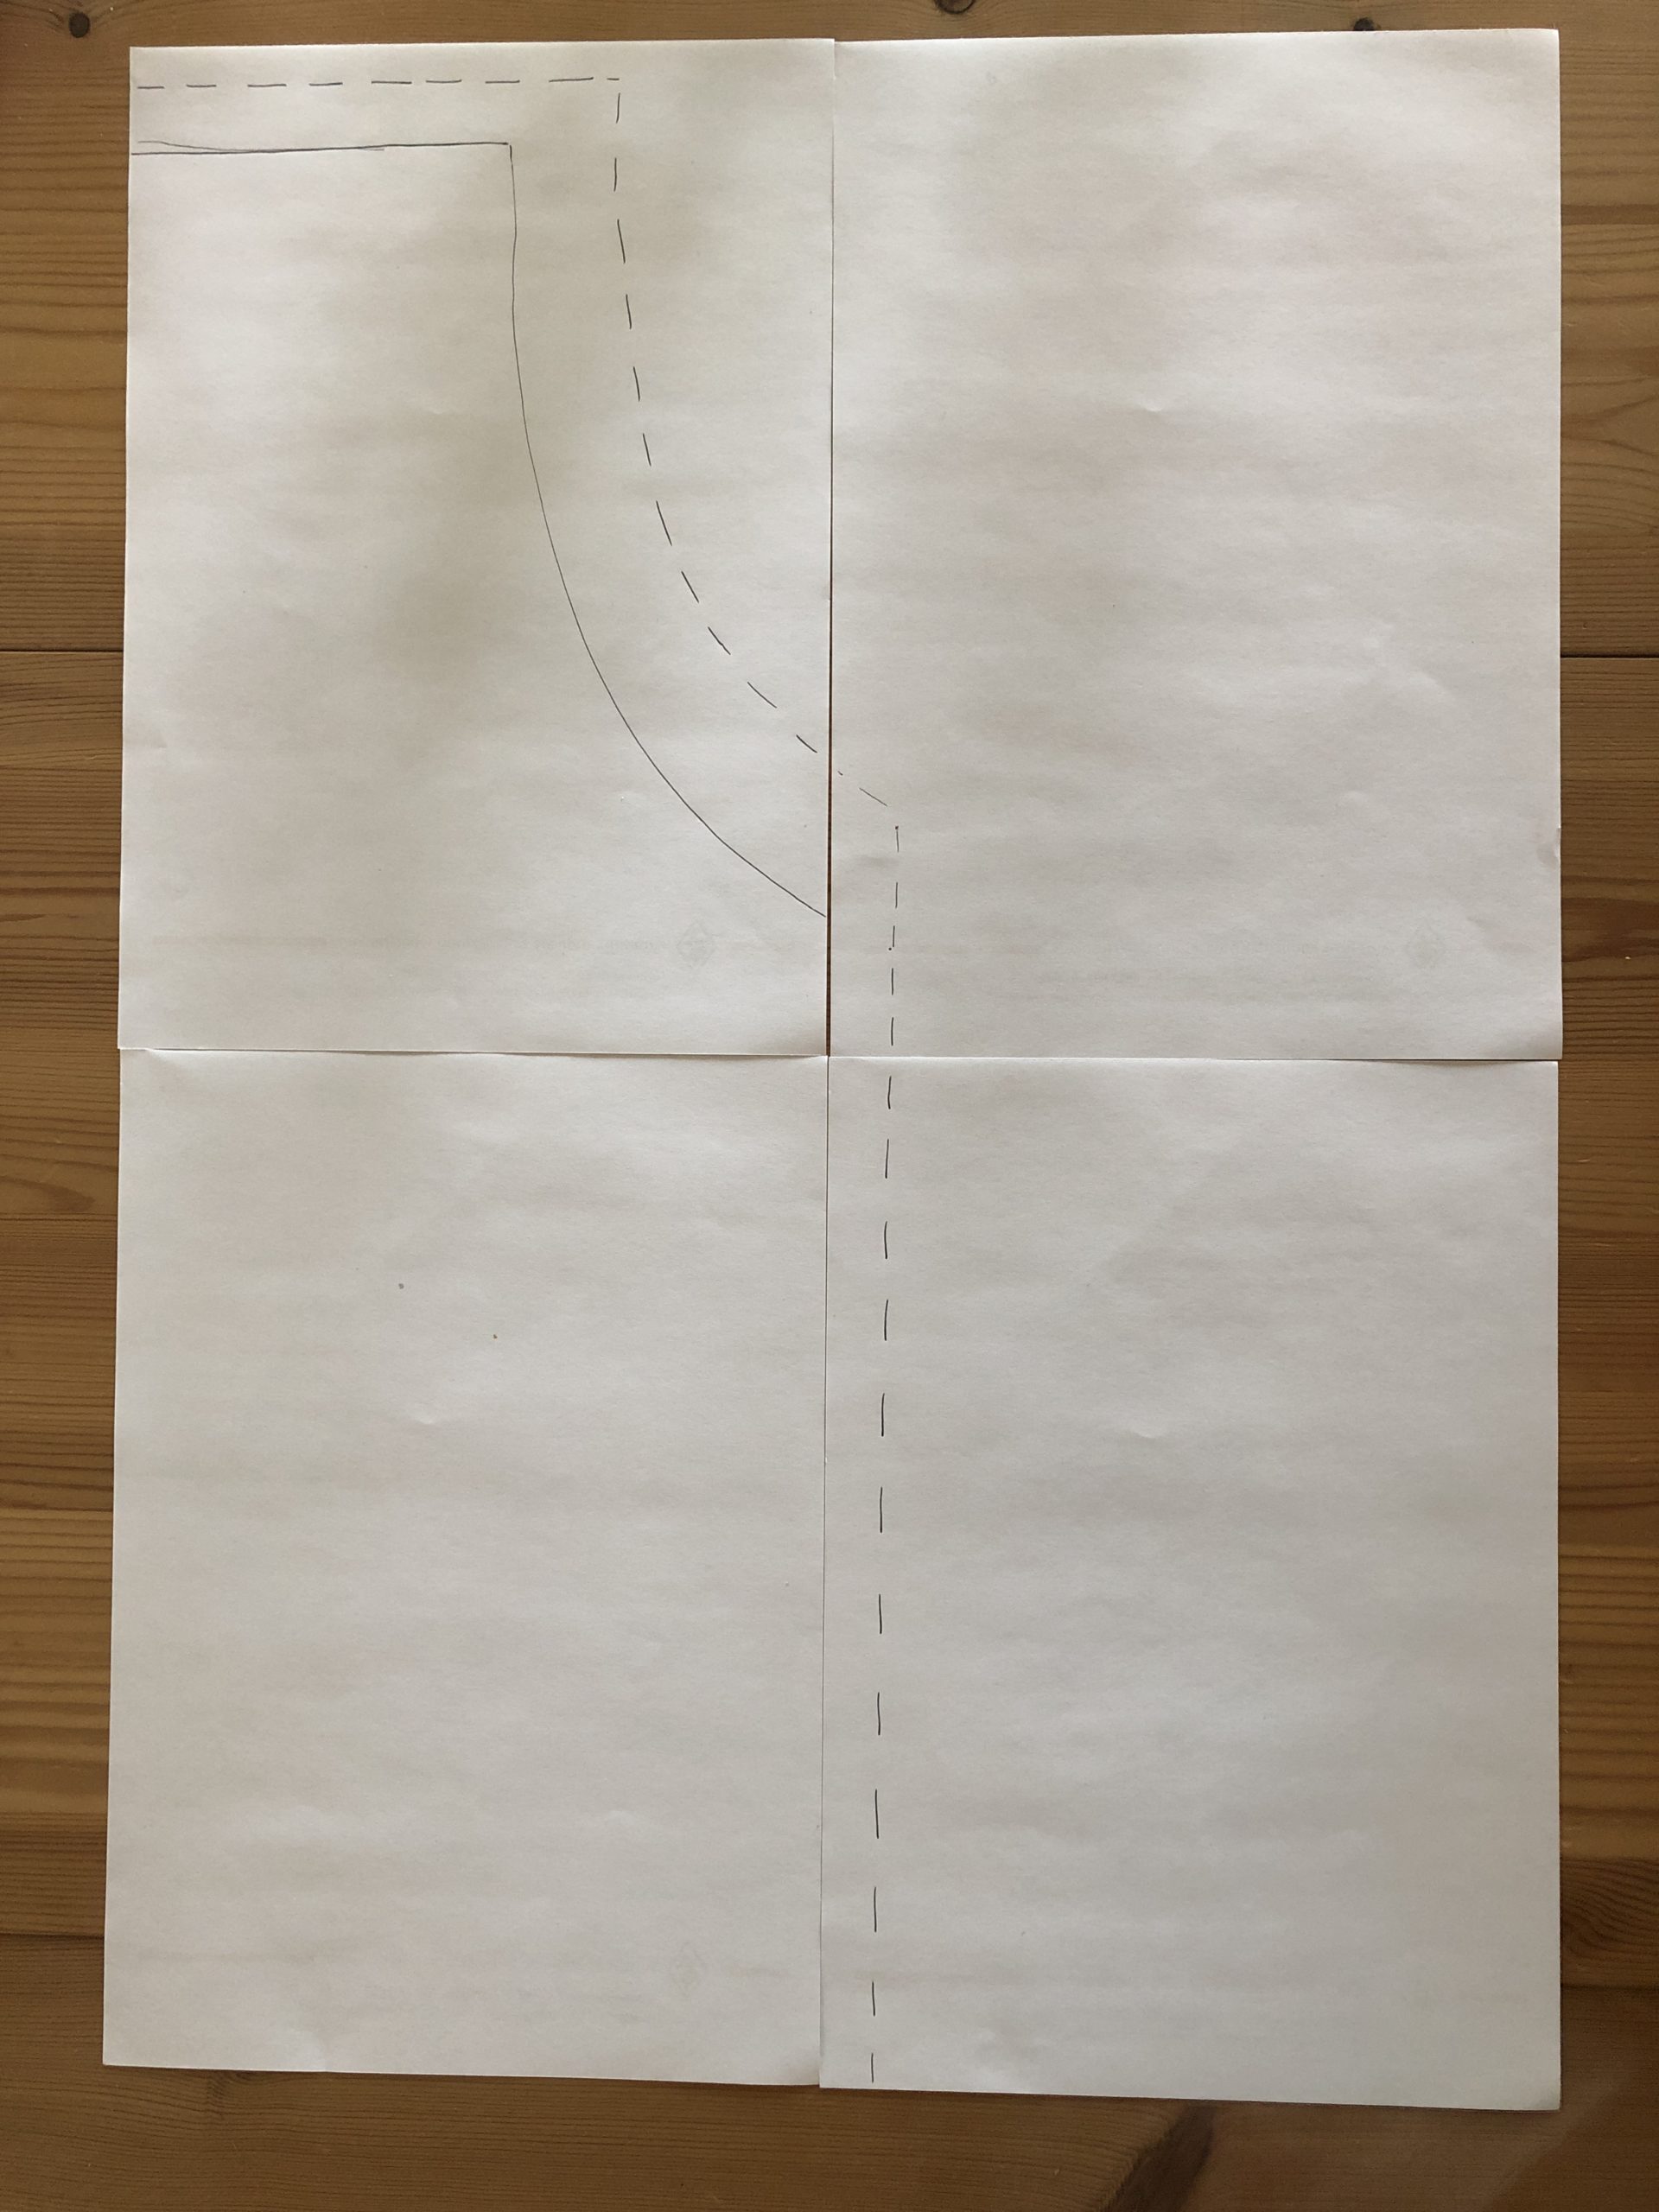
Bild zum Schritt 1 für das Bastel- und DIY-Abenteuer für Kinder: 'Vorlage: mit vier DIN A4 Blättern ganz einfach übertragen. Siehe...'

2

2. Bild zum Schritt 1 für das Bastel- und DIY-Abenteuer für Kinder: 'Vorlage: mit vier DIN A4 Blättern ganz einfach übertragen. Siehe...'

3

3. Bild zum Schritt 2 für das Bastel- und DIY-Abenteuer für Kinder: 'Vorlage: mit vier DIN A4 Blättern ganz einfach übertragen. Siehe...'

4

4. Bild zum Schritt 3 für das Bastel- und DIY-Abenteuer für Kinder: 'Vorlage: mit vier DIN A4 Blättern ganz einfach übertragen. Siehe...'

5

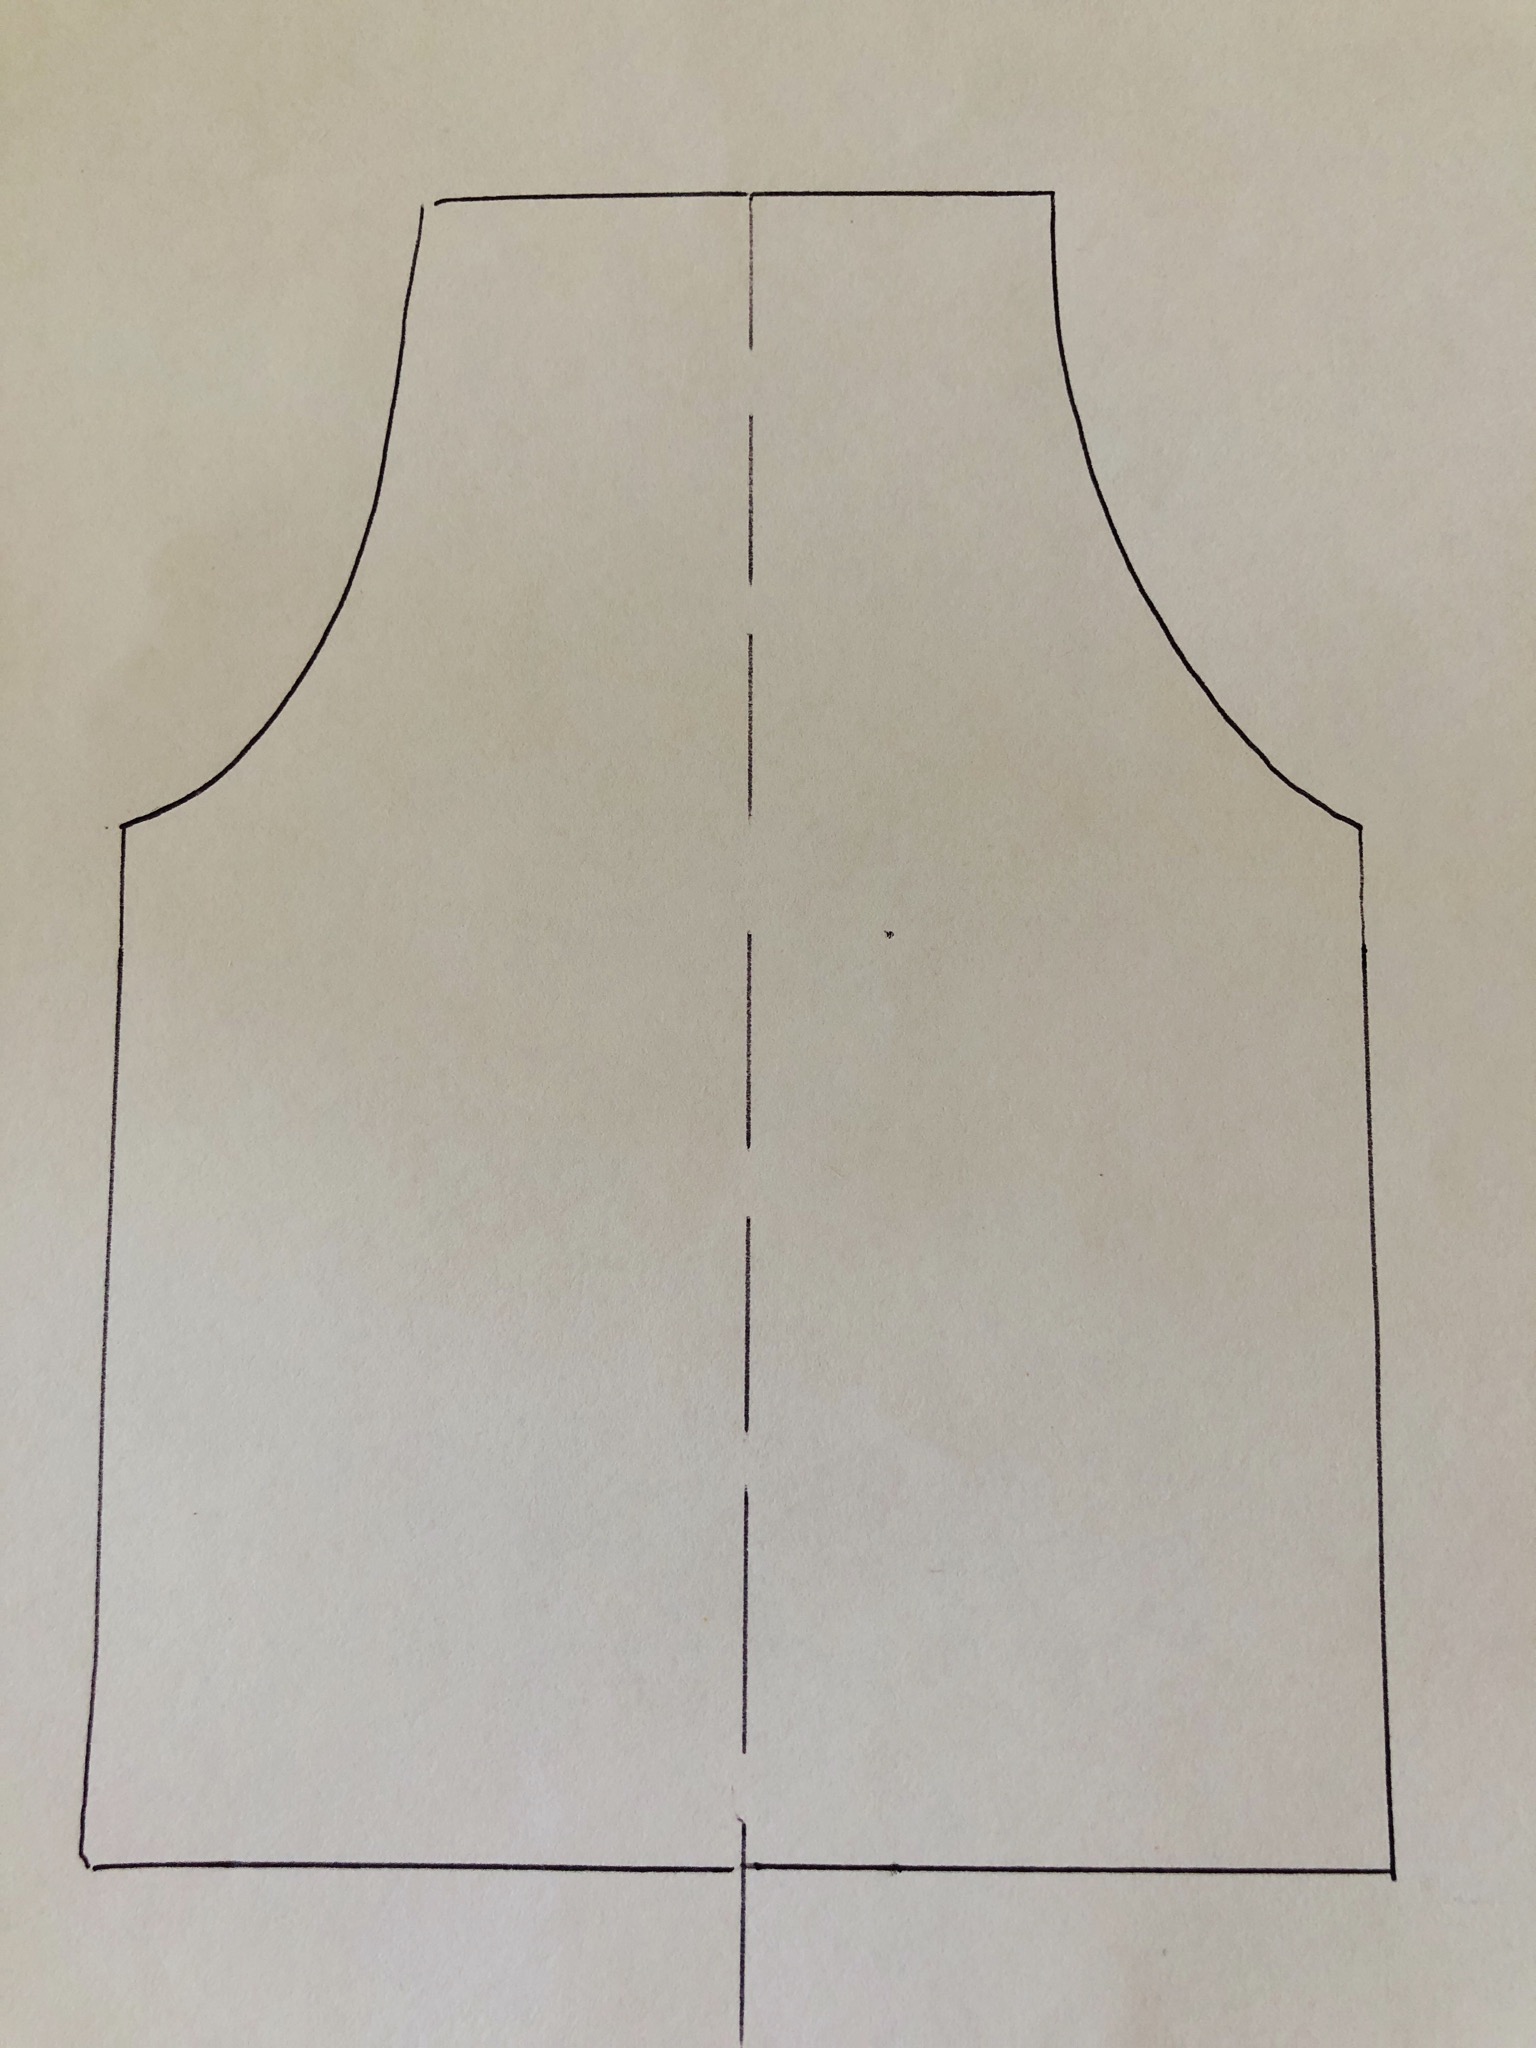
Line dashed = breakage!

Bild zum Schritt 5 für das Bastel- und DIY-Abenteuer für Kinder: 'Gestrichelte Linie = Stoffbruch!'

6

Cut fabric.

Bild zum Schritt 6 für das Bastel- und DIY-Abenteuer für Kinder: 'Stoff zuschneiden.'

7

Double the dashed sides and sew a hem.

Bild zum Schritt 7 für das Bastel- und DIY-Abenteuer für Kinder: 'Die gestrichelten Seiten doppelt umschlagen und einen Saum nähen.'

8

2. Bild zum Schritt 7 für das Bastel- und DIY-Abenteuer für Kinder: 'Die gestrichelten Seiten doppelt umschlagen und einen Saum nähen.'

9

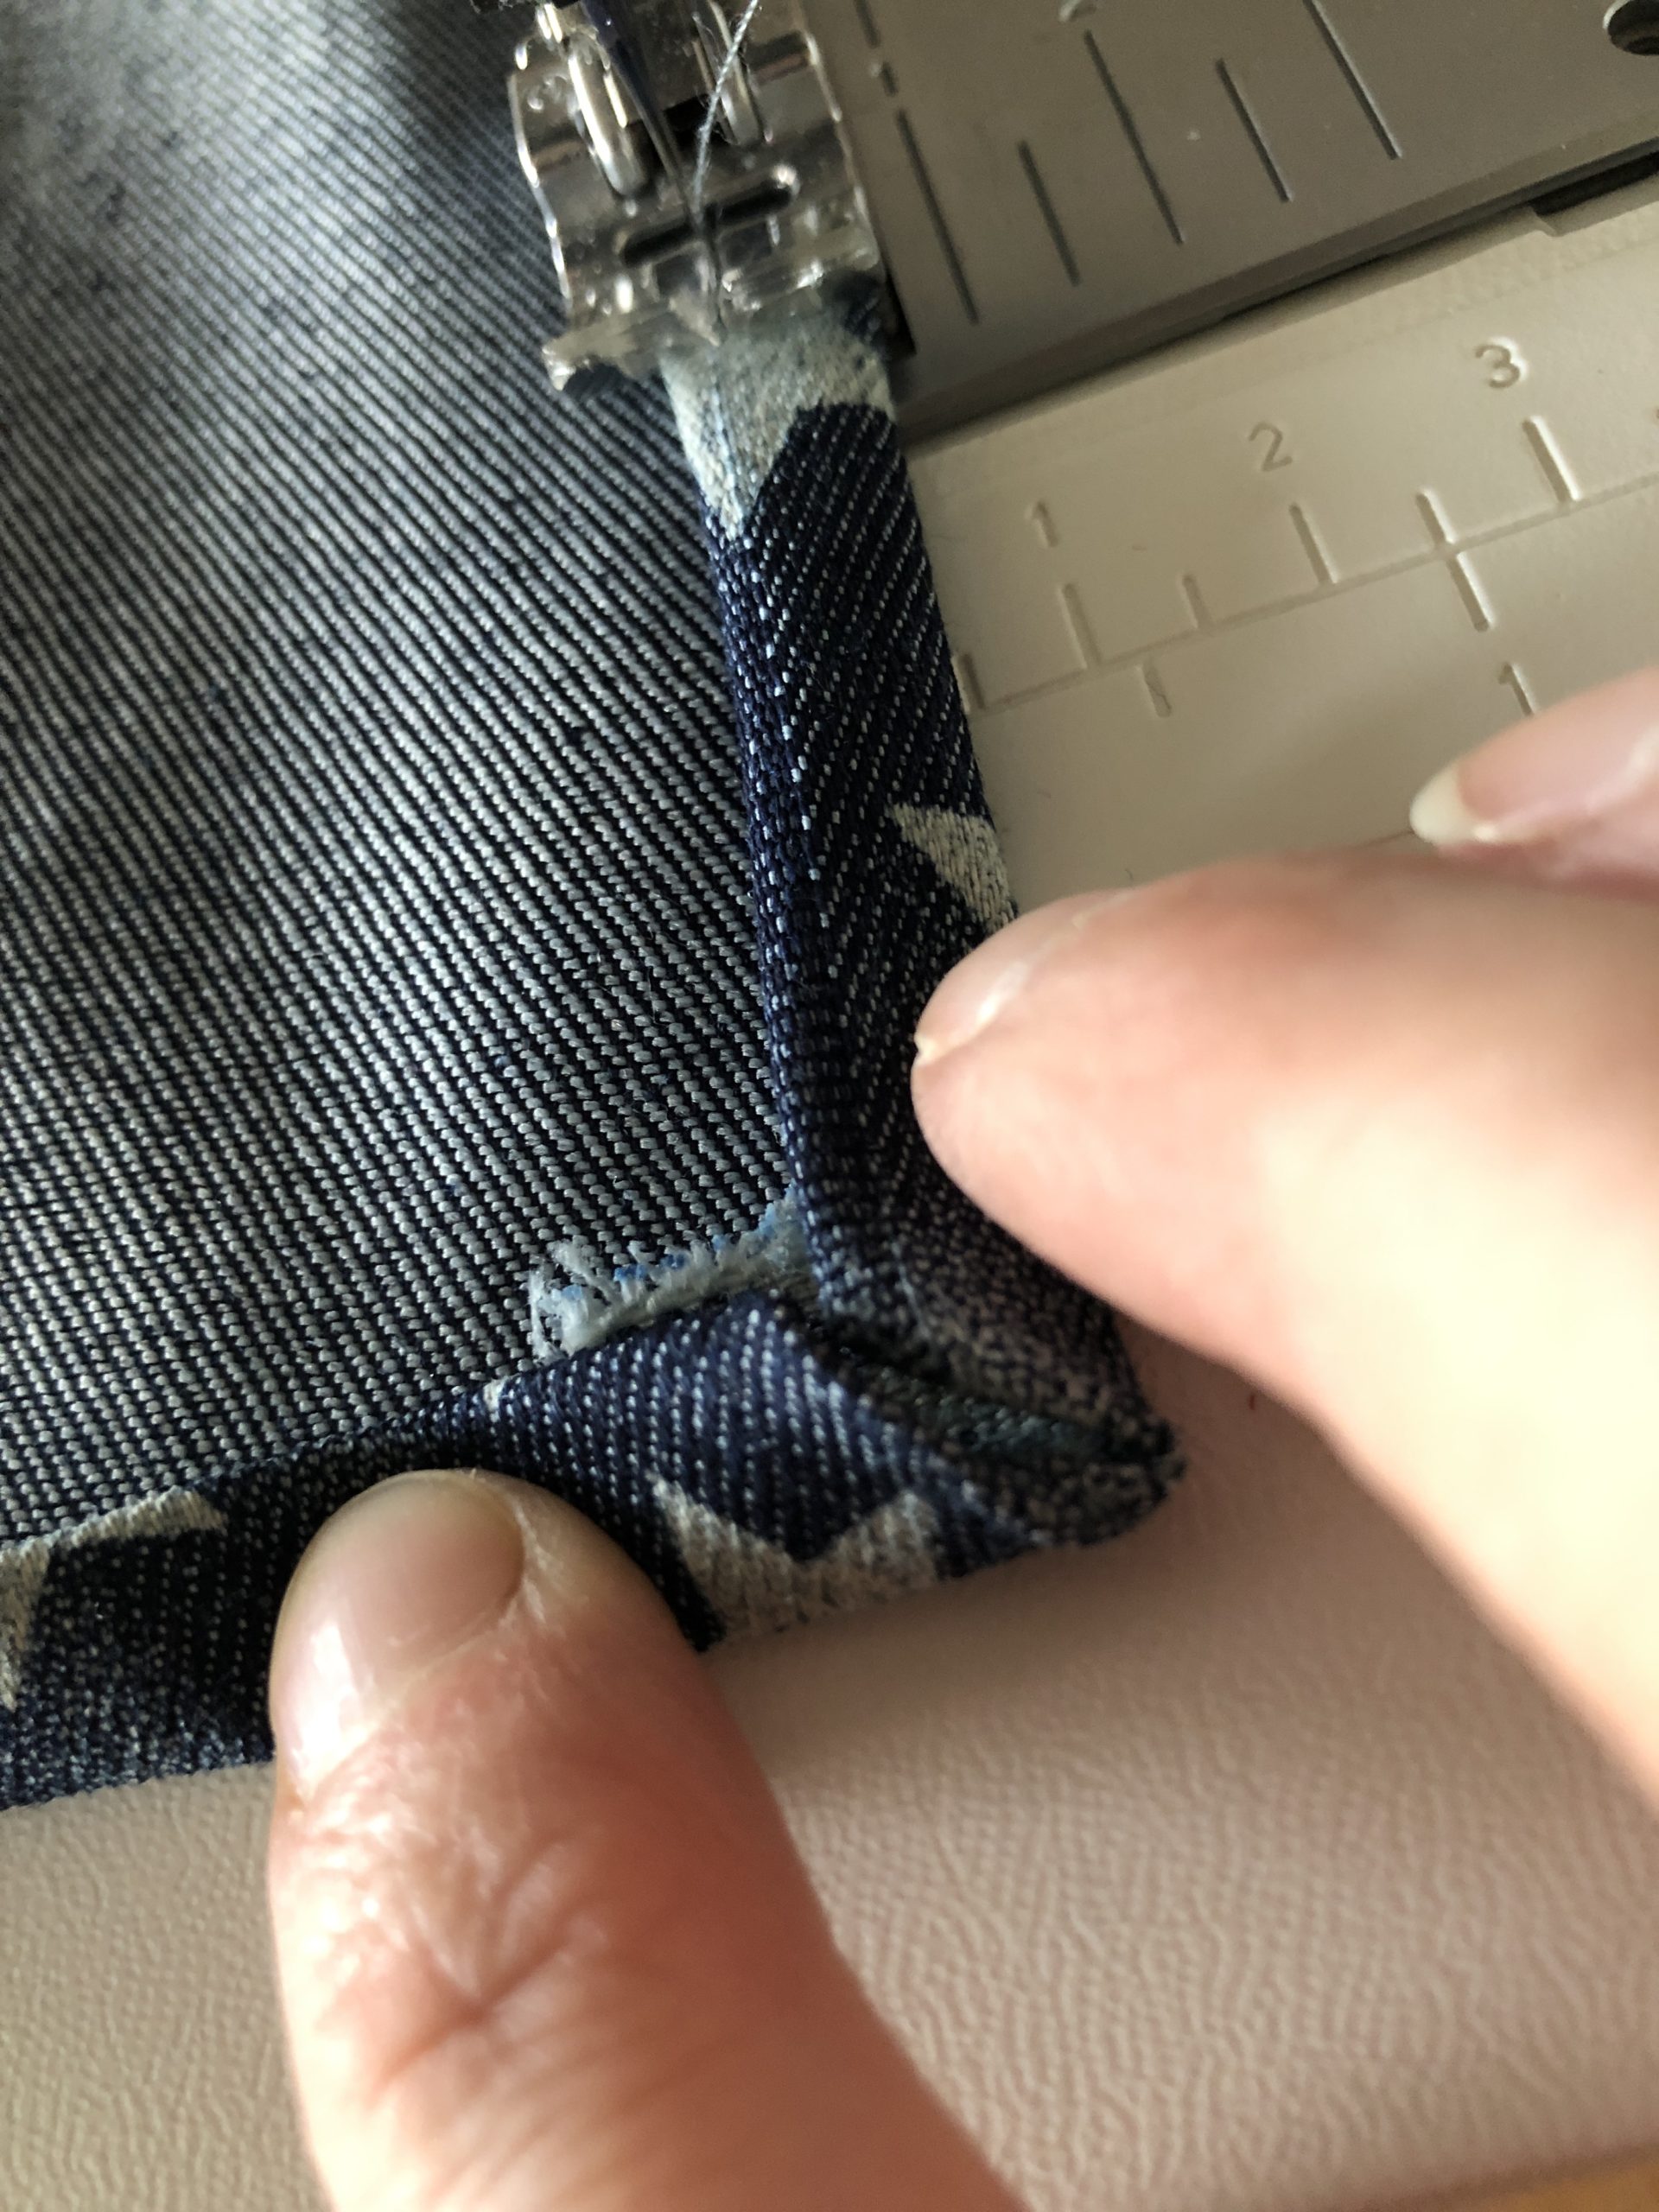
Proceed around the corner as follows: Place fabric corner inwards...

Bild zum Schritt 9 für das Bastel- und DIY-Abenteuer für Kinder: 'Um die Ecke wie folgt vorgehen: Stoffecke nach innen legen...'

10

Fold the edge of the side and lay the hem neatly.

Bild zum Schritt 10 für das Bastel- und DIY-Abenteuer für Kinder: 'Seitenrand einklappen und Saum ordentlich legen.'

11

Also the lower margin that there is a nice corner.

Bild zum Schritt 11 für das Bastel- und DIY-Abenteuer für Kinder: 'Ebenso den unteren Rand, dass es eine schöne Ecke gibt.'

12

2. Bild zum Schritt 11 für das Bastel- und DIY-Abenteuer für Kinder: 'Ebenso den unteren Rand, dass es eine schöne Ecke gibt.'

13

Then continue sewing until the corner. Leave the needle in the fabric, lift the sewing feet and turn the fabric. And continue sewing the next side.

Bild zum Schritt 13 für das Bastel- und DIY-Abenteuer für Kinder: 'Dann weiternähen bis  in die Ecke. Nadel im Stoff...'

14

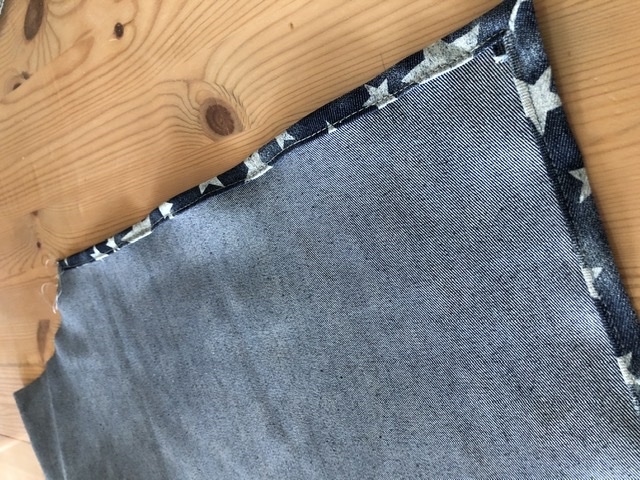
So there are two corners.

Bild zum Schritt 14 für das Bastel- und DIY-Abenteuer für Kinder: 'Es entstehen so zwei Ecken.'

15

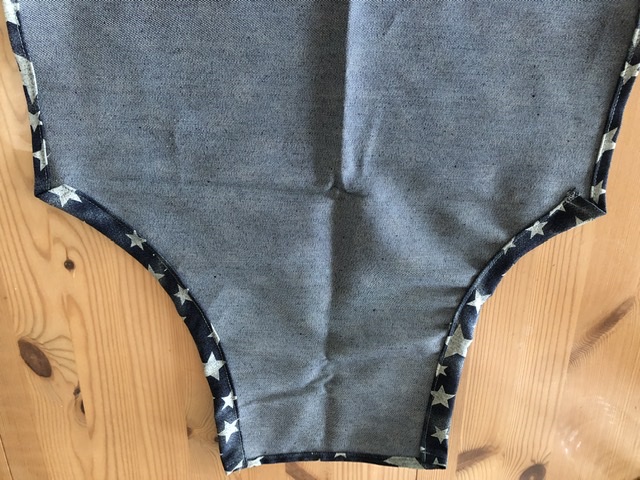
Sew a small hem at the top, too.

Bild zum Schritt 15 für das Bastel- und DIY-Abenteuer für Kinder: 'Oben ebenfalls noch einen kleinen Saum nähen.'

16

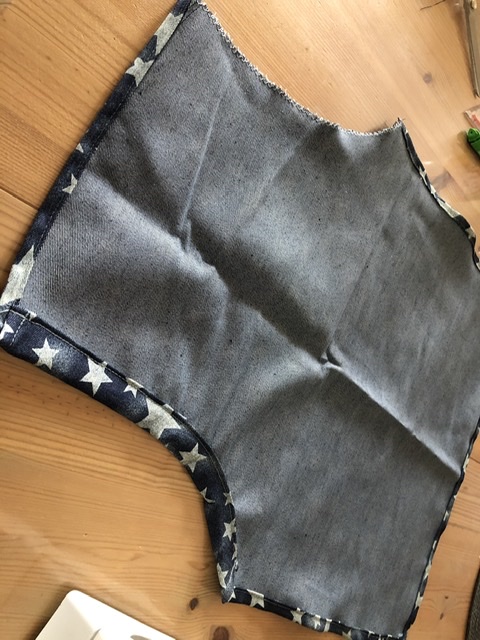
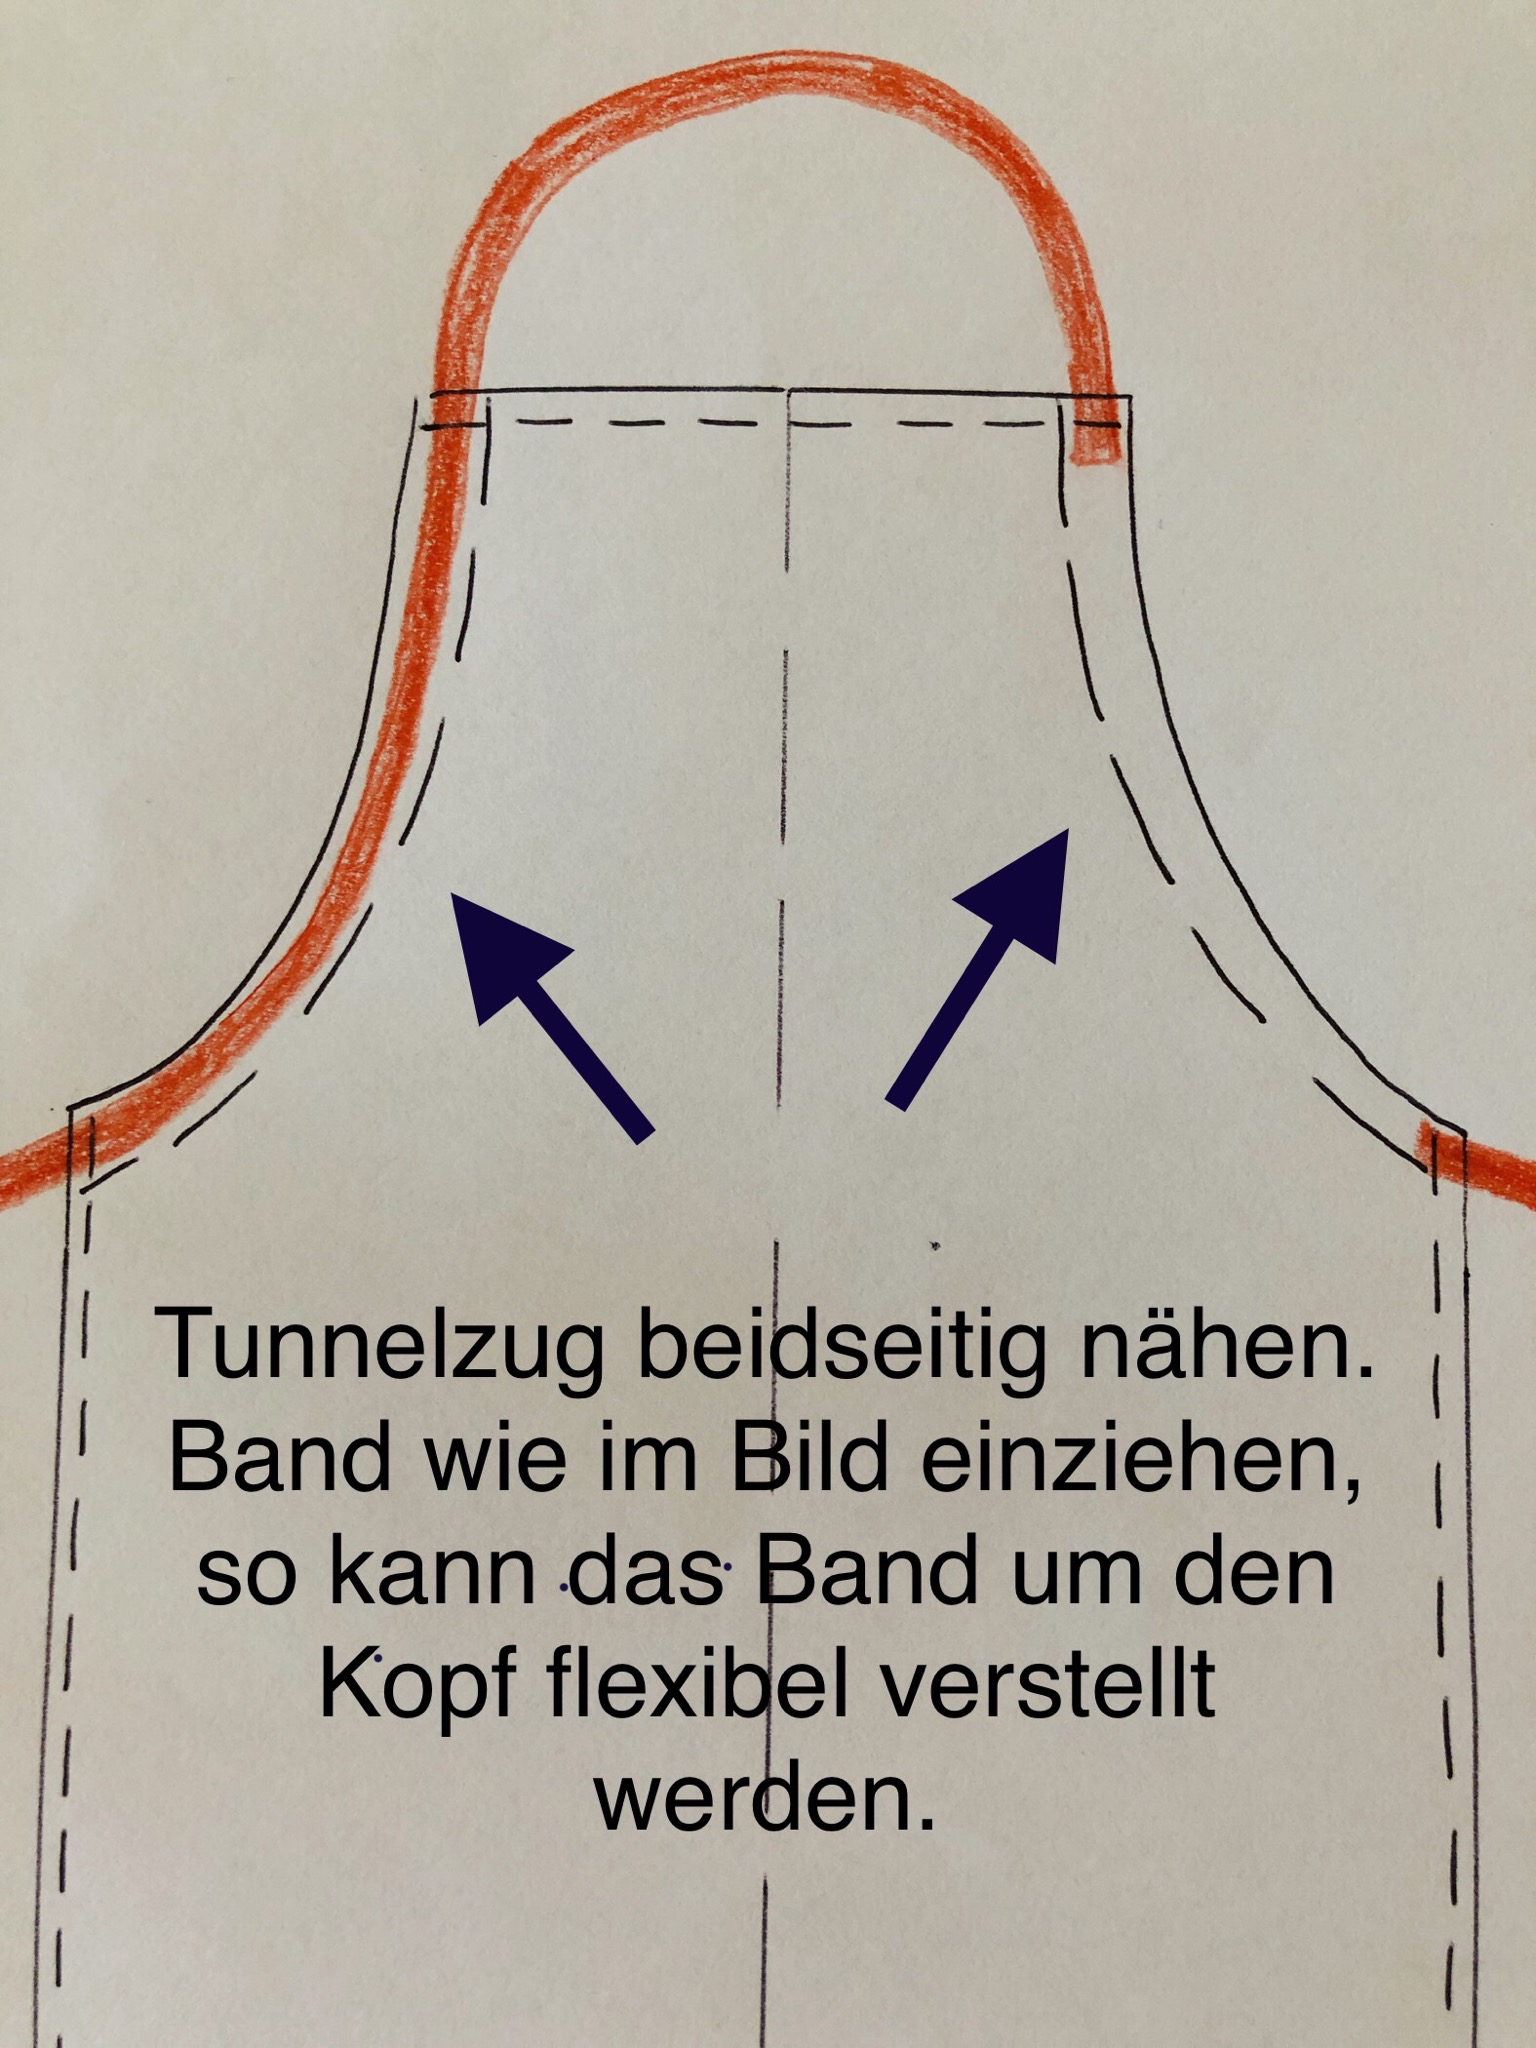
Now the armholes are sewn. Here we need a wide hem, which at the same time serves as a drawstring for the bands!

Bild zum Schritt 16 für das Bastel- und DIY-Abenteuer für Kinder: 'Nun werden die Armausschnitte genäht. Hier brauchen wir einen breiten...'

17

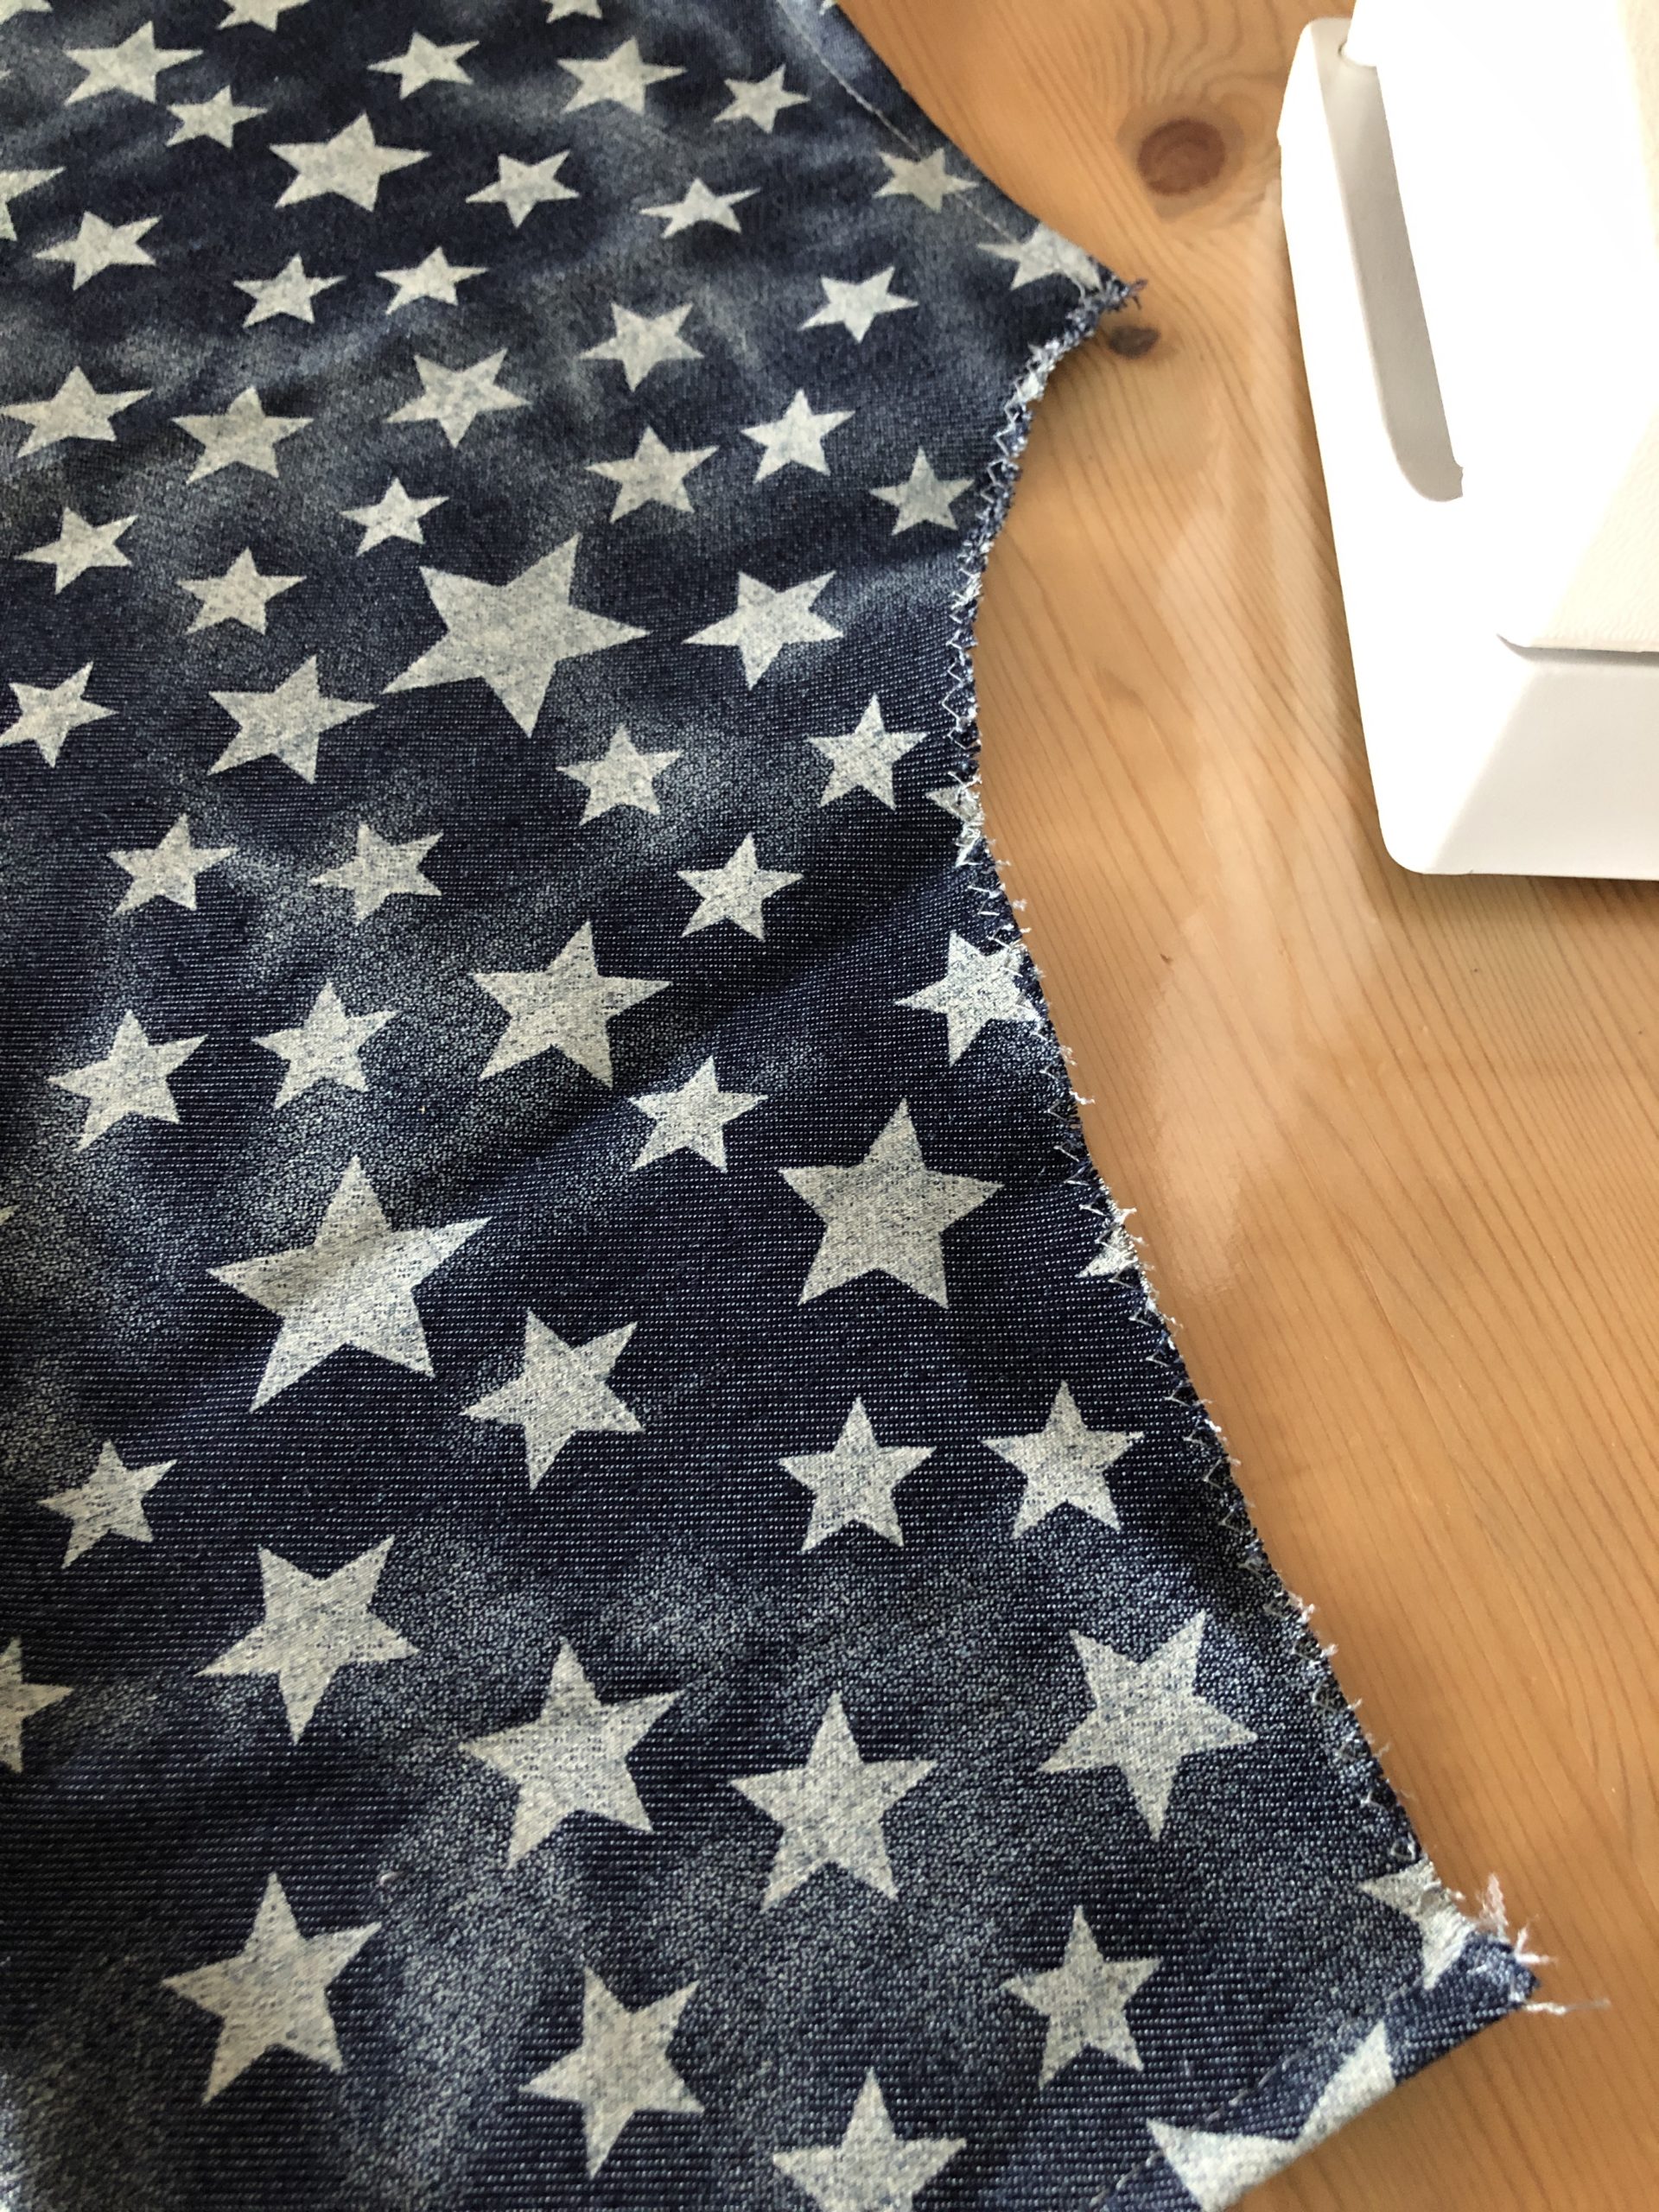
Edge the fabric with a zigzag stitch.

Bild zum Schritt 17 für das Bastel- und DIY-Abenteuer für Kinder: 'Mit einem Zickzack-Stich den Stoff einkanteln.'

18

2. Bild zum Schritt 17 für das Bastel- und DIY-Abenteuer für Kinder: 'Mit einem Zickzack-Stich den Stoff einkanteln.'

19

3. Bild zum Schritt 18 für das Bastel- und DIY-Abenteuer für Kinder: 'Mit einem Zickzack-Stich den Stoff einkanteln.'

20

4. Bild zum Schritt 19 für das Bastel- und DIY-Abenteuer für Kinder: 'Mit einem Zickzack-Stich den Stoff einkanteln.'

21

Cut the ribbons. And sew the two 4.5 cm wide ribbons as follows.

Bild zum Schritt 21 für das Bastel- und DIY-Abenteuer für Kinder: 'Bänder zuschneiden. Und die beiden 4,5 cm breiten Bänder wie...'

22

From the short side strike about 1/2 cm and strike the side length to the middle over it. Both fabric edges meet in the middle.

Bild zum Schritt 22 für das Bastel- und DIY-Abenteuer für Kinder: 'Von der kurzen Seite ca. 1/2 cm einschlagen und die...'

23

Now fold the tape together, that the open edges lie inside. (At the end again hit the short side about 1/2 cm inwards.) possibly stick together with pins or clamps.

Bild zum Schritt 23 für das Bastel- und DIY-Abenteuer für Kinder: 'Das Band nun zusammenklappen, dass die offenen Kanten innen liegen....'

24

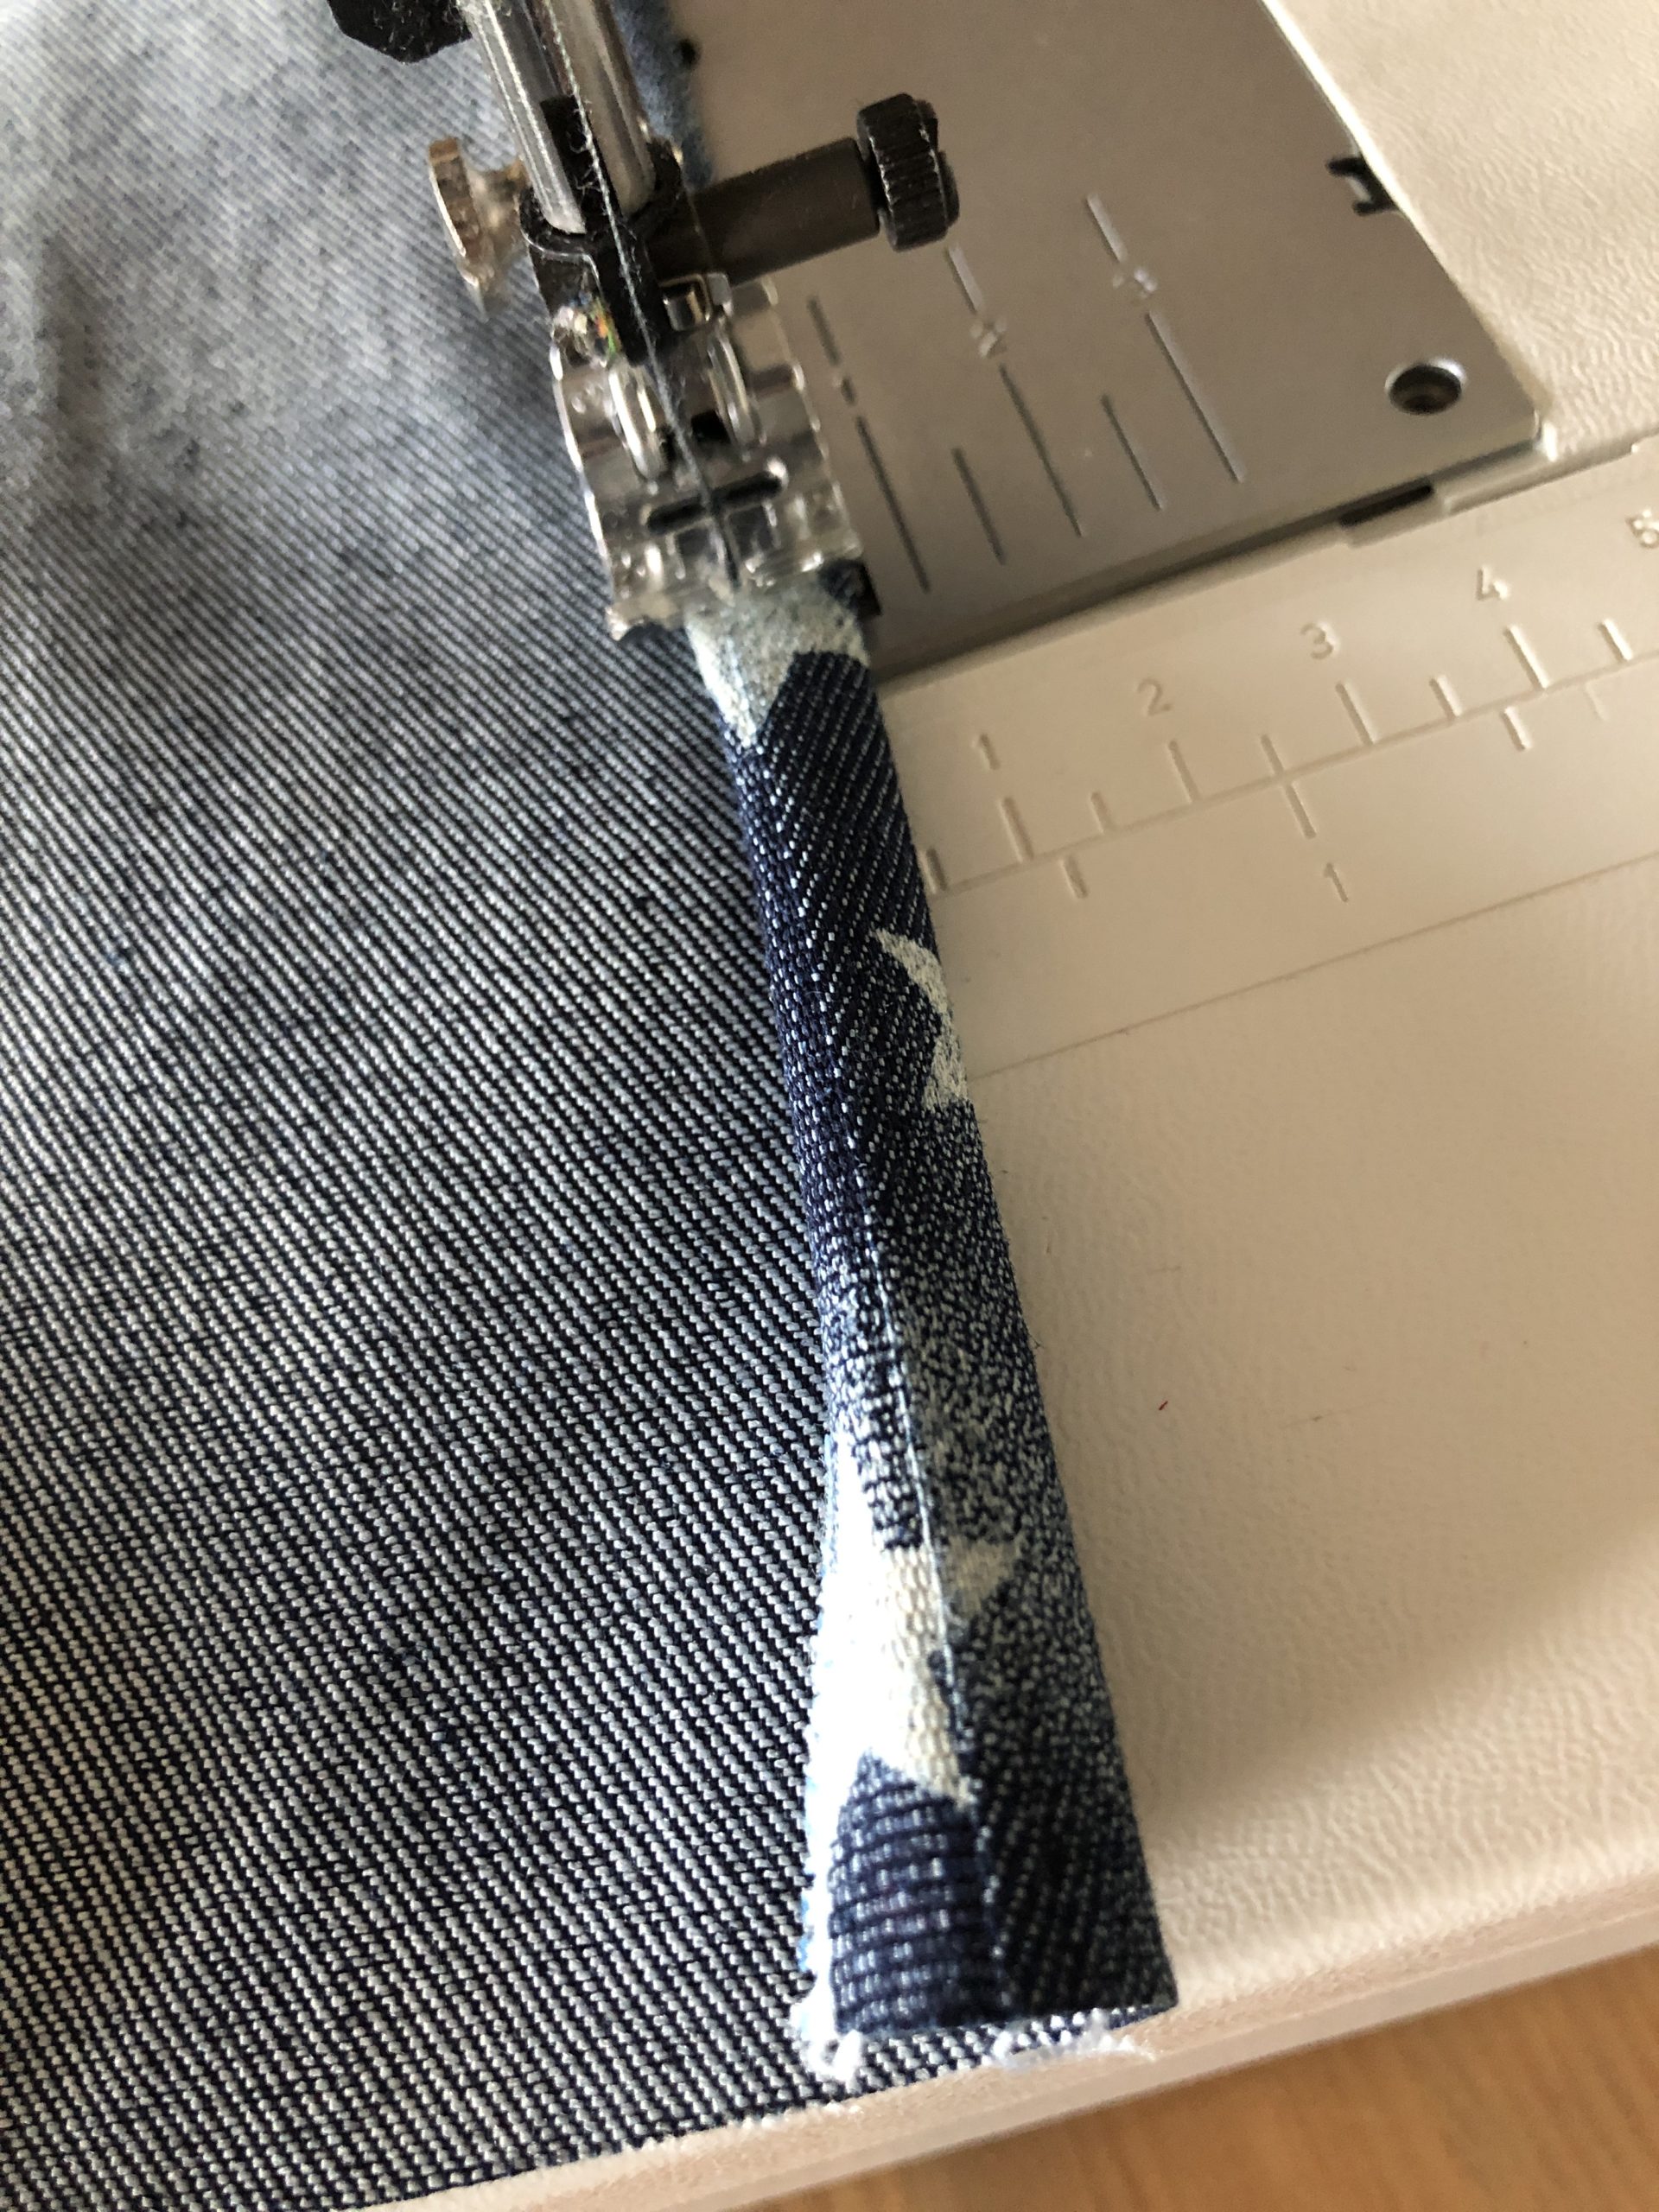
Now sew this strip together to the complete length. So sew both bands.

Bild zum Schritt 24 für das Bastel- und DIY-Abenteuer für Kinder: 'Diesen Streifen nun auf die komplette Länge zusammen nähen. Beide...'

25

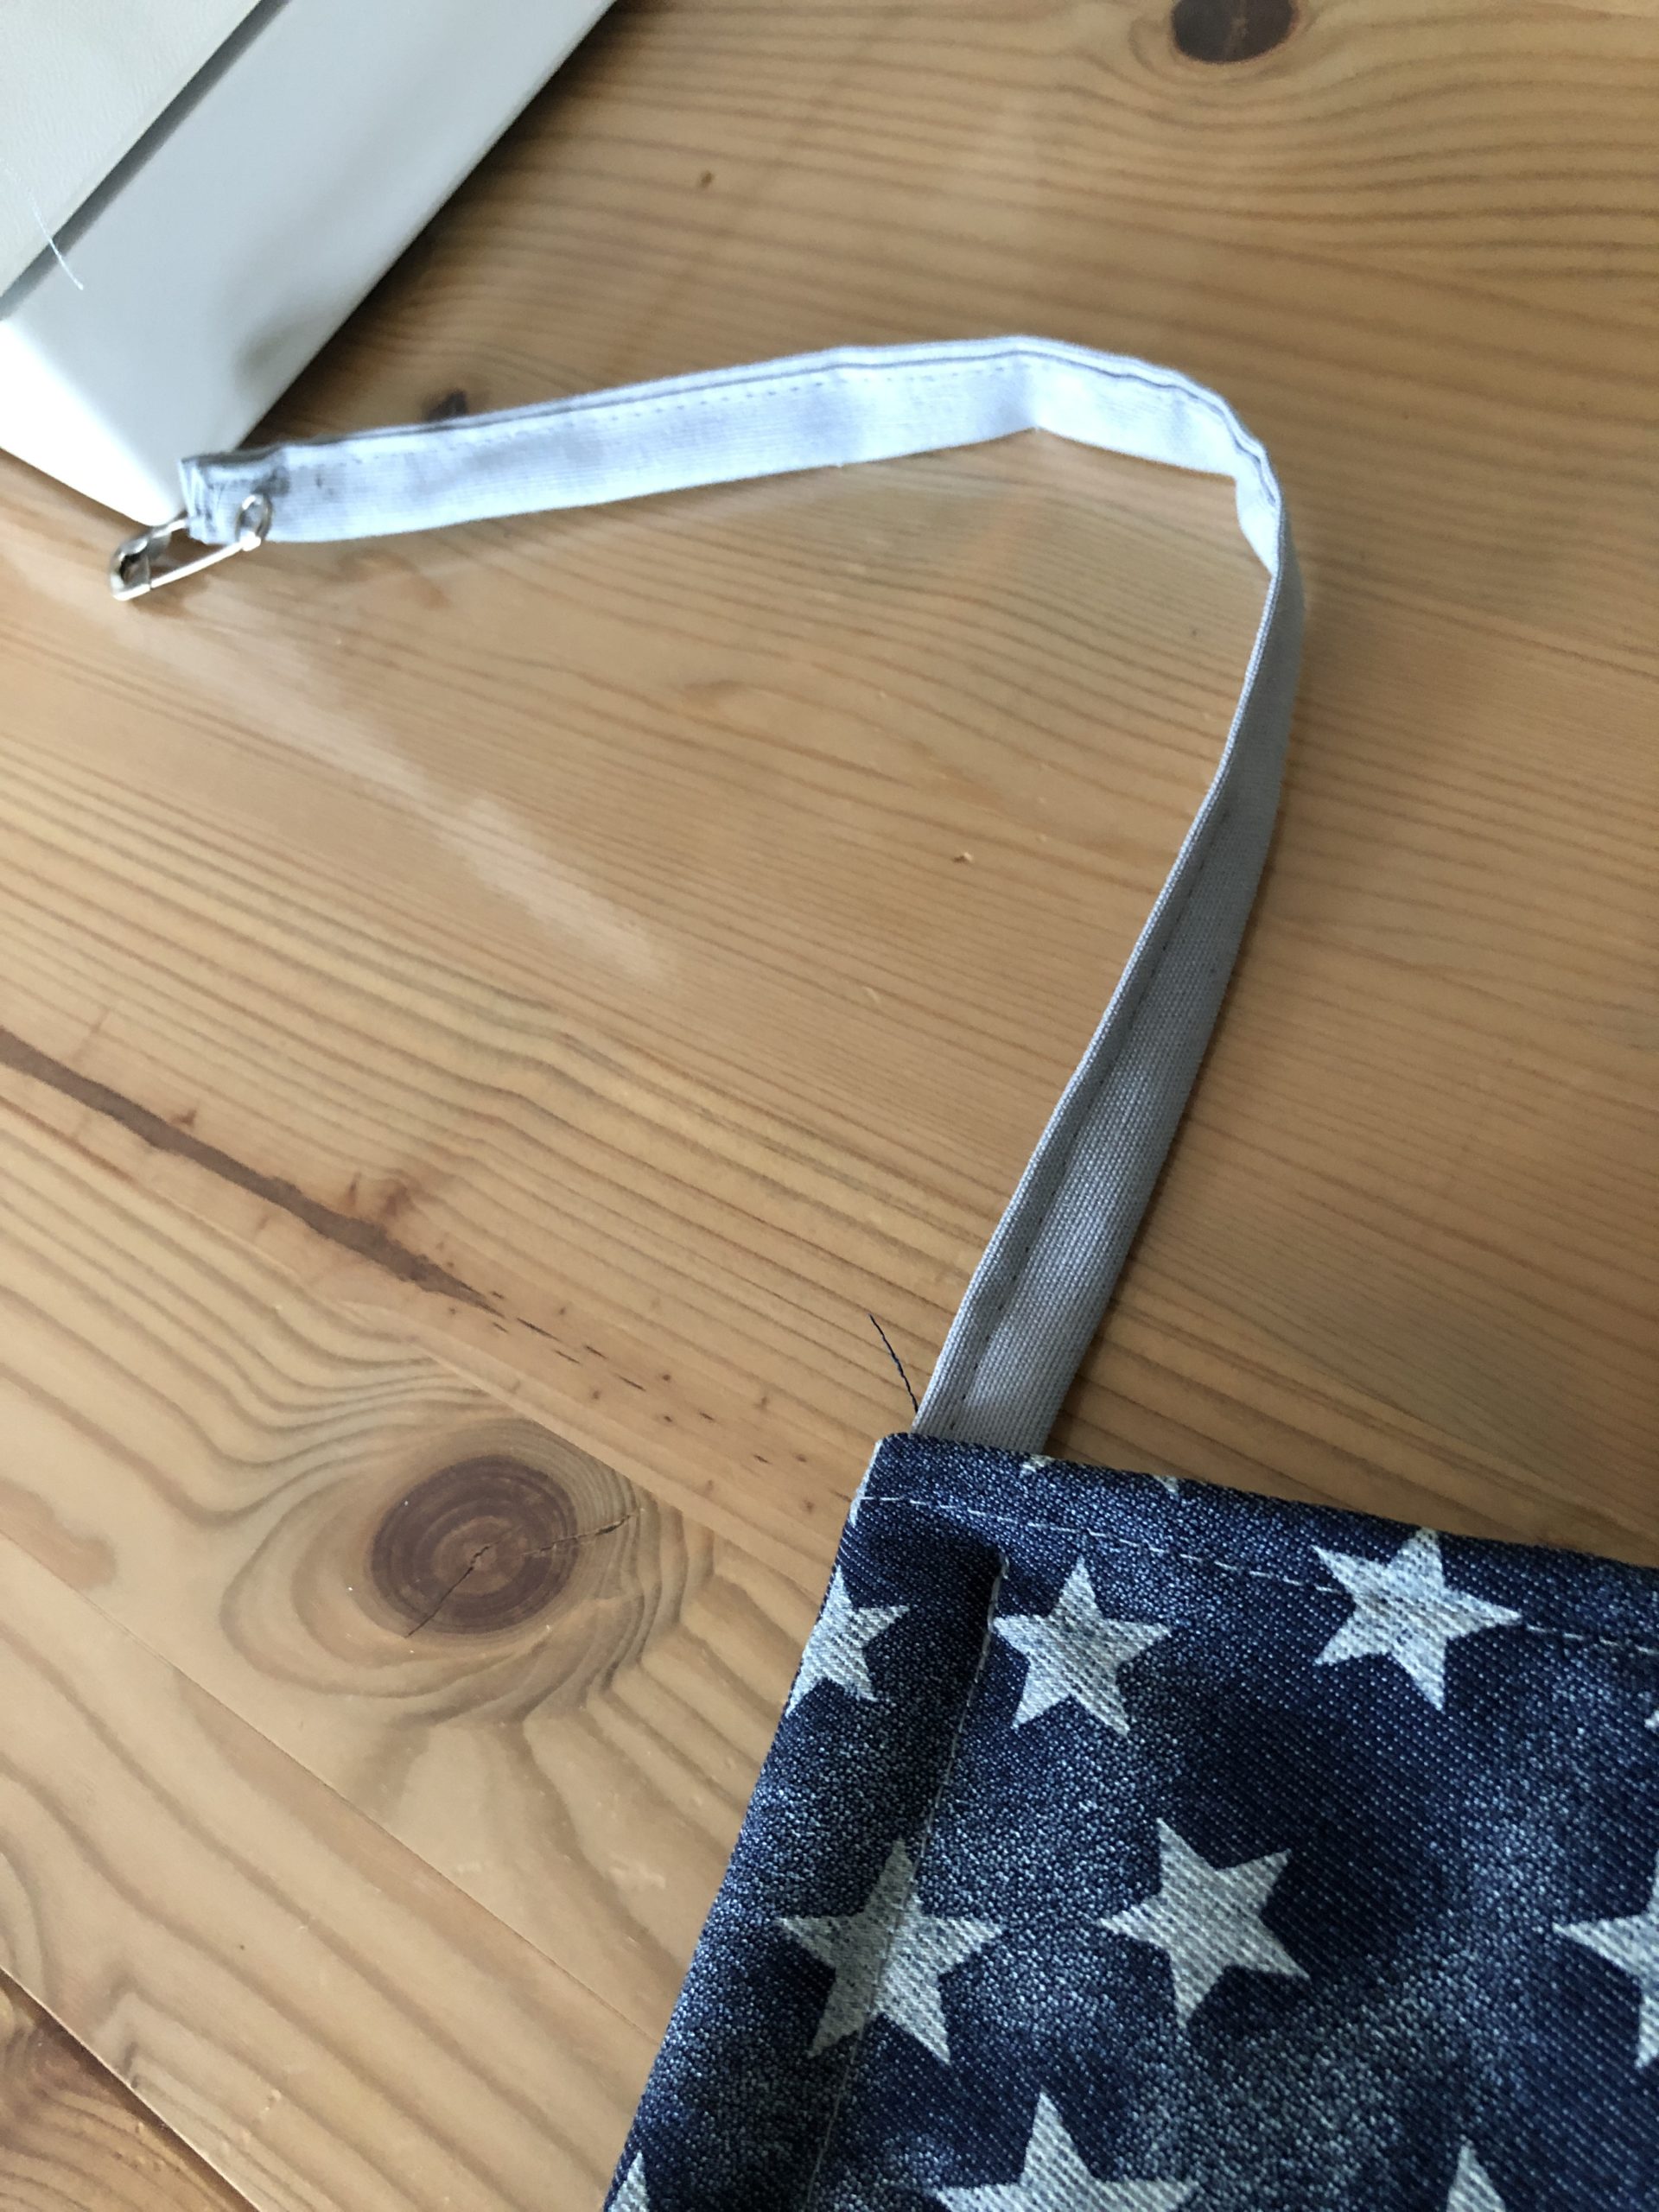
Pull the long band into the drawstring using a safety needle as follows.

Bild zum Schritt 25 für das Bastel- und DIY-Abenteuer für Kinder: 'Langes Band mit Hilfe einer Sicherheitsnadel wie folgt in den...'

26

Lower left in the picture.

Bild zum Schritt 26 für das Bastel- und DIY-Abenteuer für Kinder: 'Unten links im Bild einfädeln.'

27

2. Bild zum Schritt 26 für das Bastel- und DIY-Abenteuer für Kinder: 'Unten links im Bild einfädeln.'

28

Pull out the top.

Bild zum Schritt 28 für das Bastel- und DIY-Abenteuer für Kinder: 'Oben herausziehen.'

29

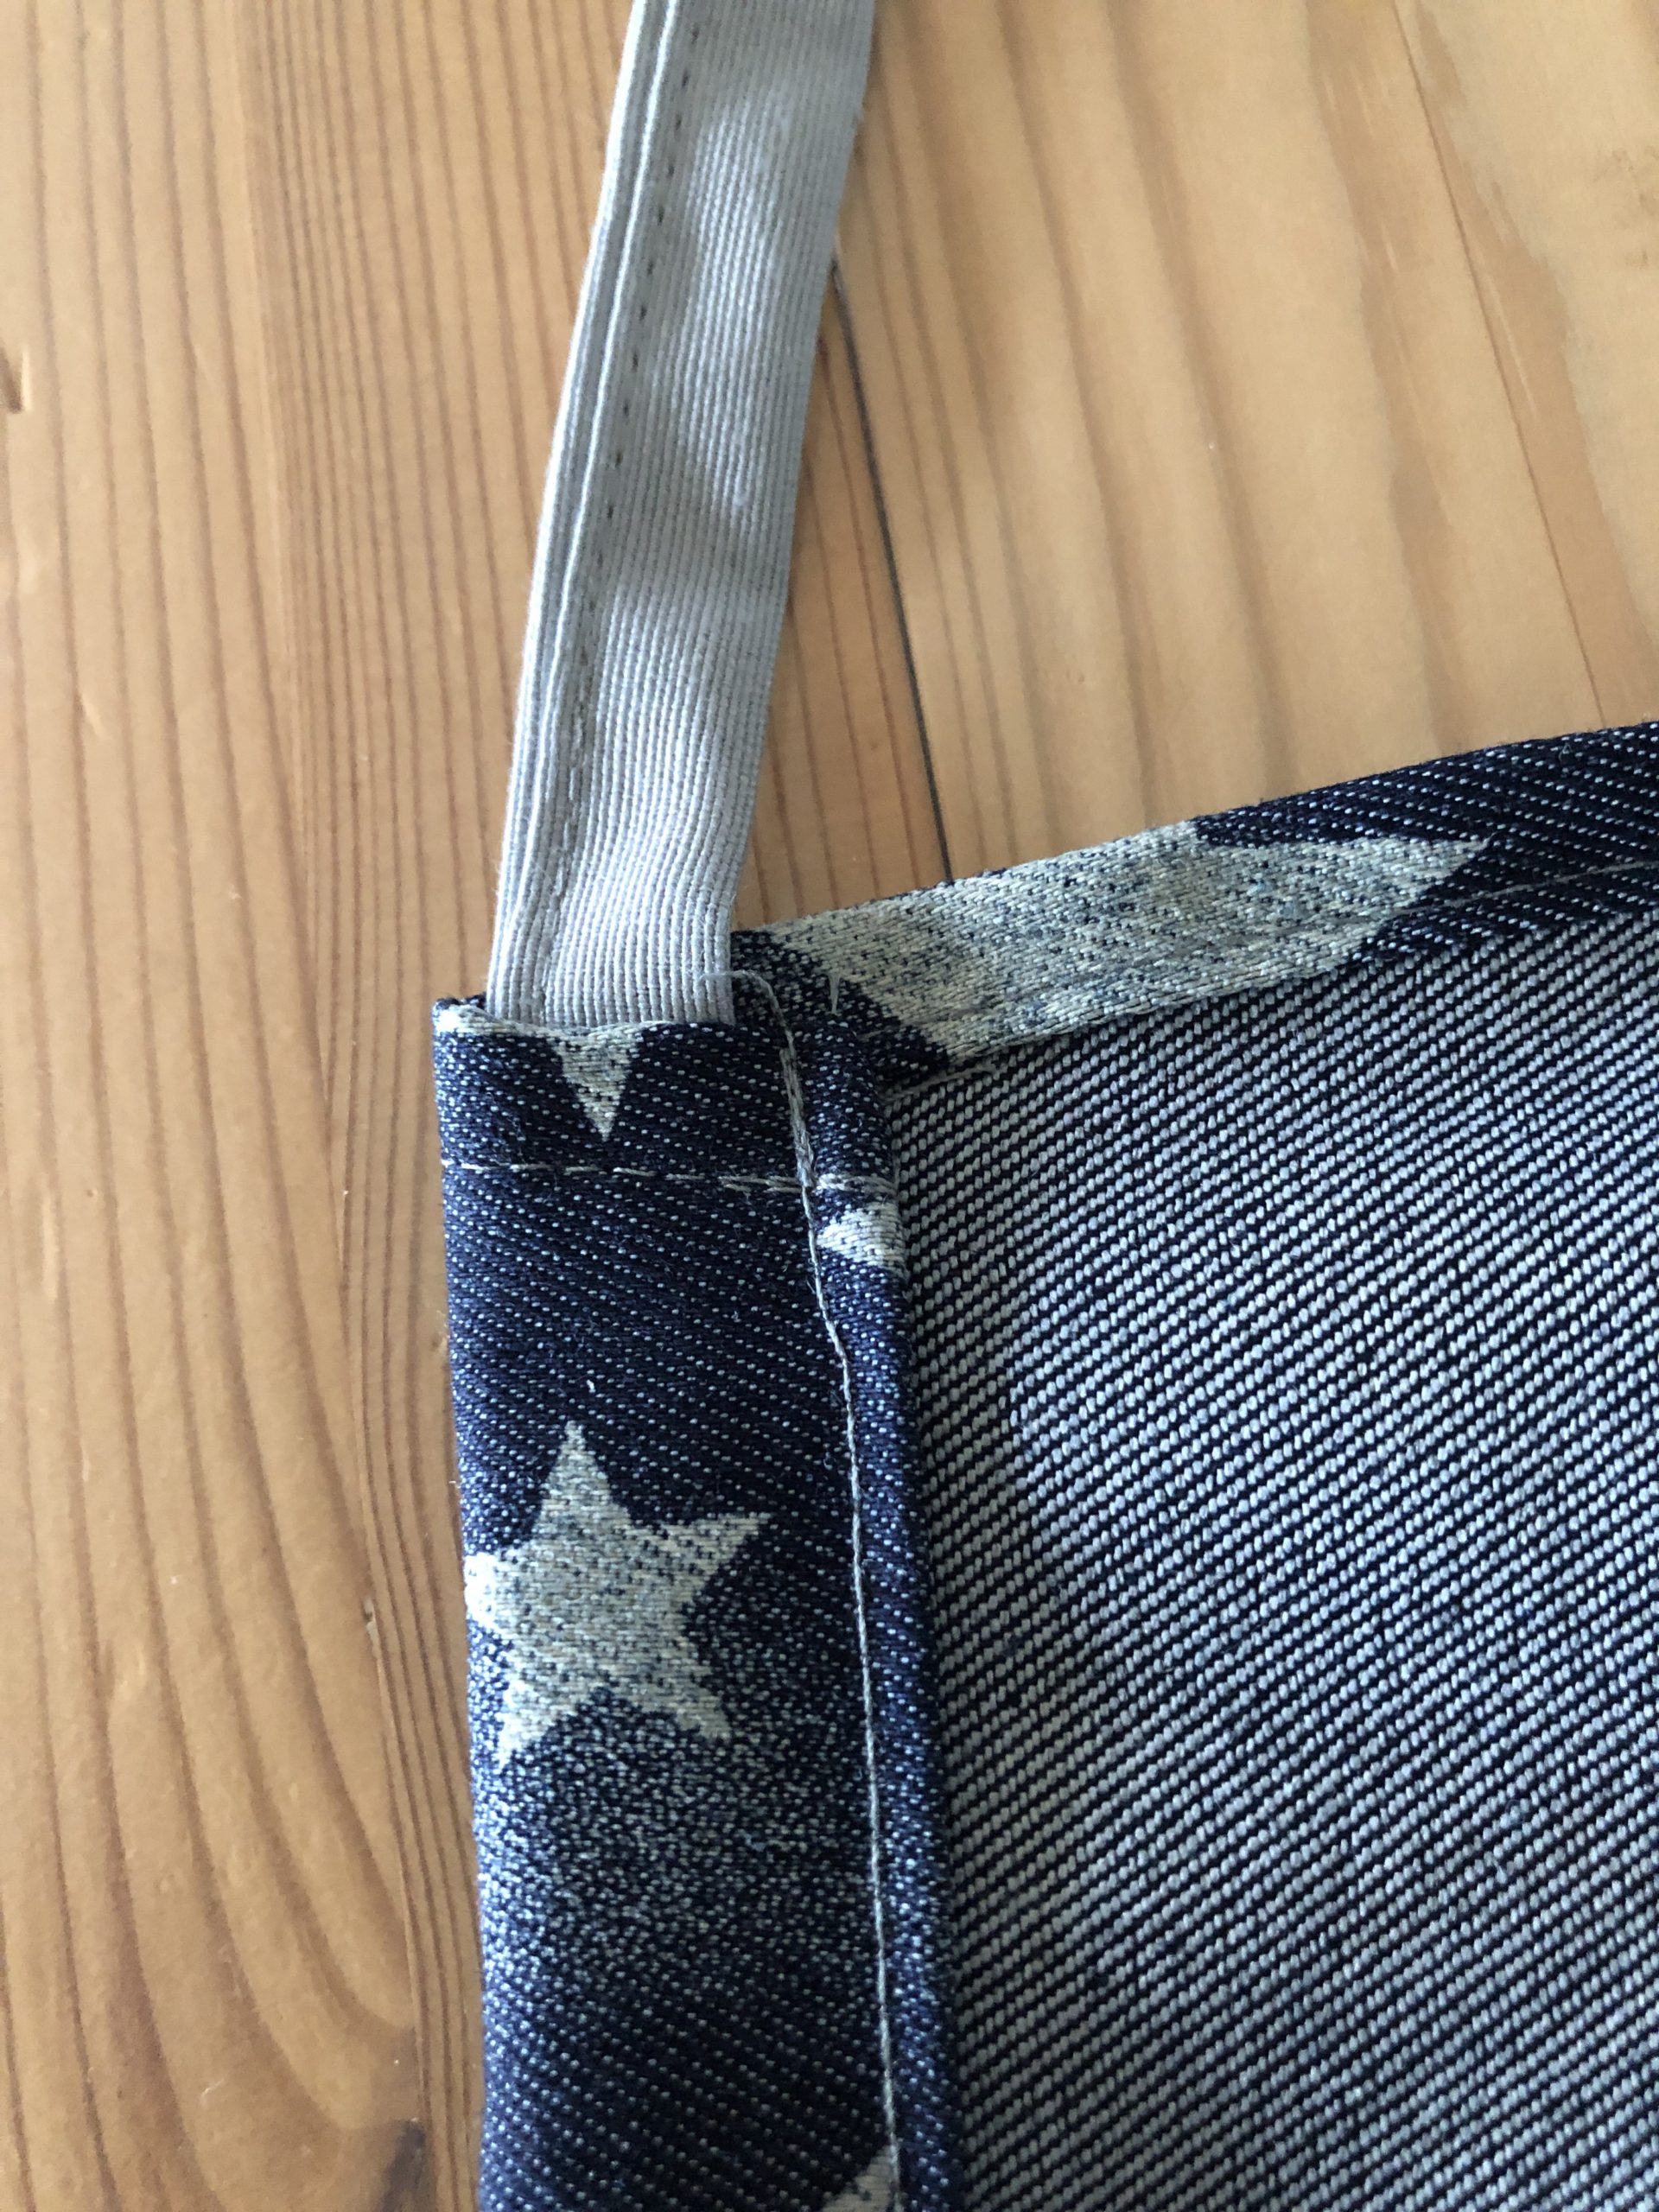
At the other end put about 2 cm wide into the other drawer

Bild zum Schritt 29 für das Bastel- und DIY-Abenteuer für Kinder: 'Am anderen Ende oben etwa 2 cm weit in den...'

30

Like this:
And sew tight!

Bild zum Schritt 30 für das Bastel- und DIY-Abenteuer für Kinder: 'So:   Und festnähen!'

31

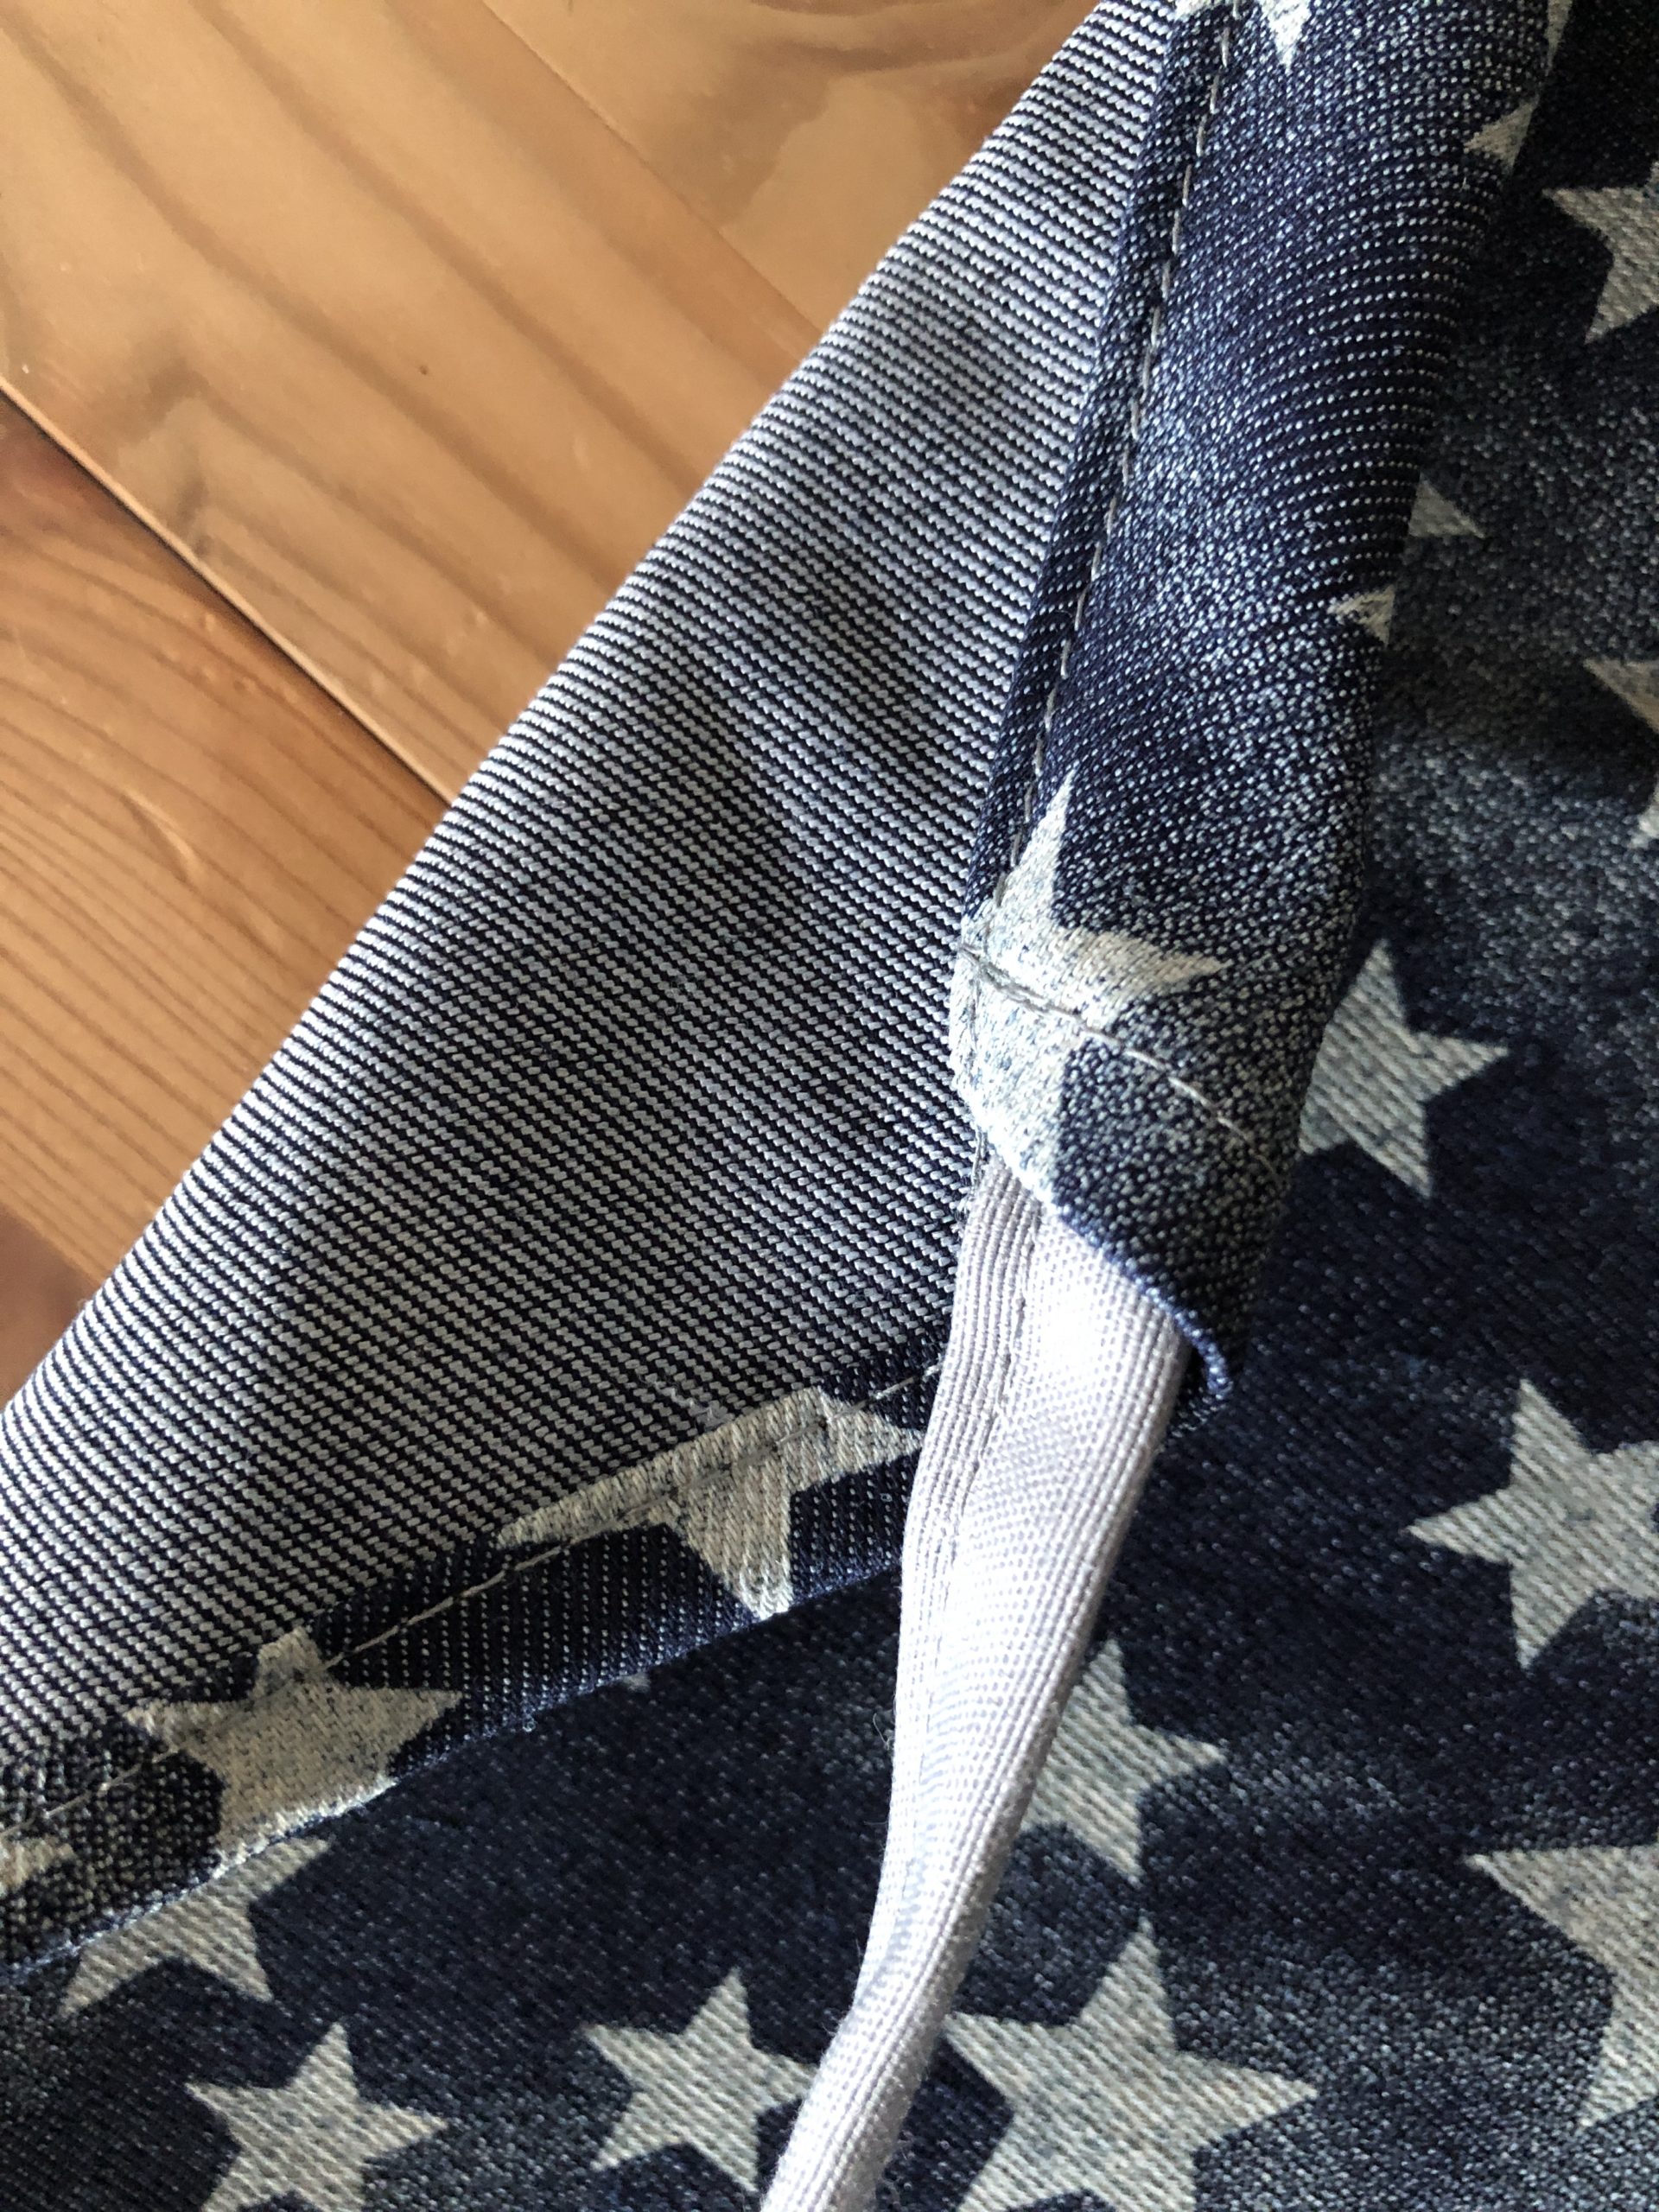
Push the short band on the other side about 2cm into the drawstring and sew firmly.

Bild zum Schritt 31 für das Bastel- und DIY-Abenteuer für Kinder: 'Das kurze Band auf der anderen Seite ca. 2cm in...'

32

2. Bild zum Schritt 31 für das Bastel- und DIY-Abenteuer für Kinder: 'Das kurze Band auf der anderen Seite ca. 2cm in...'

33

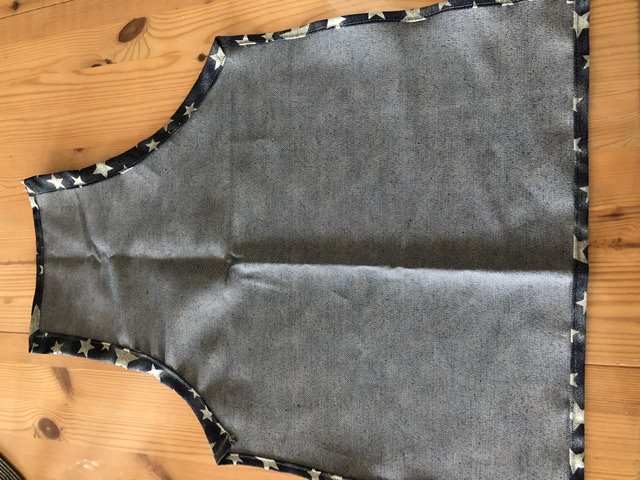
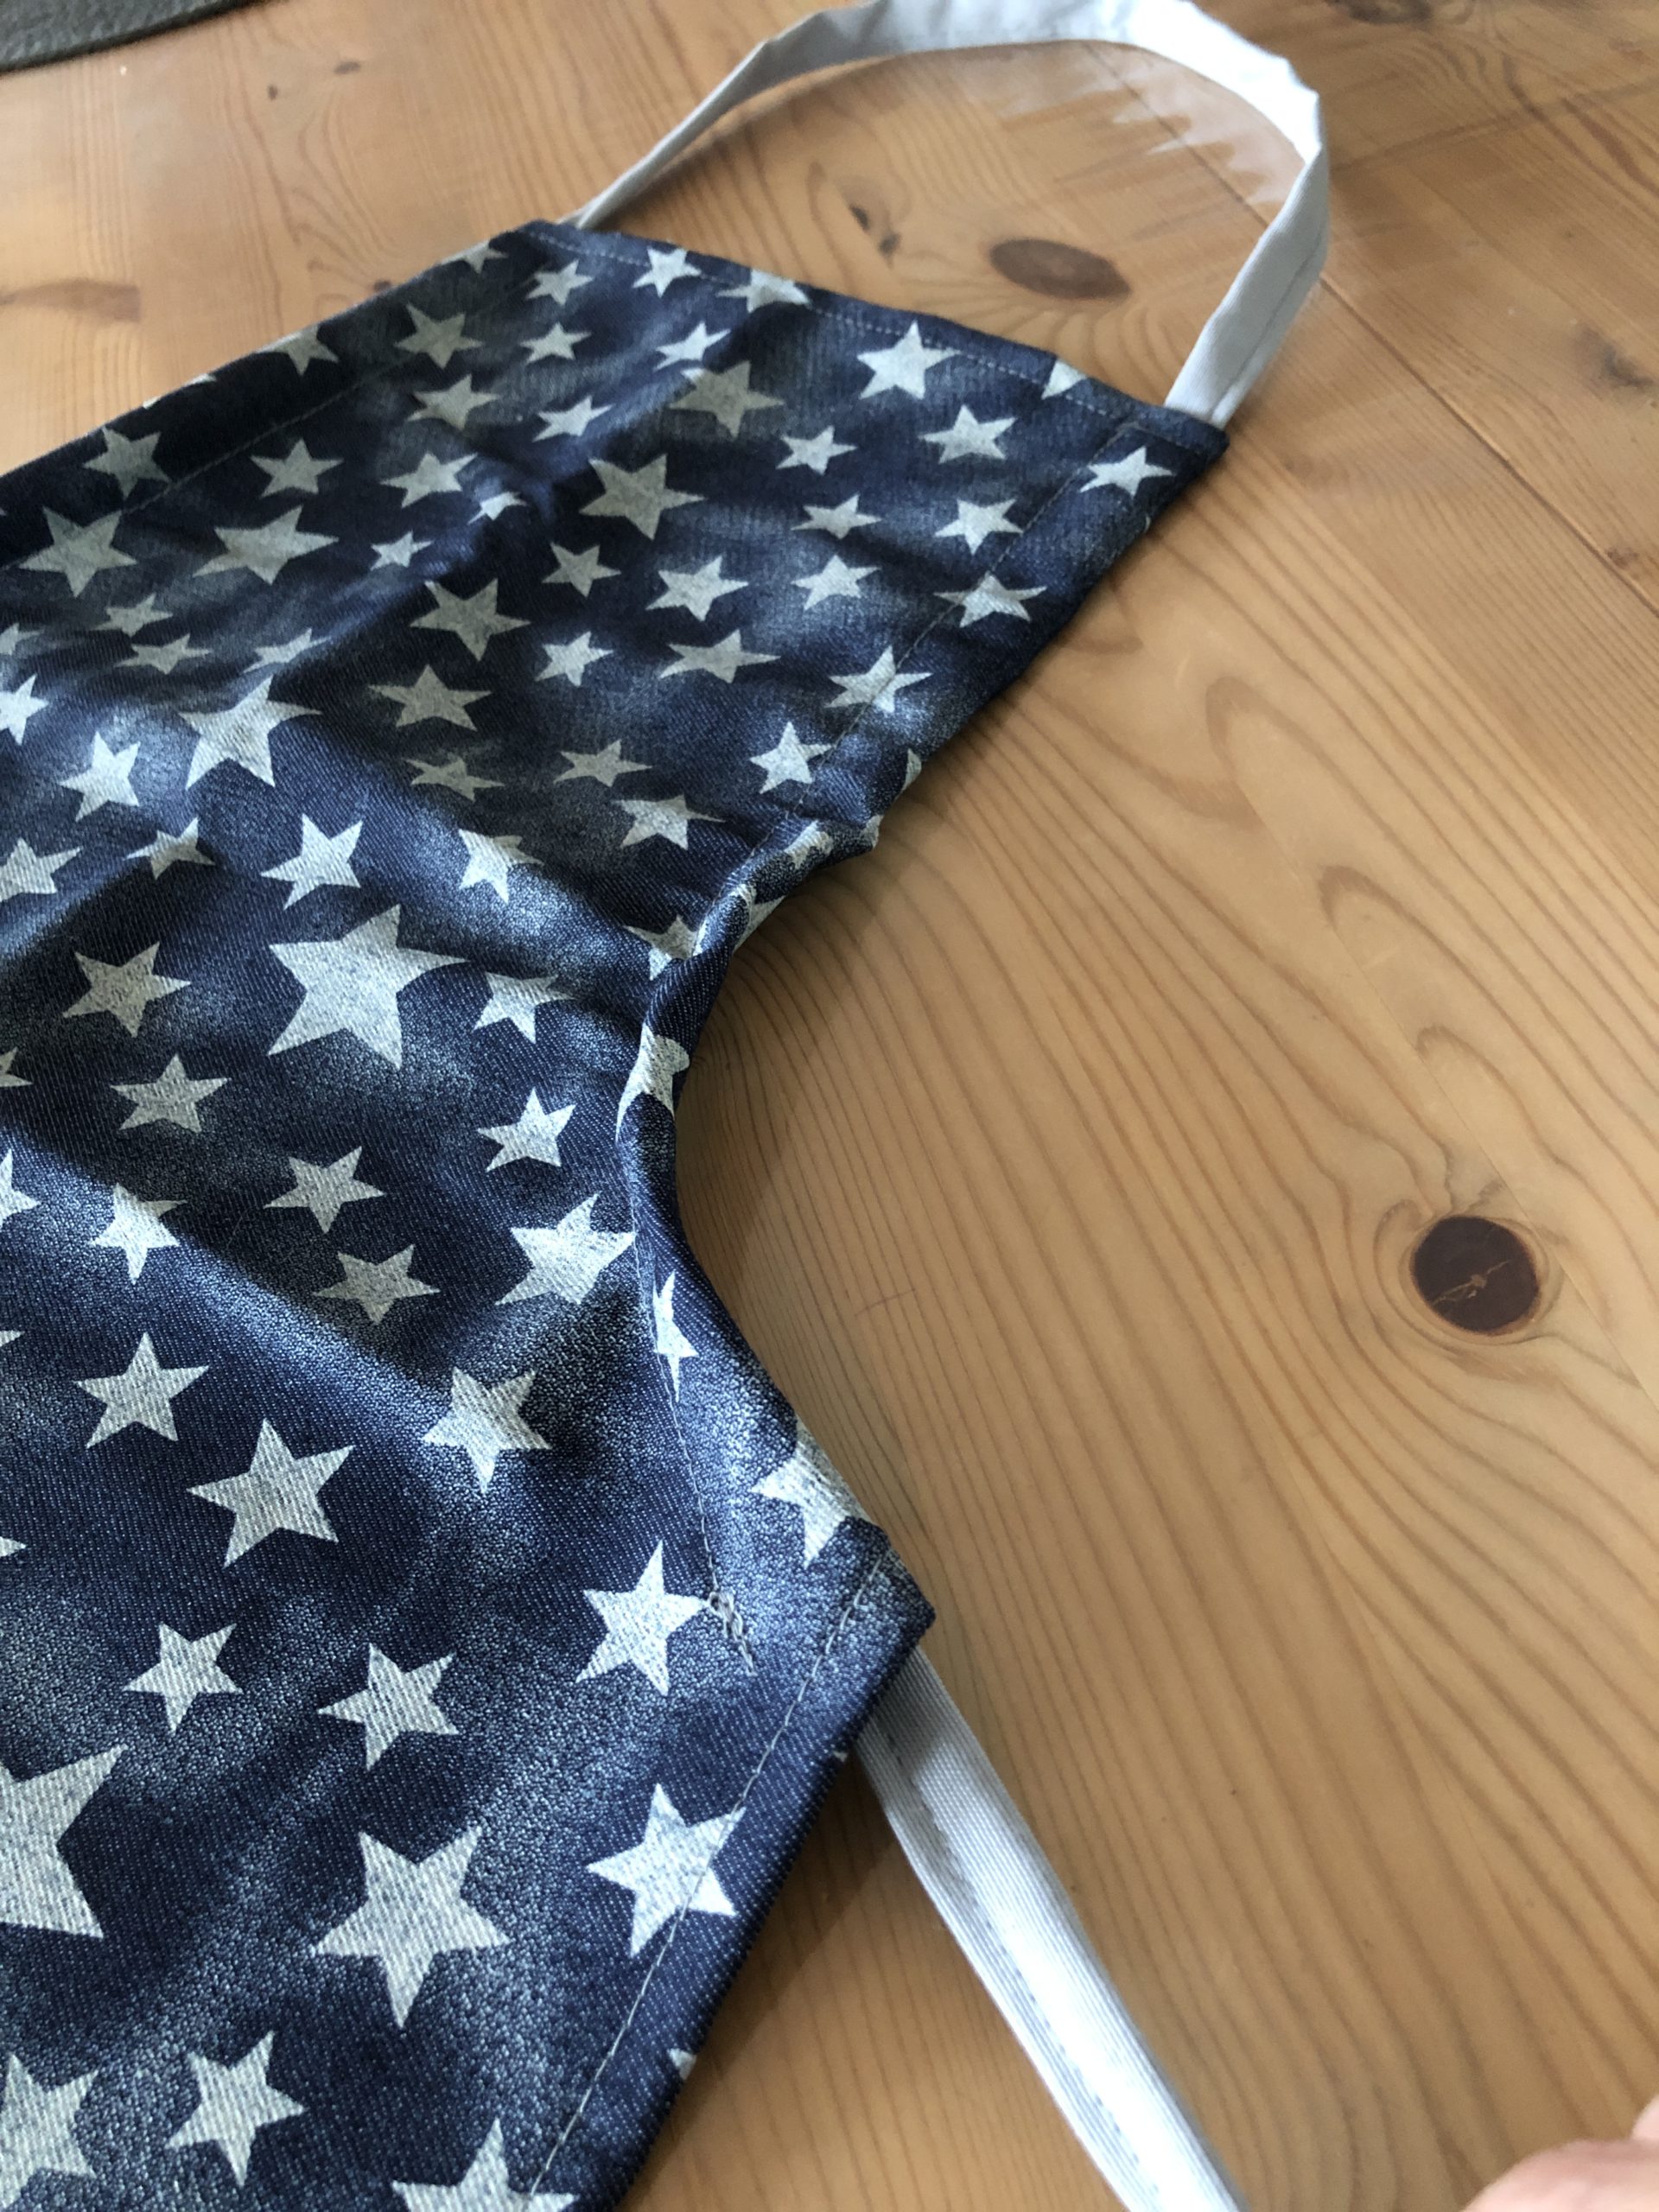
The apron is ready.

Bild zum Schritt 33 für das Bastel- und DIY-Abenteuer für Kinder: 'Fertig ist die Schürze.'

Sew on decorative ribbon (if that's what you want!)
34

If you want to do the same, I'll go on.

35

Cut tape:
50 cm x 7,5 cm

36

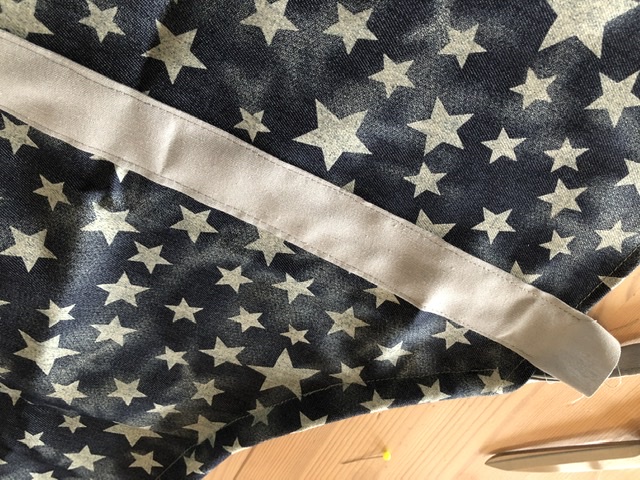
Put stripes across the middle of the apron = approx. 5 cm under the bands! (see picture) fasten and fasten

Bild zum Schritt 37 für das Bastel- und DIY-Abenteuer für Kinder: 'Streifen quer über die Schürzenmitte legen =ca. 5 cm unter...'

37

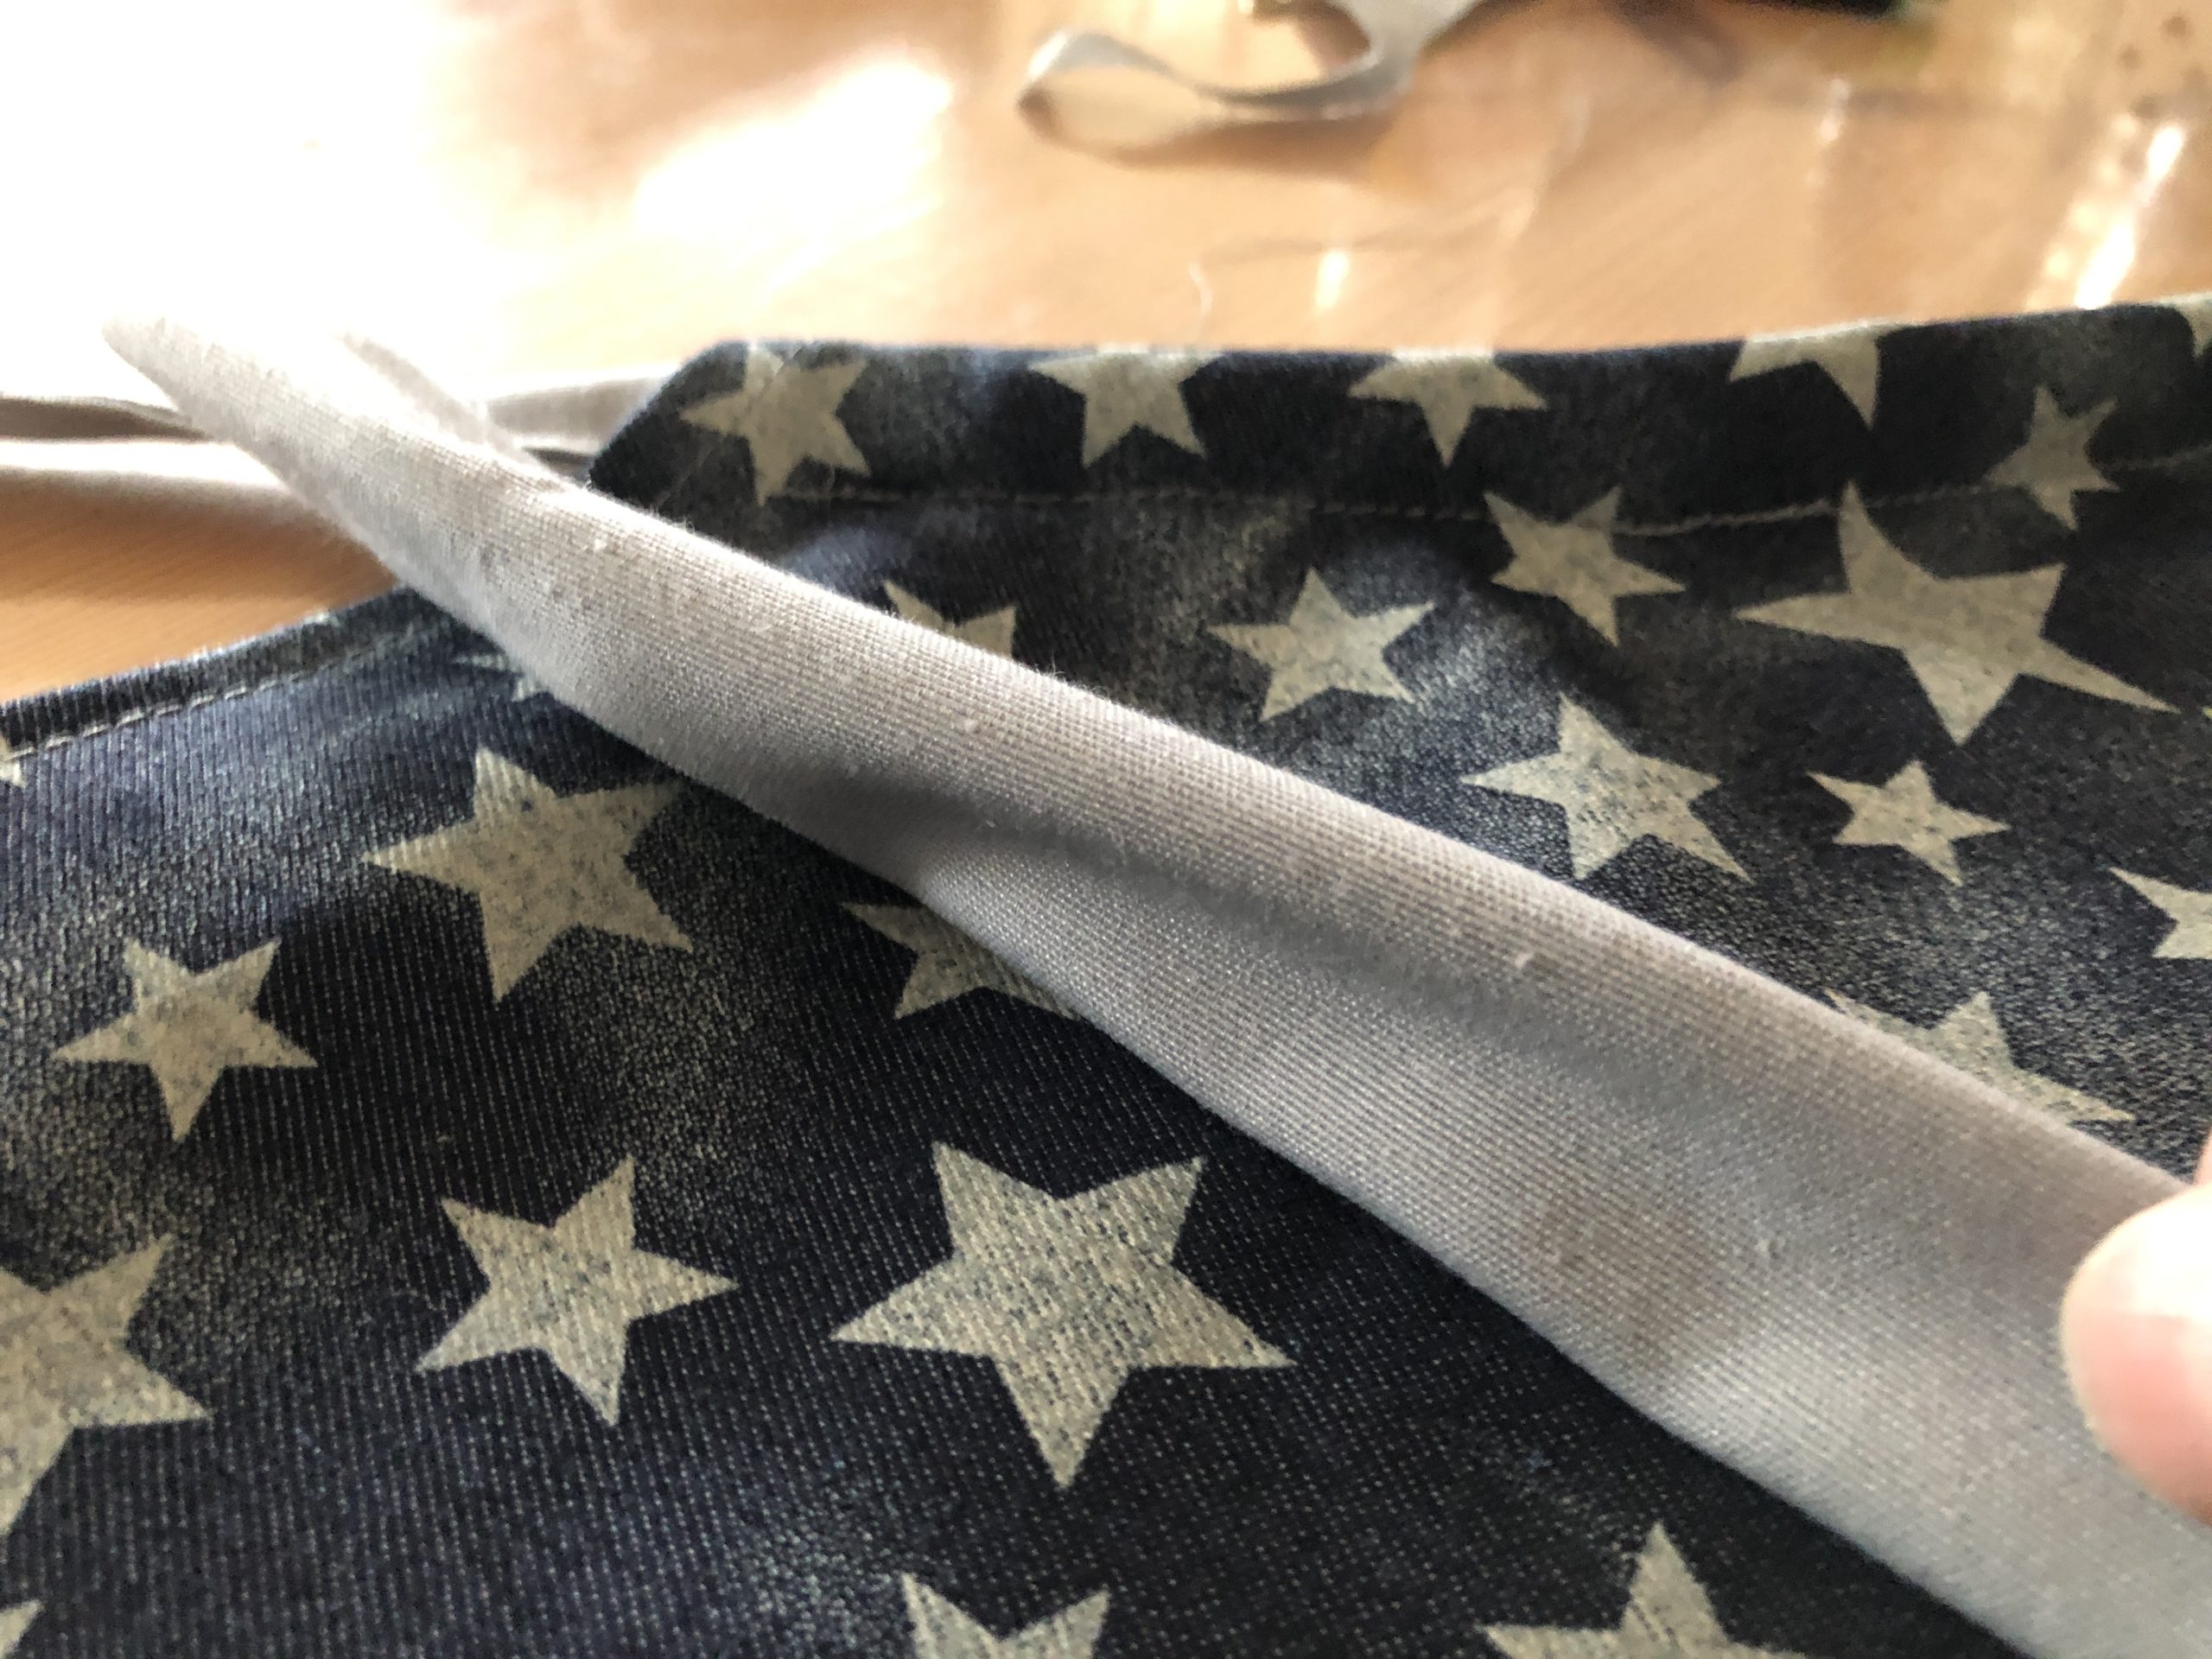
Fold fixed tape upwards and hit the fabric edge about half a centimetre inwards.

Bild zum Schritt 38 für das Bastel- und DIY-Abenteuer für Kinder: 'Festgenähtes Band nach oben klappen und die Stoffkante ca. einen...'

38

Sewing.

Bild zum Schritt 39 für das Bastel- und DIY-Abenteuer für Kinder: 'Festnähen.'

39

Sew a decorative seam on both sides and thus fix the tape on the apron.

Bild zum Schritt 40 für das Bastel- und DIY-Abenteuer für Kinder: 'An beiden Seiten eine Ziernaht nähen und somit das Band...'

40

2. Bild zum Schritt 40 für das Bastel- und DIY-Abenteuer für Kinder: 'An beiden Seiten eine Ziernaht nähen und somit das Band...'

41

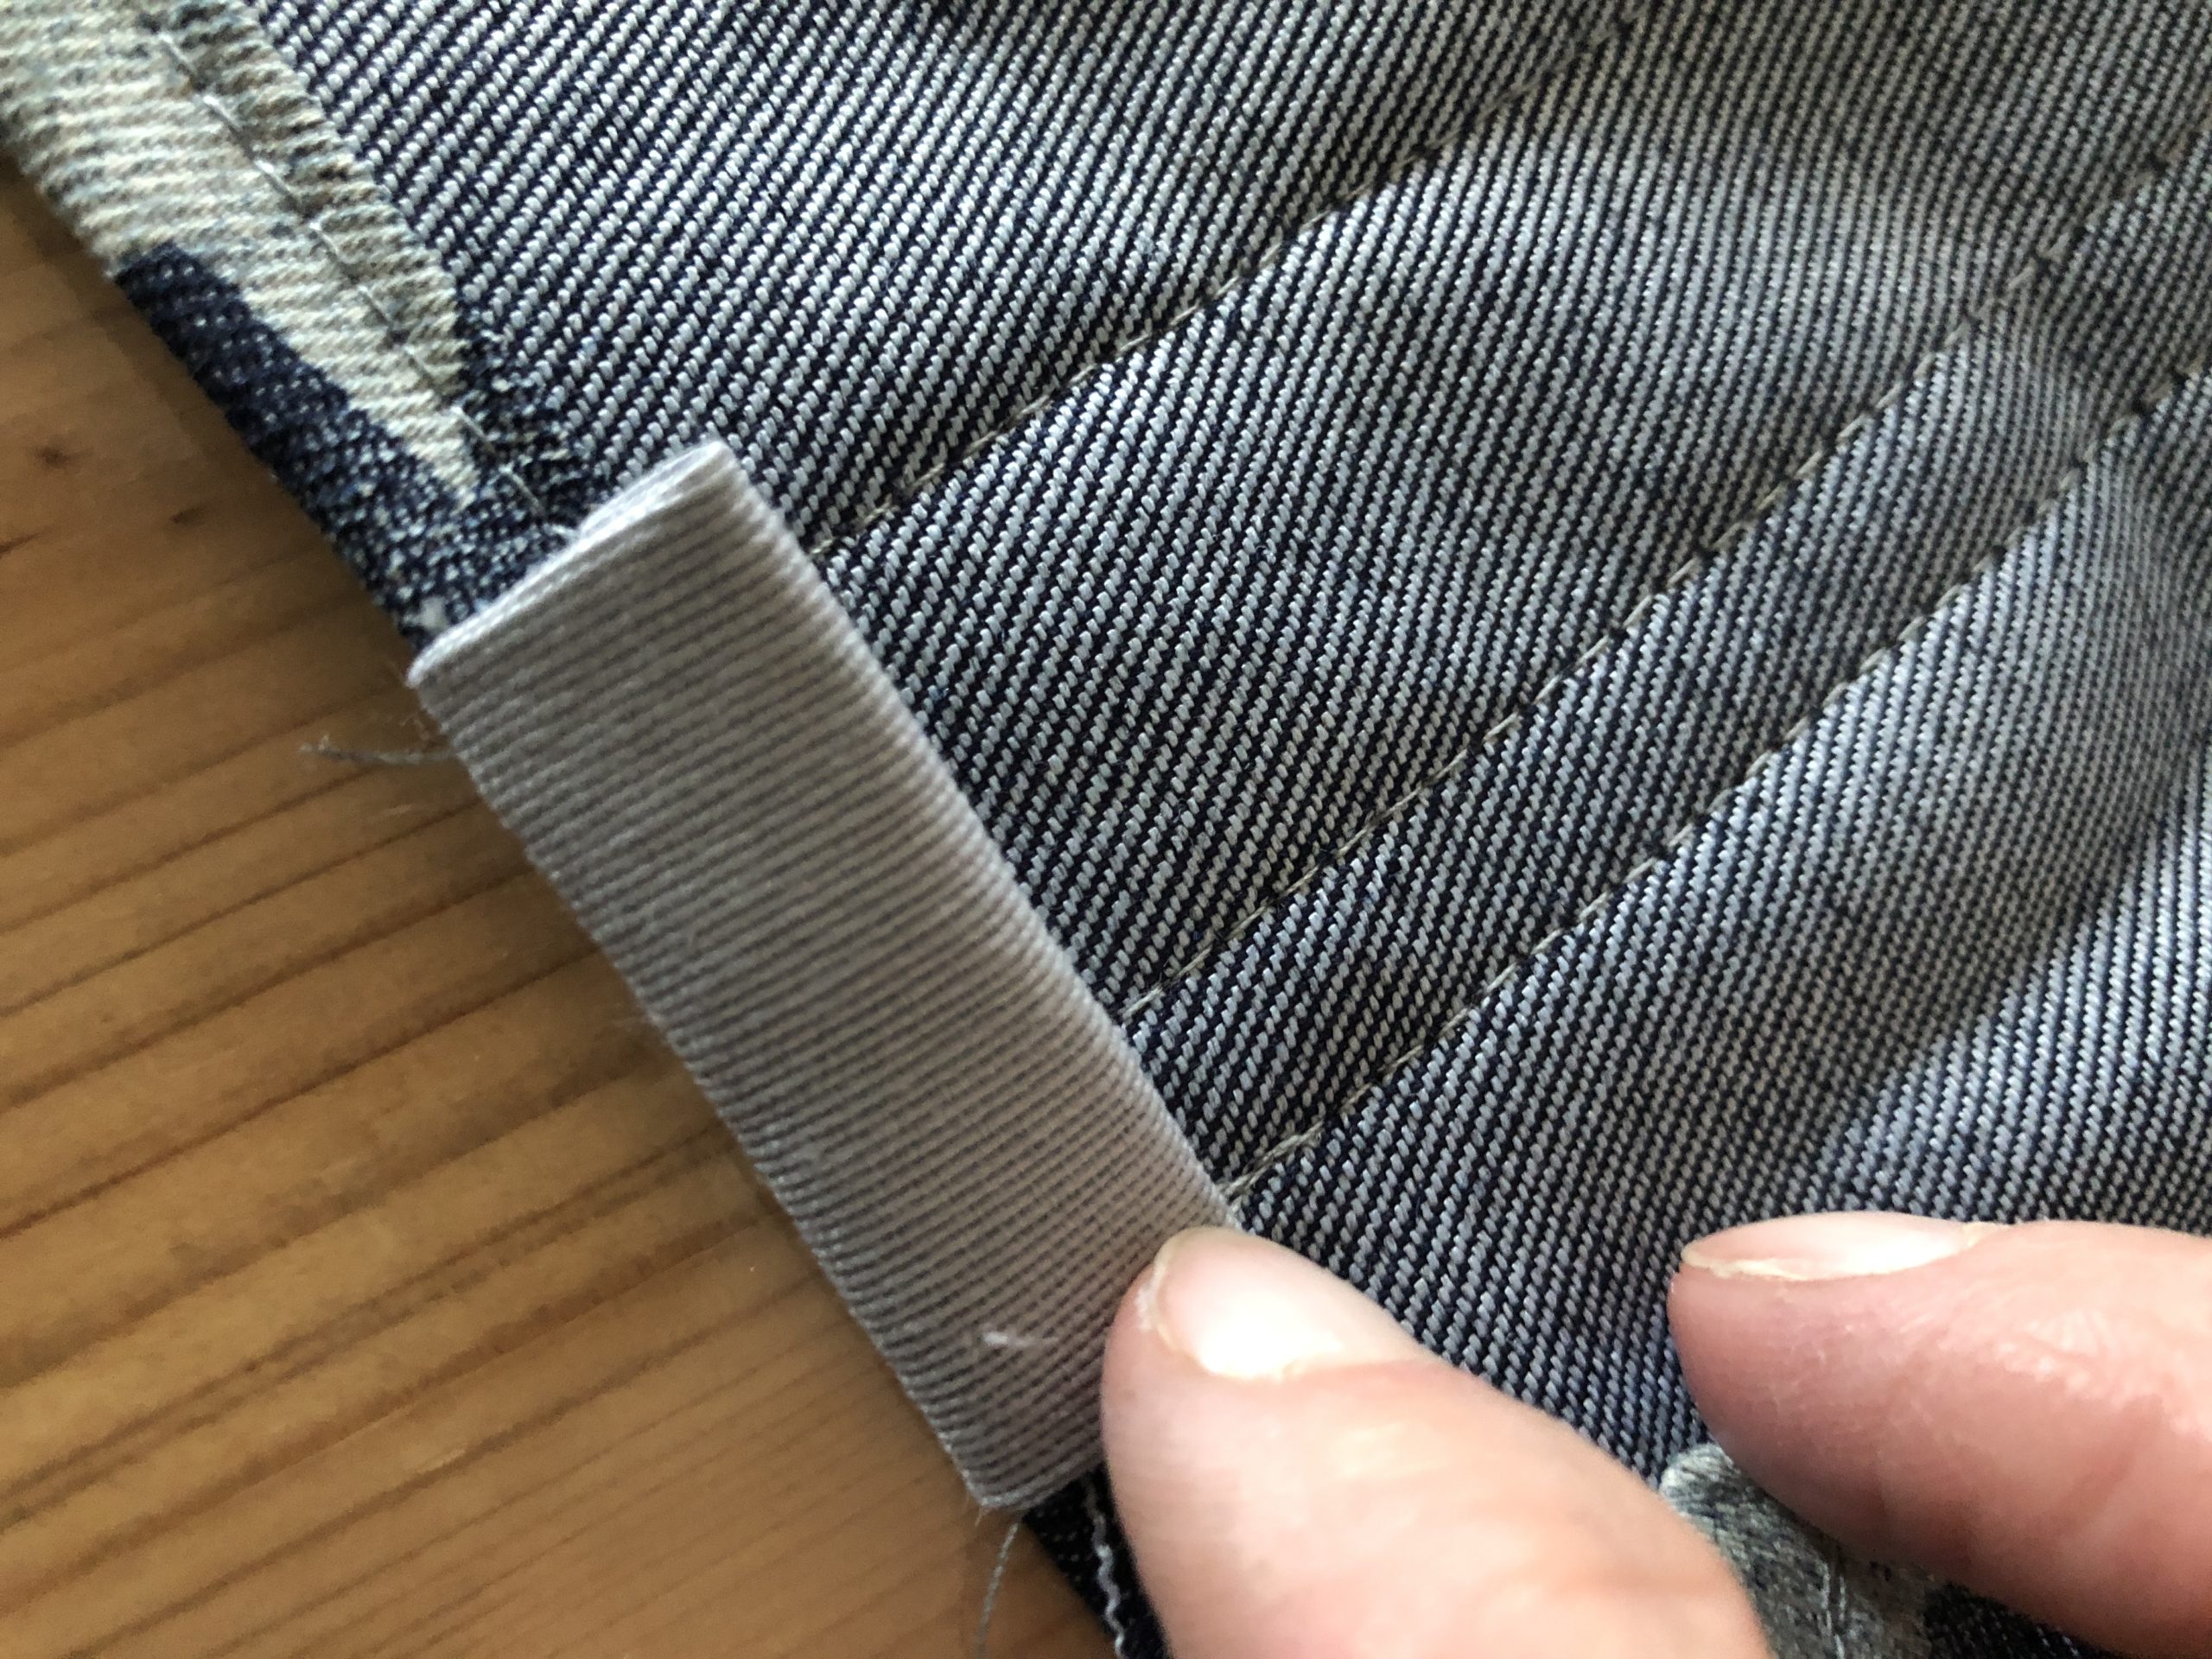
Turn the overhanging band backwards... see picture

Bild zum Schritt 42 für das Bastel- und DIY-Abenteuer für Kinder: 'Das überstehenden Band nach hinten umschlagen ... siehe Bild'

42

2. Bild zum Schritt 42 für das Bastel- und DIY-Abenteuer für Kinder: 'Das überstehenden Band nach hinten umschlagen ... siehe Bild'

43

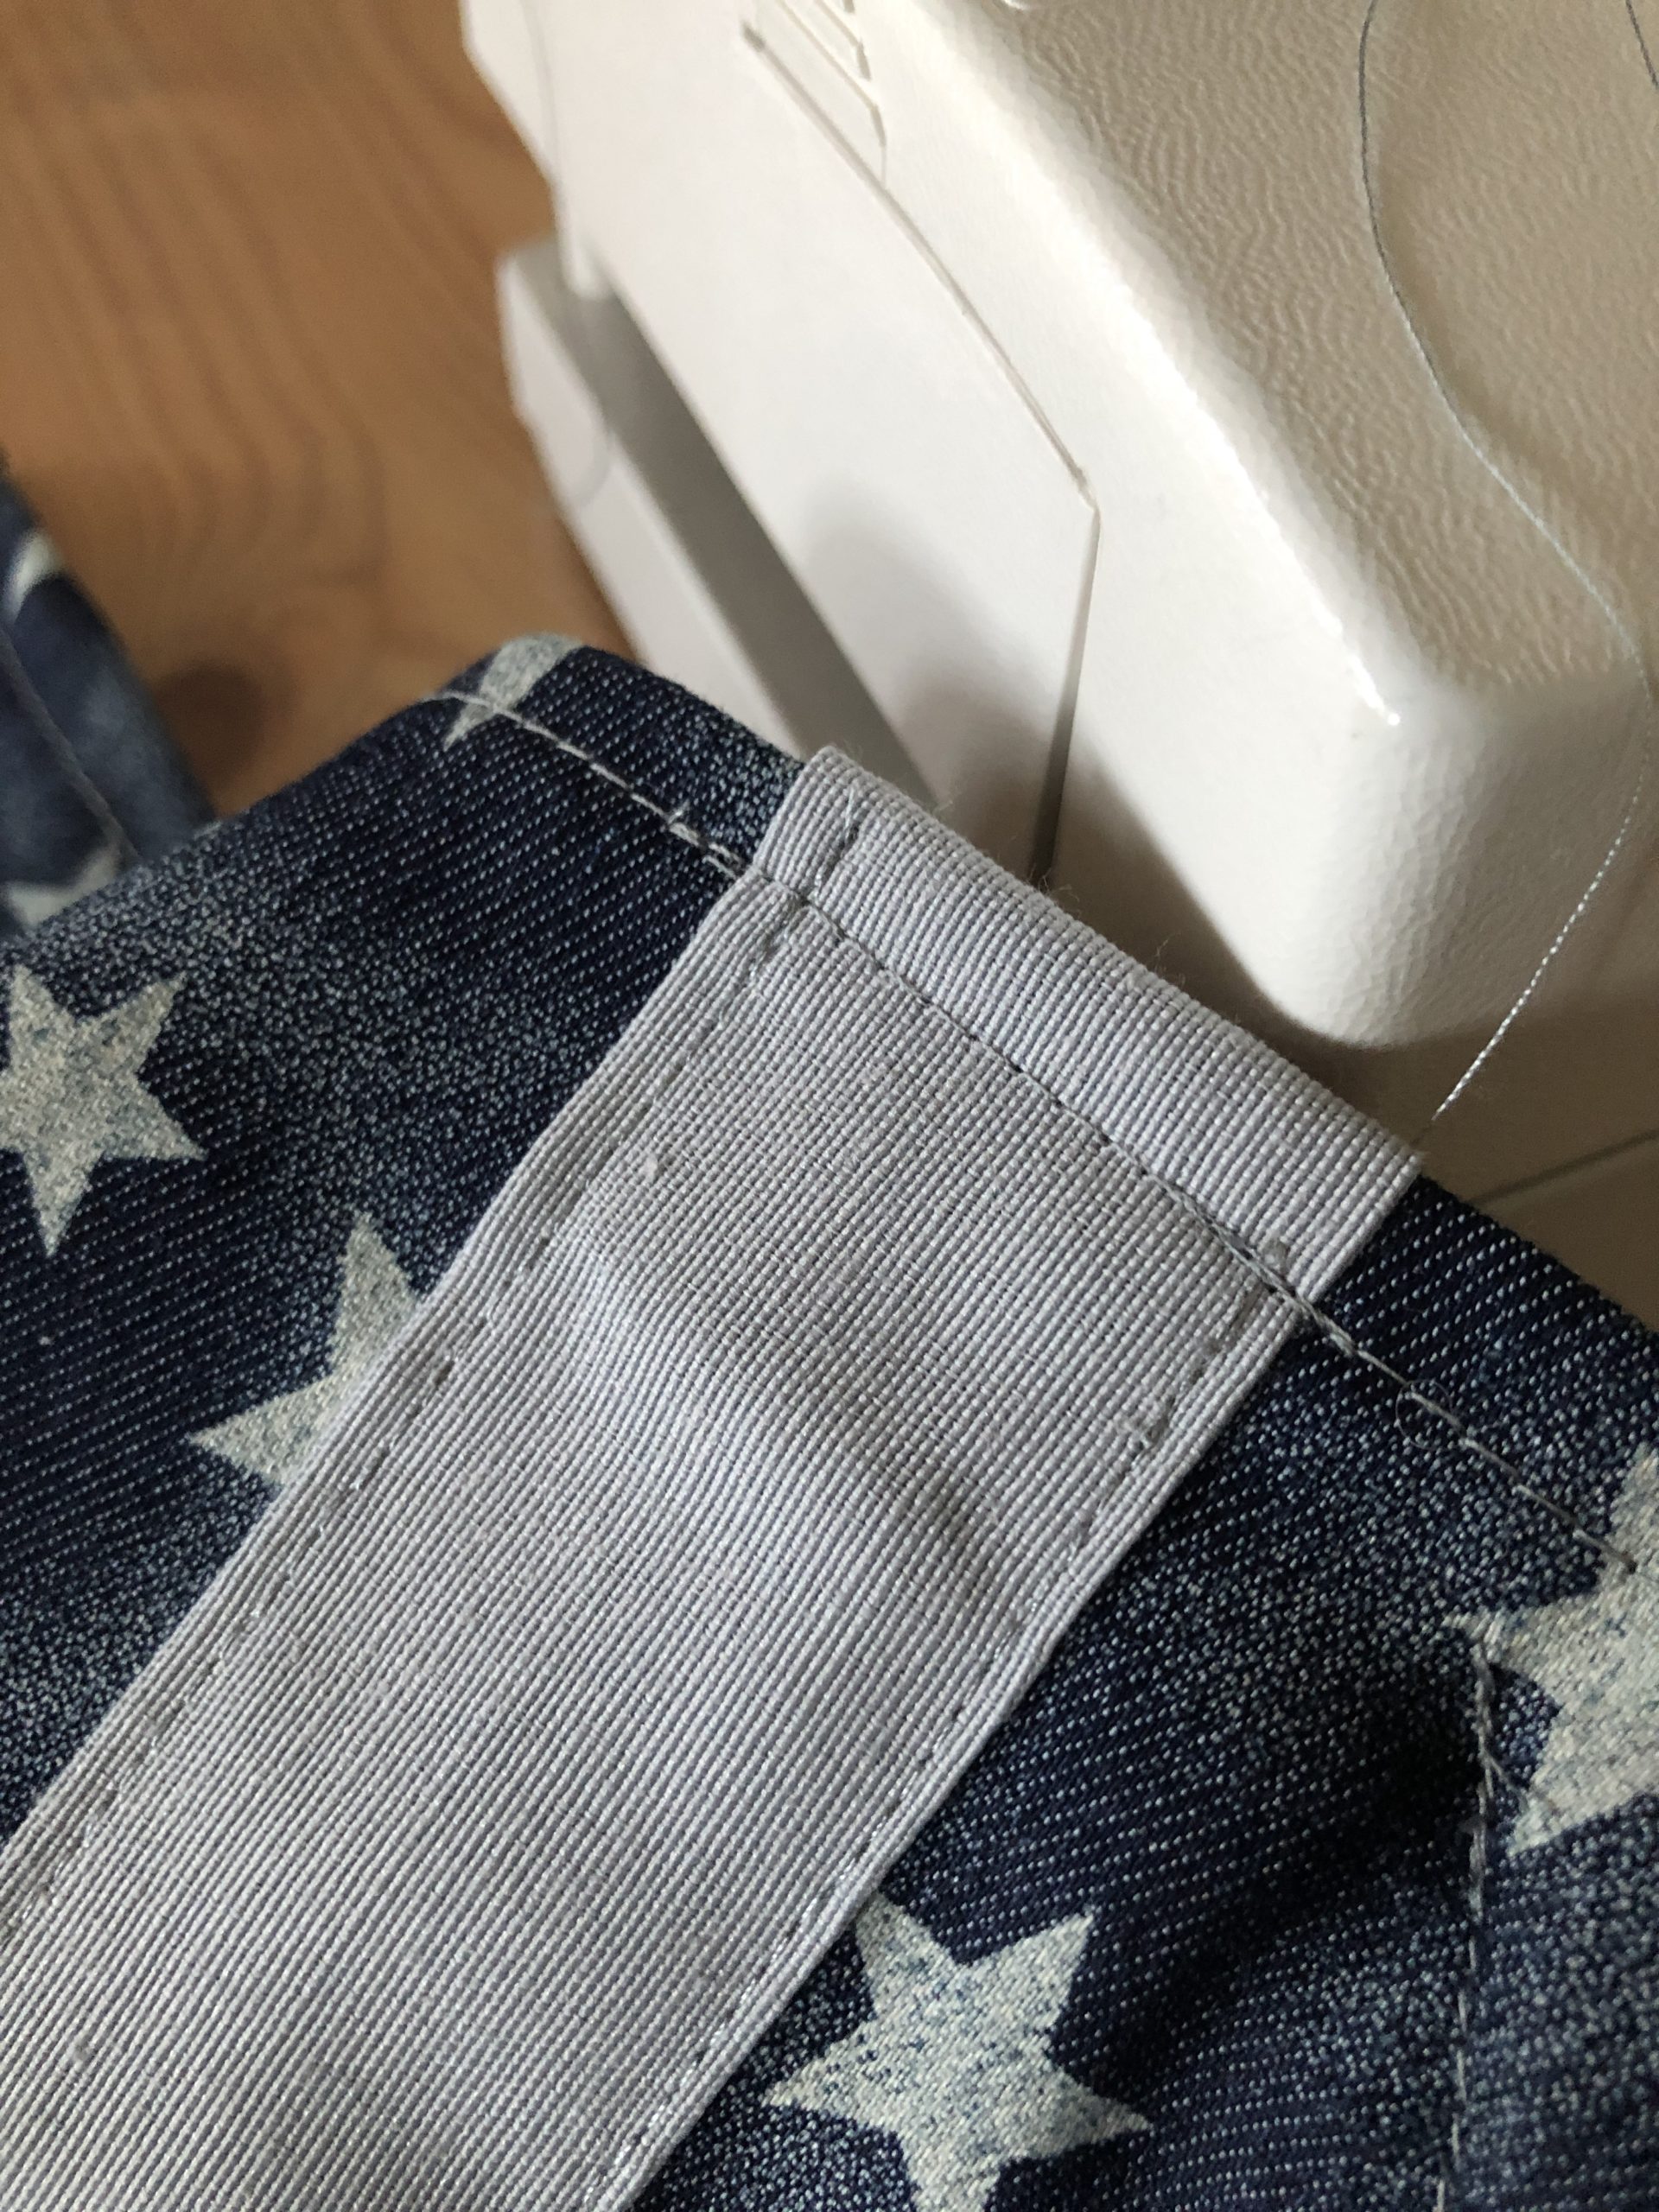
And fasten cleanly.

Bild zum Schritt 44 für das Bastel- und DIY-Abenteuer für Kinder: 'Und sauber festnähen.'

44

The apron is ready.

Bild zum Schritt 45 für das Bastel- und DIY-Abenteuer für Kinder: 'Fertig ist die Schürze.'

45

If you haven't had enough, I'd still have the matching cooking cap... look inside!

Materials

 2 Applicable Substances
  Cut Pattern
 1 Fabric shears + paper shears
 Pins and pins
 1 Pen
 1 Ruler
 1 Sewing machine
 Thread
Substance sizes:
 Apron fabric (stars): 46 cm x 60 cm46 cm x 60 cm
 Volume: 110 cm x 4.50 cm
 Volume: 55 cm x 4.50 cm
 Band: 50 cm x 7,50 cm

Directions

1

Template: with four DIN A4 sheets simply transferred. See template.
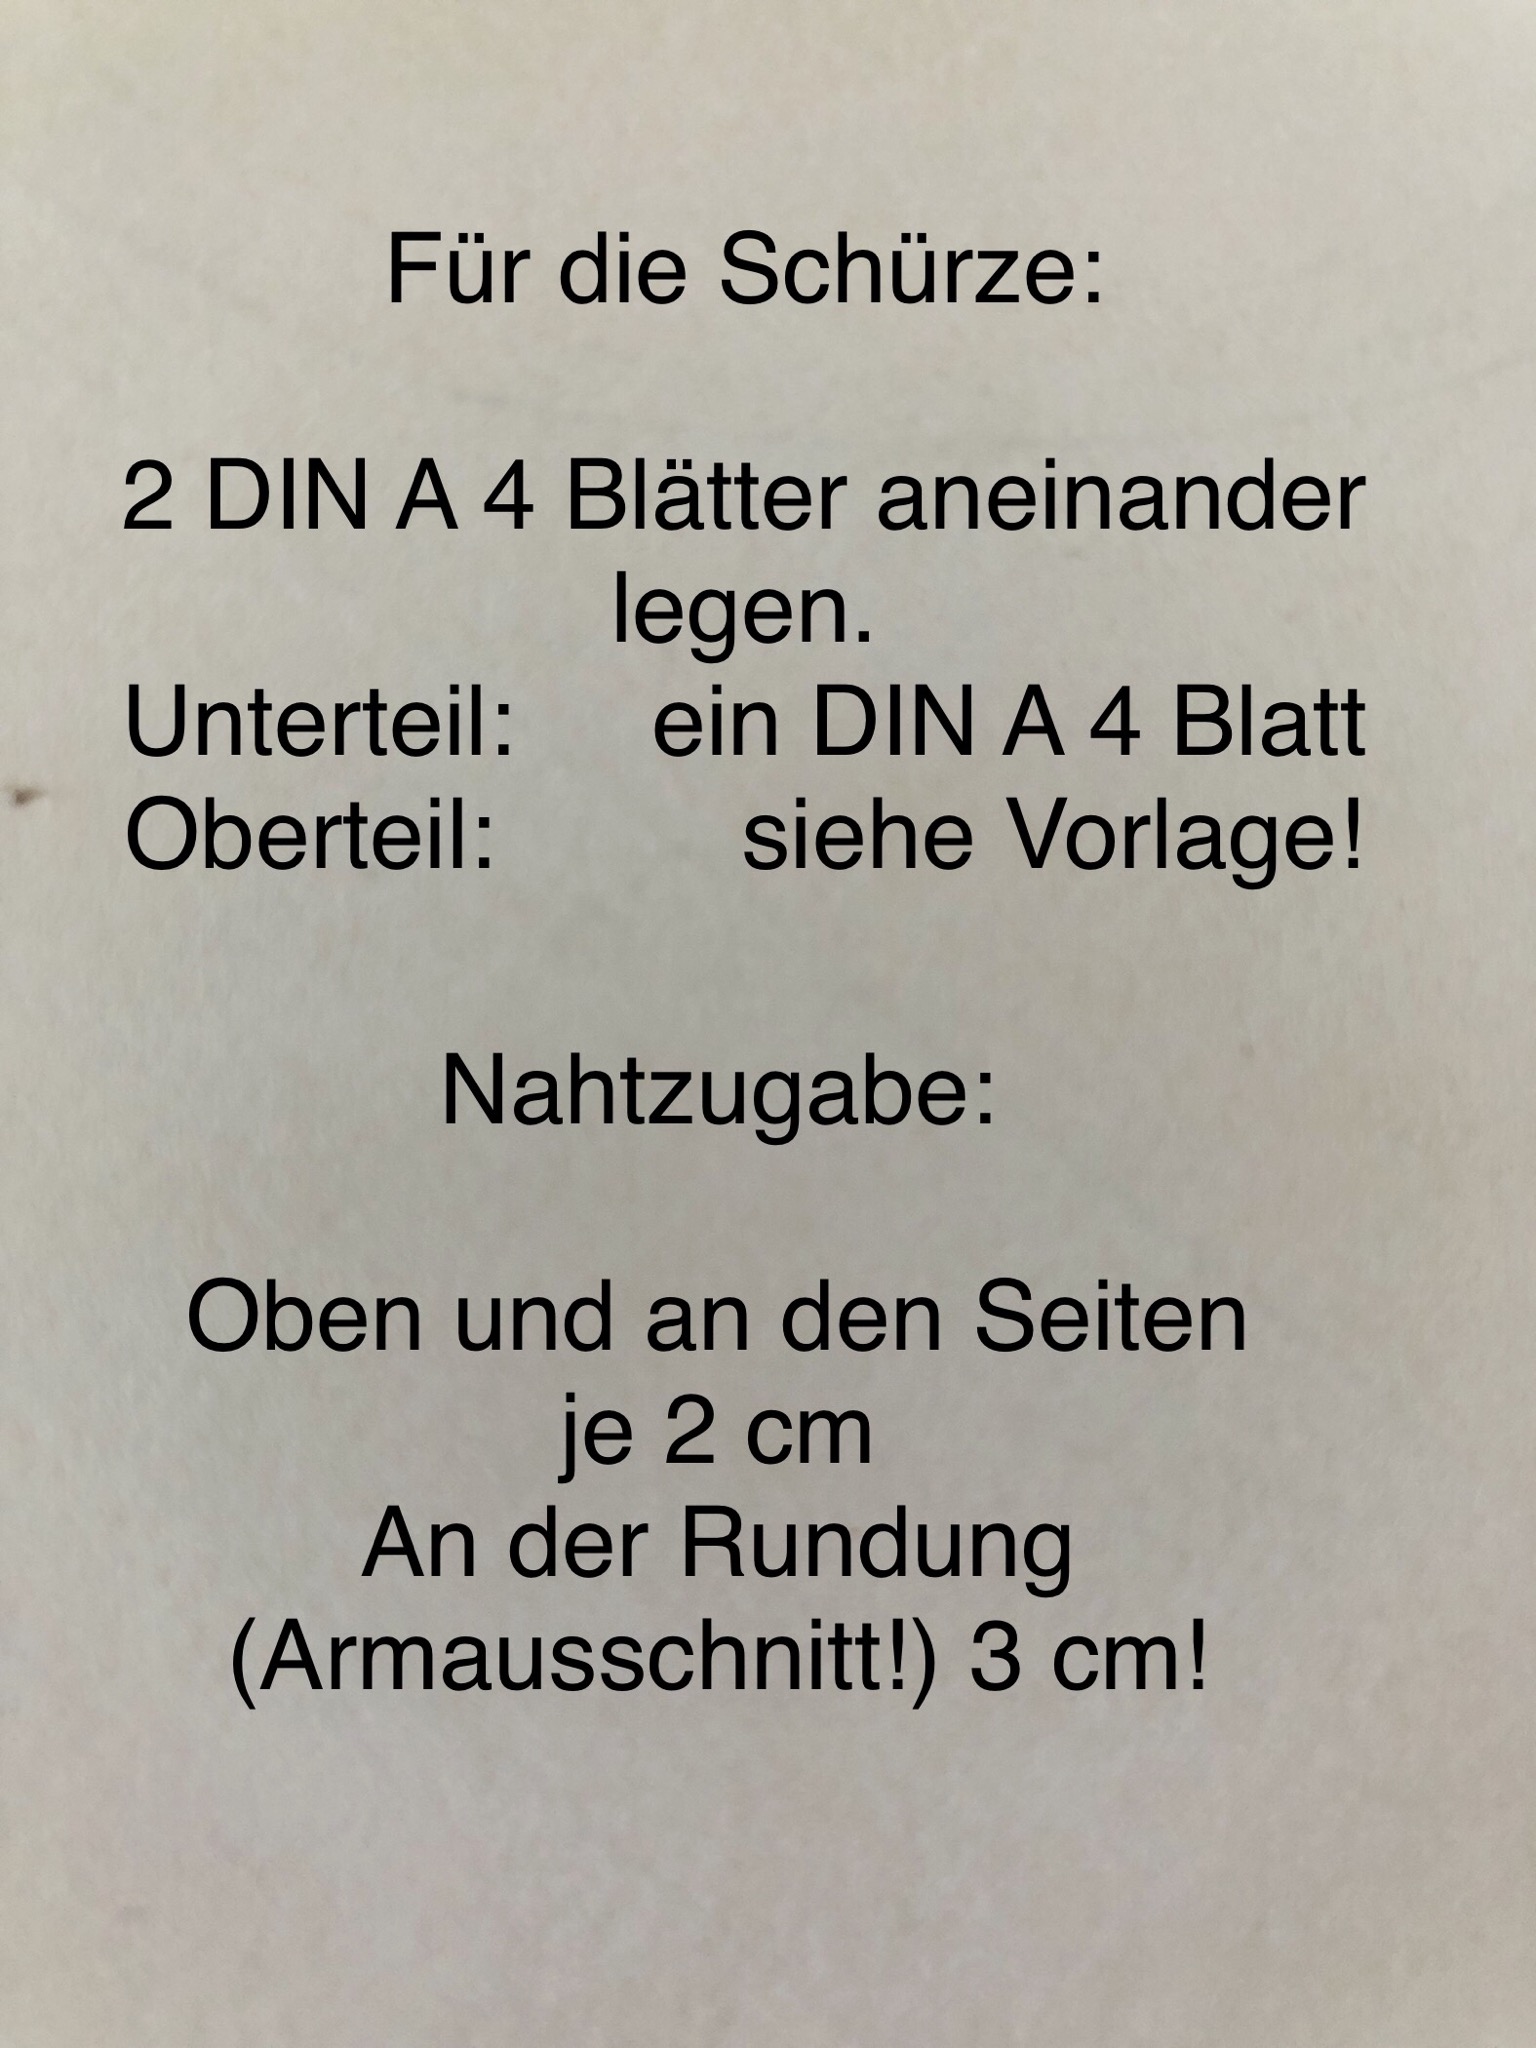
Bild zum Schritt 1 für das Bastel- und DIY-Abenteuer für Kinder: 'Vorlage: mit vier DIN A4 Blättern ganz einfach übertragen. Siehe...'

2

2. Bild zum Schritt 1 für das Bastel- und DIY-Abenteuer für Kinder: 'Vorlage: mit vier DIN A4 Blättern ganz einfach übertragen. Siehe...'

3

3. Bild zum Schritt 2 für das Bastel- und DIY-Abenteuer für Kinder: 'Vorlage: mit vier DIN A4 Blättern ganz einfach übertragen. Siehe...'

4

4. Bild zum Schritt 3 für das Bastel- und DIY-Abenteuer für Kinder: 'Vorlage: mit vier DIN A4 Blättern ganz einfach übertragen. Siehe...'

5

Line dashed = breakage!

Bild zum Schritt 5 für das Bastel- und DIY-Abenteuer für Kinder: 'Gestrichelte Linie = Stoffbruch!'

6

Cut fabric.

Bild zum Schritt 6 für das Bastel- und DIY-Abenteuer für Kinder: 'Stoff zuschneiden.'

7

Double the dashed sides and sew a hem.
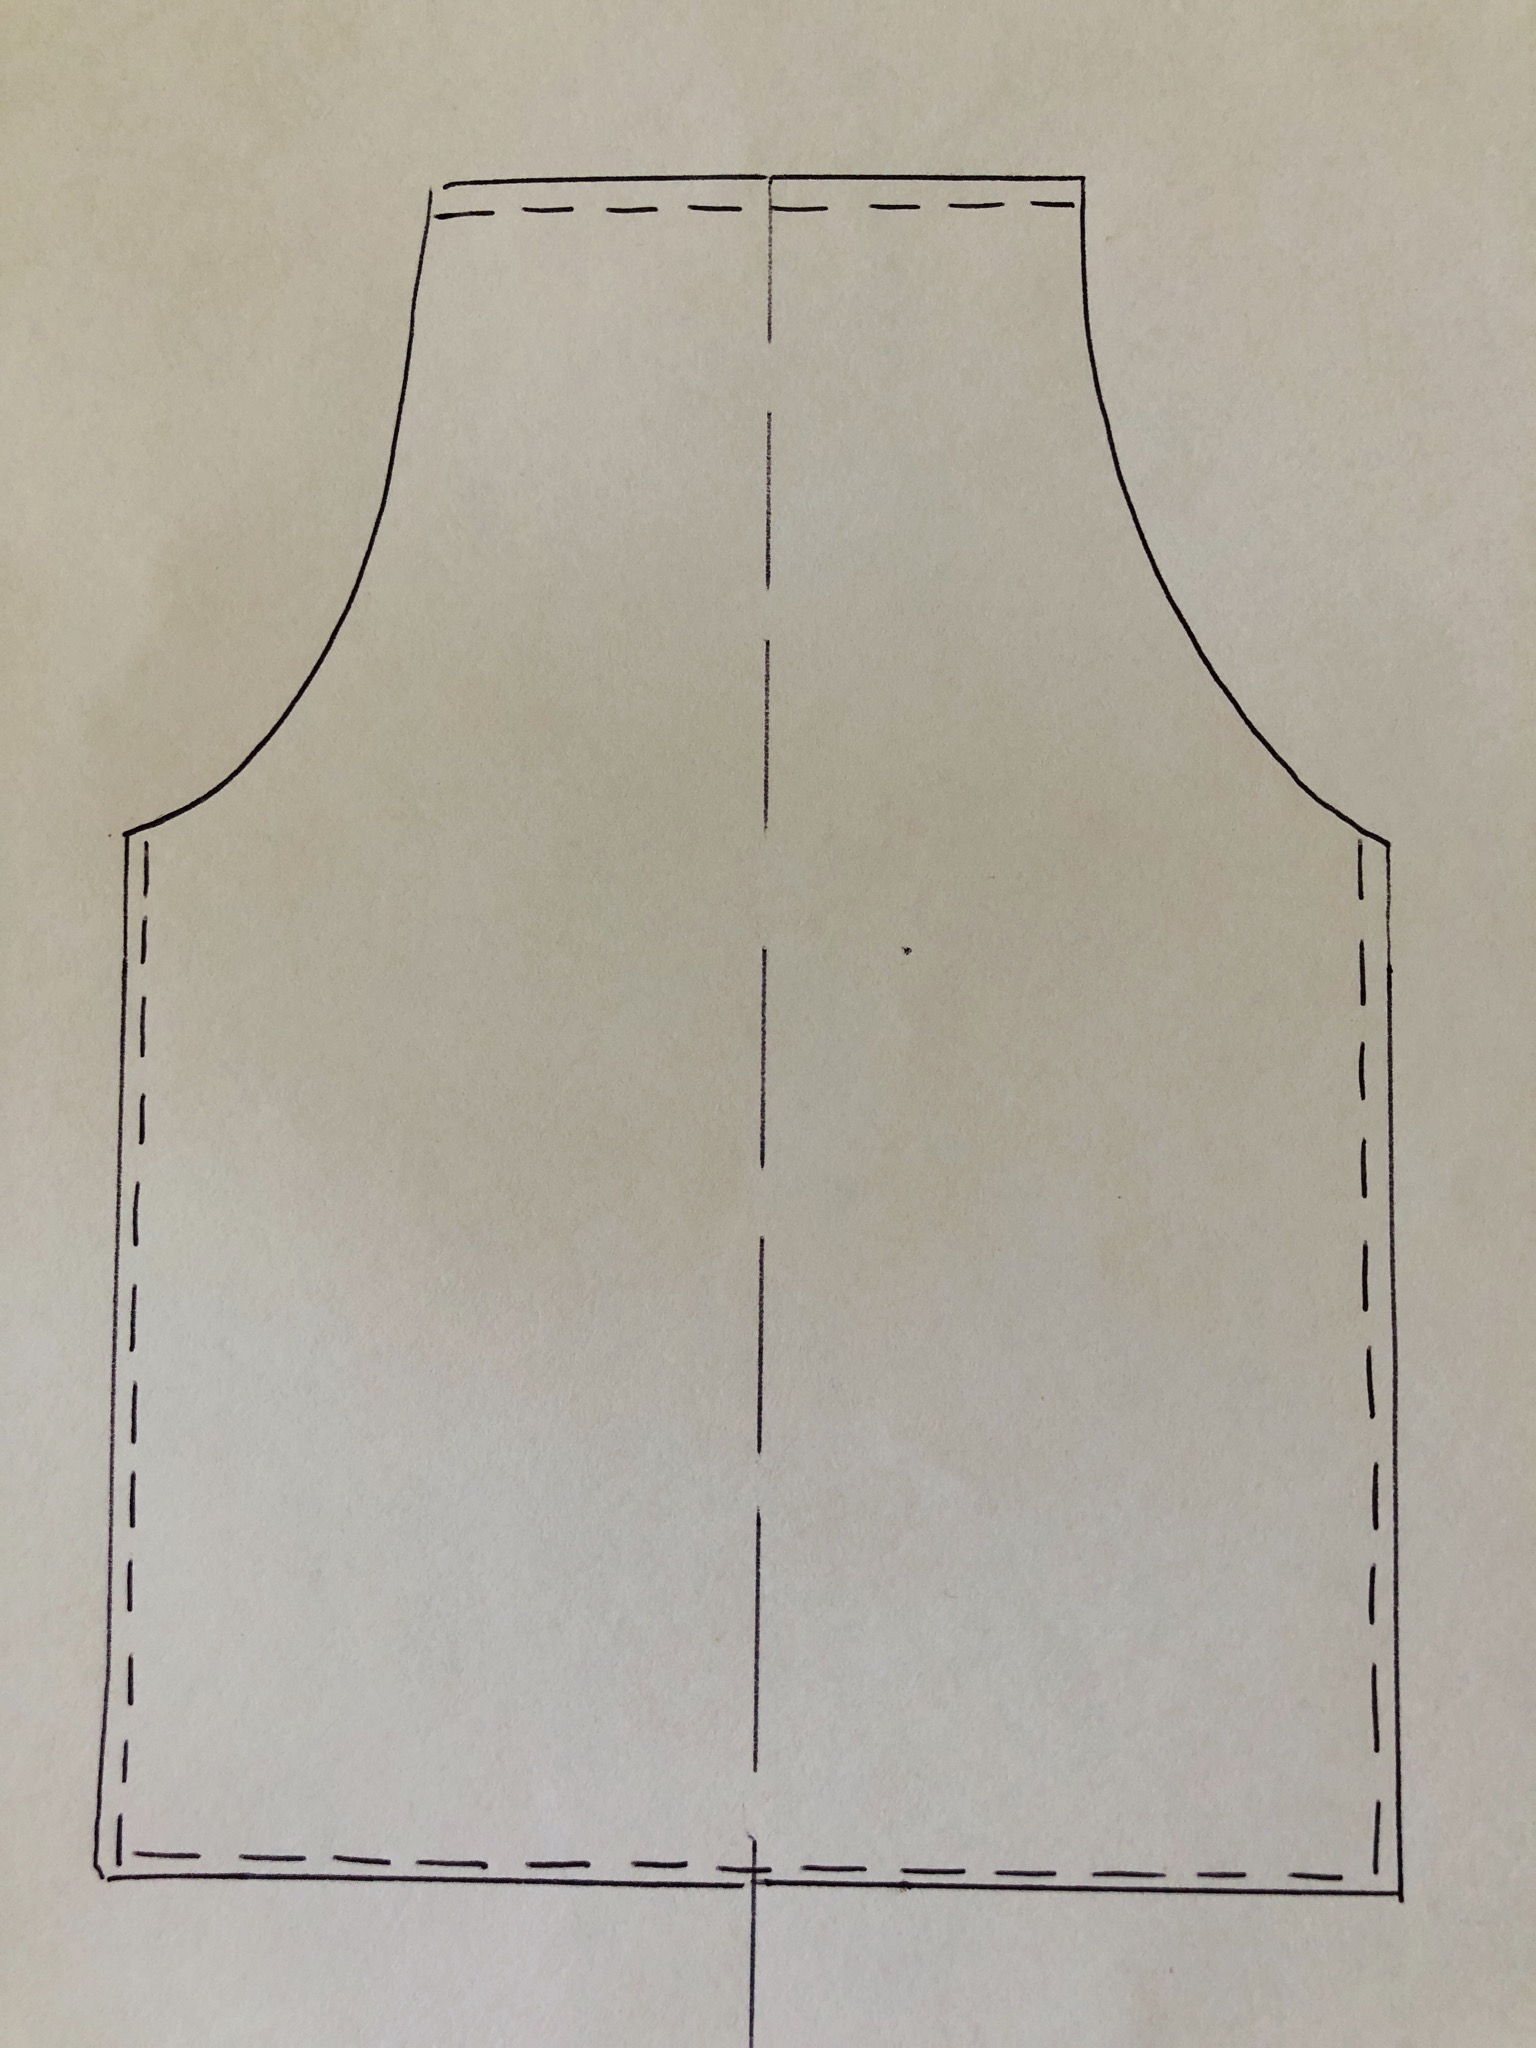
Bild zum Schritt 7 für das Bastel- und DIY-Abenteuer für Kinder: 'Die gestrichelten Seiten doppelt umschlagen und einen Saum nähen.'

8

2. Bild zum Schritt 7 für das Bastel- und DIY-Abenteuer für Kinder: 'Die gestrichelten Seiten doppelt umschlagen und einen Saum nähen.'

9

Proceed around the corner as follows: Place fabric corner inwards...
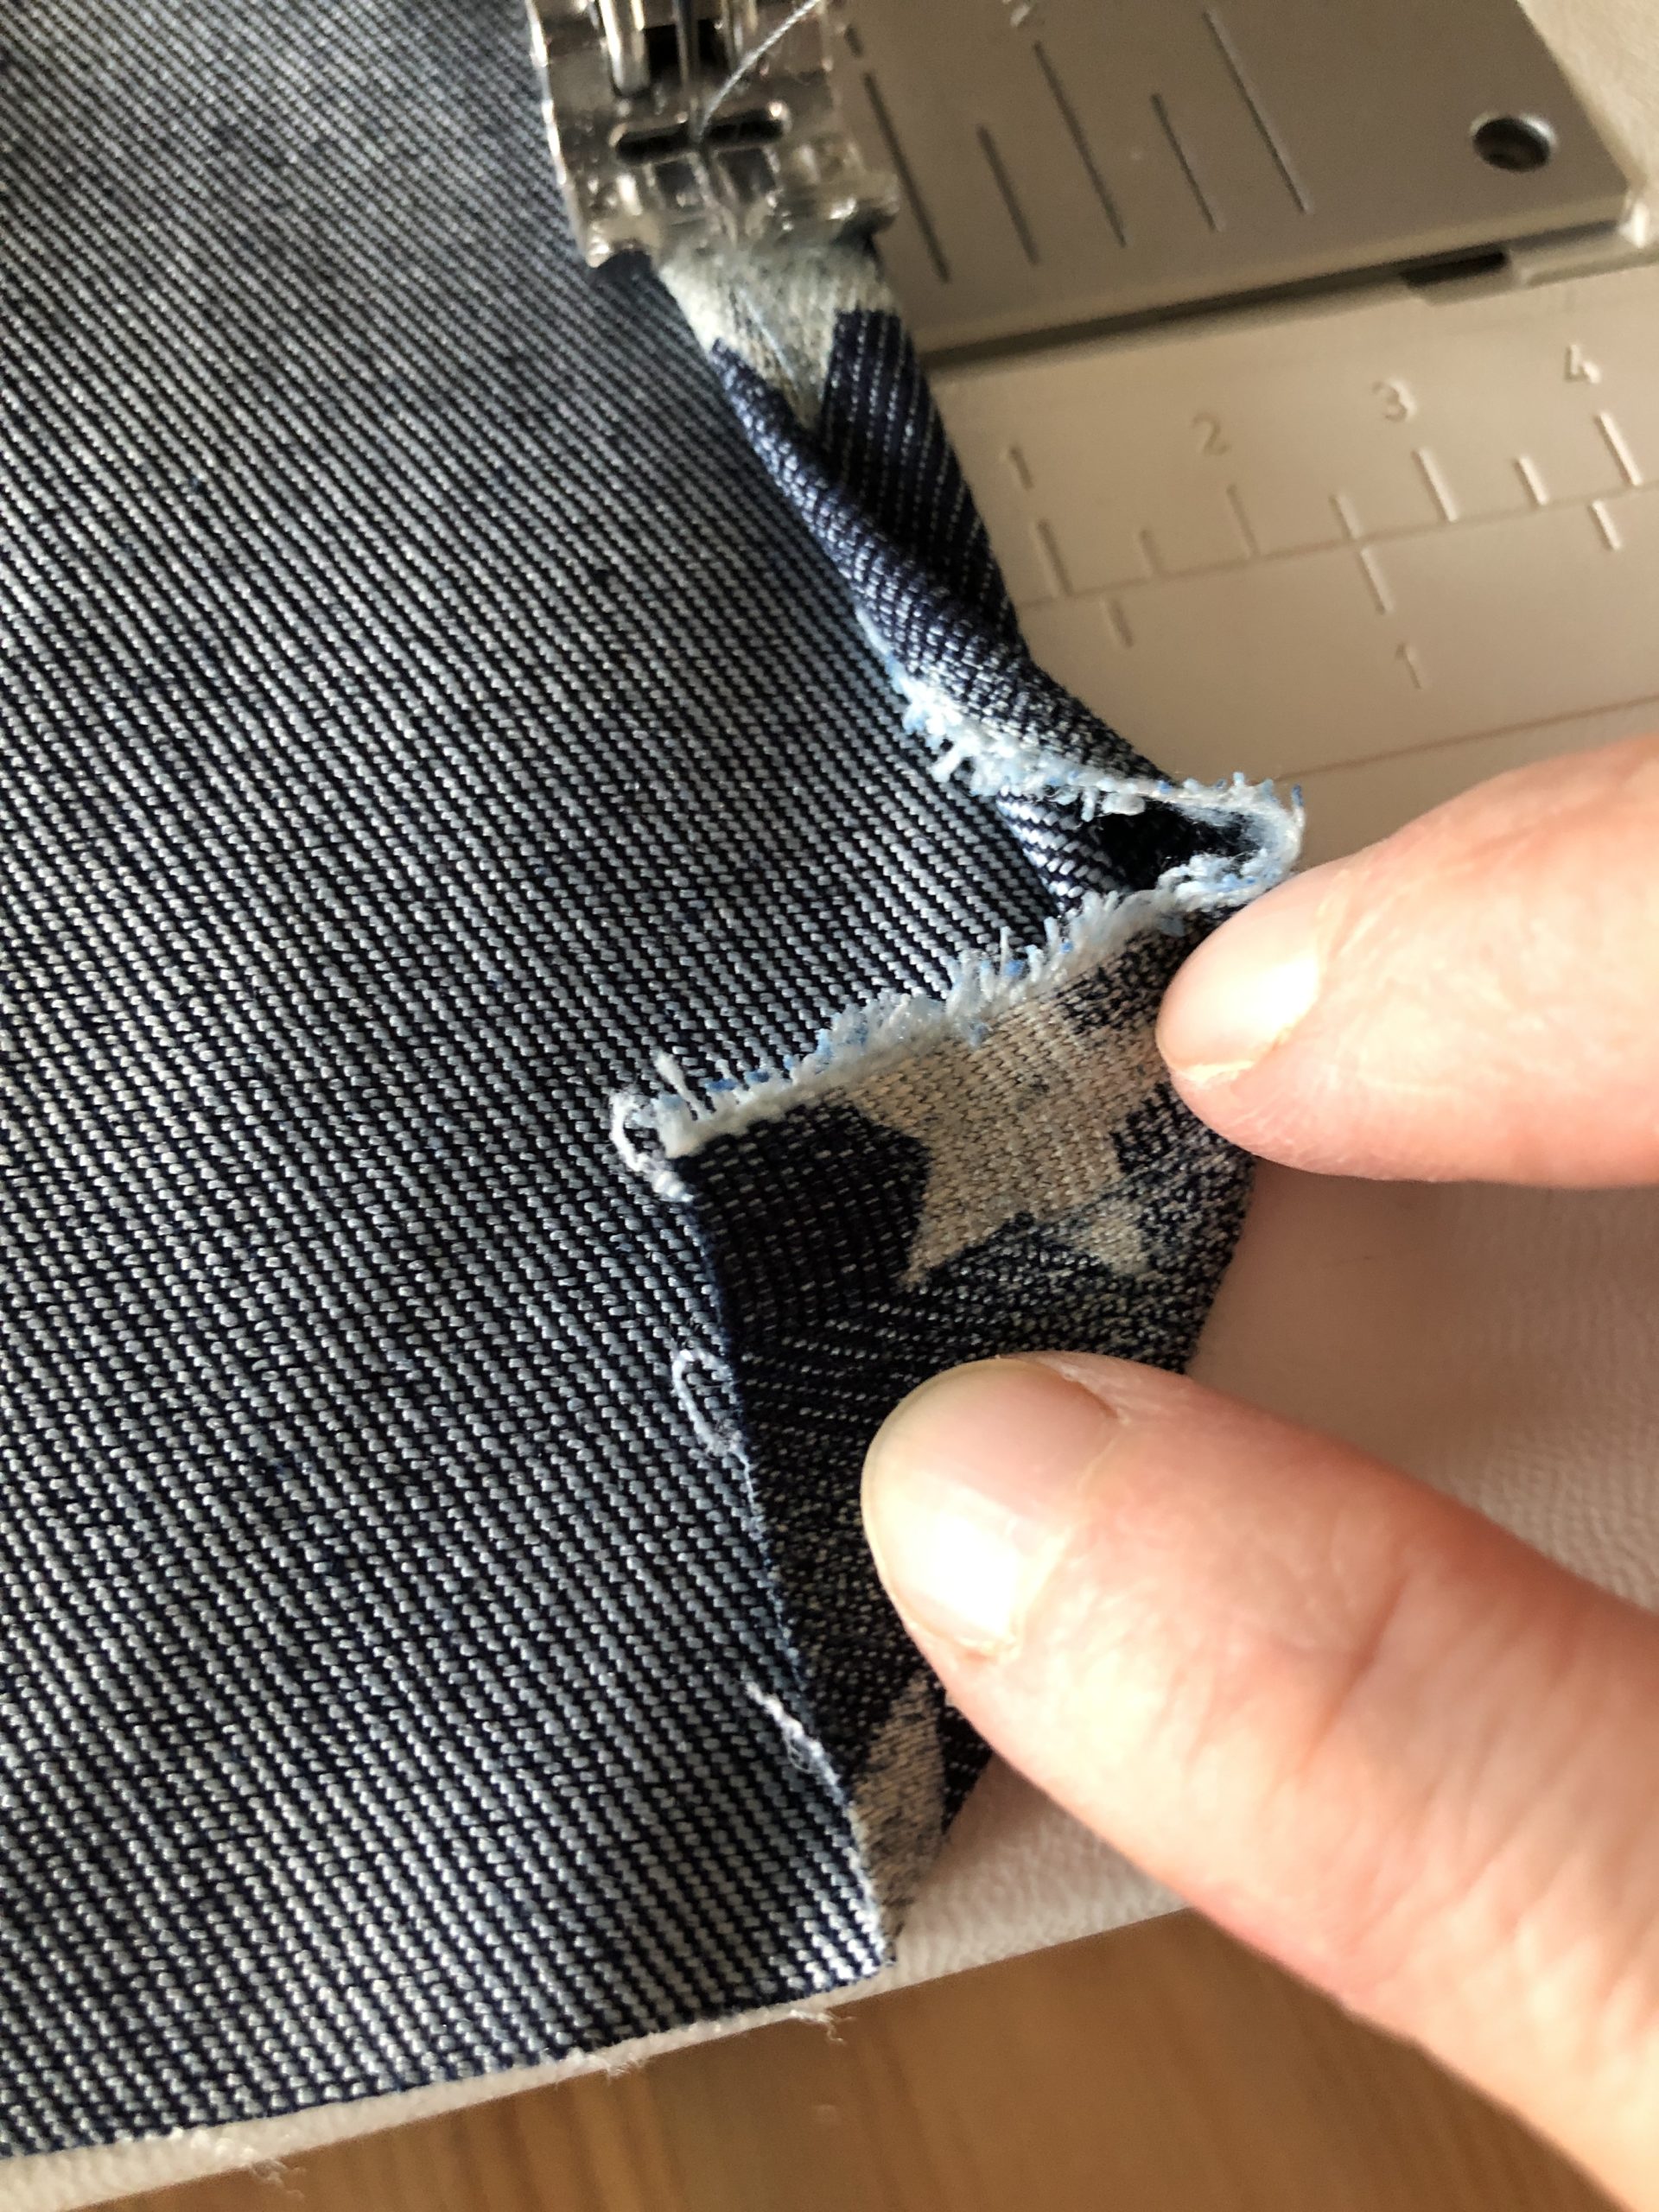
Bild zum Schritt 9 für das Bastel- und DIY-Abenteuer für Kinder: 'Um die Ecke wie folgt vorgehen: Stoffecke nach innen legen...'

10

Fold the edge of the side and lay the hem neatly.
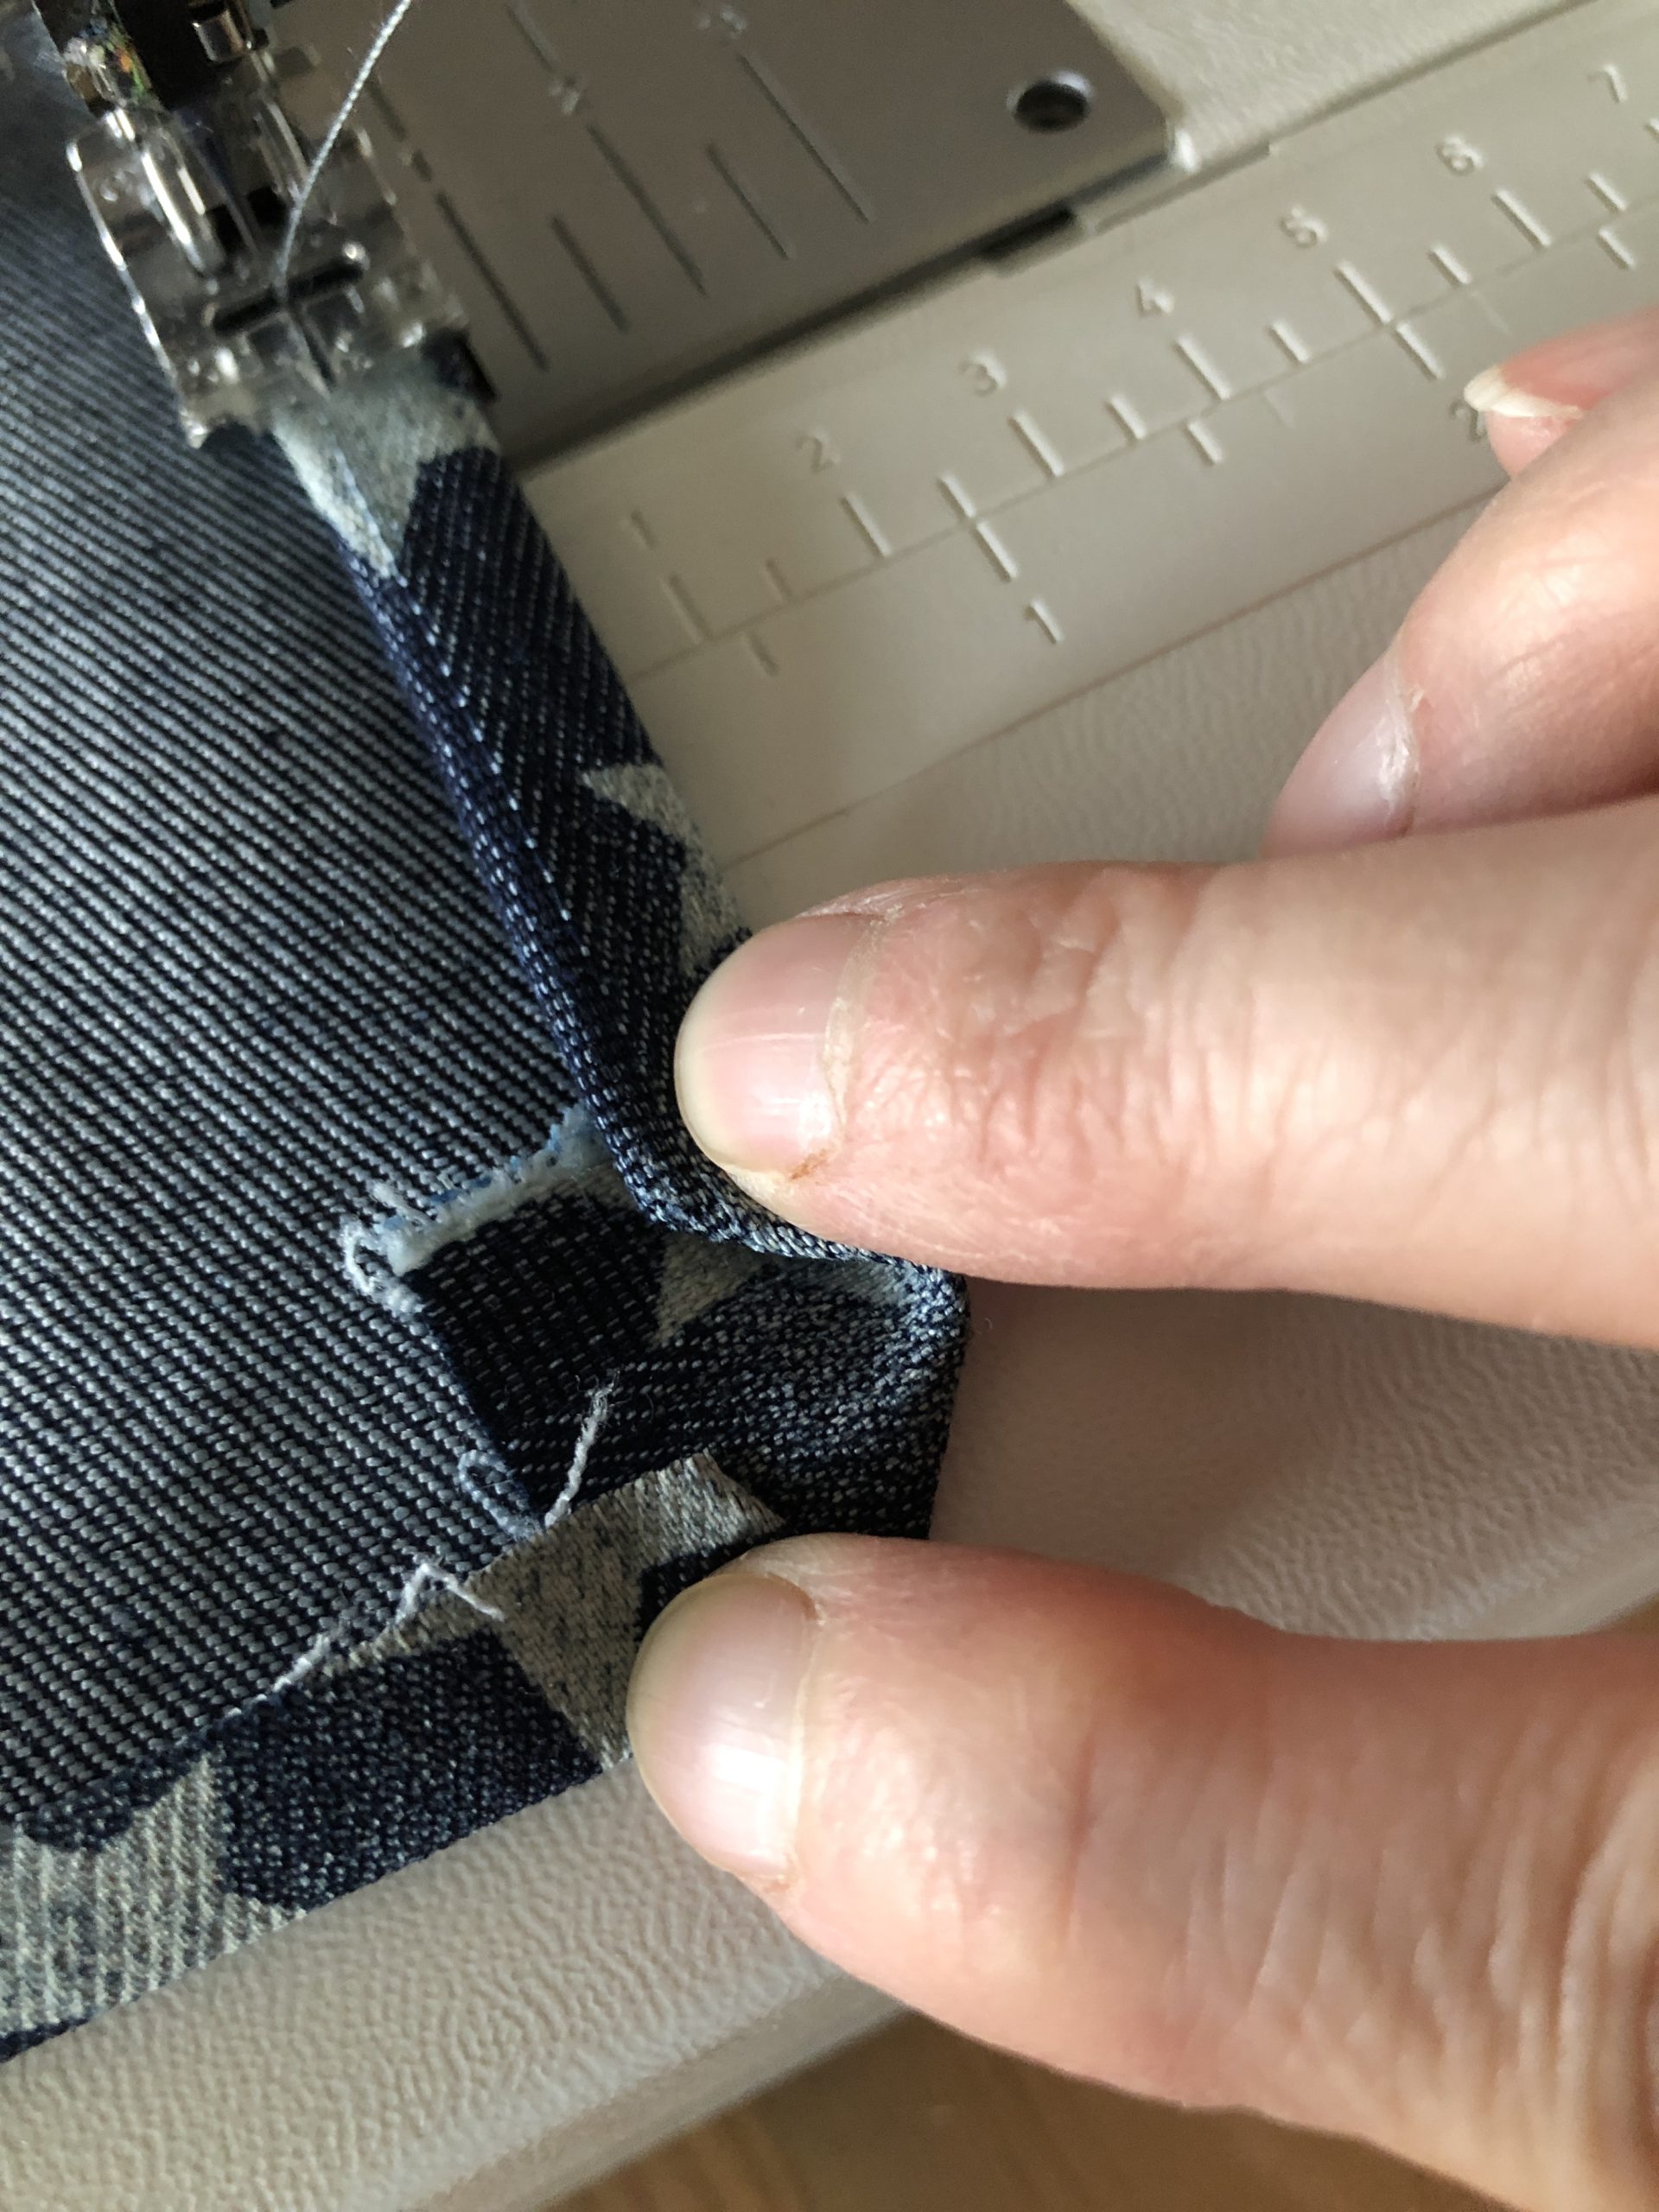
Bild zum Schritt 10 für das Bastel- und DIY-Abenteuer für Kinder: 'Seitenrand einklappen und Saum ordentlich legen.'

11

Also the lower margin that there is a nice corner.
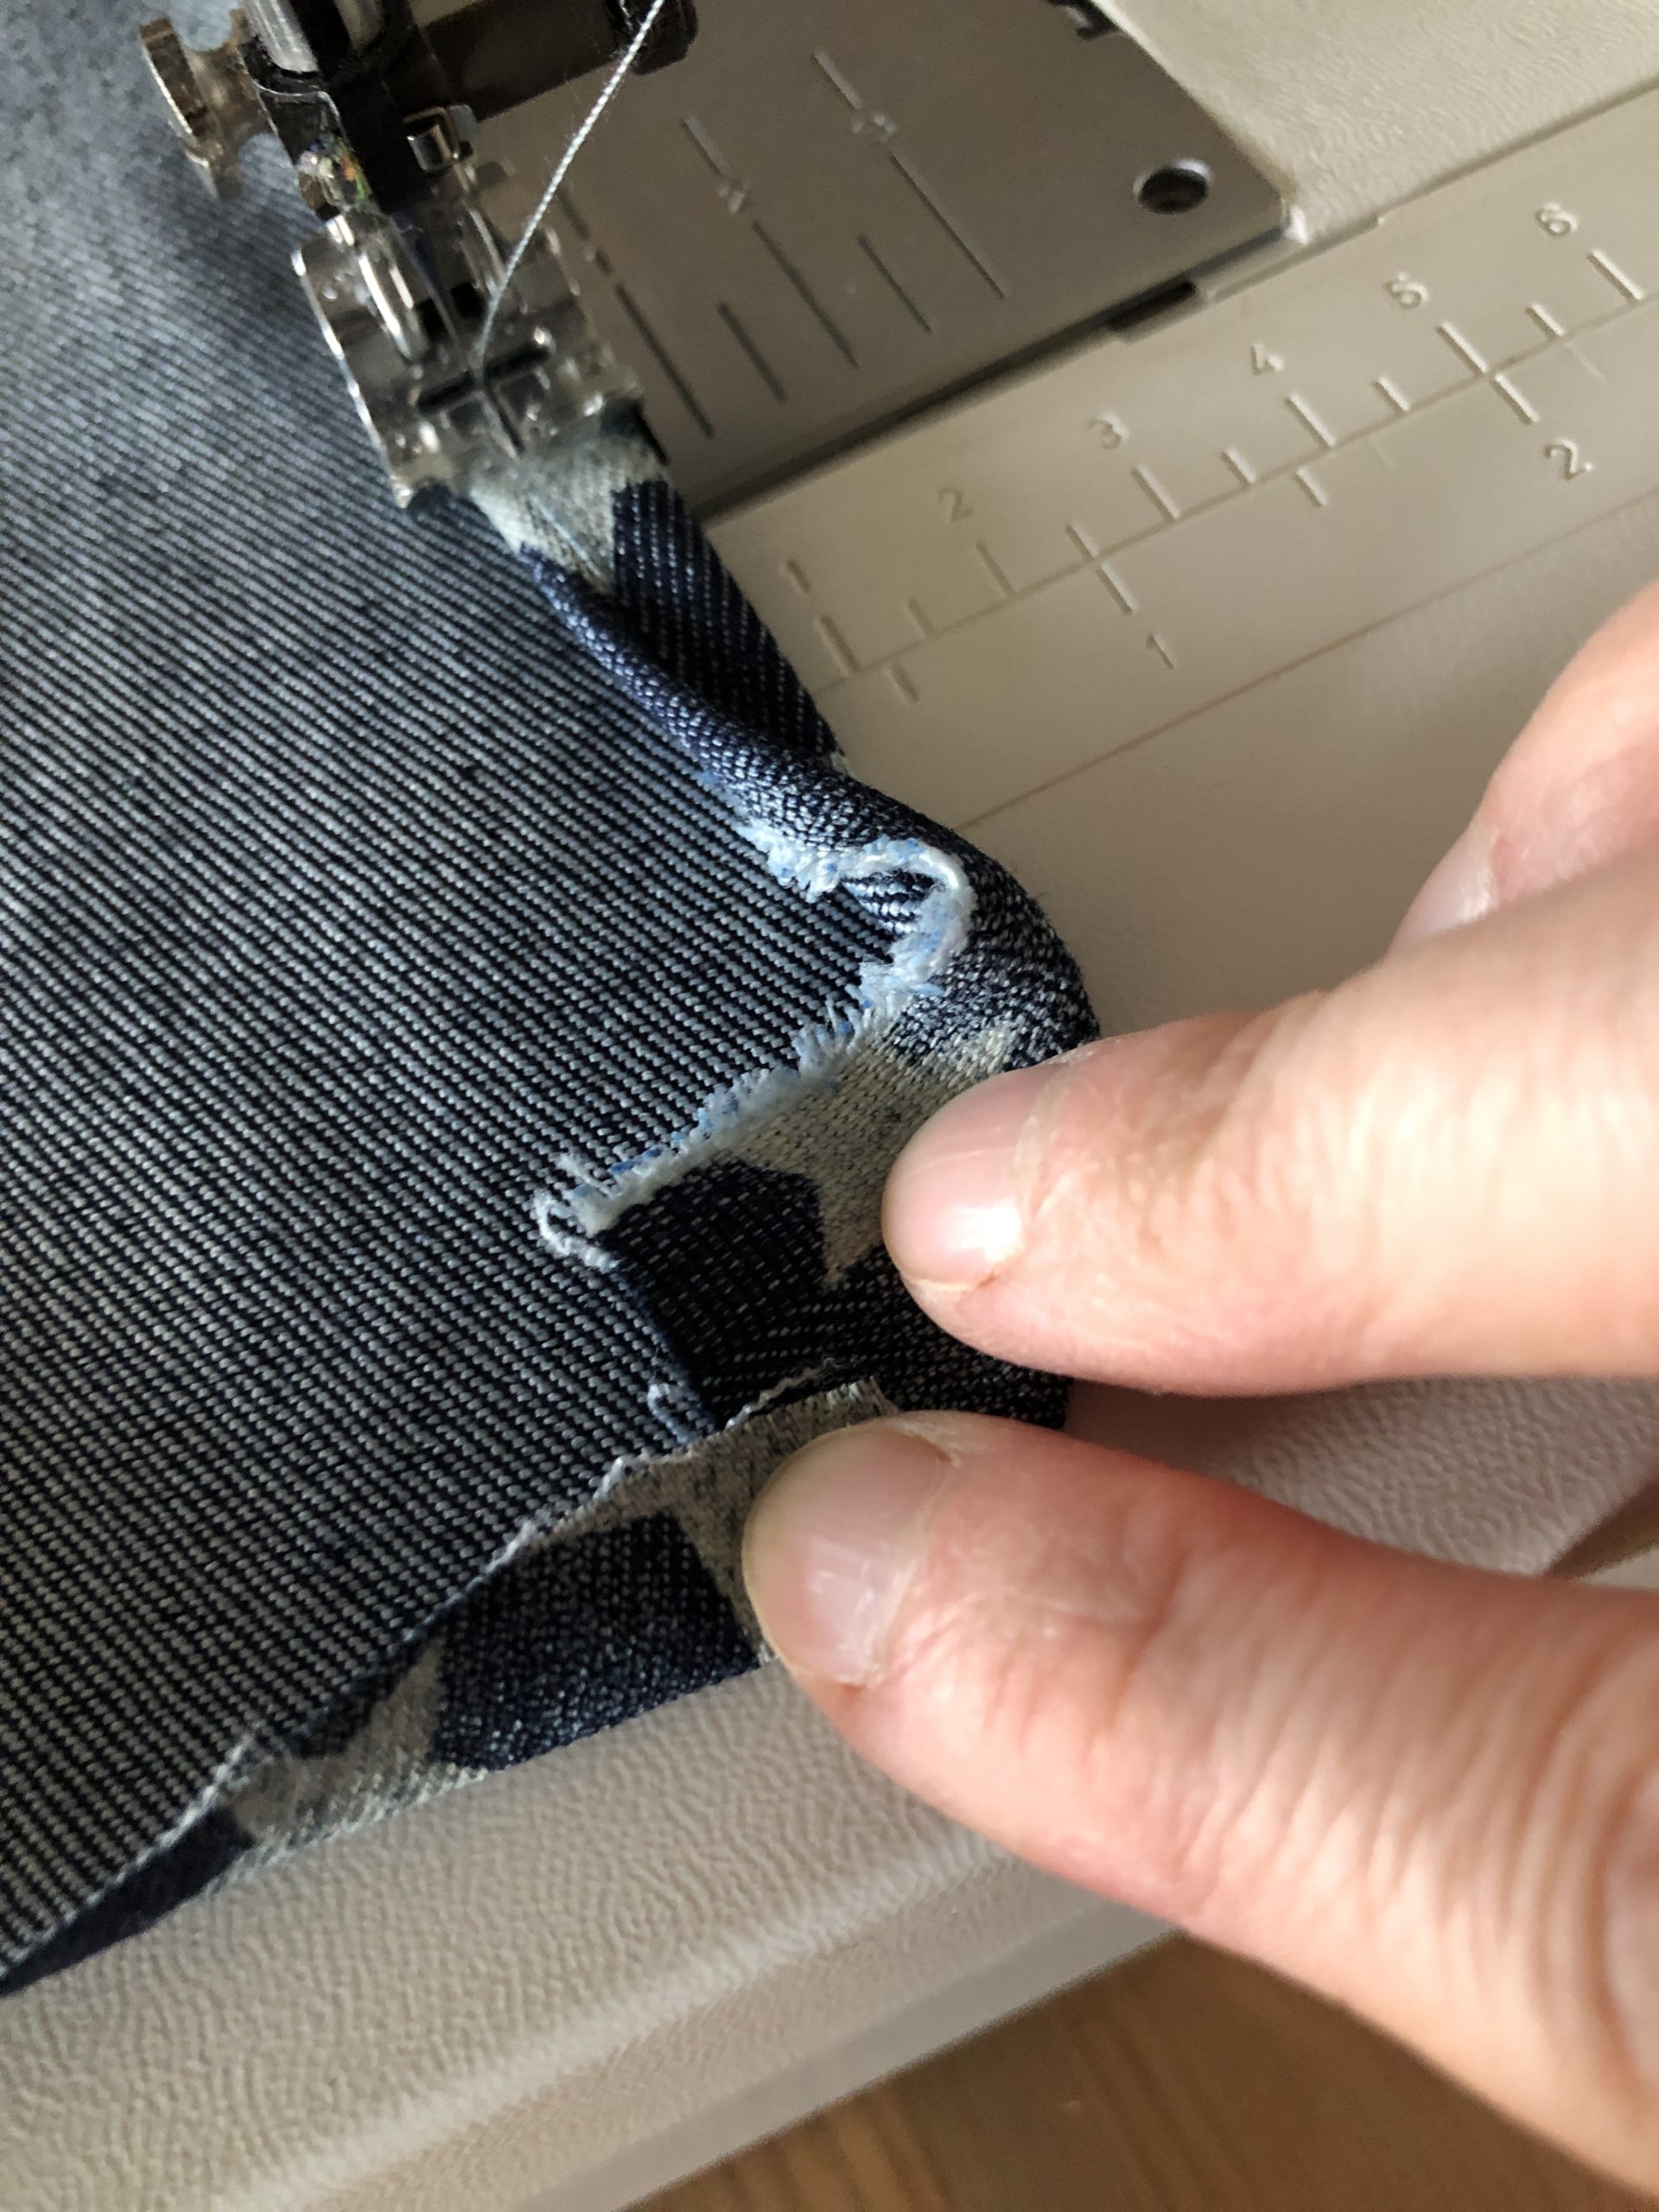
Bild zum Schritt 11 für das Bastel- und DIY-Abenteuer für Kinder: 'Ebenso den unteren Rand, dass es eine schöne Ecke gibt.'

12

2. Bild zum Schritt 11 für das Bastel- und DIY-Abenteuer für Kinder: 'Ebenso den unteren Rand, dass es eine schöne Ecke gibt.'

13

Then continue sewing until the corner. Leave the needle in the fabric, lift the sewing feet and turn the fabric. And continue sewing the next side.
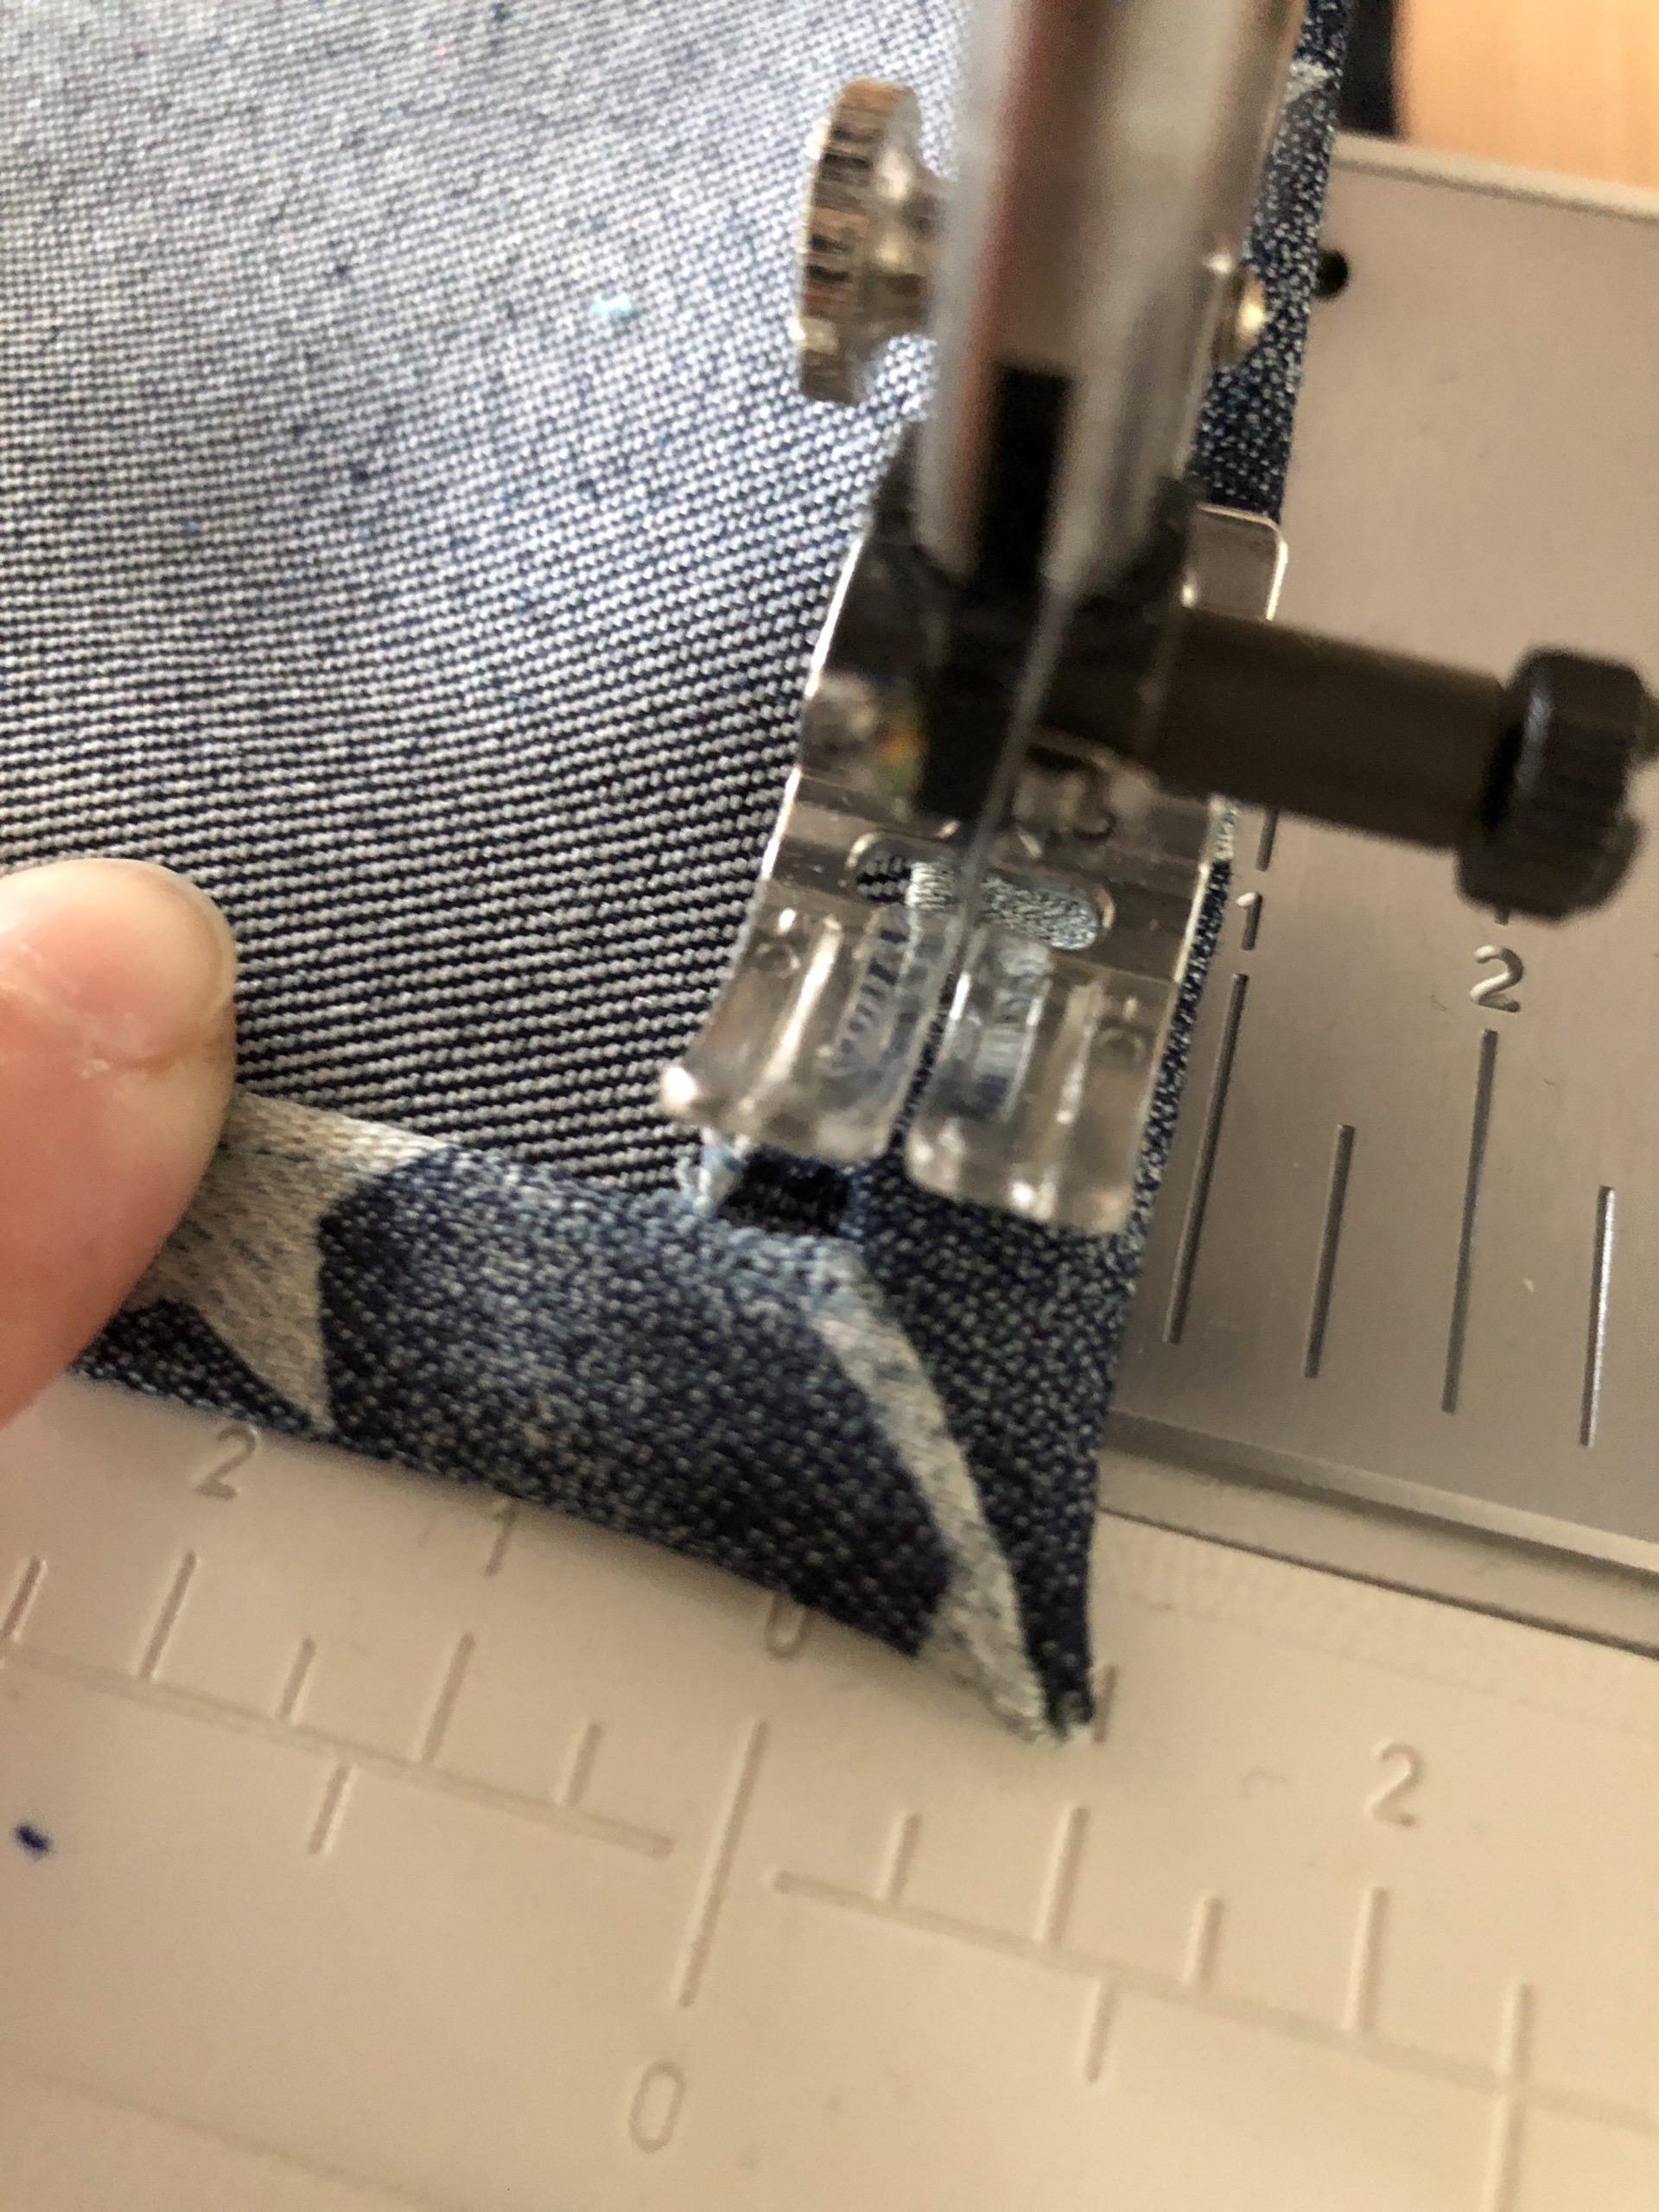
Bild zum Schritt 13 für das Bastel- und DIY-Abenteuer für Kinder: 'Dann weiternähen bis  in die Ecke. Nadel im Stoff...'

14

So there are two corners.

Bild zum Schritt 14 für das Bastel- und DIY-Abenteuer für Kinder: 'Es entstehen so zwei Ecken.'

15

Sew a small hem at the top, too.

Bild zum Schritt 15 für das Bastel- und DIY-Abenteuer für Kinder: 'Oben ebenfalls noch einen kleinen Saum nähen.'

16

Now the armholes are sewn. Here we need a wide hem, which at the same time serves as a drawstring for the bands!
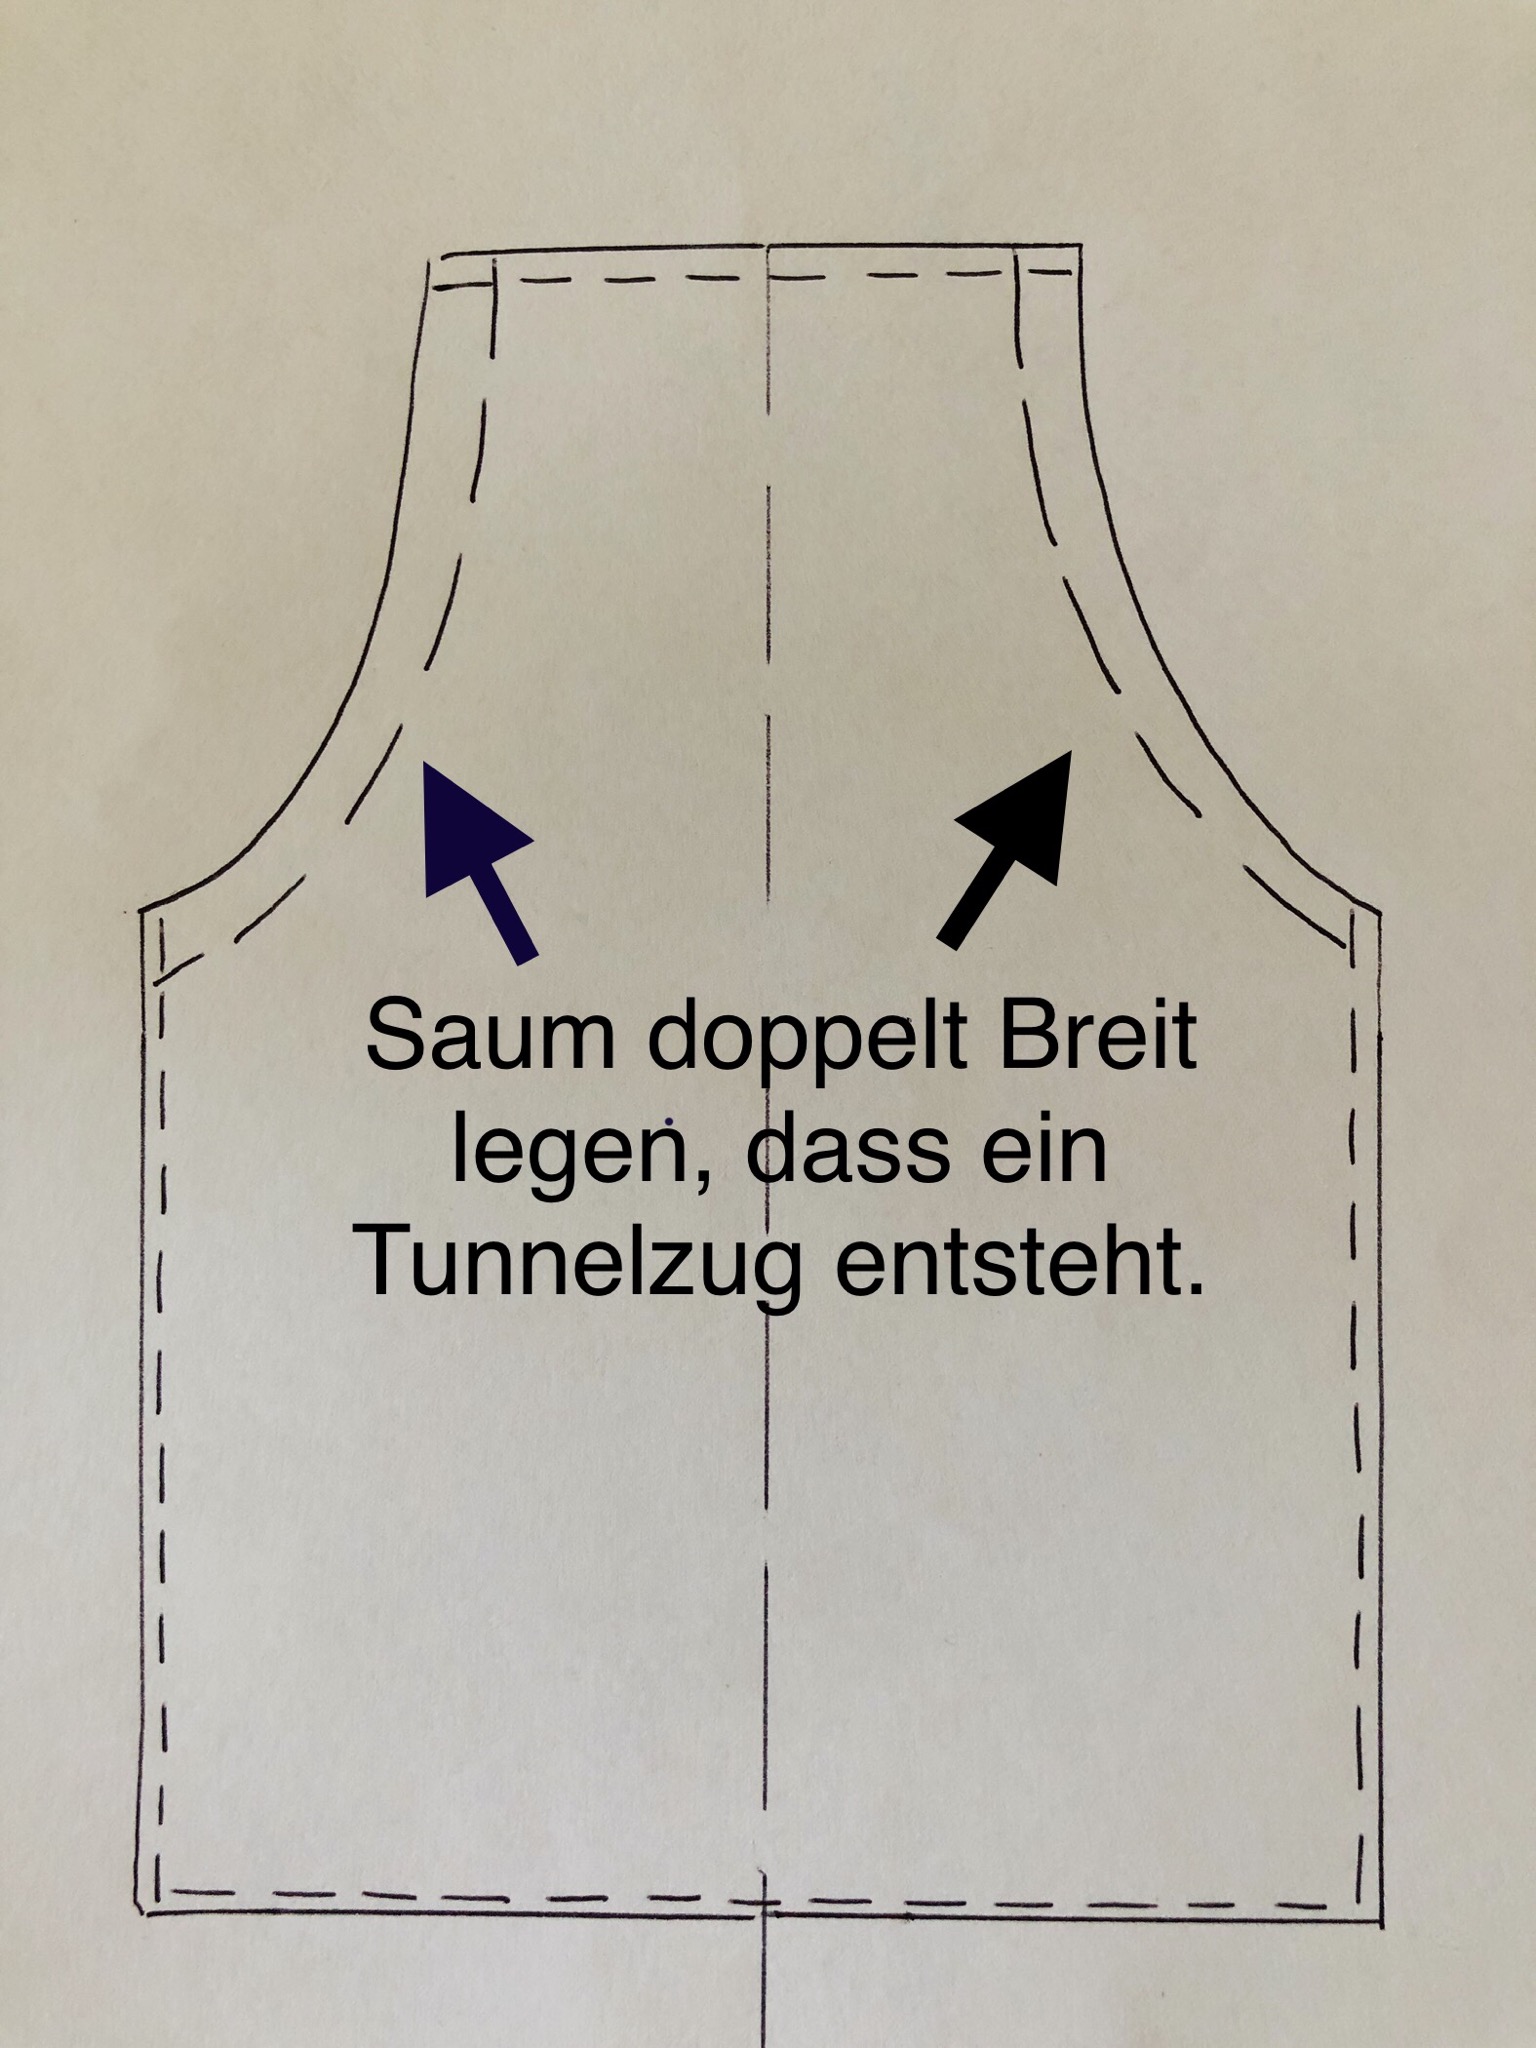
Bild zum Schritt 16 für das Bastel- und DIY-Abenteuer für Kinder: 'Nun werden die Armausschnitte genäht. Hier brauchen wir einen breiten...'

17

Edge the fabric with a zigzag stitch.
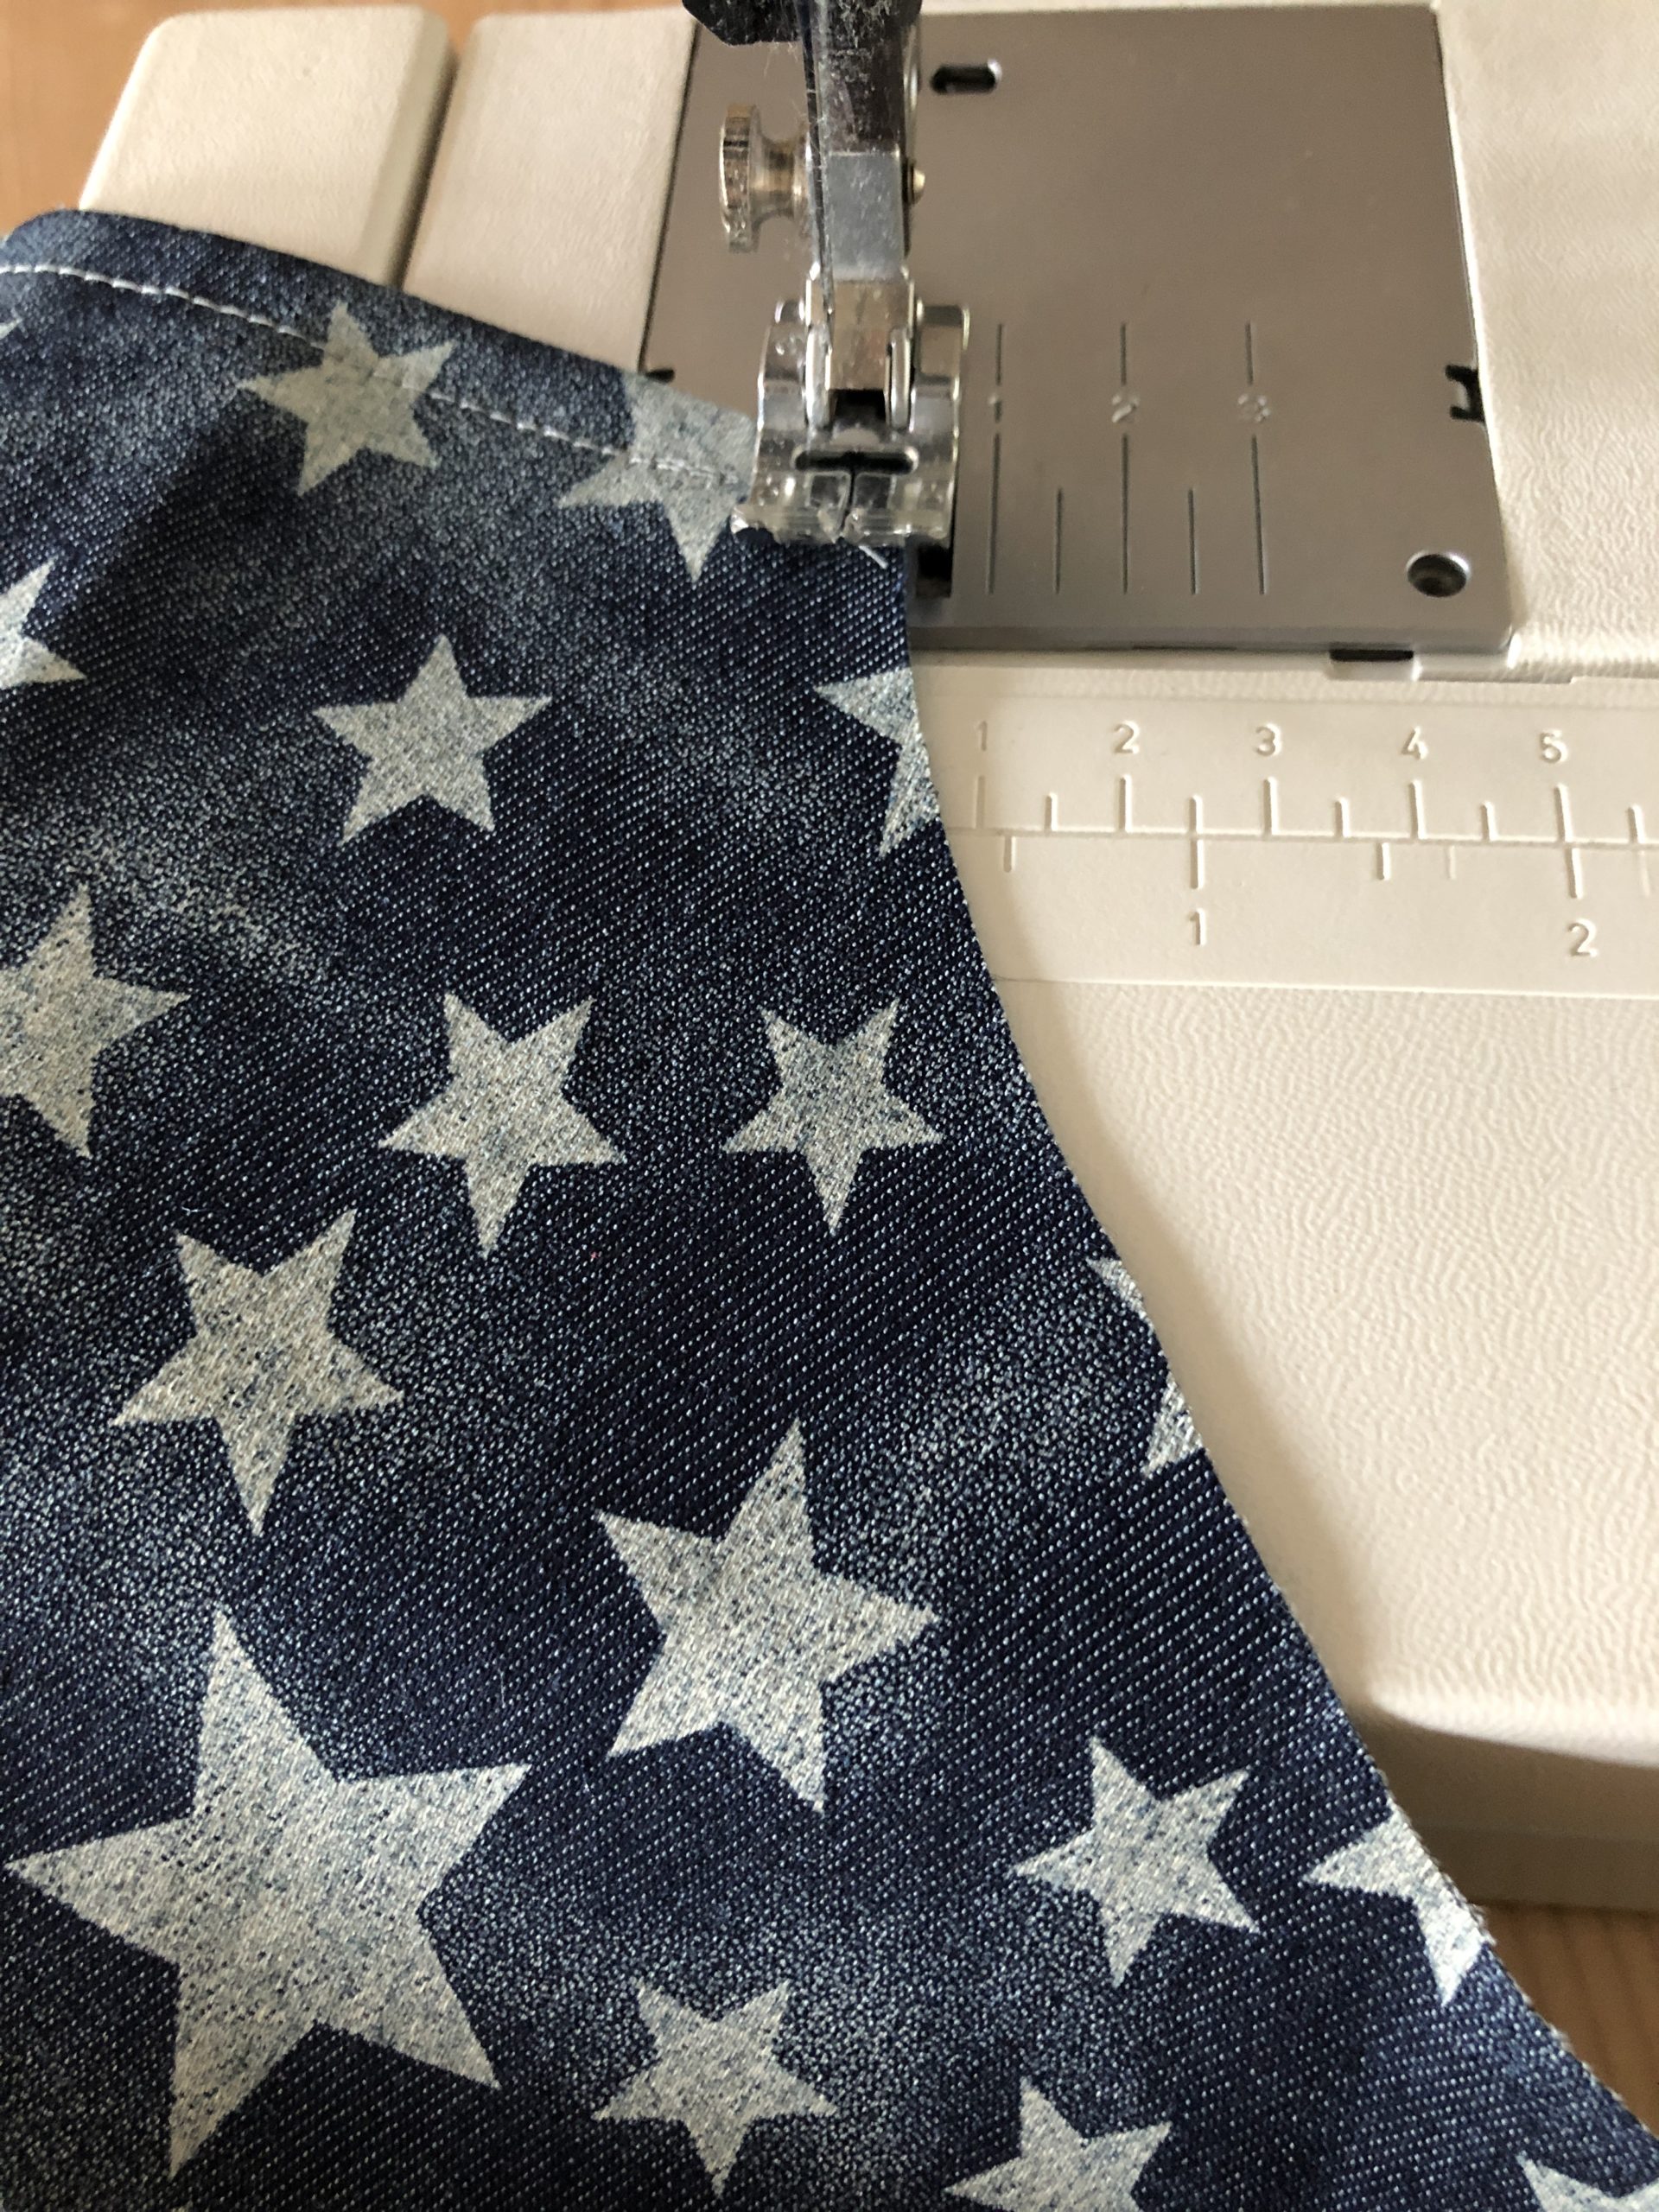
Bild zum Schritt 17 für das Bastel- und DIY-Abenteuer für Kinder: 'Mit einem Zickzack-Stich den Stoff einkanteln.'

18

2. Bild zum Schritt 17 für das Bastel- und DIY-Abenteuer für Kinder: 'Mit einem Zickzack-Stich den Stoff einkanteln.'

19

3. Bild zum Schritt 18 für das Bastel- und DIY-Abenteuer für Kinder: 'Mit einem Zickzack-Stich den Stoff einkanteln.'

20

4. Bild zum Schritt 19 für das Bastel- und DIY-Abenteuer für Kinder: 'Mit einem Zickzack-Stich den Stoff einkanteln.'

21

Cut the ribbons. And sew the two 4.5 cm wide ribbons as follows.
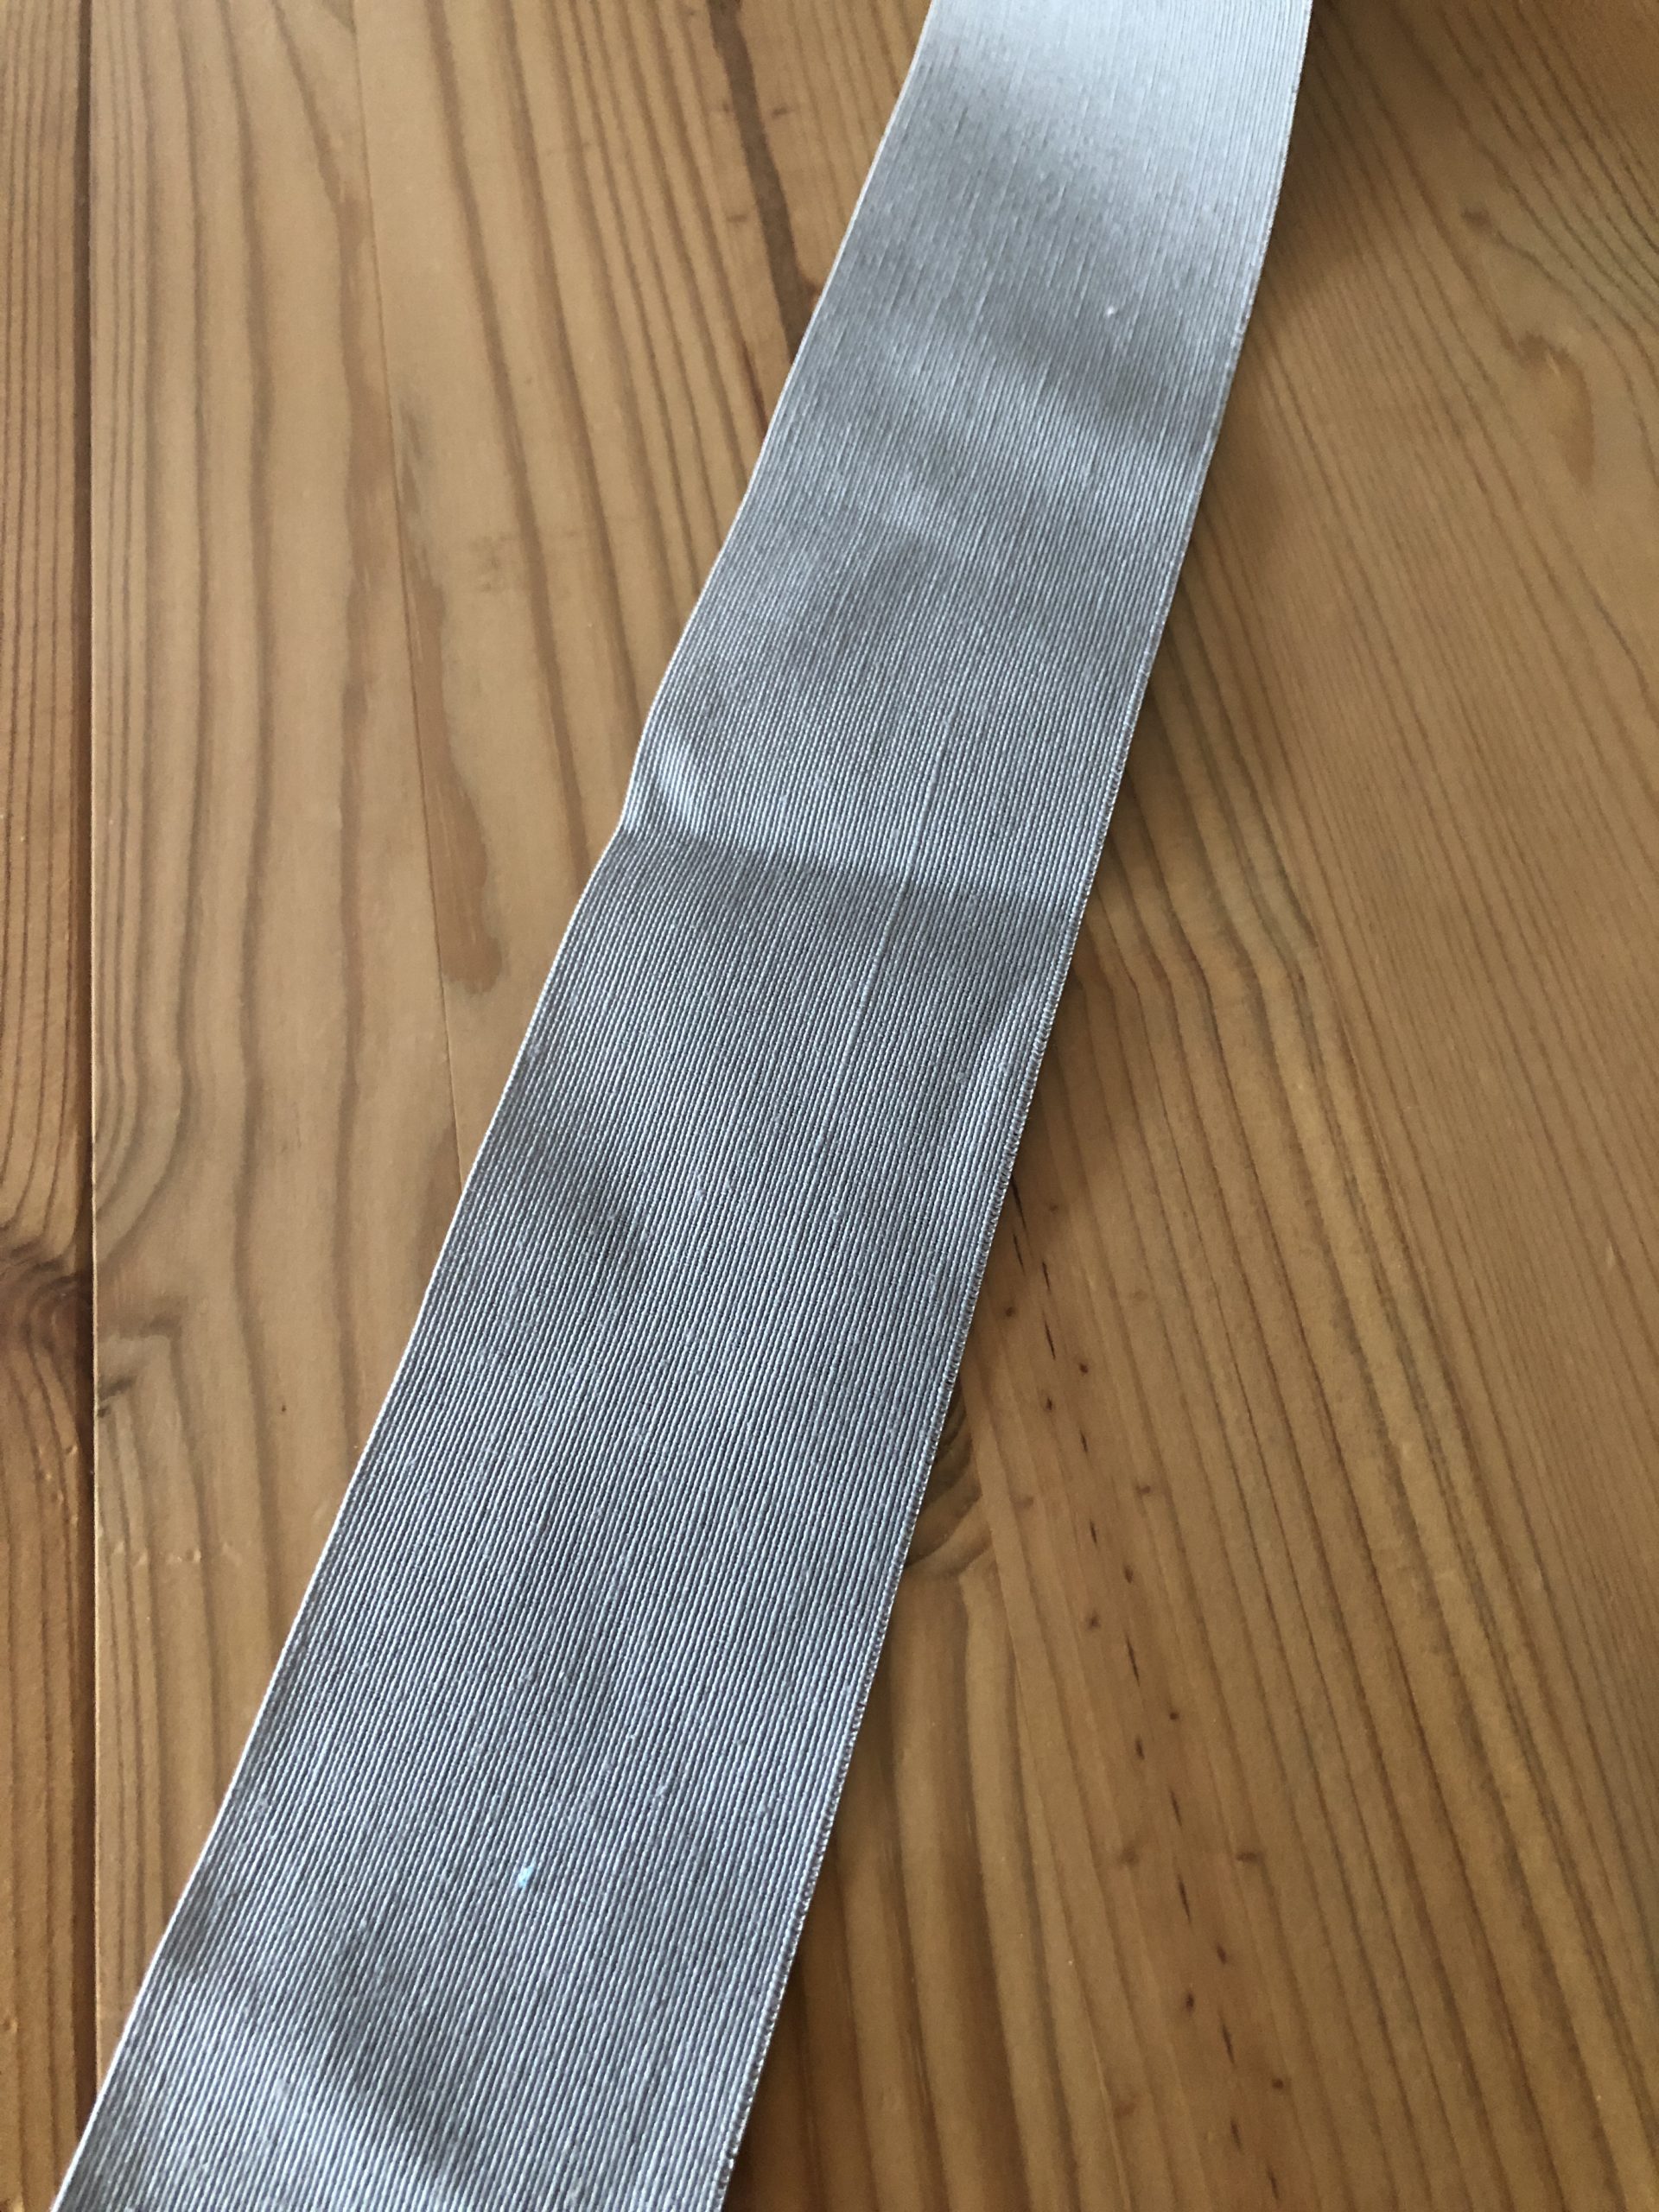
Bild zum Schritt 21 für das Bastel- und DIY-Abenteuer für Kinder: 'Bänder zuschneiden. Und die beiden 4,5 cm breiten Bänder wie...'

22

From the short side strike about 1/2 cm and strike the side length to the middle over it. Both fabric edges meet in the middle.
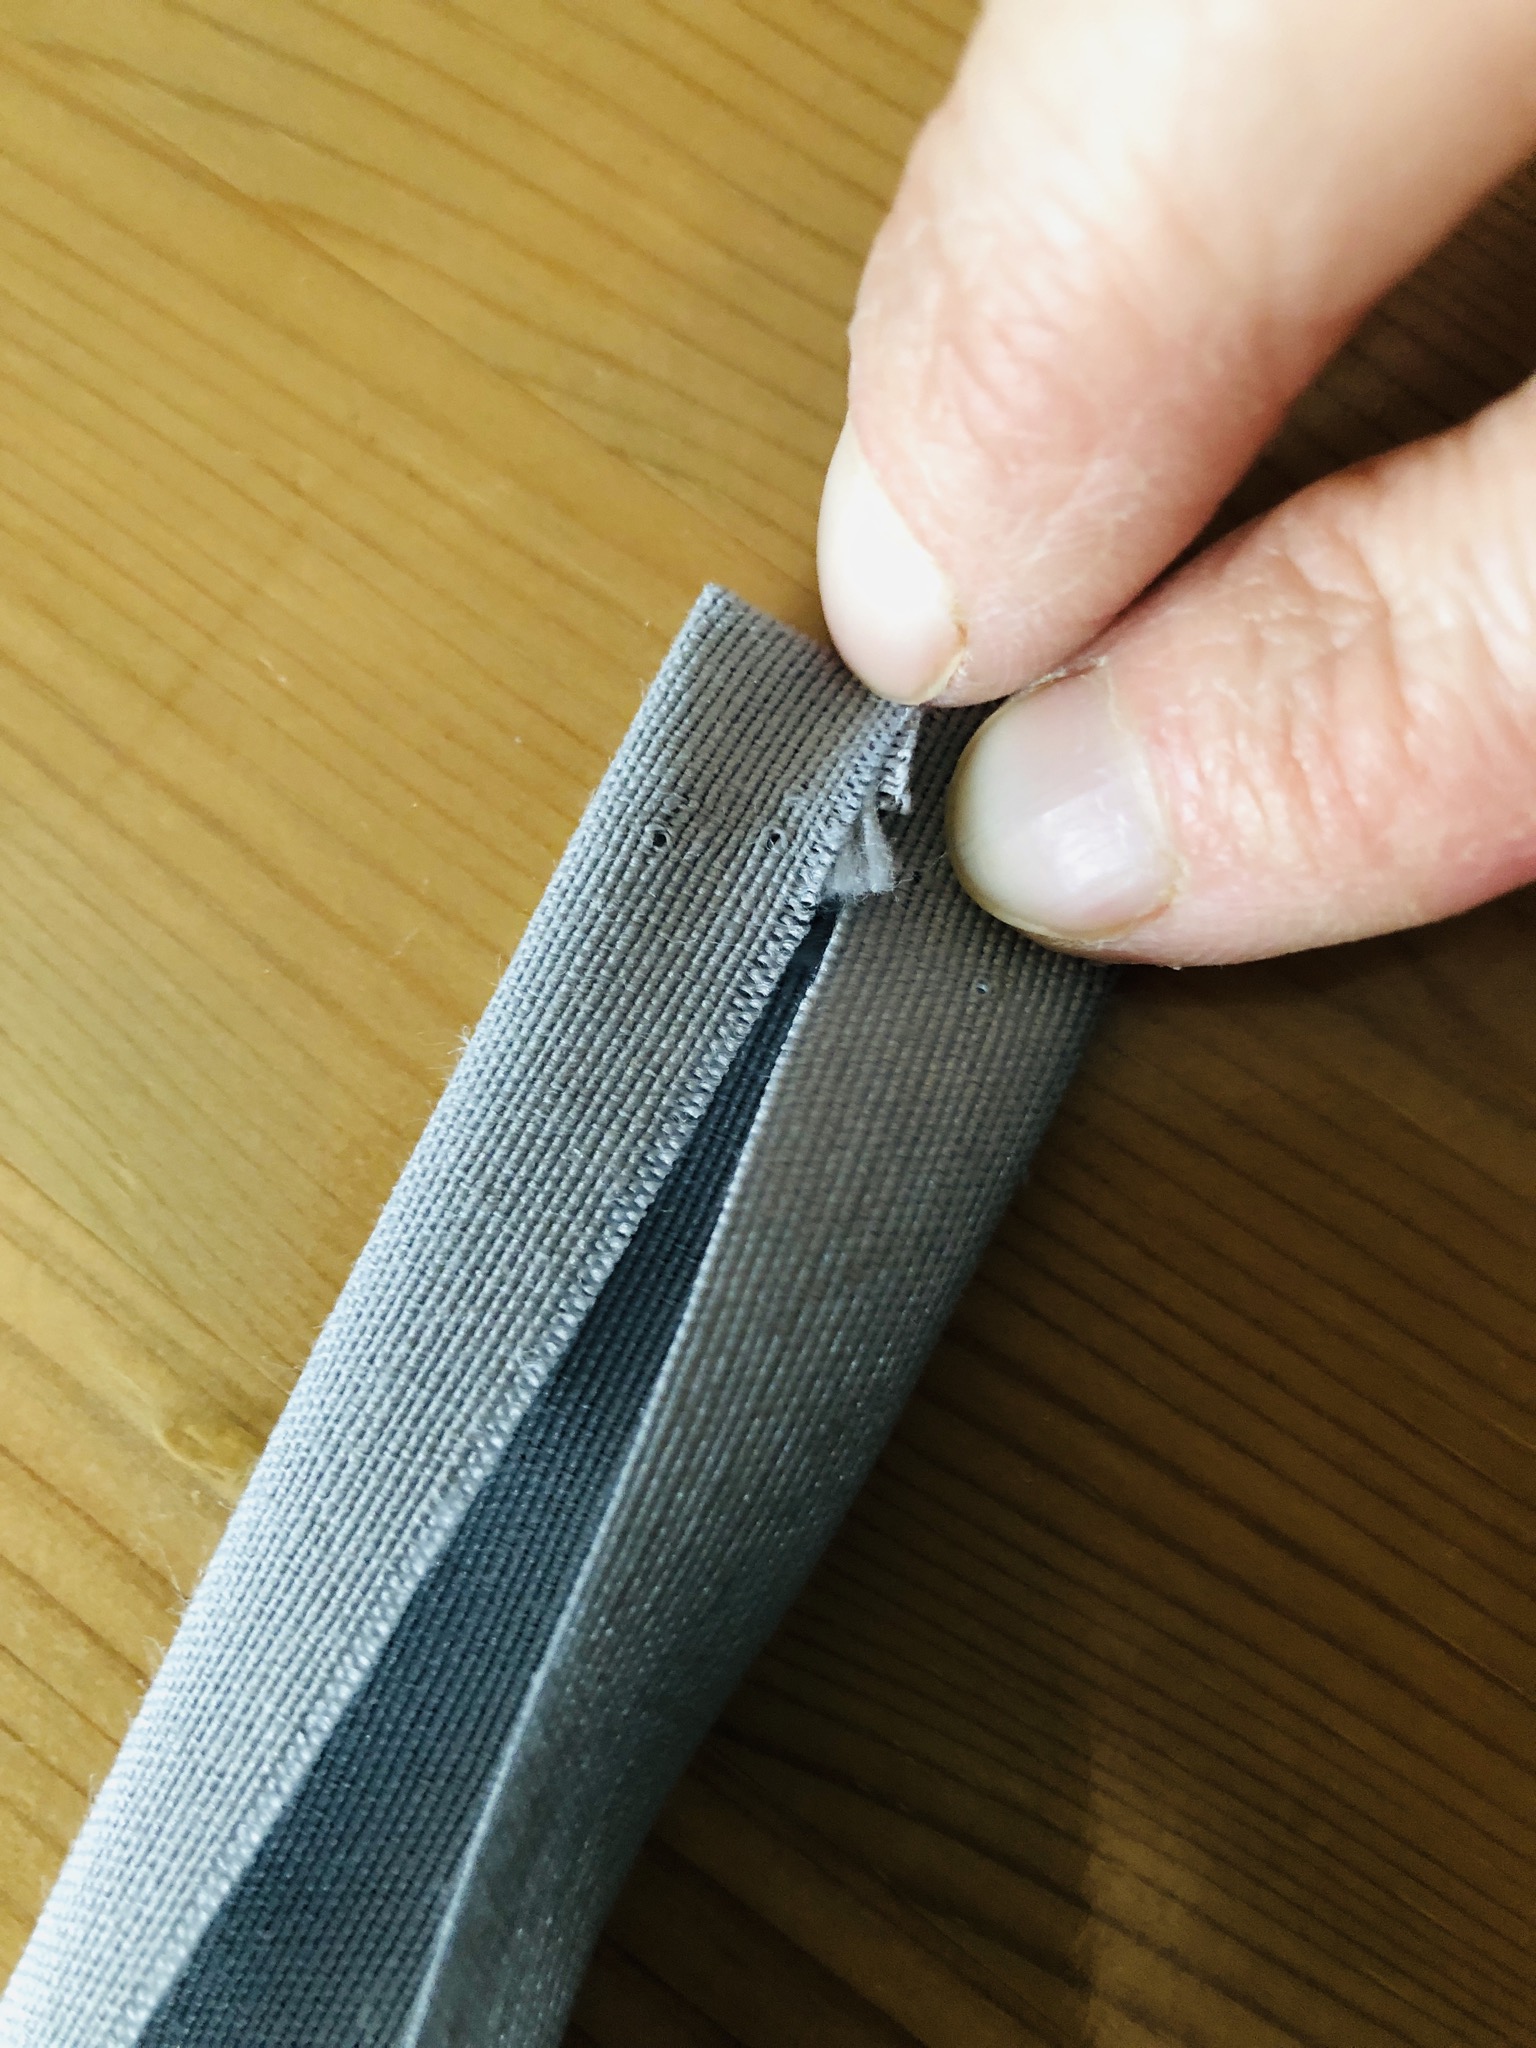
Bild zum Schritt 22 für das Bastel- und DIY-Abenteuer für Kinder: 'Von der kurzen Seite ca. 1/2 cm einschlagen und die...'

23

Now fold the tape together, that the open edges lie inside. (At the end again hit the short side about 1/2 cm inwards.) possibly stick together with pins or clamps.
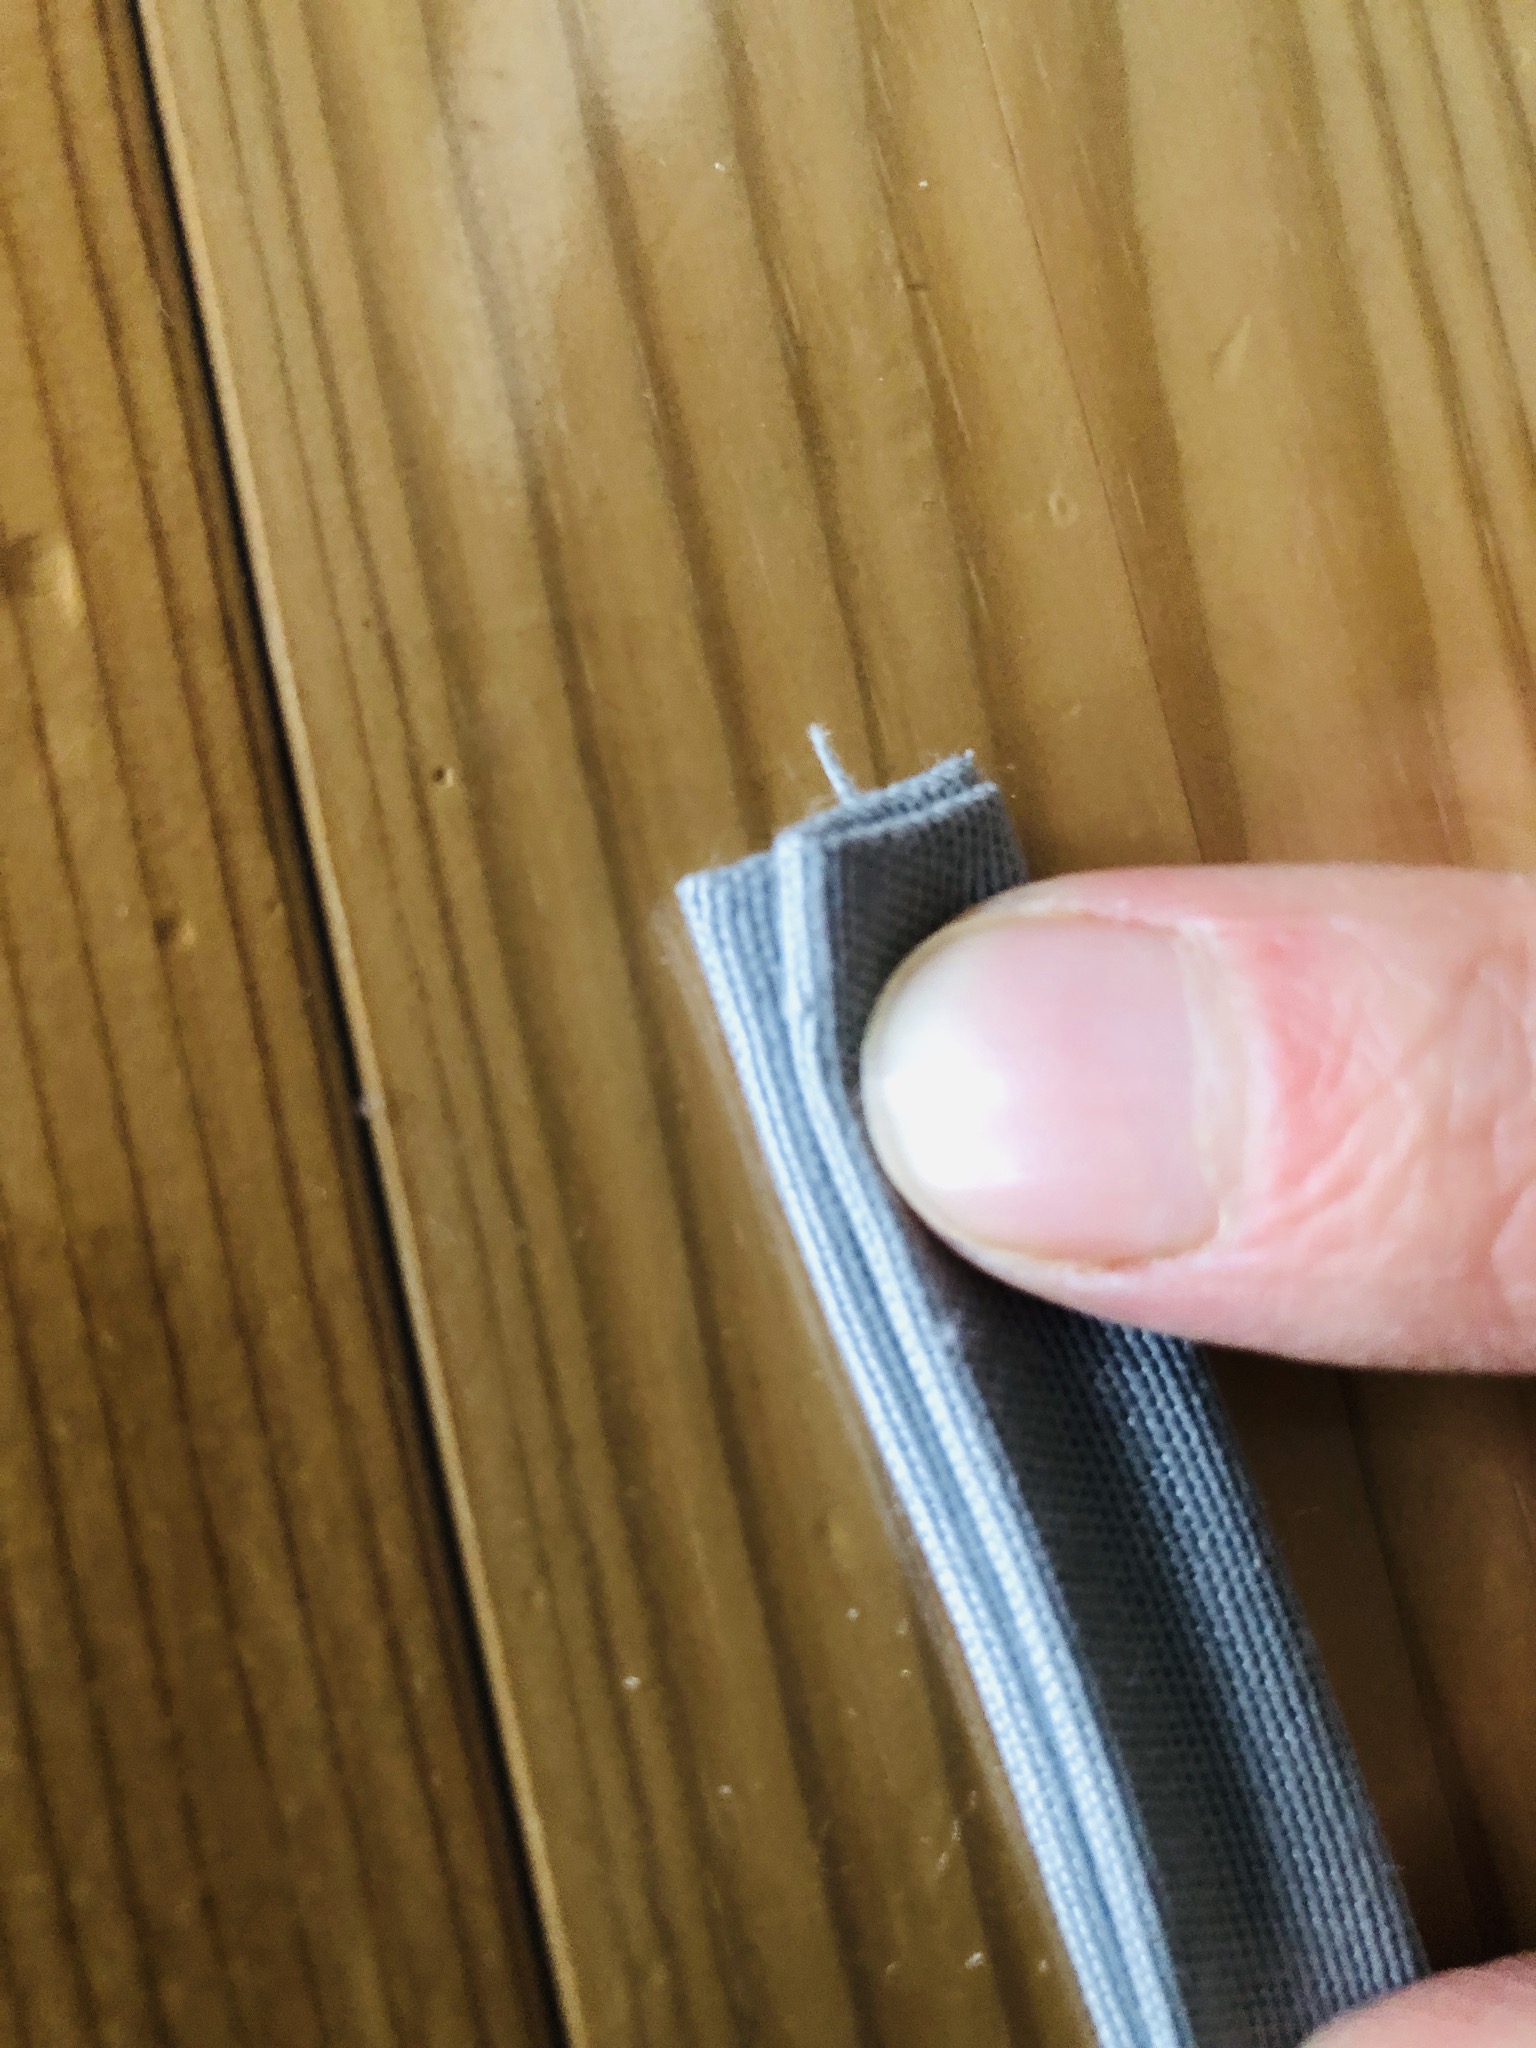
Bild zum Schritt 23 für das Bastel- und DIY-Abenteuer für Kinder: 'Das Band nun zusammenklappen, dass die offenen Kanten innen liegen....'

24

Now sew this strip together to the complete length. So sew both bands.
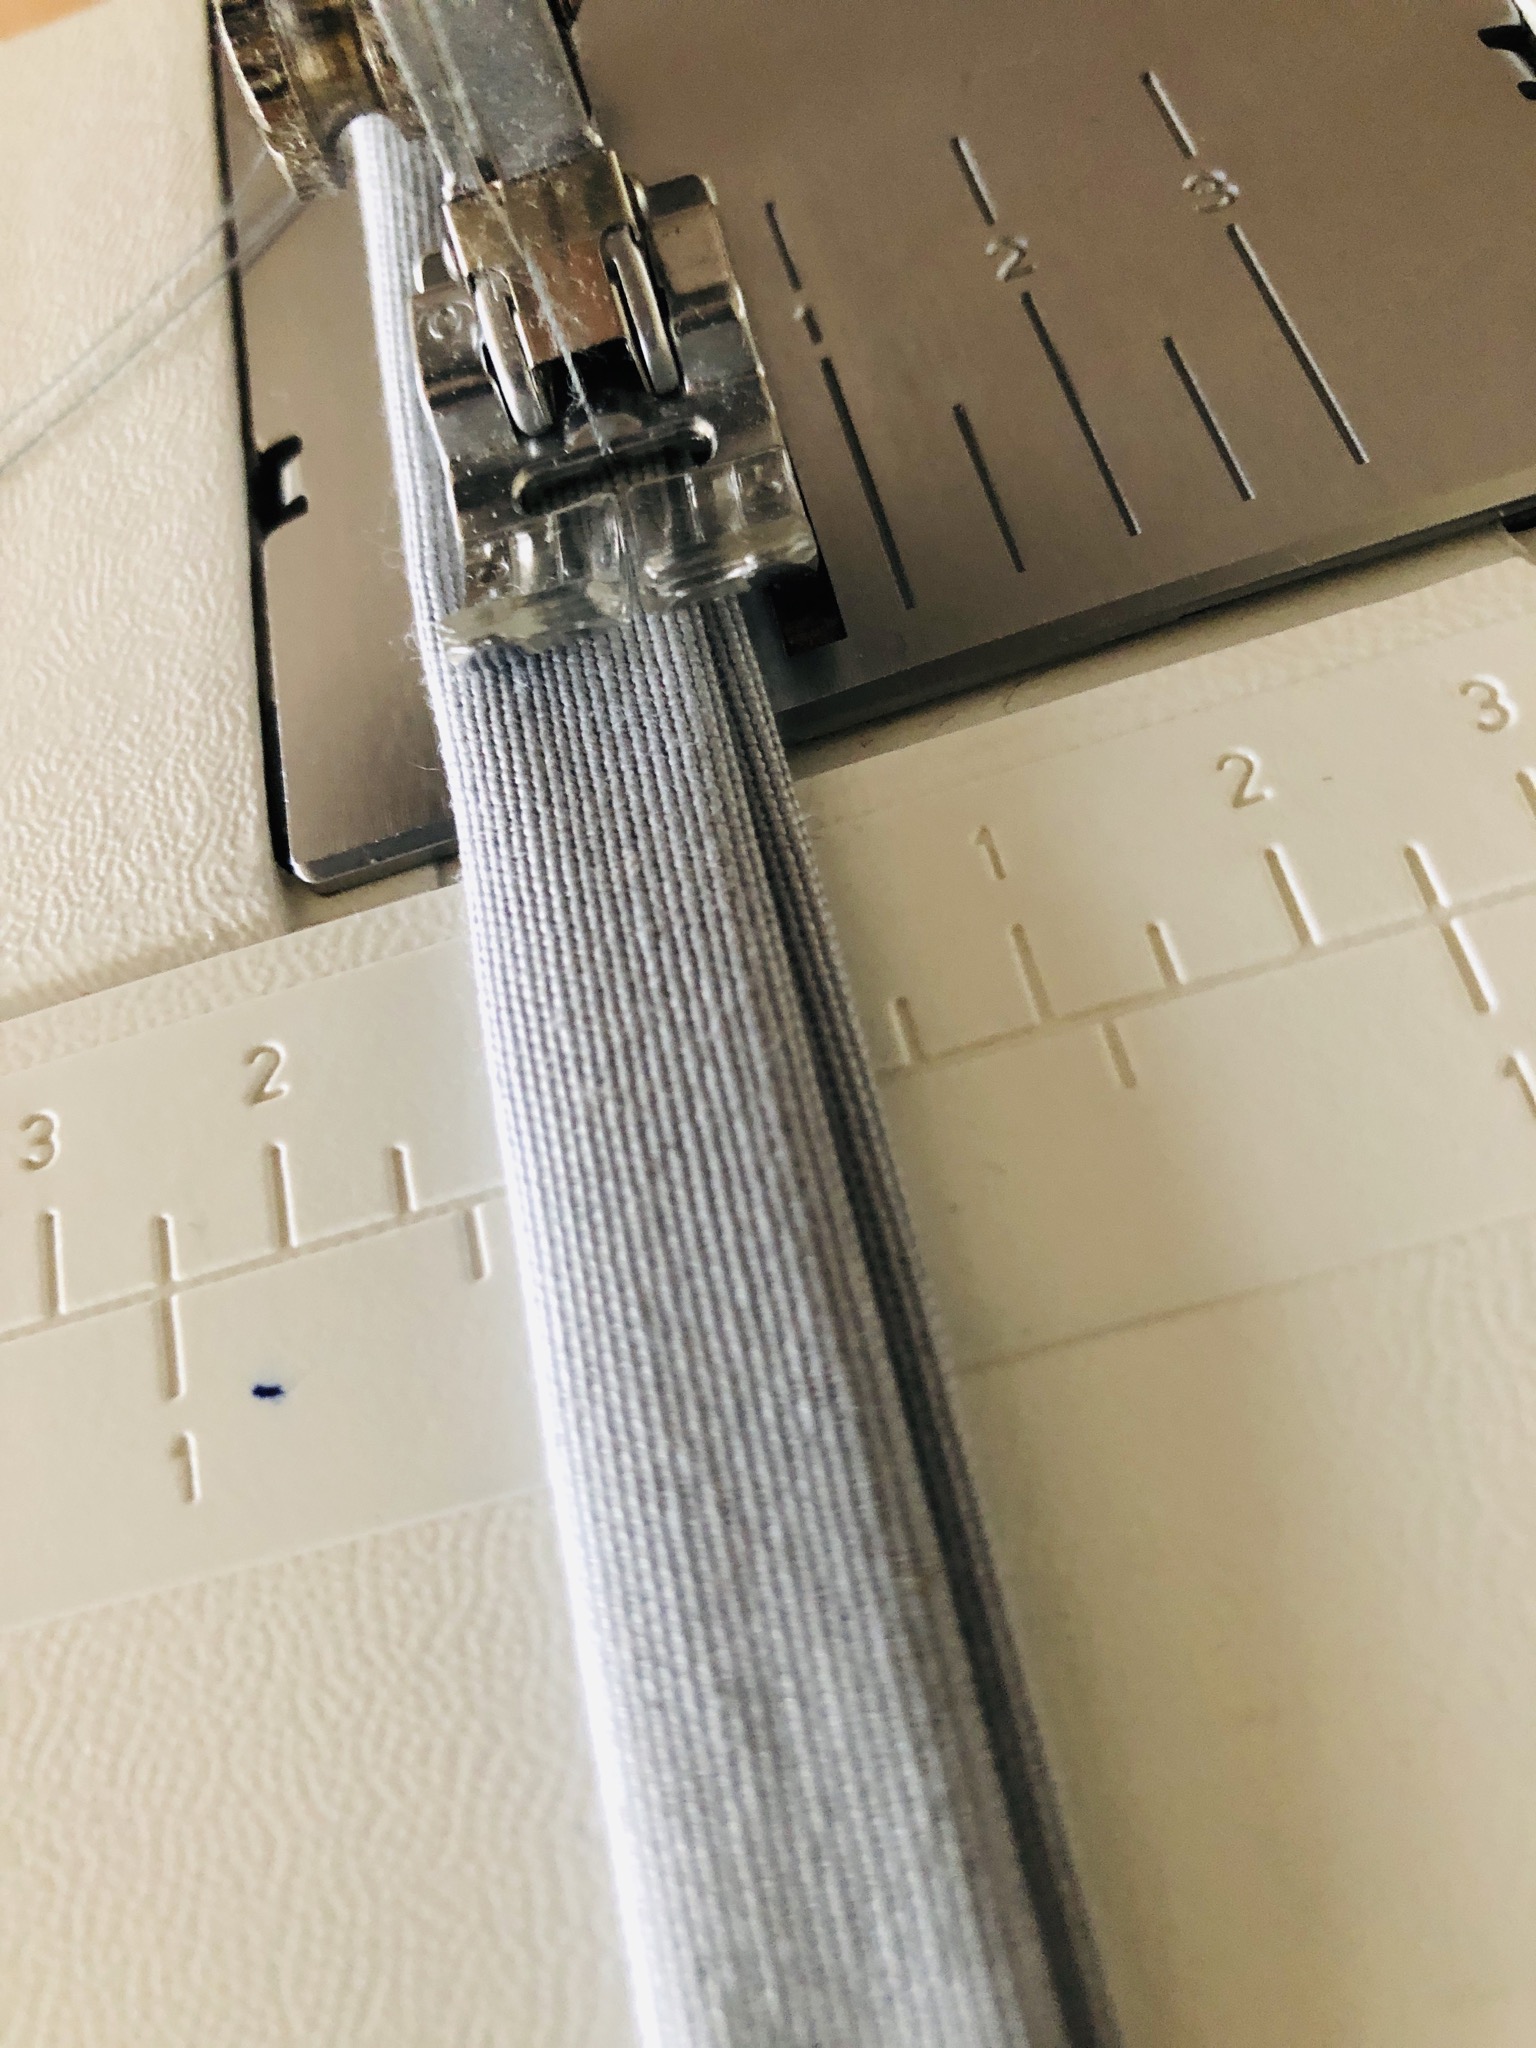
Bild zum Schritt 24 für das Bastel- und DIY-Abenteuer für Kinder: 'Diesen Streifen nun auf die komplette Länge zusammen nähen. Beide...'

25

Pull the long band into the drawstring using a safety needle as follows.
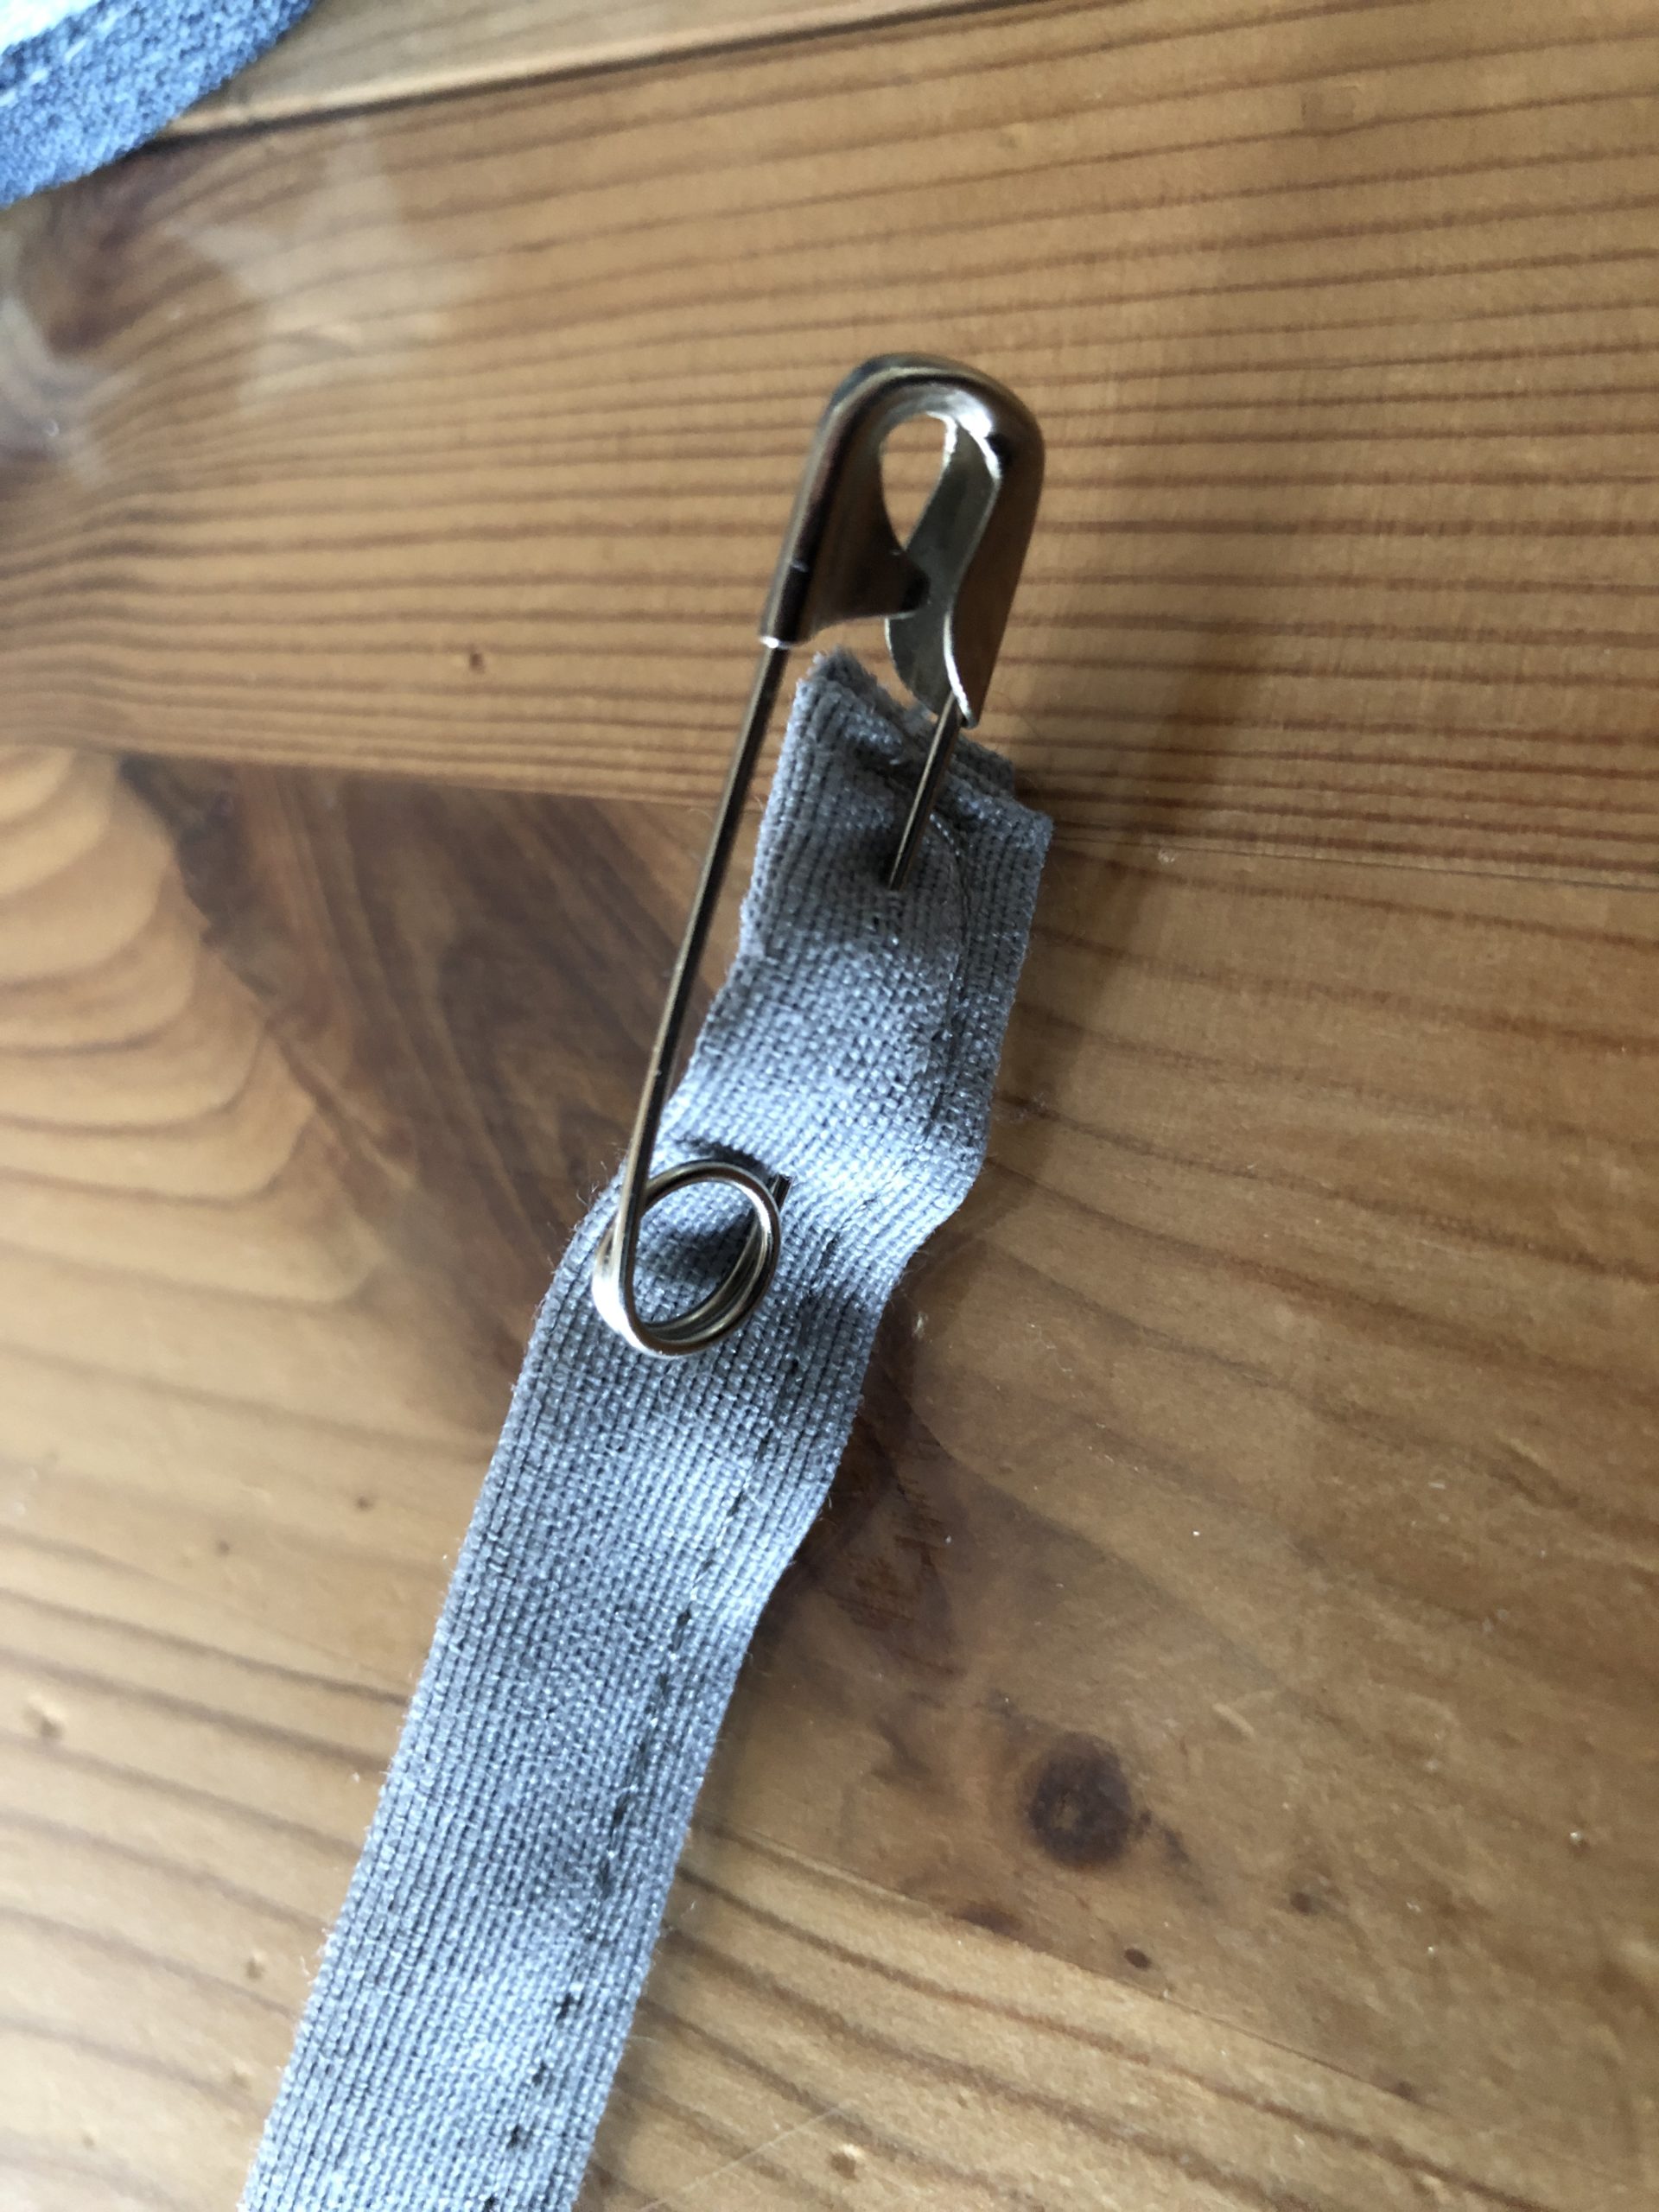
Bild zum Schritt 25 für das Bastel- und DIY-Abenteuer für Kinder: 'Langes Band mit Hilfe einer Sicherheitsnadel wie folgt in den...'

26

Lower left in the picture.

Bild zum Schritt 26 für das Bastel- und DIY-Abenteuer für Kinder: 'Unten links im Bild einfädeln.'

27

2. Bild zum Schritt 26 für das Bastel- und DIY-Abenteuer für Kinder: 'Unten links im Bild einfädeln.'

28

Pull out the top.

Bild zum Schritt 28 für das Bastel- und DIY-Abenteuer für Kinder: 'Oben herausziehen.'

29

At the other end put about 2 cm wide into the other drawer
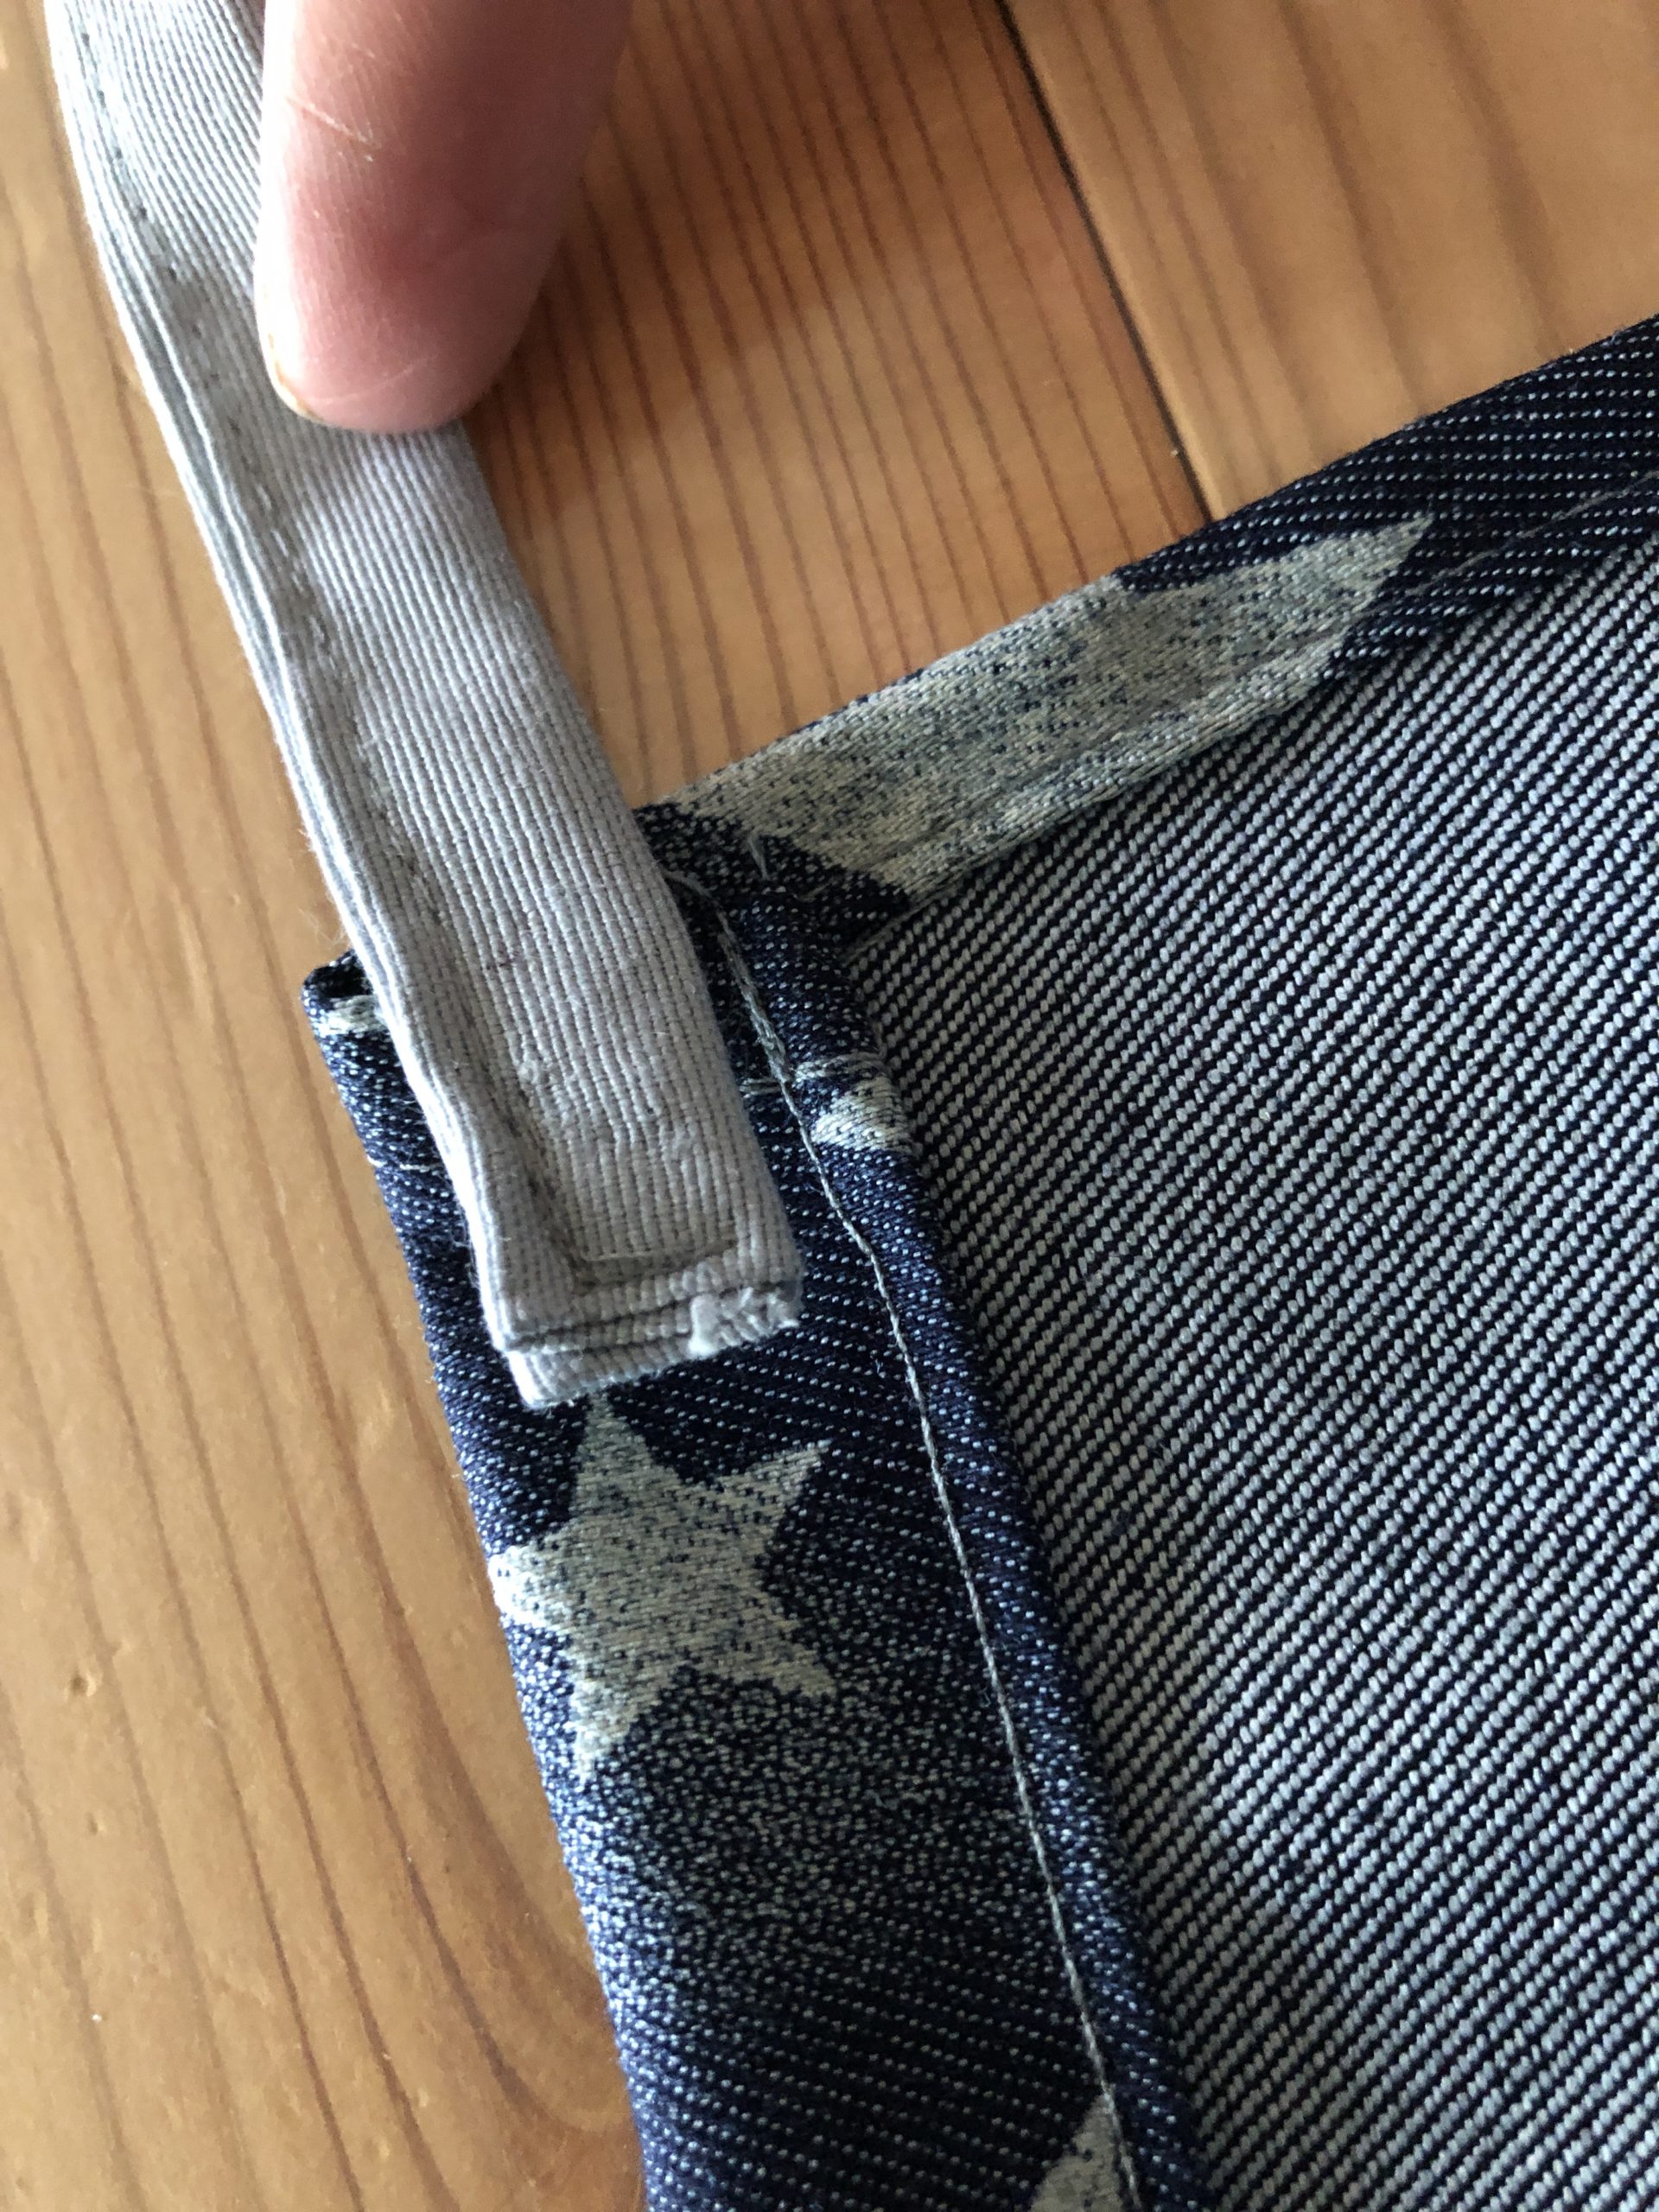
Bild zum Schritt 29 für das Bastel- und DIY-Abenteuer für Kinder: 'Am anderen Ende oben etwa 2 cm weit in den...'

30

Like this:
And sew tight!

Bild zum Schritt 30 für das Bastel- und DIY-Abenteuer für Kinder: 'So:   Und festnähen!'

31

Push the short band on the other side about 2cm into the drawstring and sew firmly.
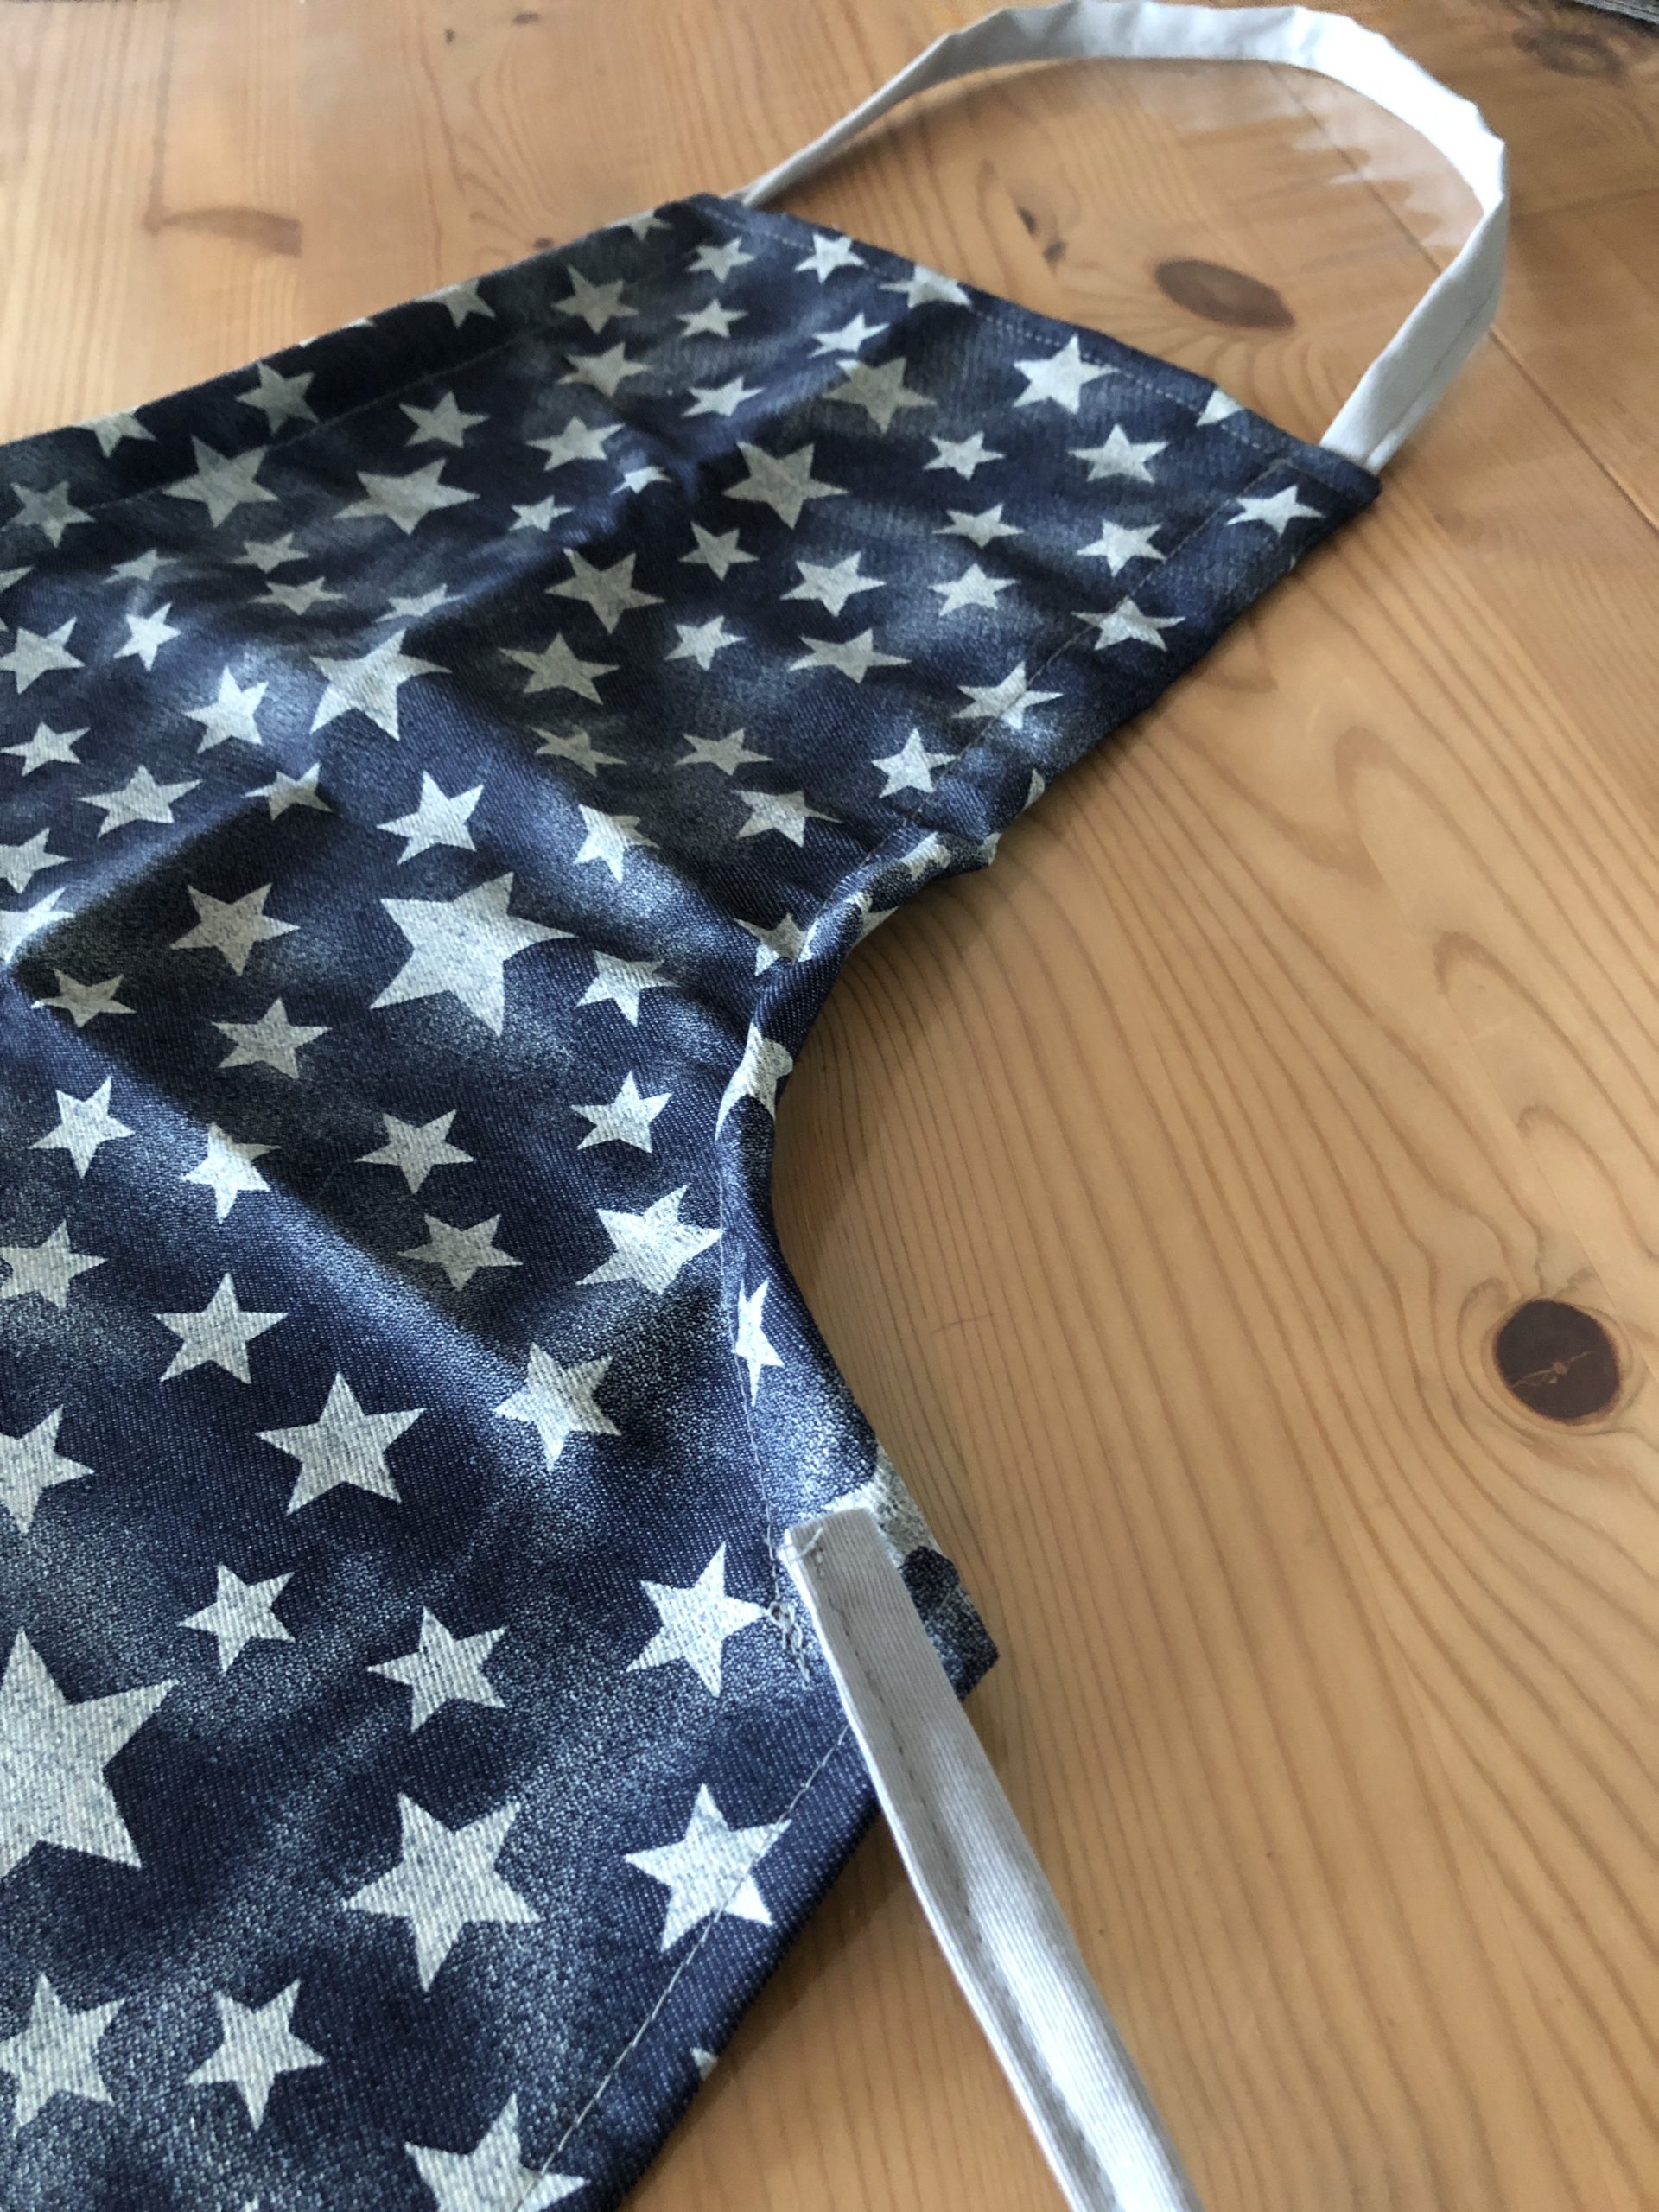
Bild zum Schritt 31 für das Bastel- und DIY-Abenteuer für Kinder: 'Das kurze Band auf der anderen Seite ca. 2cm in...'

32

2. Bild zum Schritt 31 für das Bastel- und DIY-Abenteuer für Kinder: 'Das kurze Band auf der anderen Seite ca. 2cm in...'

33

The apron is ready.

Bild zum Schritt 33 für das Bastel- und DIY-Abenteuer für Kinder: 'Fertig ist die Schürze.'

Sew on decorative ribbon (if that's what you want!)
34

If you want to do the same, I'll go on.

35

Cut tape:
50 cm x 7,5 cm

36

Put stripes across the middle of the apron = approx. 5 cm under the bands! (see picture) fasten and fasten
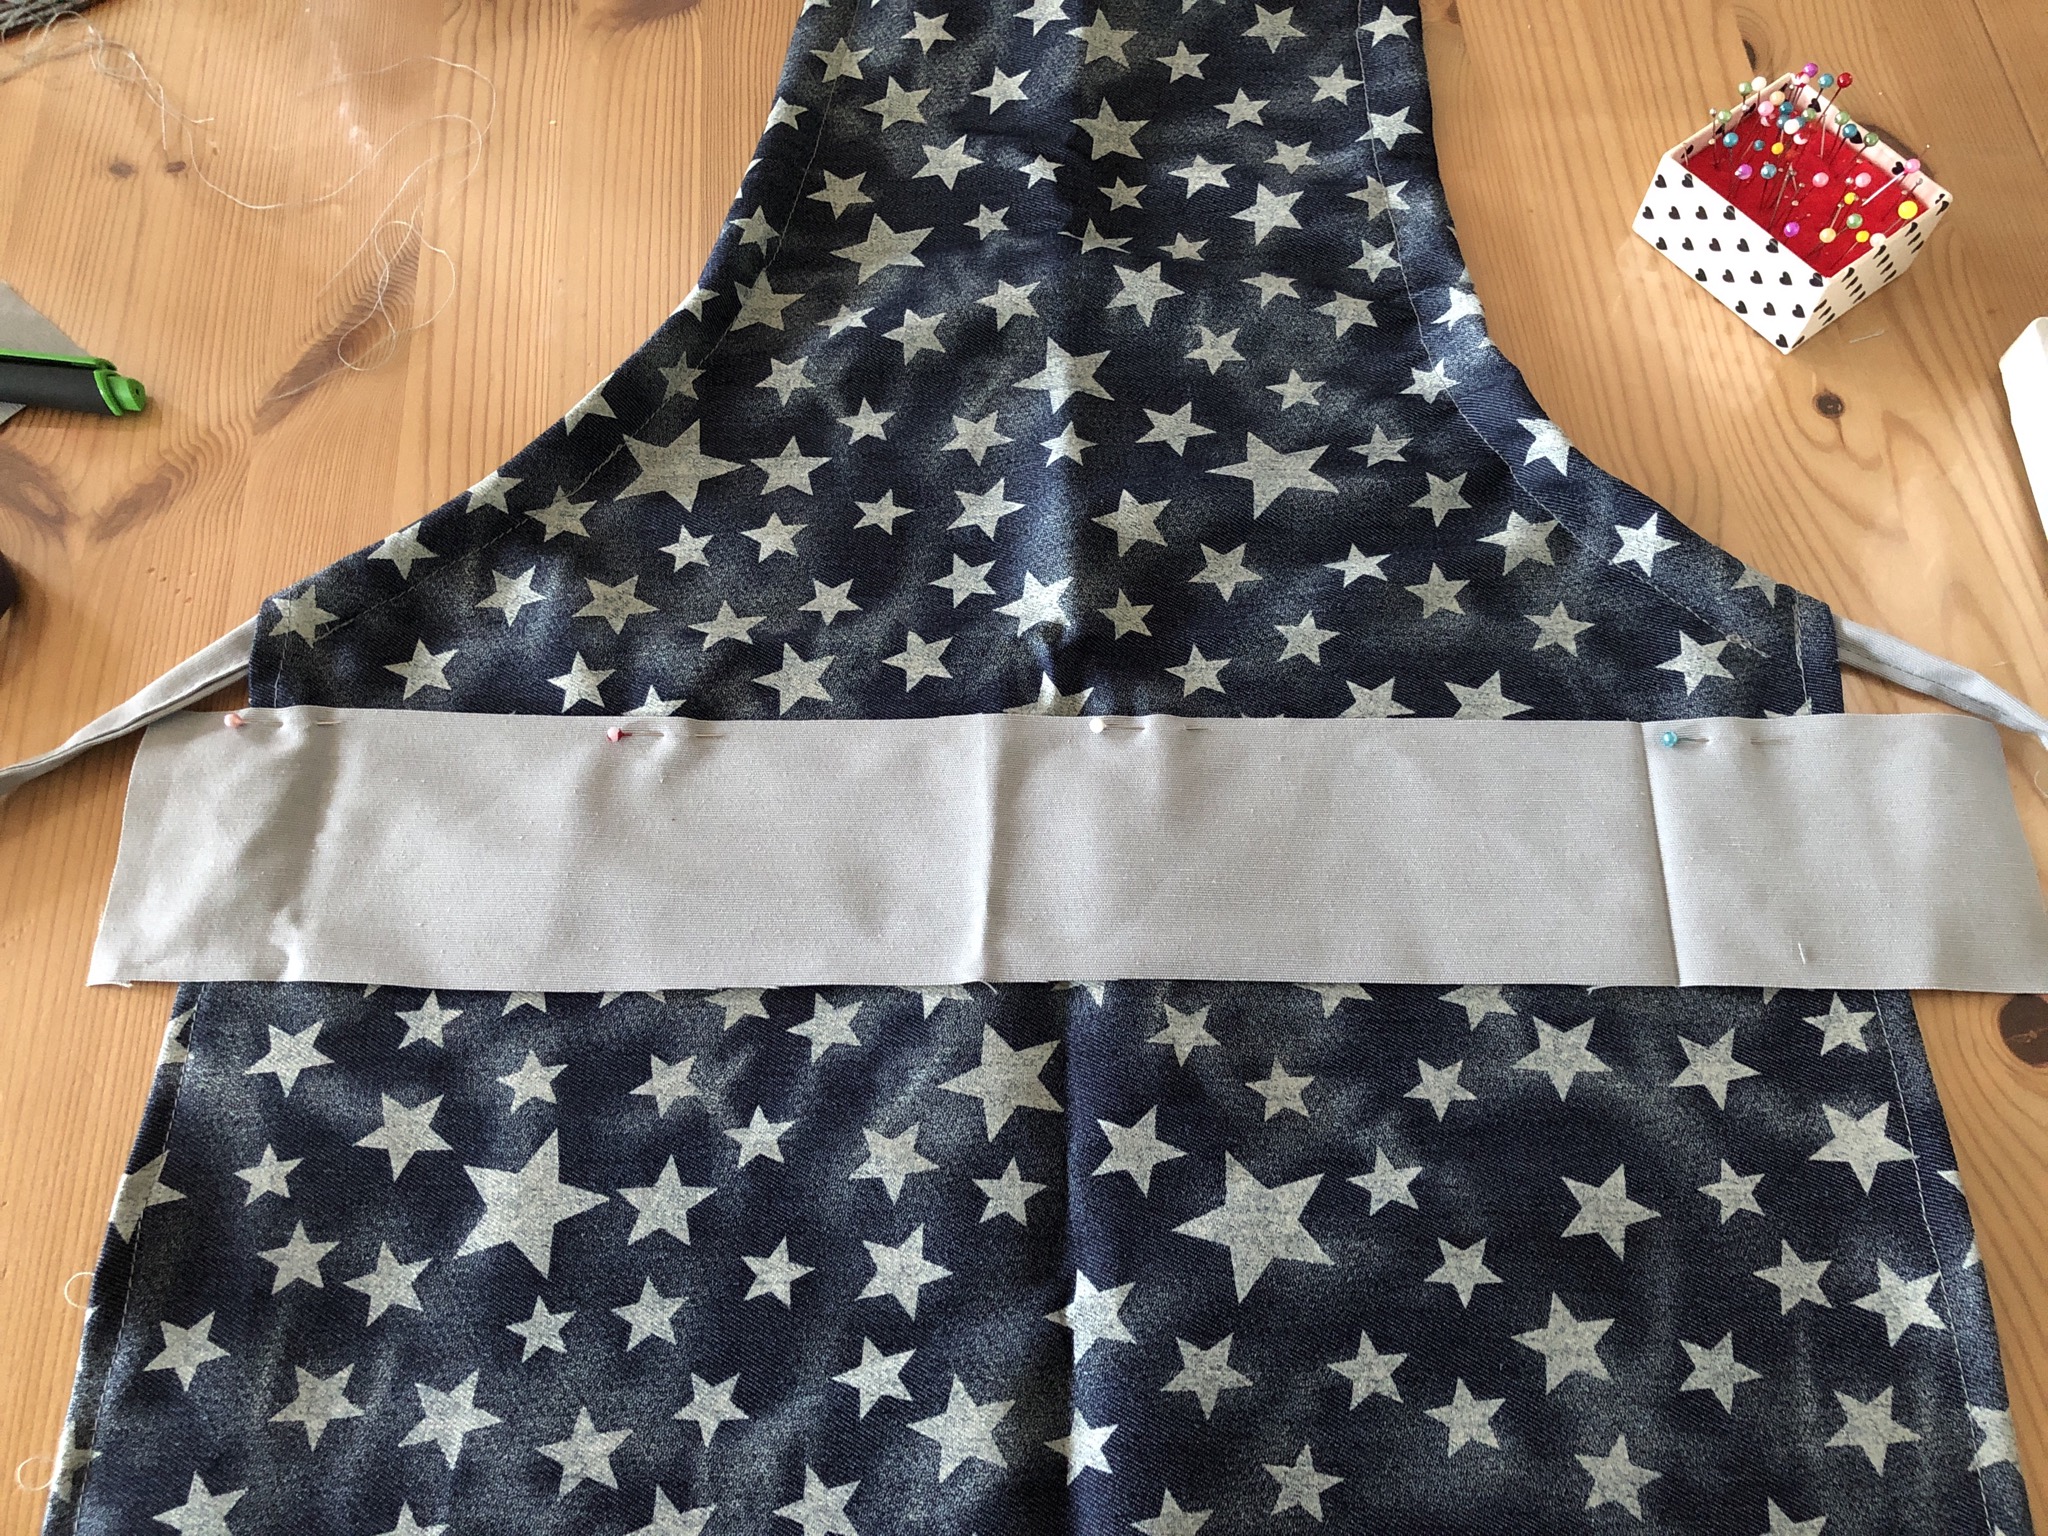
Bild zum Schritt 37 für das Bastel- und DIY-Abenteuer für Kinder: 'Streifen quer über die Schürzenmitte legen =ca. 5 cm unter...'

37

Fold fixed tape upwards and hit the fabric edge about half a centimetre inwards.
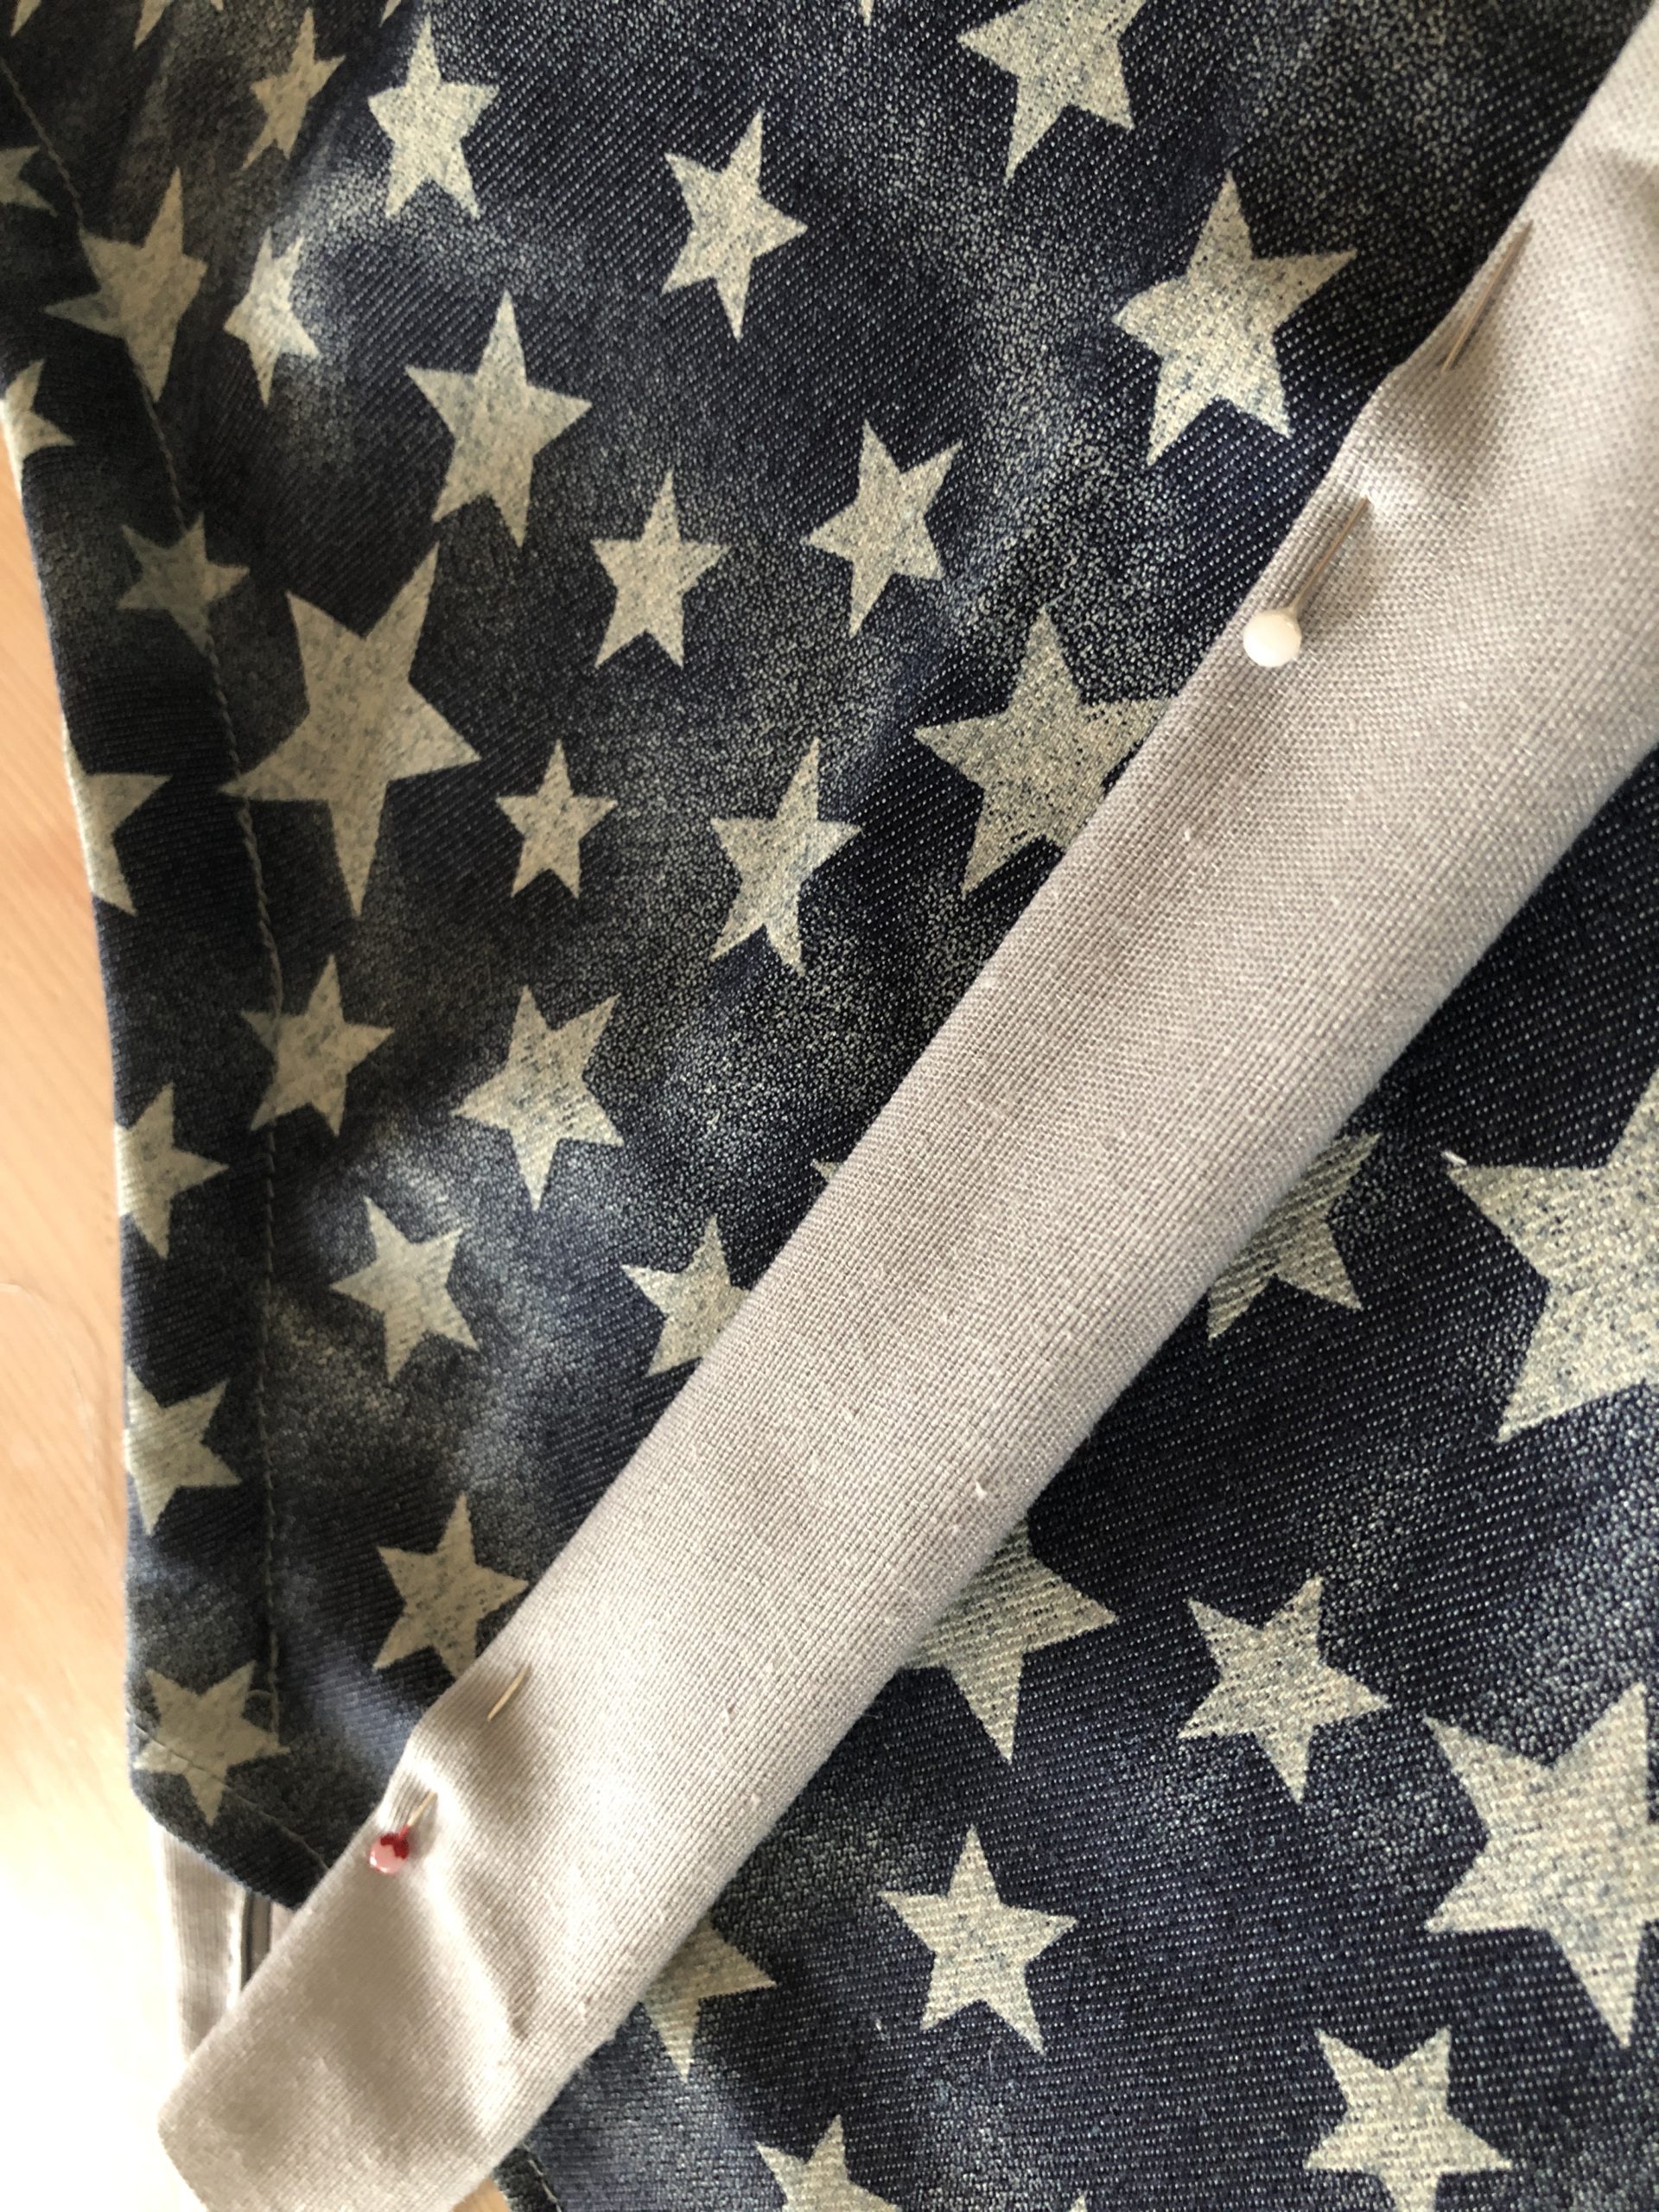
Bild zum Schritt 38 für das Bastel- und DIY-Abenteuer für Kinder: 'Festgenähtes Band nach oben klappen und die Stoffkante ca. einen...'

38

Sewing.

Bild zum Schritt 39 für das Bastel- und DIY-Abenteuer für Kinder: 'Festnähen.'

39

Sew a decorative seam on both sides and thus fix the tape on the apron.
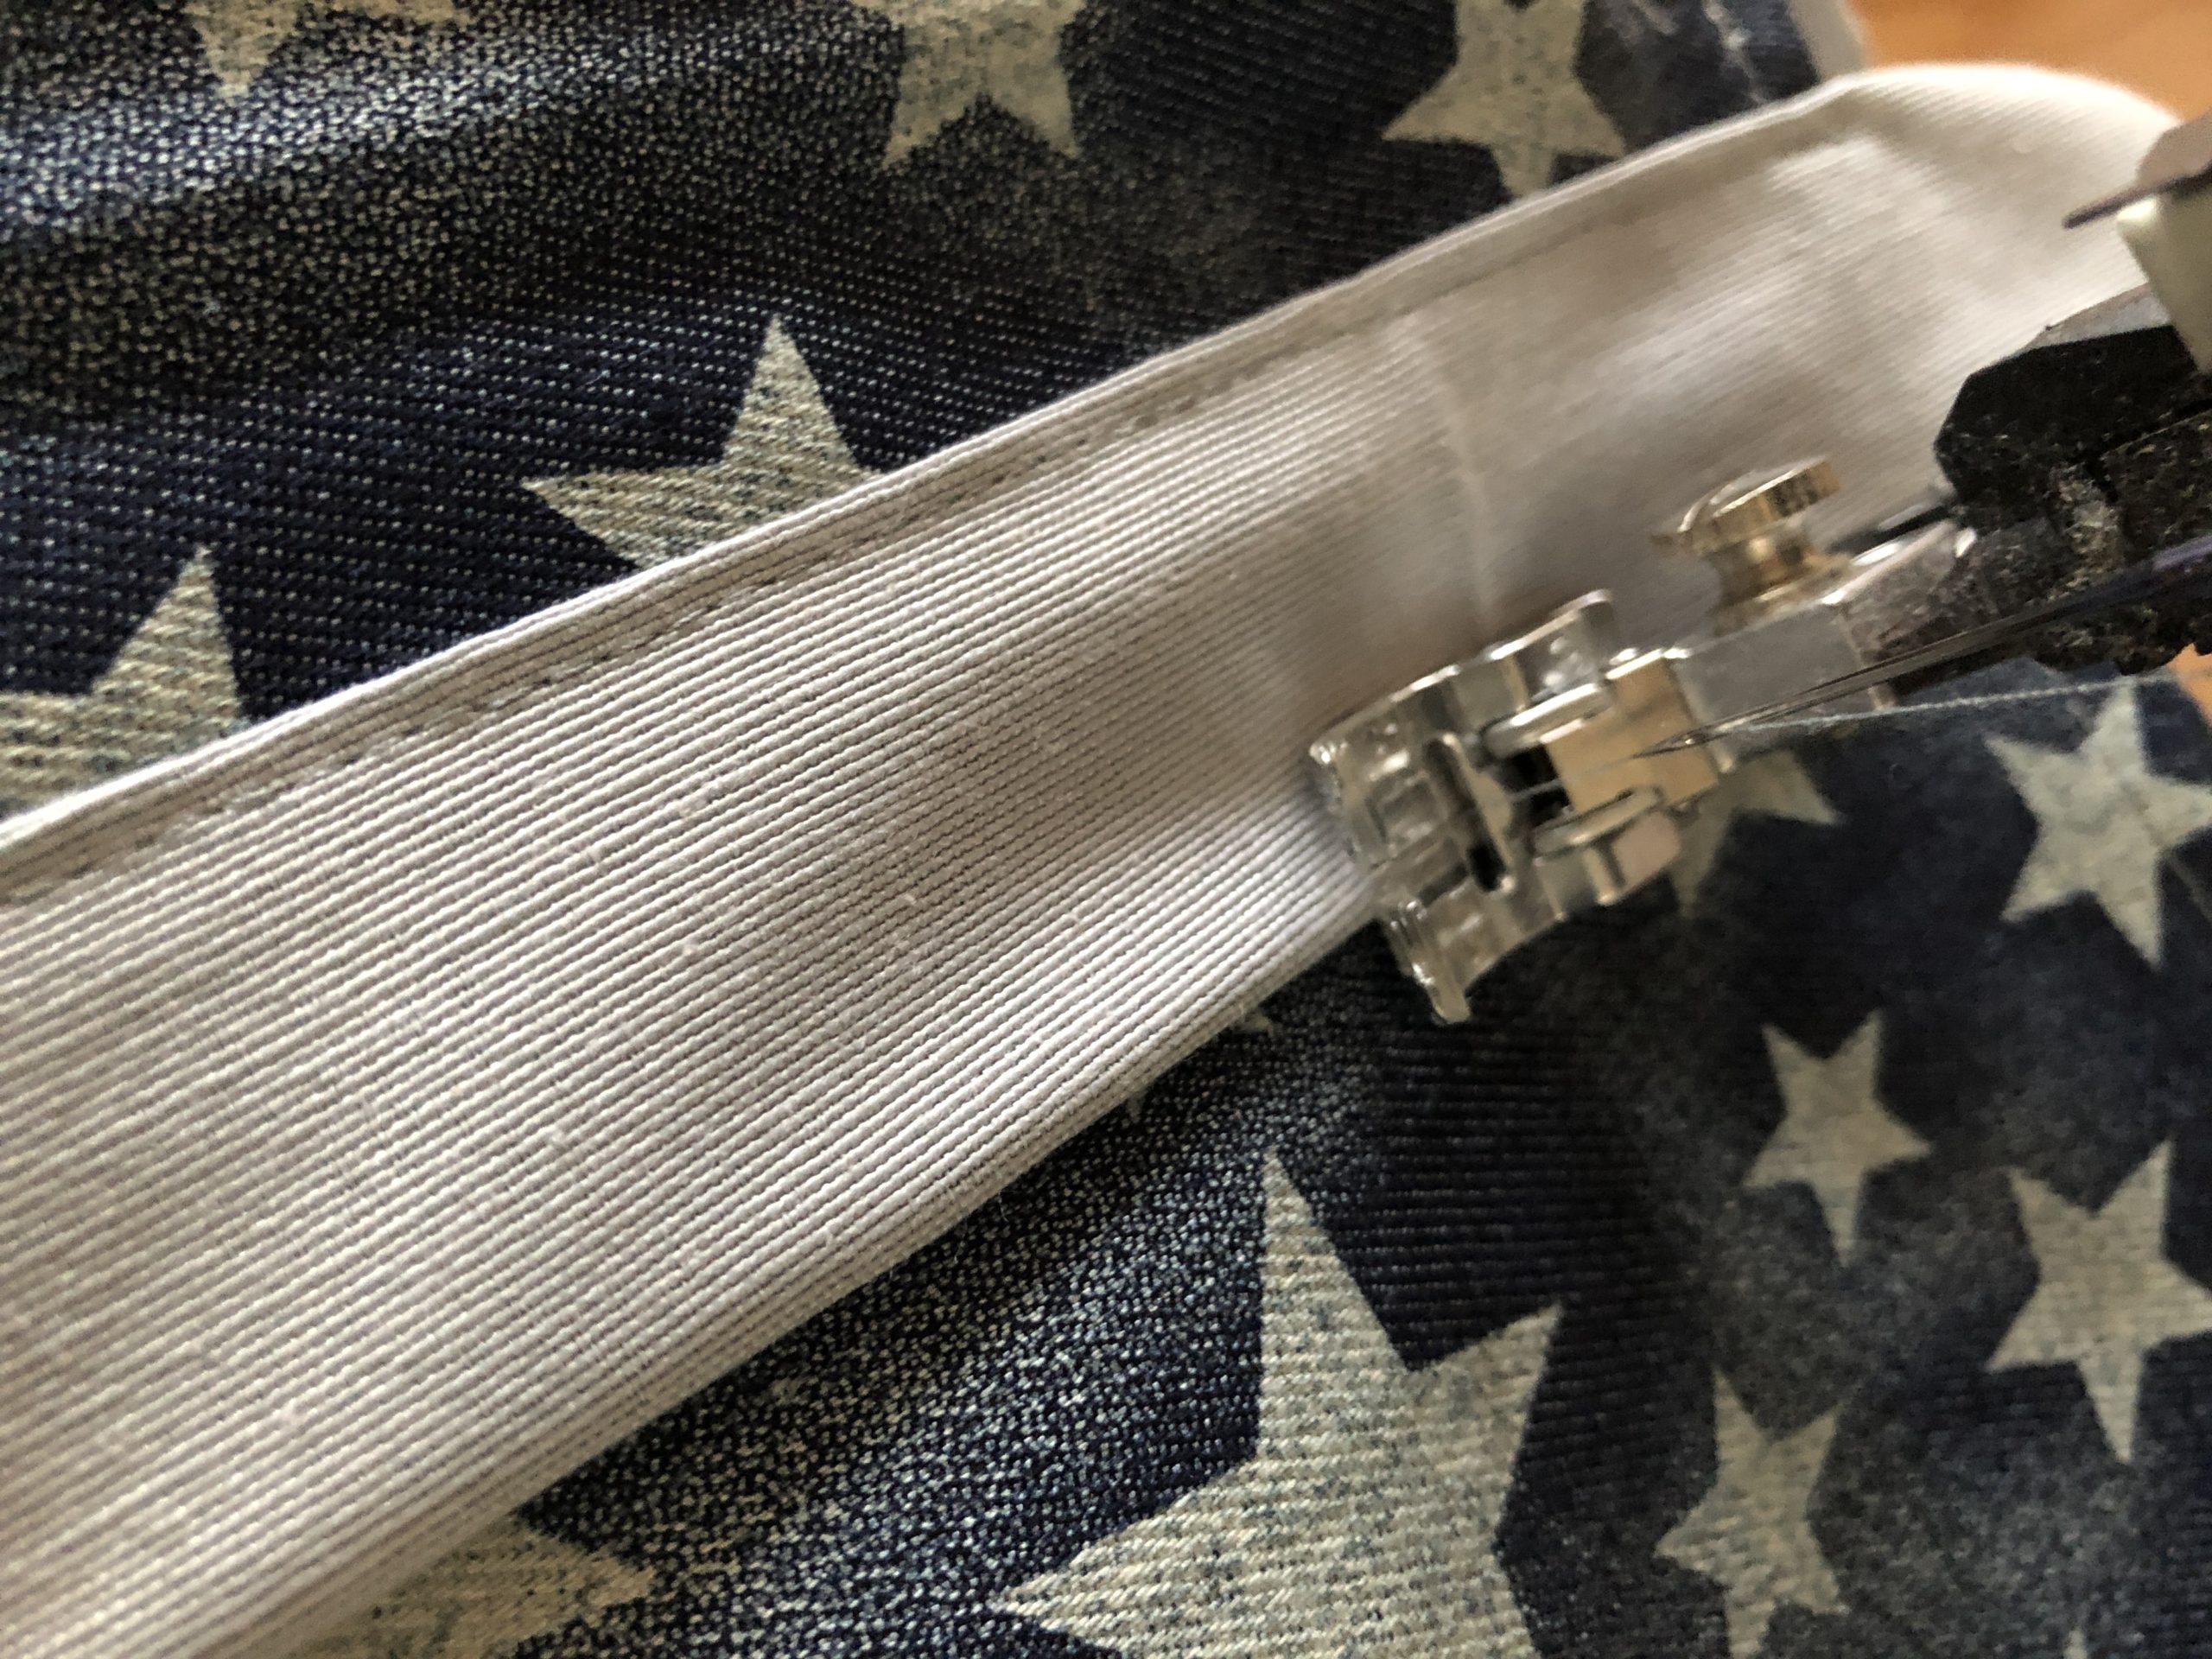
Bild zum Schritt 40 für das Bastel- und DIY-Abenteuer für Kinder: 'An beiden Seiten eine Ziernaht nähen und somit das Band...'

40

2. Bild zum Schritt 40 für das Bastel- und DIY-Abenteuer für Kinder: 'An beiden Seiten eine Ziernaht nähen und somit das Band...'

41

Turn the overhanging band backwards... see picture
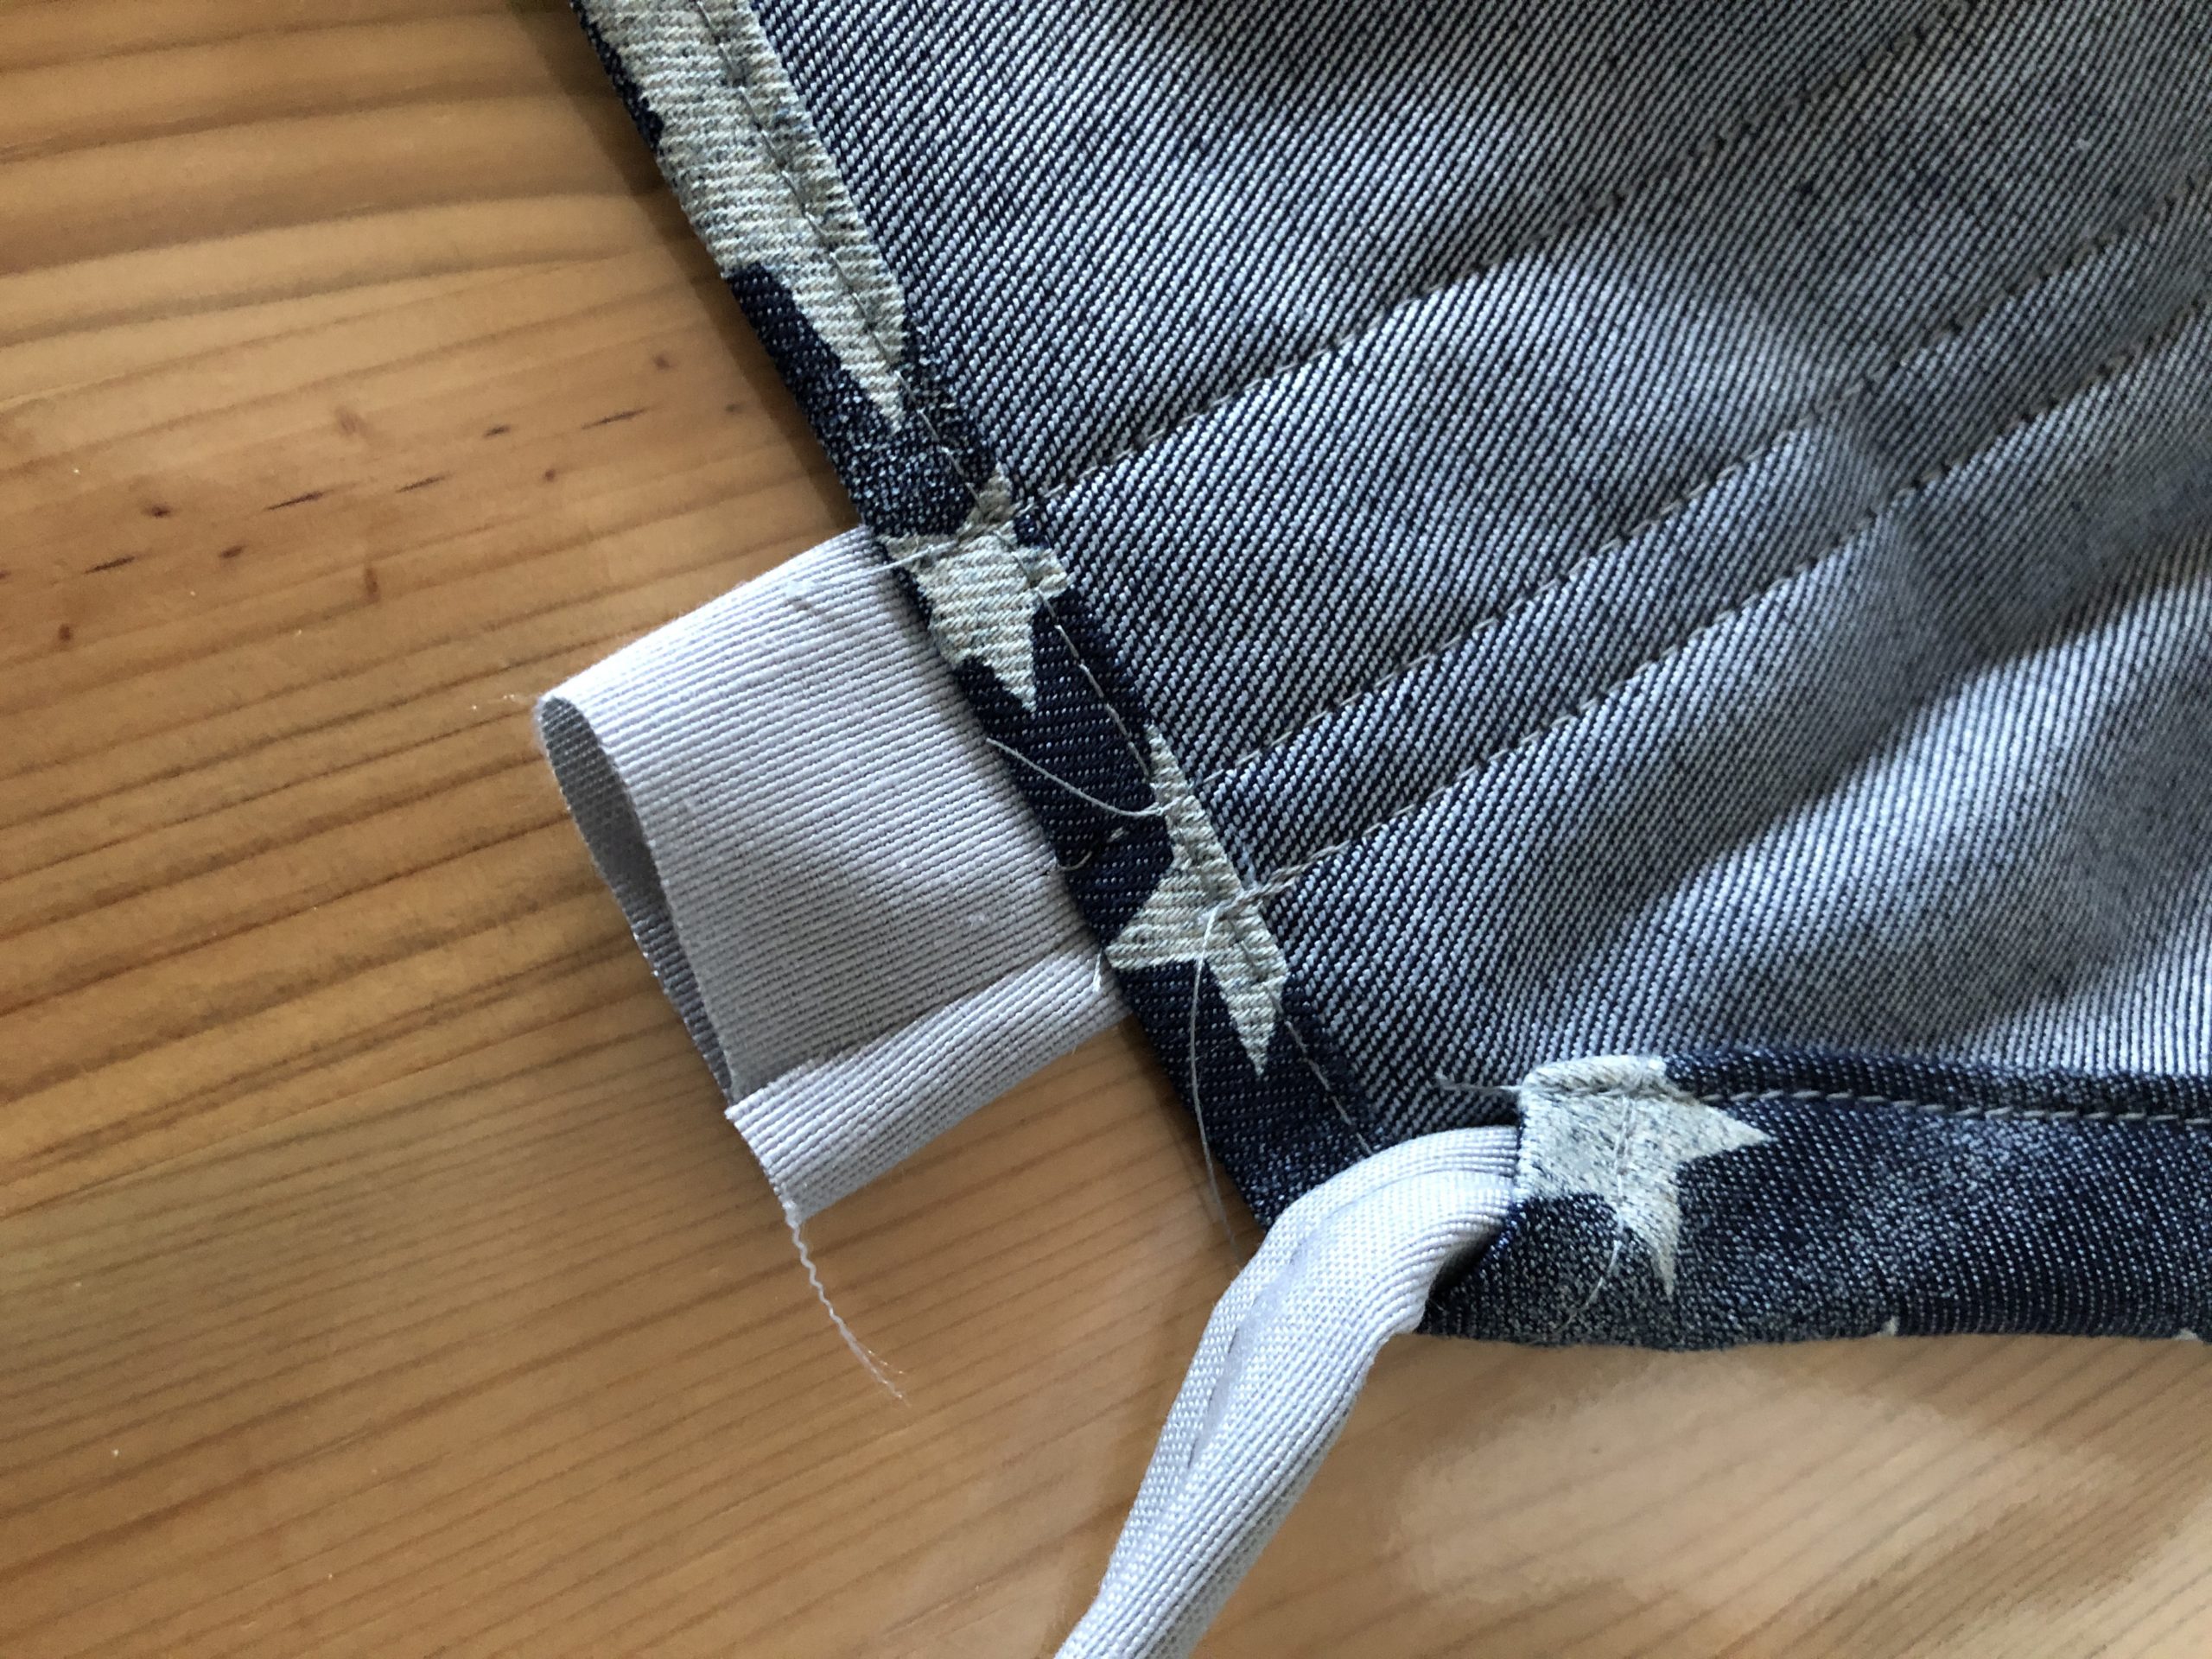
Bild zum Schritt 42 für das Bastel- und DIY-Abenteuer für Kinder: 'Das überstehenden Band nach hinten umschlagen ... siehe Bild'

42

2. Bild zum Schritt 42 für das Bastel- und DIY-Abenteuer für Kinder: 'Das überstehenden Band nach hinten umschlagen ... siehe Bild'

43

And fasten cleanly.

Bild zum Schritt 44 für das Bastel- und DIY-Abenteuer für Kinder: 'Und sauber festnähen.'

44

The apron is ready.

Bild zum Schritt 45 für das Bastel- und DIY-Abenteuer für Kinder: 'Fertig ist die Schürze.'

45

If you haven't had enough, I'd still have the matching cooking cap... look inside!

Sew children's apron

Follow us on Facebook , Instagram and Pinterest
Don't miss any more adventures: Our bottle mail

Leave a Reply

Your email address will not be published.

The maximum upload file size: 5 MB. You can upload: image, document. Drop file here