This children's chef hat fits the children's chef apron. Also great as a carnival costume or for large pizza bakers, cake bakers,, star chefs, and barbecue master!
Media Education for Kindergarten and Hort

Relief in everyday life, targeted promotion of individual children, independent learning and - without any pre-knowledge already usable by the youngest!

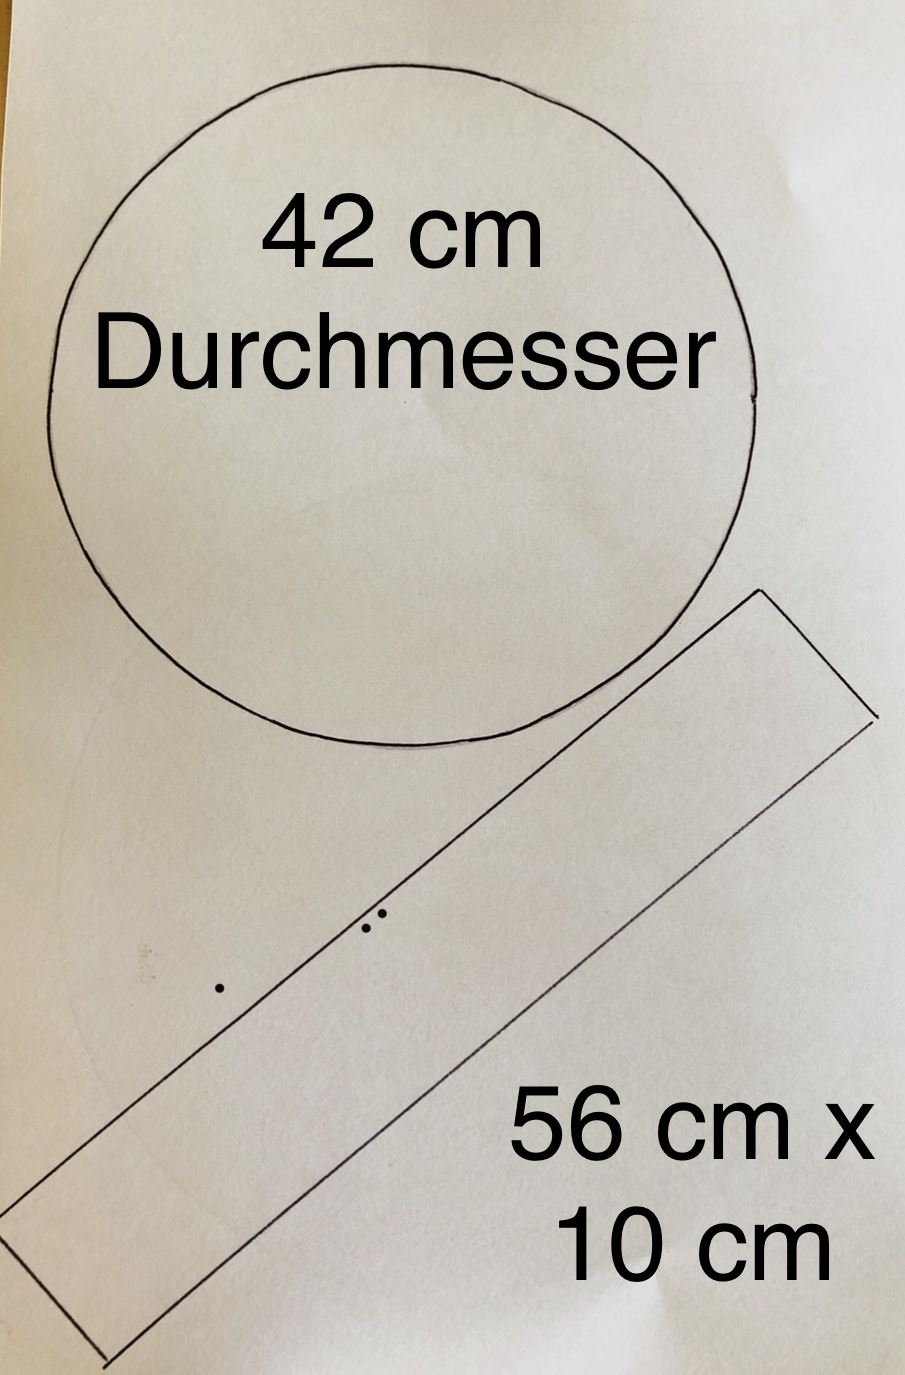
Cut the circle out of the white fabric.
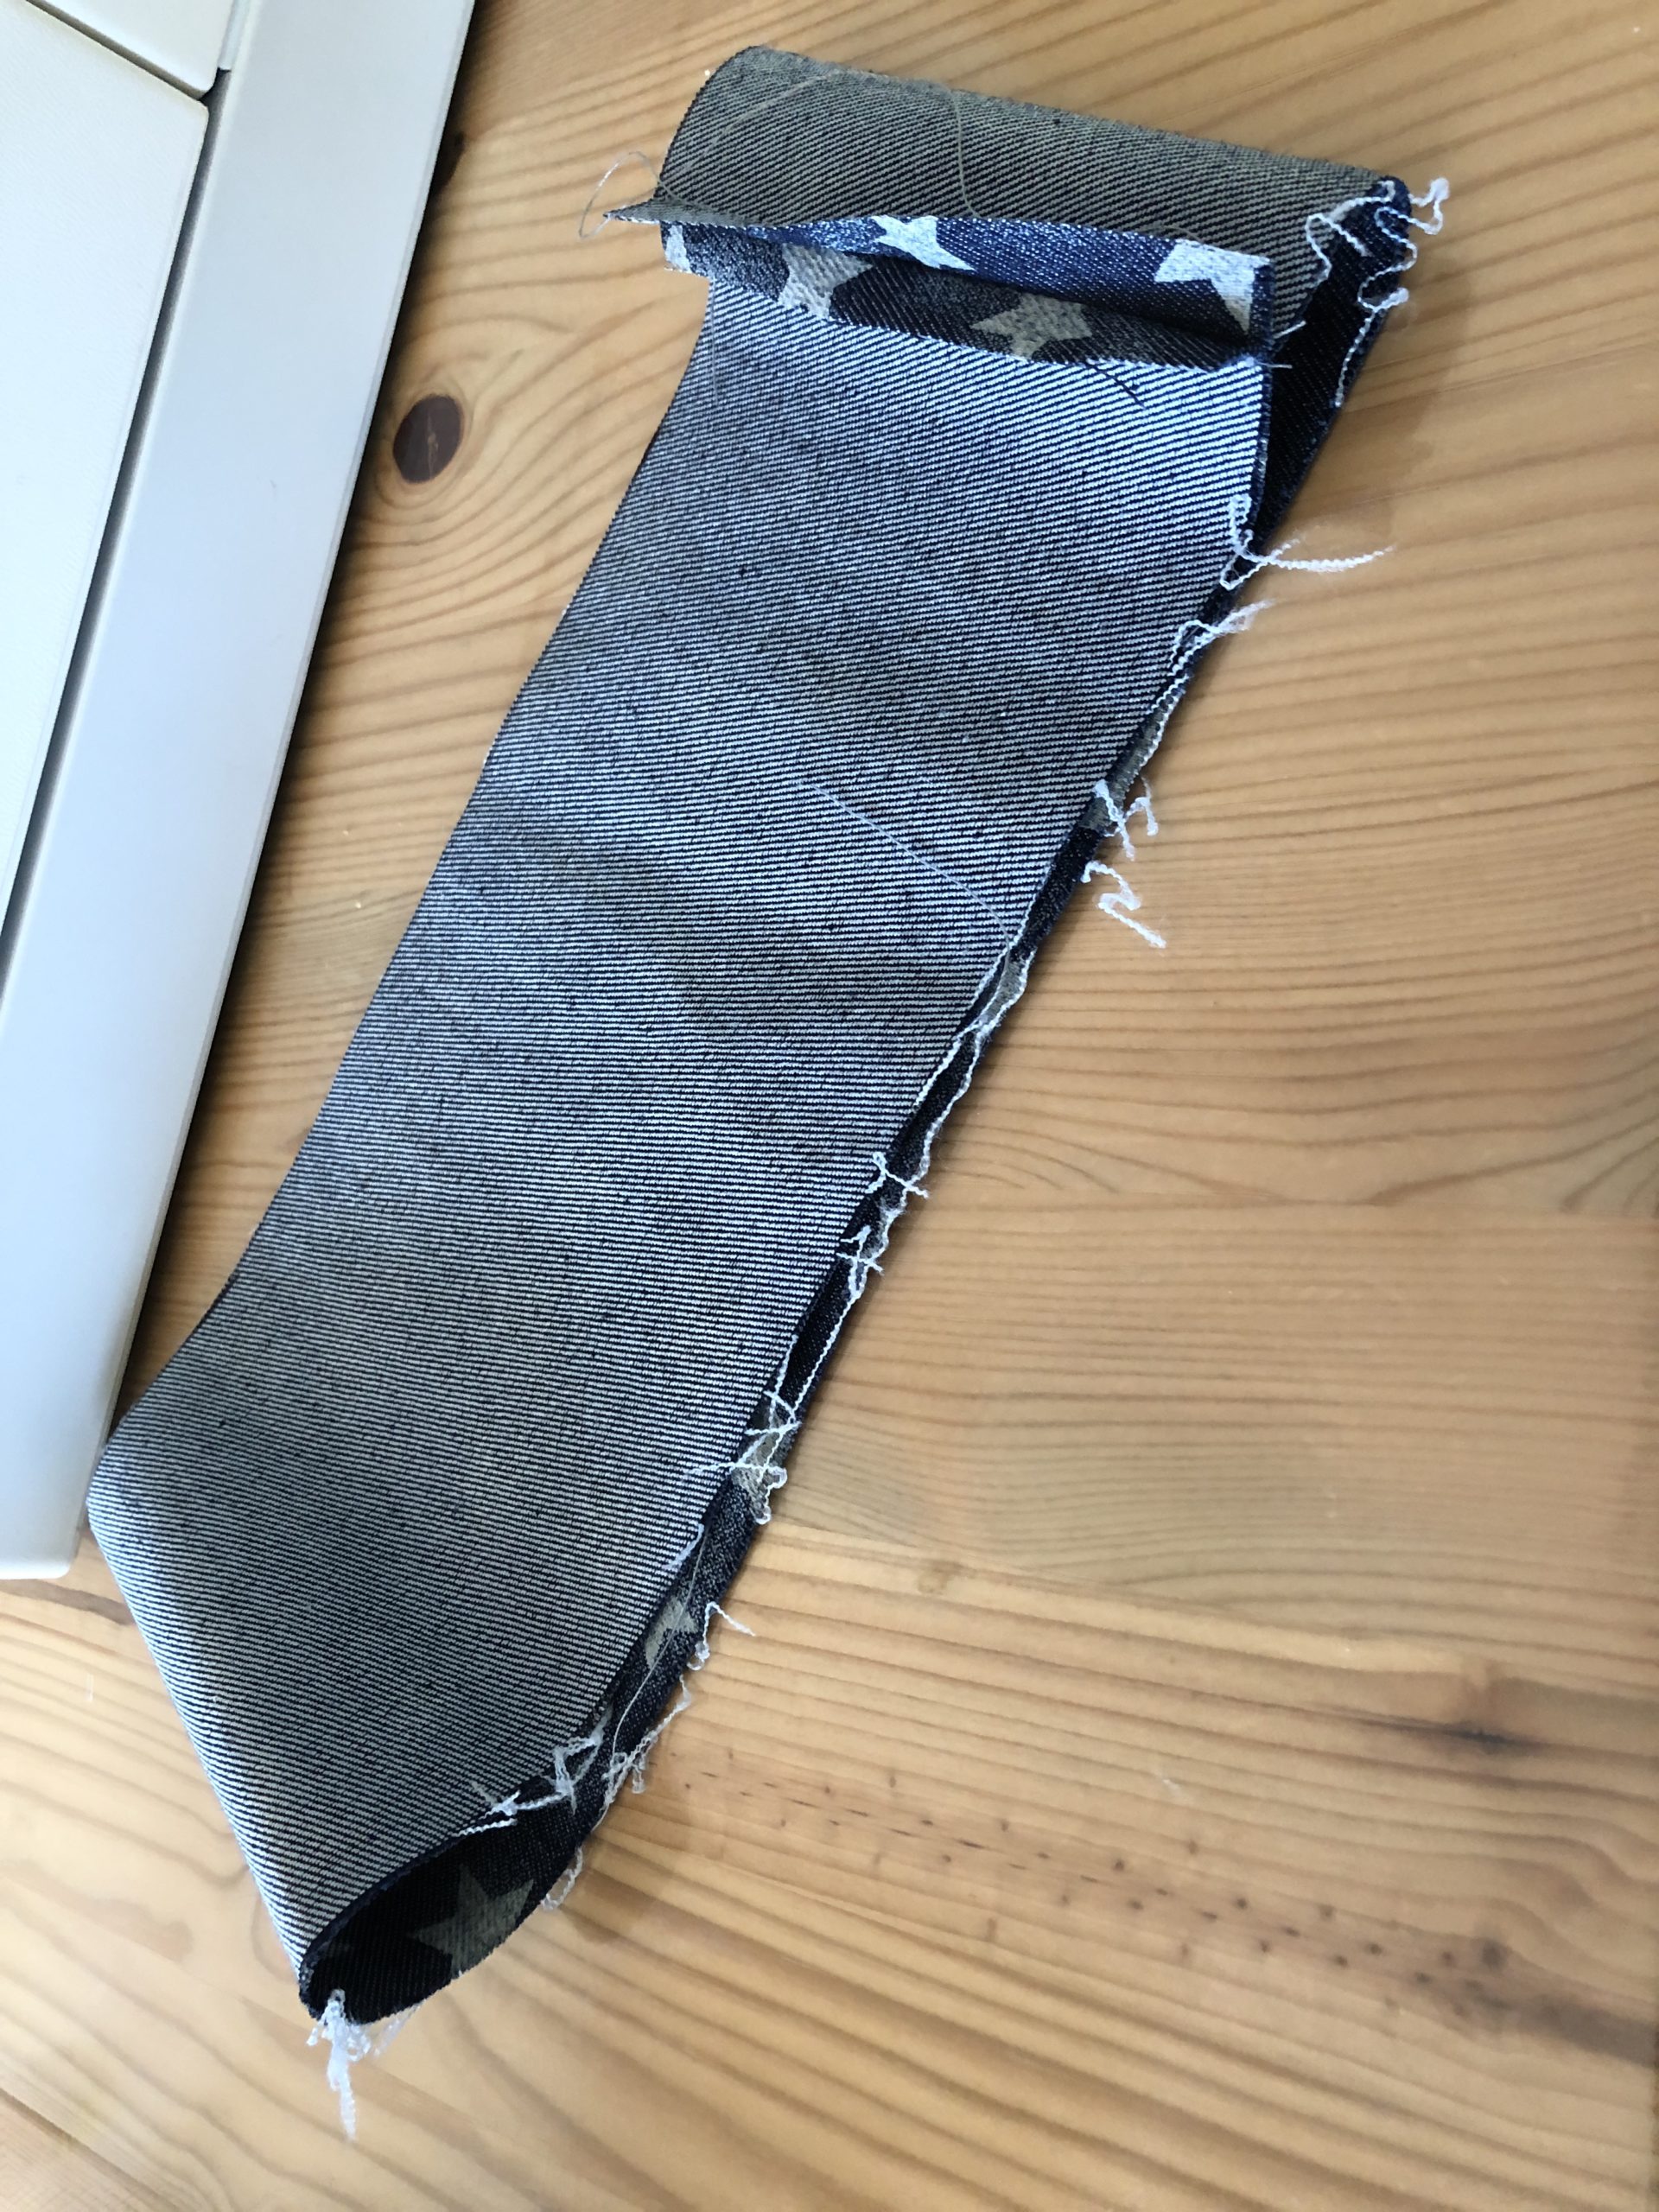
Cut the strip from the star fabric.
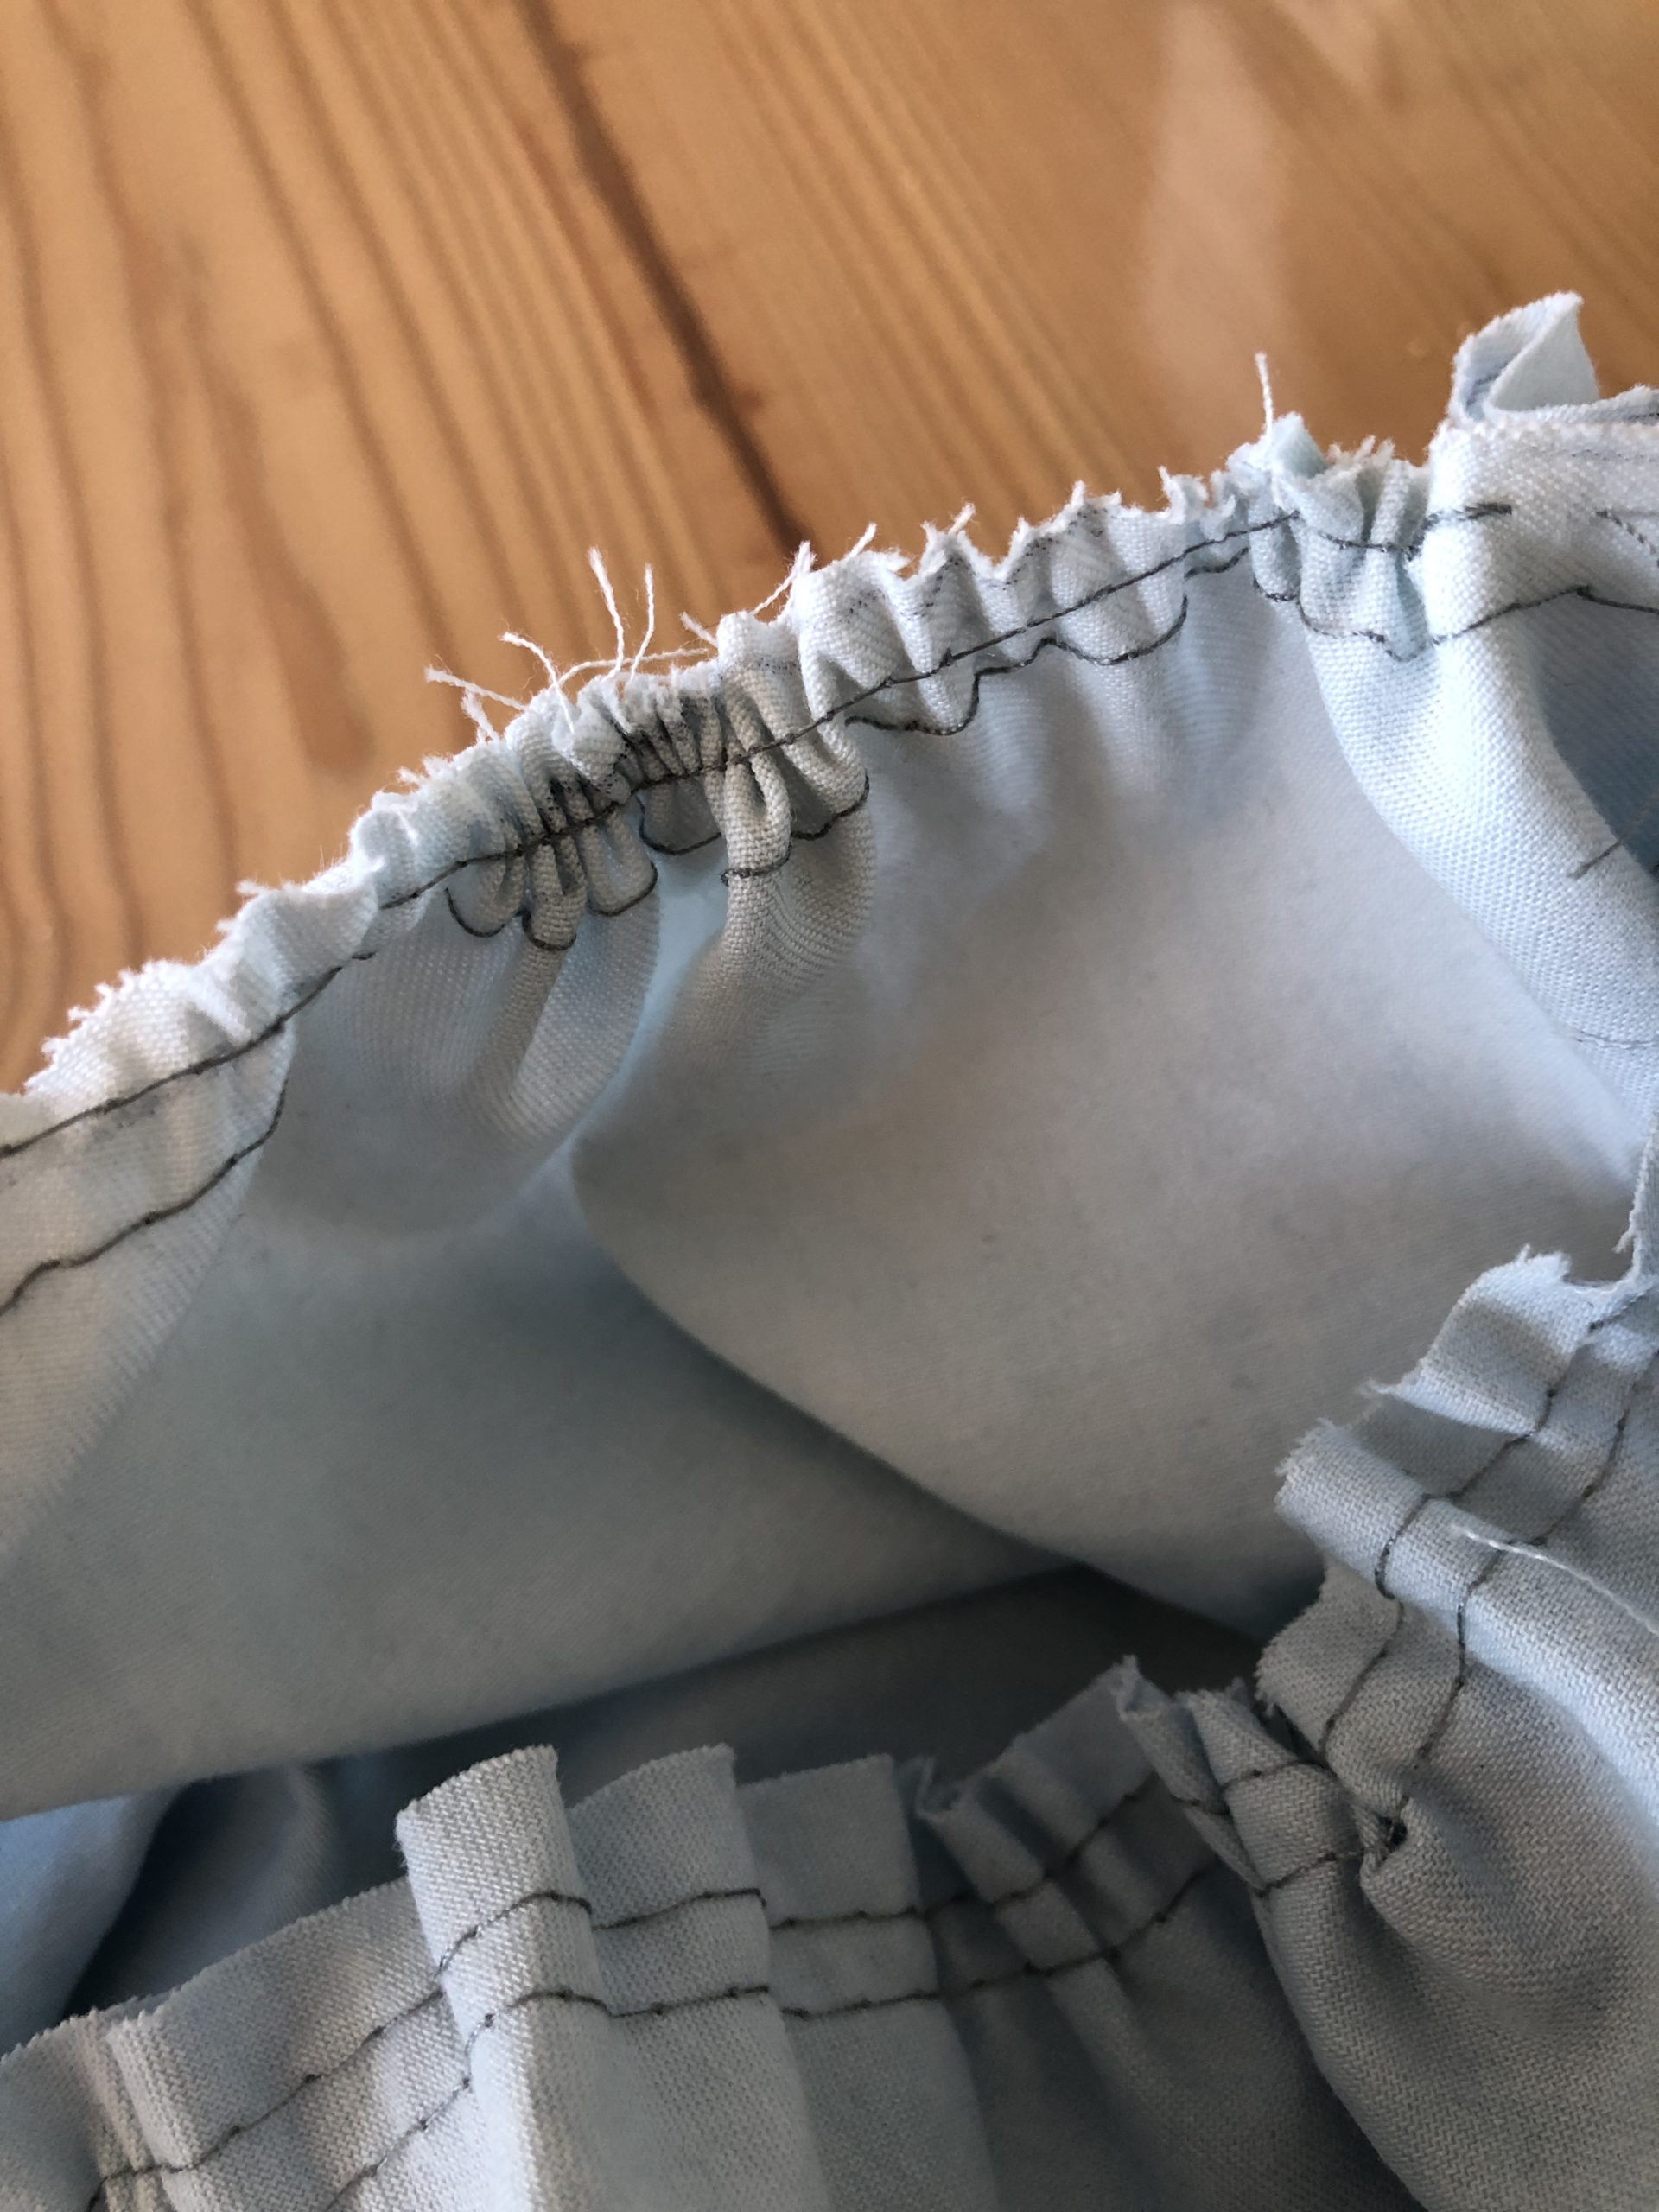
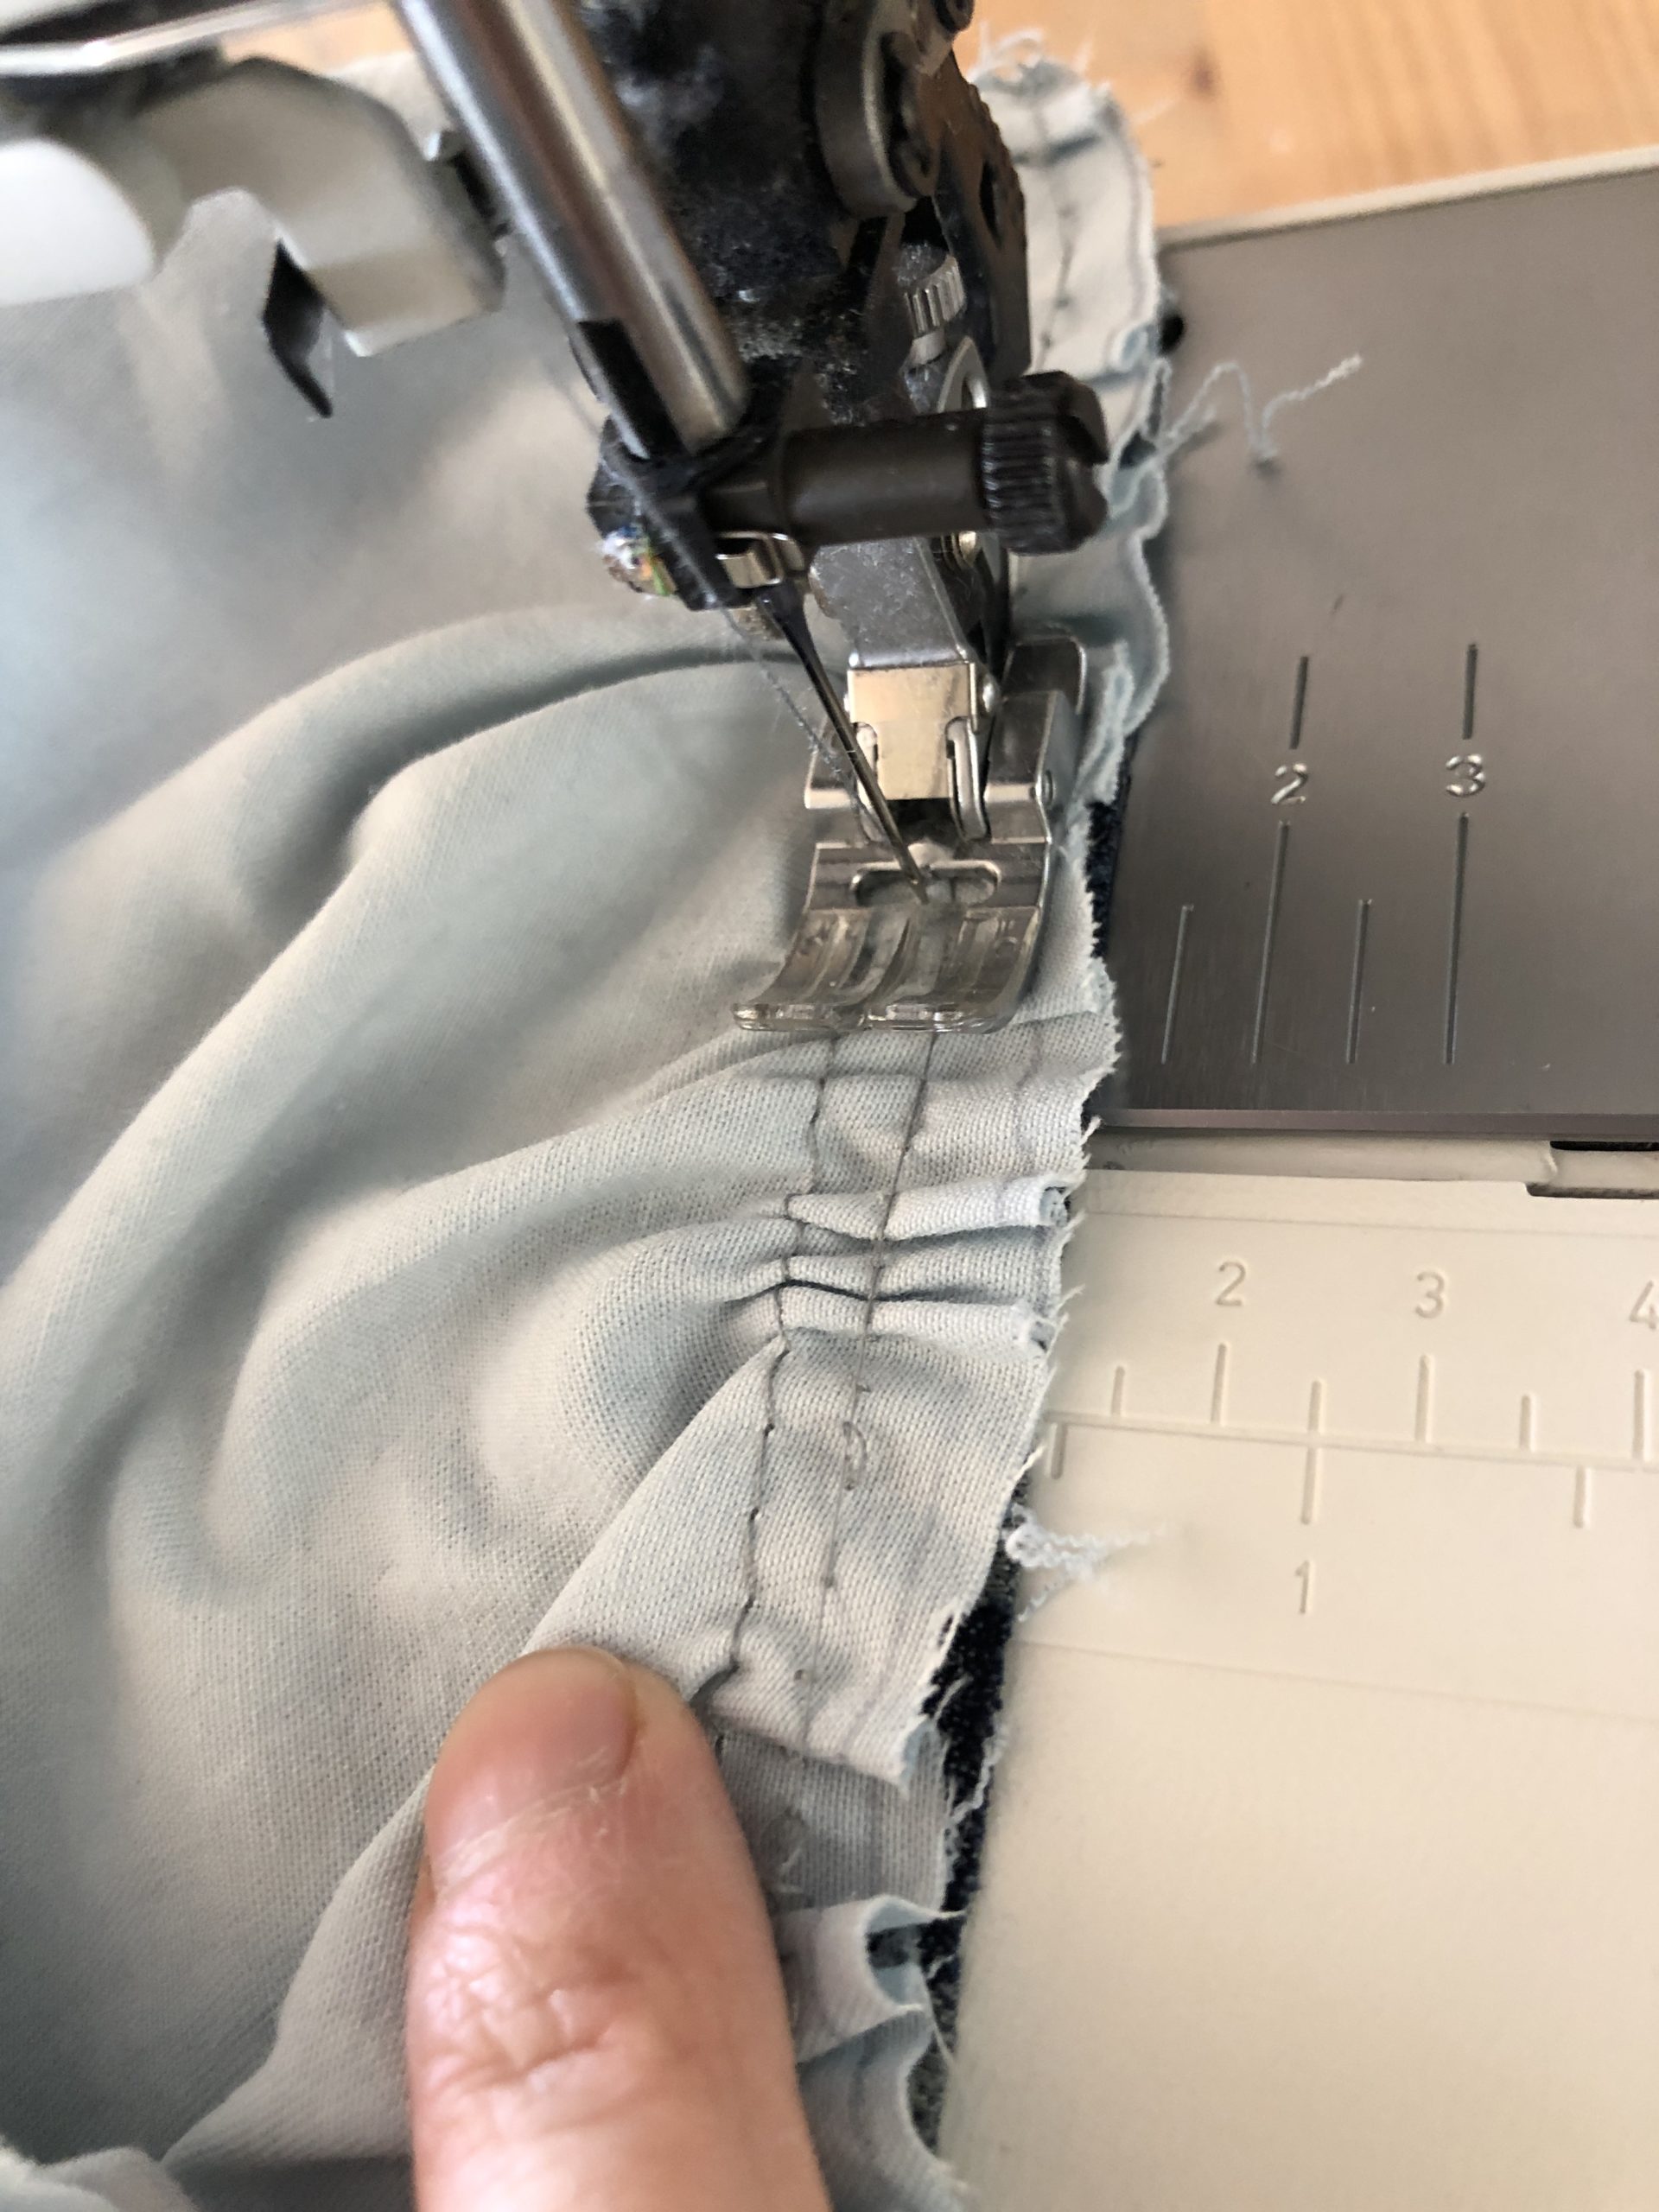
First, the circle is sewed around with two rows (largest runoff).


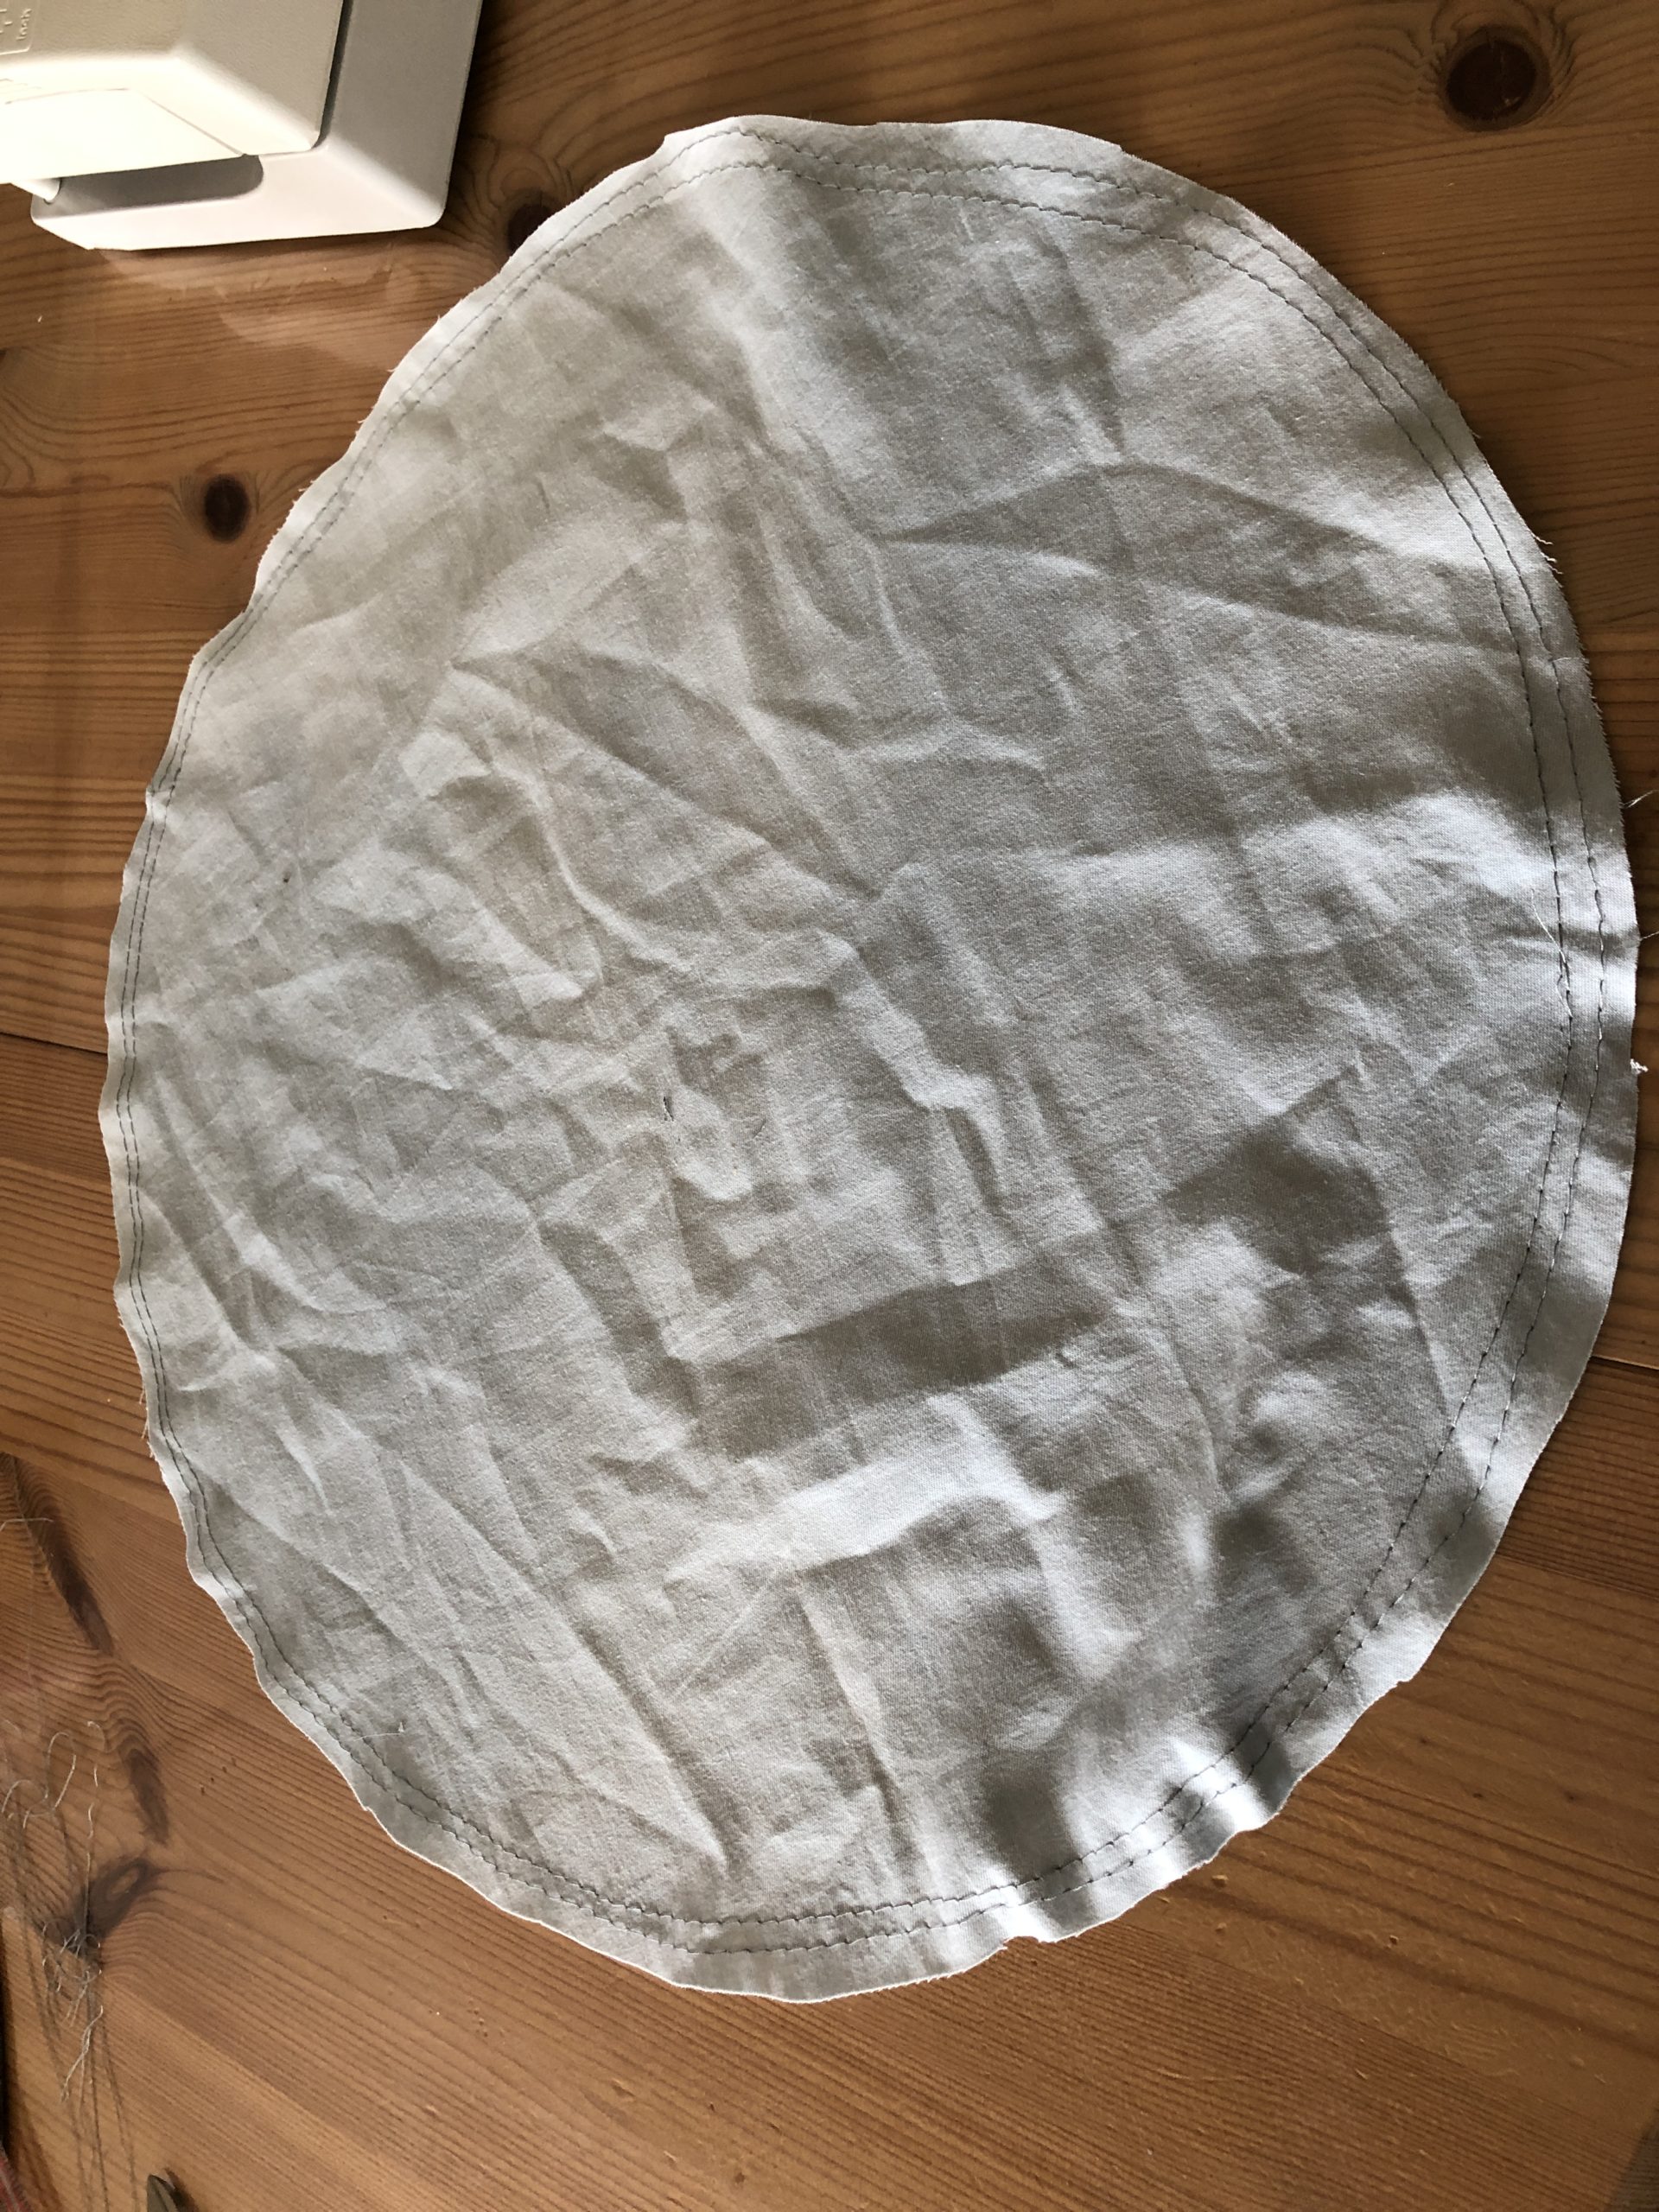
Gently pull on one of the threads. This pulls the circle together at the edge.
Pull the edge together until the diameter of the circle edge matches the head circumference of the cap.

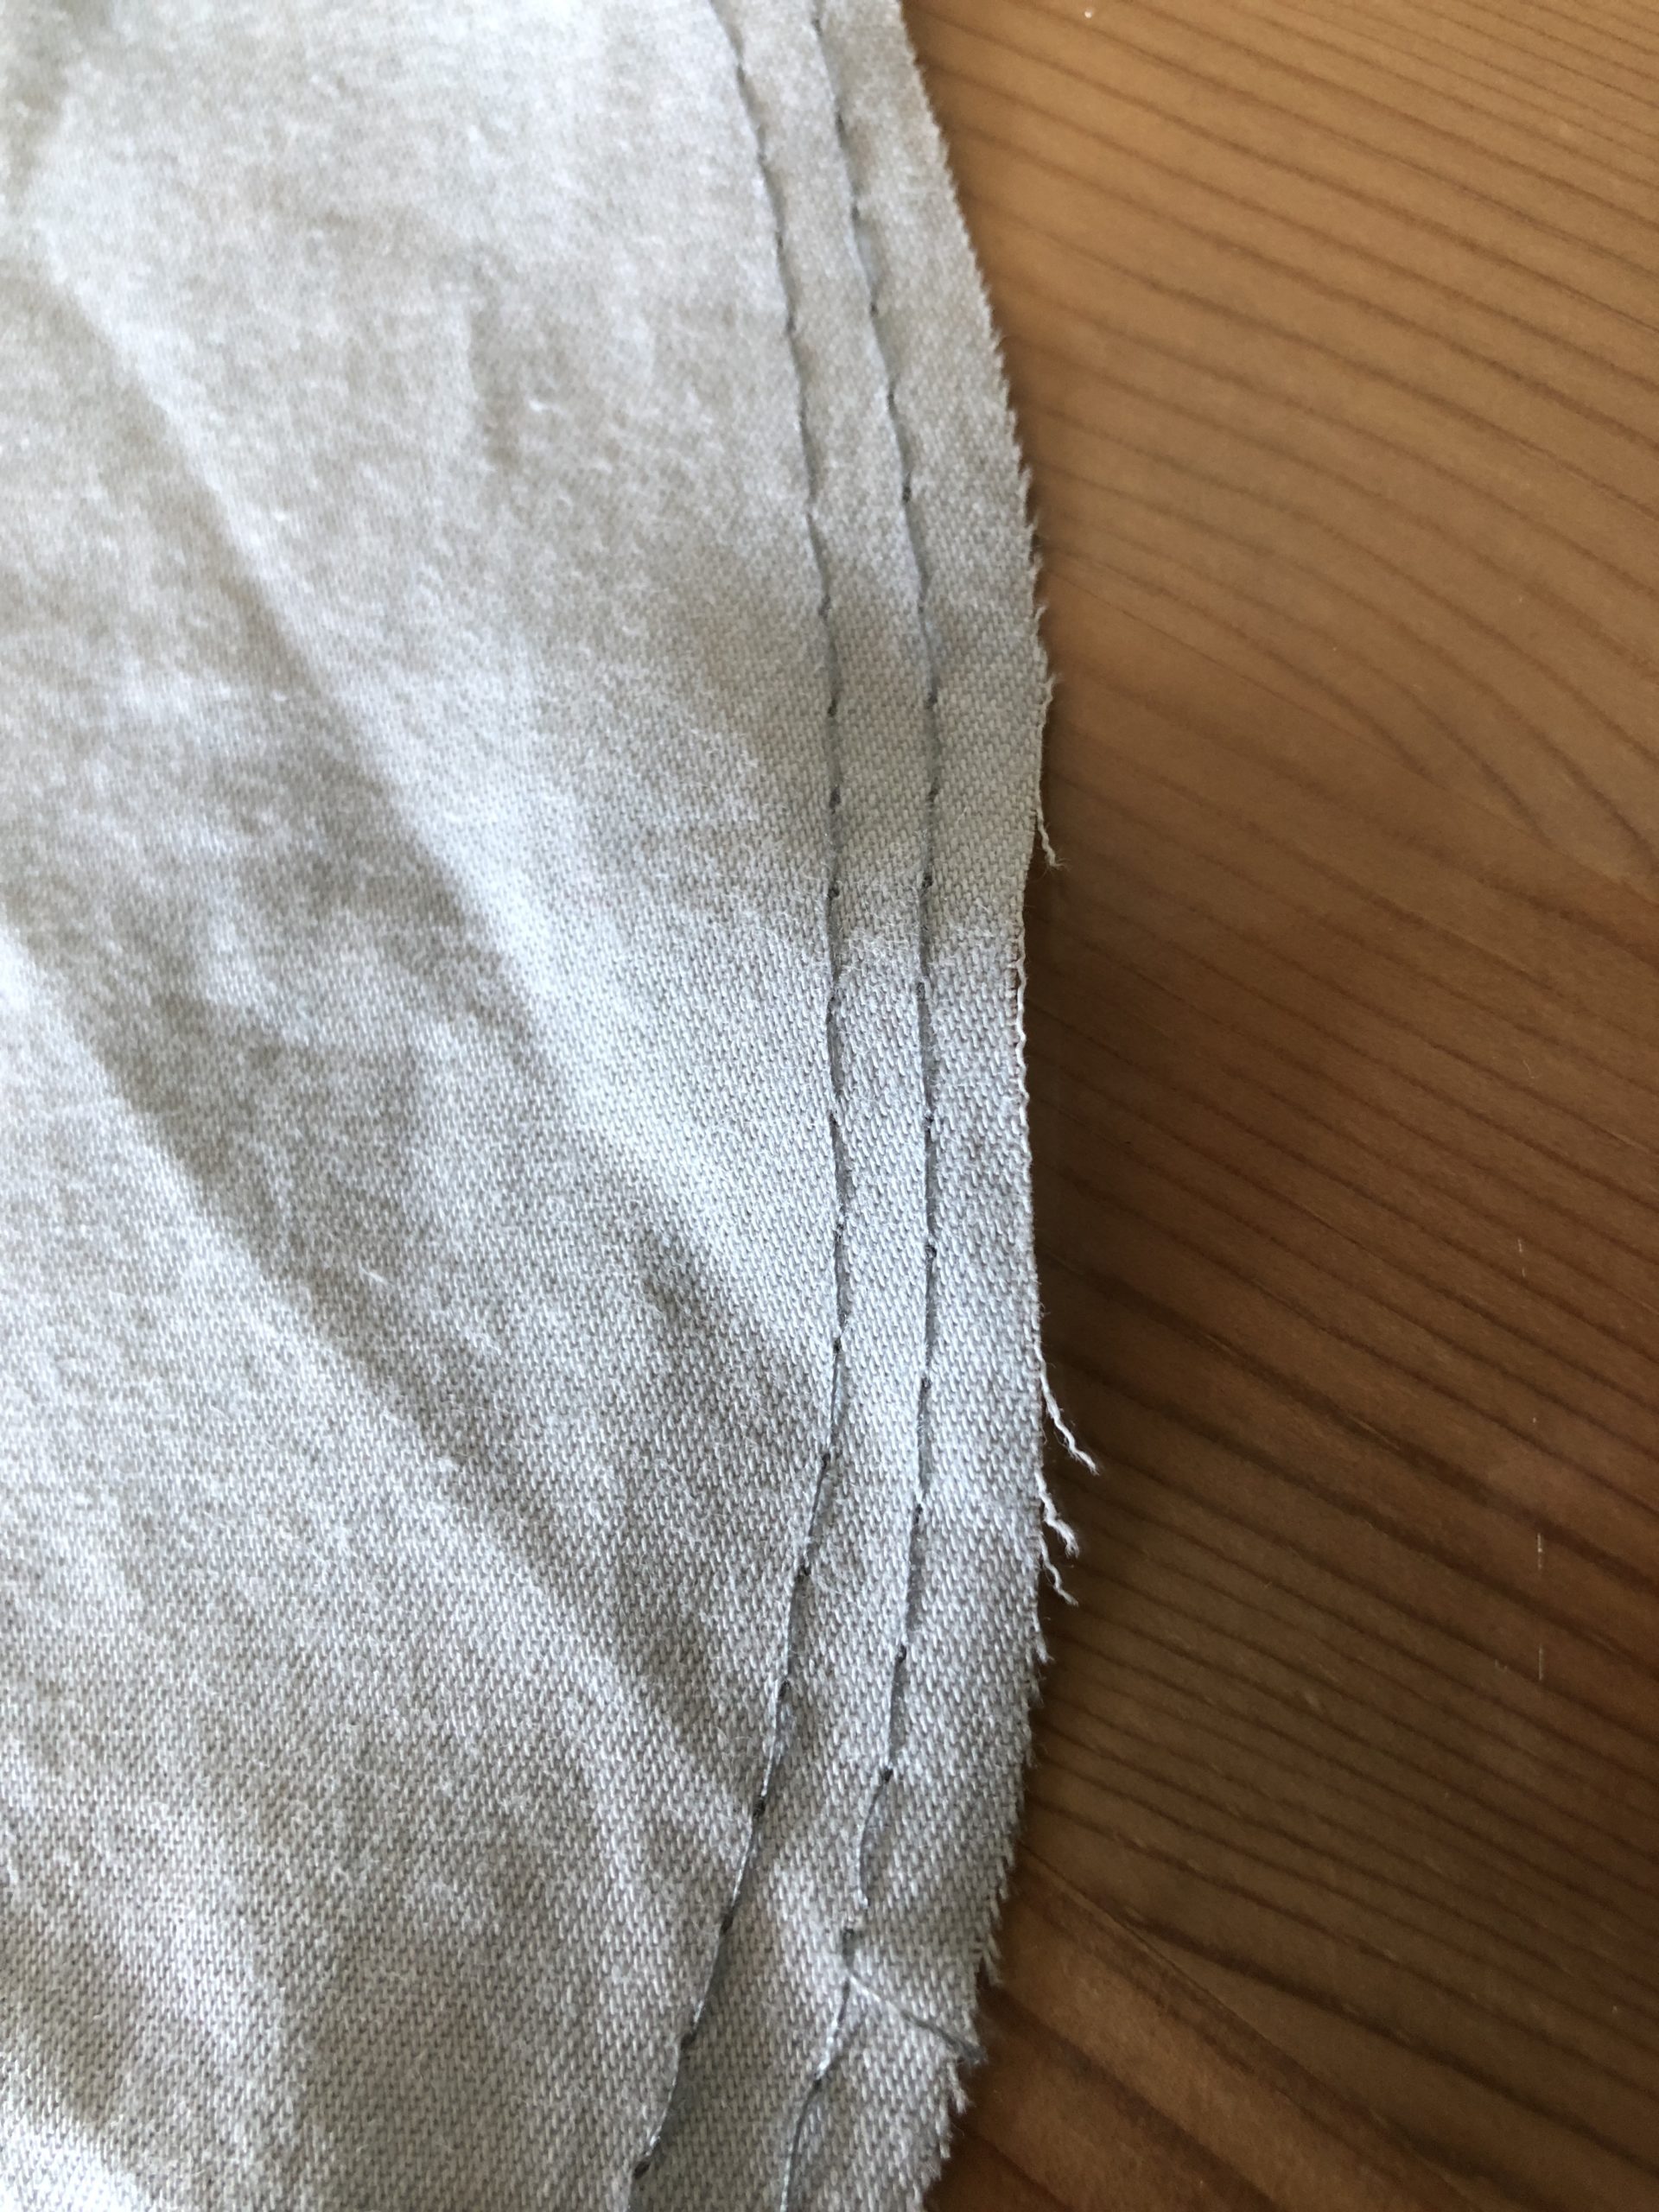
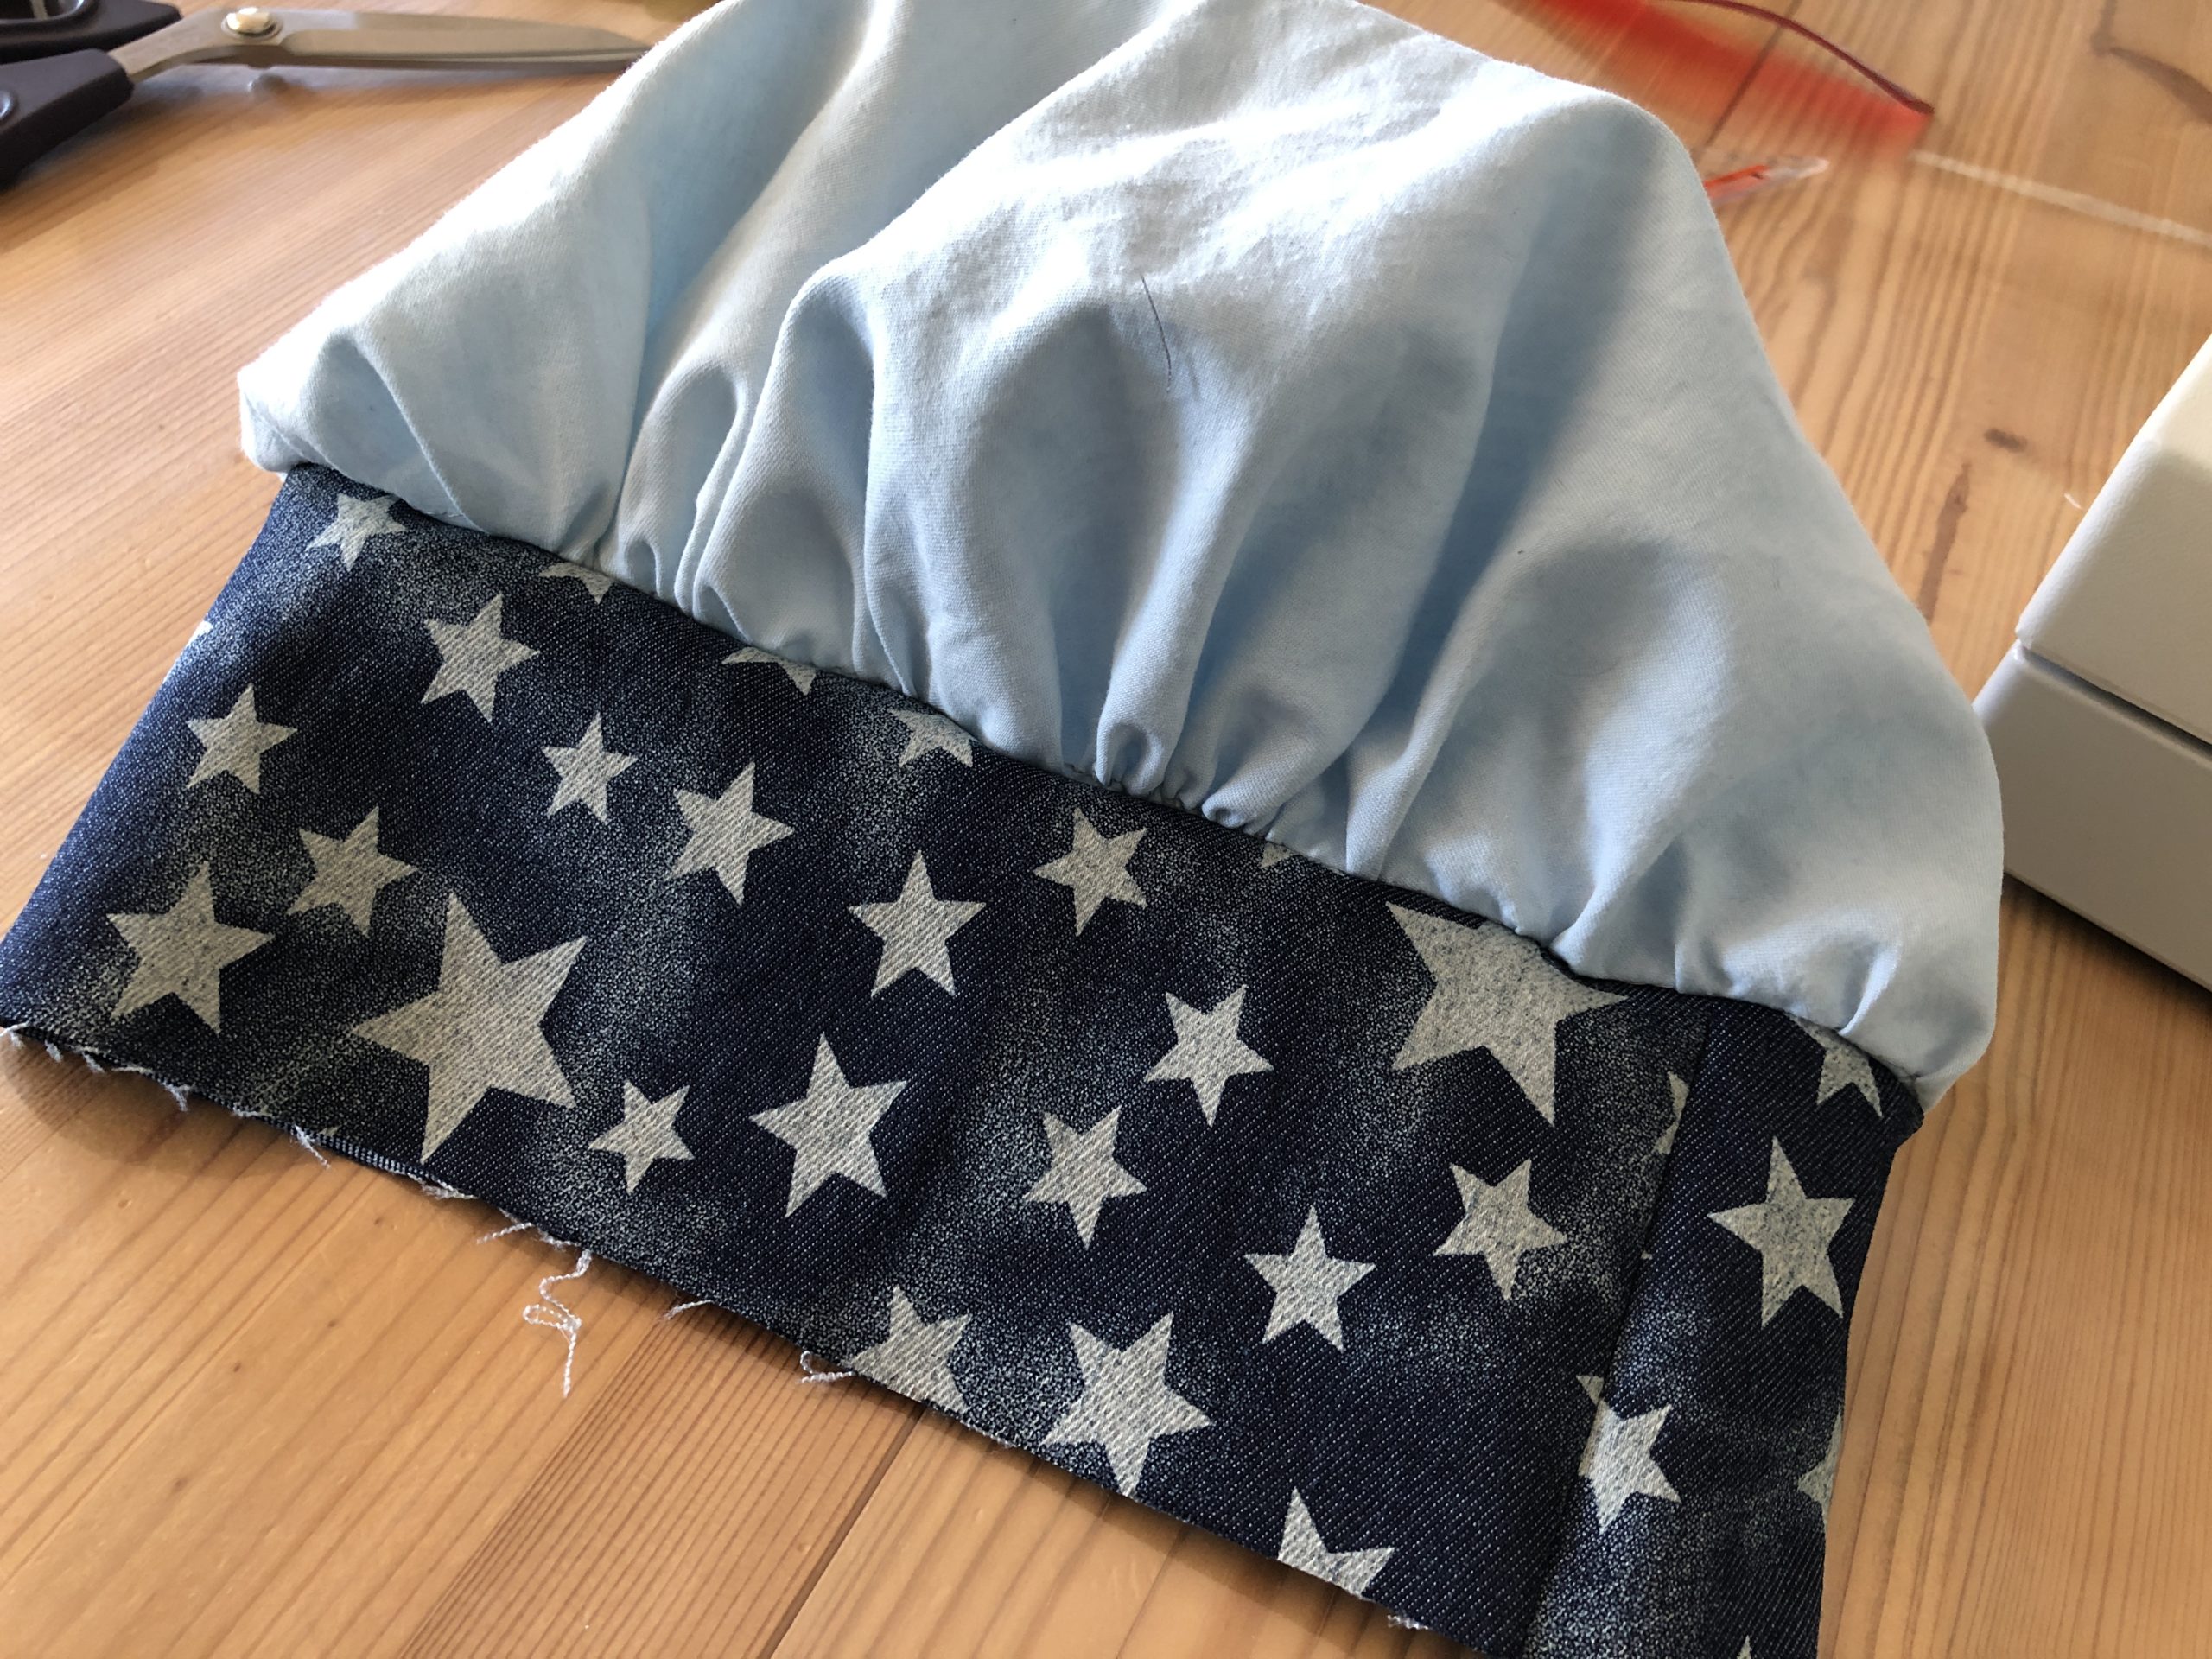
Now the strip is sewn on the short side on half together. (The beautiful sides are on top of each other!)
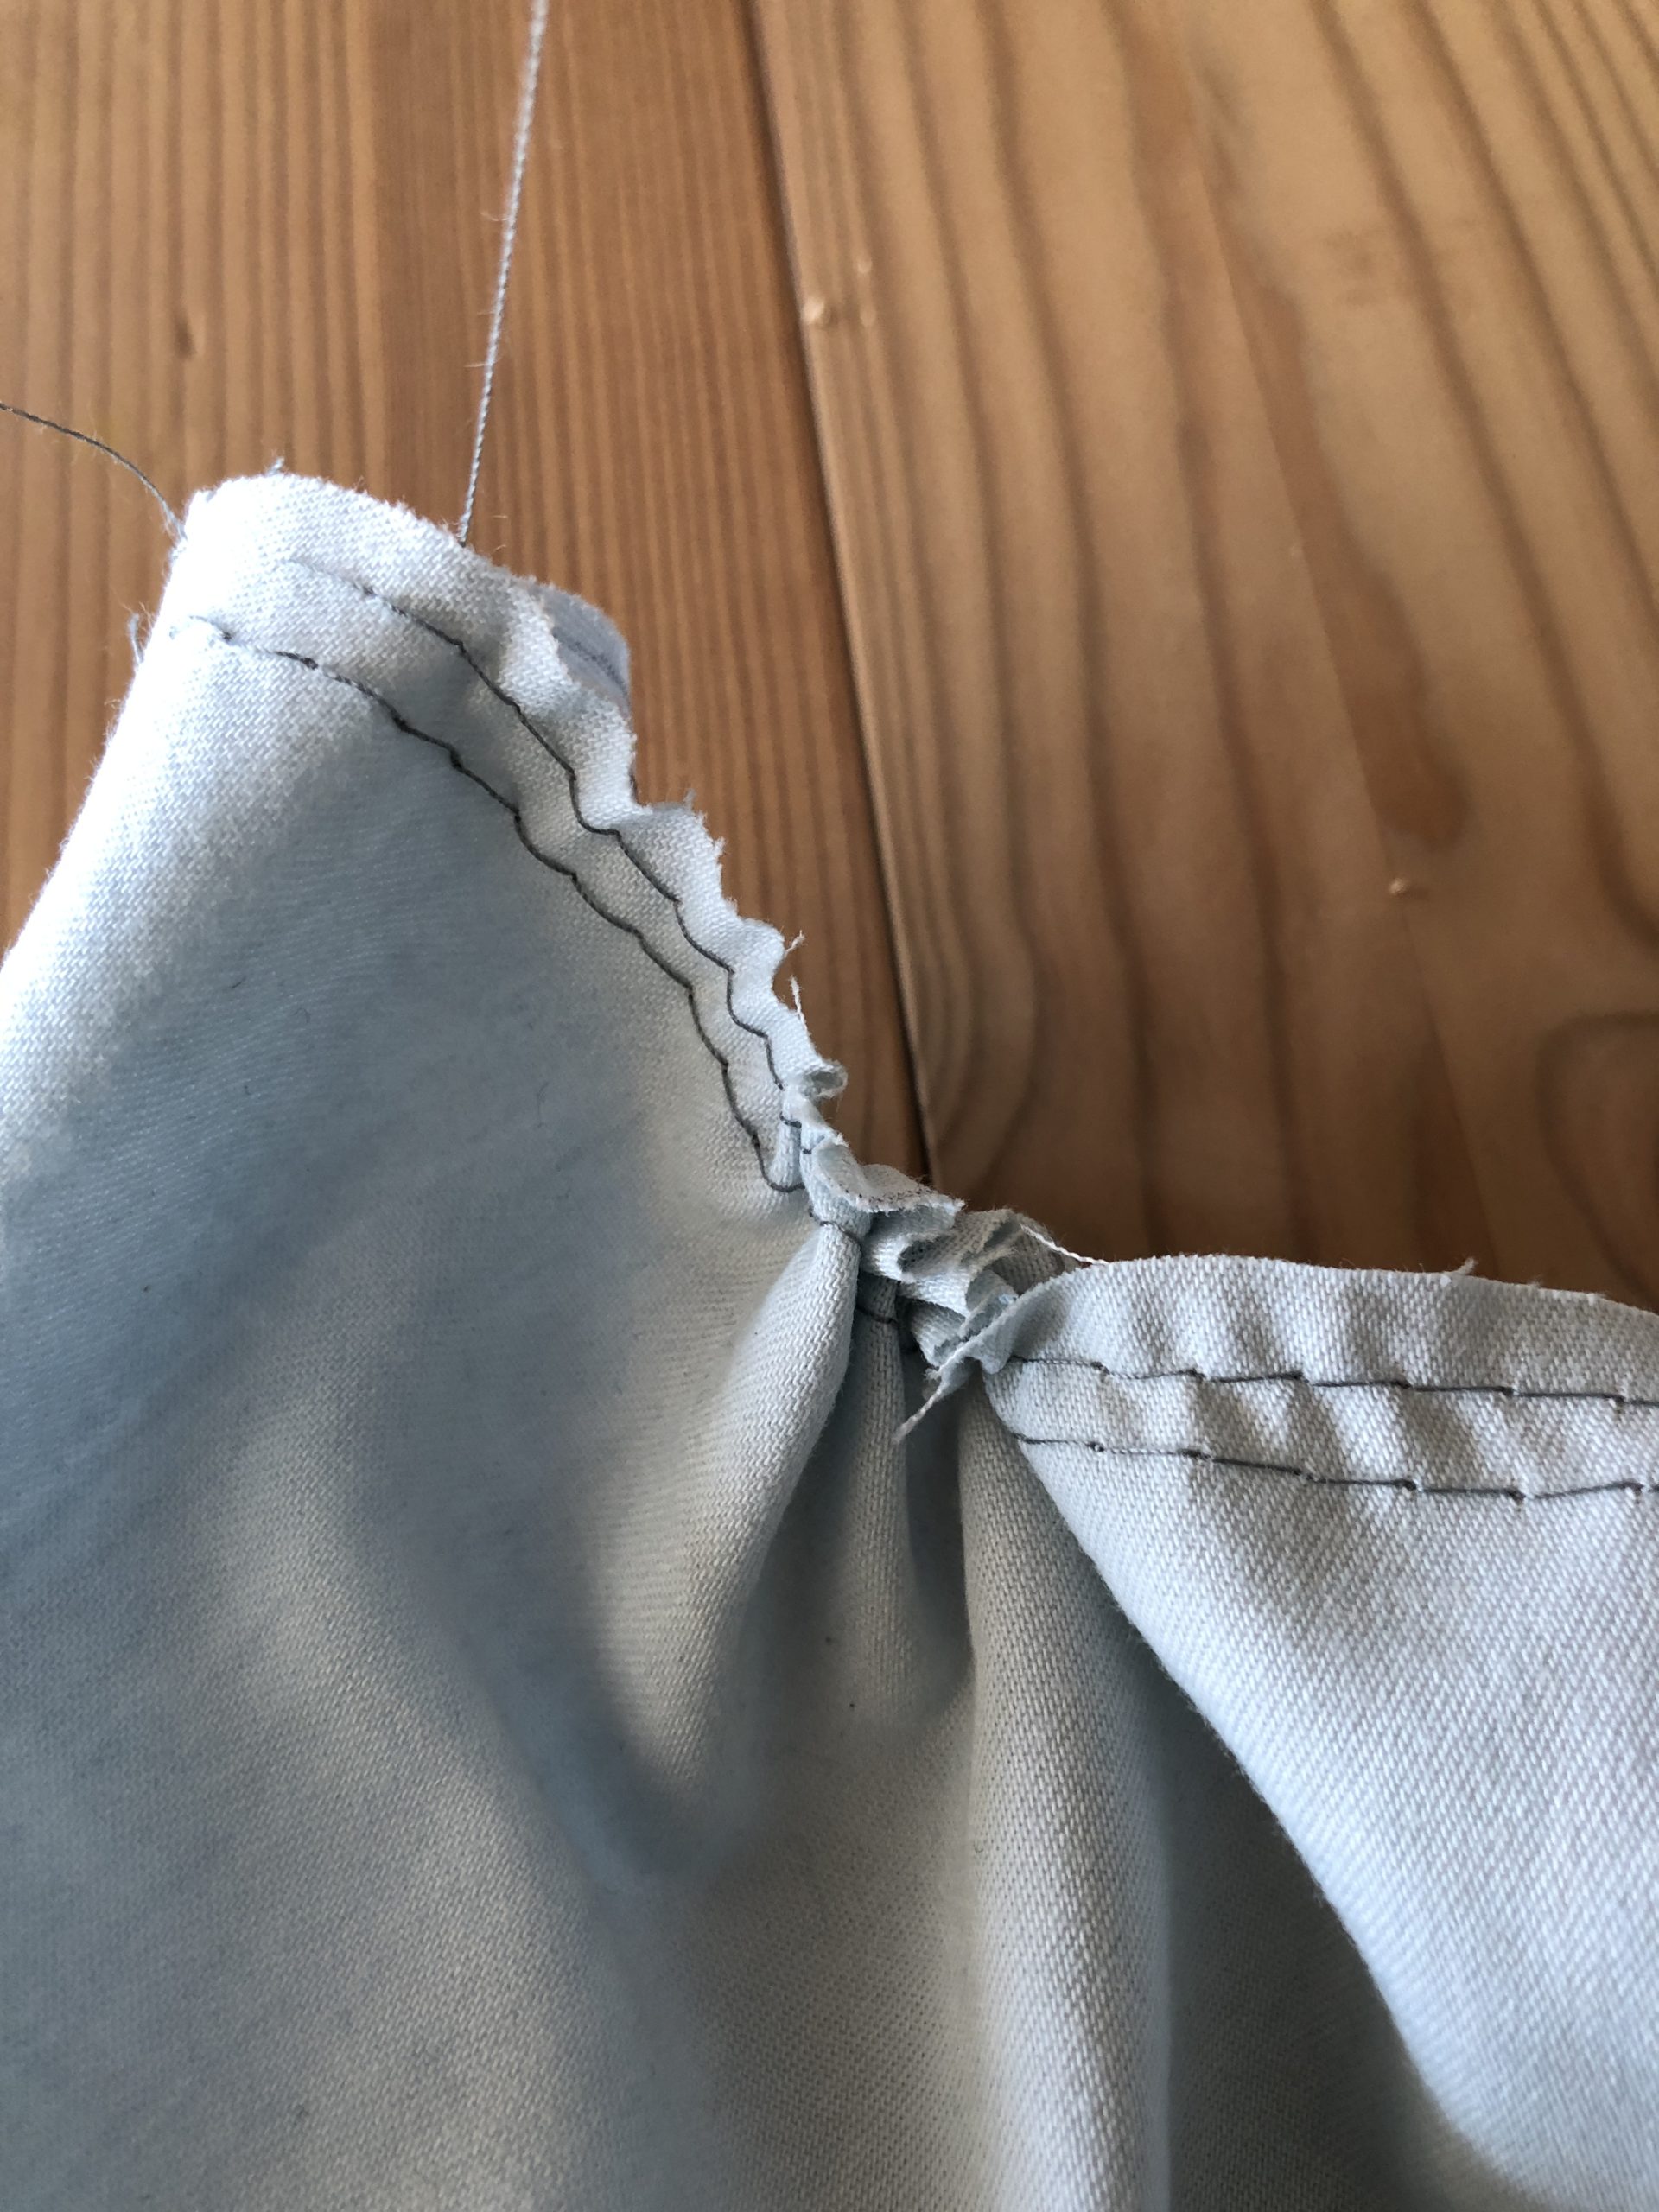
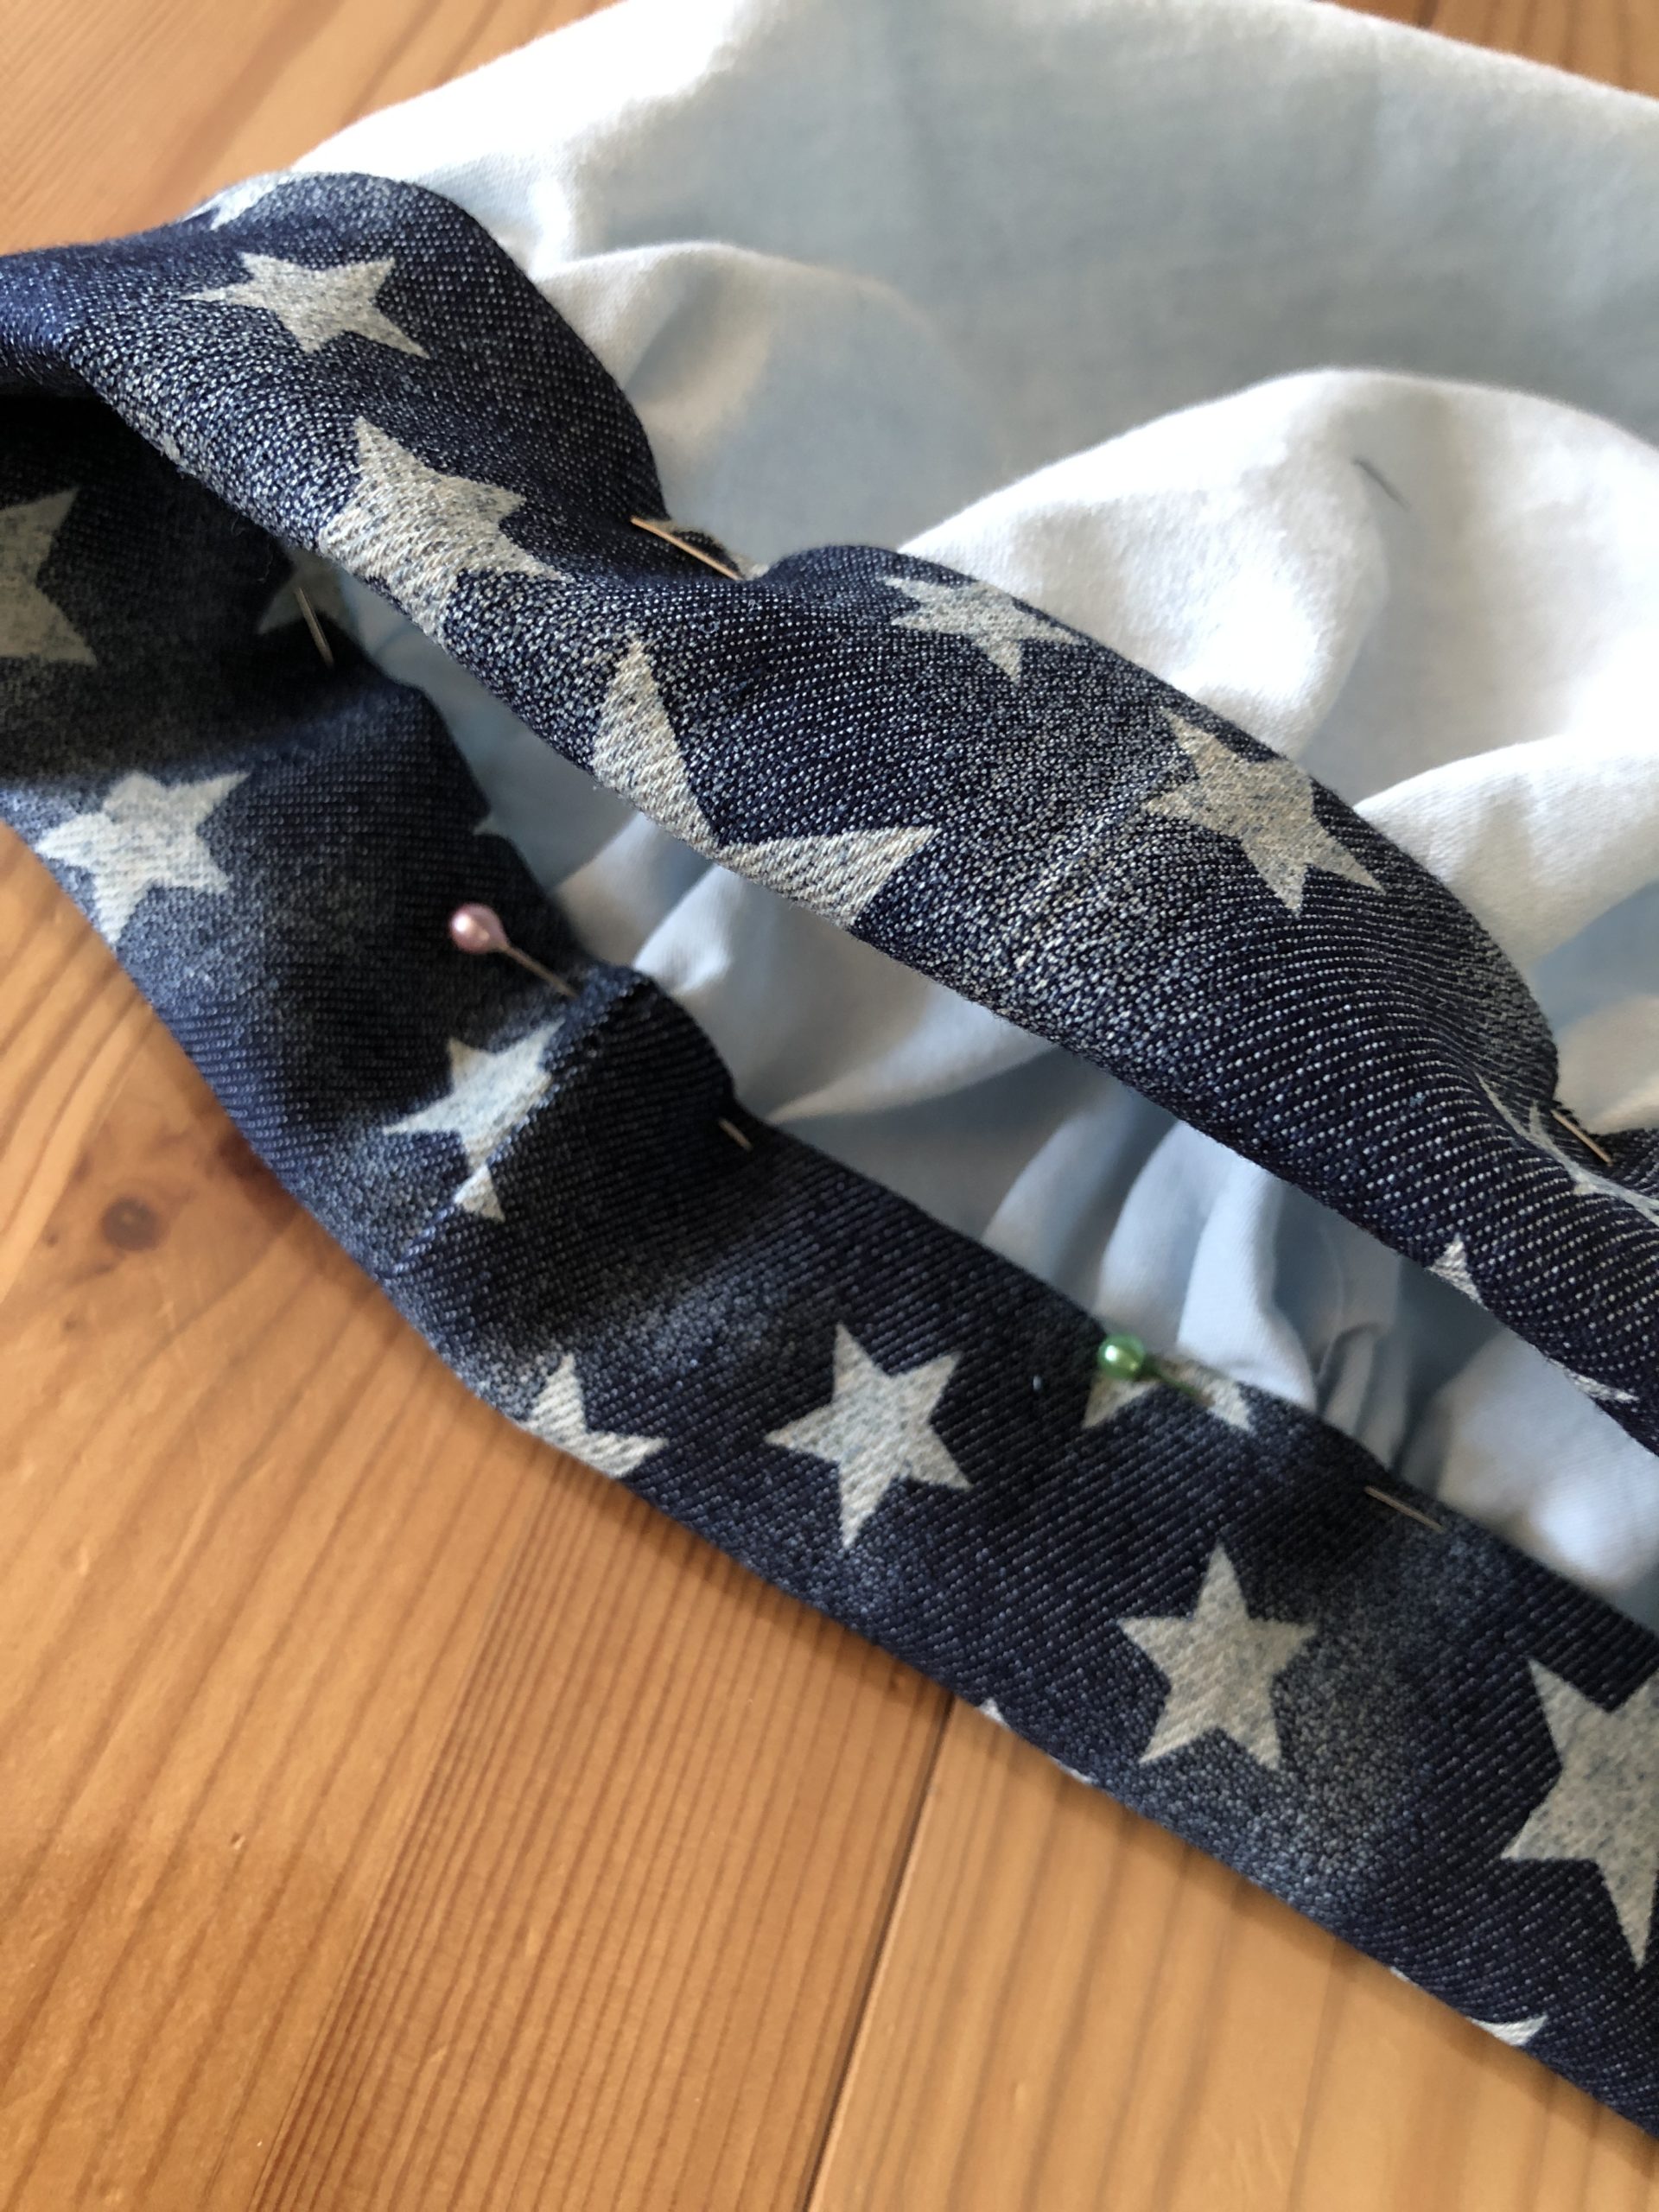
Place the strip in the inside of the drawn circle and stick it together with pins. If necessary, place the ruched edge until the dimensions match.
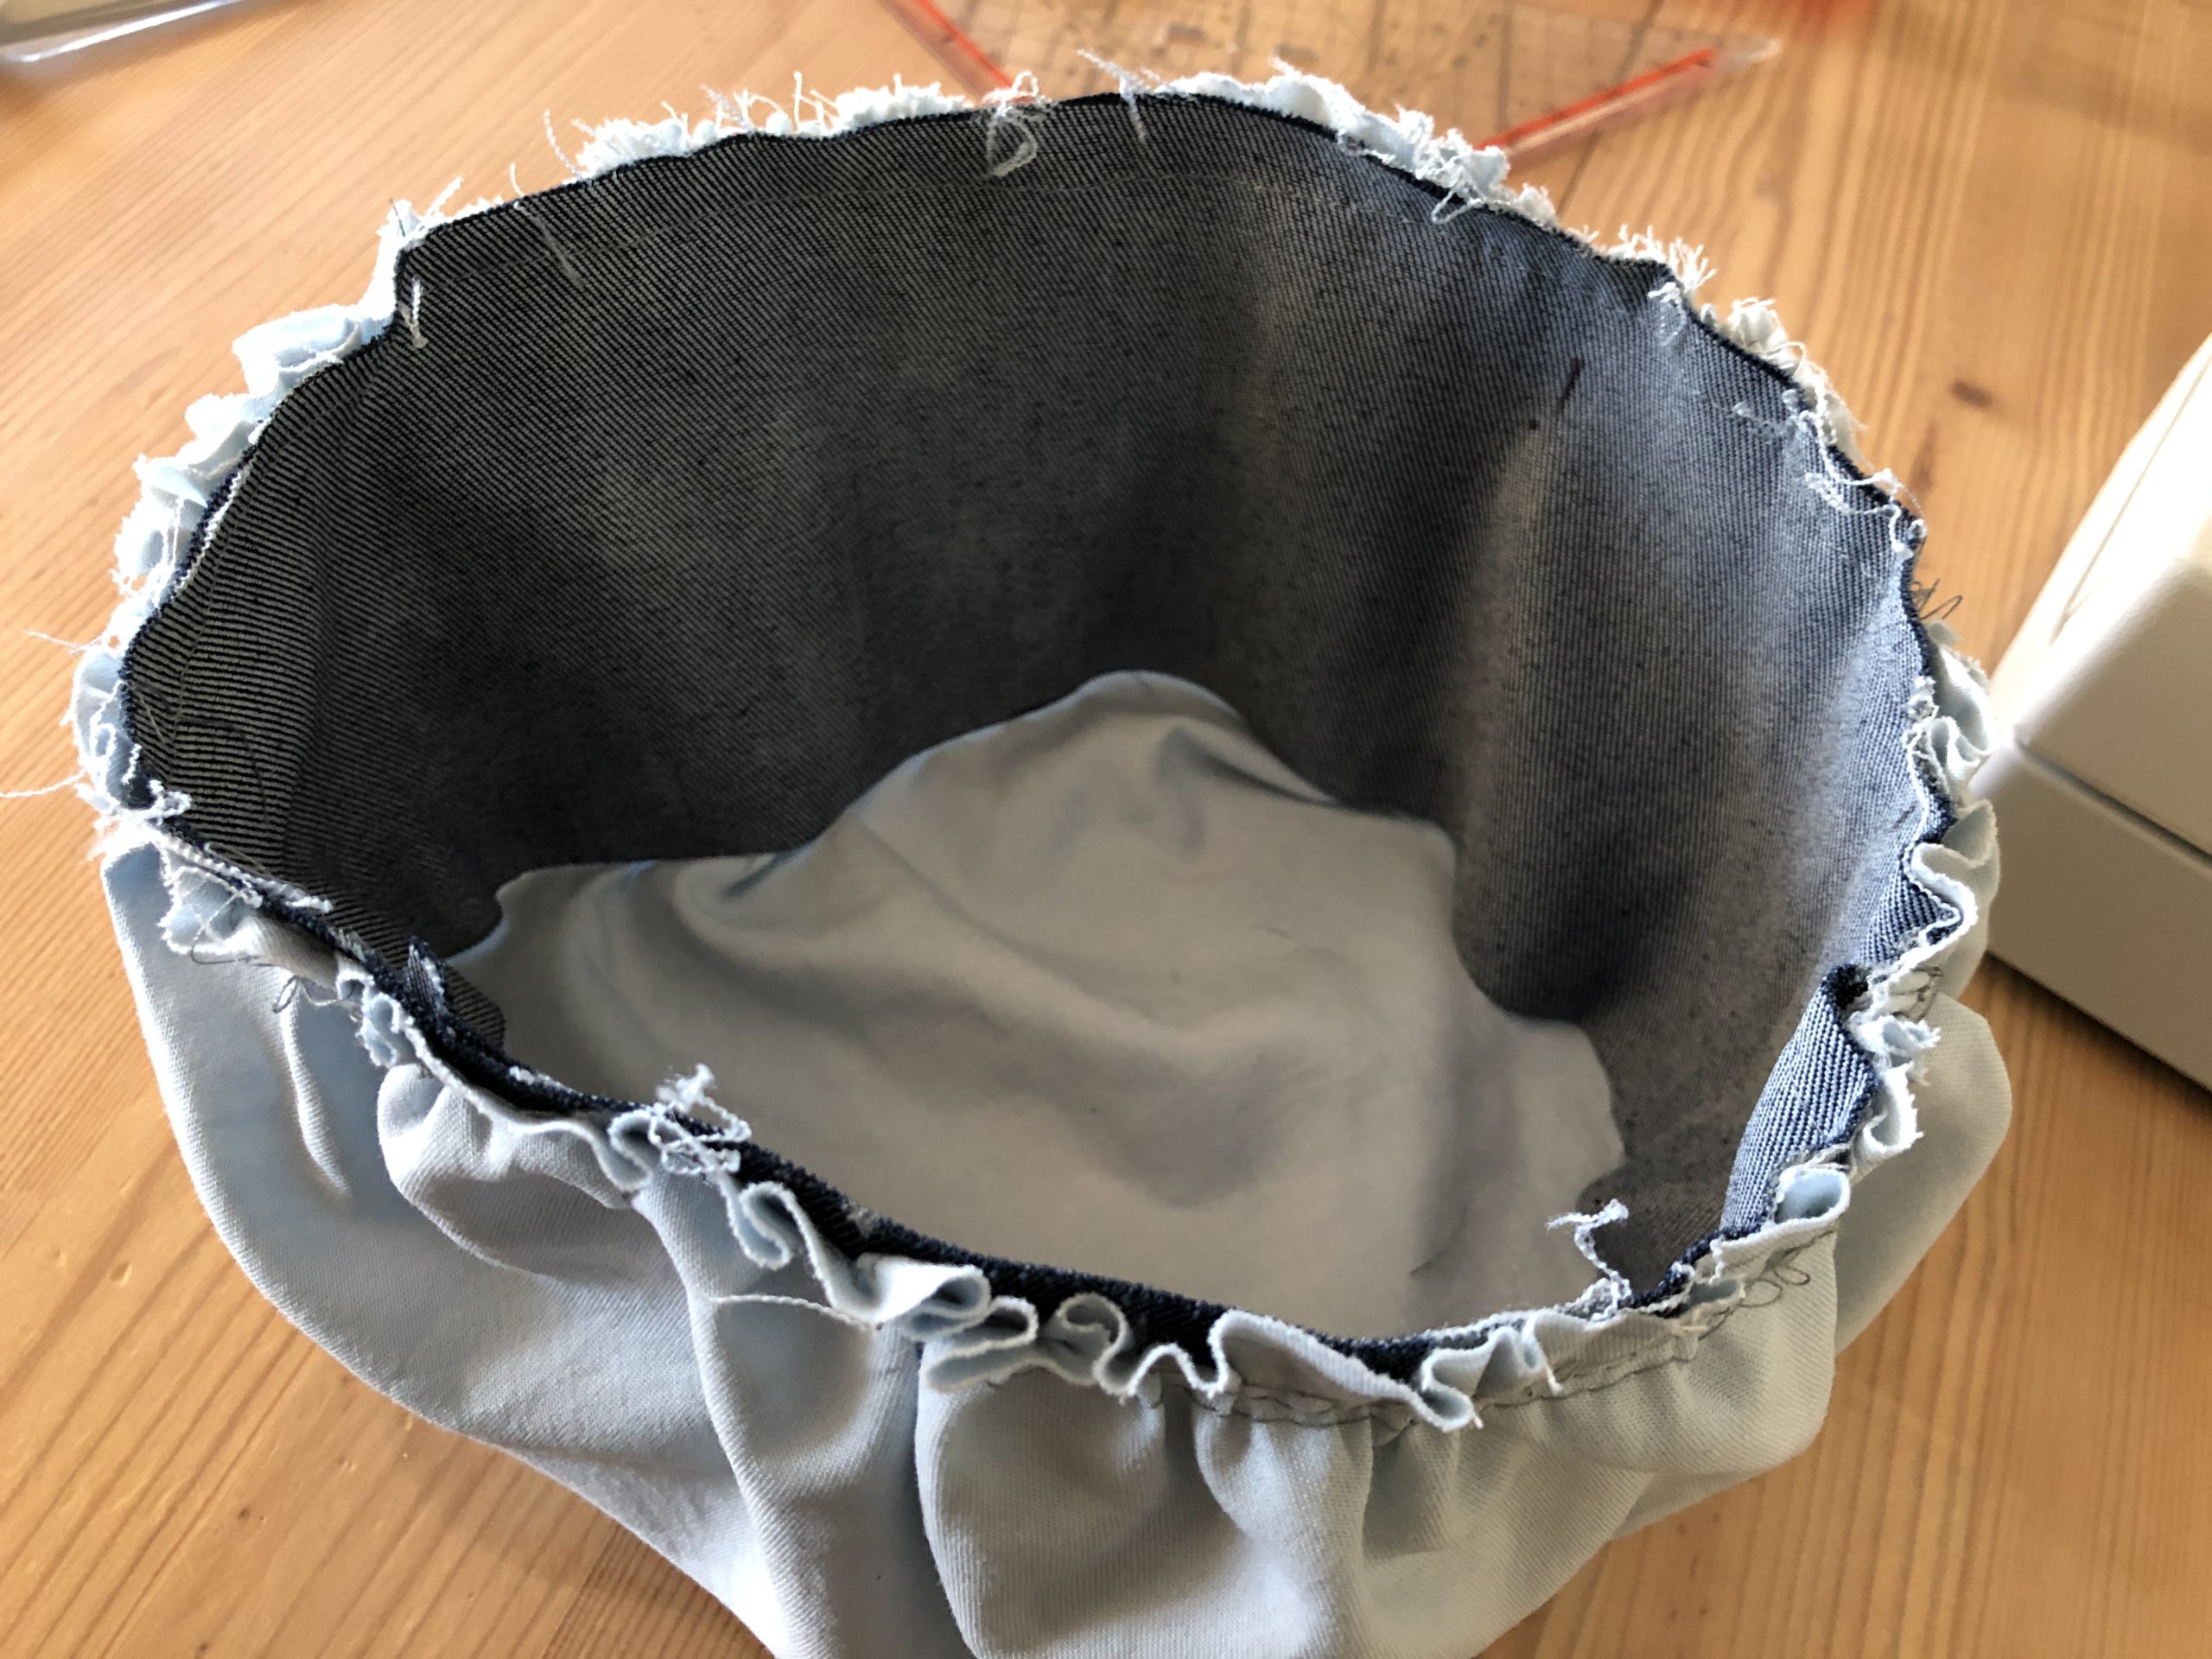
The beautiful side of the strip is on the inside
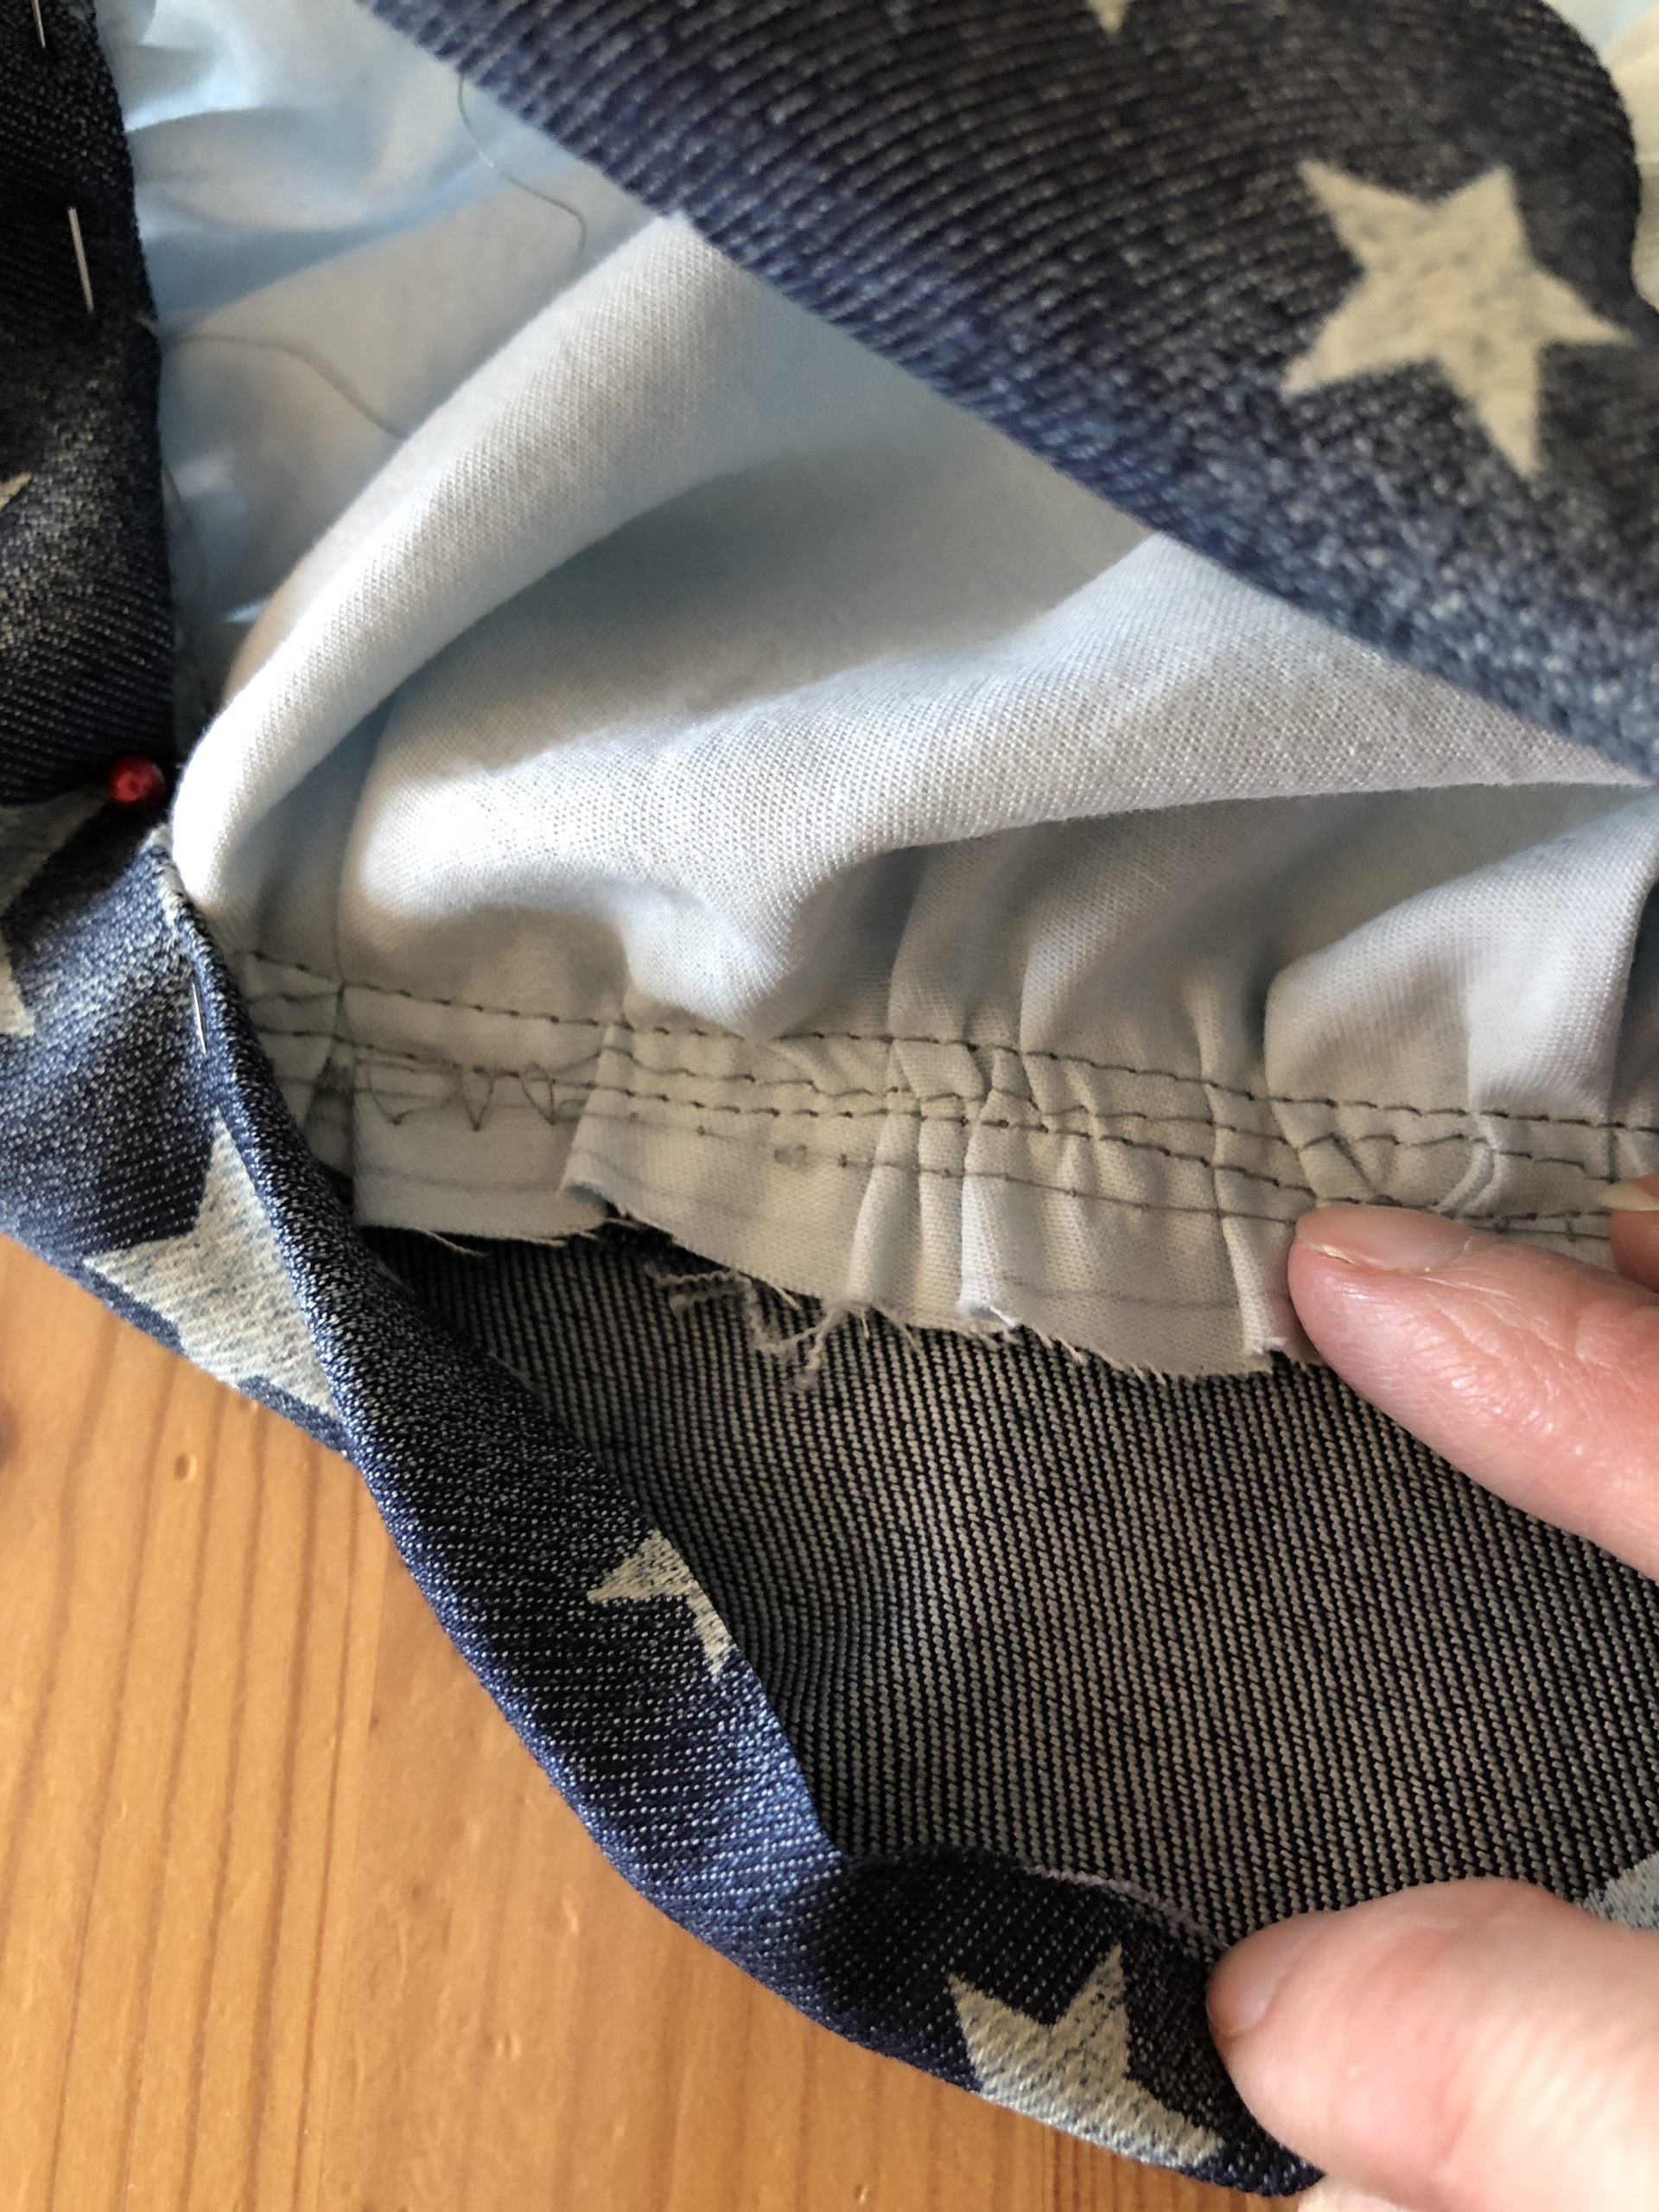
Sew right next to the existing seam (normal stitch length!)
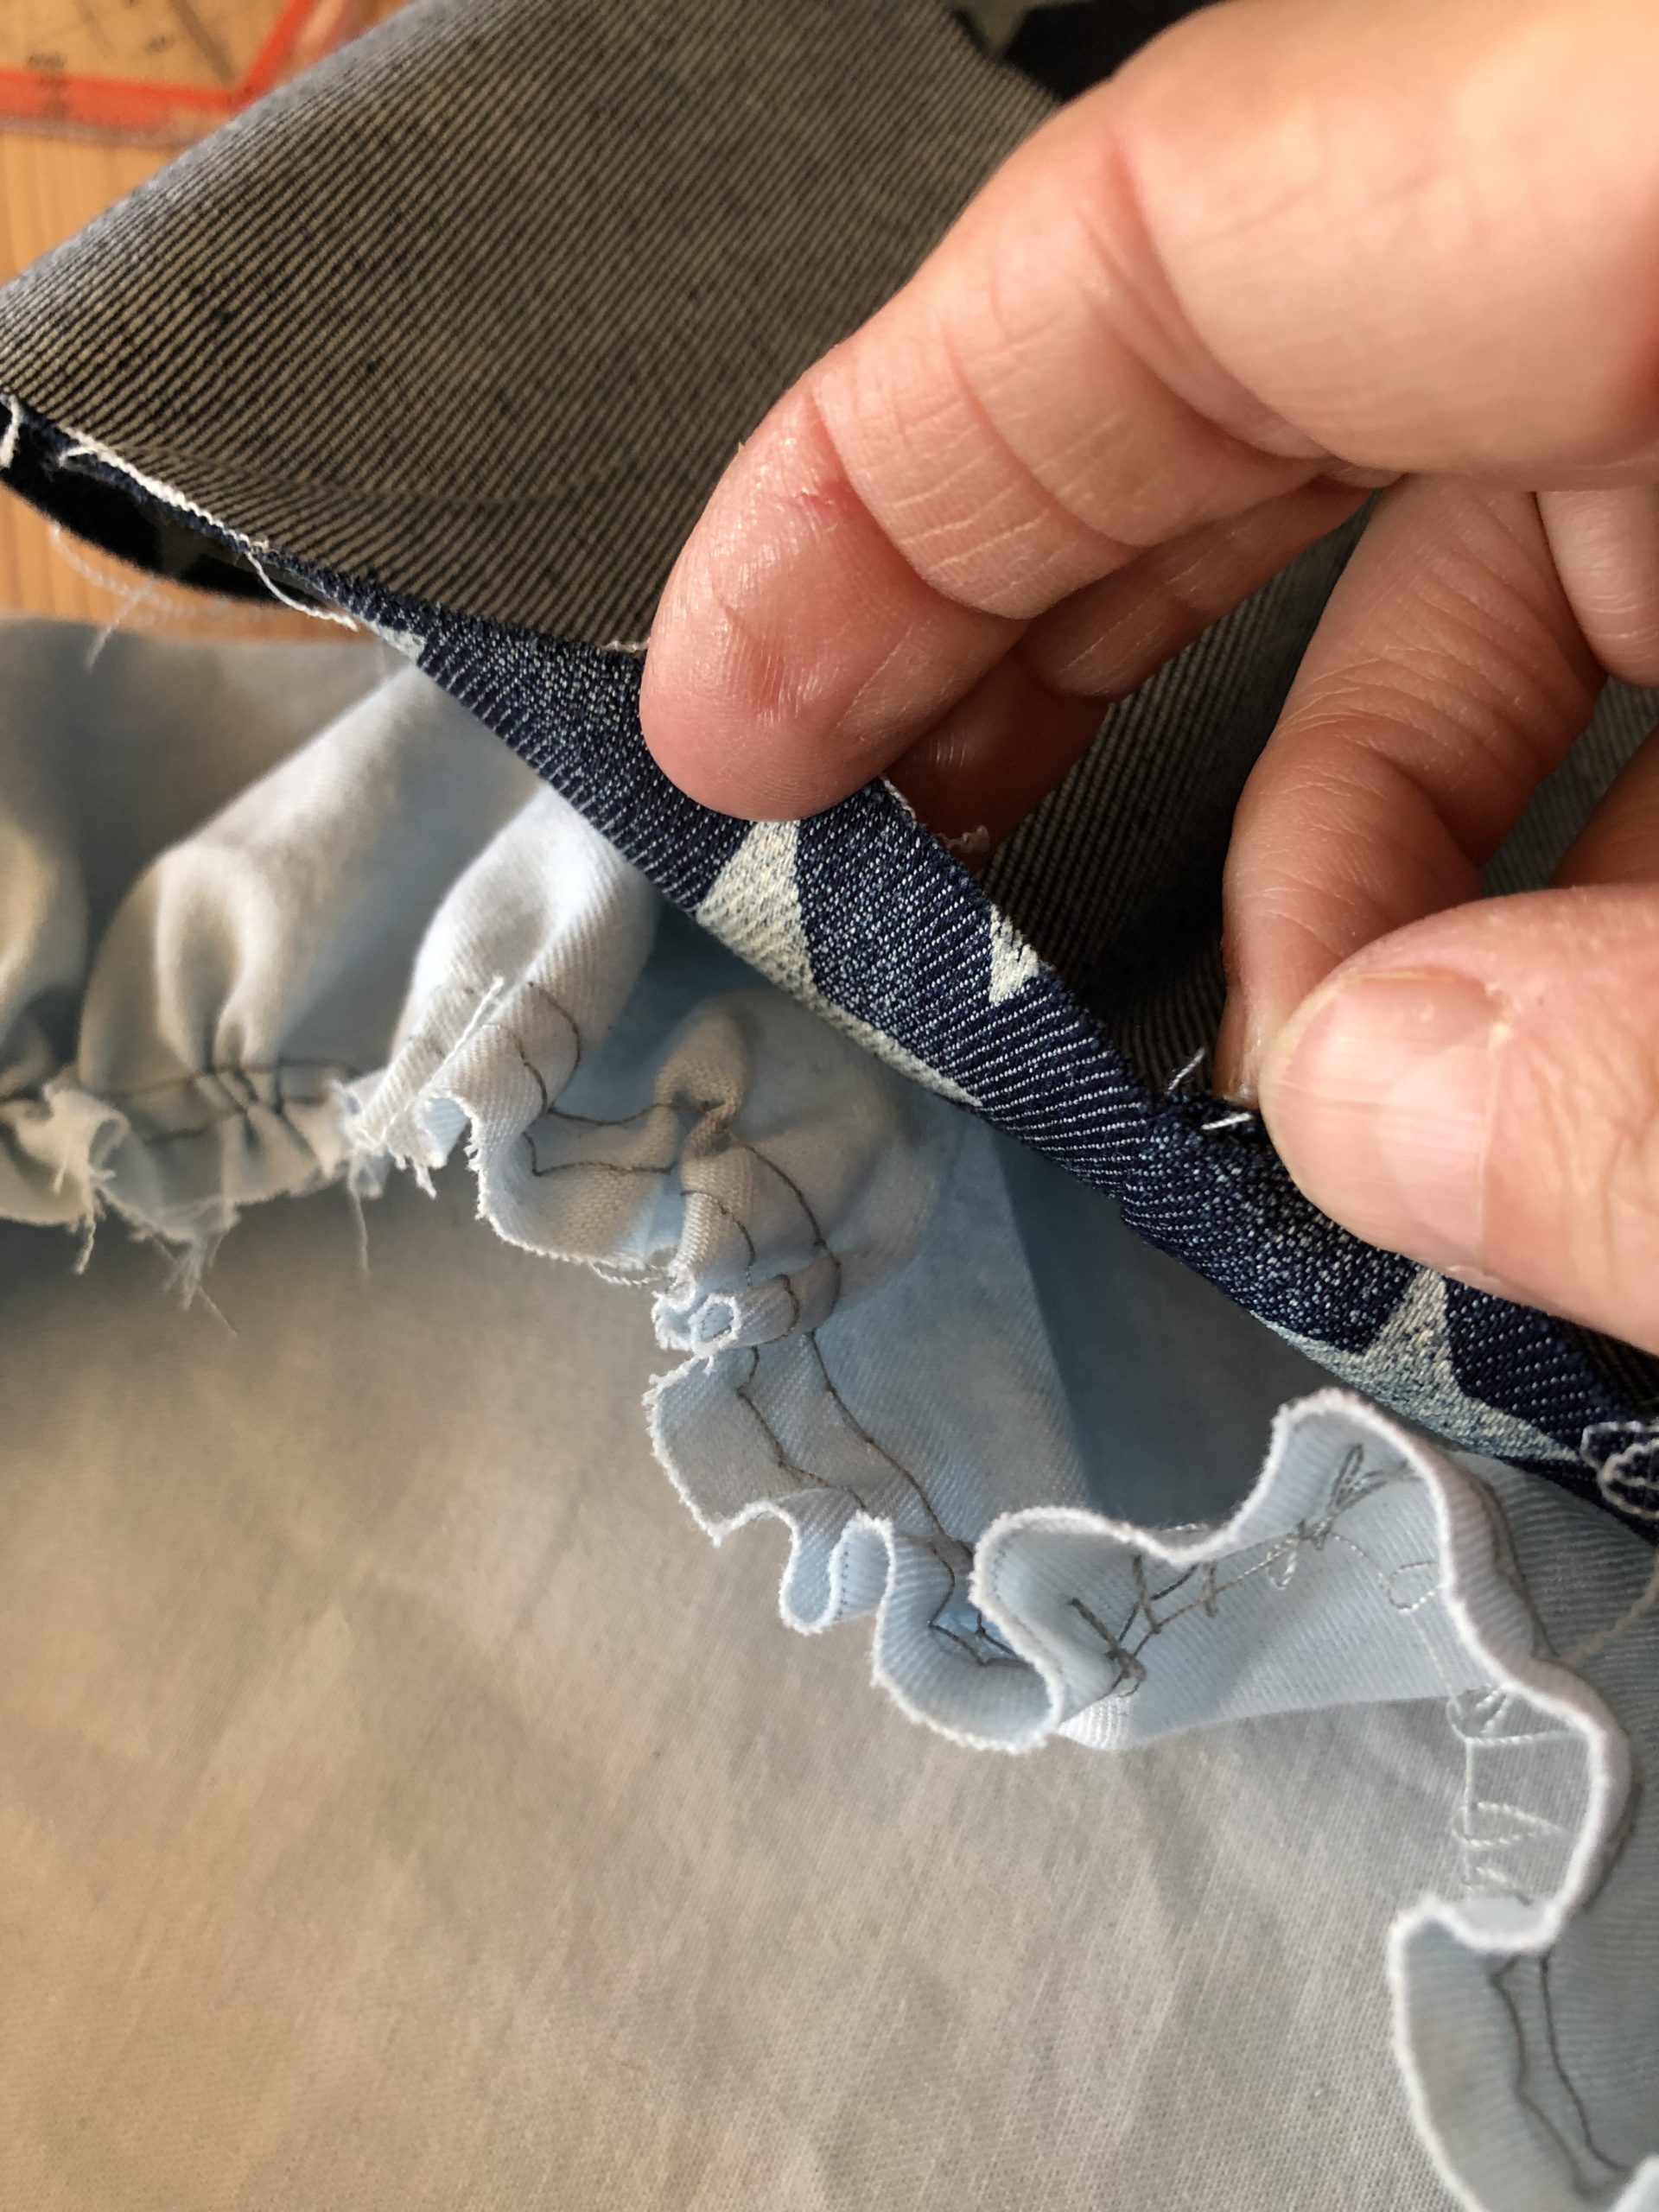
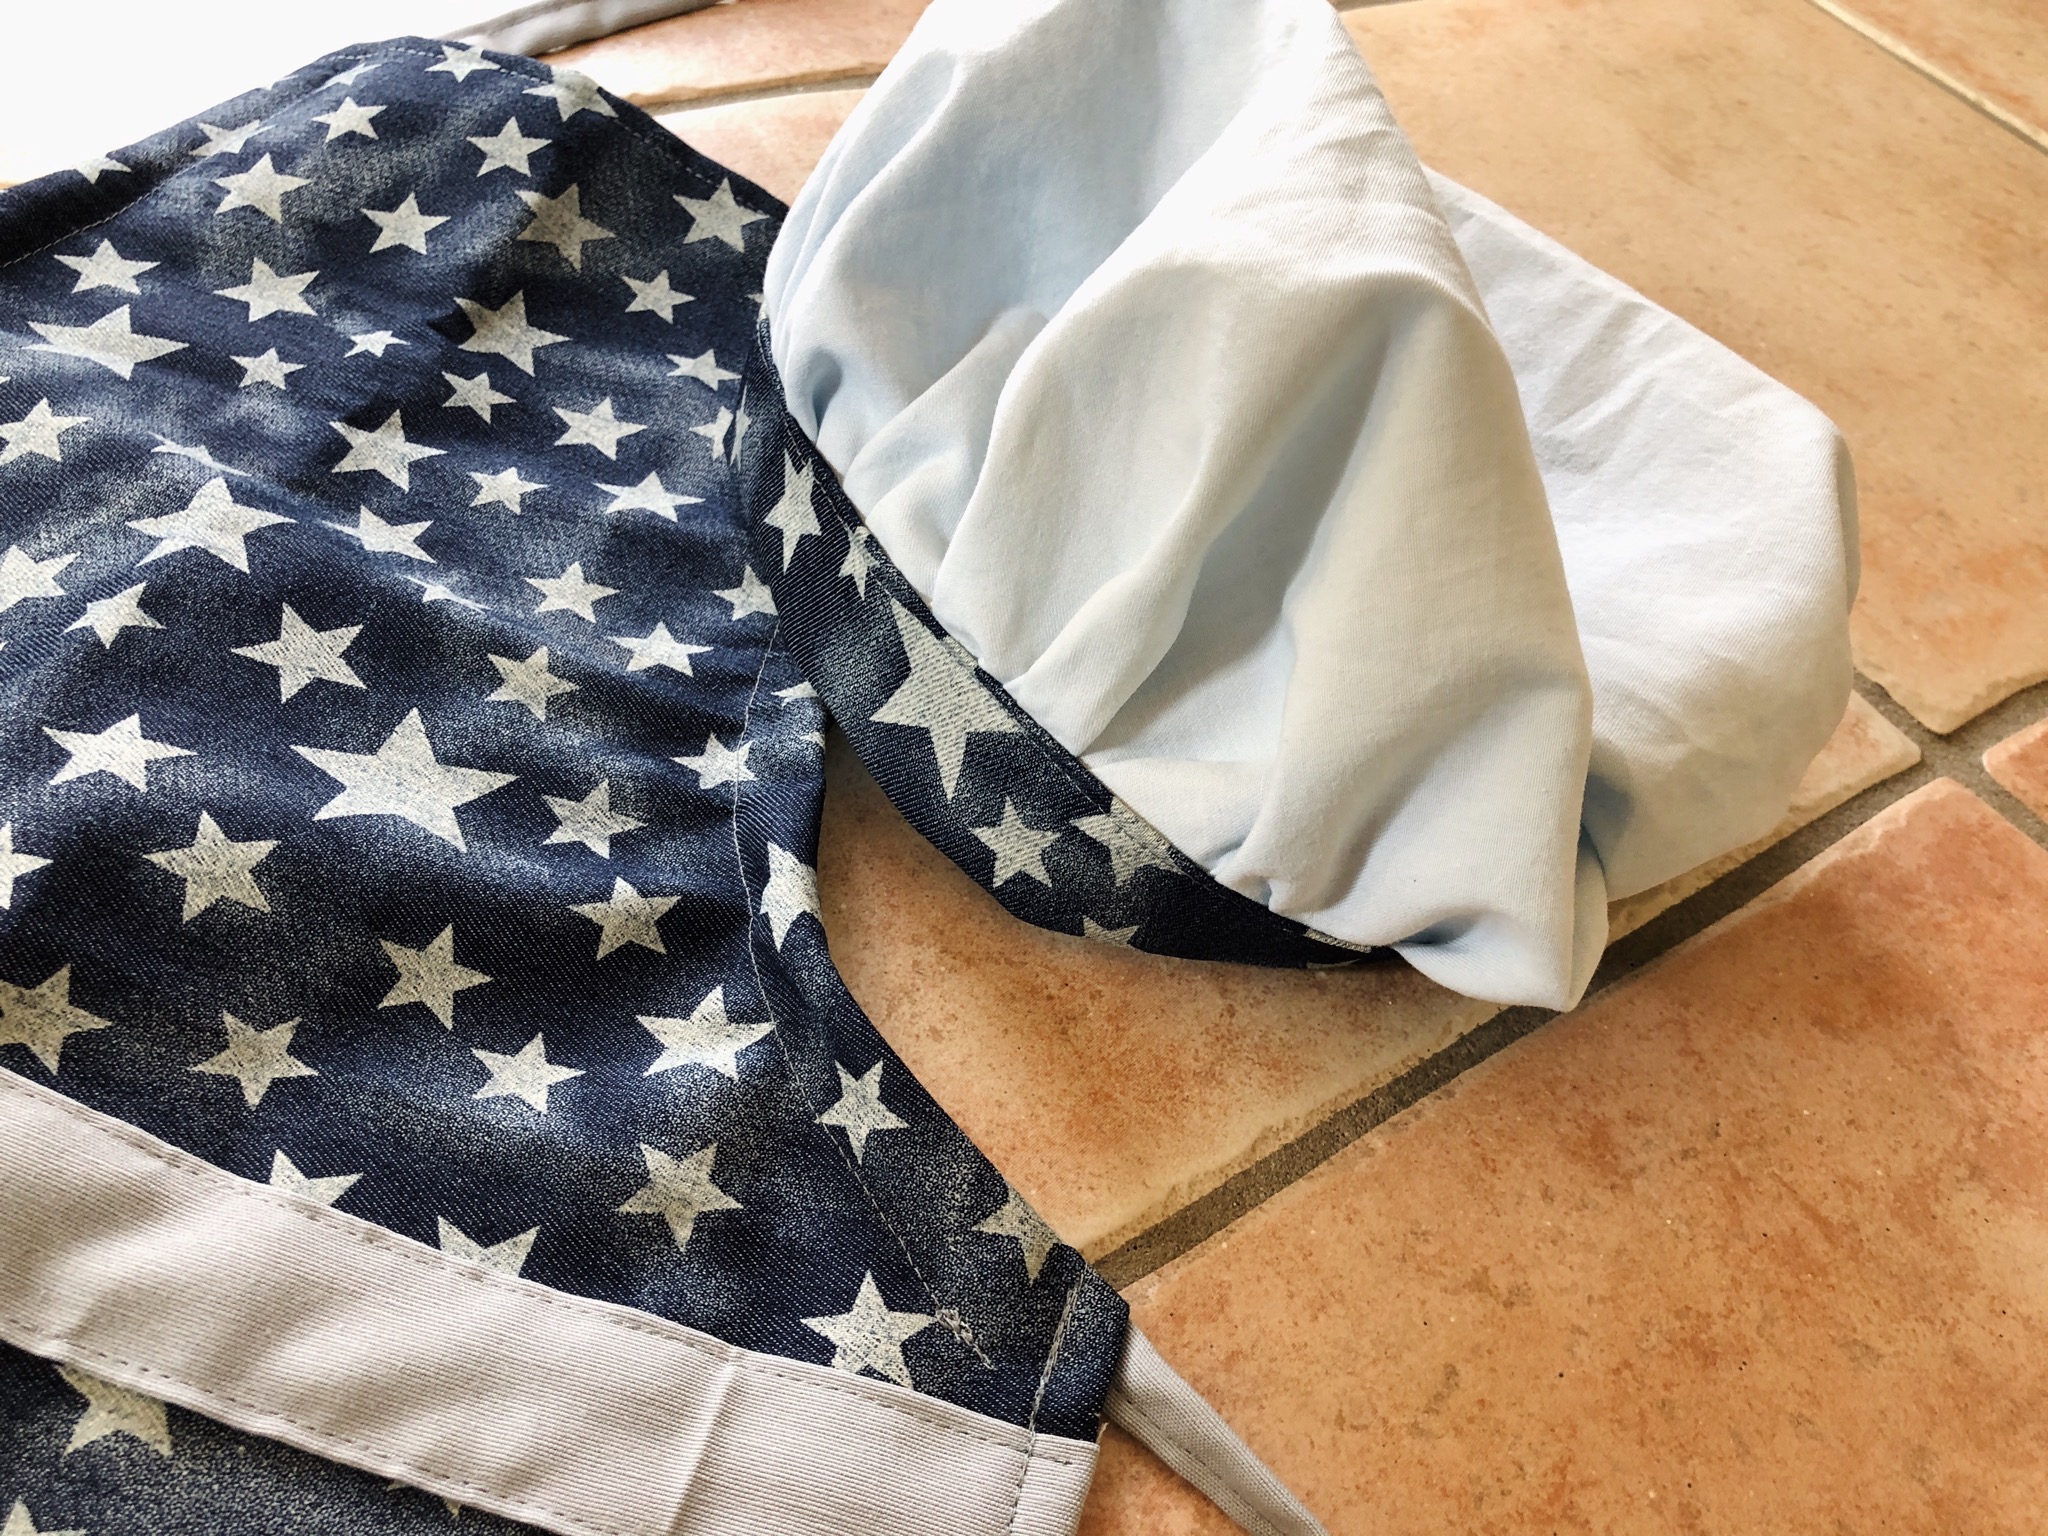
Turn the fabric around.

Fold the inside of the cap and double the hem inwards and stick with pins.
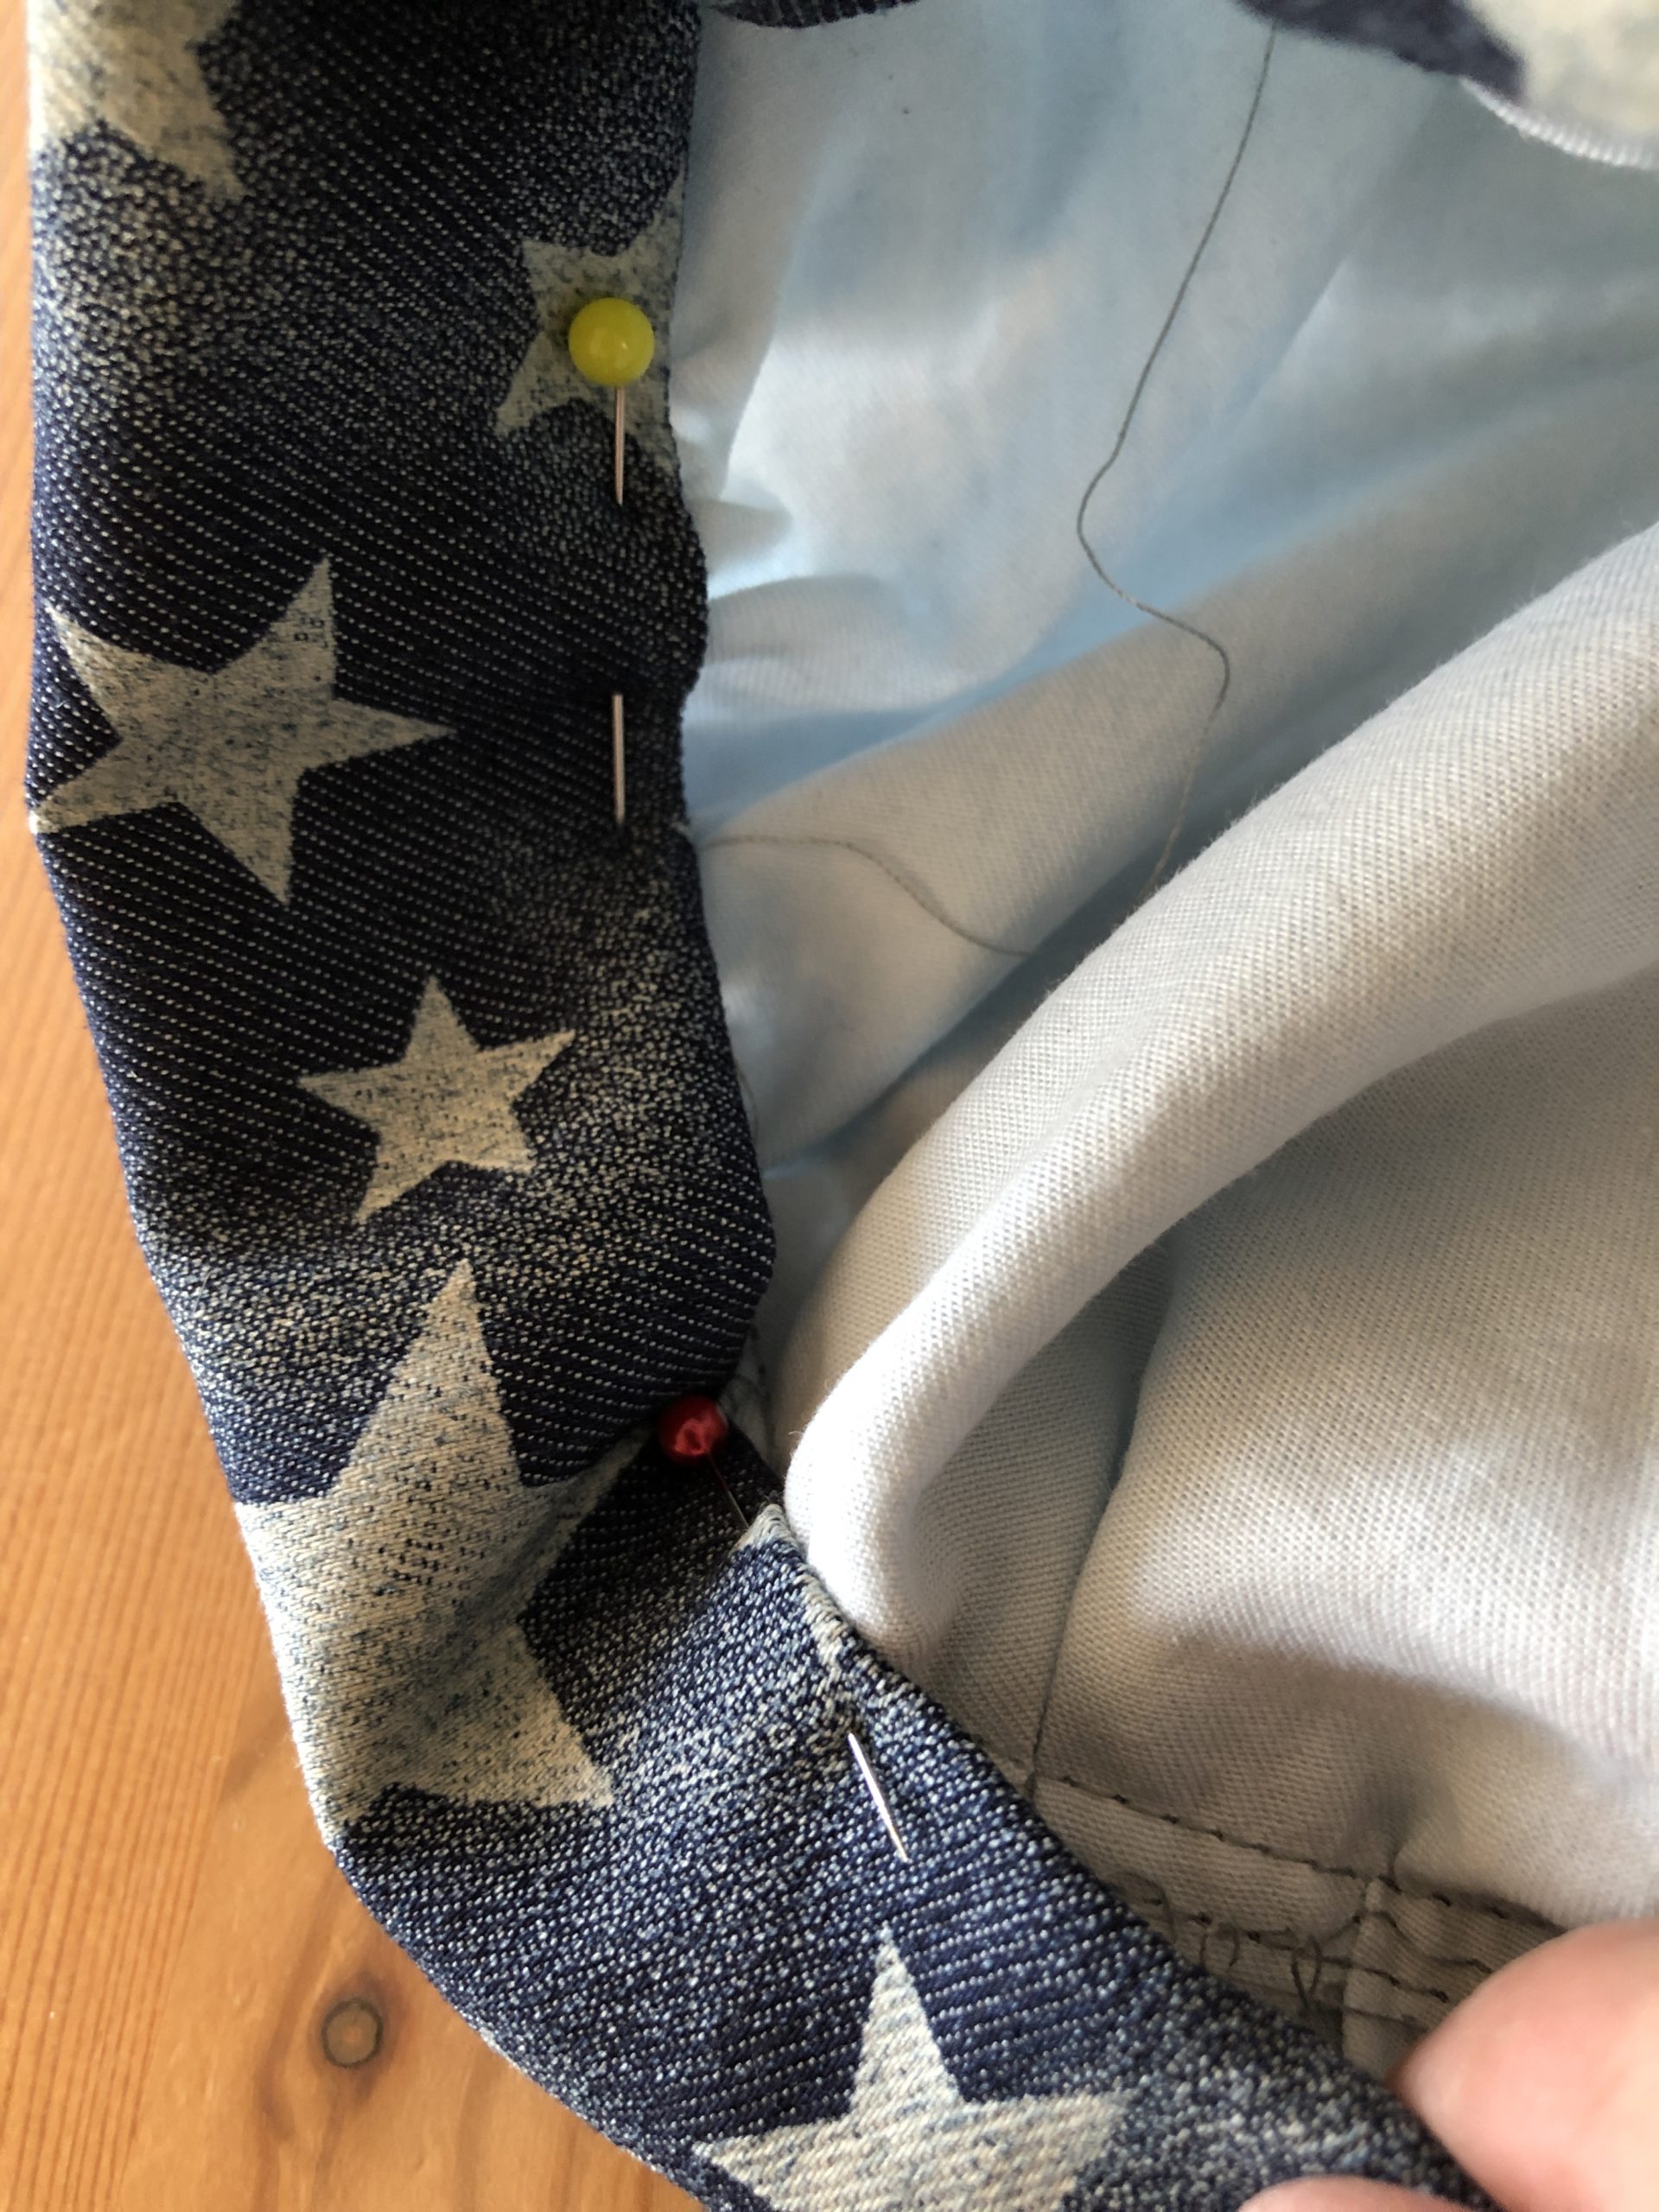
Sew the edge of the hem with a stitch row.
The cooking cap is ready.
Cut rubber to a length of 10 cm and merge both ends with a lighter.

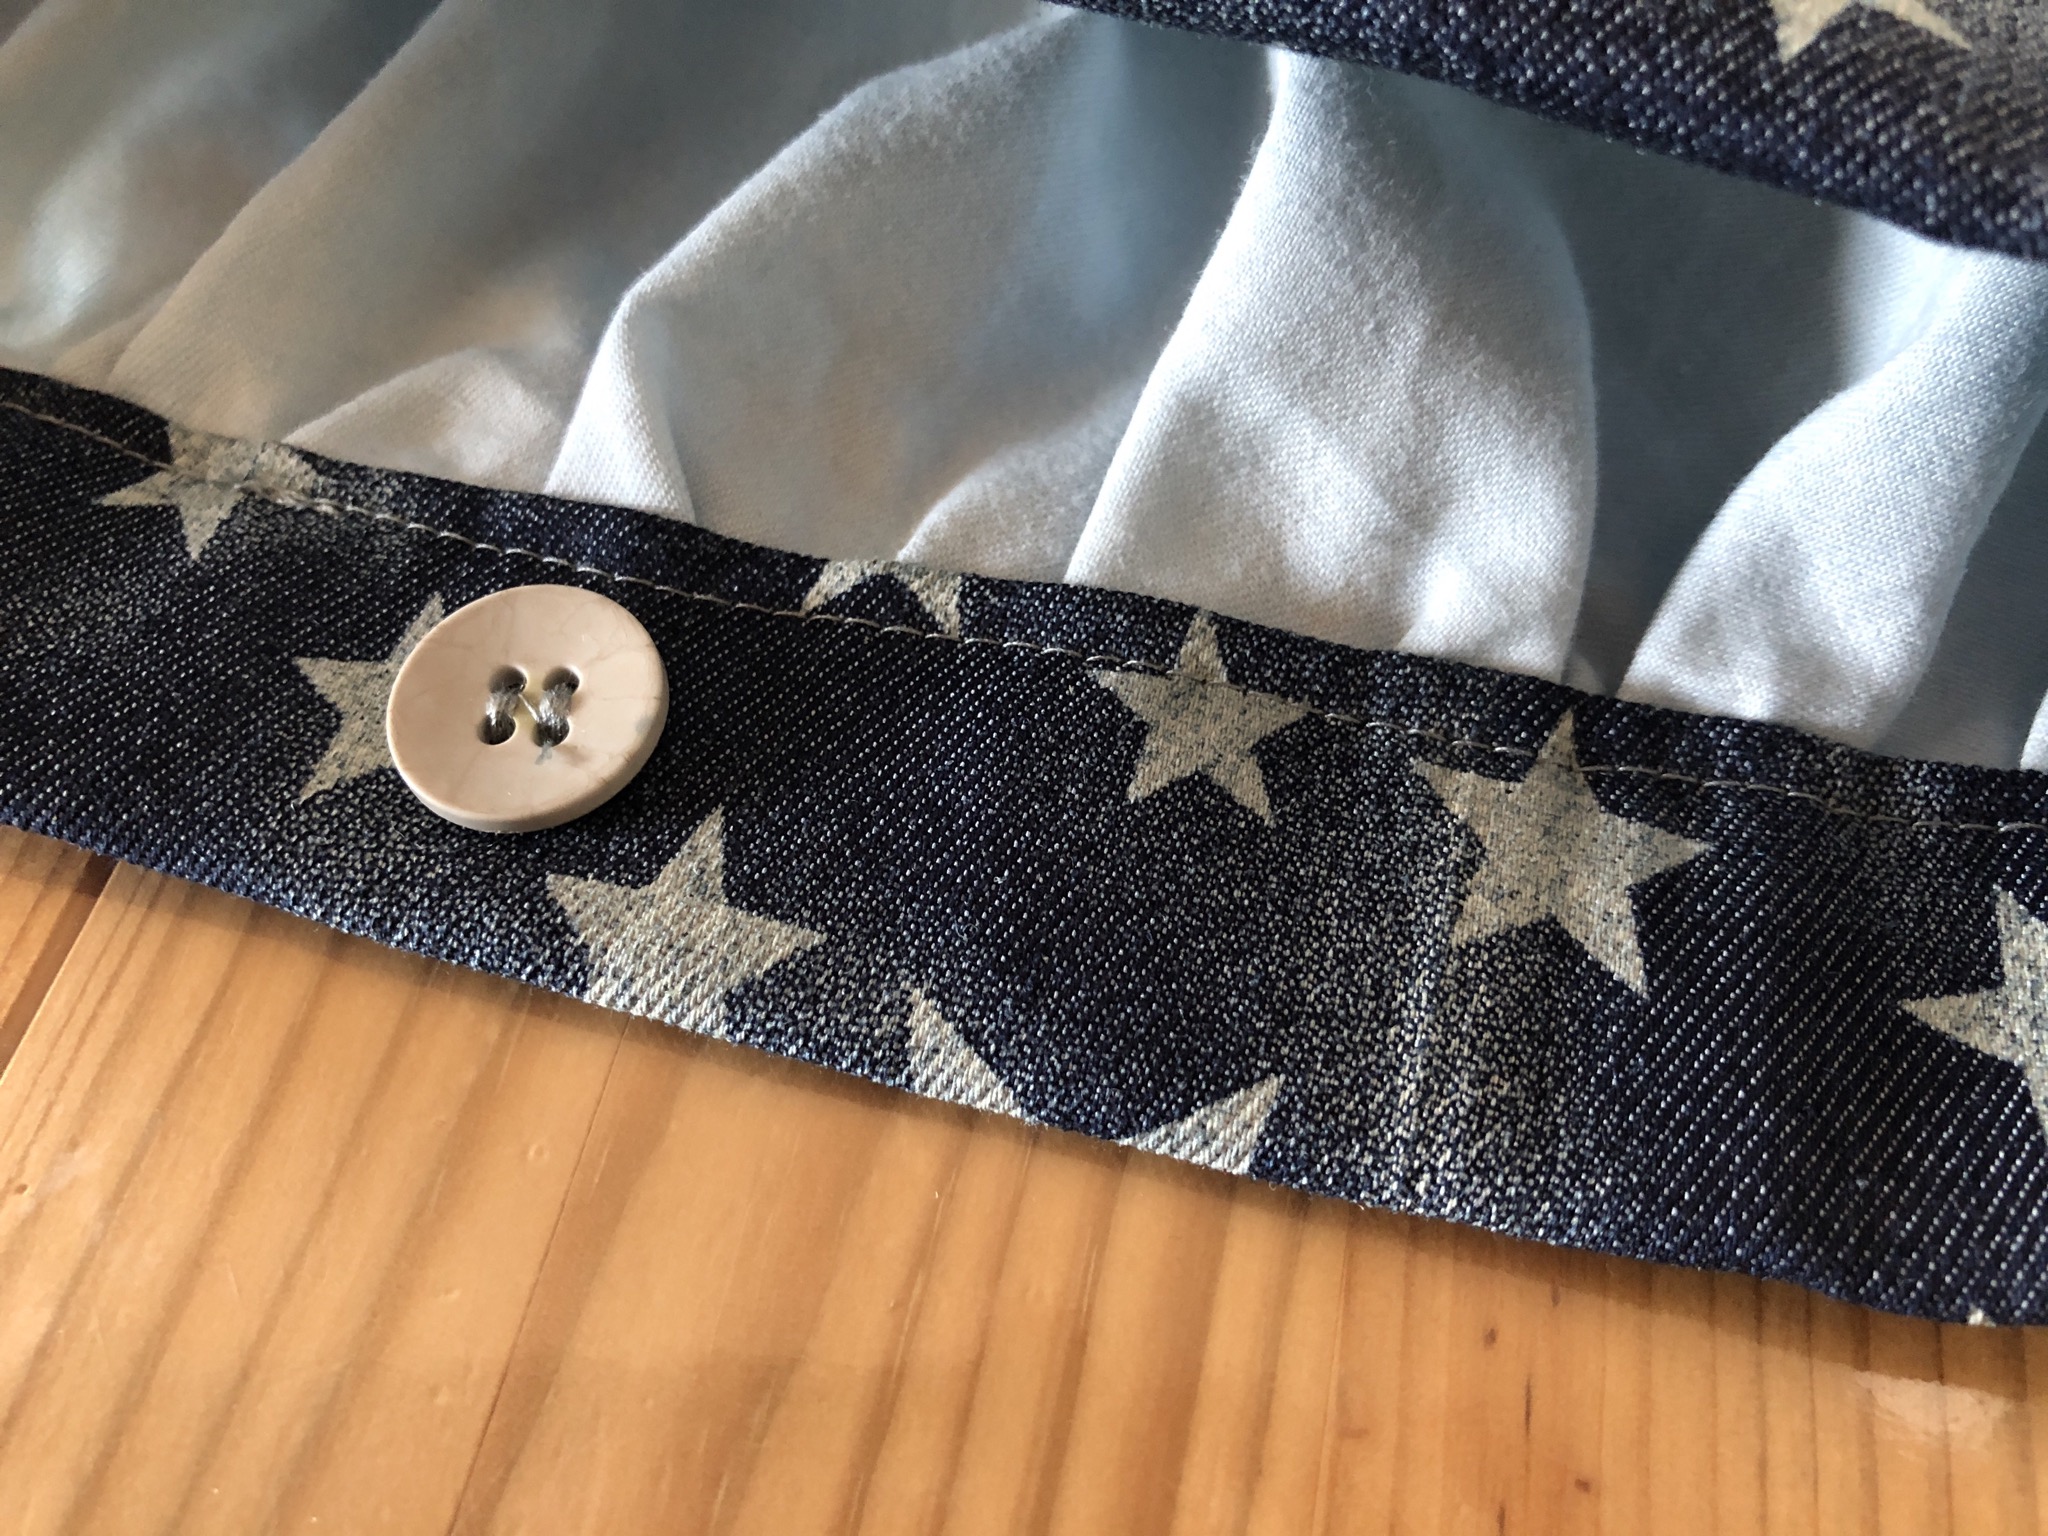
Sew the button on the inside at the hem
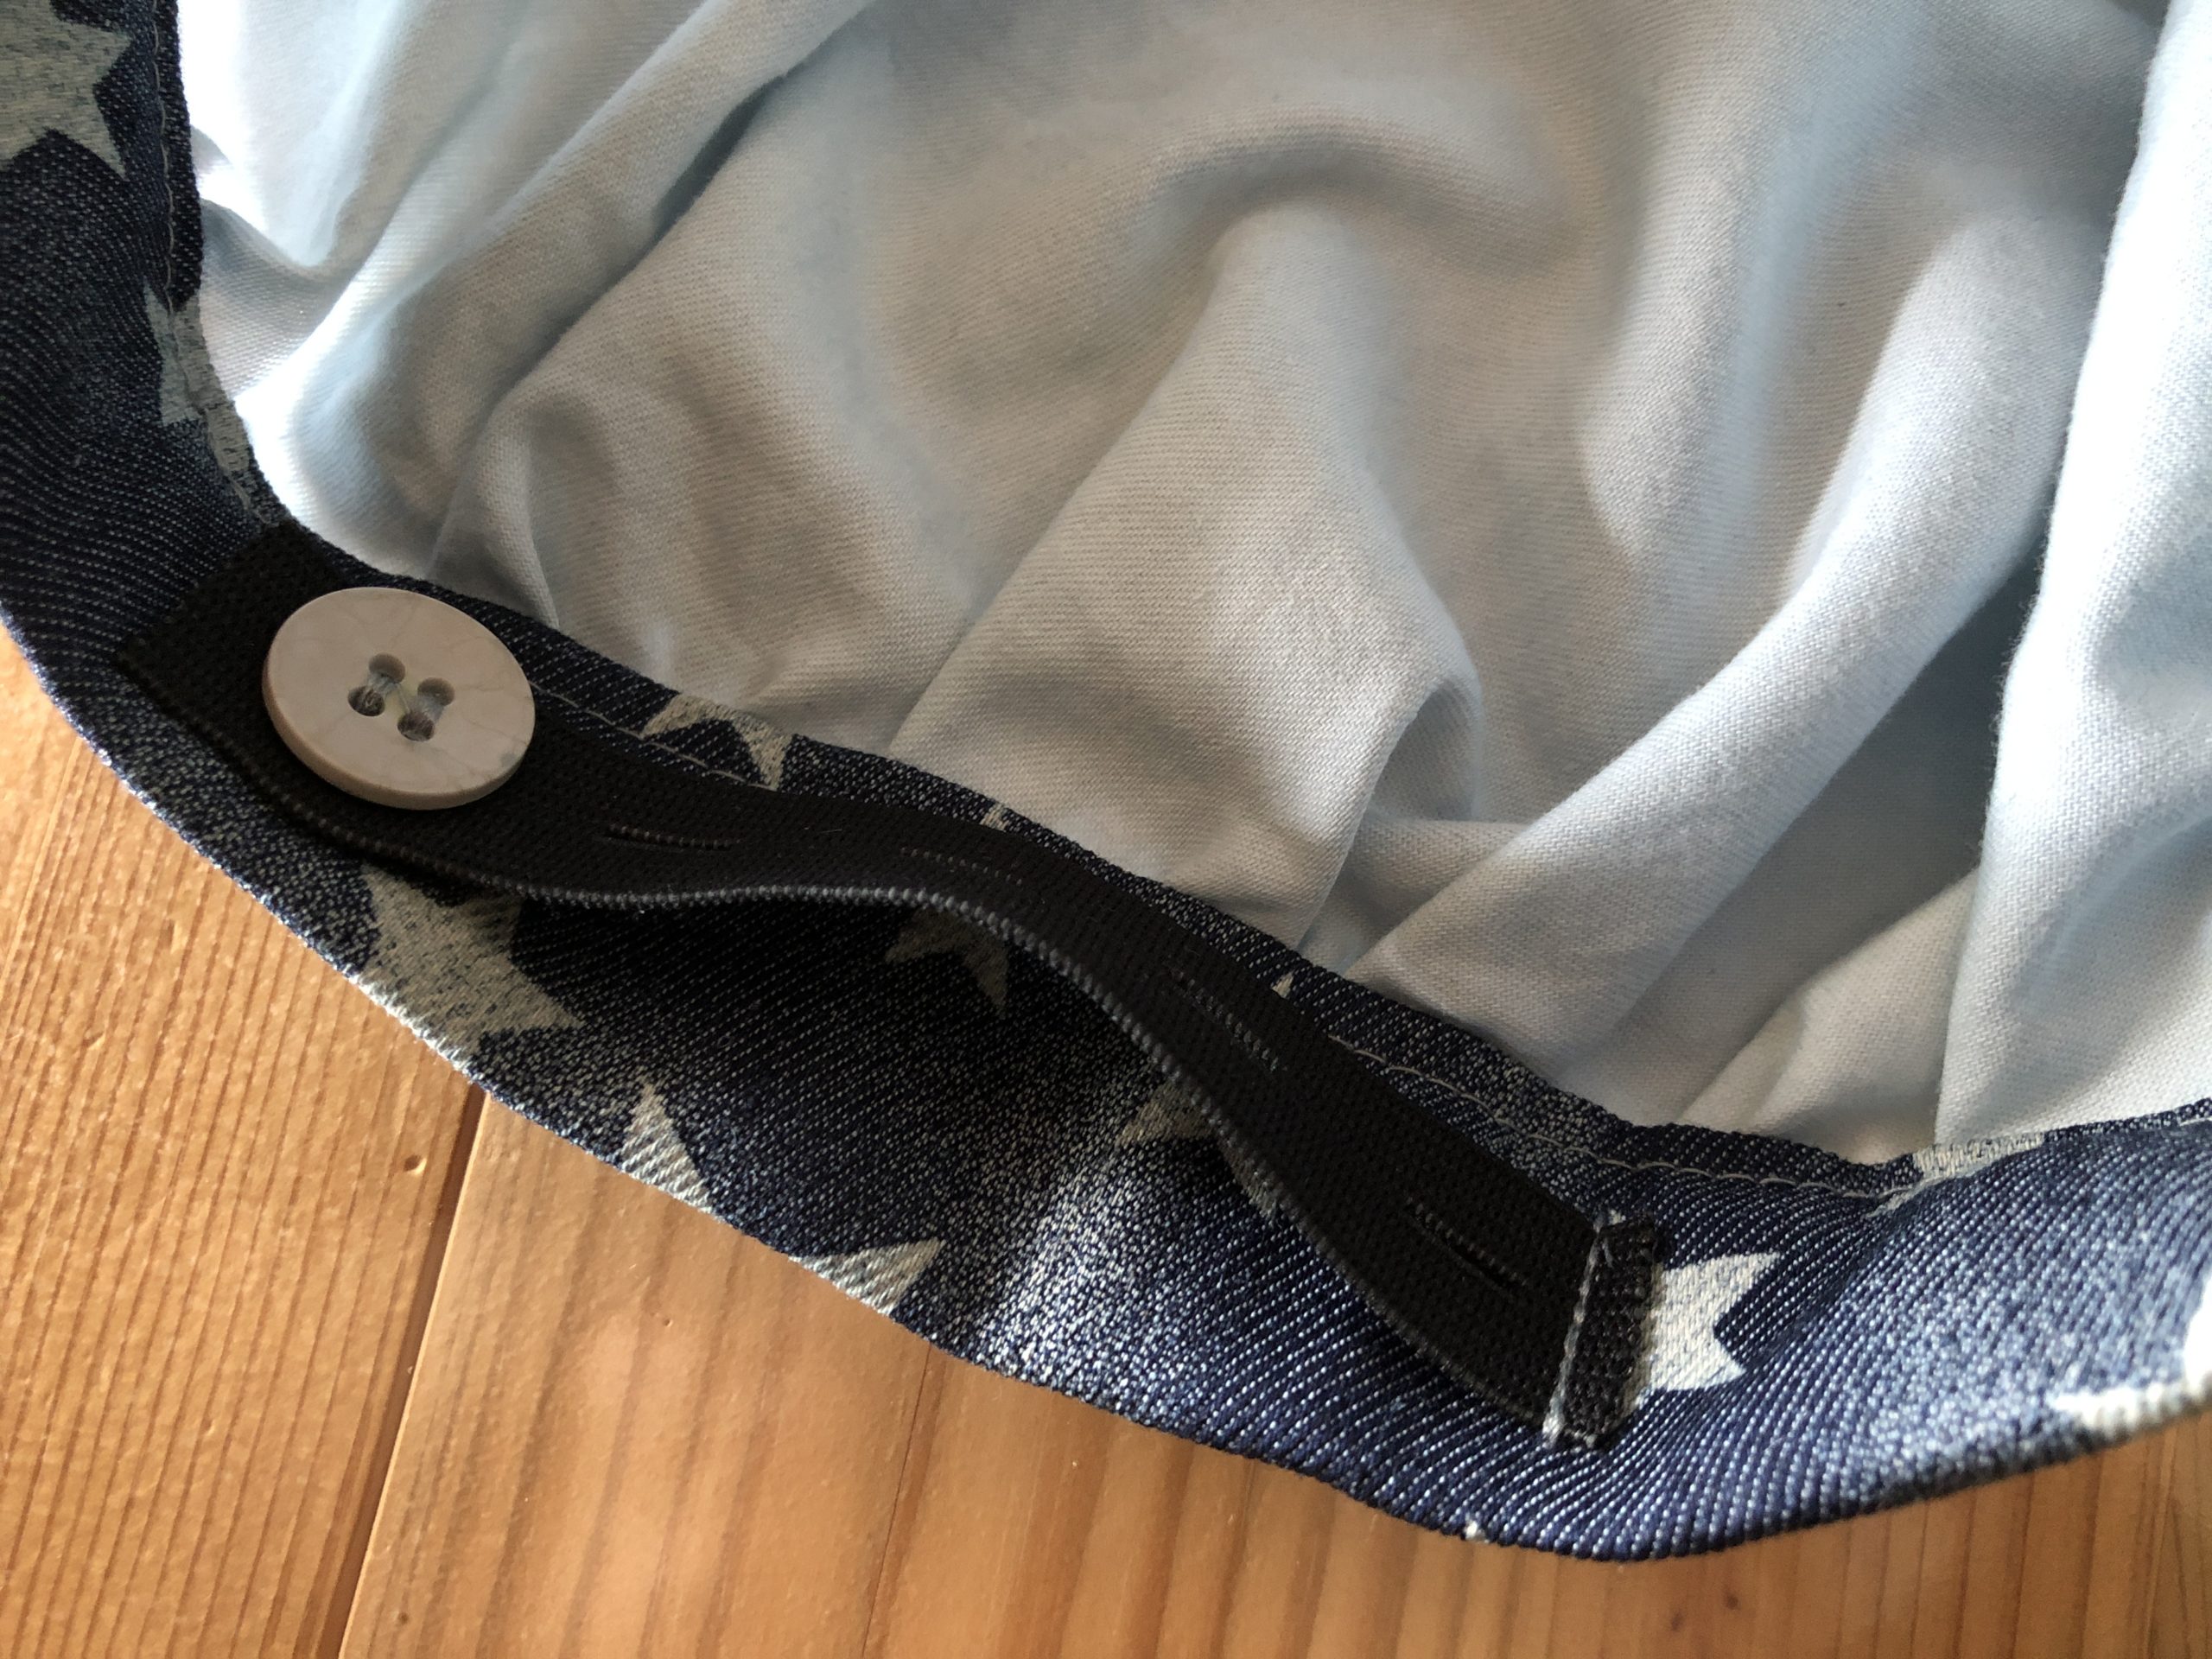
Pull the perforated rubber into the button (first hole)
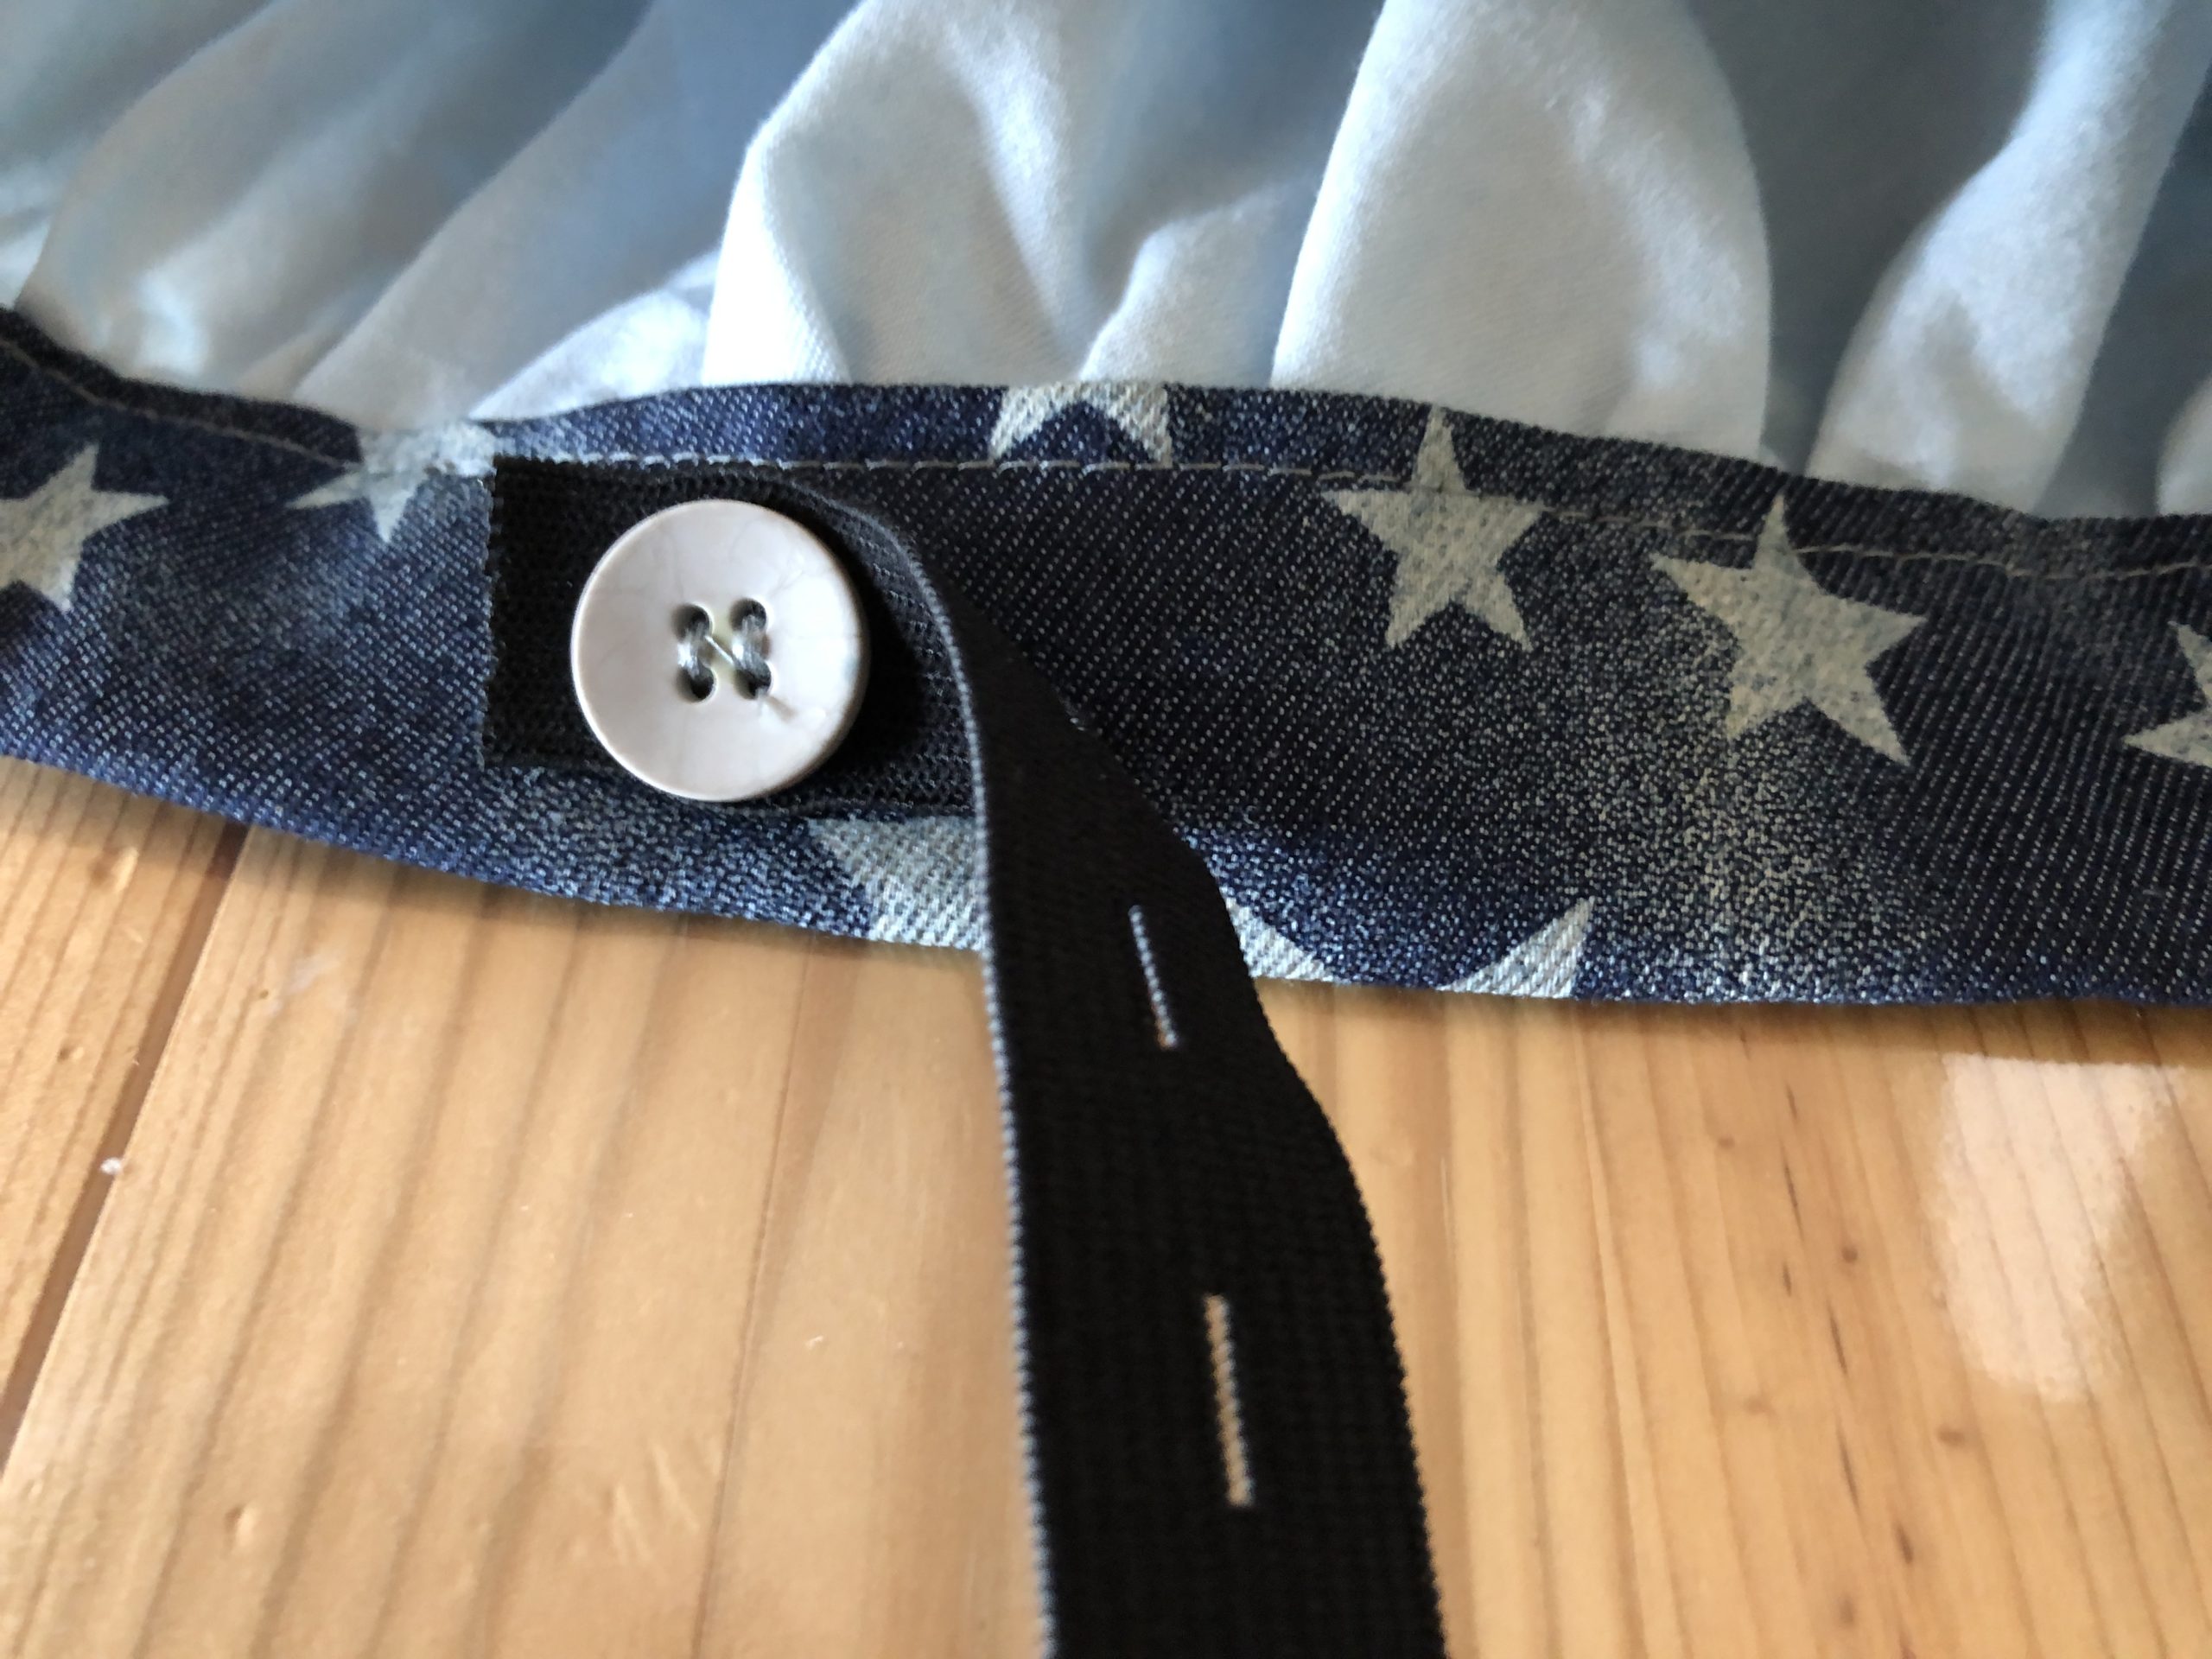
Place the perforated rubber on the hem and sew it firmly at the end.

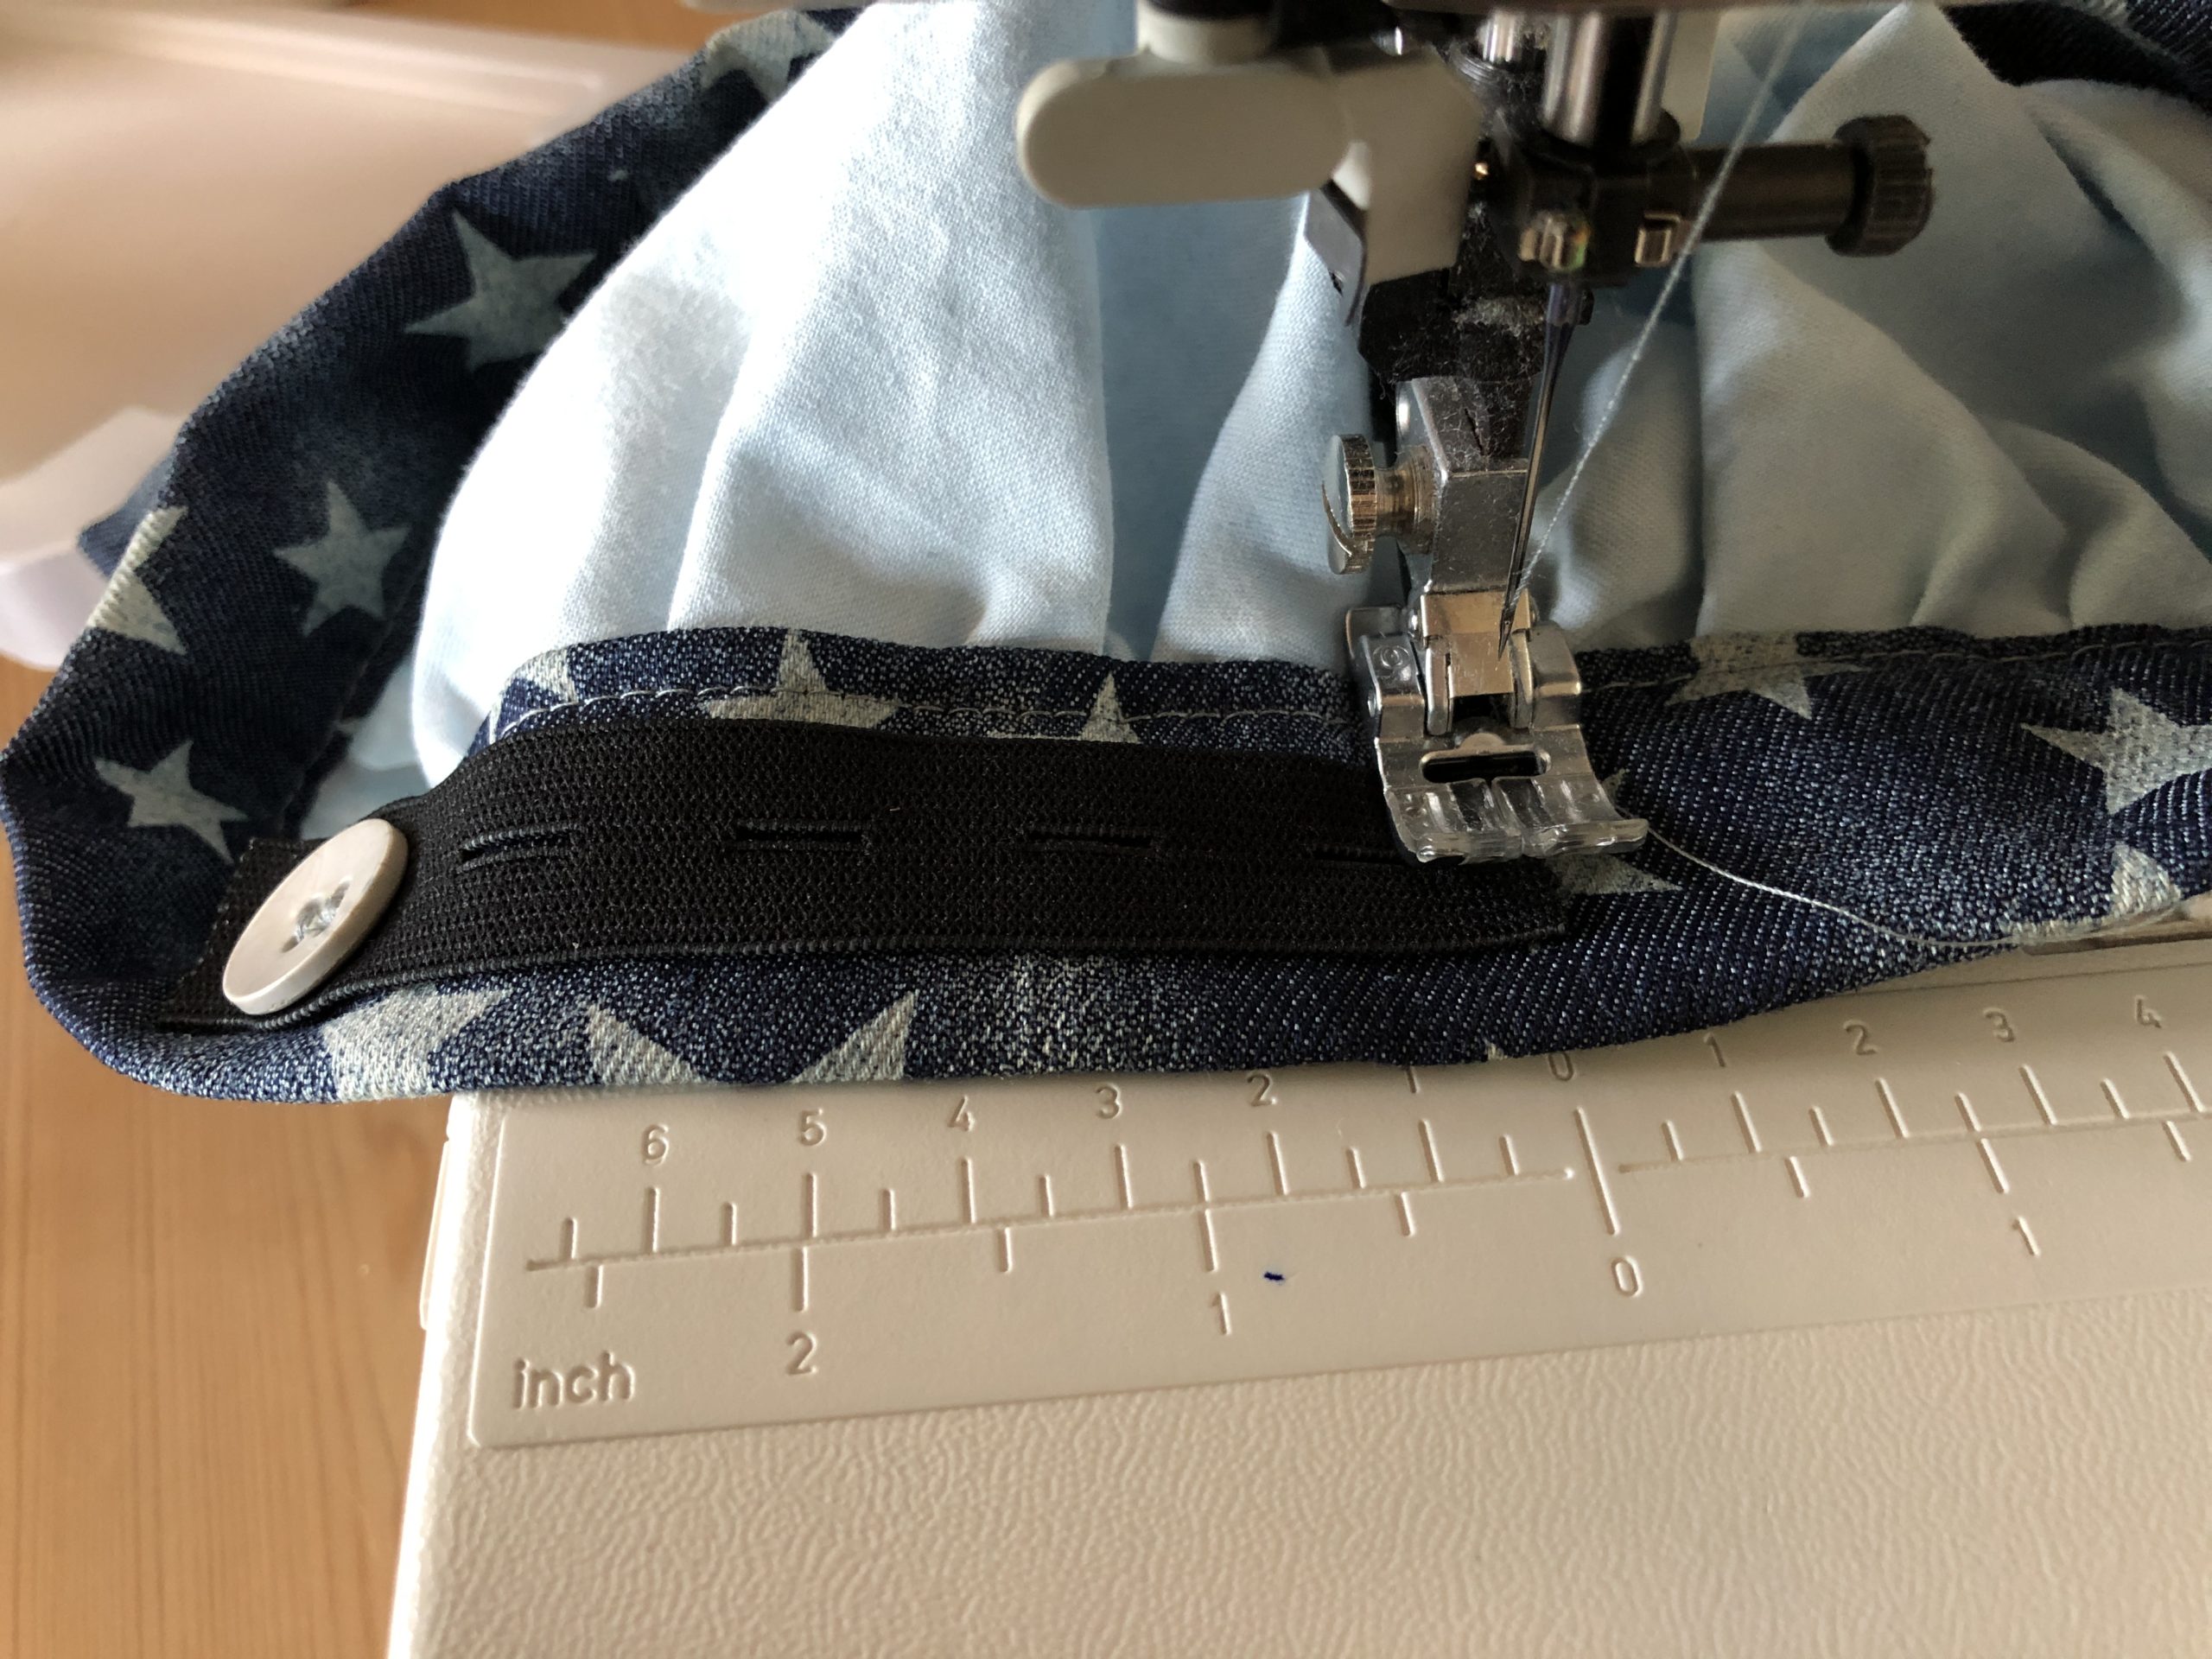

The adjustable cooking cap is ready! With the perforated rubber, the cap fits not only for different head sizes but also "growing" when the child's head grows.
Maybe this hat is also once an idea for carnival as a cook costume.
Materials
Directions
Cut the circle out of the white fabric.
Cut the strip from the star fabric.
First, the circle is sewed around with two rows (largest runoff).
Gently pull on one of the threads. This pulls the circle together at the edge.
Pull the edge together until the diameter of the circle edge matches the head circumference of the cap.
Now the strip is sewn on the short side on half together. (The beautiful sides are on top of each other!)
Place the strip in the inside of the drawn circle and stick it together with pins. If necessary, place the ruched edge until the dimensions match.
The beautiful side of the strip is on the inside
Sew right next to the existing seam (normal stitch length!)
Turn the fabric around.
Fold the inside of the cap and double the hem inwards and stick with pins.
Sew the edge of the hem with a stitch row.
The cooking cap is ready.
Cut rubber to a length of 10 cm and merge both ends with a lighter.
Sew the button on the inside at the hem
Pull the perforated rubber into the button (first hole)
Place the perforated rubber on the hem and sew it firmly at the end.
The adjustable cooking cap is ready! With the perforated rubber, the cap fits not only for different head sizes but also "growing" when the child's head grows.
Maybe this hat is also once an idea for carnival as a cook costume.
Follow us on Facebook , Instagram and Pinterest
Don't miss any more adventures: Our bottle mail


Great idea and great description! 5 stars!
Dear BaSo, this looks great! Five stars for you! We hope your sunshine cooks and bakes now even better. Thanks also to Katzi for the super reworked offer. Warm, Alice from the adventure market.