A candle that "looks out" from the picture is impressive for children, even if they can make it themselves. It looks more complicated than it actually is.
Many small handles repeat themselves over and over again and are therefore well trained. If you follow the instructions, you will succeed safely.
This picture can also be used as a map or as a decorative picture for standing or hanging.
Have fun trying out.
Media Education for Kindergarten and Hort

Relief in everyday life, targeted promotion of individual children, independent learning and - without any pre-knowledge already usable by the youngest!
Get ready.
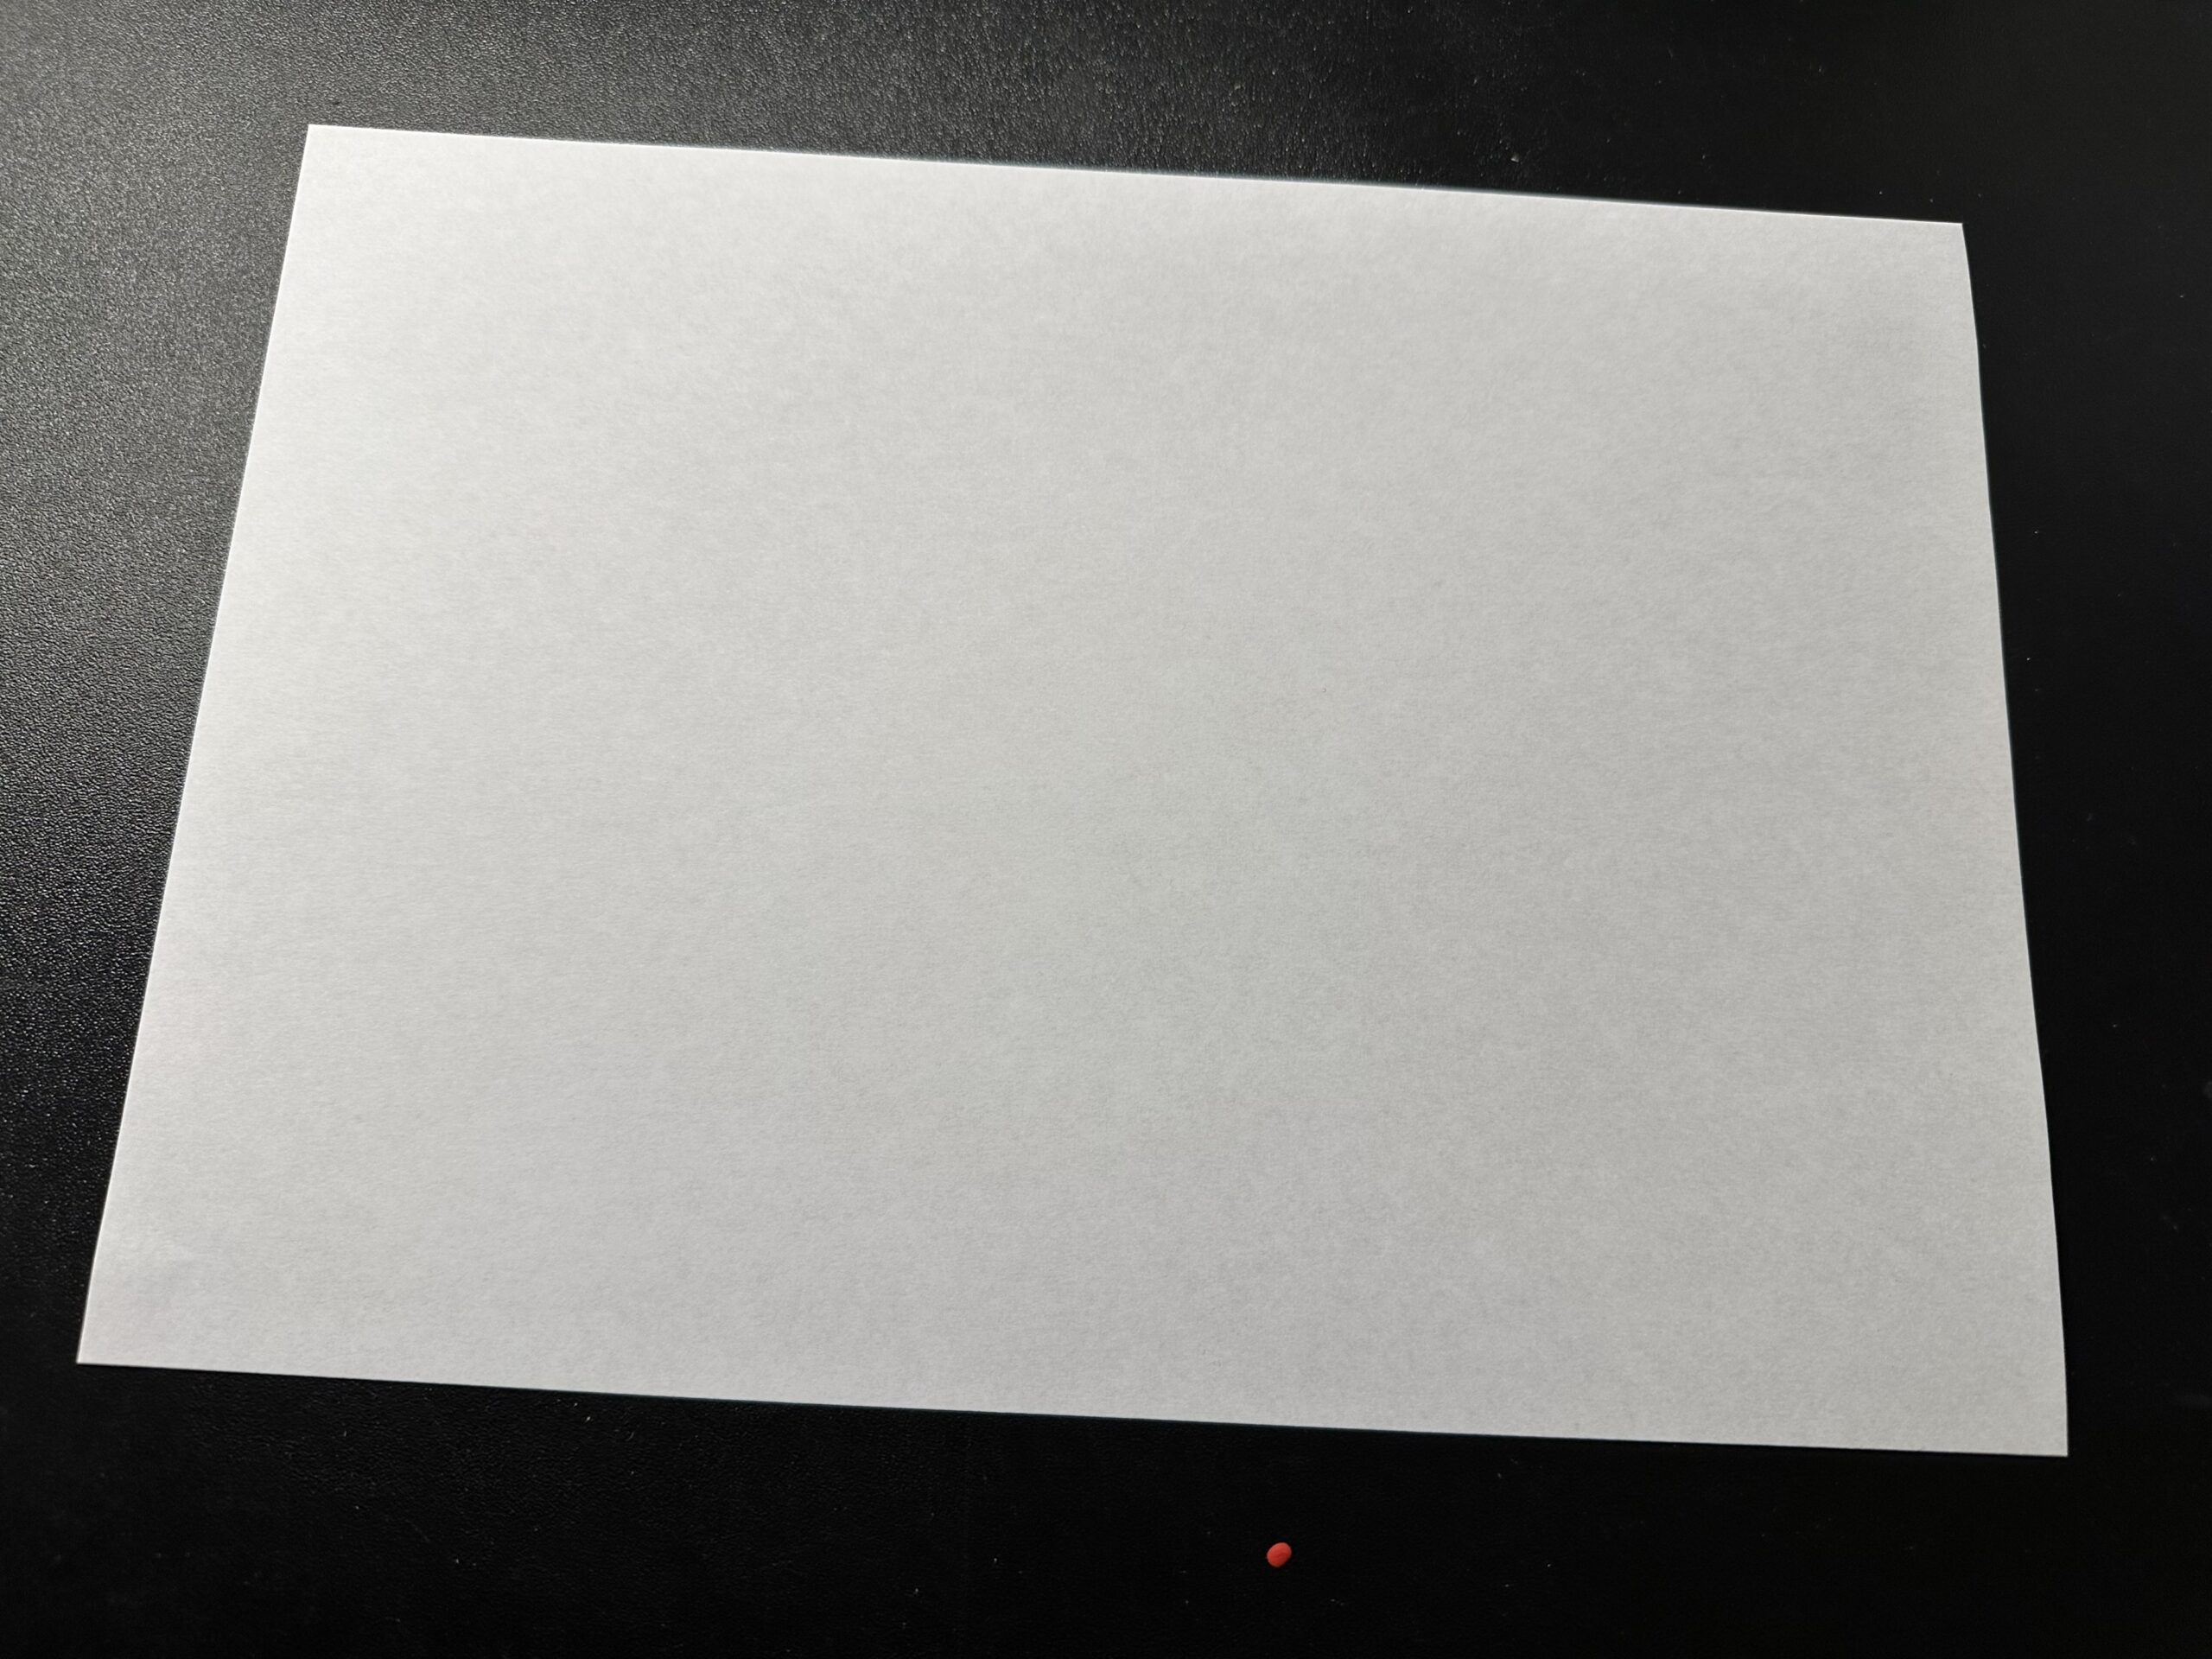
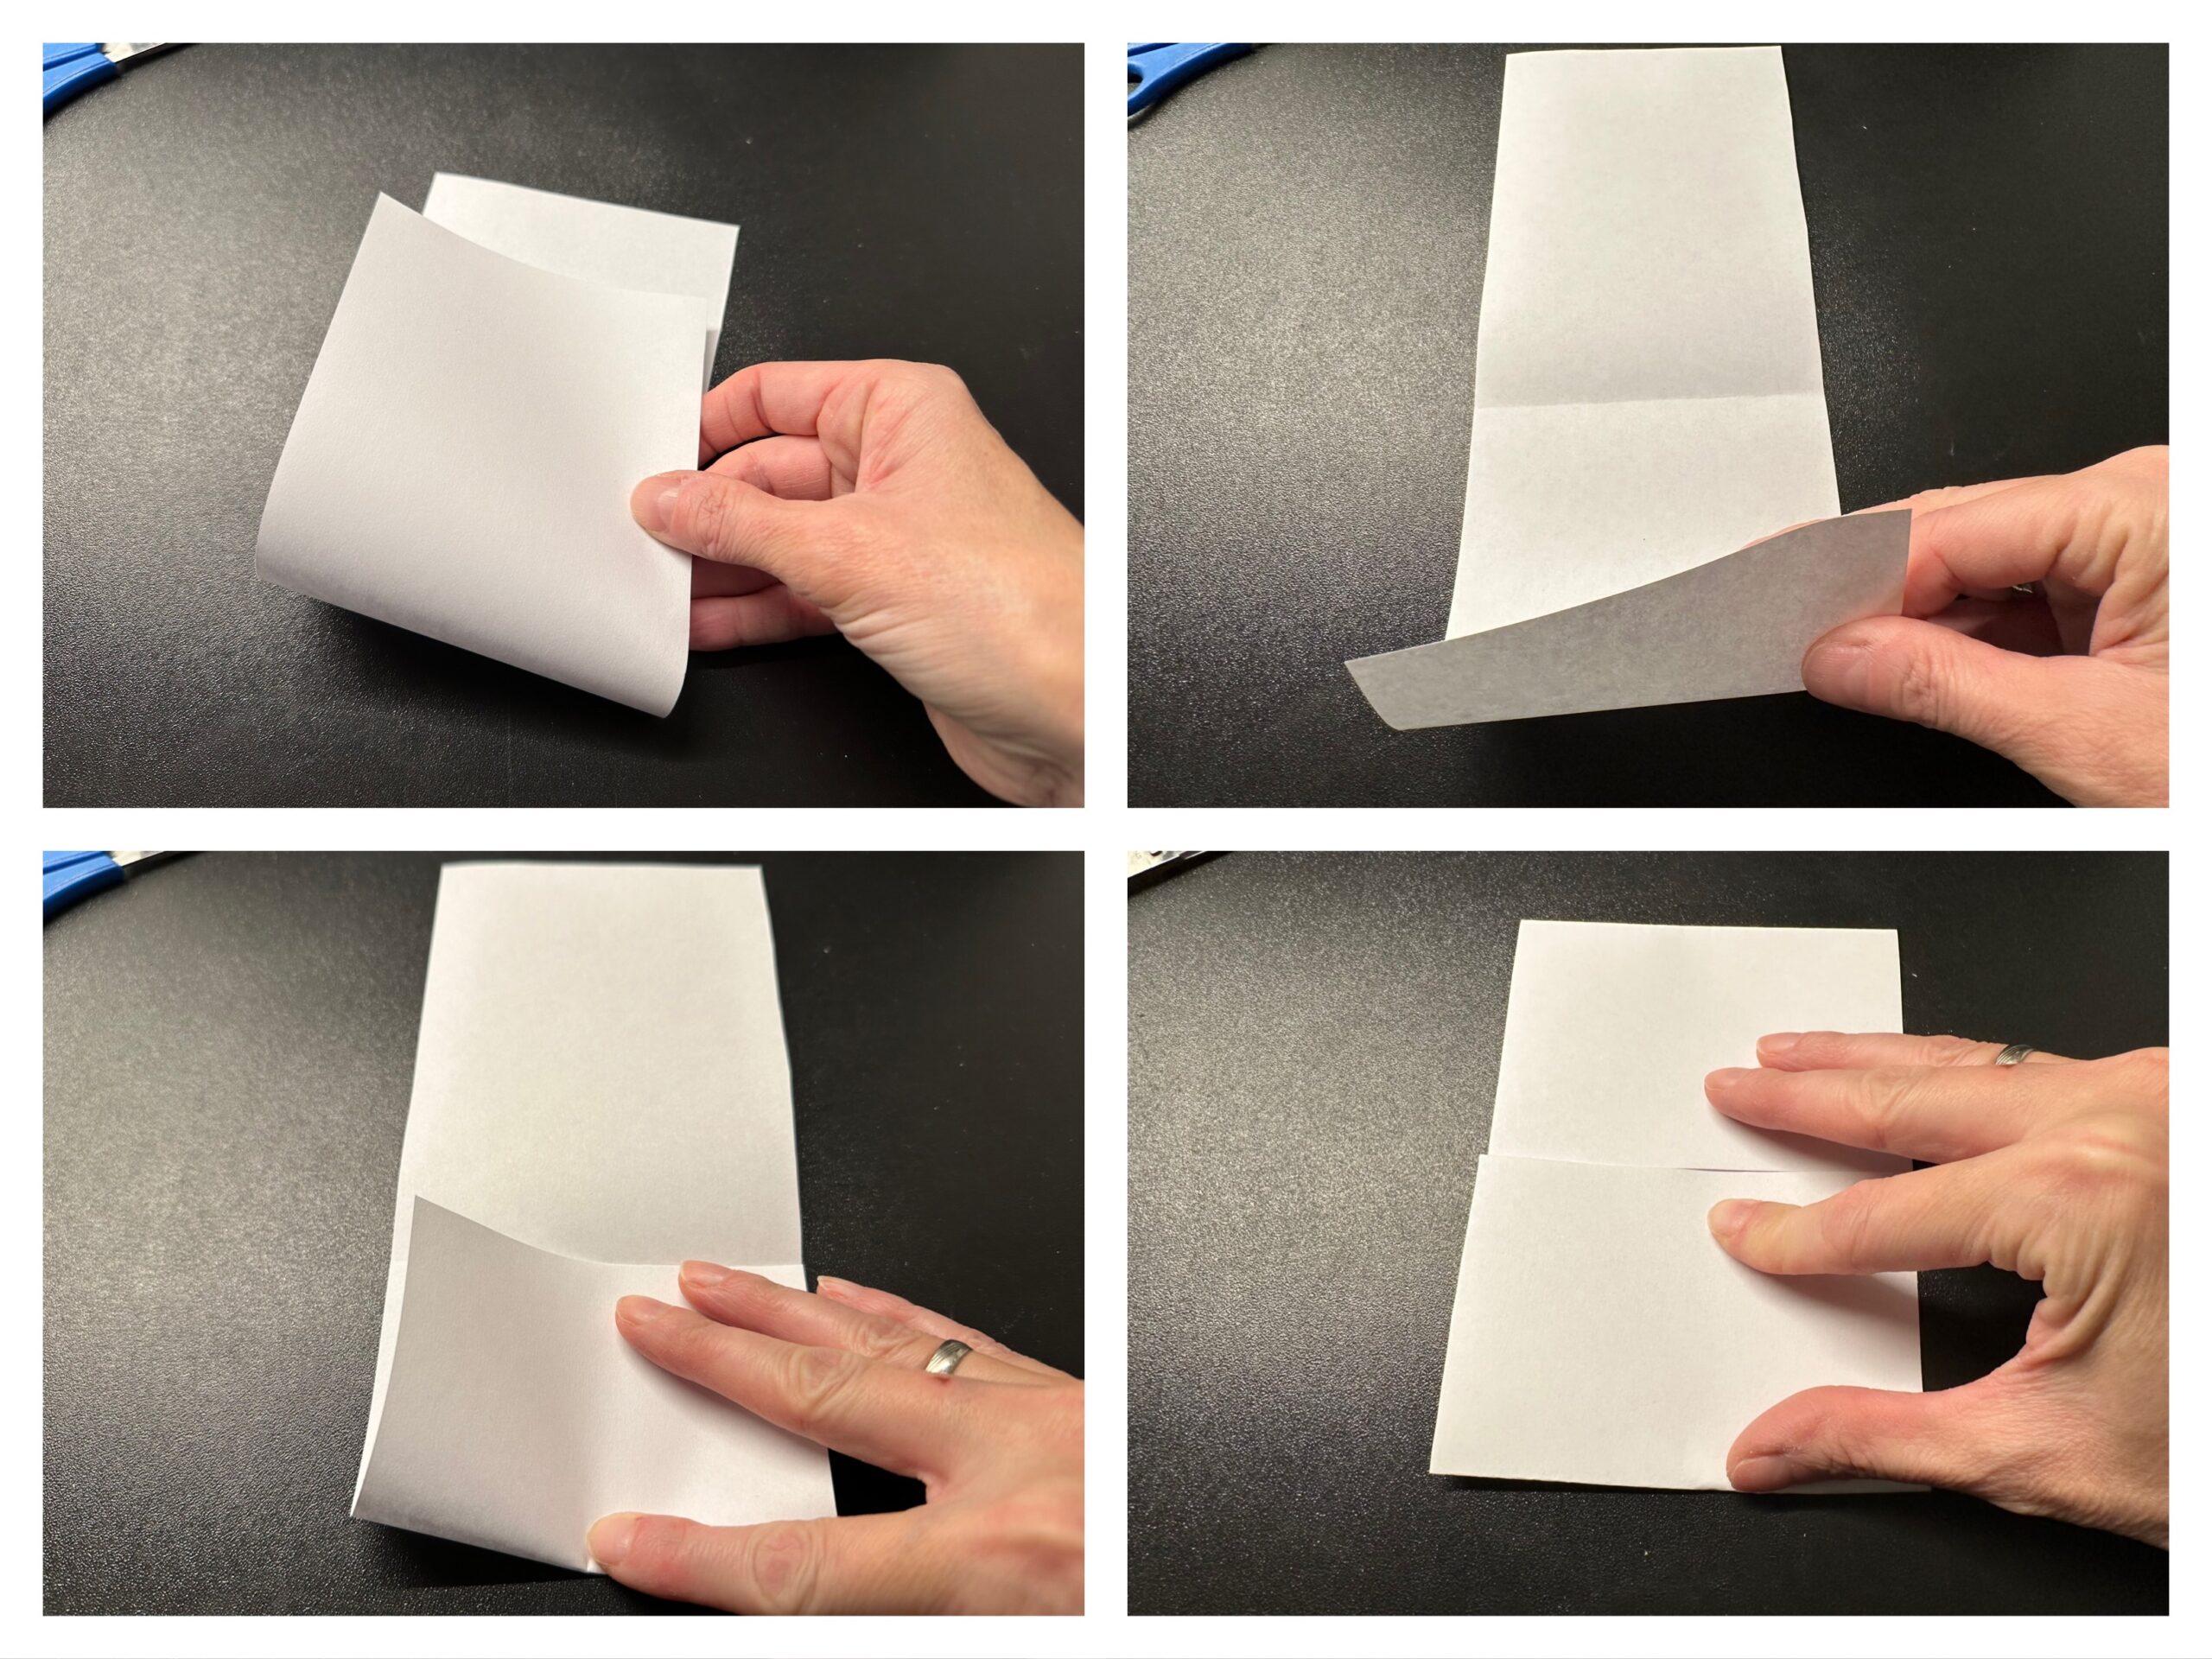
Take a large sheet of paper (DIN A4).
Put the sheet across you. Fold the bottom long edge upwards onto the opposite side. Gently strike the break. Then fold the paper apart again. Cuts along the break down the paper. You get two same strips.
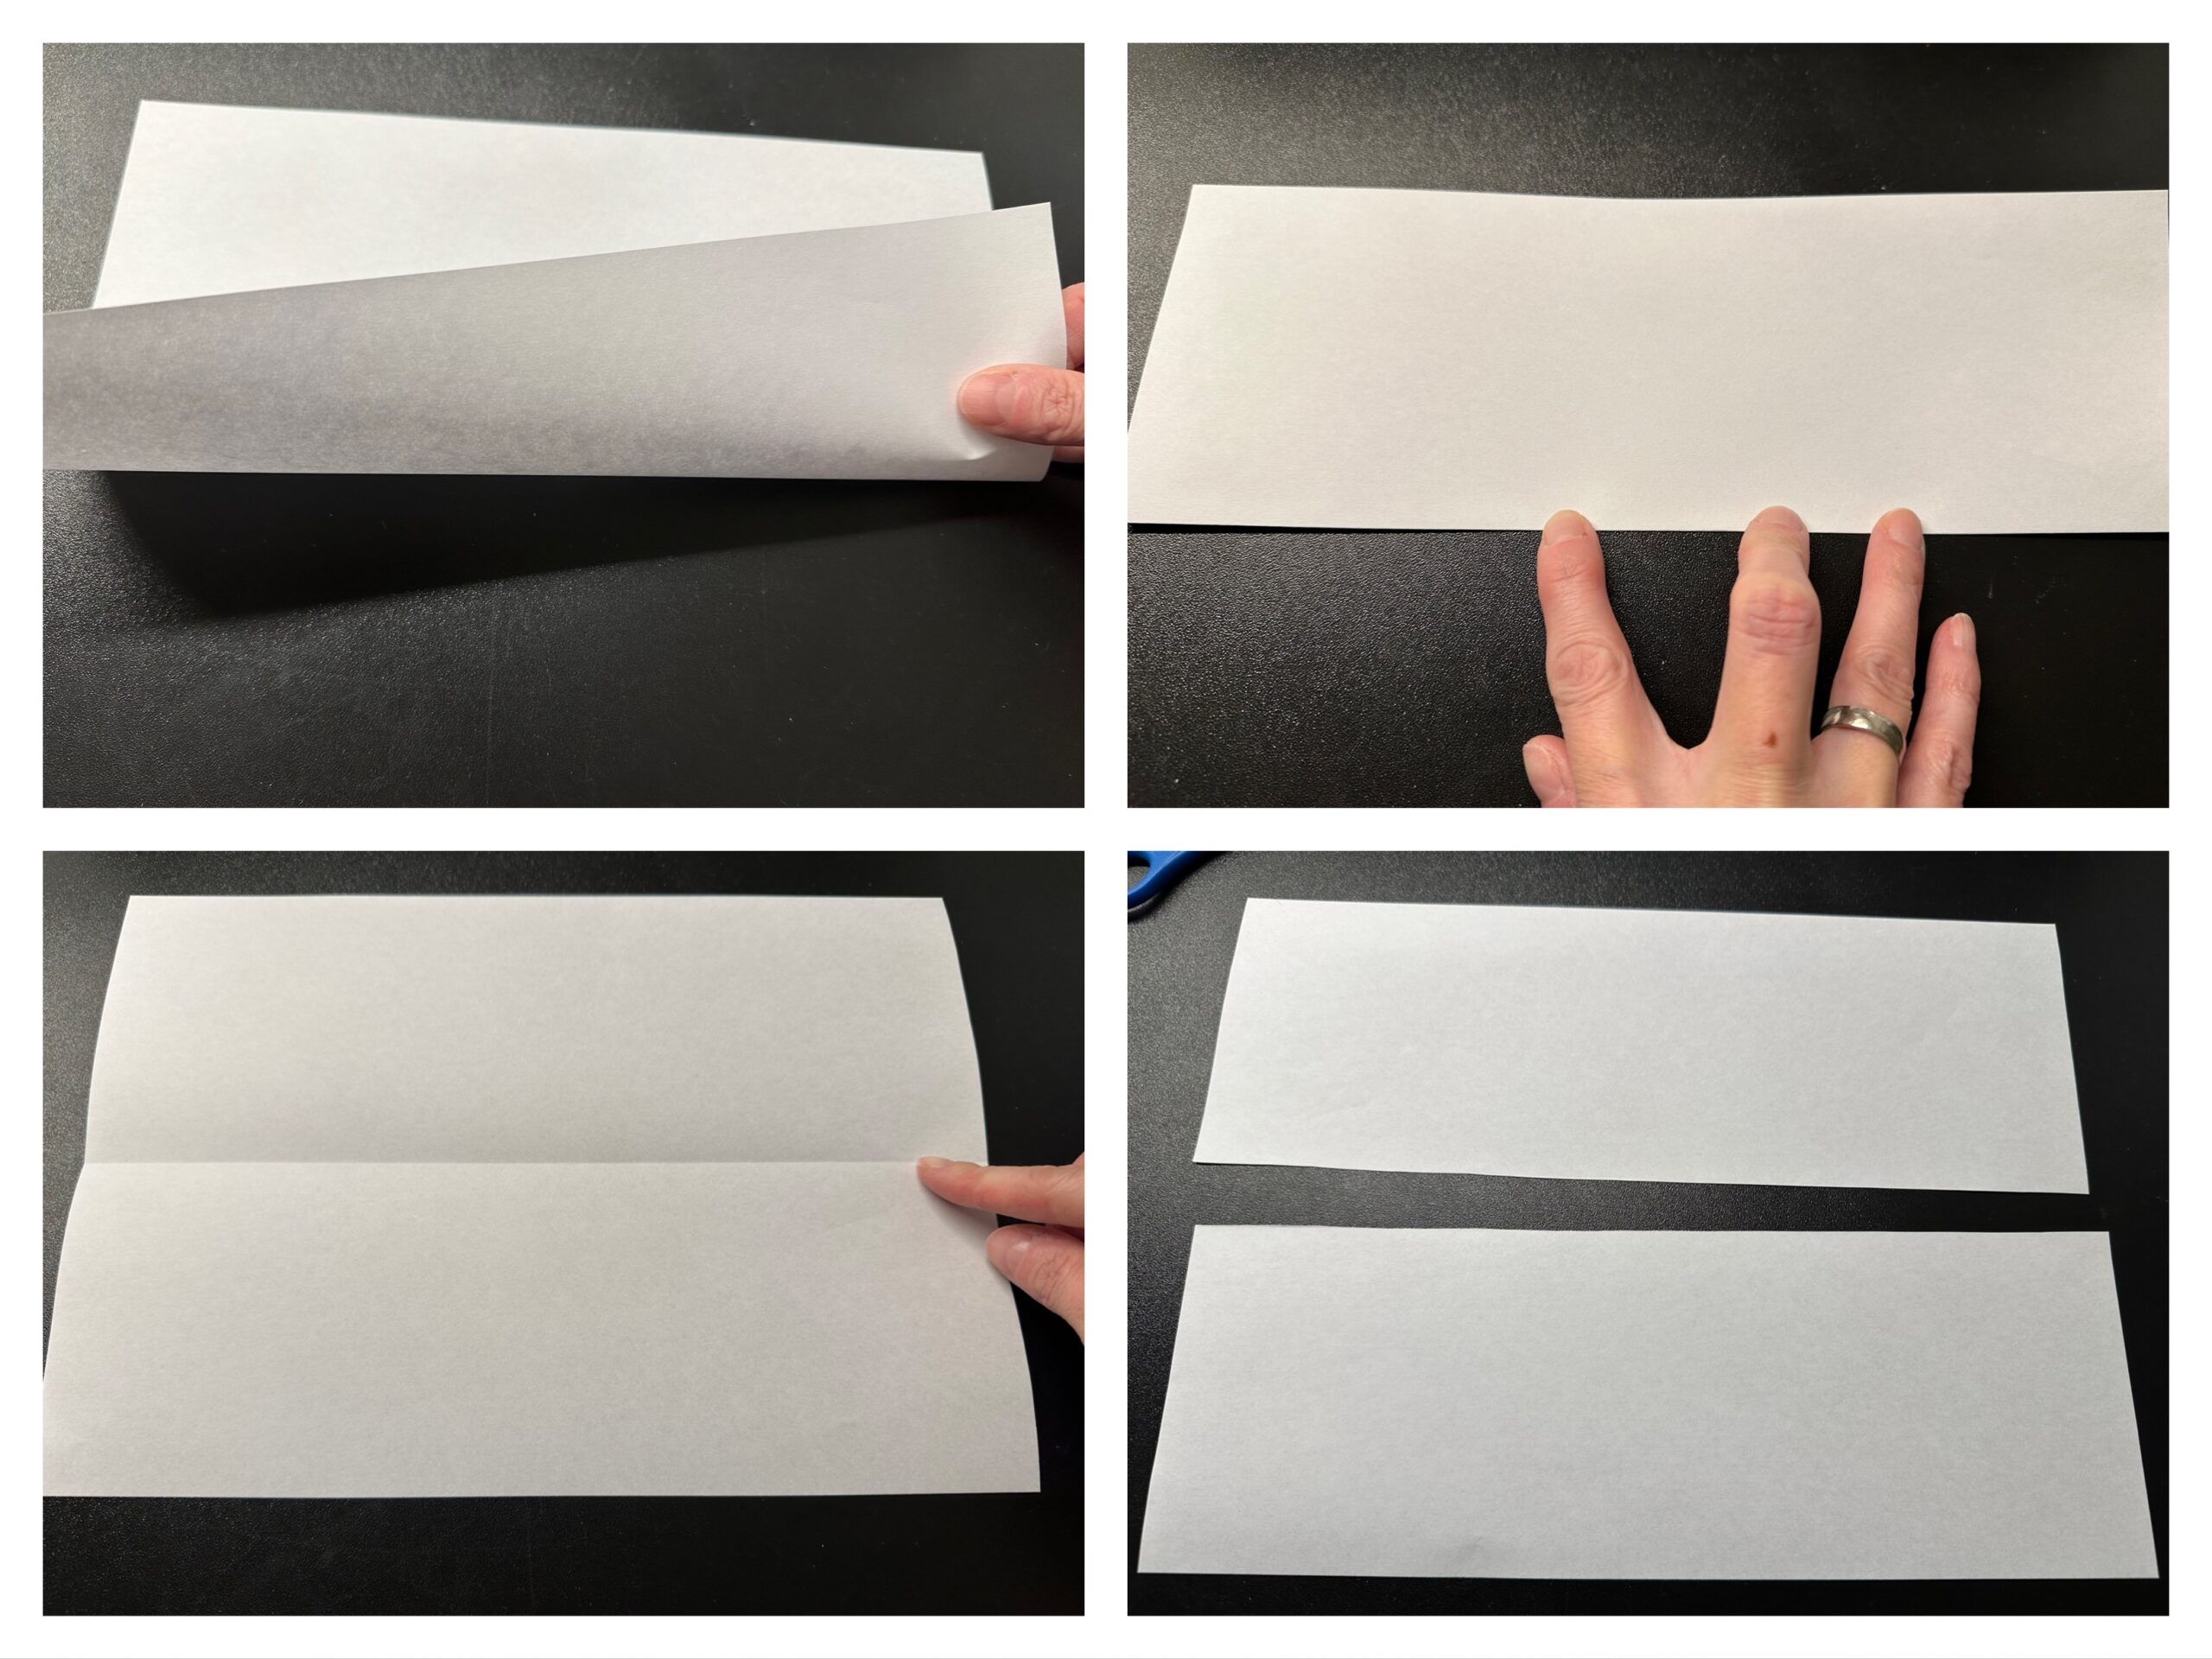
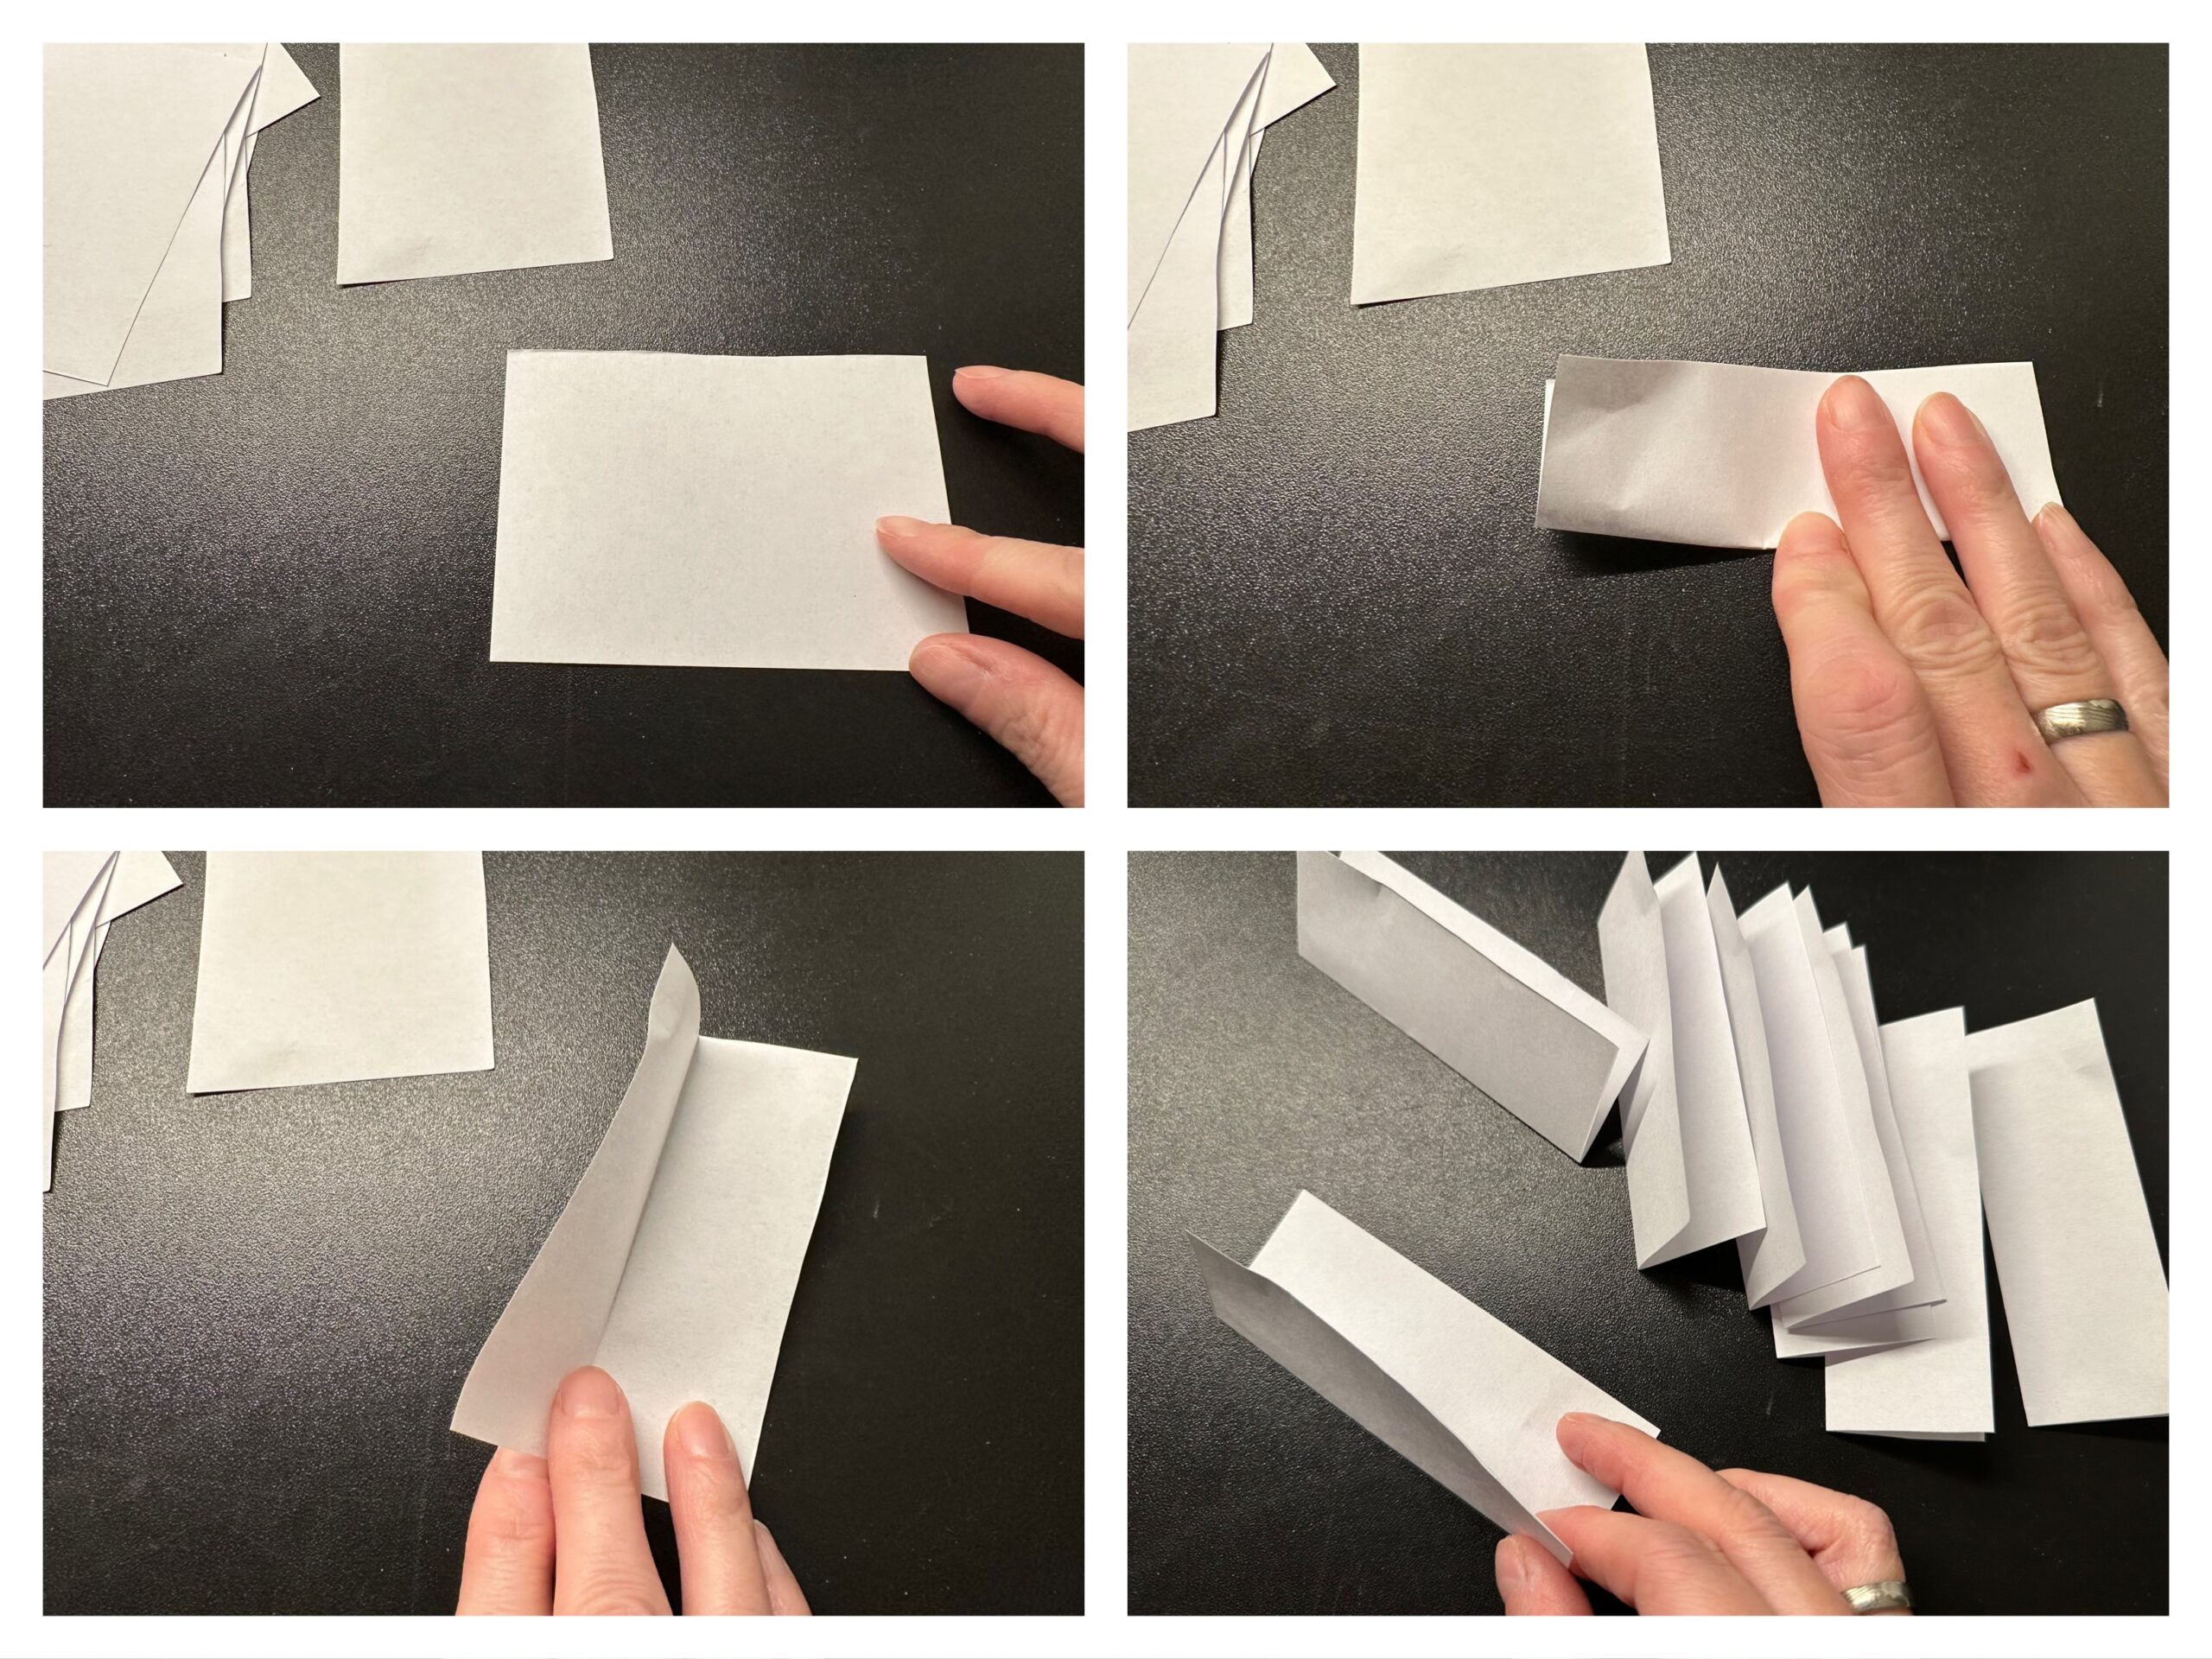
Put a strip of paper up in front of you. Fold the lower edge of the paper upwards. Gently strike the break. Fold the sheet apart again. The break now shows you the middle. Now fold the short sides from both sides to the middle line and brush the breaks smoothly.
Now fold all folds apart again. Now you can cut the clearly visible fracture lines apart with the scissors.
Do the same with the second strip of paper.

Place a small leaf across you and fold the lower edge onto the upper edge. Repeat this on all leaves.
Now put the folded leaves together. Make sure that they lie exactly in each other.
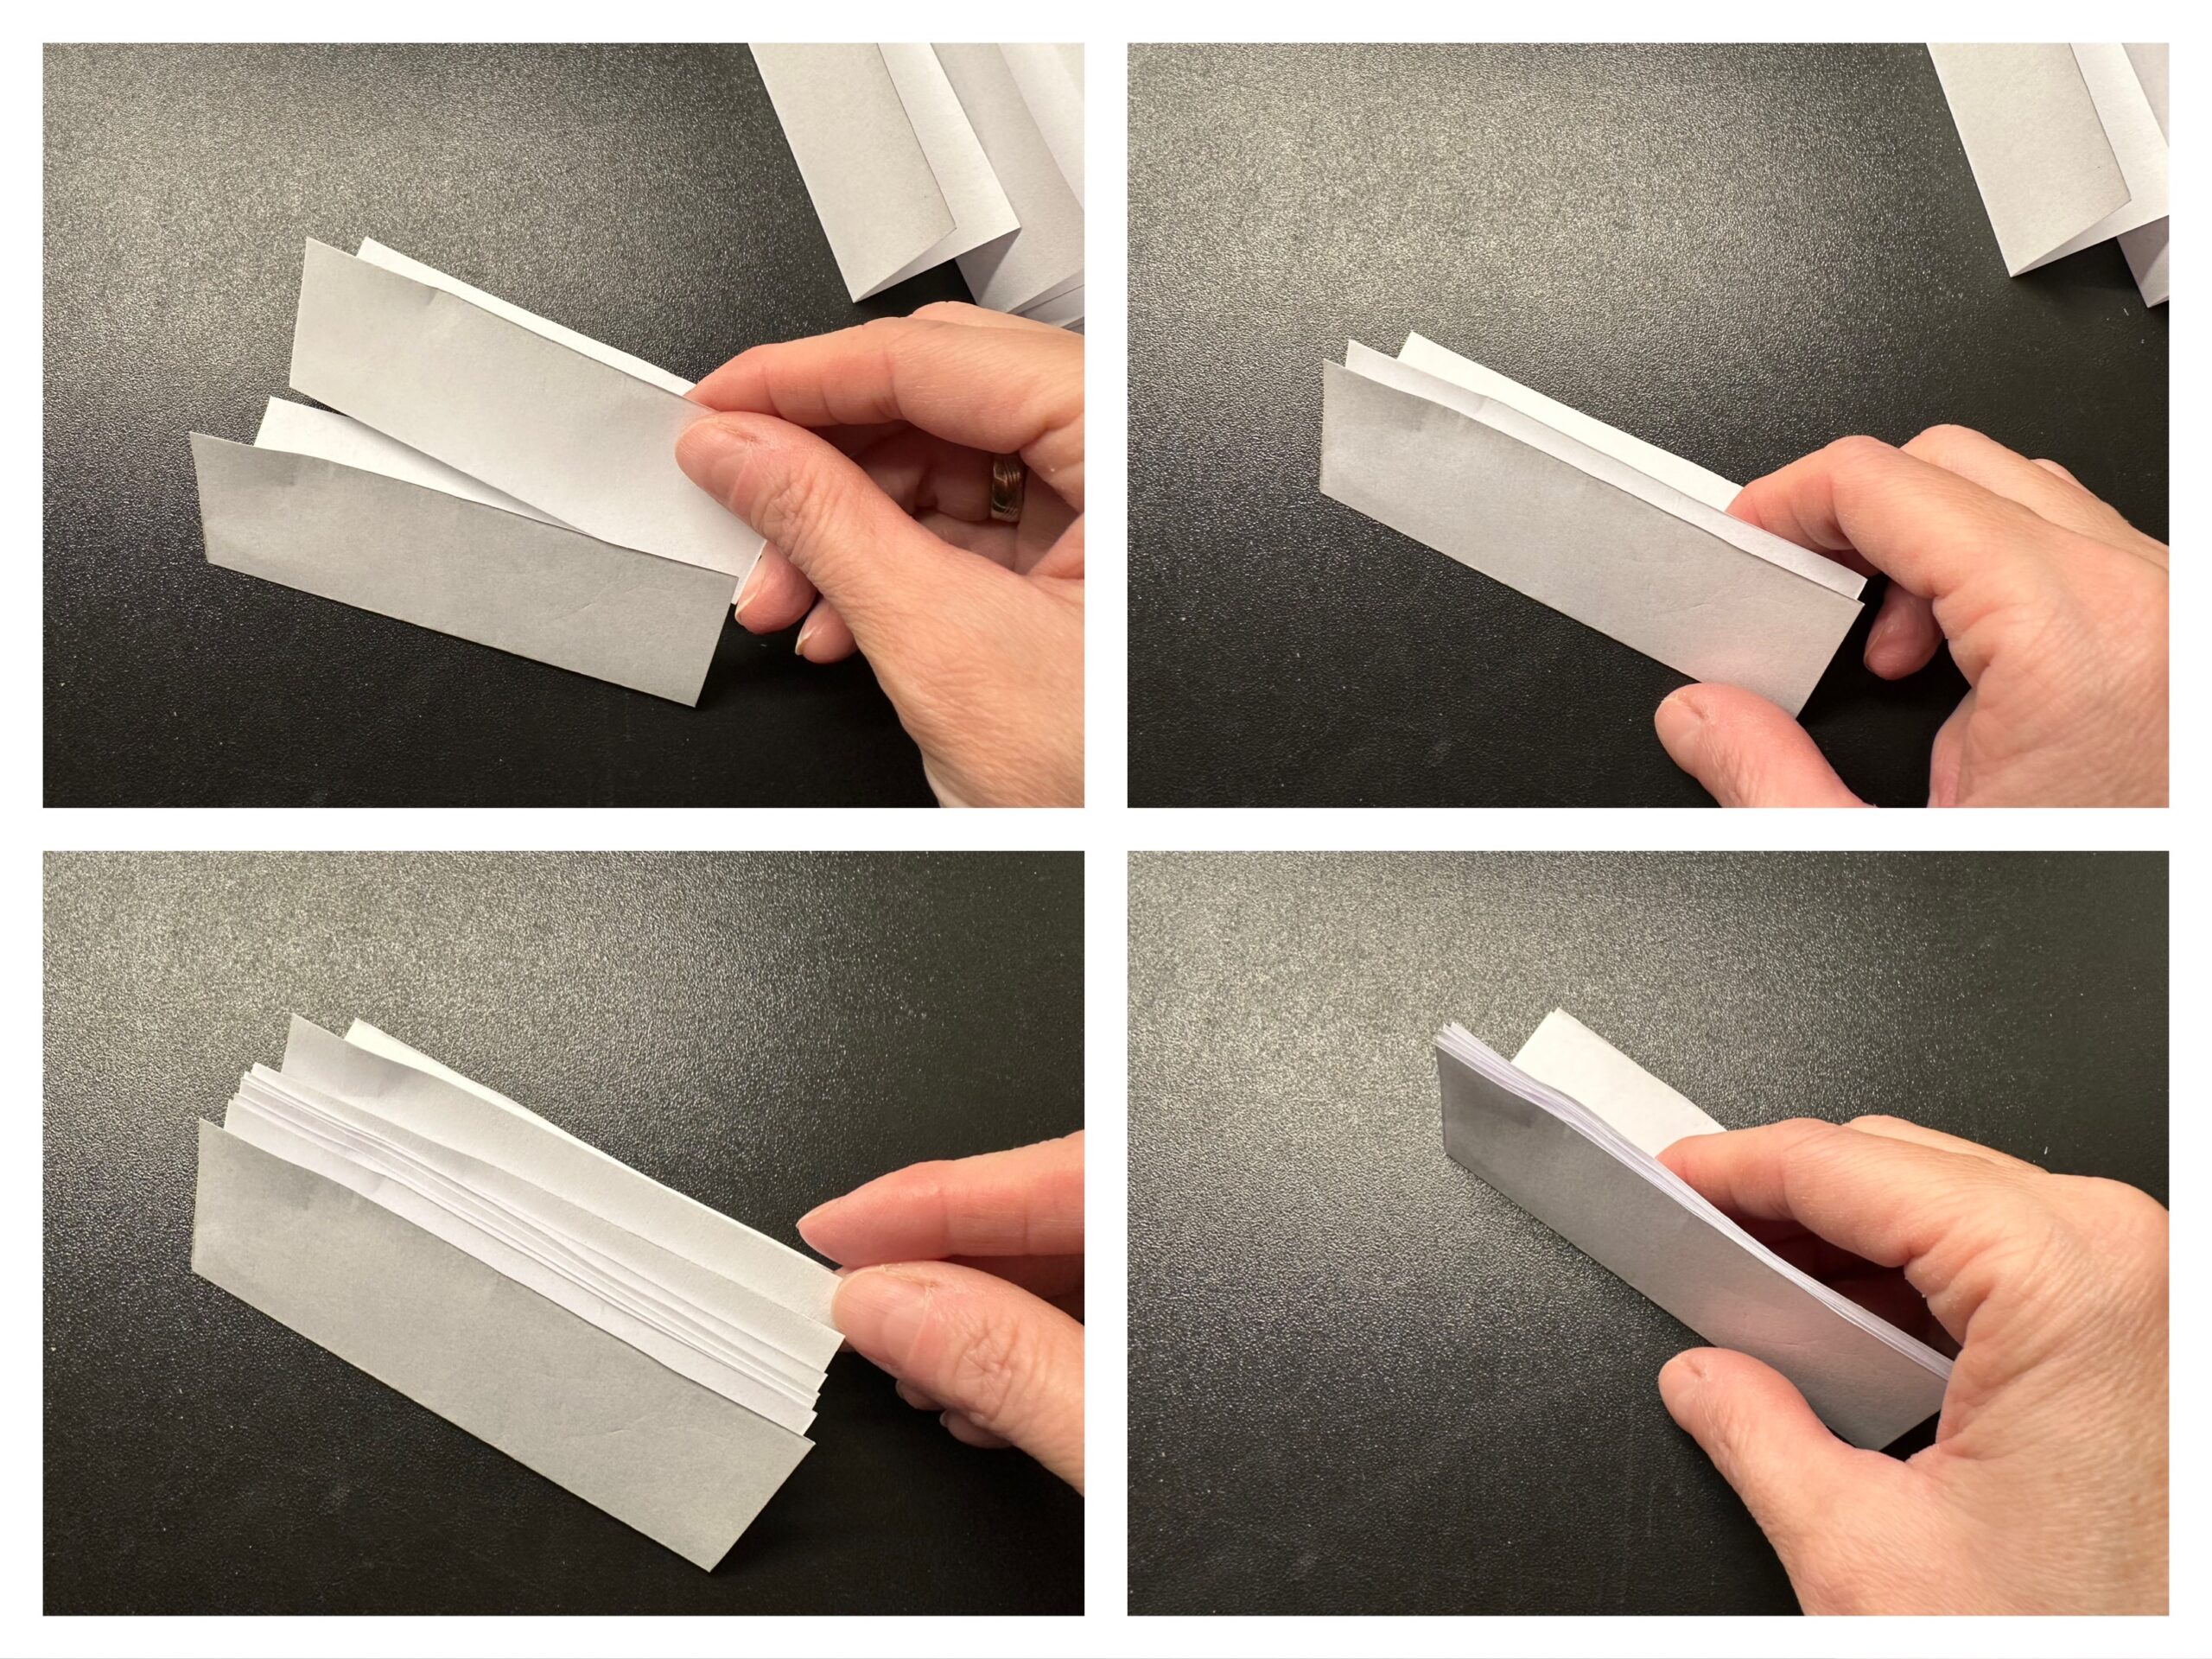
Hold on to the leaves so that they don't slip. Put the leaves folded together in front of you. Paint a curved slant with a pen to the top of the "candle". The place, other is the fracture, is the highest point of the candle. Cut off the slant.
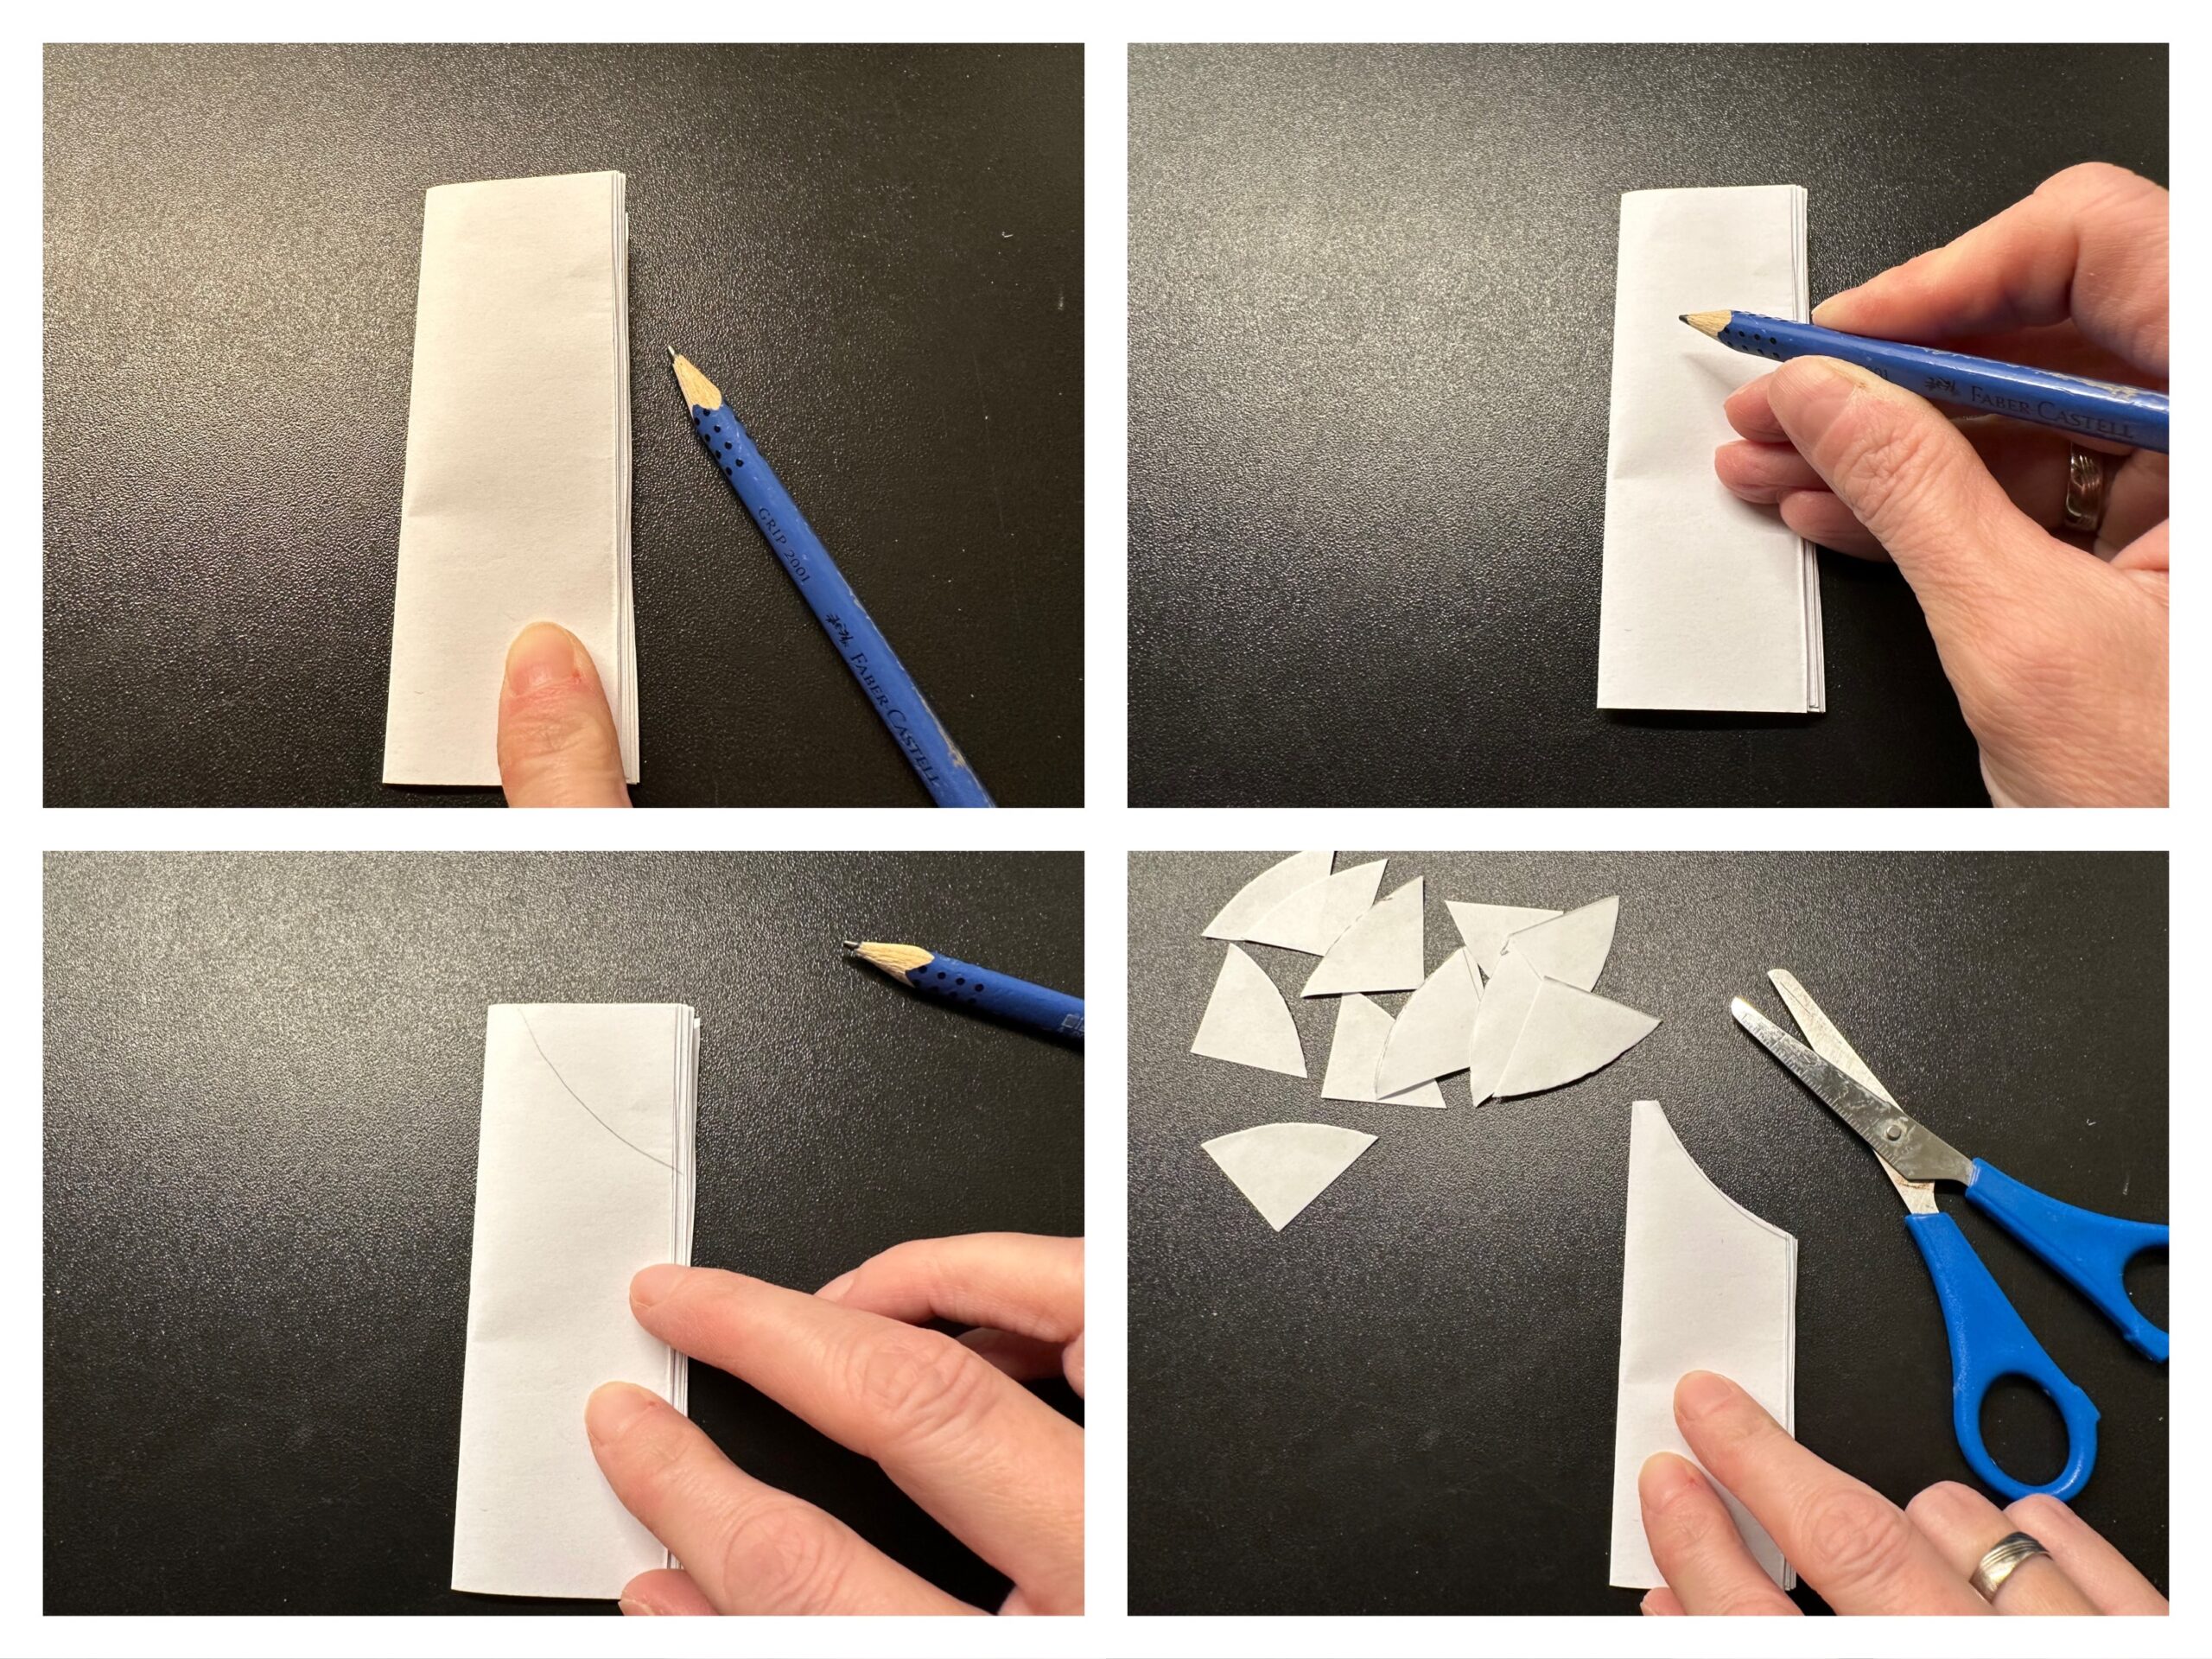
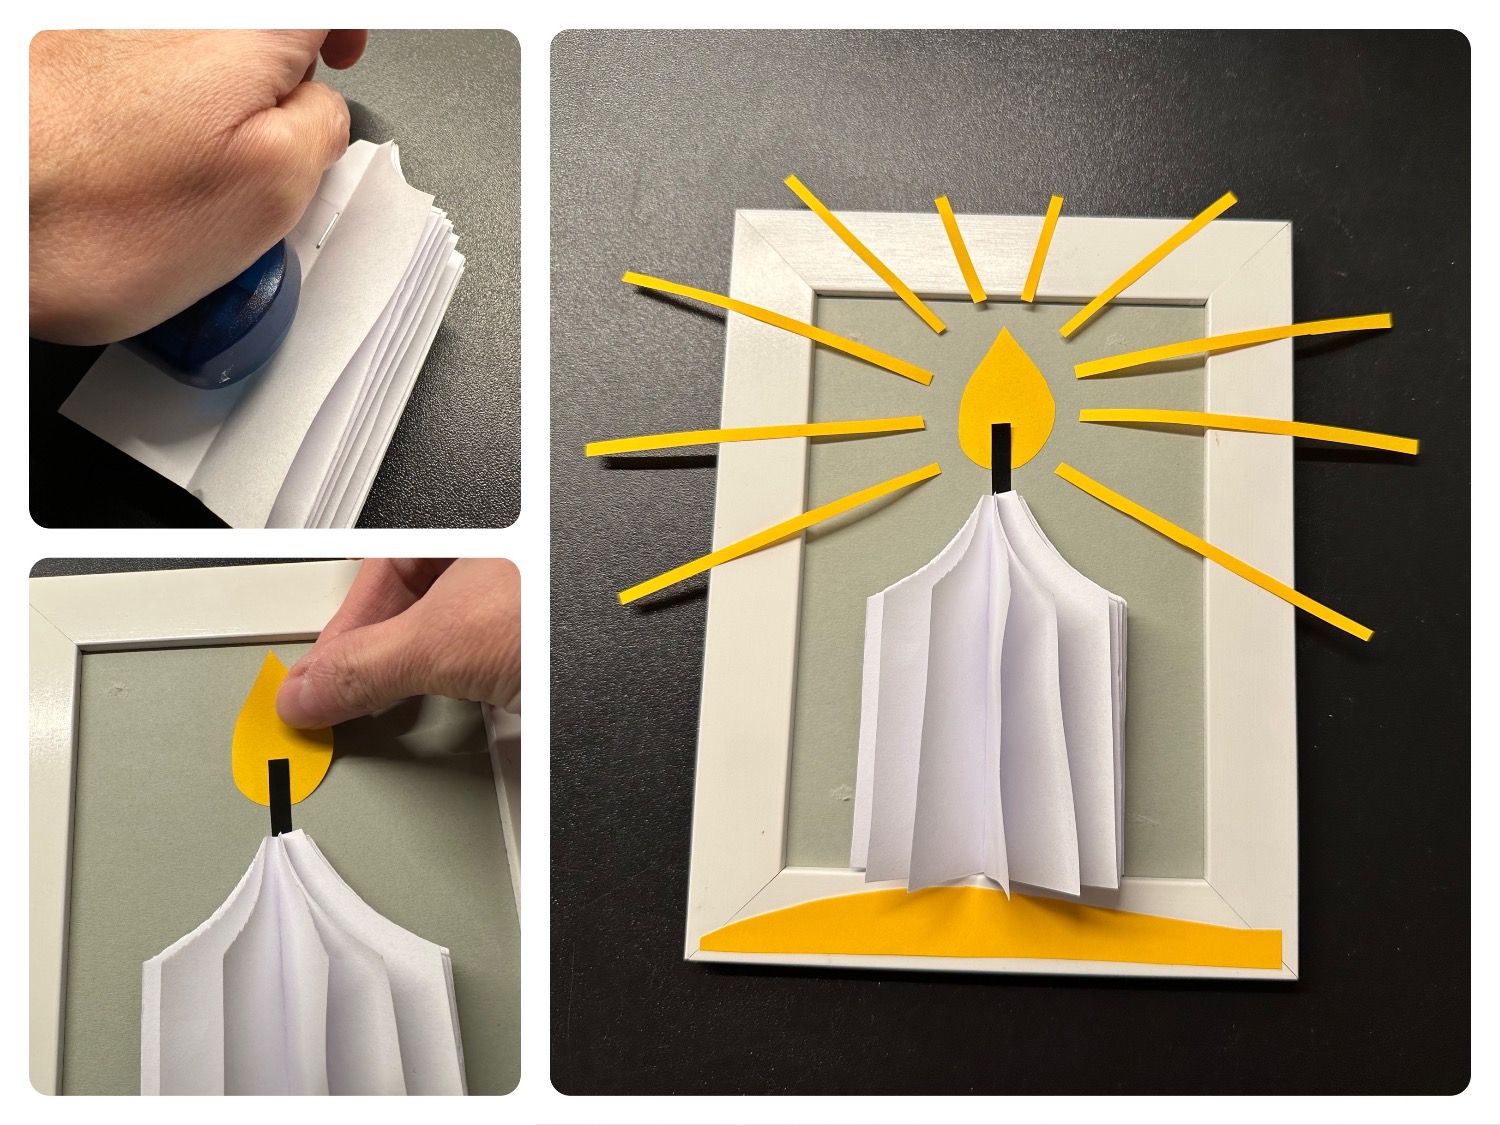
Hold the leaf bump firmly in your hand. The centre line is clearly visible (as a break). Here two clamps are put into it with the tacker. Set the tacker so that the clamps sit along the line.
Now the leaf bump is fixed and holds together.
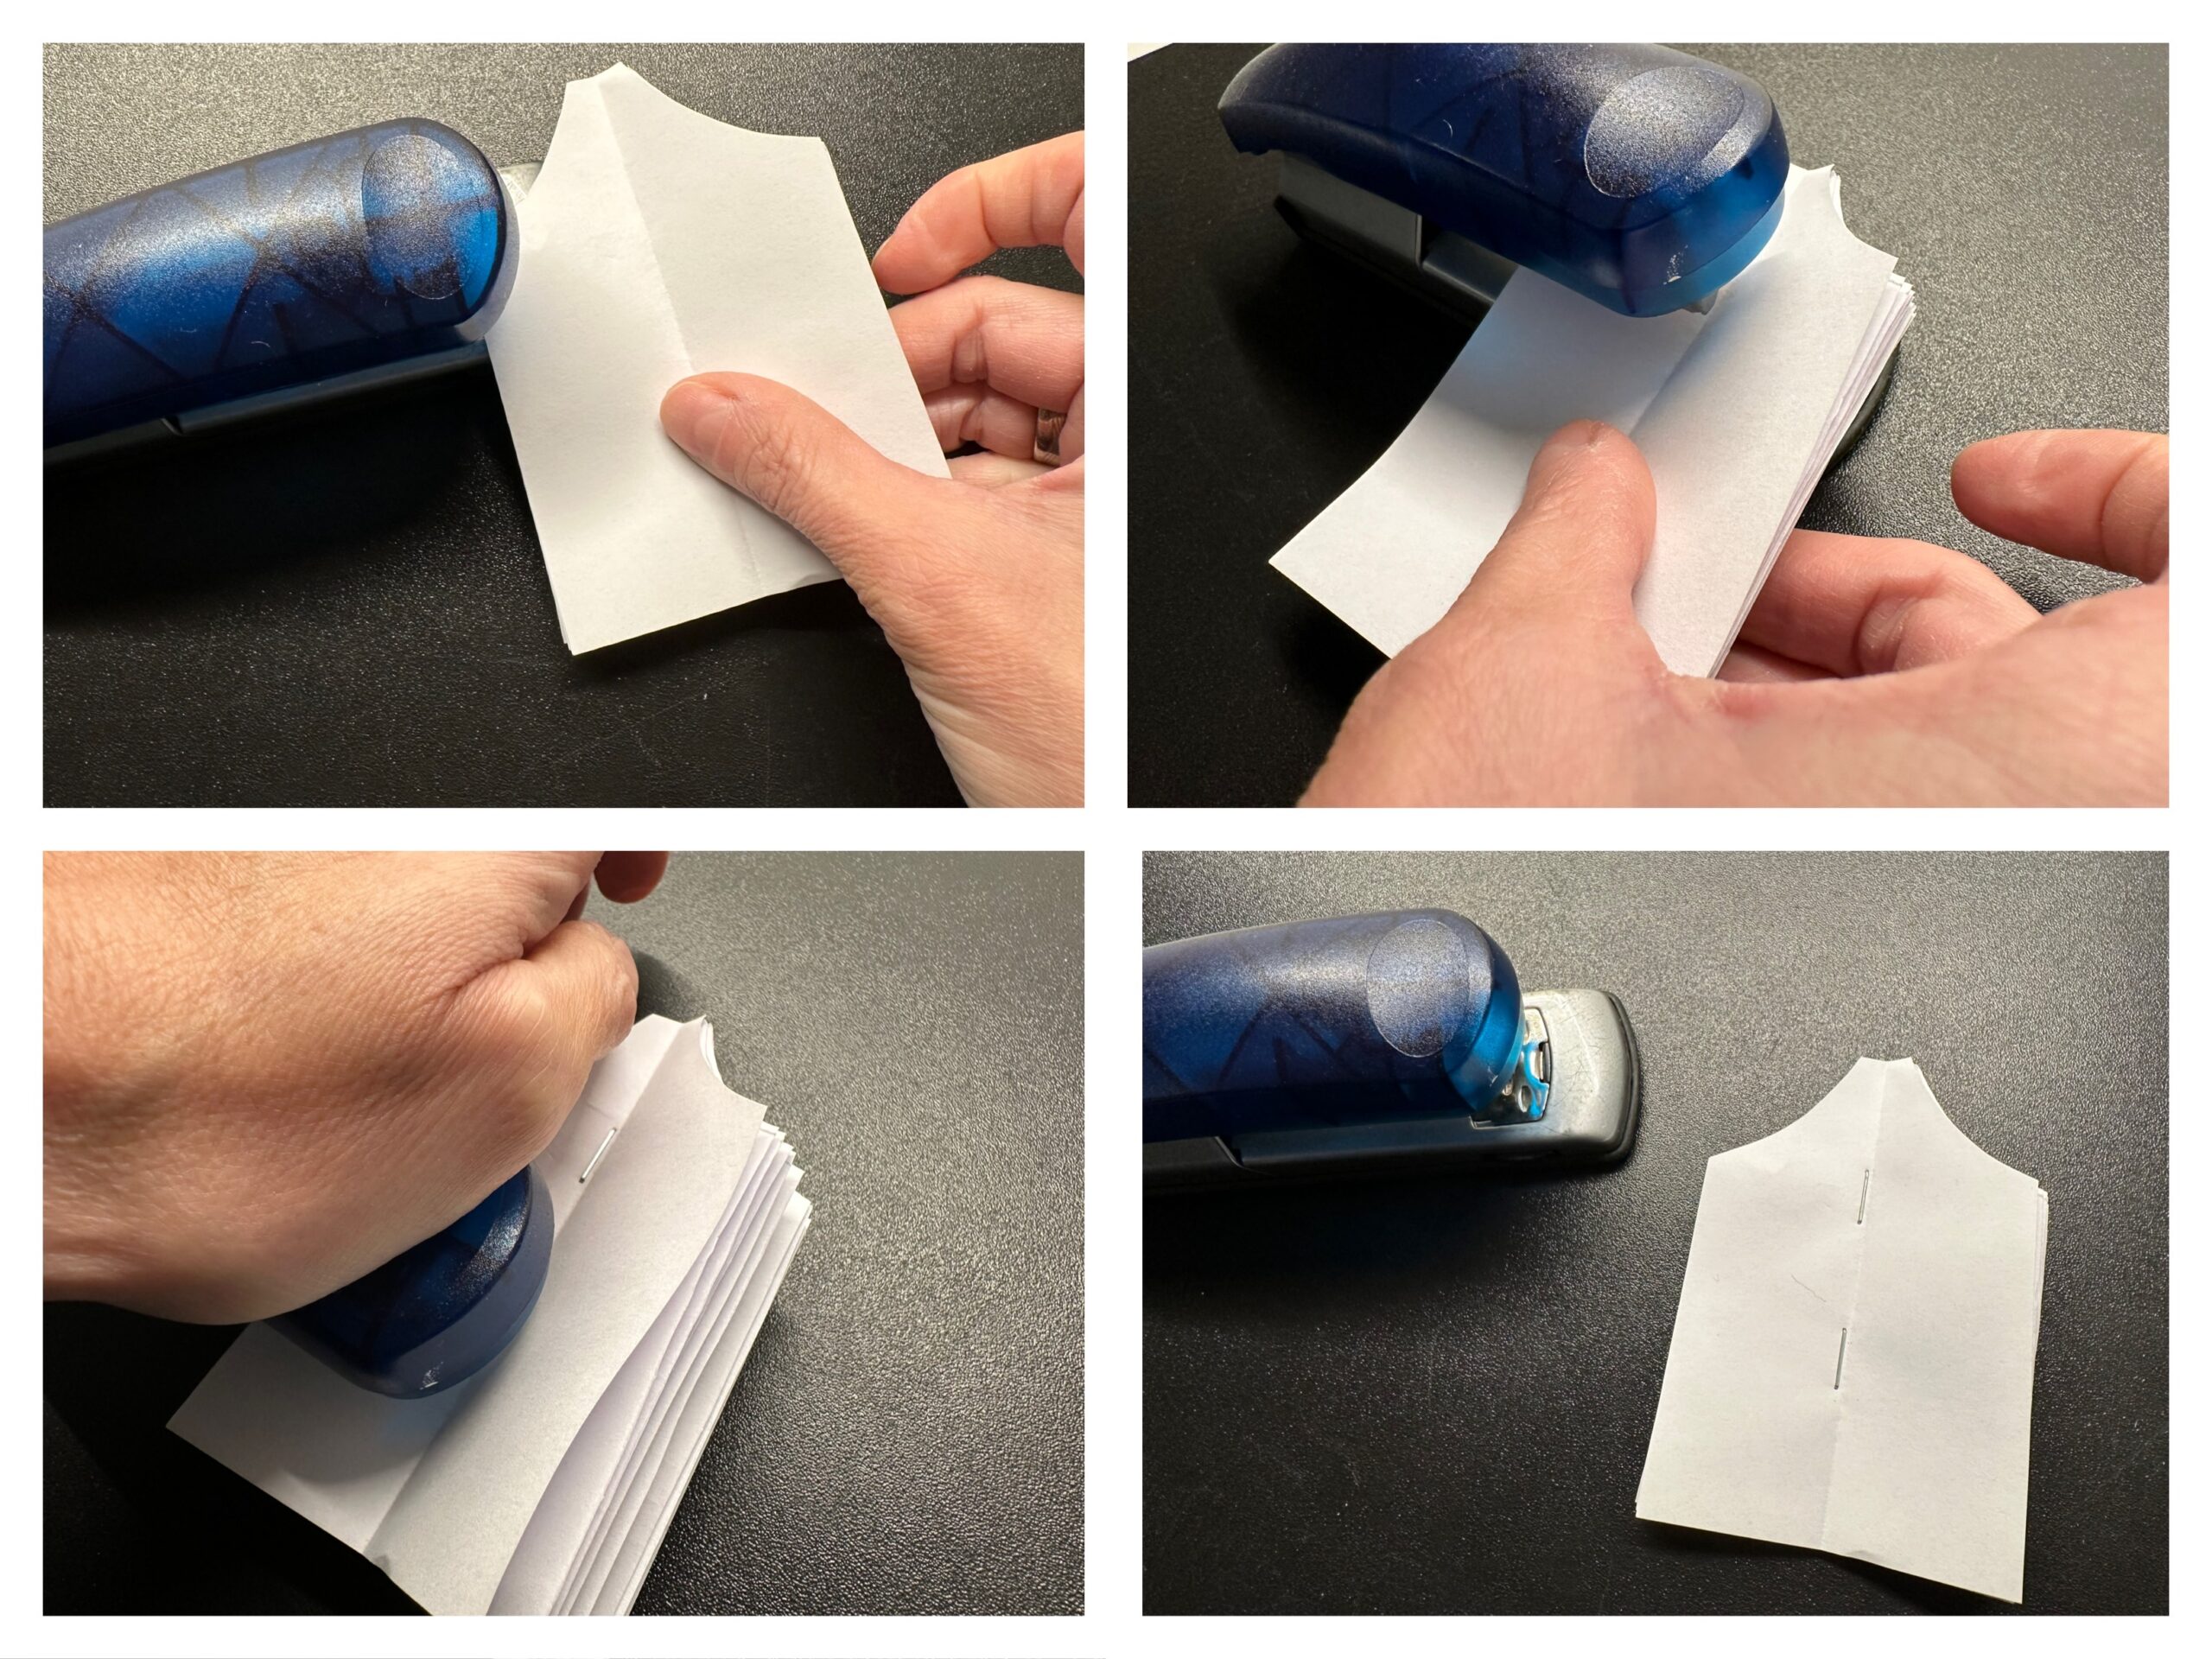
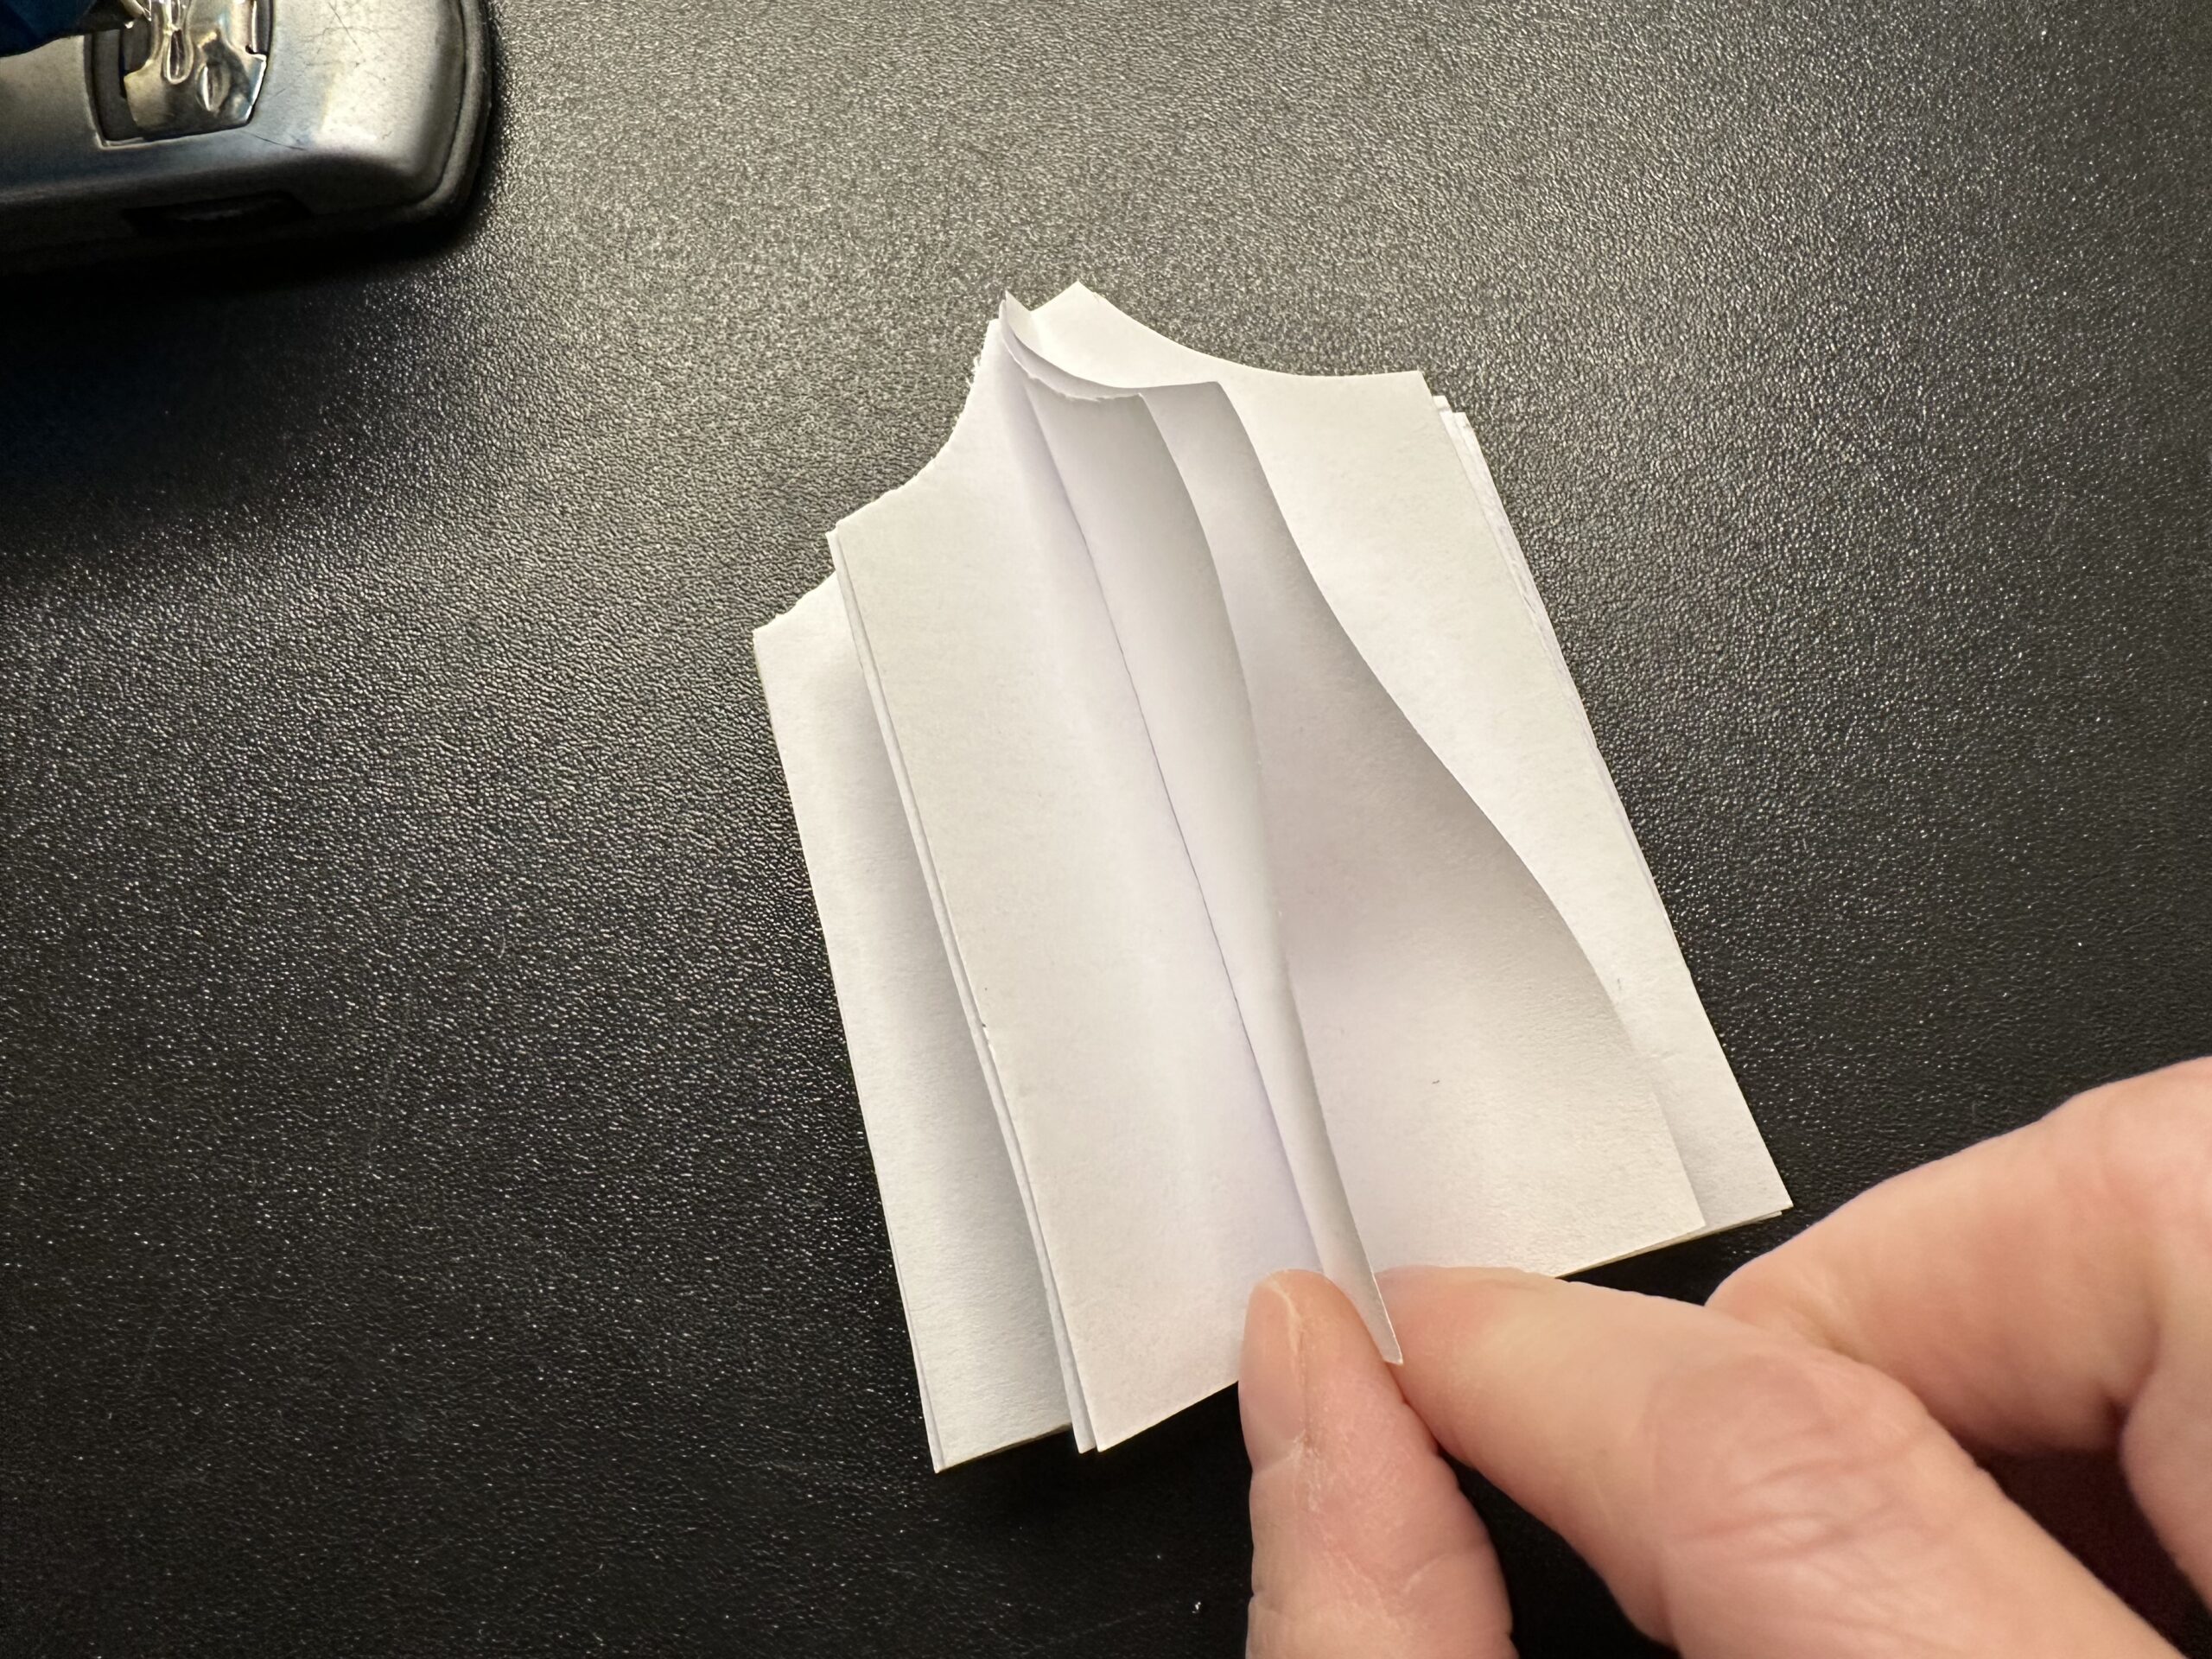
Adjusts the individual leaves that the leaf bump looks fanned. Then the candle stump is finished.
The flame is made from a yellow clay paper residue. Paints the flame in drop form and cuts it out. Cuts a wick from a black paper residue (as a small strip).
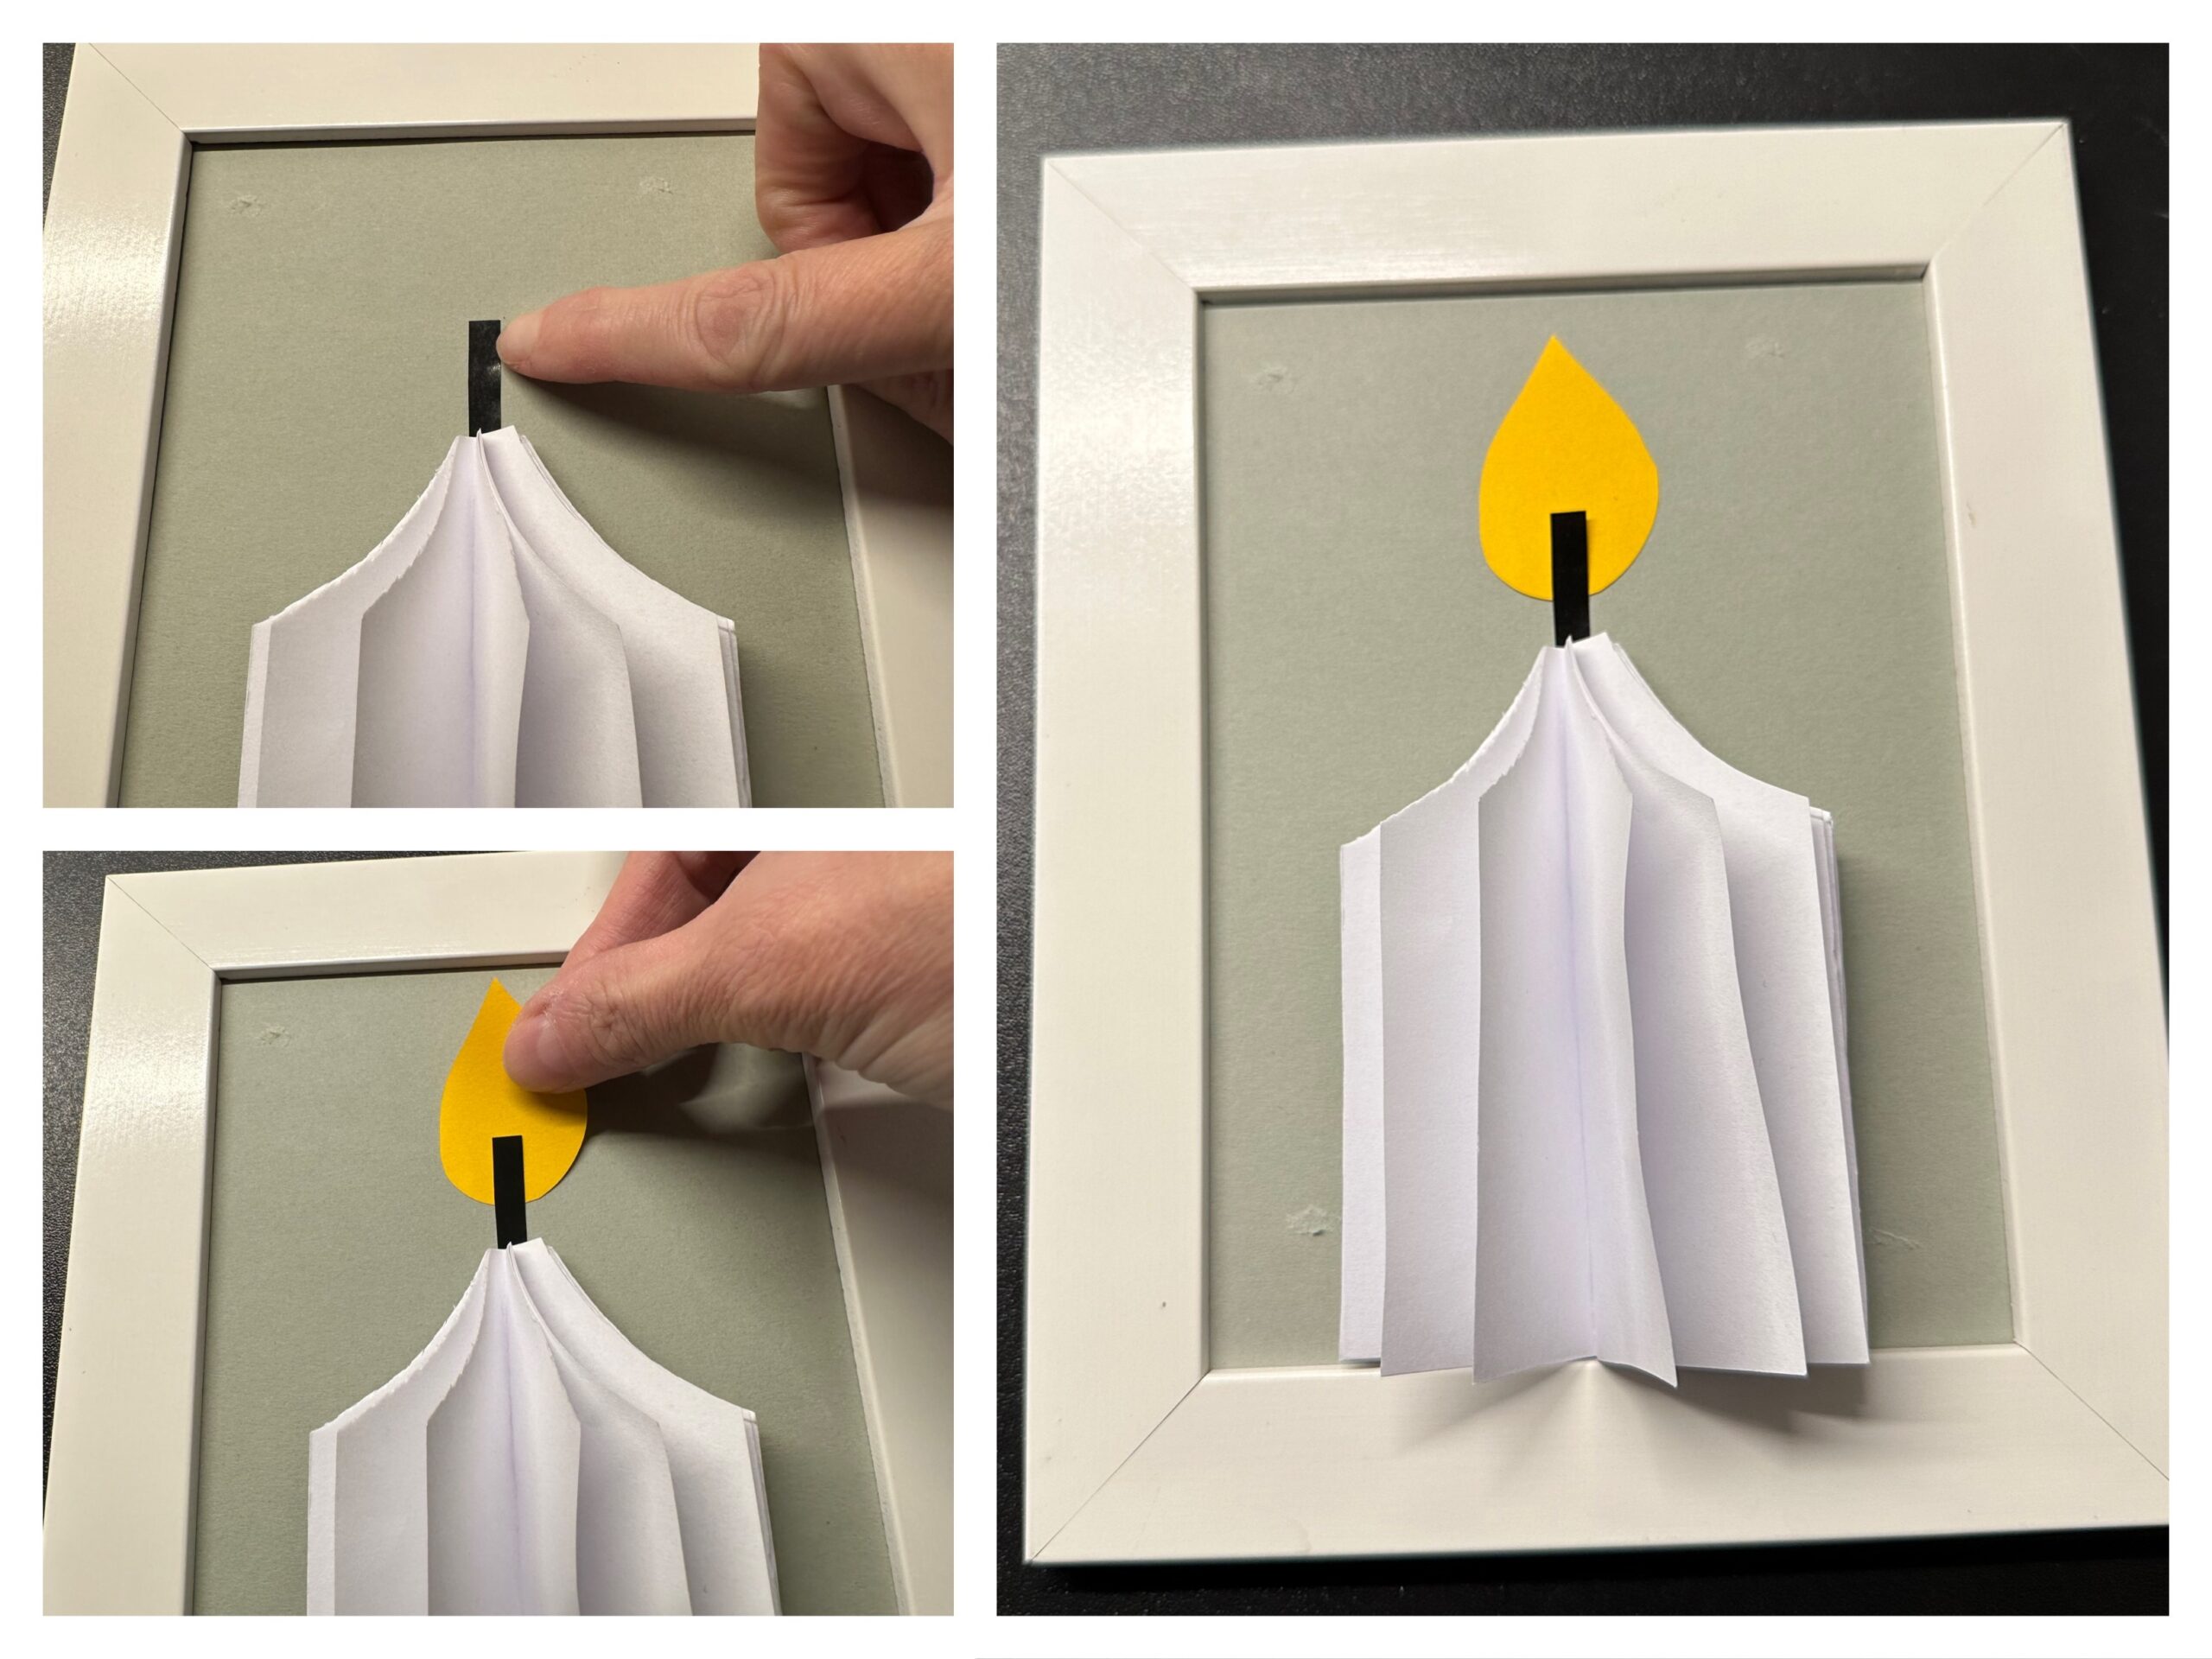
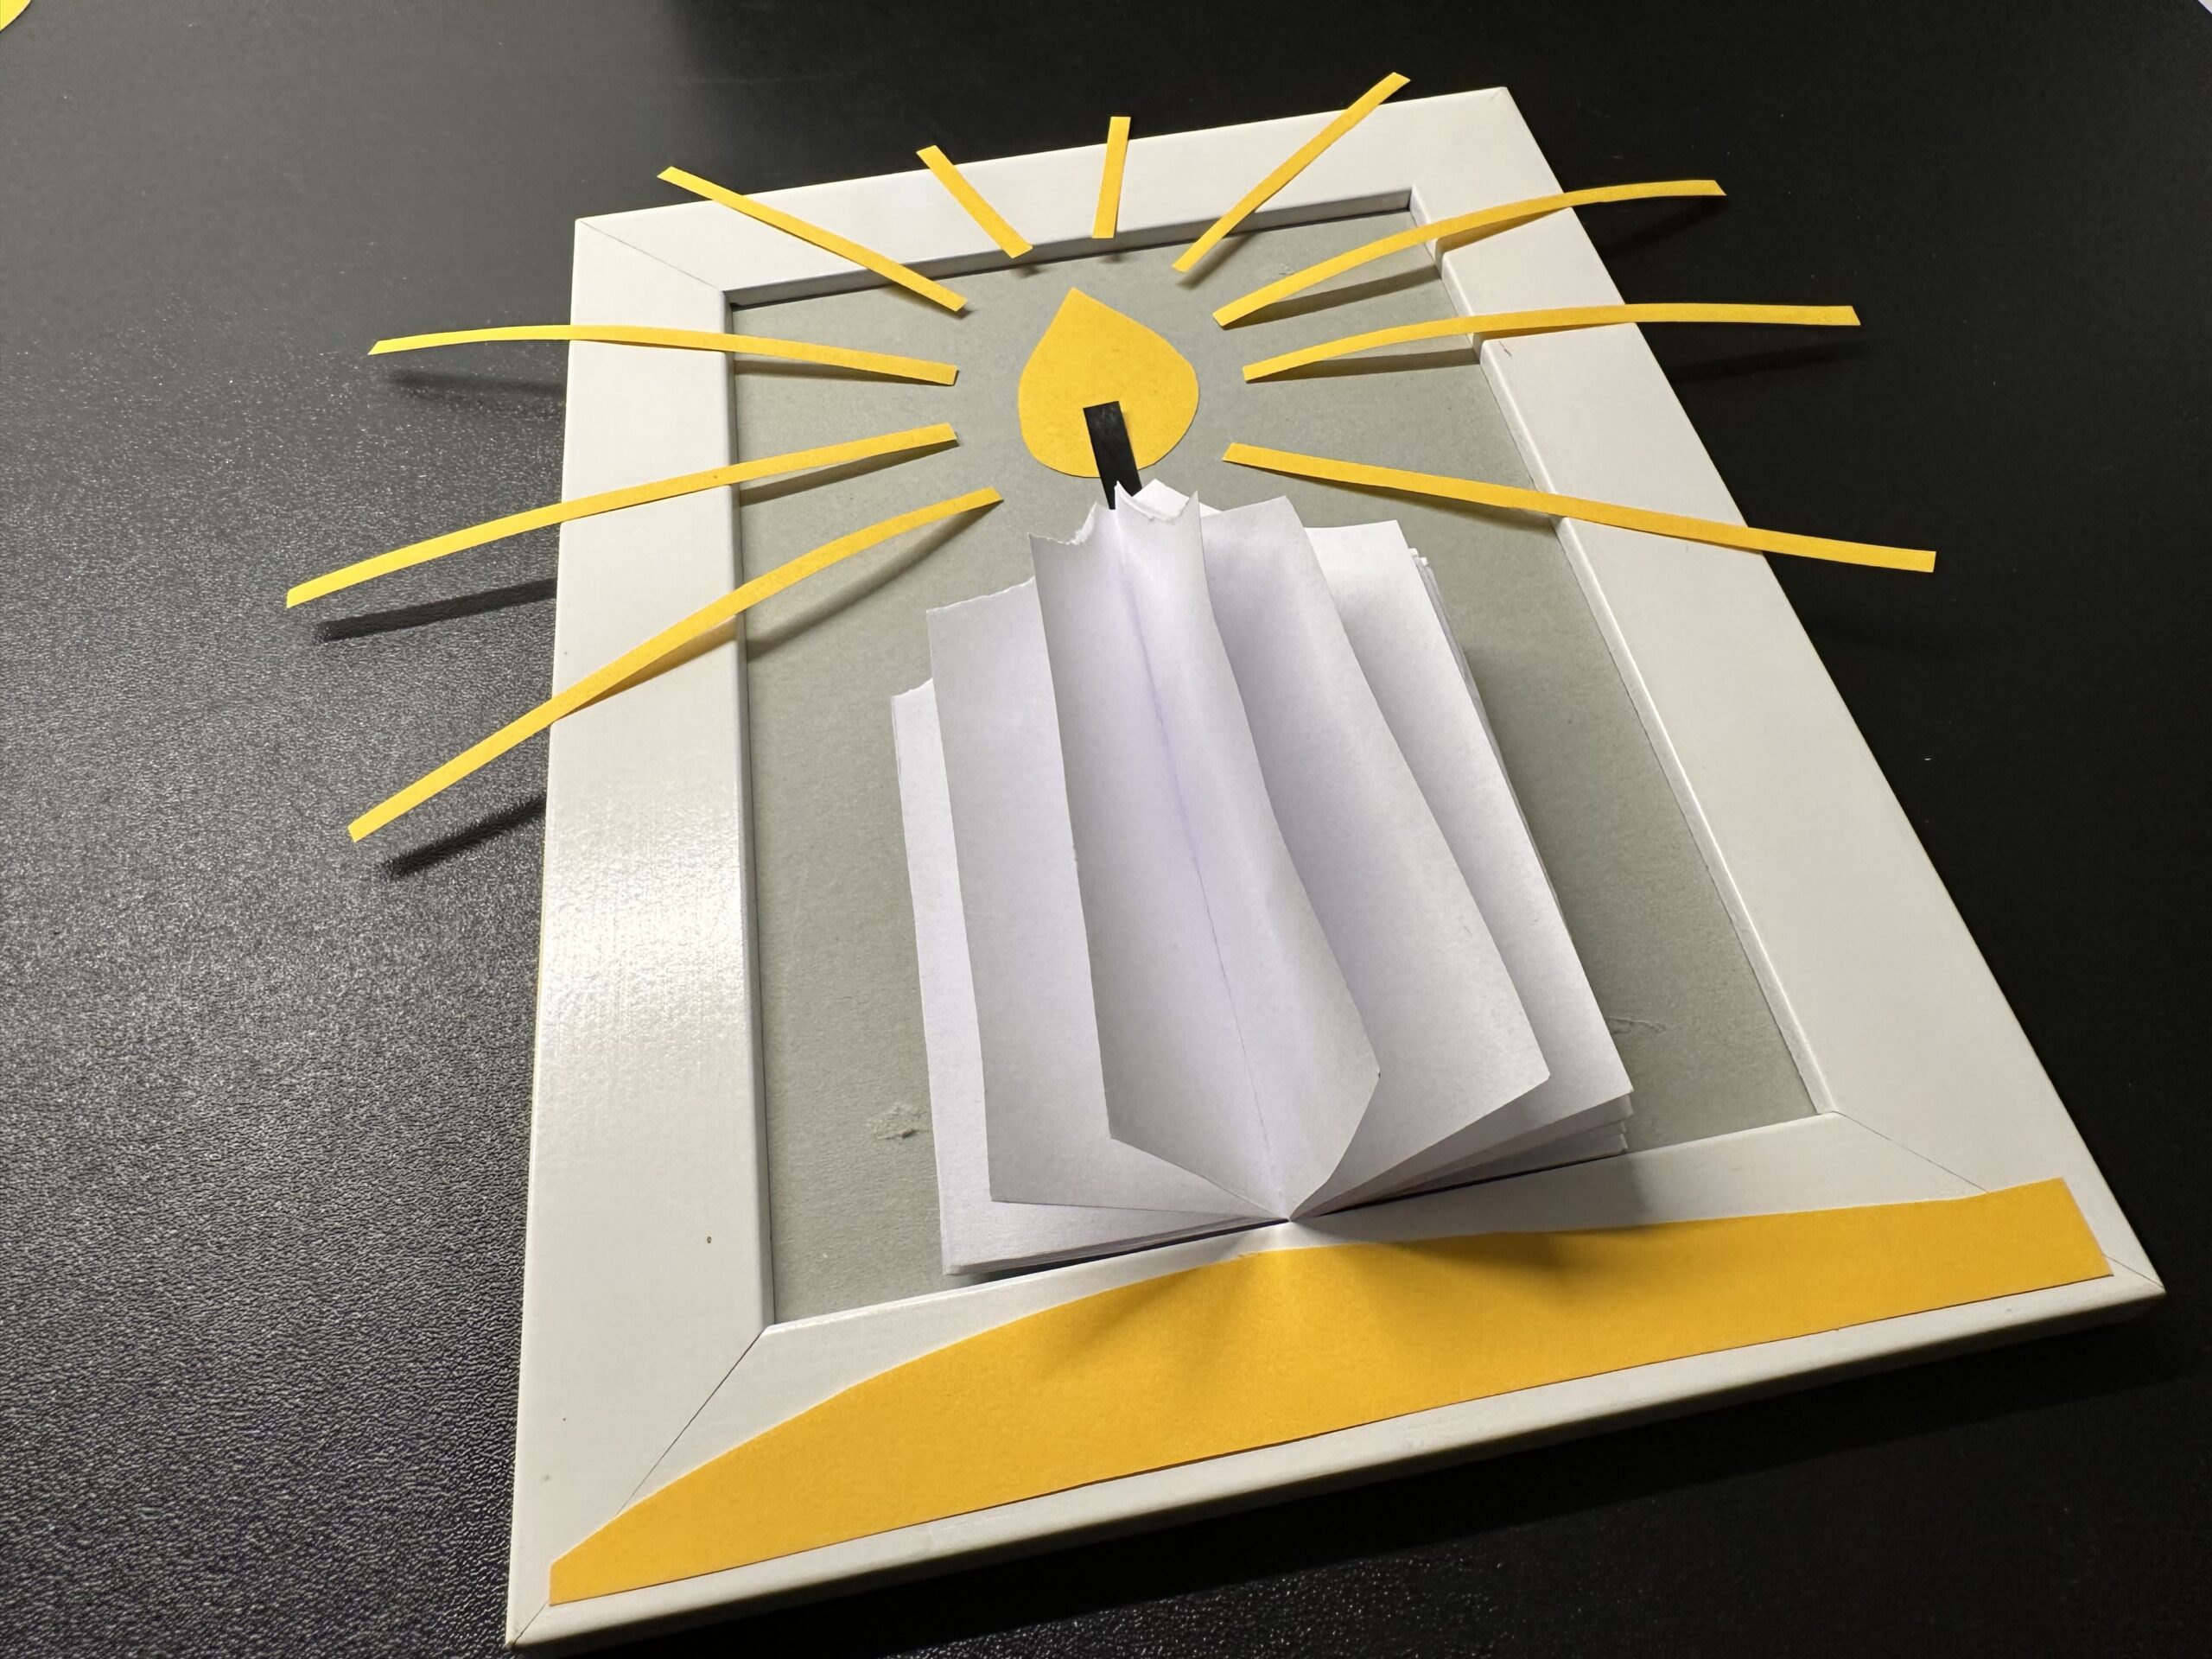
You can design the candle as a 3D card craft or as a plastic image on a picture frame.
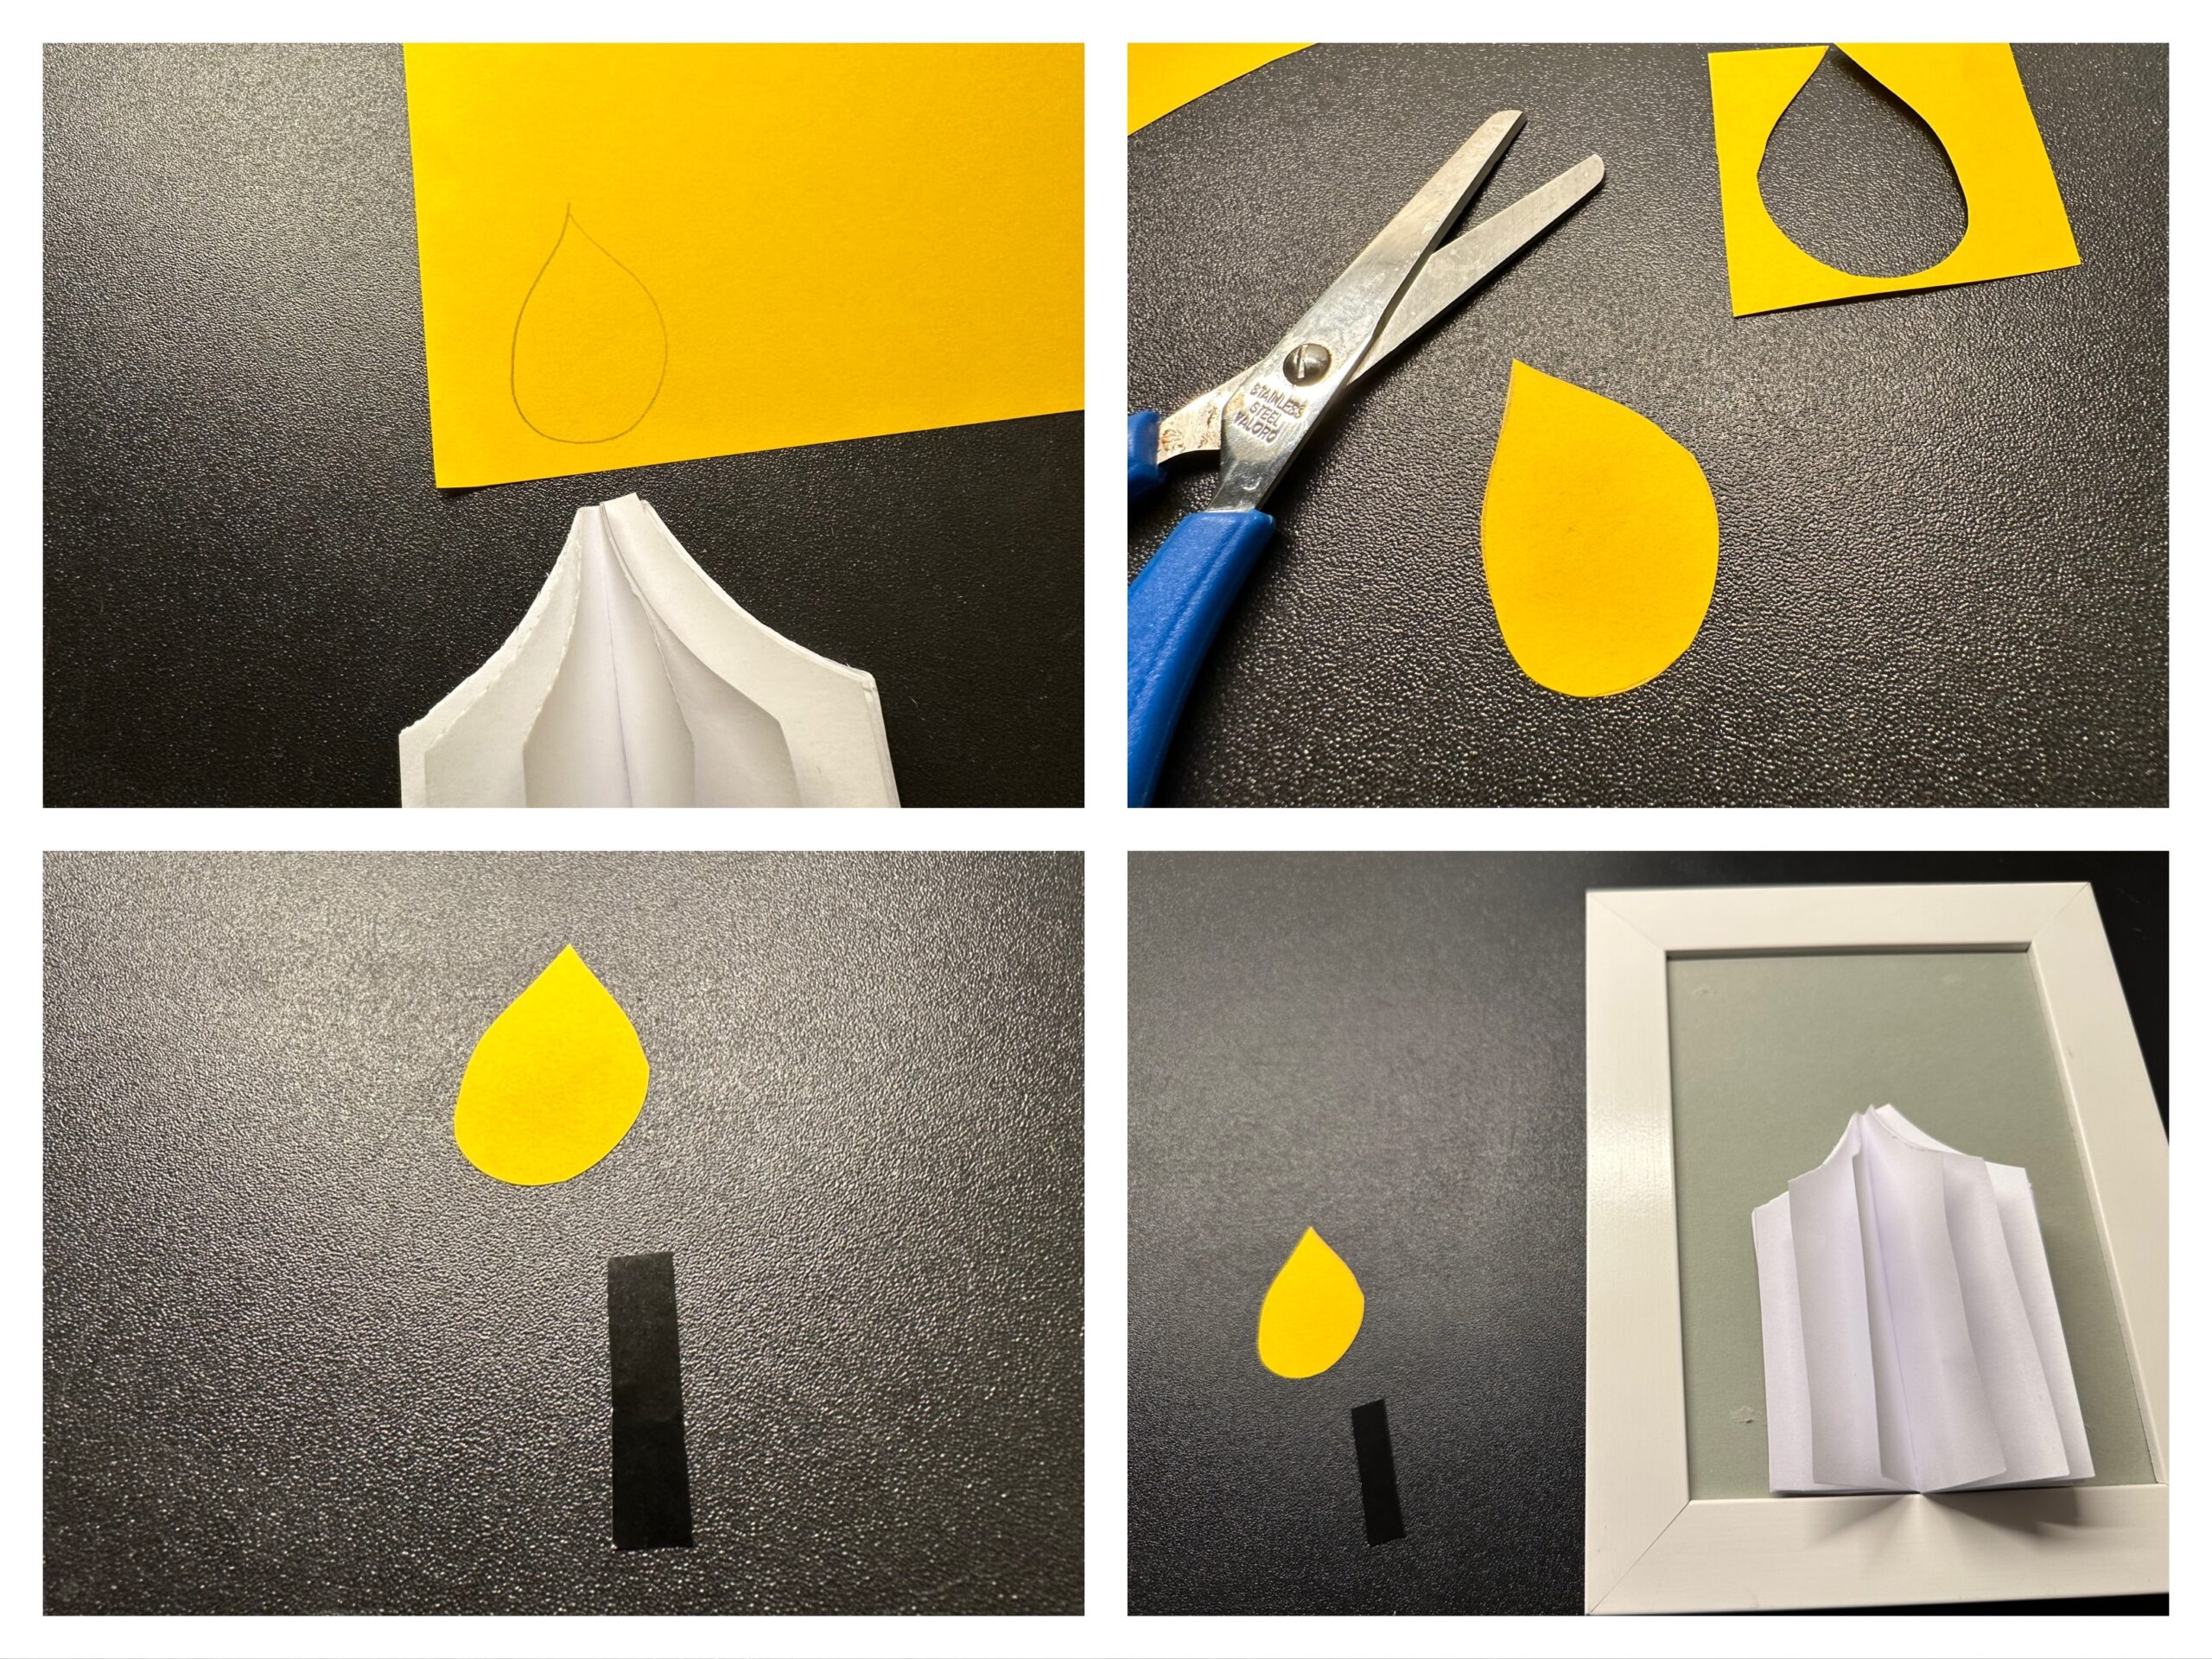
All individual parts are put together. Candle, wick and flame.
Cut out very thin strips of yellow clay paper. These are the rays of the candle flame. Put them around the flame, but leave some distance between flame and rays. You could shorten the rays or let the candle shine "outside the edge". Glue the rays only with small adhesive dots.
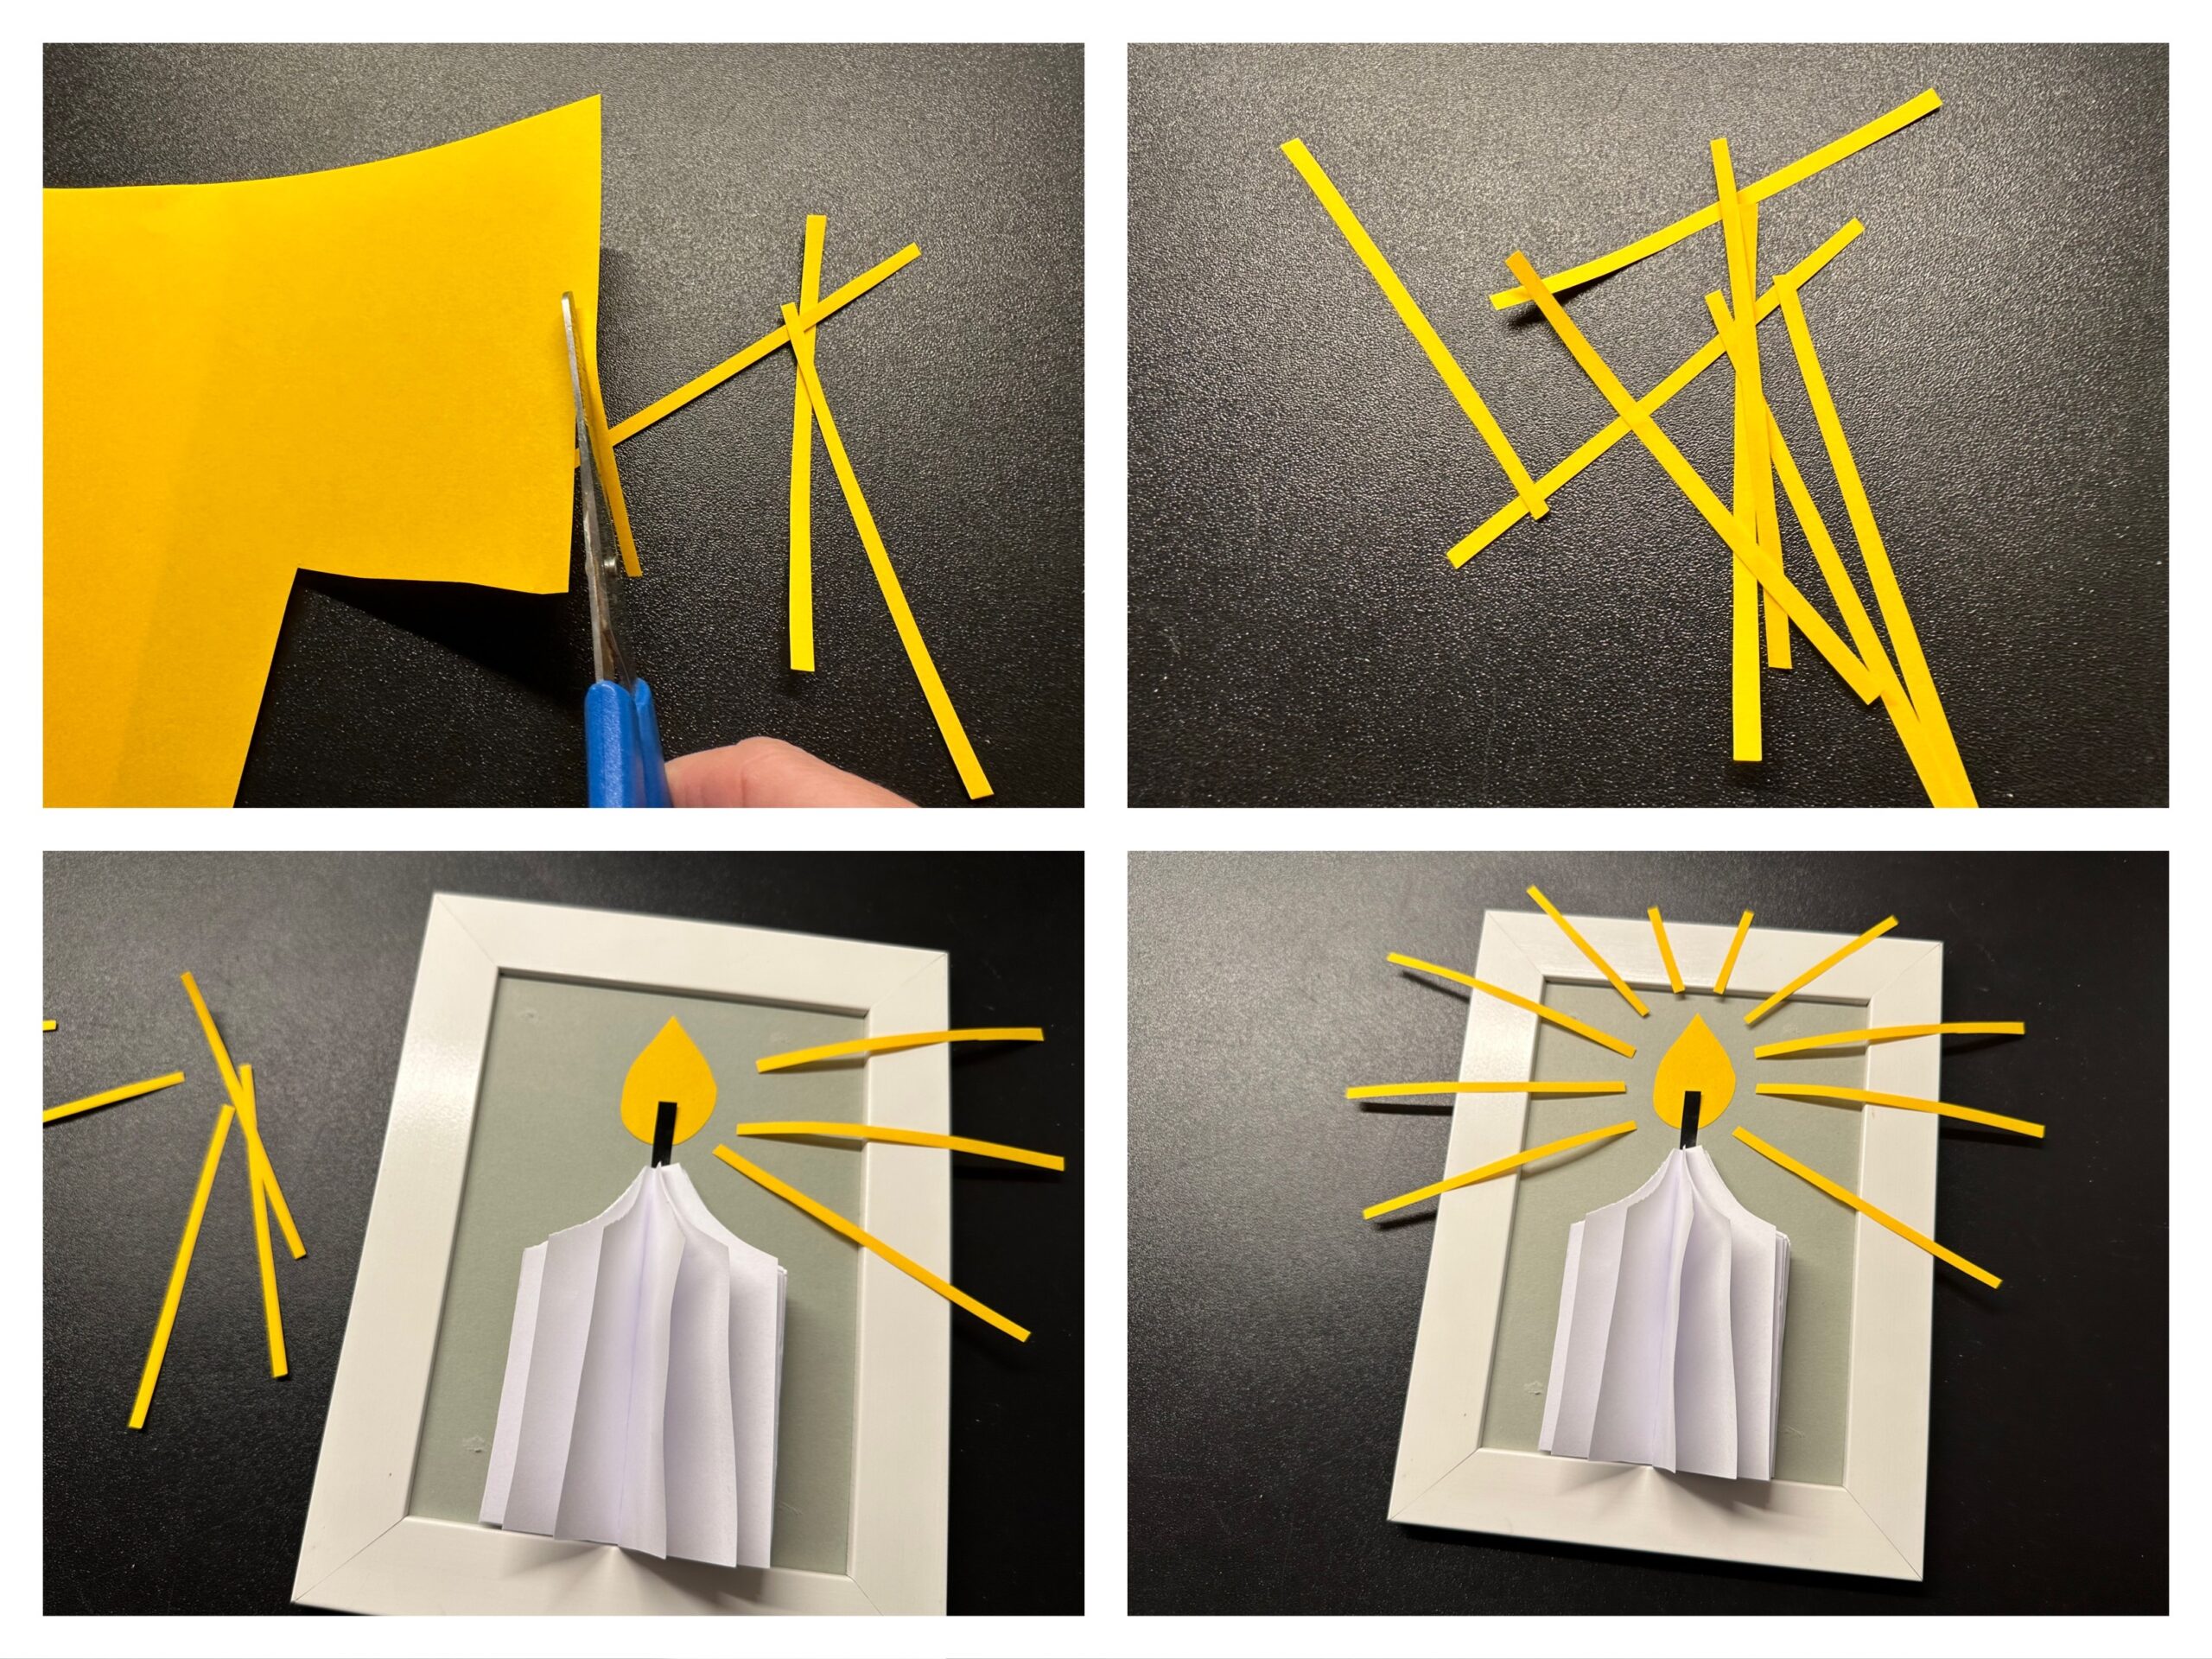
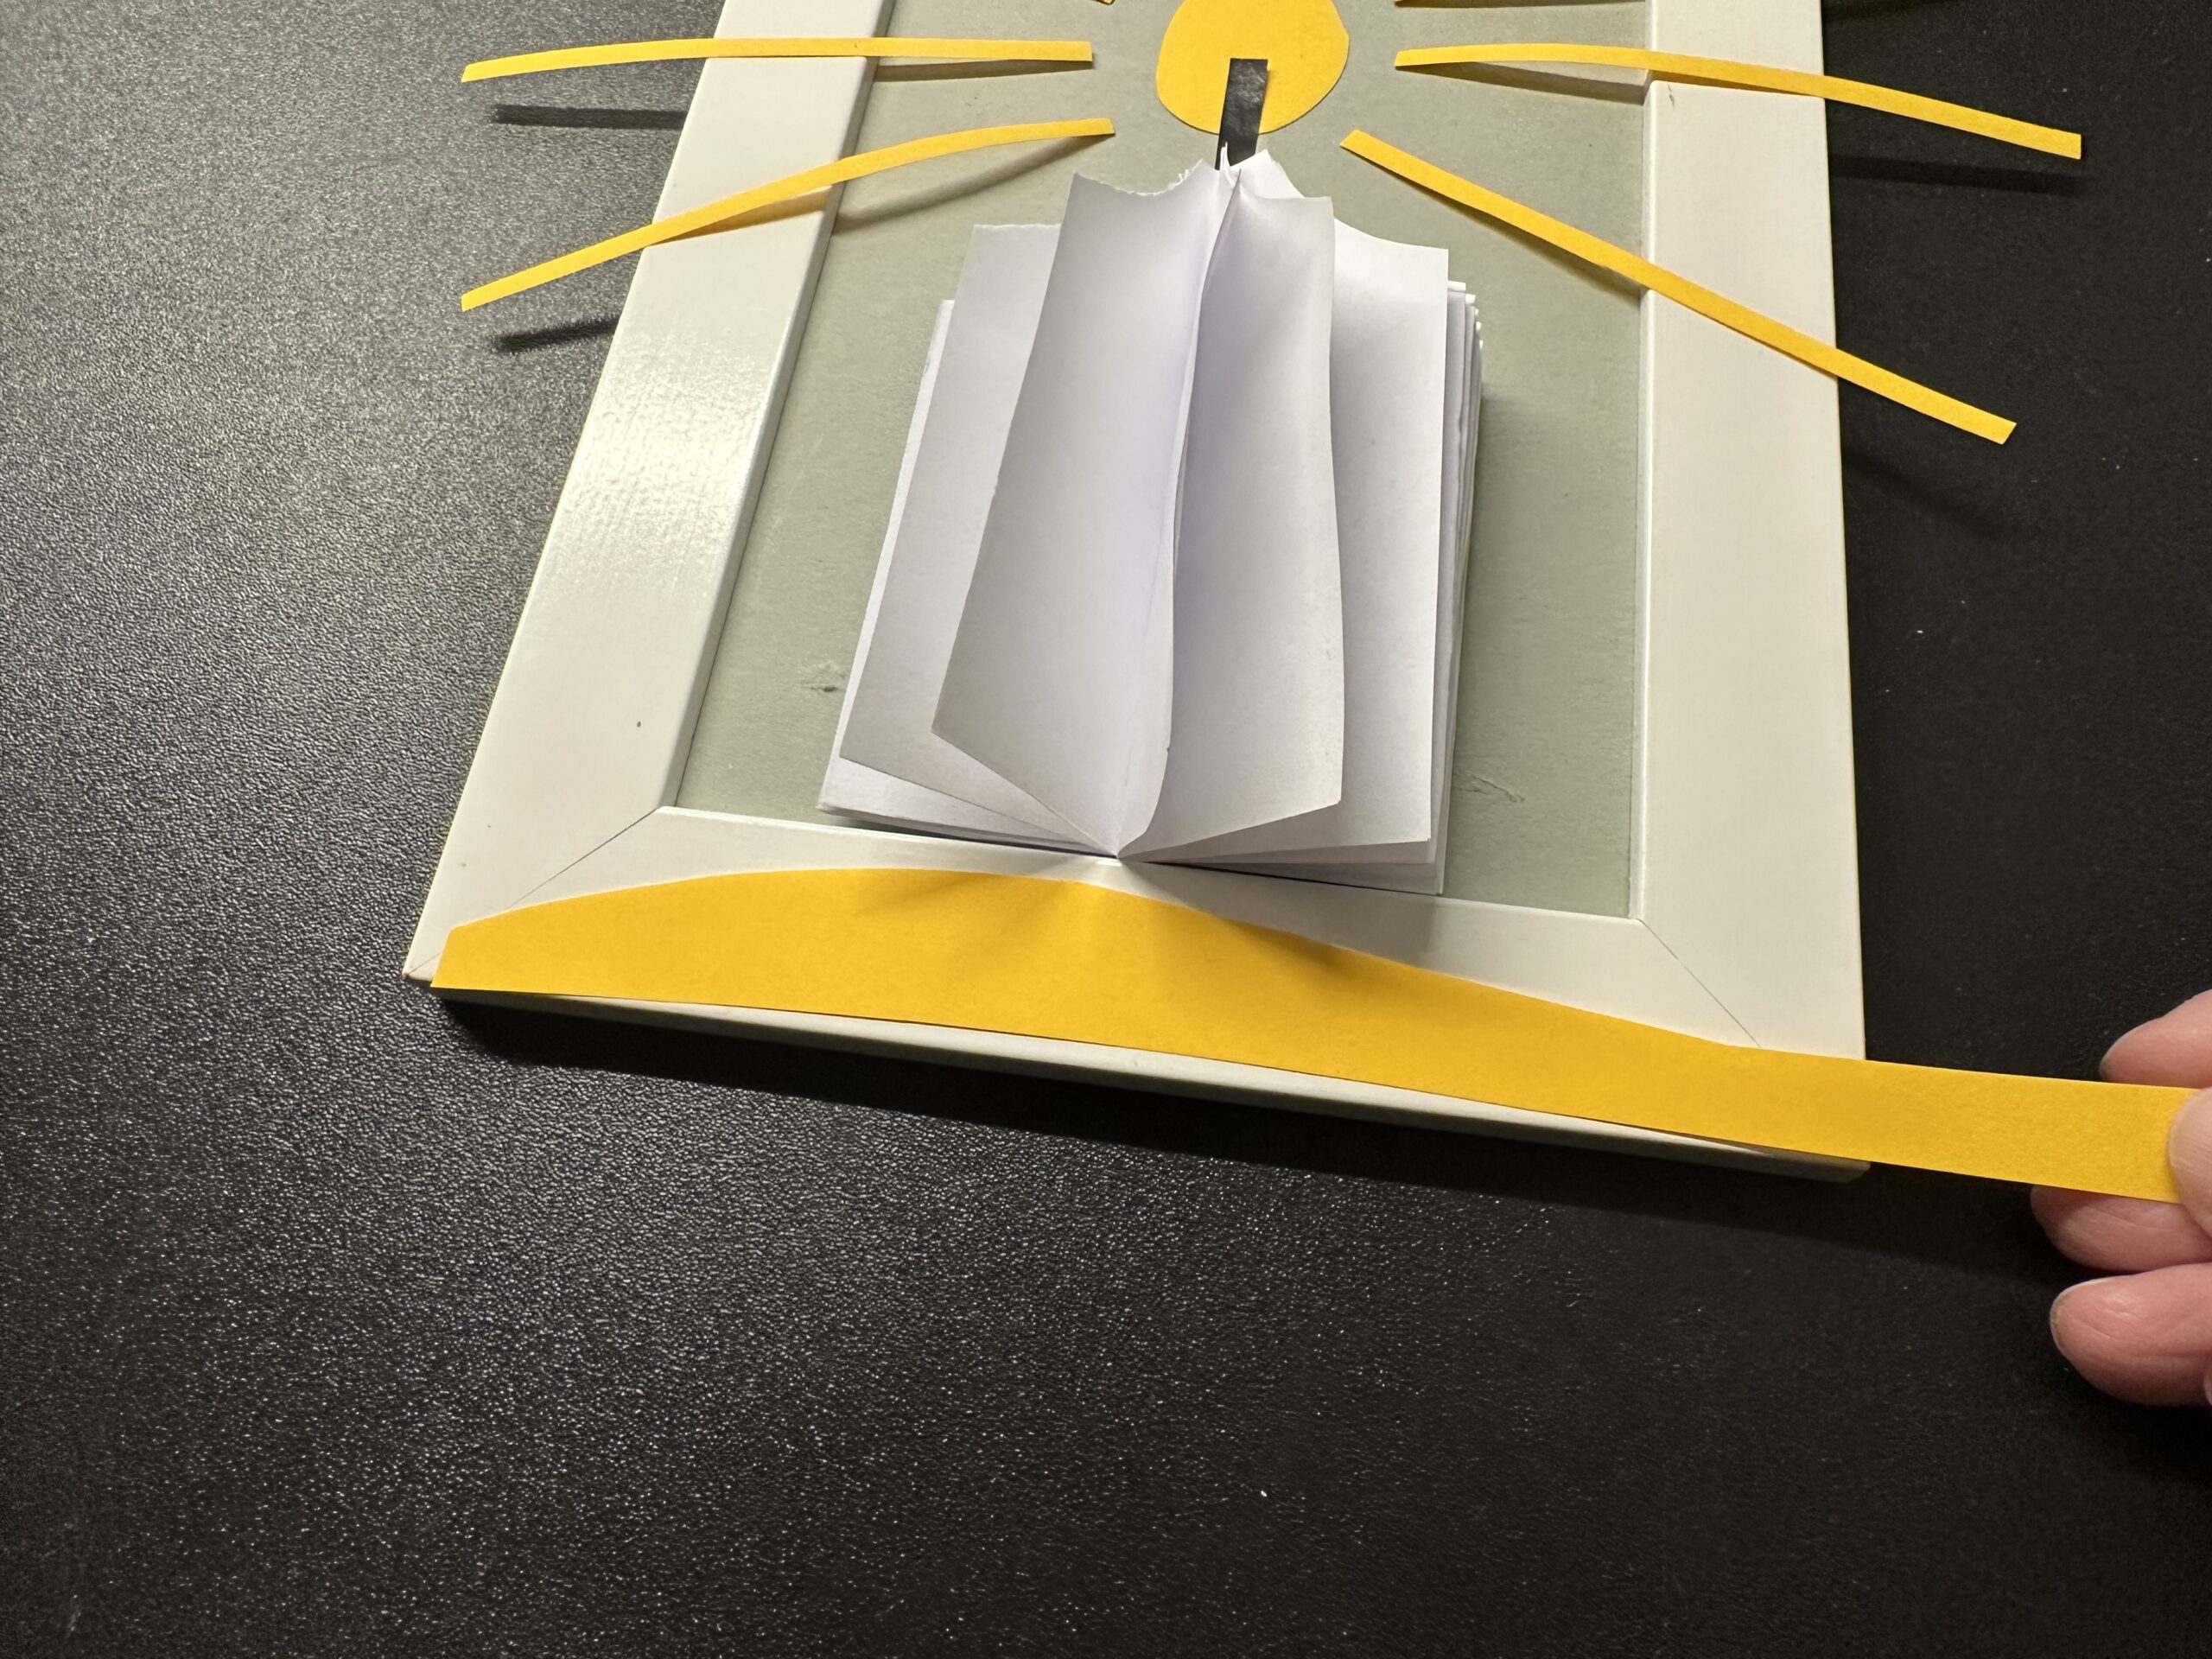
For the image to work as a unit, you could also attach a yellow strip of paper to the lower frame. You can cut it freely (well, straight... as you like).
Finished is a great 3D picture.
Stay creative.
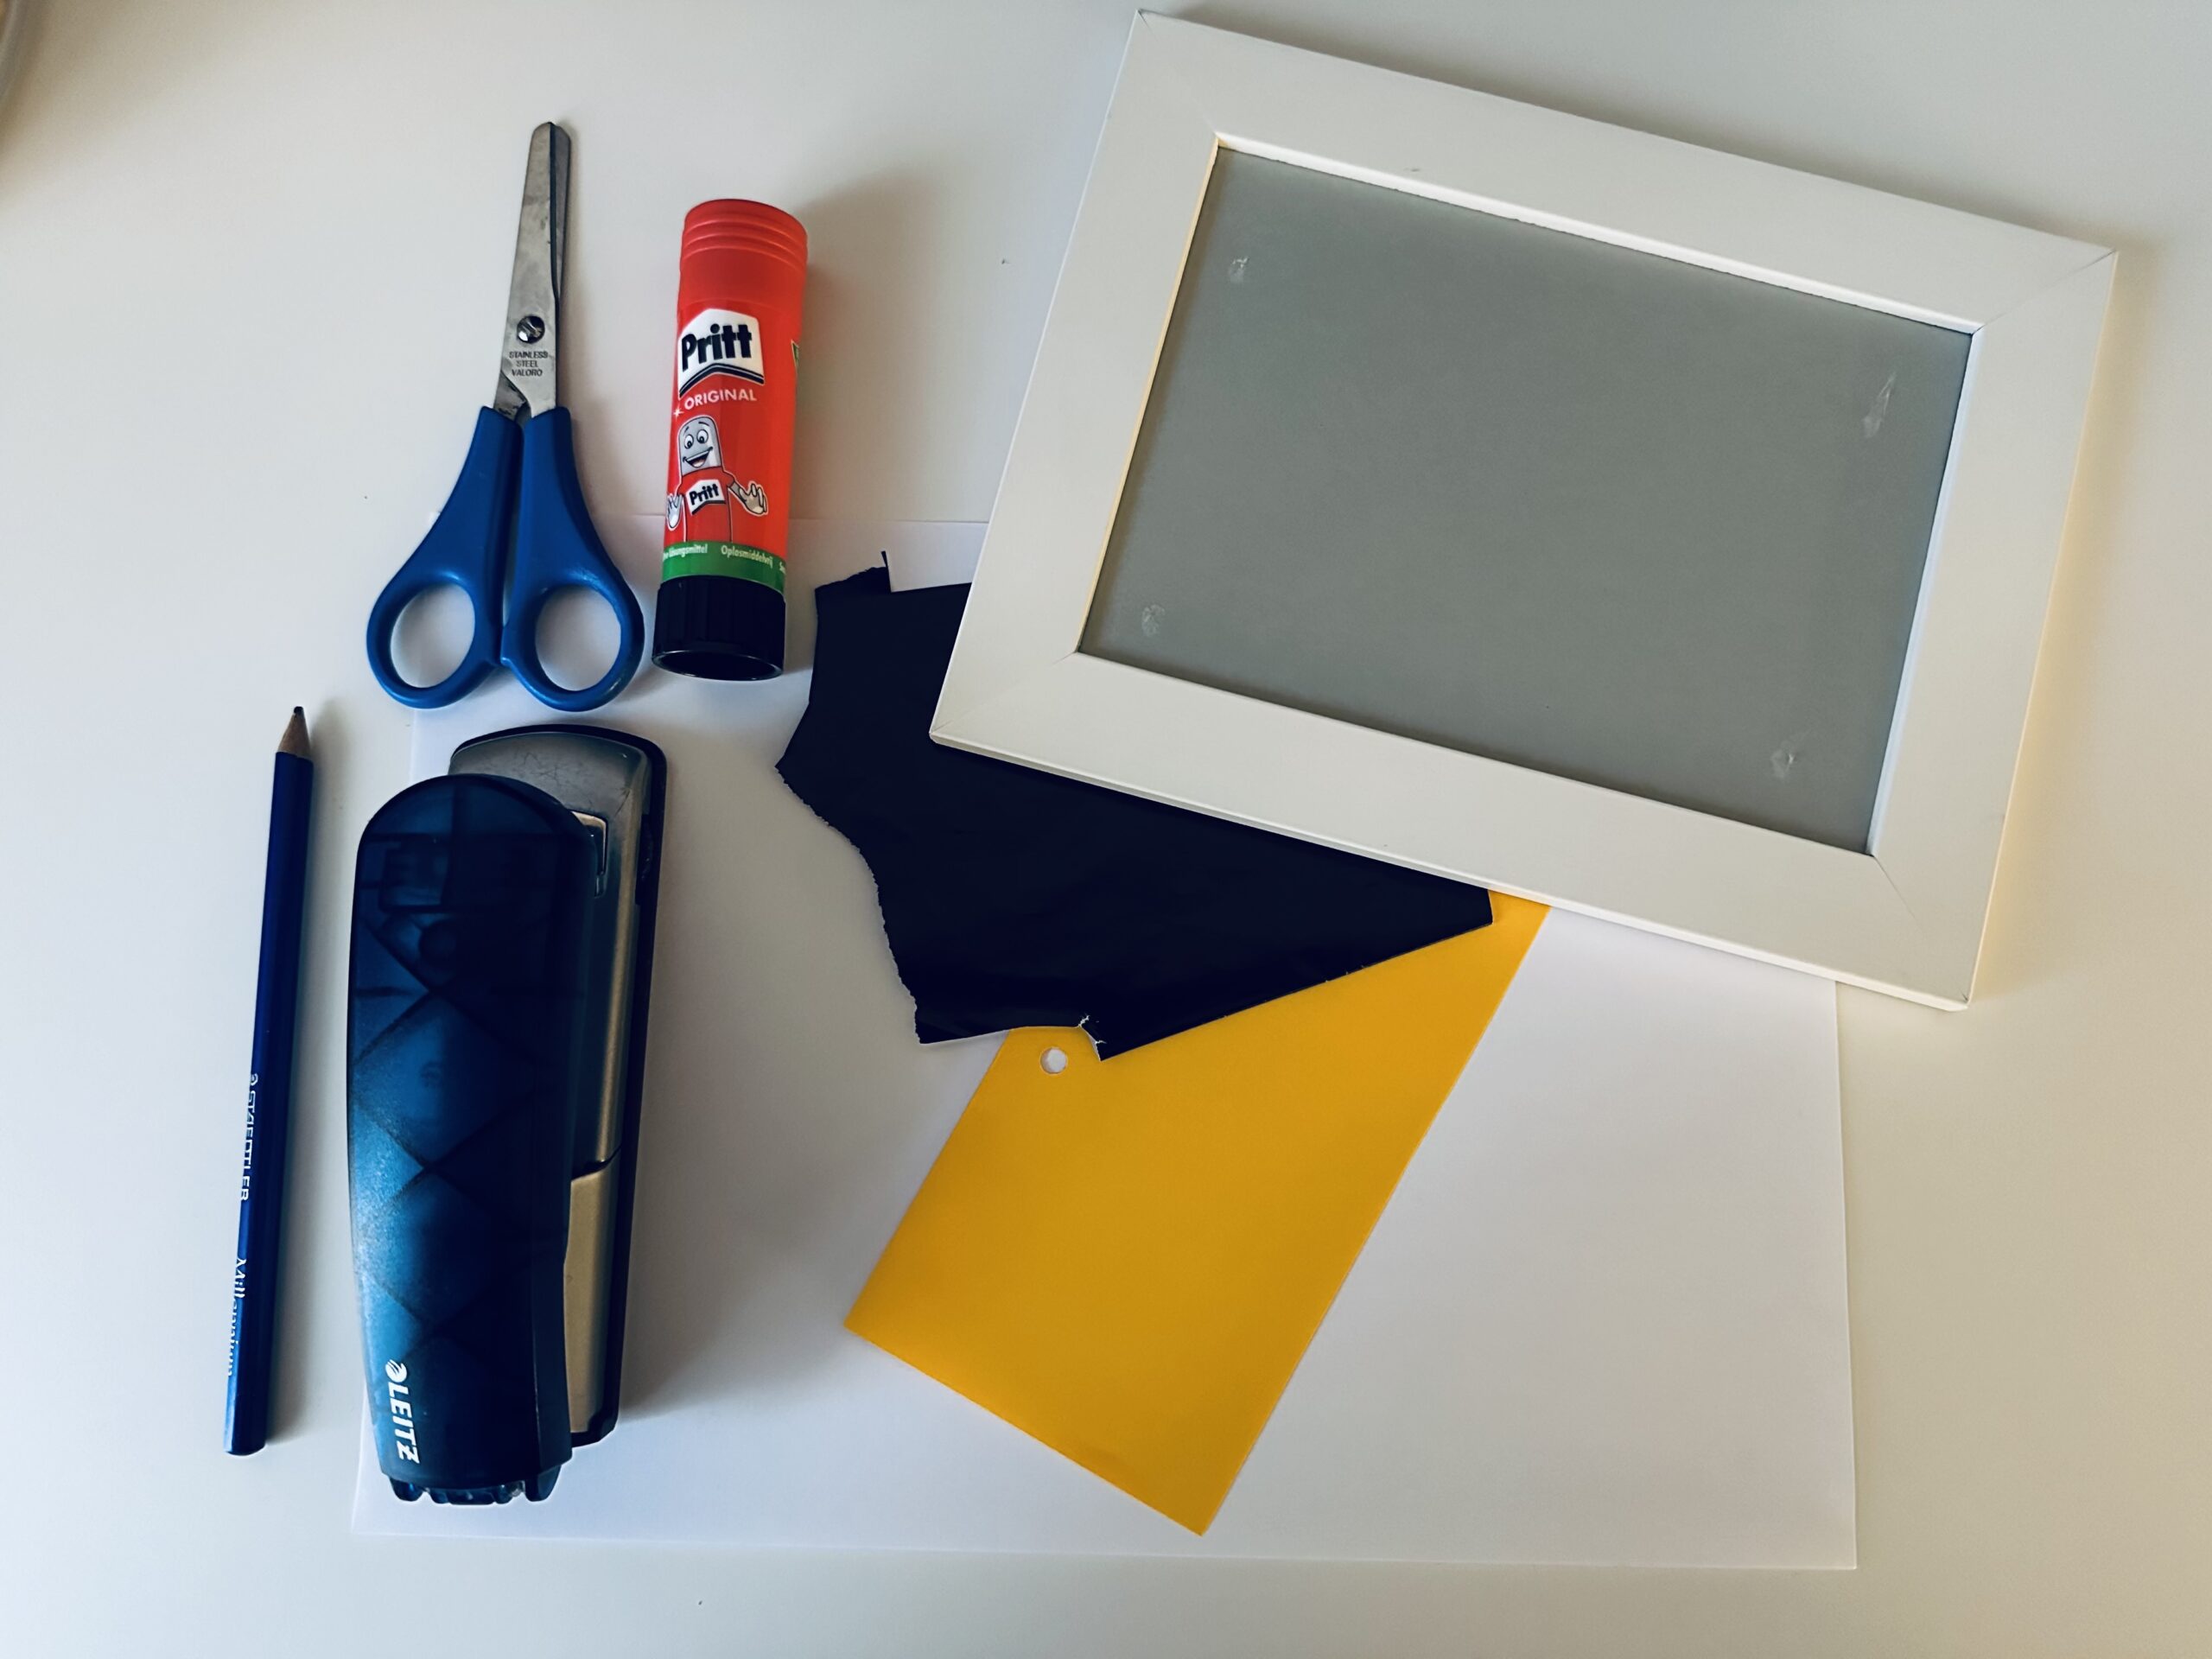
Materials
Directions
Get ready.
Take a large sheet of paper (DIN A4).
Put the sheet across you. Fold the bottom long edge upwards onto the opposite side. Gently strike the break. Then fold the paper apart again. Cuts along the break down the paper. You get two same strips.
Put a strip of paper up in front of you. Fold the lower edge of the paper upwards. Gently strike the break. Fold the sheet apart again. The break now shows you the middle. Now fold the short sides from both sides to the middle line and brush the breaks smoothly.
Now fold all folds apart again. Now you can cut the clearly visible fracture lines apart with the scissors.
Do the same with the second strip of paper.
Place a small leaf across you and fold the lower edge onto the upper edge. Repeat this on all leaves.
Now put the folded leaves together. Make sure that they lie exactly in each other.
Hold on to the leaves so that they don't slip. Put the leaves folded together in front of you. Paint a curved slant with a pen to the top of the "candle". The place, other is the fracture, is the highest point of the candle. Cut off the slant.
Hold the leaf bump firmly in your hand. The centre line is clearly visible (as a break). Here two clamps are put into it with the tacker. Set the tacker so that the clamps sit along the line.
Now the leaf bump is fixed and holds together.
Adjusts the individual leaves that the leaf bump looks fanned. Then the candle stump is finished.
The flame is made from a yellow clay paper residue. Paints the flame in drop form and cuts it out. Cuts a wick from a black paper residue (as a small strip).
You can design the candle as a 3D card craft or as a plastic image on a picture frame.
All individual parts are put together. Candle, wick and flame.
Cut out very thin strips of yellow clay paper. These are the rays of the candle flame. Put them around the flame, but leave some distance between flame and rays. You could shorten the rays or let the candle shine "outside the edge". Glue the rays only with small adhesive dots.
For the image to work as a unit, you could also attach a yellow strip of paper to the lower frame. You can cut it freely (well, straight... as you like).
Finished is a great 3D picture.
Stay creative.
Follow us on Facebook , Instagram and Pinterest
Don't miss any more adventures: Our bottle mail