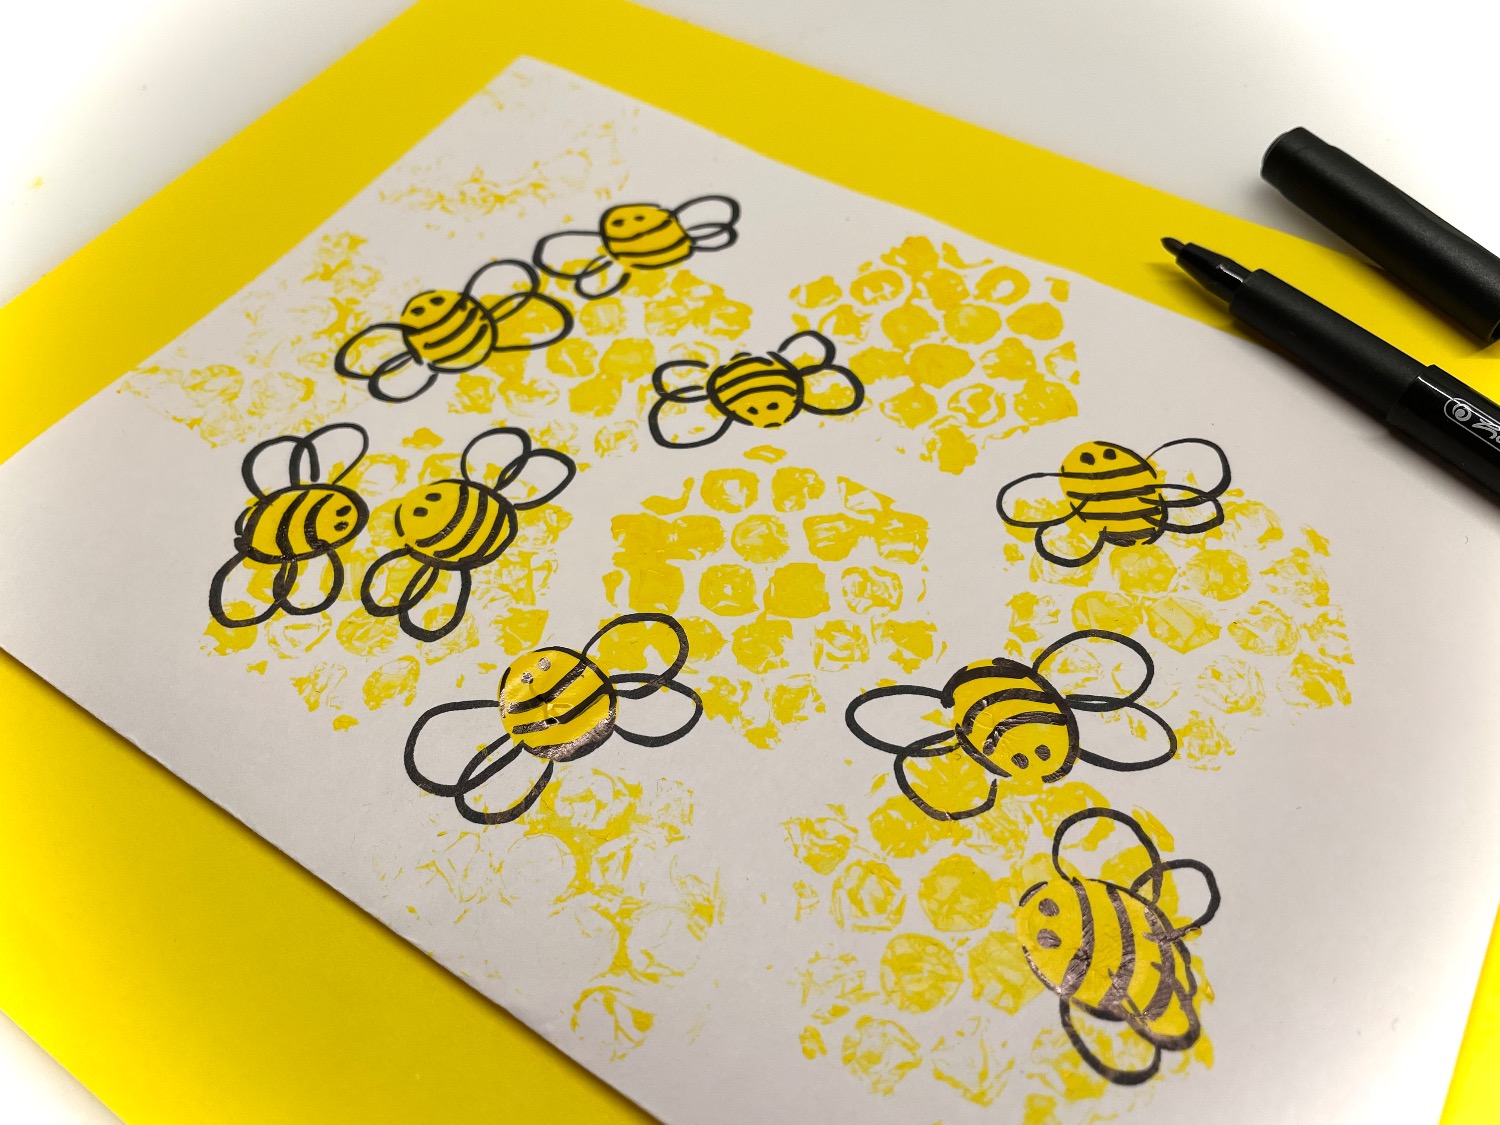
A bright card for bee lovers, honey lovers or "industrious" people. Print honeycombs with a specially crafted honeycomb stamp and put a lot of small bees on it with fingertips. A very individual card that never looks the same. It can look like a hidden card if you do a lot of bees on it. Check out the instructions and try it out. Have fun crafting the card!
Media Education for Kindergarten and Hort

Relief in everyday life, targeted promotion of individual children, independent learning and - without any pre-knowledge already usable by the youngest!
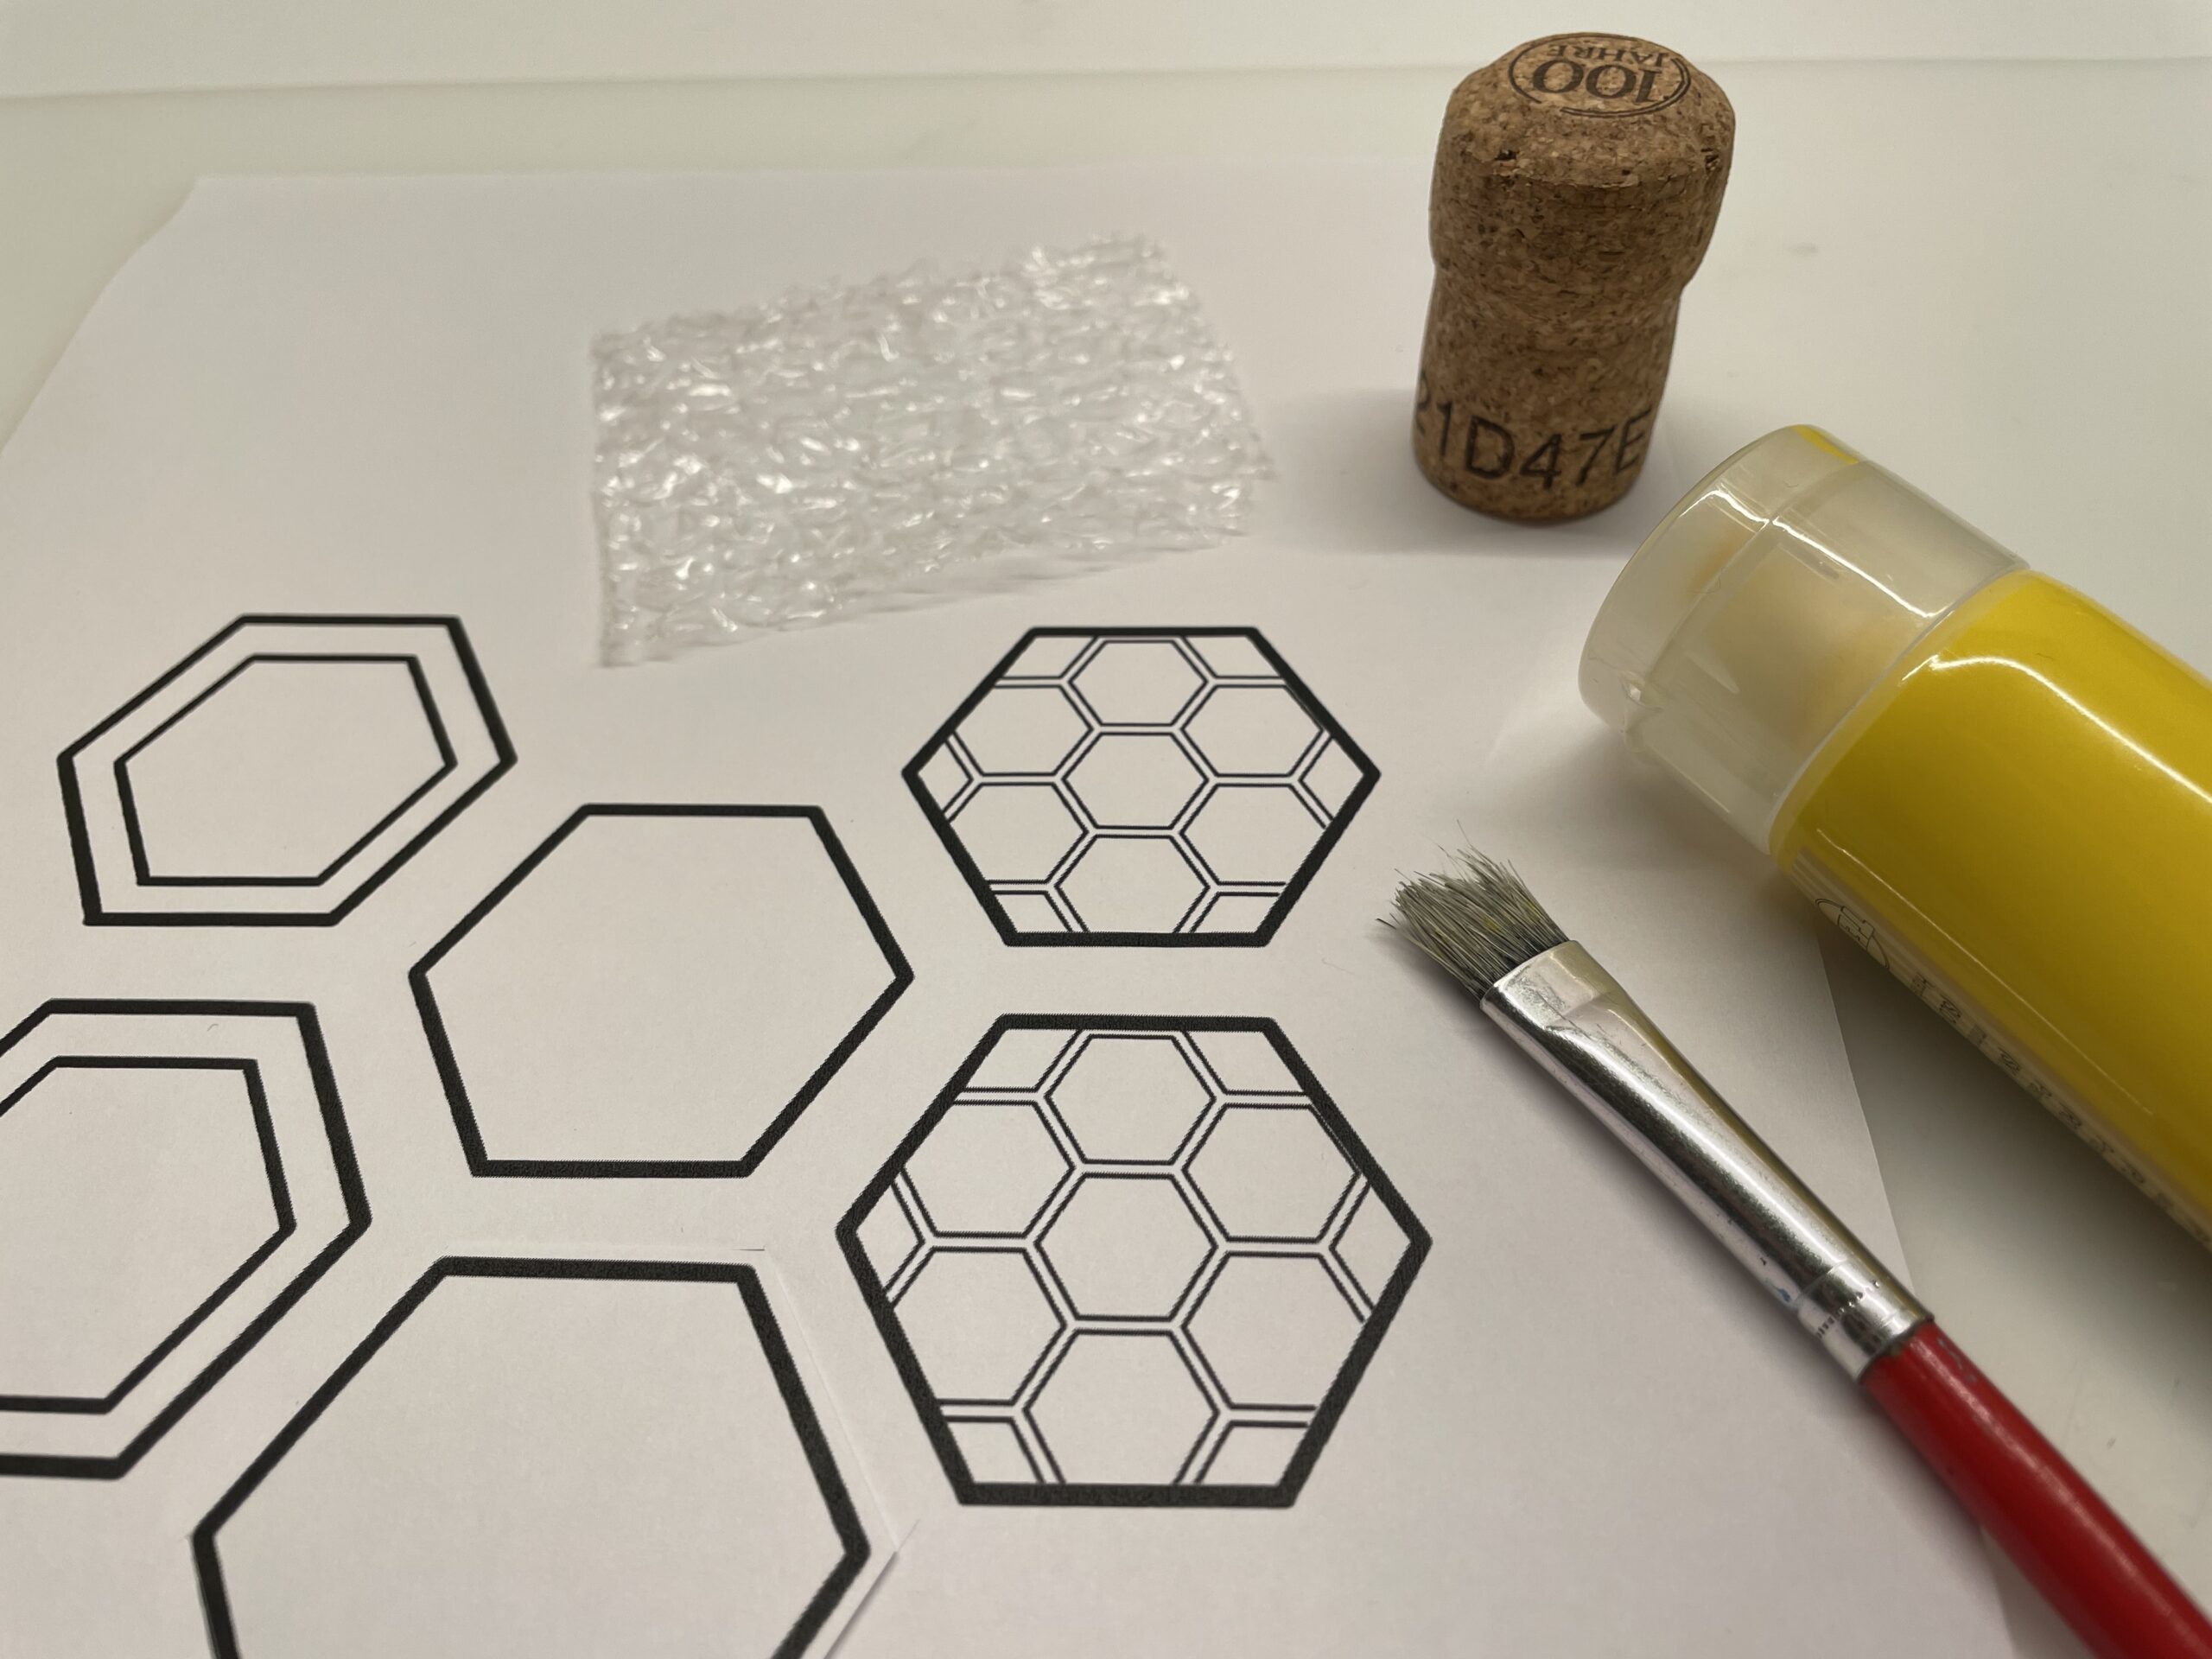
Then cut this honeycomb out of solid cardboard. Alternatively, glue the honeycomb onto a cardboard box. Then cut an equally large piece of bubble wrap.
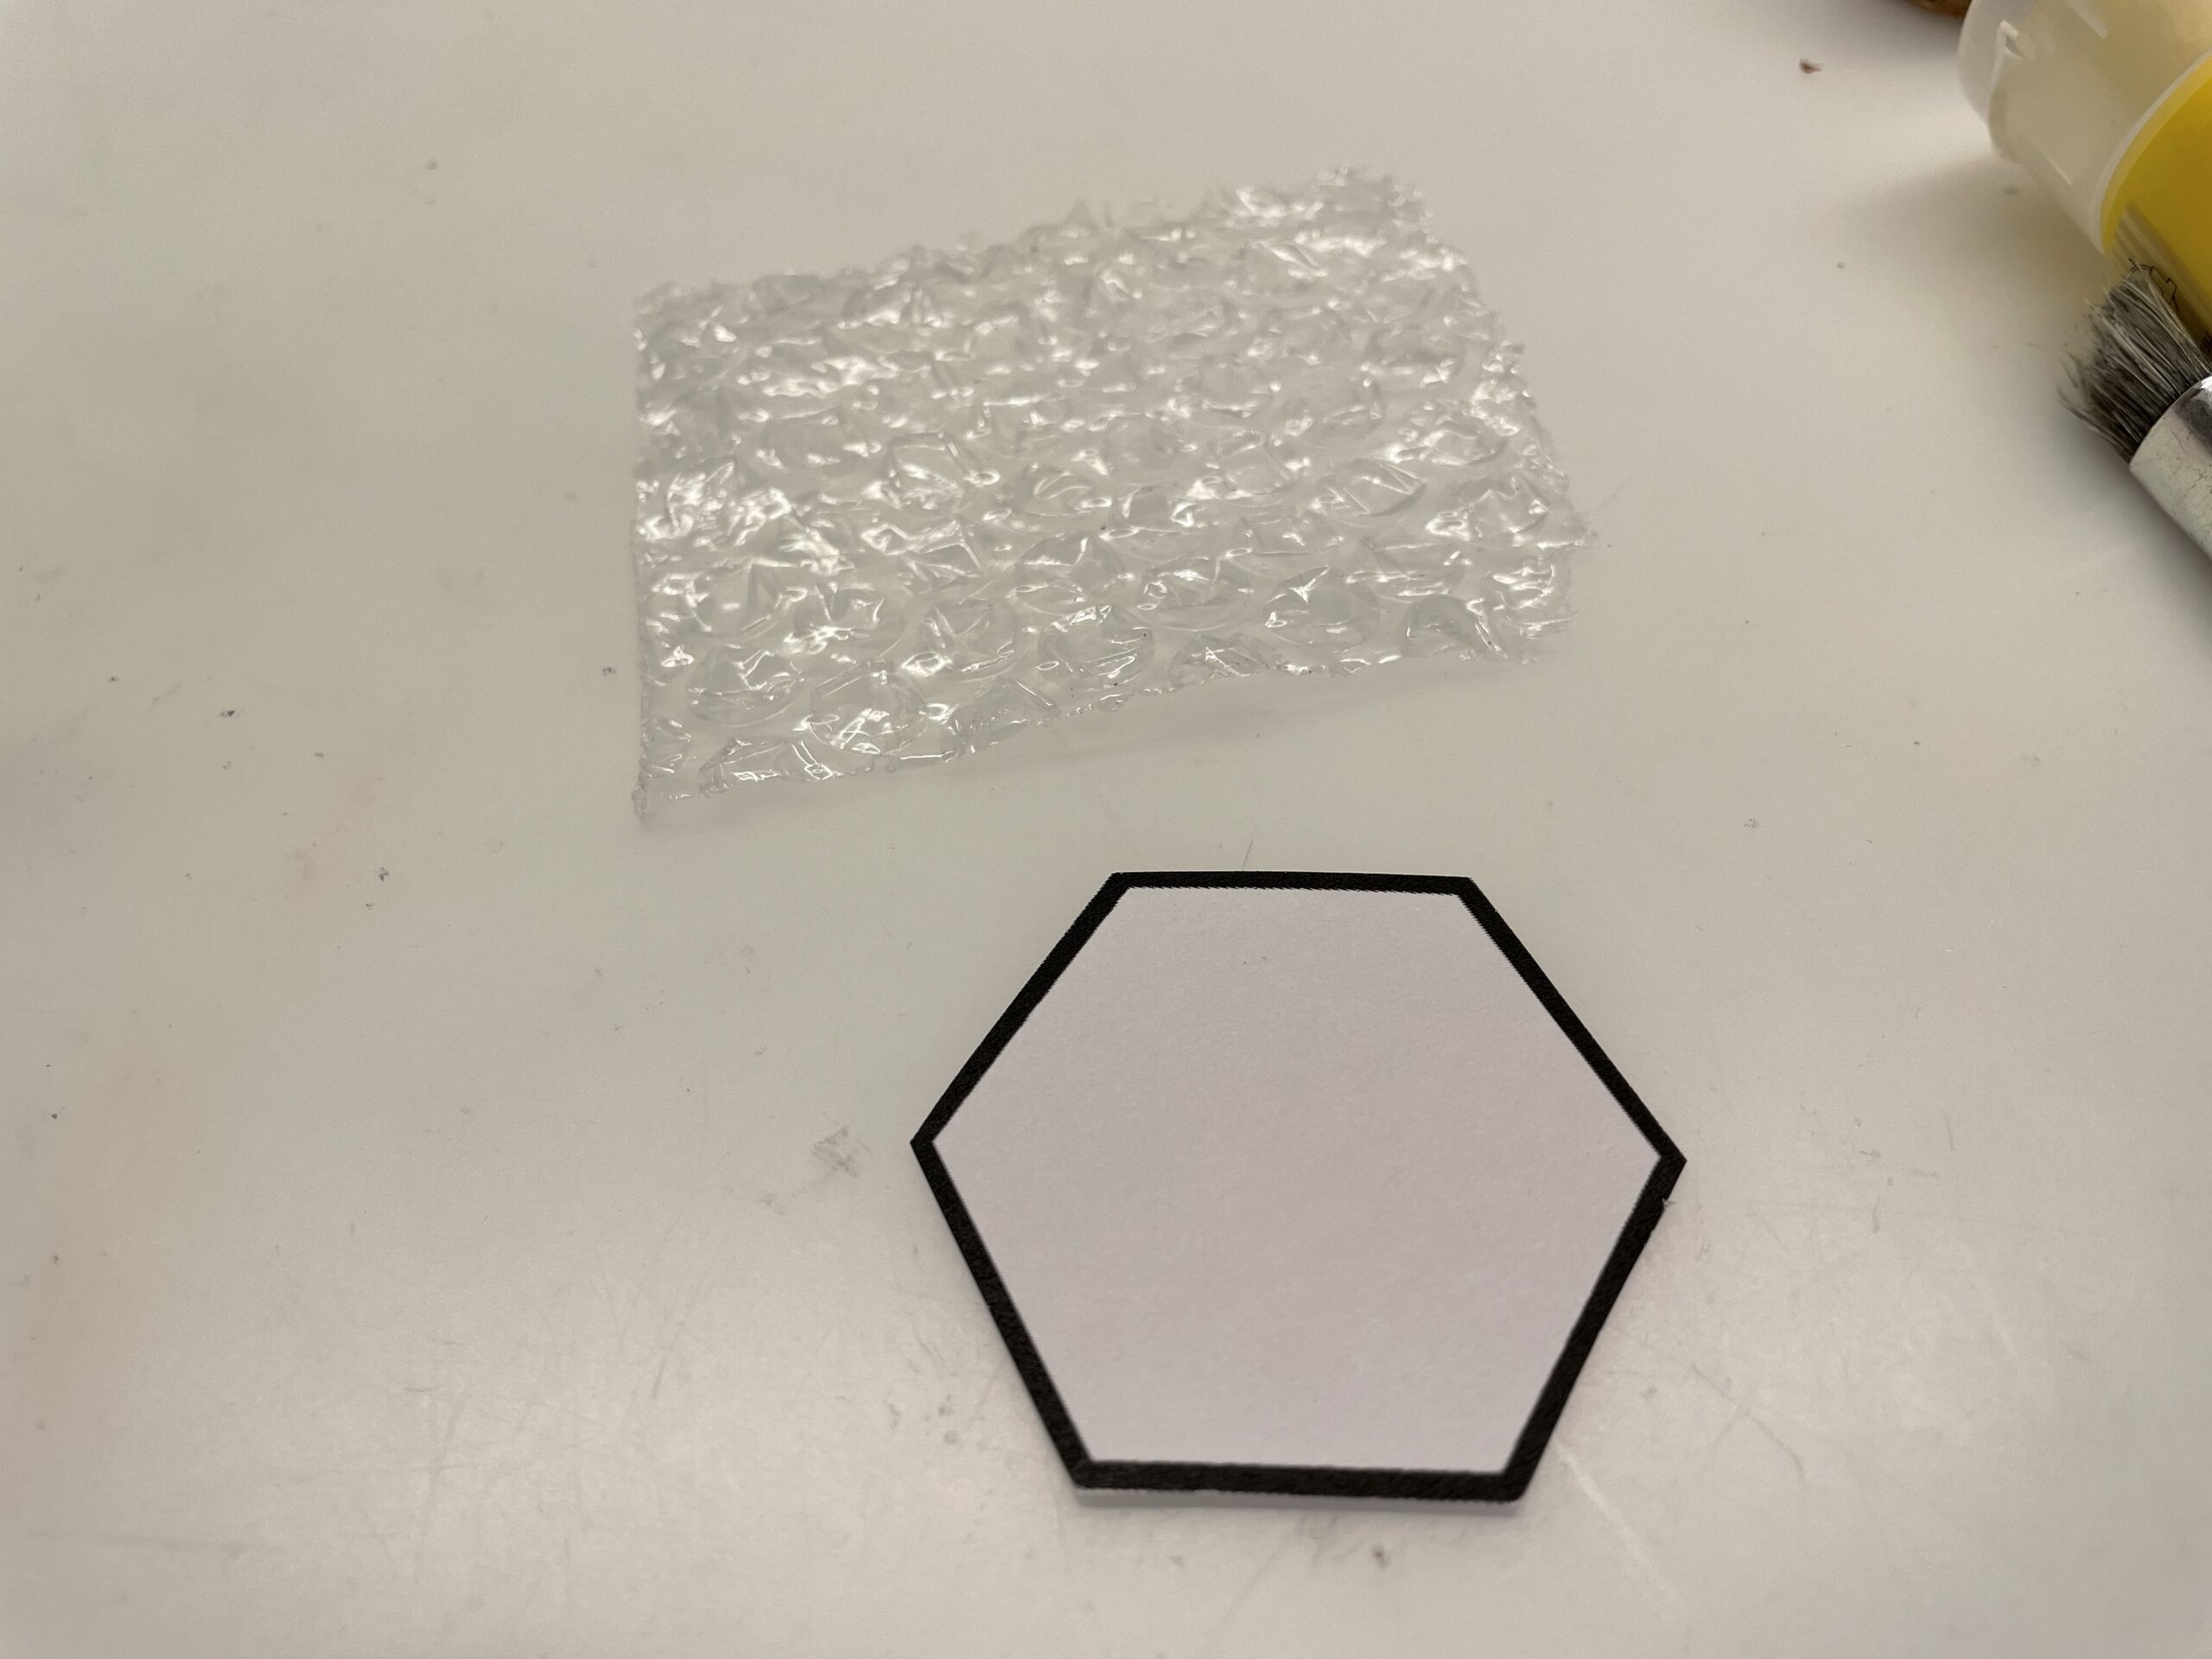
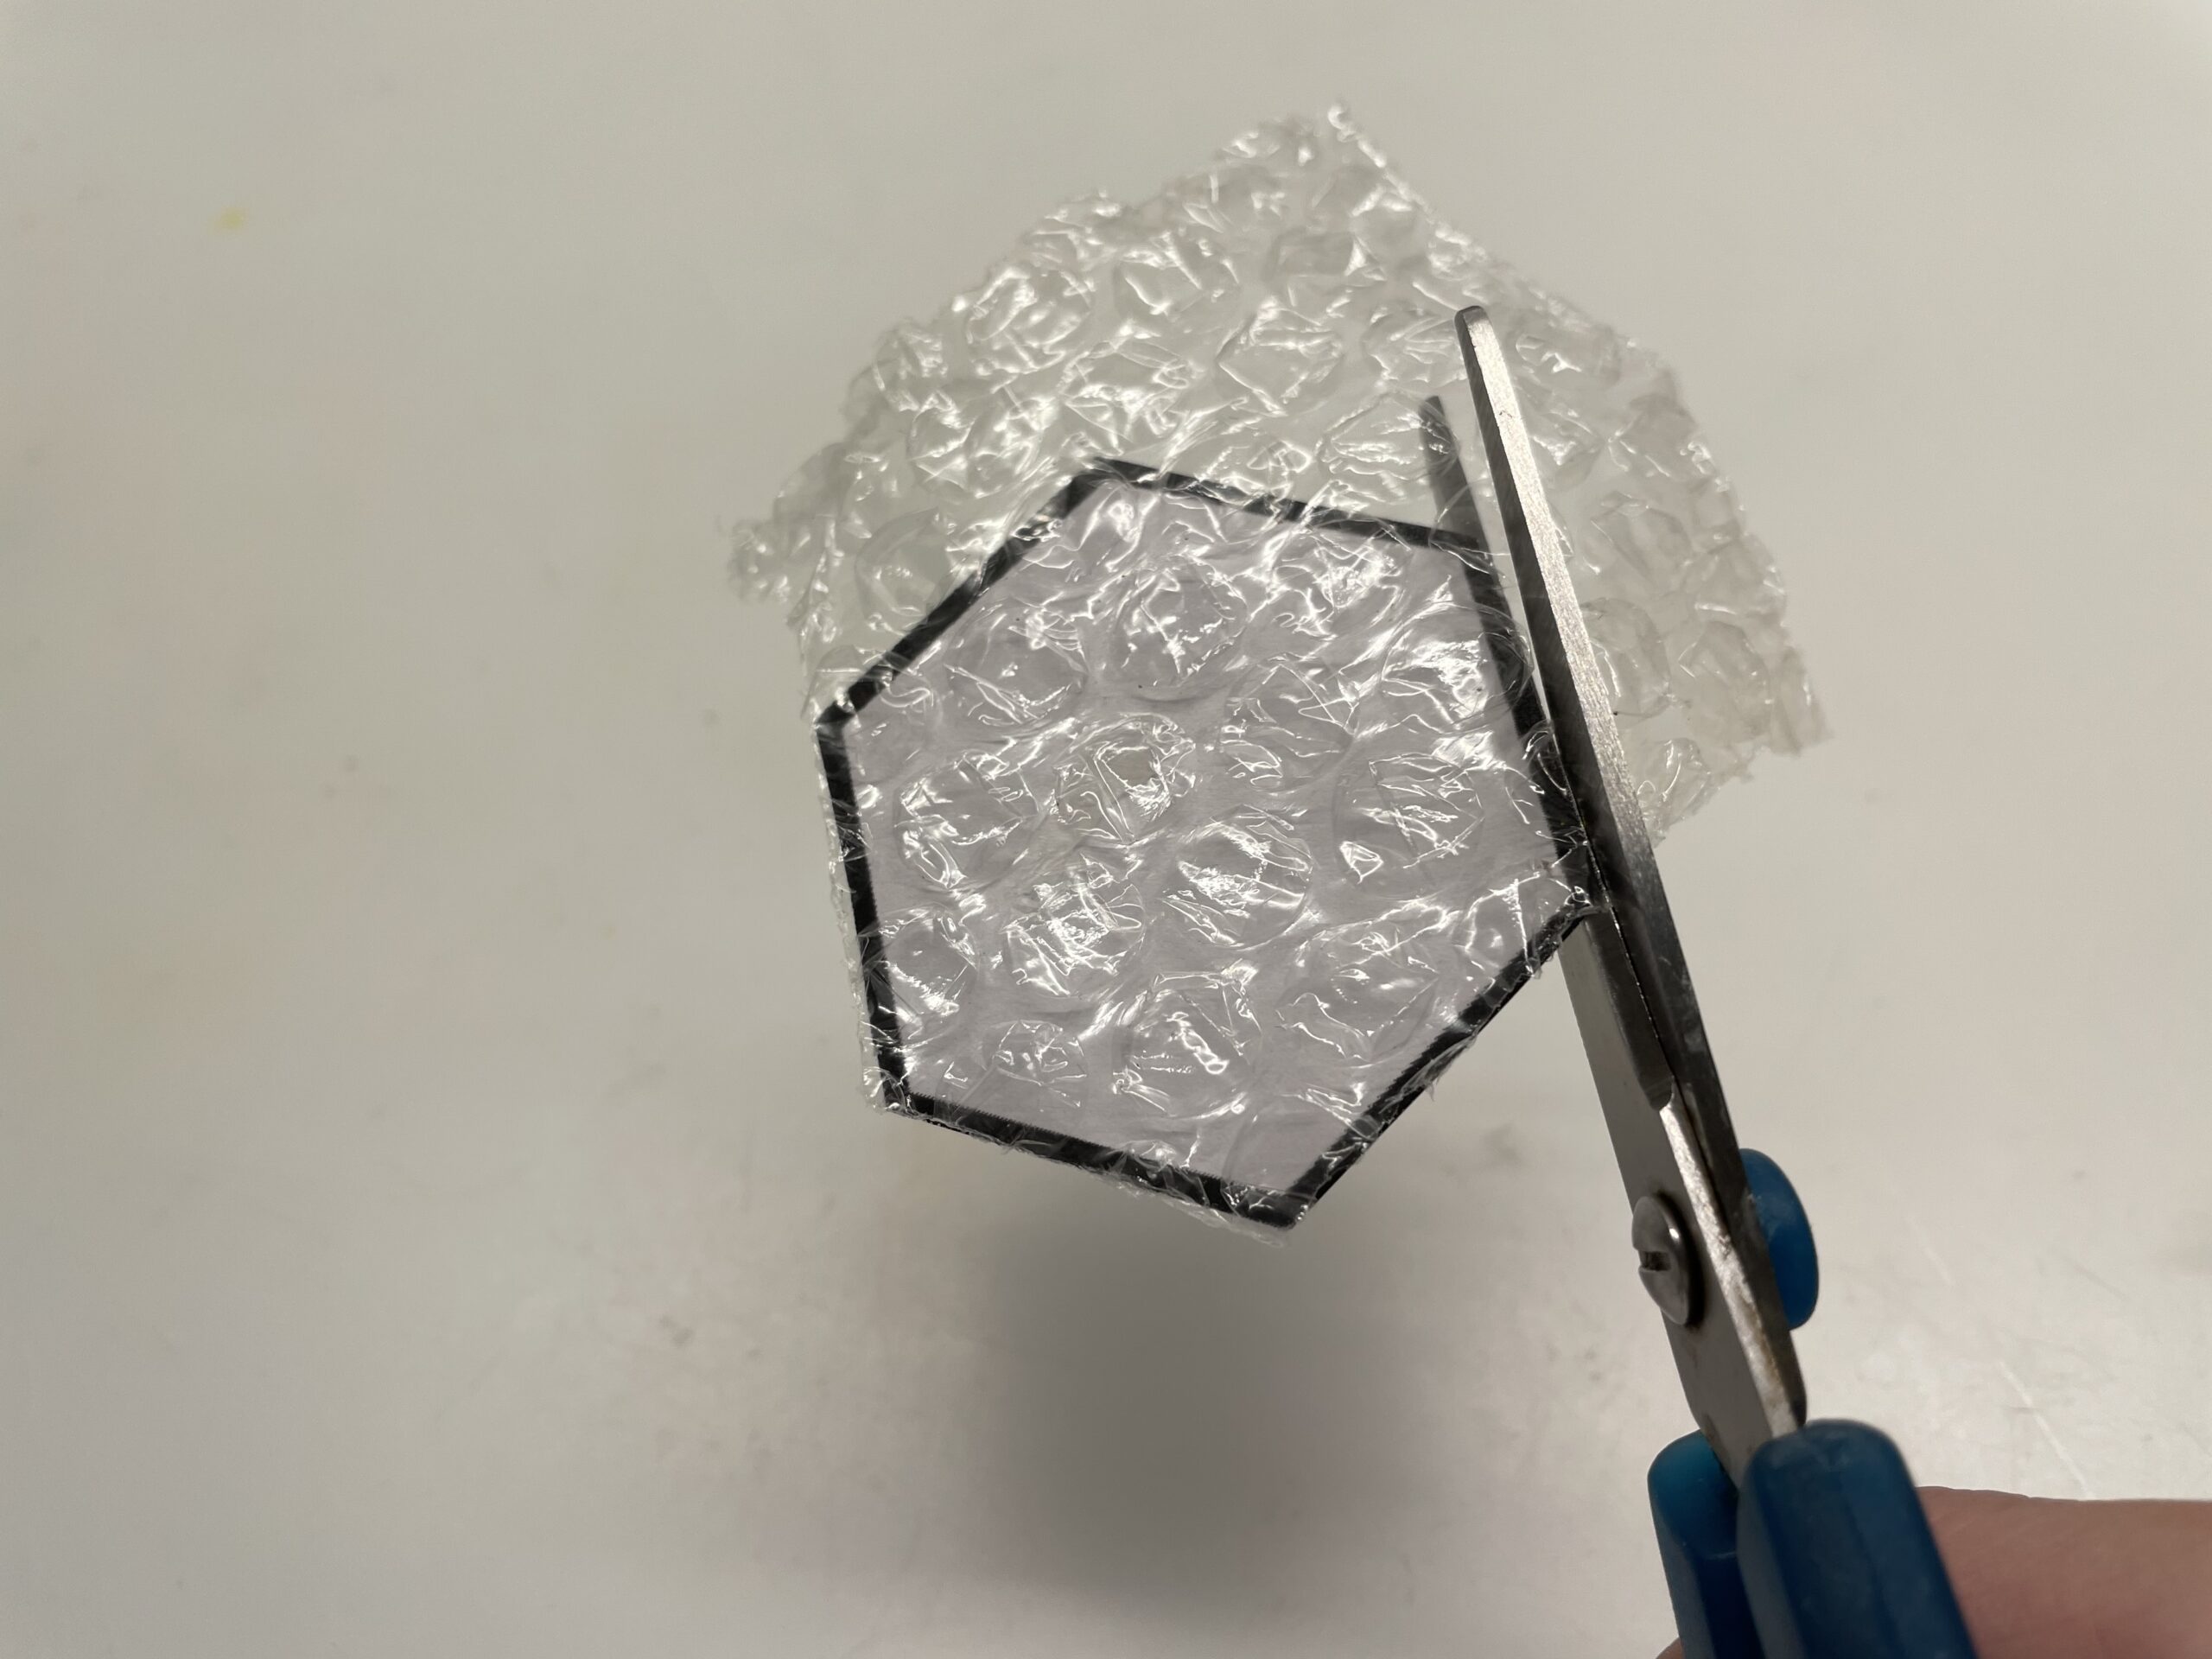
Then glue the transparent foil onto the honeycomb.

Now cut the foil along the honeycomb.
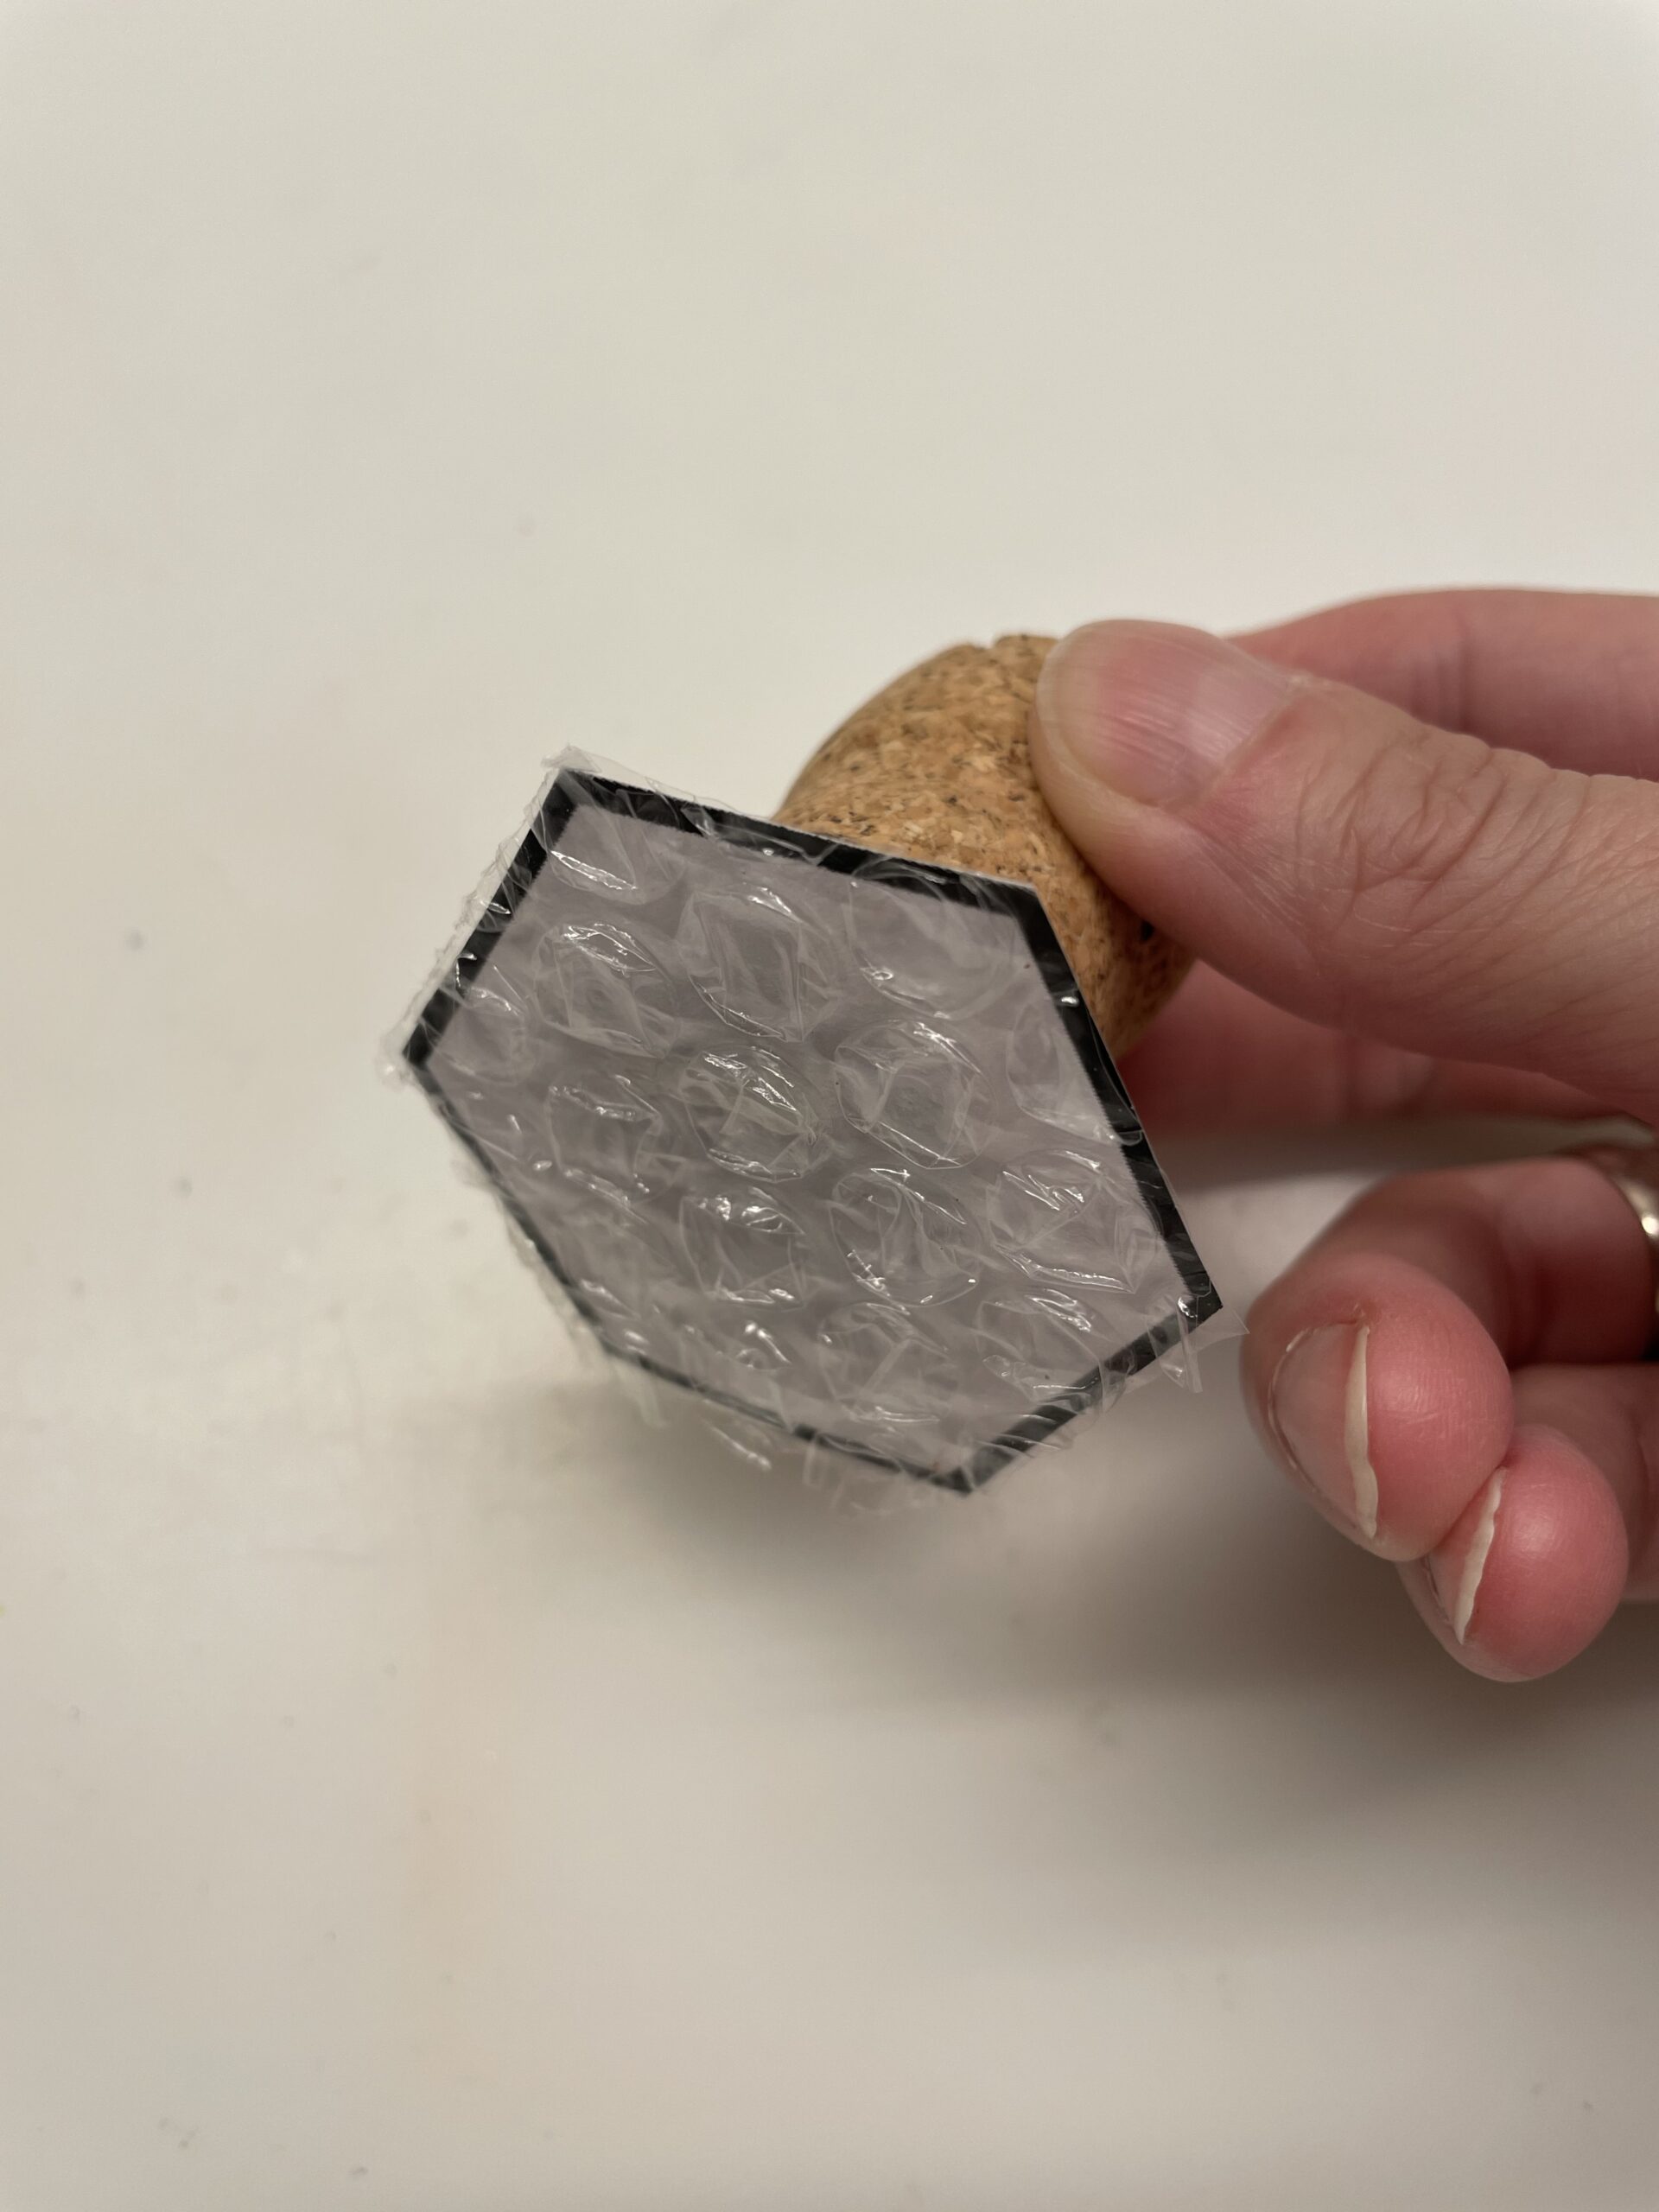
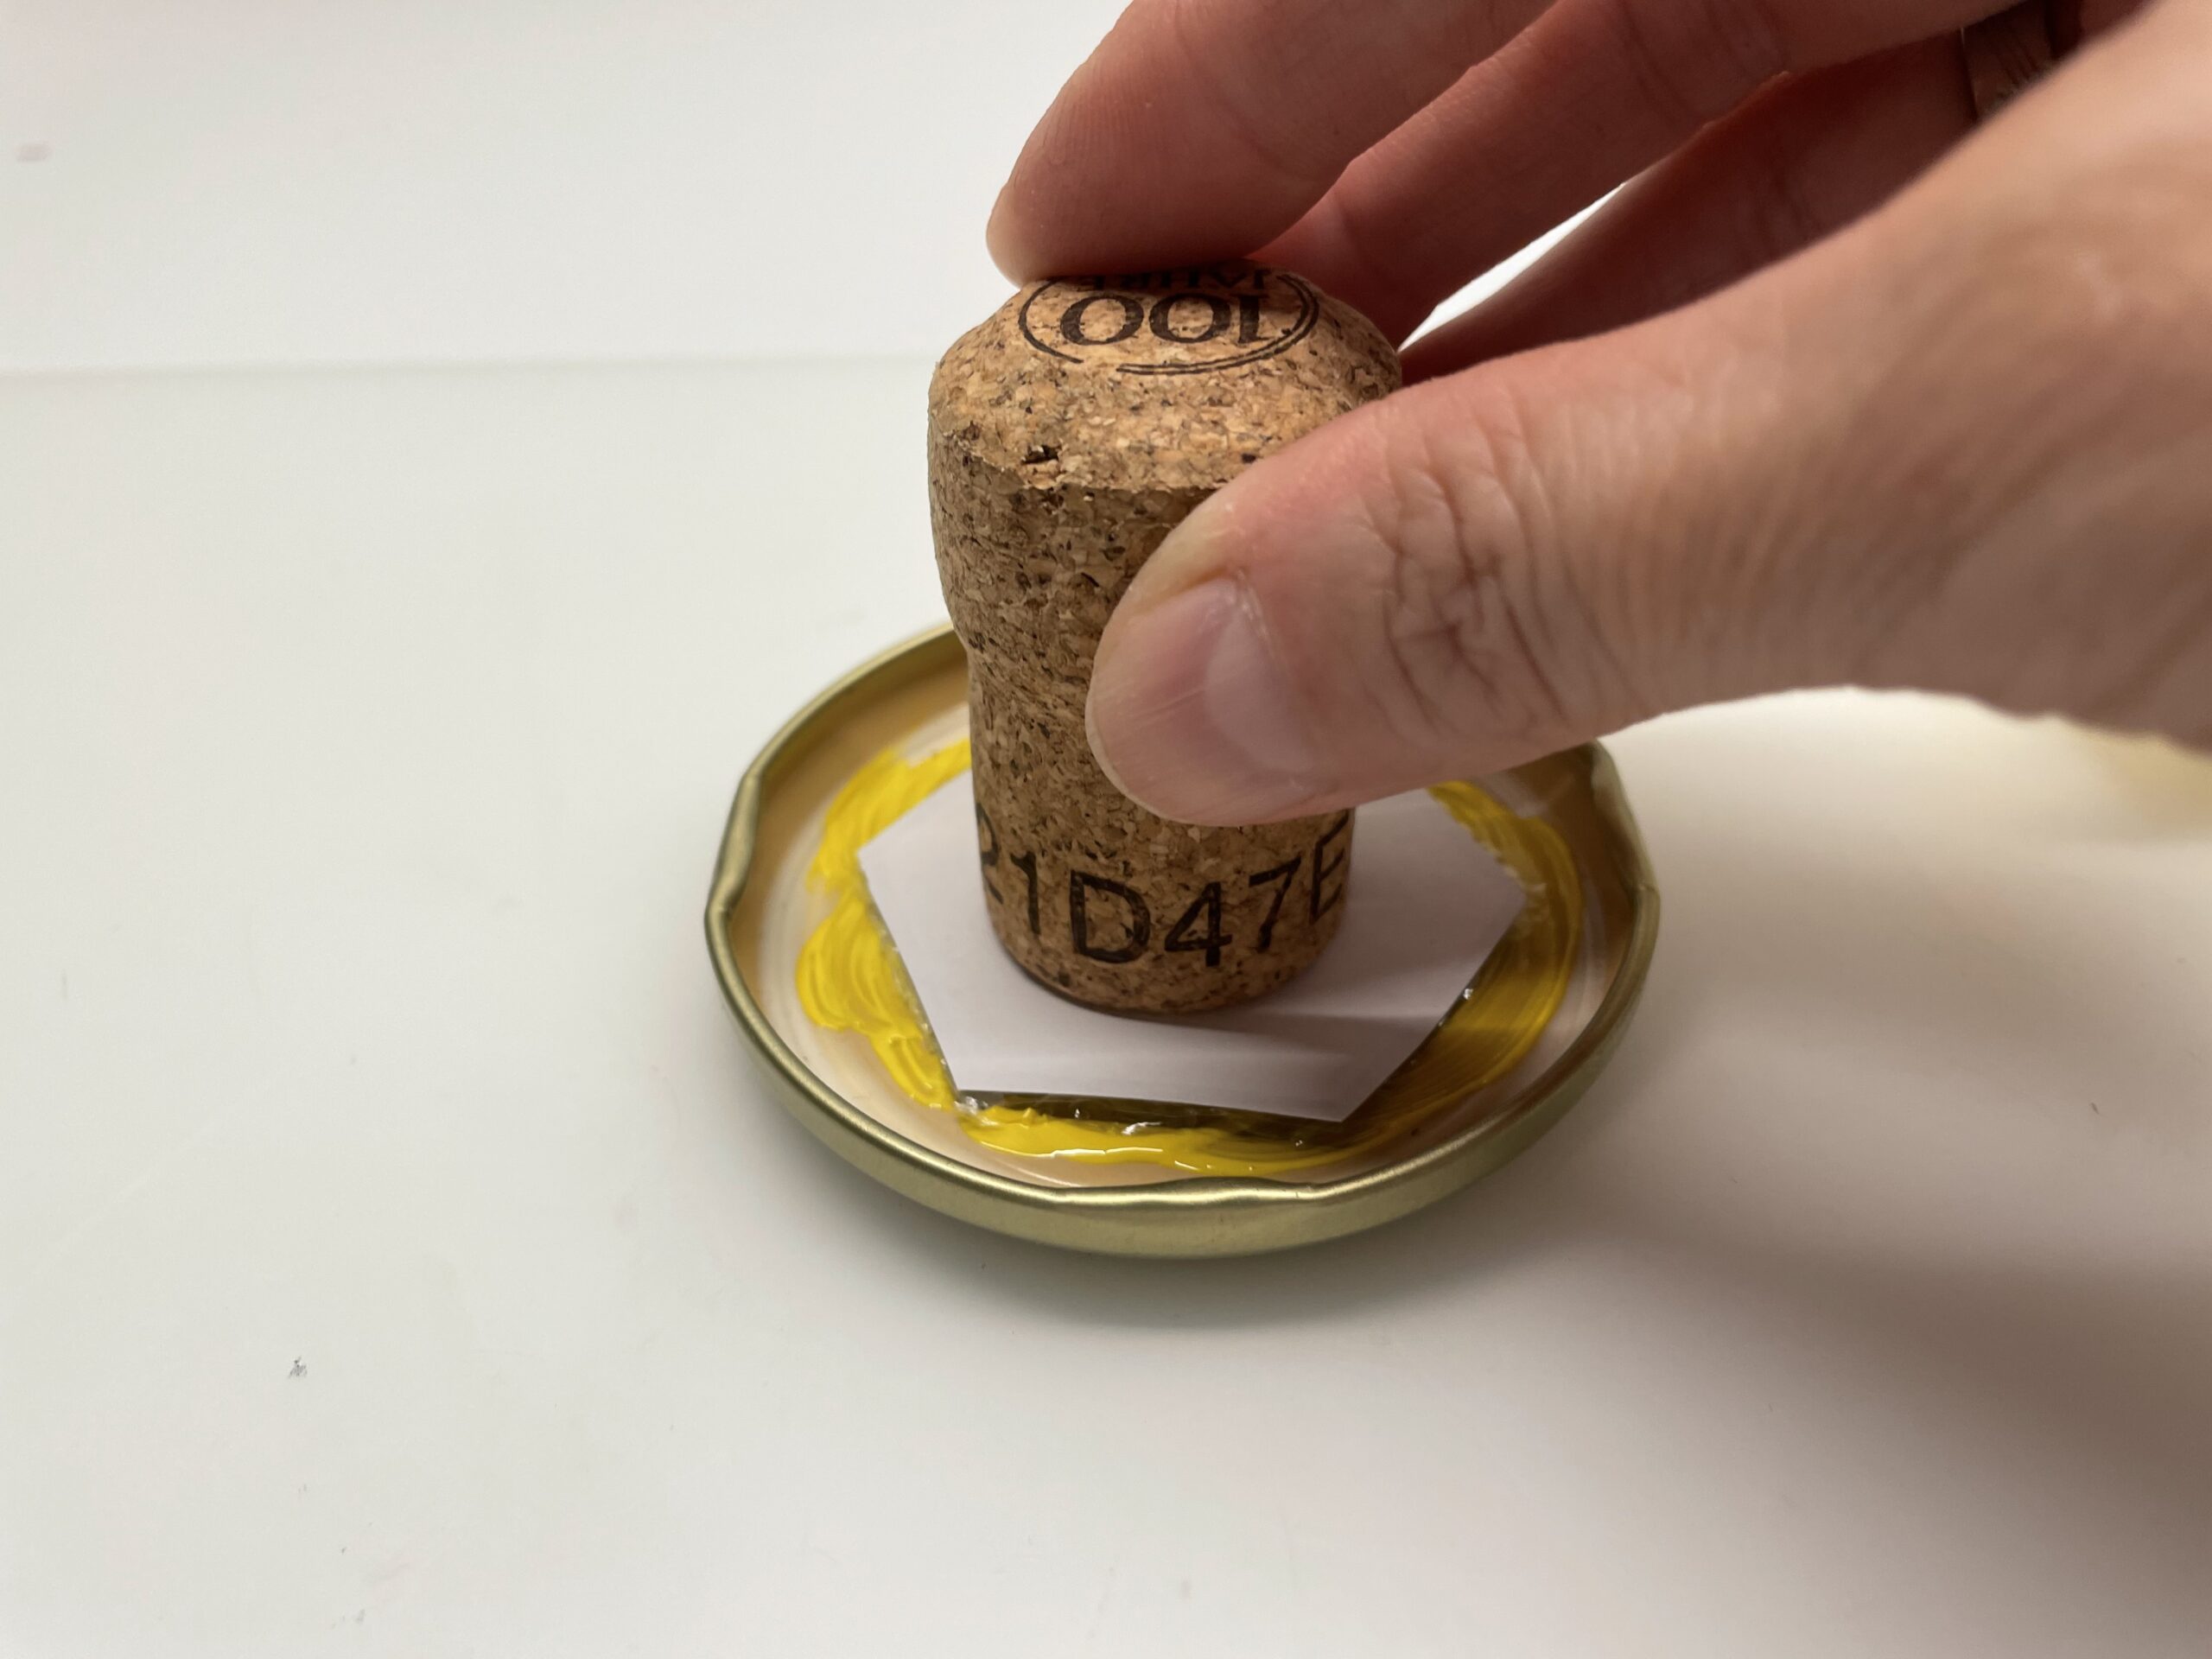
This honeycomb is stable and now glues it under a cork. This creates a self-made honeycomb stamp.
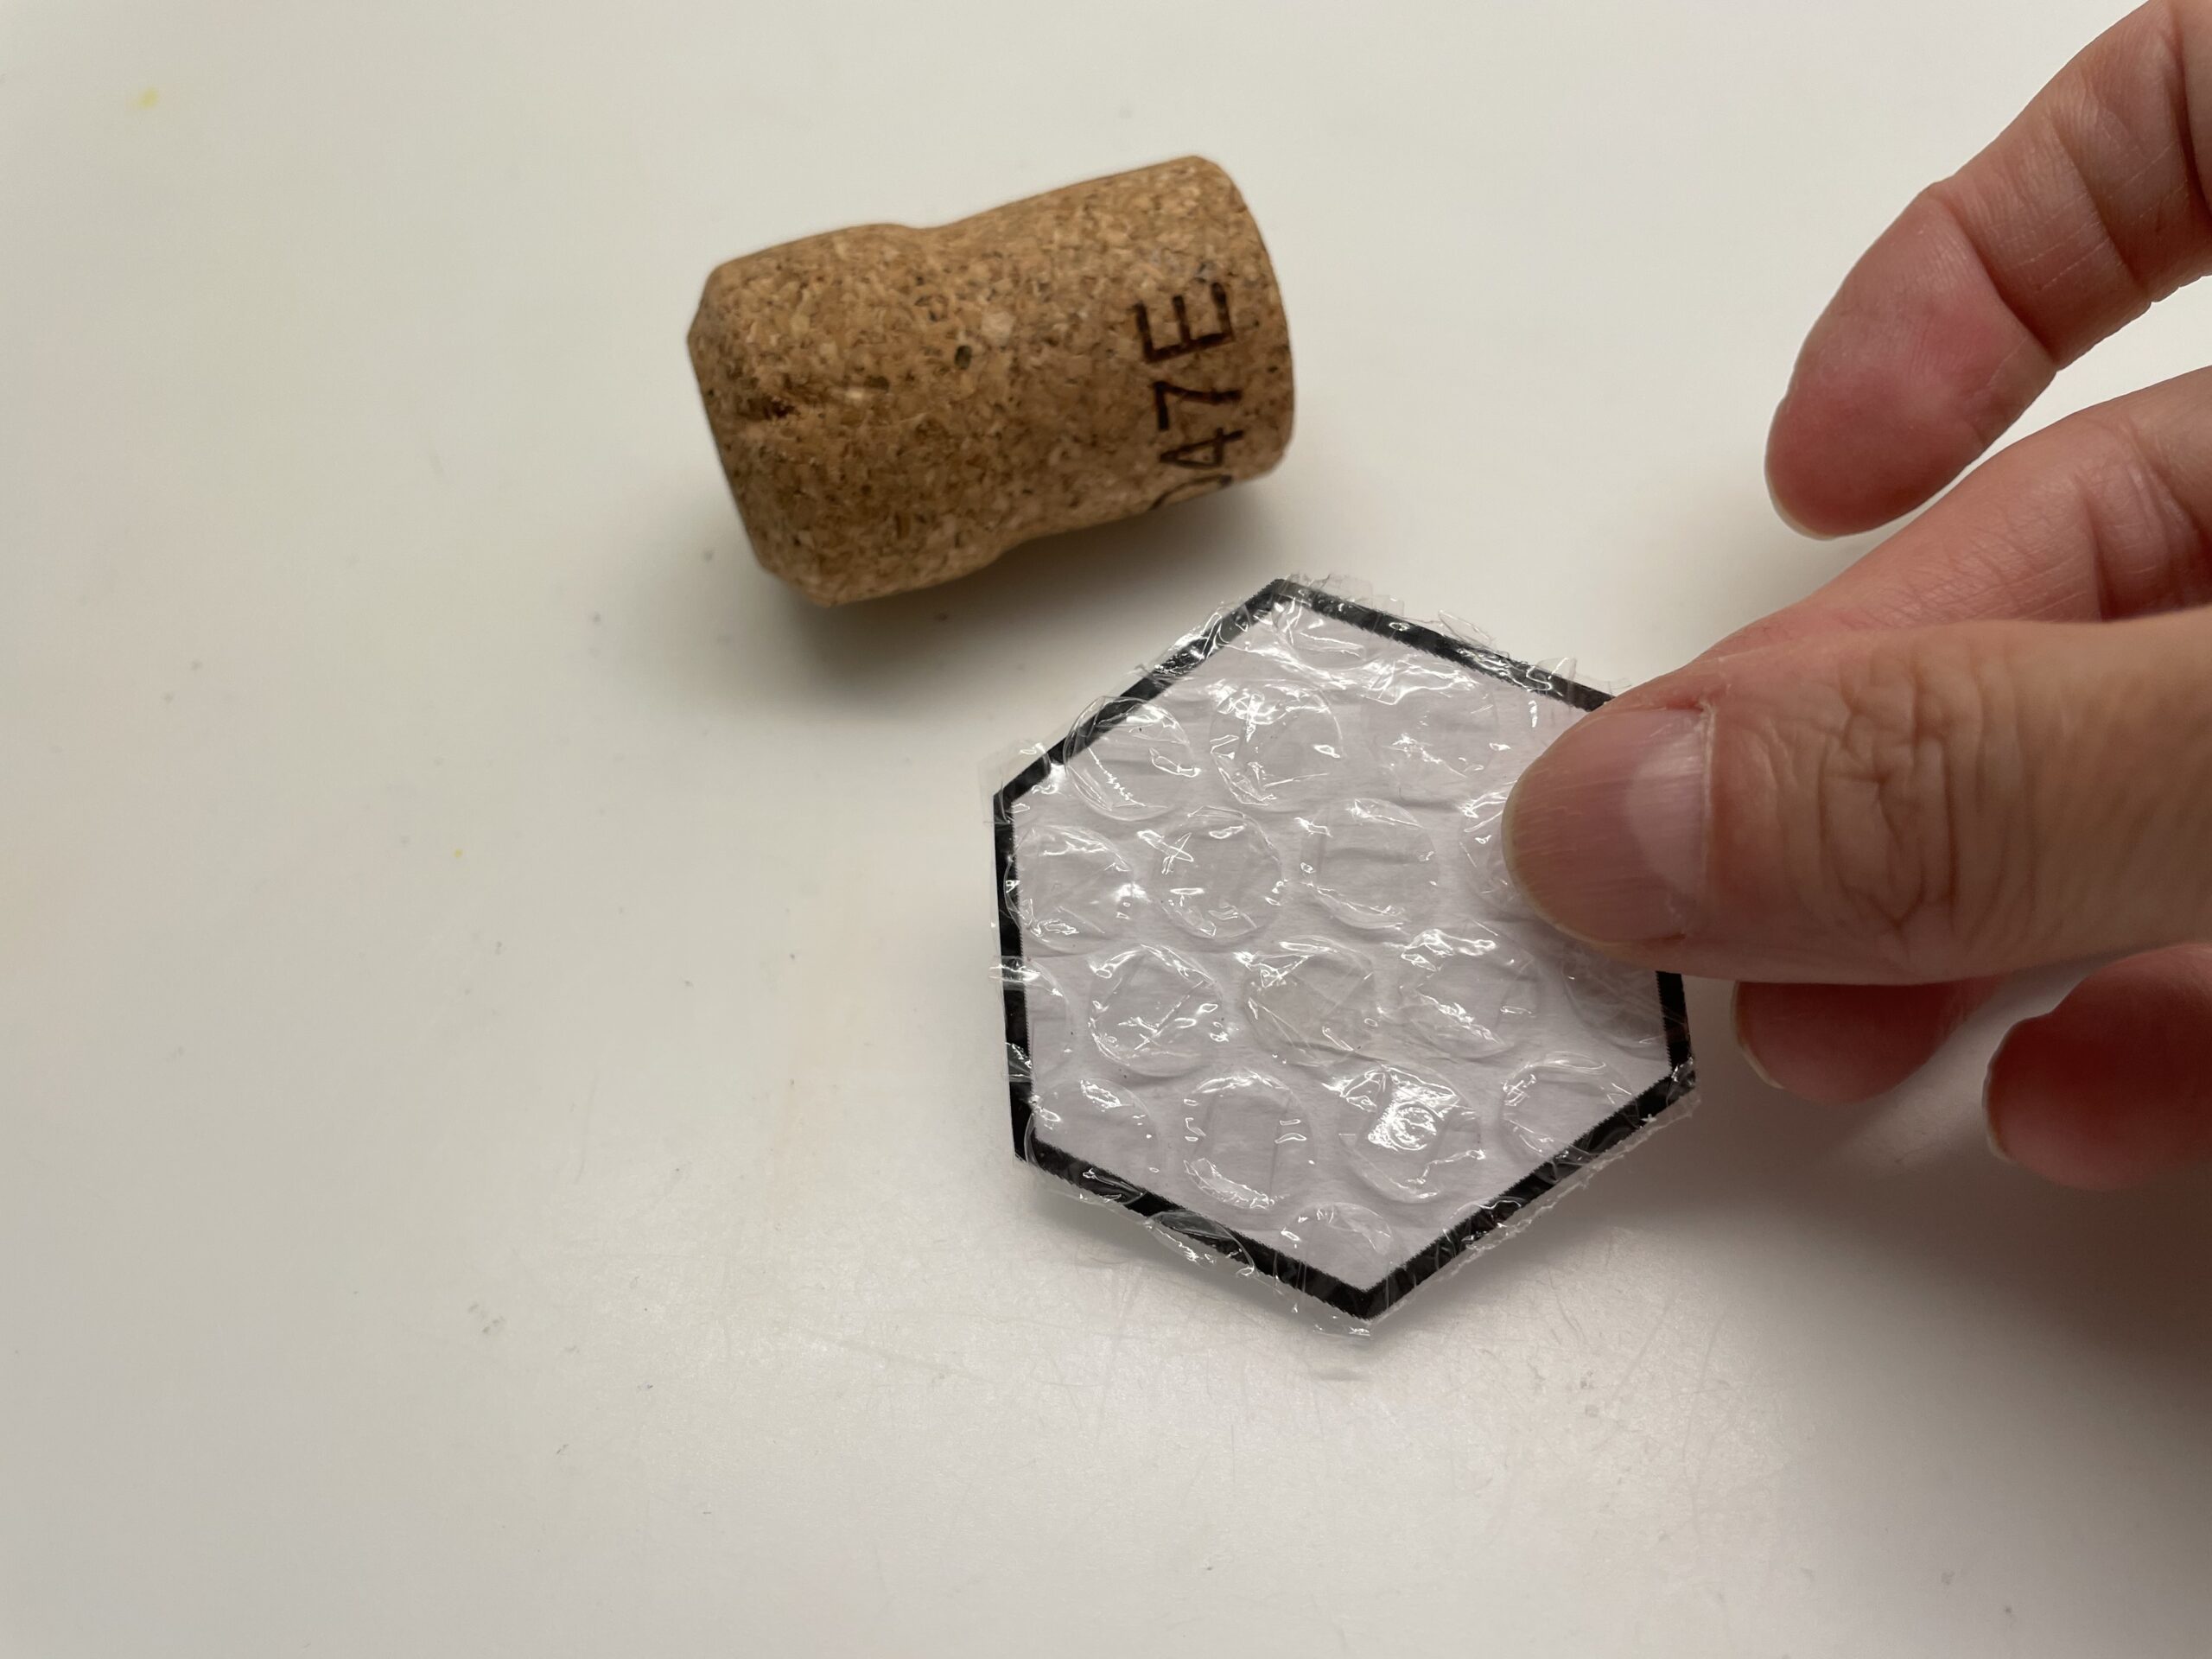
To do this, glue the cork centered on the back of the honeycomb.

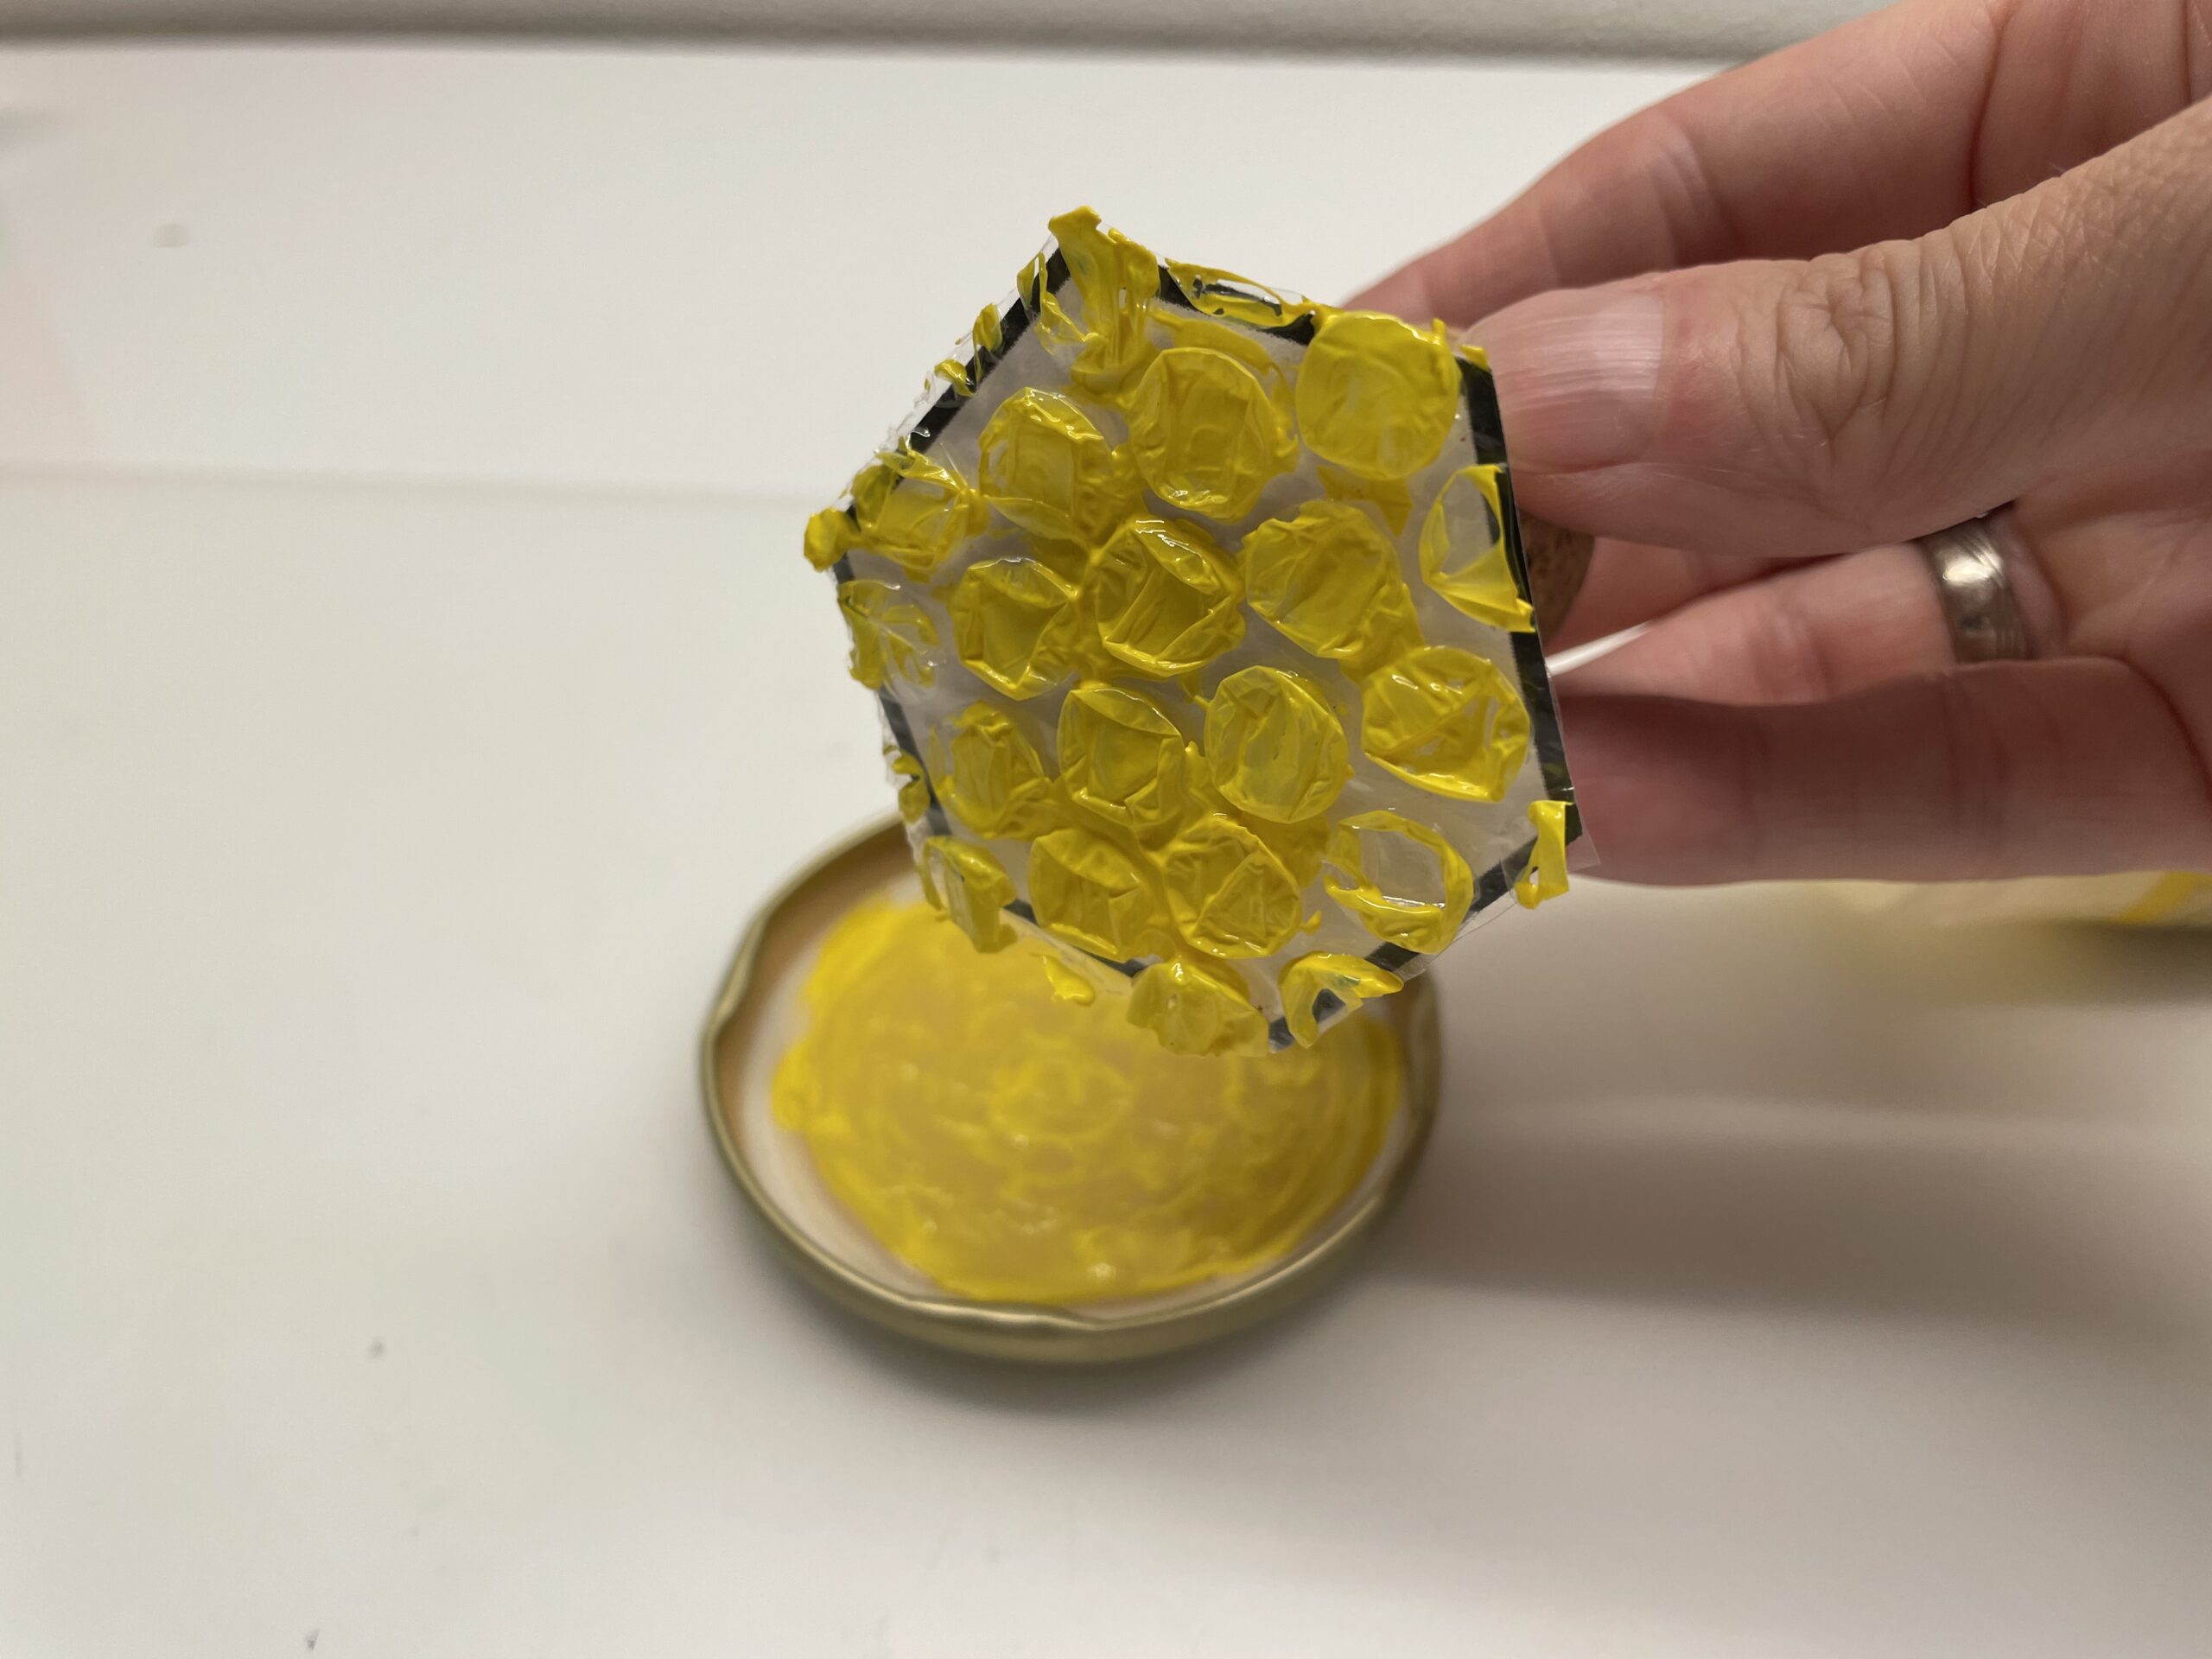
On the stamp-front you see the pimples of the foil.
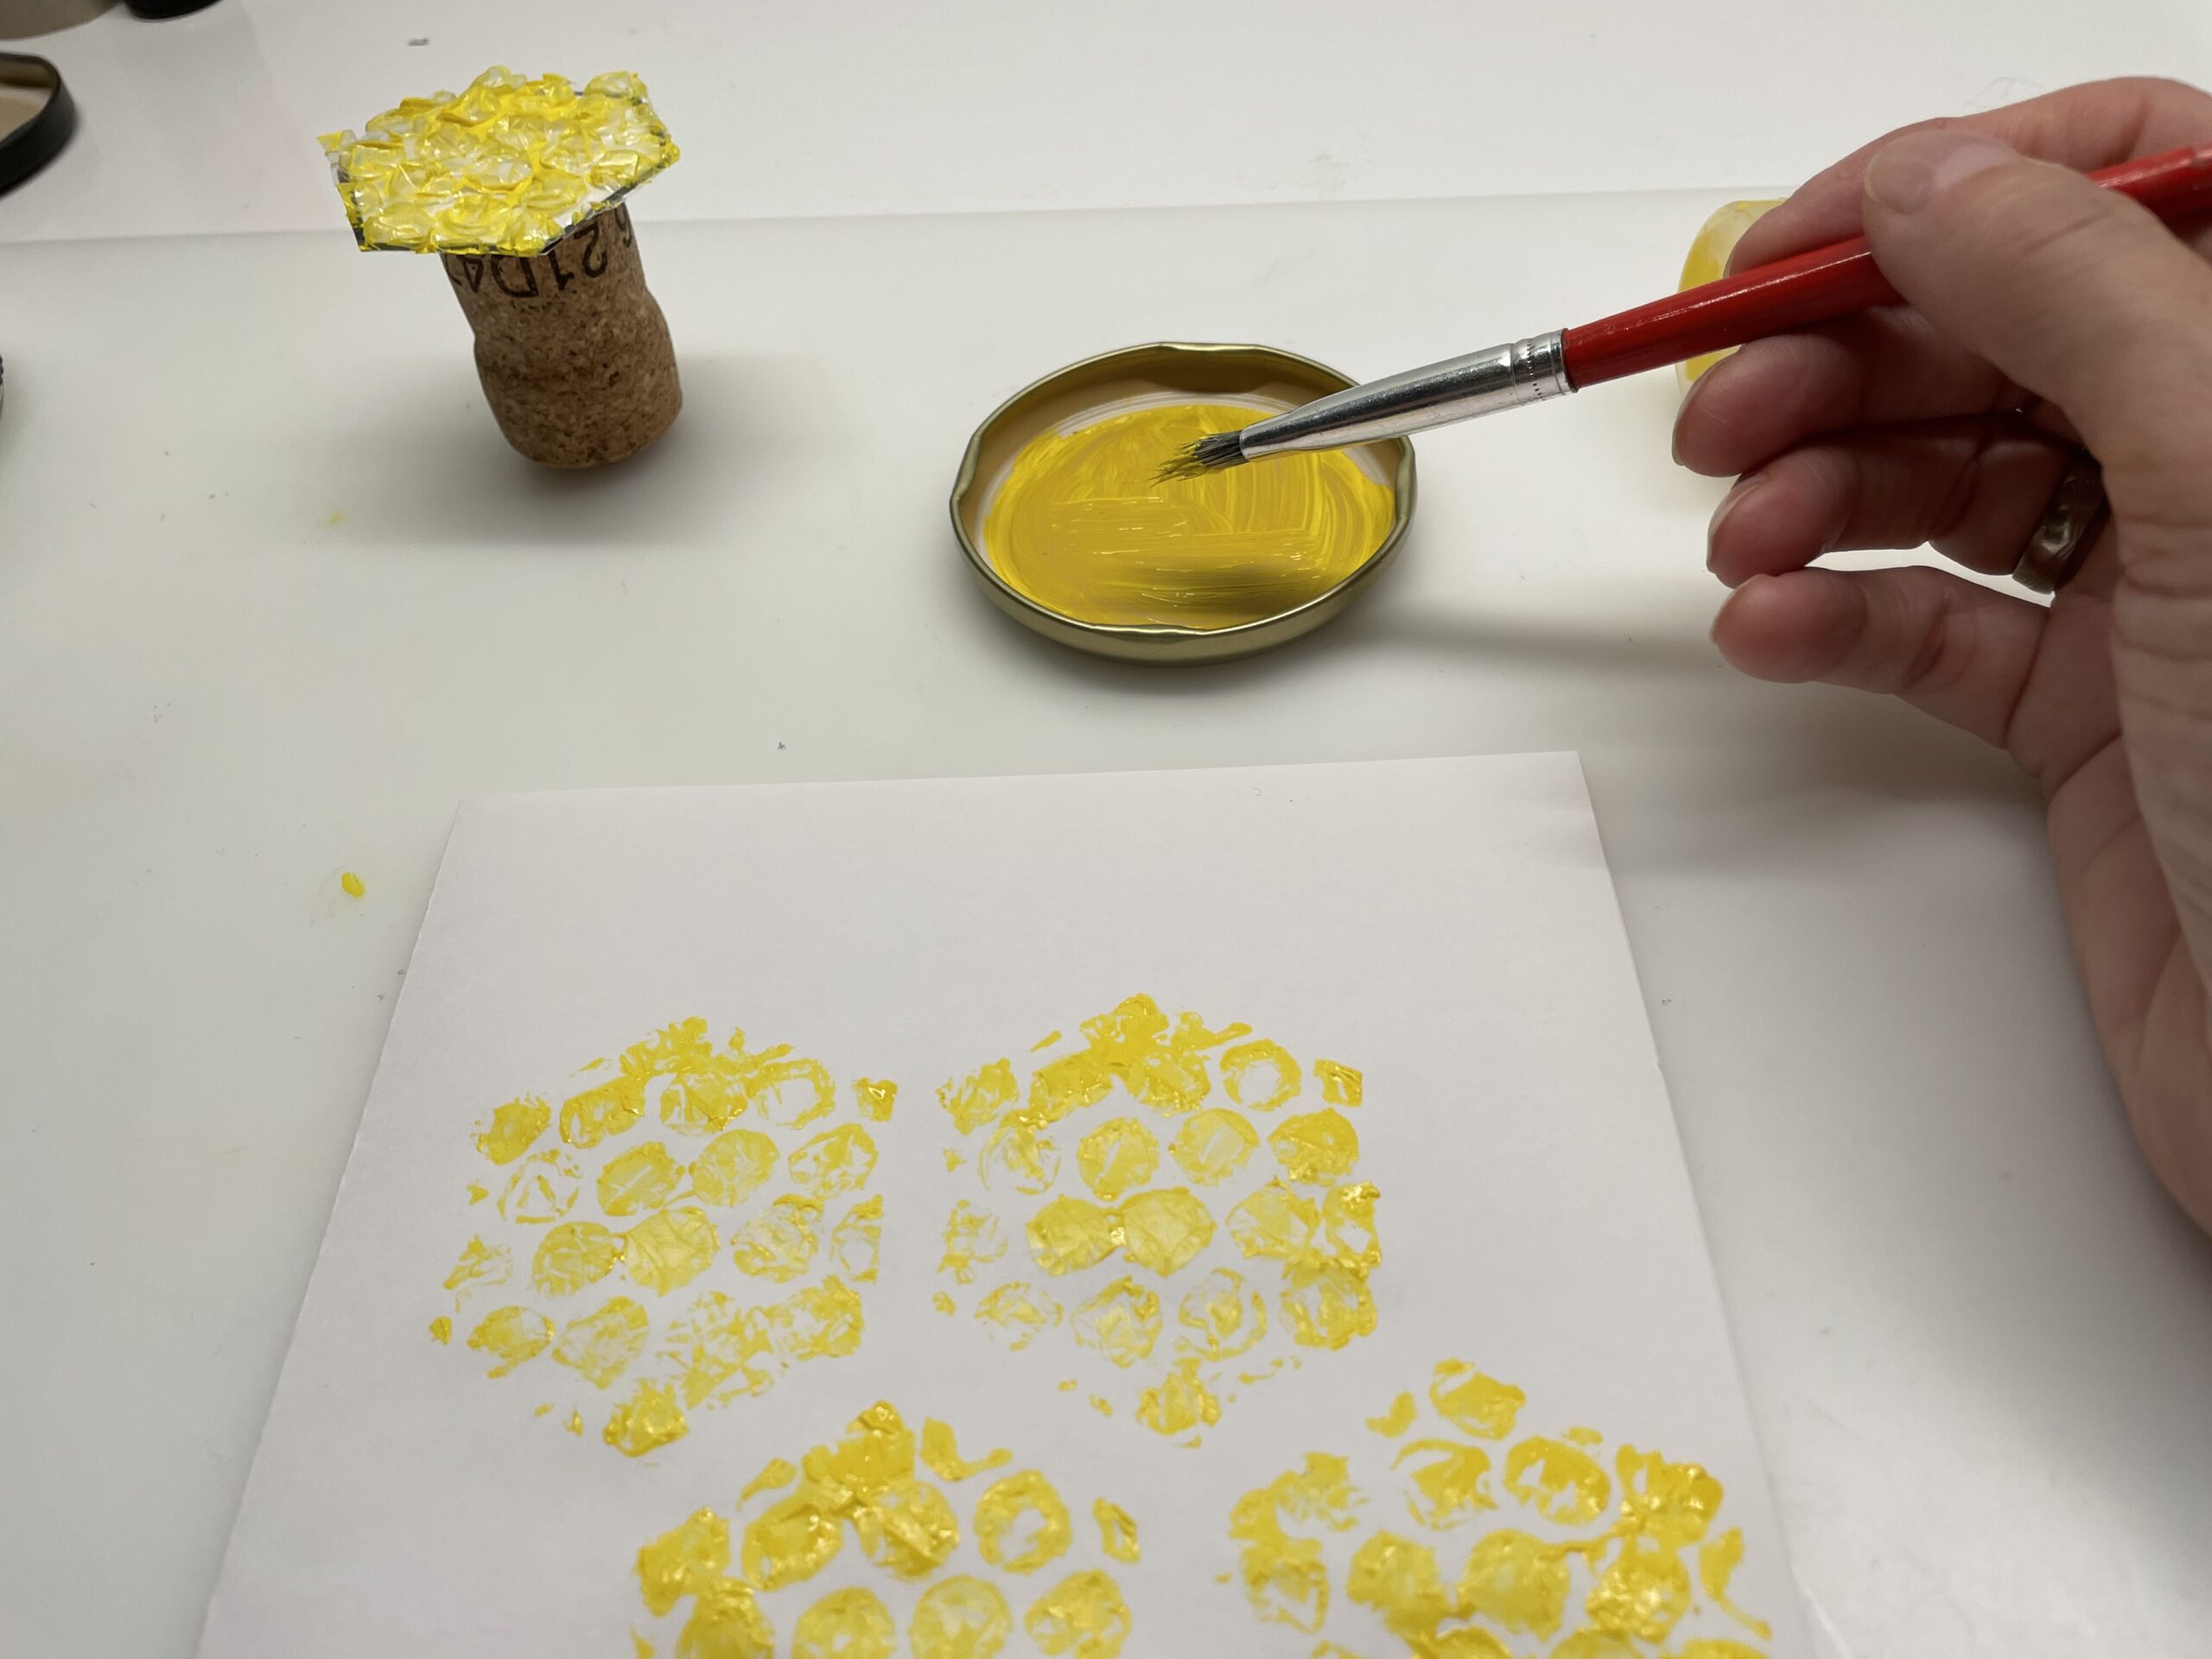
Now you need the yellow color and a screw glass lid or a saucer. Try out whether your honeycomb stamp fits in.
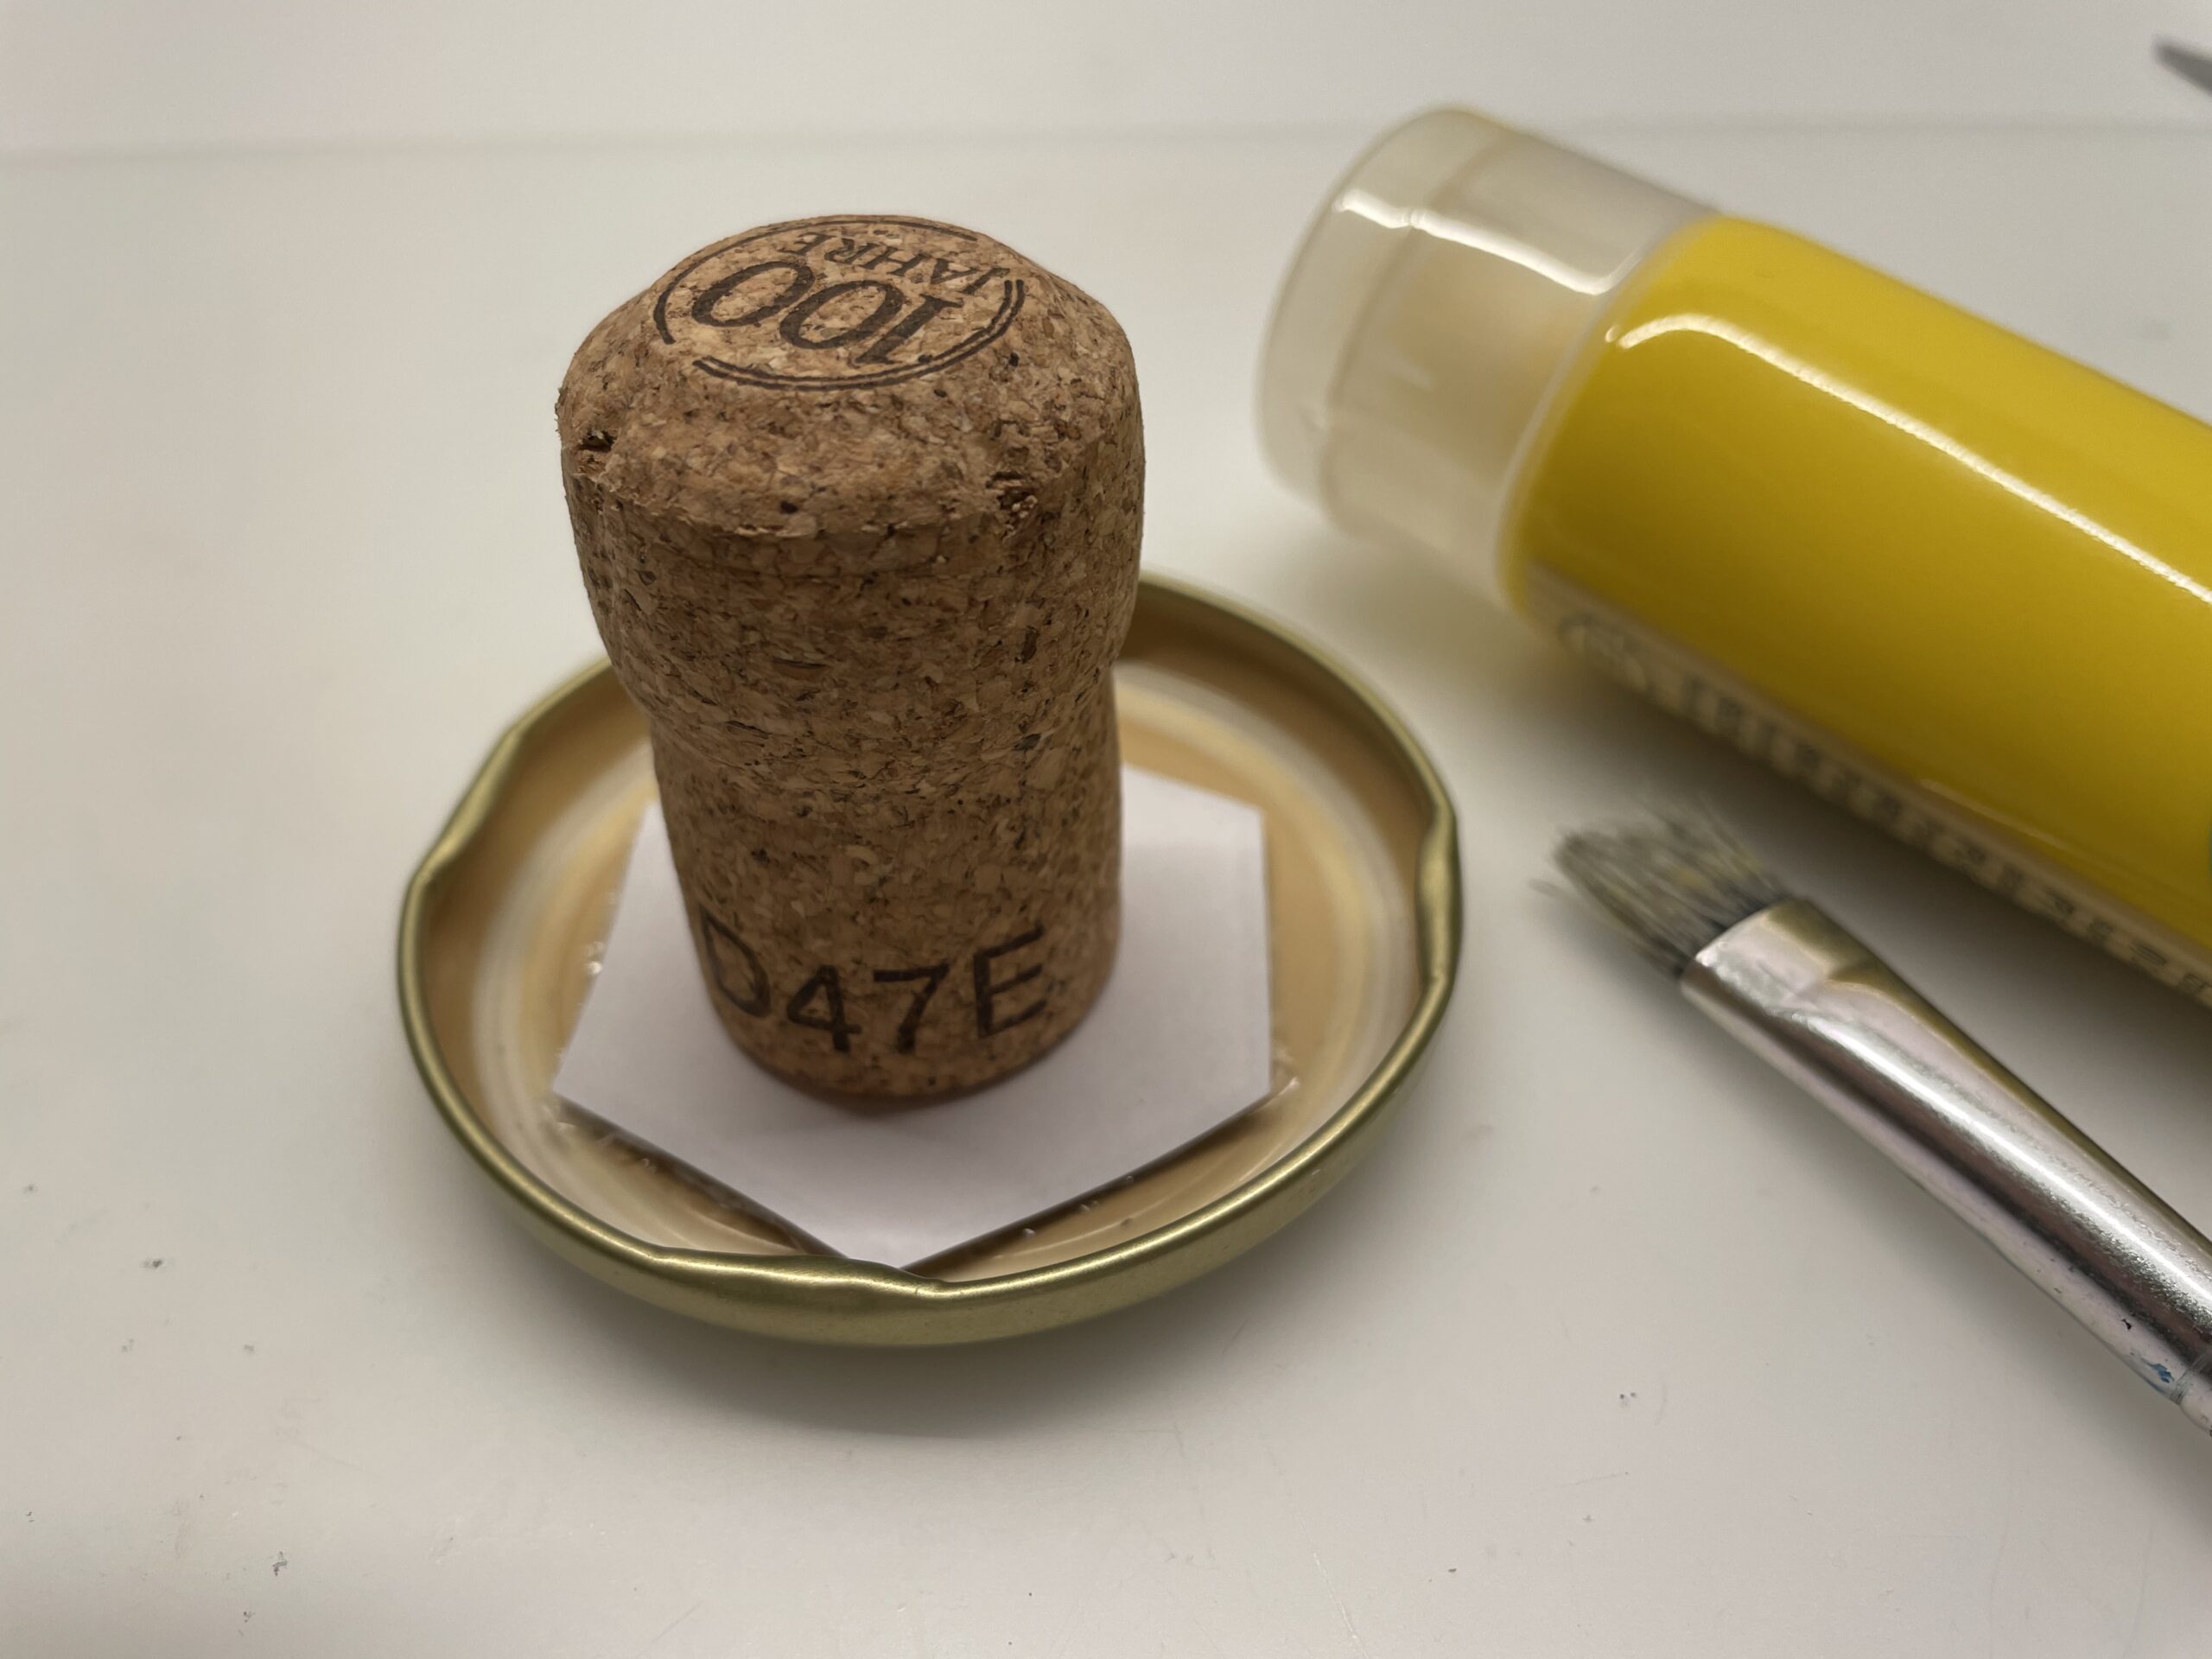
Then fill some paint in the screw-glass lid and distribute the paint in the lid.
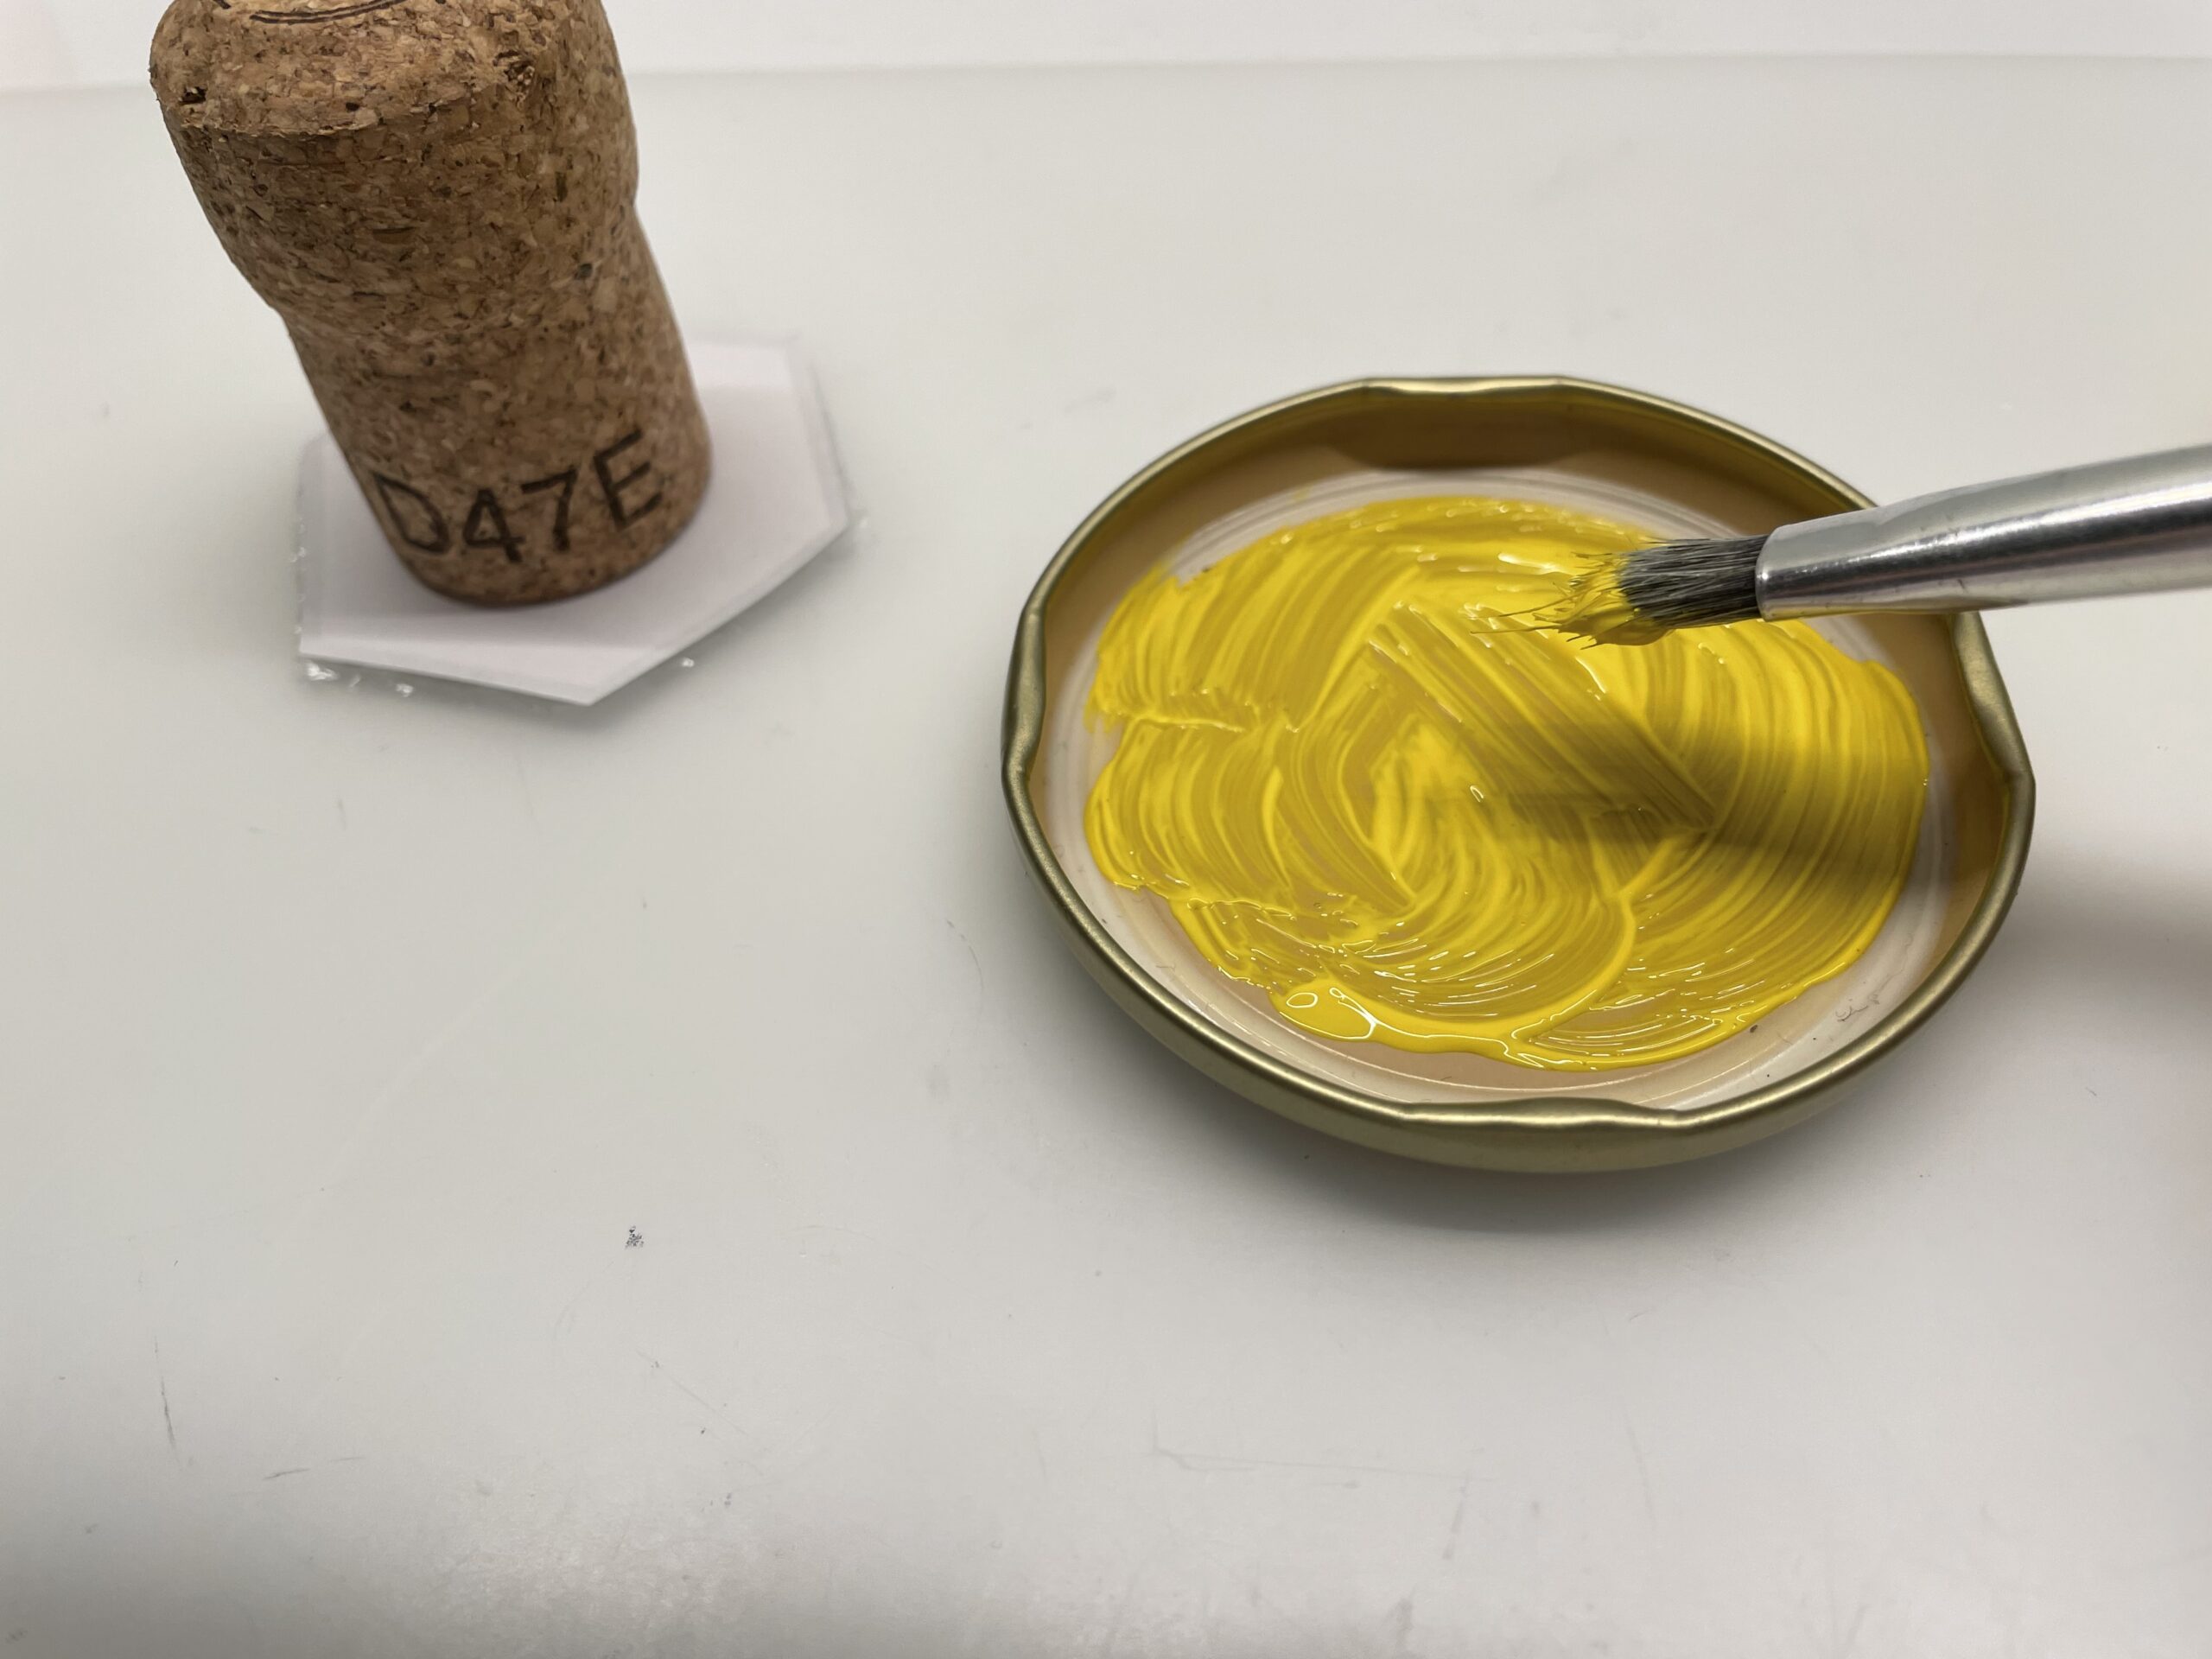
Now press the stamp into the damp colour and rub it slightly back and forth.
Checks whether the stamp is covered with paint everywhere.
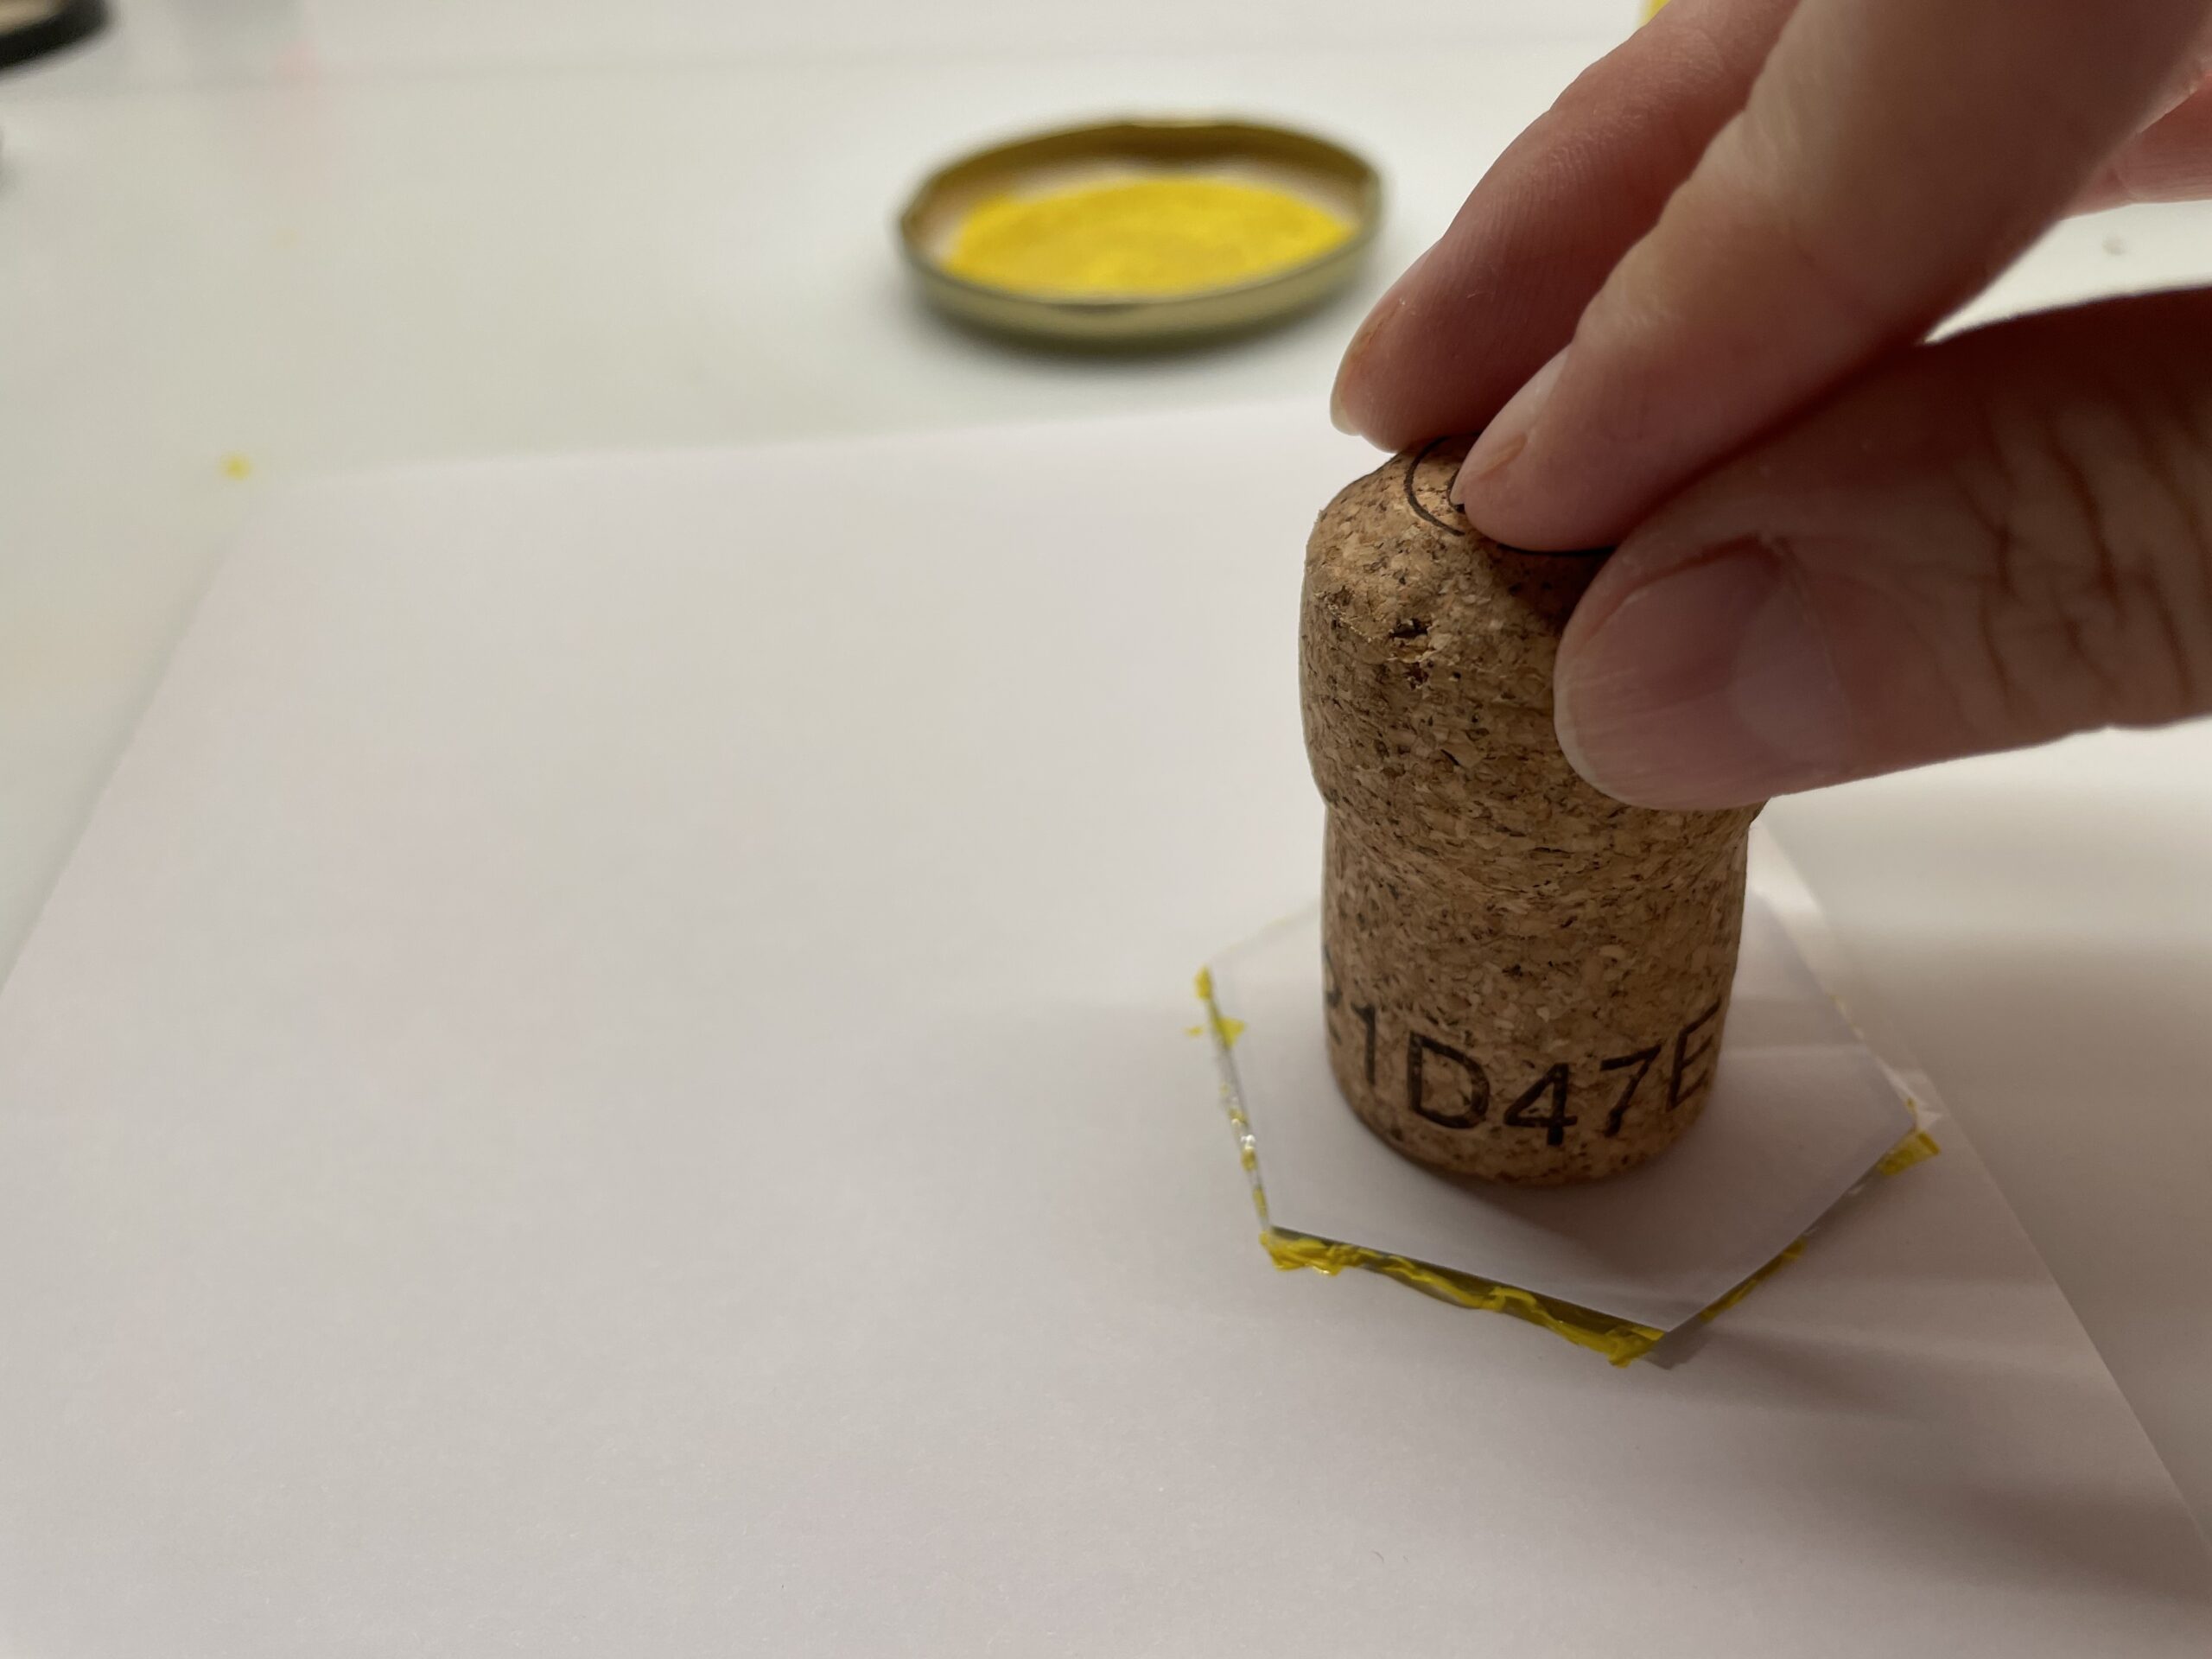
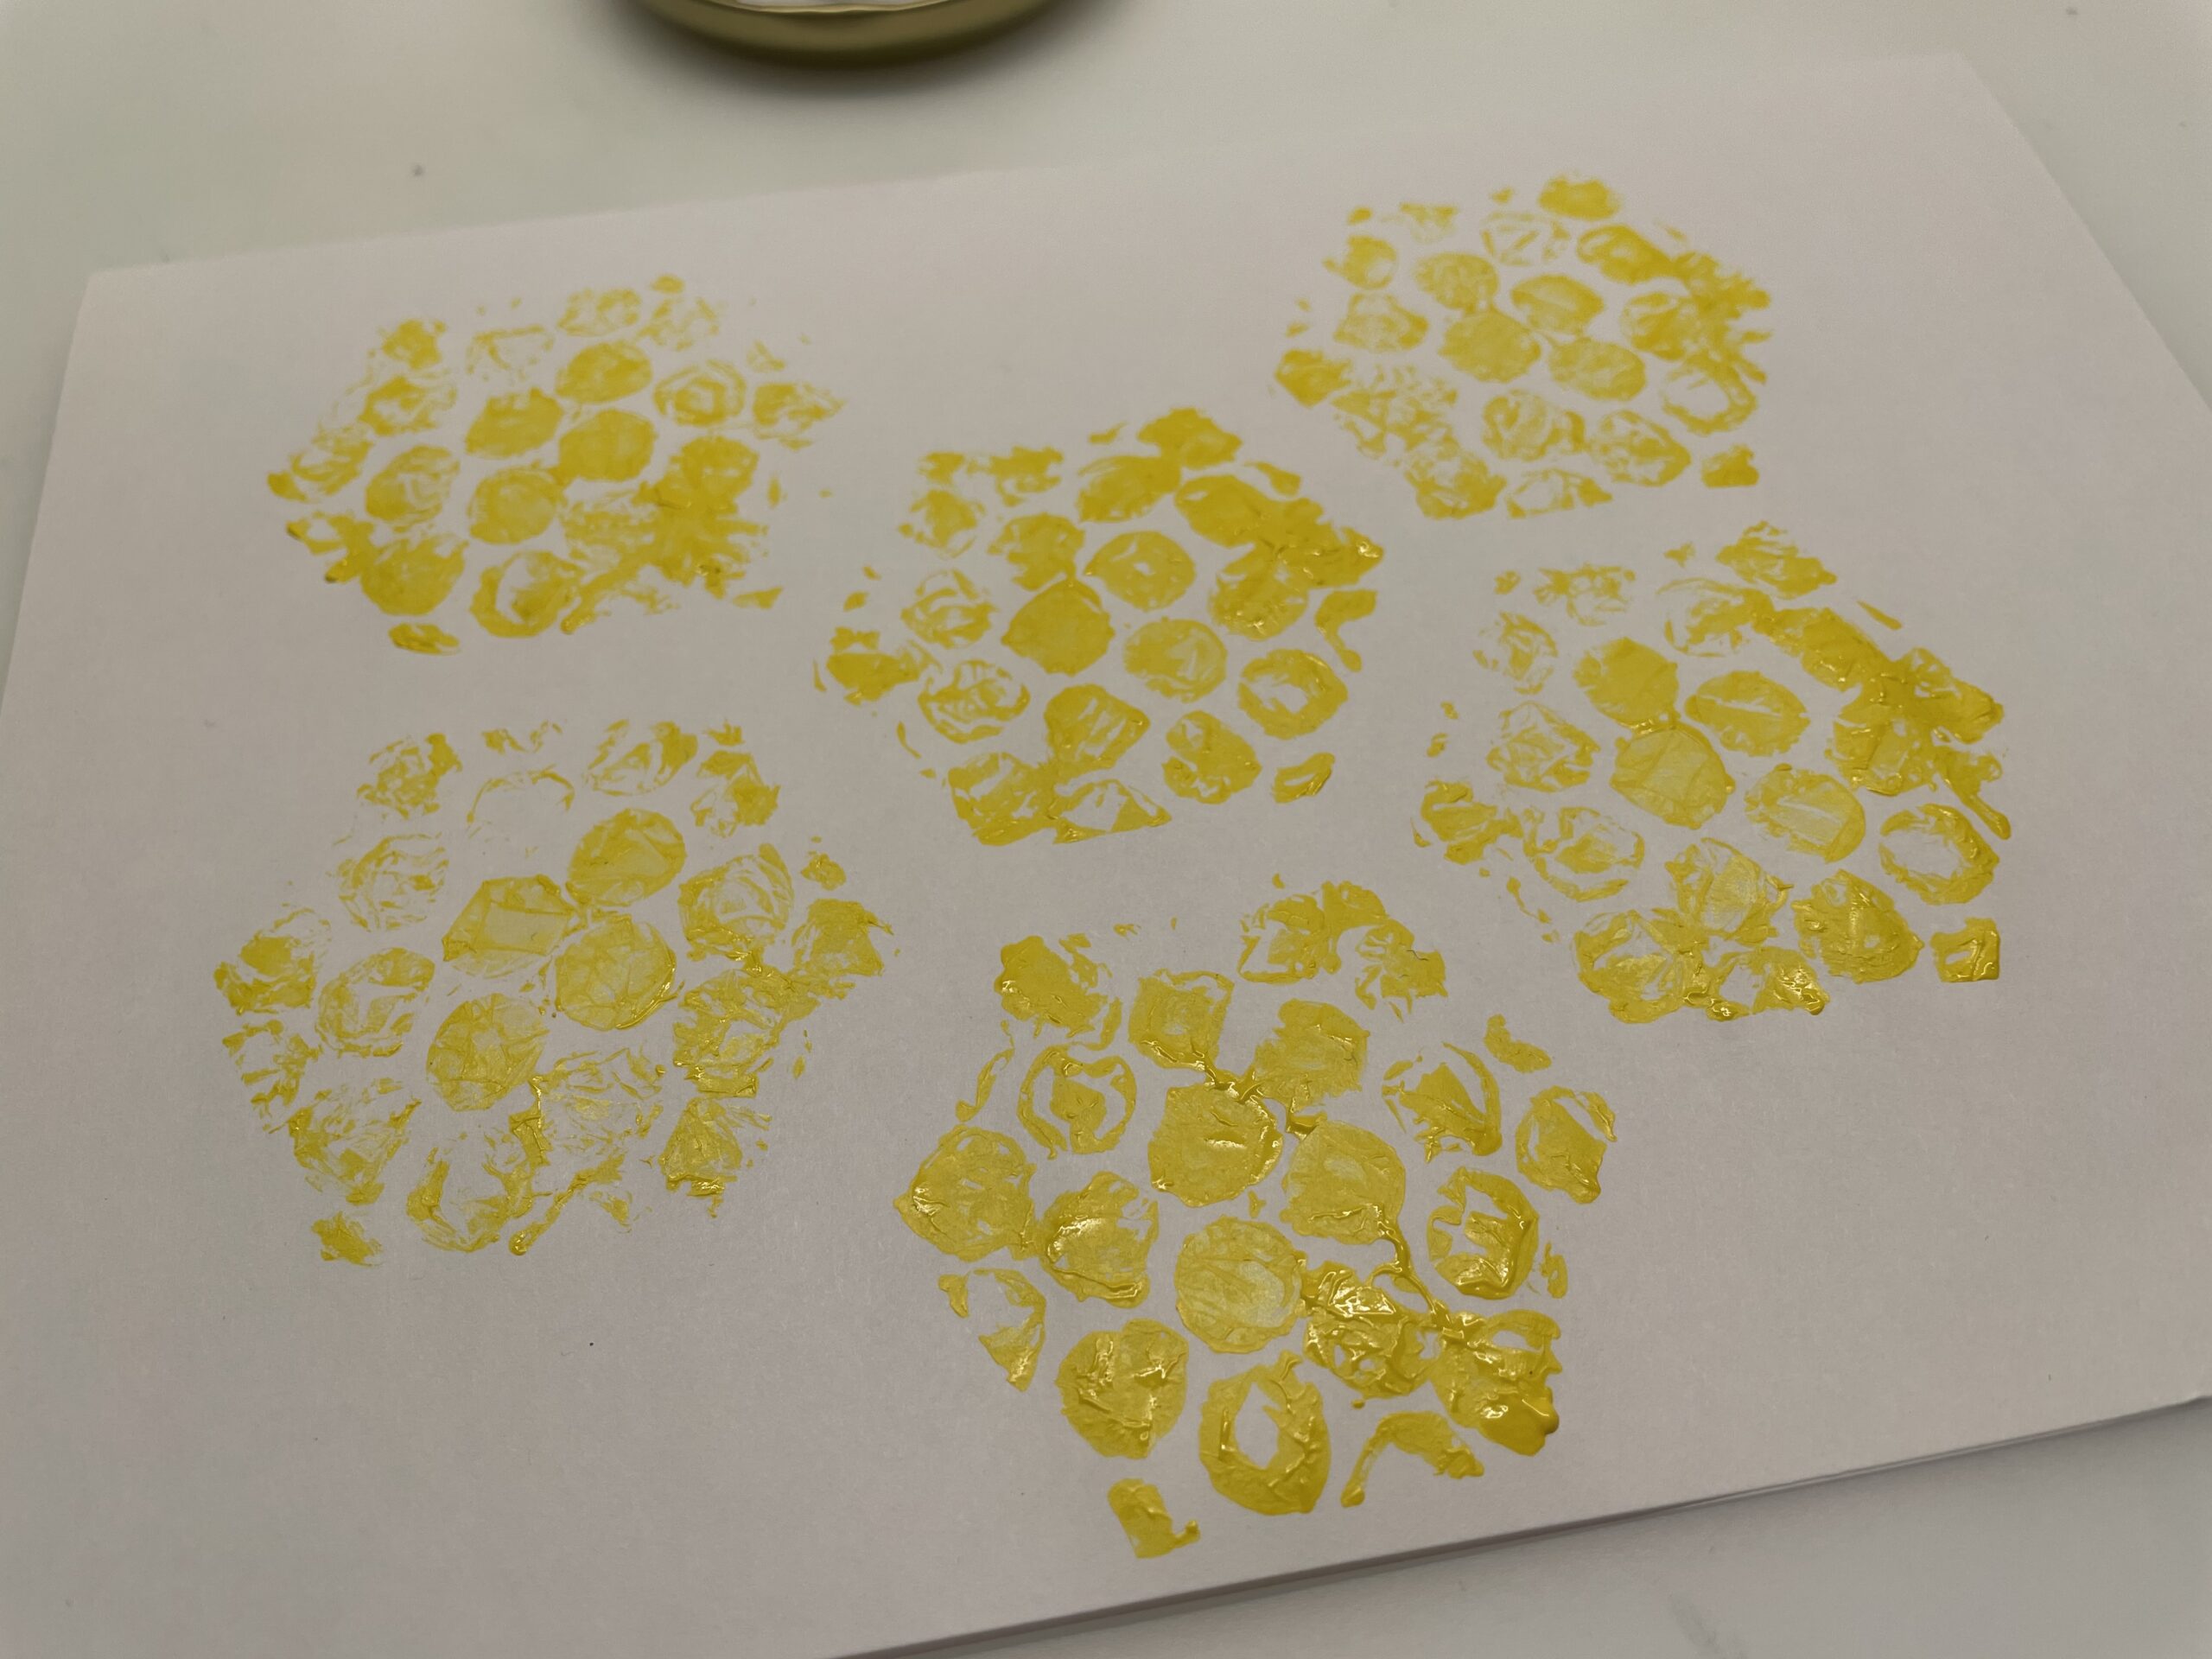
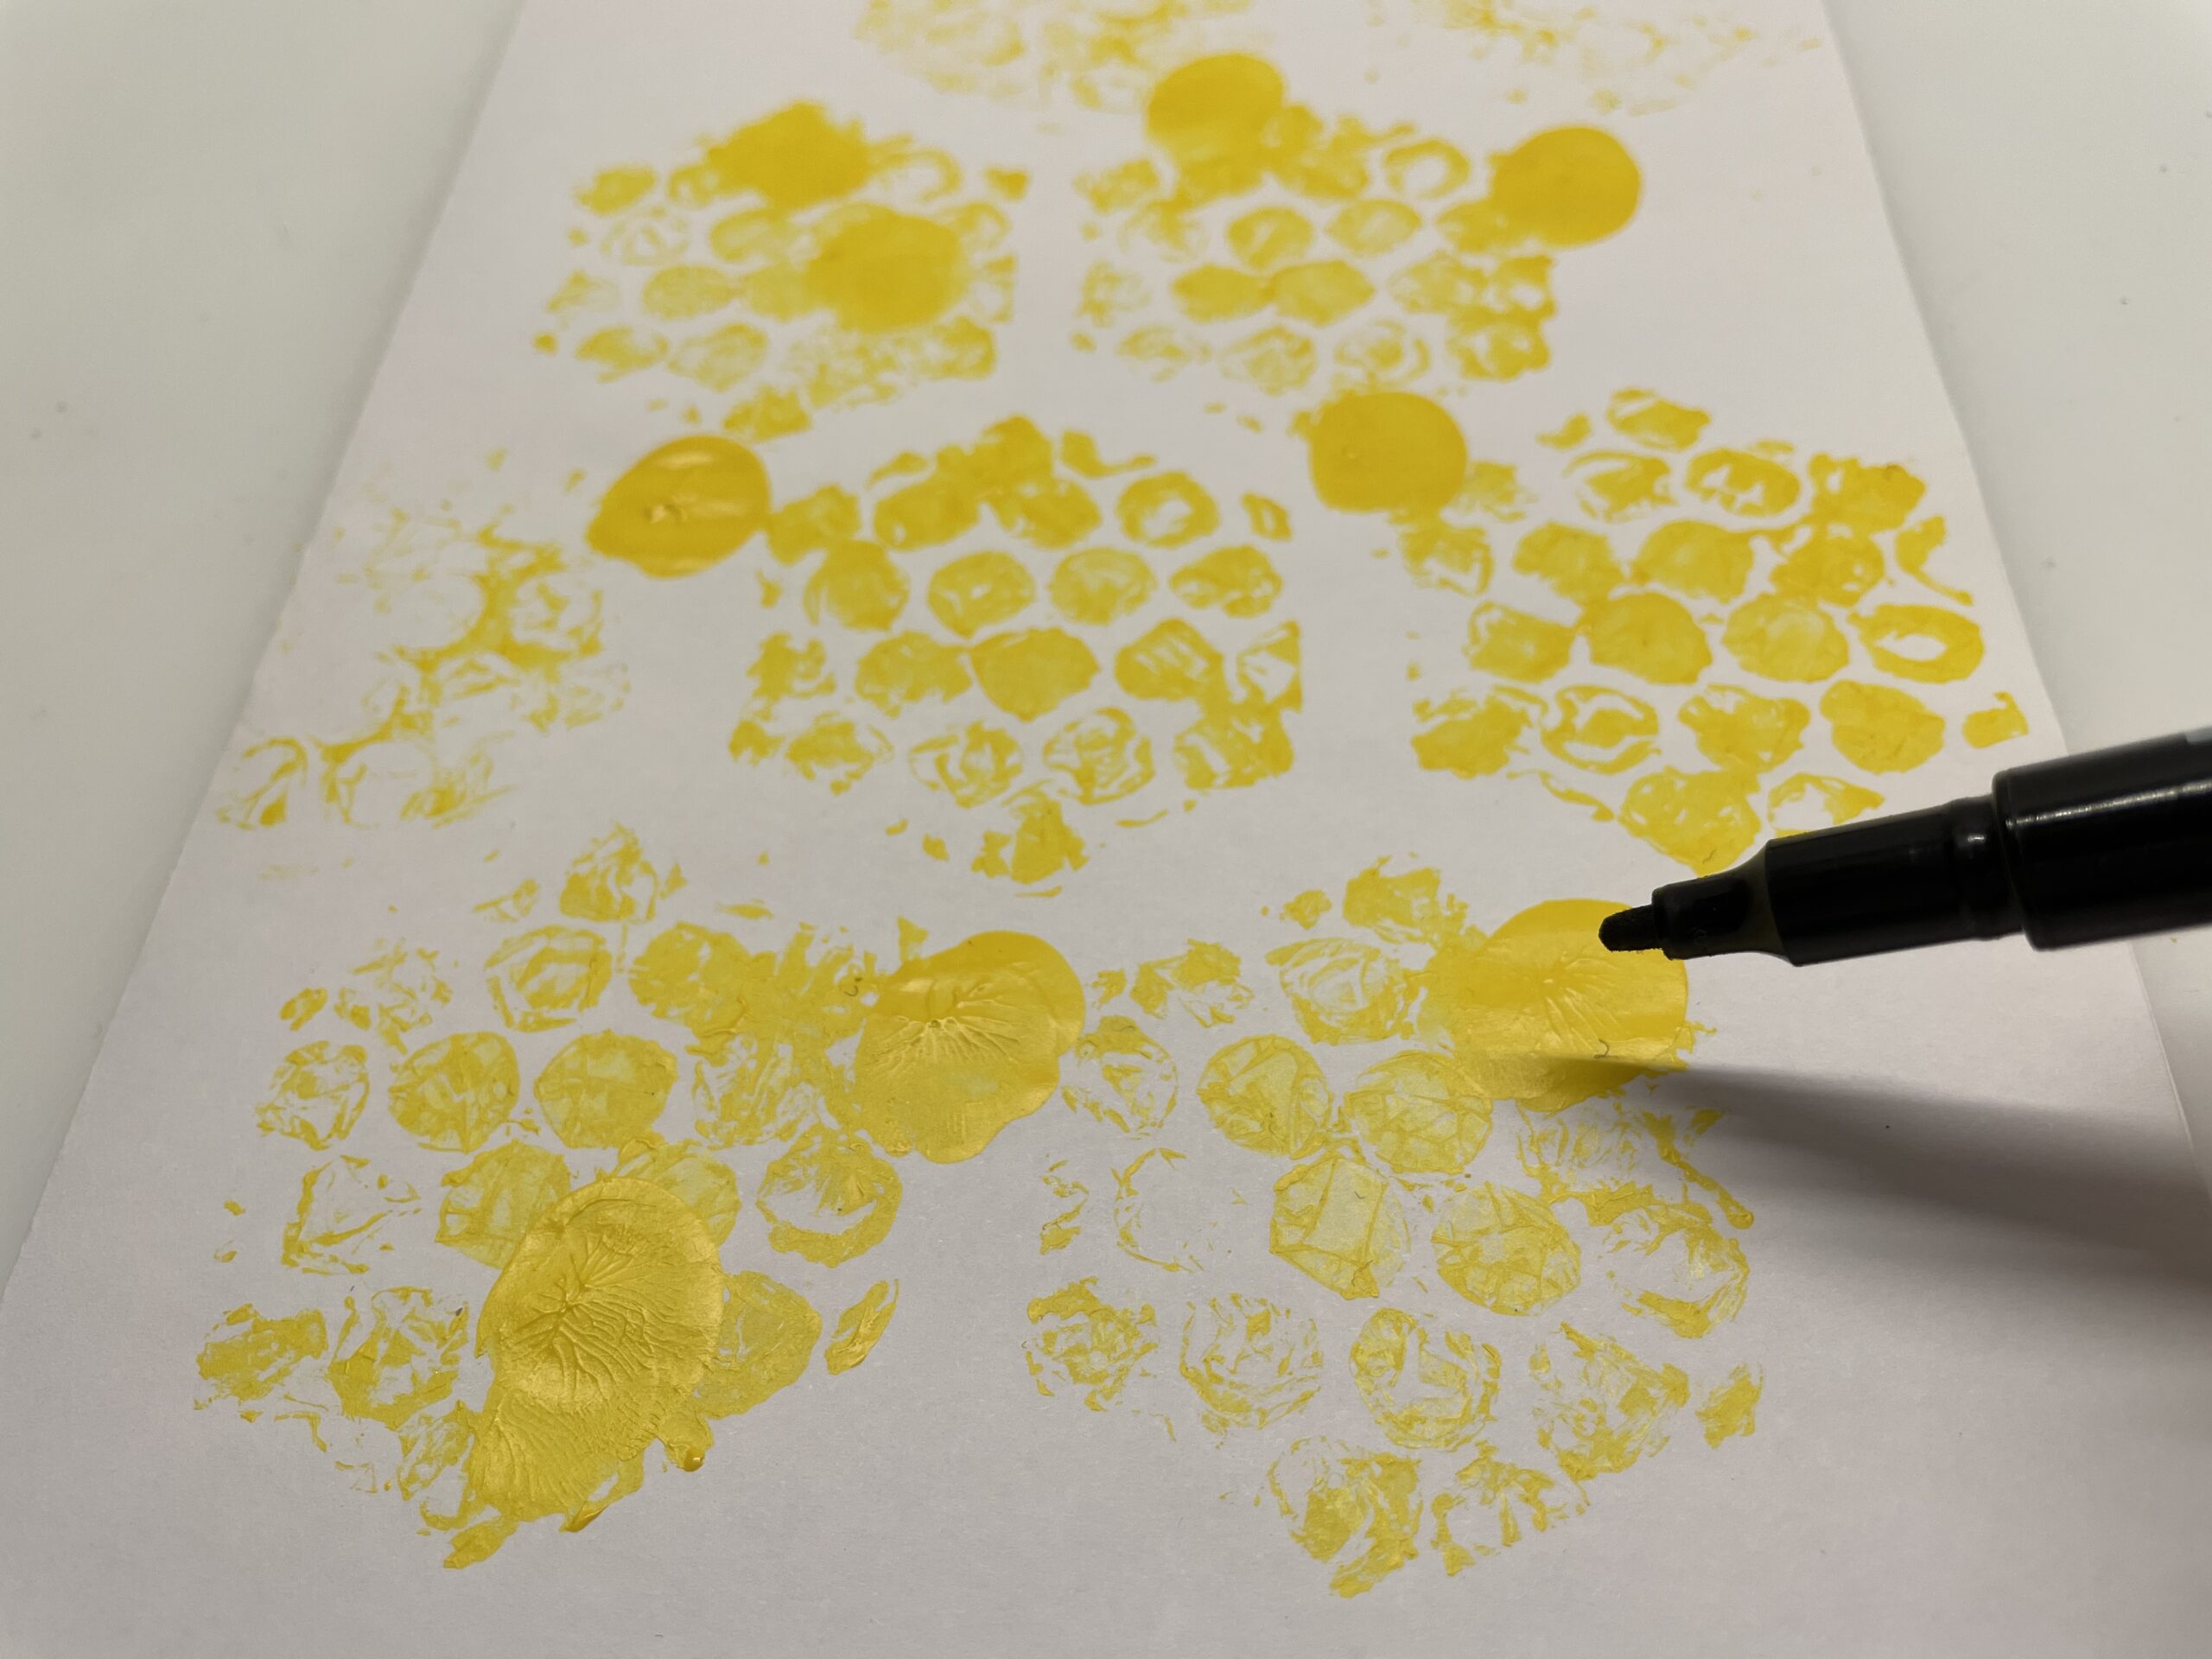
Then you print honeycombs on a white paper.
After every stamp print, you'll get back paint.

When stamping, leave some distance between the individual honeycombs.
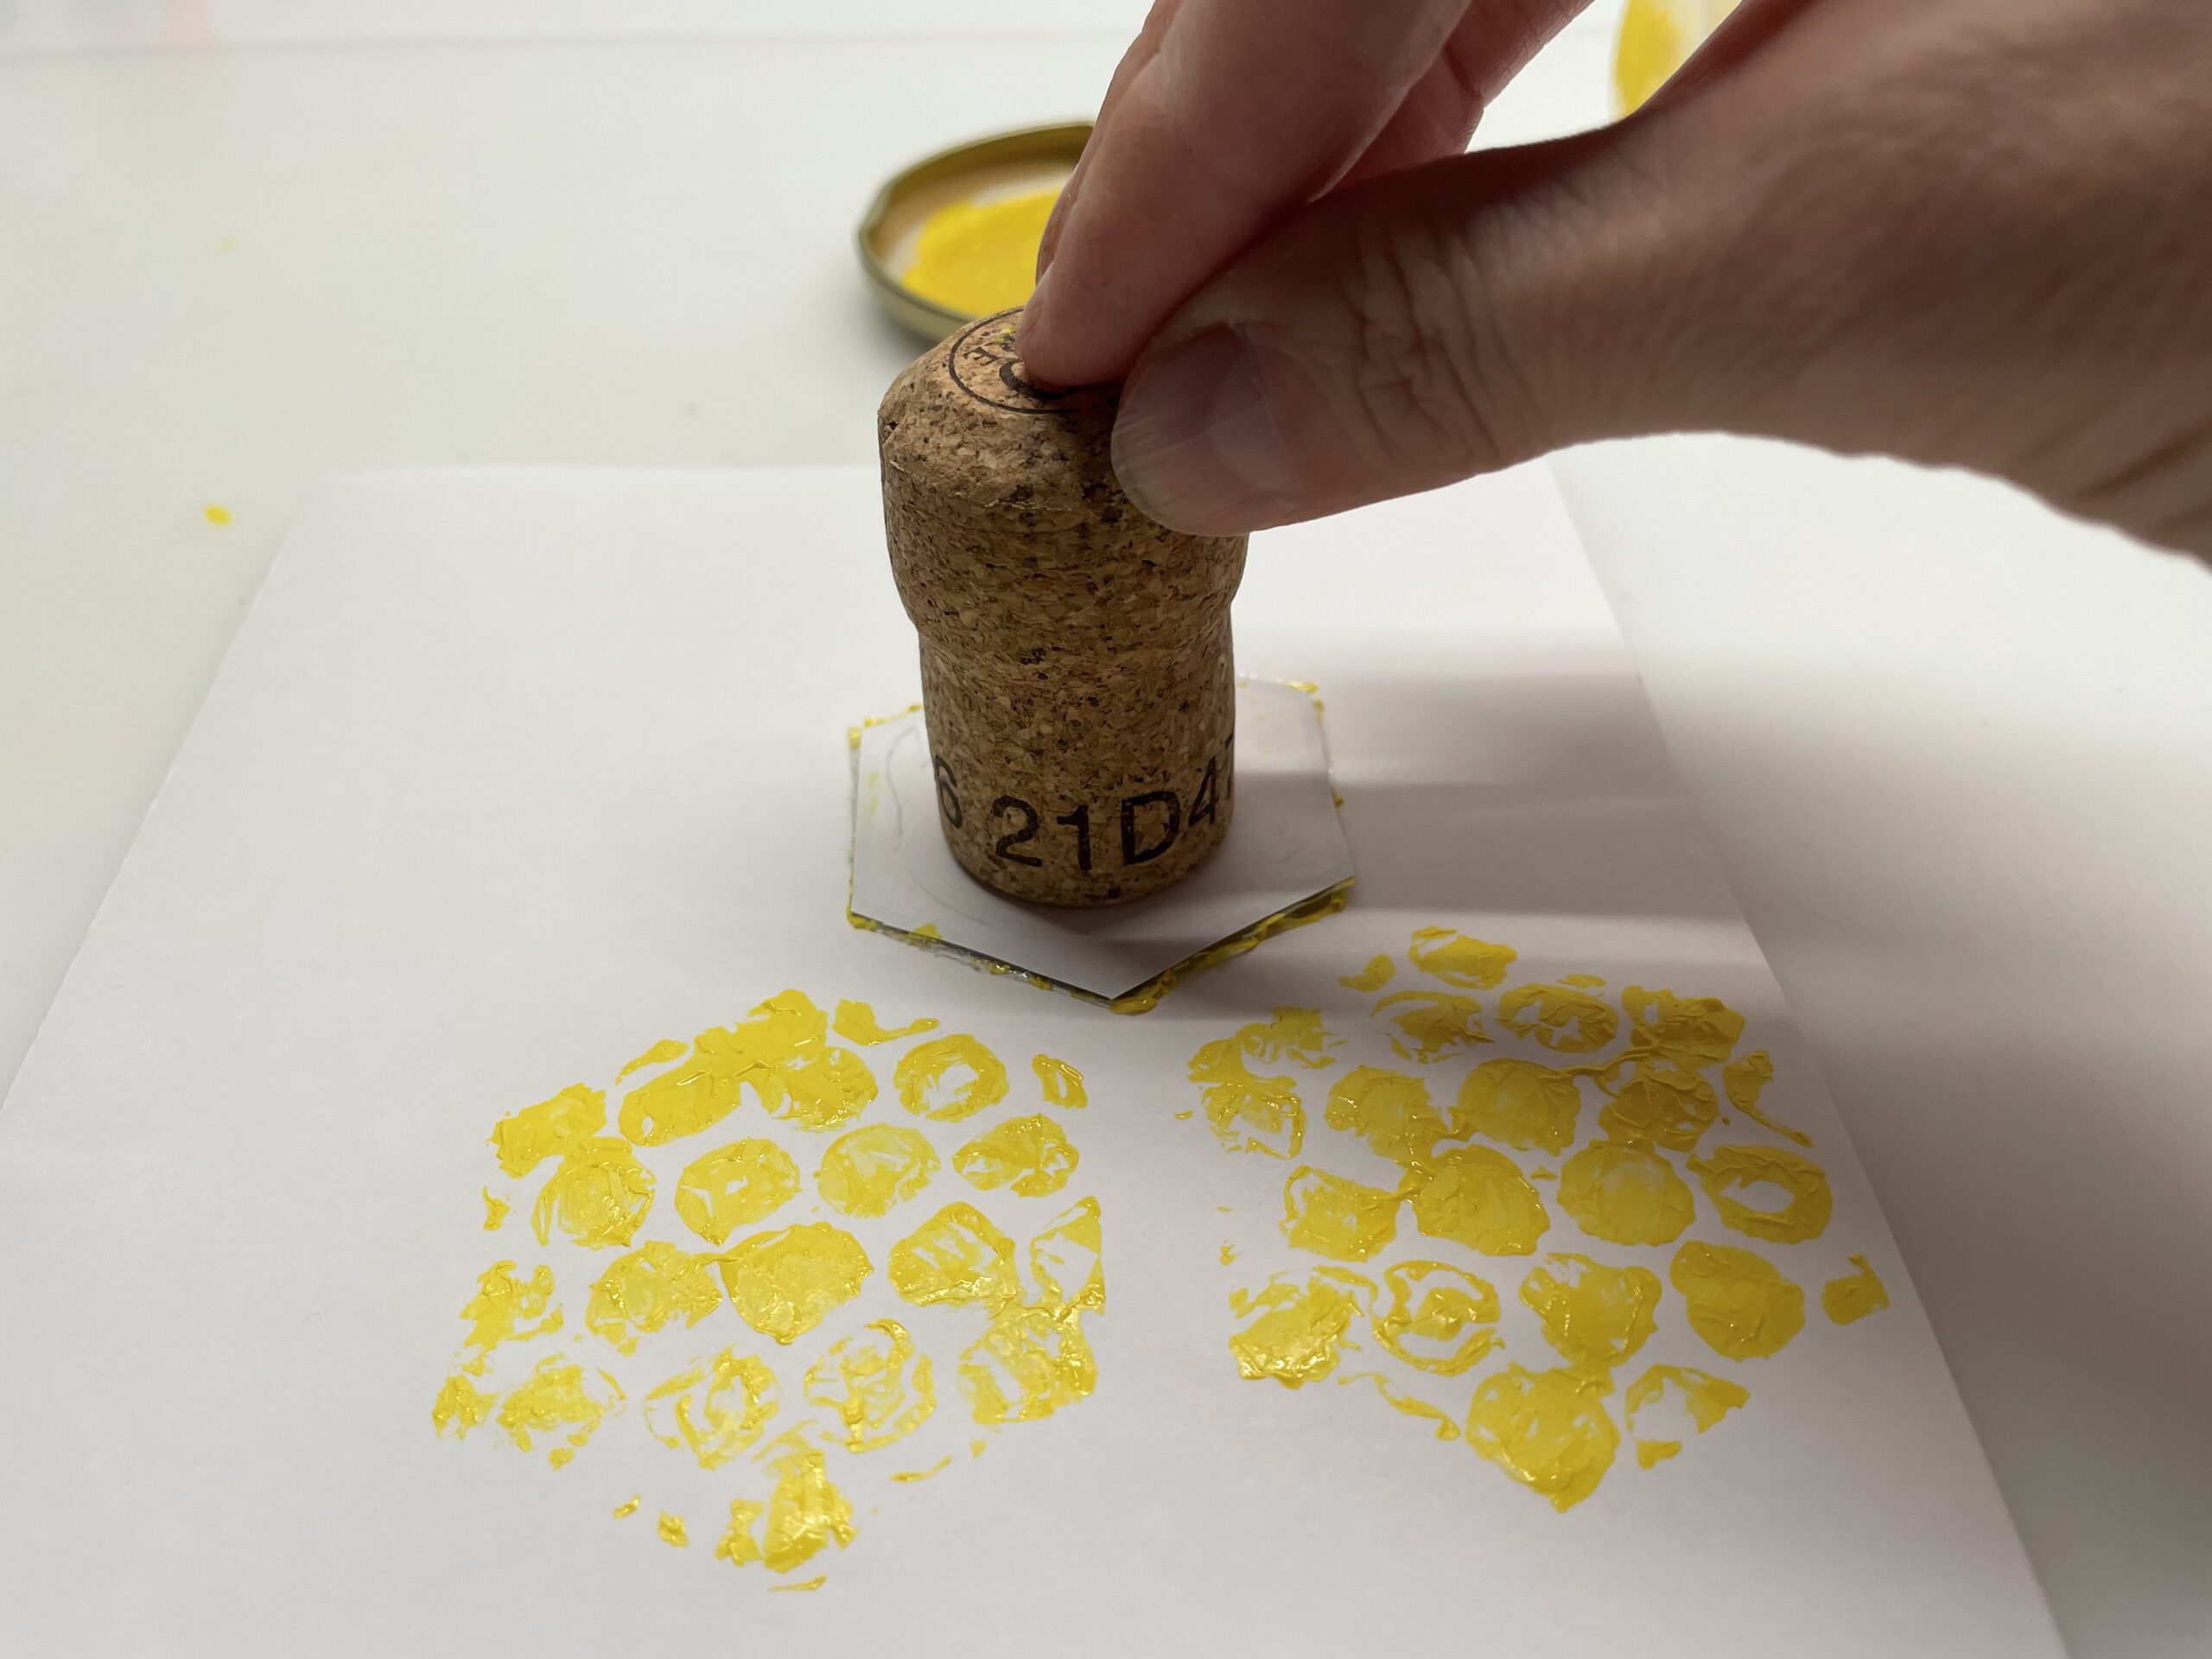
You can also use different yellow orange tones for the individual honeycombs.
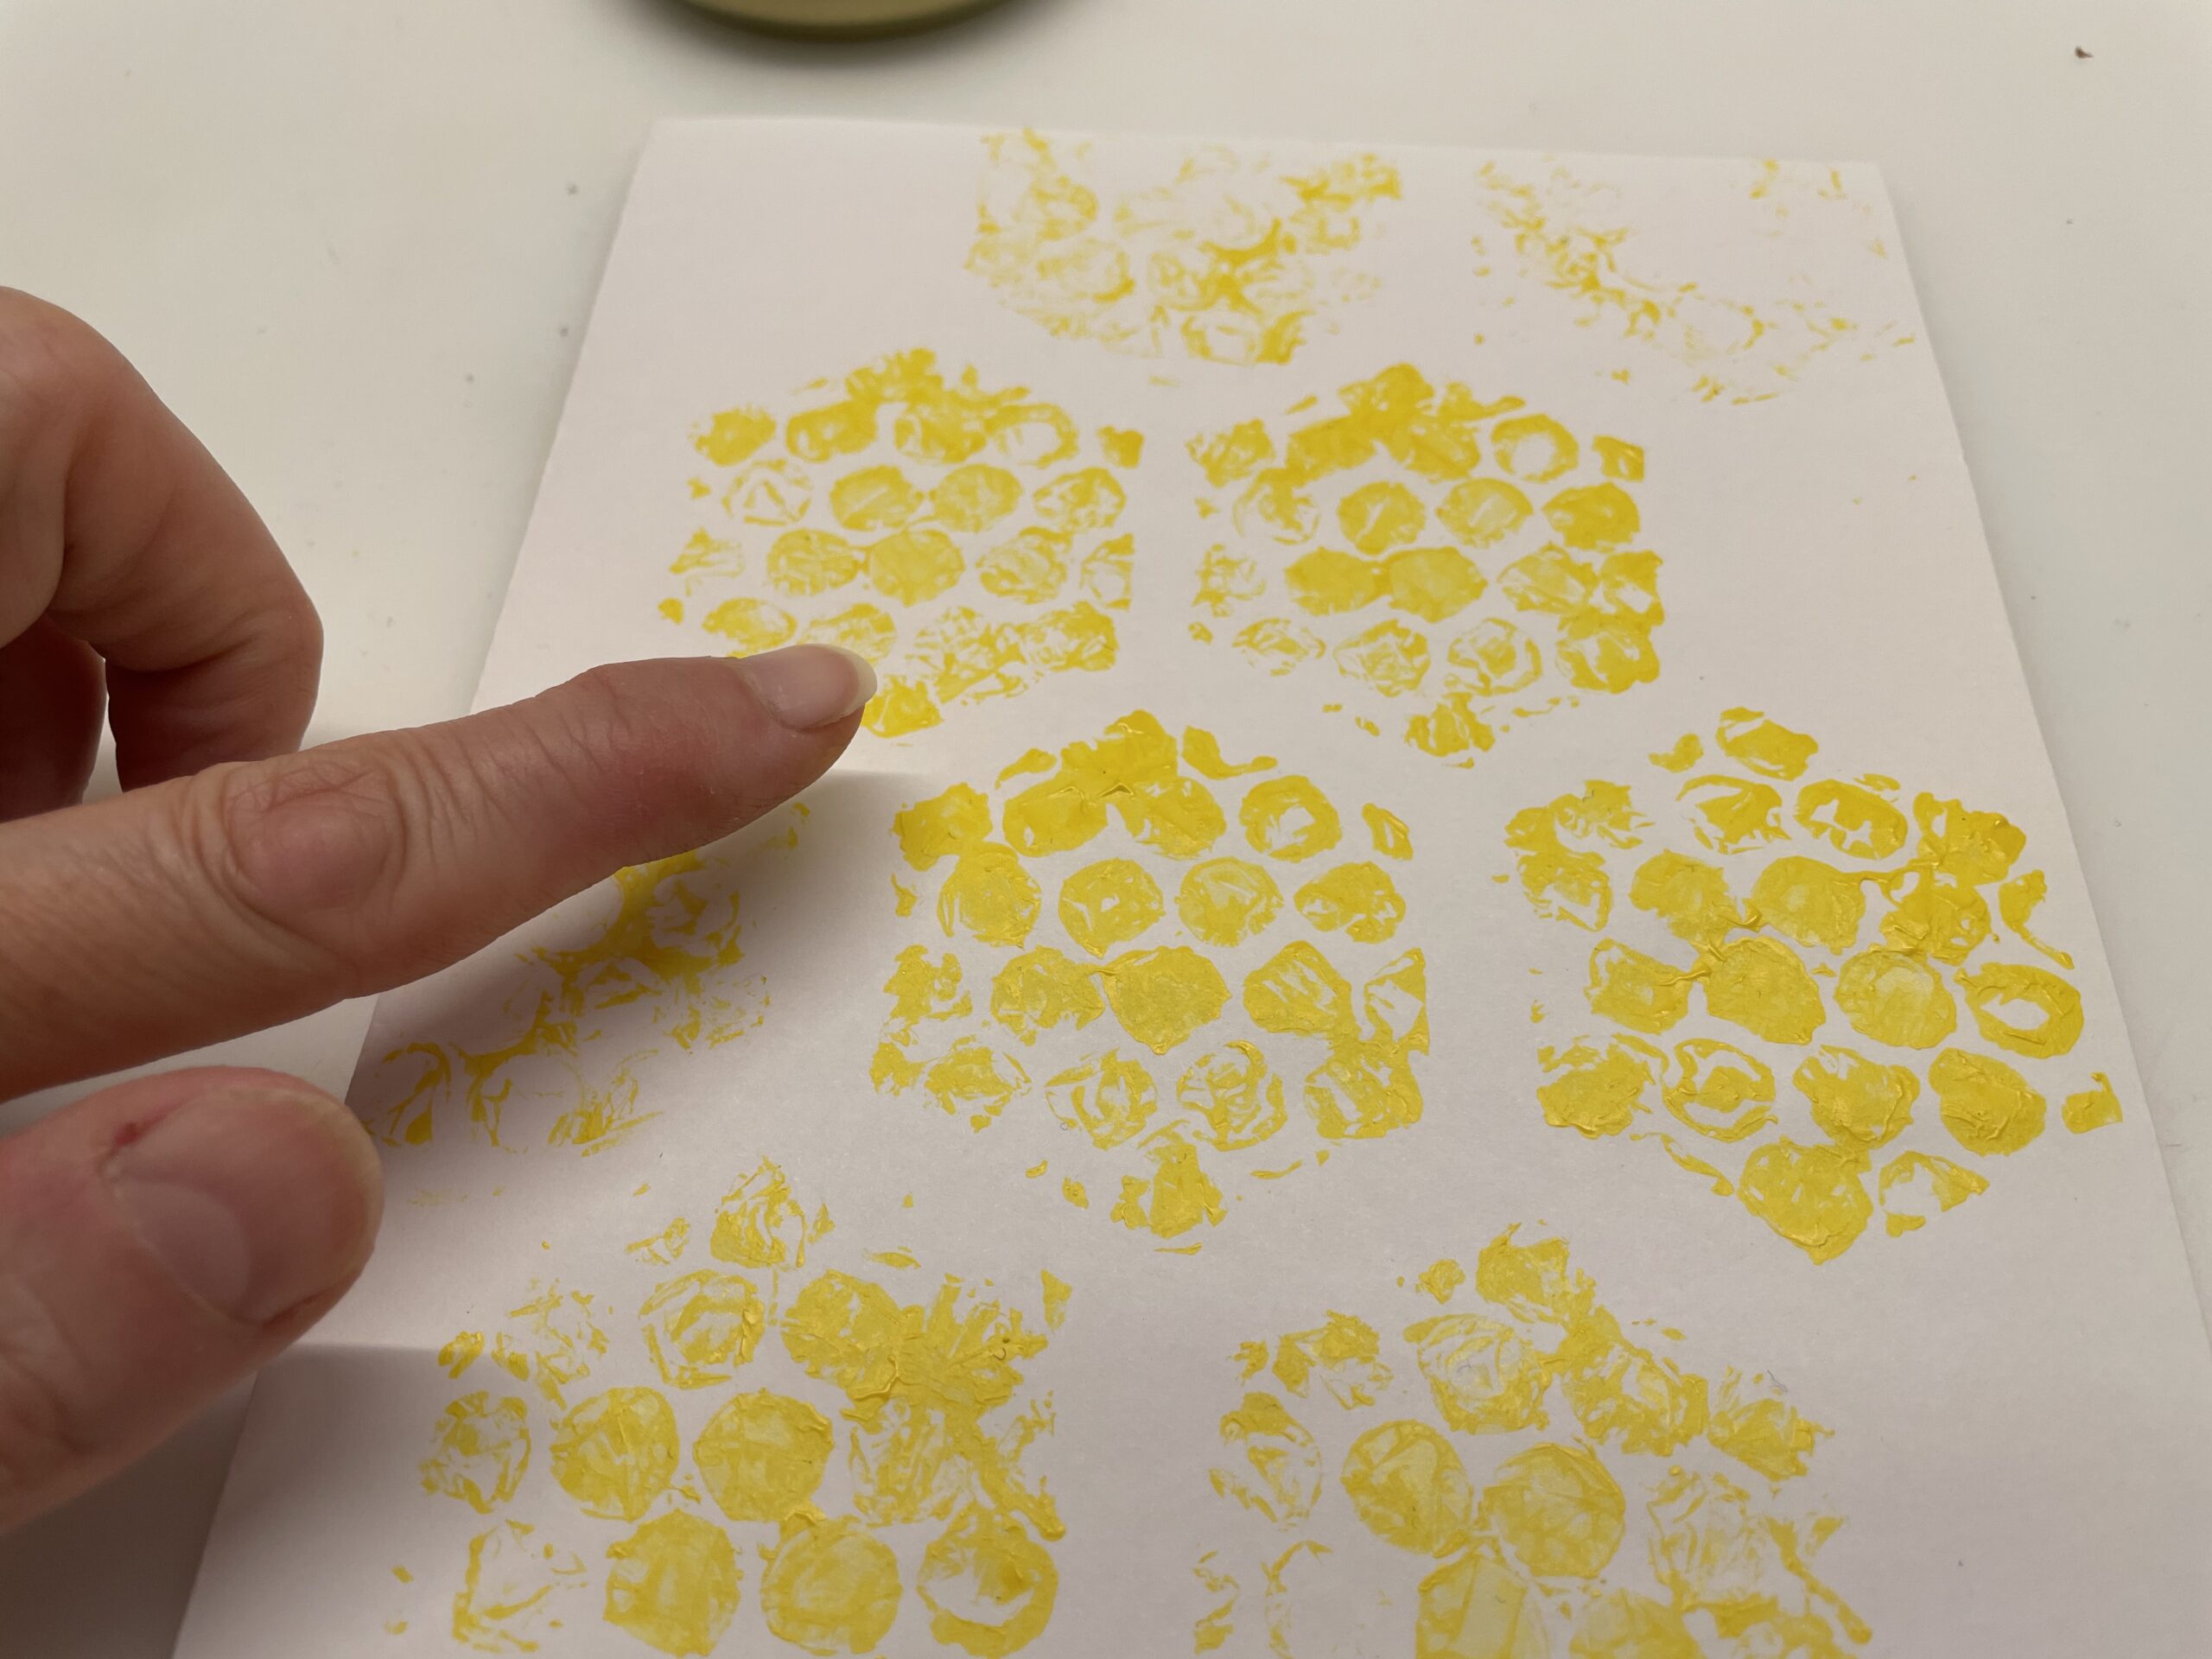
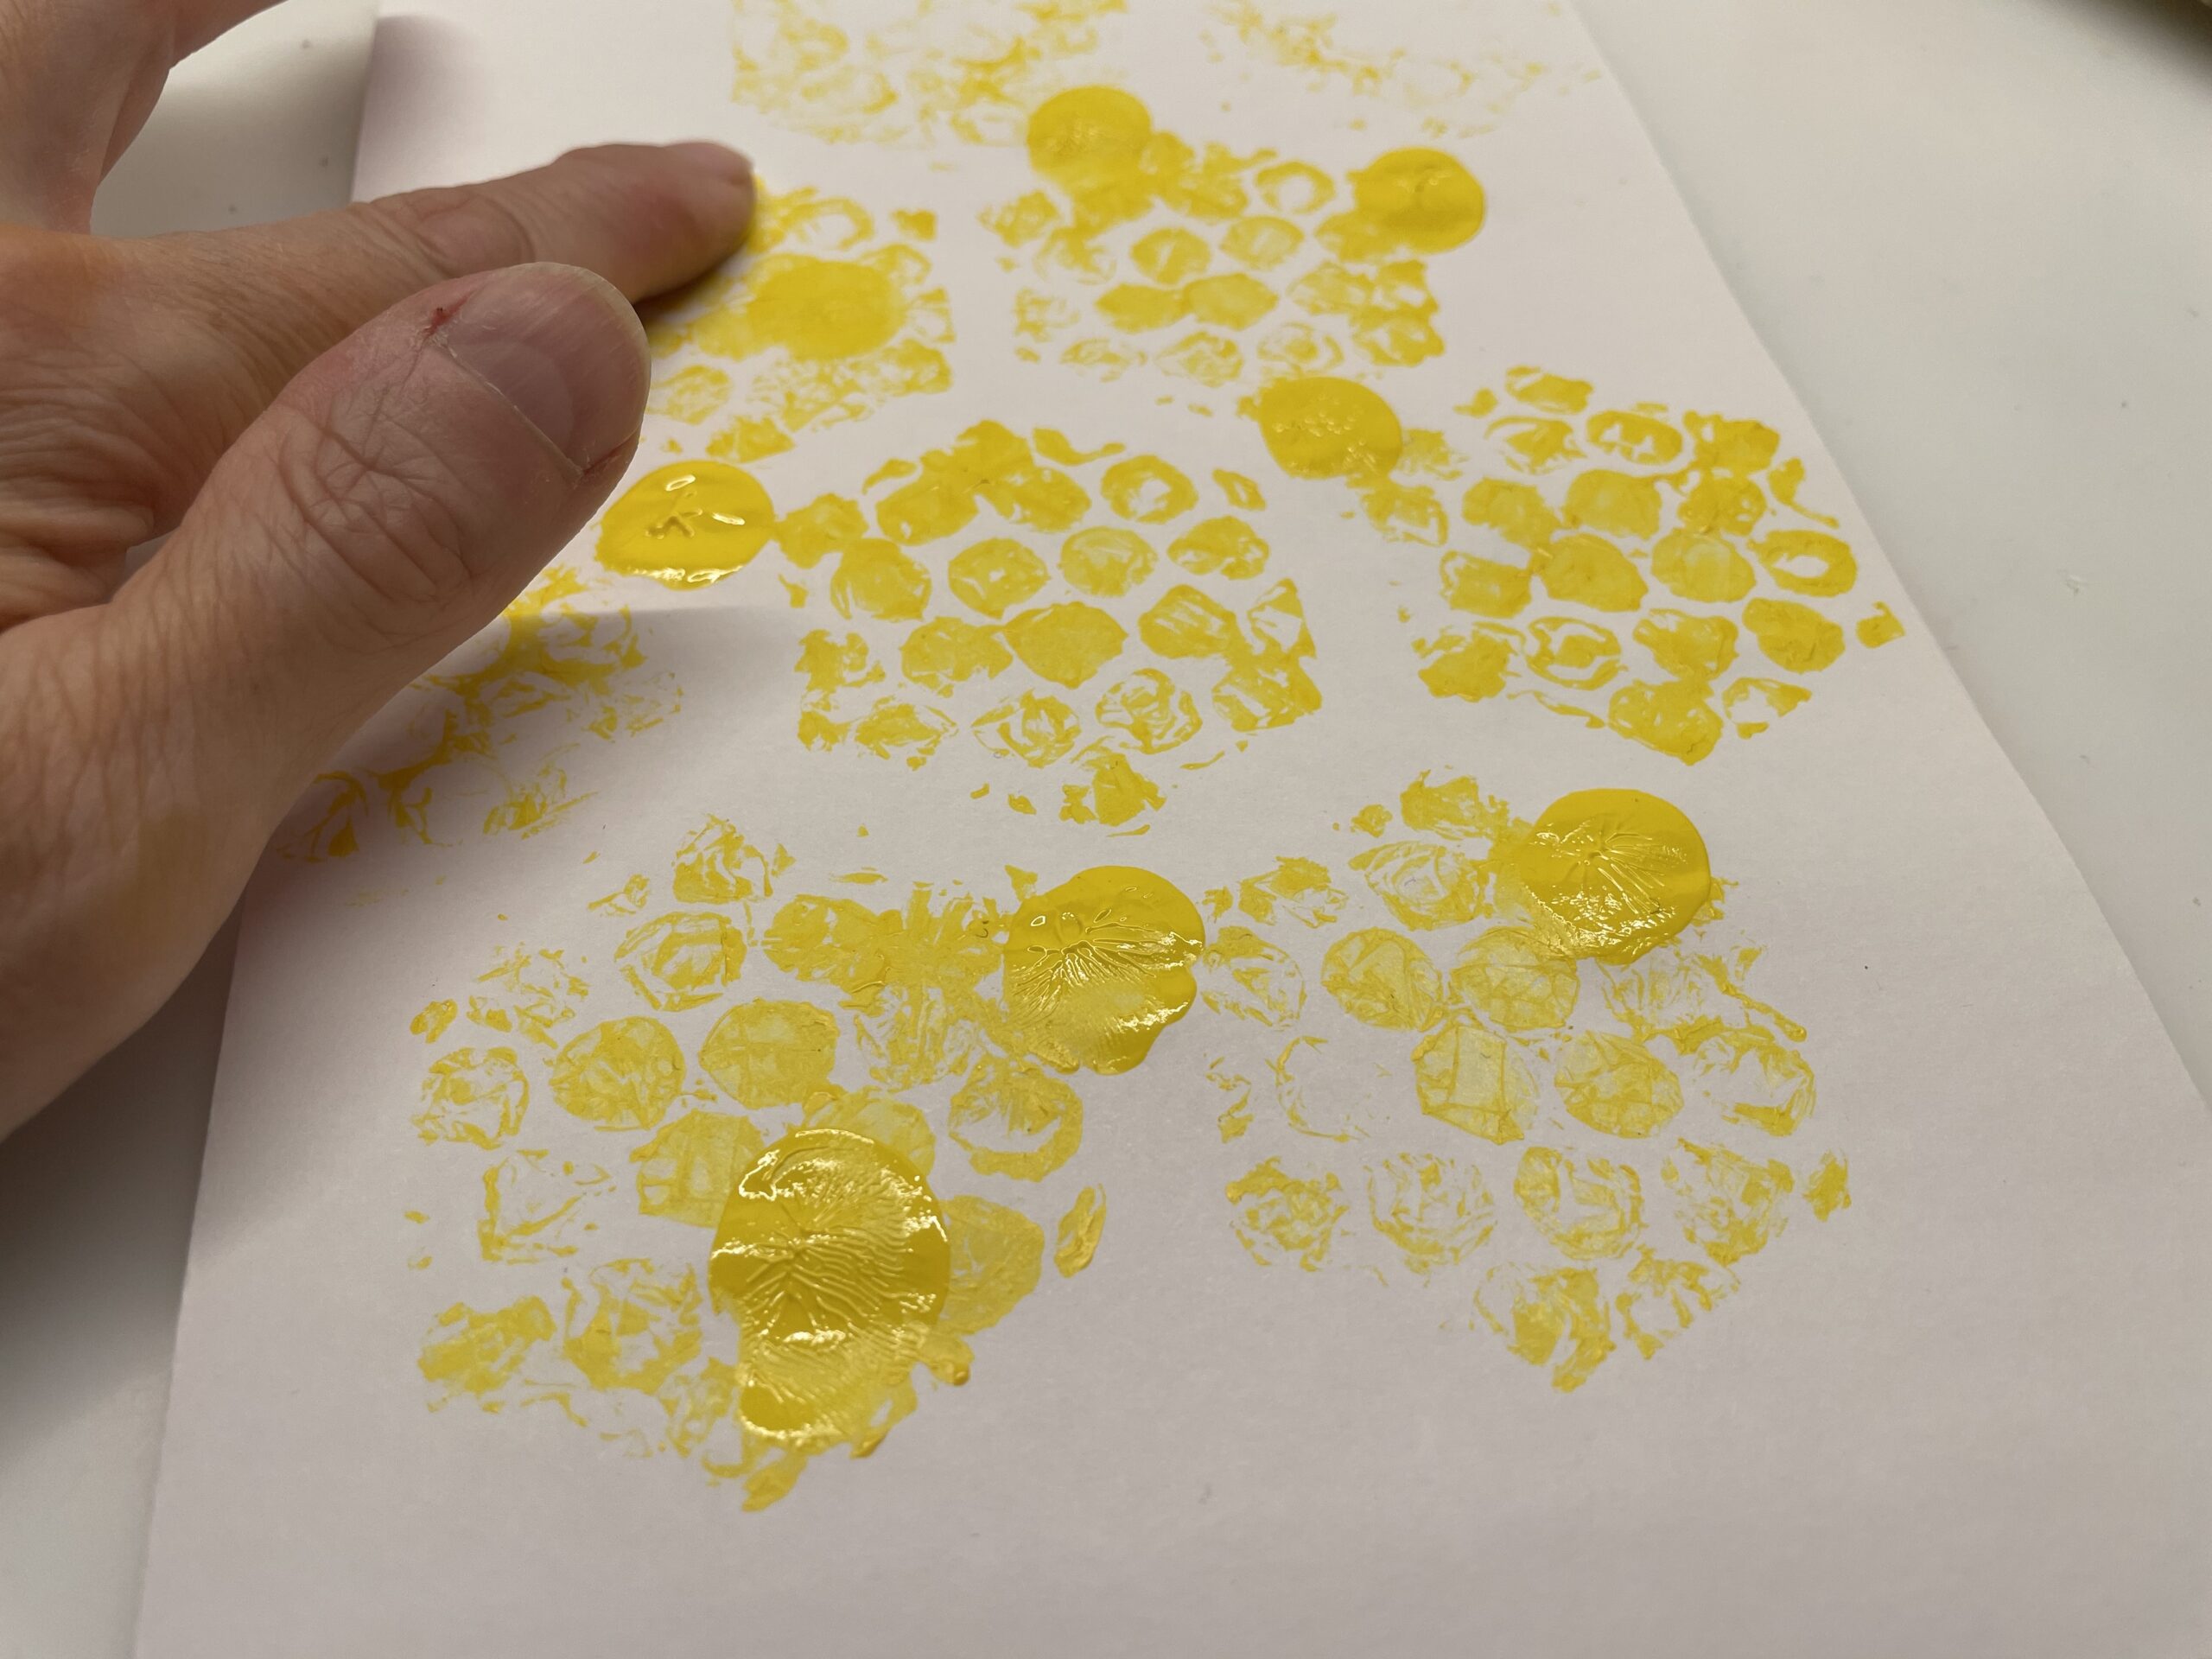
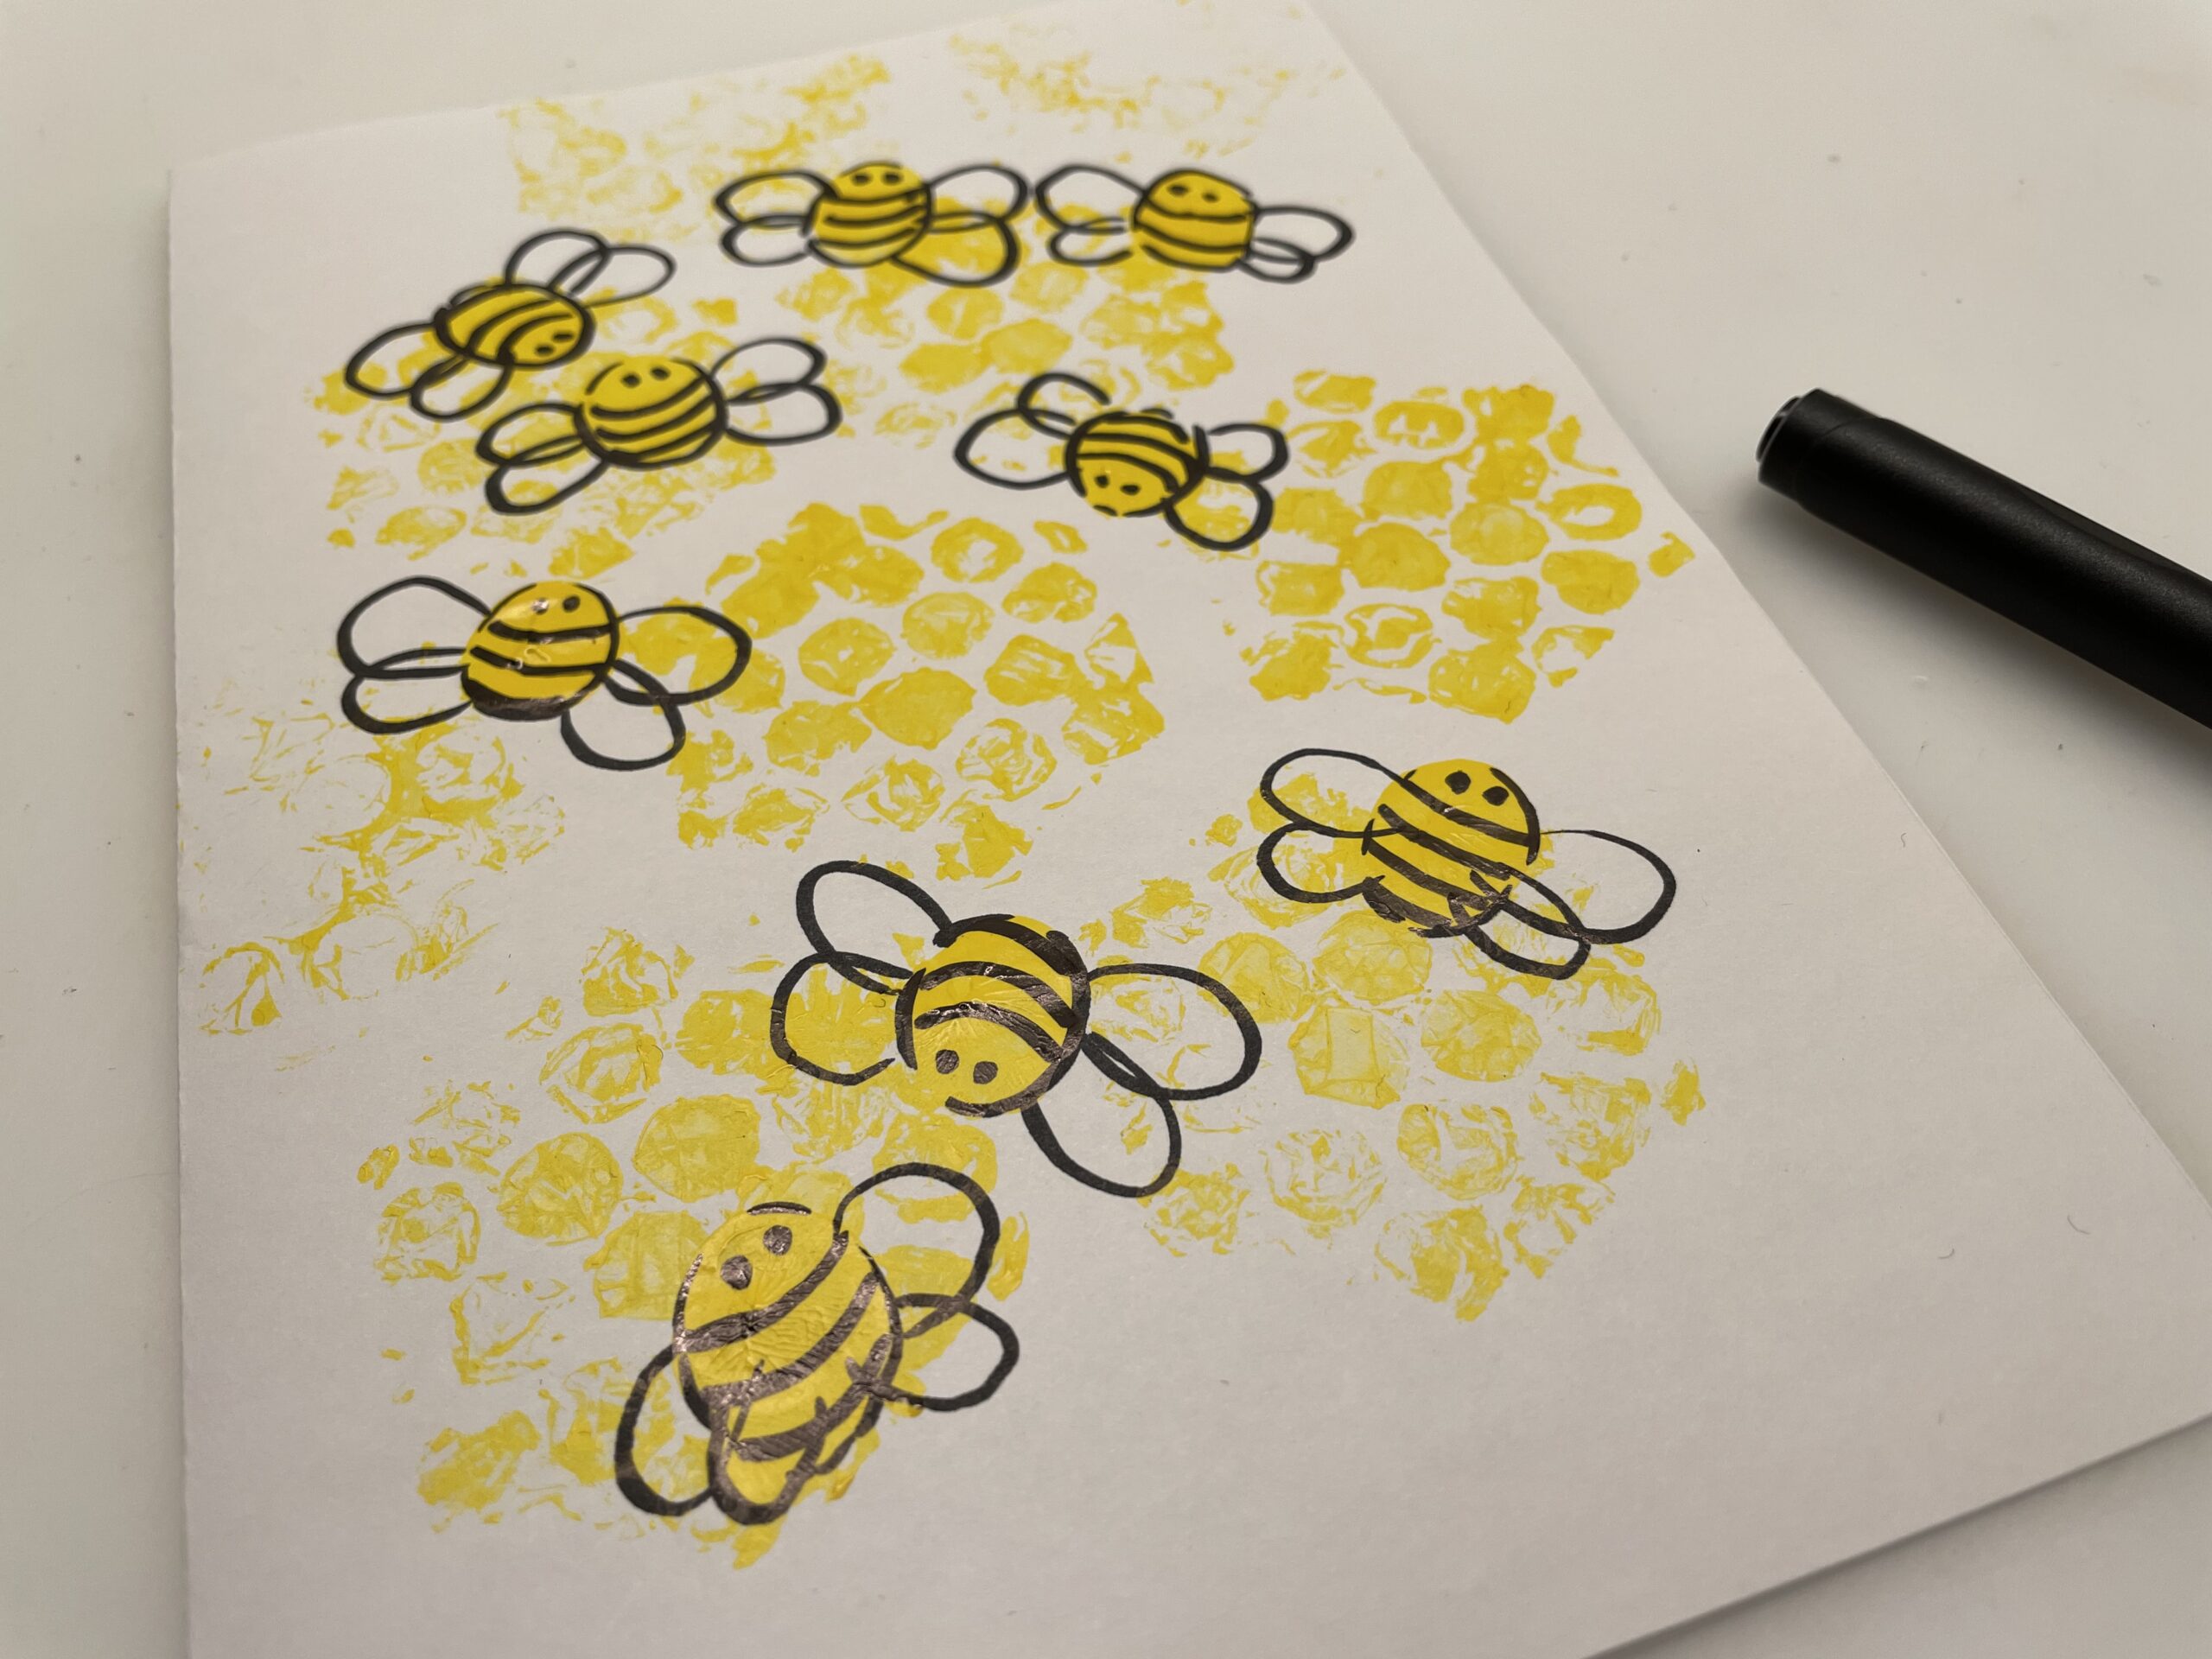
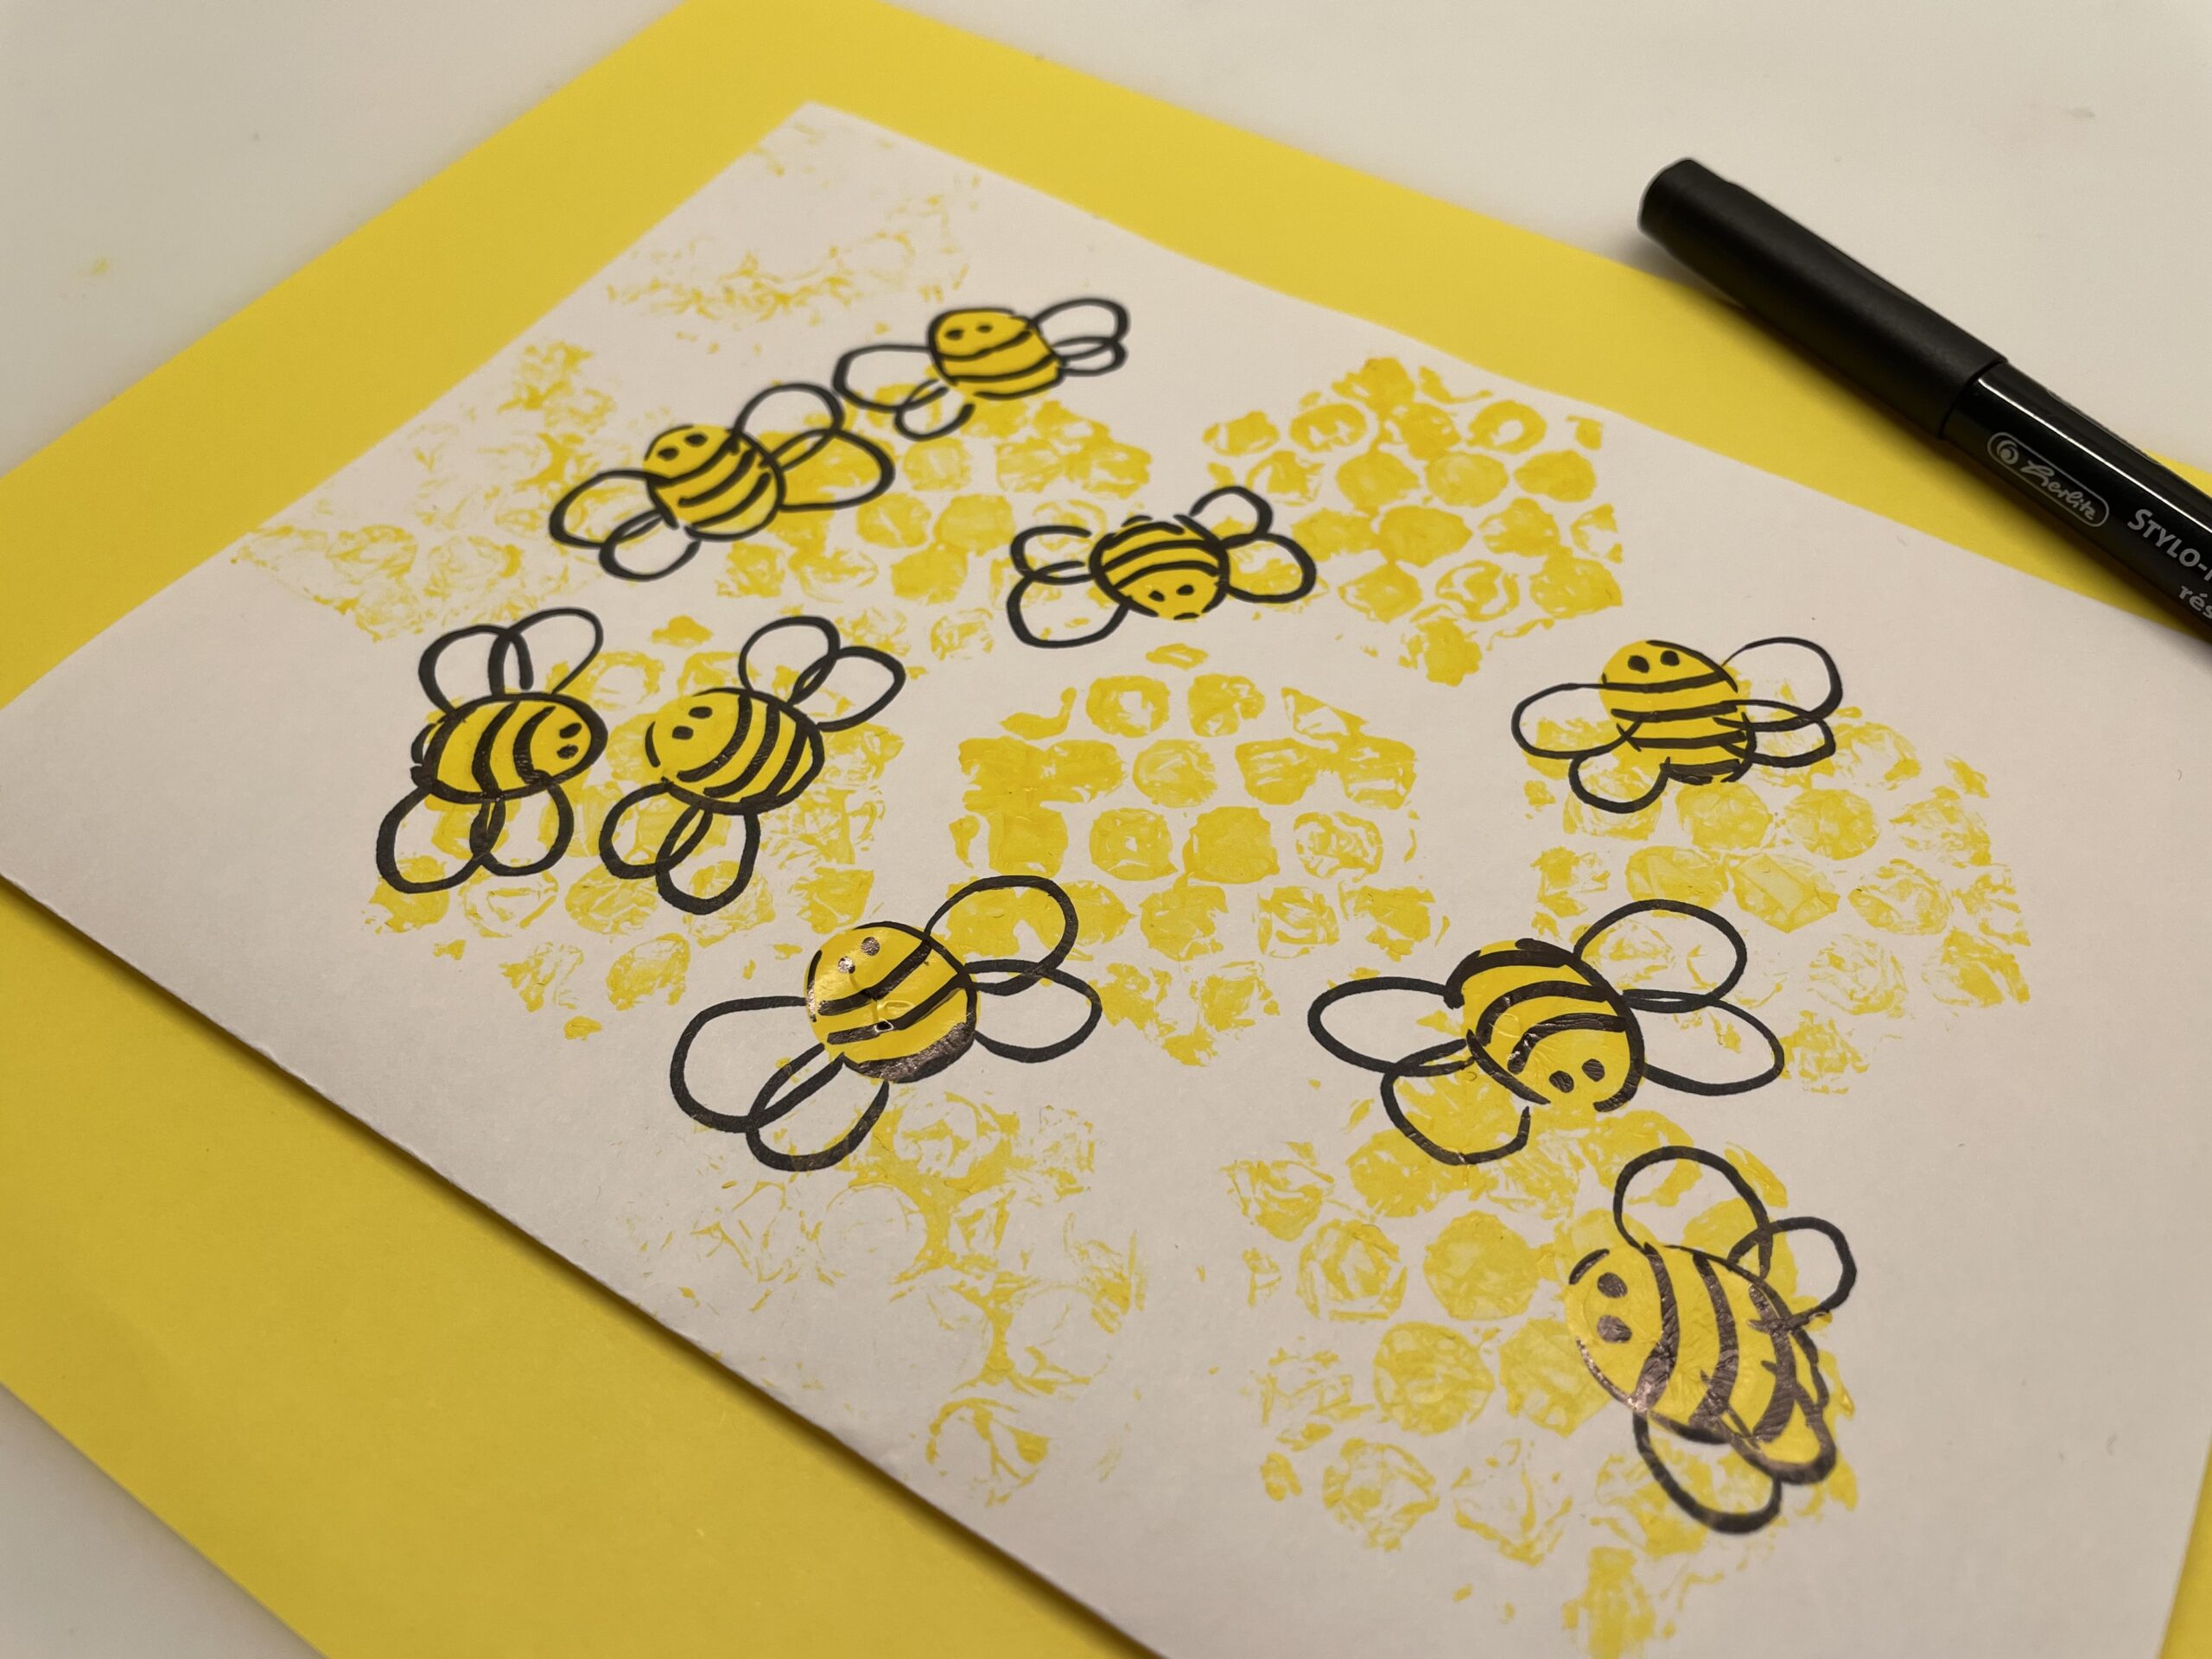
When your paper is printed with honeycombs, you print the bees' bodies.
You'd better do that with your index finger.
For this, dip the index finger in yellow color and pat between, on and next to the honeycombs fingerprints.
Then put the paper aside for drying.
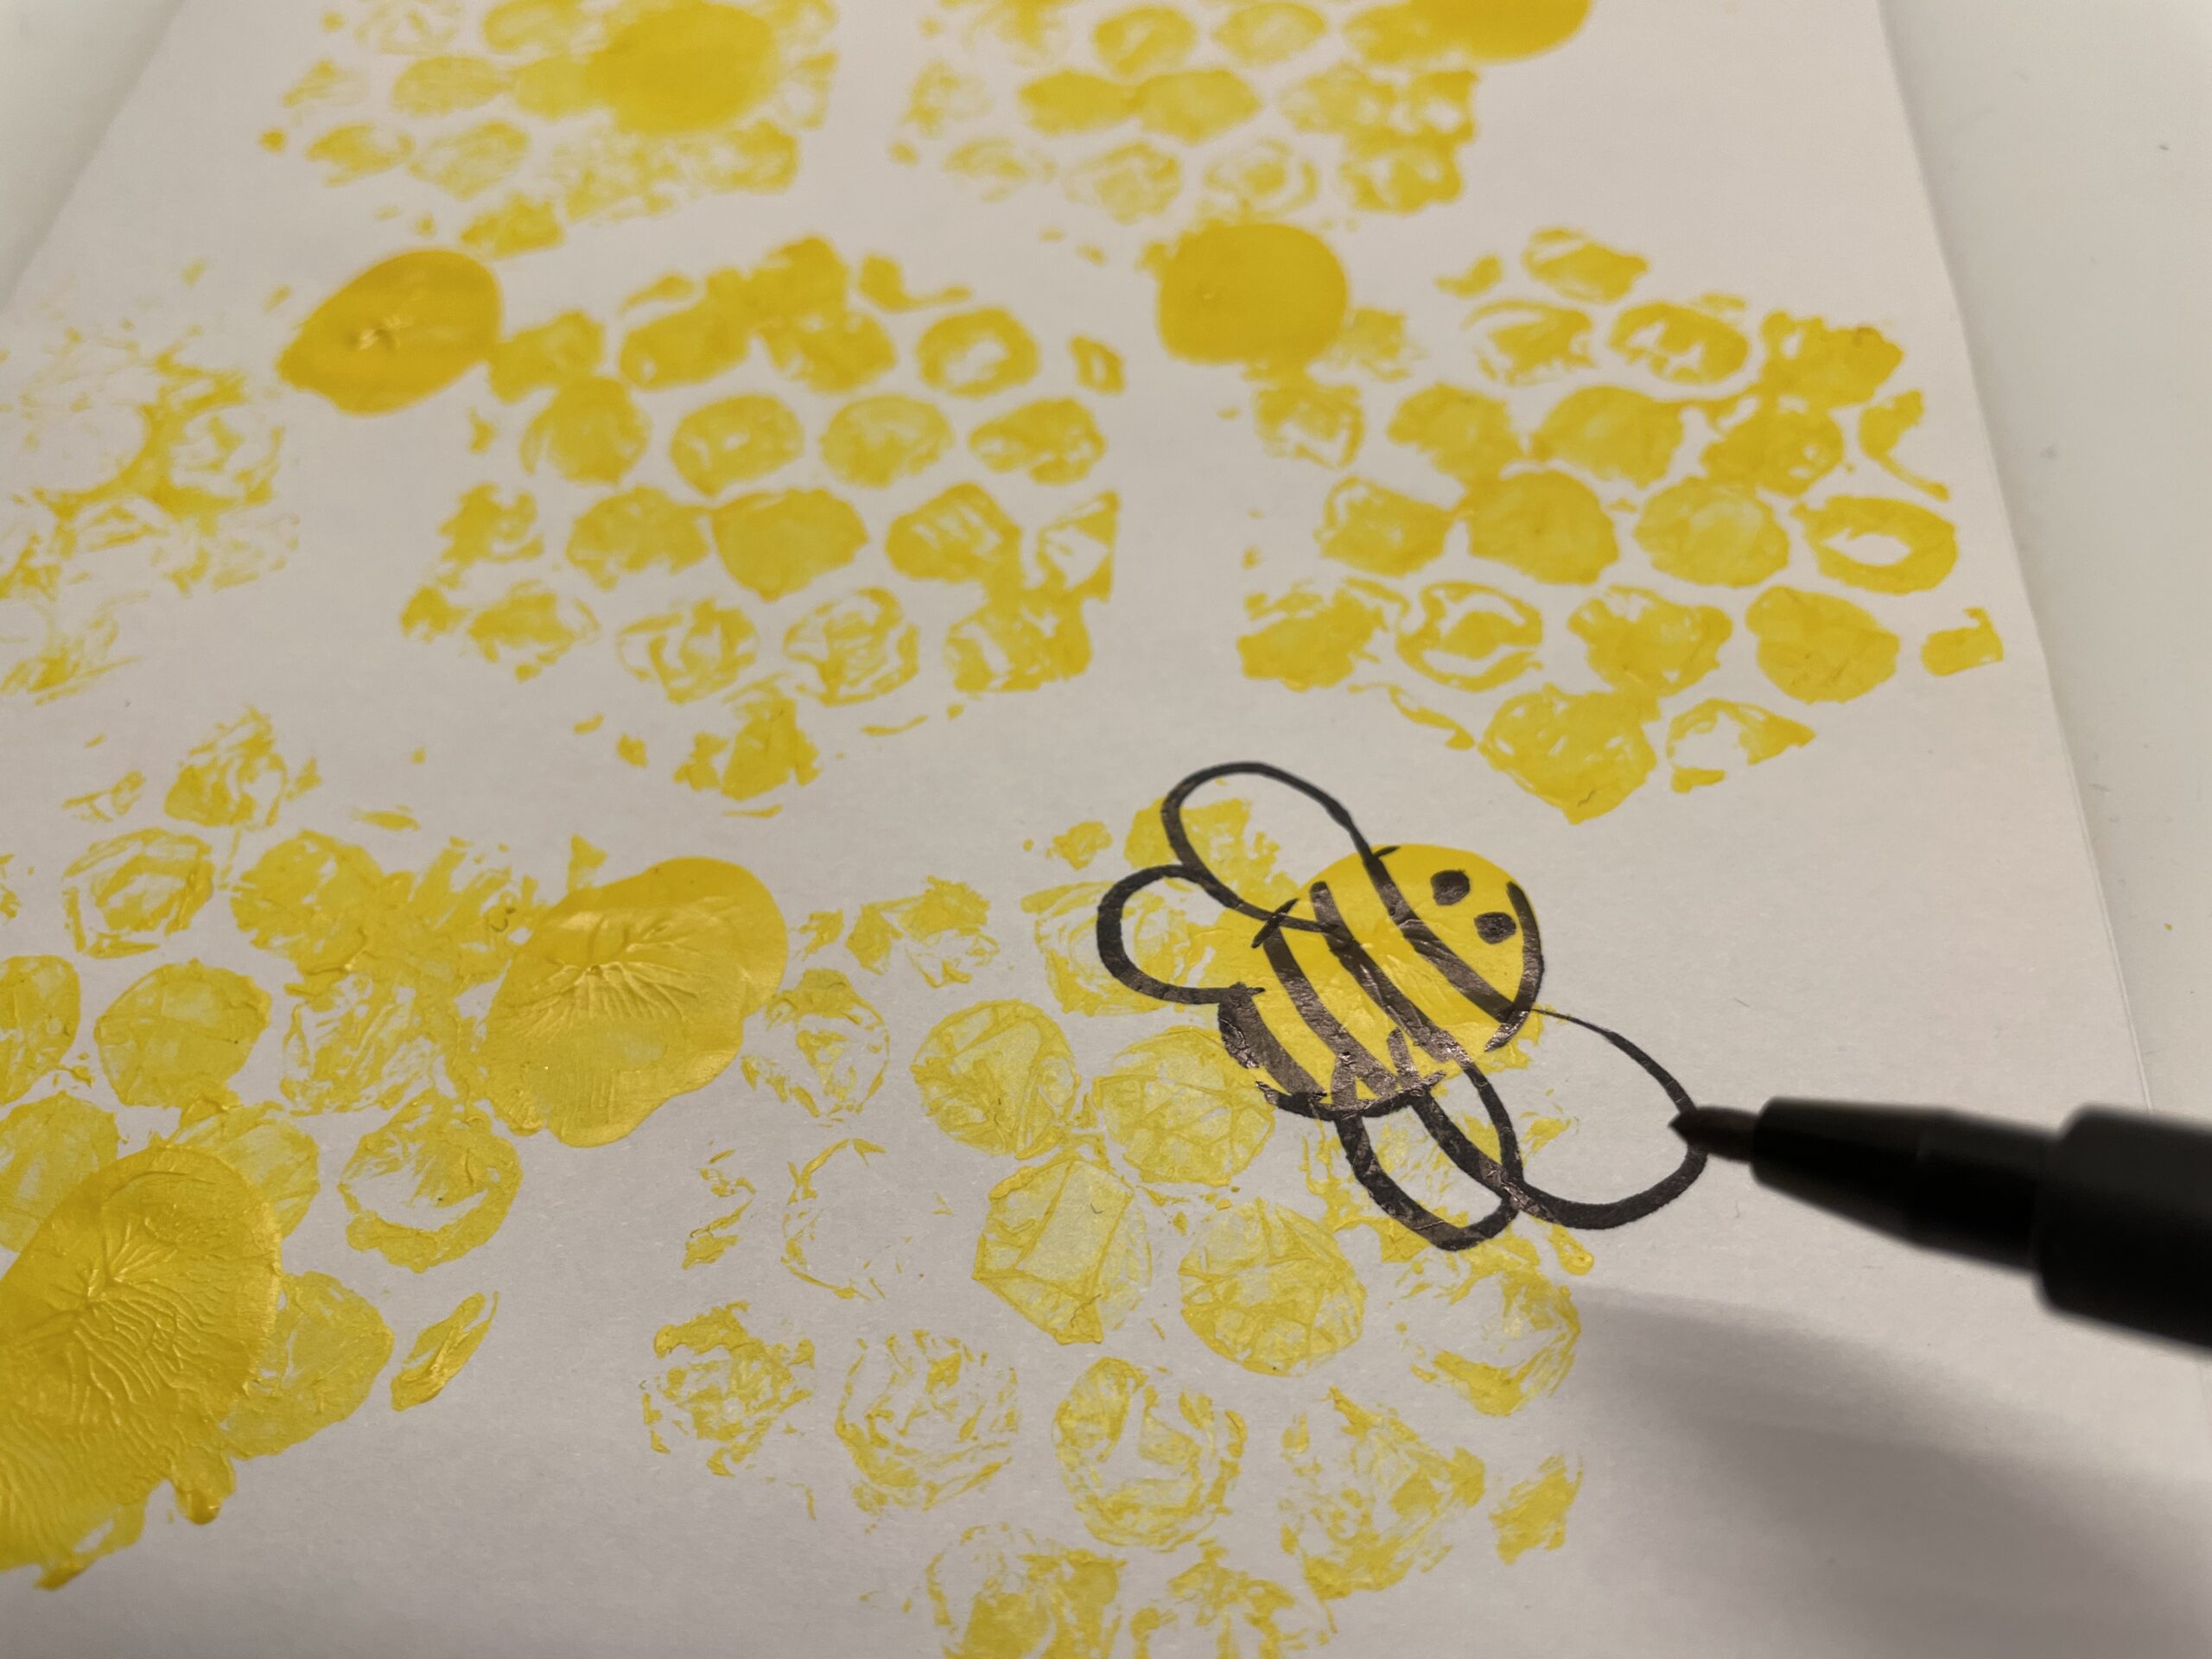
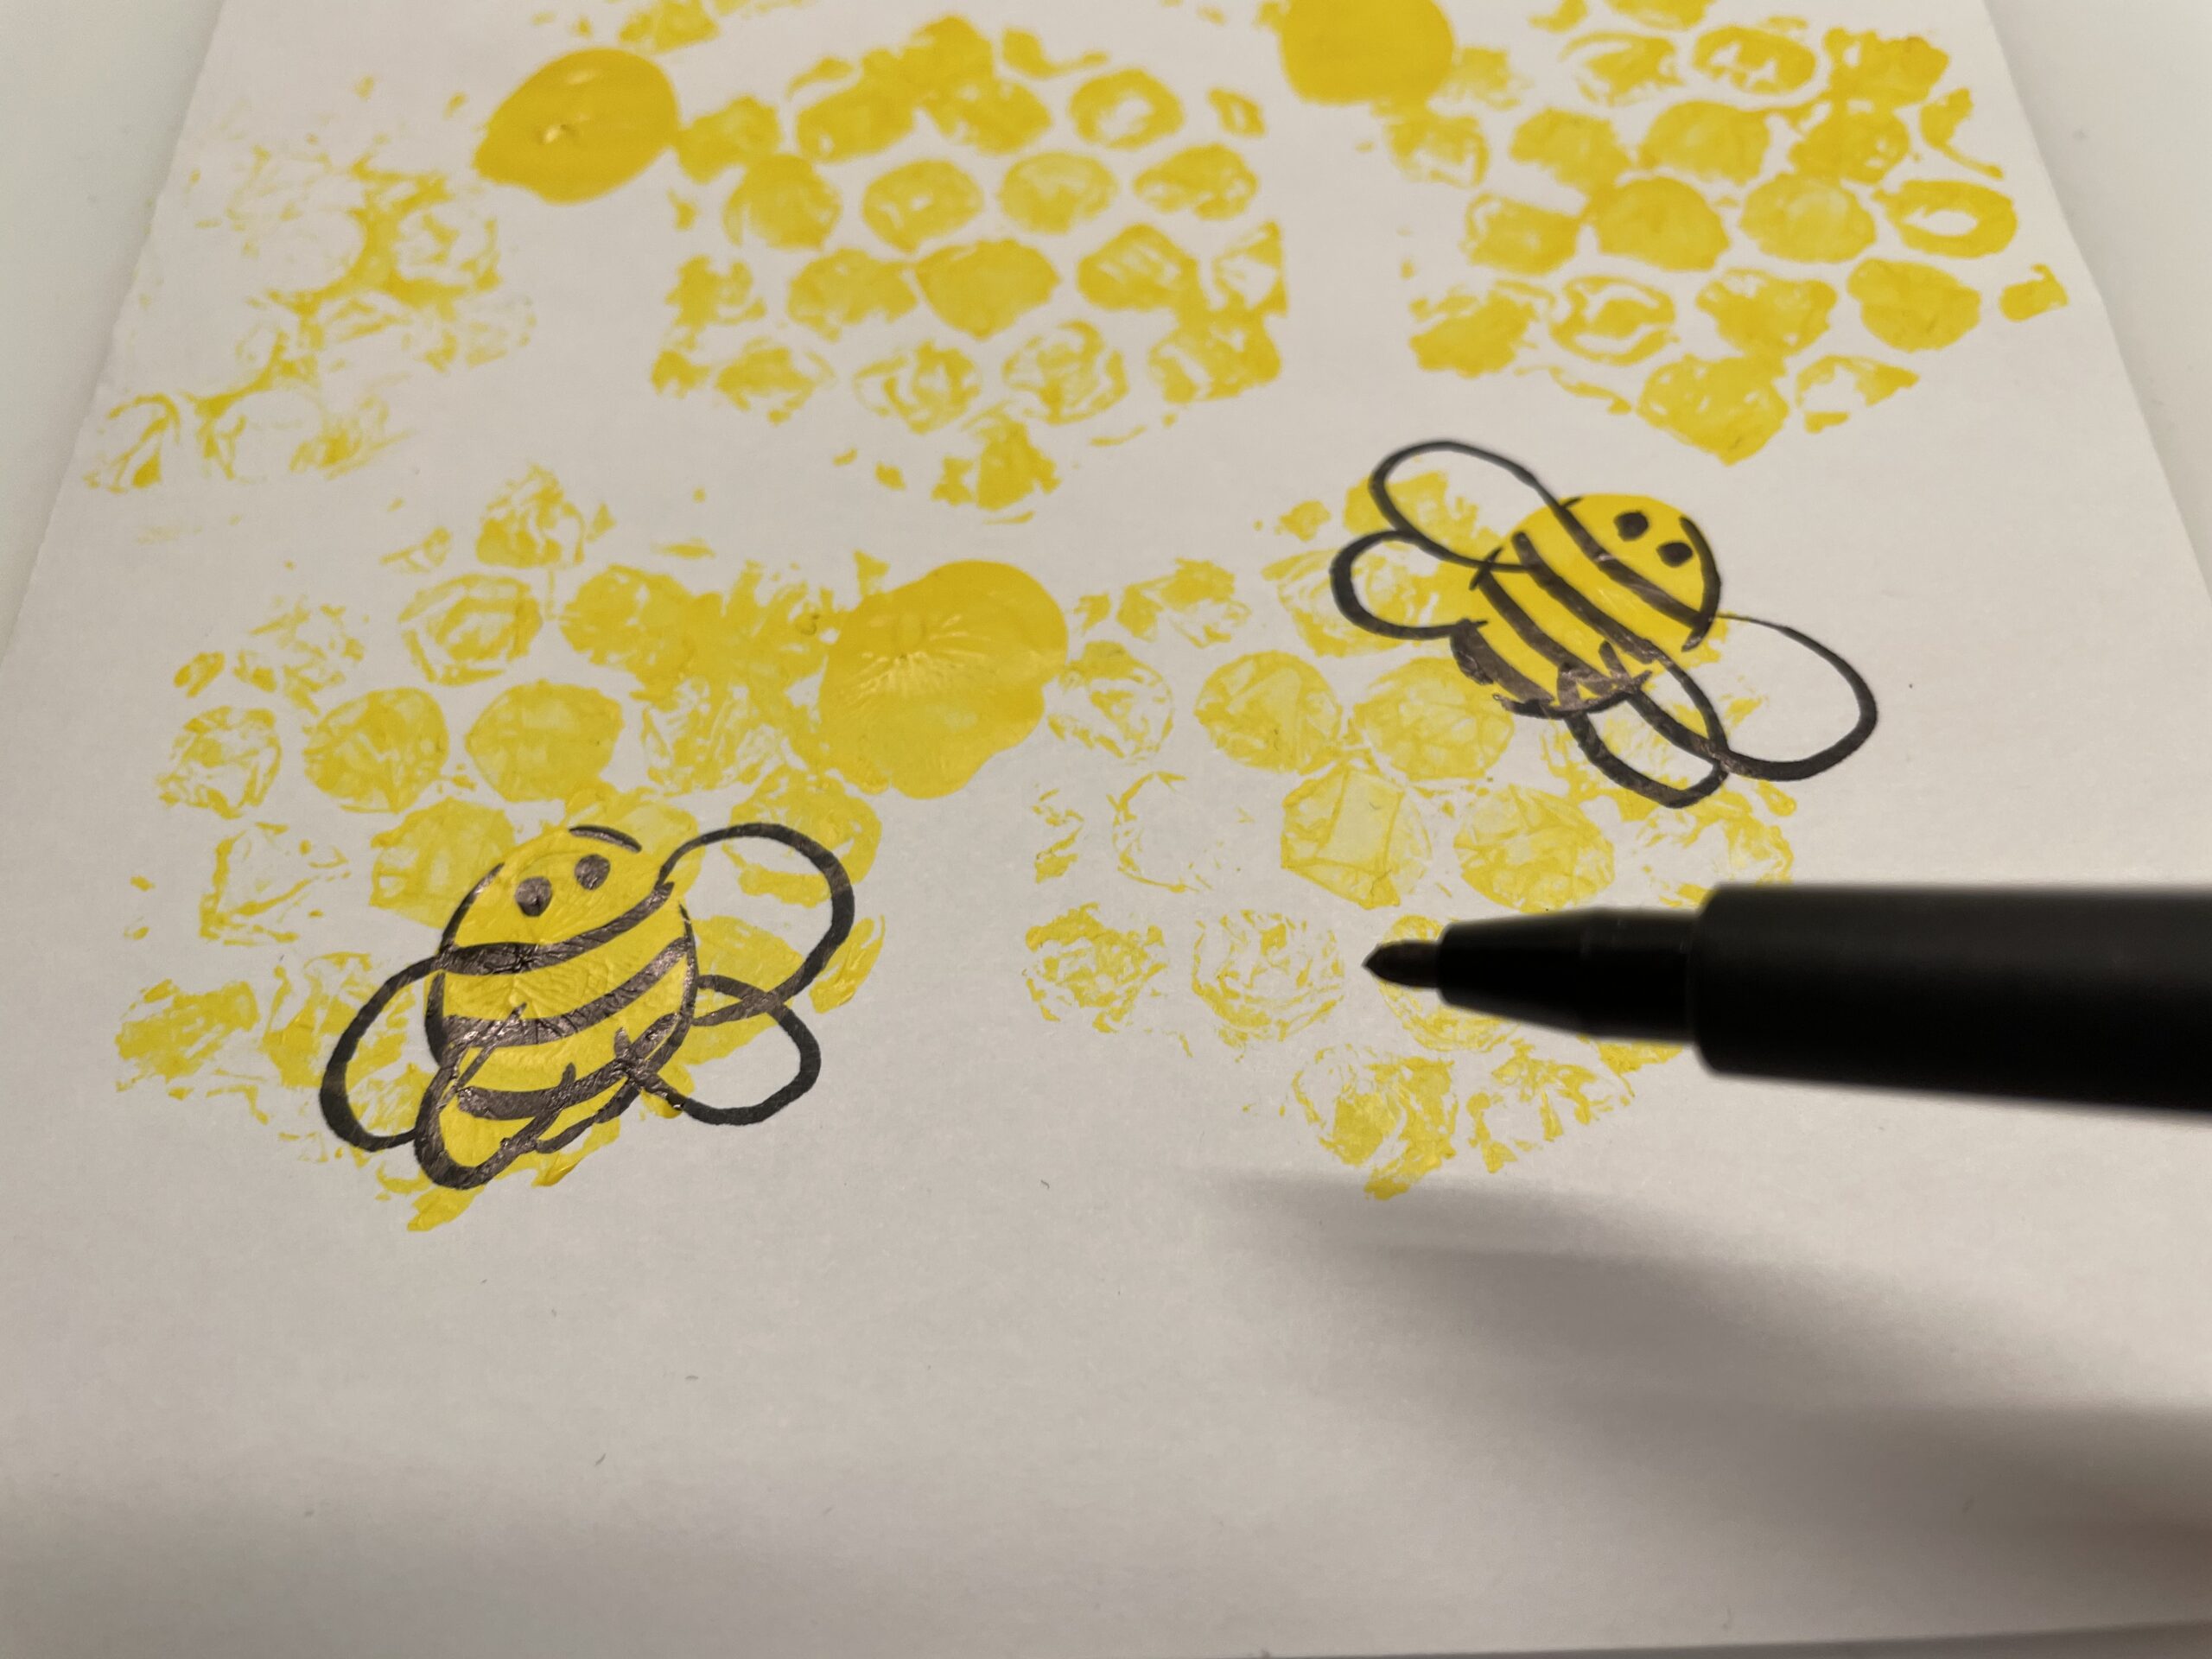
When the paint is dried, you paint a bee from each paint swab.
Paints every bee stripes and two dots as eyes.
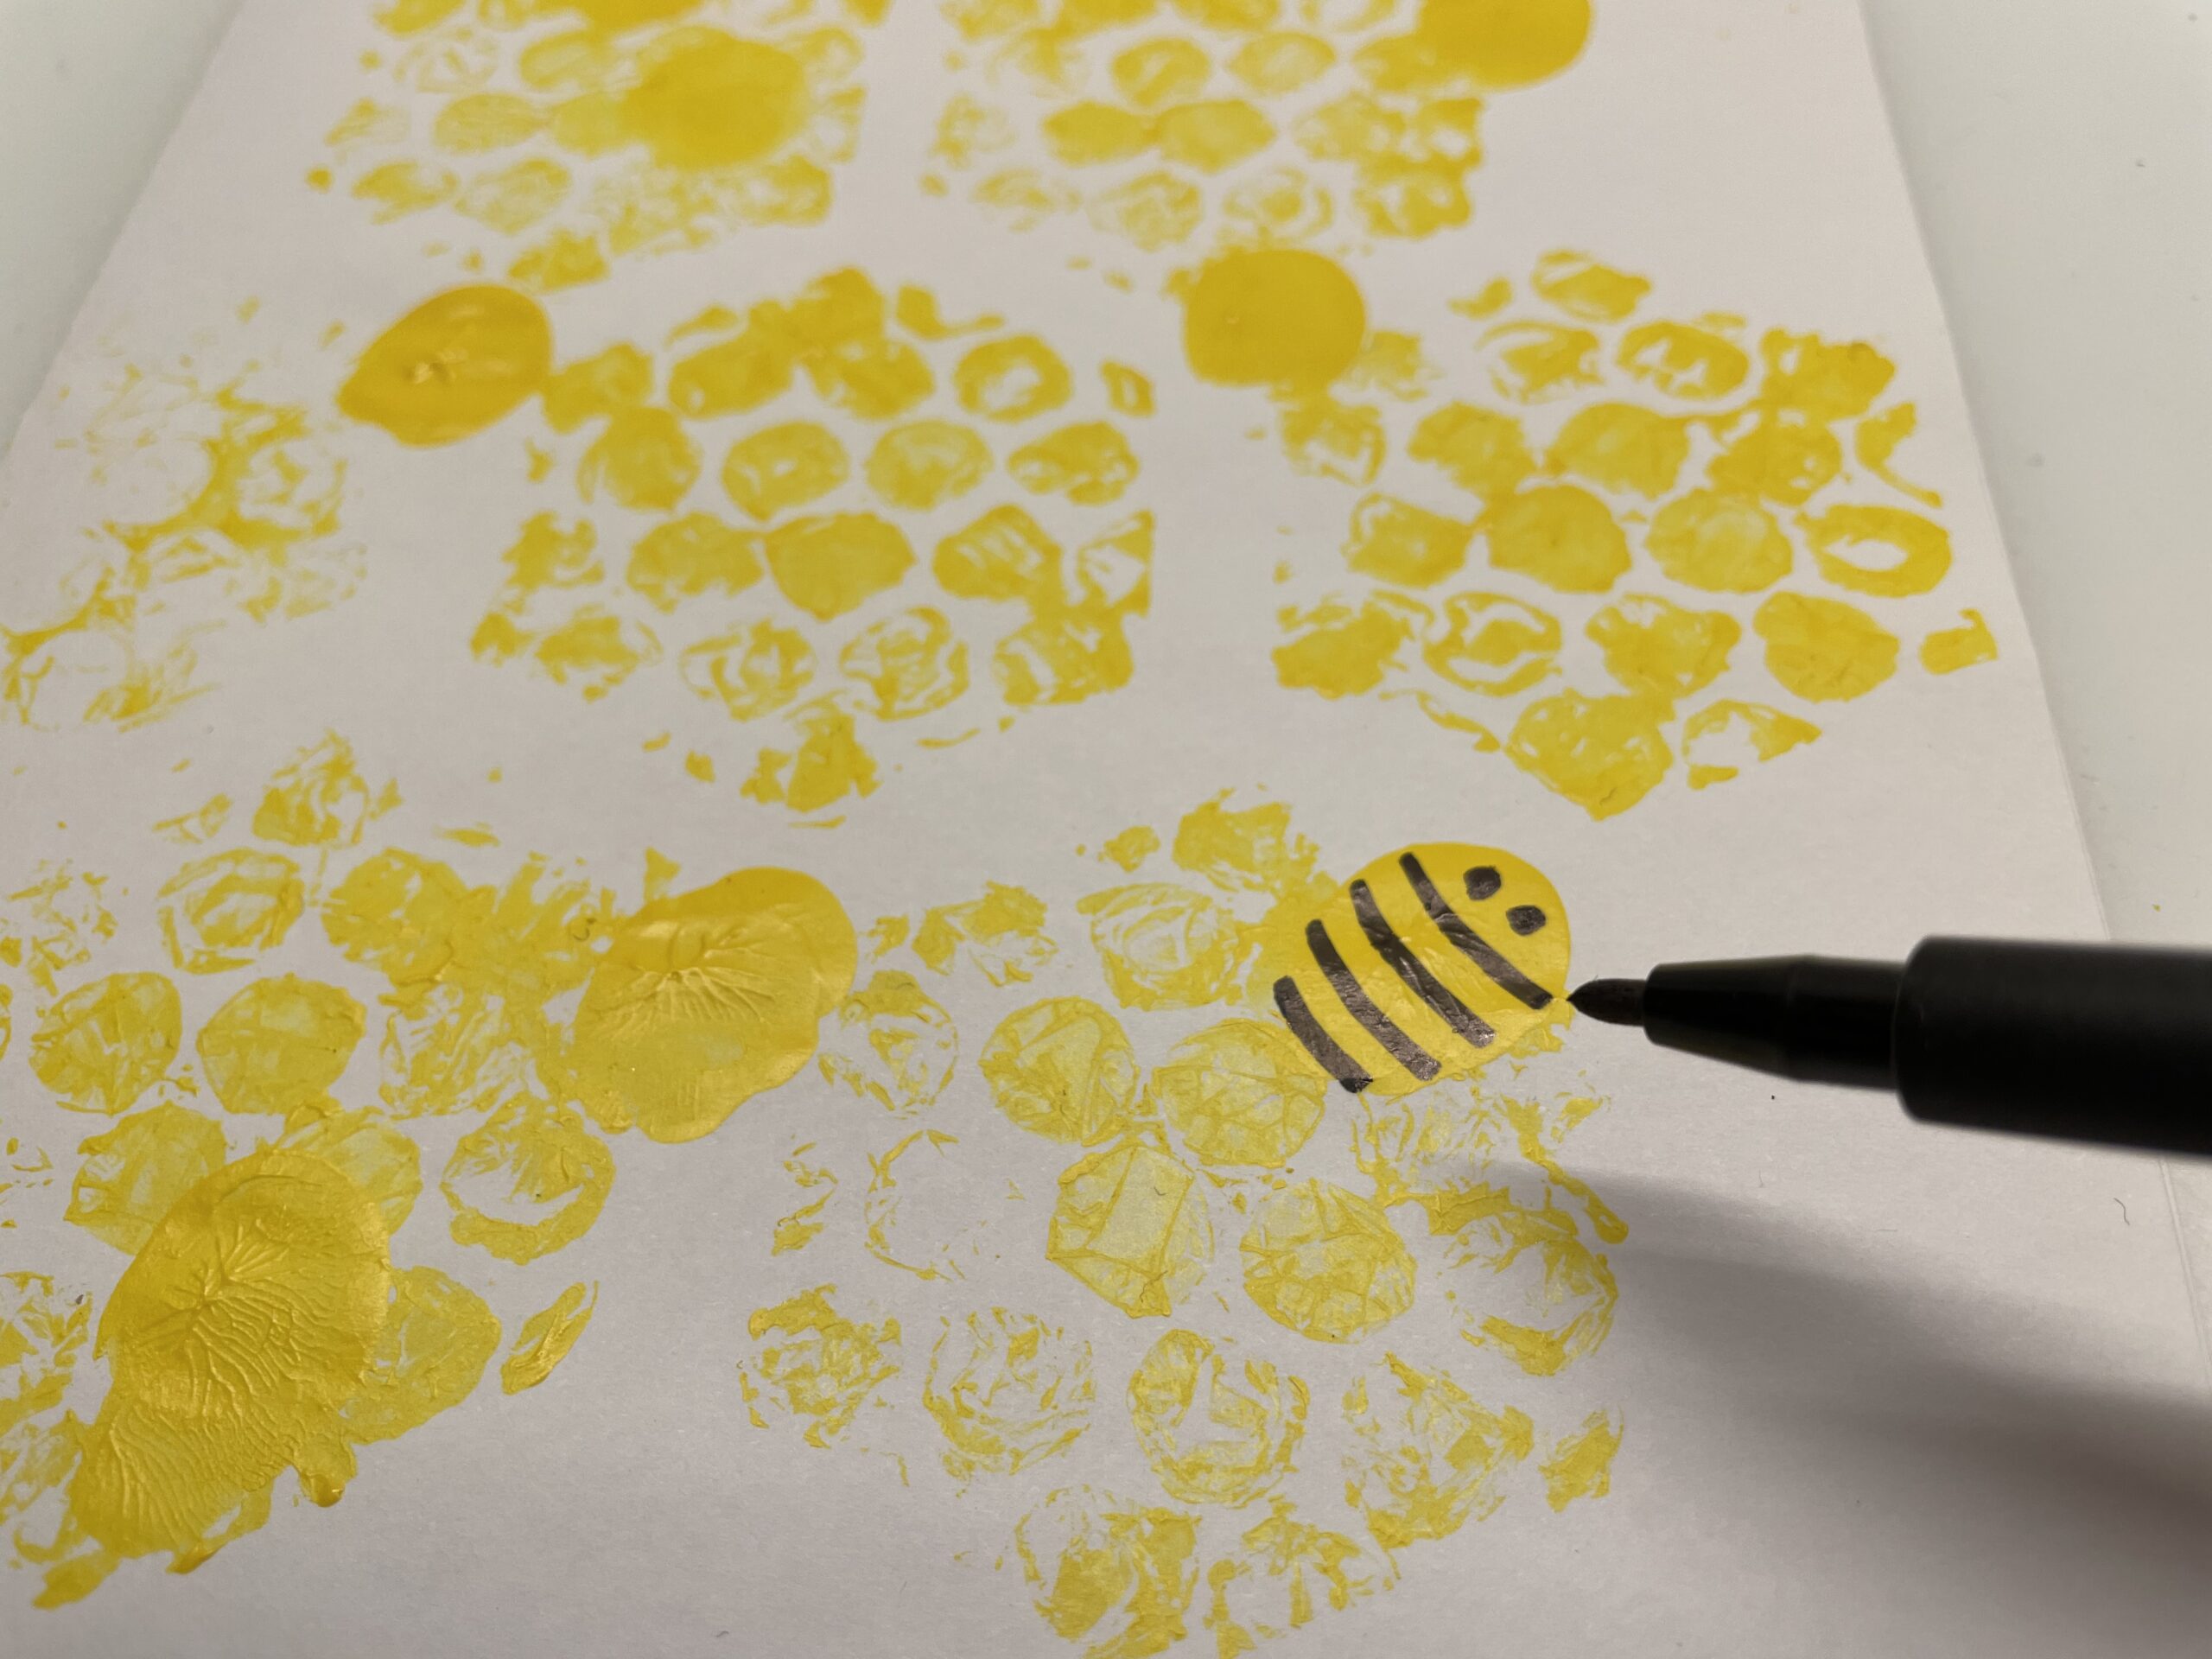
You can also run around the bees with a black pen.
Then you paint four wings for each bee.
Make sure that not all bees fly or crawl in the same direction, because in a hive there is only so much bees, whose paths cross again and again.
Stick your paper on a firmer photo box.
The bee honeycomb card is ready.
This self-made card is certainly a very special gift.
Stay creative and have fun doing crafts!?
Materials
Directions
Then cut this honeycomb out of solid cardboard. Alternatively, glue the honeycomb onto a cardboard box. Then cut an equally large piece of bubble wrap.
Then glue the transparent foil onto the honeycomb.
Now cut the foil along the honeycomb.
This honeycomb is stable and now glues it under a cork. This creates a self-made honeycomb stamp.
To do this, glue the cork centered on the back of the honeycomb.
On the stamp-front you see the pimples of the foil.
Now you need the yellow color and a screw glass lid or a saucer. Try out whether your honeycomb stamp fits in.
Then fill some paint in the screw-glass lid and distribute the paint in the lid.
Now press the stamp into the damp colour and rub it slightly back and forth.
Checks whether the stamp is covered with paint everywhere.
Then you print honeycombs on a white paper.
After every stamp print, you'll get back paint.
When stamping, leave some distance between the individual honeycombs.
You can also use different yellow orange tones for the individual honeycombs.
When your paper is printed with honeycombs, you print the bees' bodies.
You'd better do that with your index finger.
For this, dip the index finger in yellow color and pat between, on and next to the honeycombs fingerprints.
Then put the paper aside for drying.
When the paint is dried, you paint a bee from each paint swab.
Paints every bee stripes and two dots as eyes.
You can also run around the bees with a black pen.
Then you paint four wings for each bee.
Make sure that not all bees fly or crawl in the same direction, because in a hive there is only so much bees, whose paths cross again and again.
Stick your paper on a firmer photo box.
The bee honeycomb card is ready.
This self-made card is certainly a very special gift.
Stay creative and have fun doing crafts!?
Follow us on Facebook , Instagram and Pinterest
Don't miss any more adventures: Our bottle mail


