Hop spider made of plastic bottle (2 variants)

AdventurerKatzi
Rating5.019.9 thousand times (2) DifficultyIntermediate

This little jumping spider from a plastic bottle provides fun and stimulates to play.
You need a large empty clean plastic bottle and a couple of wobble eyes. The spider can make big jumps on the rubber band, while it jumps back and forth rather without rubber band. Check out the variants and decide what you like. Have fun!

Media Education for Kindergarten and Hort

Kind bastelt eine Rassel mit dem Navi
The Adventure Navi, the app for DIY projects, enables media education for the youngest.

Relief in everyday life, targeted promotion of individual children, independent learning and - without any pre-knowledge already usable by the youngest!


Titelbild zur Bastel- und DIY-Idee für Kinder '(612) Hüpfspinne aus Plastikflasche (2 Varianten)'
Material for1 Child
Prep Time5 min.Adv. Time10 min.Total Time15 min.
 1 Plastic bottle Disposable bottle
 2 Wax eyes
 Hat cordthin rubber cord
 Hot glue gun
All links marked with a shopping cart lead to Amazon - here we have selected products that we would order ourselves and in part also ordered. In a qualified purchase via the advertising link, we as Amazon partner receive a commission, for you there are no costs. You thus support our cost- and advertising banner-free, educational offer.
1

First cut off the lower part of the bottle. The length of my bottle is now about 15-20cm. Let an adult help you with this!
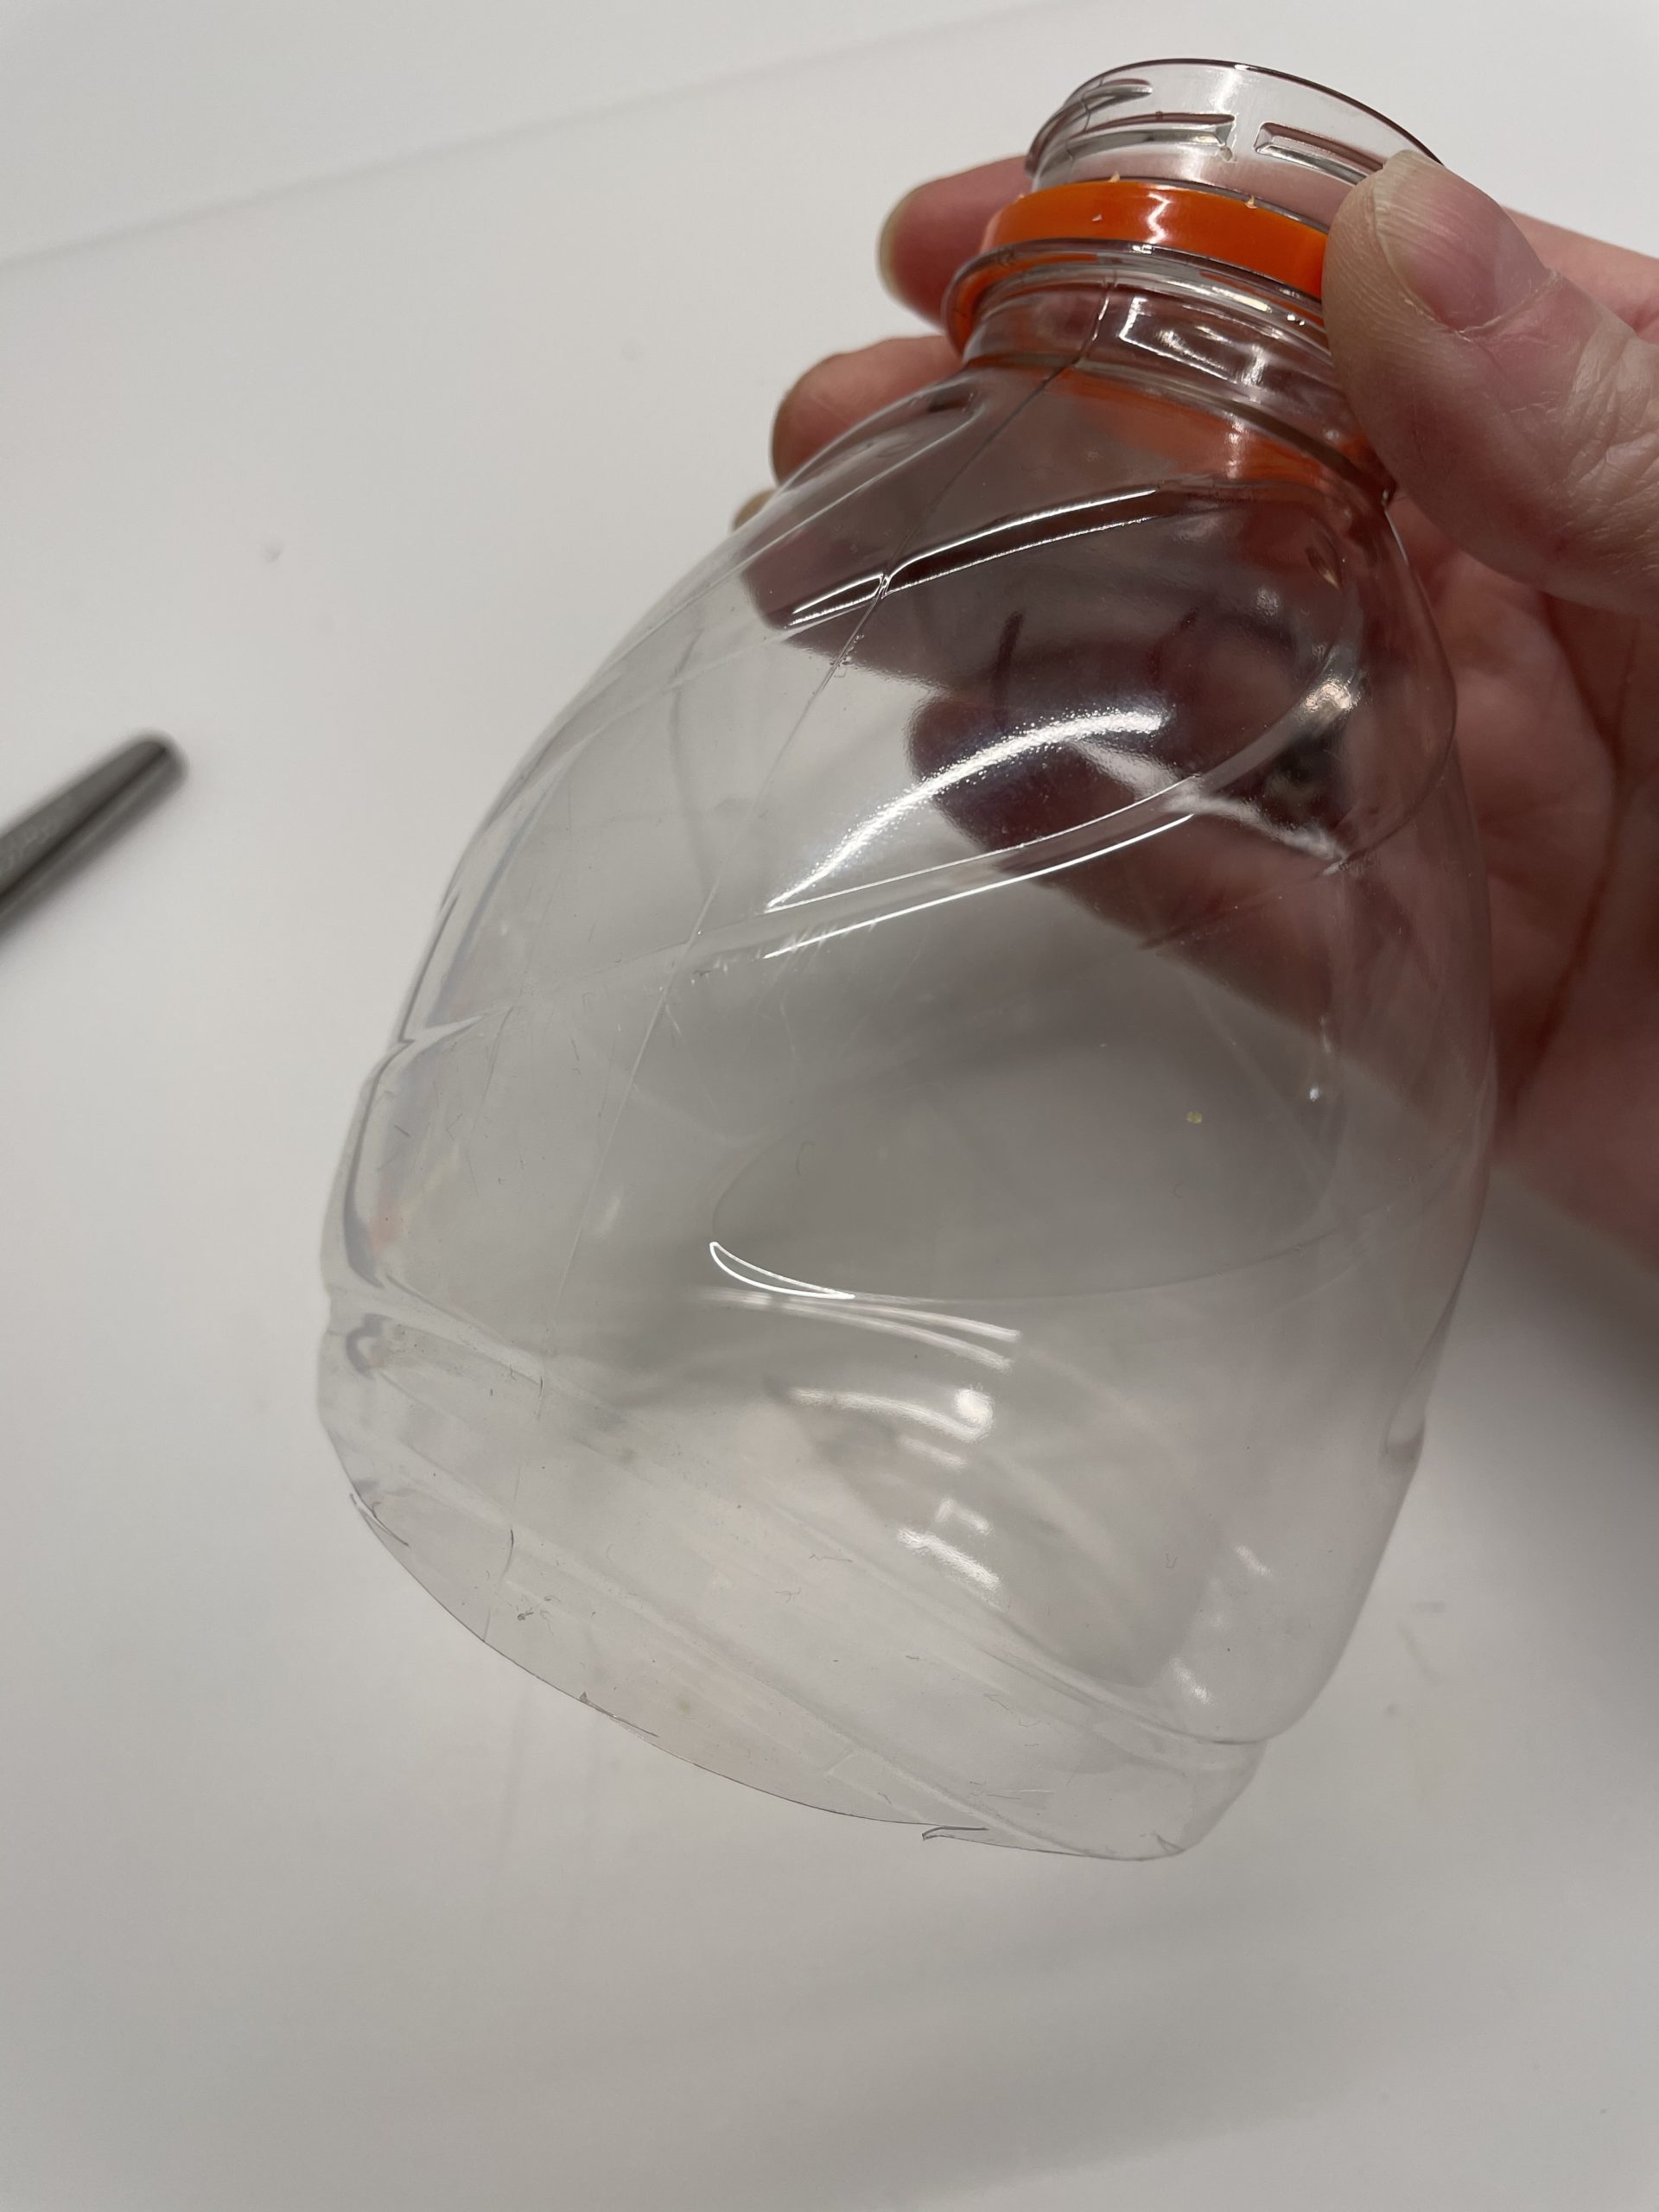
Bild zum Schritt 1 für das Bastel- und DIY-Abenteuer für Kinder: 'Schneidet zuerst den unteren Teil der Flasche ab. Die Länge...'

2

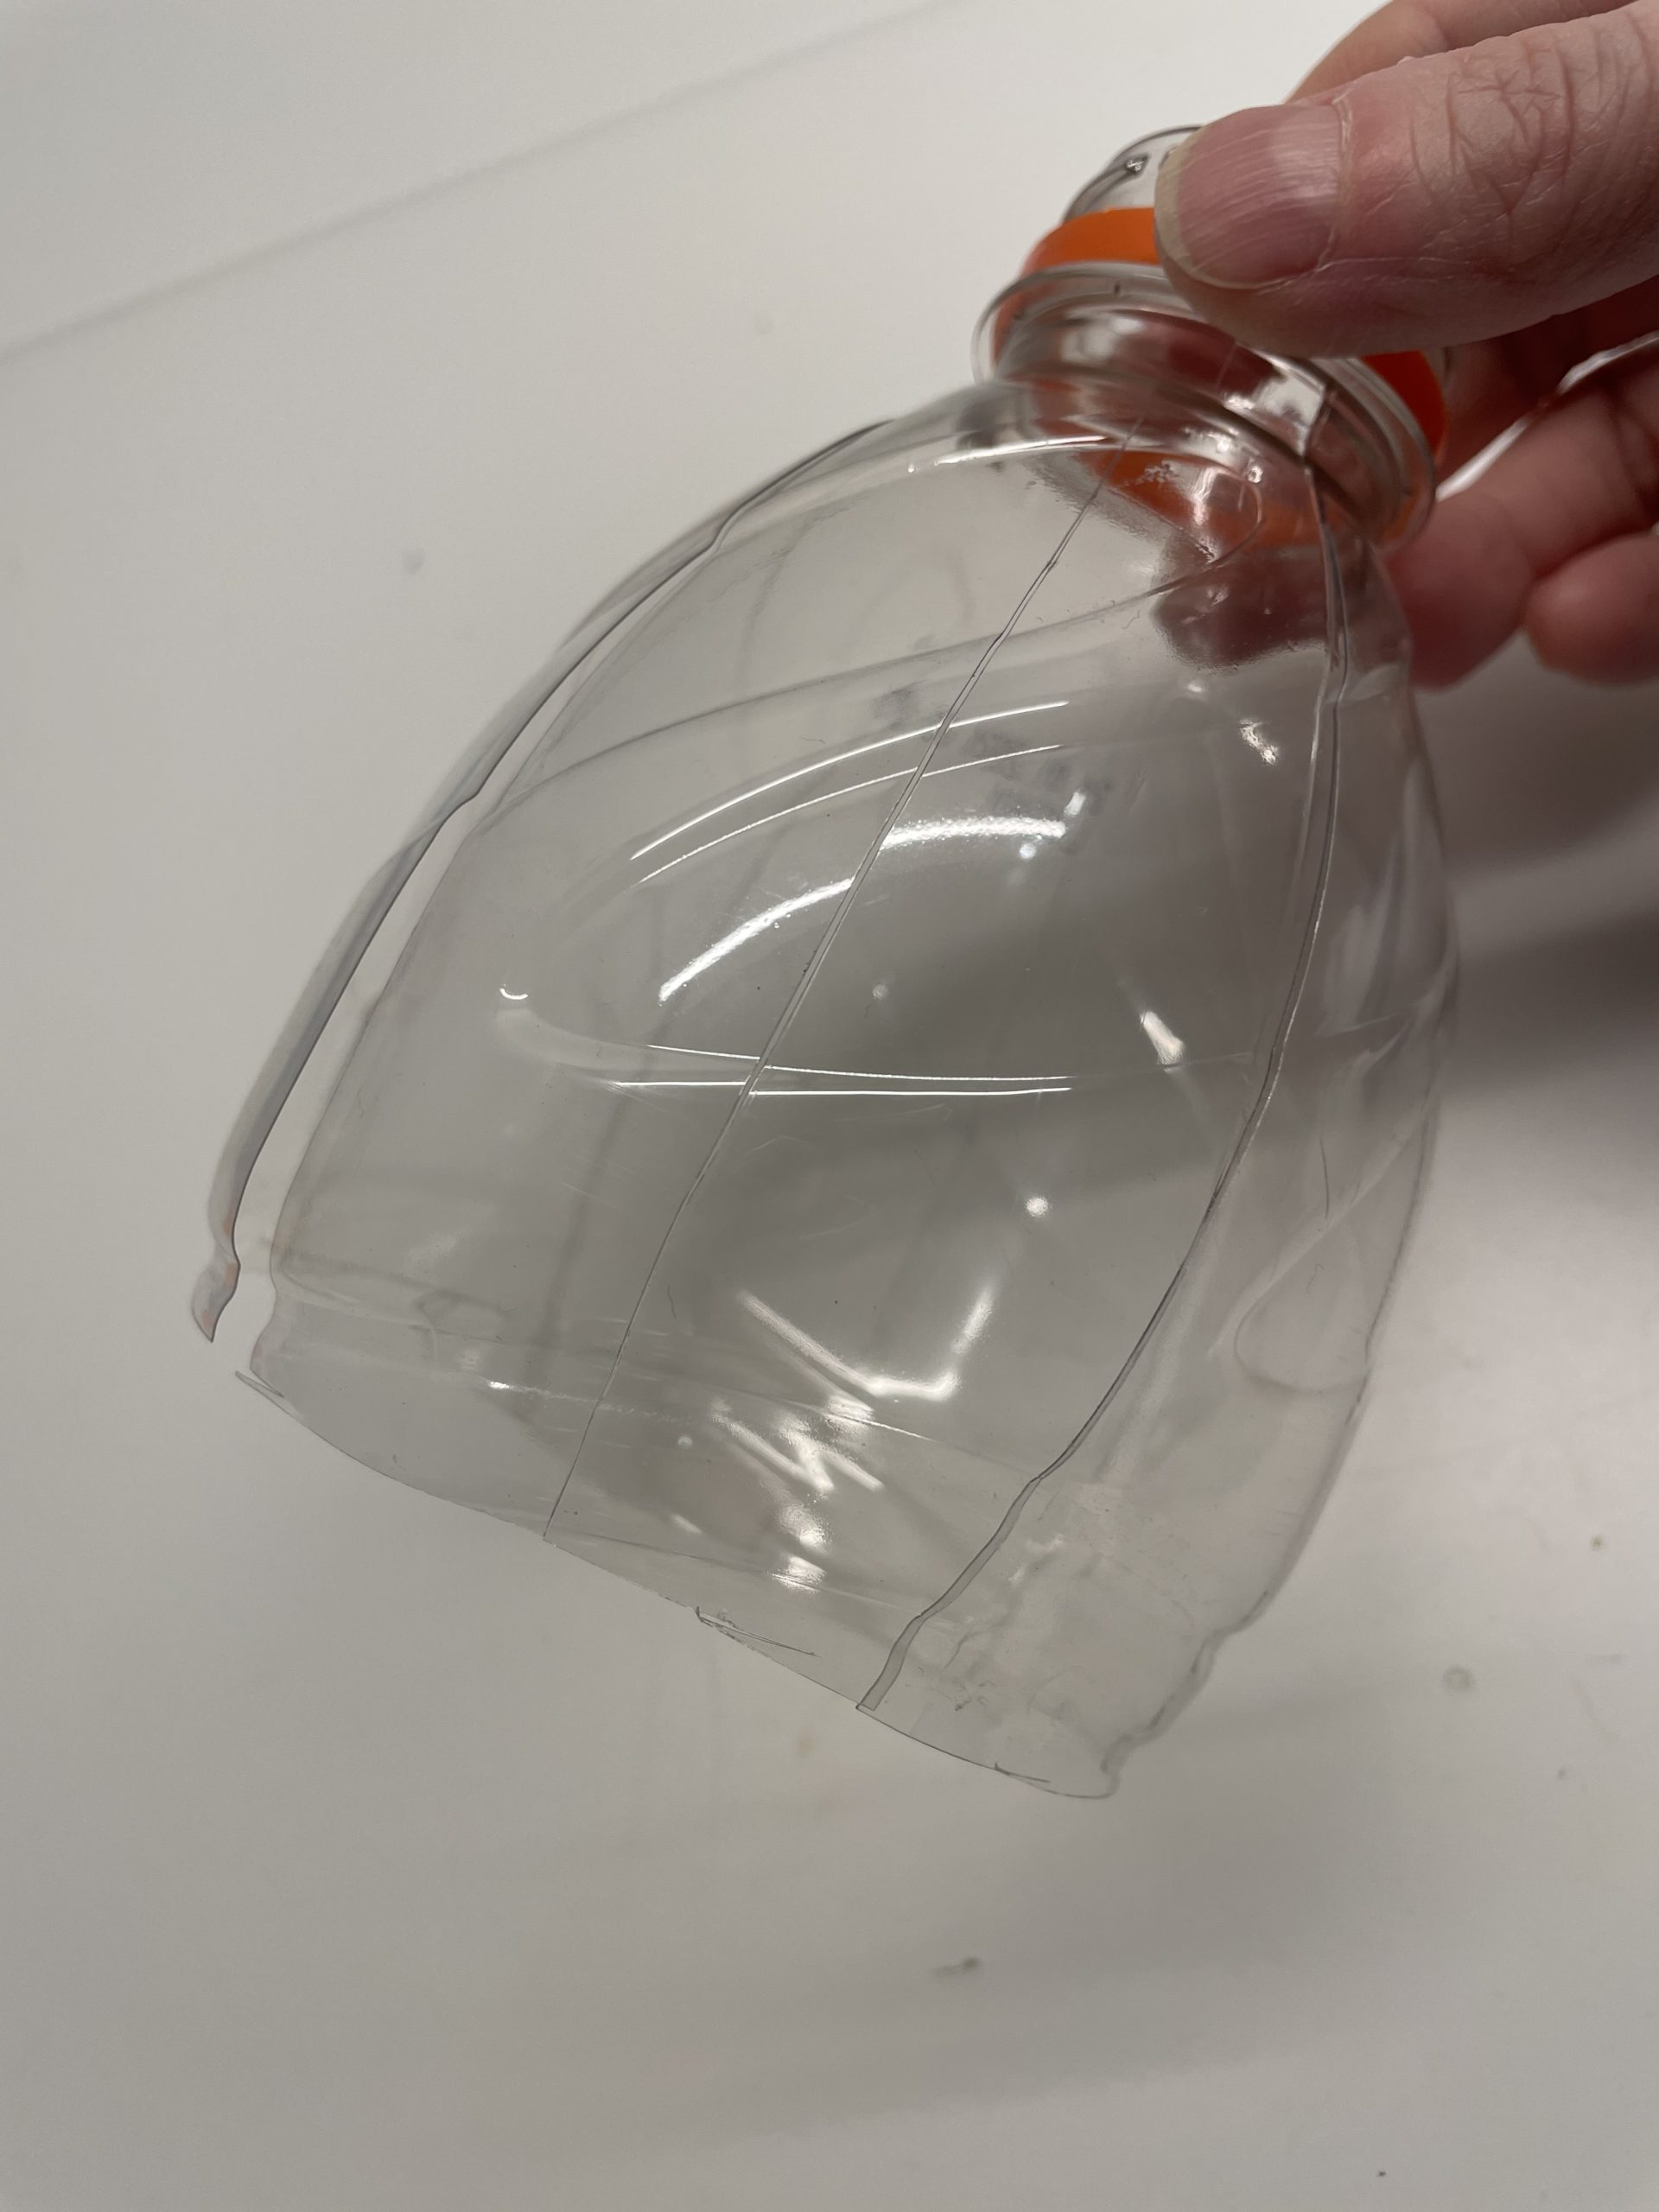
Now start cutting the plastic from the bottom to the top into narrow strips. Uses scissors to do this.

Bild zum Schritt 2 für das Bastel- und DIY-Abenteuer für Kinder: 'Beginnt nun von unten nach oben das Plastik in schmale...'

3

Cut the strips up to the bottle neck.

Bild zum Schritt 3 für das Bastel- und DIY-Abenteuer für Kinder: 'Schneidet die Streifen bis hoch zum Flaschenhals.'

4

2. Bild zum Schritt 3 für das Bastel- und DIY-Abenteuer für Kinder: 'Schneidet die Streifen bis hoch zum Flaschenhals.'

5

Now round off each strip at the ends with the scissors.

Bild zum Schritt 5 für das Bastel- und DIY-Abenteuer für Kinder: 'Rundet nun jeden Streifen an an Enden mit der Schere...'

6

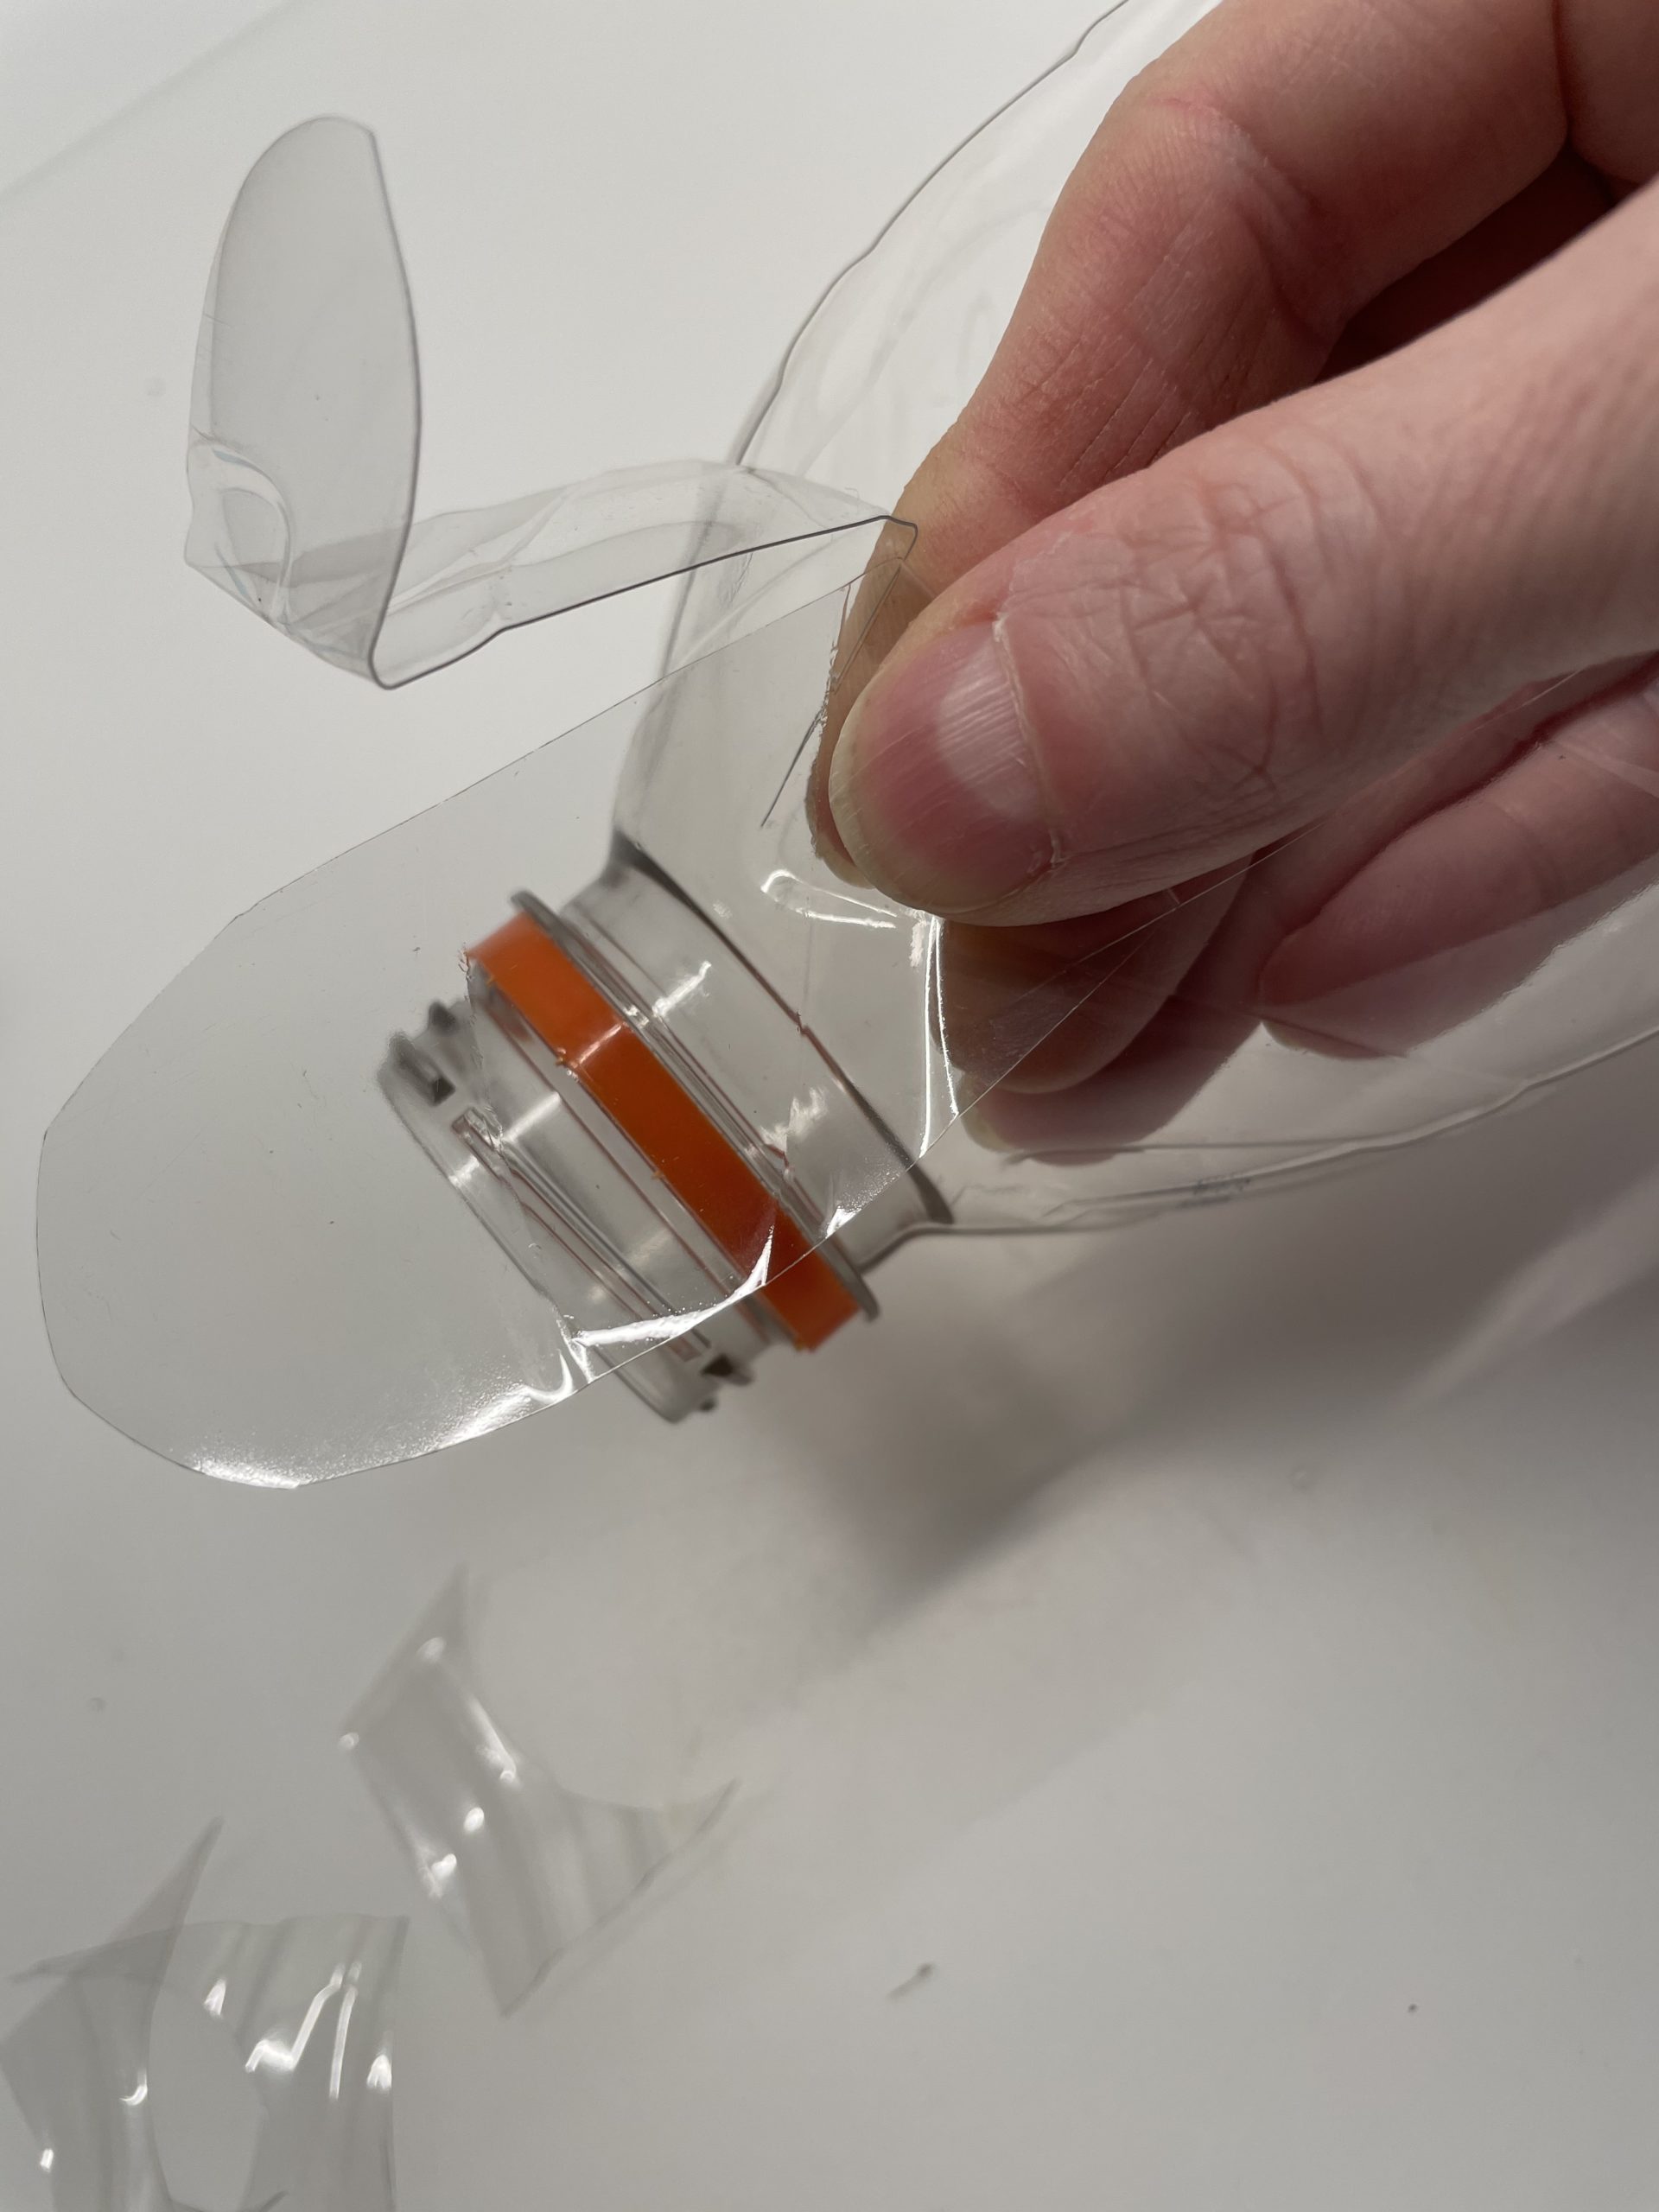
Cut the legs slightly narrower, then they bend more easily to the outside. Try it out!

Bild zum Schritt 6 für das Bastel- und DIY-Abenteuer für Kinder: 'Schneidet die Beine etwas schmäler, dann biegen sie sich anschließend...'

7

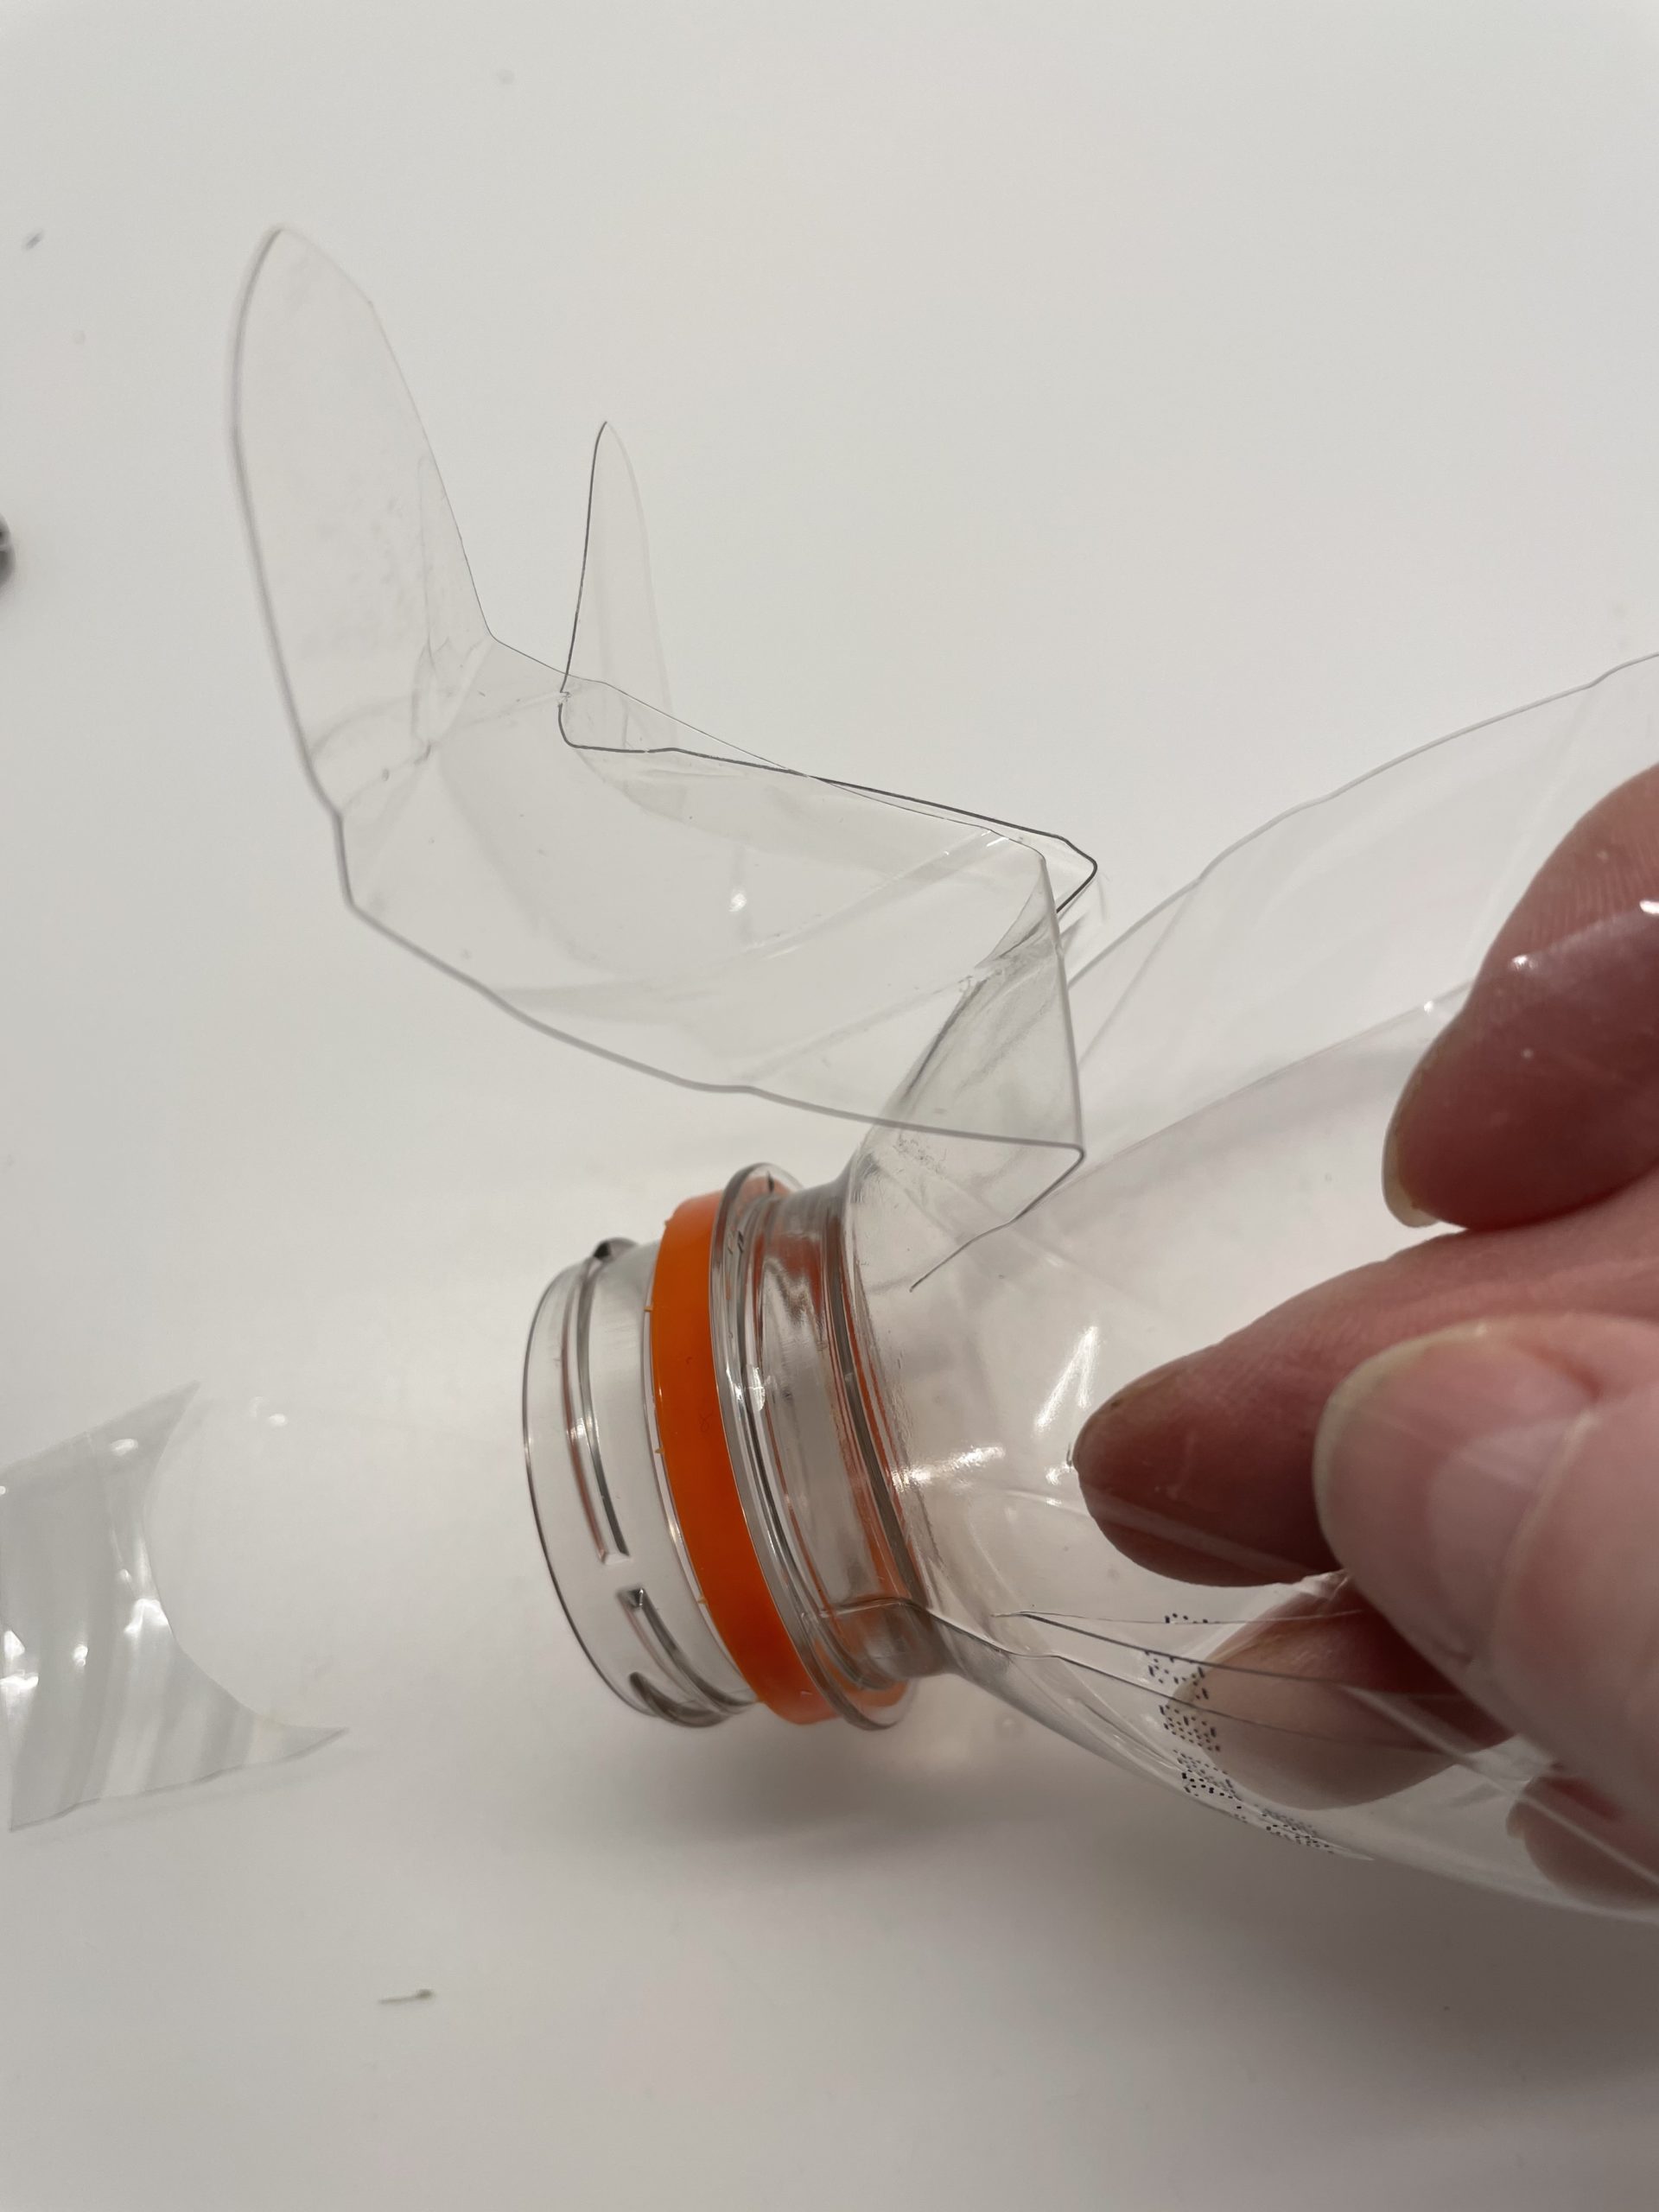
Now bends every single strip.
First bend the strip from the outer edge about 2cm wide inwards. Then bend another 3cm outwards. So you get a standing spider's leg. See the following pictures:

Bild zum Schritt 7 für das Bastel- und DIY-Abenteuer für Kinder: 'Biegt nun jeden einzelnen Streifen.   Biegt den Streifen...'

8

2. Bild zum Schritt 7 für das Bastel- und DIY-Abenteuer für Kinder: 'Biegt nun jeden einzelnen Streifen.   Biegt den Streifen...'

9

3. Bild zum Schritt 8 für das Bastel- und DIY-Abenteuer für Kinder: 'Biegt nun jeden einzelnen Streifen.   Biegt den Streifen...'

10

4. Bild zum Schritt 9 für das Bastel- und DIY-Abenteuer für Kinder: 'Biegt nun jeden einzelnen Streifen.   Biegt den Streifen...'

11

If all the legs are bent, then the spider will stand up. Try now whether the spider will wiggle as soon as you press the edge of the bottle with your fingers.
Maybe bend the spider's legs a little bit.

Bild zum Schritt 11 für das Bastel- und DIY-Abenteuer für Kinder: 'Sind alle Beine gebogen, dann stellt die Spinne auf. Probiert...'

12

Now you're gonna stick her eyes on the shackles.

Bild zum Schritt 12 für das Bastel- und DIY-Abenteuer für Kinder: 'Jetzt klebt ihr die Wackelaugen auf.'

13

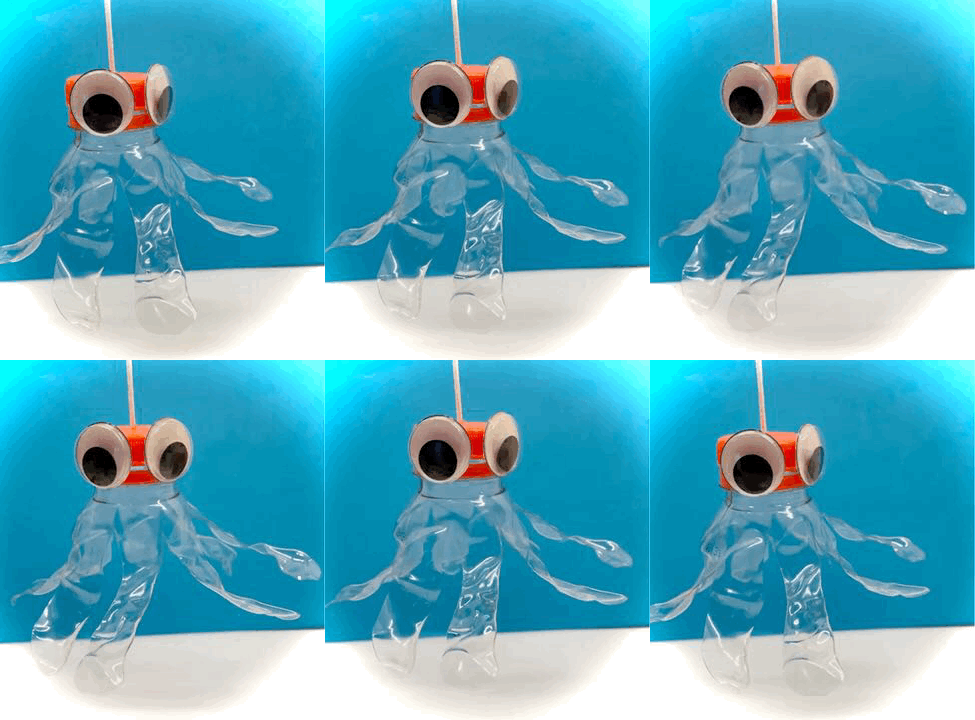
Now your spider can jump already!

Alternatively, you can also let the spider hop on the rubber band.

Bild zum Schritt 13 für das Bastel- und DIY-Abenteuer für Kinder: 'Jetzt kann eure Spinne auch schon loshüpfen!   ...'

Jumping spider on rubber band
14

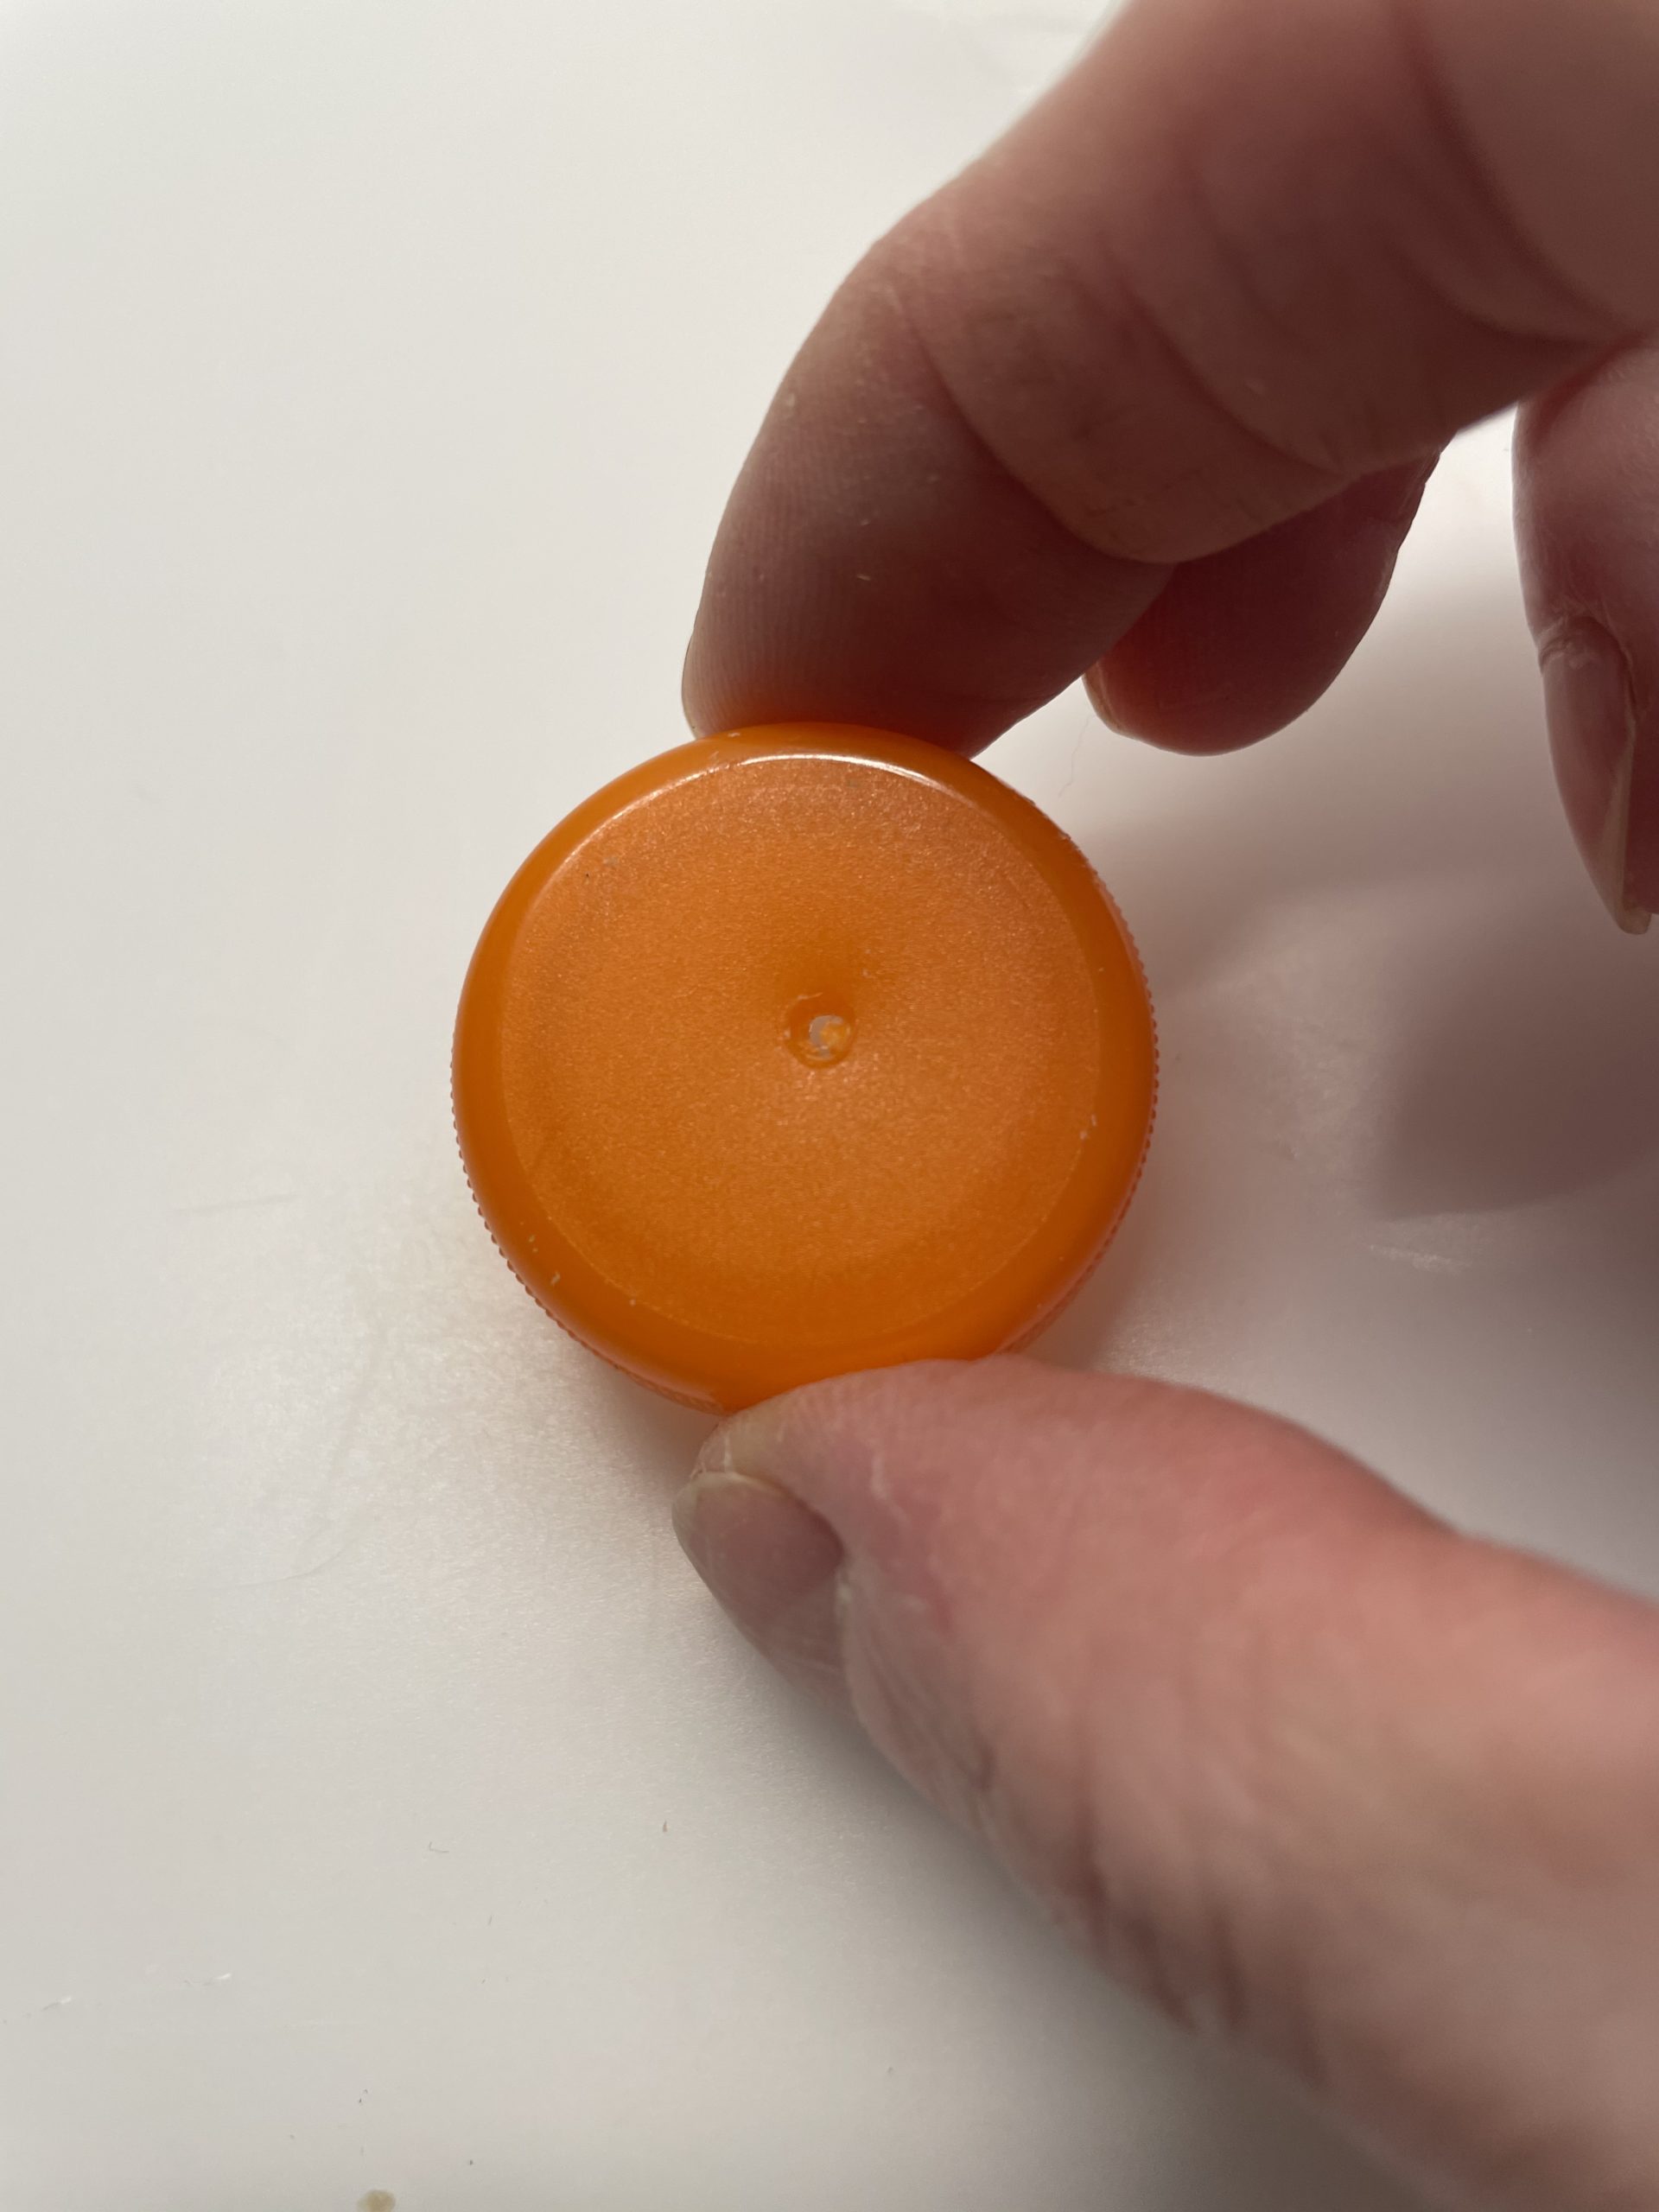
Now you're stabbing a hole in the lid of the bottle.
Uses a fingernail scissors or a nail.
Attention: Risk of injury! Let an adult help you!

Bild zum Schritt 15 für das Bastel- und DIY-Abenteuer für Kinder: 'Jetzt stecht ihr in den Deckel der Flasche ein Loch....'

15

2. Bild zum Schritt 15 für das Bastel- und DIY-Abenteuer für Kinder: 'Jetzt stecht ihr in den Deckel der Flasche ein Loch....'

16

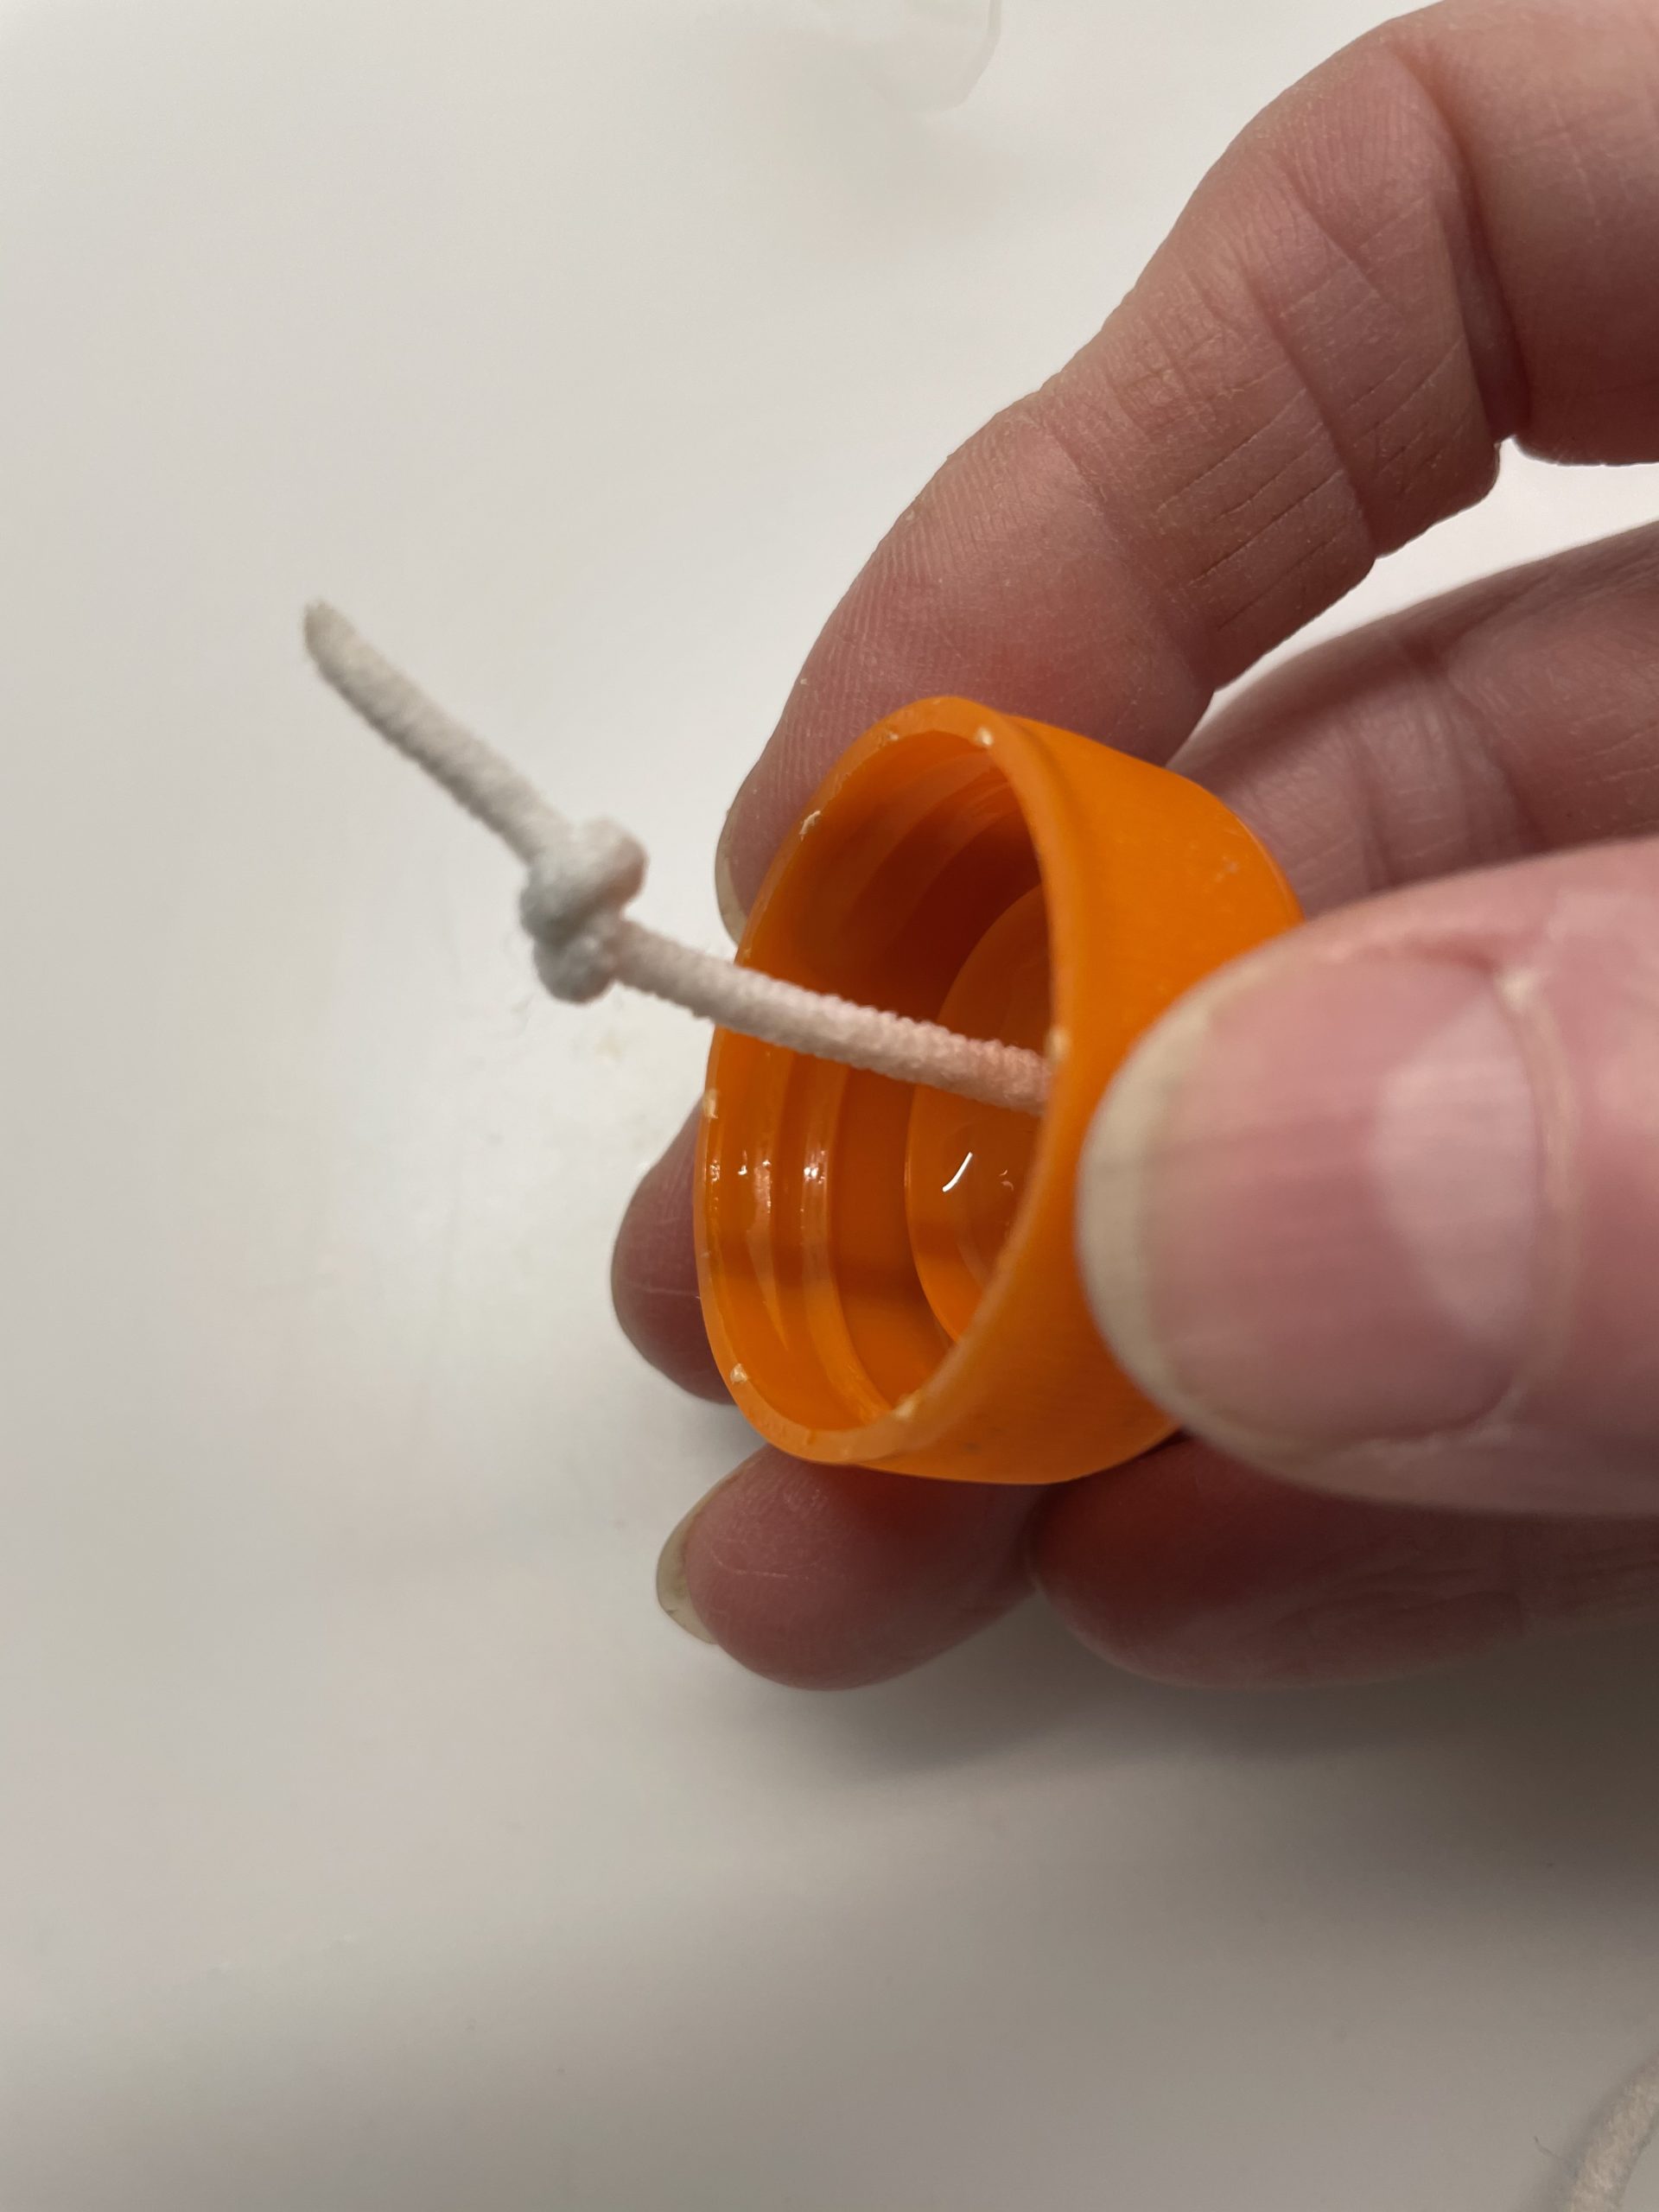
Through this hole you thread a string (length about 30cm).

Bild zum Schritt 17 für das Bastel- und DIY-Abenteuer für Kinder: 'Durch dieses Loch fädelt ihr anschließend eine Schnur (Länge circa...'

17

Now knot the end of the cord.

Bild zum Schritt 18 für das Bastel- und DIY-Abenteuer für Kinder: 'Verknotet nun das Ende der Schnur.'

18

Then pull the thread back to the point where the knot lies in the inside of the lid.

Bild zum Schritt 19 für das Bastel- und DIY-Abenteuer für Kinder: 'Dann zieht ihr den Faden soweit zurück, dass der Knoten...'

19

Now screw the lid back onto the edge of the bottle.

Bild zum Schritt 20 für das Bastel- und DIY-Abenteuer für Kinder: 'Schraubt nun den Deckel wieder auf den Flaschenrand.'

20

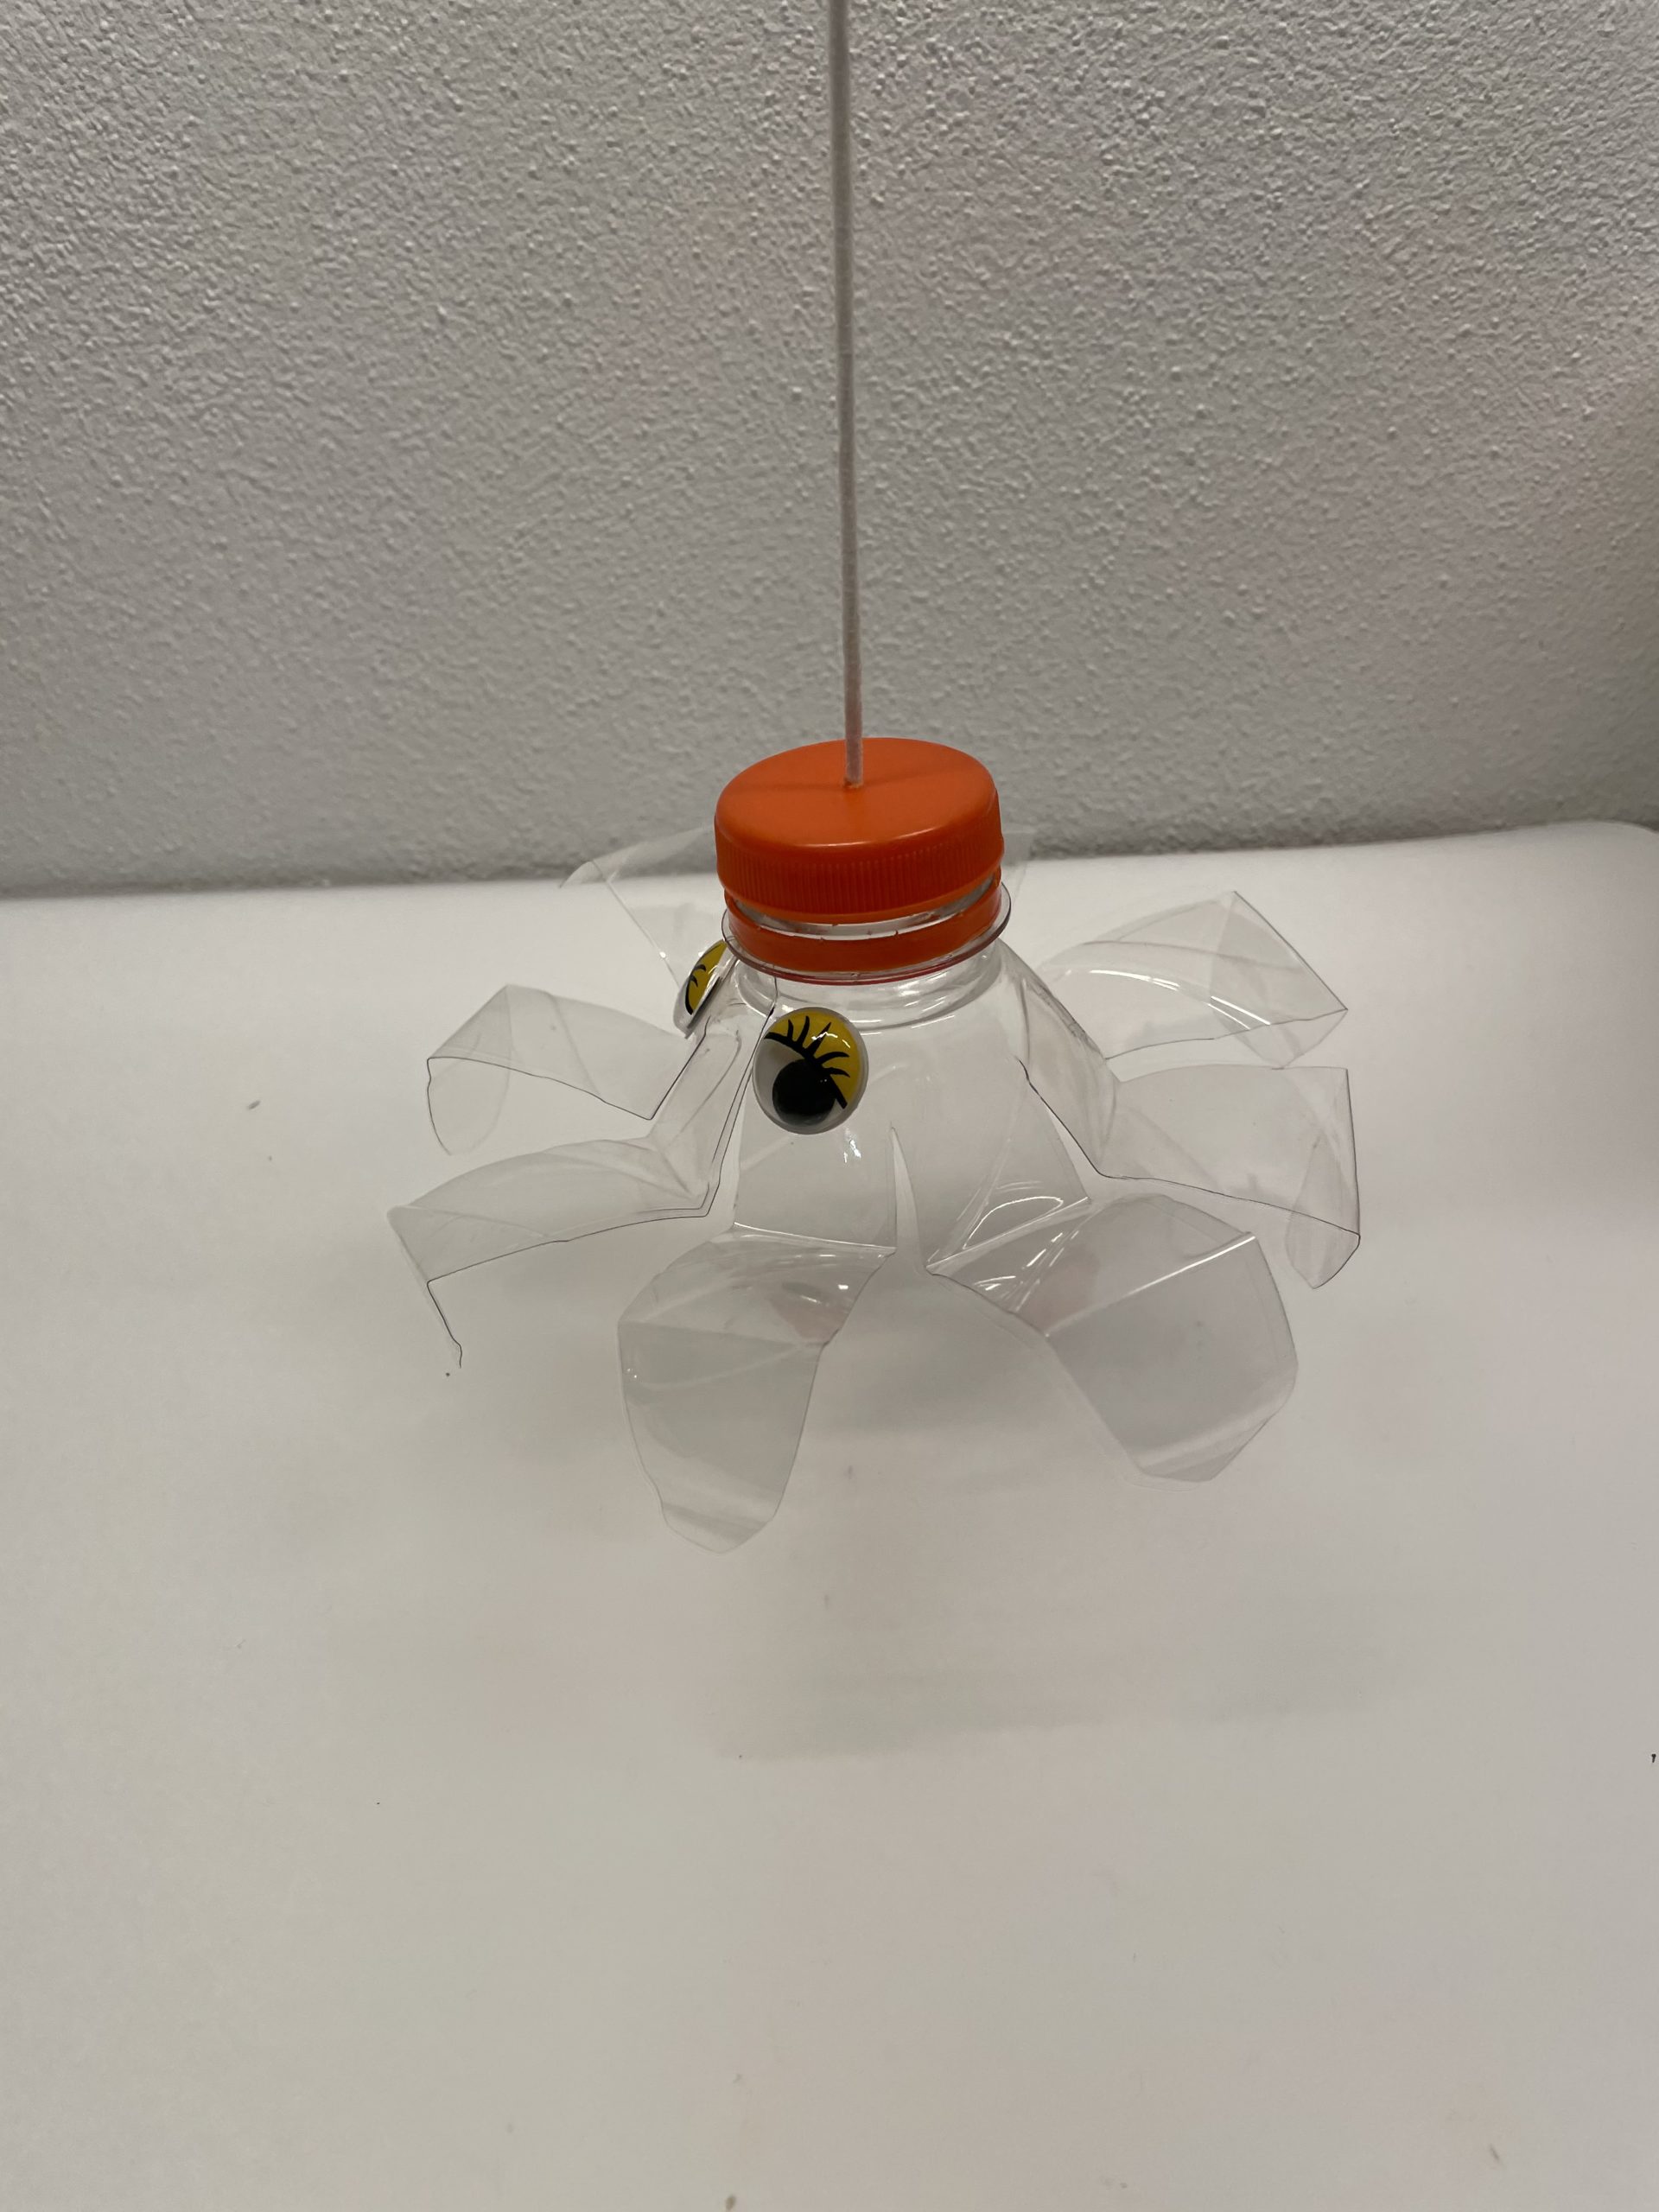
Now glue the two wobble eyes below the cap onto the bottle.

Tip: Alternatively, you can also paint the eyes with a foil pen.

Bild zum Schritt 21 für das Bastel- und DIY-Abenteuer für Kinder: 'Jetzt klebt ihr die zwei Wackelaugen unterhalb des Verschlusses auf...'

21

Your jumping spider is ready!

Bild zum Schritt 22 für das Bastel- und DIY-Abenteuer für Kinder: 'Fertig ist eure Hüpfspinne!'

22

Have fun playing!

Bild zum Schritt 23 für das Bastel- und DIY-Abenteuer für Kinder: 'Viel Spaß beim Spielen!'

Materials

 1 Plastic bottle Disposable bottle
 2 Wax eyes
 Hat cordthin rubber cord
 Hot glue gun
All links marked with a shopping cart lead to Amazon - here we have selected products that we would order ourselves and in part also ordered. In a qualified purchase via the advertising link, we as Amazon partner receive a commission, for you there are no costs. You thus support our cost- and advertising banner-free, educational offer.

Directions

1

First cut off the lower part of the bottle. The length of my bottle is now about 15-20cm. Let an adult help you with this!

Bild zum Schritt 1 für das Bastel- und DIY-Abenteuer für Kinder: 'Schneidet zuerst den unteren Teil der Flasche ab. Die Länge...'

2

Now start cutting the plastic from the bottom to the top into narrow strips. Uses scissors to do this.

Bild zum Schritt 2 für das Bastel- und DIY-Abenteuer für Kinder: 'Beginnt nun von unten nach oben das Plastik in schmale...'

3

Cut the strips up to the bottle neck.
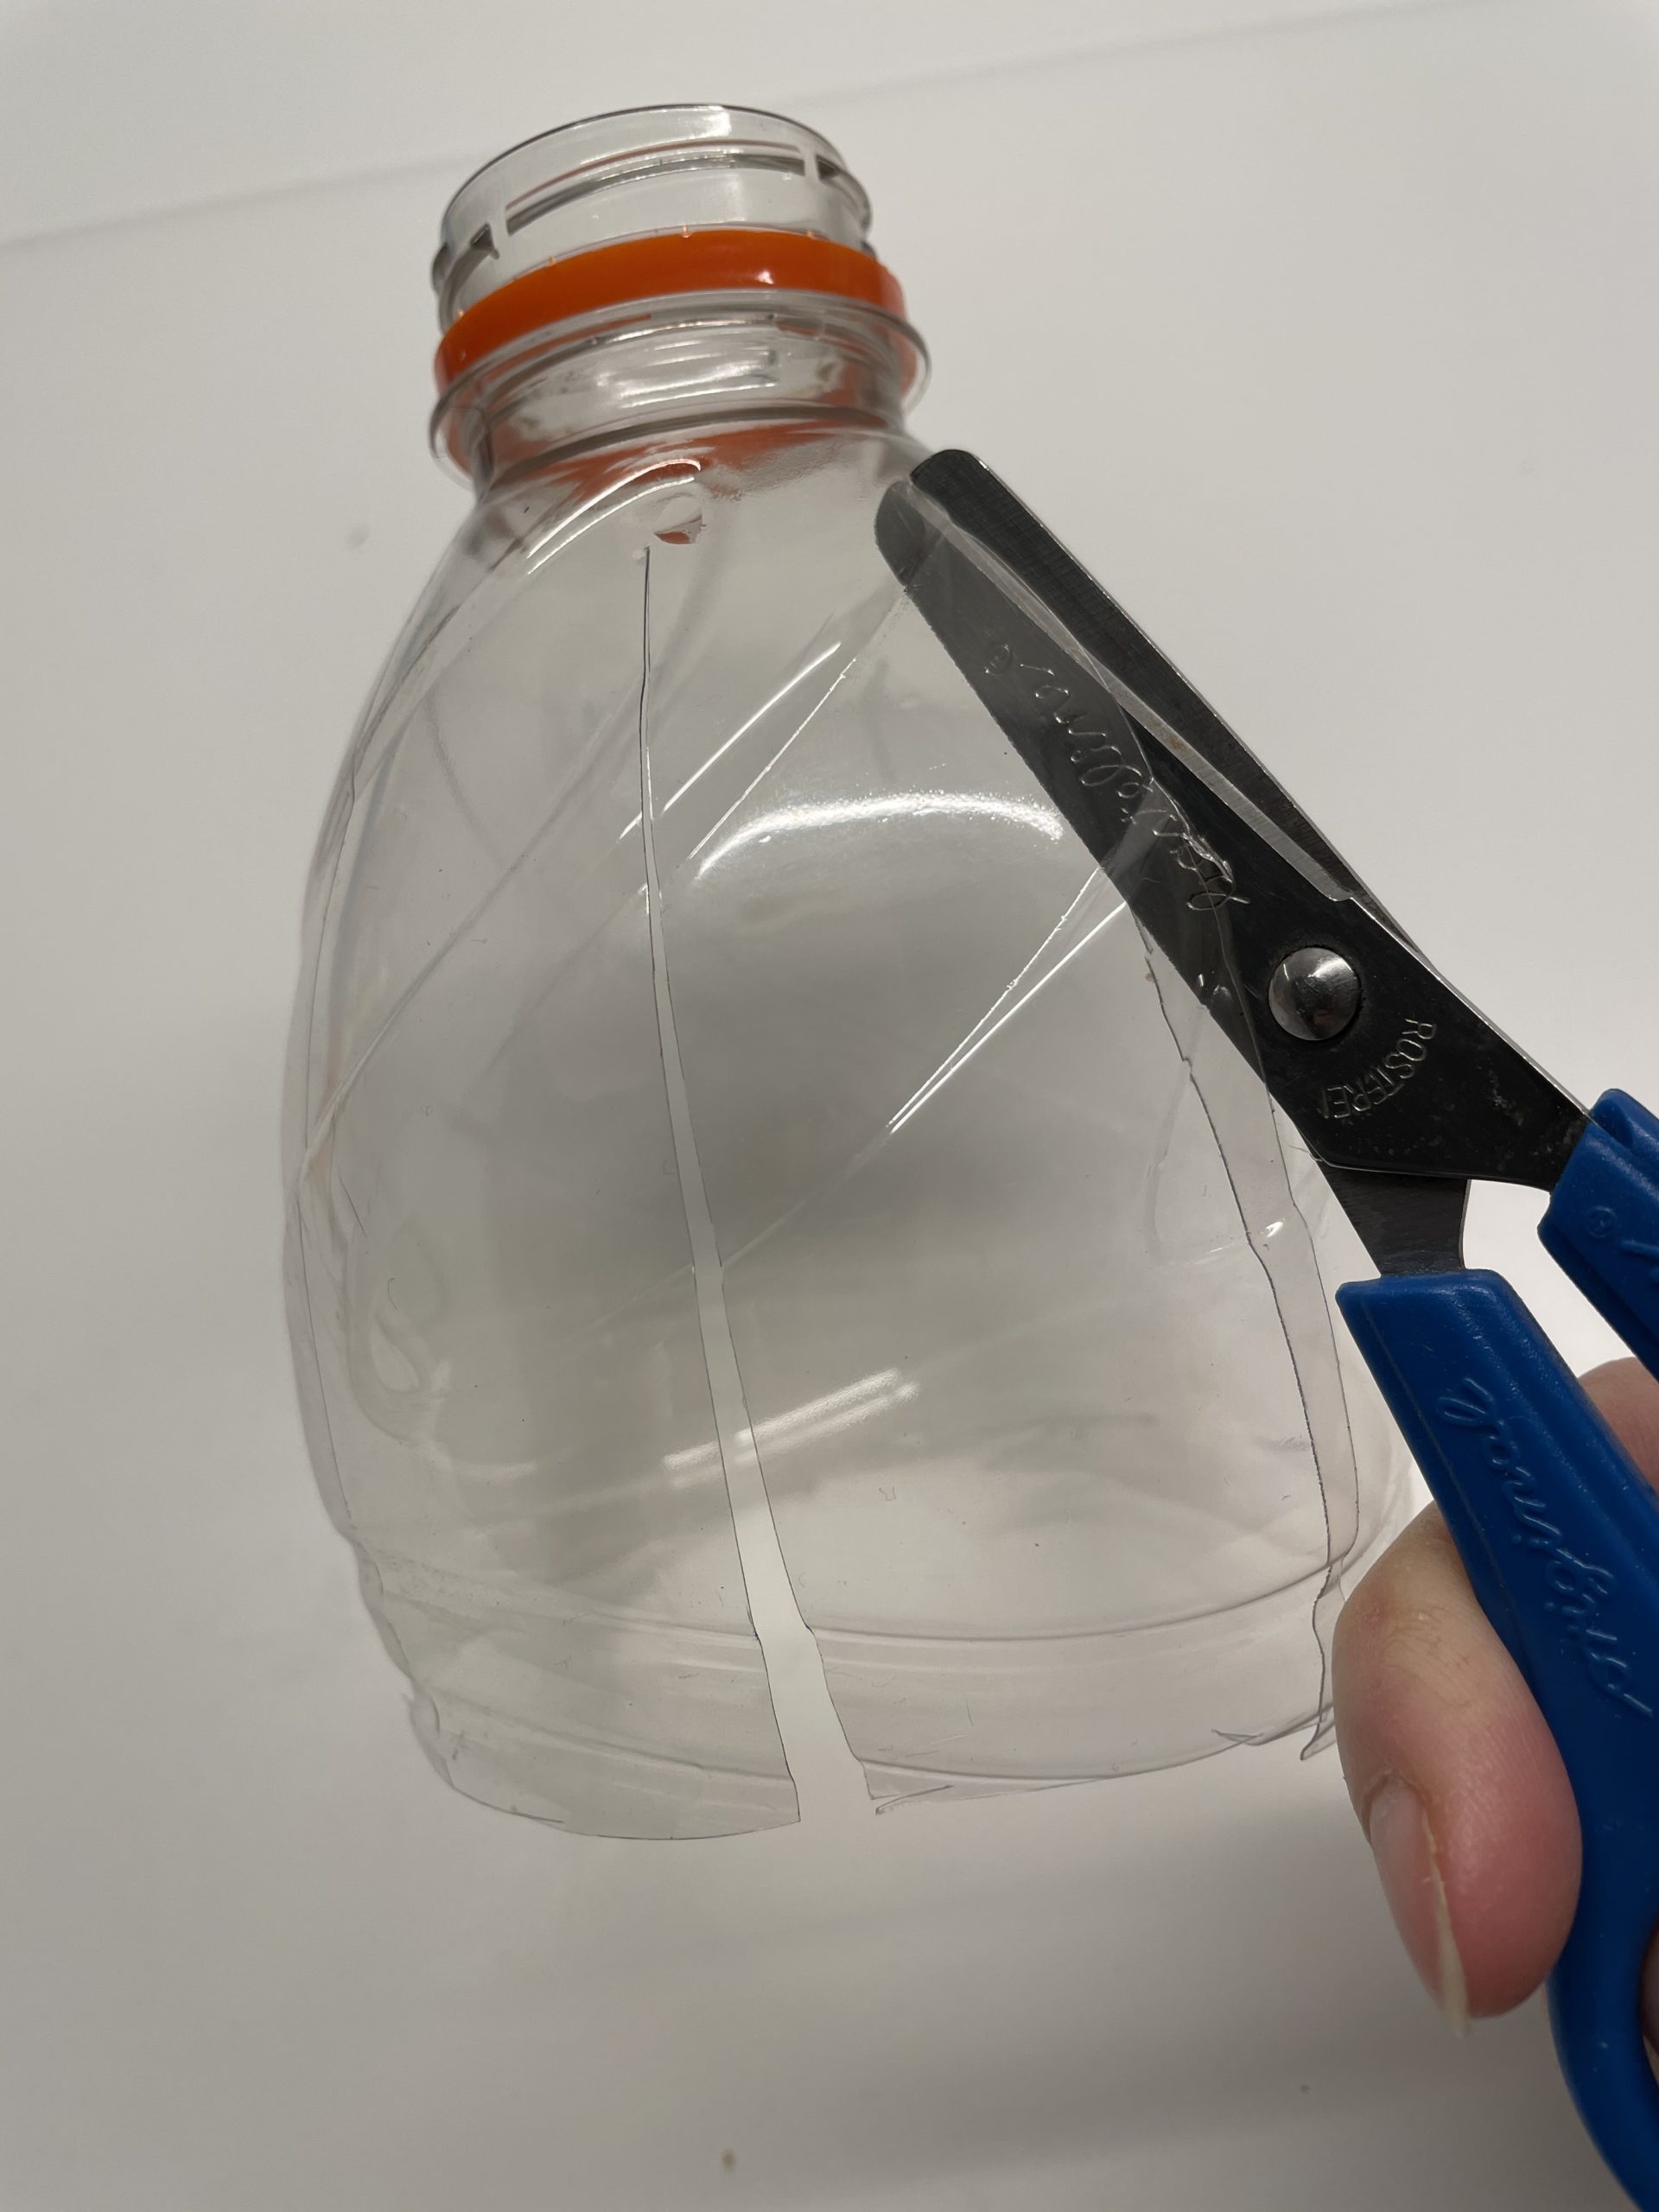
Bild zum Schritt 3 für das Bastel- und DIY-Abenteuer für Kinder: 'Schneidet die Streifen bis hoch zum Flaschenhals.'

4

2. Bild zum Schritt 3 für das Bastel- und DIY-Abenteuer für Kinder: 'Schneidet die Streifen bis hoch zum Flaschenhals.'

5

Now round off each strip at the ends with the scissors.
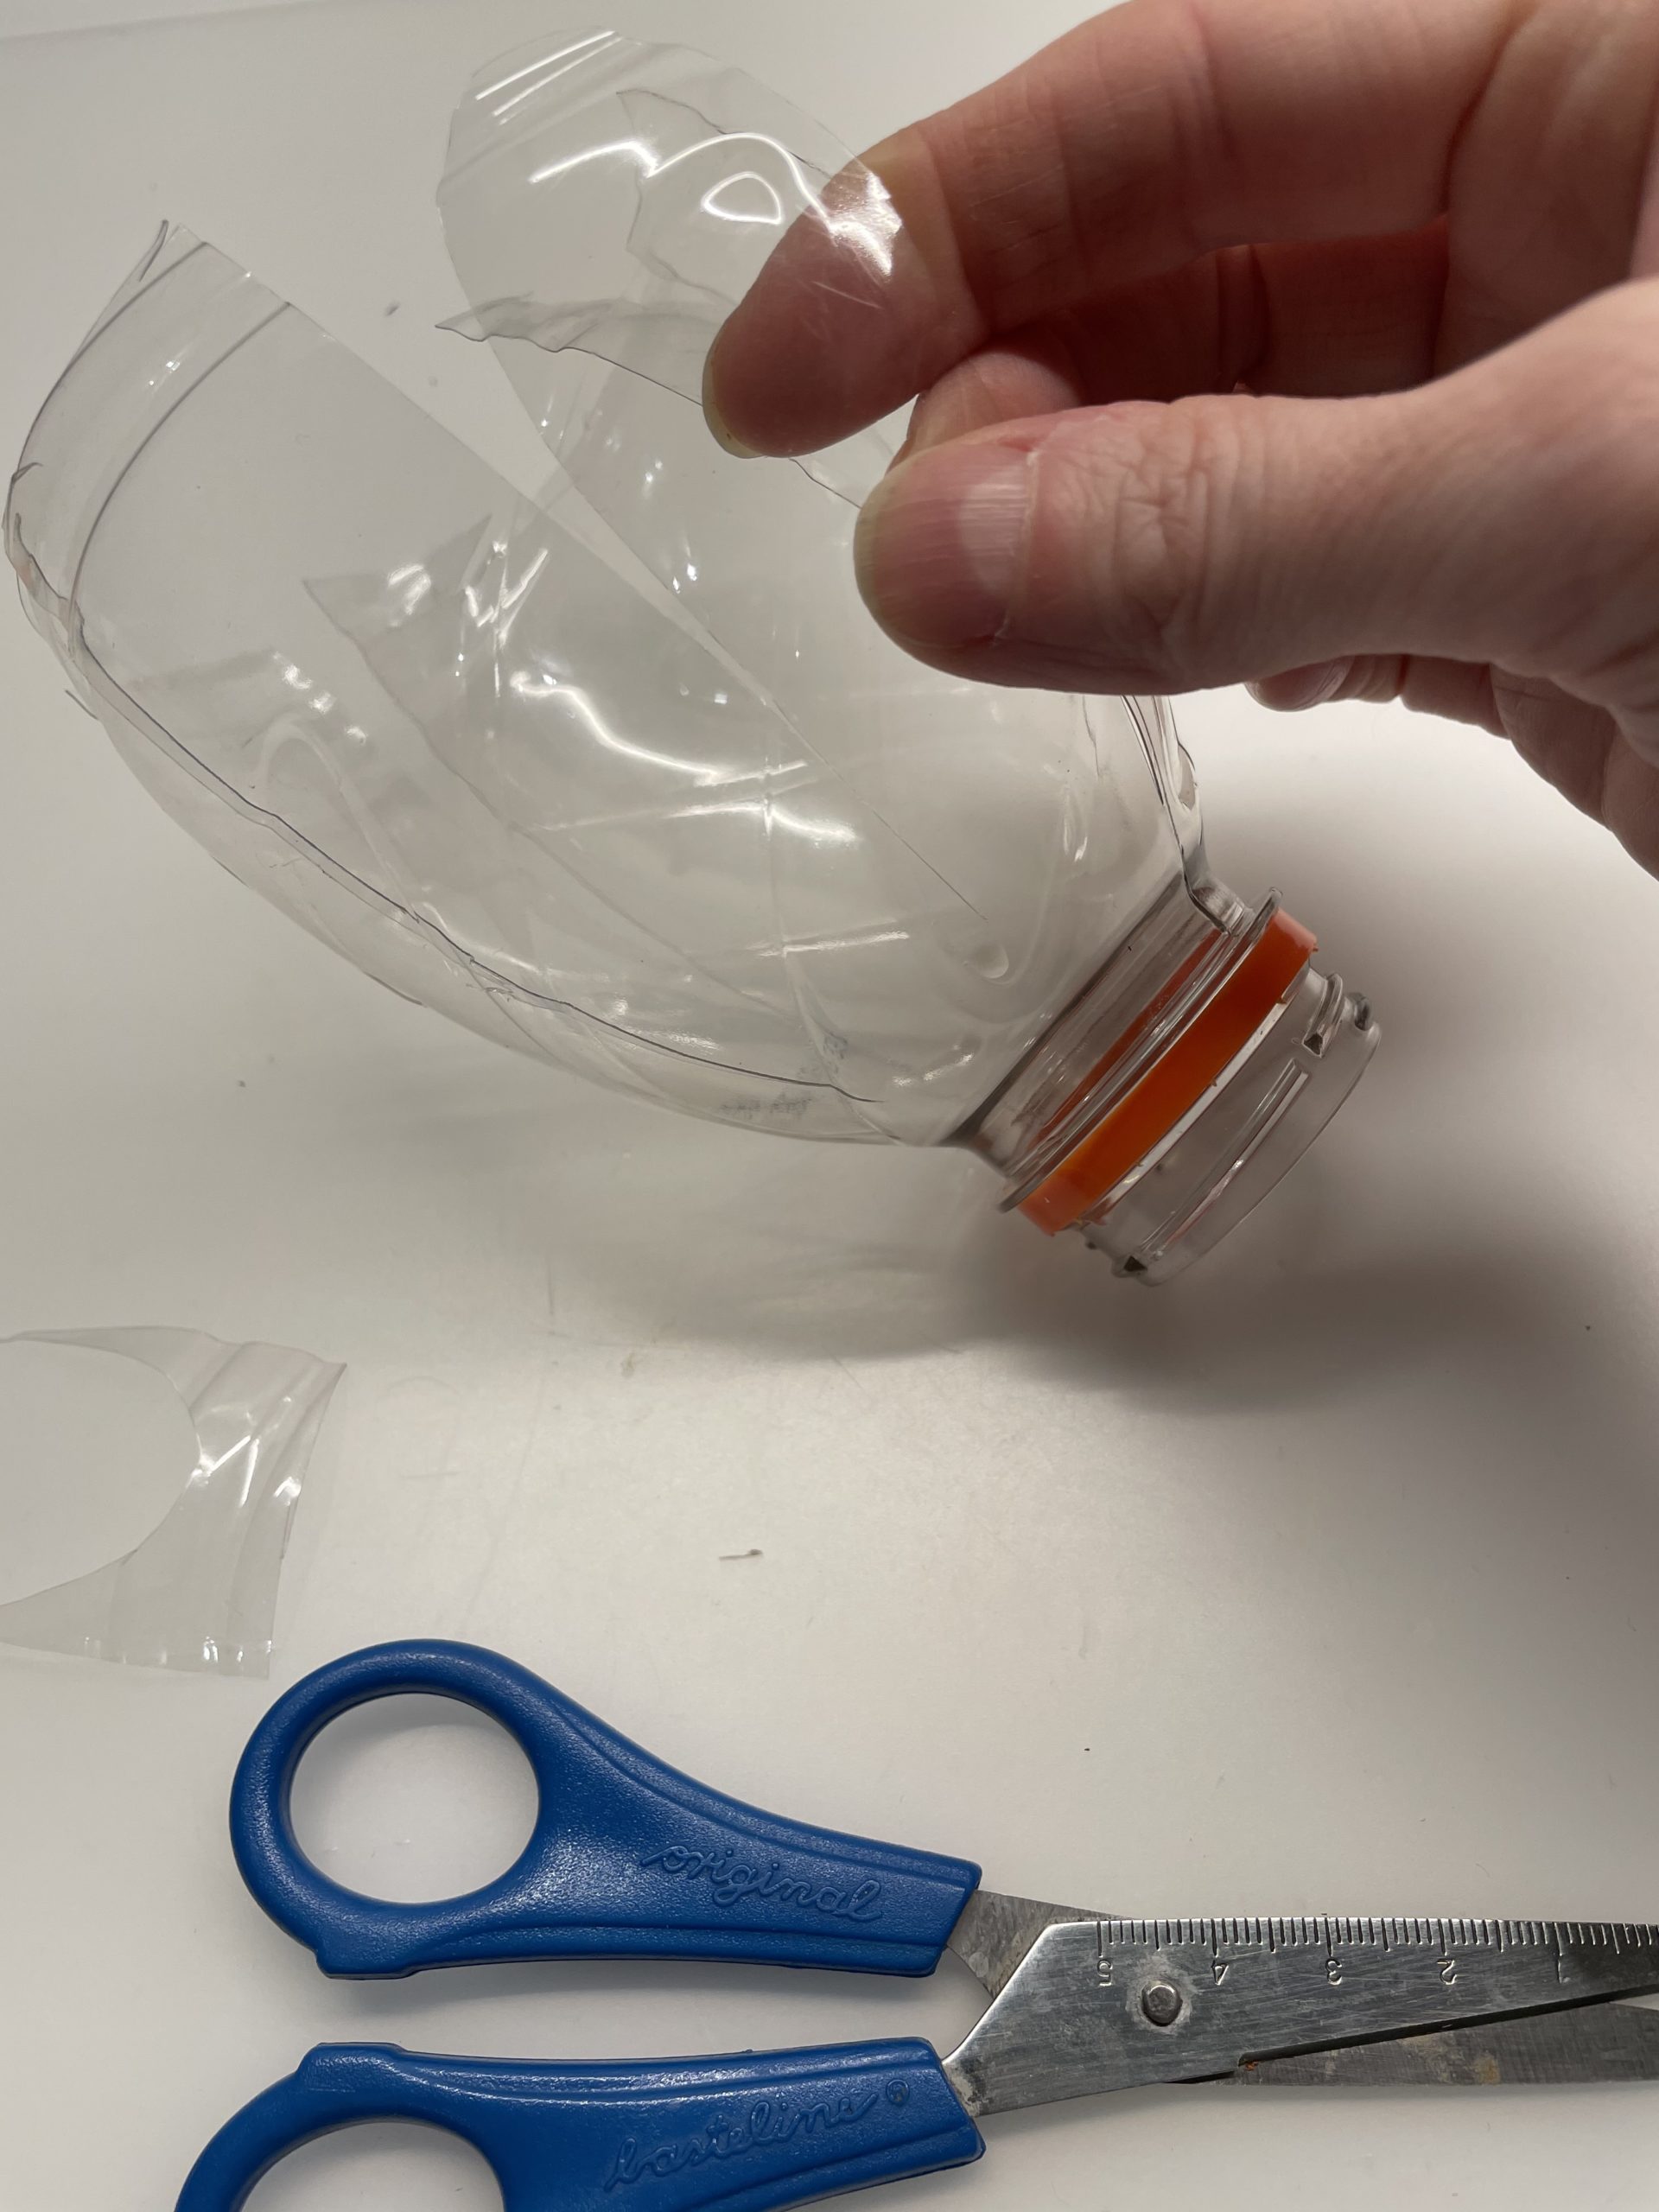
Bild zum Schritt 5 für das Bastel- und DIY-Abenteuer für Kinder: 'Rundet nun jeden Streifen an an Enden mit der Schere...'

6

Cut the legs slightly narrower, then they bend more easily to the outside. Try it out!
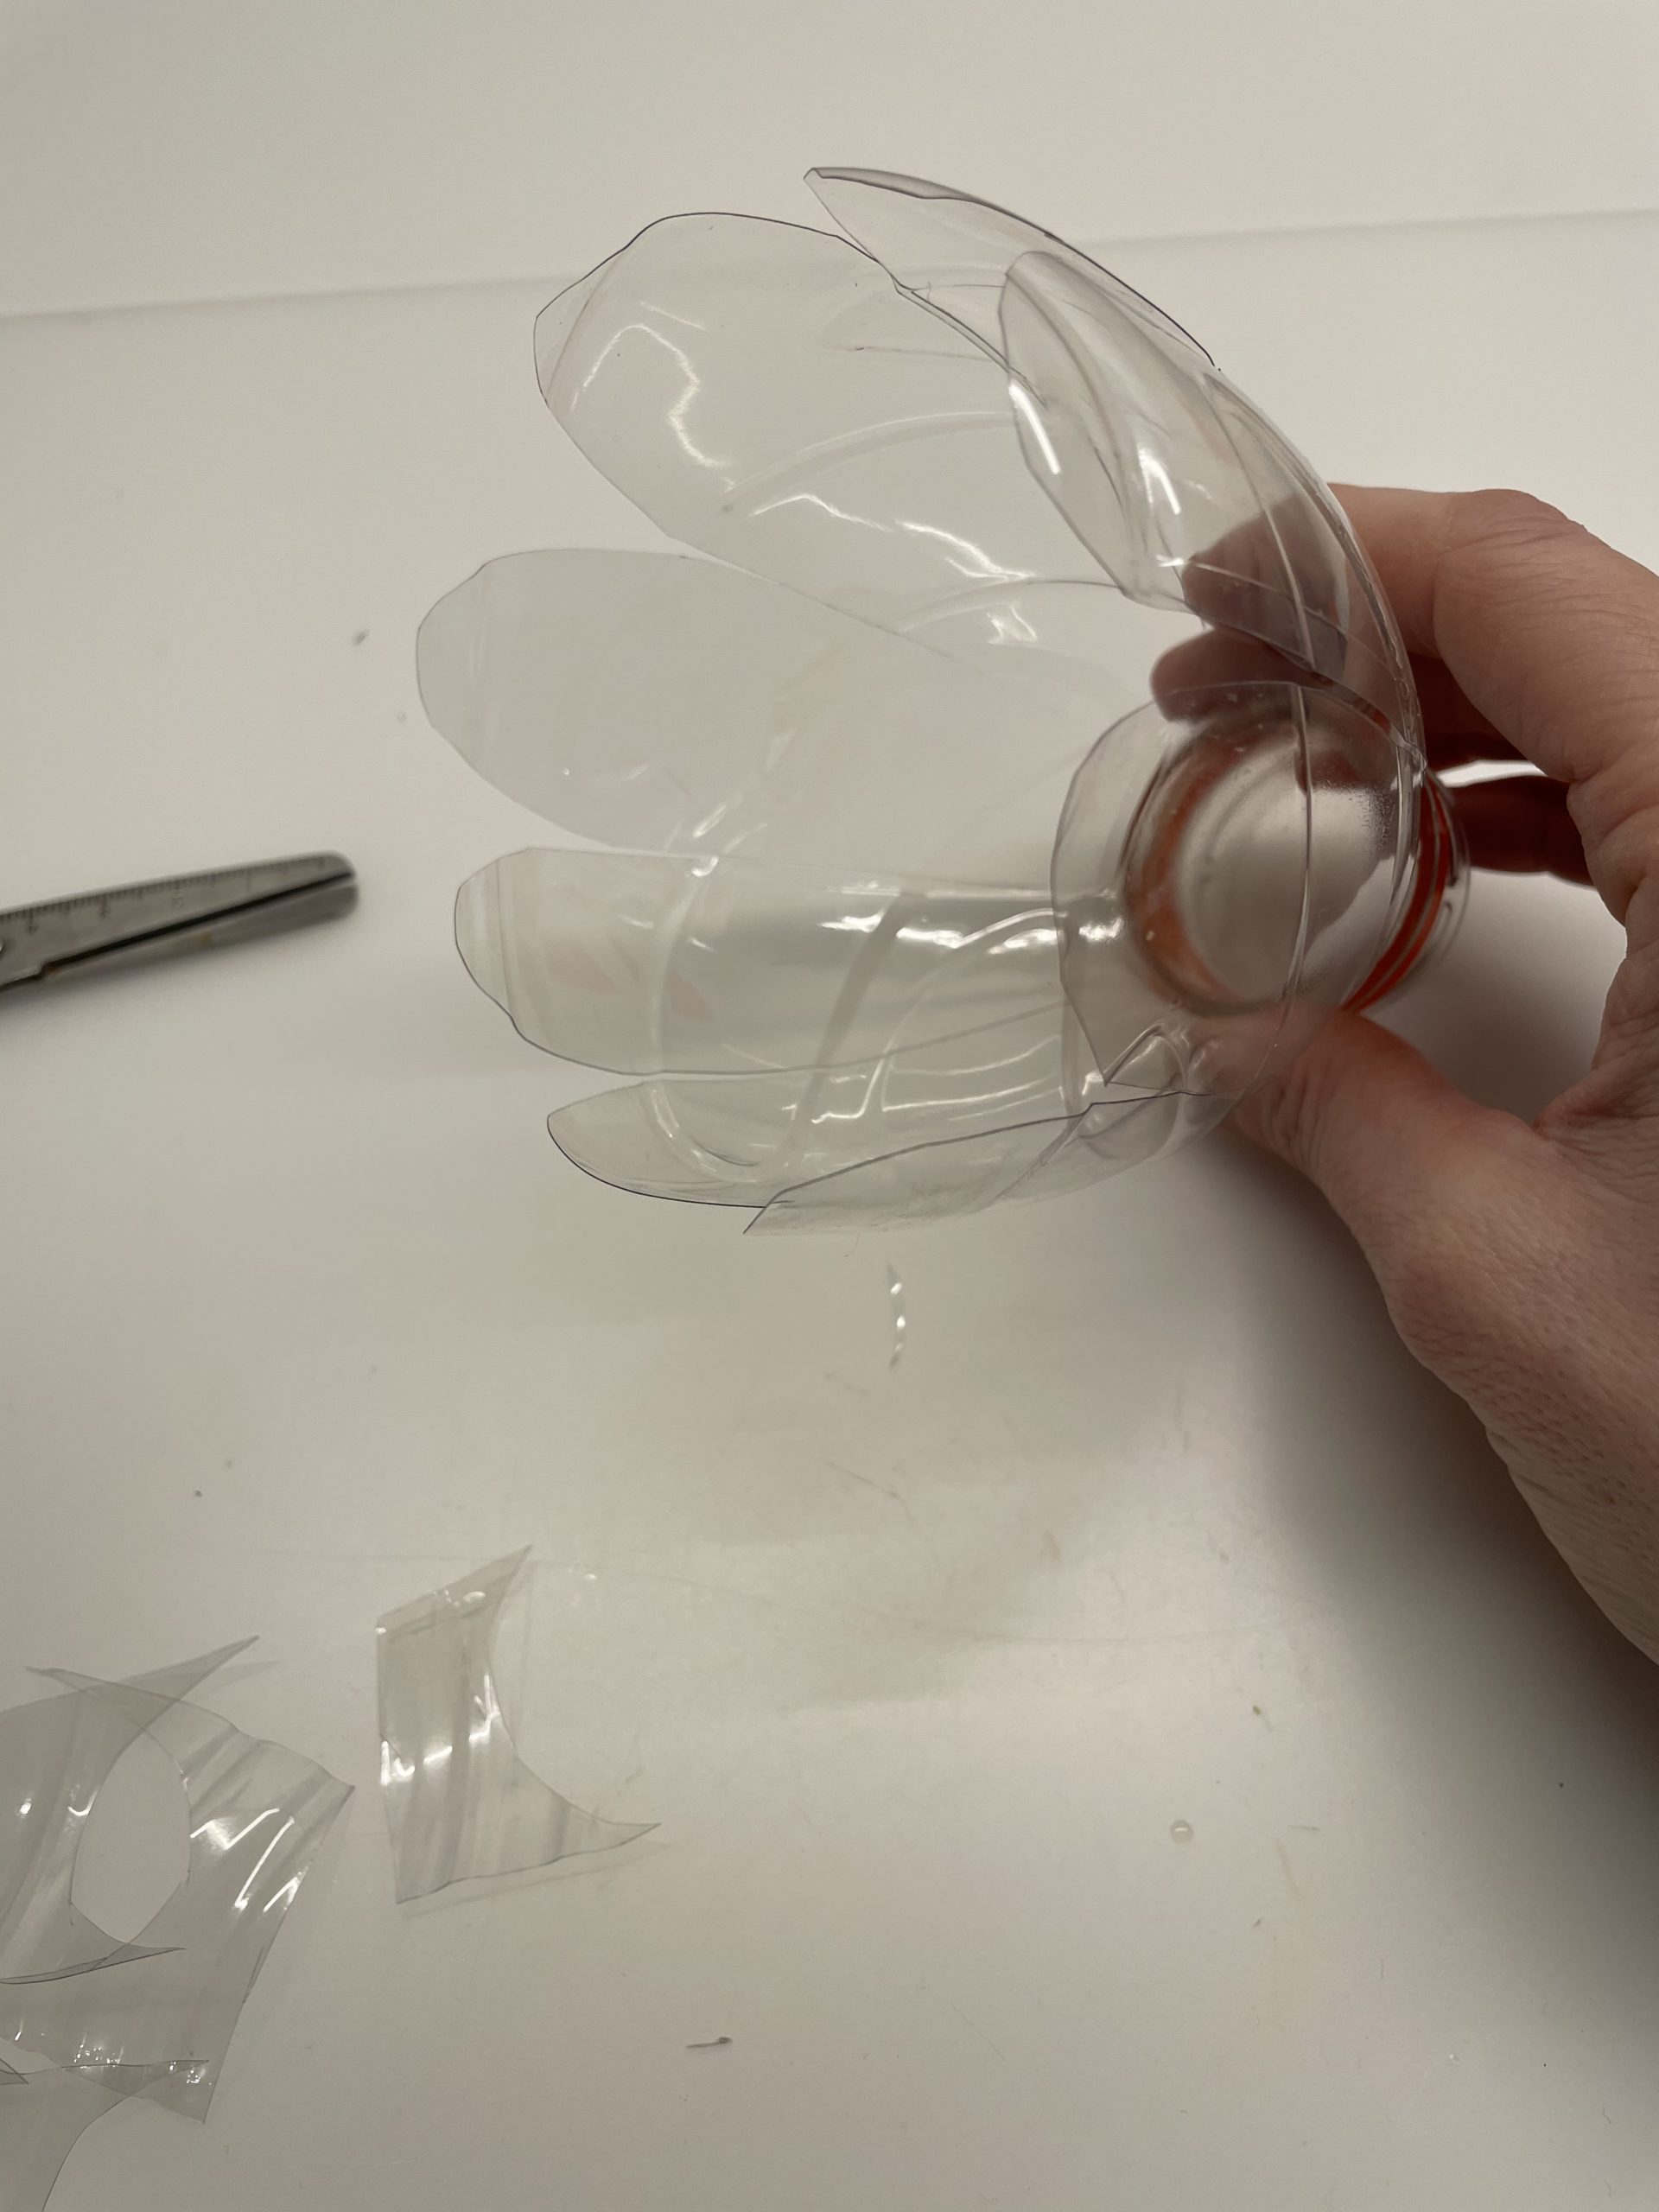
Bild zum Schritt 6 für das Bastel- und DIY-Abenteuer für Kinder: 'Schneidet die Beine etwas schmäler, dann biegen sie sich anschließend...'

7

Now bends every single strip.
First bend the strip from the outer edge about 2cm wide inwards. Then bend another 3cm outwards. So you get a standing spider's leg. See the following pictures:
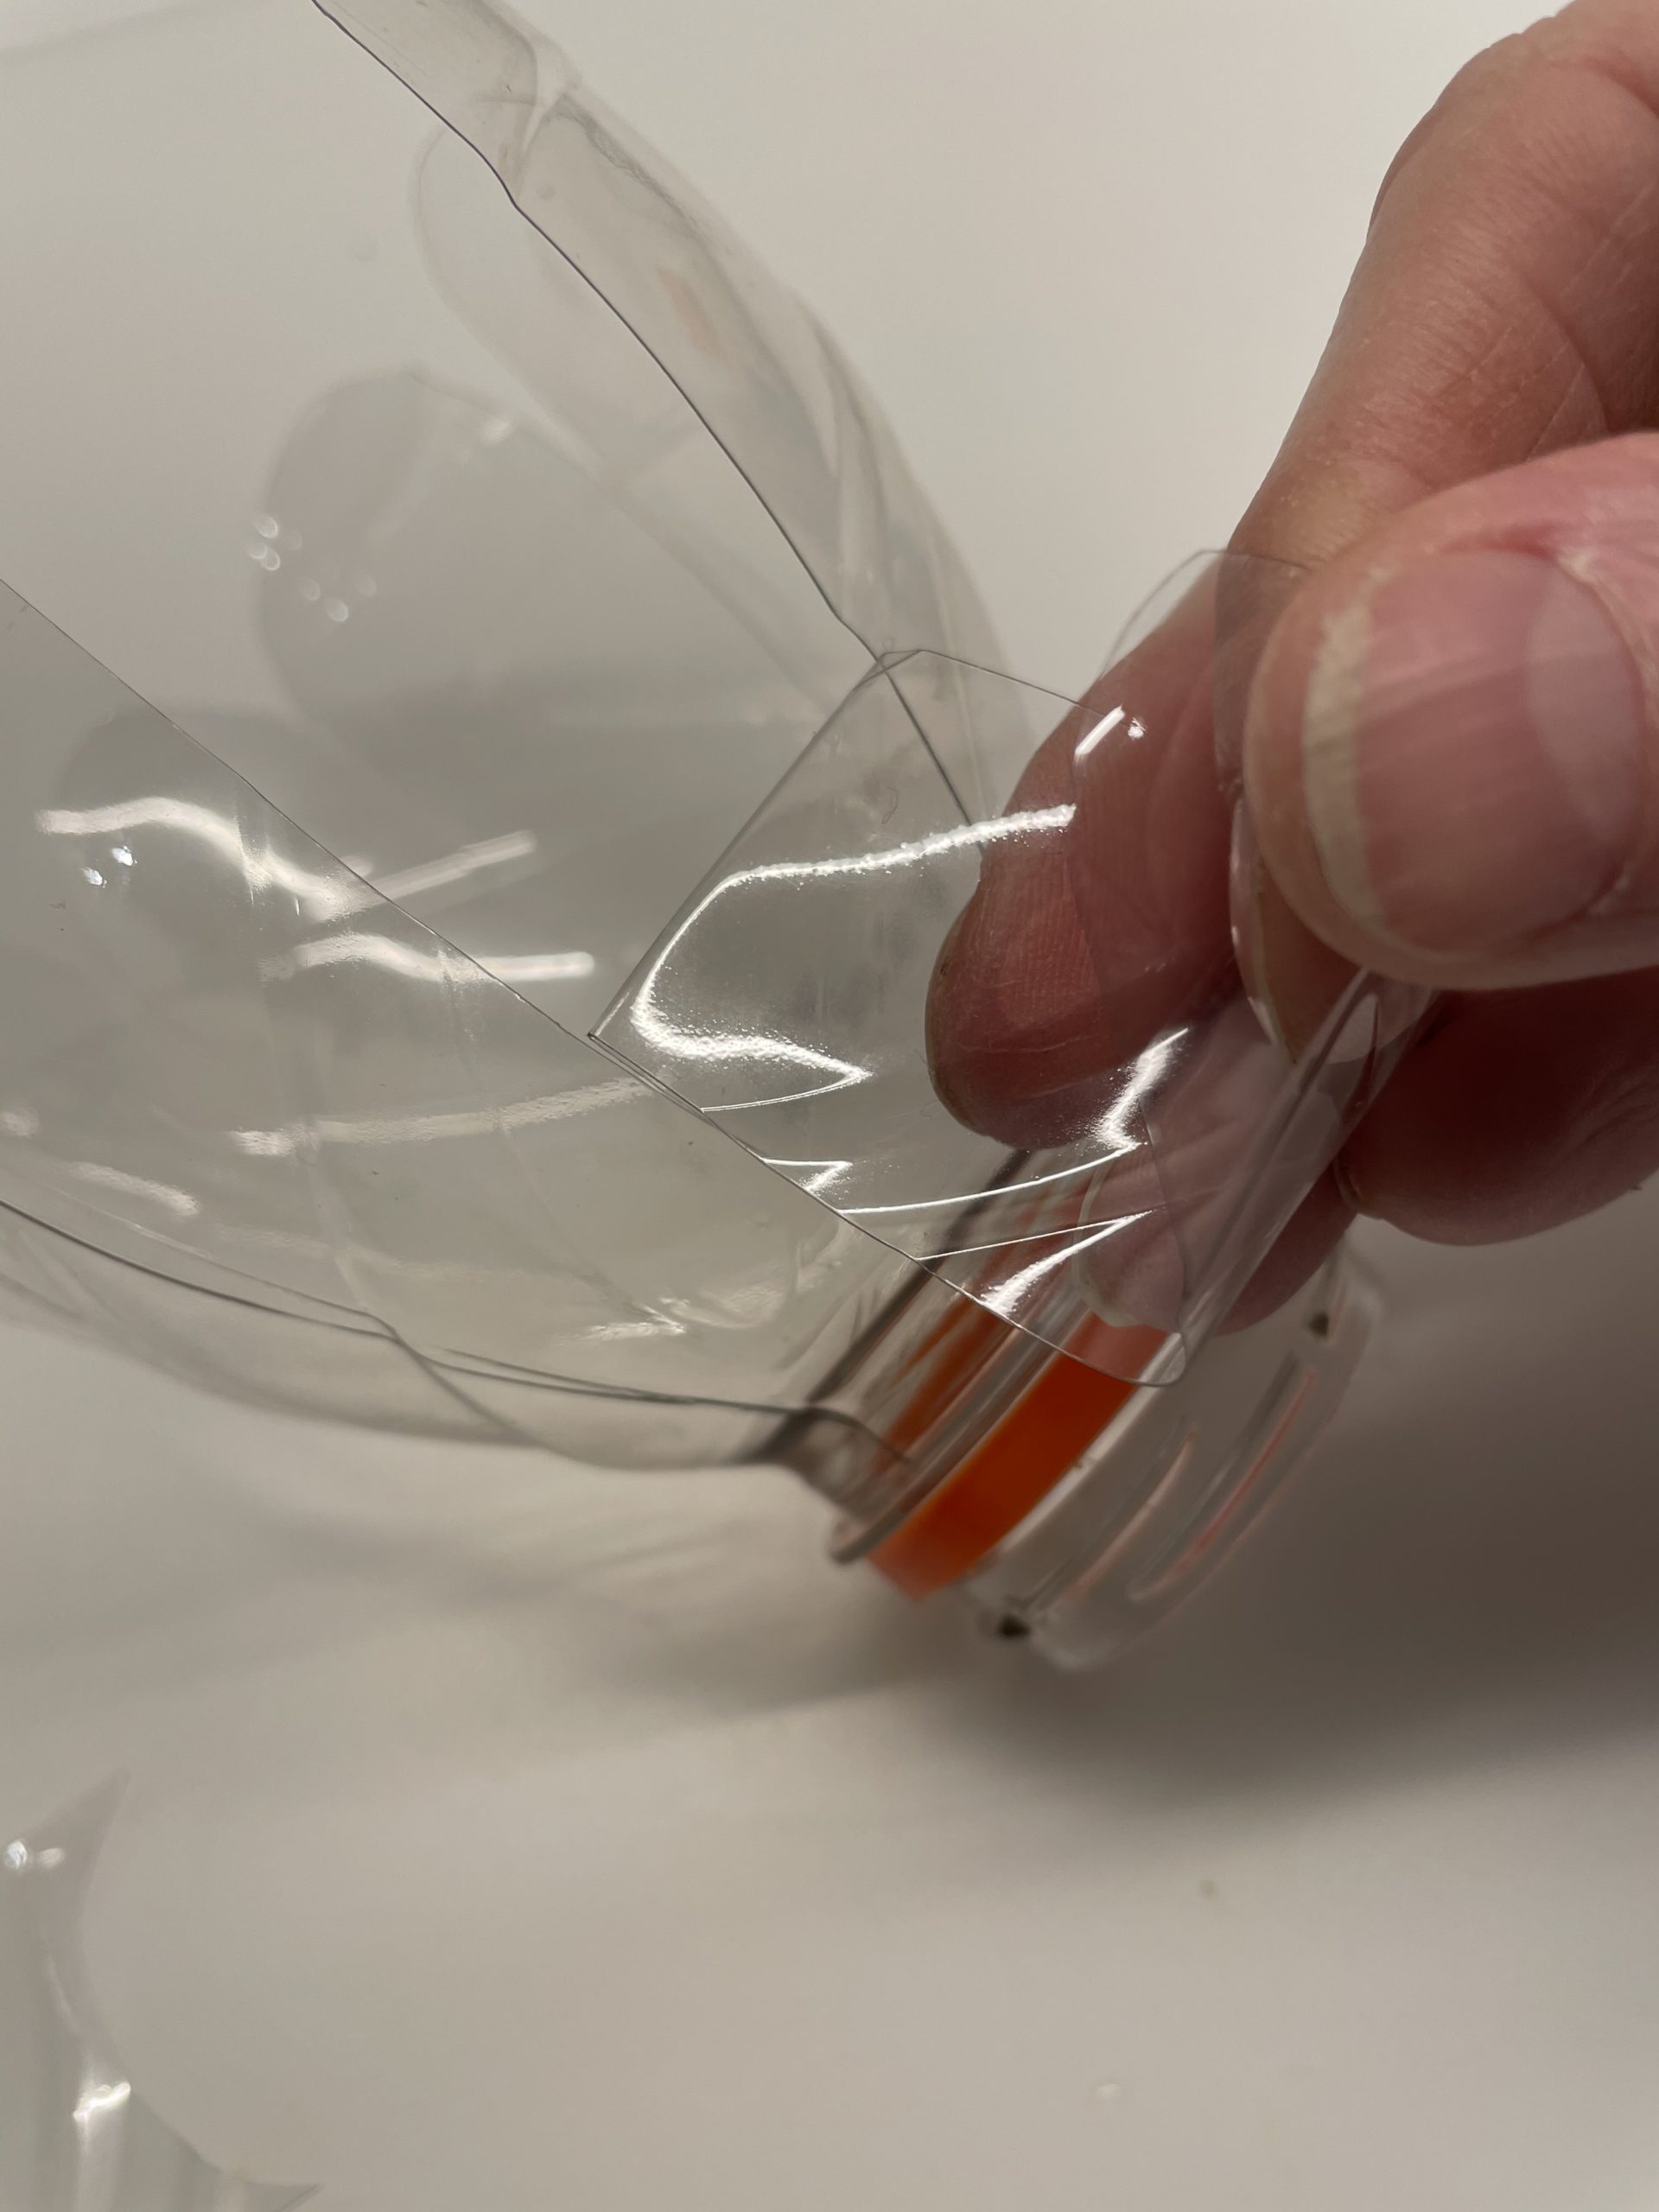
Bild zum Schritt 7 für das Bastel- und DIY-Abenteuer für Kinder: 'Biegt nun jeden einzelnen Streifen.   Biegt den Streifen...'

8

2. Bild zum Schritt 7 für das Bastel- und DIY-Abenteuer für Kinder: 'Biegt nun jeden einzelnen Streifen.   Biegt den Streifen...'

9

3. Bild zum Schritt 8 für das Bastel- und DIY-Abenteuer für Kinder: 'Biegt nun jeden einzelnen Streifen.   Biegt den Streifen...'

10

4. Bild zum Schritt 9 für das Bastel- und DIY-Abenteuer für Kinder: 'Biegt nun jeden einzelnen Streifen.   Biegt den Streifen...'

11

If all the legs are bent, then the spider will stand up. Try now whether the spider will wiggle as soon as you press the edge of the bottle with your fingers.
Maybe bend the spider's legs a little bit.
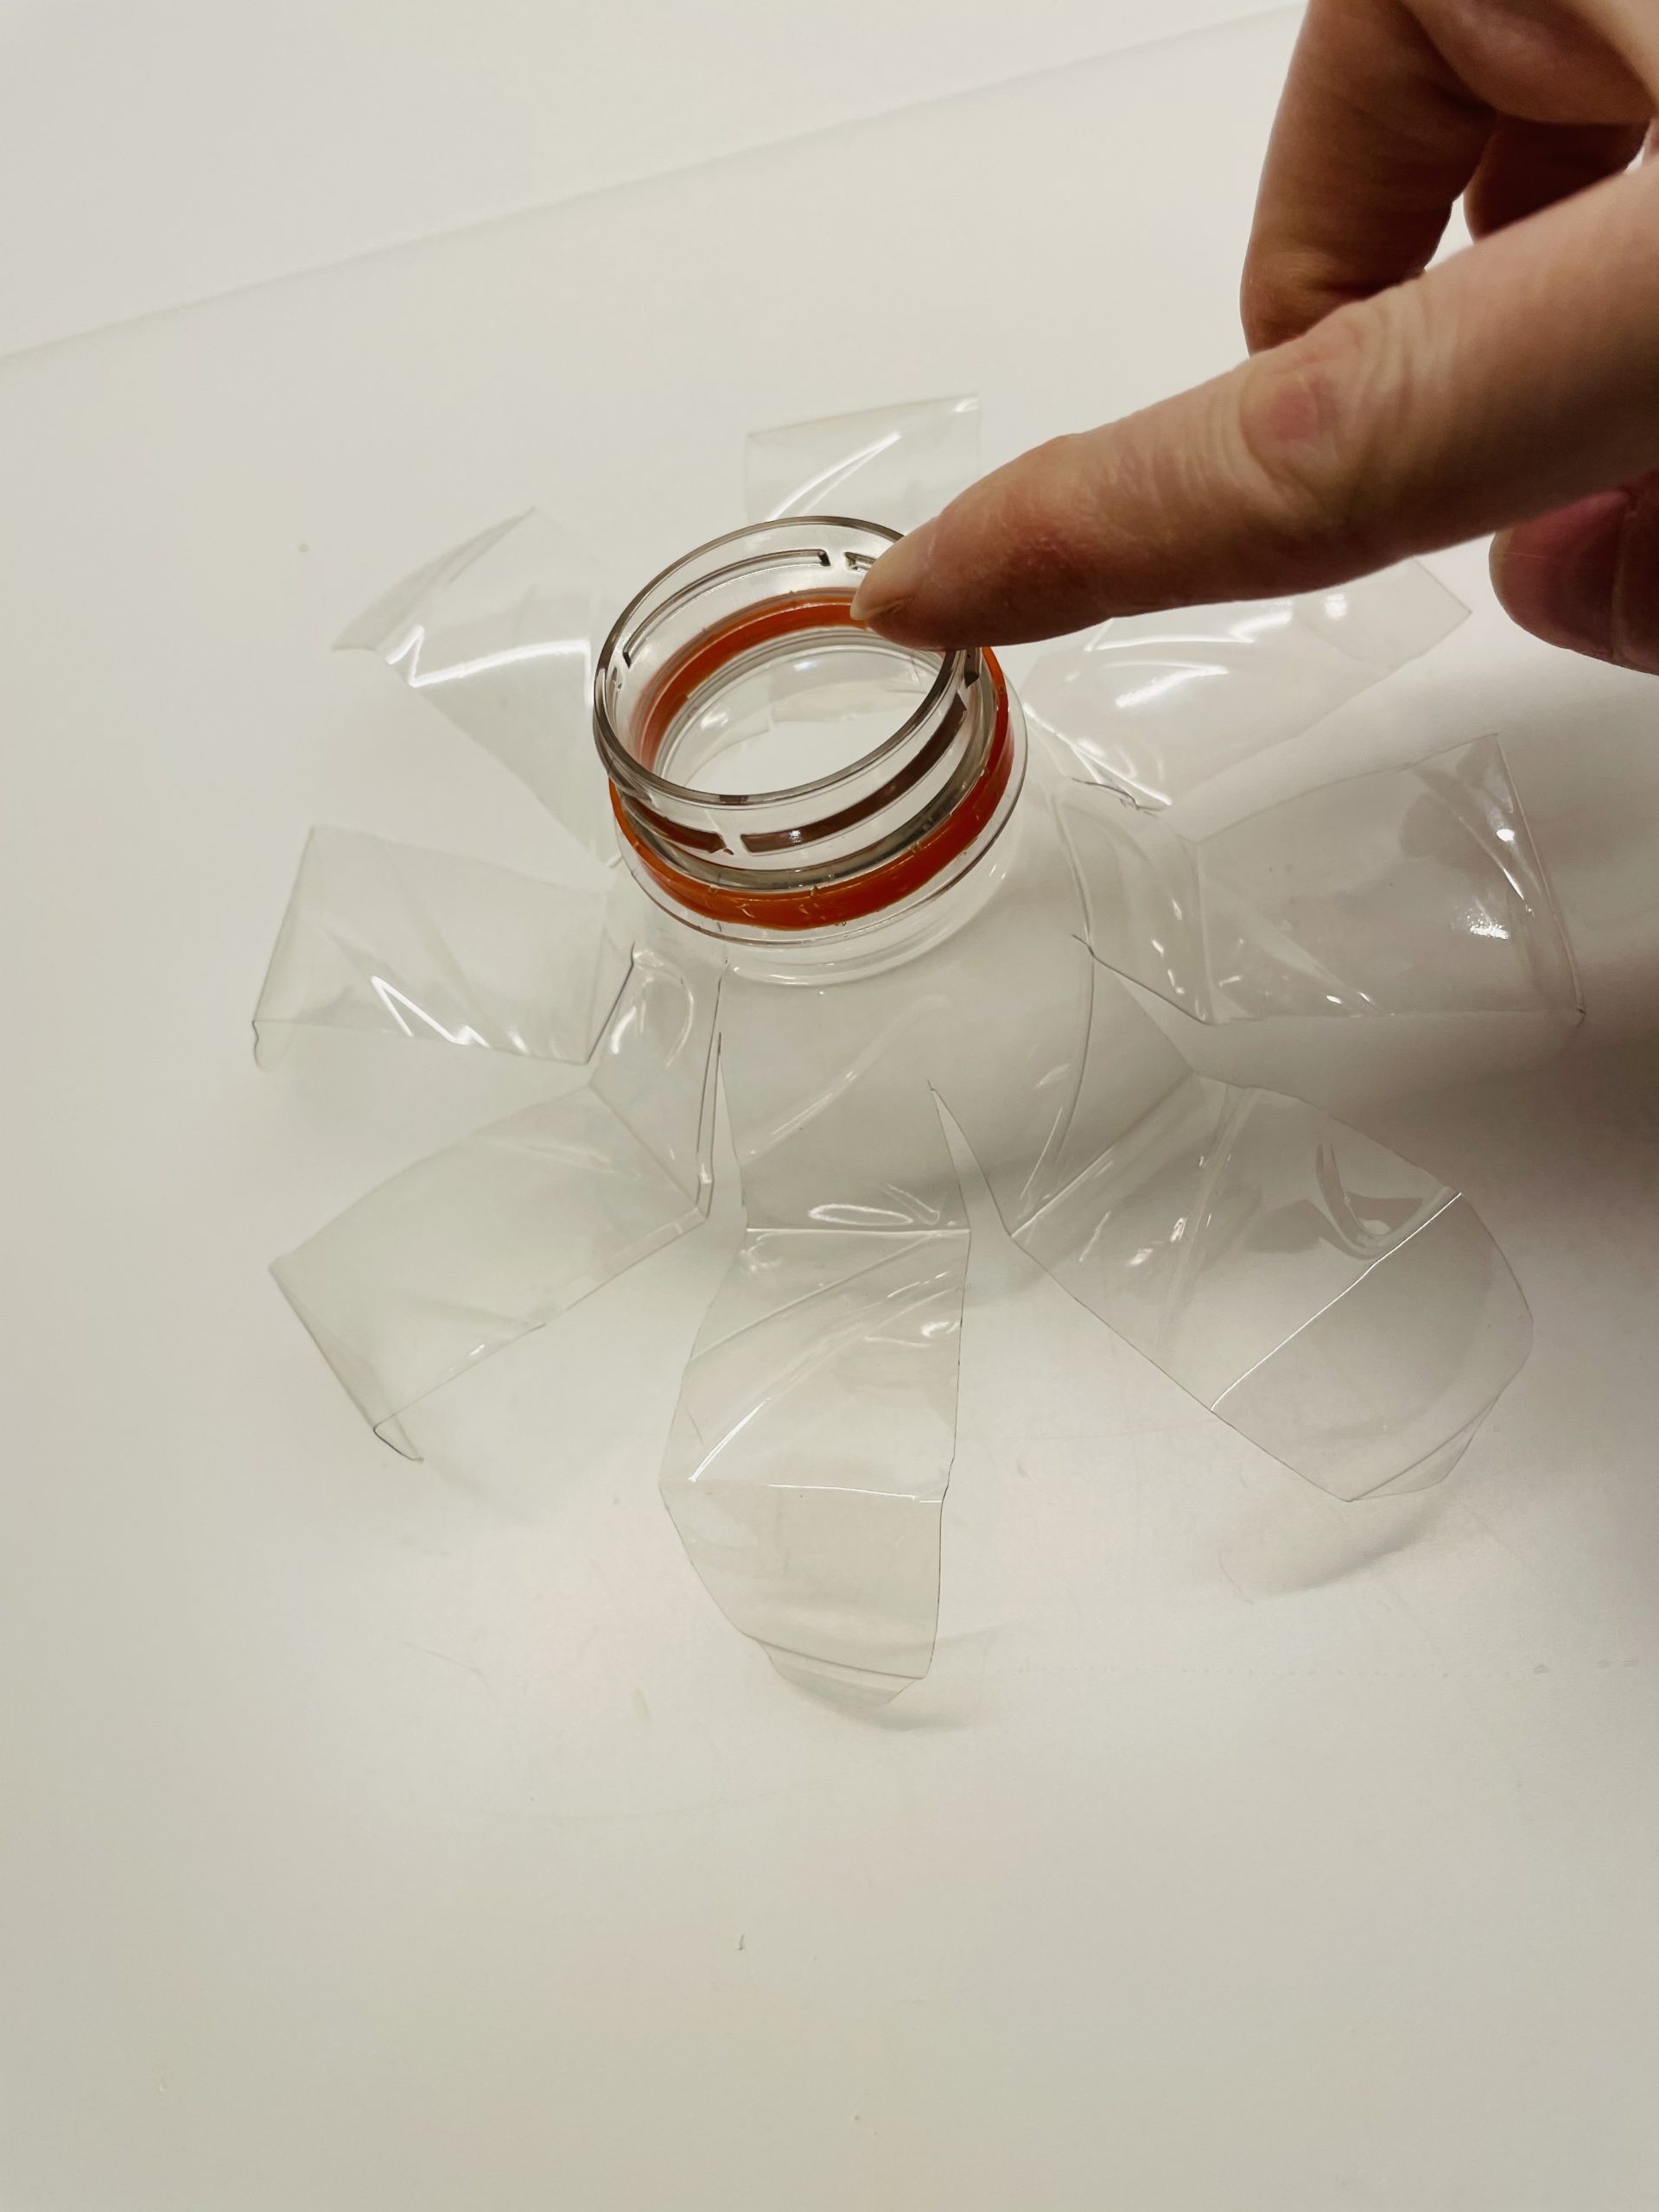
Bild zum Schritt 11 für das Bastel- und DIY-Abenteuer für Kinder: 'Sind alle Beine gebogen, dann stellt die Spinne auf. Probiert...'

12

Now you're gonna stick her eyes on the shackles.
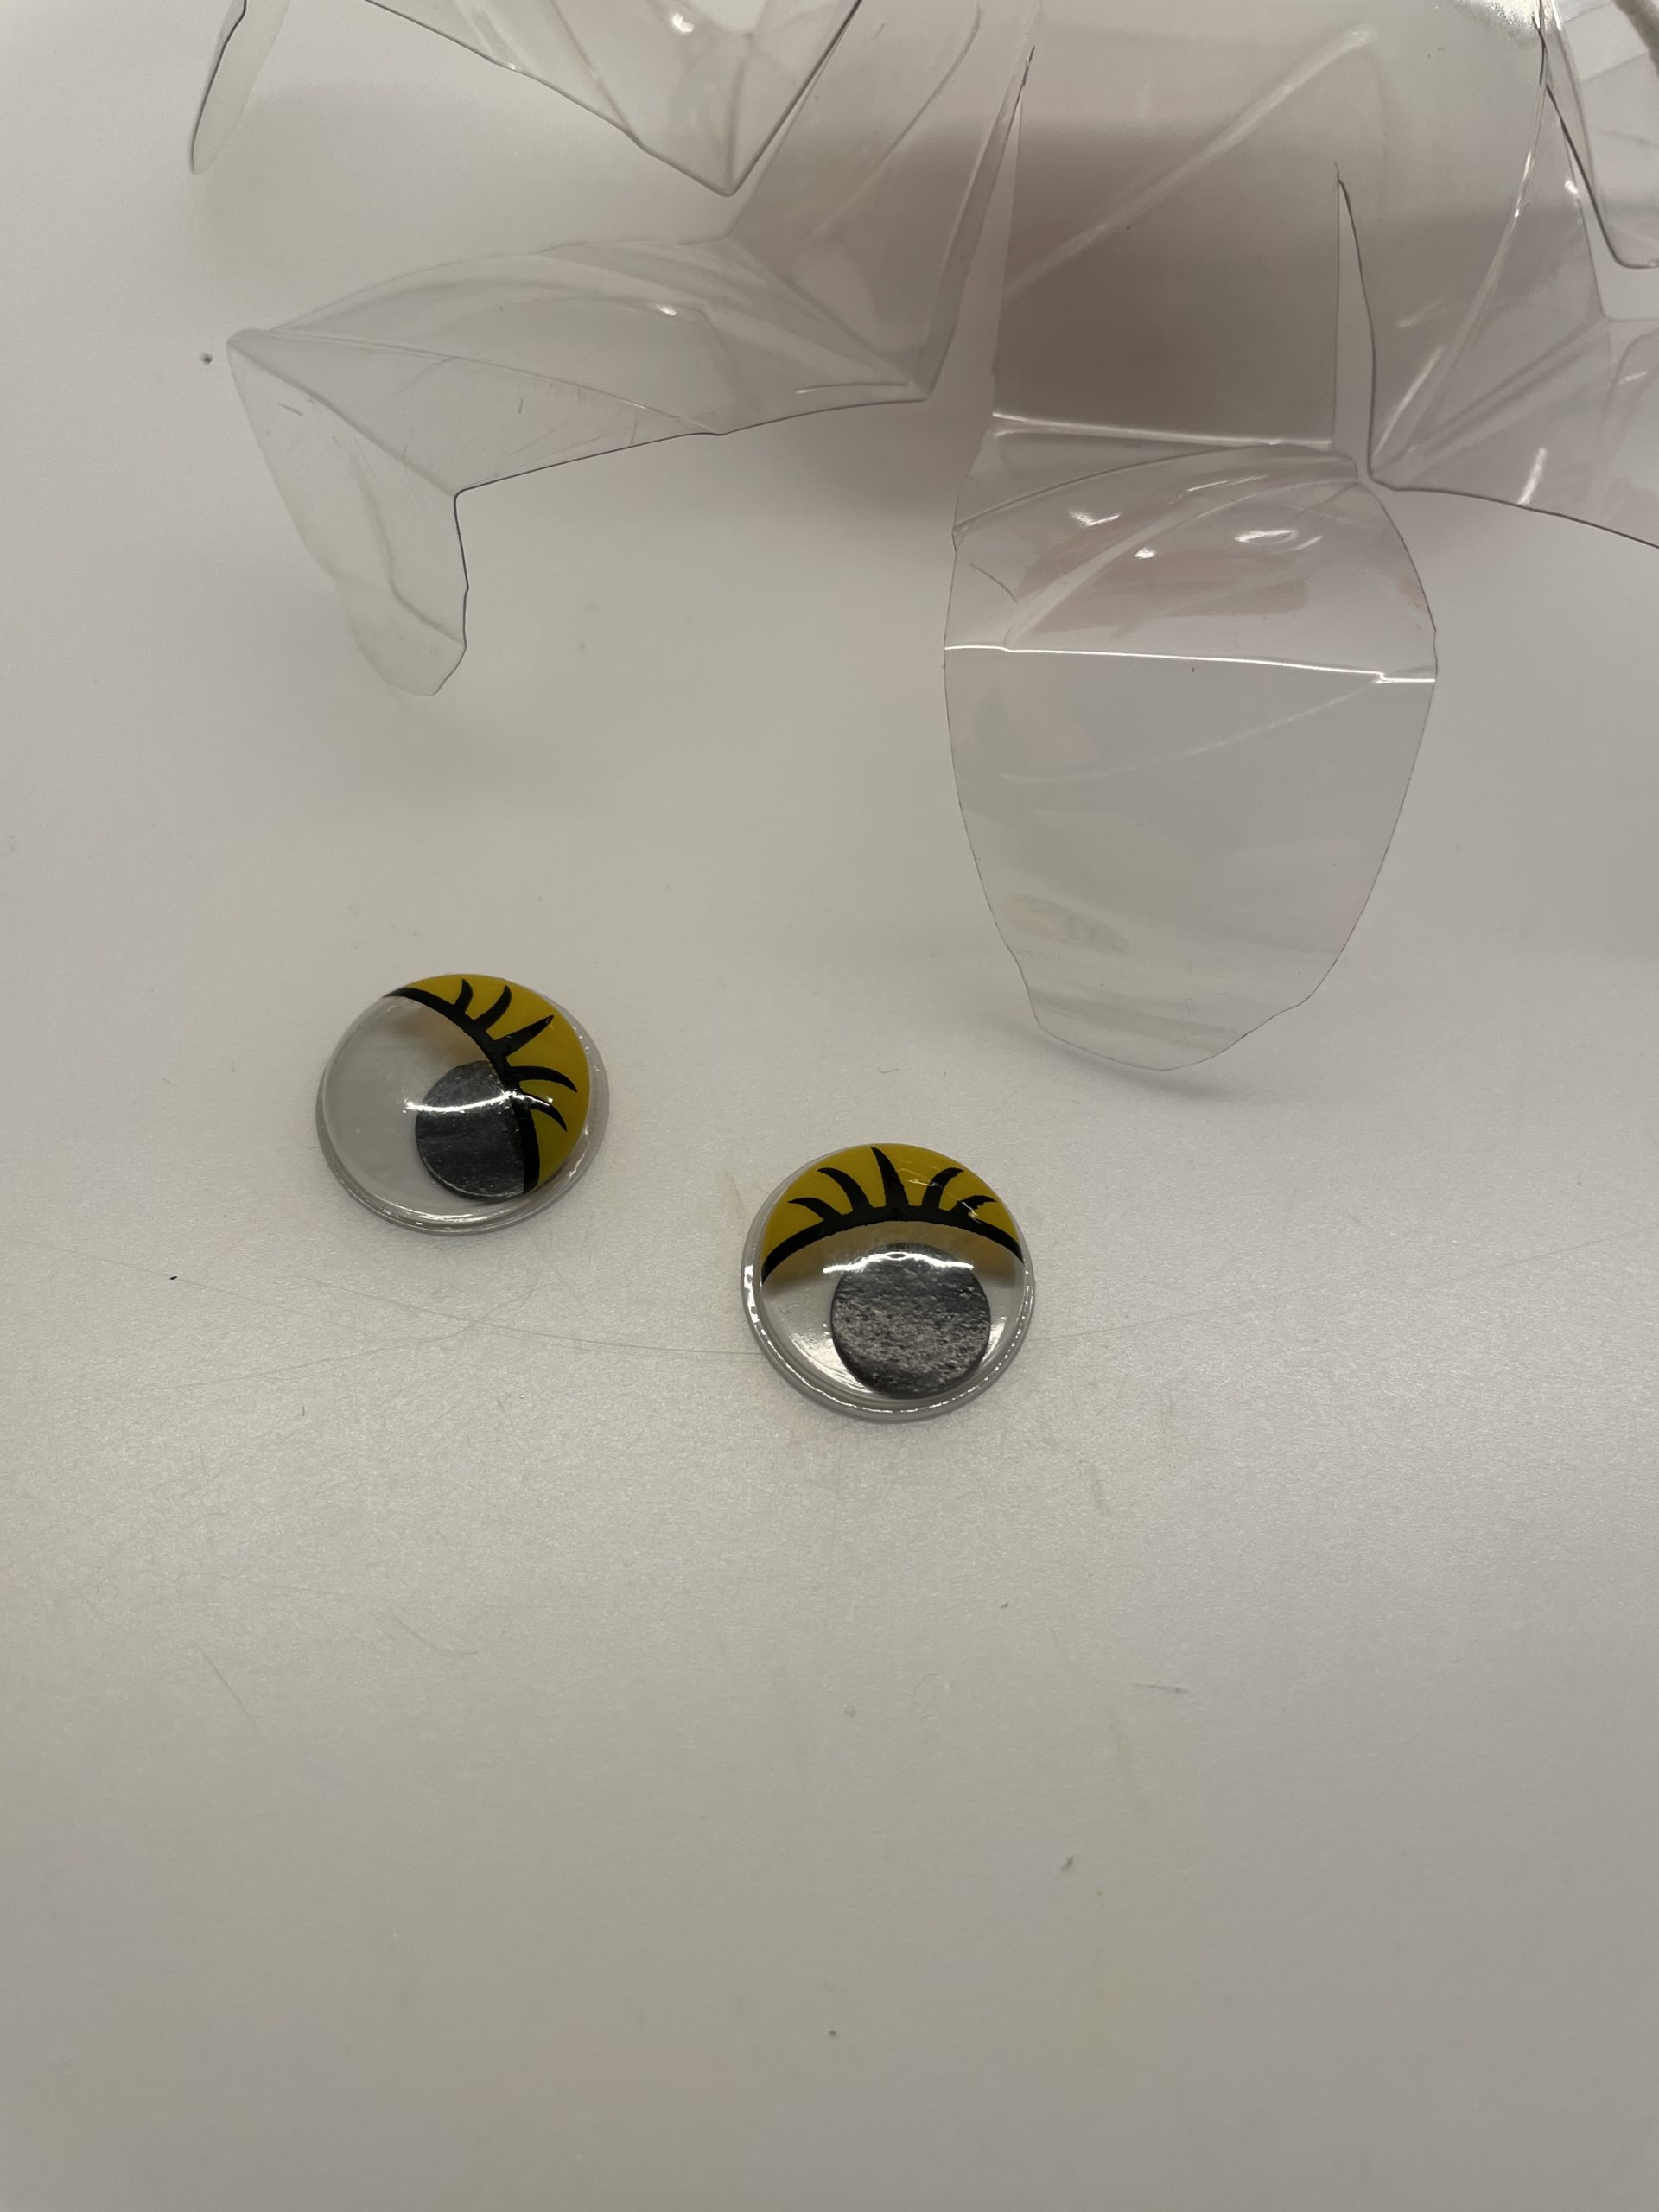
Bild zum Schritt 12 für das Bastel- und DIY-Abenteuer für Kinder: 'Jetzt klebt ihr die Wackelaugen auf.'

13

Now your spider can jump already!

Alternatively, you can also let the spider hop on the rubber band.
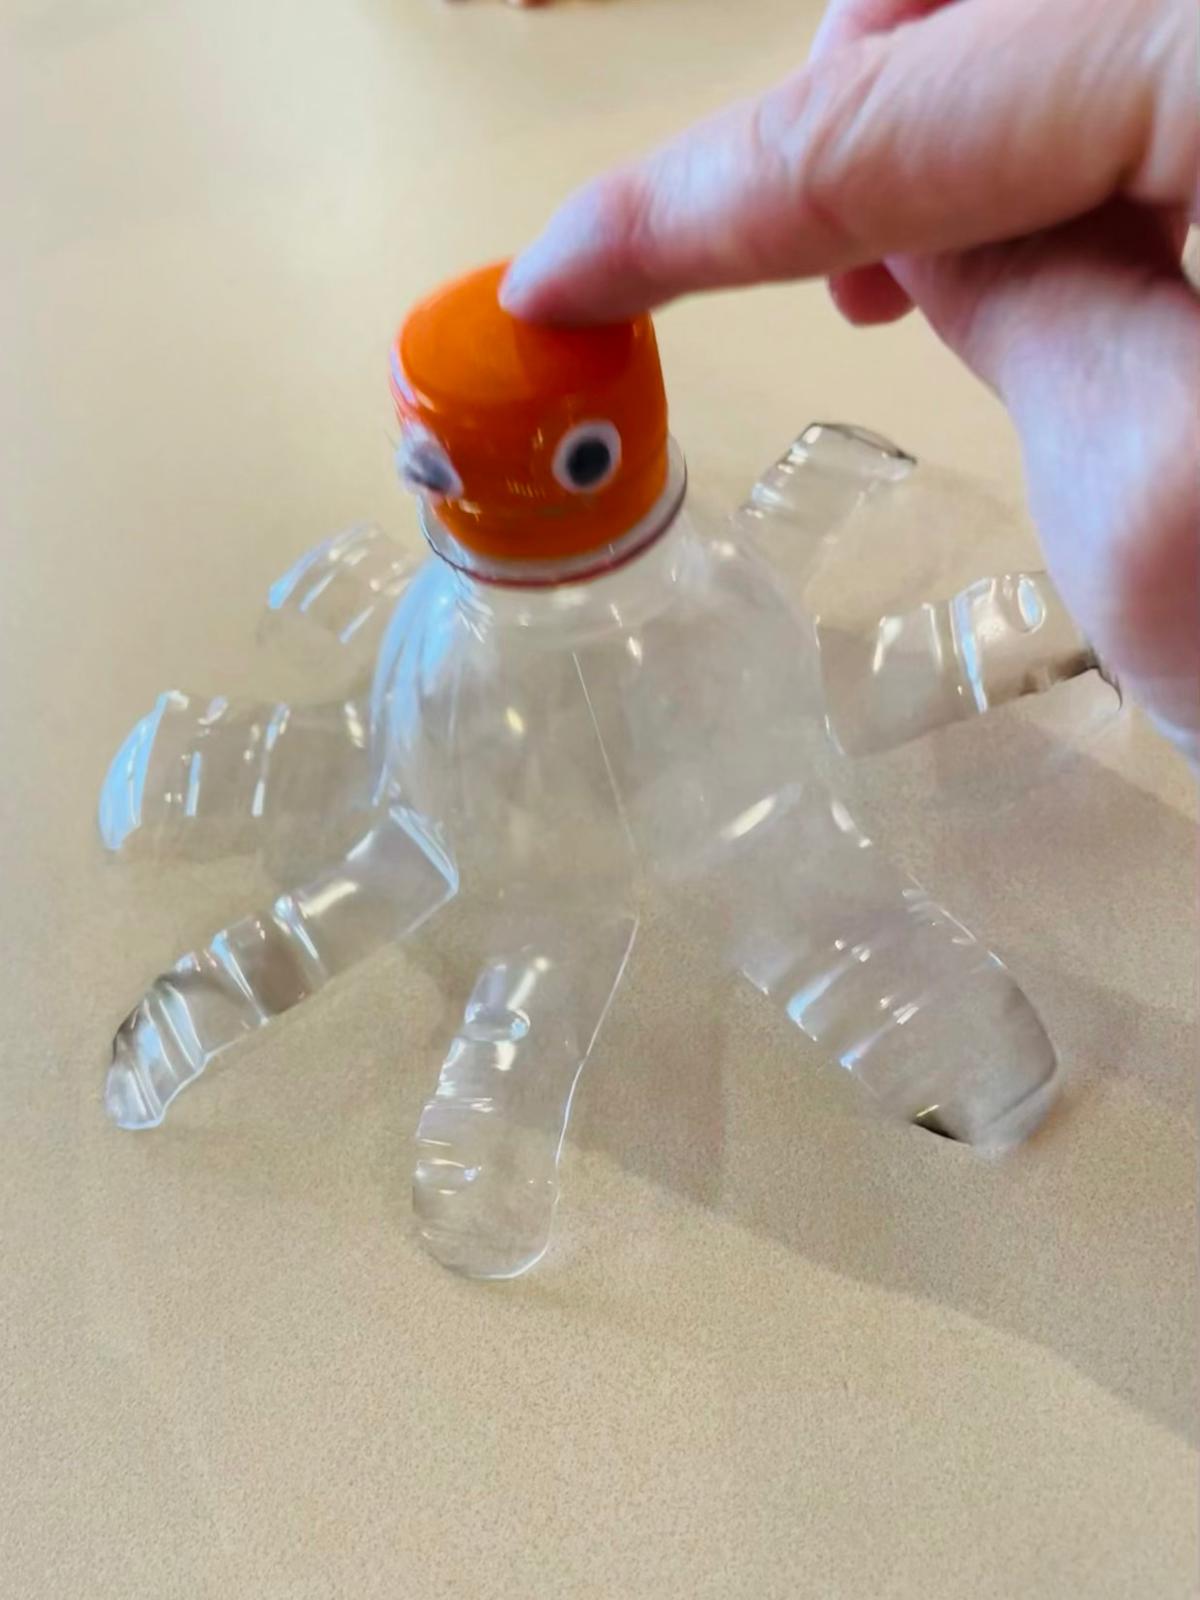
Bild zum Schritt 13 für das Bastel- und DIY-Abenteuer für Kinder: 'Jetzt kann eure Spinne auch schon loshüpfen!   ...'

Jumping spider on rubber band
14

Now you're stabbing a hole in the lid of the bottle.
Uses a fingernail scissors or a nail.
Attention: Risk of injury! Let an adult help you!
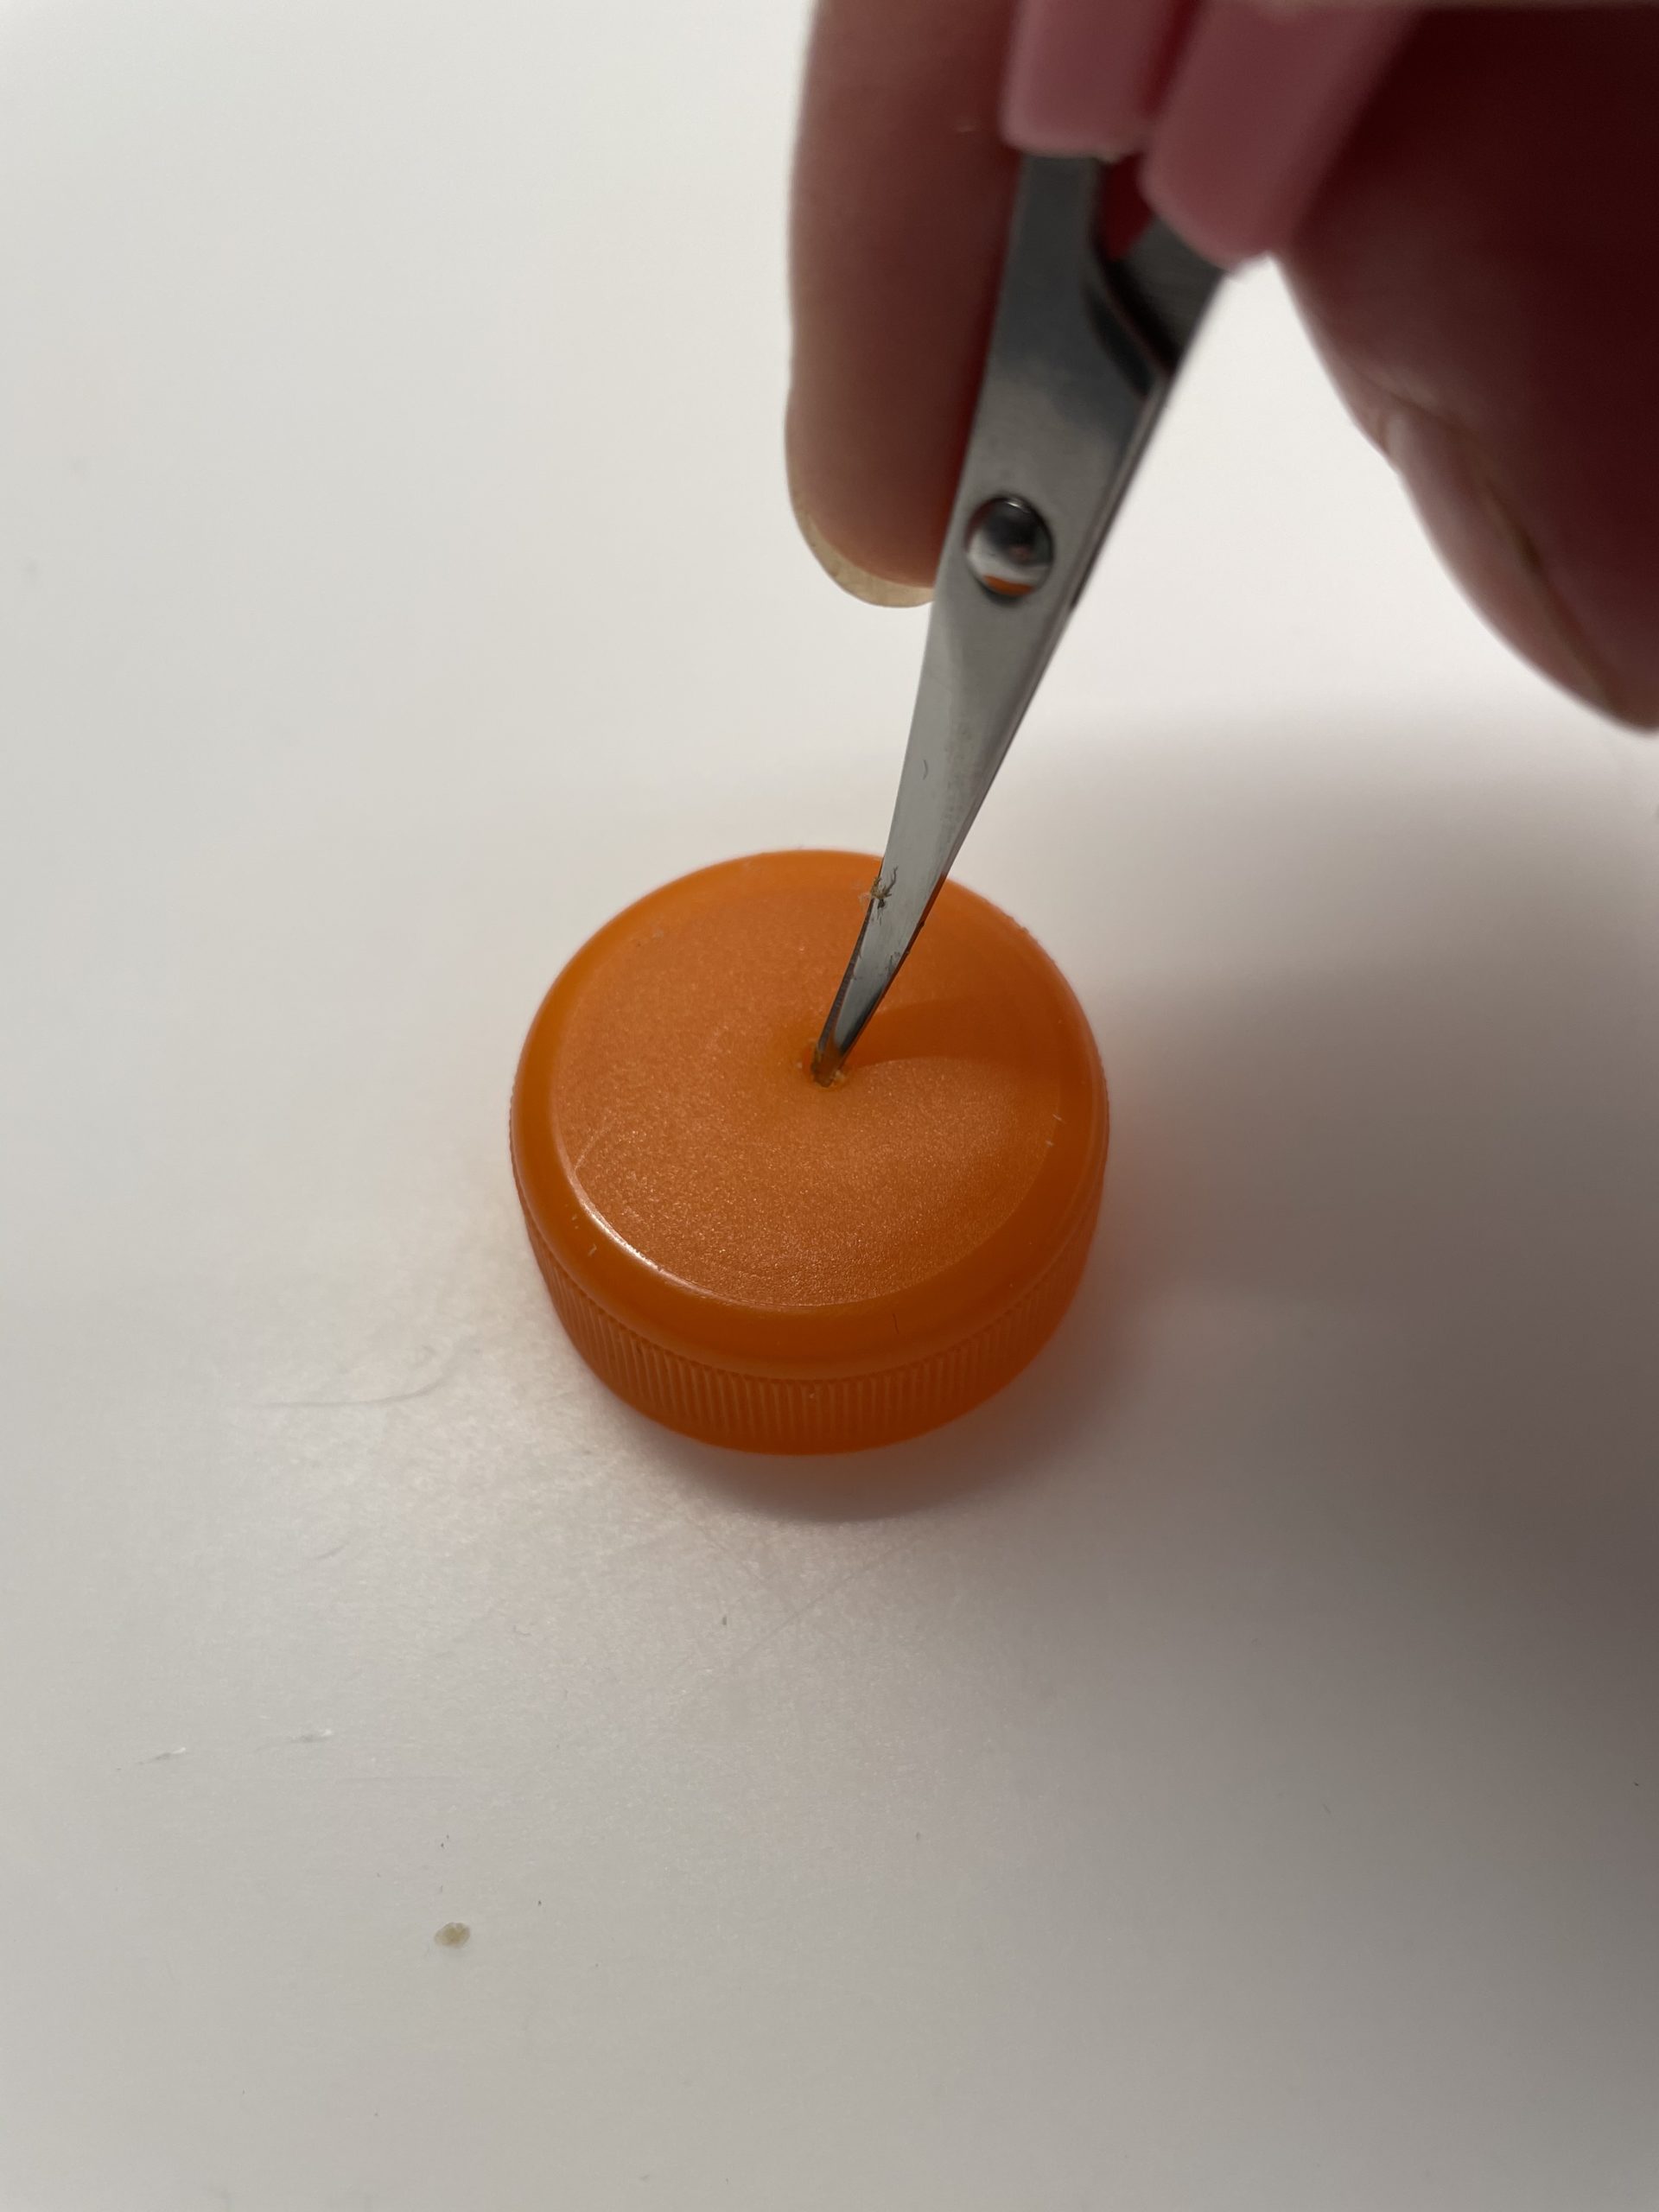
Bild zum Schritt 15 für das Bastel- und DIY-Abenteuer für Kinder: 'Jetzt stecht ihr in den Deckel der Flasche ein Loch....'

15

2. Bild zum Schritt 15 für das Bastel- und DIY-Abenteuer für Kinder: 'Jetzt stecht ihr in den Deckel der Flasche ein Loch....'

16

Through this hole you thread a string (length about 30cm).
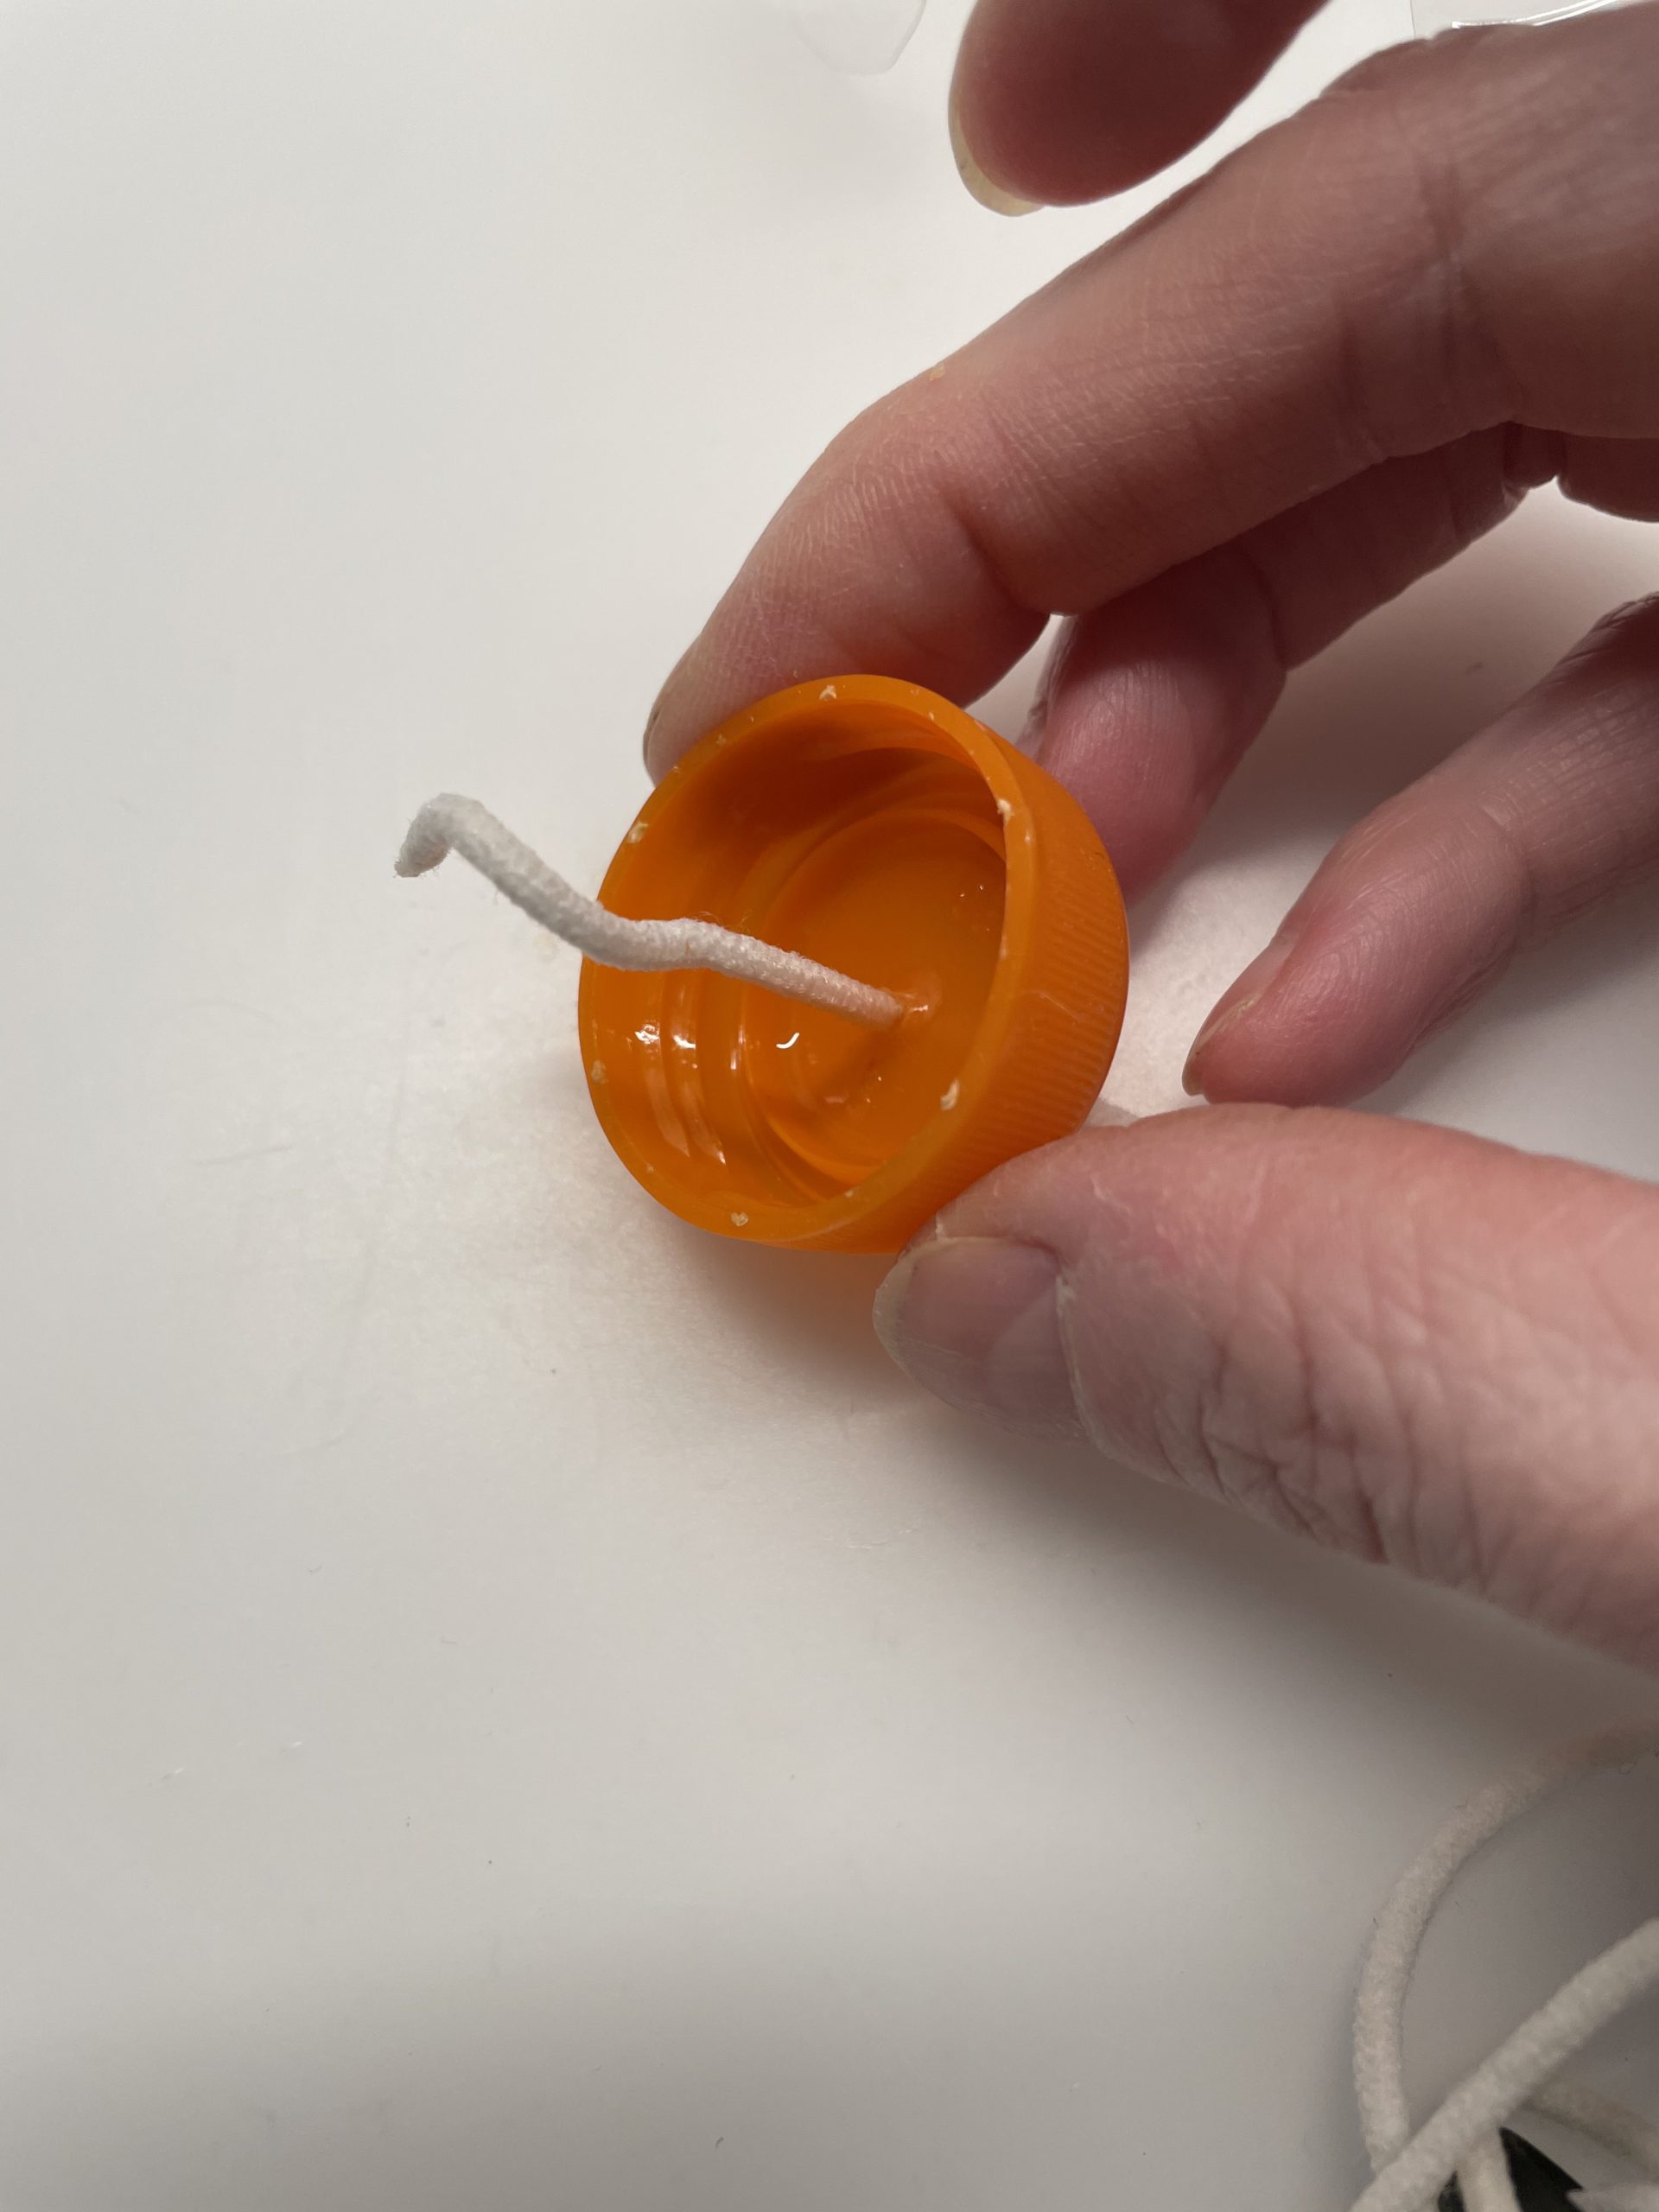
Bild zum Schritt 17 für das Bastel- und DIY-Abenteuer für Kinder: 'Durch dieses Loch fädelt ihr anschließend eine Schnur (Länge circa...'

17

Now knot the end of the cord.

Bild zum Schritt 18 für das Bastel- und DIY-Abenteuer für Kinder: 'Verknotet nun das Ende der Schnur.'

18

Then pull the thread back to the point where the knot lies in the inside of the lid.
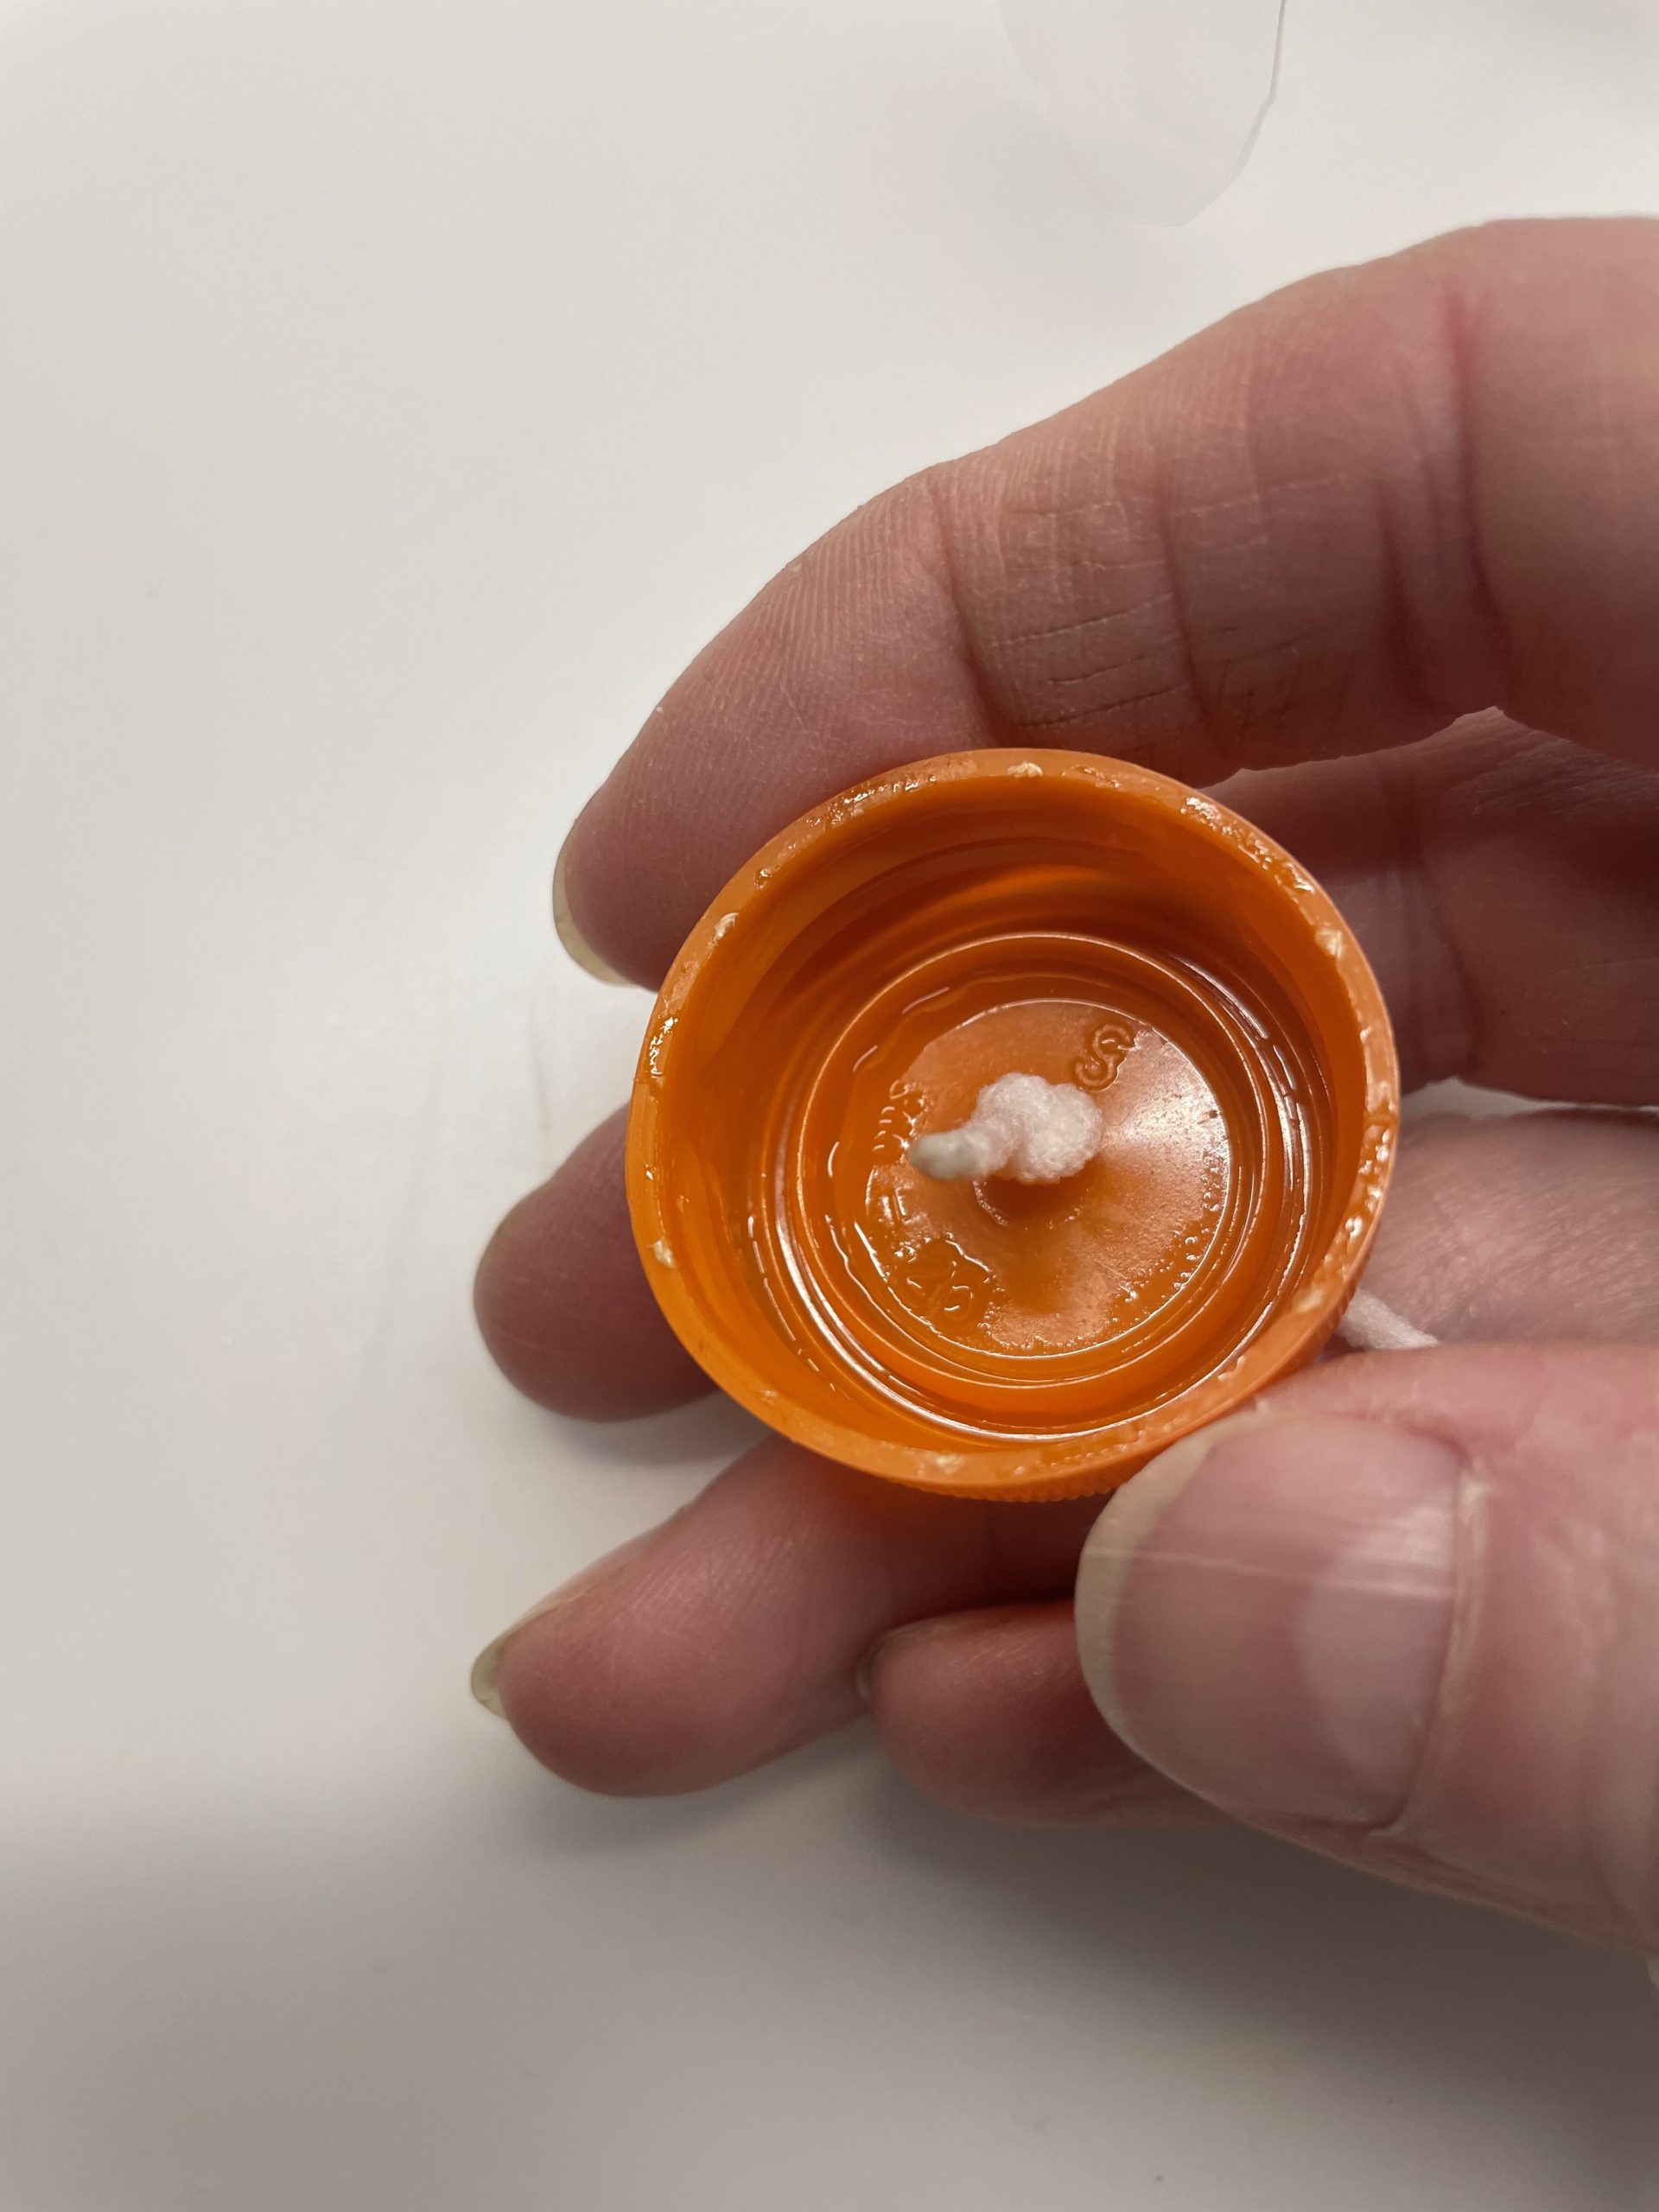
Bild zum Schritt 19 für das Bastel- und DIY-Abenteuer für Kinder: 'Dann zieht ihr den Faden soweit zurück, dass der Knoten...'

19

Now screw the lid back onto the edge of the bottle.
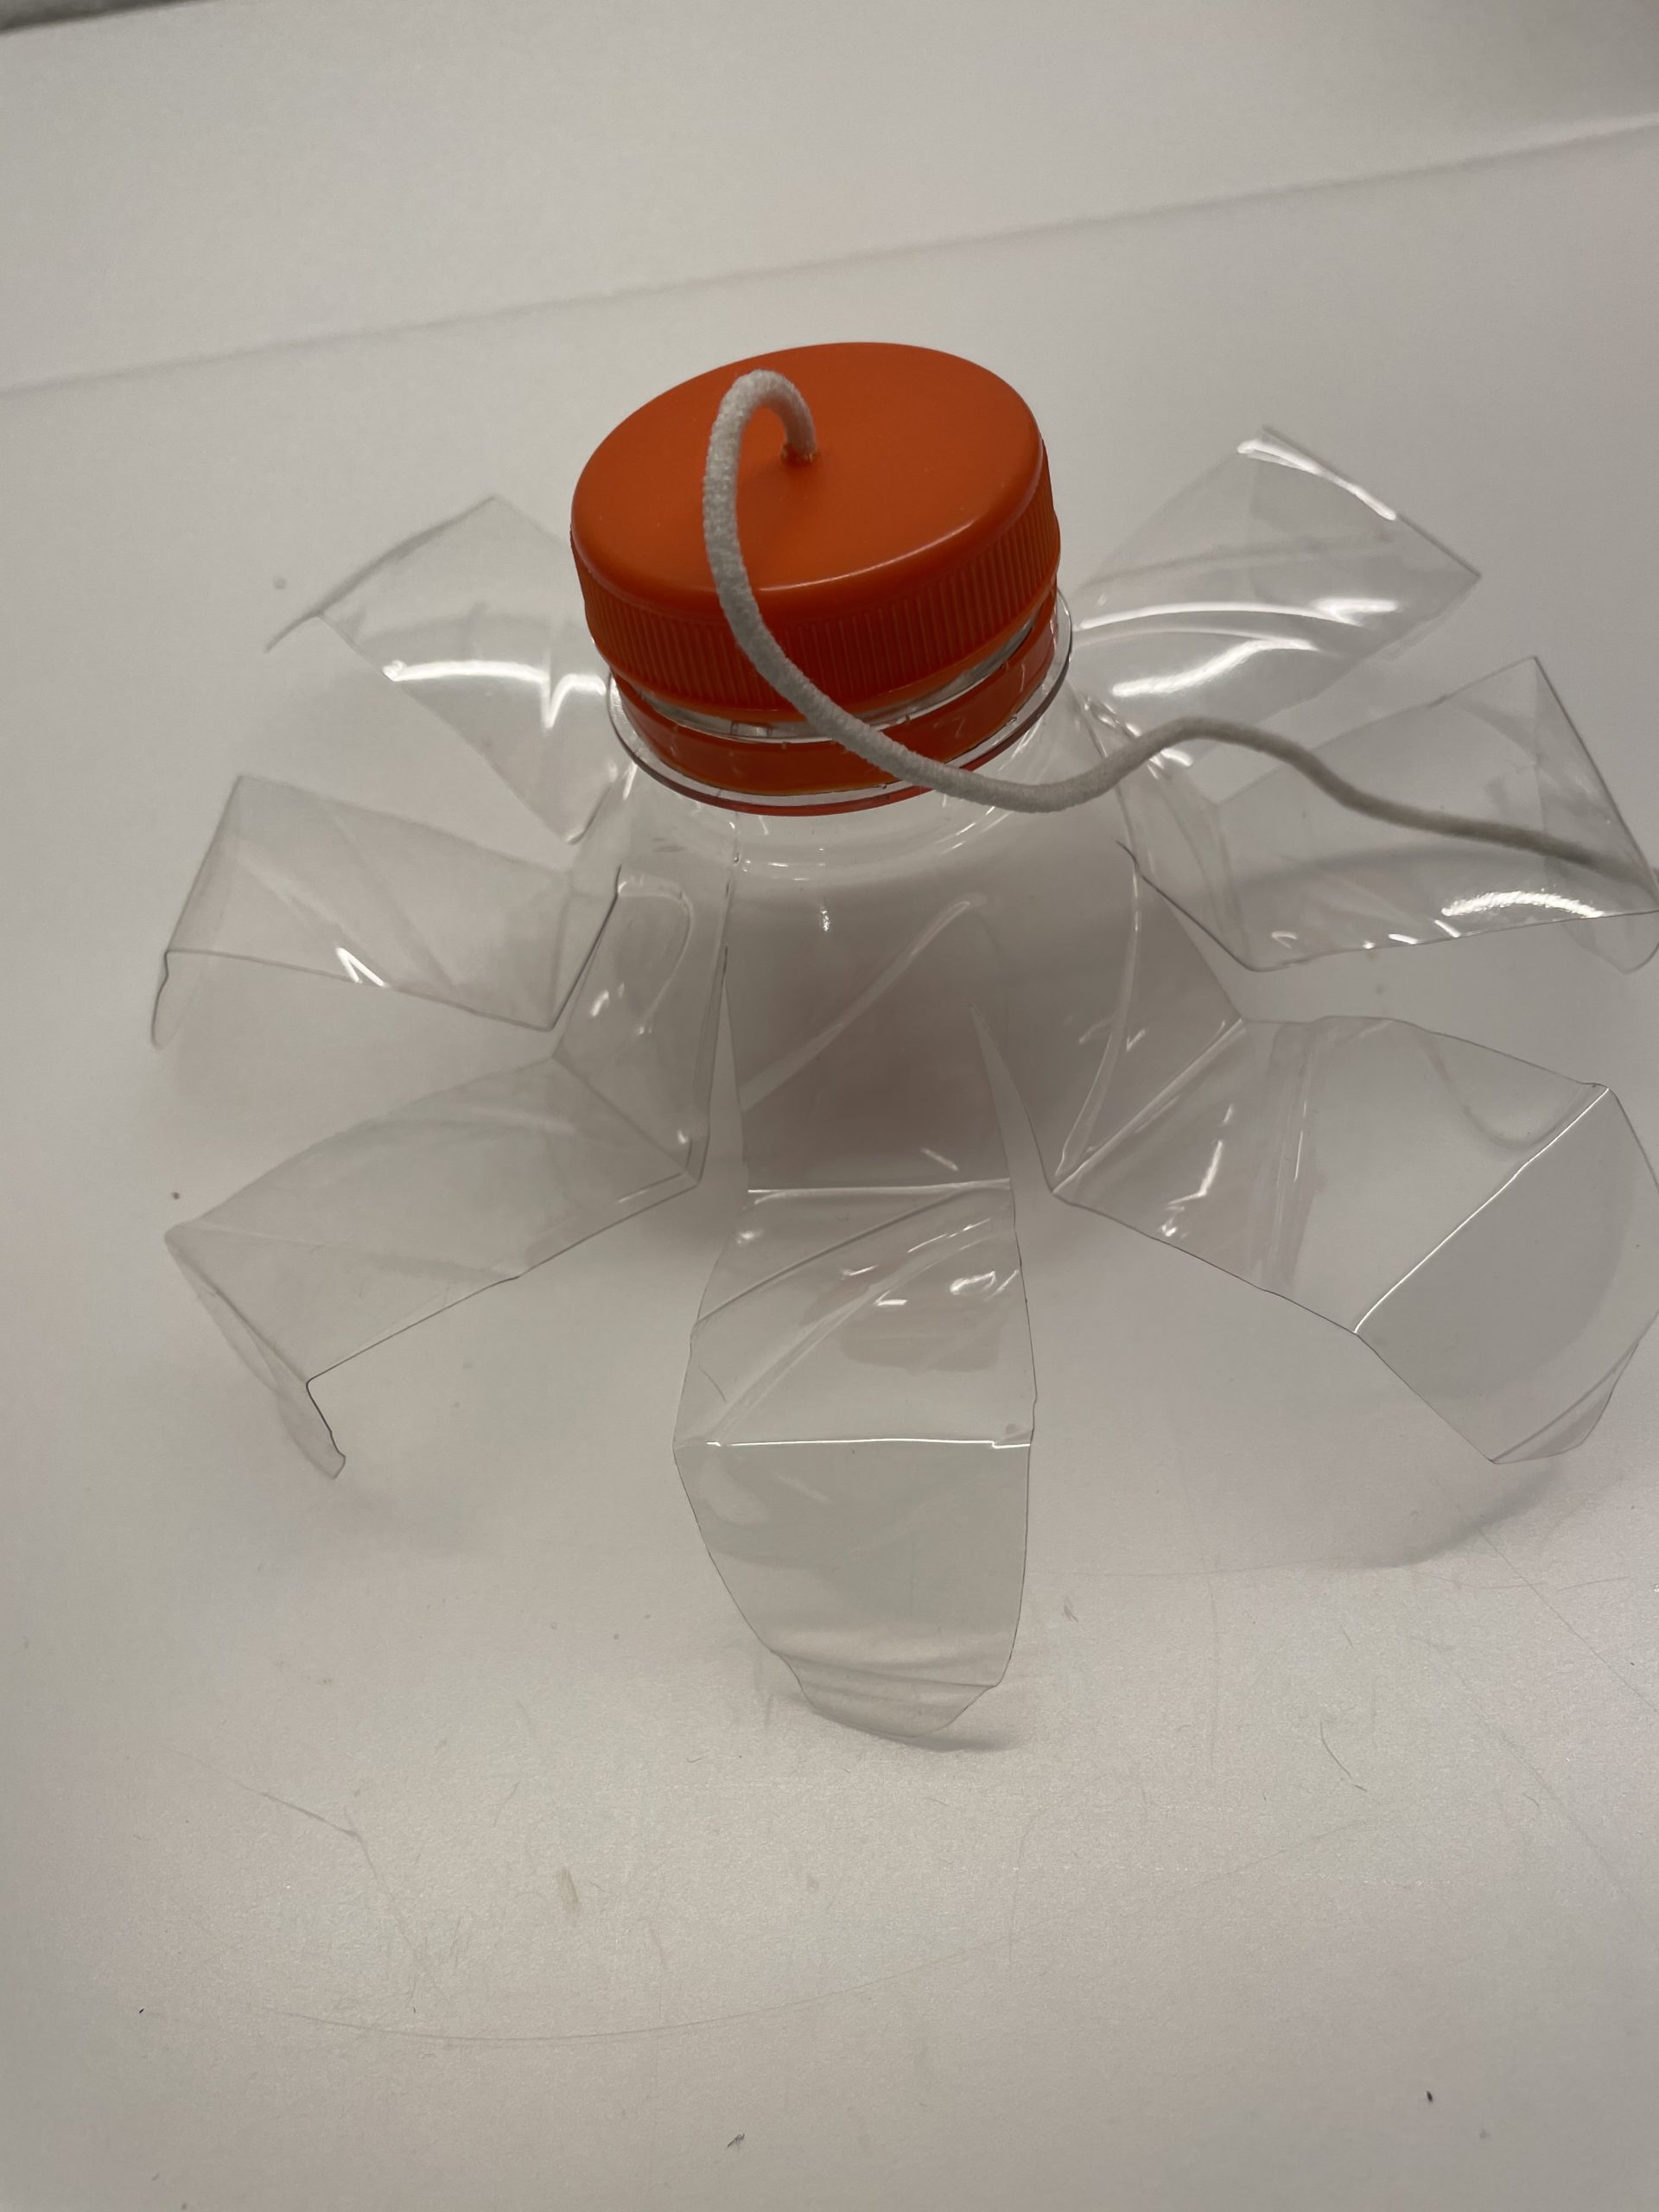
Bild zum Schritt 20 für das Bastel- und DIY-Abenteuer für Kinder: 'Schraubt nun den Deckel wieder auf den Flaschenrand.'

20

Now glue the two wobble eyes below the cap onto the bottle.

Tip: Alternatively, you can also paint the eyes with a foil pen.
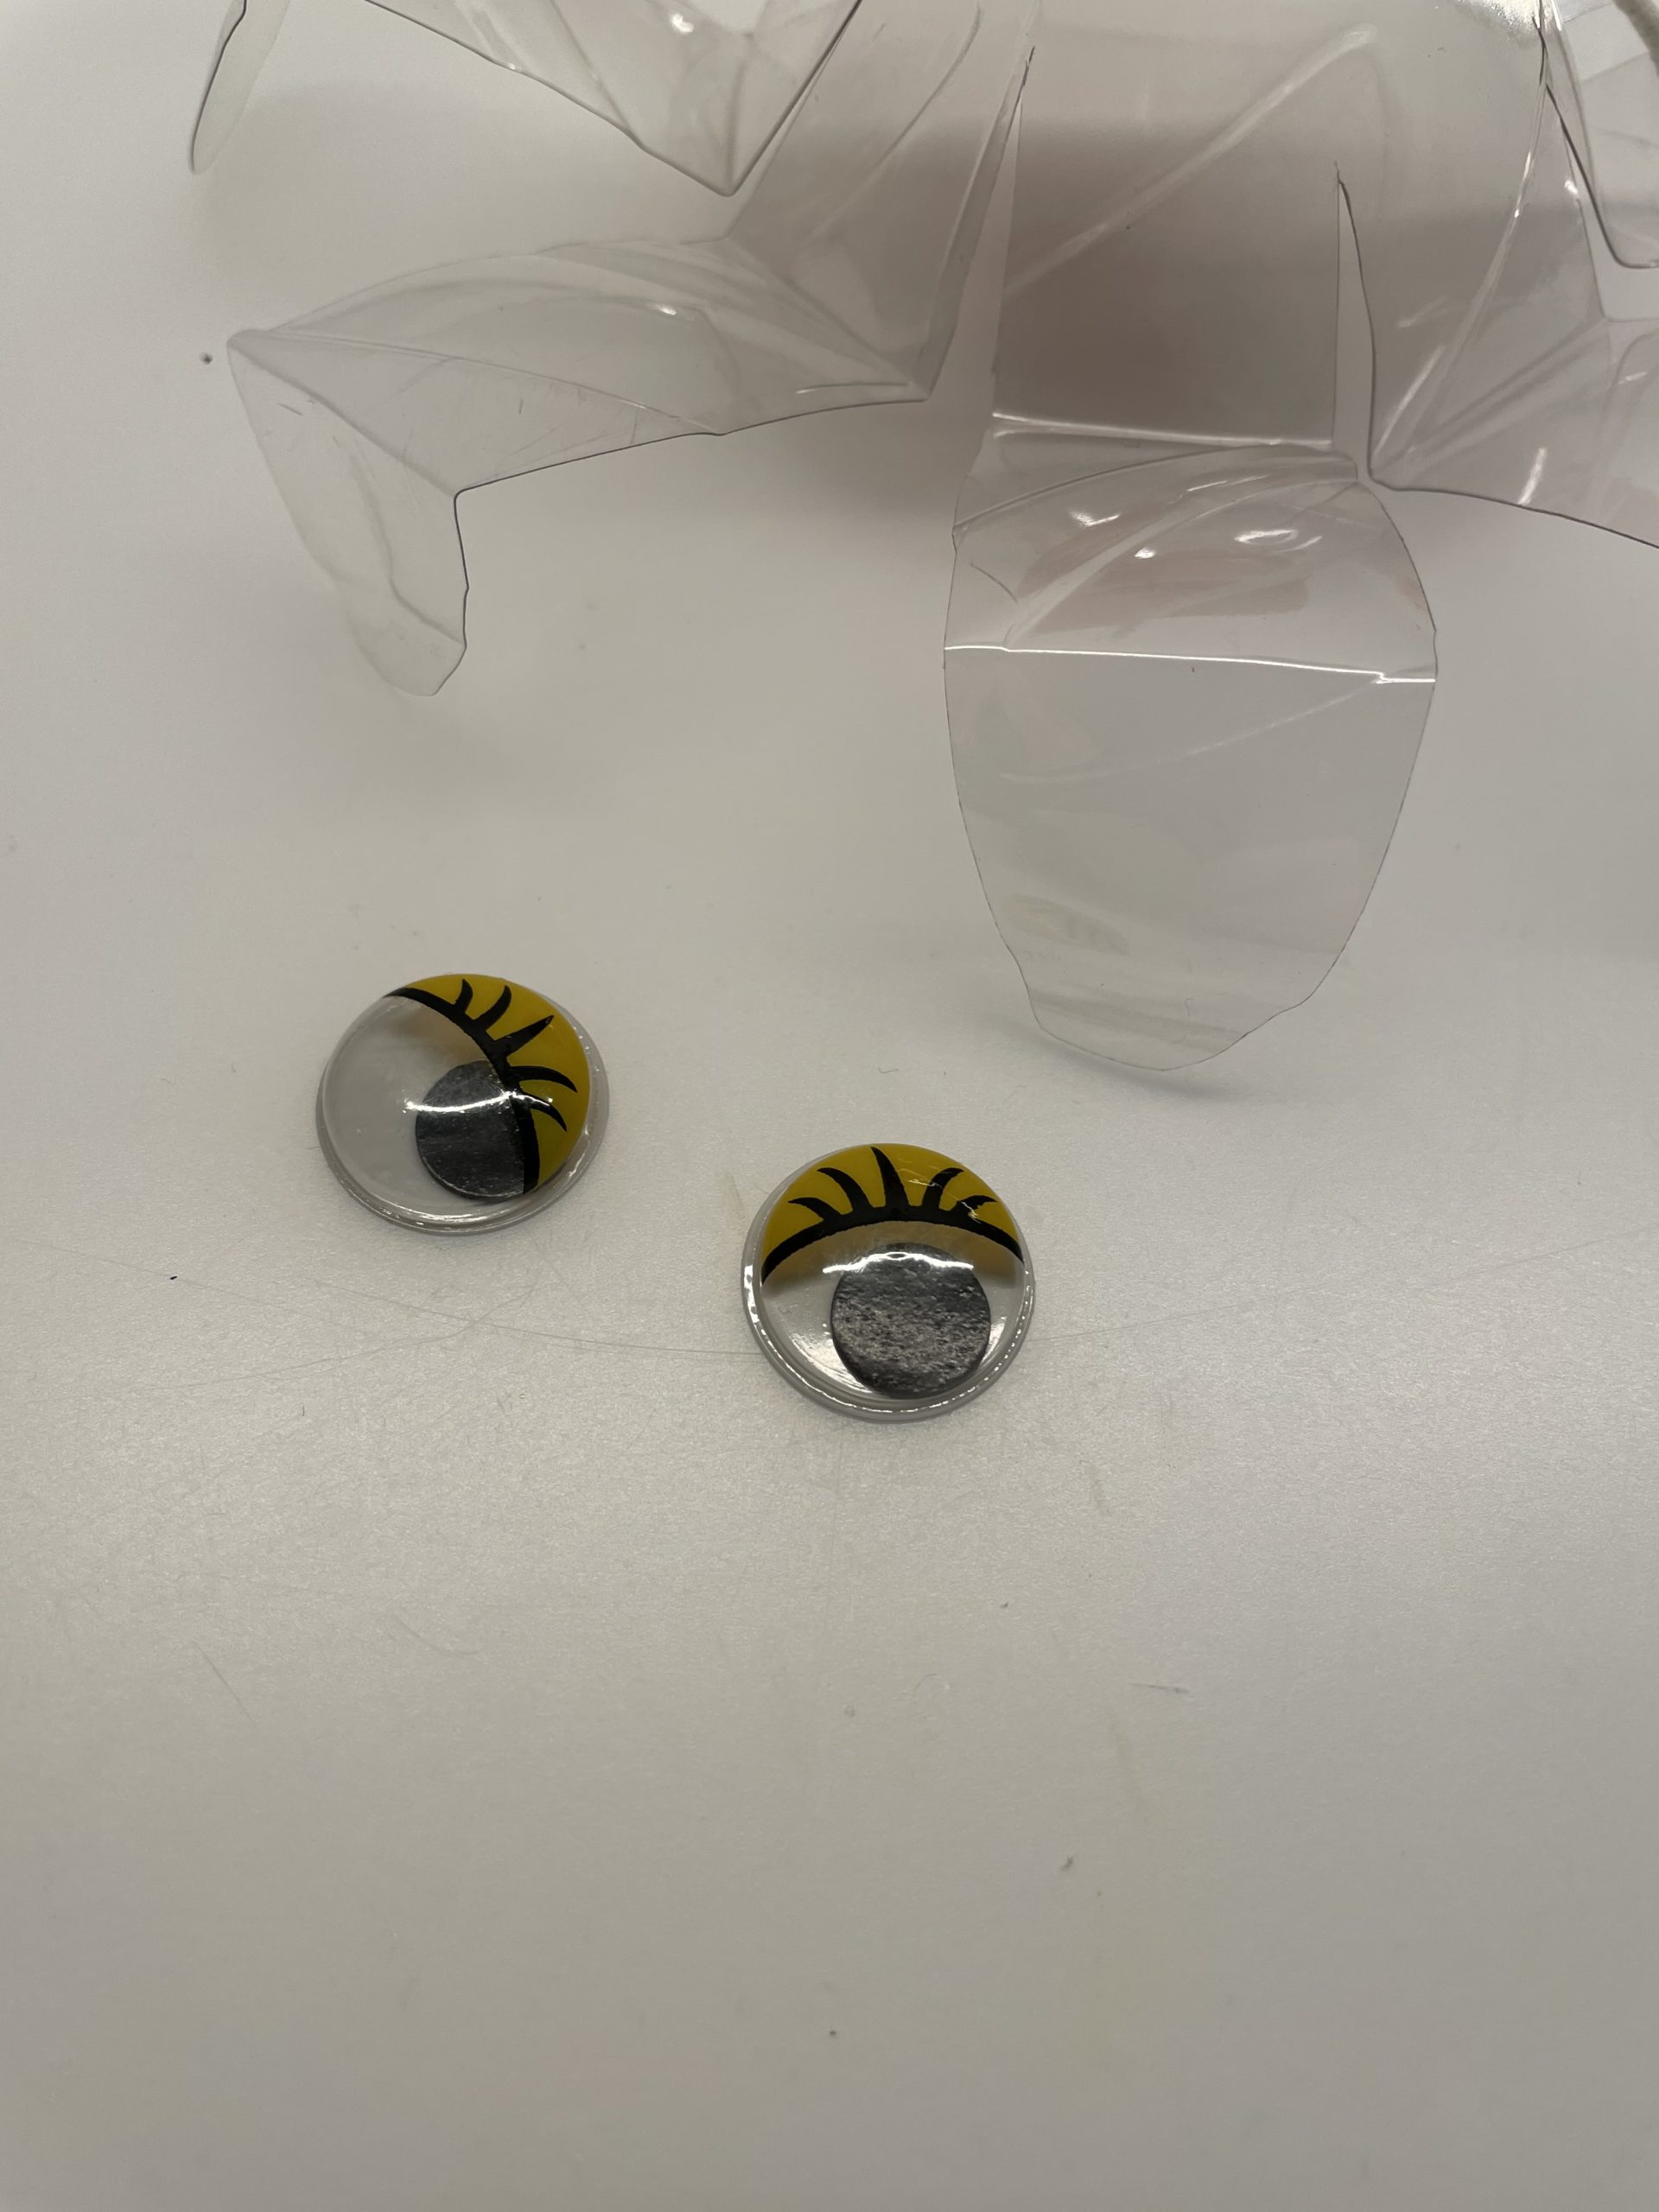
Bild zum Schritt 21 für das Bastel- und DIY-Abenteuer für Kinder: 'Jetzt klebt ihr die zwei Wackelaugen unterhalb des Verschlusses auf...'

21

Your jumping spider is ready!

Bild zum Schritt 22 für das Bastel- und DIY-Abenteuer für Kinder: 'Fertig ist eure Hüpfspinne!'

22

Have fun playing!

Bild zum Schritt 23 für das Bastel- und DIY-Abenteuer für Kinder: 'Viel Spaß beim Spielen!'

Hop spider made of plastic bottle (2 variants)

Follow us on Facebook , Instagram and Pinterest
Don't miss any more adventures: Our bottle mail

Leave a Reply

Your email address will not be published.

The maximum upload file size: 5 MB. You can upload: image, document. Drop file here