Gift bag for Santa Claus or Christmas

AdventurerFantebaer
Rating5.04.6 thousand times & (1) DifficultyIntermediate

You need a gift bag for Santa or Christmas? Then look at these beautiful bags. You don't need many materials for this and it doesn't take long to make the Santa or Christmas bags. Look for yourself! Have fun!

Media Education for Kindergarten and Hort

Kind bastelt eine Rassel mit dem Navi
The Adventure Navi, the app for DIY projects, enables media education for the youngest.

Relief in everyday life, targeted promotion of individual children, independent learning and - without any pre-knowledge already usable by the youngest!
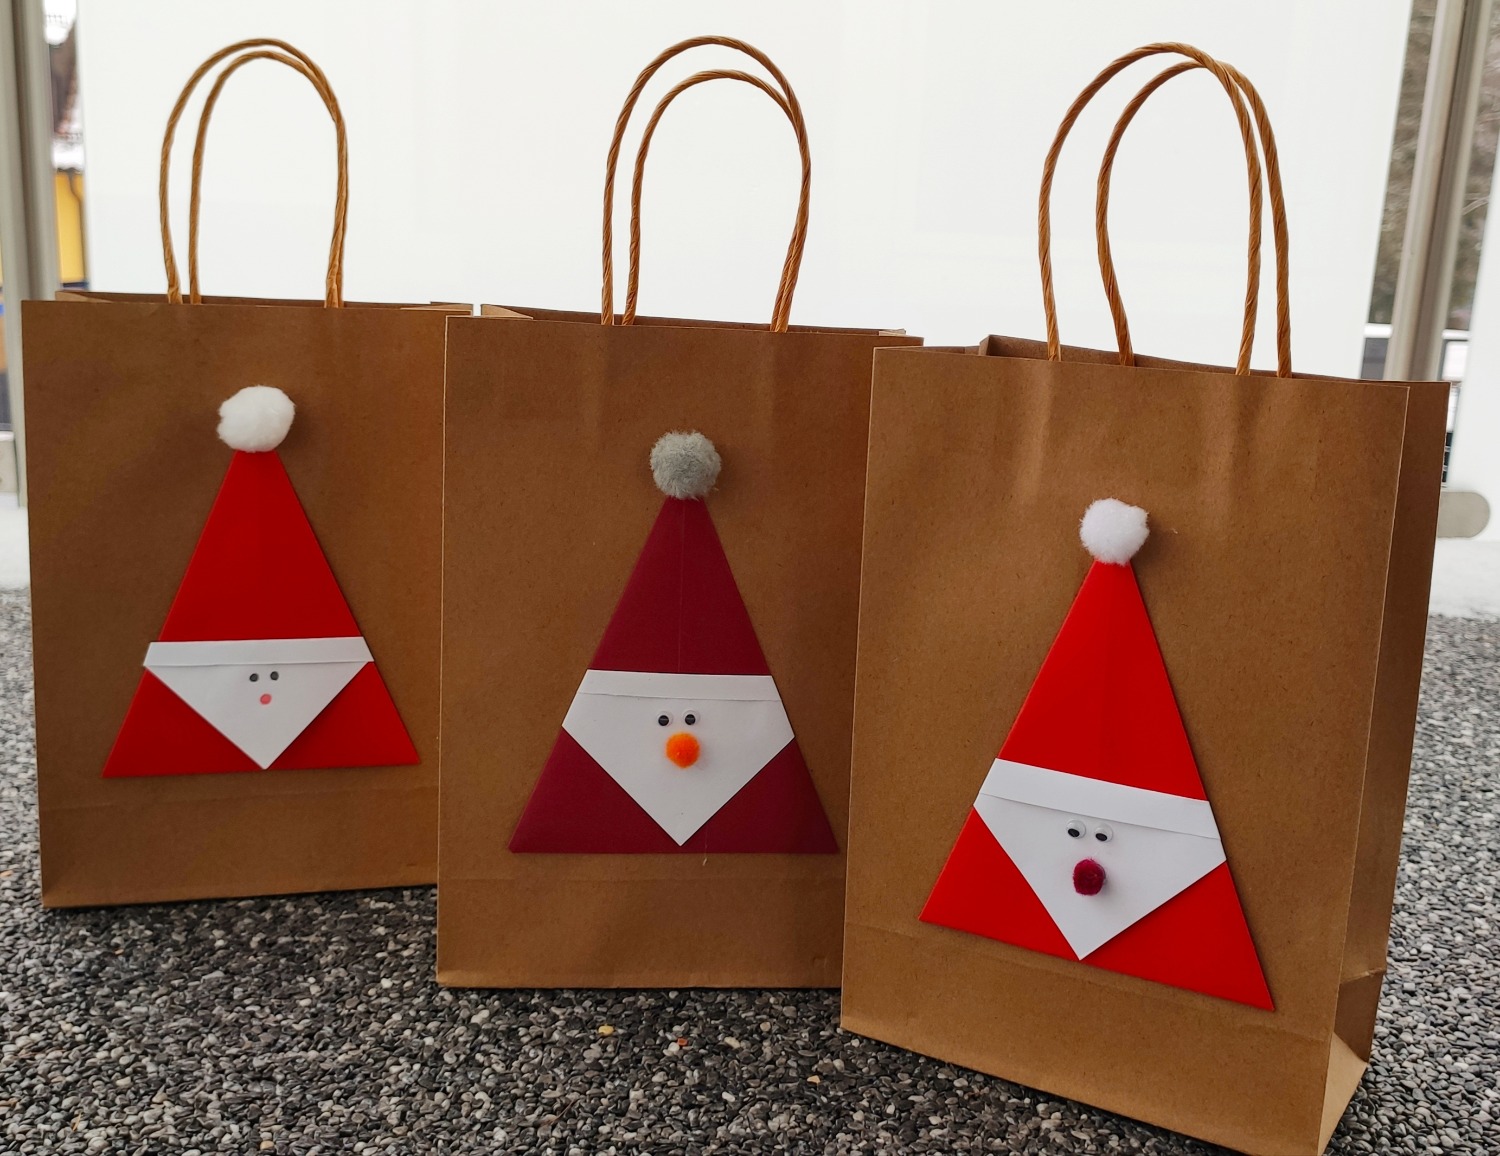


Titelbild zur Bastel- und DIY-Idee für Kinder '(922) Geschenktasche zum Nikolaus oder zu Weihnachten'
Material for1 Child
Prep Time5 min.Adv. Time15 min.Total Time20 min.
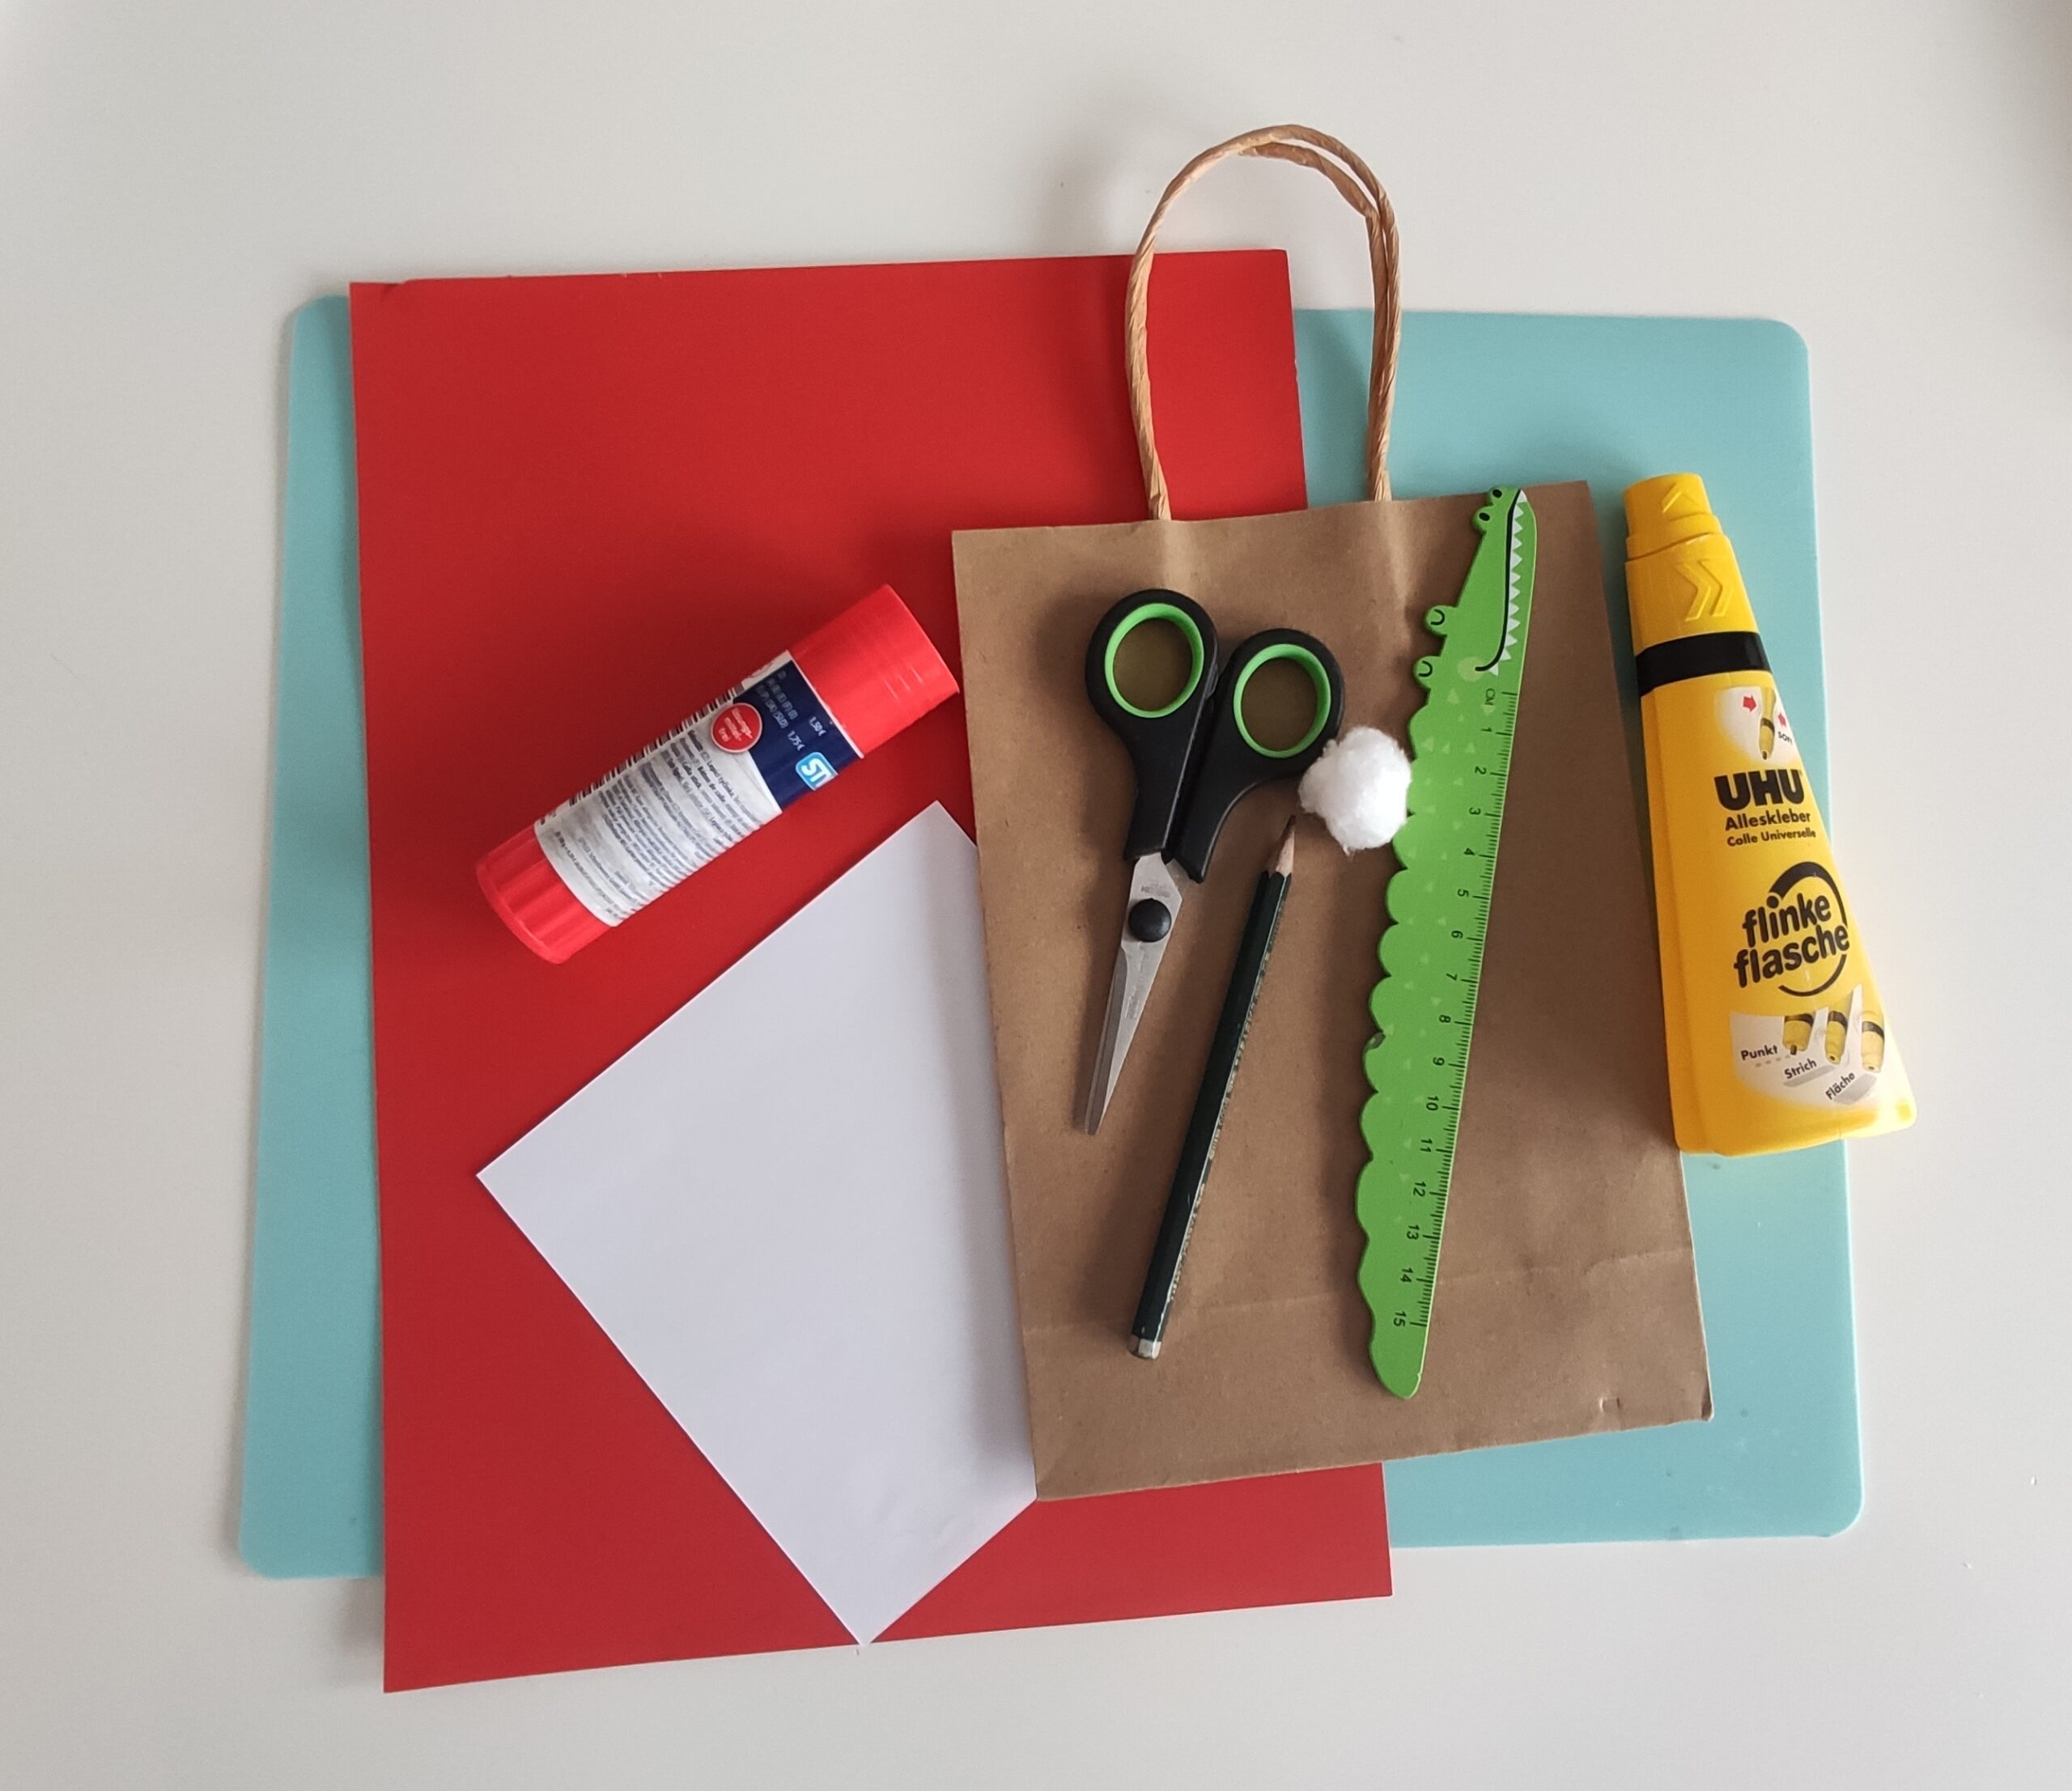
 Paper bags
 Paper red
 White paper
 Pompons white and red
 Wax eyes, if any
 Glue
 Ruler
 Builder's pad
All links marked with a shopping cart lead to Amazon - here we have selected products that we would order ourselves and in part also ordered. In a qualified purchase via the advertising link, we as Amazon partner receive a commission, for you there are no costs. You thus support our cost- and advertising banner-free, educational offer.
1

Get all the materials ready first.

Bild zum Schritt 1 für das Bastel- und DIY-Abenteuer für Kinder: 'Legt euch zuerst alle Materialien bereit.'

2

Cut the white paper squarely to 14 cm x 14 cm.
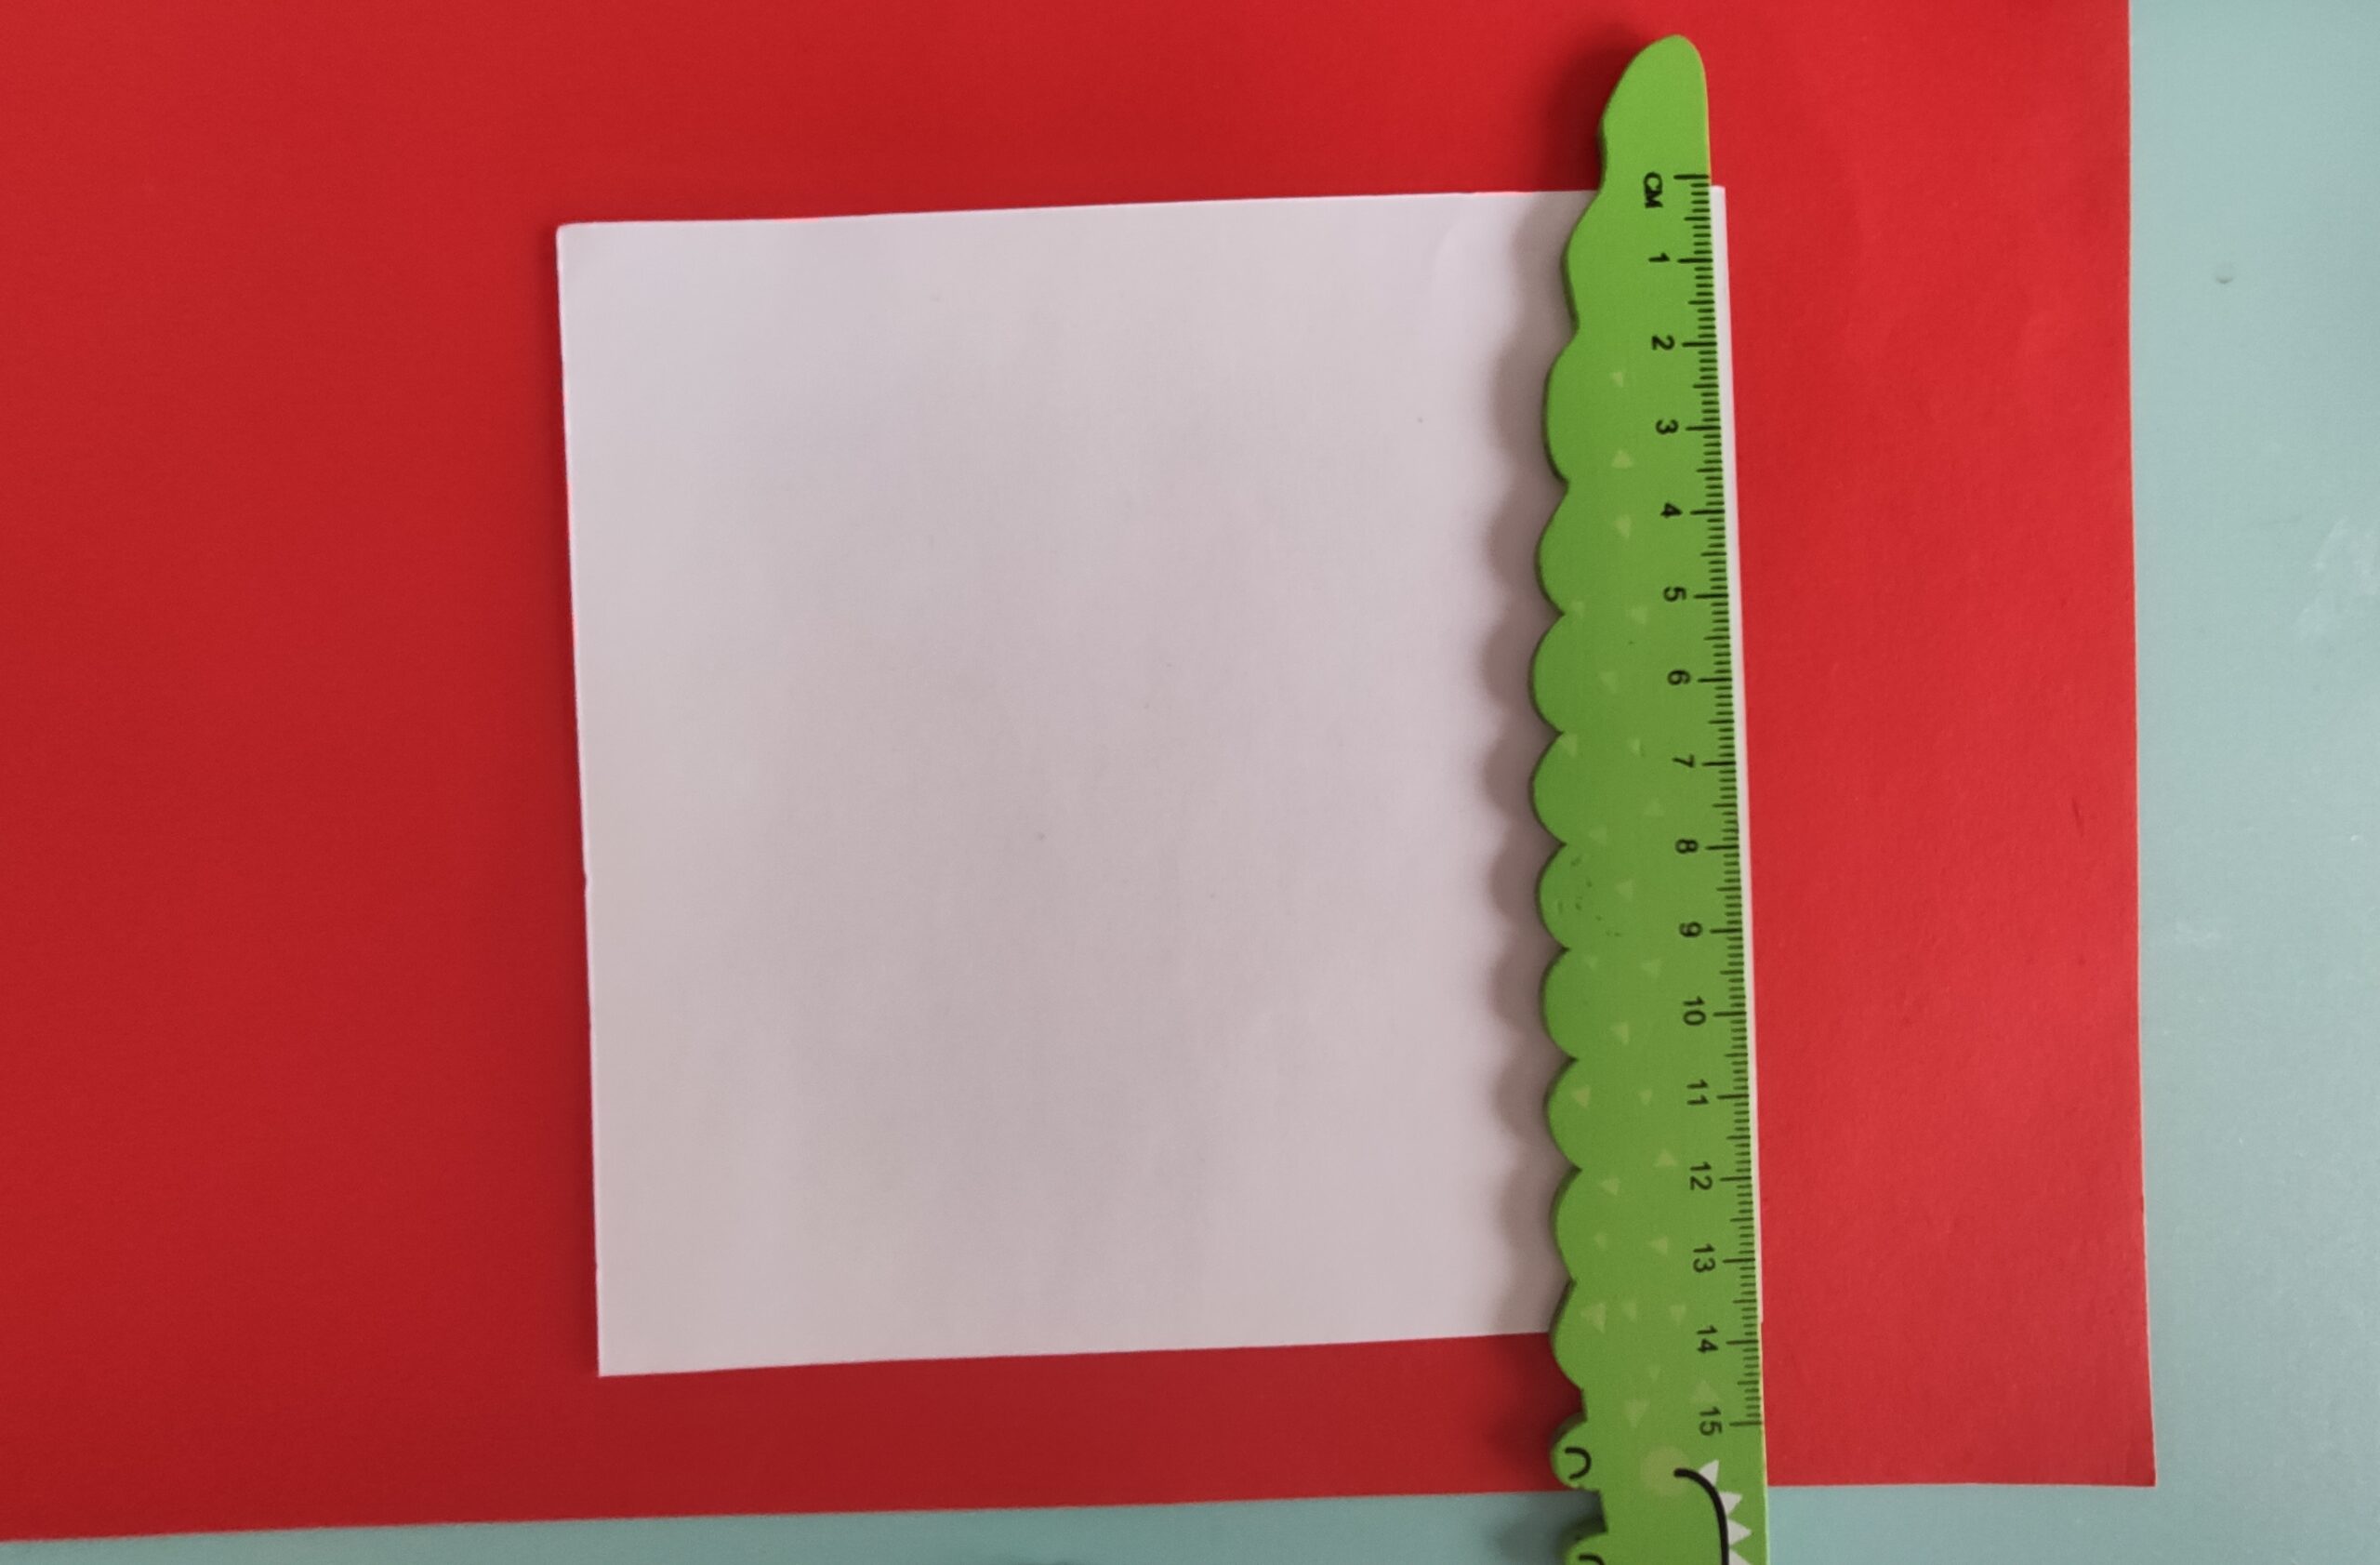
Bild zum Schritt 2 für das Bastel- und DIY-Abenteuer für Kinder: 'Schneidet euch das weiße Papier quadratisch auf 14 cm x...'

3

Then you also cut the red paper to the dimensions 14 cm x 14 cm.

Bild zum Schritt 3 für das Bastel- und DIY-Abenteuer für Kinder: 'Anschließend schneidet ihr euch das rote Papier ebenfalls auf die...'

4

Now put the red paper with a tip pointing at you on the table. Fold the red paper with the bottom tip upwards to the top tip. Then open your fold, turn the paper and fold the bottom tip again to the top tip.

Bild zum Schritt 4 für das Bastel- und DIY-Abenteuer für Kinder: 'Jetzt legt ihr das rote Papier mit einer Spitze auf...'

5

Now you open your fold again. It shows a tip to you again. Now you fold the right and left tip to the center line. Then you turn the fold around so that the folded tip points to you.

Bild zum Schritt 5 für das Bastel- und DIY-Abenteuer für Kinder: 'Jetzt öffnet ihr eure Faltung wieder. Es zeigt wieder eine...'

6

Then you put the white paper with a corner on your fold from the red paper. The white paper lies so that a small red edge survives.

Bild zum Schritt 6 für das Bastel- und DIY-Abenteuer für Kinder: 'Danach legt ihr das weiße Papier mit einer Ecke auf...'

7

Now fold both papers until the beginning of the fold. Now pull out the white paper.

Bild zum Schritt 7 für das Bastel- und DIY-Abenteuer für Kinder: 'Faltet nun beide Papiere bis zum Beginn der Faltung. Zieht...'

8

Now cut off the small white triangle at the folding edge. Turn around the red triangle so that the folding is on the back.

Bild zum Schritt 8 für das Bastel- und DIY-Abenteuer für Kinder: 'Nun schneidet ihr das kleine weiße Dreieck an der Faltkante...'

9

Now you put the white triangle on the red triangle. Now you fold the white triangle down about 0.5 cm on the long side.

Bild zum Schritt 9 für das Bastel- und DIY-Abenteuer für Kinder: 'Jetzt legt ihr das weiße Dreieck auf das rote Dreieck....'

10

Now turn everything around and stick to the top of the top. Then stick to the corners of the white paper on the back.

Bild zum Schritt 10 für das Bastel- und DIY-Abenteuer für Kinder: 'Dreht nun alles um und klebt die obere Spitze fest....'

11

Then you turn everything around and shape the face. For this you paint your eyes with a black pen.
Alternatively, you can also stick on the wobble eyes here.

Bild zum Schritt 11 für das Bastel- und DIY-Abenteuer für Kinder: 'Anschließend dreht ihr alles um und gestaltet das Gesicht. Hierfür...'

12

With the red pen you paint a nose afterwards.
Alternatively, you can apply a small red pompon.

Bild zum Schritt 12 für das Bastel- und DIY-Abenteuer für Kinder: 'Mit dem roten Stift malt ihr danach eine Nase. ...'

13

Finally, she sticks the white pompon to the top of the cap.

Bild zum Schritt 13 für das Bastel- und DIY-Abenteuer für Kinder: 'Abschließend klebt ihr den weißen Pompon an die Spitze der...'

14

Your Santa bags or Santa bags are ready!

Bild zum Schritt 14 für das Bastel- und DIY-Abenteuer für Kinder: 'Fertig sind eure Nikolaustaschen oder Weihnachtsmanntaschen!'

Materials

 Paper bags
 Paper red
 White paper
 Pompons white and red
 Wax eyes, if any
 Glue
 Ruler
 Builder's pad
All links marked with a shopping cart lead to Amazon - here we have selected products that we would order ourselves and in part also ordered. In a qualified purchase via the advertising link, we as Amazon partner receive a commission, for you there are no costs. You thus support our cost- and advertising banner-free, educational offer.

Directions

1

Get all the materials ready first.

Bild zum Schritt 1 für das Bastel- und DIY-Abenteuer für Kinder: 'Legt euch zuerst alle Materialien bereit.'

2

Cut the white paper squarely to 14 cm x 14 cm.

Bild zum Schritt 2 für das Bastel- und DIY-Abenteuer für Kinder: 'Schneidet euch das weiße Papier quadratisch auf 14 cm x...'

3

Then you also cut the red paper to the dimensions 14 cm x 14 cm.
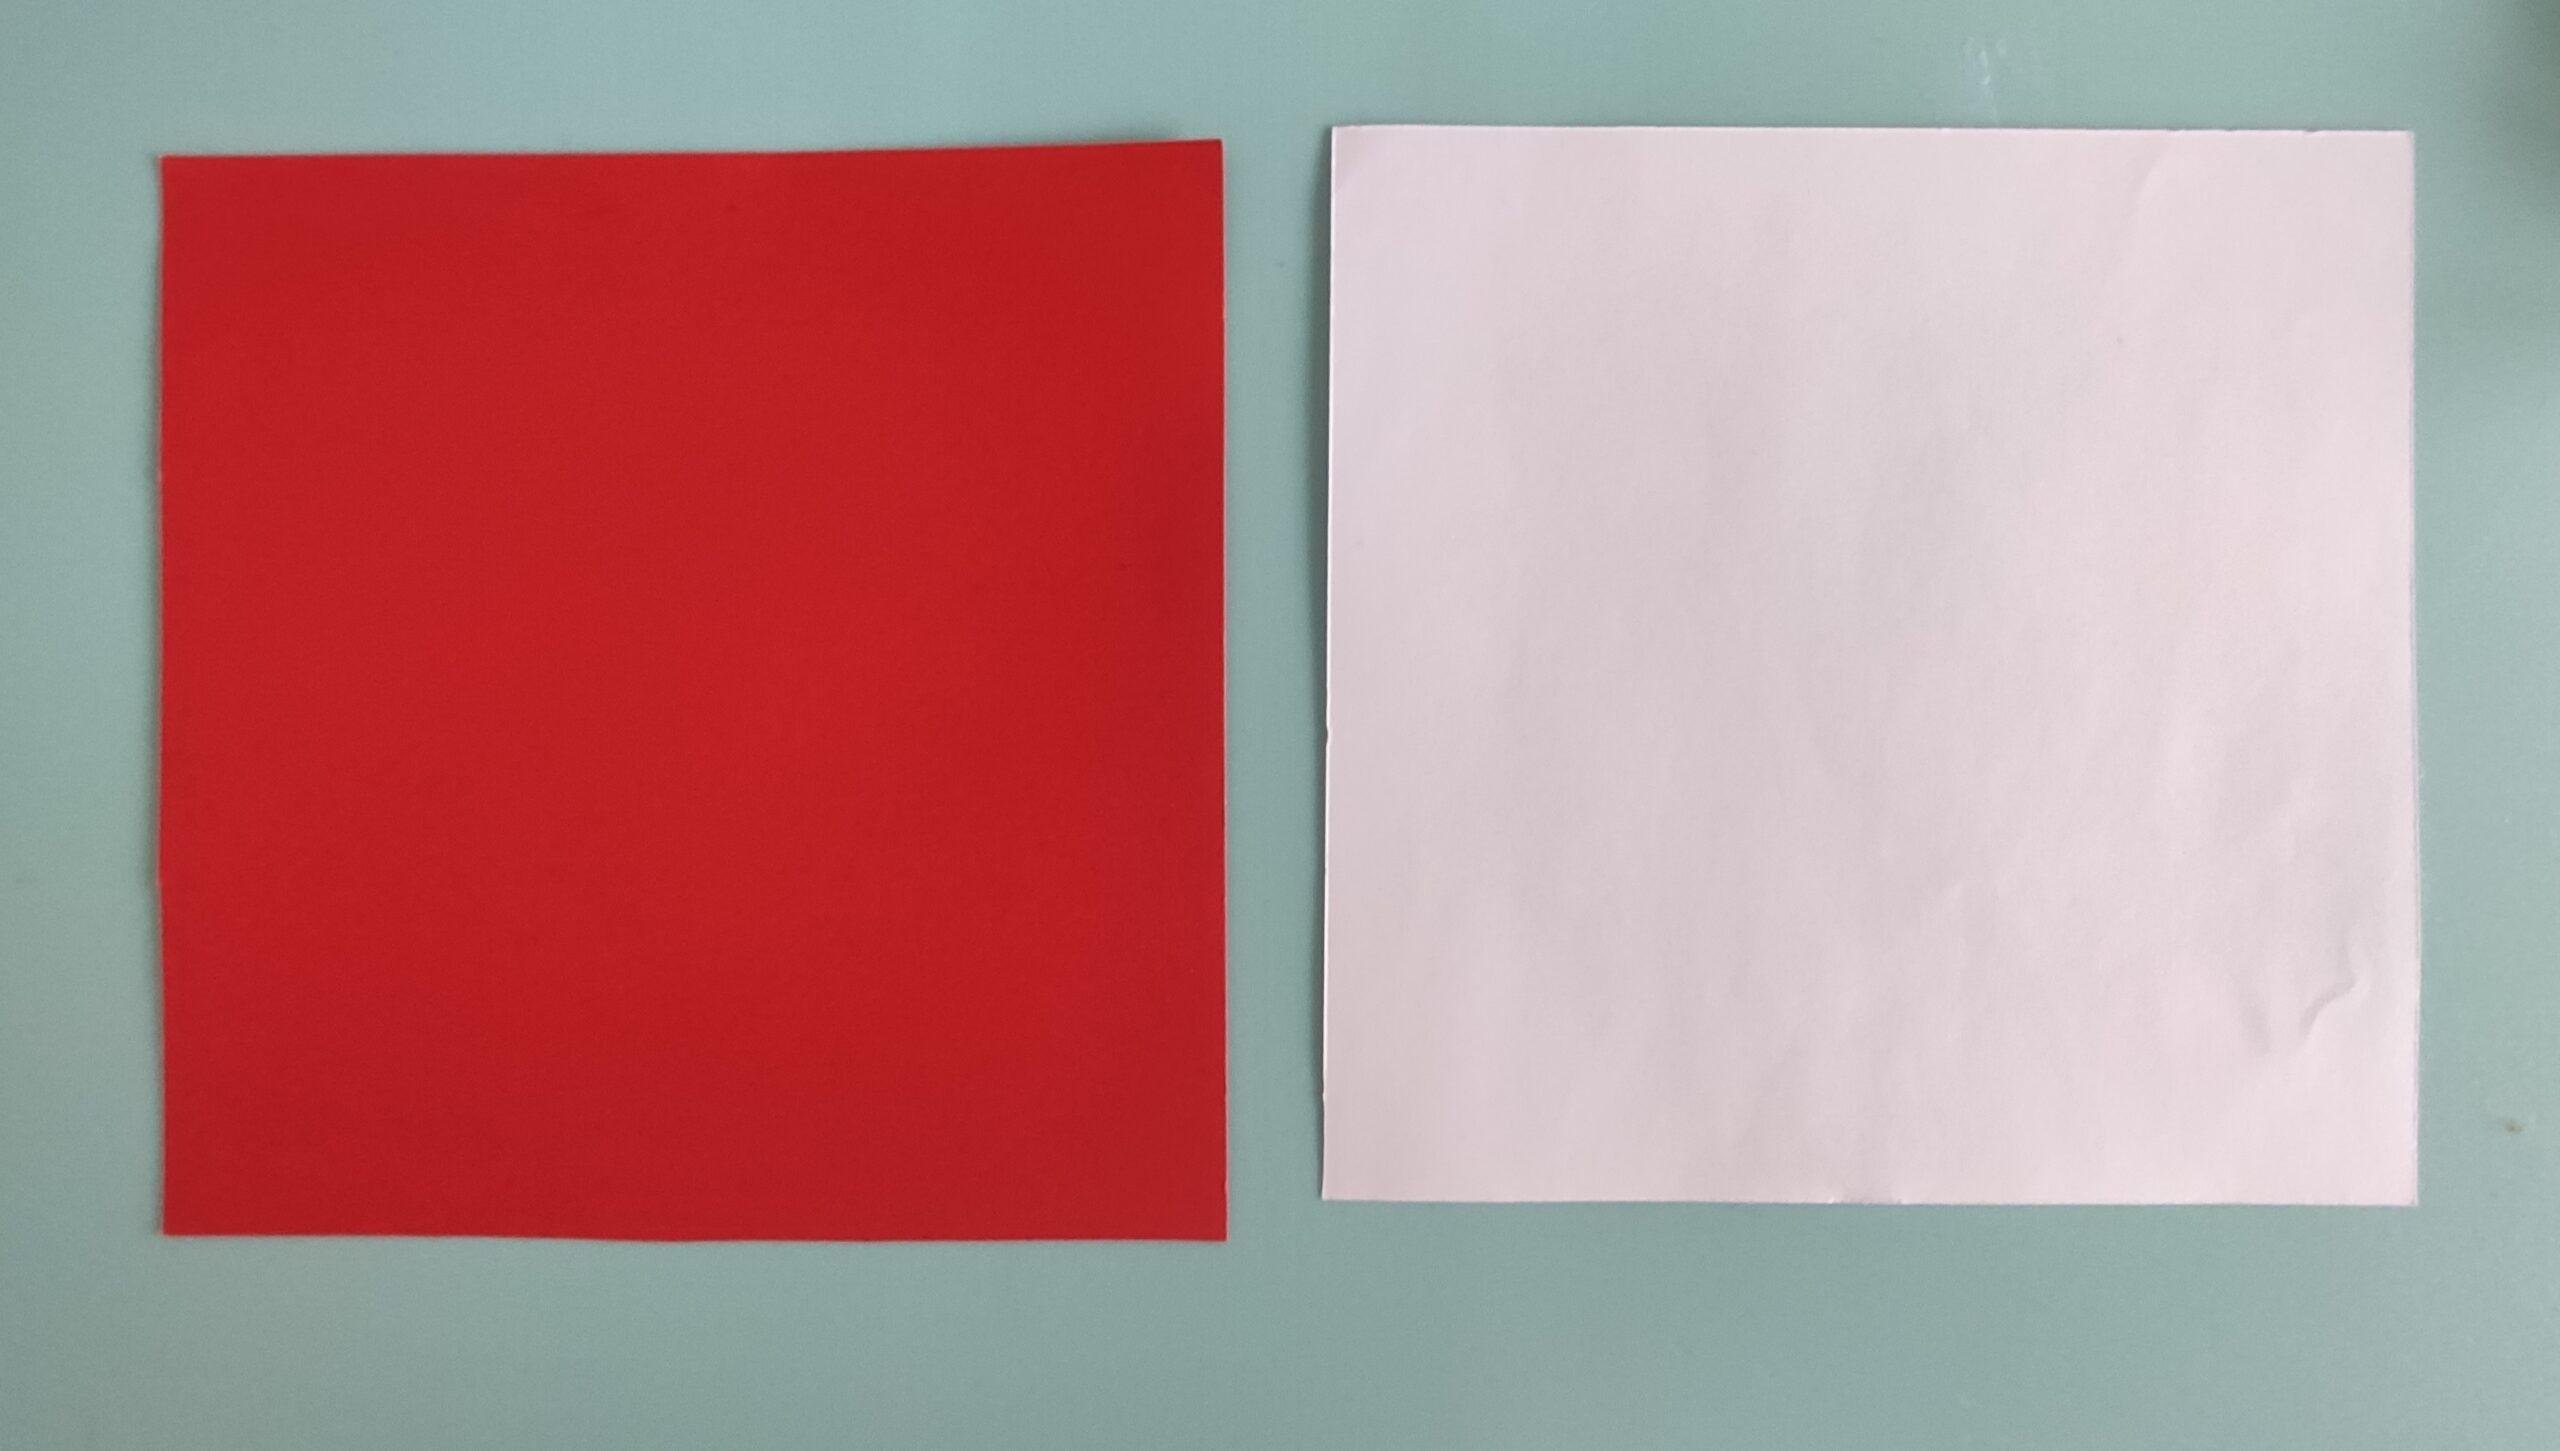
Bild zum Schritt 3 für das Bastel- und DIY-Abenteuer für Kinder: 'Anschließend schneidet ihr euch das rote Papier ebenfalls auf die...'

4

Now put the red paper with a tip pointing at you on the table. Fold the red paper with the bottom tip upwards to the top tip. Then open your fold, turn the paper and fold the bottom tip again to the top tip.
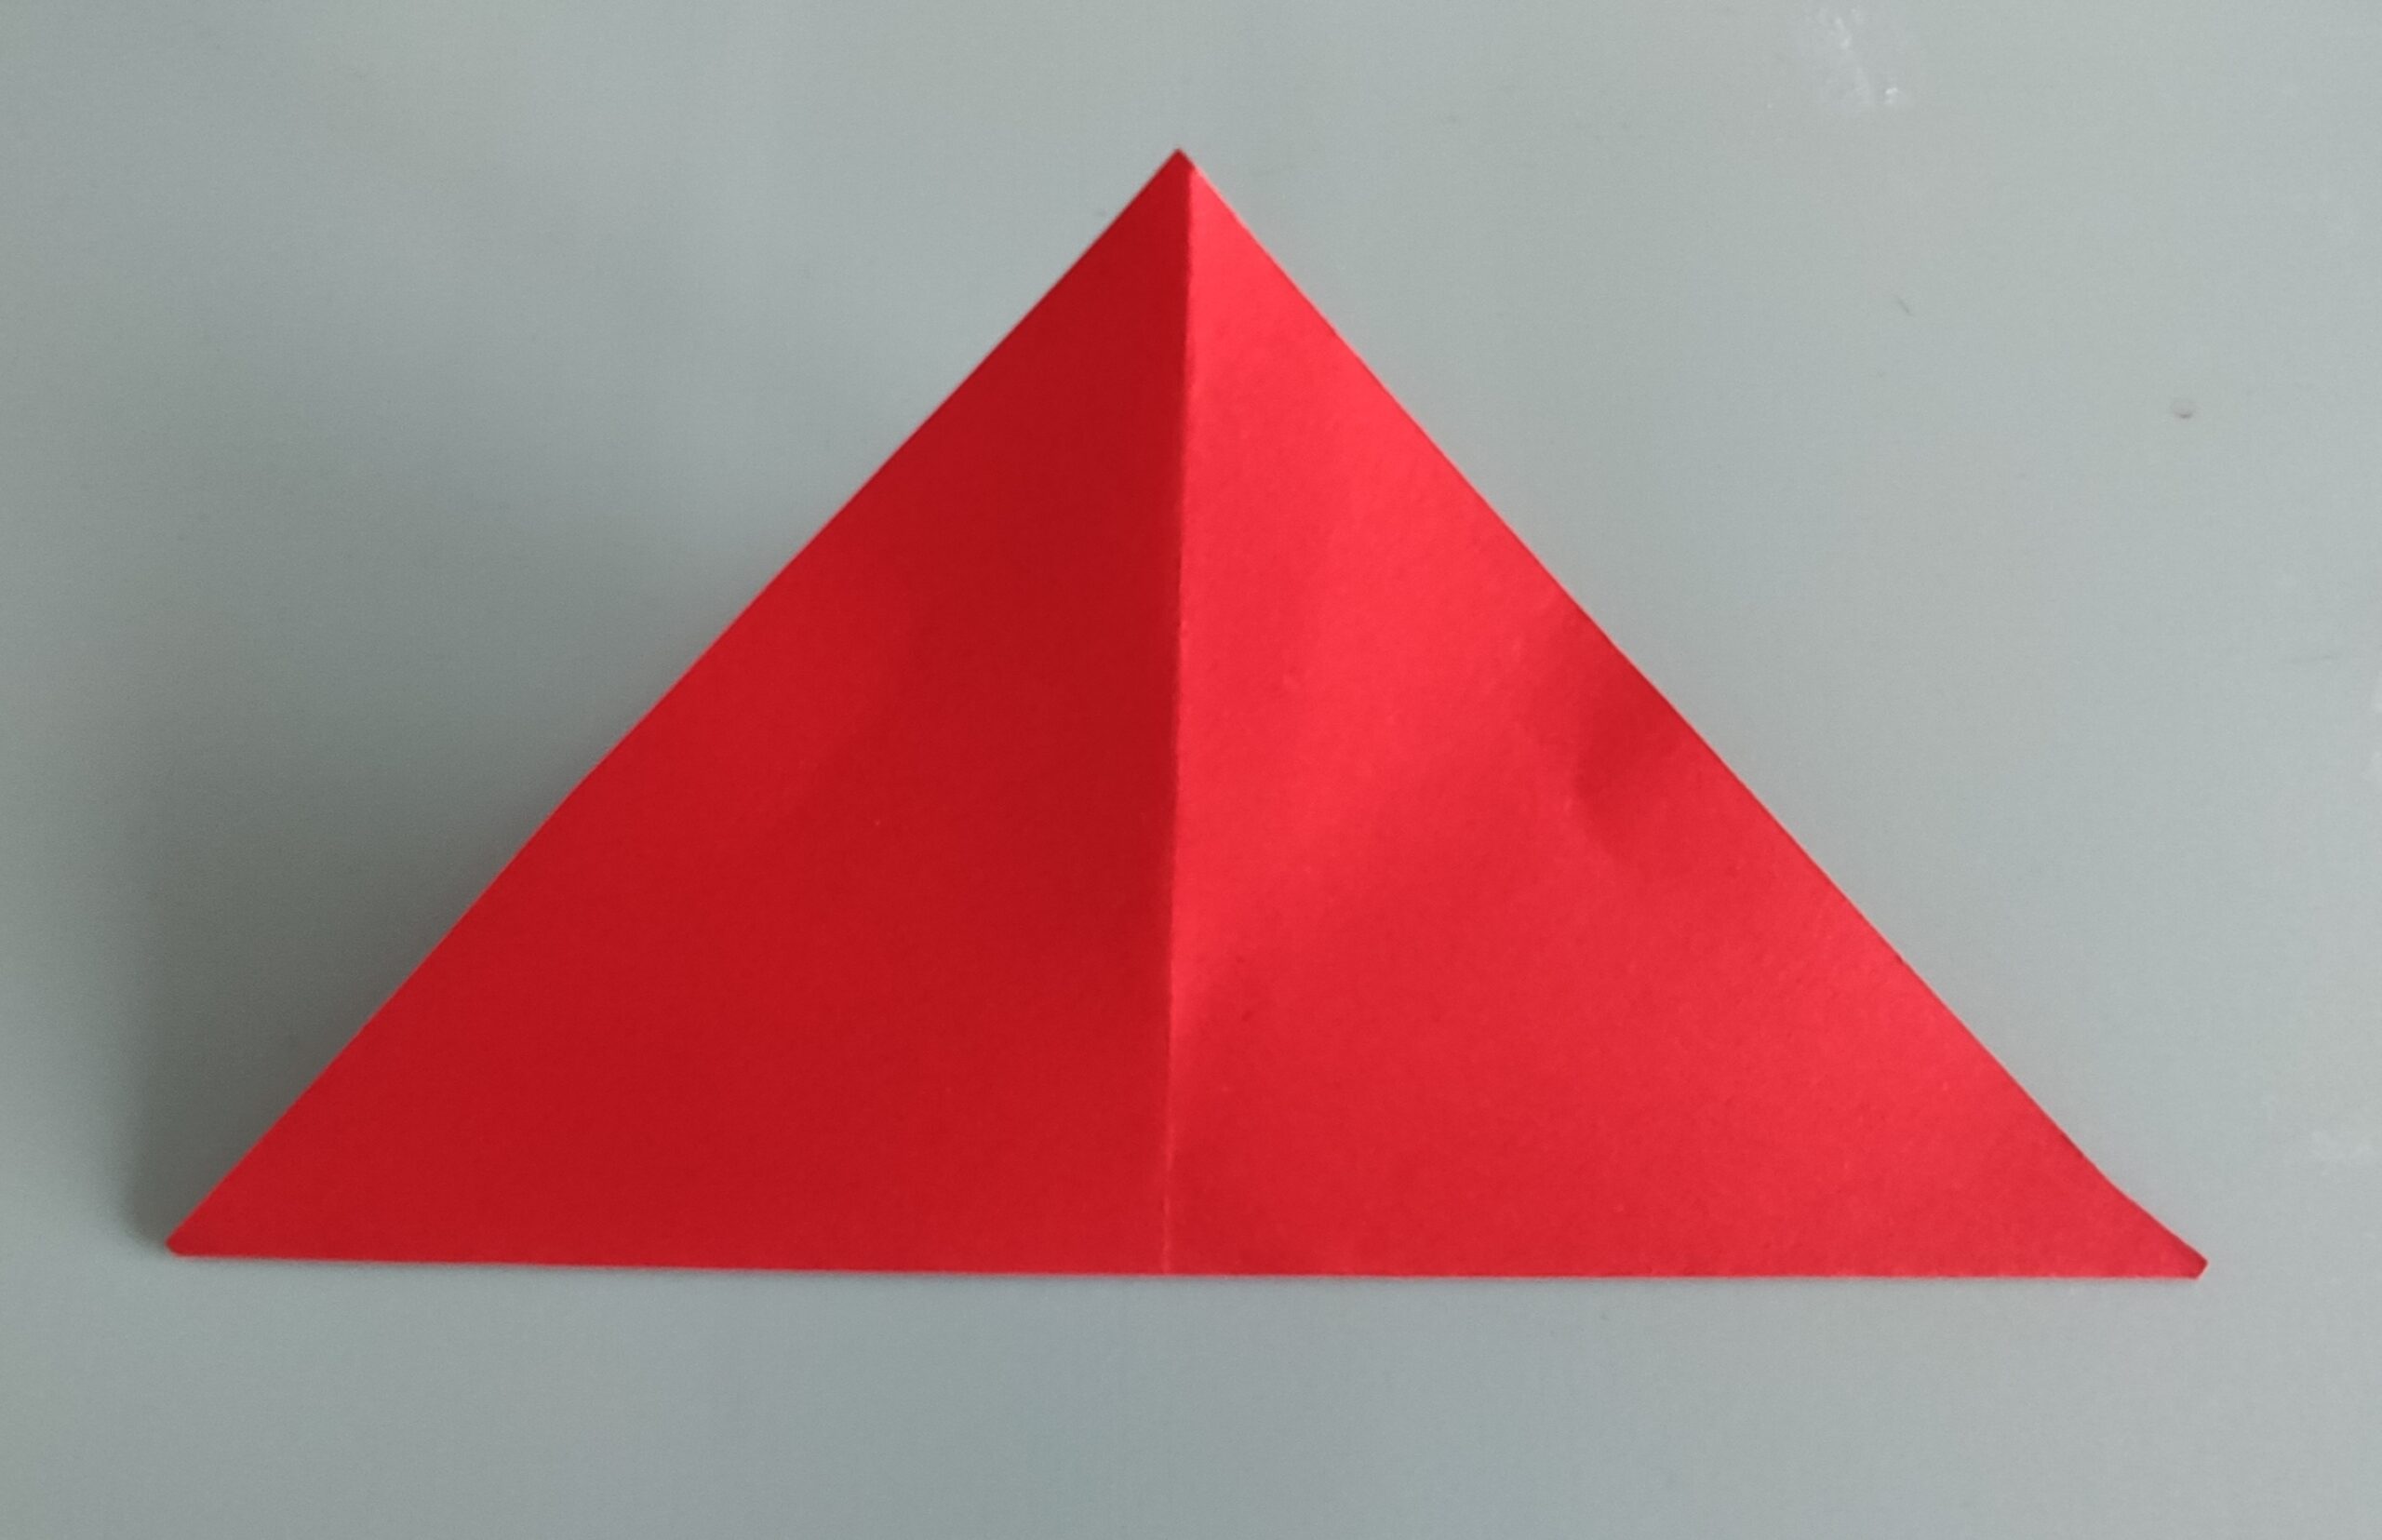
Bild zum Schritt 4 für das Bastel- und DIY-Abenteuer für Kinder: 'Jetzt legt ihr das rote Papier mit einer Spitze auf...'

5

Now you open your fold again. It shows a tip to you again. Now you fold the right and left tip to the center line. Then you turn the fold around so that the folded tip points to you.
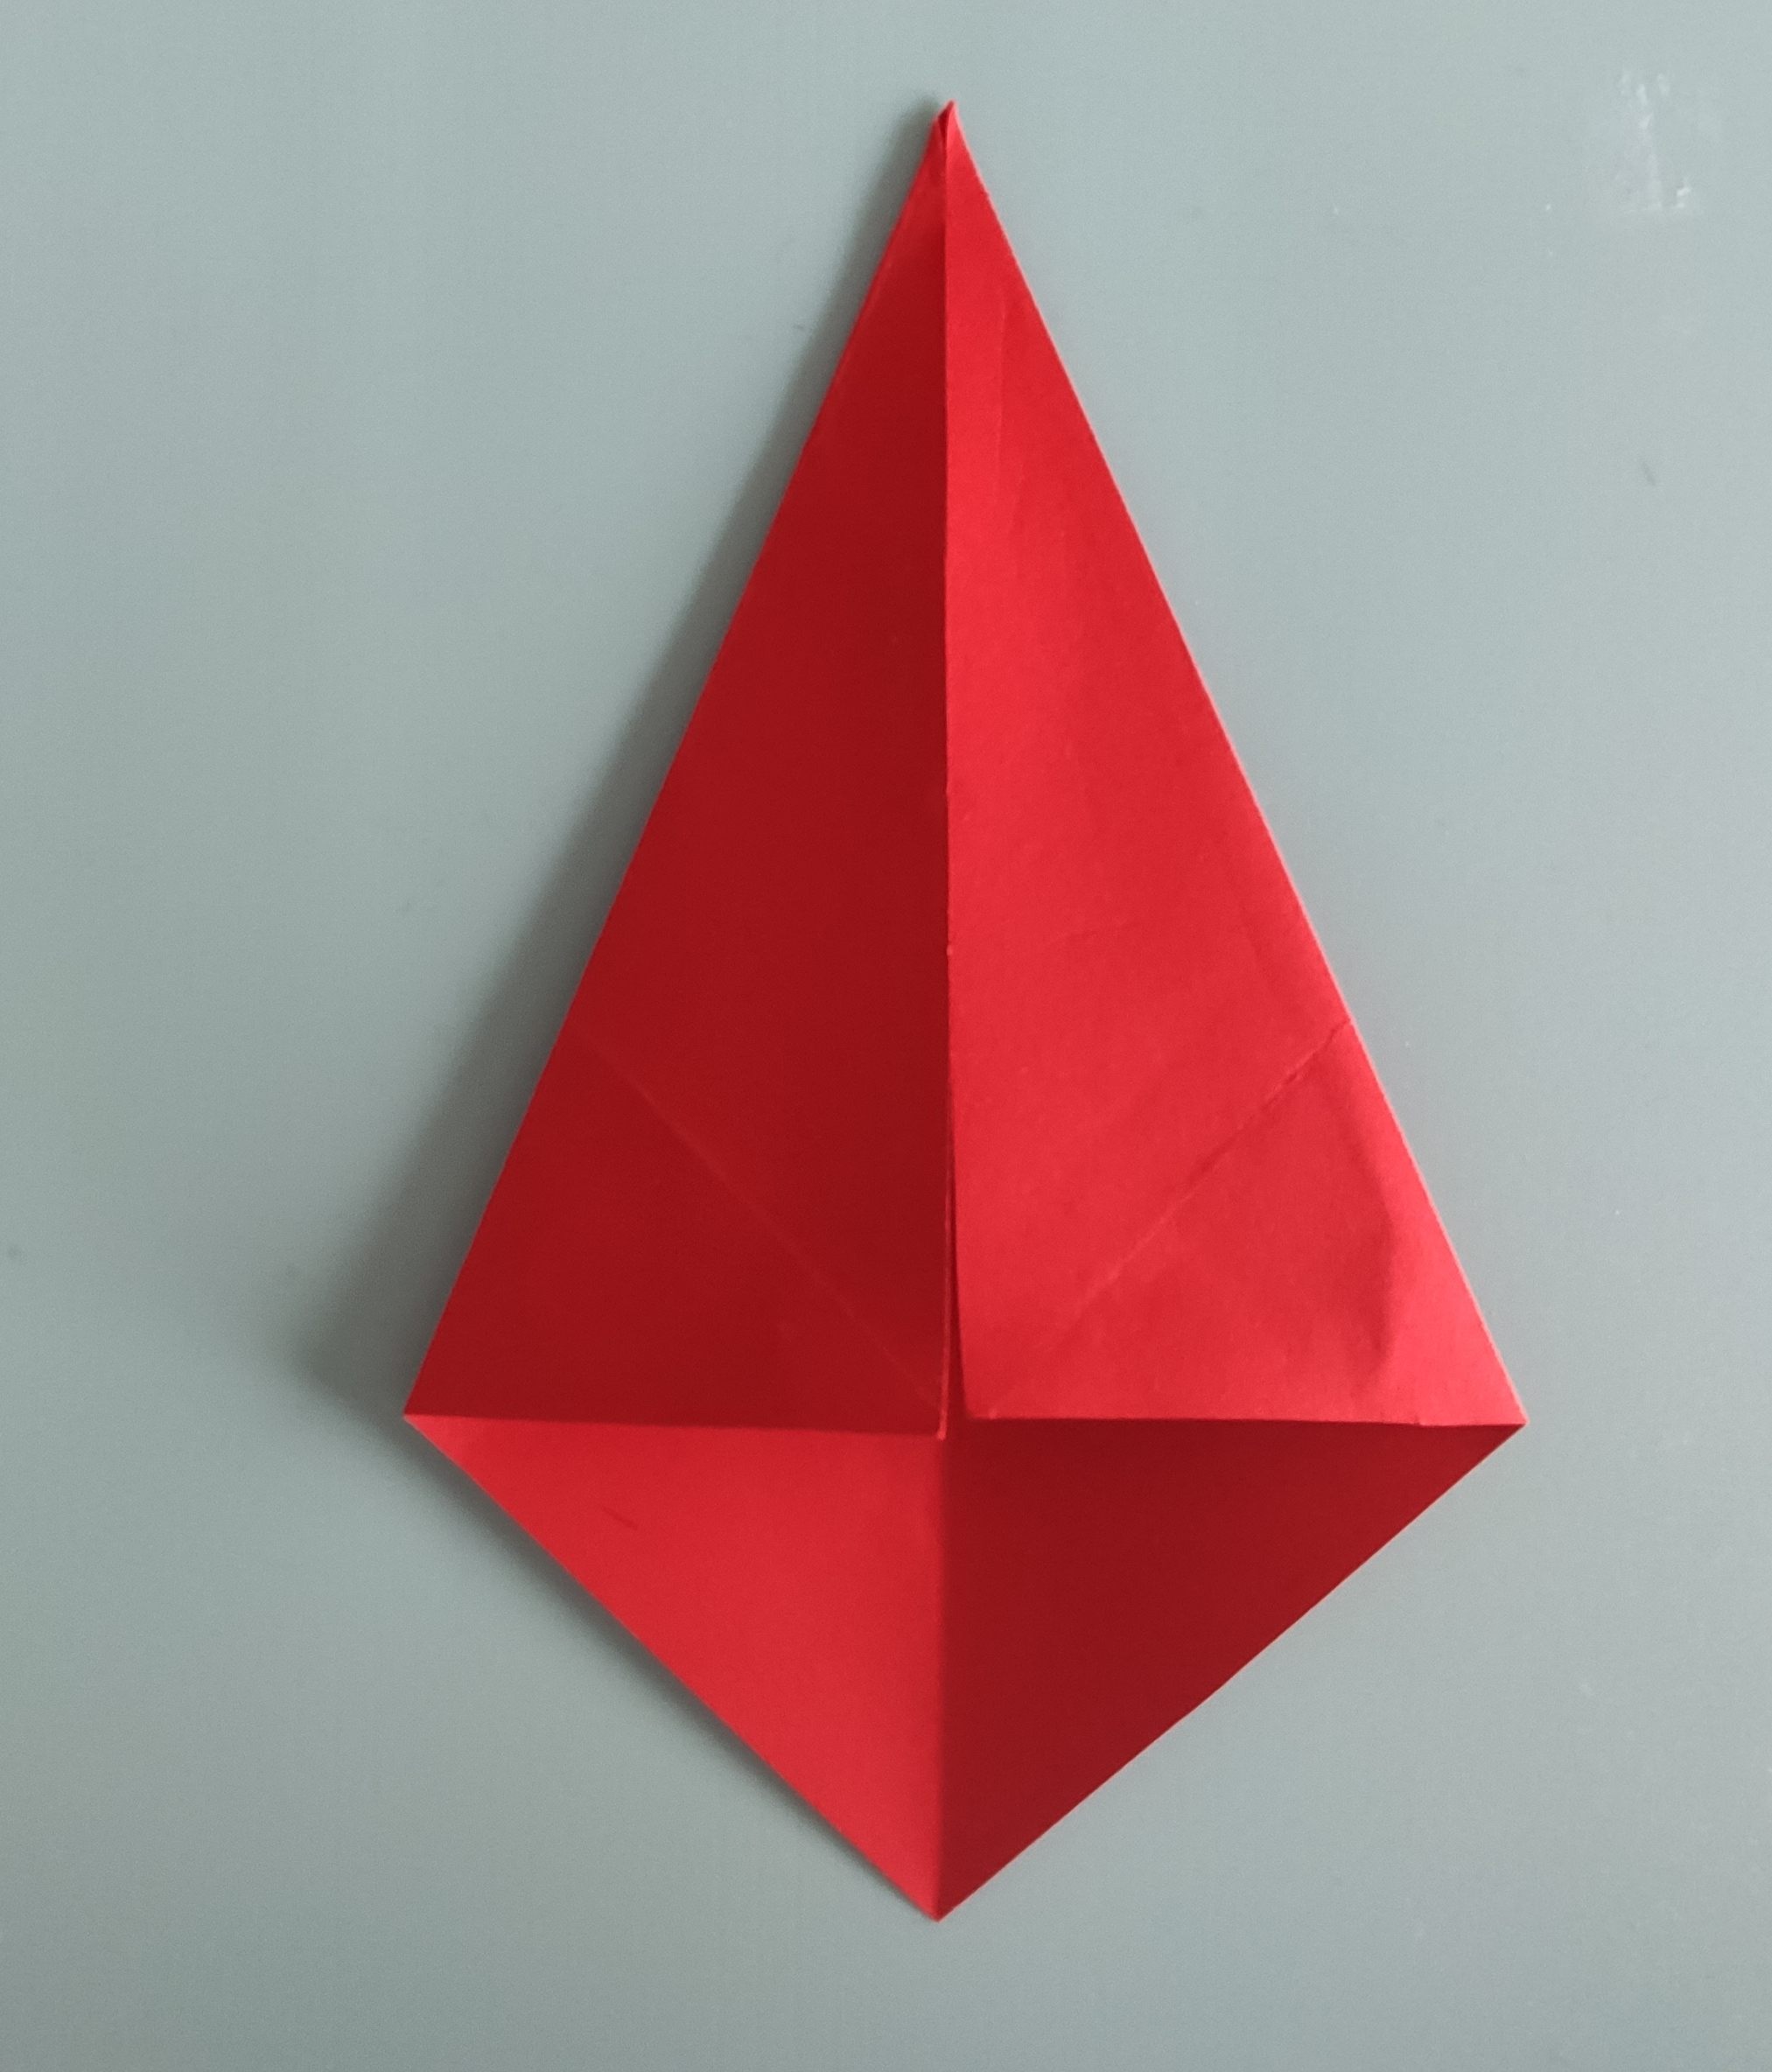
Bild zum Schritt 5 für das Bastel- und DIY-Abenteuer für Kinder: 'Jetzt öffnet ihr eure Faltung wieder. Es zeigt wieder eine...'

6

Then you put the white paper with a corner on your fold from the red paper. The white paper lies so that a small red edge survives.
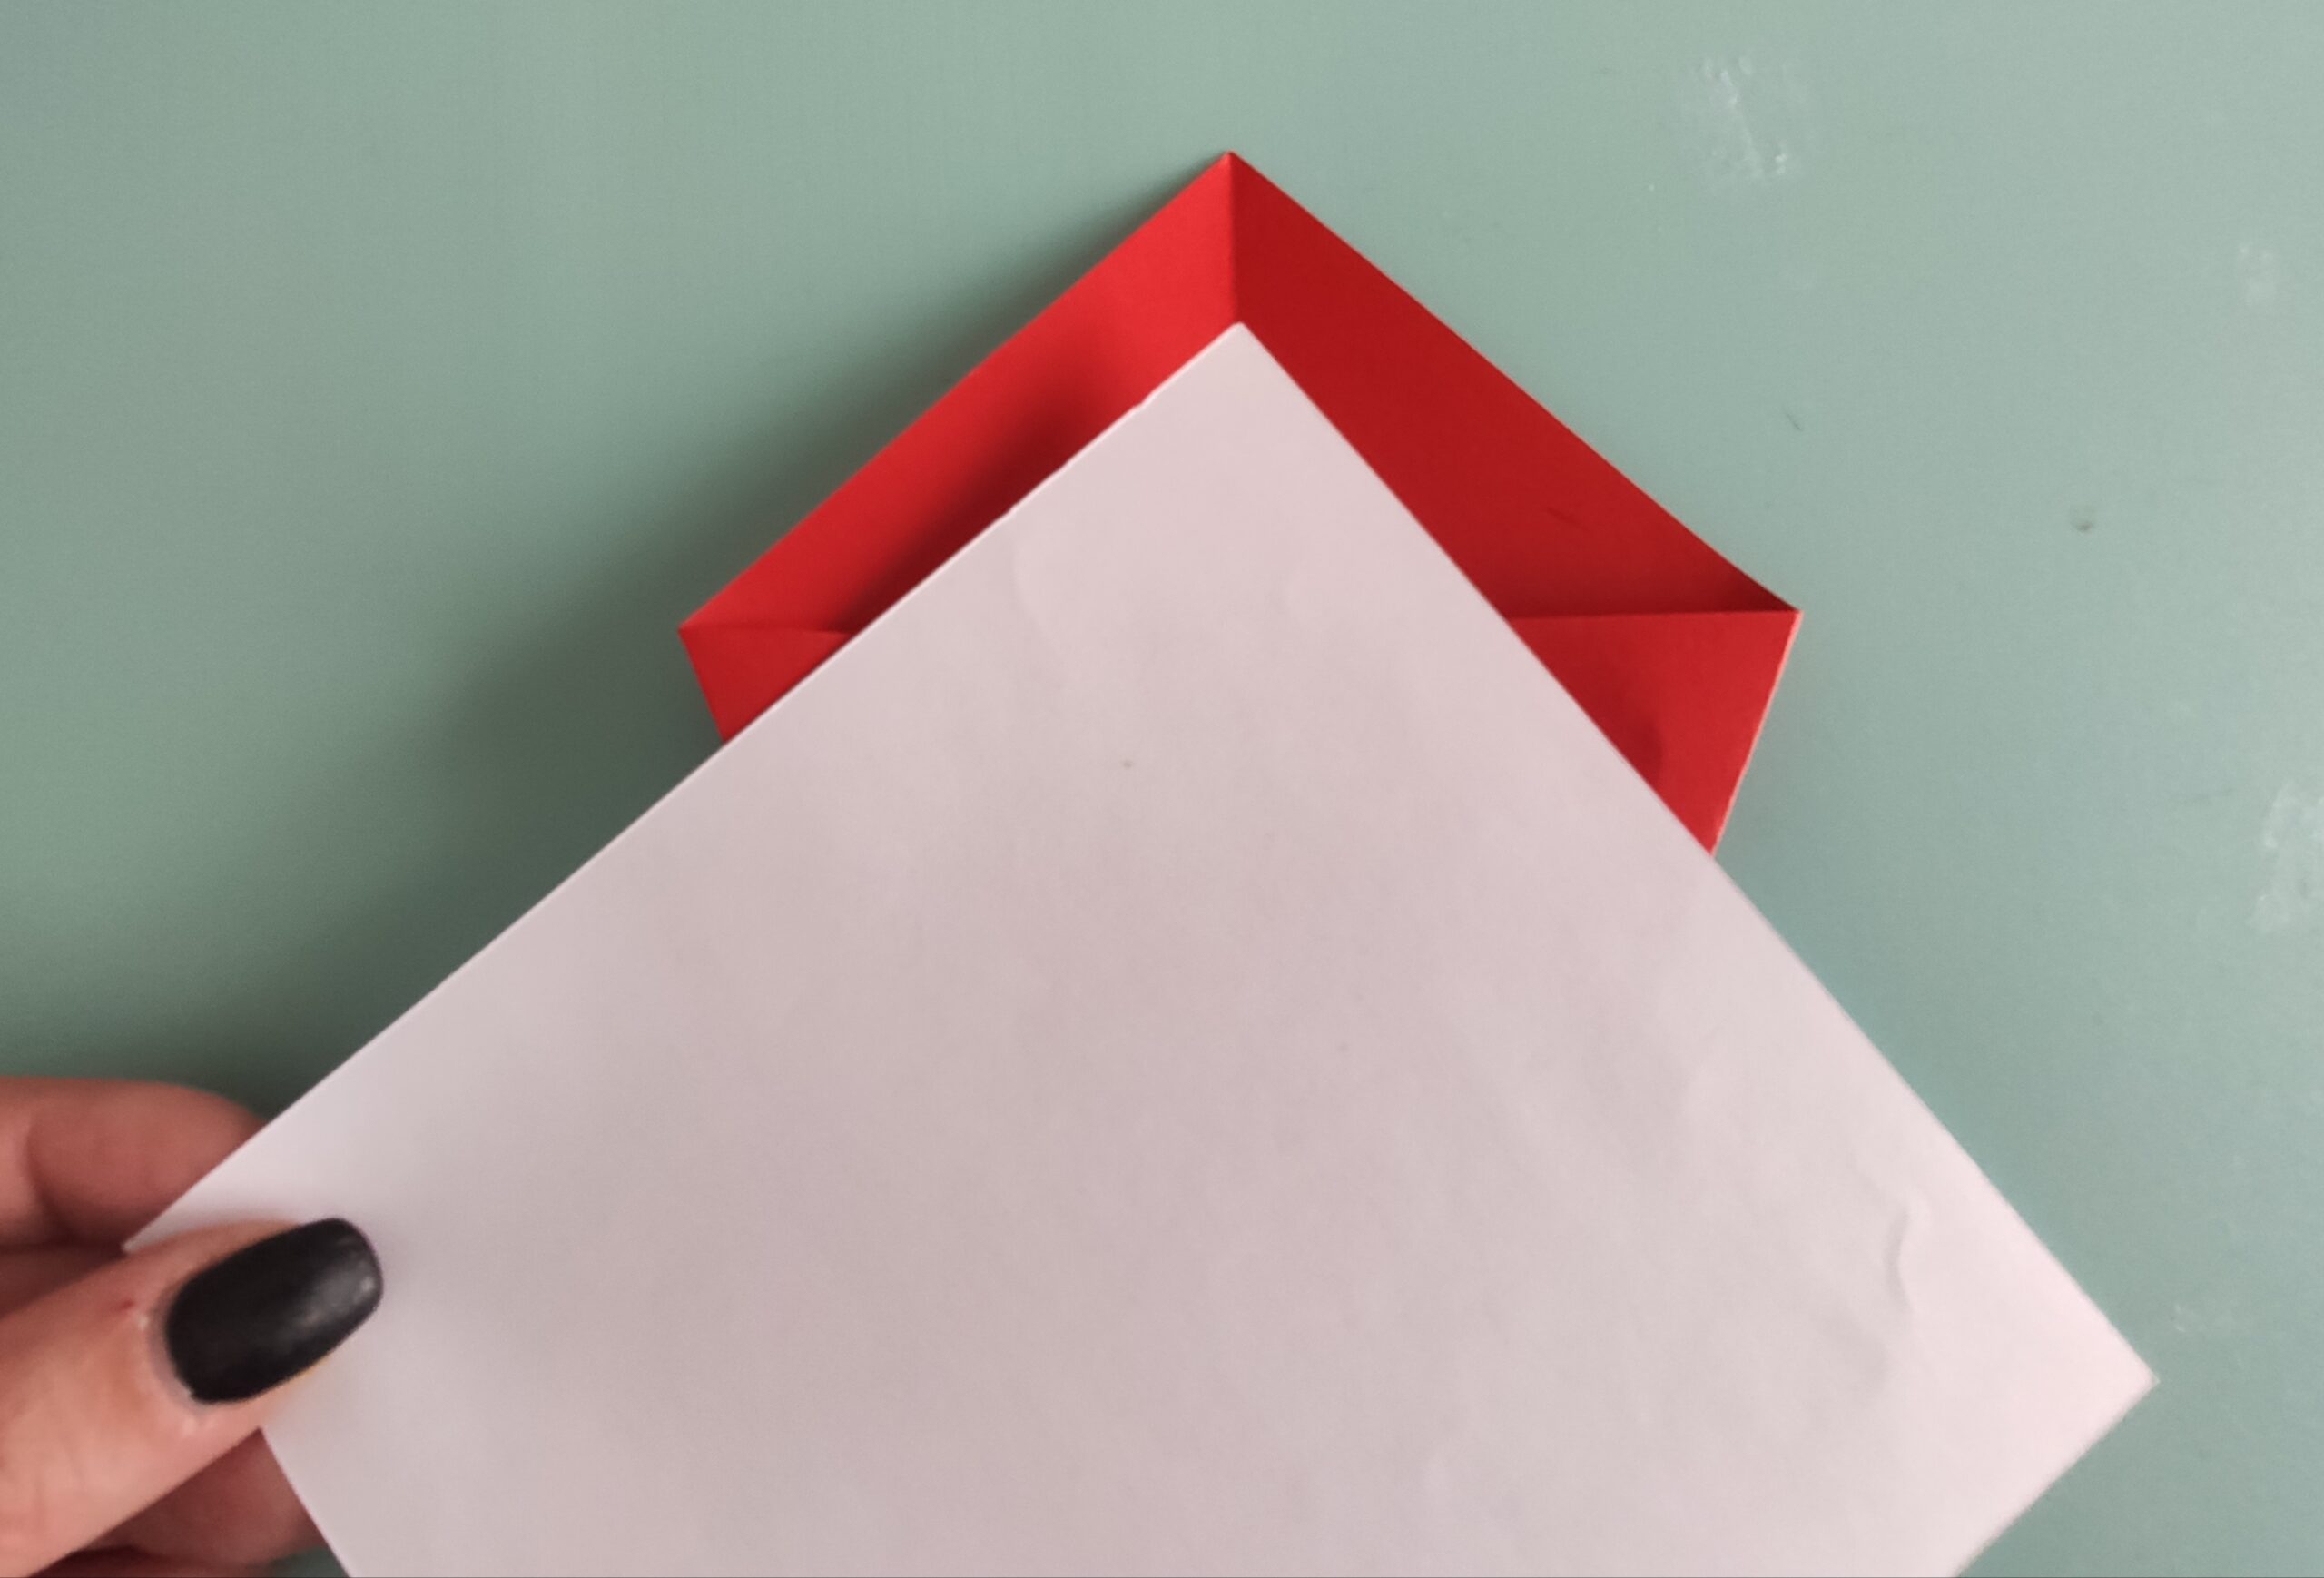
Bild zum Schritt 6 für das Bastel- und DIY-Abenteuer für Kinder: 'Danach legt ihr das weiße Papier mit einer Ecke auf...'

7

Now fold both papers until the beginning of the fold. Now pull out the white paper.
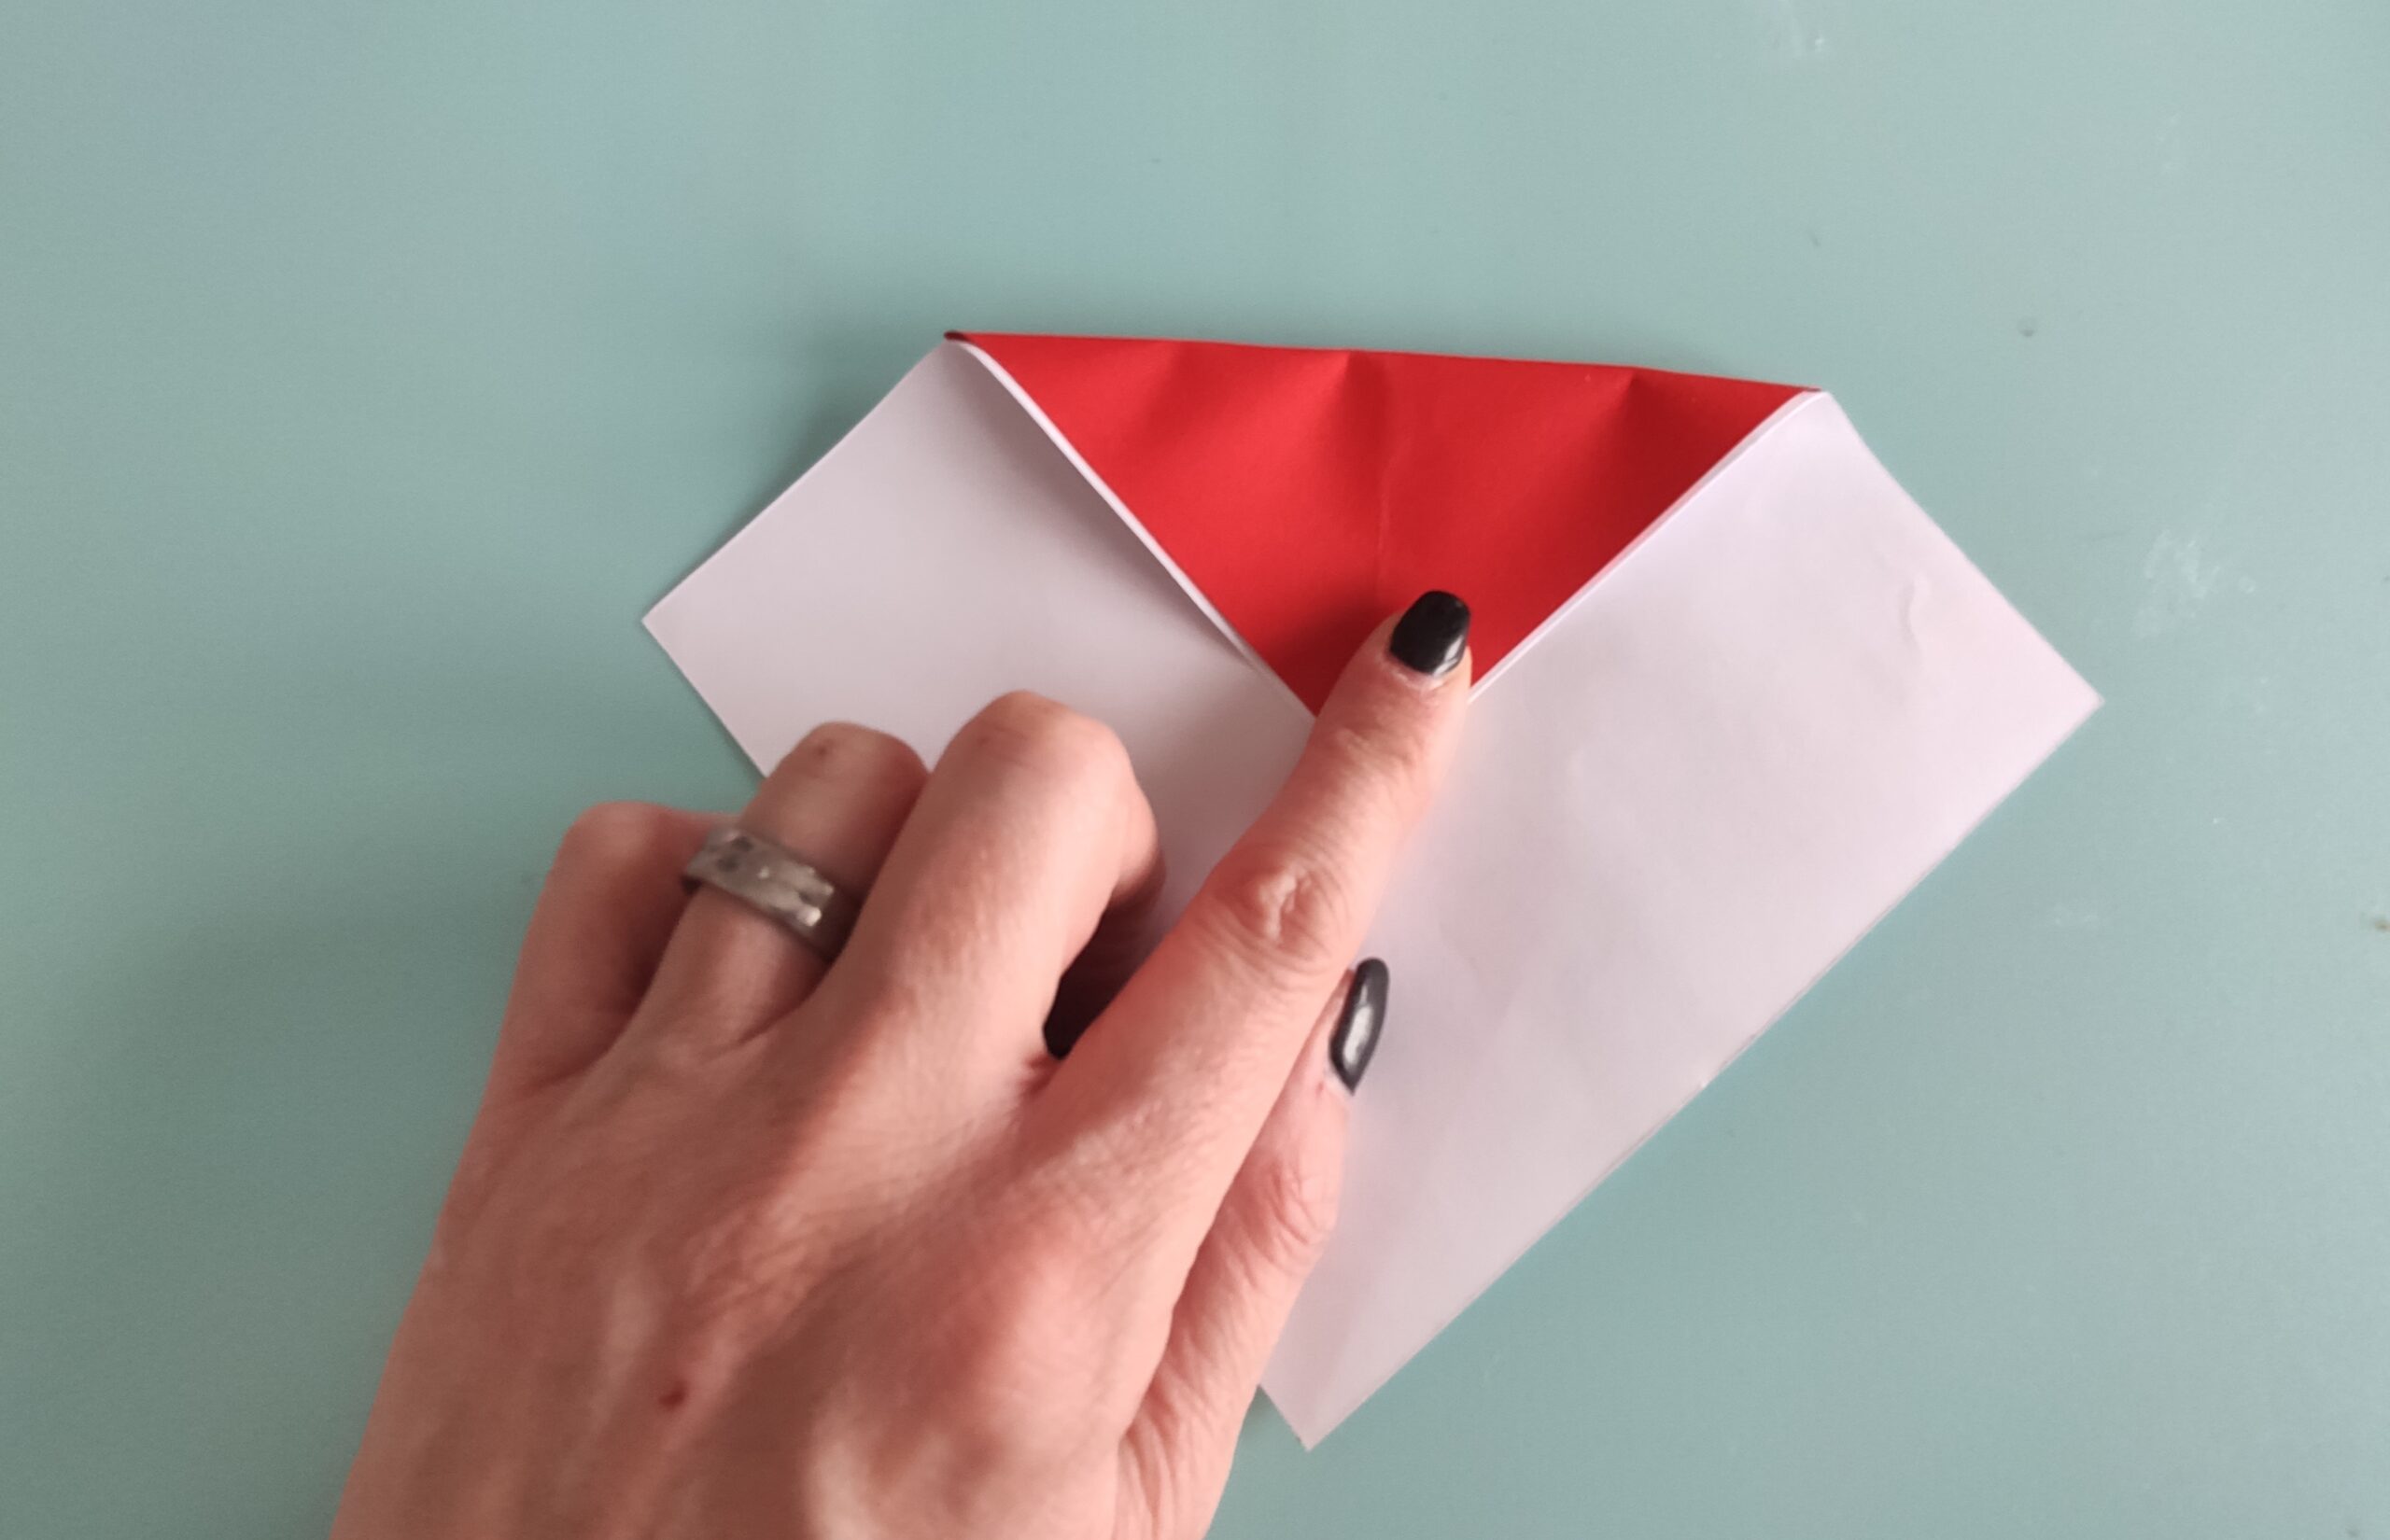
Bild zum Schritt 7 für das Bastel- und DIY-Abenteuer für Kinder: 'Faltet nun beide Papiere bis zum Beginn der Faltung. Zieht...'

8

Now cut off the small white triangle at the folding edge. Turn around the red triangle so that the folding is on the back.
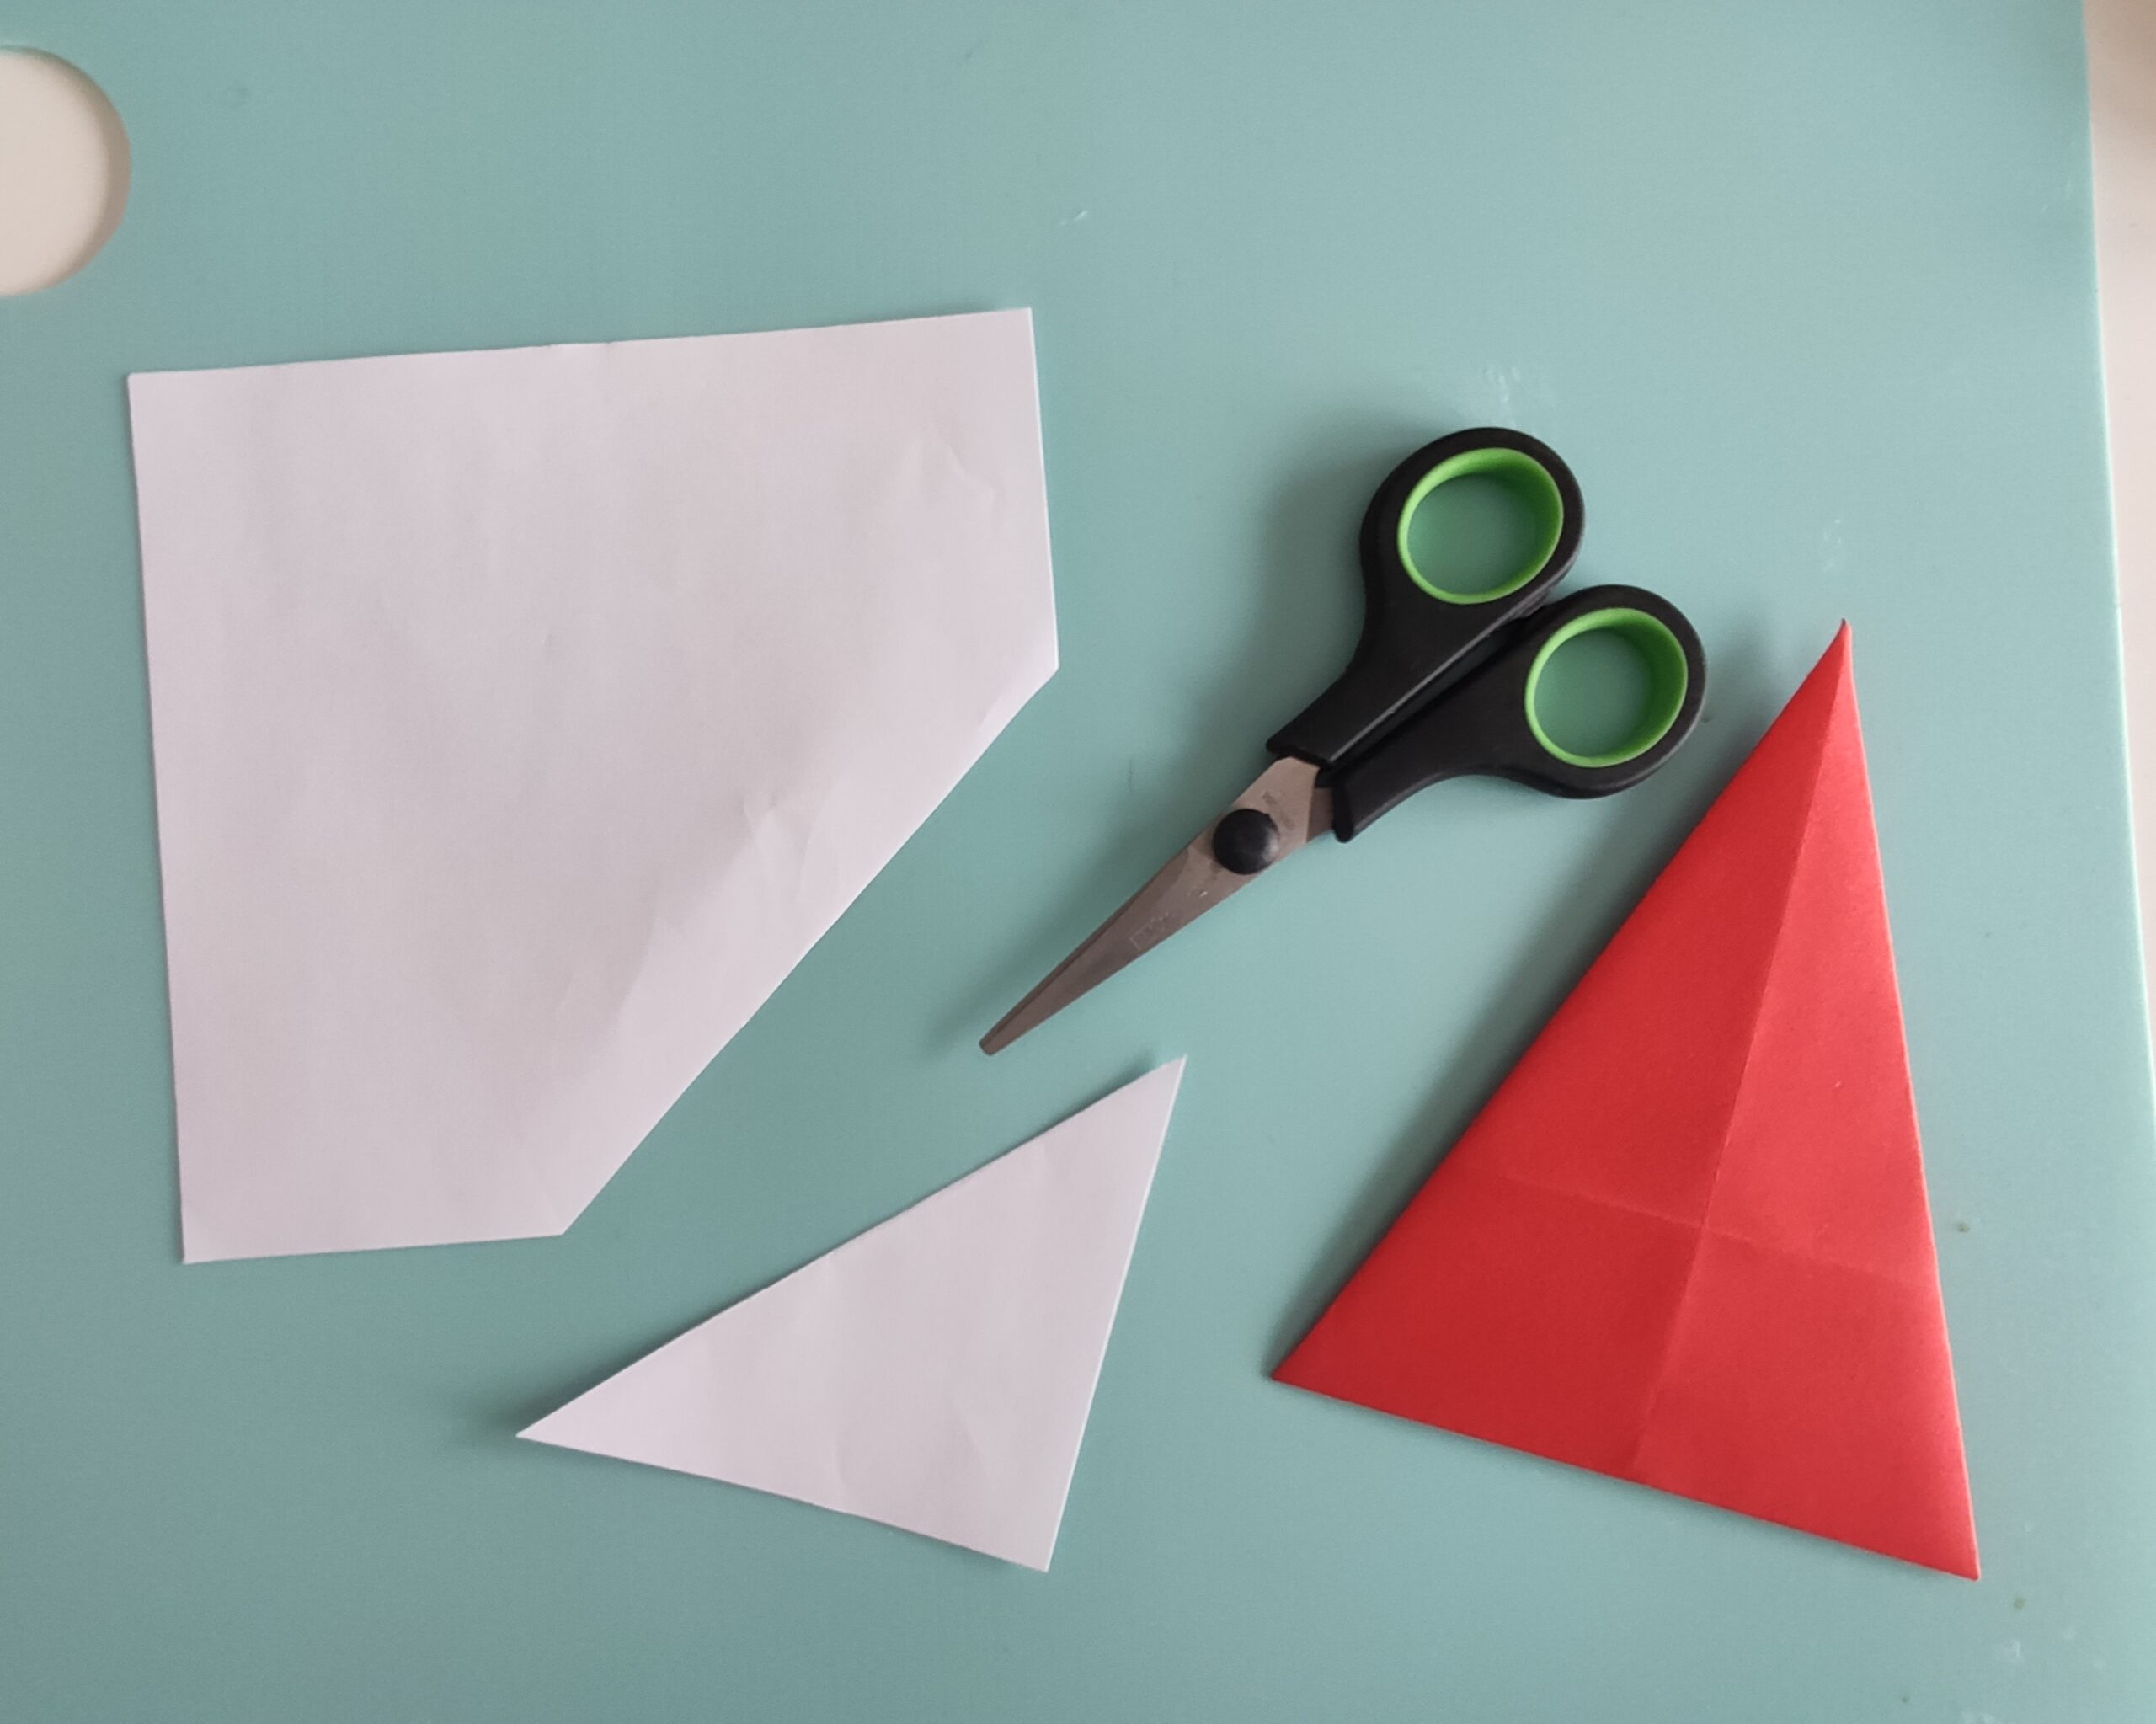
Bild zum Schritt 8 für das Bastel- und DIY-Abenteuer für Kinder: 'Nun schneidet ihr das kleine weiße Dreieck an der Faltkante...'

9

Now you put the white triangle on the red triangle. Now you fold the white triangle down about 0.5 cm on the long side.
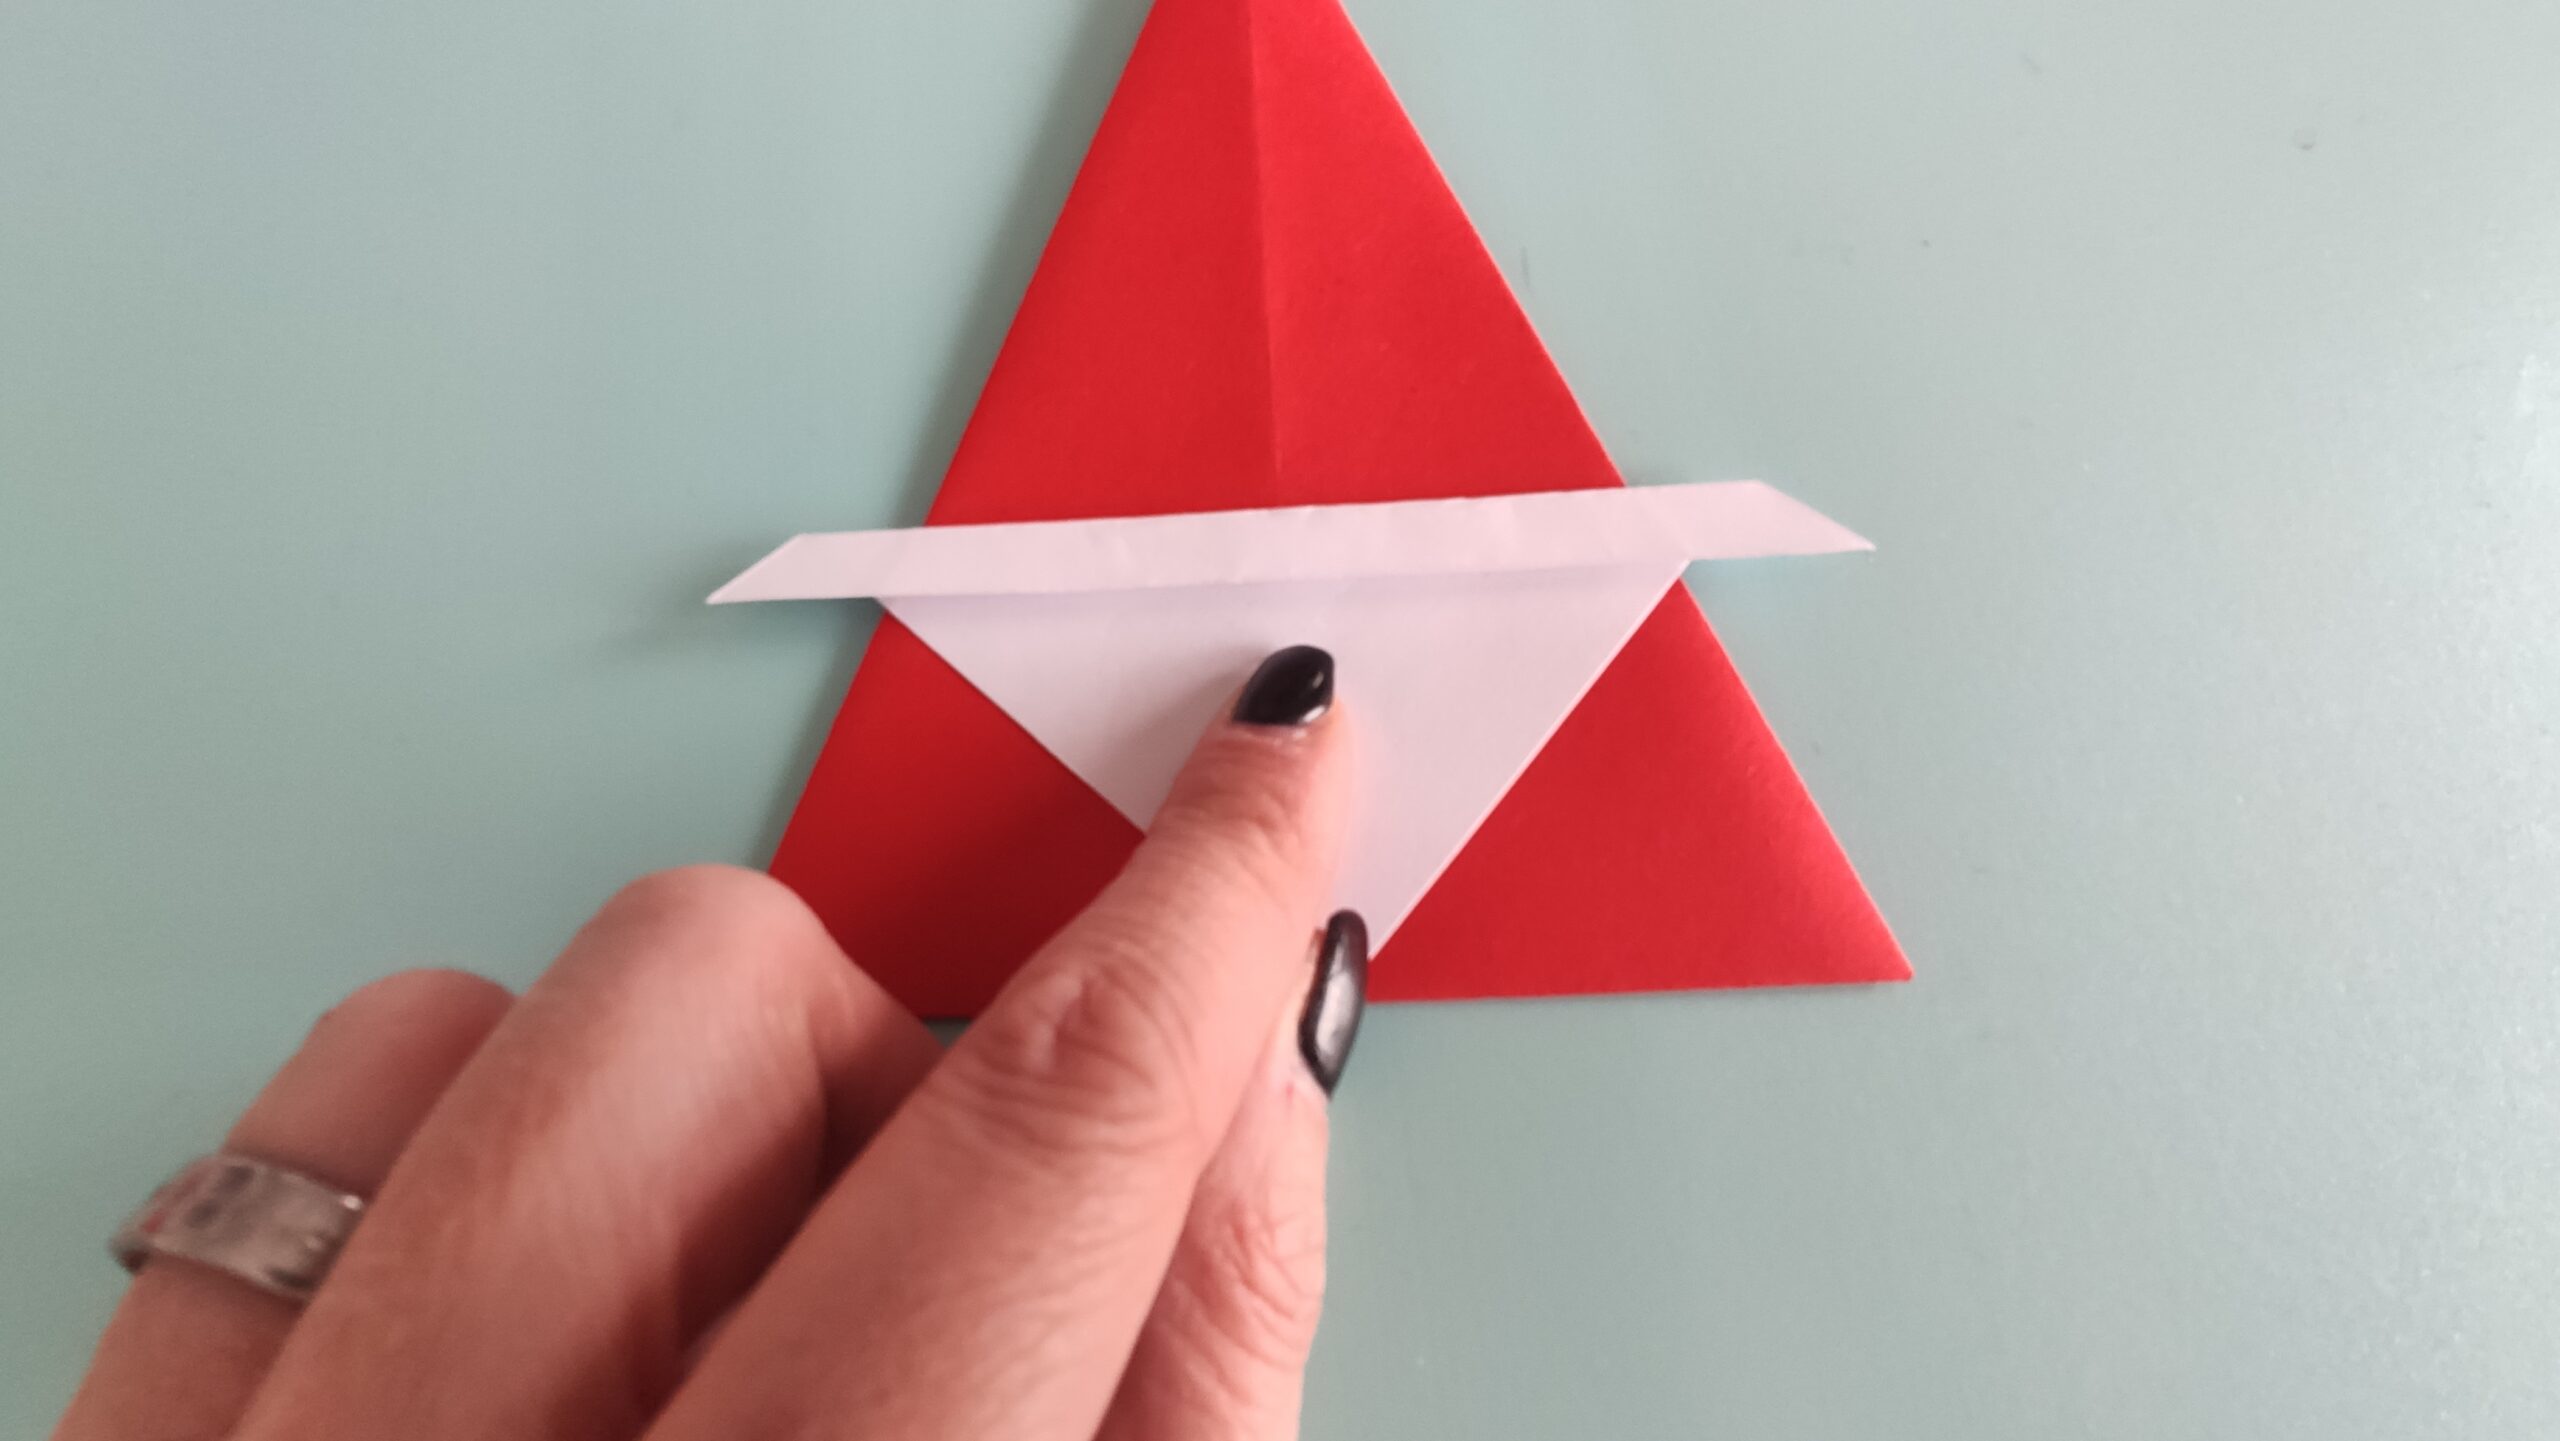
Bild zum Schritt 9 für das Bastel- und DIY-Abenteuer für Kinder: 'Jetzt legt ihr das weiße Dreieck auf das rote Dreieck....'

10

Now turn everything around and stick to the top of the top. Then stick to the corners of the white paper on the back.

Bild zum Schritt 10 für das Bastel- und DIY-Abenteuer für Kinder: 'Dreht nun alles um und klebt die obere Spitze fest....'

11

Then you turn everything around and shape the face. For this you paint your eyes with a black pen.
Alternatively, you can also stick on the wobble eyes here.
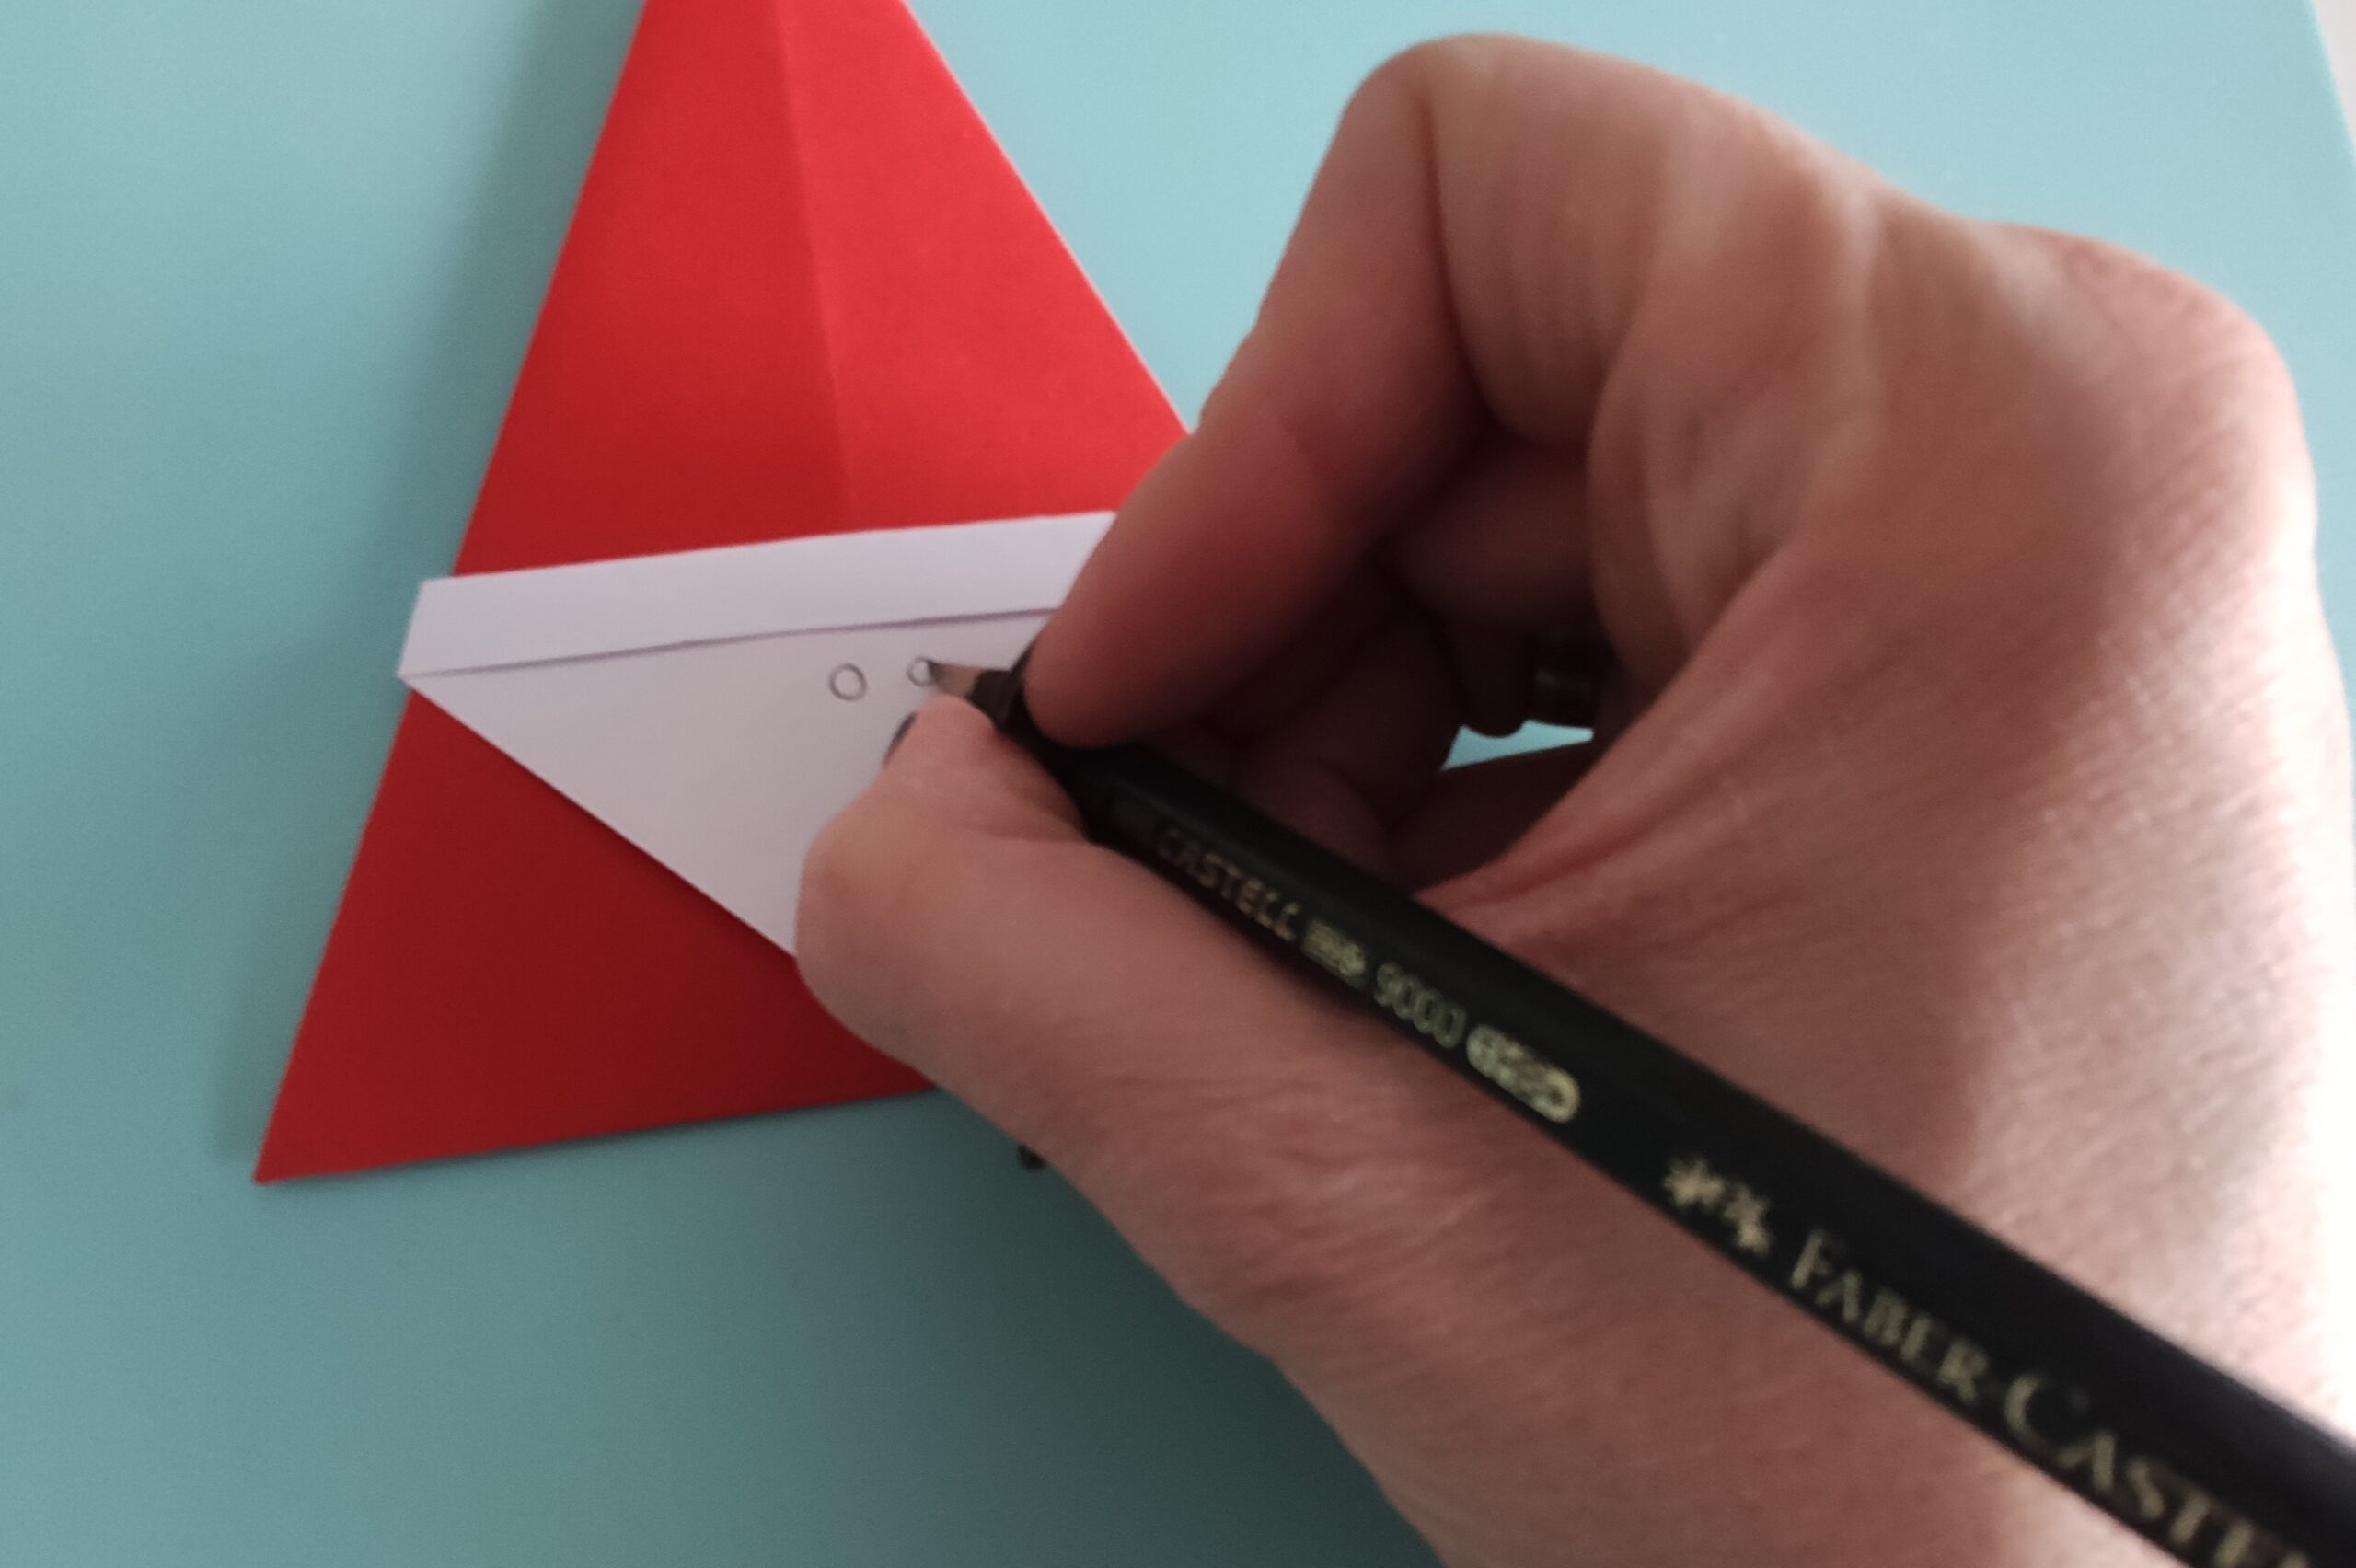
Bild zum Schritt 11 für das Bastel- und DIY-Abenteuer für Kinder: 'Anschließend dreht ihr alles um und gestaltet das Gesicht. Hierfür...'

12

With the red pen you paint a nose afterwards.
Alternatively, you can apply a small red pompon.
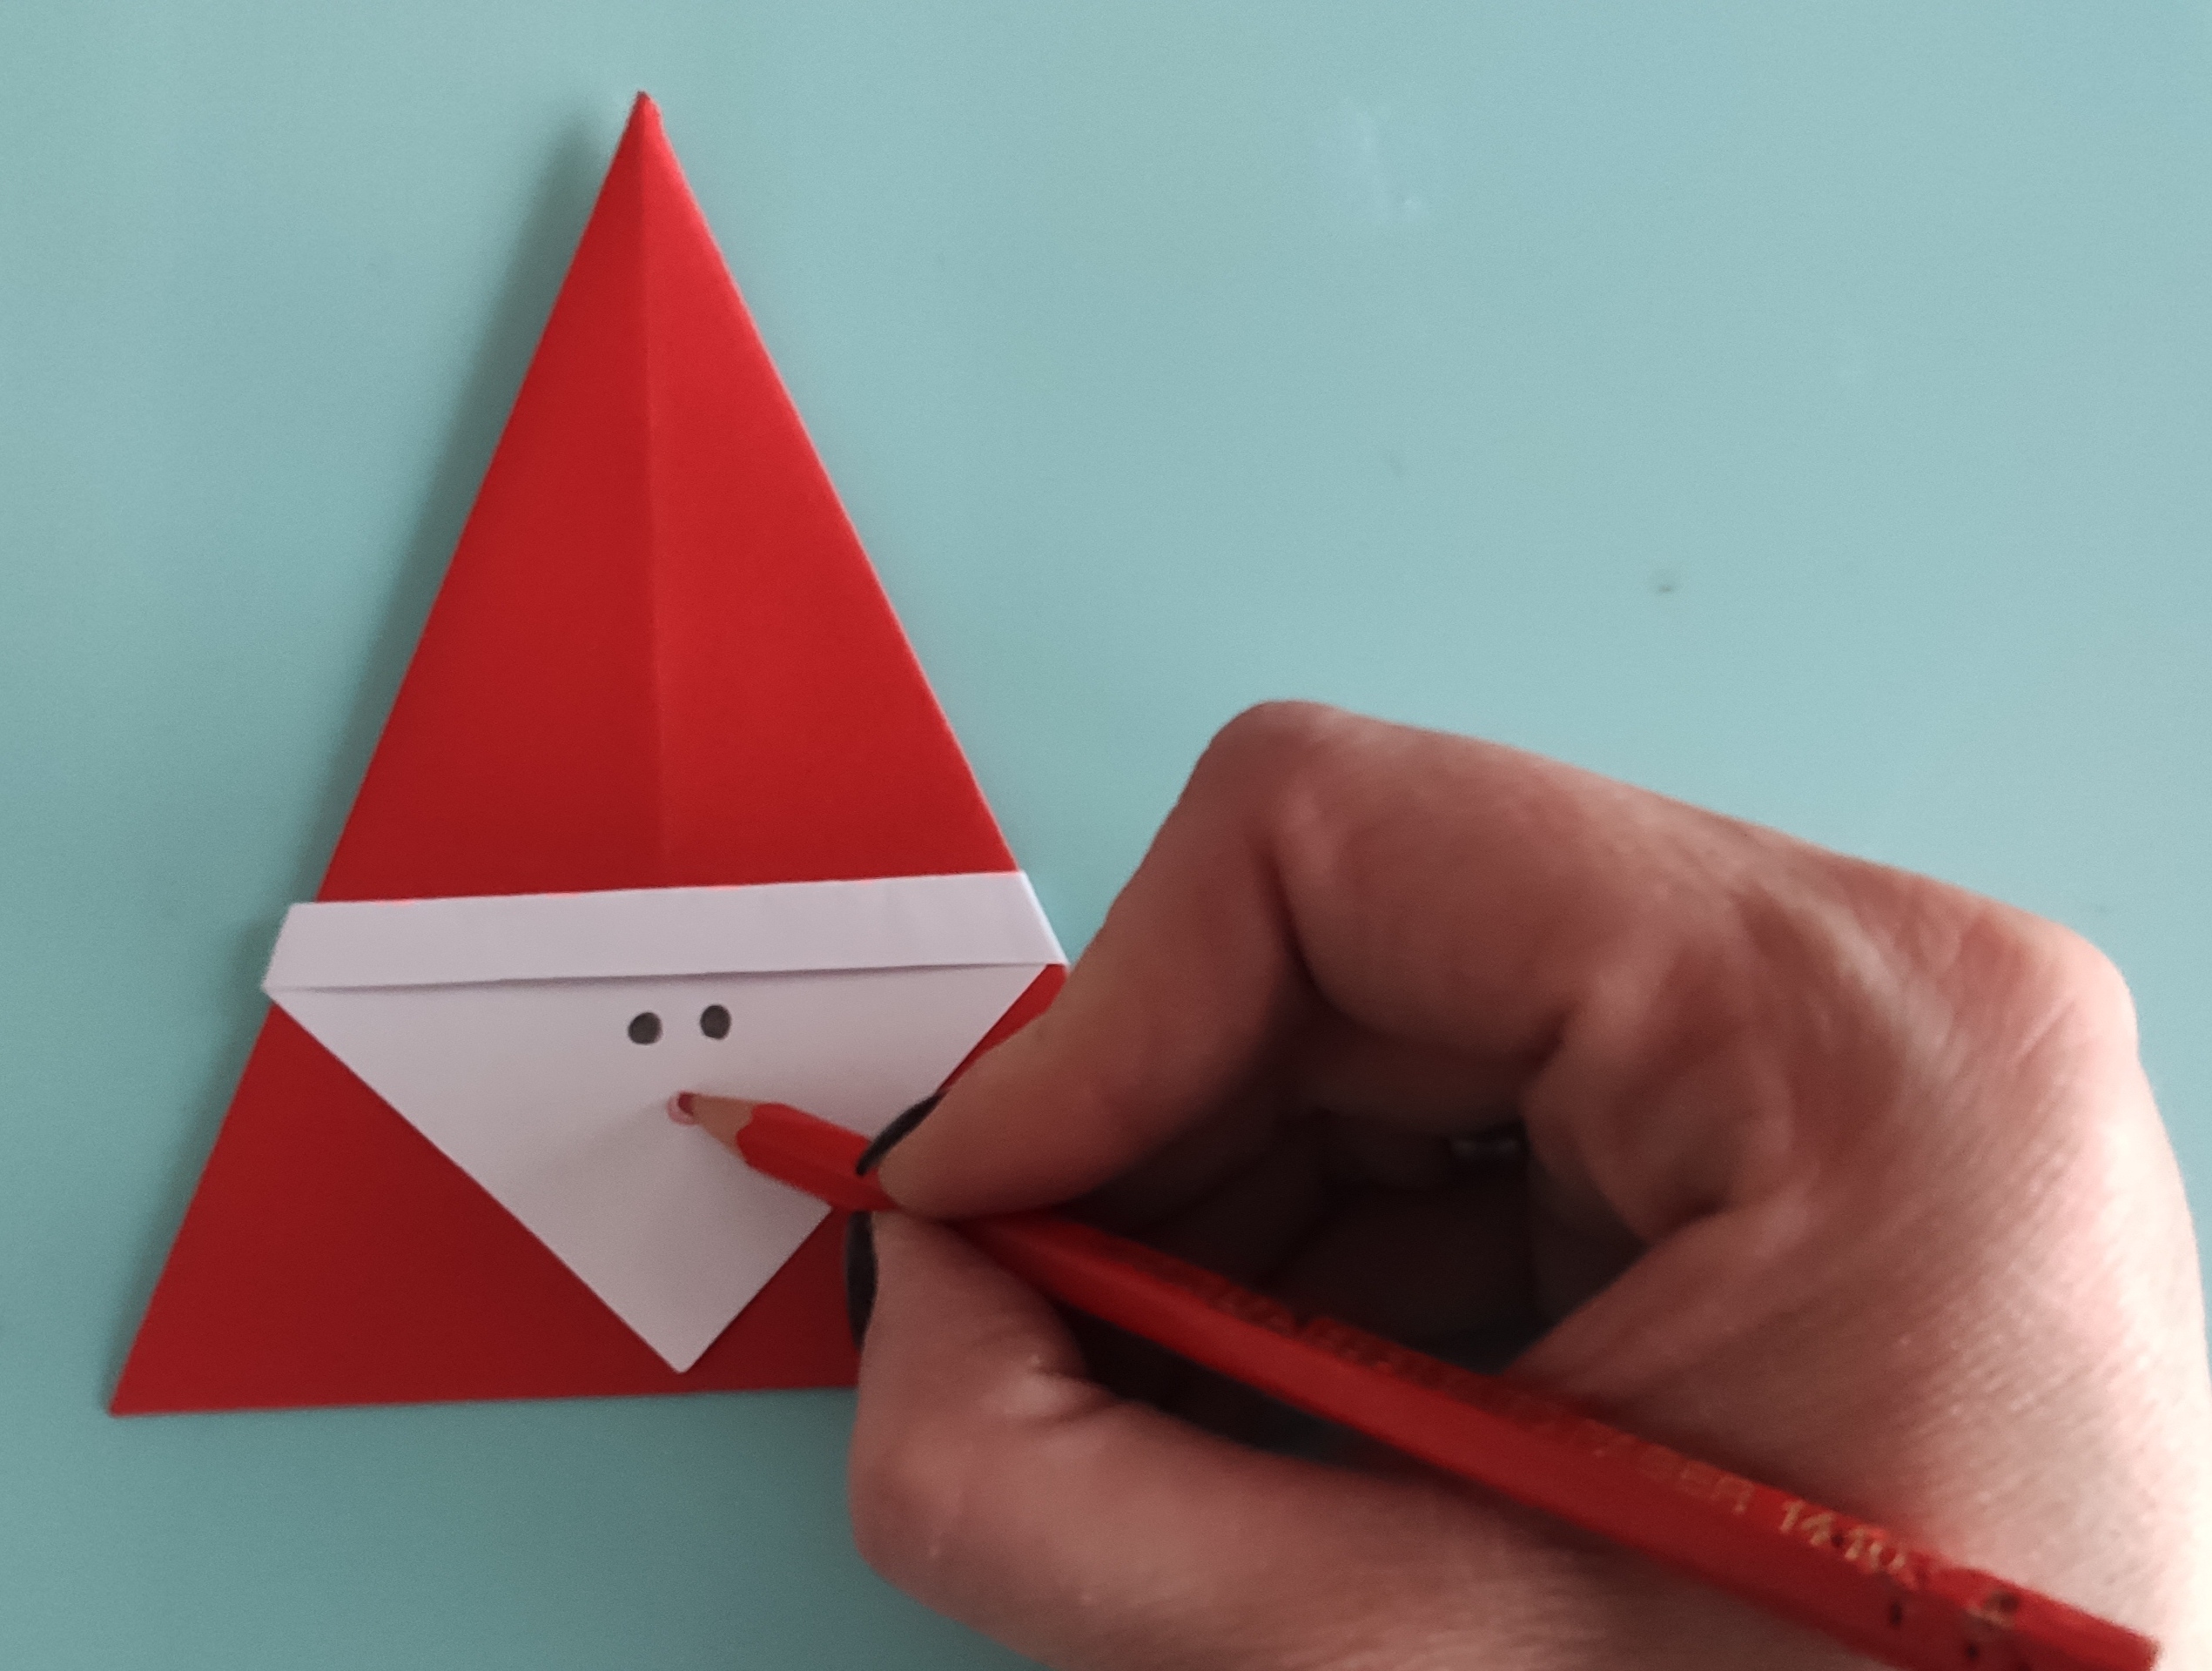
Bild zum Schritt 12 für das Bastel- und DIY-Abenteuer für Kinder: 'Mit dem roten Stift malt ihr danach eine Nase. ...'

13

Finally, she sticks the white pompon to the top of the cap.
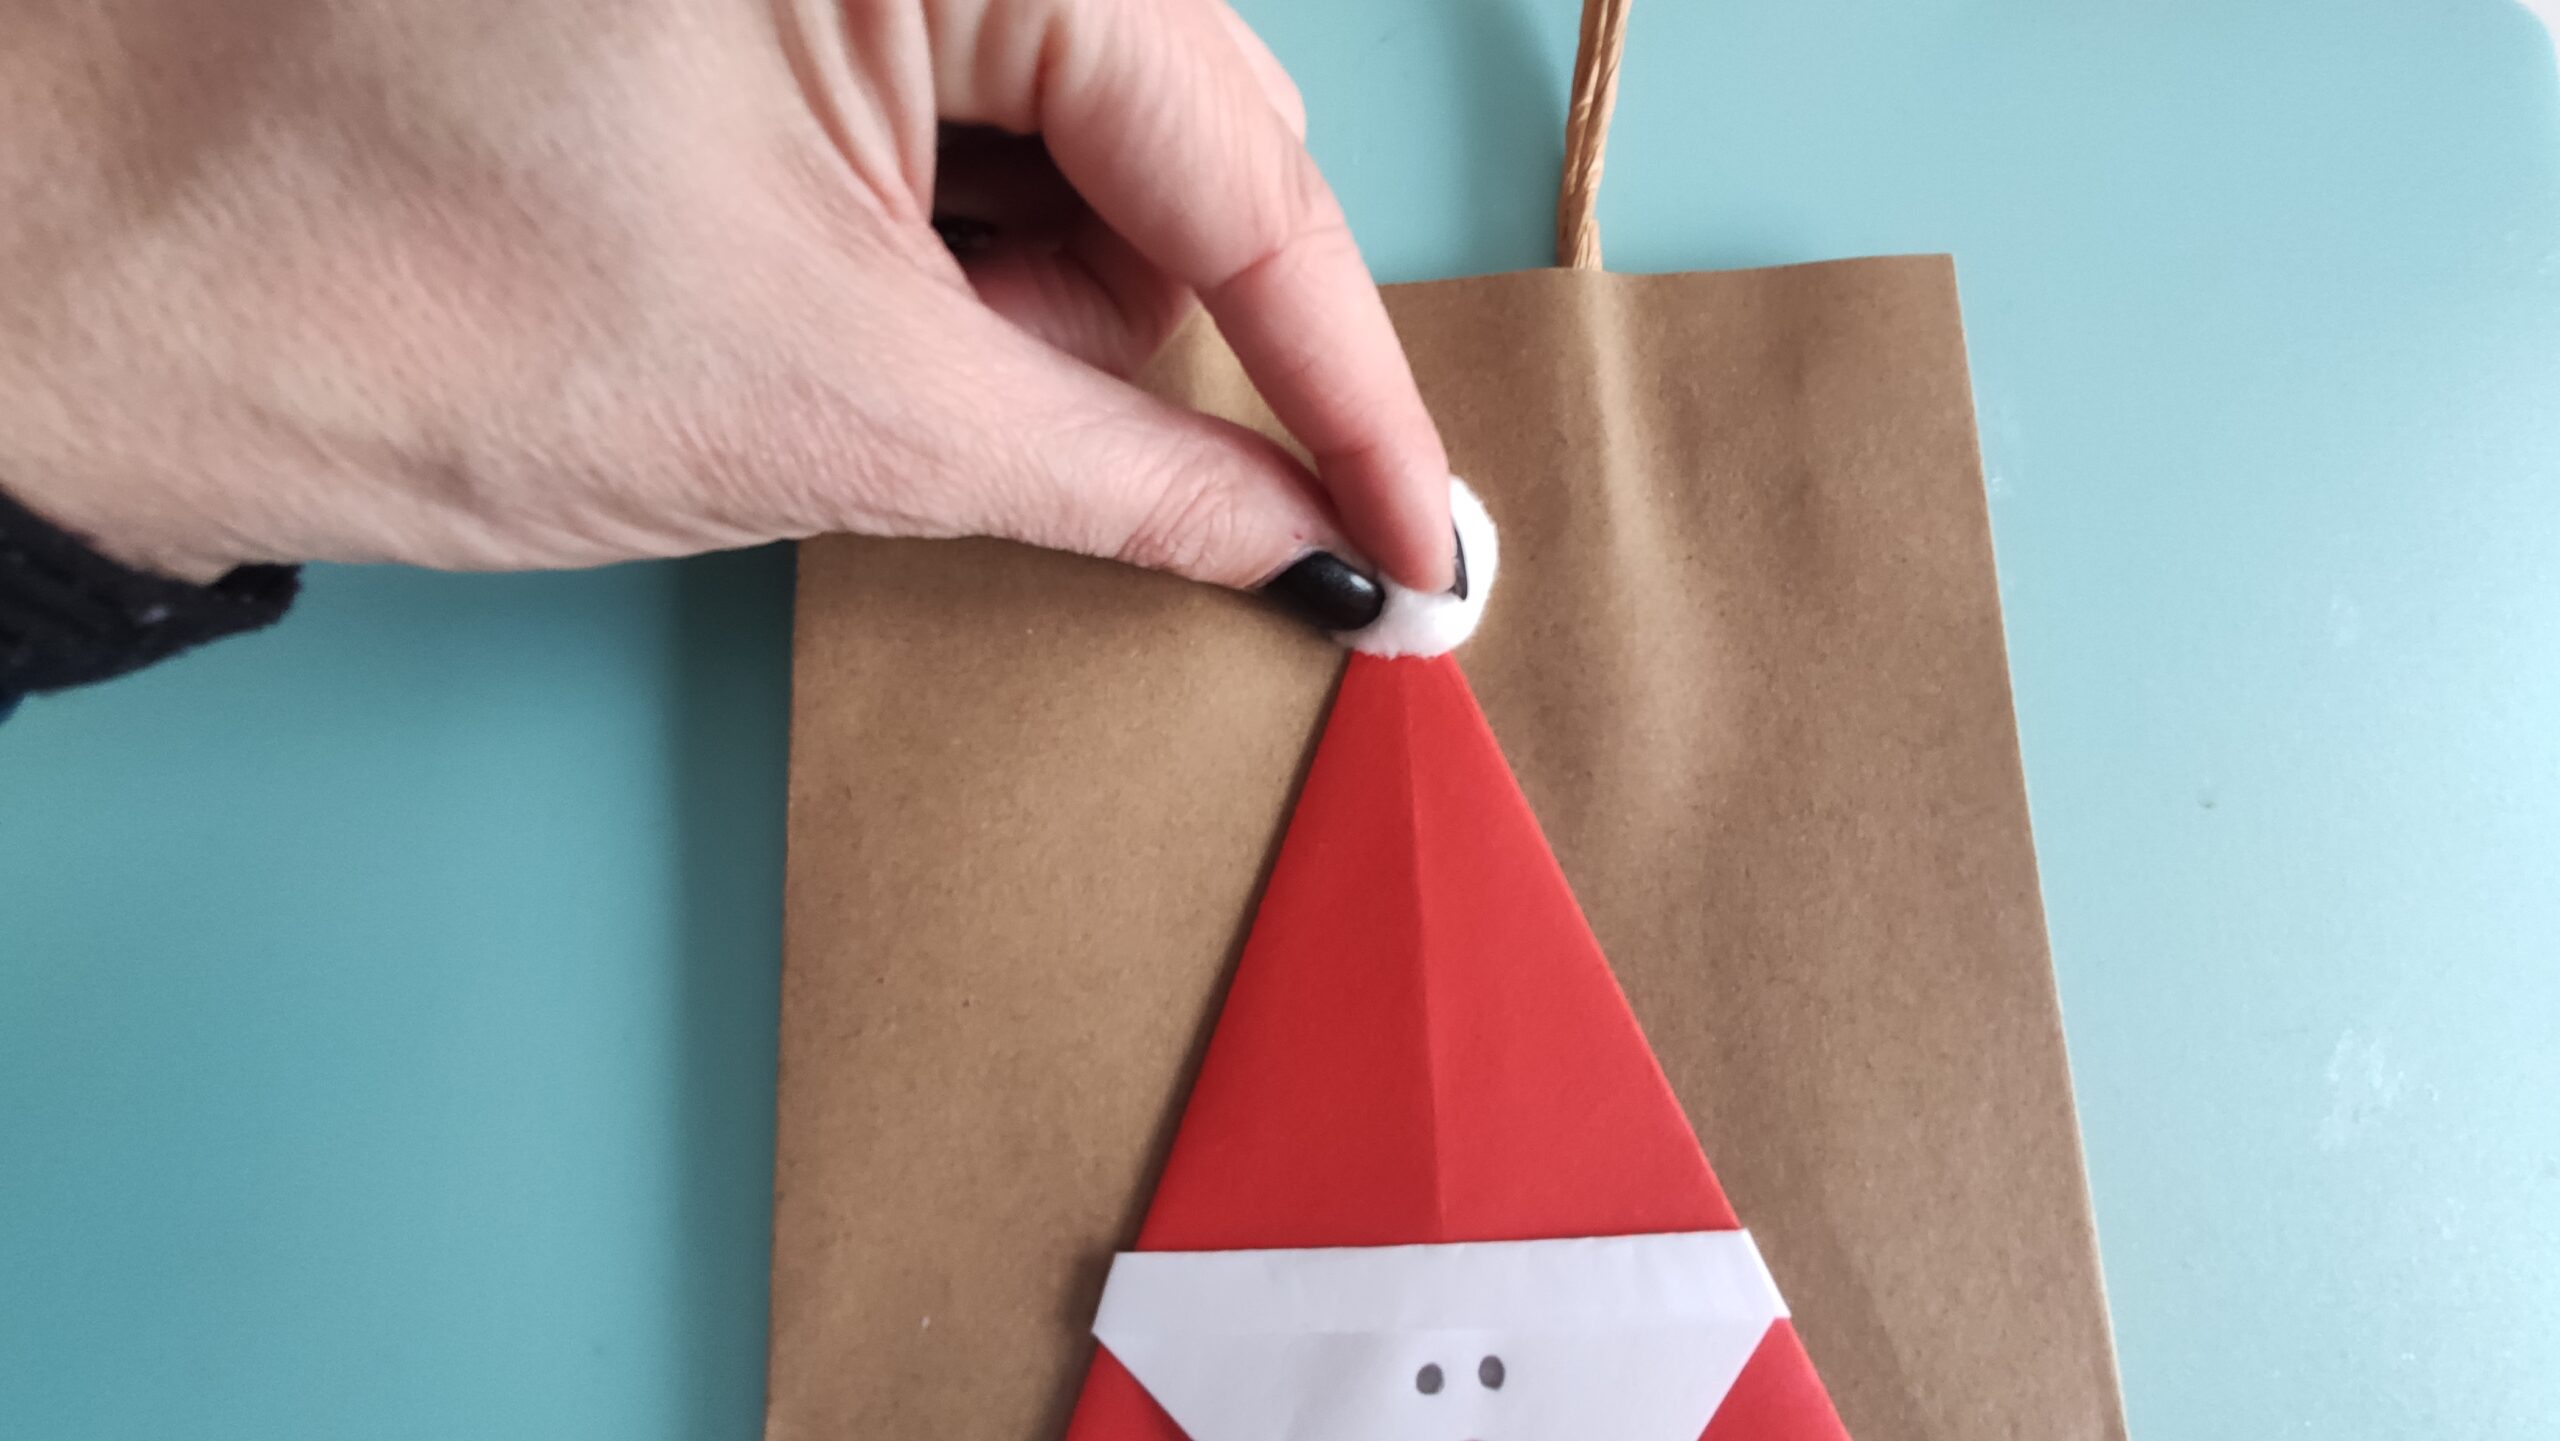
Bild zum Schritt 13 für das Bastel- und DIY-Abenteuer für Kinder: 'Abschließend klebt ihr den weißen Pompon an die Spitze der...'

14

Your Santa bags or Santa bags are ready!
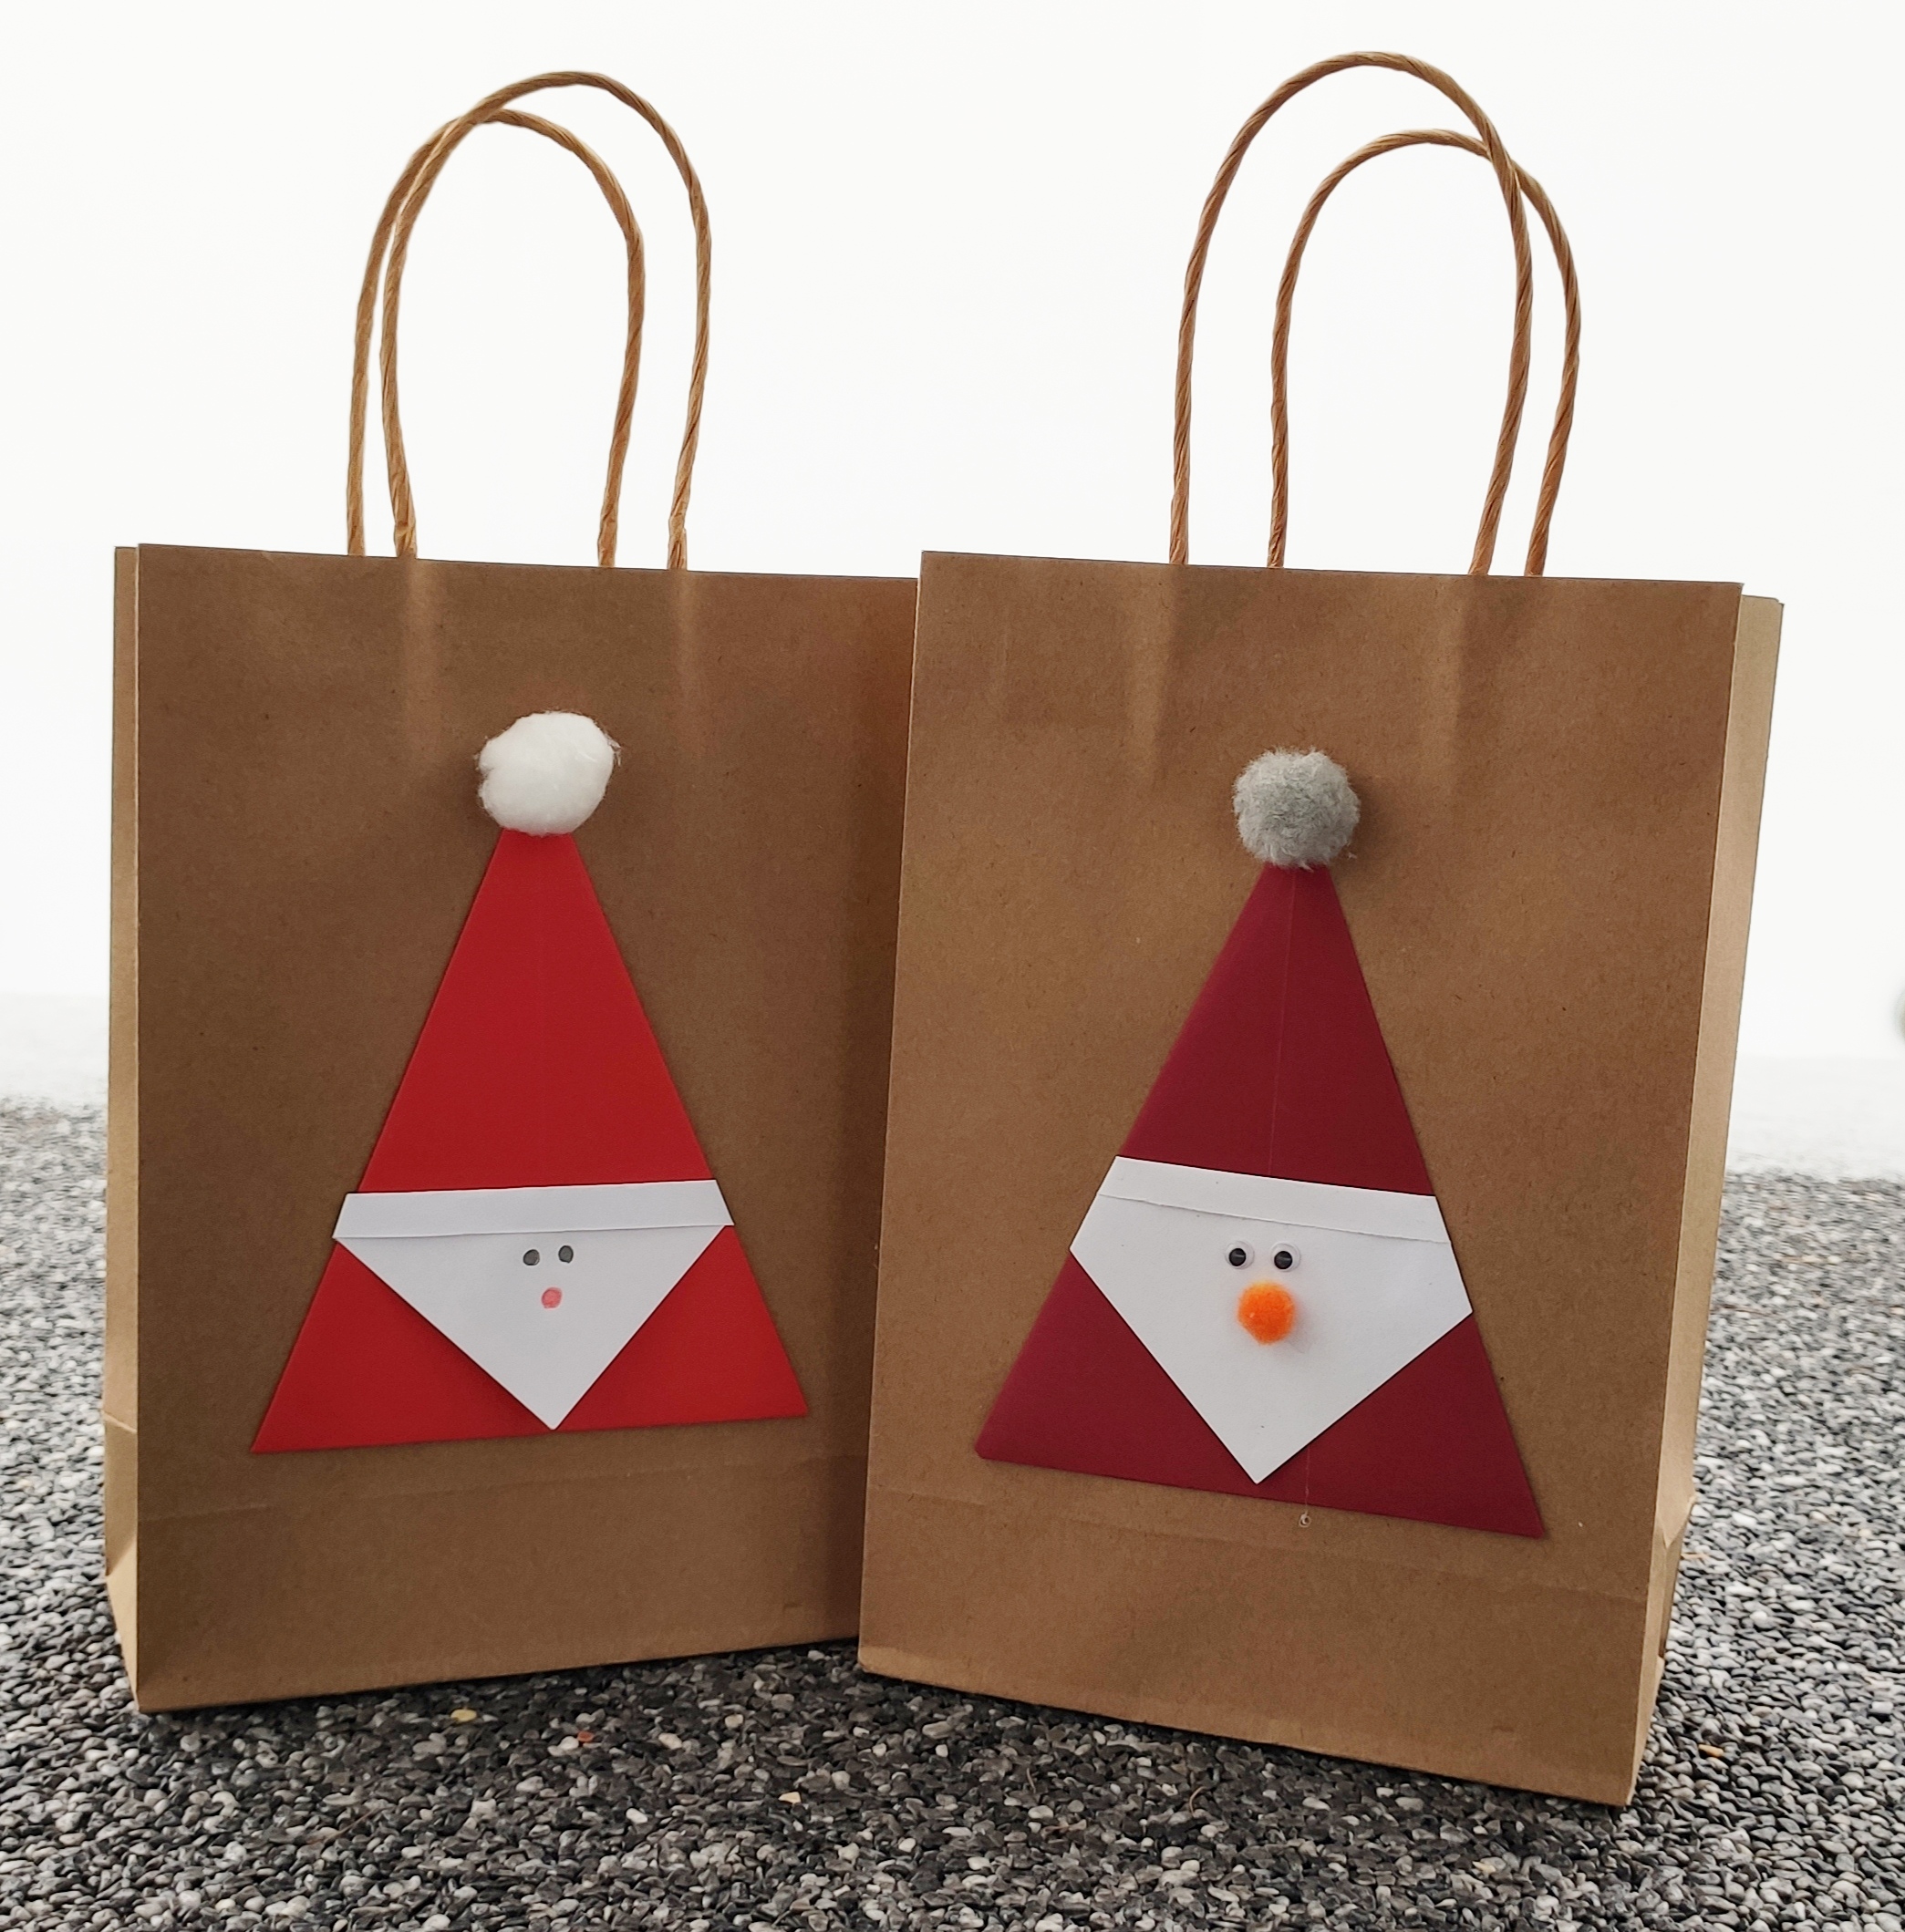
Bild zum Schritt 14 für das Bastel- und DIY-Abenteuer für Kinder: 'Fertig sind eure Nikolaustaschen oder Weihnachtsmanntaschen!'

Gift bag for Santa Claus or Christmas

Follow us on Facebook , Instagram and Pinterest
Don't miss any more adventures: Our bottle mail

Leave a Reply

Your email address will not be published.

The maximum upload file size: 5 MB. You can upload: image, document. Drop file here