Sew birthday crown

AdventurerKatzi
Rating4.02.1 thousand times & (2) DifficultyAdvanced

This birthday crown is ideal for small children. The crown is very variable in size. The crown can be adjusted to the head circumference of the child by means of straps on the back and "growing" so to speak. If you cut two different fabrics as a crown, you get a turning crown. Perhaps you distinguish between a crown side for boys and one for girls.
The crown is very stable due to an additional used inner fleece (here you can also use a new washcloth or plastercloth made of fleece fabric). Here you will find a step by step guide. Have fun trying out.

Media Education for Kindergarten and Hort

Kind bastelt eine Rassel mit dem Navi
The Adventure Navi, the app for DIY projects, enables media education for the youngest.

Relief in everyday life, targeted promotion of individual children, independent learning and - without any pre-knowledge already usable by the youngest!
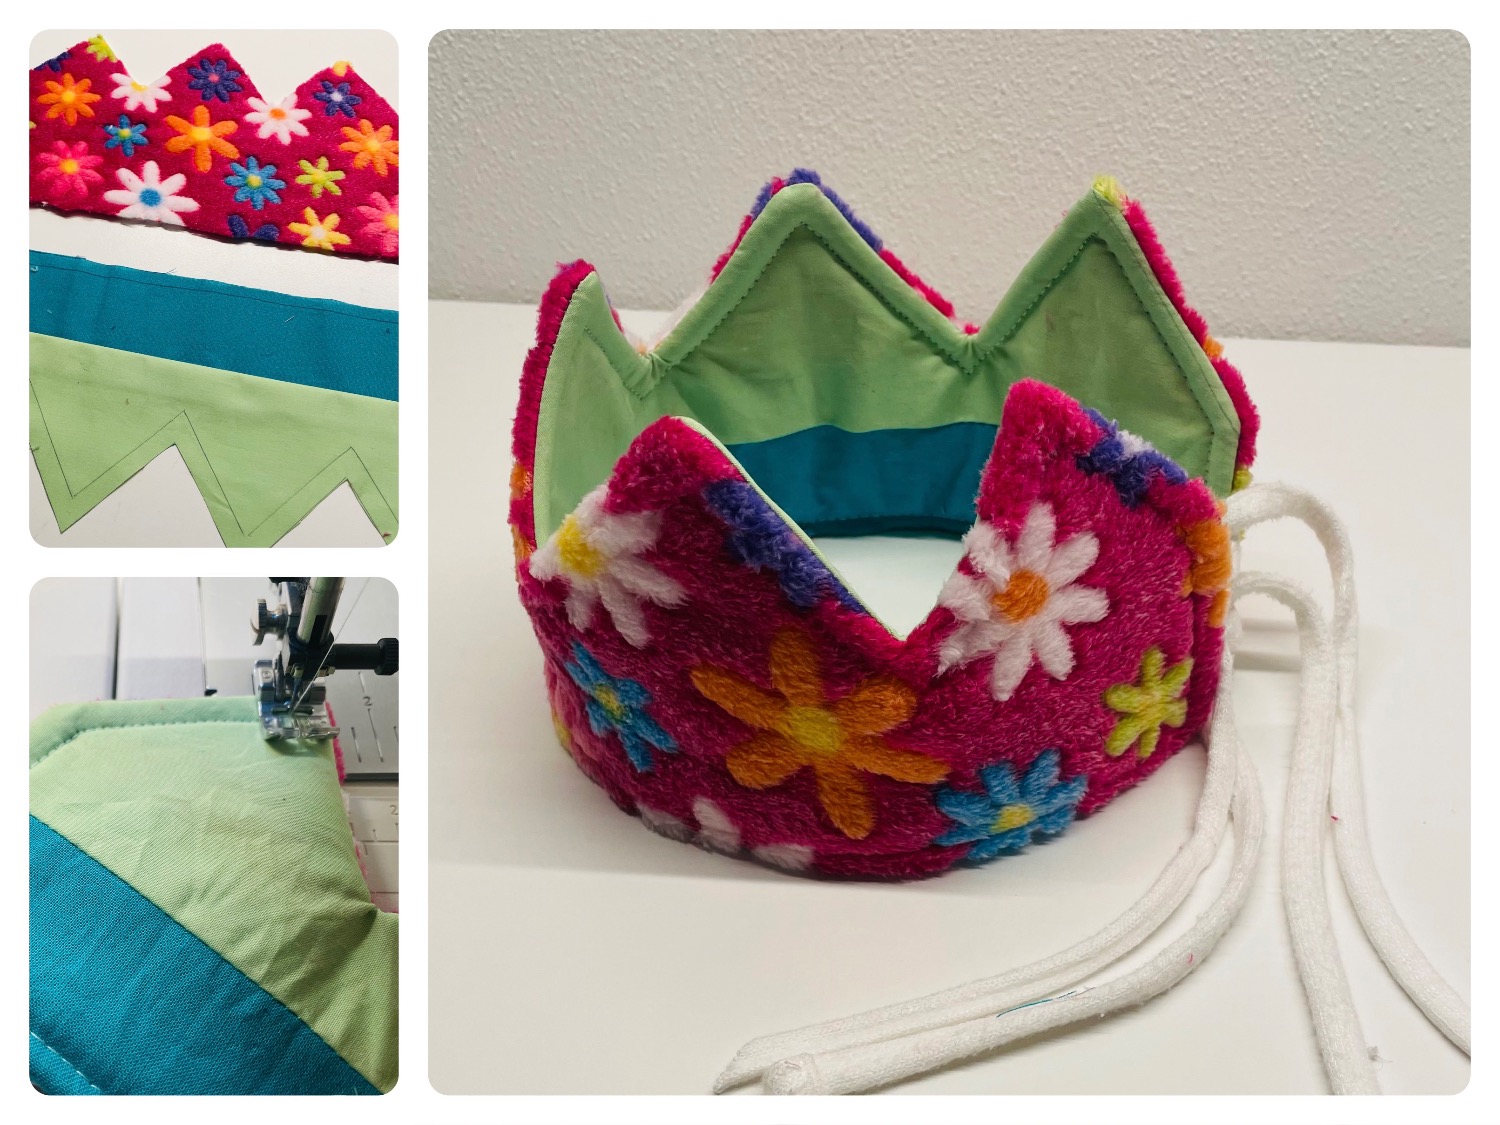


Titelbild zur Bastel- und DIY-Idee für Kinder '(904) Geburtstagskrone nähen'
Material for1 Child
Prep Time10 min.Adv. Time45 min.Total Time55 min.
 2 different substancesEach 45cm x15cm
 1 Fabric for strengthening 45cm x 15cmE.g. ironing tiles or fleece washcloths
 1 Paper shears
 1 Substance shears
 1 Ballpoint pens
 1 Pencil
 4 Laces 24 cm long each
 Sewing thread
 Sewing machine
 1 Cooking spoons
 Pins and pins
1

Print the template of the crown (you can find it at the end!) and glue both parts together.
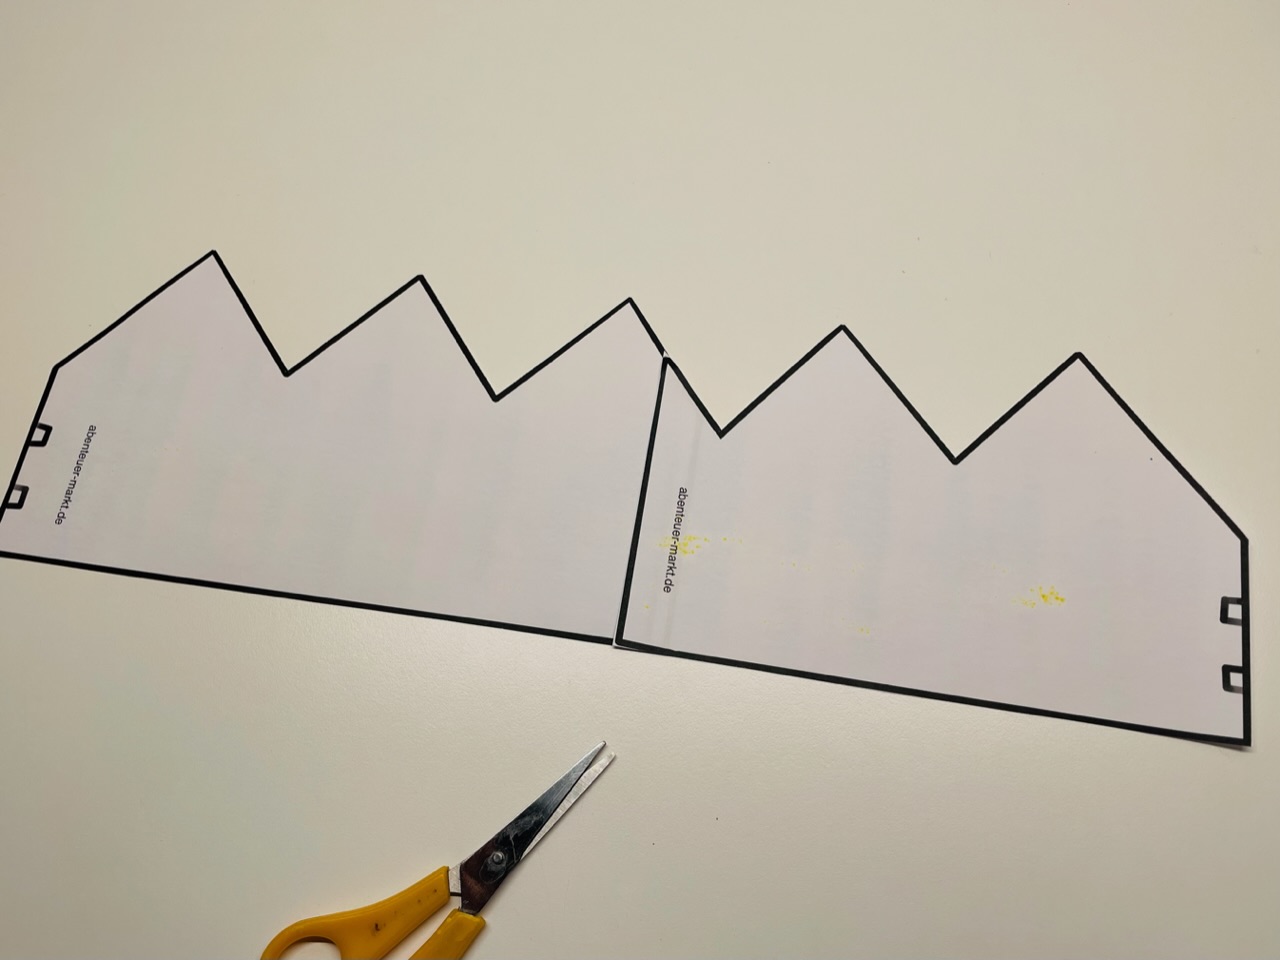
Bild zum Schritt 1 für das Bastel- und DIY-Abenteuer für Kinder: 'Drucke die Vorlage der Krone (diese findest du am Ende!)...'

2

For a fabric side a two-part fabric is used, you can also use a monochrome or printed fabric. The fabric piece should have the size of the crown template.
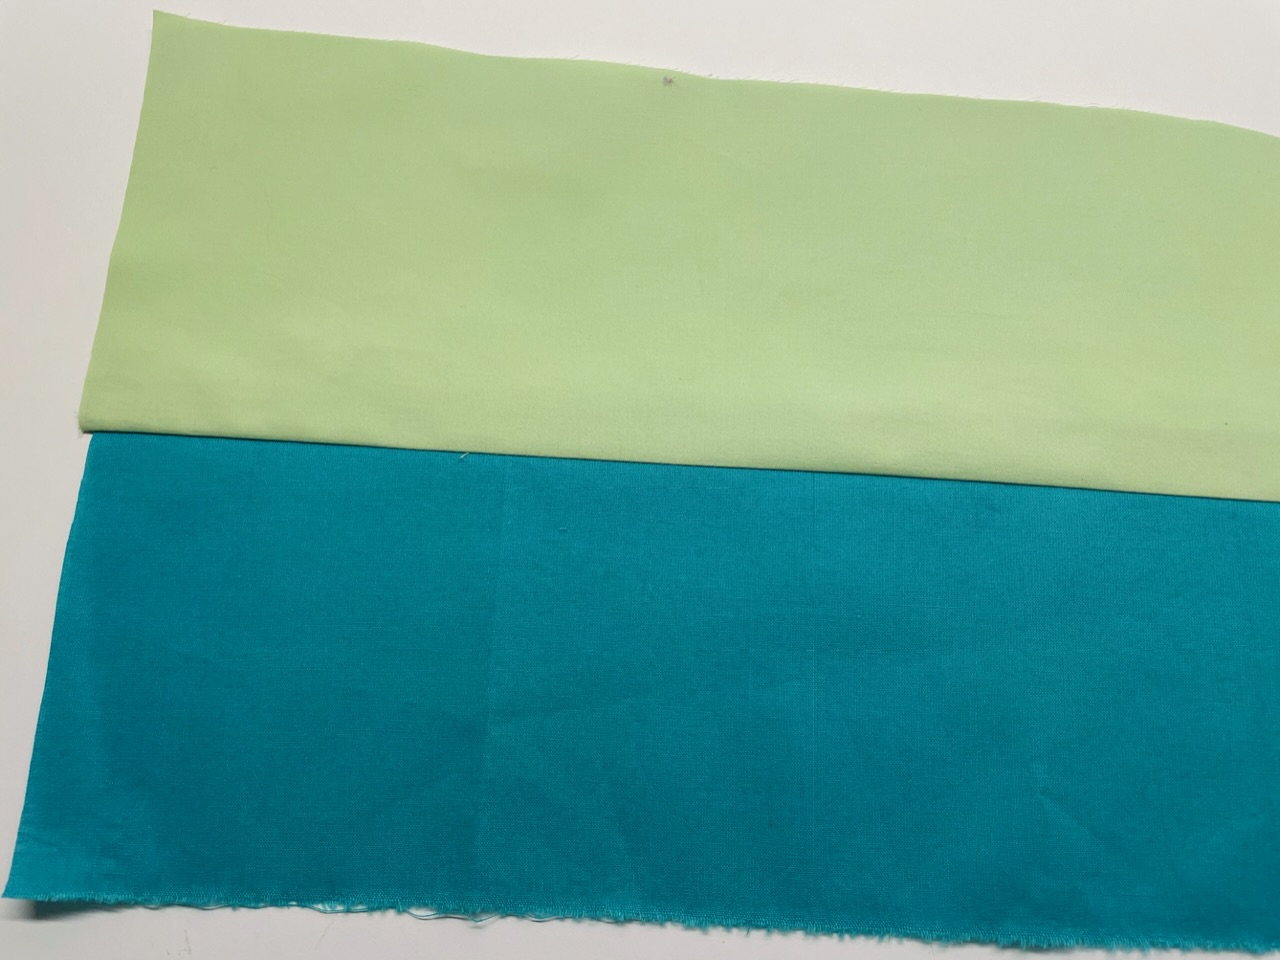
Bild zum Schritt 2 für das Bastel- und DIY-Abenteuer für Kinder: 'Für eine Stoffseite wird ein zweigeteilter Stoff verwendet, ihr könnt...'

3

Place the template on the back of the fabric and transfer the outline of the template to the fabric.

Bild zum Schritt 3 für das Bastel- und DIY-Abenteuer für Kinder: 'Legt die Vorlage auf die Rückseite des Stoffes und übertragt...'

4

With a ballpoint pen, most fabrics do quite well.

Bild zum Schritt 4 für das Bastel- und DIY-Abenteuer für Kinder: 'Mit einem Kugelschreiber geht das bei den meisten Stoffen ganz...'

5

You can also paint the sewing line by moving the template. Move the template half an inch from the edge to the inside. You do this all around. Mark the "sewing line".

Bild zum Schritt 5 für das Bastel- und DIY-Abenteuer für Kinder: 'Die Nählinie könnt ihr durch verschieben der Vorlage ebenso gleich...'

6

Cut out the painted crown with the fabric scissors.

Bild zum Schritt 6 für das Bastel- und DIY-Abenteuer für Kinder: 'Schneidet die aufgemalte Krone mit der Stoffschere aus.'

7

A second possibly different color fabric (here: flower motif) is also cut with the template.

Bild zum Schritt 7 für das Bastel- und DIY-Abenteuer für Kinder: 'Ein zweiter evtl. andersfarbiger Stoff (hier: Blumenmotiv) wird ebenfalls mit...'

8

In addition, you need a fleece fabric, (e.g. Fleece plastercloths) it also has the same crown shape.

Bild zum Schritt 8 für das Bastel- und DIY-Abenteuer für Kinder: 'Zusätzlich braucht ihr einen Fleecestoff, (z.B. Putzlappen aus Fleece) er...'

9

Then you need 4 equally long bands with 20 to 24 cm length.

Bild zum Schritt 9 für das Bastel- und DIY-Abenteuer für Kinder: 'Dann braucht ihr 4 gleich lange Bänder mit 20 bis...'

10

All crown cuts are now placed on top of each other.
First put down the fleece, on top the motif fabric with the beautiful side up!

Bild zum Schritt 10 für das Bastel- und DIY-Abenteuer für Kinder: 'Alle Kronenzuschnitte werden nun aufeinander gelegt.   Legt zuerst...'

11

Two ribbons are placed on one side. (Look at the marking on the template here.) The ribbons are placed inwards, between the two beautiful sides. Place the monochrome fabric with the beautiful side on the ribbons. Now all three layers of fabric (crown sections) lie on top of each other.

Bild zum Schritt 11 für das Bastel- und DIY-Abenteuer für Kinder: 'Zwei Bänder werden je an einer Seite platziert. (Sieh dir...'

12

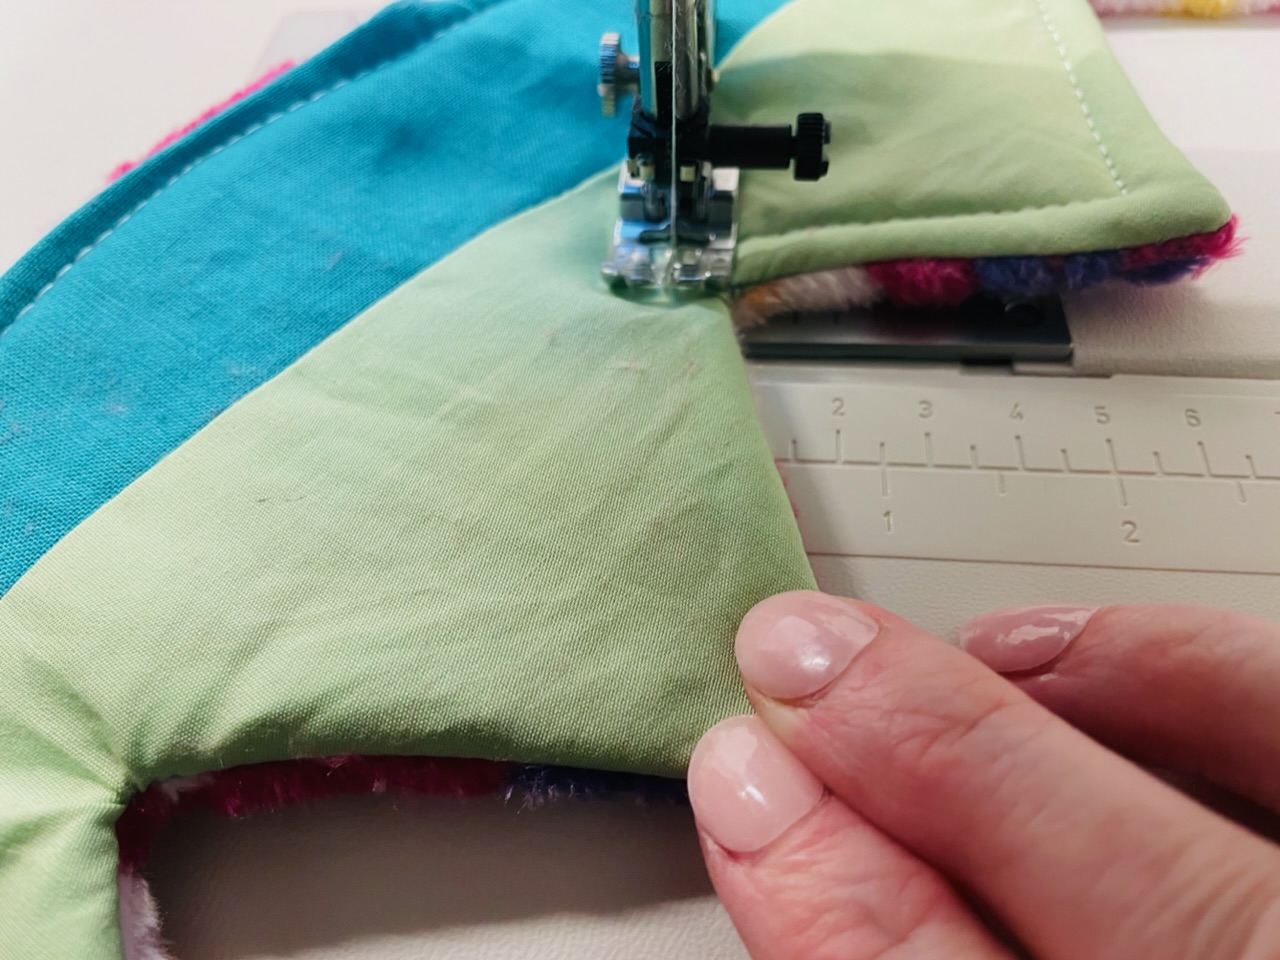
Fix the fabric with a few pins, so nothing slips and you can start sewing. Start at the long straight bottom. Sew the fabric all around on the marking. At the tips you have to stop again and again, leave the needle in the fabric and lift the foot of the sewing machine. Then turn the fabric so that the sewing direction can be continued.

Bild zum Schritt 12 für das Bastel- und DIY-Abenteuer für Kinder: 'Fixiert mit ein paar Stecknadeln die Stoffe, so verrutscht nichts...'

13

When sewn around, leave open a turning opening of 10cm width.

Bild zum Schritt 13 für das Bastel- und DIY-Abenteuer für Kinder: 'Lasst beim Umnähen eine Wendeöffnung von 10cm Breite offen.'

14

Cuts off the overhanging fabric at the corners obliquely.
The overhanging material must also be cut short at the tips.

Bild zum Schritt 14 für das Bastel- und DIY-Abenteuer für Kinder: 'Schneidet den überstehenden Stoff an den Ecken schräg ab. ...'

15

In the "valleys" the overhanging fabric is cut that the fabric can be formed well when turning.

Bild zum Schritt 15 für das Bastel- und DIY-Abenteuer für Kinder: 'In den „Tälern“ wird der überstehende Stoff eingeschnitten, dass sich...'

16

The complete fabric is now rotated through the turning opening. Grabs between both fabric outer sides and pulls the fabrics outwards.

Bild zum Schritt 16 für das Bastel- und DIY-Abenteuer für Kinder: 'Durch die Wendeöffnung wird nun der komplette Stoff gedreht. Greift...'

17

Be careful when turning, so that the seams do not open.

Bild zum Schritt 17 für das Bastel- und DIY-Abenteuer für Kinder: 'Geht vorsichtig beim Wenden vor, damit die Nähte nicht aufreißen.'

18

Take a long spoon to help uncloud the roundings.

Bild zum Schritt 18 für das Bastel- und DIY-Abenteuer für Kinder: 'Nehmt evtl einen langen Kochlöffel zur Hilfe um die Rundungen...'

19

Ride the spoon into every tip and form it well.

Bild zum Schritt 19 für das Bastel- und DIY-Abenteuer für Kinder: 'Fahrt mit dem Kochlöffel in jede Spitze und formt sie...'

20

That's what the crown looks like.

Bild zum Schritt 20 für das Bastel- und DIY-Abenteuer für Kinder: 'So sieht die gewendete Krone dann aus.'

21

You can reshape each tip with a pen from the inside.

Bild zum Schritt 21 für das Bastel- und DIY-Abenteuer für Kinder: 'Jede Spitze könnt ihr mit einem Stift von innen nachformen.'

22

The fabric at the turning opening is now neatly laid on each other.

Bild zum Schritt 22 für das Bastel- und DIY-Abenteuer für Kinder: 'Der Stoff an der Wendeöffnung wird nun ordentlich aufeinander gelegt.'

23

Inserts a pin to fix in the closed turning opening.

Bild zum Schritt 23 für das Bastel- und DIY-Abenteuer für Kinder: 'Steckt eine Stecknadel zum fixieren in die verschlossenen Wendeöffnung.'

24

Starts at the straight bottom with the sewing of the crown. The turning opening is closed when sewing.

Bild zum Schritt 24 für das Bastel- und DIY-Abenteuer für Kinder: 'Beginnt an der geraden Unterseite mit dem Umnähen der Krone....'

25

Sews an even edge around the complete crown.
Arriving at the top, leave the needle in the fabric again, raise the foot of the sewing machine, turn the fabric so far until the sewing direction is right again.

Bild zum Schritt 25 für das Bastel- und DIY-Abenteuer für Kinder: 'Näht einen gleichmäßigen Rand um die komplette Krone.  ...'

26

At the lower tip the needle is also left in the fabric, the little feet are raised and the fabric is turned back into position.

Bild zum Schritt 26 für das Bastel- und DIY-Abenteuer für Kinder: 'An der unteren Spitze wird ebenfalls die Nadel im Stoff...'

27

Go to the end of the crown.

Bild zum Schritt 27 für das Bastel- und DIY-Abenteuer für Kinder: 'Verfahrt so bis zum Ende der Krone.'

28

When you arrive at the beginning of the seam, cut off the thread.

Bild zum Schritt 28 für das Bastel- und DIY-Abenteuer für Kinder: 'Wenn ihr am Beginn der Naht angekommen seid, schneidet den...'

29

Finished is the crown! Both sides can be used as an outside.

Bild zum Schritt 29 für das Bastel- und DIY-Abenteuer für Kinder: 'Fertig ist die Krone! Beide Seiten können als Außenseite verwendet...'

30

With the ribbons you can close the crown as a circle. Adjust it to the head circumference of the child.

Bild zum Schritt 30 für das Bastel- und DIY-Abenteuer für Kinder: 'Mit den Bändern könnt ihr die Krone als Kreis schließen....'

31

Now you have a "co-growing" crown, which can not only be used at the birthday, but also play for role playing, carnival or to the theater.

Bild zum Schritt 31 für das Bastel- und DIY-Abenteuer für Kinder: 'Nun habt ihr eine „mitwachsende“ Krone, die nicht nur beim...'

Other variants:
32

Another crown with the same outer fabric, but other inner fabric!

Bild zum Schritt 33 für das Bastel- und DIY-Abenteuer für Kinder: 'Eine weitere Krone mit gleichem Außenstoff, aber anderen Innenstoff!'

33

Stay creative and have fun with it.

Model of the crown:
34

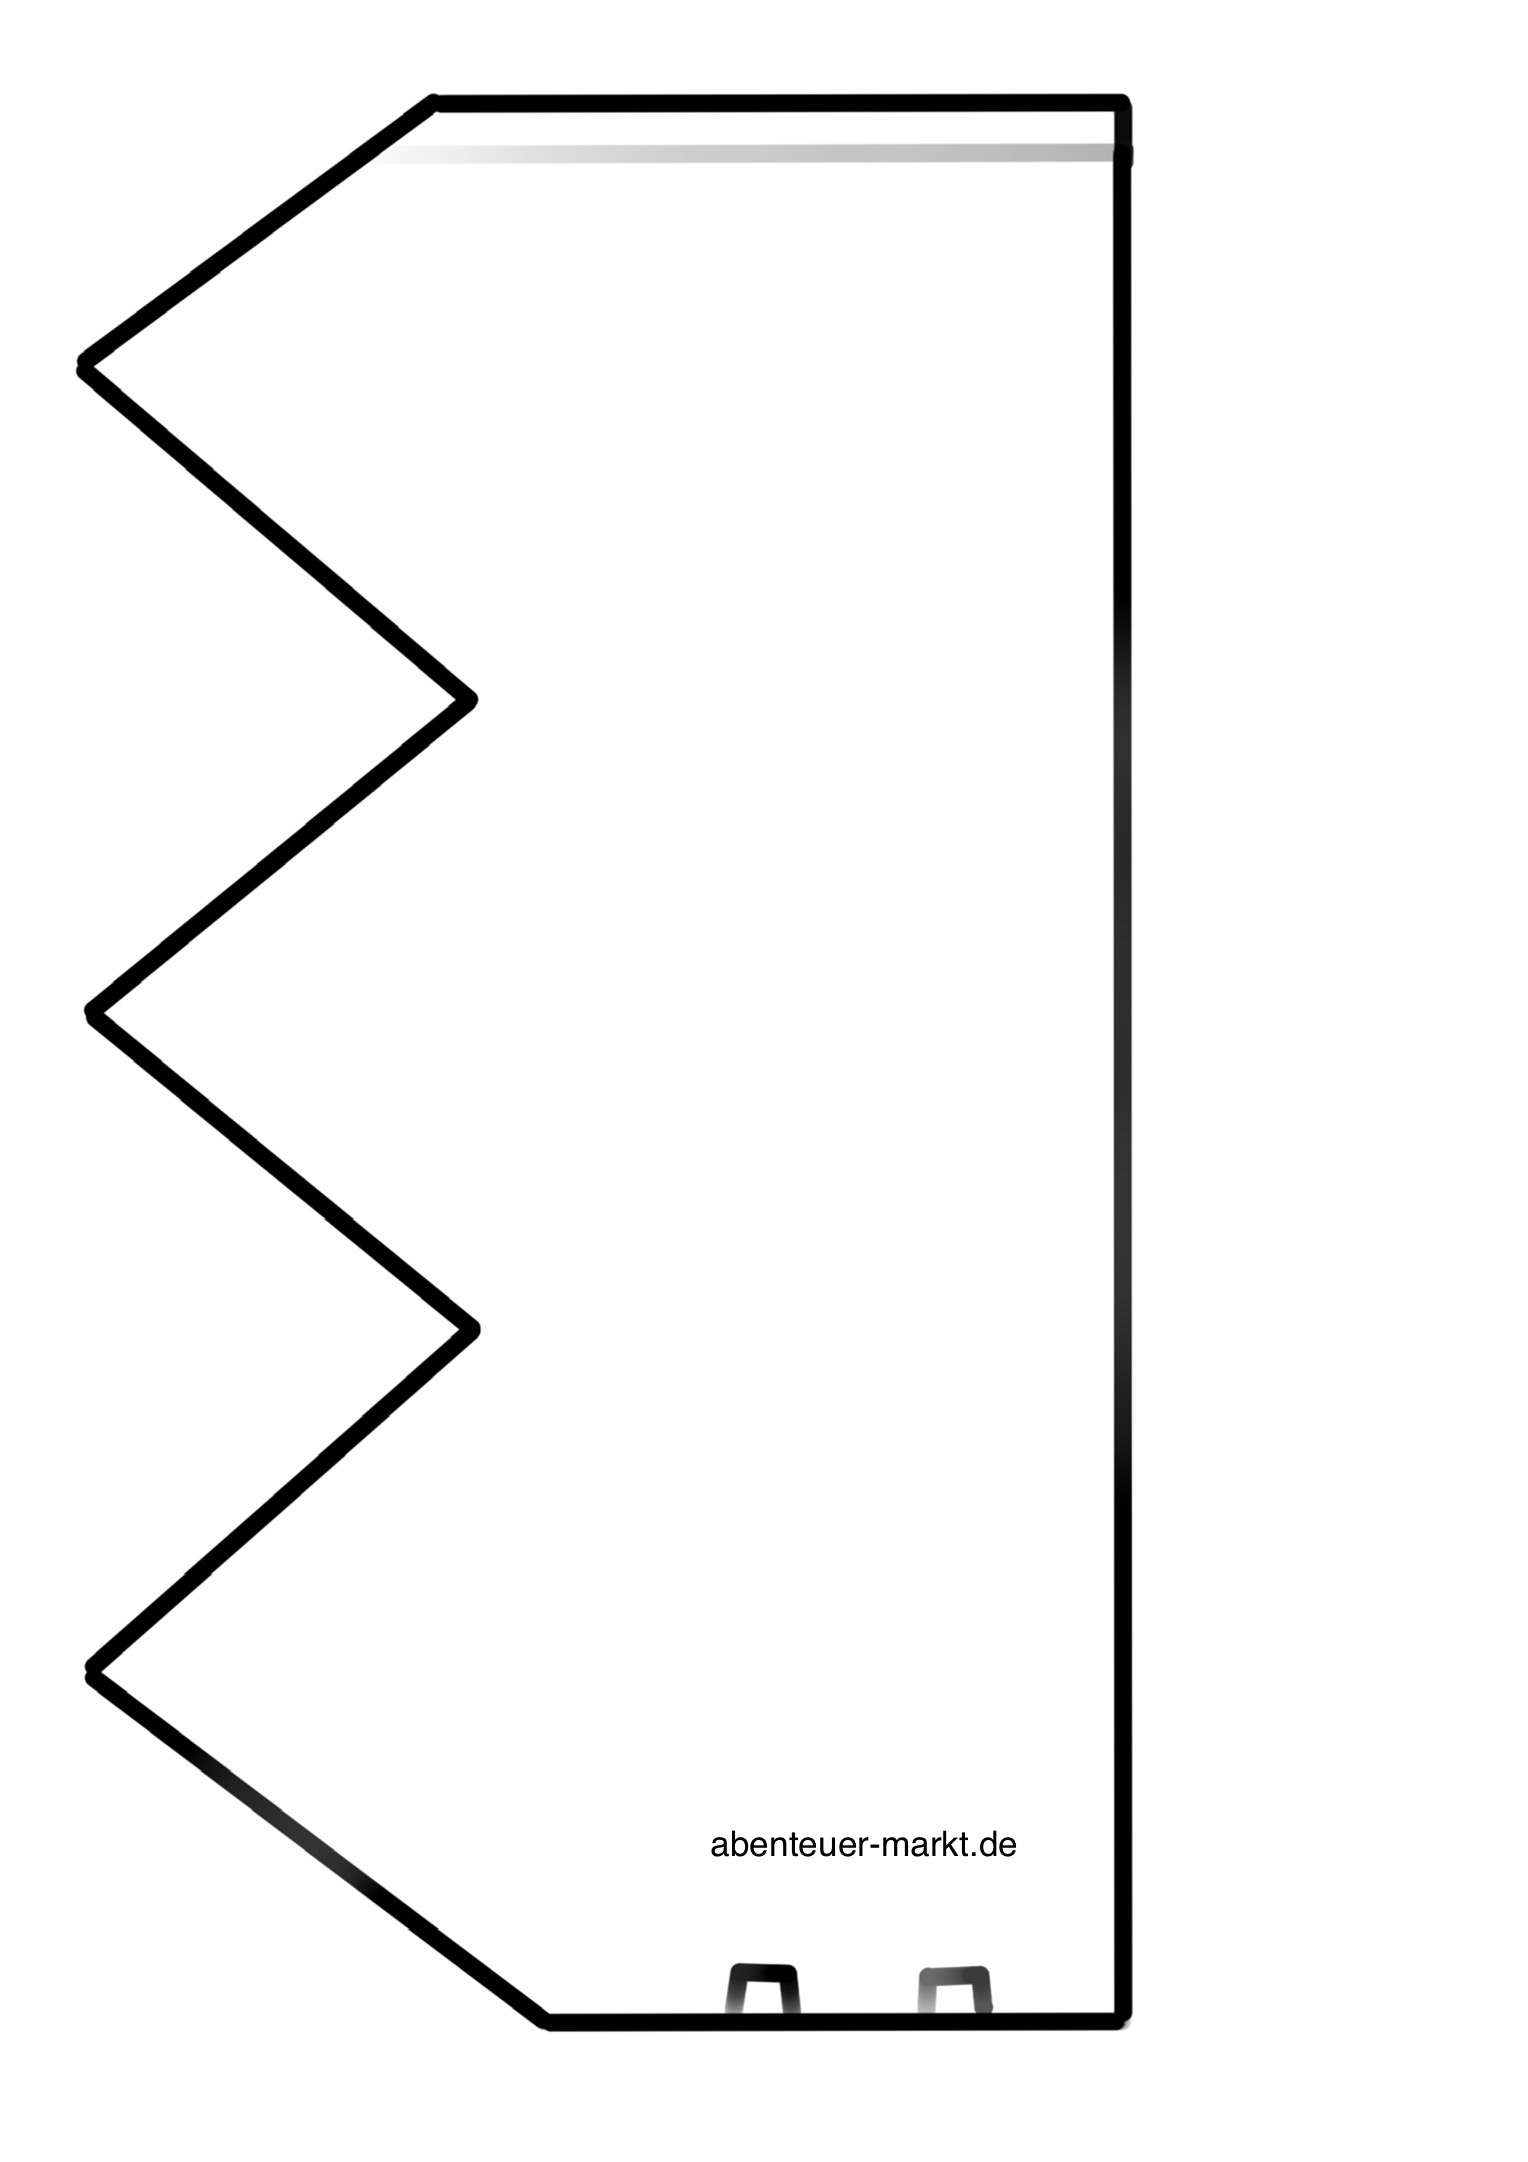
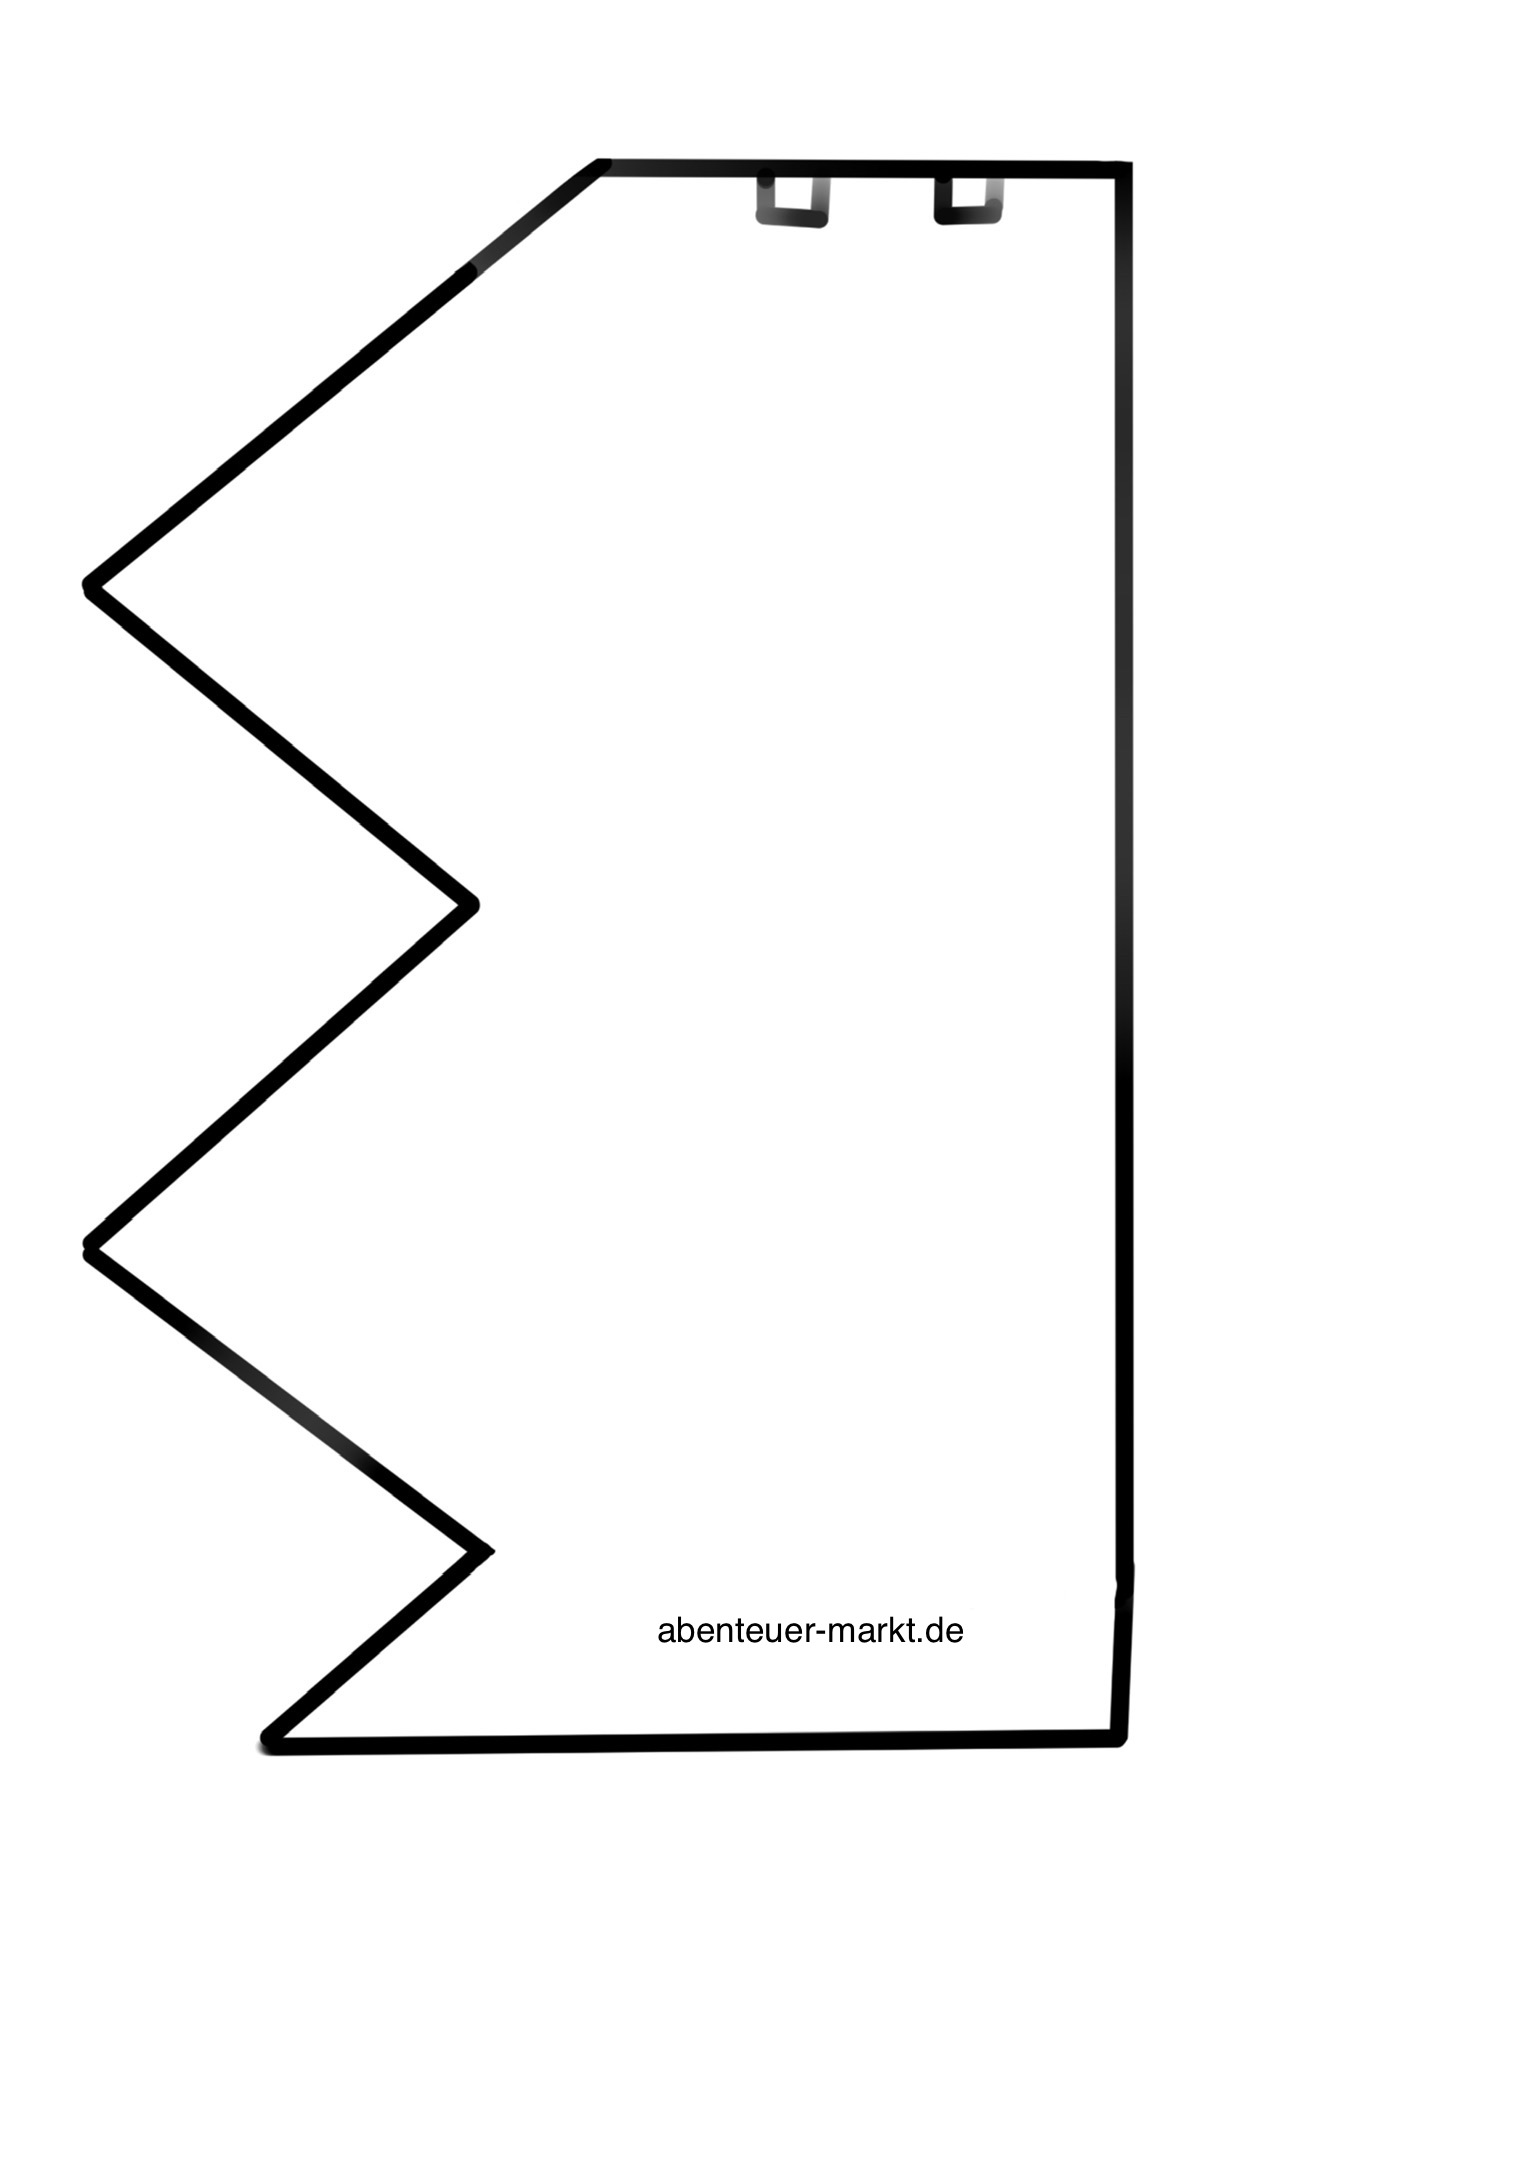
Both templates must be printed.

Bild zum Schritt 36 für das Bastel- und DIY-Abenteuer für Kinder: 'Beide Vorlagen müssen ausgedruckt werden.'

35

2. Bild zum Schritt 36 für das Bastel- und DIY-Abenteuer für Kinder: 'Beide Vorlagen müssen ausgedruckt werden.'

36

Prepare the prints and a paper scissors.

Bild zum Schritt 38 für das Bastel- und DIY-Abenteuer für Kinder: 'Legt die Ausdrucke bereit und eine Papierschere.'

37

Cut out the crown stencils neatly.

Bild zum Schritt 39 für das Bastel- und DIY-Abenteuer für Kinder: 'Schneidet die Kronenschablonen ordentlich aus.'

38

On the double line, both crown parts are placed together. Adjust the parts until the outer lines exactly match each other. Then, both parts stick together at the overlapping point.

Bild zum Schritt 40 für das Bastel- und DIY-Abenteuer für Kinder: 'An der doppelten Linie werden beide Kronenteile aneinander gelegt. Schiebt...'

39

The crown template is ready. A seam allowance is already included!
The template is only transferred to the fabric. At the outer two markings you can insert and sew the volume, the marking serves only as a clue!
If you want to sew a larger crown, simply extend the crown by painting one more pitch! Try it out.

40

Have fun sewing!

Materials

 2 different substancesEach 45cm x15cm
 1 Fabric for strengthening 45cm x 15cmE.g. ironing tiles or fleece washcloths
 1 Paper shears
 1 Substance shears
 1 Ballpoint pens
 1 Pencil
 4 Laces 24 cm long each
 Sewing thread
 Sewing machine
 1 Cooking spoons
 Pins and pins

Directions

1

Print the template of the crown (you can find it at the end!) and glue both parts together.

Bild zum Schritt 1 für das Bastel- und DIY-Abenteuer für Kinder: 'Drucke die Vorlage der Krone (diese findest du am Ende!)...'

2

For a fabric side a two-part fabric is used, you can also use a monochrome or printed fabric. The fabric piece should have the size of the crown template.

Bild zum Schritt 2 für das Bastel- und DIY-Abenteuer für Kinder: 'Für eine Stoffseite wird ein zweigeteilter Stoff verwendet, ihr könnt...'

3

Place the template on the back of the fabric and transfer the outline of the template to the fabric.
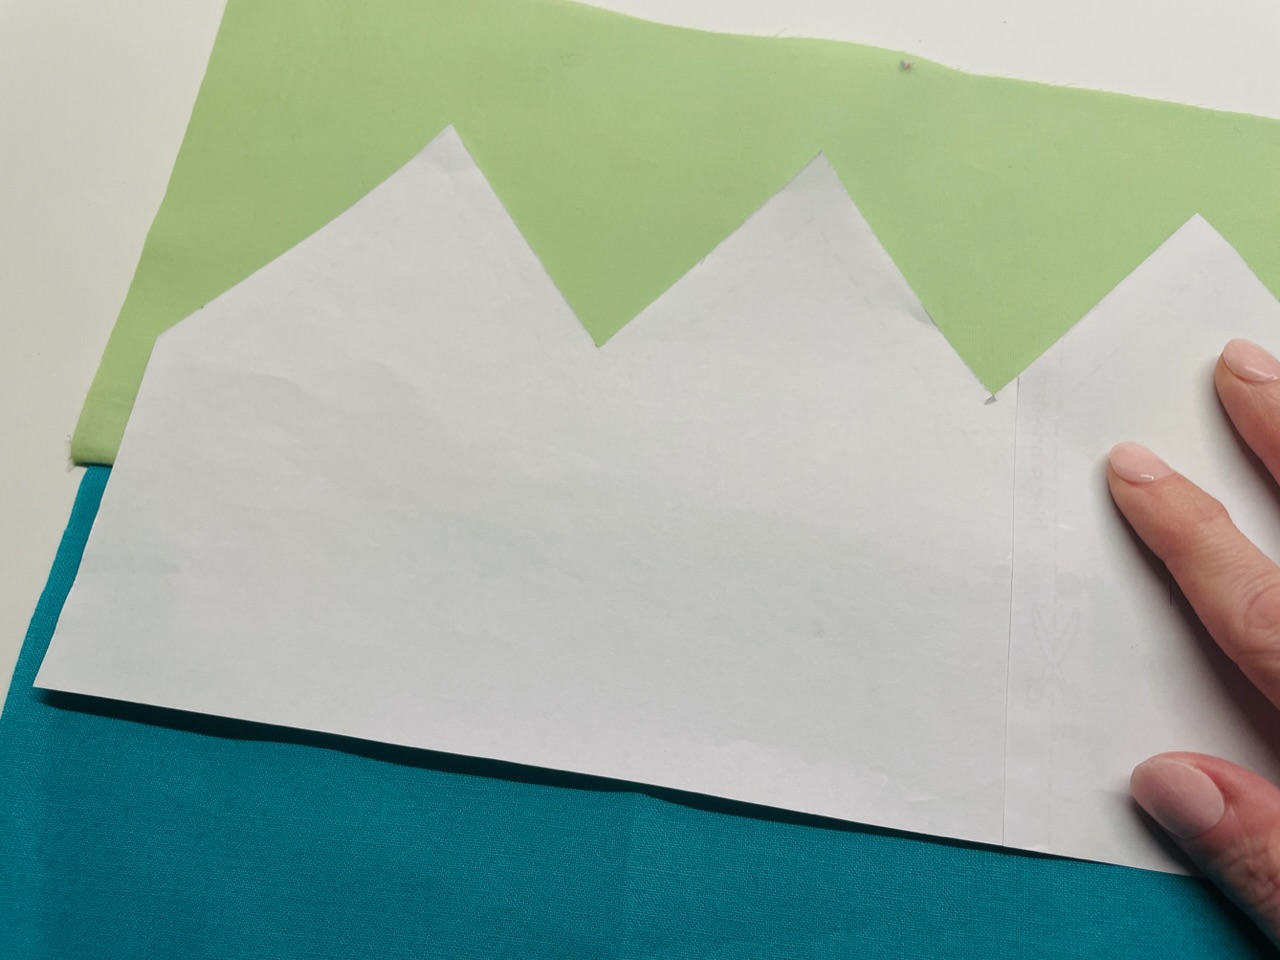
Bild zum Schritt 3 für das Bastel- und DIY-Abenteuer für Kinder: 'Legt die Vorlage auf die Rückseite des Stoffes und übertragt...'

4

With a ballpoint pen, most fabrics do quite well.
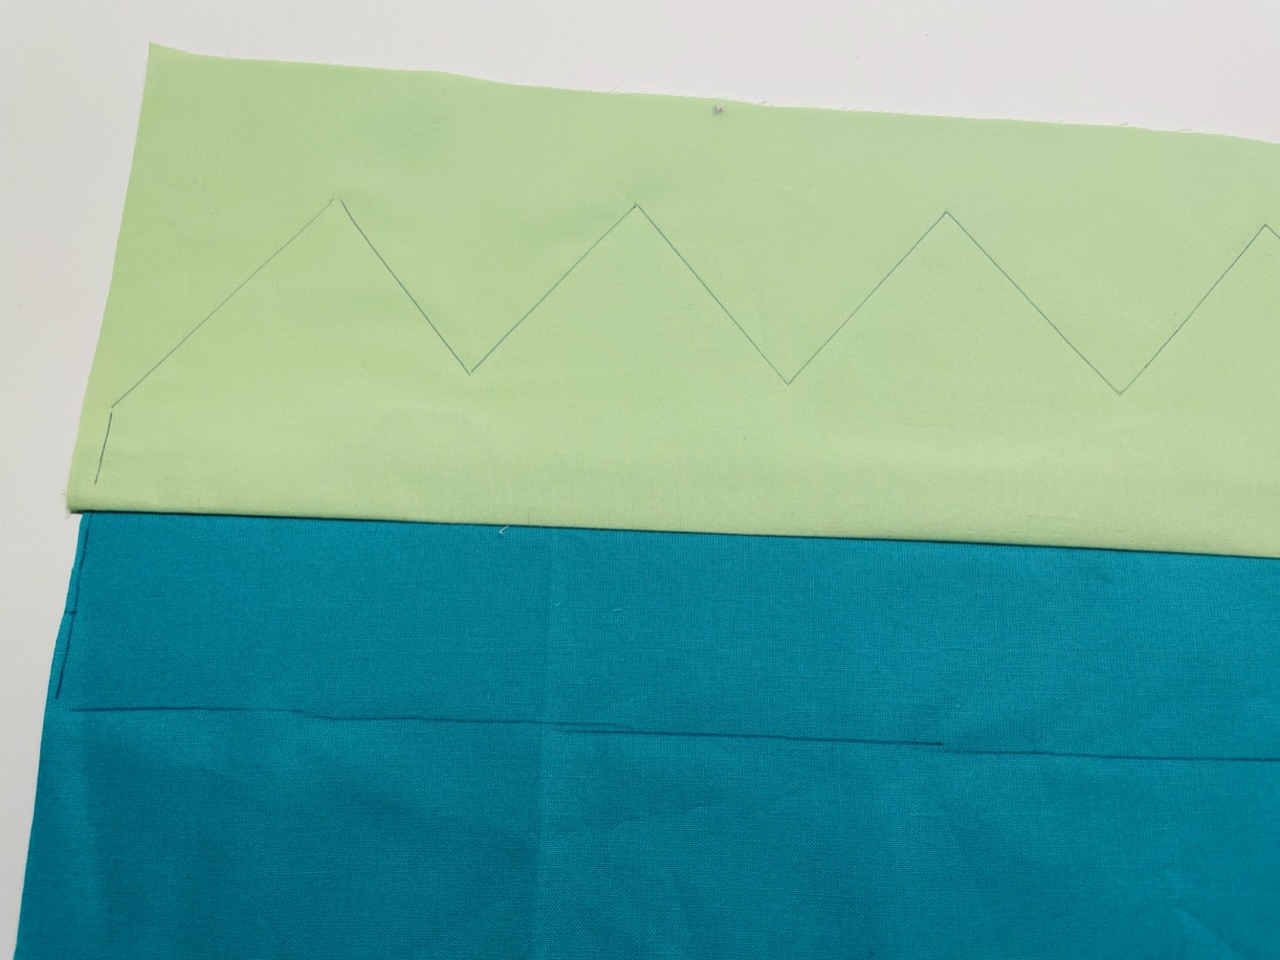
Bild zum Schritt 4 für das Bastel- und DIY-Abenteuer für Kinder: 'Mit einem Kugelschreiber geht das bei den meisten Stoffen ganz...'

5

You can also paint the sewing line by moving the template. Move the template half an inch from the edge to the inside. You do this all around. Mark the "sewing line".
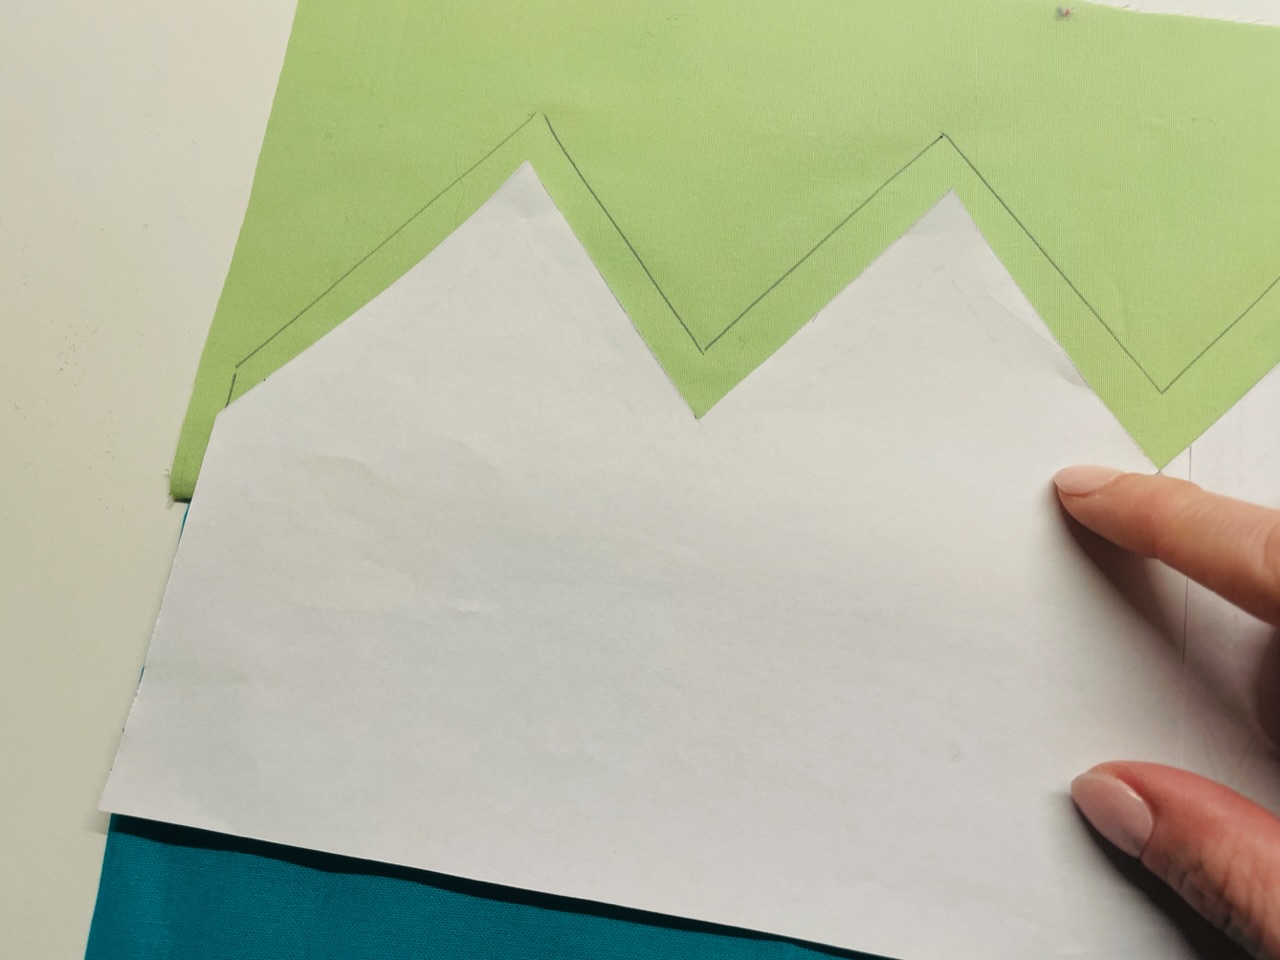
Bild zum Schritt 5 für das Bastel- und DIY-Abenteuer für Kinder: 'Die Nählinie könnt ihr durch verschieben der Vorlage ebenso gleich...'

6

Cut out the painted crown with the fabric scissors.
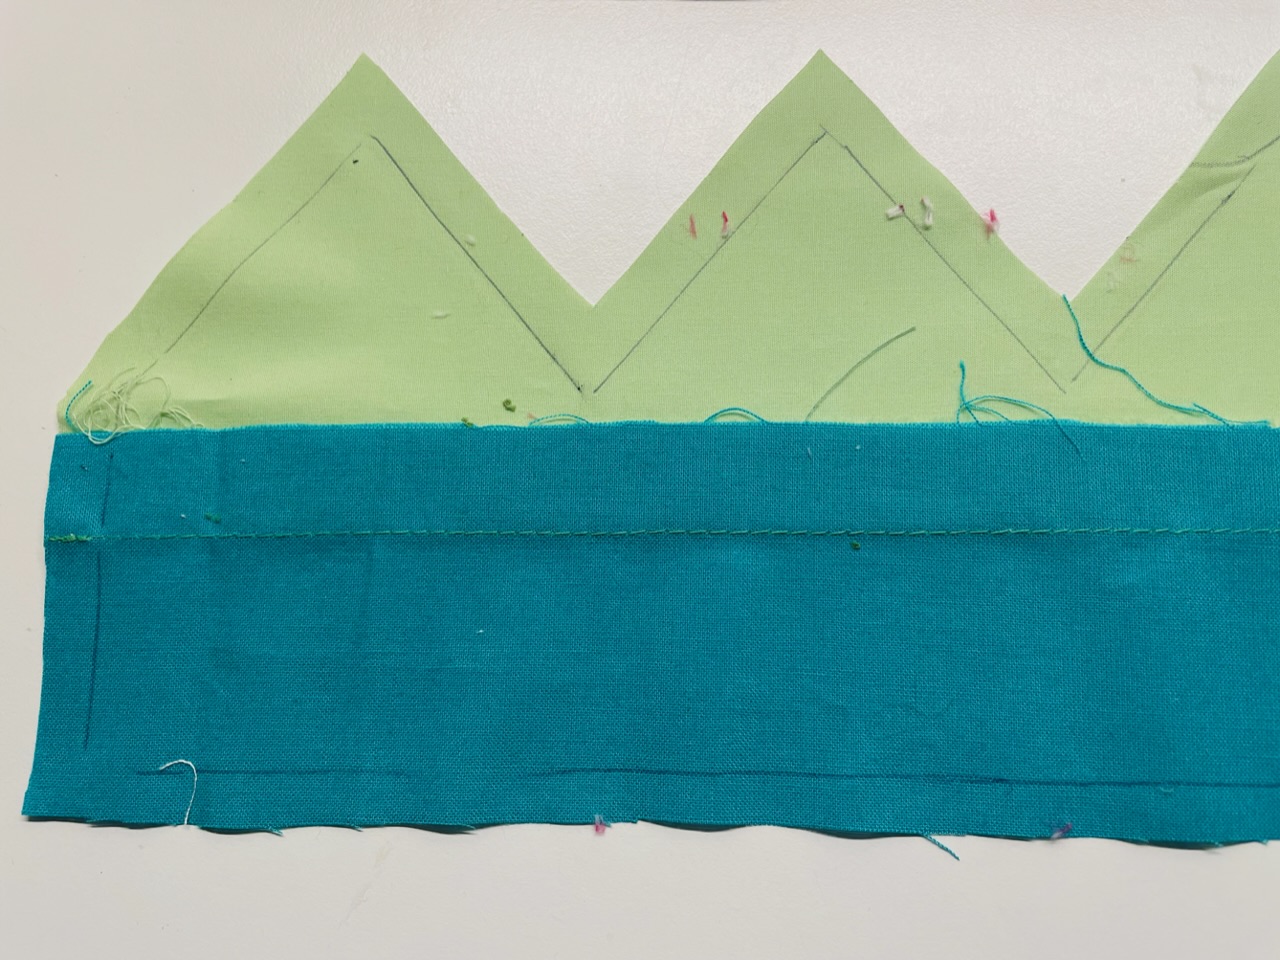
Bild zum Schritt 6 für das Bastel- und DIY-Abenteuer für Kinder: 'Schneidet die aufgemalte Krone mit der Stoffschere aus.'

7

A second possibly different color fabric (here: flower motif) is also cut with the template.
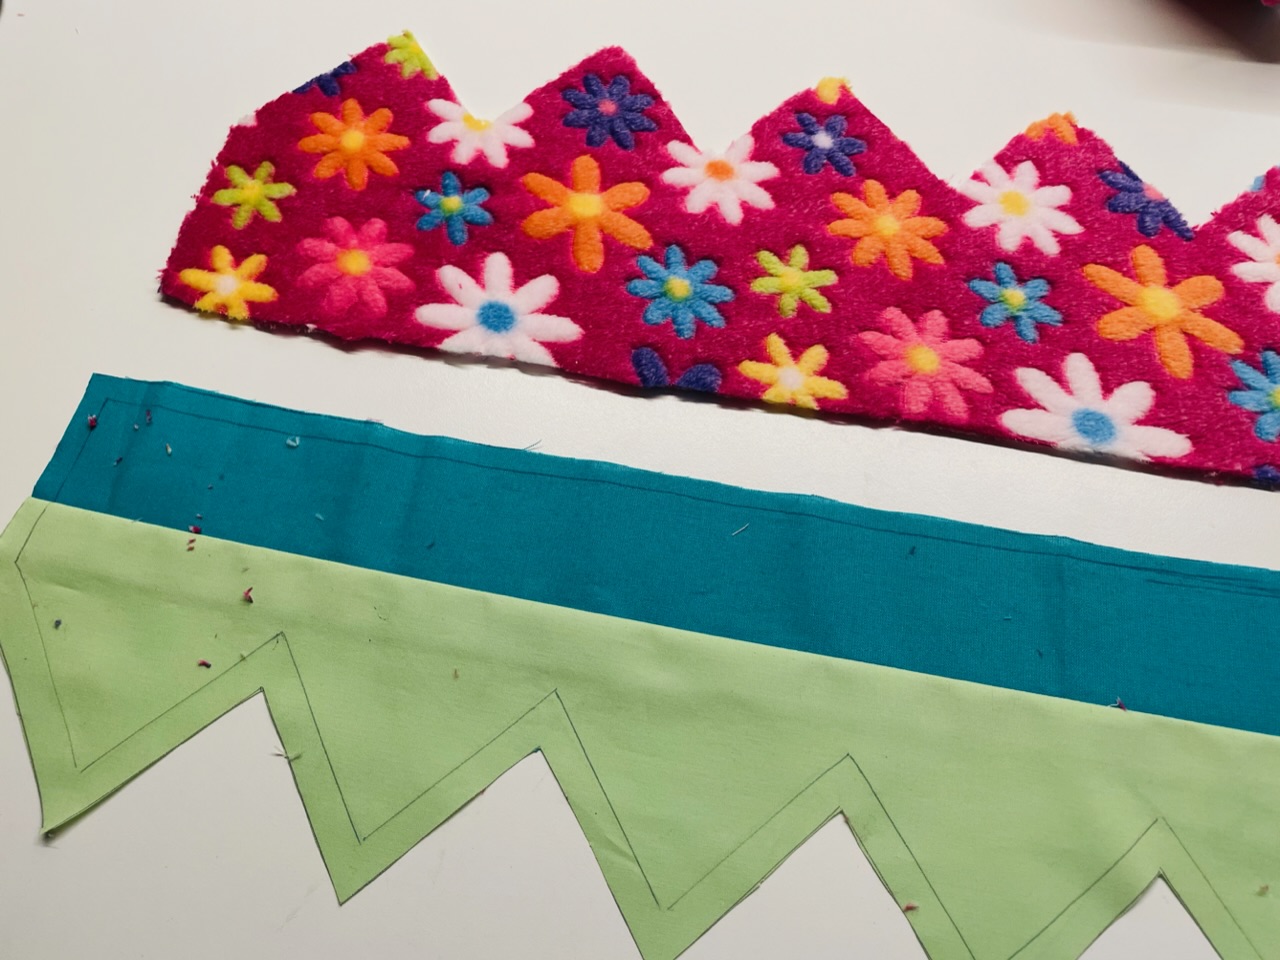
Bild zum Schritt 7 für das Bastel- und DIY-Abenteuer für Kinder: 'Ein zweiter evtl. andersfarbiger Stoff (hier: Blumenmotiv) wird ebenfalls mit...'

8

In addition, you need a fleece fabric, (e.g. Fleece plastercloths) it also has the same crown shape.
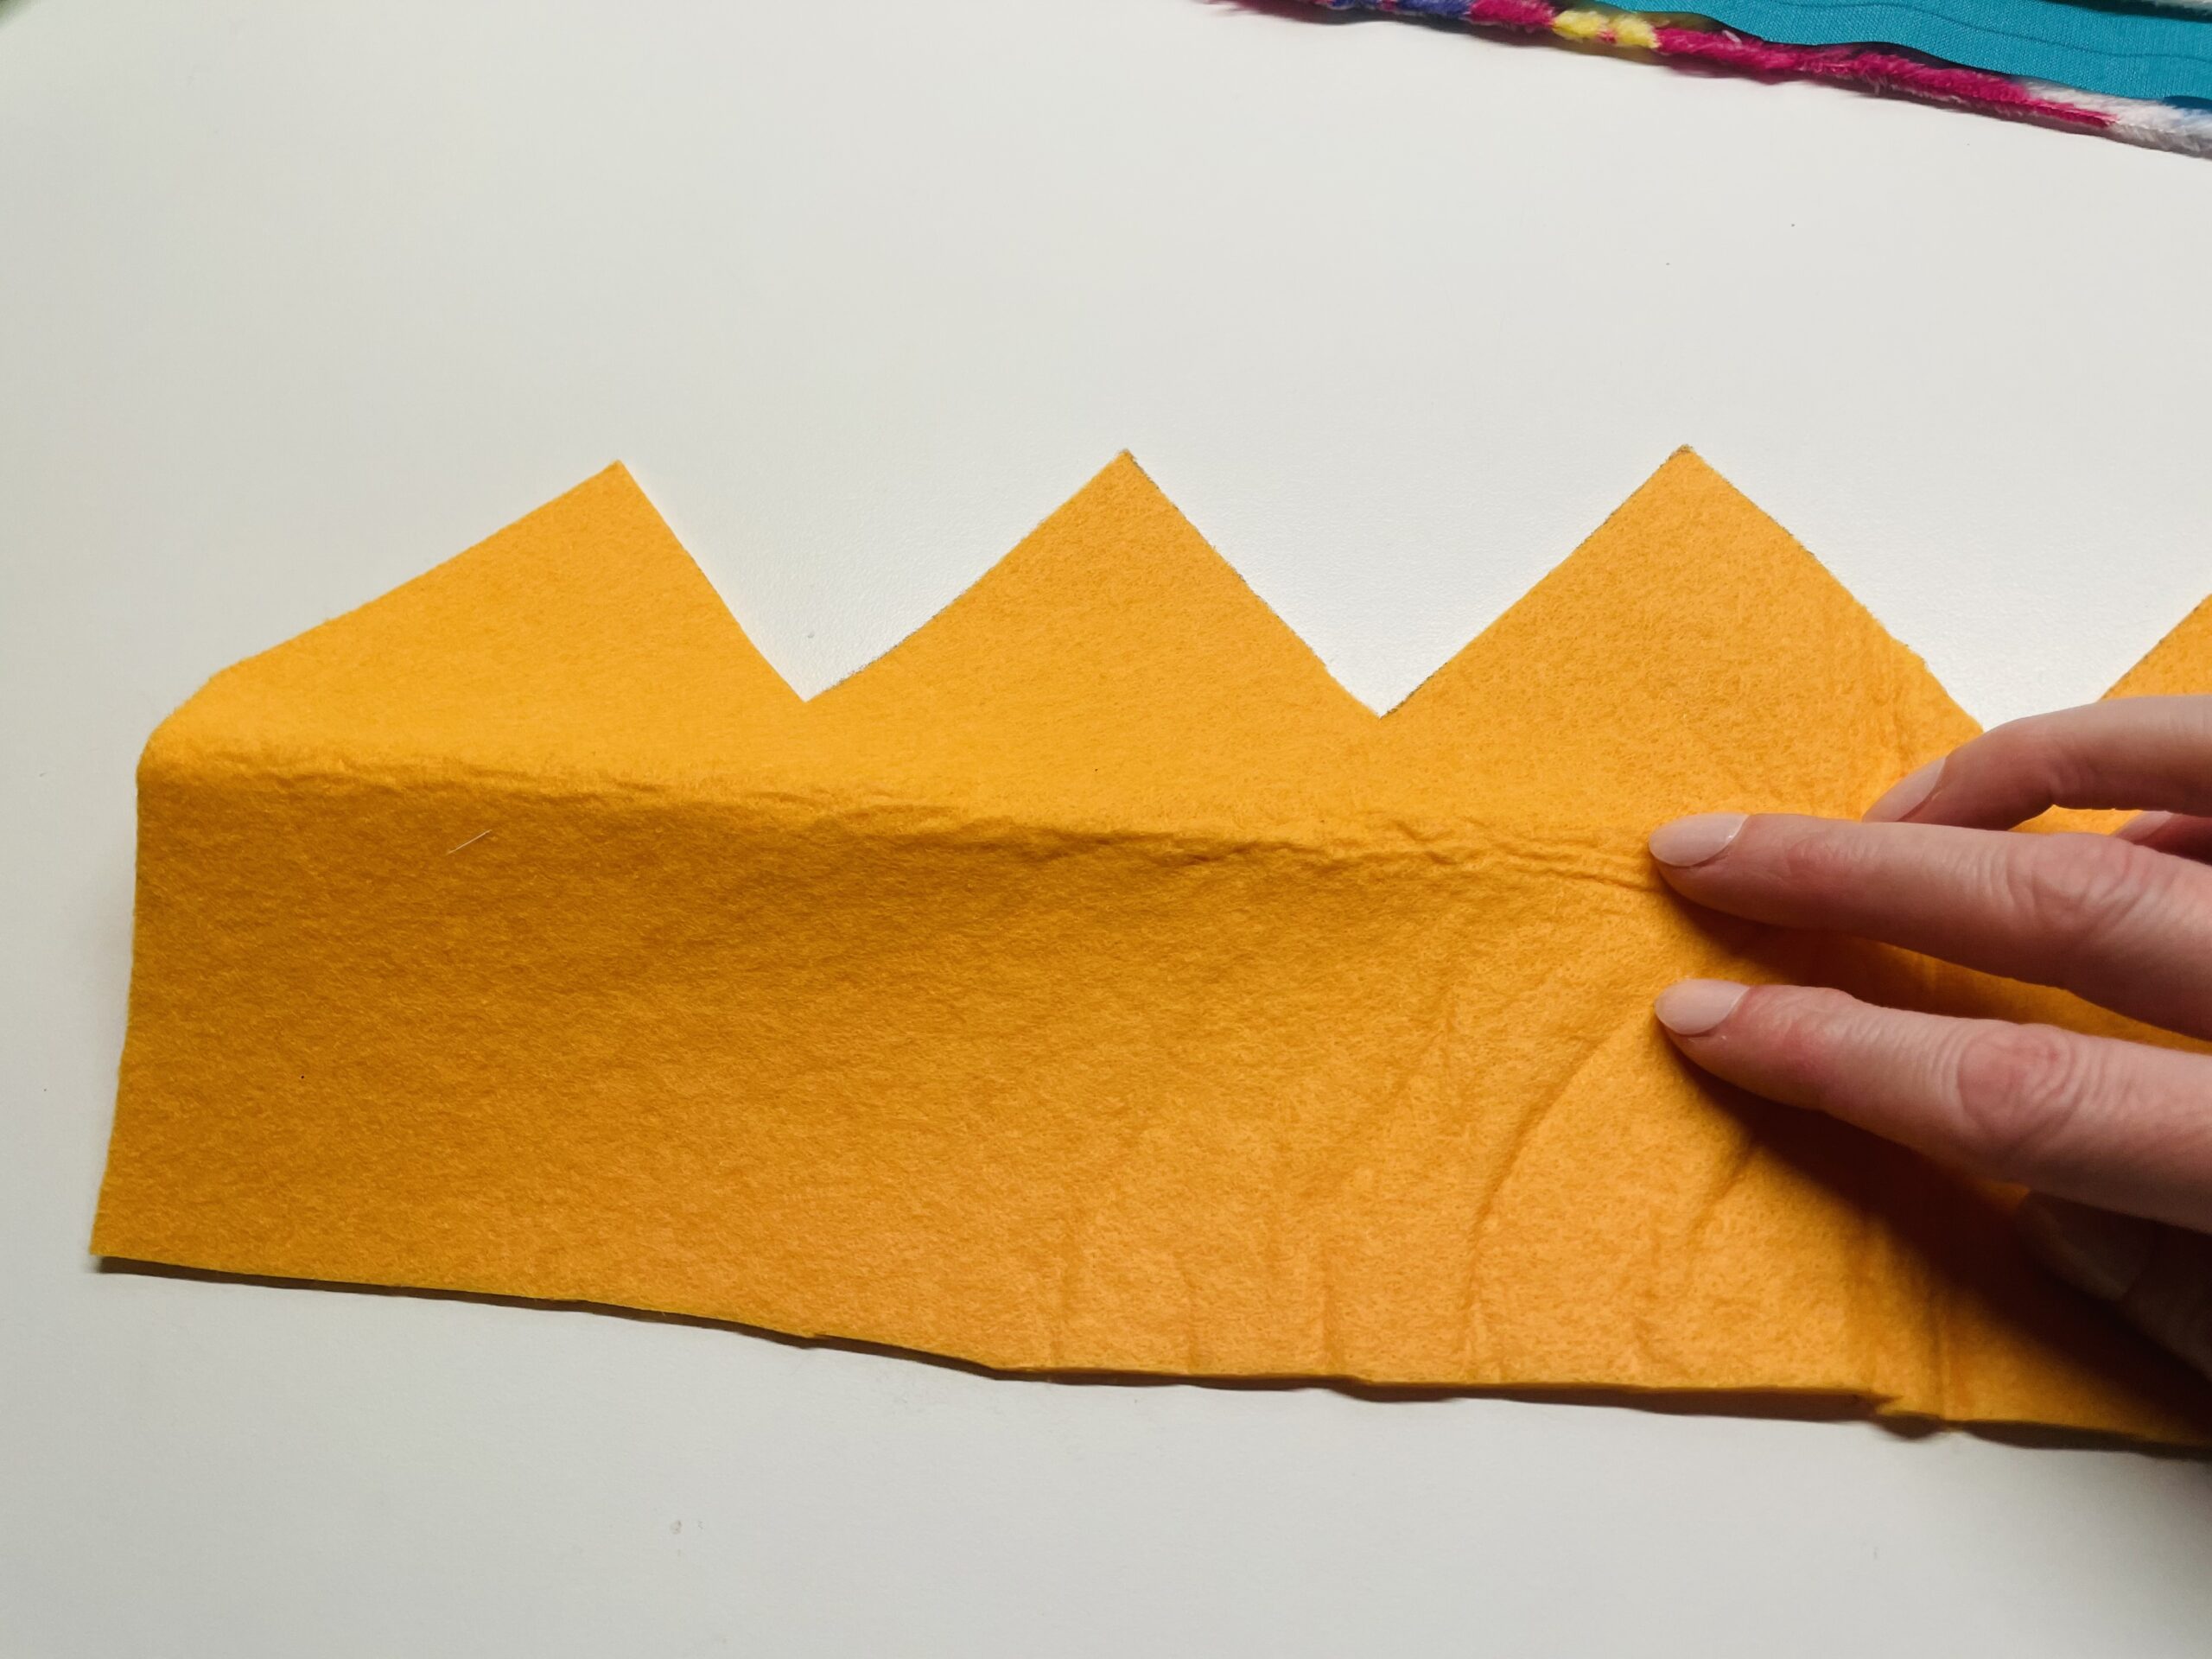
Bild zum Schritt 8 für das Bastel- und DIY-Abenteuer für Kinder: 'Zusätzlich braucht ihr einen Fleecestoff, (z.B. Putzlappen aus Fleece) er...'

9

Then you need 4 equally long bands with 20 to 24 cm length.
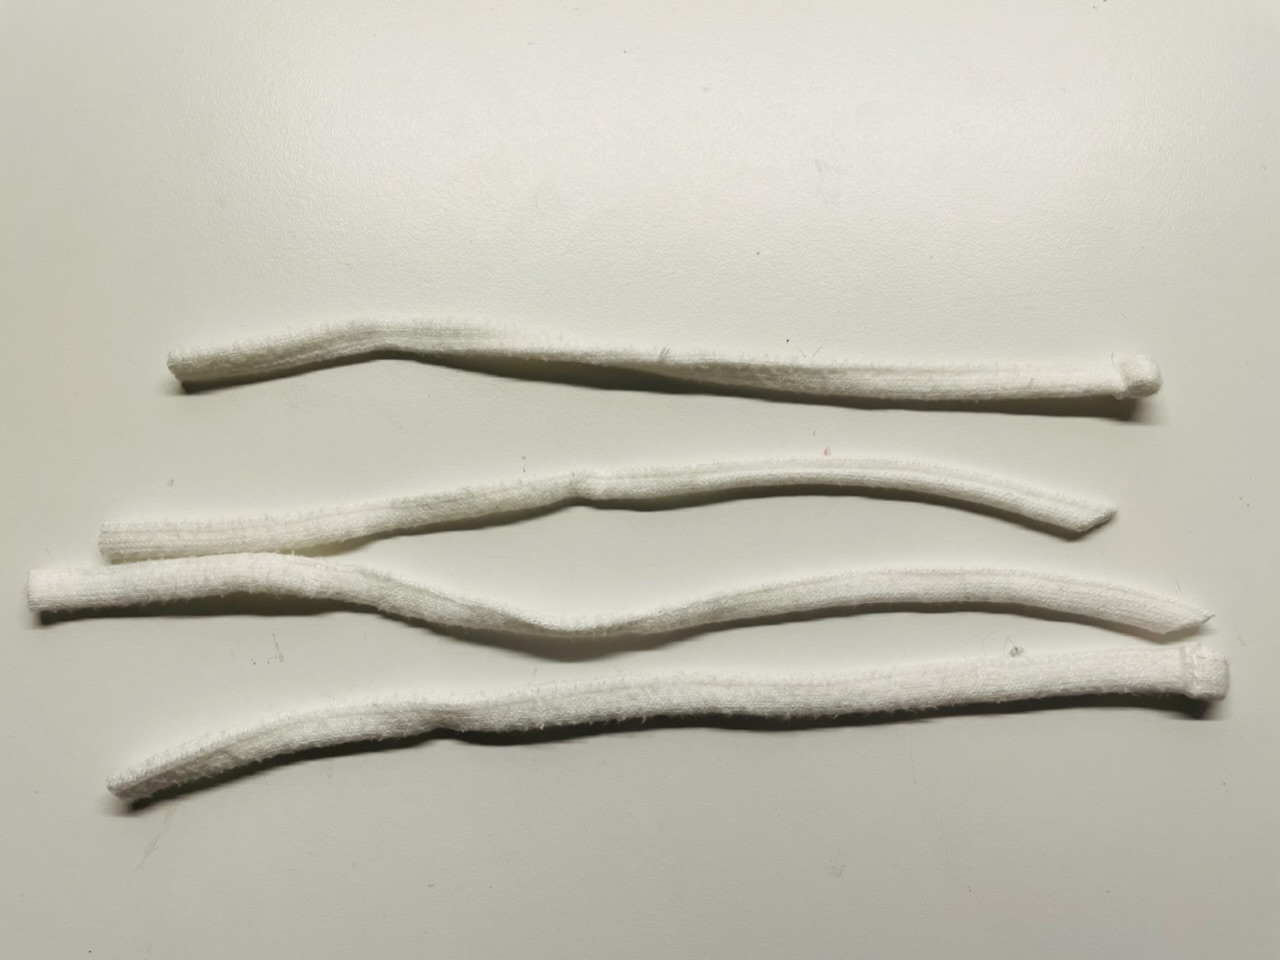
Bild zum Schritt 9 für das Bastel- und DIY-Abenteuer für Kinder: 'Dann braucht ihr 4 gleich lange Bänder mit 20 bis...'

10

All crown cuts are now placed on top of each other.
First put down the fleece, on top the motif fabric with the beautiful side up!
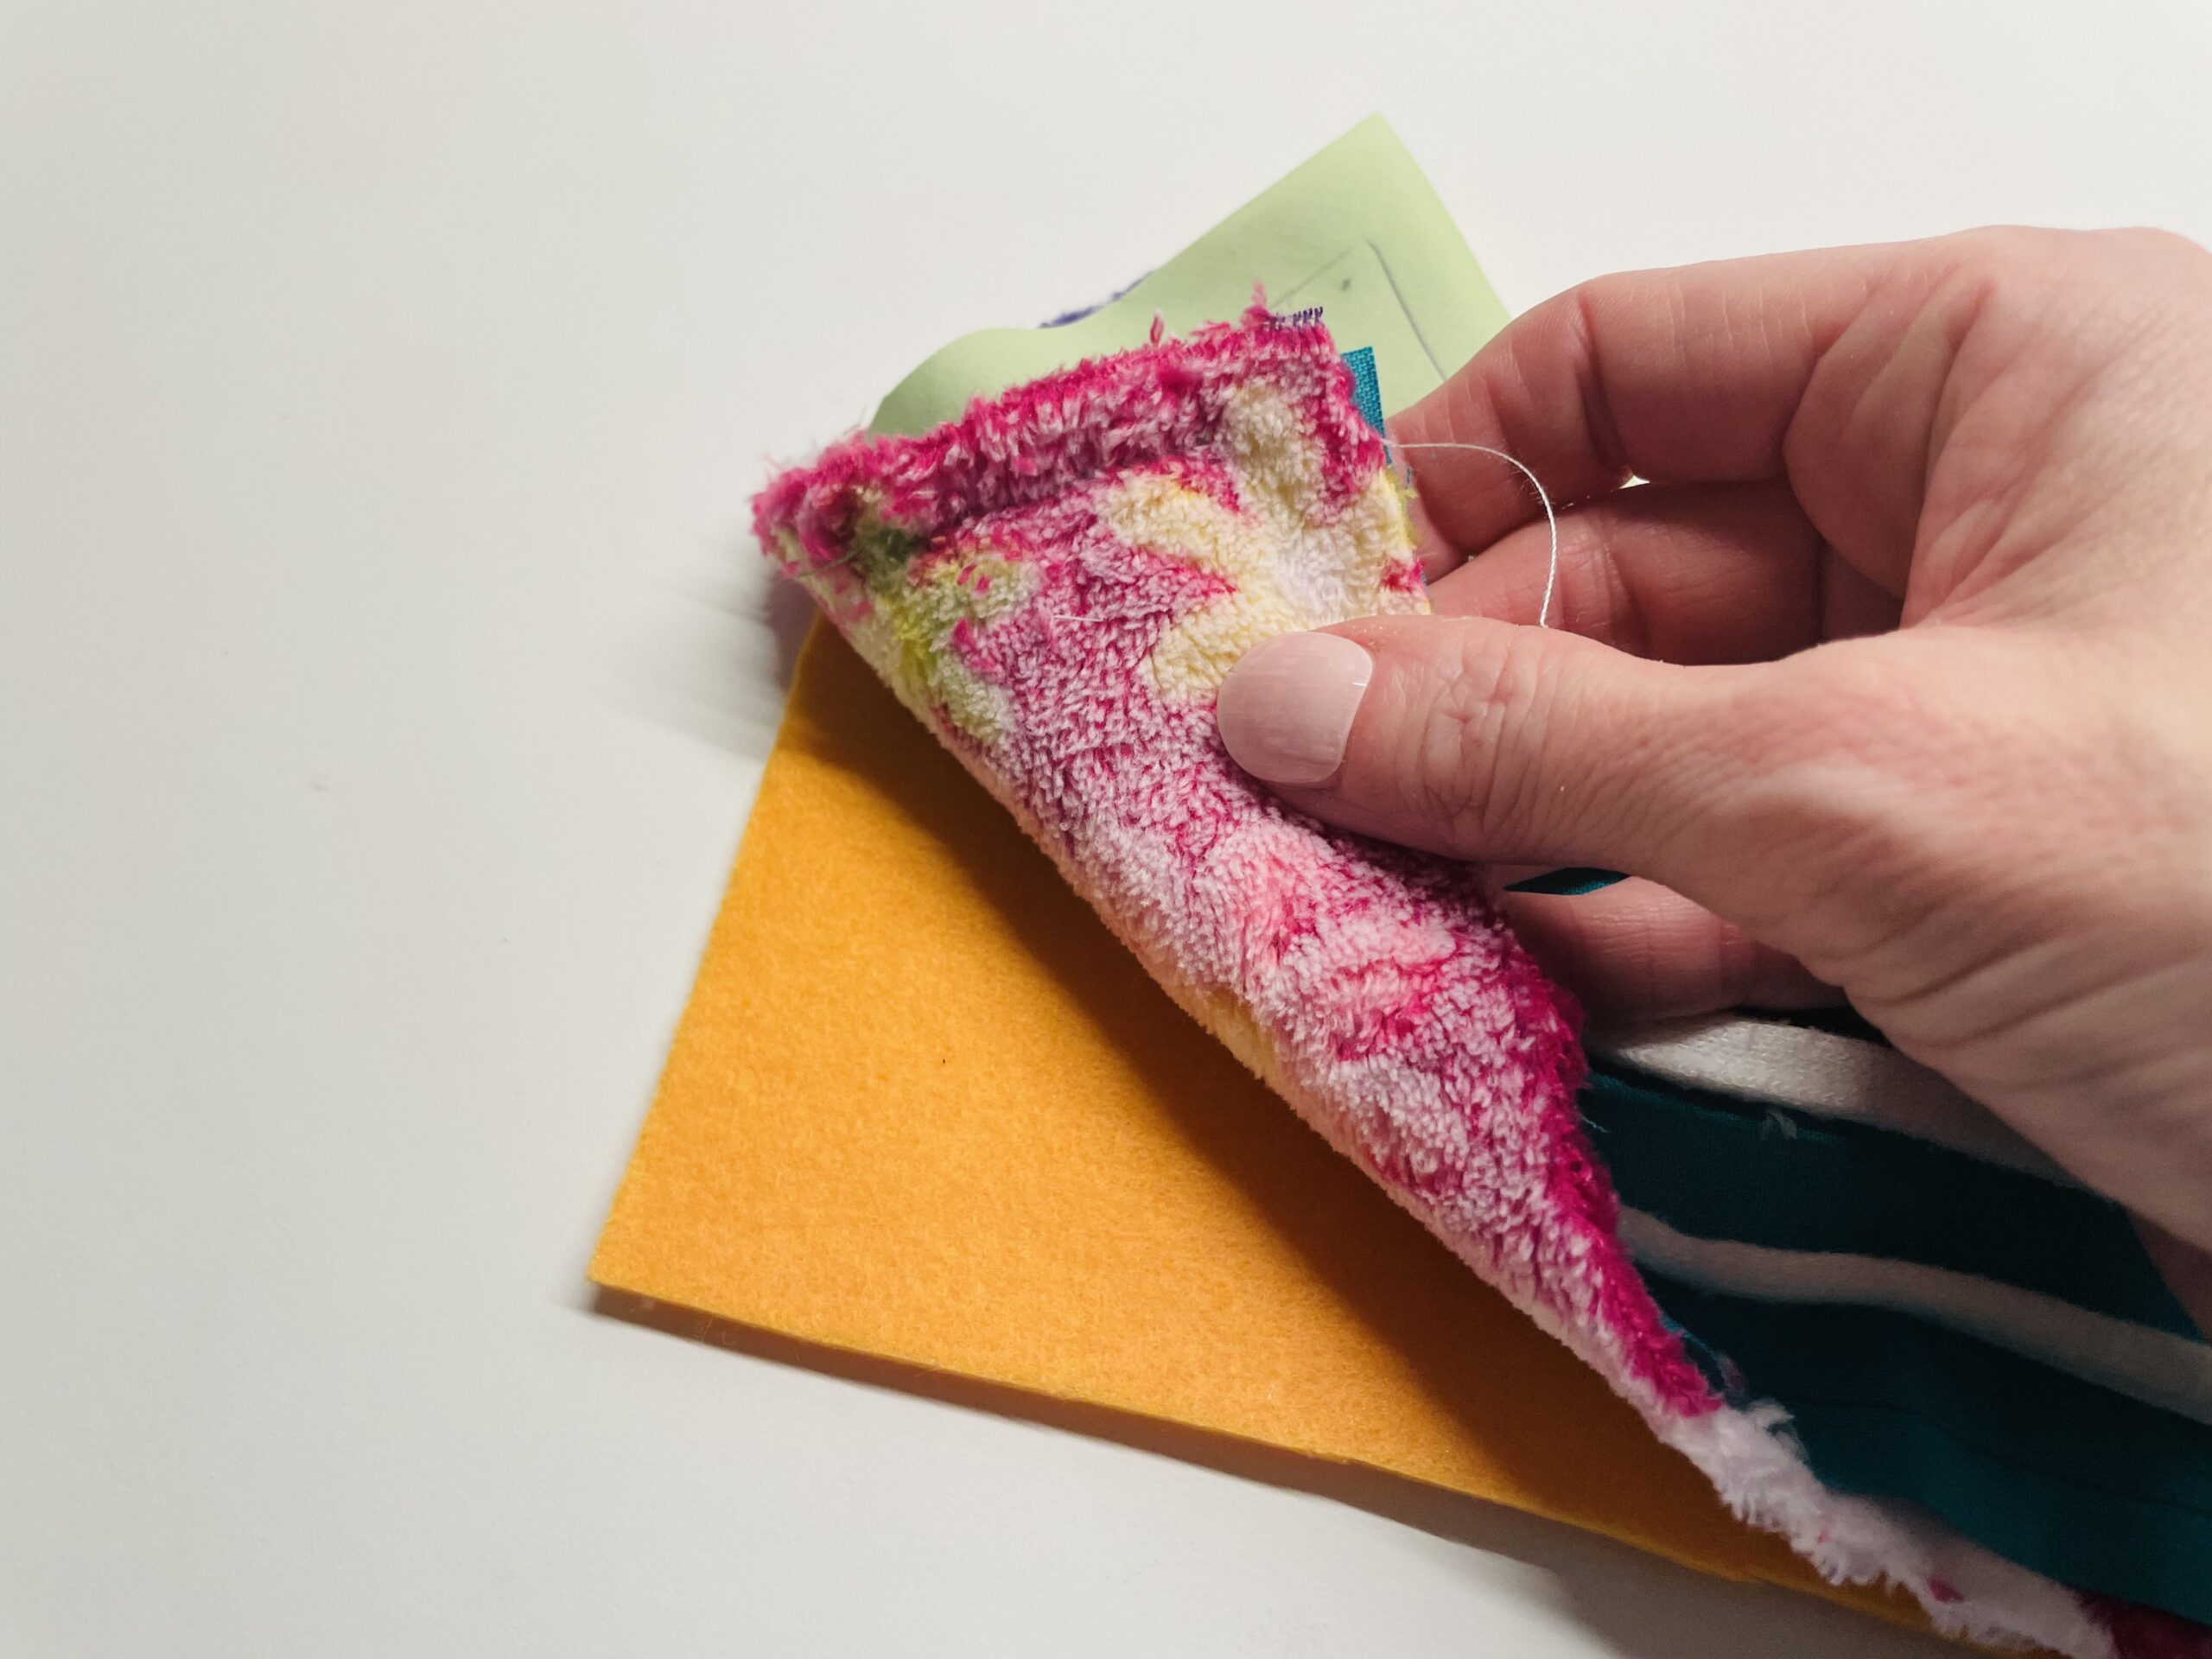
Bild zum Schritt 10 für das Bastel- und DIY-Abenteuer für Kinder: 'Alle Kronenzuschnitte werden nun aufeinander gelegt.   Legt zuerst...'

11

Two ribbons are placed on one side. (Look at the marking on the template here.) The ribbons are placed inwards, between the two beautiful sides. Place the monochrome fabric with the beautiful side on the ribbons. Now all three layers of fabric (crown sections) lie on top of each other.
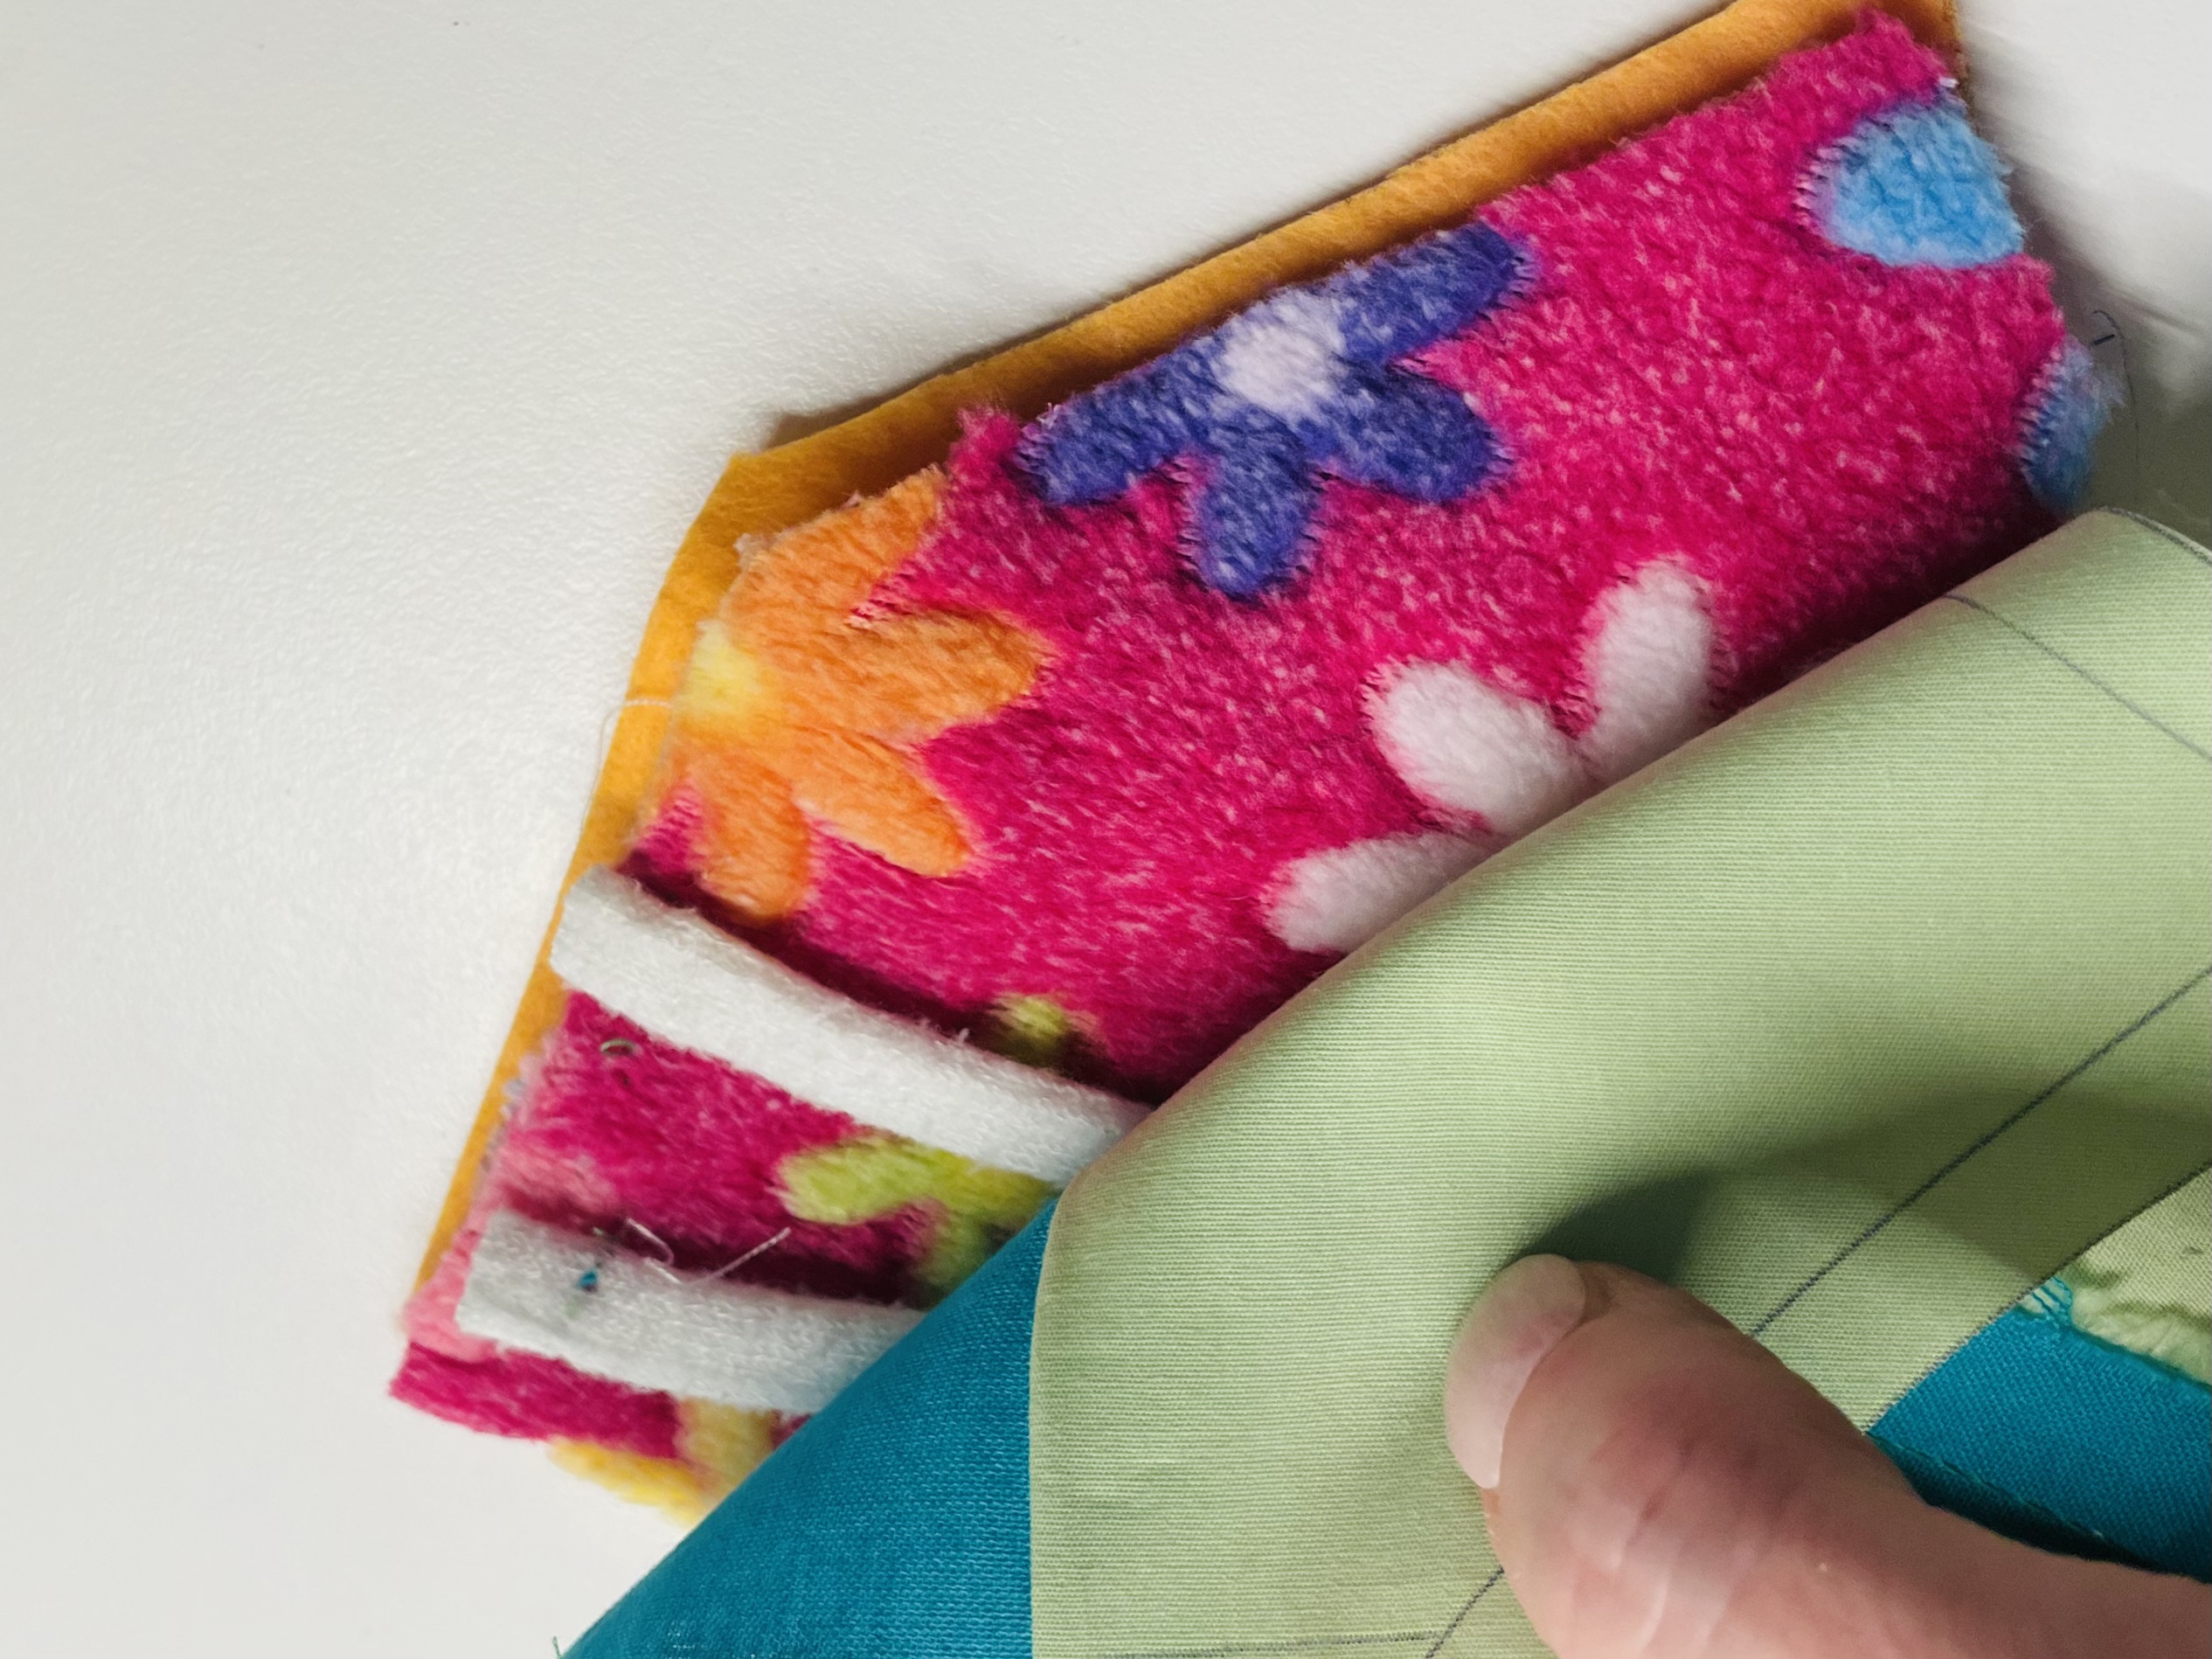
Bild zum Schritt 11 für das Bastel- und DIY-Abenteuer für Kinder: 'Zwei Bänder werden je an einer Seite platziert. (Sieh dir...'

12

Fix the fabric with a few pins, so nothing slips and you can start sewing. Start at the long straight bottom. Sew the fabric all around on the marking. At the tips you have to stop again and again, leave the needle in the fabric and lift the foot of the sewing machine. Then turn the fabric so that the sewing direction can be continued.

Bild zum Schritt 12 für das Bastel- und DIY-Abenteuer für Kinder: 'Fixiert mit ein paar Stecknadeln die Stoffe, so verrutscht nichts...'

13

When sewn around, leave open a turning opening of 10cm width.
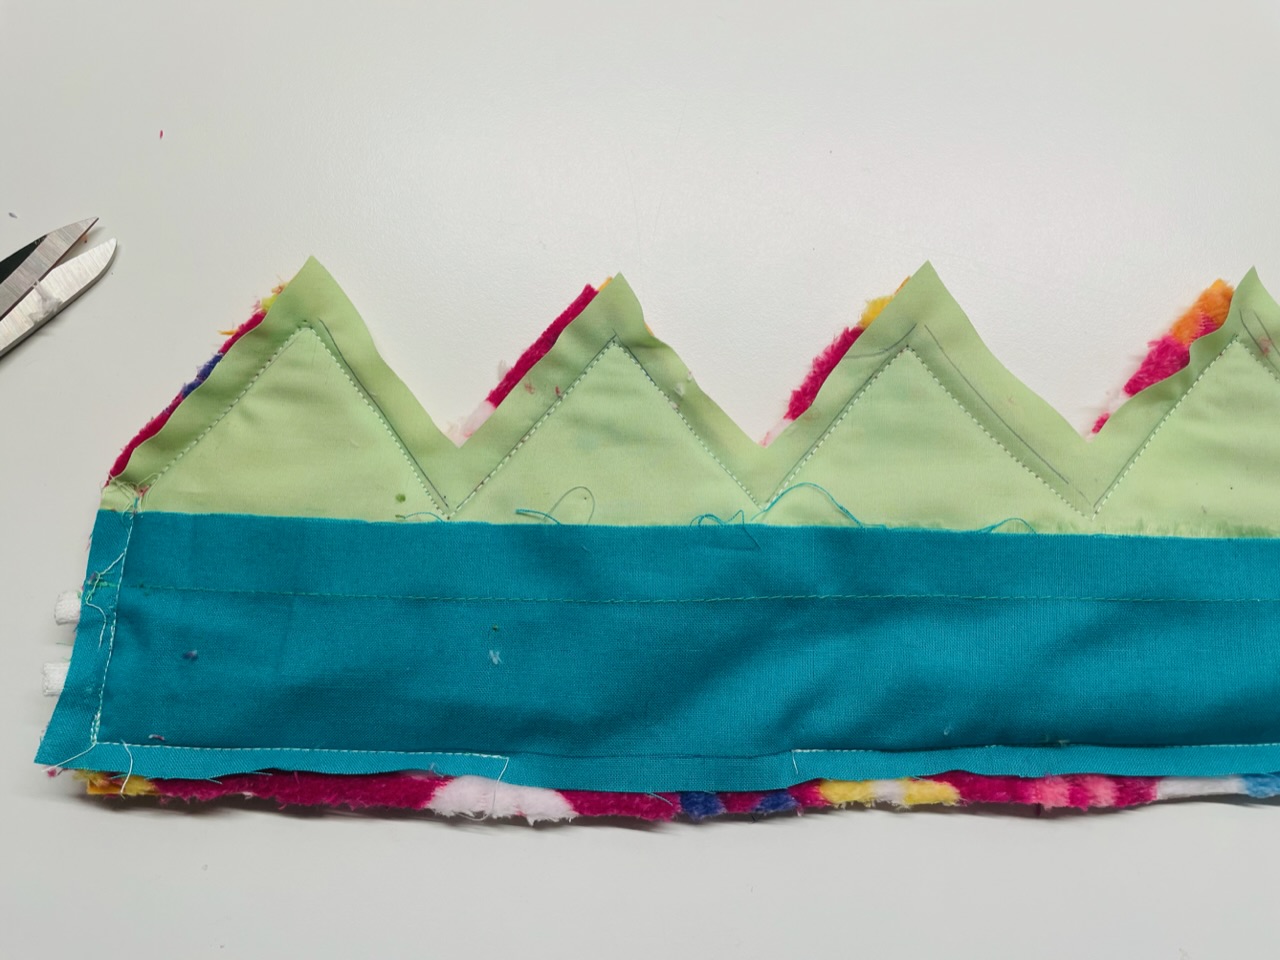
Bild zum Schritt 13 für das Bastel- und DIY-Abenteuer für Kinder: 'Lasst beim Umnähen eine Wendeöffnung von 10cm Breite offen.'

14

Cuts off the overhanging fabric at the corners obliquely.
The overhanging material must also be cut short at the tips.
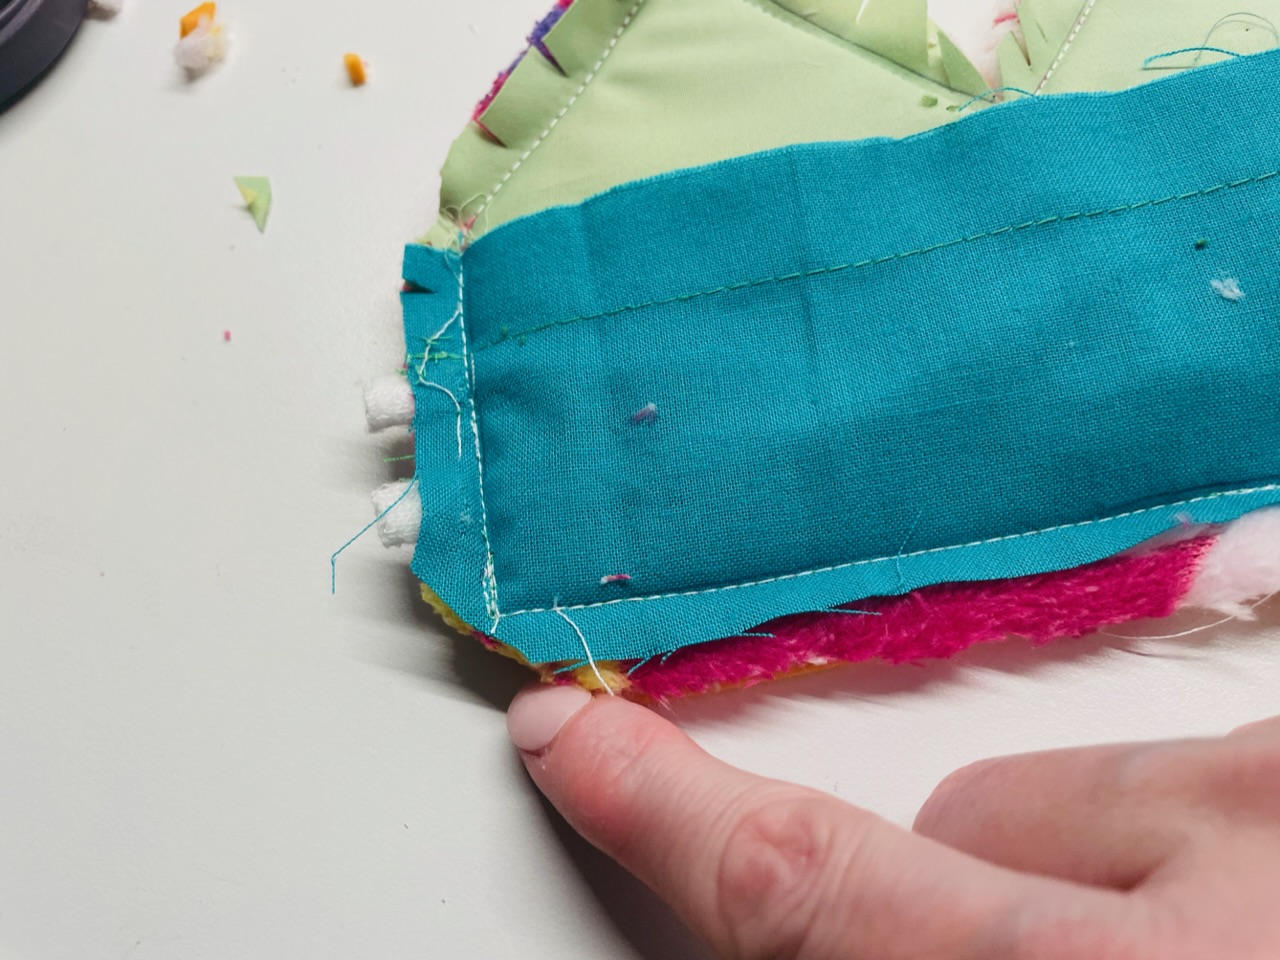
Bild zum Schritt 14 für das Bastel- und DIY-Abenteuer für Kinder: 'Schneidet den überstehenden Stoff an den Ecken schräg ab. ...'

15

In the "valleys" the overhanging fabric is cut that the fabric can be formed well when turning.
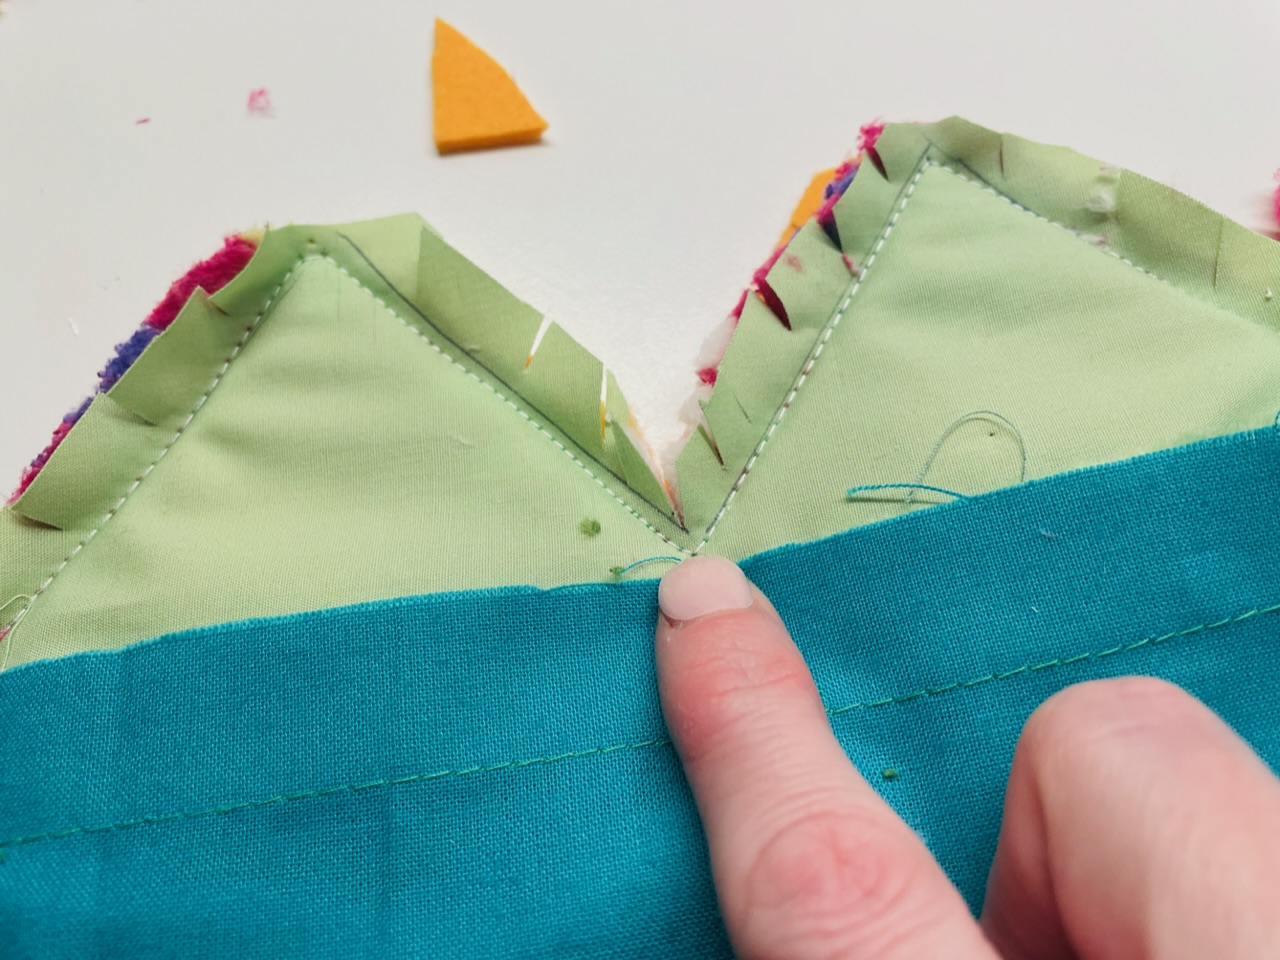
Bild zum Schritt 15 für das Bastel- und DIY-Abenteuer für Kinder: 'In den „Tälern“ wird der überstehende Stoff eingeschnitten, dass sich...'

16

The complete fabric is now rotated through the turning opening. Grabs between both fabric outer sides and pulls the fabrics outwards.
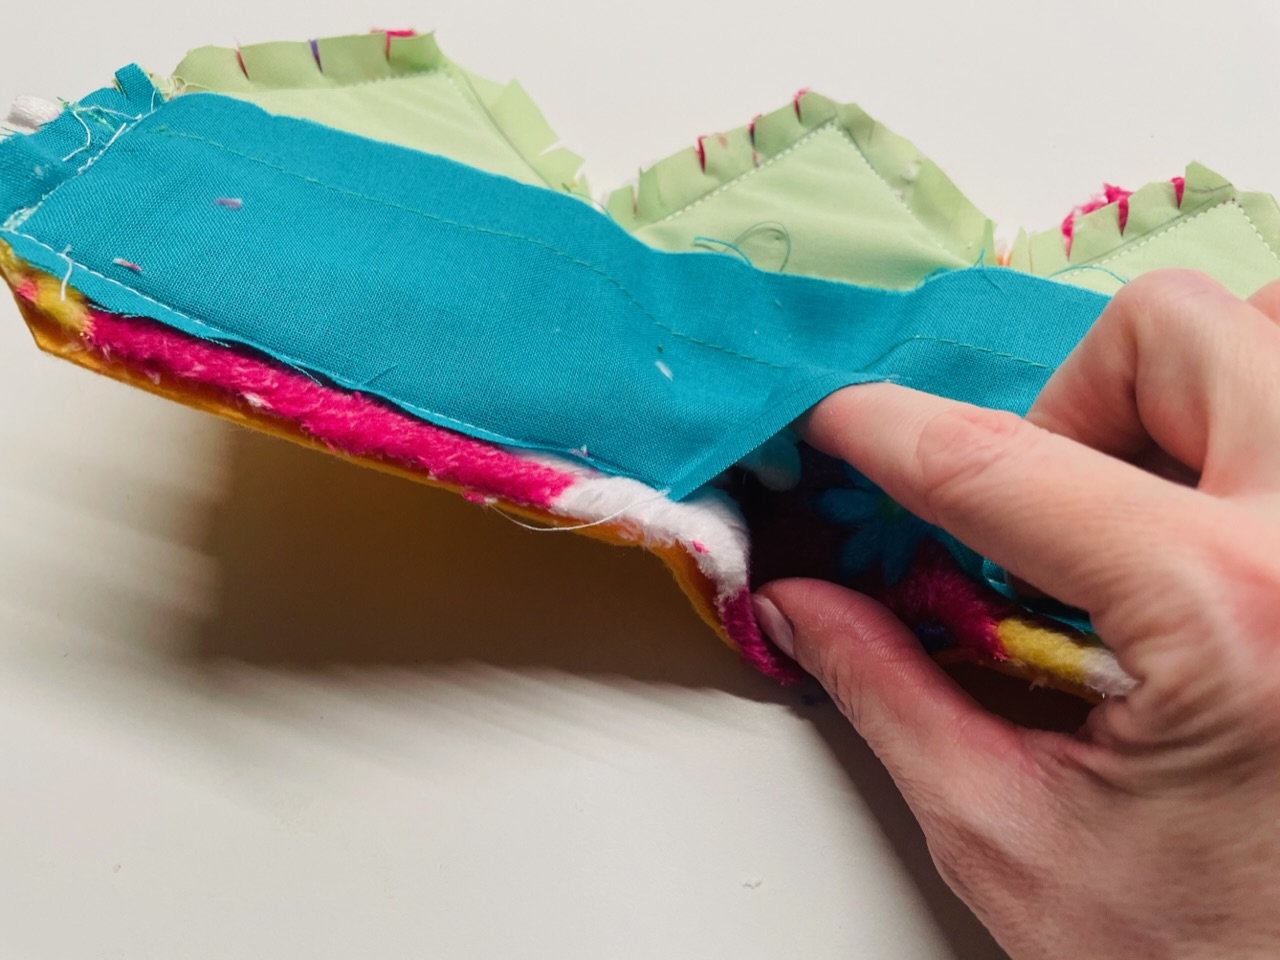
Bild zum Schritt 16 für das Bastel- und DIY-Abenteuer für Kinder: 'Durch die Wendeöffnung wird nun der komplette Stoff gedreht. Greift...'

17

Be careful when turning, so that the seams do not open.
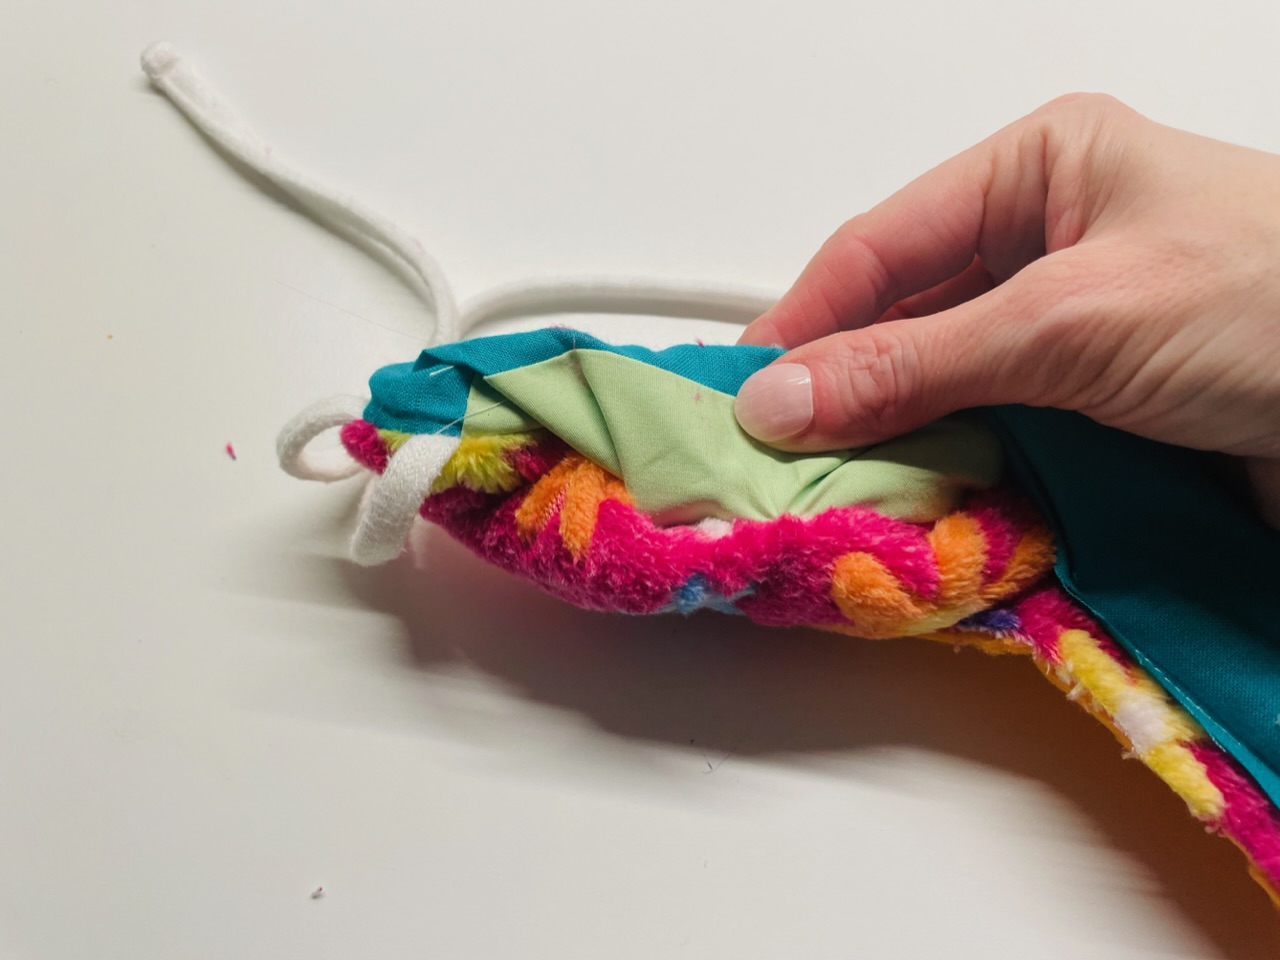
Bild zum Schritt 17 für das Bastel- und DIY-Abenteuer für Kinder: 'Geht vorsichtig beim Wenden vor, damit die Nähte nicht aufreißen.'

18

Take a long spoon to help uncloud the roundings.
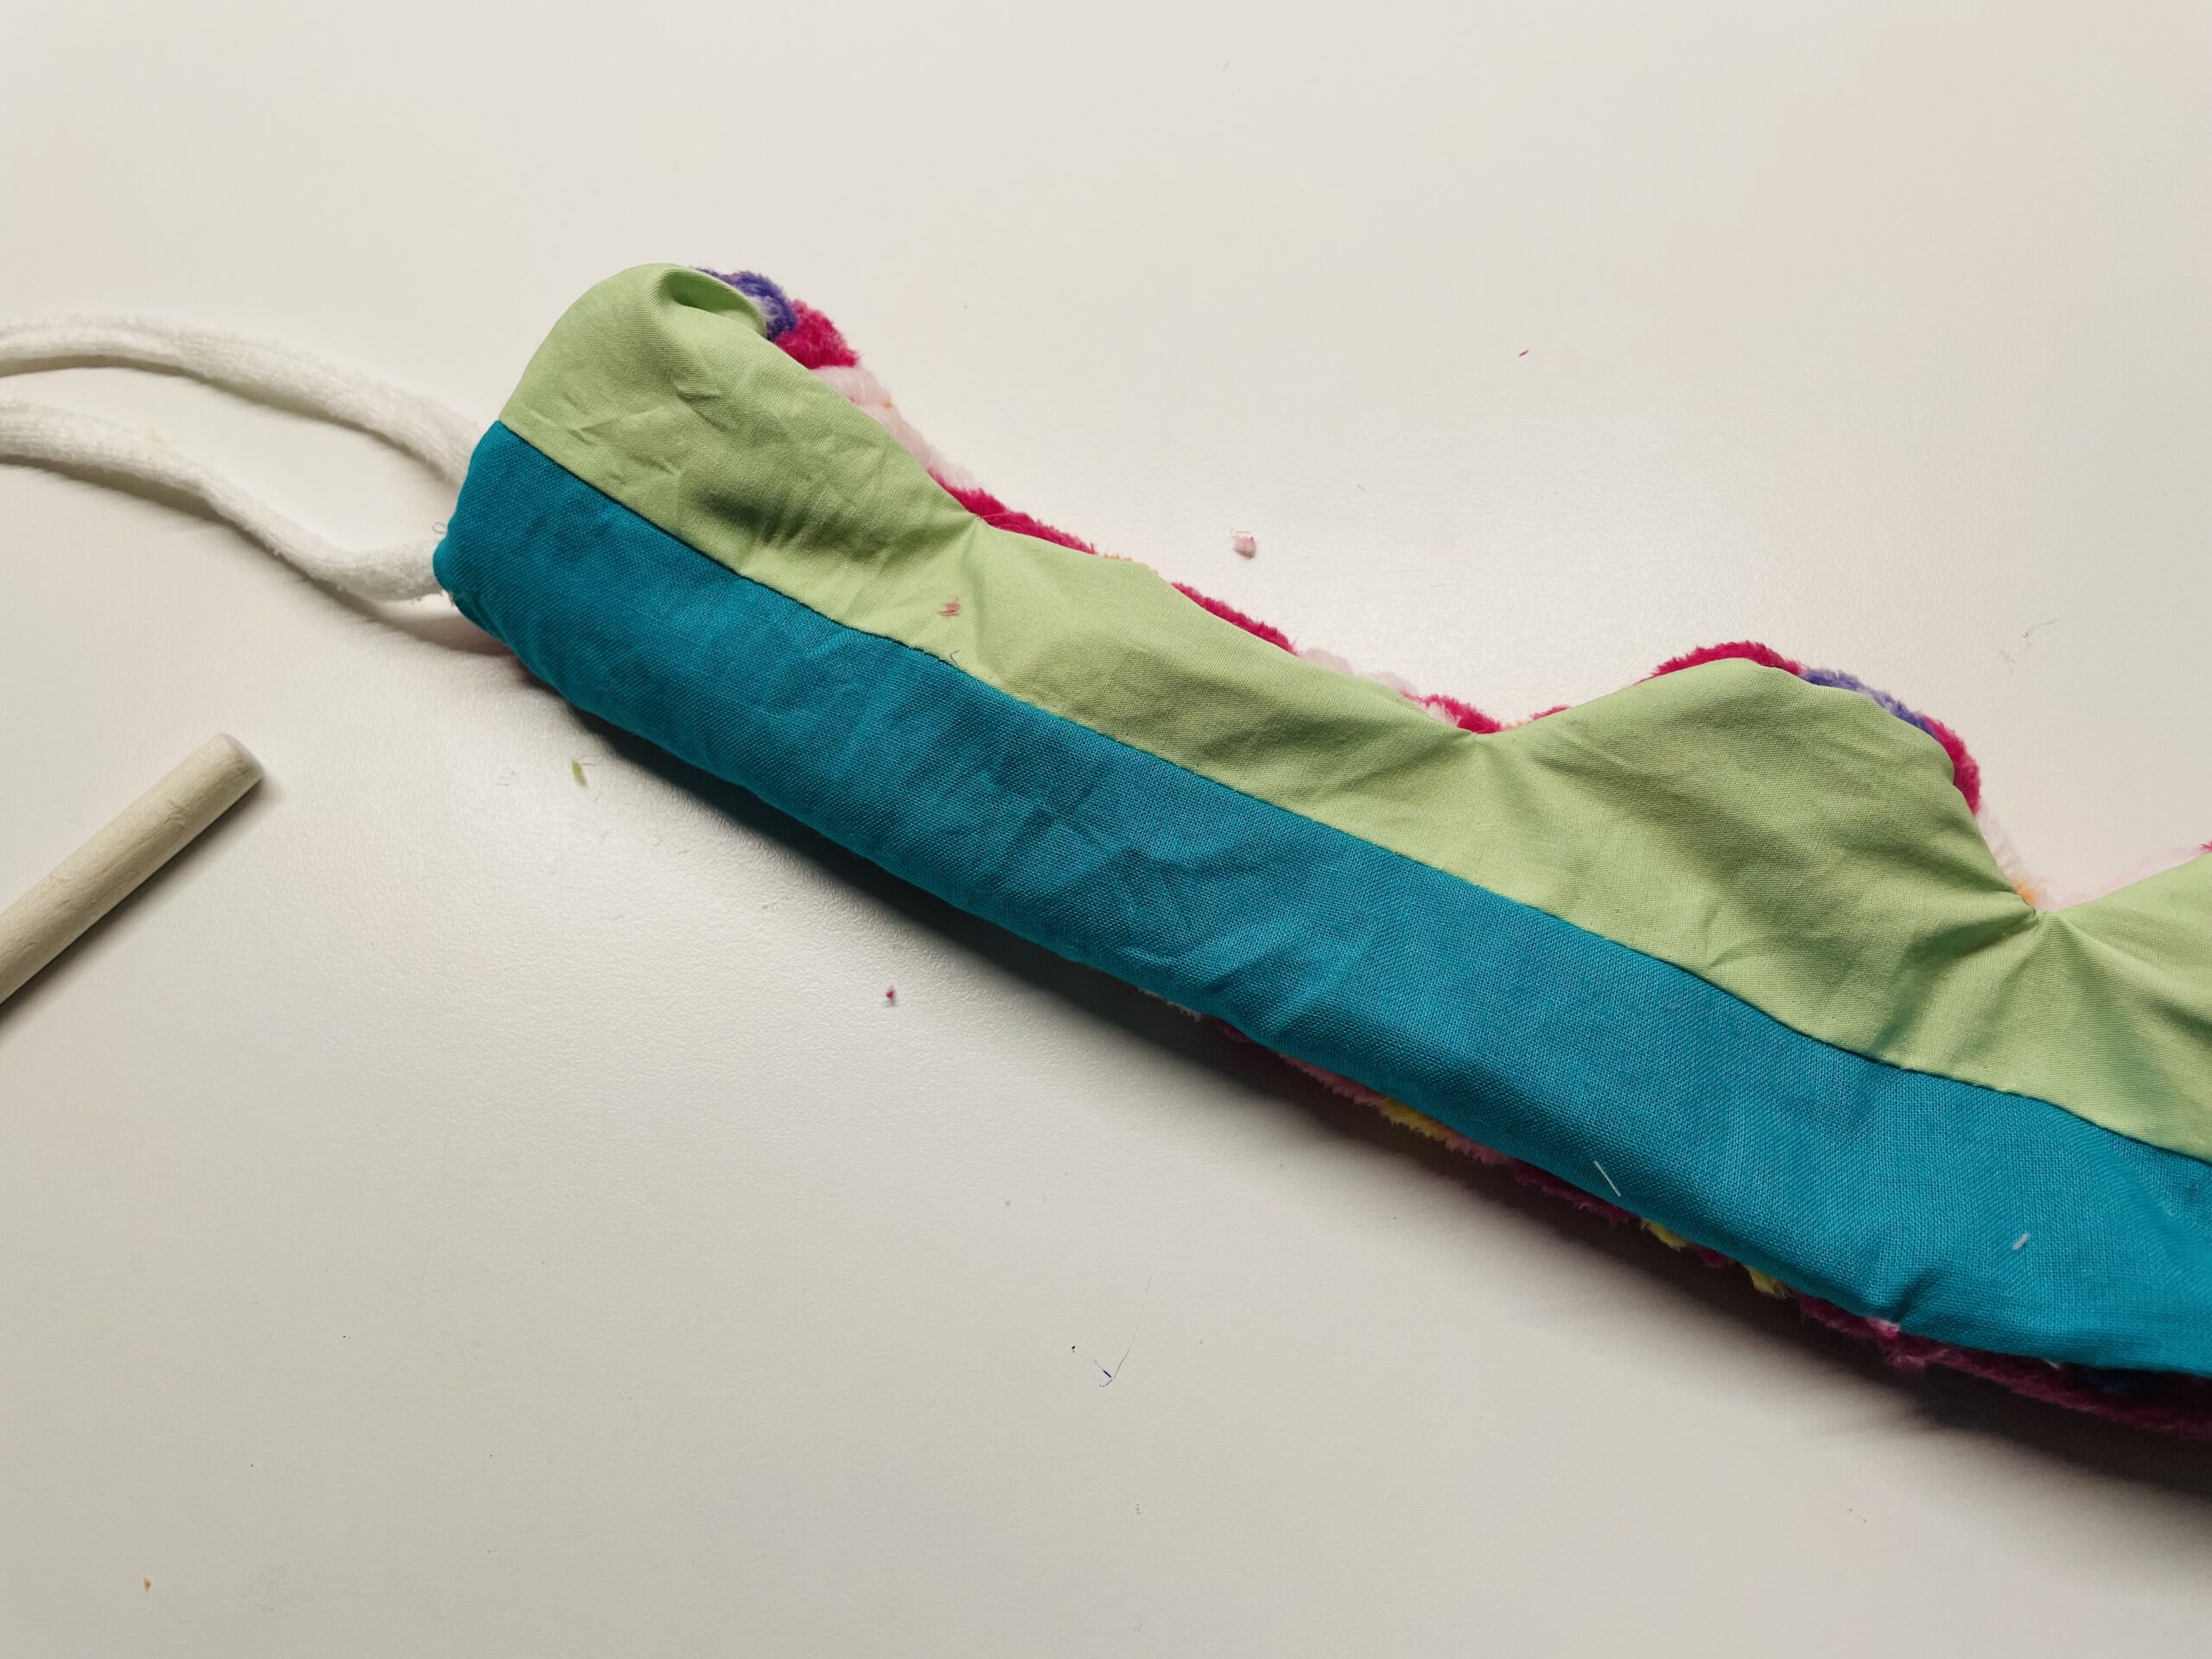
Bild zum Schritt 18 für das Bastel- und DIY-Abenteuer für Kinder: 'Nehmt evtl einen langen Kochlöffel zur Hilfe um die Rundungen...'

19

Ride the spoon into every tip and form it well.
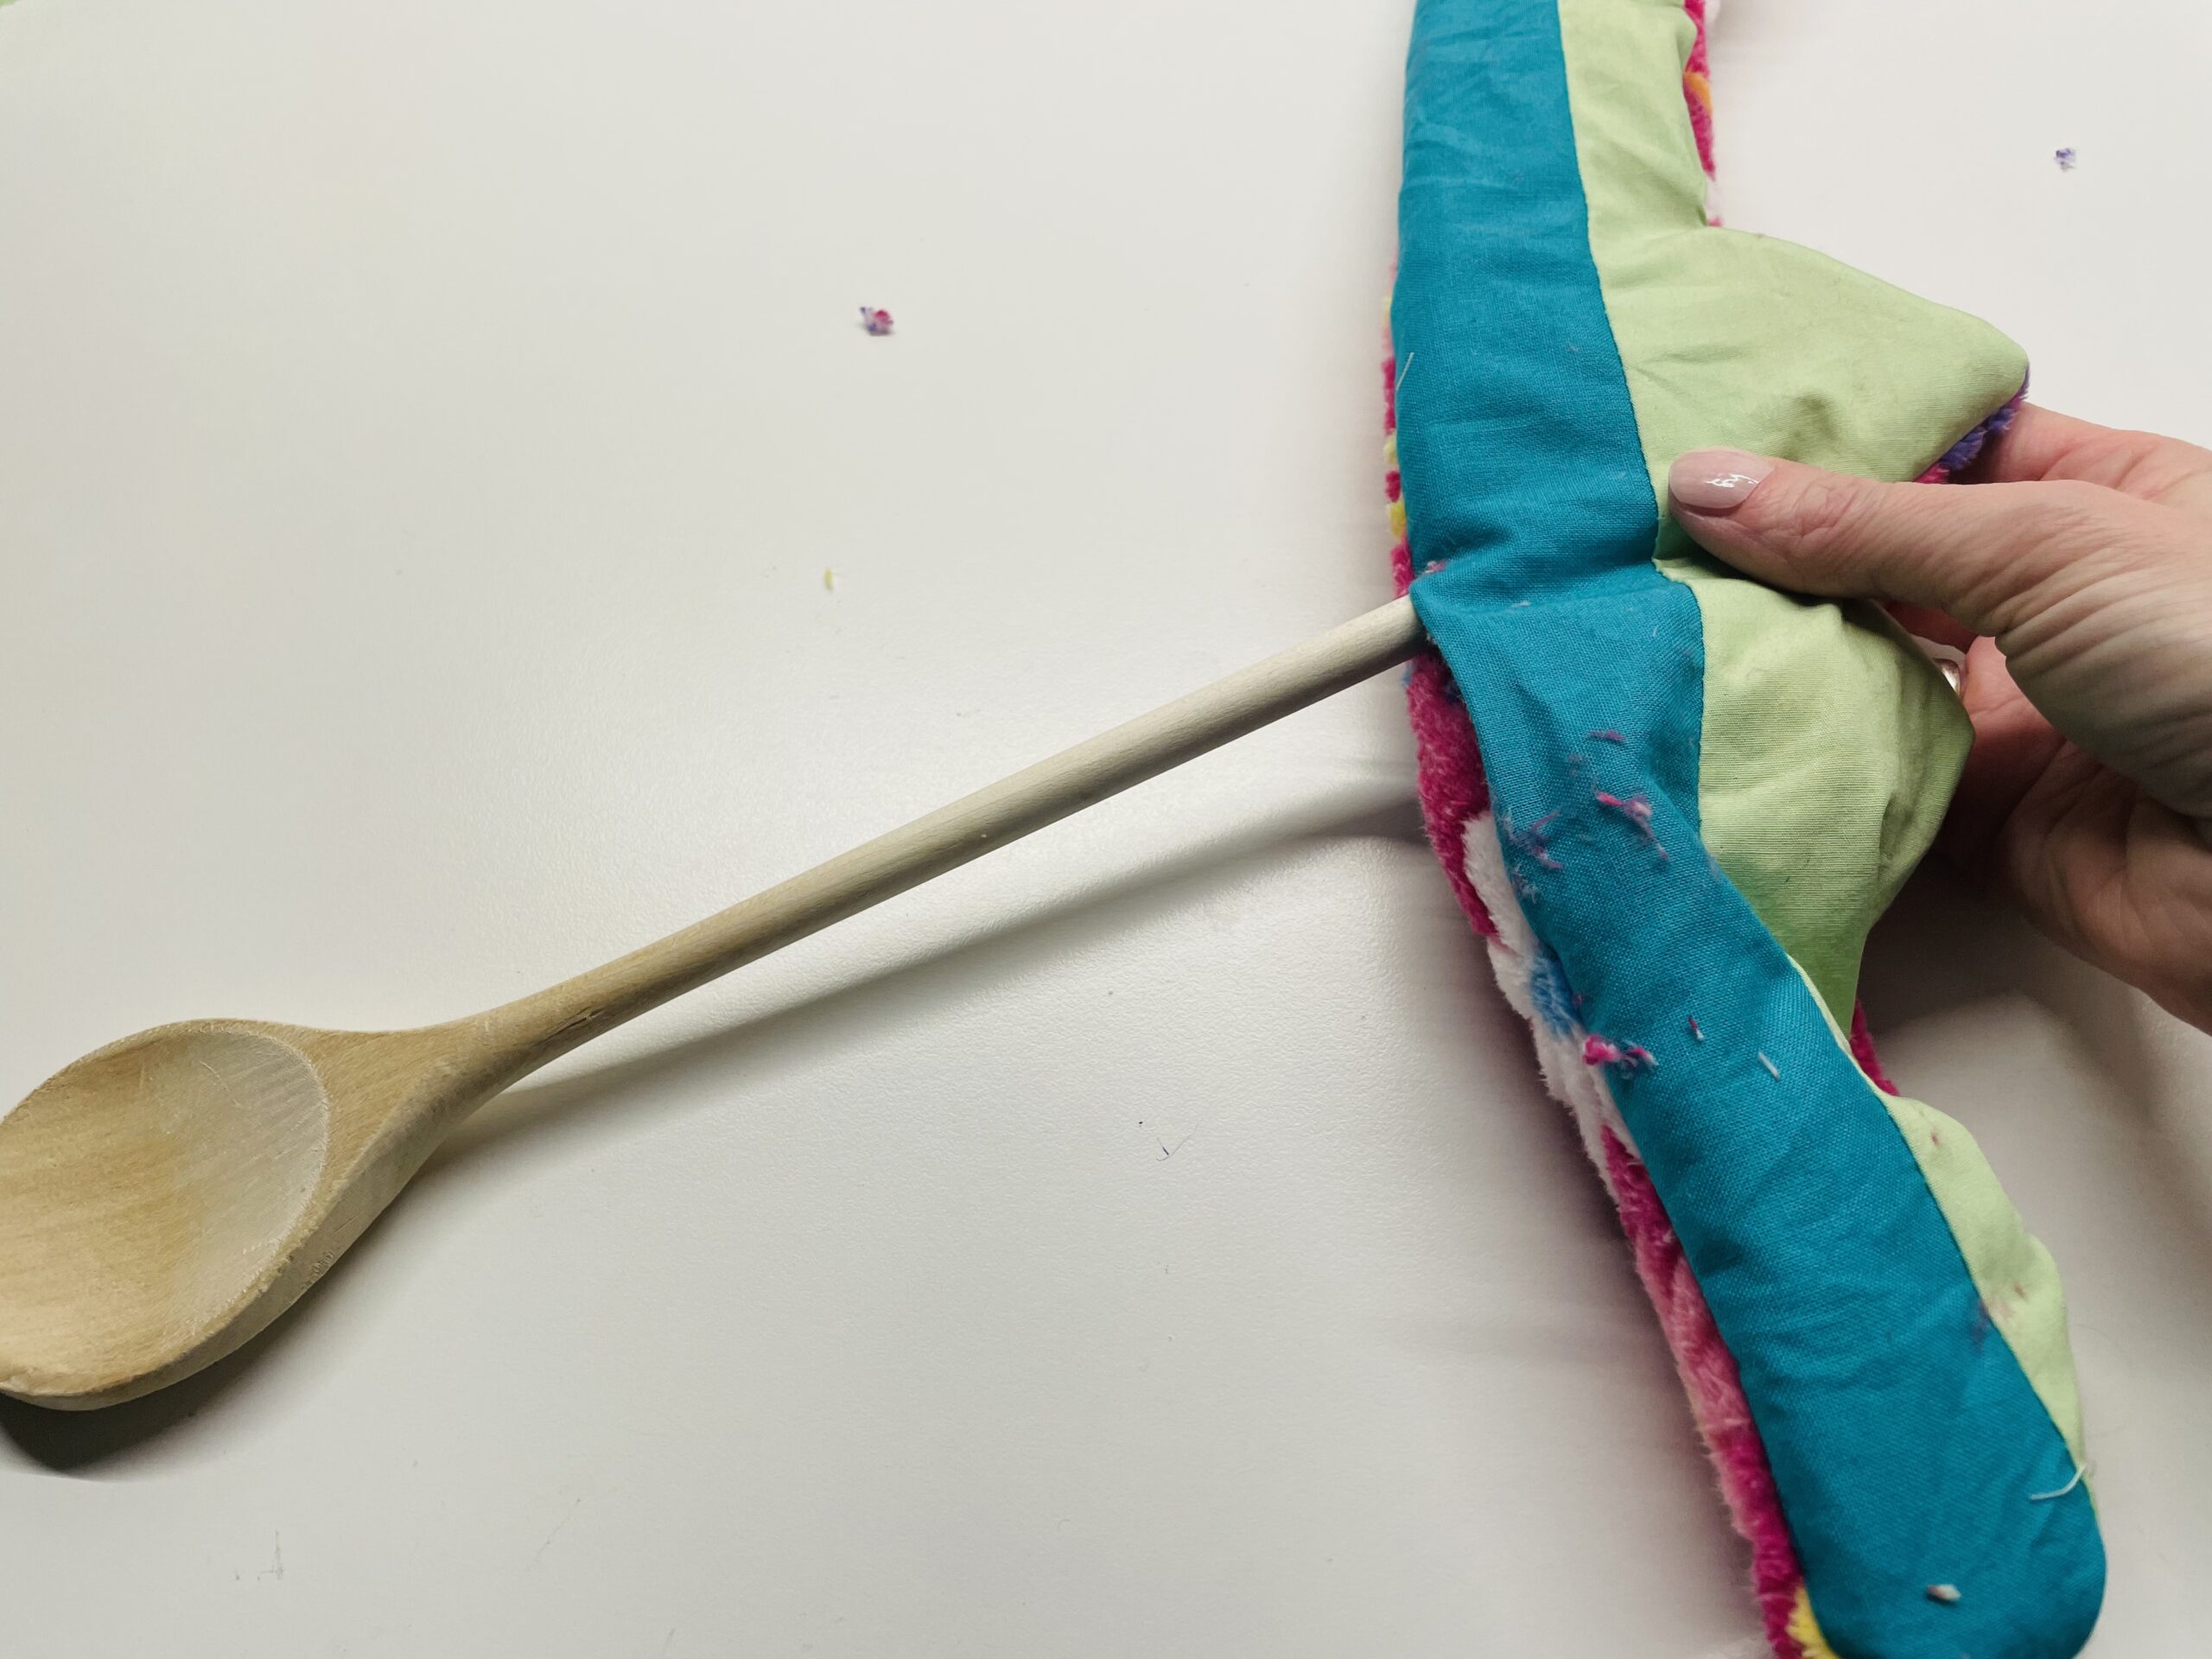
Bild zum Schritt 19 für das Bastel- und DIY-Abenteuer für Kinder: 'Fahrt mit dem Kochlöffel in jede Spitze und formt sie...'

20

That's what the crown looks like.
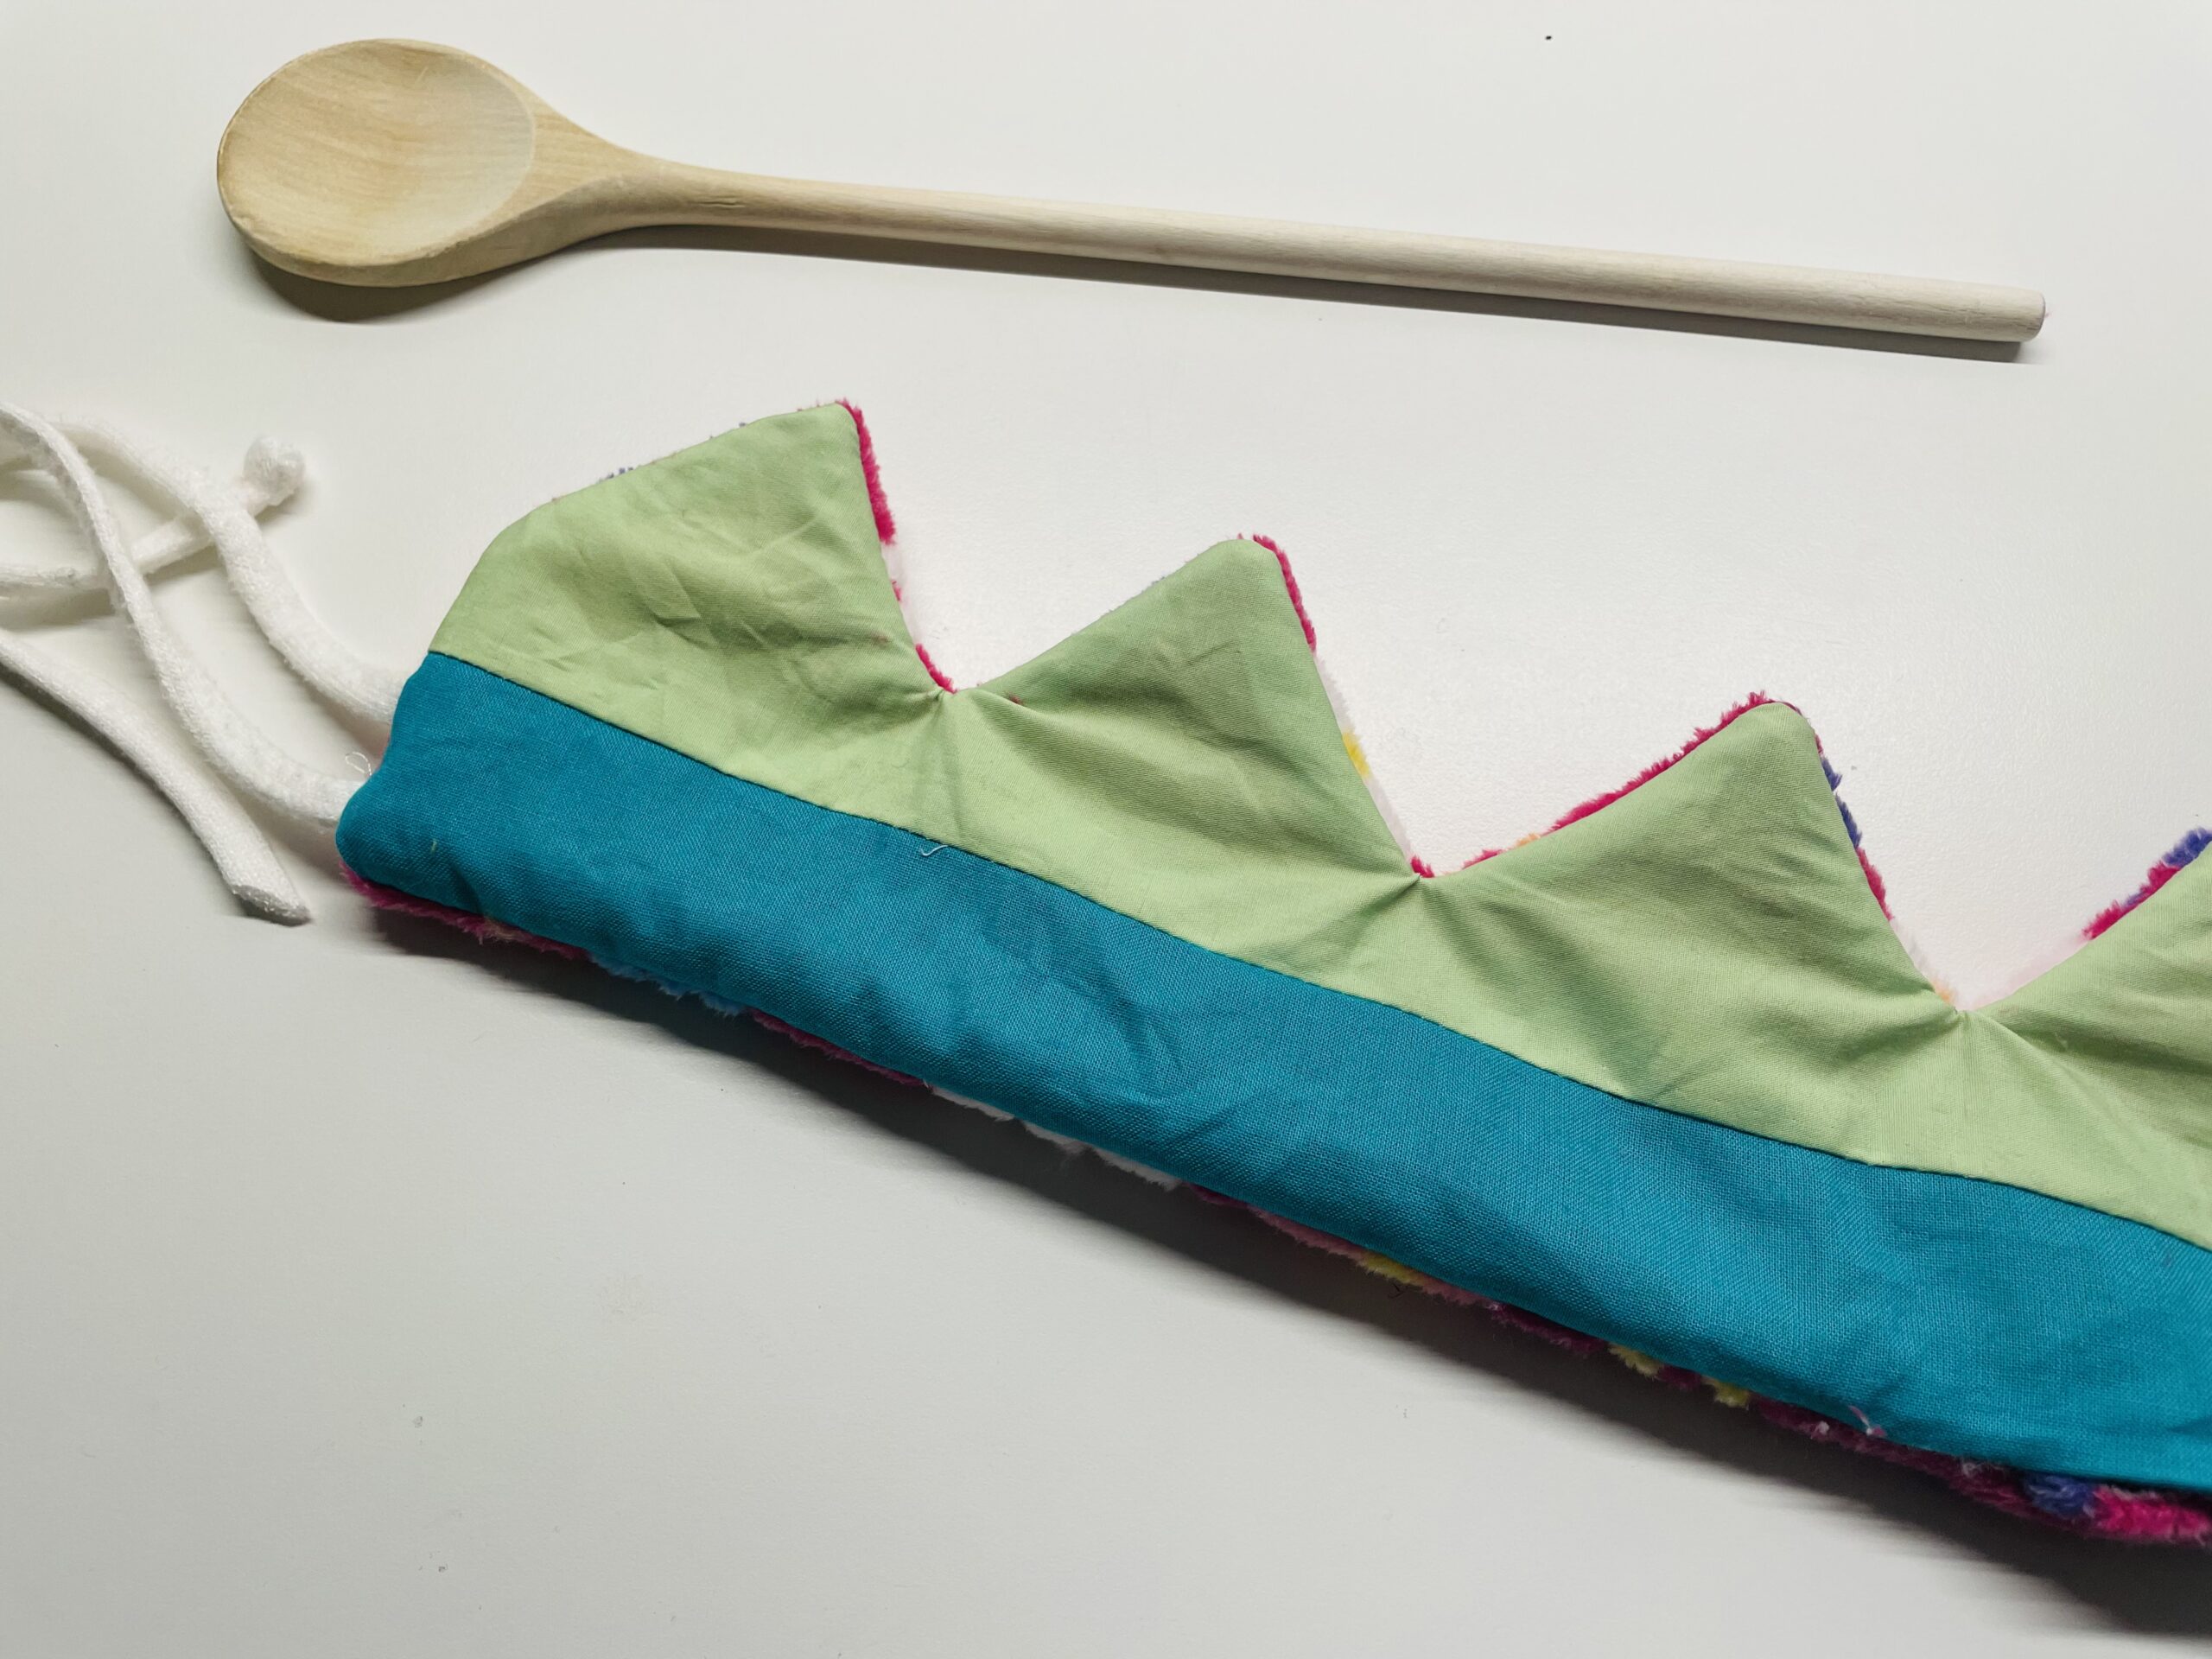
Bild zum Schritt 20 für das Bastel- und DIY-Abenteuer für Kinder: 'So sieht die gewendete Krone dann aus.'

21

You can reshape each tip with a pen from the inside.
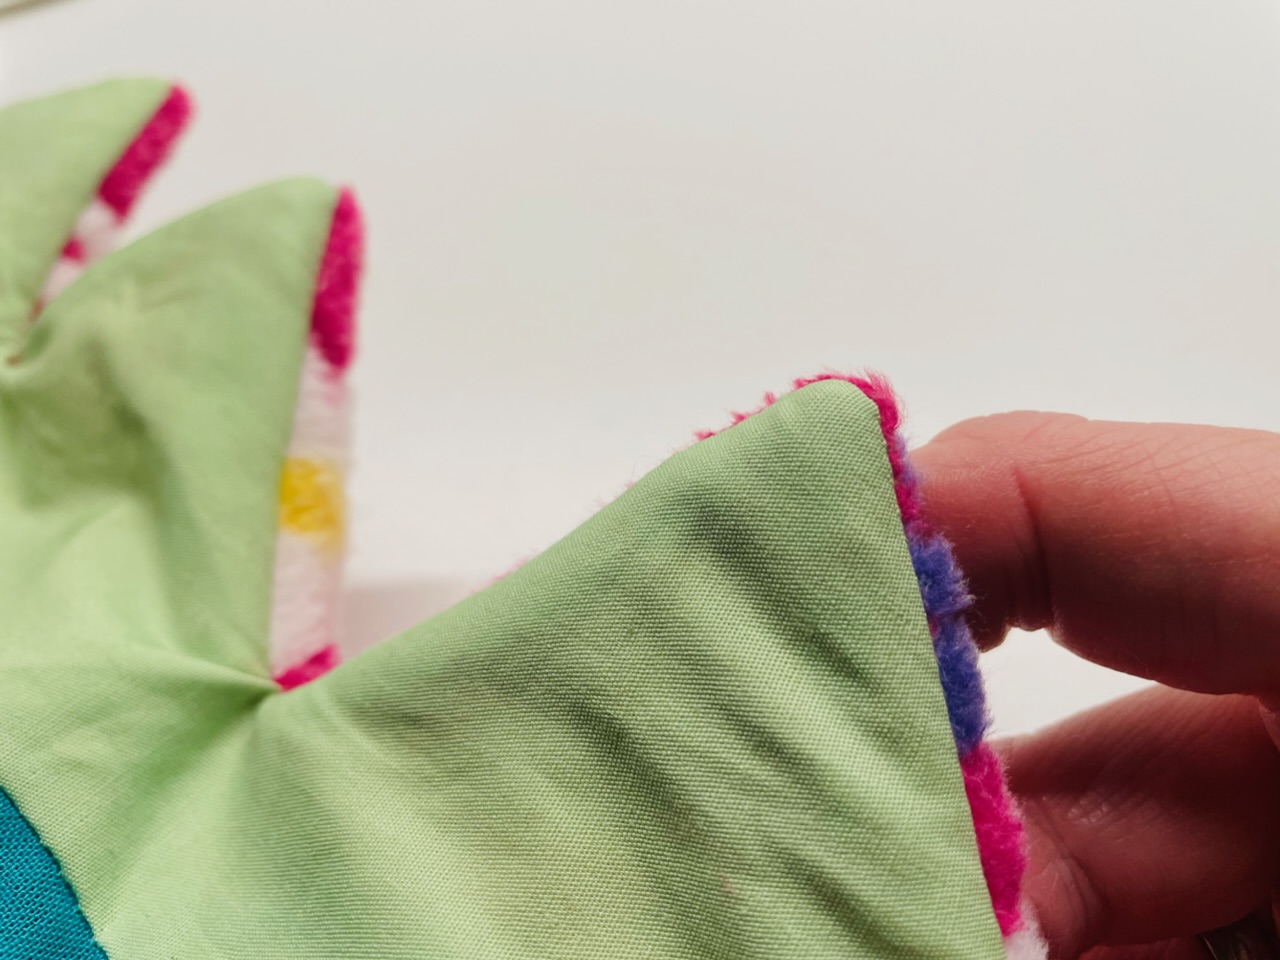
Bild zum Schritt 21 für das Bastel- und DIY-Abenteuer für Kinder: 'Jede Spitze könnt ihr mit einem Stift von innen nachformen.'

22

The fabric at the turning opening is now neatly laid on each other.
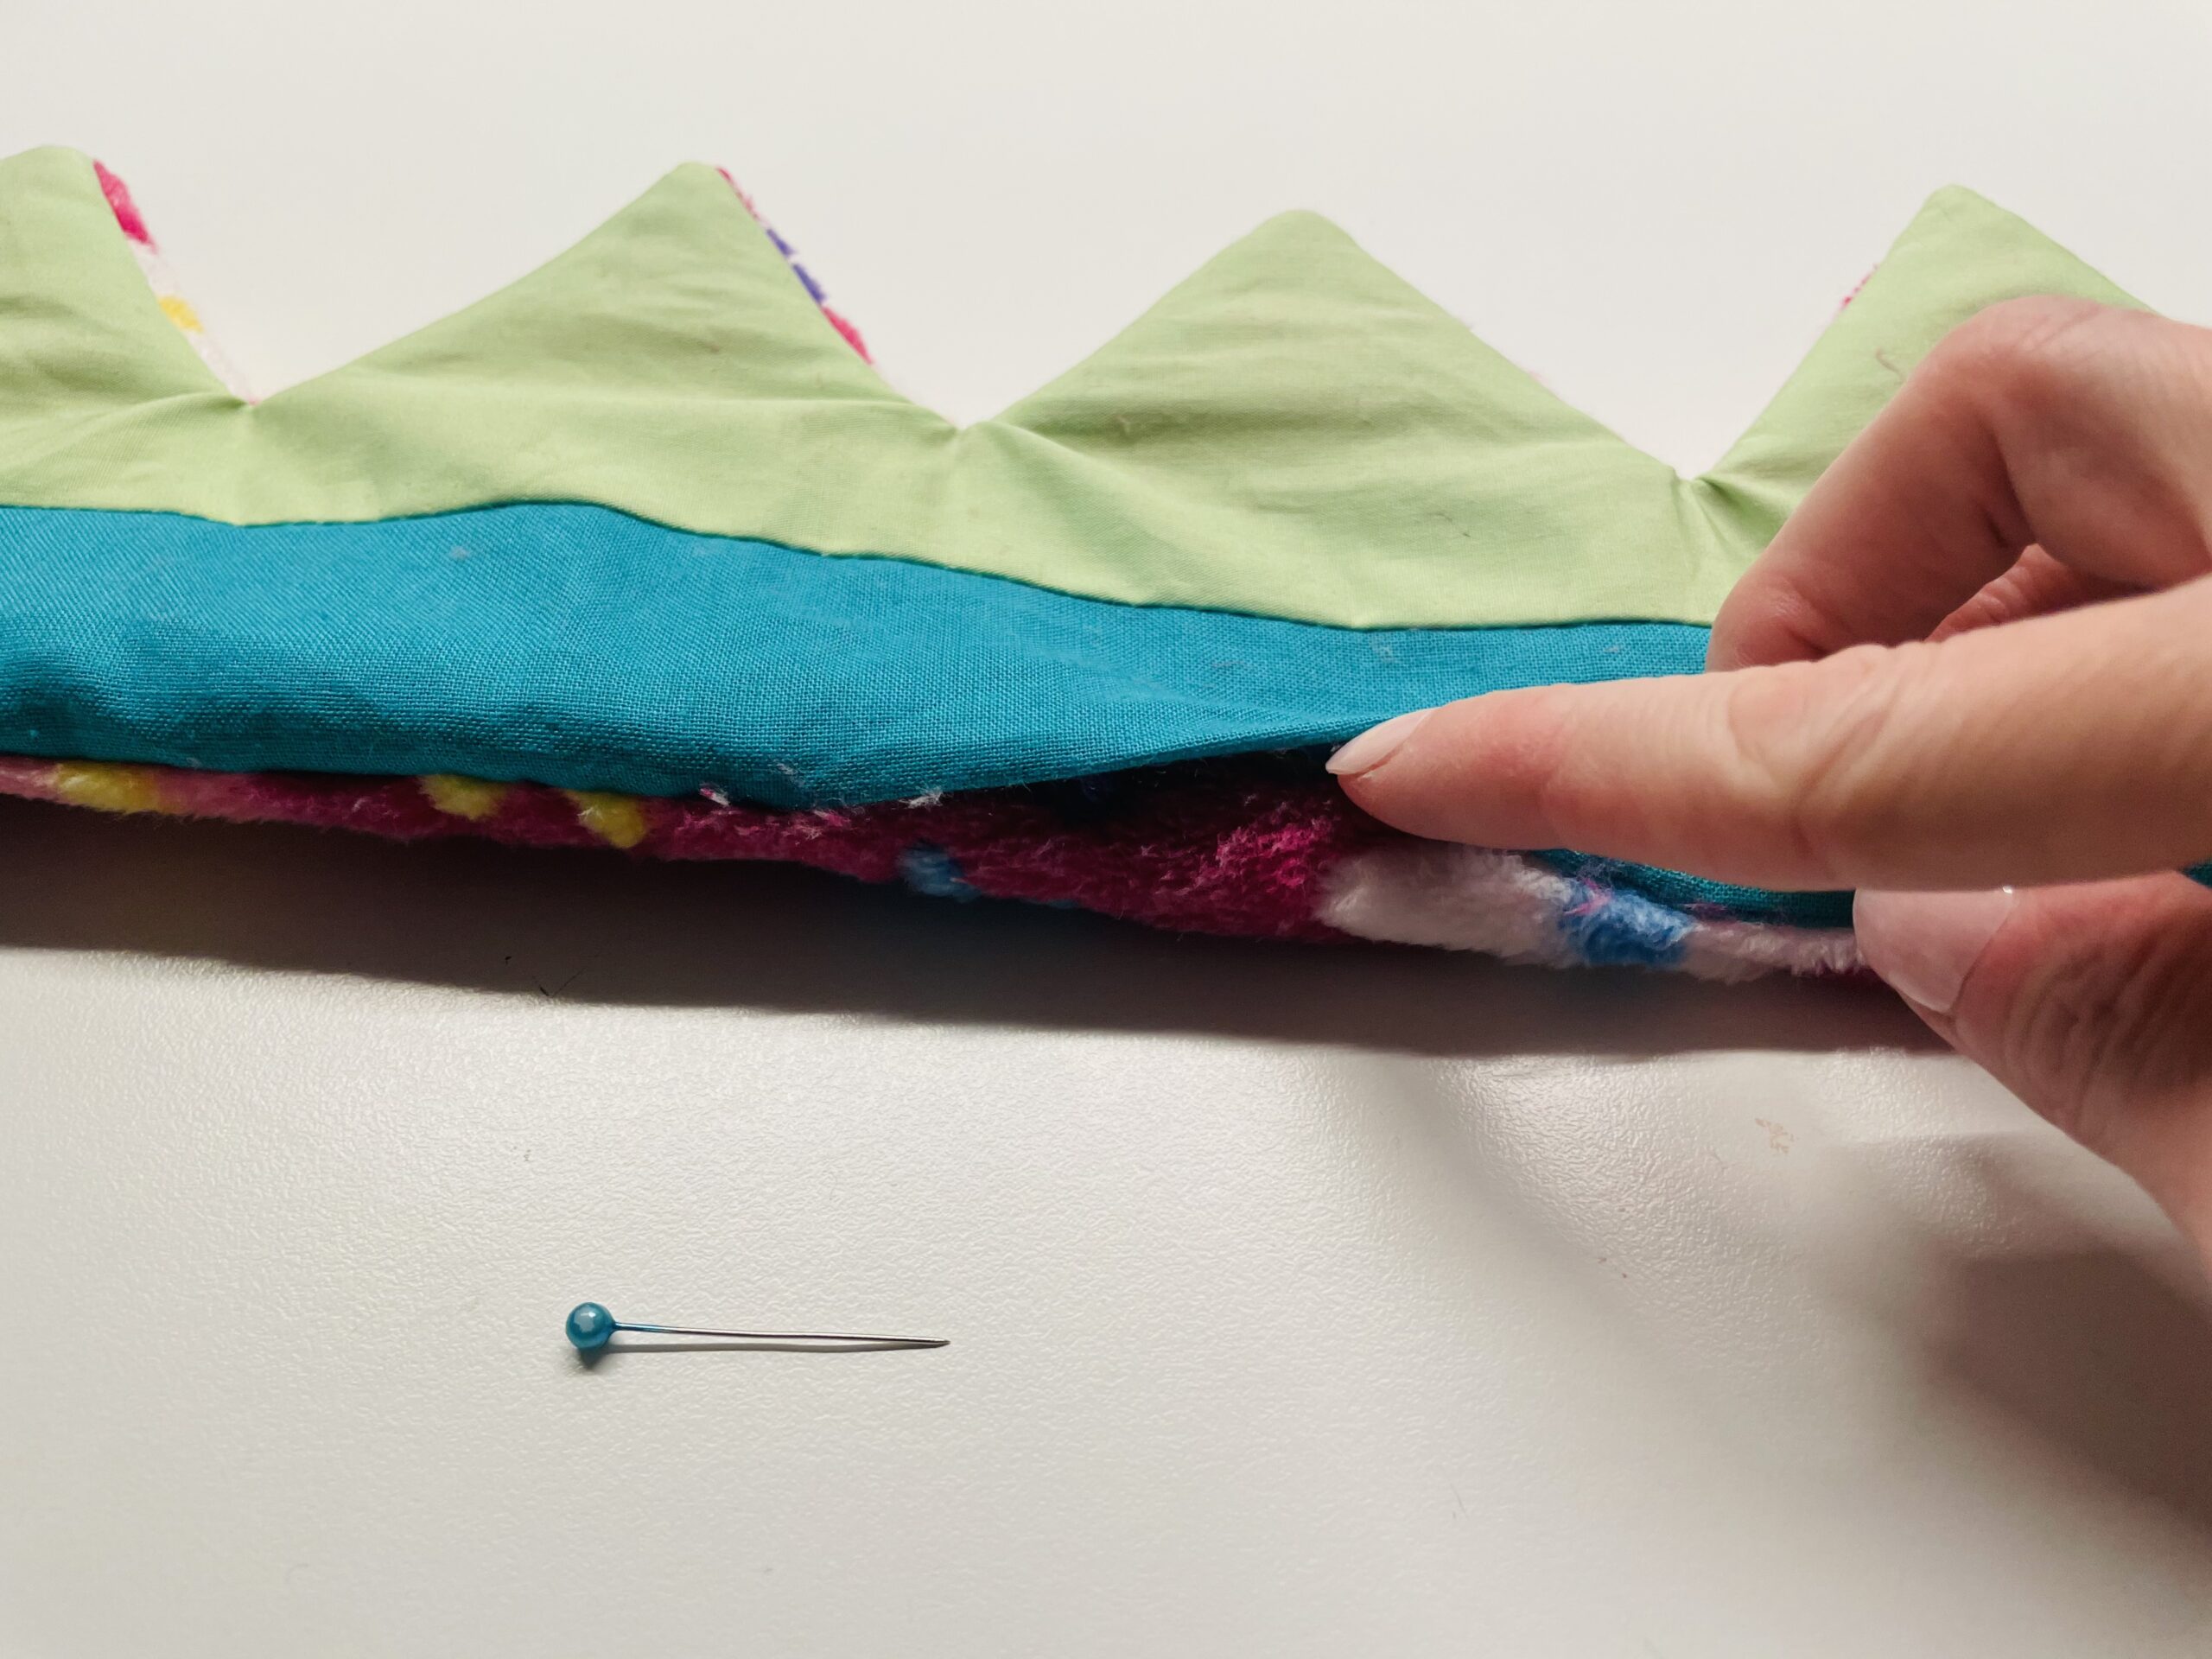
Bild zum Schritt 22 für das Bastel- und DIY-Abenteuer für Kinder: 'Der Stoff an der Wendeöffnung wird nun ordentlich aufeinander gelegt.'

23

Inserts a pin to fix in the closed turning opening.
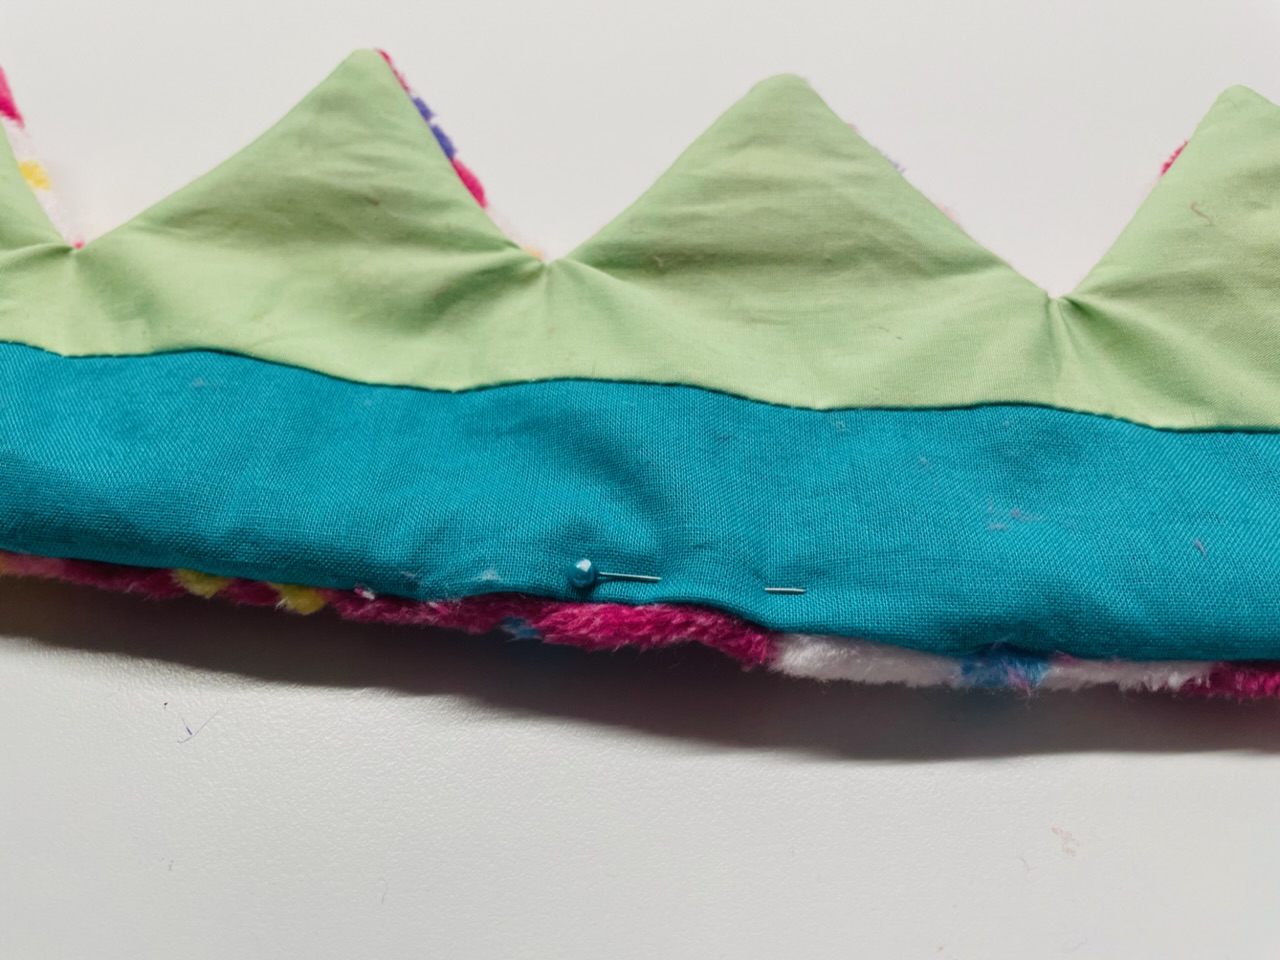
Bild zum Schritt 23 für das Bastel- und DIY-Abenteuer für Kinder: 'Steckt eine Stecknadel zum fixieren in die verschlossenen Wendeöffnung.'

24

Starts at the straight bottom with the sewing of the crown. The turning opening is closed when sewing.
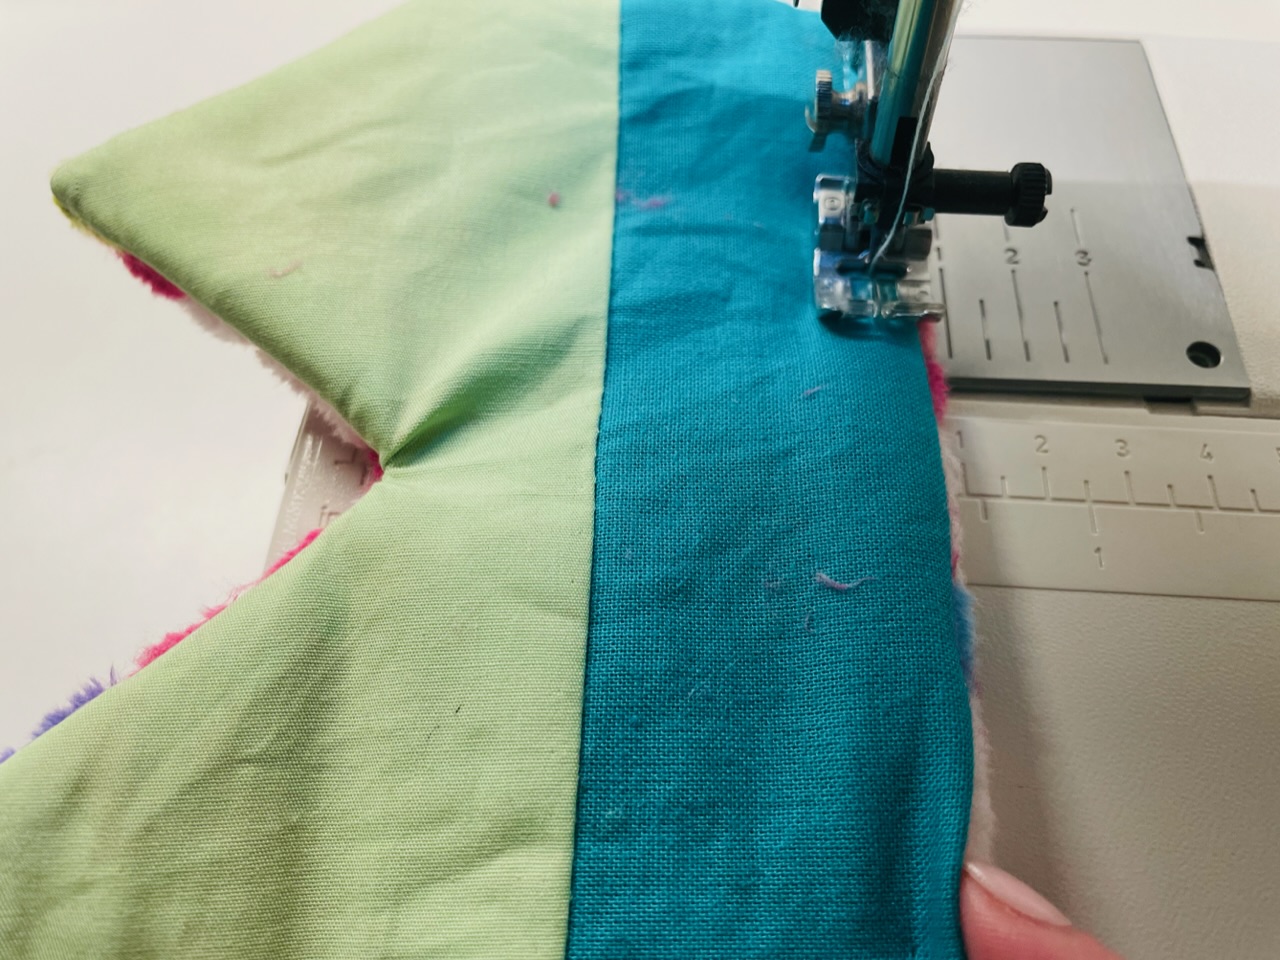
Bild zum Schritt 24 für das Bastel- und DIY-Abenteuer für Kinder: 'Beginnt an der geraden Unterseite mit dem Umnähen der Krone....'

25

Sews an even edge around the complete crown.
Arriving at the top, leave the needle in the fabric again, raise the foot of the sewing machine, turn the fabric so far until the sewing direction is right again.
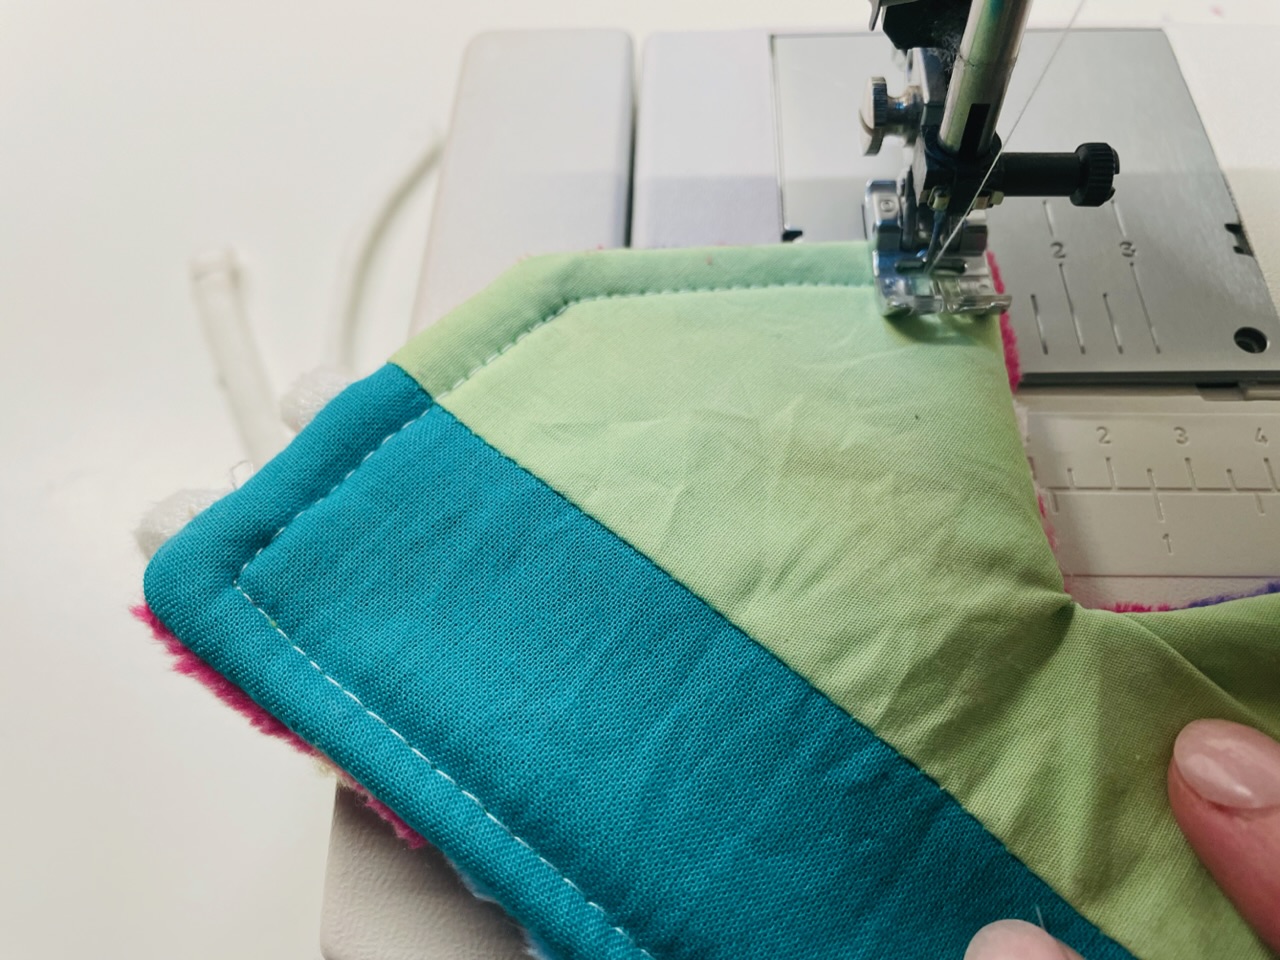
Bild zum Schritt 25 für das Bastel- und DIY-Abenteuer für Kinder: 'Näht einen gleichmäßigen Rand um die komplette Krone.  ...'

26

At the lower tip the needle is also left in the fabric, the little feet are raised and the fabric is turned back into position.
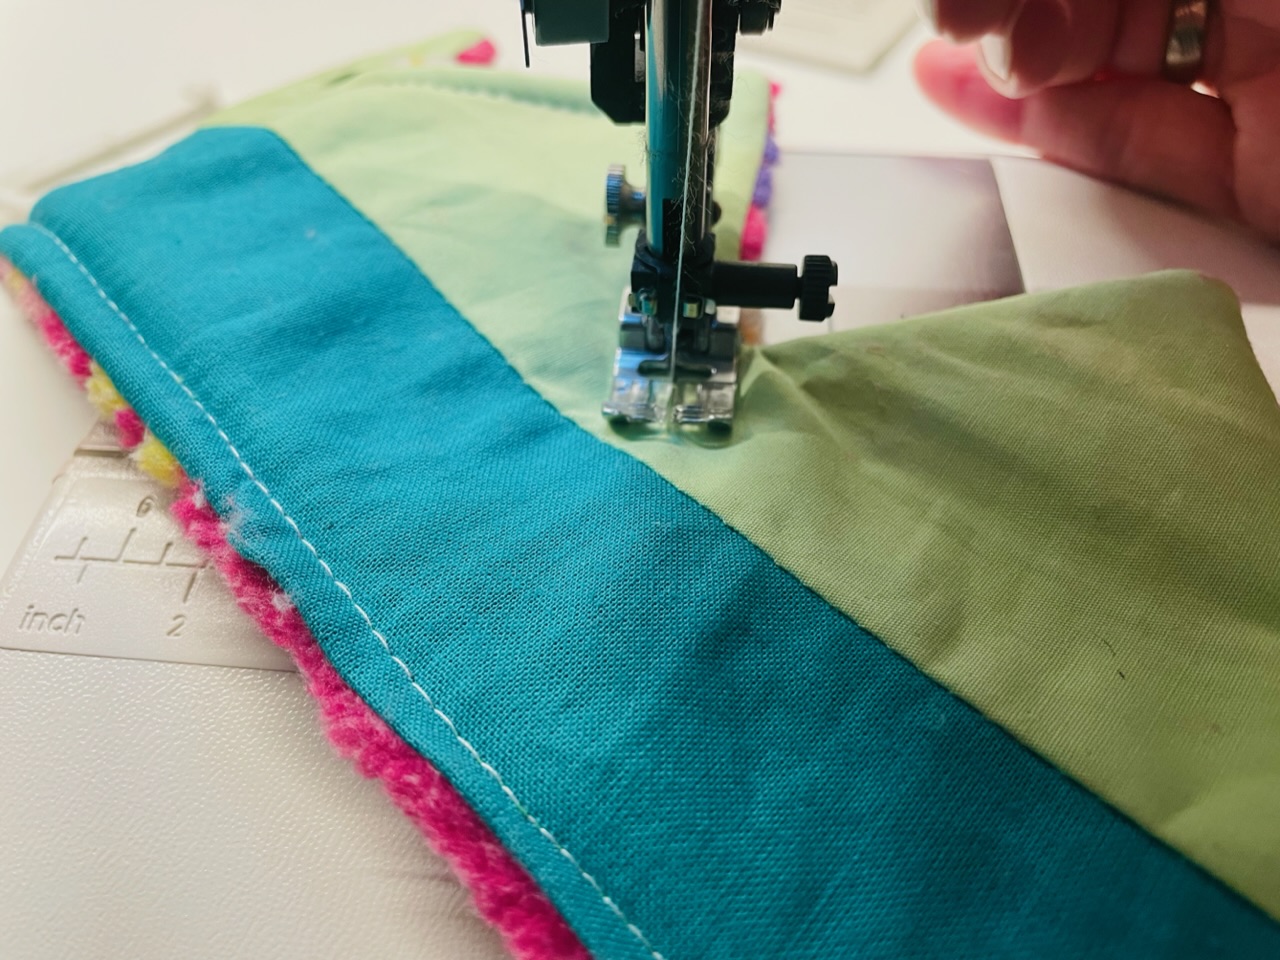
Bild zum Schritt 26 für das Bastel- und DIY-Abenteuer für Kinder: 'An der unteren Spitze wird ebenfalls die Nadel im Stoff...'

27

Go to the end of the crown.

Bild zum Schritt 27 für das Bastel- und DIY-Abenteuer für Kinder: 'Verfahrt so bis zum Ende der Krone.'

28

When you arrive at the beginning of the seam, cut off the thread.
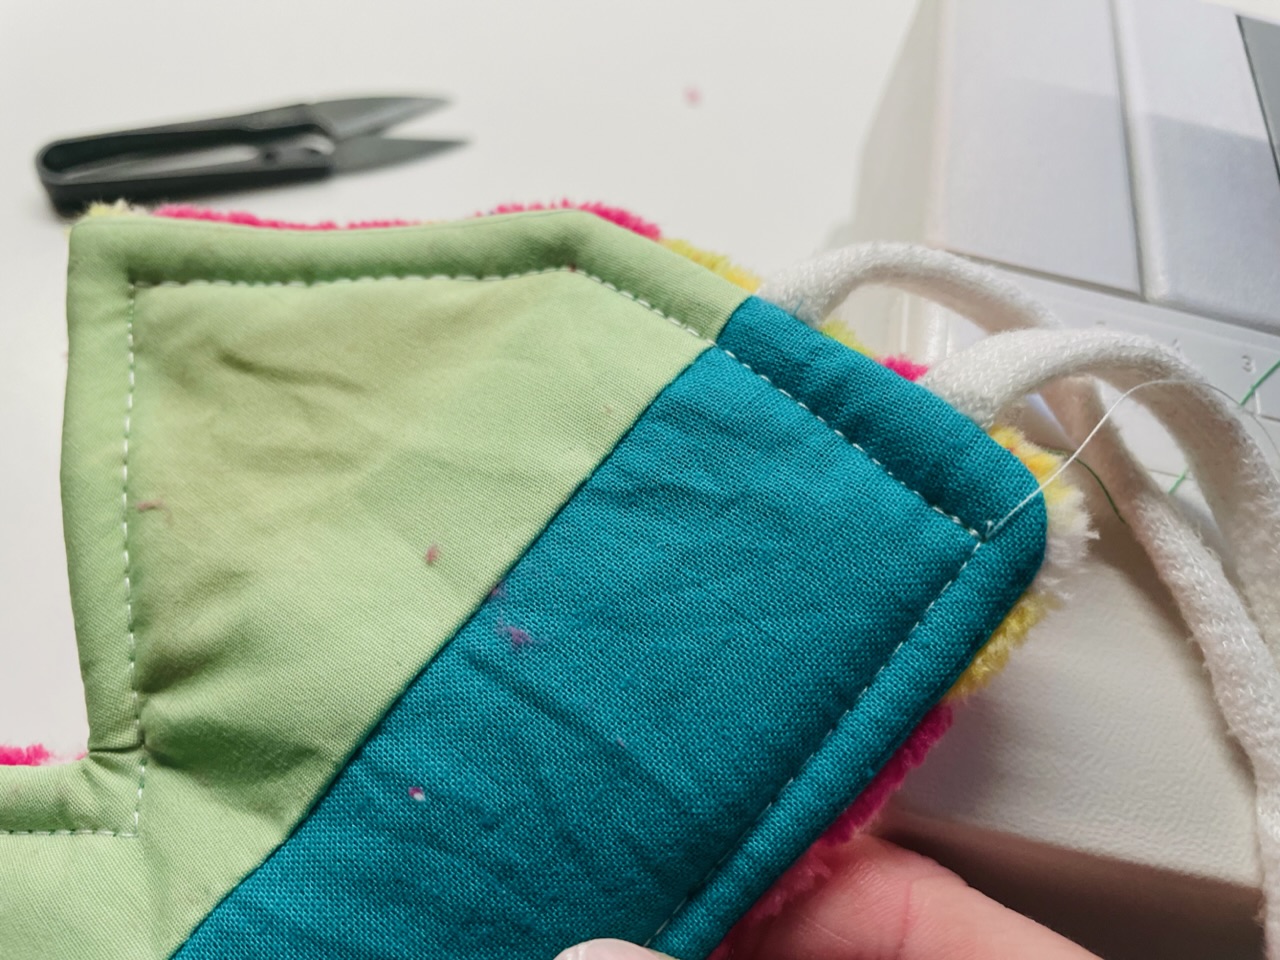
Bild zum Schritt 28 für das Bastel- und DIY-Abenteuer für Kinder: 'Wenn ihr am Beginn der Naht angekommen seid, schneidet den...'

29

Finished is the crown! Both sides can be used as an outside.
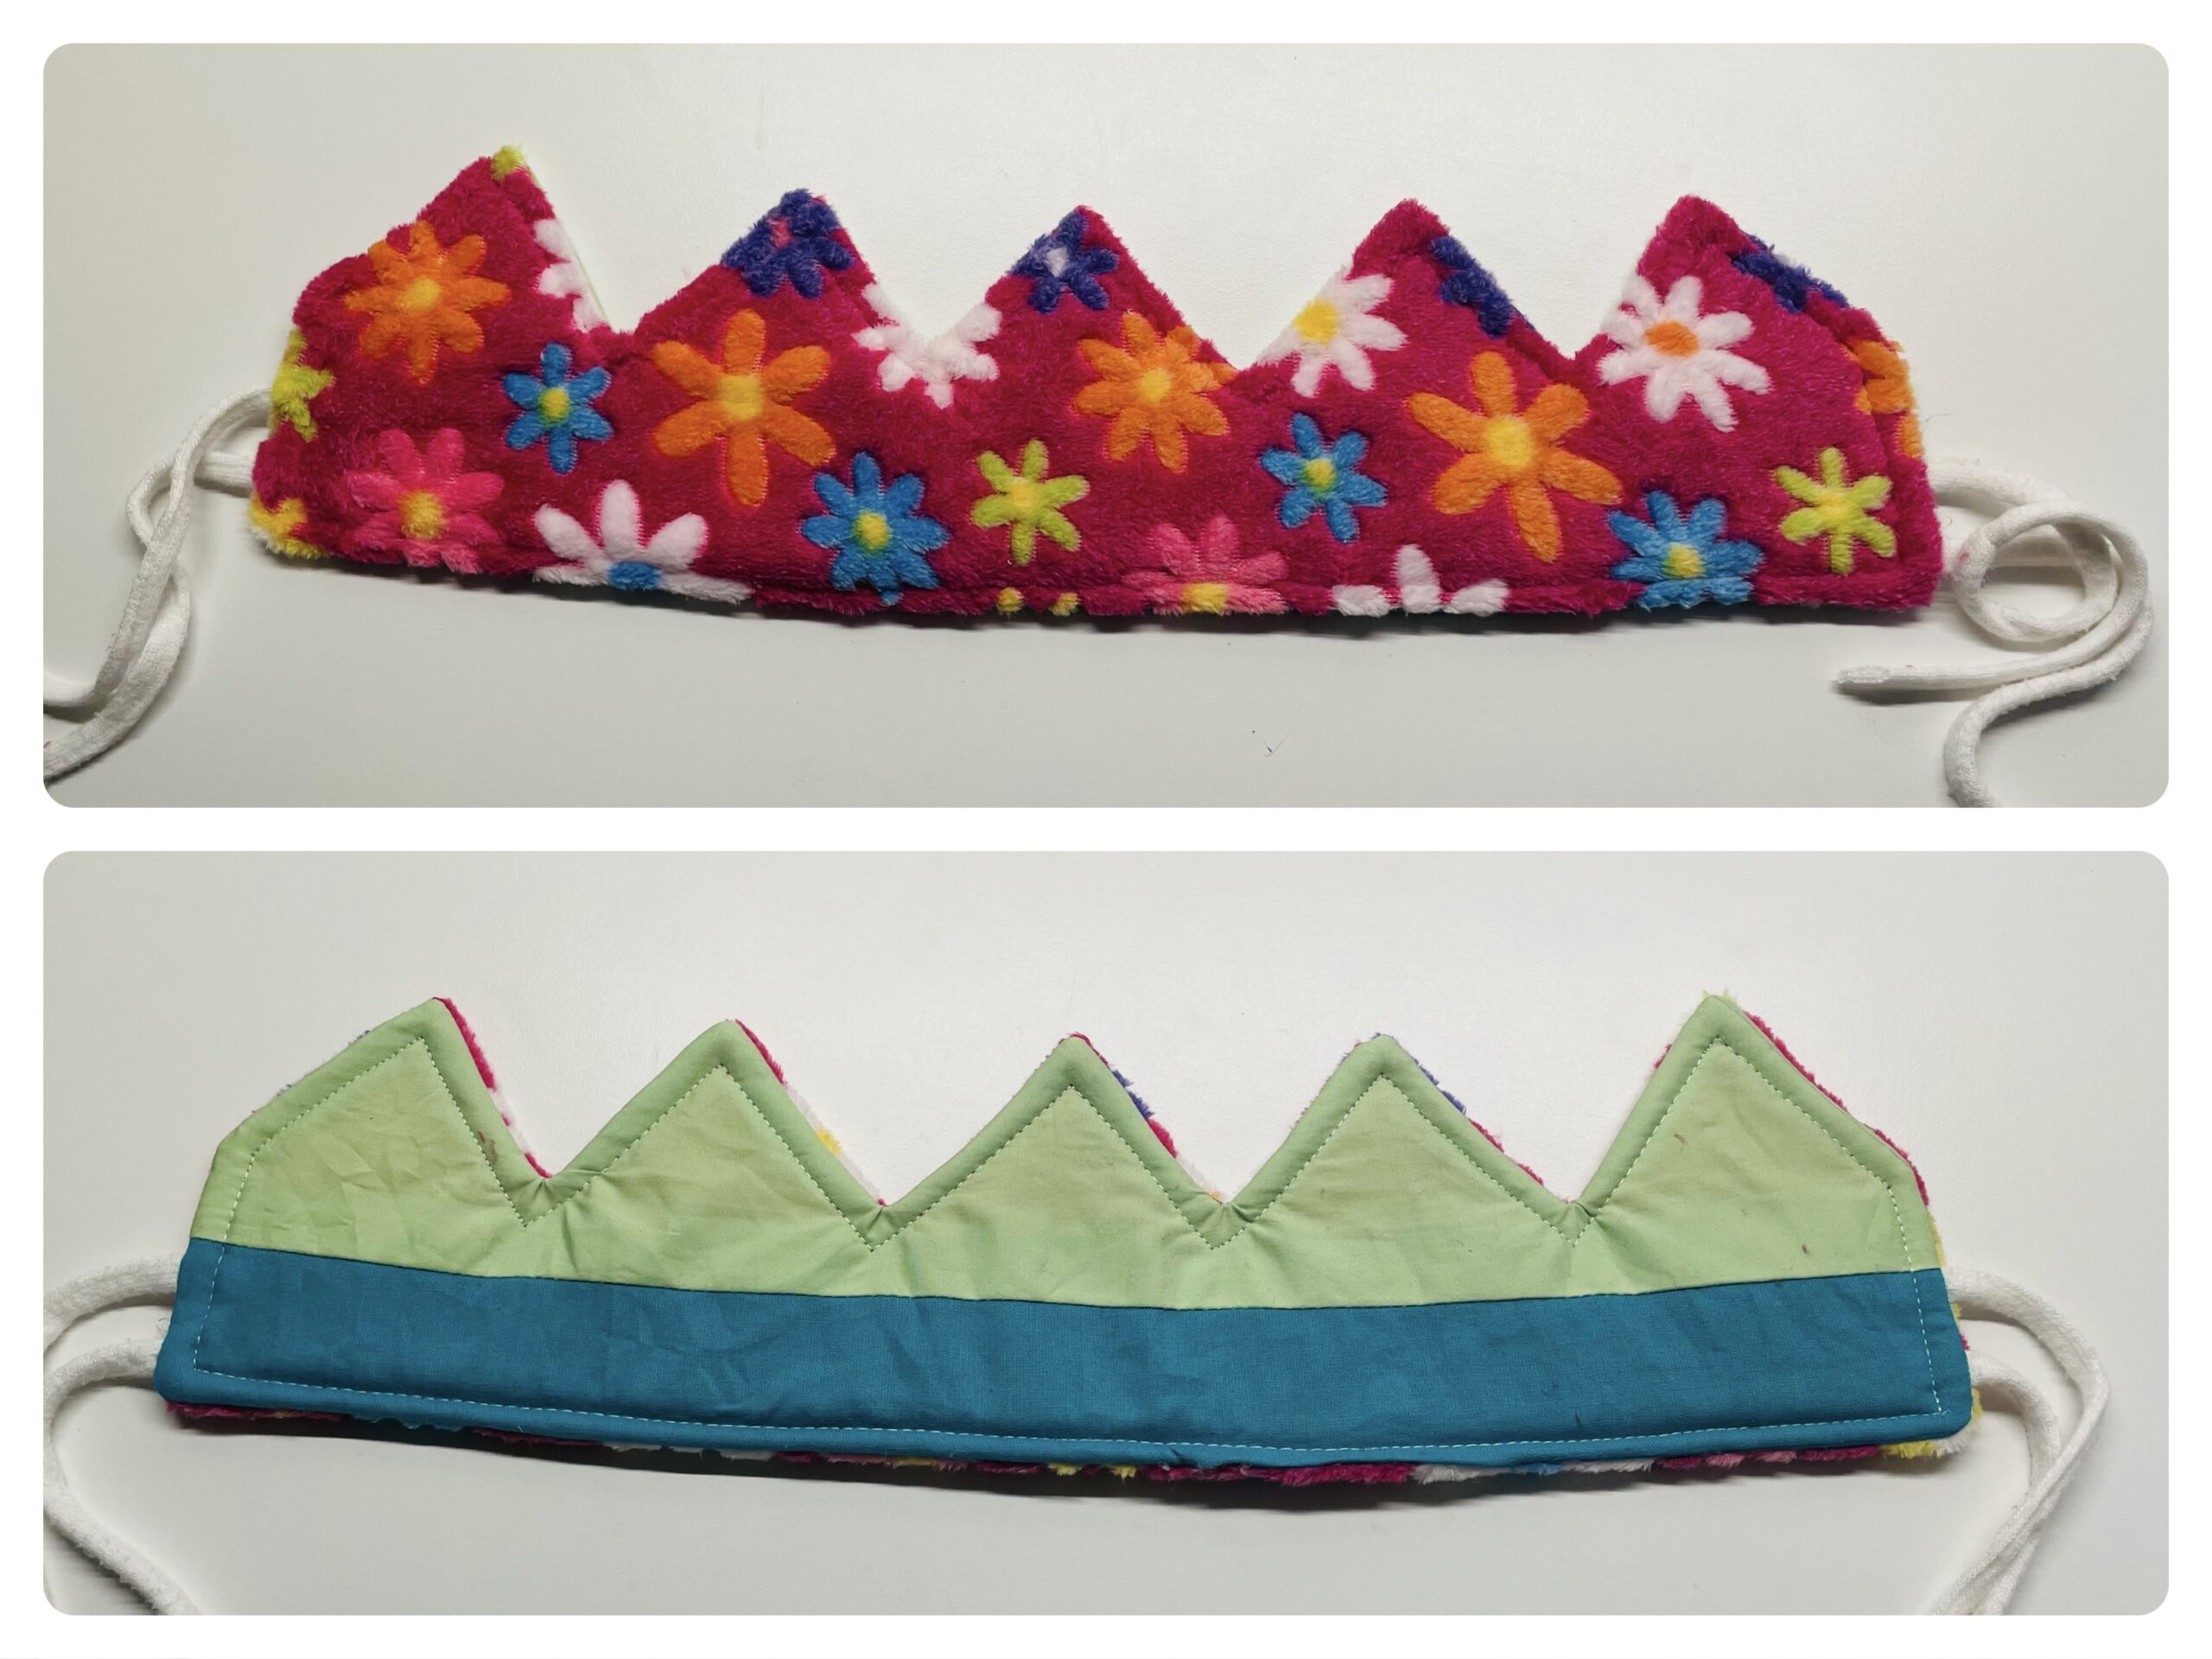
Bild zum Schritt 29 für das Bastel- und DIY-Abenteuer für Kinder: 'Fertig ist die Krone! Beide Seiten können als Außenseite verwendet...'

30

With the ribbons you can close the crown as a circle. Adjust it to the head circumference of the child.
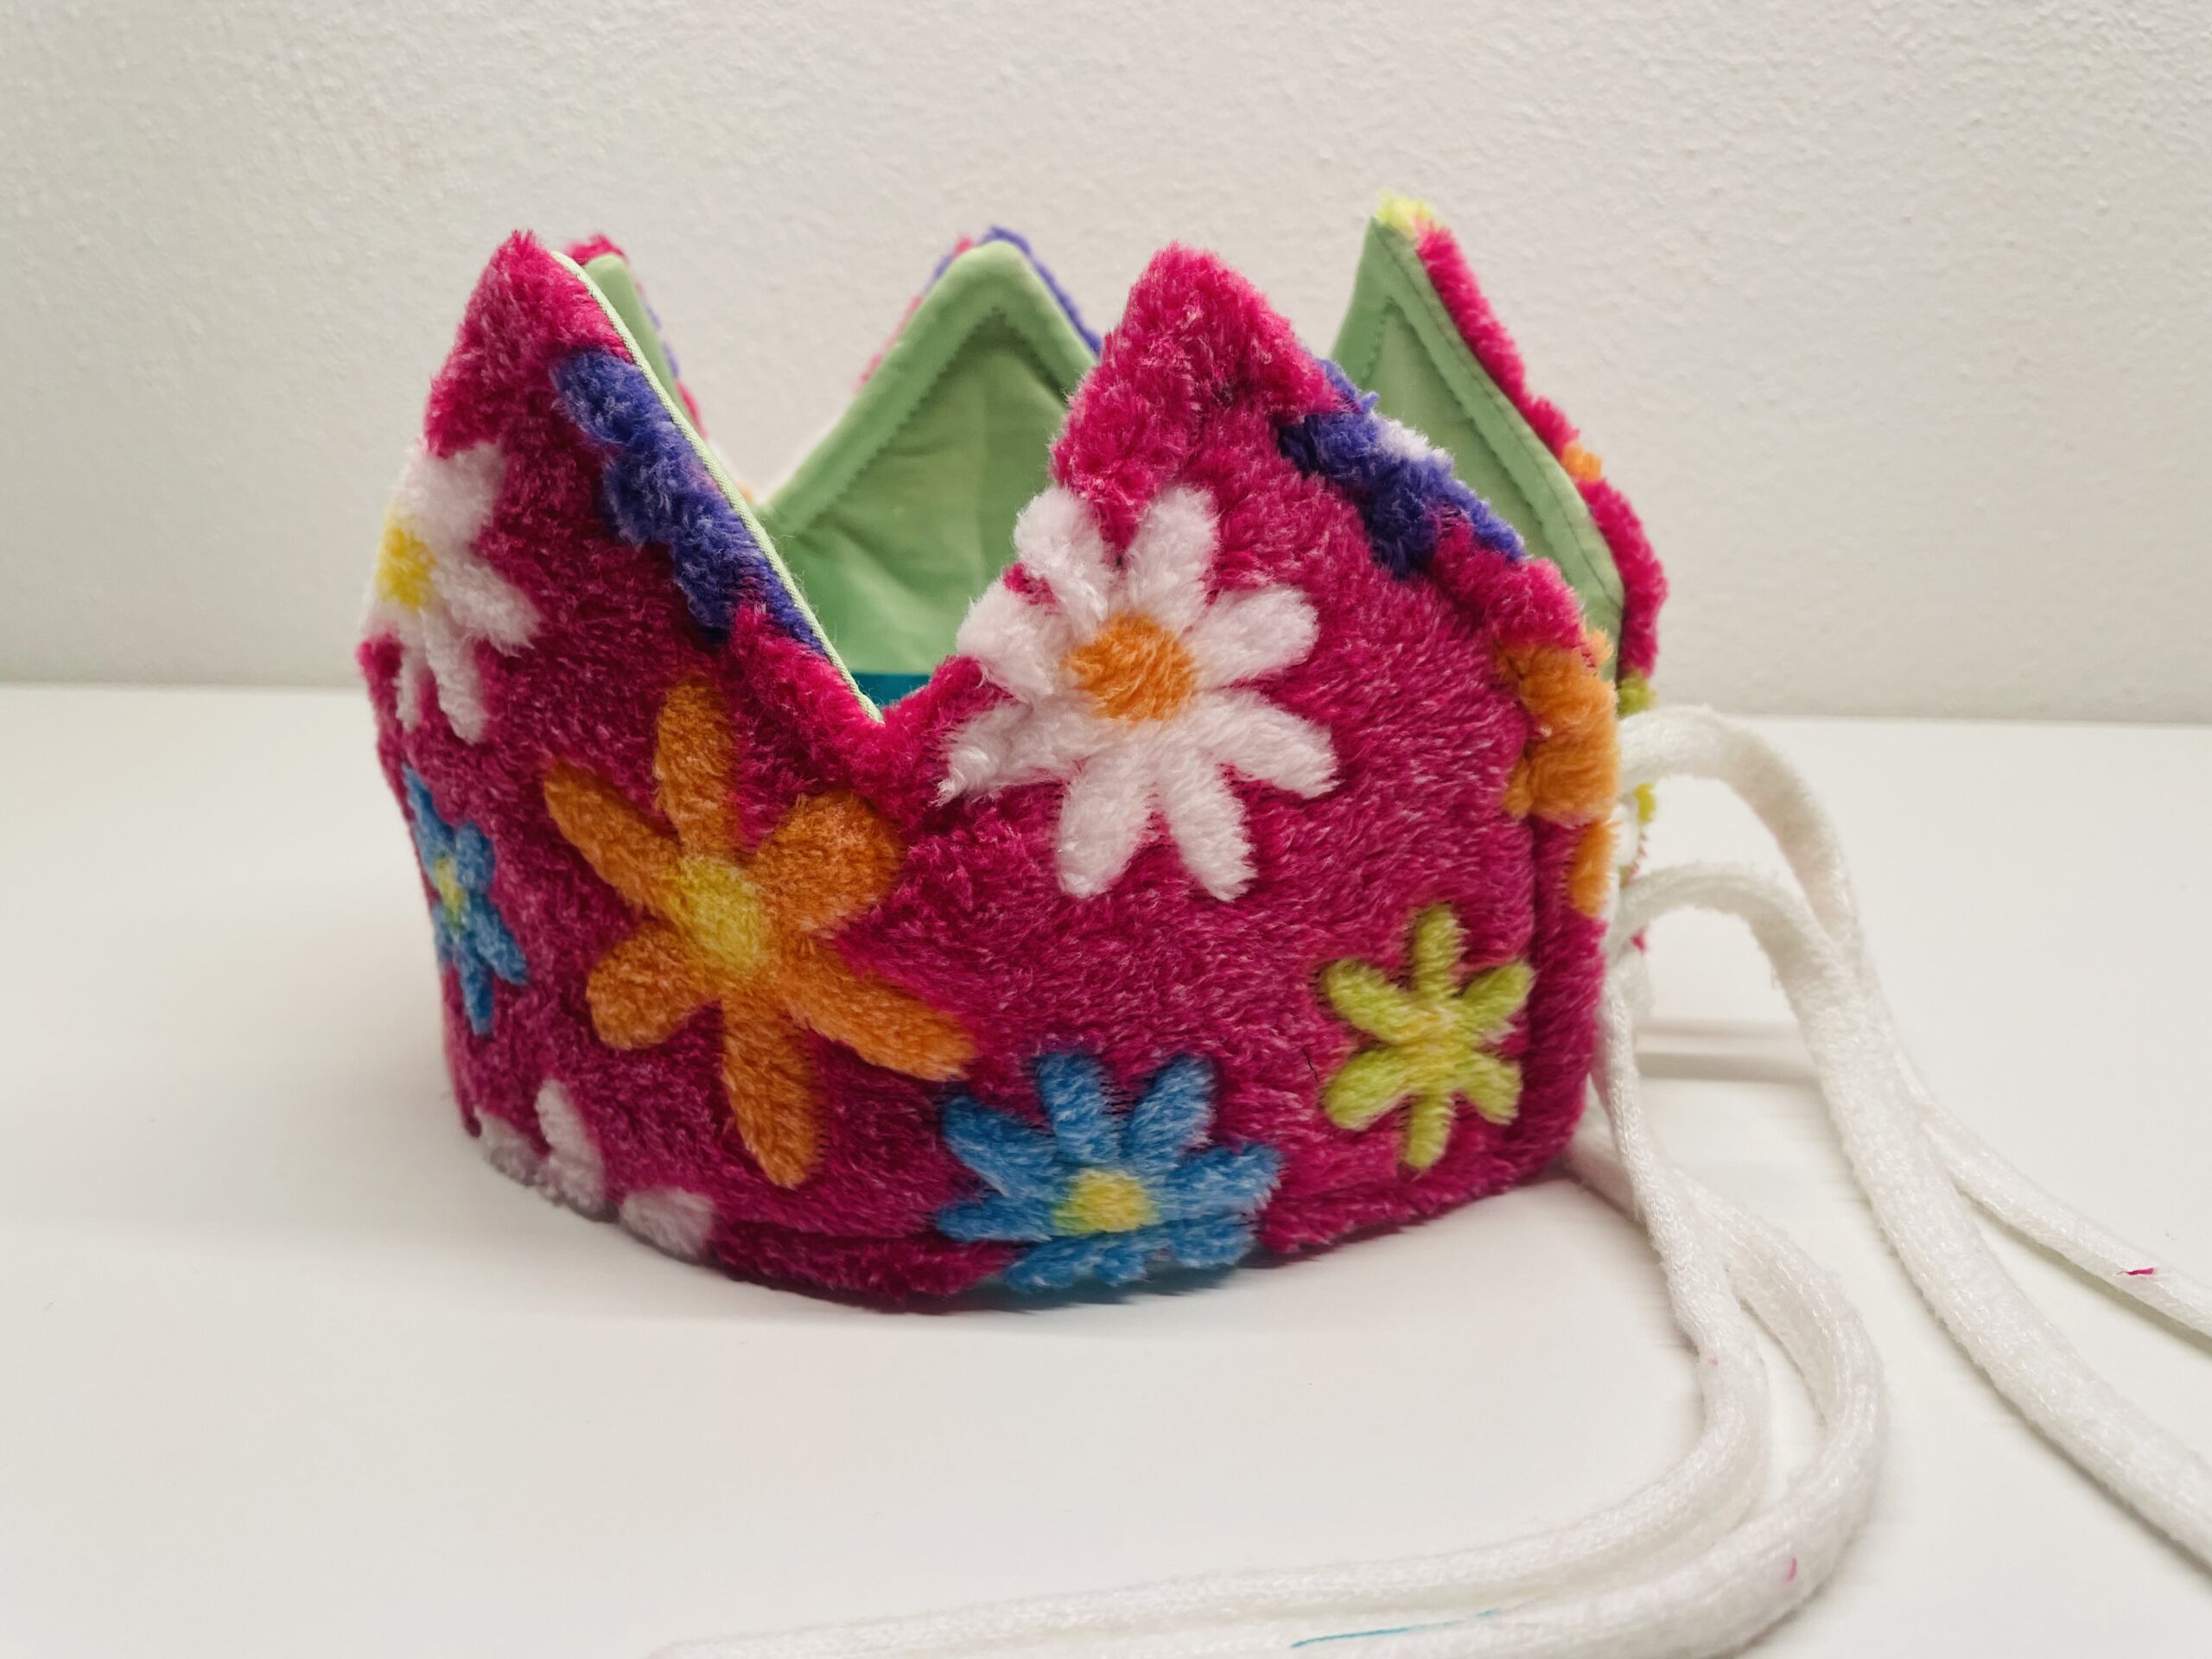
Bild zum Schritt 30 für das Bastel- und DIY-Abenteuer für Kinder: 'Mit den Bändern könnt ihr die Krone als Kreis schließen....'

31

Now you have a "co-growing" crown, which can not only be used at the birthday, but also play for role playing, carnival or to the theater.
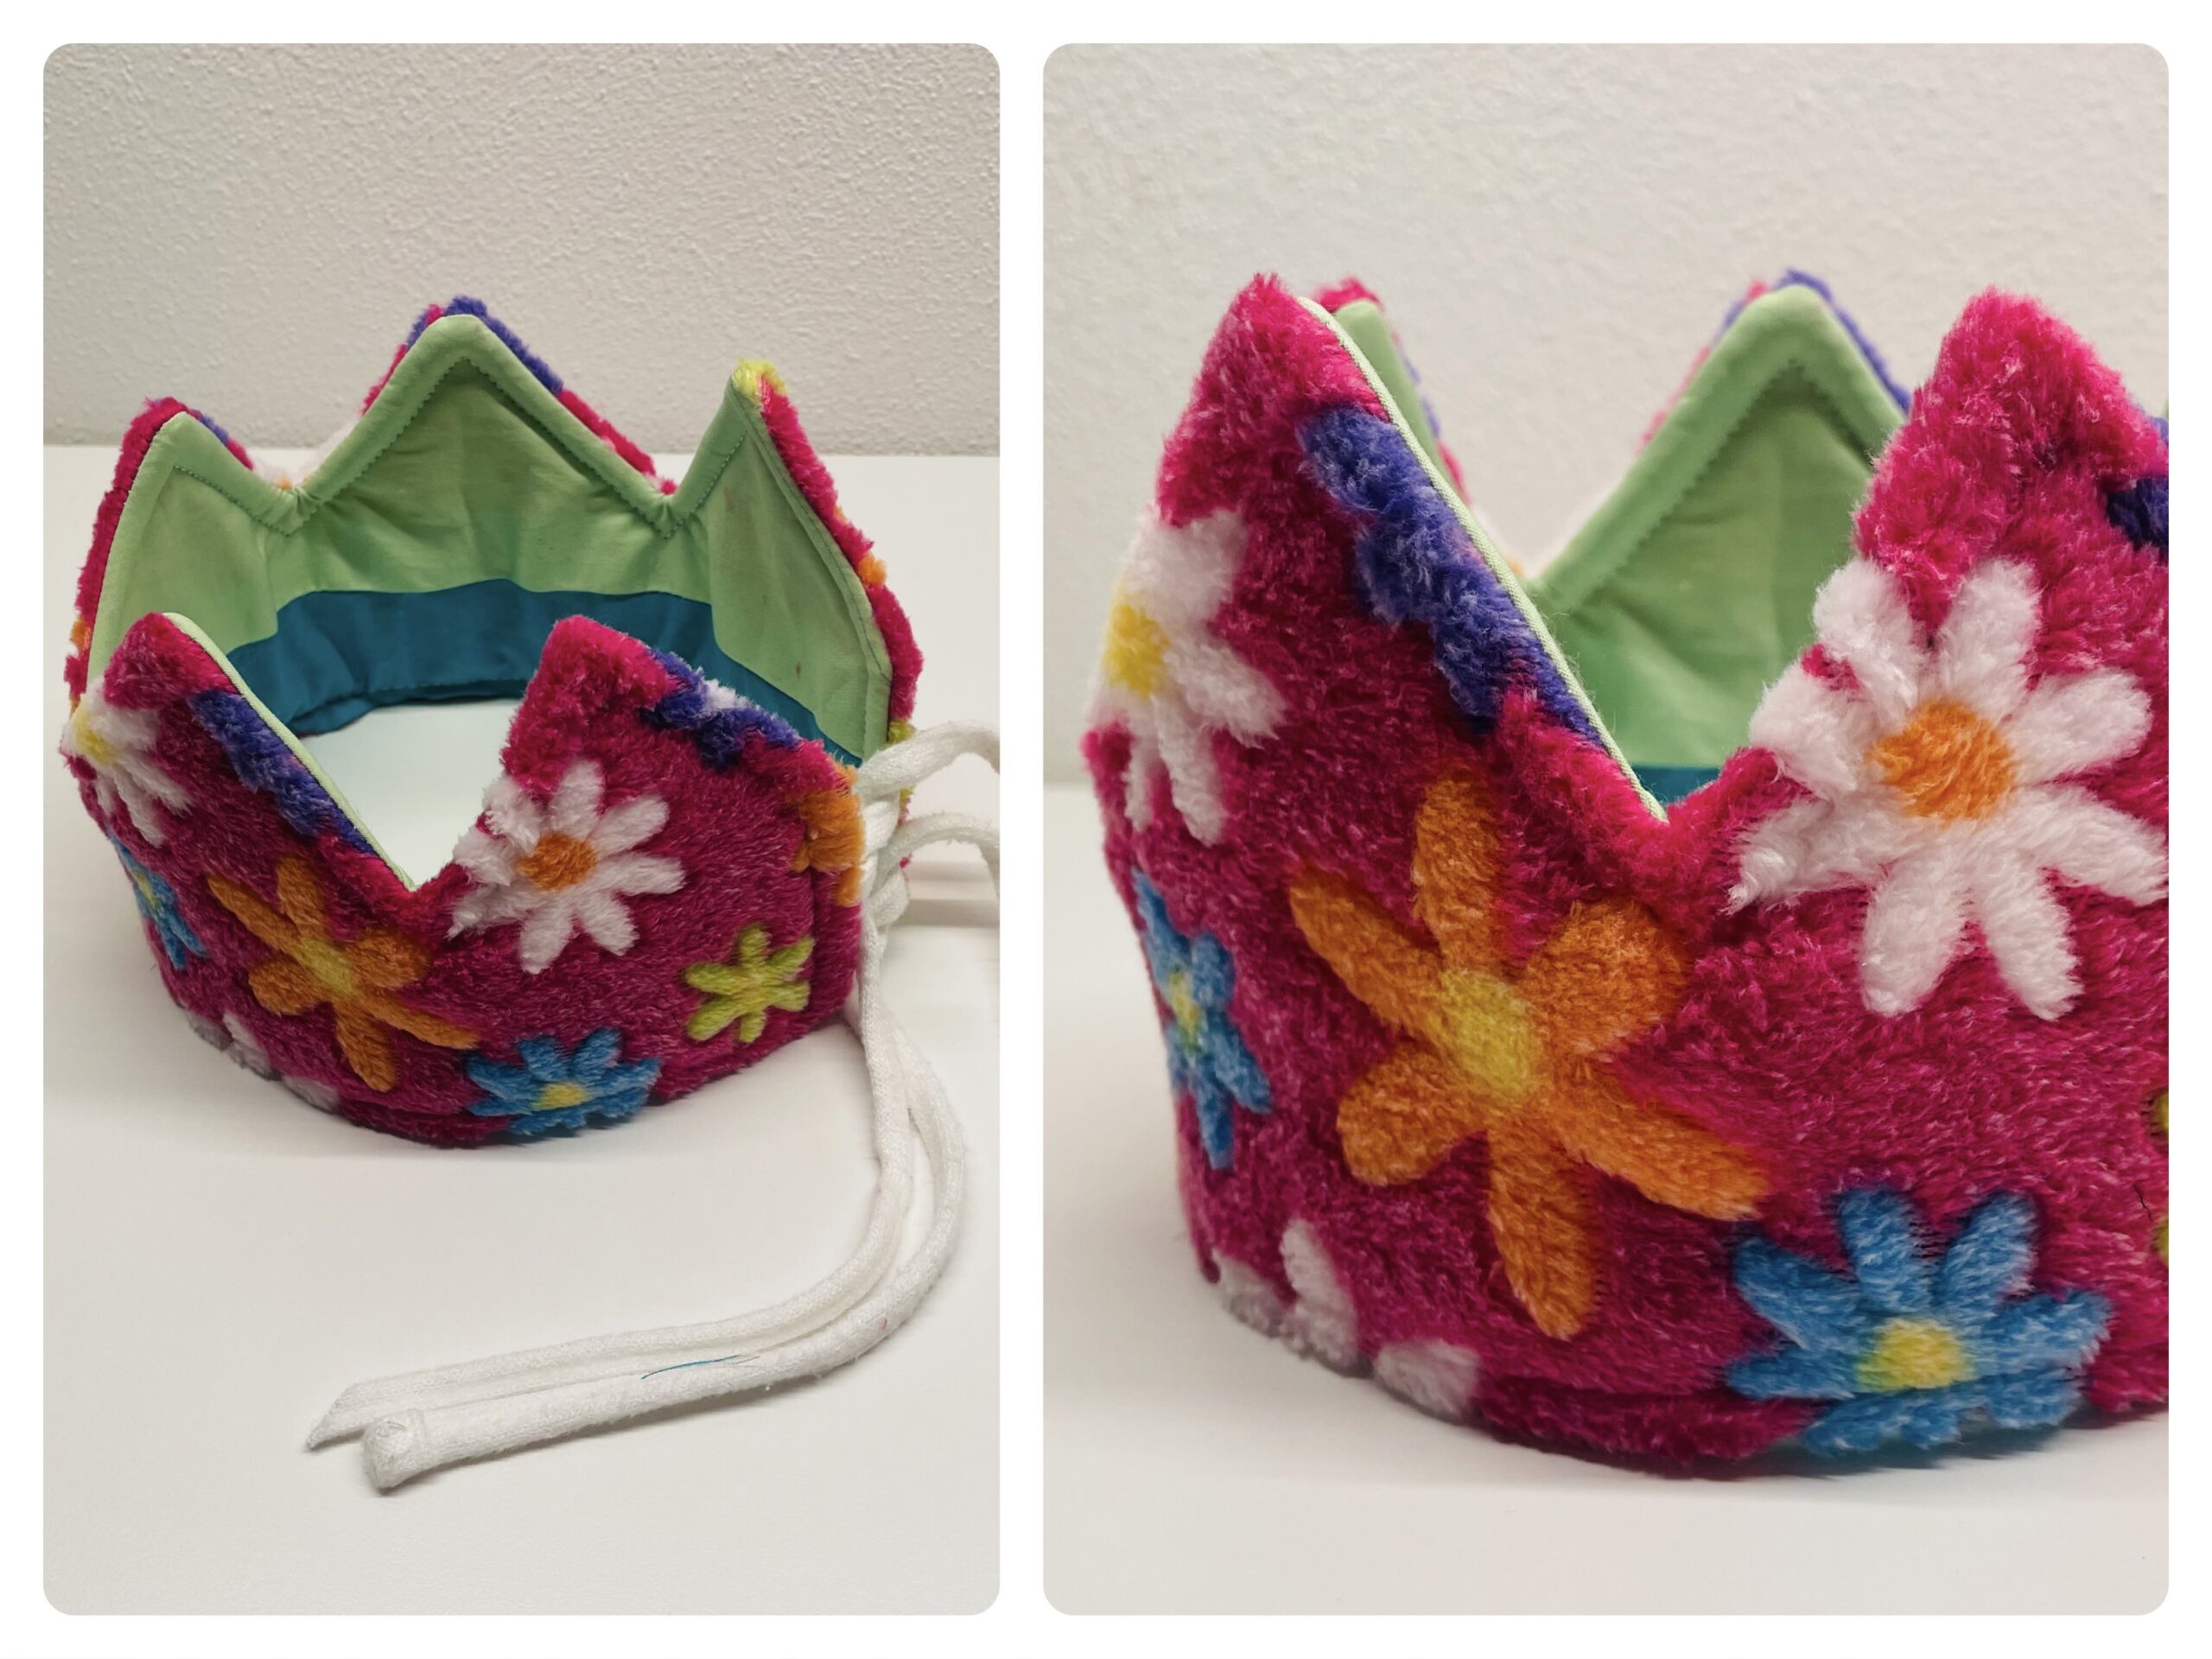
Bild zum Schritt 31 für das Bastel- und DIY-Abenteuer für Kinder: 'Nun habt ihr eine „mitwachsende“ Krone, die nicht nur beim...'

Other variants:
32

Another crown with the same outer fabric, but other inner fabric!
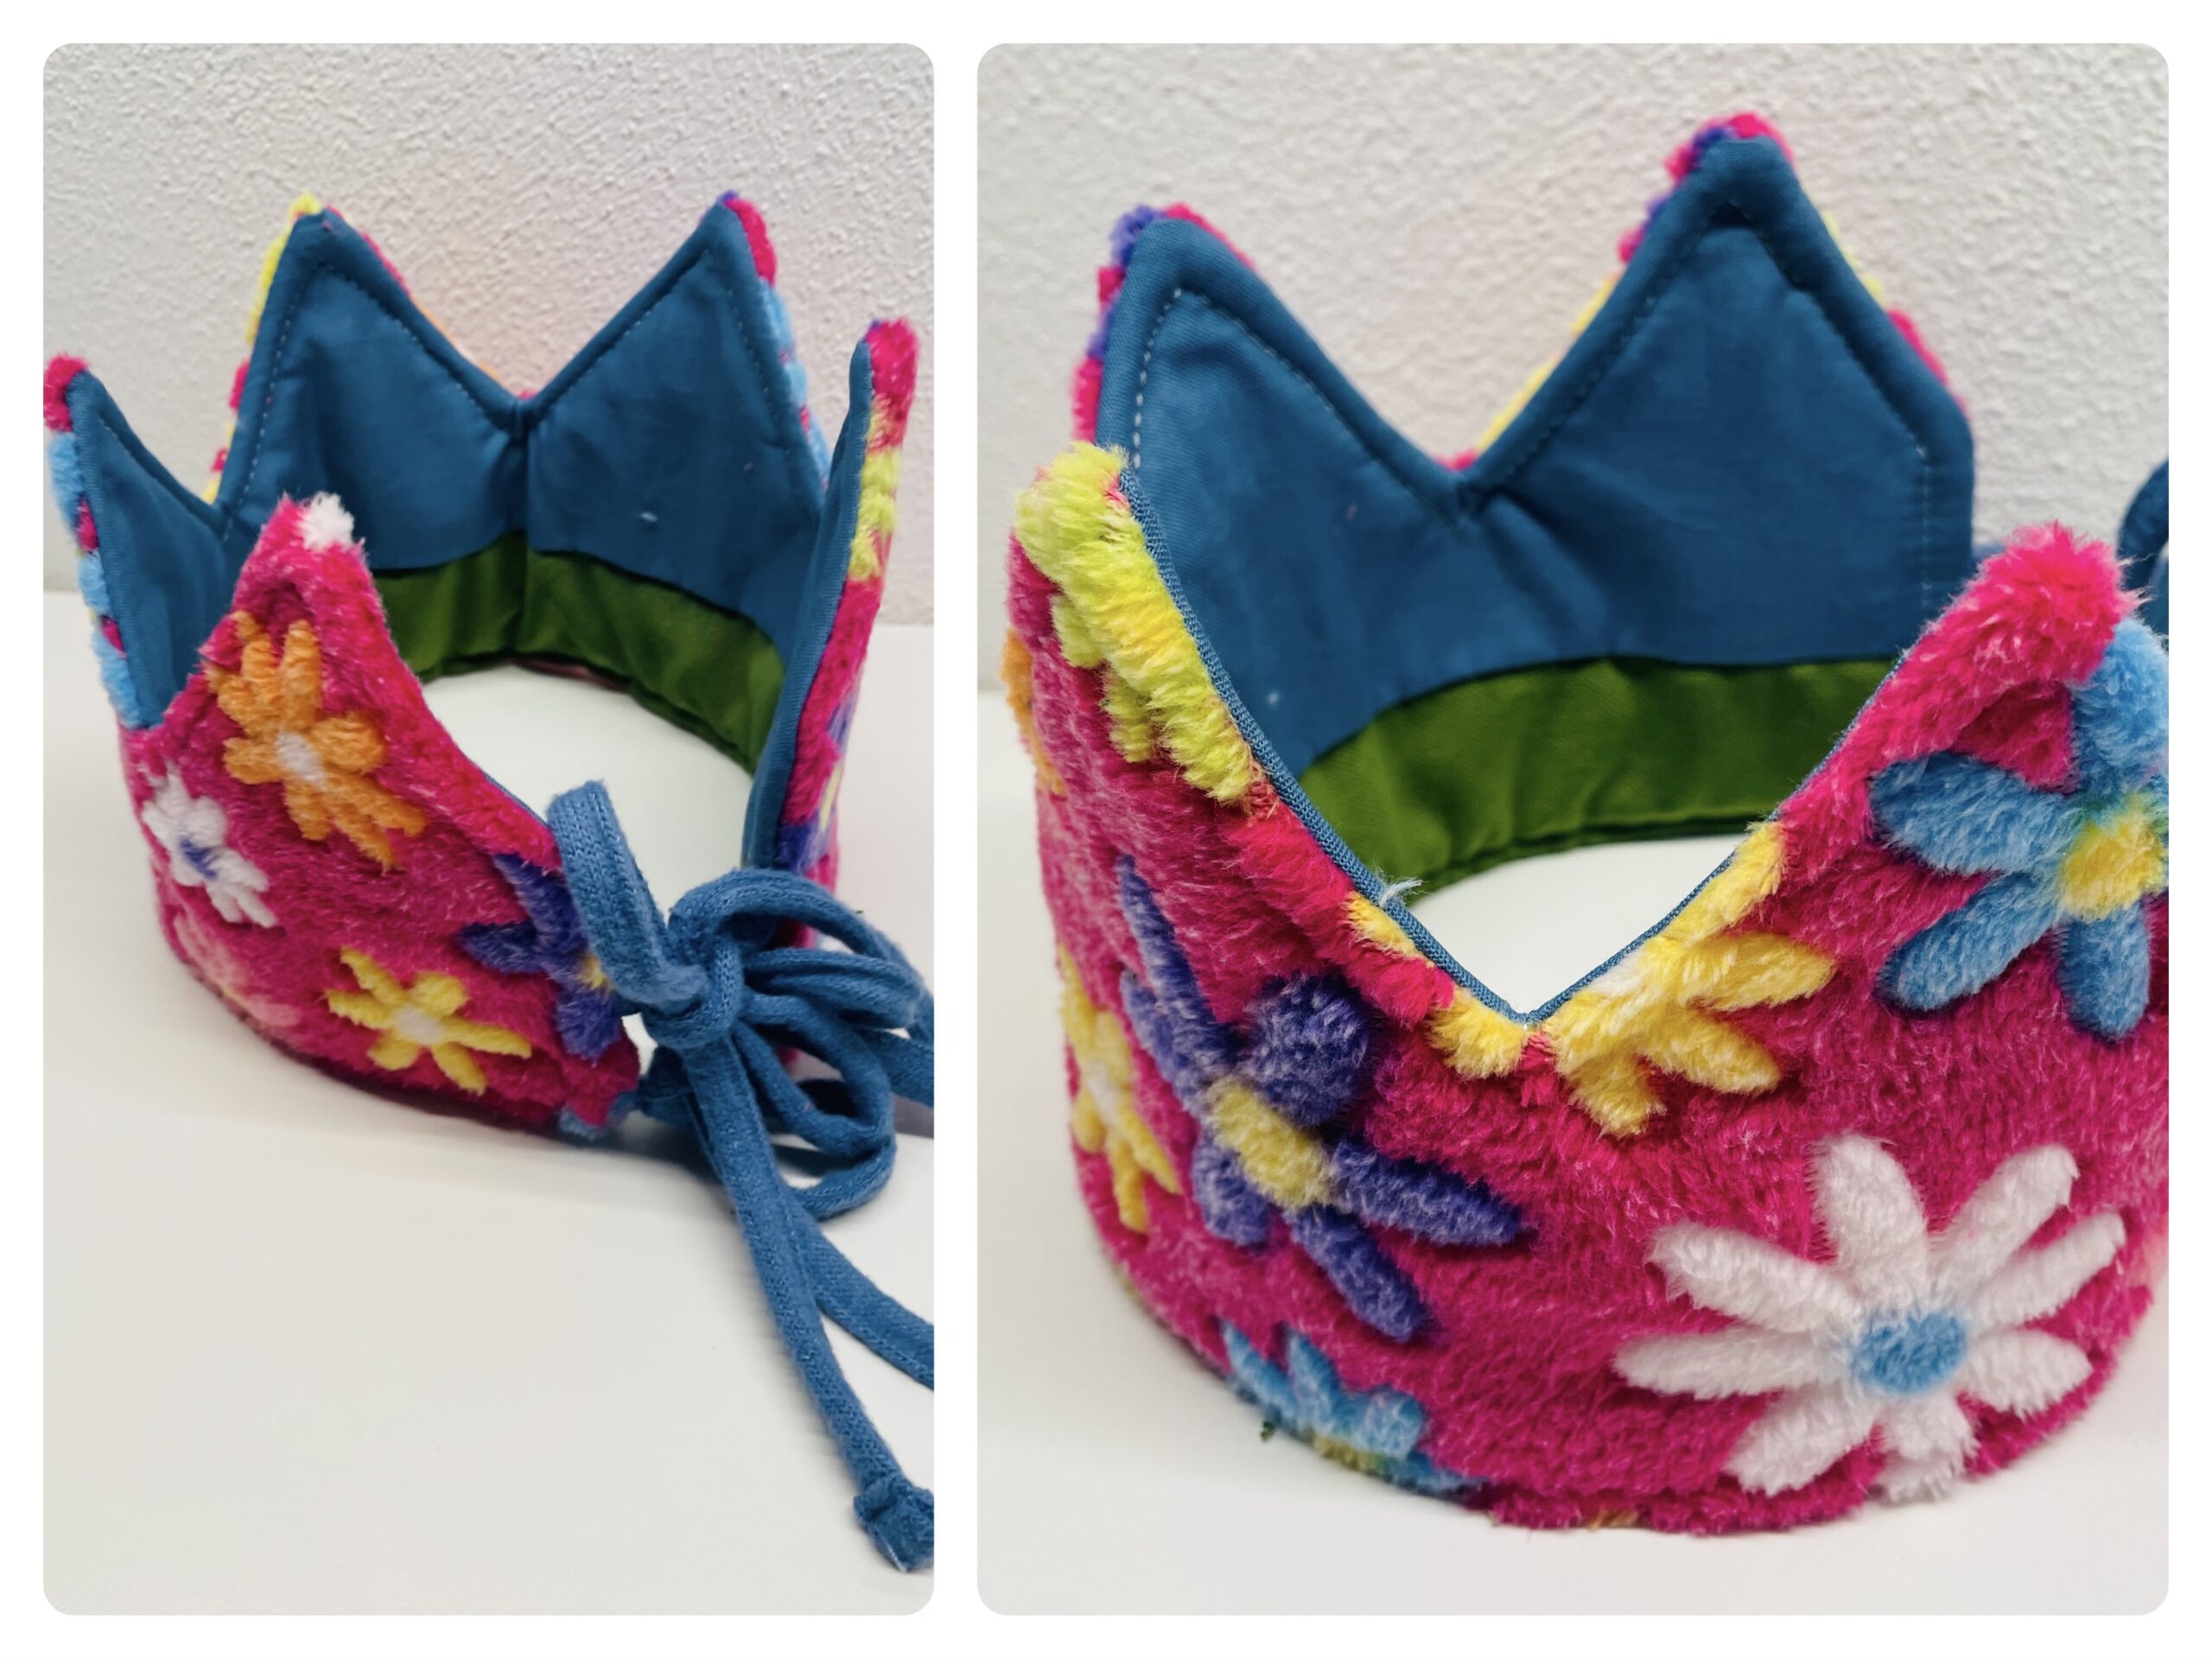
Bild zum Schritt 33 für das Bastel- und DIY-Abenteuer für Kinder: 'Eine weitere Krone mit gleichem Außenstoff, aber anderen Innenstoff!'

33

Stay creative and have fun with it.

Model of the crown:
34

Both templates must be printed.

Bild zum Schritt 36 für das Bastel- und DIY-Abenteuer für Kinder: 'Beide Vorlagen müssen ausgedruckt werden.'

35

2. Bild zum Schritt 36 für das Bastel- und DIY-Abenteuer für Kinder: 'Beide Vorlagen müssen ausgedruckt werden.'

36

Prepare the prints and a paper scissors.
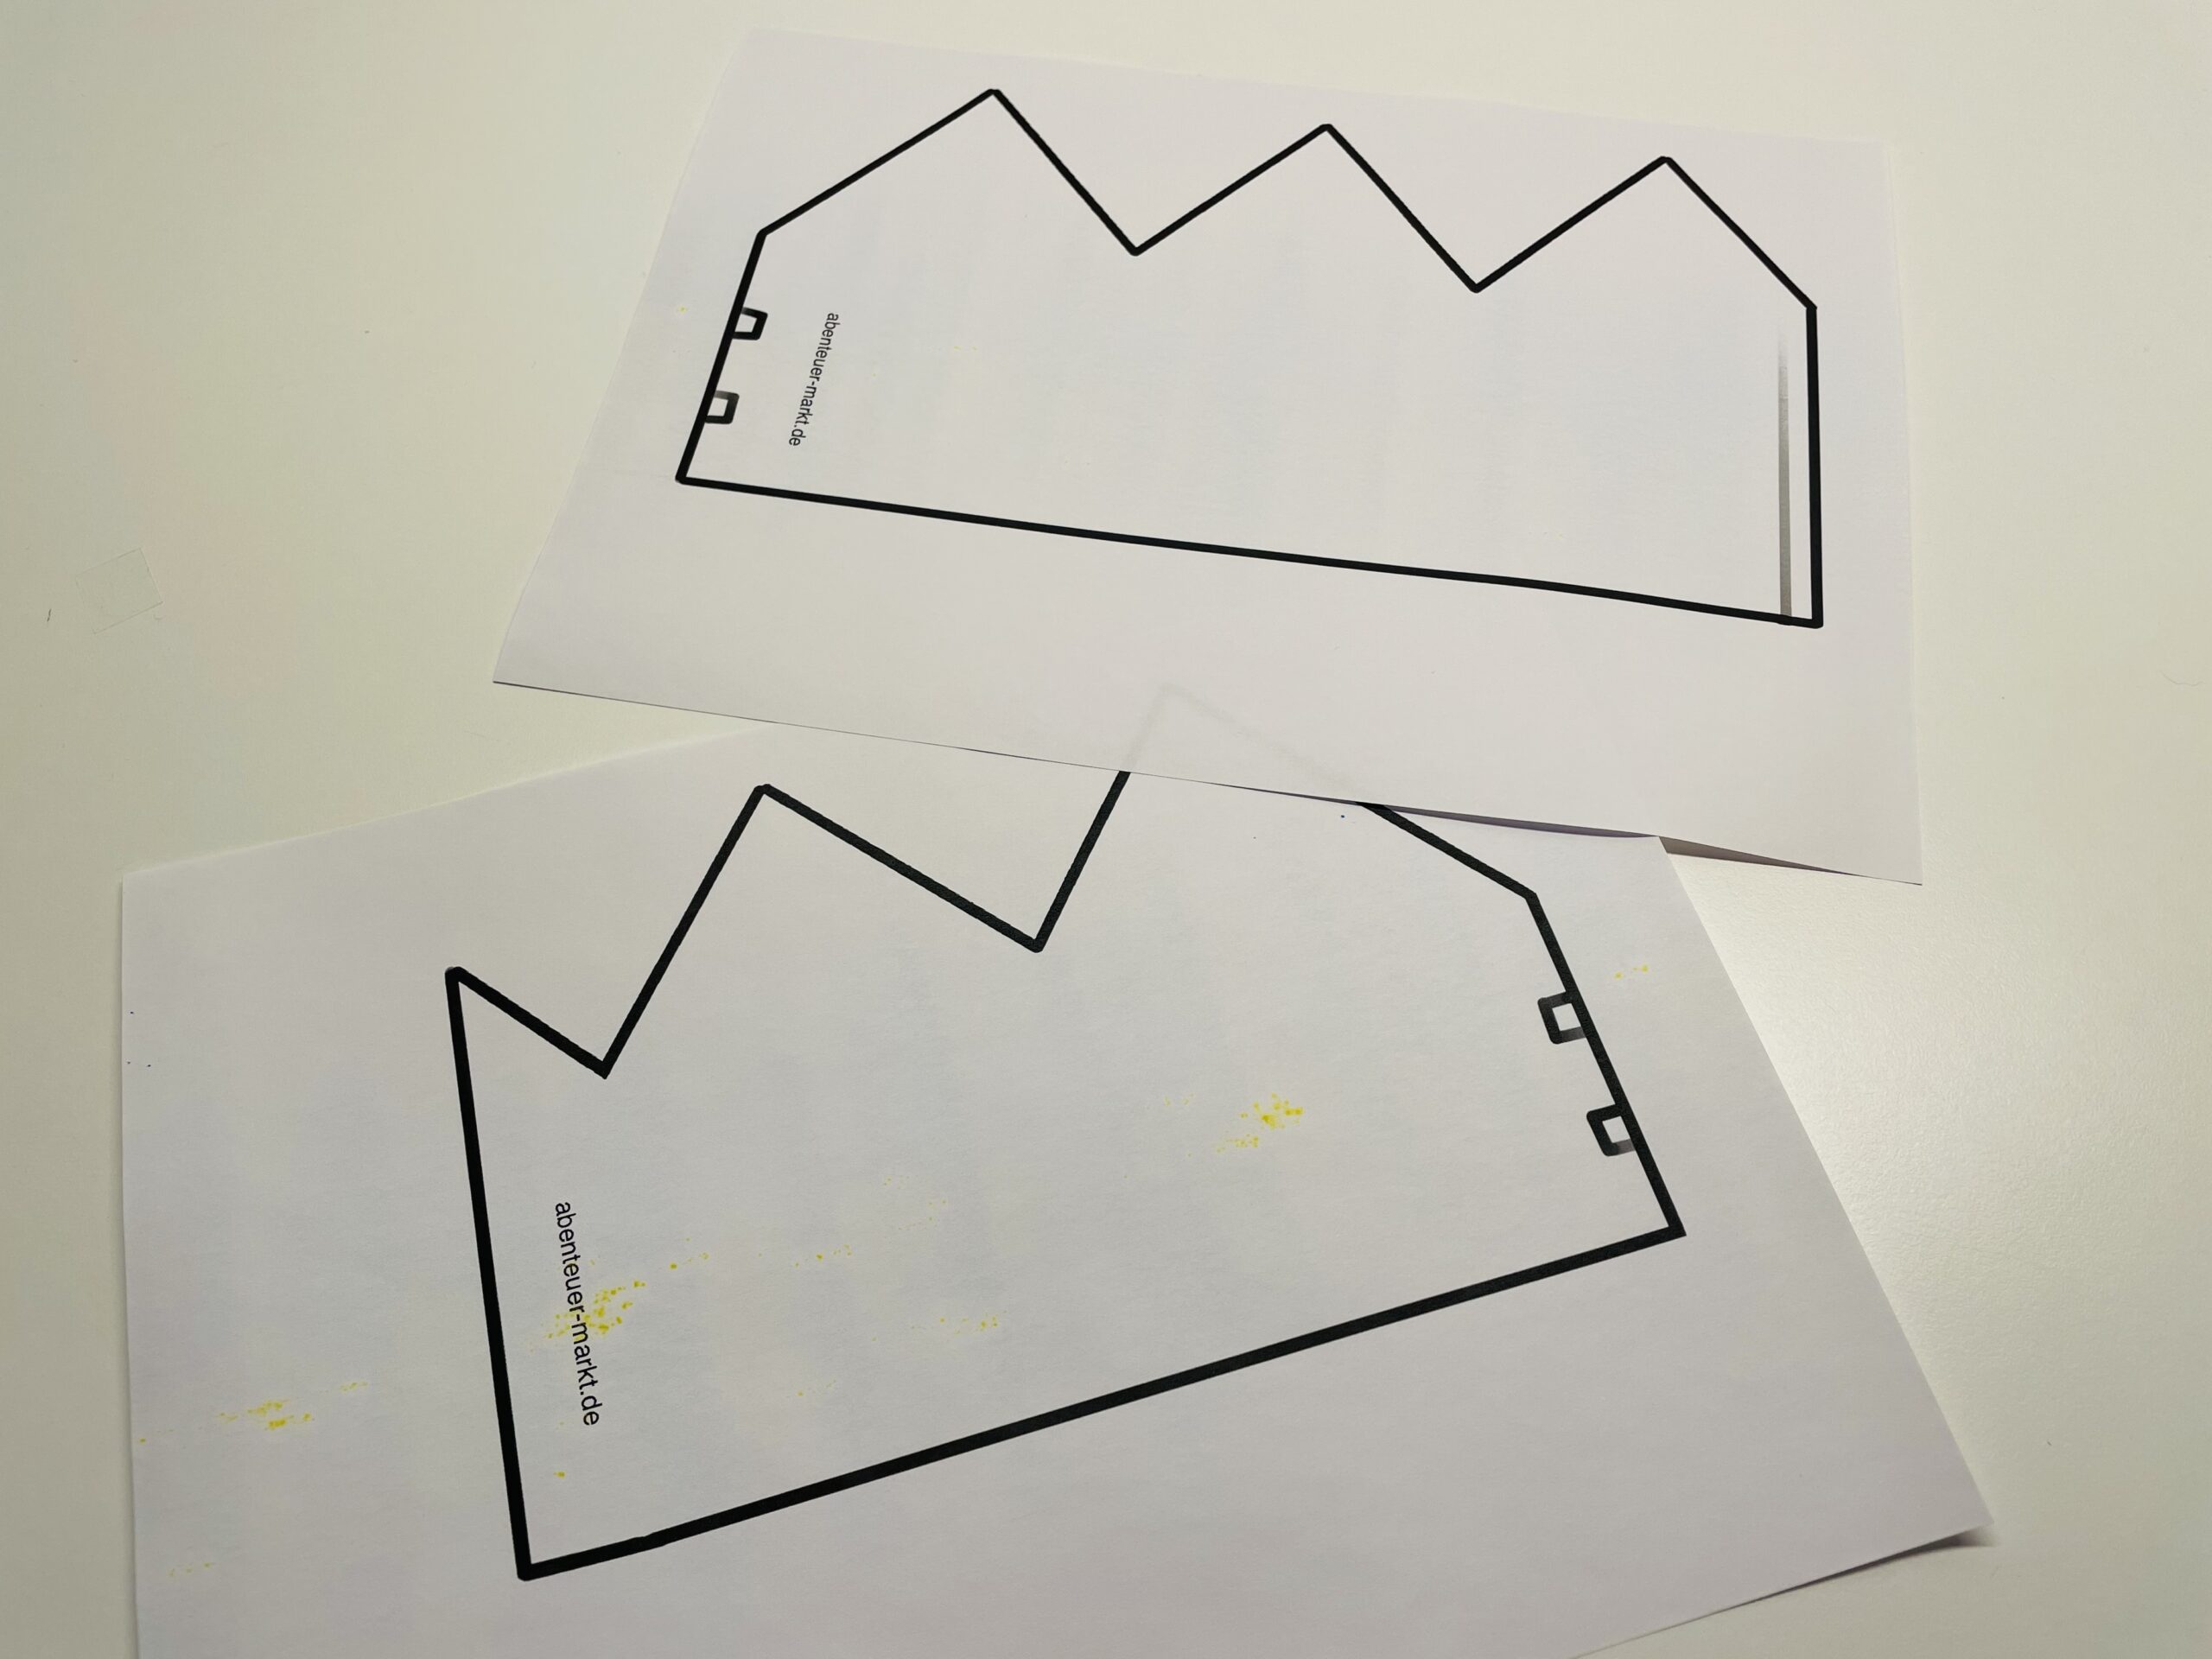
Bild zum Schritt 38 für das Bastel- und DIY-Abenteuer für Kinder: 'Legt die Ausdrucke bereit und eine Papierschere.'

37

Cut out the crown stencils neatly.
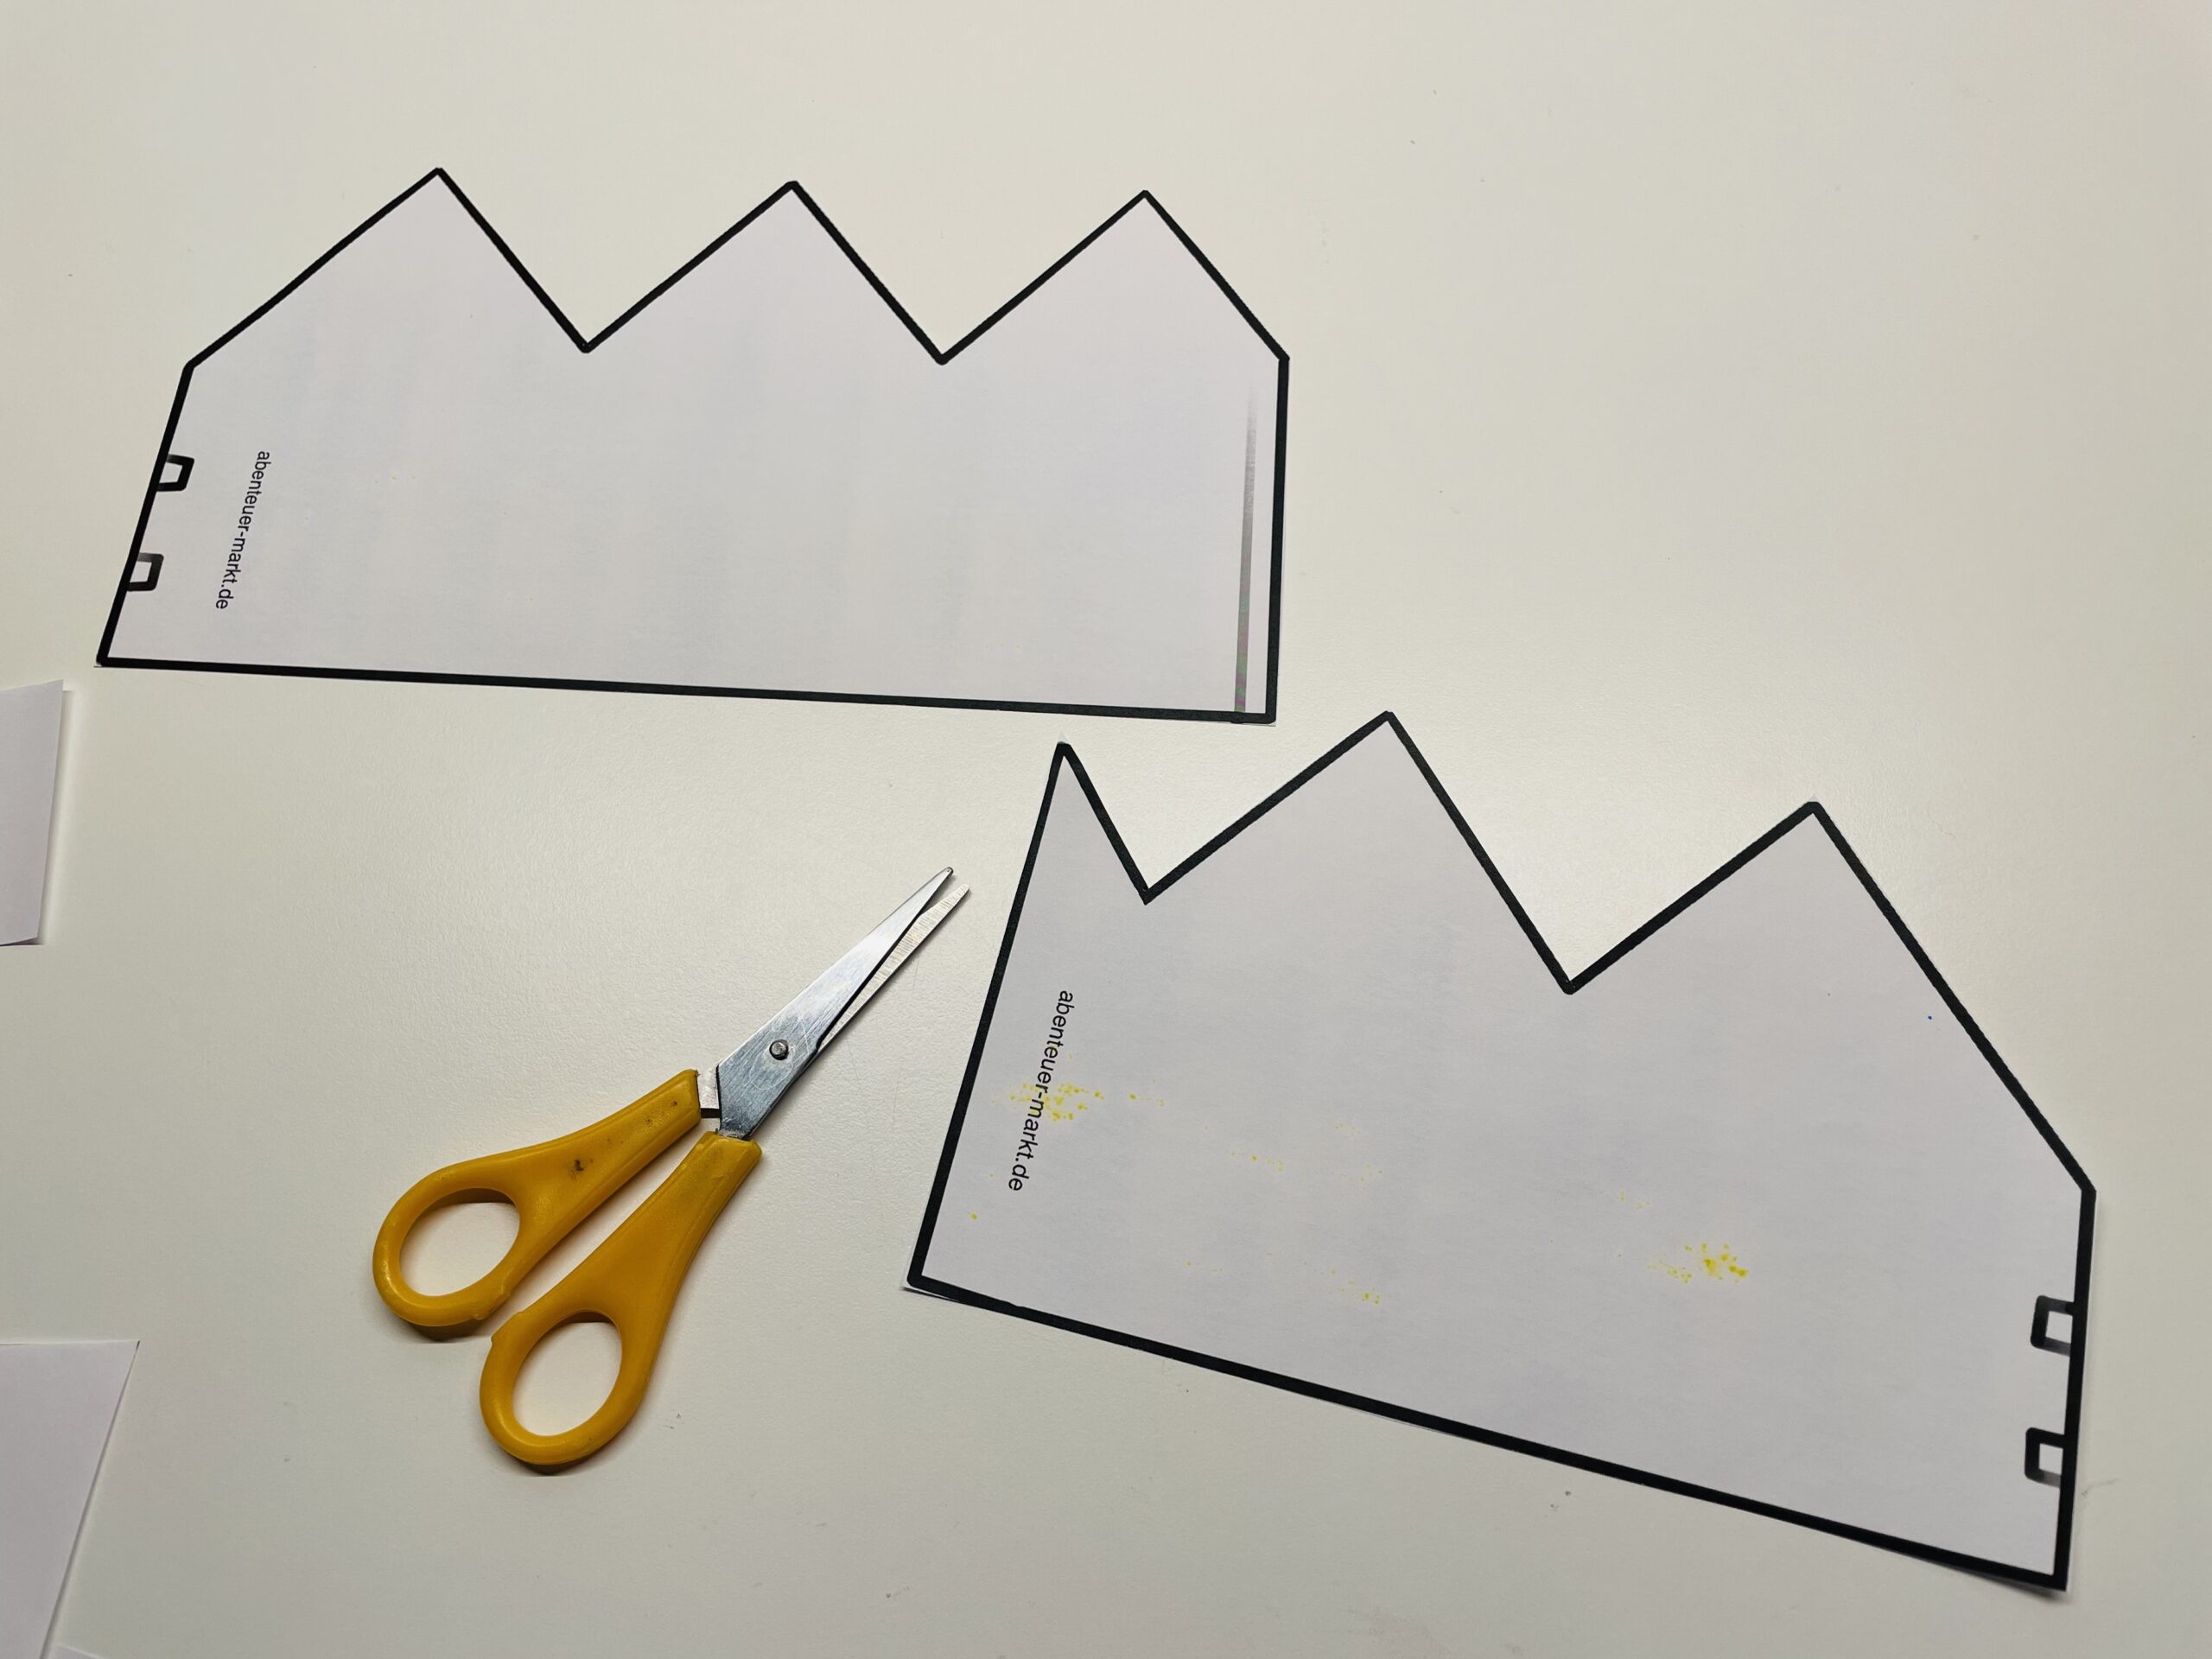
Bild zum Schritt 39 für das Bastel- und DIY-Abenteuer für Kinder: 'Schneidet die Kronenschablonen ordentlich aus.'

38

On the double line, both crown parts are placed together. Adjust the parts until the outer lines exactly match each other. Then, both parts stick together at the overlapping point.
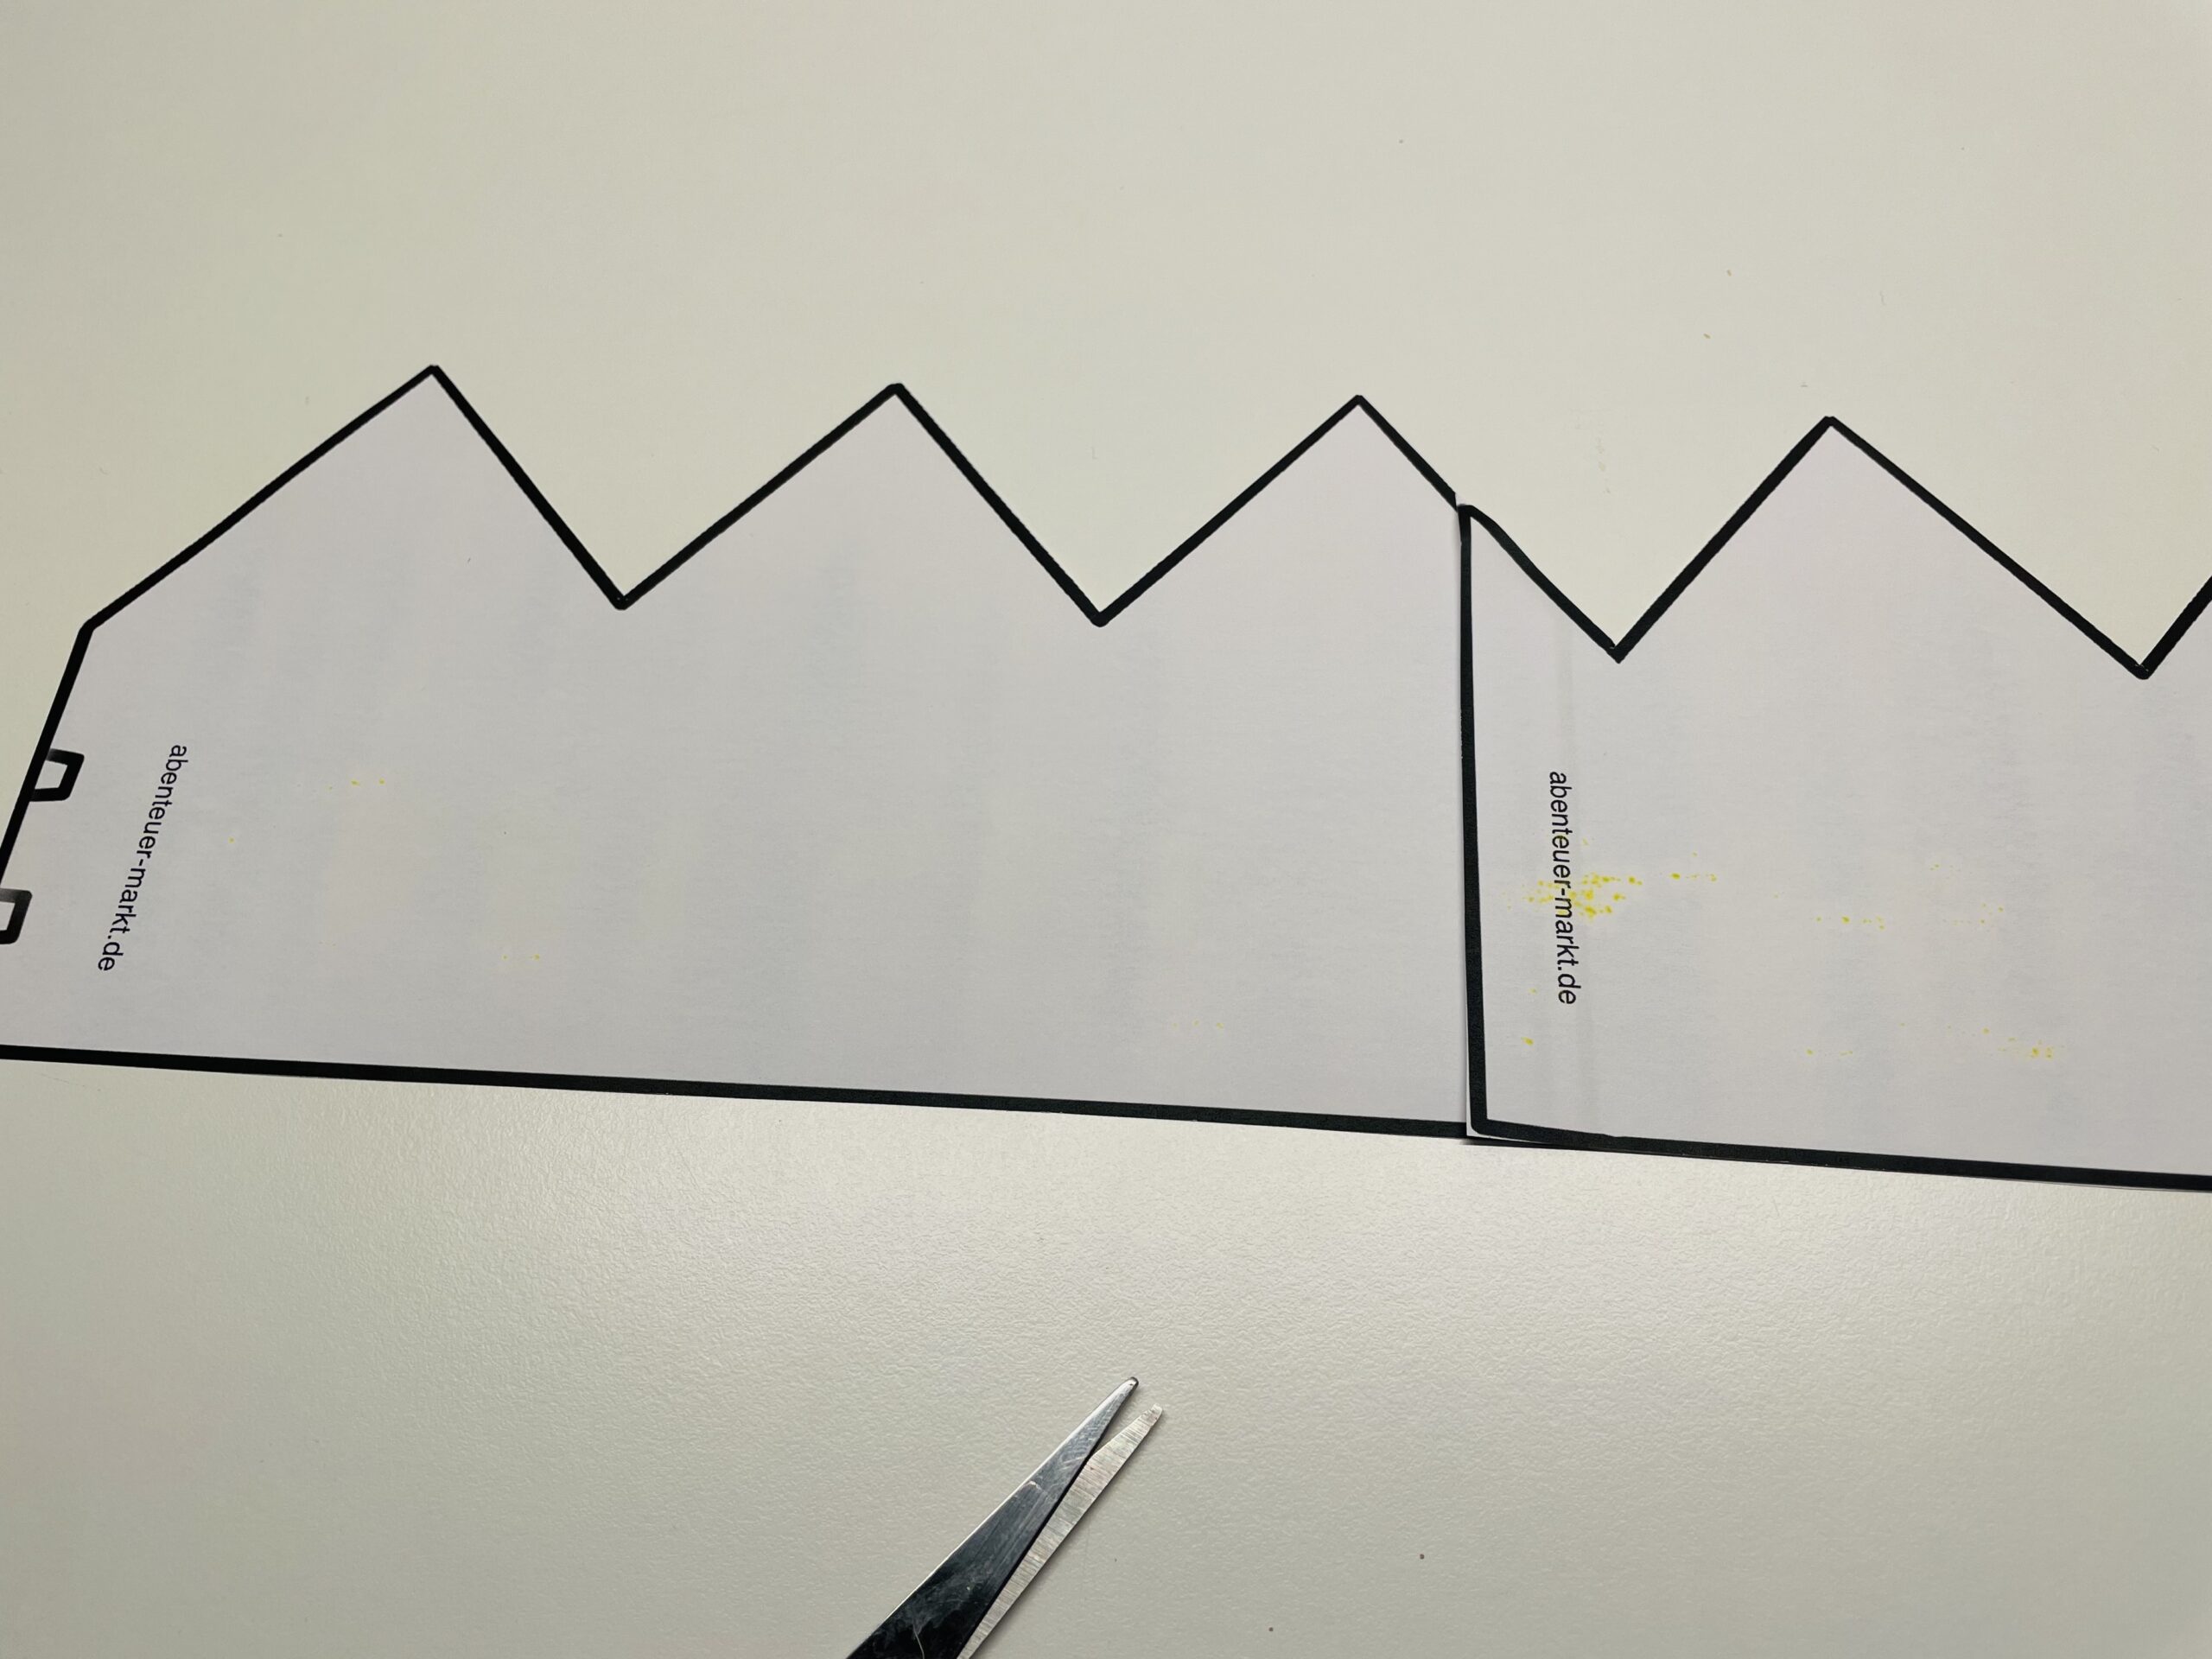
Bild zum Schritt 40 für das Bastel- und DIY-Abenteuer für Kinder: 'An der doppelten Linie werden beide Kronenteile aneinander gelegt. Schiebt...'

39

The crown template is ready. A seam allowance is already included!
The template is only transferred to the fabric. At the outer two markings you can insert and sew the volume, the marking serves only as a clue!
If you want to sew a larger crown, simply extend the crown by painting one more pitch! Try it out.

40

Have fun sewing!

Sew birthday crown

Follow us on Facebook , Instagram and Pinterest
Don't miss any more adventures: Our bottle mail

Leave a Reply

Your email address will not be published.

The maximum upload file size: 5 MB. You can upload: image, document. Drop file here