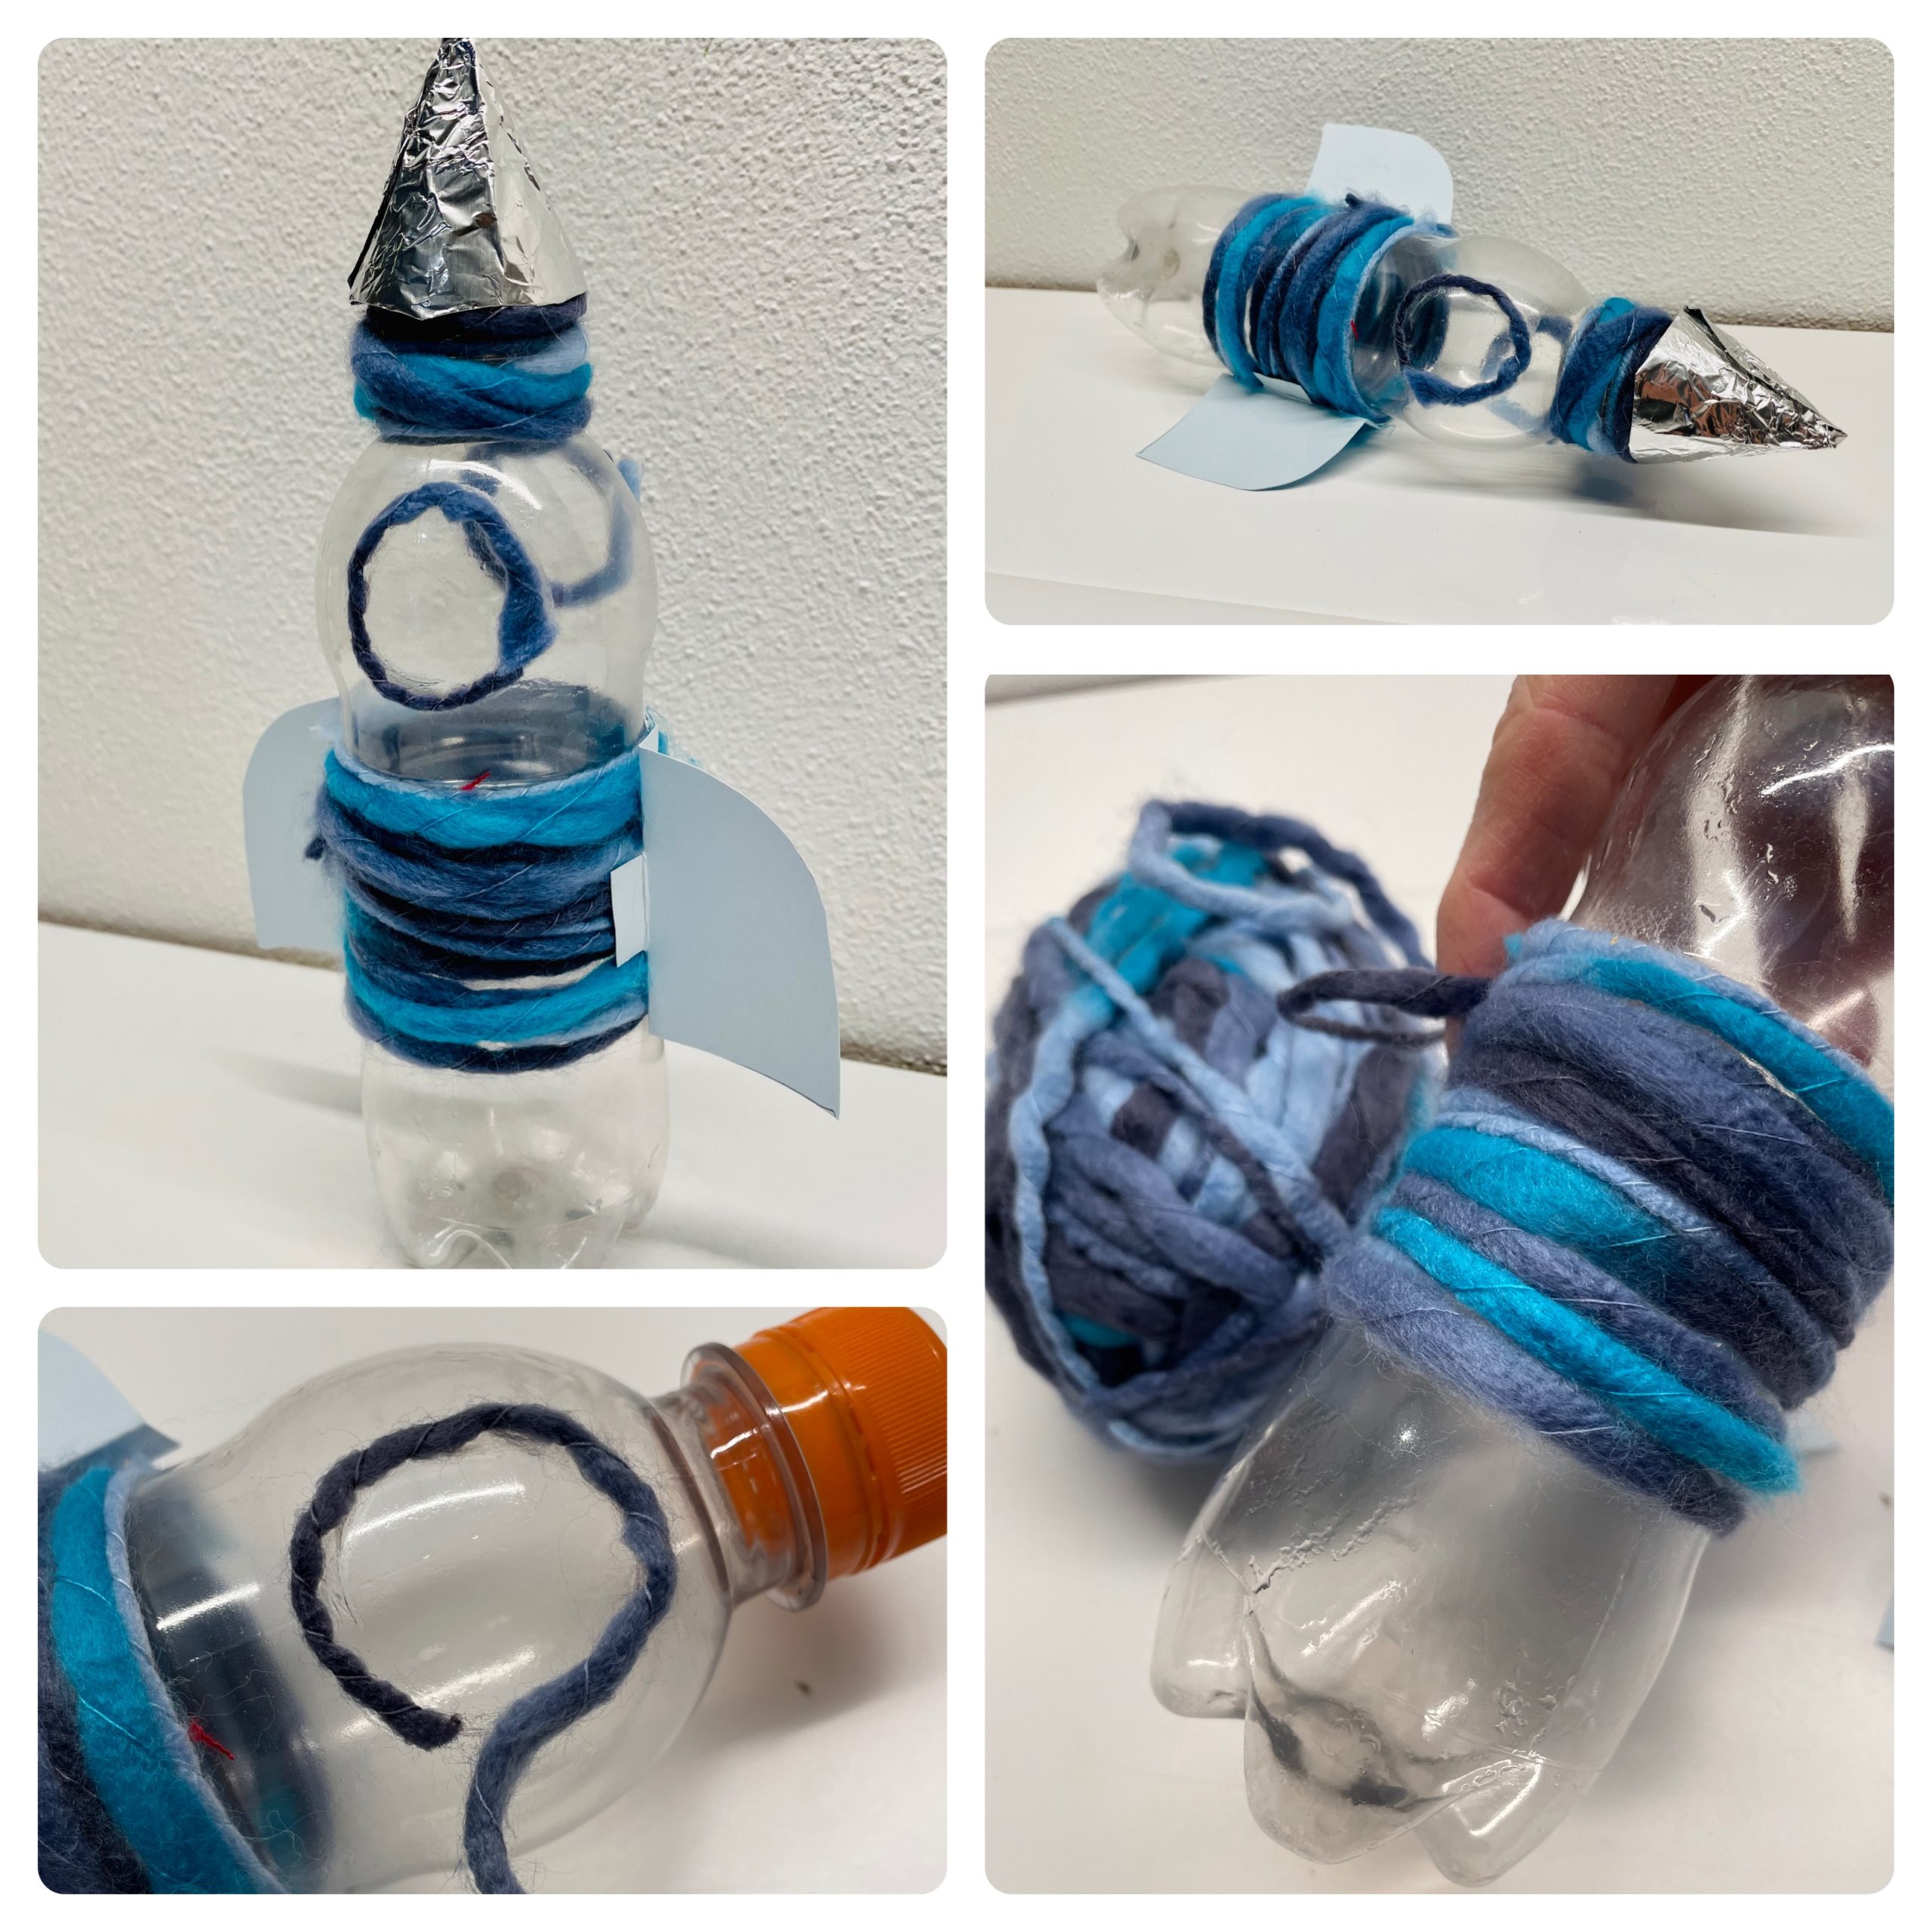
Bottles – Rocket

AdventurerKatzi
Rating5.026.2 thousand times & (4) DifficultyAdvanced

Have you ever built a rocket? Build your own small rocket from a small PET bottle. This is a nice upcycle project with a plastic bottle, wool and paper residue, as well as a piece of aluminium foil or aluminium packaging waste. I'll show you how to do that now!

Media Education for Kindergarten and Hort

Kind bastelt eine Rassel mit dem Navi
The Adventure Navi, the app for DIY projects, enables media education for the youngest.

Relief in everyday life, targeted promotion of individual children, independent learning and - without any pre-knowledge already usable by the youngest!
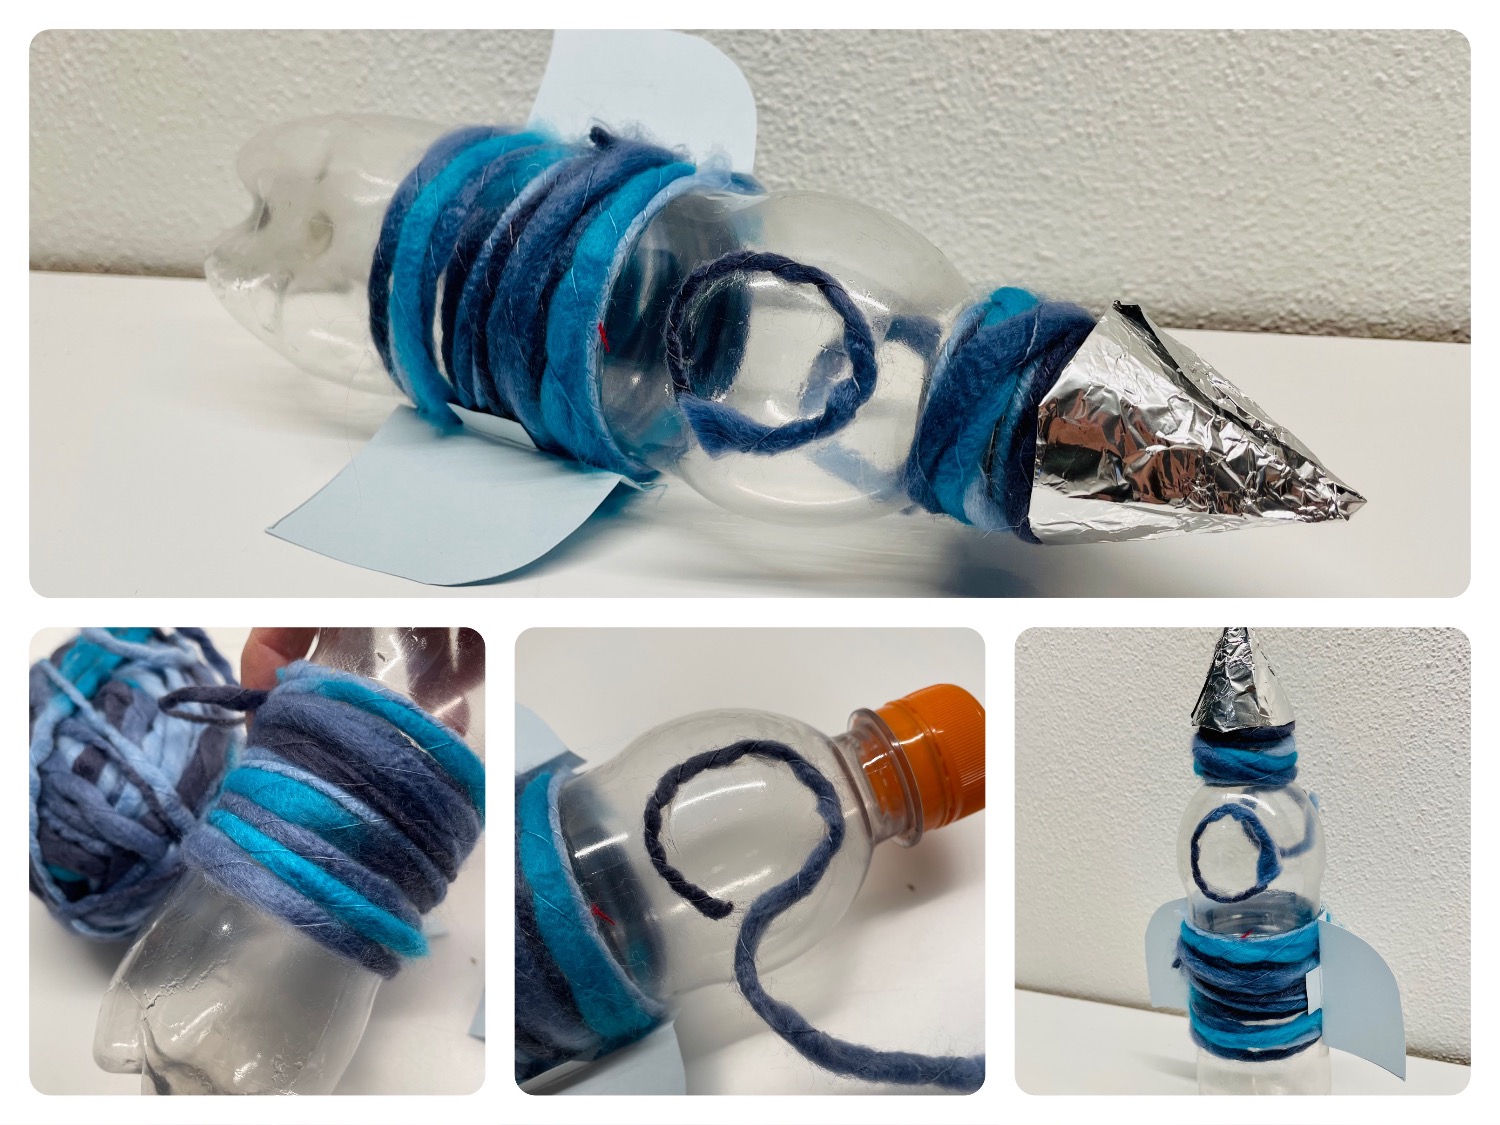


Titelbild zur Bastel- und DIY-Idee für Kinder '(587) Flaschen – Rakete'
Material for1 Child
Prep Time5 min.Adv. Time30 min.Total Time35 min.
 1 small PET bottle
 Wool
 Unwrought paper
 Aluminium foil or aluminium packaging material e.g. chip bag
Other:
 1 Adhesive penPossibly wood glue or hot glue
 1 Pencil
 1 Felt pen
 Builder's pad
All links marked with a shopping cart lead to Amazon - here we have selected products that we would order ourselves and in part also ordered. In a qualified purchase via the advertising link, we as Amazon partner receive a commission, for you there are no costs. You thus support our cost- and advertising banner-free, educational offer.
1

First you need a small empty PET bottle.
You rinse them out and let them dry.
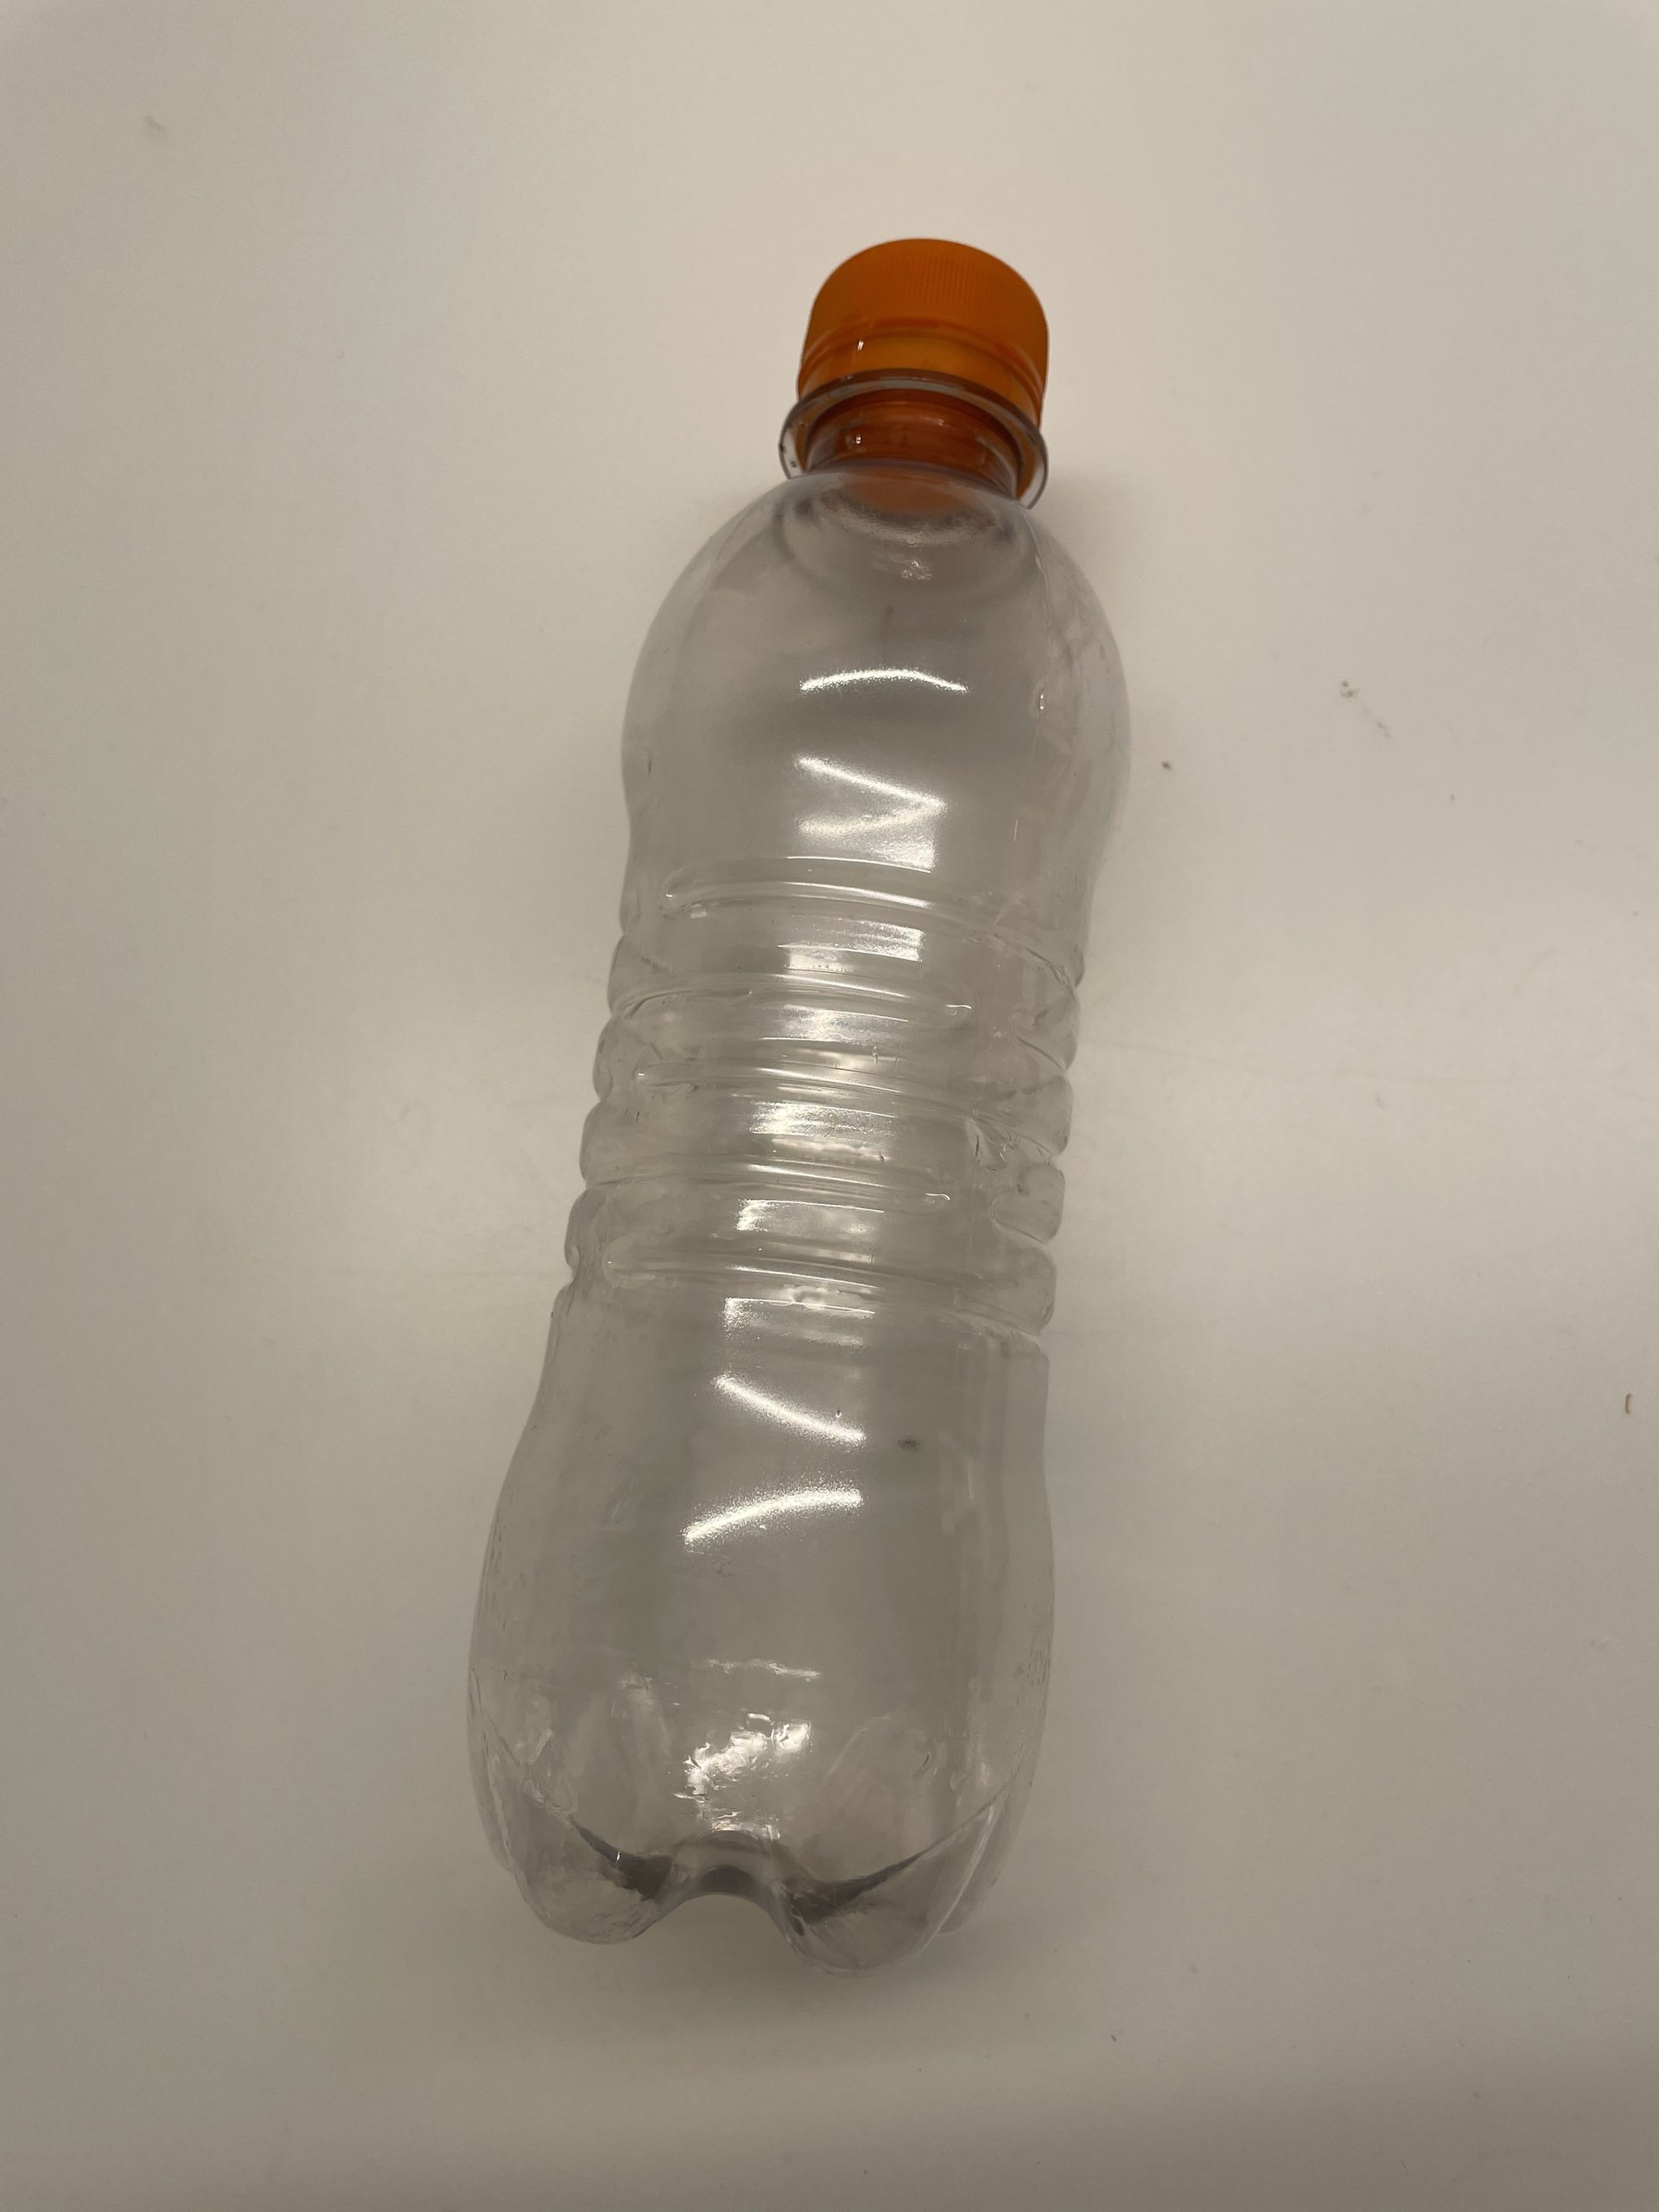
Bild zum Schritt 1 für das Bastel- und DIY-Abenteuer für Kinder: 'Zuerst braucht ihr eine kleine leere PET Flasche.  ...'

2

Then you put out your craft pad and prepare pens, scissors and glue.
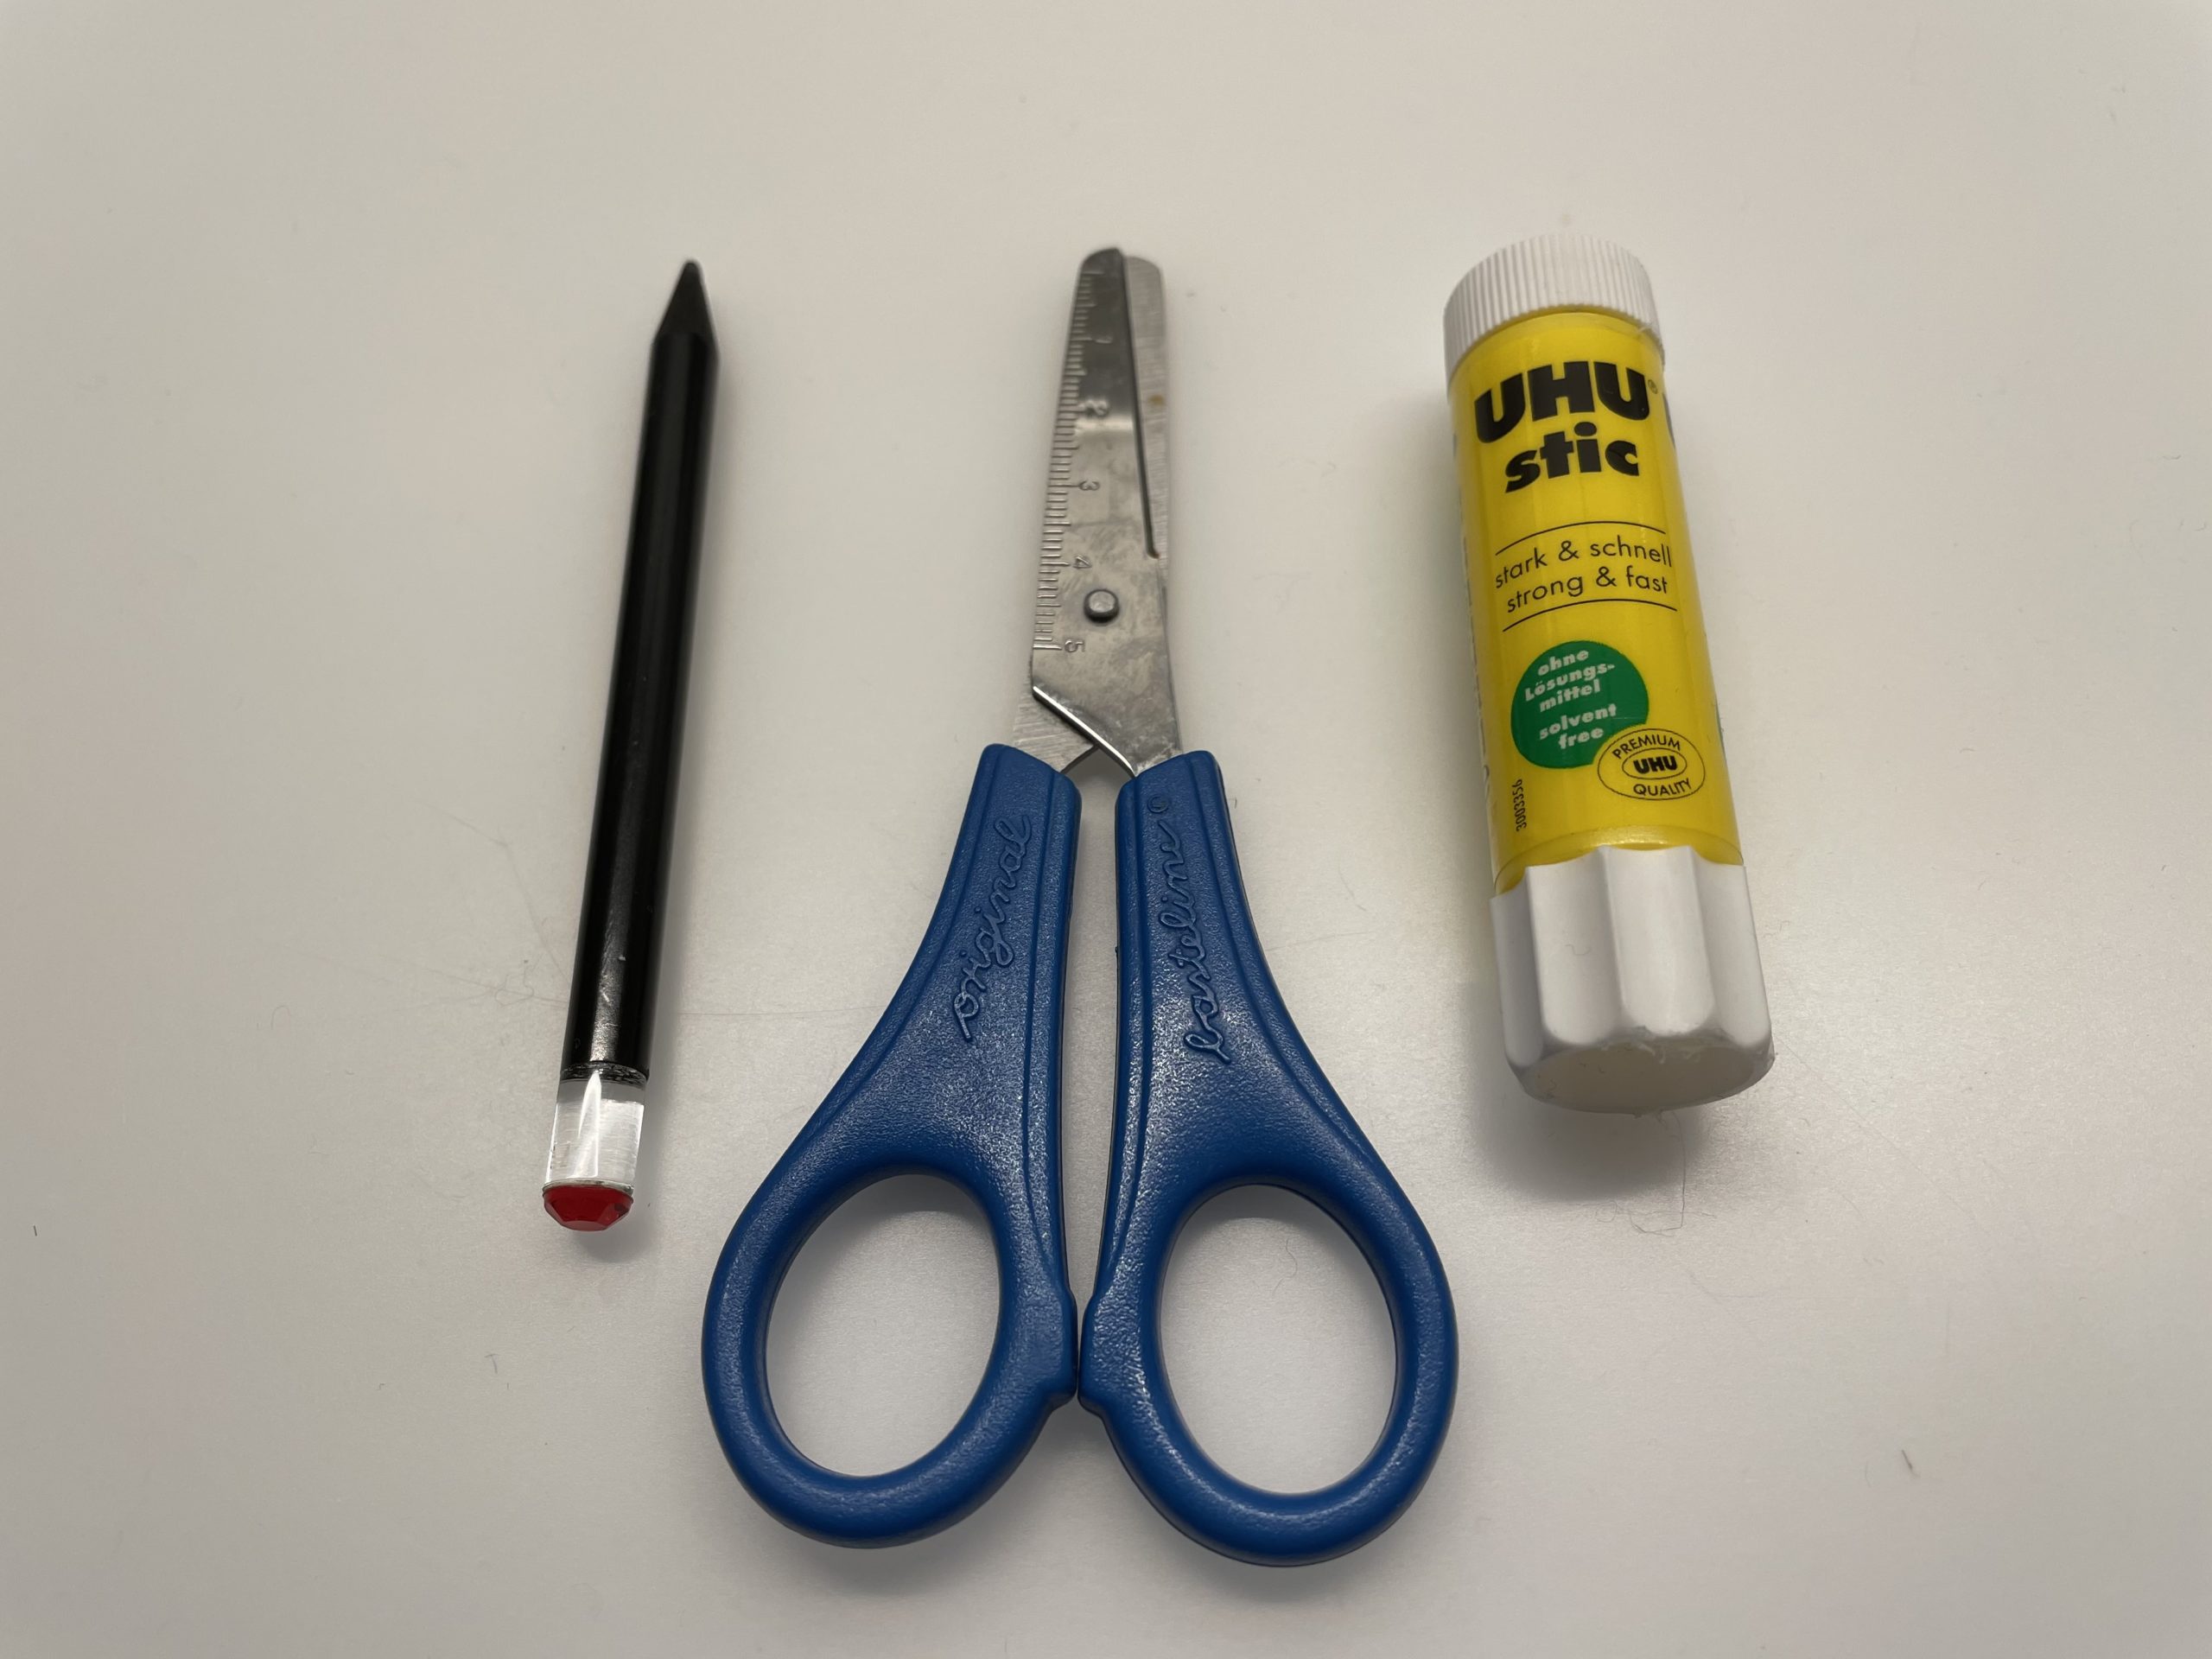
Bild zum Schritt 2 für das Bastel- und DIY-Abenteuer für Kinder: 'Dann legt ihr eure Bastelunterlage aus und legt Stift, Schere...'

3

Now you paint on a piece of clay paper the wings of the rocket!
In doing so, the straight side of the wing paints as long as the ribbed thin spot on your plastic bottle.

Bild zum Schritt 3 für das Bastel- und DIY-Abenteuer für Kinder: 'Jetzt malt ihr euch auf ein Stück Tonpapier die Tragflächen...'

4

Then cut out the wings with the scissors (2 pieces).
Then fold the straight side half an inch.

Bild zum Schritt 4 für das Bastel- und DIY-Abenteuer für Kinder: 'Anschließend schneidet ihr die Tragflächen mit der Schere aus (2...'

5

At this fold you cut 2 times with the scissors and bend one fold backwards and the other forward.

Bild zum Schritt 5 für das Bastel- und DIY-Abenteuer für Kinder: 'An diesem Falz schneidet ihr 2x mit der Schere ein...'

6

Make sure you make two counterparts!

Bild zum Schritt 6 für das Bastel- und DIY-Abenteuer für Kinder: 'Achtet darauf, dass ihr zwei Gegenstücke bastelt!'

7

Now hold the finished wings to the bottle for trial. If they are too large, they will shorten something if necessary.

Bild zum Schritt 7 für das Bastel- und DIY-Abenteuer für Kinder: 'Haltet nun die fertigen Tragflächen probeweise an die Flasche. Falls...'

8

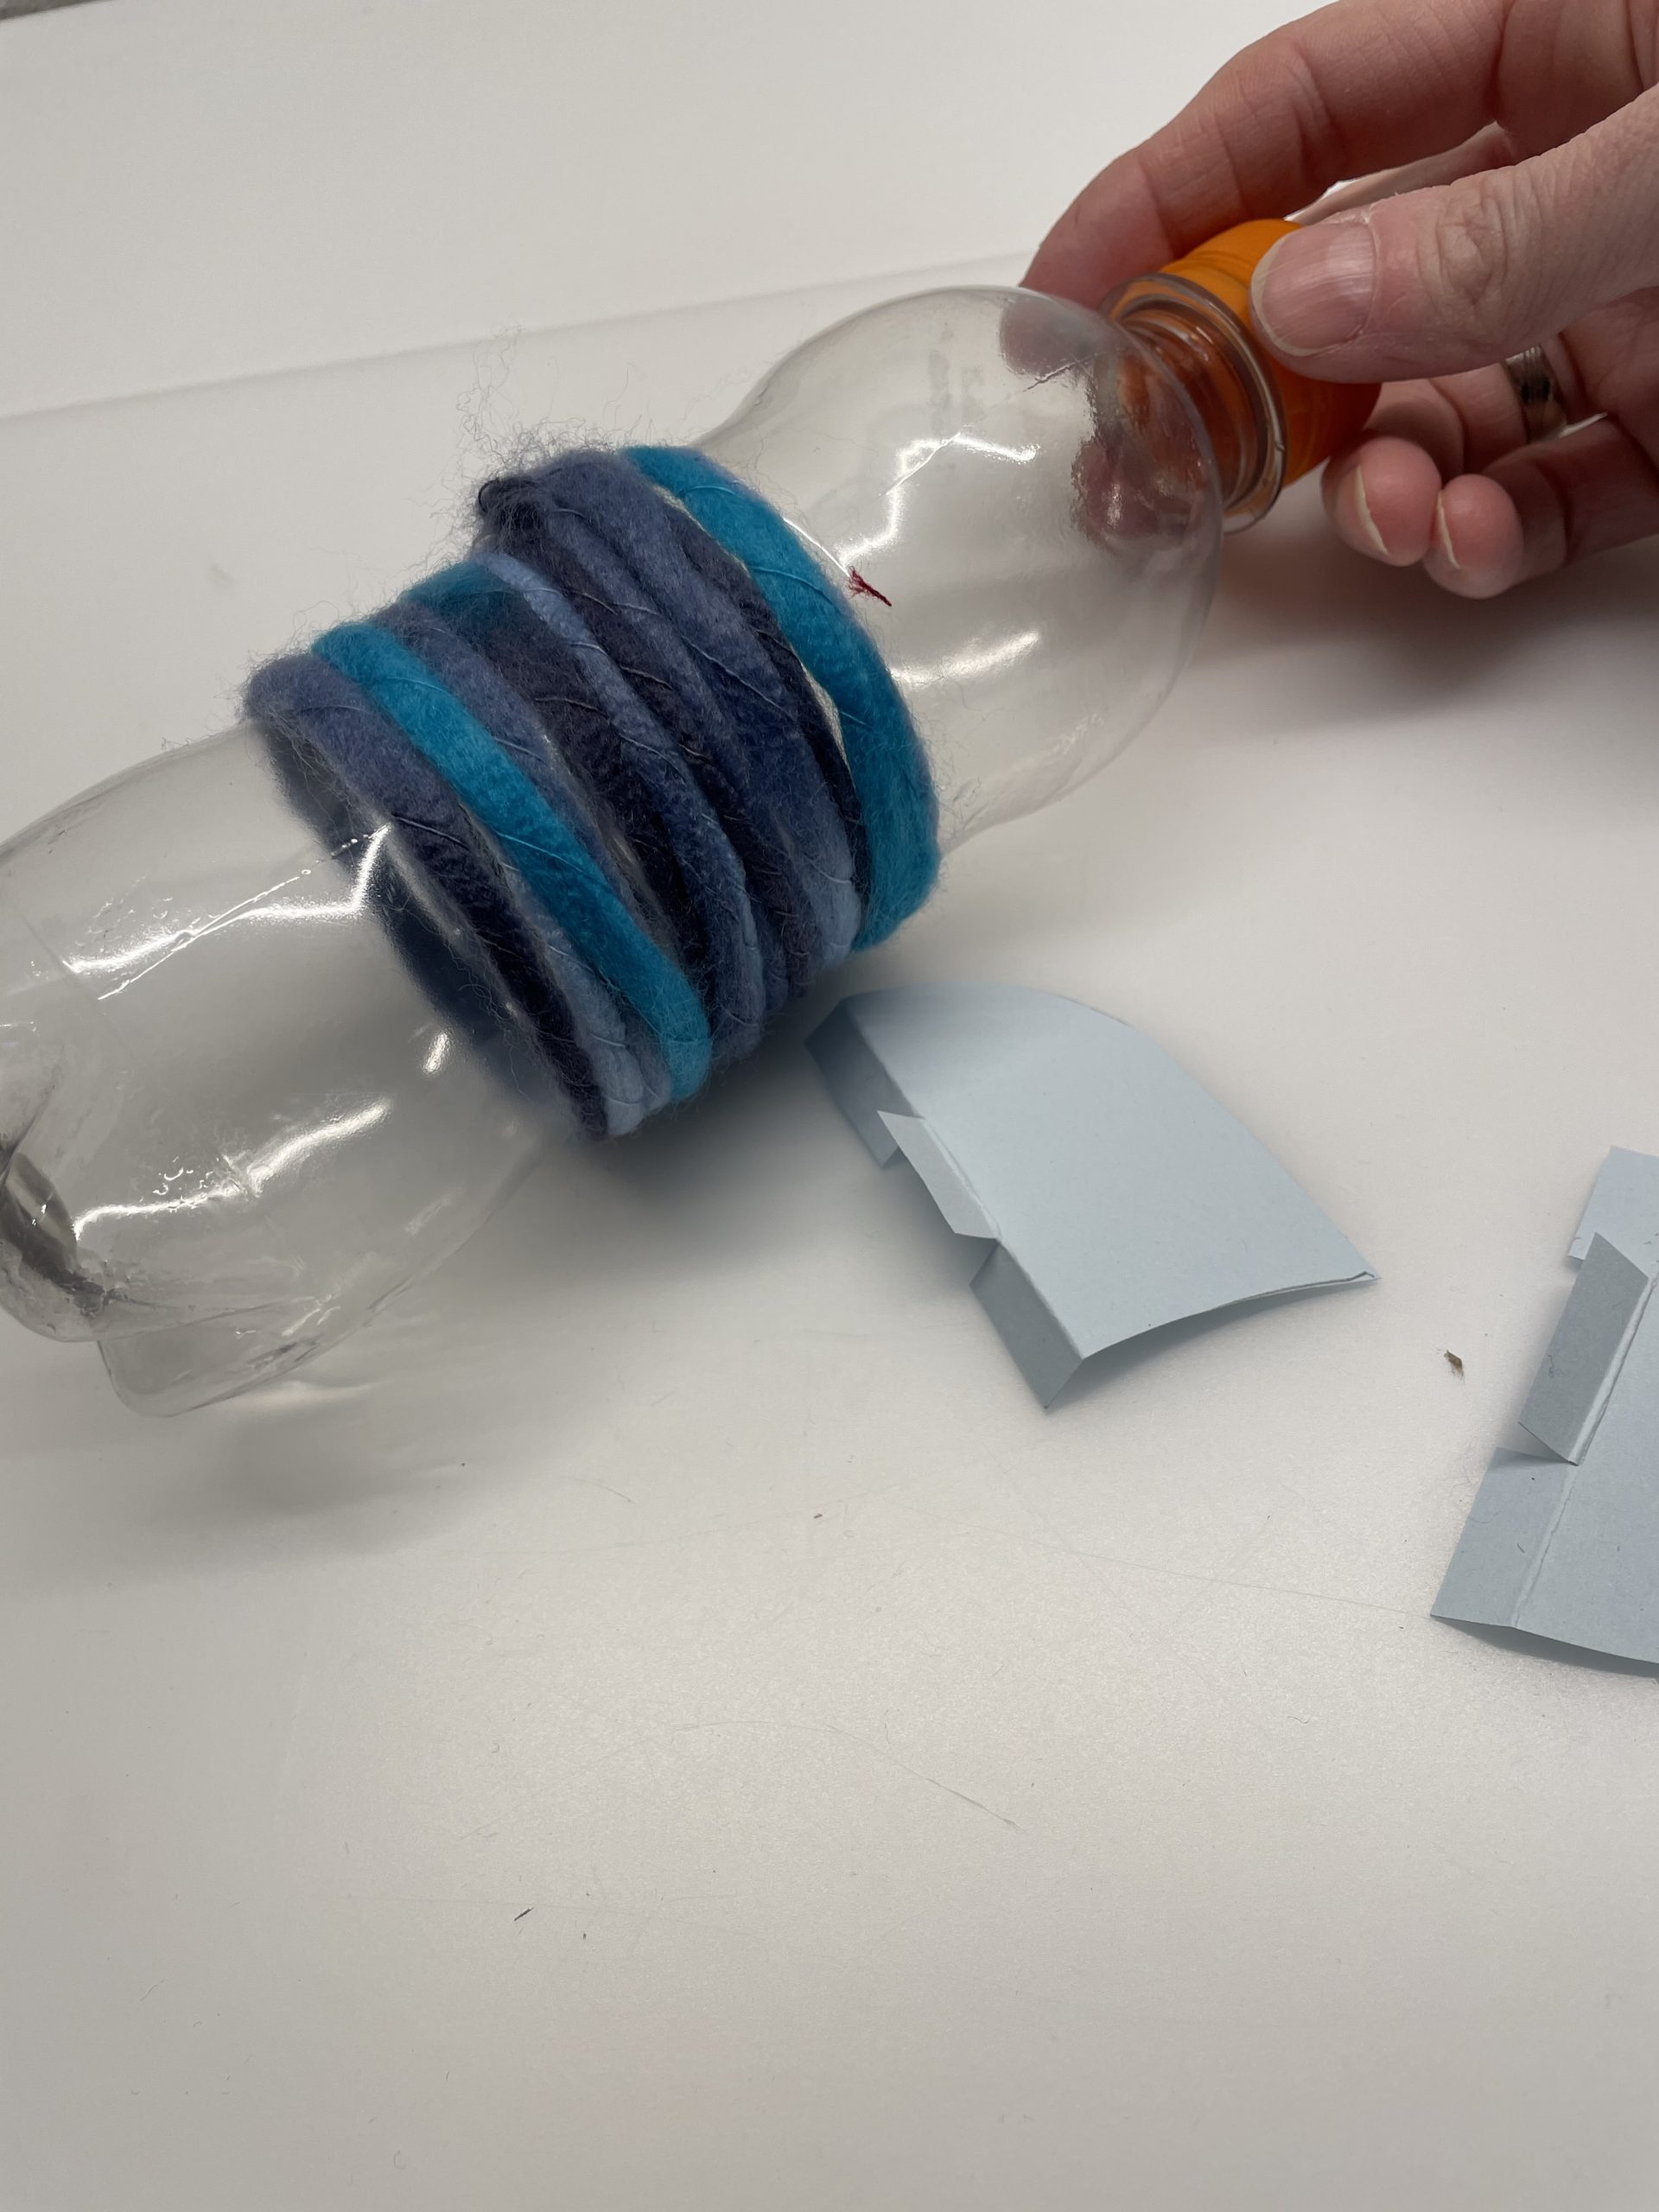
Before you stick the wings on, wrap the bottle centre with wool.

Bild zum Schritt 8 für das Bastel- und DIY-Abenteuer für Kinder: 'Bevor ihr die Tragflächen anklebt, umwickelt ihr die Flaschenmitte mit...'

9

To do this, brush a strip with glue from top to bottom over the ribbed part of the bottle. Attention: a narrow adhesive tape is enough!
Then you press the beginning of the thread onto the glue.

Bild zum Schritt 9 für das Bastel- und DIY-Abenteuer für Kinder: 'Dafür streicht ihr einen Streifen mit Kleber von oben nach...'

10

Now wrap the bottle centre with wool.

Bild zum Schritt 10 für das Bastel- und DIY-Abenteuer für Kinder: 'Nun umwickelt ihr die Flaschenmitte mit Wolle.'

11

When the whole center is wrapped, cut off the wool.
Just put the tail under the wrapped wool.

Bild zum Schritt 11 für das Bastel- und DIY-Abenteuer für Kinder: 'Ist die komplette Mitte umwickelt, dann schneidet ihr die Wolle...'

12

2. Bild zum Schritt 11 für das Bastel- und DIY-Abenteuer für Kinder: 'Ist die komplette Mitte umwickelt, dann schneidet ihr die Wolle...'

13

Now you stick the wings directly on the wool. For this you apply glue to the folded paper fold.

Tip: If it does not stick well, use wood glue or hot glue! (Attention when handling the hot glue - risk of injury!)

Bild zum Schritt 13 für das Bastel- und DIY-Abenteuer für Kinder: 'Jetzt klebt ihr die Tragflächen direkt auf die Wolle. Dafür...'

14

Now you paint a round window with a felt pen on the bottle.

Bild zum Schritt 14 für das Bastel- und DIY-Abenteuer für Kinder: 'Nun malt ihr euch ein rundes Fenster mit einem Filzstift...'

15

Now follow the pre-drawn circle with the glue pen.

Bild zum Schritt 15 für das Bastel- und DIY-Abenteuer für Kinder: 'Den vorgezeichneten Kreis fahrt ihr jetzt mit dem Klebestift nach.'

16

Now you stick a piece of wool on it.

Bild zum Schritt 16 für das Bastel- und DIY-Abenteuer für Kinder: 'Darauf klebt ihr nun ein Stück der Wolle.'

17

If the circle is closed, cut off the wool appropriately..

Bild zum Schritt 17 für das Bastel- und DIY-Abenteuer für Kinder: 'Ist der Kreis geschlossen, dann schneidet ihr die Wolle passend...'

18

The peephole or the bulleye is ready.

Bild zum Schritt 18 für das Bastel- und DIY-Abenteuer für Kinder: 'Fertig ist das Guckloch bzw. das Bullauge.'

19

On the opposite side you can now also create a round window.

Tip: Alternatively, you can also cut out circles of clay paper and stick them on or paint the portholes with a foil pin.

Bild zum Schritt 19 für das Bastel- und DIY-Abenteuer für Kinder: 'Auf der gegenüberliegenden Seite gestaltet ihr nun ebenfalls noch ein...'

20

Now you also wrap the bottle neck and half of the lid with wool.
For this you fix the beginning of the wool and the end with glue.

Bild zum Schritt 20 für das Bastel- und DIY-Abenteuer für Kinder: 'Jetzt umwickelt ihr auch den Flaschenhals und die Hälfte des...'

21

You can also stick the end of the thread on the bottle lid.

Bild zum Schritt 21 für das Bastel- und DIY-Abenteuer für Kinder: 'Ihr könnt das Fadenende auch auf dem Flaschendeckel festkleben.'

22

Now we're still making the top of the rocket.
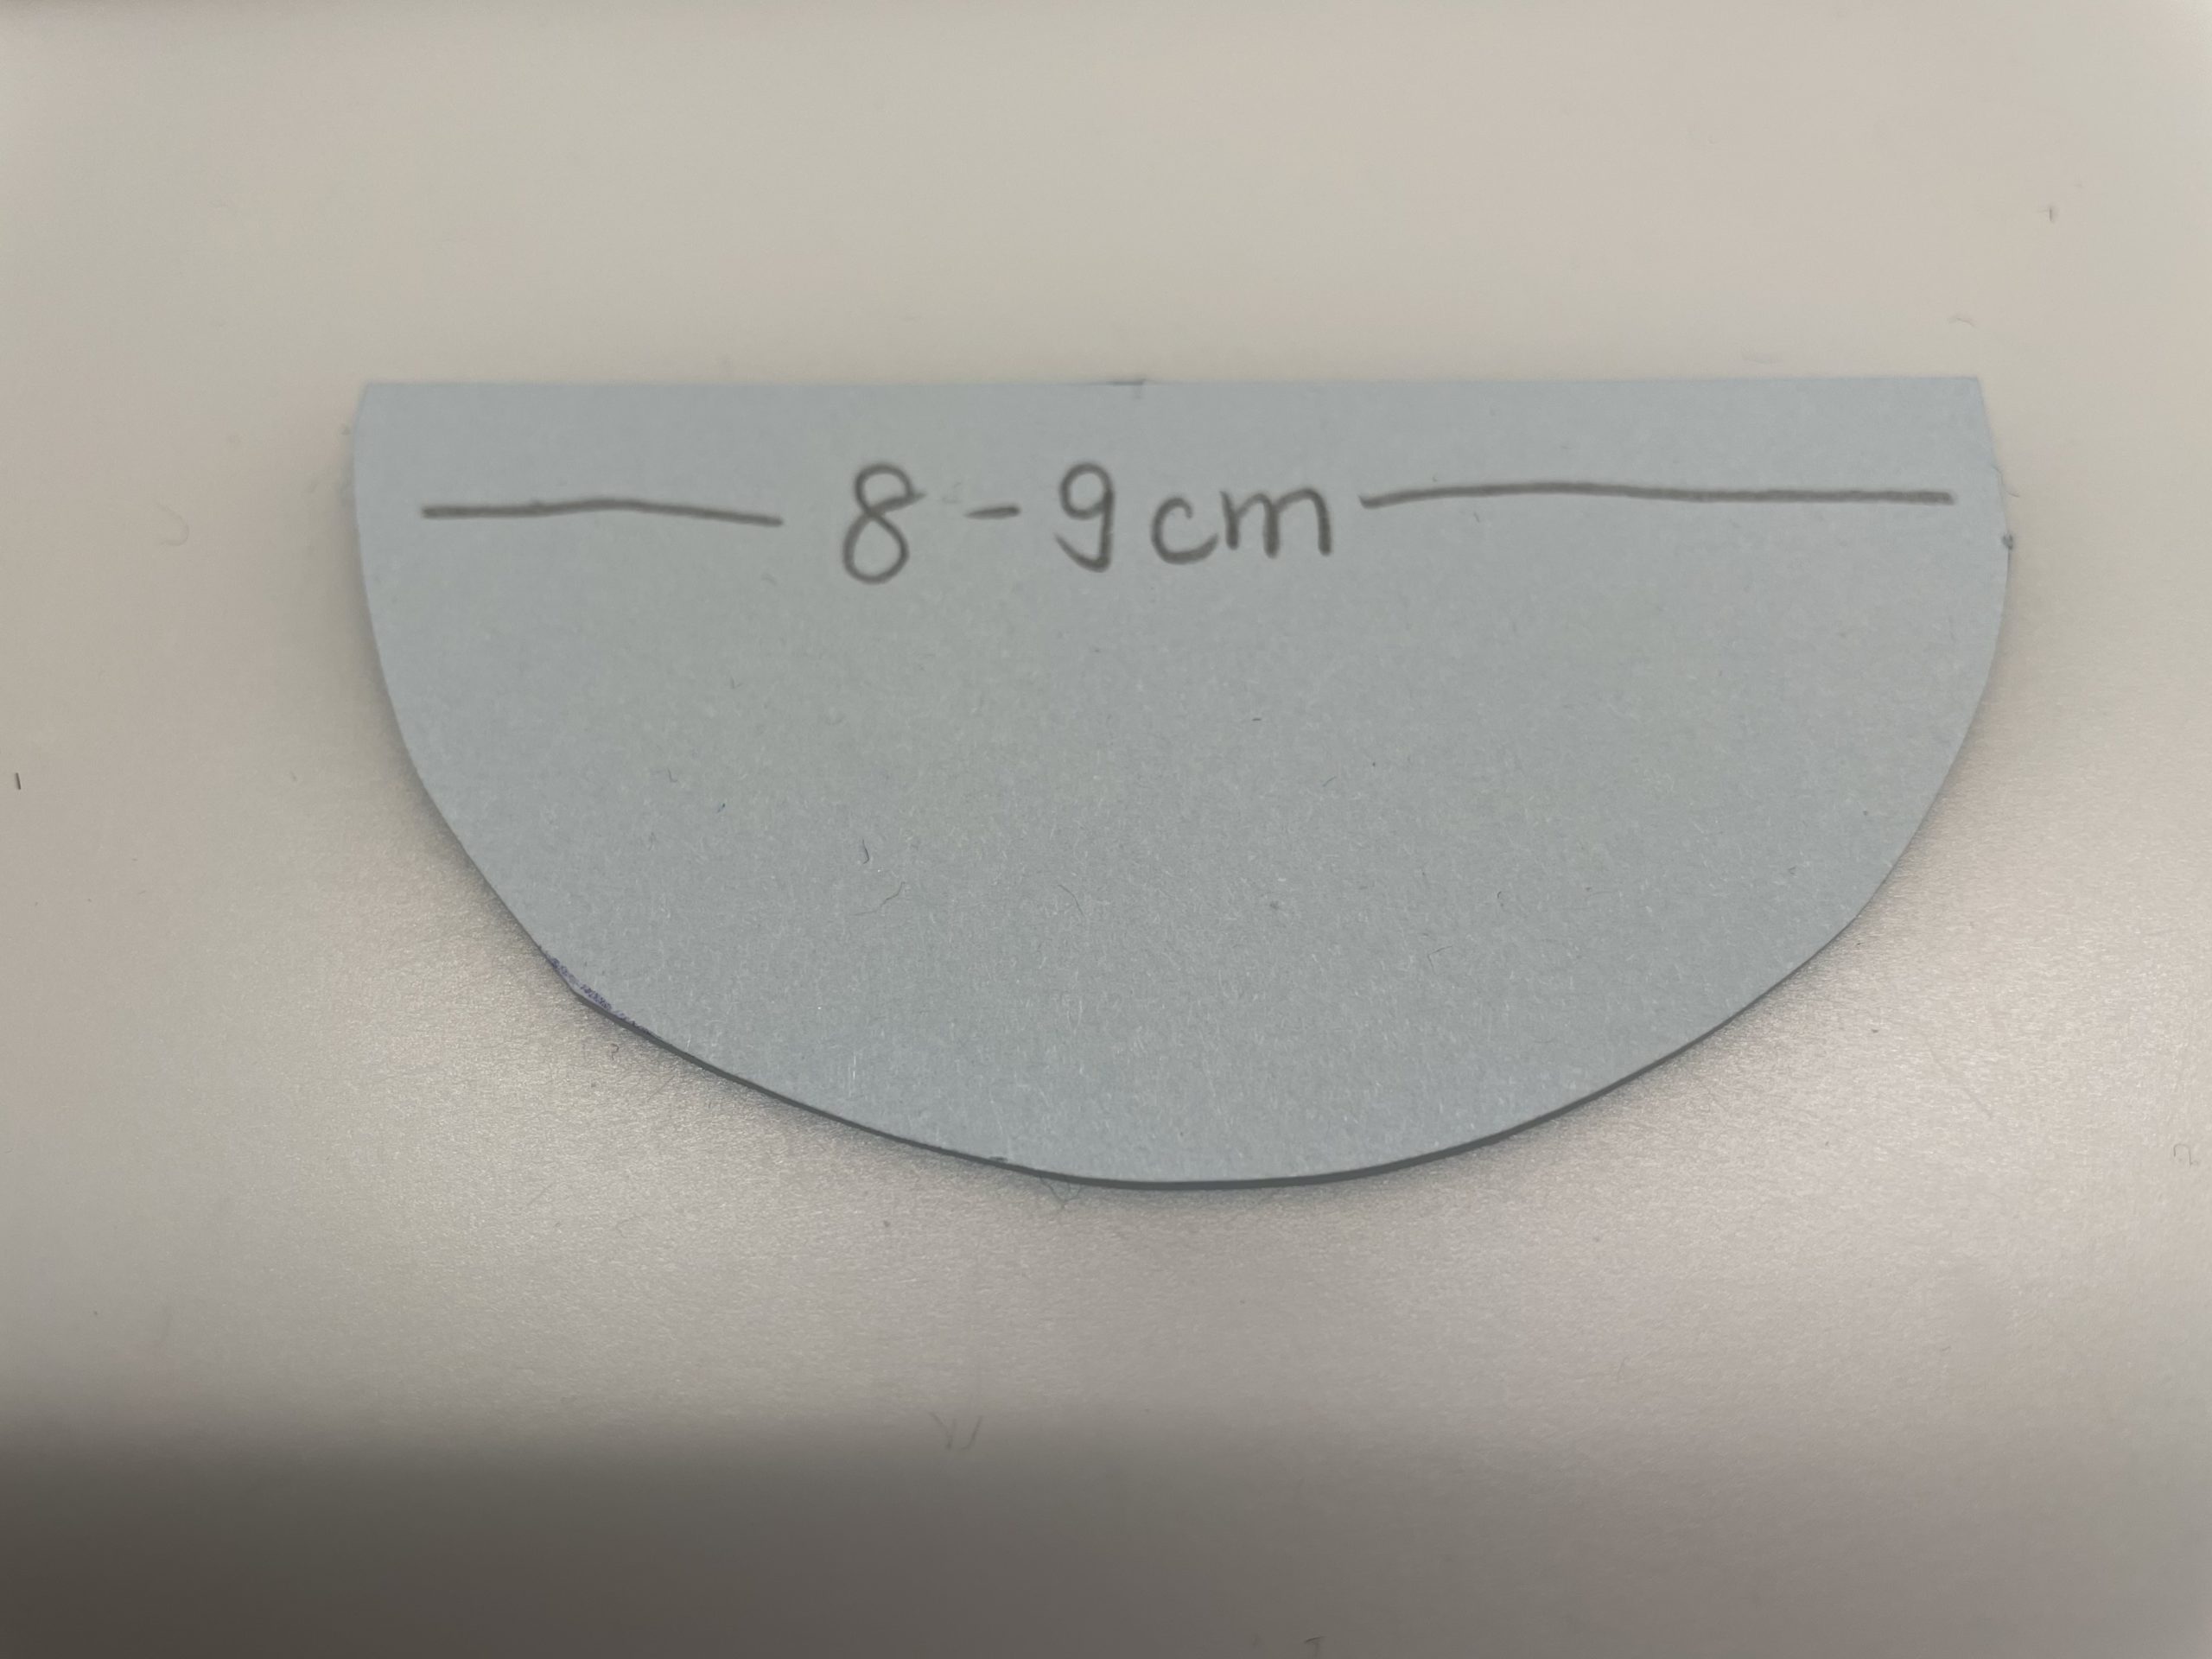
For this you paint a circle (diameter about 8-9cm).

Tip: Uses a small bowl or a large glass for drawing.

Bild zum Schritt 22 für das Bastel- und DIY-Abenteuer für Kinder: 'Jetzt basteln wir noch die Spitze der Rakete.  Dafür...'

23

Then cut out the circle and halve it in the middle.

Bild zum Schritt 23 für das Bastel- und DIY-Abenteuer für Kinder: 'Anschließend schneidet ihr den Kreis aus und halbiert ihn in...'

24

2. Bild zum Schritt 23 für das Bastel- und DIY-Abenteuer für Kinder: 'Anschließend schneidet ihr den Kreis aus und halbiert ihn in...'

25

Now you roll a half circle to a pointed hat.

For a shiny rocket tip you use aluminium foil in advance. Look at it in the next step!

Bild zum Schritt 25 für das Bastel- und DIY-Abenteuer für Kinder: 'Nun rollt ihr einen Halbkreis zu einem spitzen Hut zusammen....'

26

For the shiny rocket tip, glue the semicircle to a piece of aluminium foil.

Bild zum Schritt 26 für das Bastel- und DIY-Abenteuer für Kinder: 'Für die glänzende Raketenspitze klebt ihr den Halbkreis auf ein...'

27

Then cut off the overhanging aluminium foil. Overhanging aluminium foil bends her backwards.

Bild zum Schritt 27 für das Bastel- und DIY-Abenteuer für Kinder: 'Dann schneidet ihr die überstehenden Alufolie ab. Überstehende Alufolie biegt...'

28

Now you roll the half circle to a hat.

Bild zum Schritt 28 für das Bastel- und DIY-Abenteuer für Kinder: 'Nun rollt ihr den Halbkreis zu einem Hut.'

29

Then glue the overlapping parts together.

Bild zum Schritt 29 für das Bastel- und DIY-Abenteuer für Kinder: 'Anschließend klebt ihr die überlappenden Teile zusammen.'

30

Press the sticky spot tightly together.

Bild zum Schritt 30 für das Bastel- und DIY-Abenteuer für Kinder: 'Drückt die Klebestelle fest zusammen.'

31

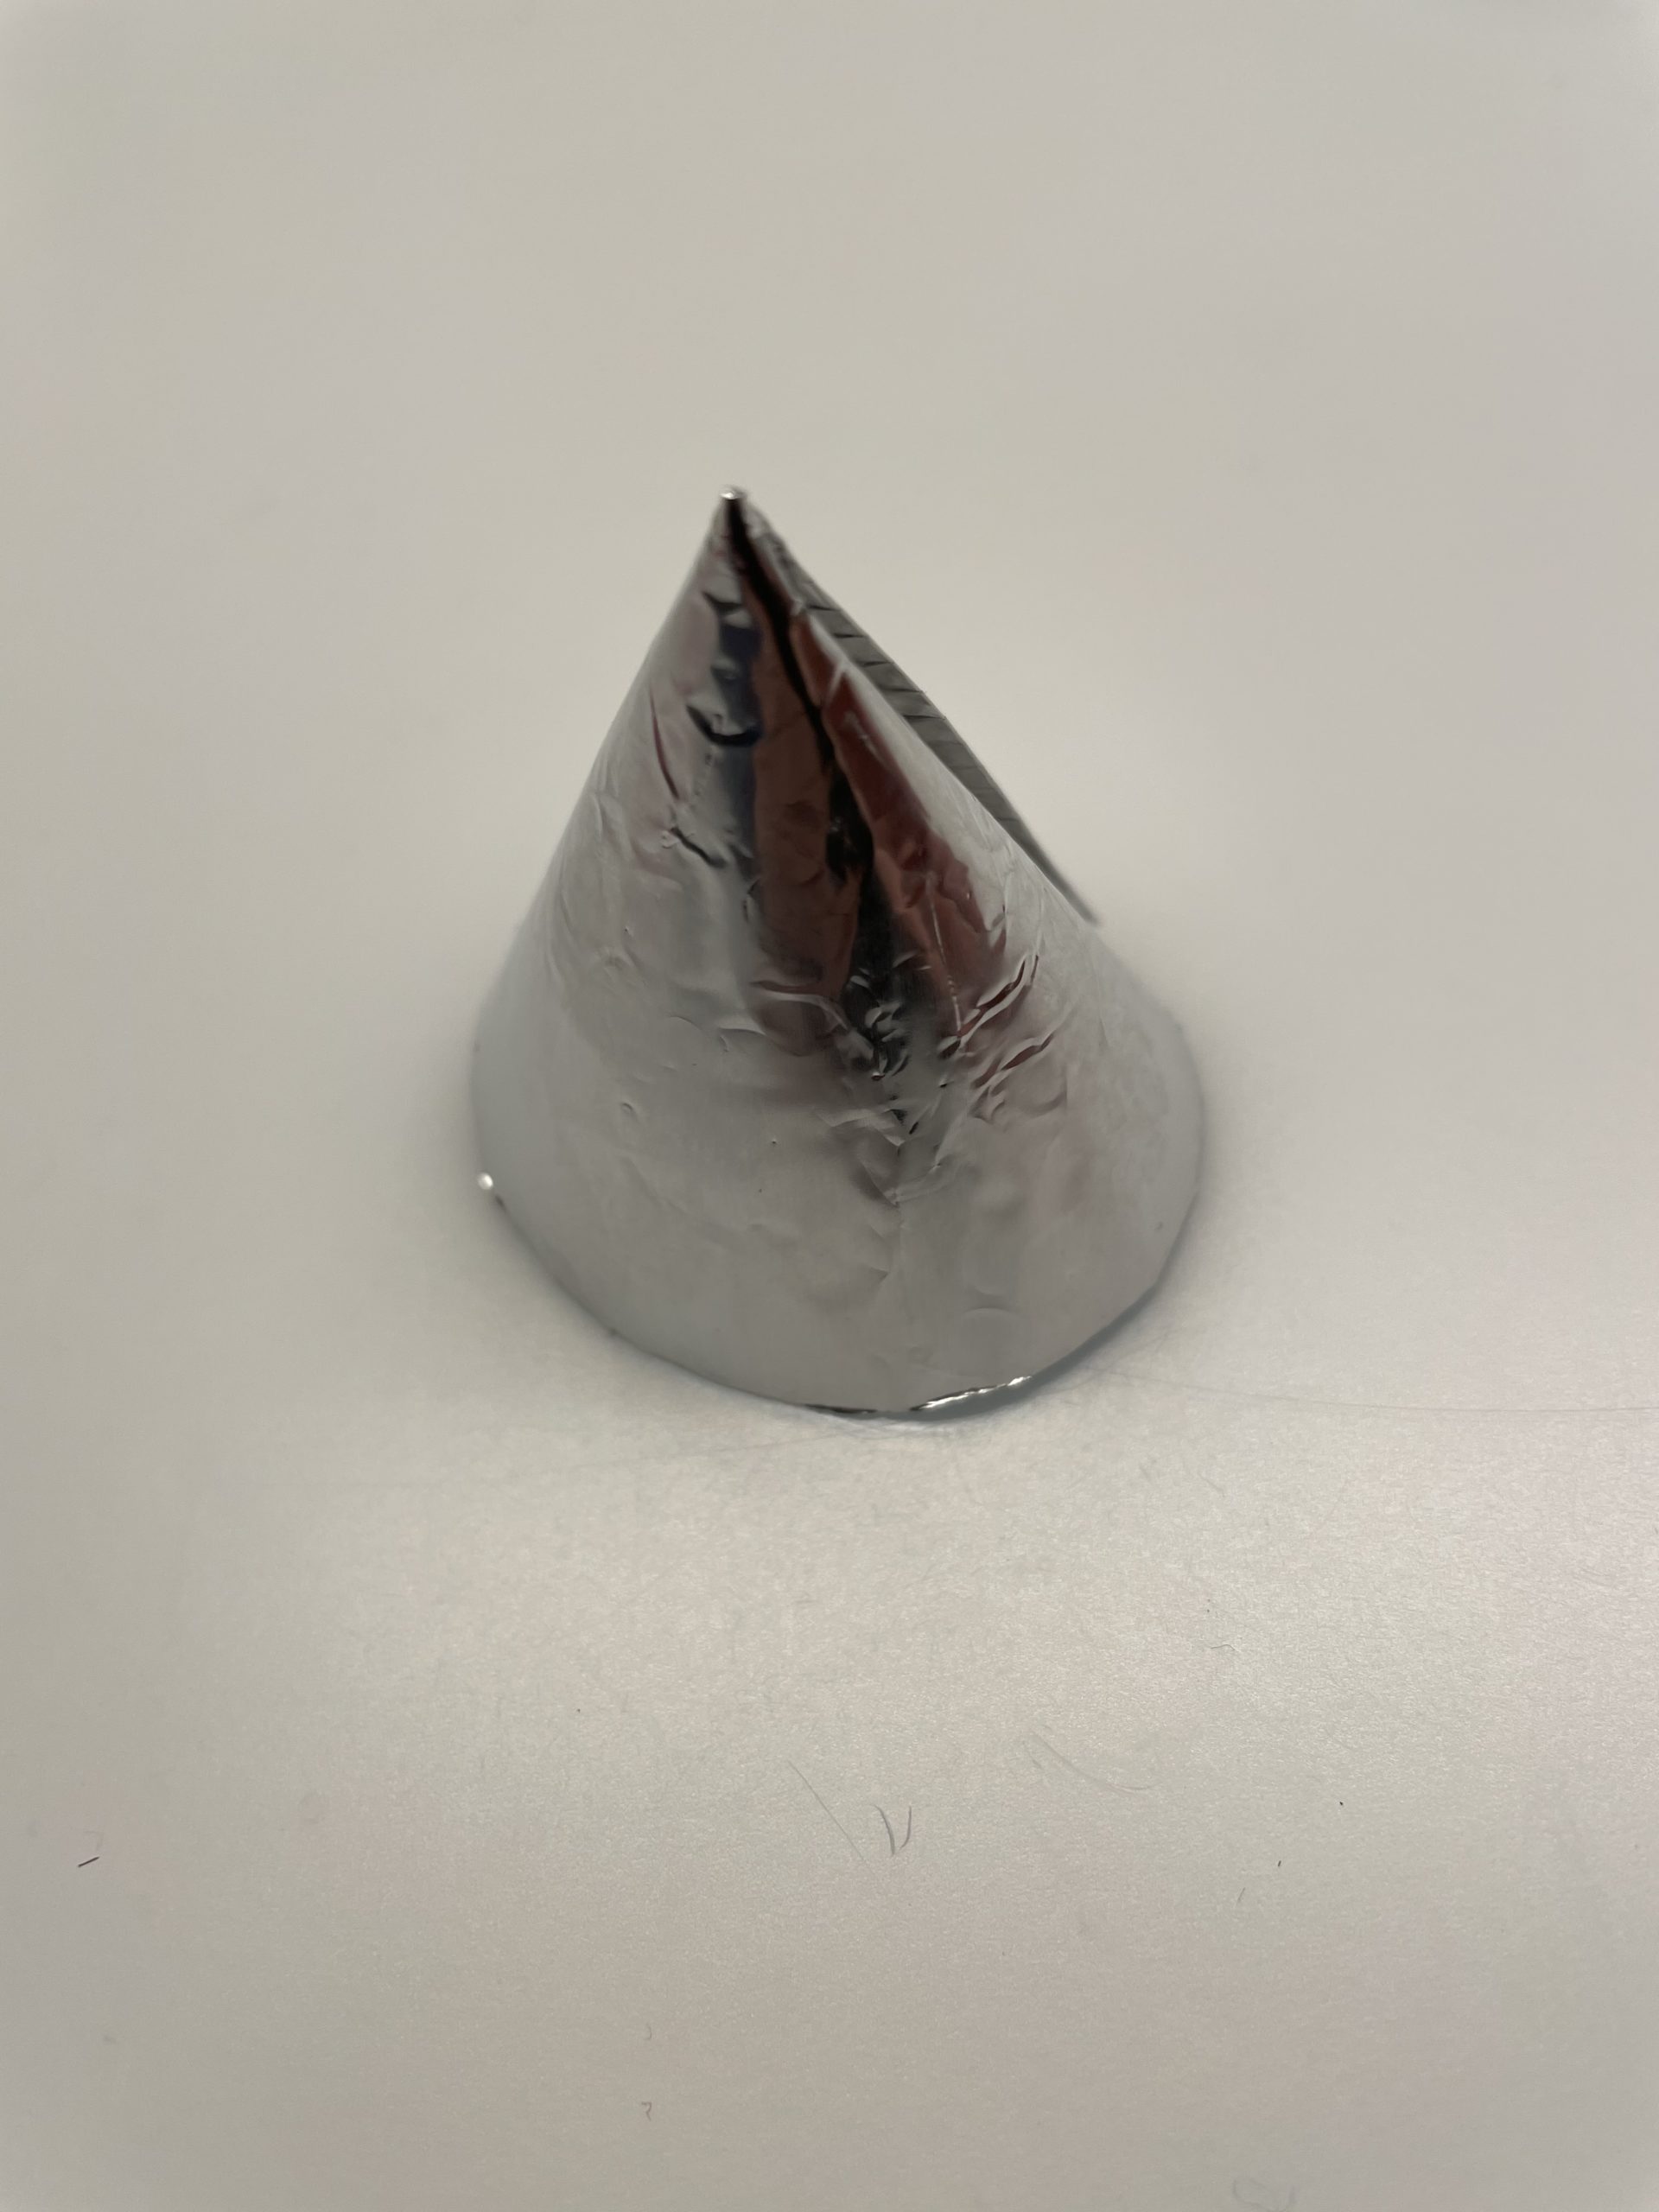
The rocket tip is ready.

Bild zum Schritt 31 für das Bastel- und DIY-Abenteuer für Kinder: 'Fertig ist die Raketenspitze.'

32

Now you put these over the bottle cap and stick them tight.

Bild zum Schritt 32 für das Bastel- und DIY-Abenteuer für Kinder: 'Jetzt stülpt ihr diese über den Flaschendeckel und klebt sie...'

33

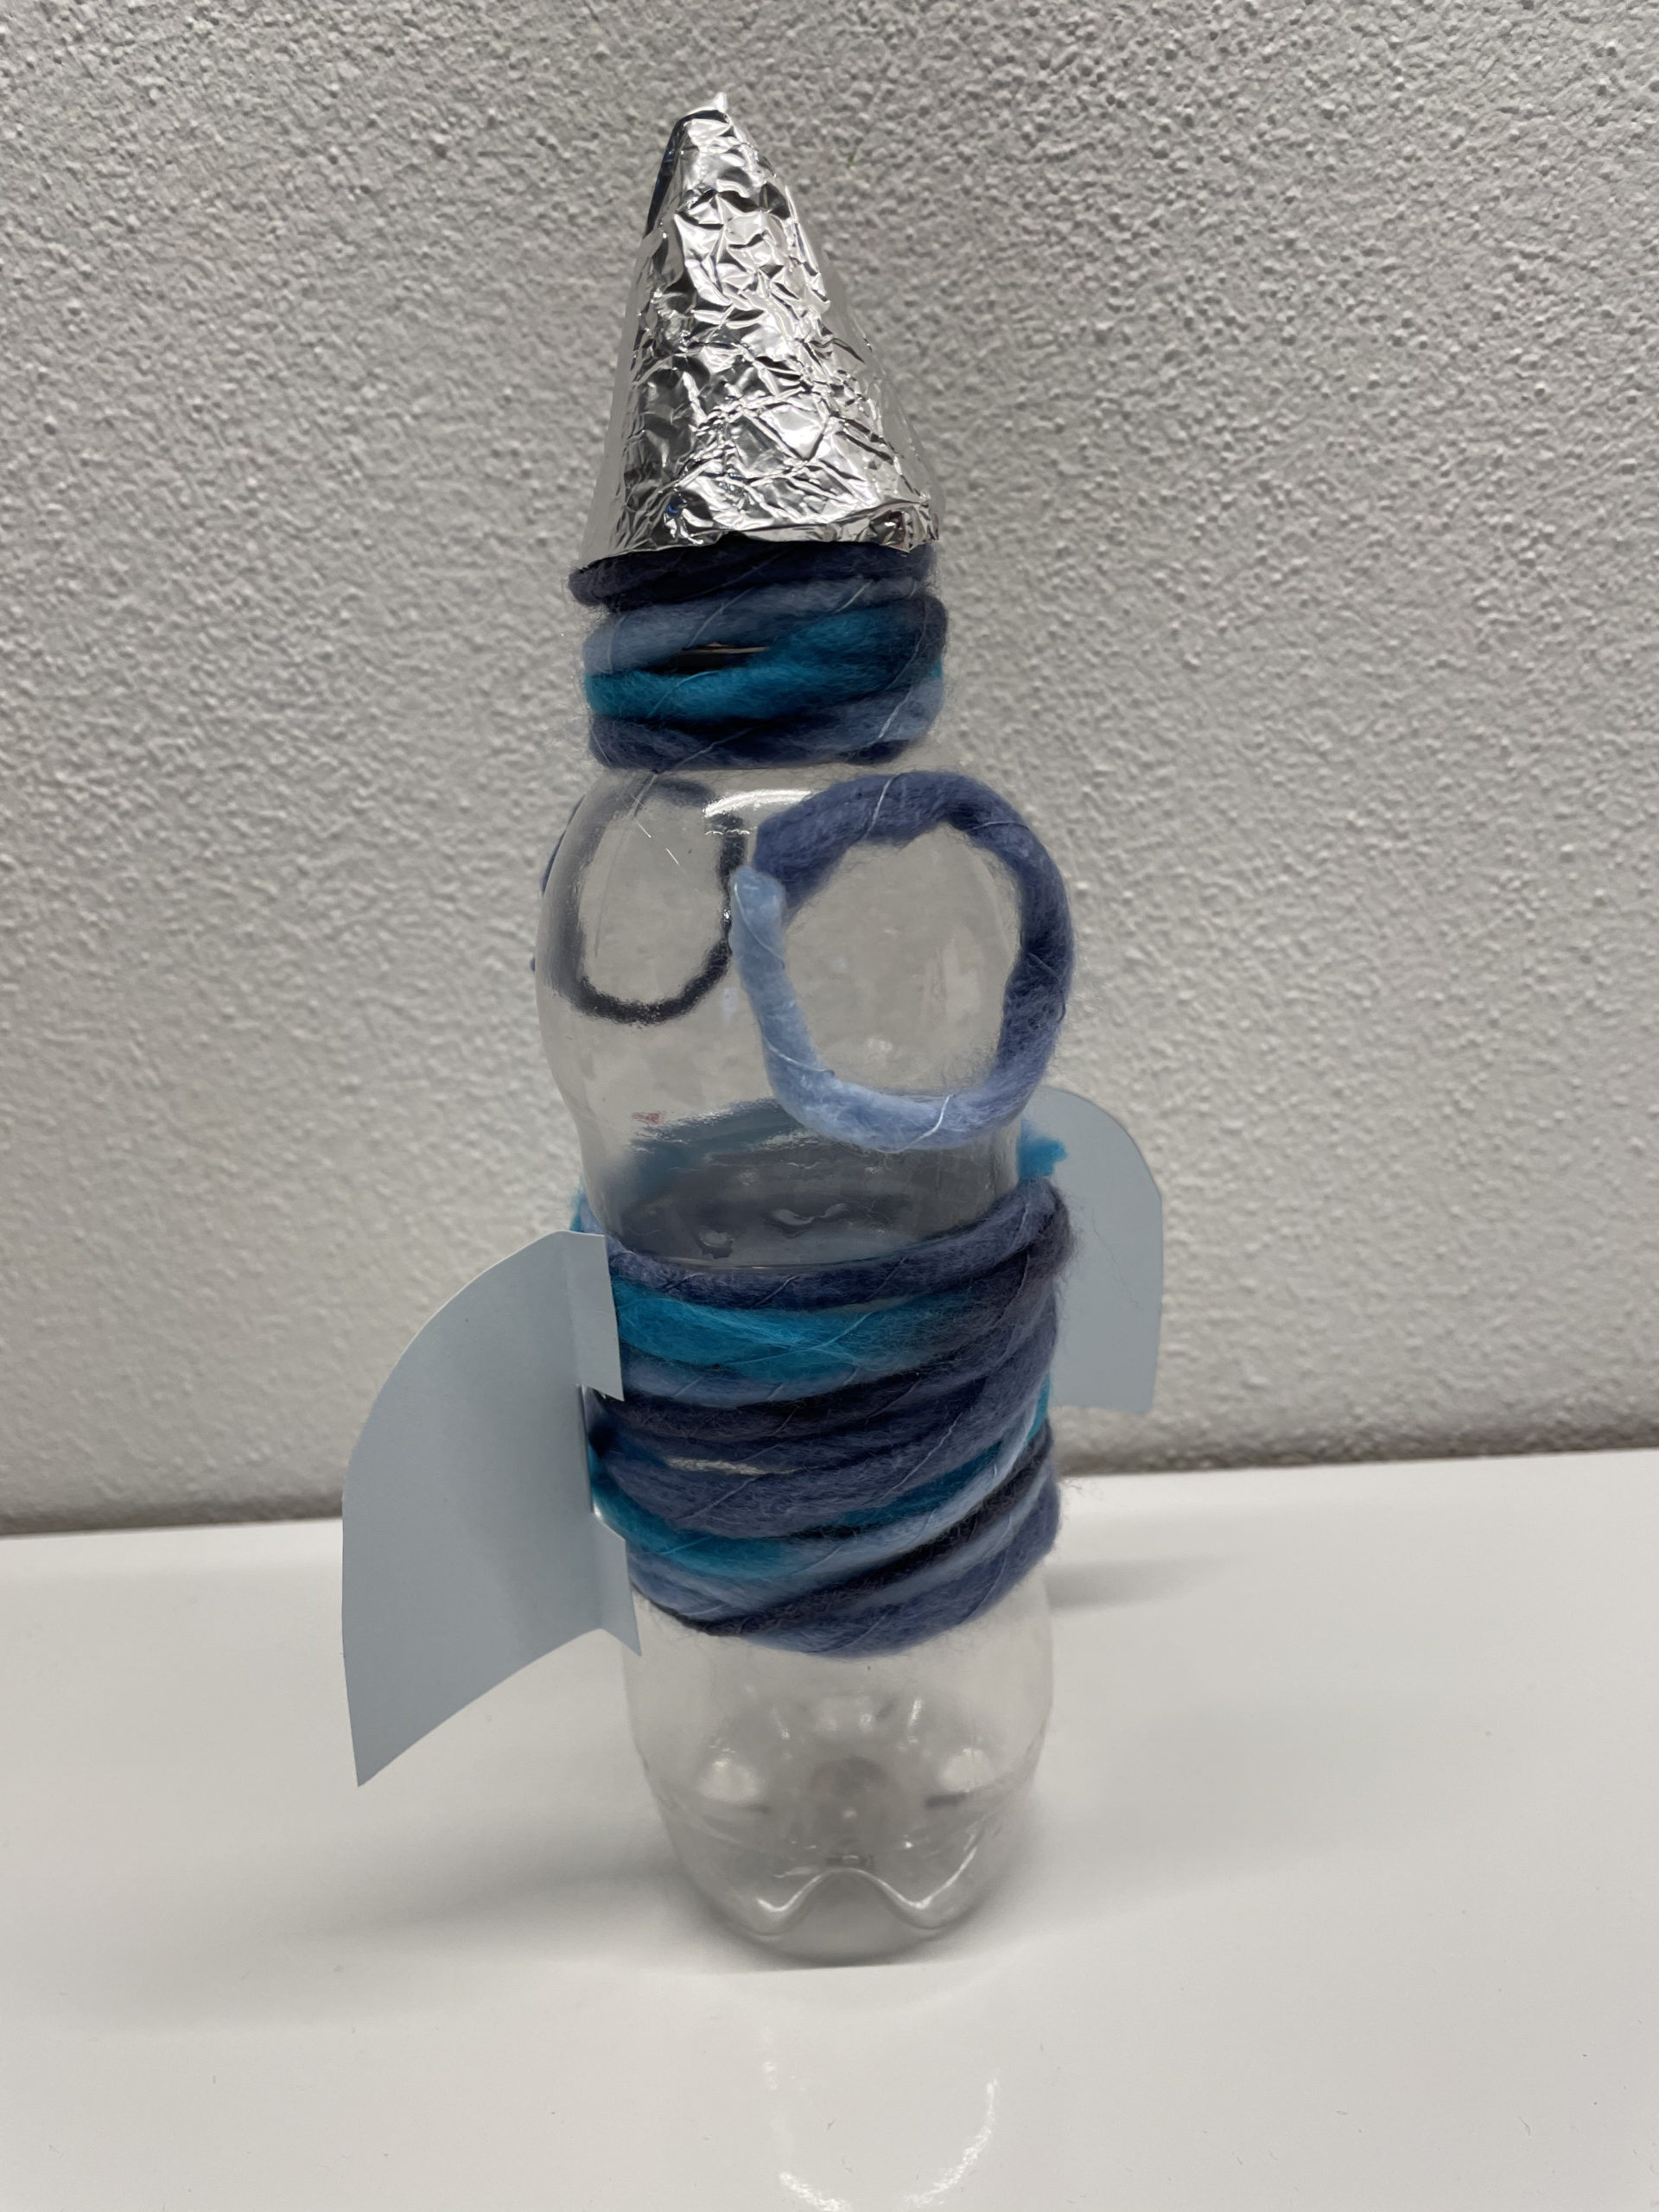
The bottle rocket is ready.

Bild zum Schritt 33 für das Bastel- und DIY-Abenteuer für Kinder: 'Fertig ist die Flaschenrakete.'

34

Have fun doing crafts and playing.
Maybe you'll come up with more design ideas!

Bild zum Schritt 34 für das Bastel- und DIY-Abenteuer für Kinder: 'Viel Spaß beim Basteln und Spielen.   Vielleicht fallen...'

35

2. Bild zum Schritt 34 für das Bastel- und DIY-Abenteuer für Kinder: 'Viel Spaß beim Basteln und Spielen.   Vielleicht fallen...'

36

Have fun with your rocket!

Materials

 1 small PET bottle
 Wool
 Unwrought paper
 Aluminium foil or aluminium packaging material e.g. chip bag
Other:
 1 Adhesive penPossibly wood glue or hot glue
 1 Pencil
 1 Felt pen
 Builder's pad
All links marked with a shopping cart lead to Amazon - here we have selected products that we would order ourselves and in part also ordered. In a qualified purchase via the advertising link, we as Amazon partner receive a commission, for you there are no costs. You thus support our cost- and advertising banner-free, educational offer.

Directions

1

First you need a small empty PET bottle.
You rinse them out and let them dry.

Bild zum Schritt 1 für das Bastel- und DIY-Abenteuer für Kinder: 'Zuerst braucht ihr eine kleine leere PET Flasche.  ...'

2

Then you put out your craft pad and prepare pens, scissors and glue.

Bild zum Schritt 2 für das Bastel- und DIY-Abenteuer für Kinder: 'Dann legt ihr eure Bastelunterlage aus und legt Stift, Schere...'

3

Now you paint on a piece of clay paper the wings of the rocket!
In doing so, the straight side of the wing paints as long as the ribbed thin spot on your plastic bottle.
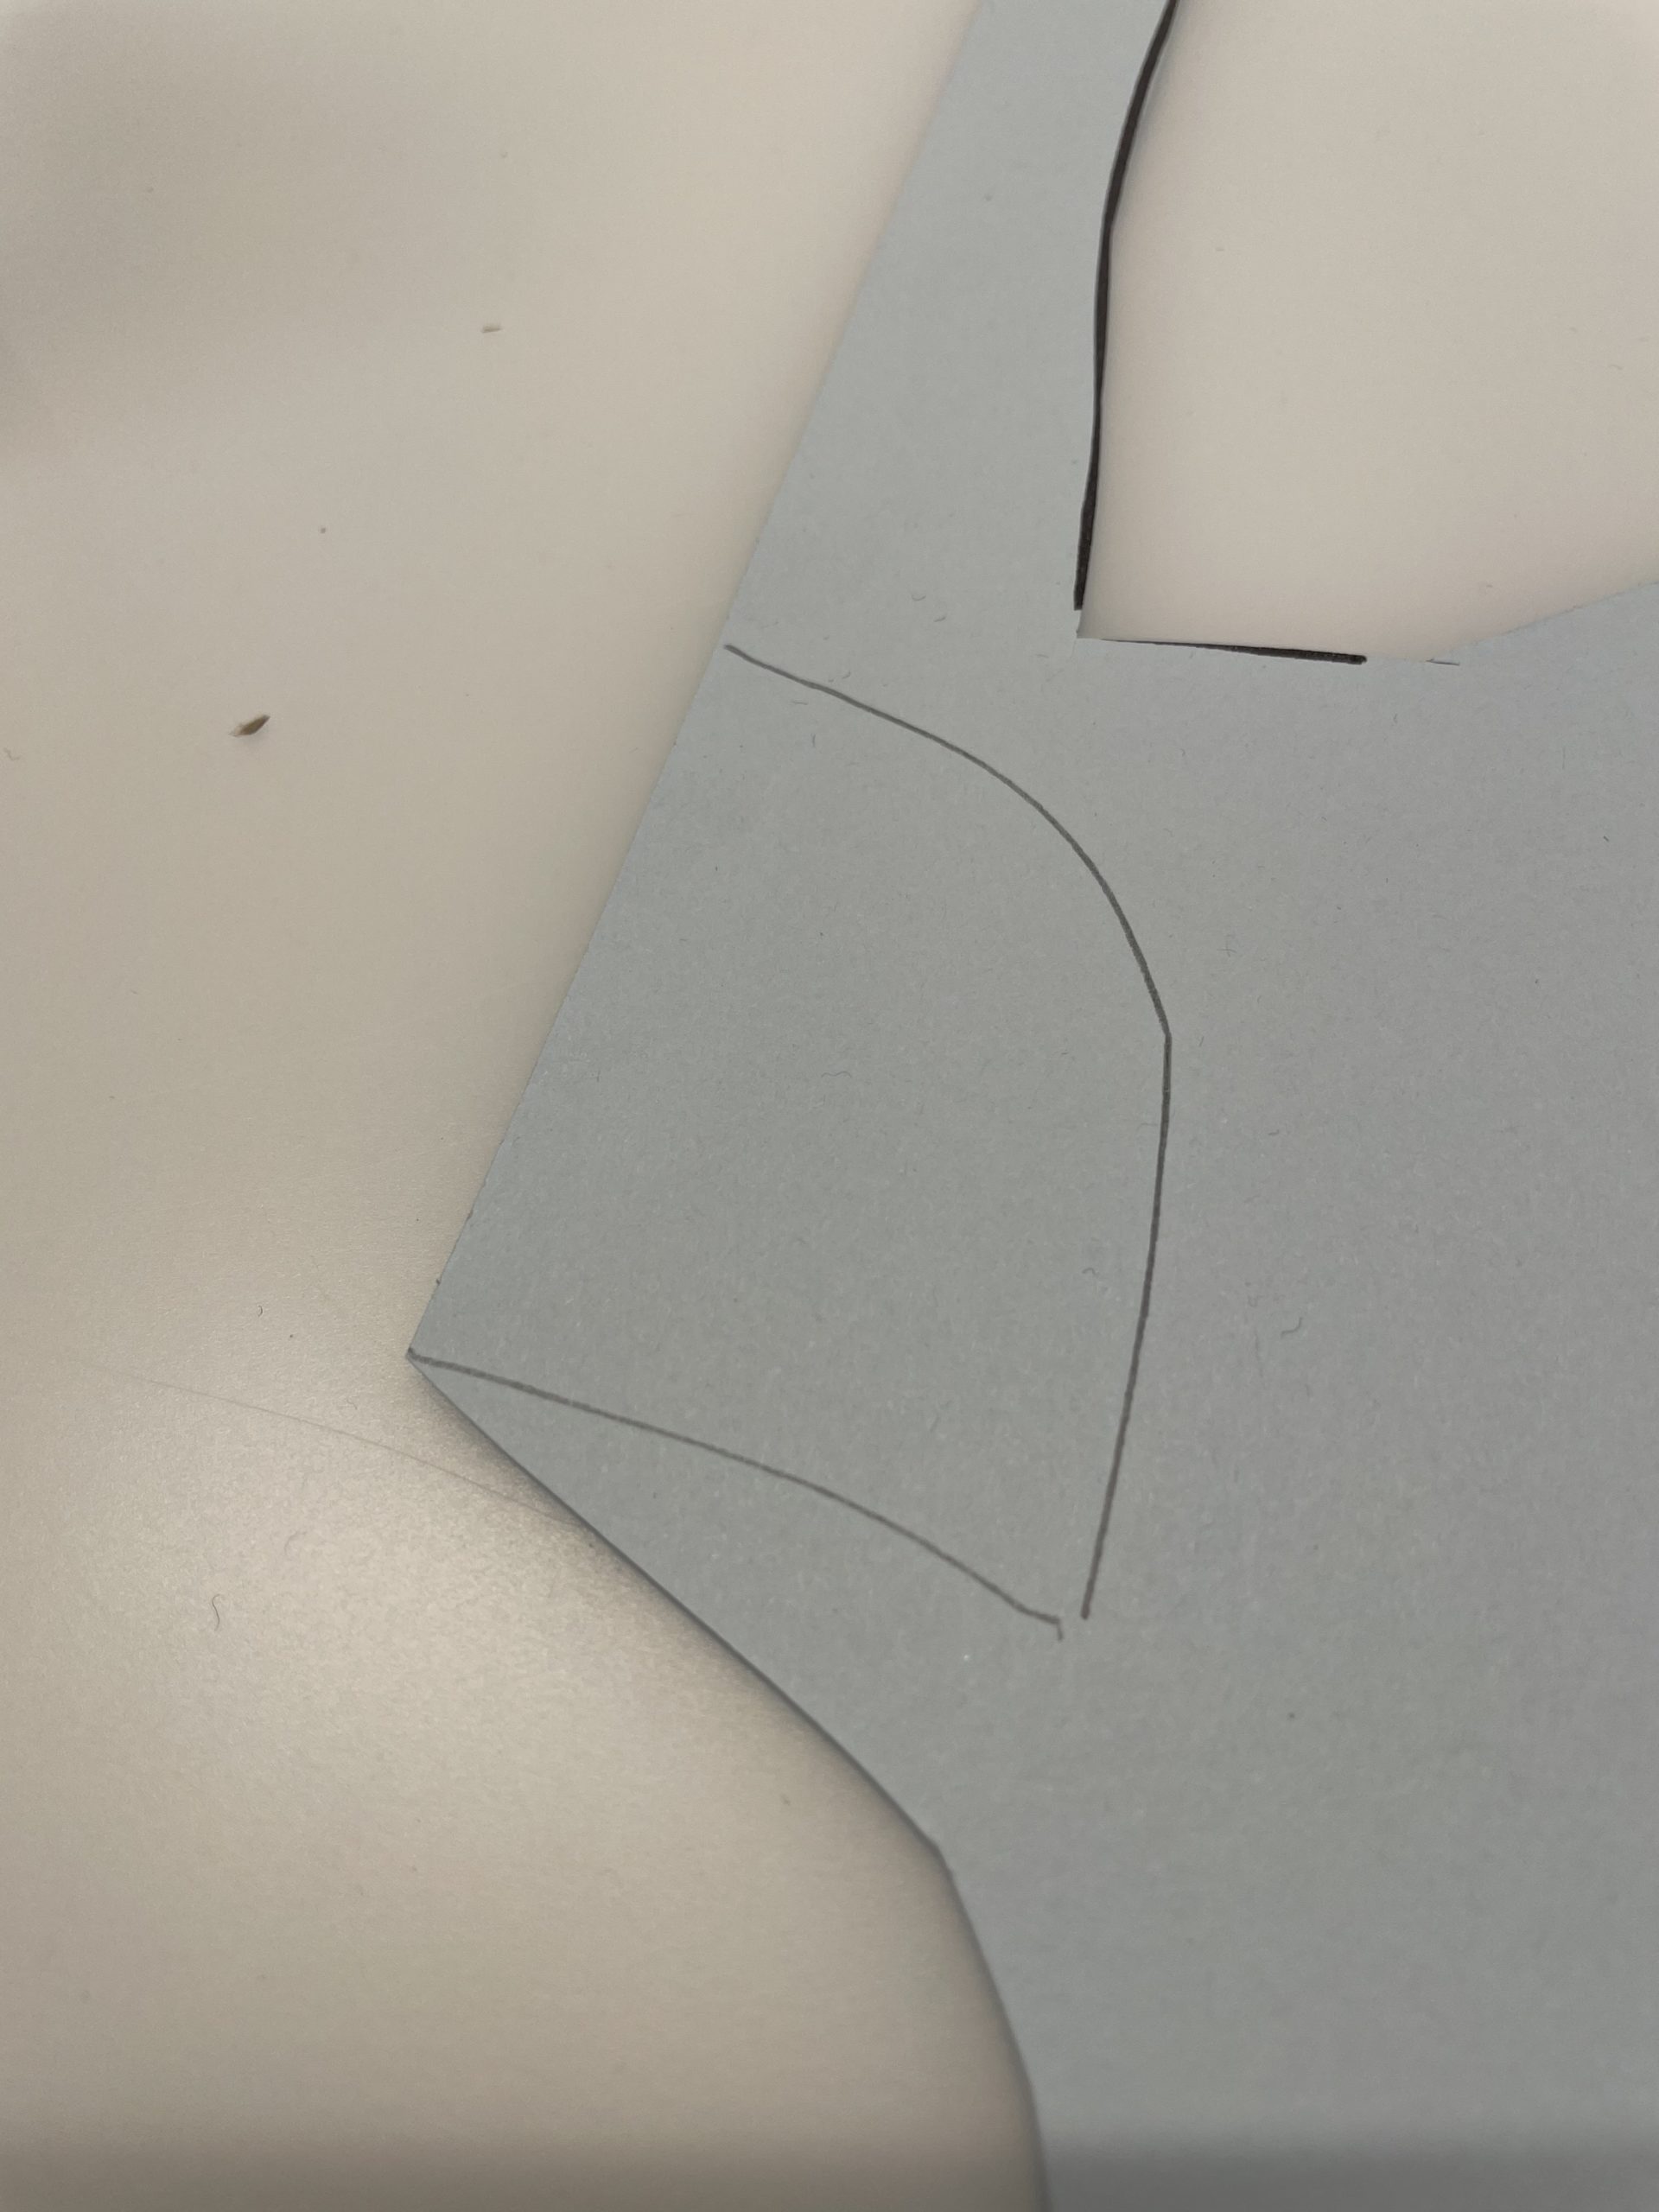
Bild zum Schritt 3 für das Bastel- und DIY-Abenteuer für Kinder: 'Jetzt malt ihr euch auf ein Stück Tonpapier die Tragflächen...'

4

Then cut out the wings with the scissors (2 pieces).
Then fold the straight side half an inch.

Bild zum Schritt 4 für das Bastel- und DIY-Abenteuer für Kinder: 'Anschließend schneidet ihr die Tragflächen mit der Schere aus (2...'

5

At this fold you cut 2 times with the scissors and bend one fold backwards and the other forward.
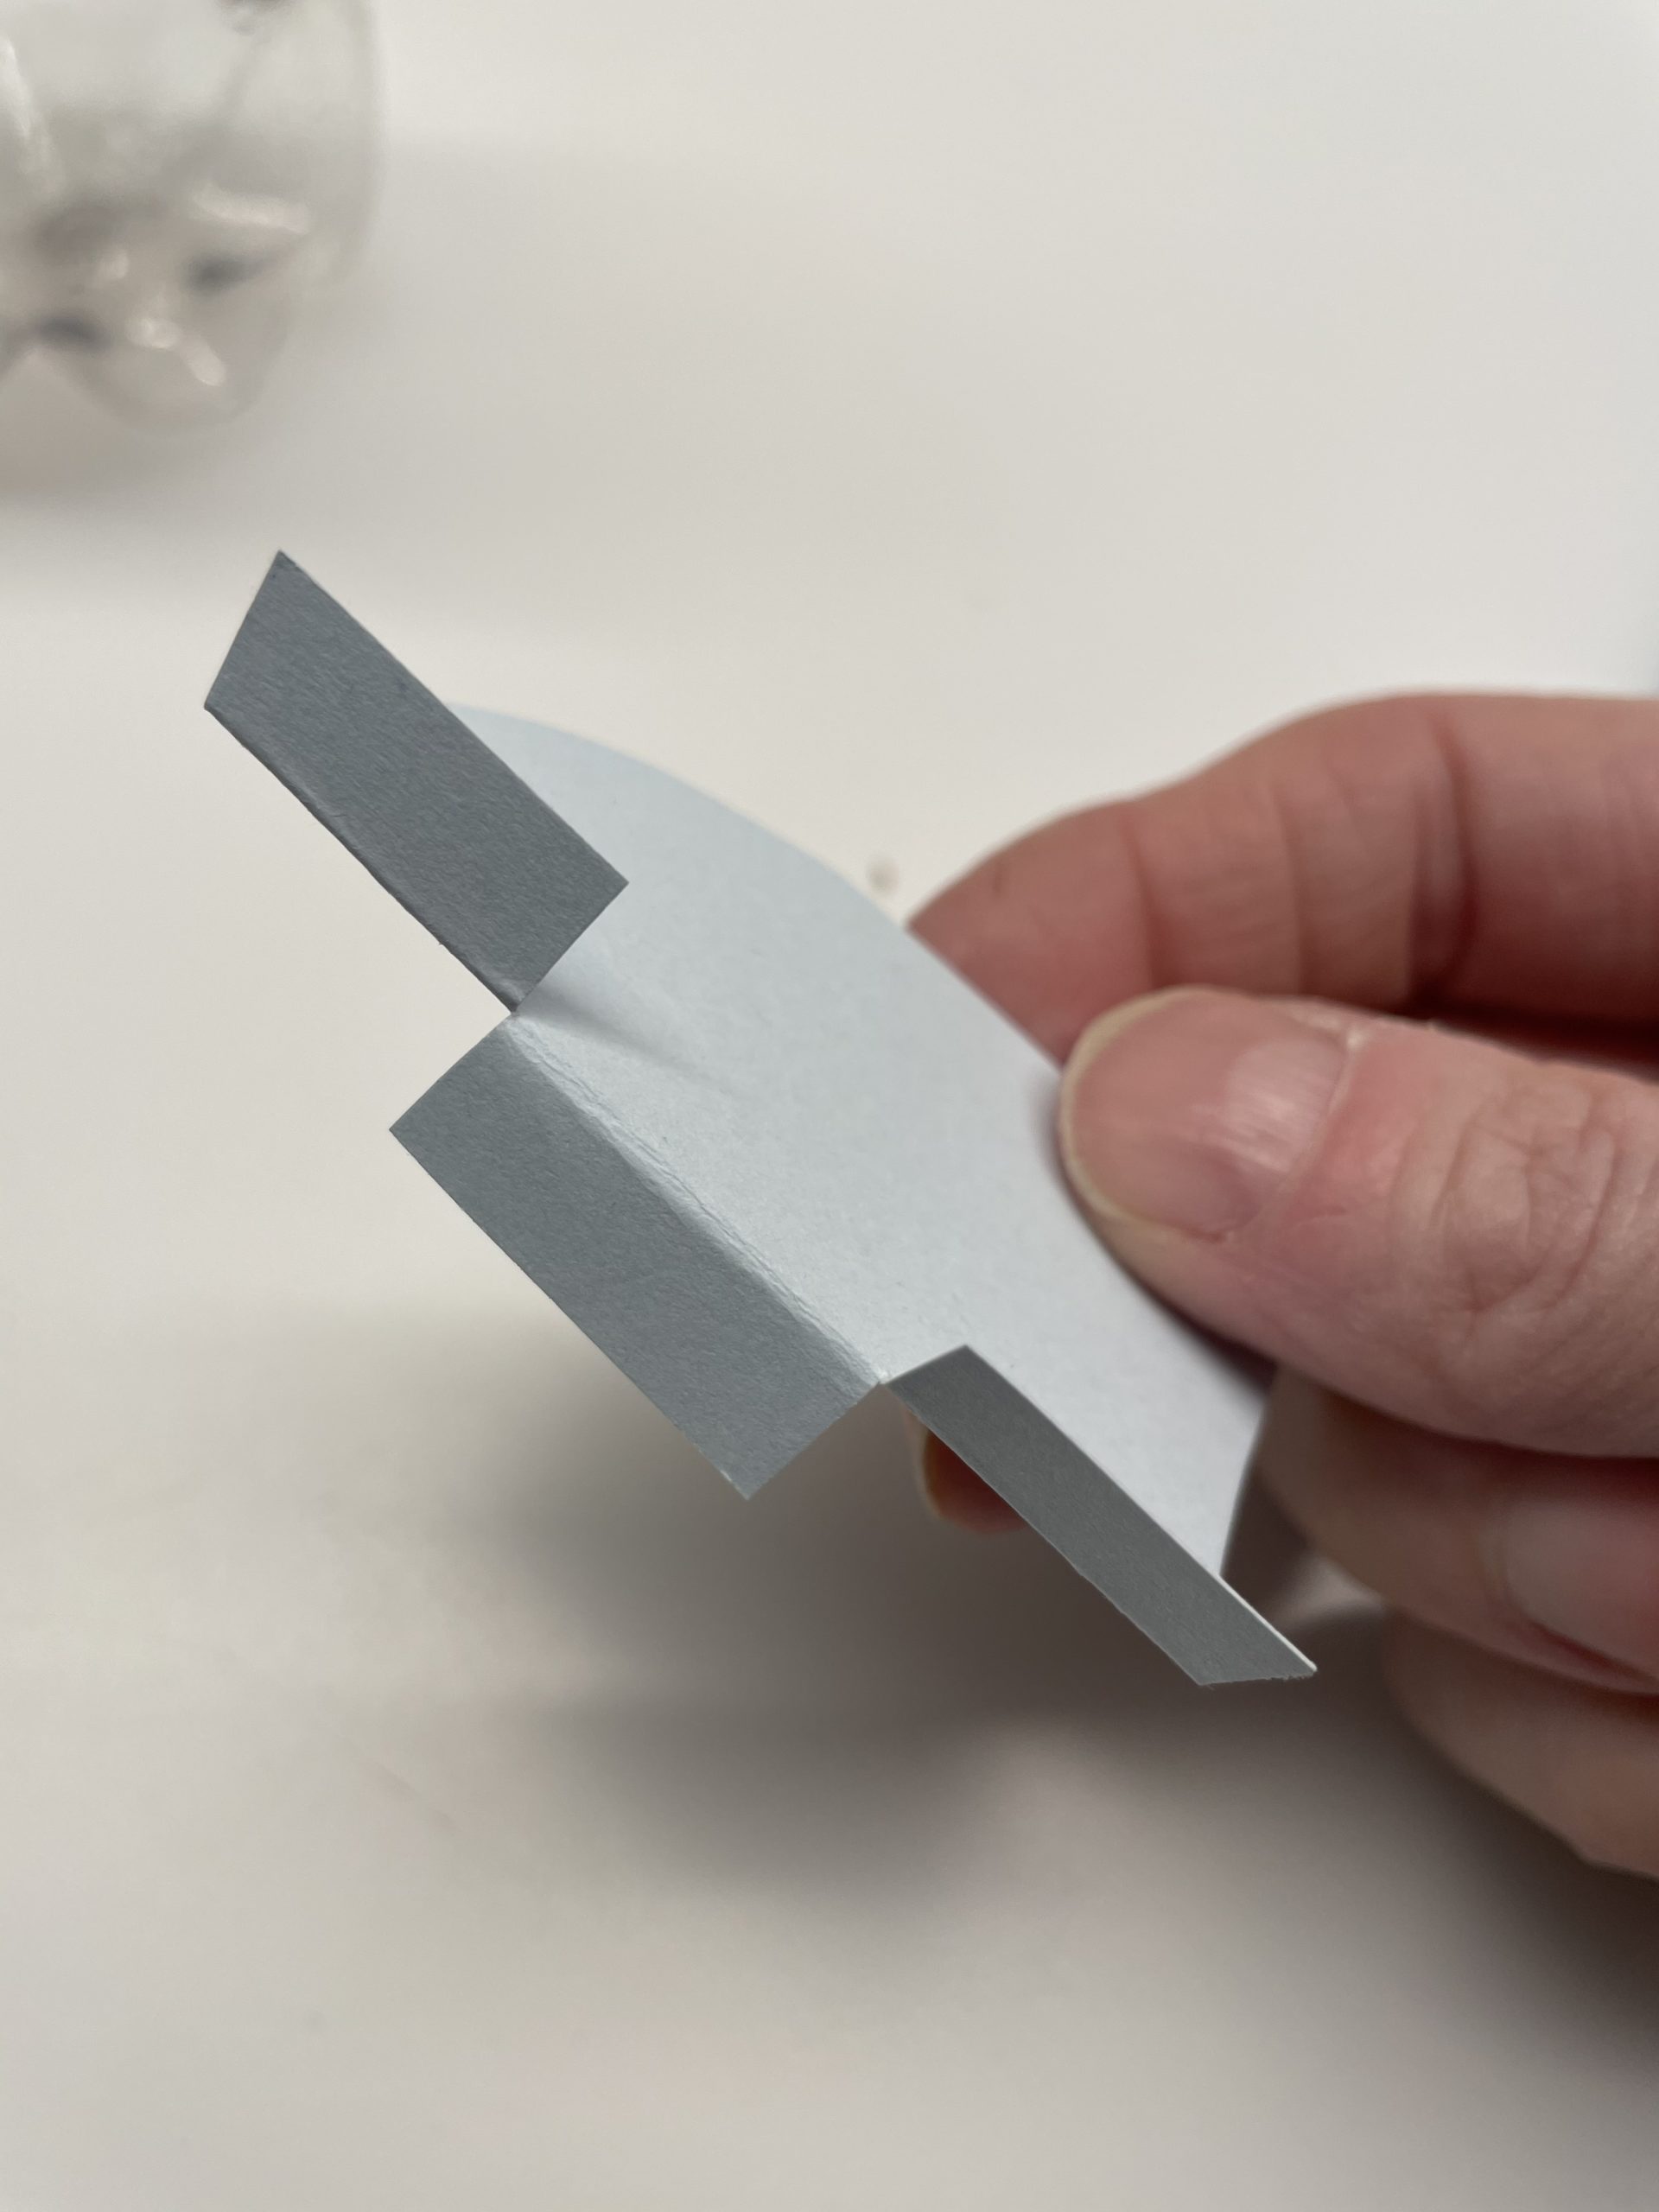
Bild zum Schritt 5 für das Bastel- und DIY-Abenteuer für Kinder: 'An diesem Falz schneidet ihr 2x mit der Schere ein...'

6

Make sure you make two counterparts!
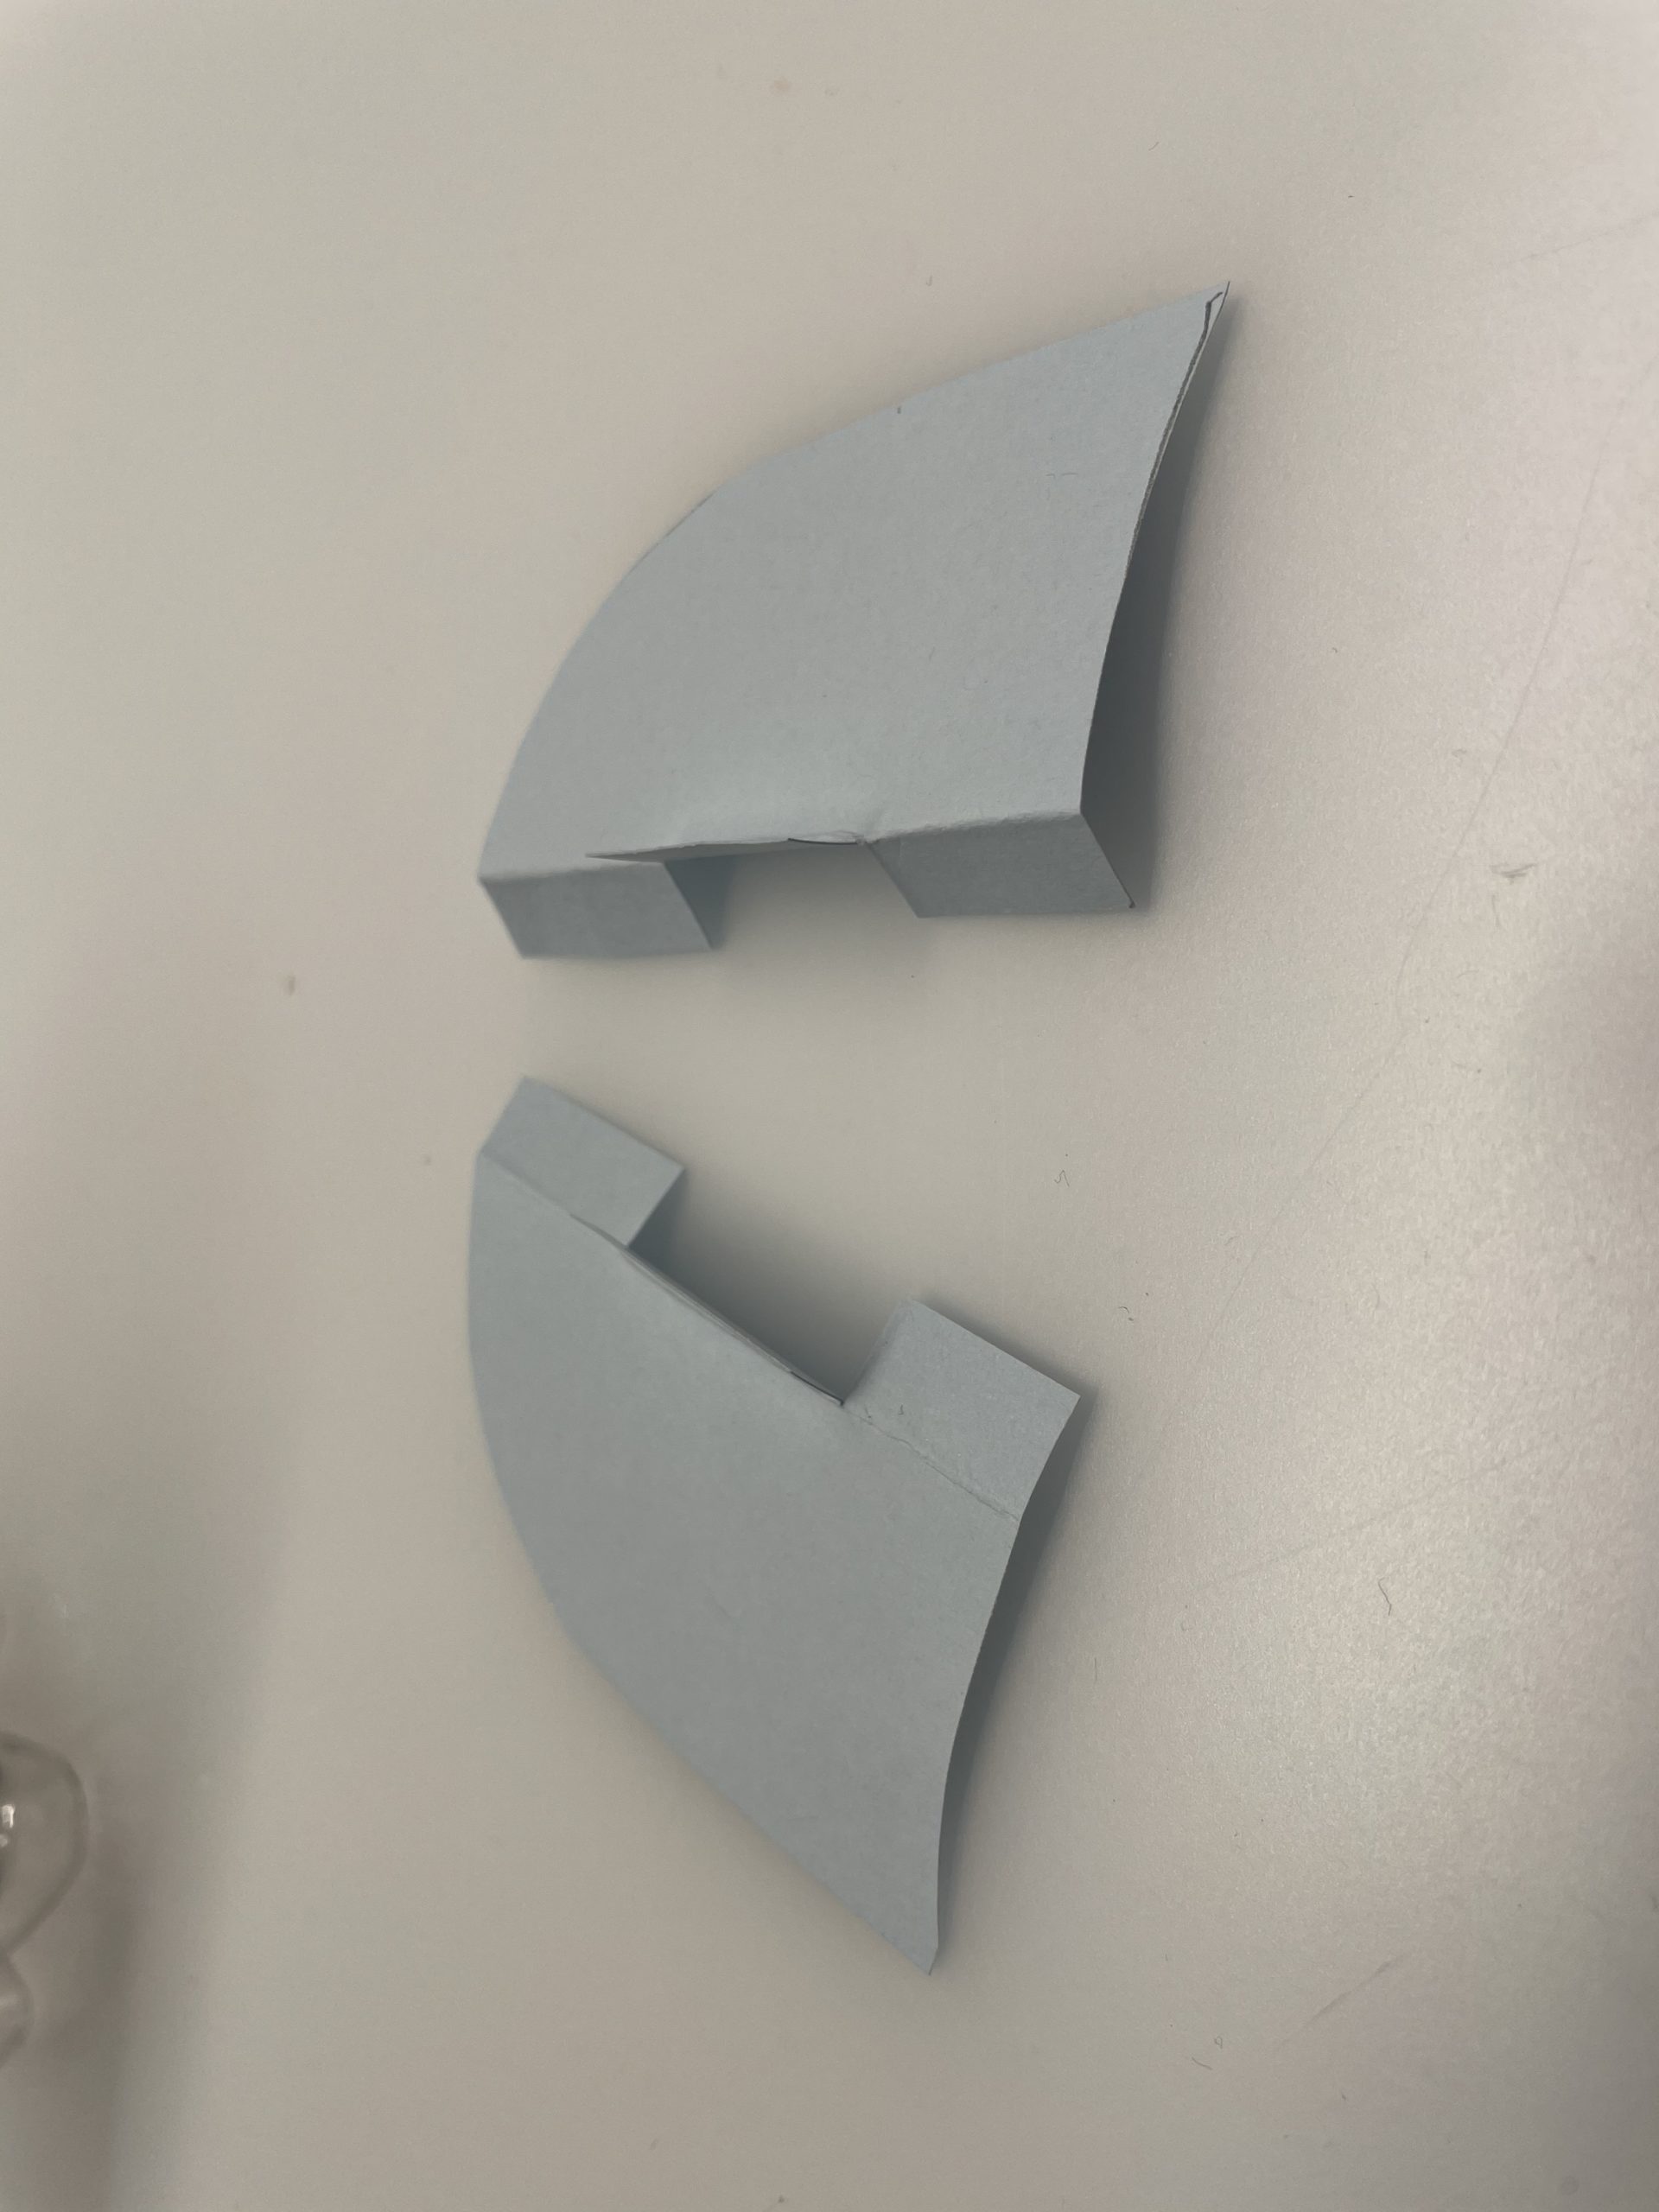
Bild zum Schritt 6 für das Bastel- und DIY-Abenteuer für Kinder: 'Achtet darauf, dass ihr zwei Gegenstücke bastelt!'

7

Now hold the finished wings to the bottle for trial. If they are too large, they will shorten something if necessary.
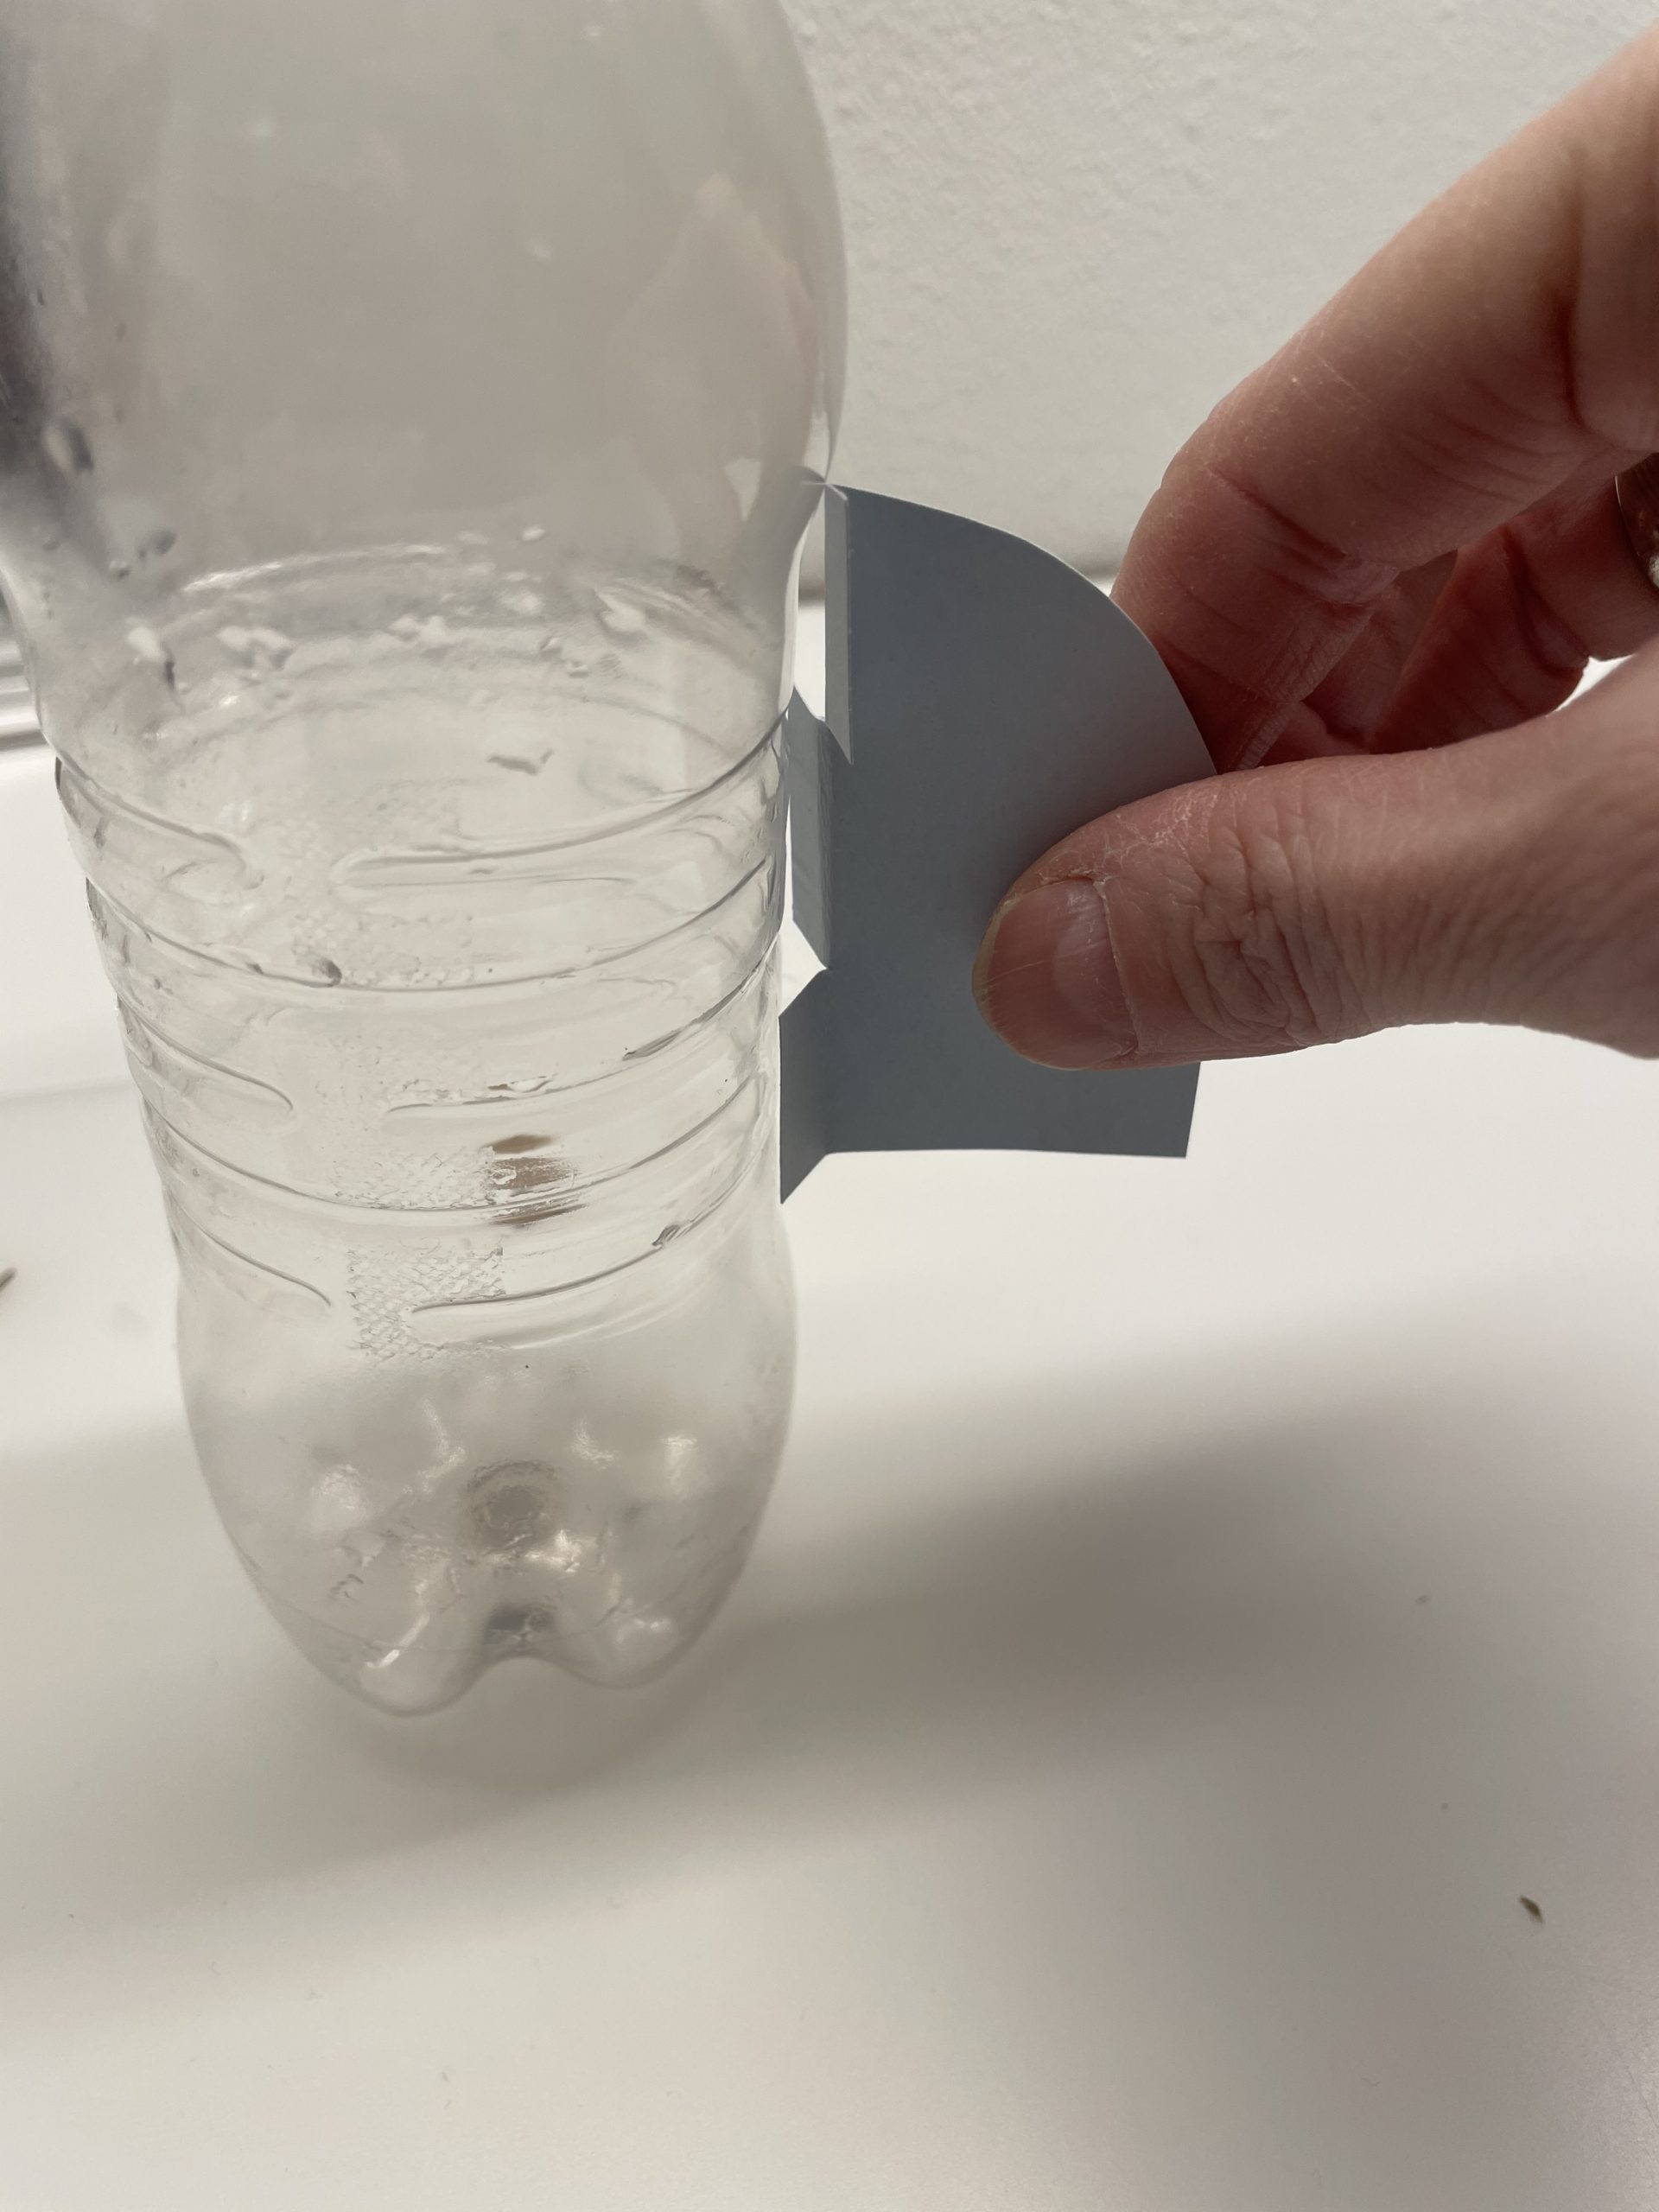
Bild zum Schritt 7 für das Bastel- und DIY-Abenteuer für Kinder: 'Haltet nun die fertigen Tragflächen probeweise an die Flasche. Falls...'

8

Before you stick the wings on, wrap the bottle centre with wool.
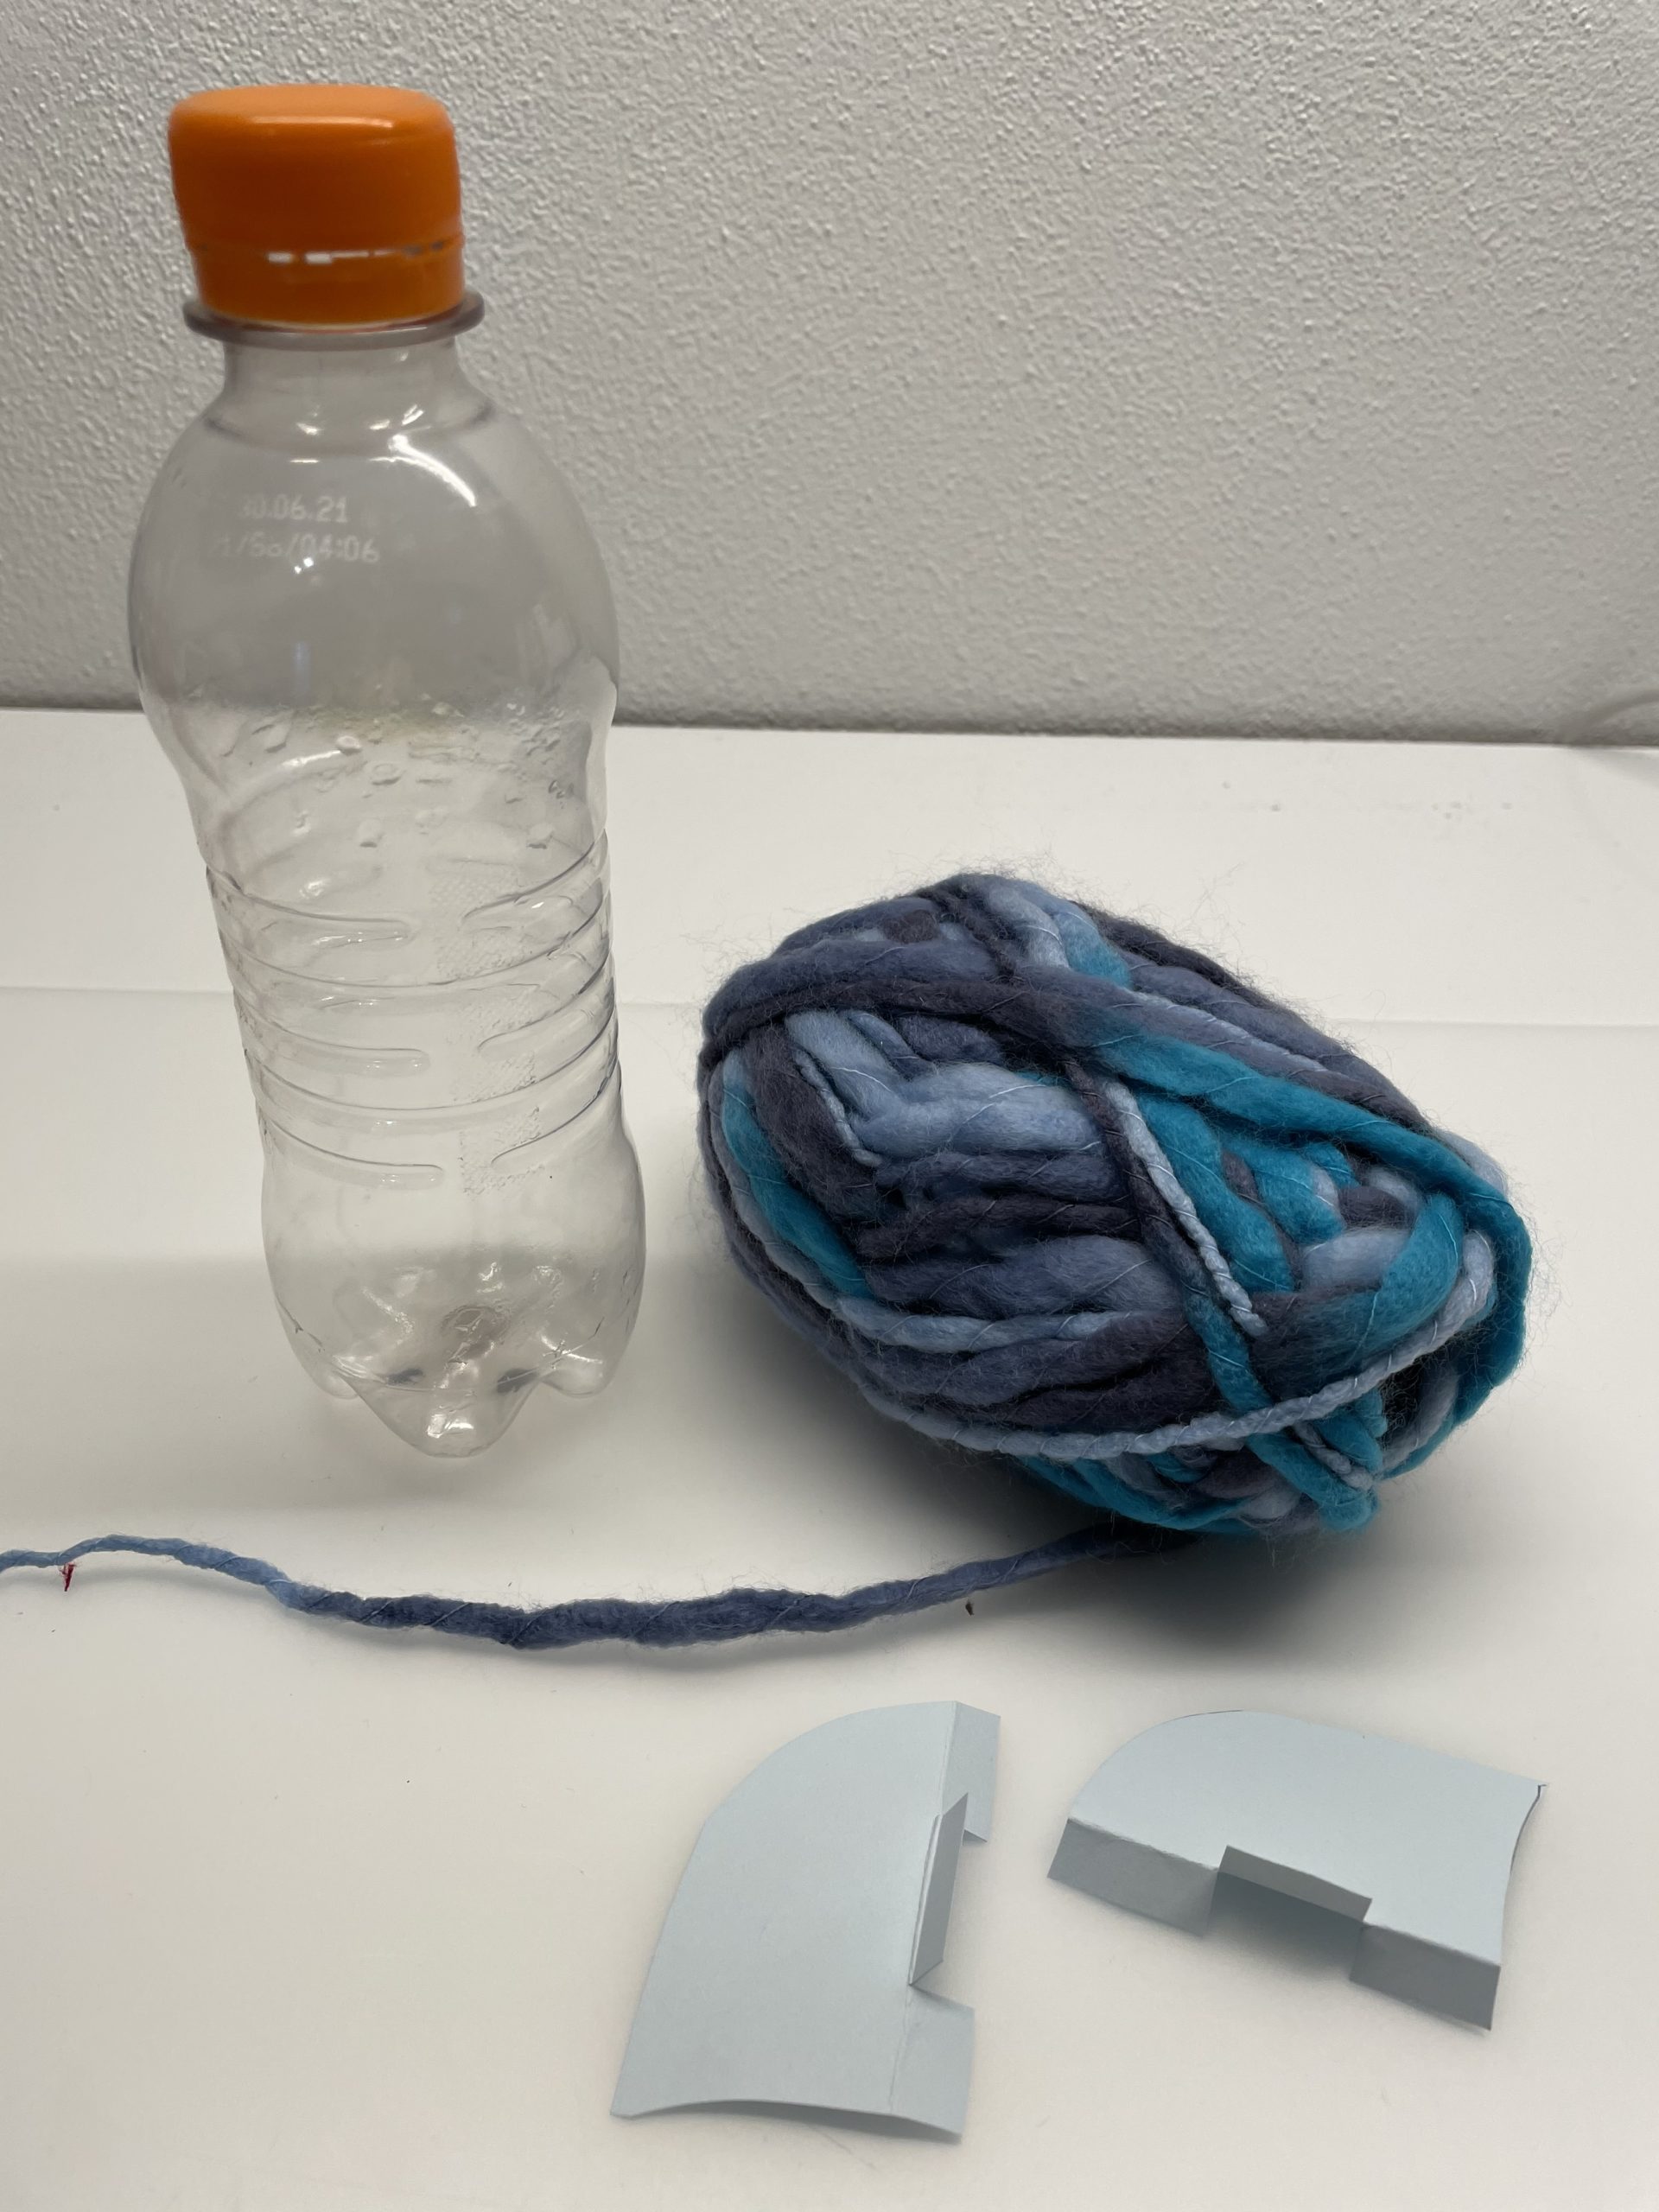
Bild zum Schritt 8 für das Bastel- und DIY-Abenteuer für Kinder: 'Bevor ihr die Tragflächen anklebt, umwickelt ihr die Flaschenmitte mit...'

9

To do this, brush a strip with glue from top to bottom over the ribbed part of the bottle. Attention: a narrow adhesive tape is enough!
Then you press the beginning of the thread onto the glue.
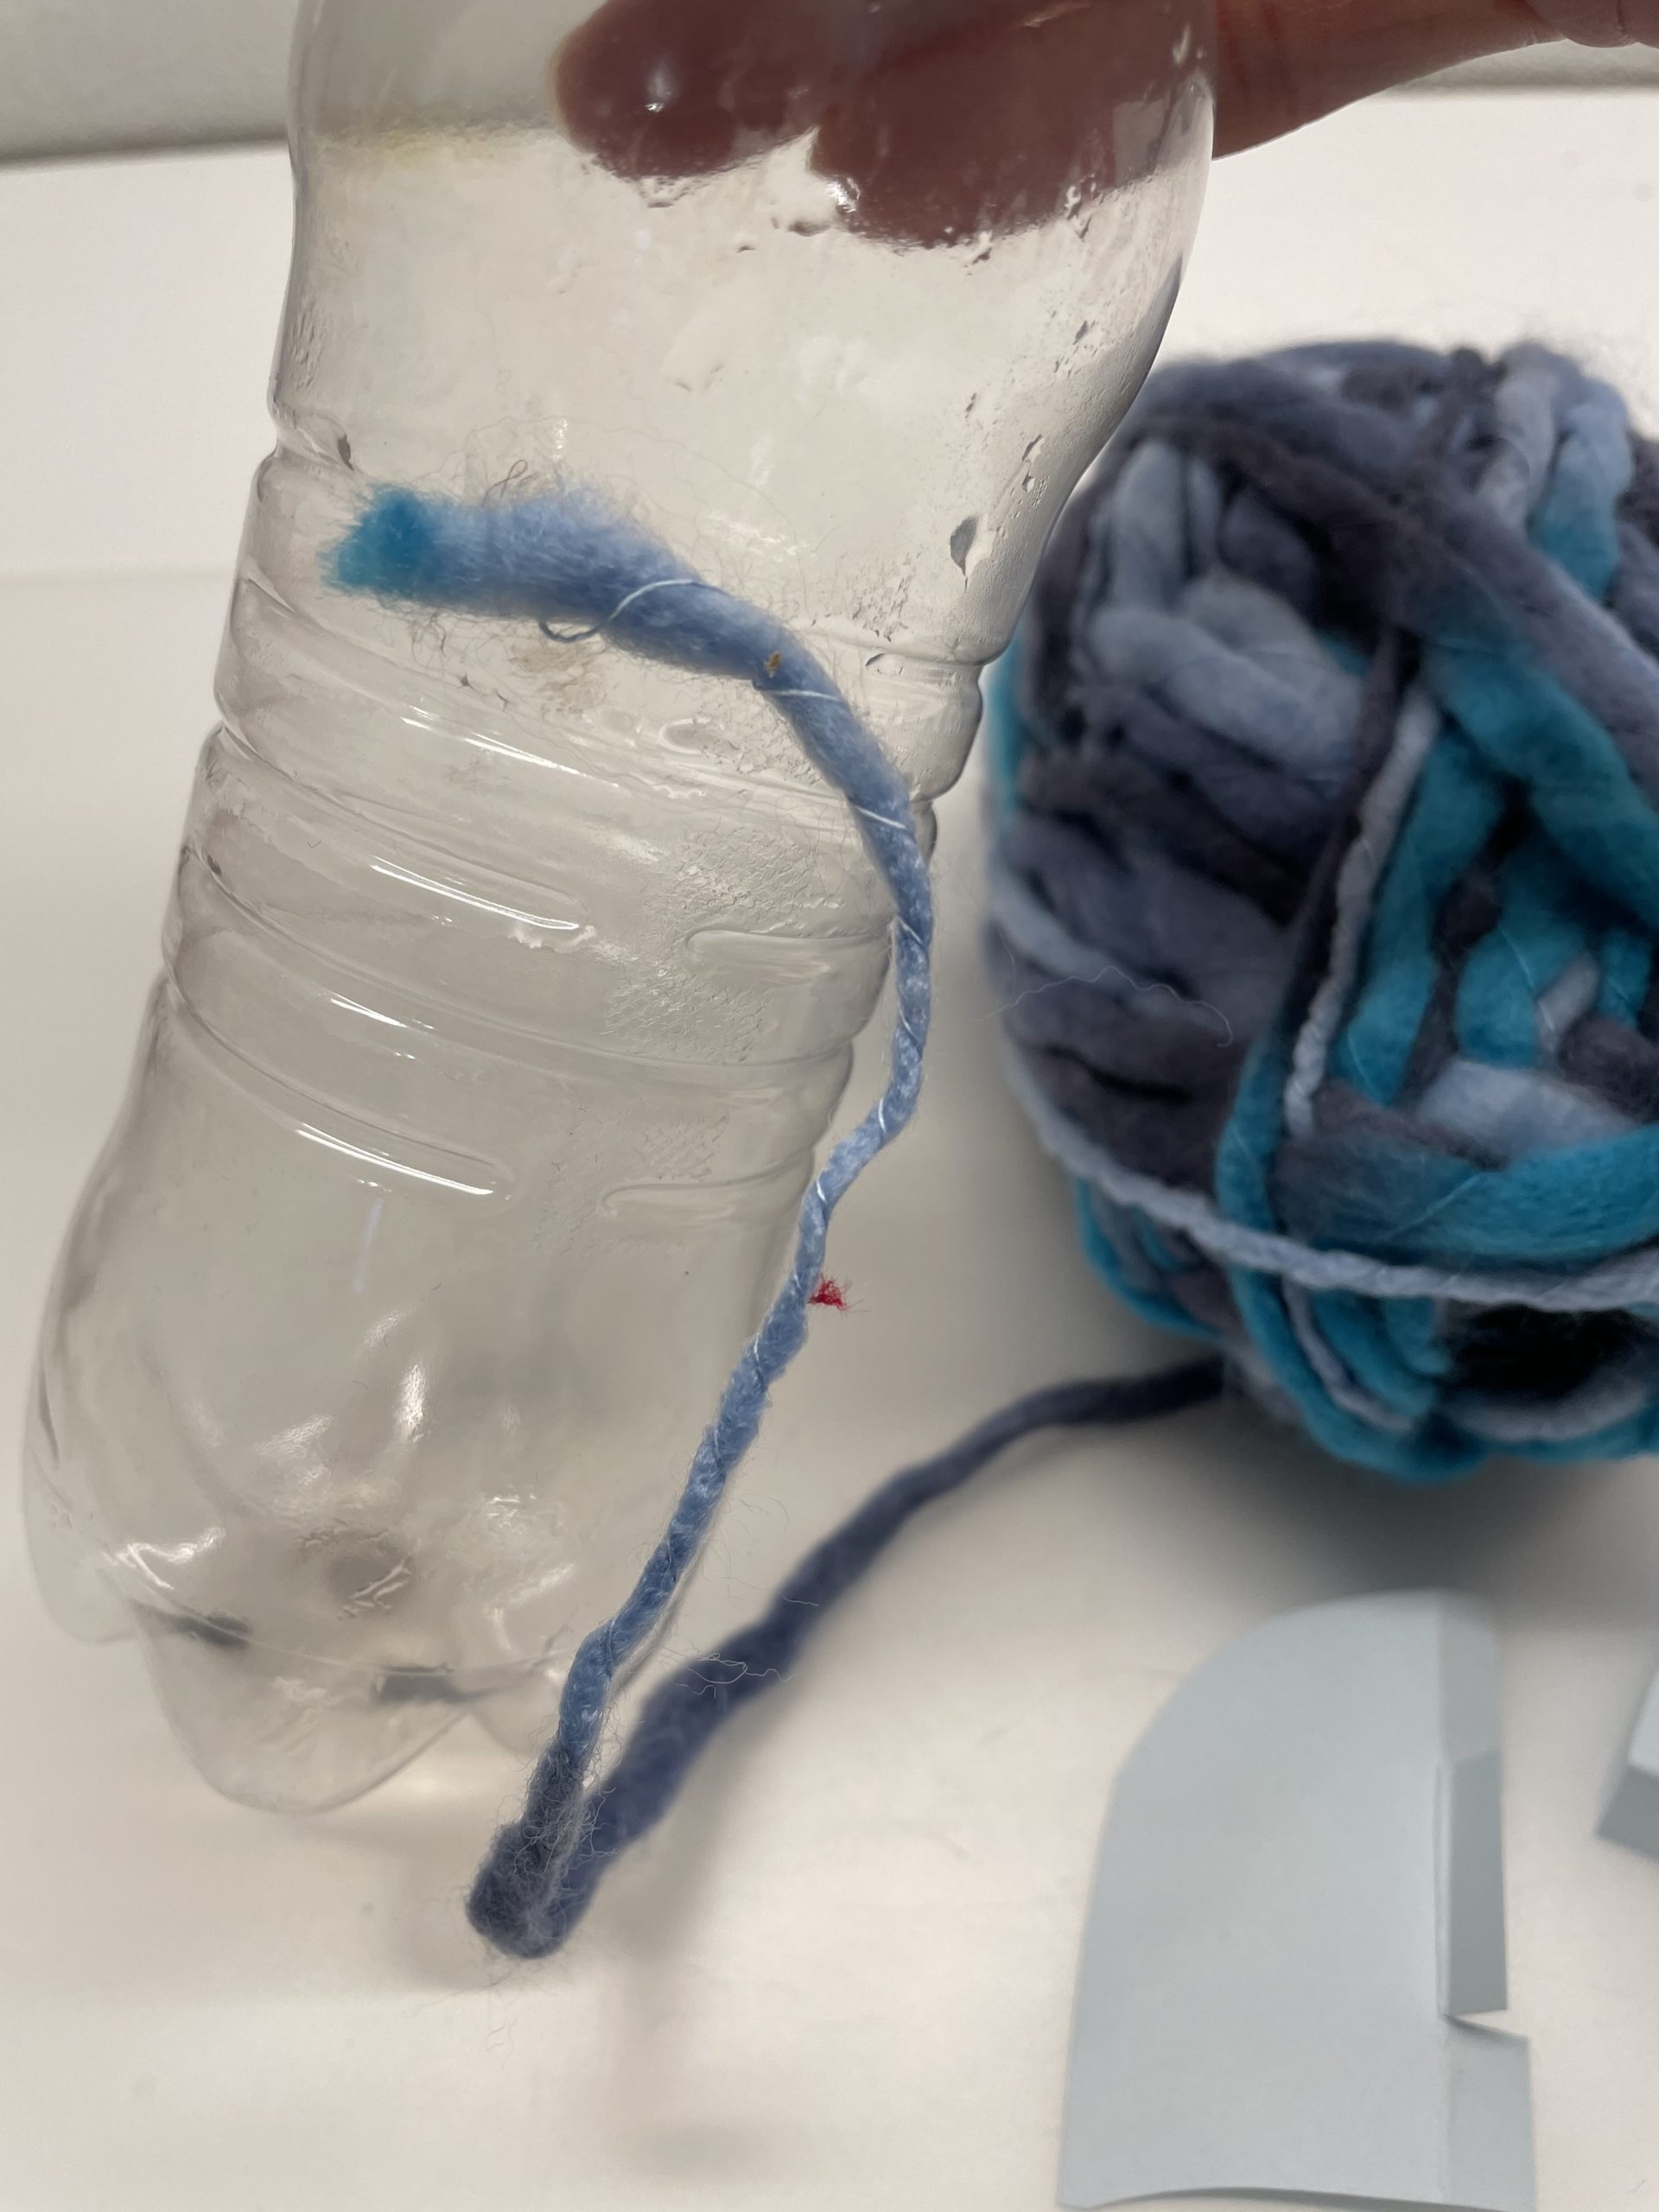
Bild zum Schritt 9 für das Bastel- und DIY-Abenteuer für Kinder: 'Dafür streicht ihr einen Streifen mit Kleber von oben nach...'

10

Now wrap the bottle centre with wool.
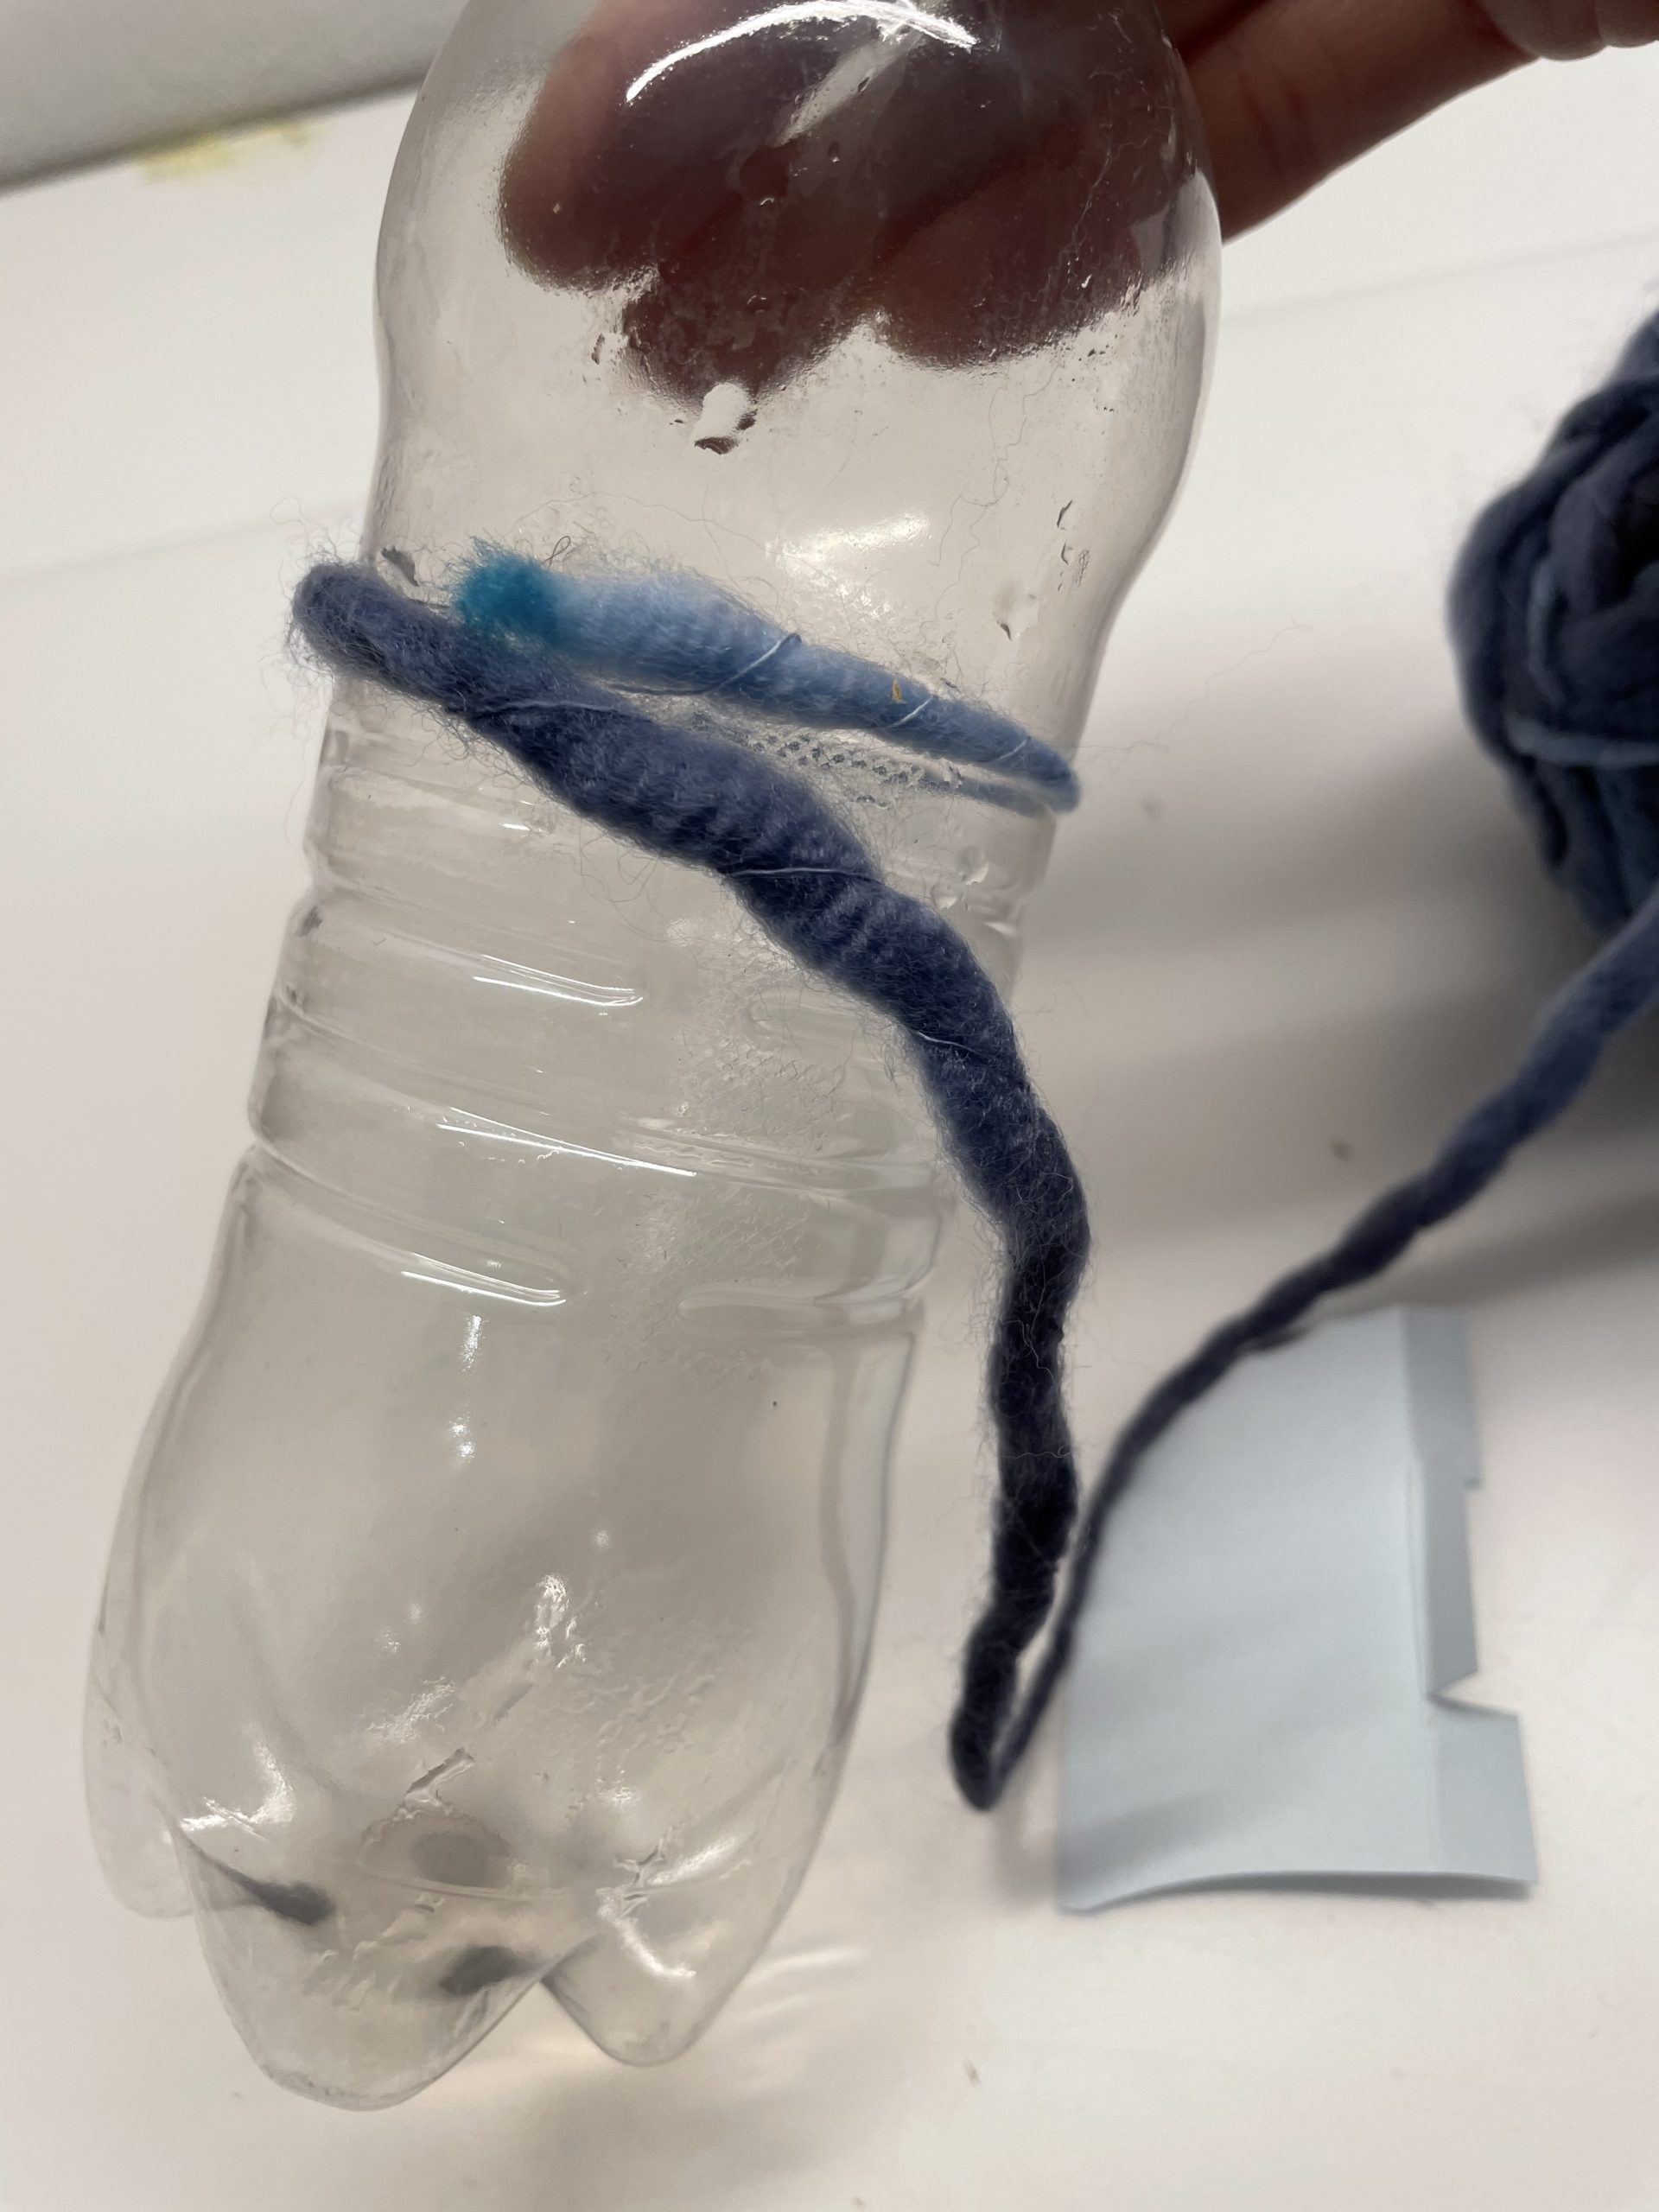
Bild zum Schritt 10 für das Bastel- und DIY-Abenteuer für Kinder: 'Nun umwickelt ihr die Flaschenmitte mit Wolle.'

11

When the whole center is wrapped, cut off the wool.
Just put the tail under the wrapped wool.
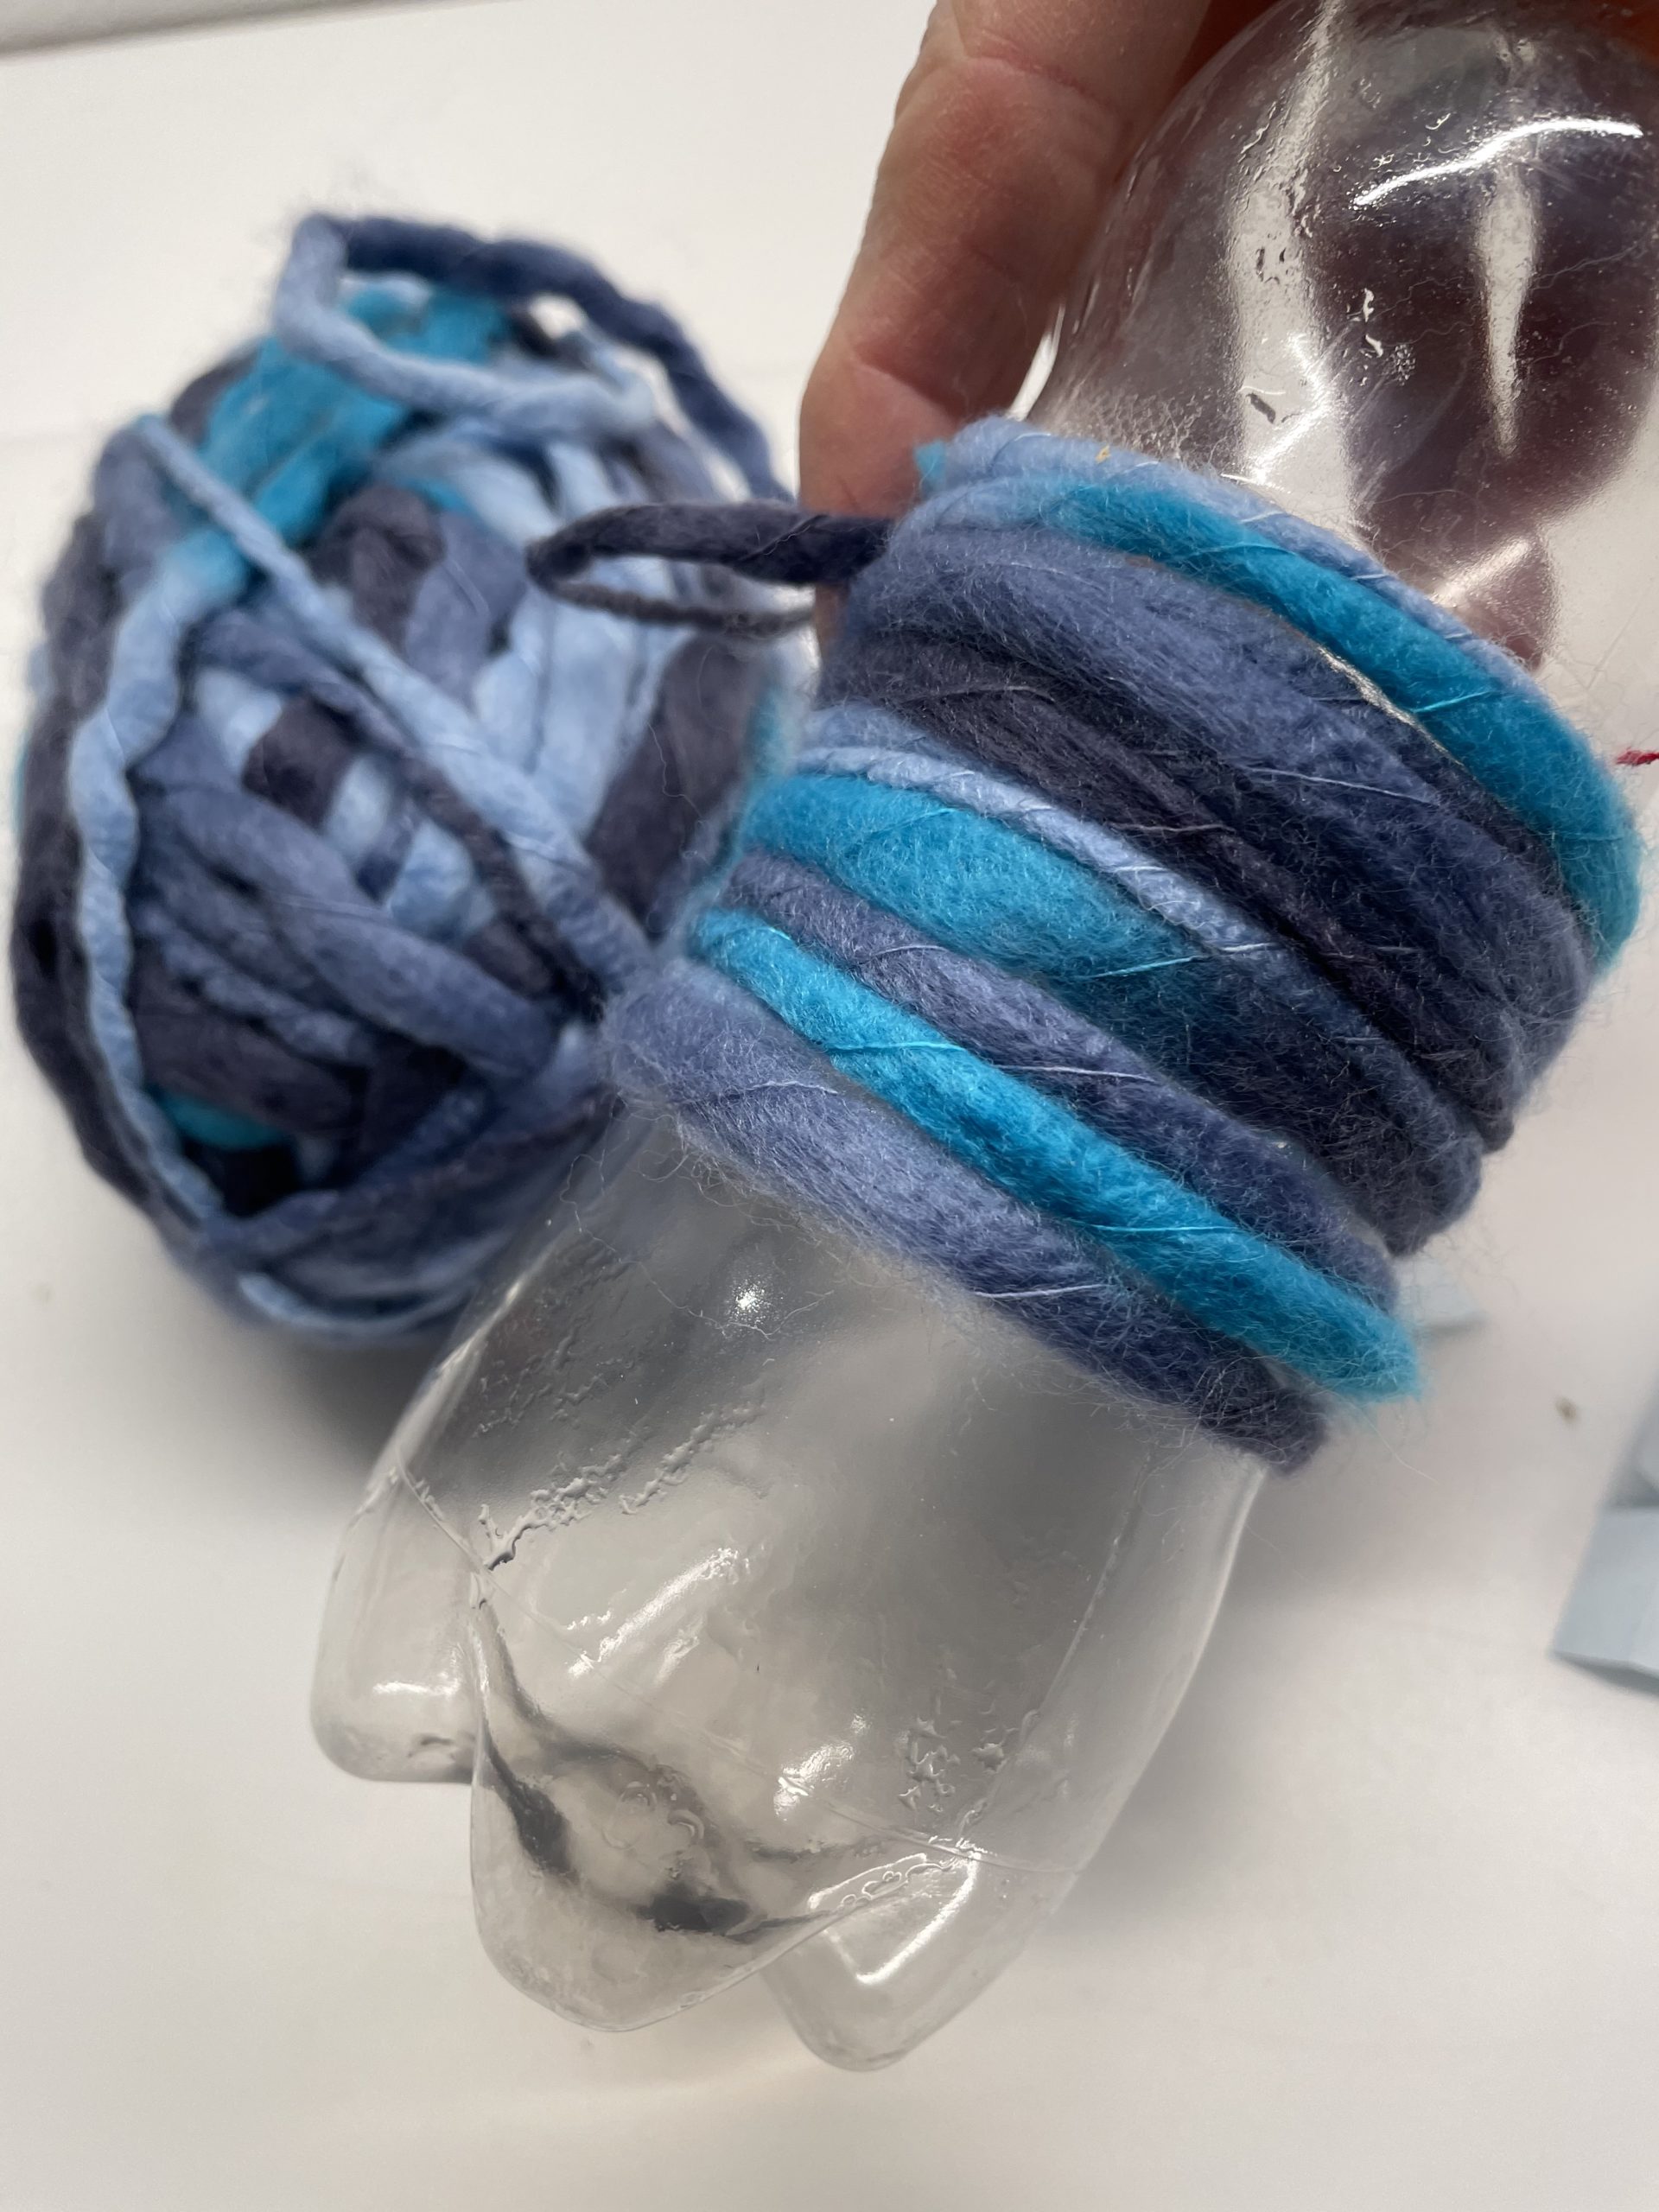
Bild zum Schritt 11 für das Bastel- und DIY-Abenteuer für Kinder: 'Ist die komplette Mitte umwickelt, dann schneidet ihr die Wolle...'

12

2. Bild zum Schritt 11 für das Bastel- und DIY-Abenteuer für Kinder: 'Ist die komplette Mitte umwickelt, dann schneidet ihr die Wolle...'

13

Now you stick the wings directly on the wool. For this you apply glue to the folded paper fold.

Tip: If it does not stick well, use wood glue or hot glue! (Attention when handling the hot glue - risk of injury!)
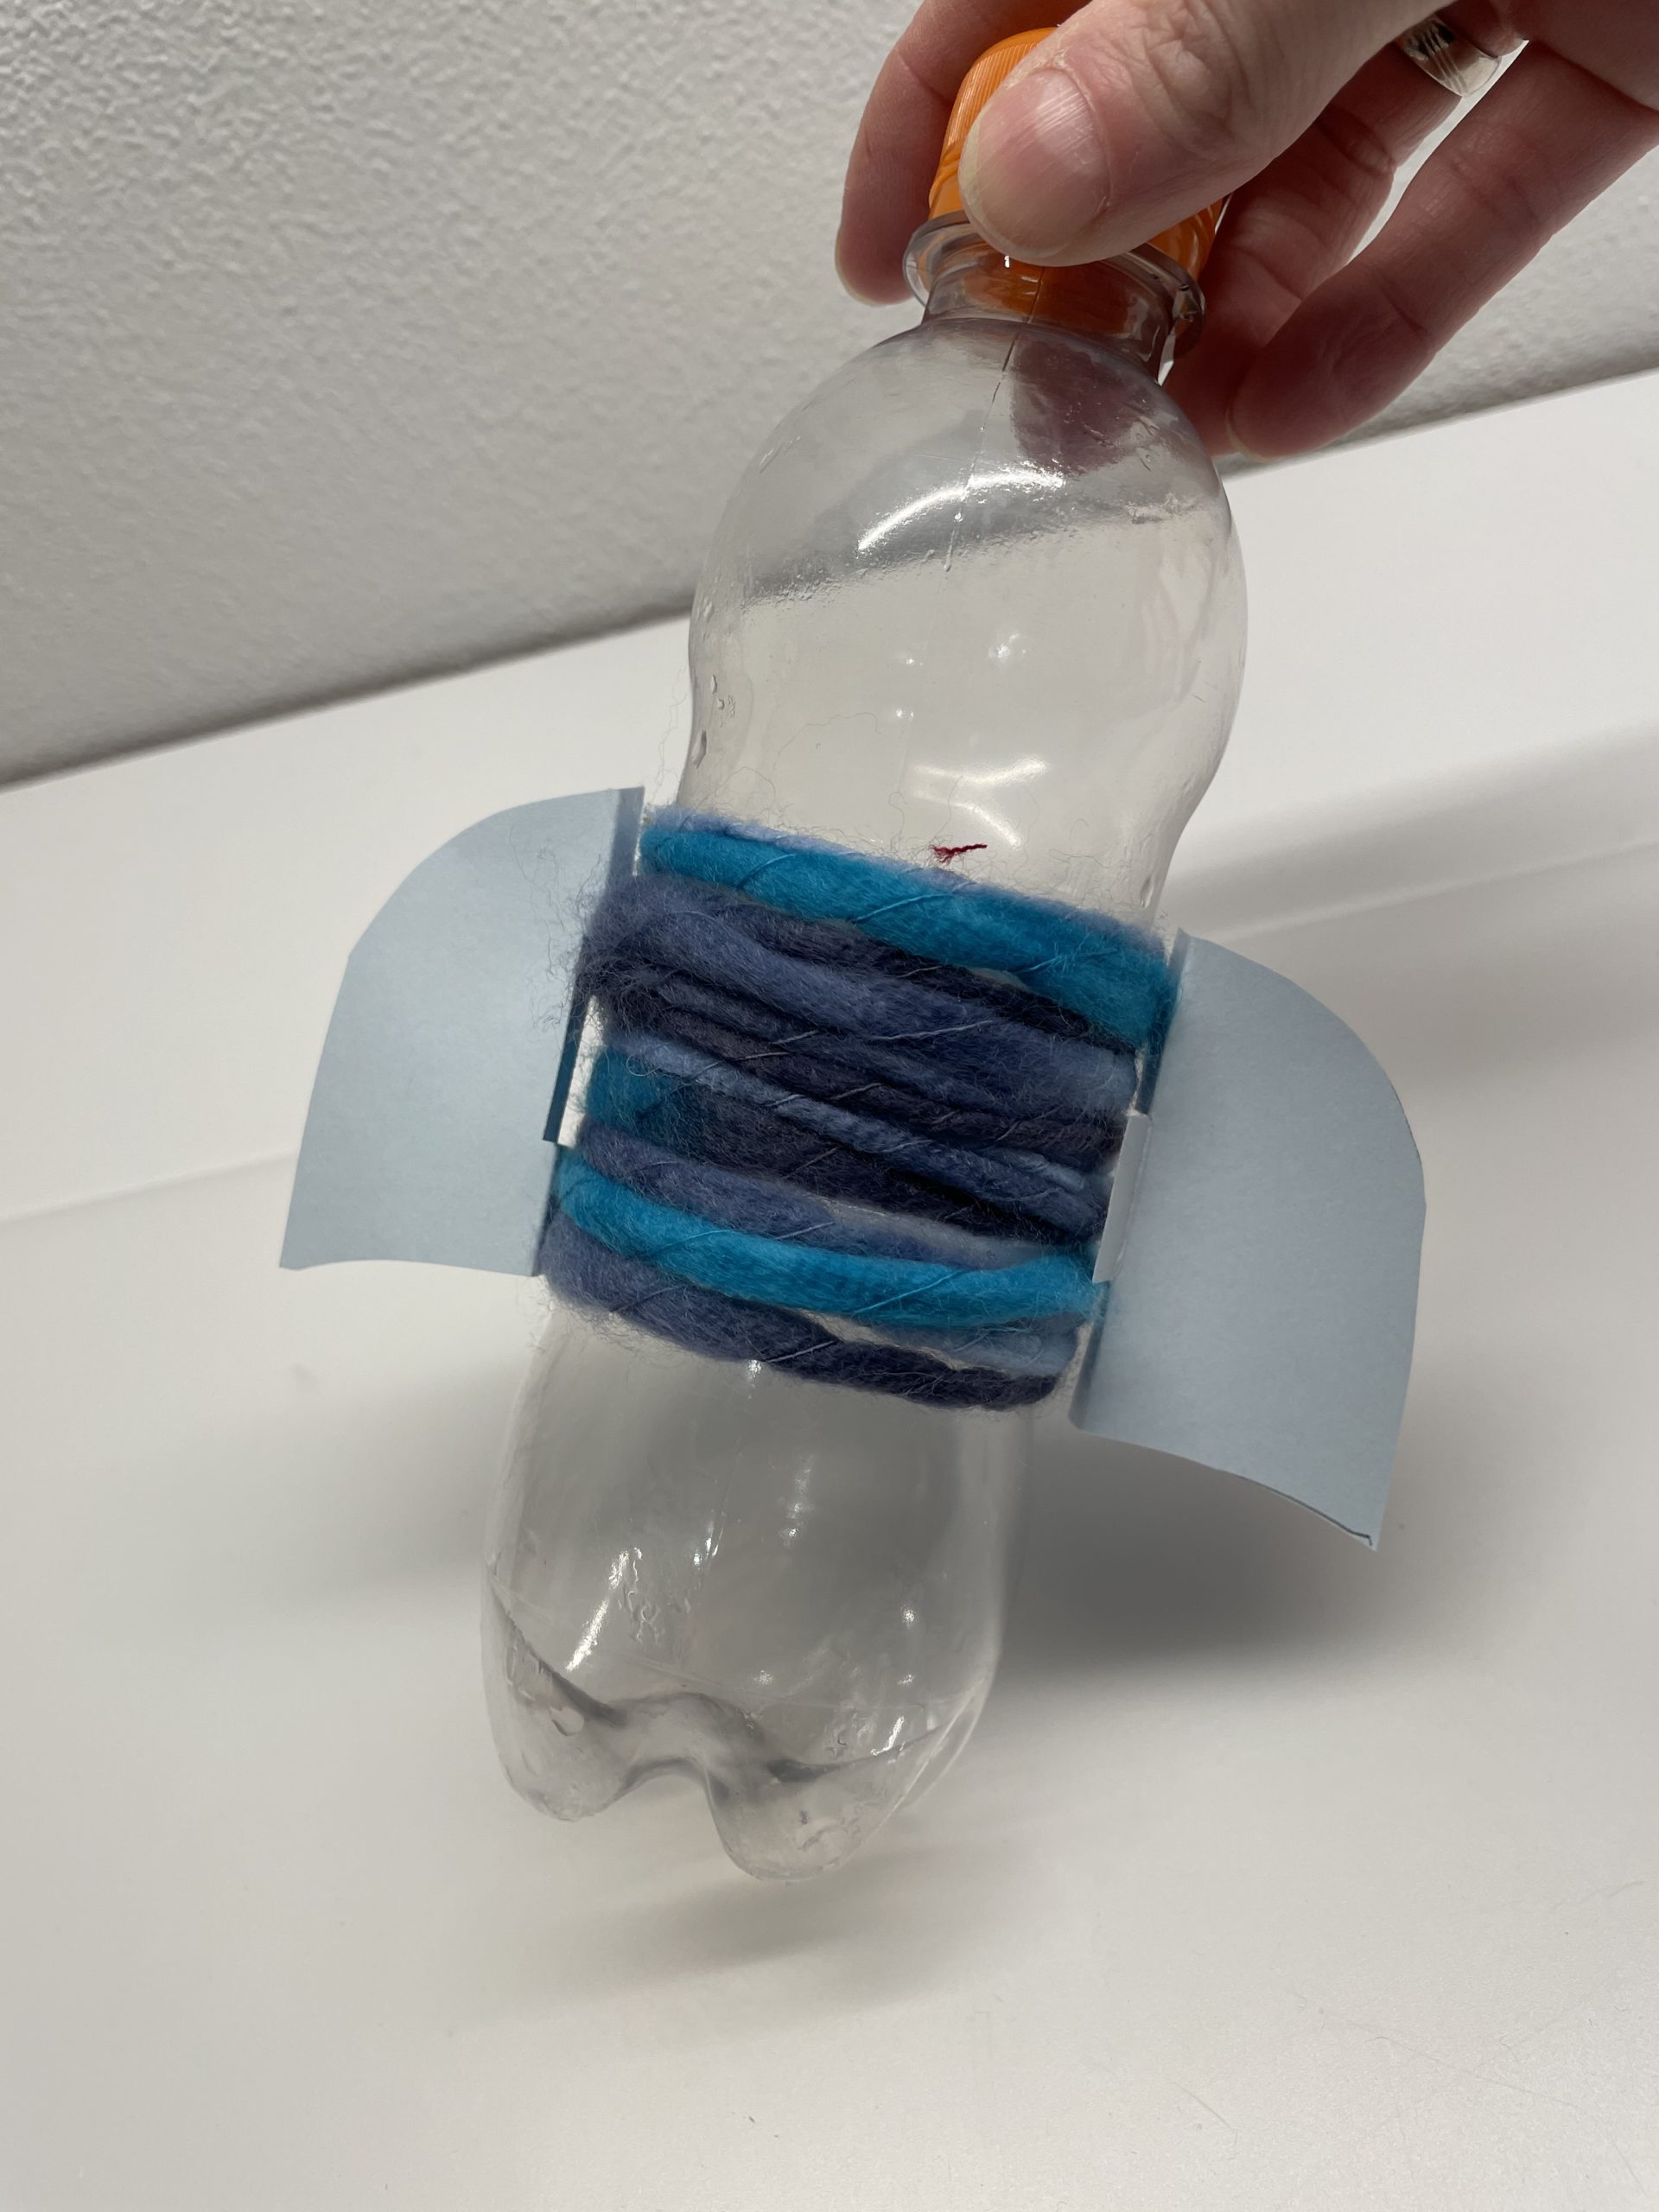
Bild zum Schritt 13 für das Bastel- und DIY-Abenteuer für Kinder: 'Jetzt klebt ihr die Tragflächen direkt auf die Wolle. Dafür...'

14

Now you paint a round window with a felt pen on the bottle.

Bild zum Schritt 14 für das Bastel- und DIY-Abenteuer für Kinder: 'Nun malt ihr euch ein rundes Fenster mit einem Filzstift...'

15

Now follow the pre-drawn circle with the glue pen.
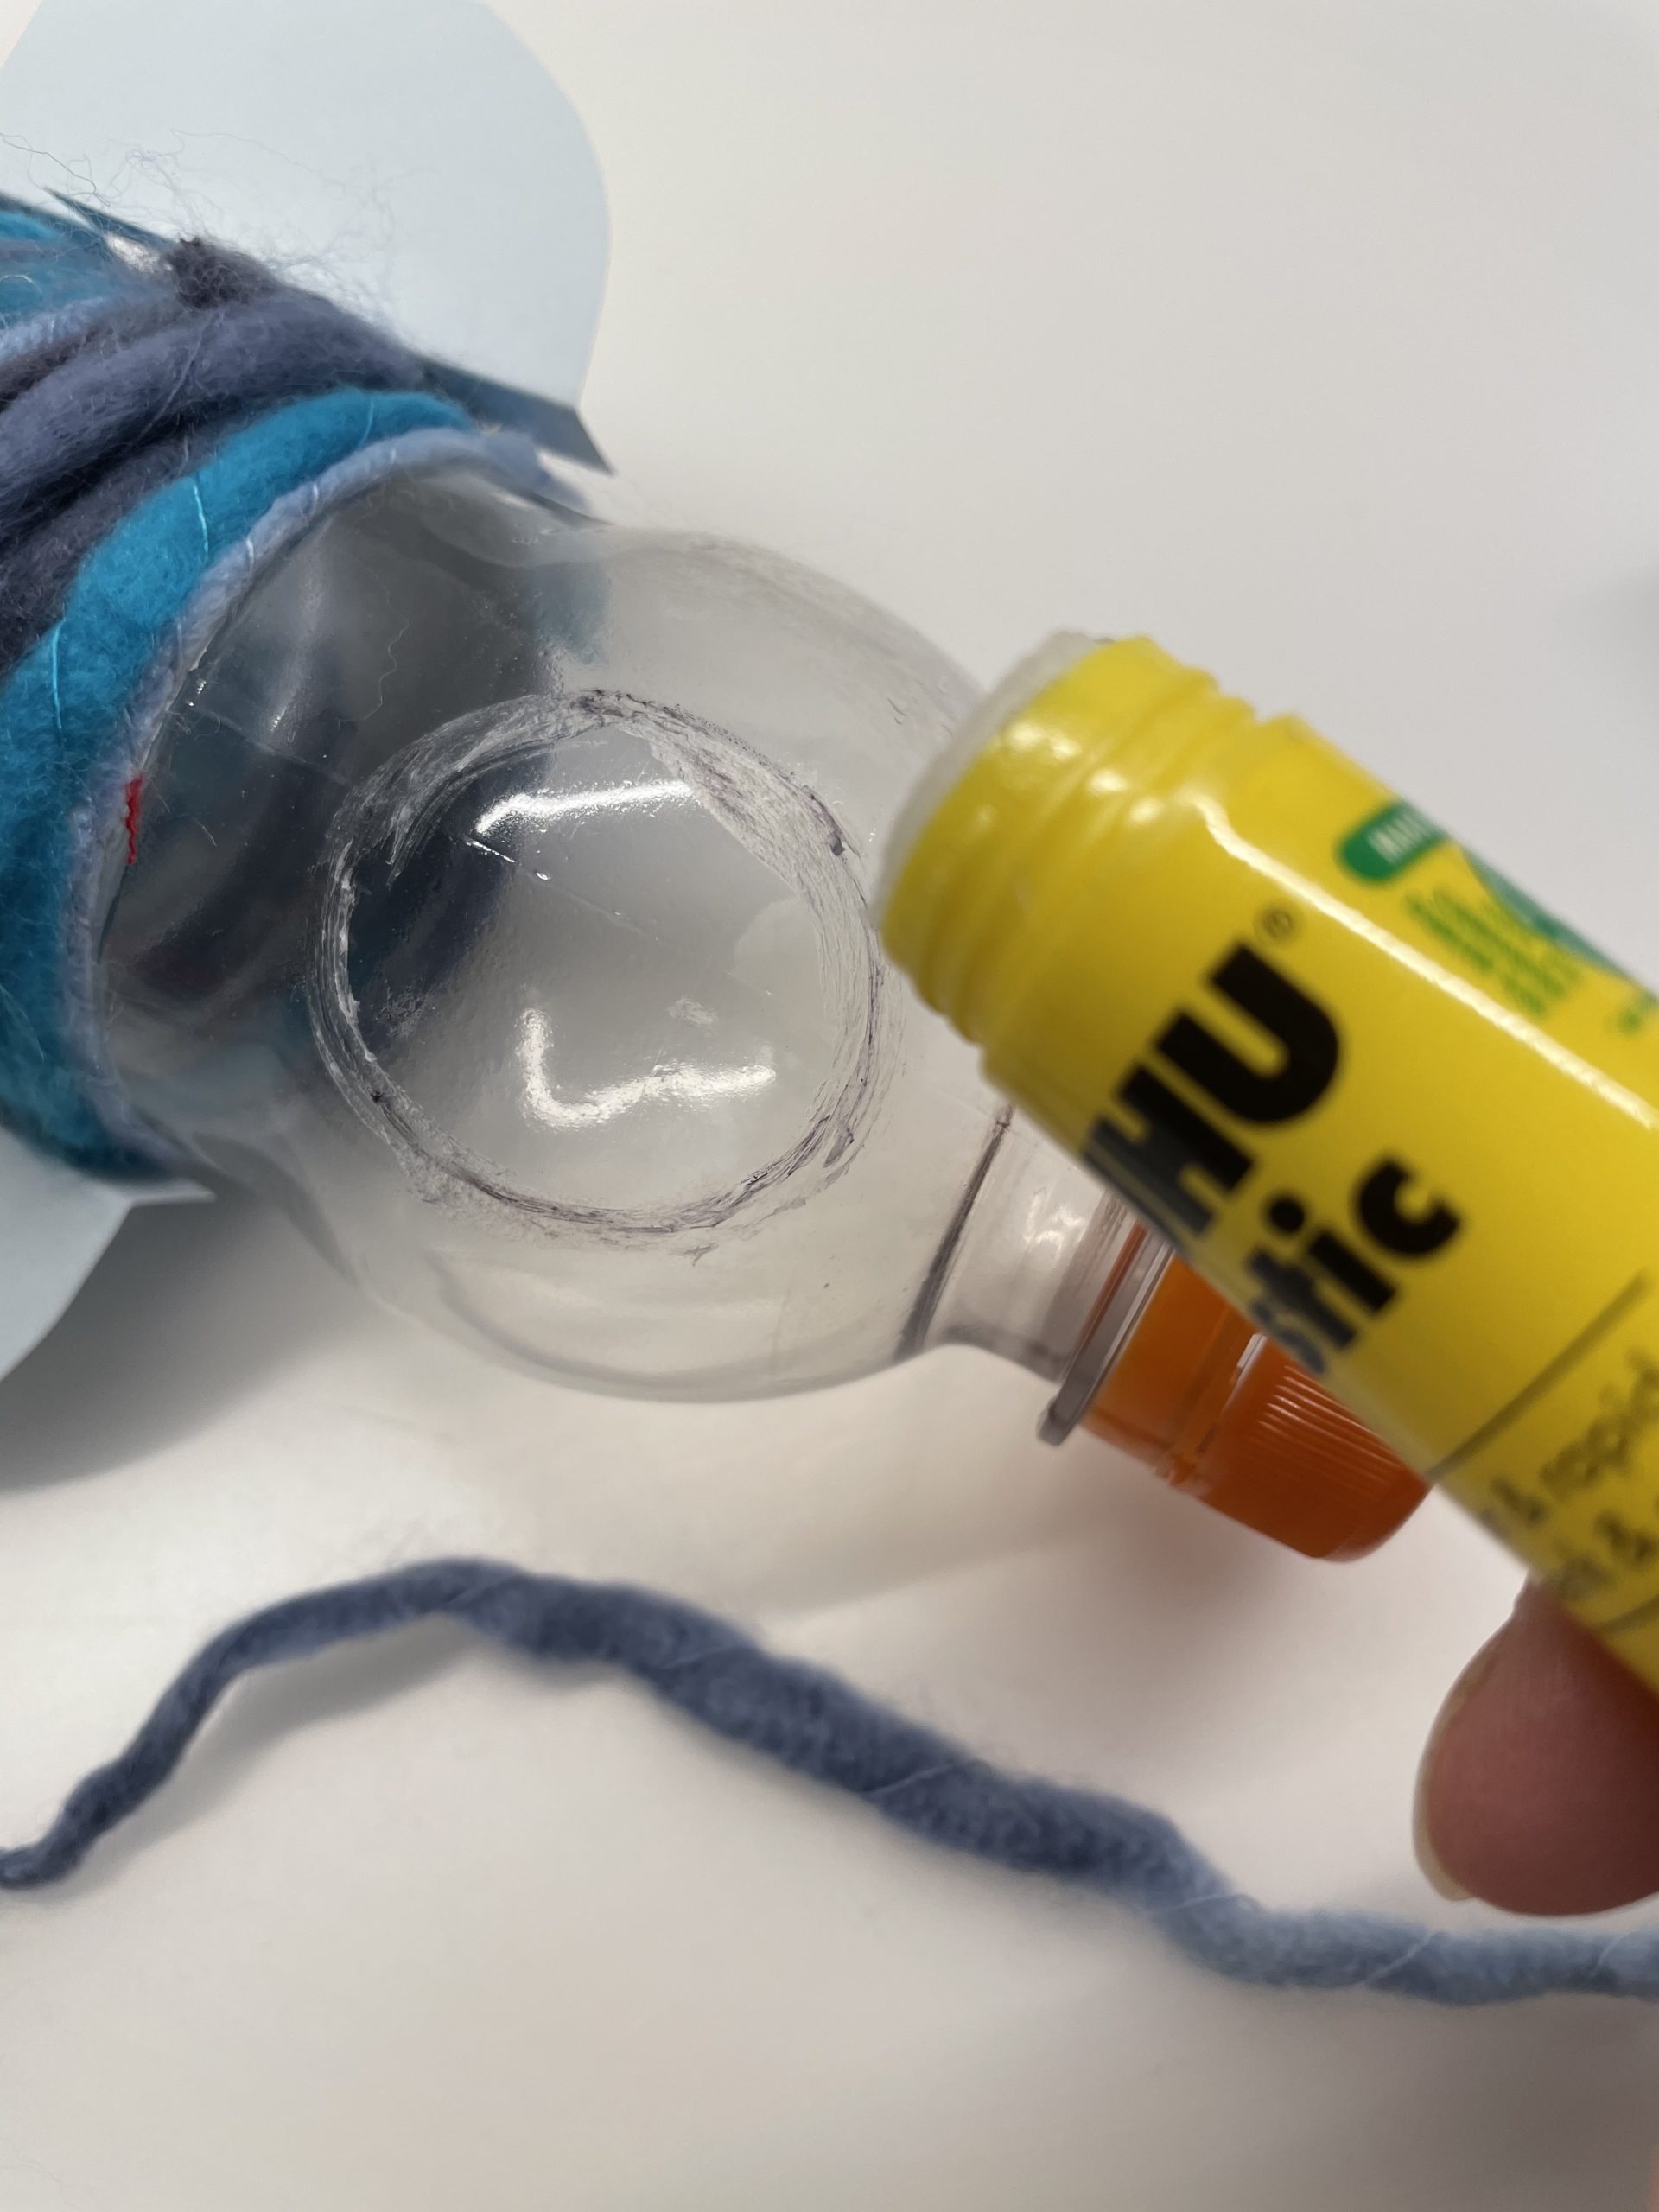
Bild zum Schritt 15 für das Bastel- und DIY-Abenteuer für Kinder: 'Den vorgezeichneten Kreis fahrt ihr jetzt mit dem Klebestift nach.'

16

Now you stick a piece of wool on it.
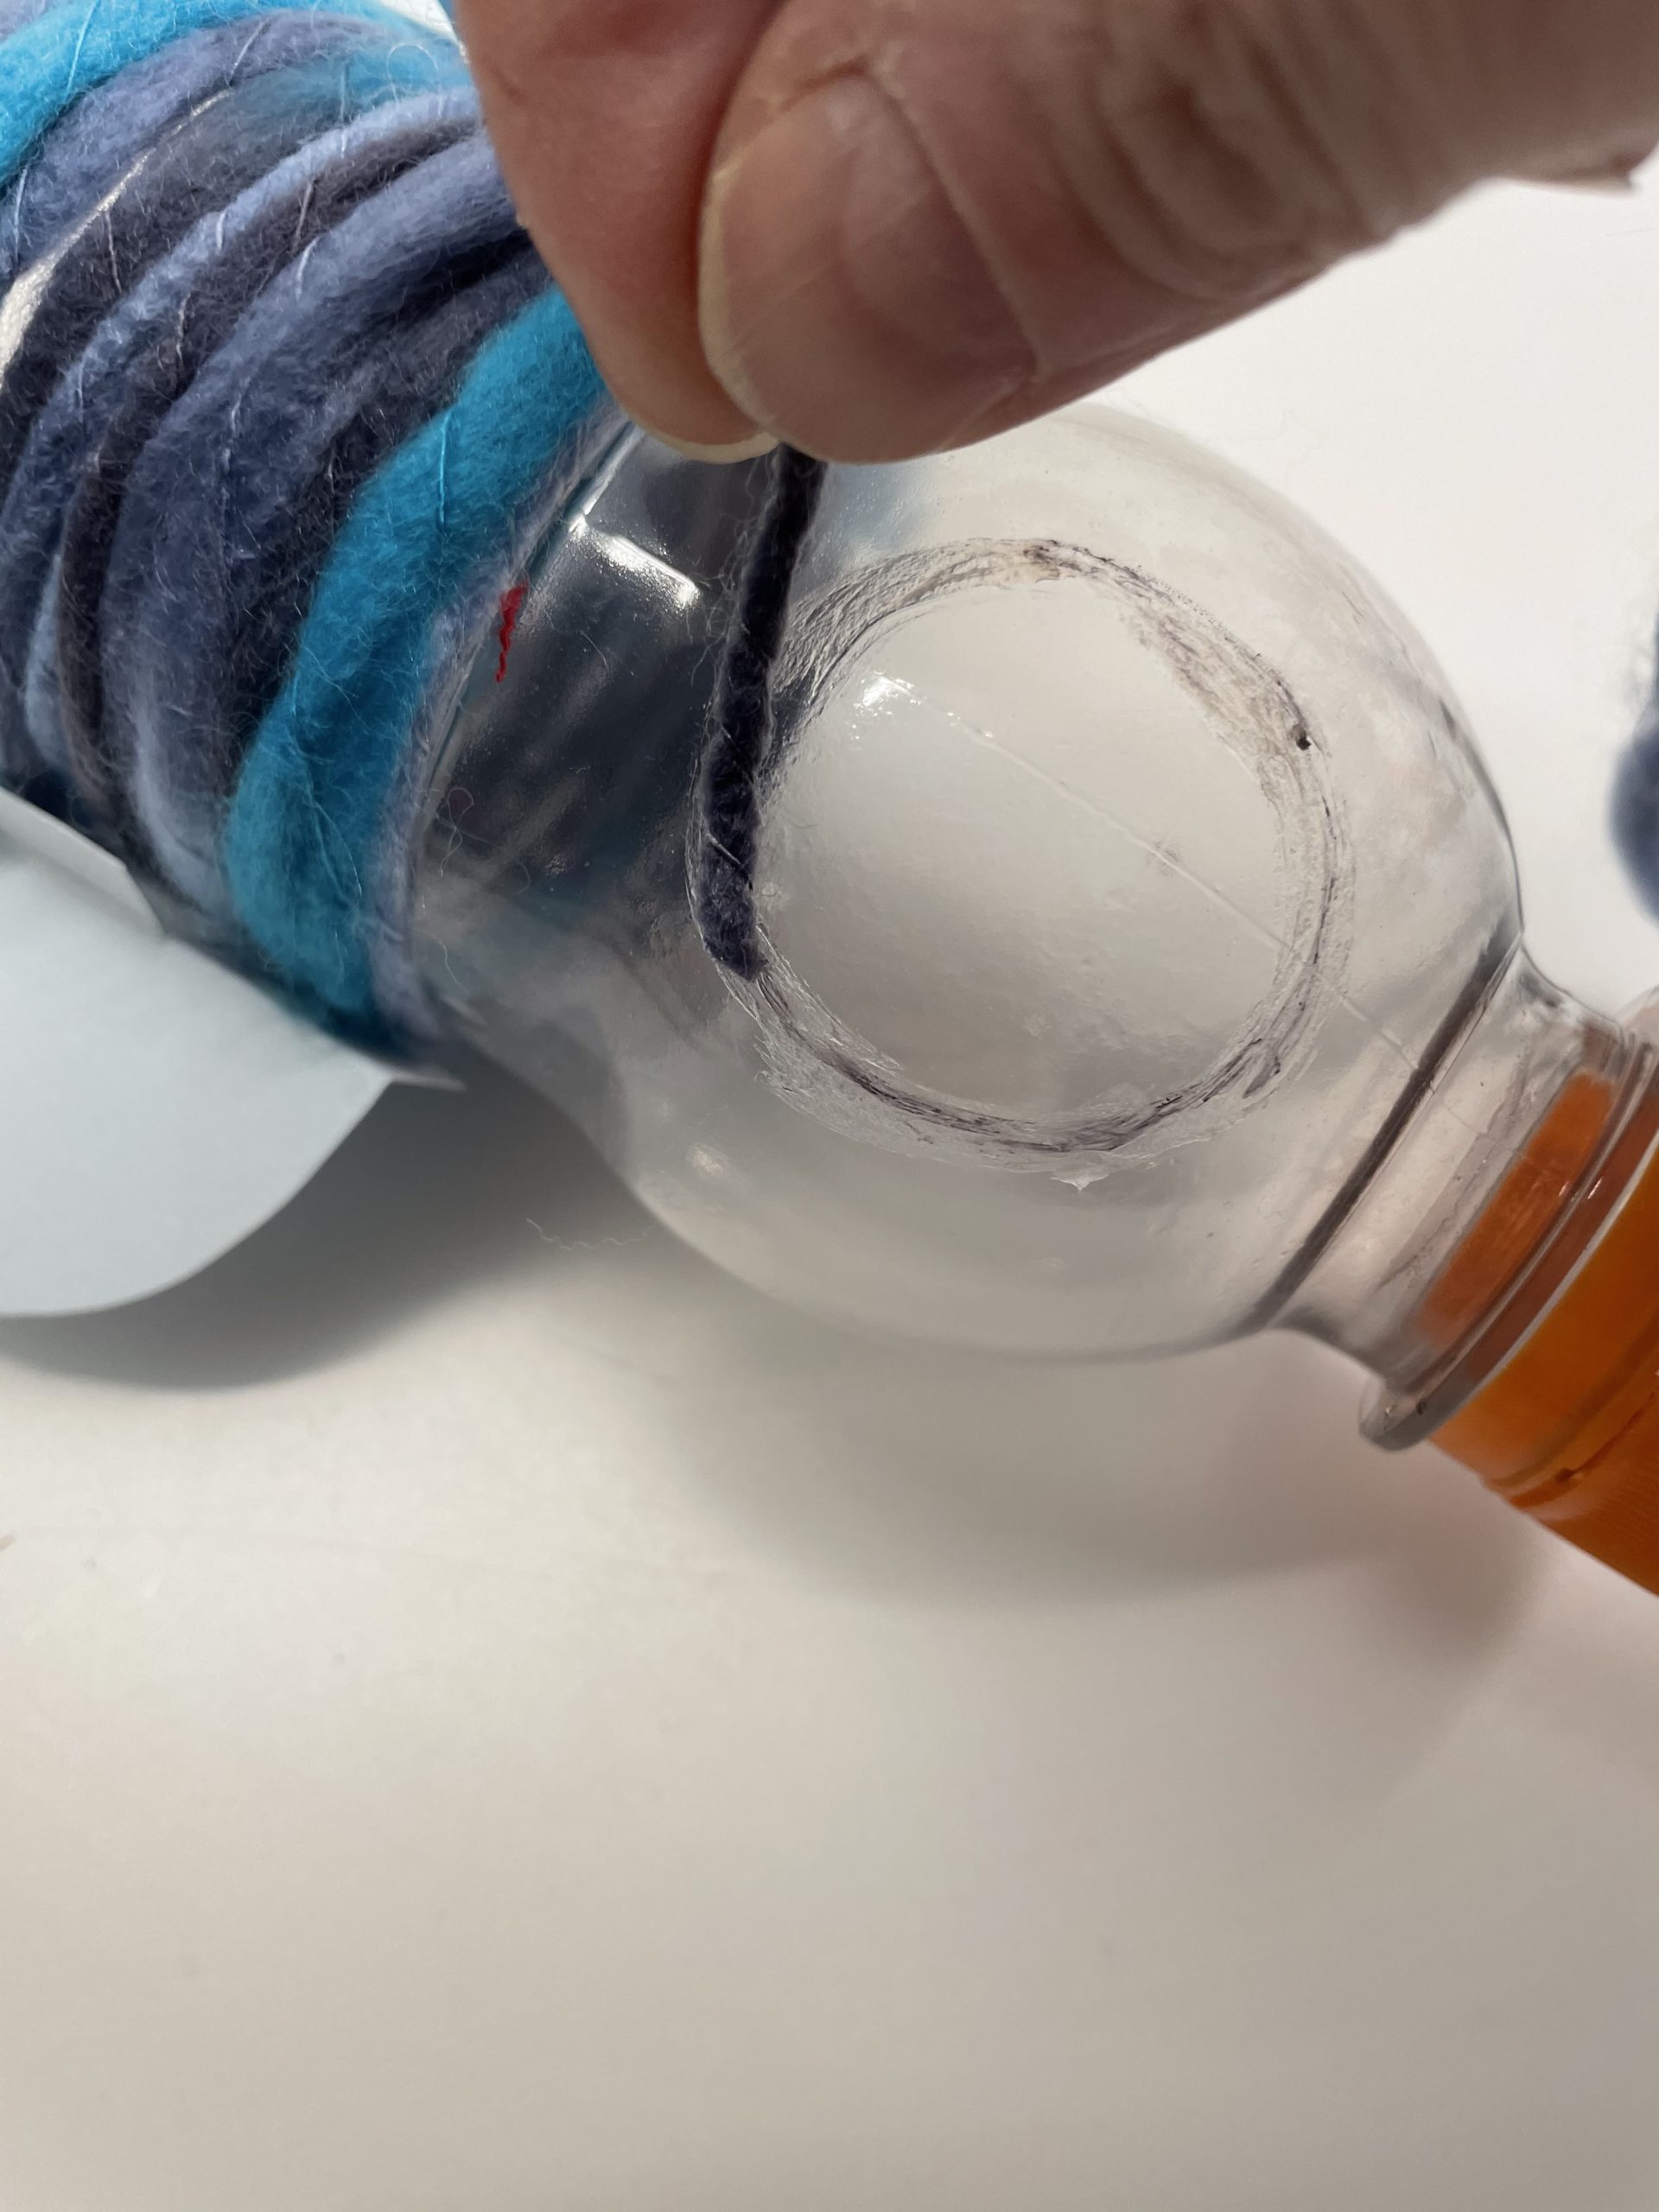
Bild zum Schritt 16 für das Bastel- und DIY-Abenteuer für Kinder: 'Darauf klebt ihr nun ein Stück der Wolle.'

17

If the circle is closed, cut off the wool appropriately..
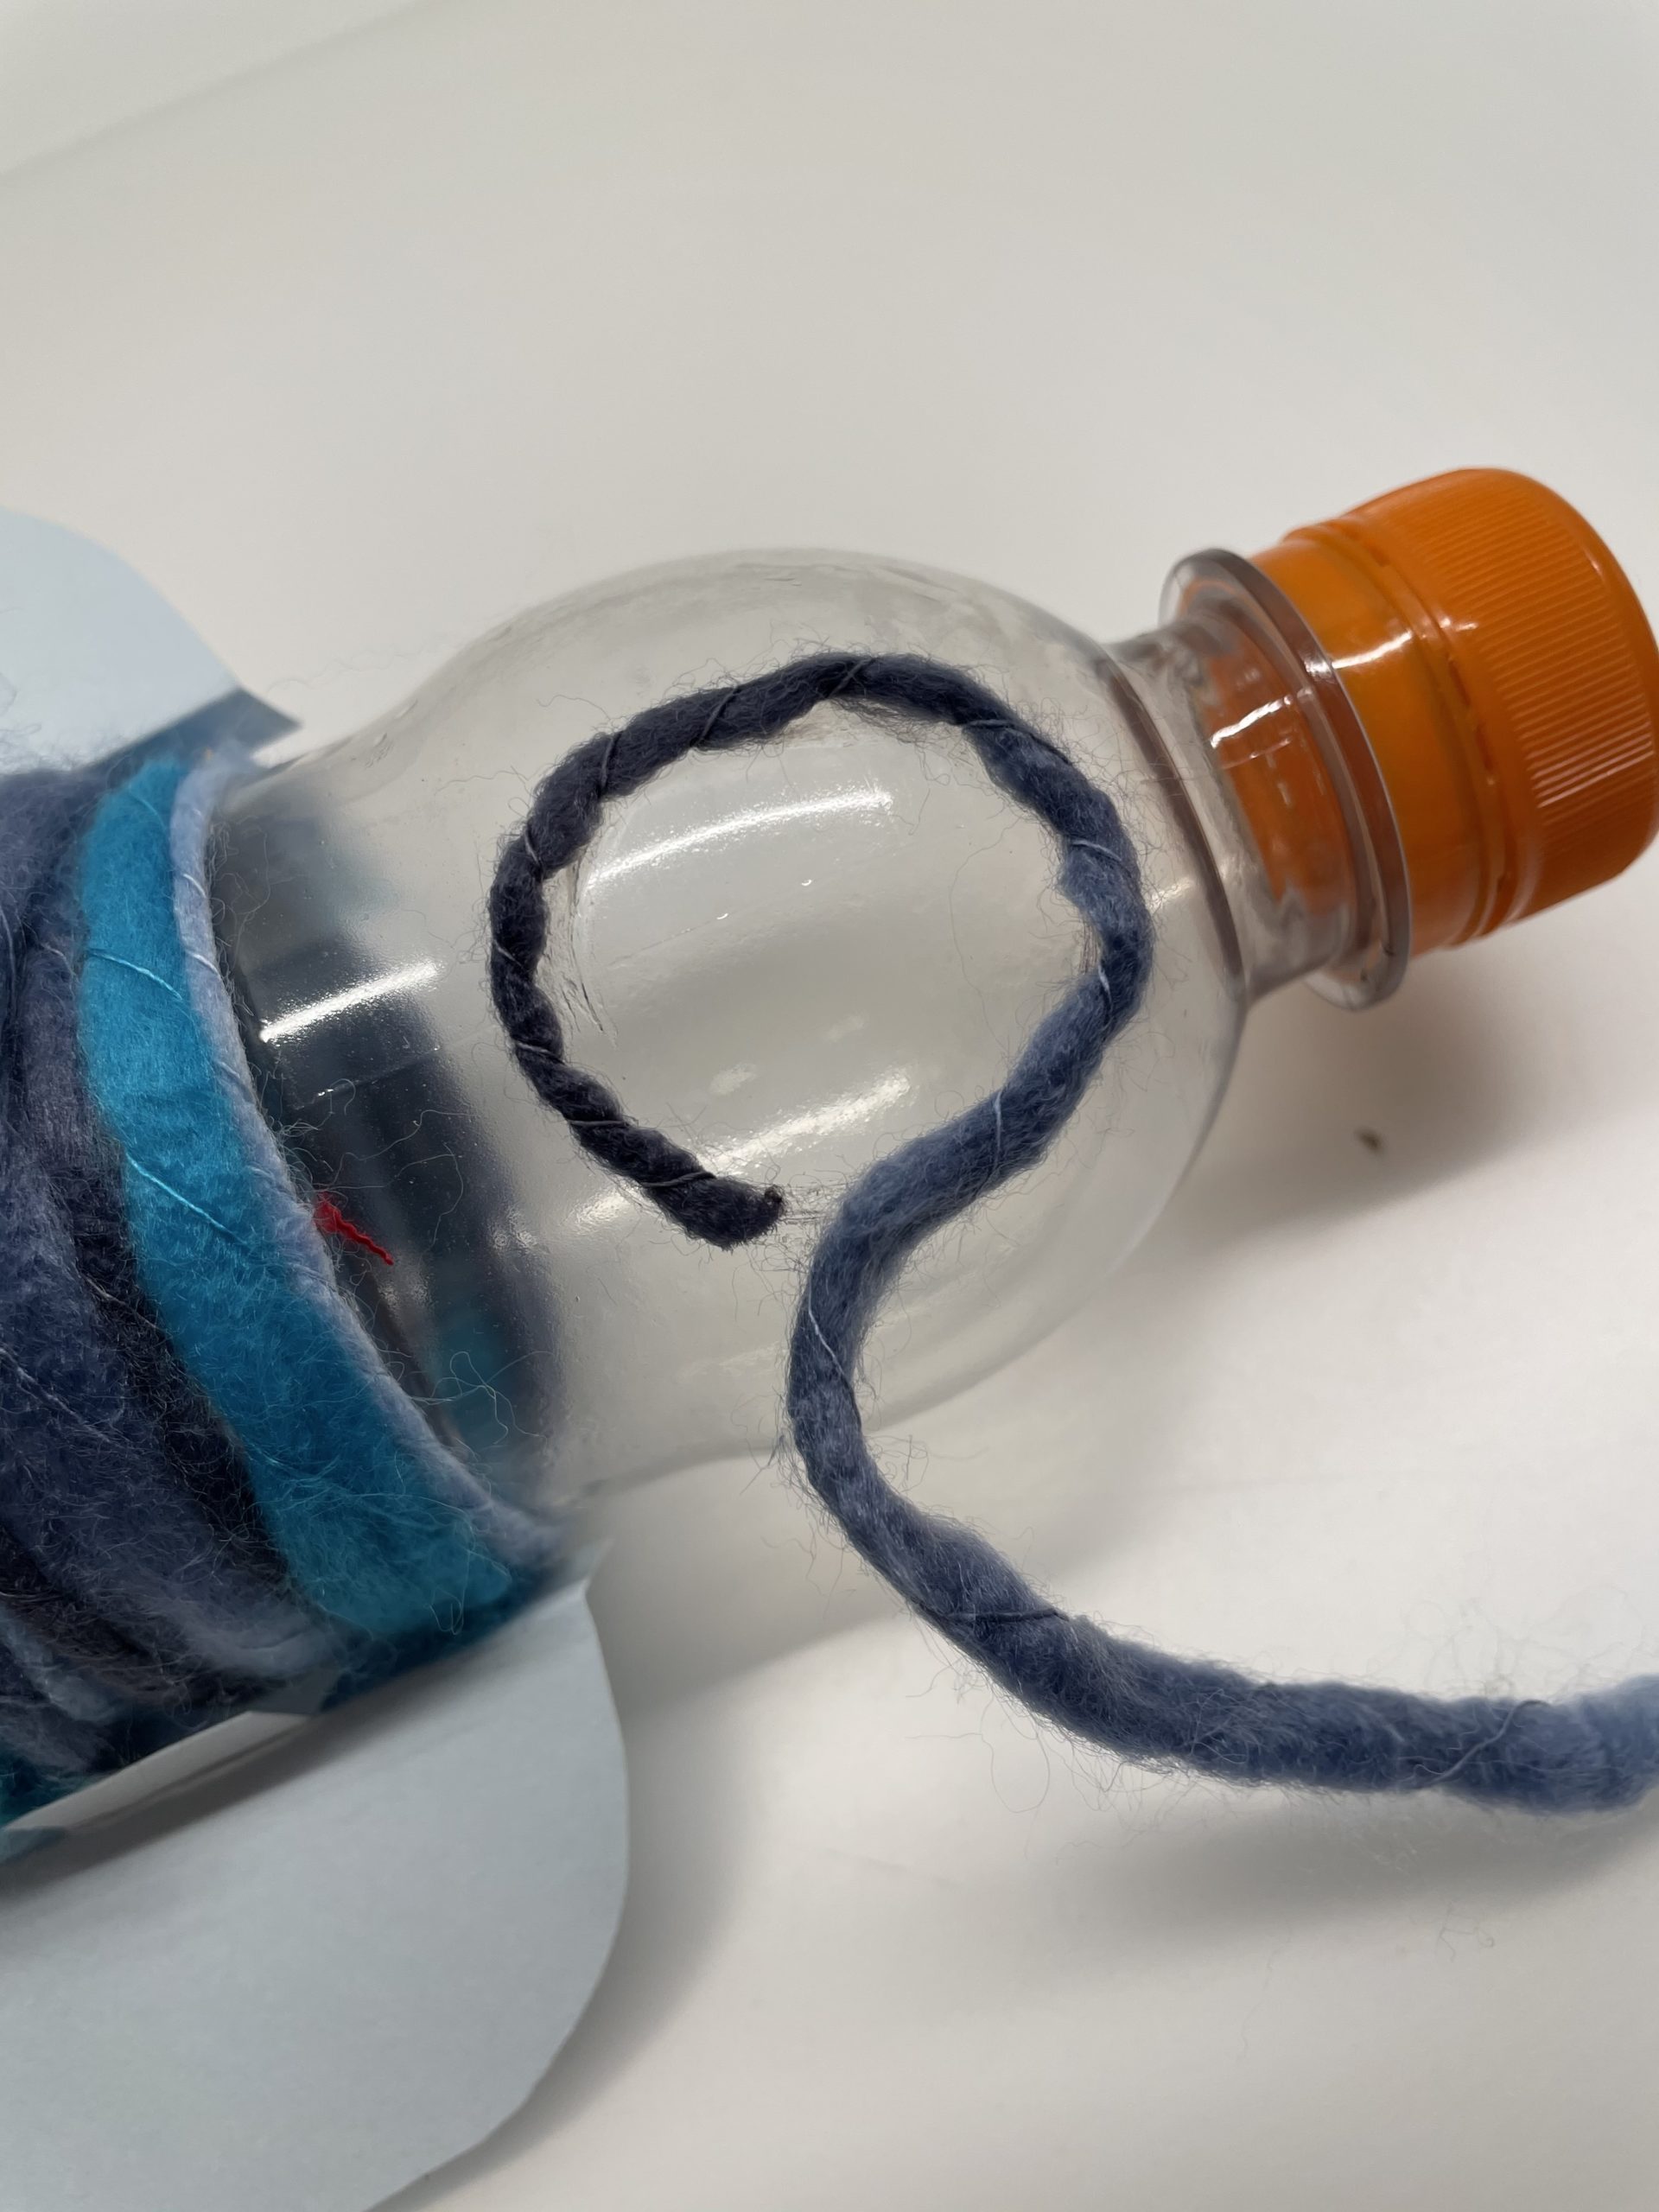
Bild zum Schritt 17 für das Bastel- und DIY-Abenteuer für Kinder: 'Ist der Kreis geschlossen, dann schneidet ihr die Wolle passend...'

18

The peephole or the bulleye is ready.
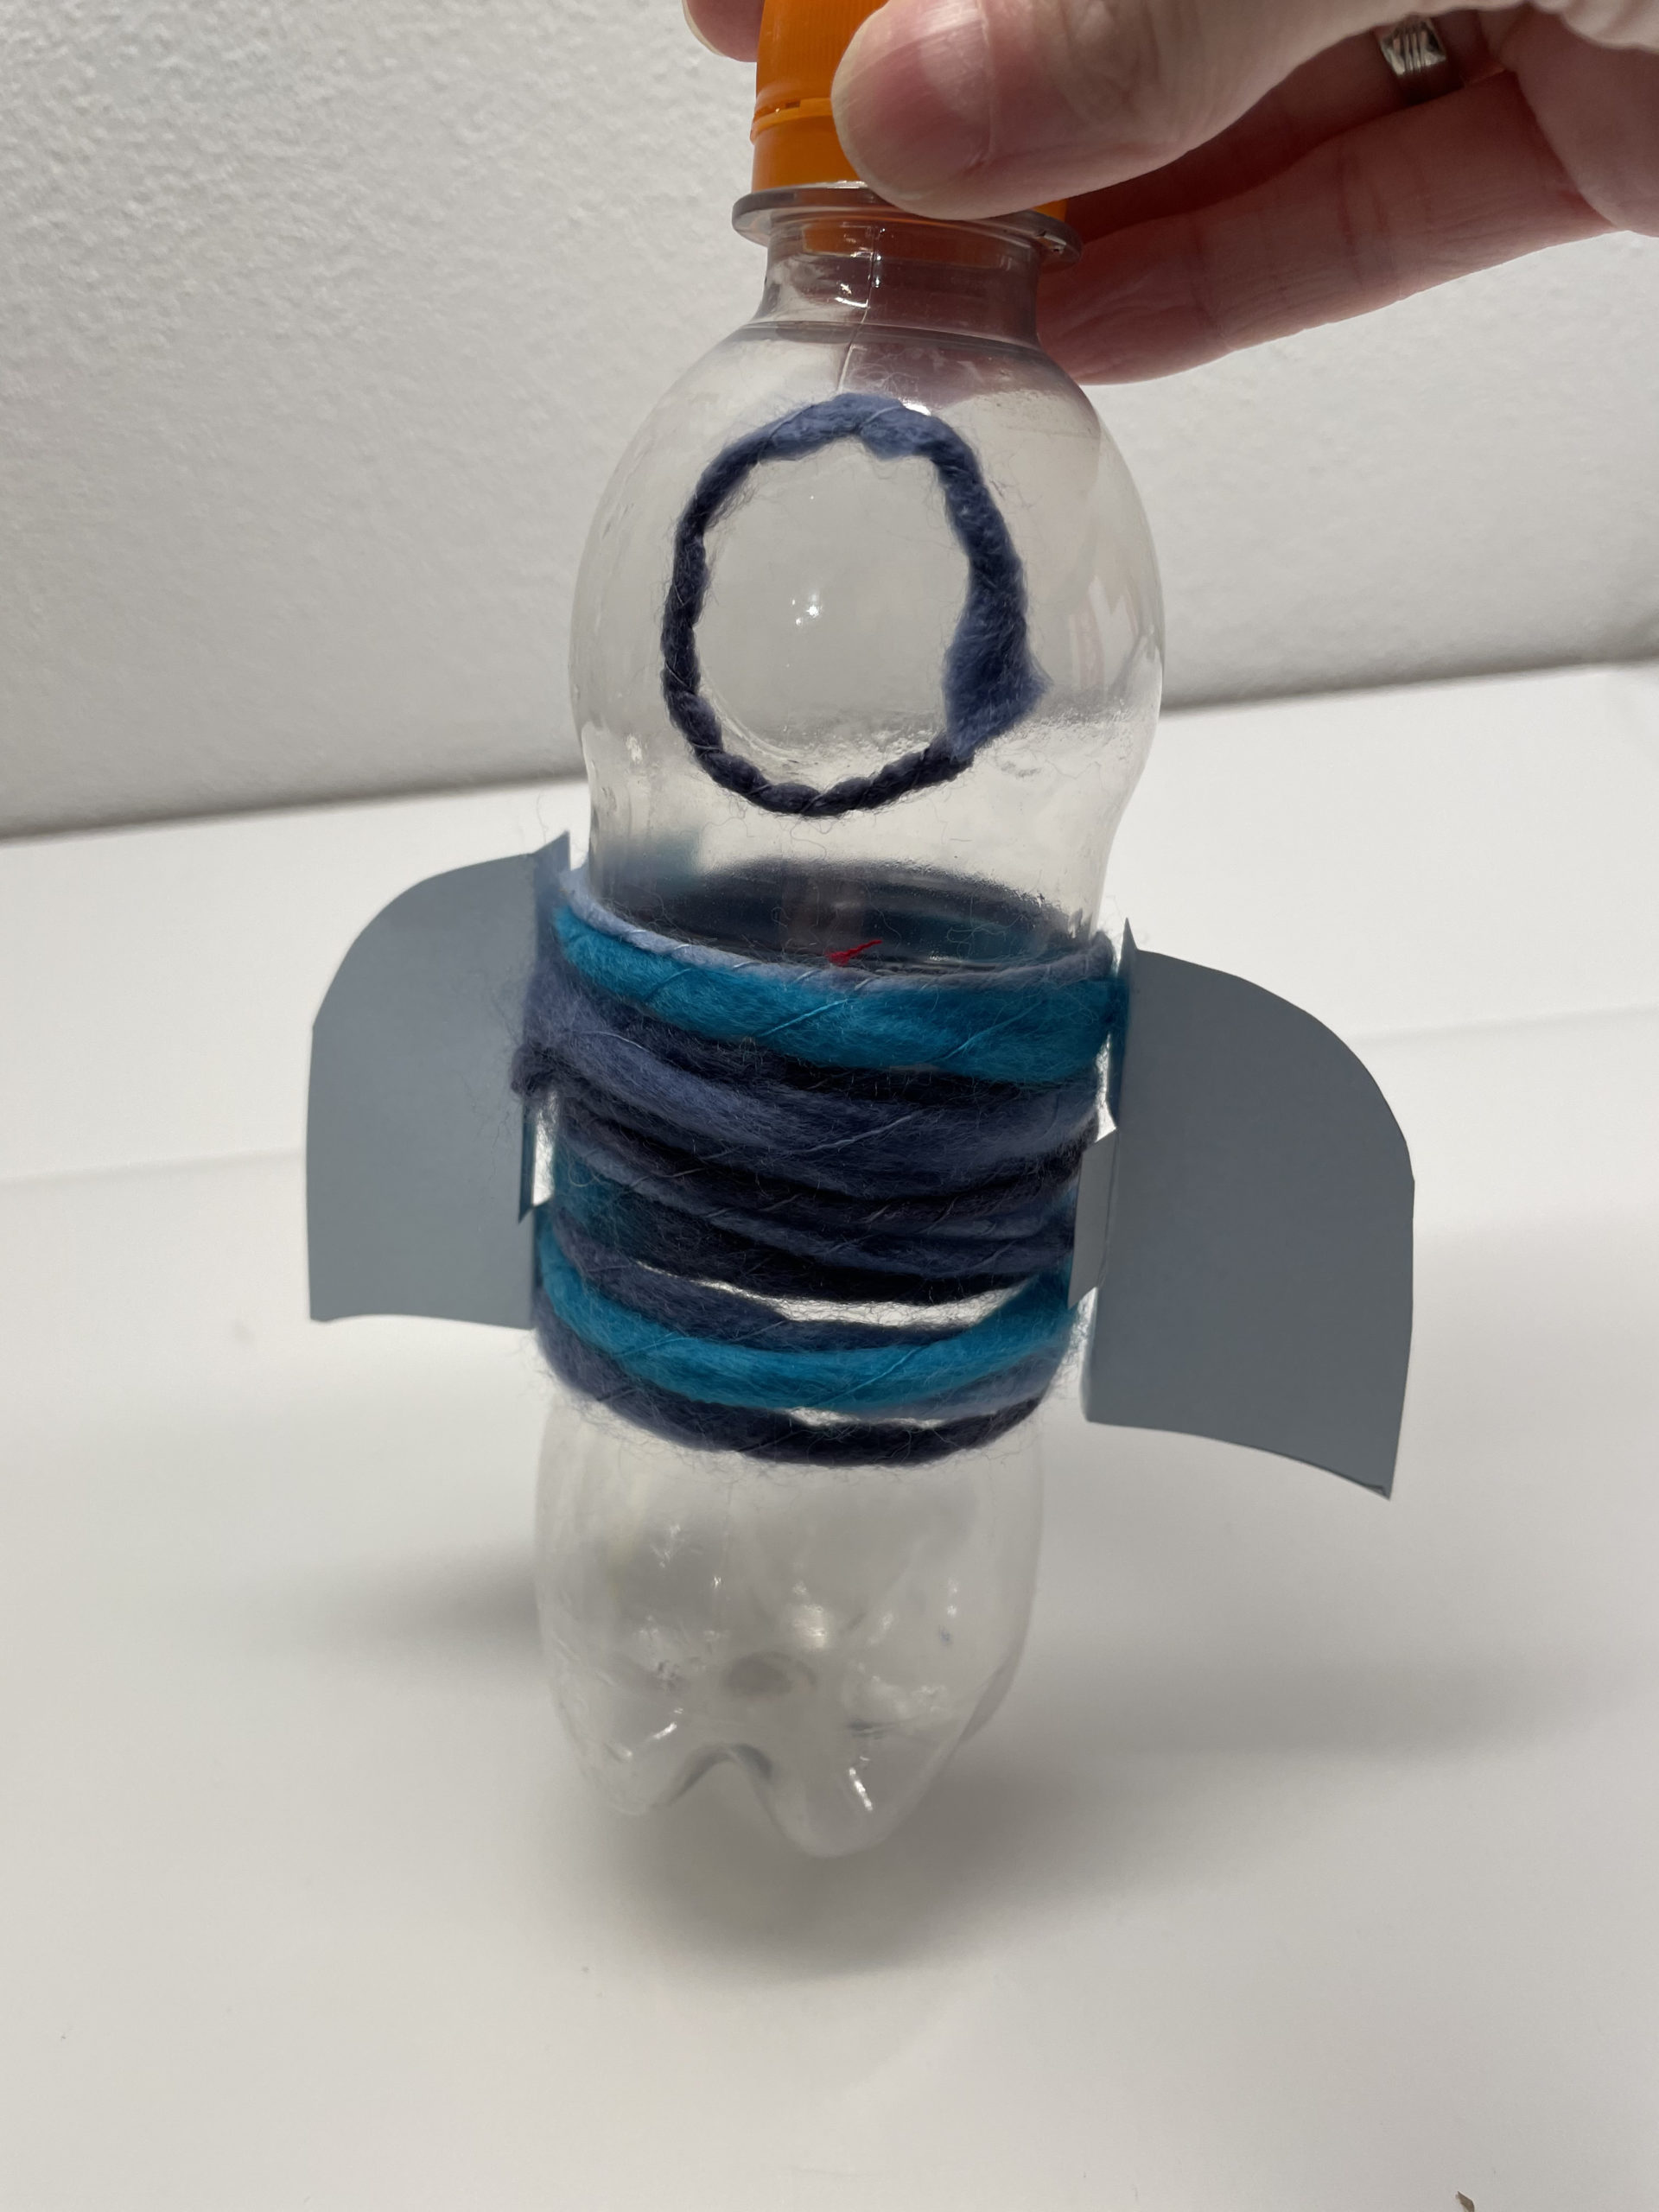
Bild zum Schritt 18 für das Bastel- und DIY-Abenteuer für Kinder: 'Fertig ist das Guckloch bzw. das Bullauge.'

19

On the opposite side you can now also create a round window.

Tip: Alternatively, you can also cut out circles of clay paper and stick them on or paint the portholes with a foil pin.

Bild zum Schritt 19 für das Bastel- und DIY-Abenteuer für Kinder: 'Auf der gegenüberliegenden Seite gestaltet ihr nun ebenfalls noch ein...'

20

Now you also wrap the bottle neck and half of the lid with wool.
For this you fix the beginning of the wool and the end with glue.

Bild zum Schritt 20 für das Bastel- und DIY-Abenteuer für Kinder: 'Jetzt umwickelt ihr auch den Flaschenhals und die Hälfte des...'

21

You can also stick the end of the thread on the bottle lid.
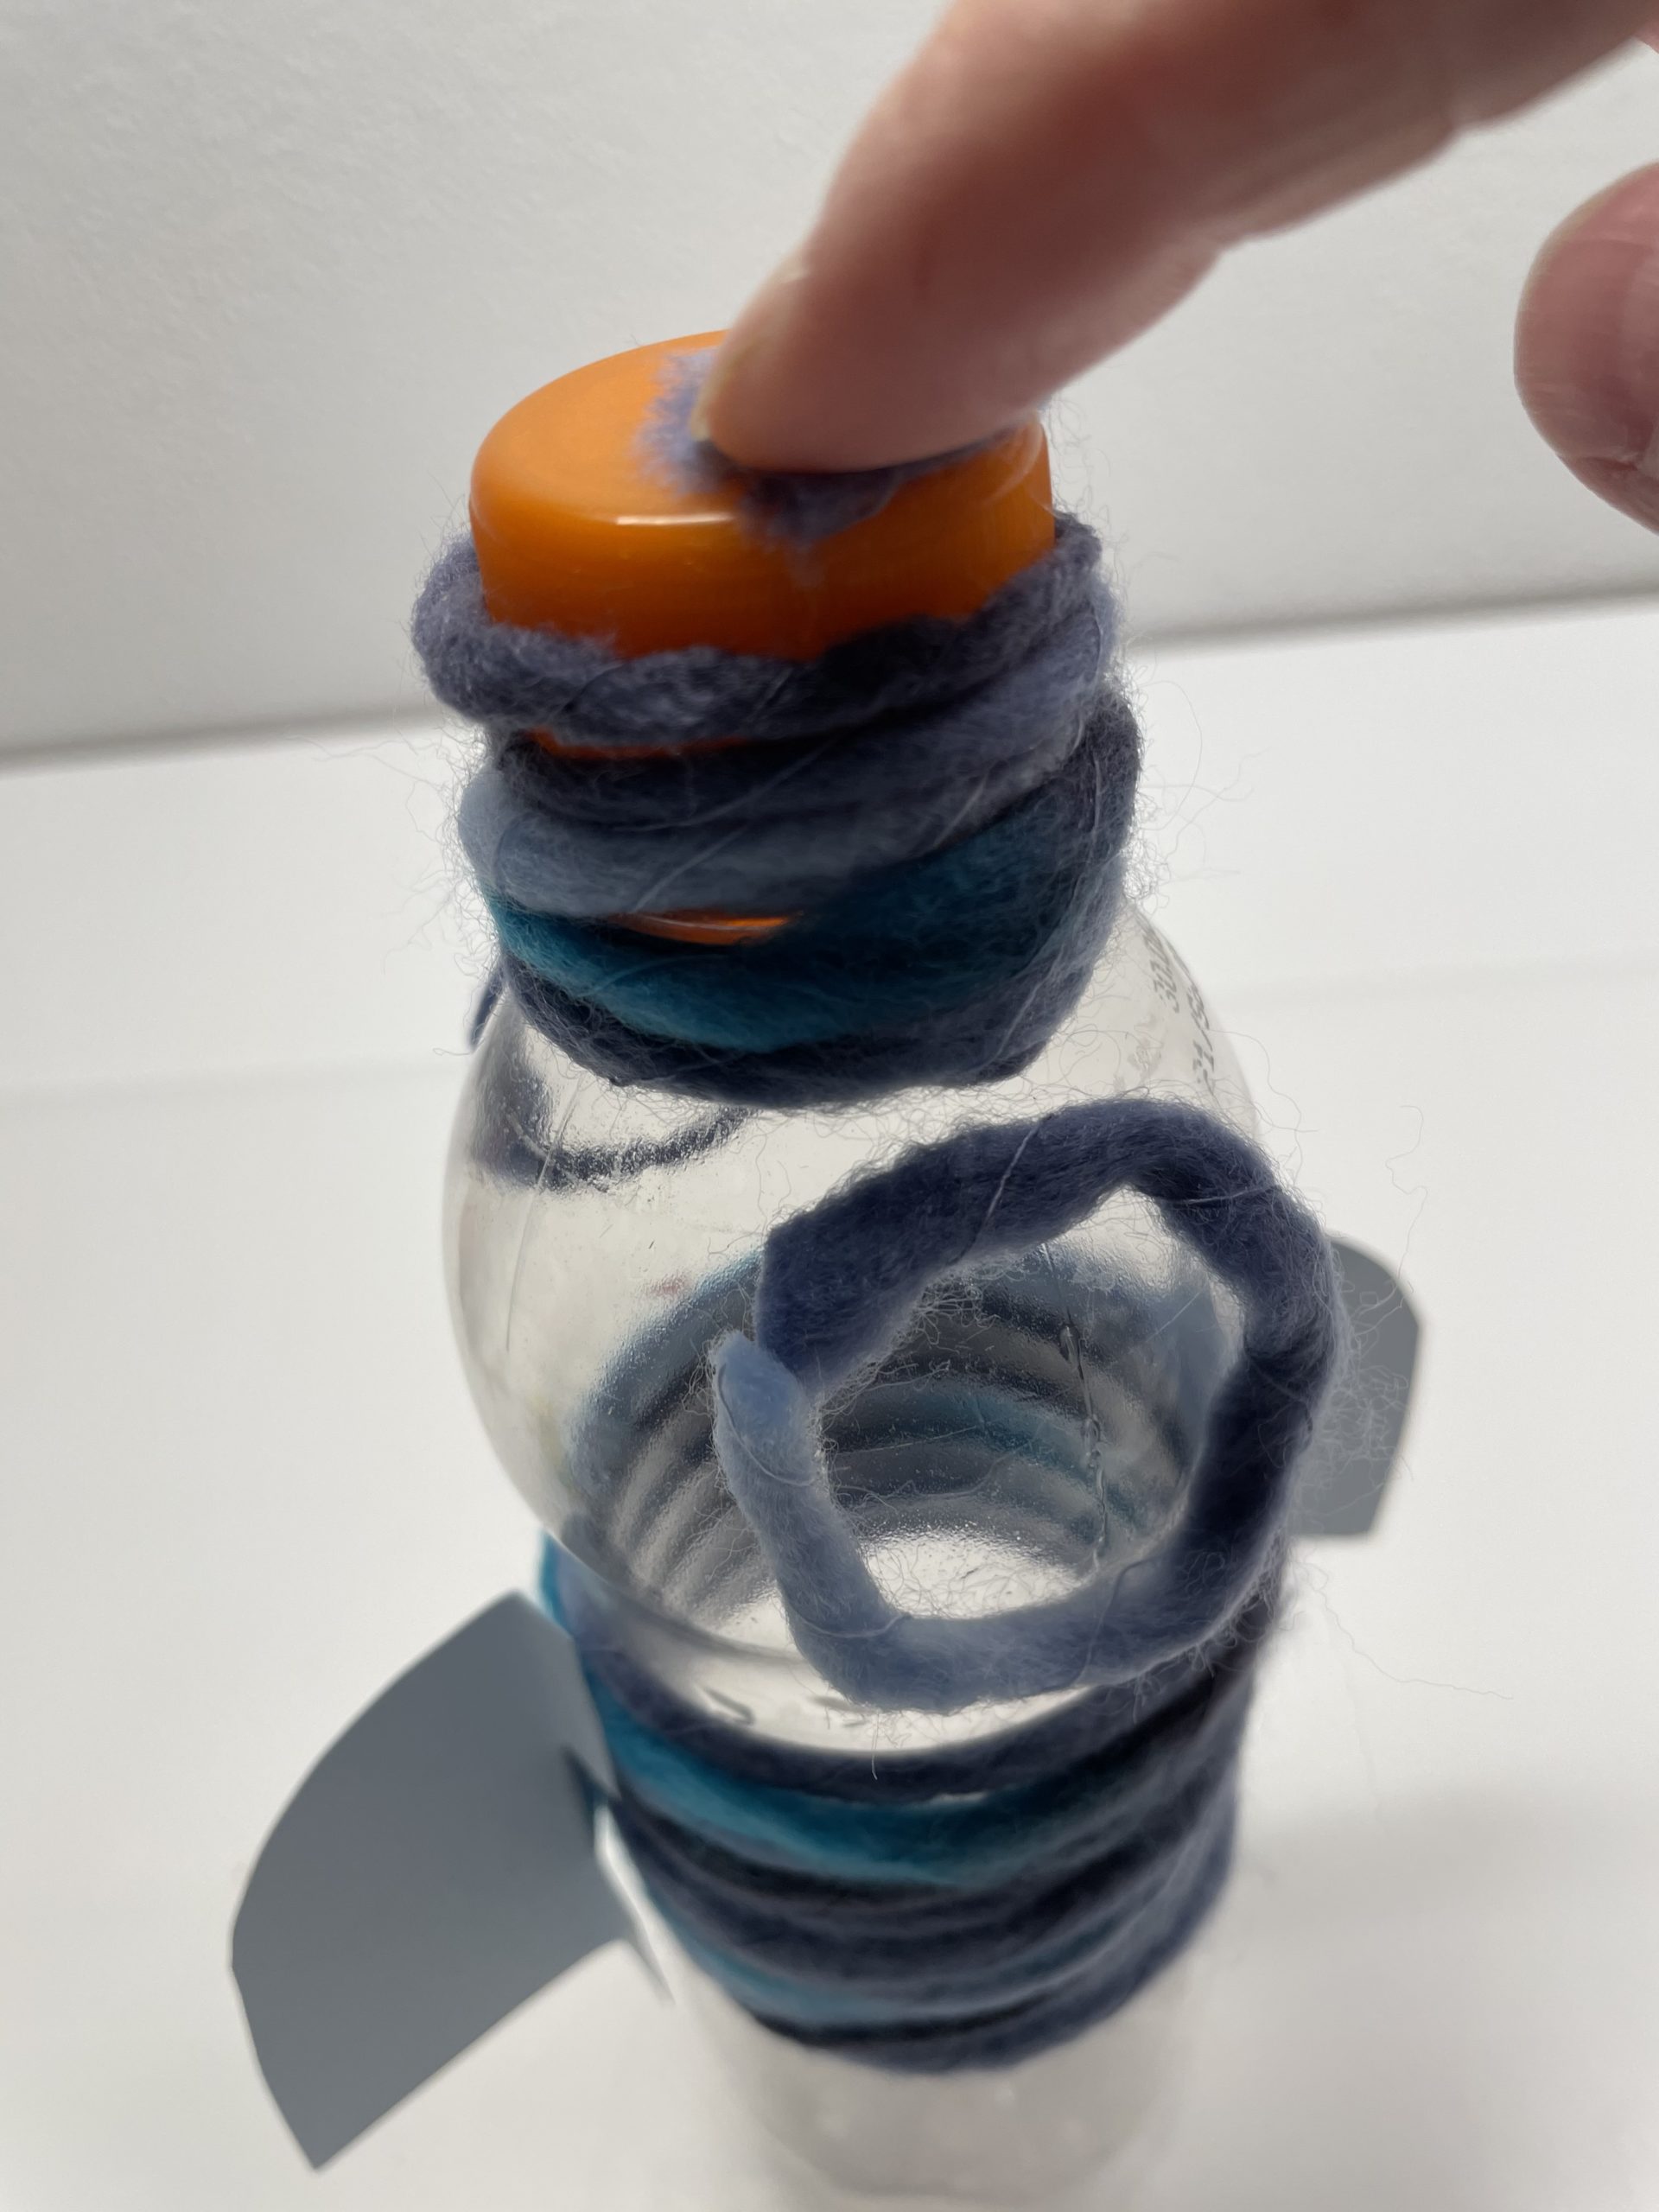
Bild zum Schritt 21 für das Bastel- und DIY-Abenteuer für Kinder: 'Ihr könnt das Fadenende auch auf dem Flaschendeckel festkleben.'

22

Now we're still making the top of the rocket.
For this you paint a circle (diameter about 8-9cm).

Tip: Uses a small bowl or a large glass for drawing.

Bild zum Schritt 22 für das Bastel- und DIY-Abenteuer für Kinder: 'Jetzt basteln wir noch die Spitze der Rakete.  Dafür...'

23

Then cut out the circle and halve it in the middle.
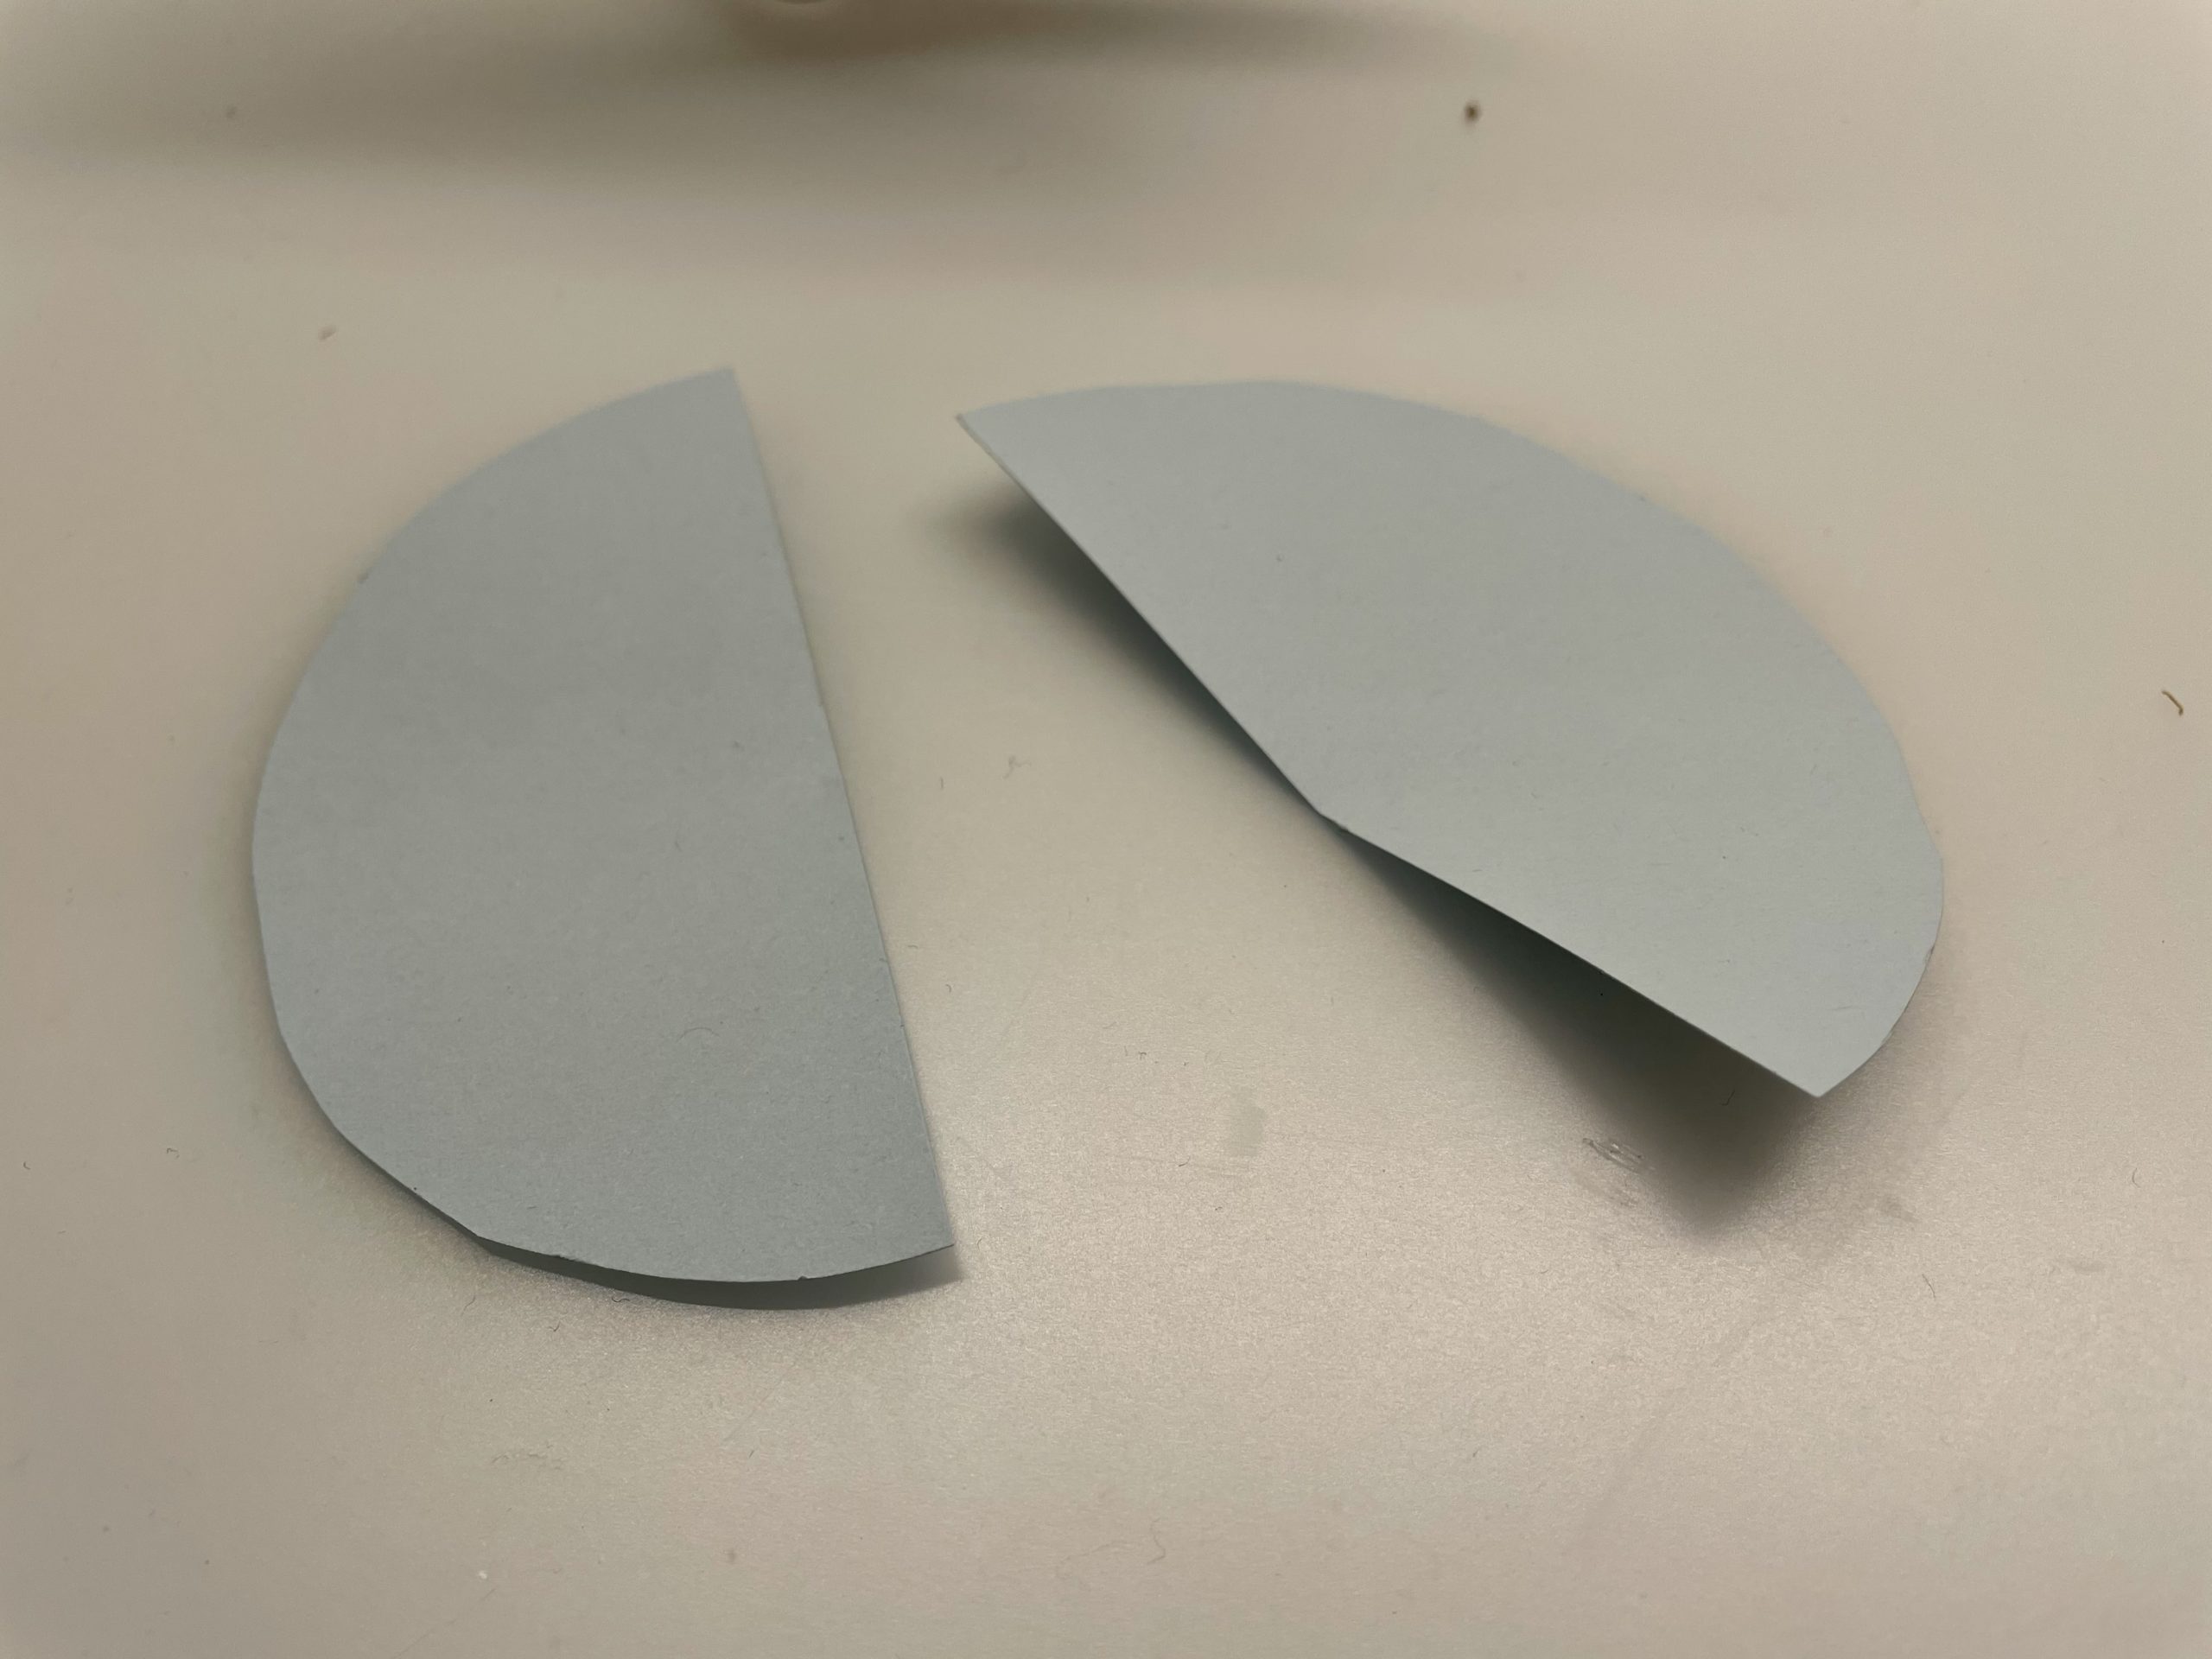
Bild zum Schritt 23 für das Bastel- und DIY-Abenteuer für Kinder: 'Anschließend schneidet ihr den Kreis aus und halbiert ihn in...'

24

2. Bild zum Schritt 23 für das Bastel- und DIY-Abenteuer für Kinder: 'Anschließend schneidet ihr den Kreis aus und halbiert ihn in...'

25

Now you roll a half circle to a pointed hat.

For a shiny rocket tip you use aluminium foil in advance. Look at it in the next step!
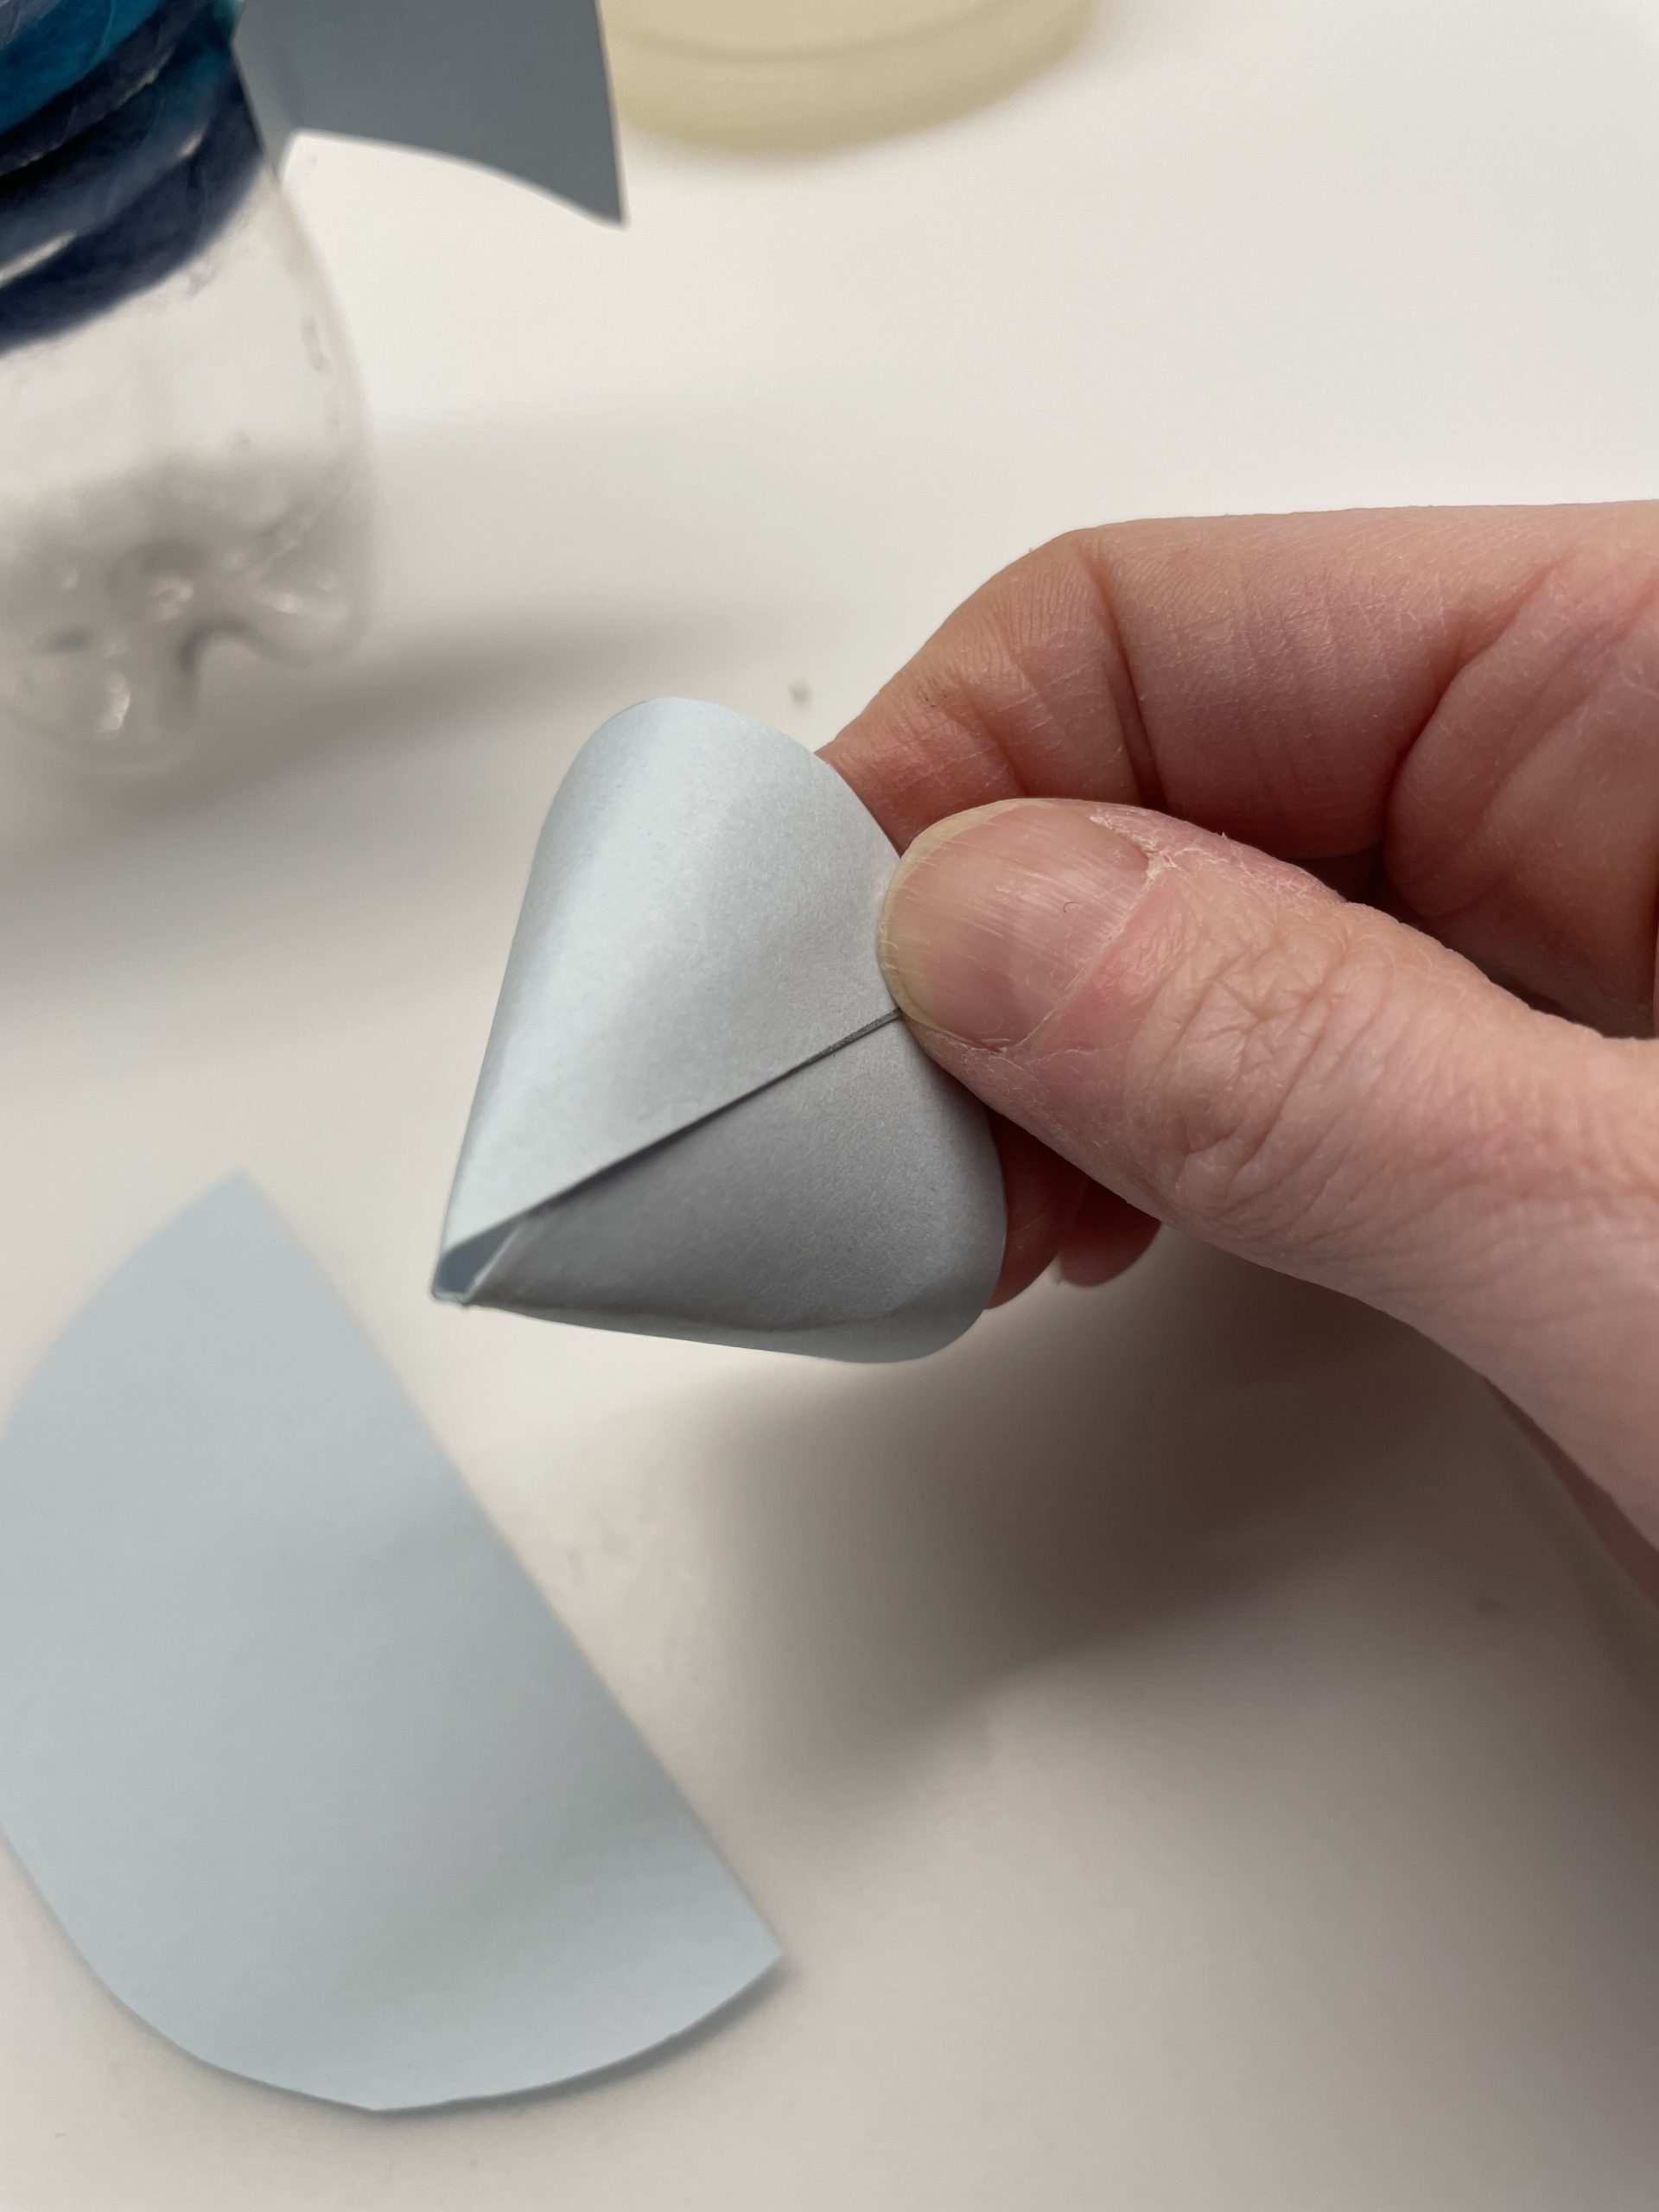
Bild zum Schritt 25 für das Bastel- und DIY-Abenteuer für Kinder: 'Nun rollt ihr einen Halbkreis zu einem spitzen Hut zusammen....'

26

For the shiny rocket tip, glue the semicircle to a piece of aluminium foil.

Bild zum Schritt 26 für das Bastel- und DIY-Abenteuer für Kinder: 'Für die glänzende Raketenspitze klebt ihr den Halbkreis auf ein...'

27

Then cut off the overhanging aluminium foil. Overhanging aluminium foil bends her backwards.
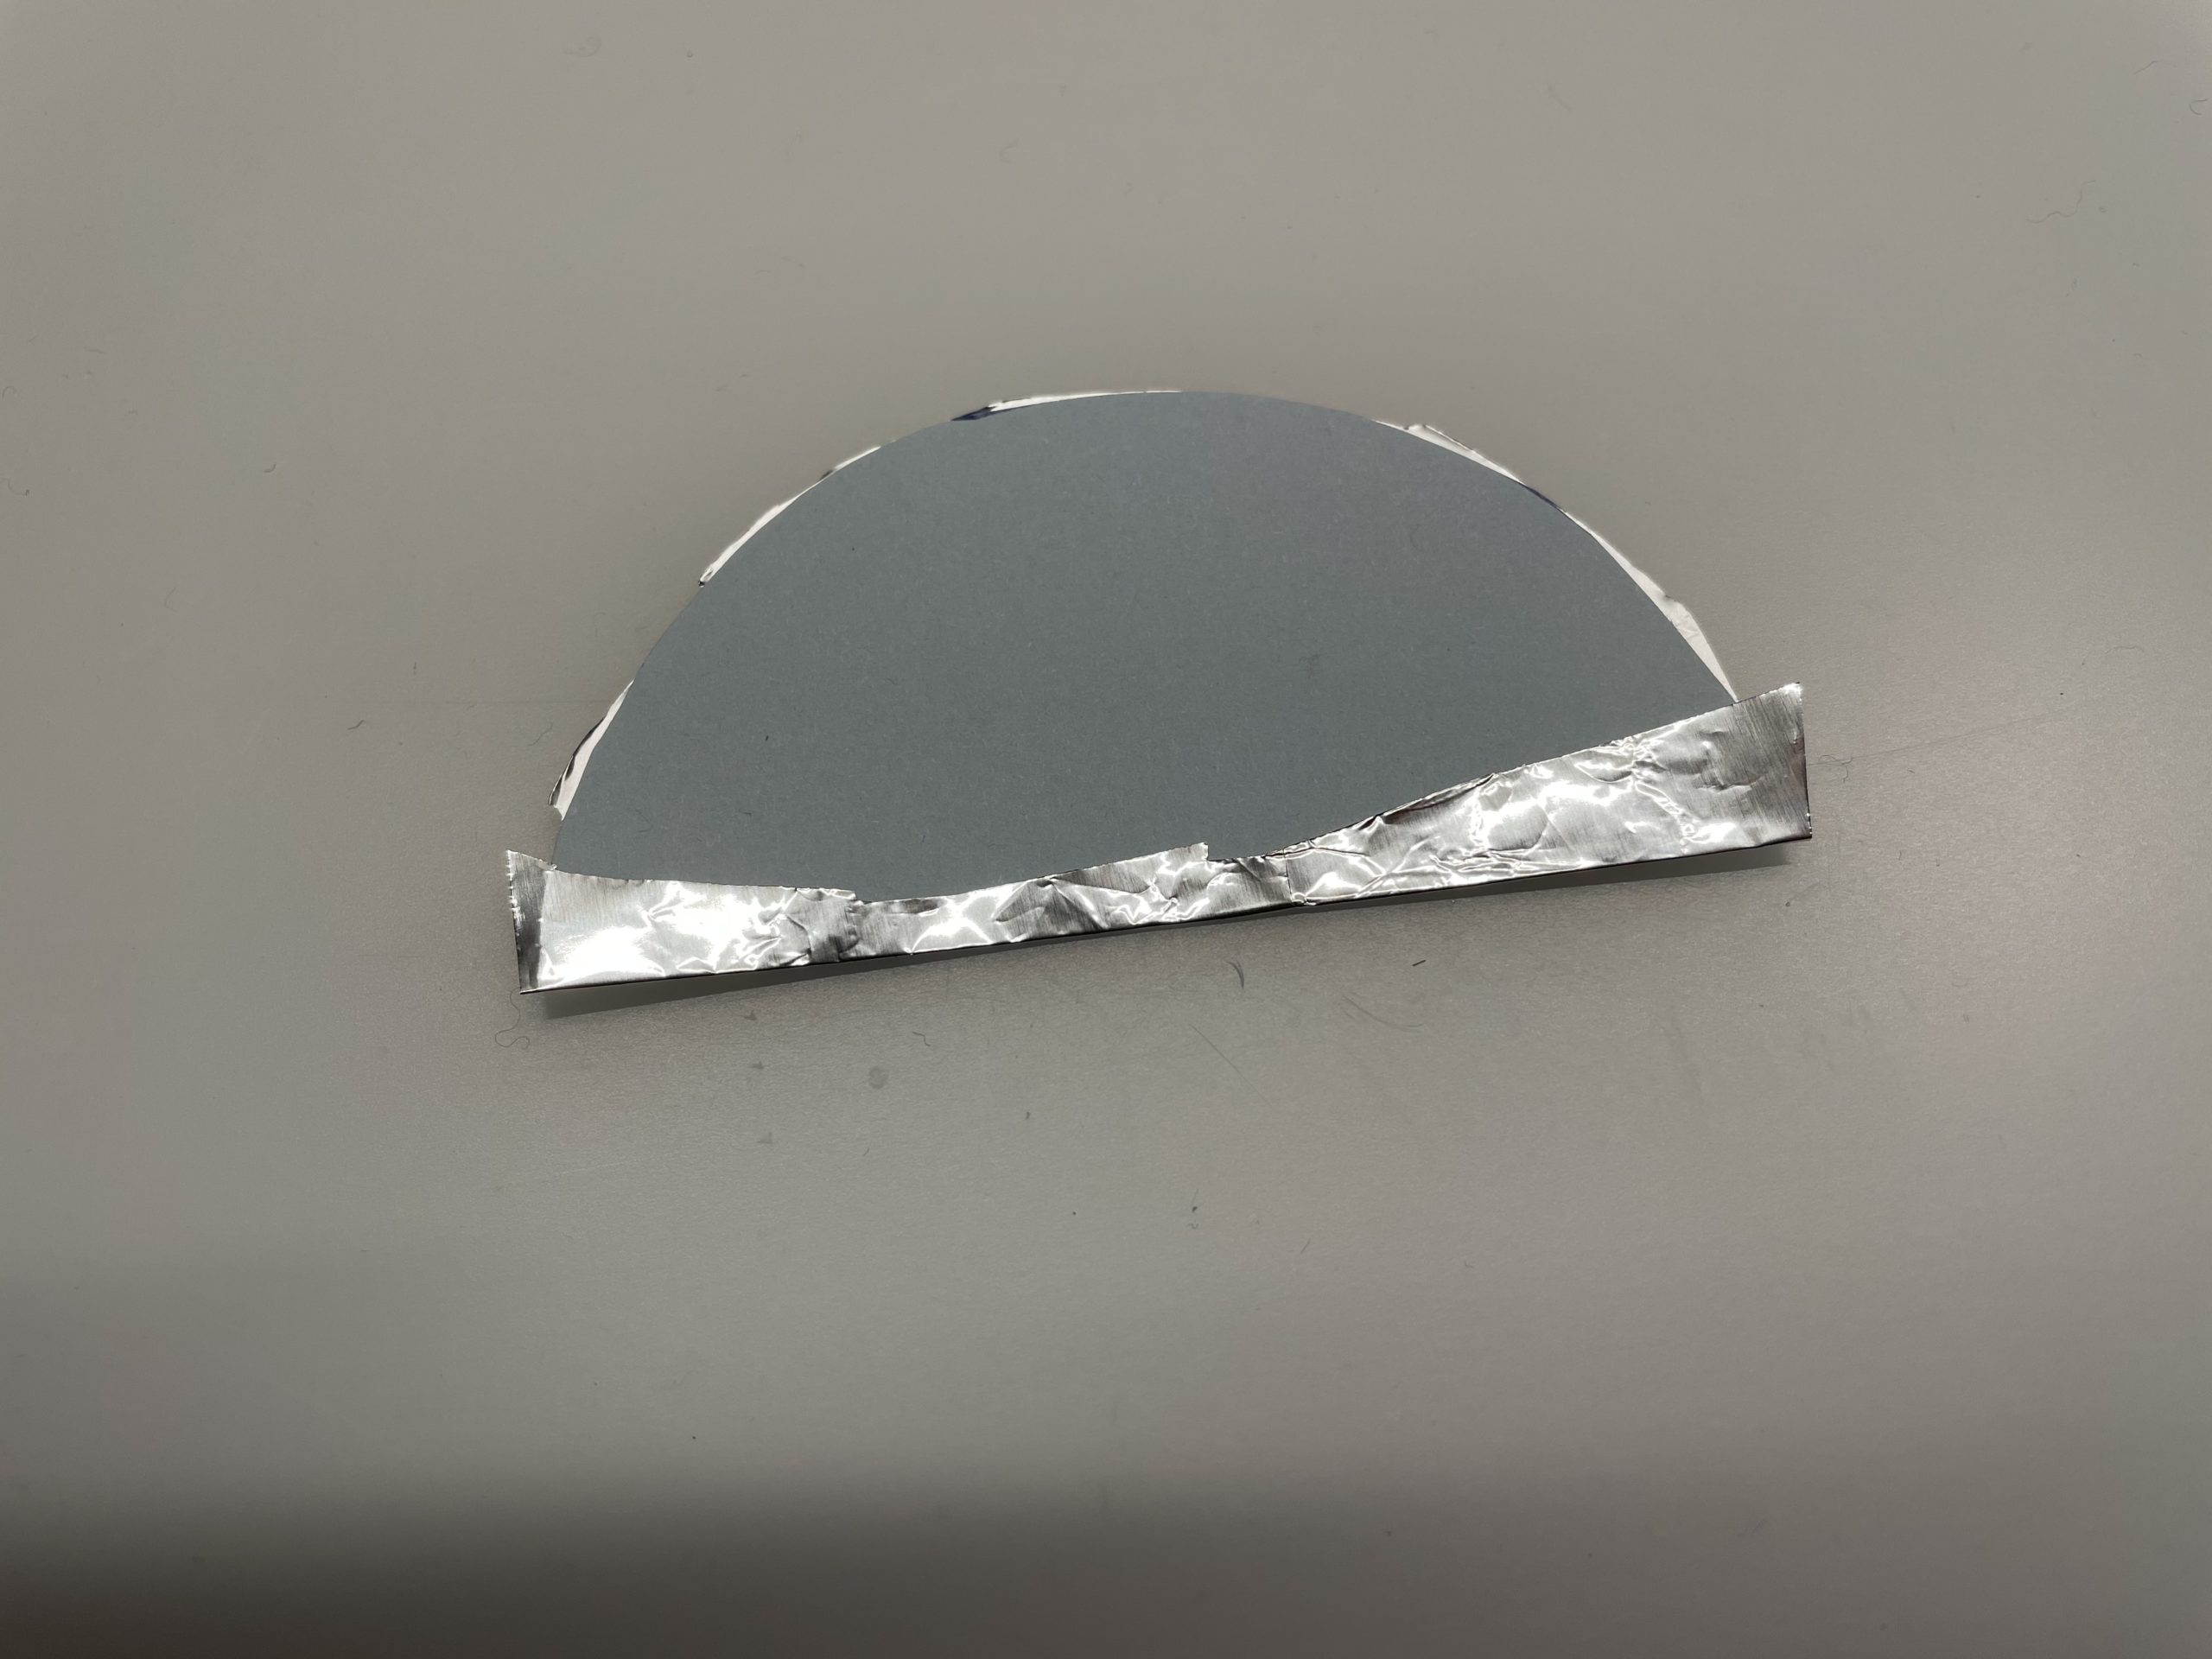
Bild zum Schritt 27 für das Bastel- und DIY-Abenteuer für Kinder: 'Dann schneidet ihr die überstehenden Alufolie ab. Überstehende Alufolie biegt...'

28

Now you roll the half circle to a hat.
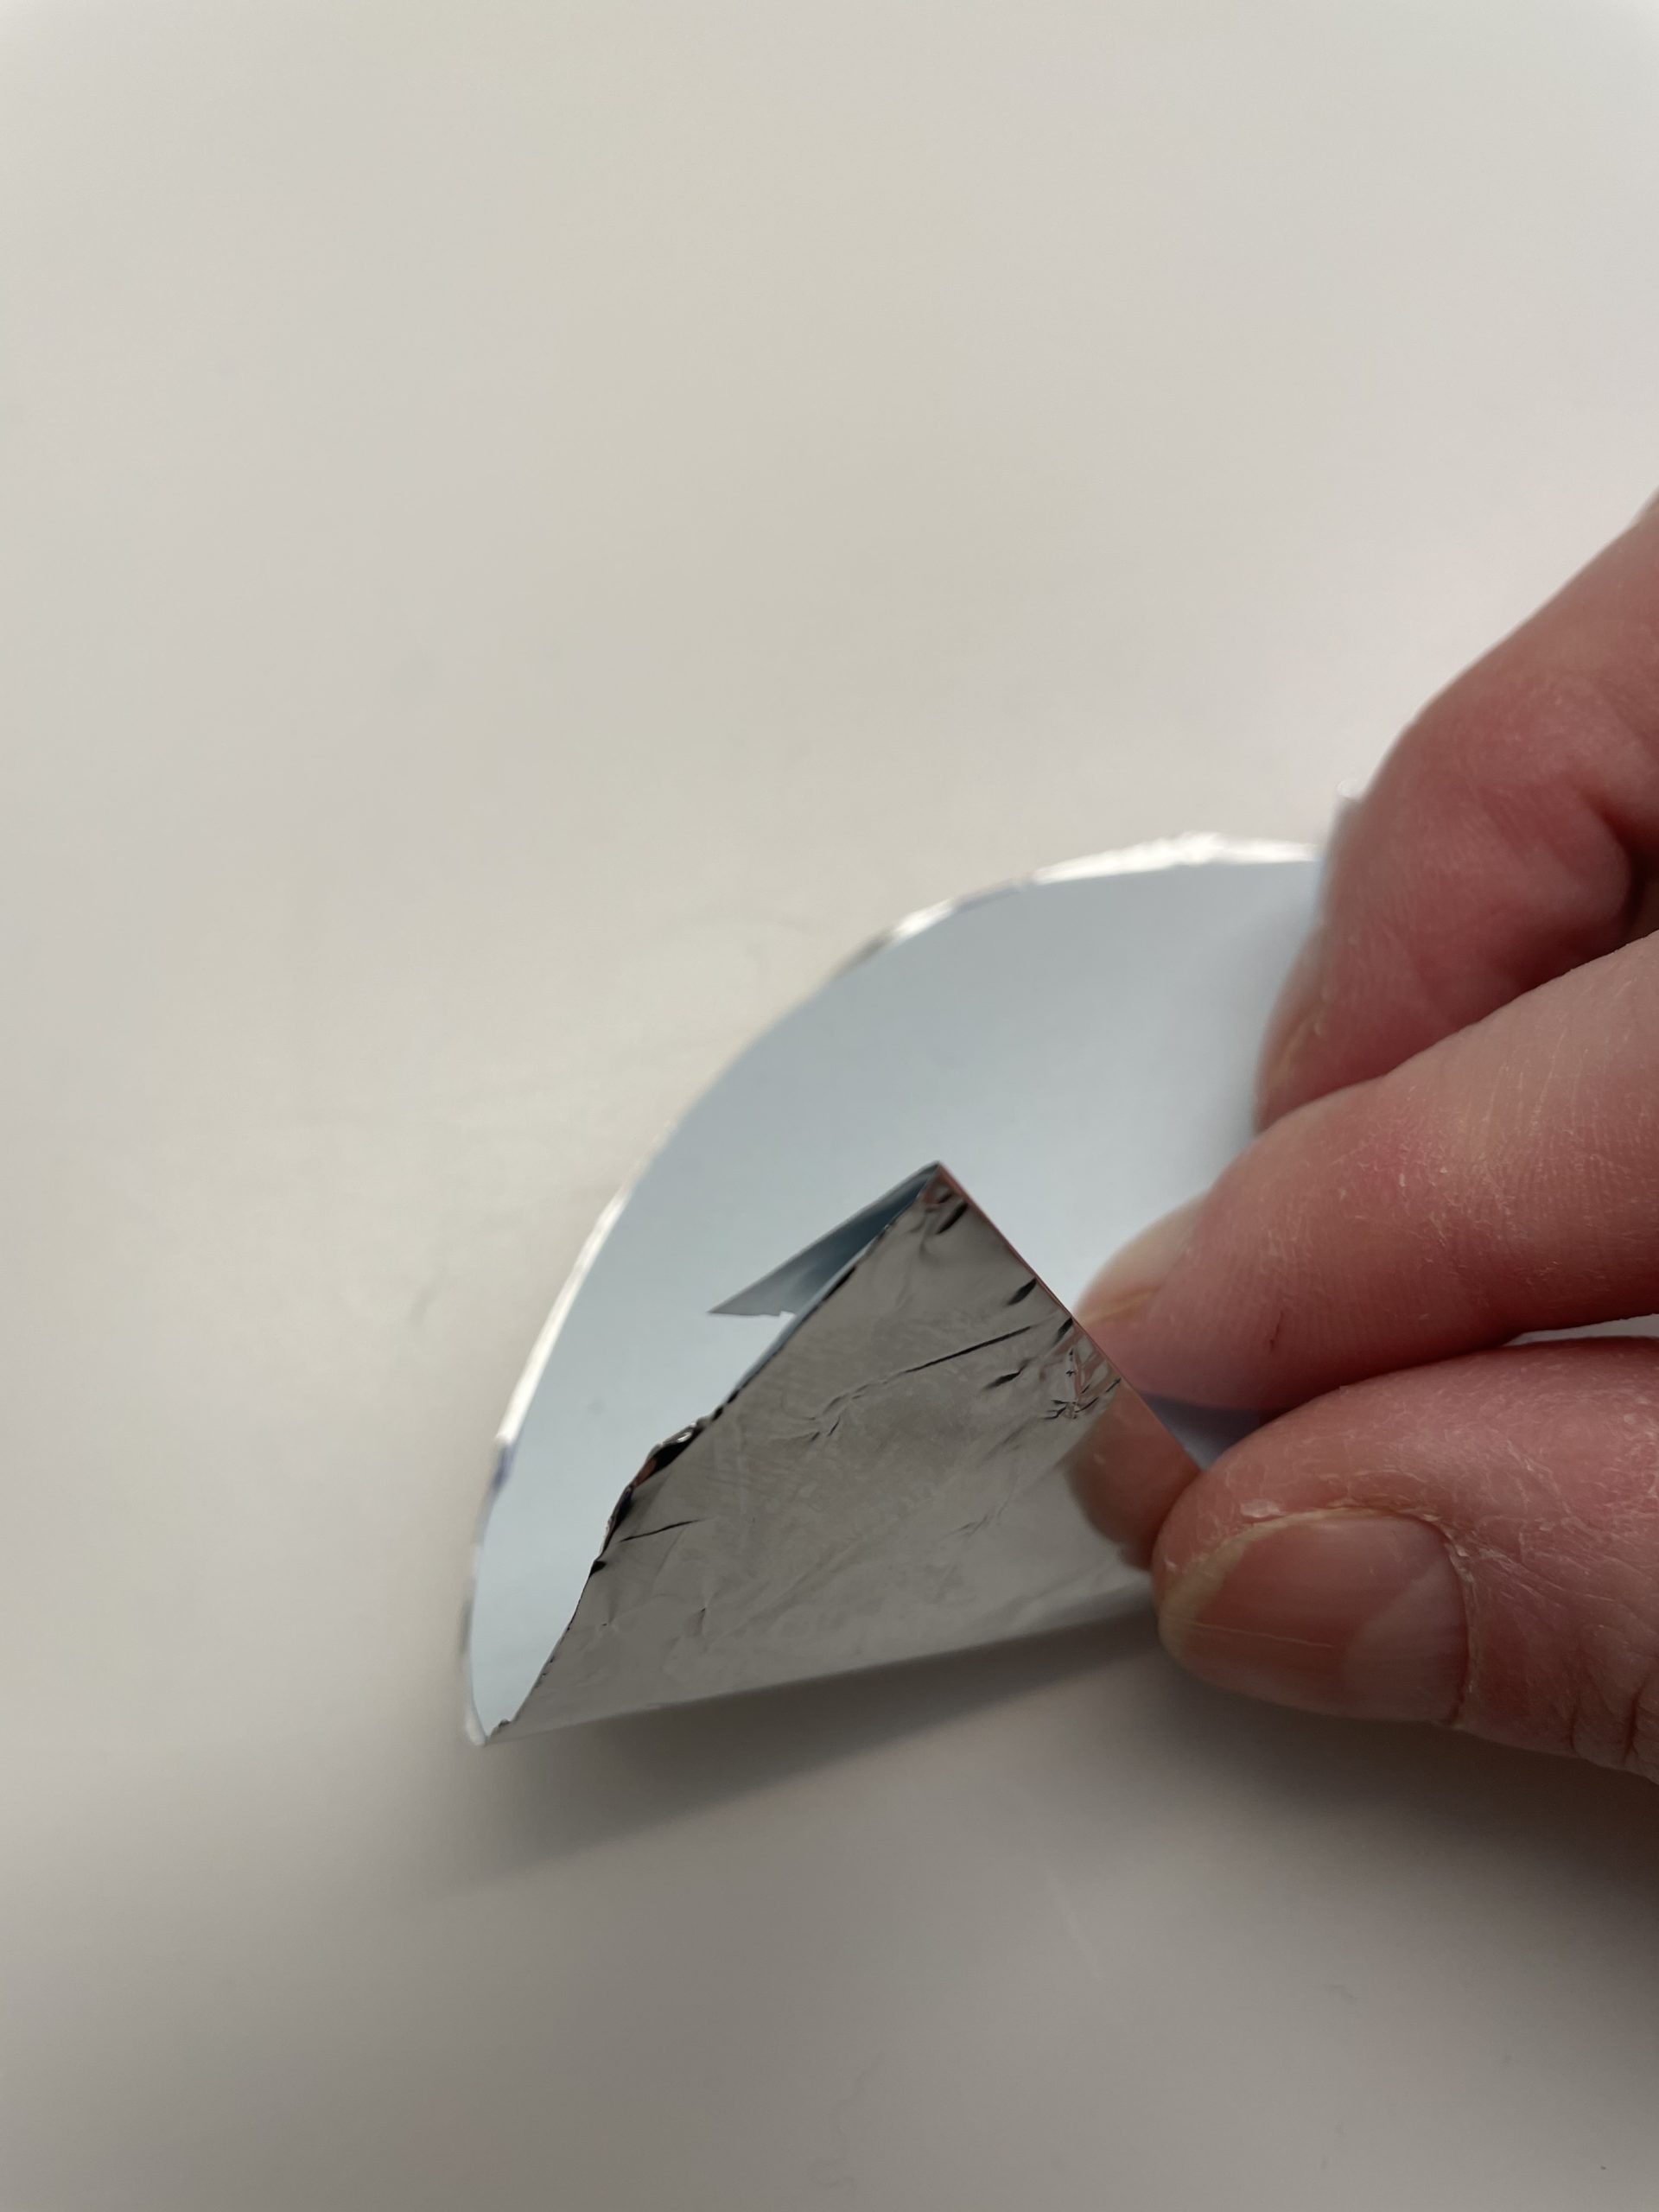
Bild zum Schritt 28 für das Bastel- und DIY-Abenteuer für Kinder: 'Nun rollt ihr den Halbkreis zu einem Hut.'

29

Then glue the overlapping parts together.
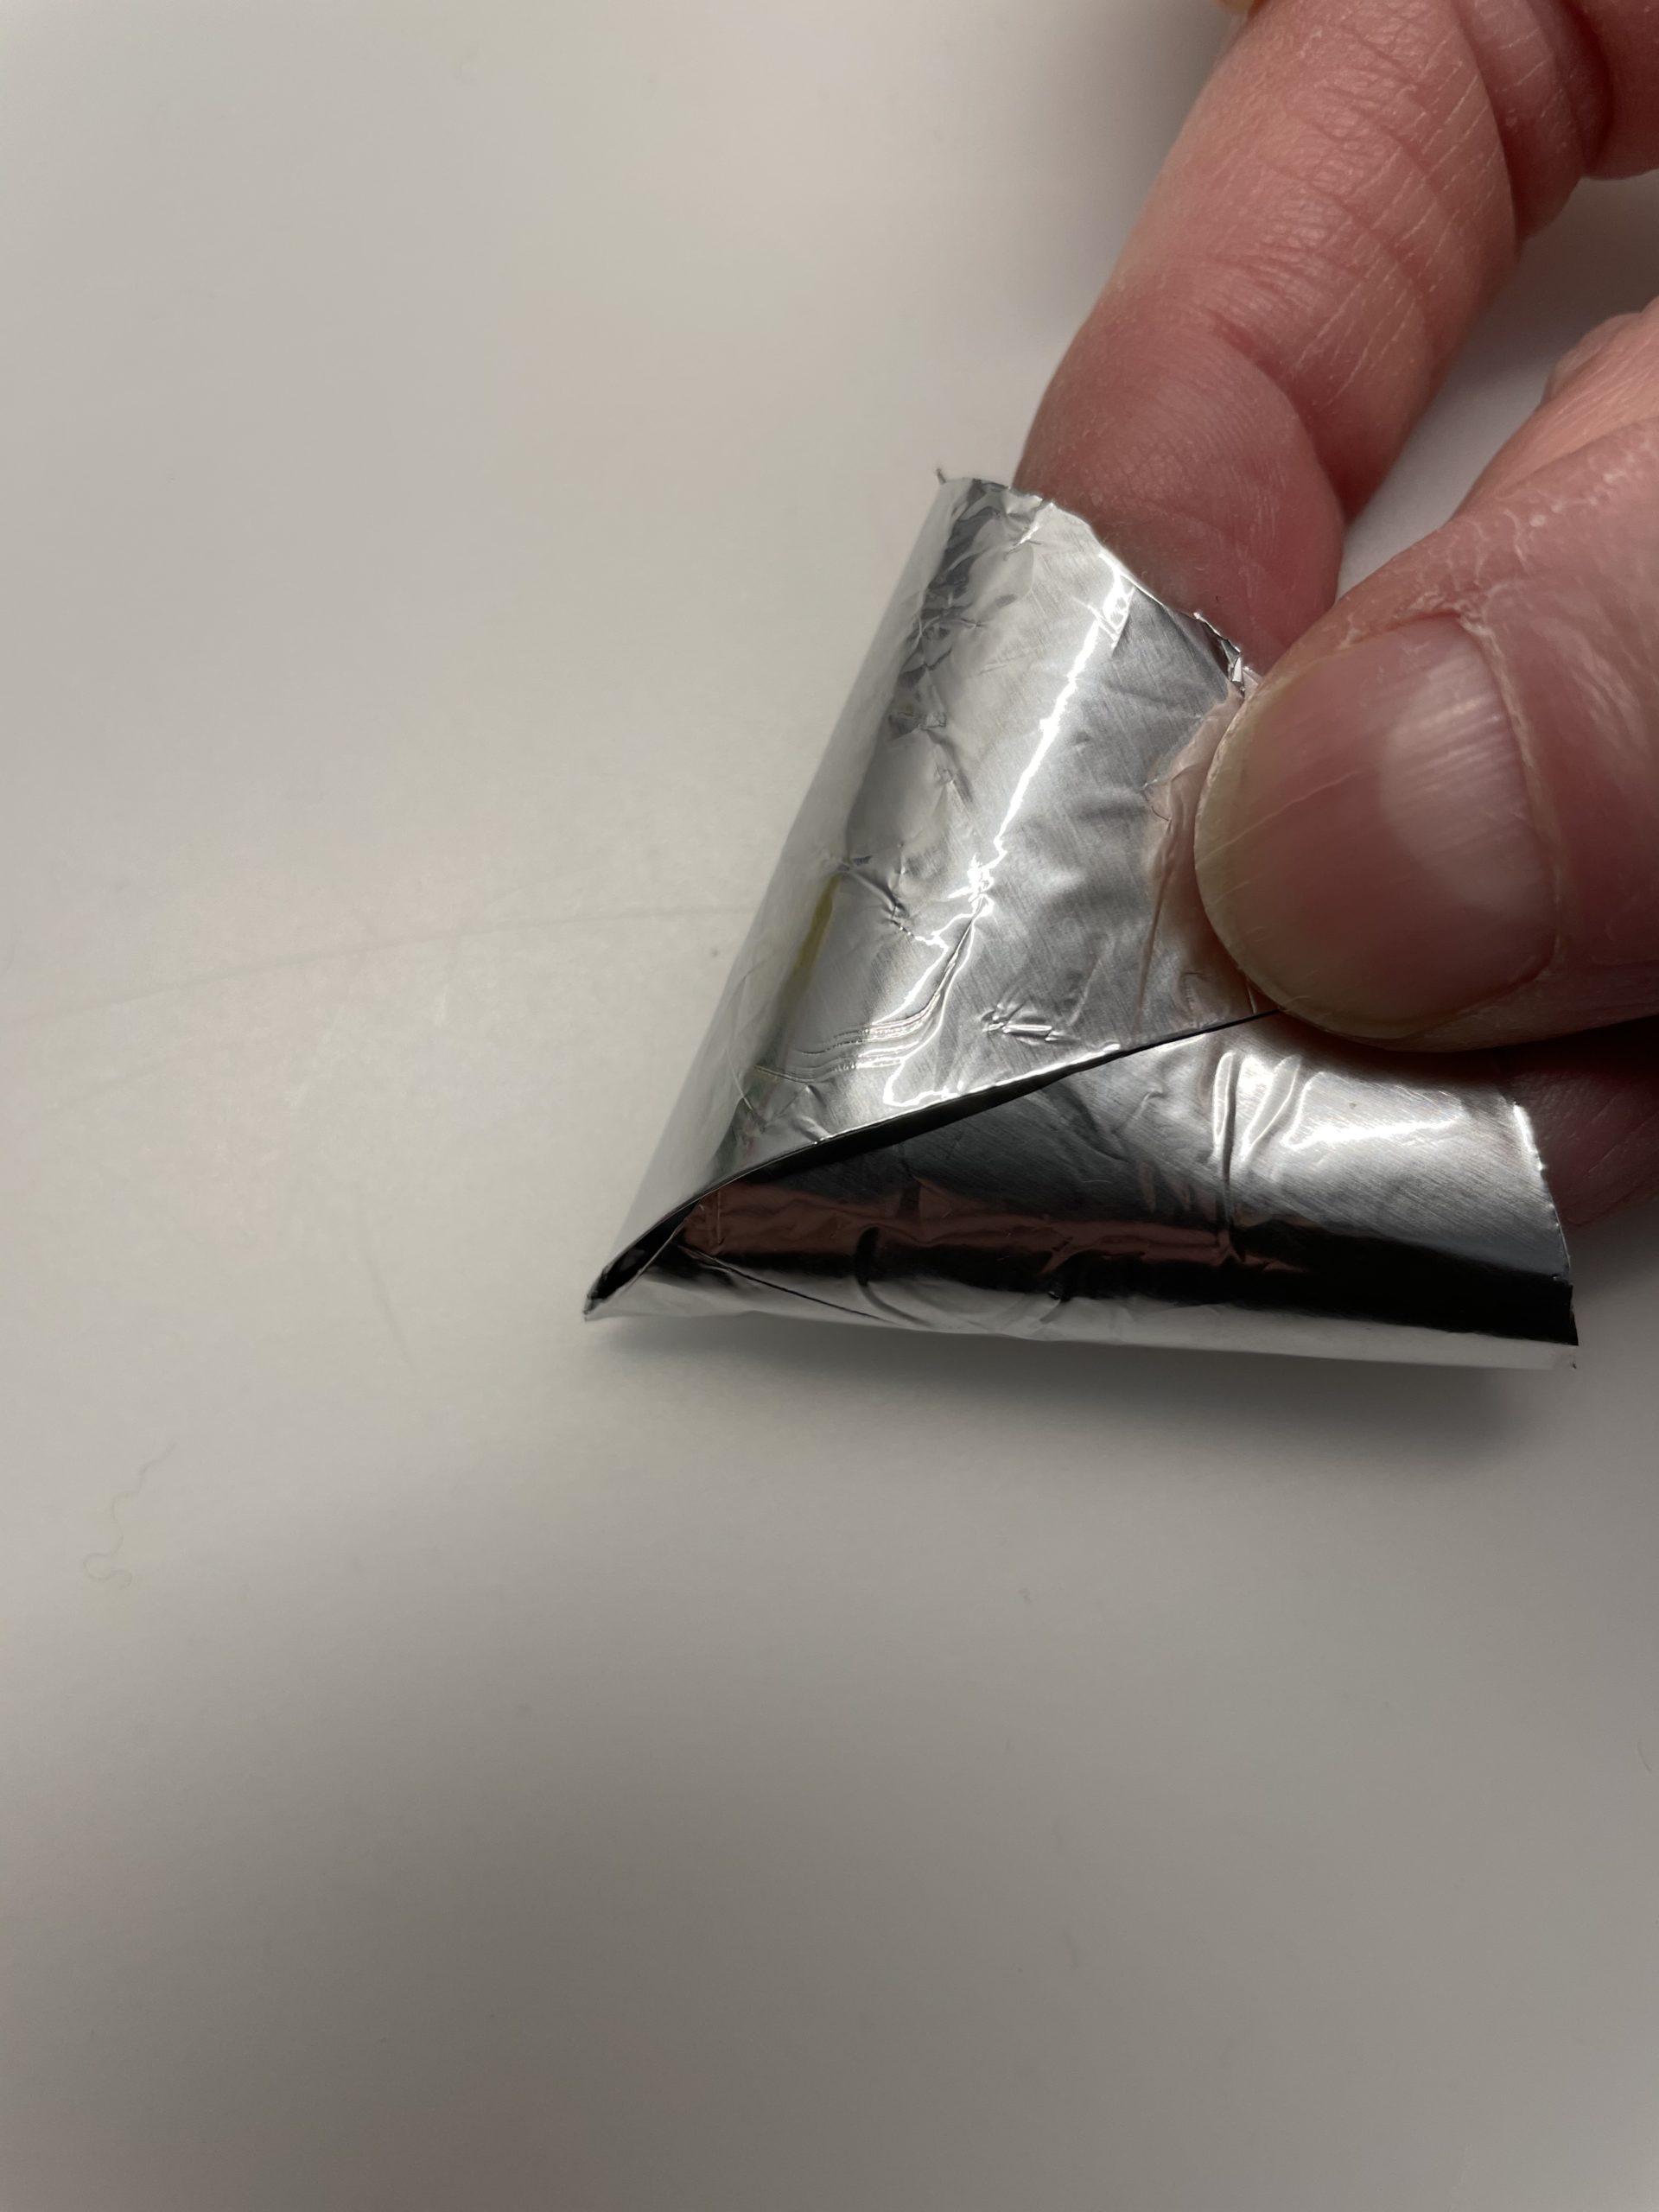
Bild zum Schritt 29 für das Bastel- und DIY-Abenteuer für Kinder: 'Anschließend klebt ihr die überlappenden Teile zusammen.'

30

Press the sticky spot tightly together.
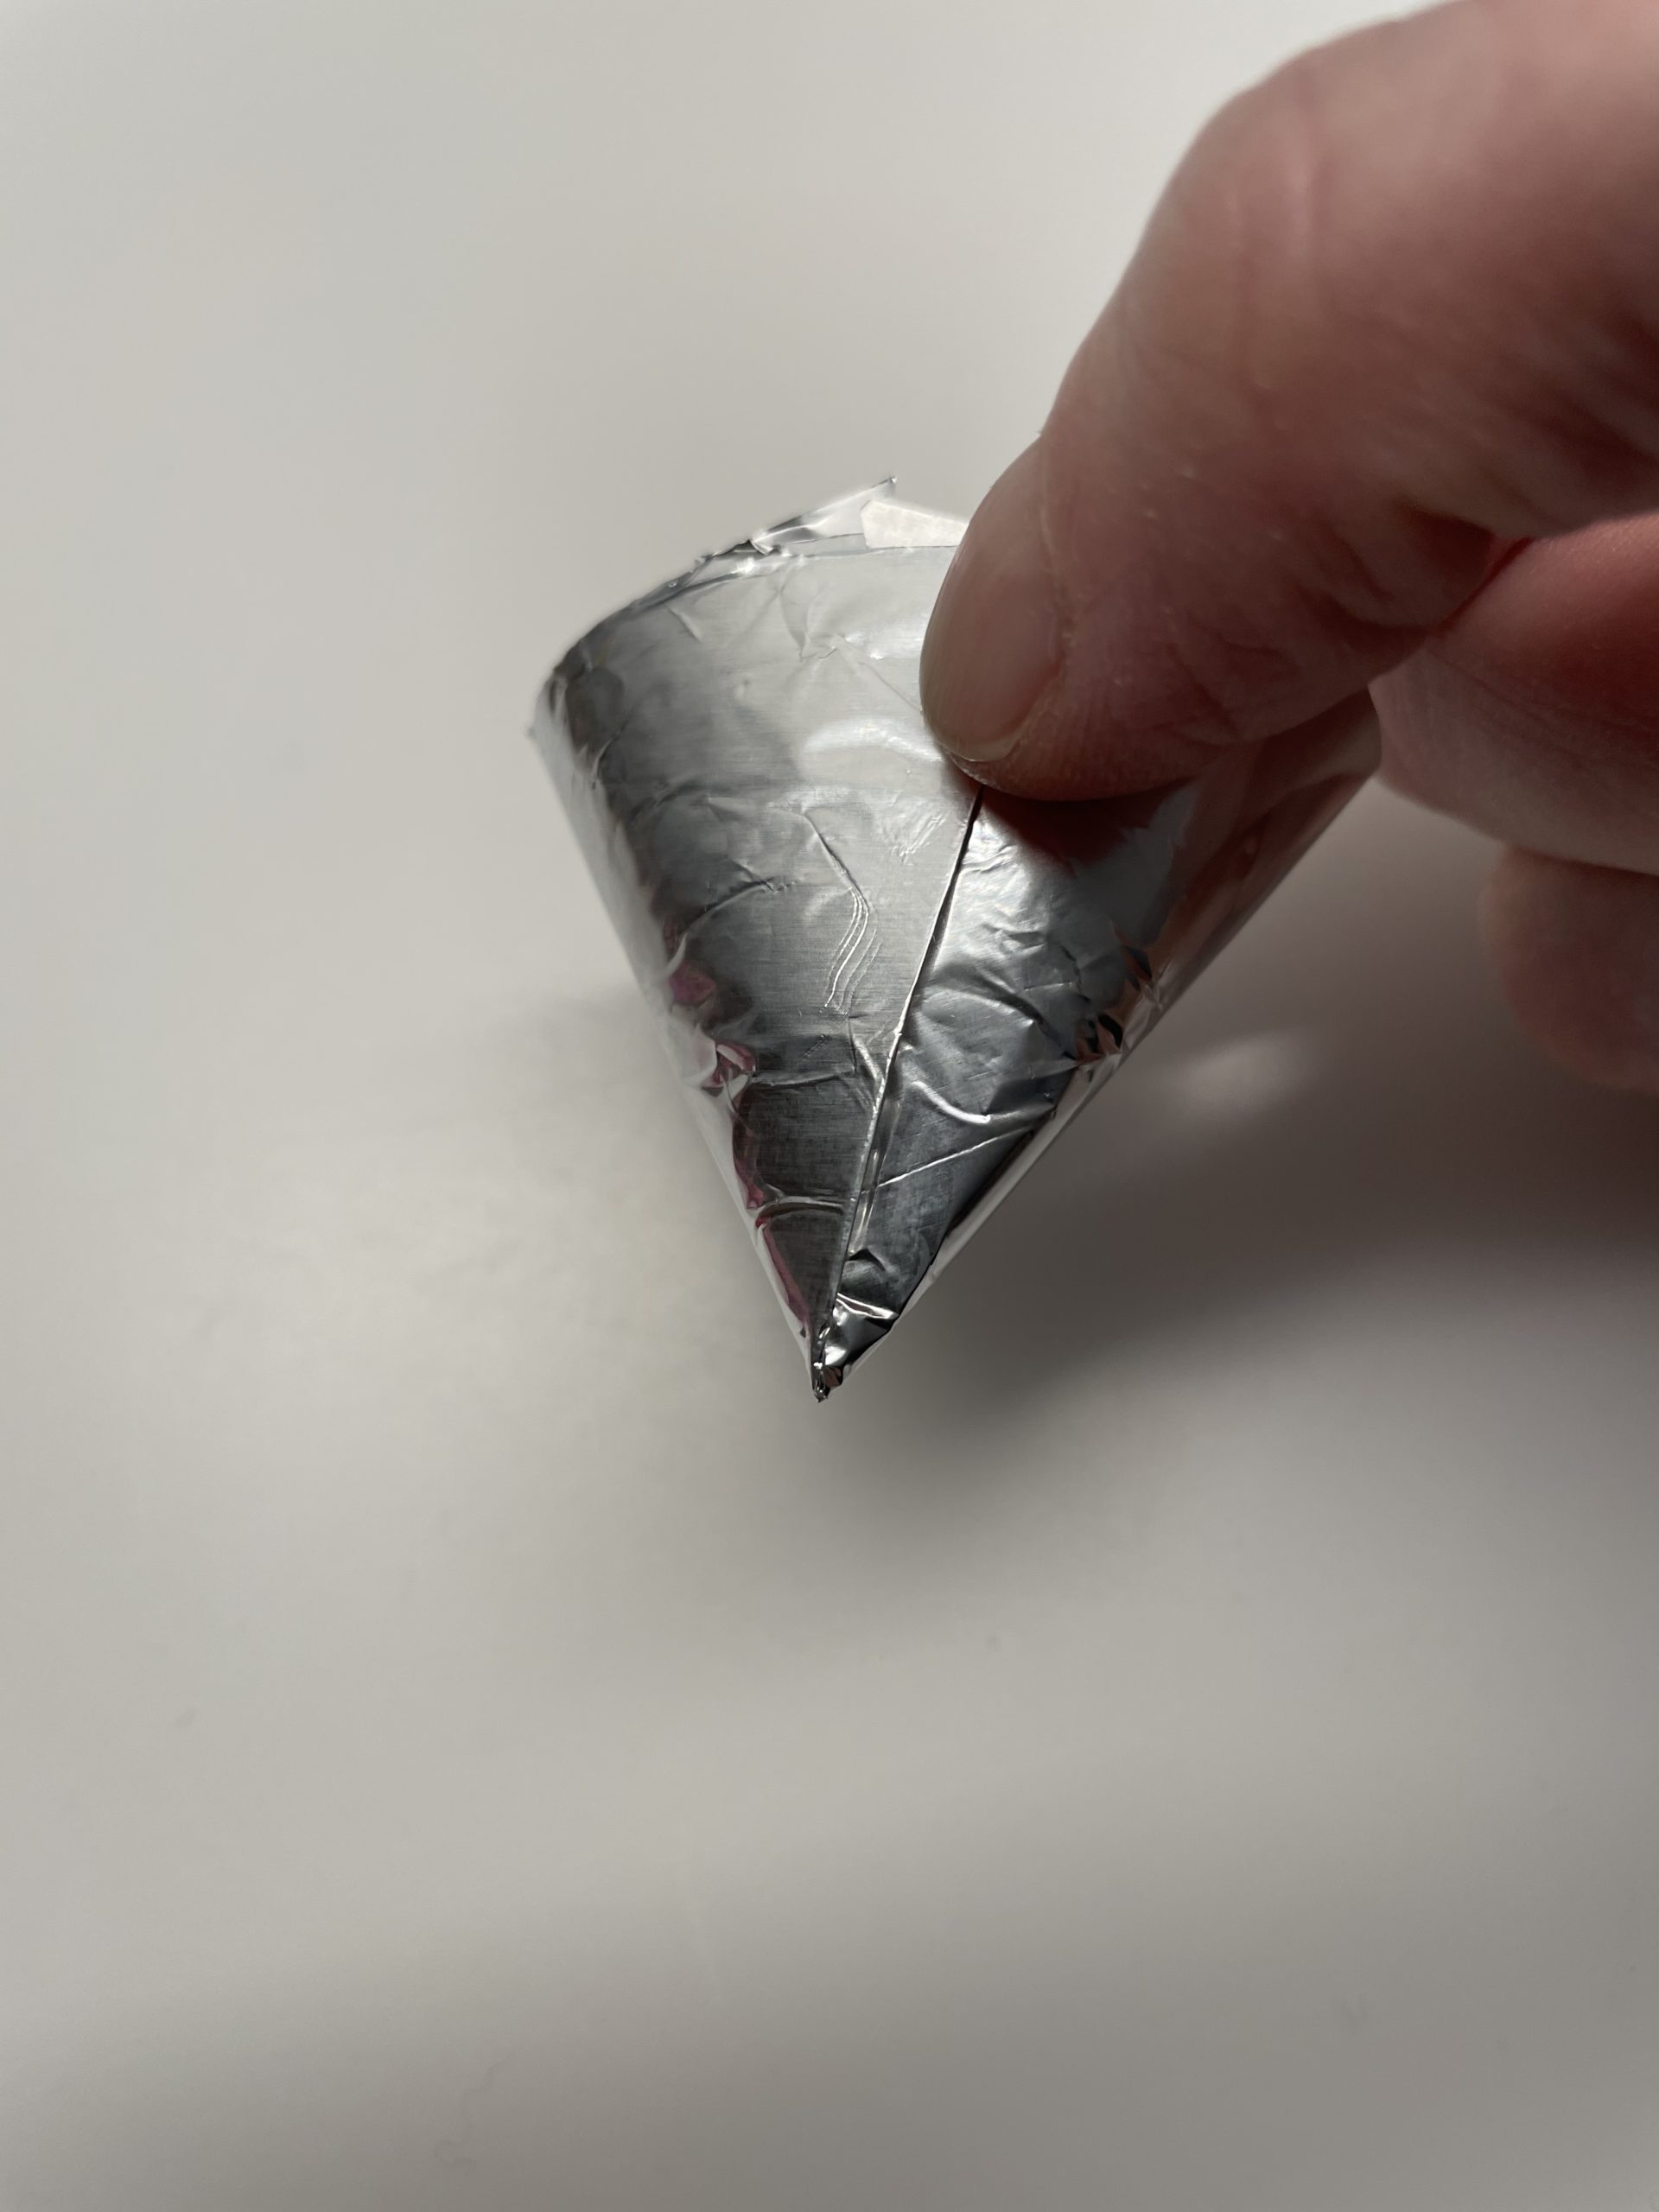
Bild zum Schritt 30 für das Bastel- und DIY-Abenteuer für Kinder: 'Drückt die Klebestelle fest zusammen.'

31

The rocket tip is ready.

Bild zum Schritt 31 für das Bastel- und DIY-Abenteuer für Kinder: 'Fertig ist die Raketenspitze.'

32

Now you put these over the bottle cap and stick them tight.
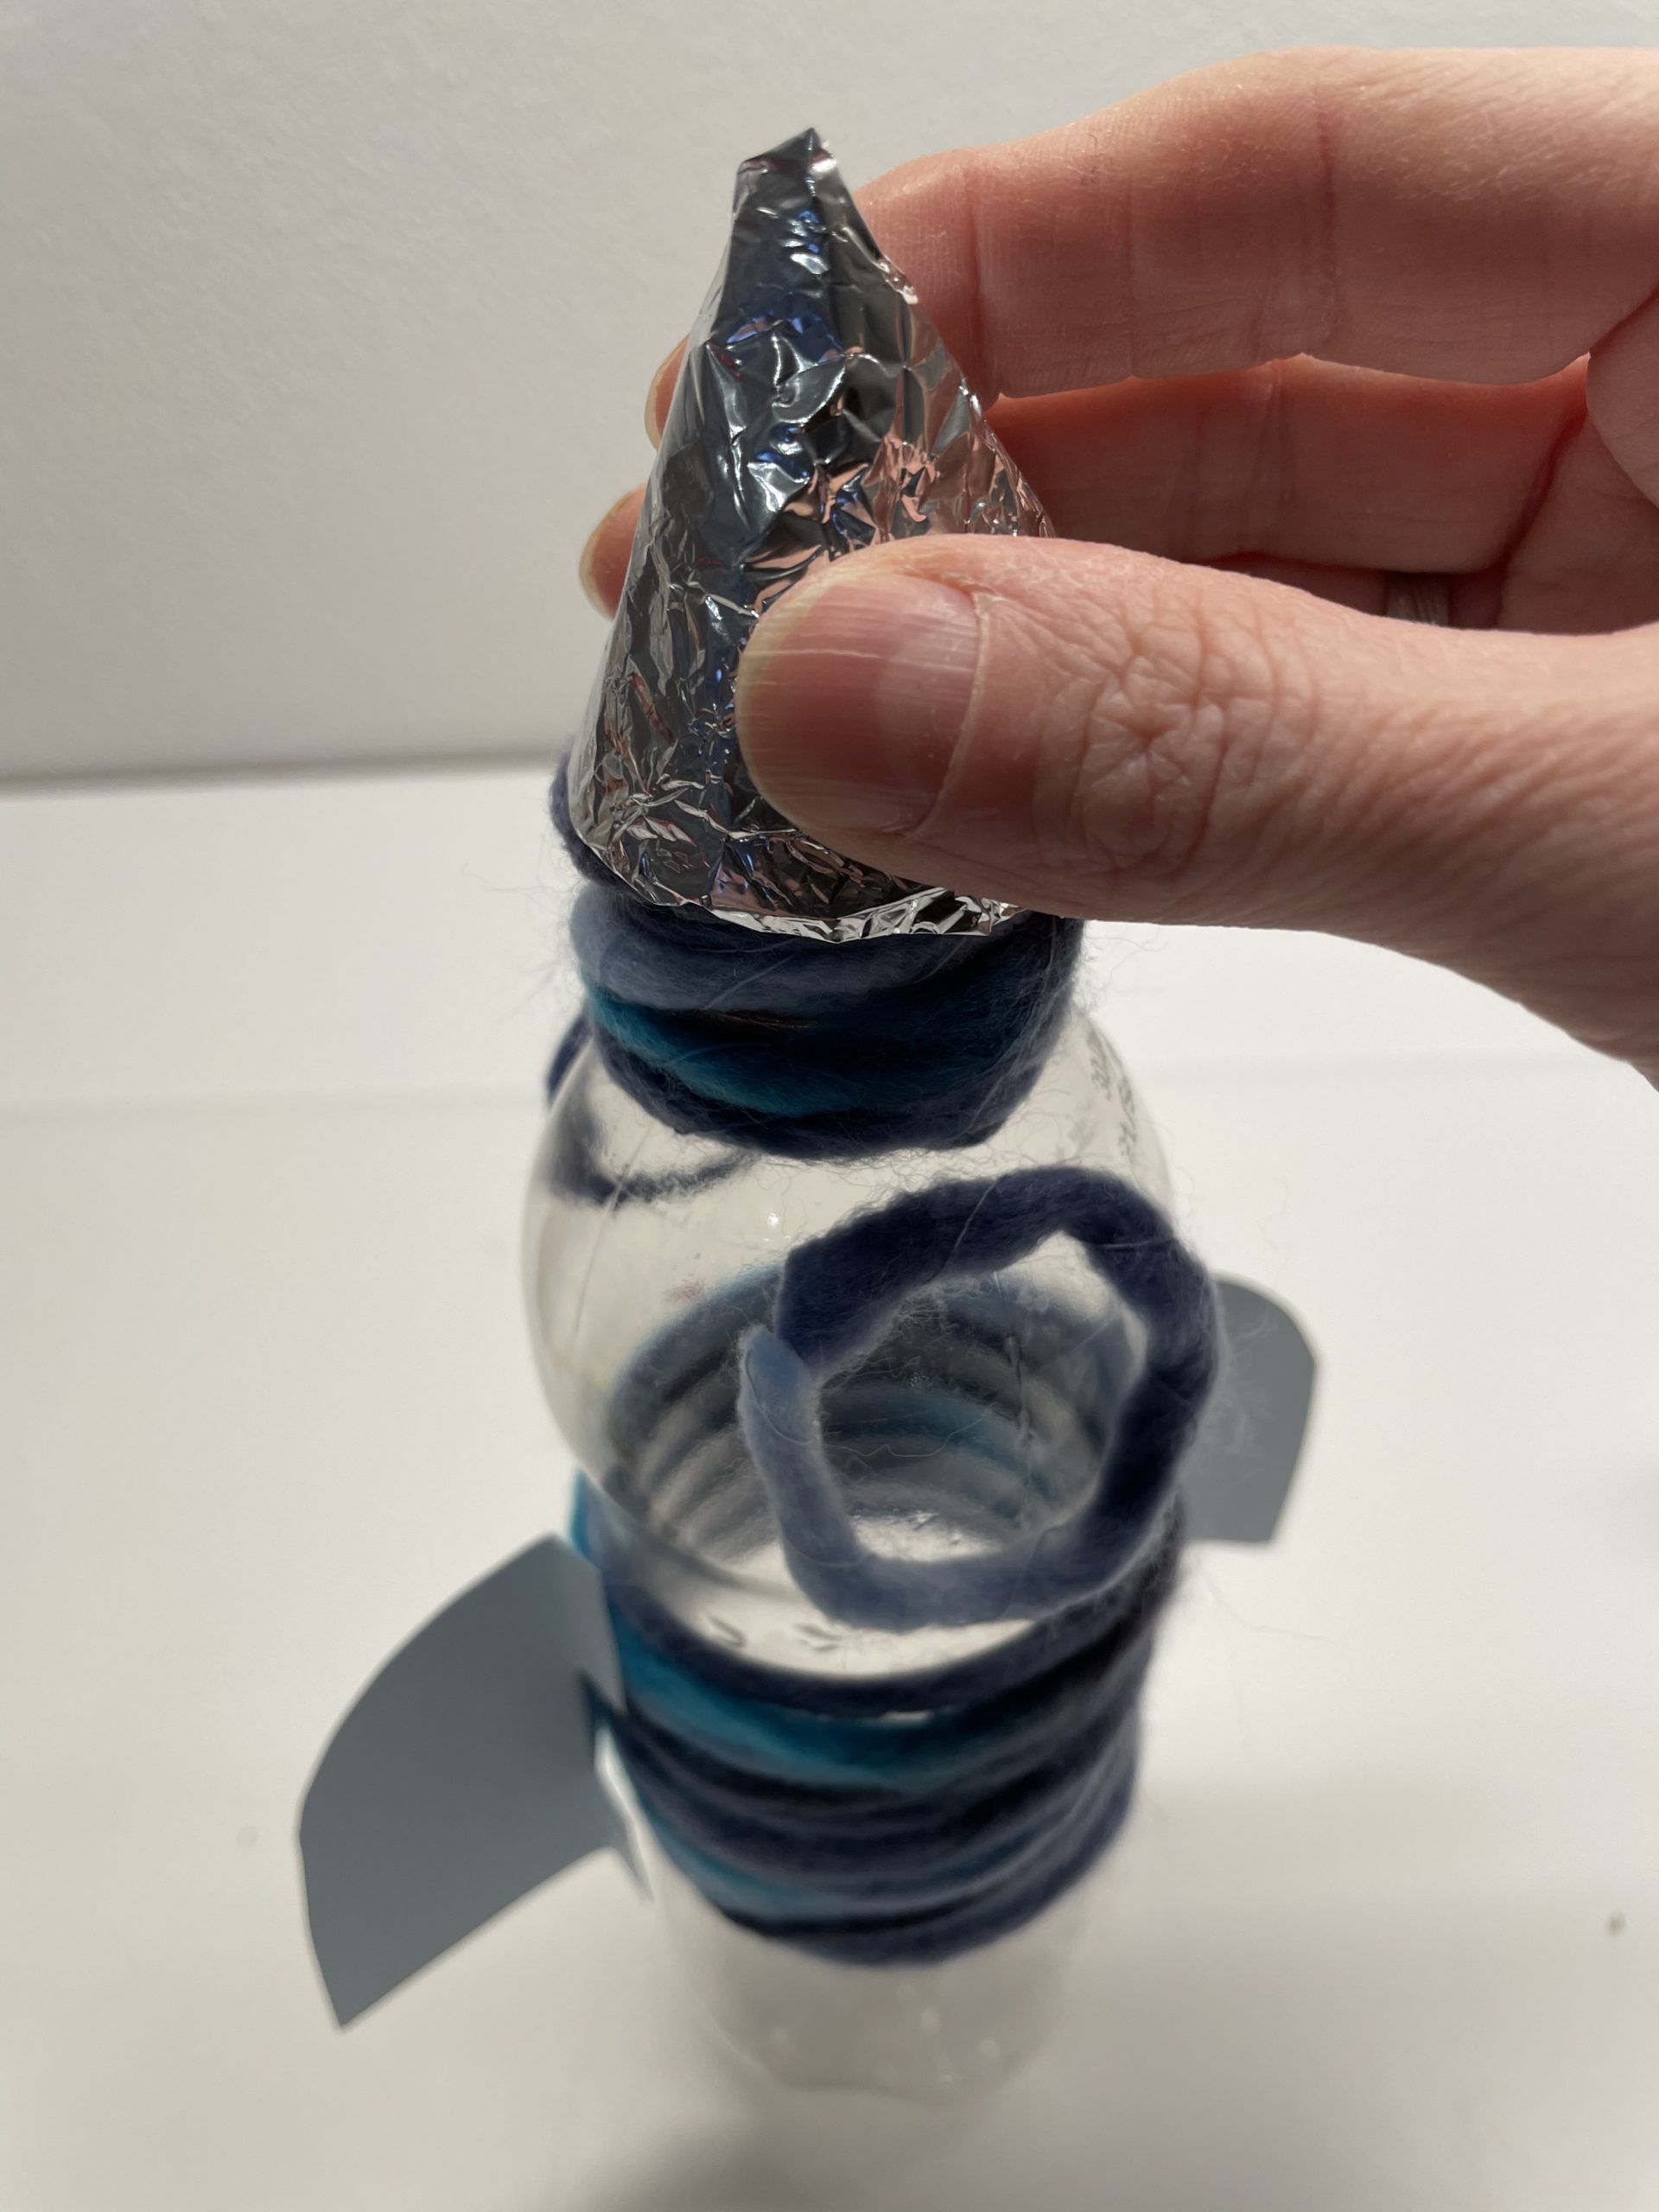
Bild zum Schritt 32 für das Bastel- und DIY-Abenteuer für Kinder: 'Jetzt stülpt ihr diese über den Flaschendeckel und klebt sie...'

33

The bottle rocket is ready.

Bild zum Schritt 33 für das Bastel- und DIY-Abenteuer für Kinder: 'Fertig ist die Flaschenrakete.'

34

Have fun doing crafts and playing.
Maybe you'll come up with more design ideas!
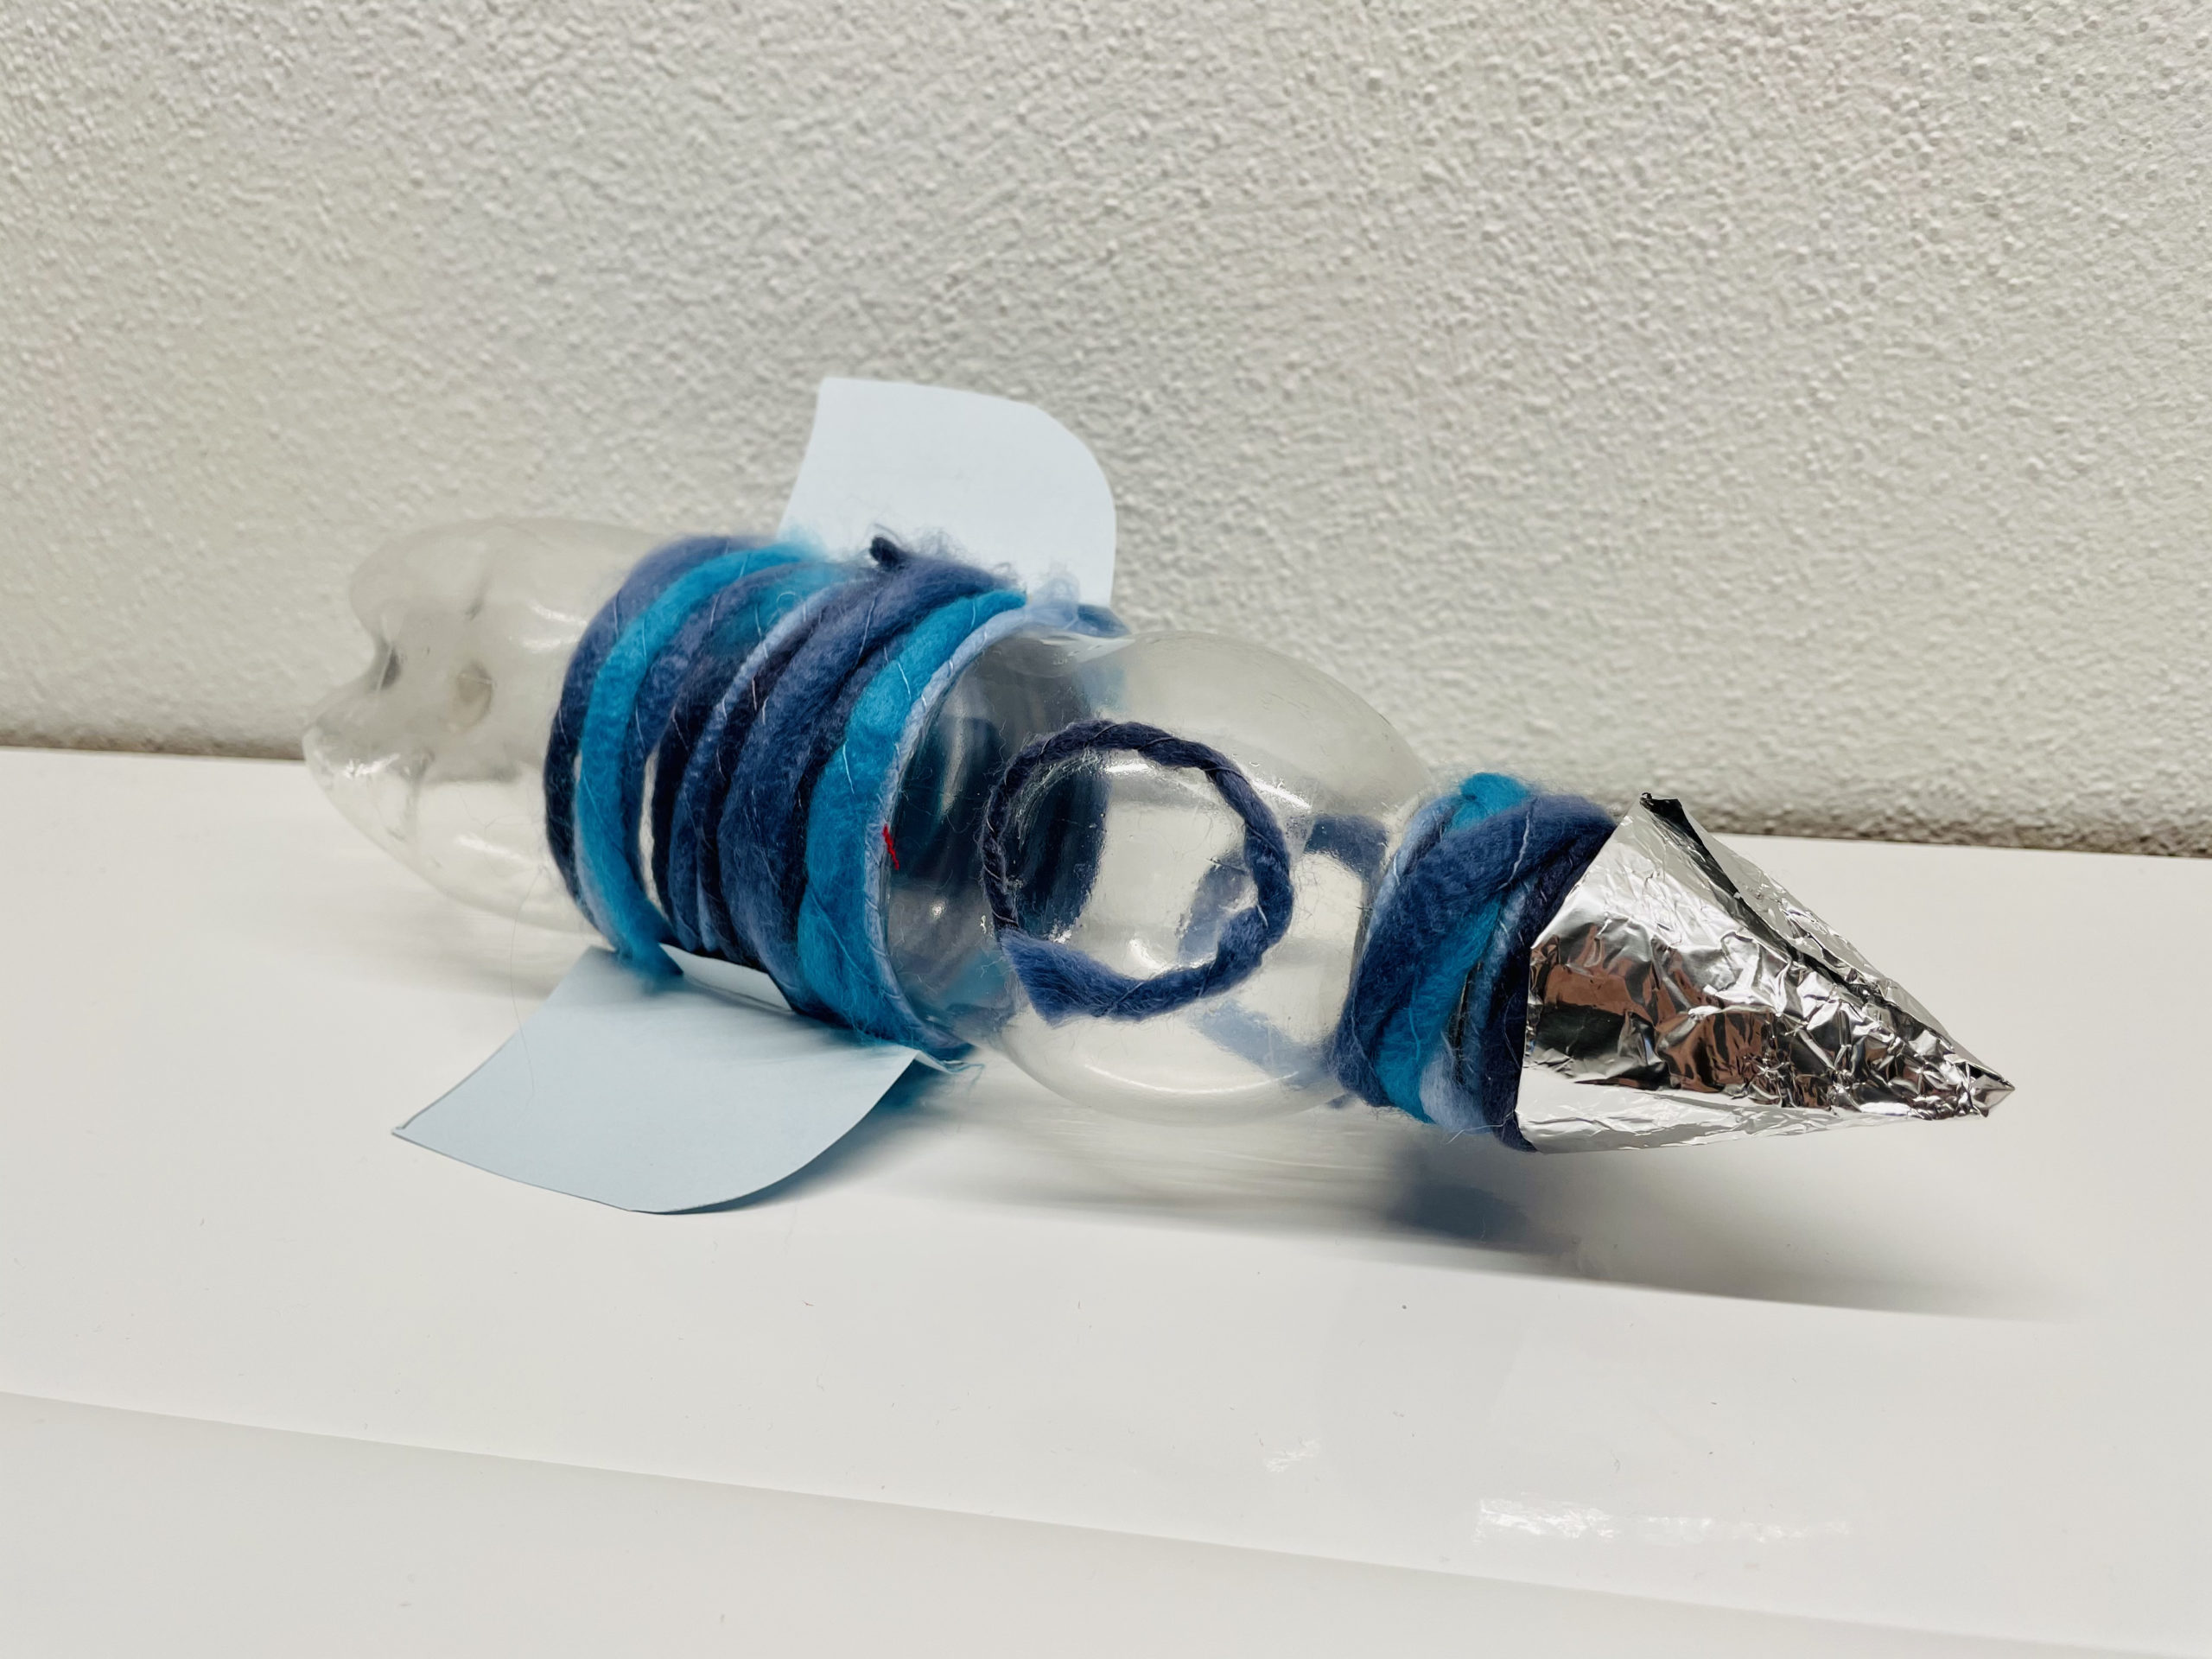
Bild zum Schritt 34 für das Bastel- und DIY-Abenteuer für Kinder: 'Viel Spaß beim Basteln und Spielen.   Vielleicht fallen...'

35

2. Bild zum Schritt 34 für das Bastel- und DIY-Abenteuer für Kinder: 'Viel Spaß beim Basteln und Spielen.   Vielleicht fallen...'

36

Have fun with your rocket!

Bottles – Rocket

Follow us on Facebook , Instagram and Pinterest
Don't miss any more adventures: Our bottle mail

One Comment

  1. 1.9 thousand times & ()

    Hello, I made this rocket.
    That worked out really well and looks great.?

Leave a Reply

Your email address will not be published.

The maximum upload file size: 5 MB. You can upload: image, document. Drop file here