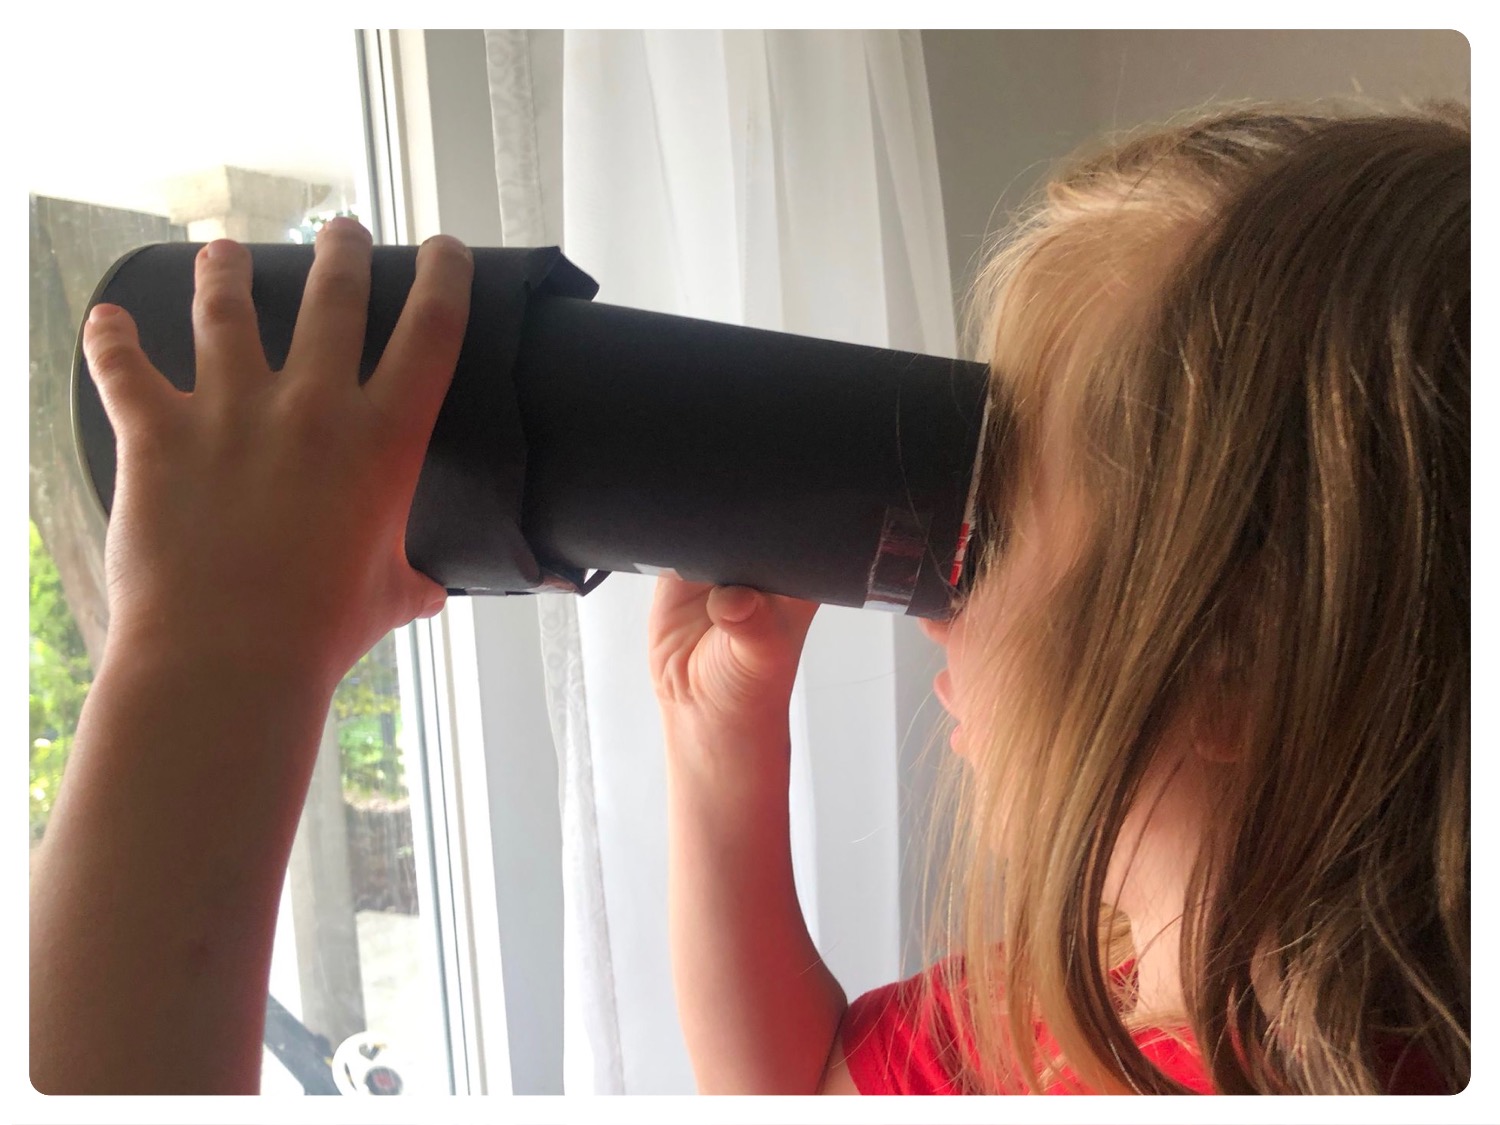
Two cans (chip can and a can of fruit can) create a great telescope with a little effort. As you can see here.
Media Education for Kindergarten and Hort

Relief in everyday life, targeted promotion of individual children, independent learning and - without any pre-knowledge already usable by the youngest!
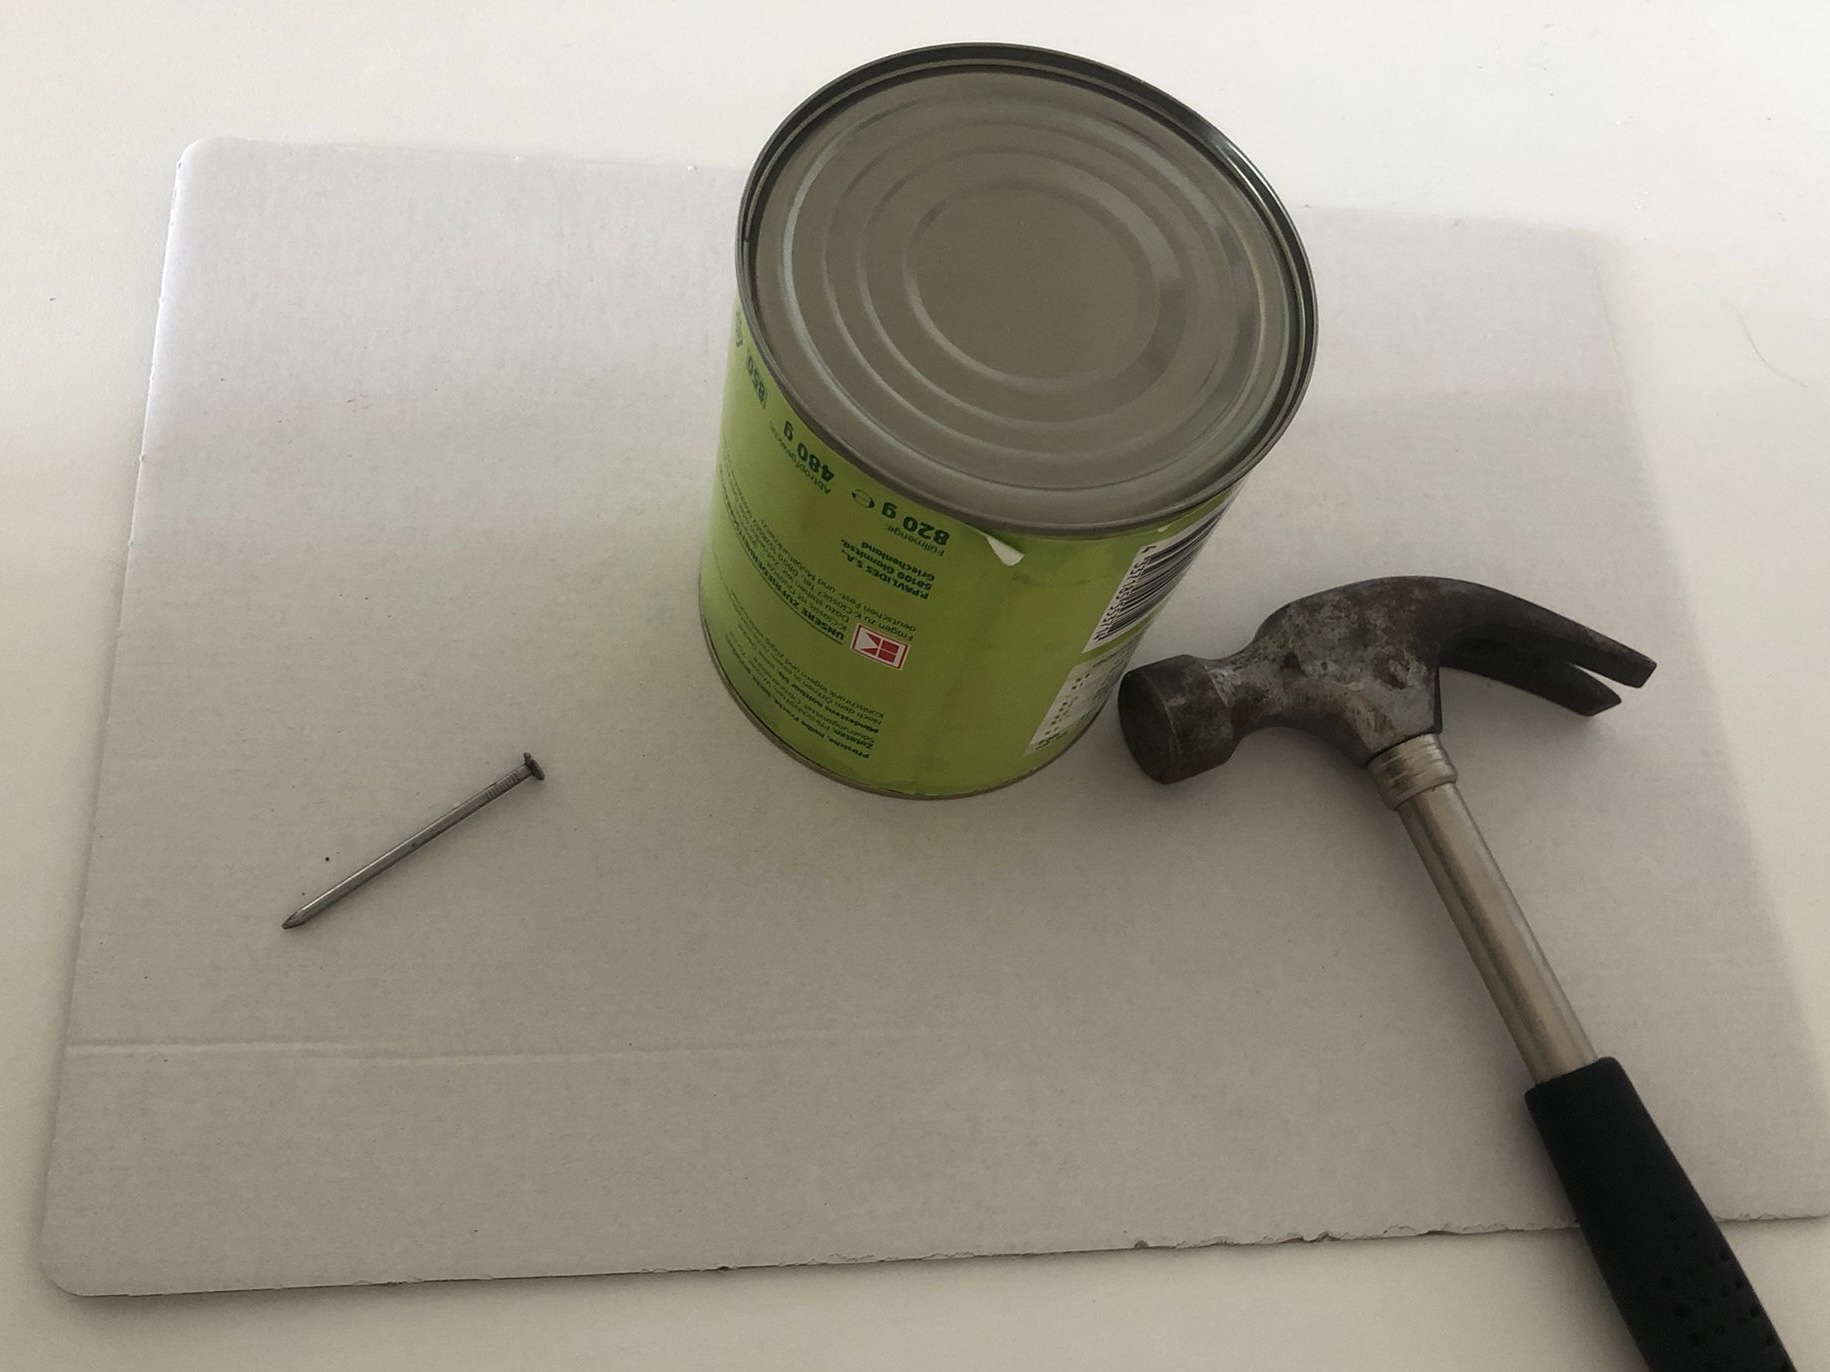
Get it ready.

Place the board on the table and put the tin can upside down (with the floor up) on the table. First you need hammer and nail.
Put the nail in the middle of the can, hold it firmly with two fingers. Take the hammer in the other hand.
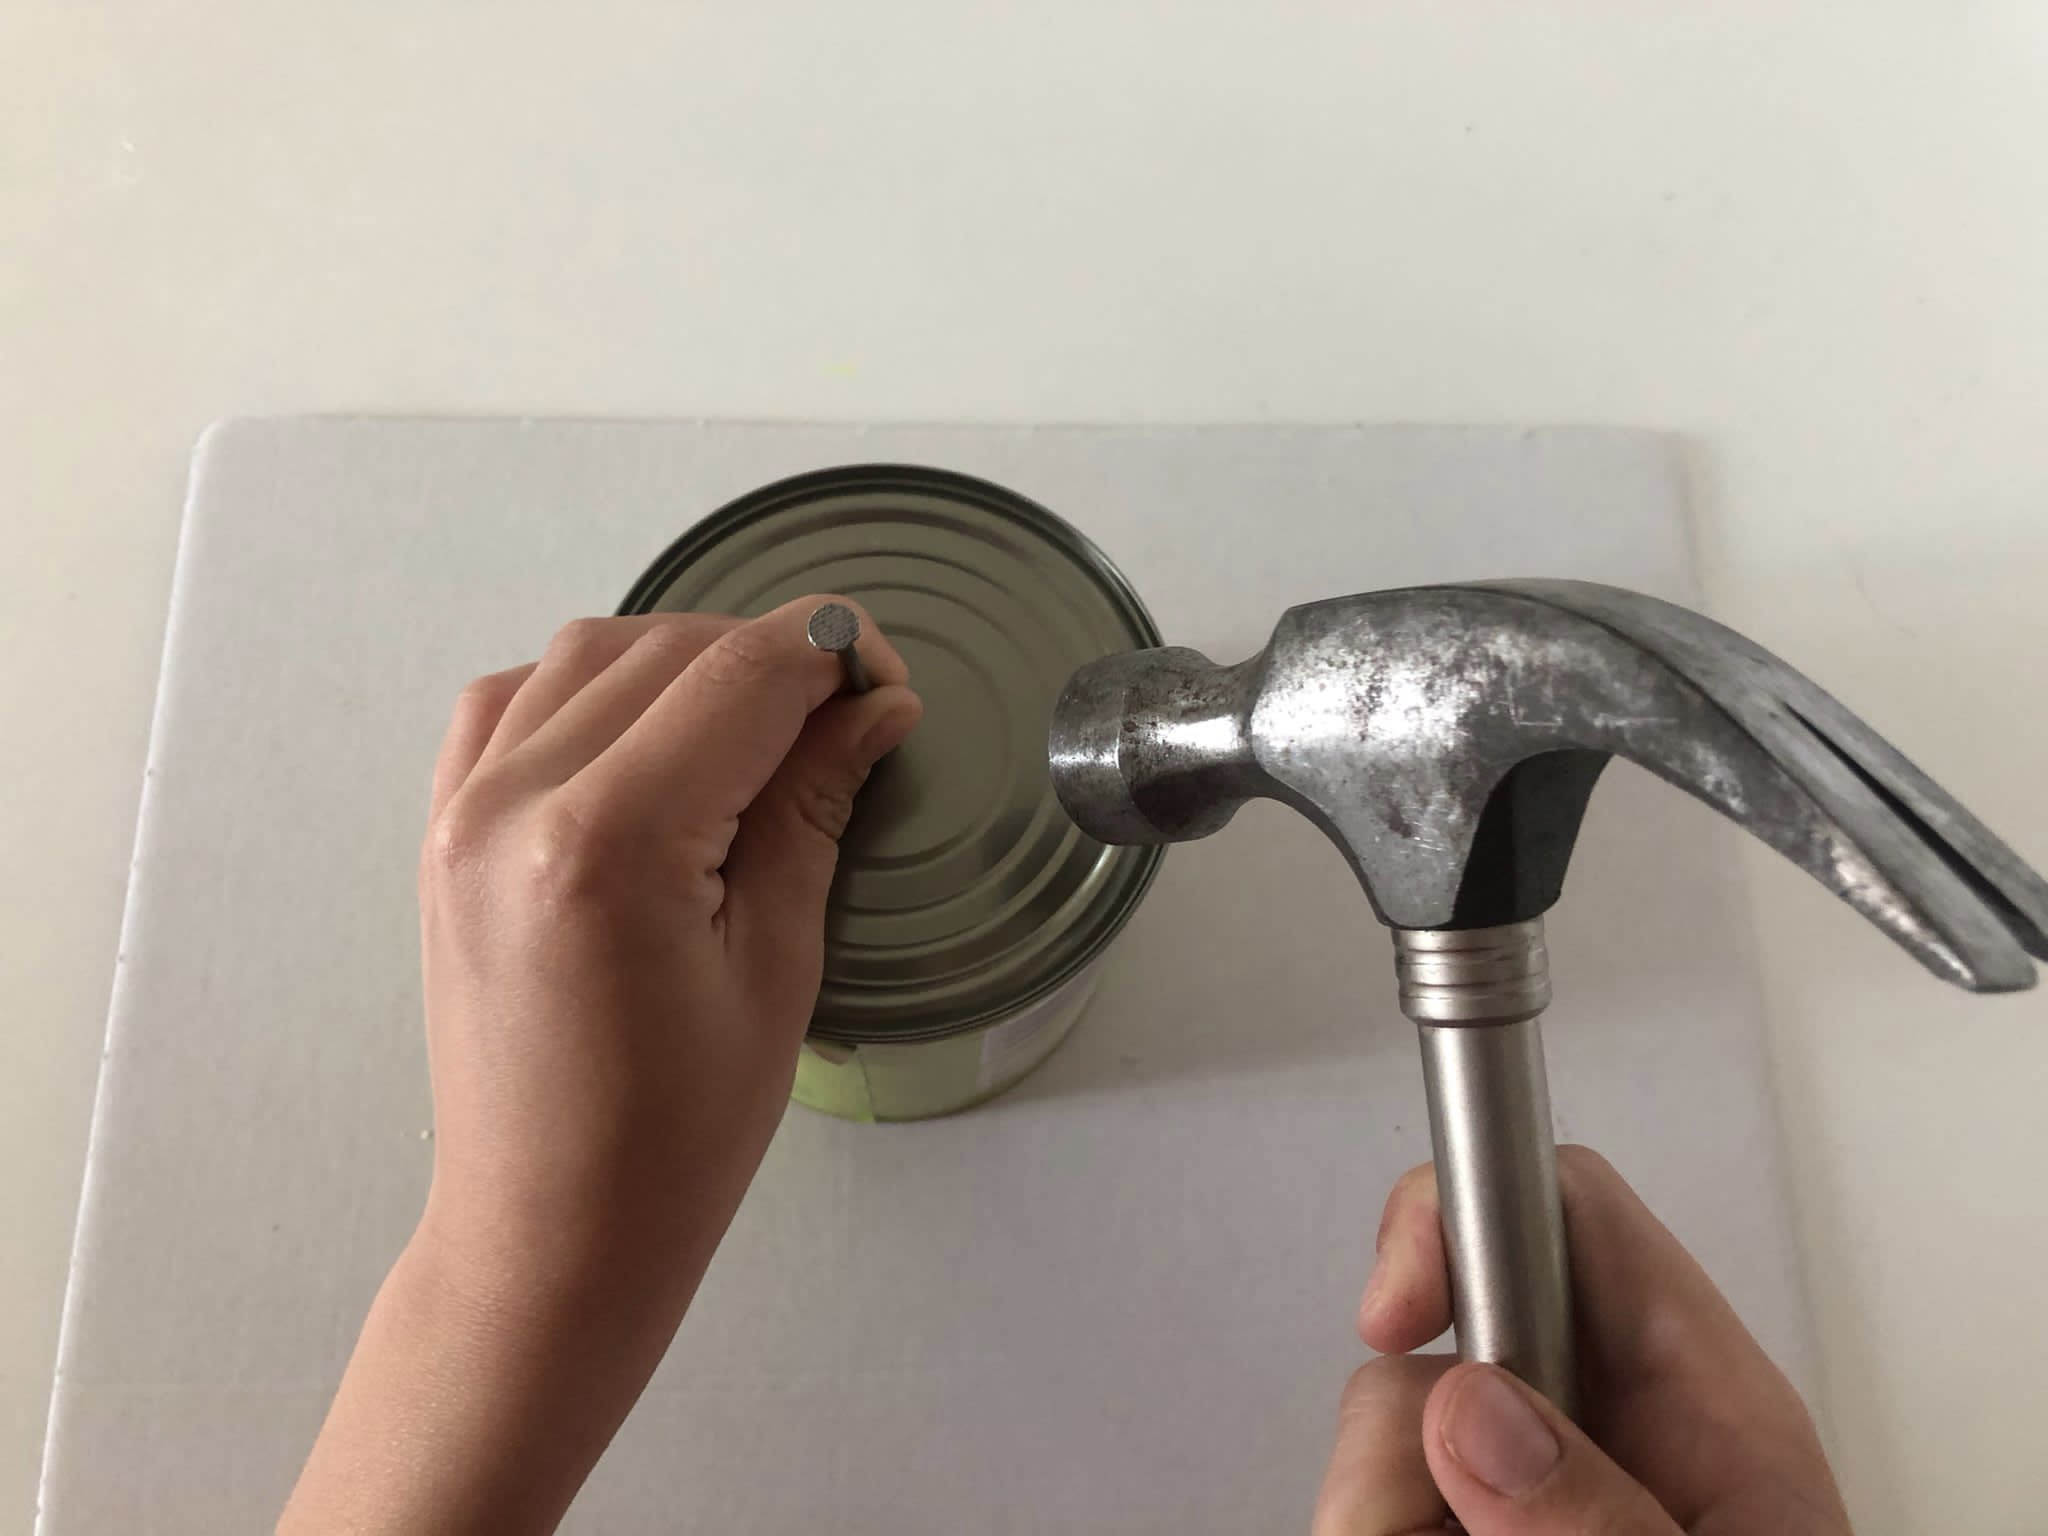
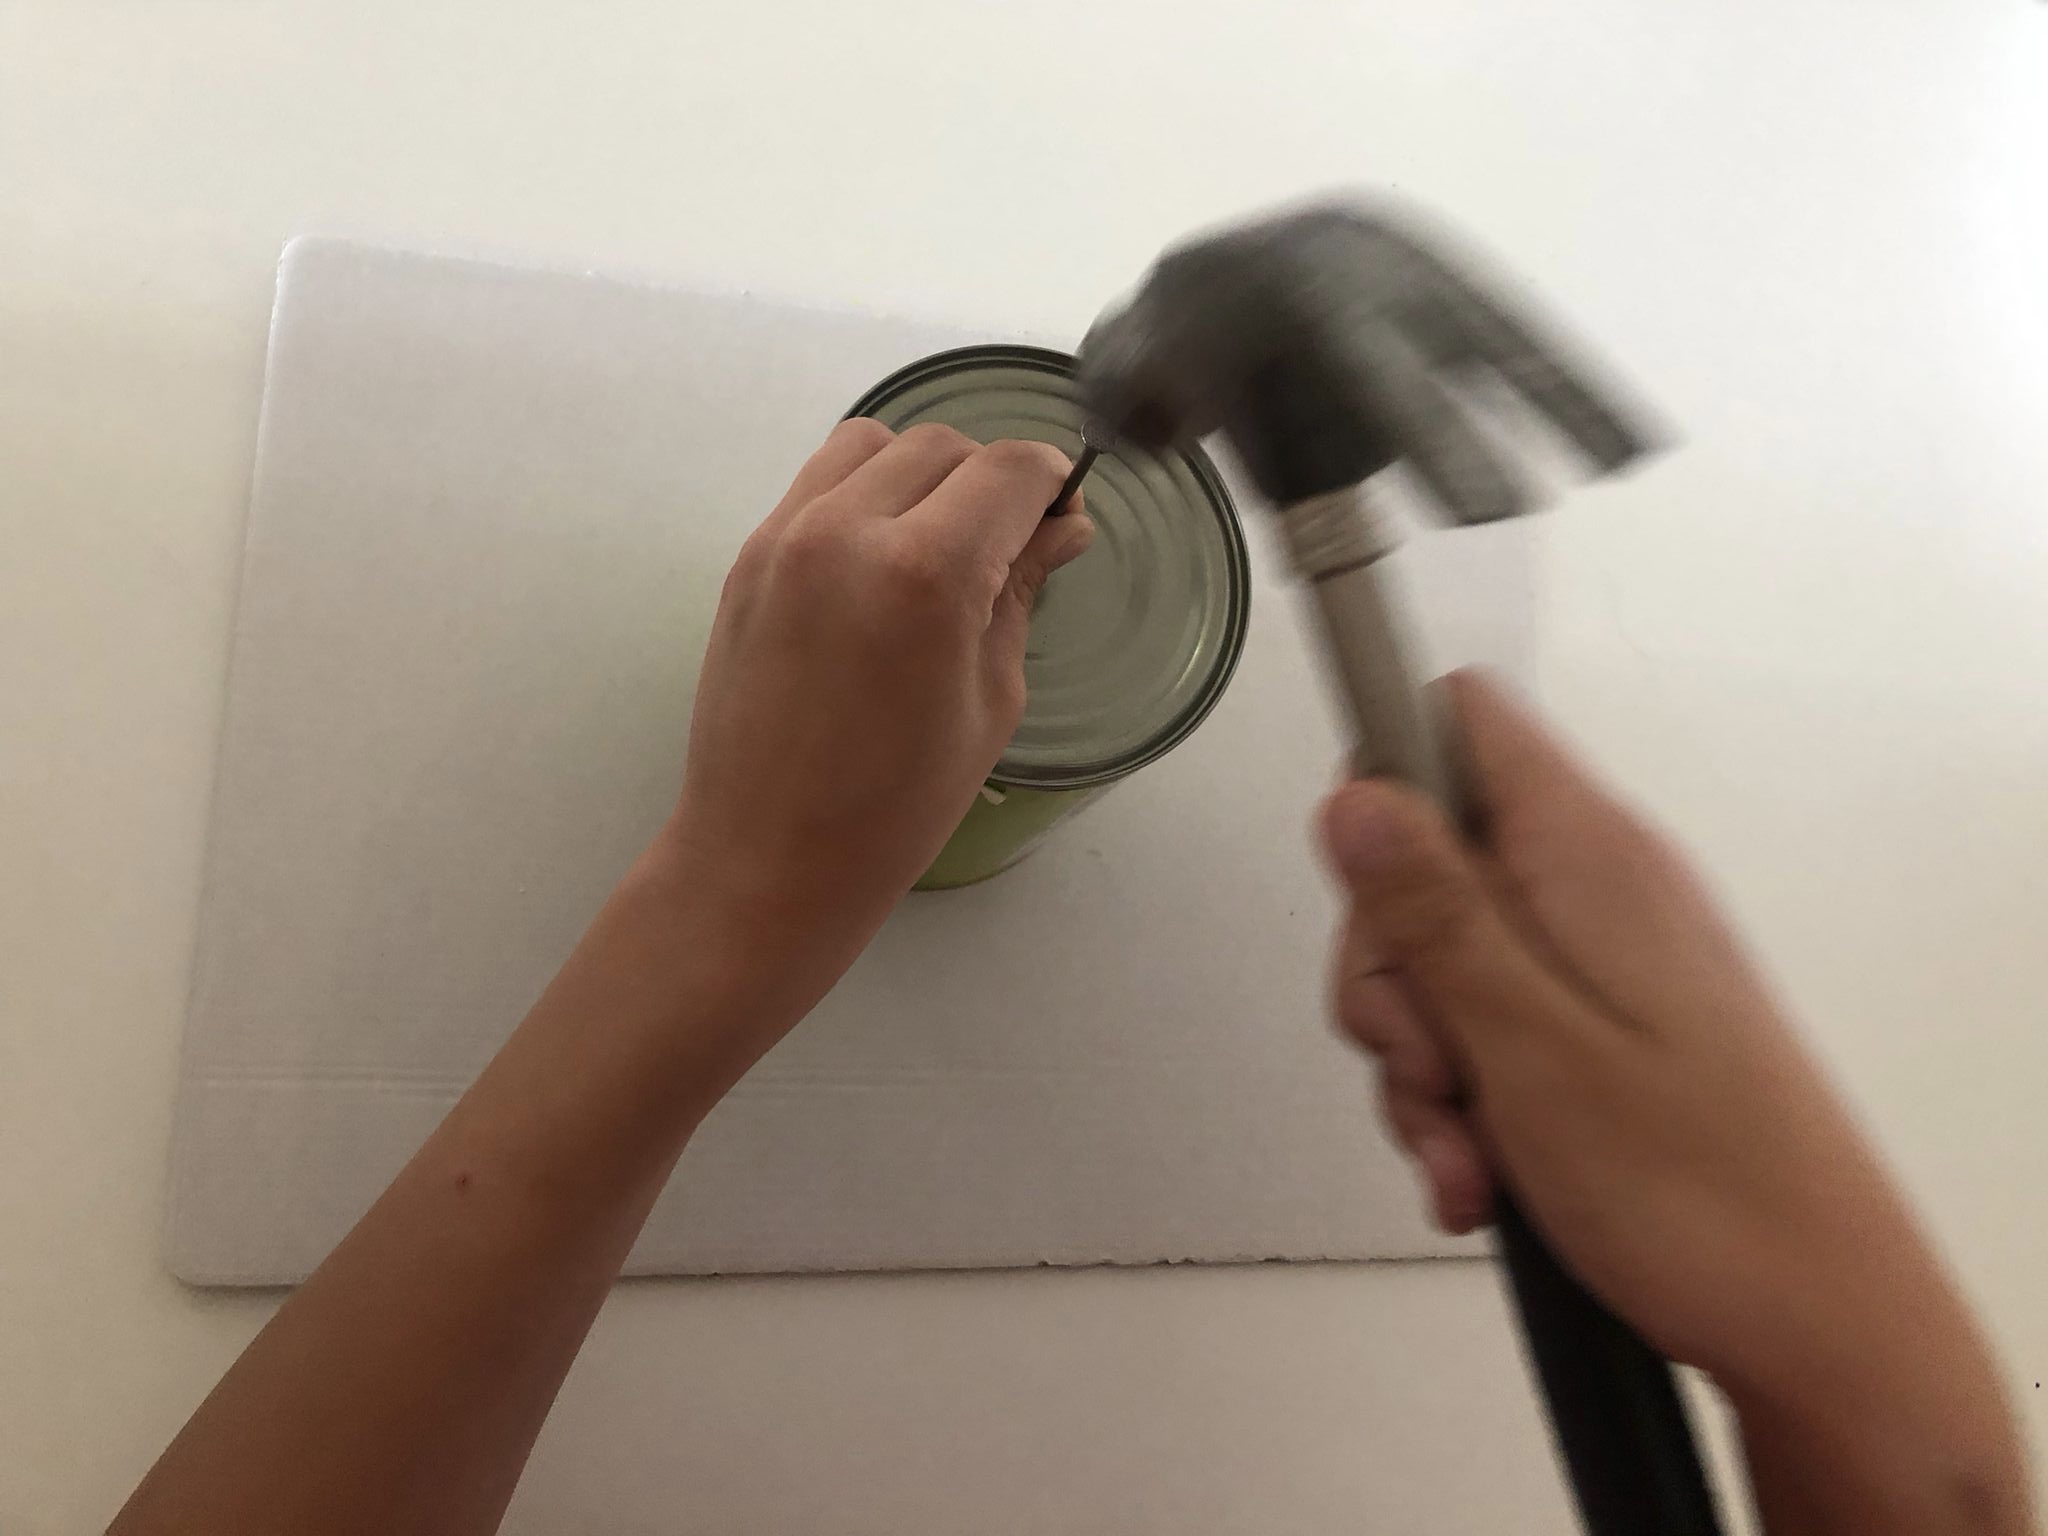
Now you tap the nail carefully with the hammer until it sticks something in the can. Then tap the nail a piece into the can bottom (not quite!)
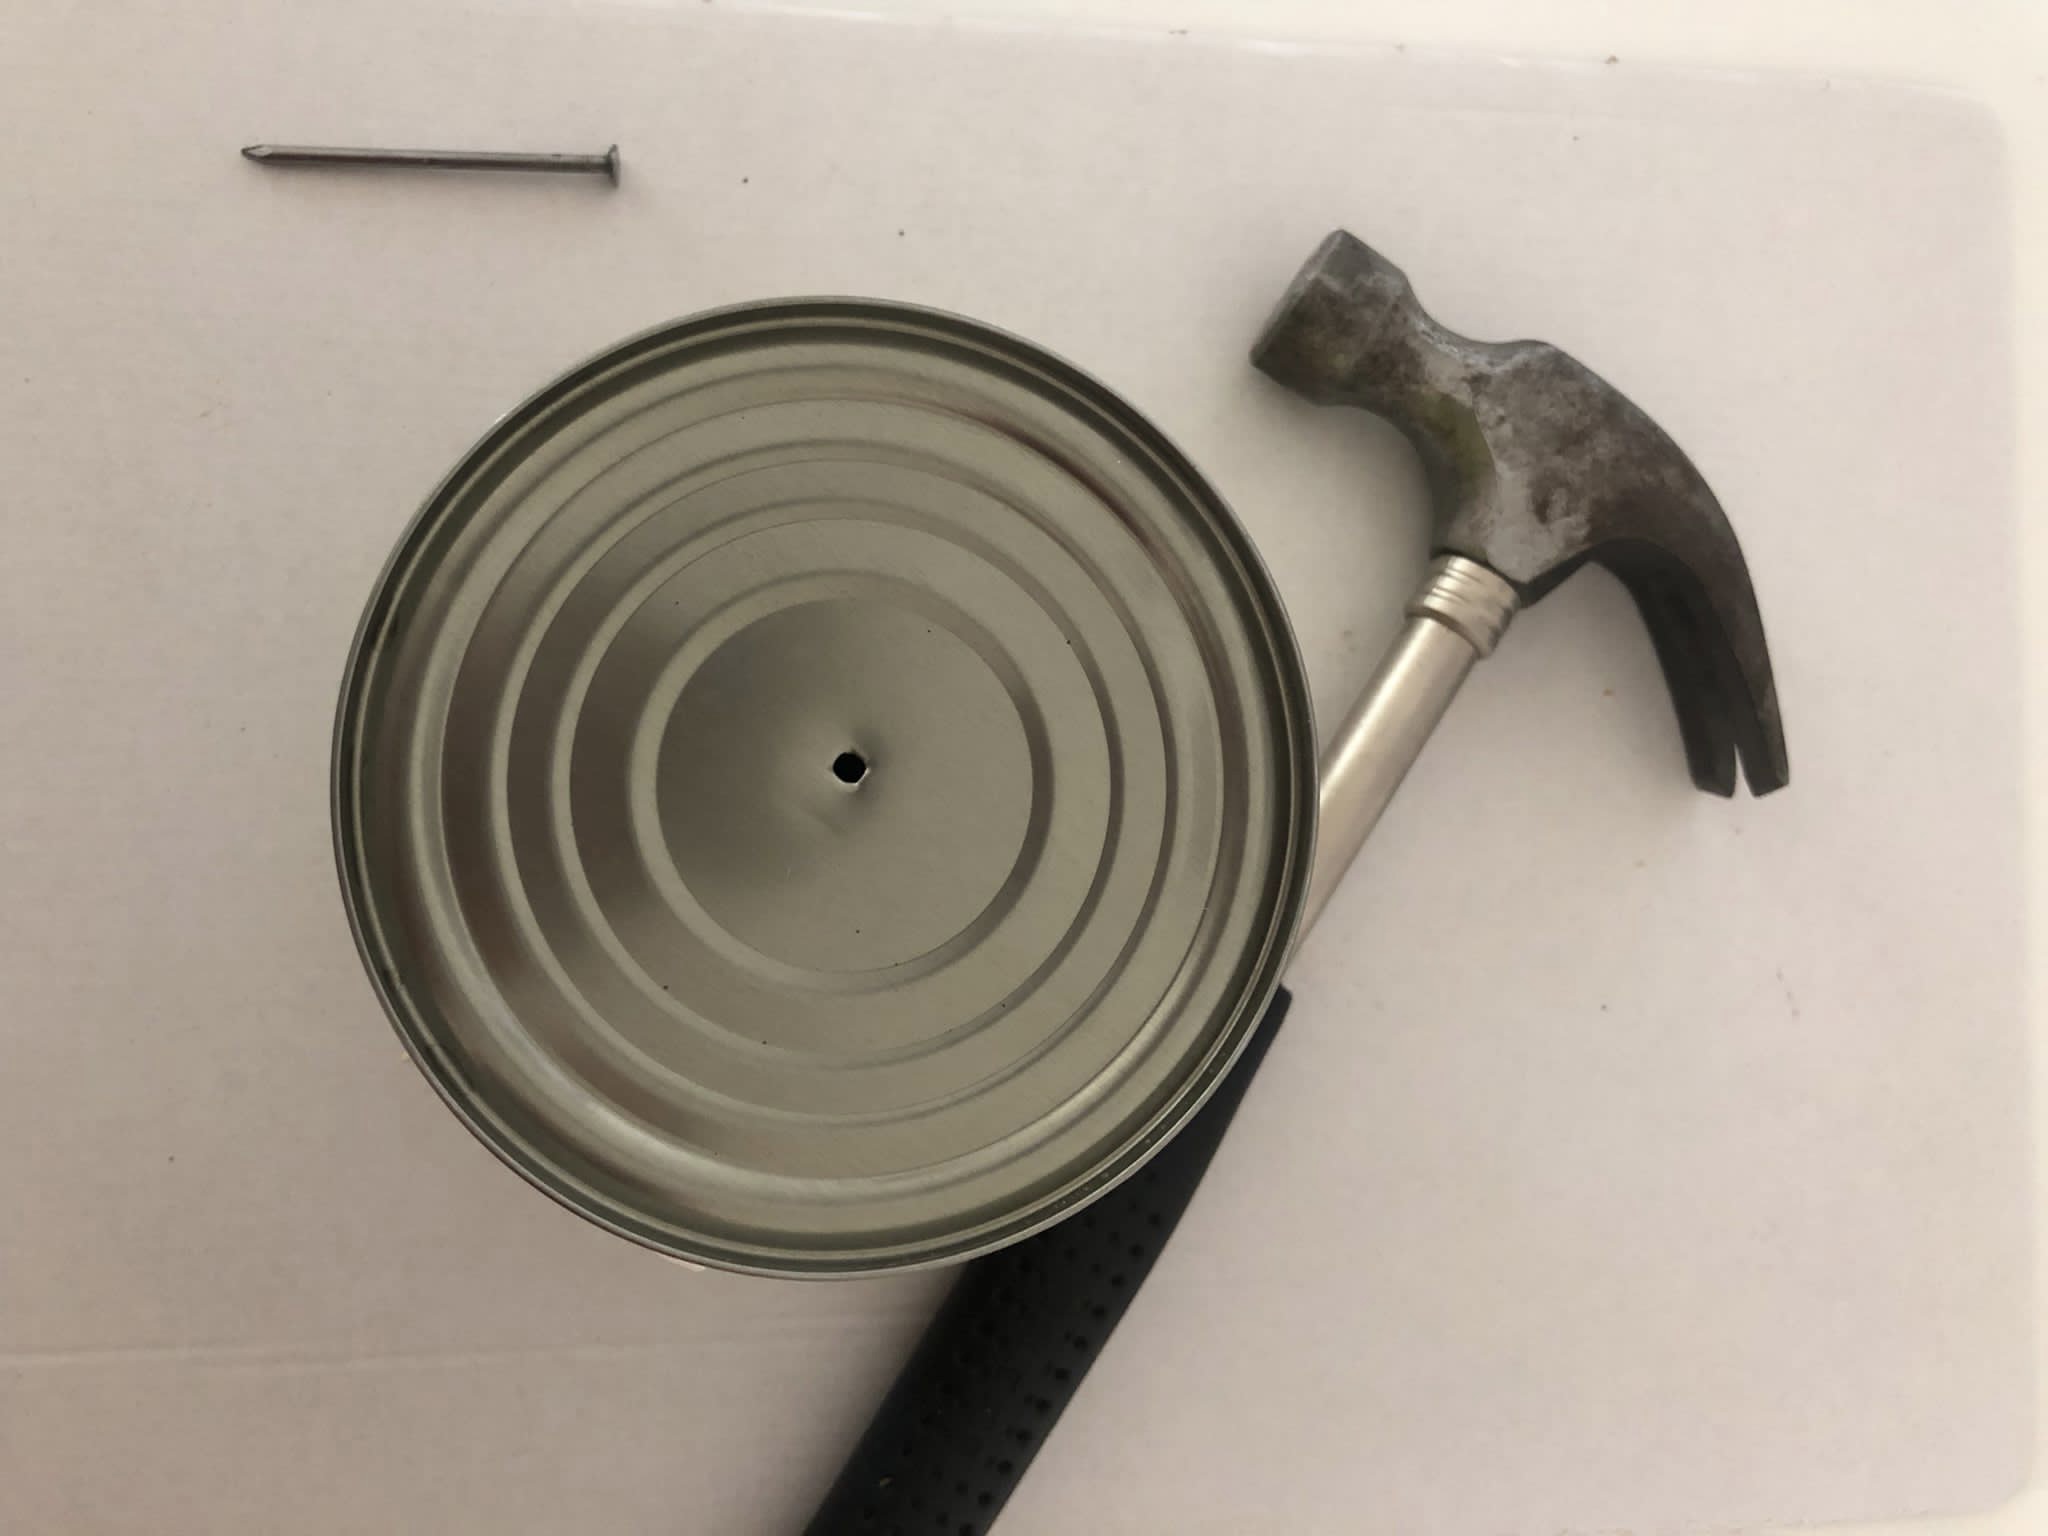
Then you pull the nail out again.
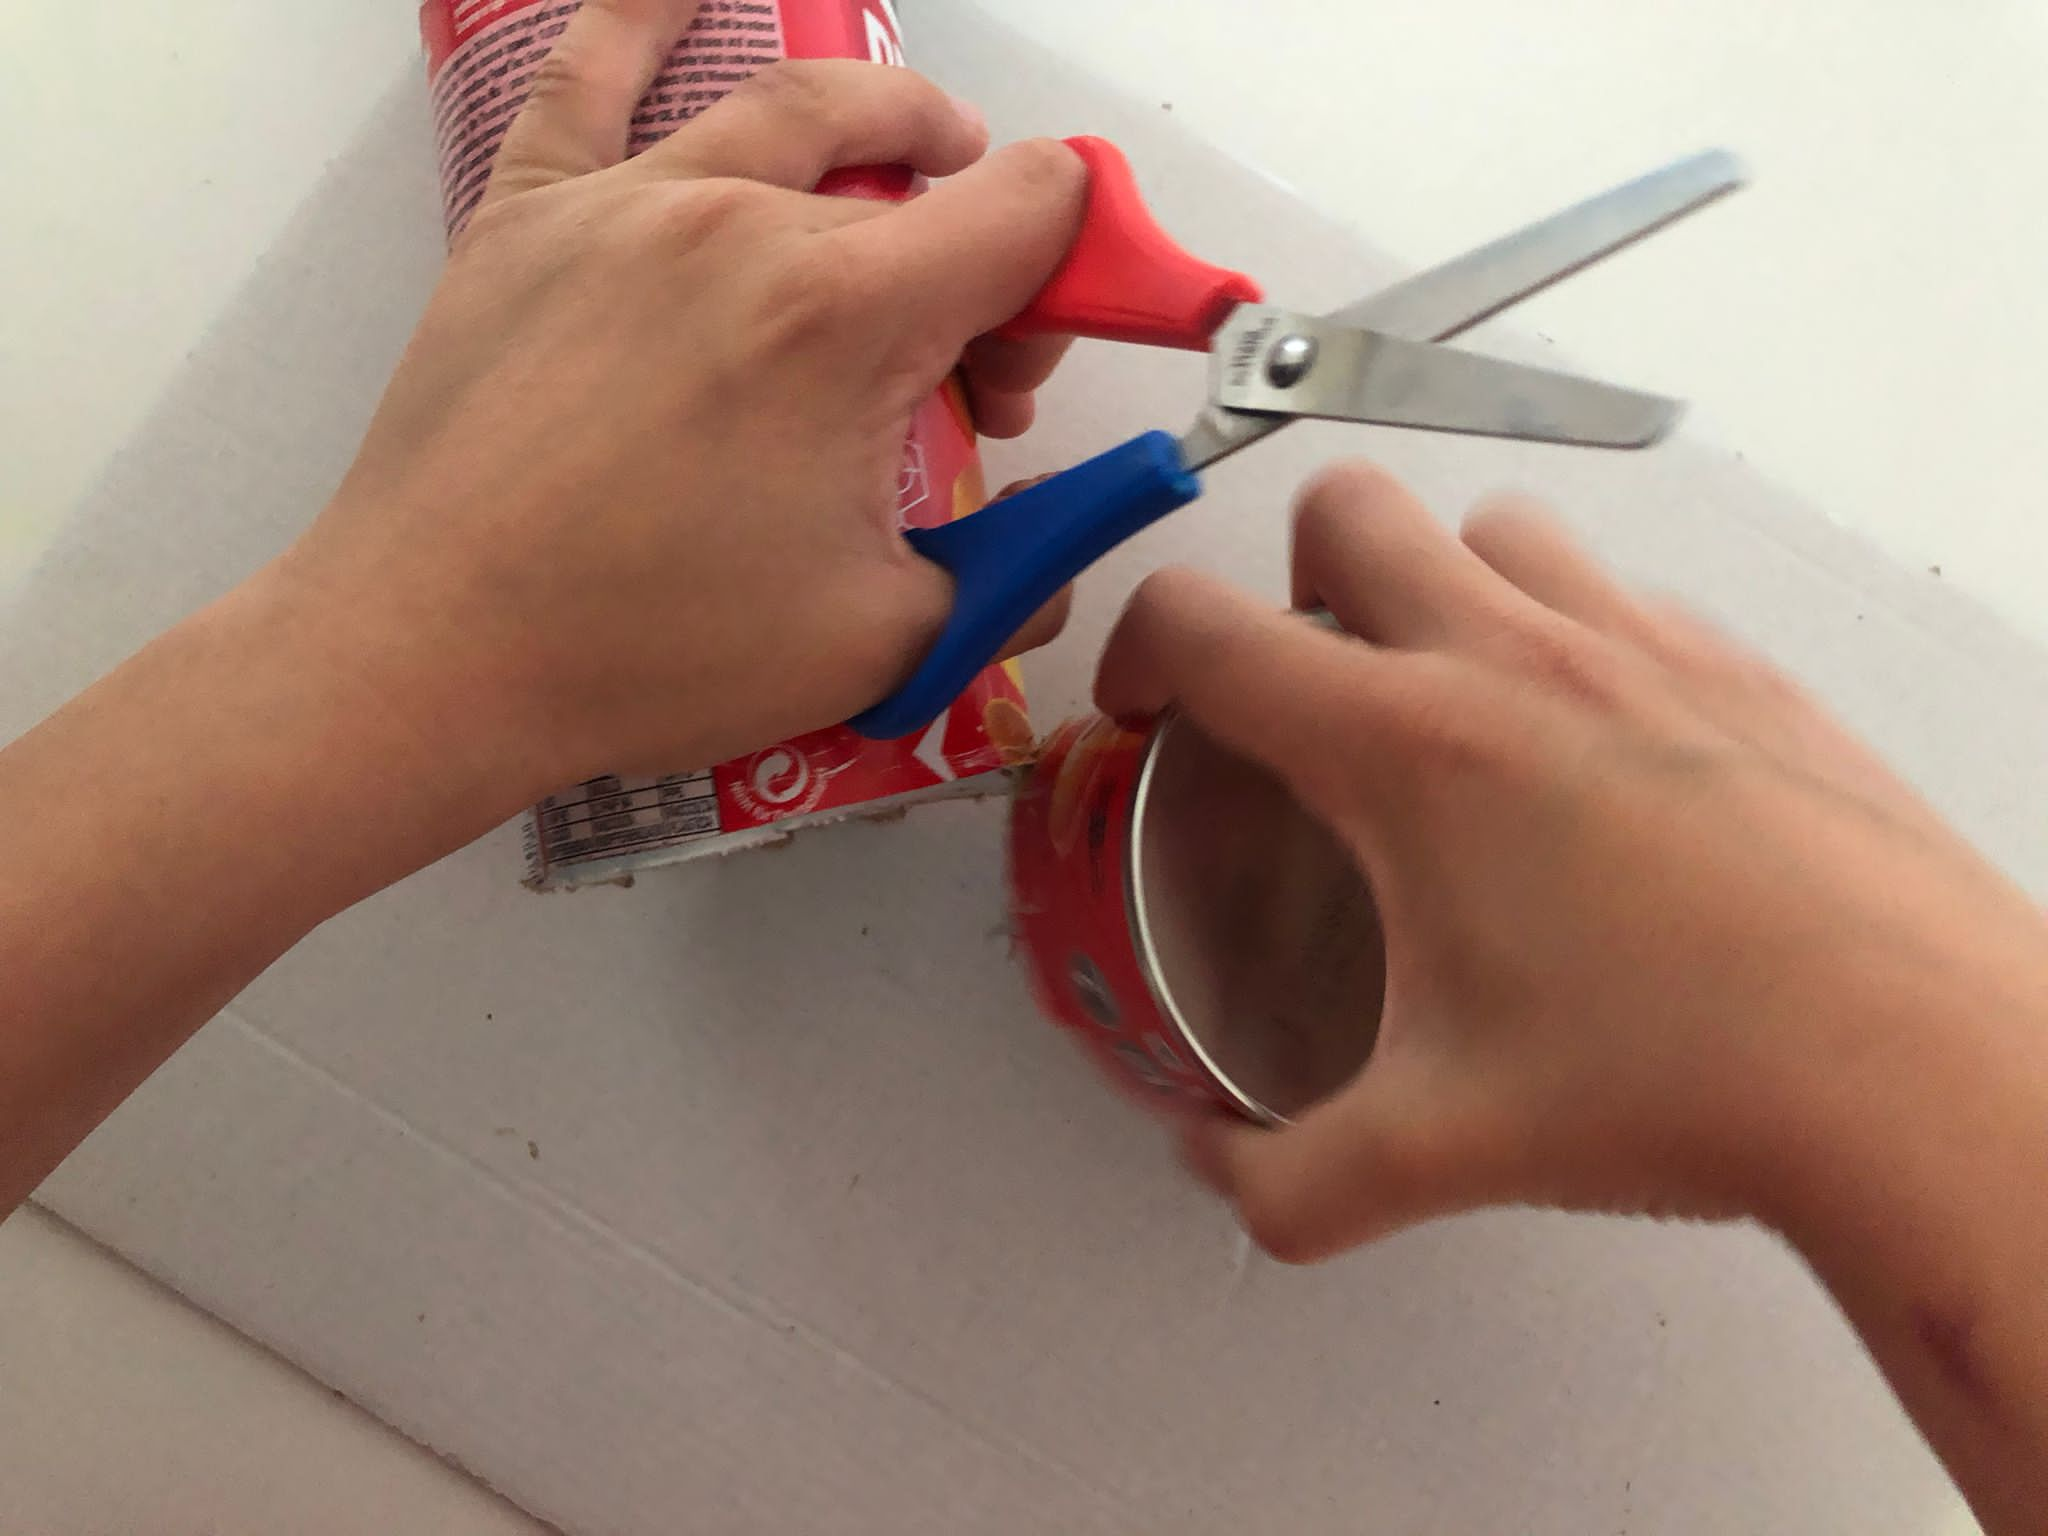
Now you need the chip can. First take off the lid. Then hold the can on the ground and cut off a piece from the bottom of the can. First put a hole in the can with the nail so that you can insert the scissors.
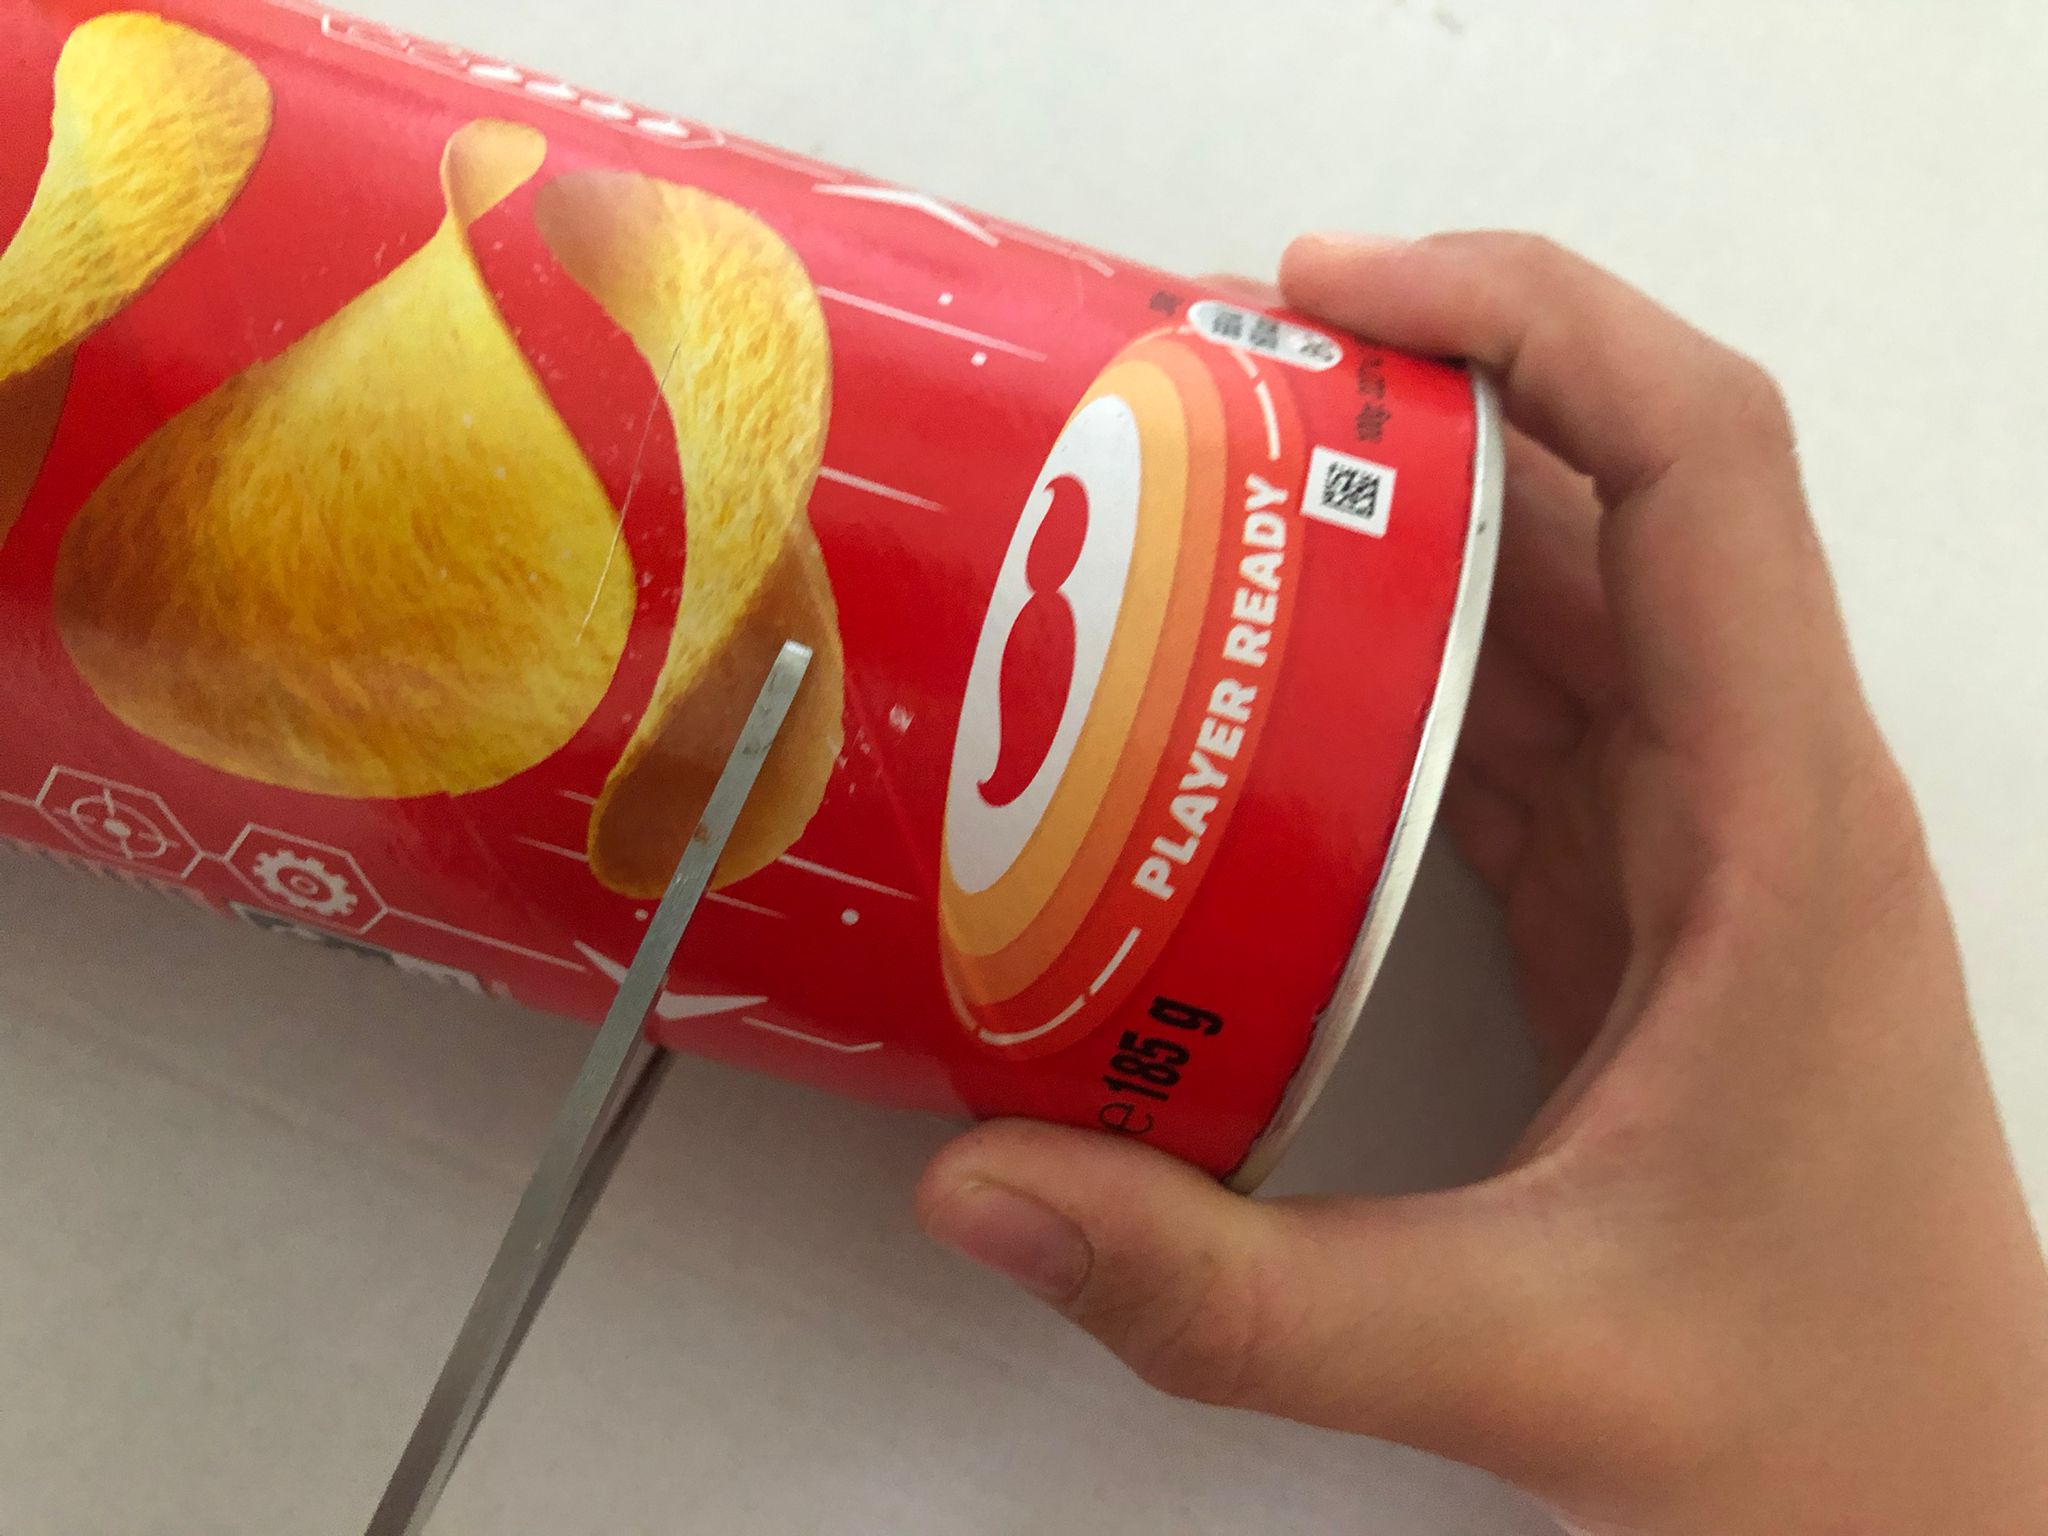
Cut off the floor completely, you don't need it anymore.
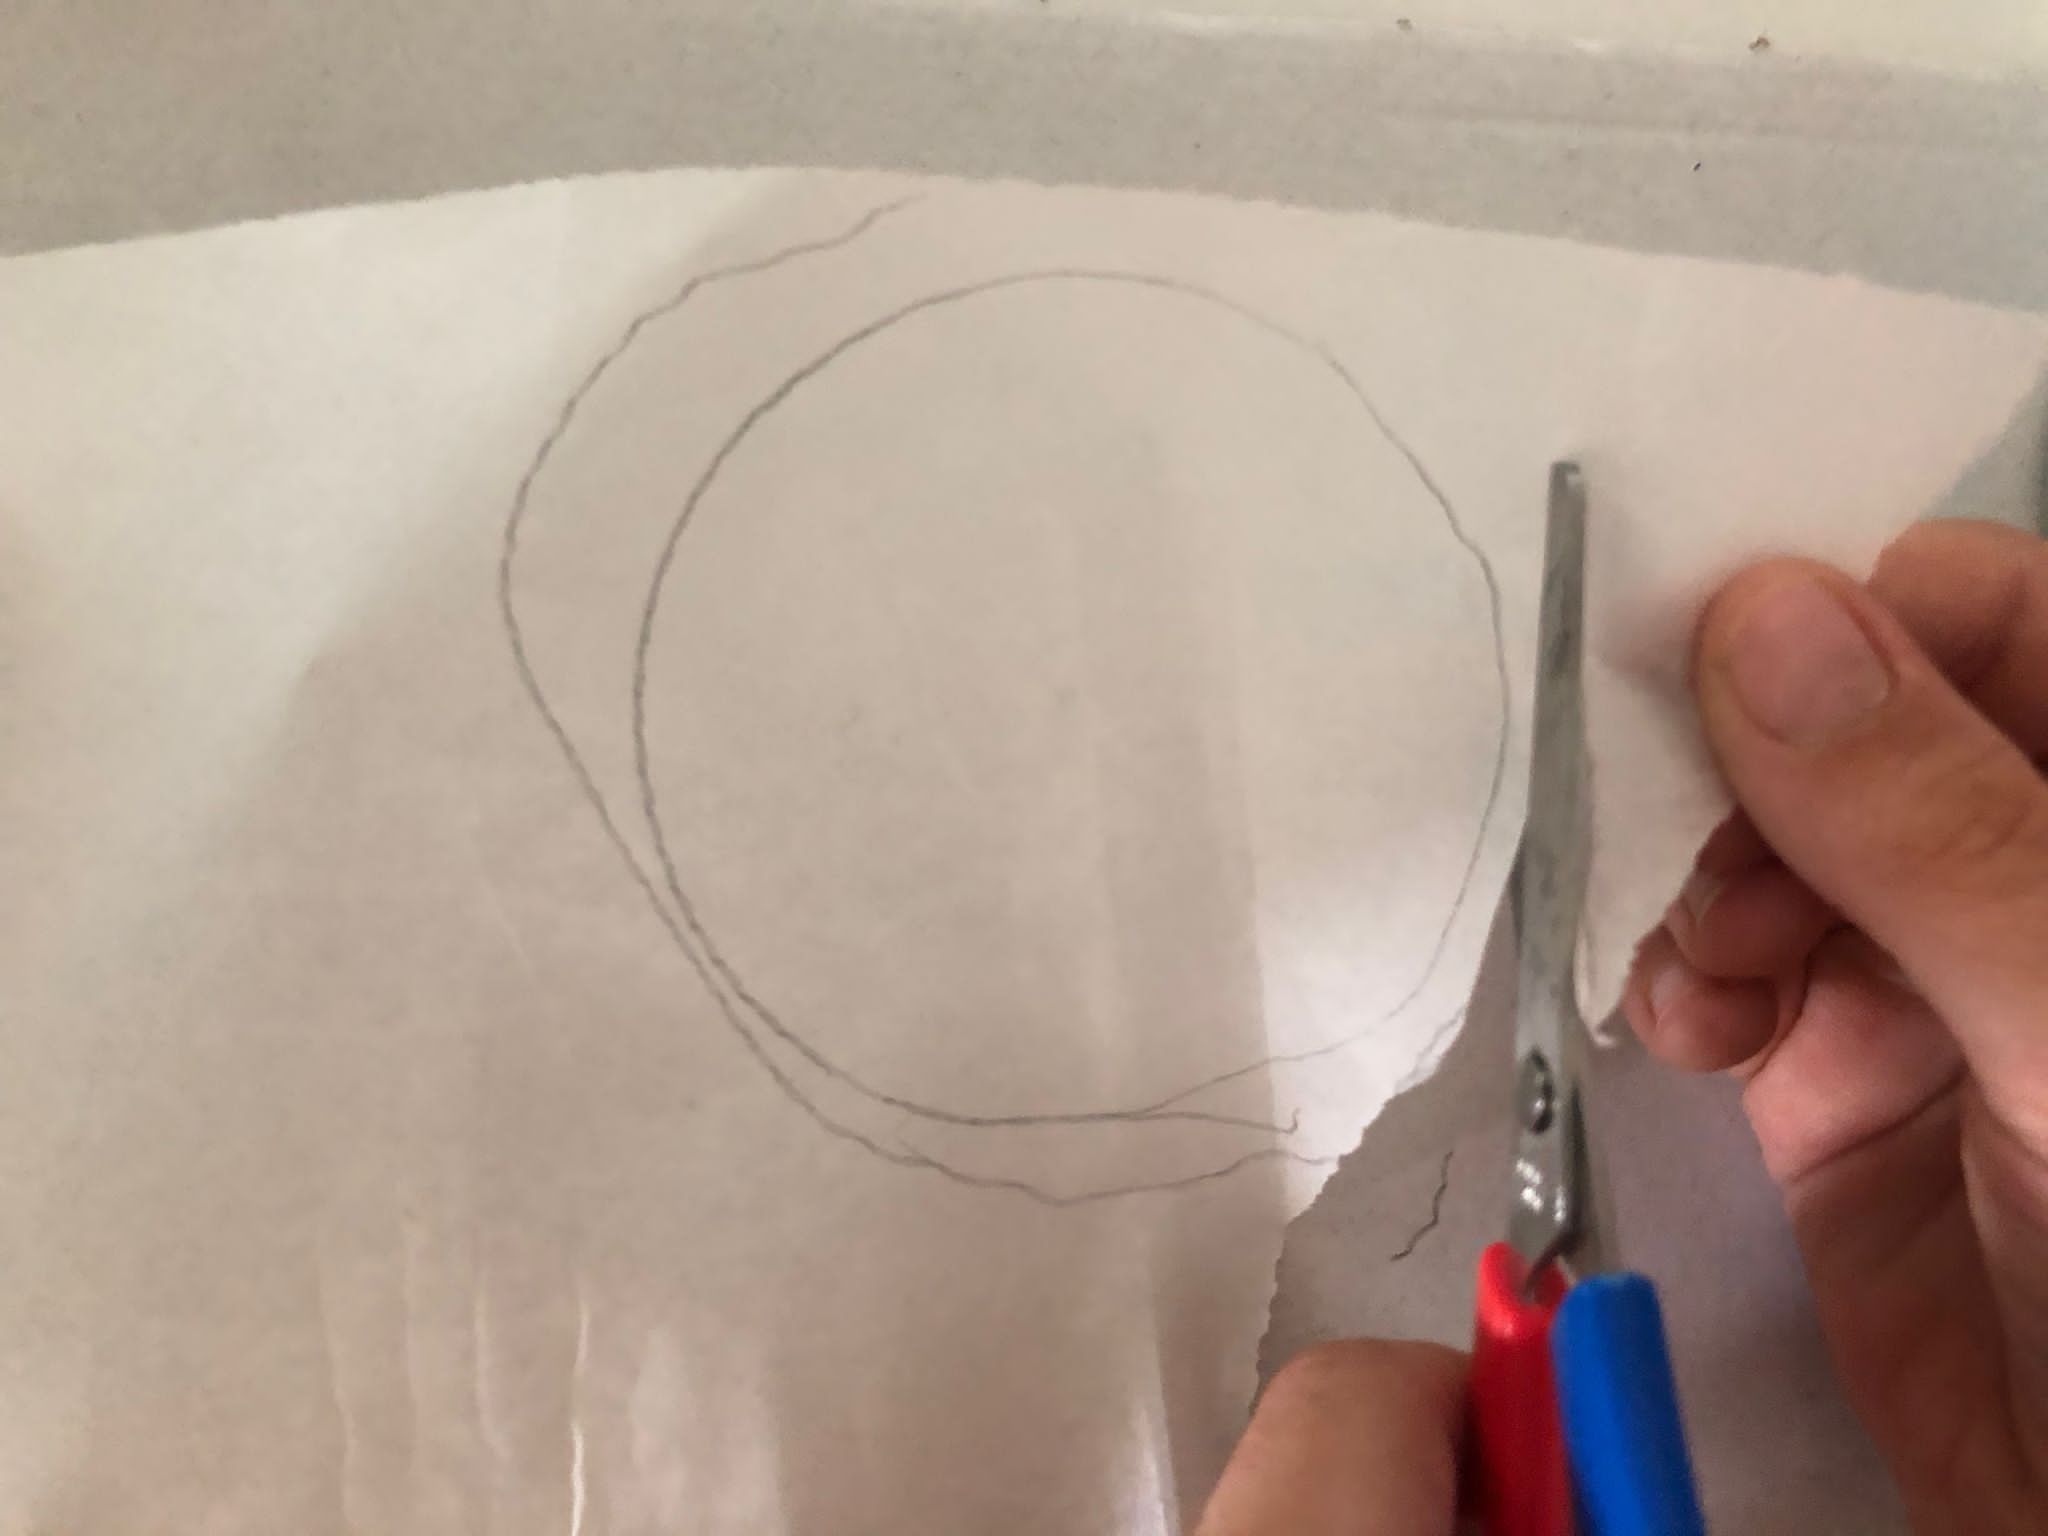
Place the chip can on the transparent paper and paint the can with a pencil.

Make a second circle around the painted line, which is a finger thicker.

Next, cut out the outer line.
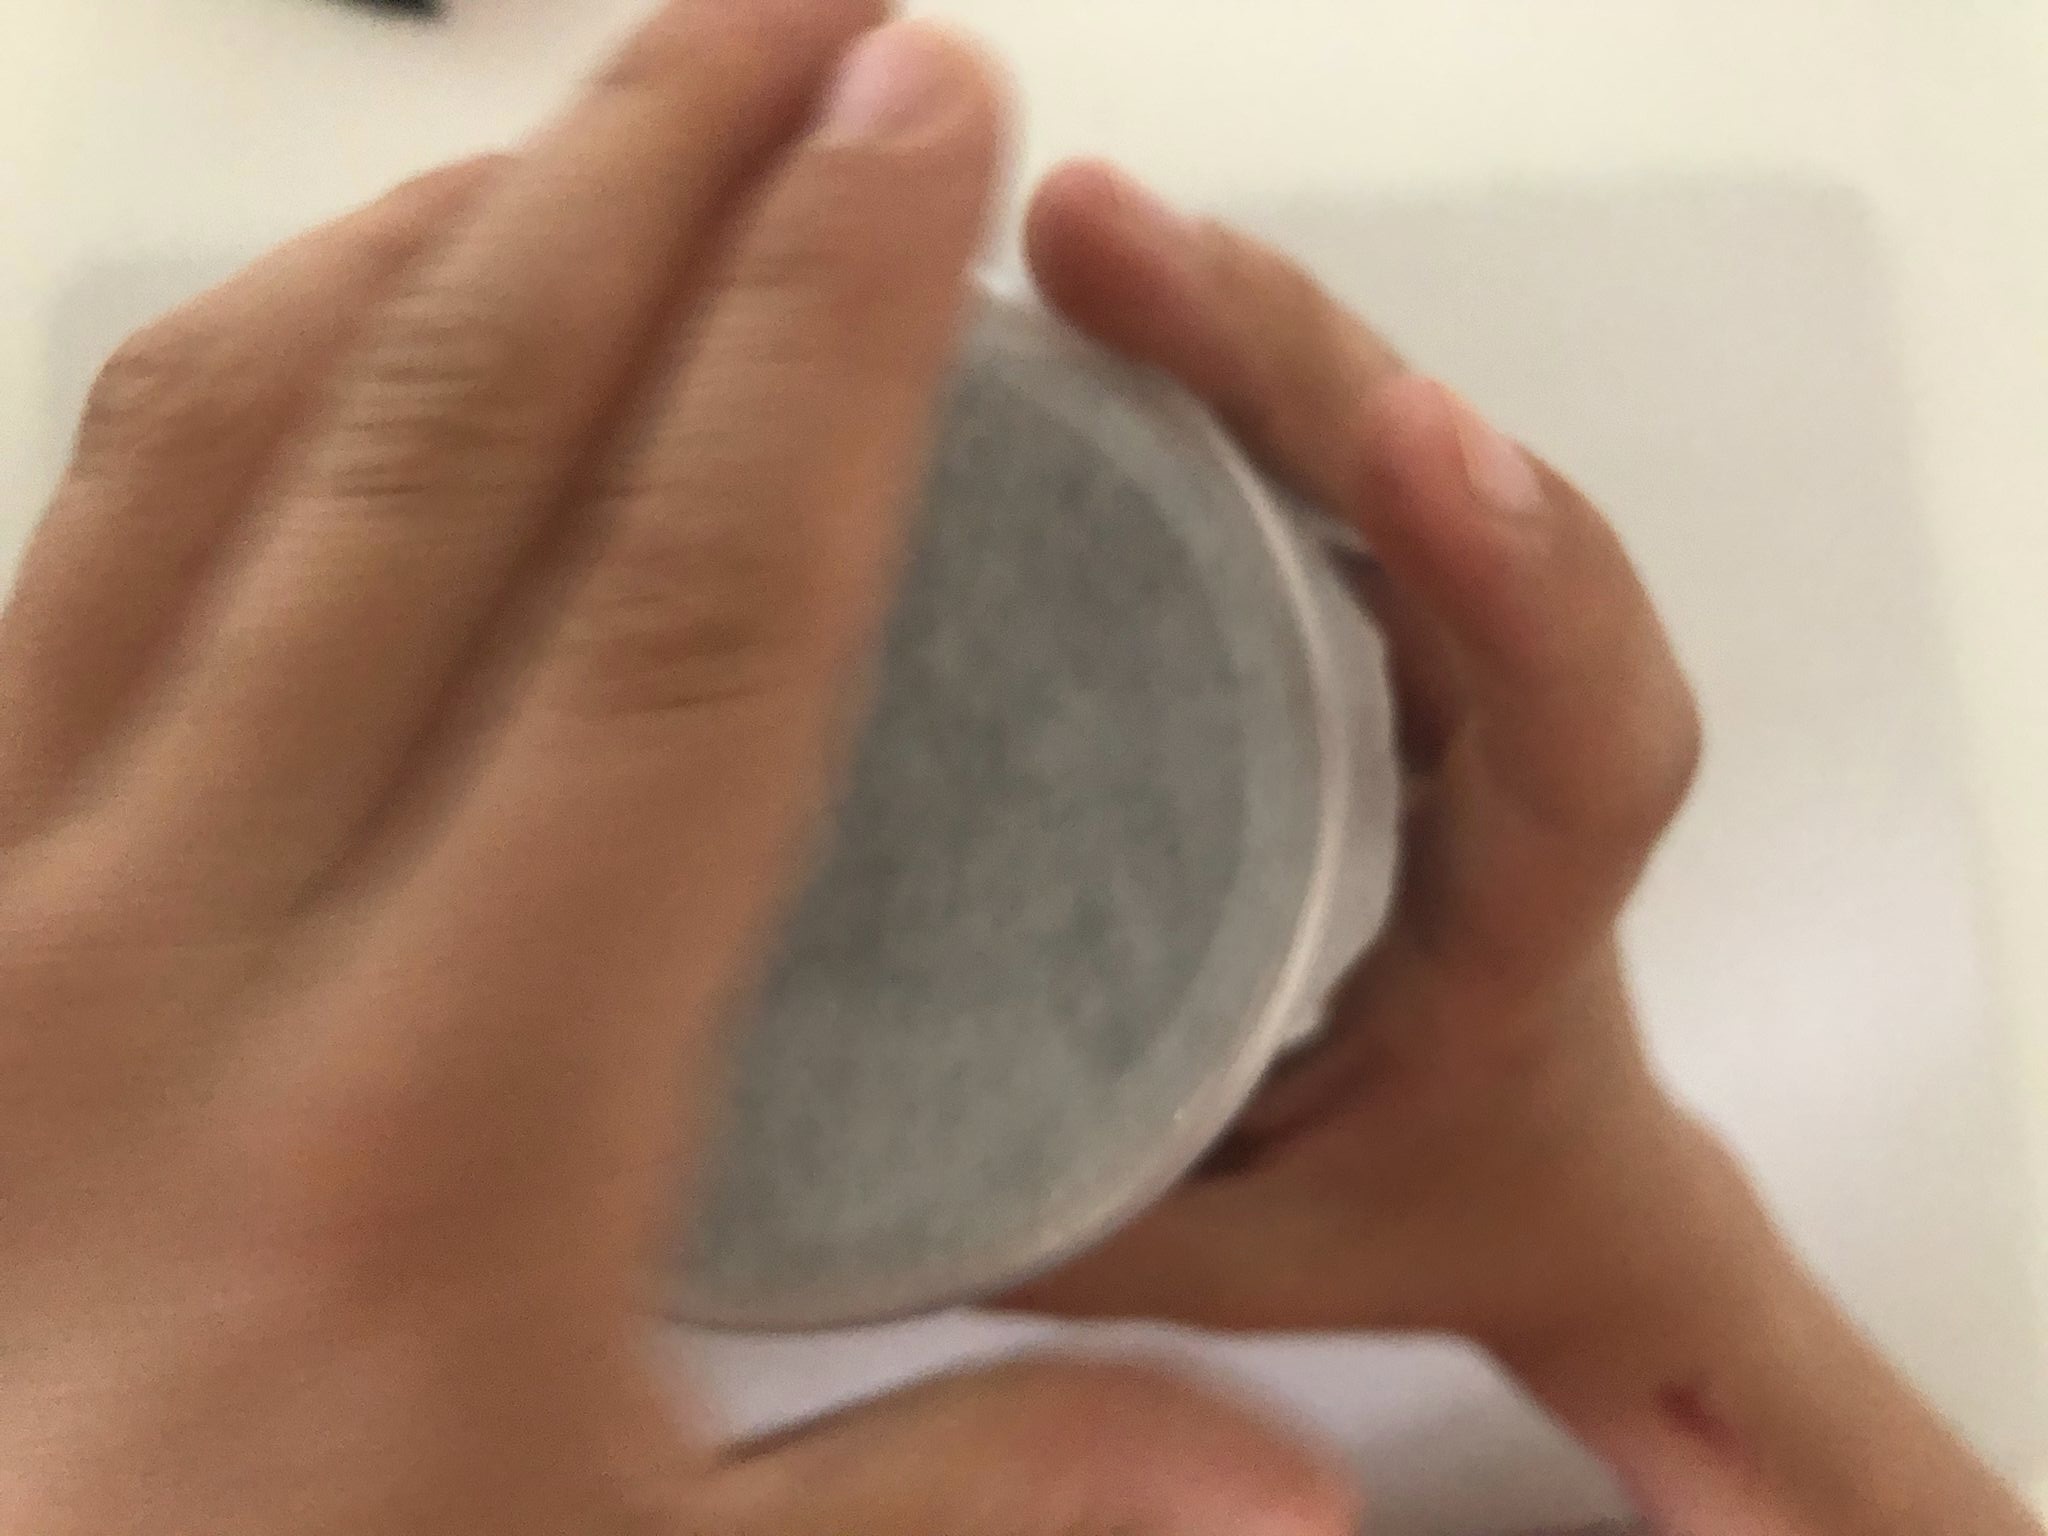
Place the cut-out transparent paper or butterbread paper circle in the chip can lid. Press it firmly in to adapt to the lid.

Put the lid back on the chip can.
Next you take the black clay paper and roll the can with it. Fair roughly the paper, so that it reaches around the can and overlaps a bit.

Next thing you know, you cut off the overhanging paper.

Prepare several short pieces of adhesive tape, maybe glue it to the edge of the table with a small piece. So you can take one by one and still hold the can well.
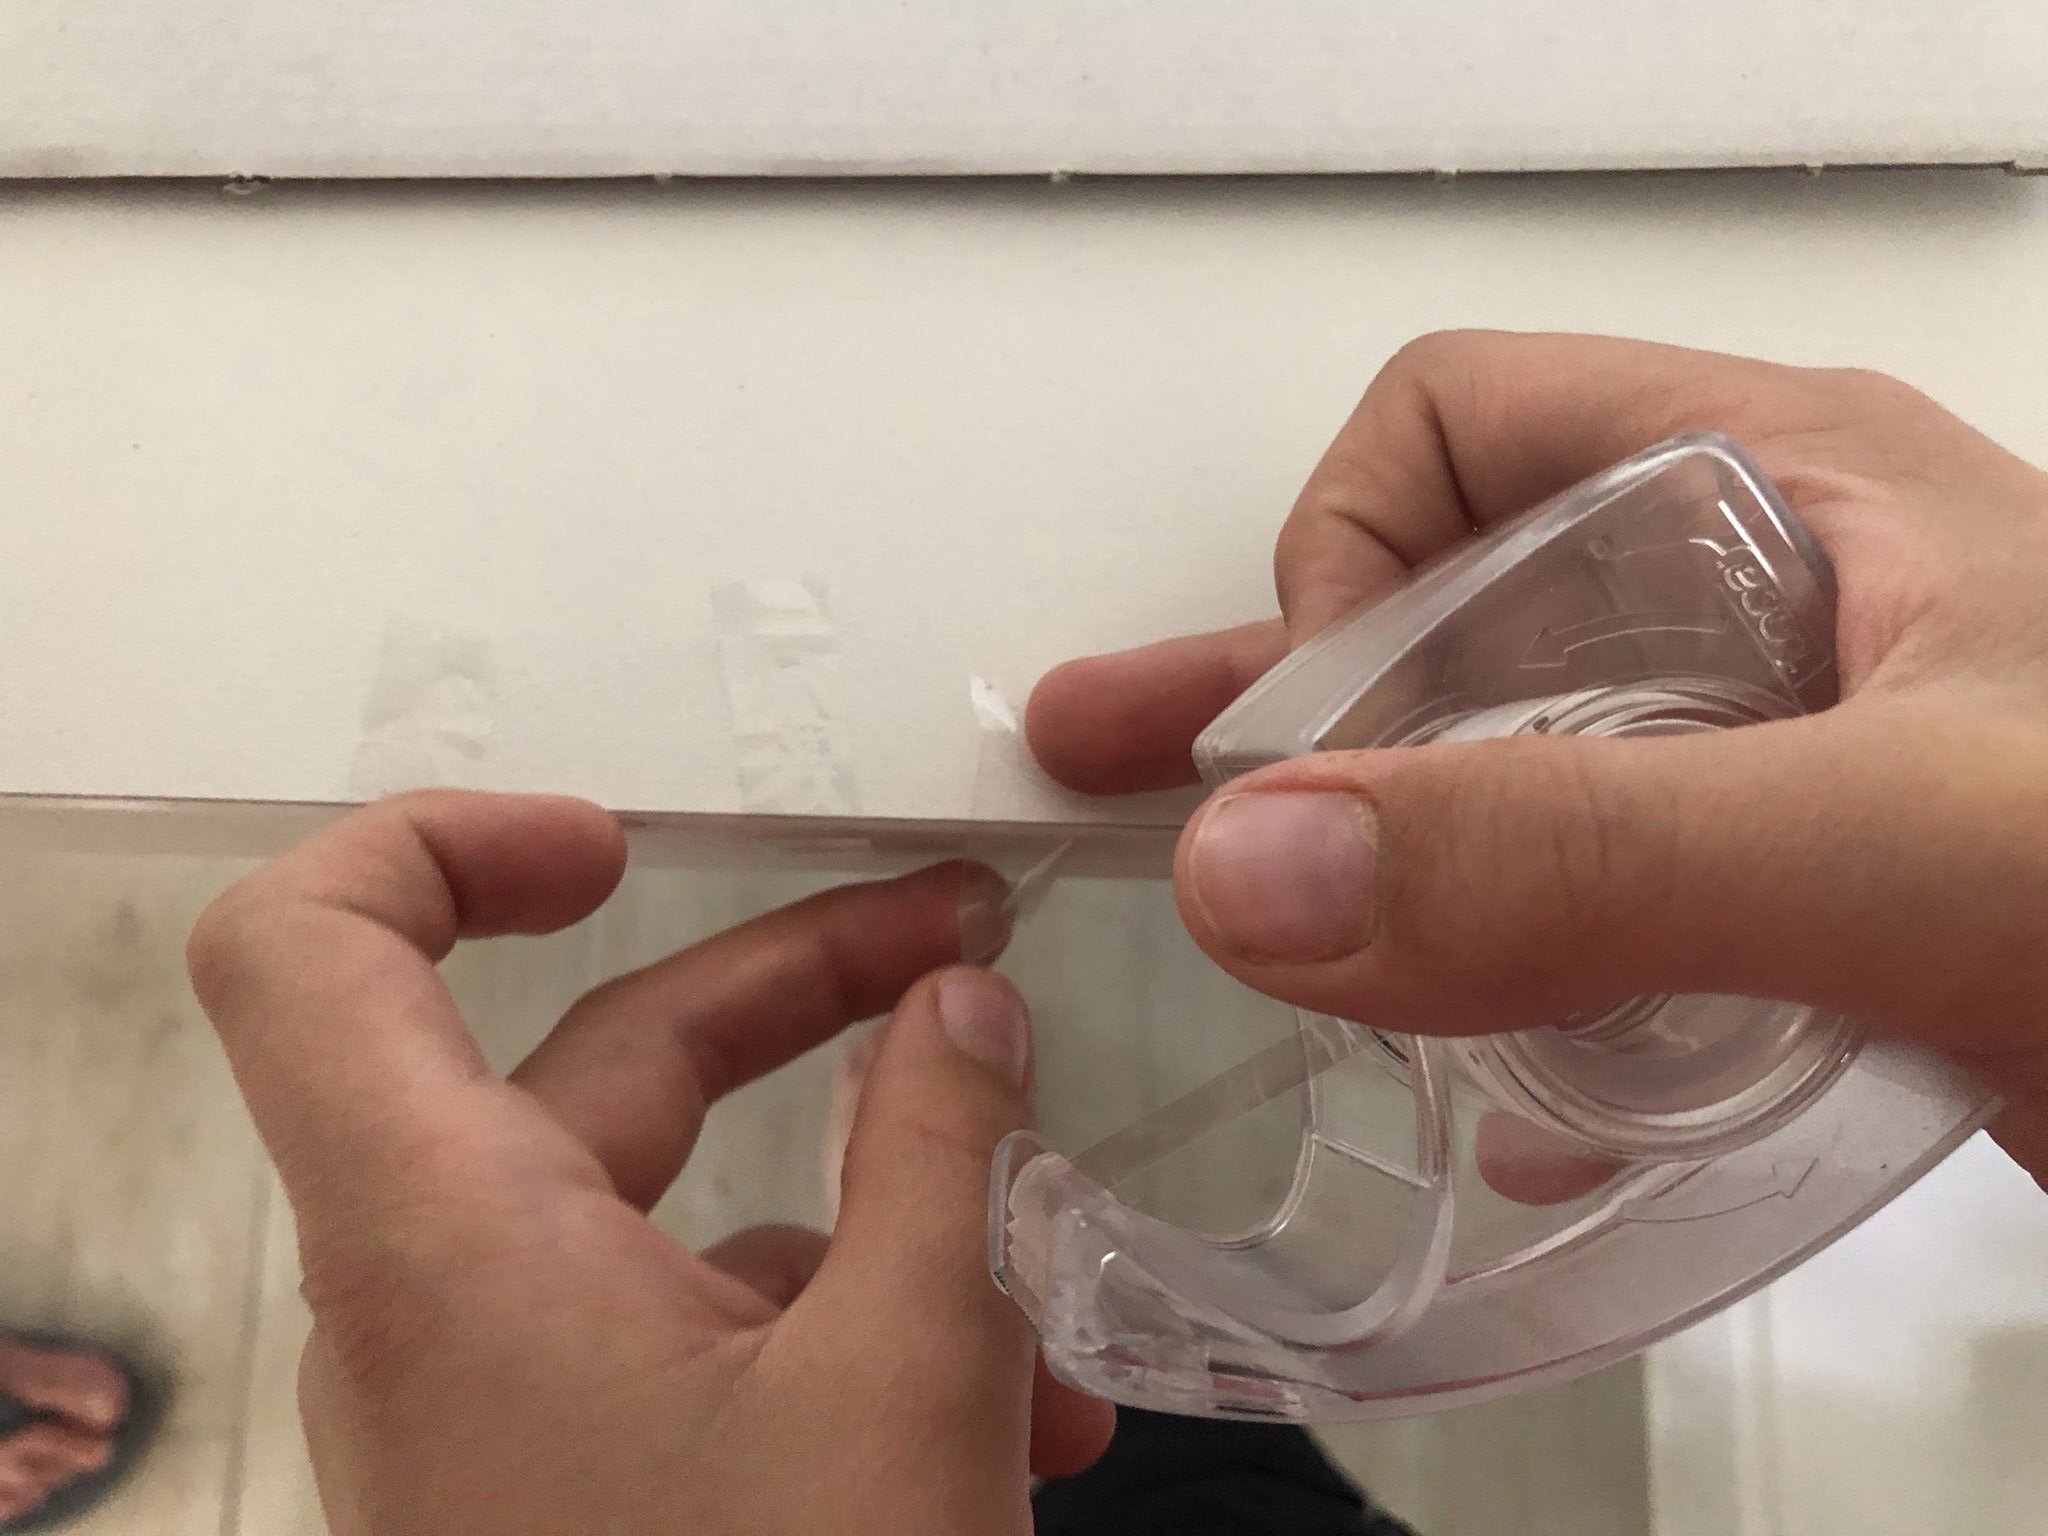
Let the paper overlap and glue the overlapping piece of paper to the can. Take the adhesive strips for this.
And now you repeat the process with the second can.

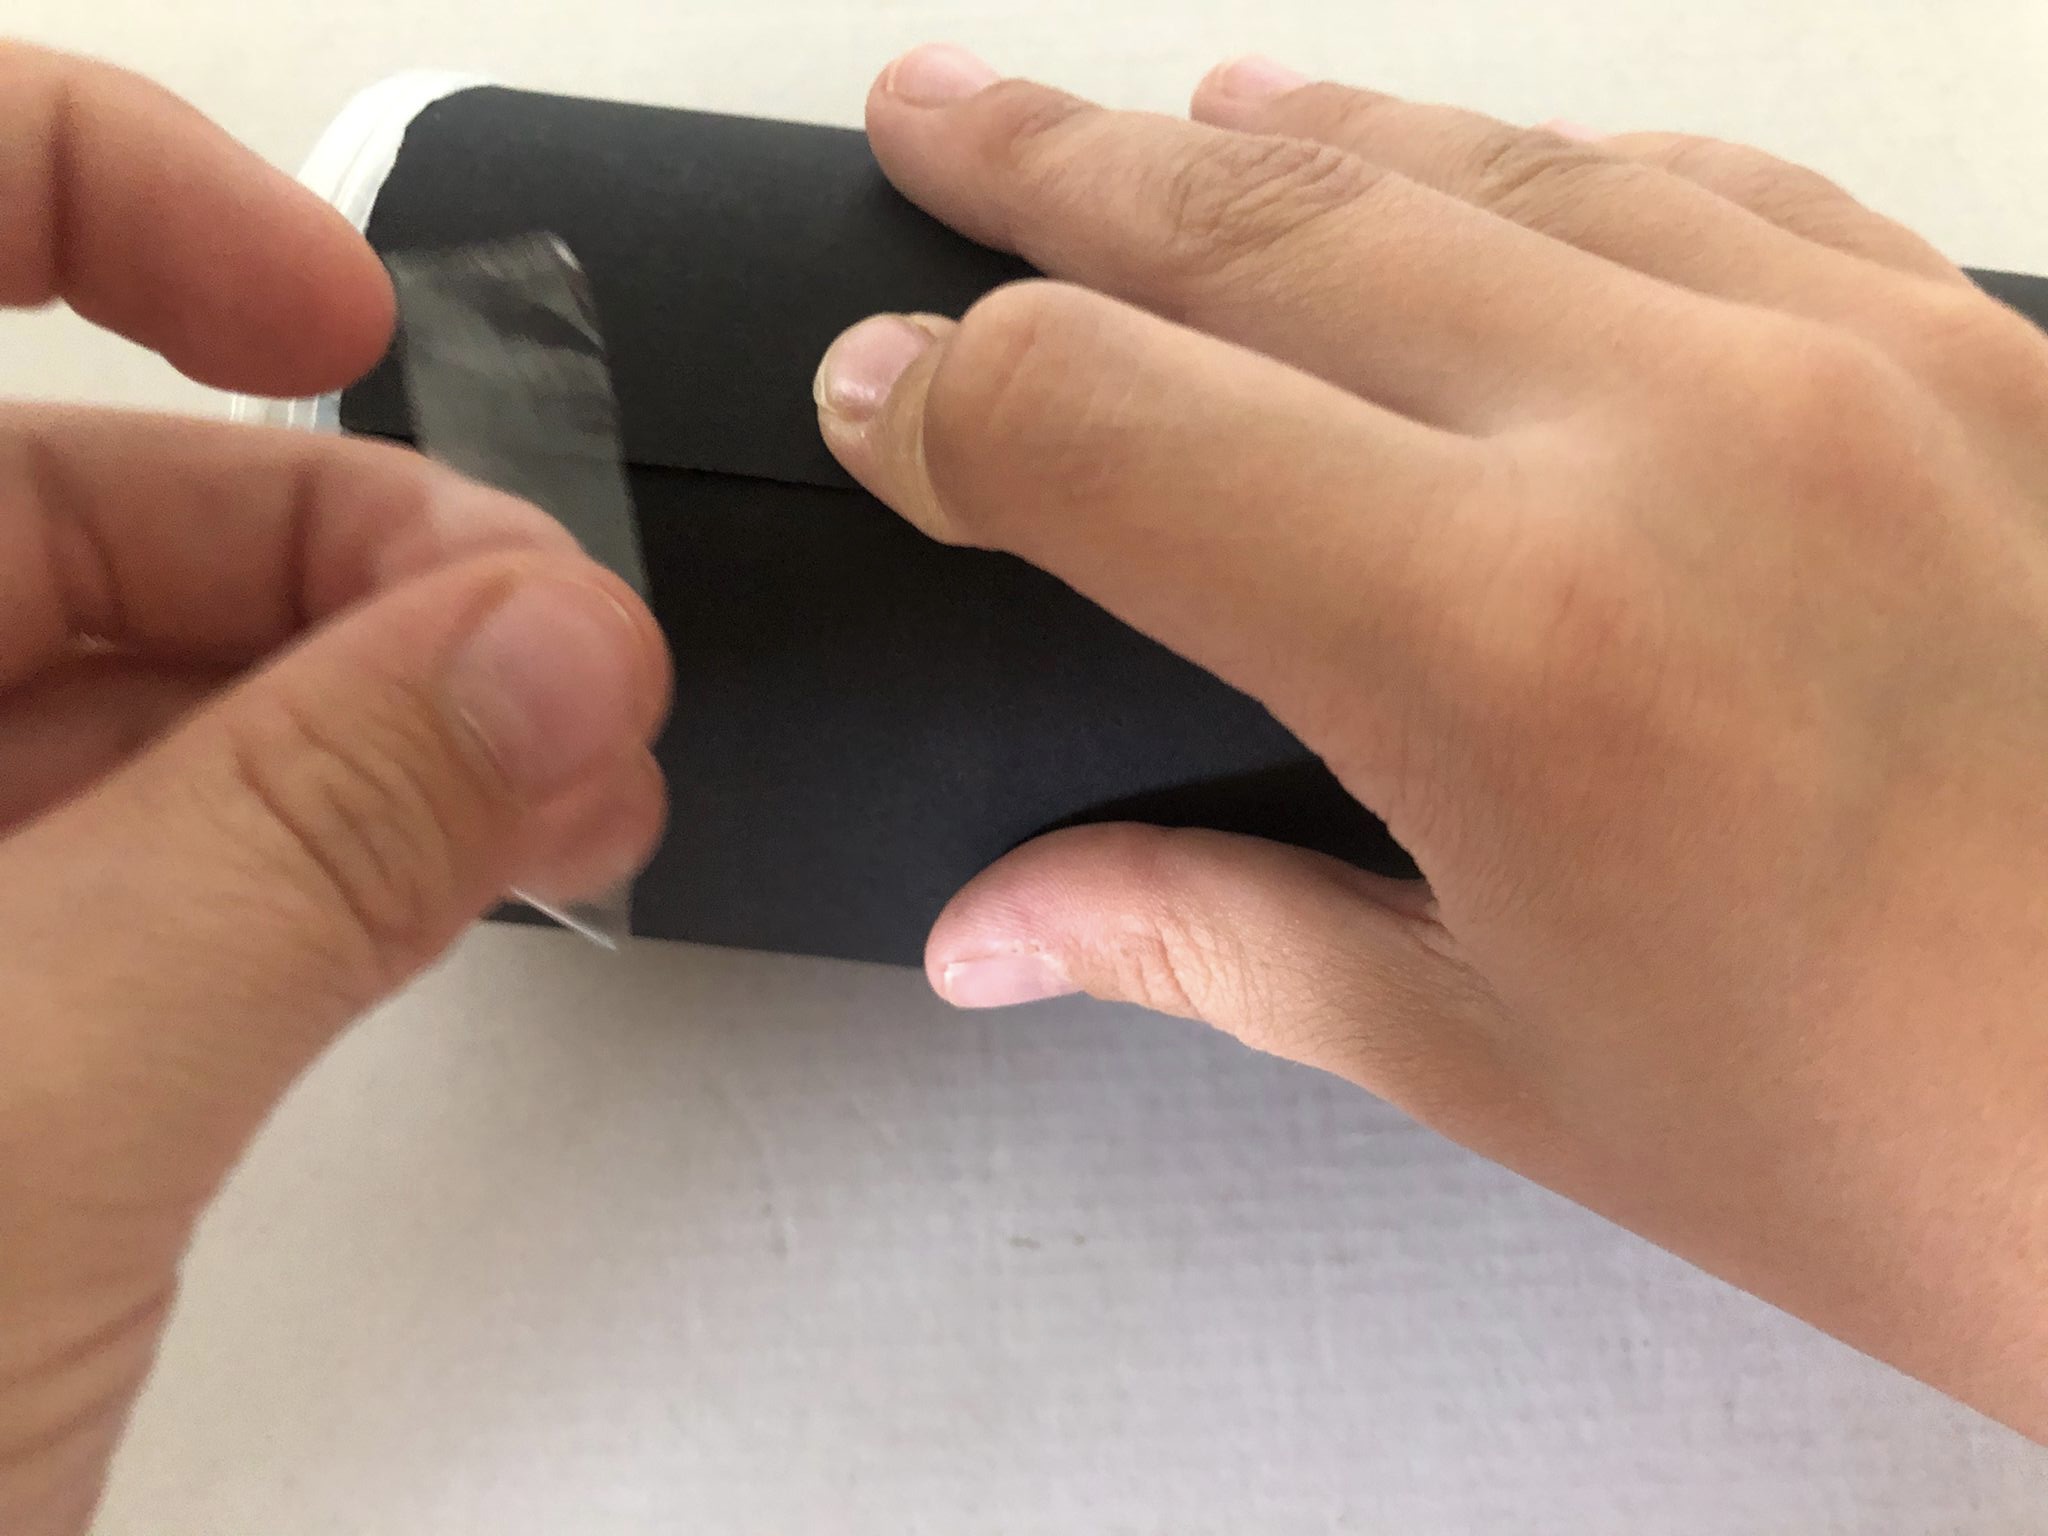
To do this, you also stick the black paper with adhesive strips to the tin can. The black paper can survive the tin can.

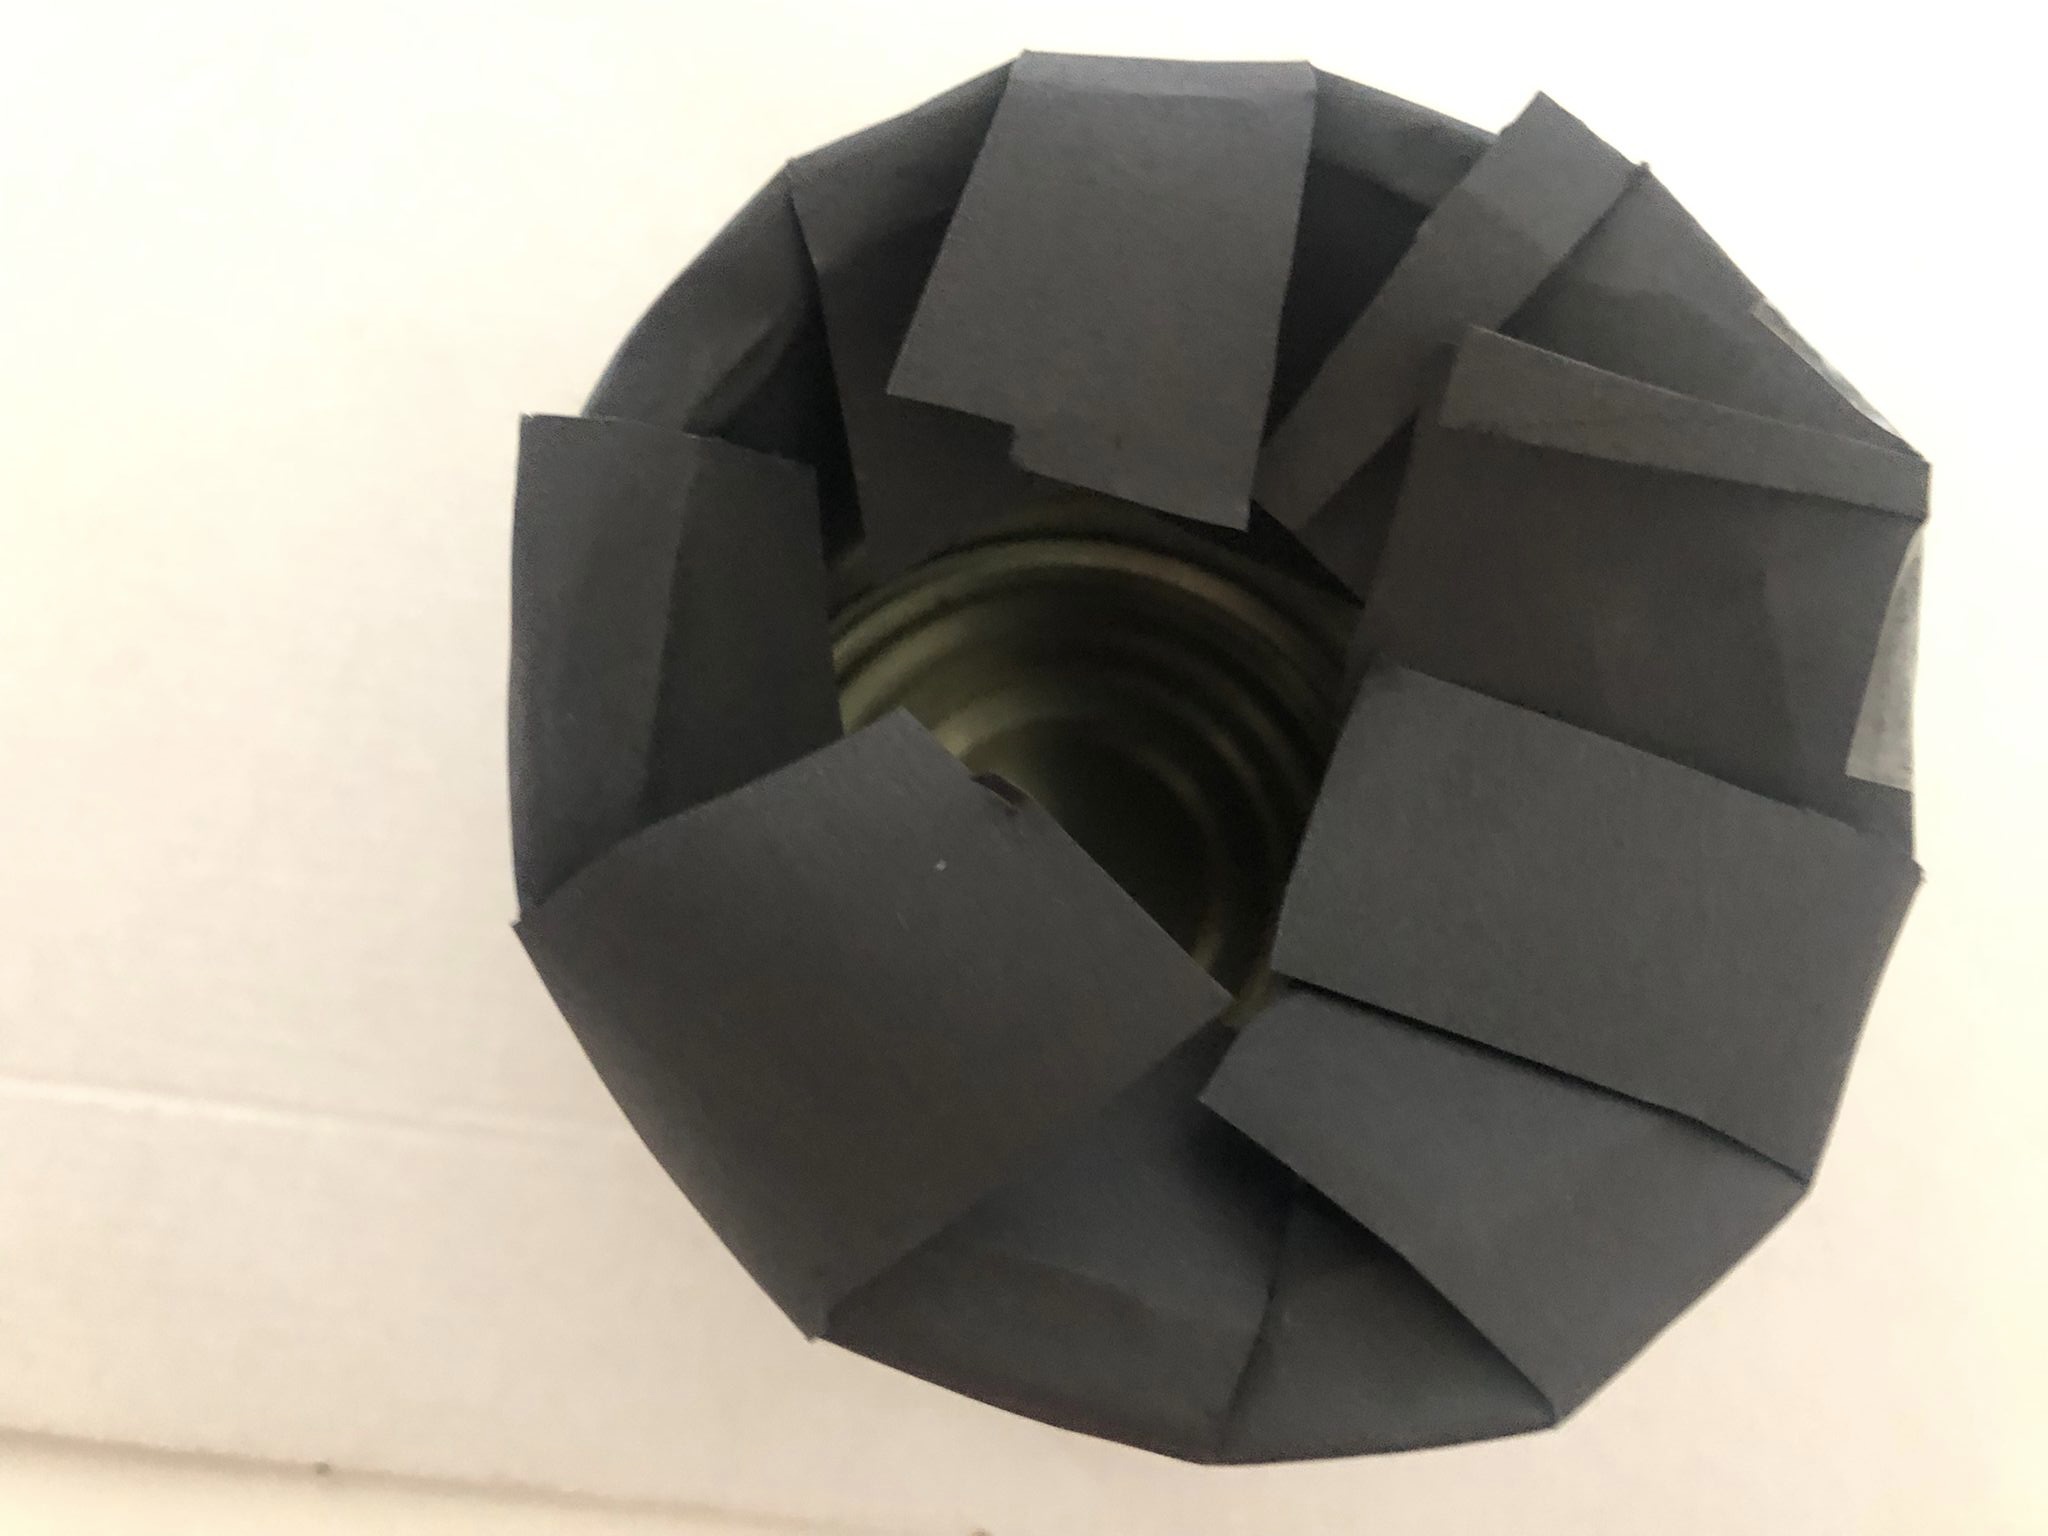
Cut the overhanging clay paper edge very often with the scissors.
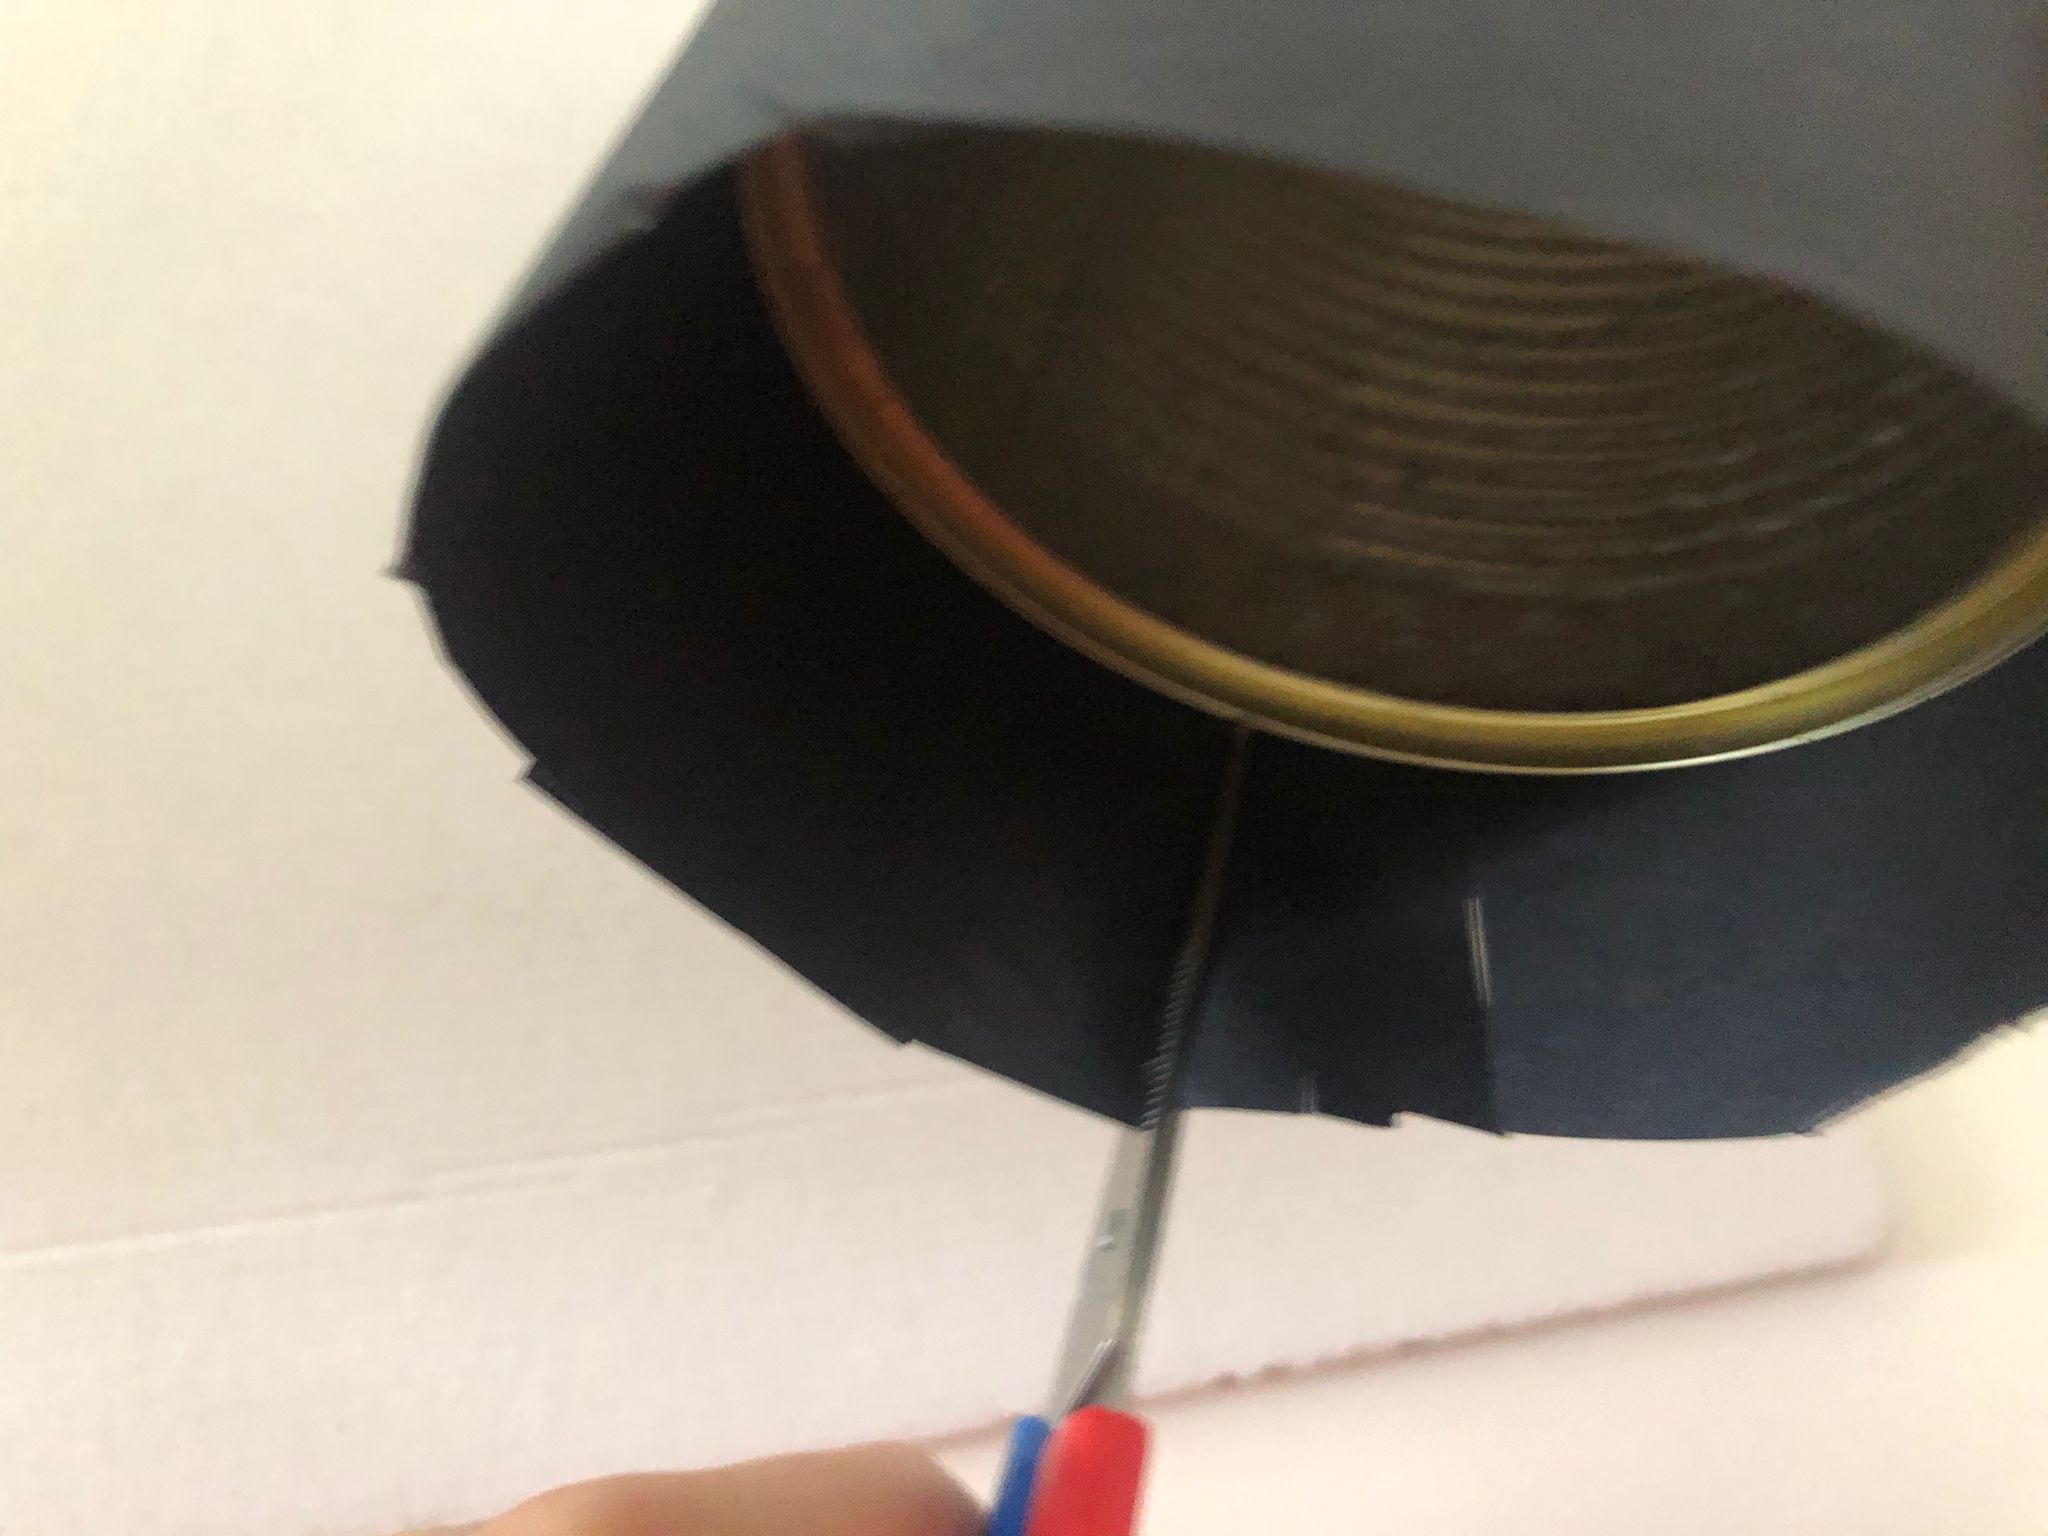
Bend the cut strips inwards into the can.

Take both hands for this. With the thumbs it is best.
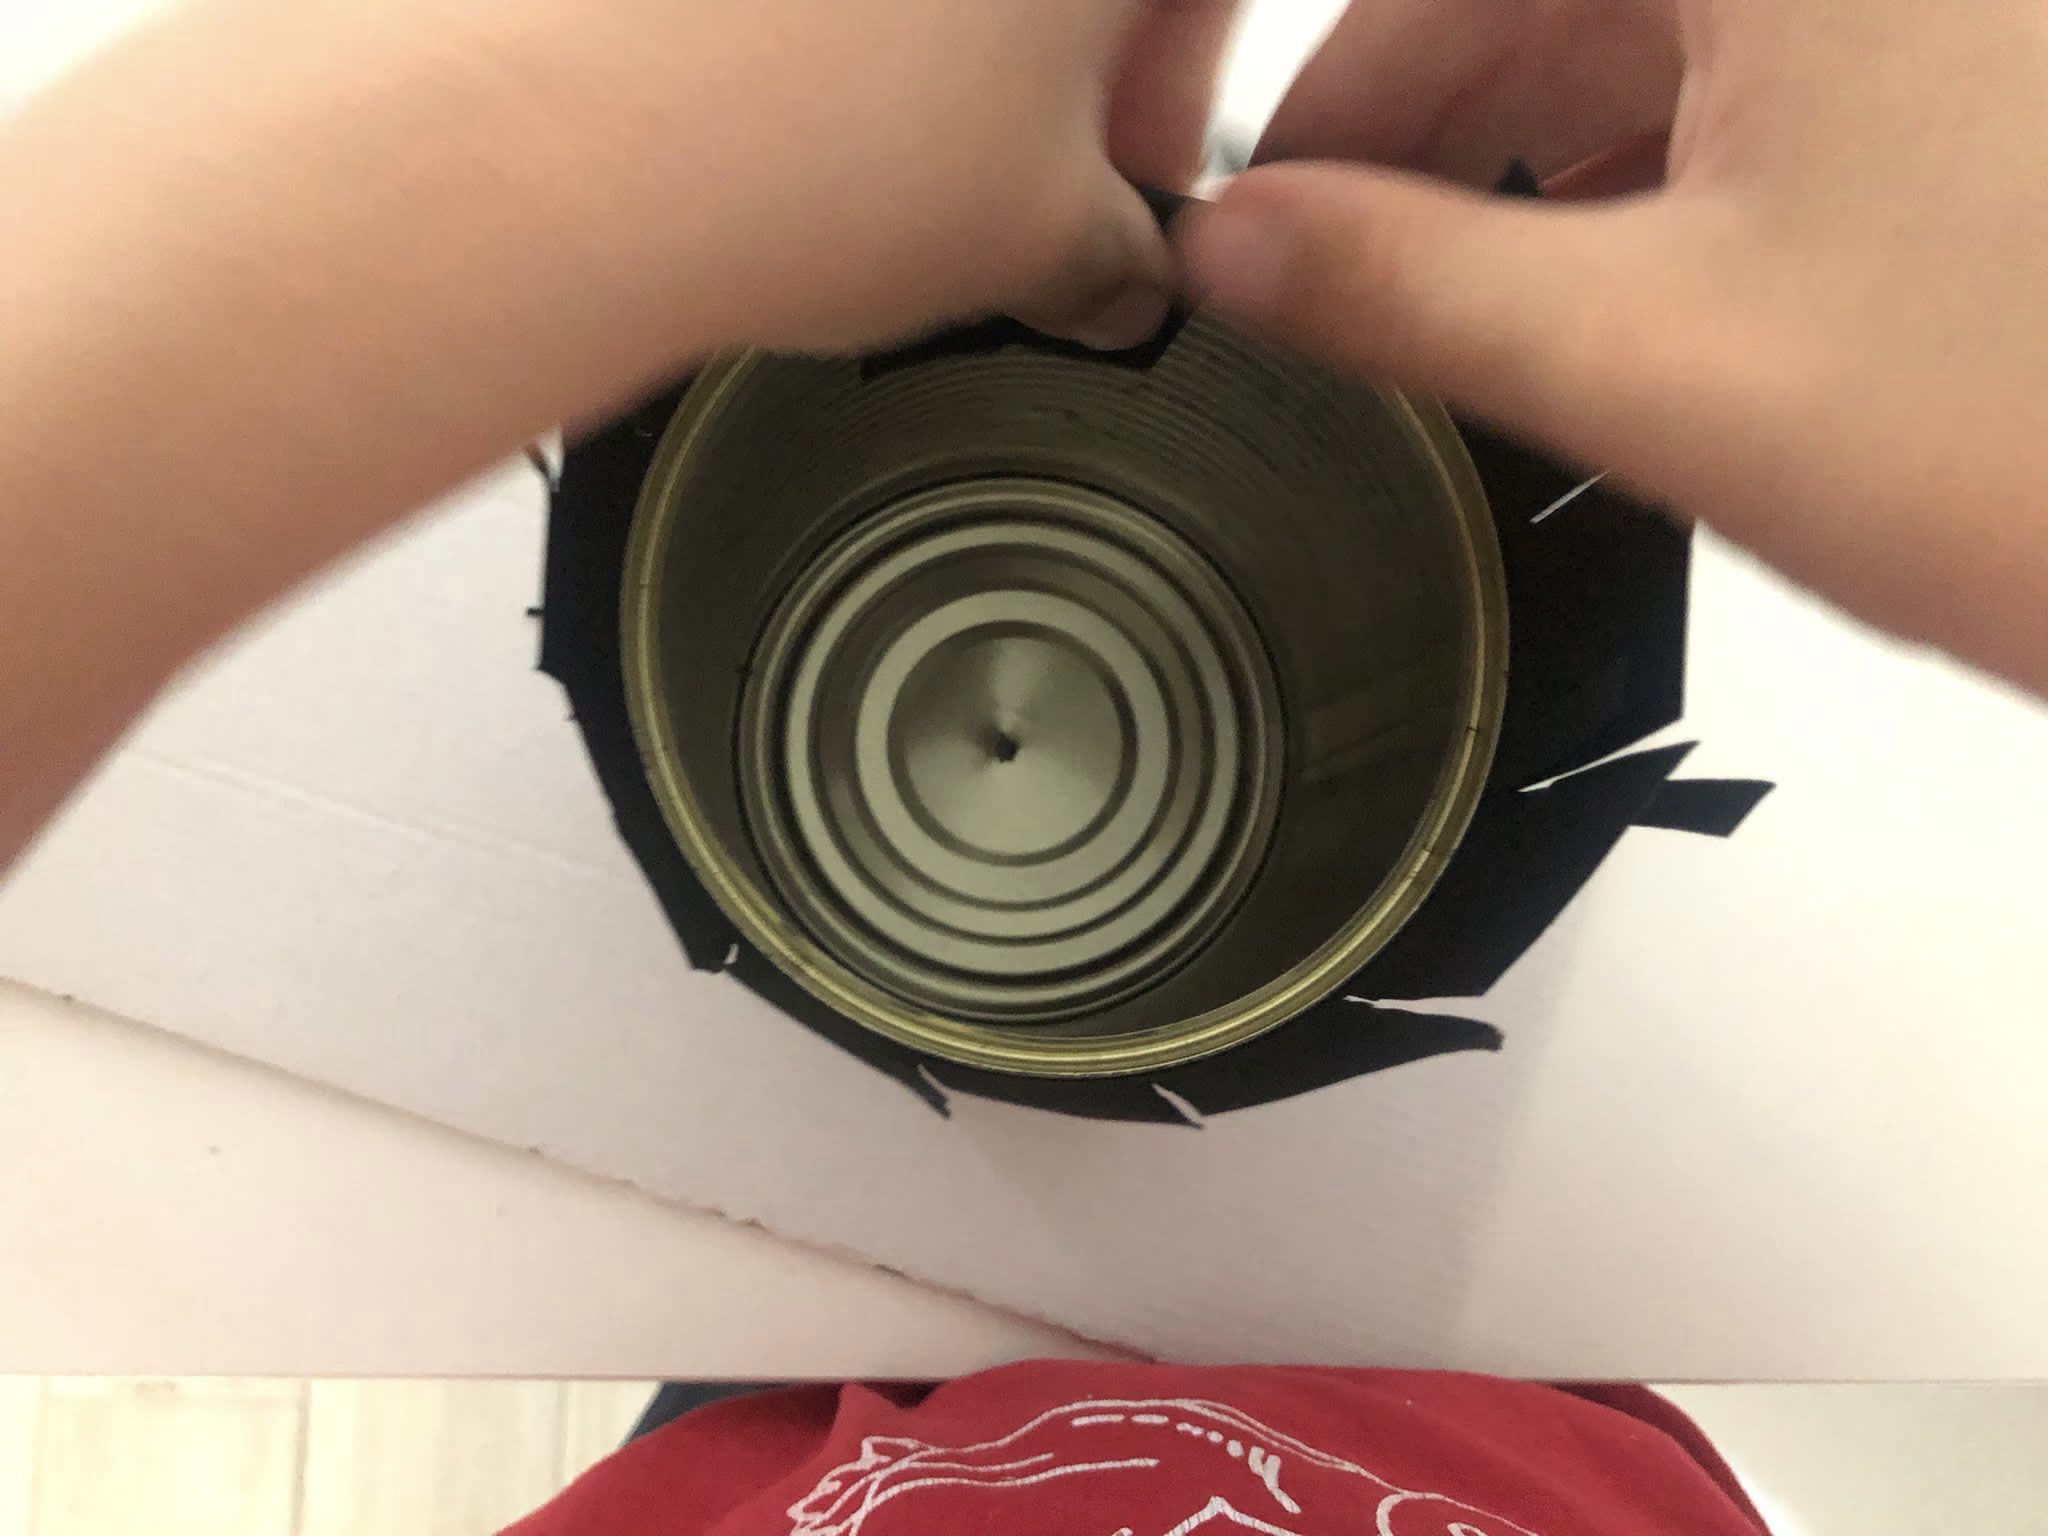
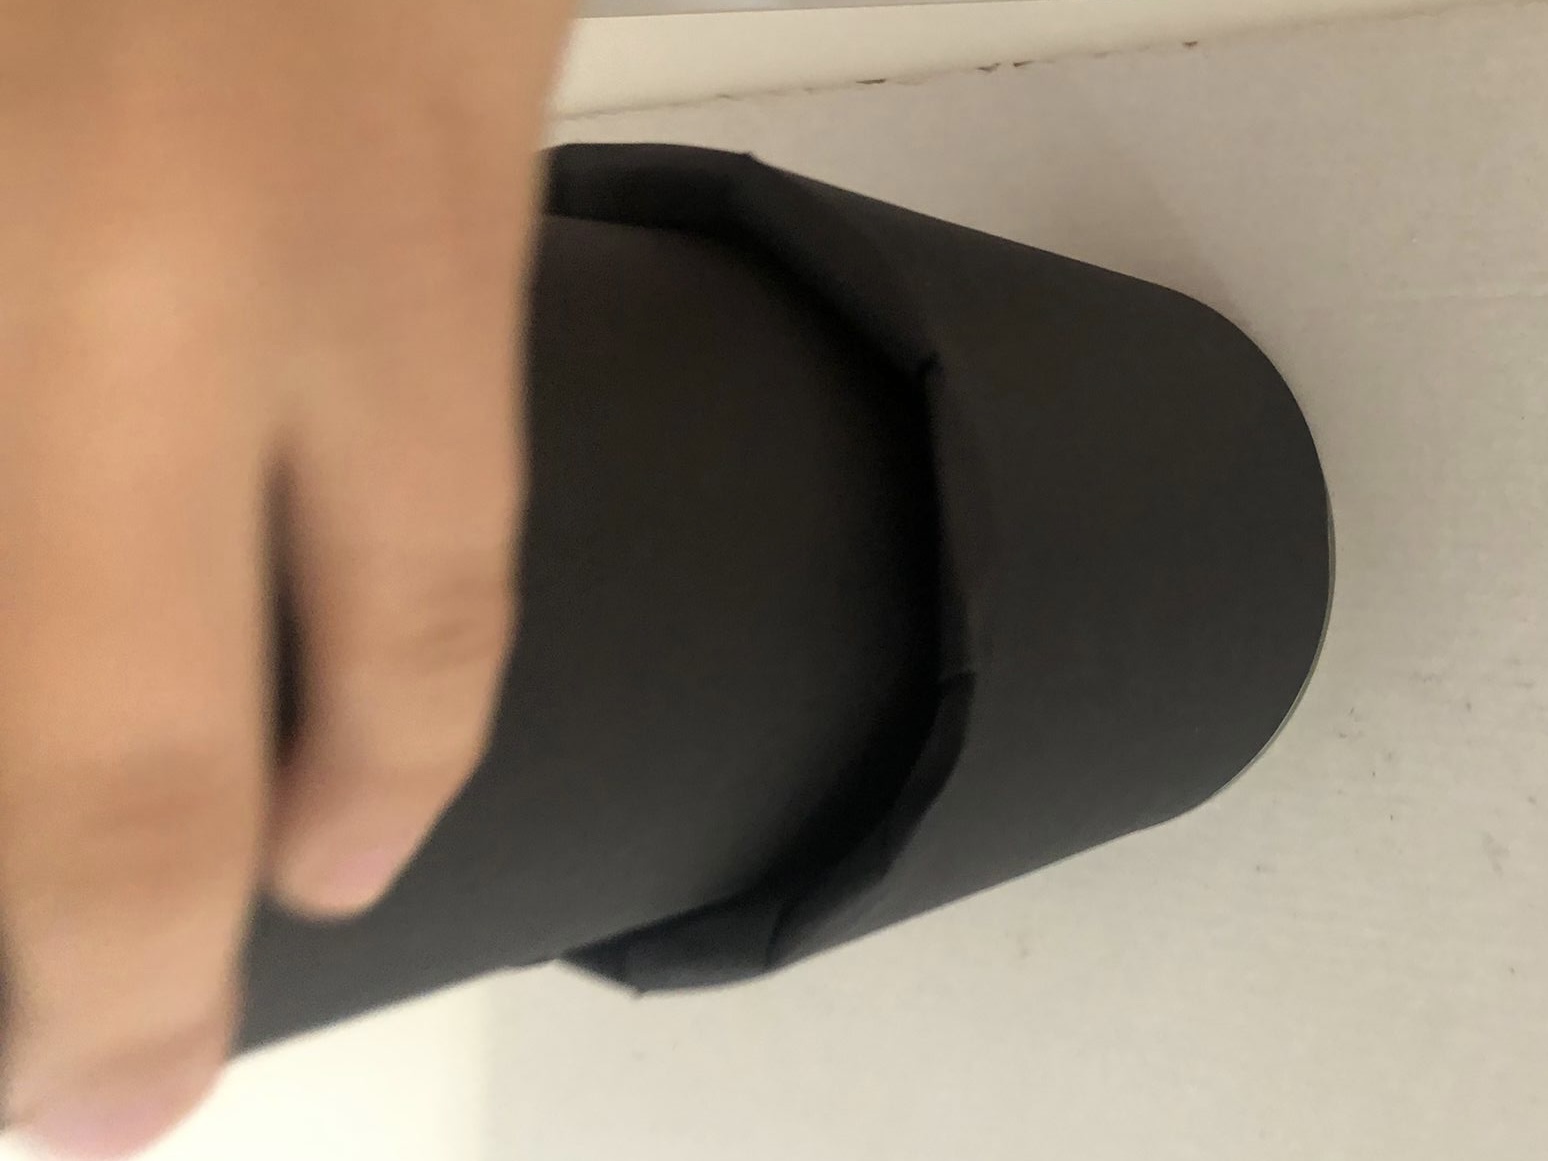
That's what your can looks like now.
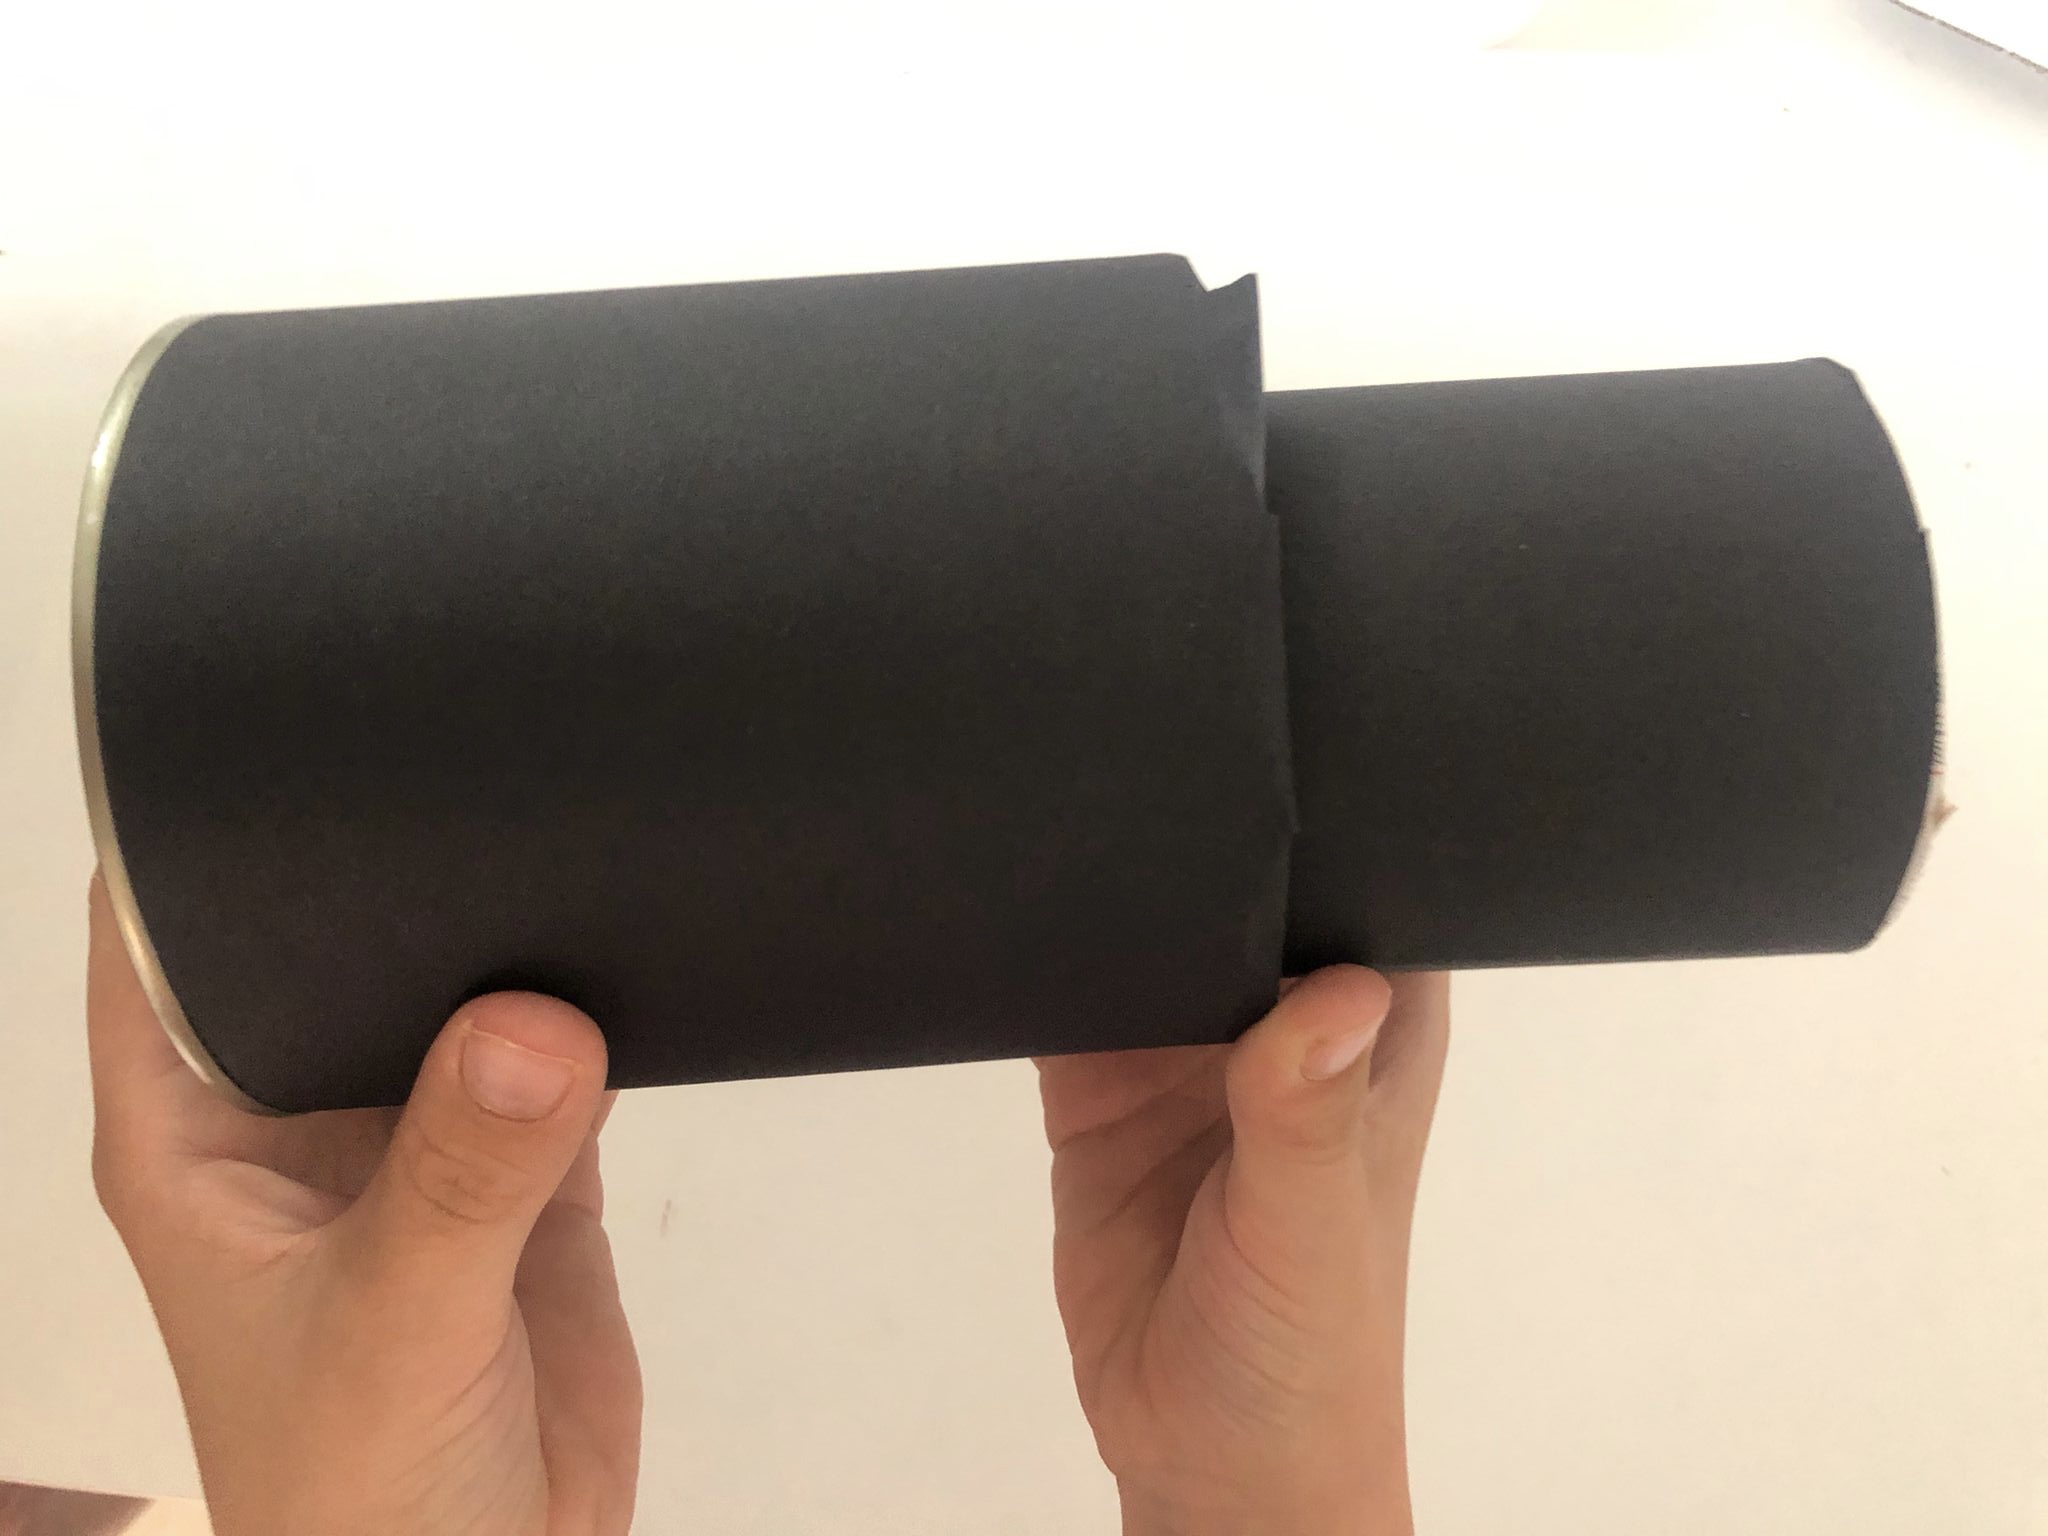
Take the chip can and put it in front of the tin can with the lid.
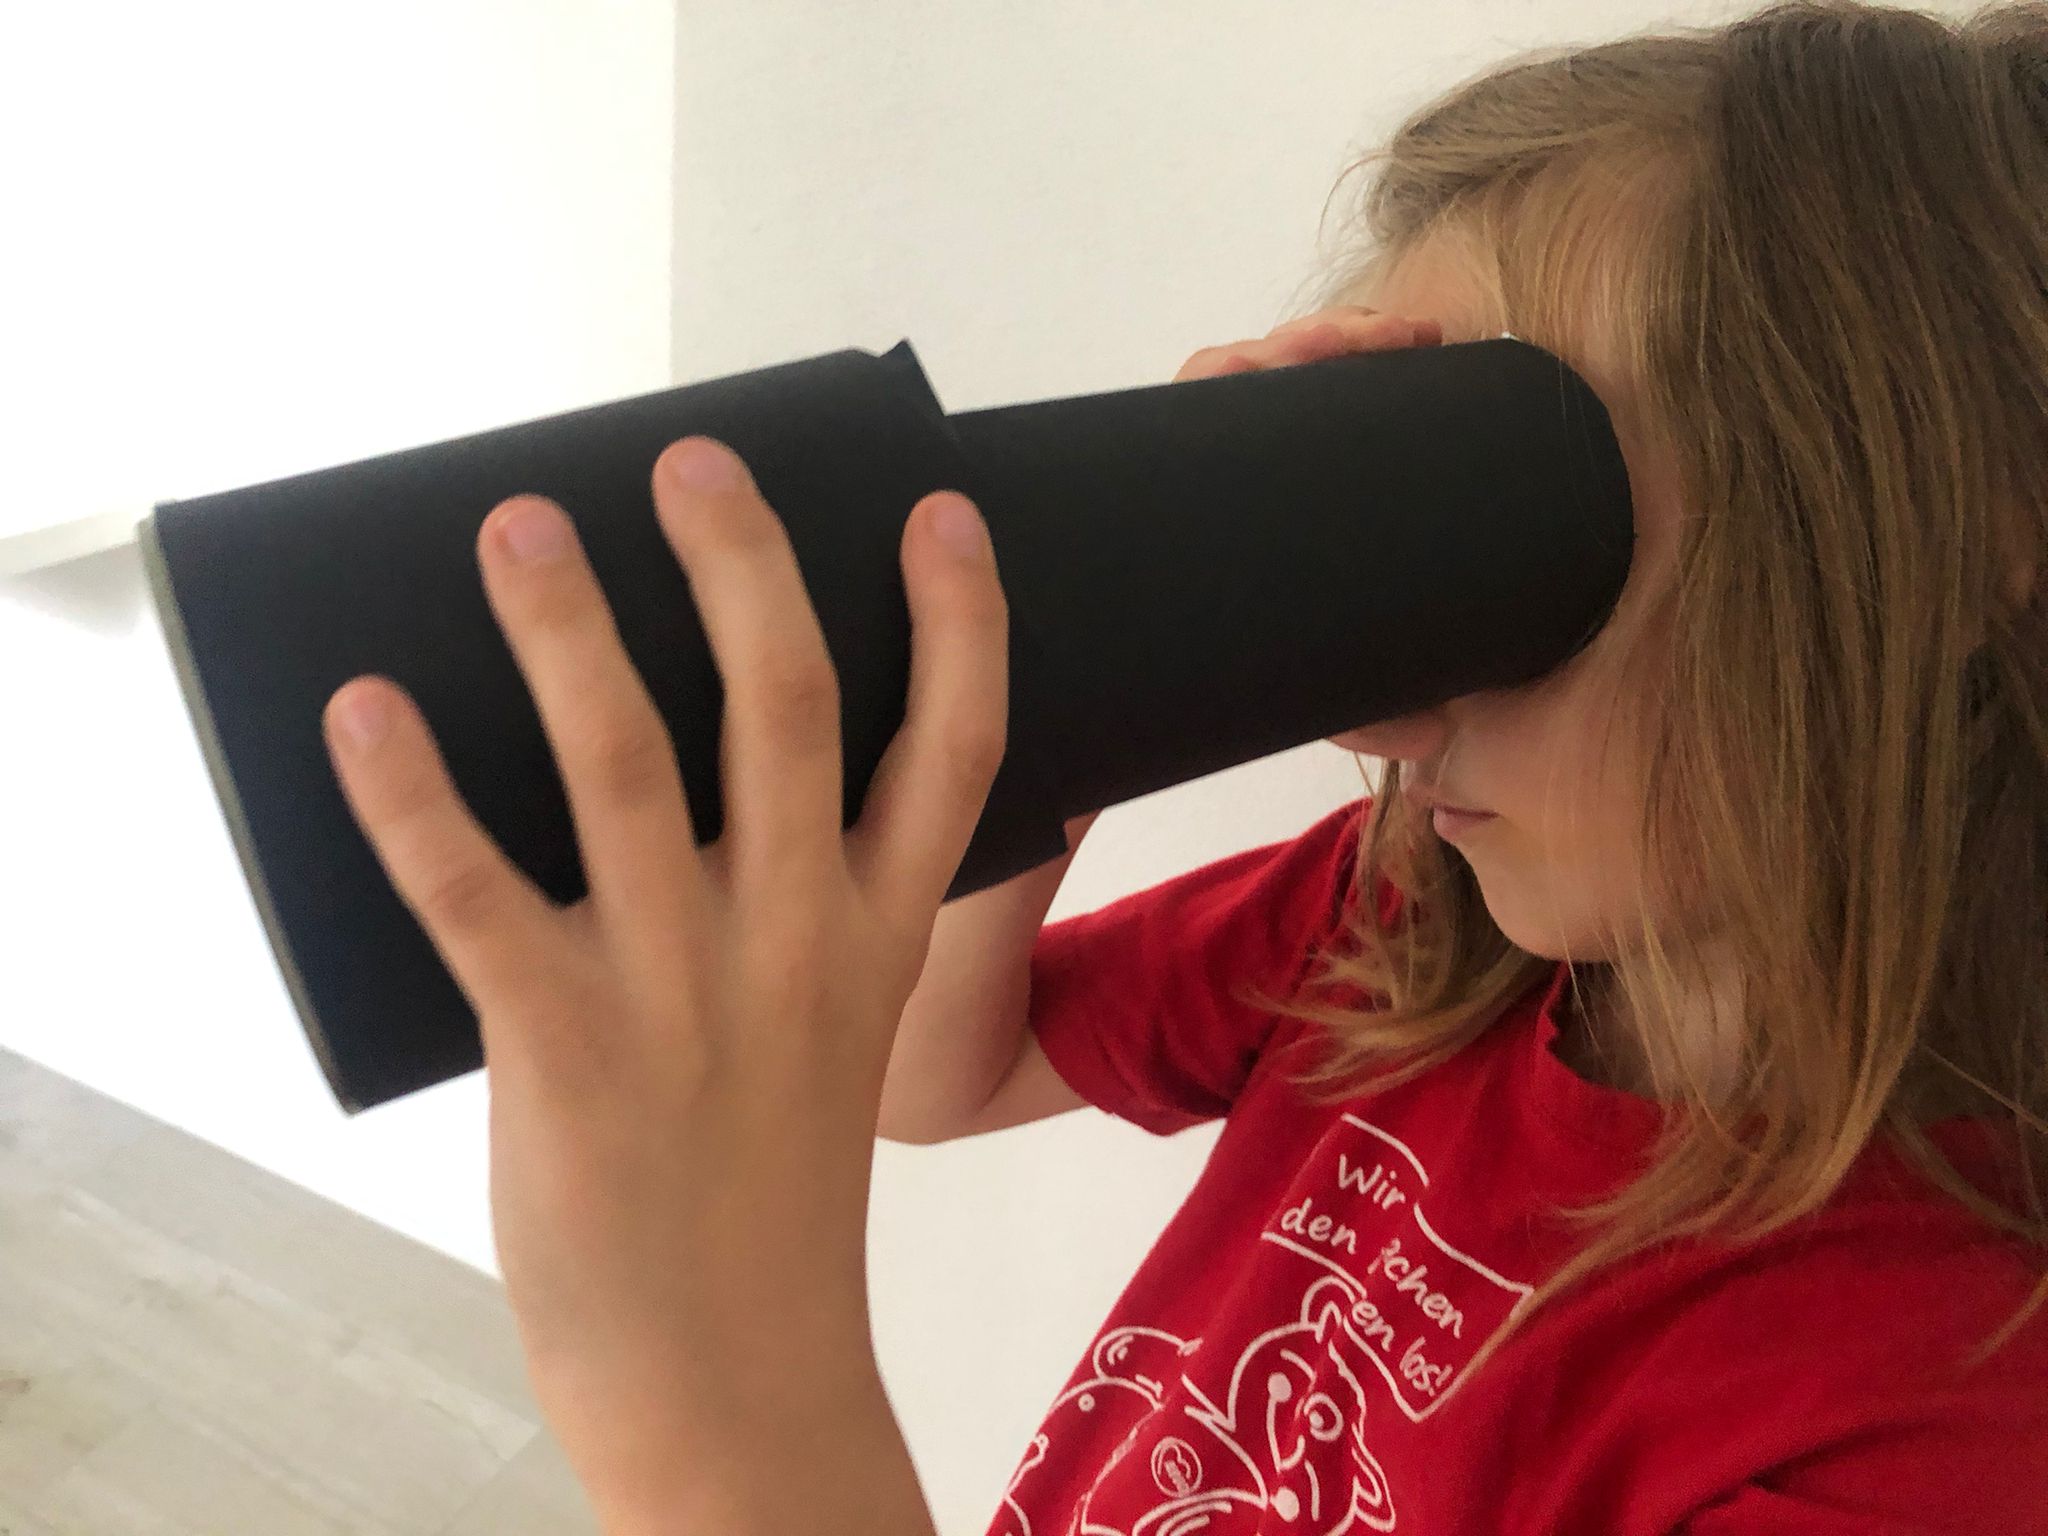
The telescope is ready.
Pushing back and forth the telescope can be operated. Just take a look inside. It's best to look out the window - what do you discover?
Stay curious and have fun doing crafts.
Materials
Directions
Get it ready.
Place the board on the table and put the tin can upside down (with the floor up) on the table. First you need hammer and nail.
Put the nail in the middle of the can, hold it firmly with two fingers. Take the hammer in the other hand.
Now you tap the nail carefully with the hammer until it sticks something in the can. Then tap the nail a piece into the can bottom (not quite!)
Then you pull the nail out again.
Now you need the chip can. First take off the lid. Then hold the can on the ground and cut off a piece from the bottom of the can. First put a hole in the can with the nail so that you can insert the scissors.
Cut off the floor completely, you don't need it anymore.
Place the chip can on the transparent paper and paint the can with a pencil.
Make a second circle around the painted line, which is a finger thicker.
Next, cut out the outer line.
Place the cut-out transparent paper or butterbread paper circle in the chip can lid. Press it firmly in to adapt to the lid.
Put the lid back on the chip can.
Next you take the black clay paper and roll the can with it. Fair roughly the paper, so that it reaches around the can and overlaps a bit.
Next thing you know, you cut off the overhanging paper.
Prepare several short pieces of adhesive tape, maybe glue it to the edge of the table with a small piece. So you can take one by one and still hold the can well.
Let the paper overlap and glue the overlapping piece of paper to the can. Take the adhesive strips for this.
And now you repeat the process with the second can.
To do this, you also stick the black paper with adhesive strips to the tin can. The black paper can survive the tin can.
Cut the overhanging clay paper edge very often with the scissors.
Bend the cut strips inwards into the can.
Take both hands for this. With the thumbs it is best.
That's what your can looks like now.
Take the chip can and put it in front of the tin can with the lid.
The telescope is ready.
Pushing back and forth the telescope can be operated. Just take a look inside. It's best to look out the window - what do you discover?
Stay curious and have fun doing crafts.
Follow us on Facebook , Instagram and Pinterest
Don't miss any more adventures: Our bottle mail