Bake the carrots

AdventurerKatzi
Rating4.7101.7 Tausend mal & (3) DifficultyAdvanced

This is where childhood memories come up! These delicious Krapfen (Berliner) are a bit more elaborate in the production, because the dough has to open twice! But the wait is worth it! I'll show you how to bake the Krapfen step by step. Look at it and dare to try it yourself once. This recipe results in about 35 small Krapfen. For a small carnival party, it's definitely worth the effort! Enjoy the Krapfen absolutely fresh!
Tip: The dough is also suitable for filled doughs. For this you only have to reduce the temperature of the fat. Thus the dough is also made inside.
Try it out!

Media Education for Kindergarten and Hort

Kind bastelt eine Rassel mit dem Navi
The Adventure Navi, the app for DIY projects, enables media education for the youngest.

Relief in everyday life, targeted promotion of individual children, independent learning and - without any pre-knowledge already usable by the youngest!


Titelbild zur Bastel- und DIY-Idee für Kinder '(618) Faschingskrapfen backen'
Material for1 Child
Prep Time30 min.Adv. Time45 min.Total Time1 Stunde 15 min.
Frozen dough:
 500 g Flour
 1 Dice yeast
 1 lb Sugar
 1 Cup of warm milk
 80 g Sugar
 80 g Butter malt
 5 Egg yolks
 a little lemon juice
Other ingredients:
 ½ Bar fat for baking
Other utensils:
 1 Kitchen machine
 1 Bowl
 1 Pasta wood
 1 Dishcloth
 1 Pasta wood
 3 Teaspoon
 1 Baking tray or cake board
 1 Drinking glass
 1 Pot
 2 Cooking spoons
 1 small hand sieve
 1 Large plate
 1 Bowl
 Kitchen crepe
 Aprons
 Cooking aprons
All links marked with a shopping cart lead to Amazon - here we have selected products that we would order ourselves and in part also ordered. In a qualified purchase via the advertising link, we as Amazon partner receive a commission, for you there are no costs. You thus support our cost- and advertising banner-free, educational offer.
1

After you have your apron on, have washed your hands, then it can start already.
First you weigh and measure all the ingredients and put them in the thermomix. Knead these 2 minutes with the dough level.
Or:
You put the flour in a bowl and dig a hole in the middle with a spoon.
Then stir the yeast, sugar and milk in a cup and then pour them into the hollow in the flour..
Fat, sugar, egg yolk, lemon juice stir her frothy and then add it to her. Now you knead everything together.
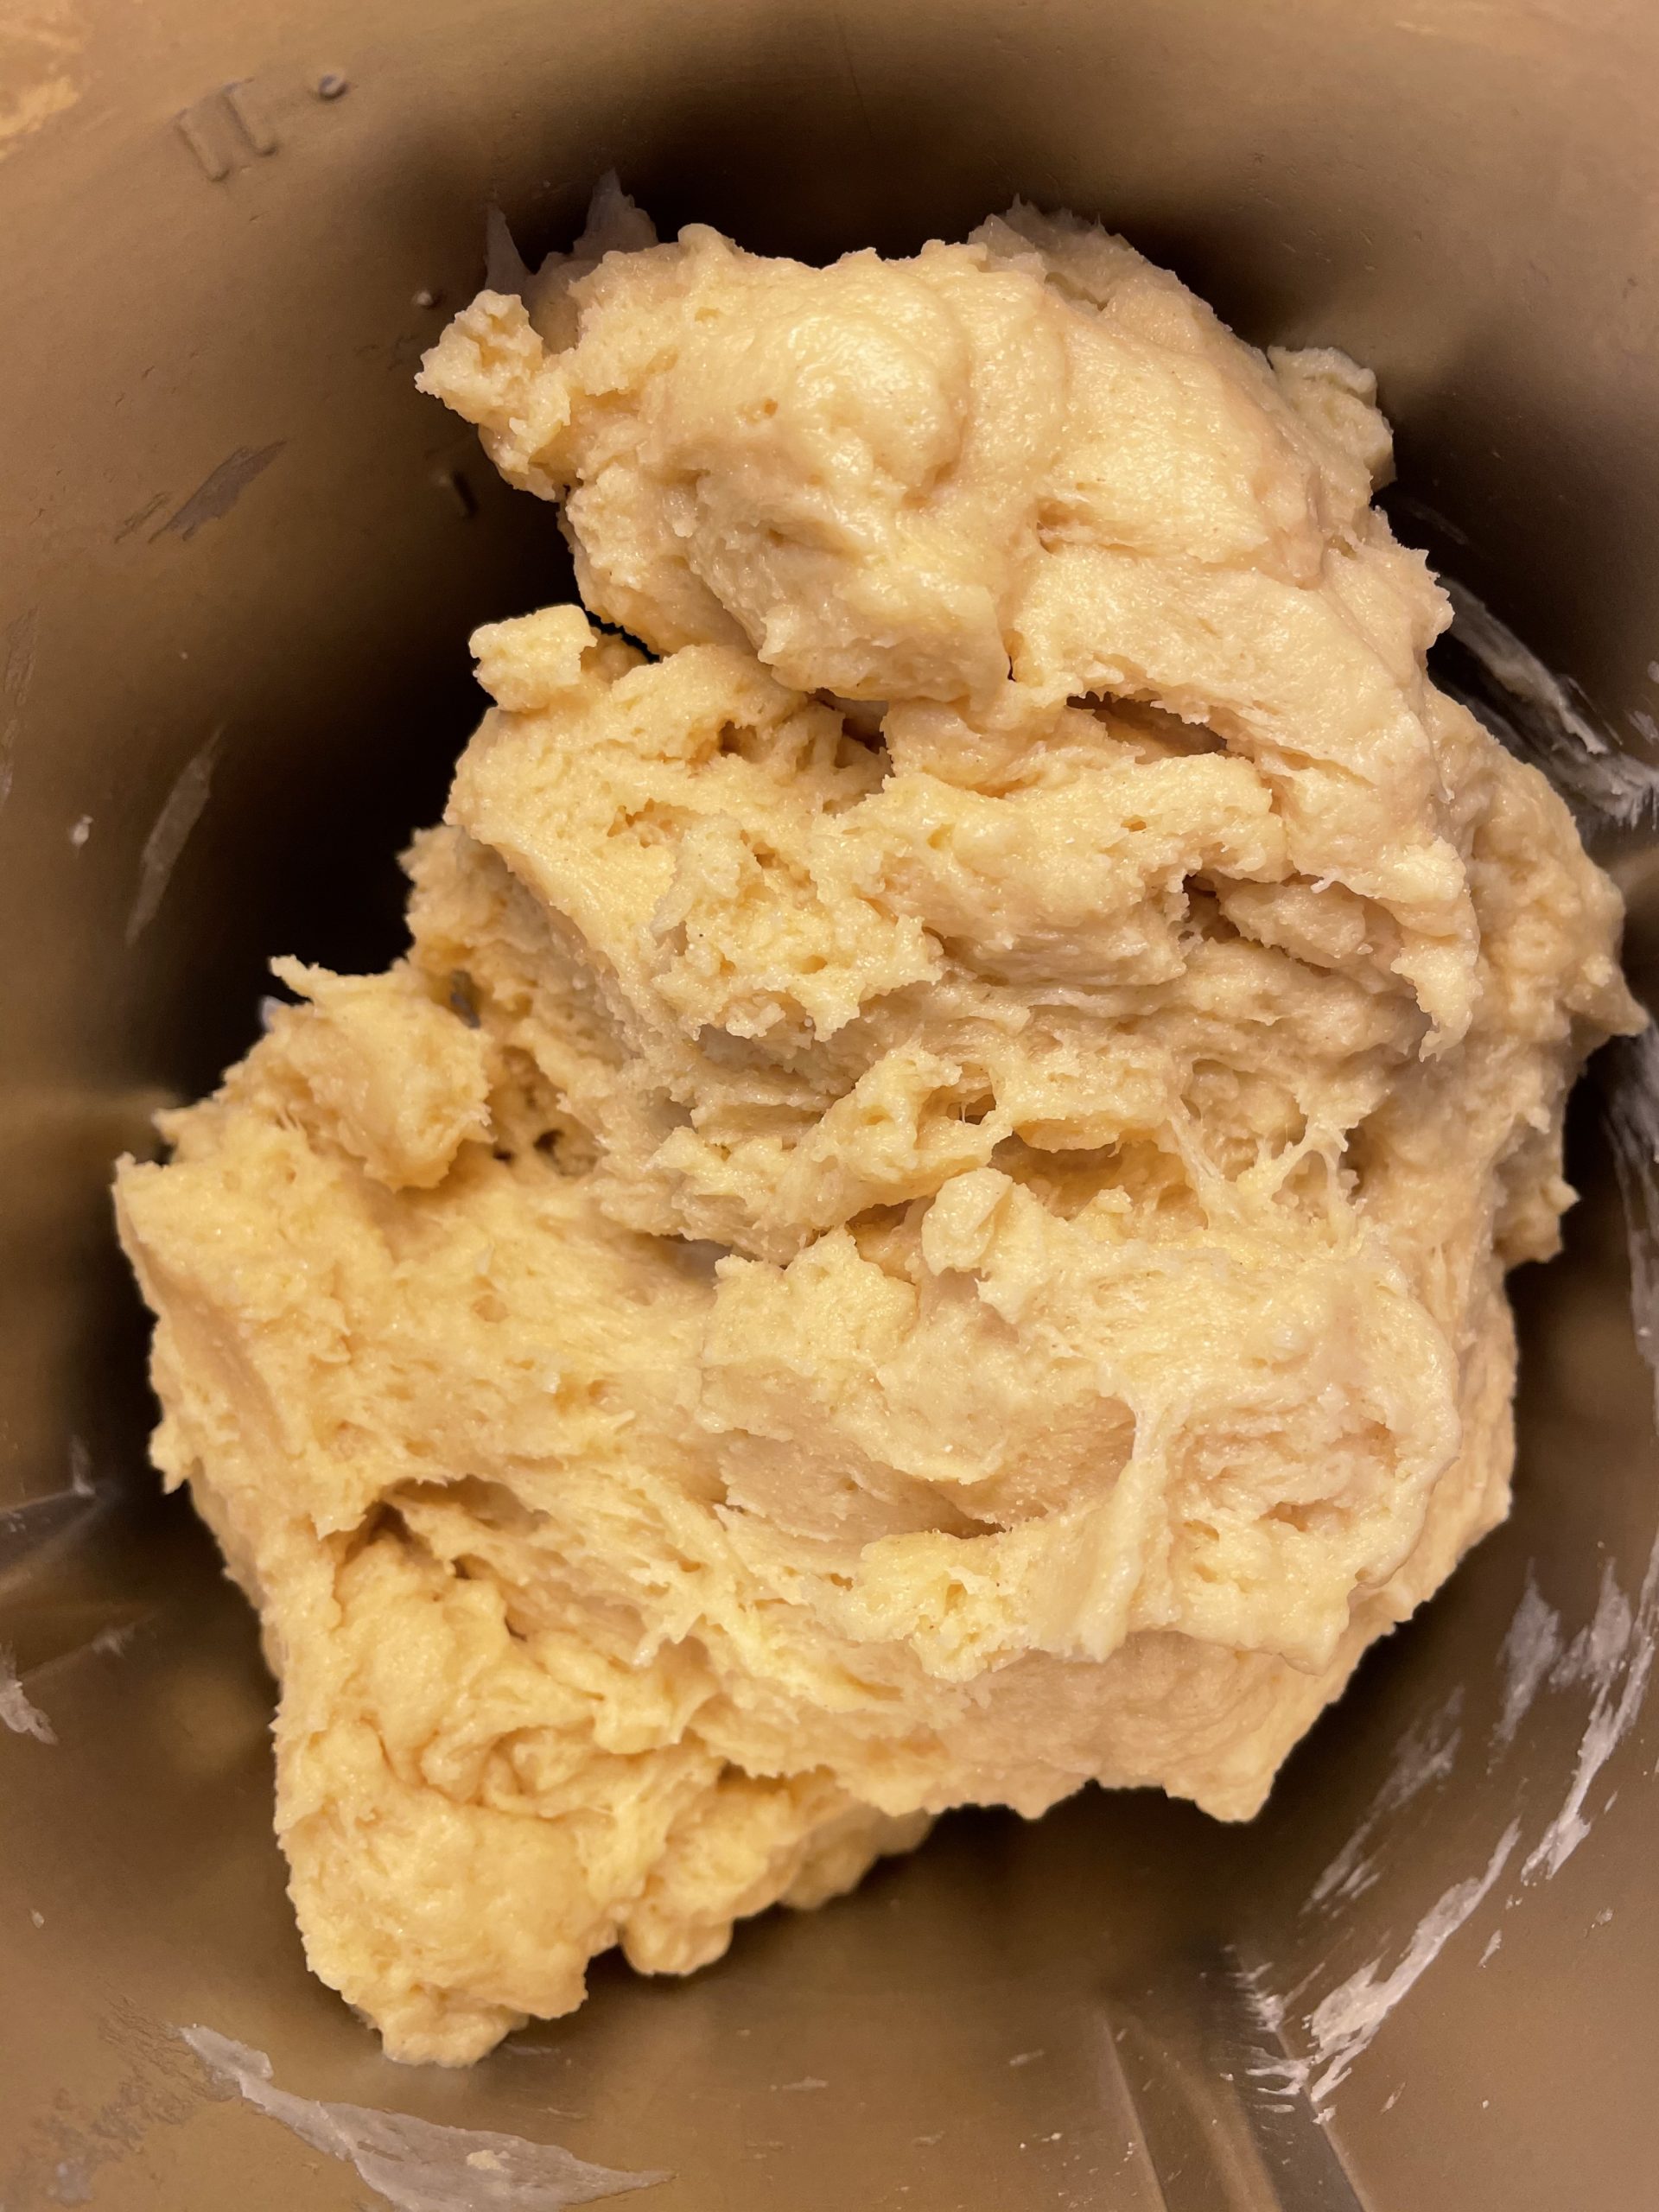
Bild zum Schritt 1 für das Bastel- und DIY-Abenteuer für Kinder: 'Nachdem ihr eure Schürze an habt, die Hände gewaschen habt,...'

2

Then leave the dough in a bowl in a warm place. To do this, cover the dough with a dishcloth.
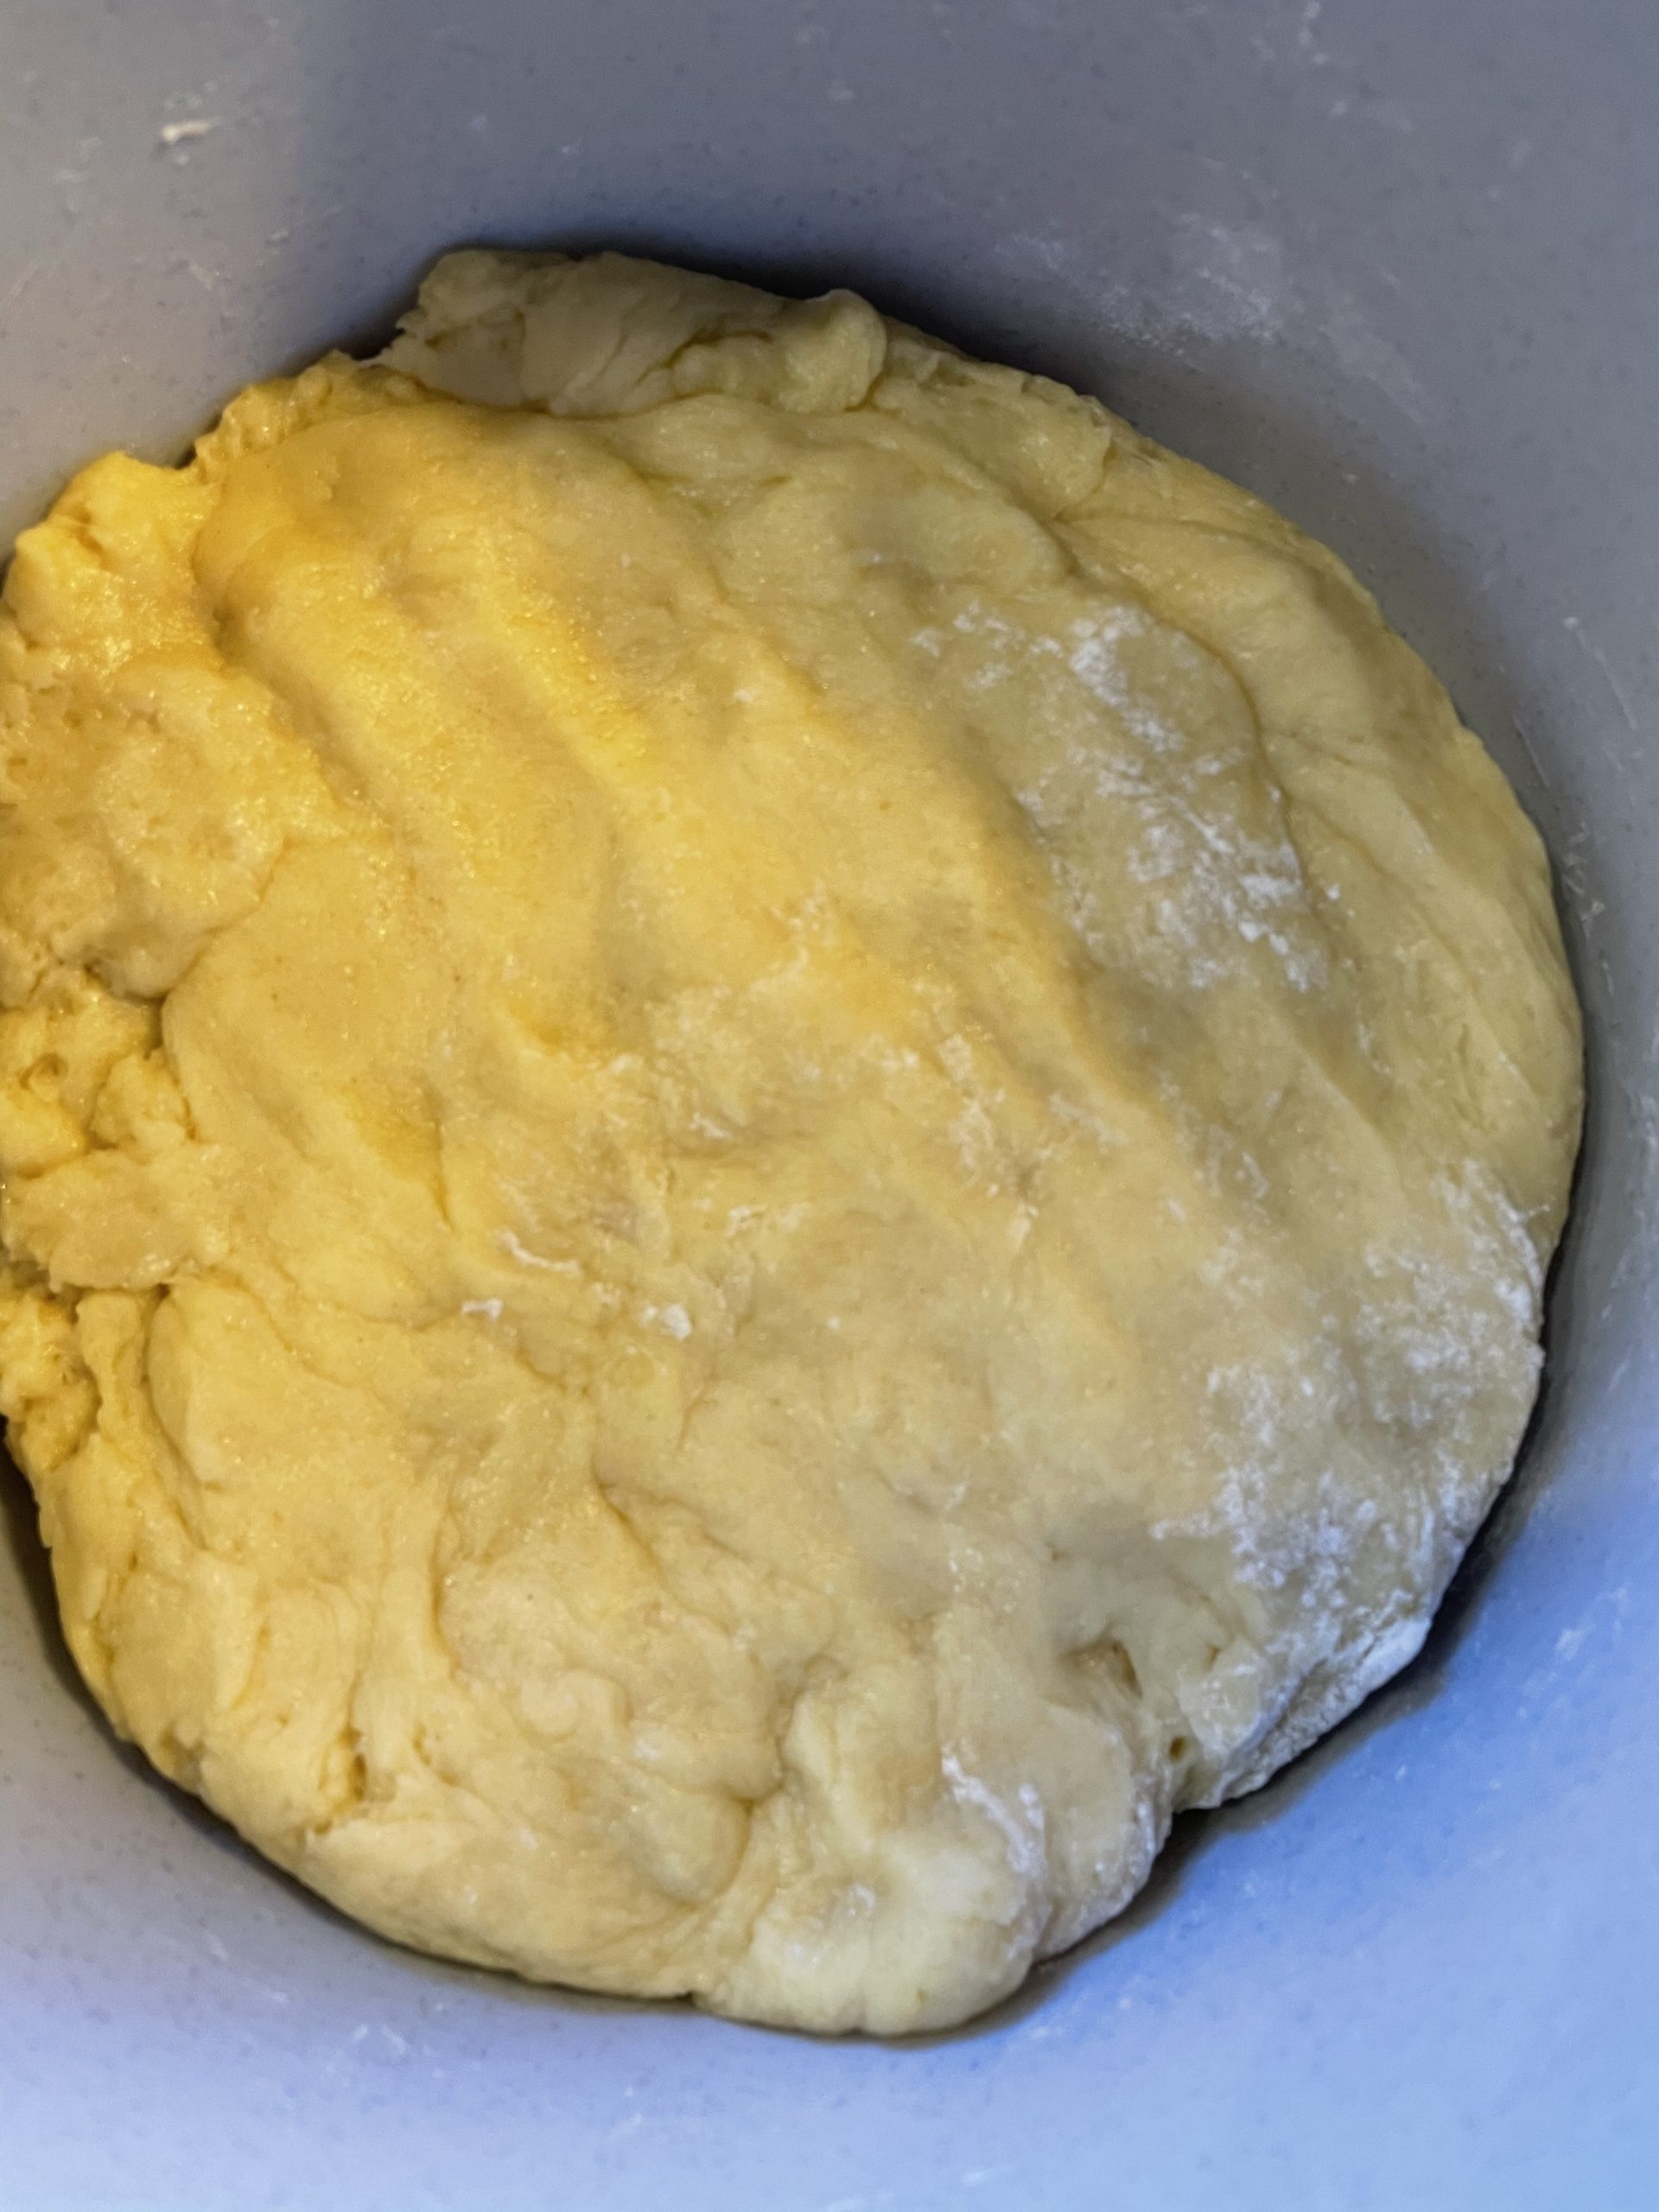
Bild zum Schritt 2 für das Bastel- und DIY-Abenteuer für Kinder: 'Anschließend lasst ihr den Teig in einer Schüssel an einem...'

3

Kneads the dough after it has risen again.

Bild zum Schritt 3 für das Bastel- und DIY-Abenteuer für Kinder: 'Knetet den Teig nachdem er aufgegangen ist noch einmal durch.'

4

Then roll it out thick. Use as little flour as possible, as the flour burns quickly in the fat later!

Bild zum Schritt 4 für das Bastel- und DIY-Abenteuer für Kinder: 'Dann rollt ihr ihn dick aus. Verwendet dabei möglichst wenig...'

5

Now you're cutting out circles with a drinking glass.

Bild zum Schritt 5 für das Bastel- und DIY-Abenteuer für Kinder: 'Jetzt stecht ihr mit einem Trinkglas Kreise aus.'

6

Put the punctured circles on a dishcloth.
They'd stick to another bottom!

Bild zum Schritt 6 für das Bastel- und DIY-Abenteuer für Kinder: 'Die ausgestochenen Kreise legt ihr auf ein Geschirrtuch.  ...'

7

Place the circles at a distance, so that they can still have room when they open.

Bild zum Schritt 7 für das Bastel- und DIY-Abenteuer für Kinder: 'Legt die Kreise mit Abstand aus. Damit sie beim Aufgehen...'

8

Cover her with a dishcloth and put her in a warm place.

Bild zum Schritt 8 für das Bastel- und DIY-Abenteuer für Kinder: 'Deckt sie nun mit einem Geschirrtuch ab und stellt sie...'

9

Let them open for the second time!

Bild zum Schritt 9 für das Bastel- und DIY-Abenteuer für Kinder: 'Lasst sie zum zweiten Mal aufgehen!'

10

Now put a pot on the stove and melt in it half a rod of fat. For this use high-heatable frying and frying fat! Test if the fat is hot enough with a wooden cooking spoon to make it small bubbles!

11

Meanwhile, you can start to take off the cones.
First, use your fingertips to stretch into cold fat and rub it into the fingertips. Then take a circle and pull or squeeze out the middle of your dough. So the dough in the middle becomes thin and outside a small thick dough edge remains.

Bild zum Schritt 11 für das Bastel- und DIY-Abenteuer für Kinder: 'Währenddessen könnt ihr beginnen die Krapfen auszuziehen.   Zuerst...'

12

Make sure to not reach the edge if possible. Form only the thin middle with the two thumbs. Now you should not lay the dough anymore, but bake in the fat immediately.

Bild zum Schritt 12 für das Bastel- und DIY-Abenteuer für Kinder: 'Achtet darauf den Rand möglichst nicht anzulangen. Formt nur mit...'

13

Now set the temperature of your fat to half (otherwise, the cones become dark too quickly!). Then carefully put your pulled out cones into the fat. DO NOT REINSCHMEISSEN!!!
Let them glide in very carefully! They then submerge briefly, come up very quickly and form a dough bubble in the middle.
If the edge becomes slightly brown, then gently apply the cone with two wooden spoons.

Bild zum Schritt 13 für das Bastel- und DIY-Abenteuer für Kinder: 'Stellt die Temperatur eures Fettes nun auf die Hälfte zurück...'

14

Leave the doughnuts in the fat for a short time, so that the back also gets slightly color.

Bild zum Schritt 14 für das Bastel- und DIY-Abenteuer für Kinder: 'Lasst die Krapfen dann noch kurz im Fett, so dass...'

15

Remove the finished dough from the grease, let it drain over the pot for a short time. Place the dough on a plate lined with kitchen crepe or a cake plate.

Bild zum Schritt 15 für das Bastel- und DIY-Abenteuer für Kinder: 'Nehmt den fertigen Krapfen aus dem Fett, lasst ihn über...'

16

If the cones are slightly cooled, then they pollinate on the bottom and then on the top with powdered sugar.

Bild zum Schritt 16 für das Bastel- und DIY-Abenteuer für Kinder: 'Sind die Krapfen etwas abgekühlt, dann bestäubt sie auf der...'

17

Until serving, put the doughnuts in a bowl.

Bild zum Schritt 17 für das Bastel- und DIY-Abenteuer für Kinder: 'Bis zum Servieren legt ihr die Krapfen nun in eine...'

18

Freshly baked, by the way, the Krapfen taste at the EVERYTHING!

Bild zum Schritt 18 für das Bastel- und DIY-Abenteuer für Kinder: 'Frisch gebacken schmecken die Krapfen übrigens am ALLERBESTEN!'

19

Decorate your carnival table, dress up and the carnival party can start!

Bild zum Schritt 19 für das Bastel- und DIY-Abenteuer für Kinder: 'Dekoriert euren Faschingstisch, verkleidet euch und schon kann die Faschingsparty...'

20

Let them taste them to you!

Materials

Frozen dough:
 500 g Flour
 1 Dice yeast
 1 lb Sugar
 1 Cup of warm milk
 80 g Sugar
 80 g Butter malt
 5 Egg yolks
 a little lemon juice
Other ingredients:
 ½ Bar fat for baking
Other utensils:
 1 Kitchen machine
 1 Bowl
 1 Pasta wood
 1 Dishcloth
 1 Pasta wood
 3 Teaspoon
 1 Baking tray or cake board
 1 Drinking glass
 1 Pot
 2 Cooking spoons
 1 small hand sieve
 1 Large plate
 1 Bowl
 Kitchen crepe
 Aprons
 Cooking aprons
All links marked with a shopping cart lead to Amazon - here we have selected products that we would order ourselves and in part also ordered. In a qualified purchase via the advertising link, we as Amazon partner receive a commission, for you there are no costs. You thus support our cost- and advertising banner-free, educational offer.

Directions

1

After you have your apron on, have washed your hands, then it can start already.
First you weigh and measure all the ingredients and put them in the thermomix. Knead these 2 minutes with the dough level.
Or:
You put the flour in a bowl and dig a hole in the middle with a spoon.
Then stir the yeast, sugar and milk in a cup and then pour them into the hollow in the flour..
Fat, sugar, egg yolk, lemon juice stir her frothy and then add it to her. Now you knead everything together.

Bild zum Schritt 1 für das Bastel- und DIY-Abenteuer für Kinder: 'Nachdem ihr eure Schürze an habt, die Hände gewaschen habt,...'

2

Then leave the dough in a bowl in a warm place. To do this, cover the dough with a dishcloth.

Bild zum Schritt 2 für das Bastel- und DIY-Abenteuer für Kinder: 'Anschließend lasst ihr den Teig in einer Schüssel an einem...'

3

Kneads the dough after it has risen again.
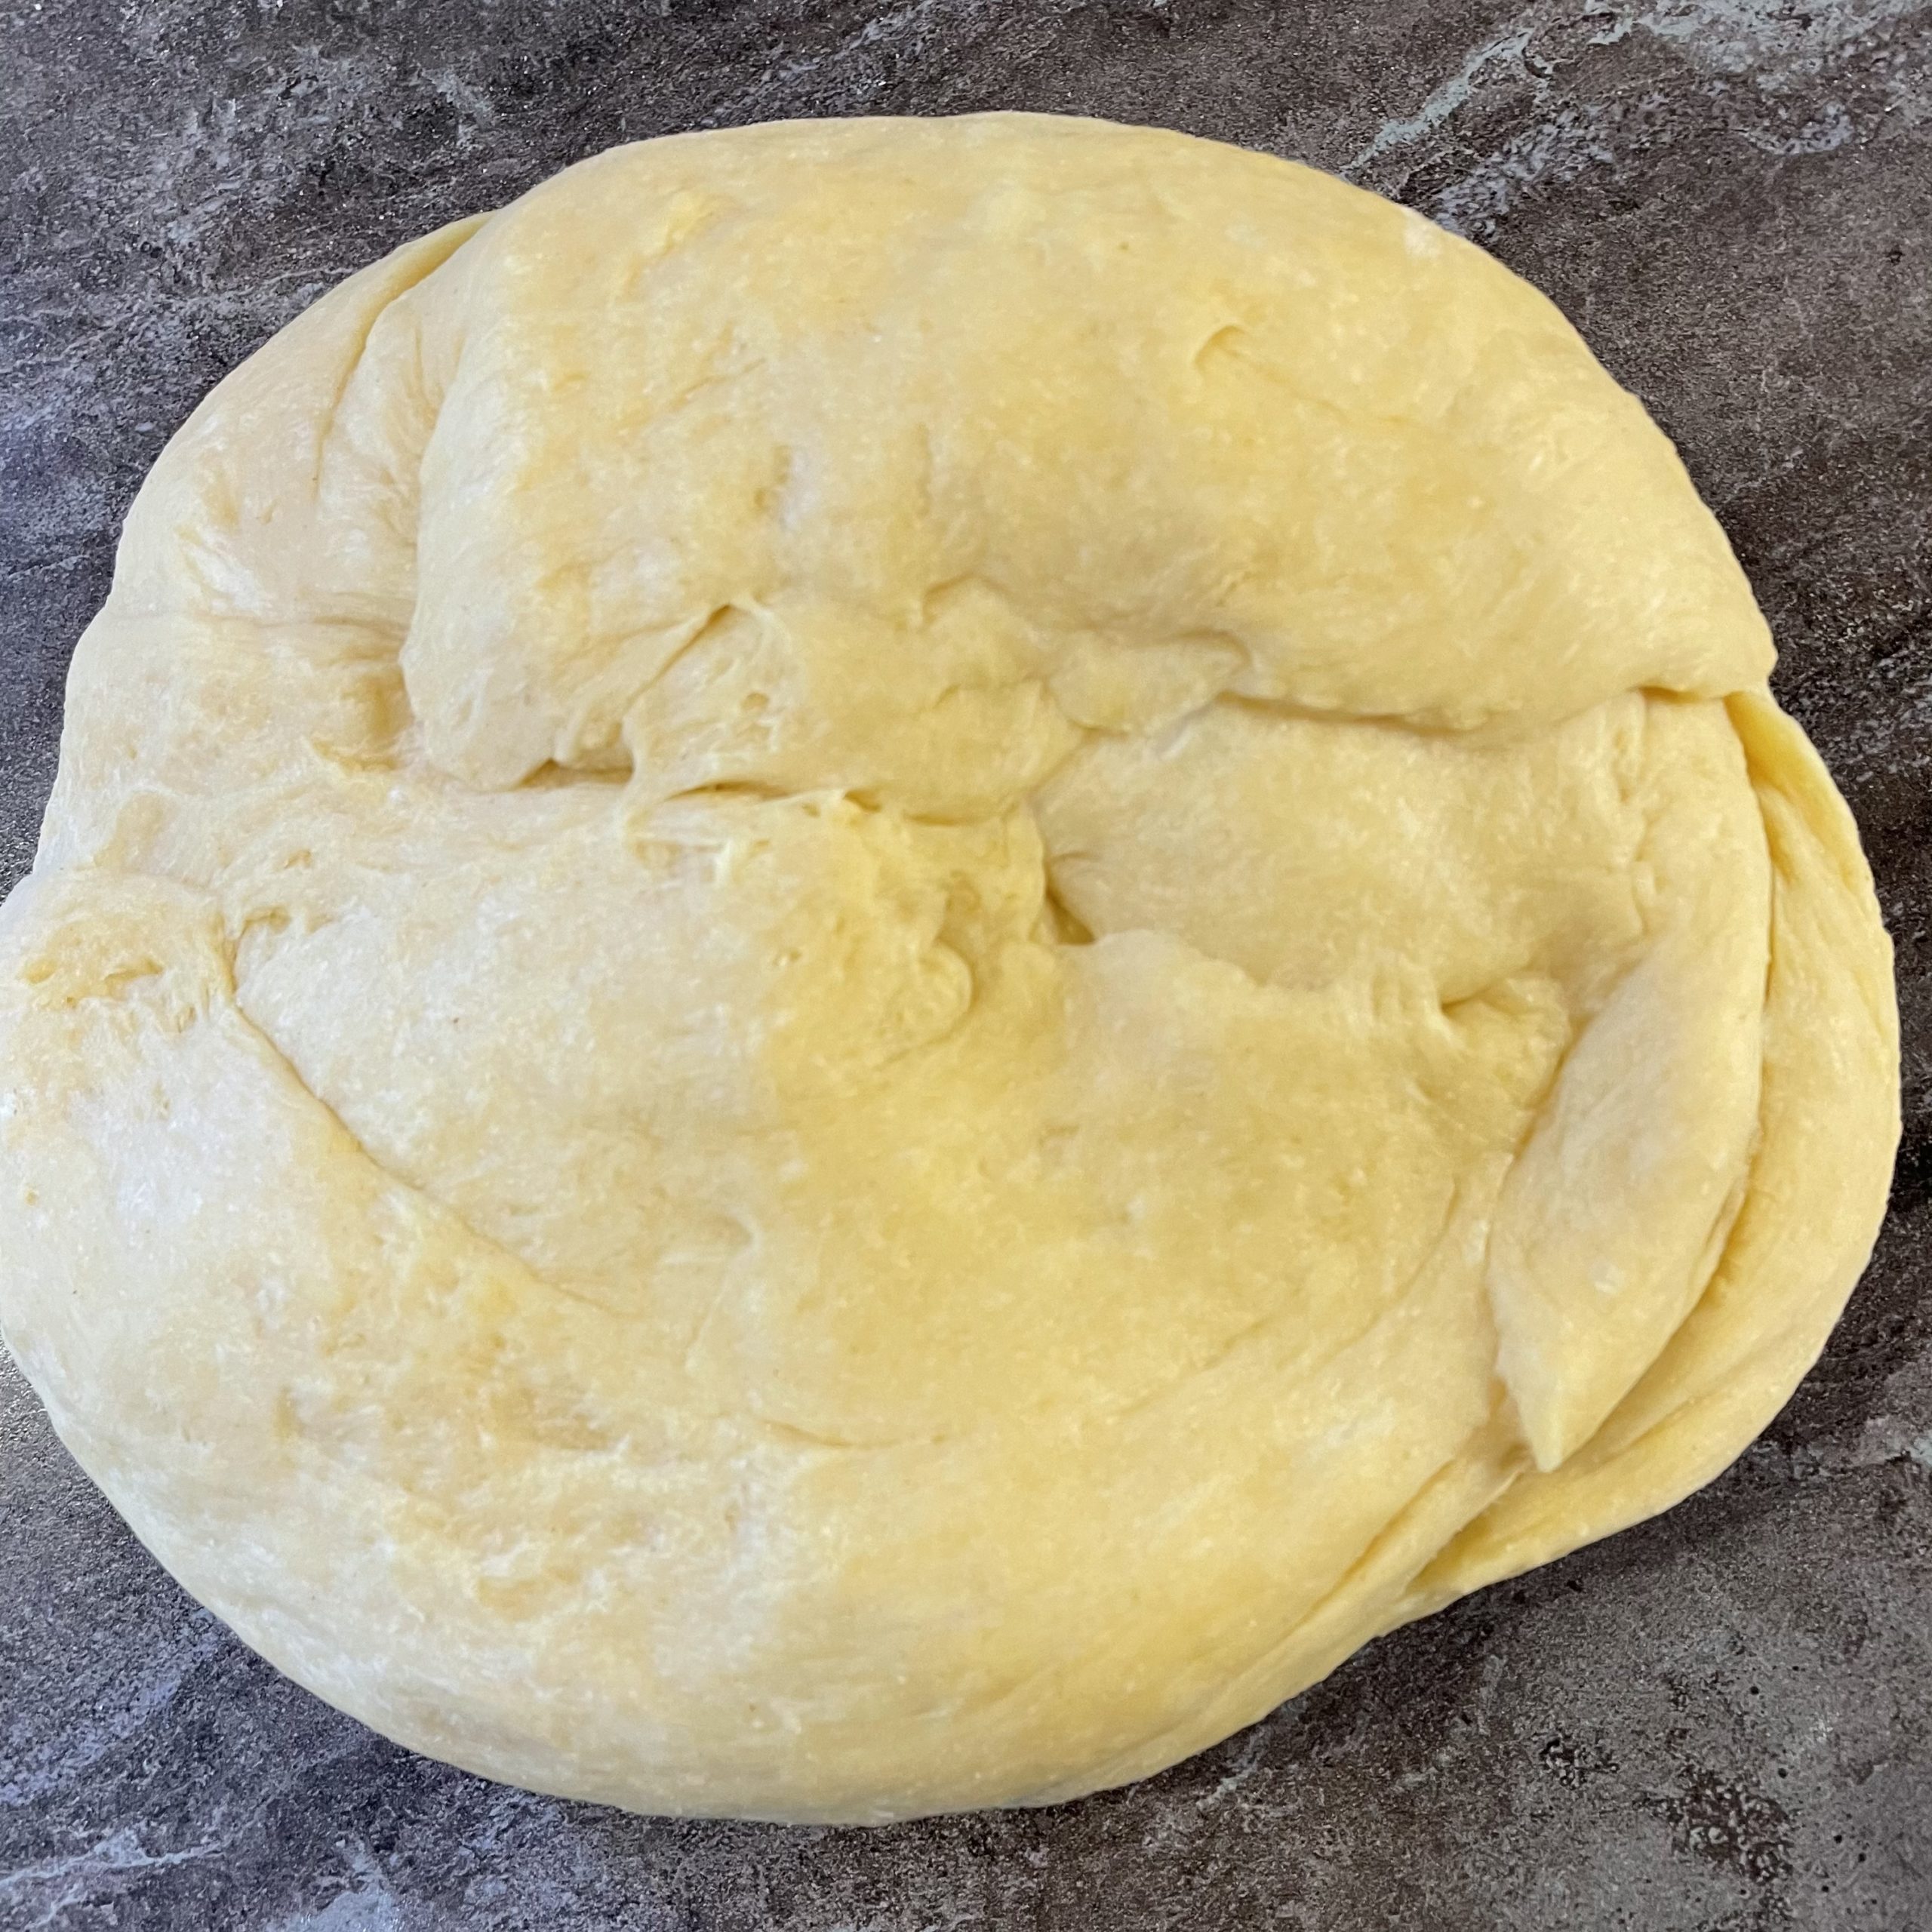
Bild zum Schritt 3 für das Bastel- und DIY-Abenteuer für Kinder: 'Knetet den Teig nachdem er aufgegangen ist noch einmal durch.'

4

Then roll it out thick. Use as little flour as possible, as the flour burns quickly in the fat later!
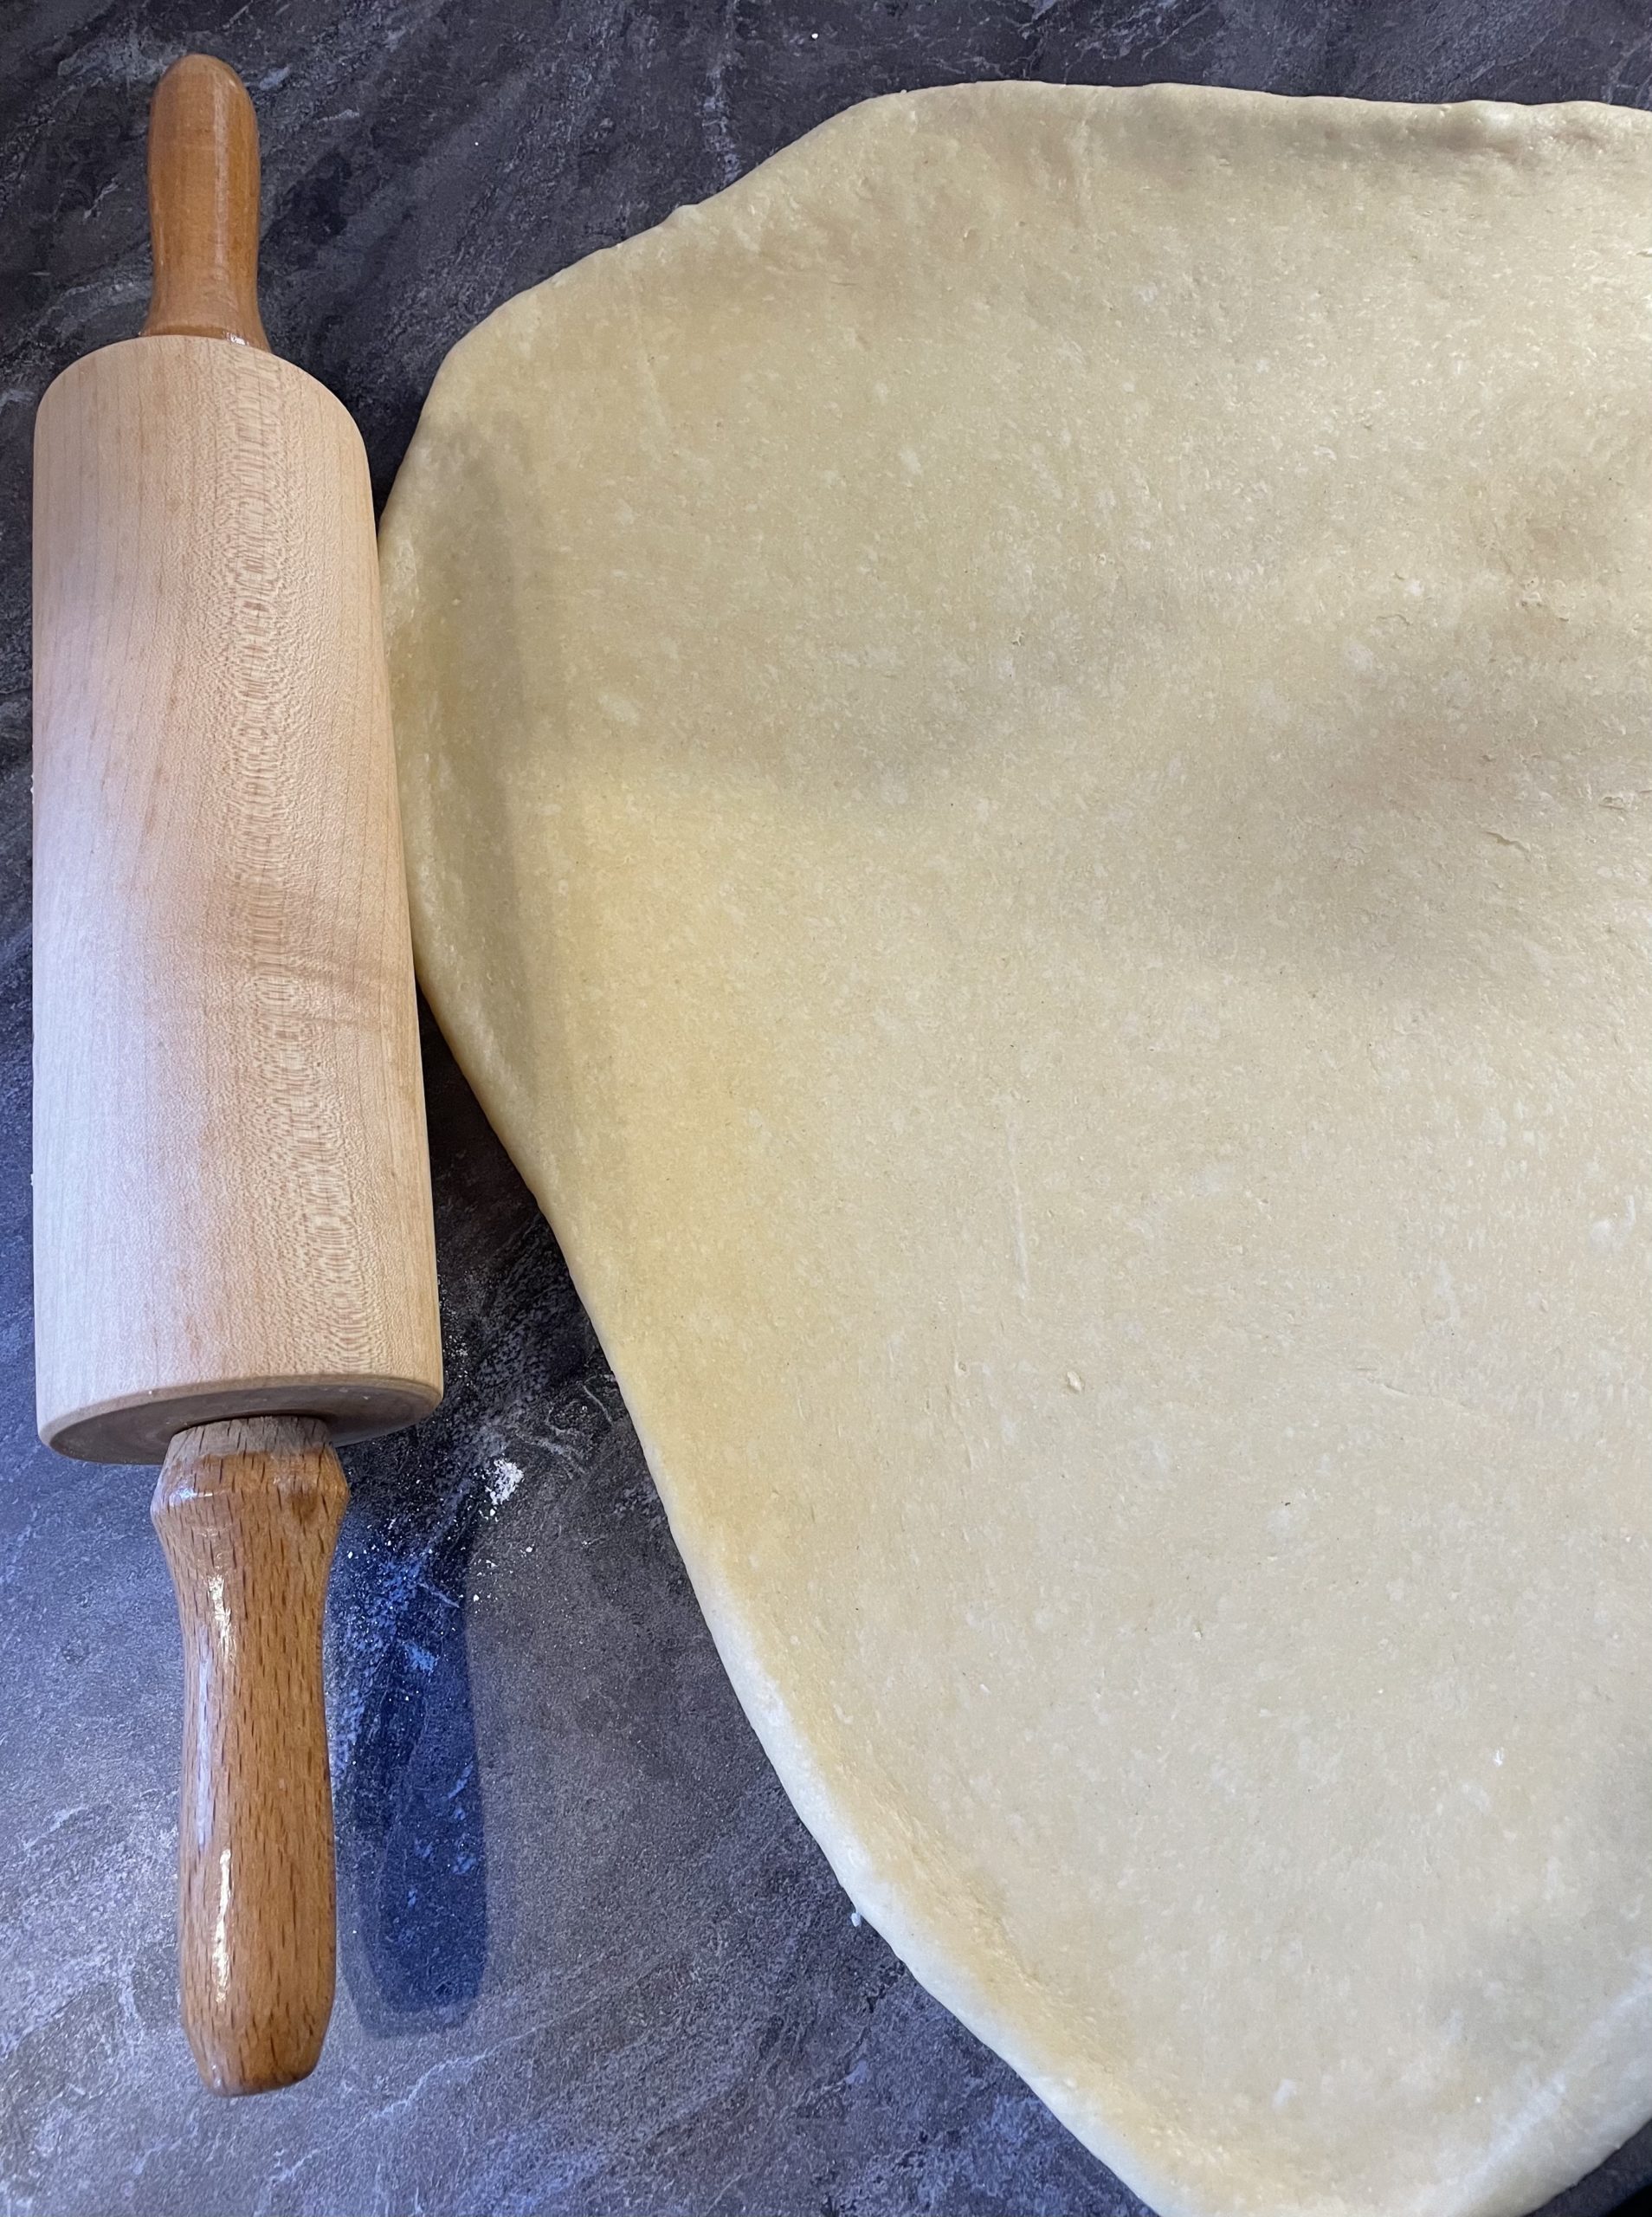
Bild zum Schritt 4 für das Bastel- und DIY-Abenteuer für Kinder: 'Dann rollt ihr ihn dick aus. Verwendet dabei möglichst wenig...'

5

Now you're cutting out circles with a drinking glass.
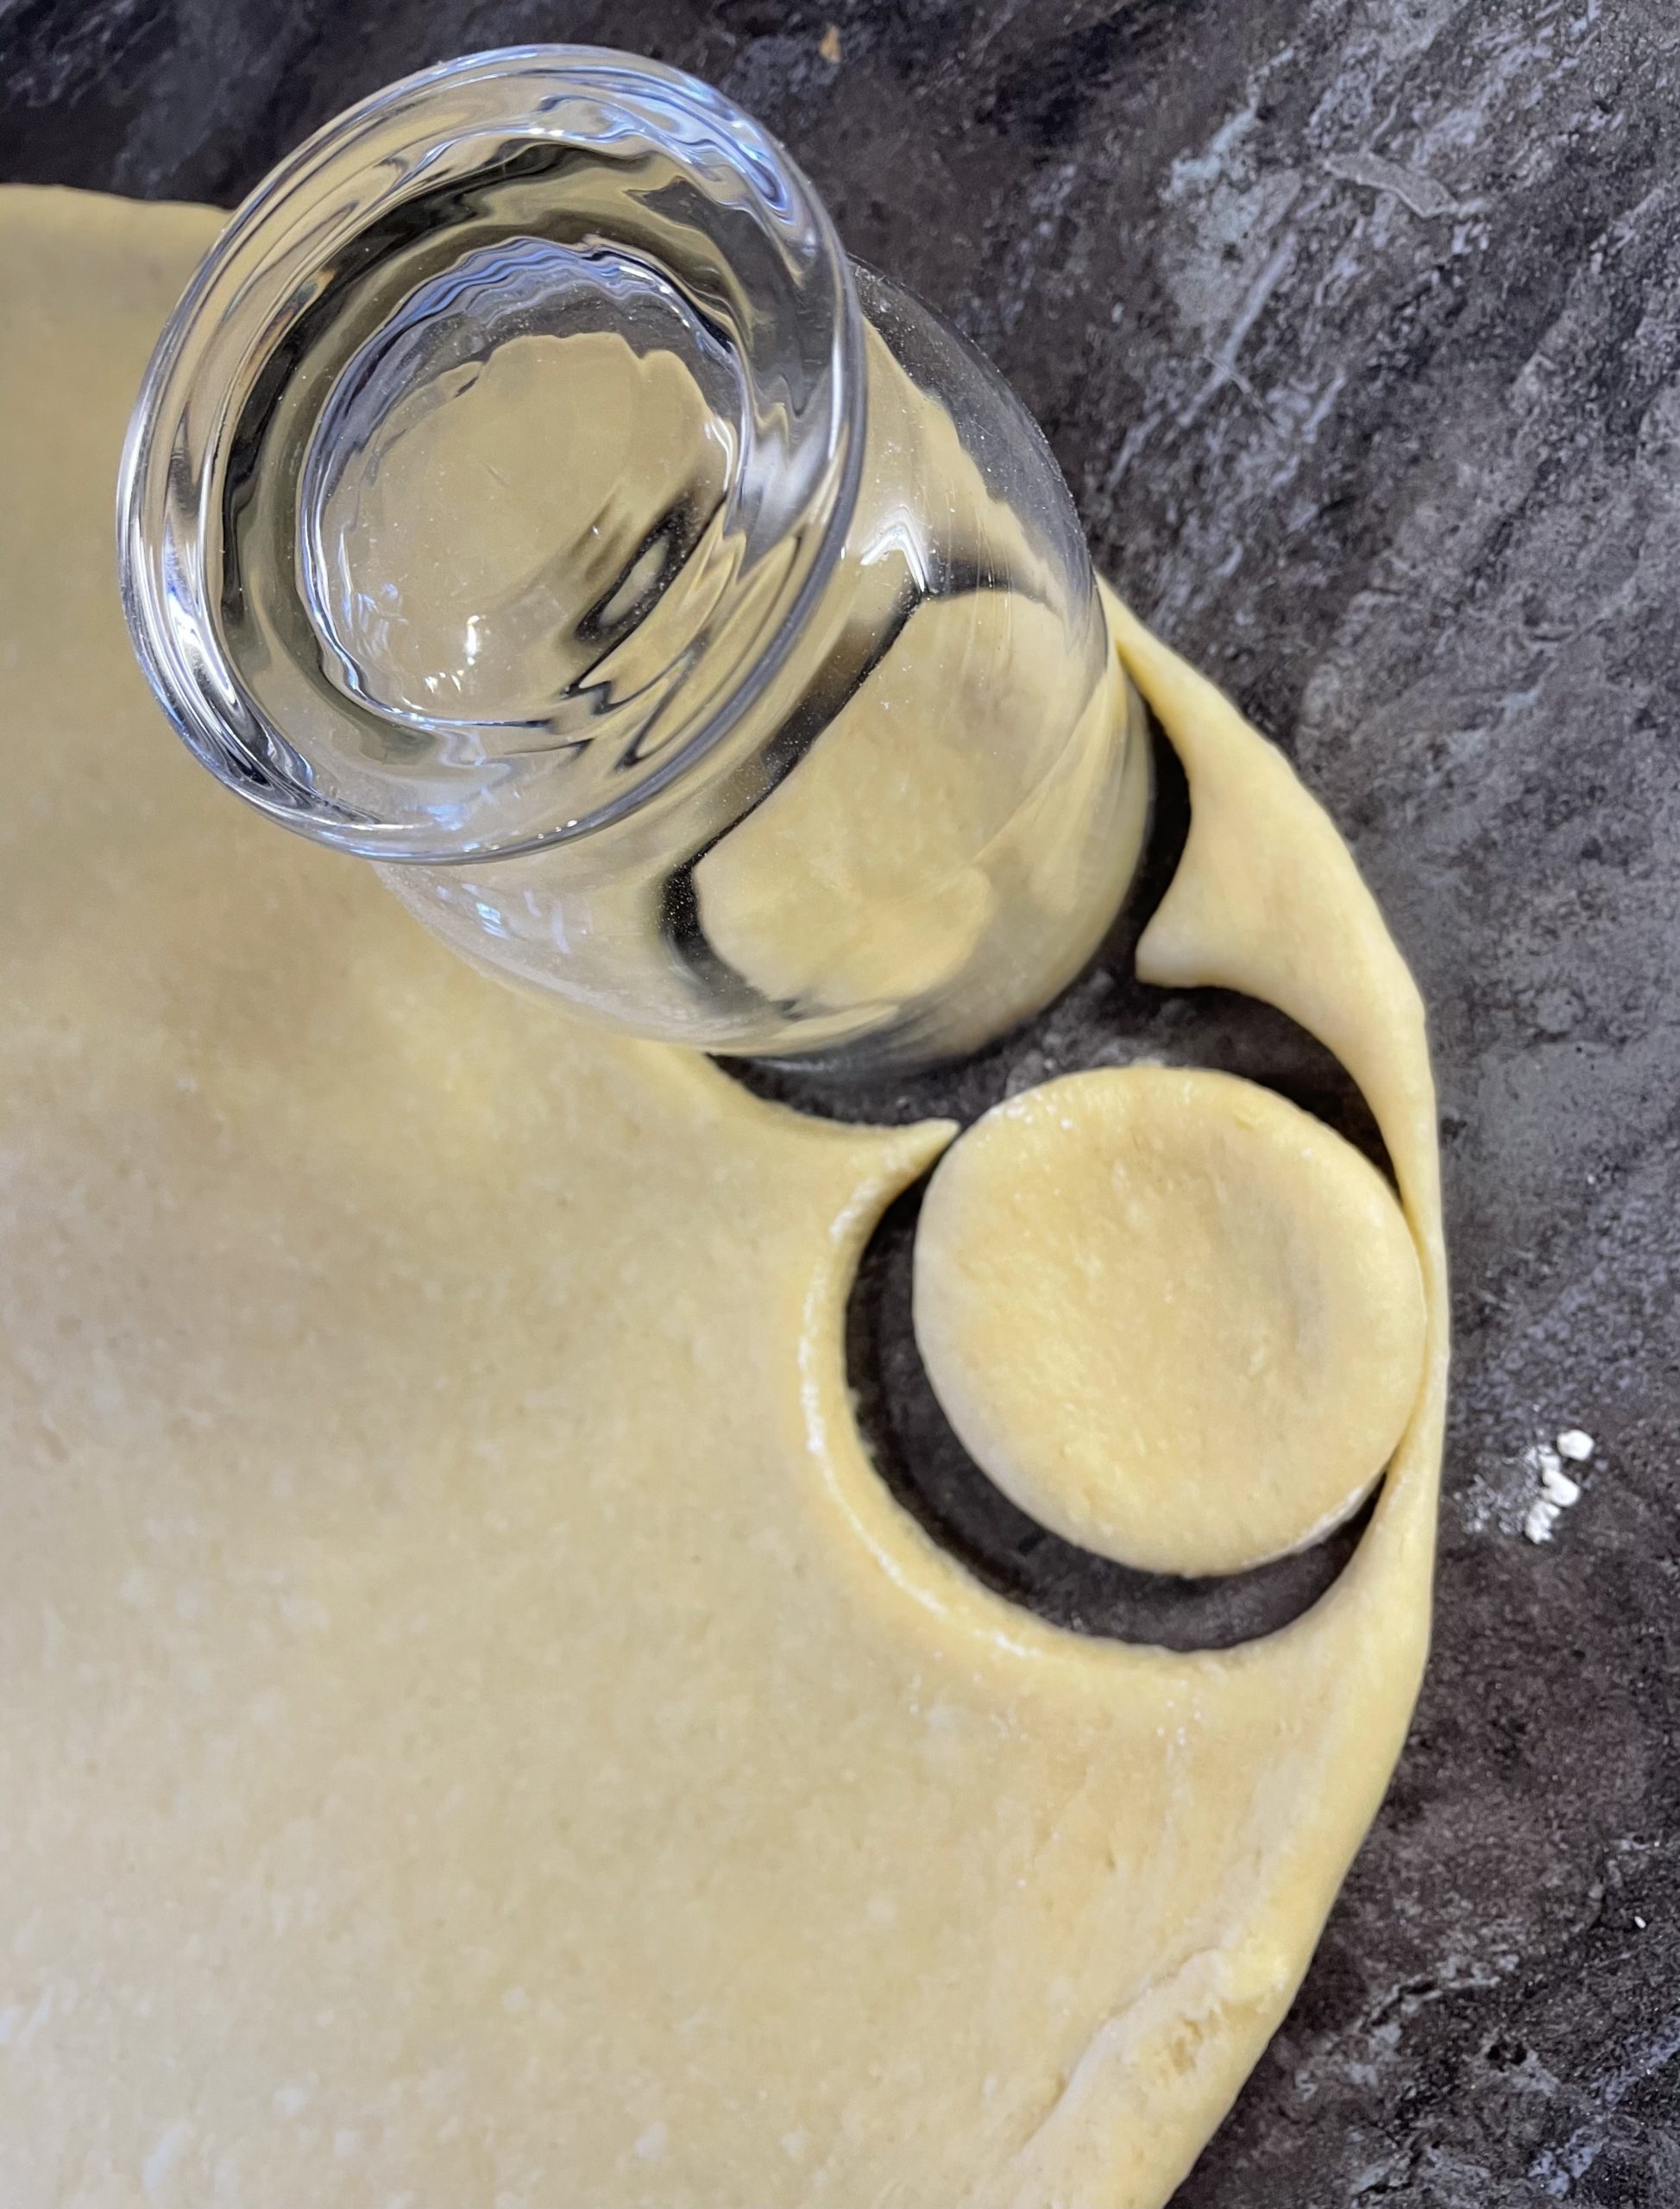
Bild zum Schritt 5 für das Bastel- und DIY-Abenteuer für Kinder: 'Jetzt stecht ihr mit einem Trinkglas Kreise aus.'

6

Put the punctured circles on a dishcloth.
They'd stick to another bottom!
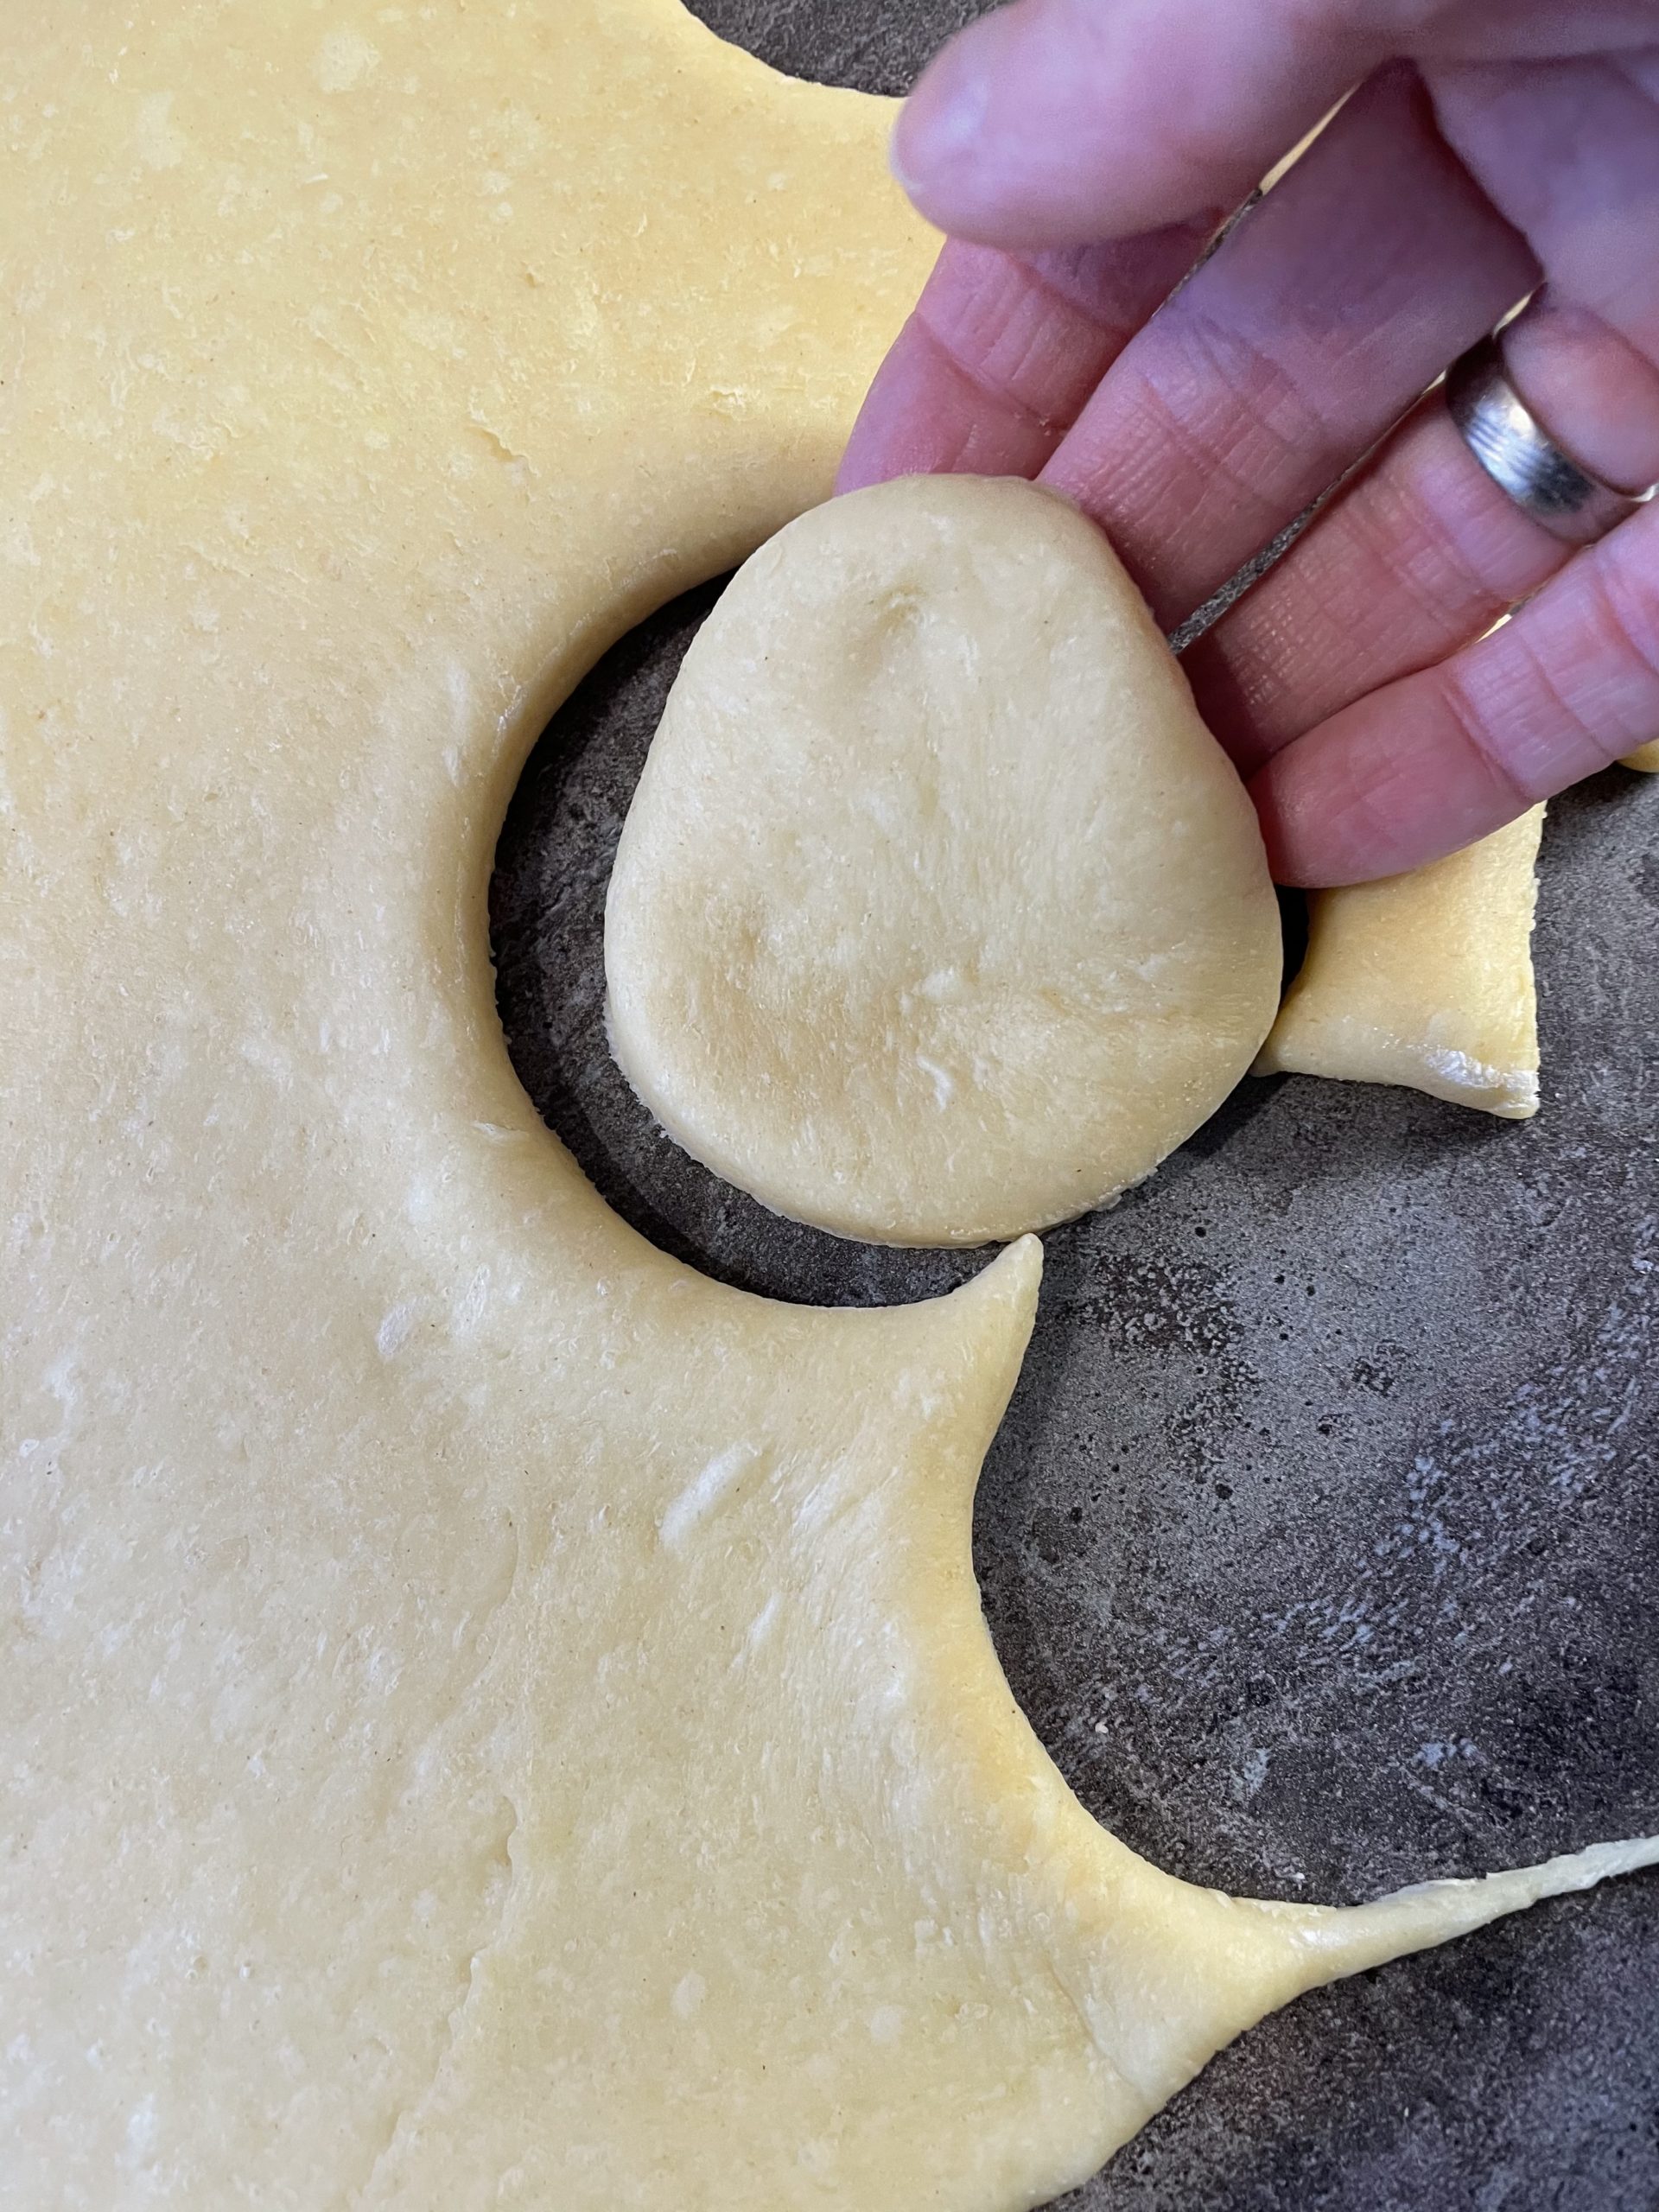
Bild zum Schritt 6 für das Bastel- und DIY-Abenteuer für Kinder: 'Die ausgestochenen Kreise legt ihr auf ein Geschirrtuch.  ...'

7

Place the circles at a distance, so that they can still have room when they open.
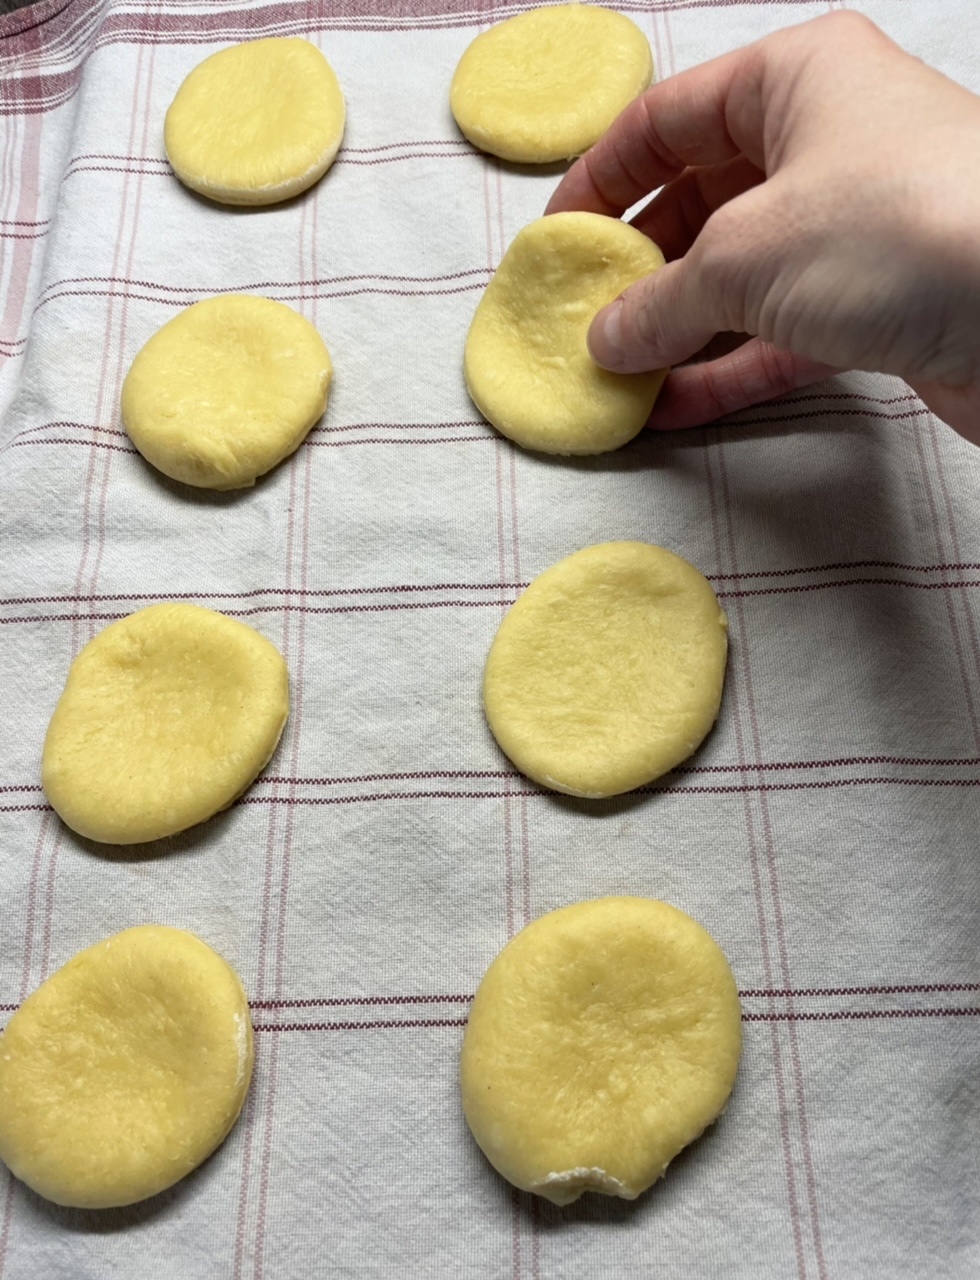
Bild zum Schritt 7 für das Bastel- und DIY-Abenteuer für Kinder: 'Legt die Kreise mit Abstand aus. Damit sie beim Aufgehen...'

8

Cover her with a dishcloth and put her in a warm place.
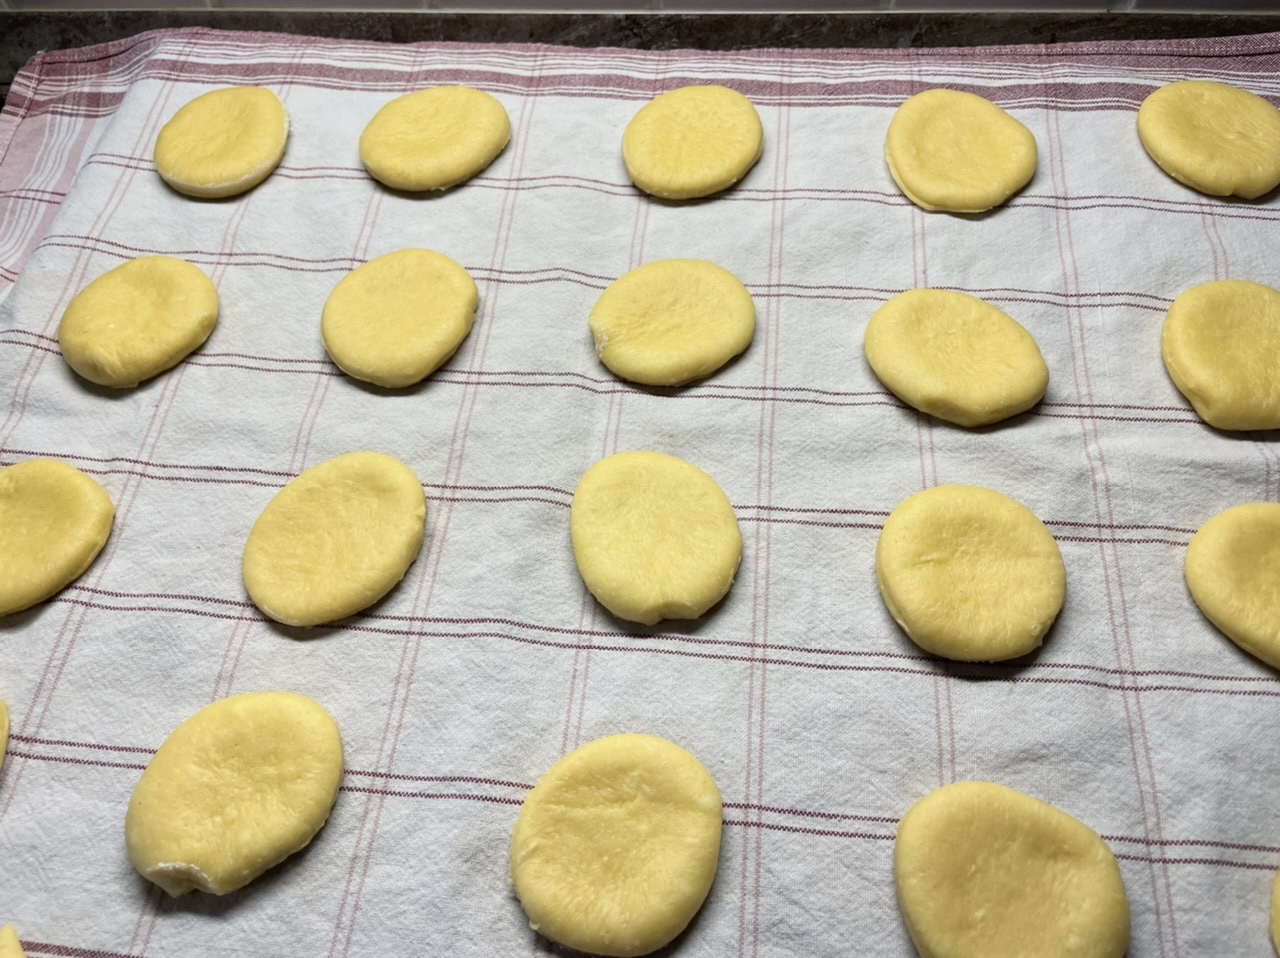
Bild zum Schritt 8 für das Bastel- und DIY-Abenteuer für Kinder: 'Deckt sie nun mit einem Geschirrtuch ab und stellt sie...'

9

Let them open for the second time!
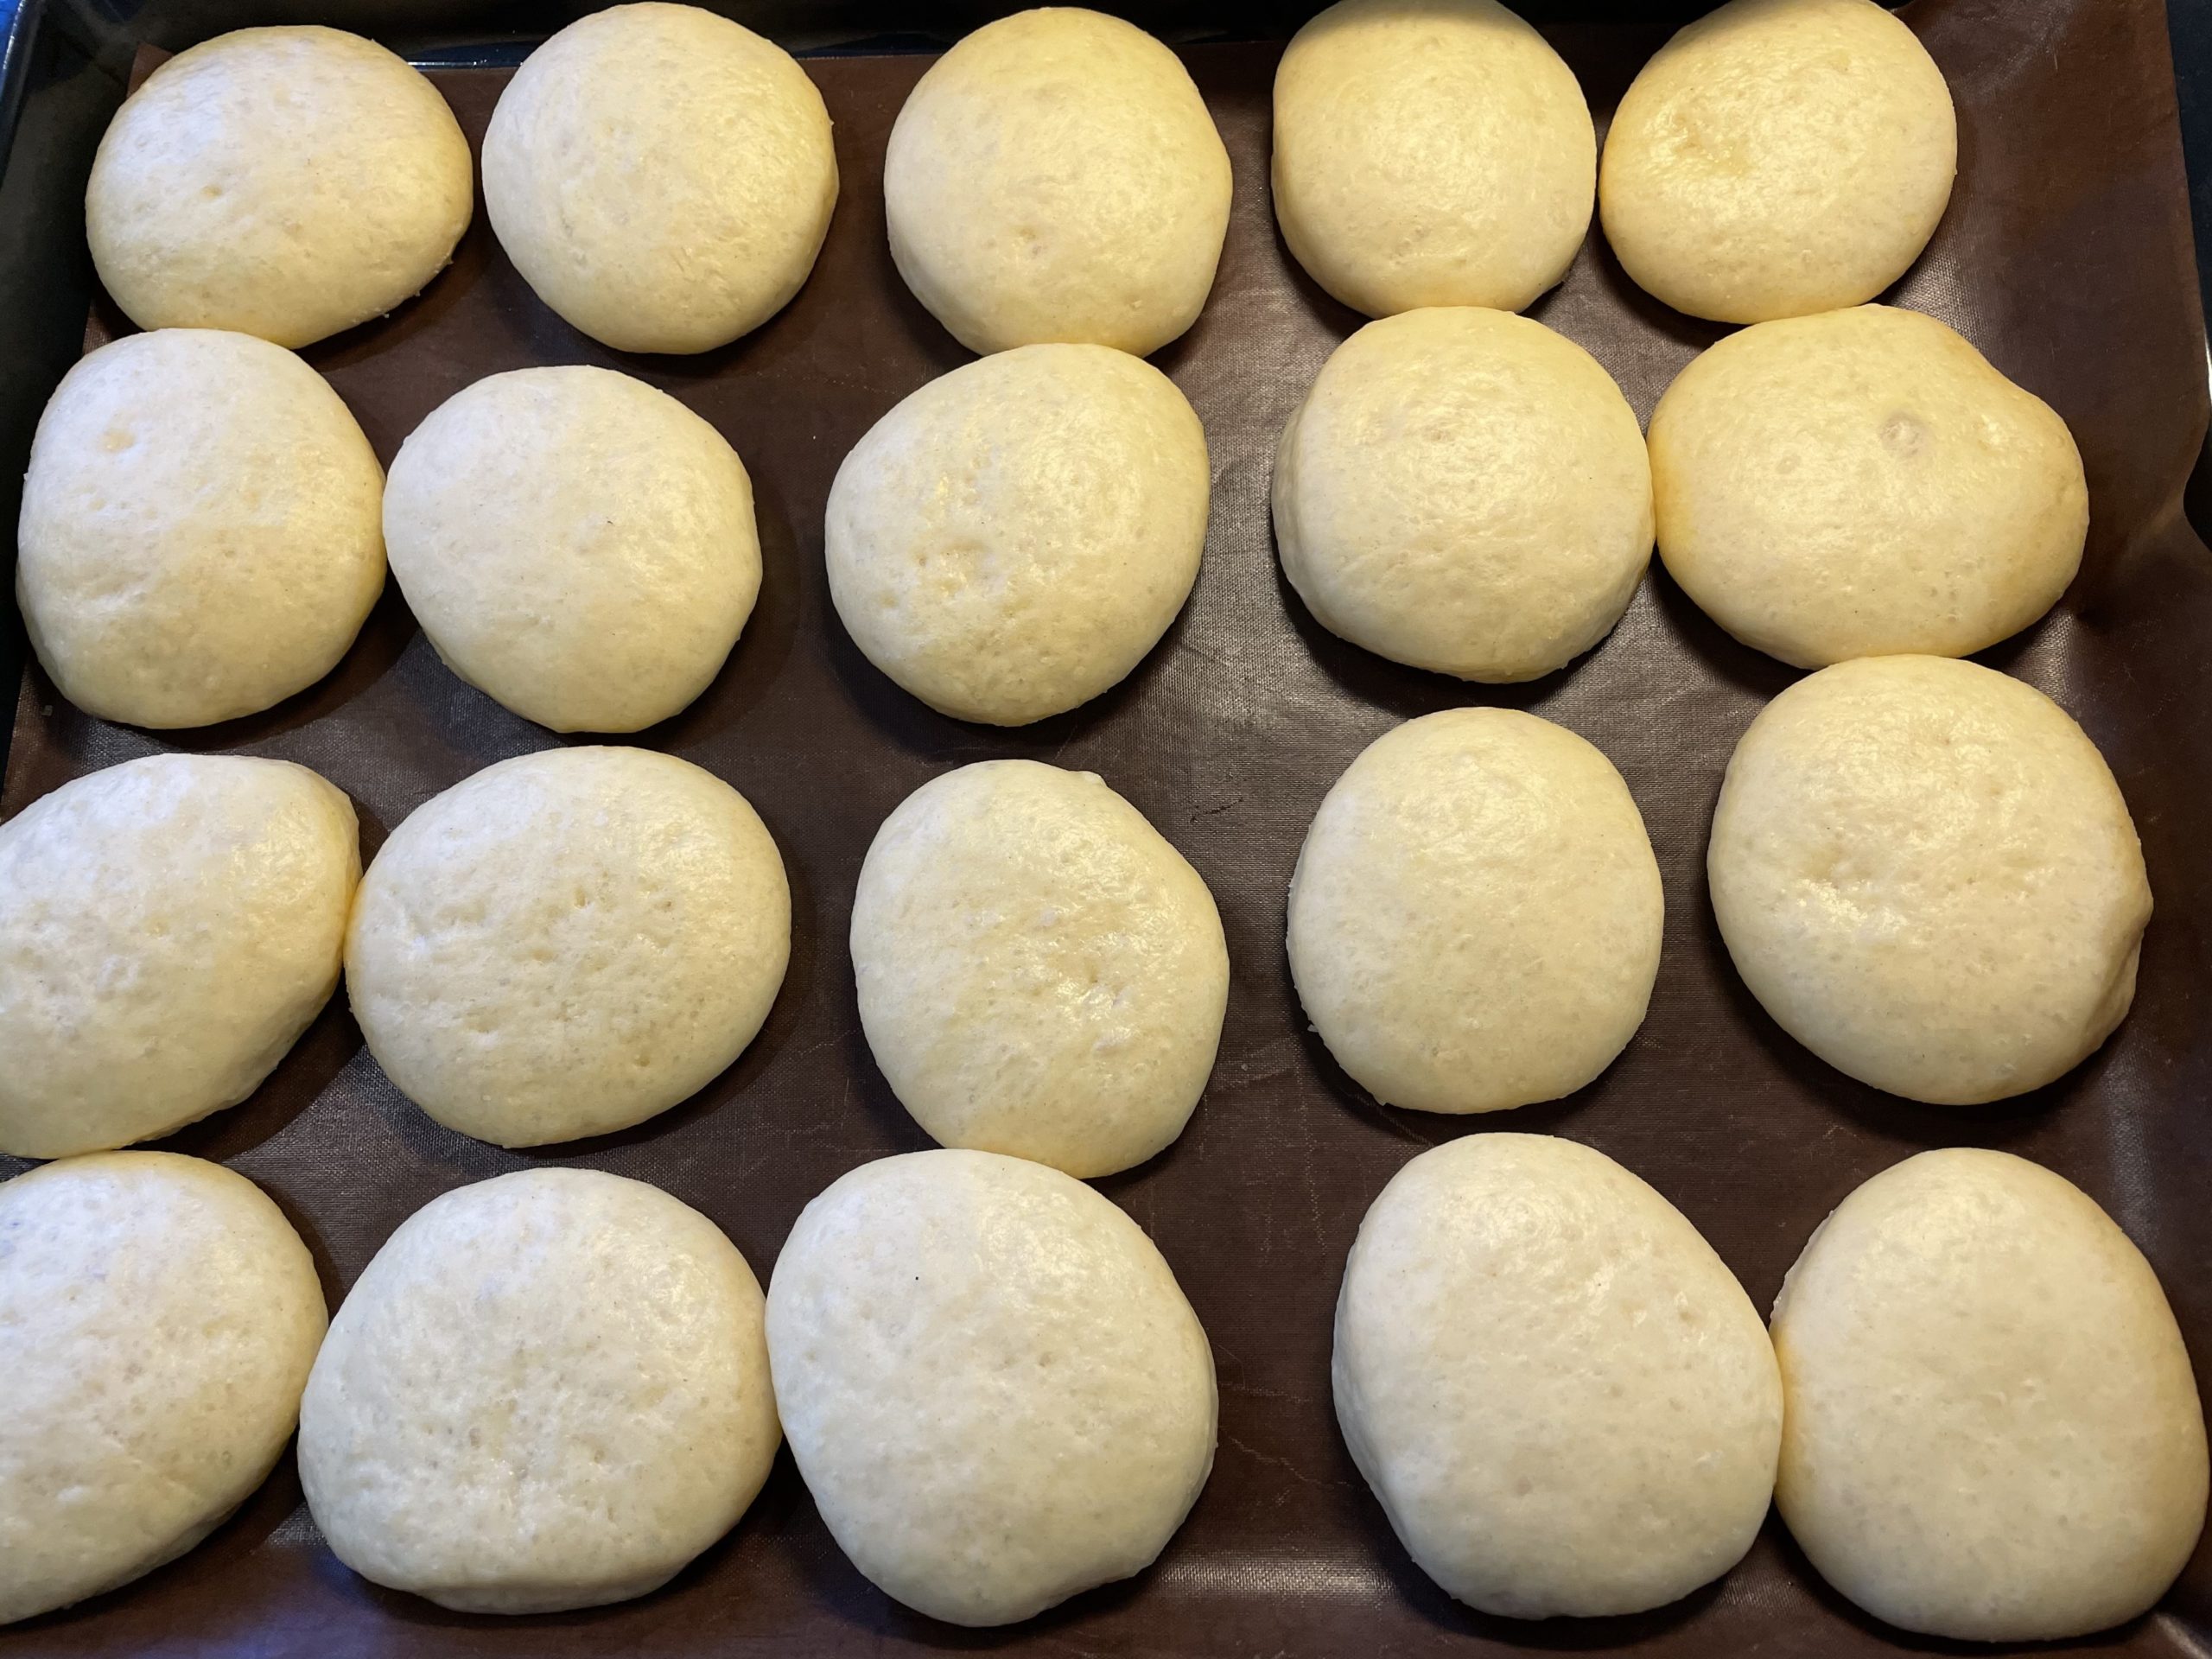
Bild zum Schritt 9 für das Bastel- und DIY-Abenteuer für Kinder: 'Lasst sie zum zweiten Mal aufgehen!'

10

Now put a pot on the stove and melt in it half a rod of fat. For this use high-heatable frying and frying fat! Test if the fat is hot enough with a wooden cooking spoon to make it small bubbles!

11

Meanwhile, you can start to take off the cones.
First, use your fingertips to stretch into cold fat and rub it into the fingertips. Then take a circle and pull or squeeze out the middle of your dough. So the dough in the middle becomes thin and outside a small thick dough edge remains.
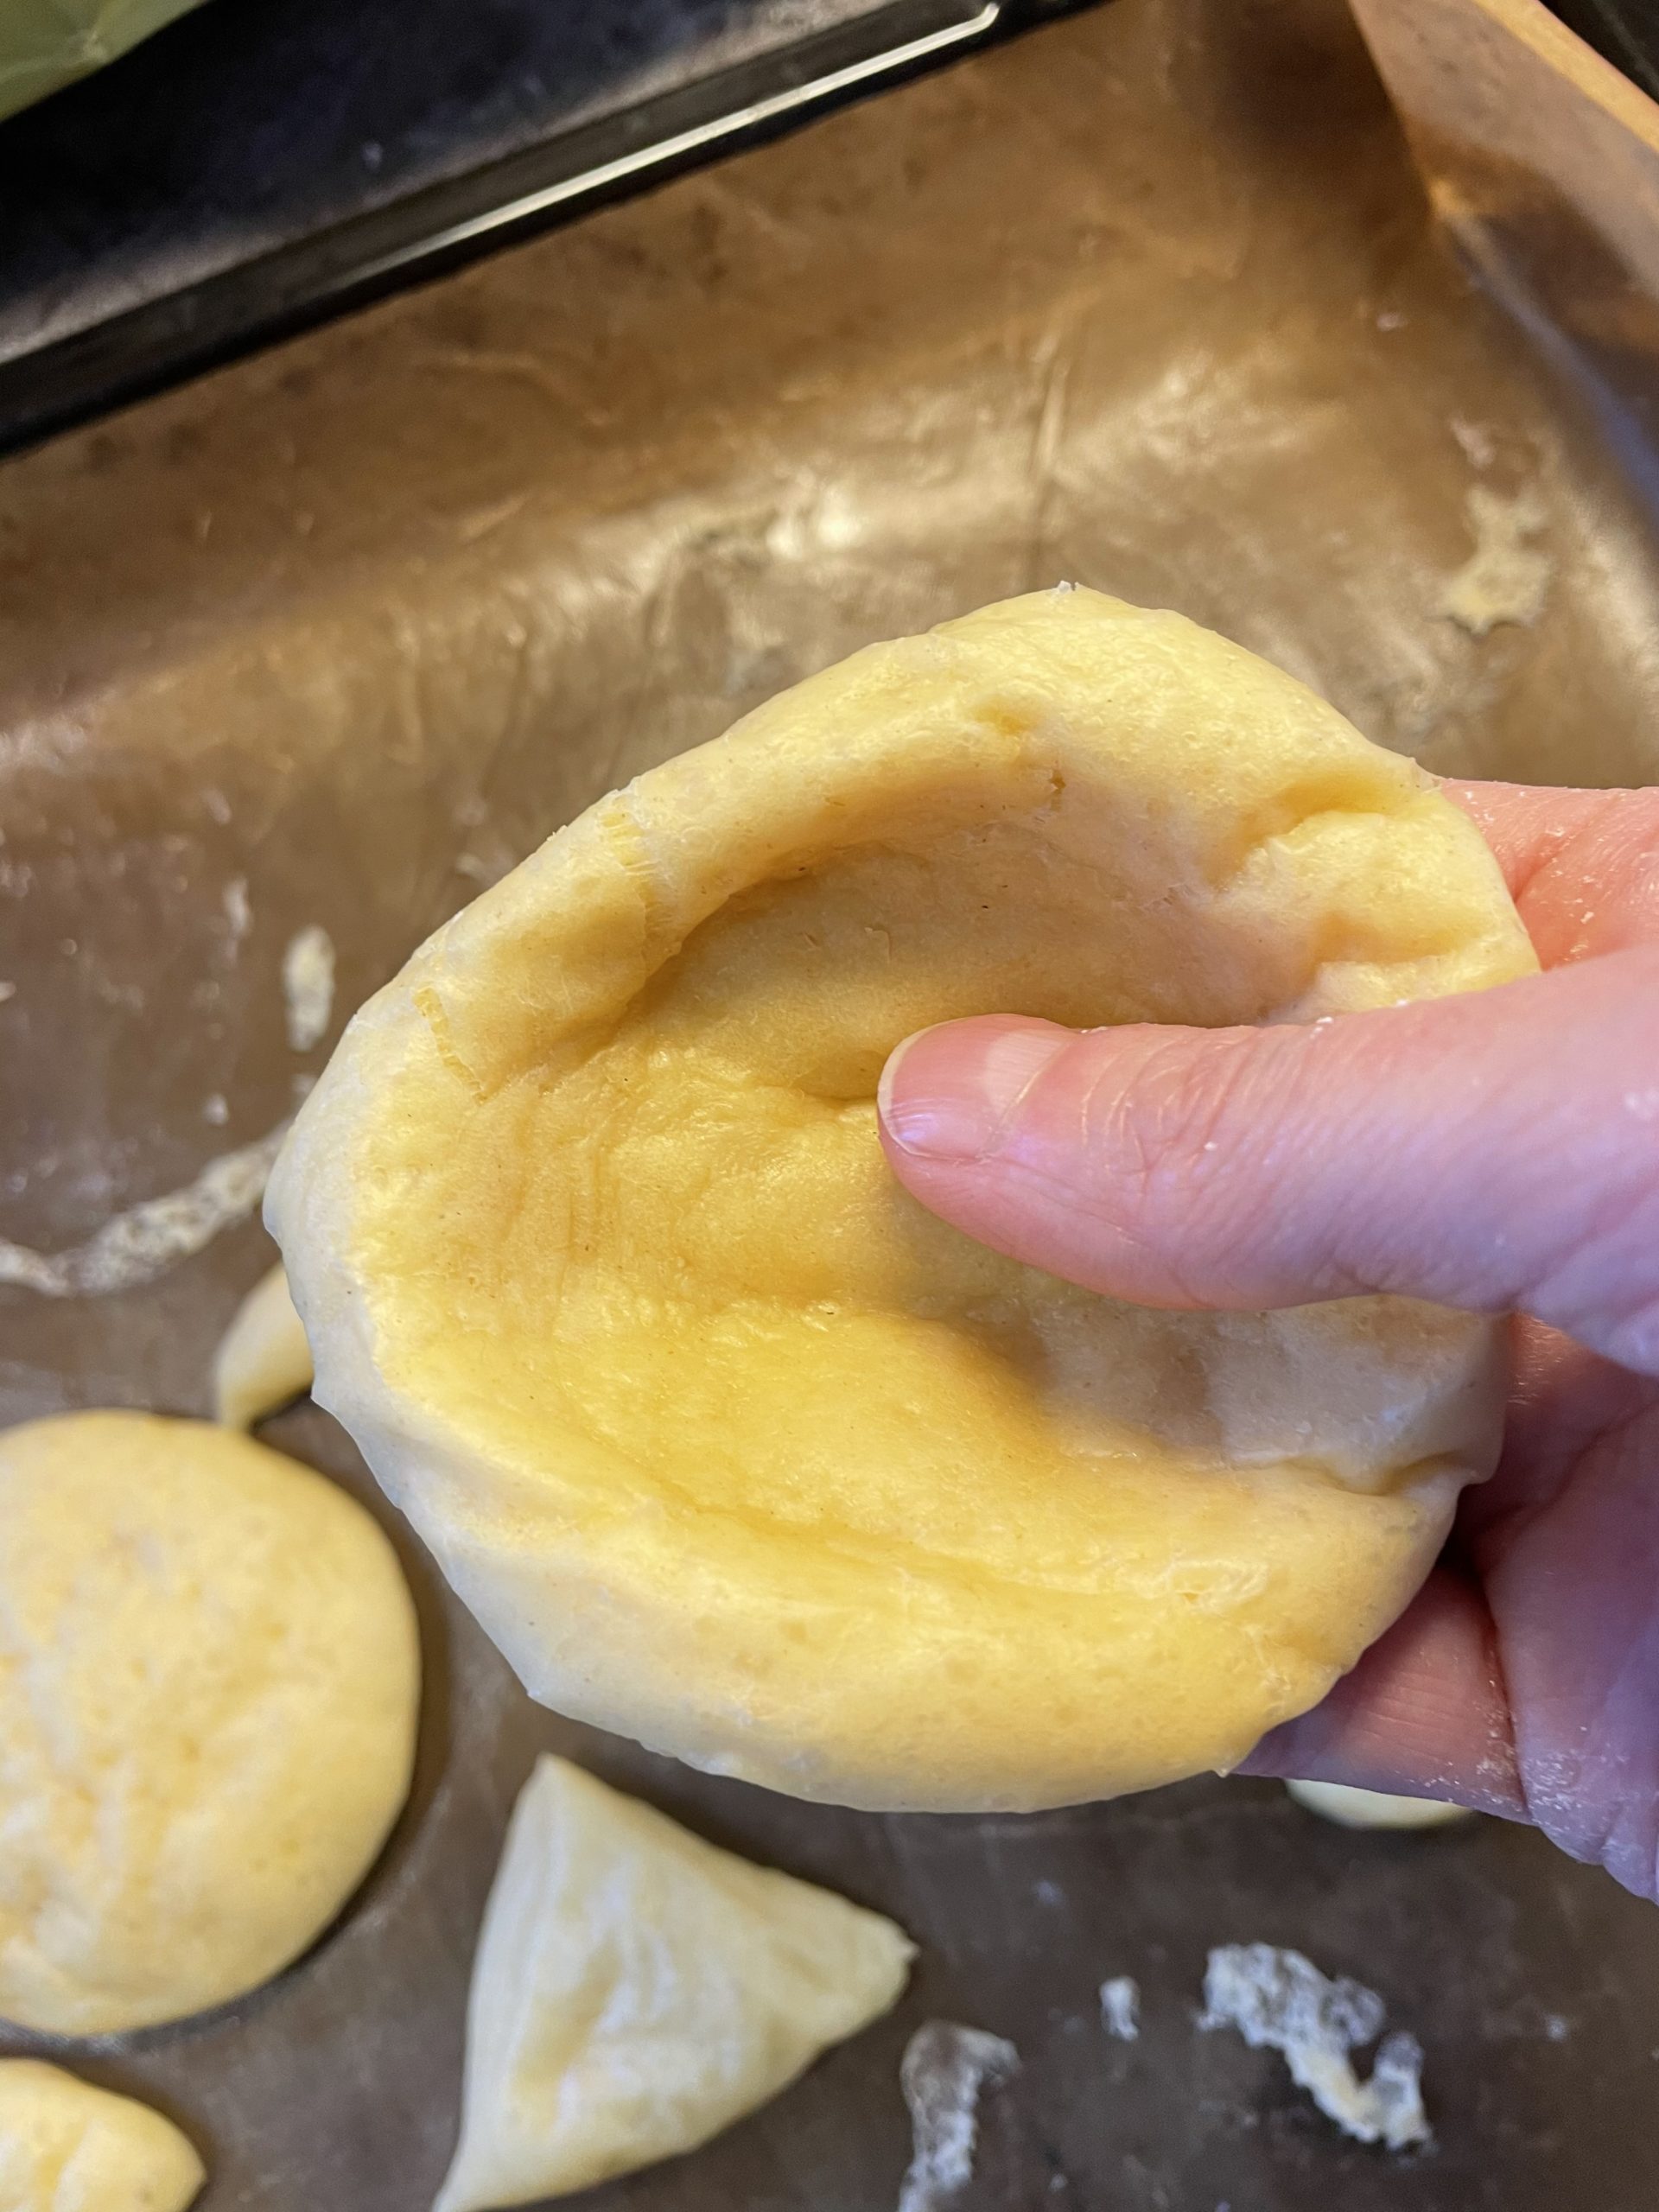
Bild zum Schritt 11 für das Bastel- und DIY-Abenteuer für Kinder: 'Währenddessen könnt ihr beginnen die Krapfen auszuziehen.   Zuerst...'

12

Make sure to not reach the edge if possible. Form only the thin middle with the two thumbs. Now you should not lay the dough anymore, but bake in the fat immediately.
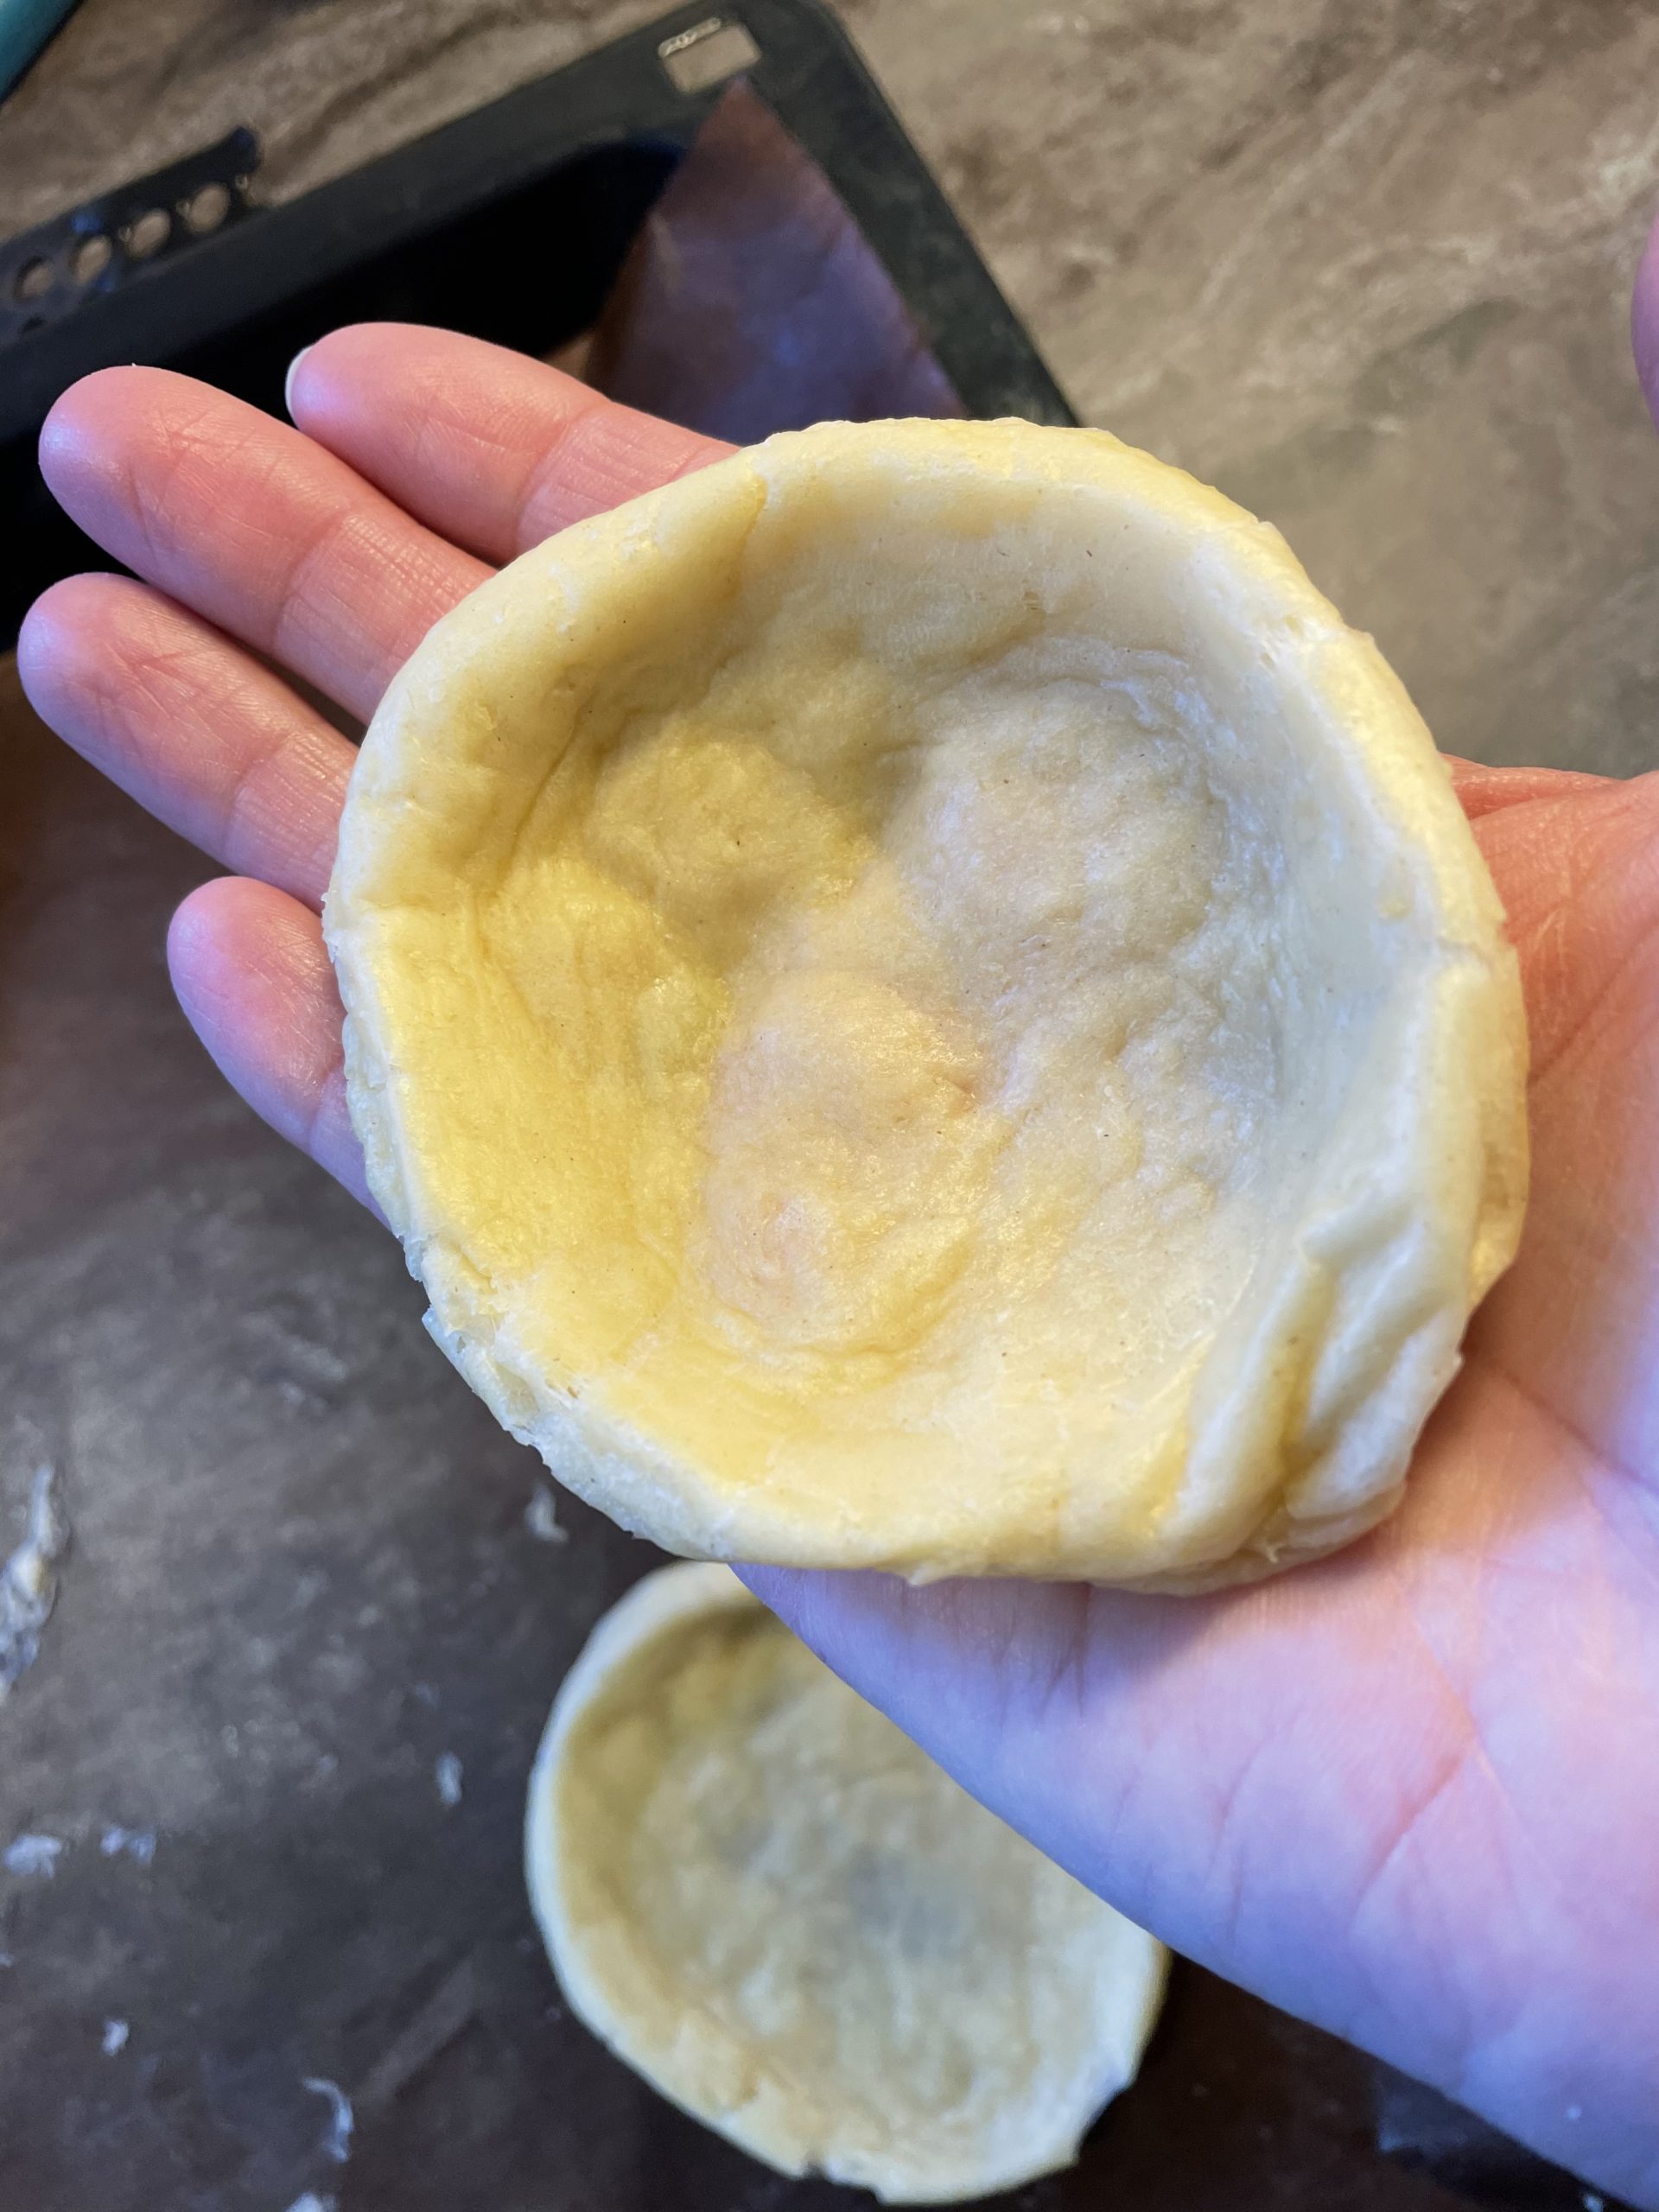
Bild zum Schritt 12 für das Bastel- und DIY-Abenteuer für Kinder: 'Achtet darauf den Rand möglichst nicht anzulangen. Formt nur mit...'

13

Now set the temperature of your fat to half (otherwise, the cones become dark too quickly!). Then carefully put your pulled out cones into the fat. DO NOT REINSCHMEISSEN!!!
Let them glide in very carefully! They then submerge briefly, come up very quickly and form a dough bubble in the middle.
If the edge becomes slightly brown, then gently apply the cone with two wooden spoons.
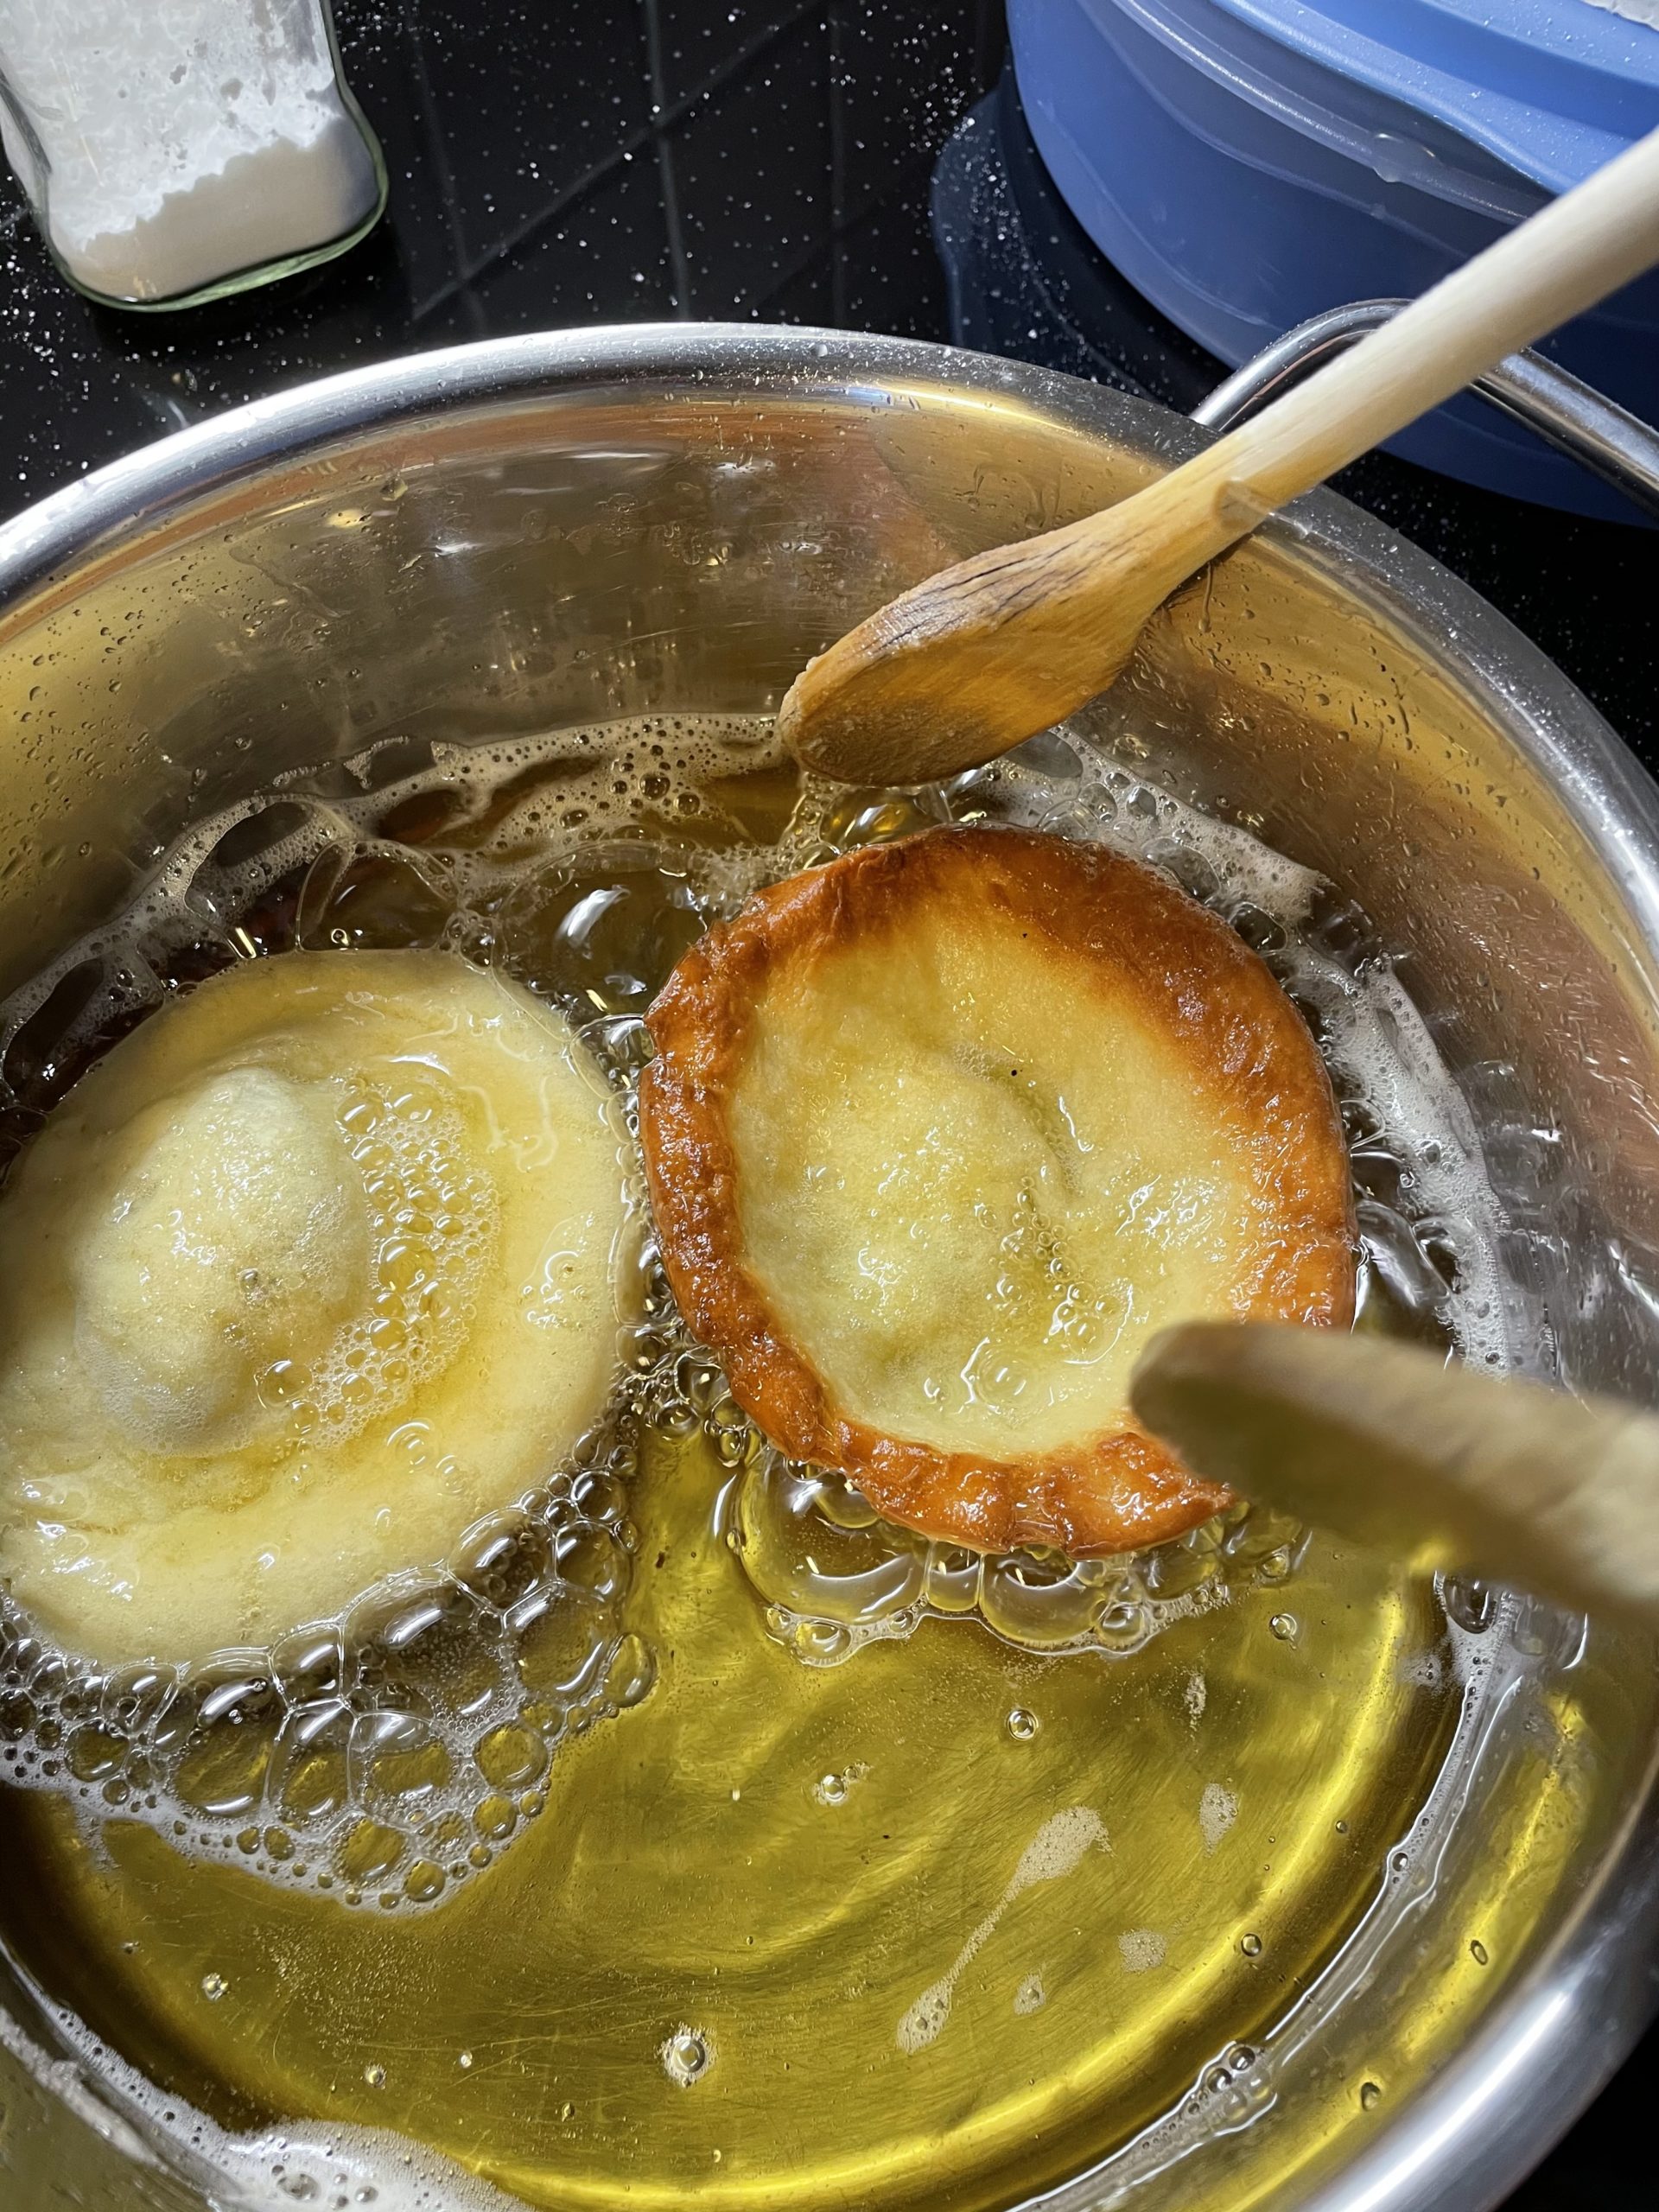
Bild zum Schritt 13 für das Bastel- und DIY-Abenteuer für Kinder: 'Stellt die Temperatur eures Fettes nun auf die Hälfte zurück...'

14

Leave the doughnuts in the fat for a short time, so that the back also gets slightly color.
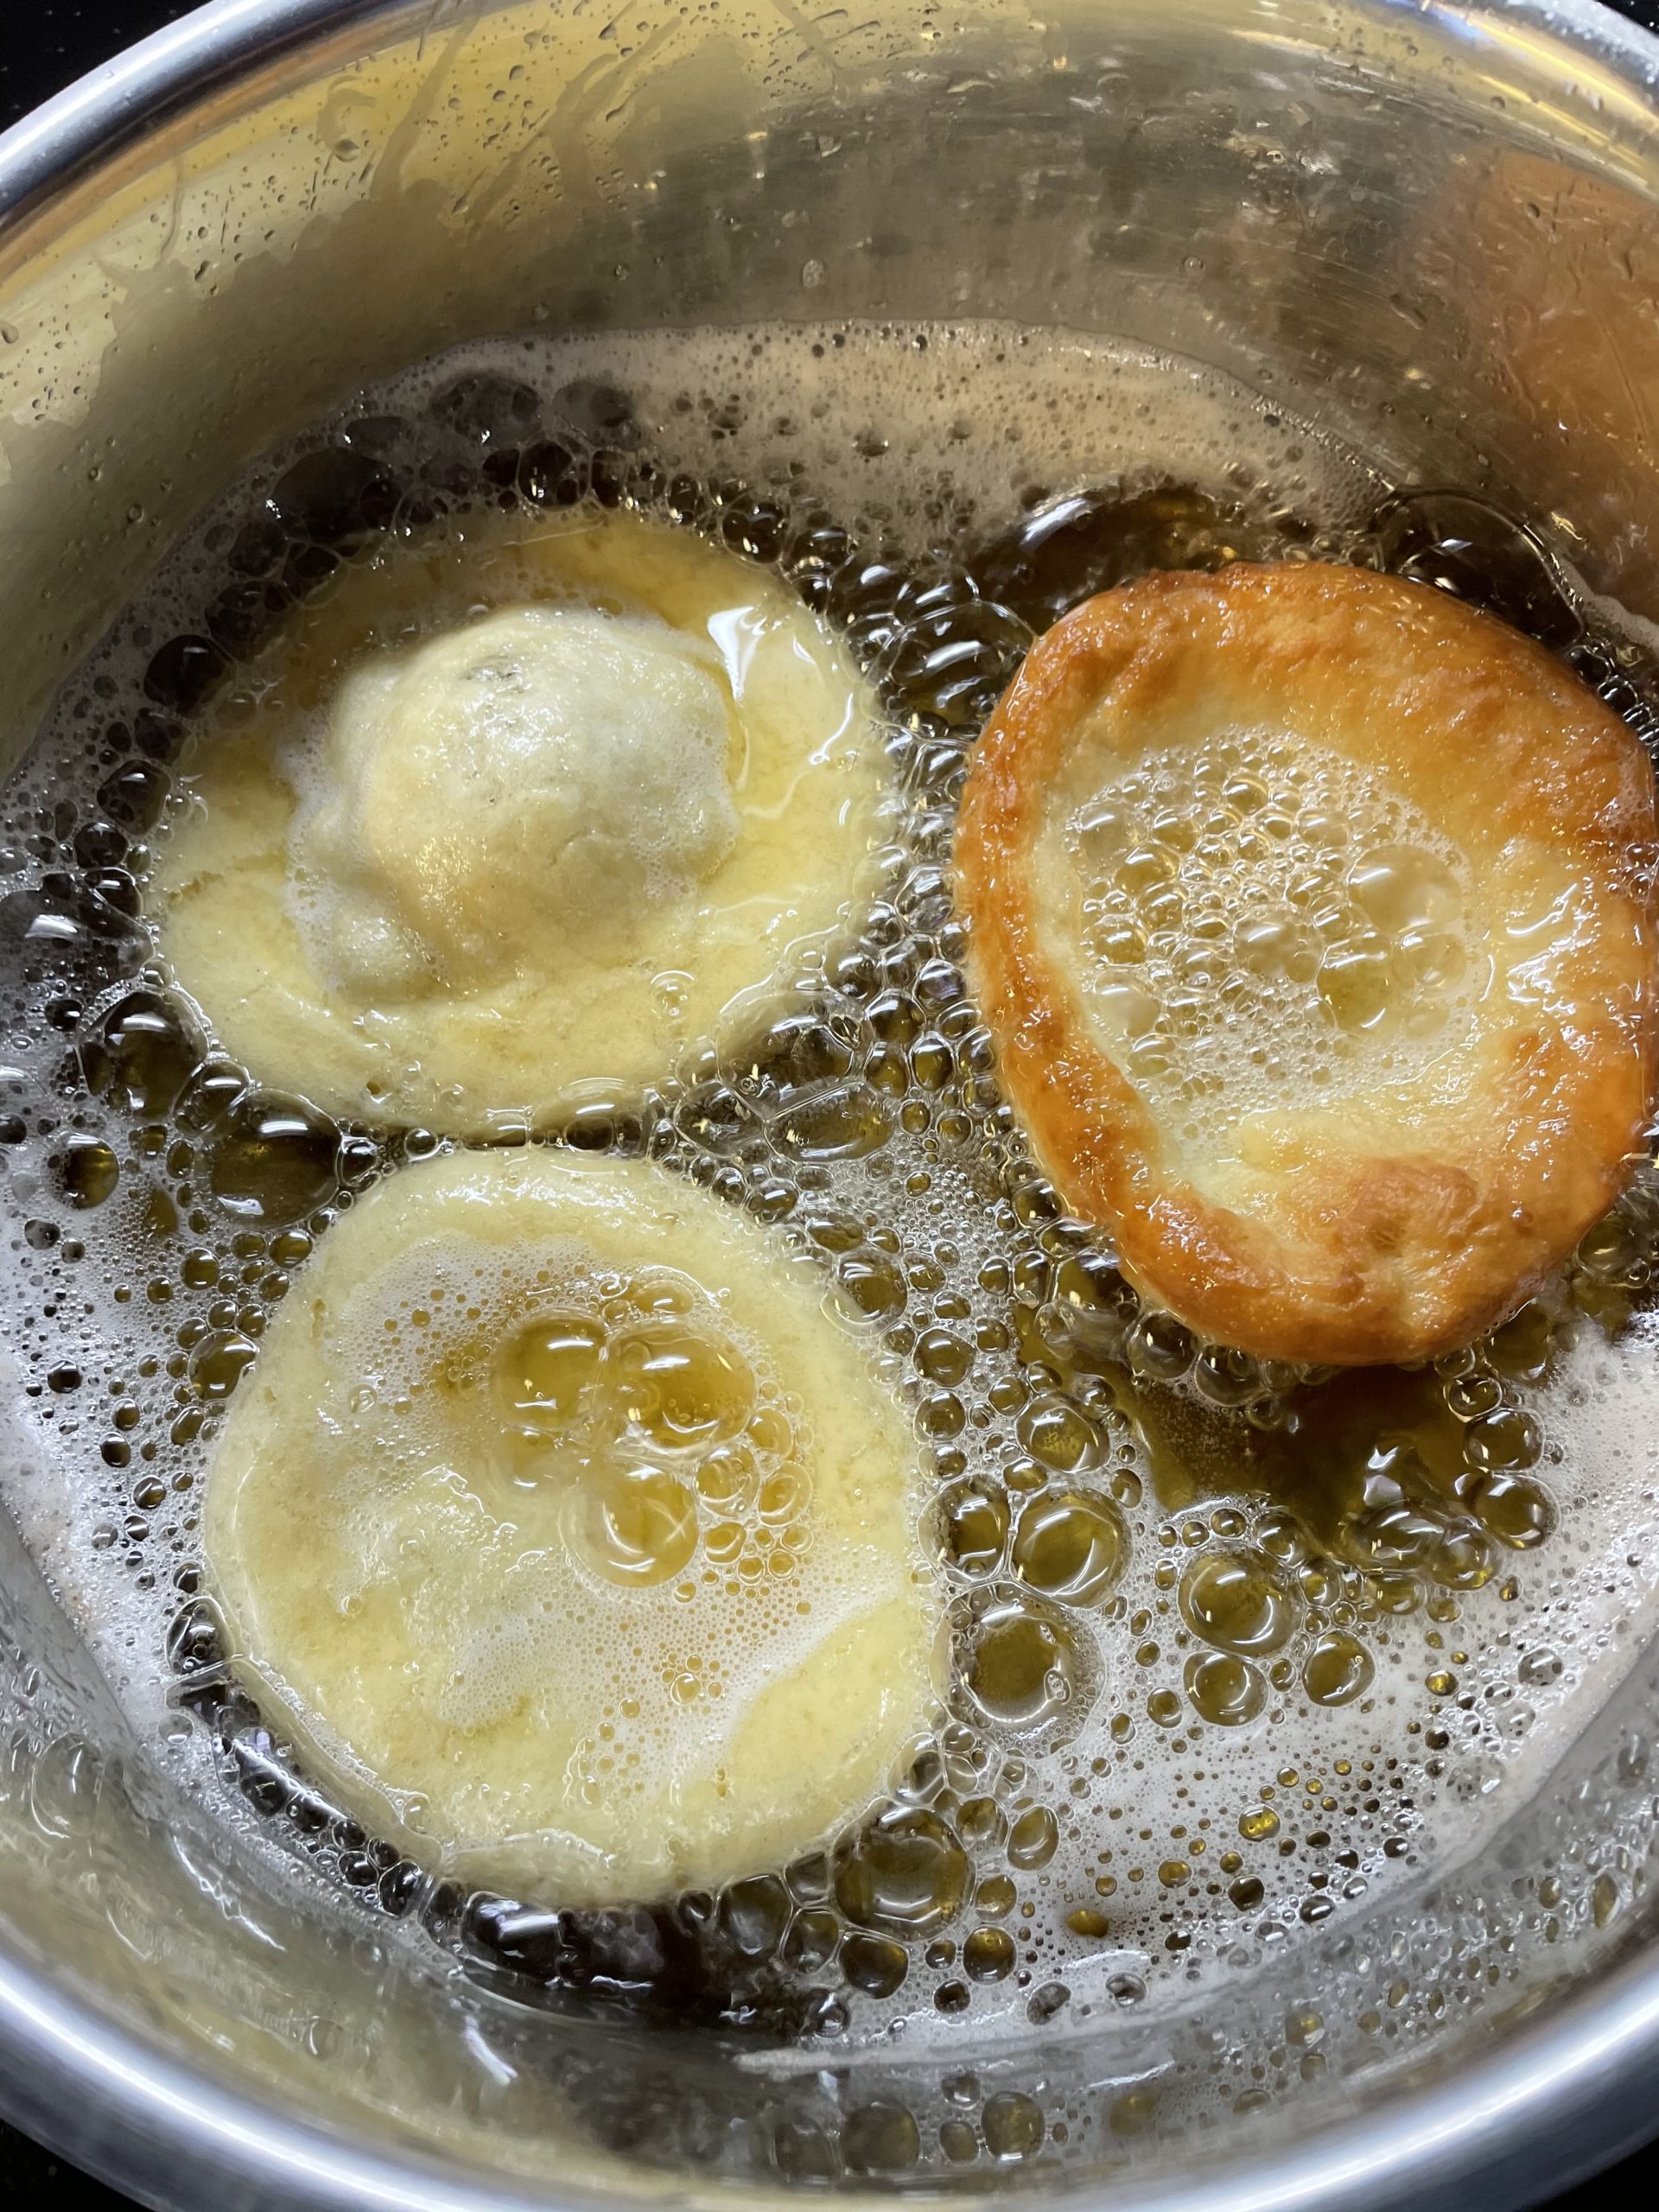
Bild zum Schritt 14 für das Bastel- und DIY-Abenteuer für Kinder: 'Lasst die Krapfen dann noch kurz im Fett, so dass...'

15

Remove the finished dough from the grease, let it drain over the pot for a short time. Place the dough on a plate lined with kitchen crepe or a cake plate.
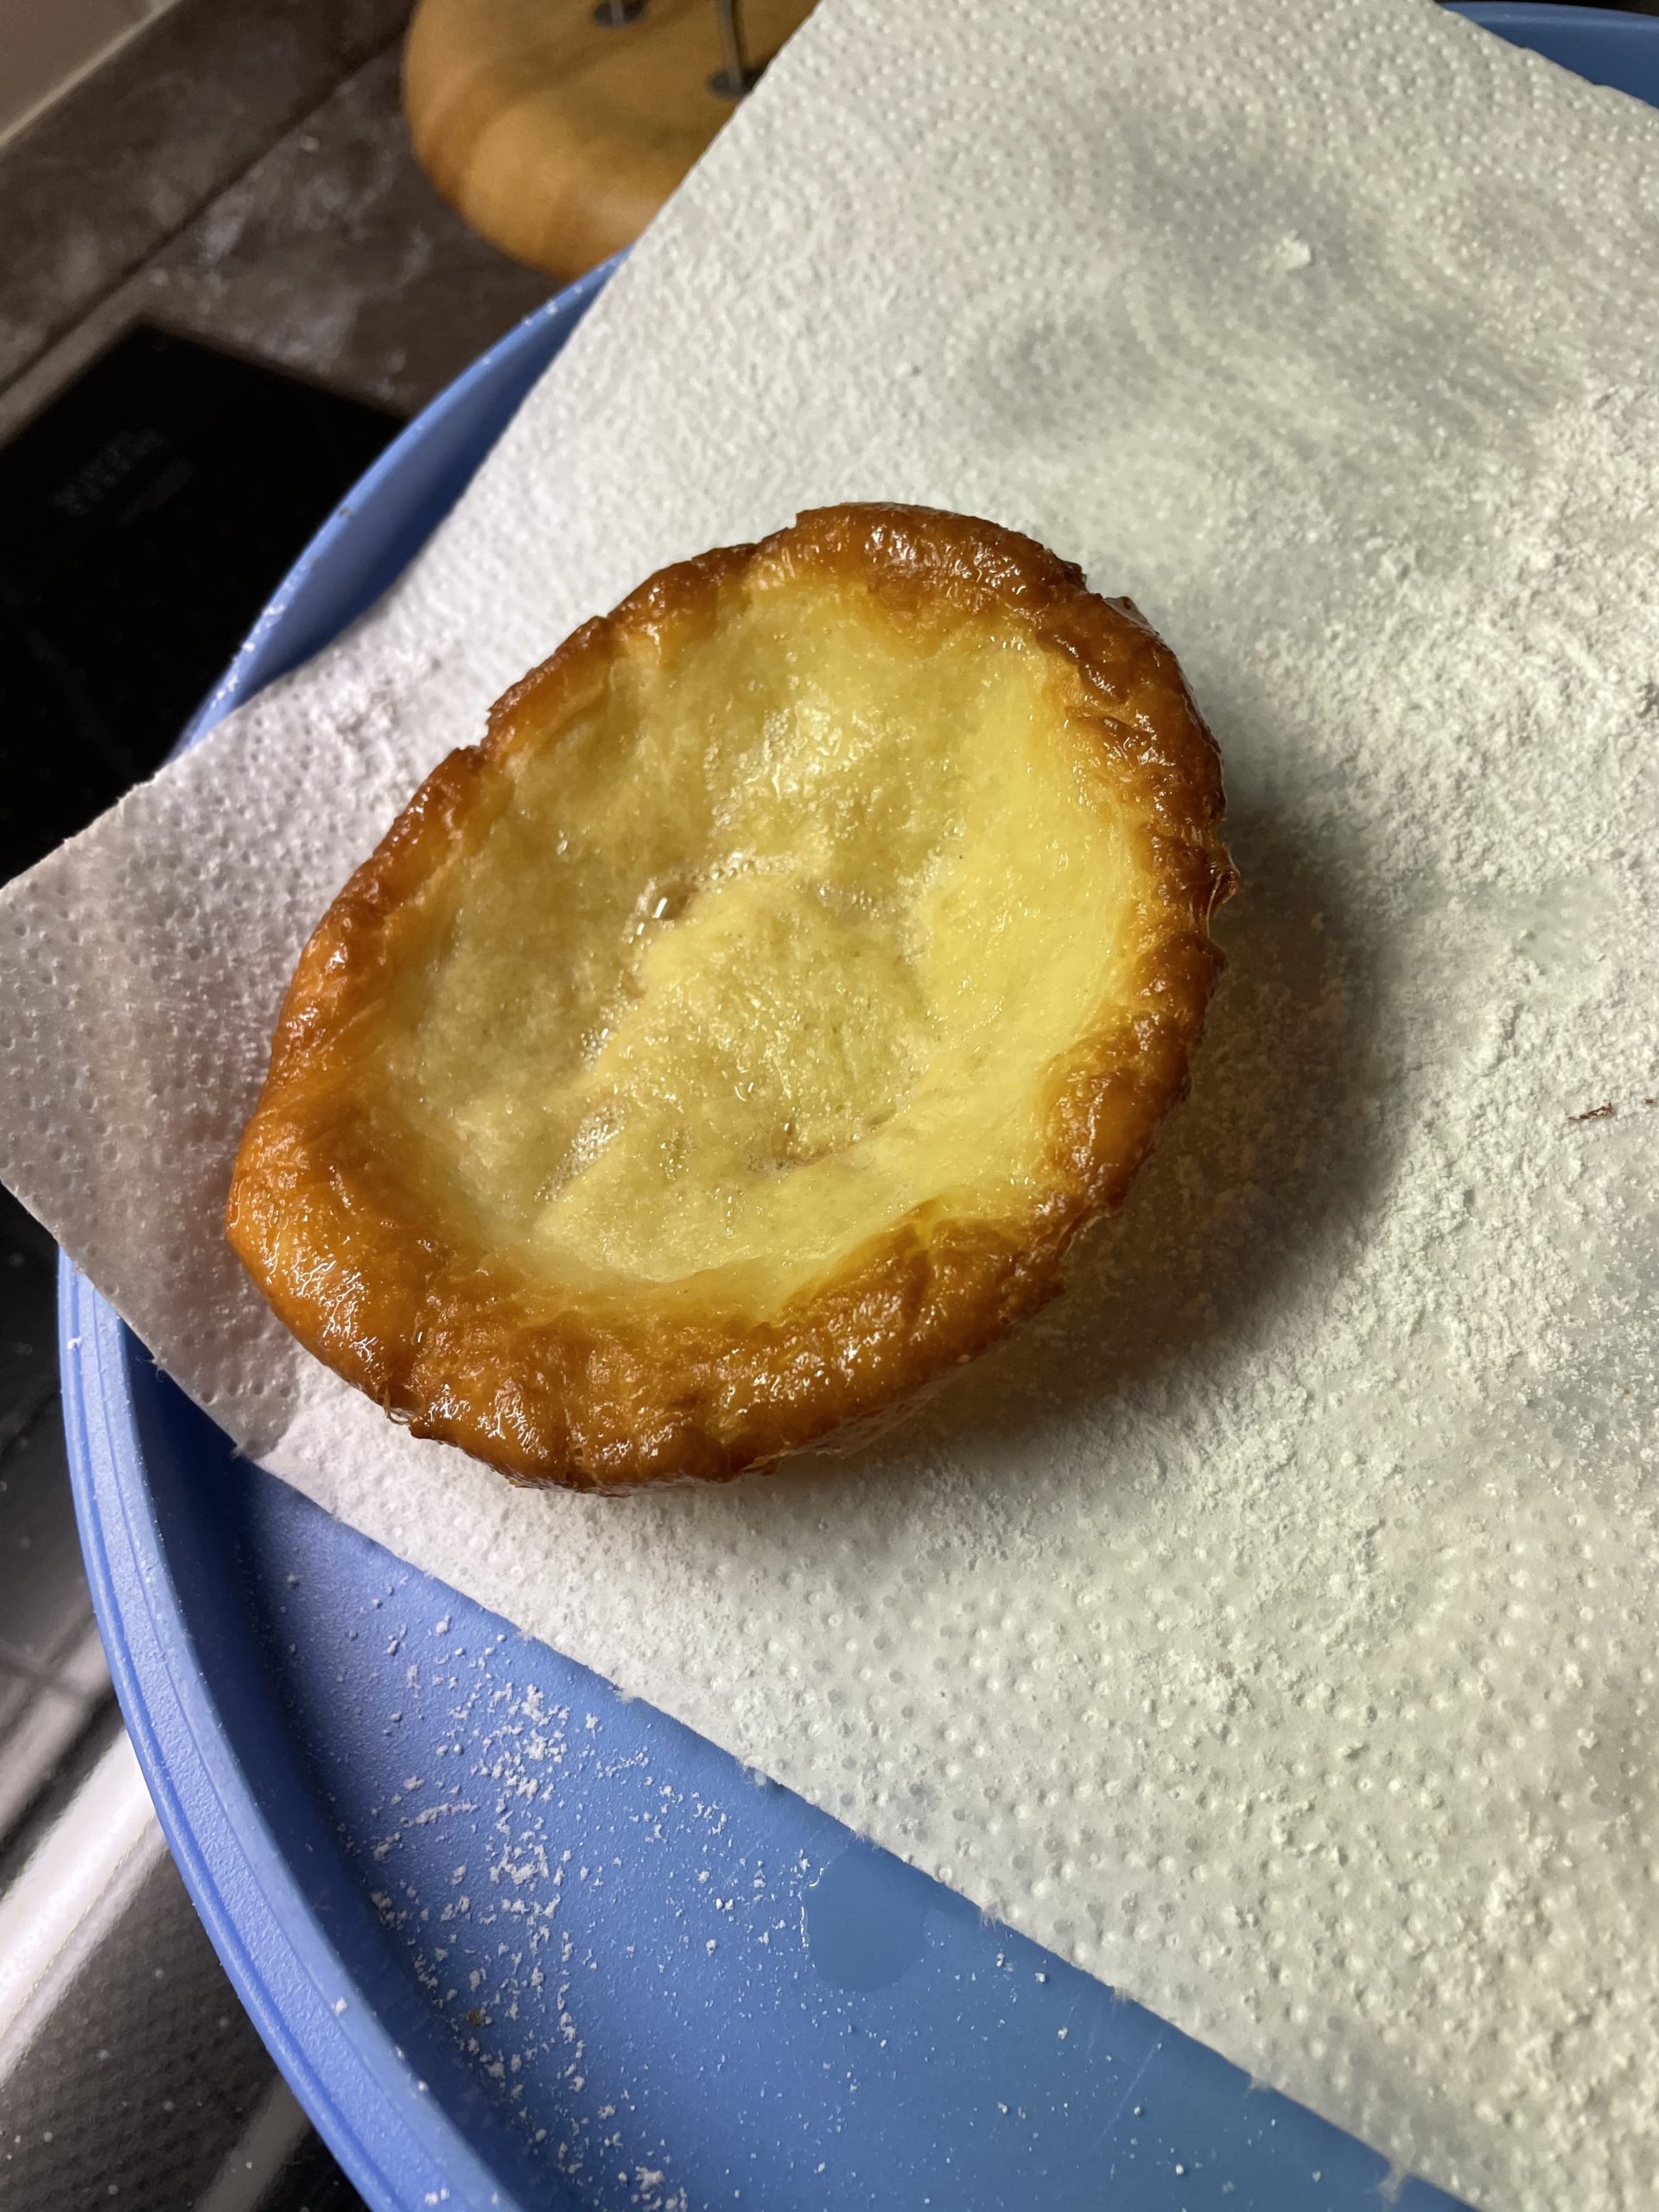
Bild zum Schritt 15 für das Bastel- und DIY-Abenteuer für Kinder: 'Nehmt den fertigen Krapfen aus dem Fett, lasst ihn über...'

16

If the cones are slightly cooled, then they pollinate on the bottom and then on the top with powdered sugar.
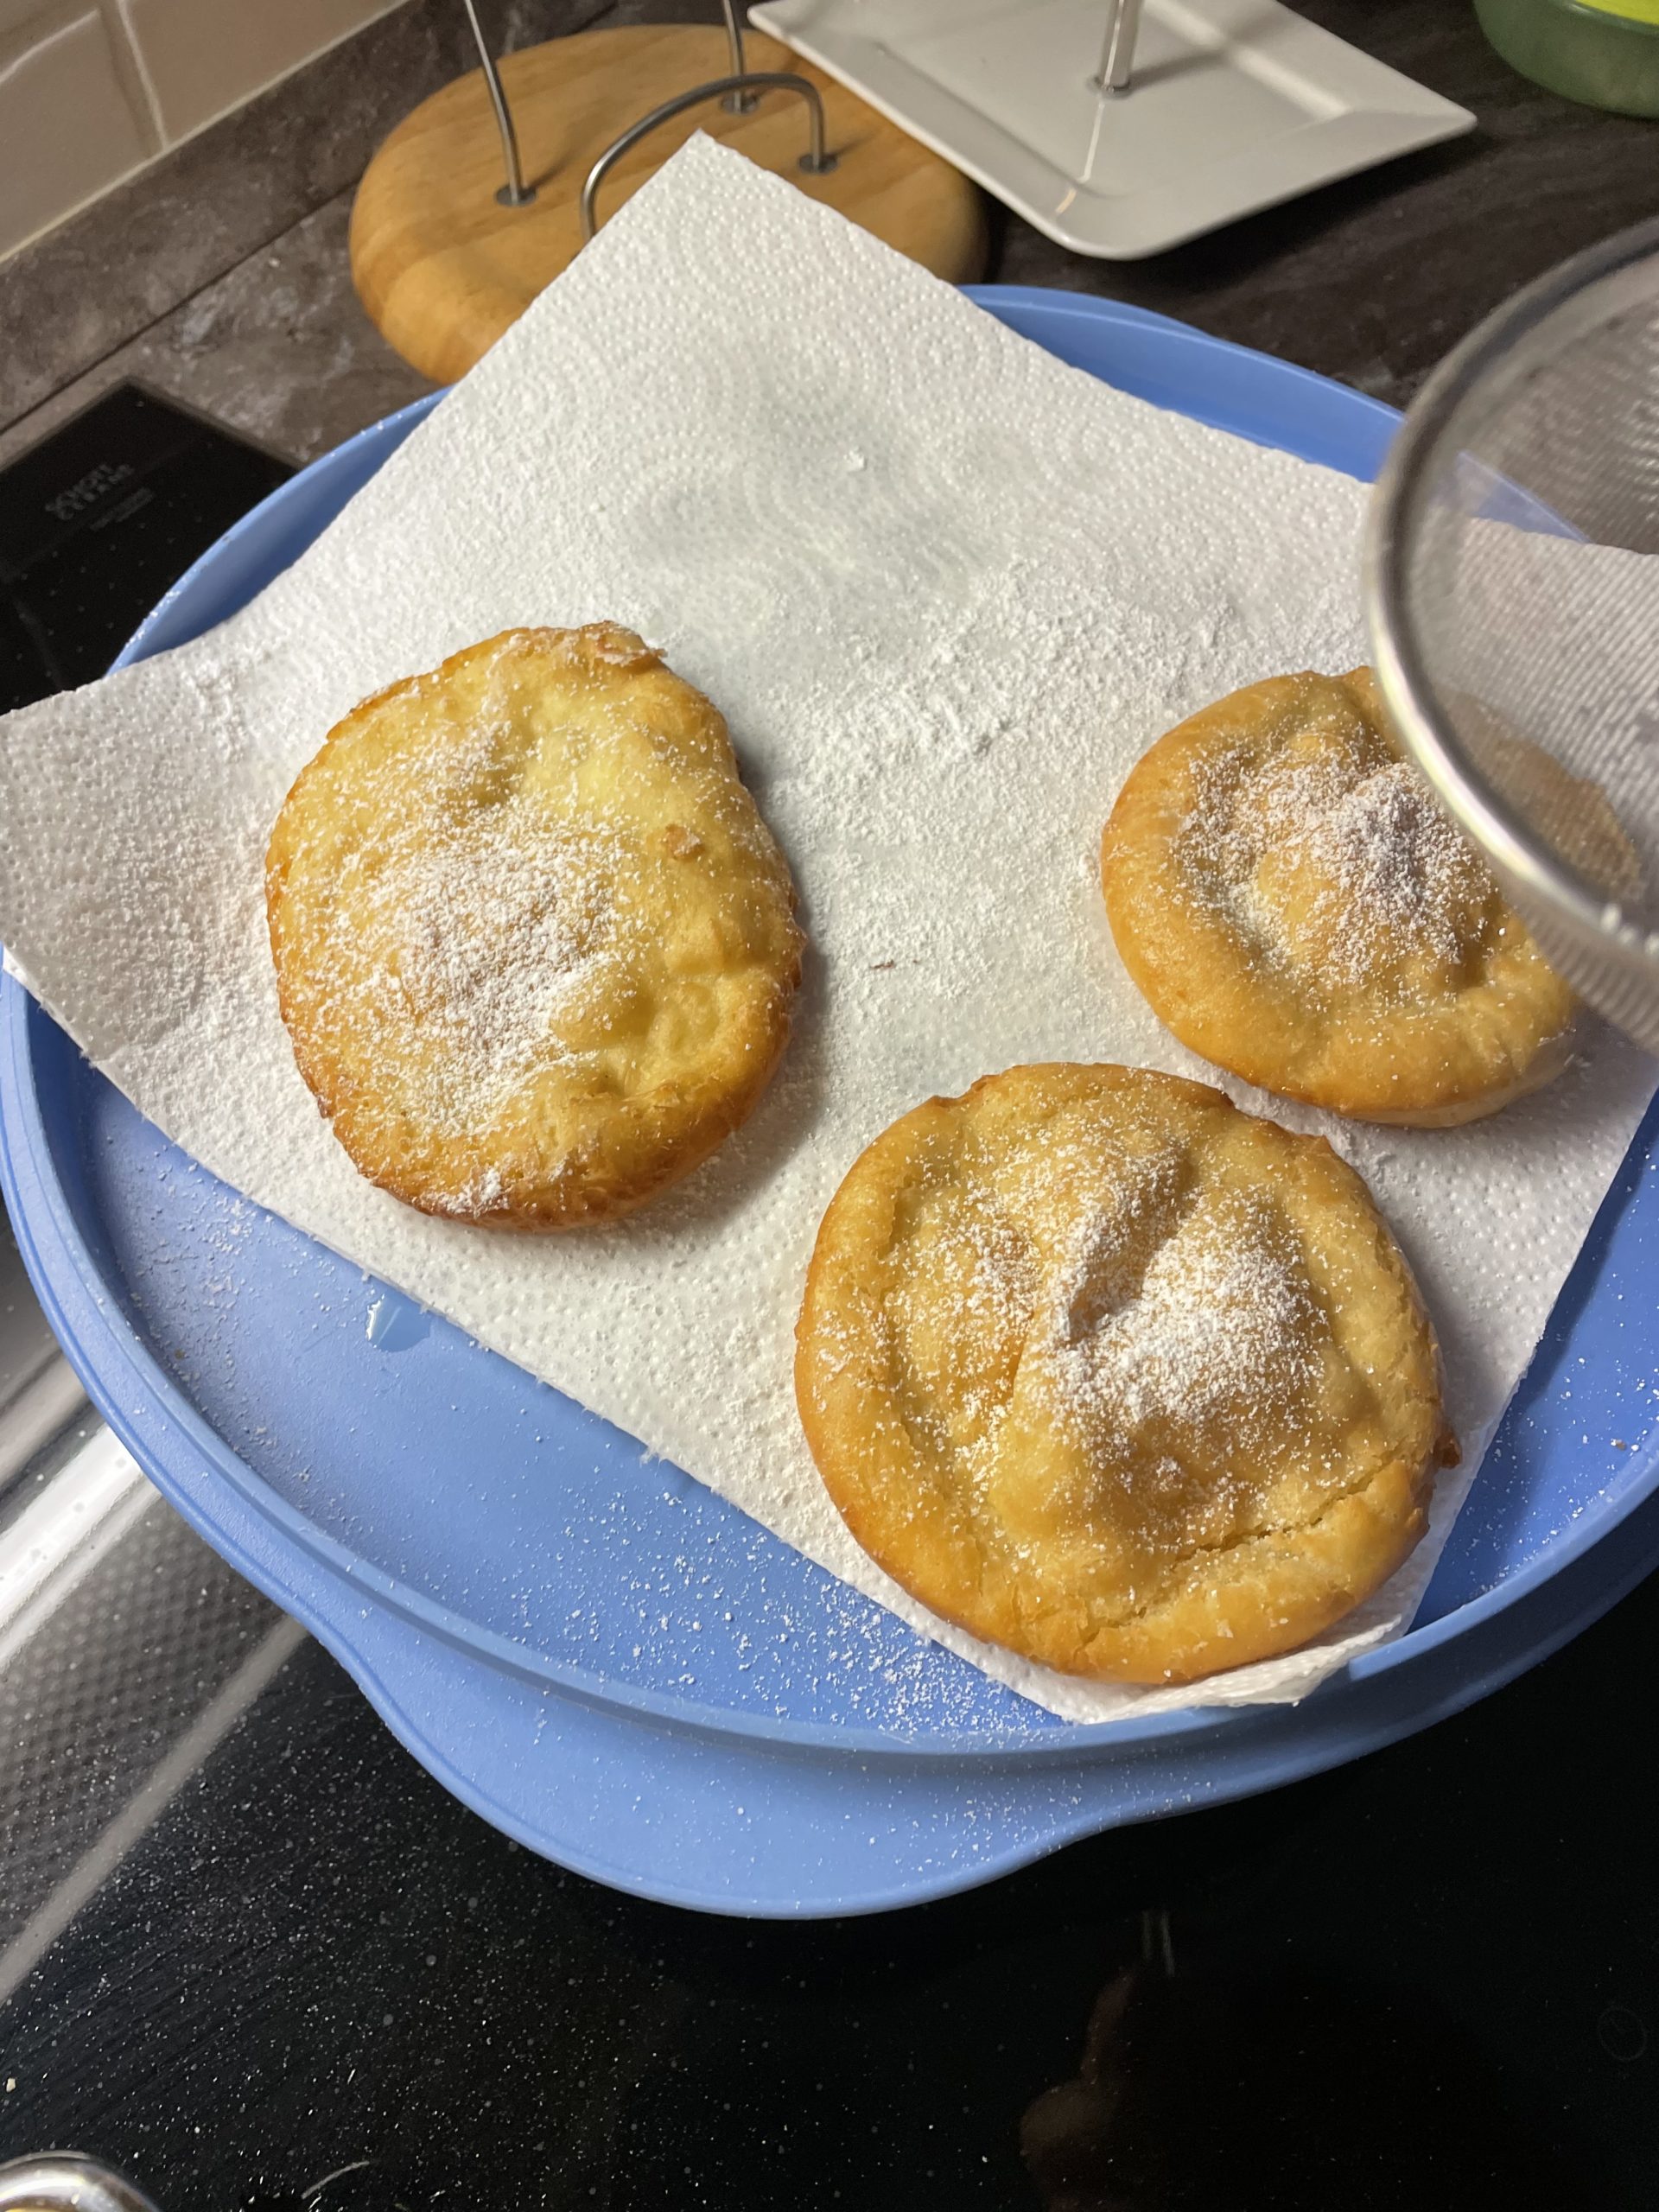
Bild zum Schritt 16 für das Bastel- und DIY-Abenteuer für Kinder: 'Sind die Krapfen etwas abgekühlt, dann bestäubt sie auf der...'

17

Until serving, put the doughnuts in a bowl.
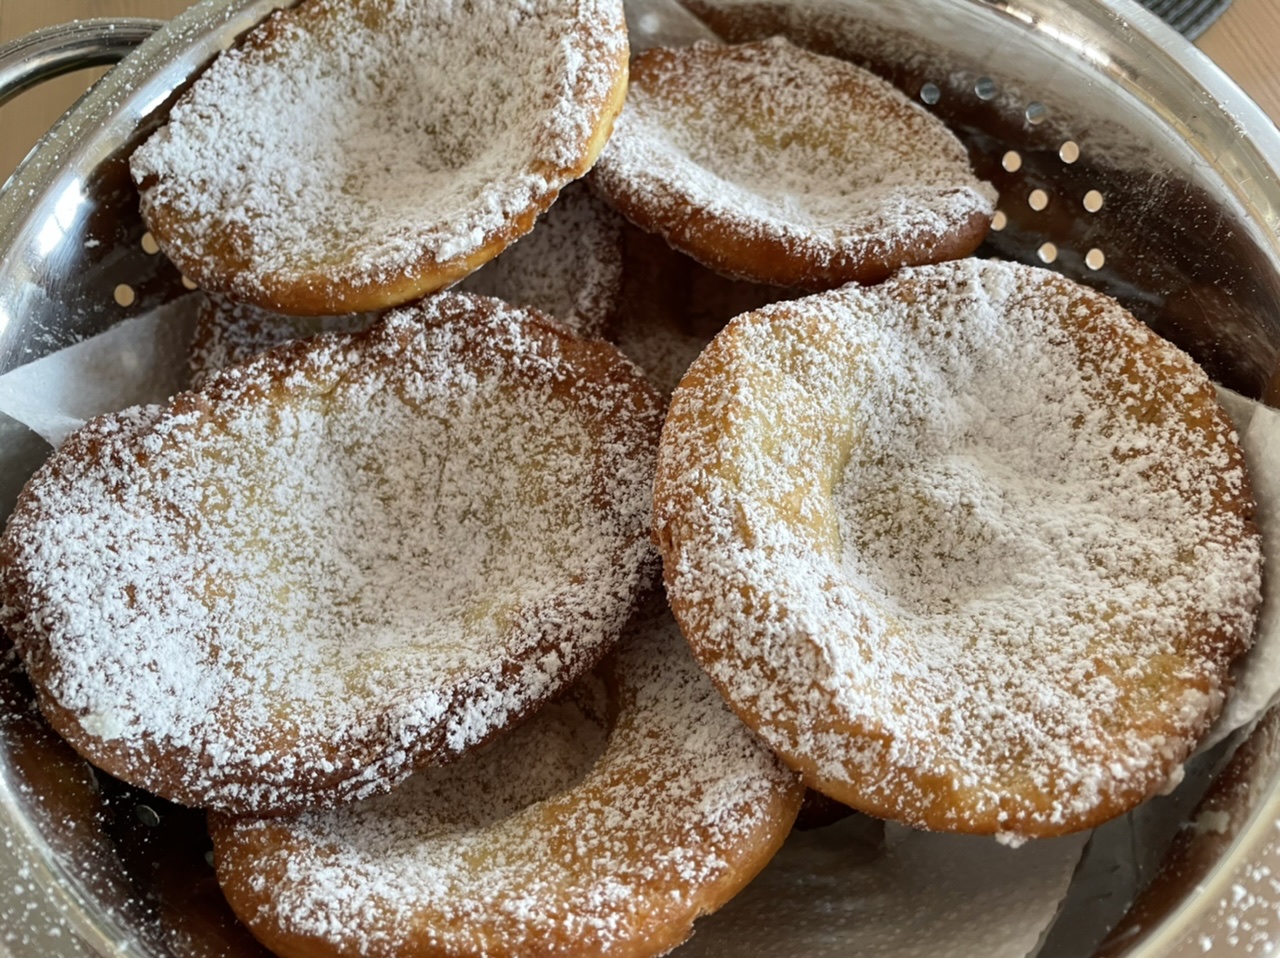
Bild zum Schritt 17 für das Bastel- und DIY-Abenteuer für Kinder: 'Bis zum Servieren legt ihr die Krapfen nun in eine...'

18

Freshly baked, by the way, the Krapfen taste at the EVERYTHING!
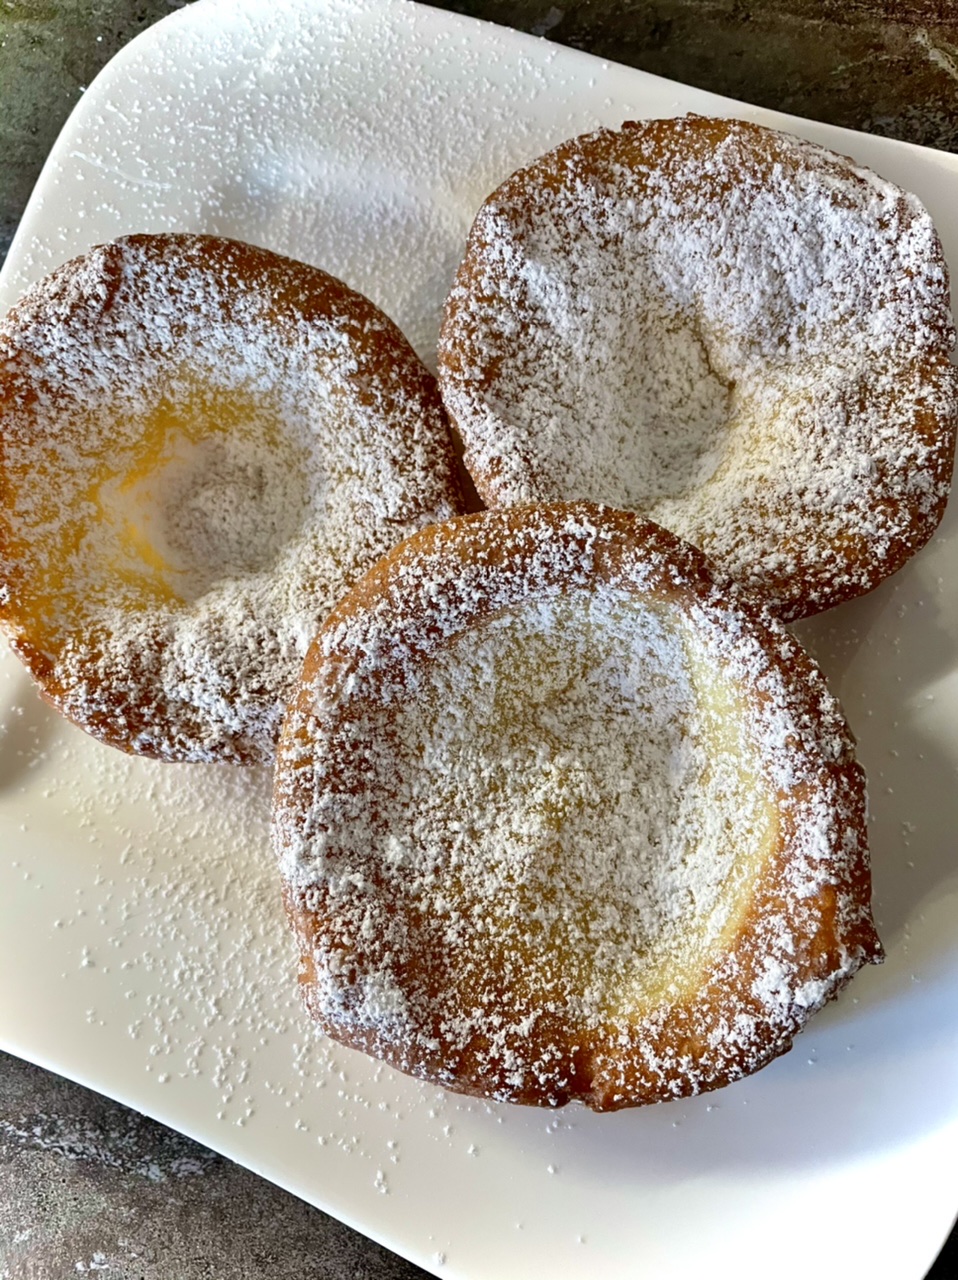
Bild zum Schritt 18 für das Bastel- und DIY-Abenteuer für Kinder: 'Frisch gebacken schmecken die Krapfen übrigens am ALLERBESTEN!'

19

Decorate your carnival table, dress up and the carnival party can start!
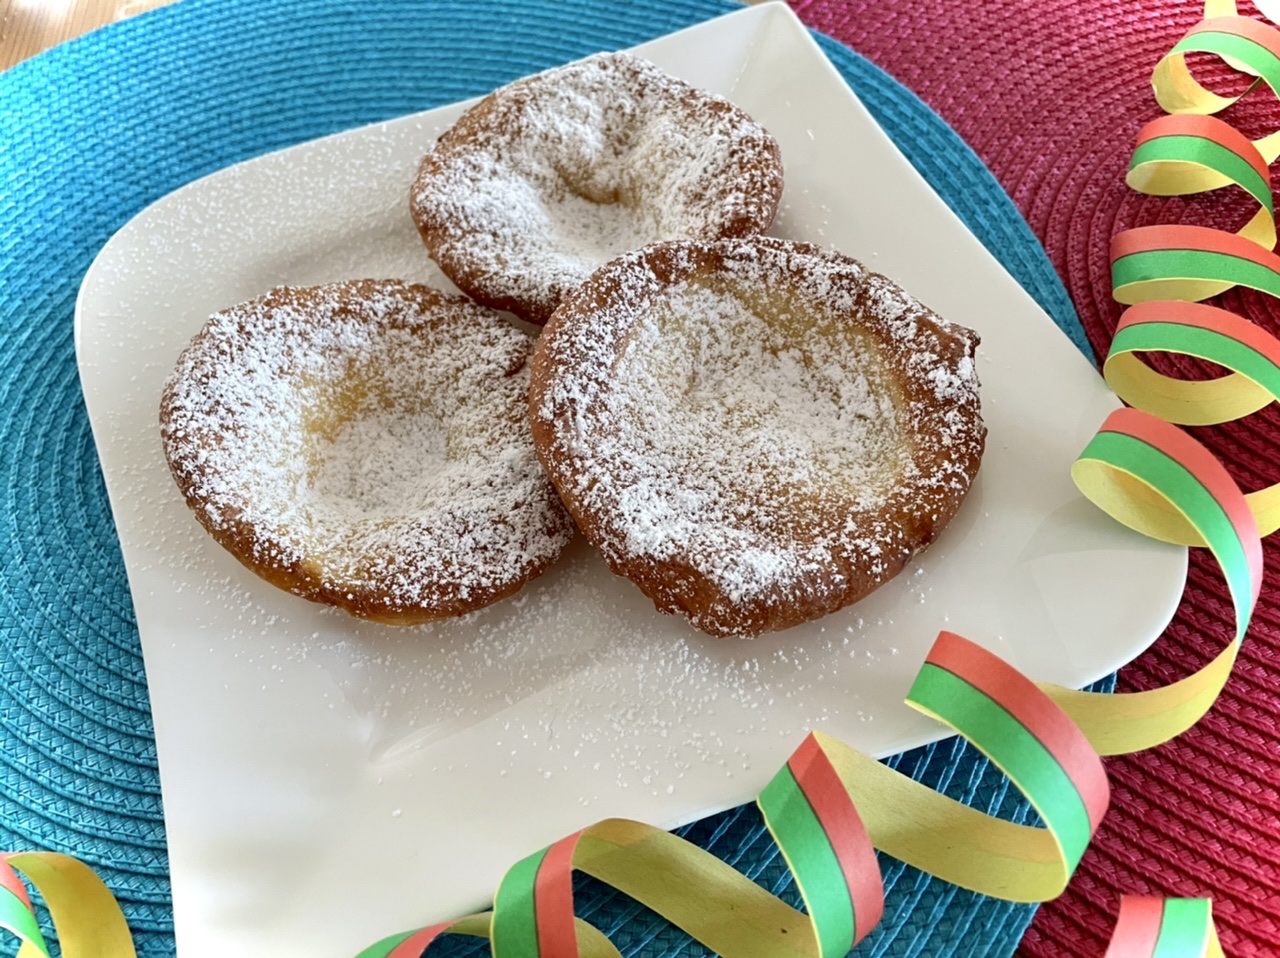
Bild zum Schritt 19 für das Bastel- und DIY-Abenteuer für Kinder: 'Dekoriert euren Faschingstisch, verkleidet euch und schon kann die Faschingsparty...'

20

Let them taste them to you!

Bake the carrots

Follow us on Facebook , Instagram and Pinterest
Don't miss any more adventures: Our bottle mail

One Comment

  1. The recipe is totally easy and actually made fast, super described and easy to imitate! We will now make the doughnuts more often they are also the next day really delicious! Have them covered only with a dishcloth! Thank you

Leave a Reply

Your email address will not be published.

The maximum upload file size: 5 MB. You can upload: image, document. Drop file here